
I have seen the terror in the eyes of knitter when they read these words, “increase in pattern.” Or “decrease in pattern”, or “maintain stitches in pattern”, or any other number of similar phrases. What does this mean, “in pattern”???
I hope to demystify this for you, at least as far as you need to know for the Rocked top. And the main body pattern in Rocked is actually a really good pattern to learn this concept on. The stitch repeat is only 4 stitches wide x 4 rows high, so it’s reasonably easy to “read” your work.
Here is how the text for the “Increase for Sleeves” section reads:
Cast on 2 sts at beg of next 6 rows, cast on 10 sts at beg of next 2 rows. While it doesn’t expressly say so, the pattern is telling you to also maintain stitches in pattern when casting on.
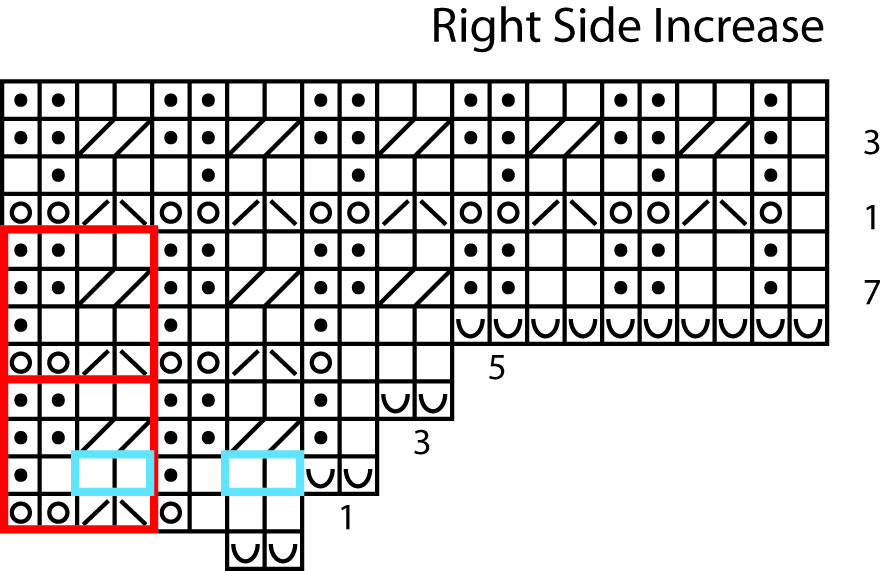
I’ll try to go about this a couple of ways. For anyone who understands what it means to “maintain in pattern” or just wants to jump right in, I have made a chart for the sleeve increases:
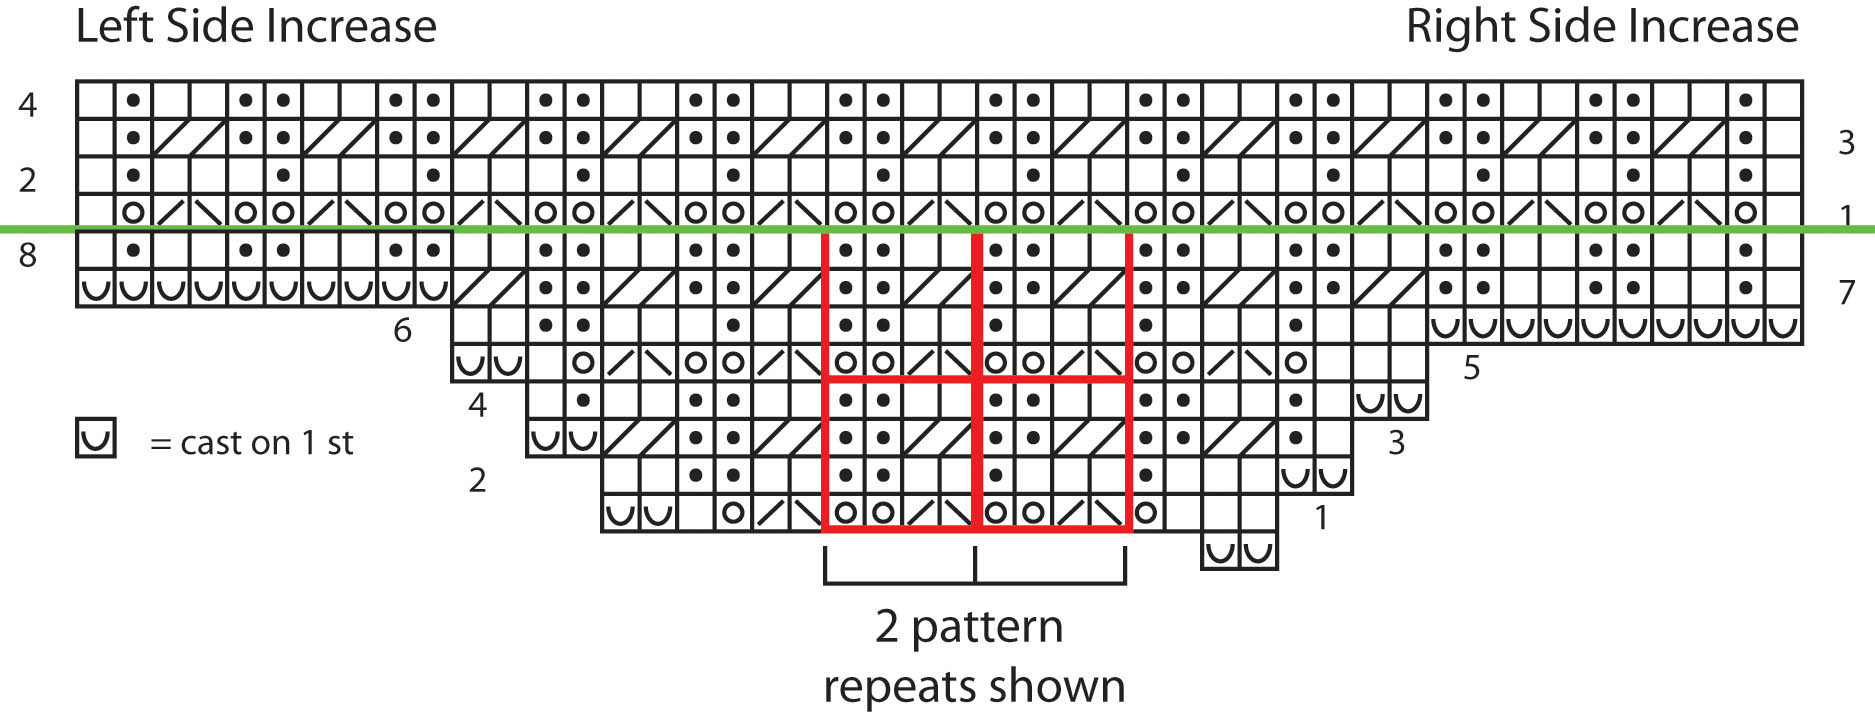
Rows 1-8 of the chart show the increases. After that point, because we have increased a multiple of 4 stitches on each side, the number of stitches for a full pattern repeat, we will simply continue to follow Rows 1-4 of the Mesh pattern.
To try and break it down, let’s look at just the right side portion of the increase chart.
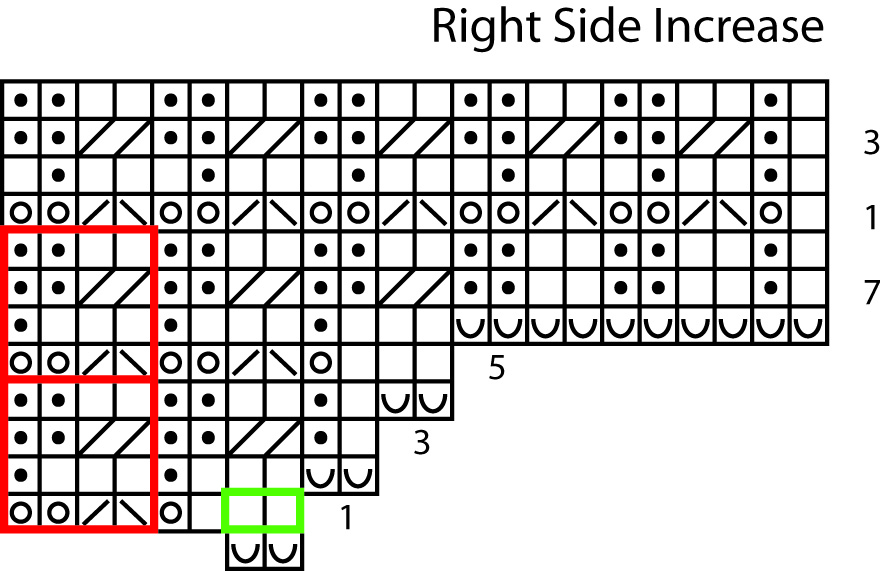
For our first 2-stitch cast on, we will then have to work back across those stitches on RS row 1. Although after having cast-on 2 stitches we could fit in part of a pattern repeat, it’s not usually a good idea to do so directly onto cast on stitches. K2tog and ssk are tough to do over cast on stitches, and it’s just not worth it to do it here. Plus, we will be seaming this area later and we want it to be stable.
On the following WS row, take a look at those last stitches that were cast on. Try to visualize them as part of a full pattern repeat. If you shift your eyes 4 stitches to the left on the chart, you can see that you will do the same thing over the new 2 stitches as you would have done on the previous repeat.
Now, just for the sake of further trying to understand increasing in pattern, here is a different way I could have worked the chart:
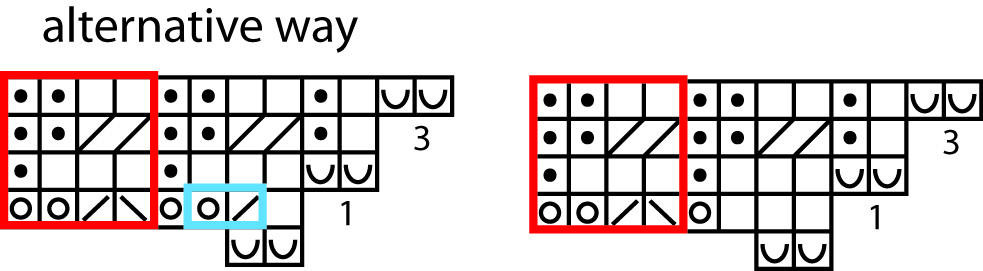
The chart on the right is the way I’ve done it above. The chart on the left shows how we could work the stitches if we really wanted to start incorporating the pattern in as soon as possible. Sometimes we do want to do this in the case of, say, a delicate lace shawl where every stitch shows and counts. It’s also important to remember that if you’re doing lace like we are here, only work a decrease if there are enough stitches for a corresponding increase, and vice versa.
Another simpler way of incorporating new stitches into your pattern without having to follow charts or use your intuition is to place markers. Try placing a marker between every pattern repeat where those vertical red lines of the pattern repeat box sit. Or, at least add markers to the couple of pattern repeats each side of your piece. If you have enough stitches on the sides of your markers for a pattern repeat, do it! If not, just work the stitches in stockinette stitch.
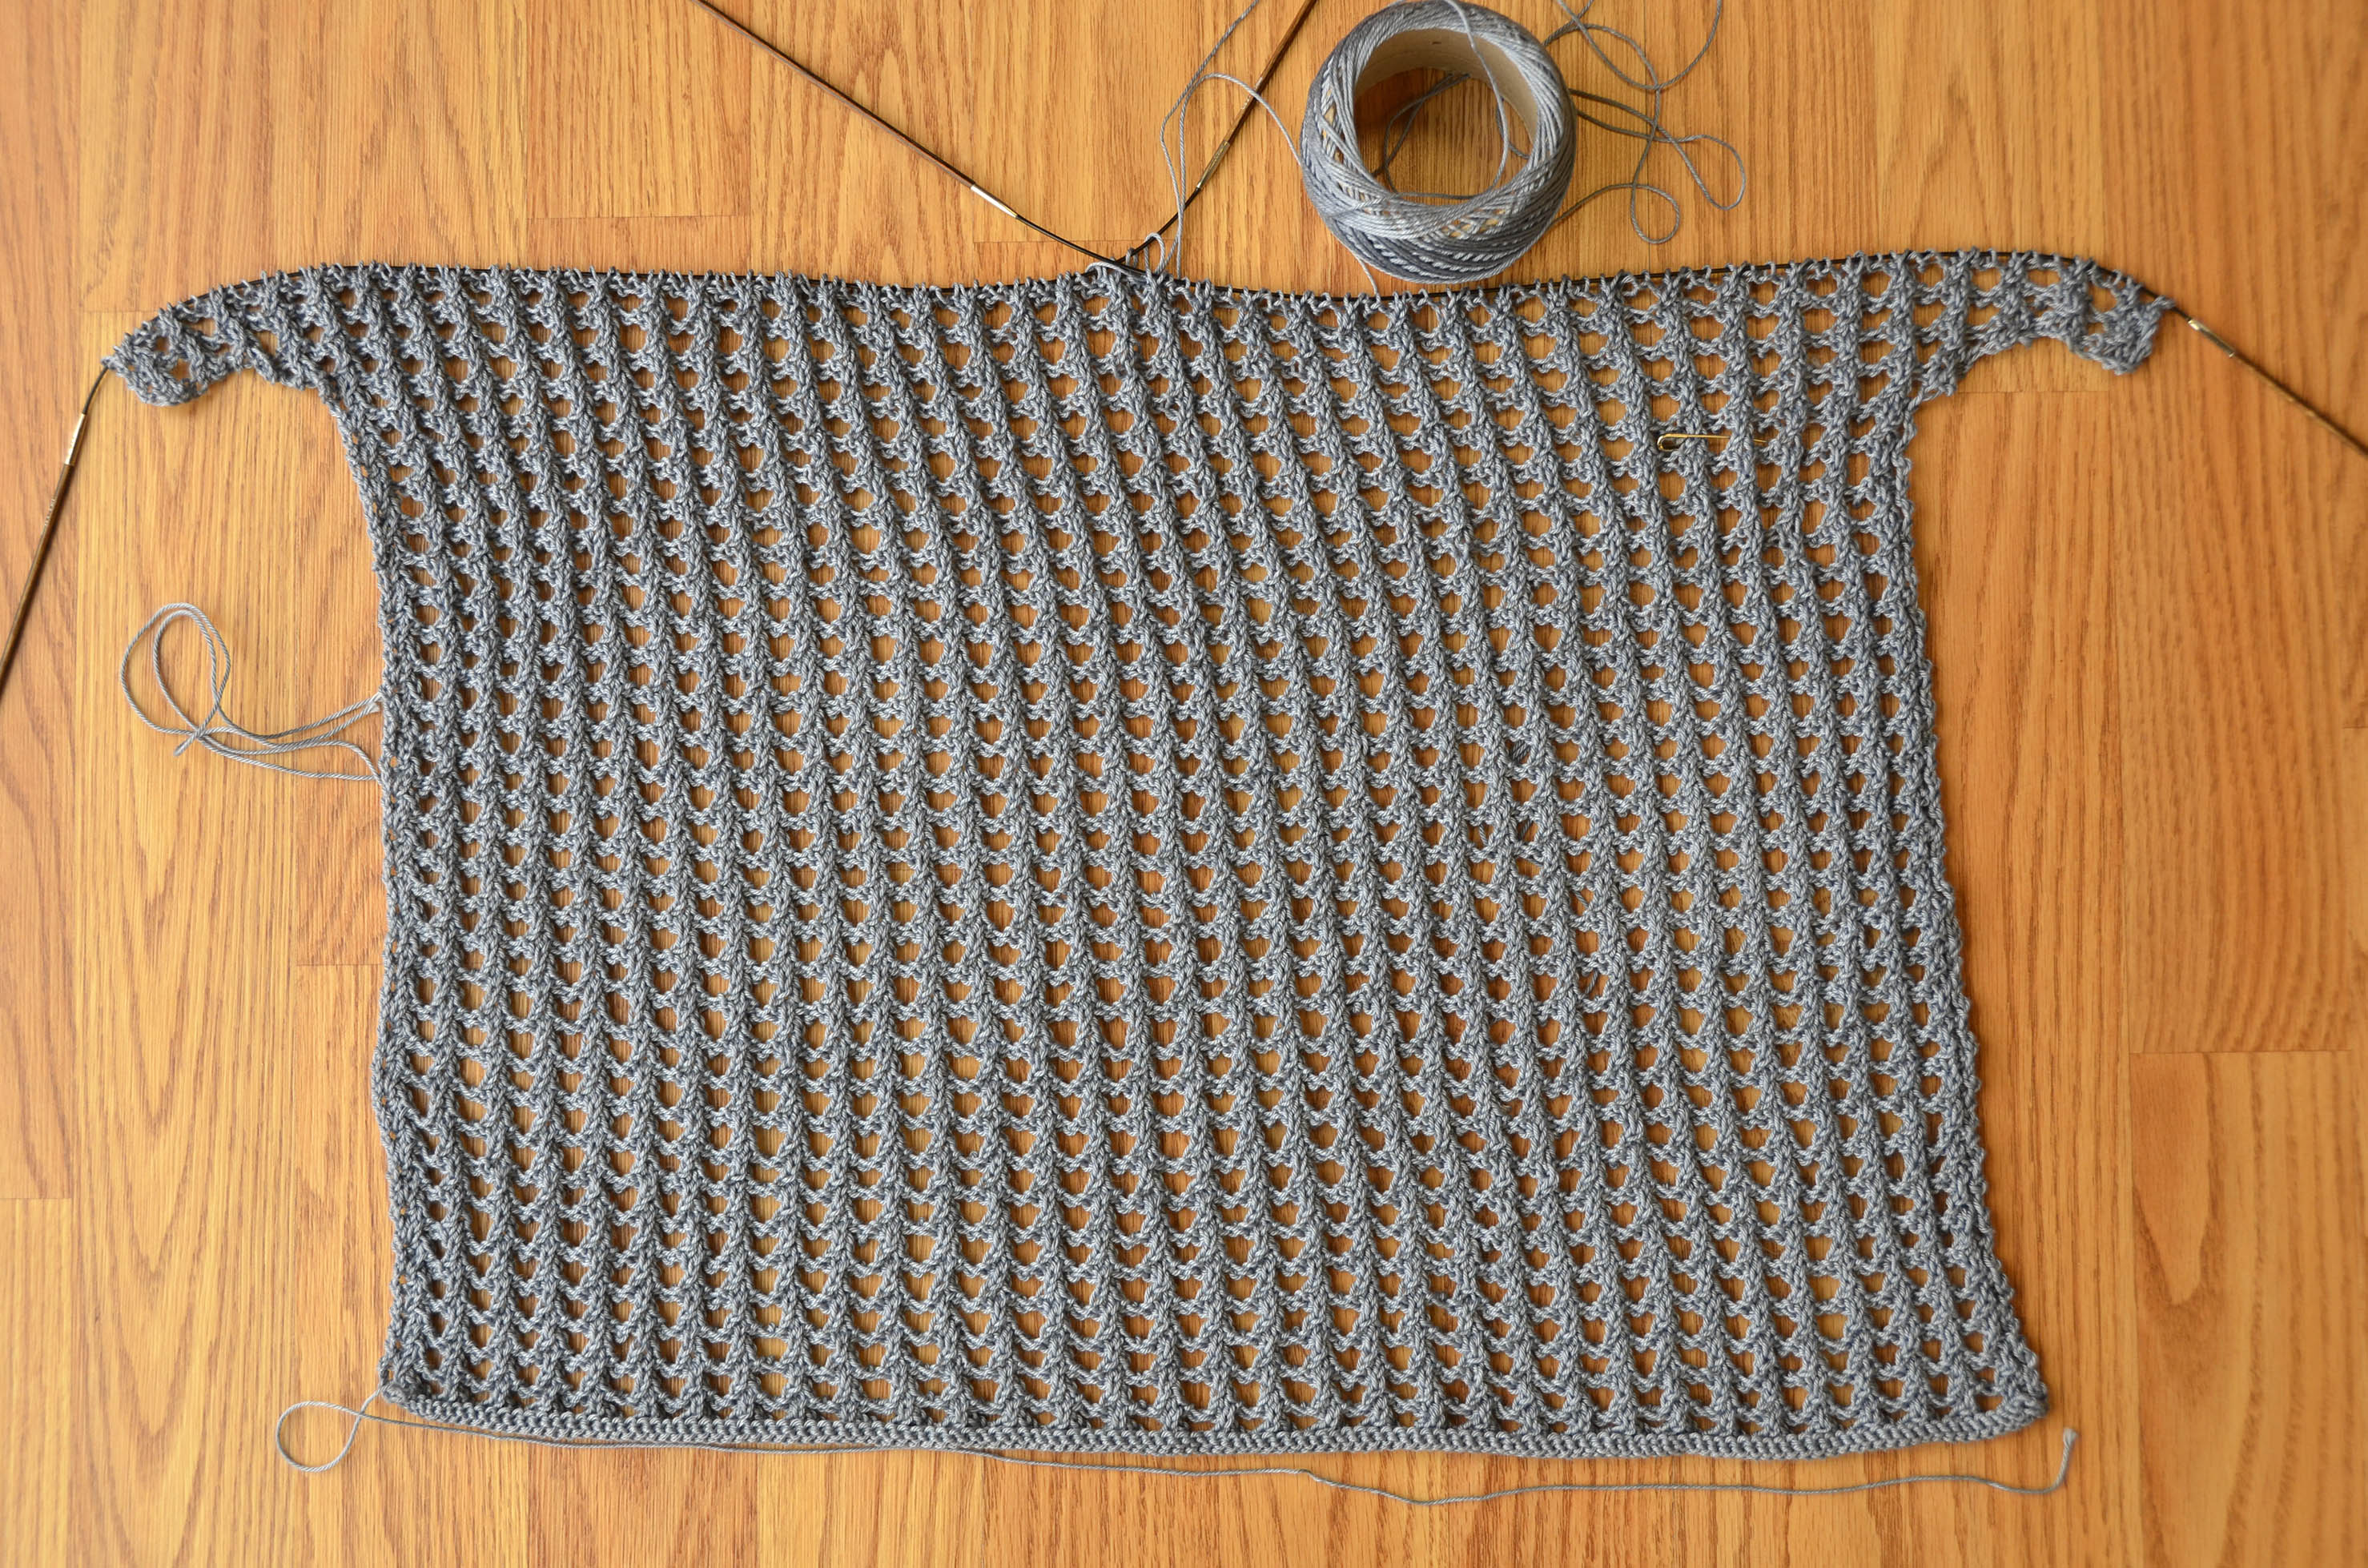
Here’s my Rocked after working a couple of pattern repeats past the sleeve cast on: