

Mother’s Day is tomorrow! Are you ready? Me neither! Fortunately, Amy came up with marvelous way to put together a handmade gift from your stash in a flash. Yarn art!
Step one is to find an image that you want to use and draw or trace it onto your card. We used a cut-down sheet of foam core board. We’re going to be using adhesive for this craft, so construction paper or thinner paper is a little iffy – we don’t want it to buckle or ripple from the moisture of the glue.
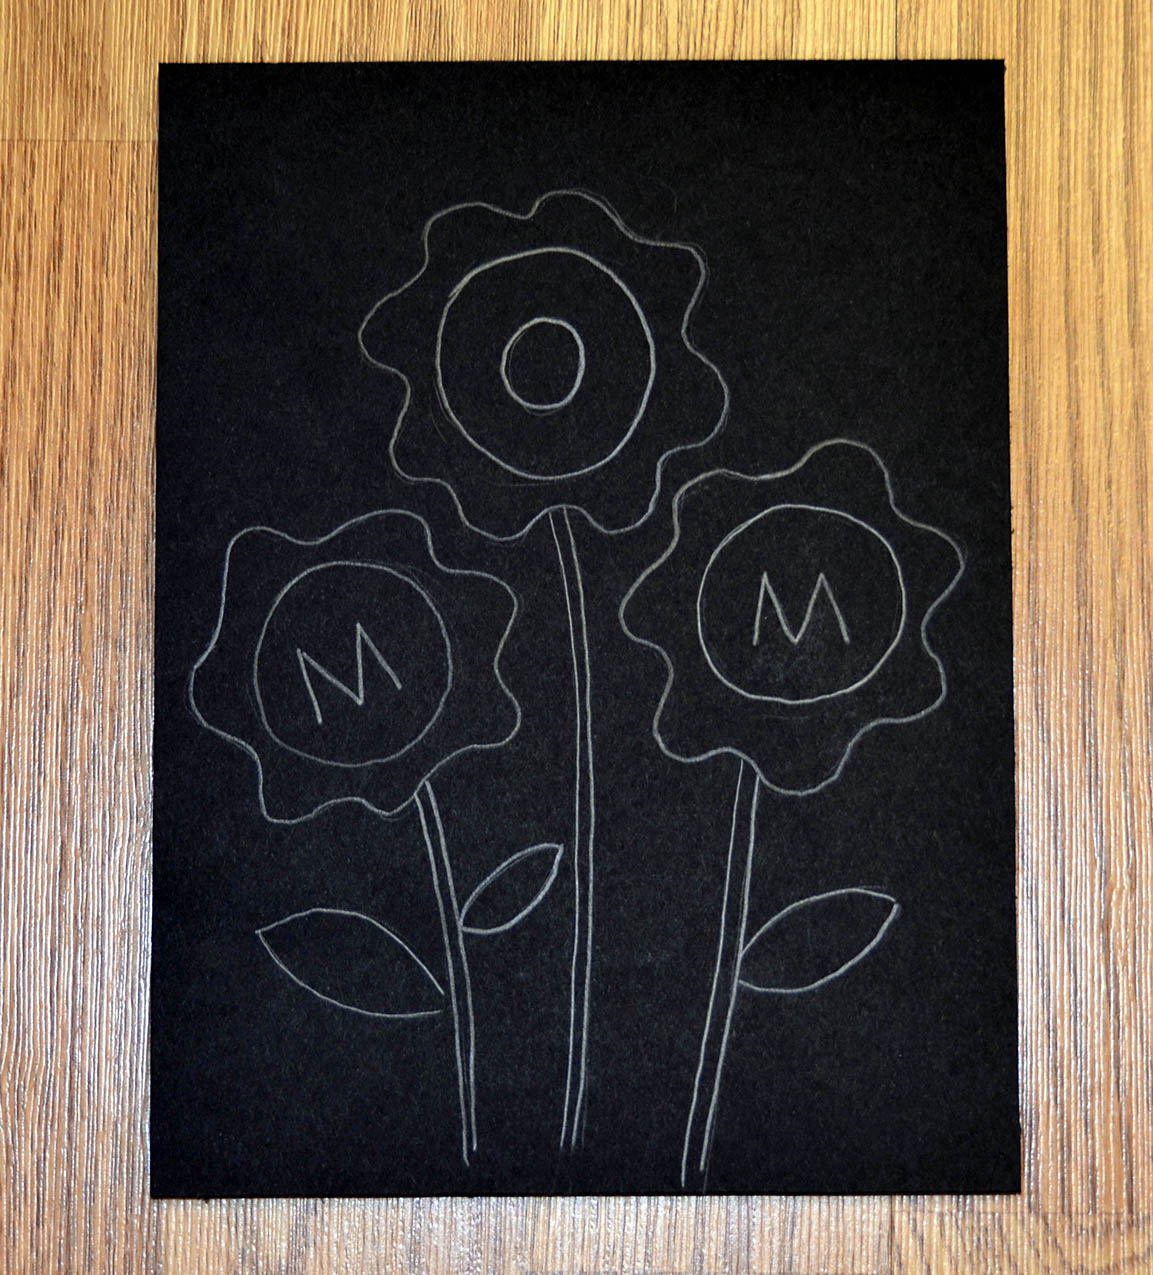

Amy freehanded her design, but you could also use clip art. You can see it above with a couple of flowers already filled in with Bamboo Pop. We’ll show you how to do that in the next step!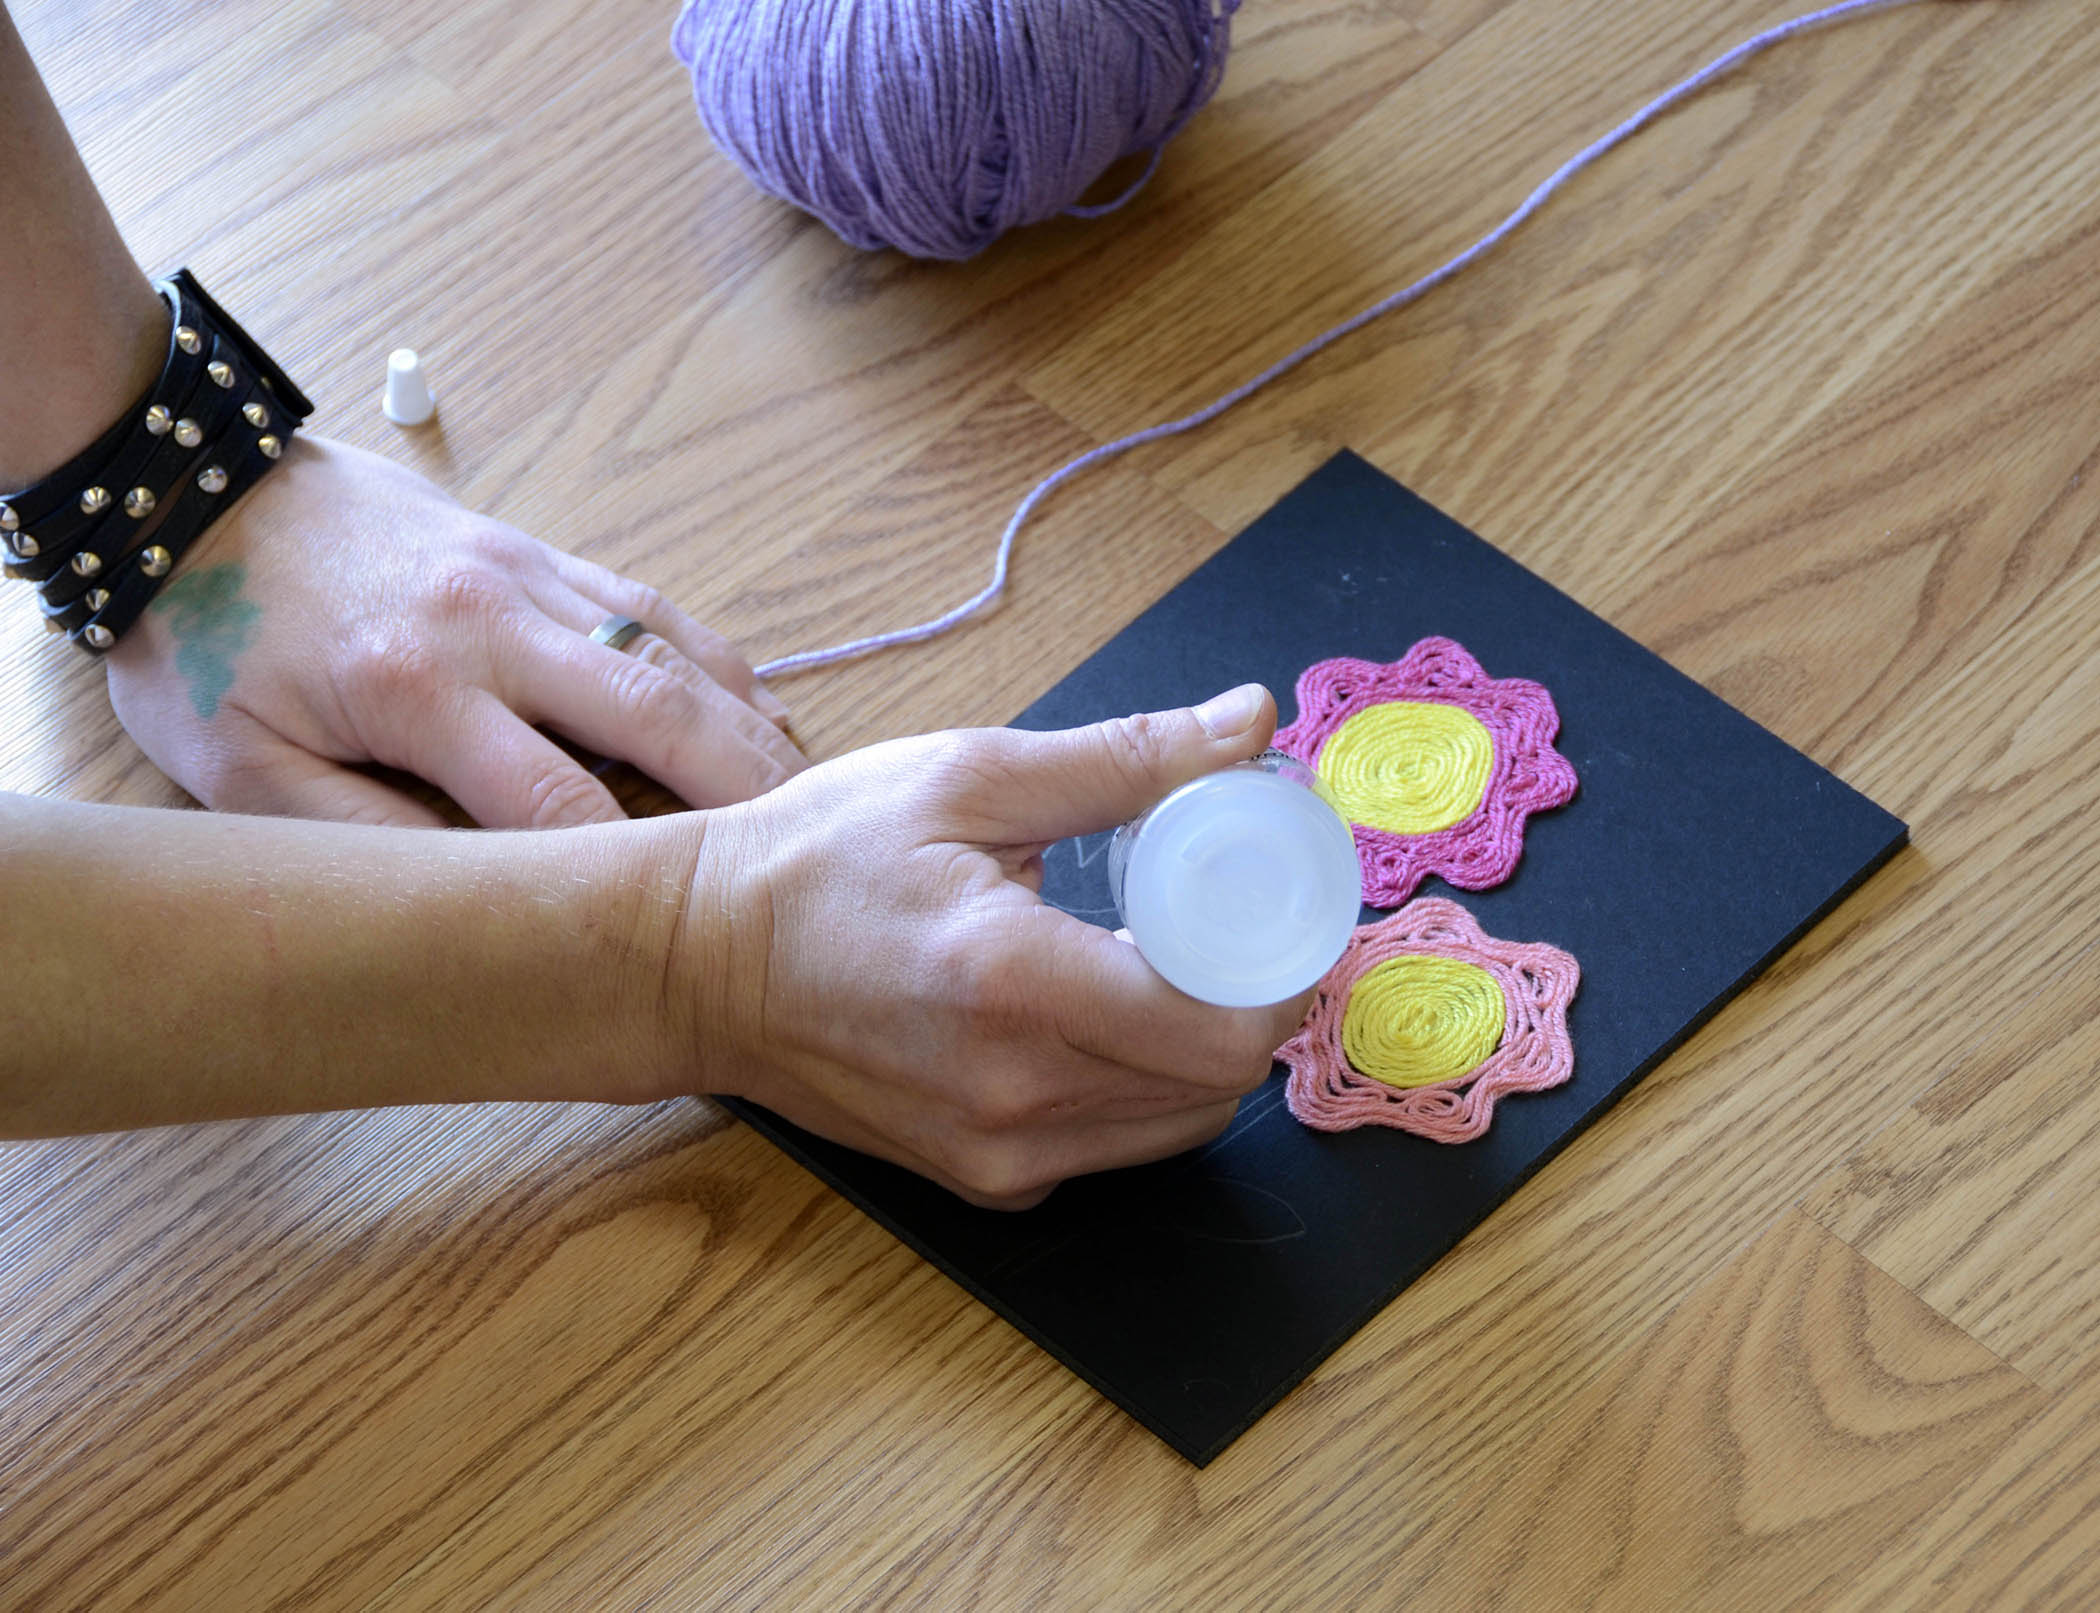
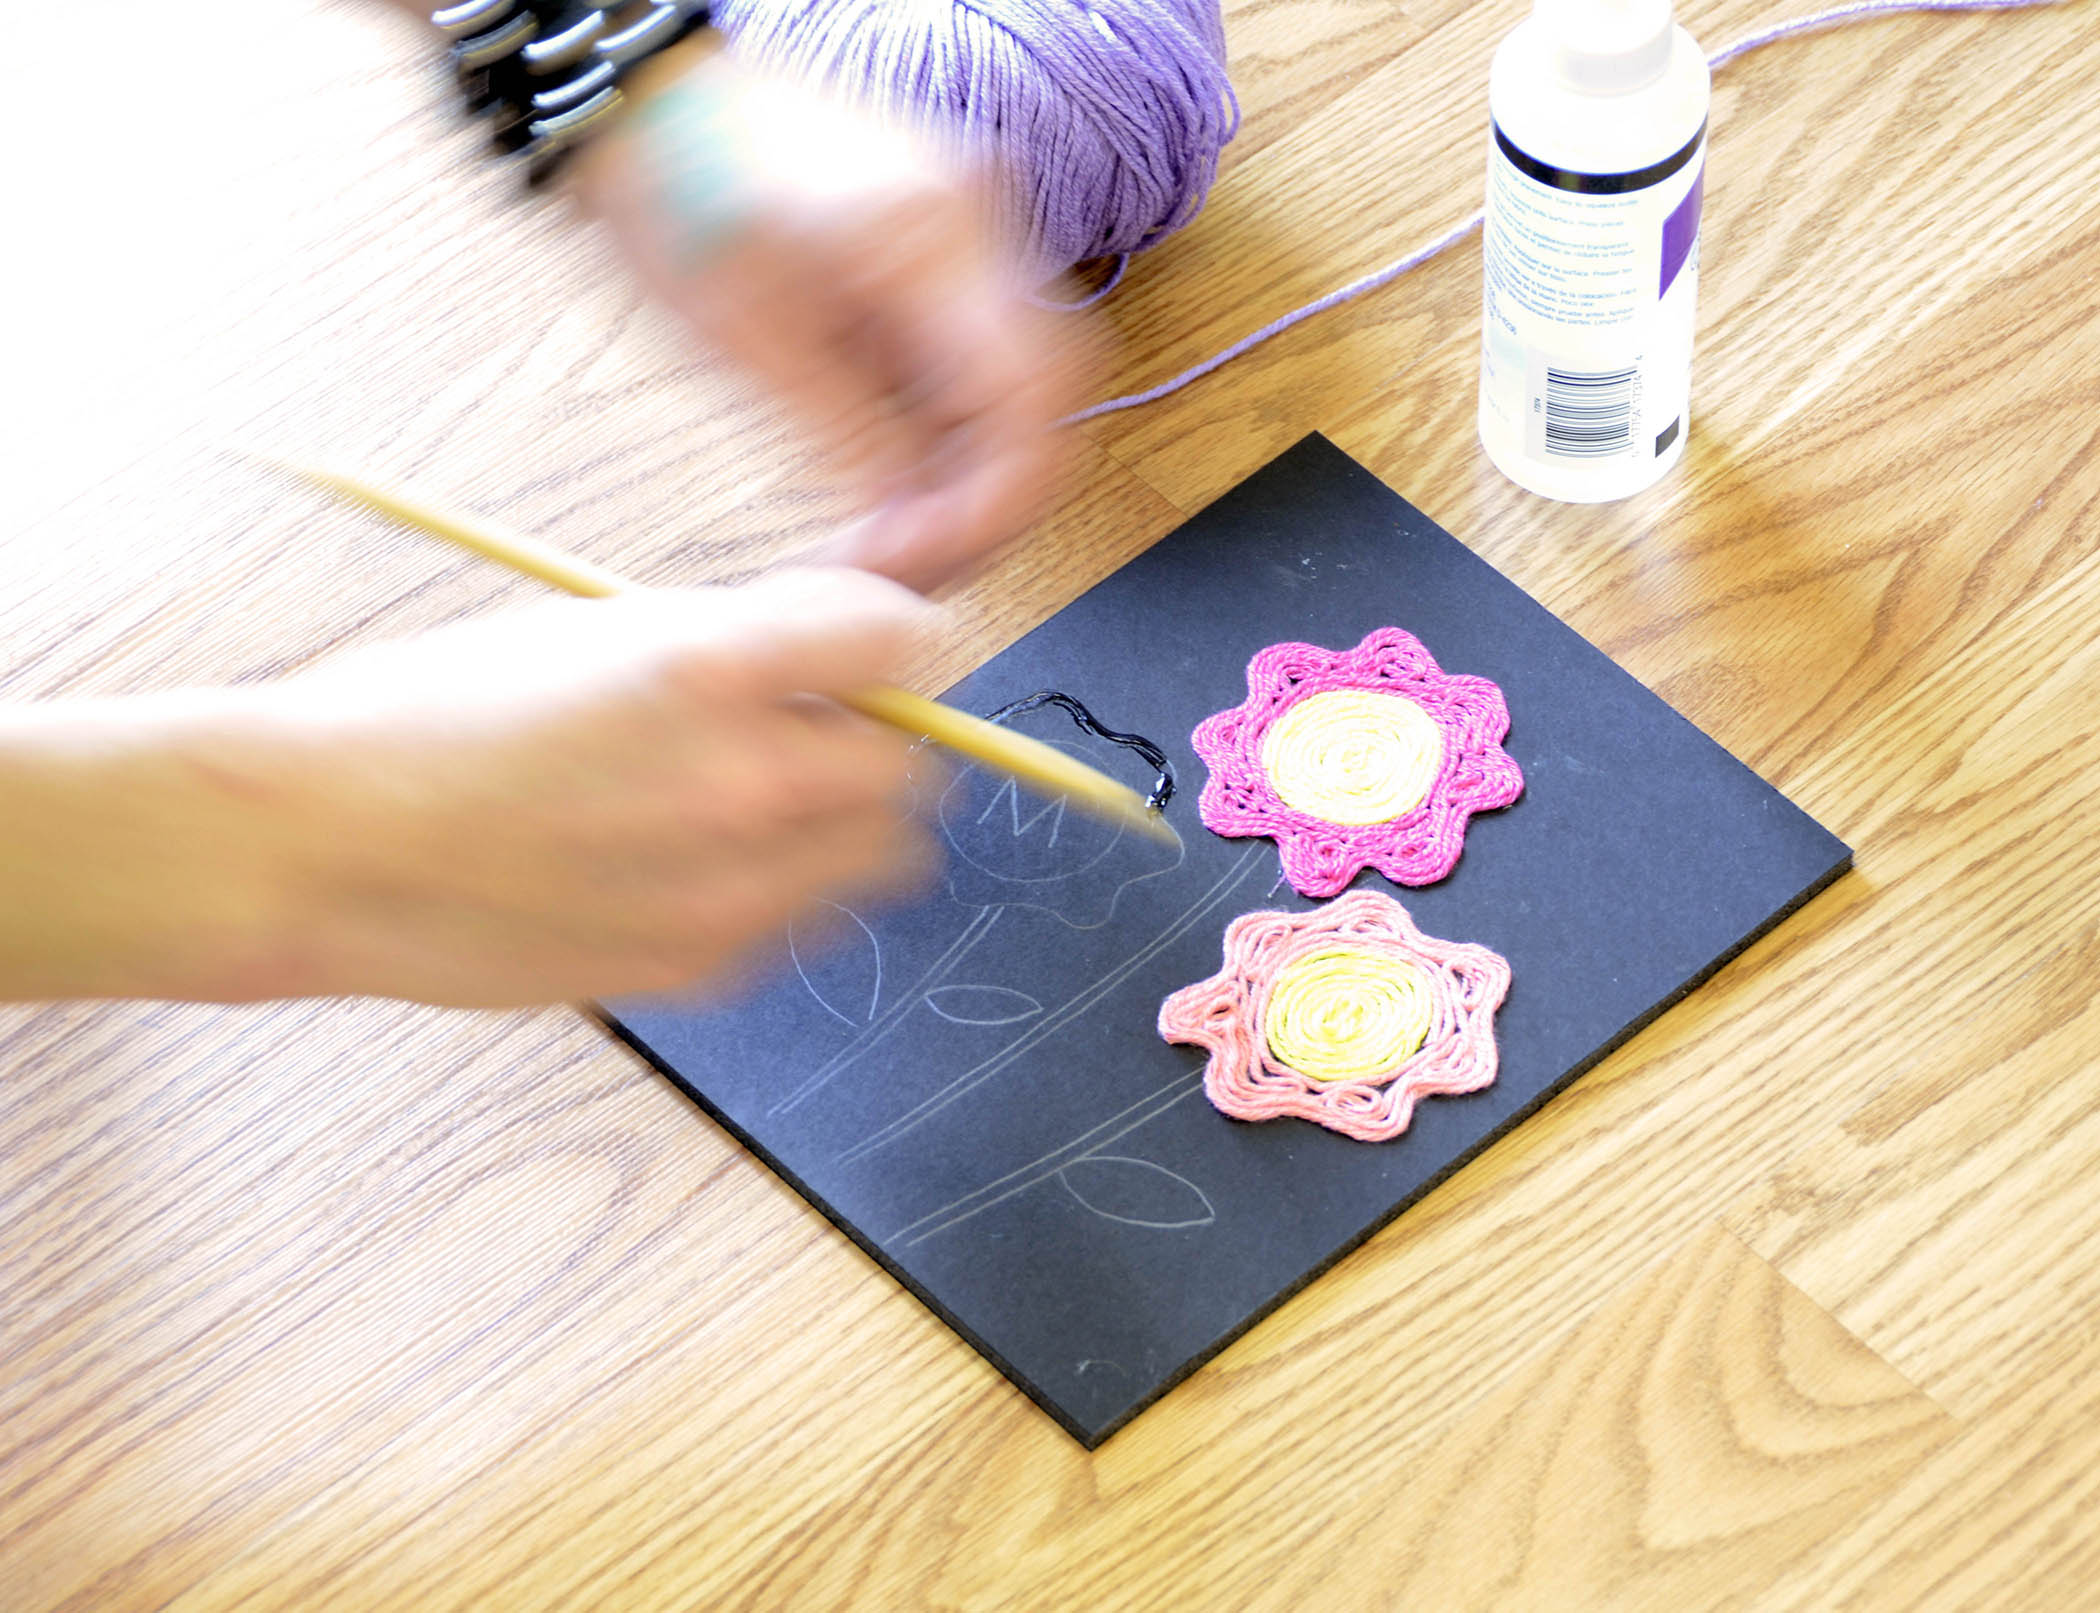
Outline your design with glue (we used Alene’s clear gel tacky glue). It’ll be easier to do a small section at a time rather than the whole thing – it’s easy to accidentally smear your yarn through the glue if the whole card is covered in it.
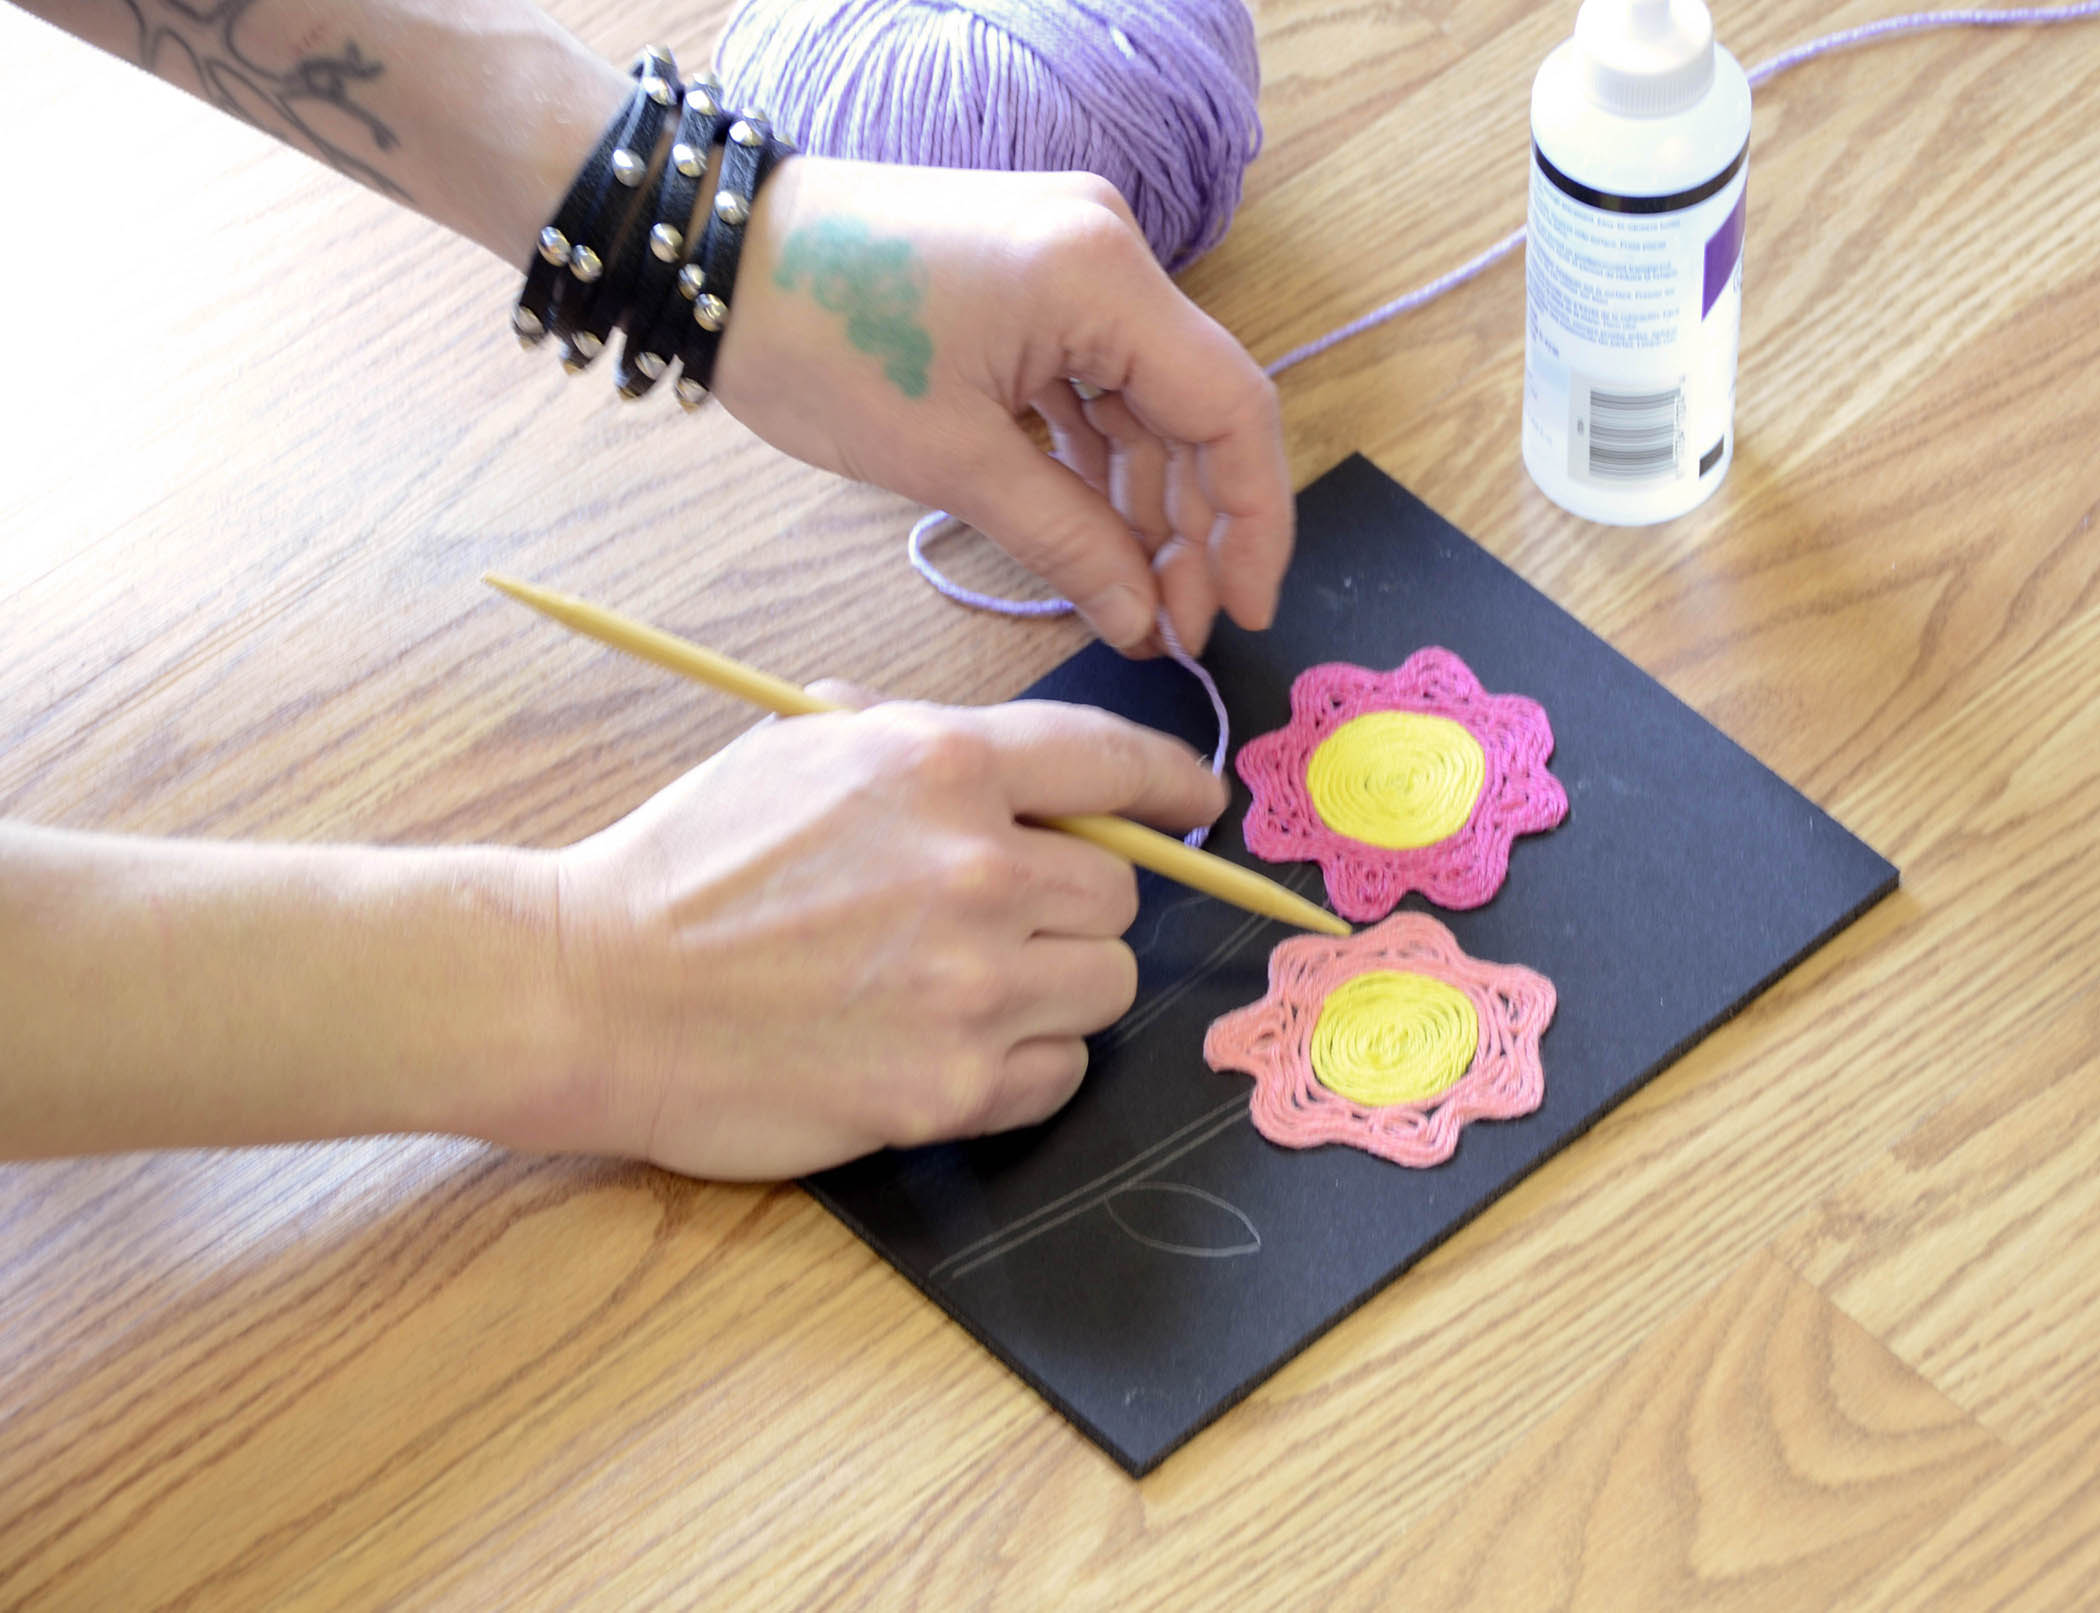
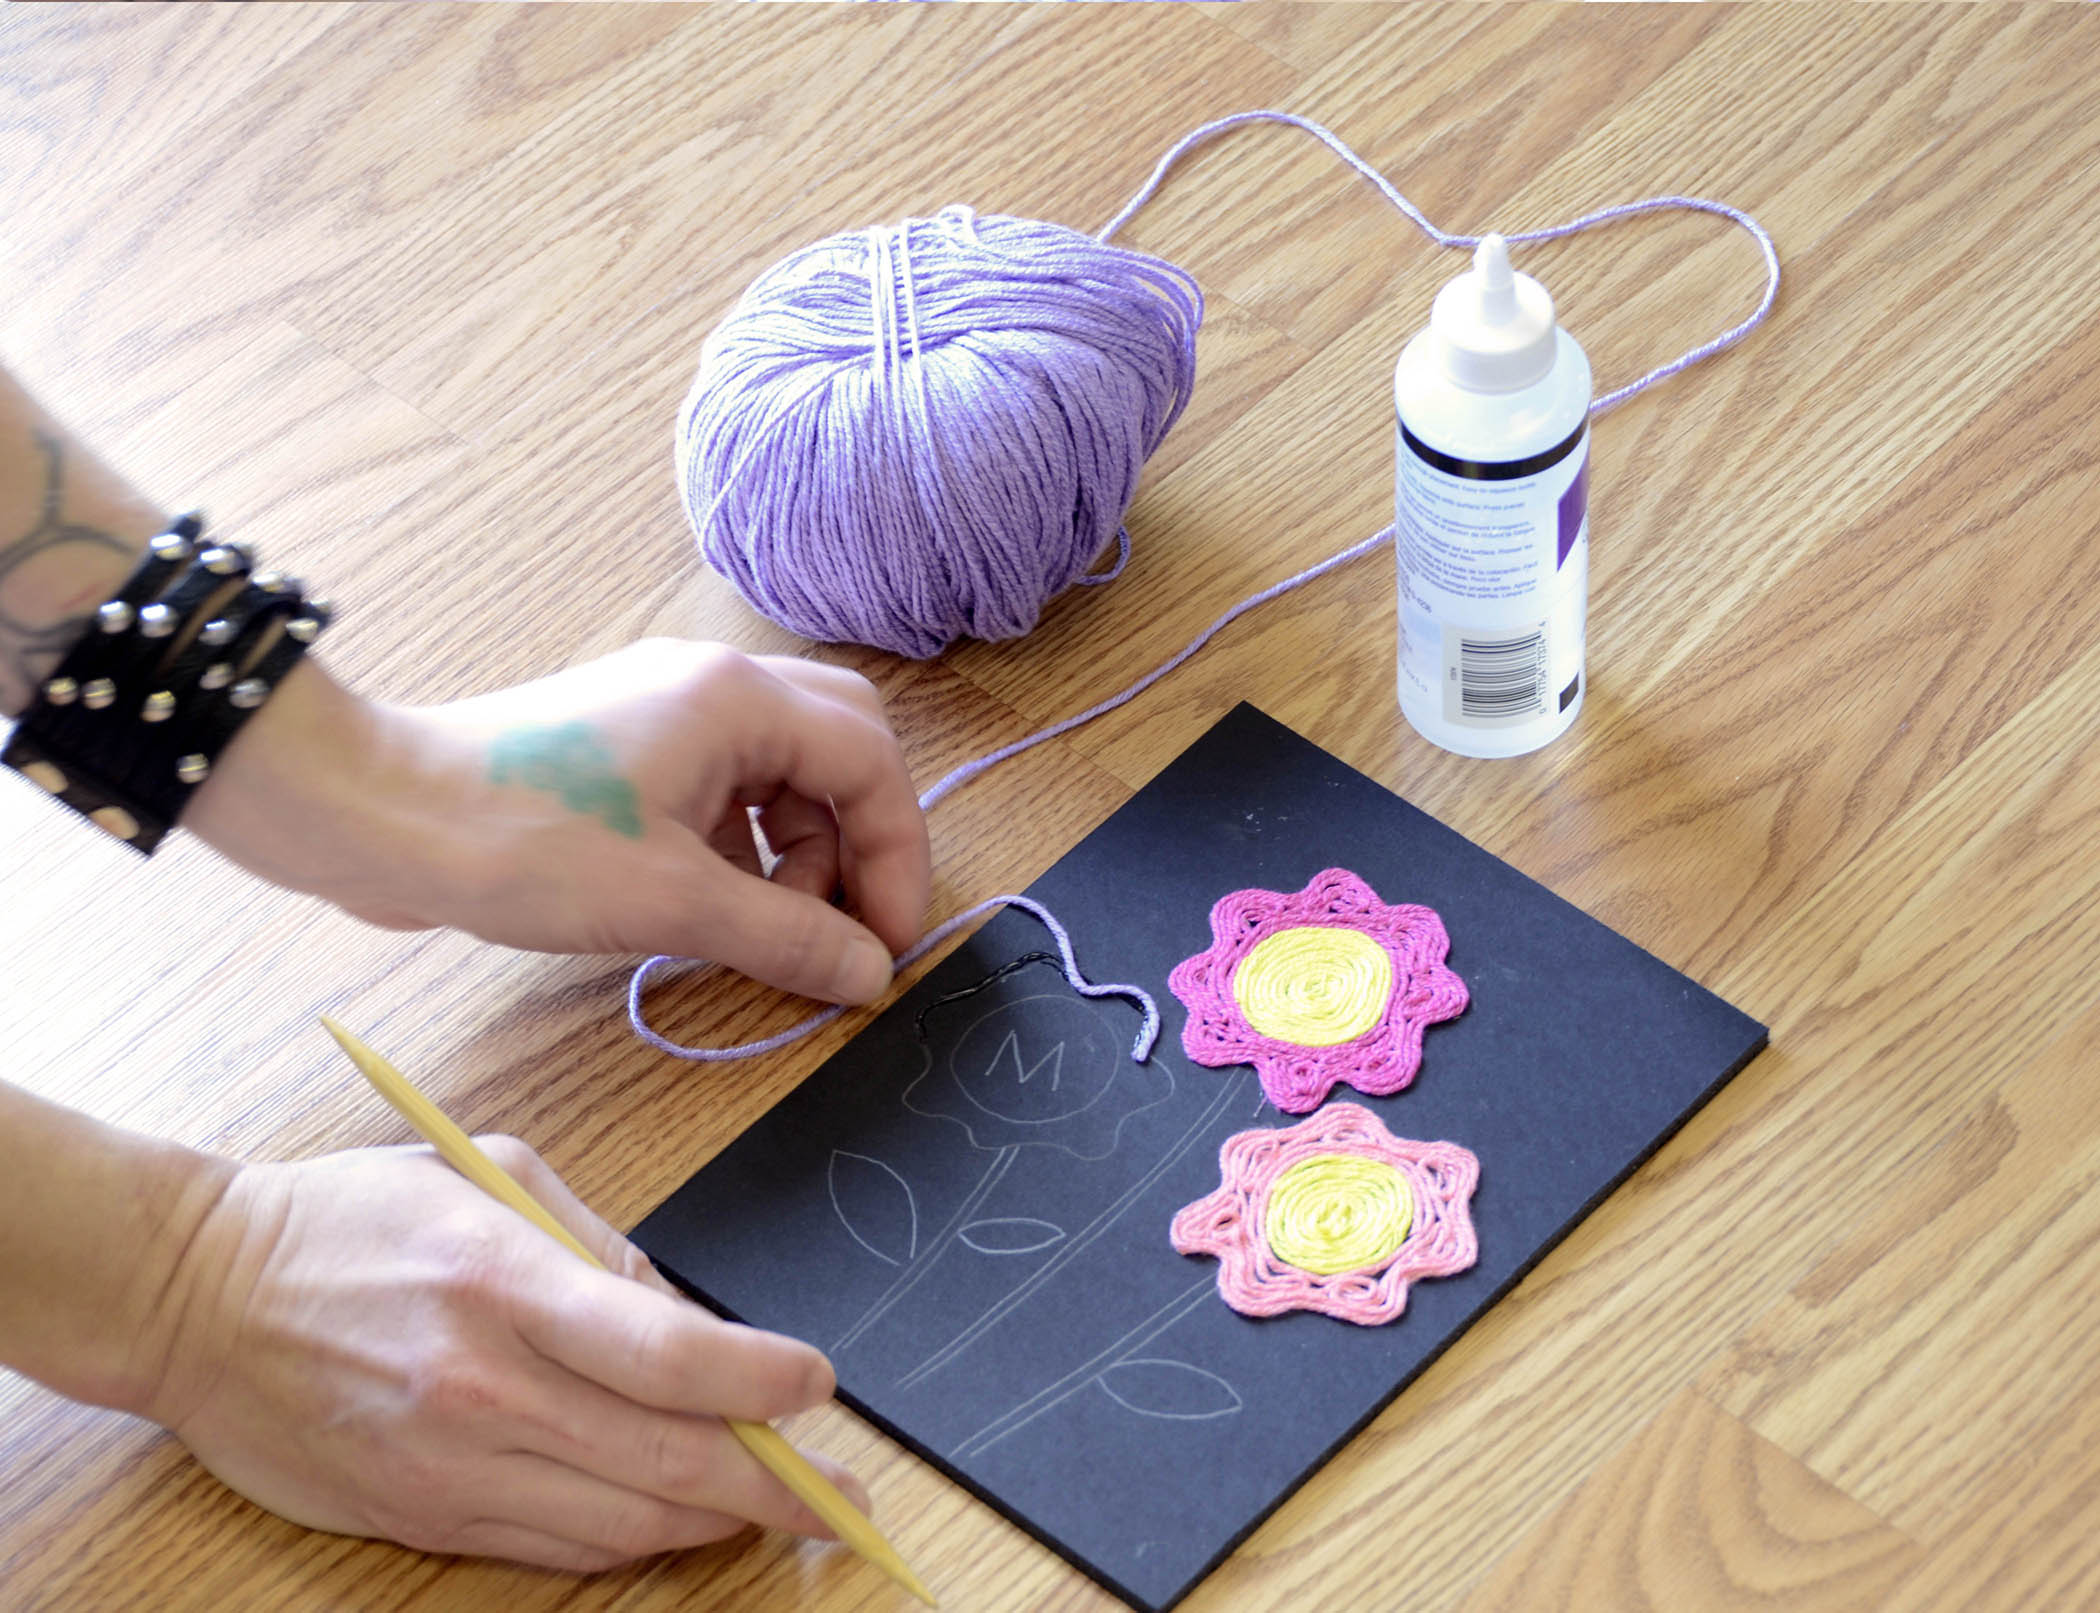
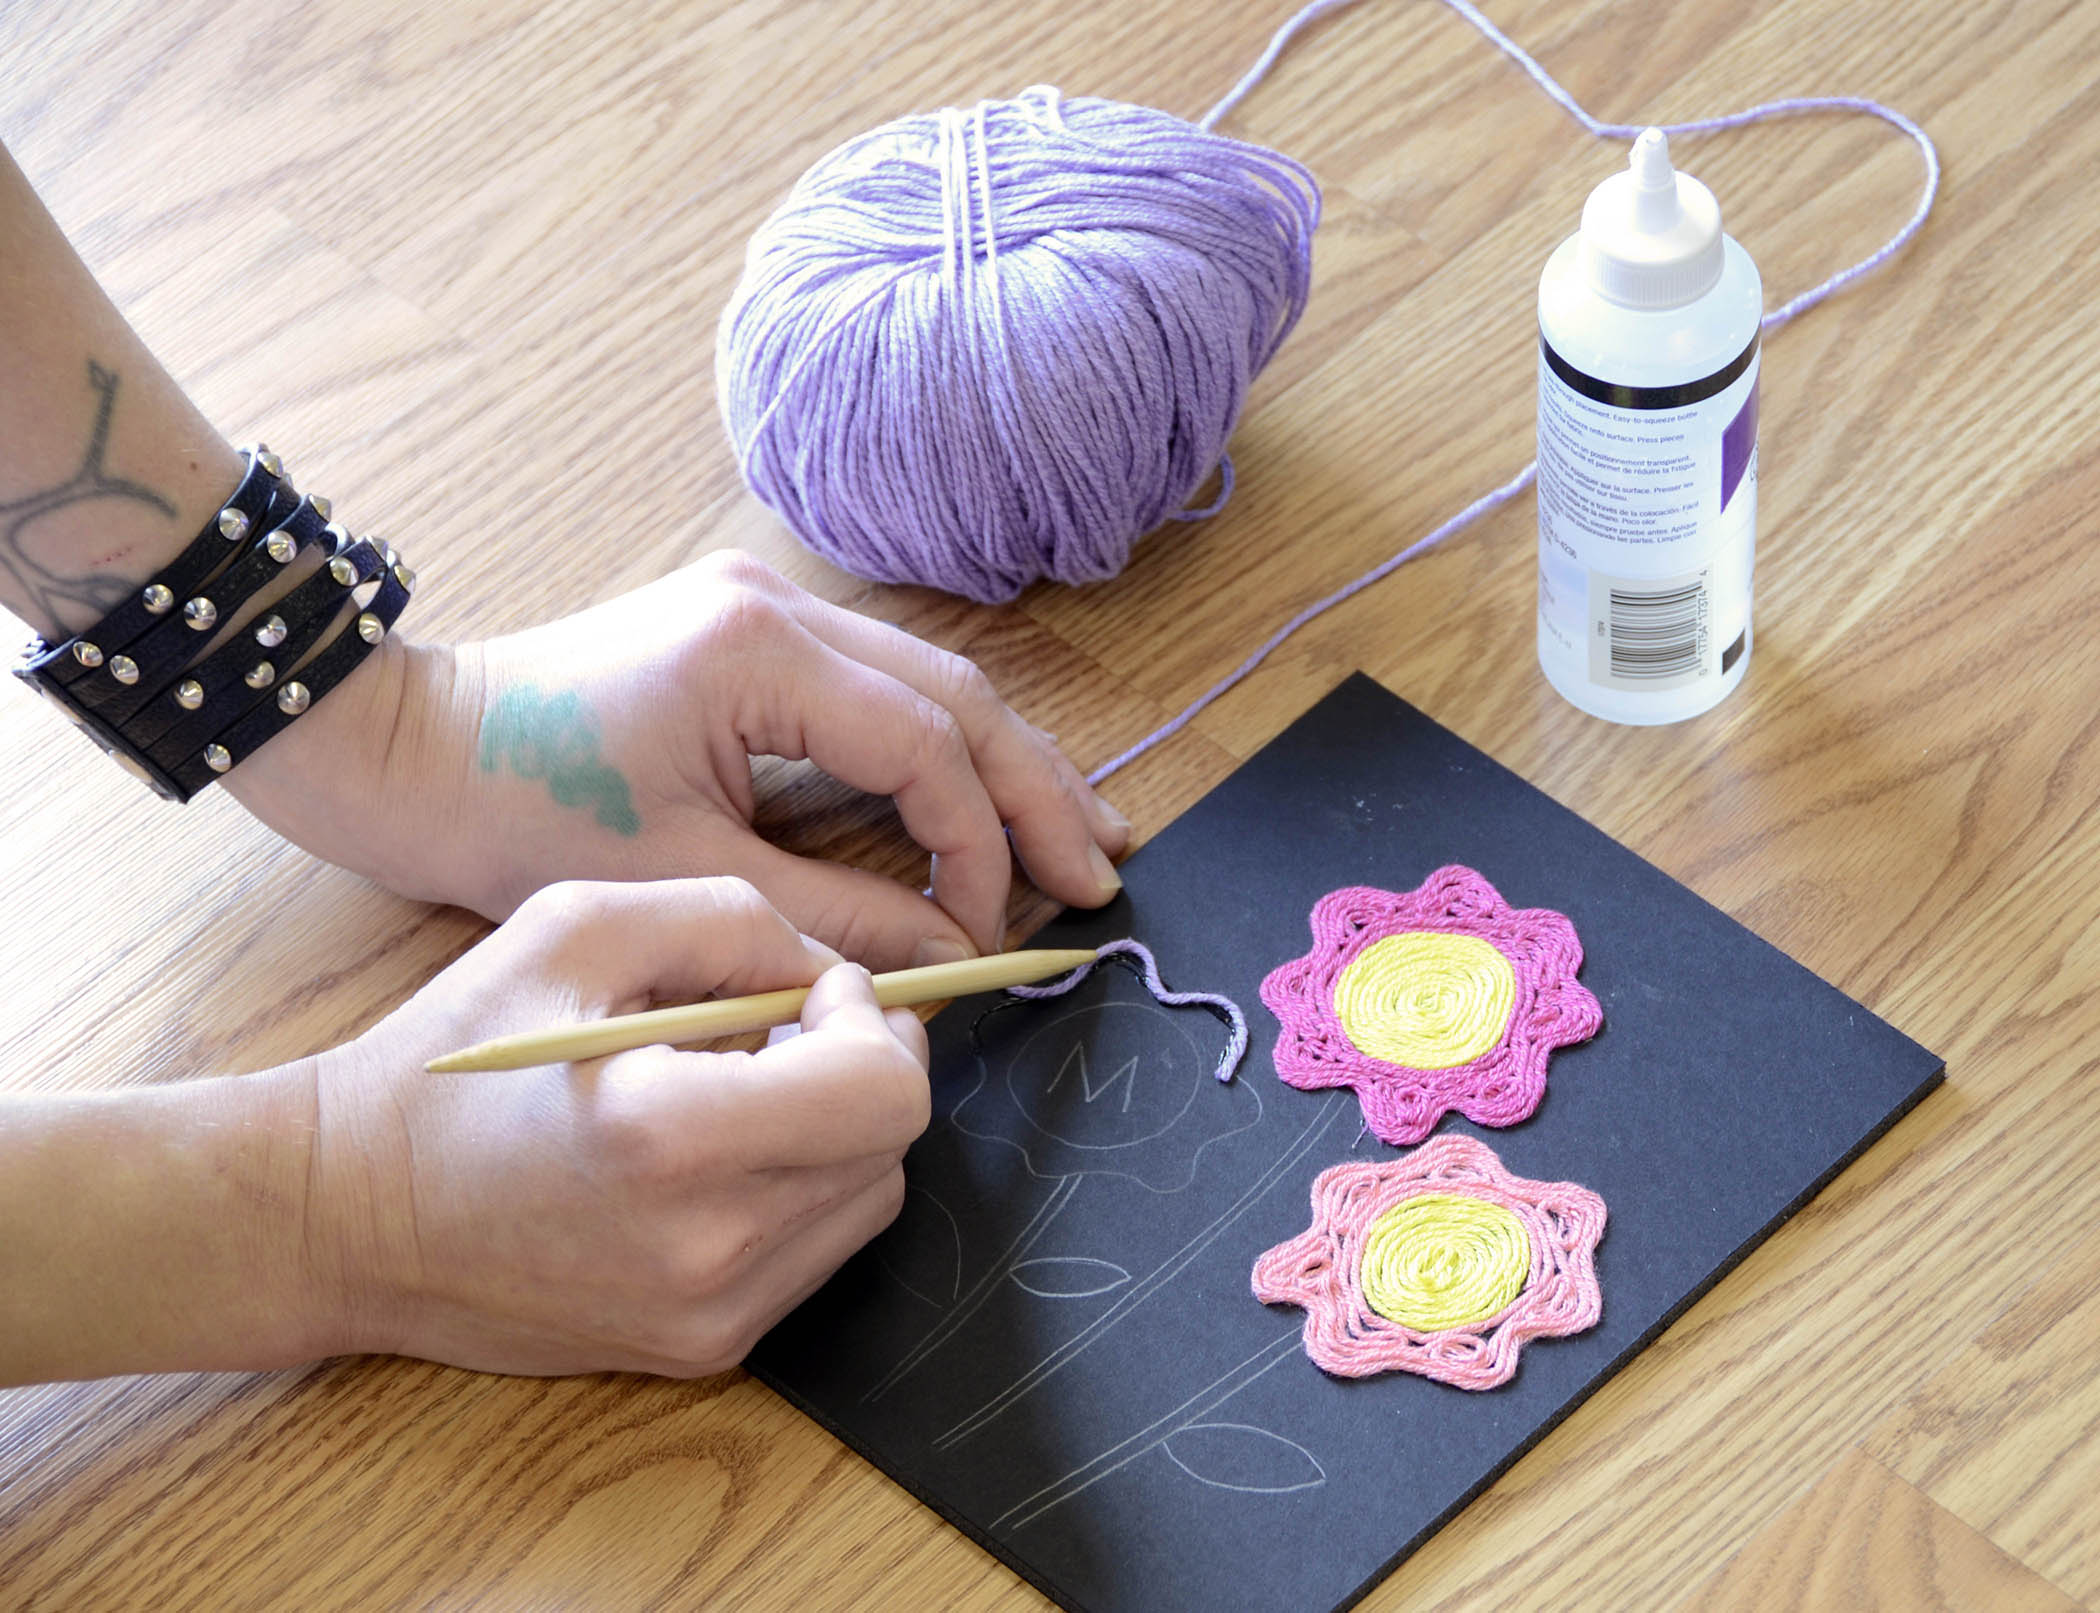
Position your yarn over the outline and stick it down. We used the point of a pencil to press the Bamboo Pop to the card. It keeps glue off the fingers and it’s more precise.
After you do your outlines, fill in the area inside, then if you wish you can cover any remaining space. Be as creative as you want. Incorporate straight lines, whirls and swirls, unusual colors or shapes – it’s all up to you!
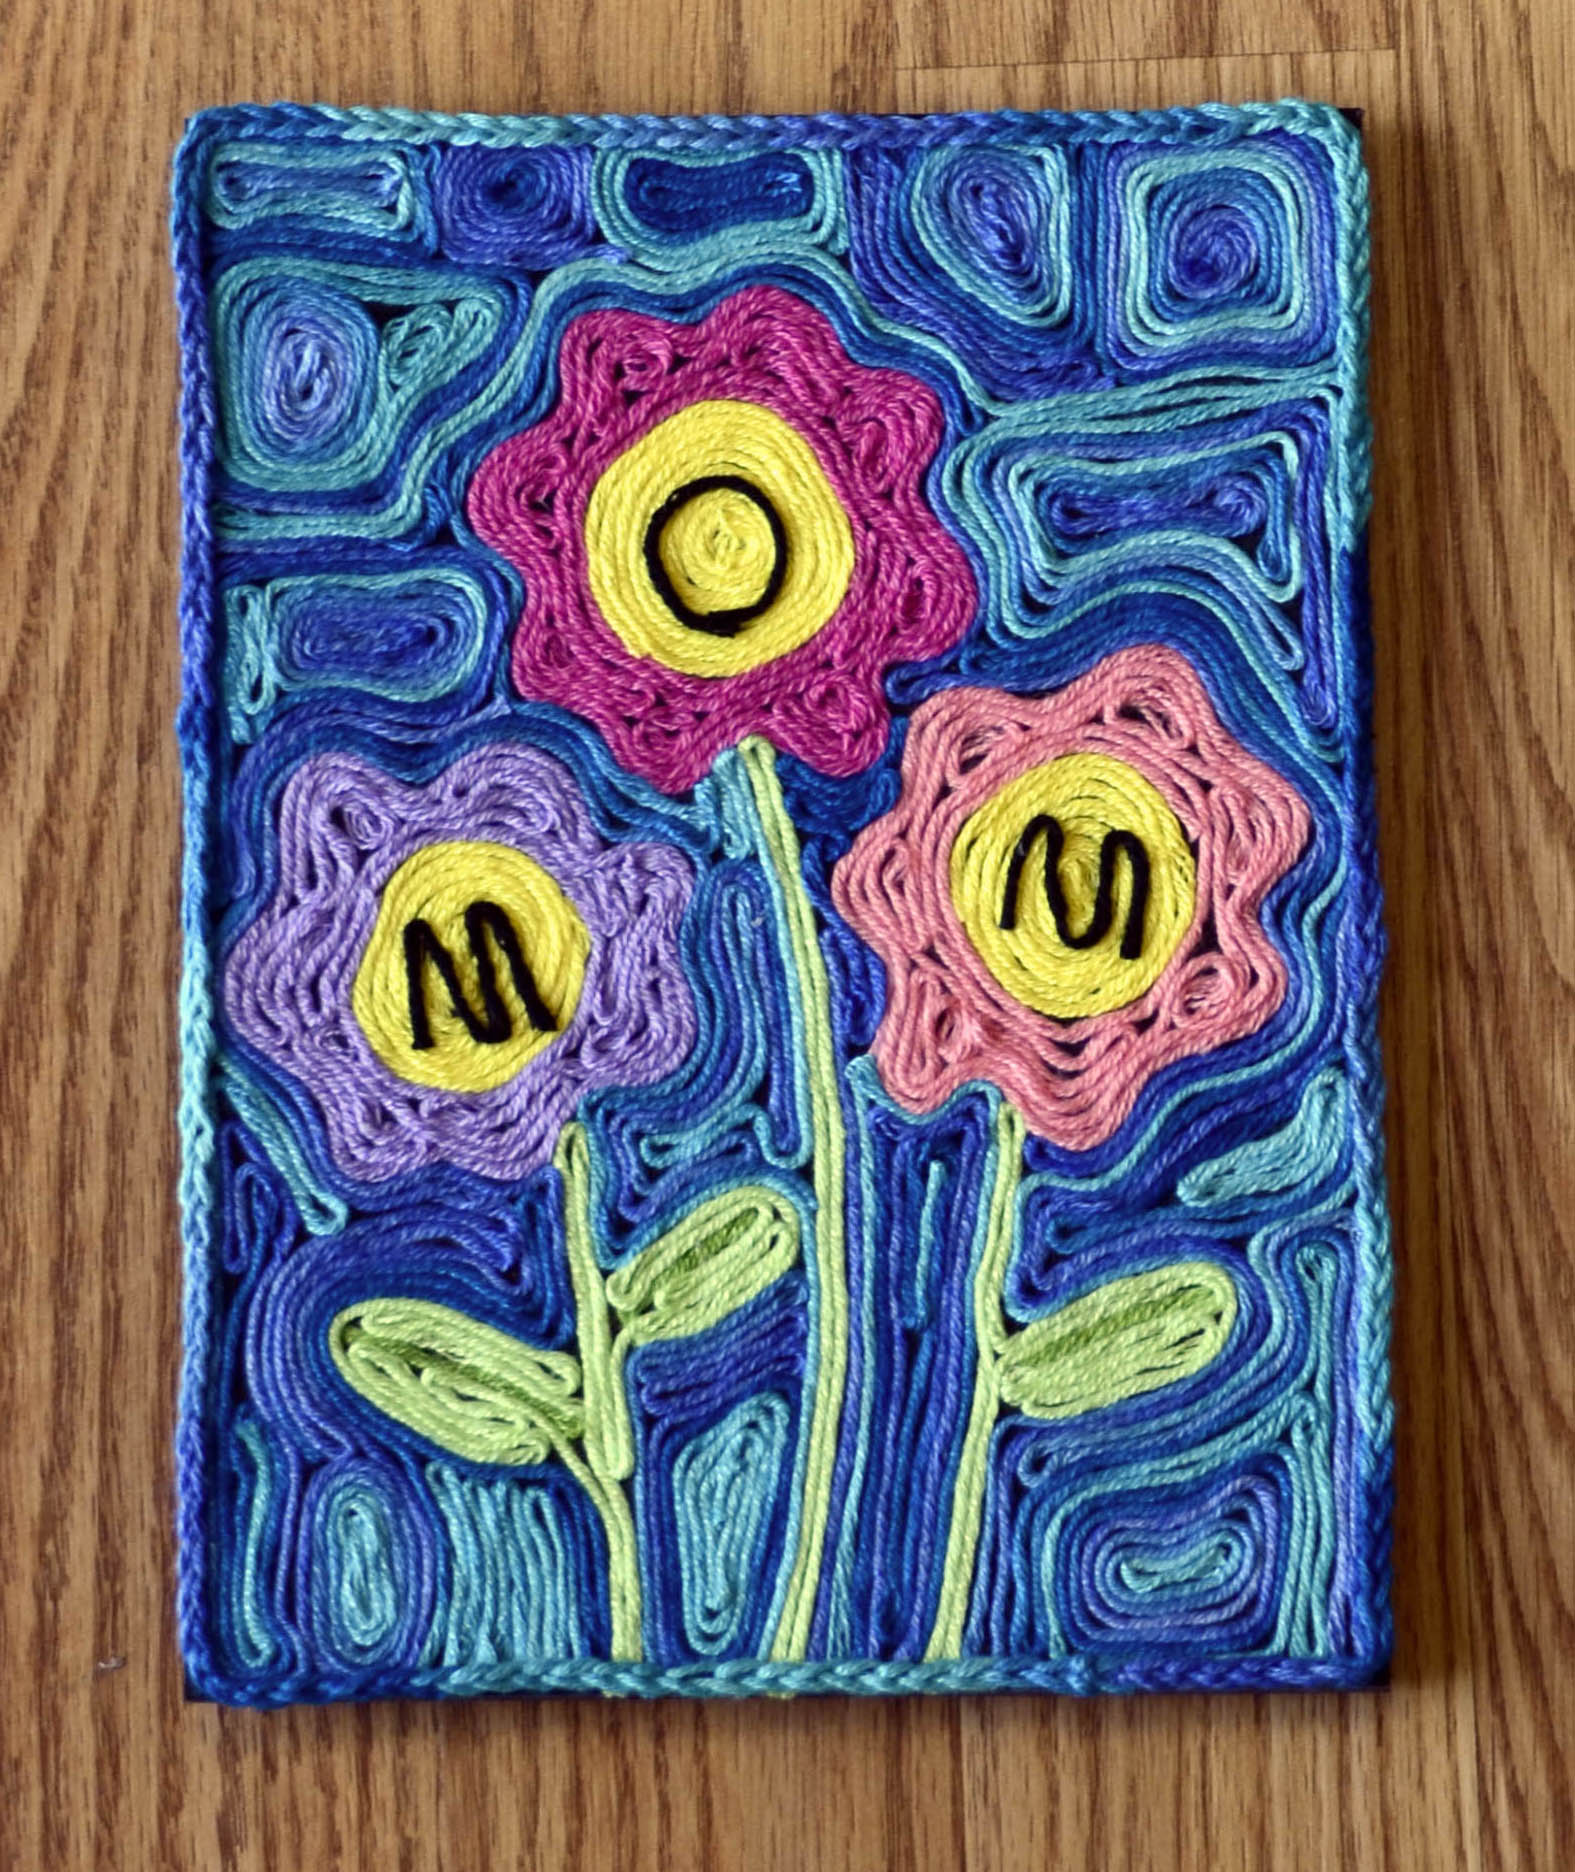
I love the touch Amy included of the chain stitch around the edge of the card!
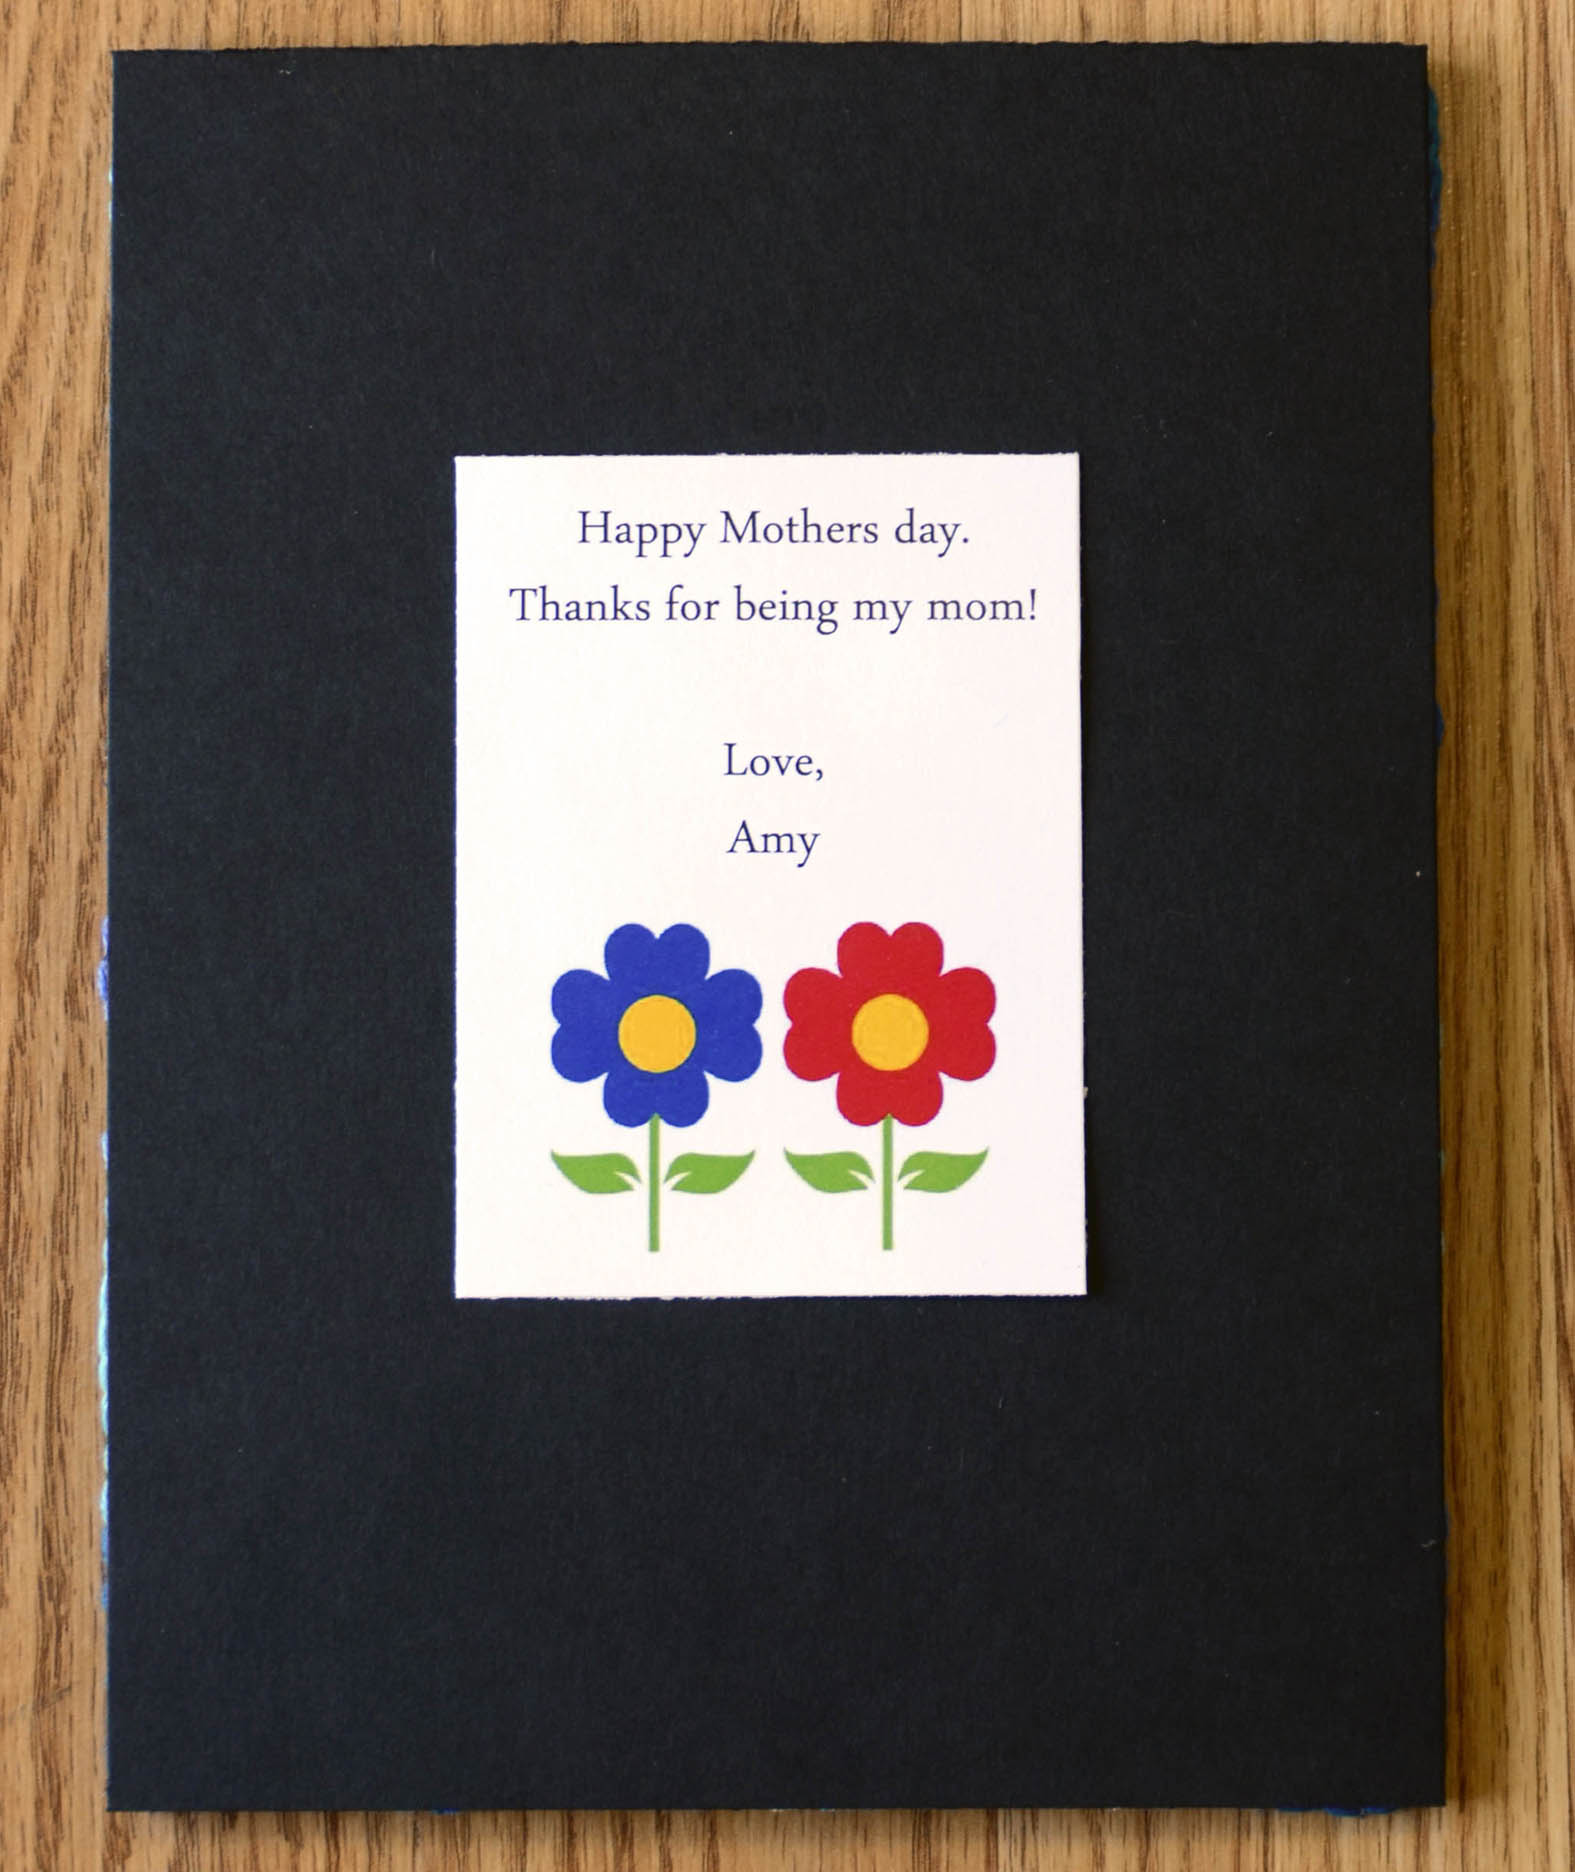
Finish it off with a personalized message on the back. Draw your own, or use clip art or illustration from the internet.
Voila! A personalized card that you made yourself without making yourself crazy. We’ll hope that Amy’s mom gets the card before she reads this post!
Happy crafting!