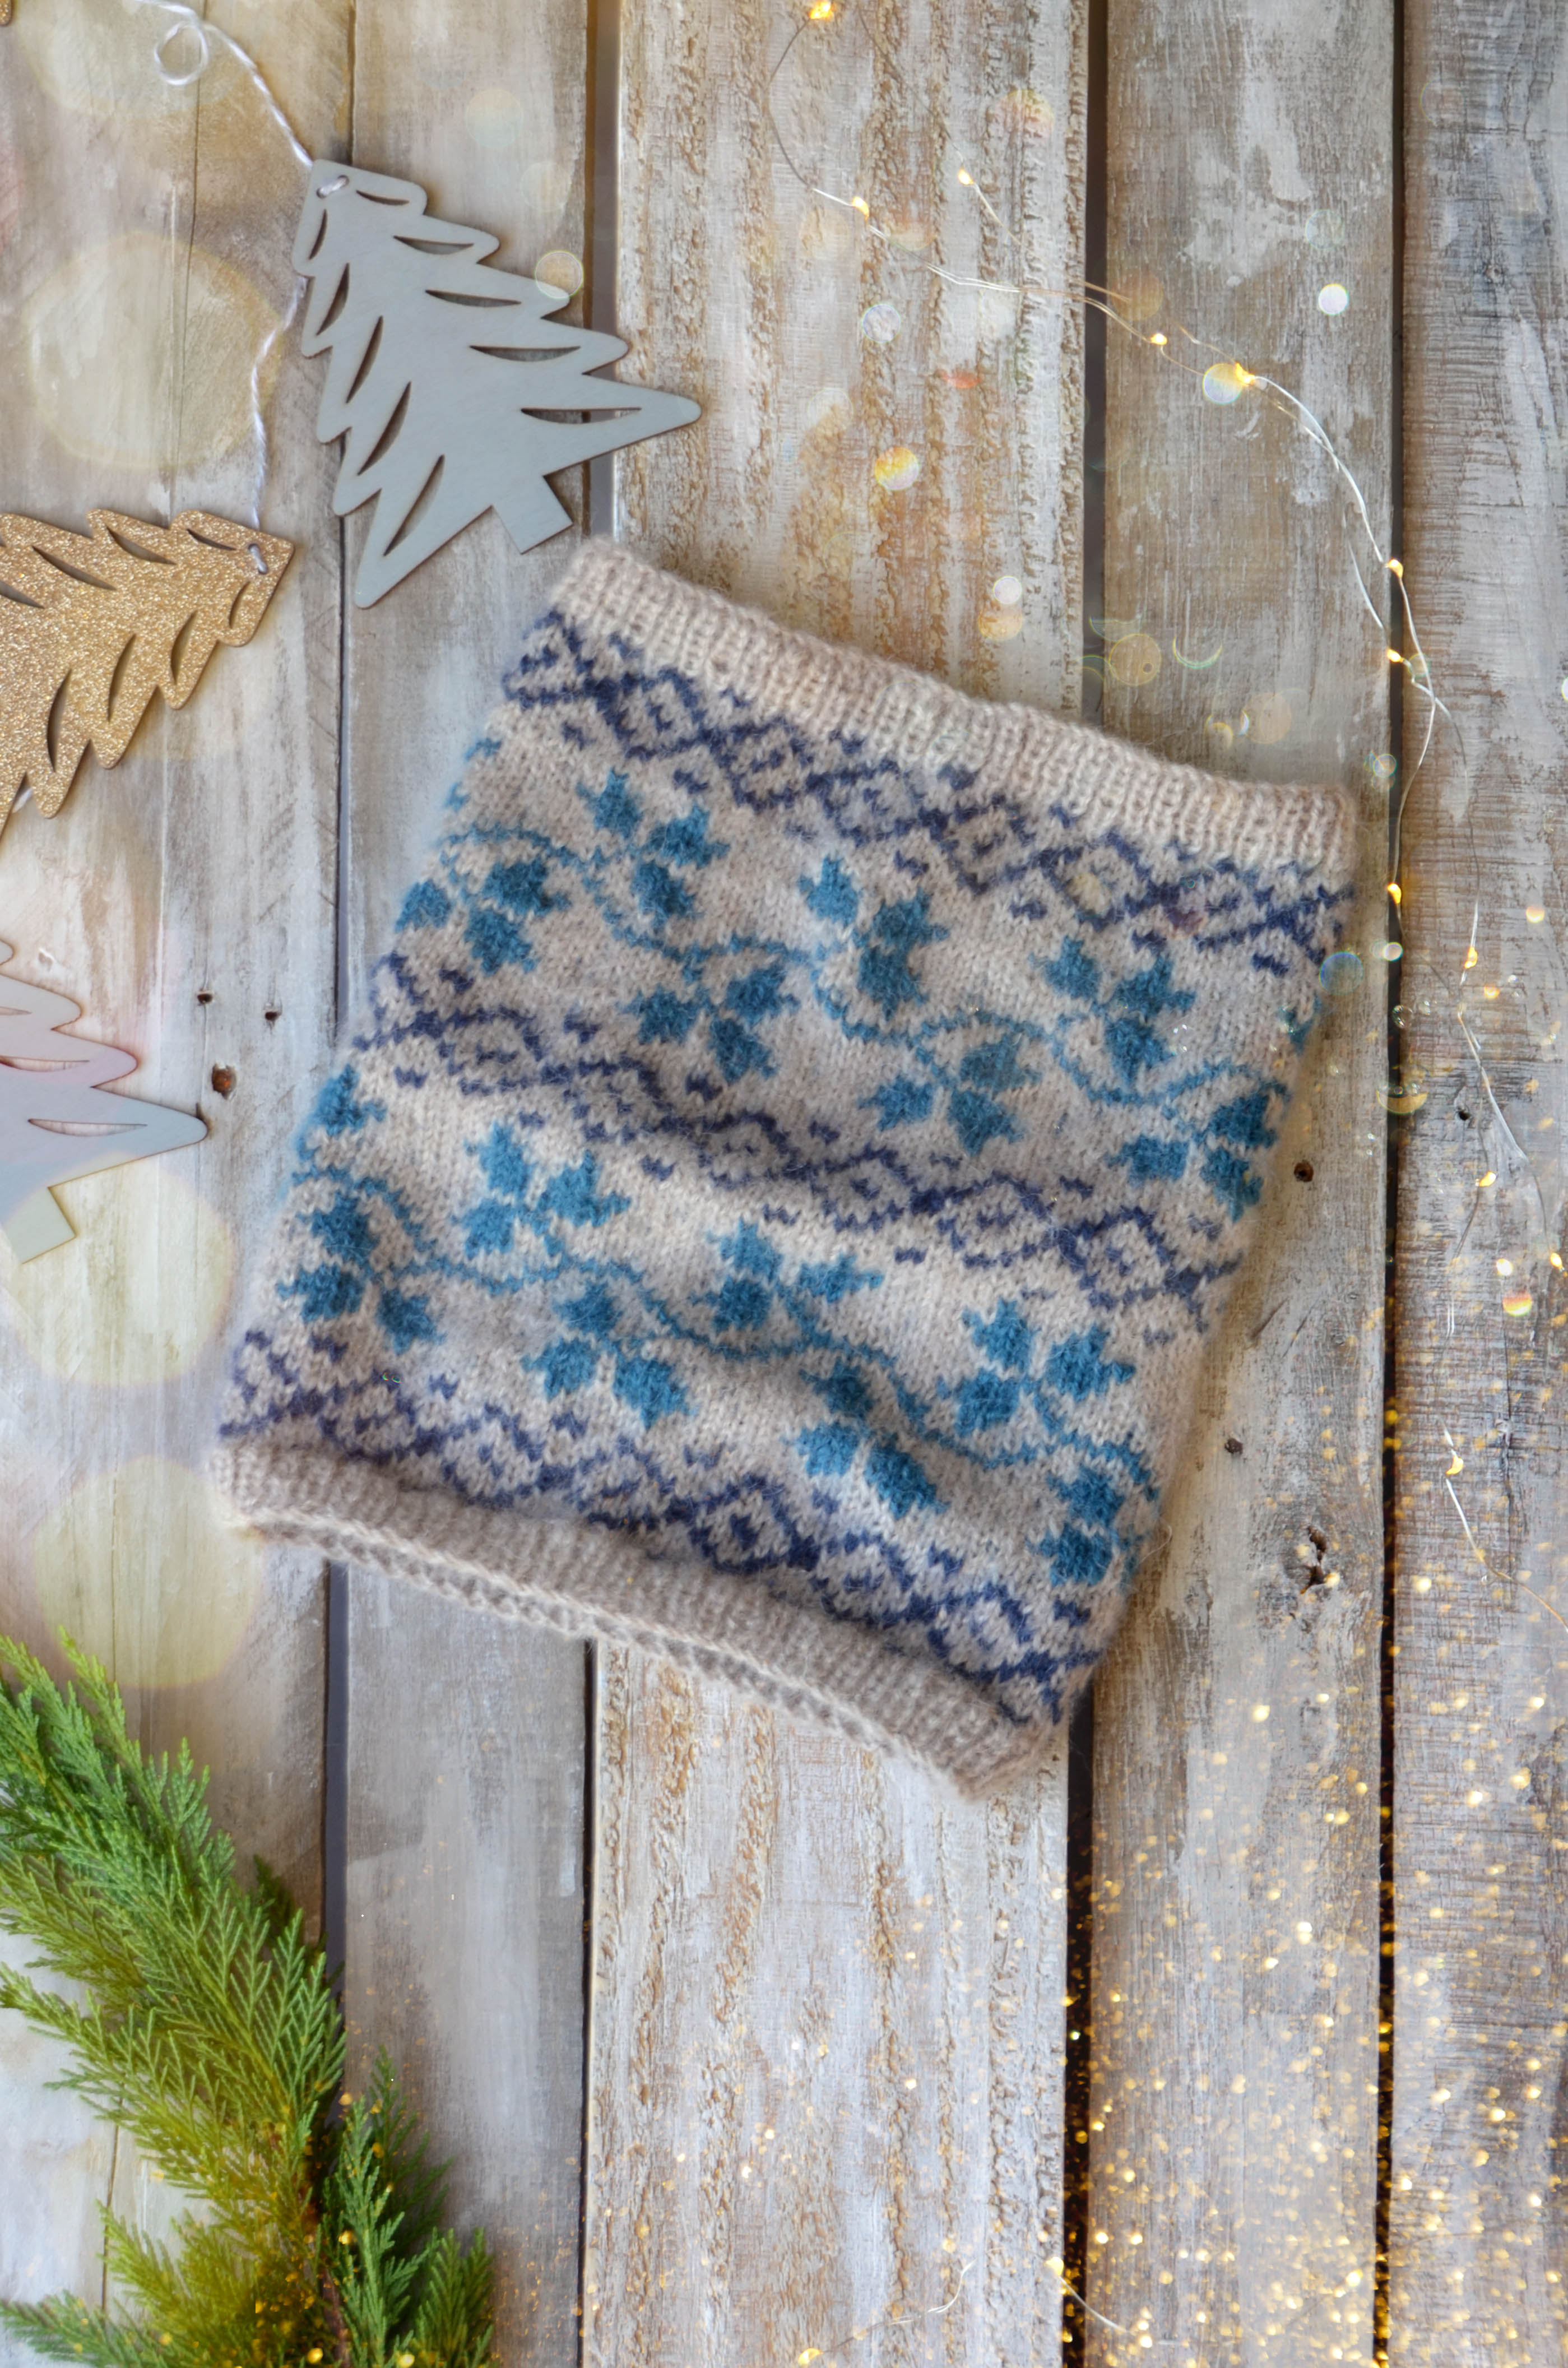
For the last installment of our blog series on our 12 Days of Winter Kit Collection, we’re unveiling the Twining Vines Cowl. Twining Vinesfeatures Amphora. It is a perfect yarn for colorwork because its gorgeous halo blends the fibers together seamlessly. The effect is almost like an impressionist painting.
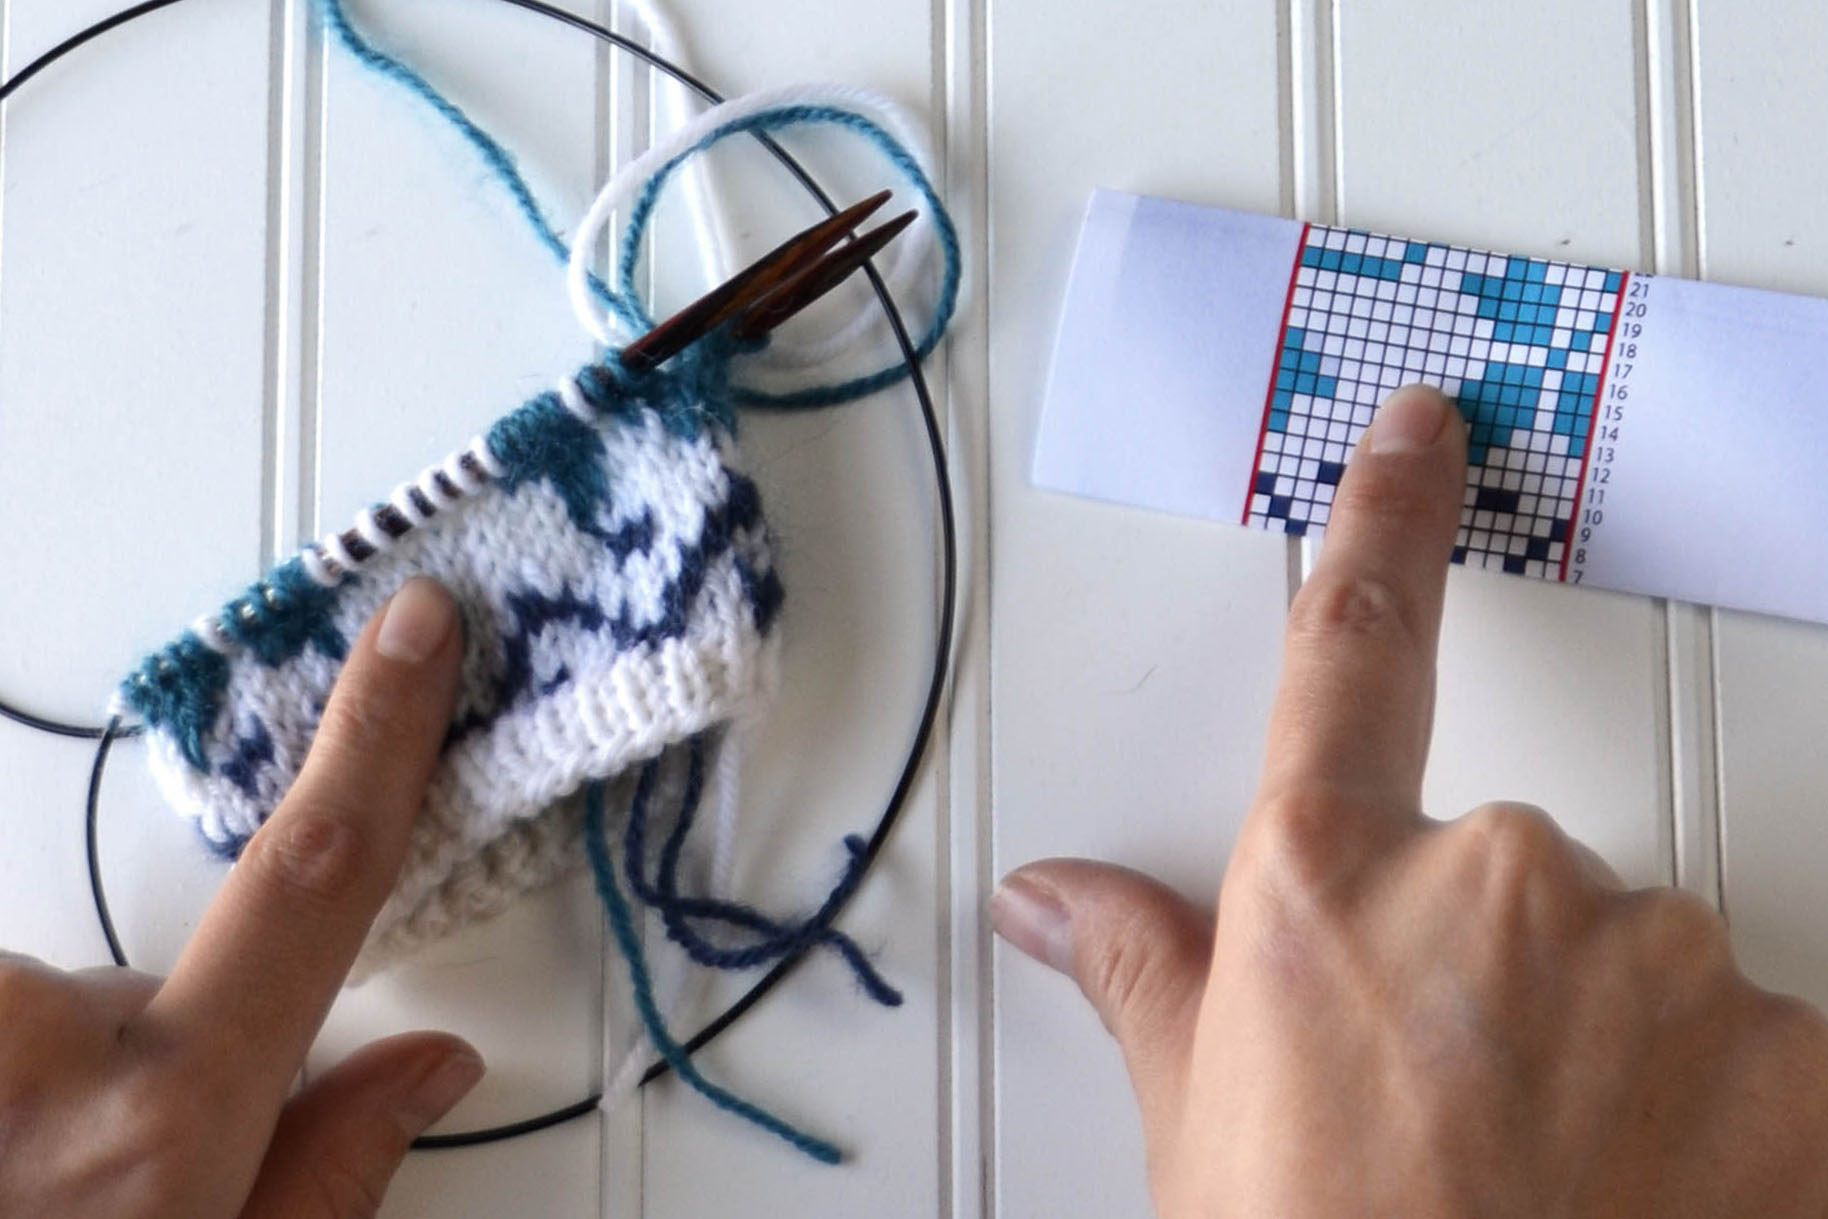
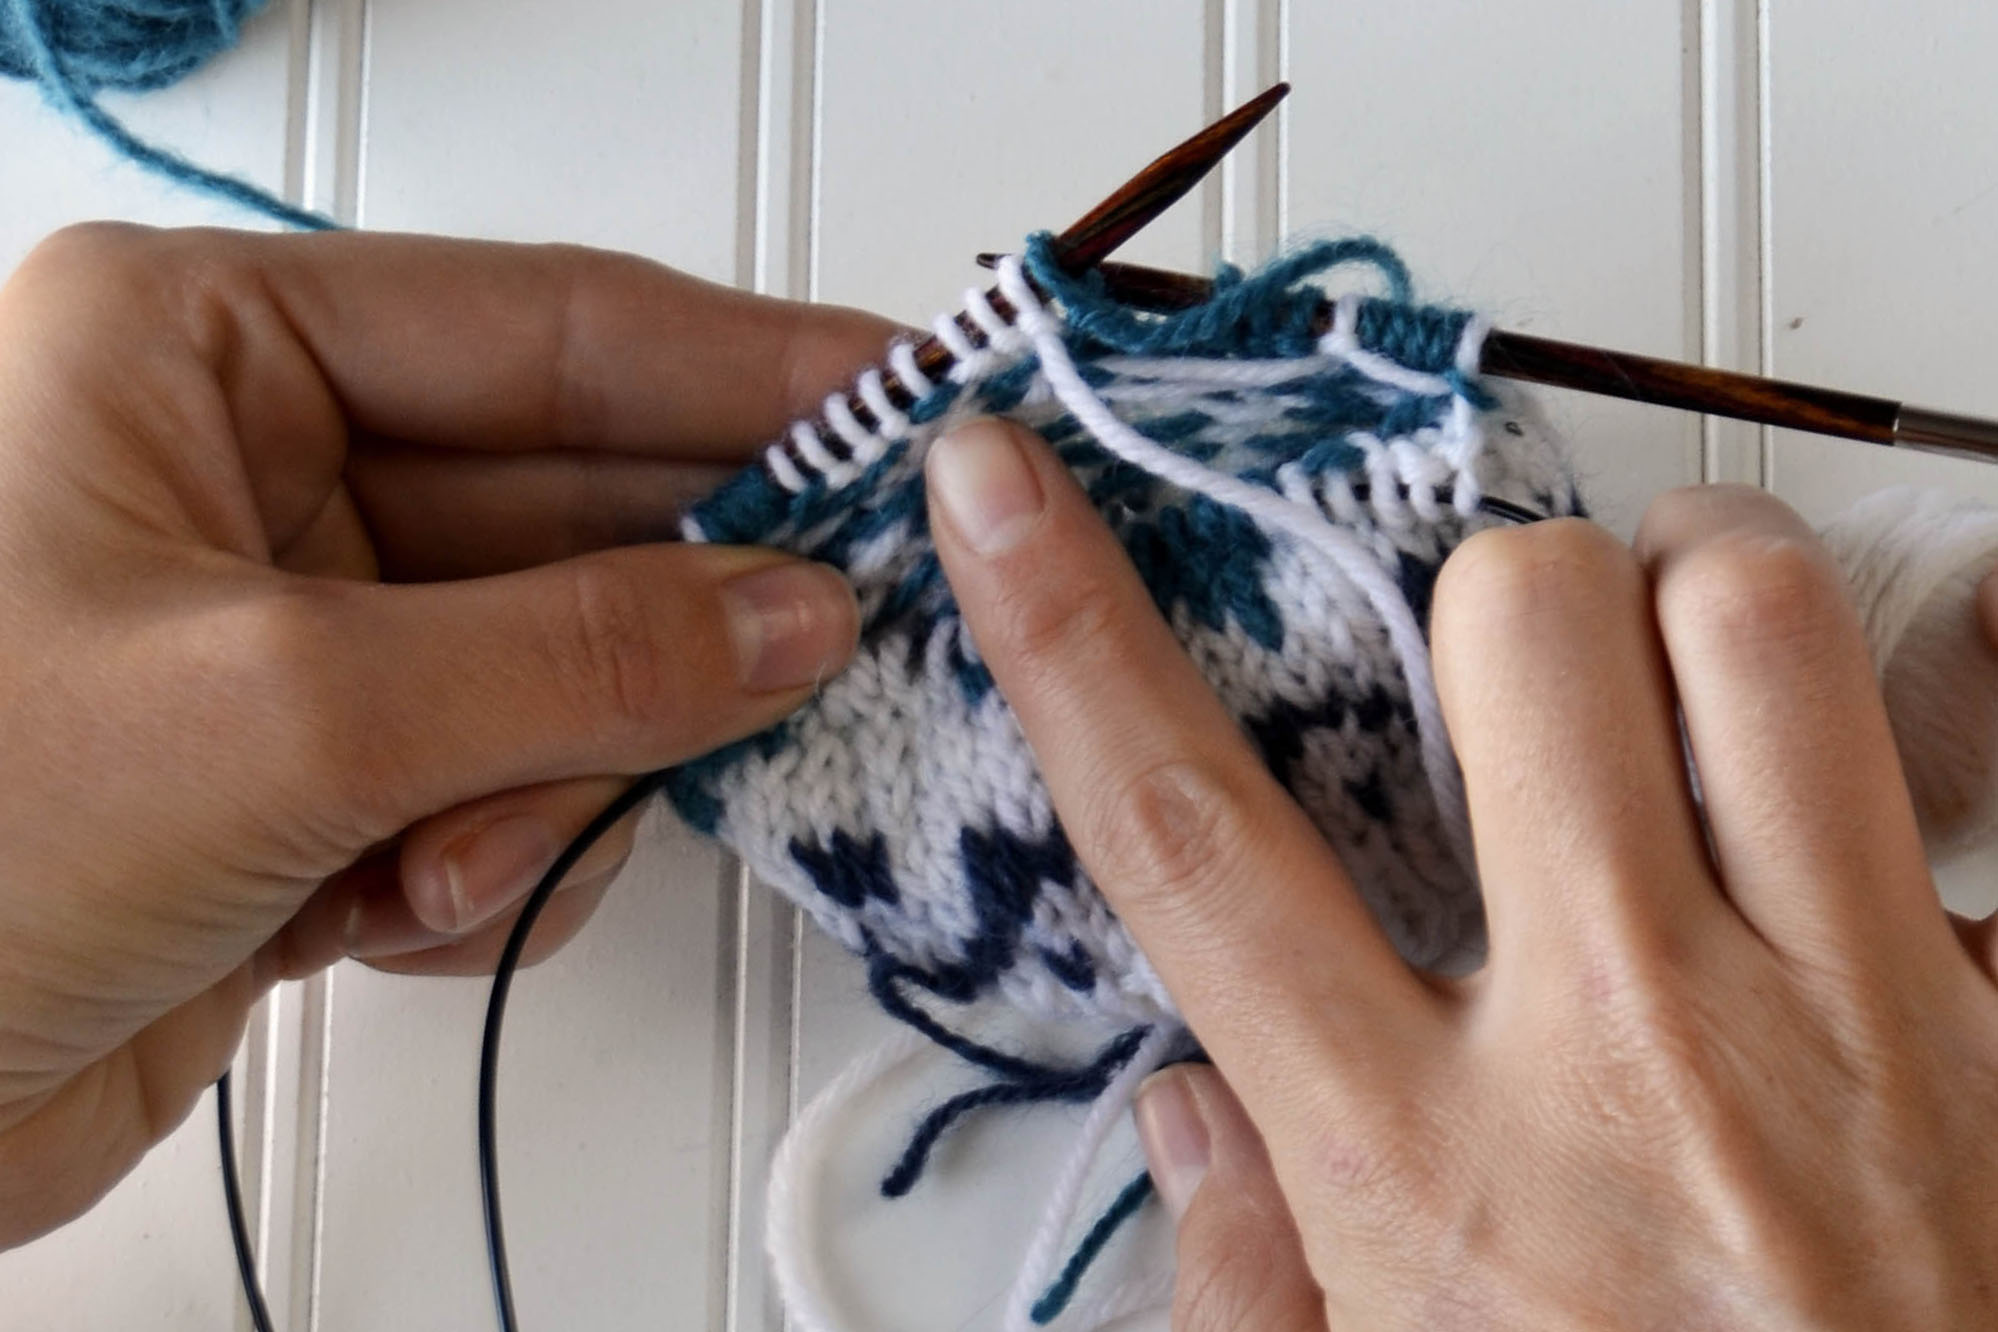
In addition to carrying two colors throughout this pattern, you’ll also need to trap your floats. It’s simpler than you might think. This tutorial is useful for any stranded project. If you’d like a closer look at the images, simply click on them.
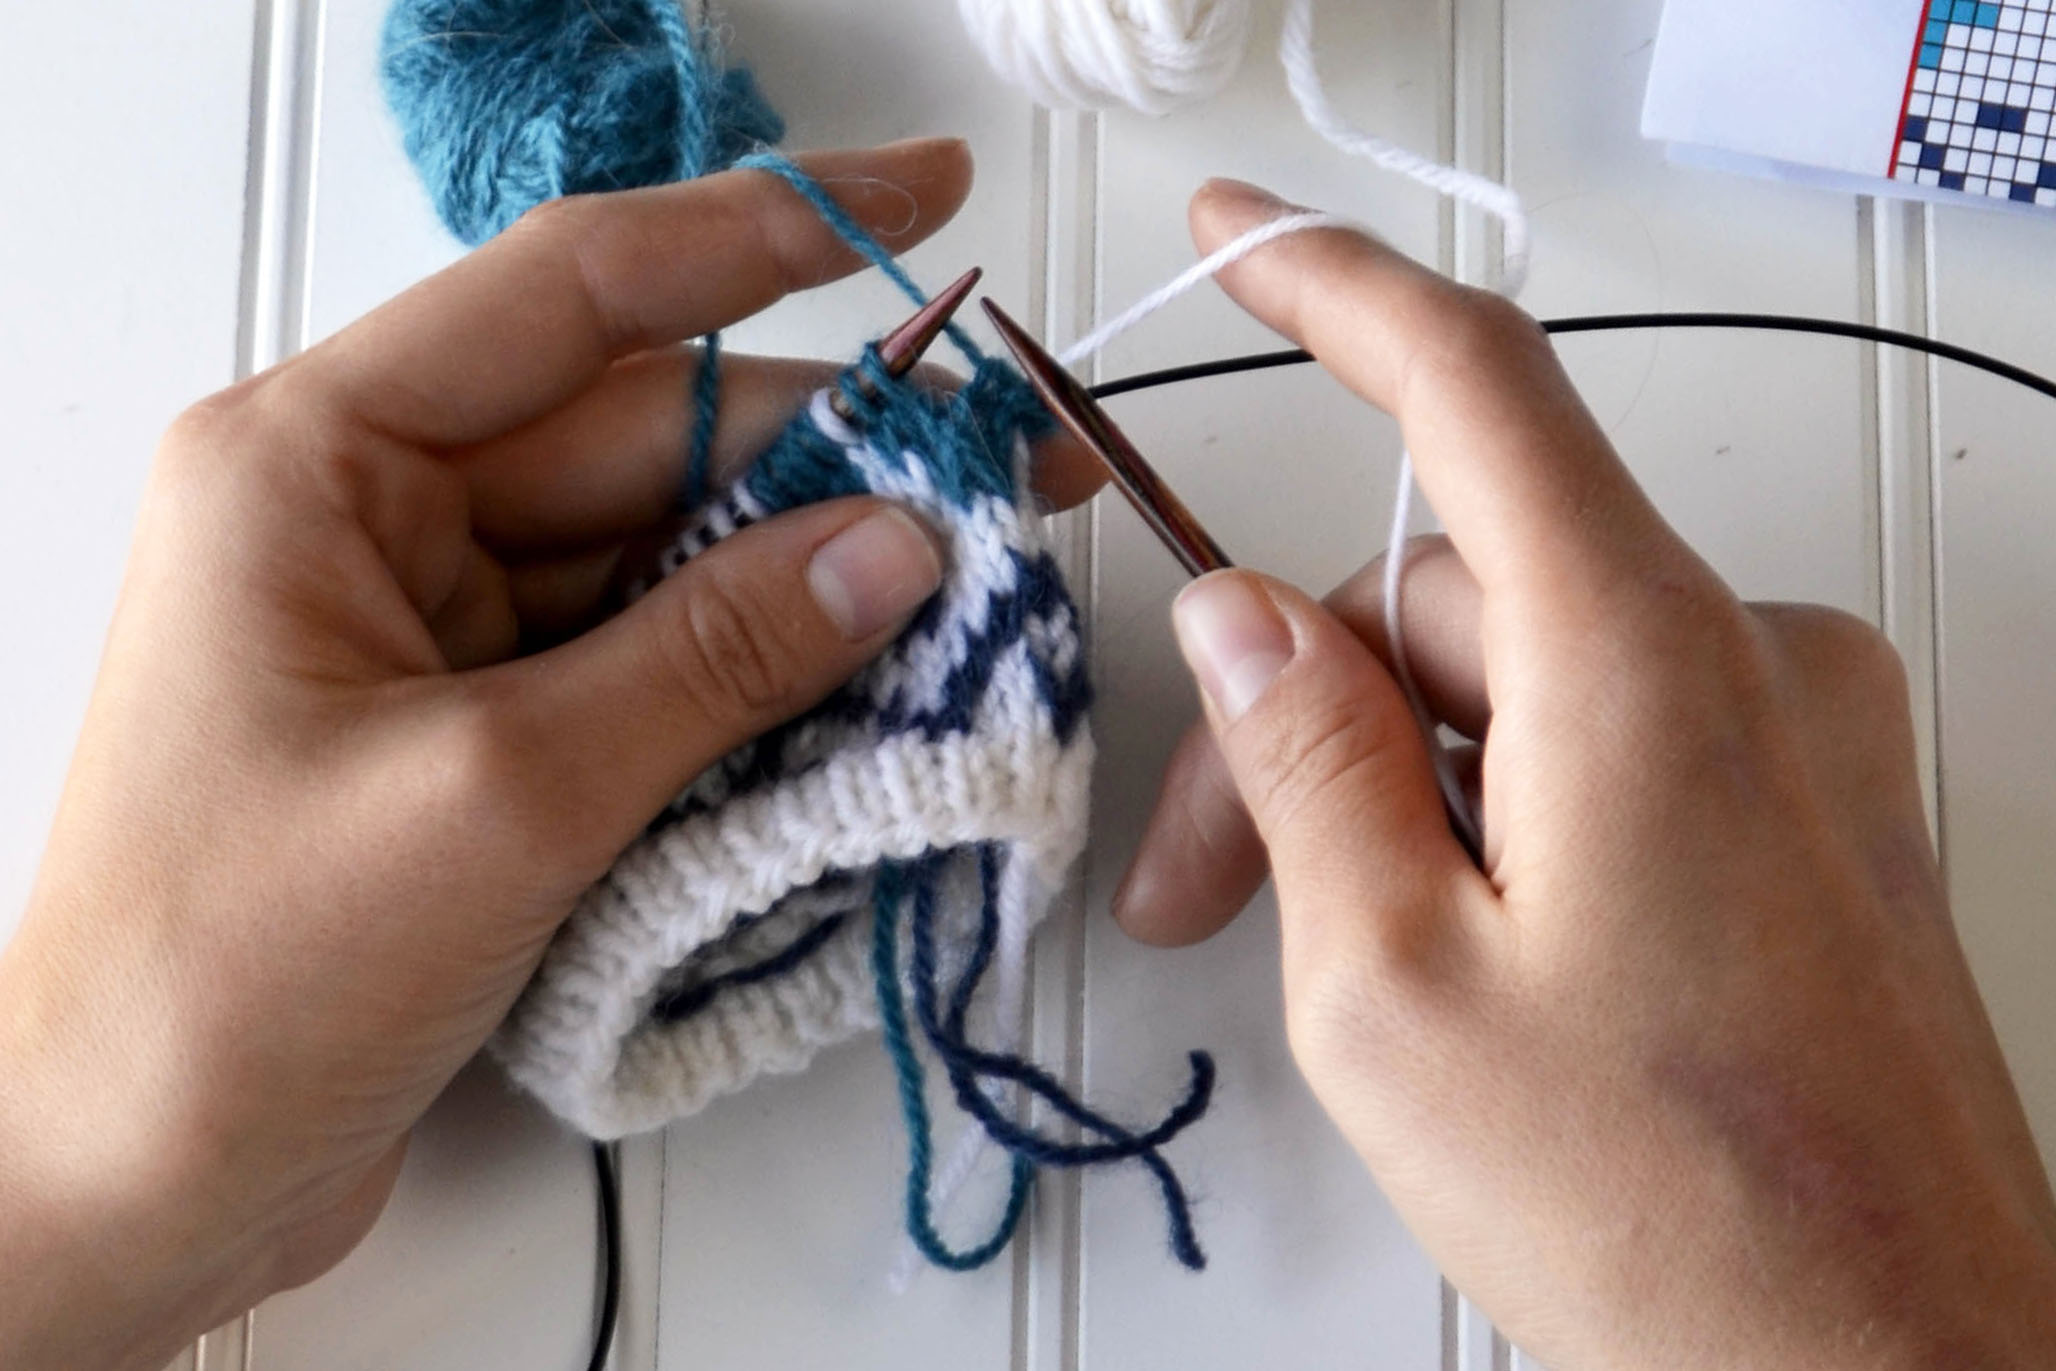
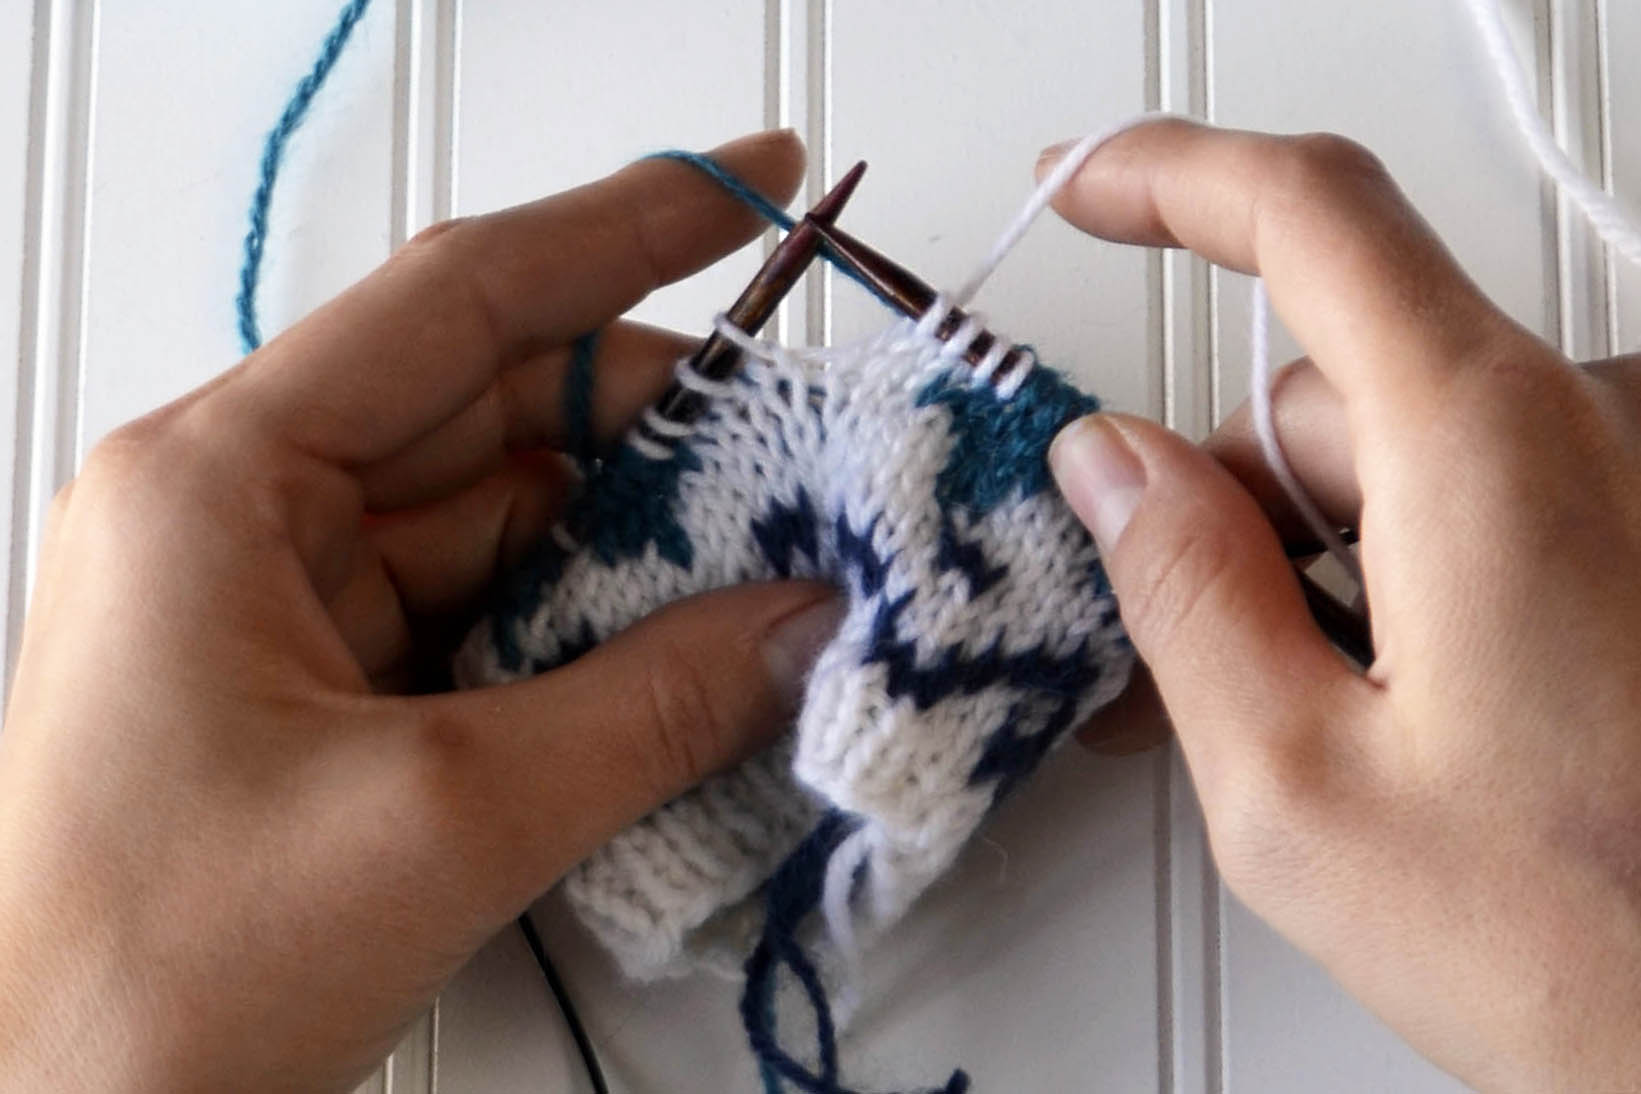
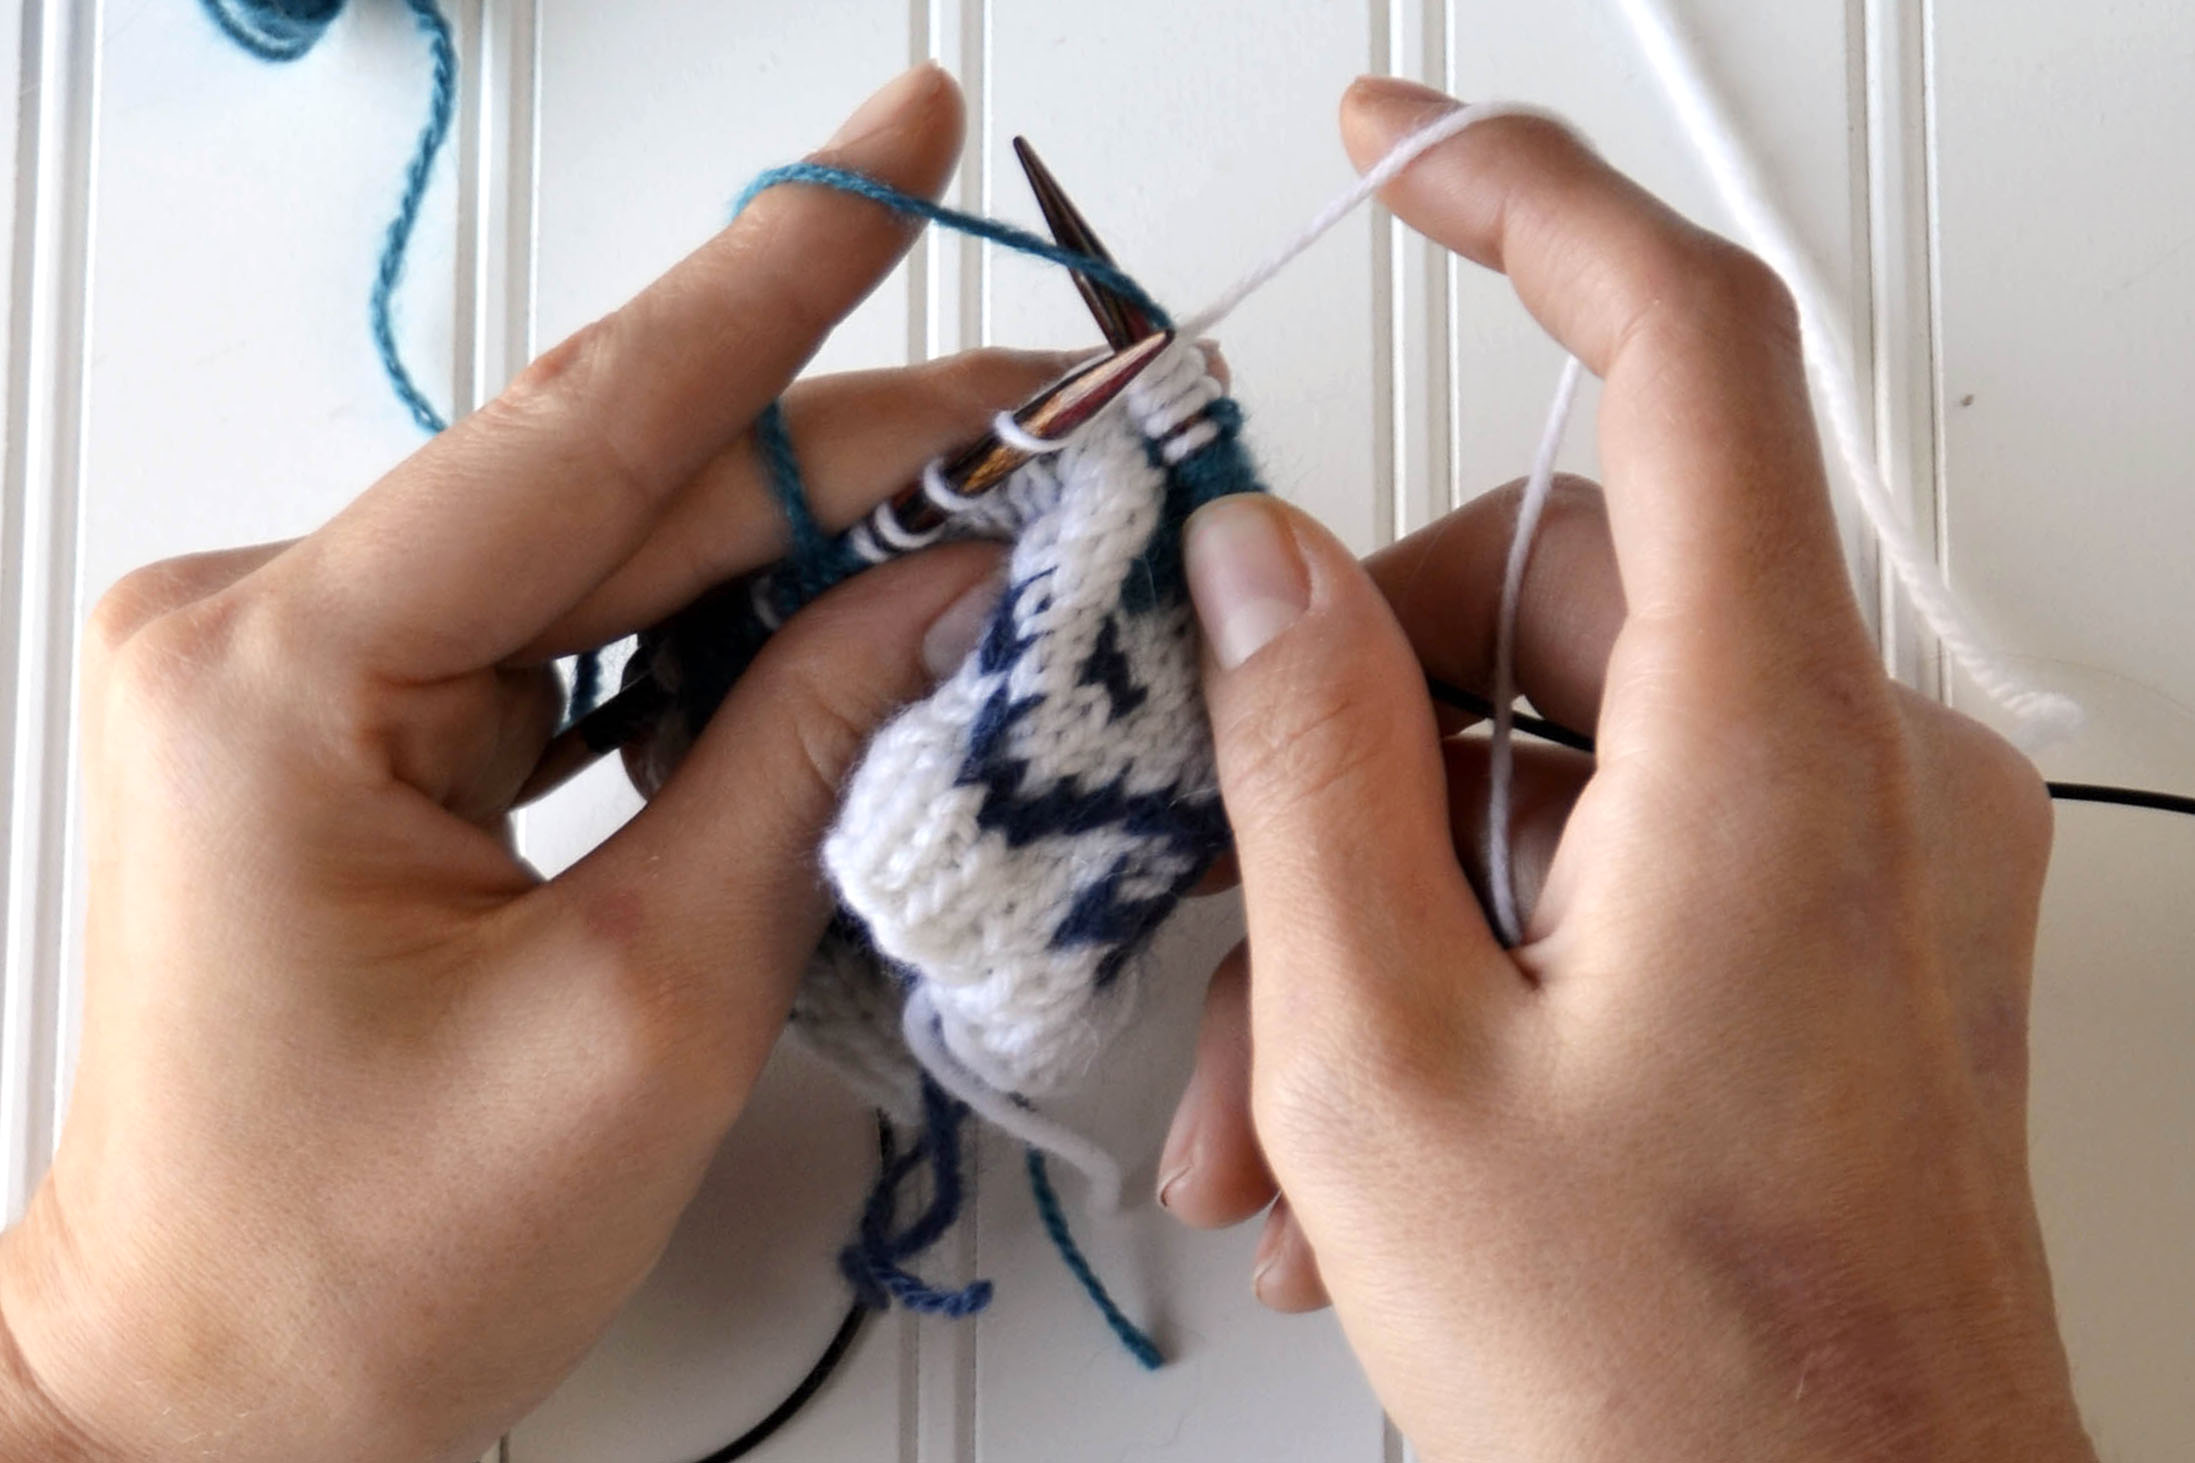
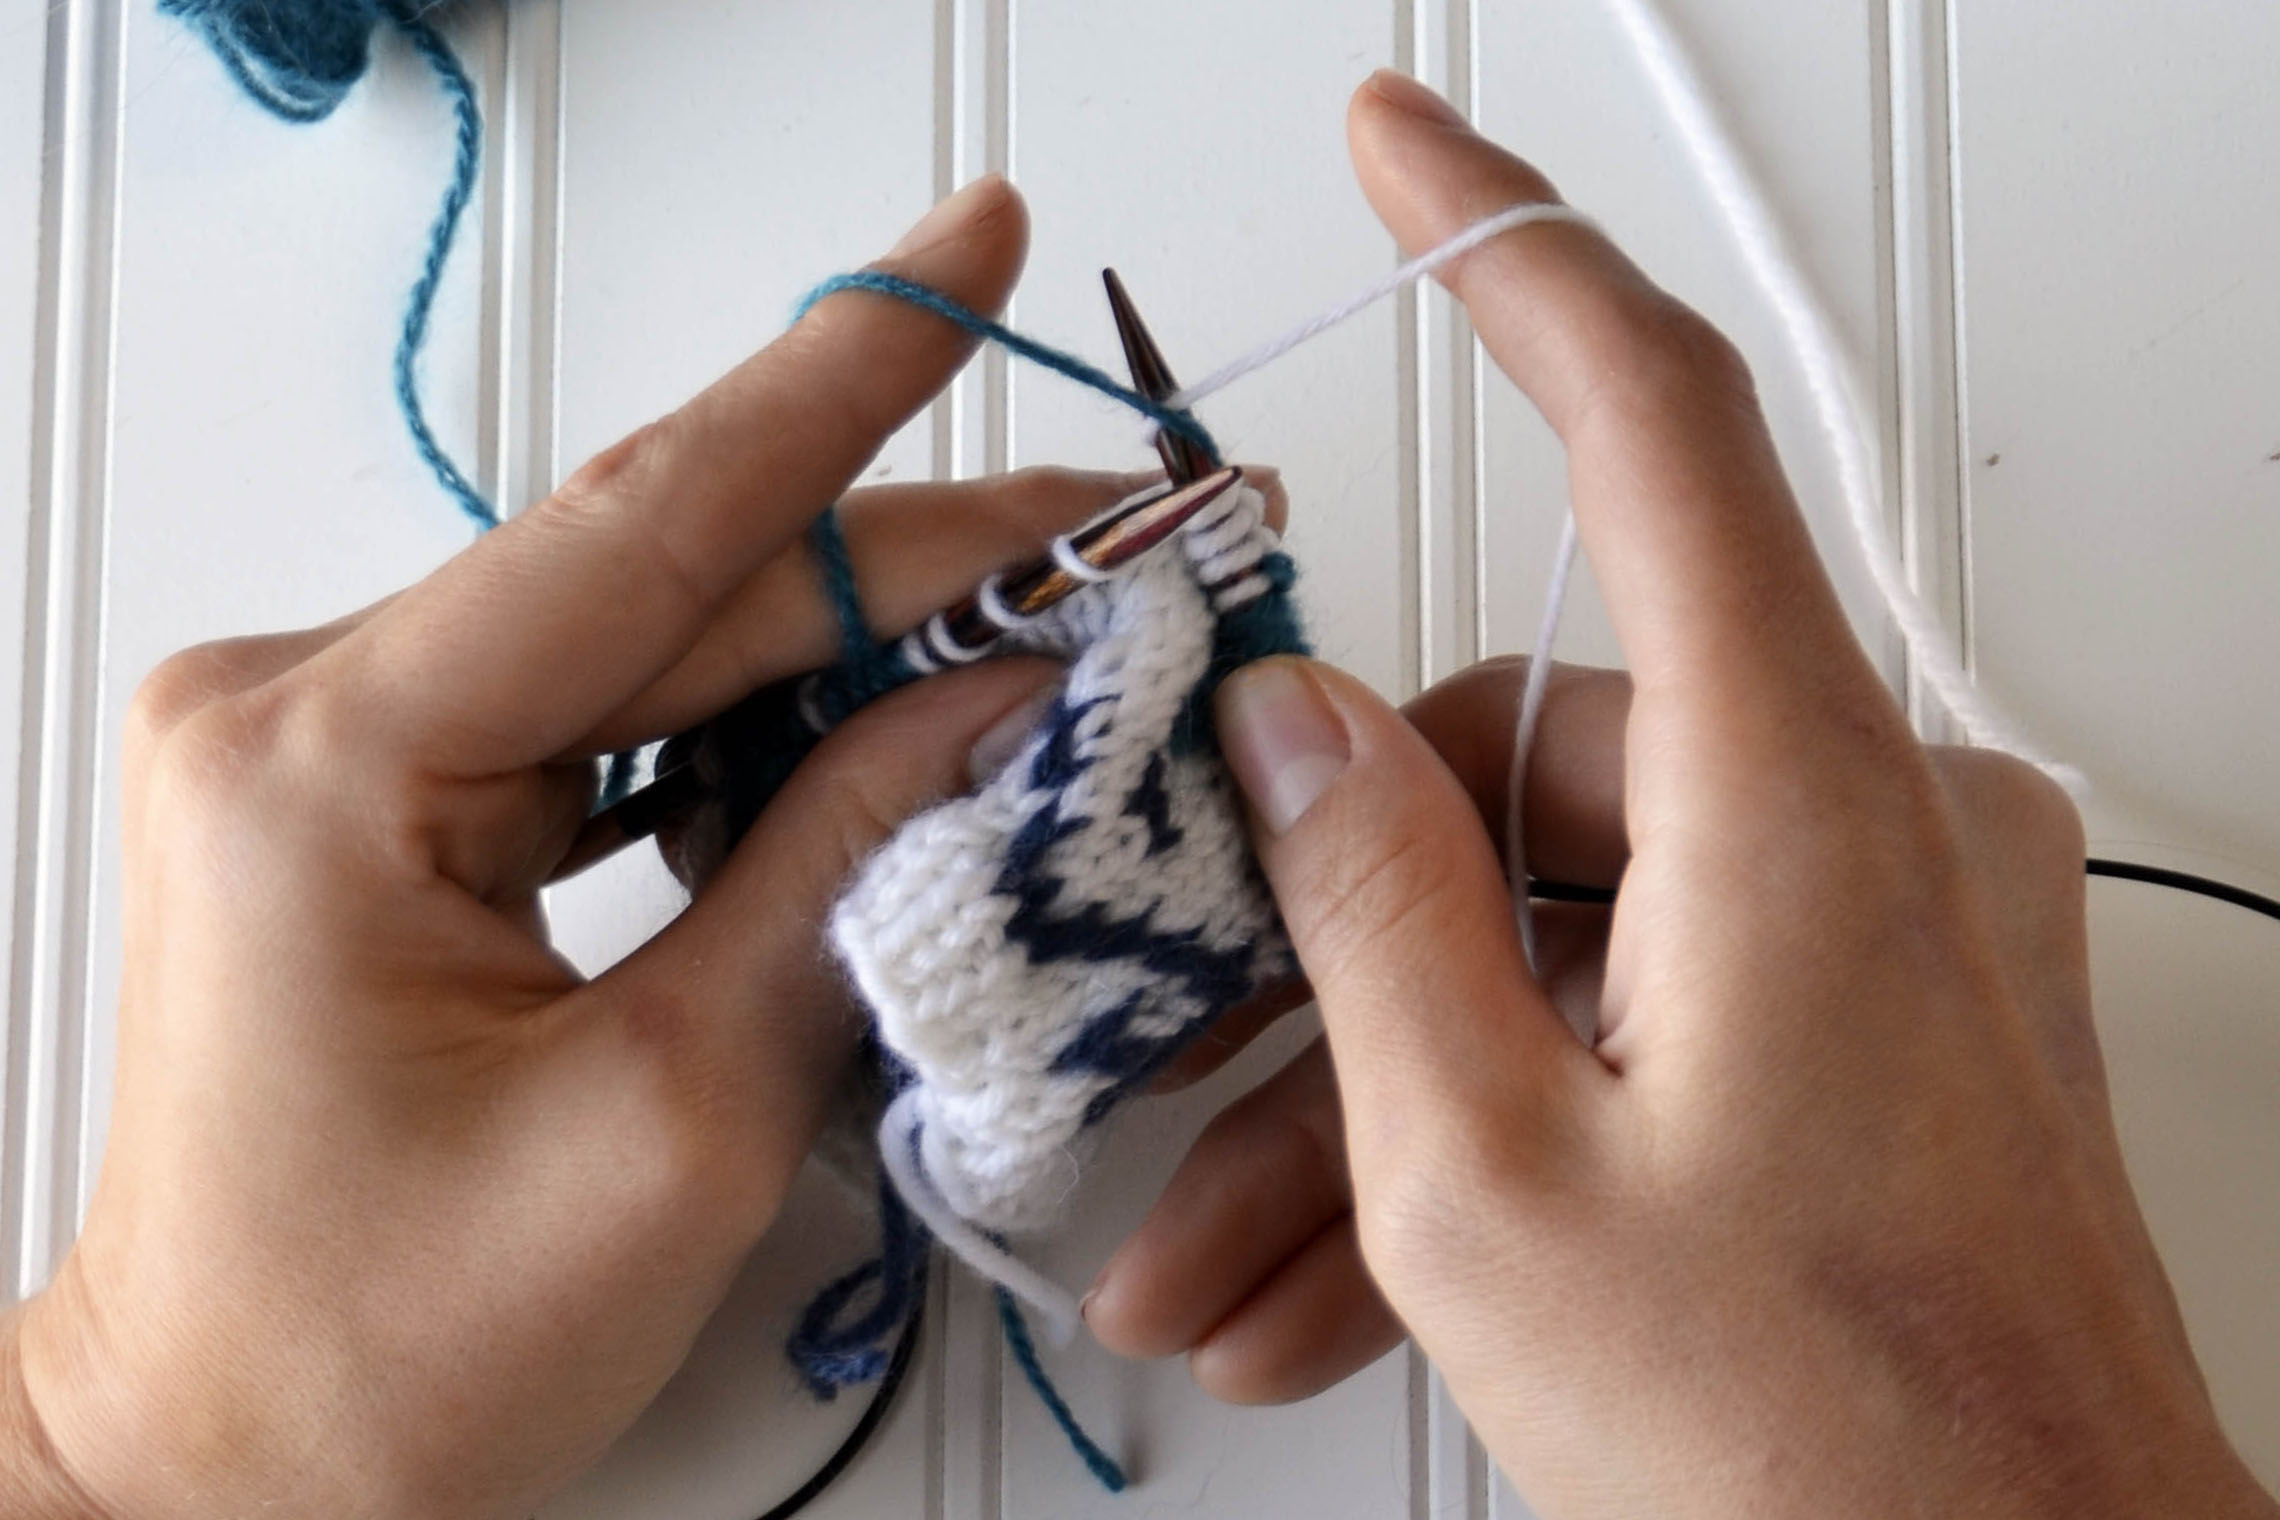
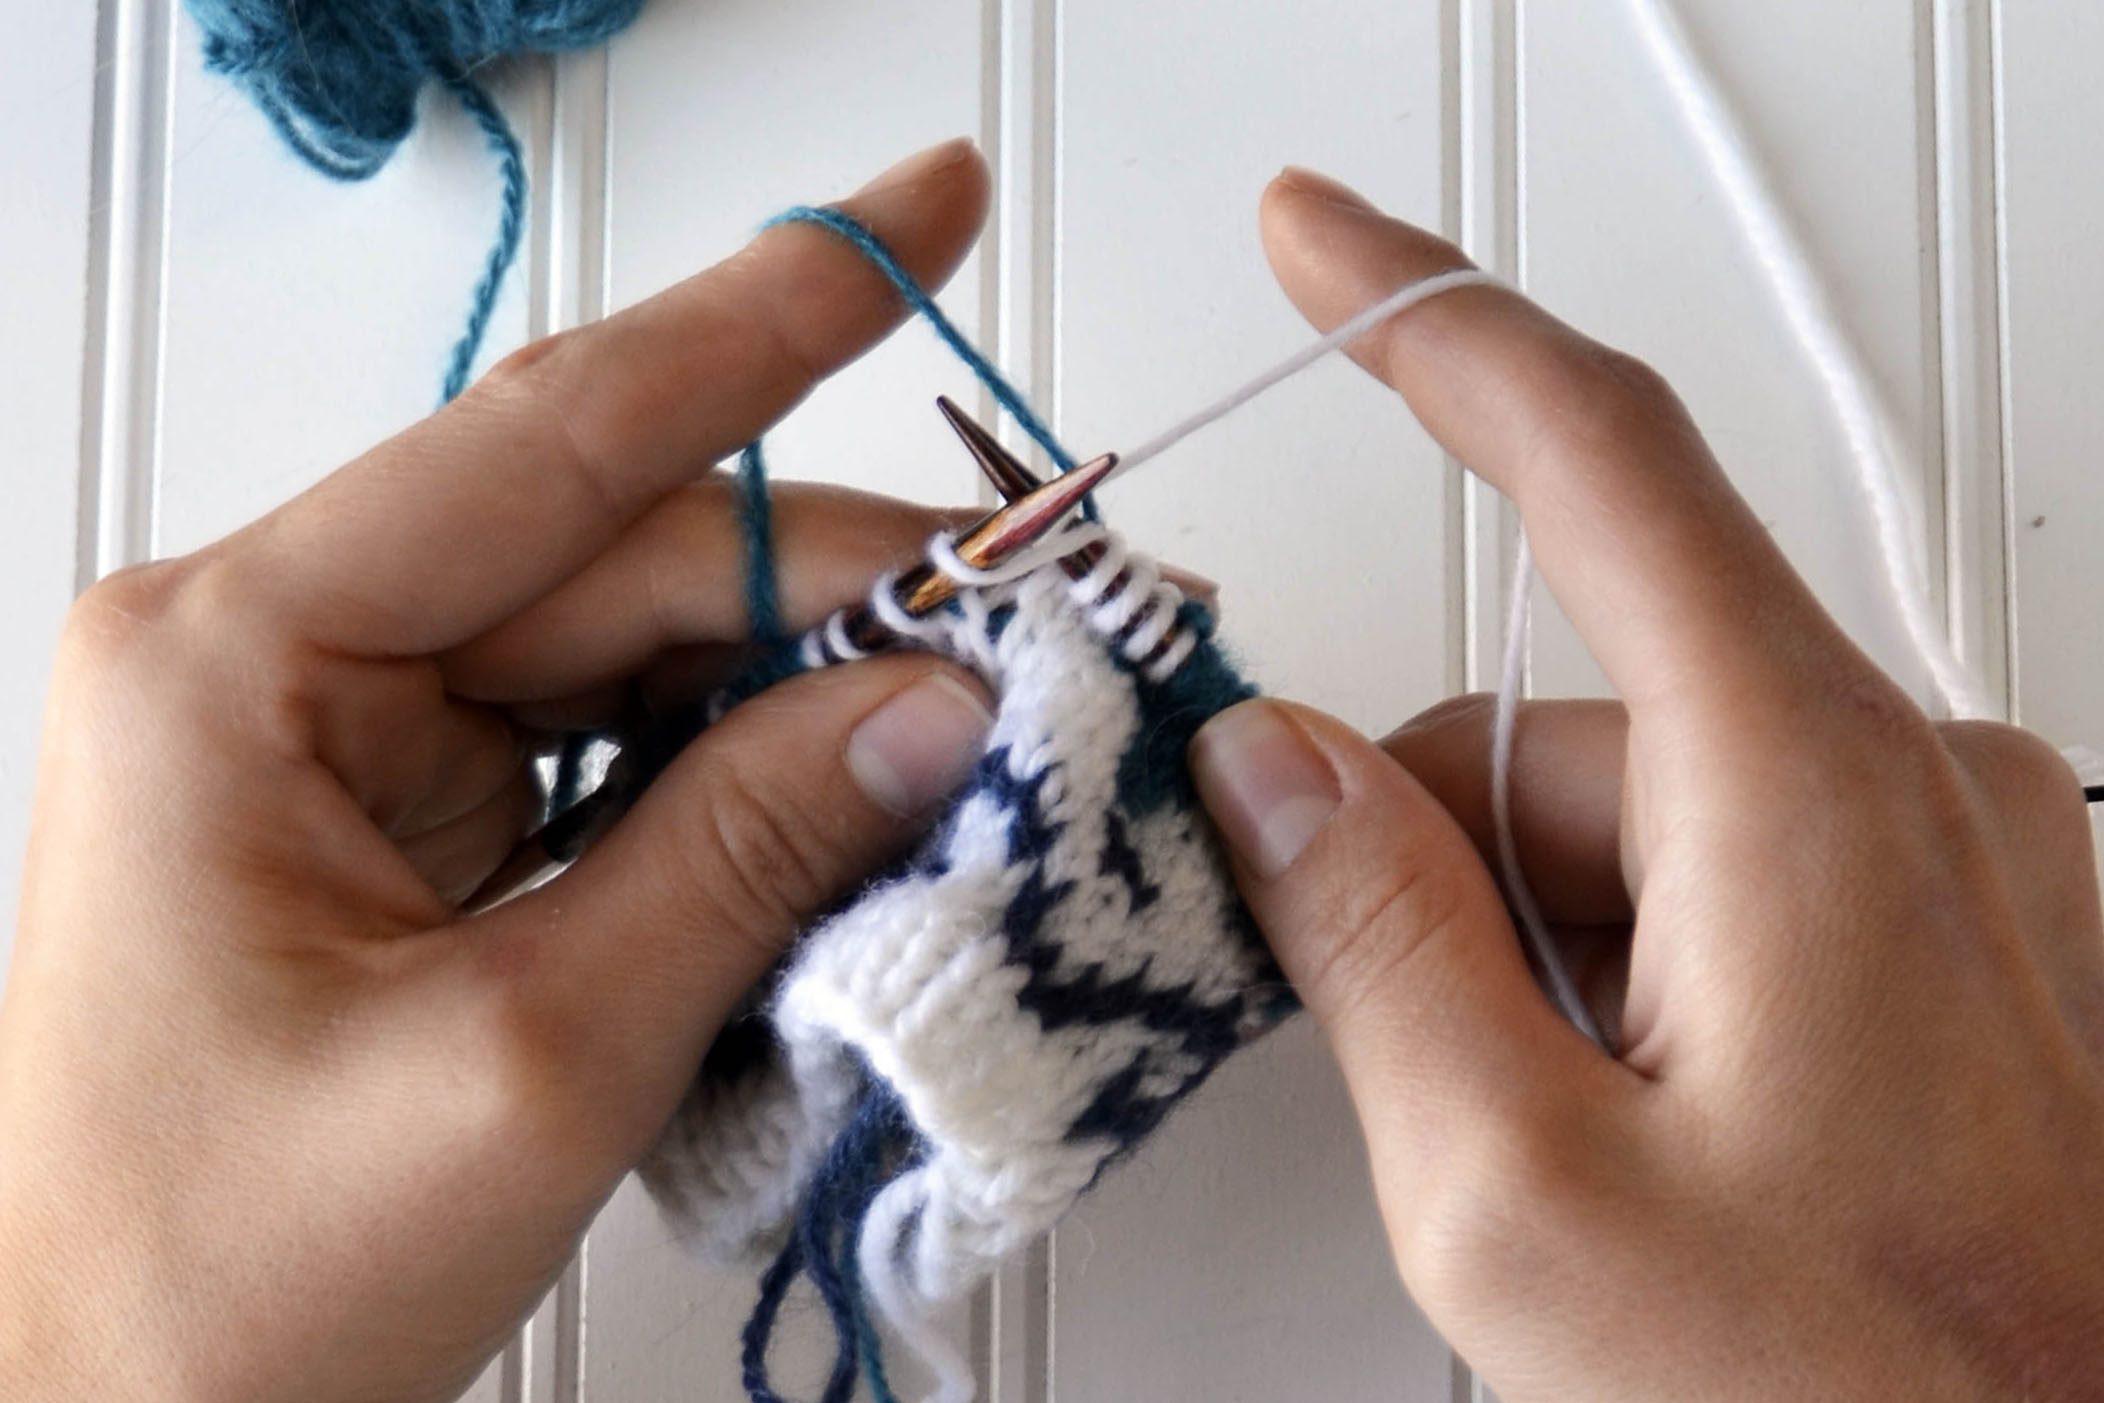
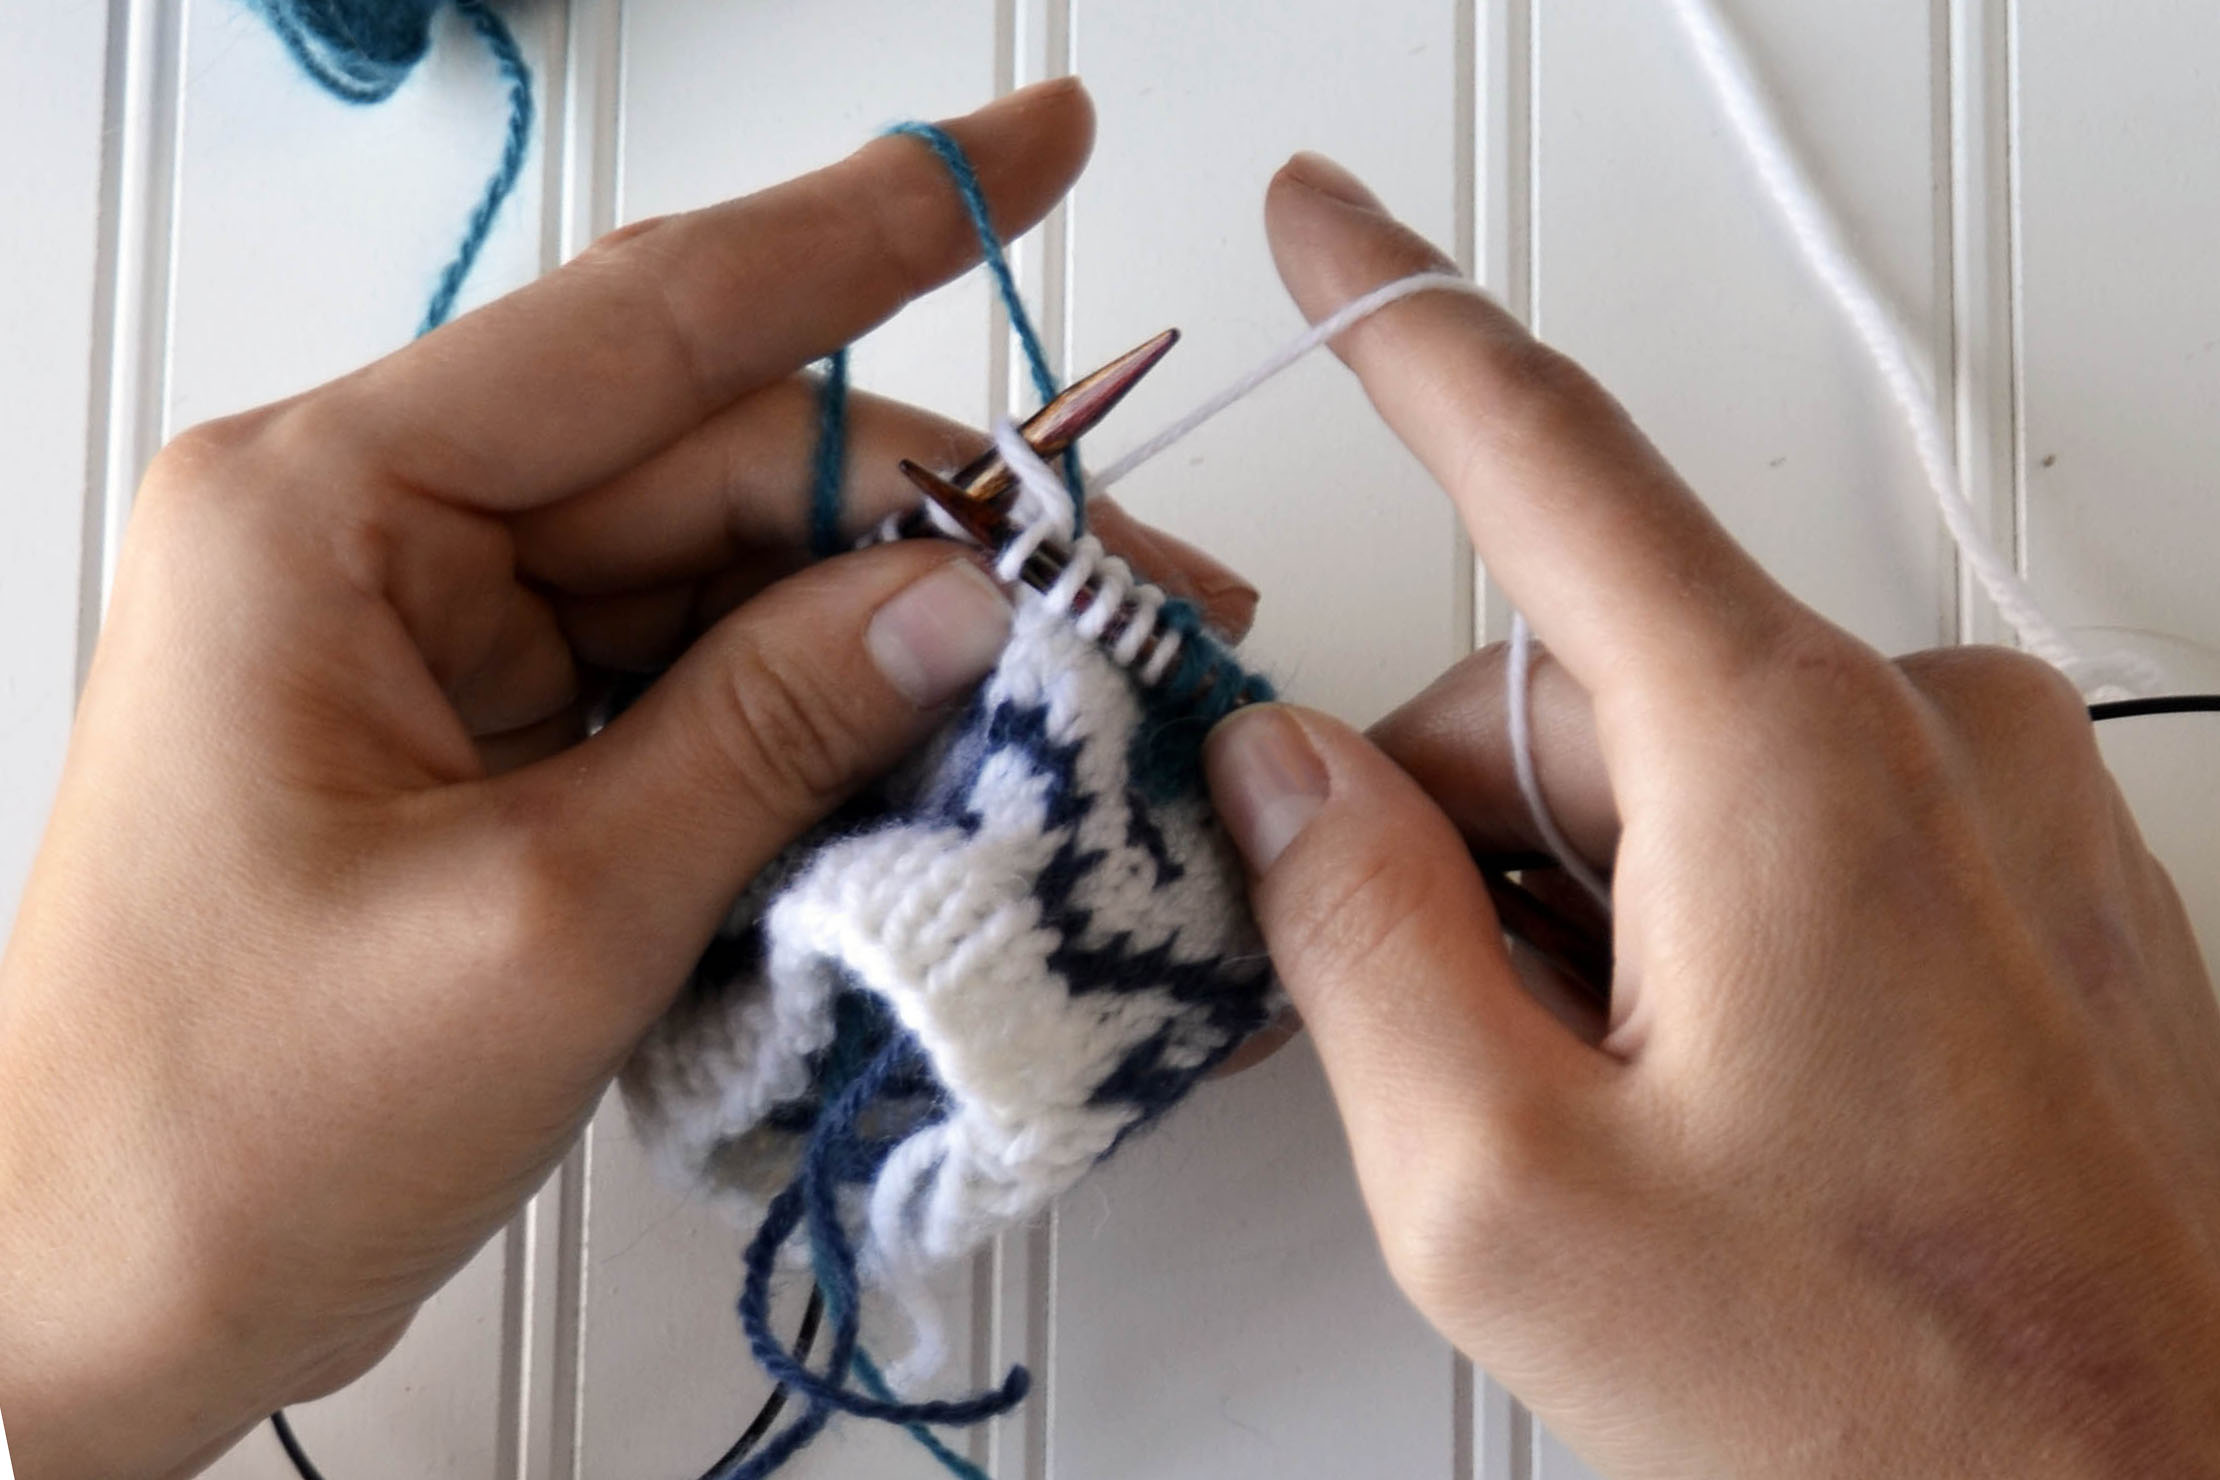
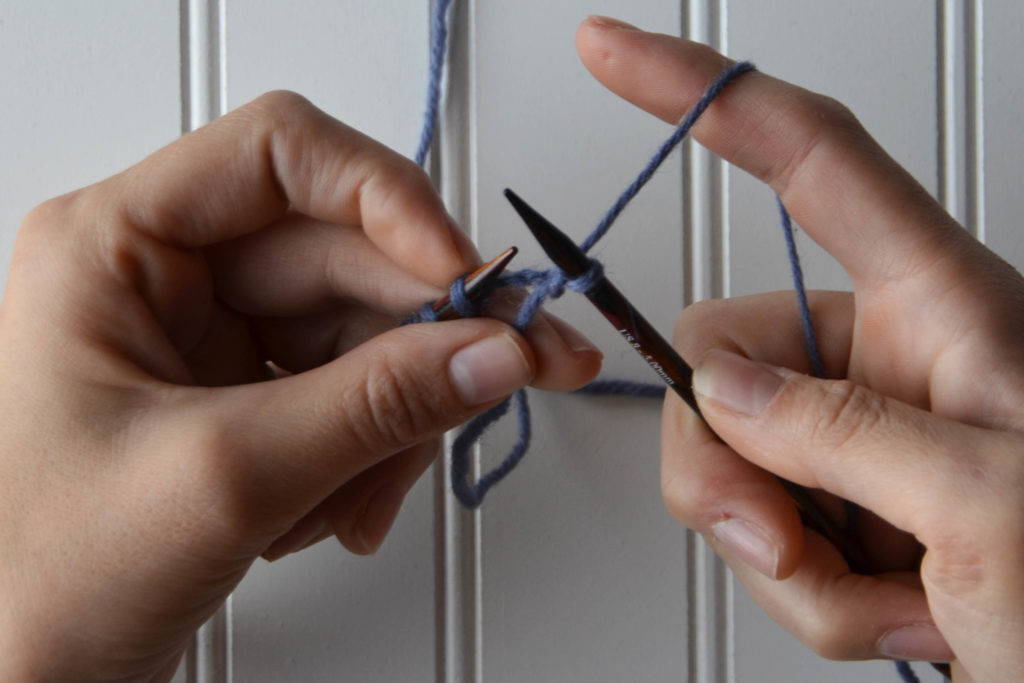
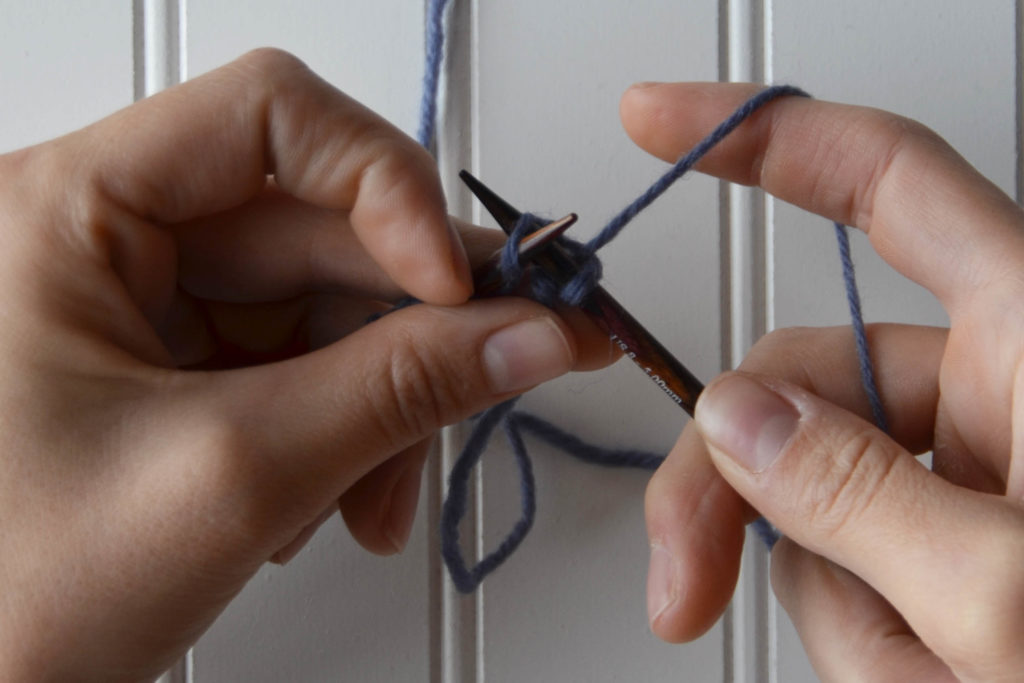
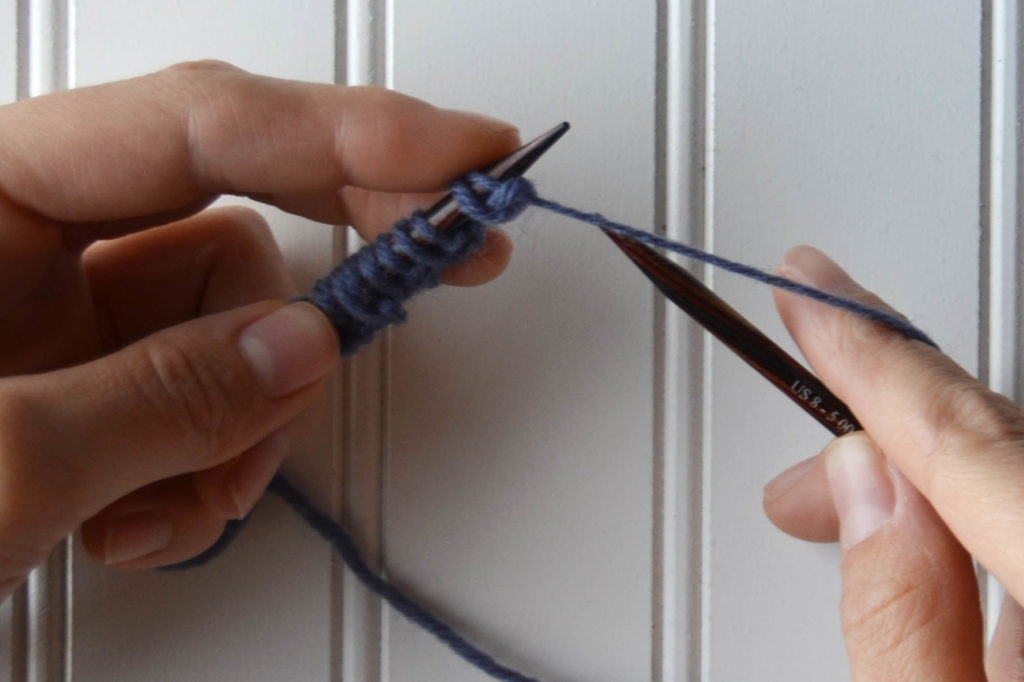
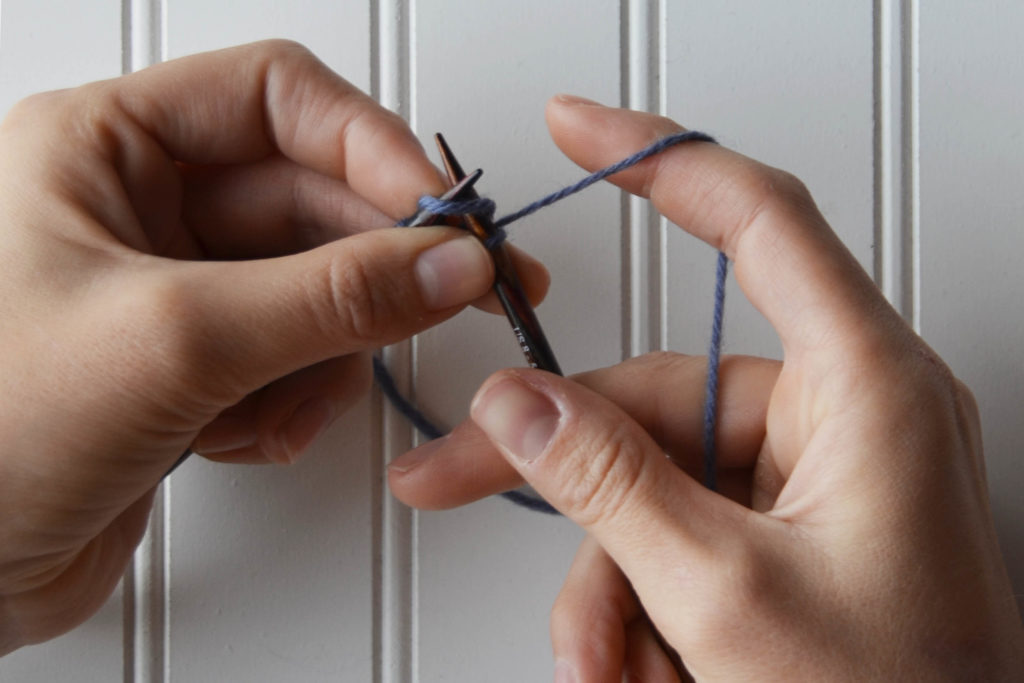
Notice the large number of white stitches between the blue stitches. This is an area you’ll want to “trap” or “catch” your float to prevent any snagging.Begin by knitting across your row as usual. Continue until you reach the section that requires trapping a float. Usually, an area that requires trapping floats will have more than five stitches.As a rule of thumb, I trap my floats every five stitches. I’ve knit across four stitches, and I will trap my float on the fifth stitch.Simply place your non-working yarn over the right-hand needle, but do not knit with it.Wrap your working yarn around the right-hand needle to knit. Make sure your non-working yarn (the blue yarn) is over the needle and the working yarn (the white yarn).Begin to knit the stitch. Notice how I’m holding the blue yarn. It is still above the white yarn, but it is not wrapped around the right-hand needle. Take care not to pull the non-working (blue) yarn through the stitch. Knit the stitch. As you can see, the blue yarn is still at the back of the work. You can continue knitting as usual after this. That’s really how simple it is!When you peek at the wrong side of your work, you’ll be able to see where you trapped the float. Notice the blue bump in the middle of the white stitches? That is where I’ve trapped the blue yarn underneath the white yarn.
Just like that, we’ve released all 12 of the patterns featured in our 12 Days of Winter Collection. We sincerely hope you’ve been enjoying our blog series highlighting each pattern. You can find the Twining Vines kit on our website here.
Now that you’ve seen them all, I’d also like to emphasize that tomorrow is Small Business Saturday. What better way to show your support for your local yarn shop than by stopping by to pick up one of our kits on Small Business Saturday?
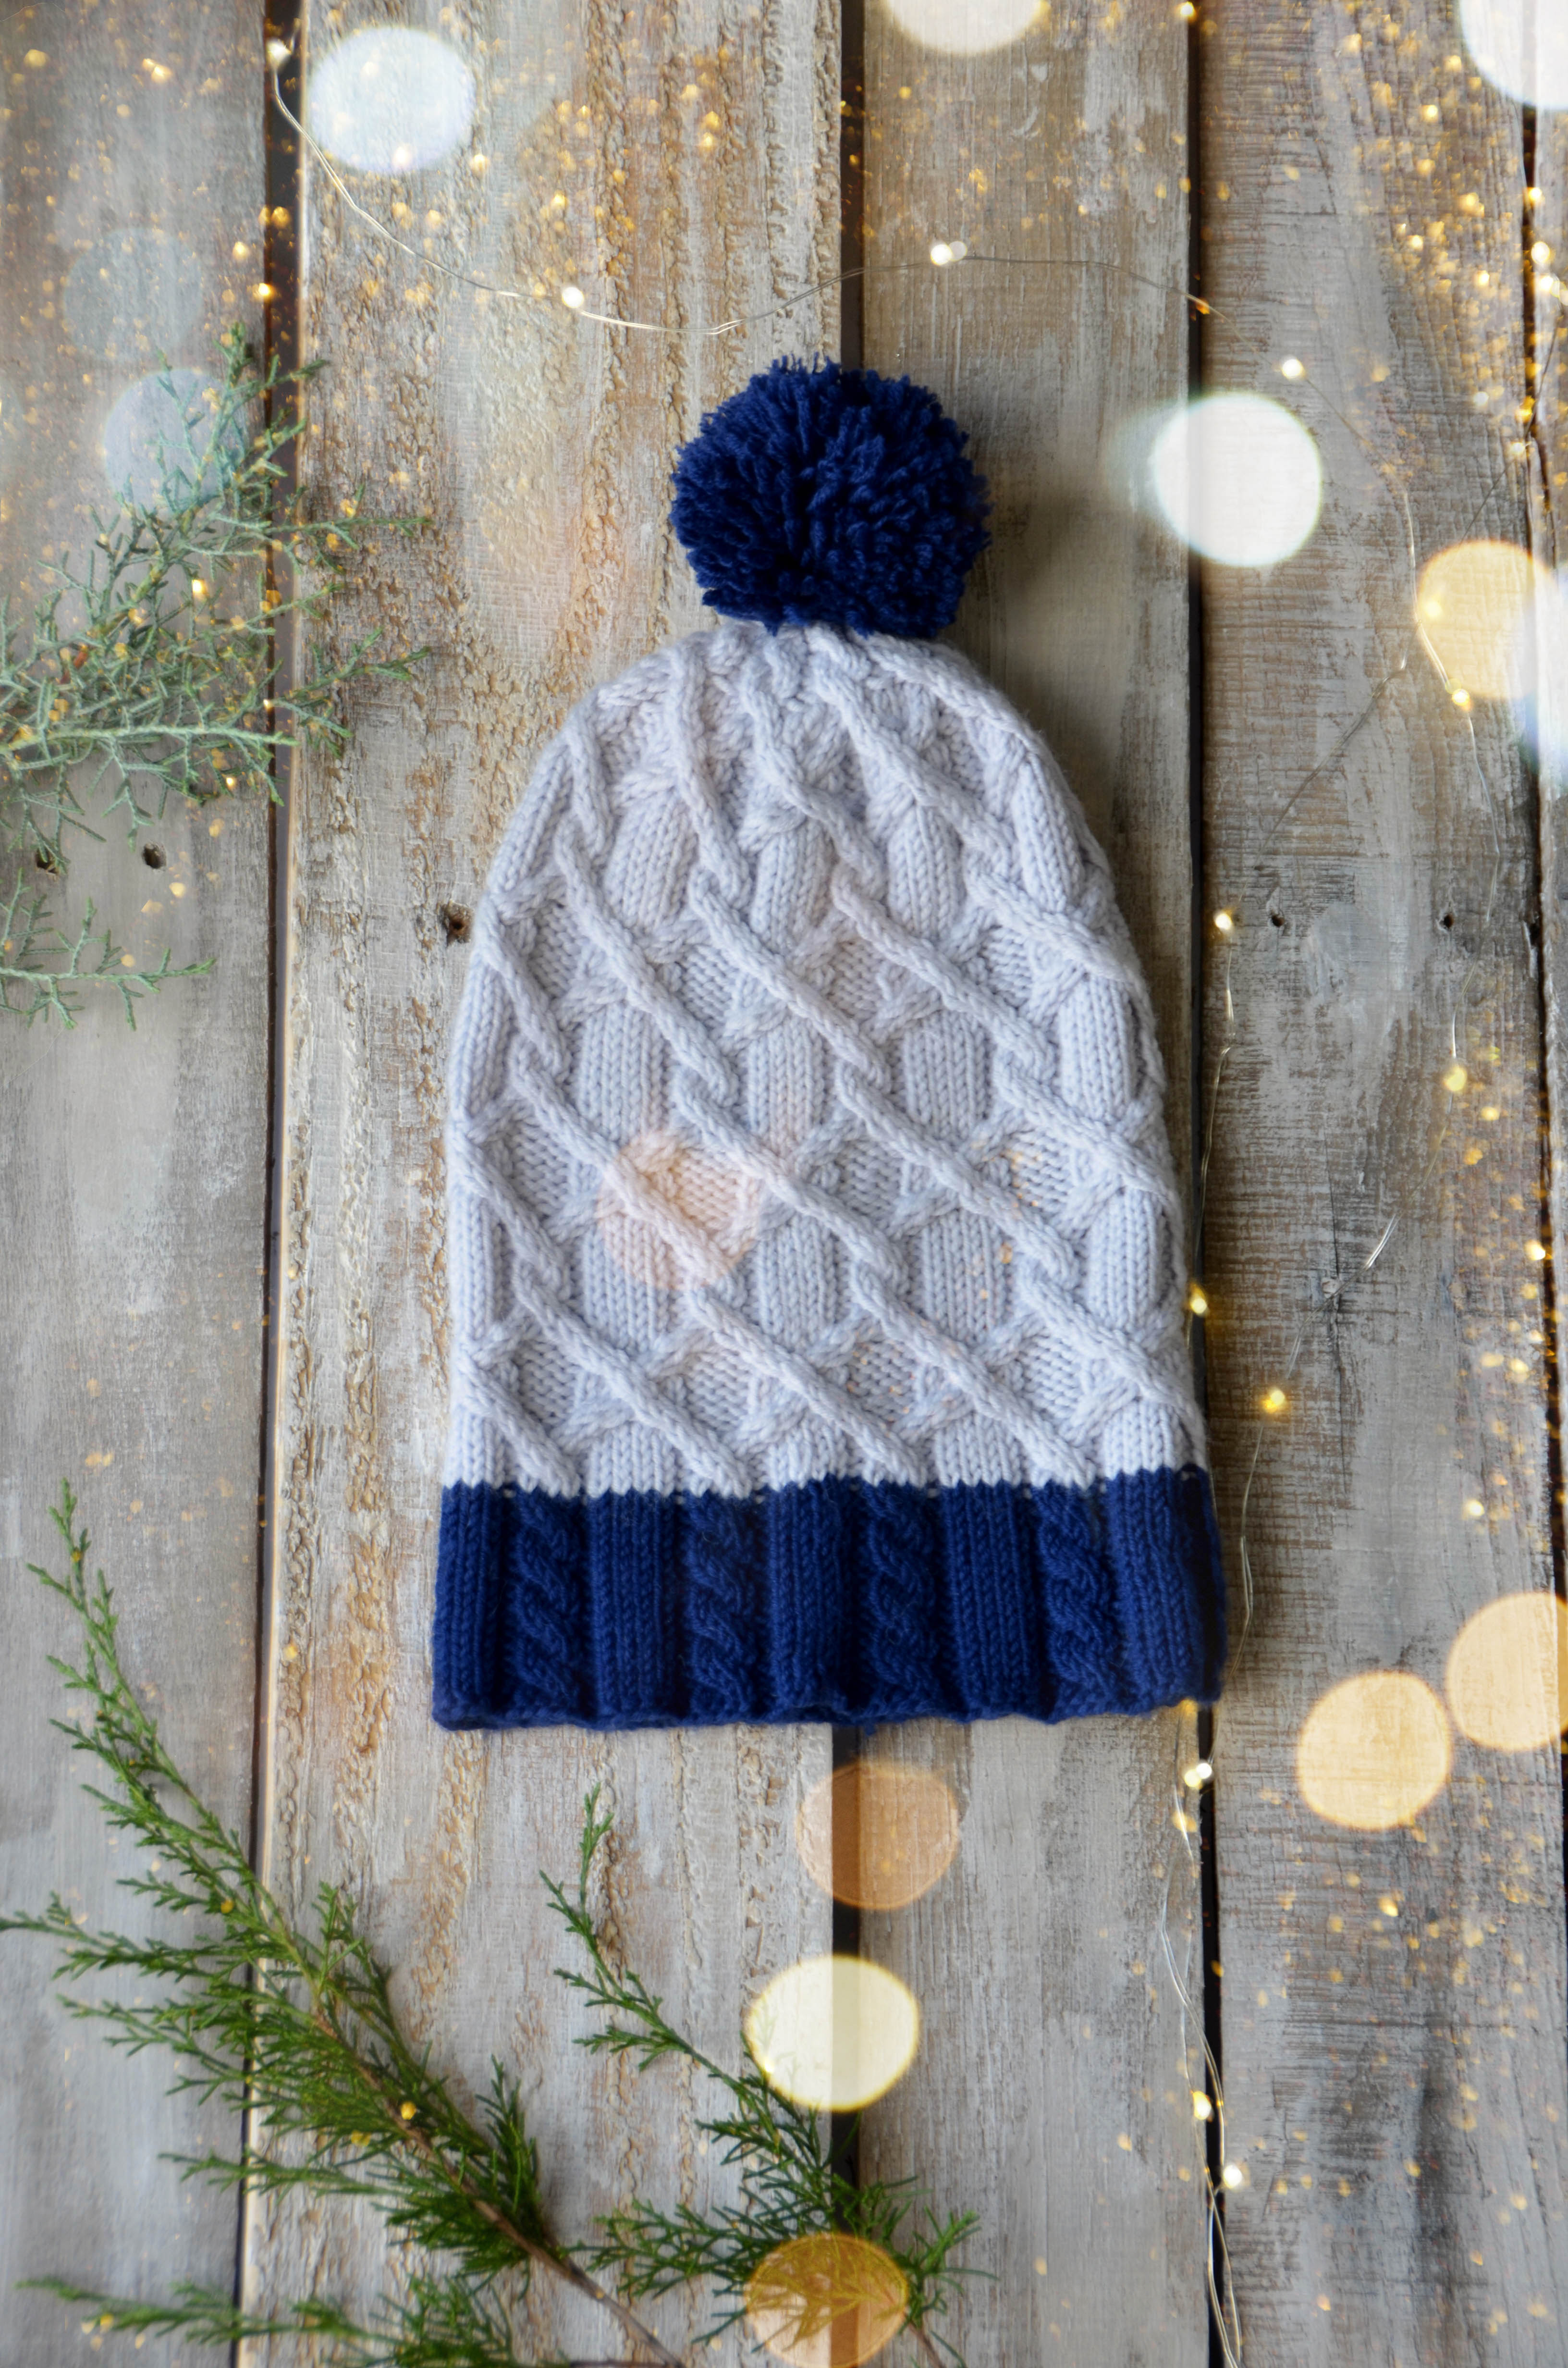
What are some things that come to mind when you think of winter? Seeing your breath in the cool air? Staying warm at home as snow falls softly to the ground? Building snowmen and coming inside to a cup of warm cocoa? Whatever you envision on a cold winter’s day, Tundra is sure to keep you warm.
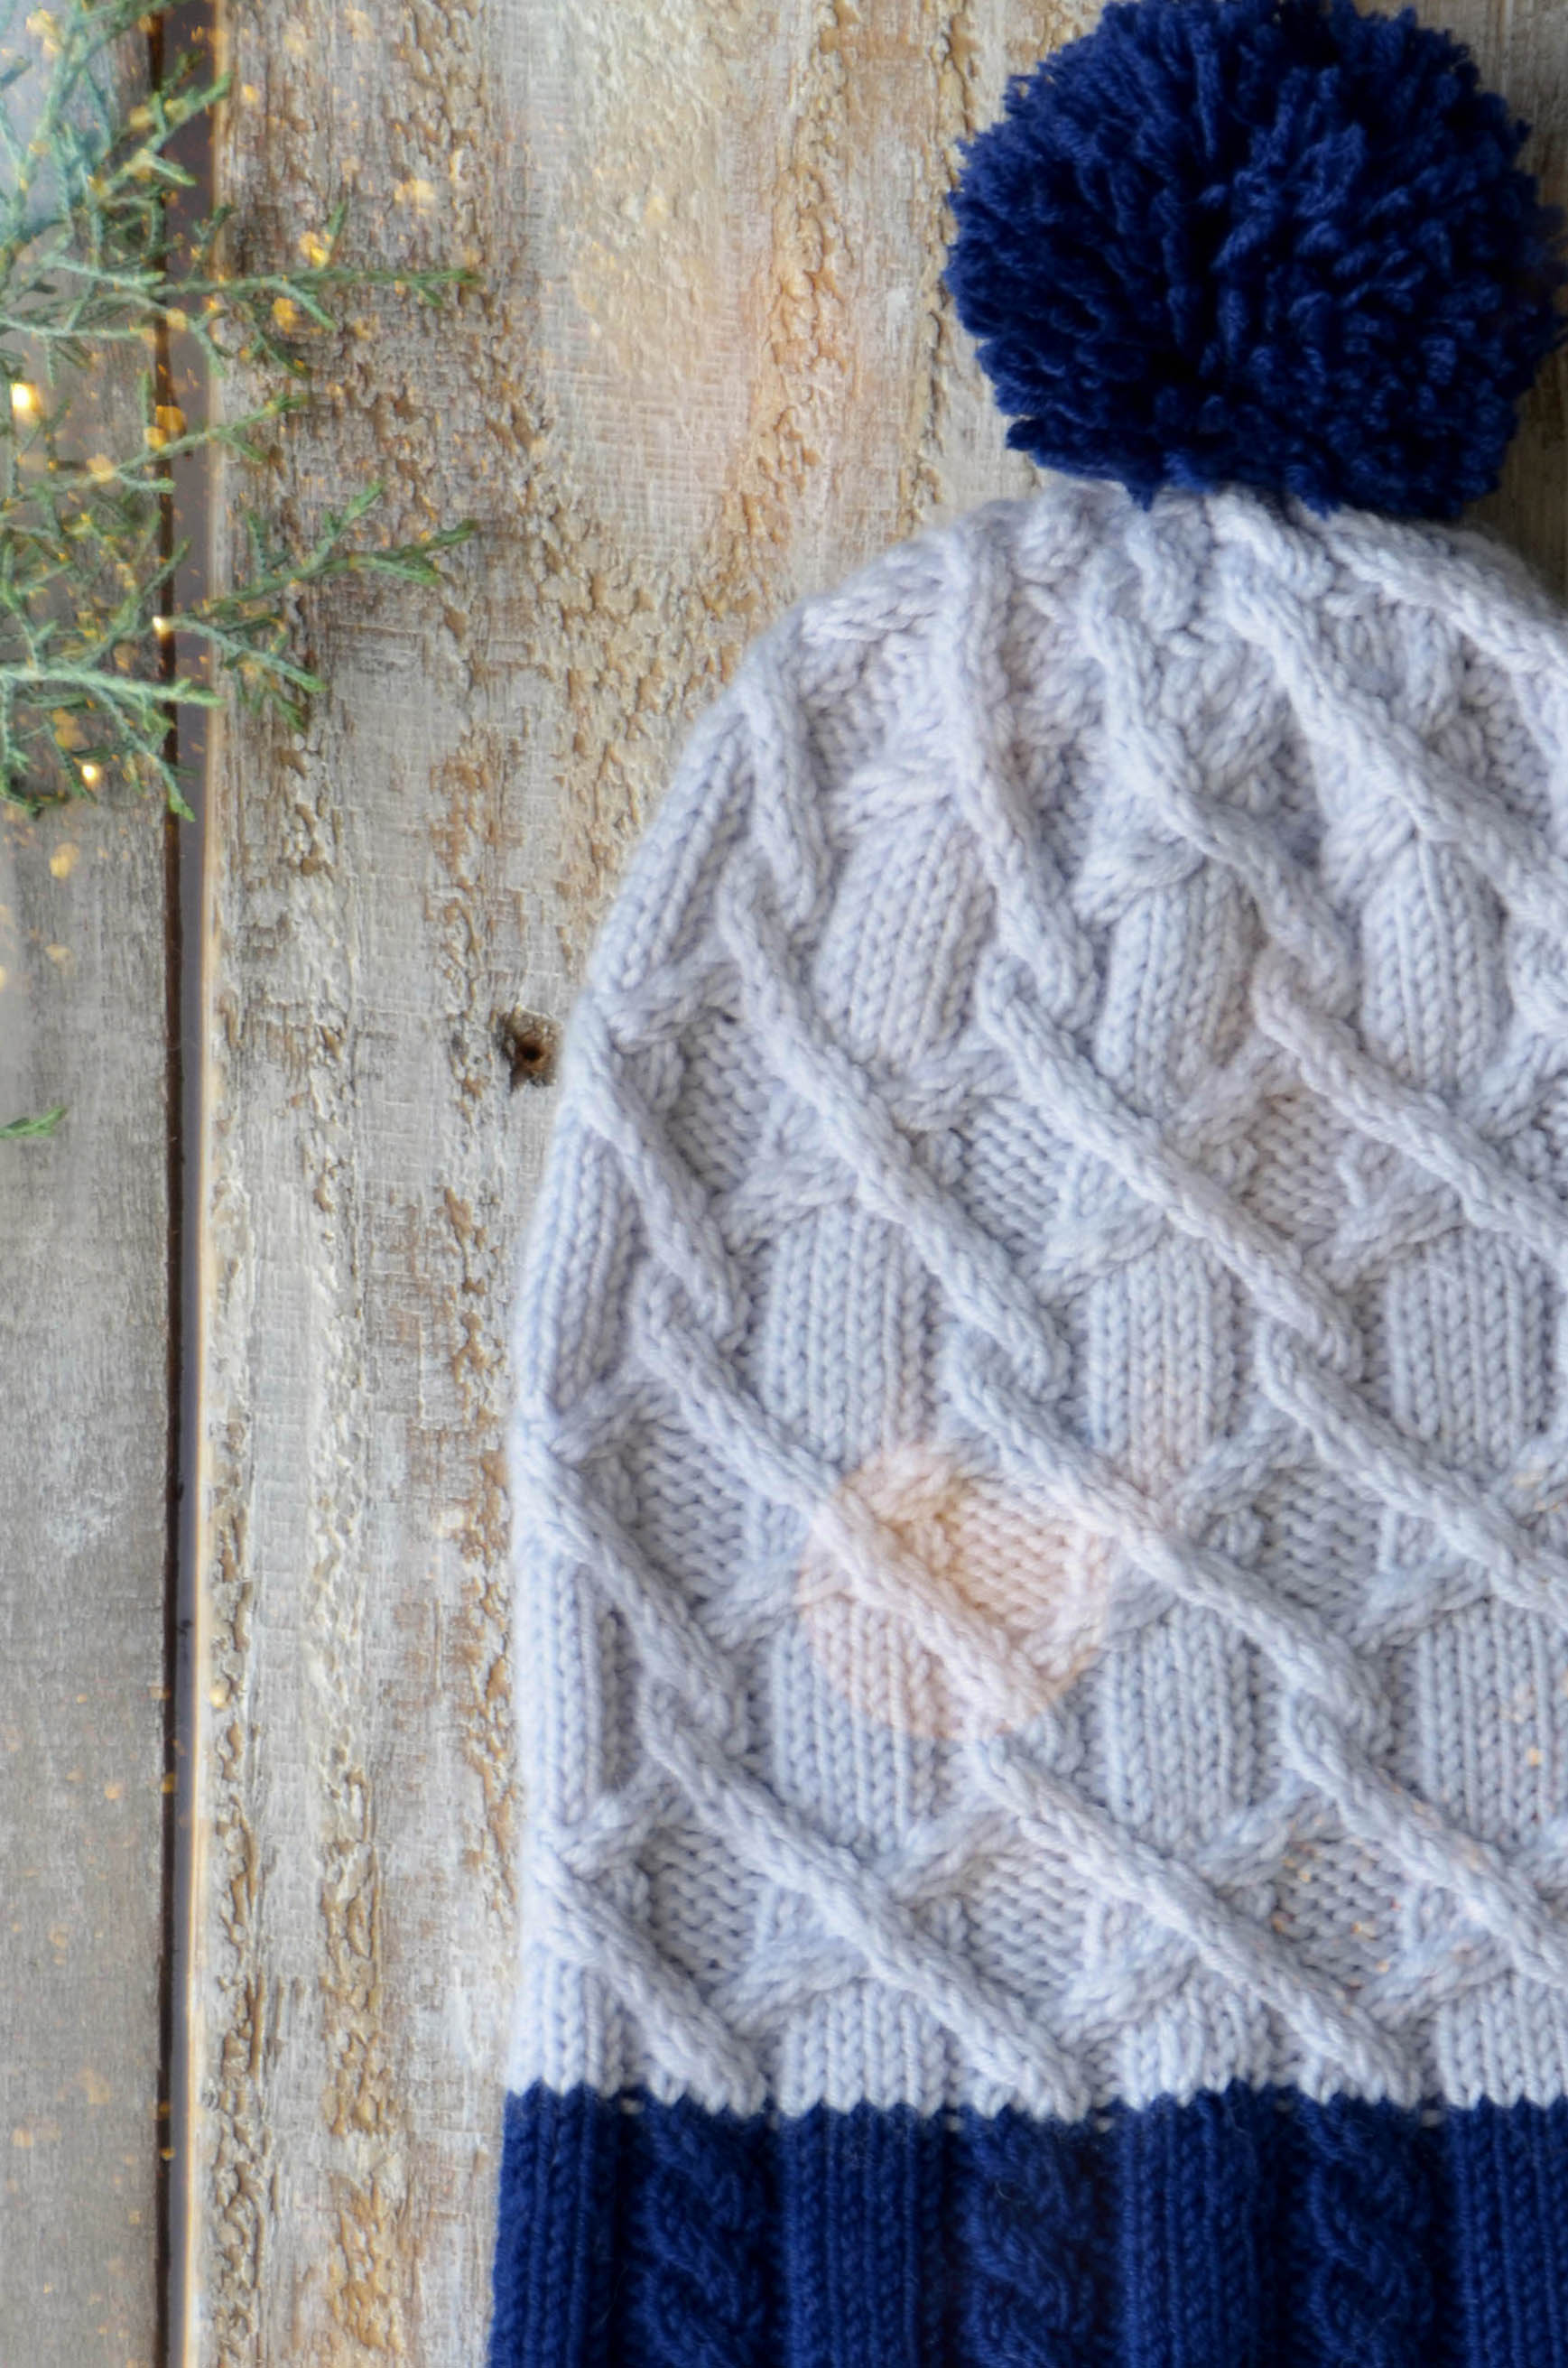
Tundra is cabled hat that captures the look of icy winter days, yet keeps you snug and warm. It features all-over cables that begin at the cuff and are carried into the crown shaping.
If ever there was a yarn meant to be coupled with cables, Dona would be that yarn. It has impeccable stitch definition, which is perfect for the interlocking twists and turns of cabled fabric. The Tundra hat combines simple, but beautiful cables with the plump and incredibly soft Dona.
Like each kit in the 12 Days of Winter Collection, the Tundra Kit comes in a giftable package. Perhaps you’re the knitter doing the gifting (isn’t the act of knitting a gift to yourself anyway?)–great news–this pattern is sized baby through adult, so it’s perfect for anyone special in your life.
By the way, I’d be remiss not to mention that today is also Thanksgiving! Happy Thanksgiving to each and every one of you. I hope your day is full of delicious food, laughter among loved ones, and some comfort knitting while you recover from all of that feasting!
You can find the kit for Tundra on our website here.
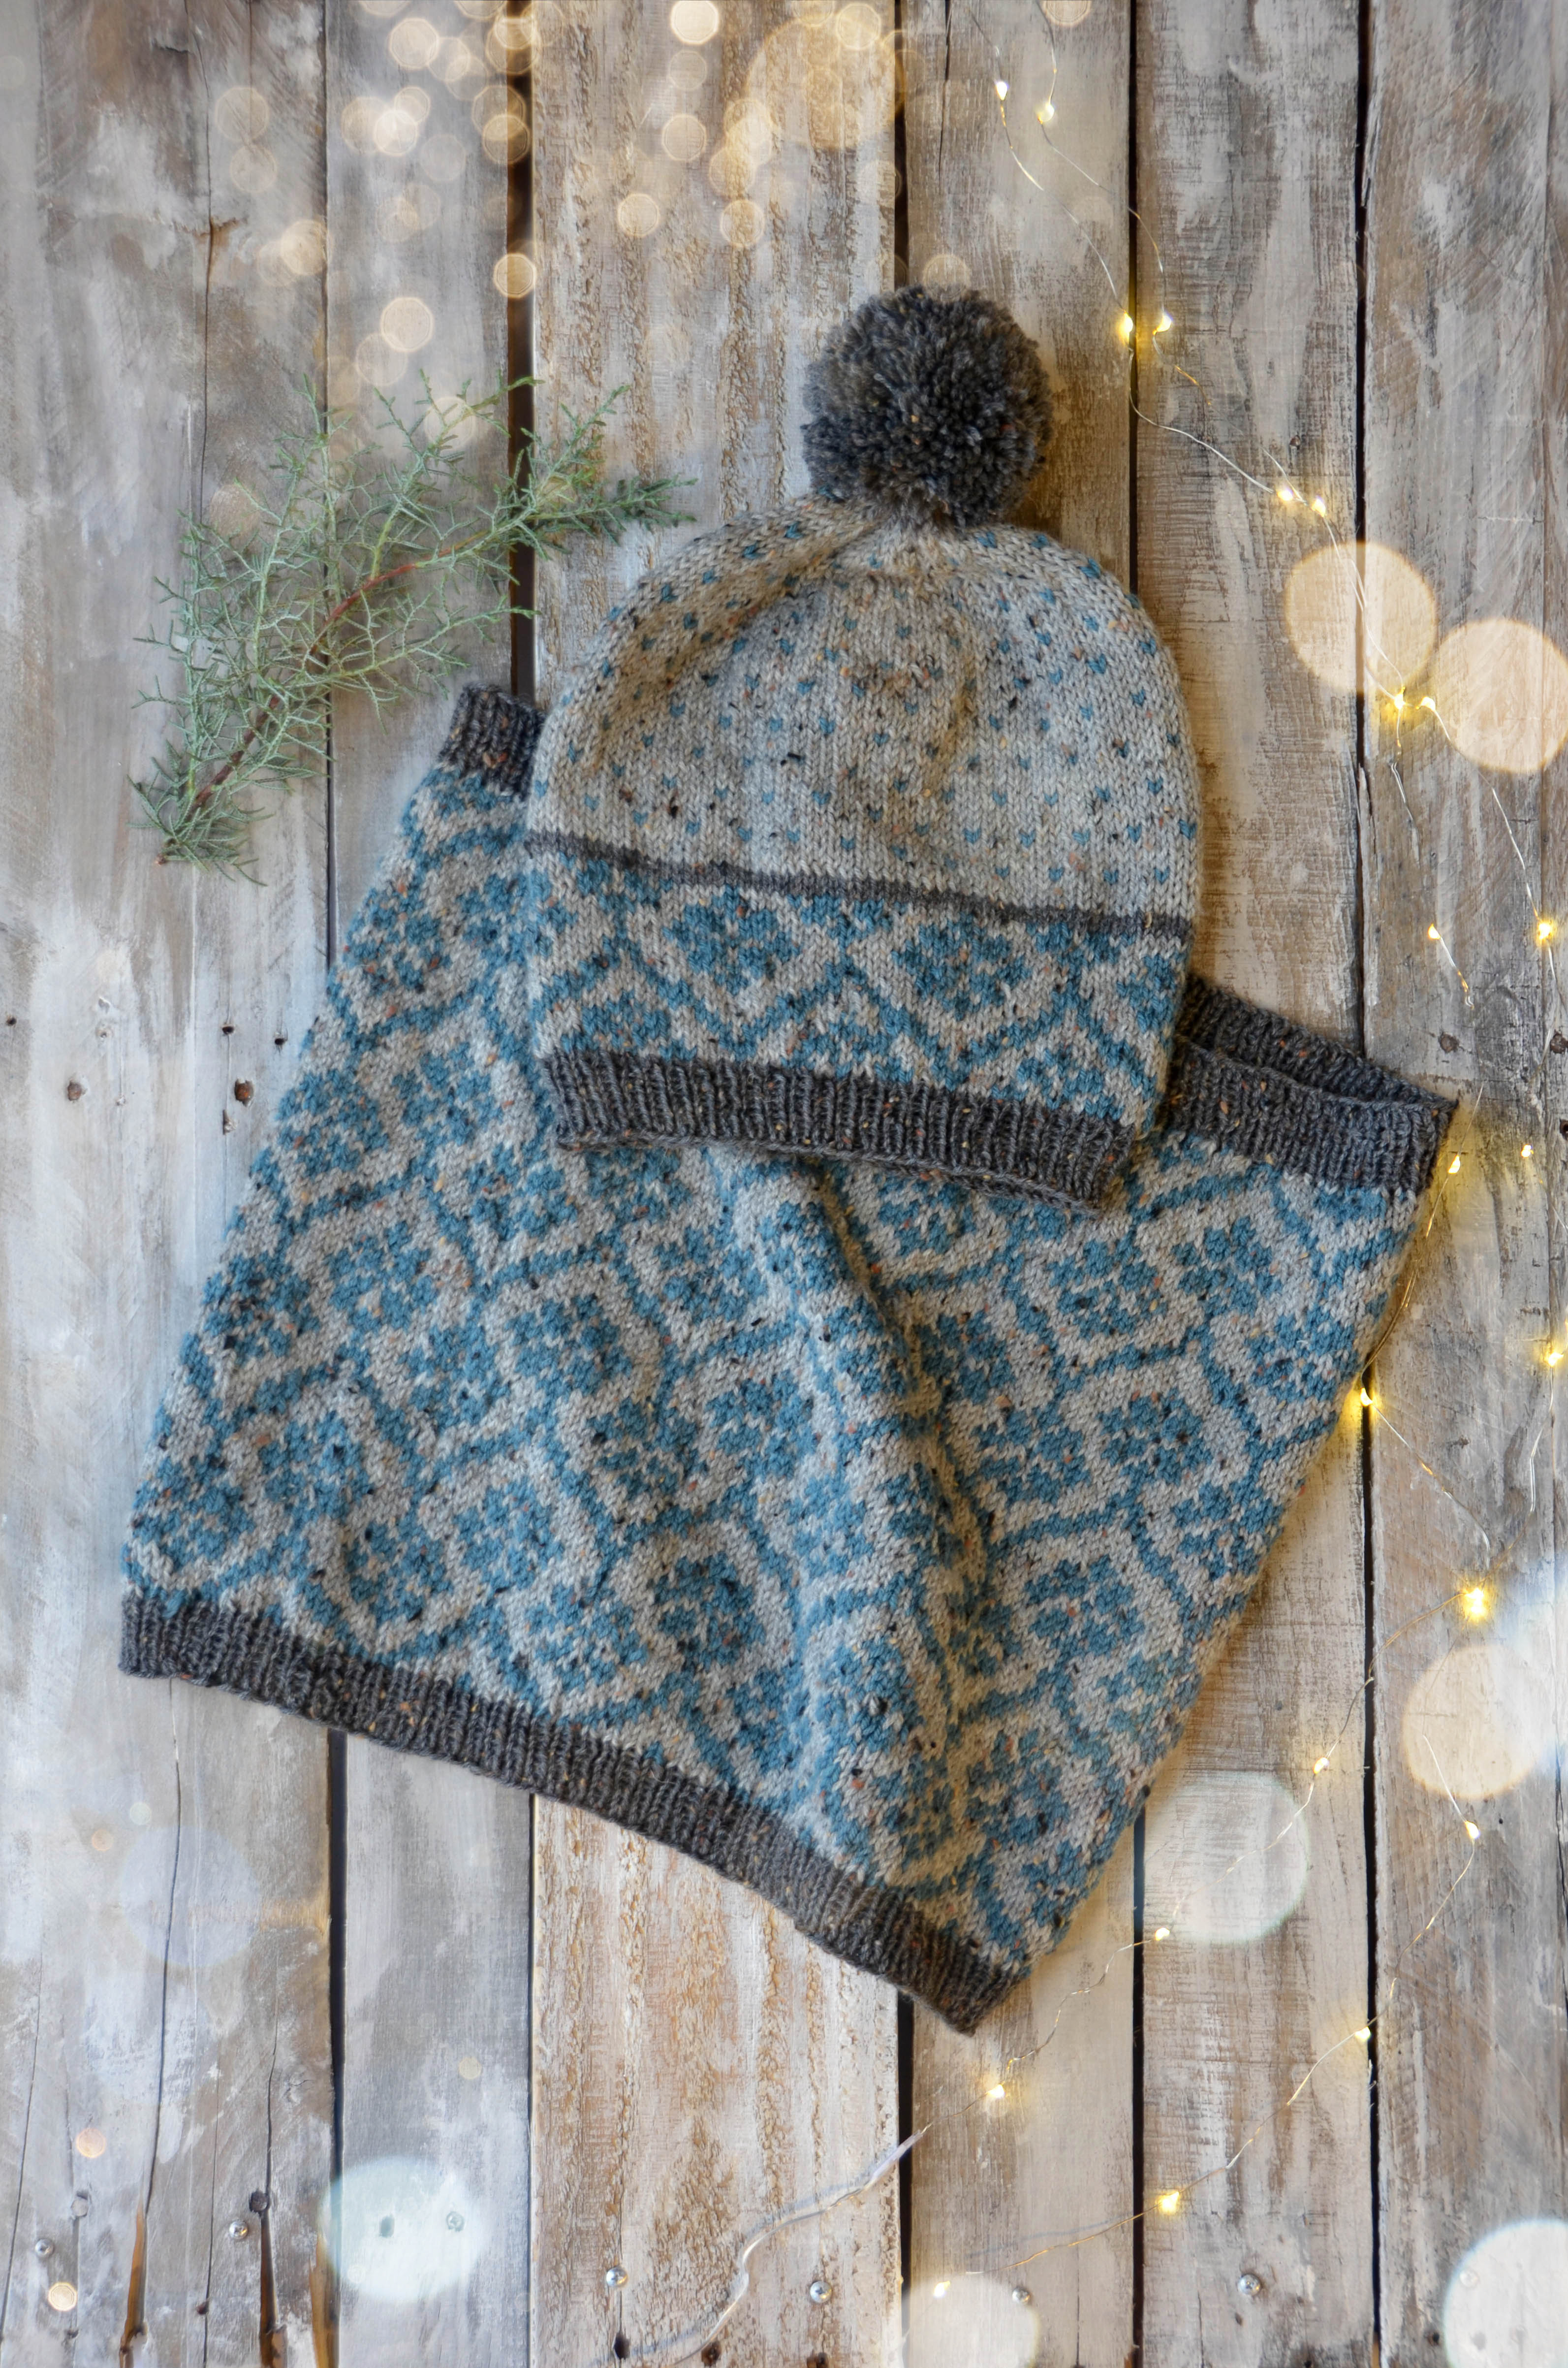
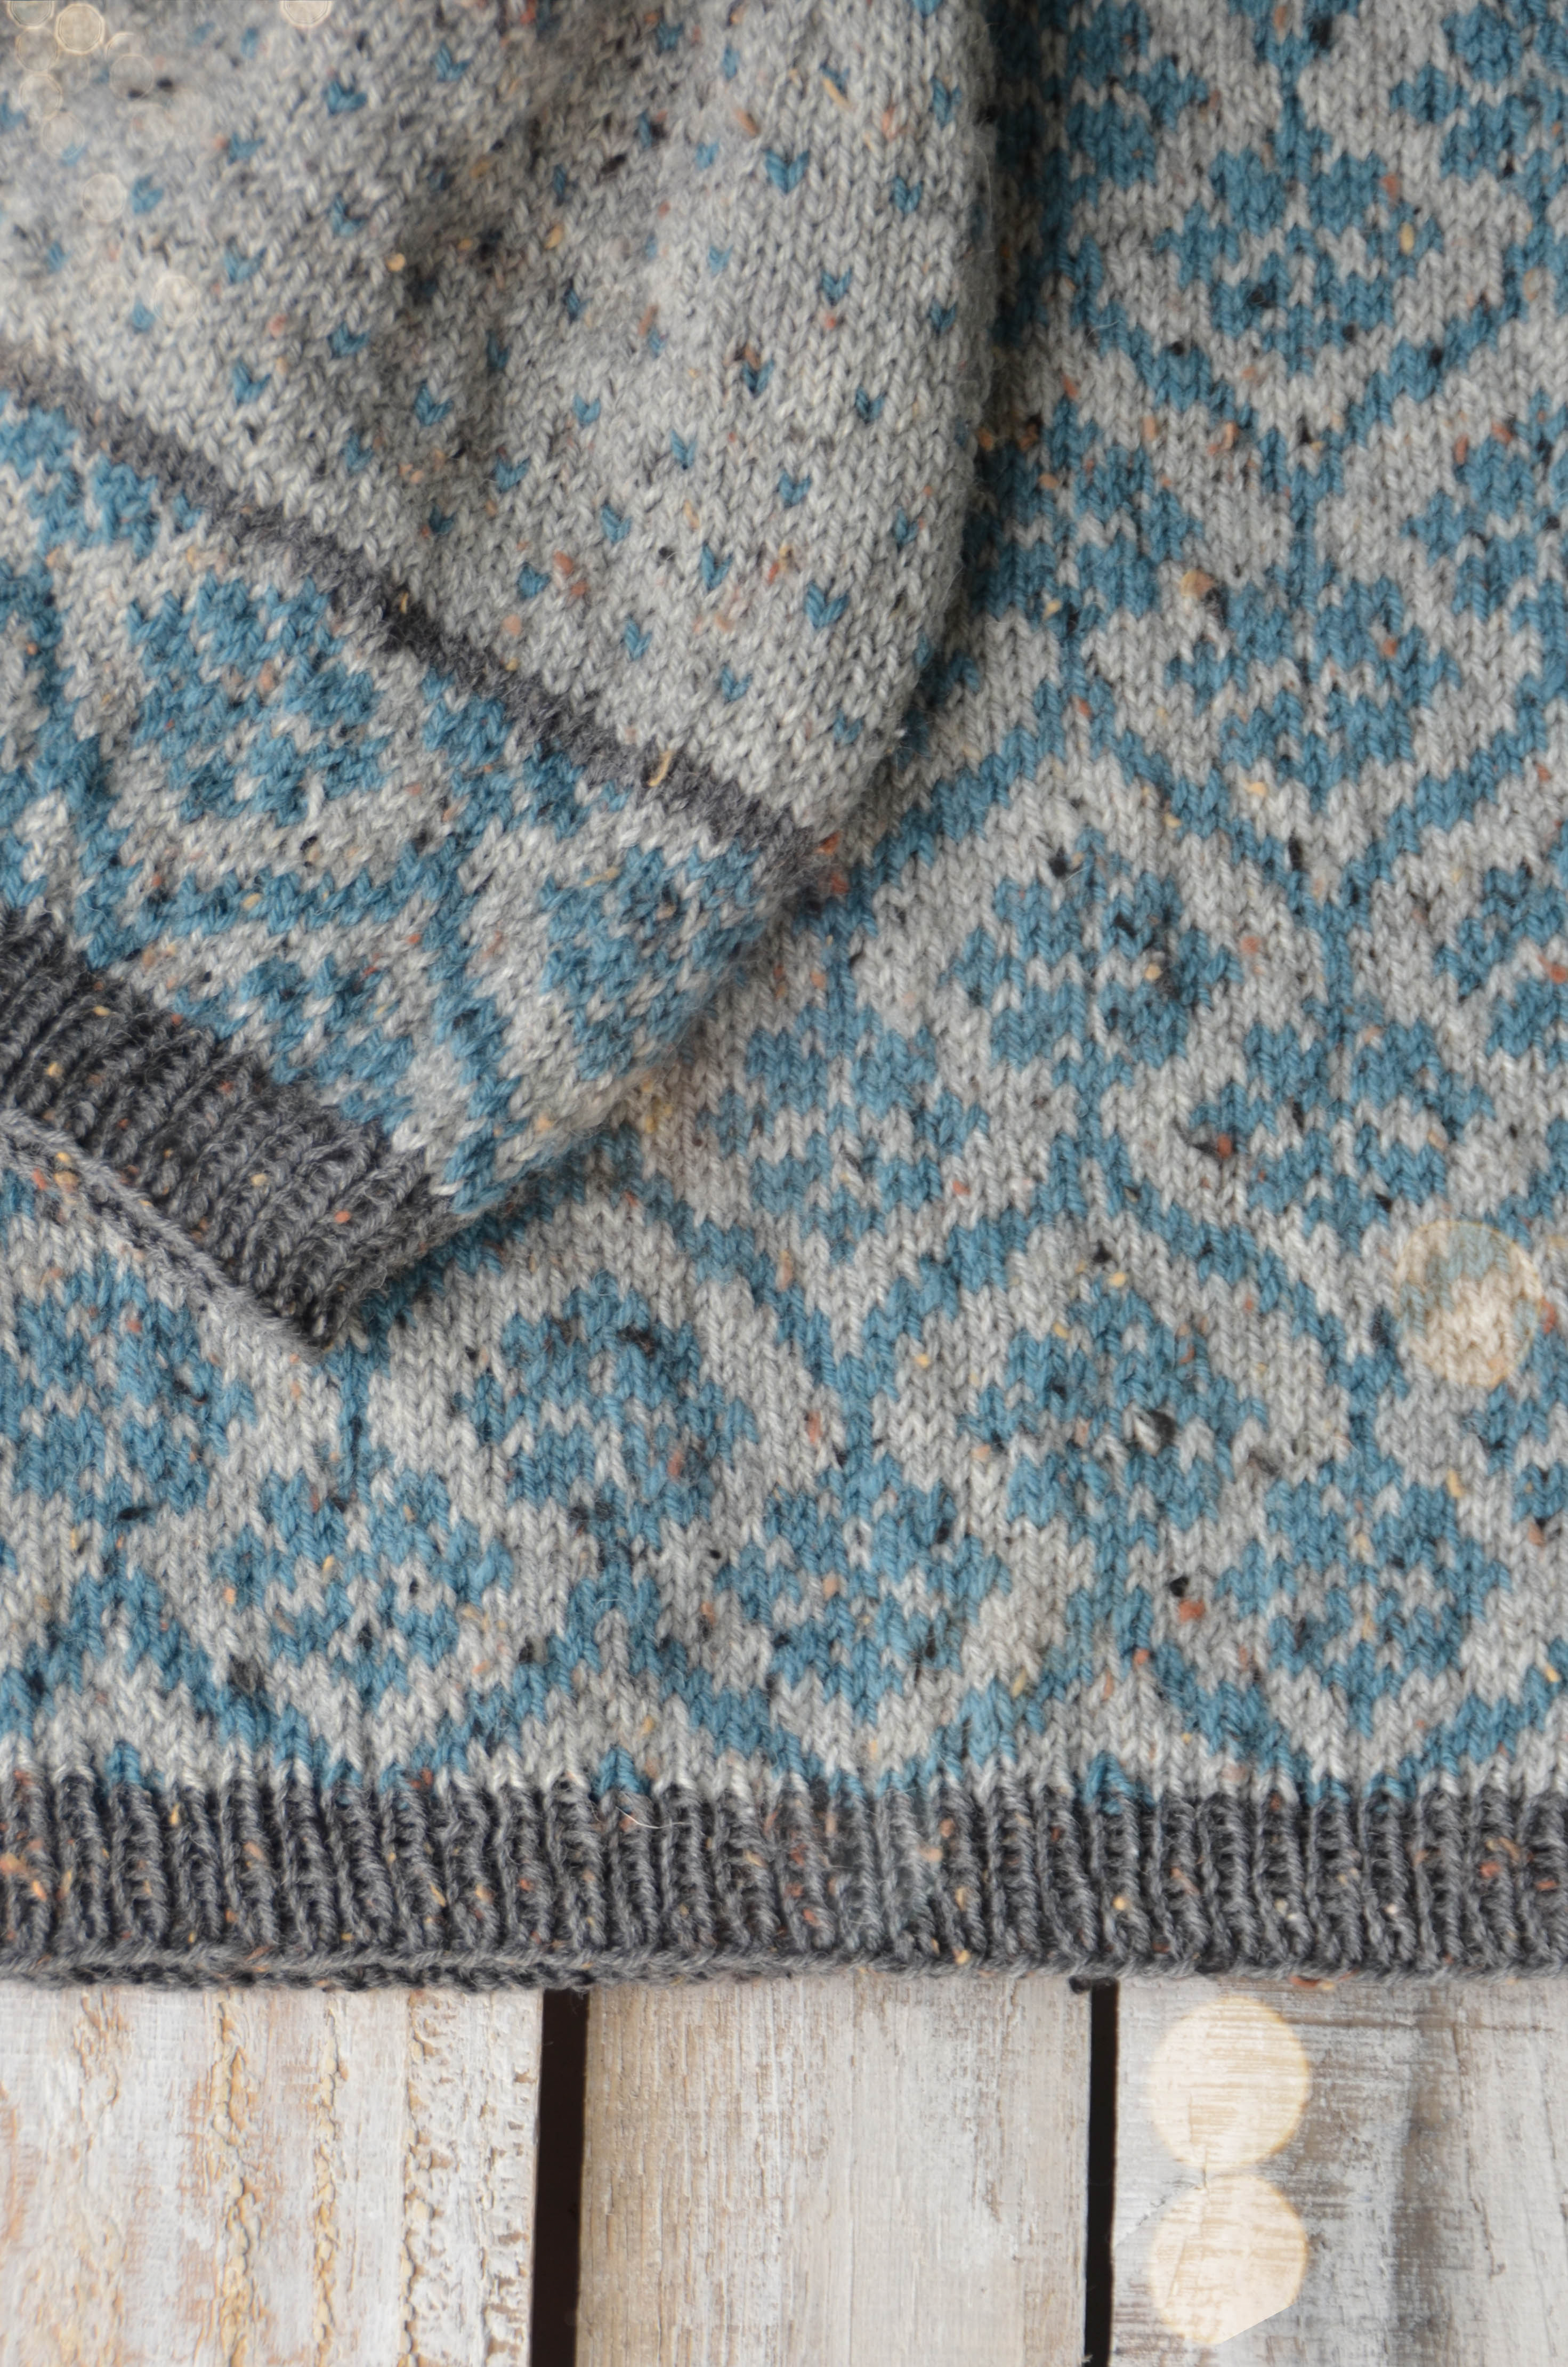
Oh, how I adore stranded knitting in our Deluxe DK Tweed! Crisp, defined colorwork has its place. But when the yarn has more character like our tweed, it softens the lines of the patterning and gives more interest.
This title of this design has the caveat of “revisited” because the original Templetop Cowl indeed exists. The first incarnation of this design was knit in Amphora, another yarn with one of my favorite characteristics: halo.
With smooth, plied yarns, knitting is crisp, even, and predictable. But when a yarn has a special characteristic such as tweedy bits or loft, stitches are less cut and dry and more organic. They have a mind of their own, so to speak. And they become more like real life, too, where we can’t always control things down to every last detail. There is a level of relief that comes with that acceptance, where we just let things be how they’re going to be, and this is ultimately why I love yarns with character. They mirror our own lives in ways that we might not realize at first.
Golly, you never knew yarn and knitting could get so philosophical, right? You can find the Templetop Revisited kit on our website here.
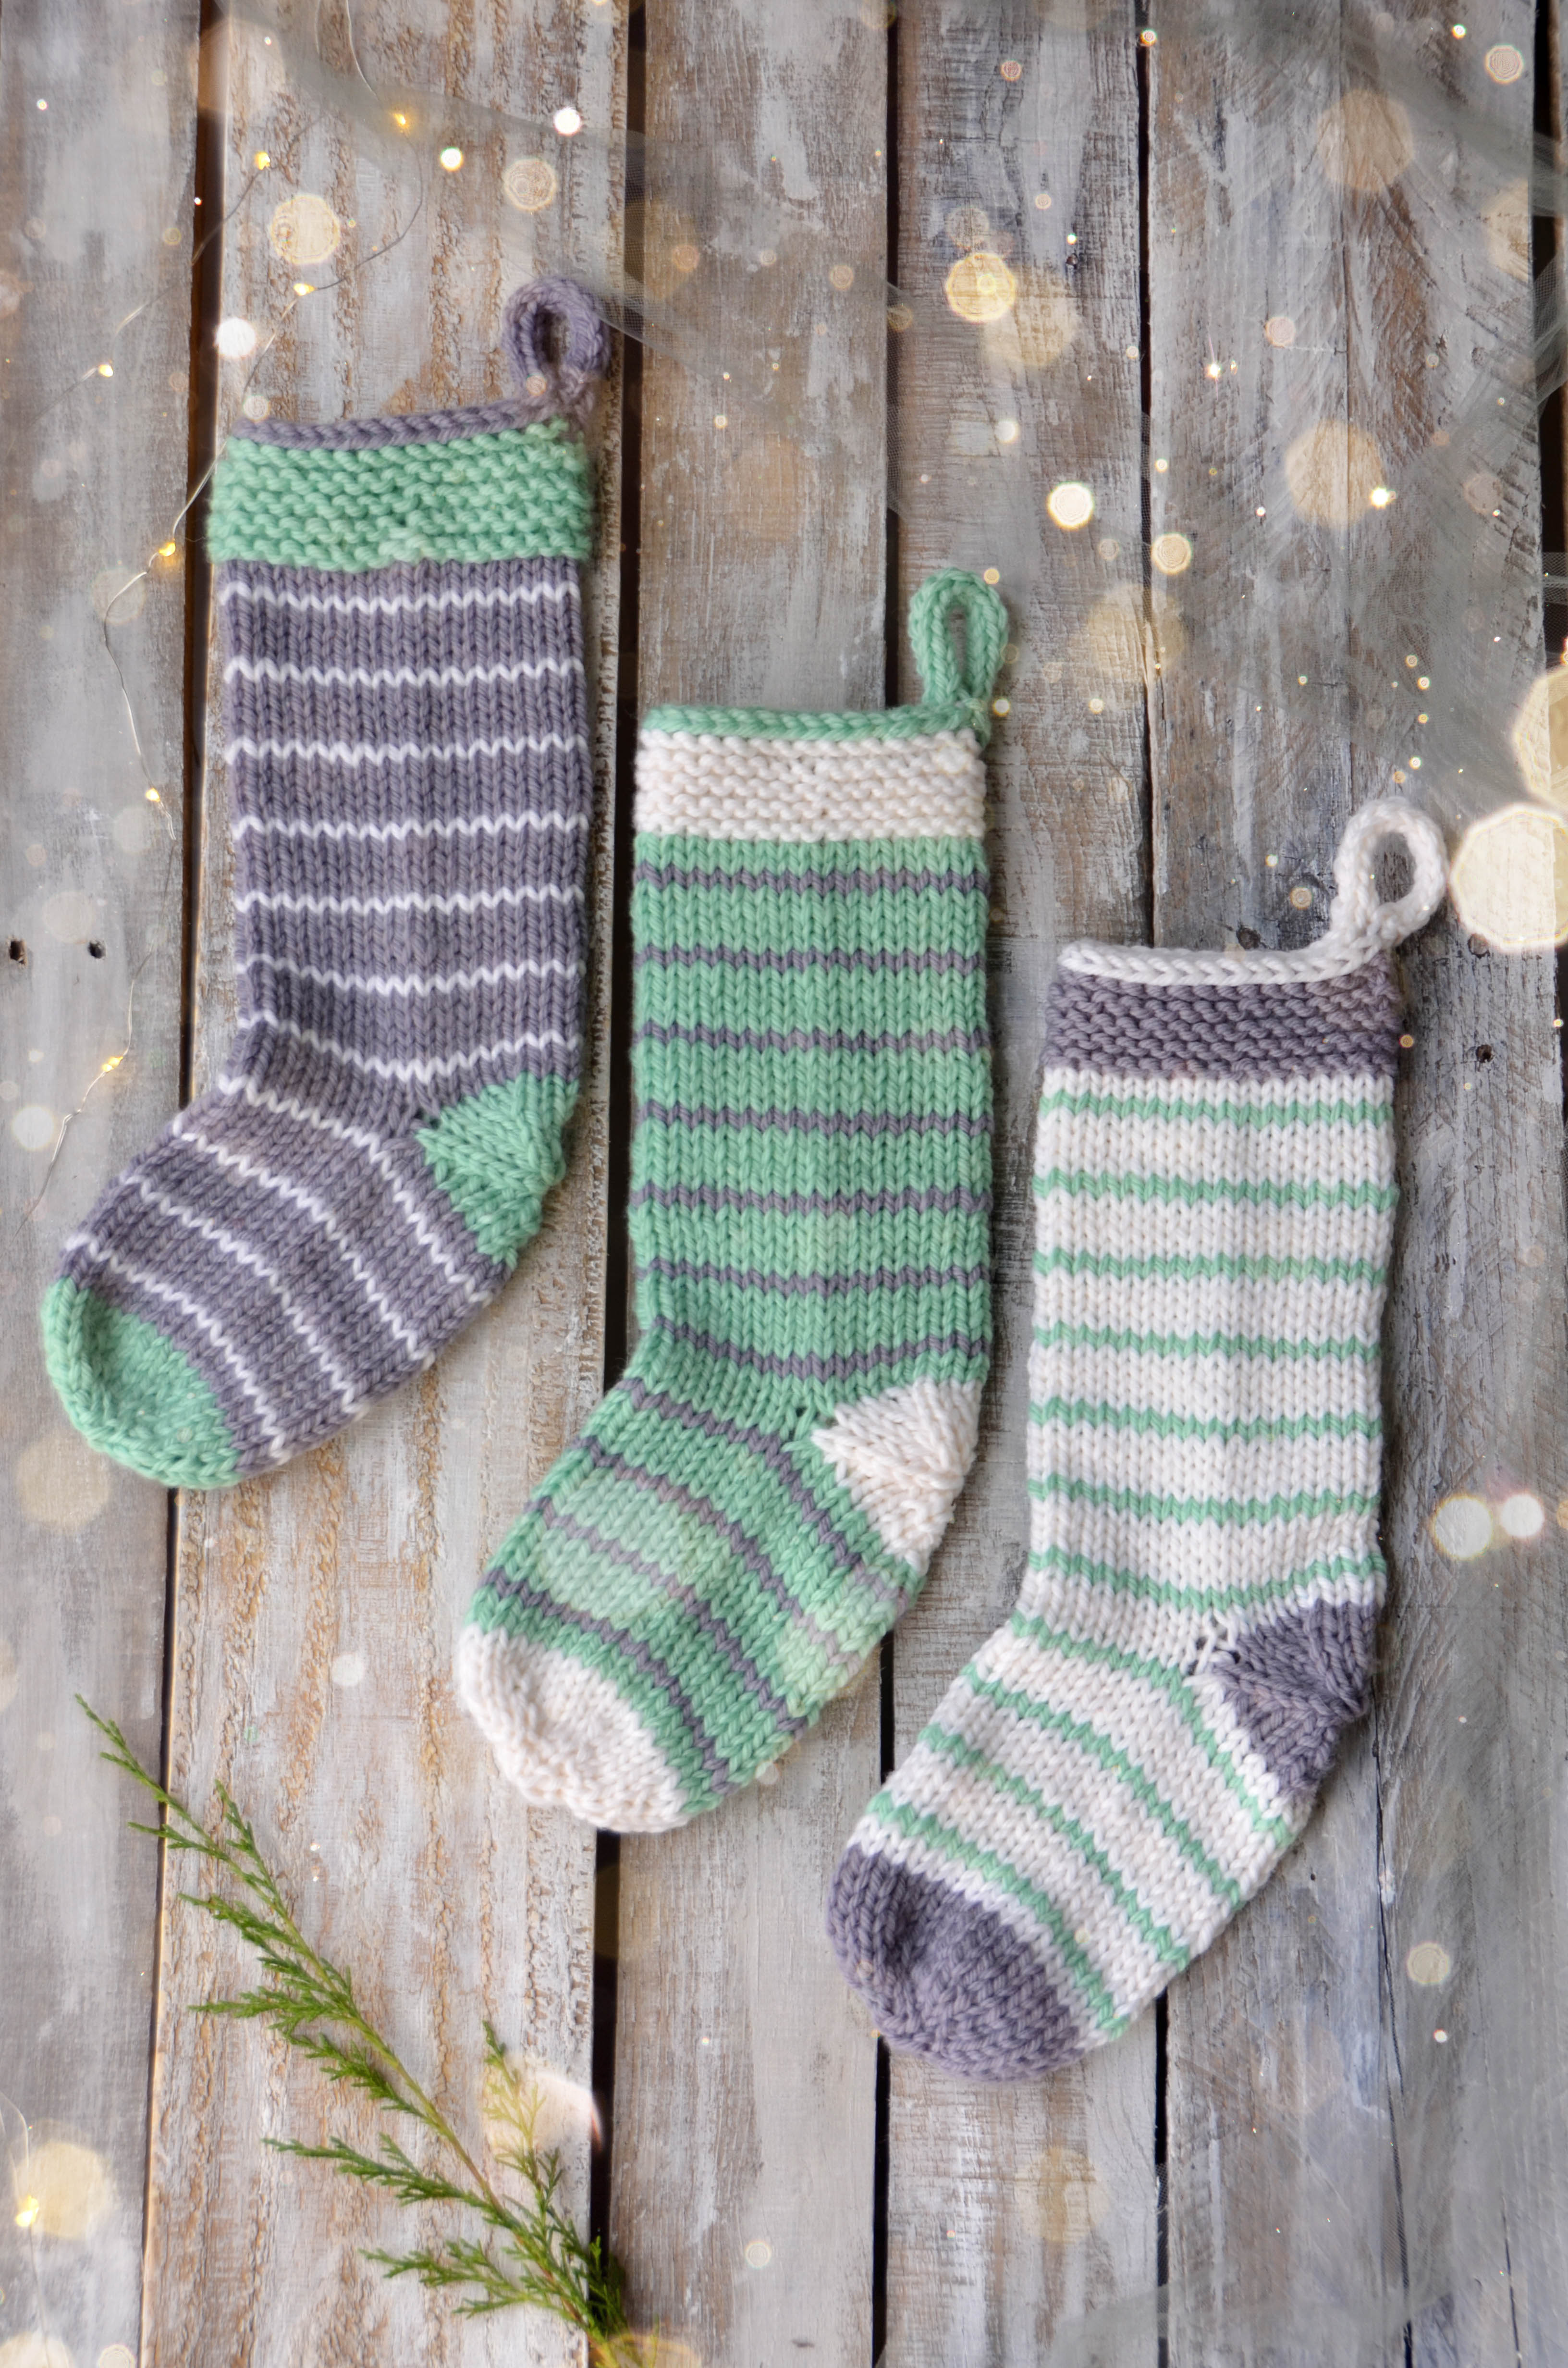
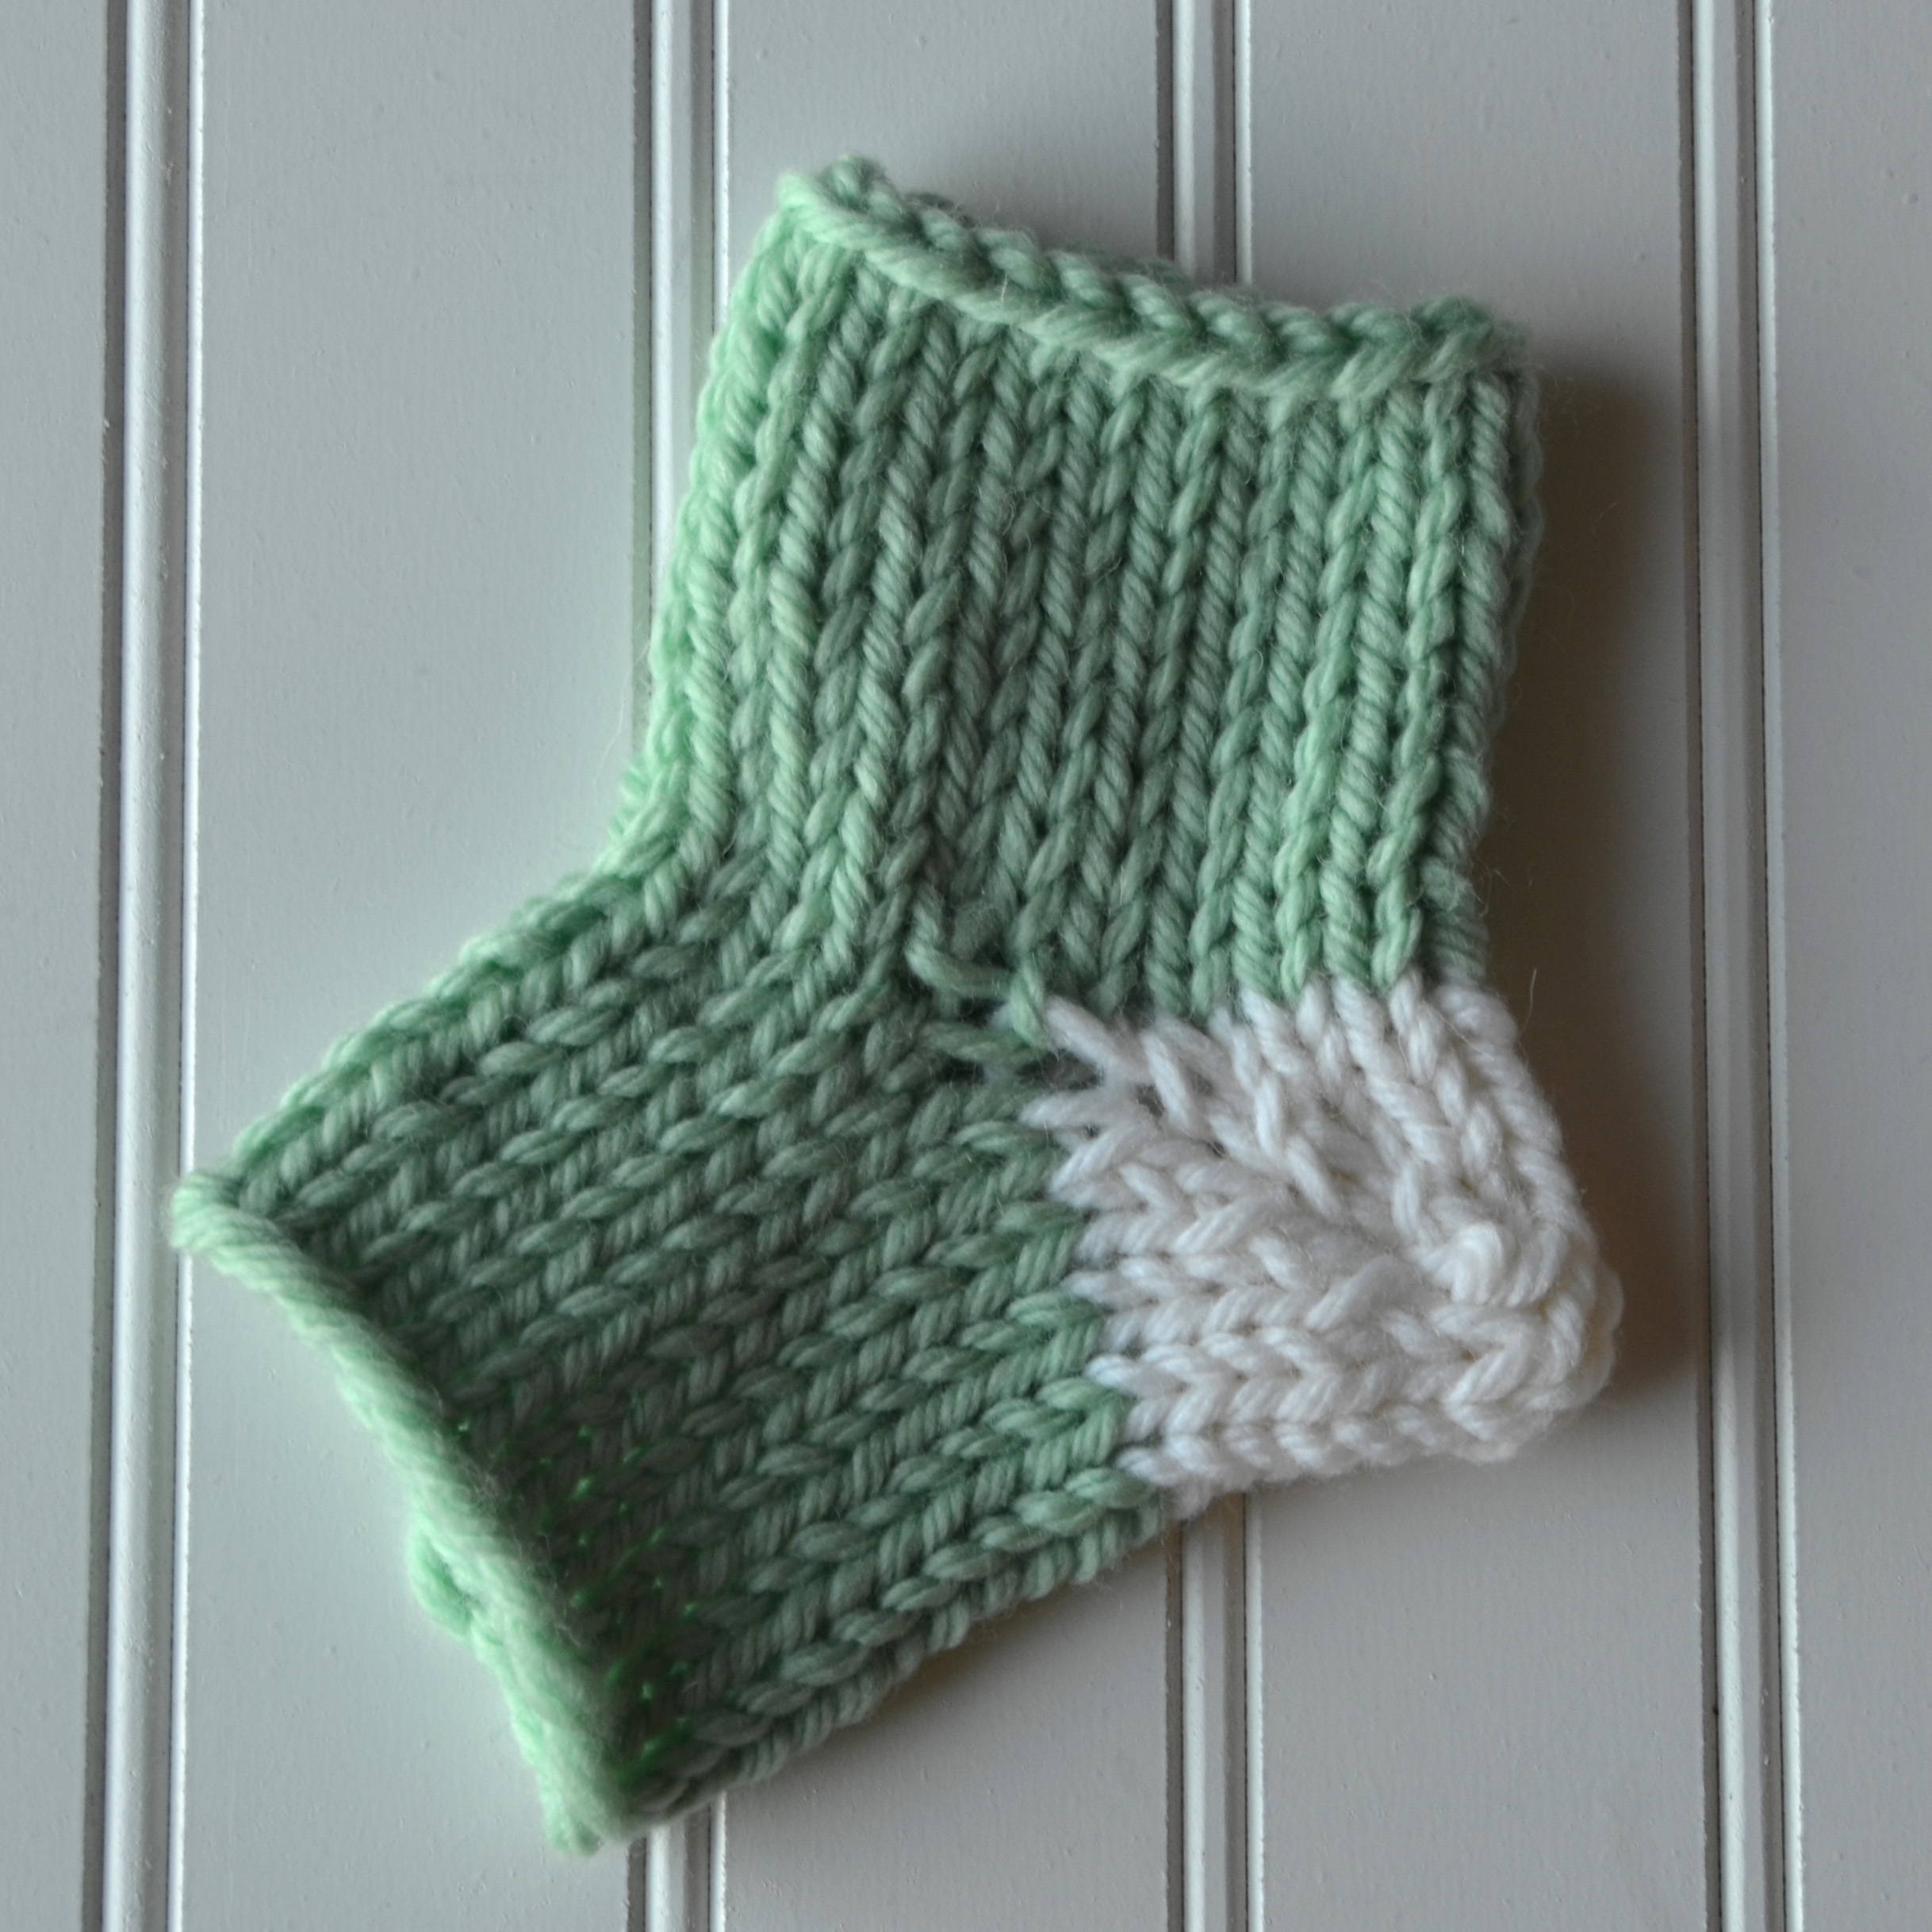
It’s hardly winter without stockings, amiright? Three balls of yarn make three stockings in the Stripe Stockings kit. Knit in Deluxe Bulky Superwash, these will virtually fly off your needles.
The knitting in these is relatively simple – mostly stockinette with a bit of garter and an i-cord bind-off. There are enough details to keep a seasoned knitter entertained, but are simple enough that they would also make a good first sock project.
One feature that I’d like to explain more in detail is the afterthought heel. Unlike the common short-row heel which is knit as the rest of your sock is knit, an afterthought heel is added later after the rest of the sock is complete. There are various reasons for choosing this type of heel. My reasoning for doing so in this project was both to keep my stripe sequence uninterrupted and also to make the most of my yarn.
Grab your needles and yarn and let’s get to learning!
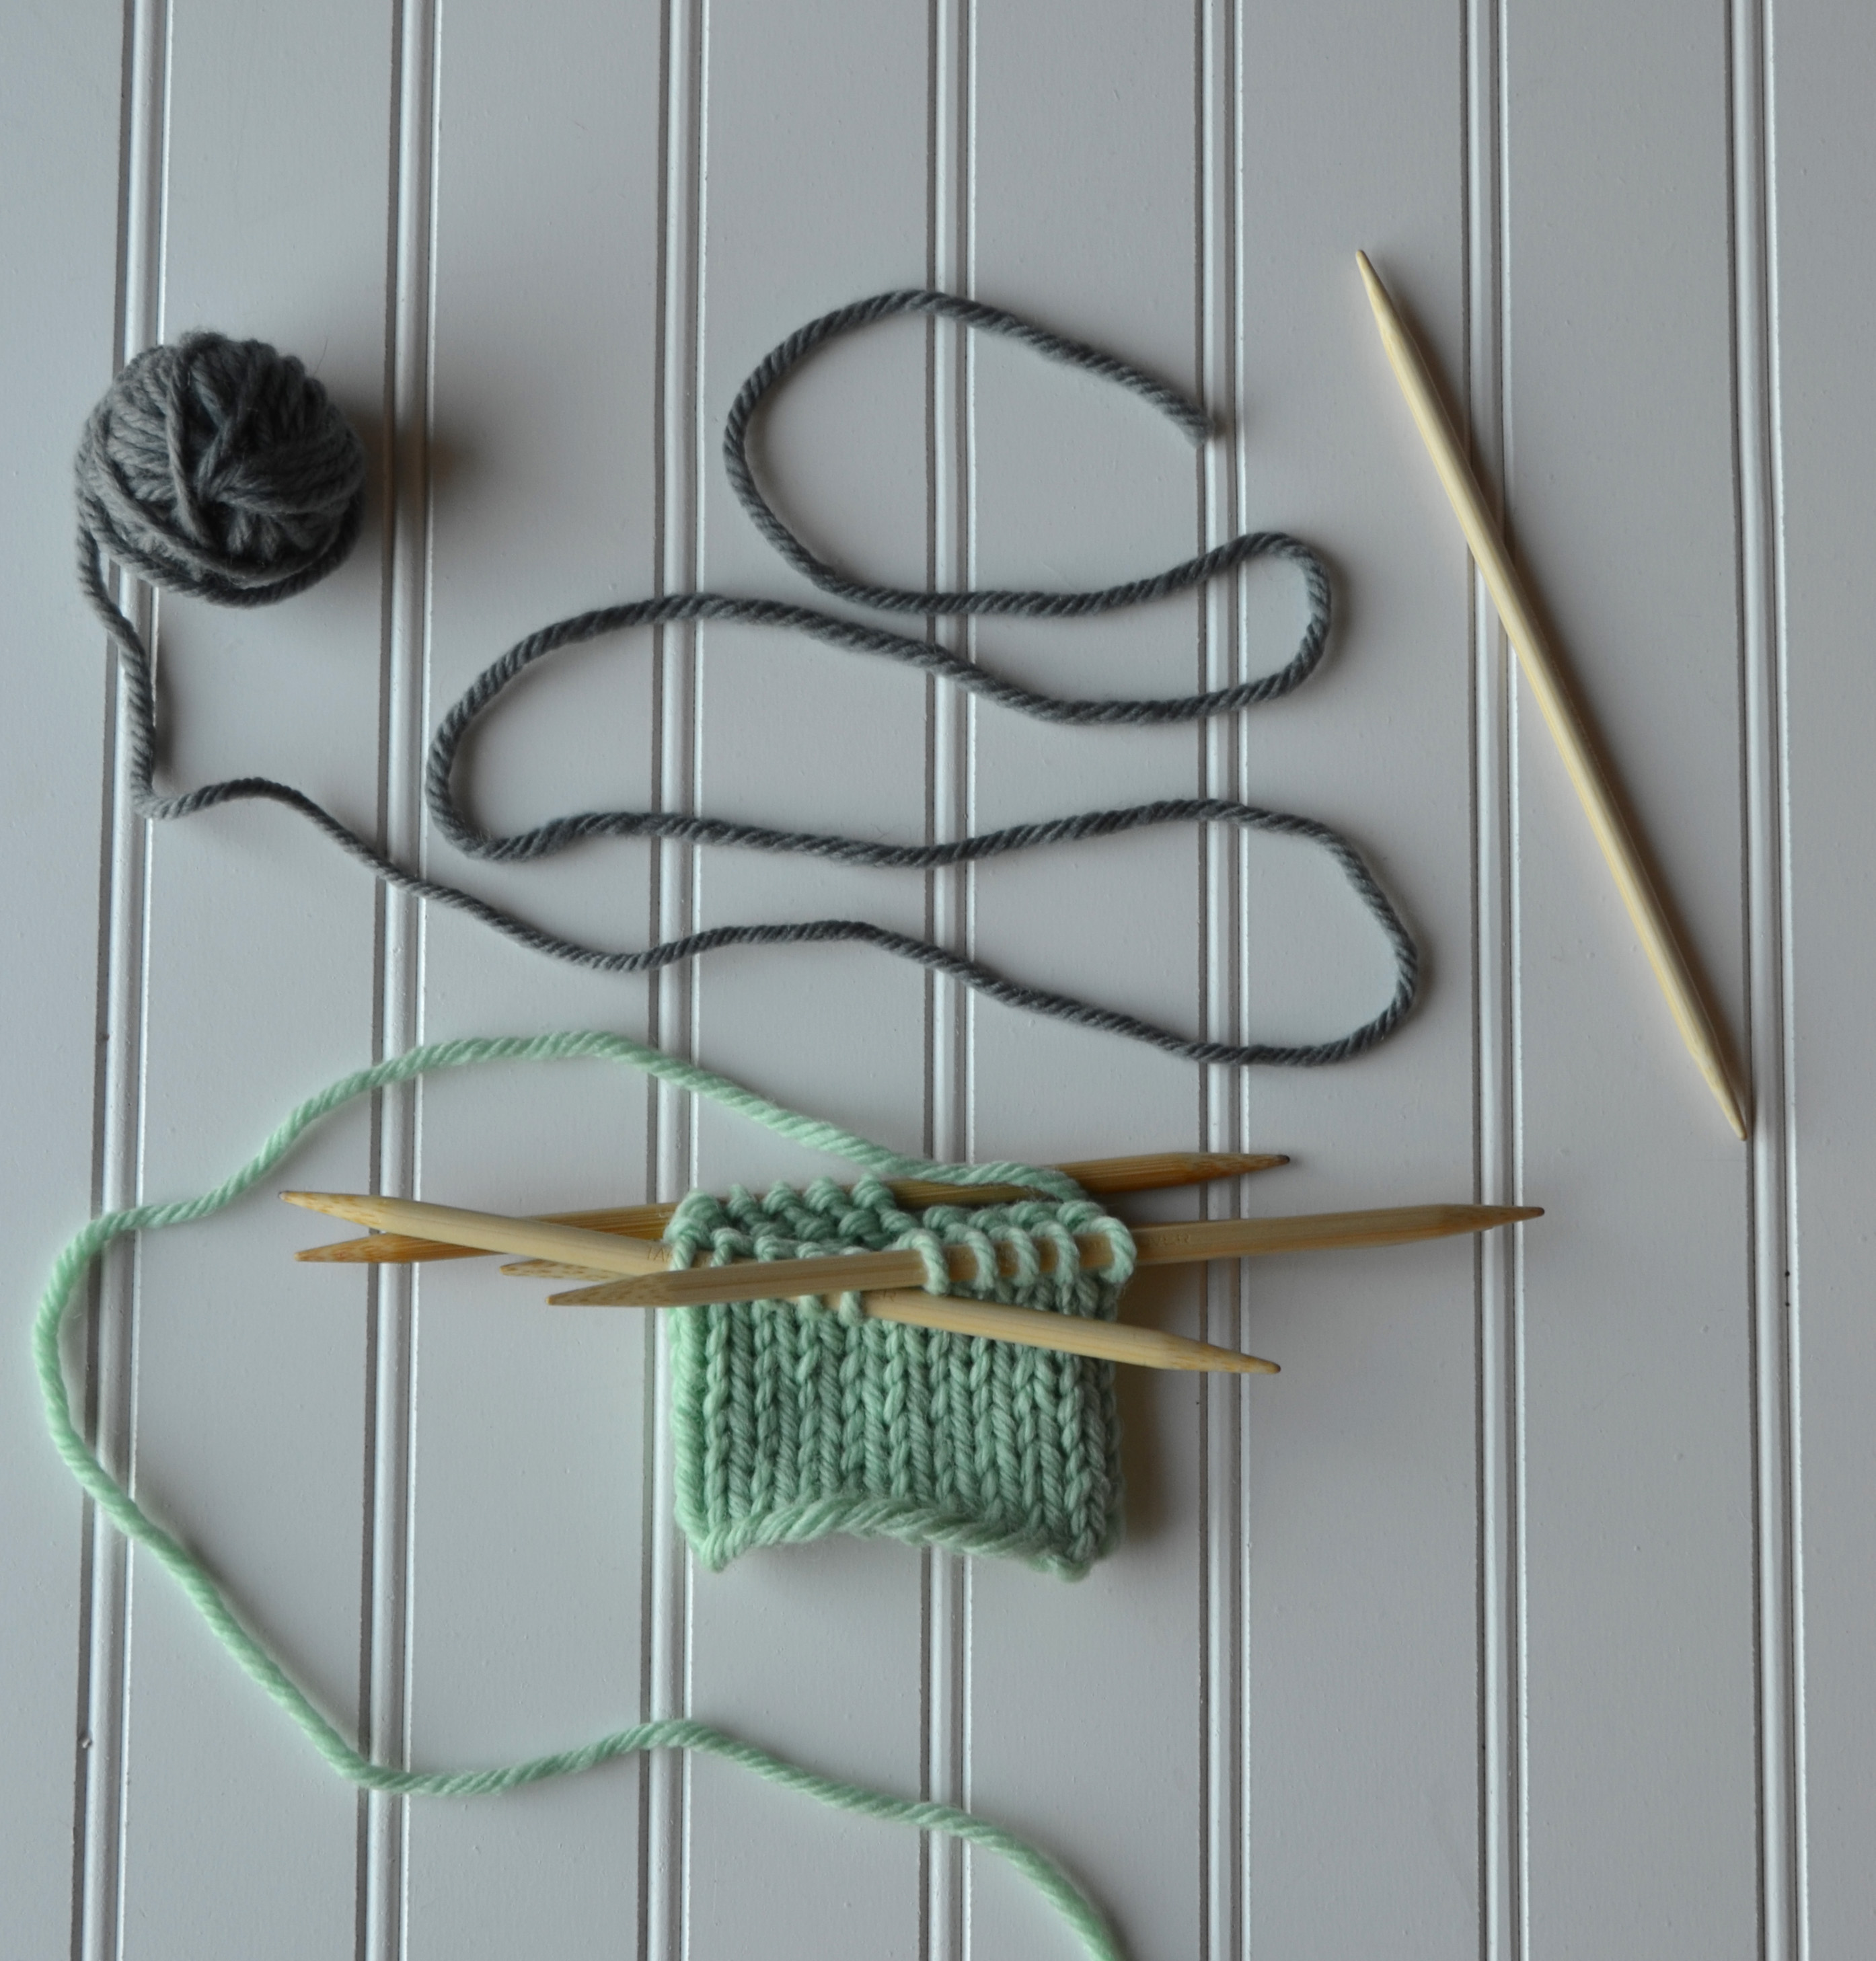
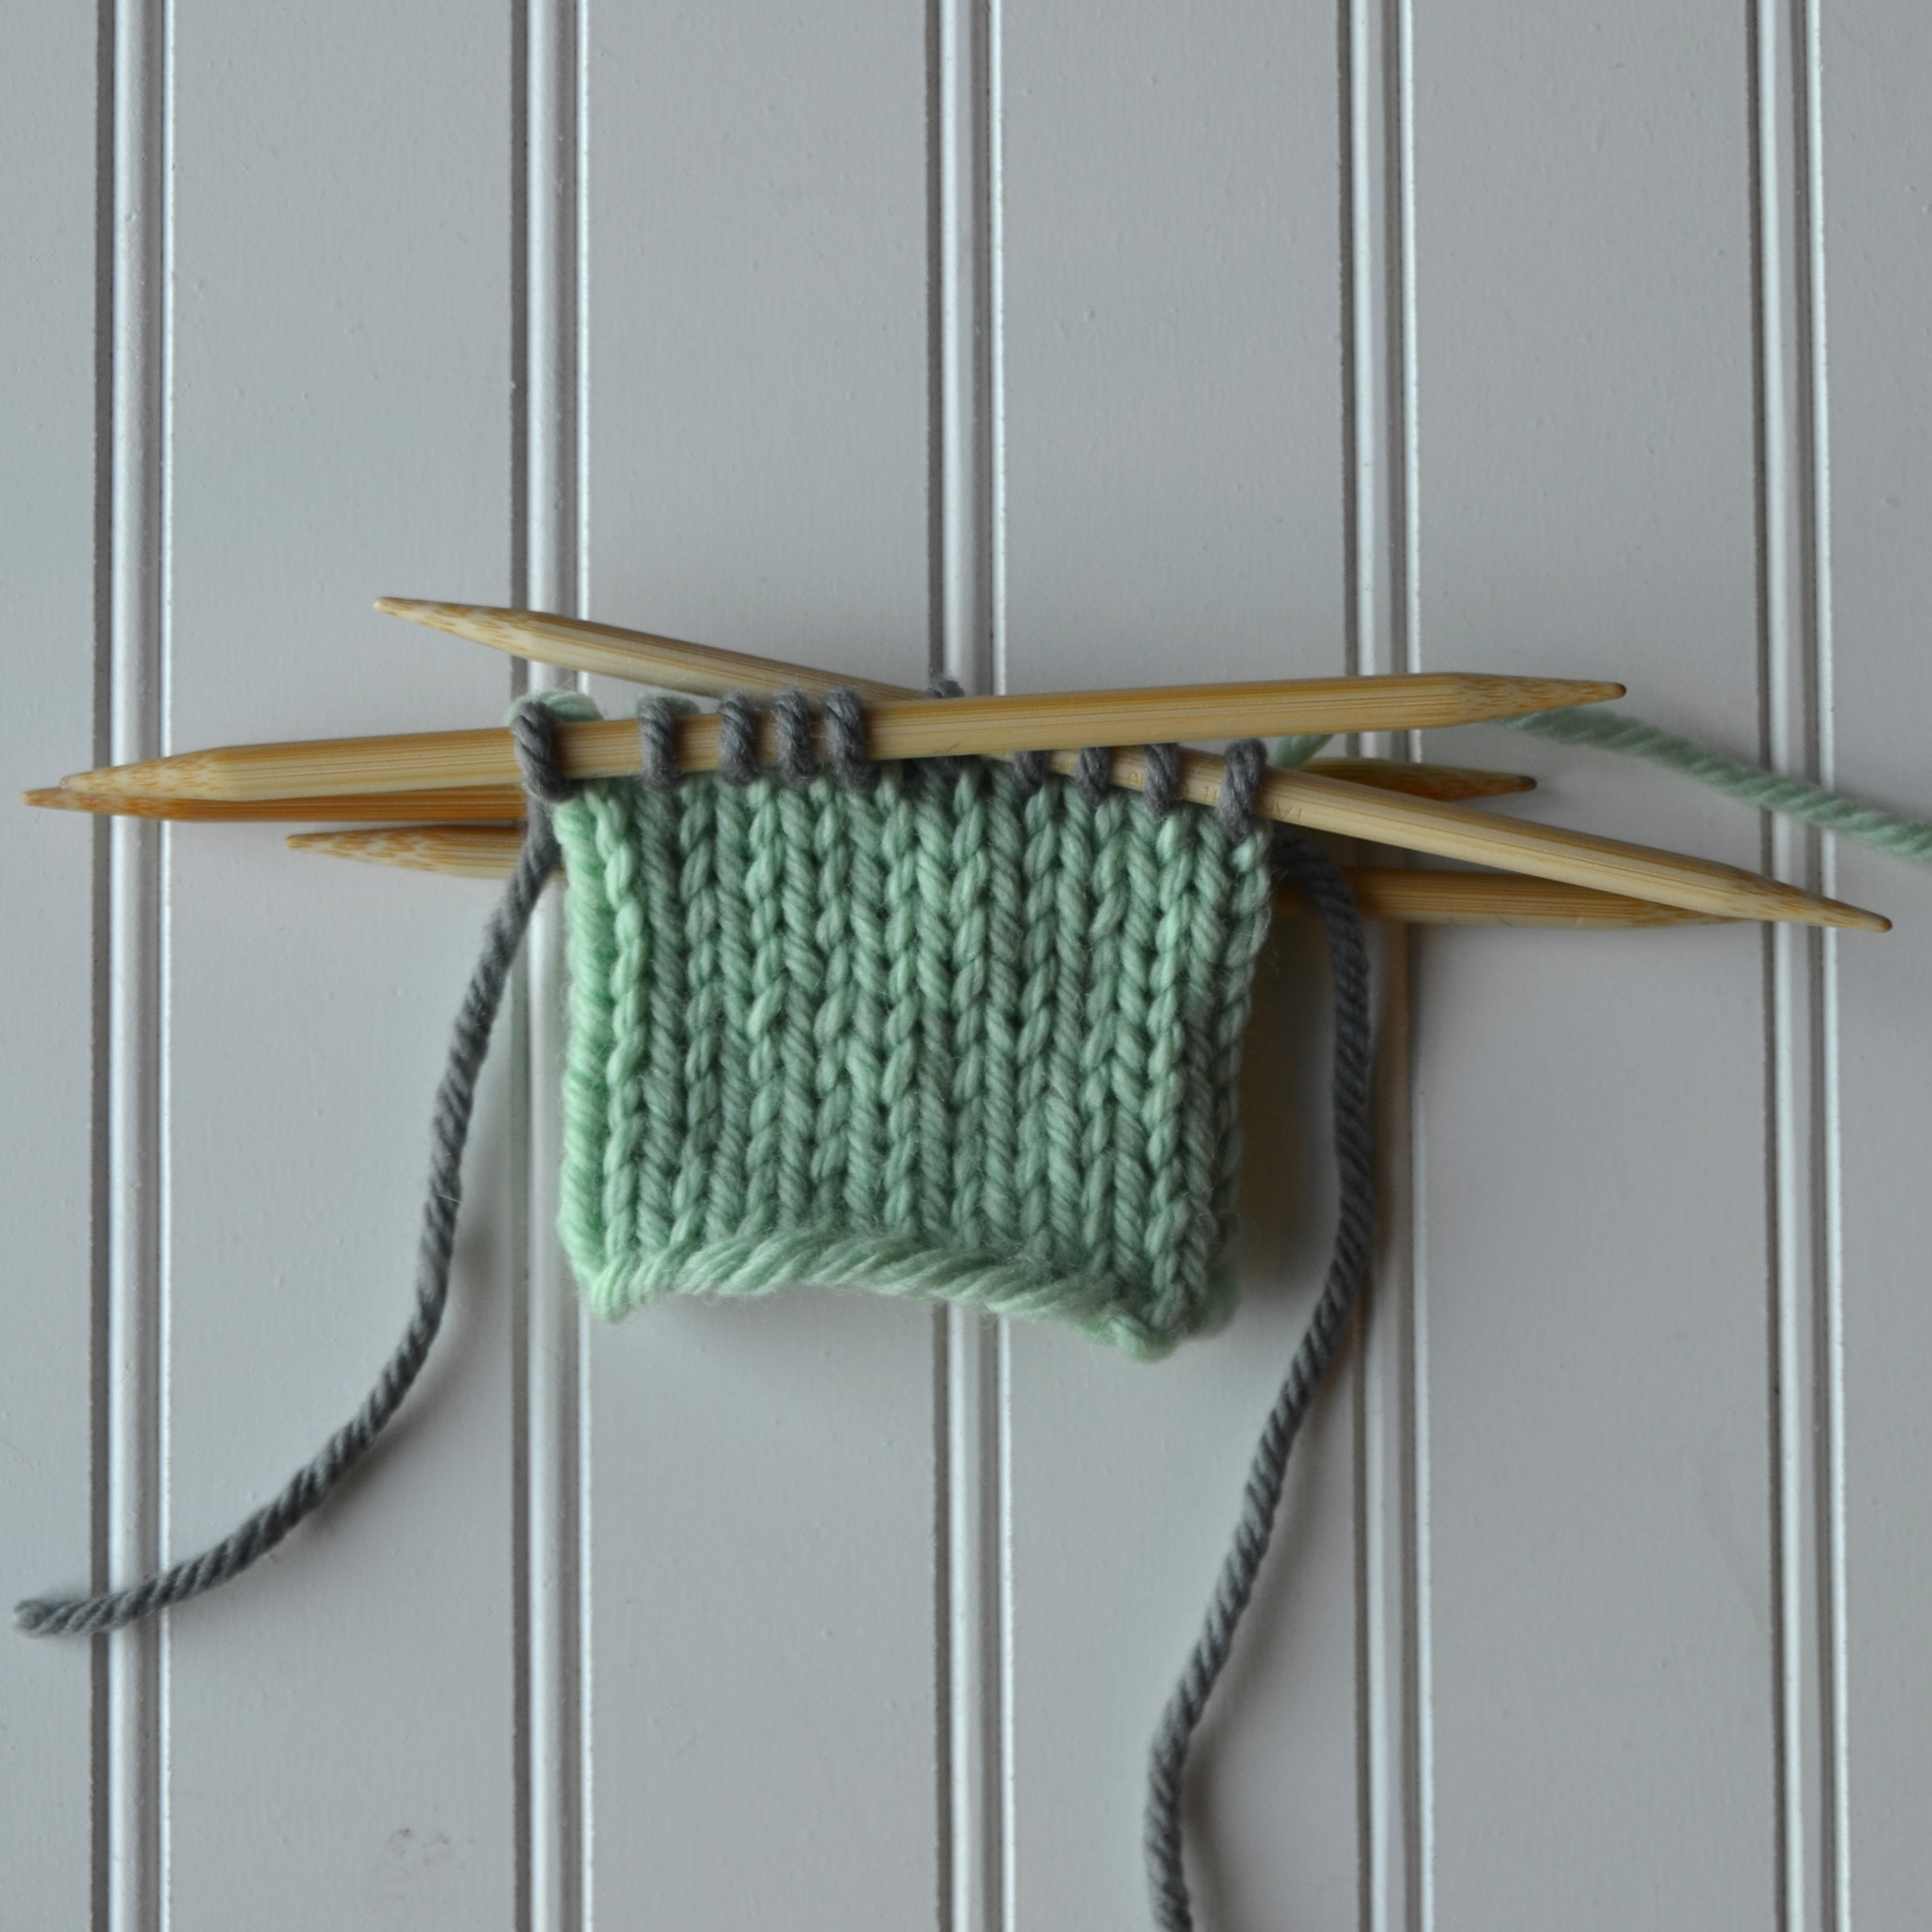
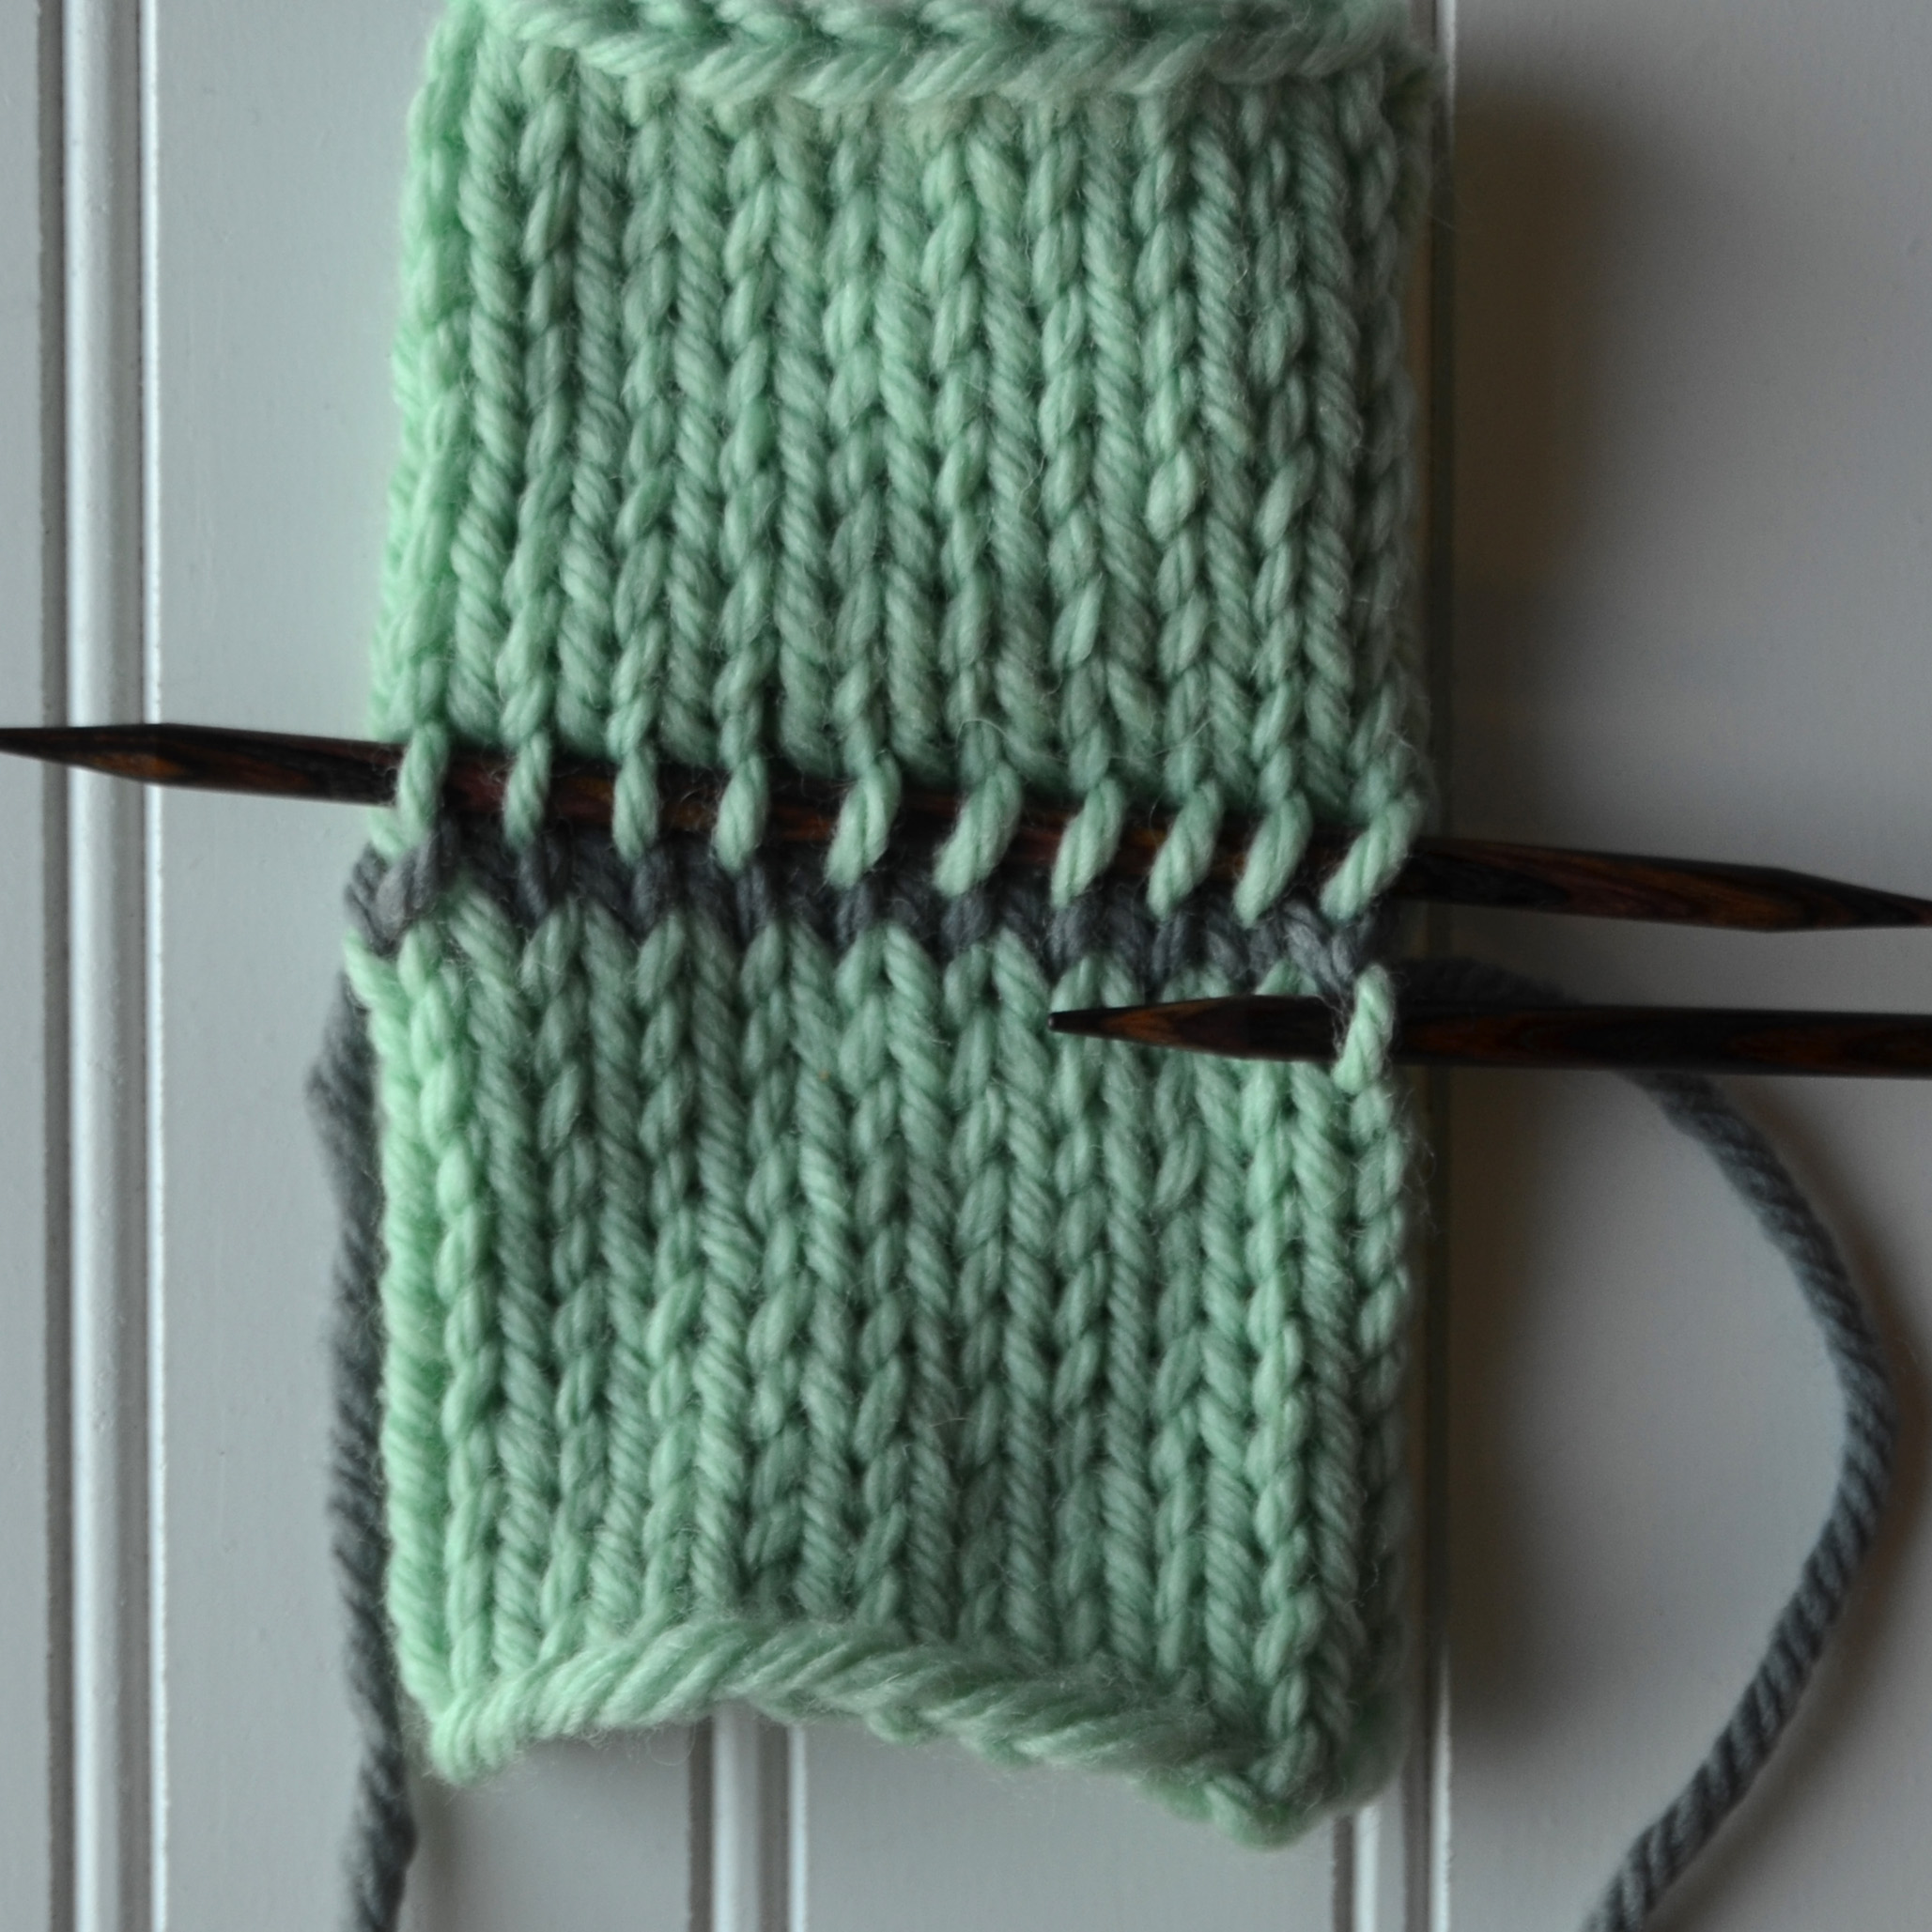
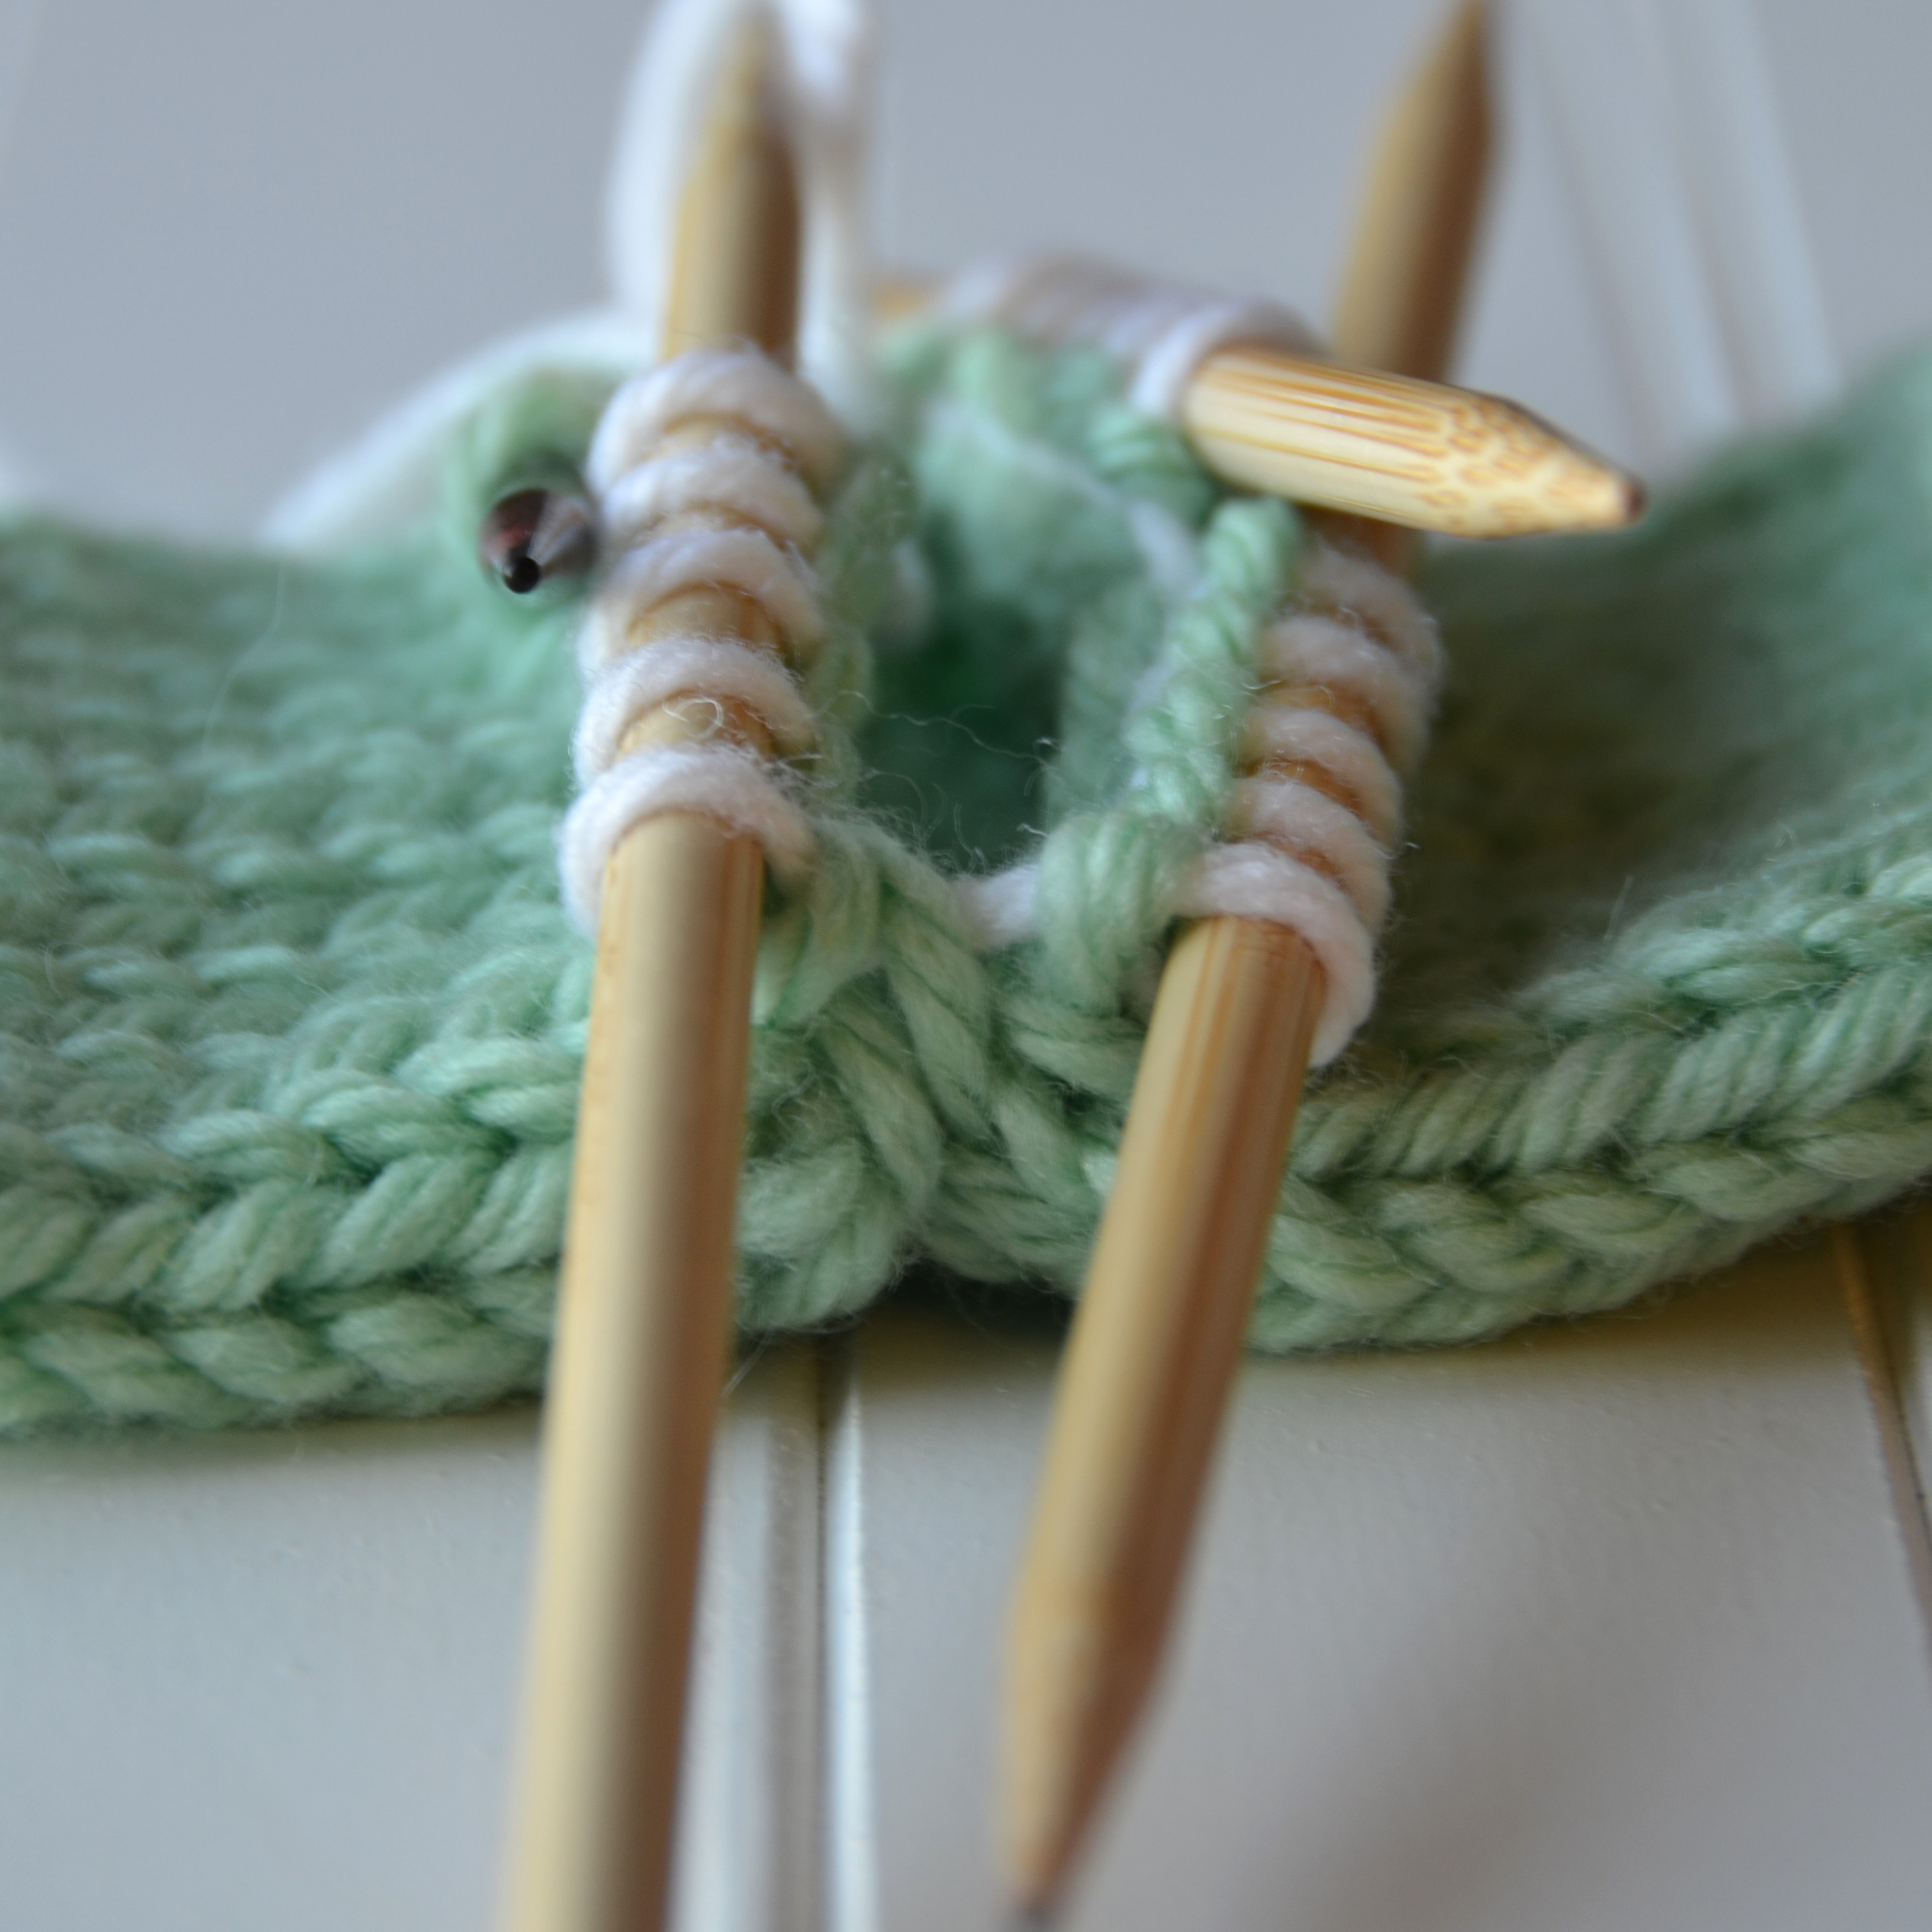
First, knit a stockinette swatch. I am knitting my swatch in the round just like the stockings, but this technique can just as easily be done worked flat in rows.Next, get ready with your waste yarn. This waste yarn is temporarily going to hold the place of where your heel will eventually be.Leaving your working (green) yarn where it is, knit across the heel stitches with the waste yarn. Your pattern will specify how many stitches this is. Typically, it is half of the total sock stitches.
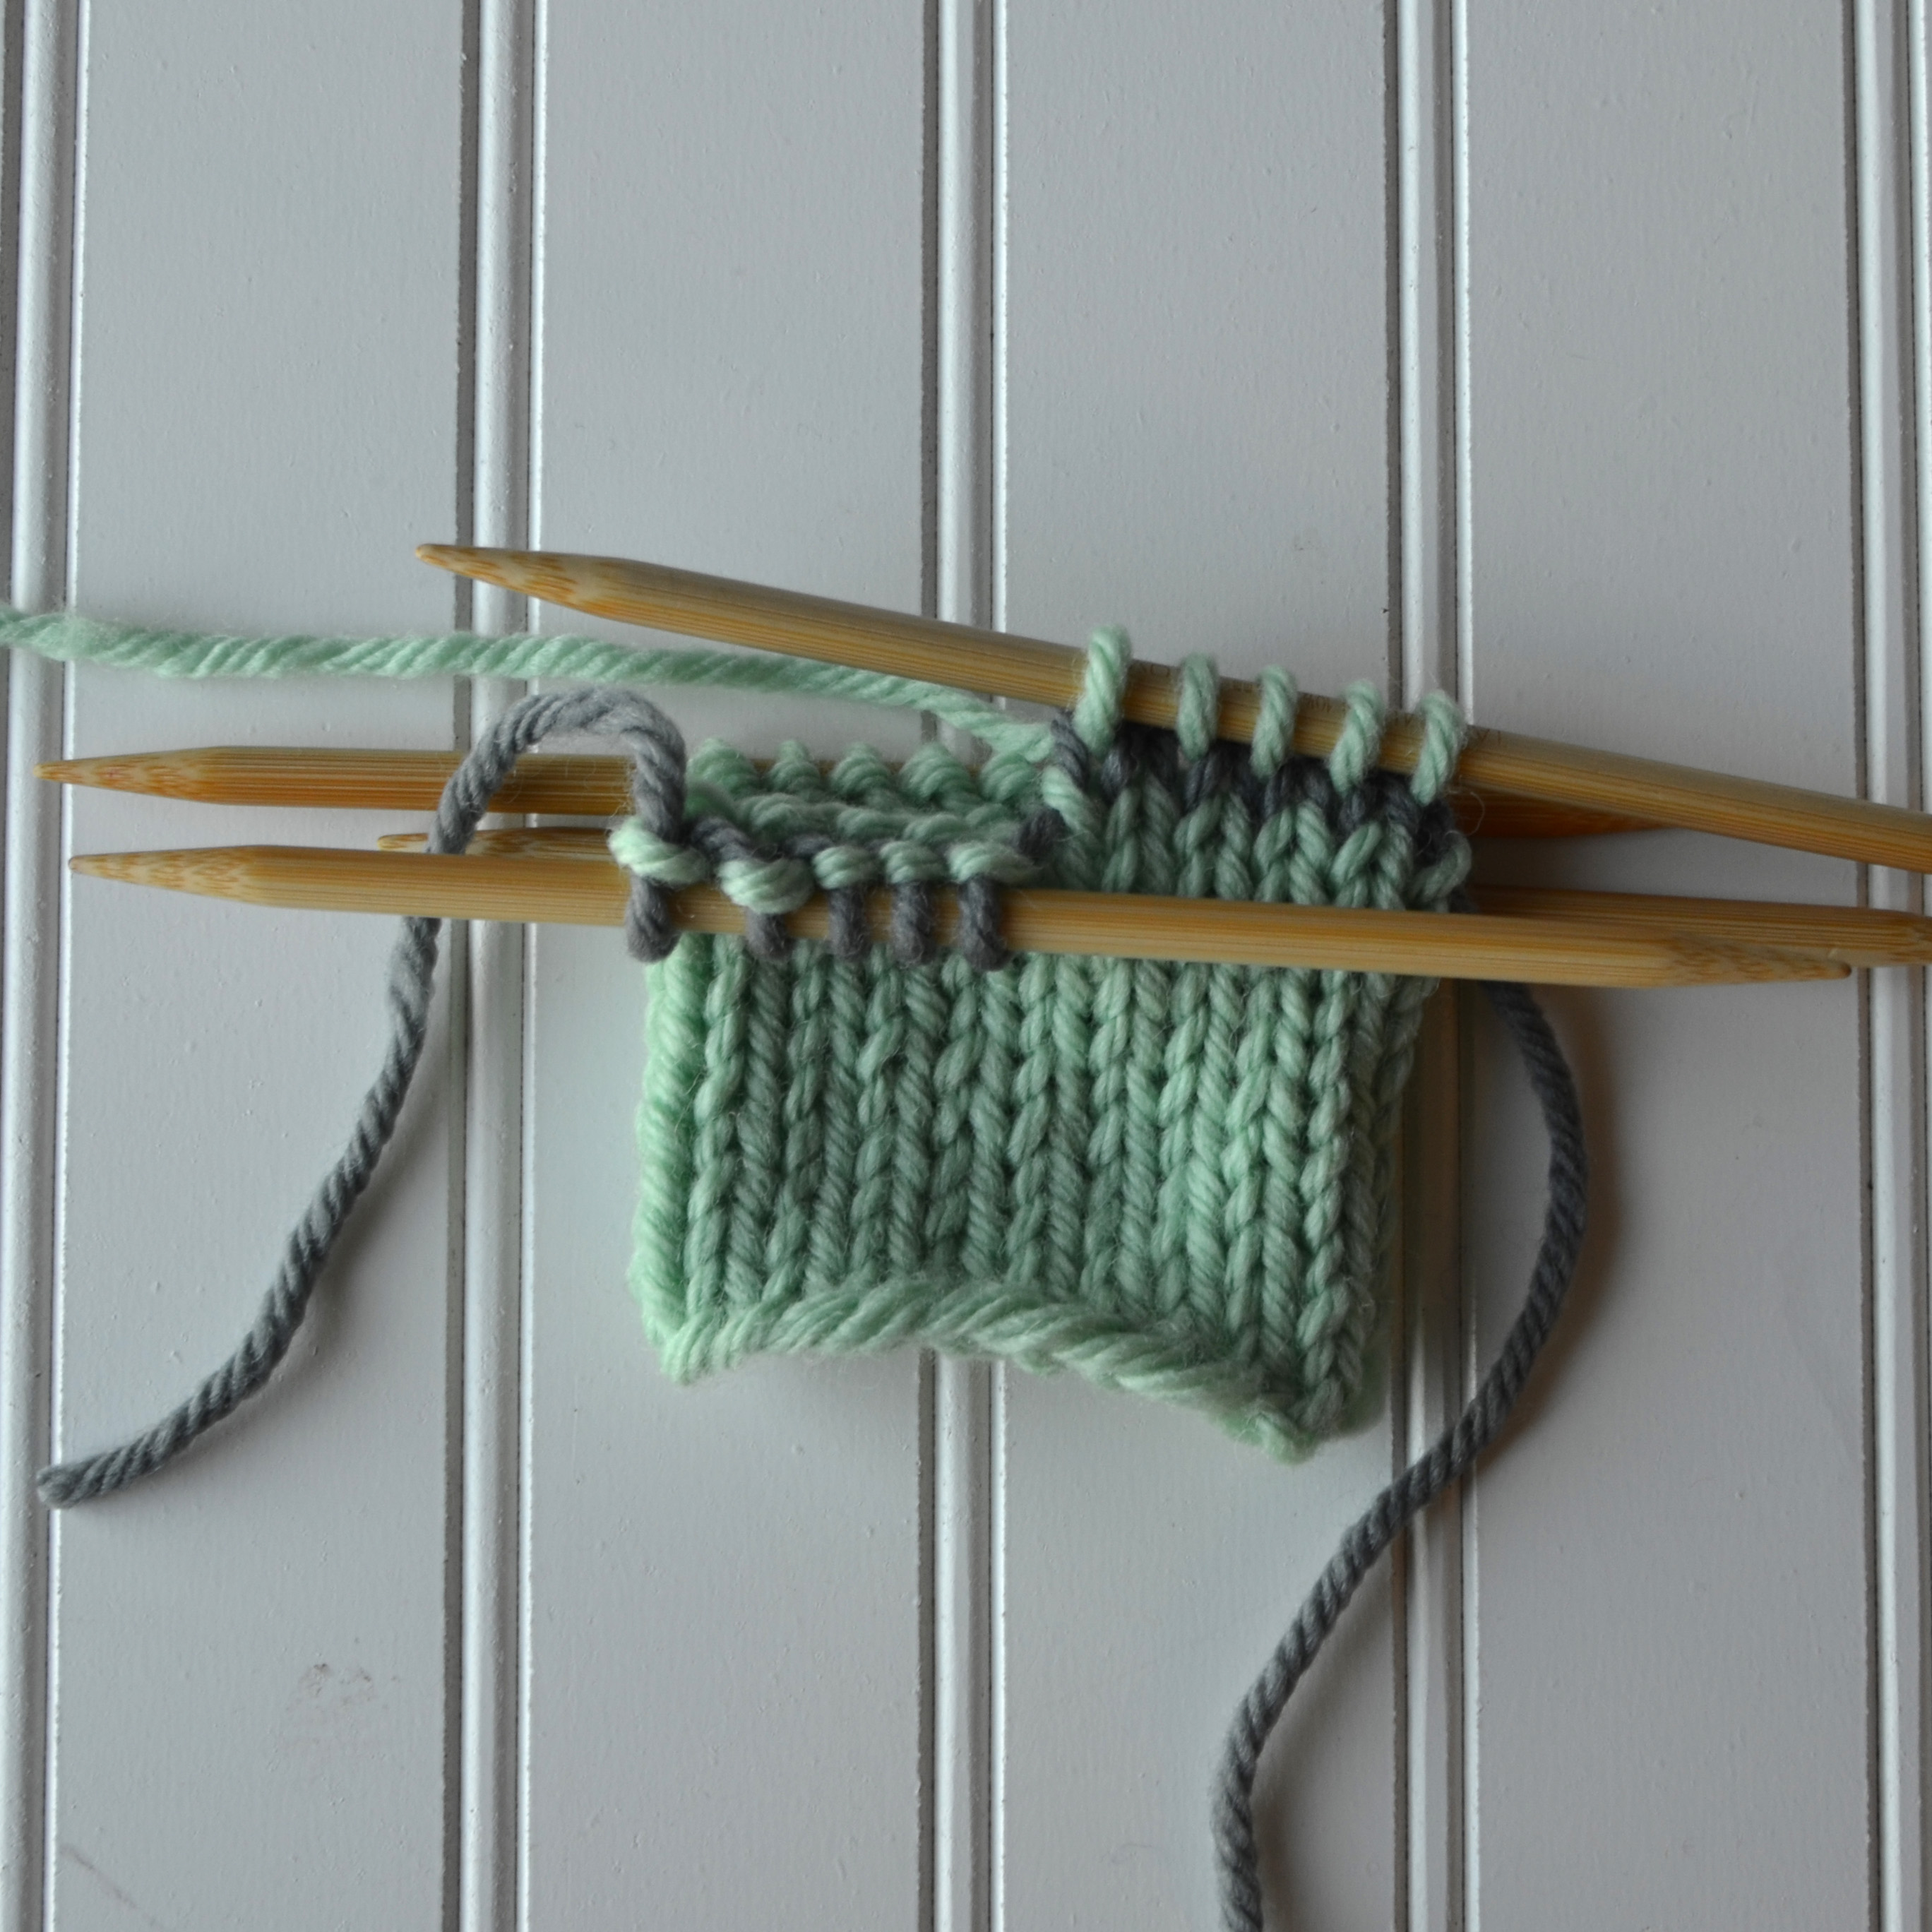
Continue to knit the rest of the sock/swatch. Knit across the waste yarn stitches and on around.
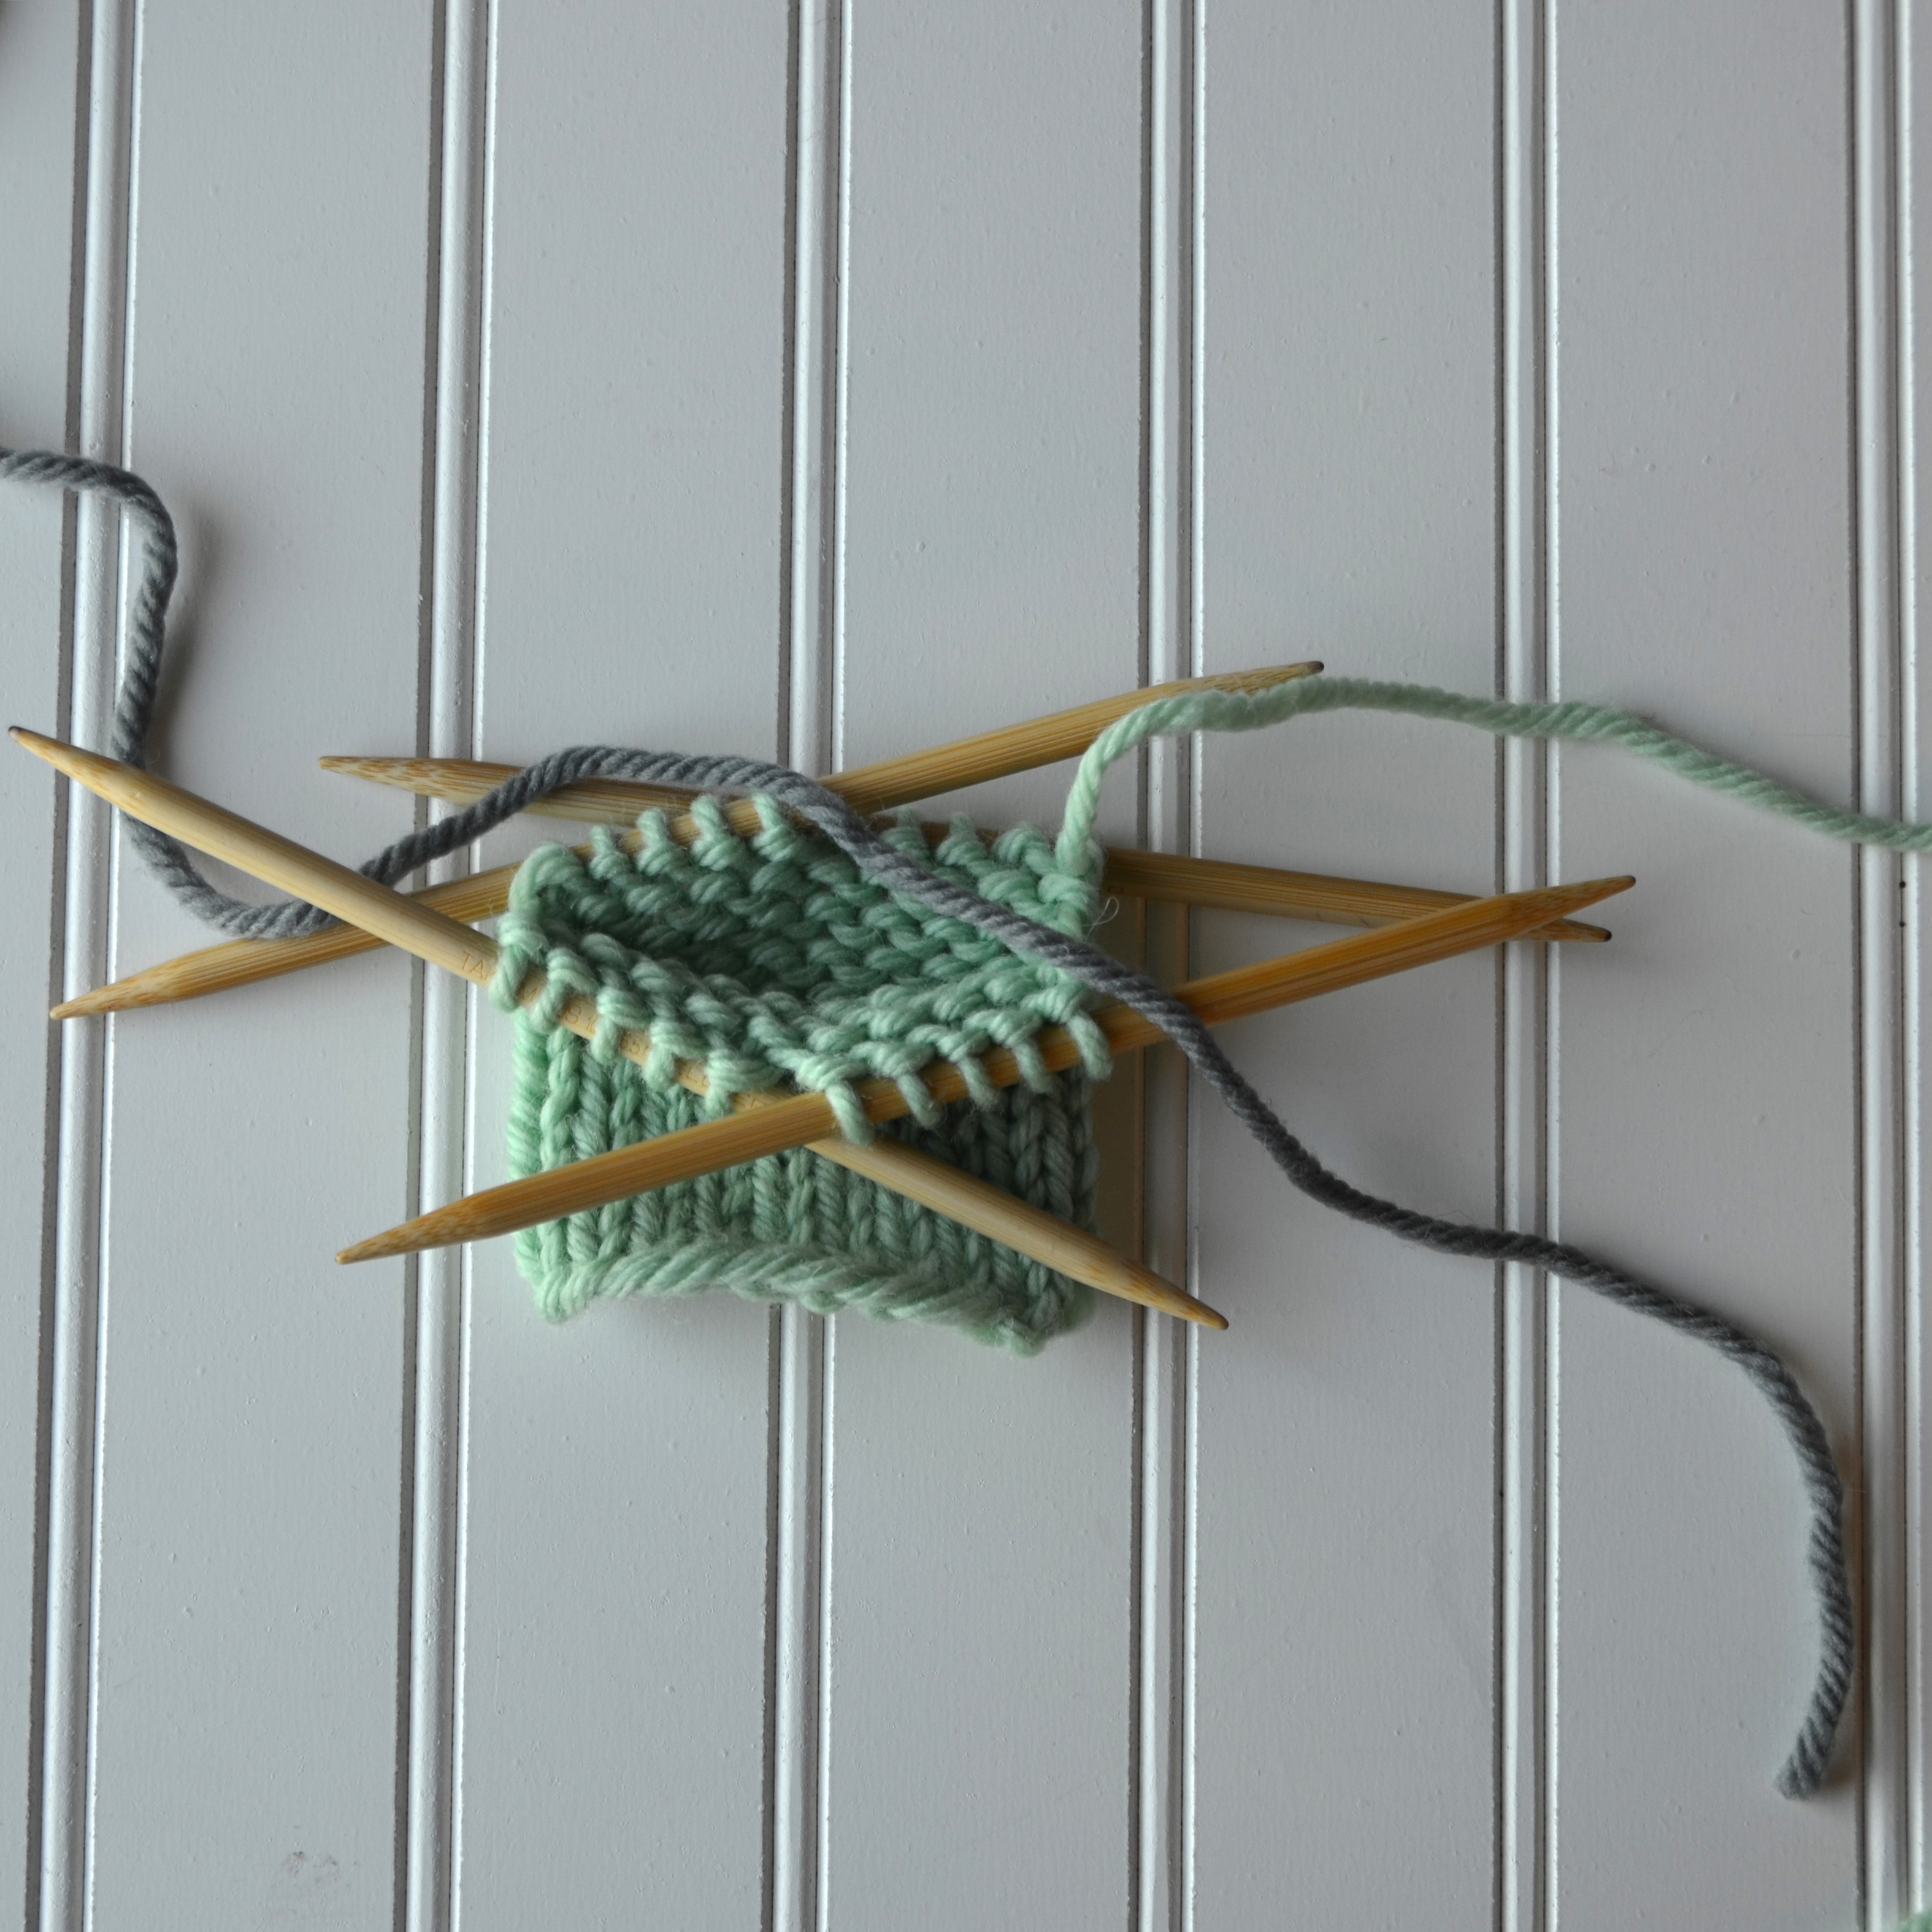
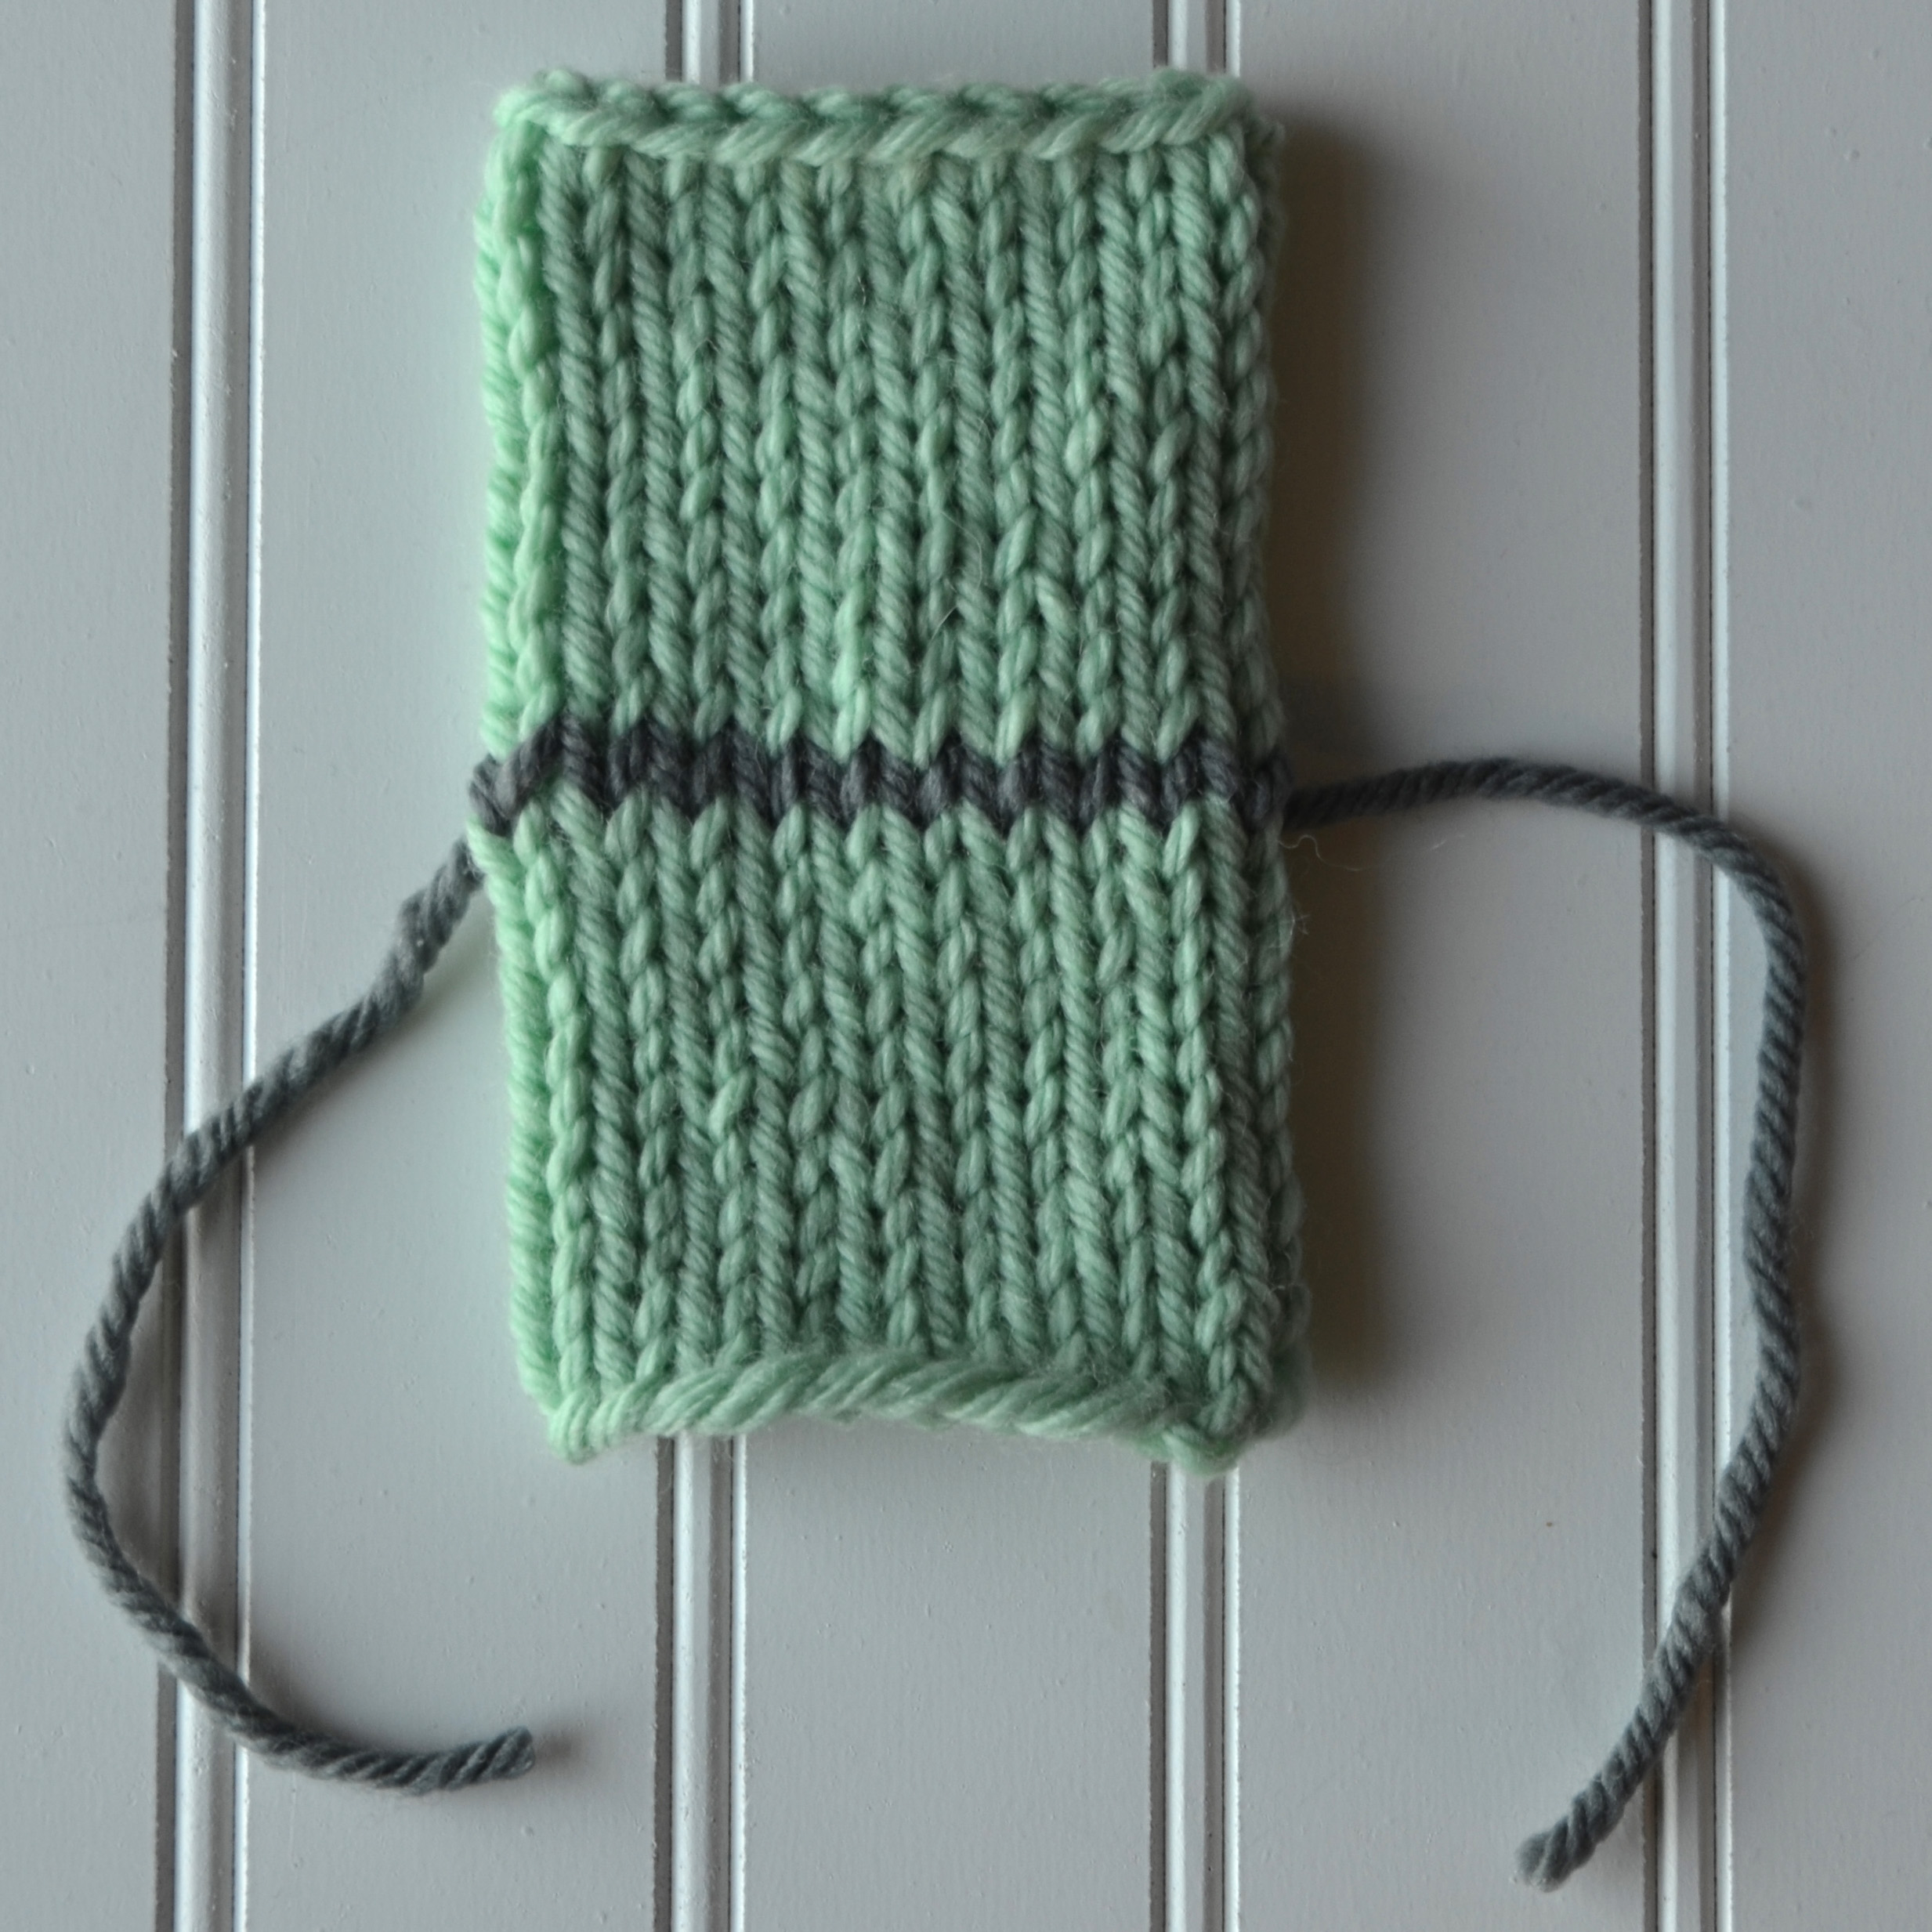
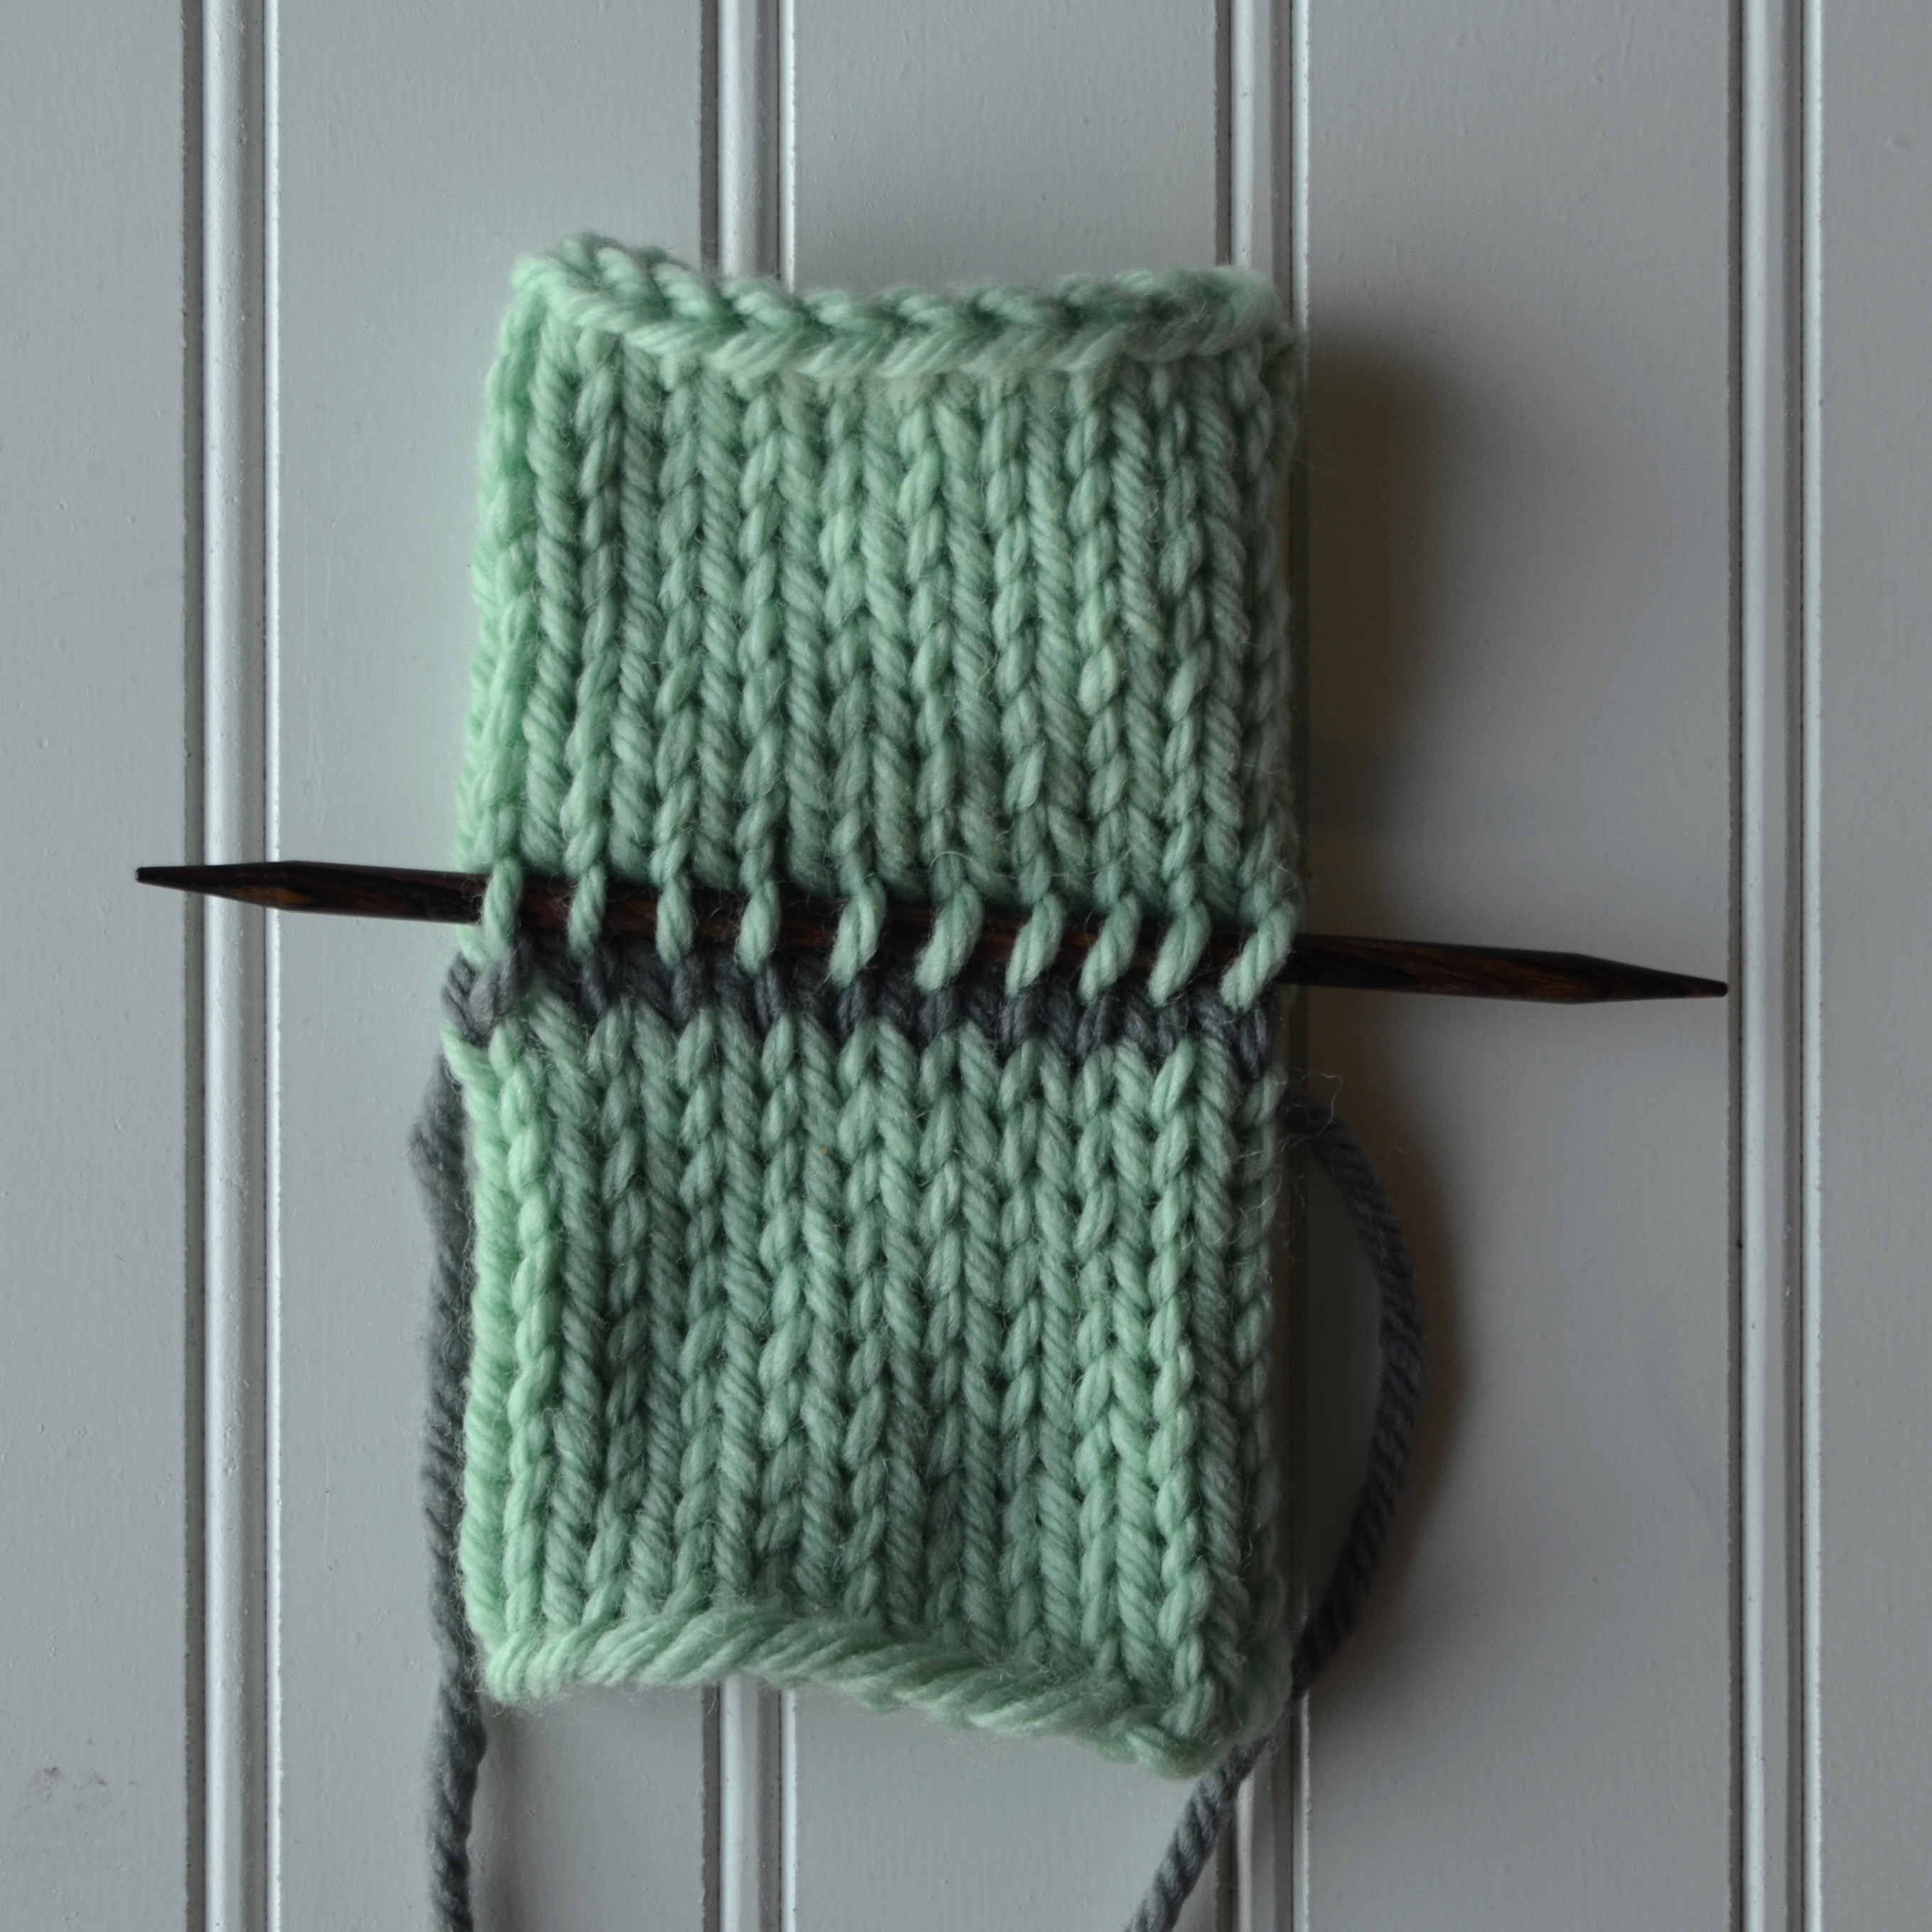
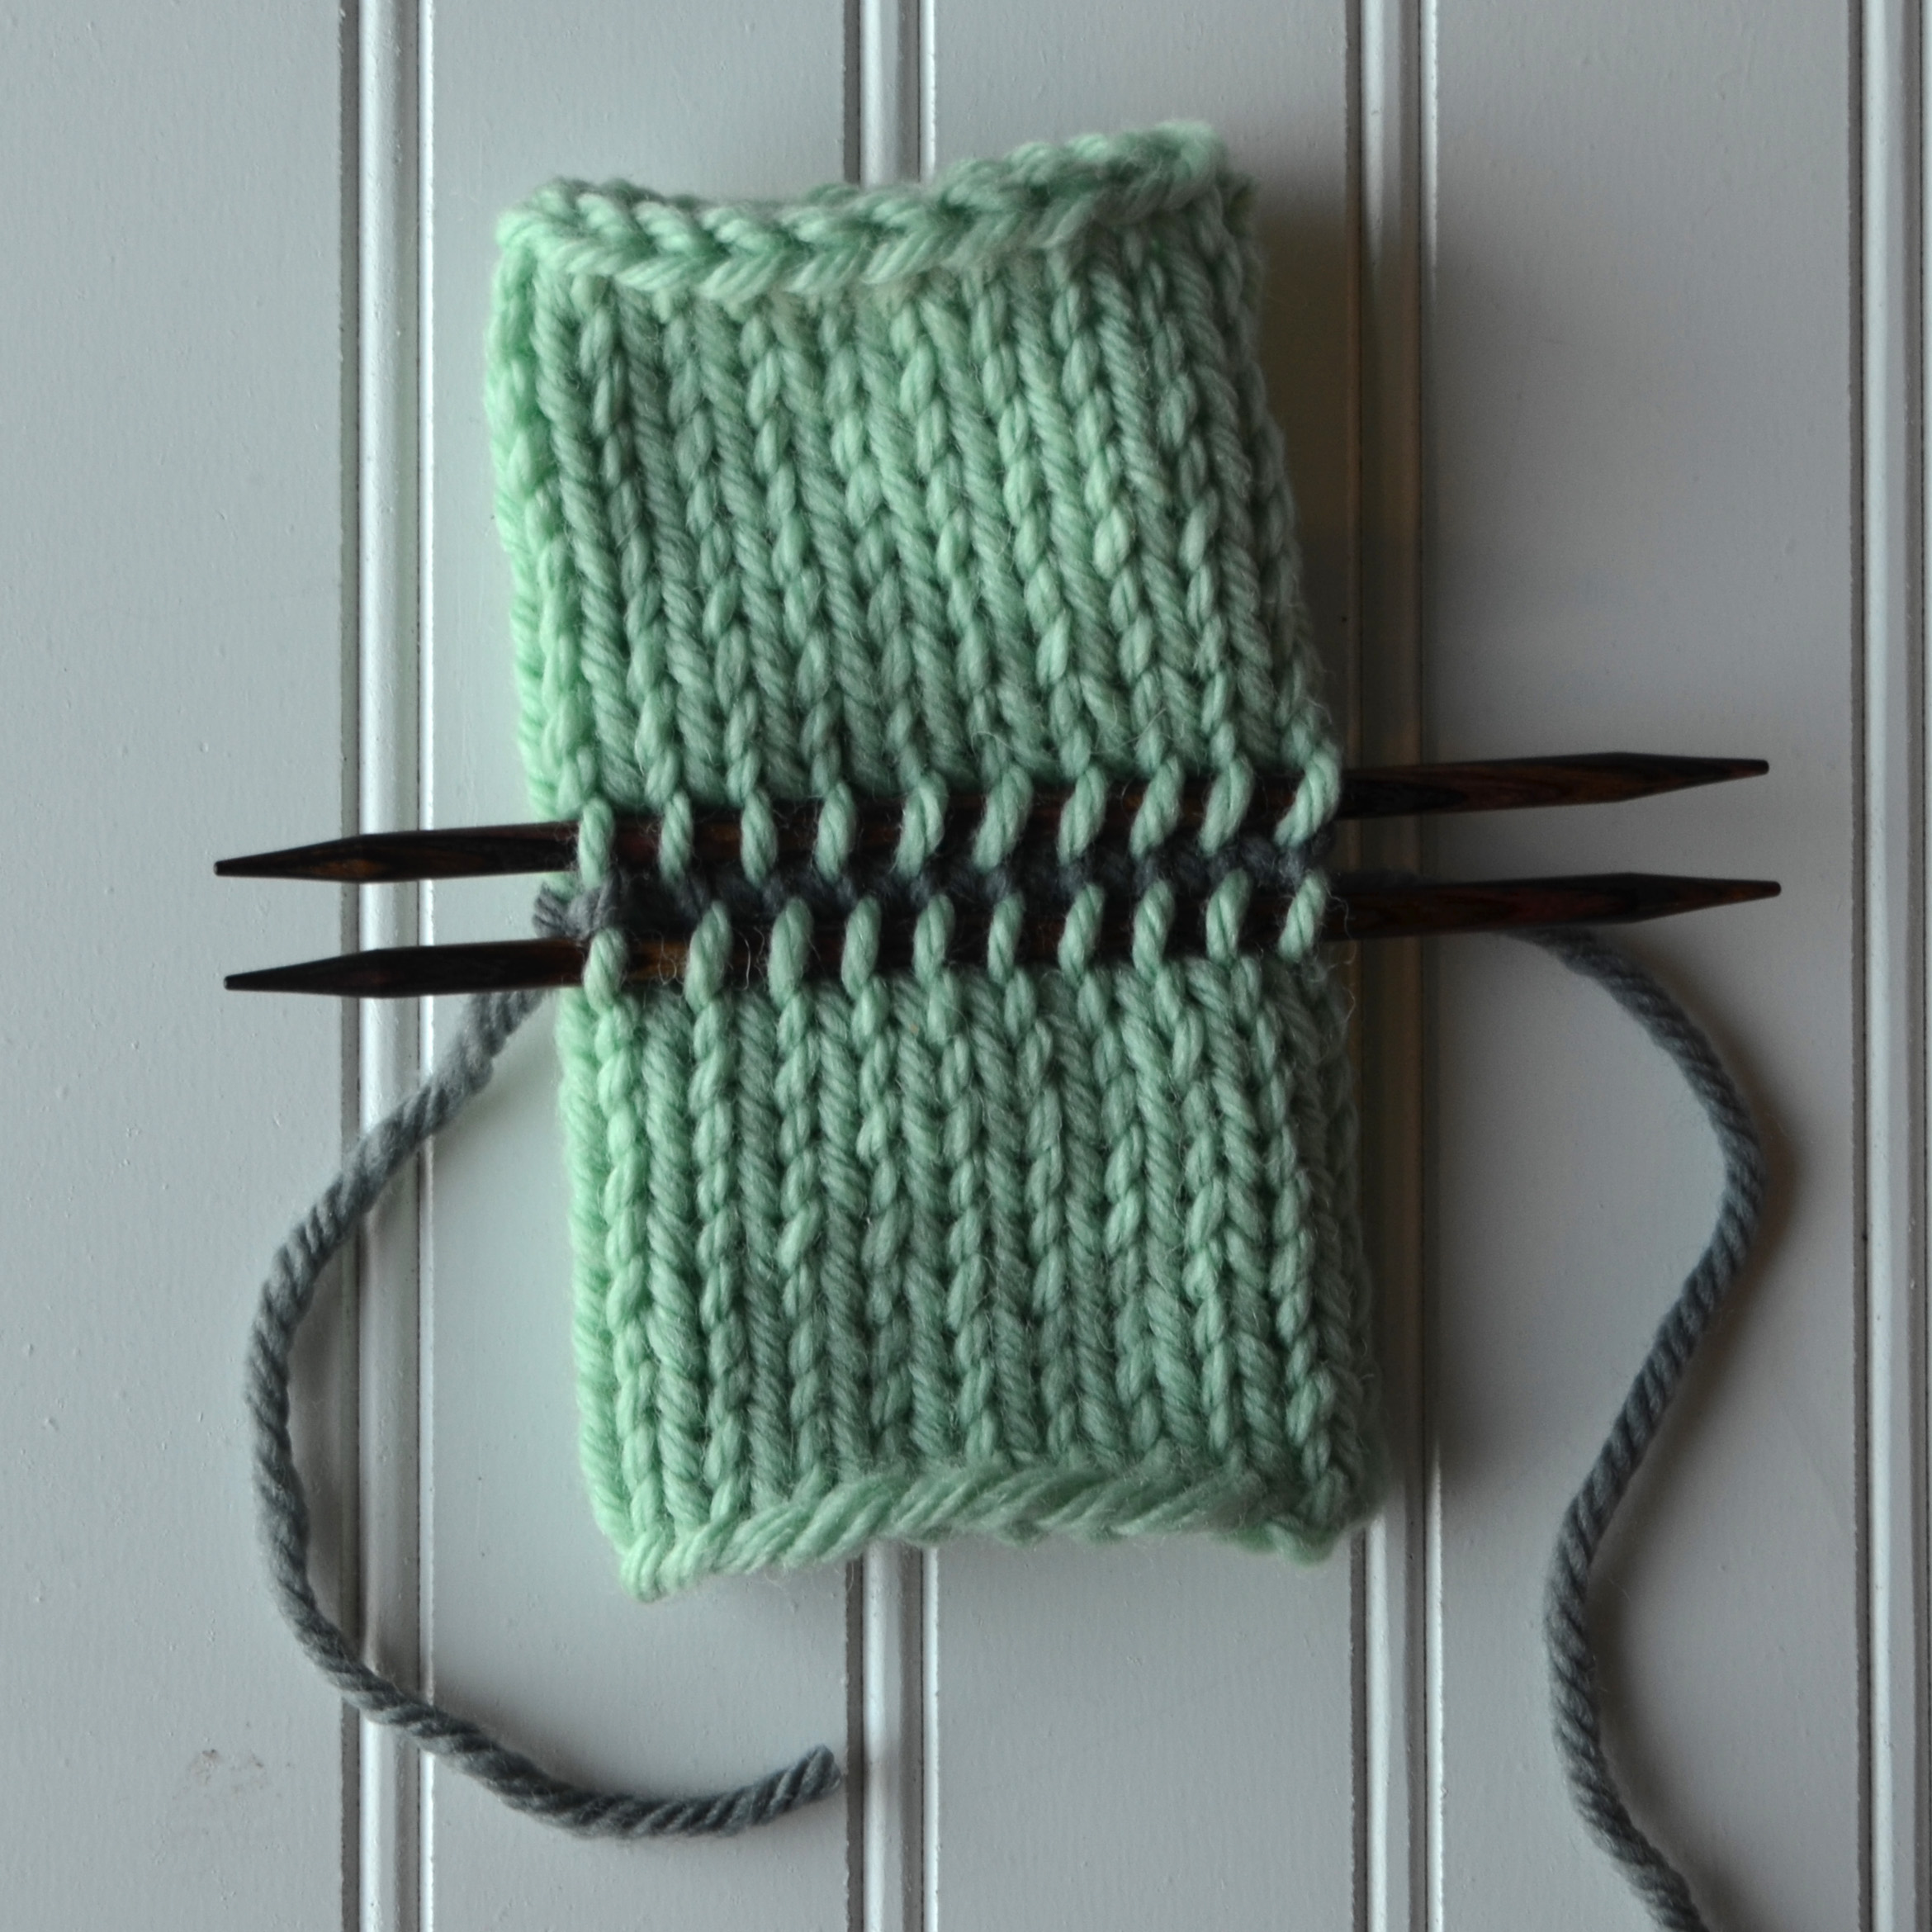
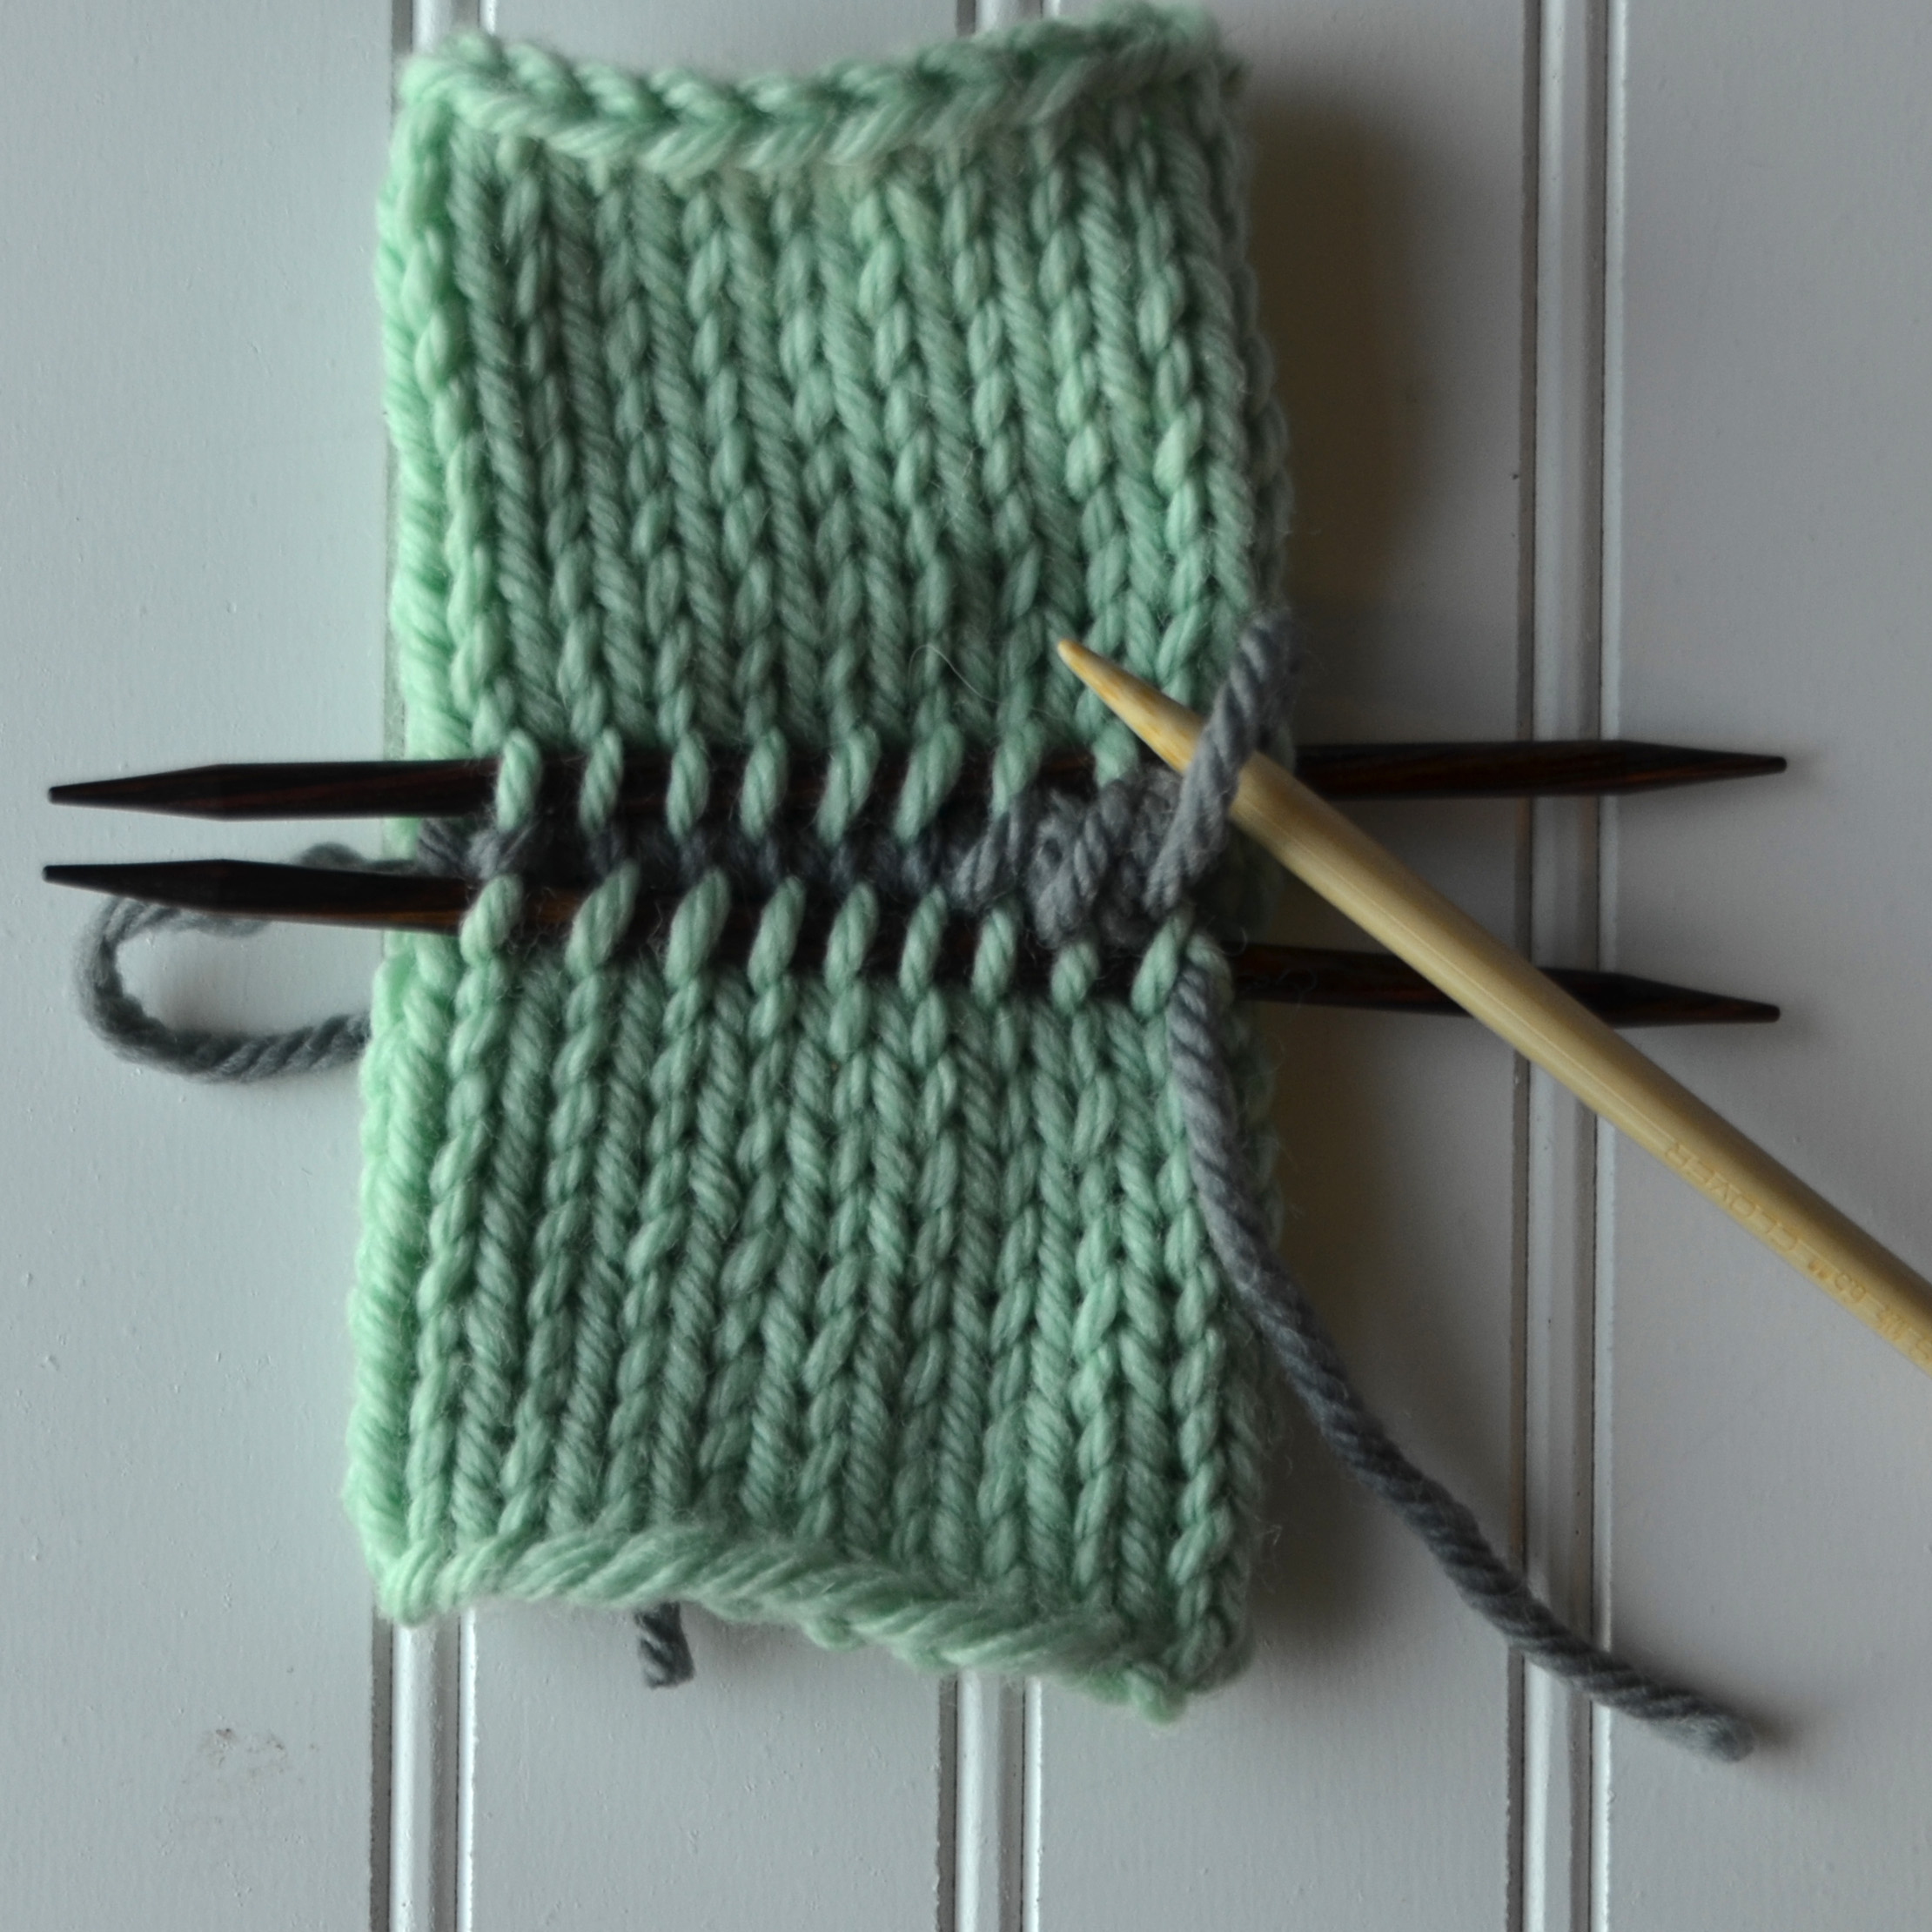
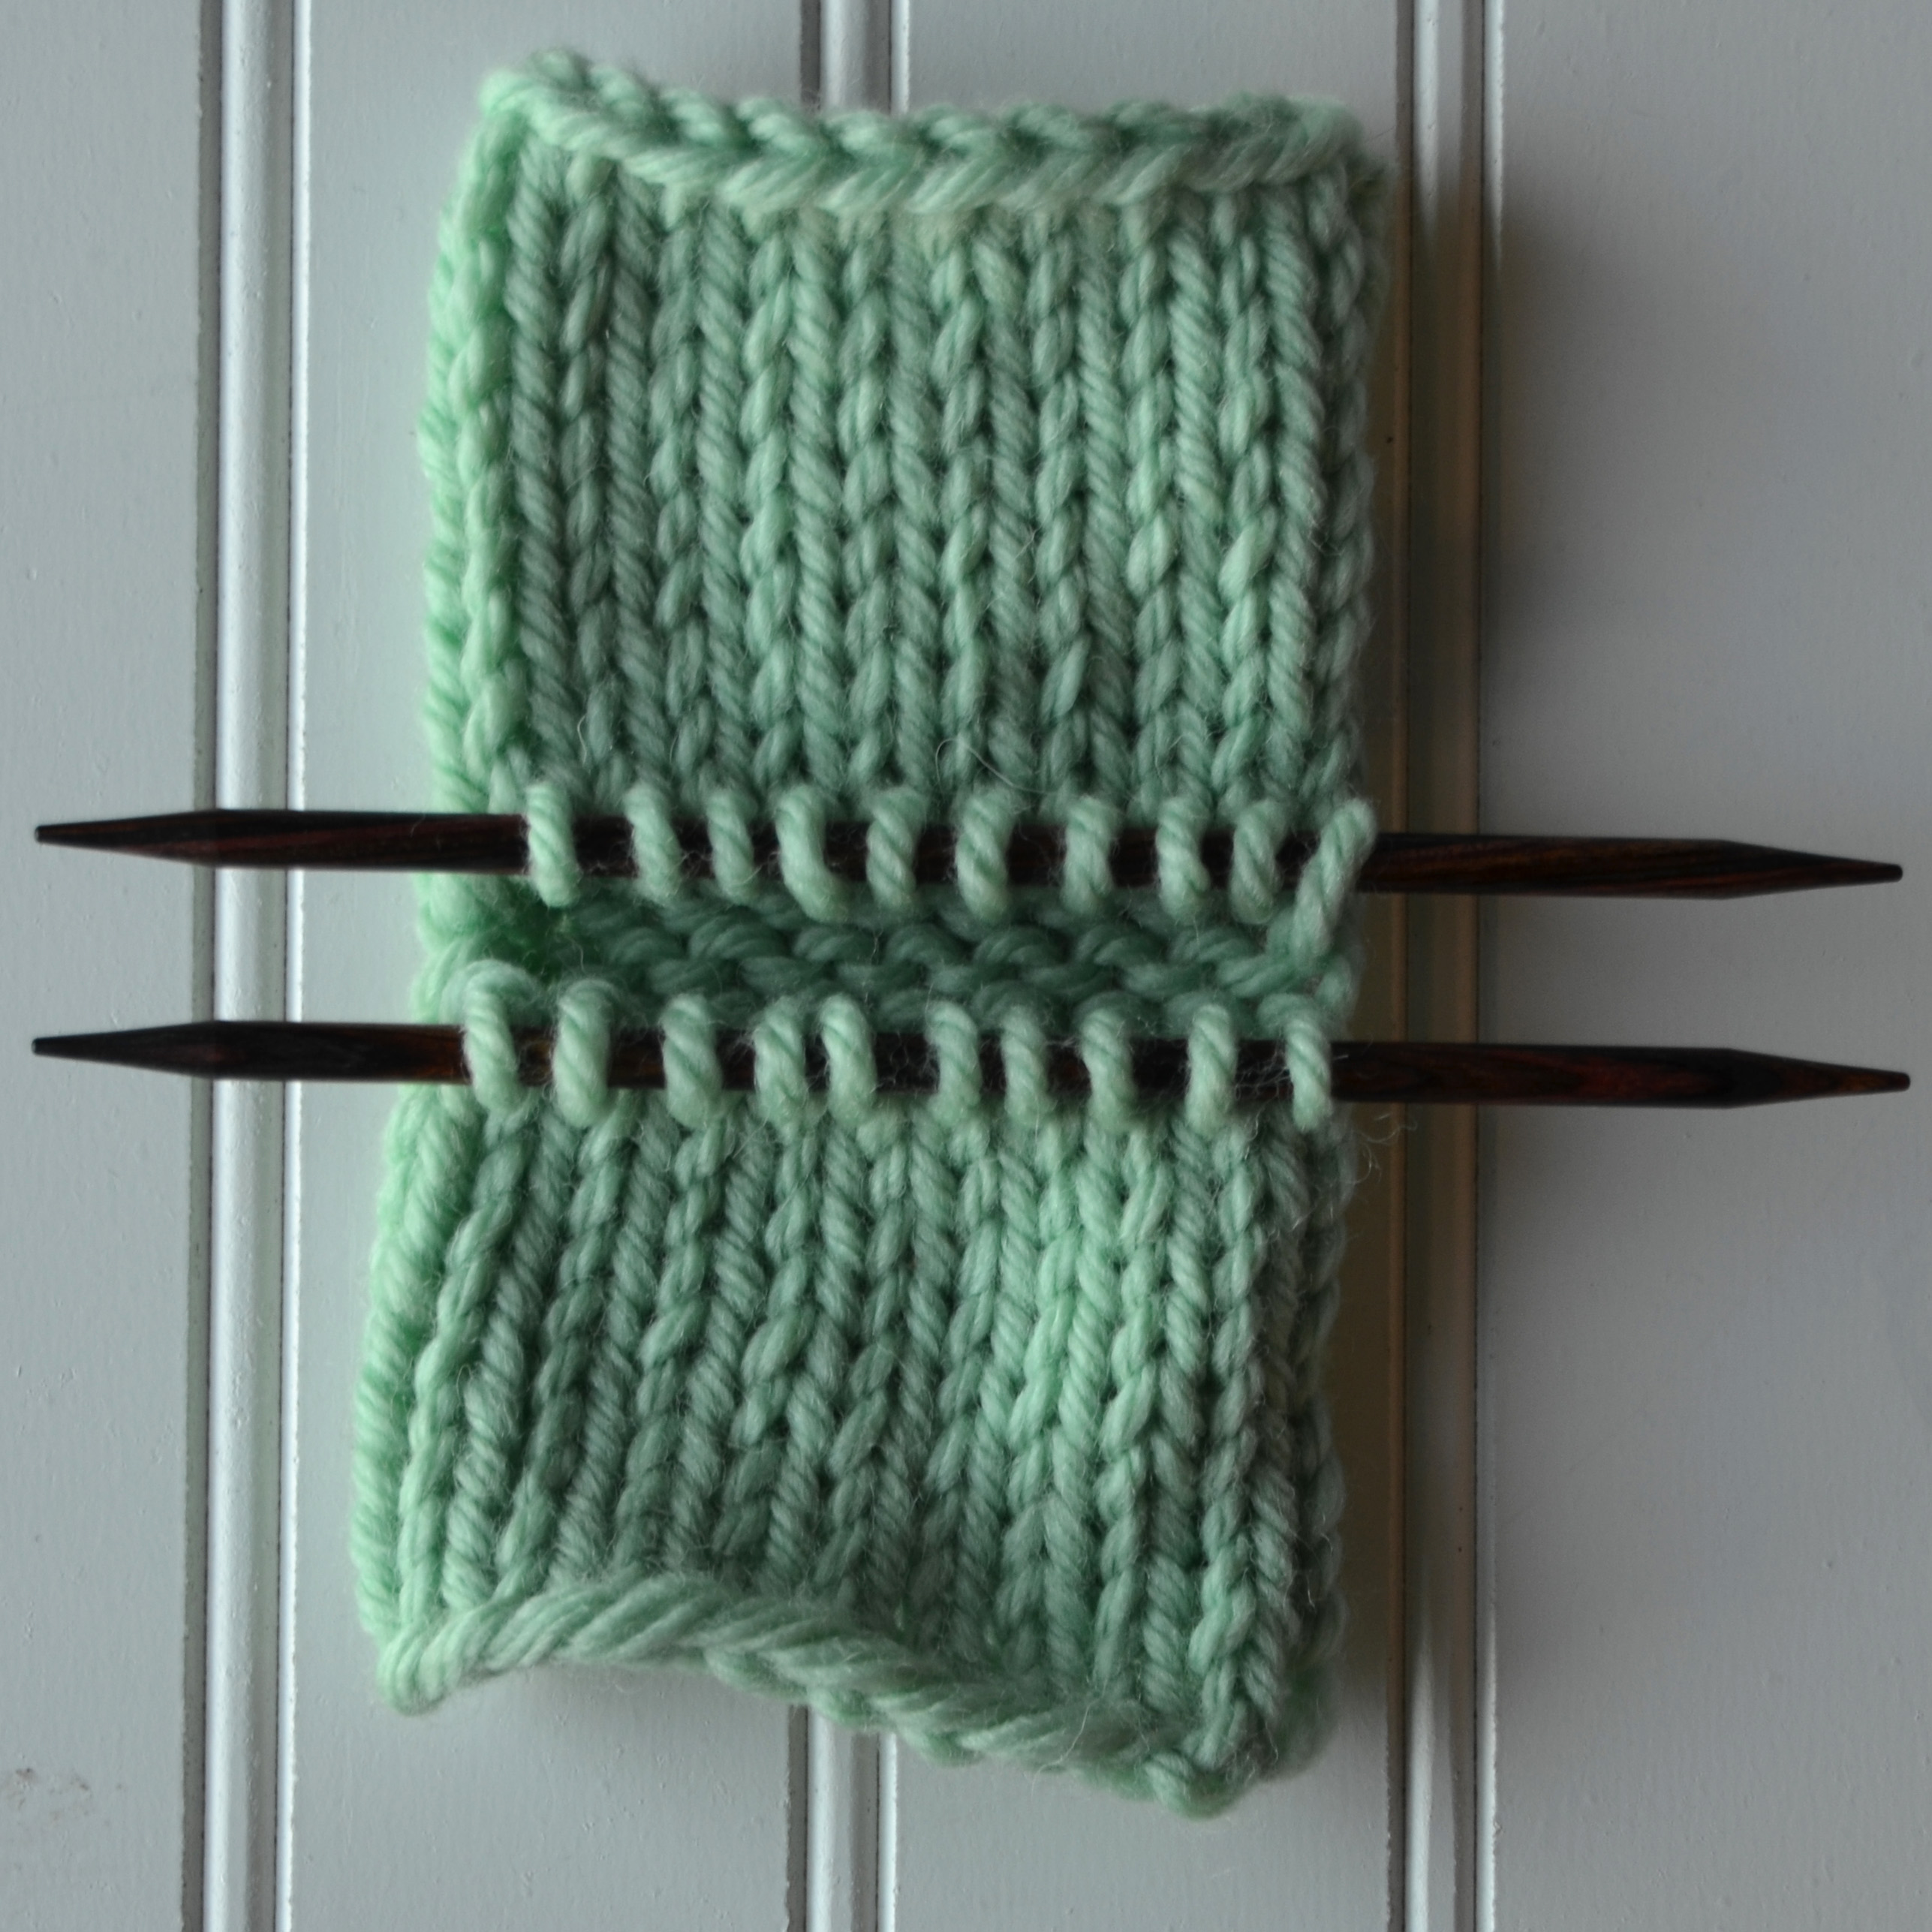
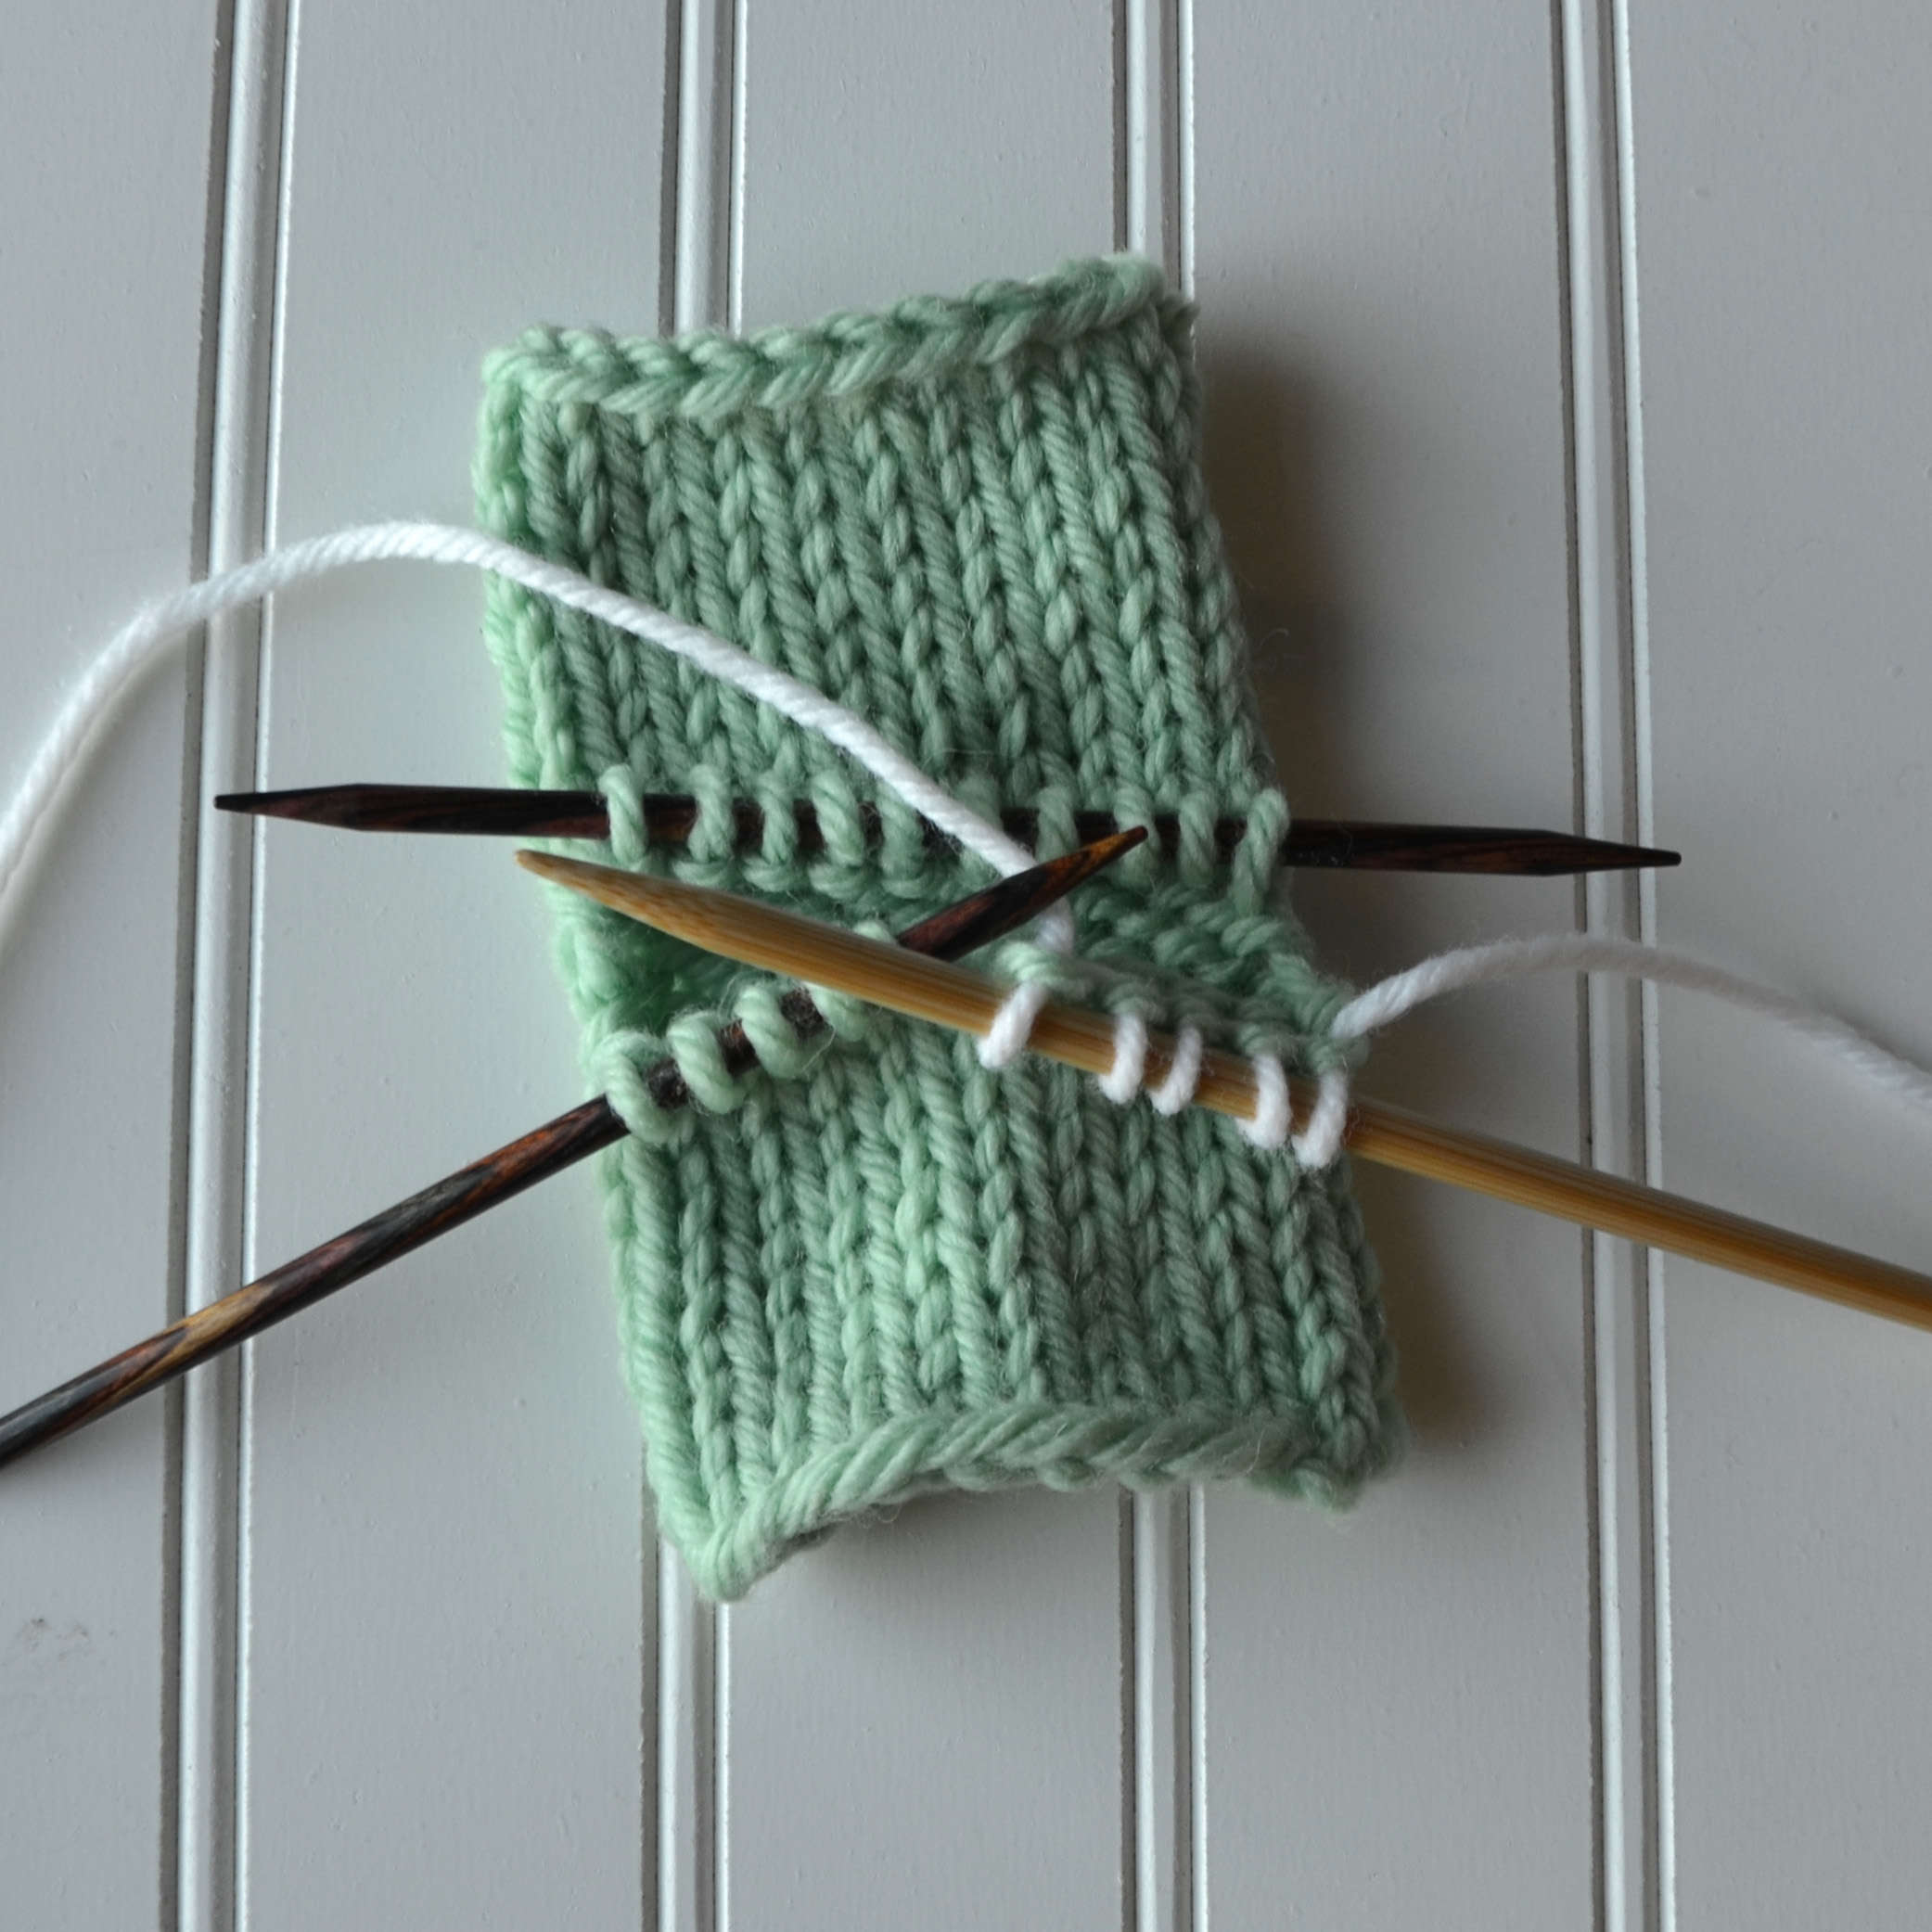
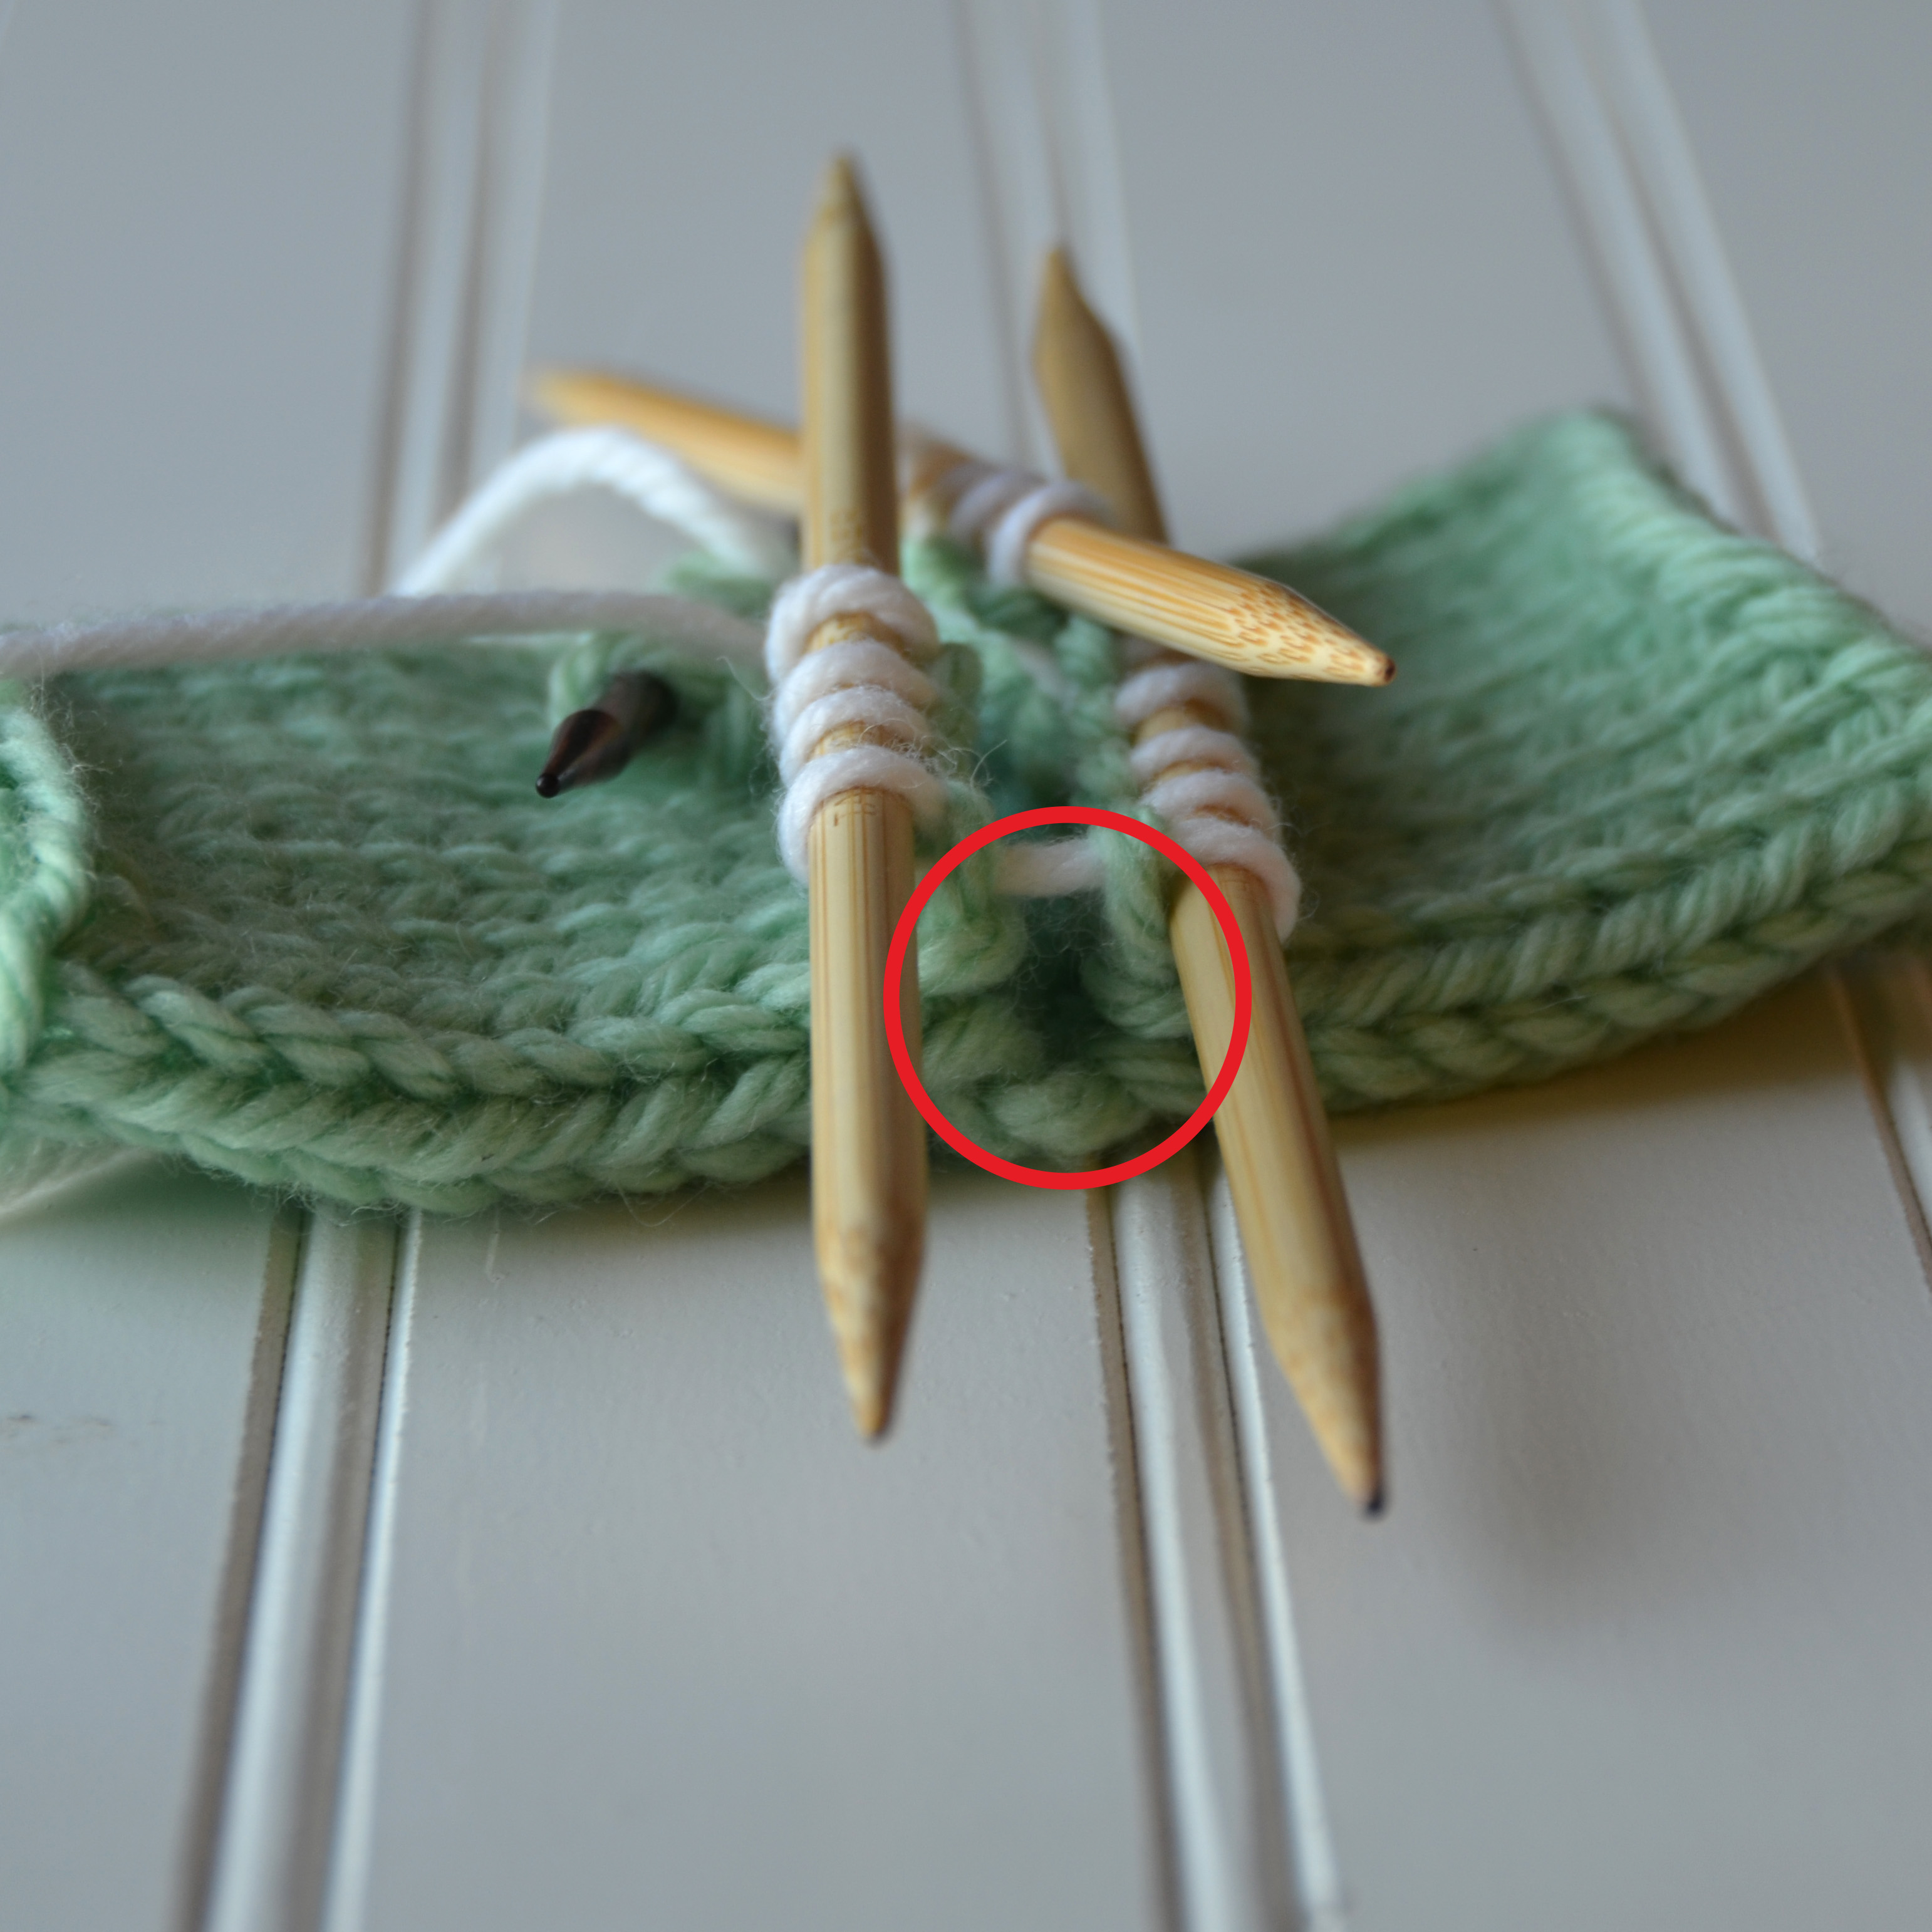
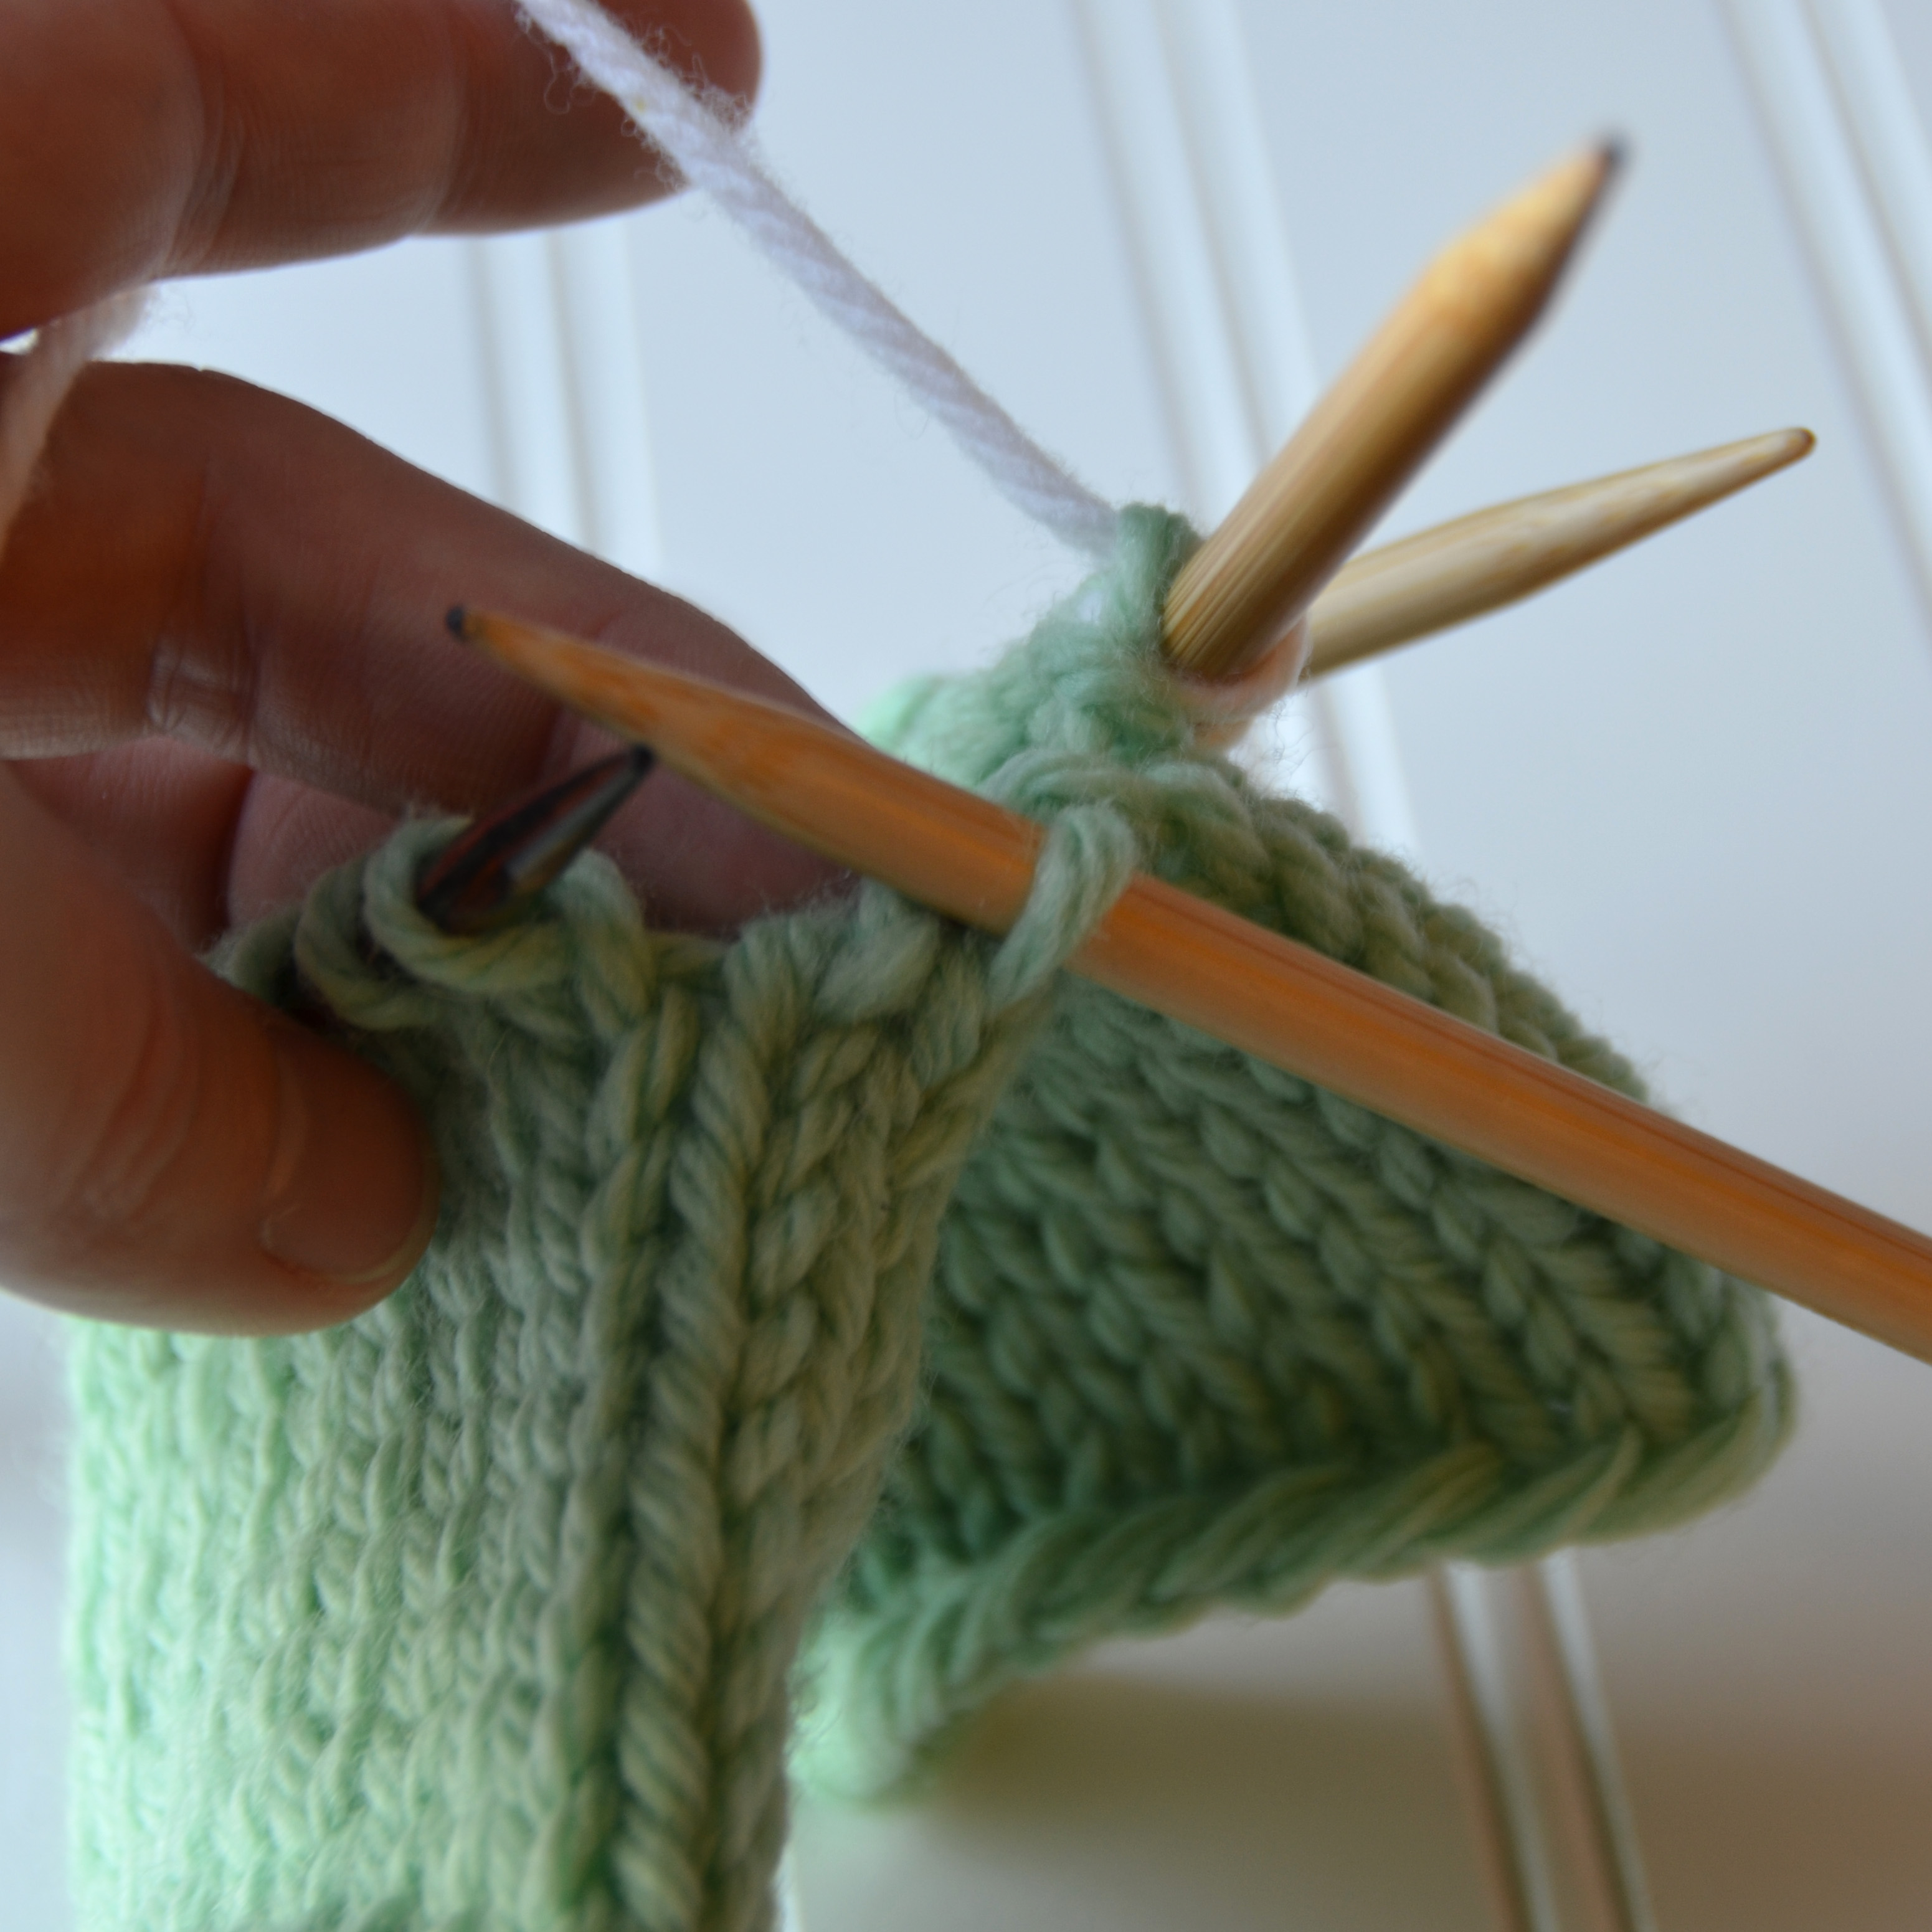
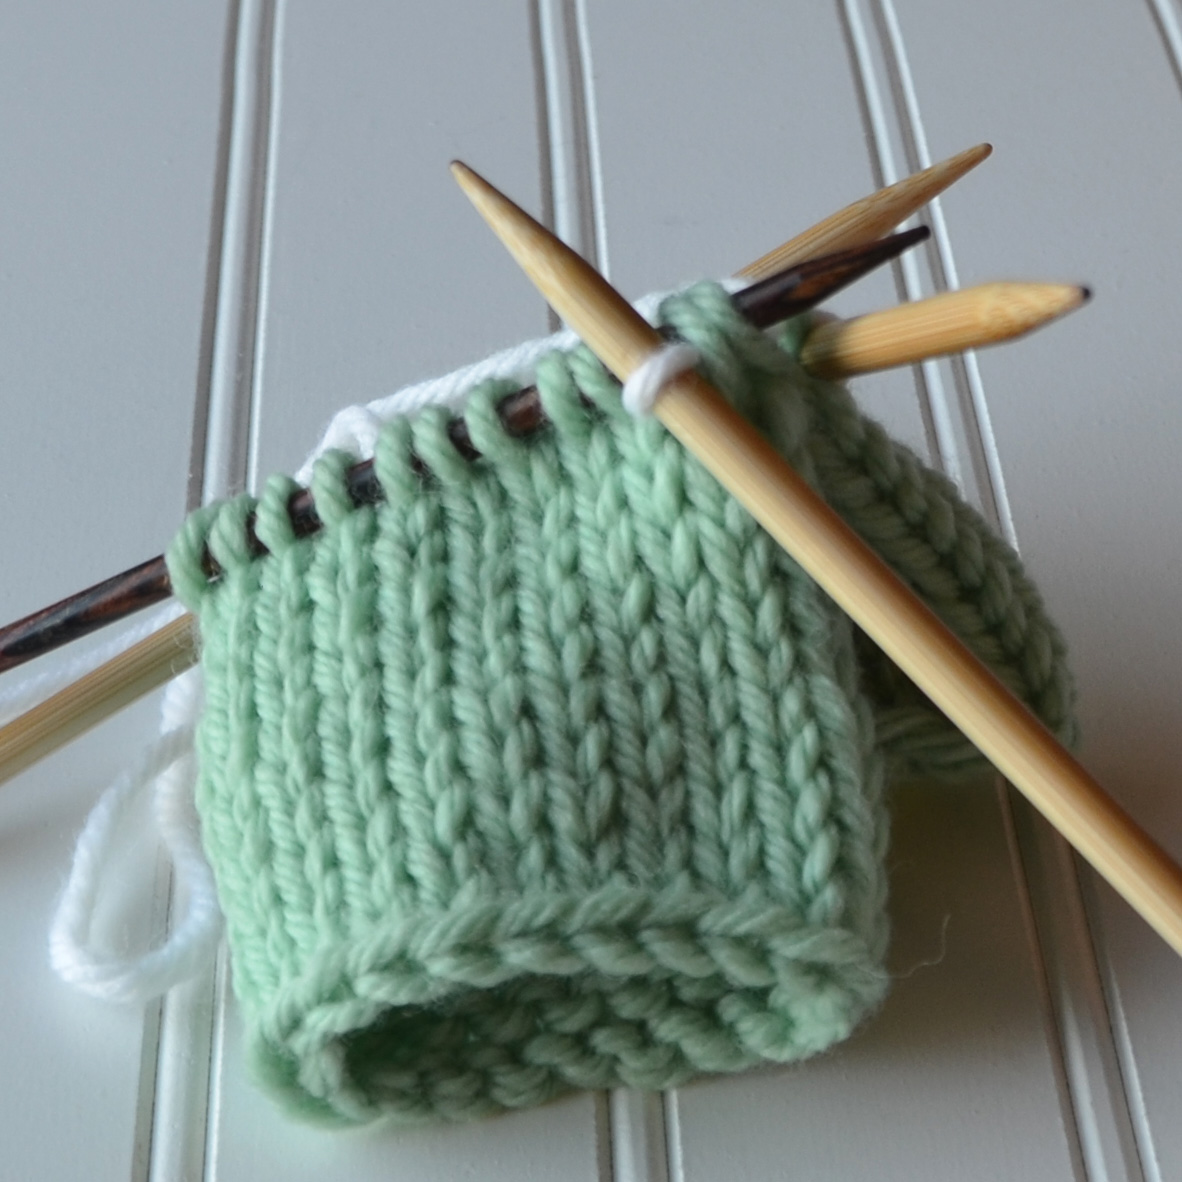
Bind off your swatch.Next, we’re going to place the stitches from the row above and also the row below onto separate needles. I like to use a smaller needle for this step. Pick up stitches with the tip of your needle, going through the front leg of each stitch. By doing this, the stitches will be oriented correctly when you go to knit the first round.My 10 stitches from the row above the waste yarn are now on a needle.Insert a second needle through the front leg of each stitch below the waste yarn.Now we’re ready to remove the waste yarn.With a spare needle, carefully pick out the waste yarn.Waste yarn be gone!Now it’s time to knit the heel, and return to your larger dpns. This first round is usually a plain/knit round.This photo shows what happens in that gap where the waste yarn was if you simply knit across and ignore it.Pick up a stitch from the side of the row where the waste yarn was. It’s best not to pick up the very outermost part of this loop, but to pick up the half of the stitch just inside the opening.Place this picked up stitch on the needle and knit it together with the next stitch, closing the gap. Depending on the pattern and yarn, I might do this twice at each side of the gap. It’s best to experiment and see what looks best with your particular yarn and stitch pattern.And here’s what that gap will look like now. No holes!Knit the rest of the heel as instructed. It’s like a heel magically grew out of your knitting.
I also like this technique for set-in pockets on a top-down sweater. It’s not as hard as you thought it was going to be, right?
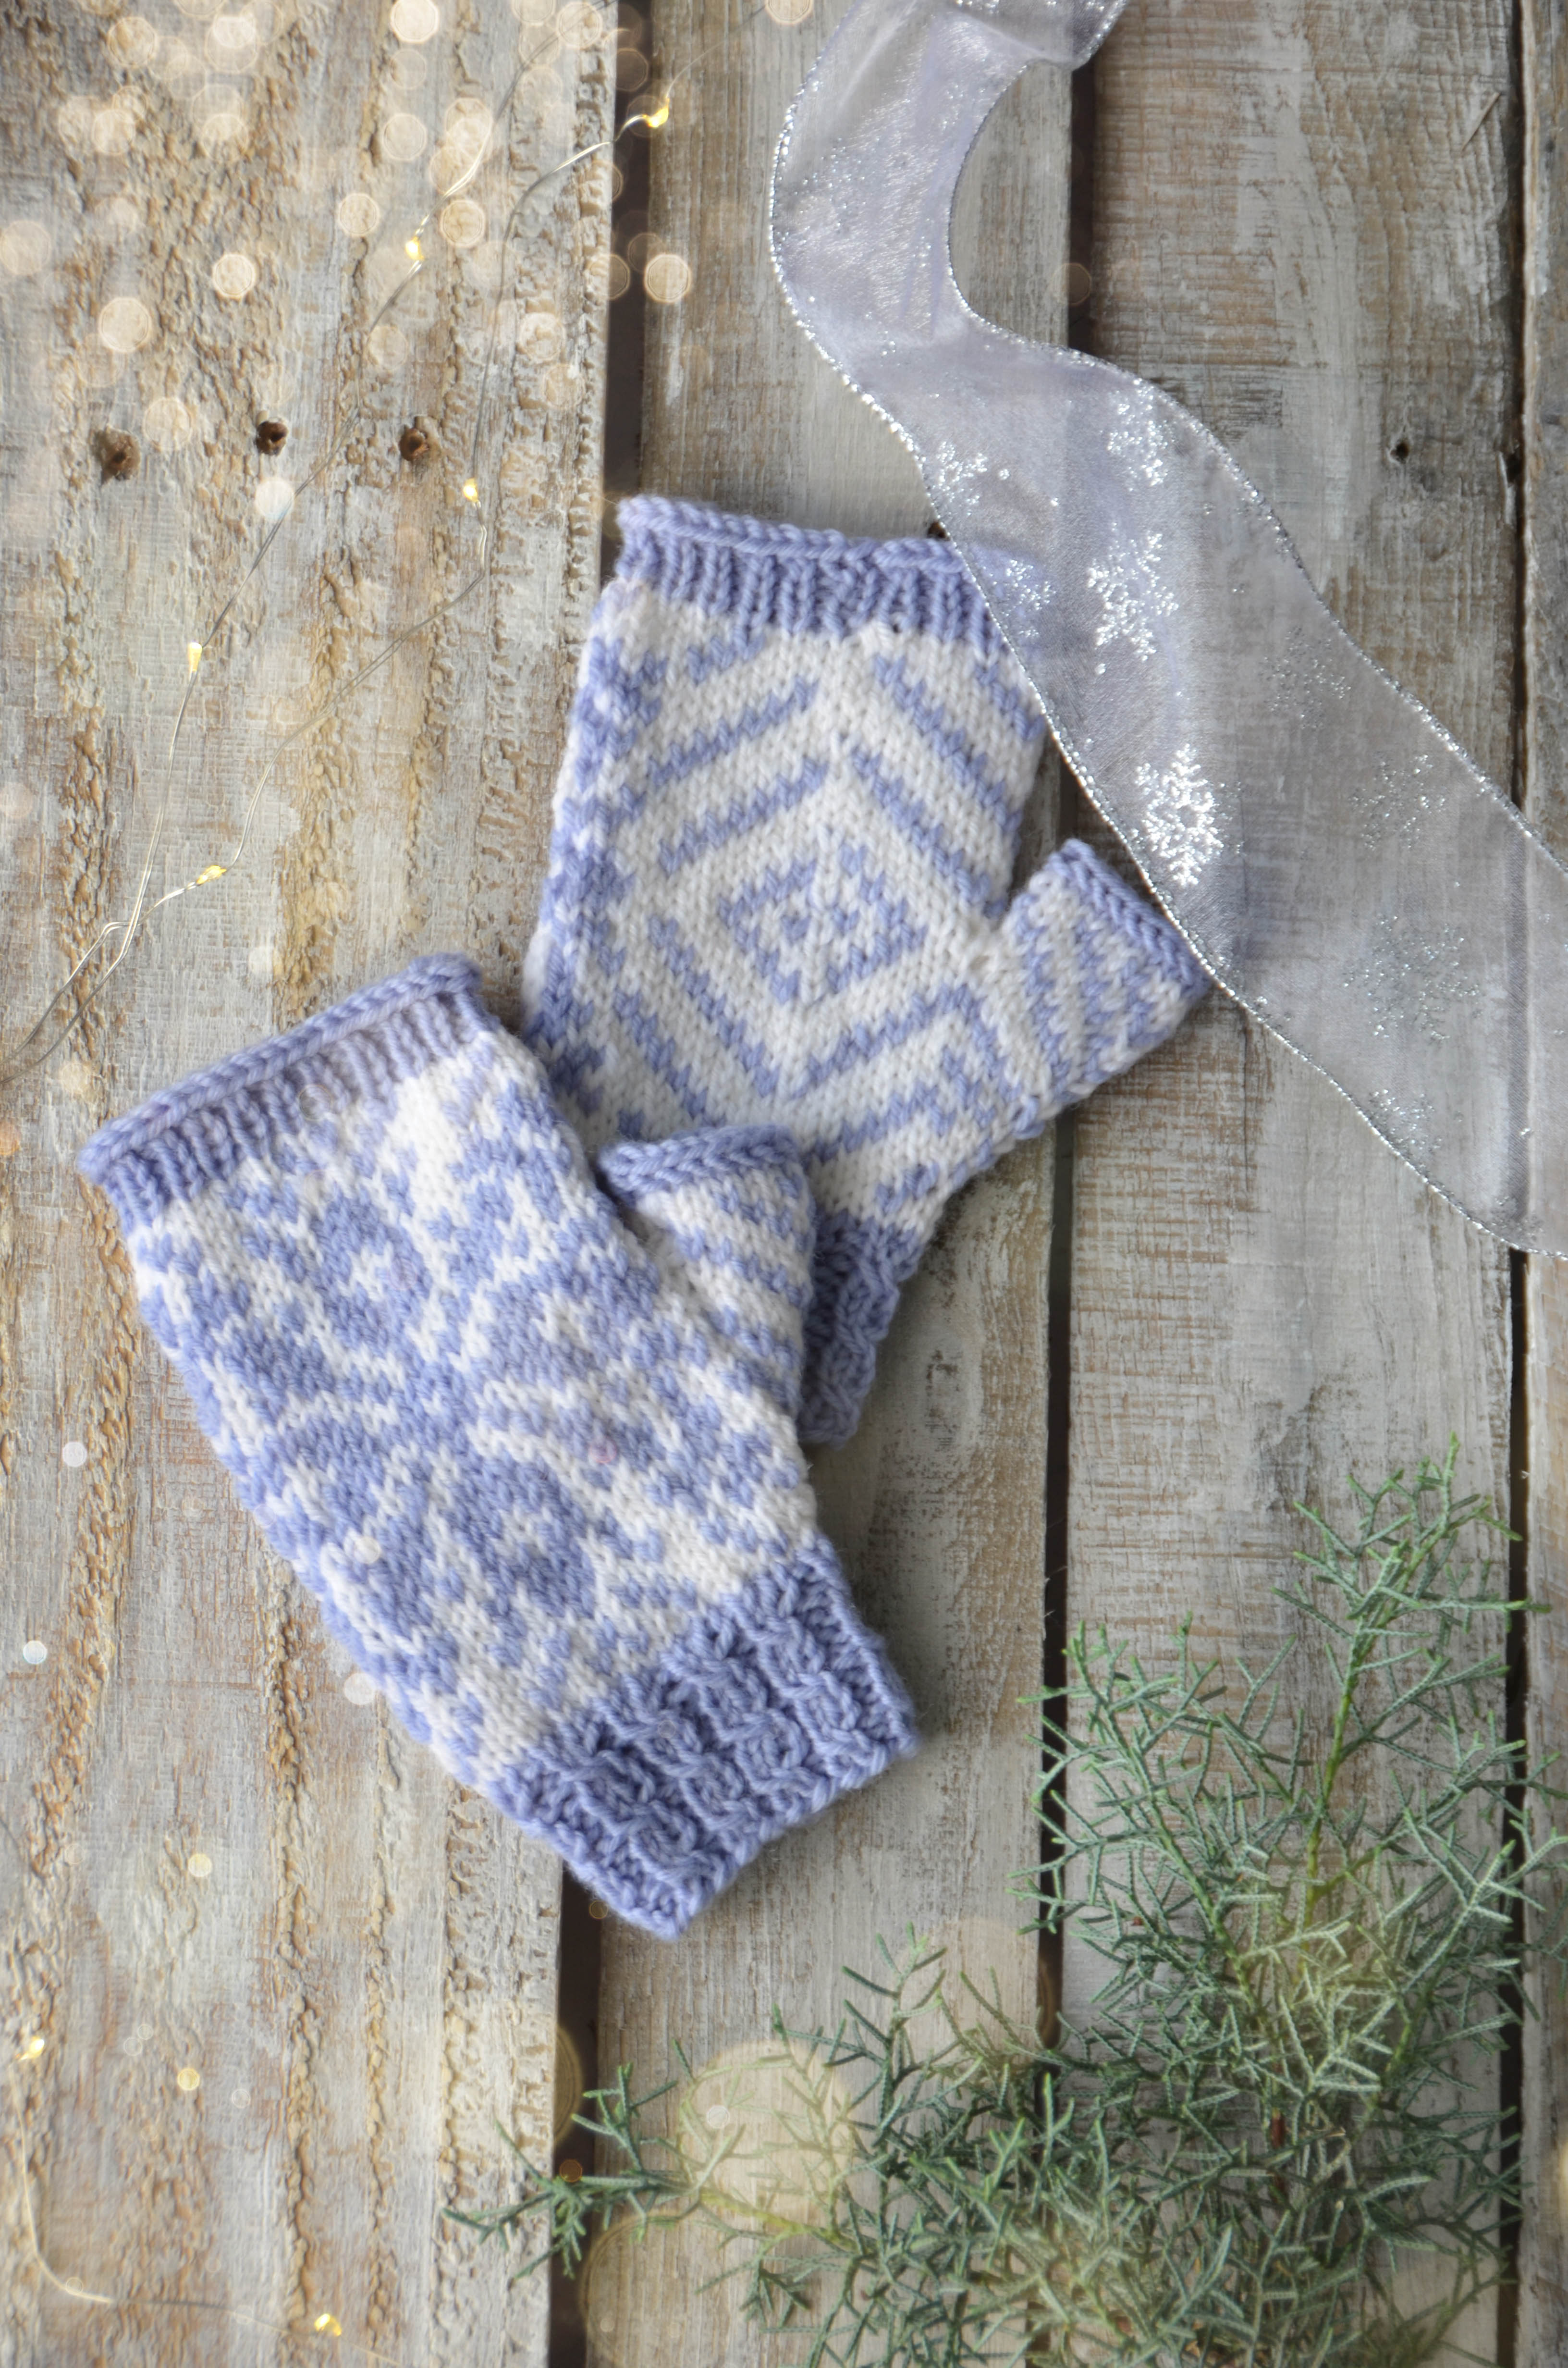
These warm and wooly mitts are knit from the bottom up, beginning with a cable rib and ending with an i-cord bind-off. The patterning is Fair Isle, meaning two colors are used on each round. If this is a technique you’ve never tried before, these mitts could be a good place to start. It’s always less daunting trying out new skills on a small project. Deluxe DK Superwash is the featured yarn in this project, making this pair a great gift since they are machine washable.
To celebrate the 12 Days of Winter and my love of snowflakes, I’ve written a poem.
The Snowflake Sonnet
Each year the wind turns cold and gray. For some this is a hindrance. But for those who knit and crochet This weather is far from nuisance.
In May through the fall when it’s warm, I turn to linen, cotton, and bamboo. But plant fibers aren’t fit for snowstorm As I trudge to work on showshoe.
It is springy wool that I long for Throughout most months of the year. Its fabric warms me to the core; The feel of its stitches brings me such cheer.
For this year’s winter I believe I will make Knitted mitts adorned with a snowflake.
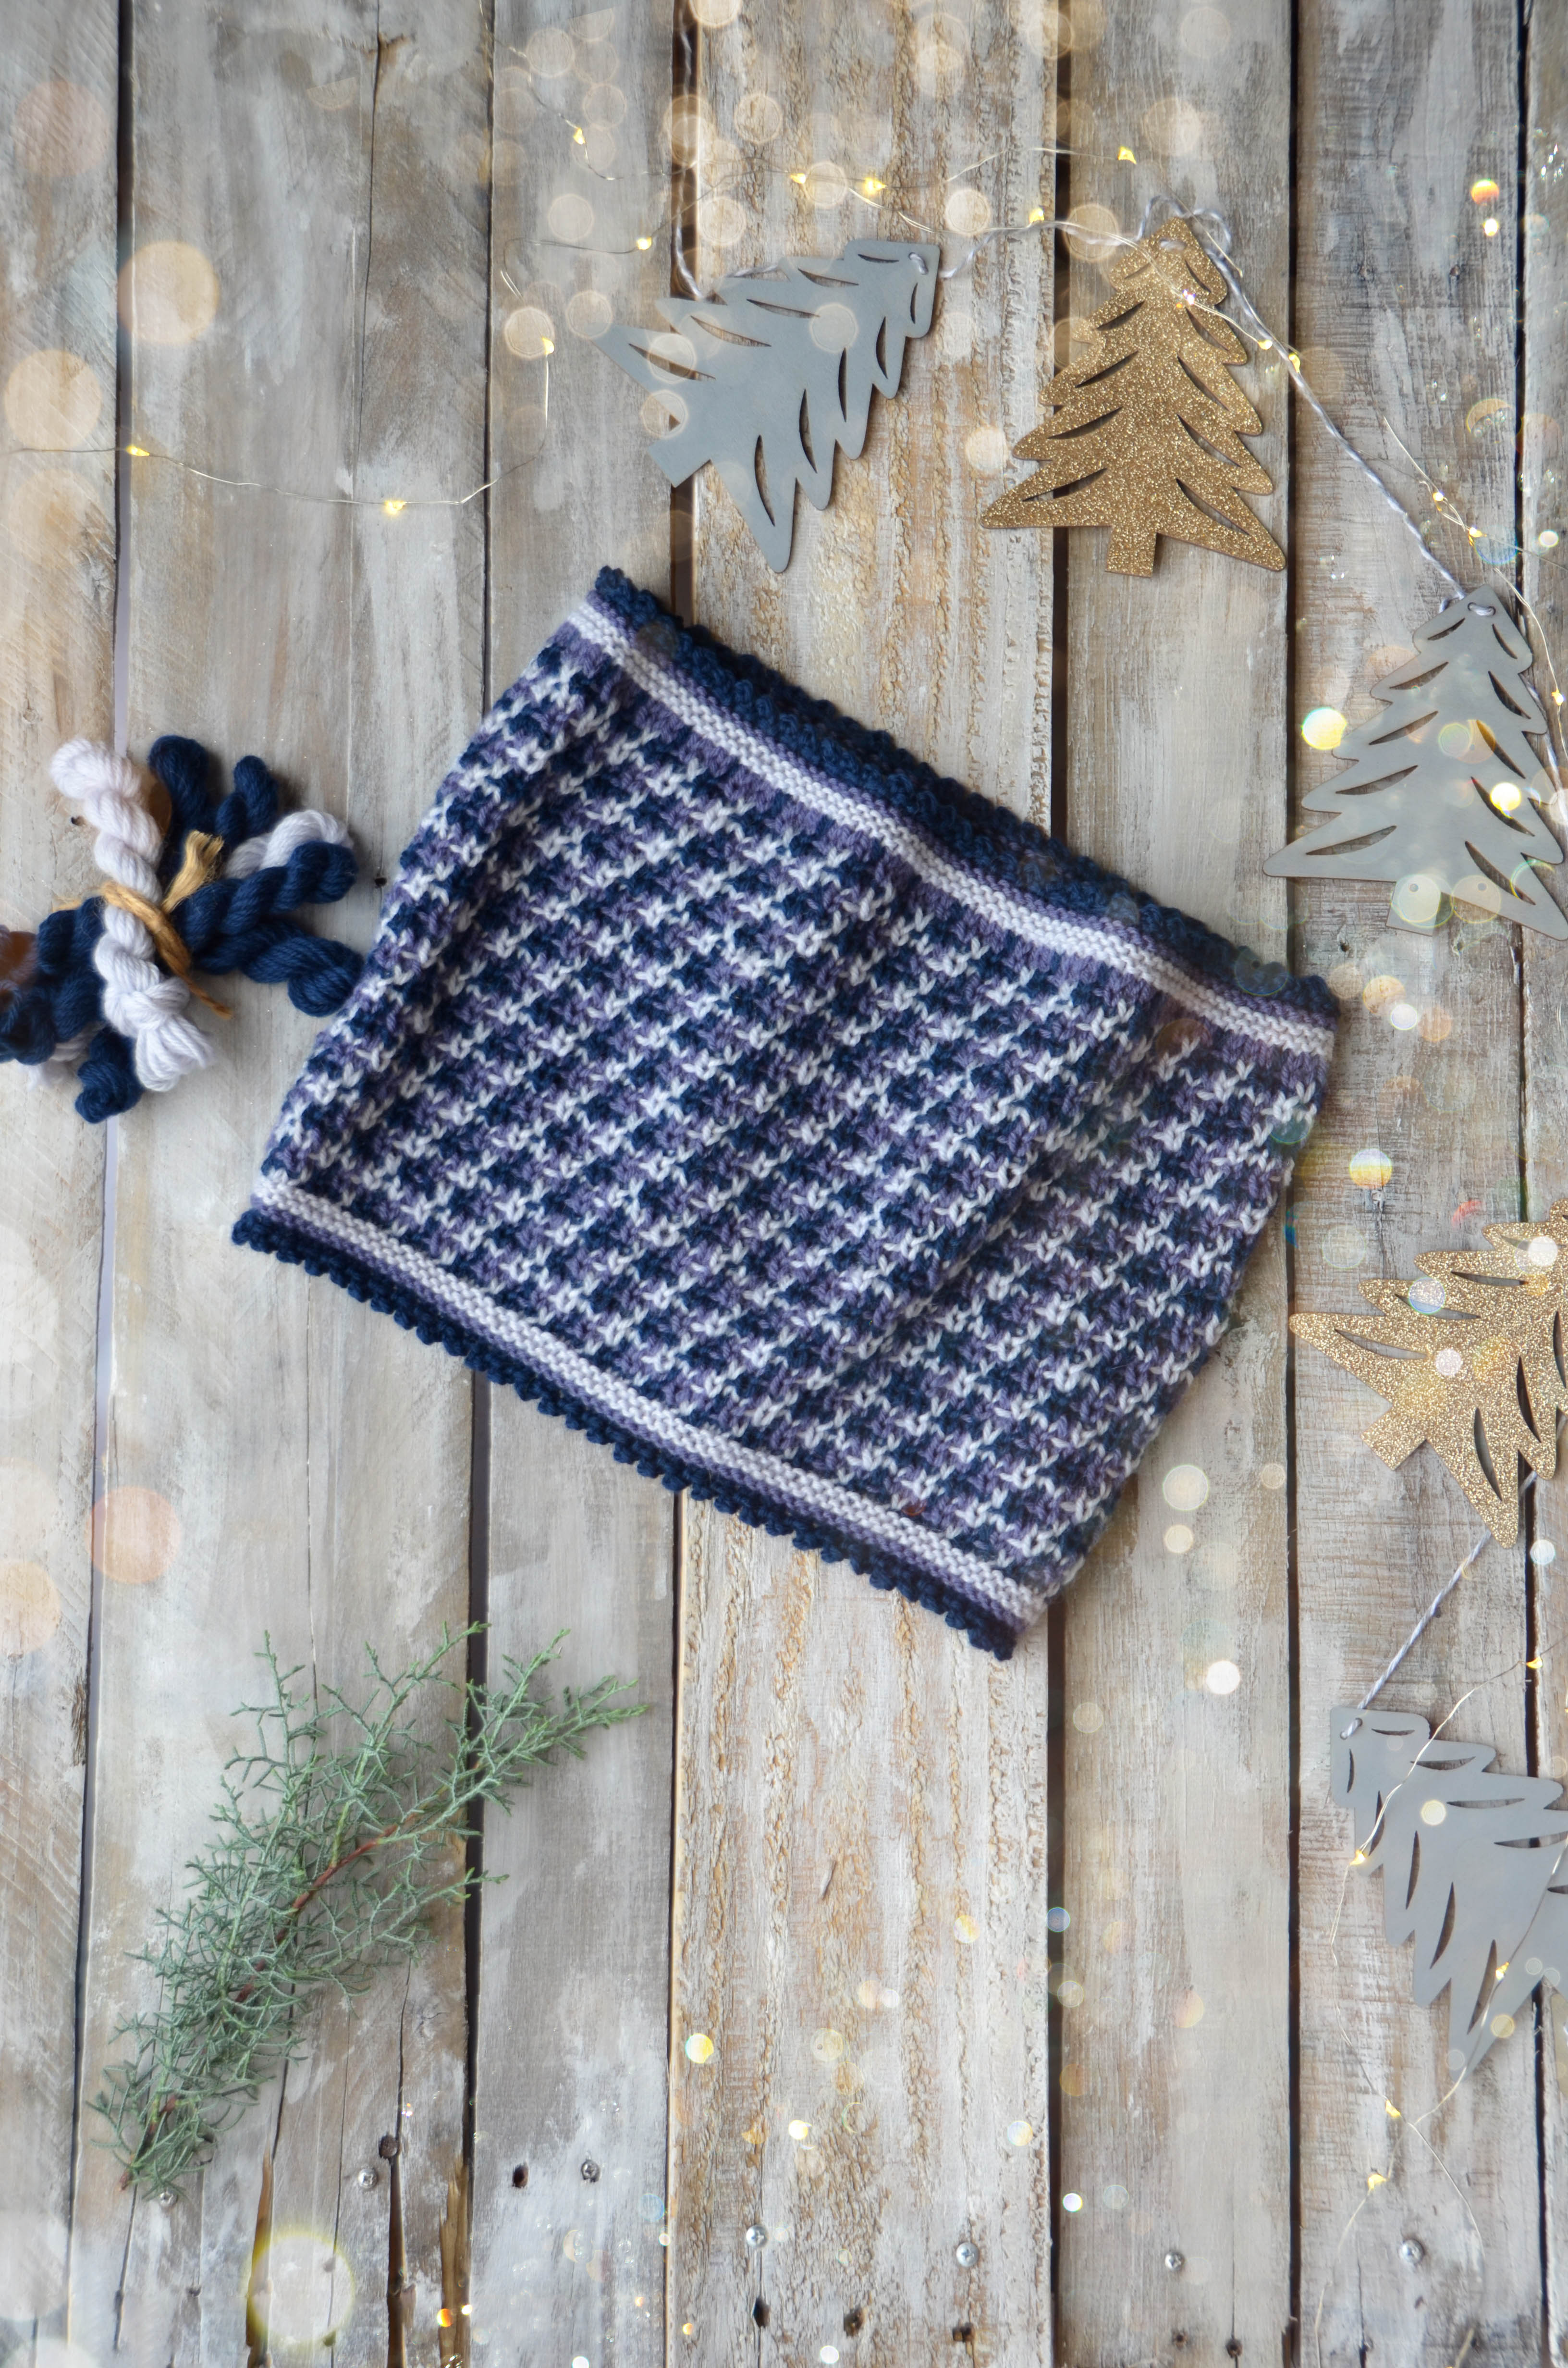
The pattern is written for the smaller size as shown, and also a large size, long enough to wrap around your neck twice. The yarn included in the kit is enough to knit either two small cowls, or one large. So – bonus!
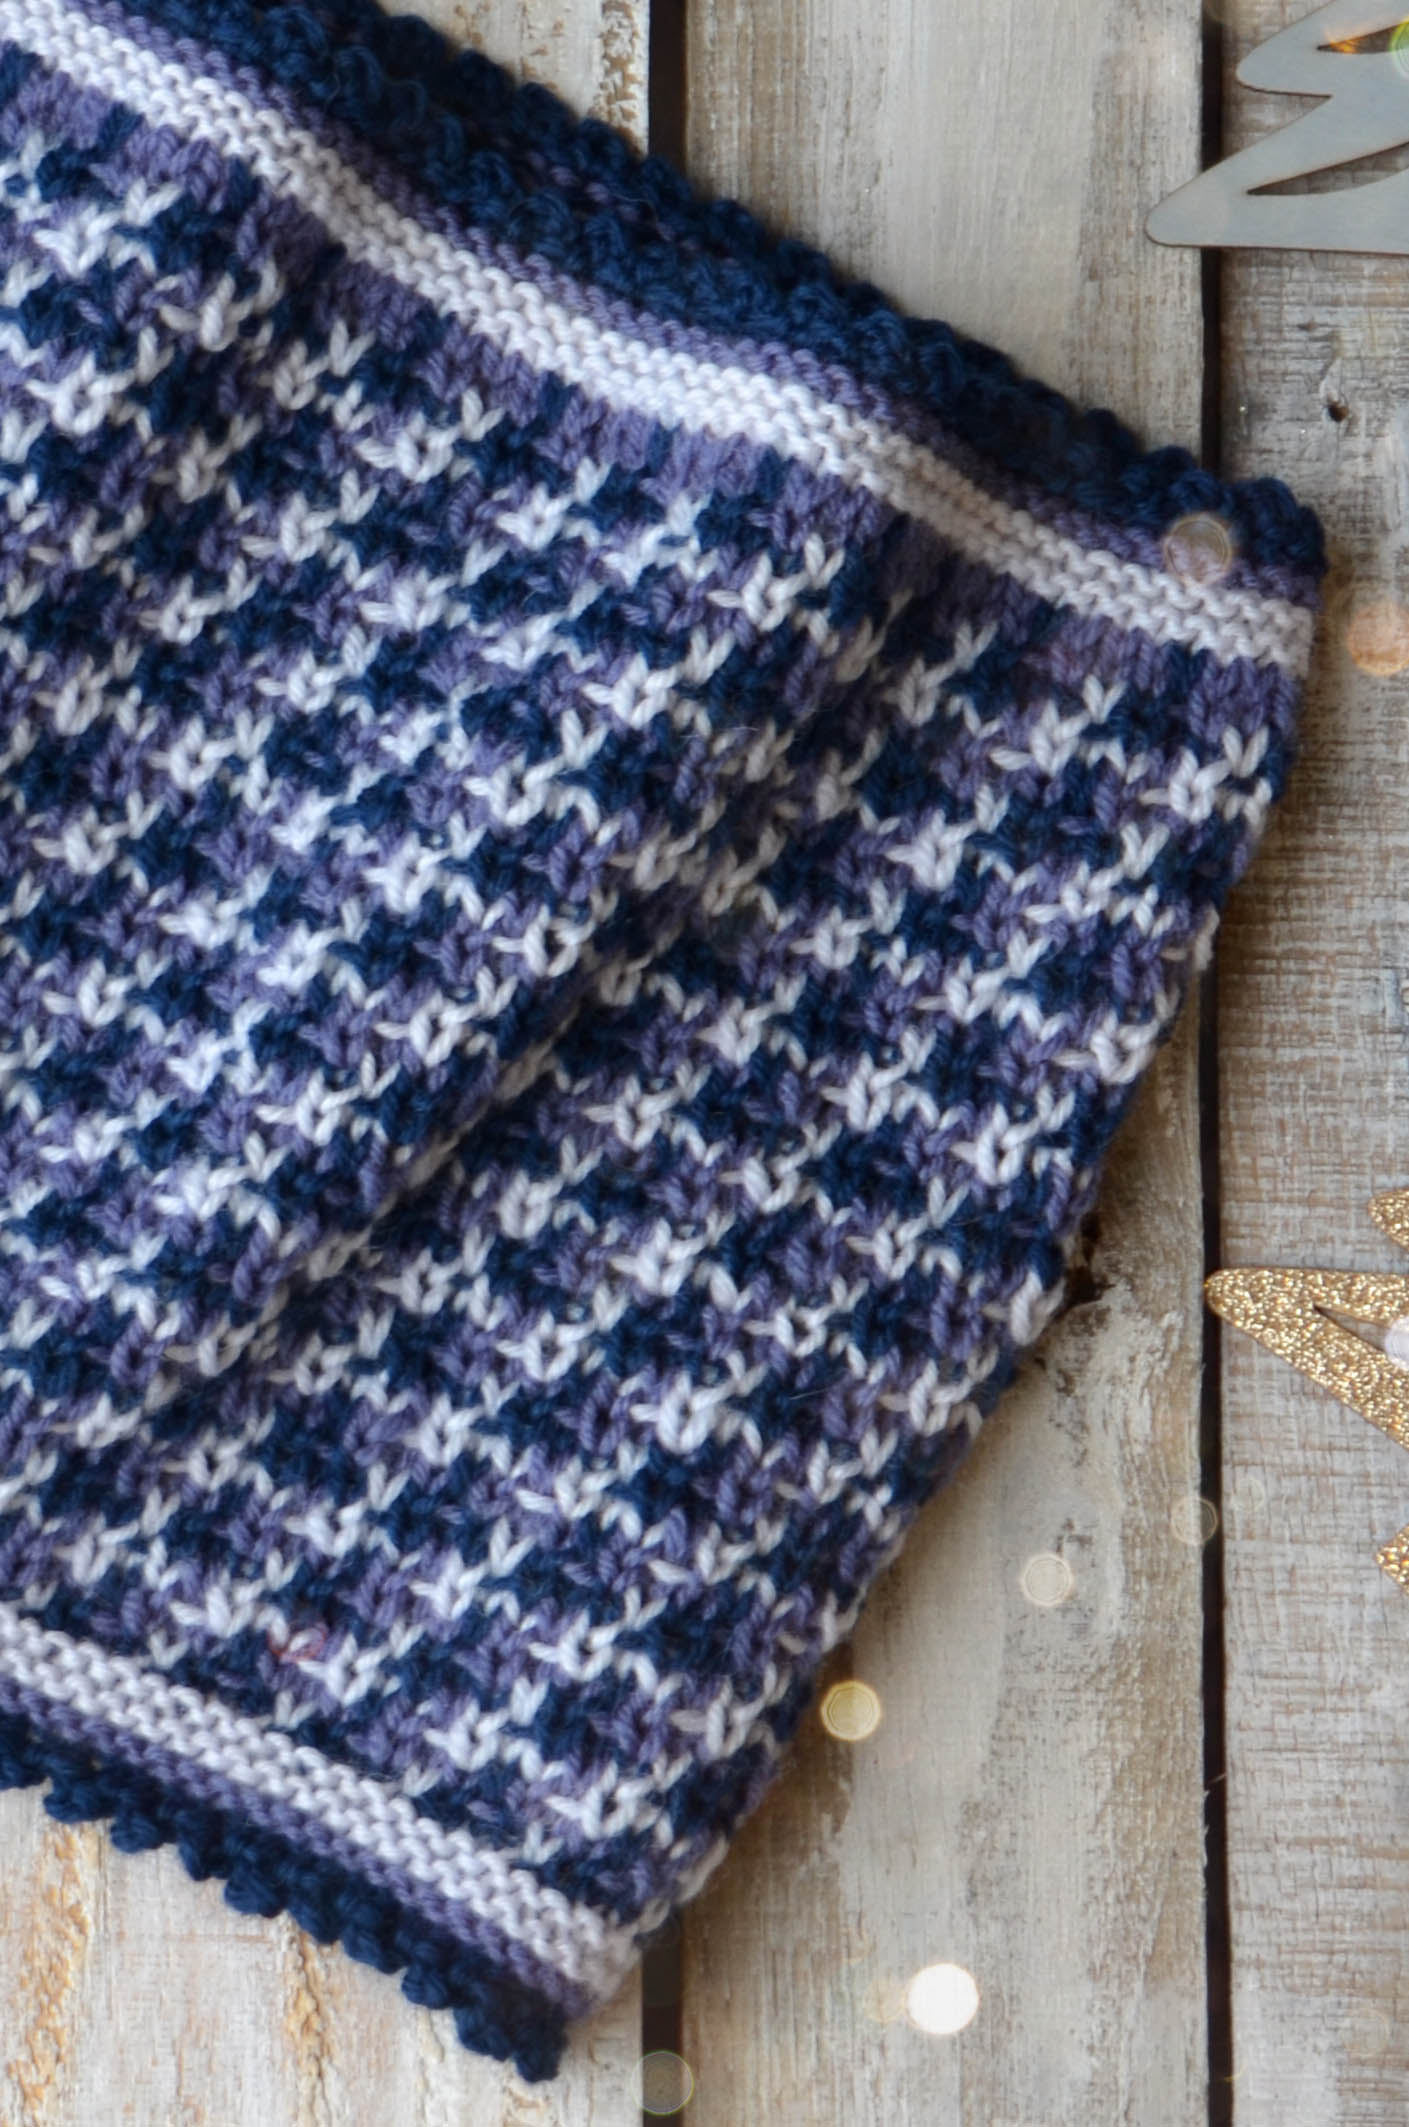
The main body of the cowl is super-duper simple. The complex looking color pattern is just slipped stitches. Colors are changed every two rounds, and only one color is used per round. It hits that sweet spot of knitting where the pattern is just a bit more than stockinette – enough to keep you interested – but easy enough that you can work on it anywhere.
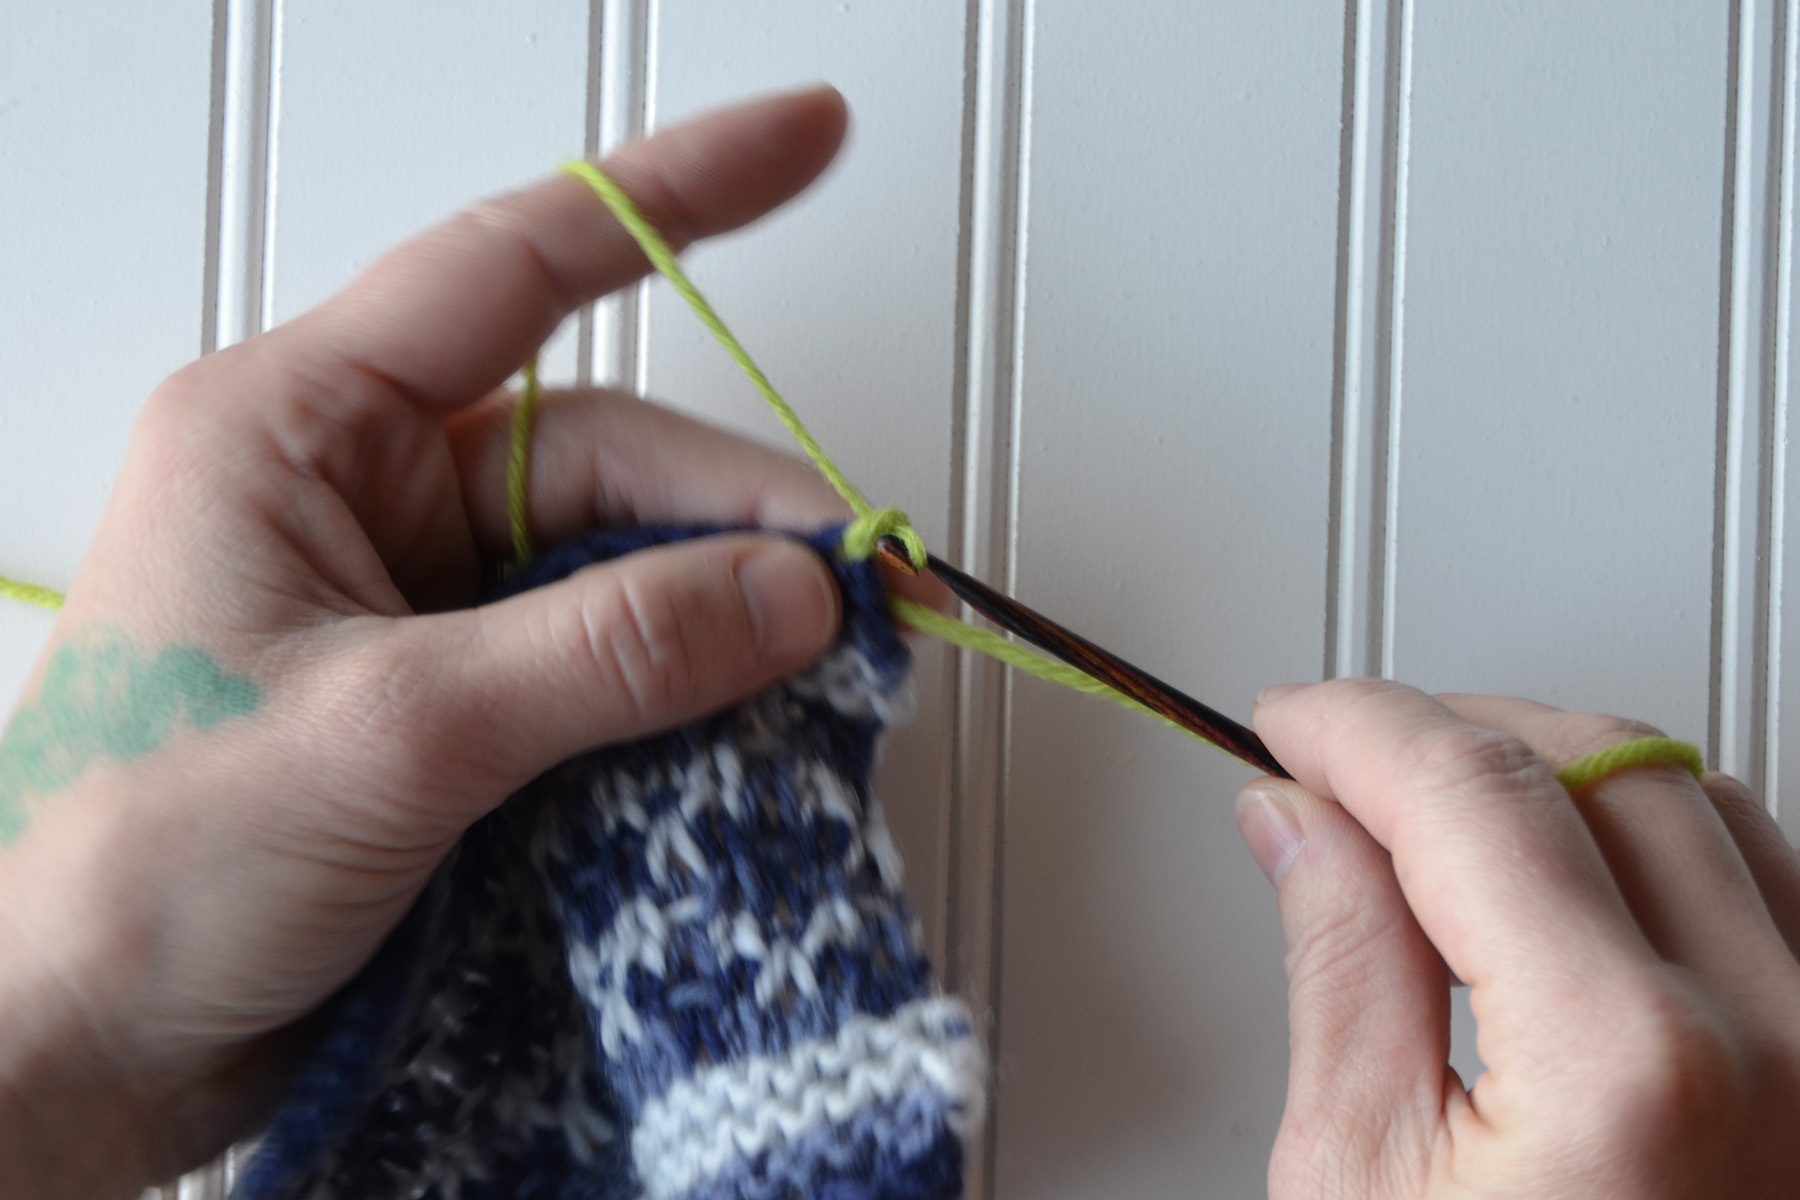
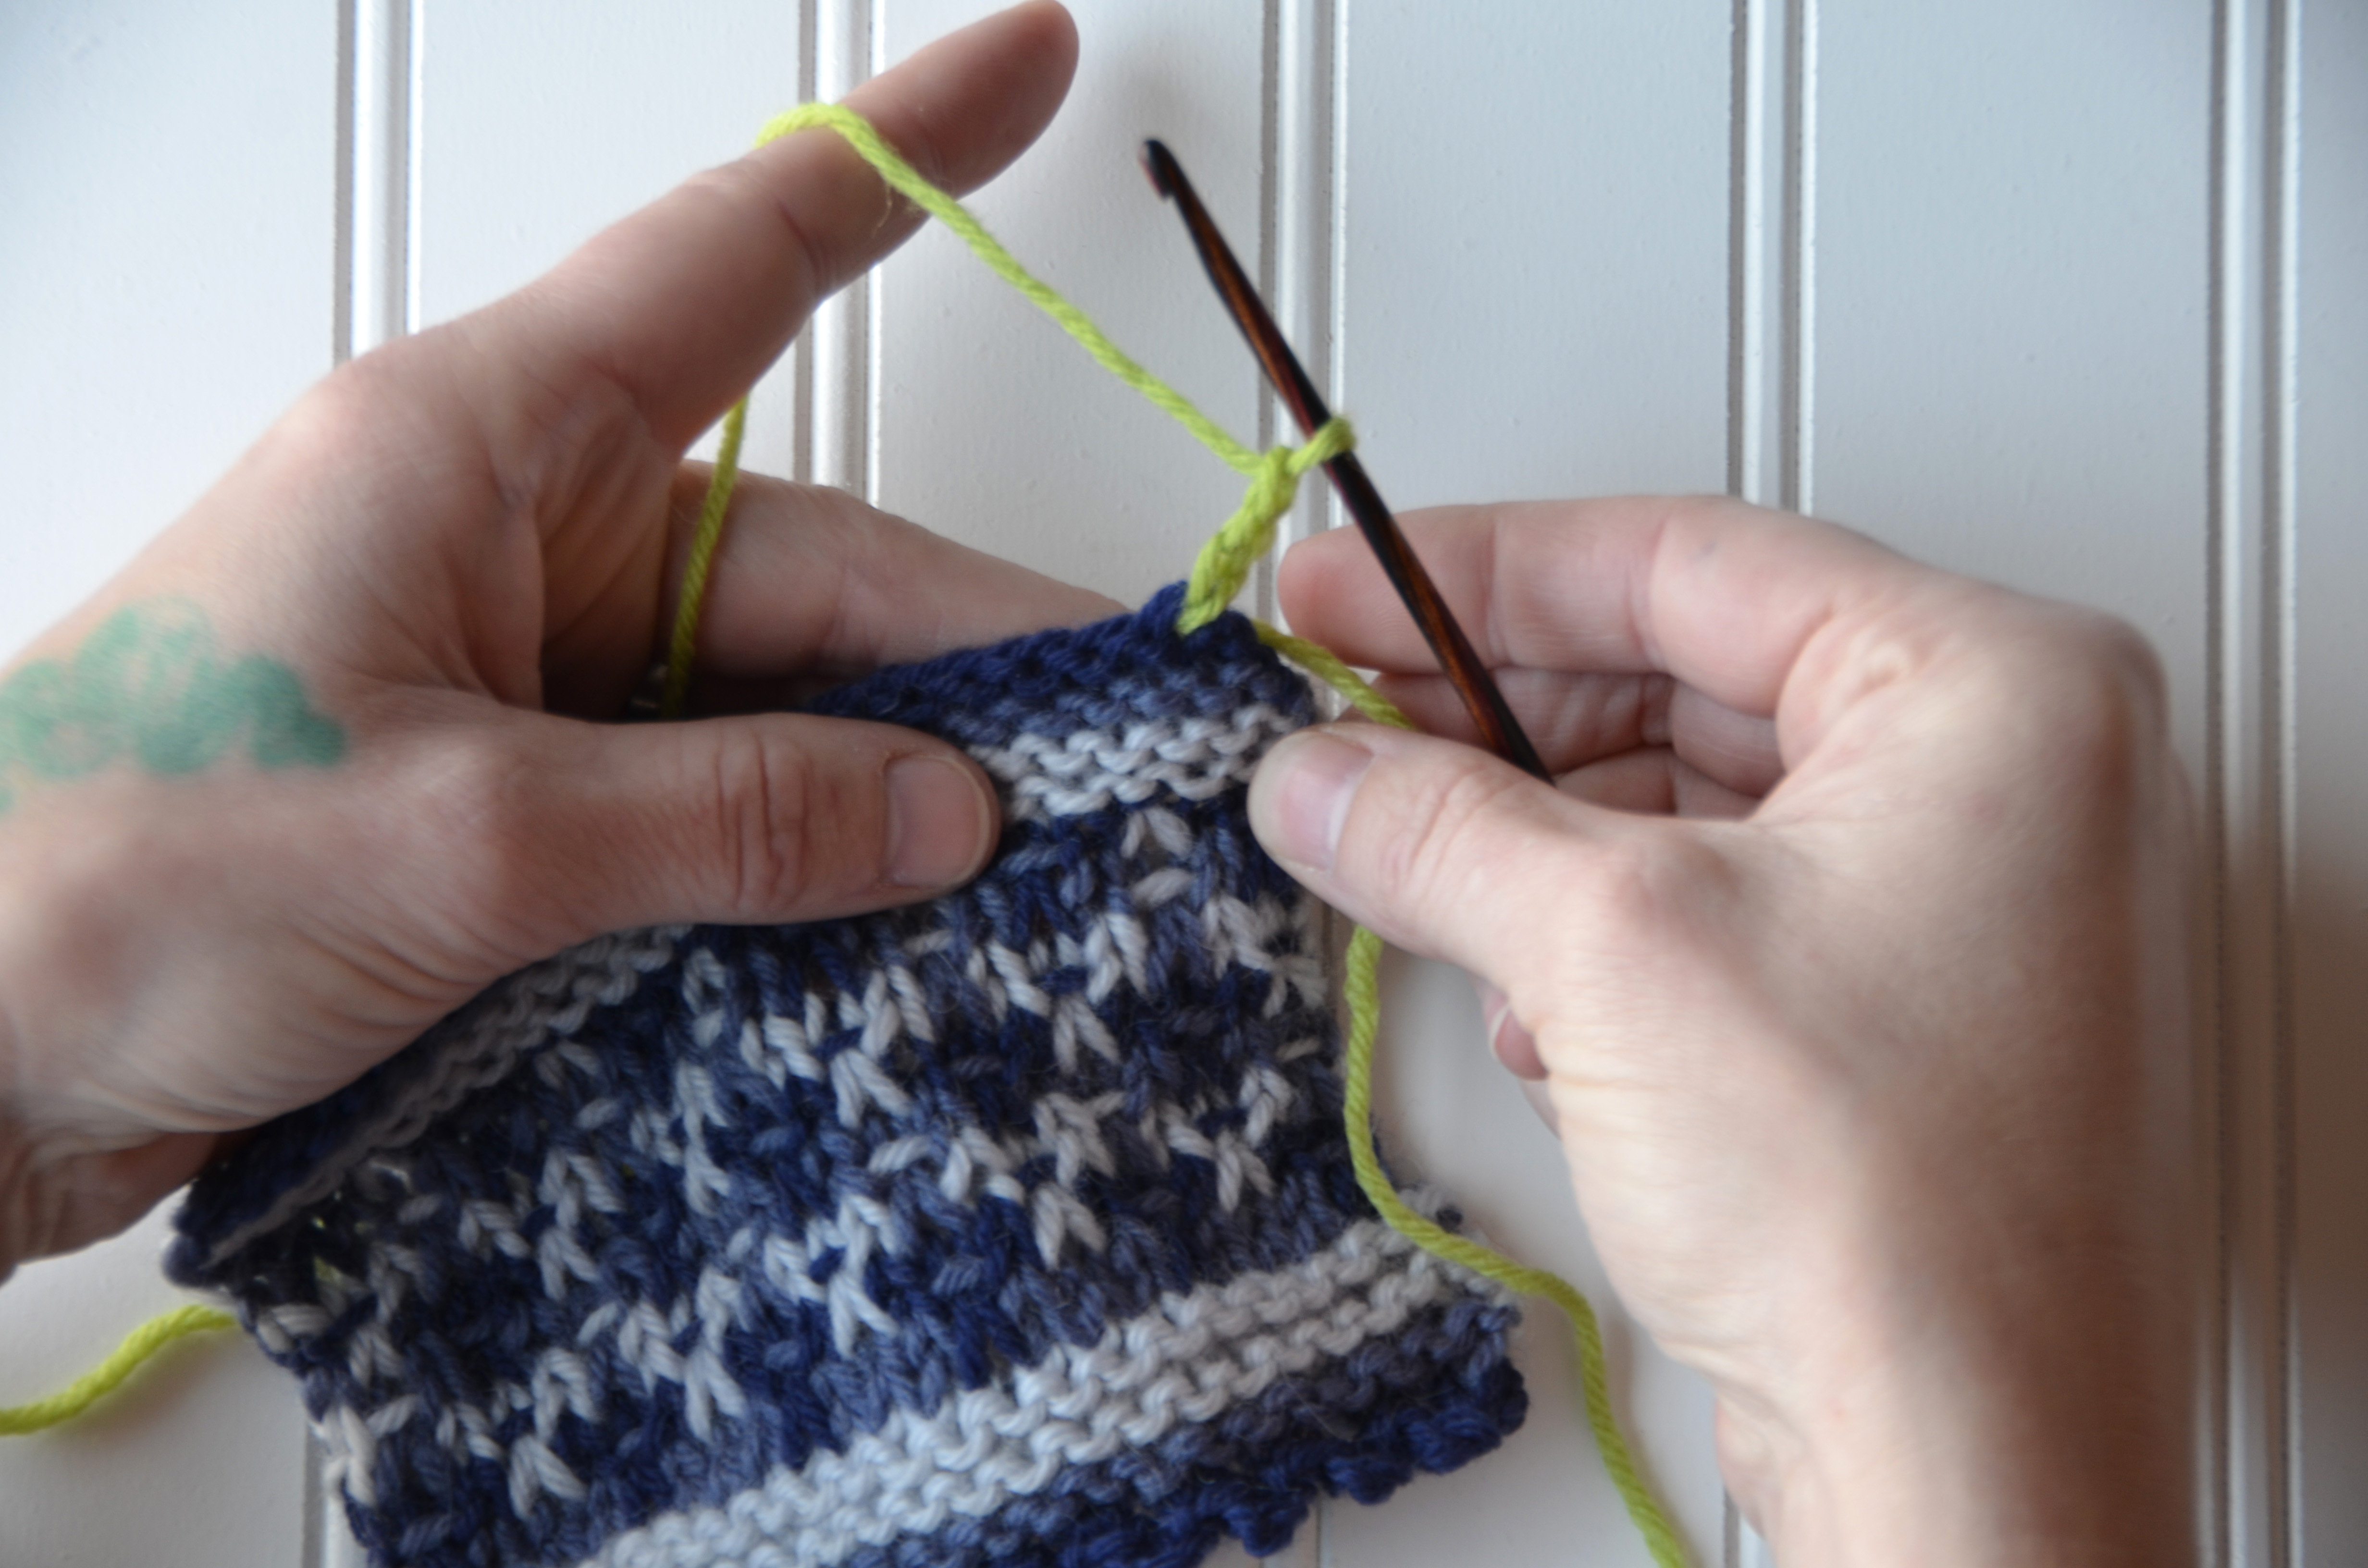
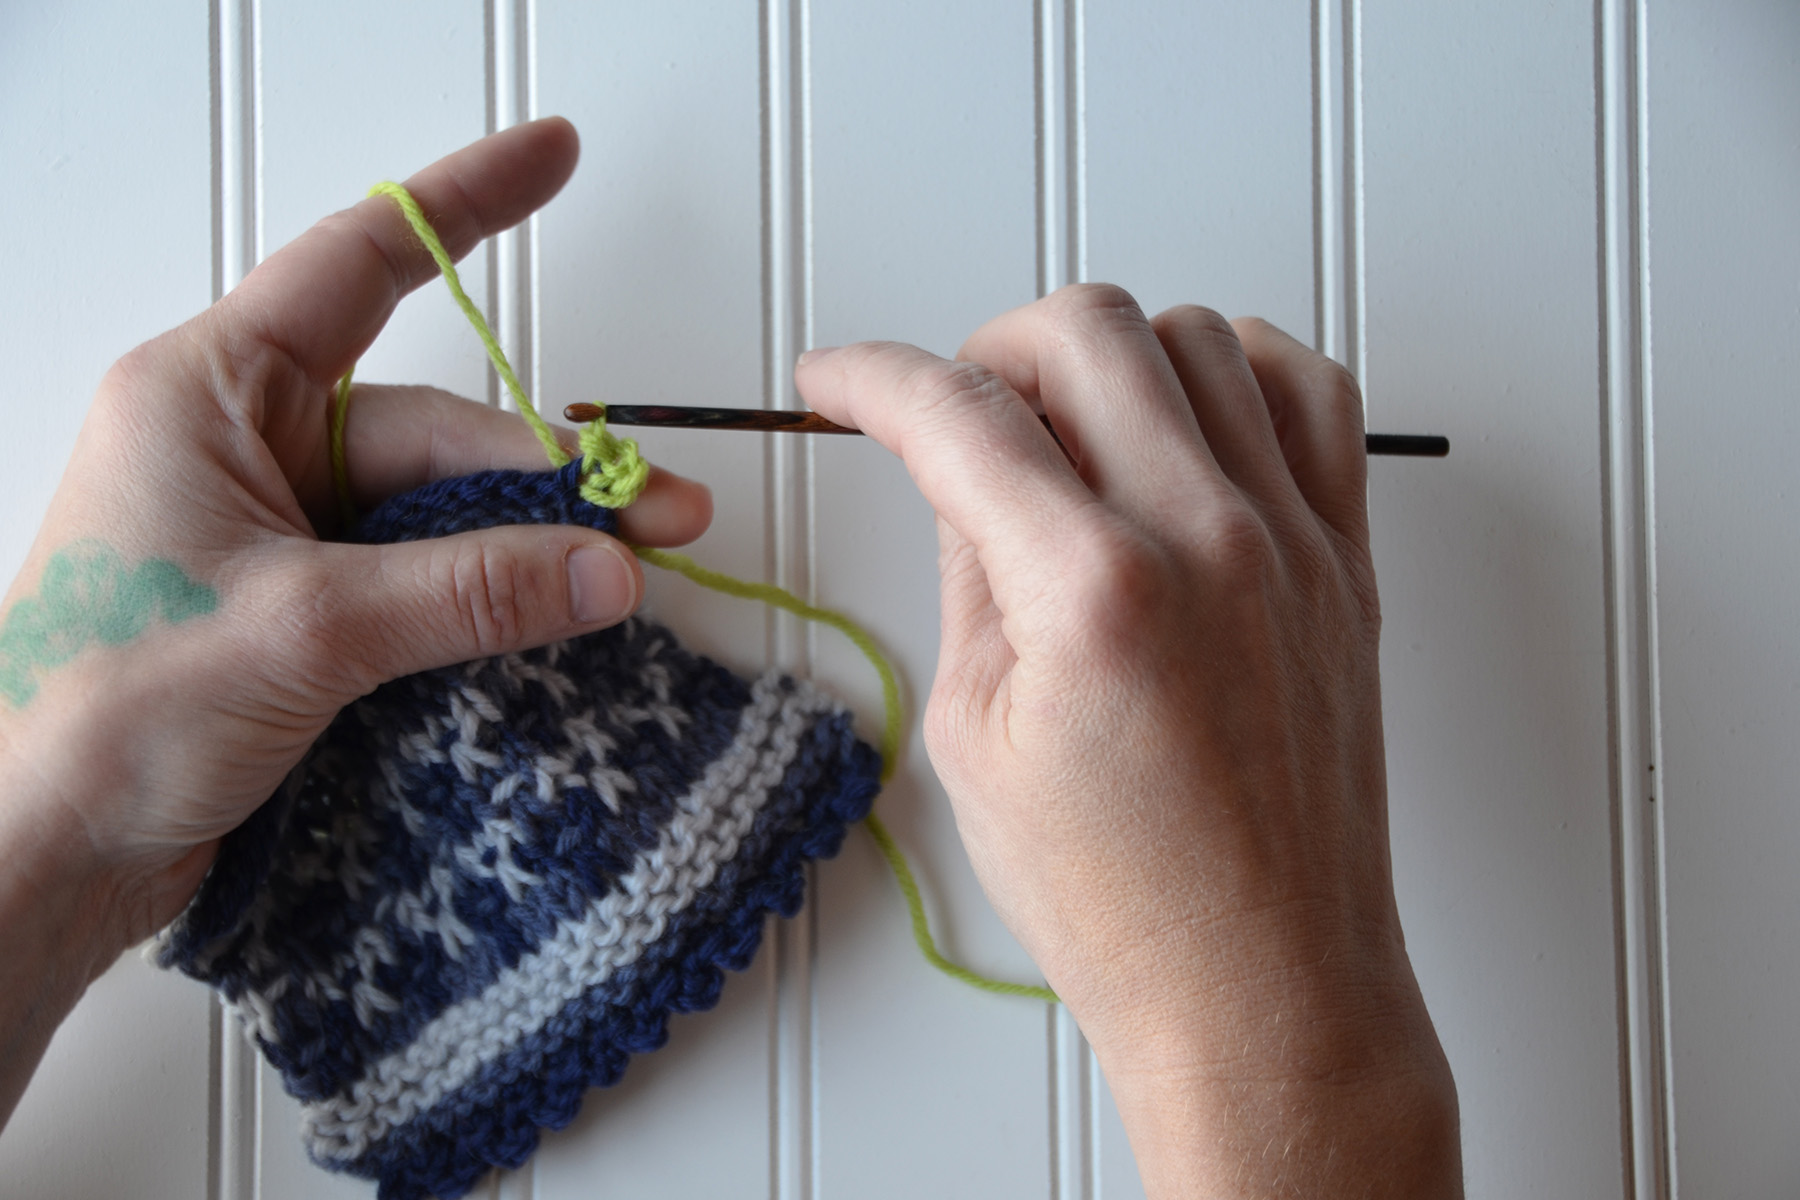
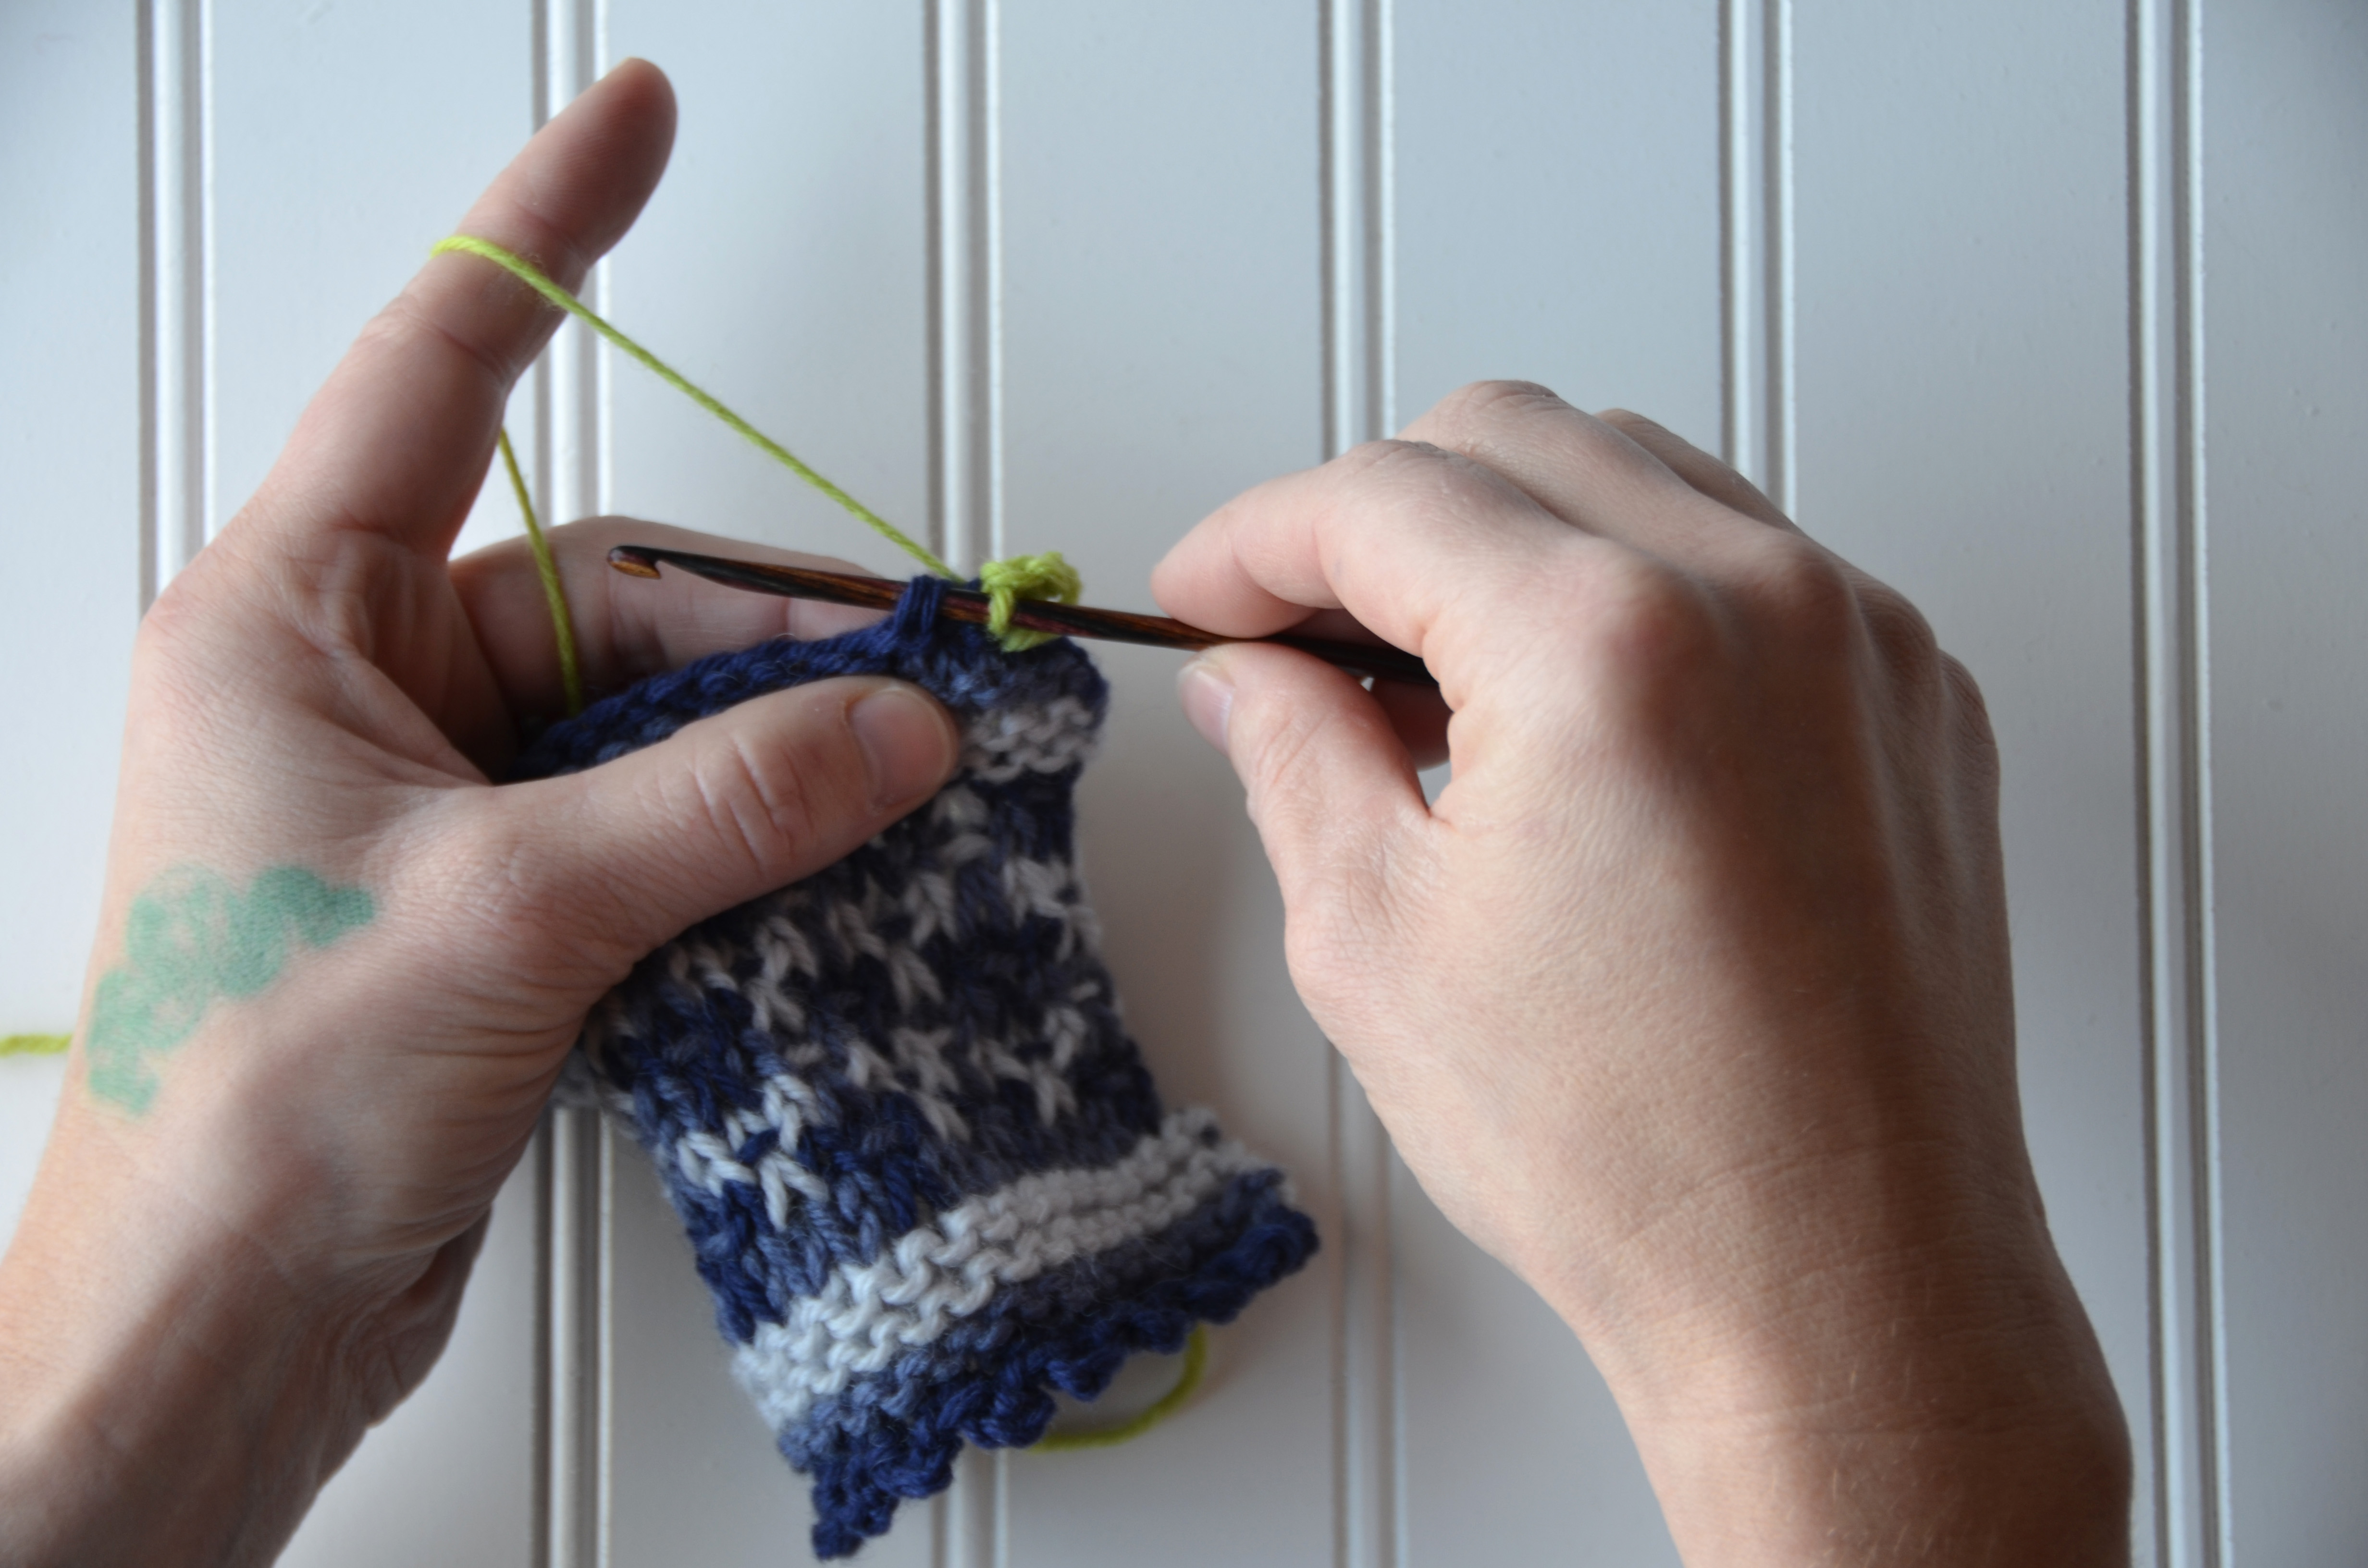
My favorite detail of this cowl is the picot edging along both edges. This could have been done with a knitted picot bind-off, but I chose to use a crochet picot instead. For me, it’s just less fiddly than doing its knit counterpart. Let’s learn how to do it!
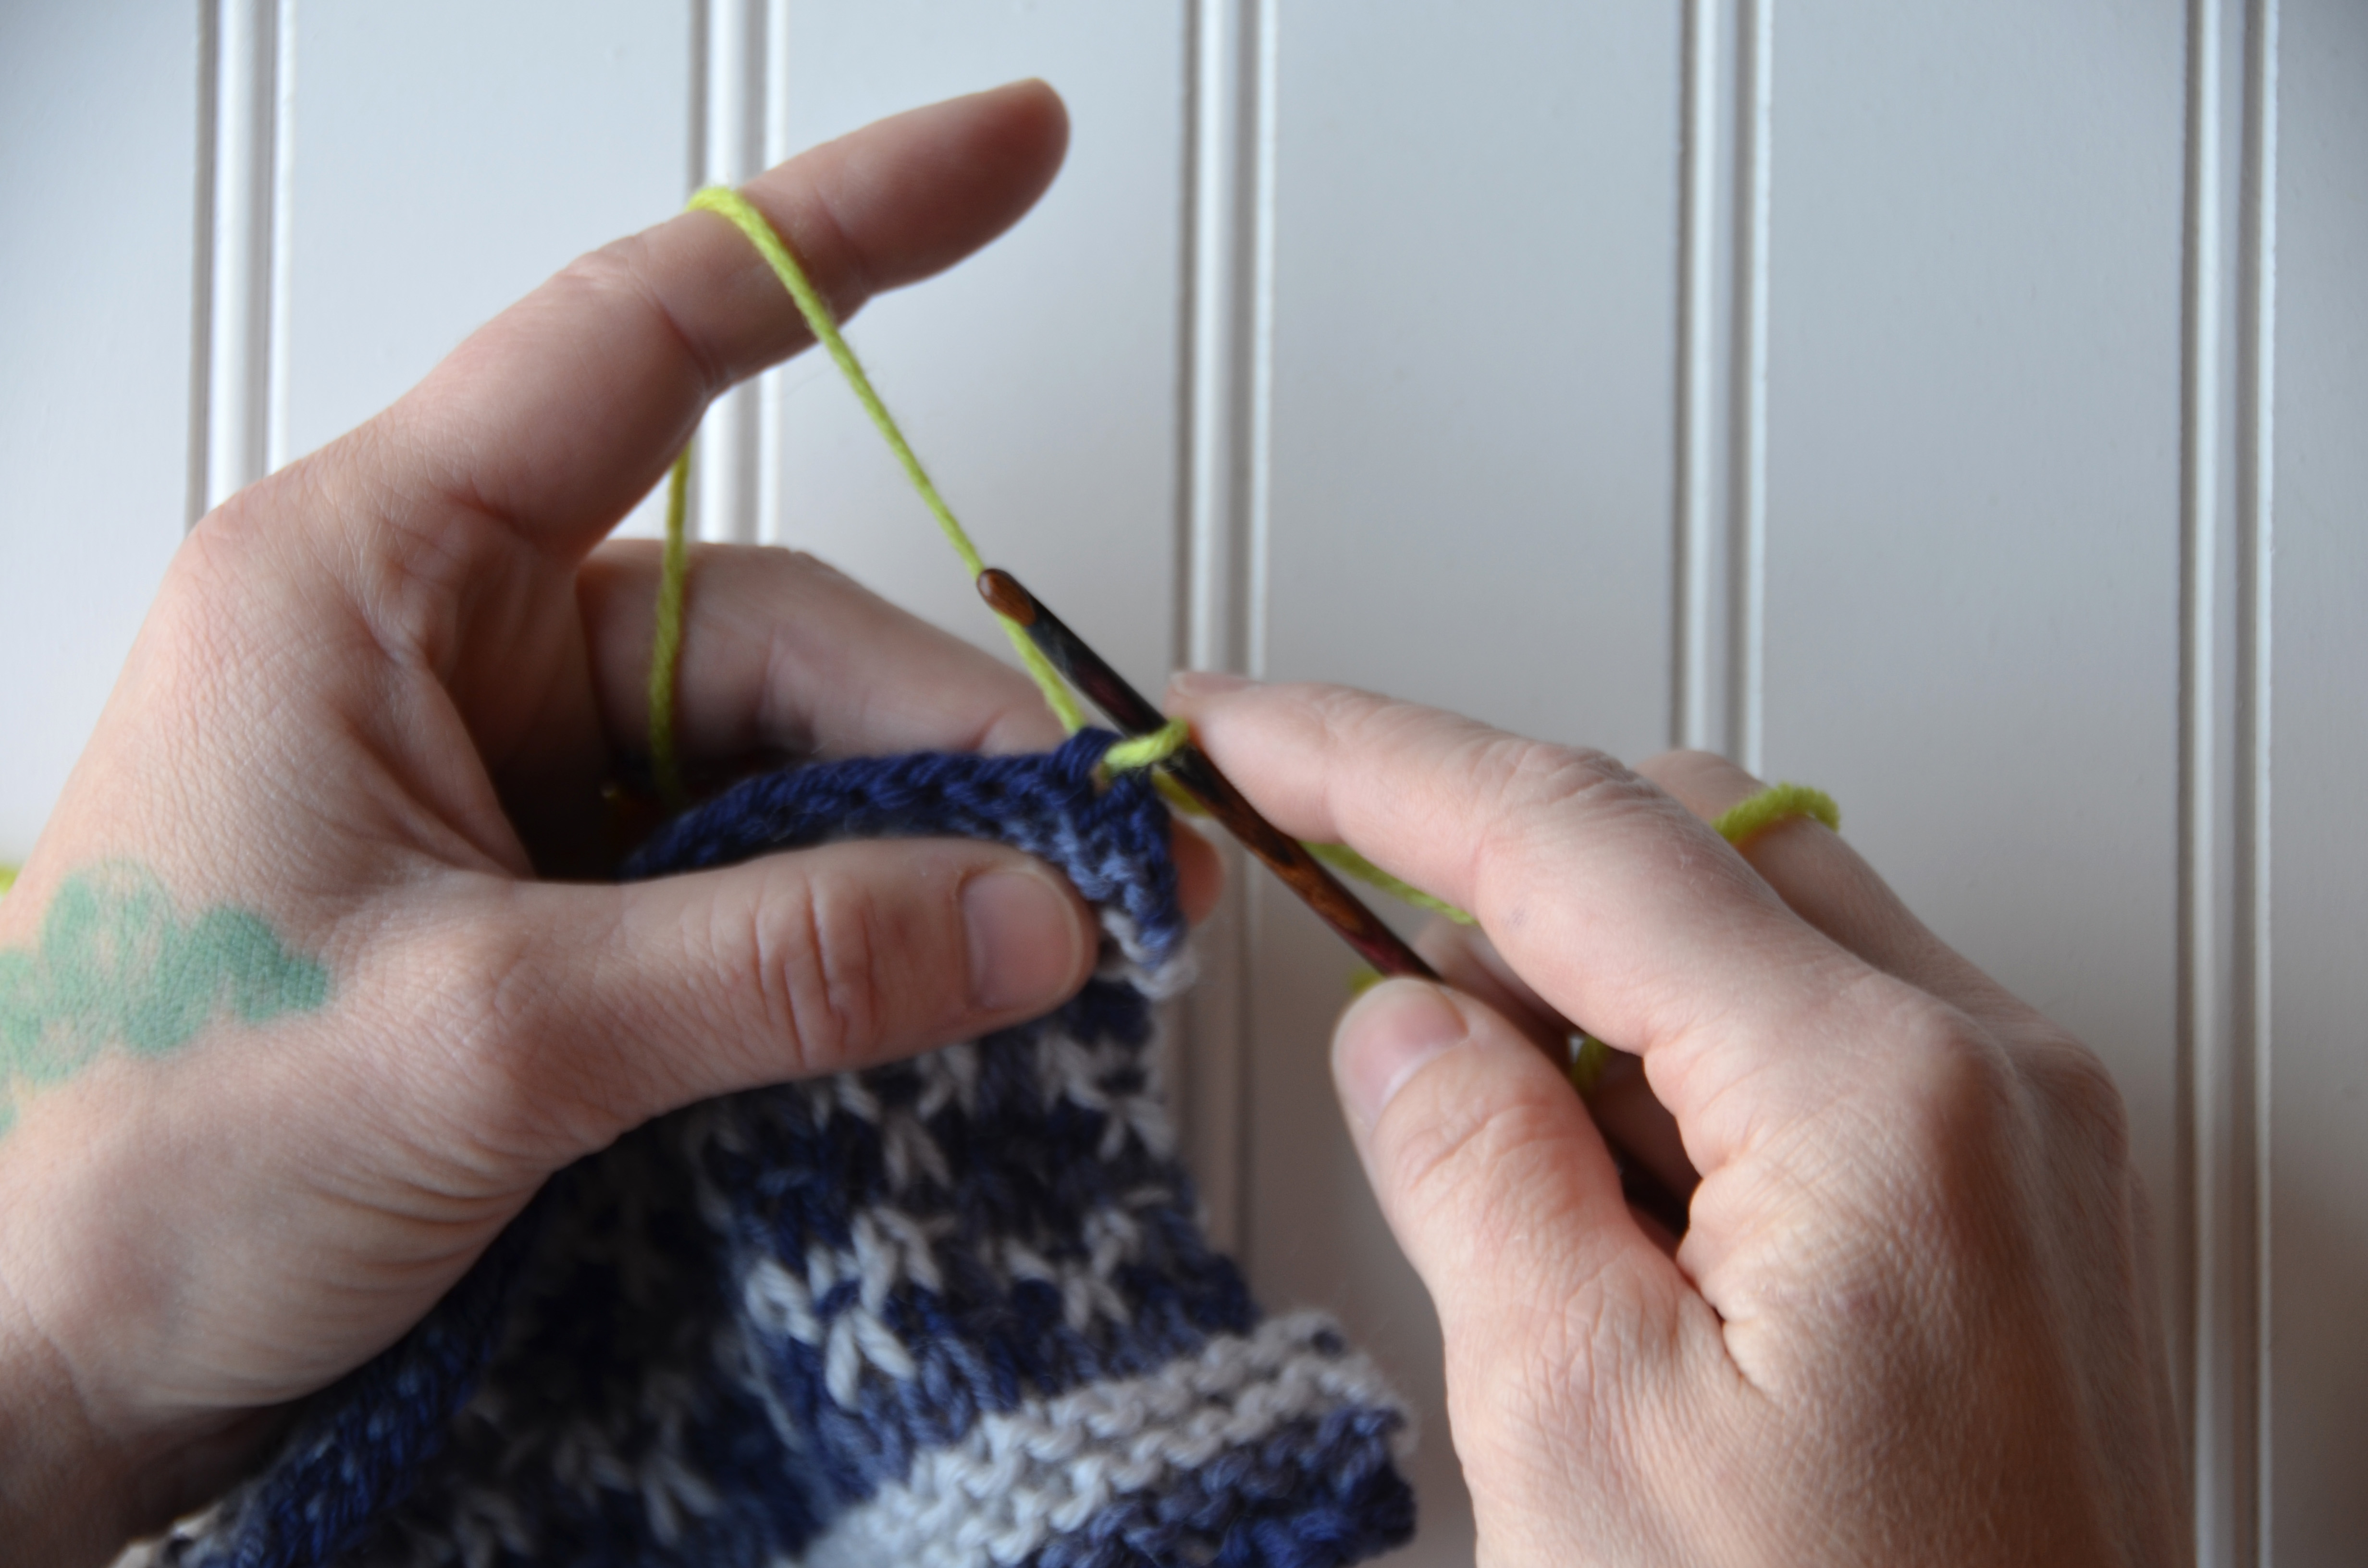
If you need a little closer view on any of the following images, just click on it and it will open in a new browser window.
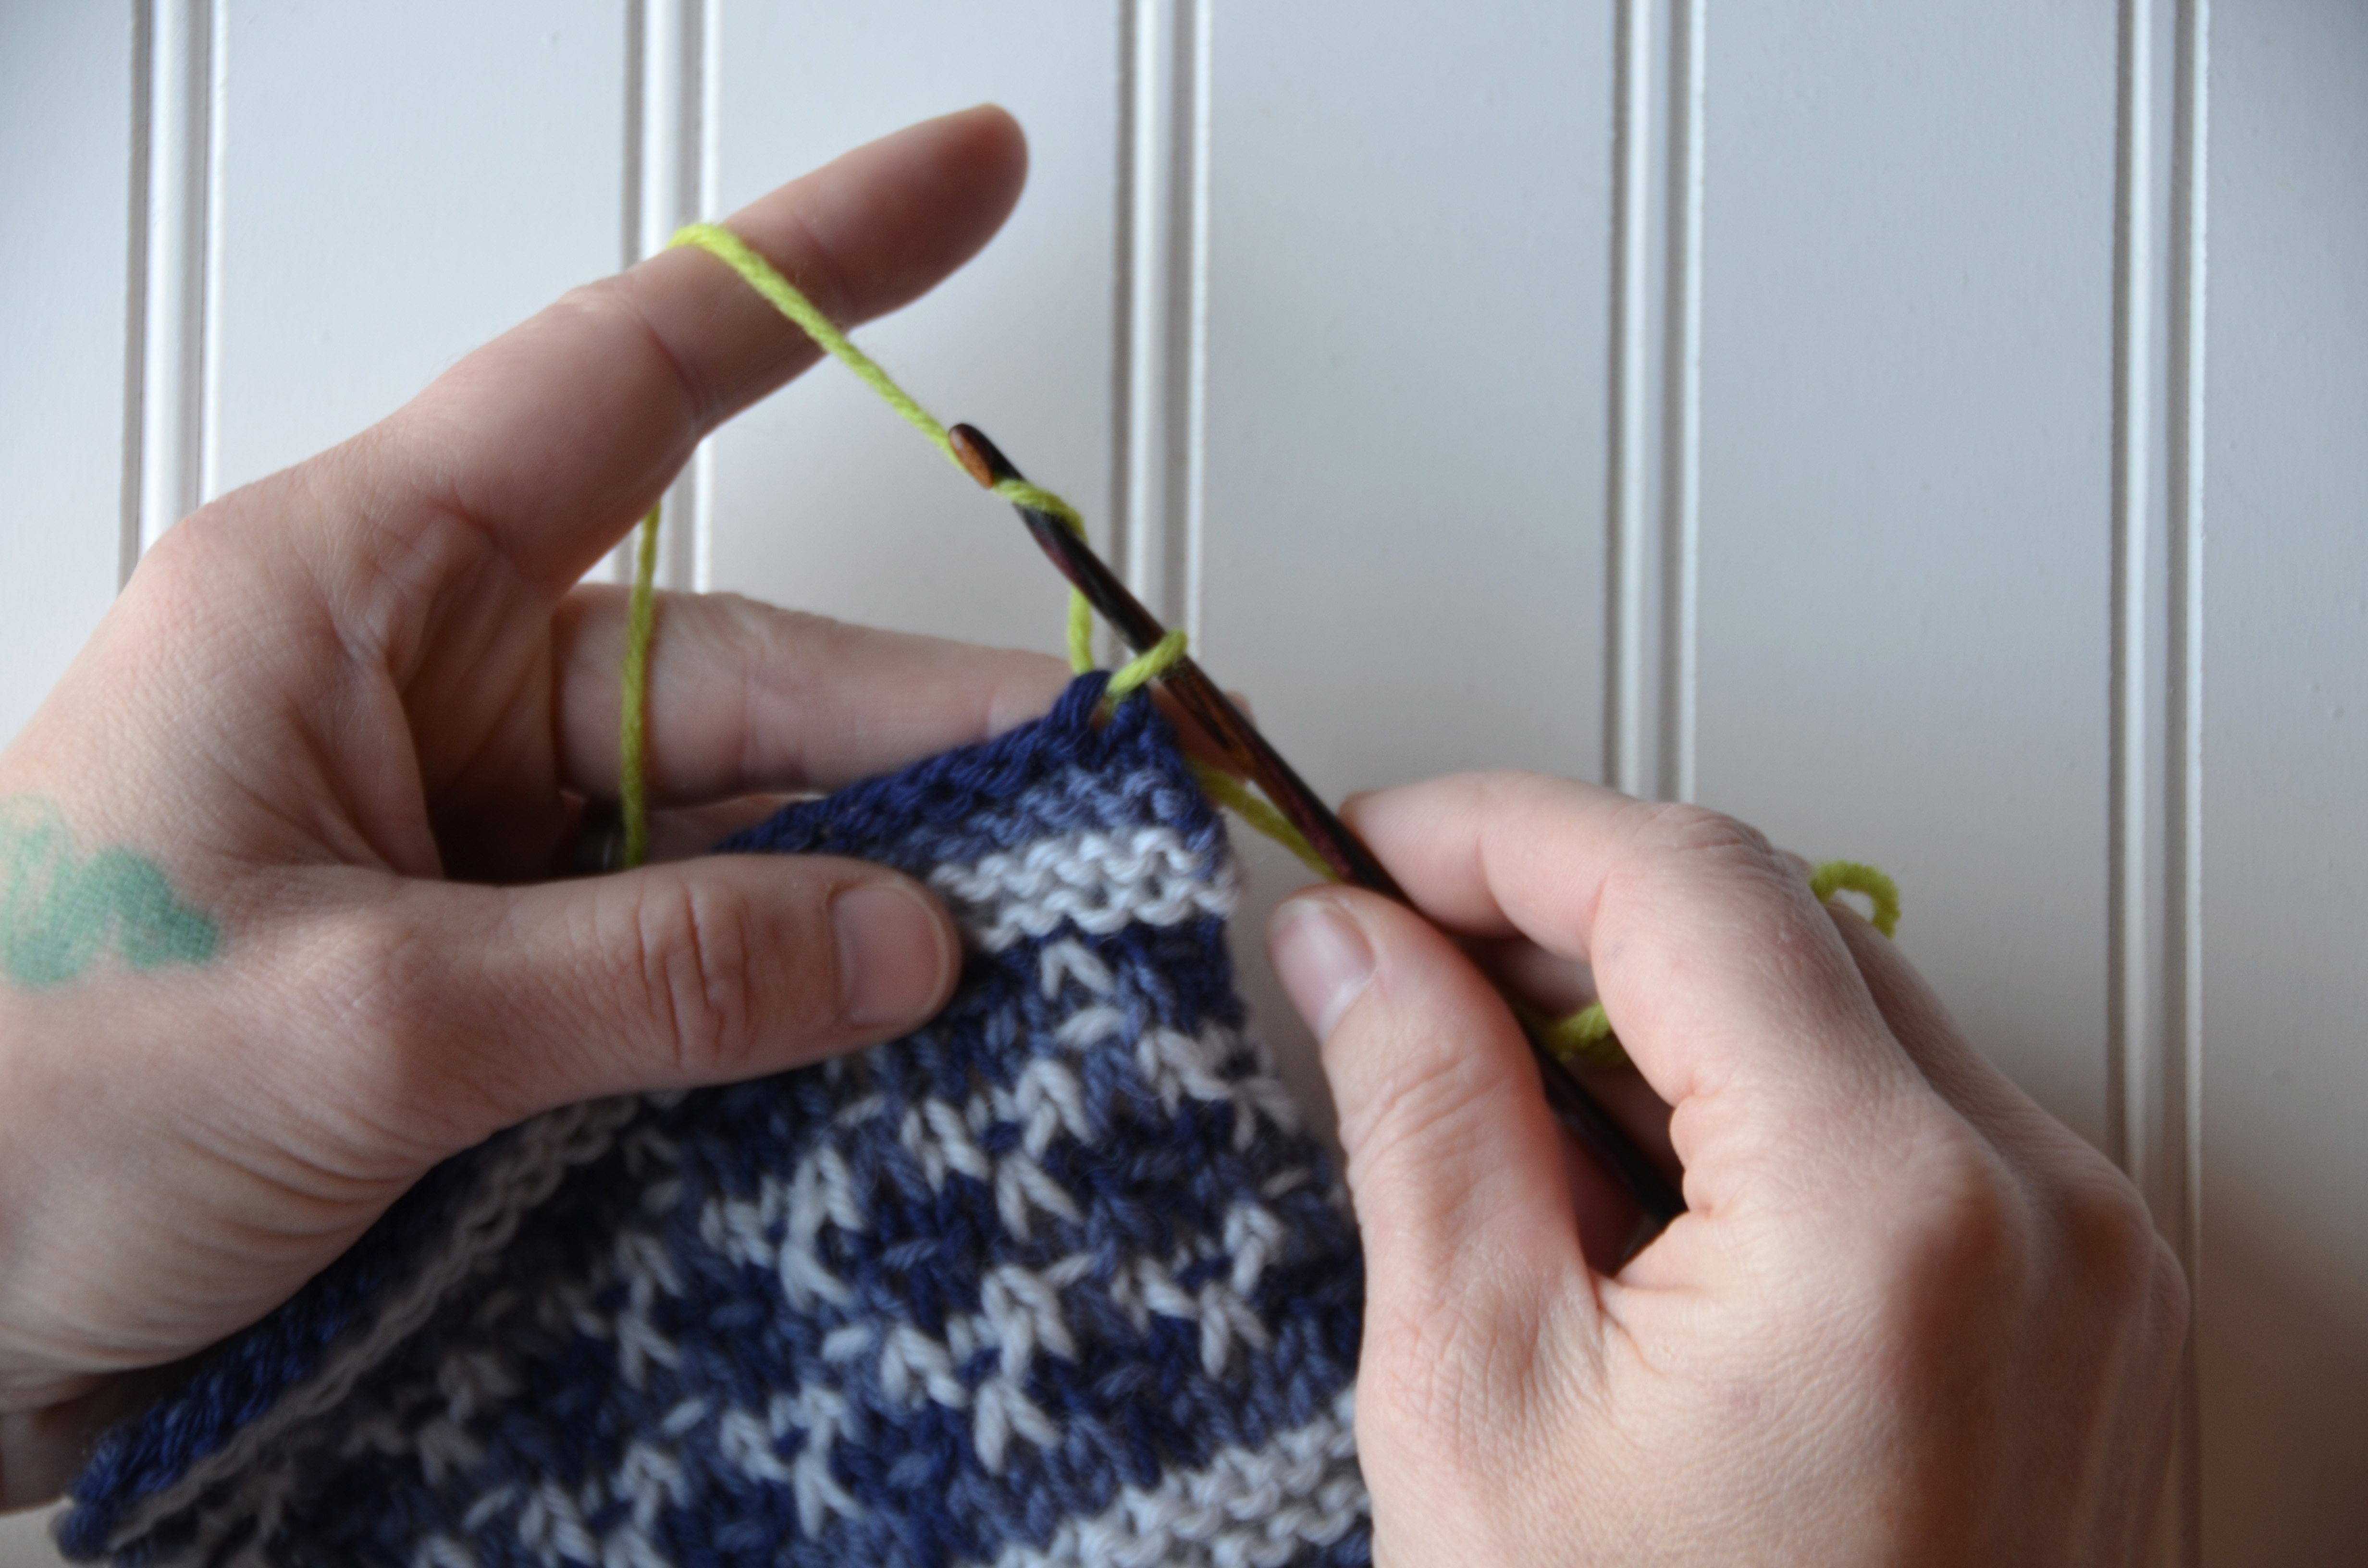
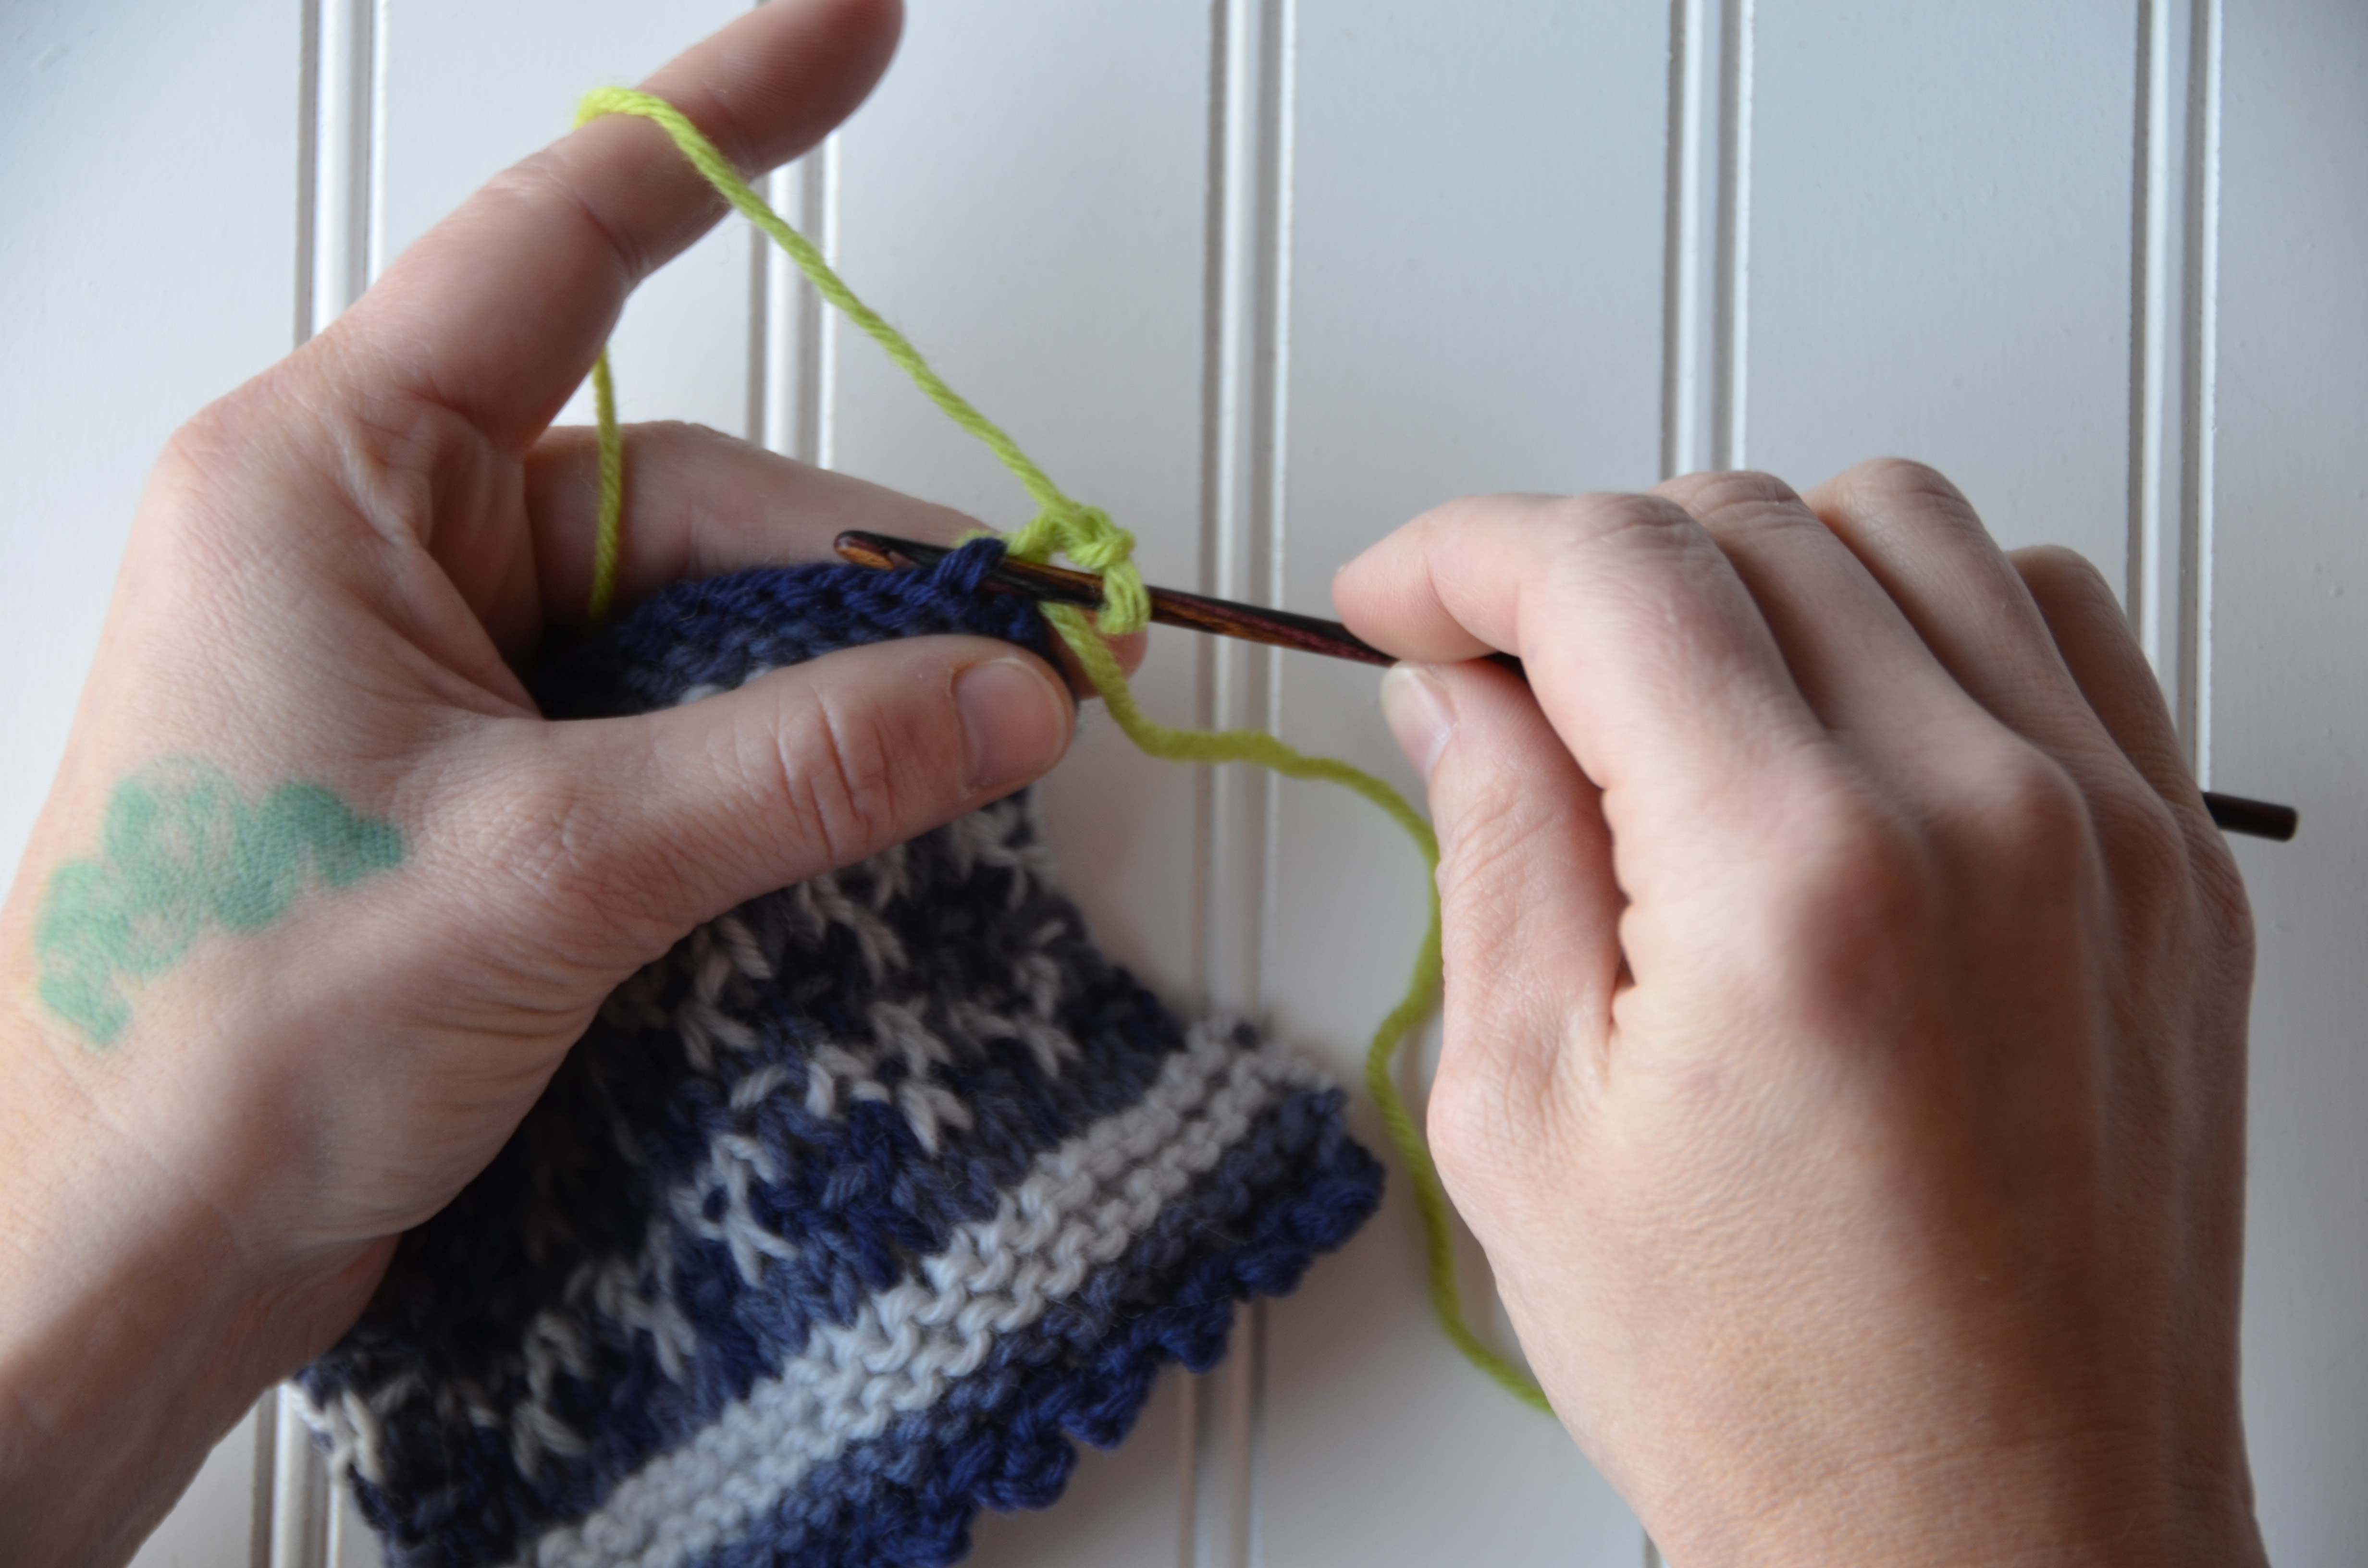
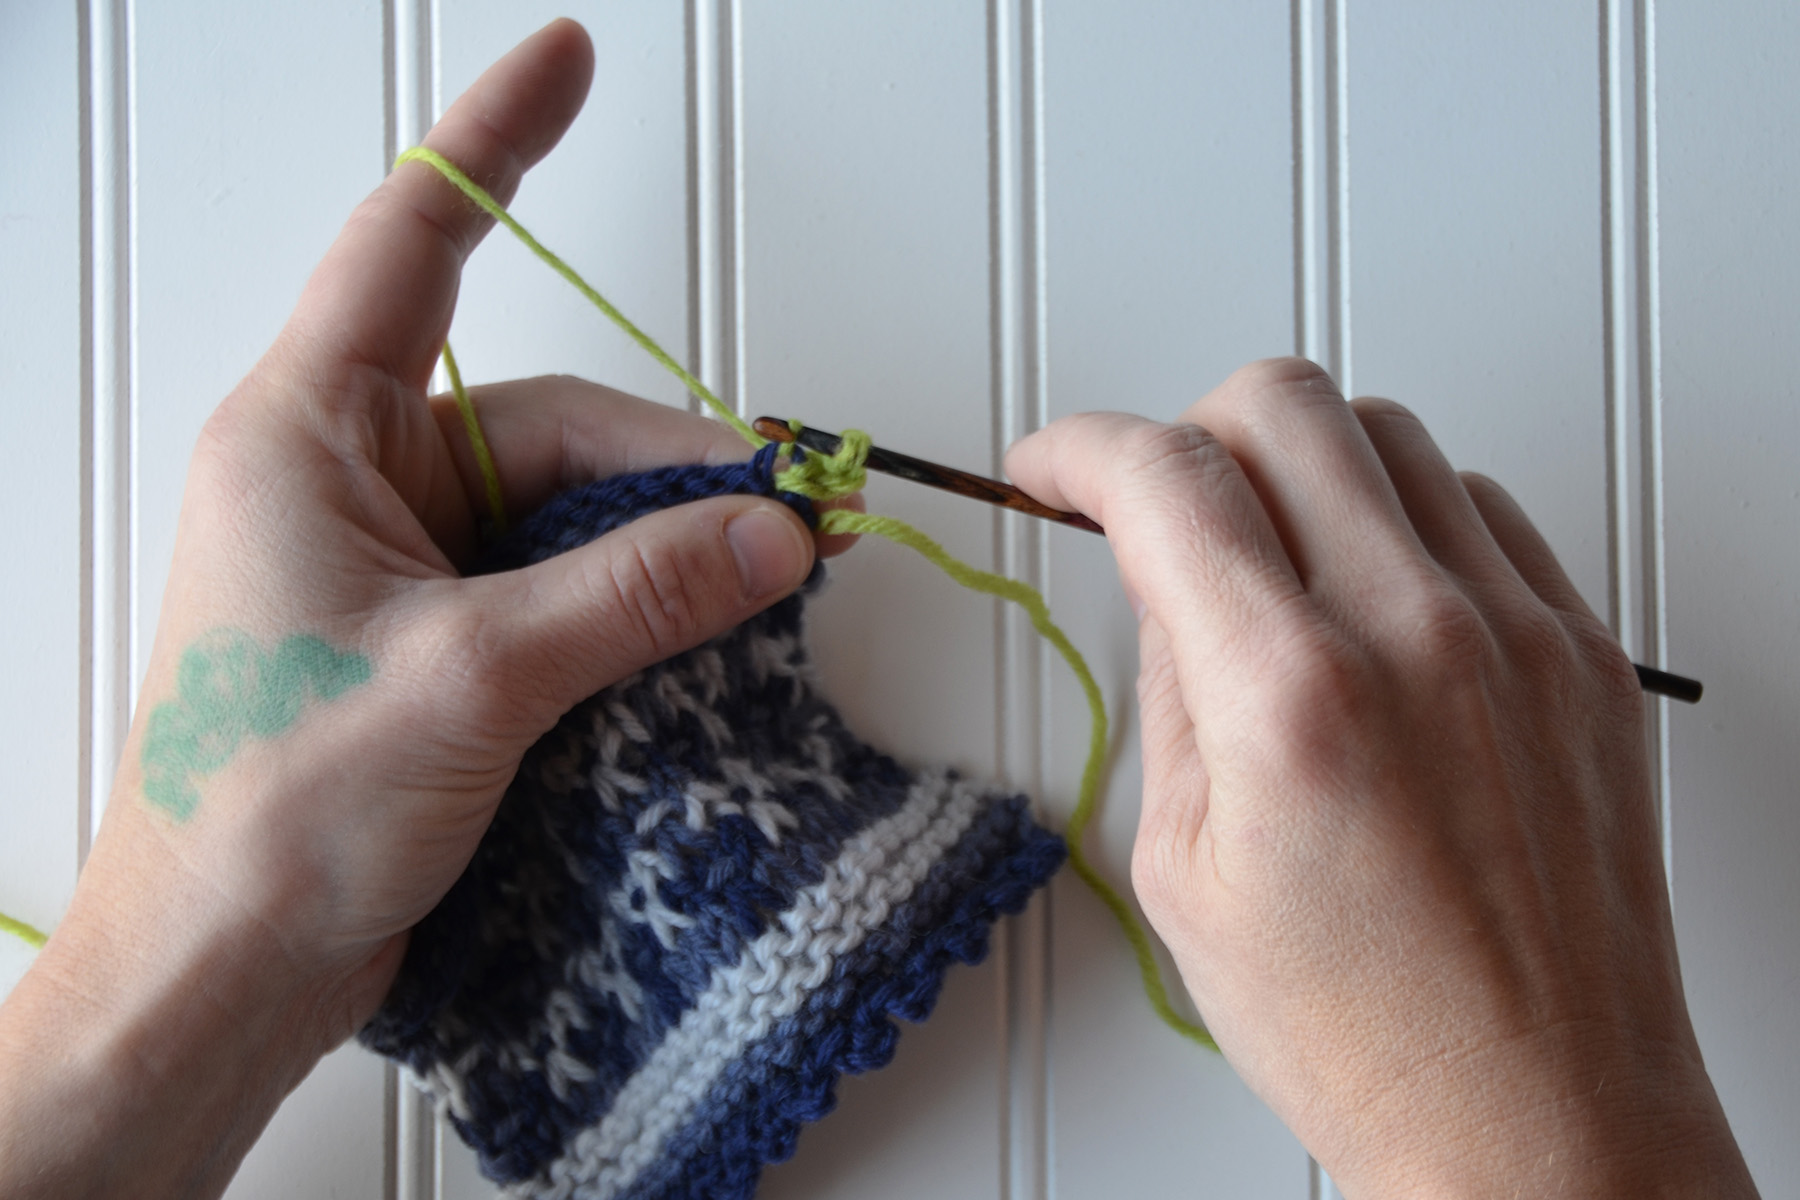
In my swatch, you can see that I’ve already done the picot edging along the lower edge. I’m going to be using a contrast color for the top edge so it’s easier for you to see.Begin by pulling up a loop onto your hook. Be sure to work through both loops of the knit stitch from the cowl as you do this.Step 1: Chain 3. To make a chain, first yarn over as shown.To complete the chain, pull the yarn over through the loop already on your hook.All 3 chains complete.Step 2: Slip stitch into the same knit stitch from the cowl body. To do this, first insert your hook into the stitch, going underneath the same two loops again.Yarn over and pull through the knit stitch.Then pull this second loop through the first loop on the hook to complete the slip stitch.Step 3: Skip the next knit stitch from the cowl body, and slip stitch into the next knit stitch.
Repeat Steps 1-3 for the edging. So you’re going to be working [slip stitch, chain 3, slip stitch] into every other stitch along both edges of the cowl. No big deal, right?
Here’s my swatch after a few more little picots.
Again, you can find the kit for this cowl on our website here (link). Here’s to learning new things!
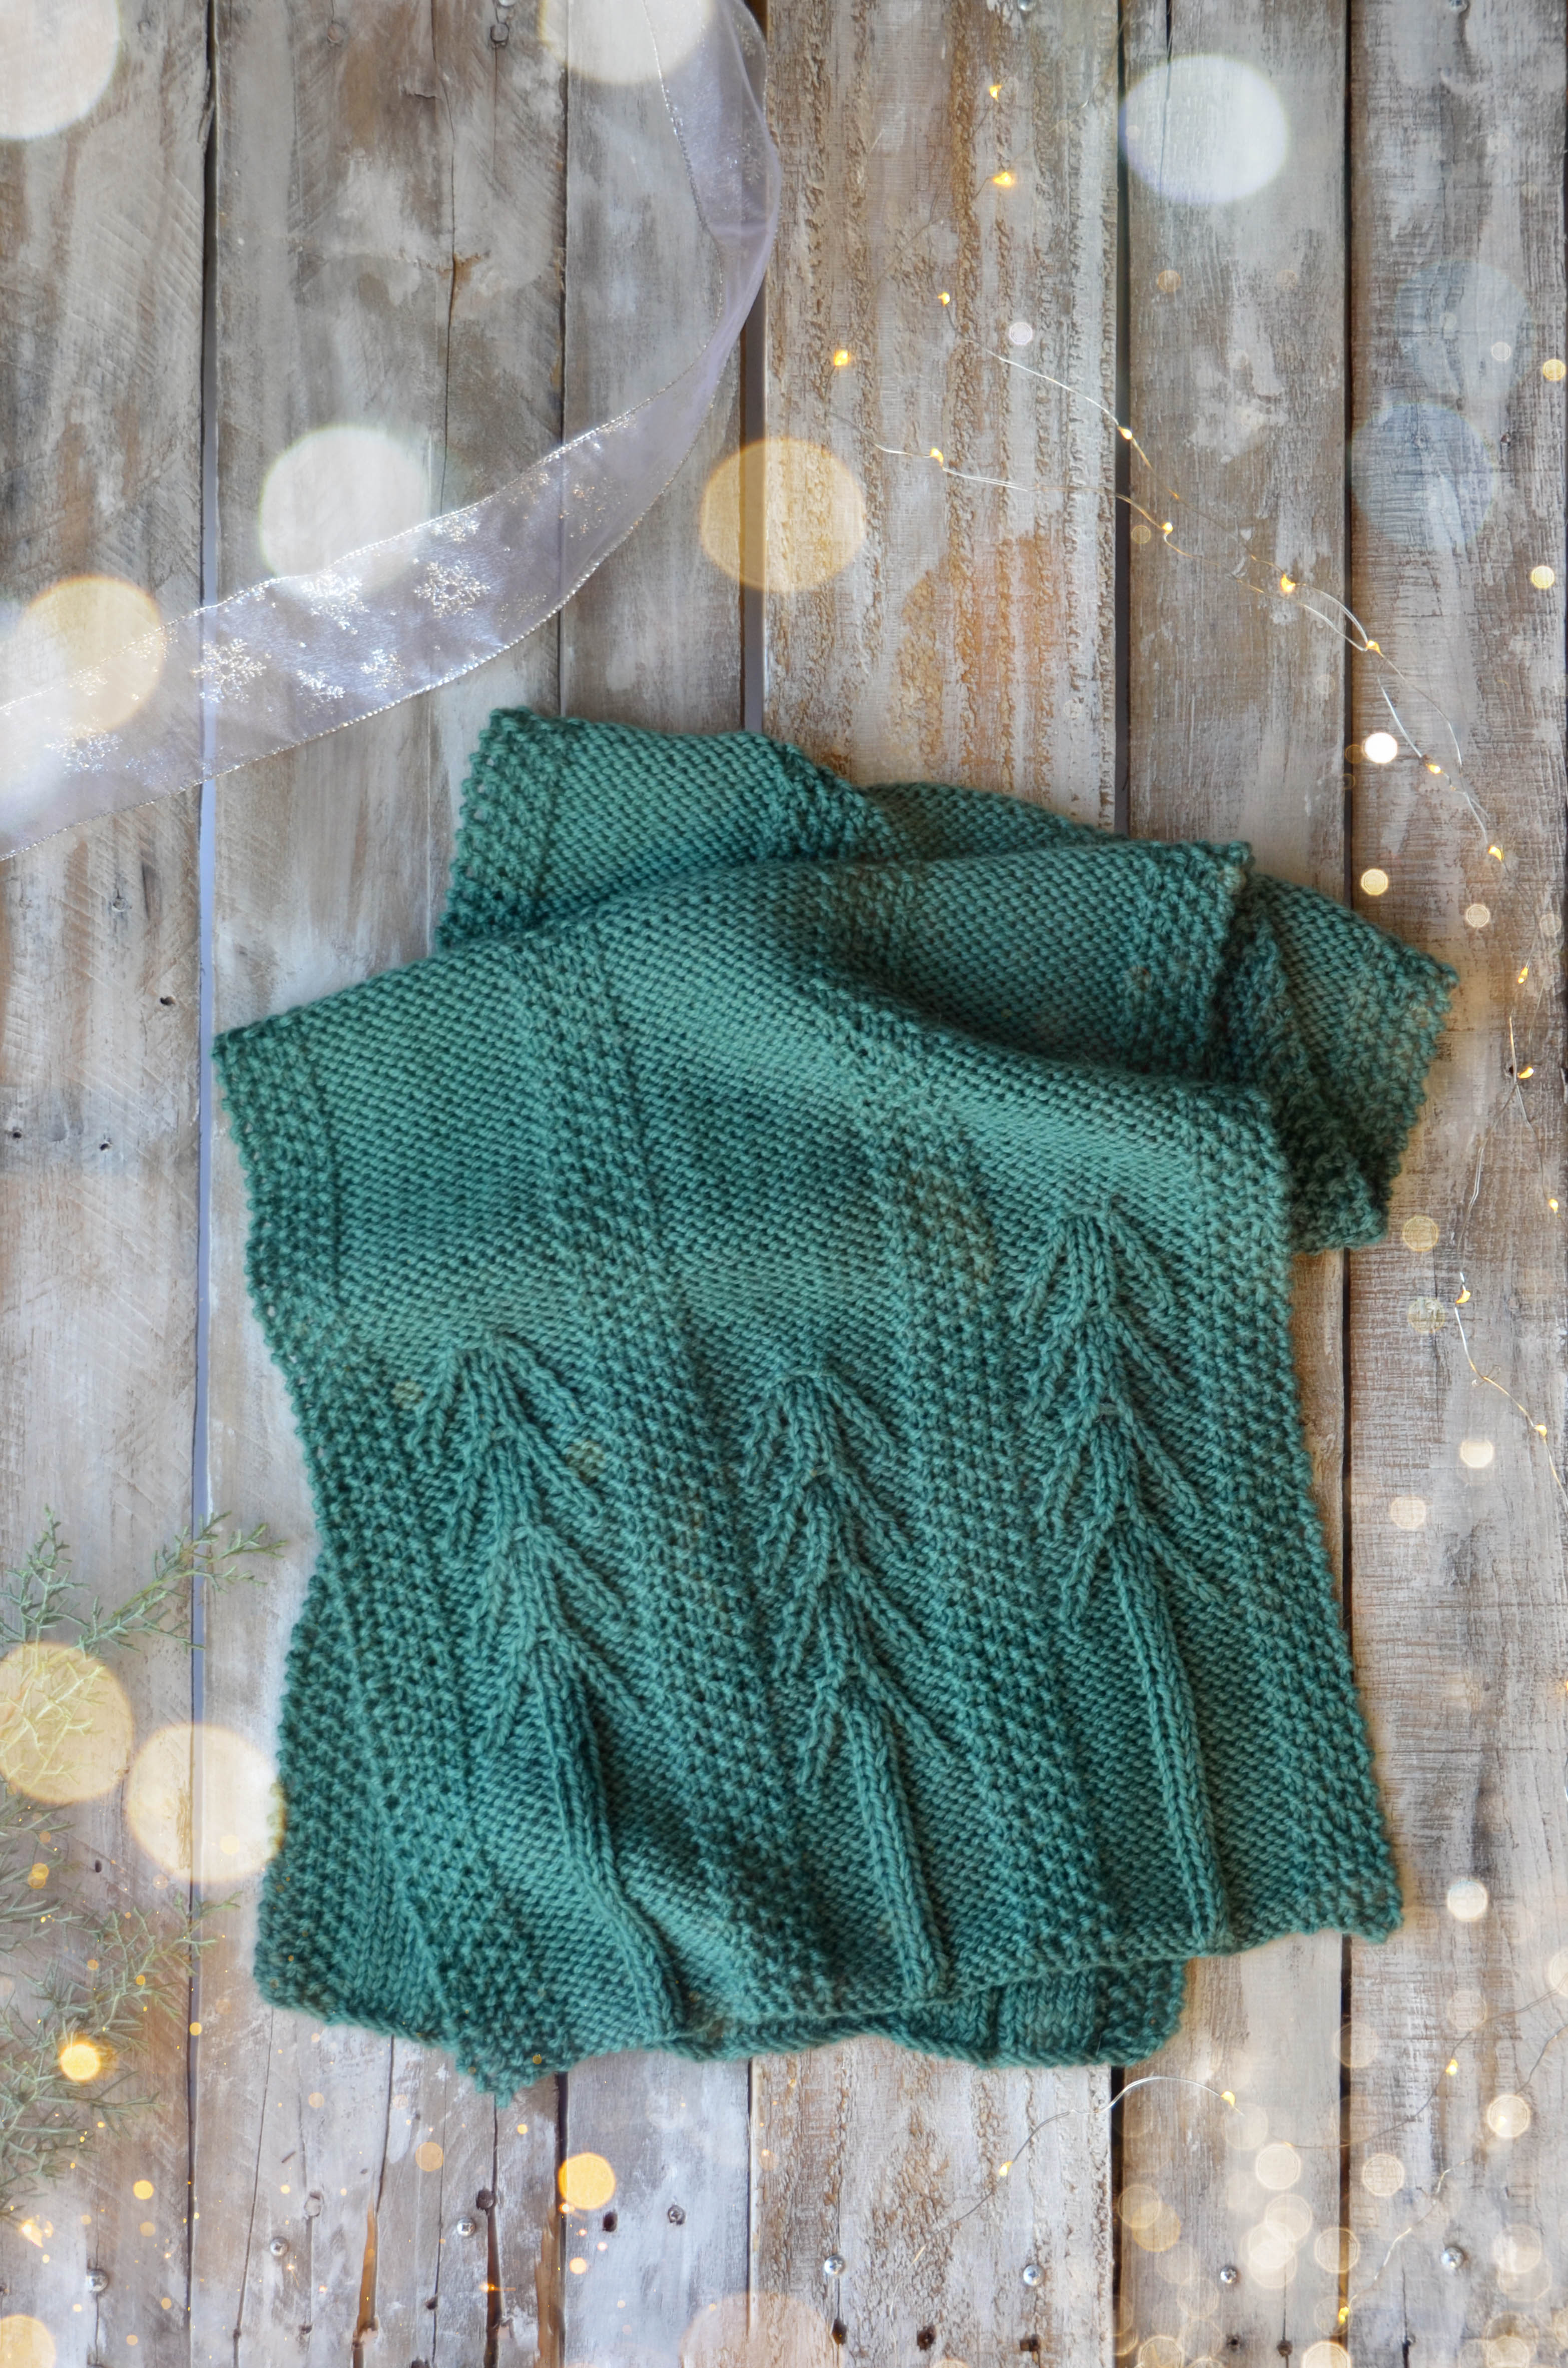
The Pine View scarf is a perfect winter accessory. It’s large, warm, and has an excellent amount of squish because it’s knit in our Deluxe Chunky.
This pattern only uses charts, but don’t let that intimidate you! The stitches are not at all complicated. You’ll get a nice rest at the center of the scarf, too. Personally, I prefer charts over written instructions because I’m a visual person. Charts enable you to see the stitches before you create them.
With that said, some charts can seem overwhelming. You might feel as though you’re getting lost in the grid full of symbols. Fear not, because I’d like to share some helpful tips and tricks for reading charts.
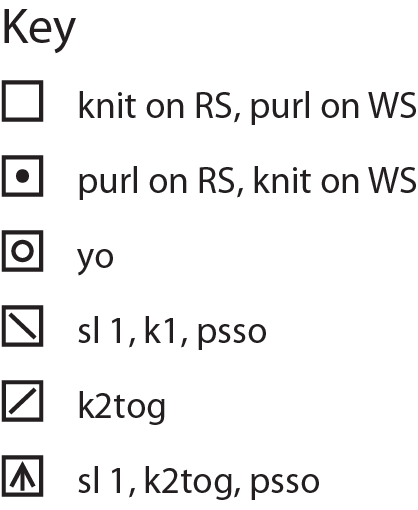
1. Familiarize yourself with symbols.
Take time to review the key and ensure you understand what each symbol means.
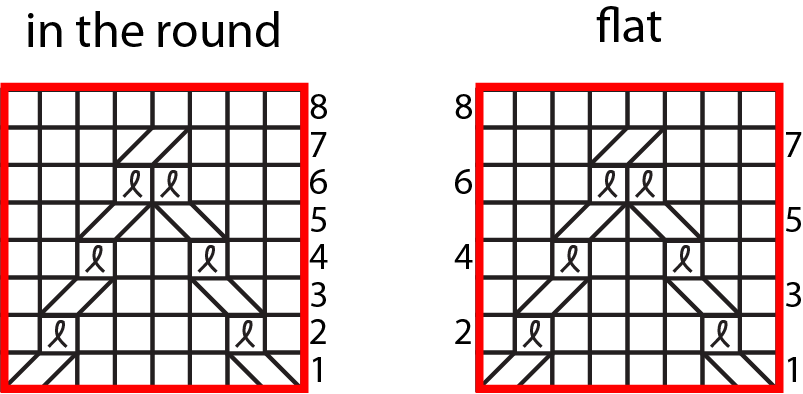
2. Flat or in the round?
Is the pattern flat or in the round? When you knit in the round, charts are read from right to left on every row. Pine View is knit flat, meaning that on right side rows you’ll read right to left, and on wrong side rows you’ll read left to right.
Charts that are knit flat have numbers on both the right and left sides. Charts knit in the round only have numbers on the right side.
3. Stay on track!
Highlighters – Don’t cross out rows—you want to be able to go back and read previous rows in case you make a mistake. And, if you’re like me, you will make mistakes! I probably use highlighters most frequently. Simply highlight the rows you’ve completed, and read from the row above.
Washi Tape – For those who prefer not to see previous rows at all, washi tape is a great solution. It can easily be removed from the paper, so you can hide previous rows and simply peel back the tape to see them.
Stitch markers – For charts that have repeats, use stitch markers. It honestly makes a world of difference. A mistake is less likely to offset the entire row if you’re using stitch markers between each repeat.
You can find this pattern, Day 6 of our 12 Days of Winter collection here.
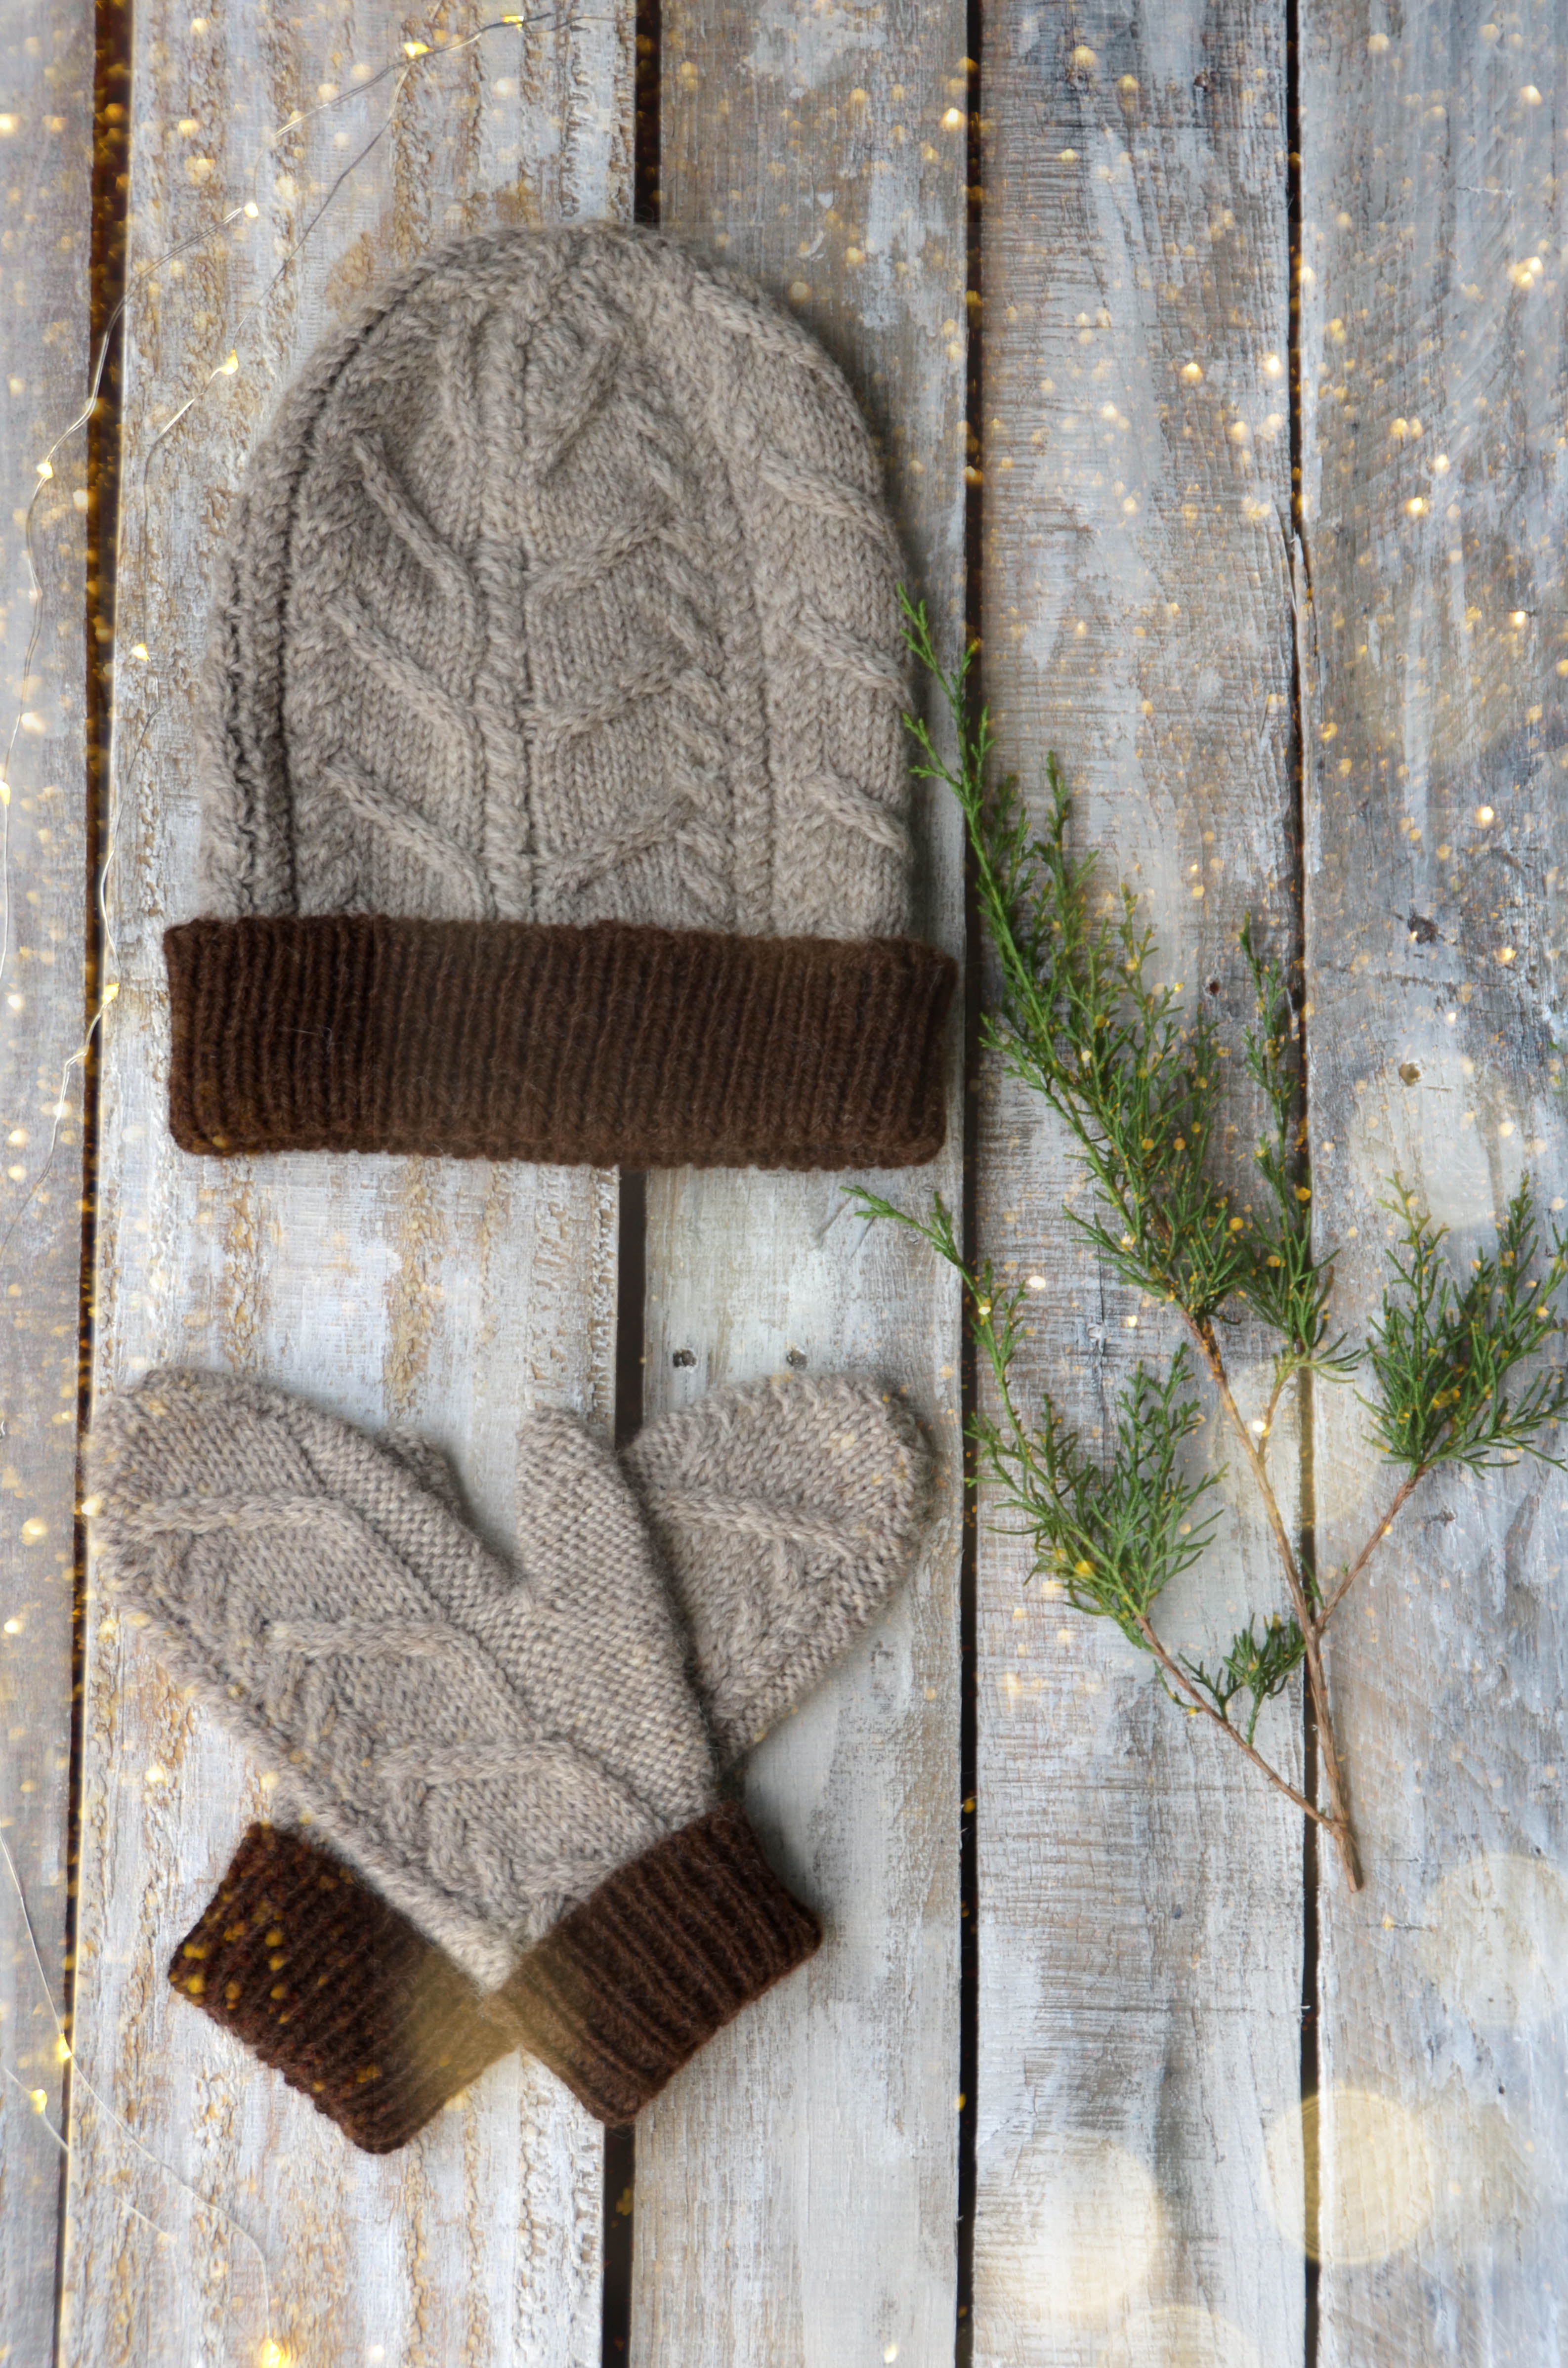
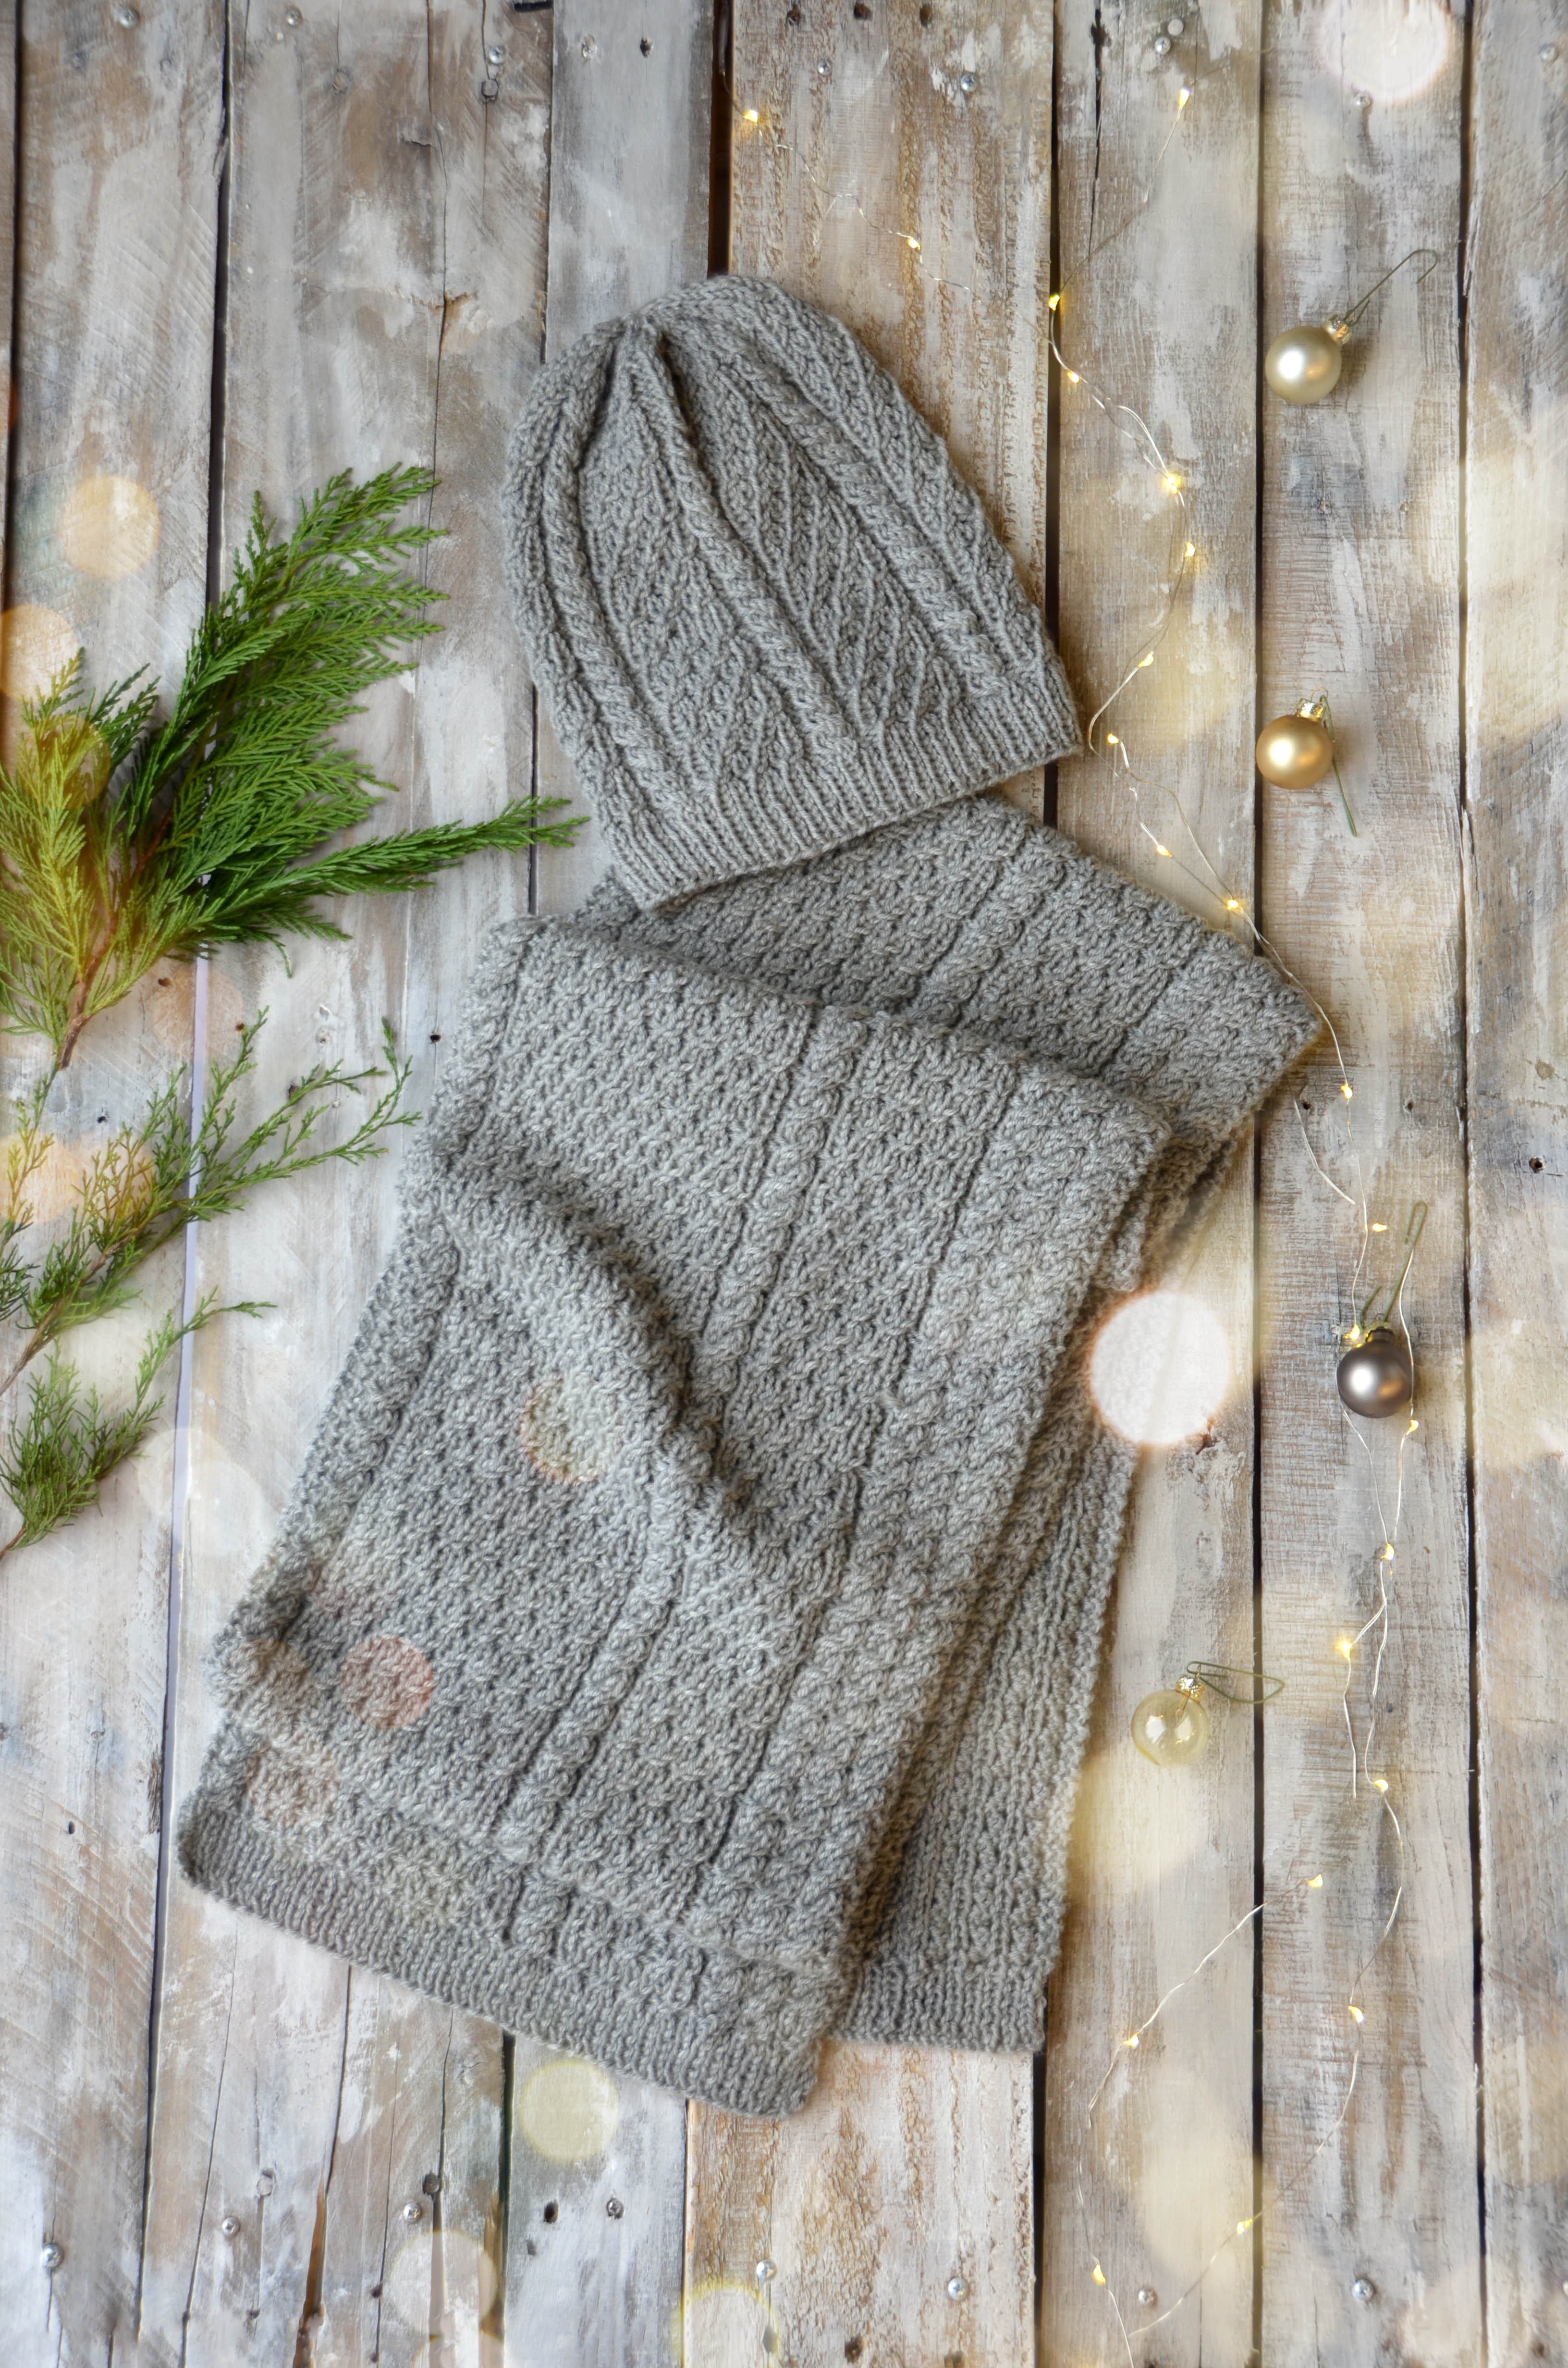
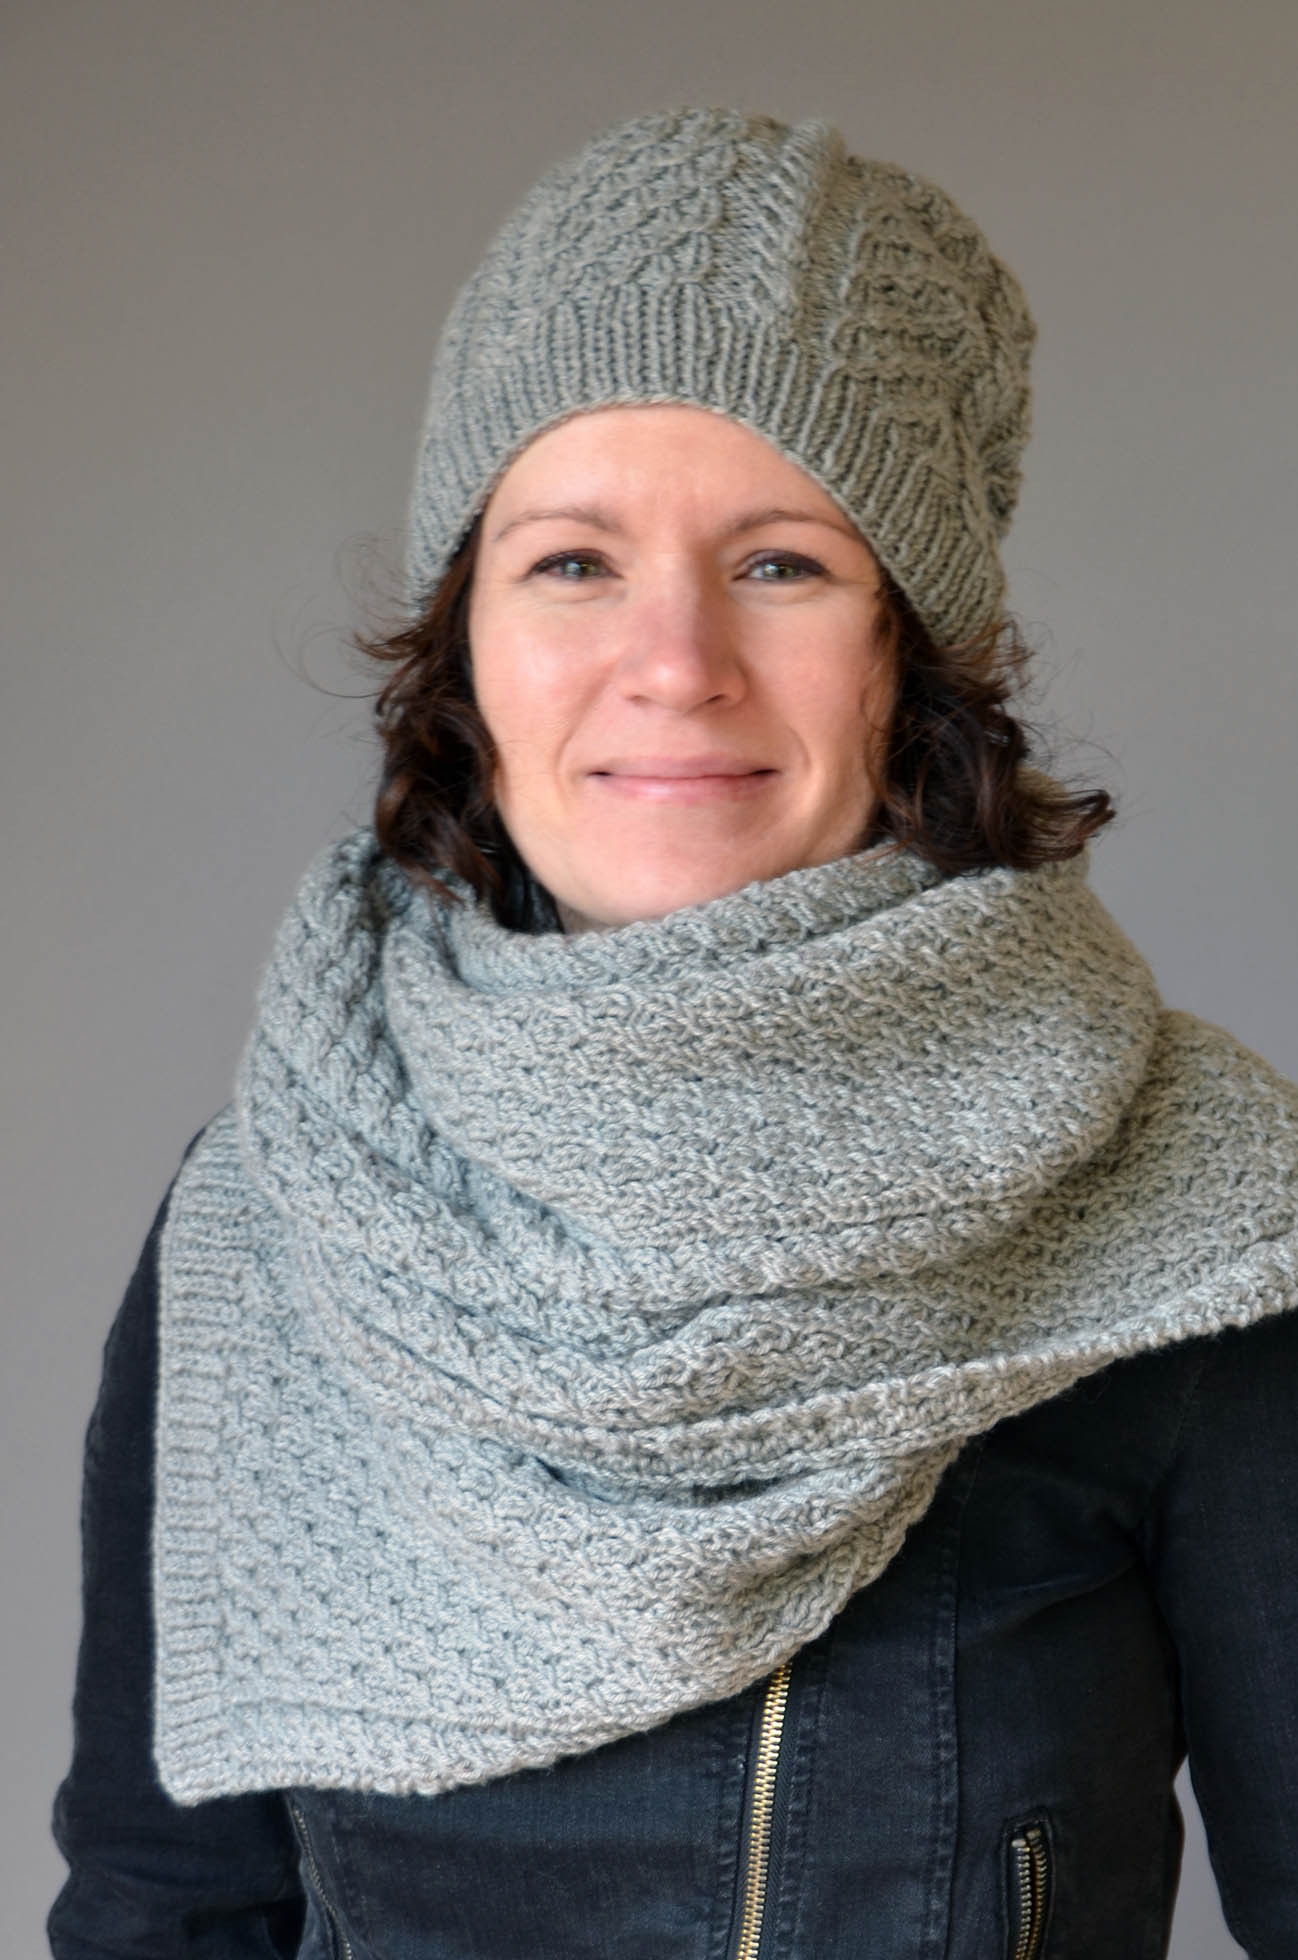
Today we’re introducing the Nutmeg Hat and Mitten Set. The neutral set is incredibly wearable for men and women alike. Personally, I love working with undyed wool. It is rustic in appearance and goes with nearly anything. While I’m a lover of color, I equally adore the natural shades of wool. You can see more of our Deluxe Worsted Naturals collection here.
This set features all over cables and a contrasting cuff. I wanted to give this set a professional finish, so I used the long-tail tubular cast-on method.
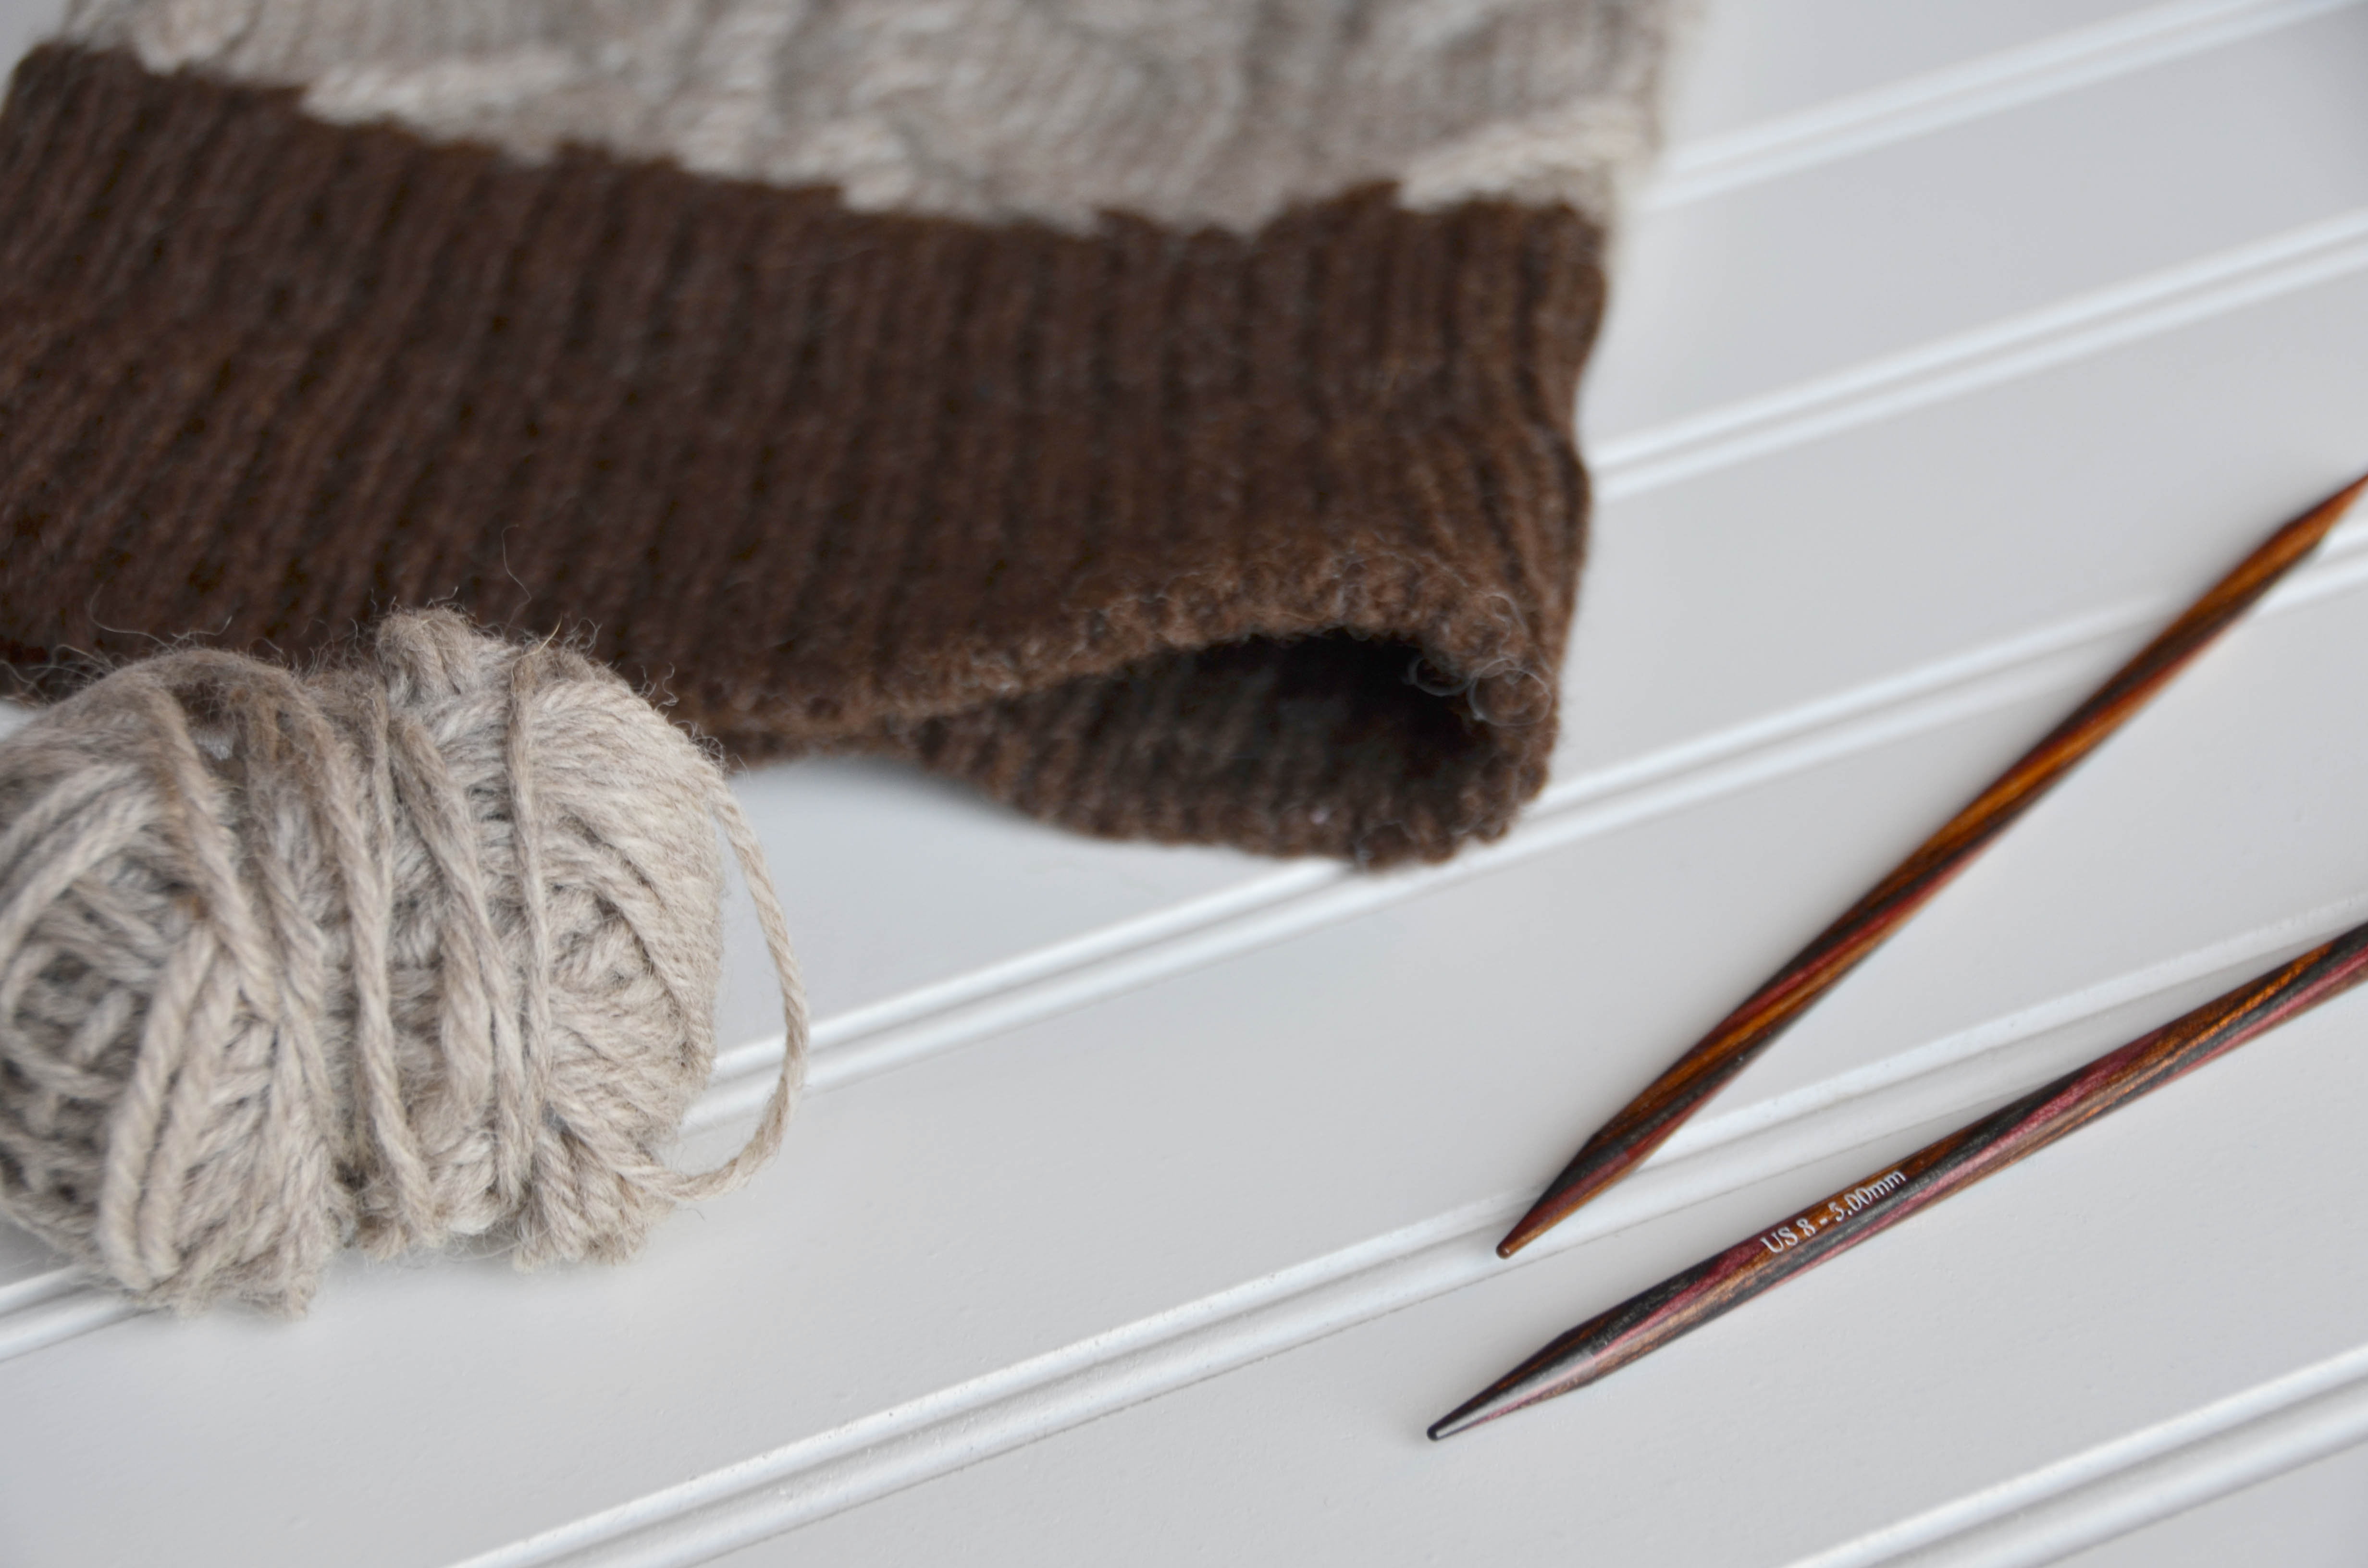
I can easily recall a time when I felt intimidated by the Tubular cast-on method. Like many things in knitting (and in life), we often perceive new things to be more challenging than they really are. This cast-on method is one of those things. If you look at the Nutmeg set, you’ll notice that the 1×1 Ribbing seems to run seamlessly from the right side to the wrong side. Notice the lack of a cast-on edge in the photo below. You can’t tell where it was cast-on. That is the beauty of a tubular cast-on.
It takes more time than most other methods and it feels a bit fiddly at first, but it’s well worth it. It’s by far my favorite method when I’m using 1×1 Rib.
If you’d like a closer look at each photo, simply click it.
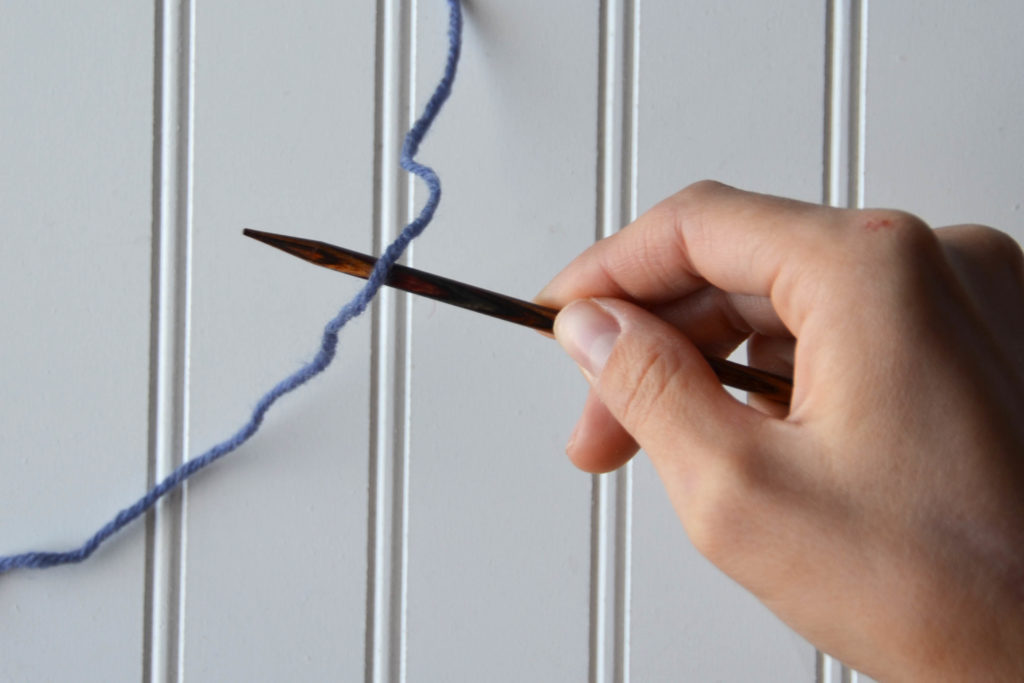
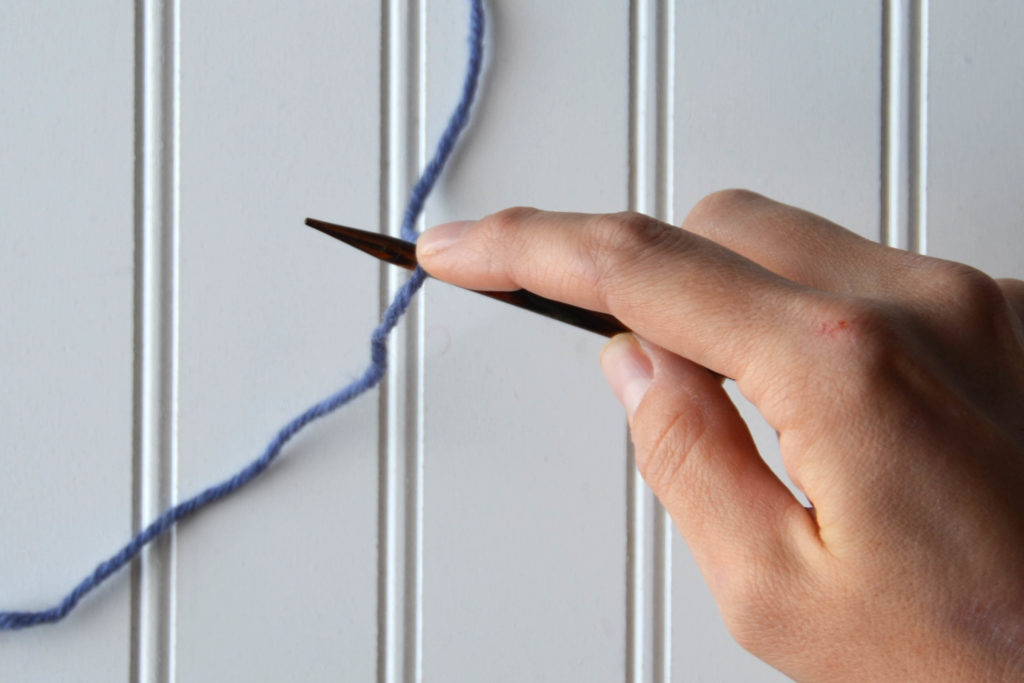
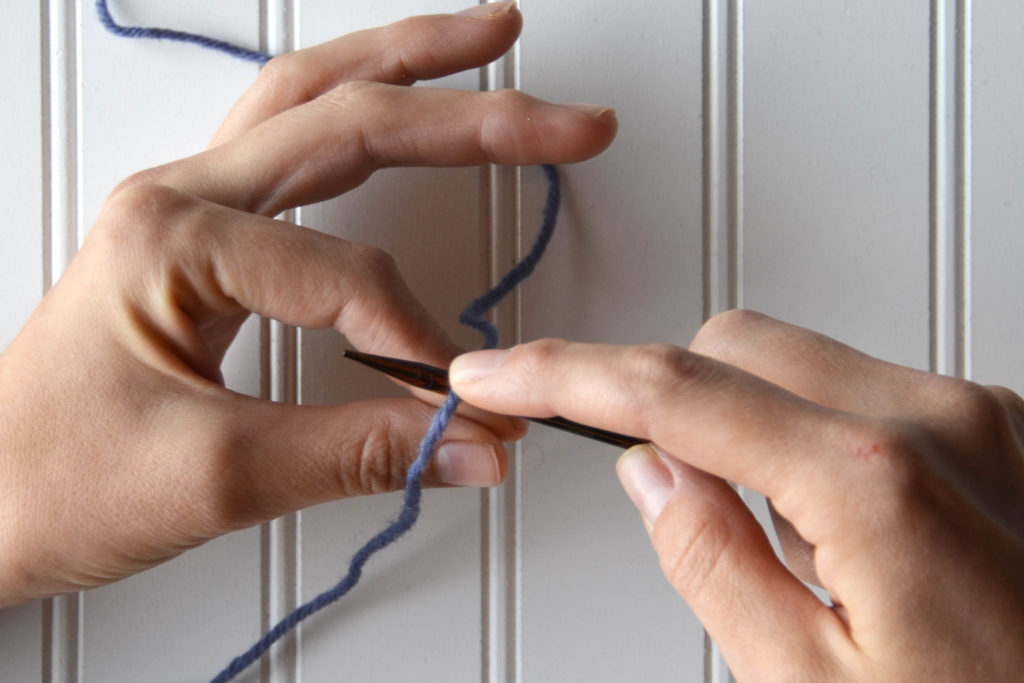
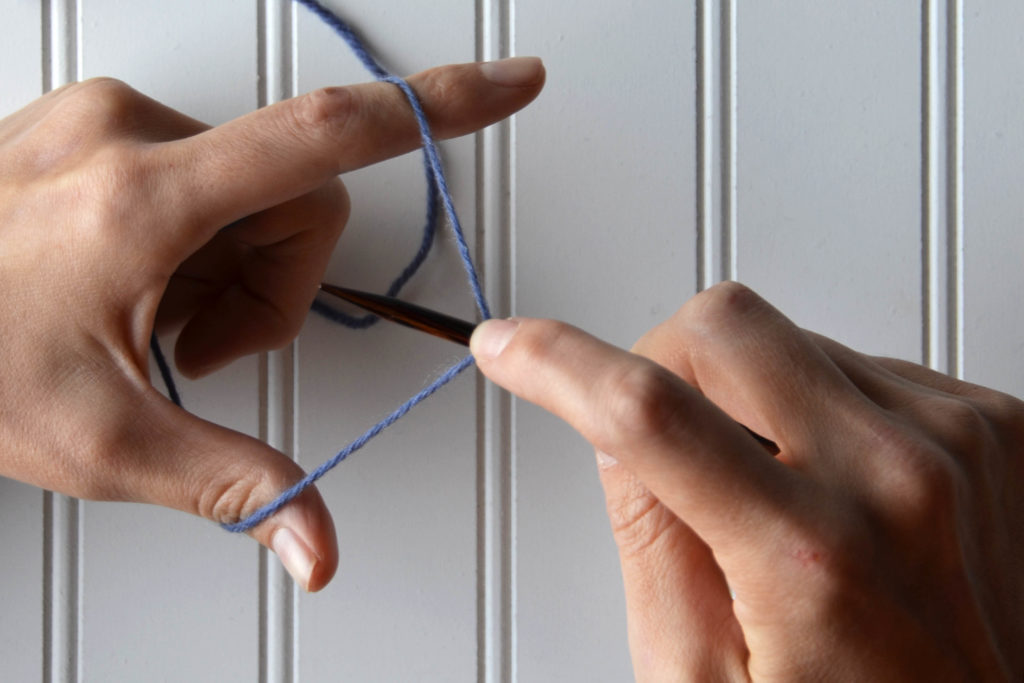
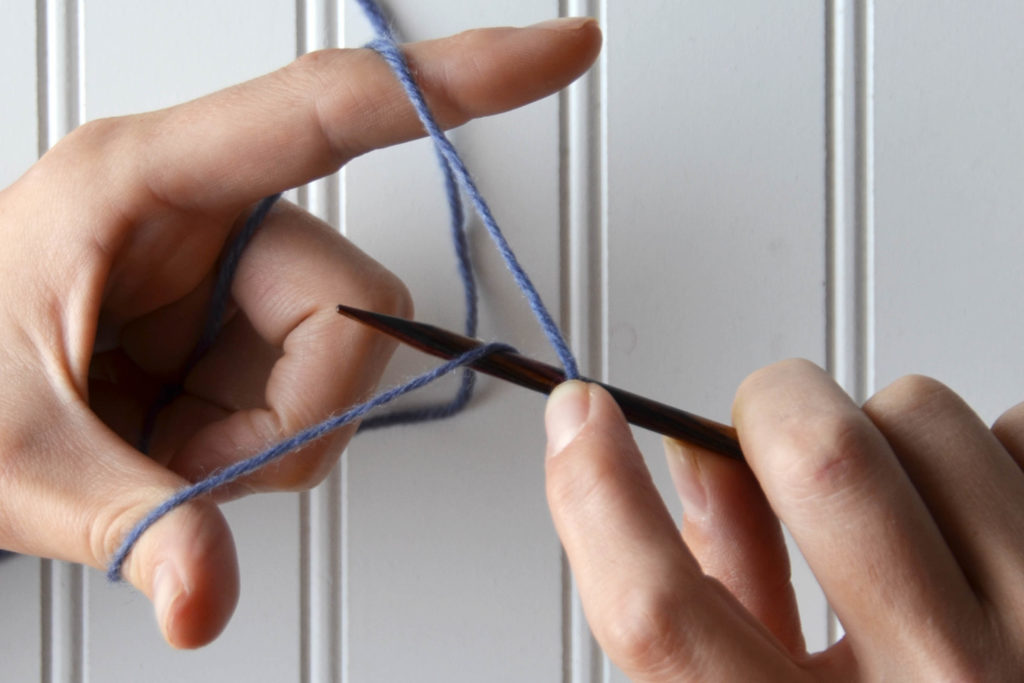
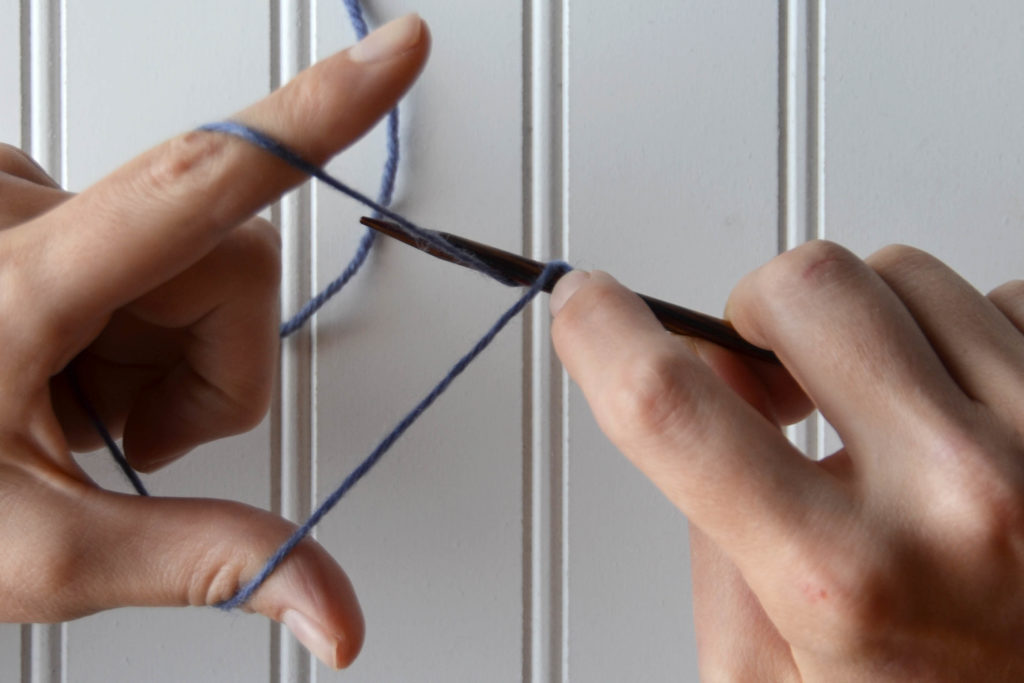
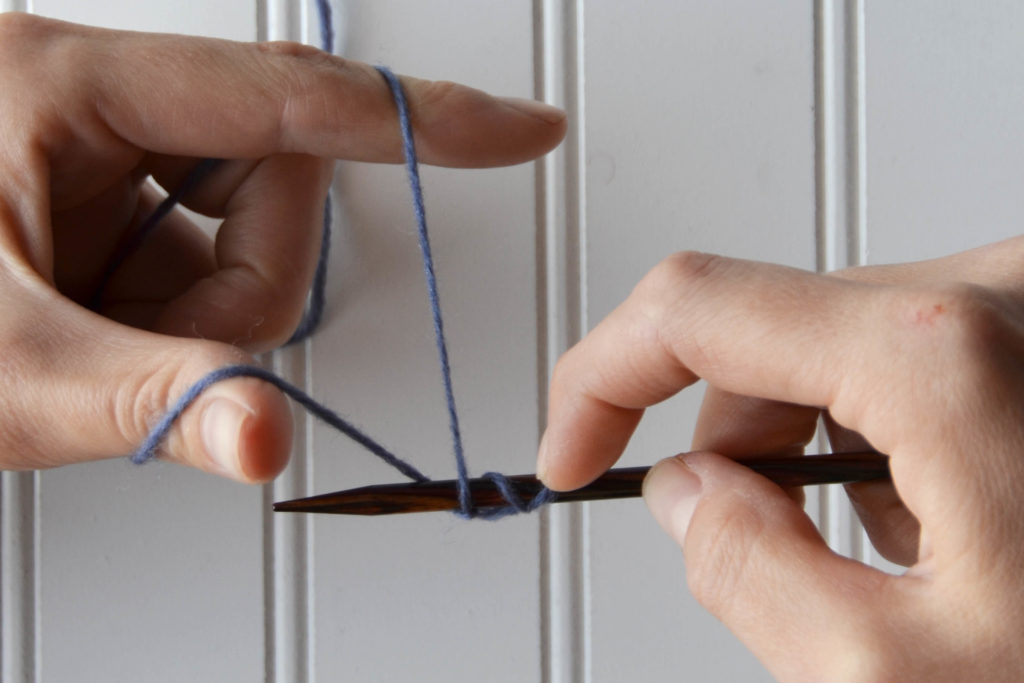
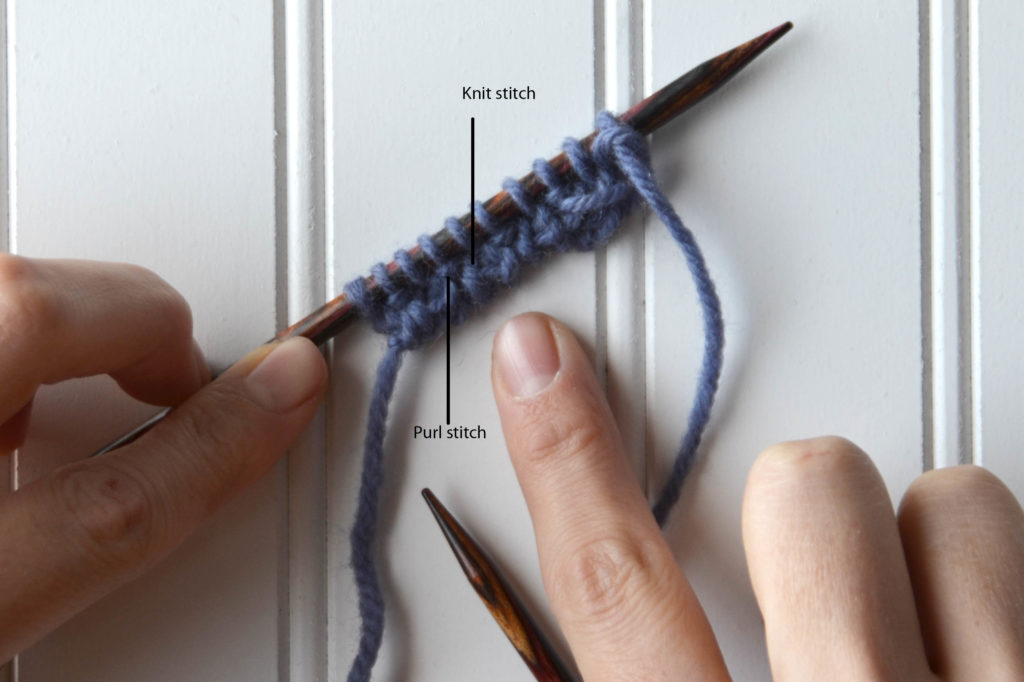
To begin, place your yarn over the needle, leave a long tail as you would with a traditional long-tail cast on. You can use a slip knot, however; I do not so that the cast-on stitches are as invisible as possible.Hold your yarn in place with your index finger. Separate your tail and working yarn with your thumb and your index finger. You’ll do the same way you would for a regular long-tail cast-on.Notice that I’m tensioning my yarn the same way that I would for a regular long-tail cast on.Working from front to back, bring your needle under the yarn around your thumb.Bring the needle up through the center.Working from front to back, bring the needle over the yarn around your index finger and dip underneath it, then underneath the yarn around your thumb.Correct the tension in your yarn. You now have two stitches. Notice how there is not a bump across that stitch? This will be a knit stitch.
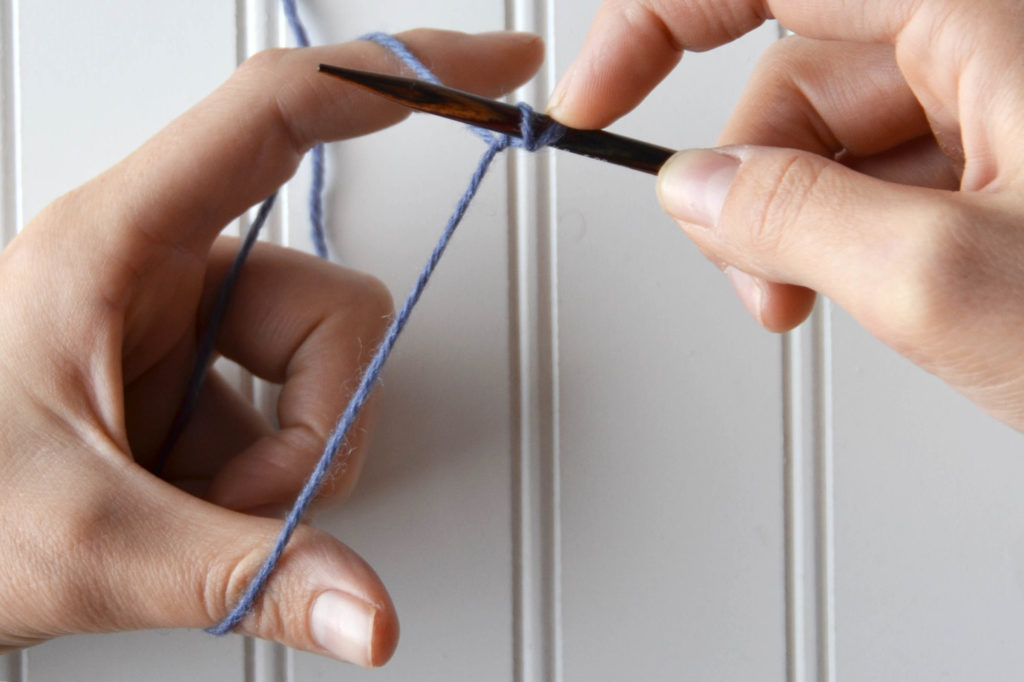
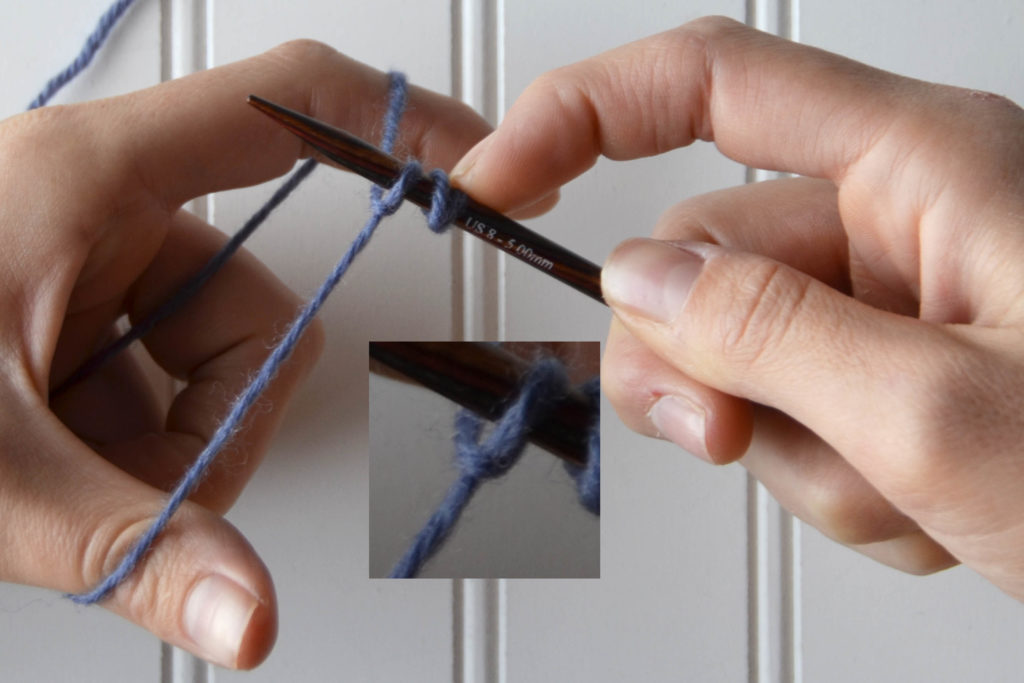
The motion for a purl stitch mirrors the knit stitch.
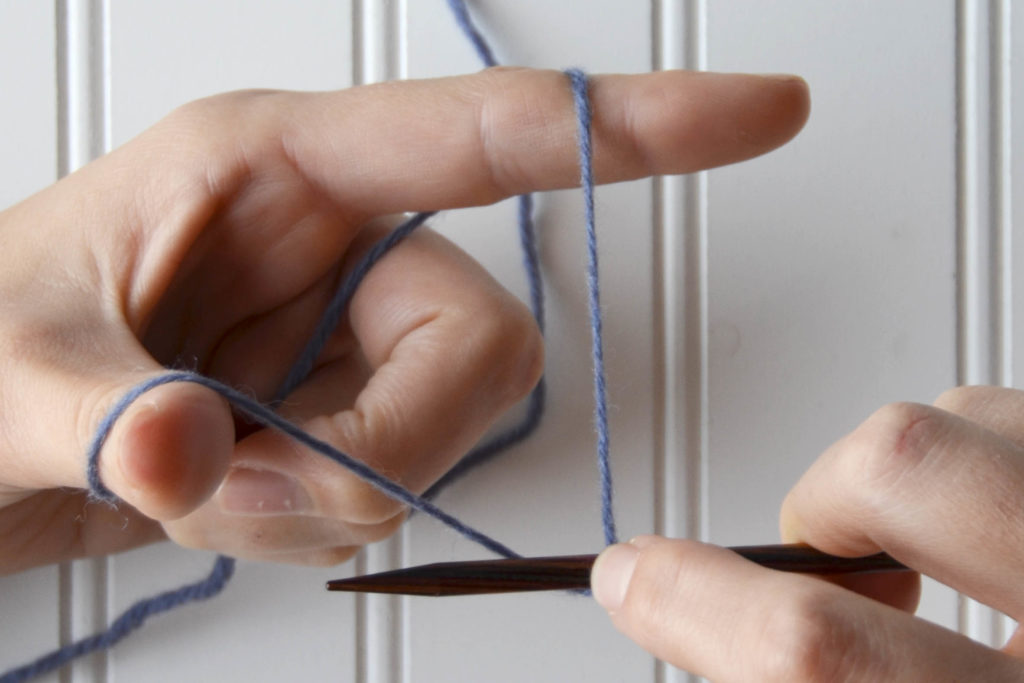
Working from front to back, bring the needle over the yarn around your index finger, dipping below it and bringing the needle back through the center.Working from back to front, bring the needle over the yarn around your thumb, dipping below it and then below the yarn around your index finger.Correct your tension. Notice that this stitch has a purl bump. This is a purl stitch.
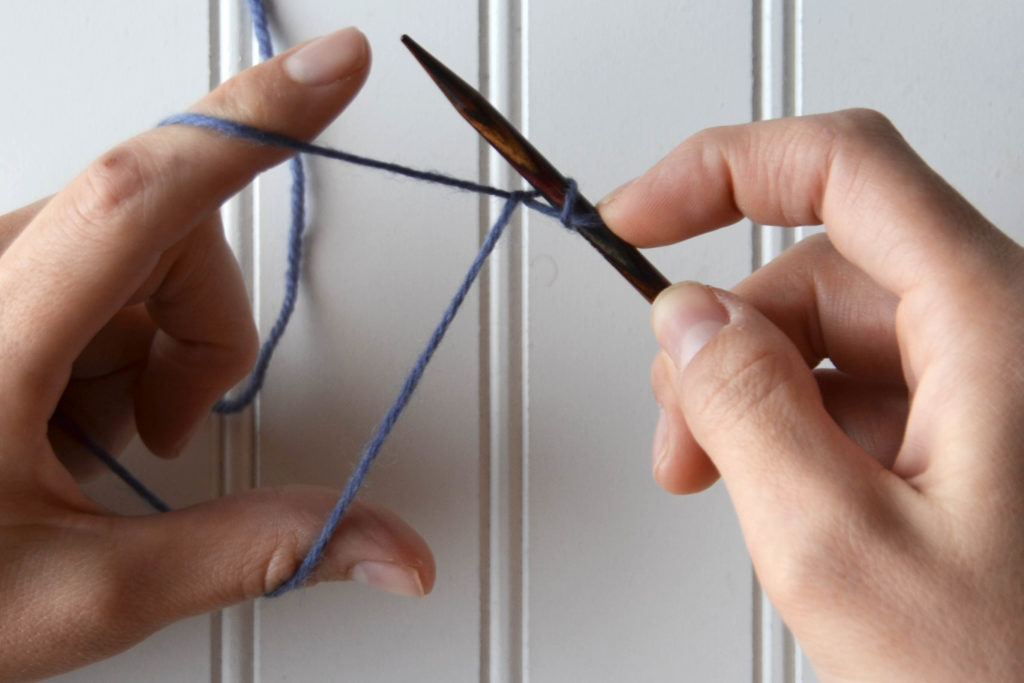
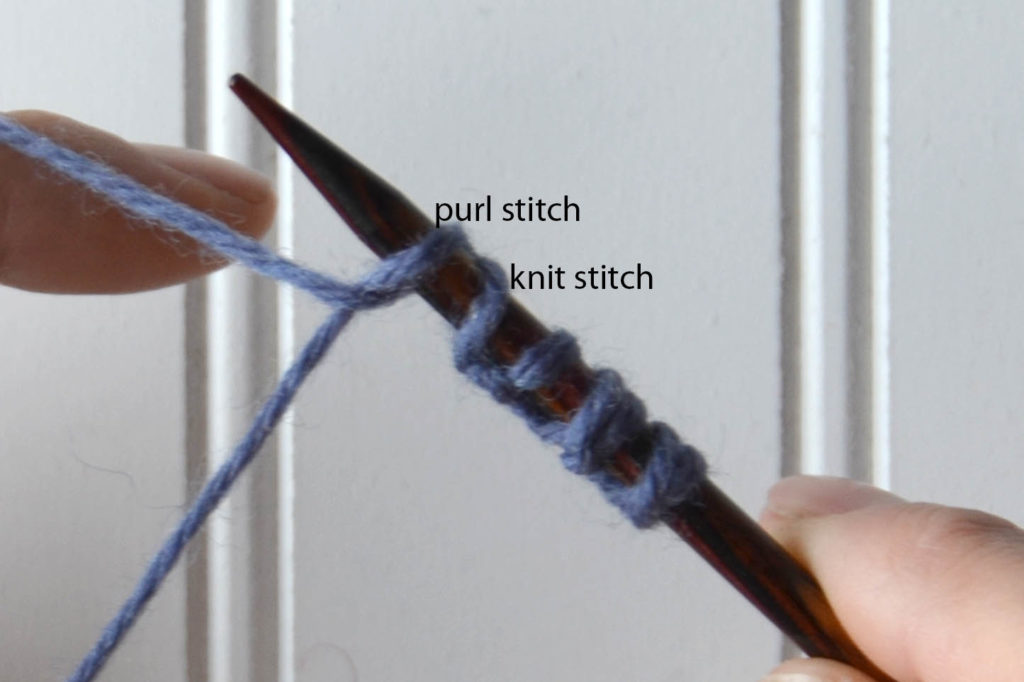
Continue in this manner, alternating between knit and purl stitches until you have the required number of stitches.
Notice the difference between the knit stitches and the purl stitches.
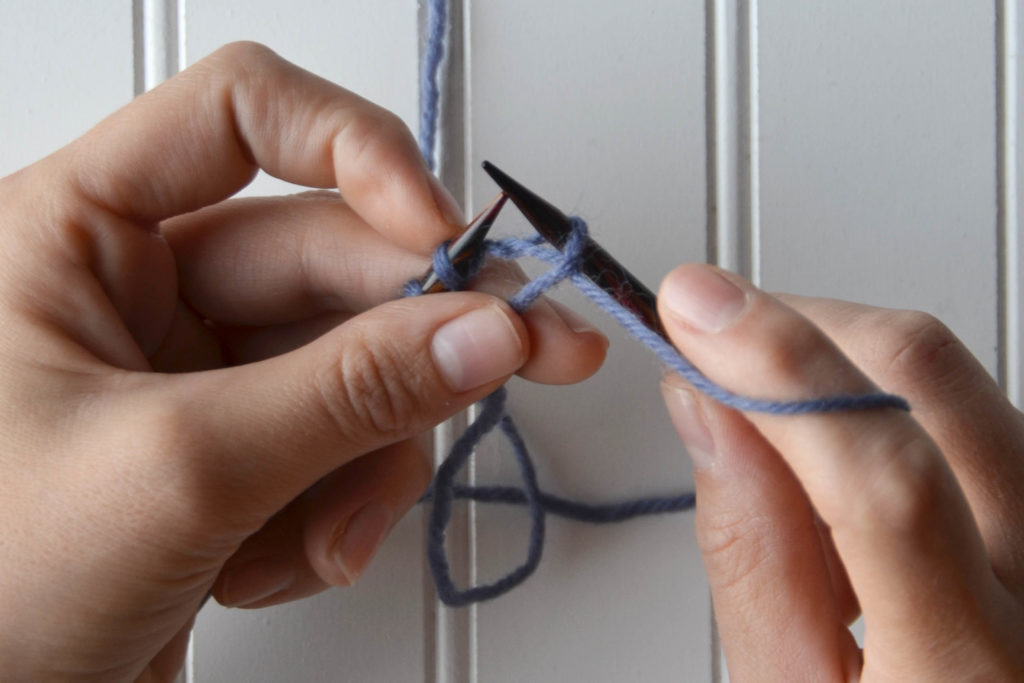
Once you have the correct number of stitches, carefully turn your work. I highly recommend using your index finger to hold the last stitch you cast on in place. Now you’ll begin working the first foundation row.
Once you’ve turned your work, grab your working yarn and slip the first stitch purlwise with your yarn in front.Bring your yarn to the back.Knit the next stitch through the back loop. This will untwist the knit stitch.
Continue to slip the purl stitches with your yarn in front and knit the knit stitches through the back loop to the end of your work. Turn your work. Now you’ll begin the second foundation row.
Just as in the previous row, slip the purl stitches purlwise with yarn in front.Knit the knit stitches normally–there is no need to knit them through the back loop because these stitches should no longer be twisted.
Repeat the last two steps to the end of the row
On the next row, simply work in K1, P1 ribbing by purling the purl stitches and knitting the knit stitches.
This is what your finished cast on should look like.
Once you’ve finished casting on, you can join your work in the round (as would be the case for the Nutmeg Hat and Mitten Set). There will be a small space you’ll want to seam. Typically I do this just before weaving my tail into the project.
This method works for projects that are knit flat or in the round. It gives your projects such a neat finish. It’s also much more stretchy than a traditional long tail cast-on.
You can find the link to the Nutmeg Hat and Mitten set here.
Though there are some traditional 2×2 cable panels in both hat and scarf, most of the crossed stitches are actually twisted stitches. Right and left twist stitches are a way of crossing stitches that doesn’t require a cable needle. And with just a bit of confidence, 2×2 cables can be crossed without a needle, as well.
I love love love twisted stitches and use them frequently in designs. Through the magic of (simple) needle acrobatics, a lovely texture can be made across your knit fabric. These types of stitches were used a few years ago in our Uptown Afghan Knitalong. Here is the video showing how to do right and left twists.
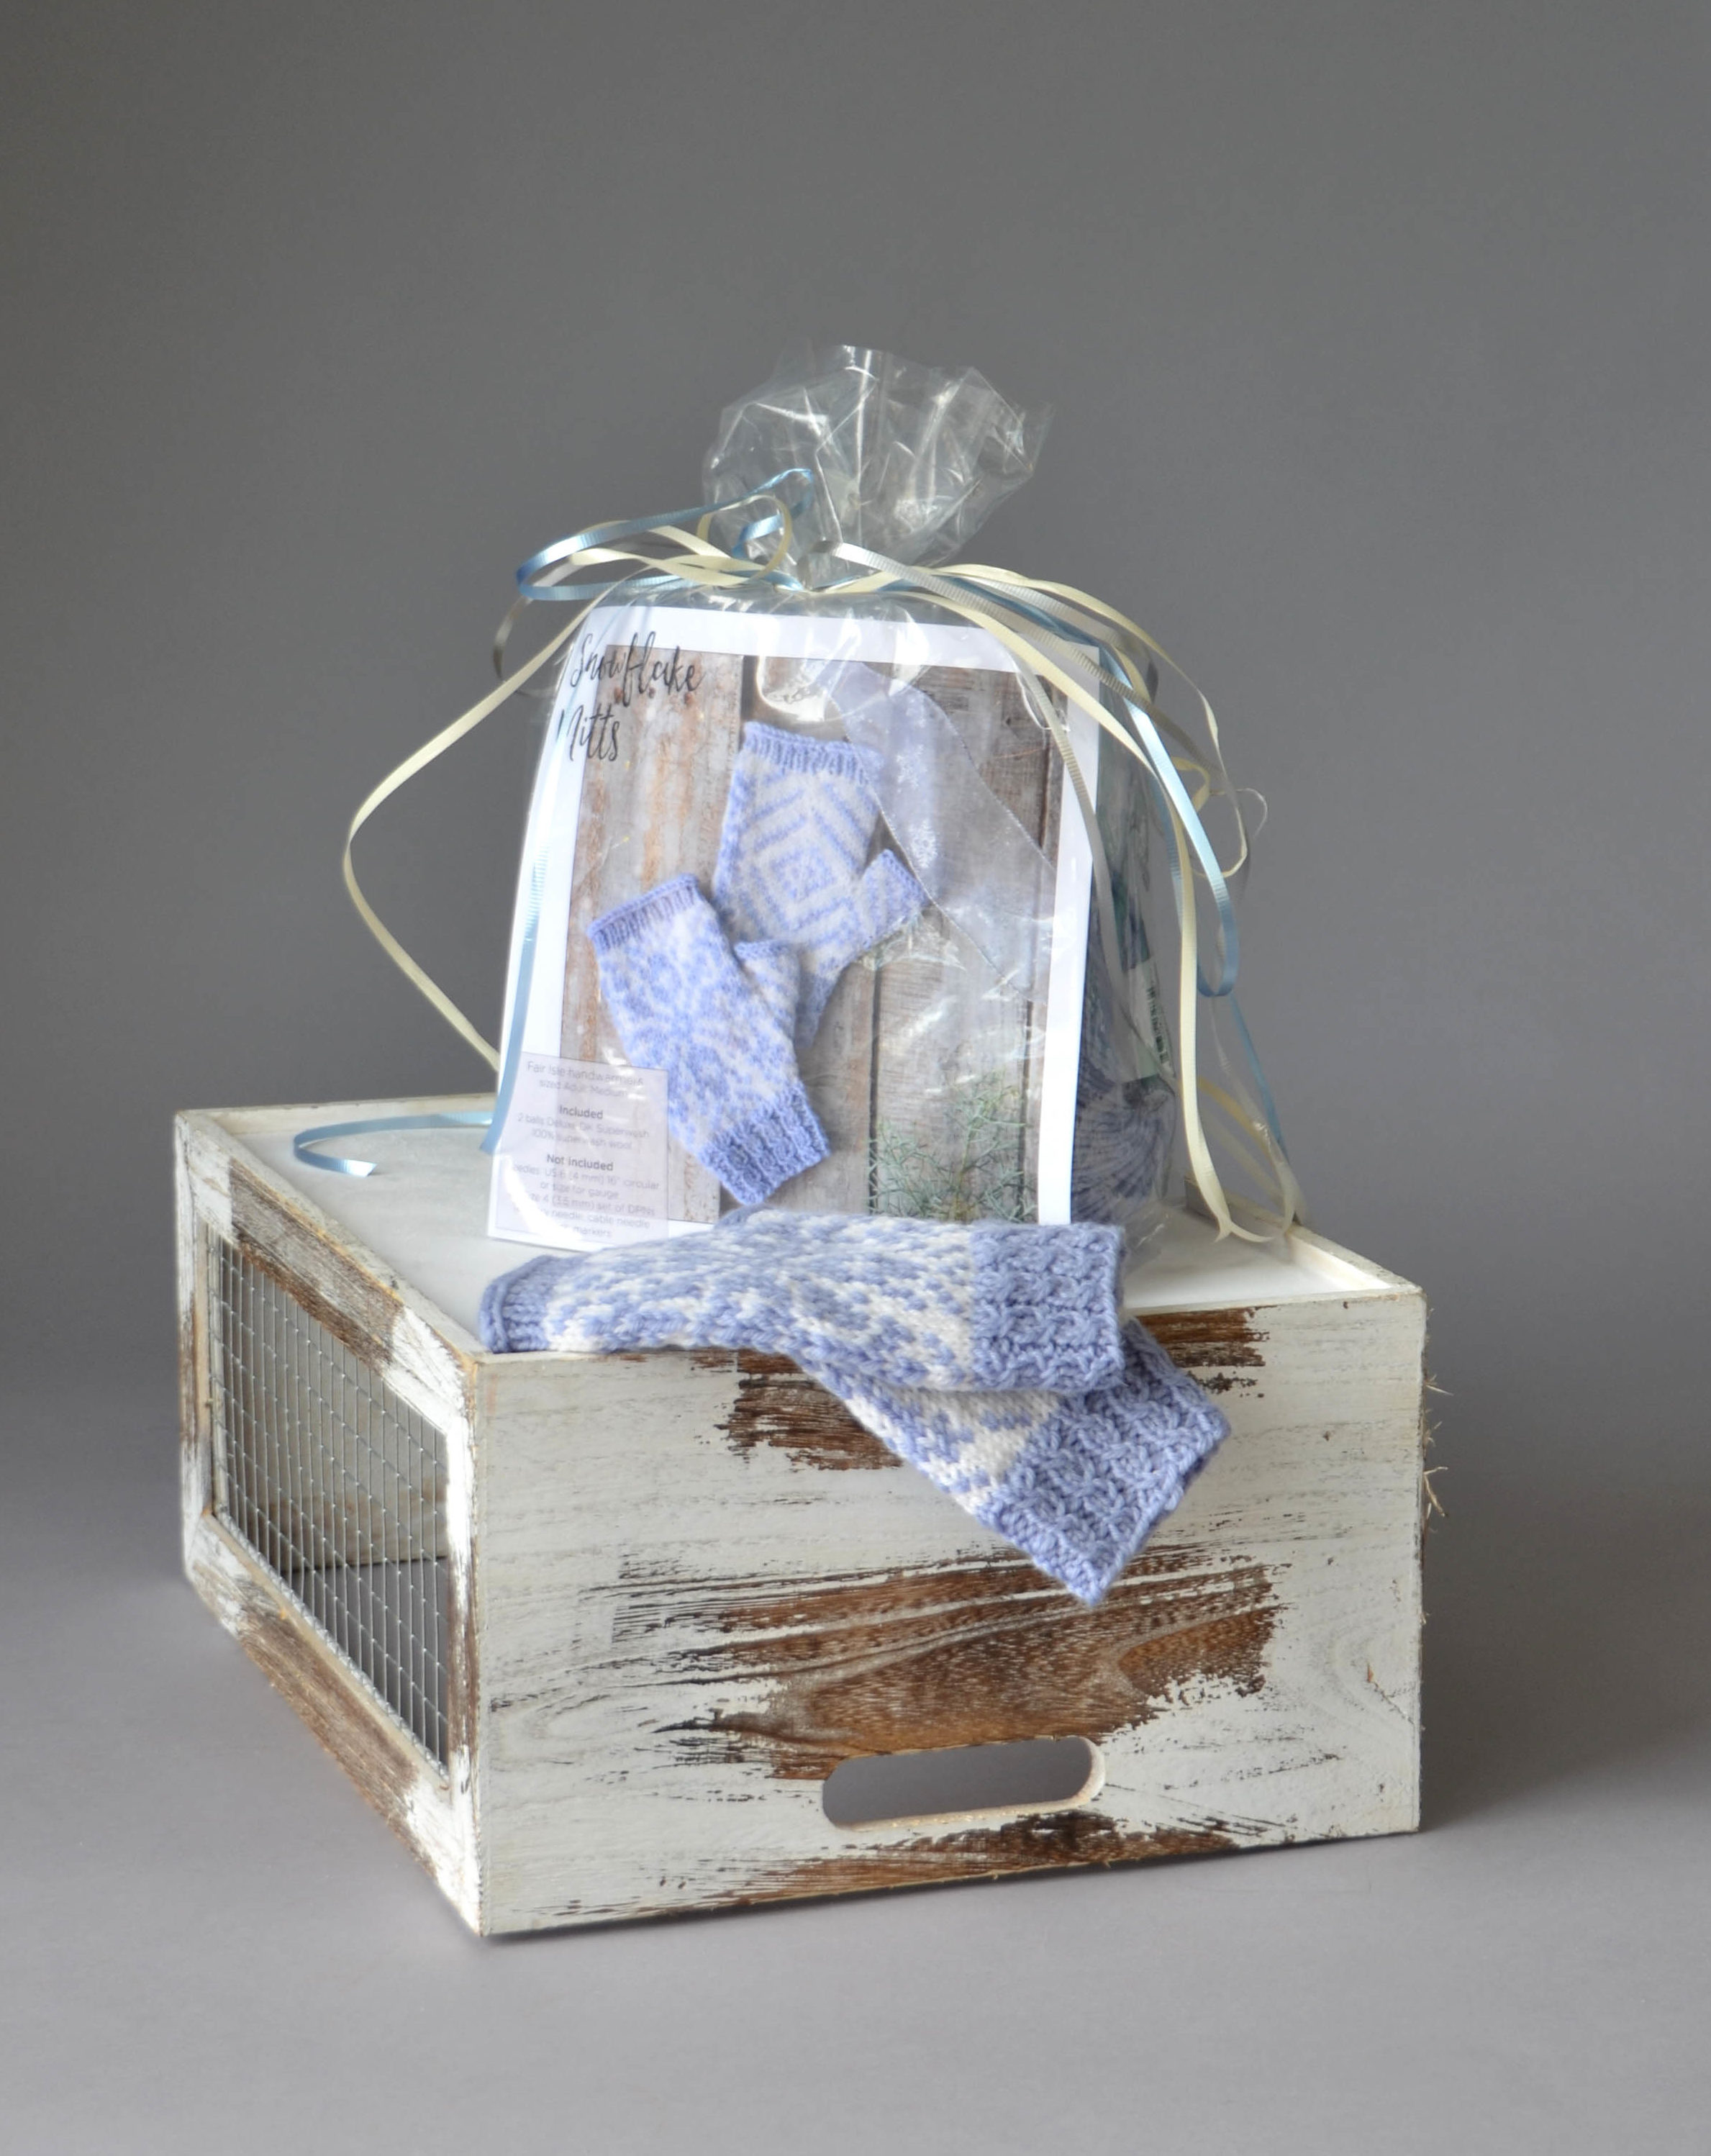
Remember, each of our 12 Days of Winter projects come packaged in a very giftable bag tied with ribbon. So if you’re shopping for one of your knitting buddies, these might just fit the bill.
I have no plans of taking this off any time soon. It’s freezing in our office!
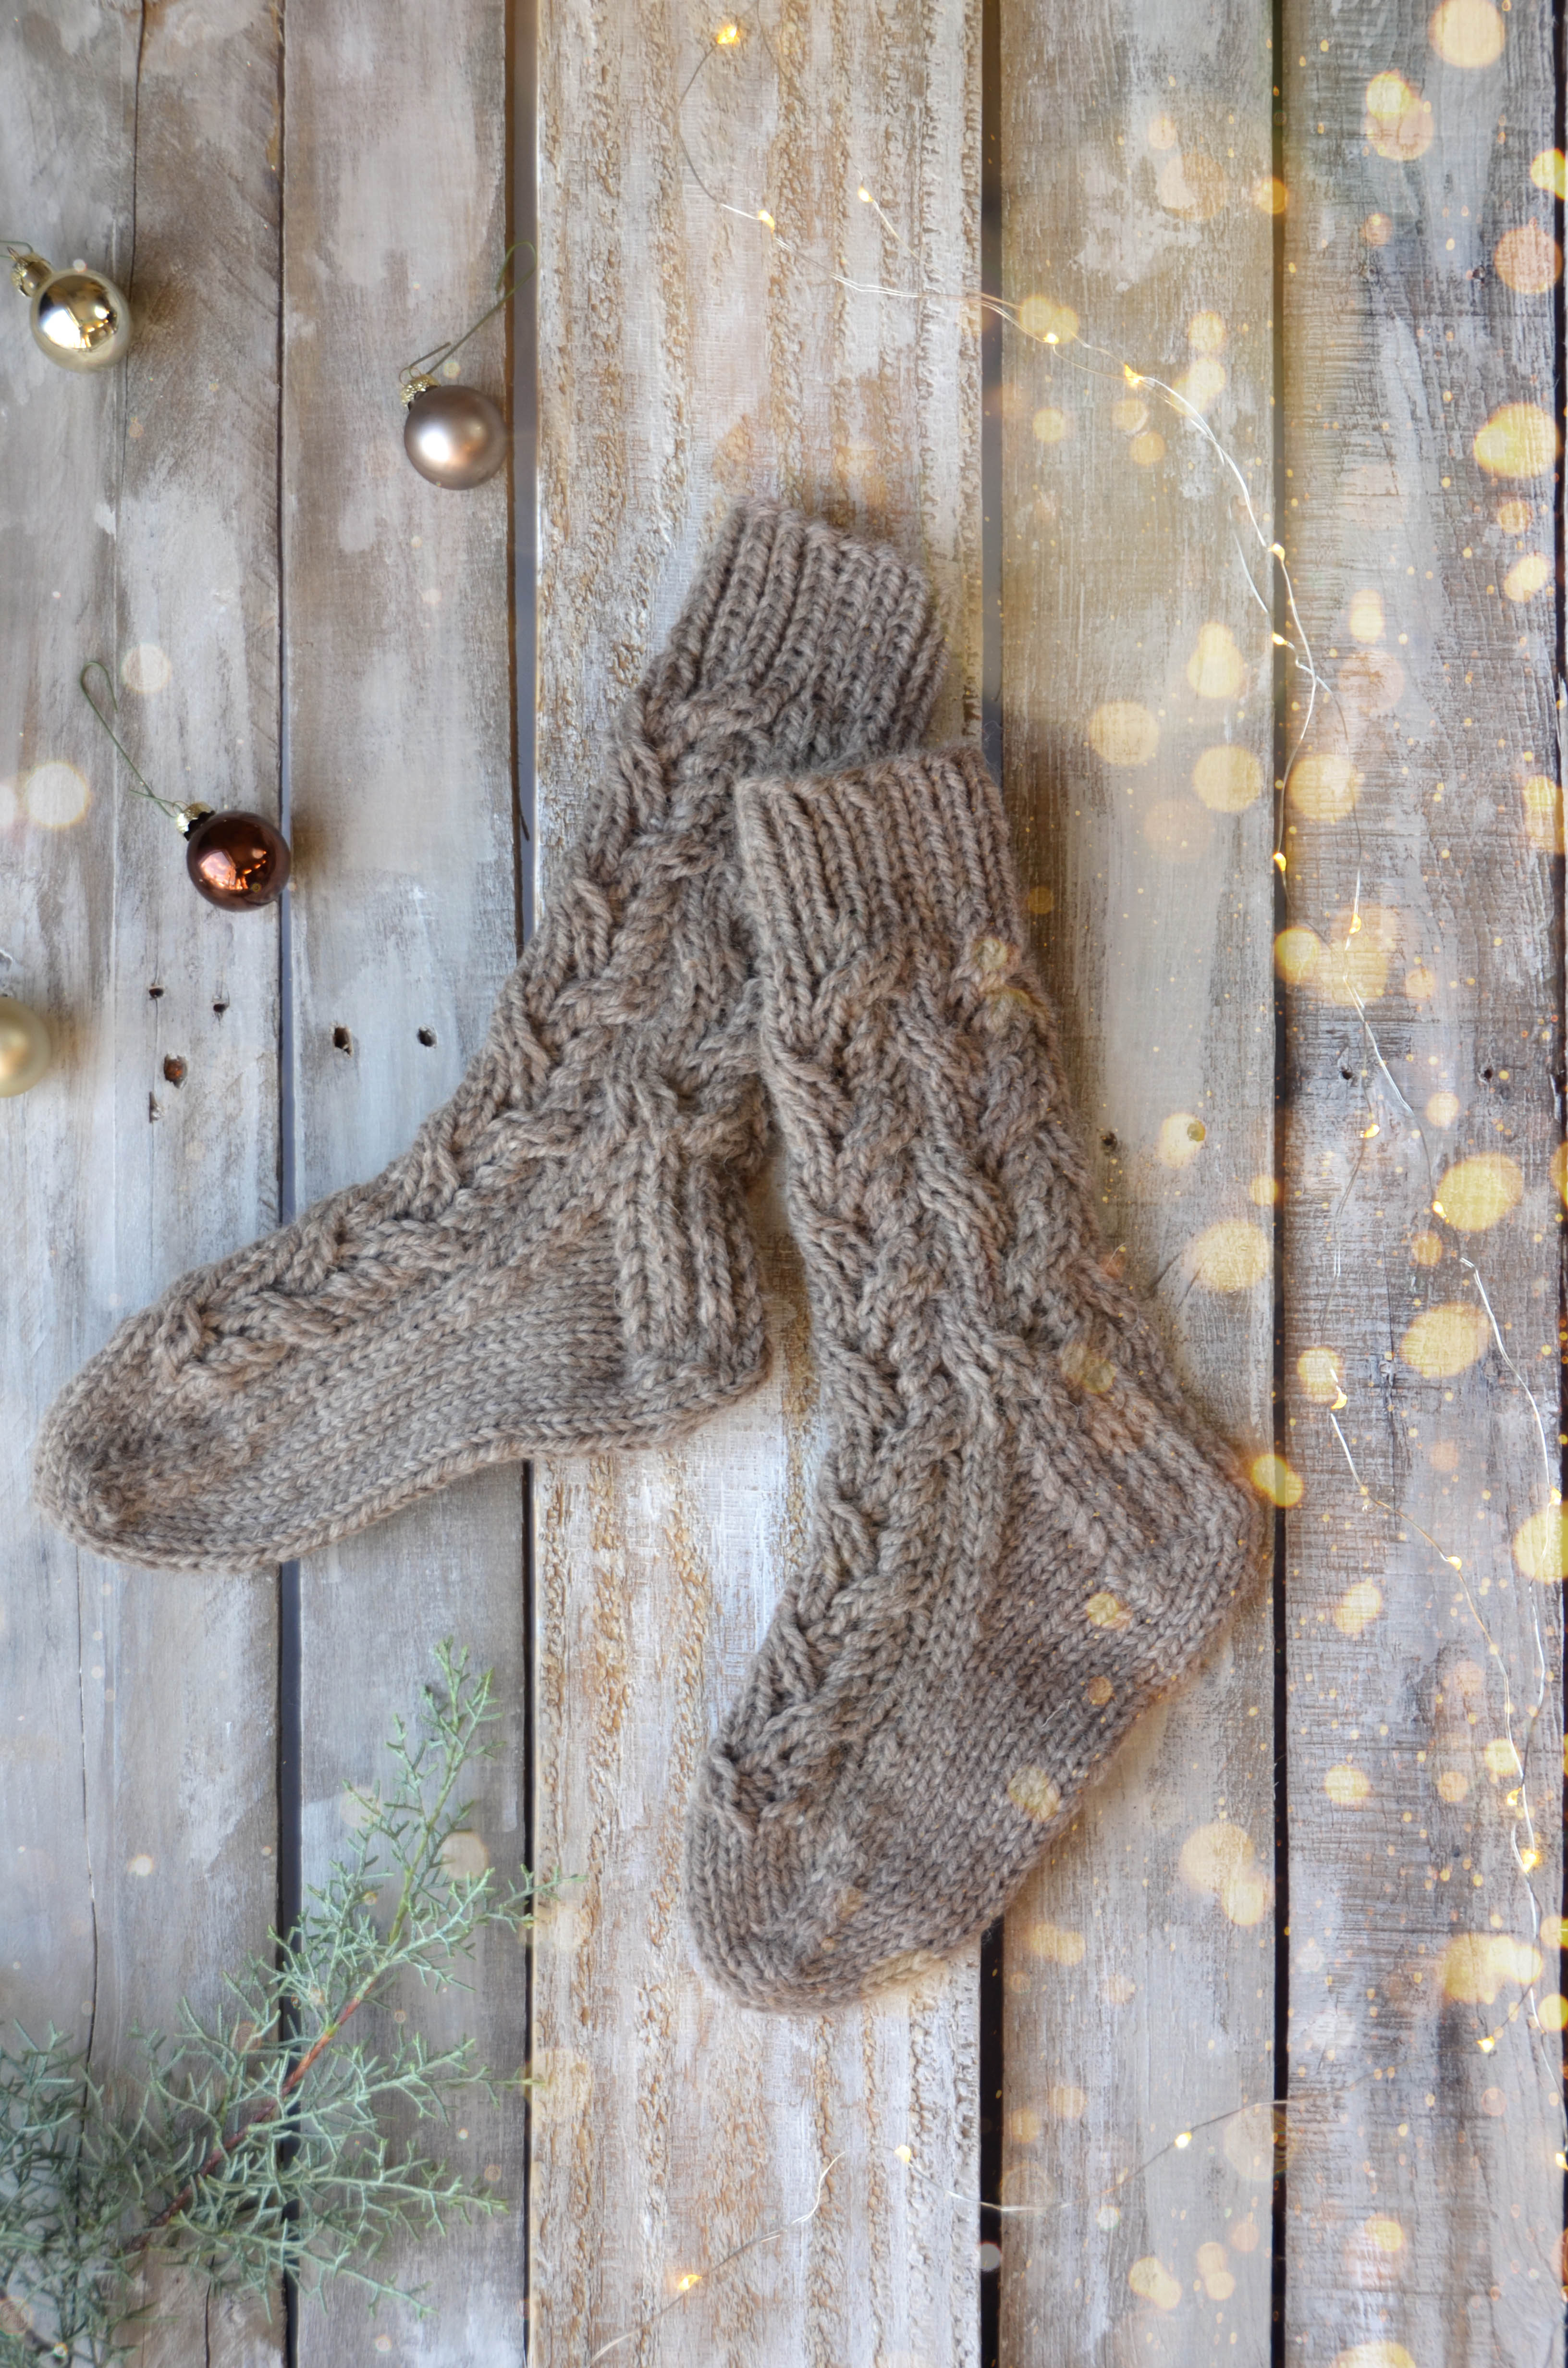
Let me set the scene for you: It’s snowing outside. You’re curled up on a sectional sofa with freshly made hot-cocoa (with a nip…and marshmallows), the sun just set, and your favorite furry friend has his head on your lap. You have no worries, no place to be, you’re on vacation, and you can sleep as late as you like tomorrow morning. The fire is crackling, but it’s still a bit drafty. Cool enough that knitwear is very much required. You’re just about to turn on the first episode of a TV series you are quite sure will be binge-watched. You have just cast on for your next sweater project that you’re fantasizing about wearing this year still. And last but not least, you’re already wearing your Cozy House Socks that were started just yesterday because they go crazy quick!
Sound like a dream? Well, at least one part of that fantasy can be very real. Knit in Deluxe Chunky Naturals, these socks are a truly quick project. I know, because I personally knit the sample over part of a day! Each sock pictured took about 60g of a 100g skein, leaving plenty of room for giant man feet or to make the leg a bit longer.
These socks are knit from the top down with a gusset and short-row heel. The cable pattern is both written and charted. You can find this the pattern for this kit, Series 1 Day 3 of our 12 Days of Winter collection here (link).