You’ve got a few days left – what are you waiting for?

Universal Yarn Creative Network
Inspiration By Design
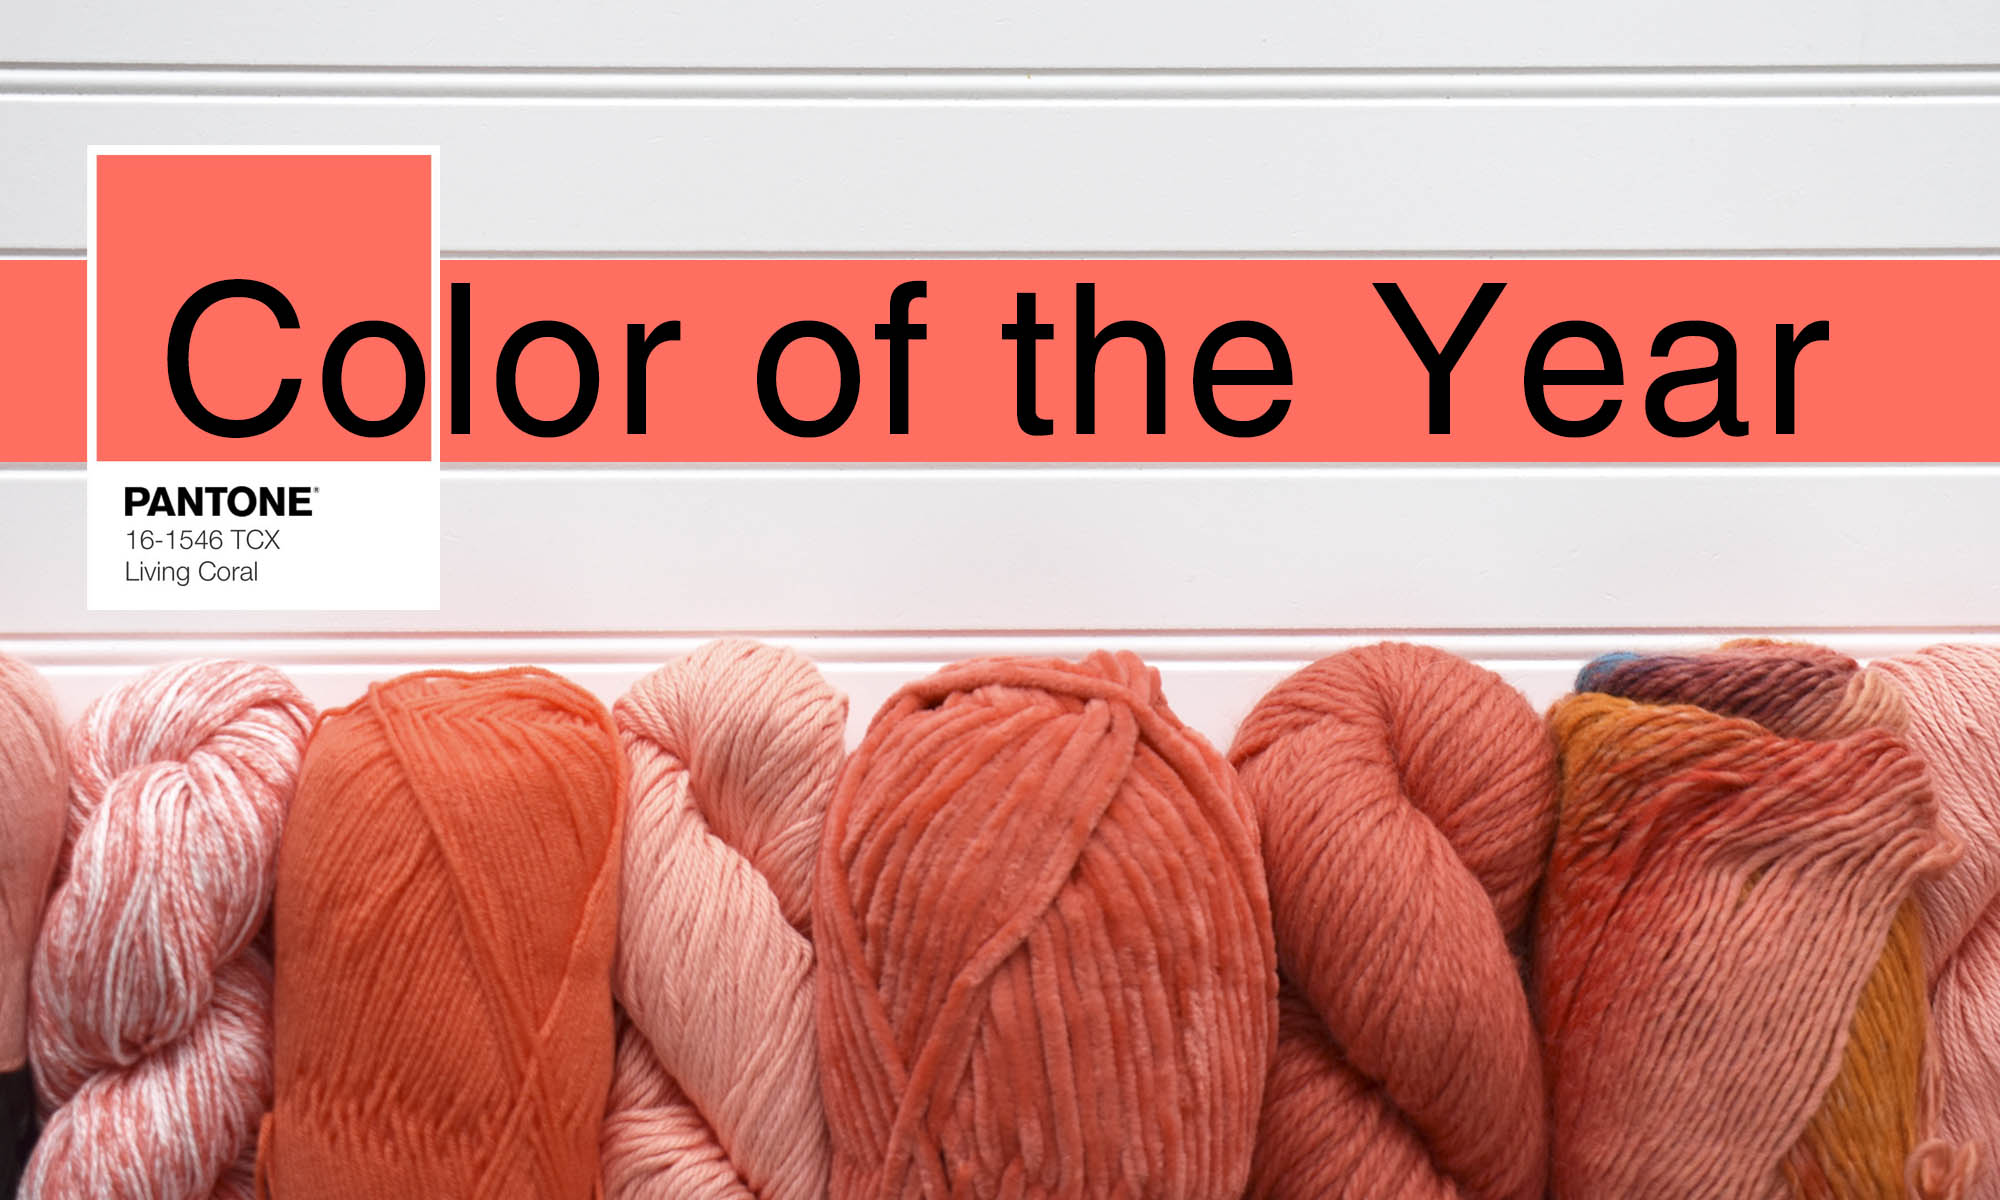
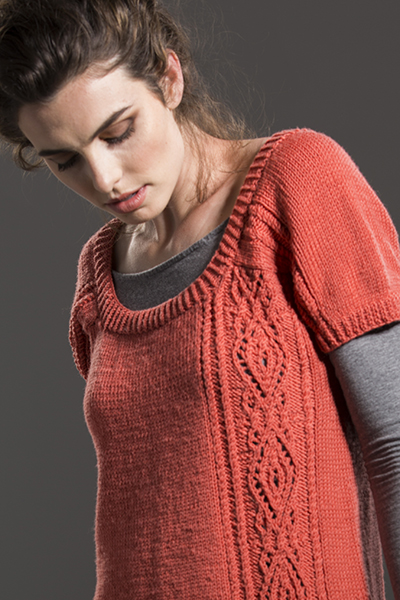
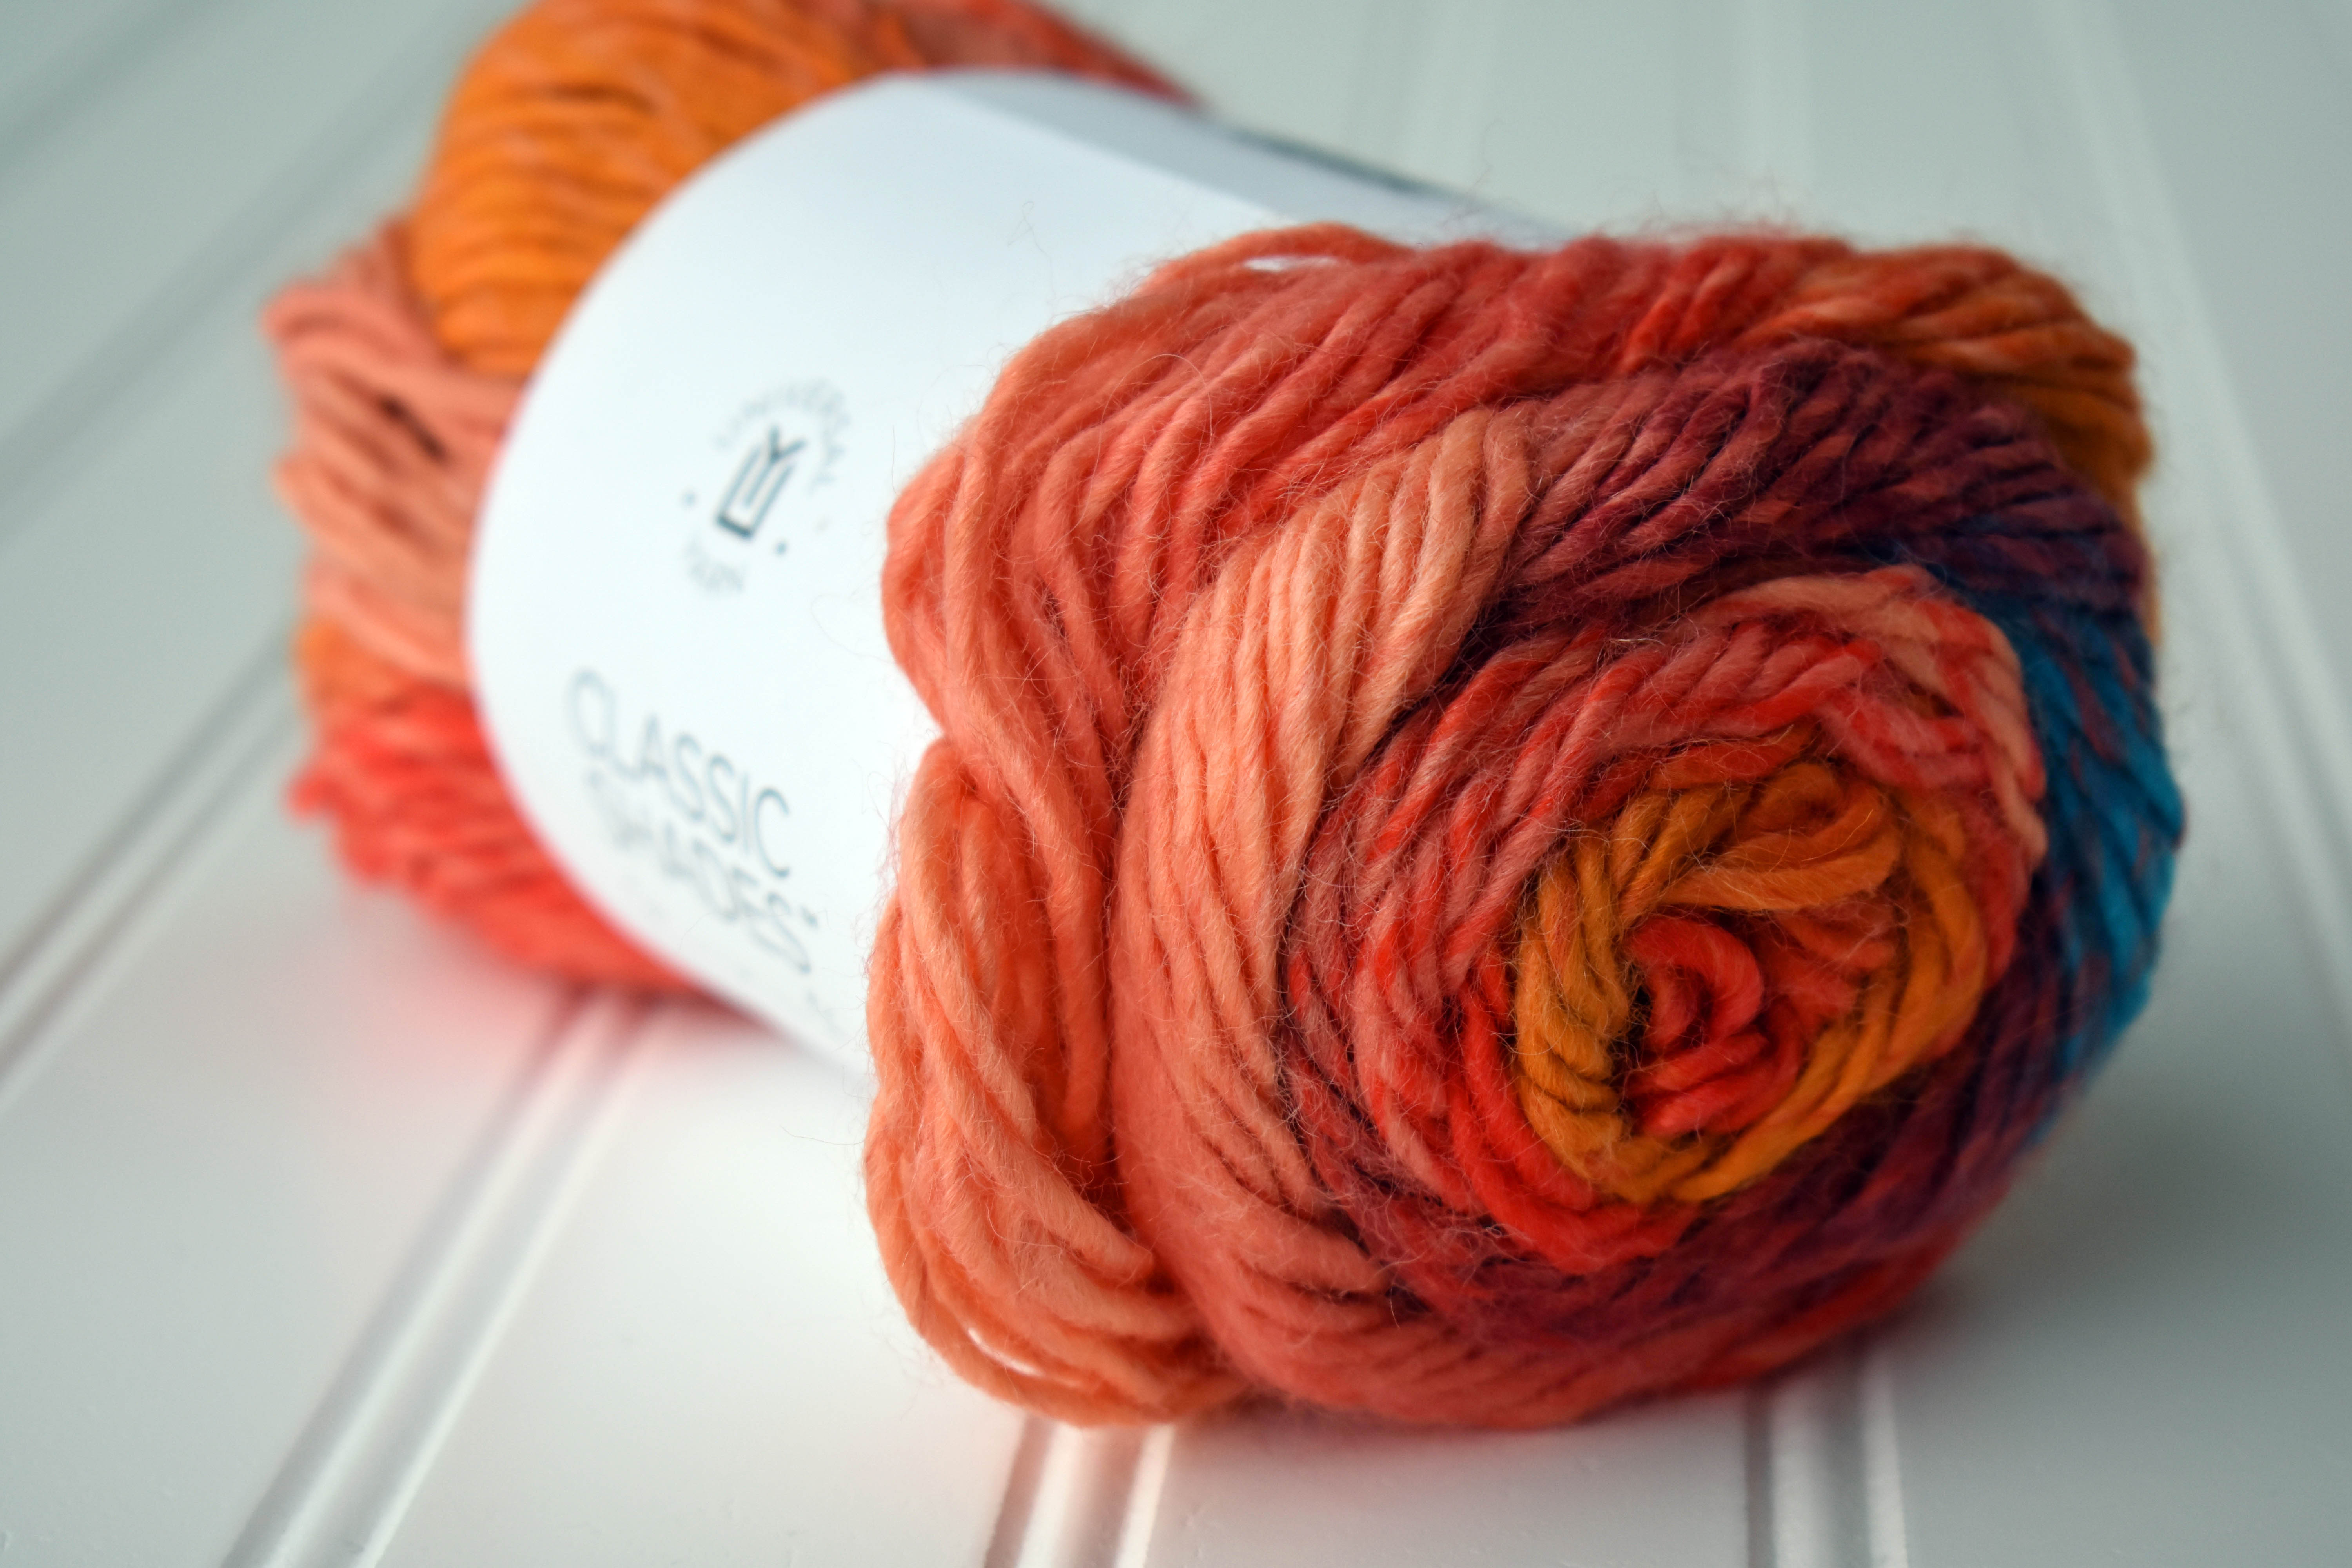
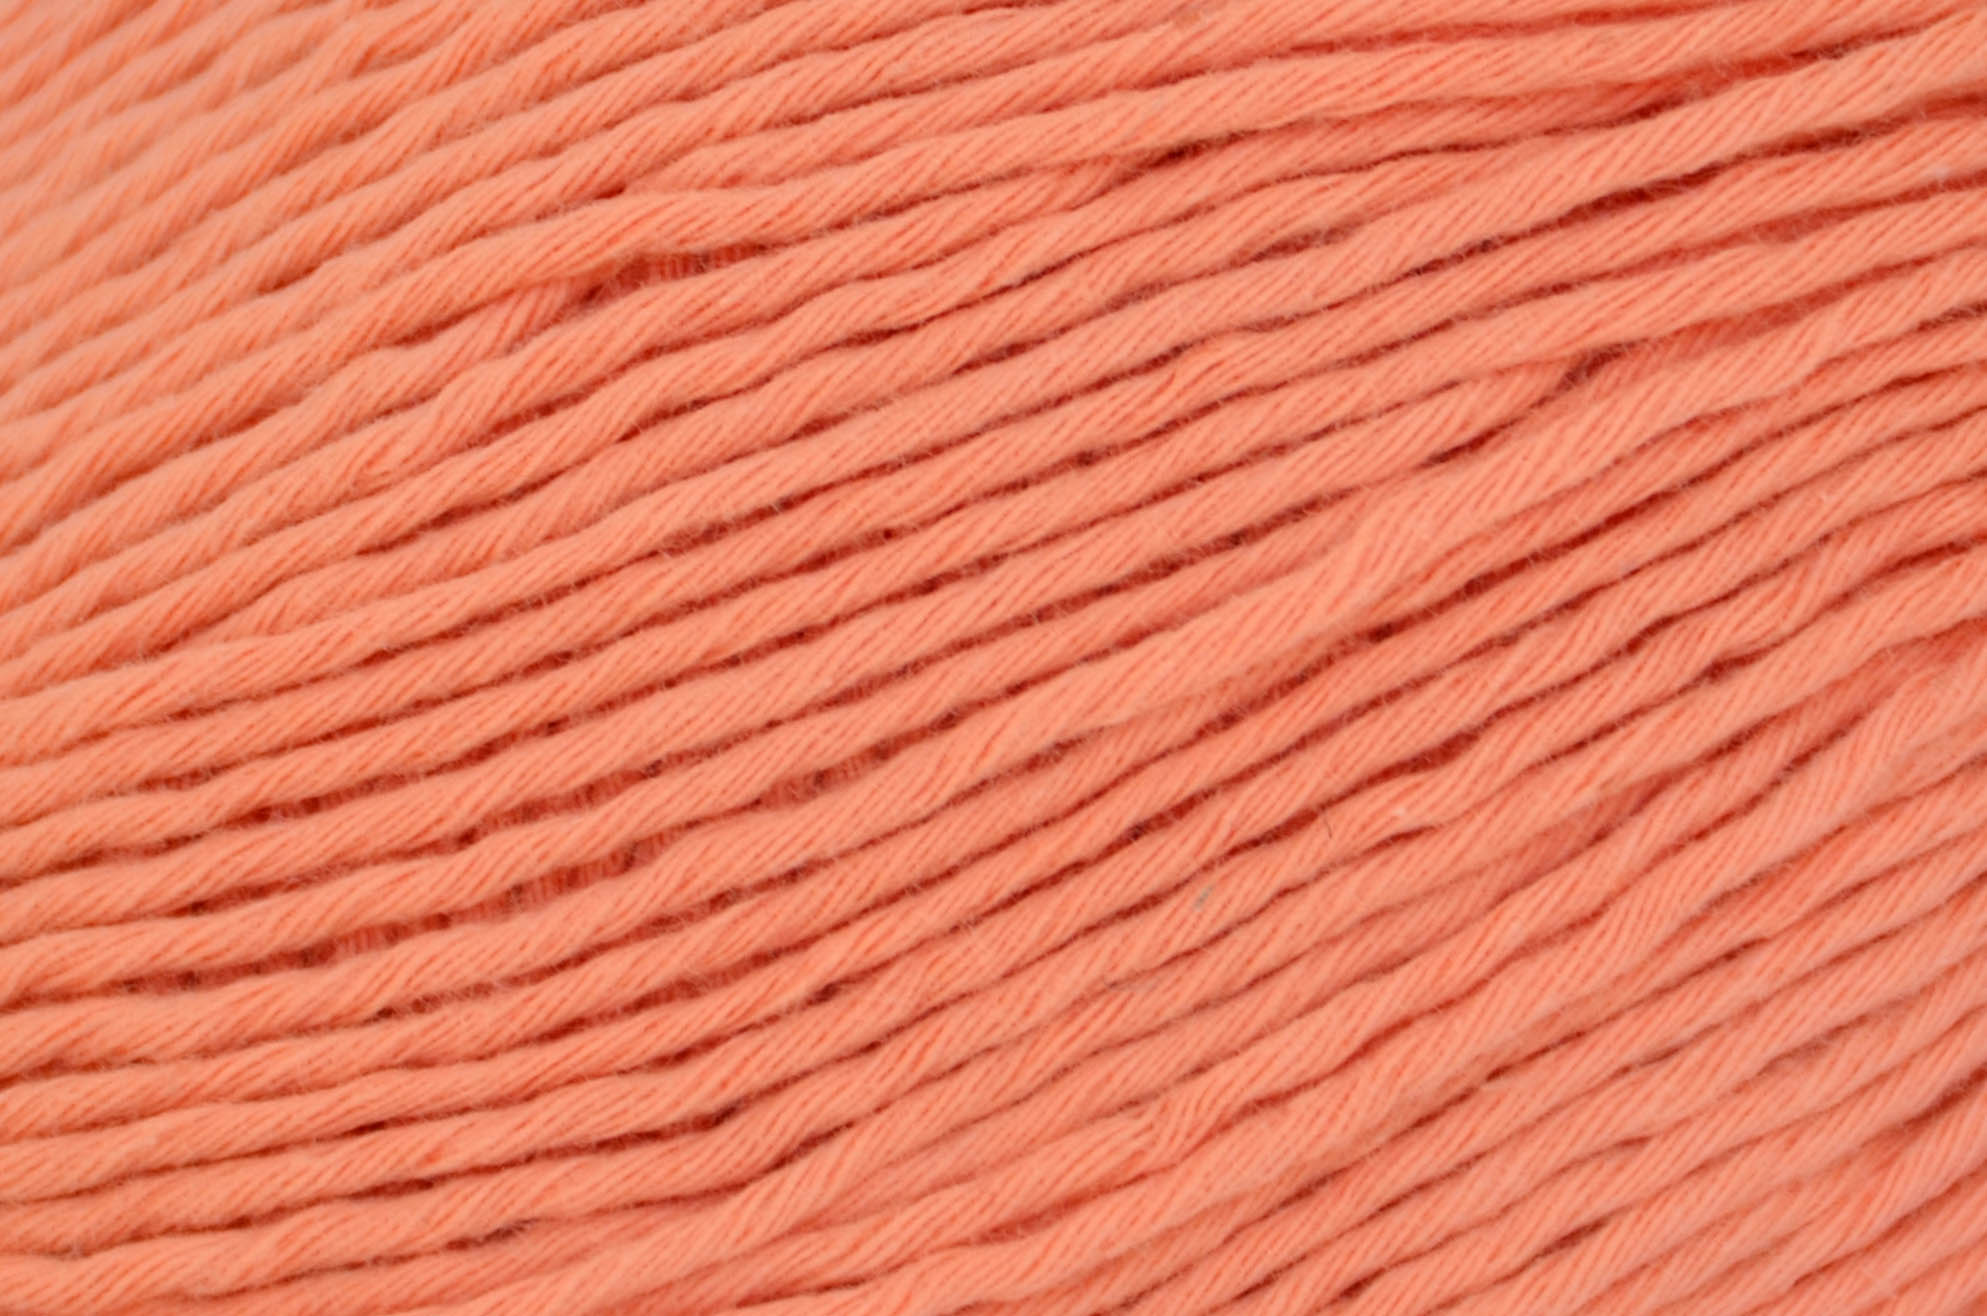
Love it or hate it, Pantone has just announced their 2019 color of the year: 16-1546 Living Coral. Personally, I love it! My own closet is full of black and gray. Coral is that perfect pop of color against a background of neutrals.
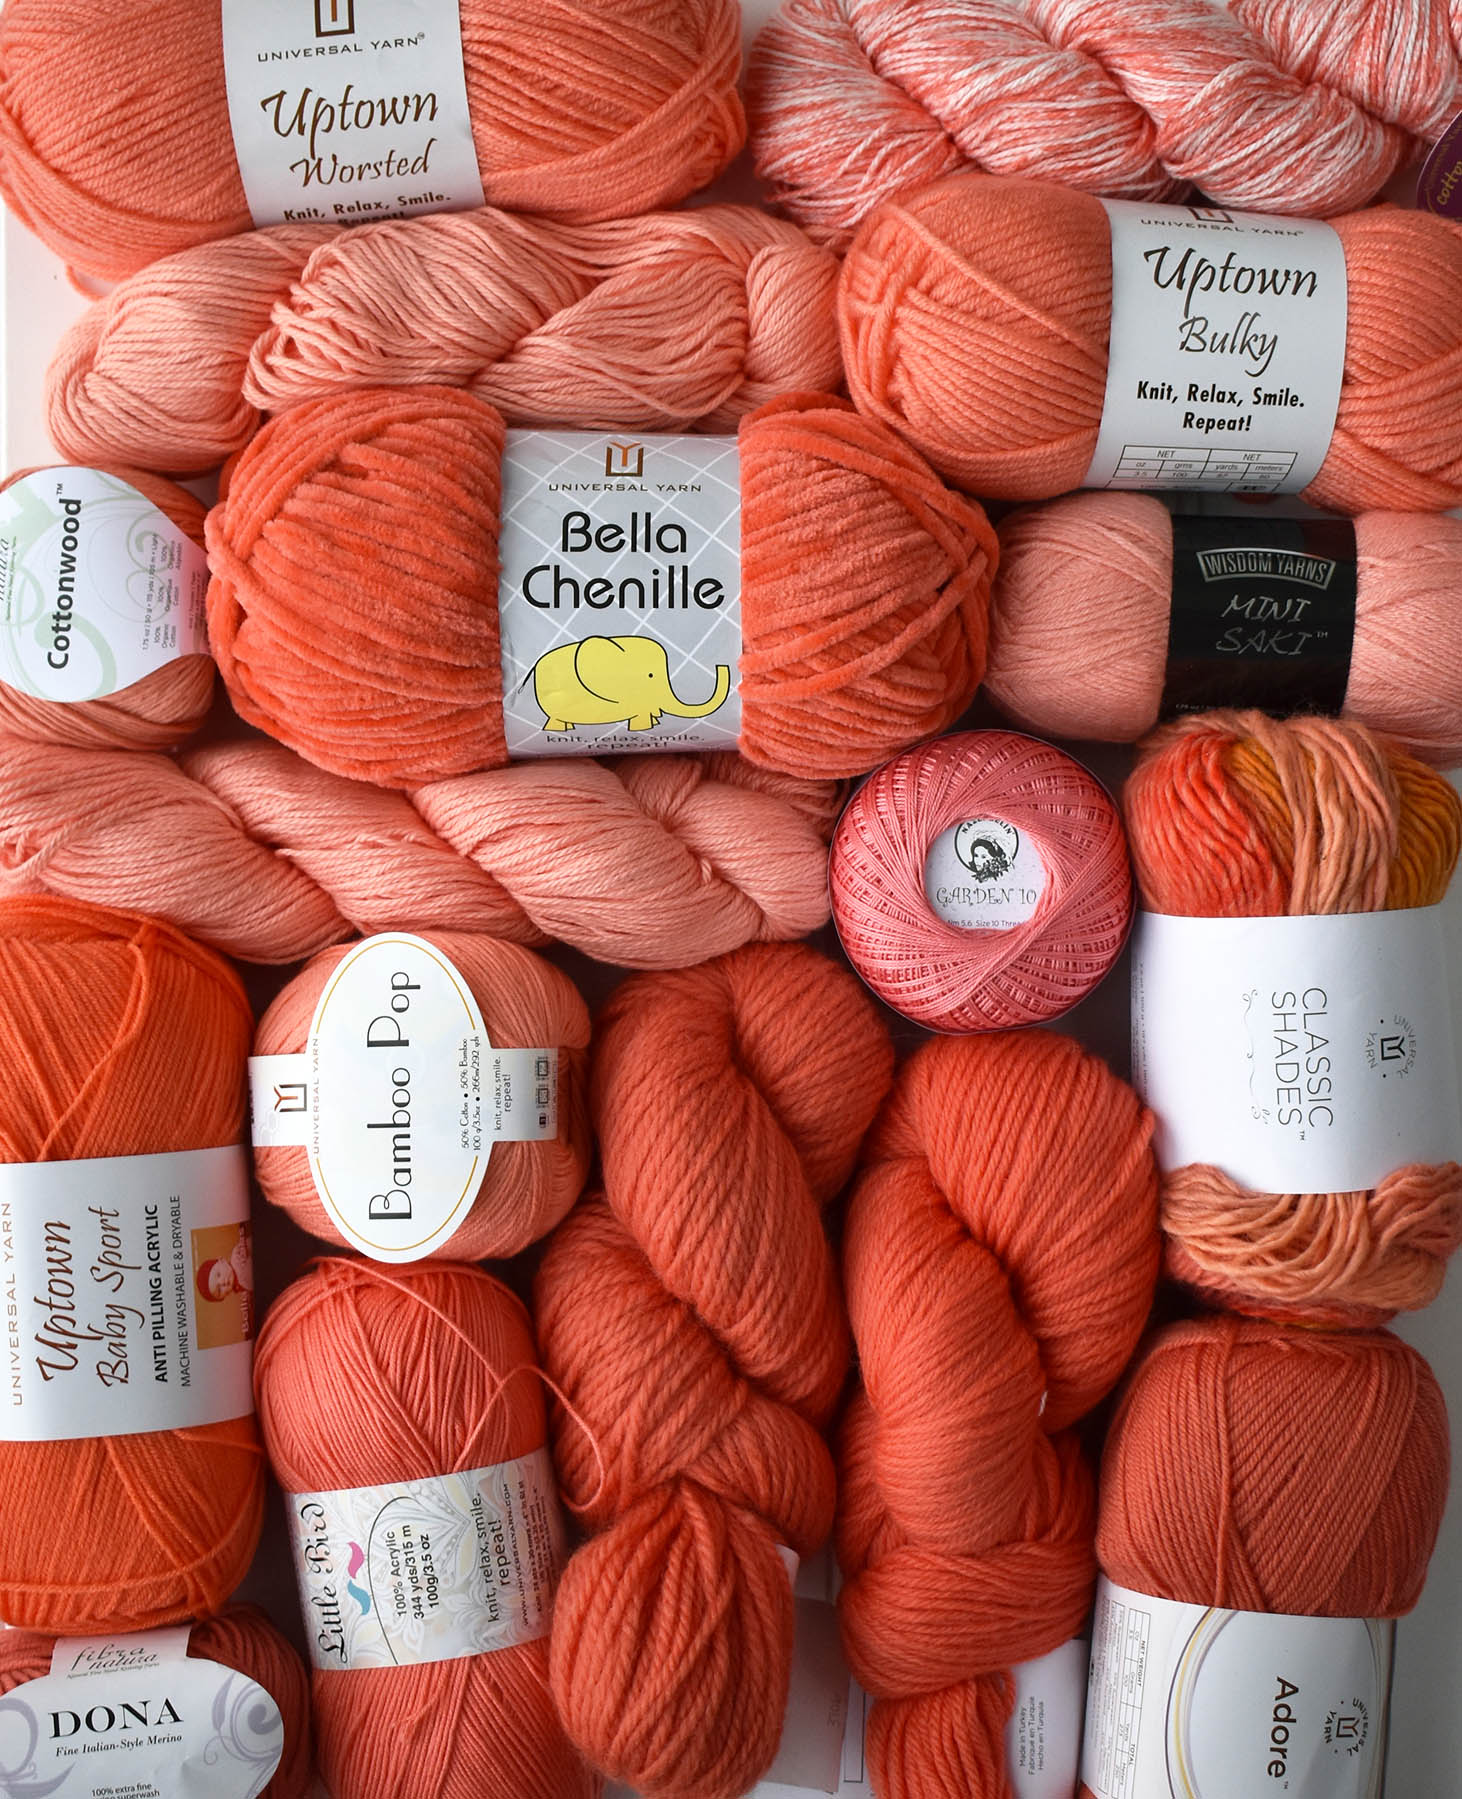
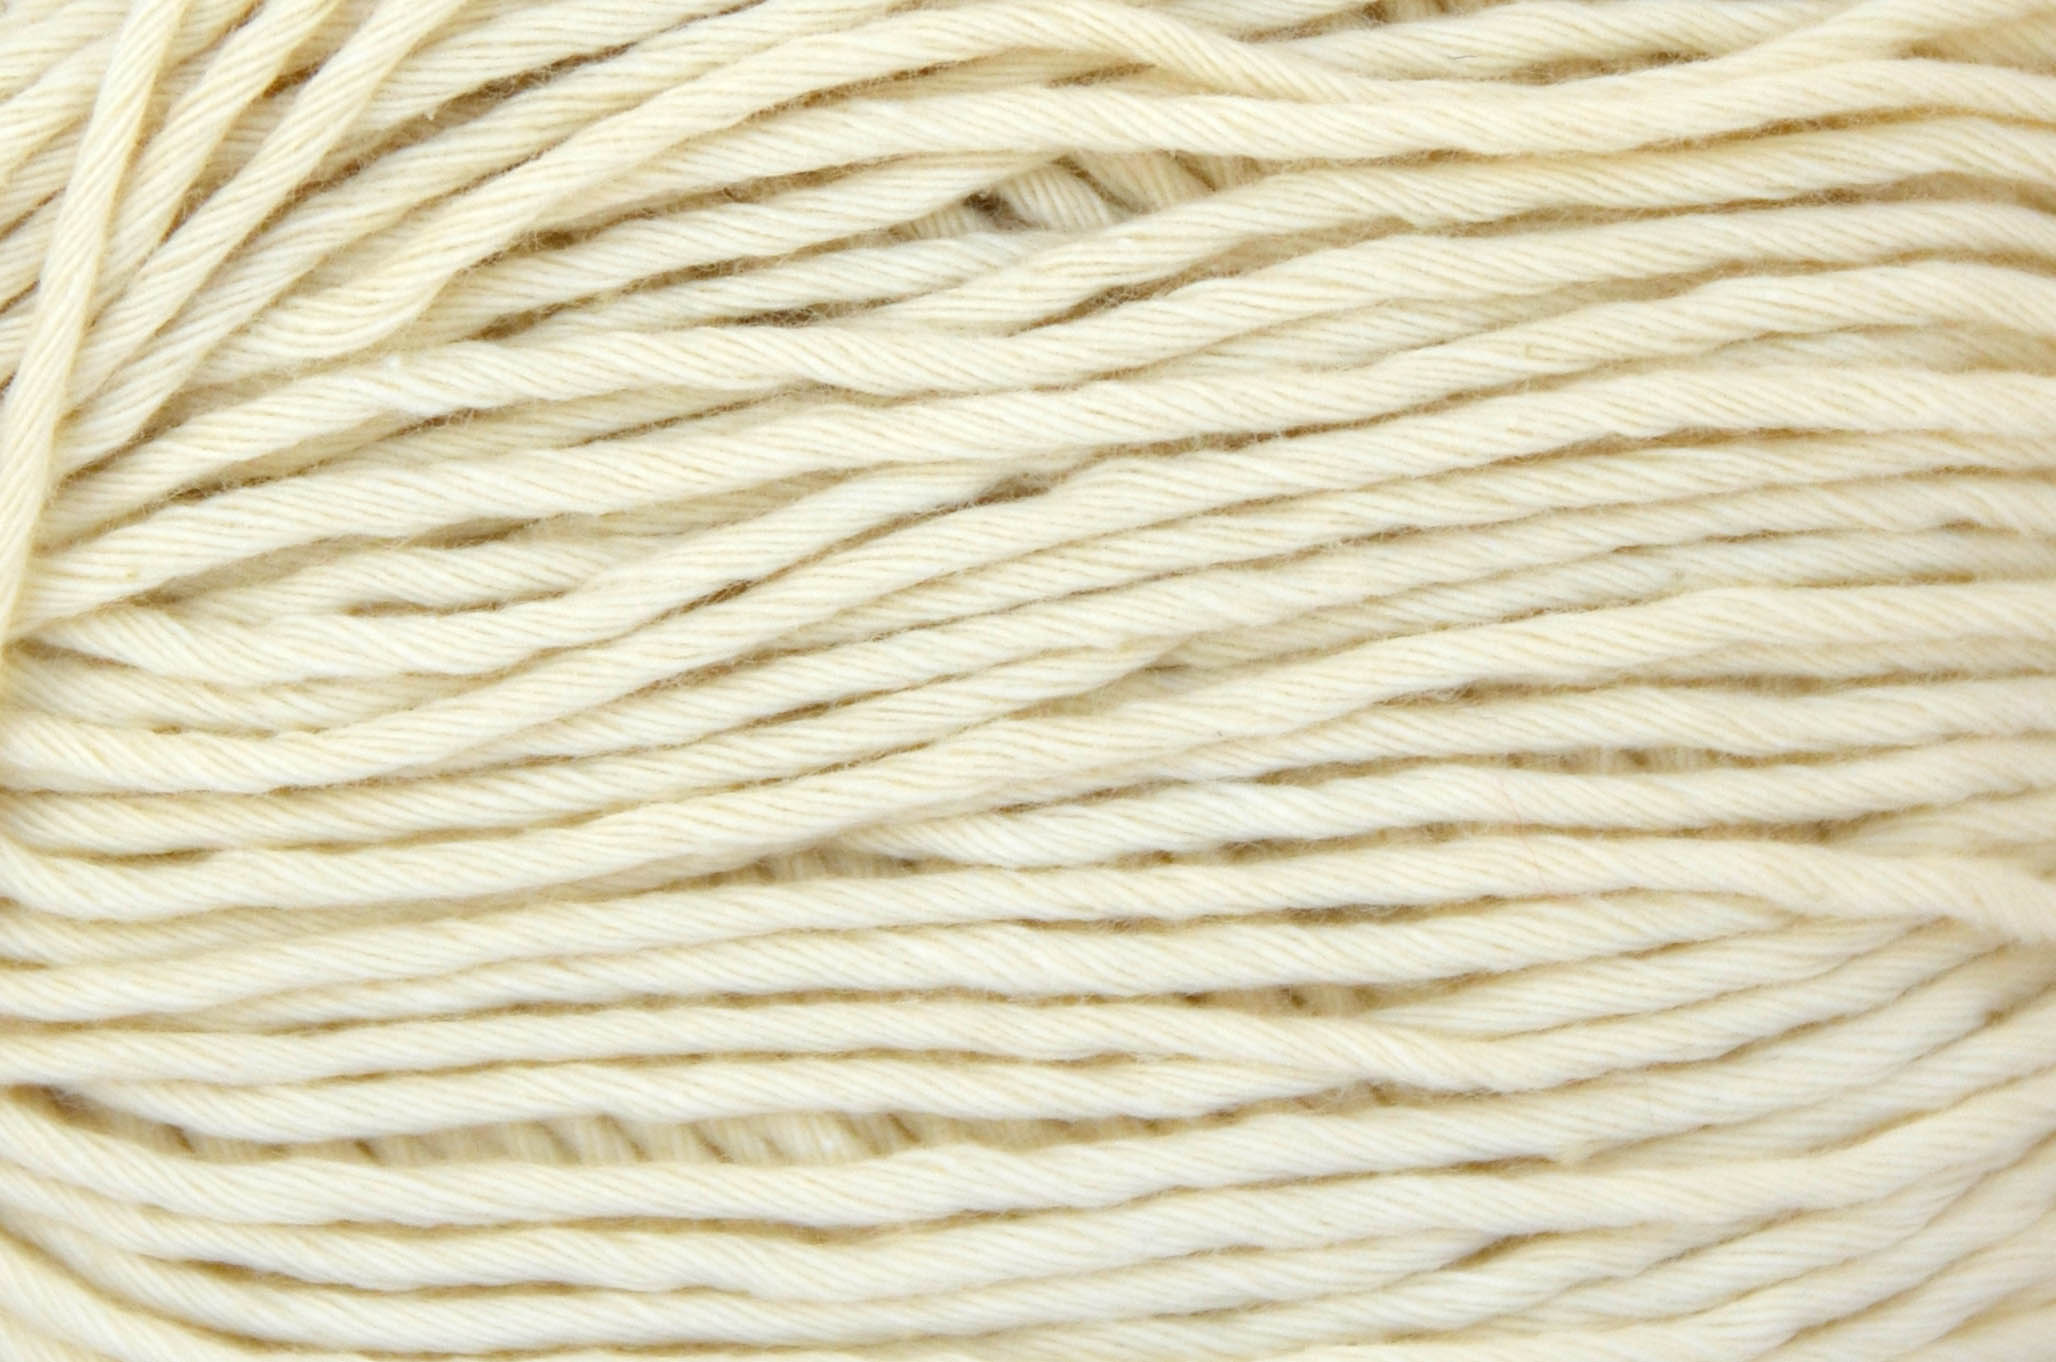
We happen to have varying shades of coral in many of our yarn lines. A lot of them are spot on to Pantone’s specific coral pick. Here’s a sampling:
Anyway. Coral. It’s so fun and vibrant. It makes me happy because I have a few designs coming down the pike for spring that incorporate this color, and I can’t wait to share them with you. But in the meantime, let’s look at some other coral-y goodness.
![]()
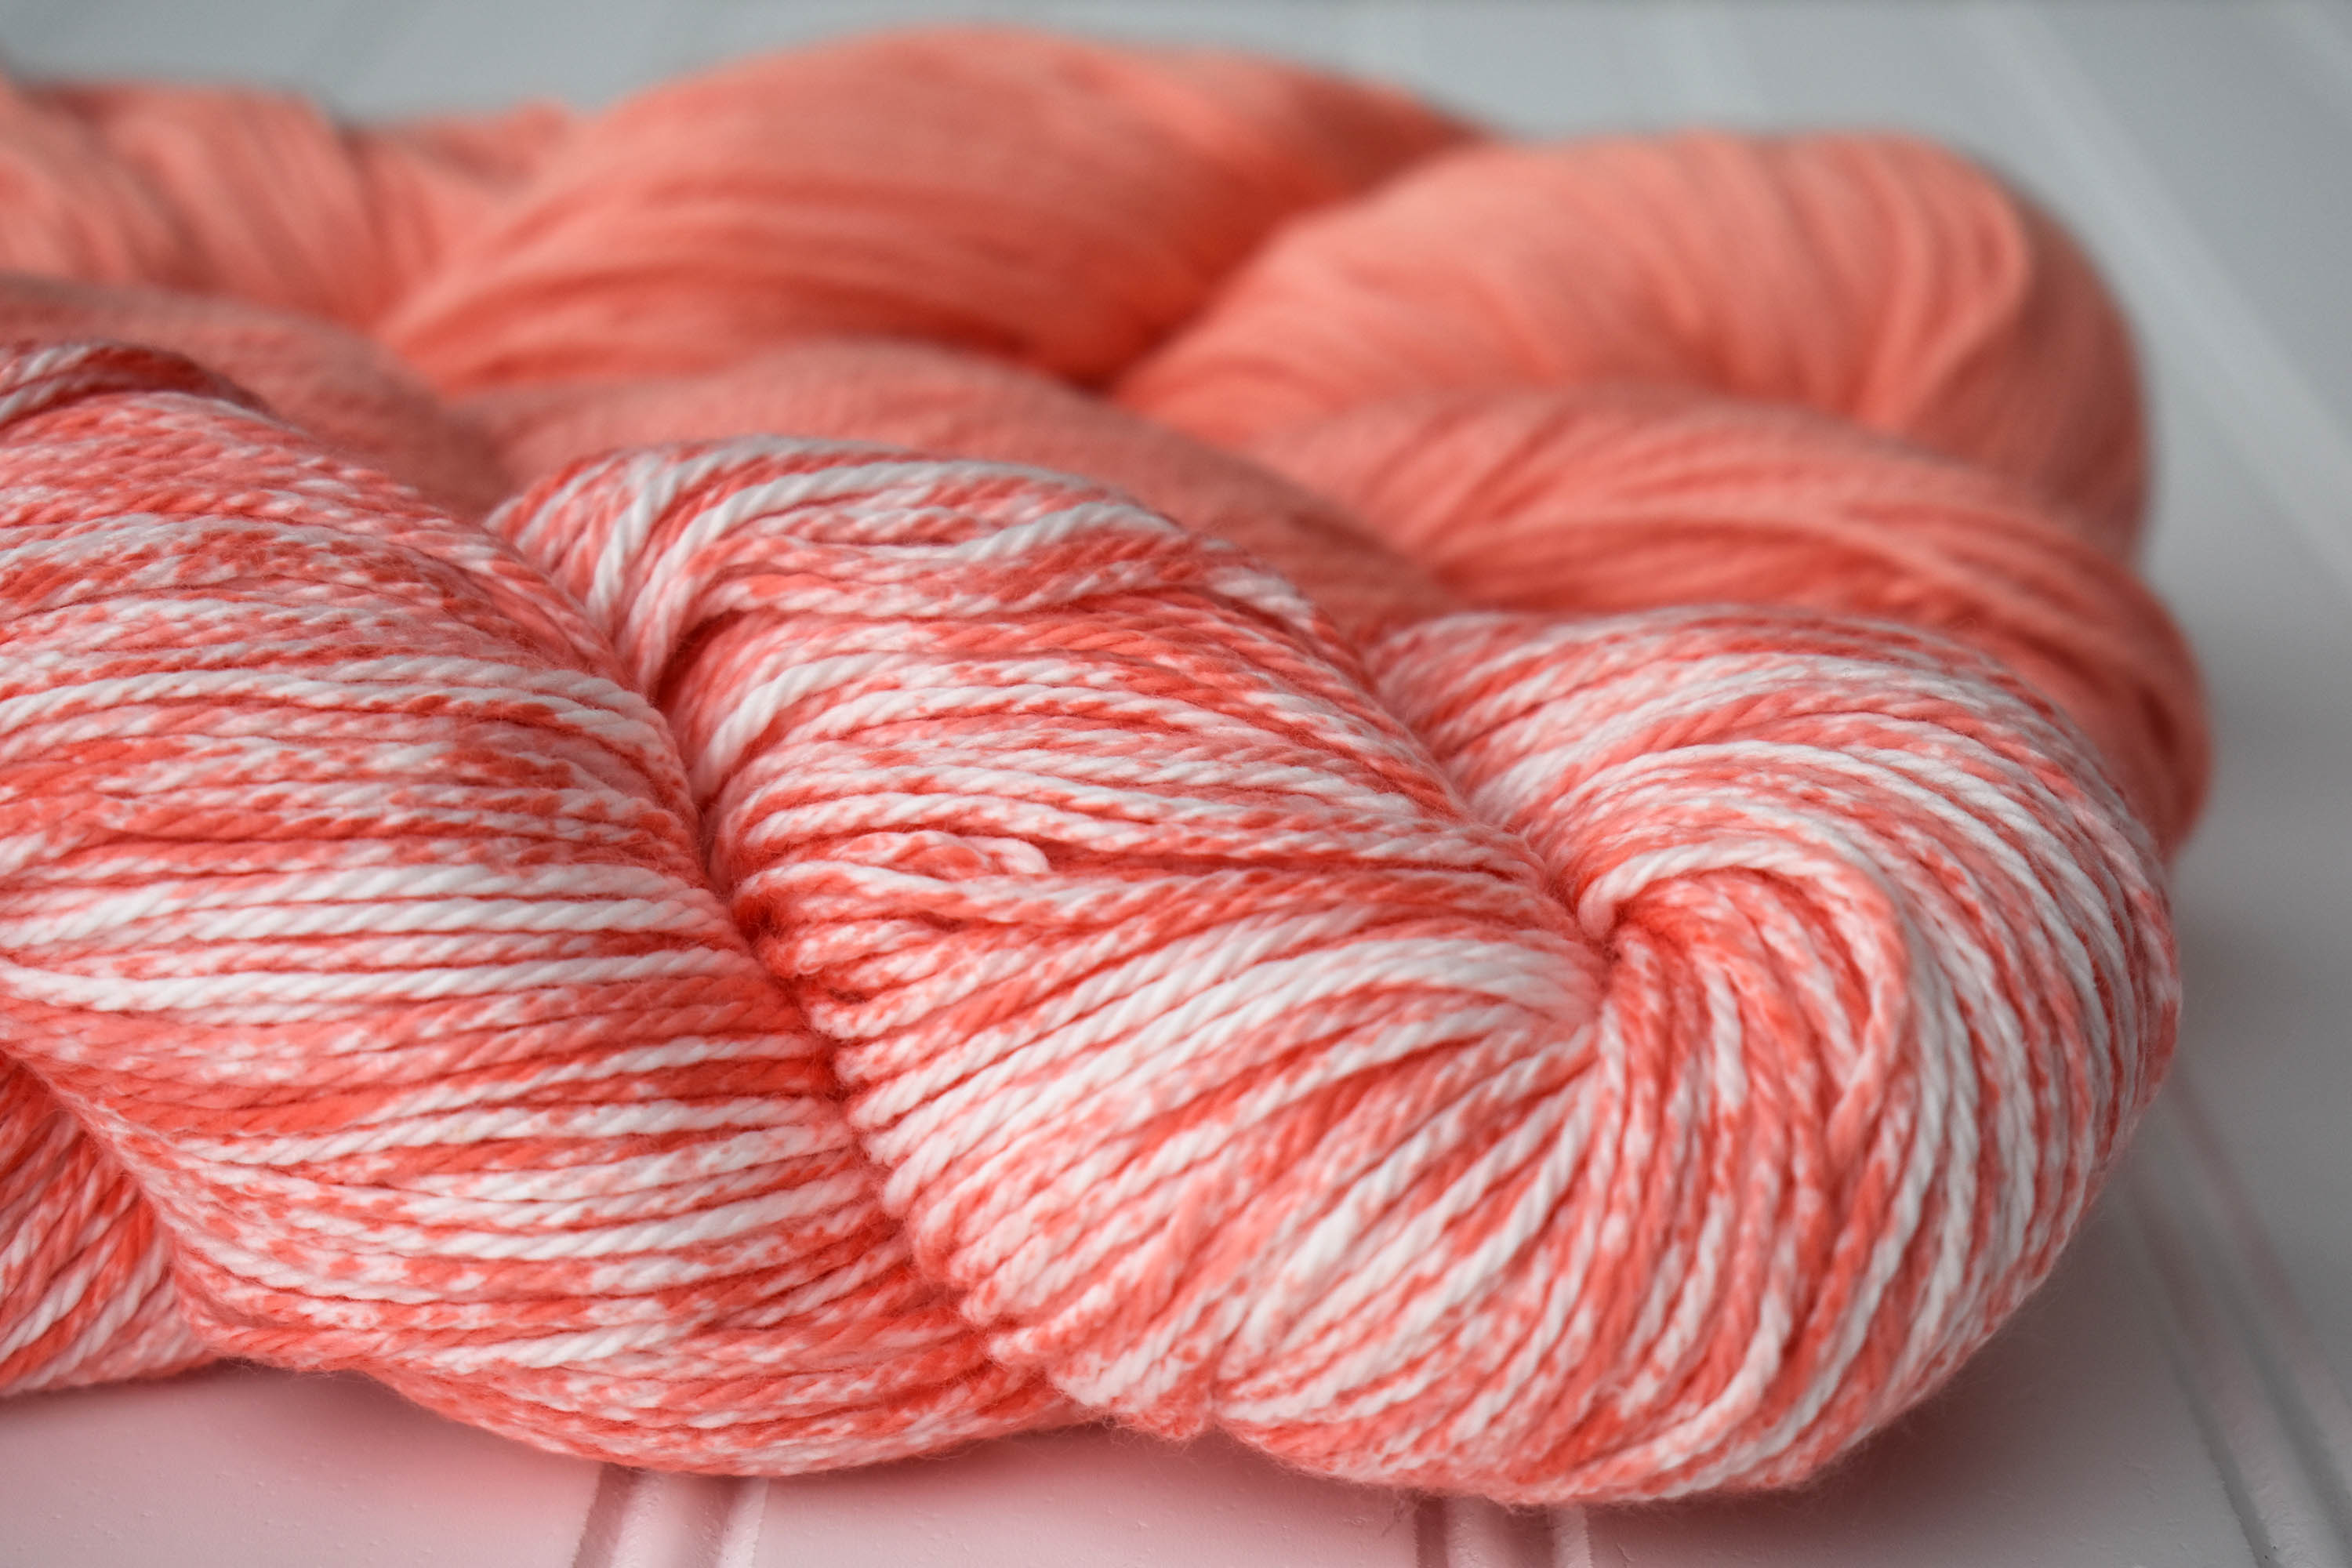
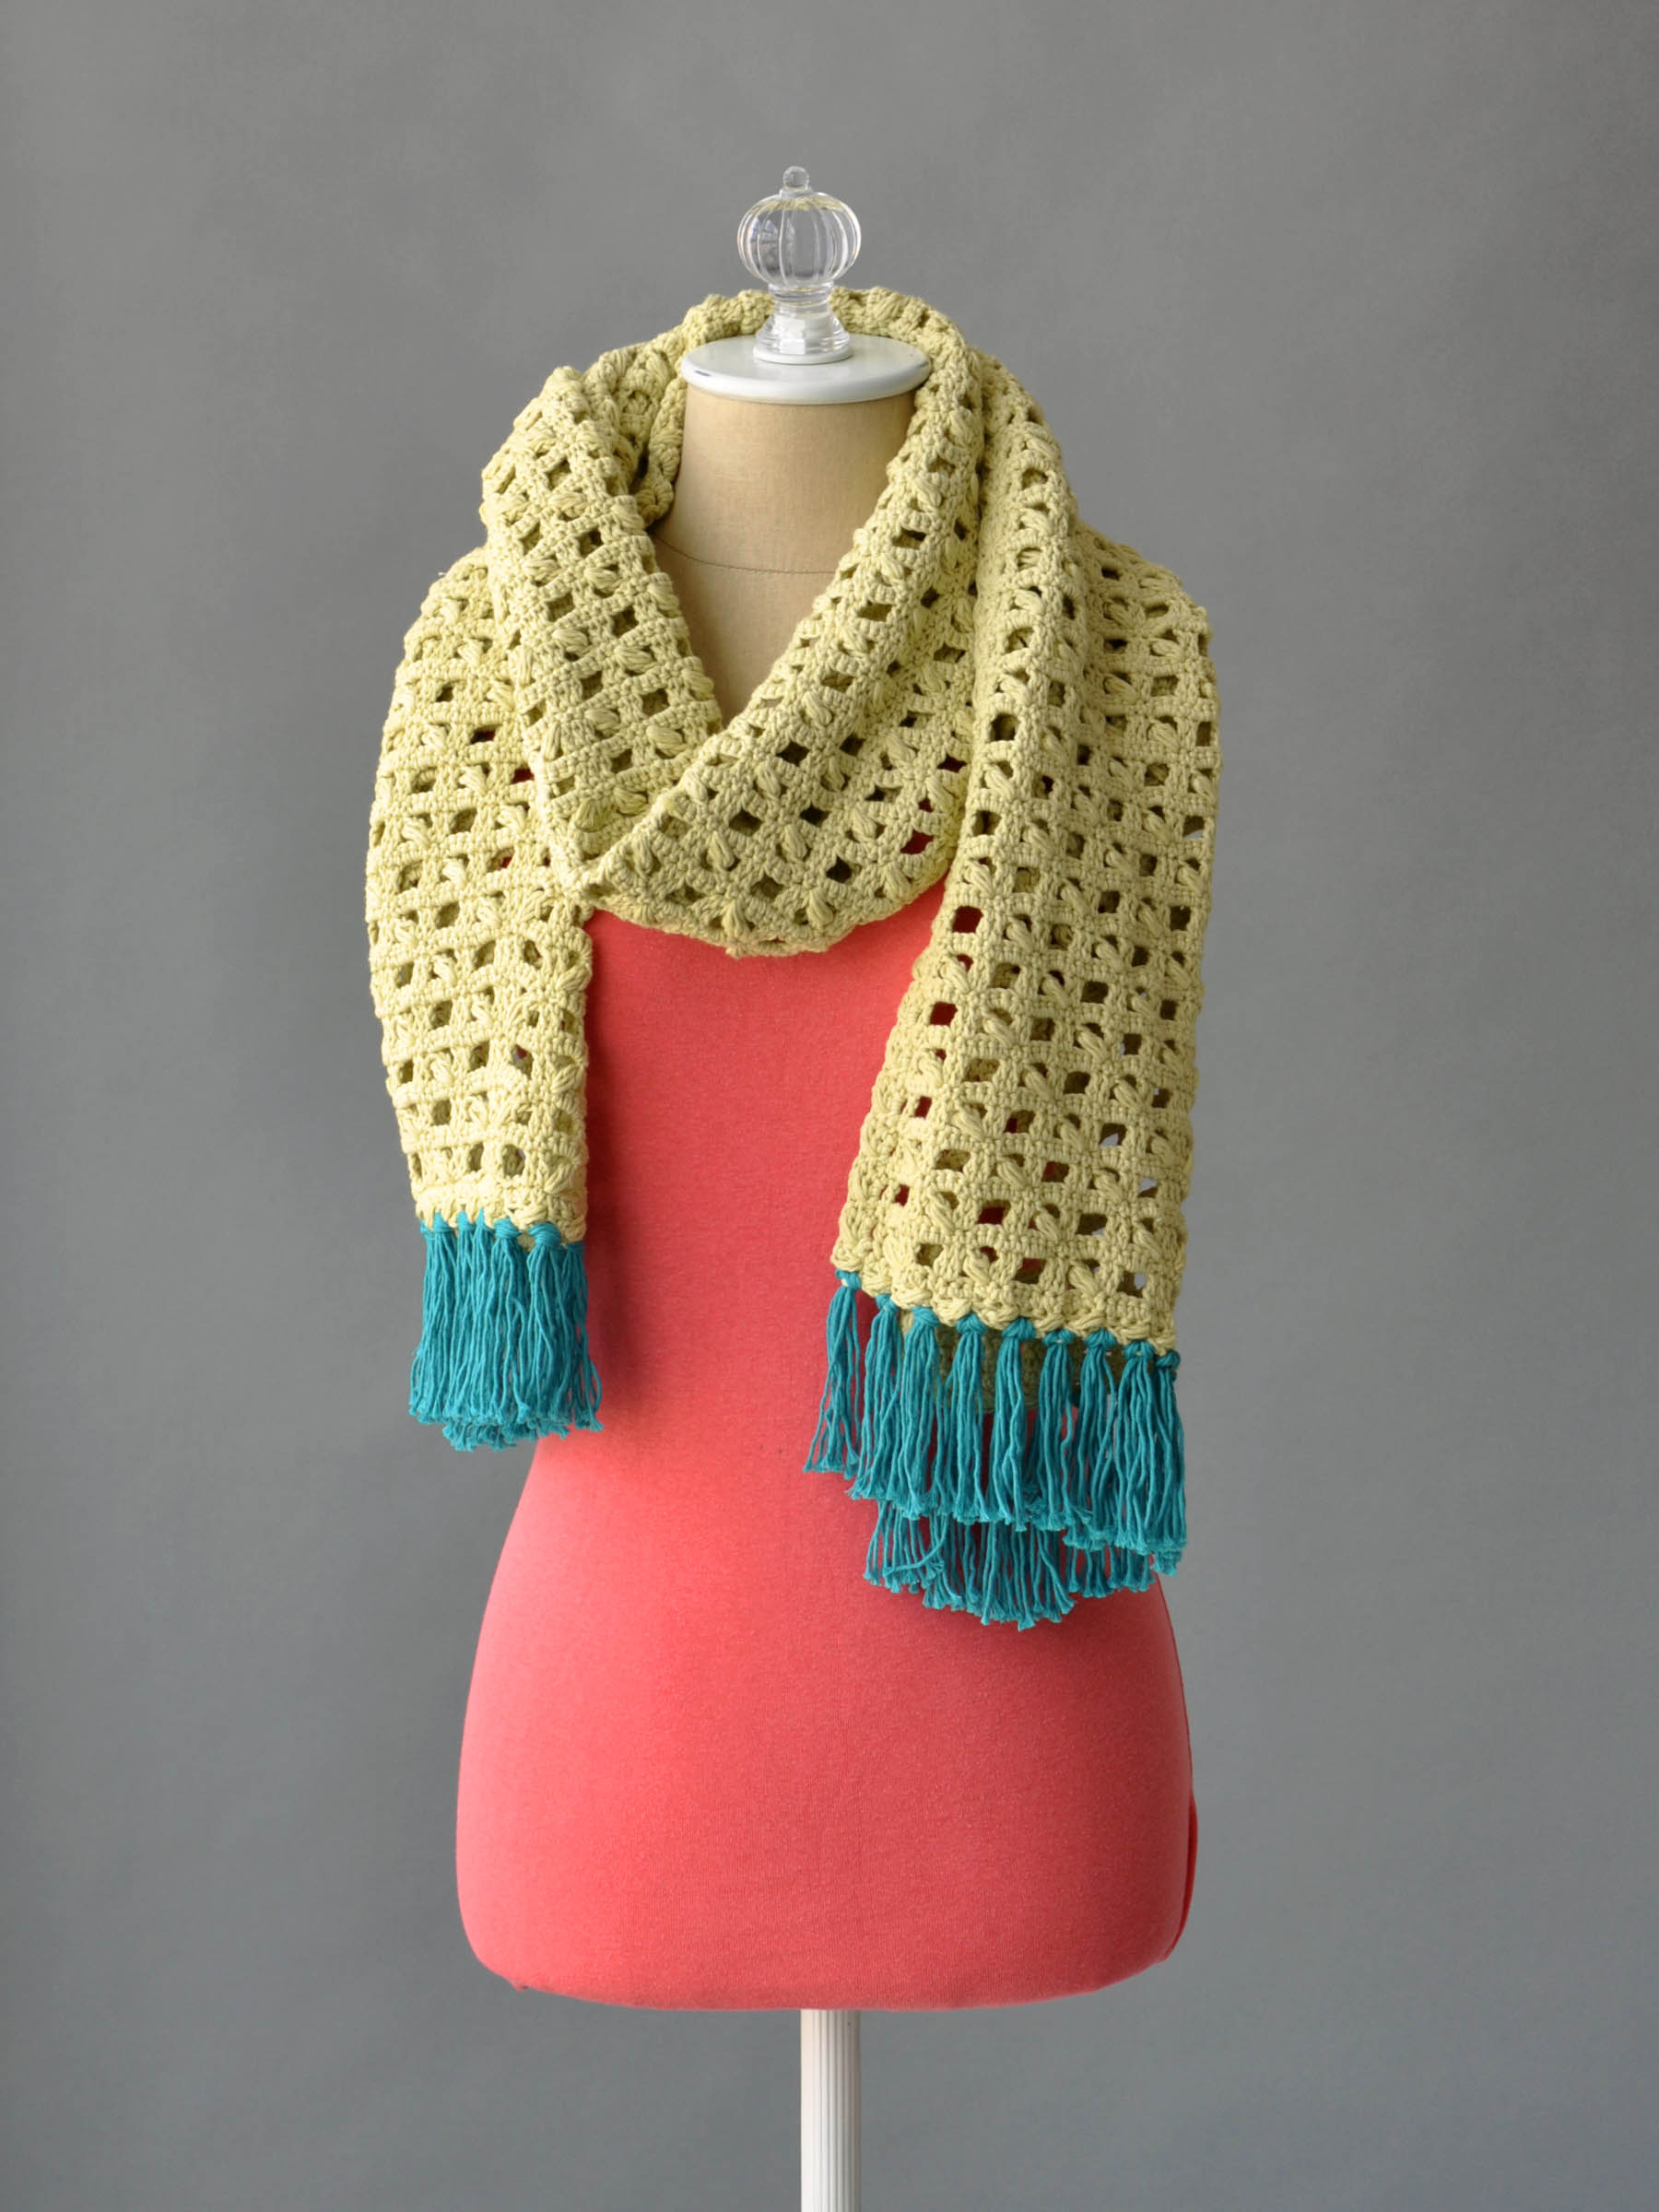
And of course, you can crochet or knit anything you want in coral or any other color! If you’re thinking you’d like to start with a pop of coral rather than using it all-over in a project, how about the Citron Scarf in Cottonwood? You could crochet the body of the scarf in a neutral, and add color 41107 Monica (coral) as the fringe?
Happy making!
It’s Free Pattern…Wednesday? What?
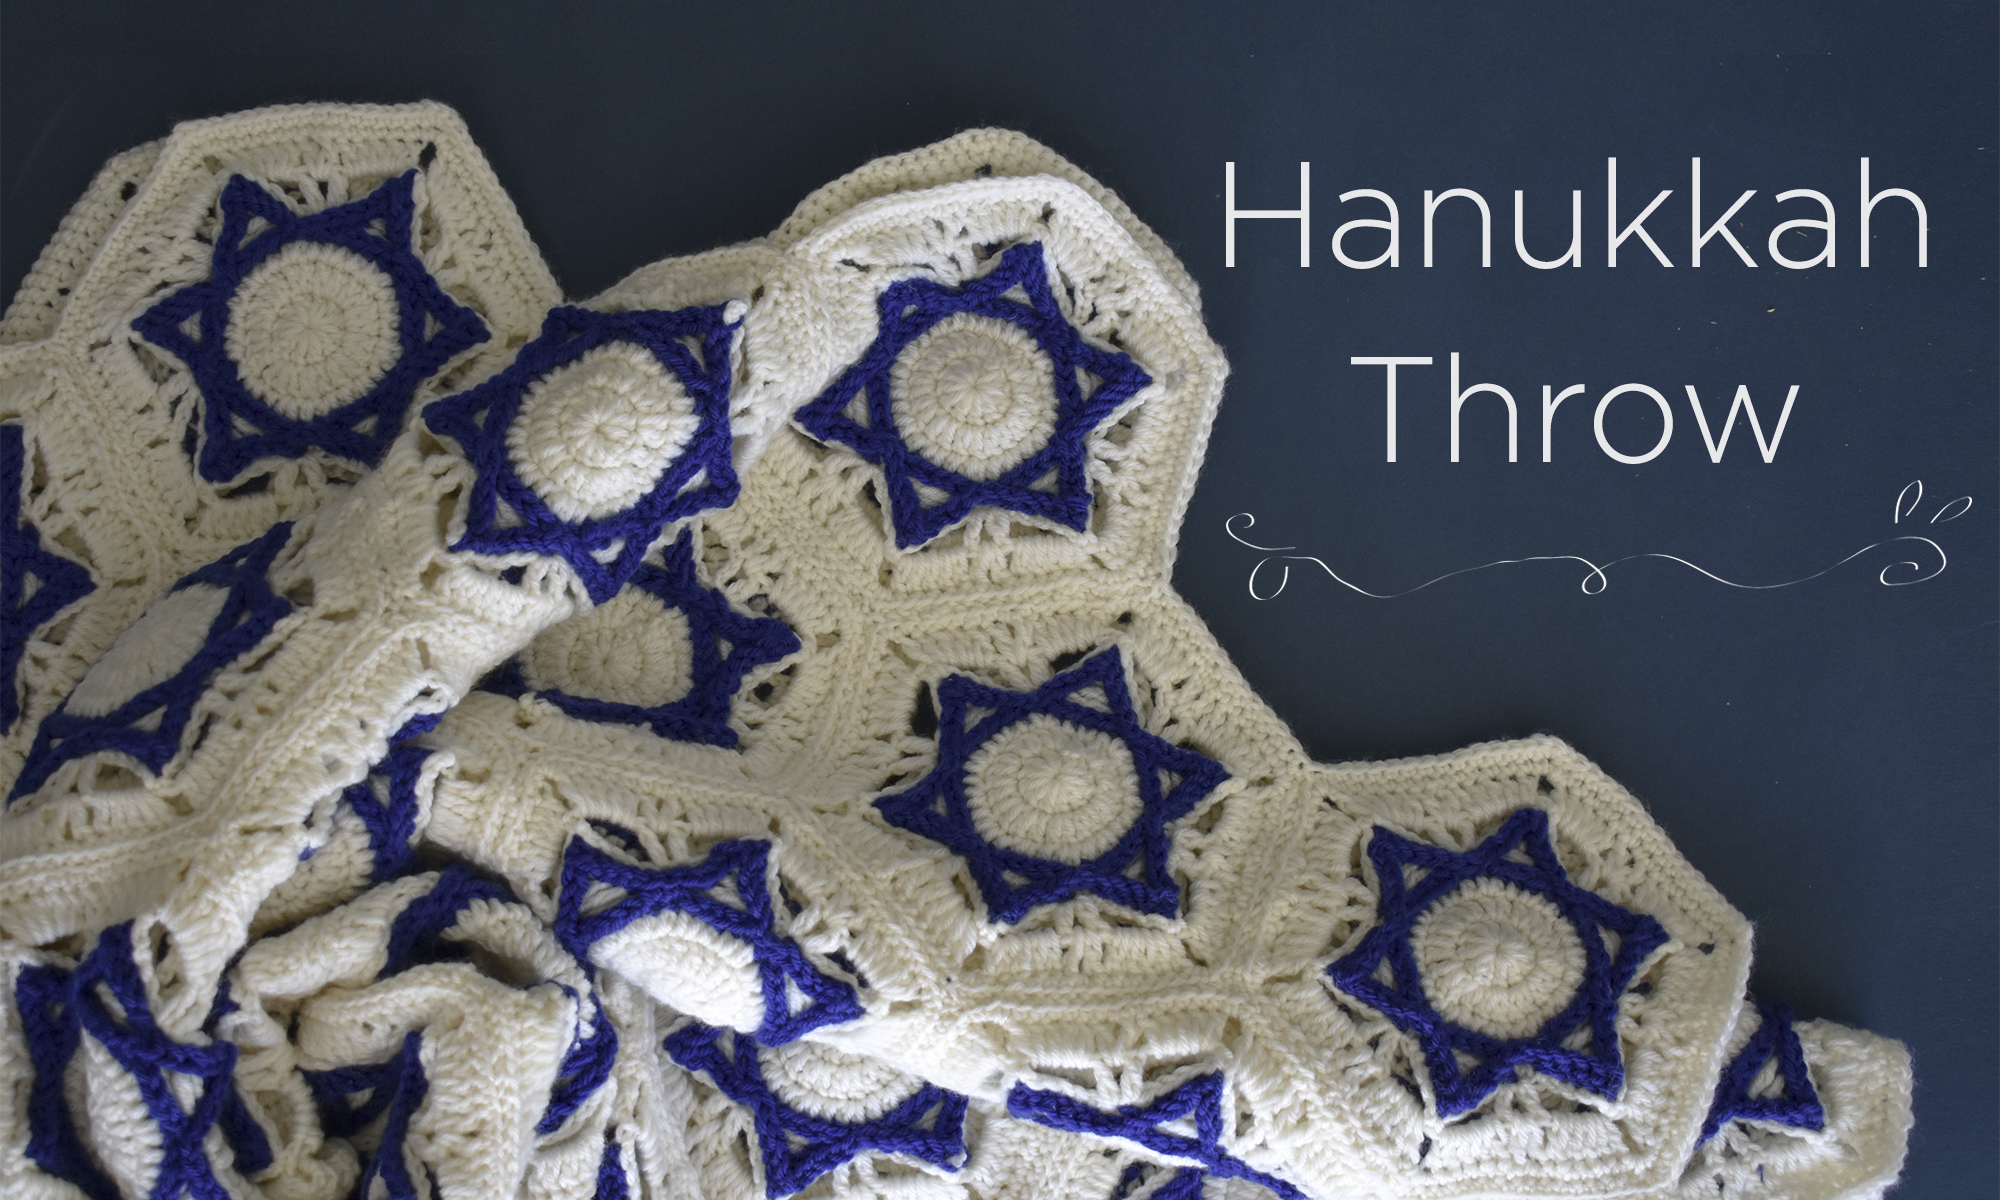
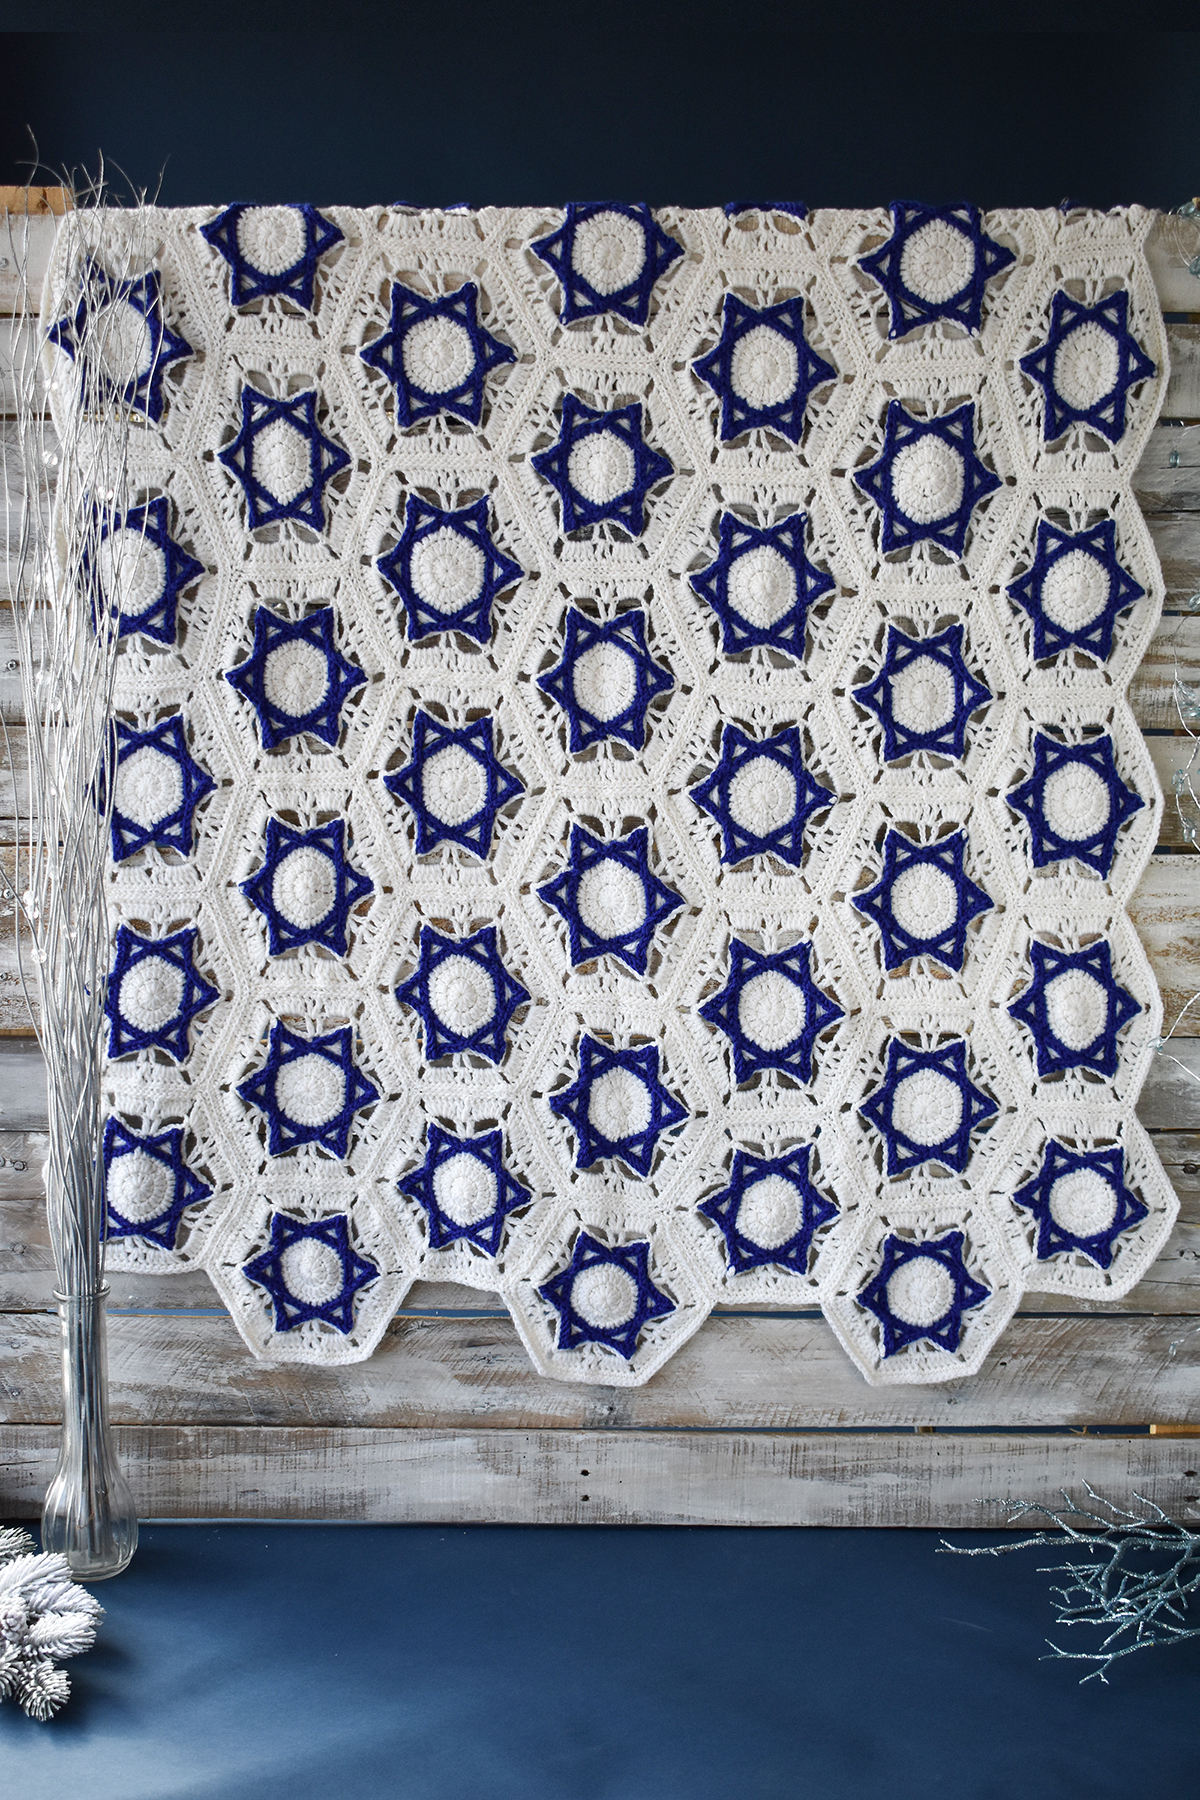
Today, to mark the halfway point of the 8-day celebration that is Hanukkah, we’d like to present the Hanukkah Throw (pattern link), crocheted in machine washable Adore.
Though I am not of the Jewish faith, I have many friends who are. When I was tasked with developing a project to celebrate Hanukkah, I wanted to be sure to come up with something that was pretty, respectful, and ultimately useful.
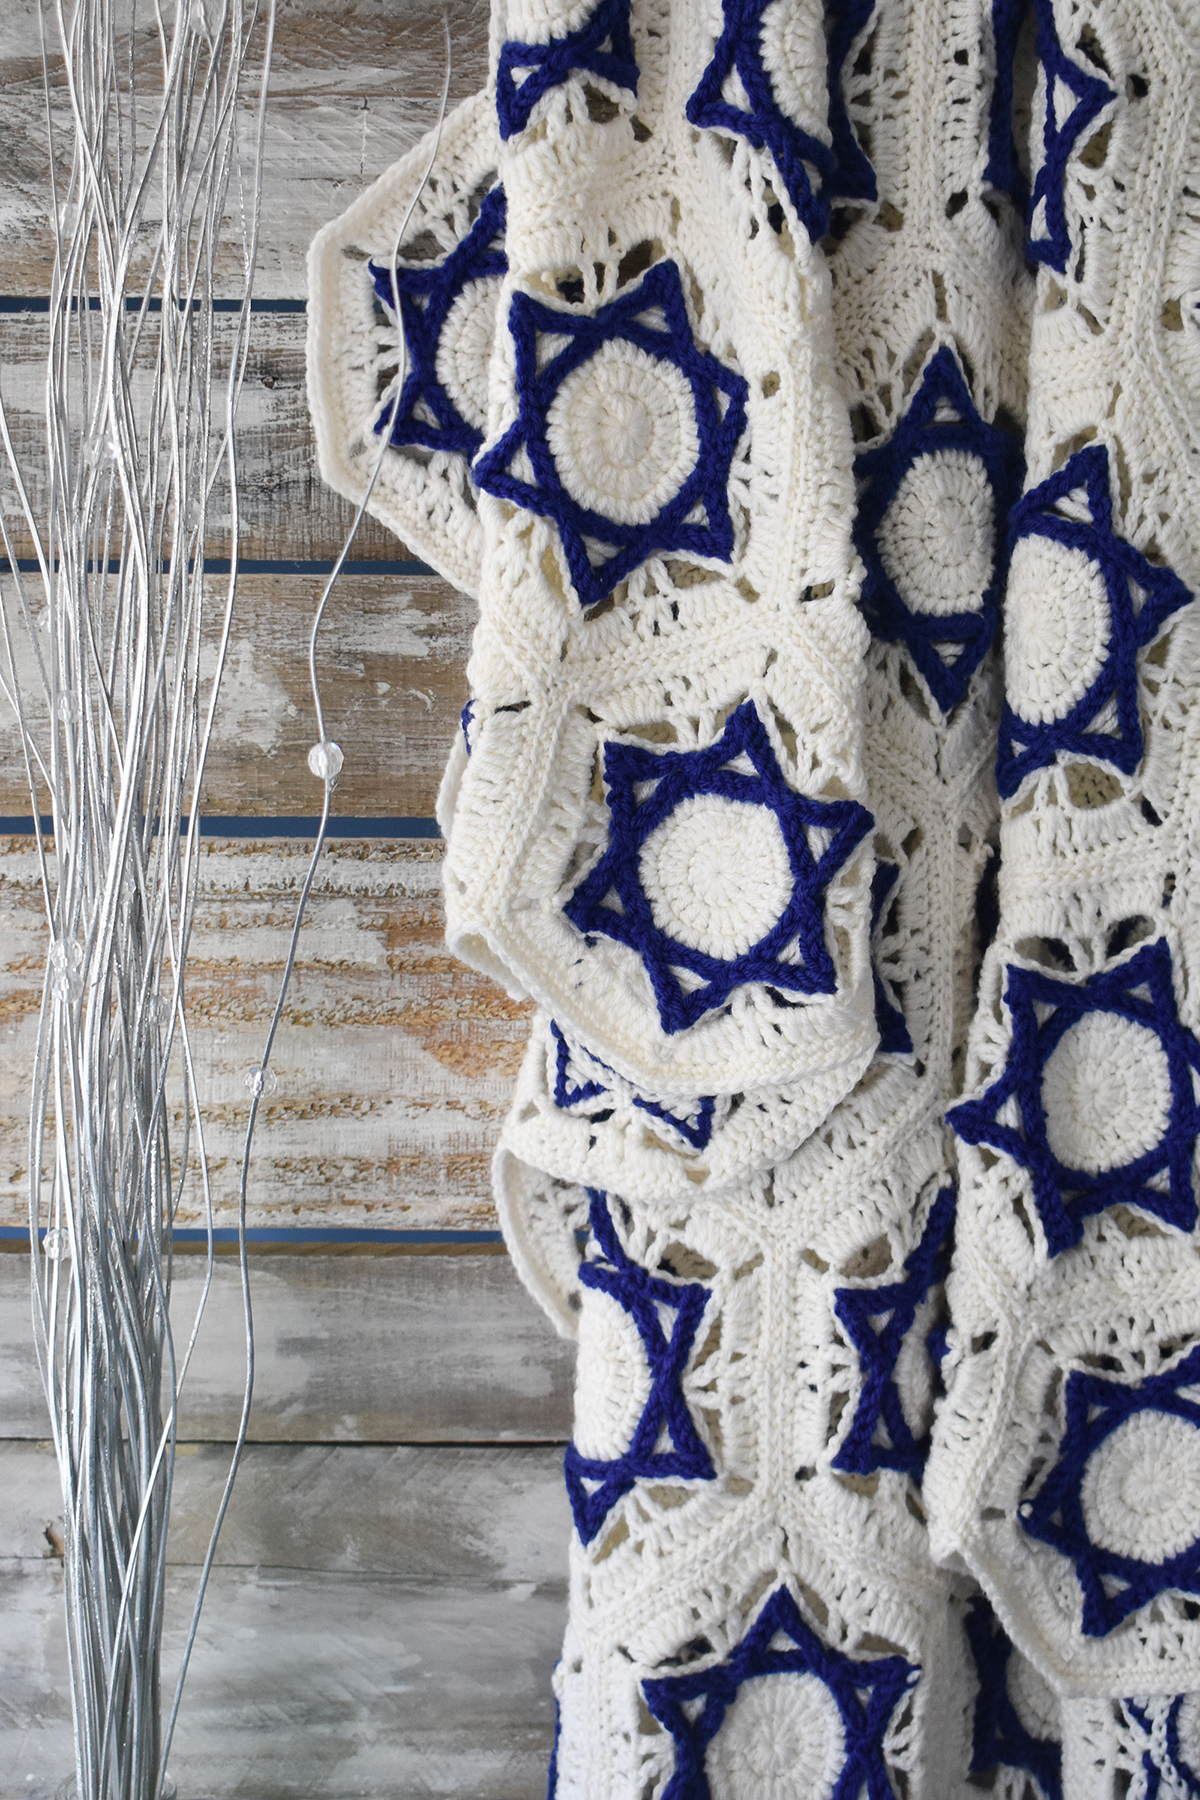
Even I know that the Star of David motif is an important symbol to Judaism (among other religions). This six-pointed star is actually formed by two triangles laid on top of one another. The Star of David (aka “Shield” of David) is named after King David, the second king of Israel. It is a symbol that has many meanings to different groups of people. This symbol was painfully used by the Nazis to mark Jews for persecution. Today, it can be found on the flag of Israel.
When I started looking around for knit or crochet patterns with this motif, I wasn’t coming up with much. But I knew that it could be well suited to crochet, I just wasn’t sure exactly how I wanted to accomplish it. I took an afternoon with my yarn and hook, played around, and came up with the motif you see here.
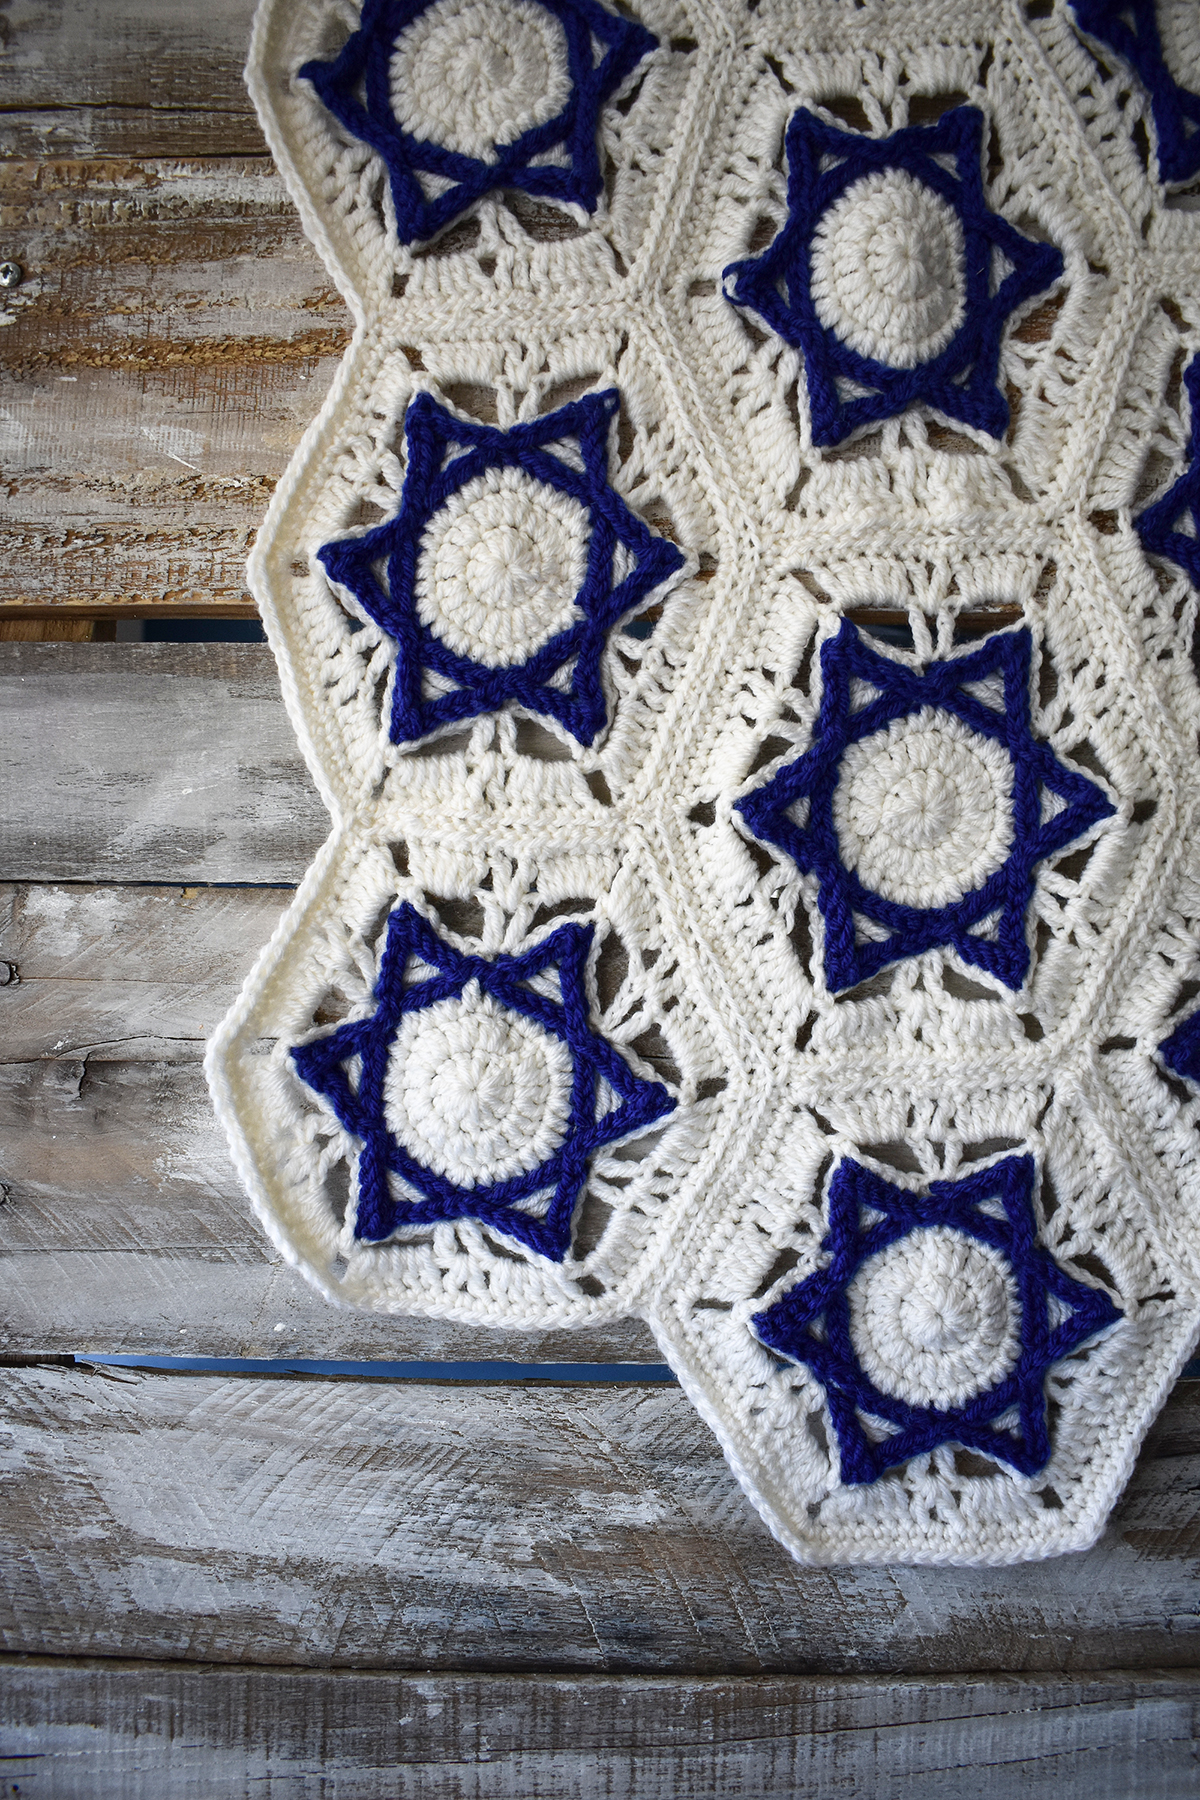
The base layer is crocheted first, and then an overlay of blue post stitches is worked onto the base layer. The motif is both written and charted. In addition to a throw as seen here, I could easily see this motif used in a table runner using 10-weight crochet thread (like our Garden 10), any weight of yarn for a single ornament, gift toppers, and much more!
Happy Hanukkah!
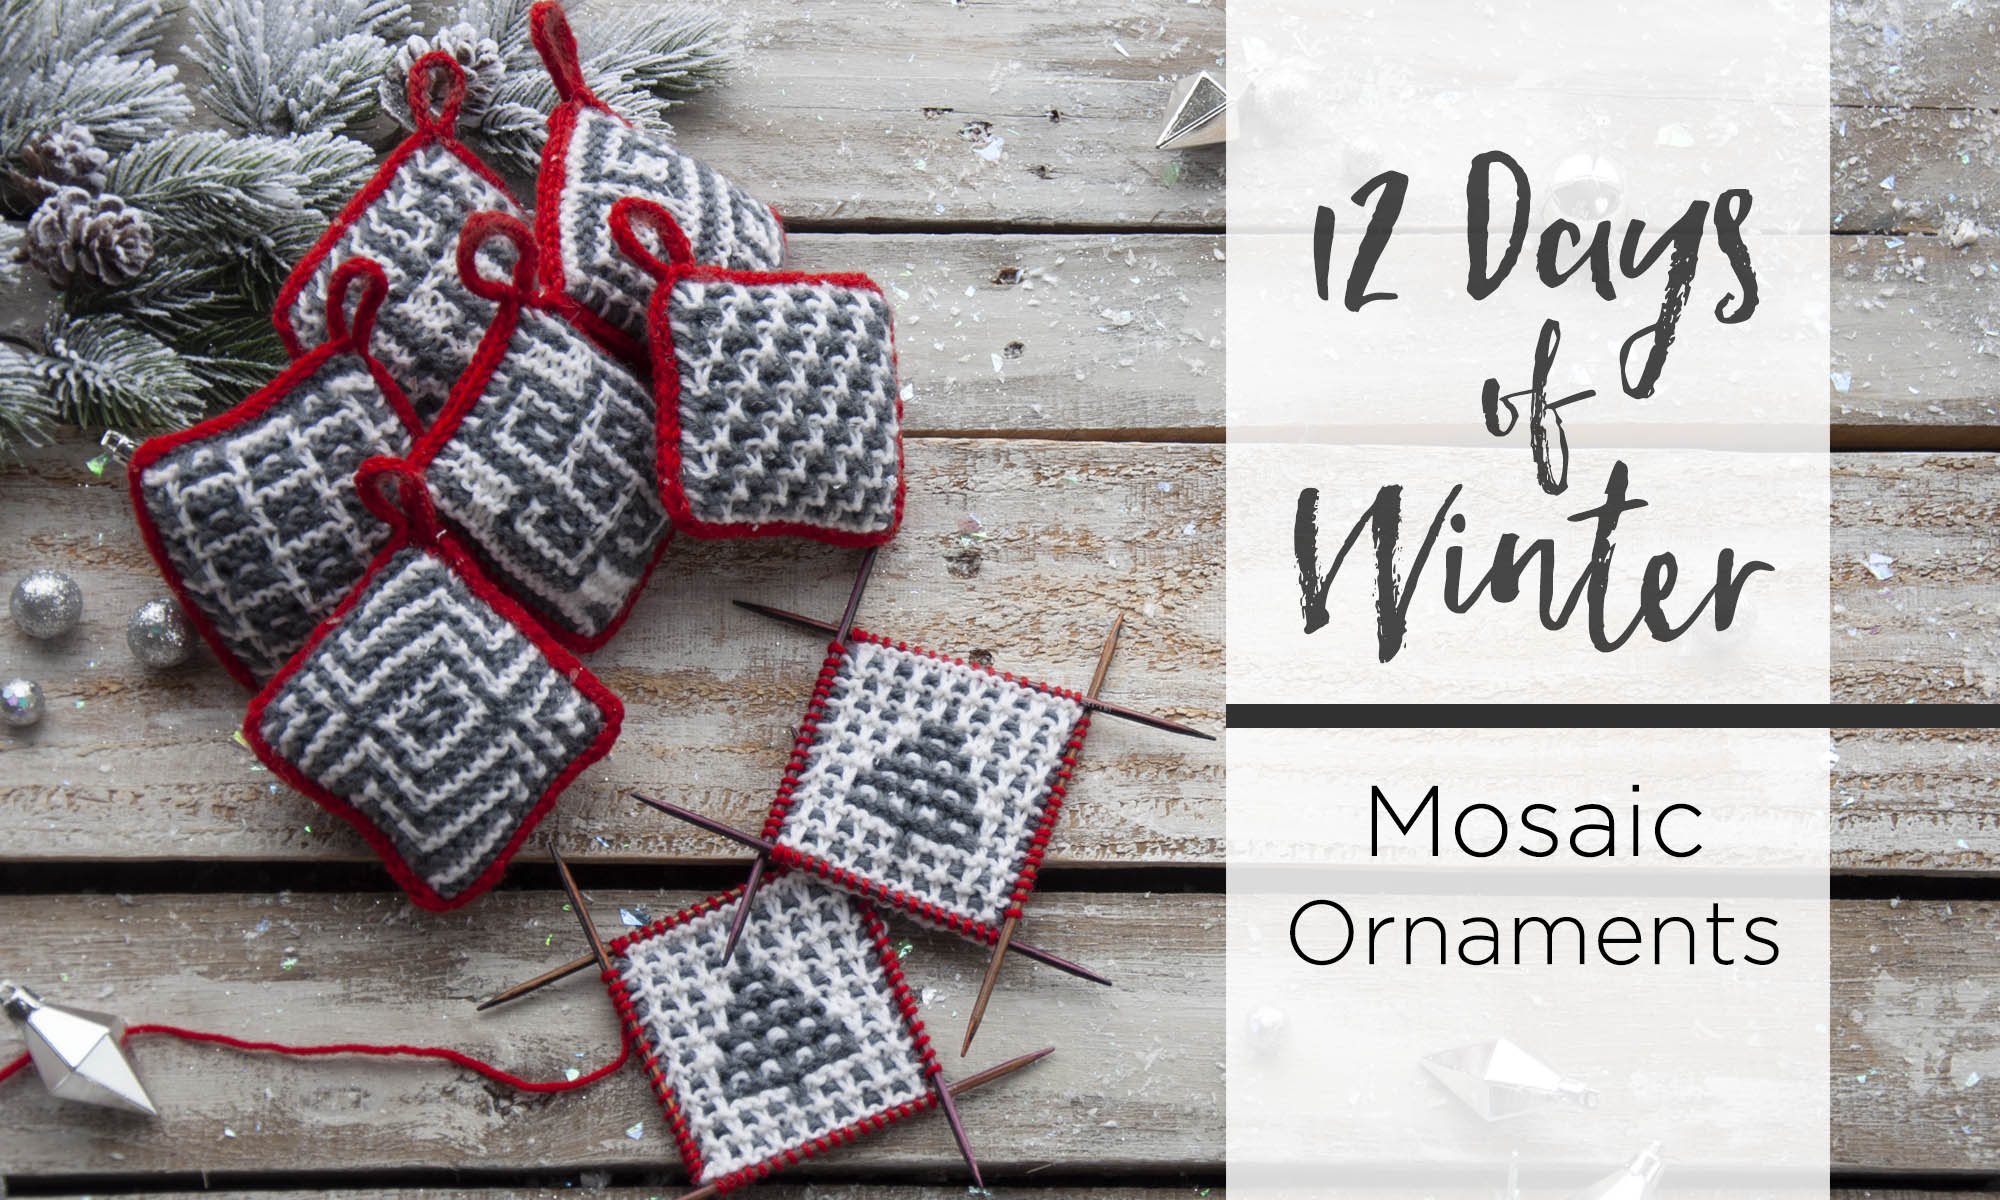
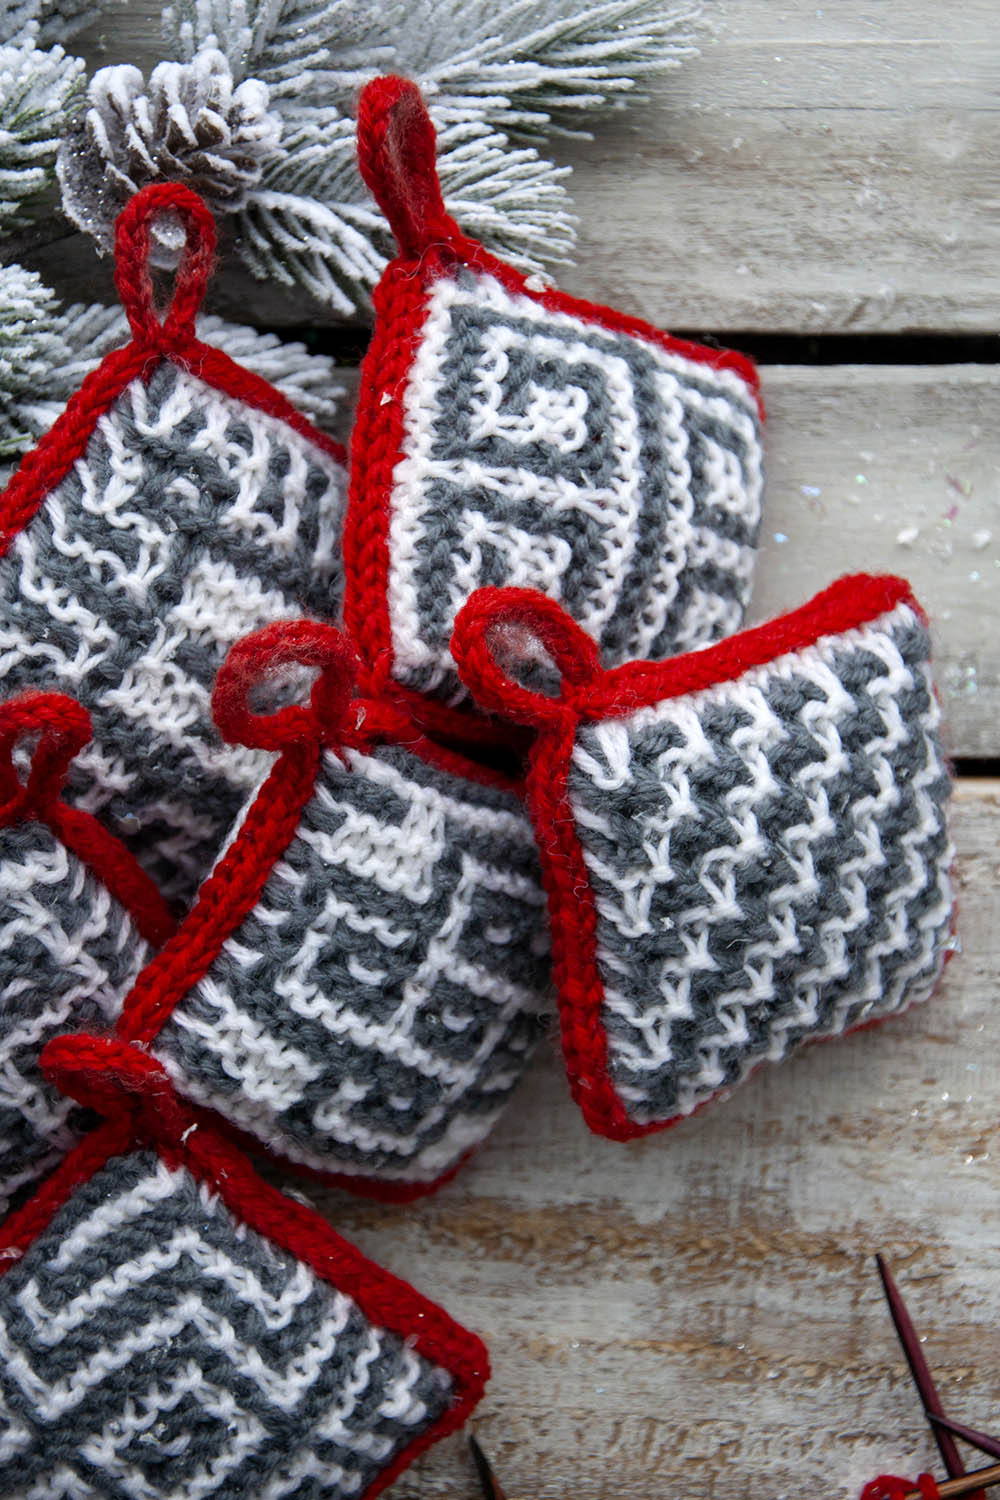
This is part 9 in a 12 part series highlighting designs from our 12 Days of Winter, Series 2 Edition.
Ornaments are meant to be special. Often they are passed down to us. Perhaps they’ve been collected from some treasured place, or maybe they are handmade. After all, what is more charming than lovingly made handmade items?
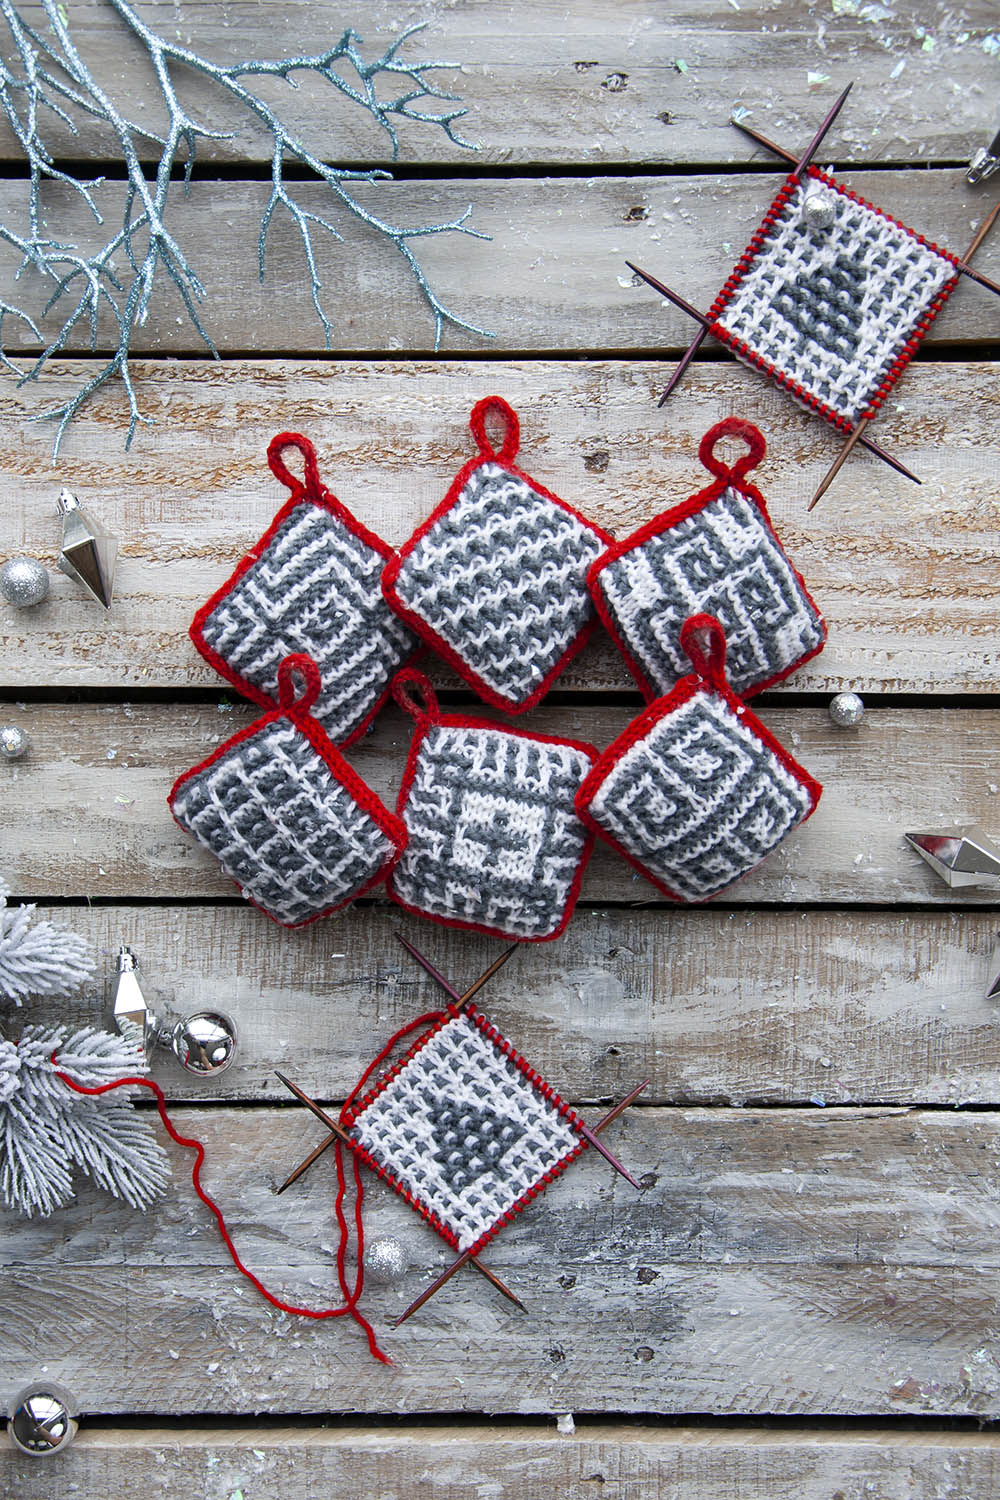
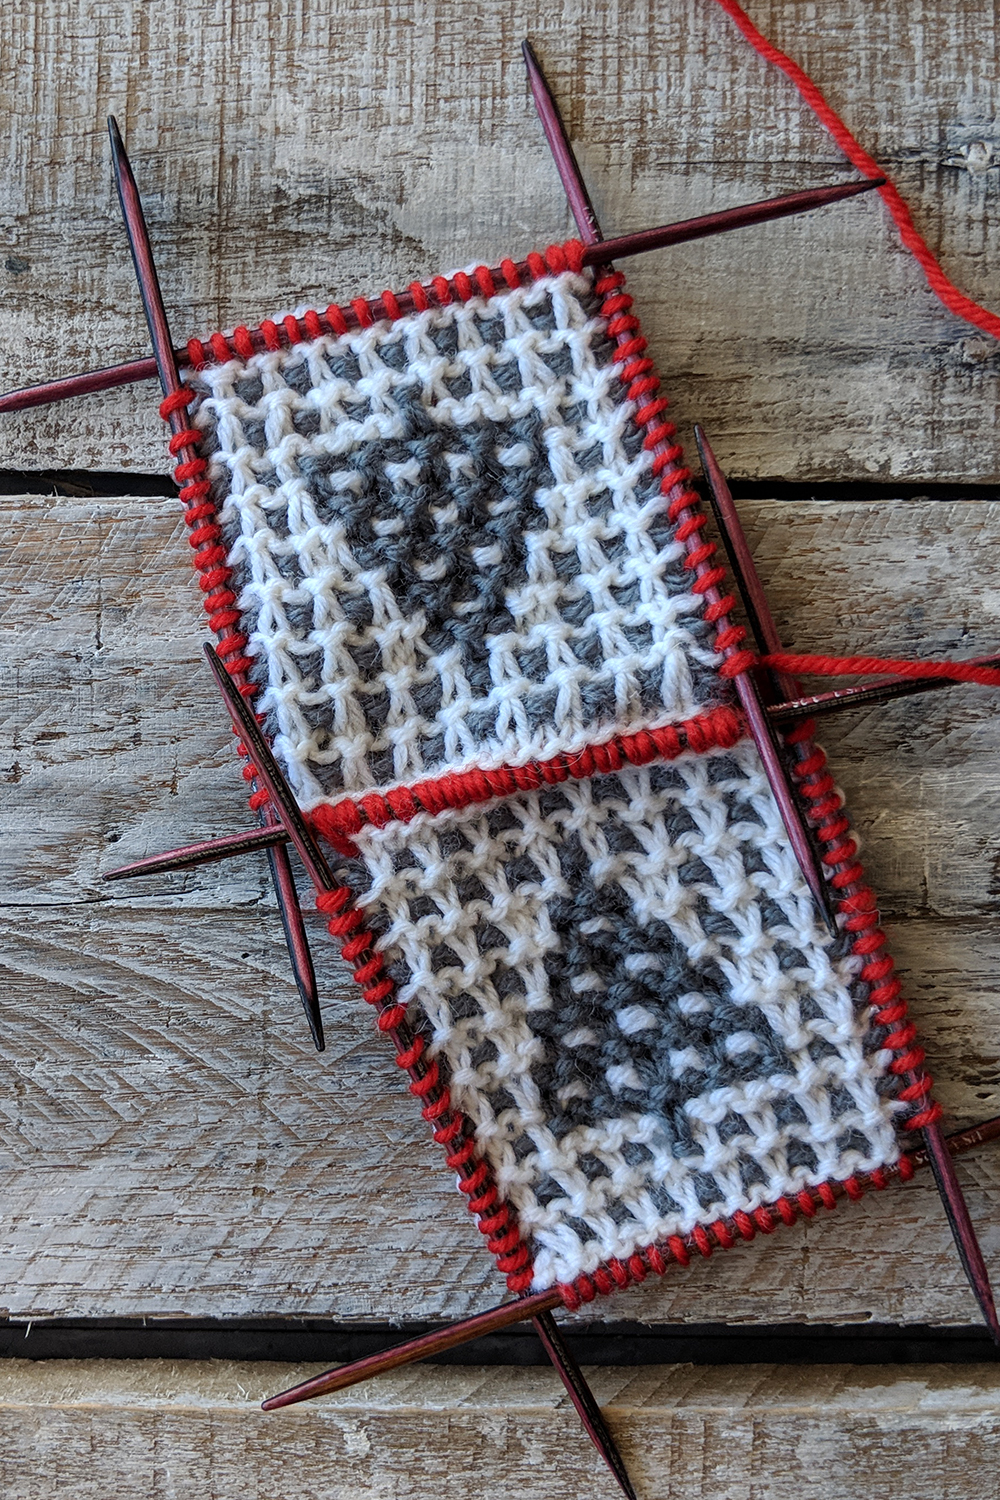
The Mosaic Ornaments pattern calls for 3 balls (1 of each color) of Deluxe DK Superwash. Though there are seven different mosaic designs included in the pattern, the yarn amounts are enough to make at least 40 ornaments. Quite a bargain, eh?
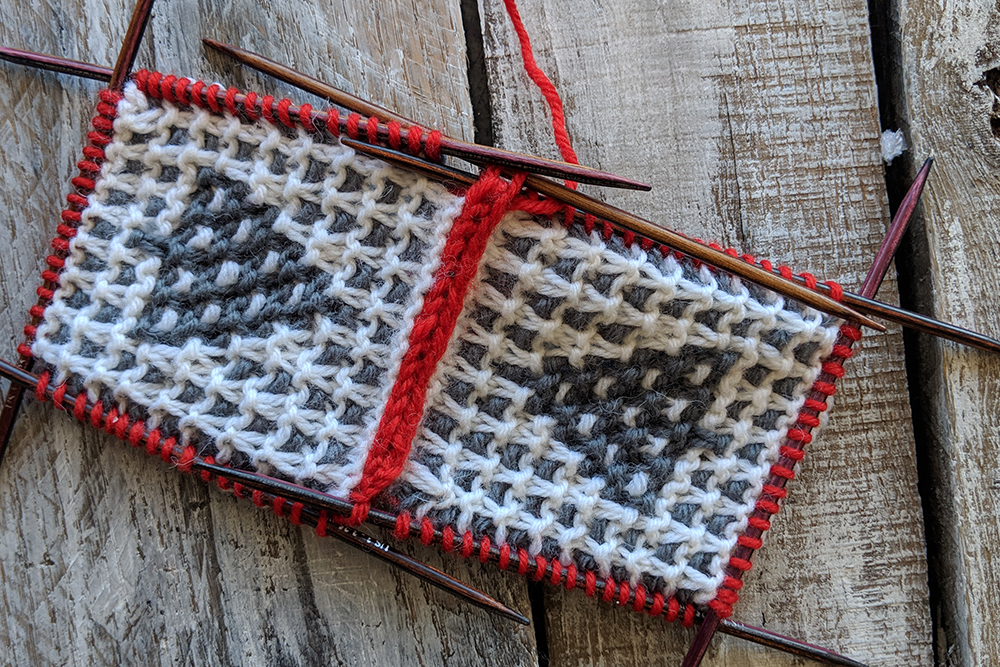
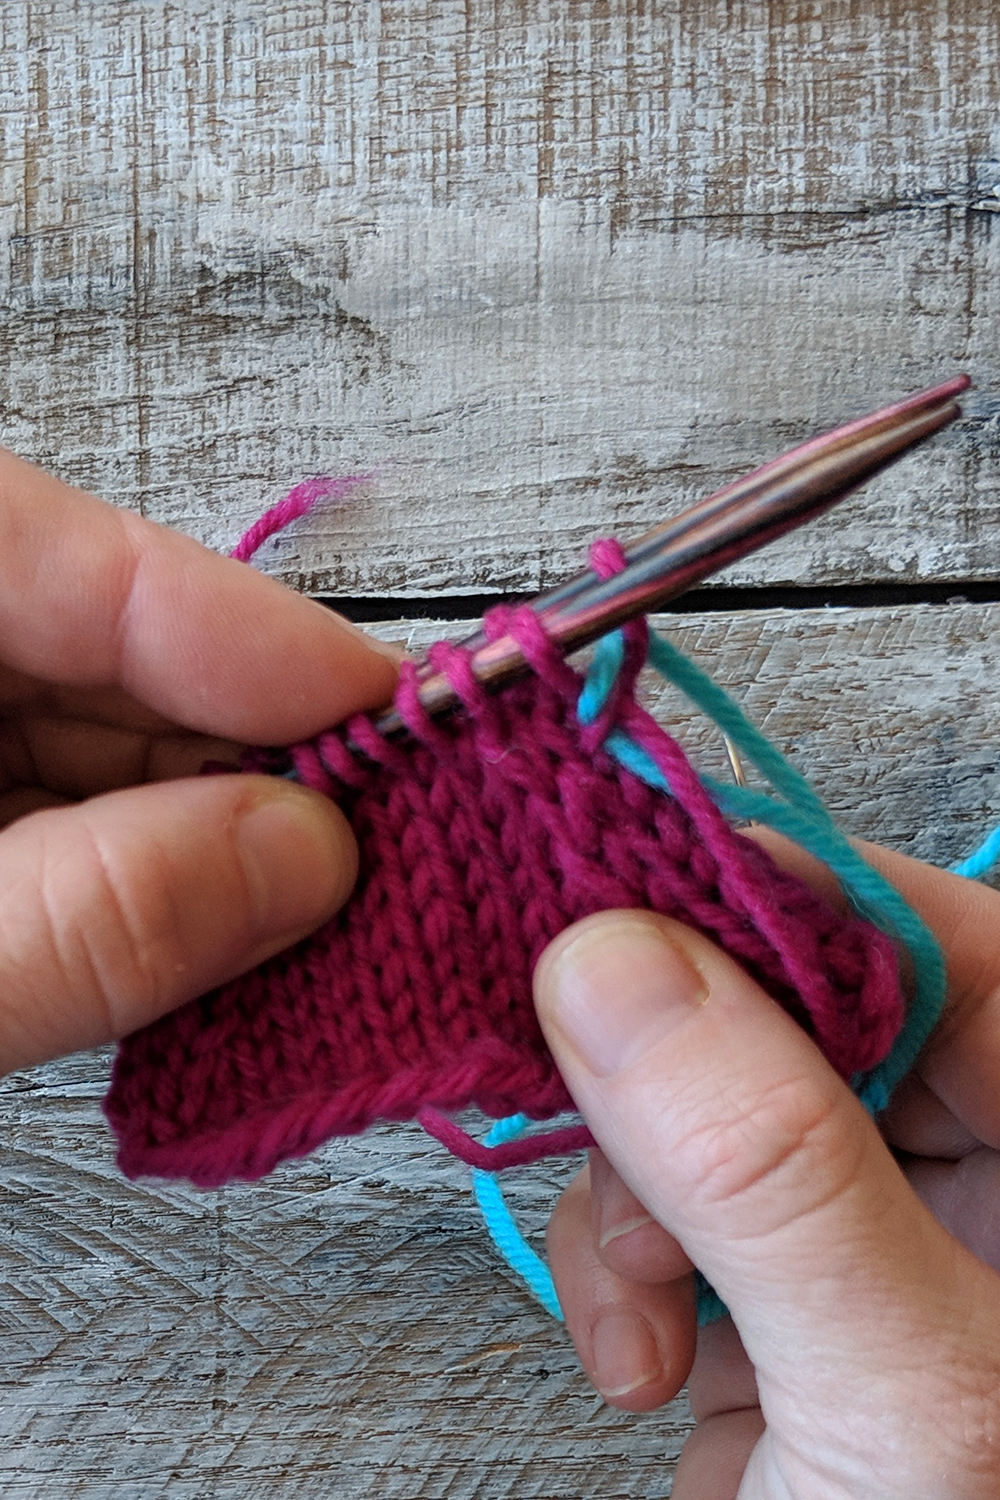
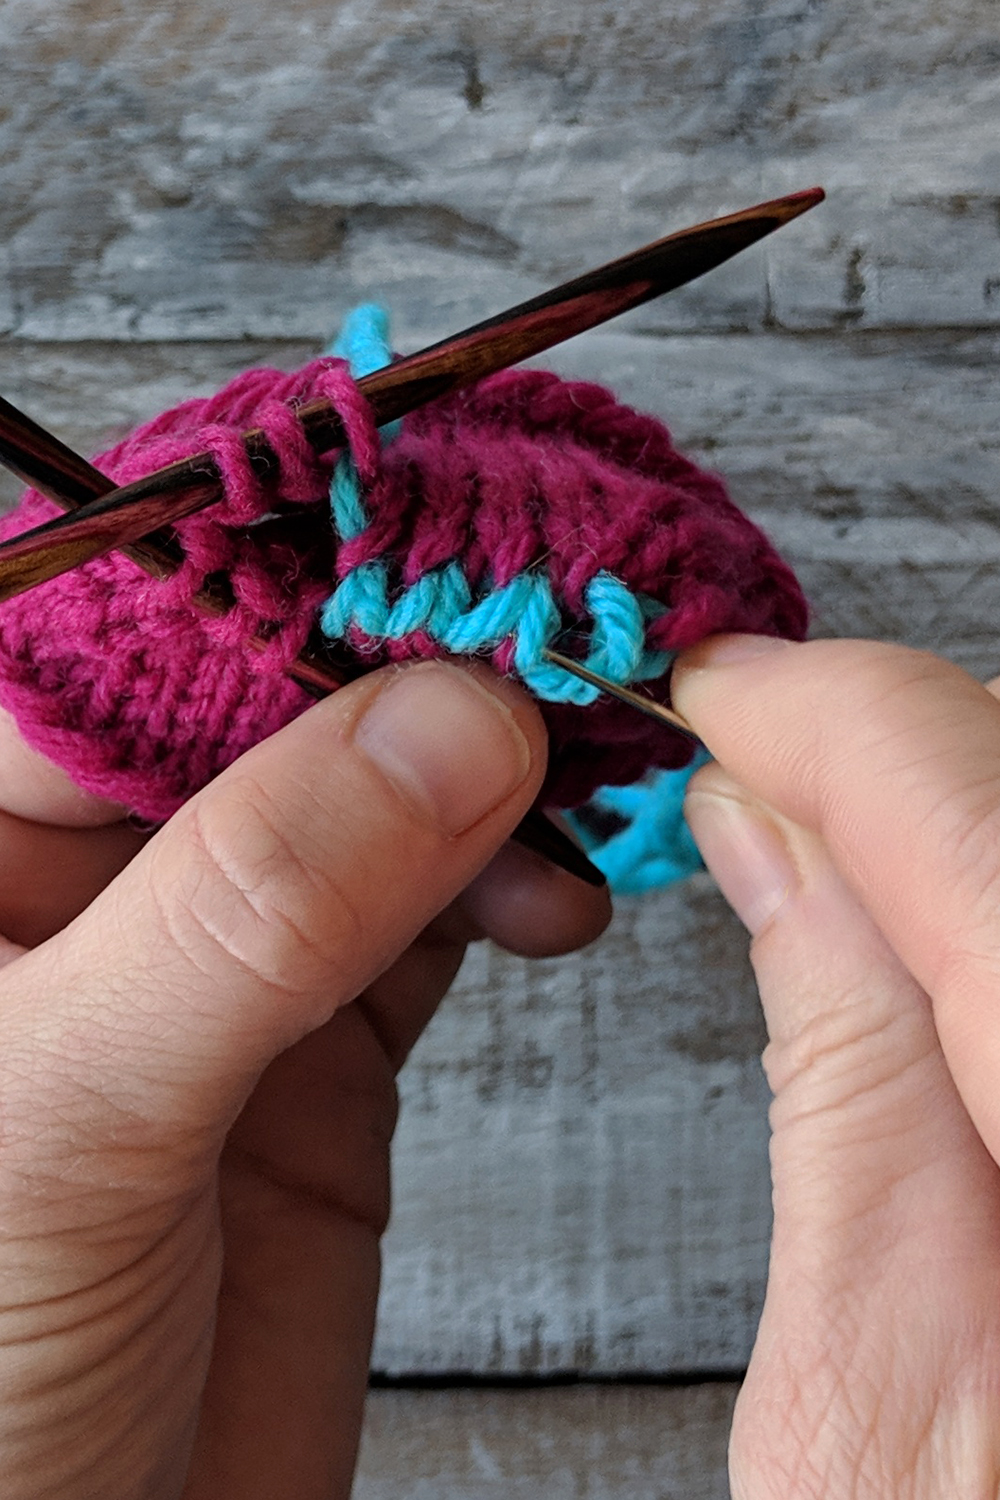
Each ornament begins by knitting the two sides separately. They are then joined with a three-needle I-Cord bind-off. Sound tough? It’s not, because I’m adding a step that takes this from a three-needle bind-off to just (the usual) two needles. Keep on reading to see how I like to do it!
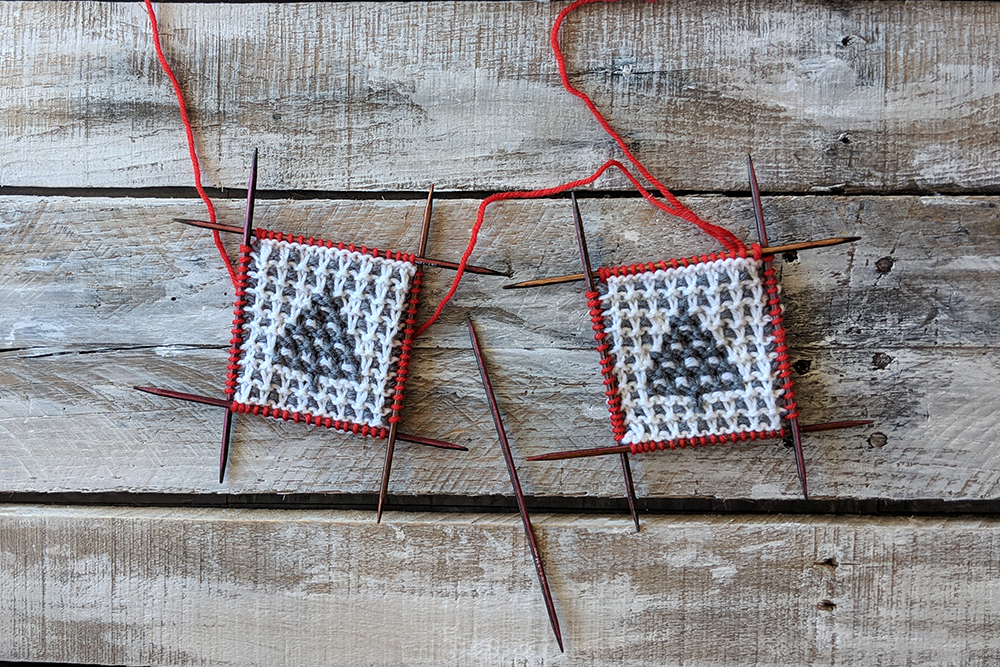
What I haven’t shown in these images is that the first step is to pick up and knit stitches all the way around each square with the contrasting red color. So that’s where we are at now – stitches have been picked up around each square.
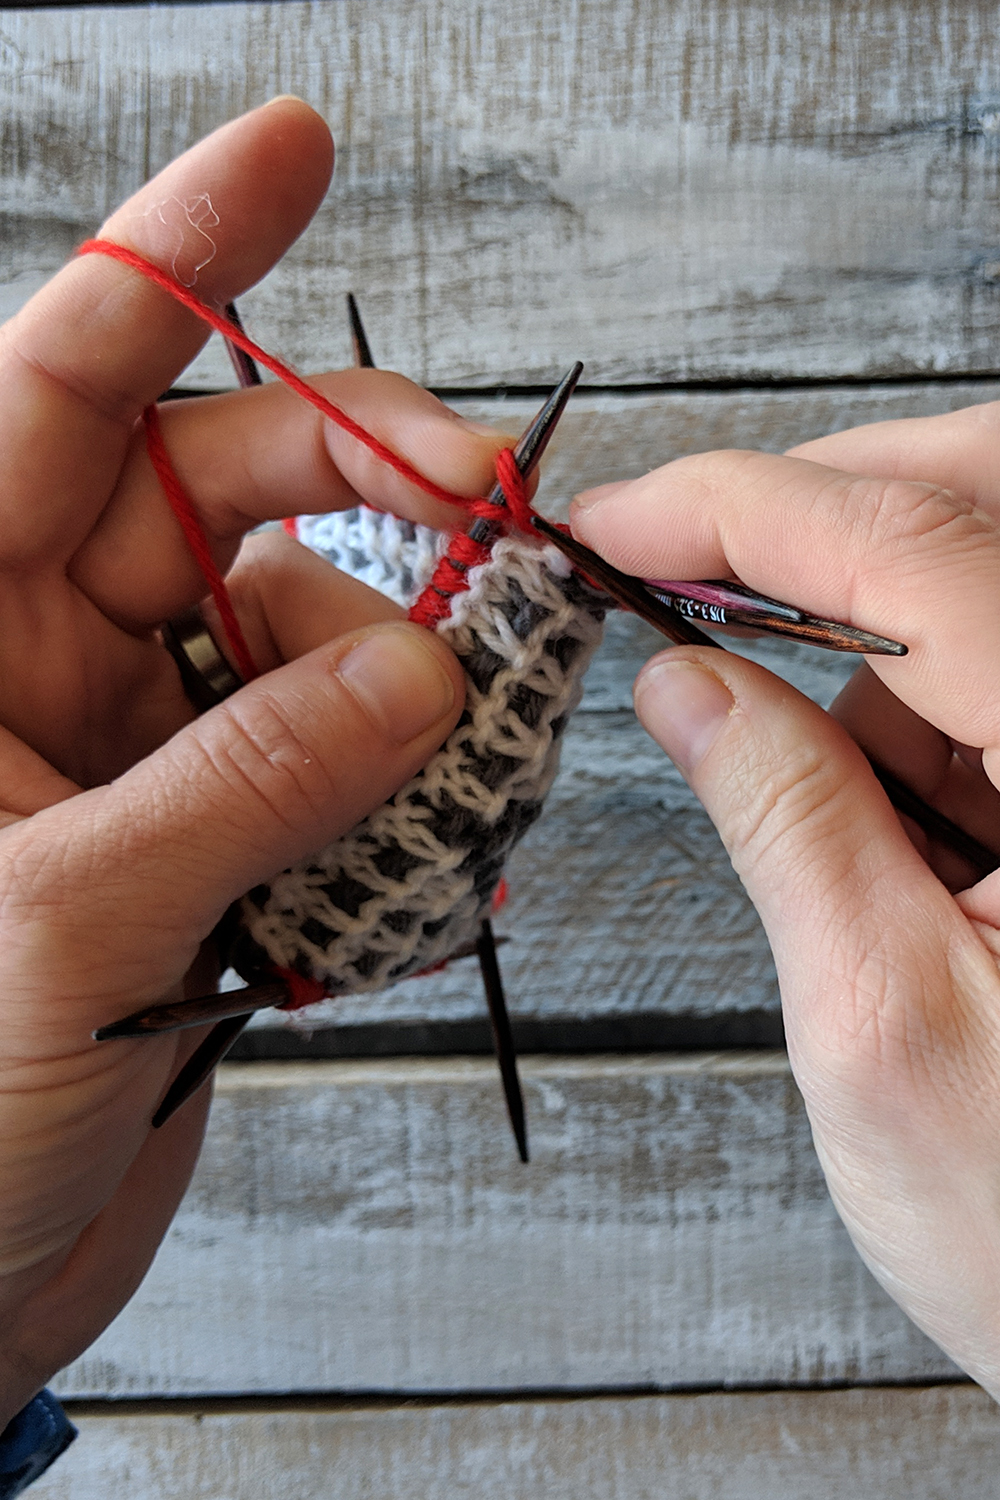
Next, place both pieces with their wrong sides facing together.
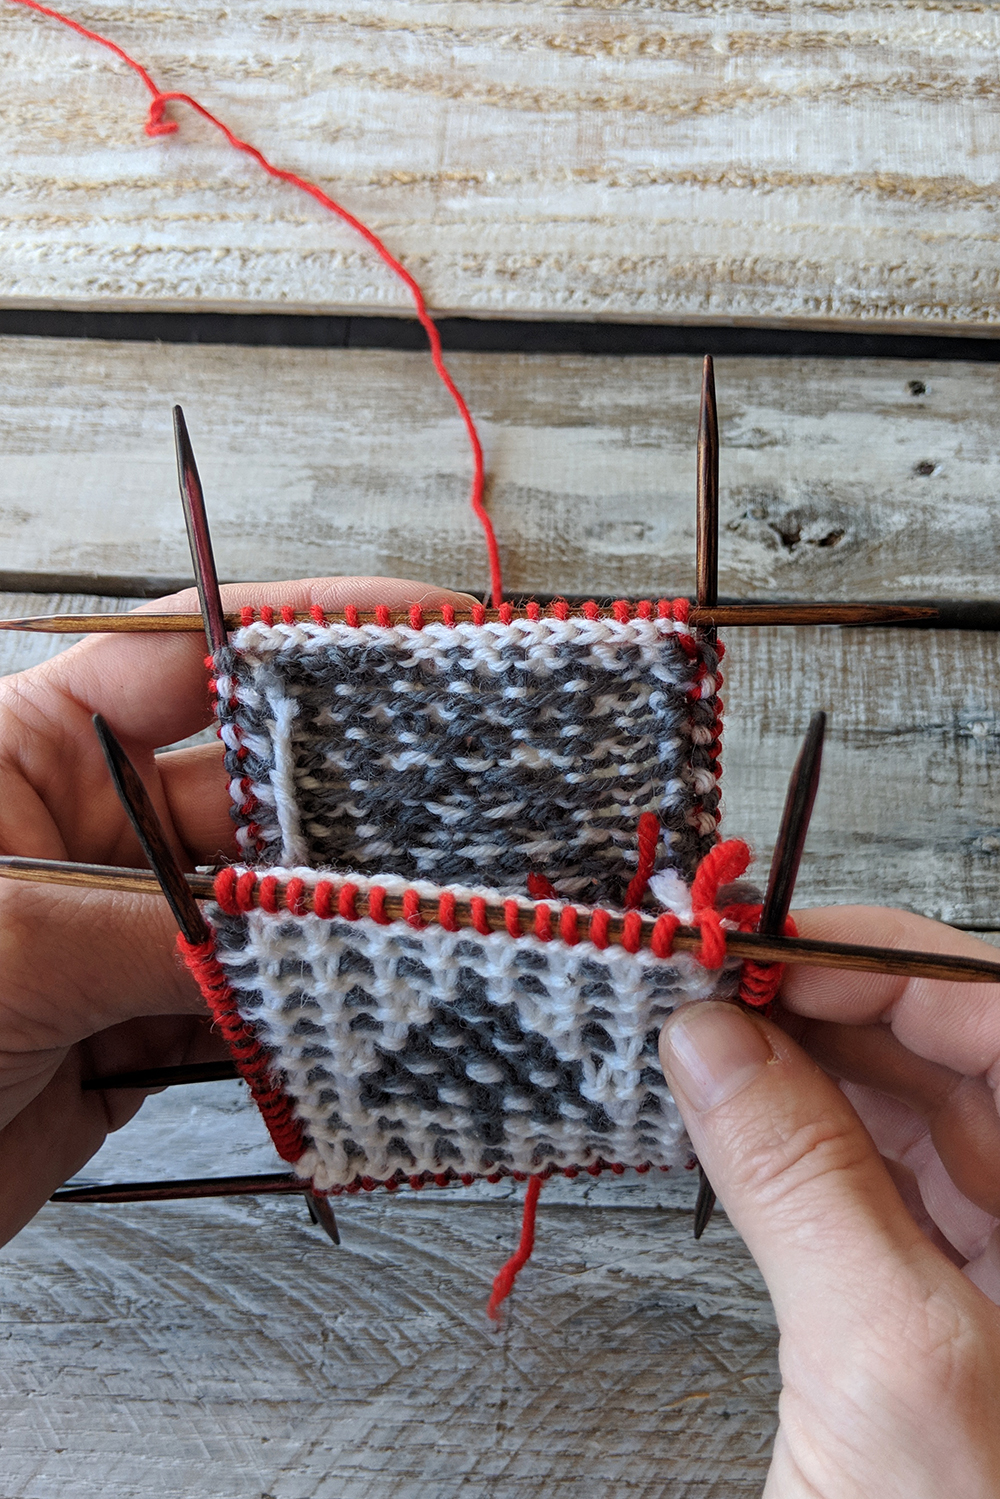
What I’m doing now is certainly not absolutely necessary, but I find it makes the process so much easier. With a separate double pointed needle (dpn), first I slide a stitch from the front needle onto the spare dpn.
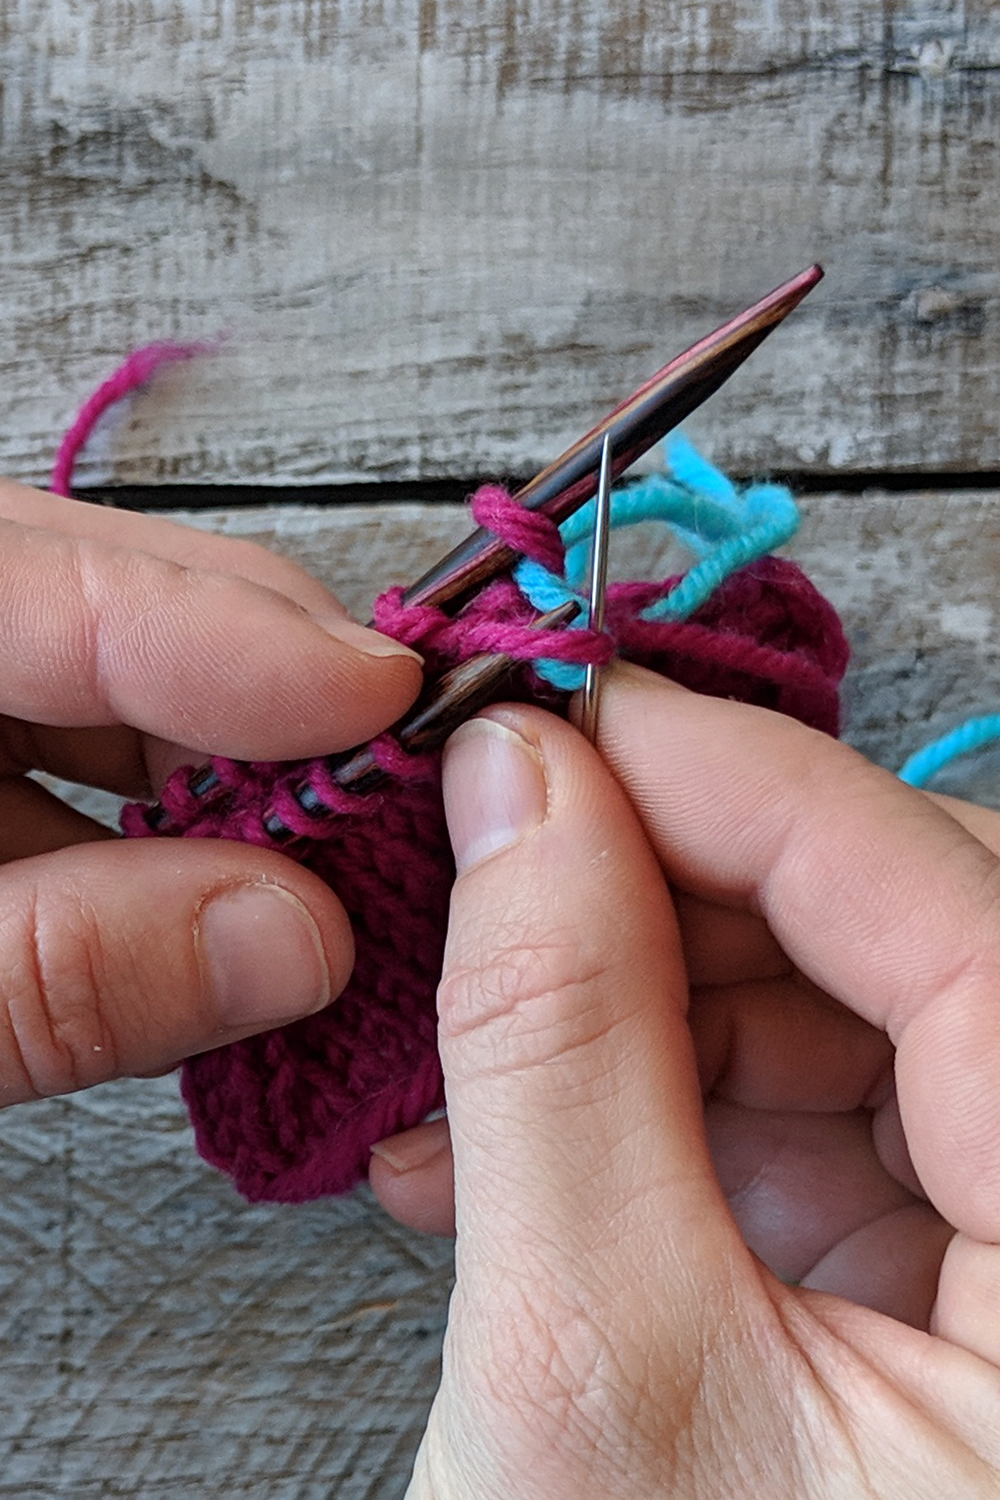
Next, I slide a stitch from the back needle onto this same dpn.
Keep going, alternating front and back needles/stitches until all stitches from one front and back needle have been transferred to the spare.
Now that the stitches from both needles have been combined onto one needle, all we’re really doing is an I-Cord bind-off, but with one extra step.
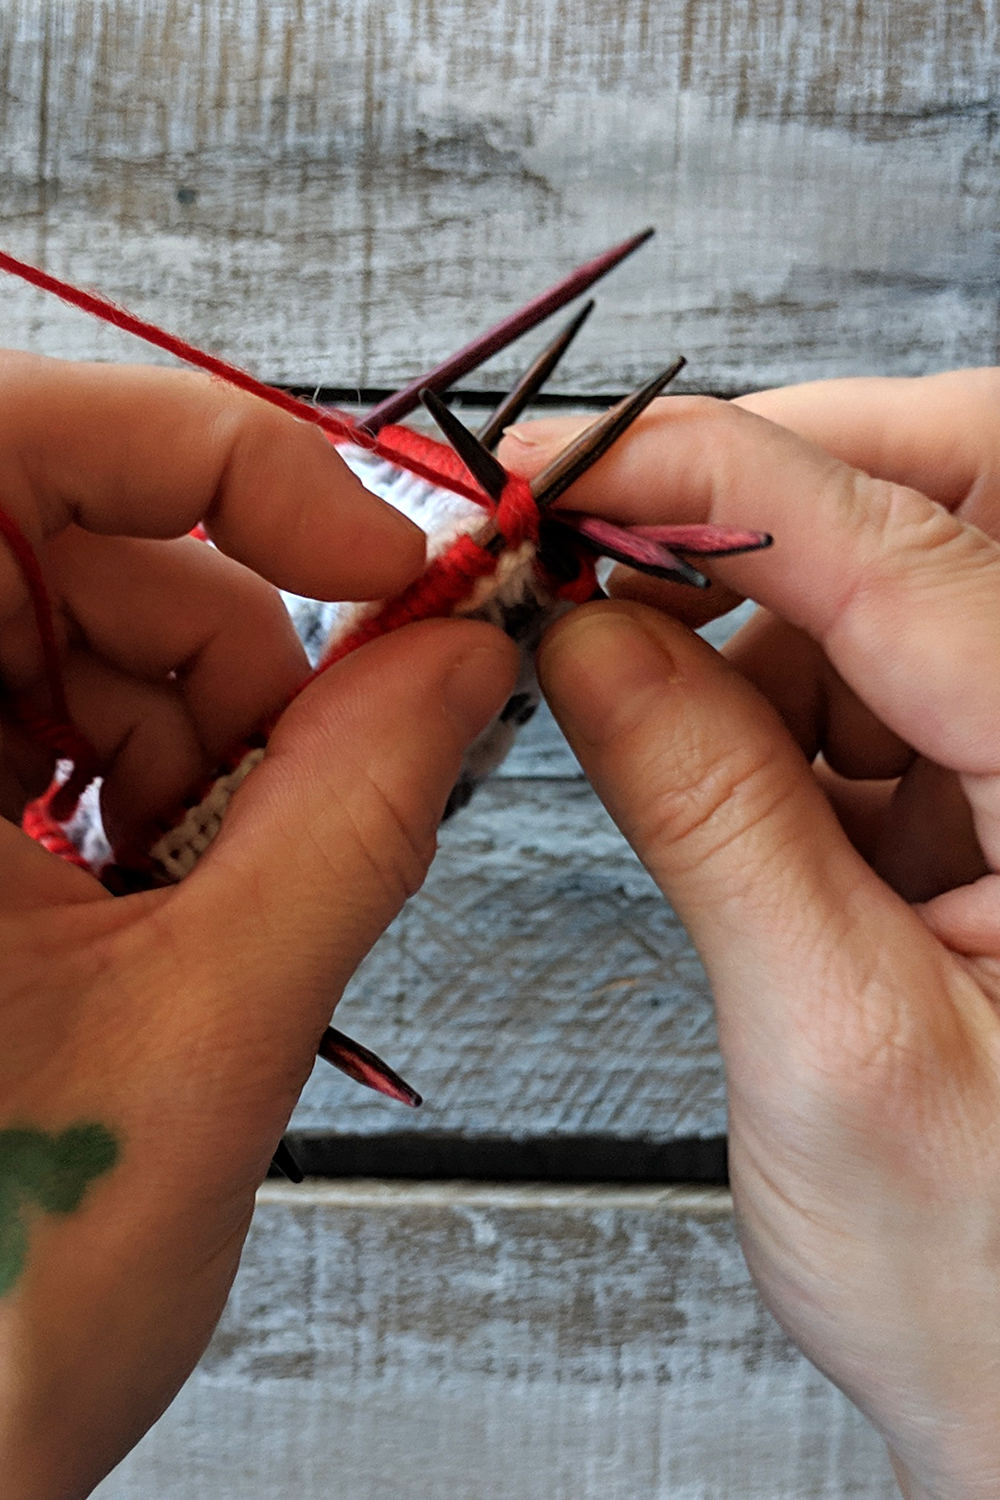
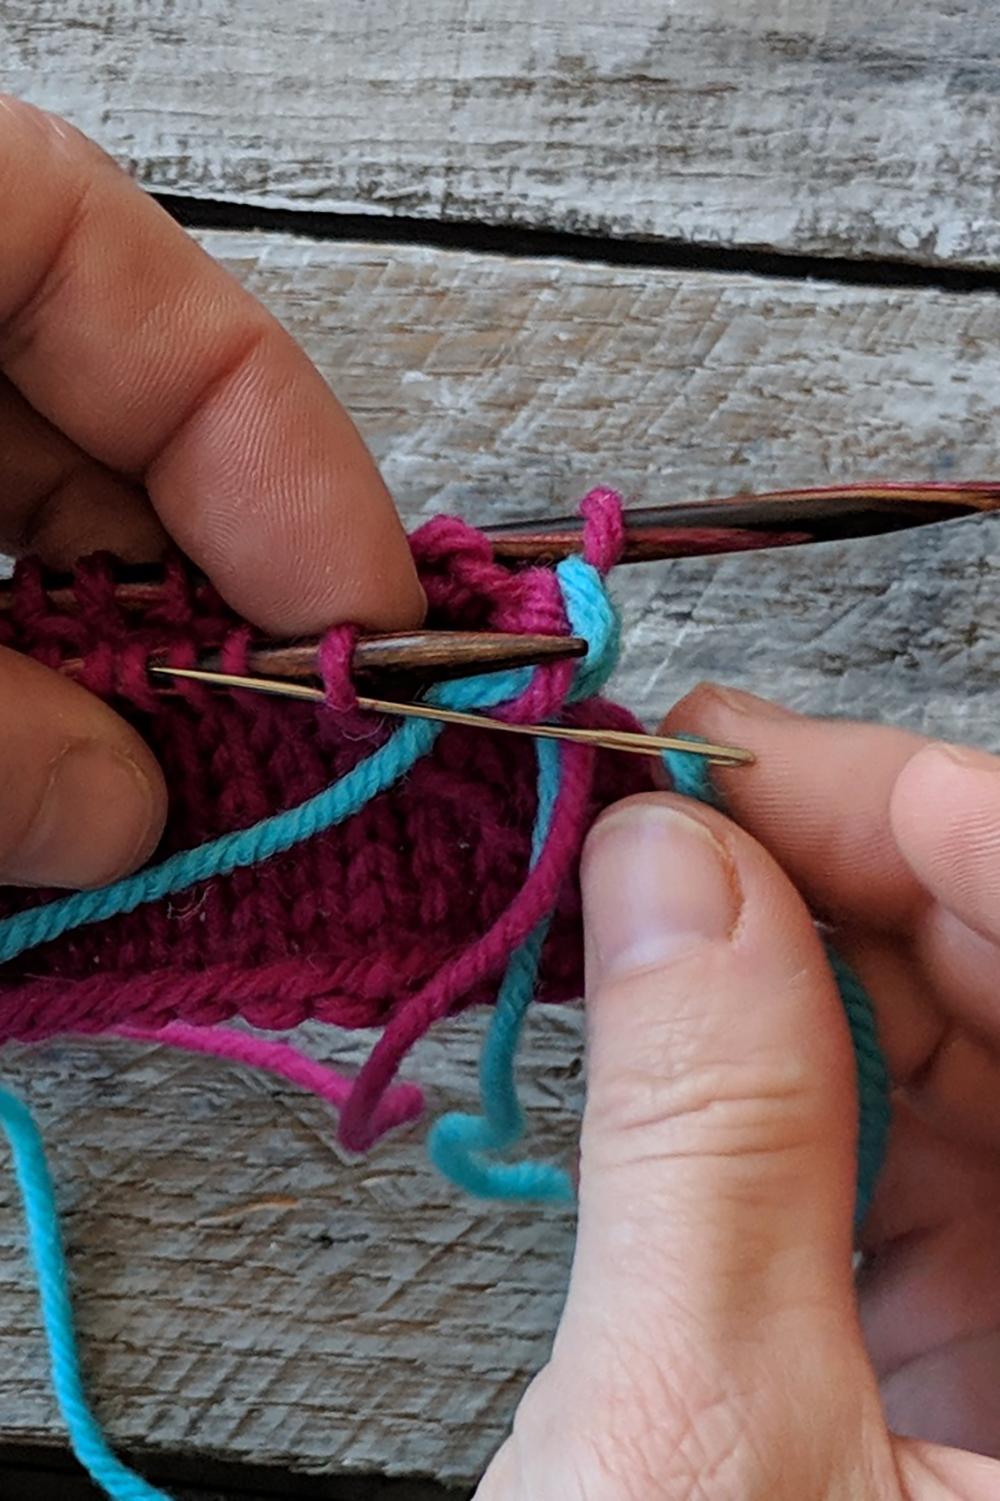
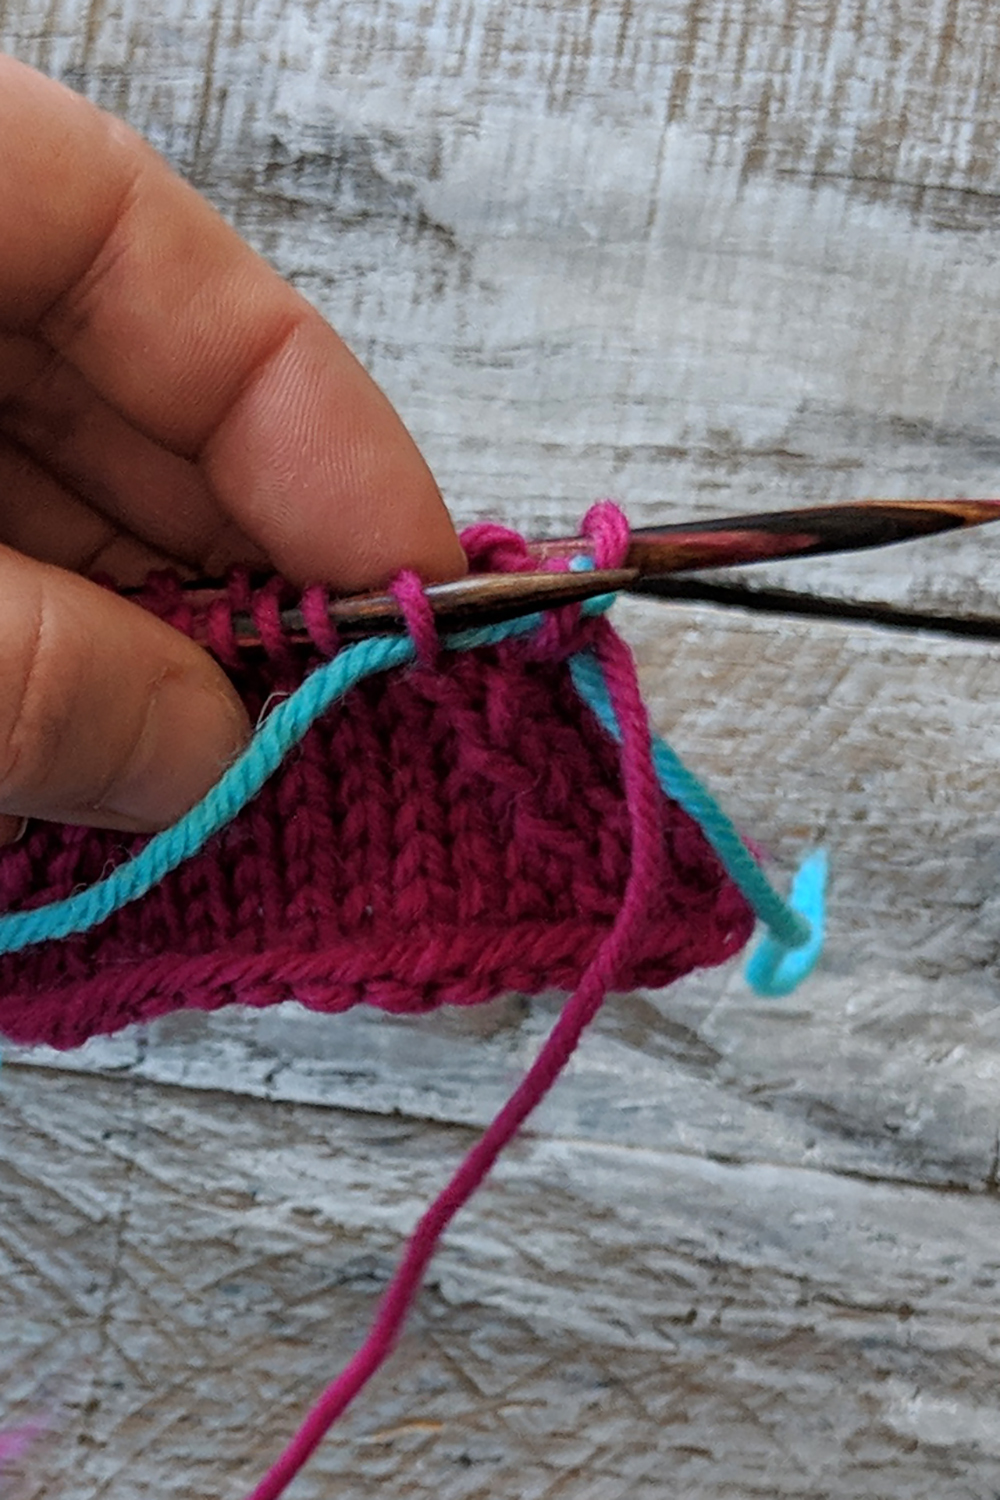
Next, knit 1 (the first cast-on stitch), then k3tog tbl (knit three stitches together through the back loops). These three stitches are: the second cast-on stitch, a stitch from the prior front needle, and a stitch from the prior back needle. Slip the resulting 2 stitches back to the working left needle. Then: * K1, k3tog tbl, slip these 2 sts back to the left needle; rep from *
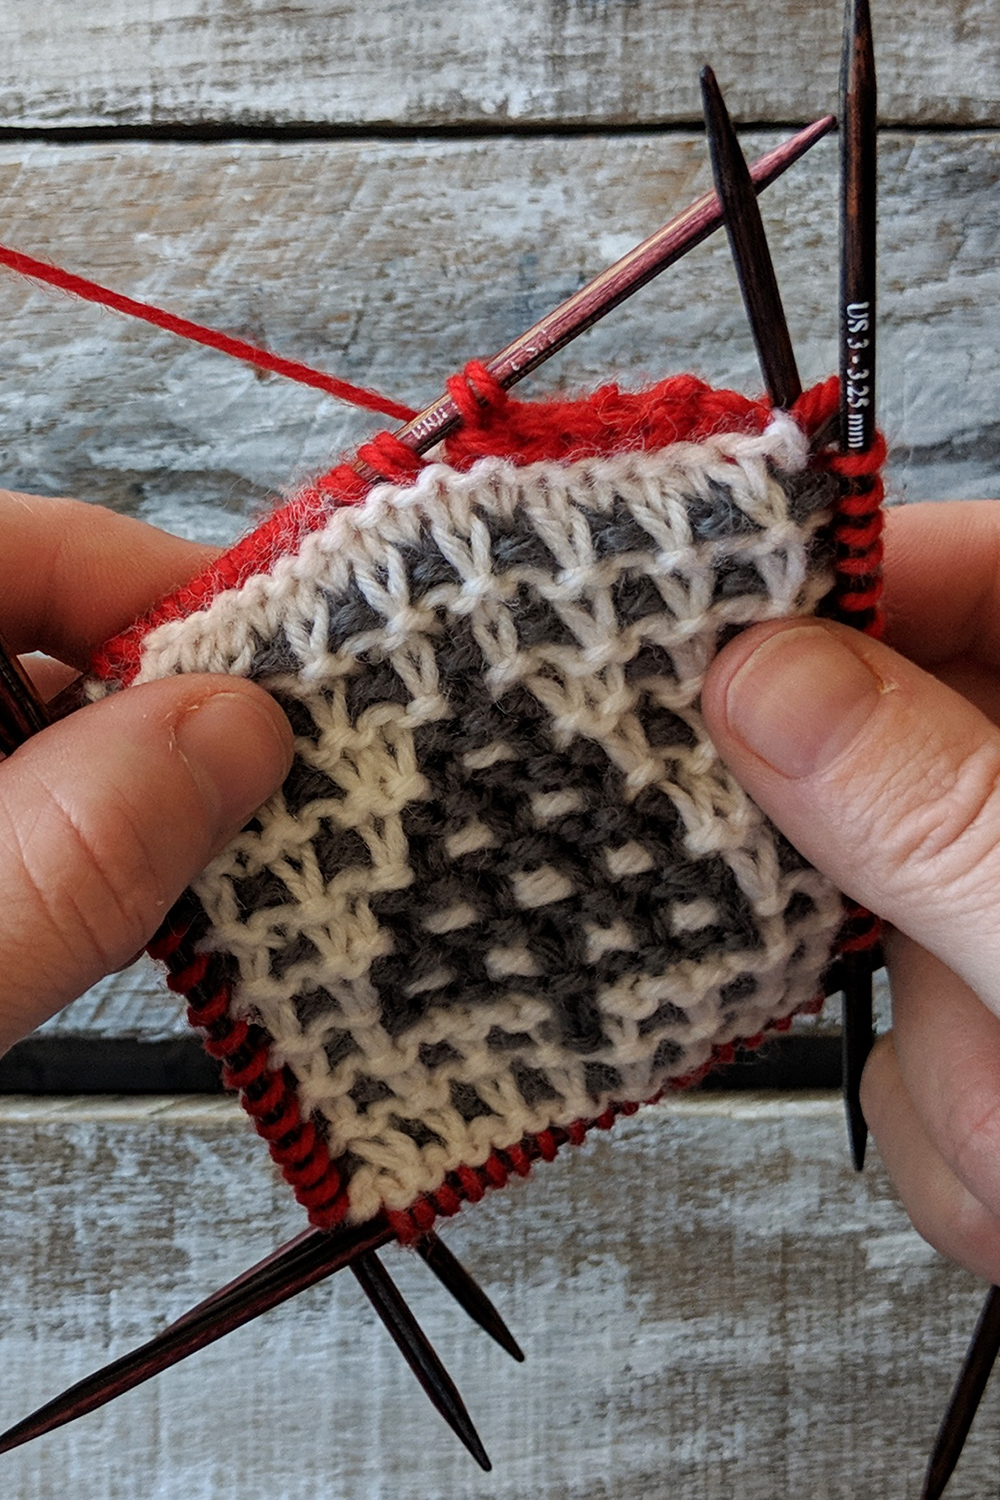
This baby 2-stitch I-Cord is works well to join the sides of the ornament and gives a nice finished look to the project, as well.
Remember, you can find the Series 2 12 Days of Winter patterns on Ravelry!
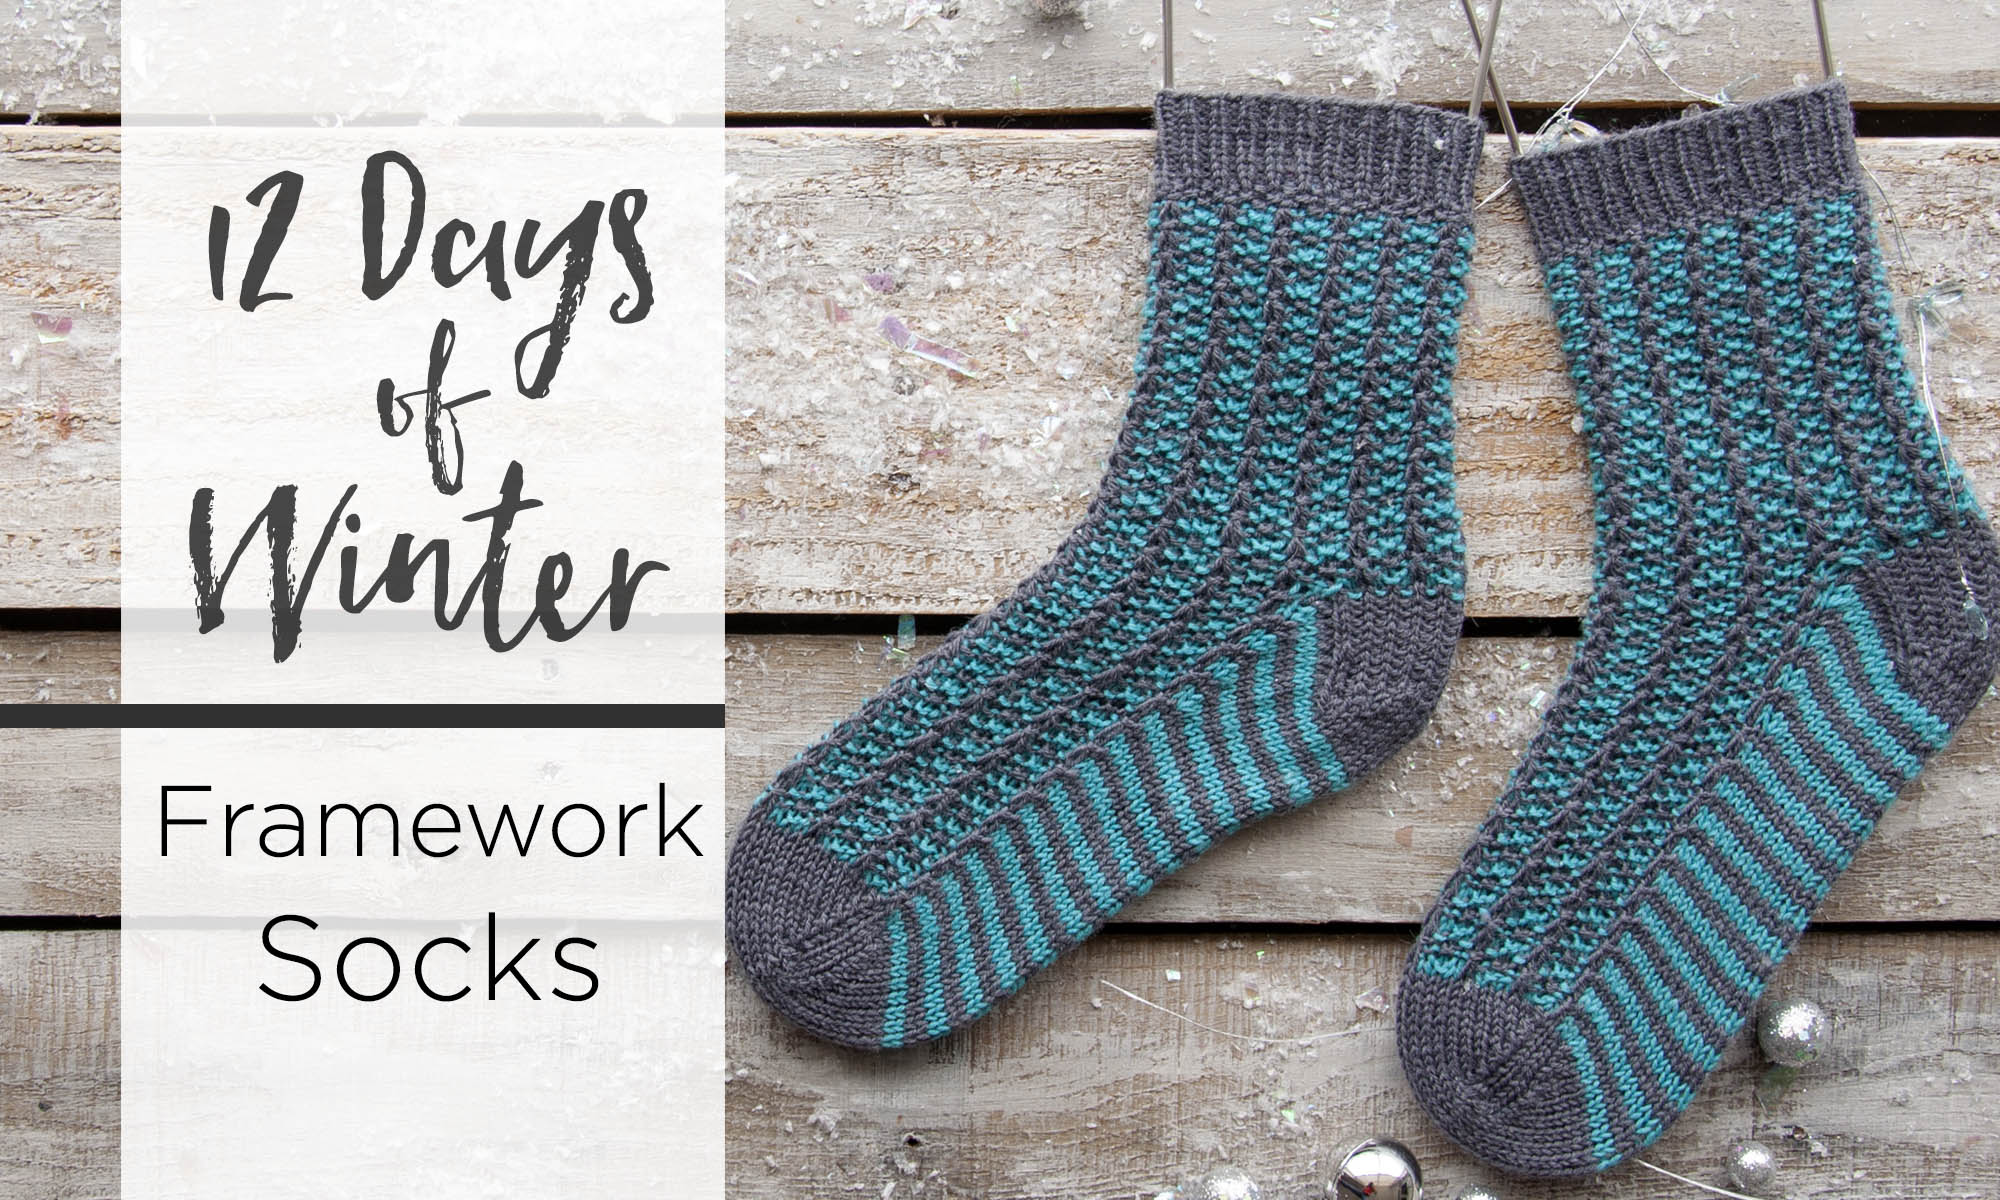
This is part 7 in a 12 part series highlighting designs from our 12 Days of Winter, Series 2 Edition.
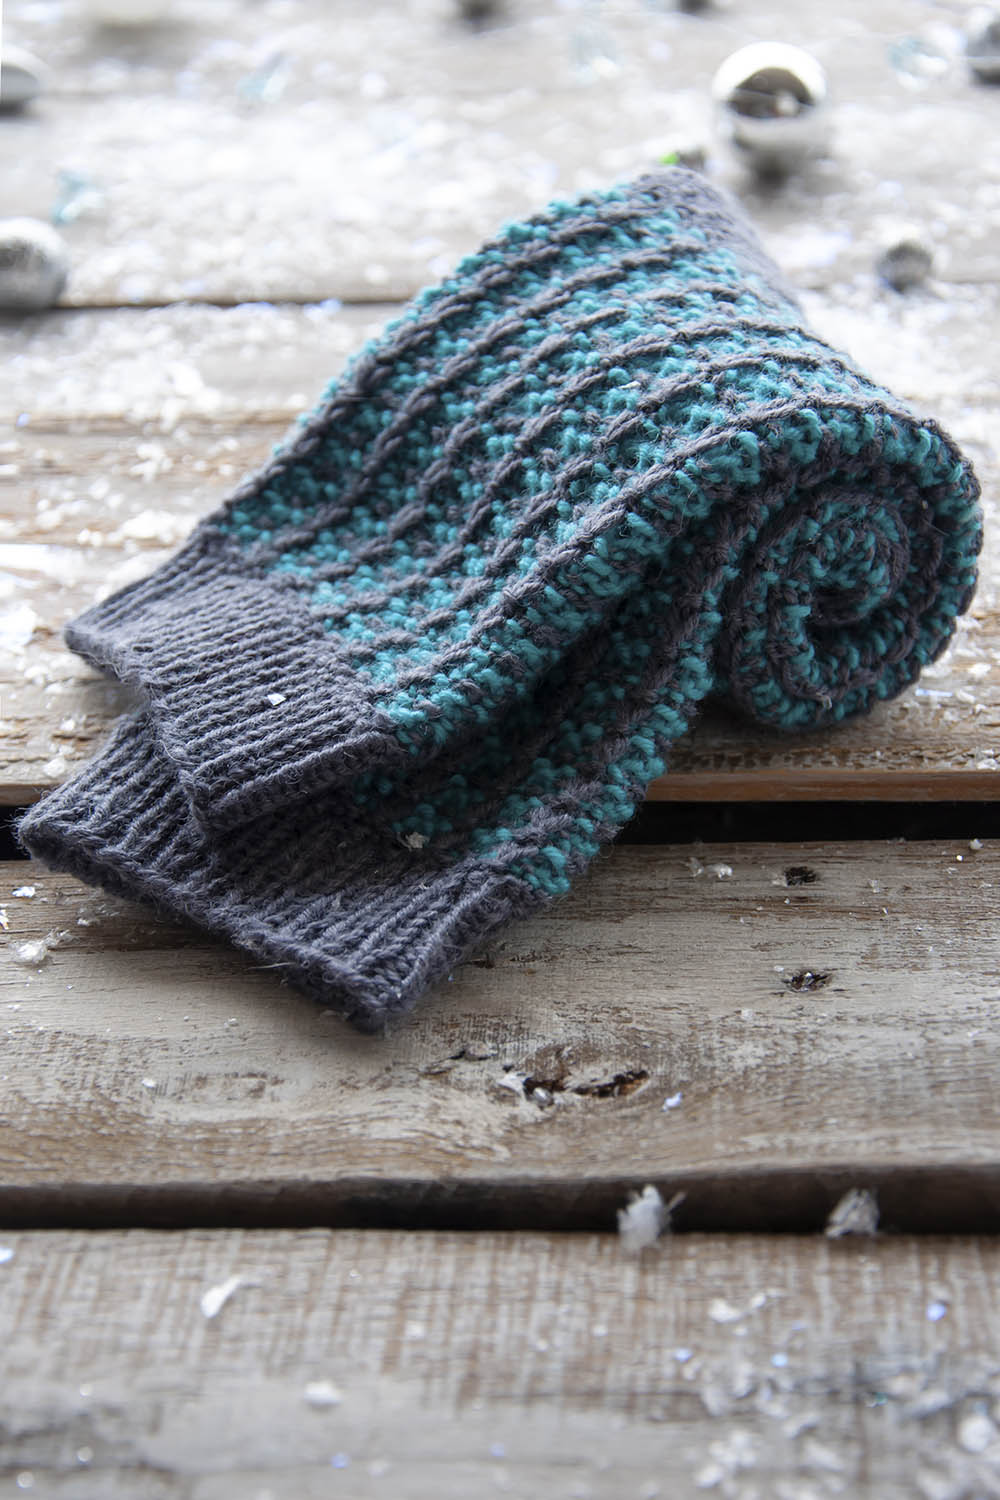
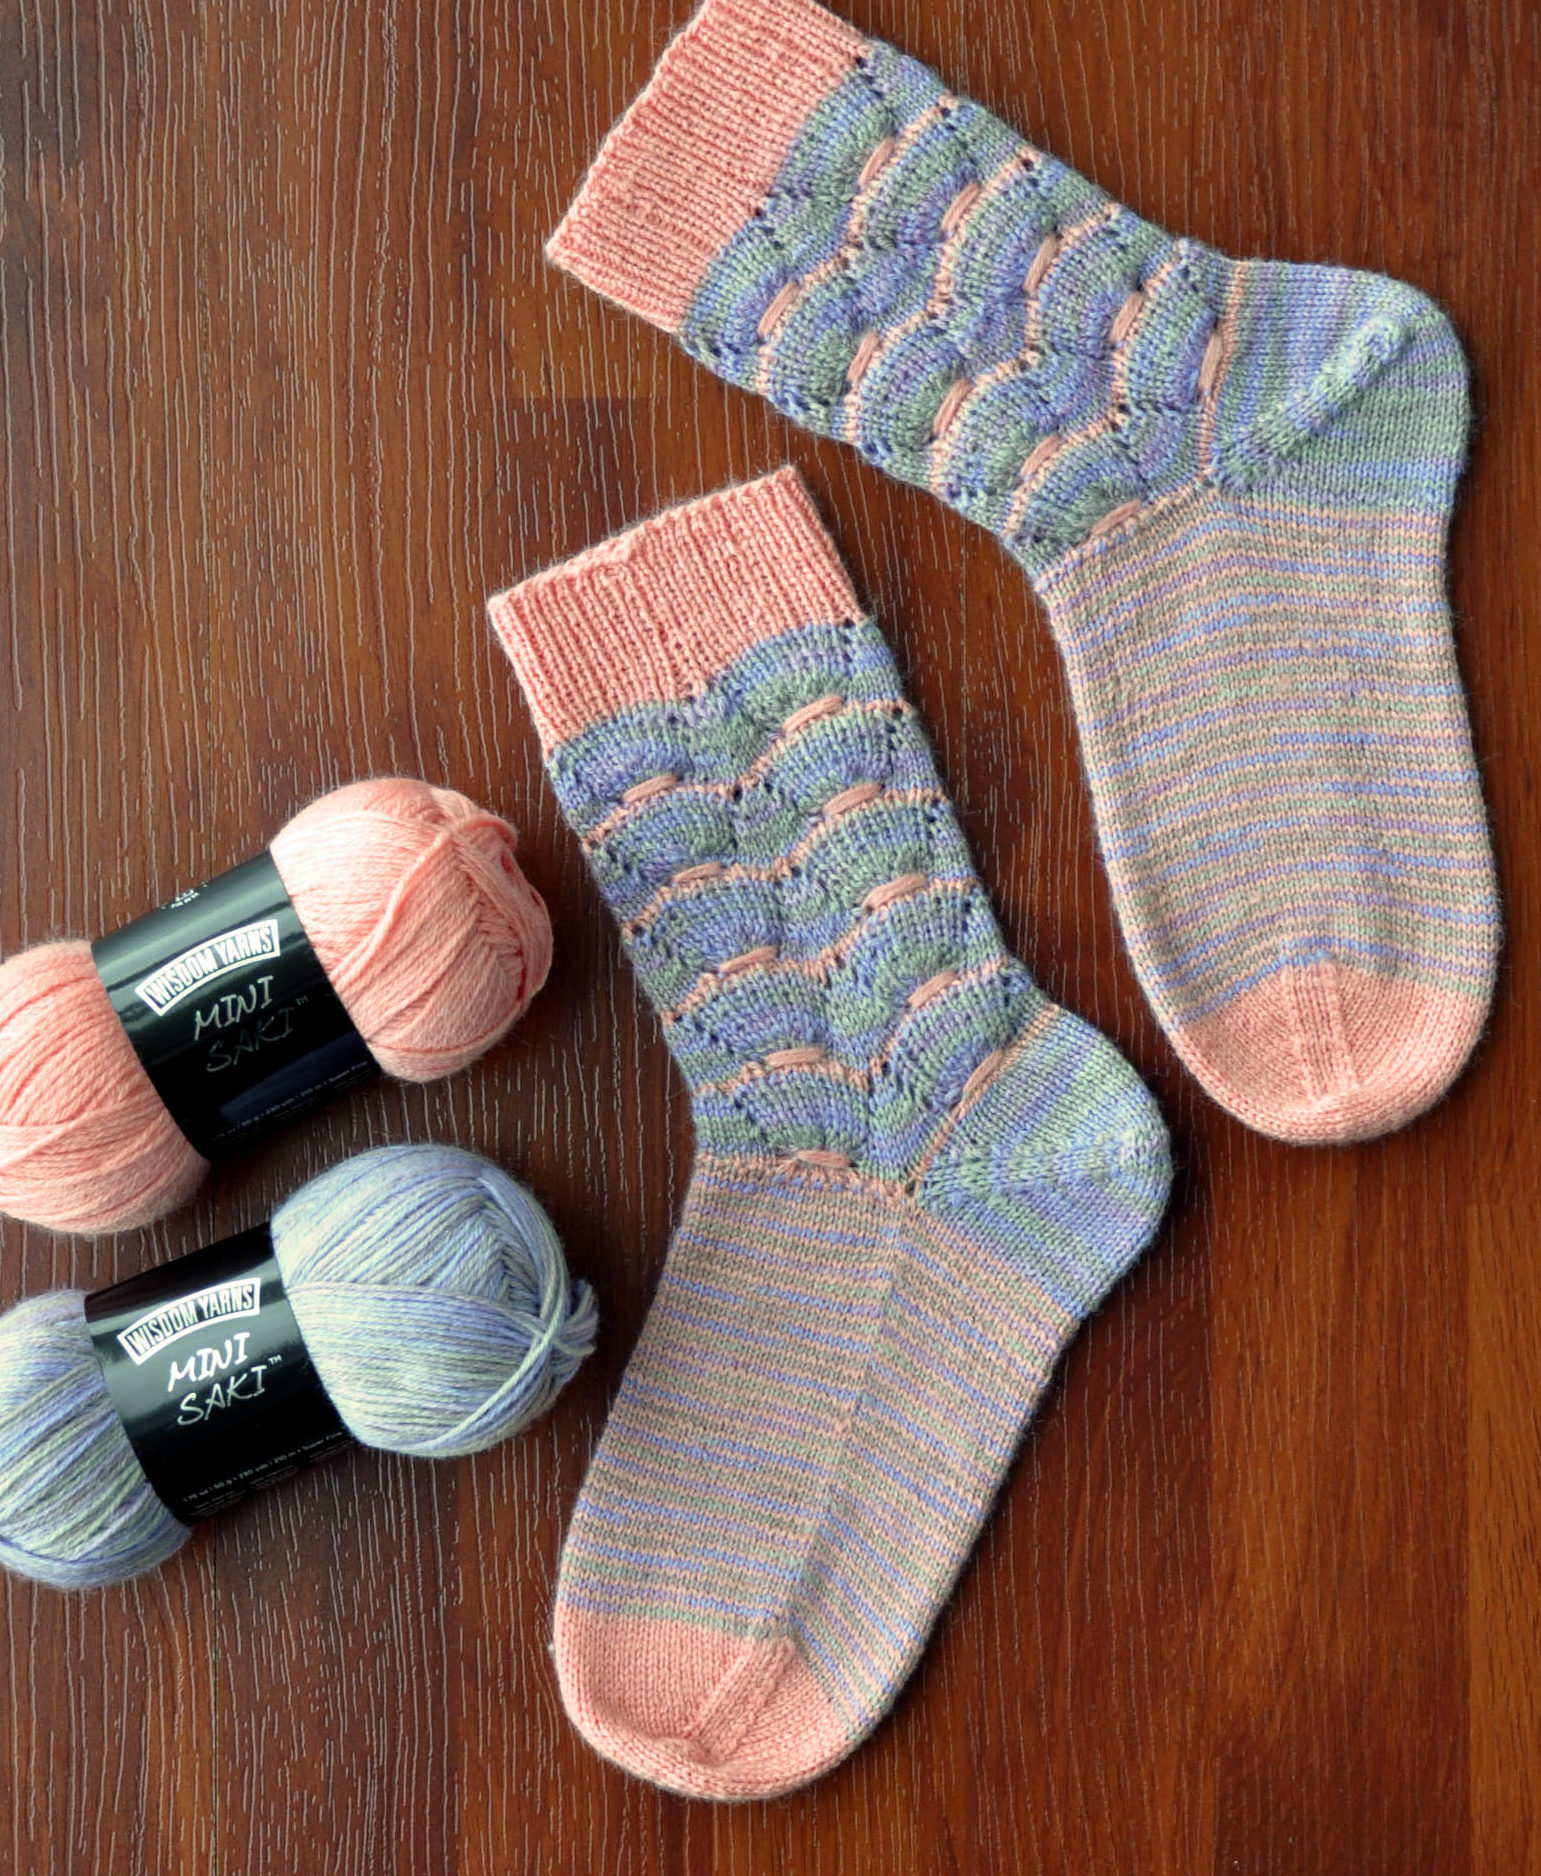
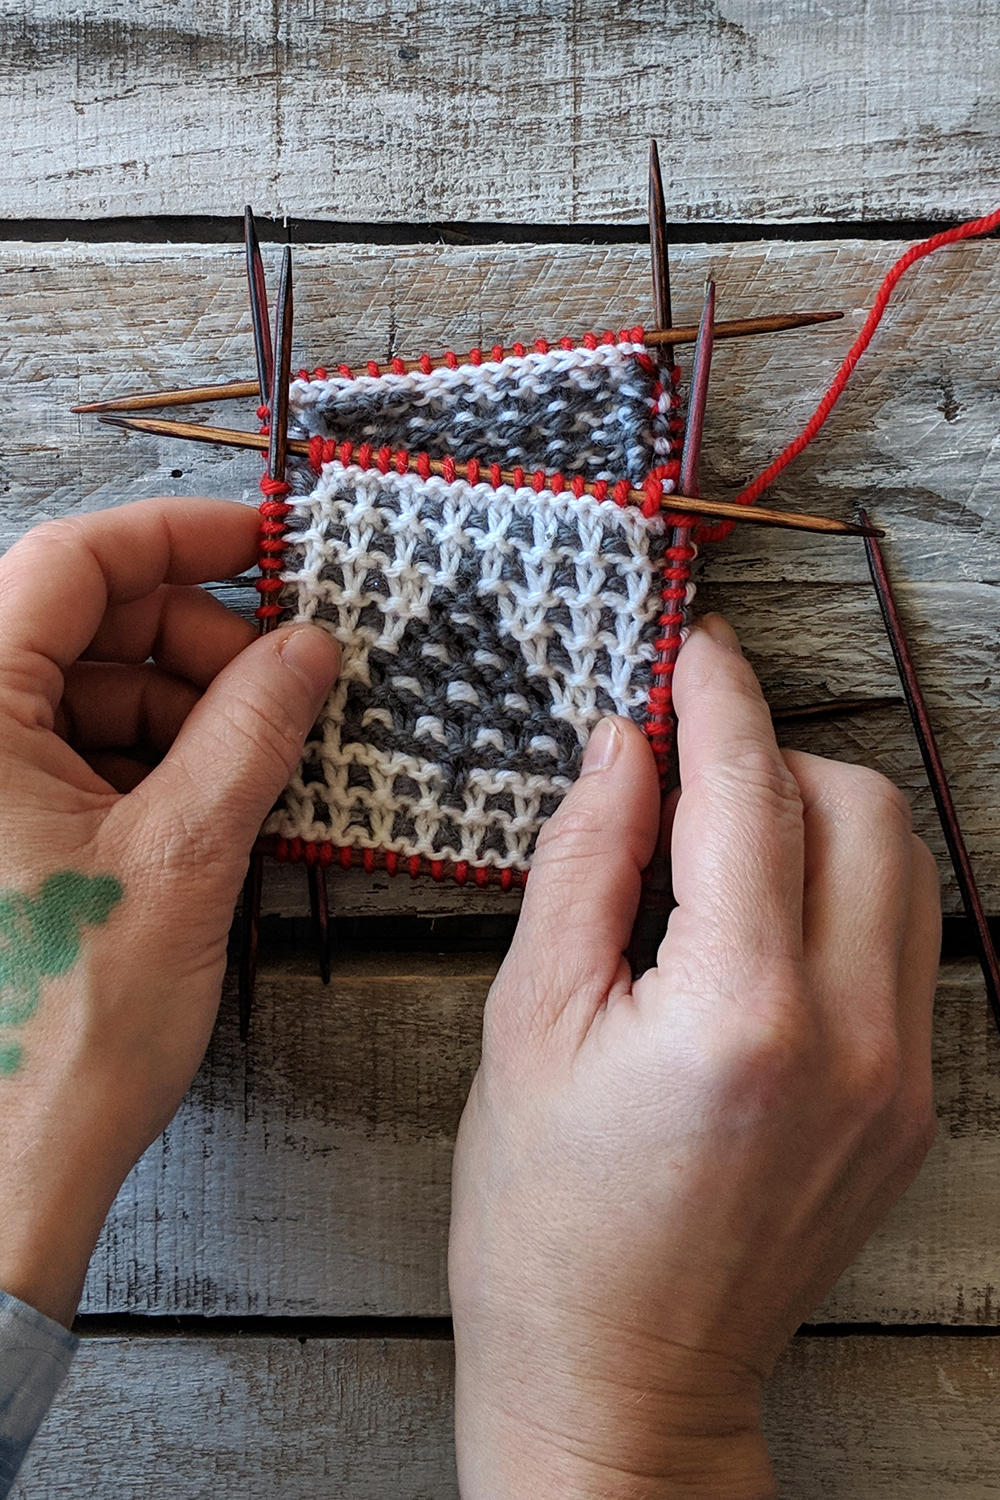
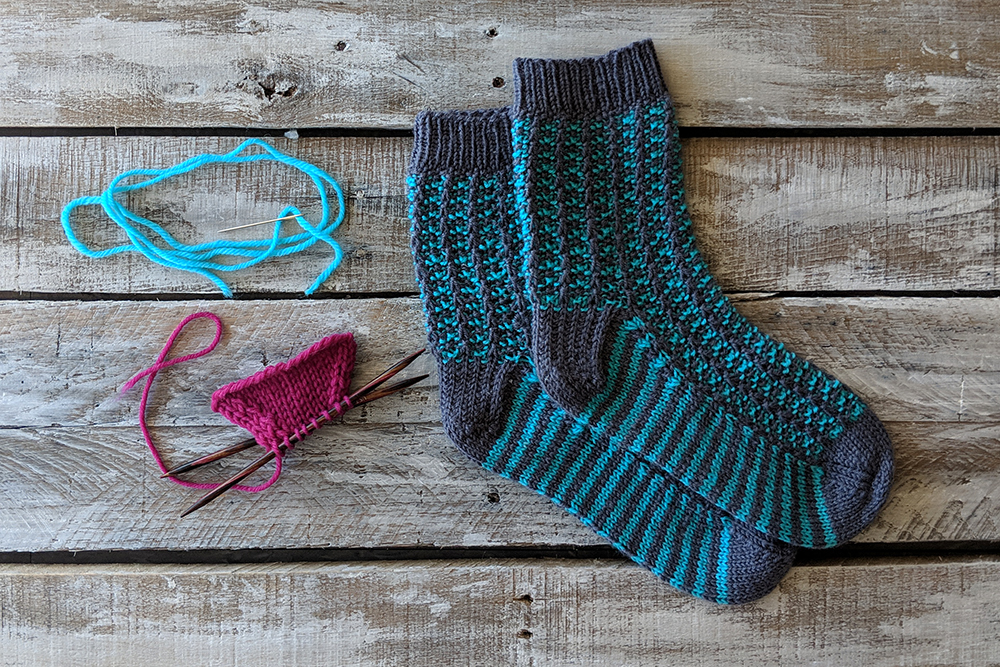
Socks! Though I’m a pretty dedicated sweater knitter, I also love to knit socks. When I first started knitting about a decade ago, I was obsessed. Cuff down, toe up, afterthought heel, gusset – I loved it all.
Framework Socks (pattern link) in Bella Cash are knit from the cuff down in two colors of this machine washable cashmere (ooohhhh) blend. A slip stitch pattern creates the interesting texture on the leg and foot, but that’s not what I’m focusing on today.
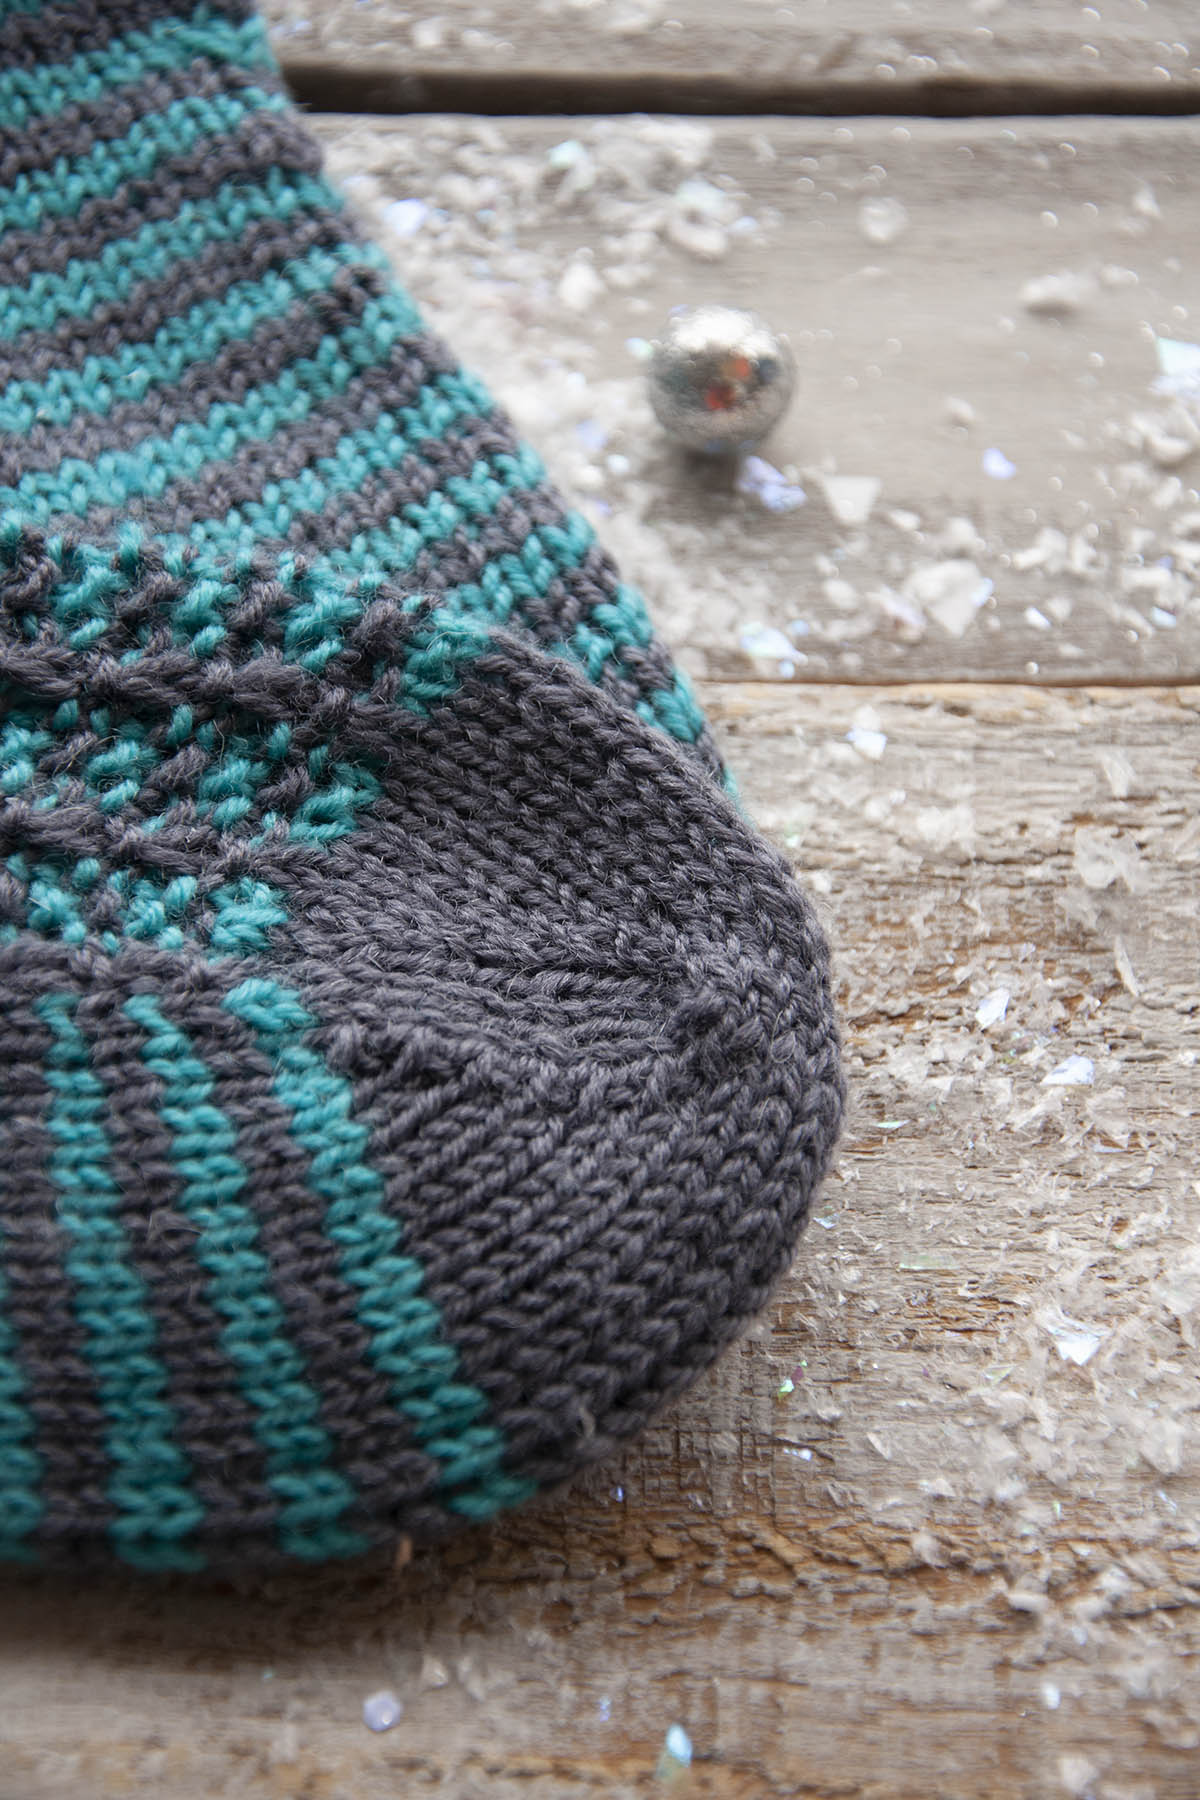
I’m here to talk about the toe finishing on a top-down sock. The best way to join remaining stitches at the toe of a sock is by grafting, AKA Kitchener stitch. This is a technique that basically creates a row of knit stitches that is formed while joining two sets of live stitches. It is far superior to a seam because – who wants an uncomfortable seam on their toe?
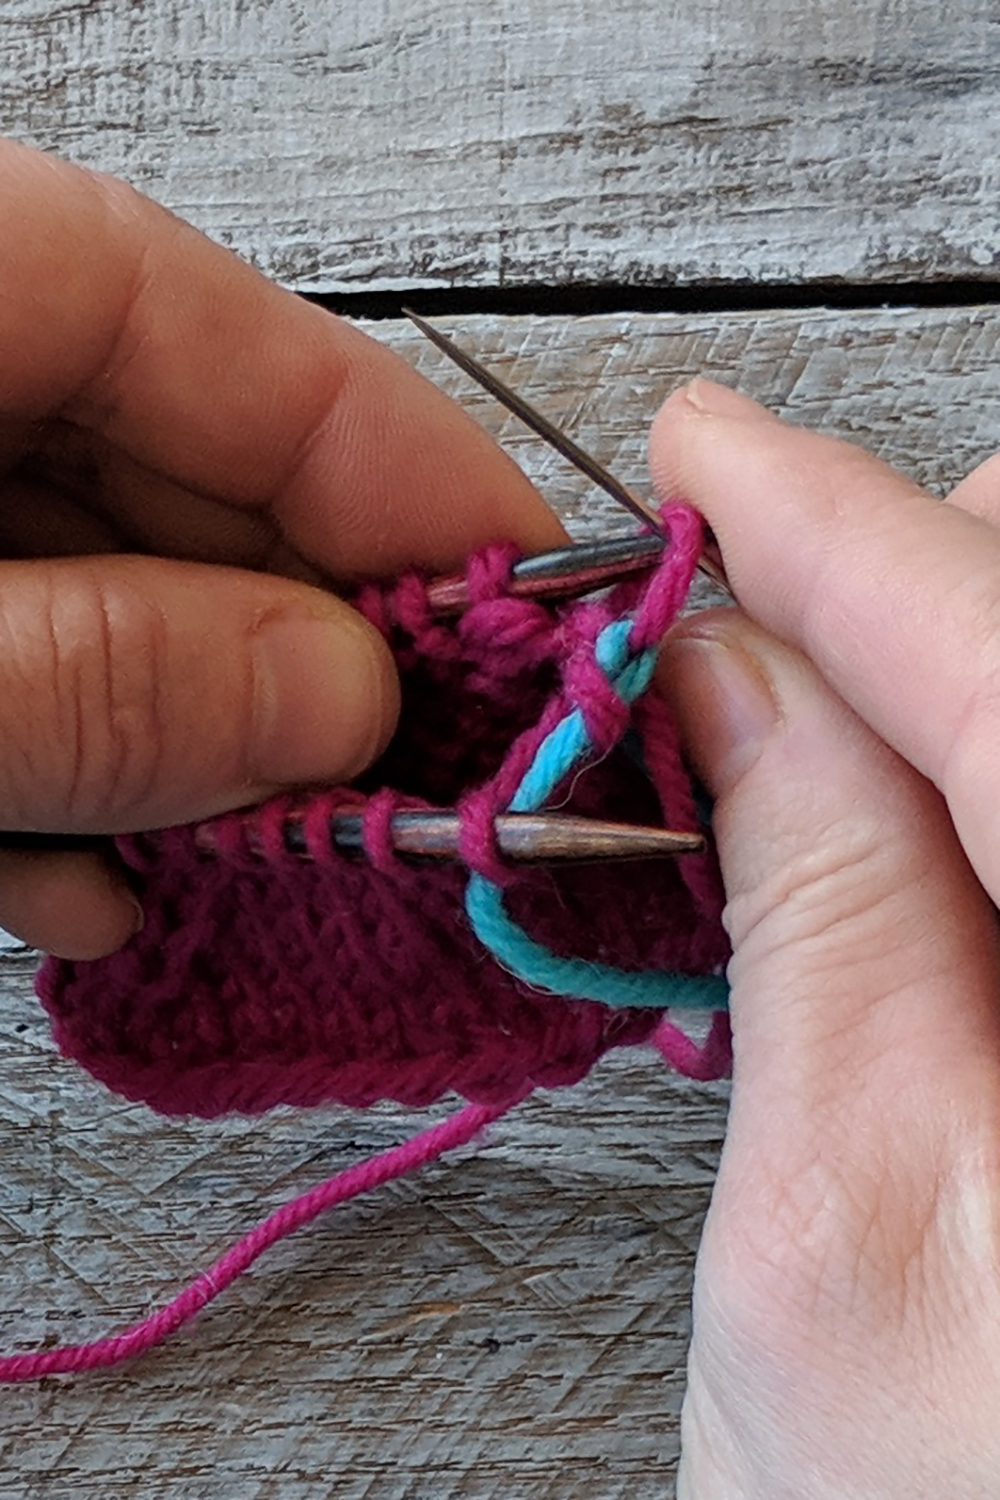
The first thing to do is to cut your yarn after the last row of your pattern, leaving a tail about 3-4 times the width of the toe. Thread this tail through a tapestry needle. Place half your stitches on one dpn (front), and the other half on a second dpn (back).
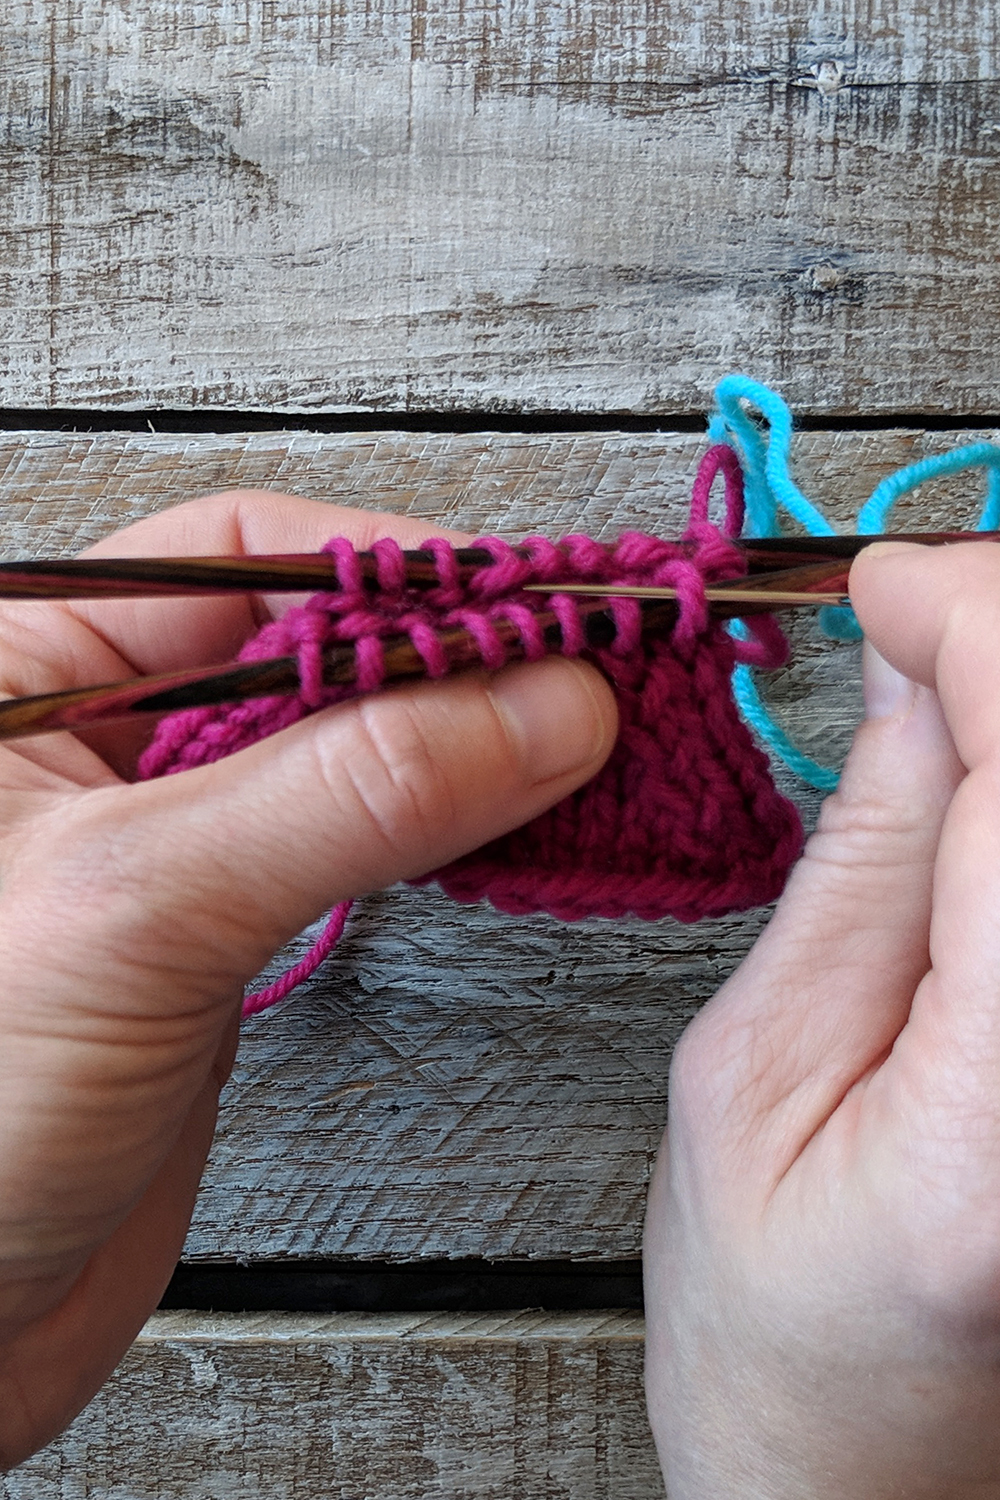
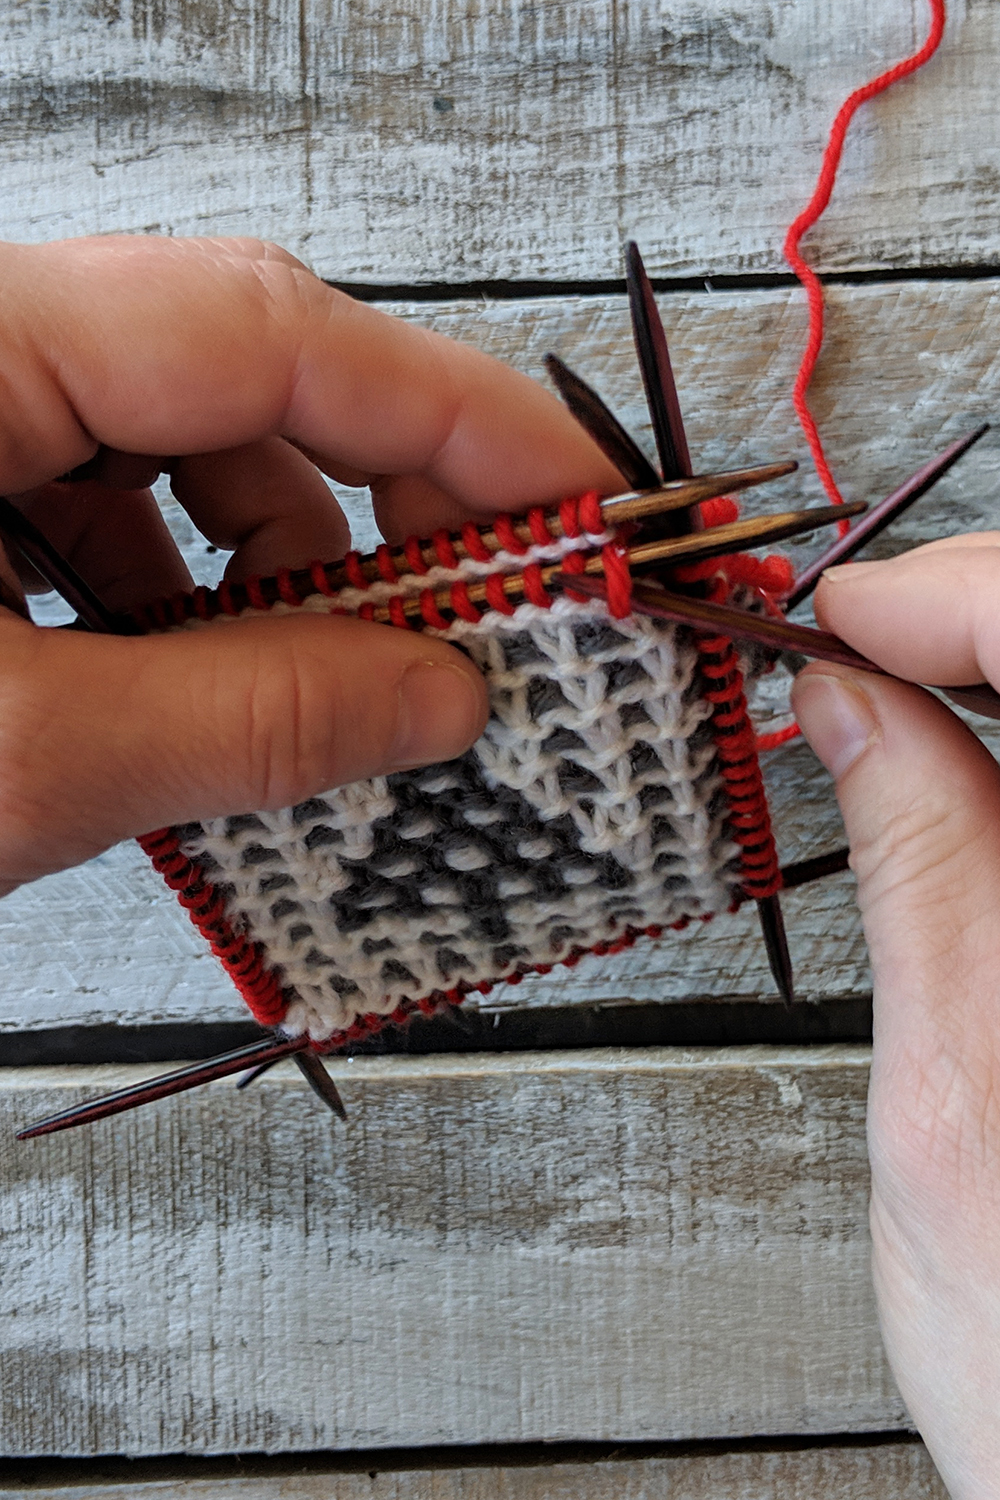
Preliminary Step 1: Insert your needle purlwise through the first stitch on the front dpn.
Pull the yarn through the stitch, leaving it on the dpn.
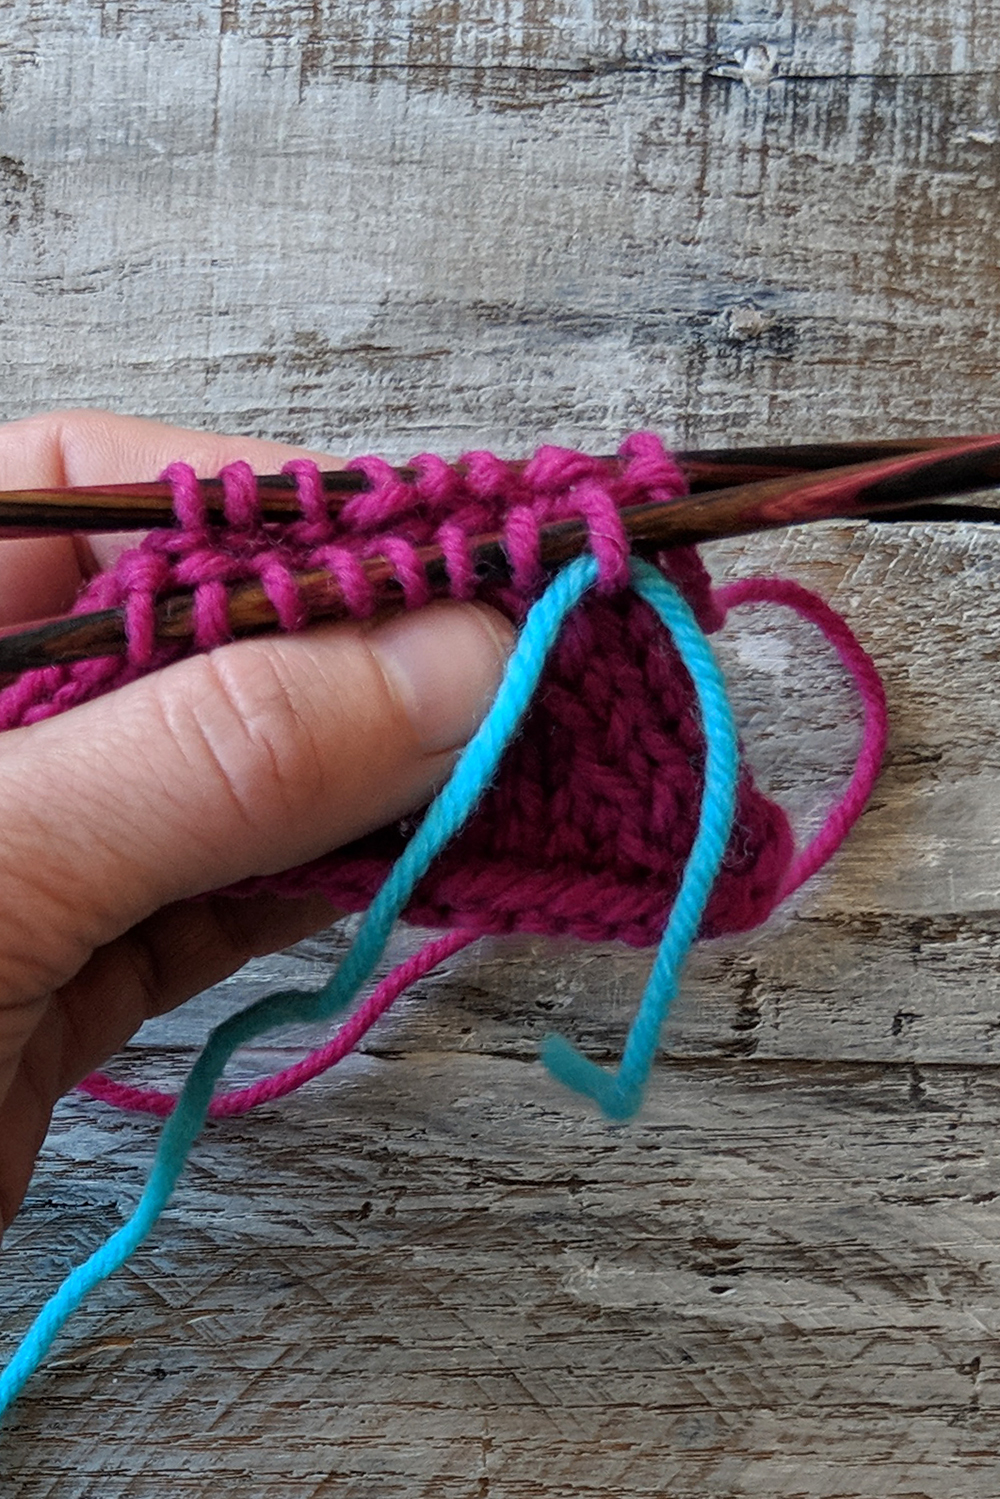
Preliminary Step 2: Insert your needle knitwise through the first stitch on the back dpn.
Pull the yarn through the stitch, leaving it on the dpn. Set-up is complete. Now for the repeating action of grafting!
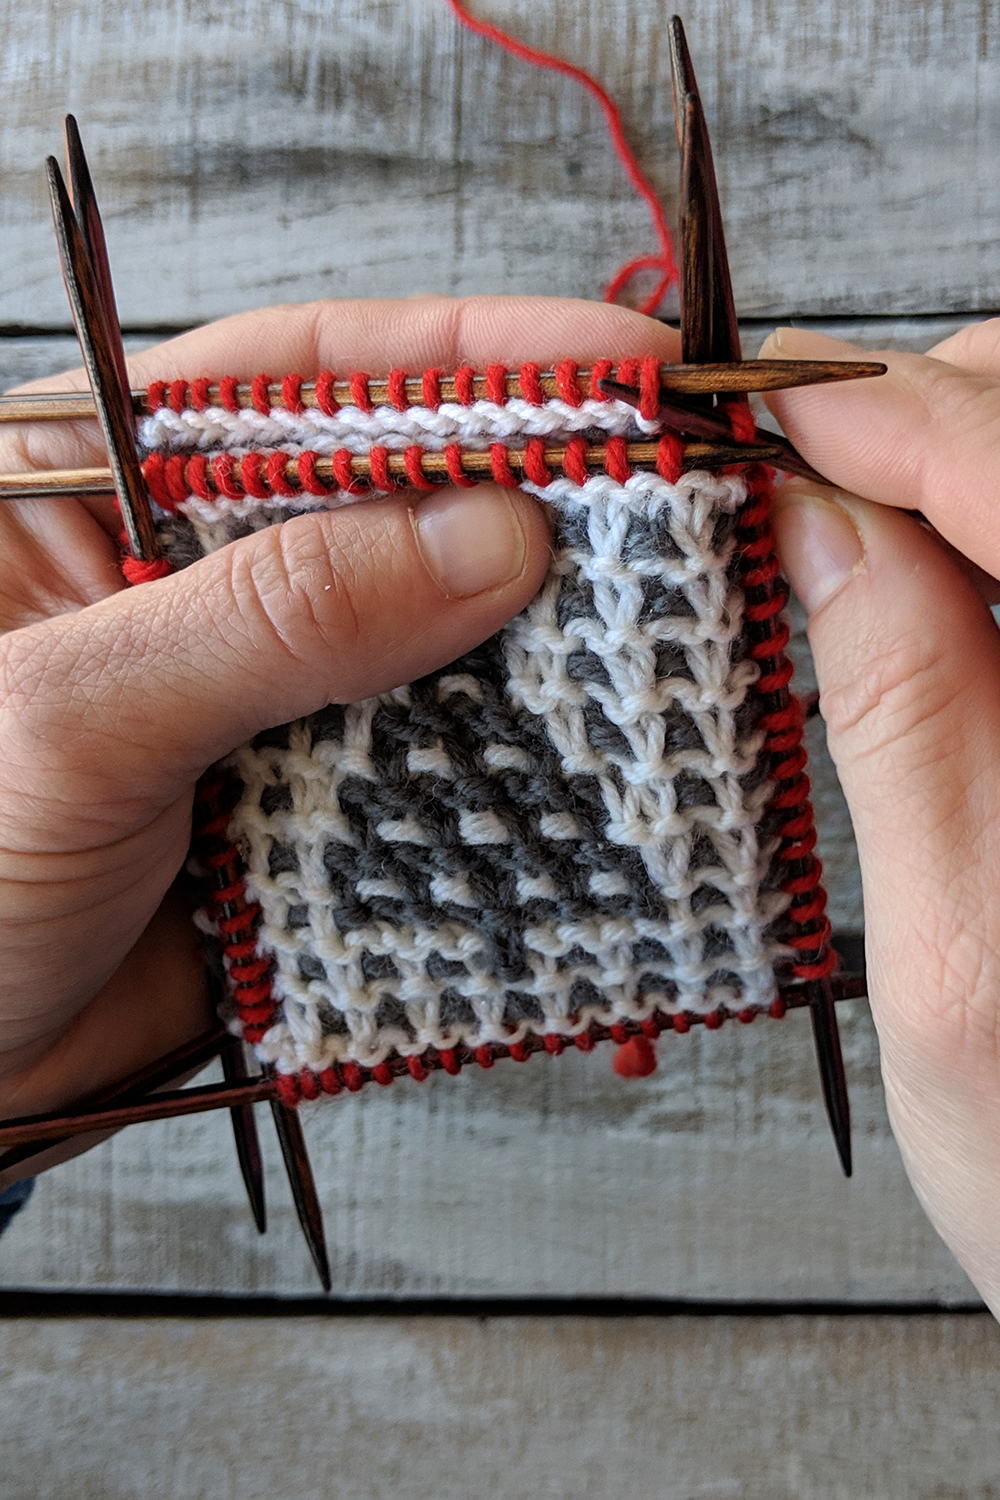
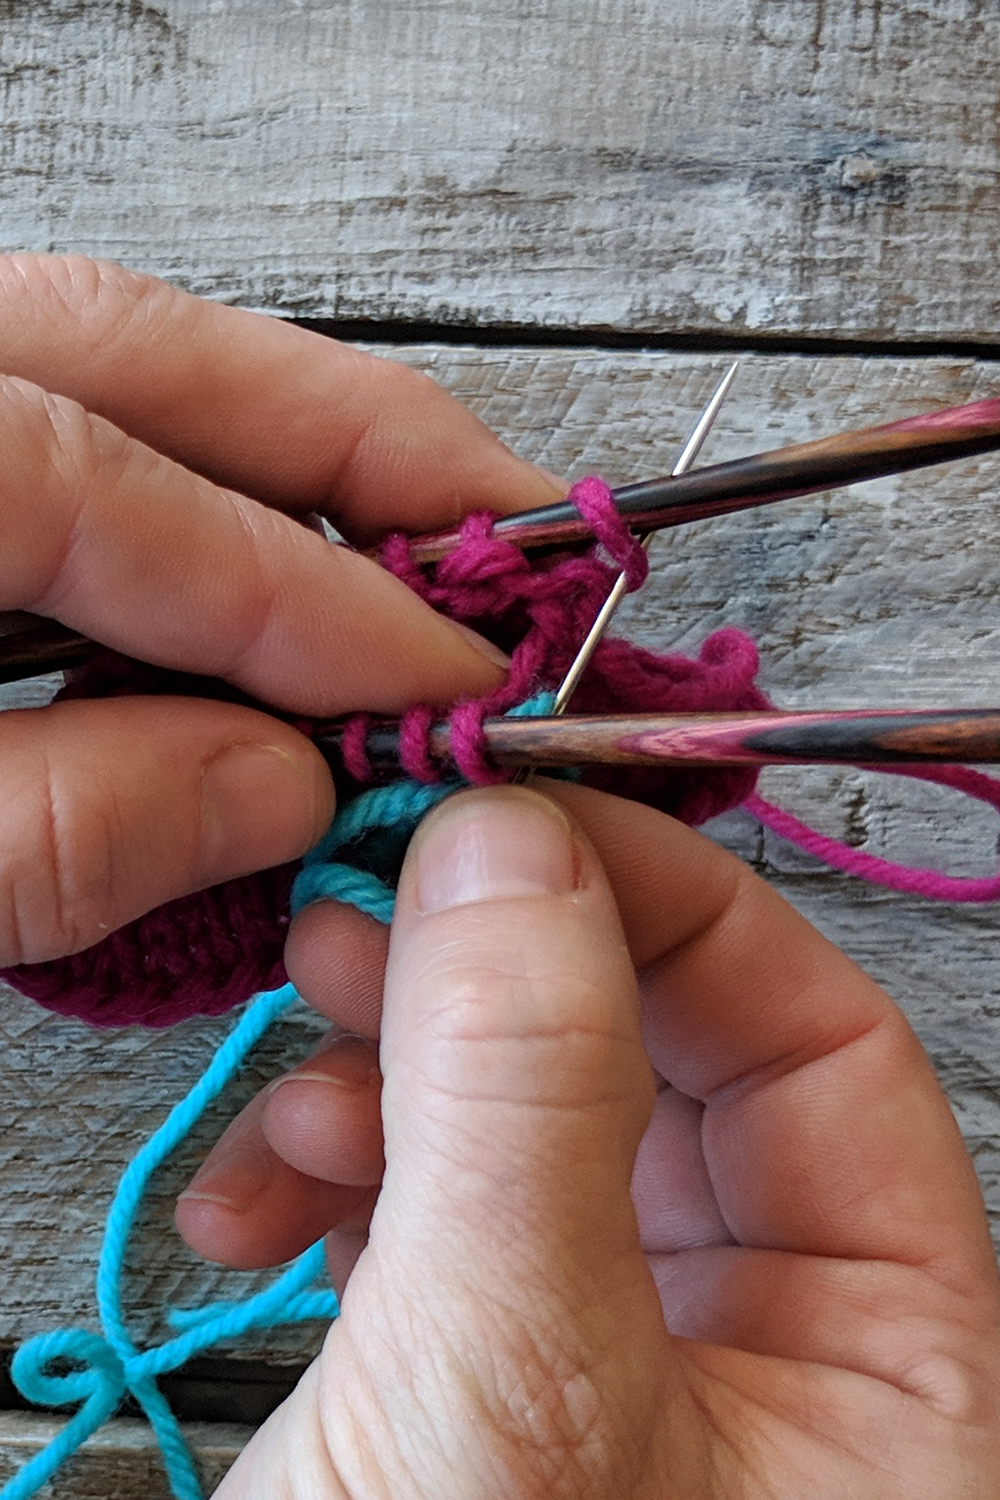
Step 1: Insert your needle knitwise through the first stitch on the front dpn and let this stitch slide off the dpn.
Step 2: Insert your needle purlwise through the next stitch on the front dpn but do not slide off the dpn.
Pull the yarn through.
Step 3: Insert your needle purlwise through the first stitch on the back dpn and let this stitch slide off the dpn.
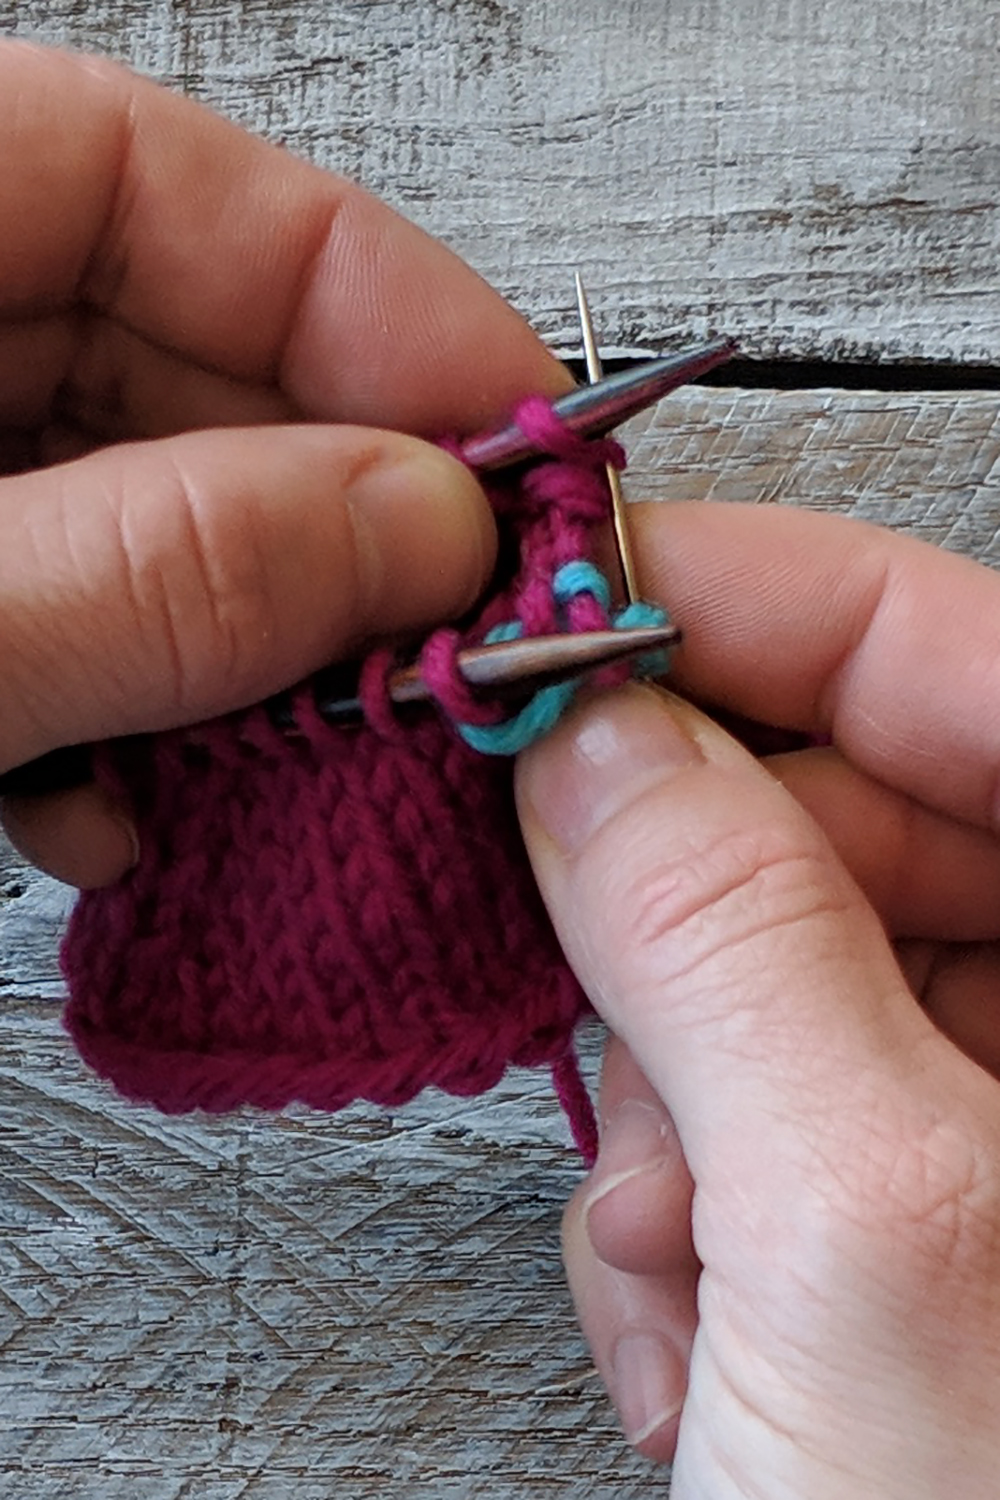
Step 4: Insert your needle knitwise through the next stitch on the back dpn but do not slide off the dpn.
Pull the yarn through.
Repeat steps 1 through 4. When I’m grafting, I always have this running through my head: “Knit, Purl, Purl Knit.” It helps to keep me on track. If you’re grafting for the first time, I definitely recommend having a quiet space in which to practice. Once you get the hang of it, it’s easy enough to visually know where you are in the process. But in the beginning, it does require a bit of concentration.
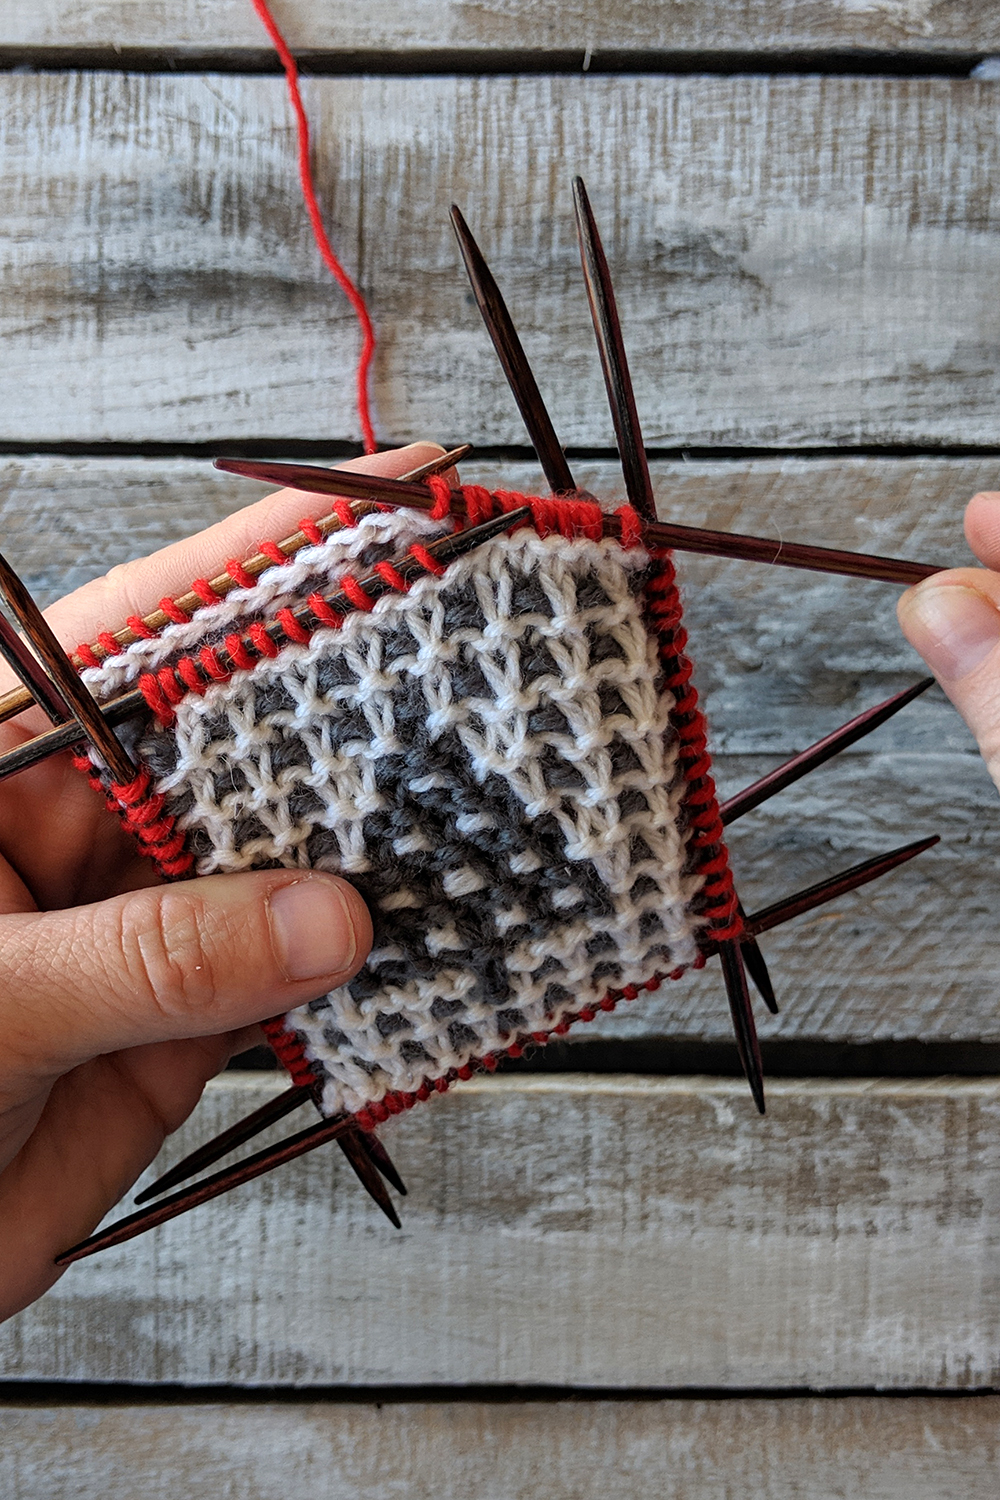
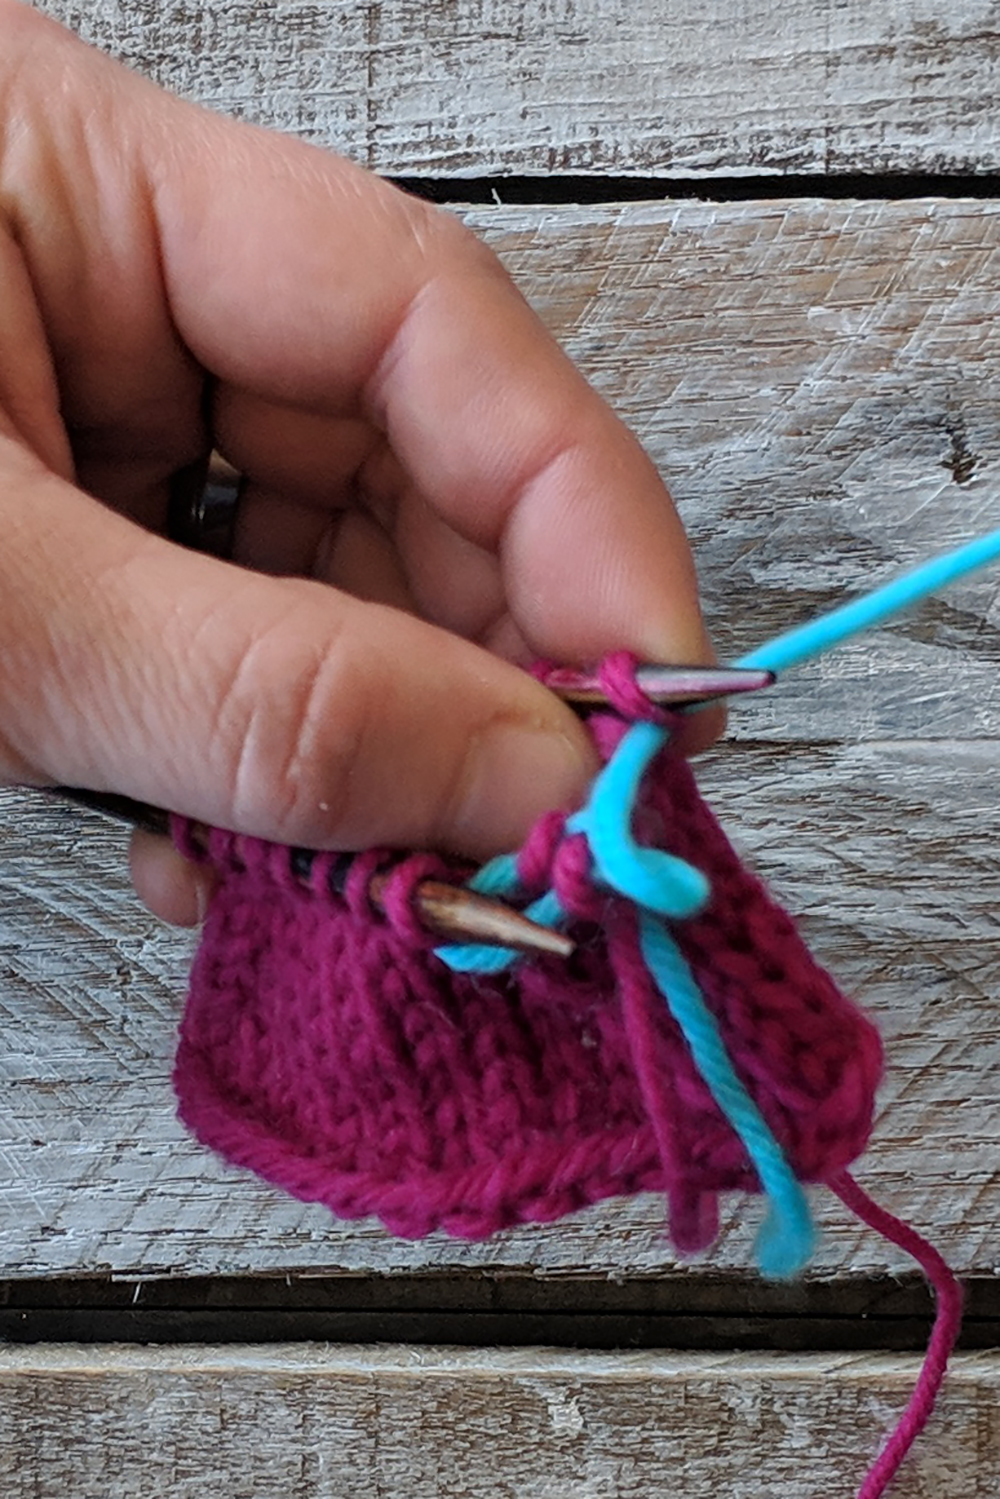
Heres what my practice toe looks like after a few more passes. You can see how the contrast yarn is forming a row of Vs, just like a row of stockinette stitch.
I didn’t tighten up my yarn enough while grafting, so the stitches look sloppy. But its okay! I can just take the tip of my tapestry needle and snug up the loose stitches, traveling the slack off to the side.

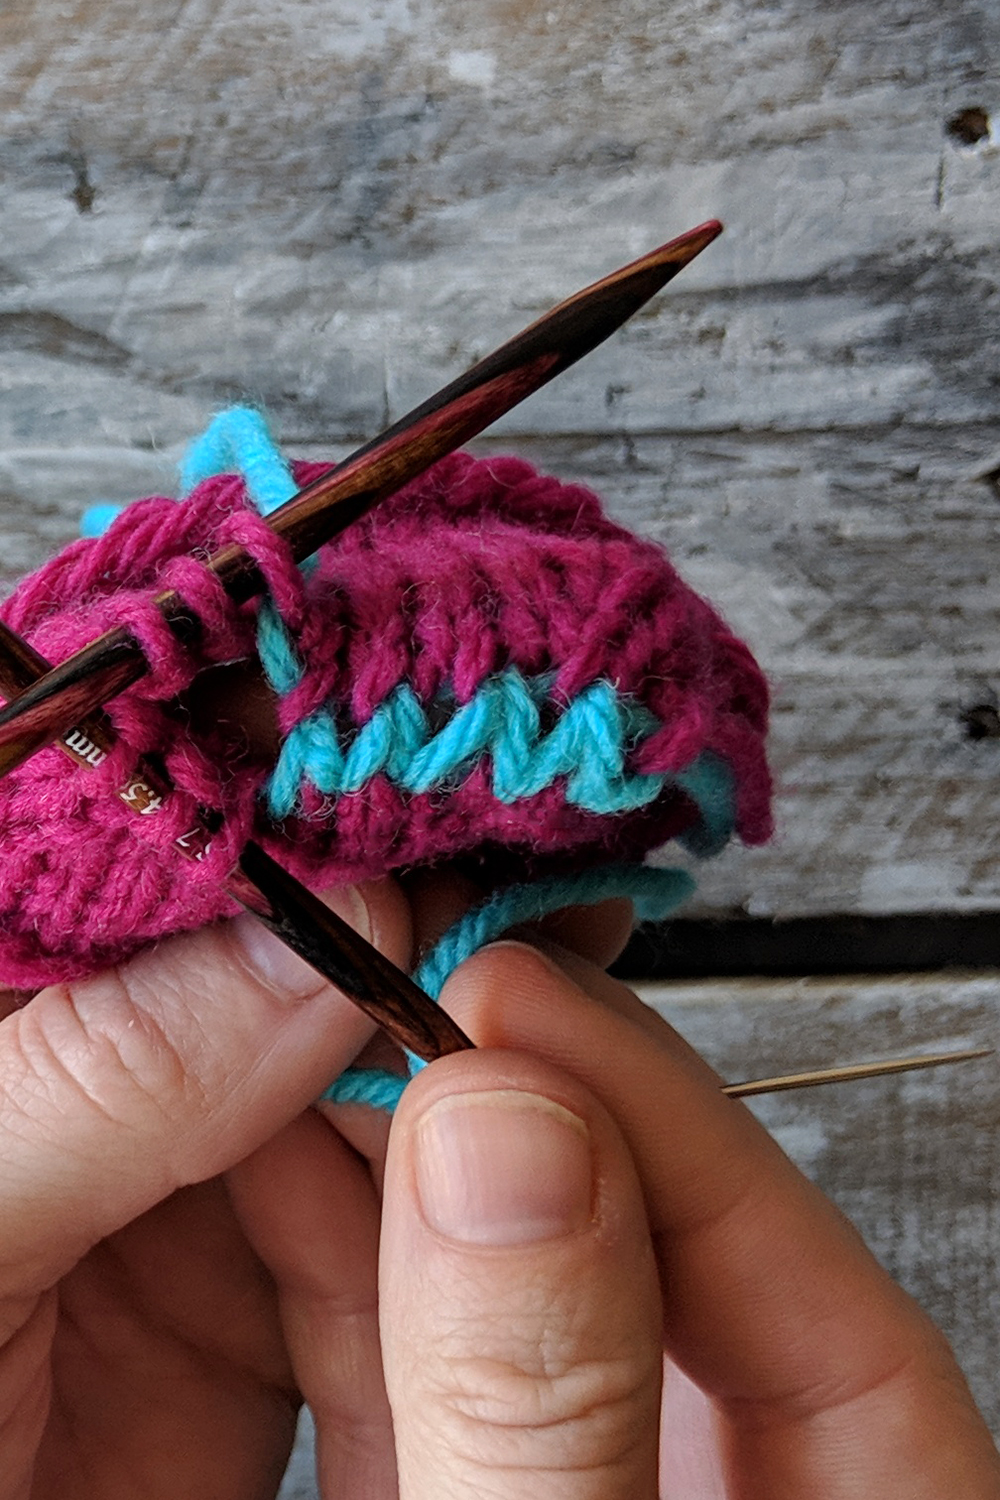
The final two steps when there is just one stitch remaining on each needle is: knitwise through the front stitch, purlwise through the back stitch. Pull the remaining yarn tail through. The end!
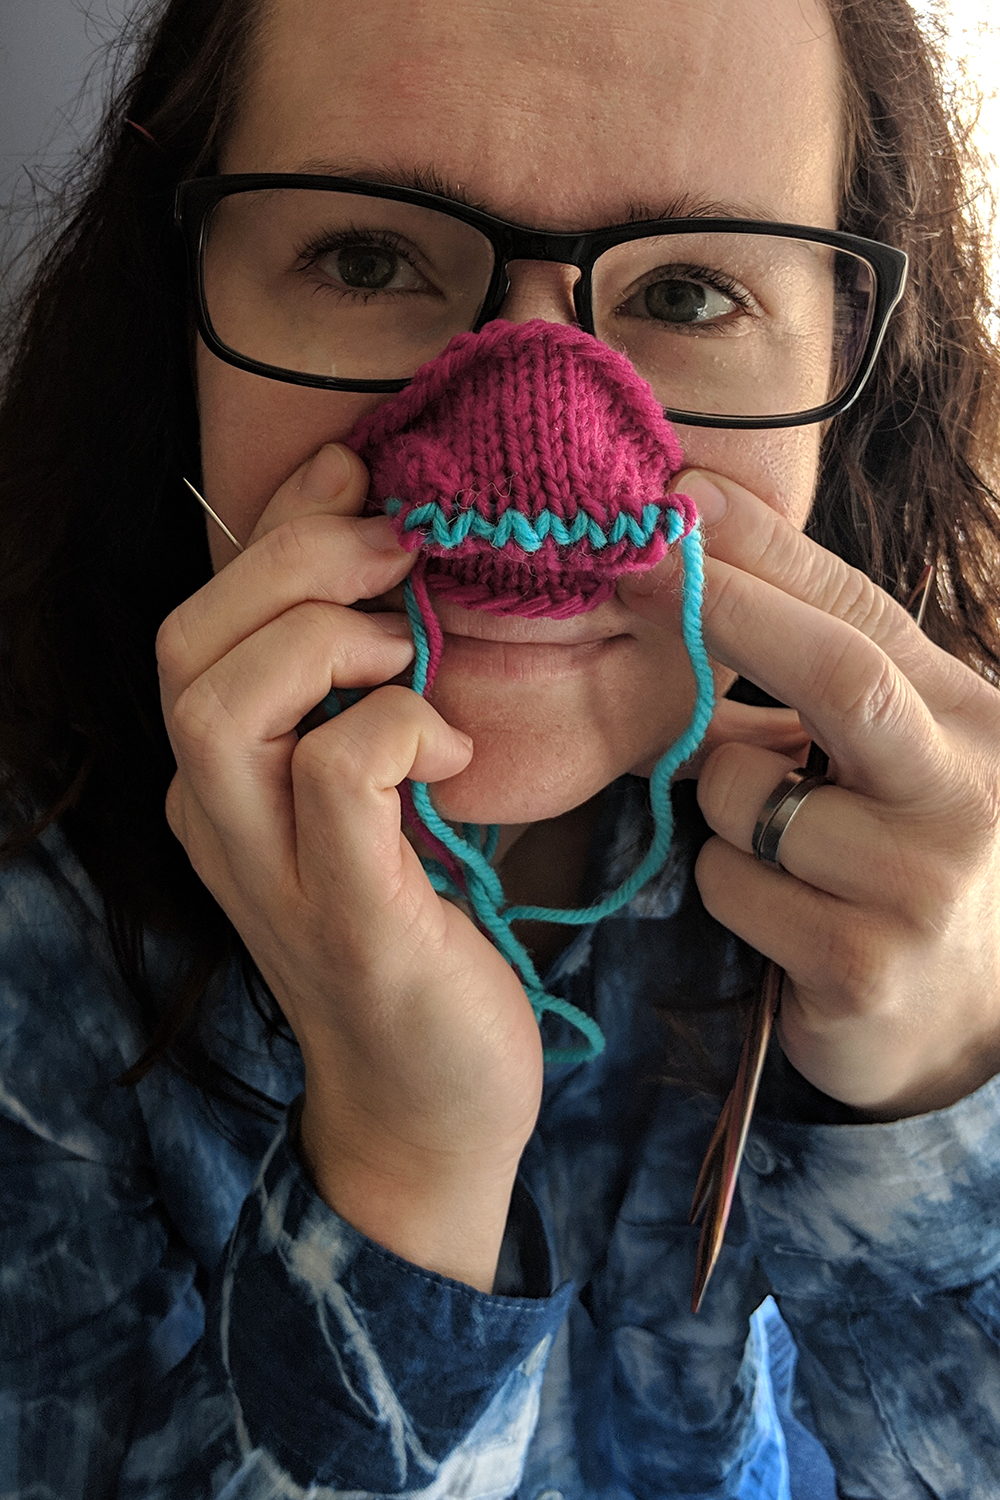
And actually, if you’re making a practice toe, you should definitely wear it on your face as a mask.
Remember, you can find the Series 2 12 Days of Winter Kit Patterns on Ravelry.

This is part 6 in a 12 part series highlighting designs from our 12 Days of Winter 2018 Collection.
My number one goal when designing a scarf is to make it look good on both sides. This can be quite challenging! Many/most cables have a definite unpleasant look to their wrong sided rows. Fair isle in a scarf is better done in the round because A) curling and B) floats. But simple knit/purl texture can be very nice on a scarf, and easy to work, too.
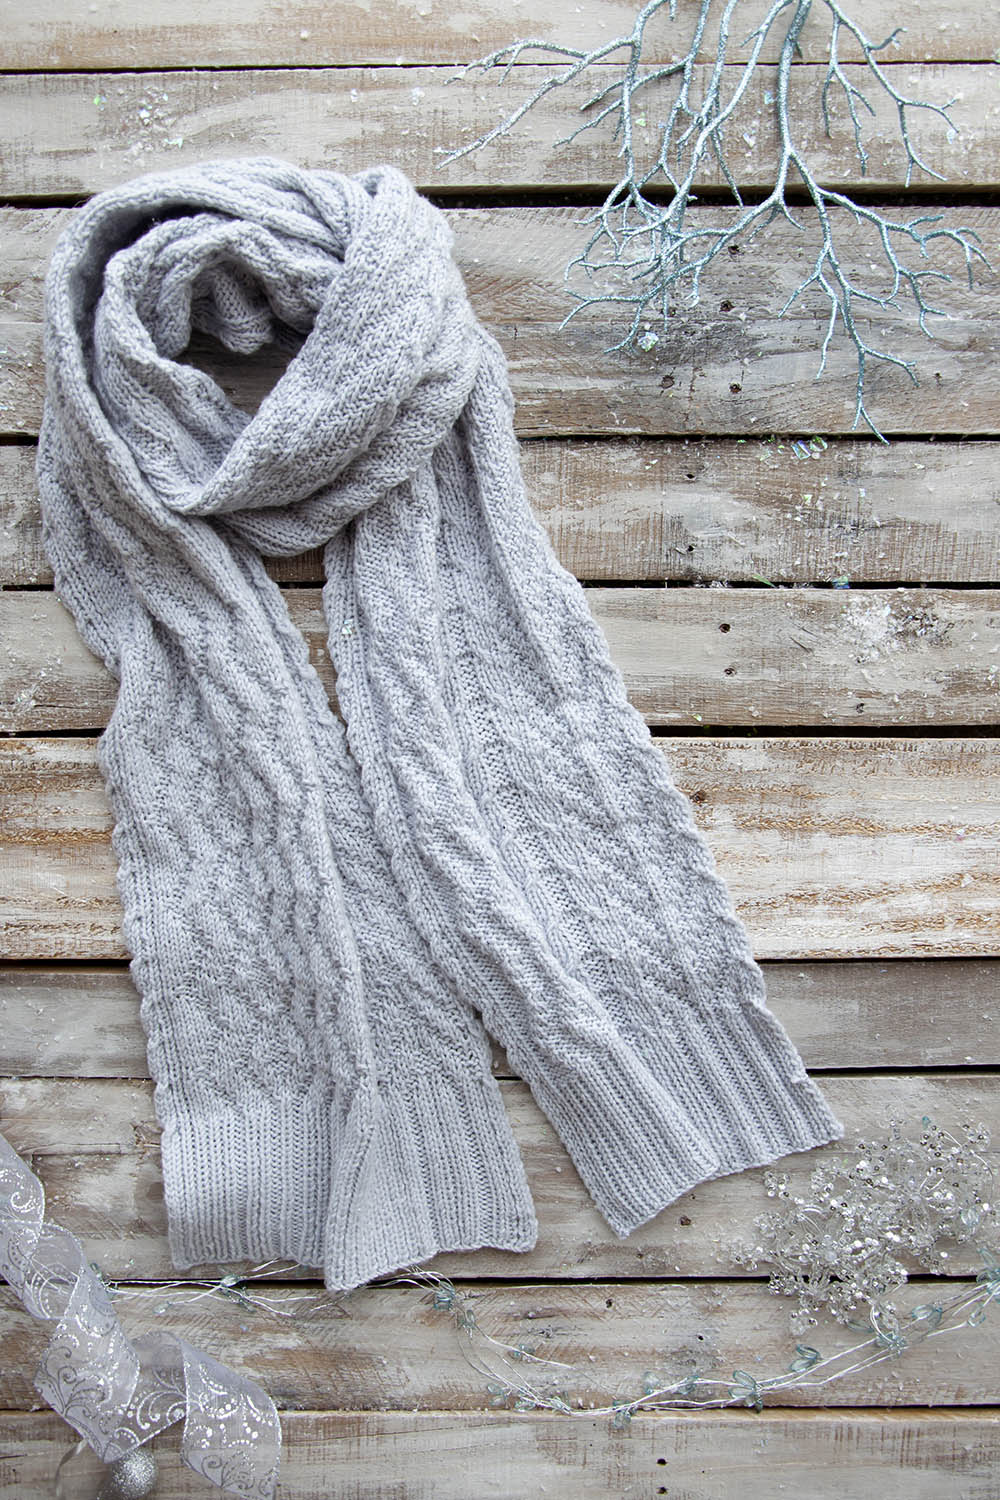
Echo Scarf (pattern link) is knit in Dona. Scrummy, scrumptious, buttery, and soft with amazing stitch definition: Dona. This scarf features a generous amount of ribbing at each end that flows directly into the texture and reversible cable patterning on the body of the scarf.
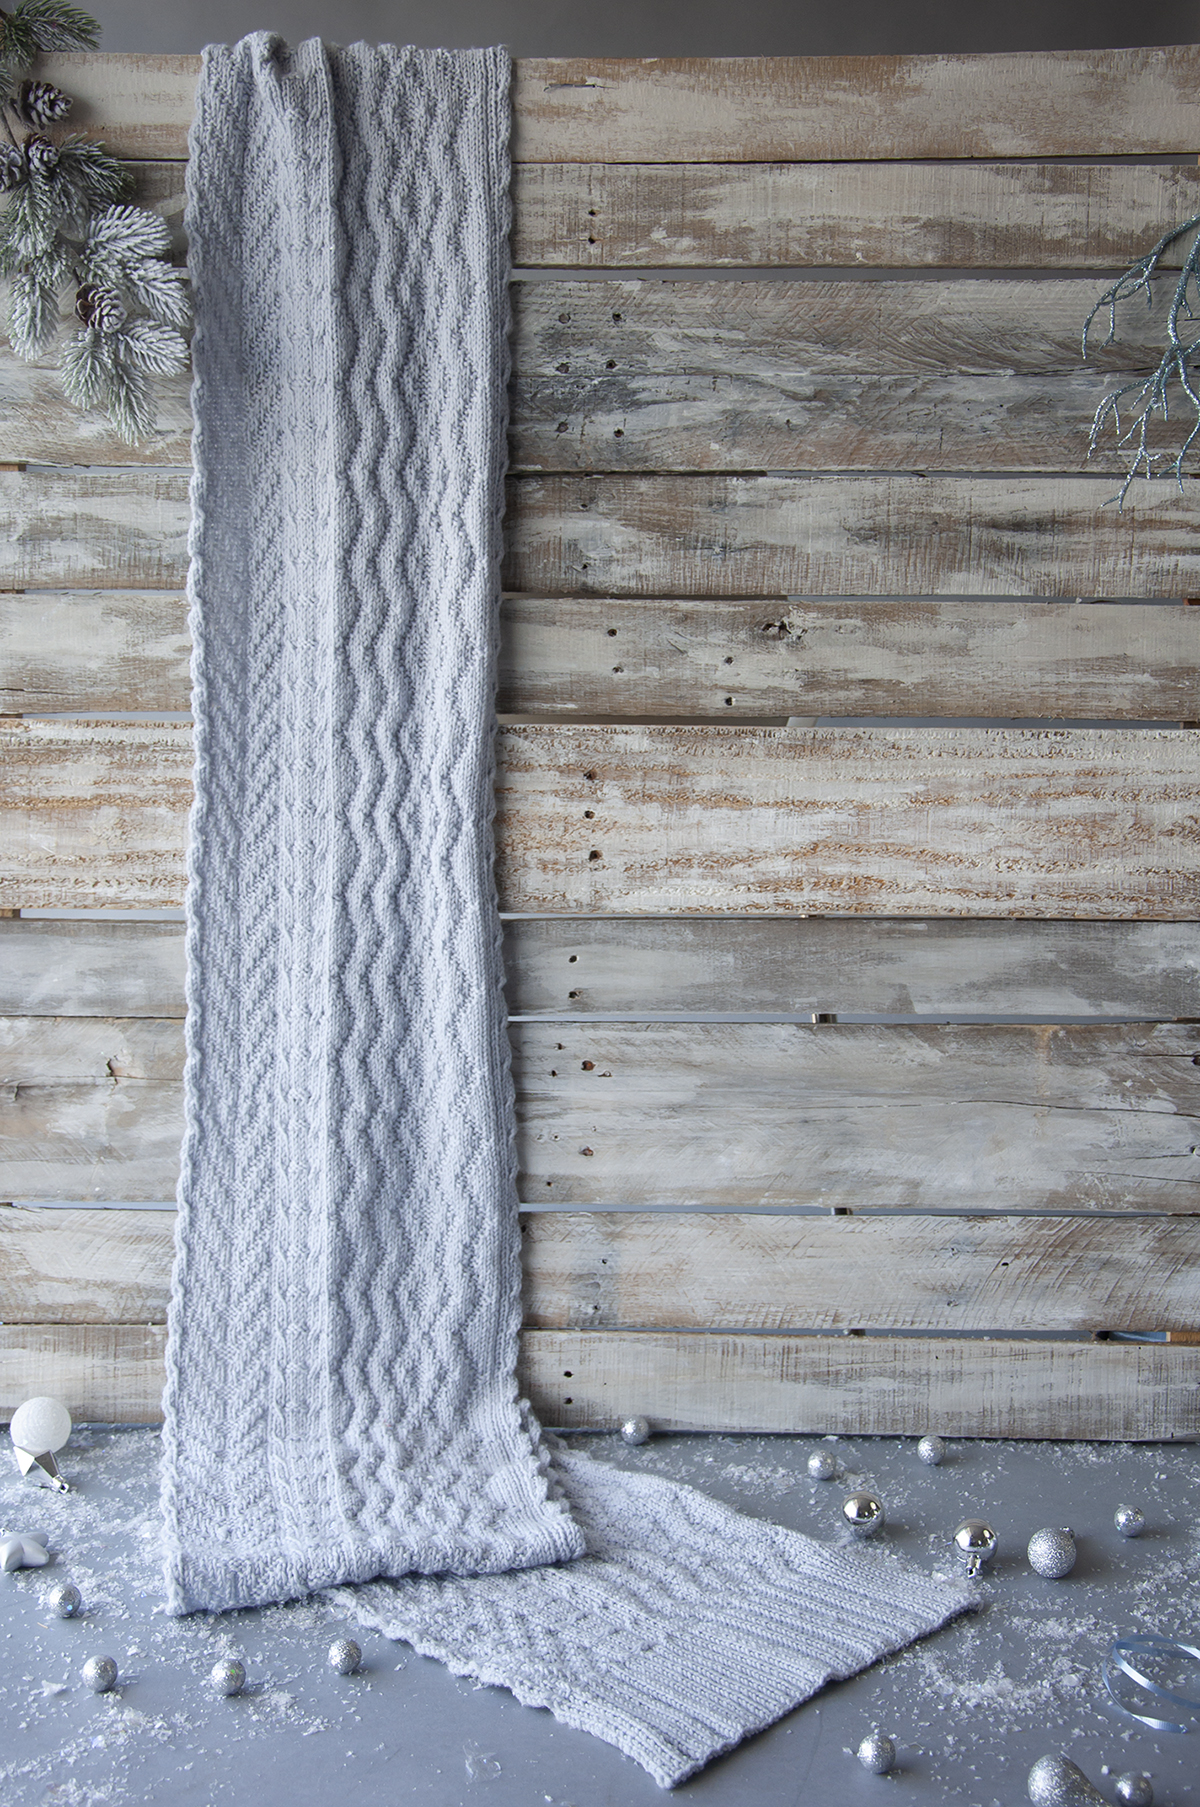
It may be difficult to tell from the photos, but the main stitch pattern is only an 8 row repeat. The patterning is also shown in the pattern in chart form and also written text. I am 100% a chart person, but I know that some knitters prefer text because their brains don’t always “click” with the way charts are presented. I’ll never pass up an opportunity to talk about chart reading because I believe they are so much easier (once you get the hang of them) to follow at a glance.
To illustrate, I’ve highlighted a few sections of the actual scarf below that correspond to the chart.
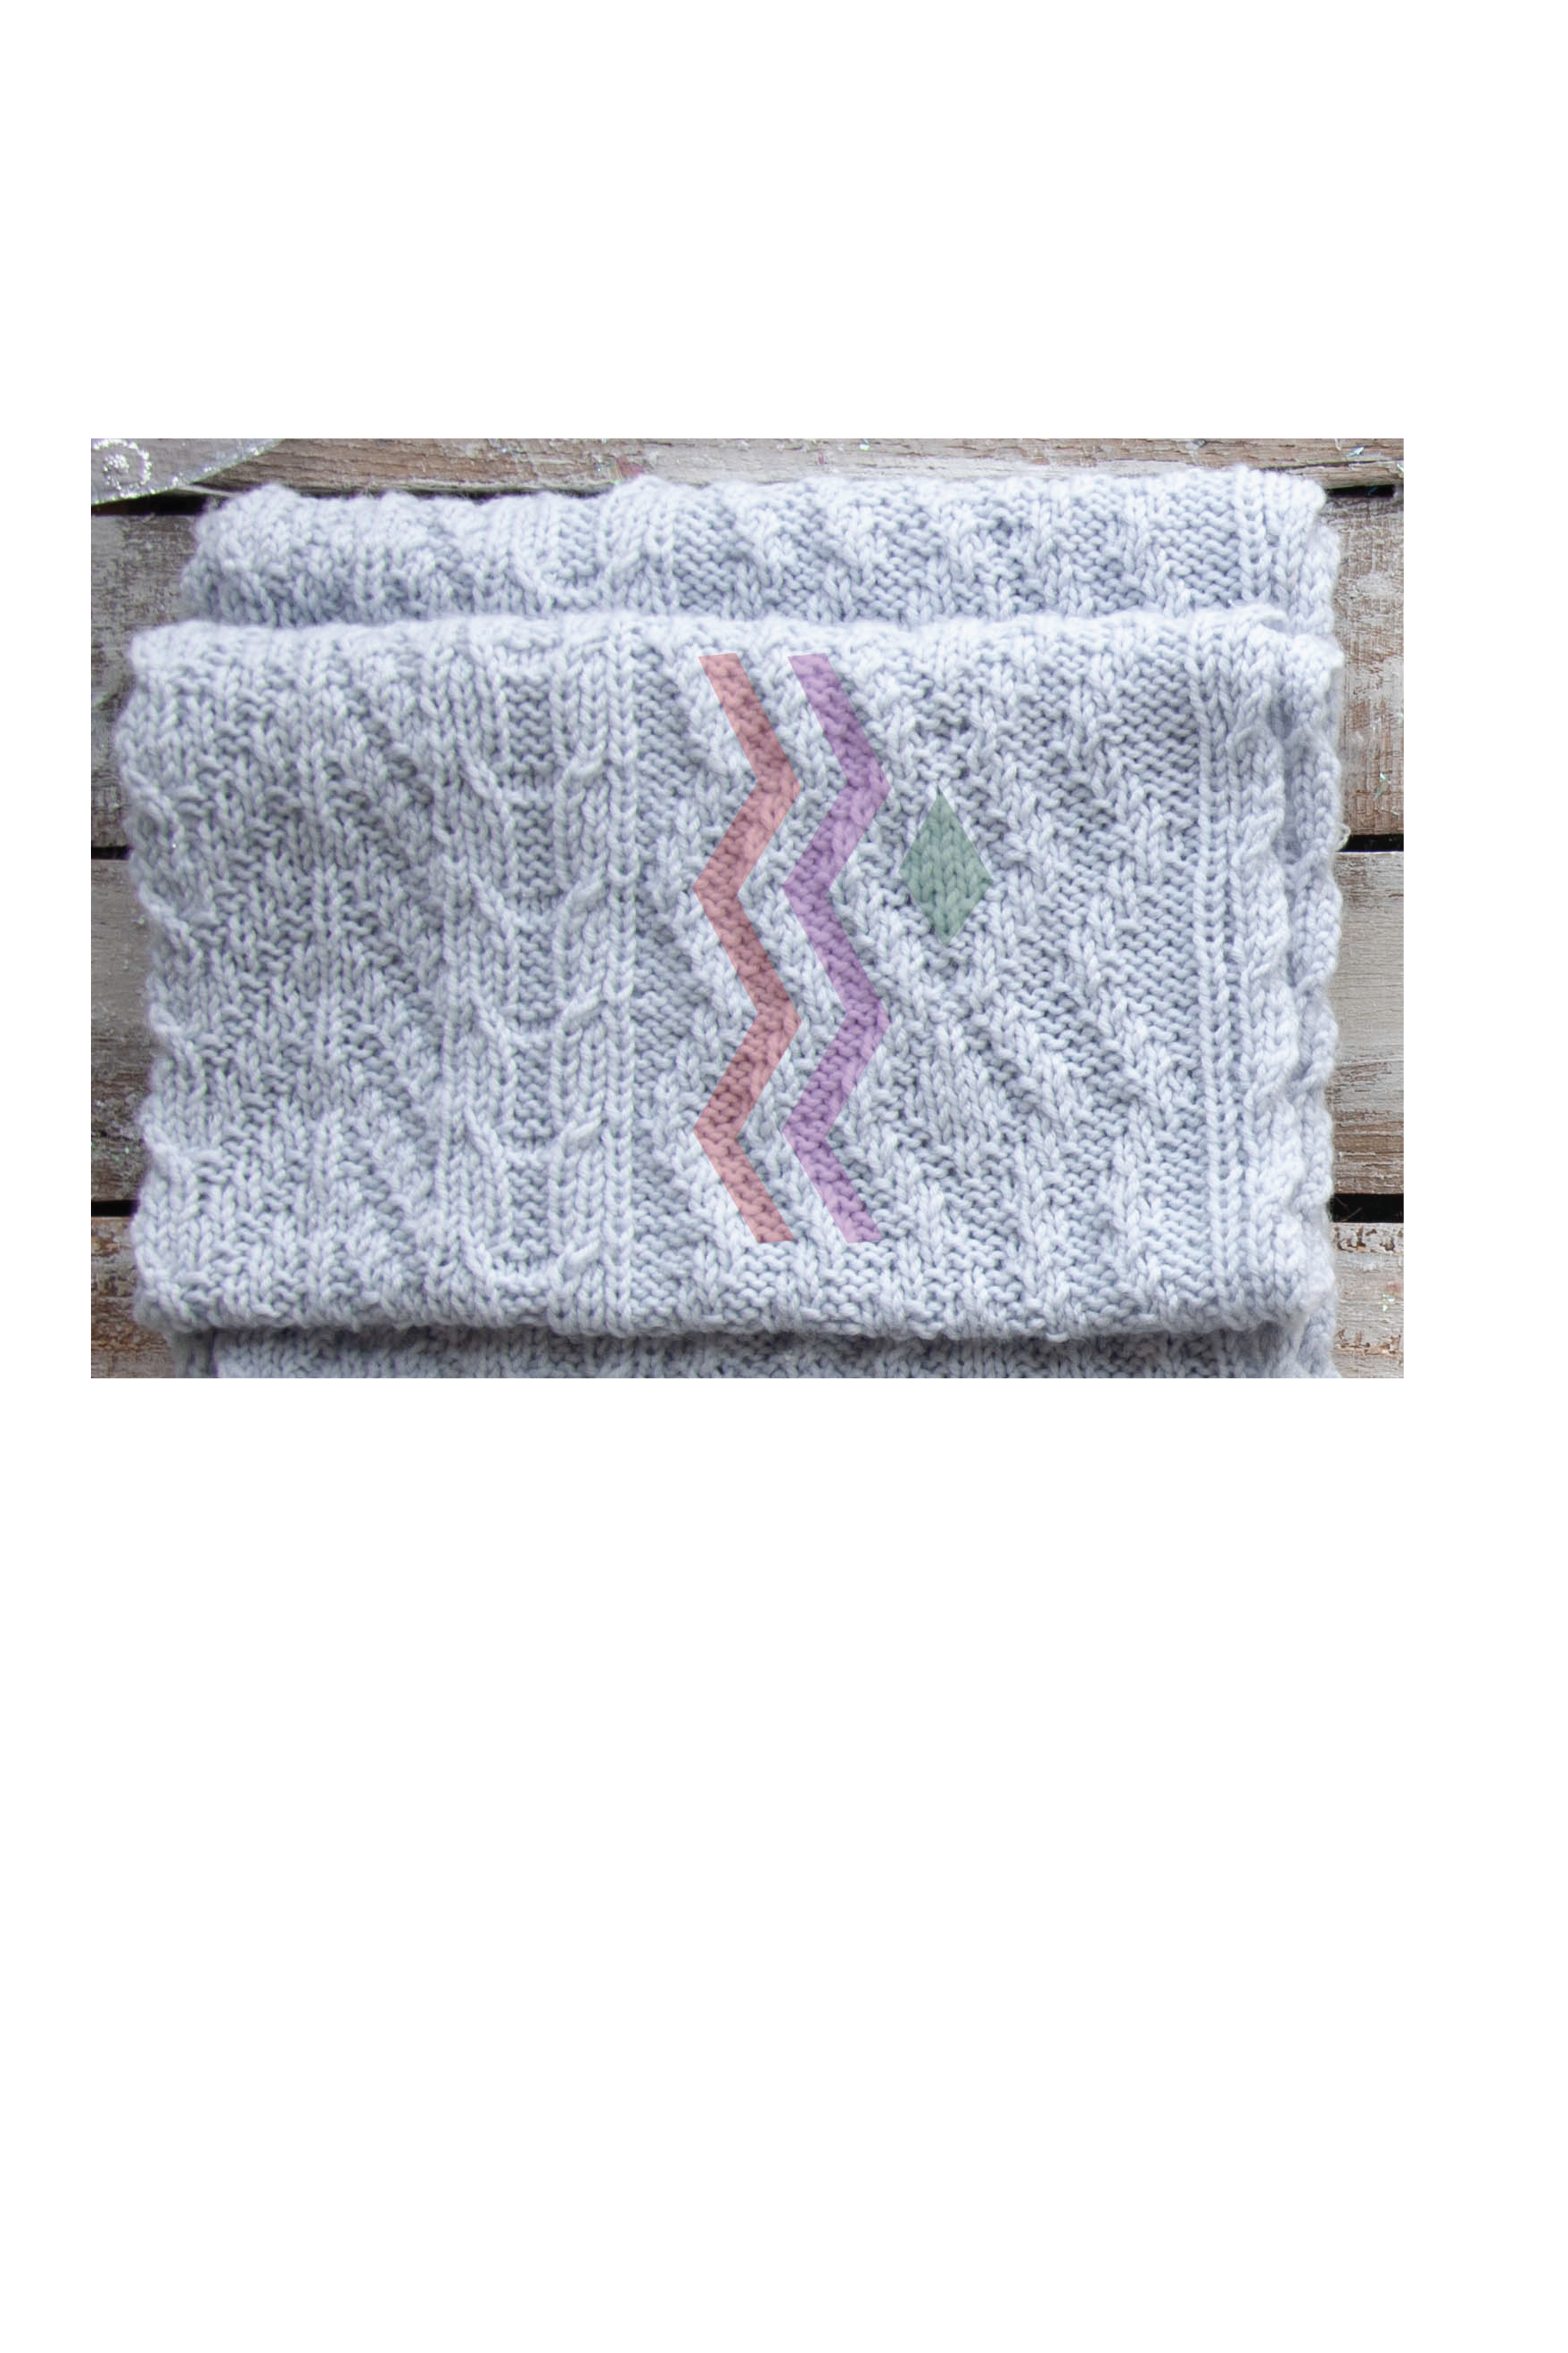
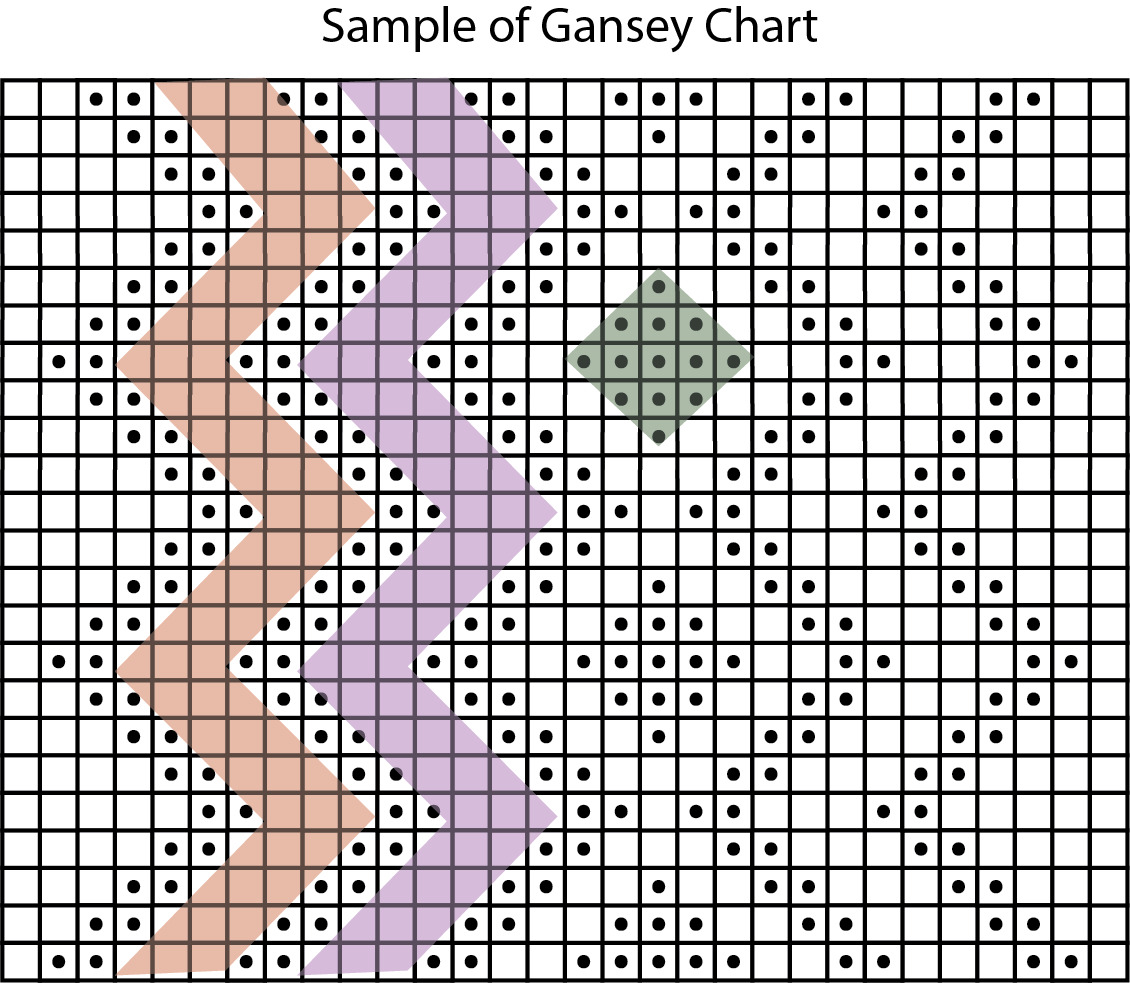
A blank square means to knit on the right side and purl on the wrong side, and represents stockinette stitch. A square with a dot inside it means to purl on the right side and knit on the wrong side, and represents reverse stockinette stitch.
The squares are visually conveying what the actual piece of knitting will look like. The blank squares which are stockinette look plain and smooth, just as they do in the finished piece. So the idea is that when you look at the chart and see this arrangement of symbols, you can know what stitches come next just at a glance.
As a reminder, whether you’re a chart or a word person, this pattern still has you covered. Remember, you can find Series 2 of the 12 Days of Winter Kit patterns on Ravelry.
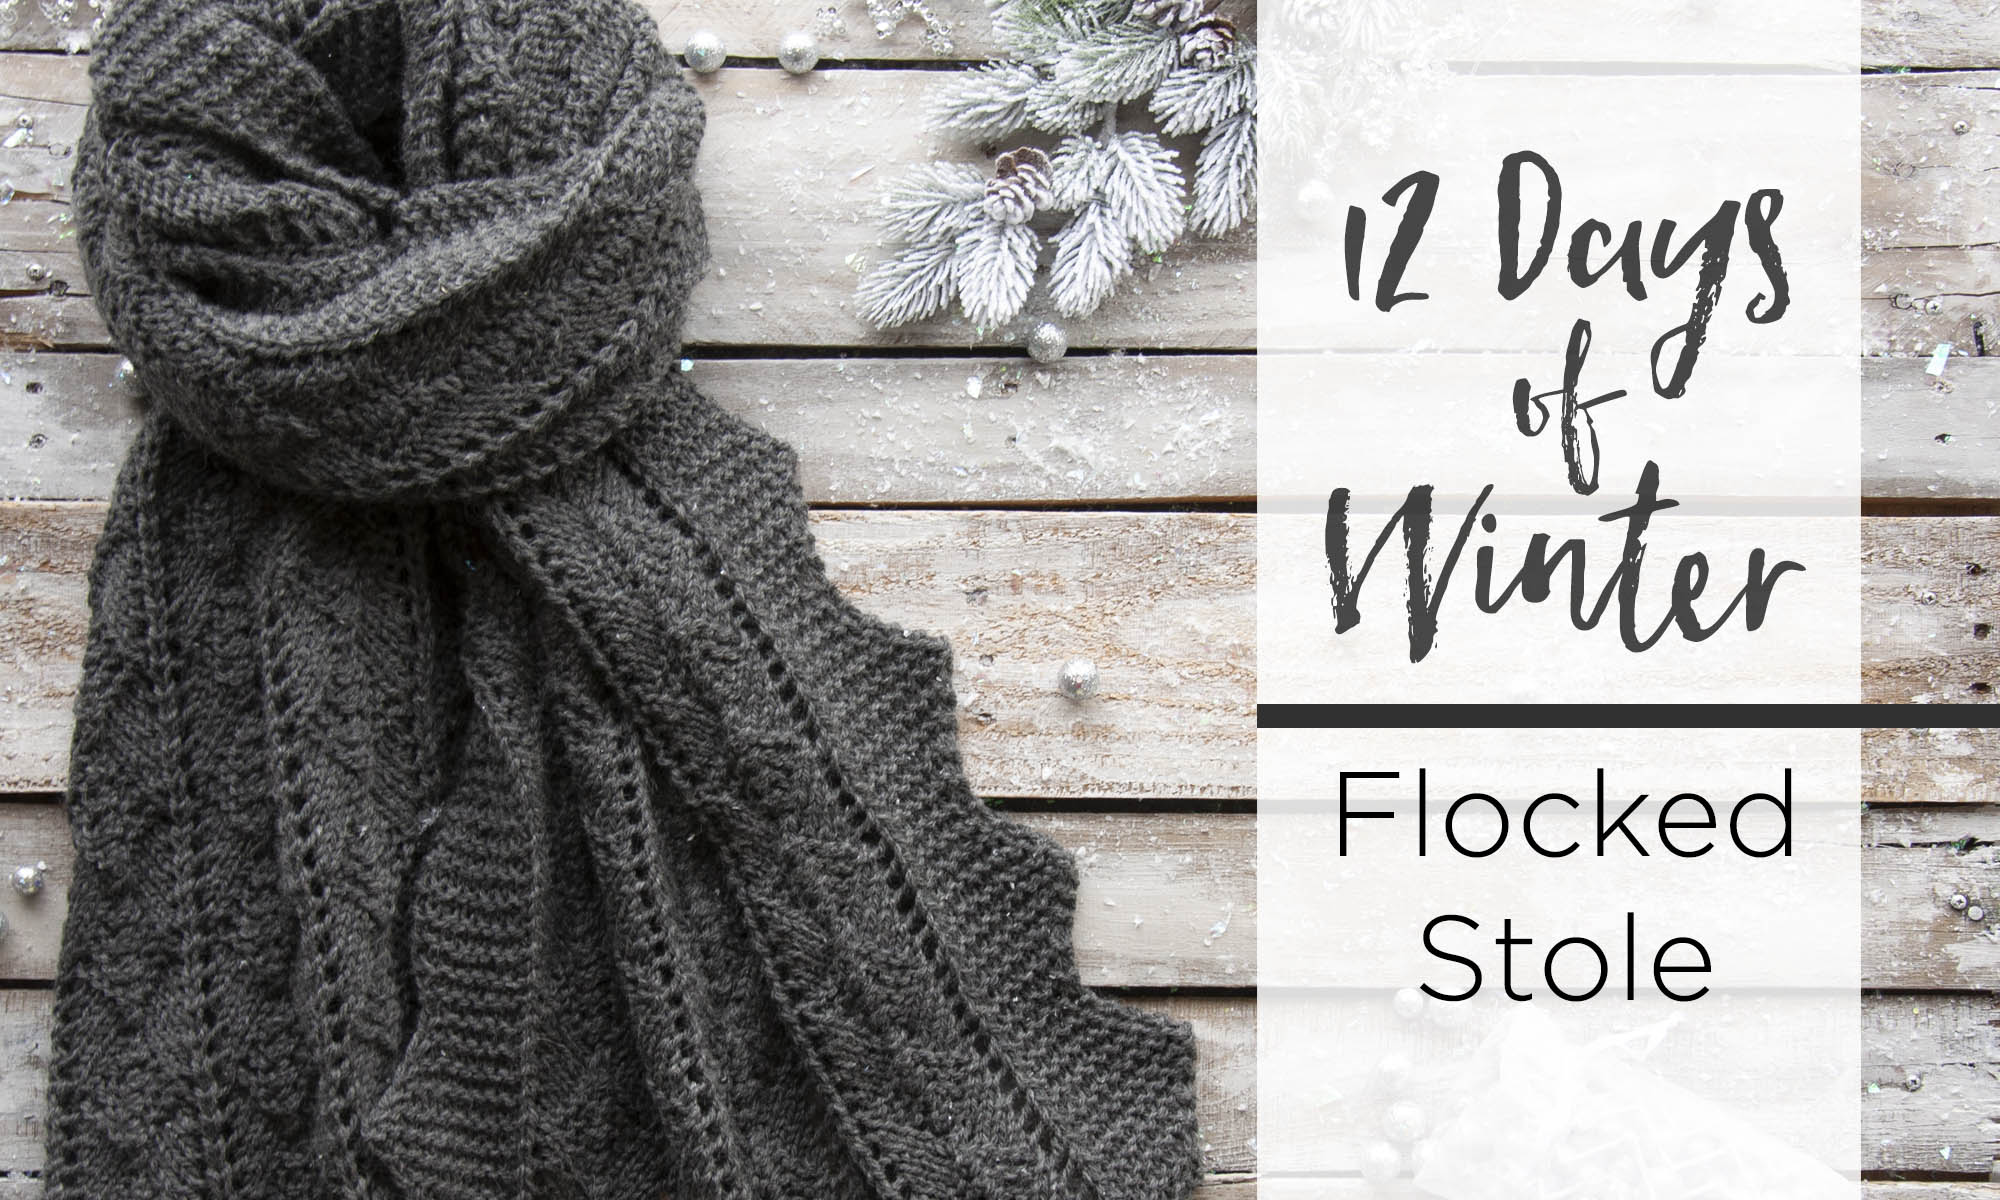
This is part 4 in a 12 part series highlighting designs from our 12 Days of Winter, Series 2 Edition.
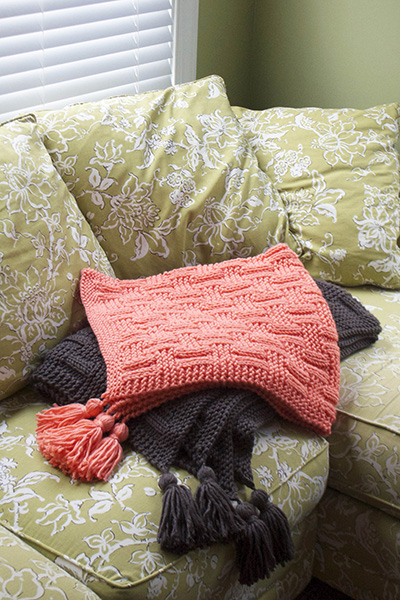
Meet the Flocked Stole (pattern link):
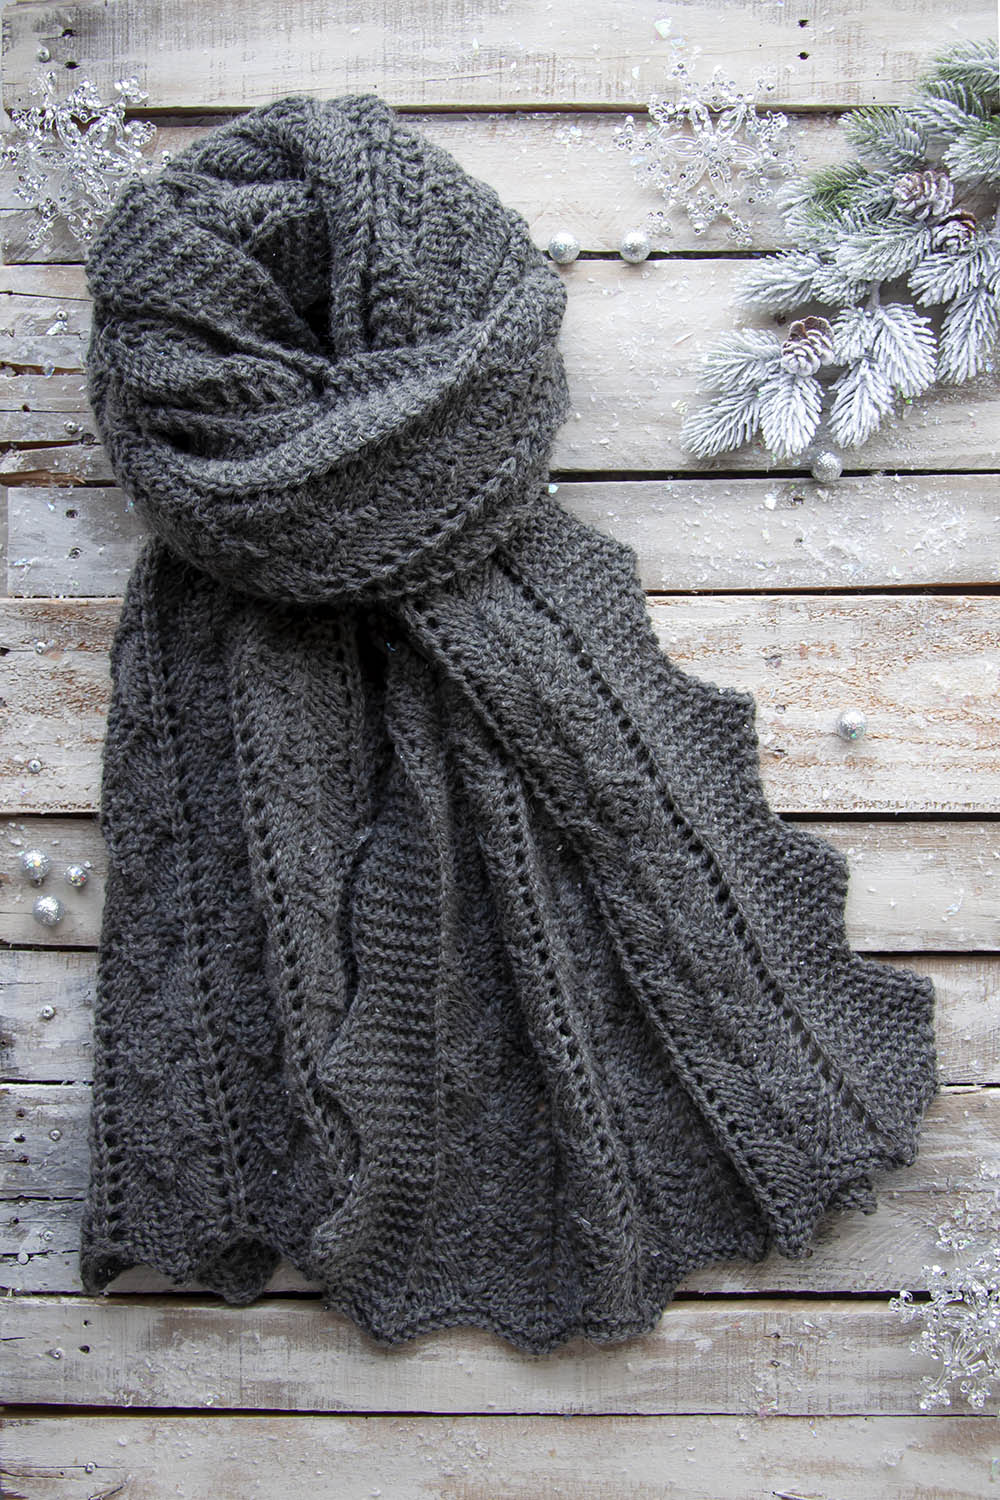
This generously sized stole/shawl/scarf is knit in one piece from one end to the other. It uses Deluxe Chunky in my favorite heathered shade of gray, #91903 Charcoal Heather. On a size 10 needle, this is a project that isn’t going to take until next winter, either.

This project goes to show that rectangles do not have to be boring! The lace pattern in the main body of this stole uses centered double decreases which create angles on both cast-on and bind-off edges. The garter edging on each side also forms points, which brings me to the next thing I love about this piece – it is so easy to block!
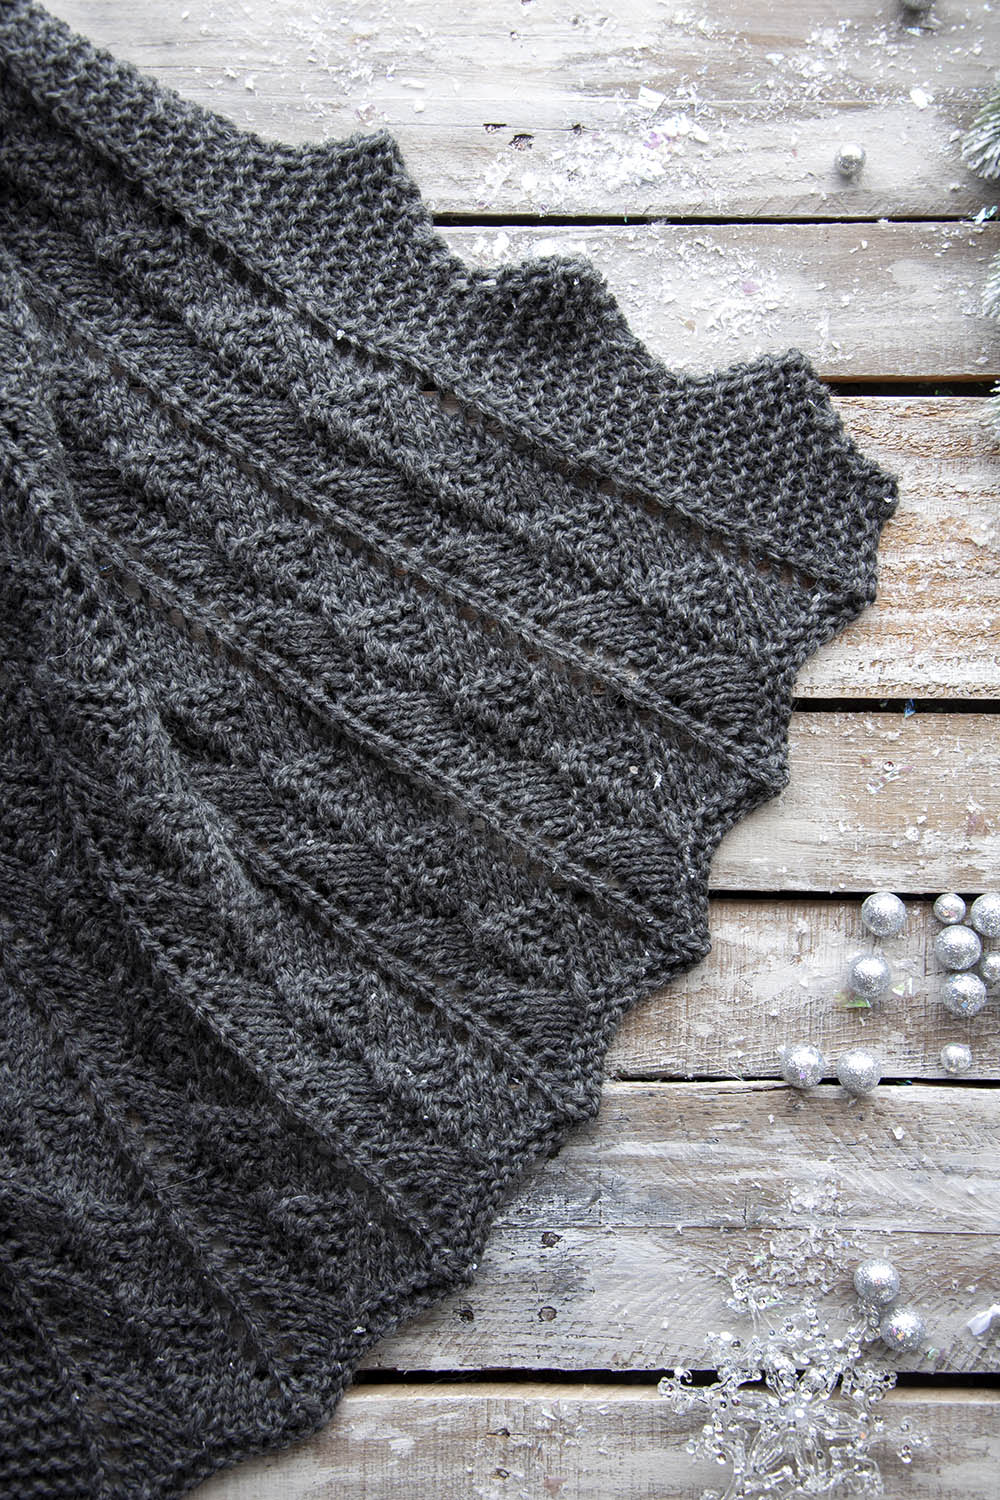
To block, the easiest method is to use blocking wires and pins. You could also use pins by themselves on a blocking board. But I find it’s much easier to use the wires because I can stretch the item more evenly.

Because all four edges of the stole have points on them, I ran wires through the tips of these points, and then pinned my wires to a blocking board which stretched the whole thing out evenly. It’s almost always very important to block lace in order to open up the fabric, and also to even out the stitchwork.
Never used blocking wires before? This might be a good project to get started! I bet your LYS carries them – just ask!
Remember, you can find Series 2 of the 12 Days of Winter Kit patterns on Ravelry.
This is part 3 in a 12 part series highlighting designs from our 12 Days of Winter, Series 2 Edition.
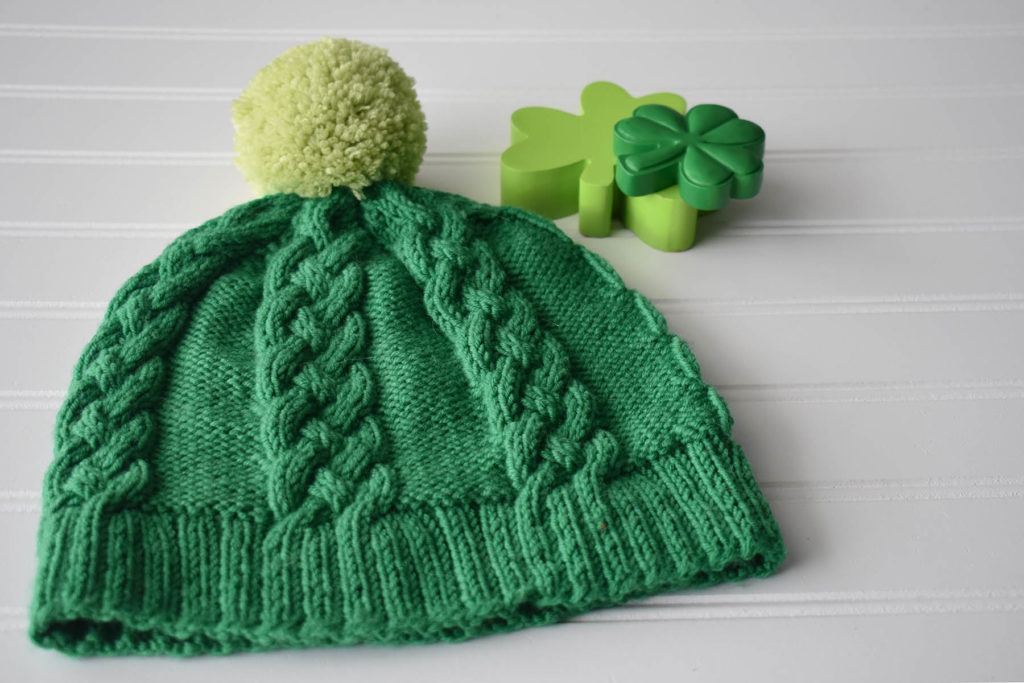
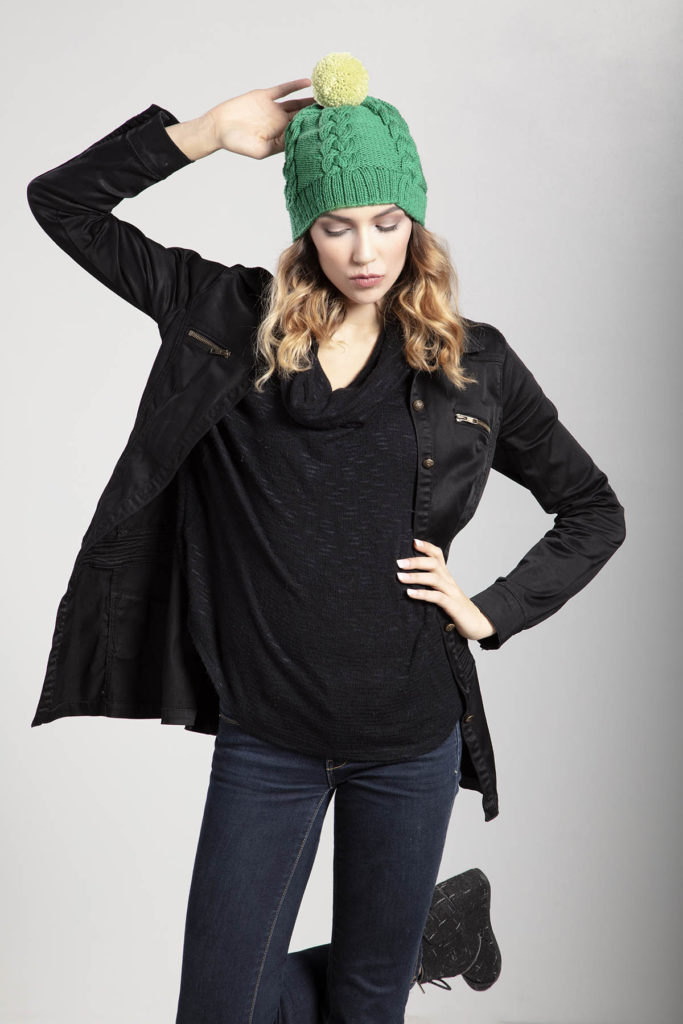
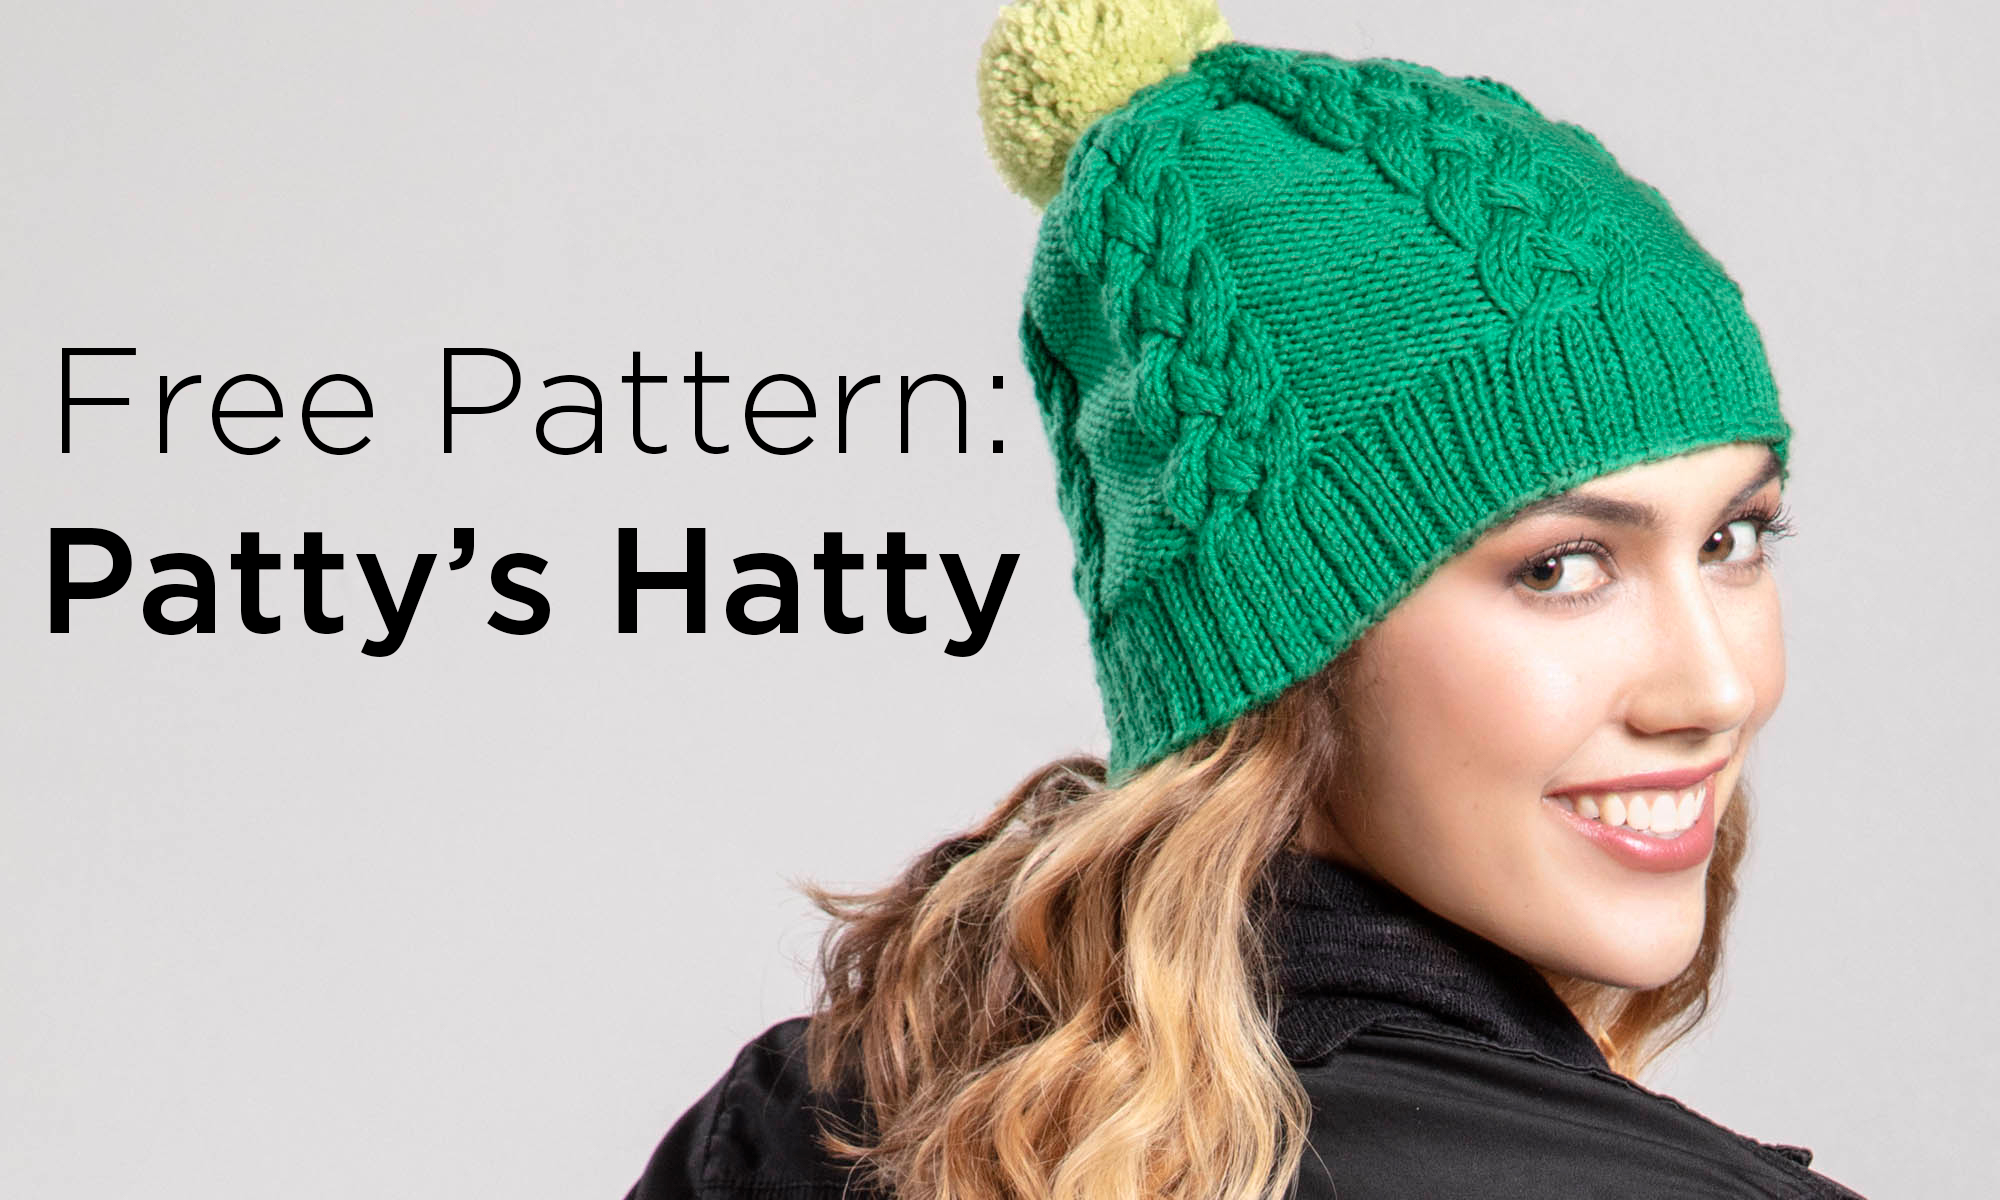
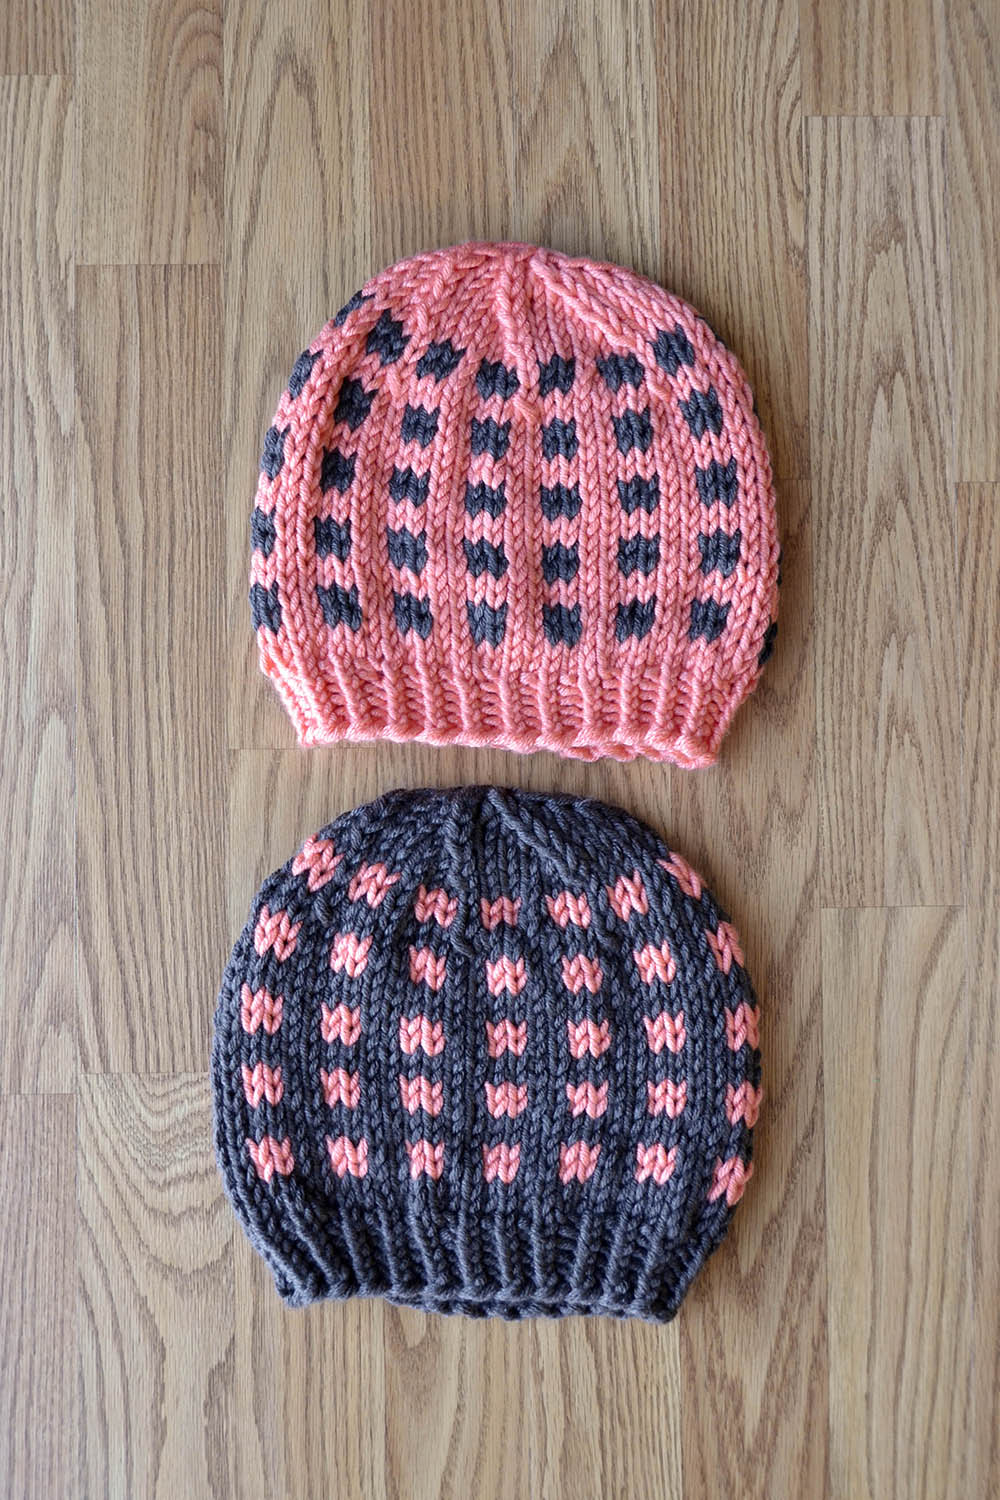
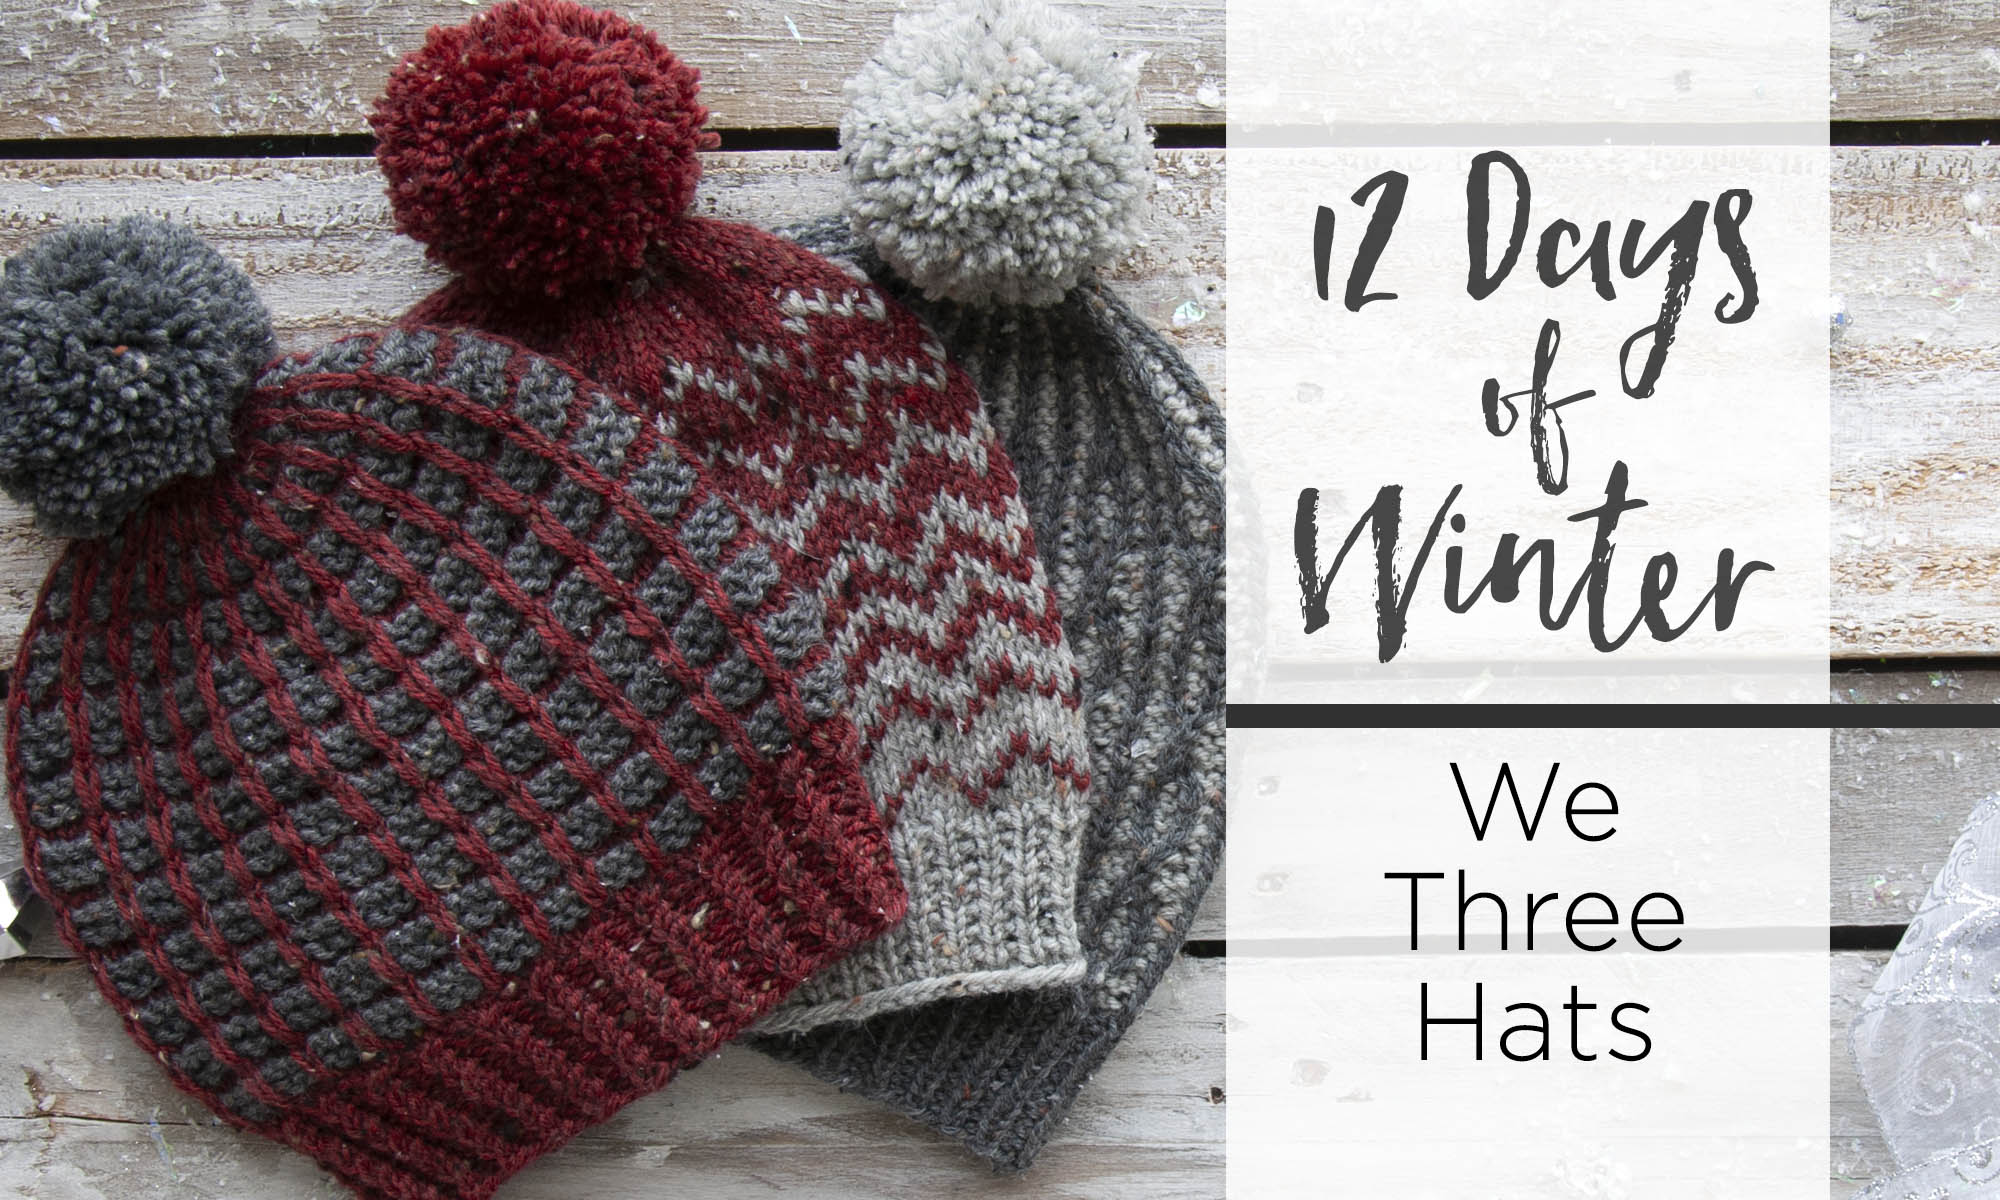
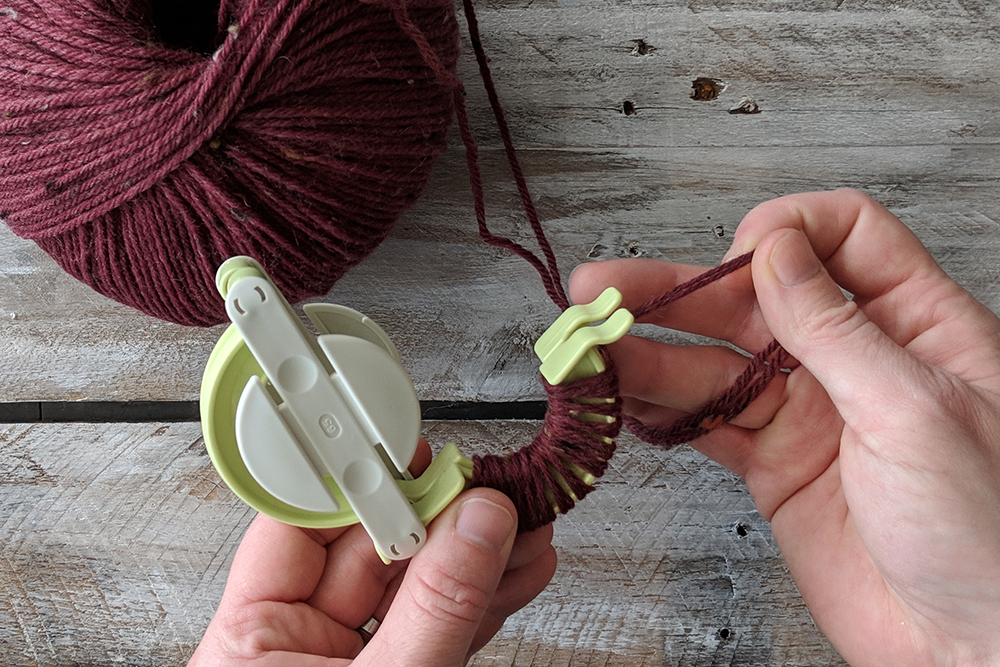
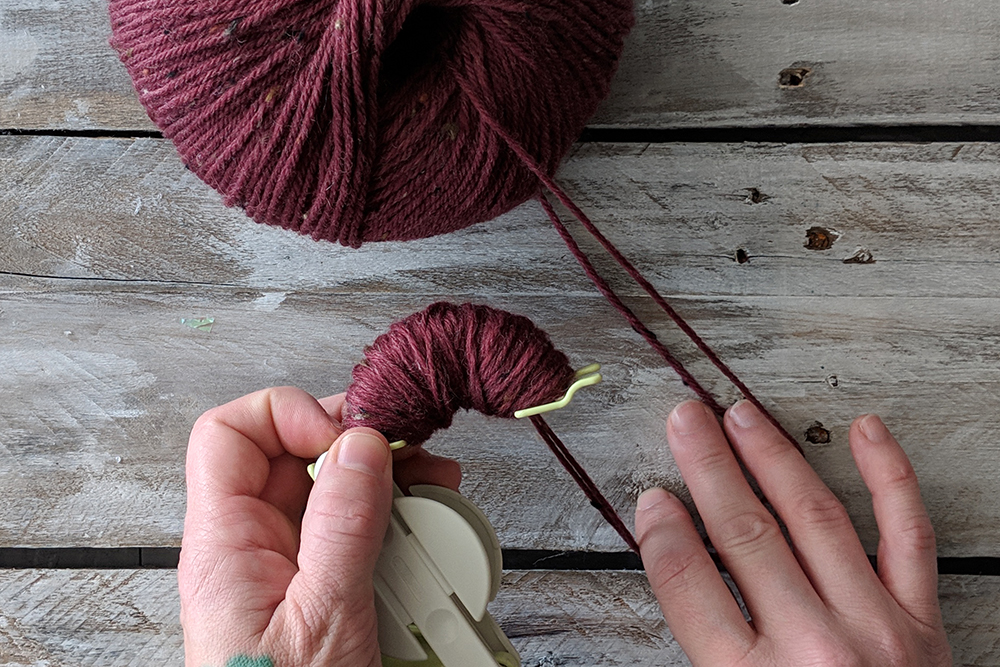
Hats make such a satisfying knit. They’re small and portable, make great gifts, and they’re a fun medium to try out a new technique with.
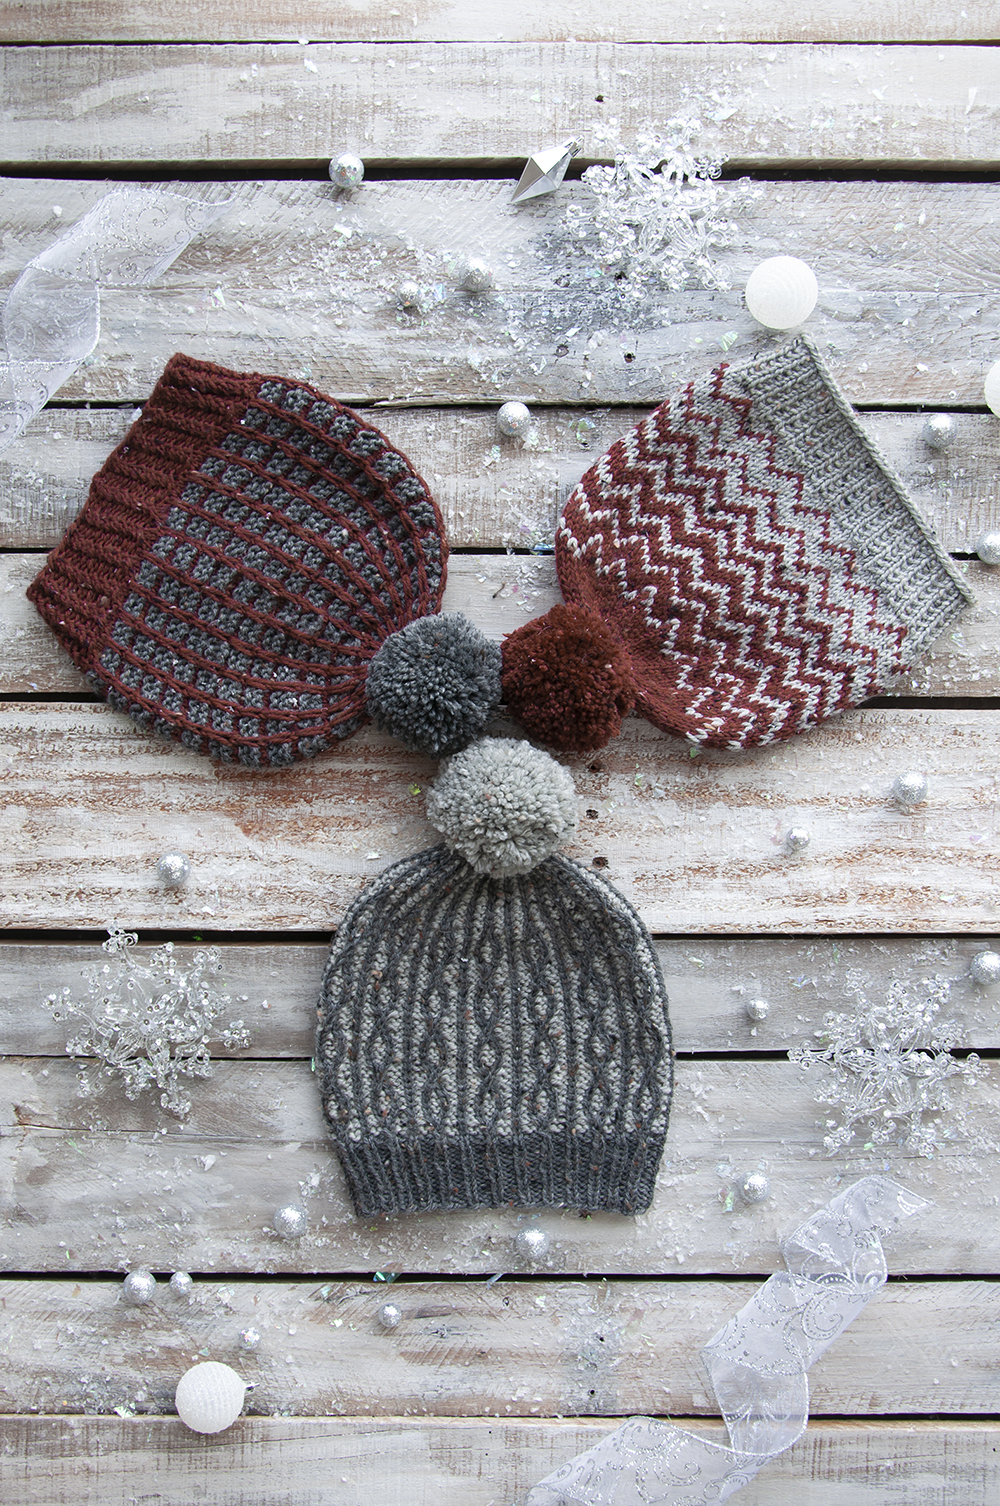
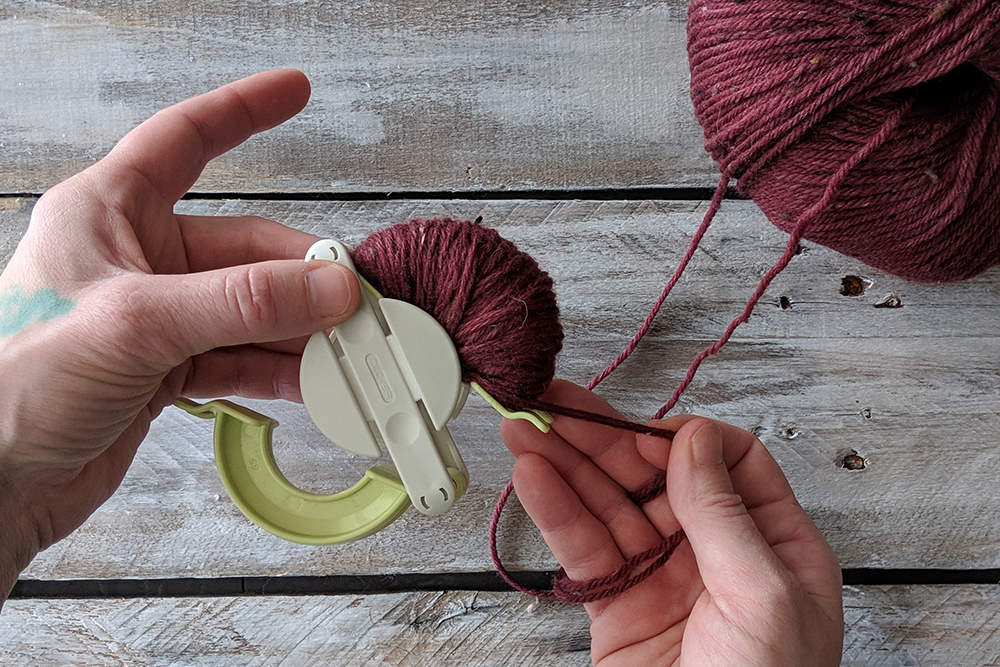
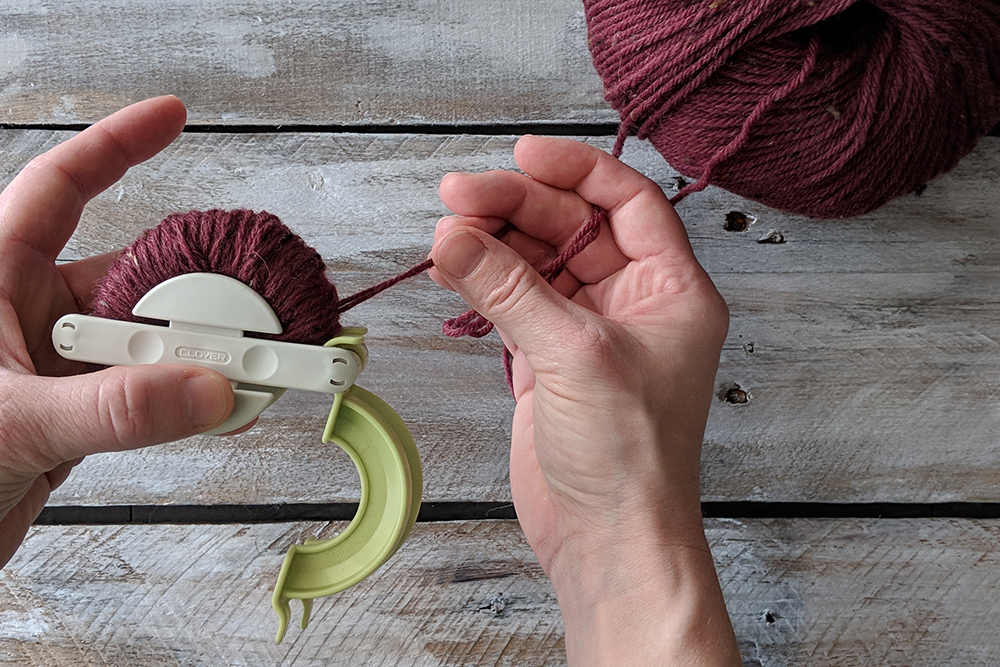
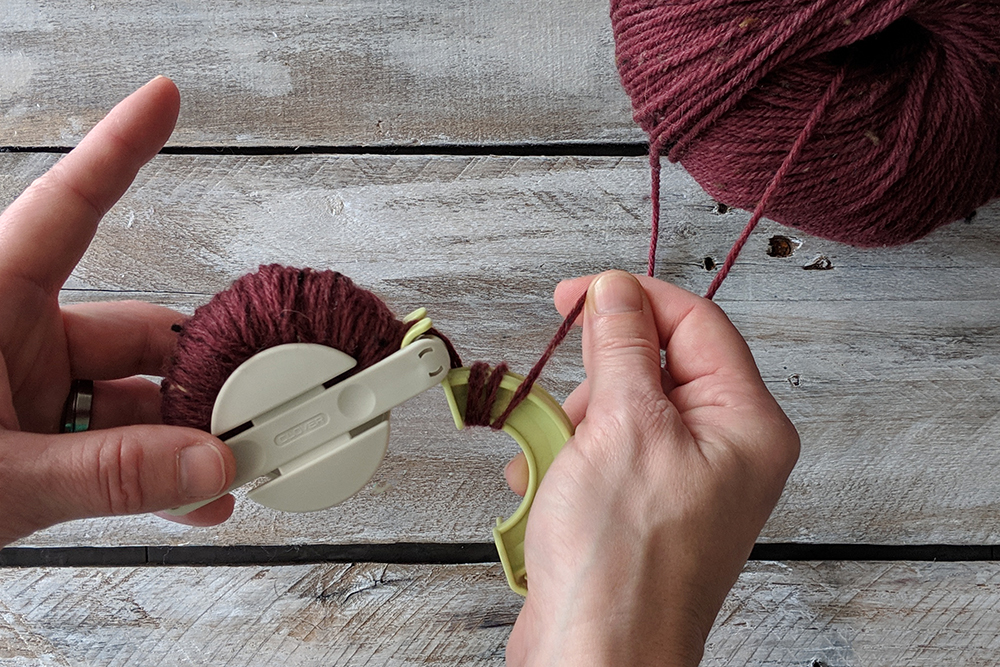
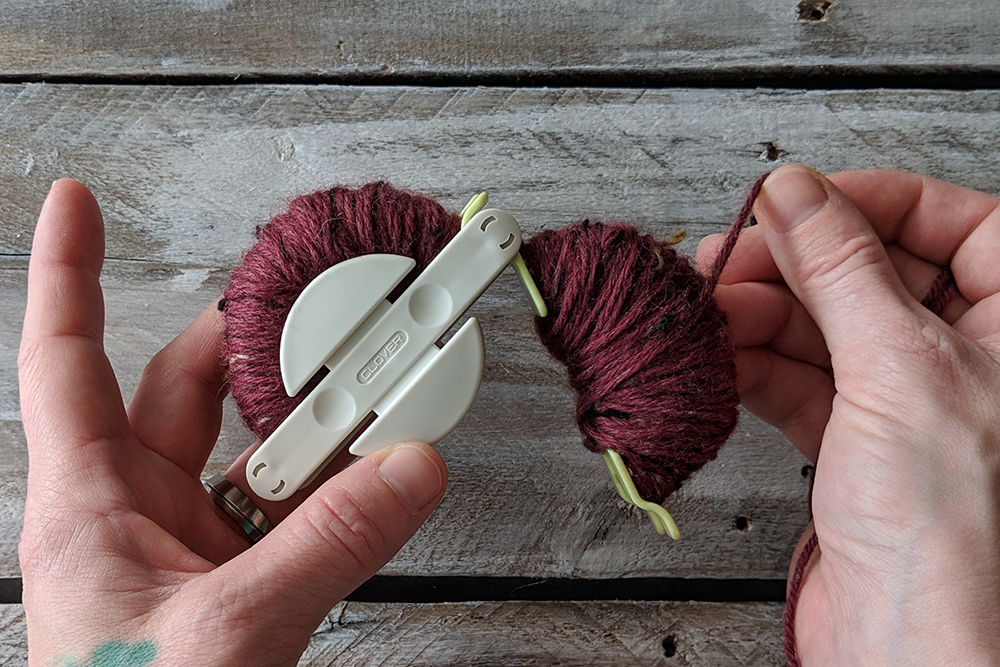
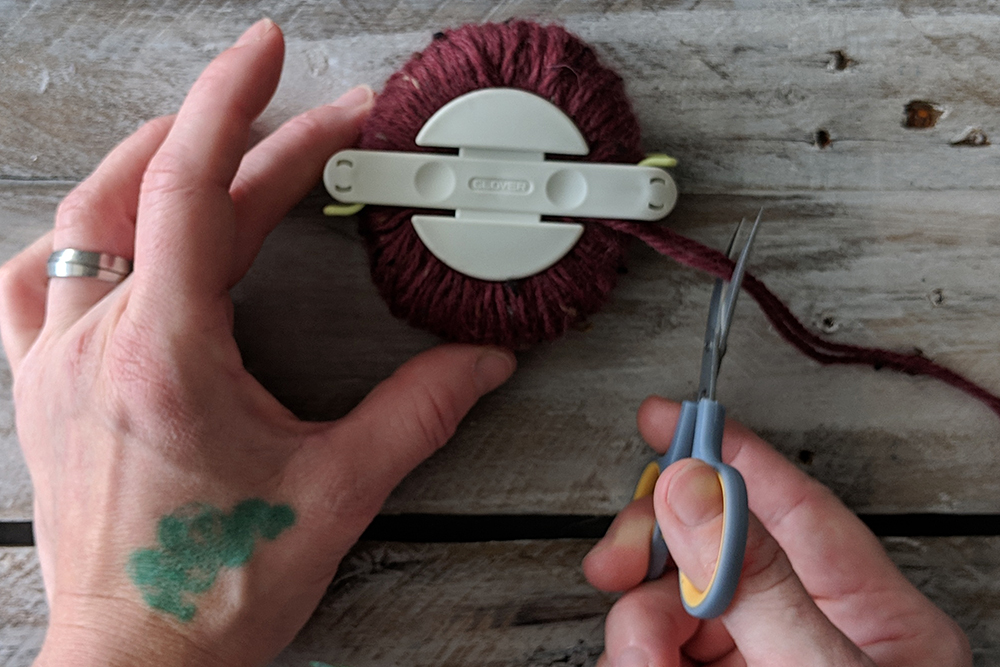
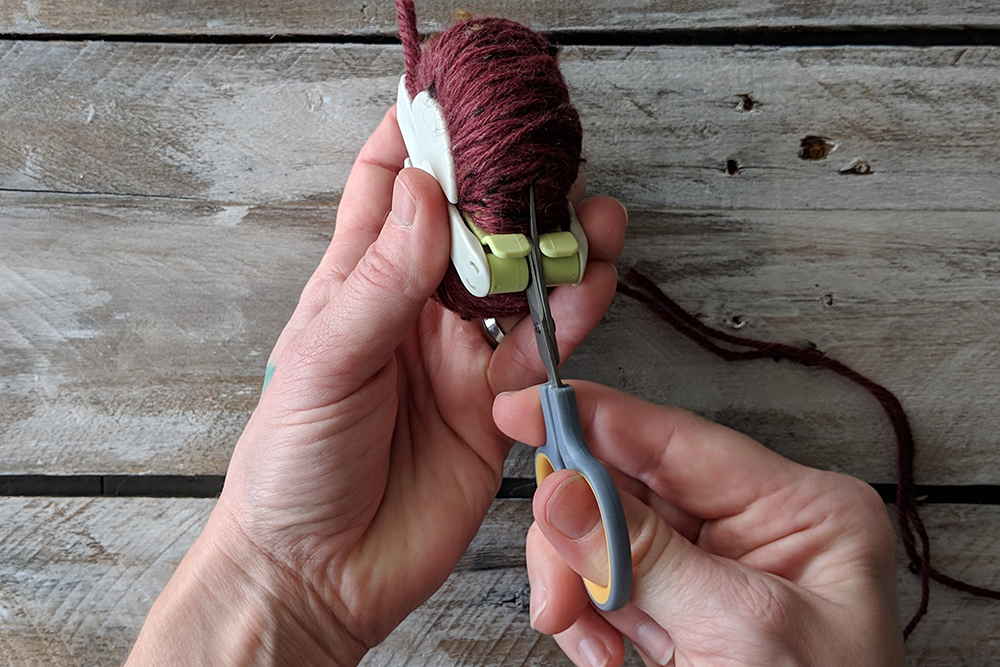
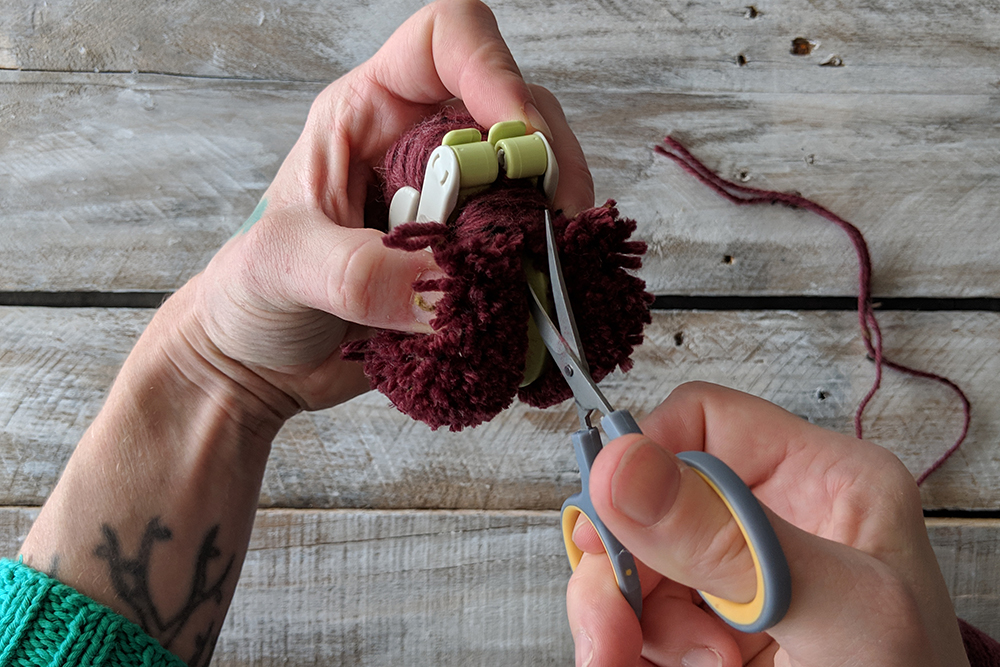
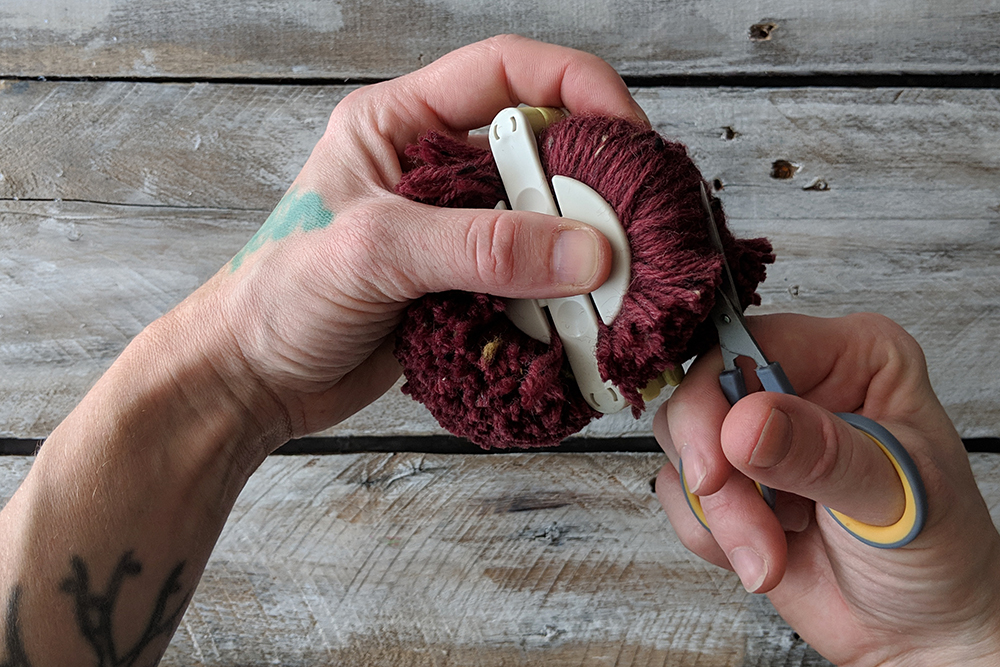
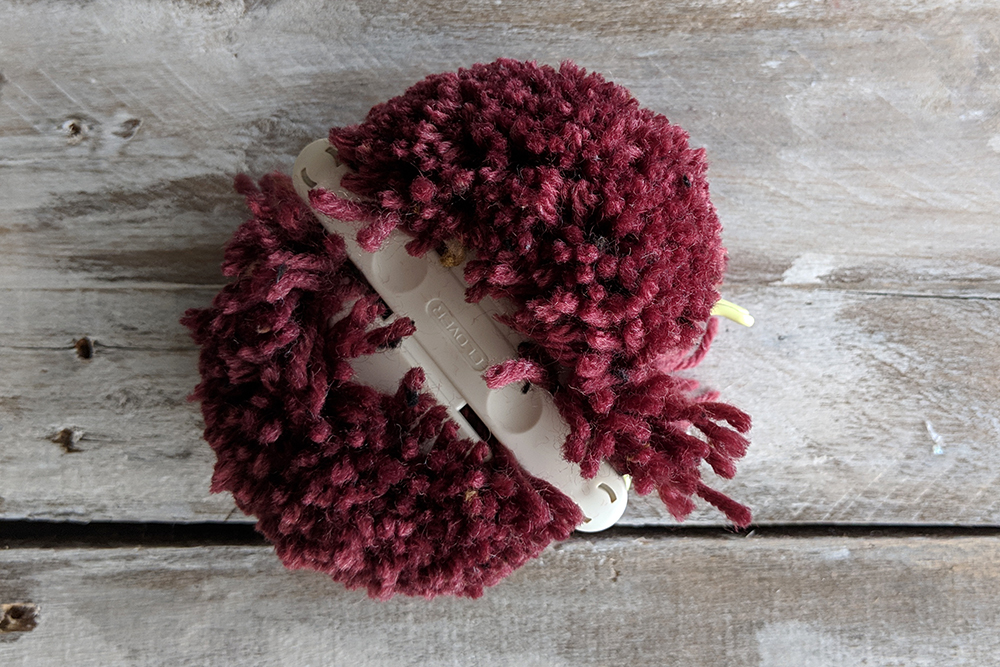
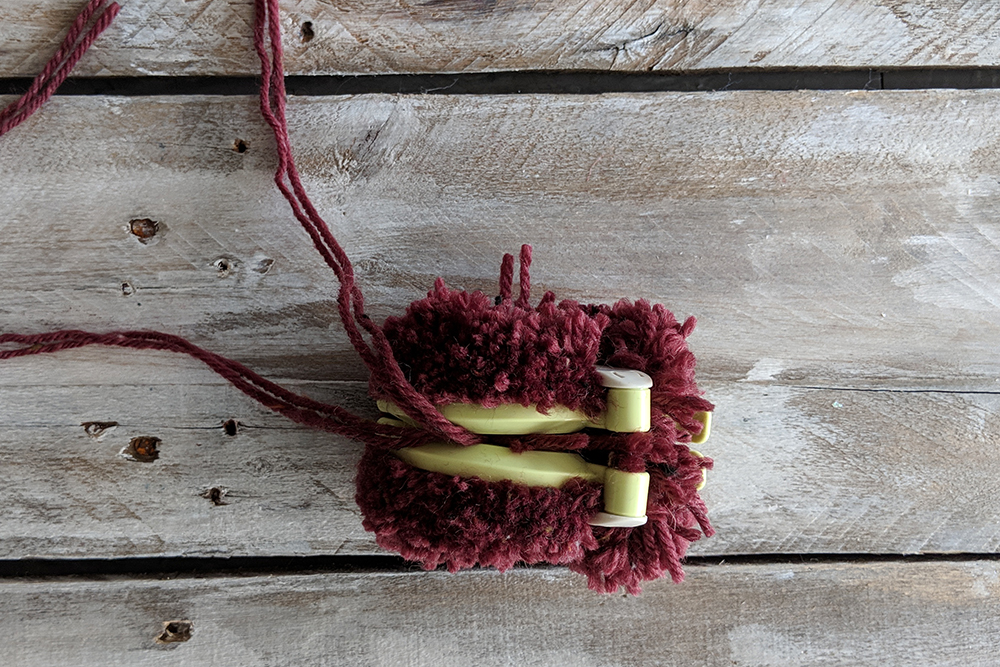
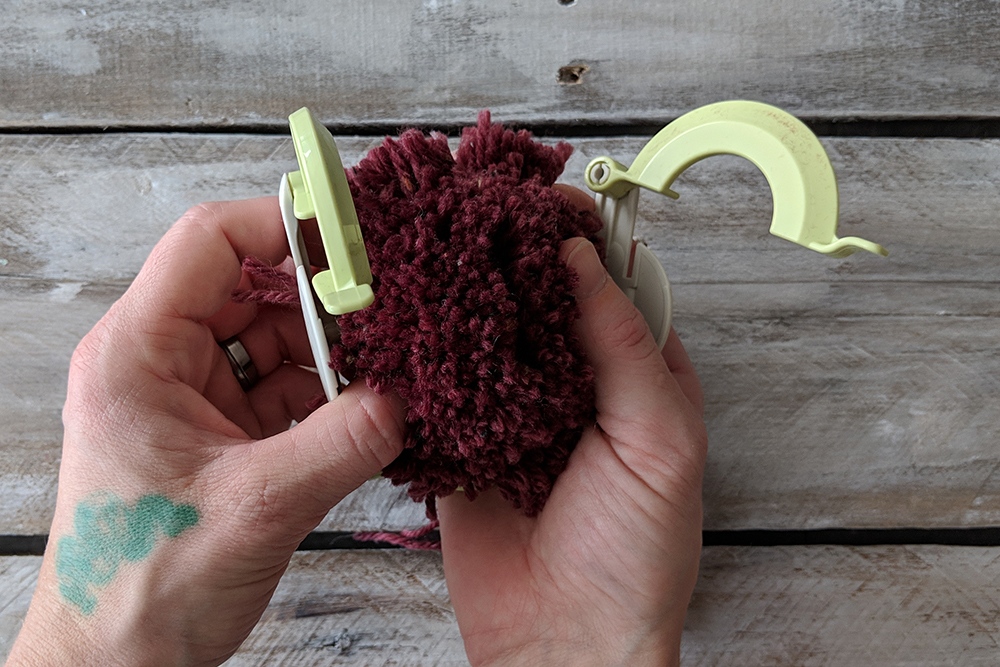
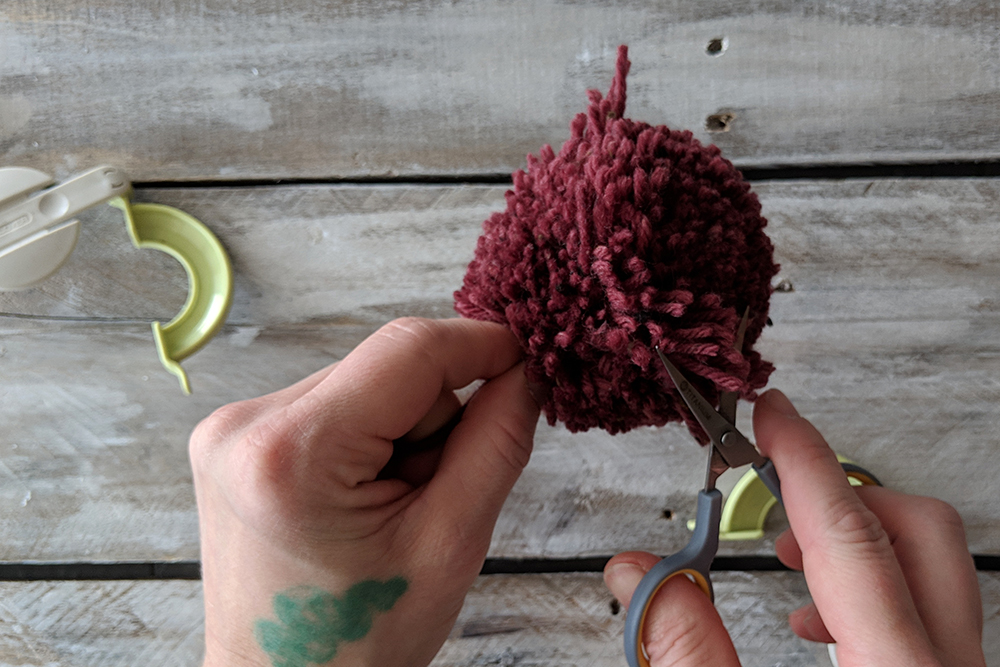
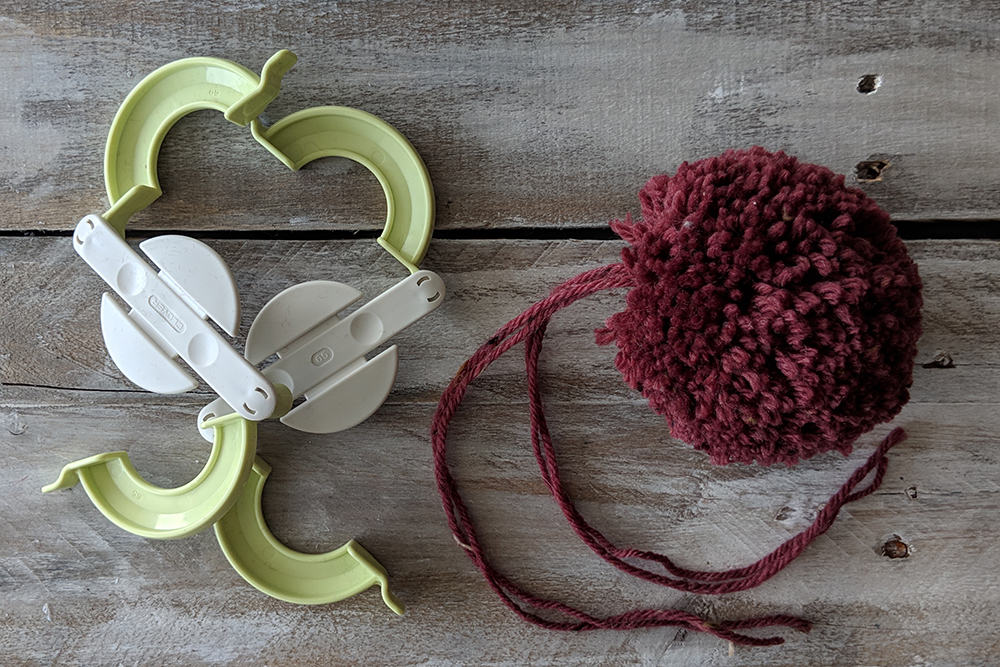
The We Three Hats pattern (pattern link) includes three different hat patterns that can be made out of three colors of Deluxe Worsted Tweed Superwash. All hats are knit from the brim up to the crown. Each hat is a bit different, but one thing they all have in common is a coordinating pom-pom.
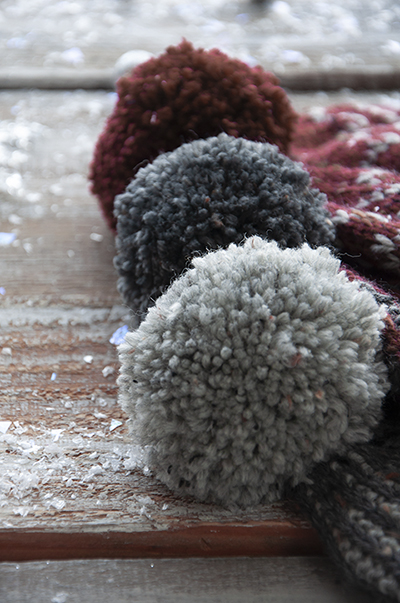
And for me, the answer to that question will inevitably be: heck yes! I love pom-poms, all sizes. I have made many pom-poms in my life using lots of different techniques. I’d like to share with you my favorite way to make a pom-pom, along with a few little tips.

Remember, you can find Series 2 of the 12 Days of Winter Kit patterns on Ravelry.
This is part 2 in a 12 part series highlighting designs from our 12 Days of Winter, Series 2 Edition.
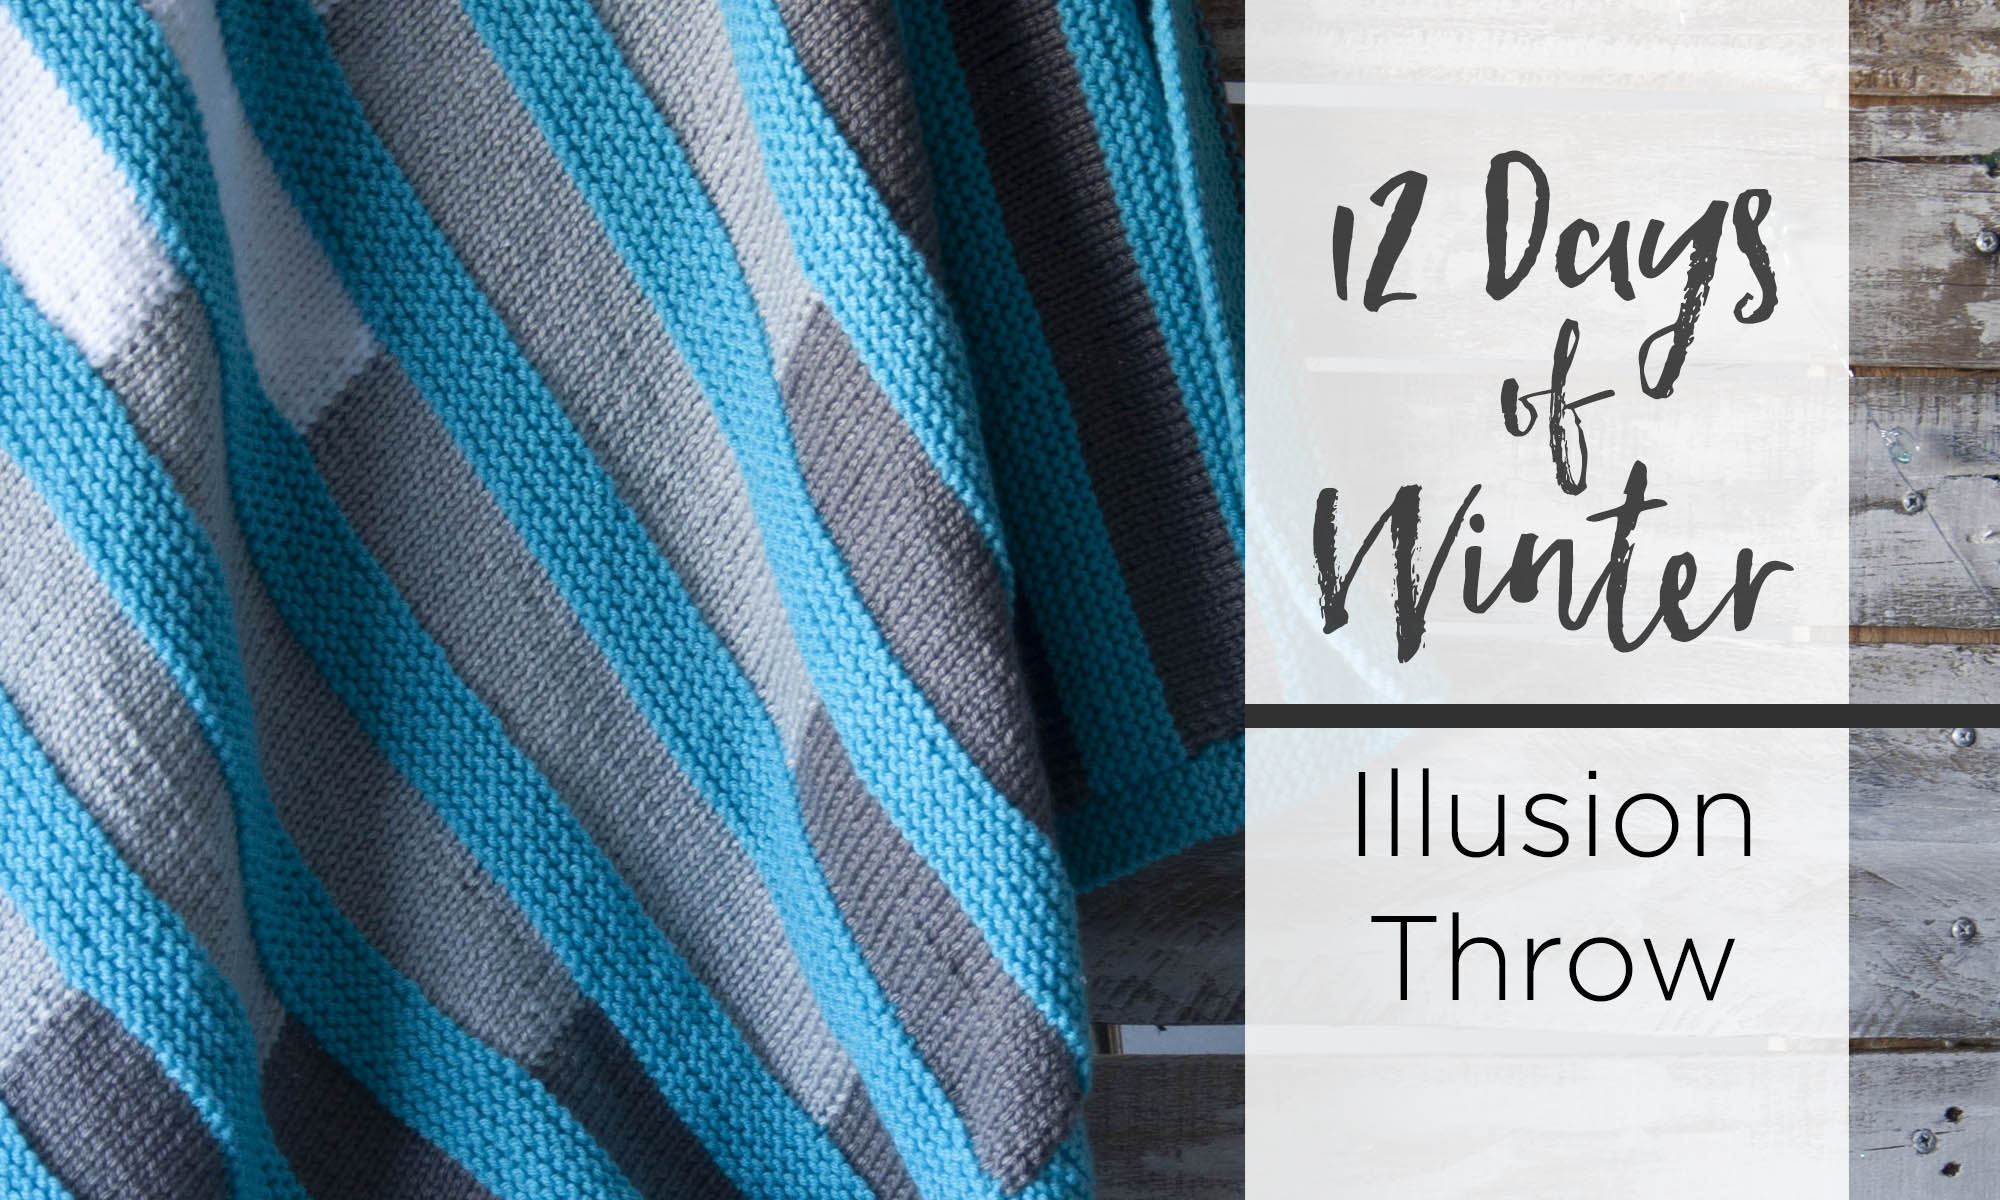
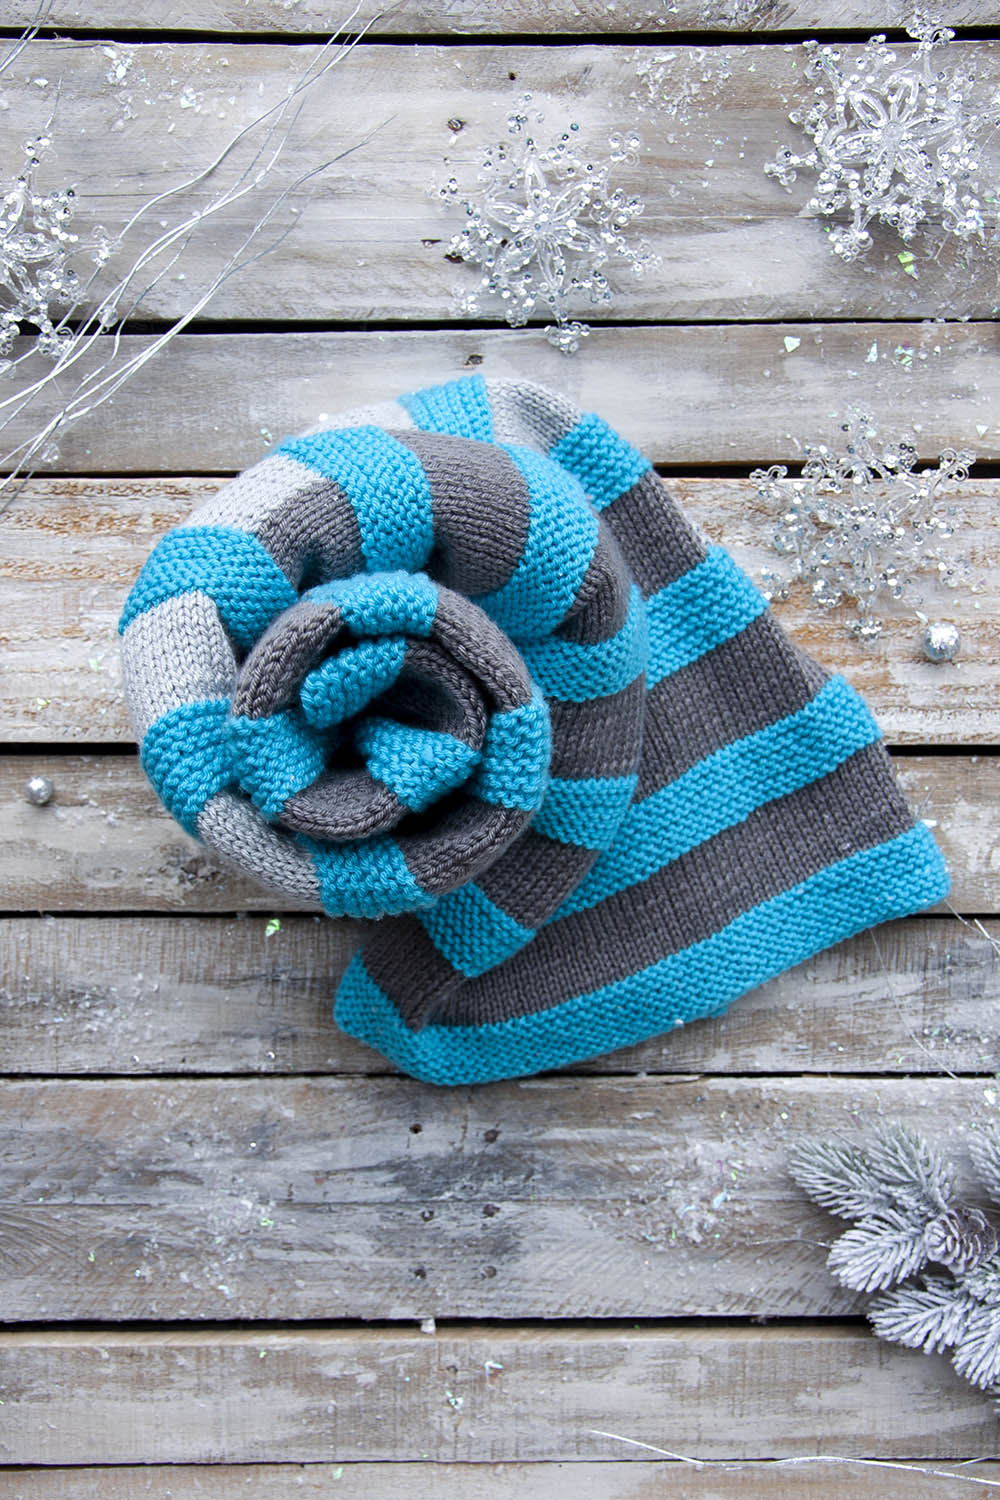
Meet the Illusion Throw (pattern link)! Made using machine washable Uptown Worsted, this throw is squishy, resilient to pilling (perfect for everyday use!), and the perfect size to throw over your couch.
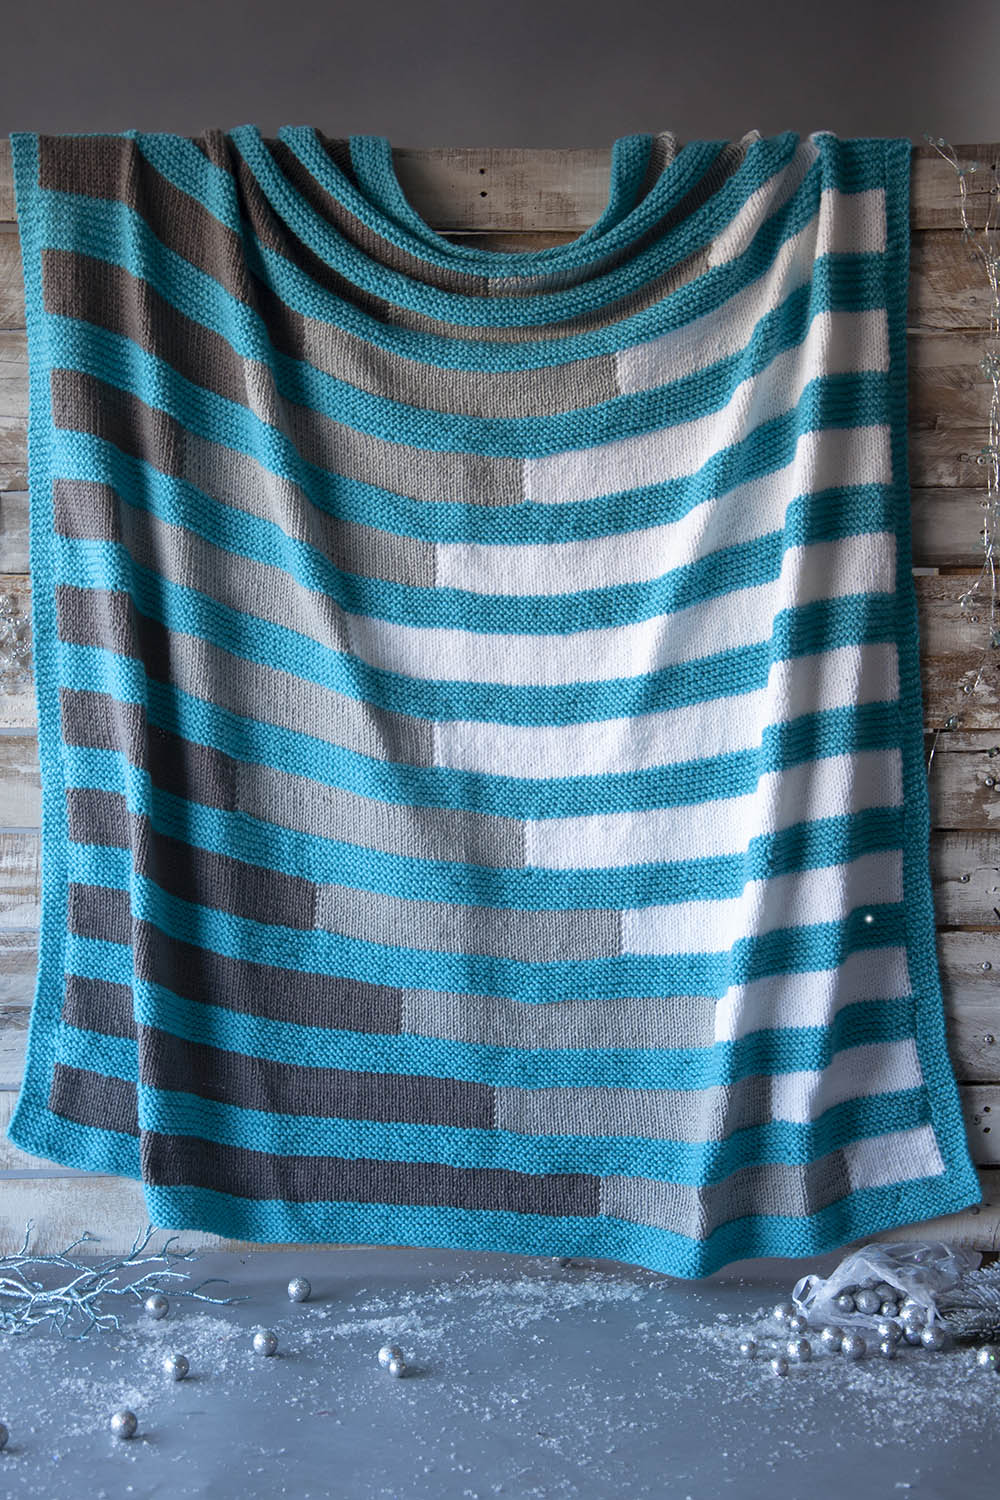
This graphic throw is inspired by one of my other favorite crafty things: quilting. Illusion Throw is definitely not like your grandmother’s quilt. Rather, it is a knitted interpretation of some beautiful modern and graphic quilts I’ve seen out there in the world.
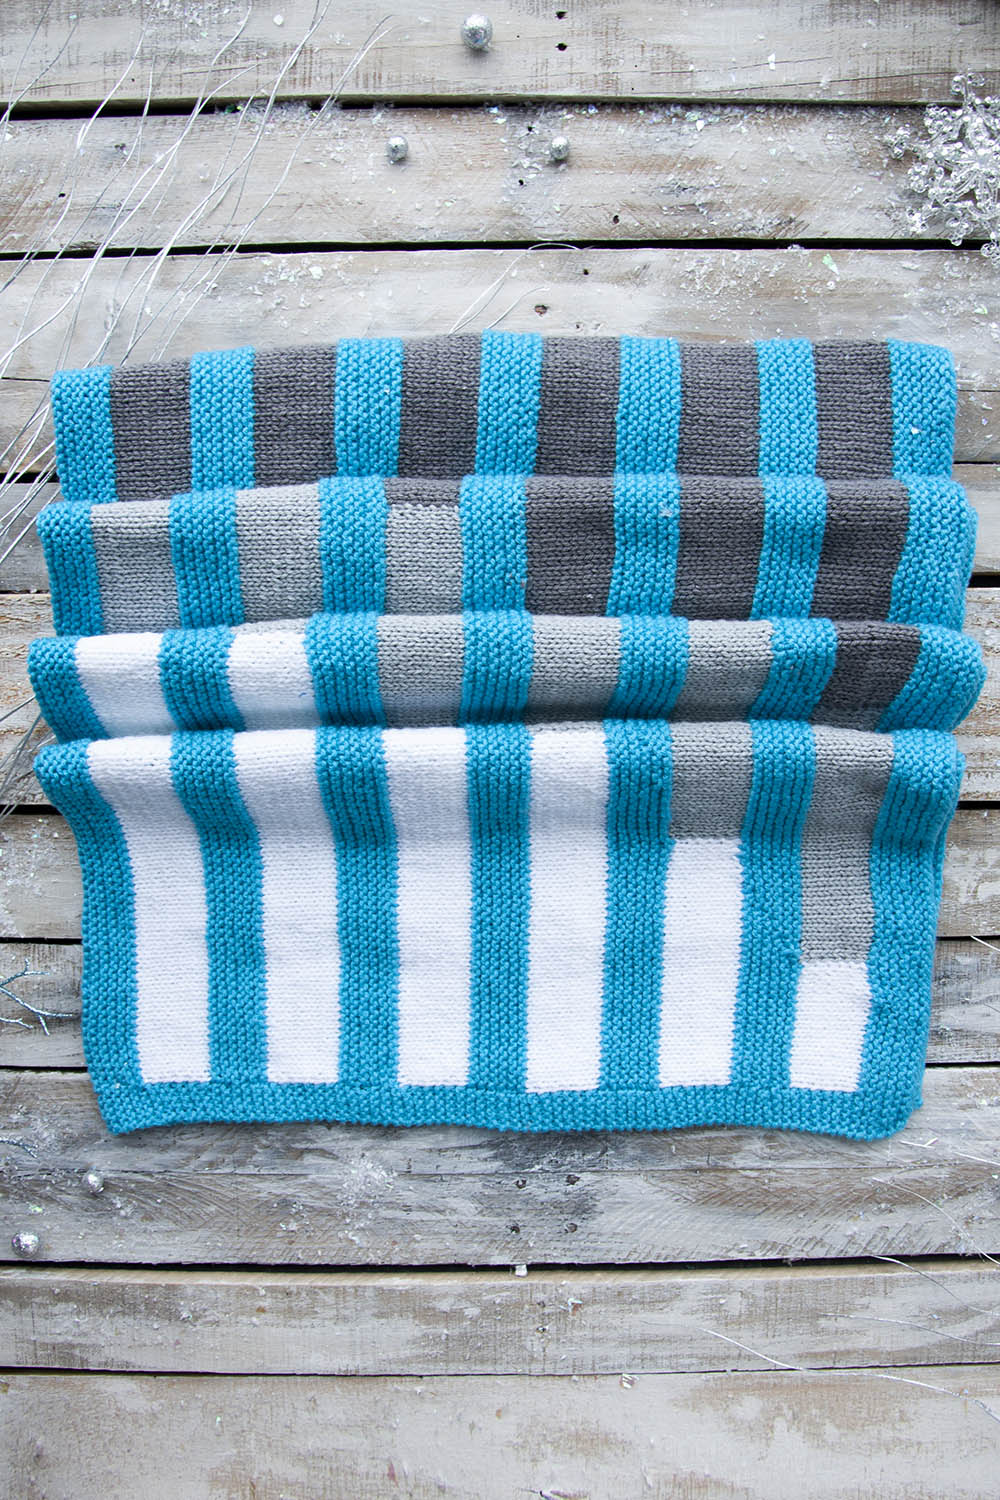
I wanted to create a project easy enough for beginners (so no complicated shapes or shaping) but entertaining for more experienced knitters, too. The stitches themselves are easy – there is nothing more than knit and purl going on here.
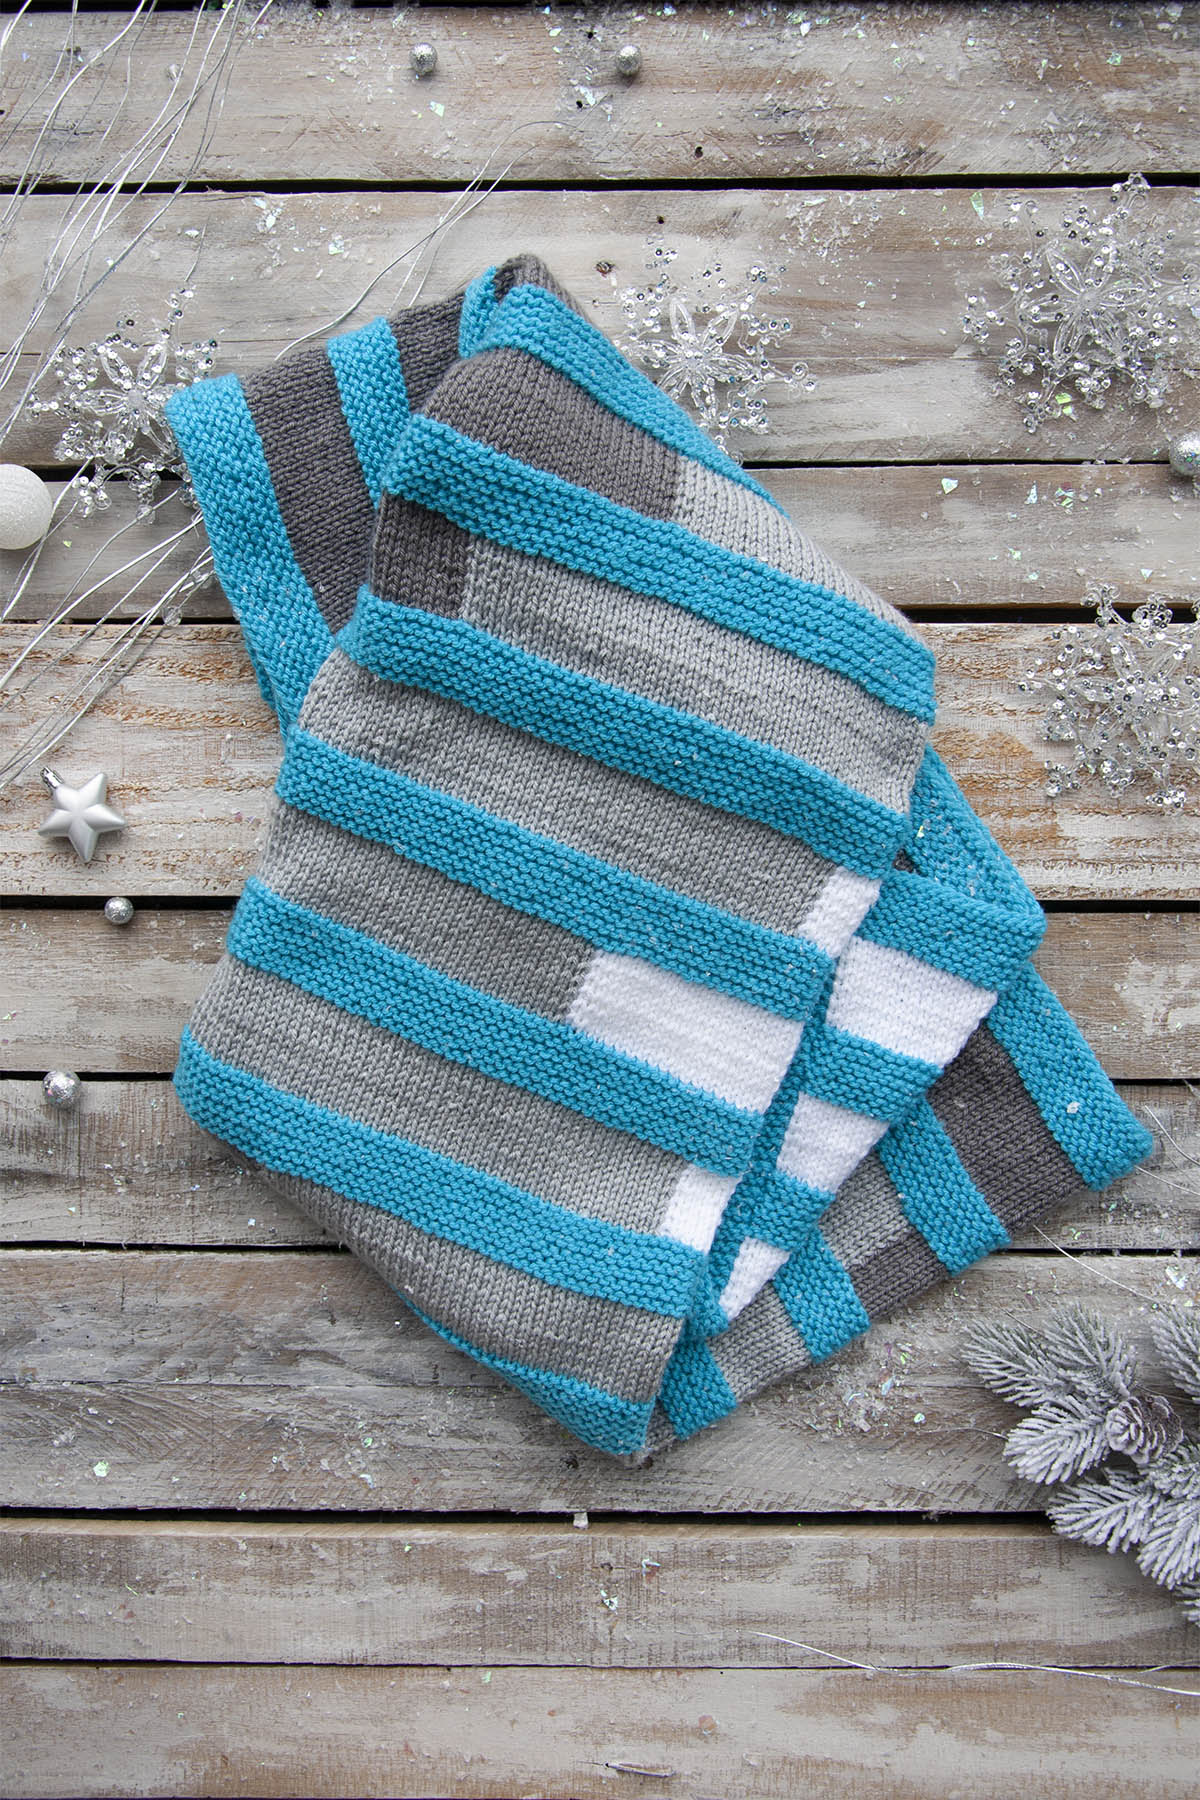
The color changes – where white shifts to light gray and then to dark gray – this is achieved using the intarsia technique. I feel like intarsia sometimes has an unpleasant reputation, but it’s actually very simple to do. And there are only a few color changes on each row, so there is no need to have a thousand bobbins hanging off the back of your work.
To change colors with intarsia, all you’re doing is dropping the color you were using, picking up the new color behind the old one (to prevent any gaps or holes in your work) and knitting on. That’s it!
Remember, you can find Series 2 of the 12 Days of Winter Kits patterns on Ravelry.
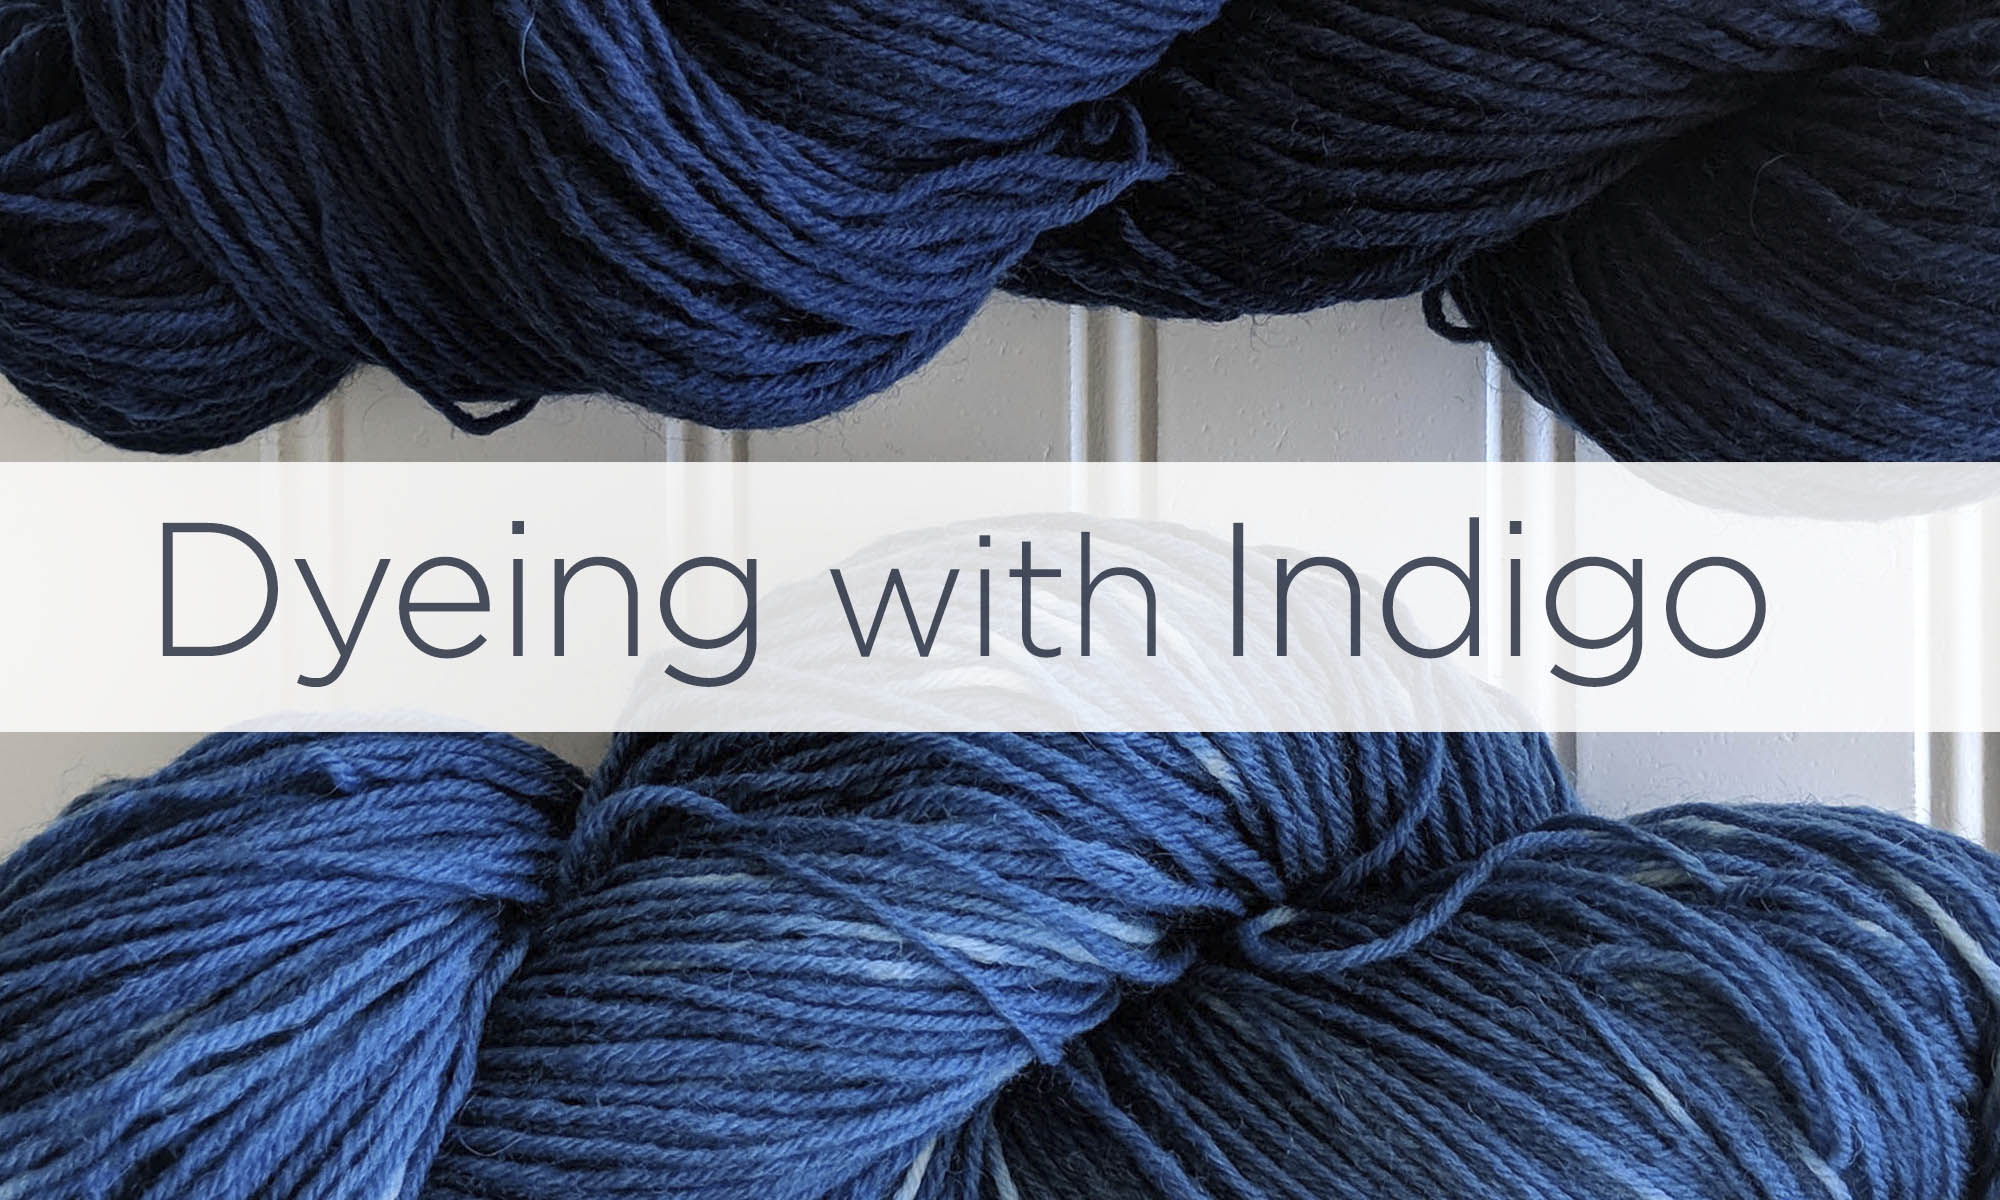
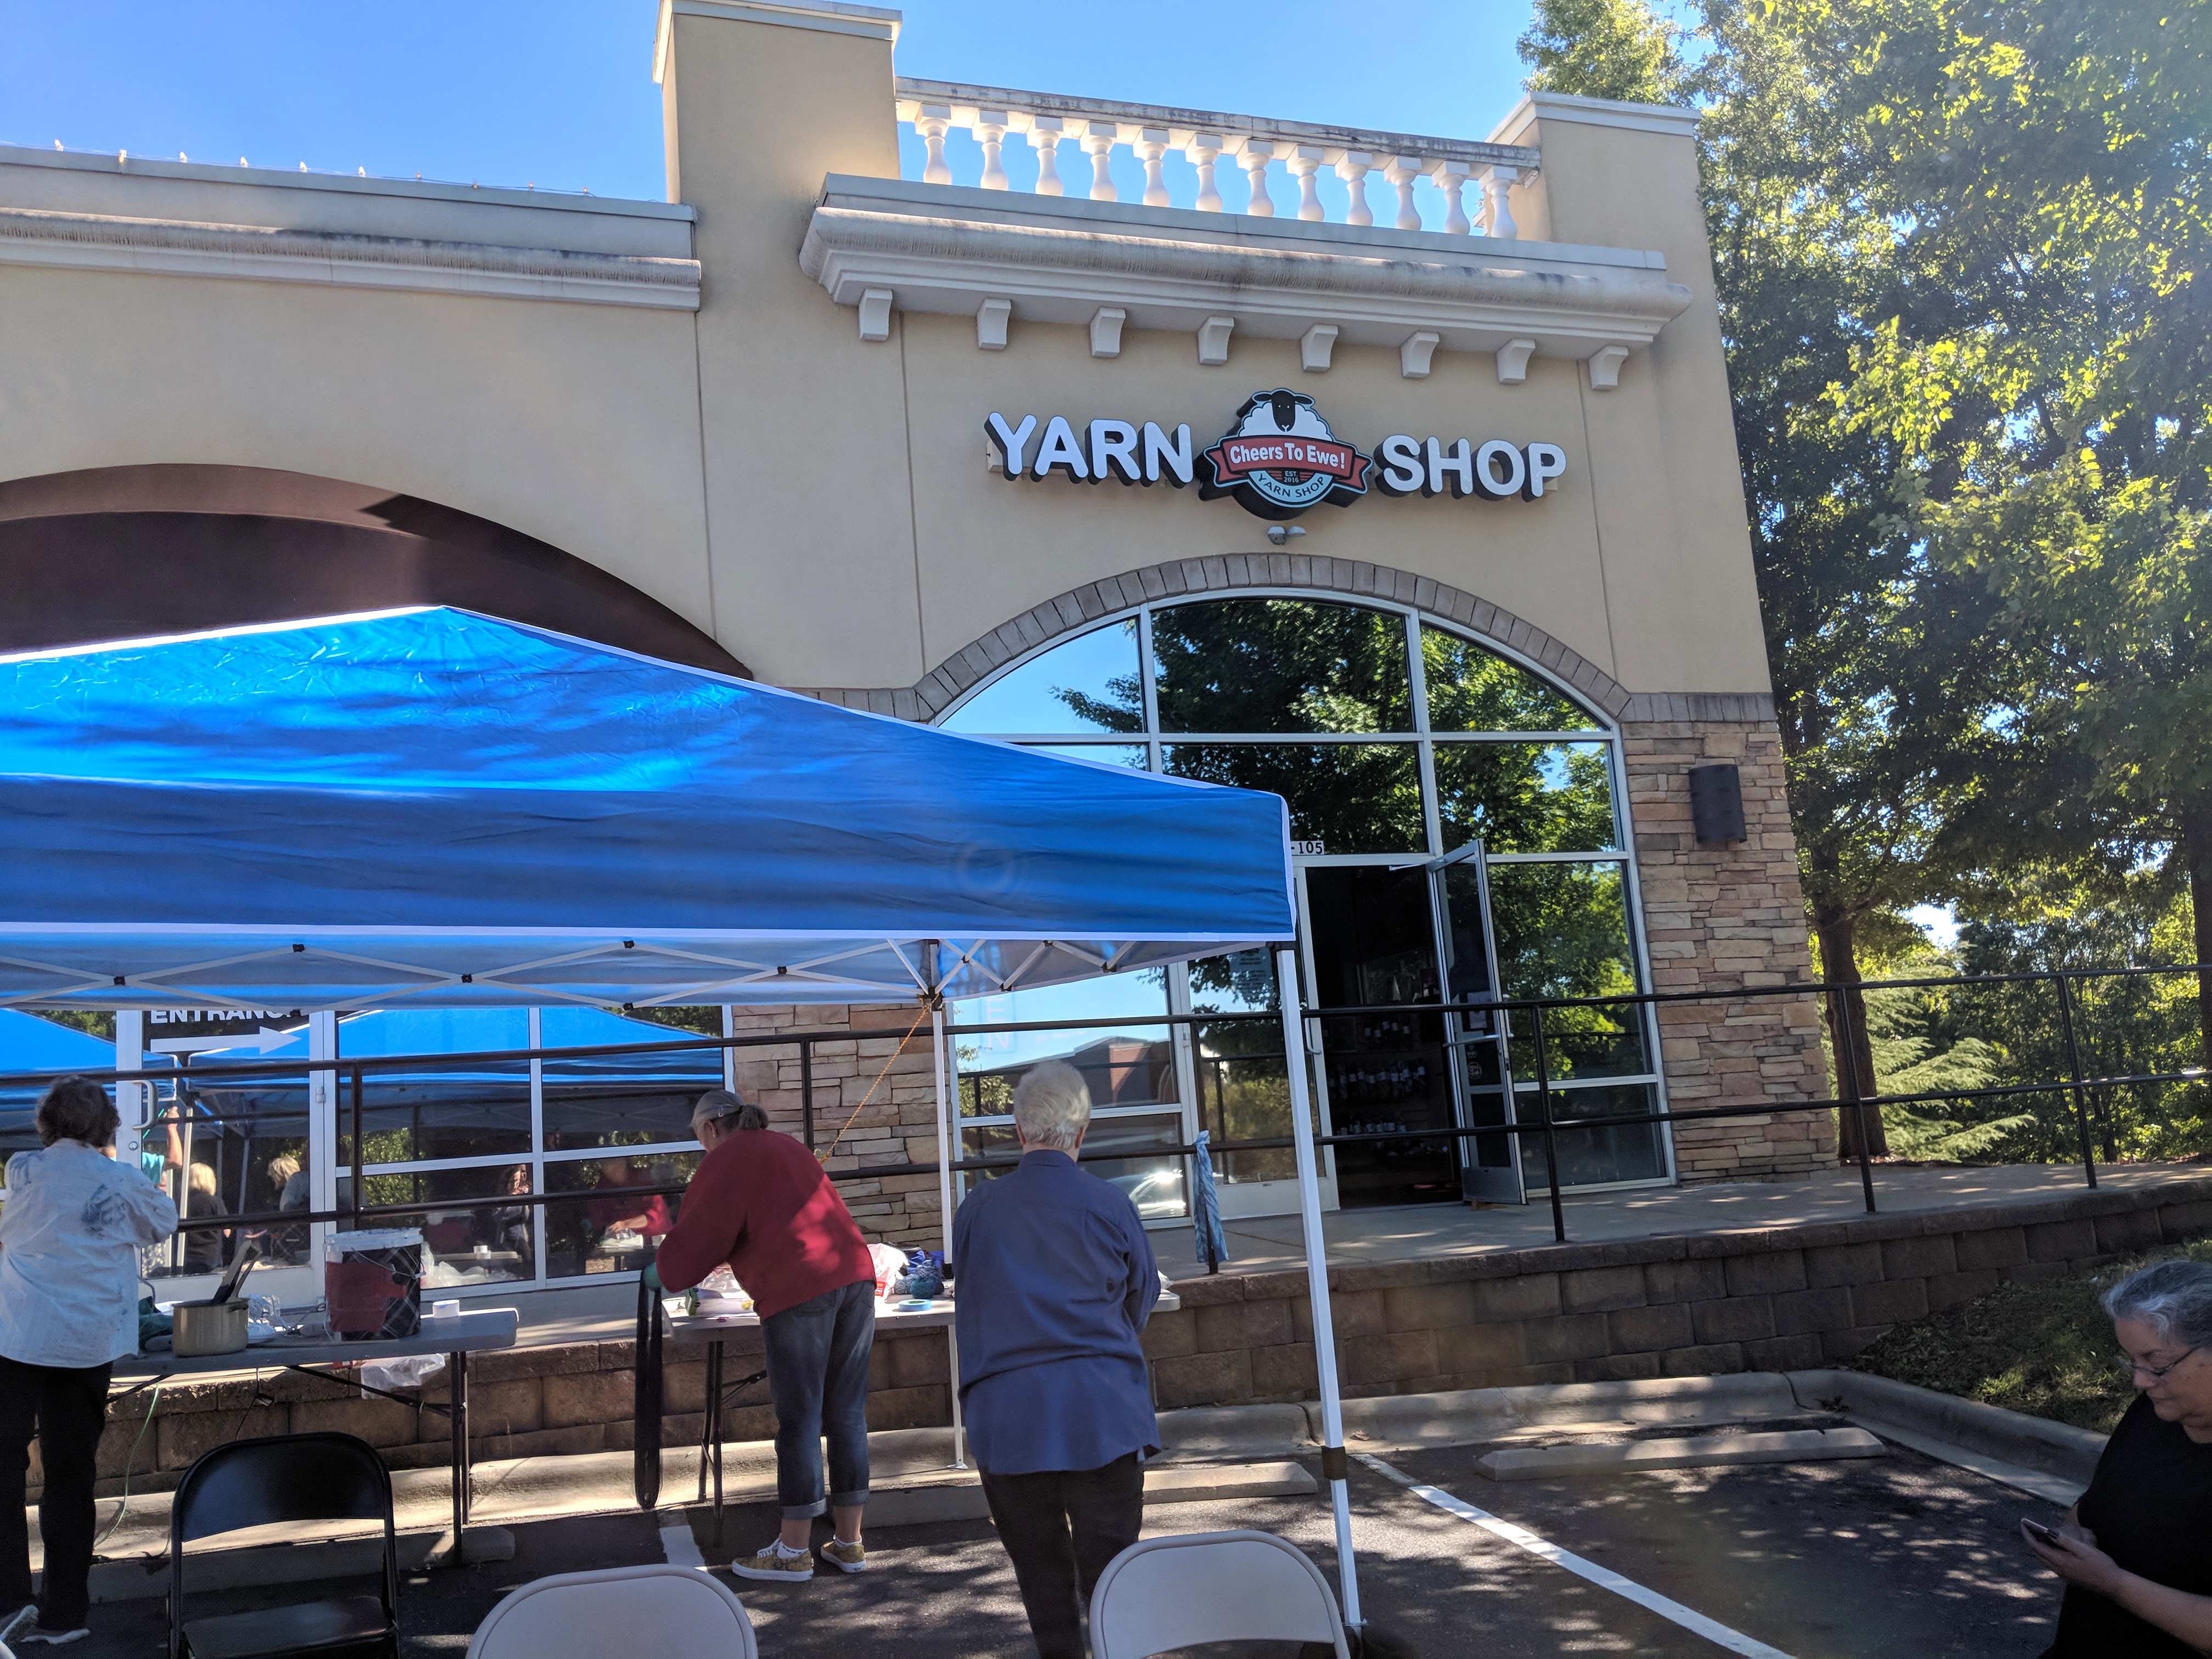
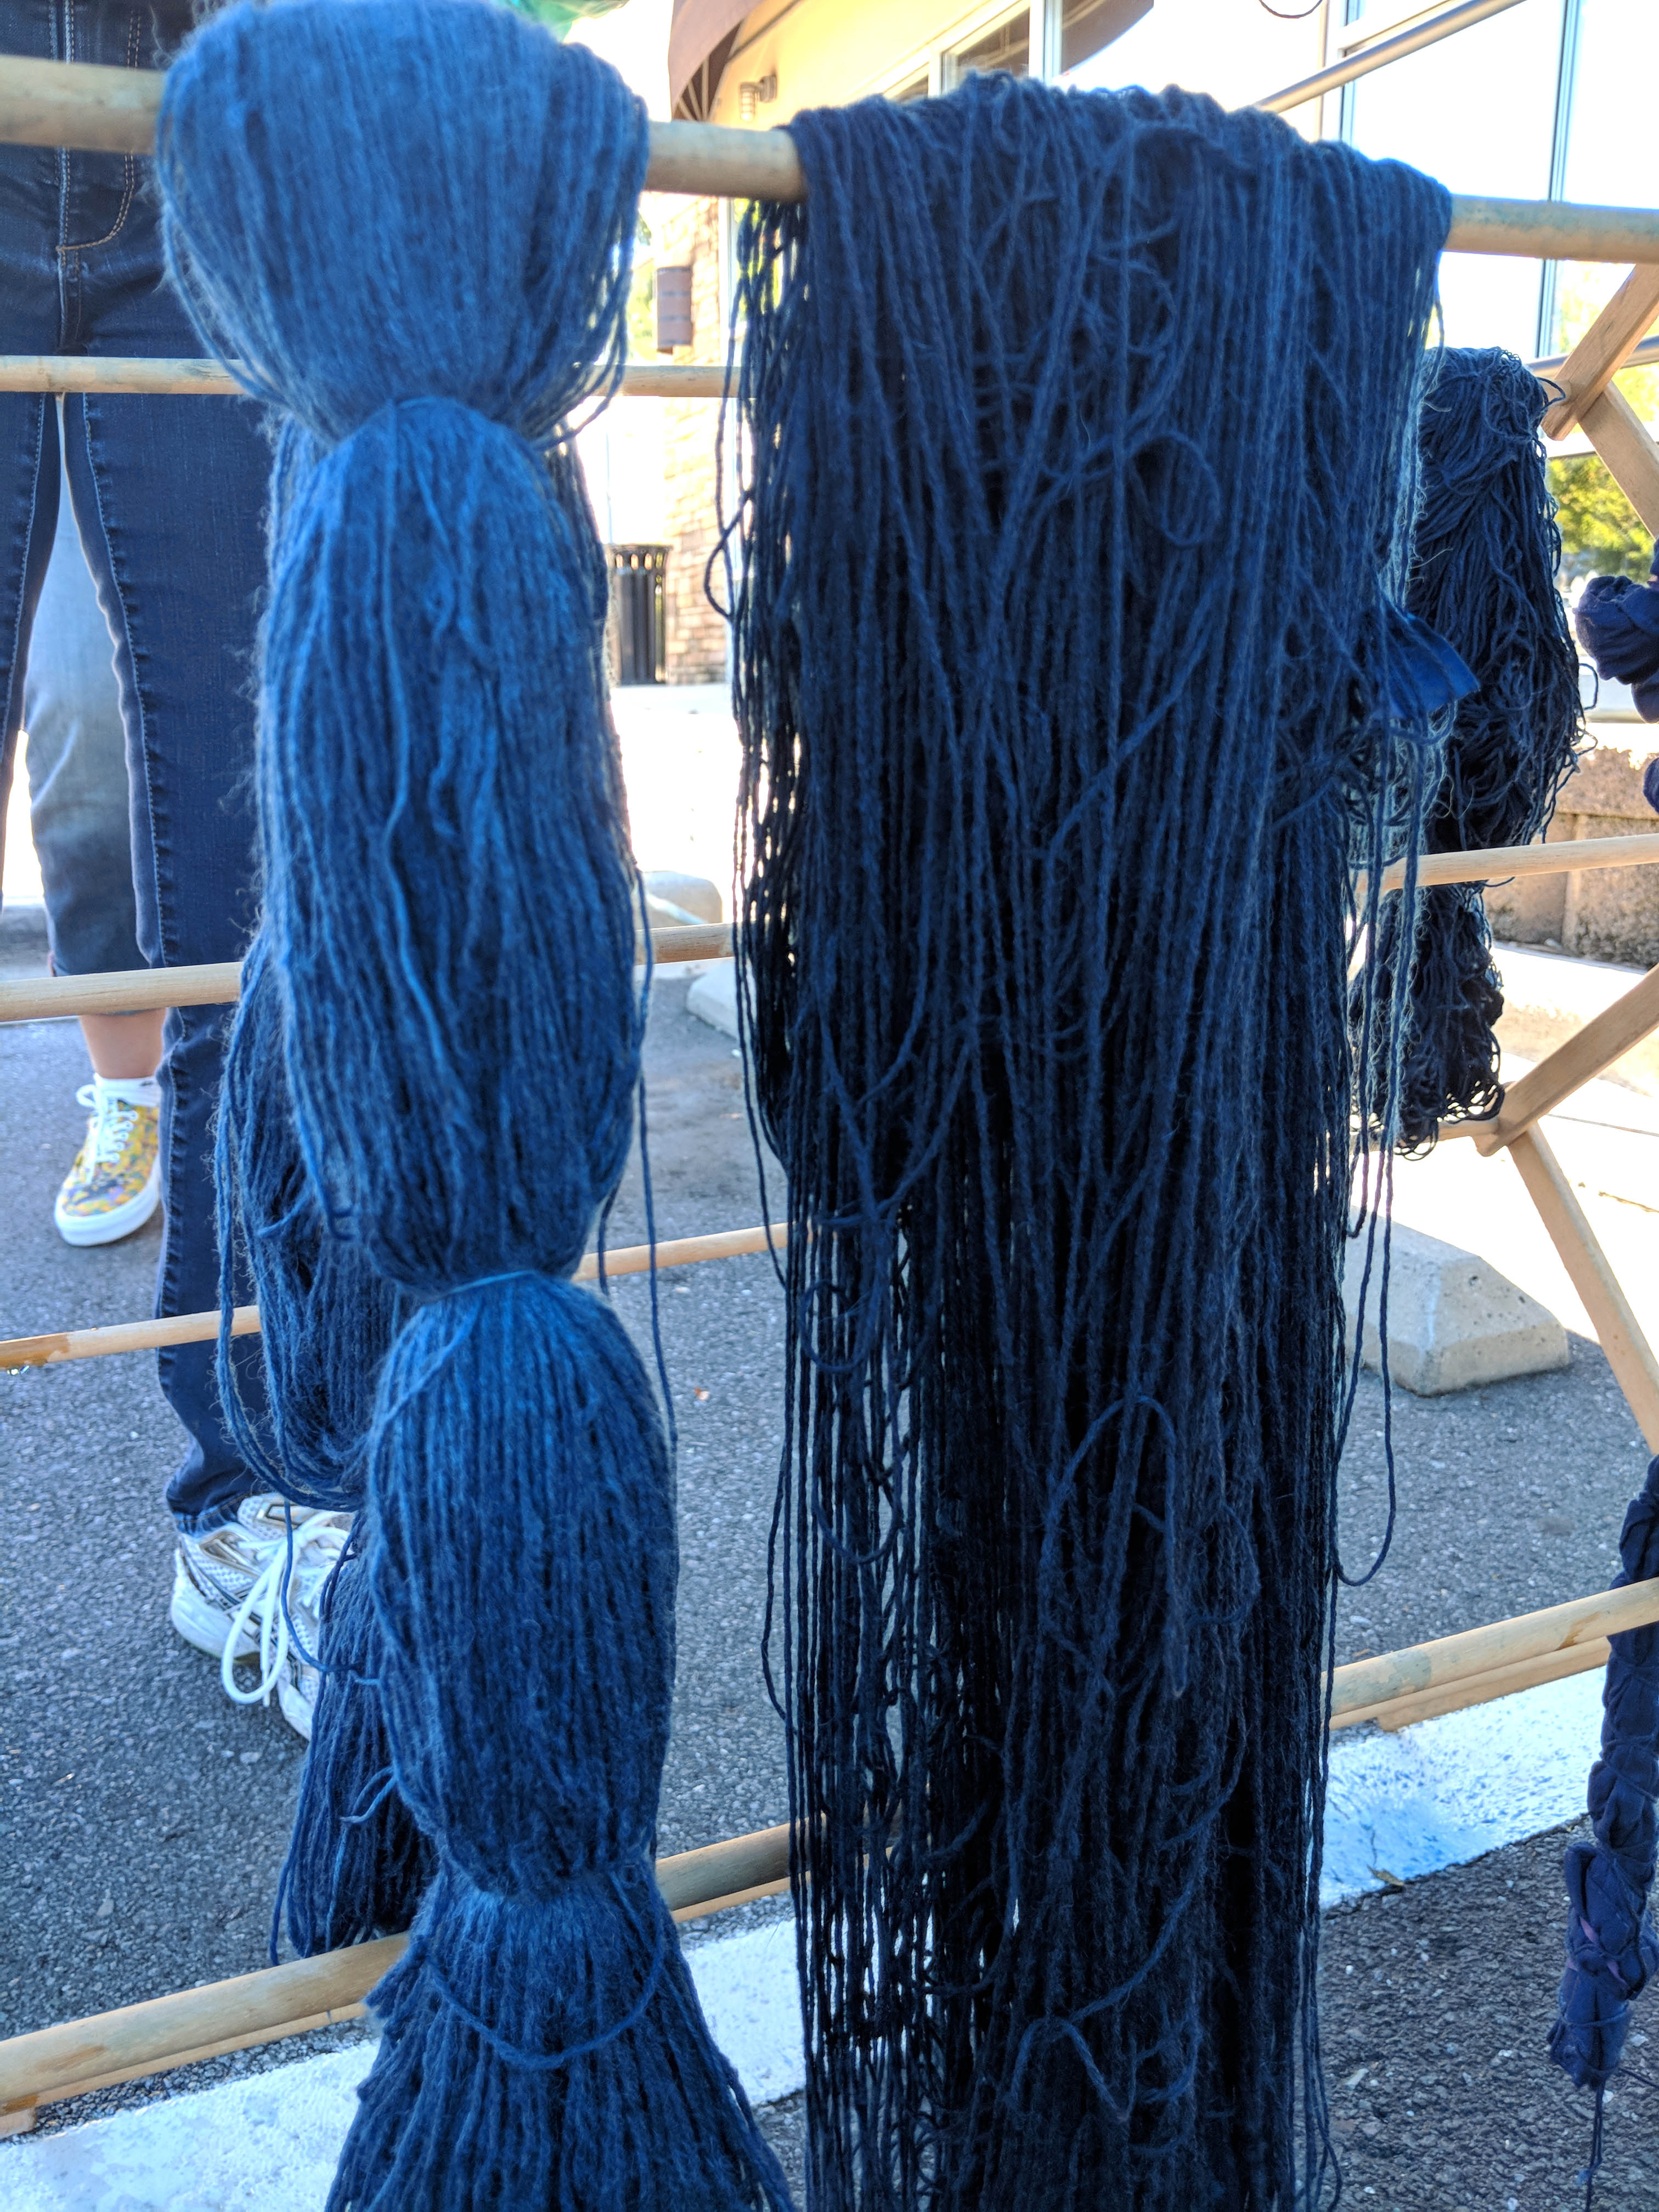
I knit, crochet, sew, weave, and do a lot of other random crafty things. Dyeing, however, has been unexplored territory for me. When my good friend Sandi asked if I’d like to join her for an indigo dyeing class at LYS Cheers to Ewe, I said yes immediately. I love trying new things! So please keep in mind, this post is absolutely not written by an expert yarn dyer.
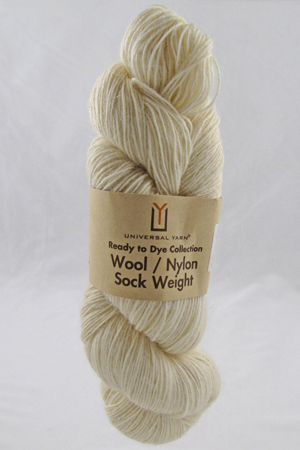
We happen to sell a nice variety of yarn especially for hand dyeing. Appropriately enough, we call it our “Ready to Dye” collection of yarns. I chose two skeins of our 02 Wool/Nylon blend to dye.
This class was taught by local fiber artist, Sue Helmken. When Sandi and I showed up for class with our yarn, Sue was already preparing indigo dye baths. This is a process that involves carefully mixing water, soda ash, salt, sodium hydroxide, and indigo. Though I’m fascinated by the science of it all, I was just as happy to be able to show up, dye my yarn, and skip the prep. But this is something I would love to explore more in the future. If only there were more hours in the day!
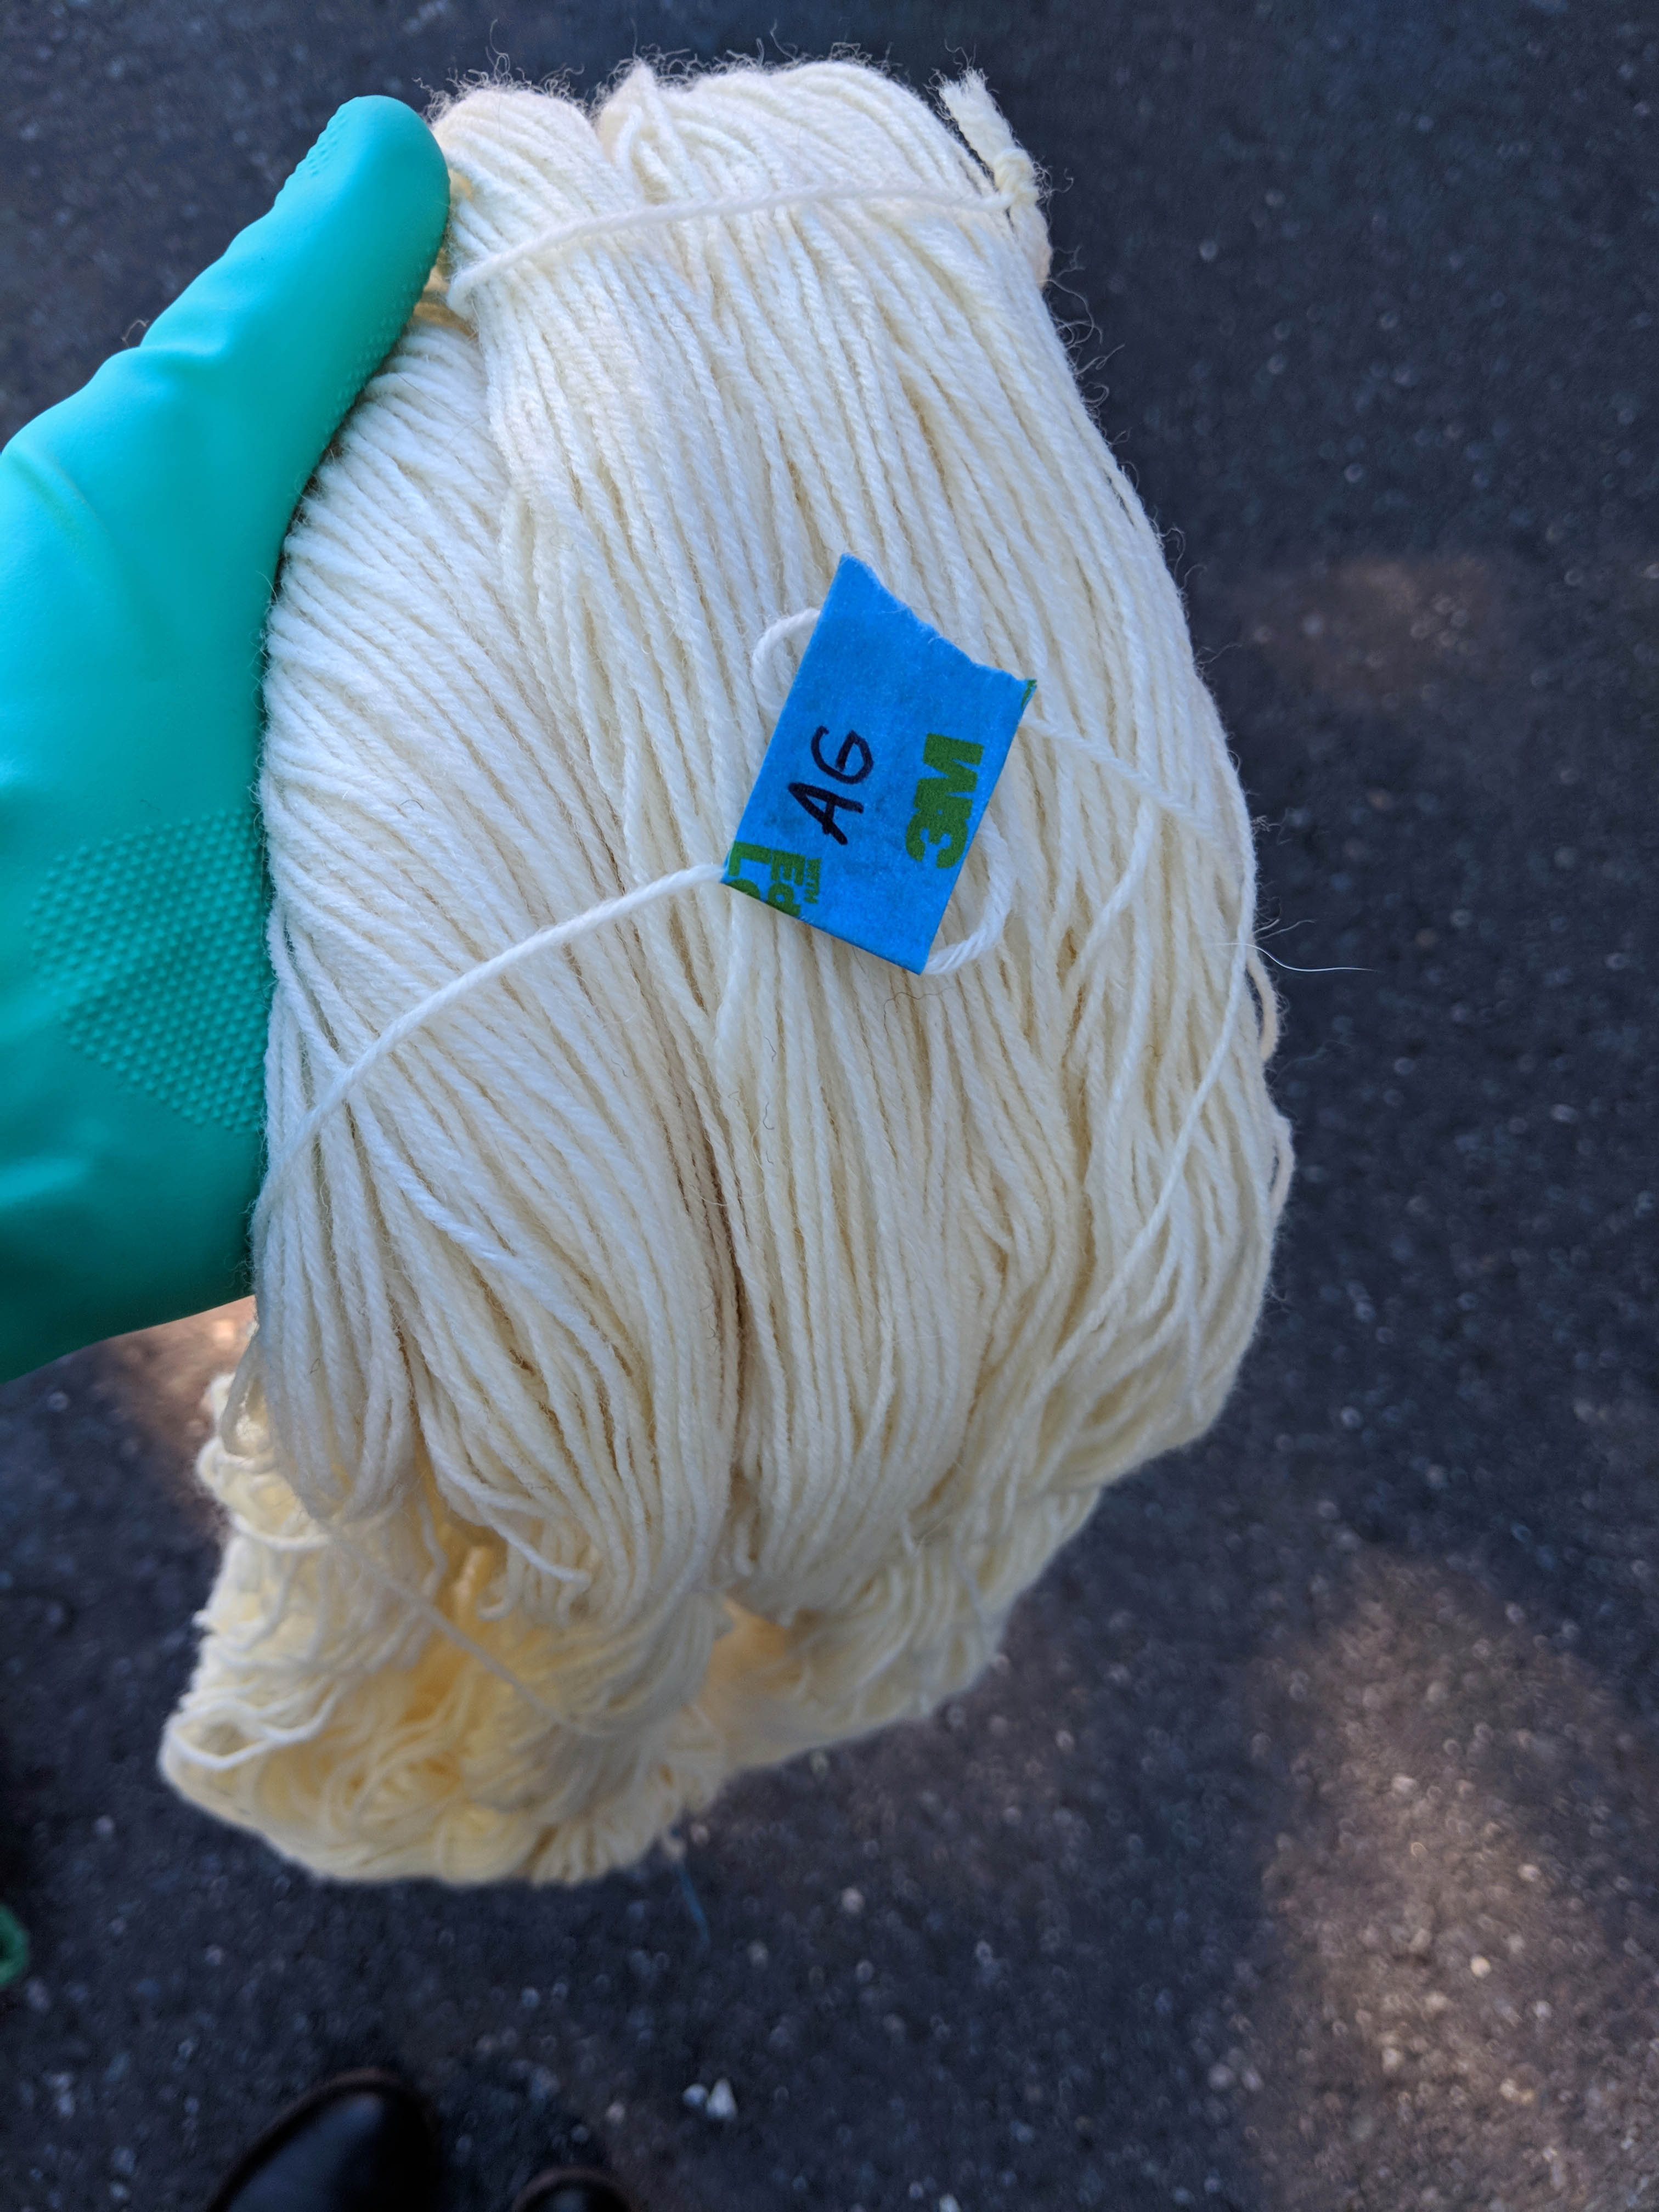
Since all of our hanks of undyed yarn looked the same, we had to tag skeins with our initials to tell them apart.
I plan to do a weaving project with my beautiful blue yarn, so I thought it would be fun to dye the hanks a bit differently.
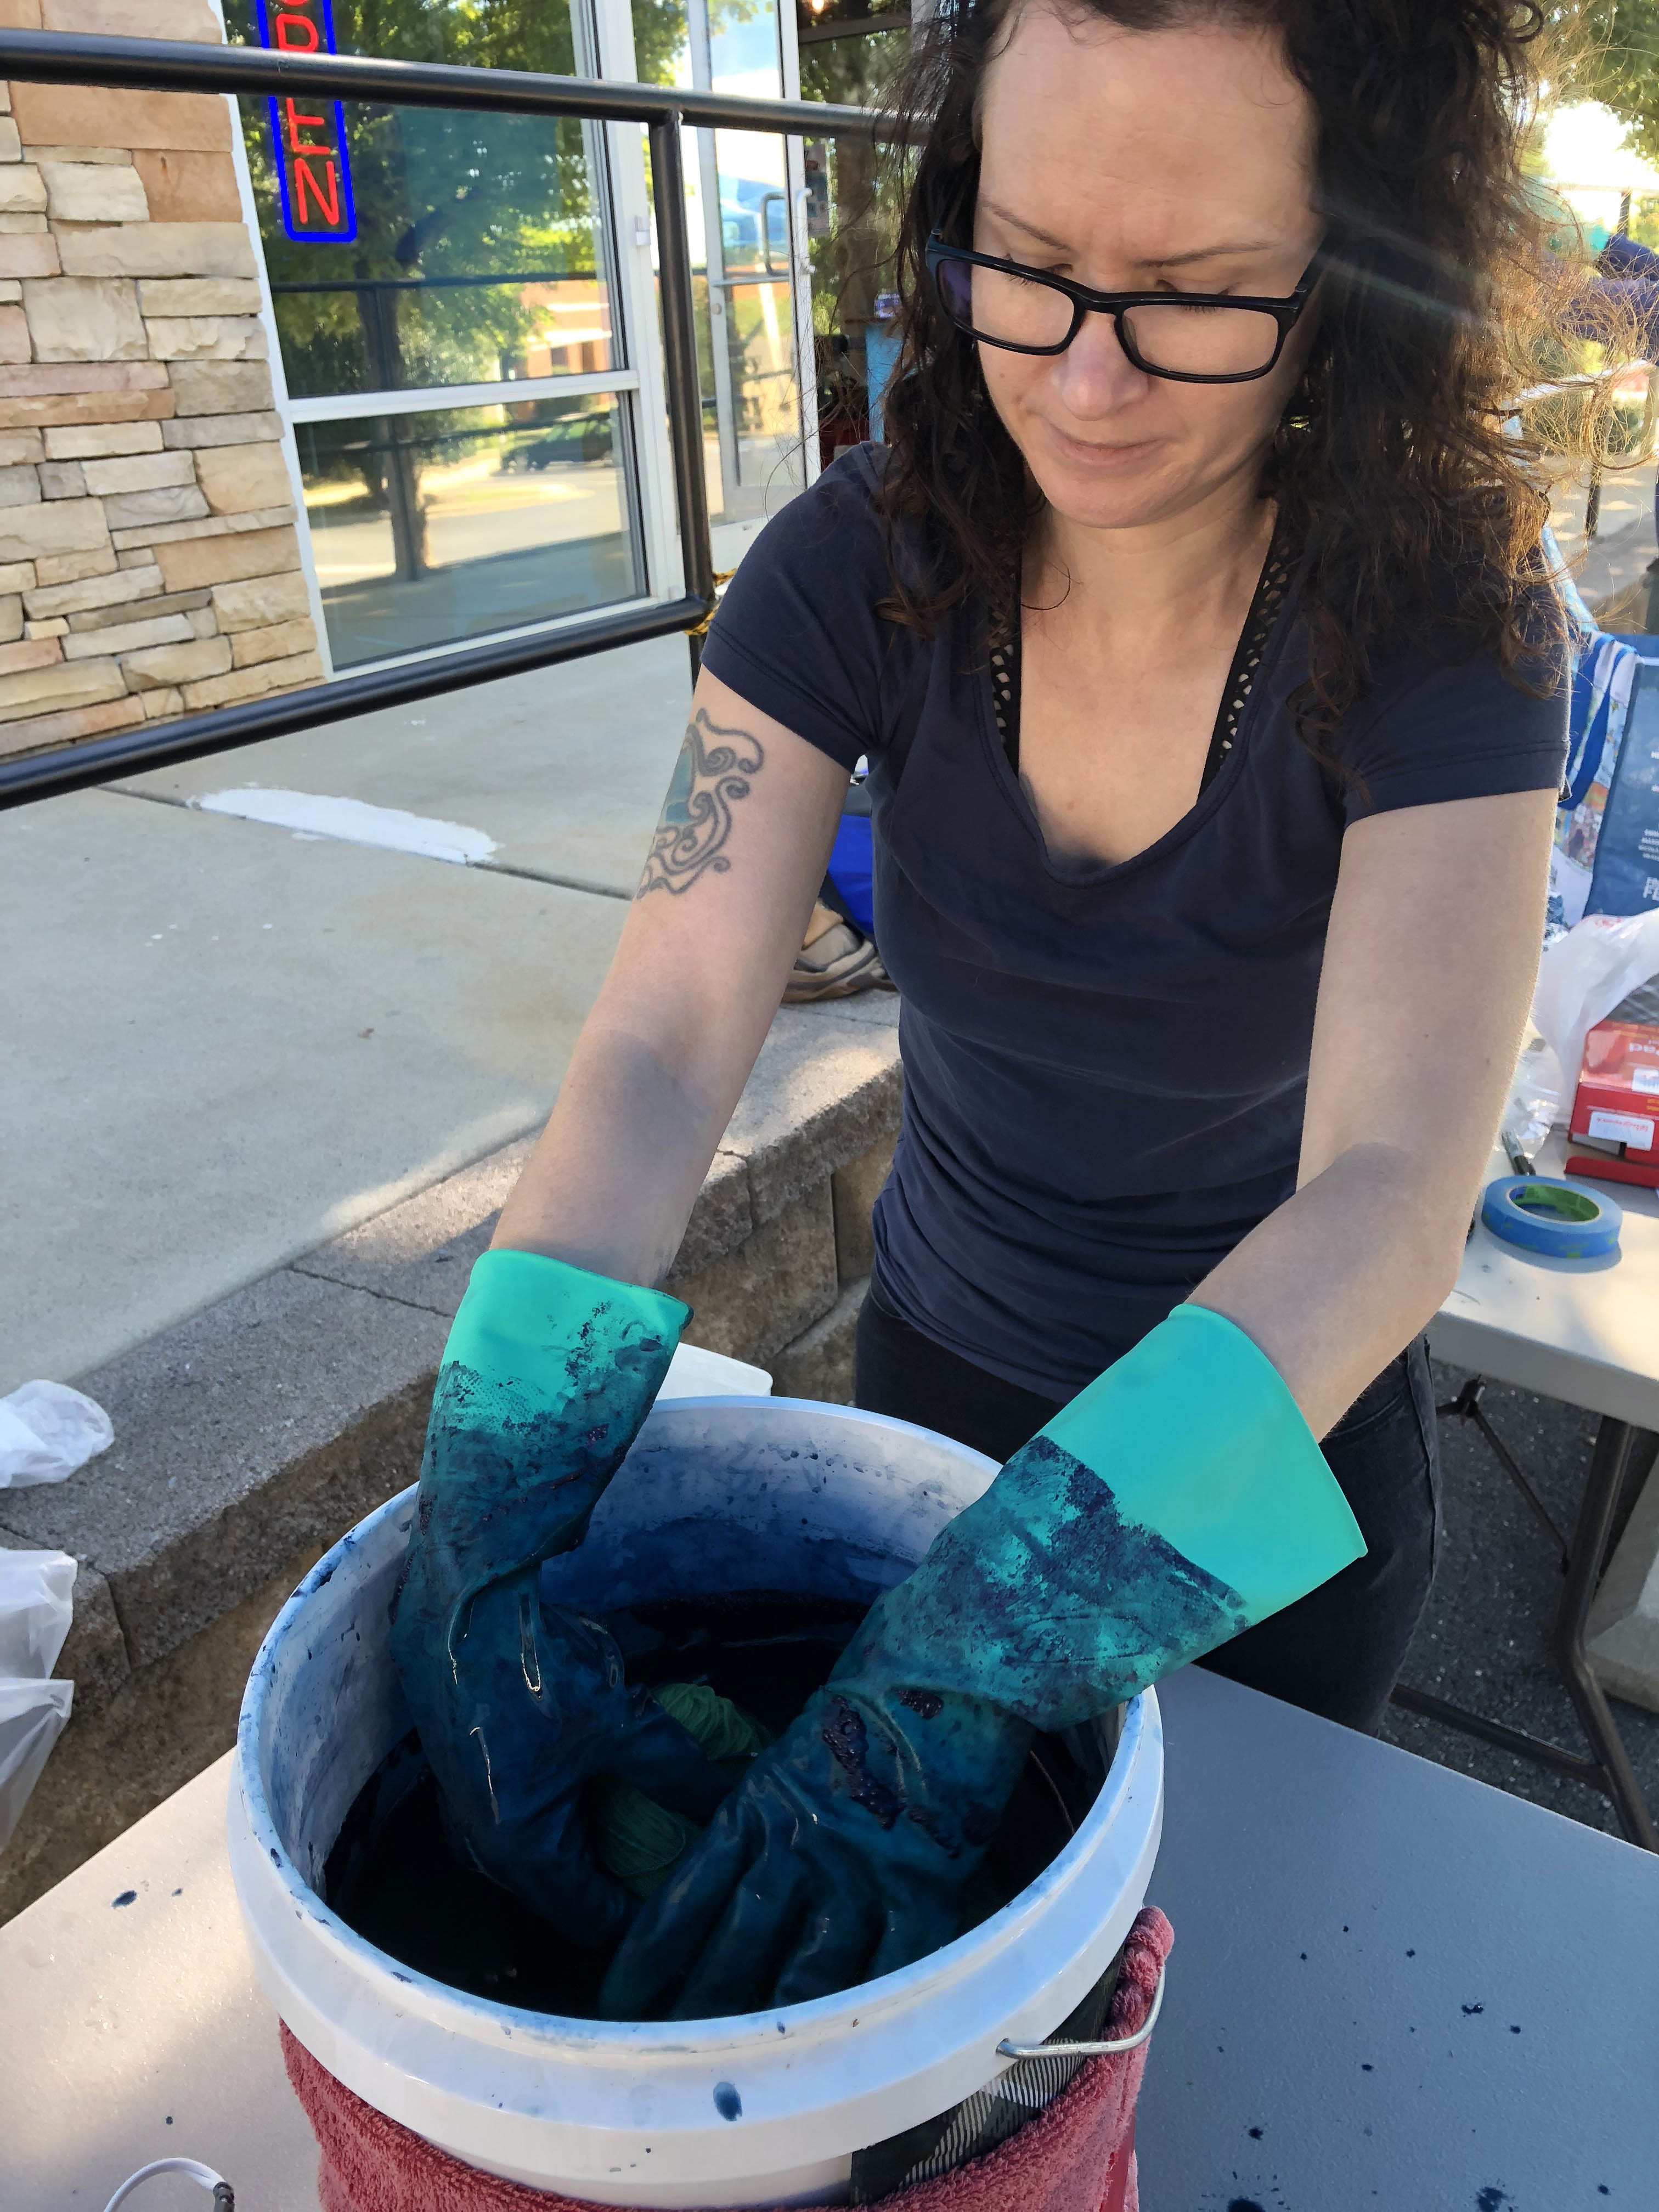
Squeezing out the dye from my yarn. Even with gloves, I still managed to leave with blue arms!
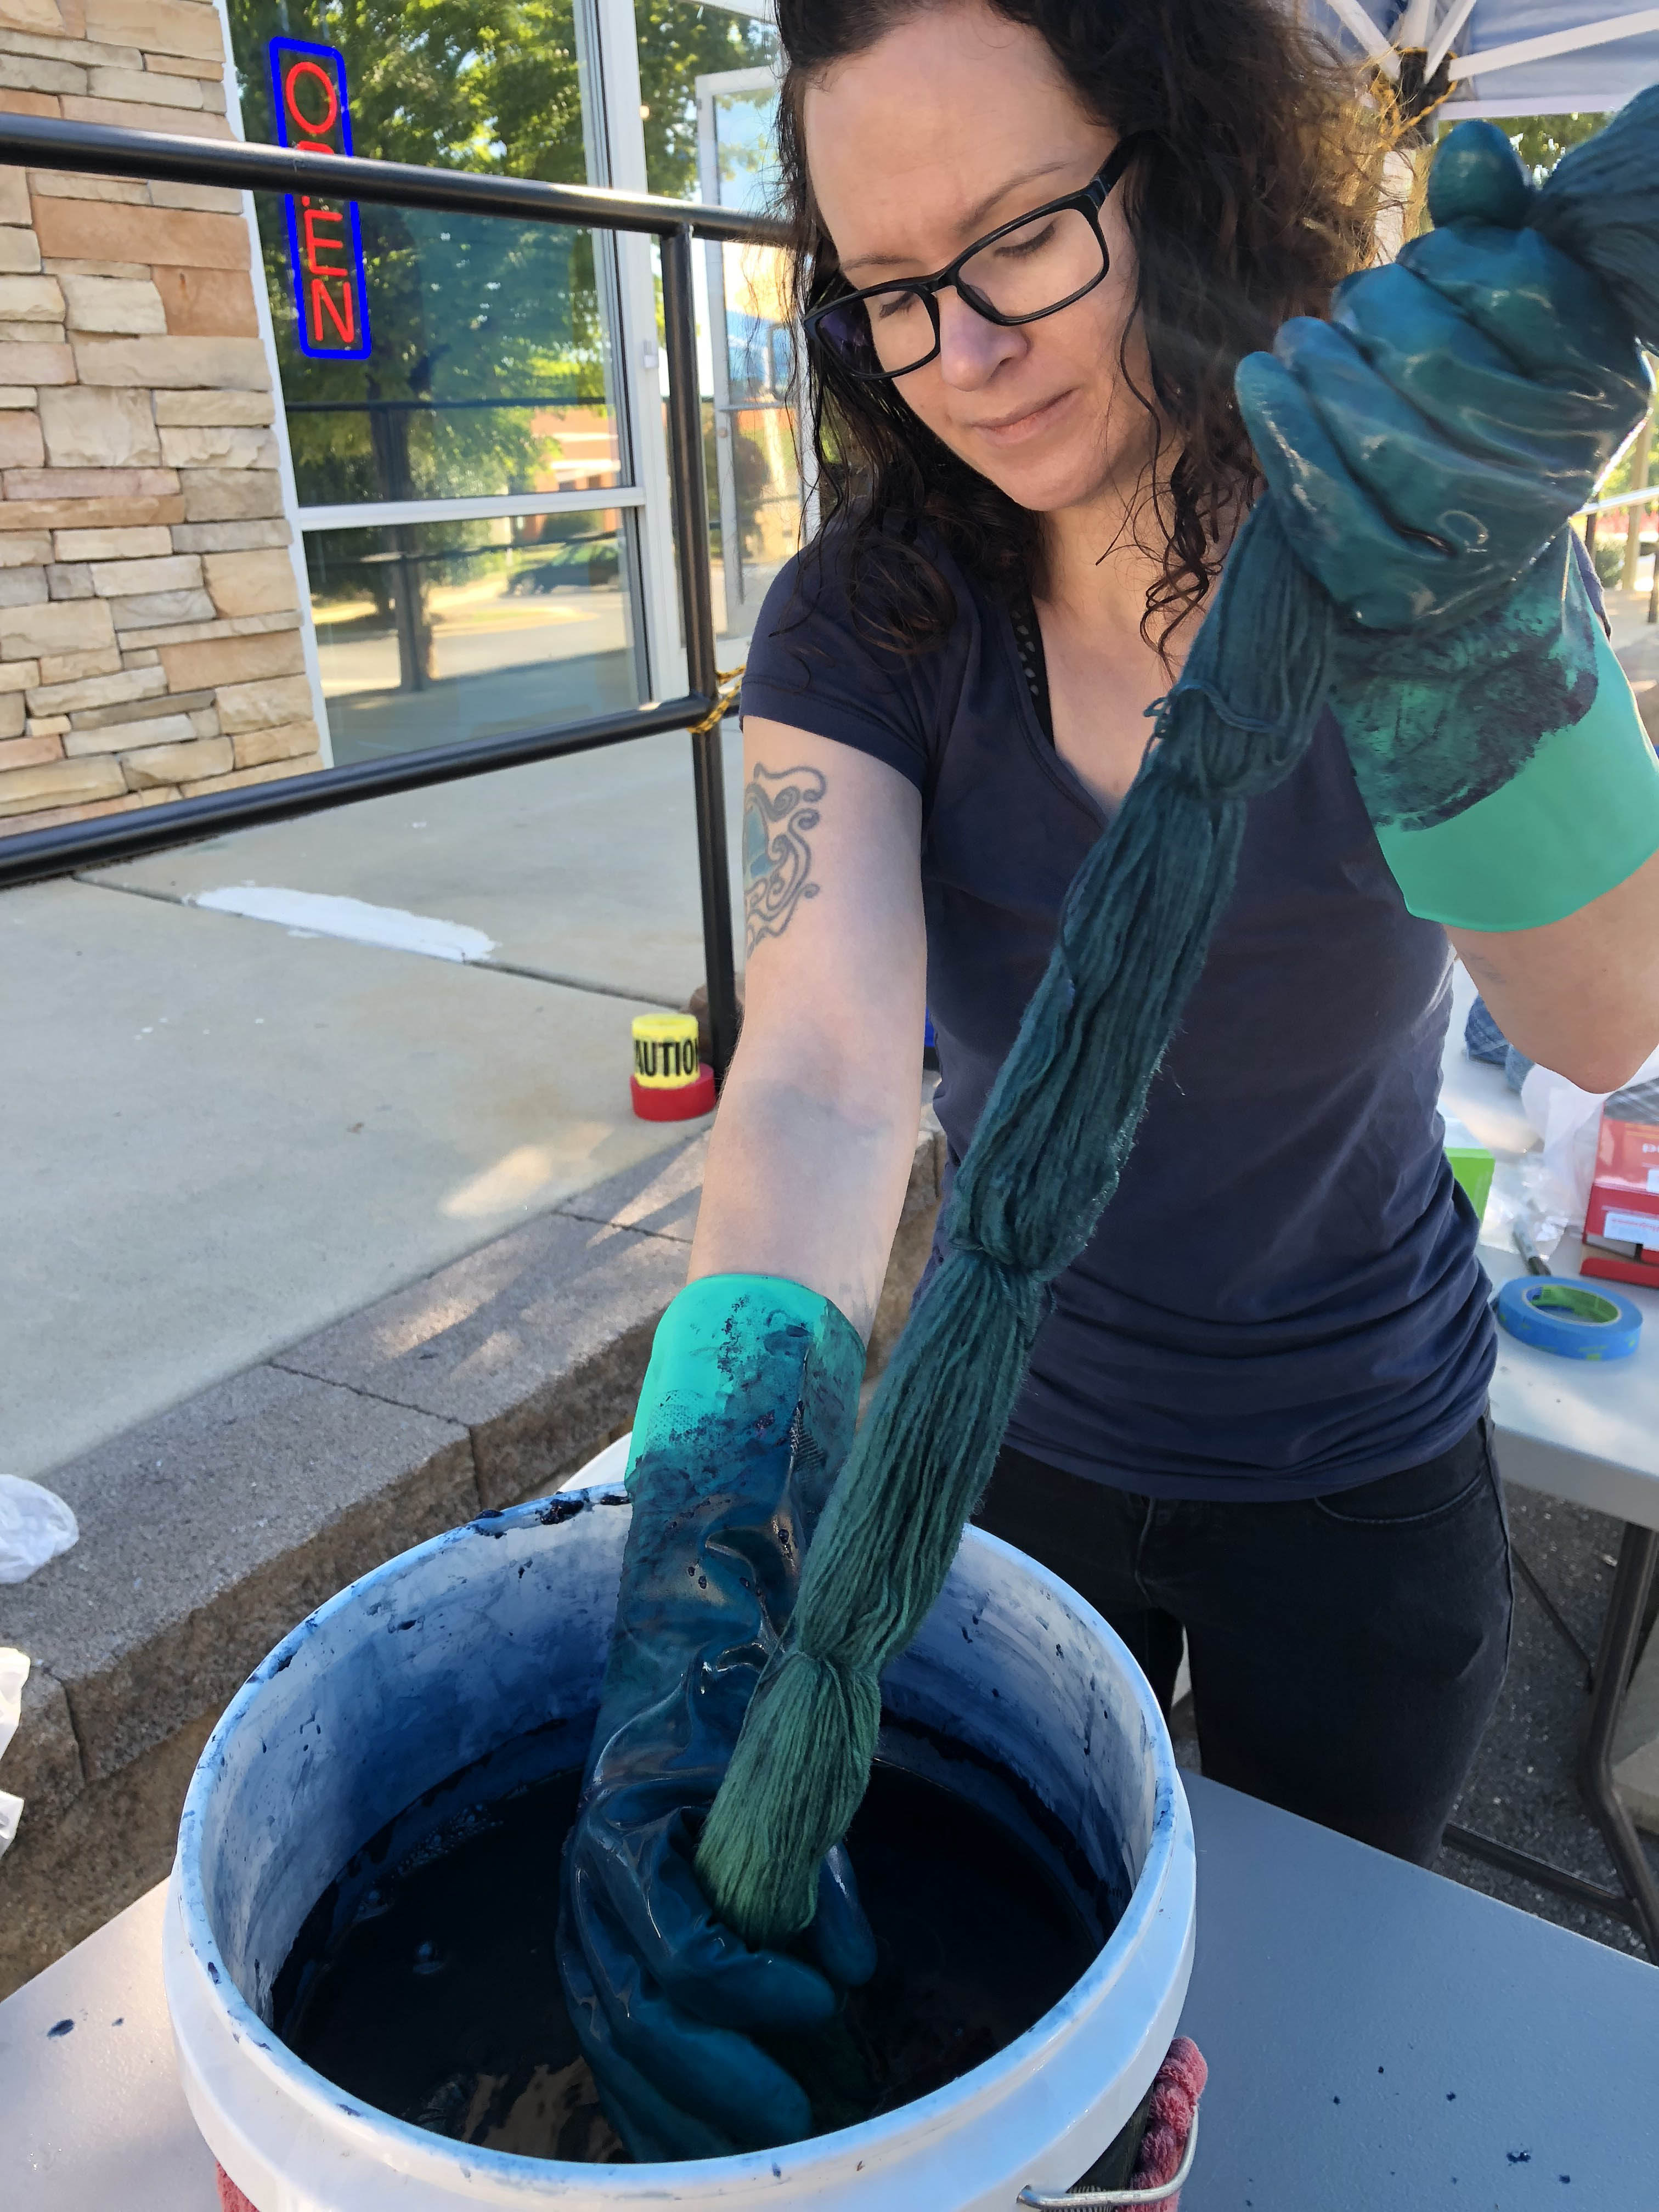
To achieve different effects in the two hanks, I processed one of them in the dyebath twice for a deeper color. And for the other, I tied off a few spots tightly so that the dye wouldn’t reach them, and only processed it once.
The results were just what I expected. That’s always nice!
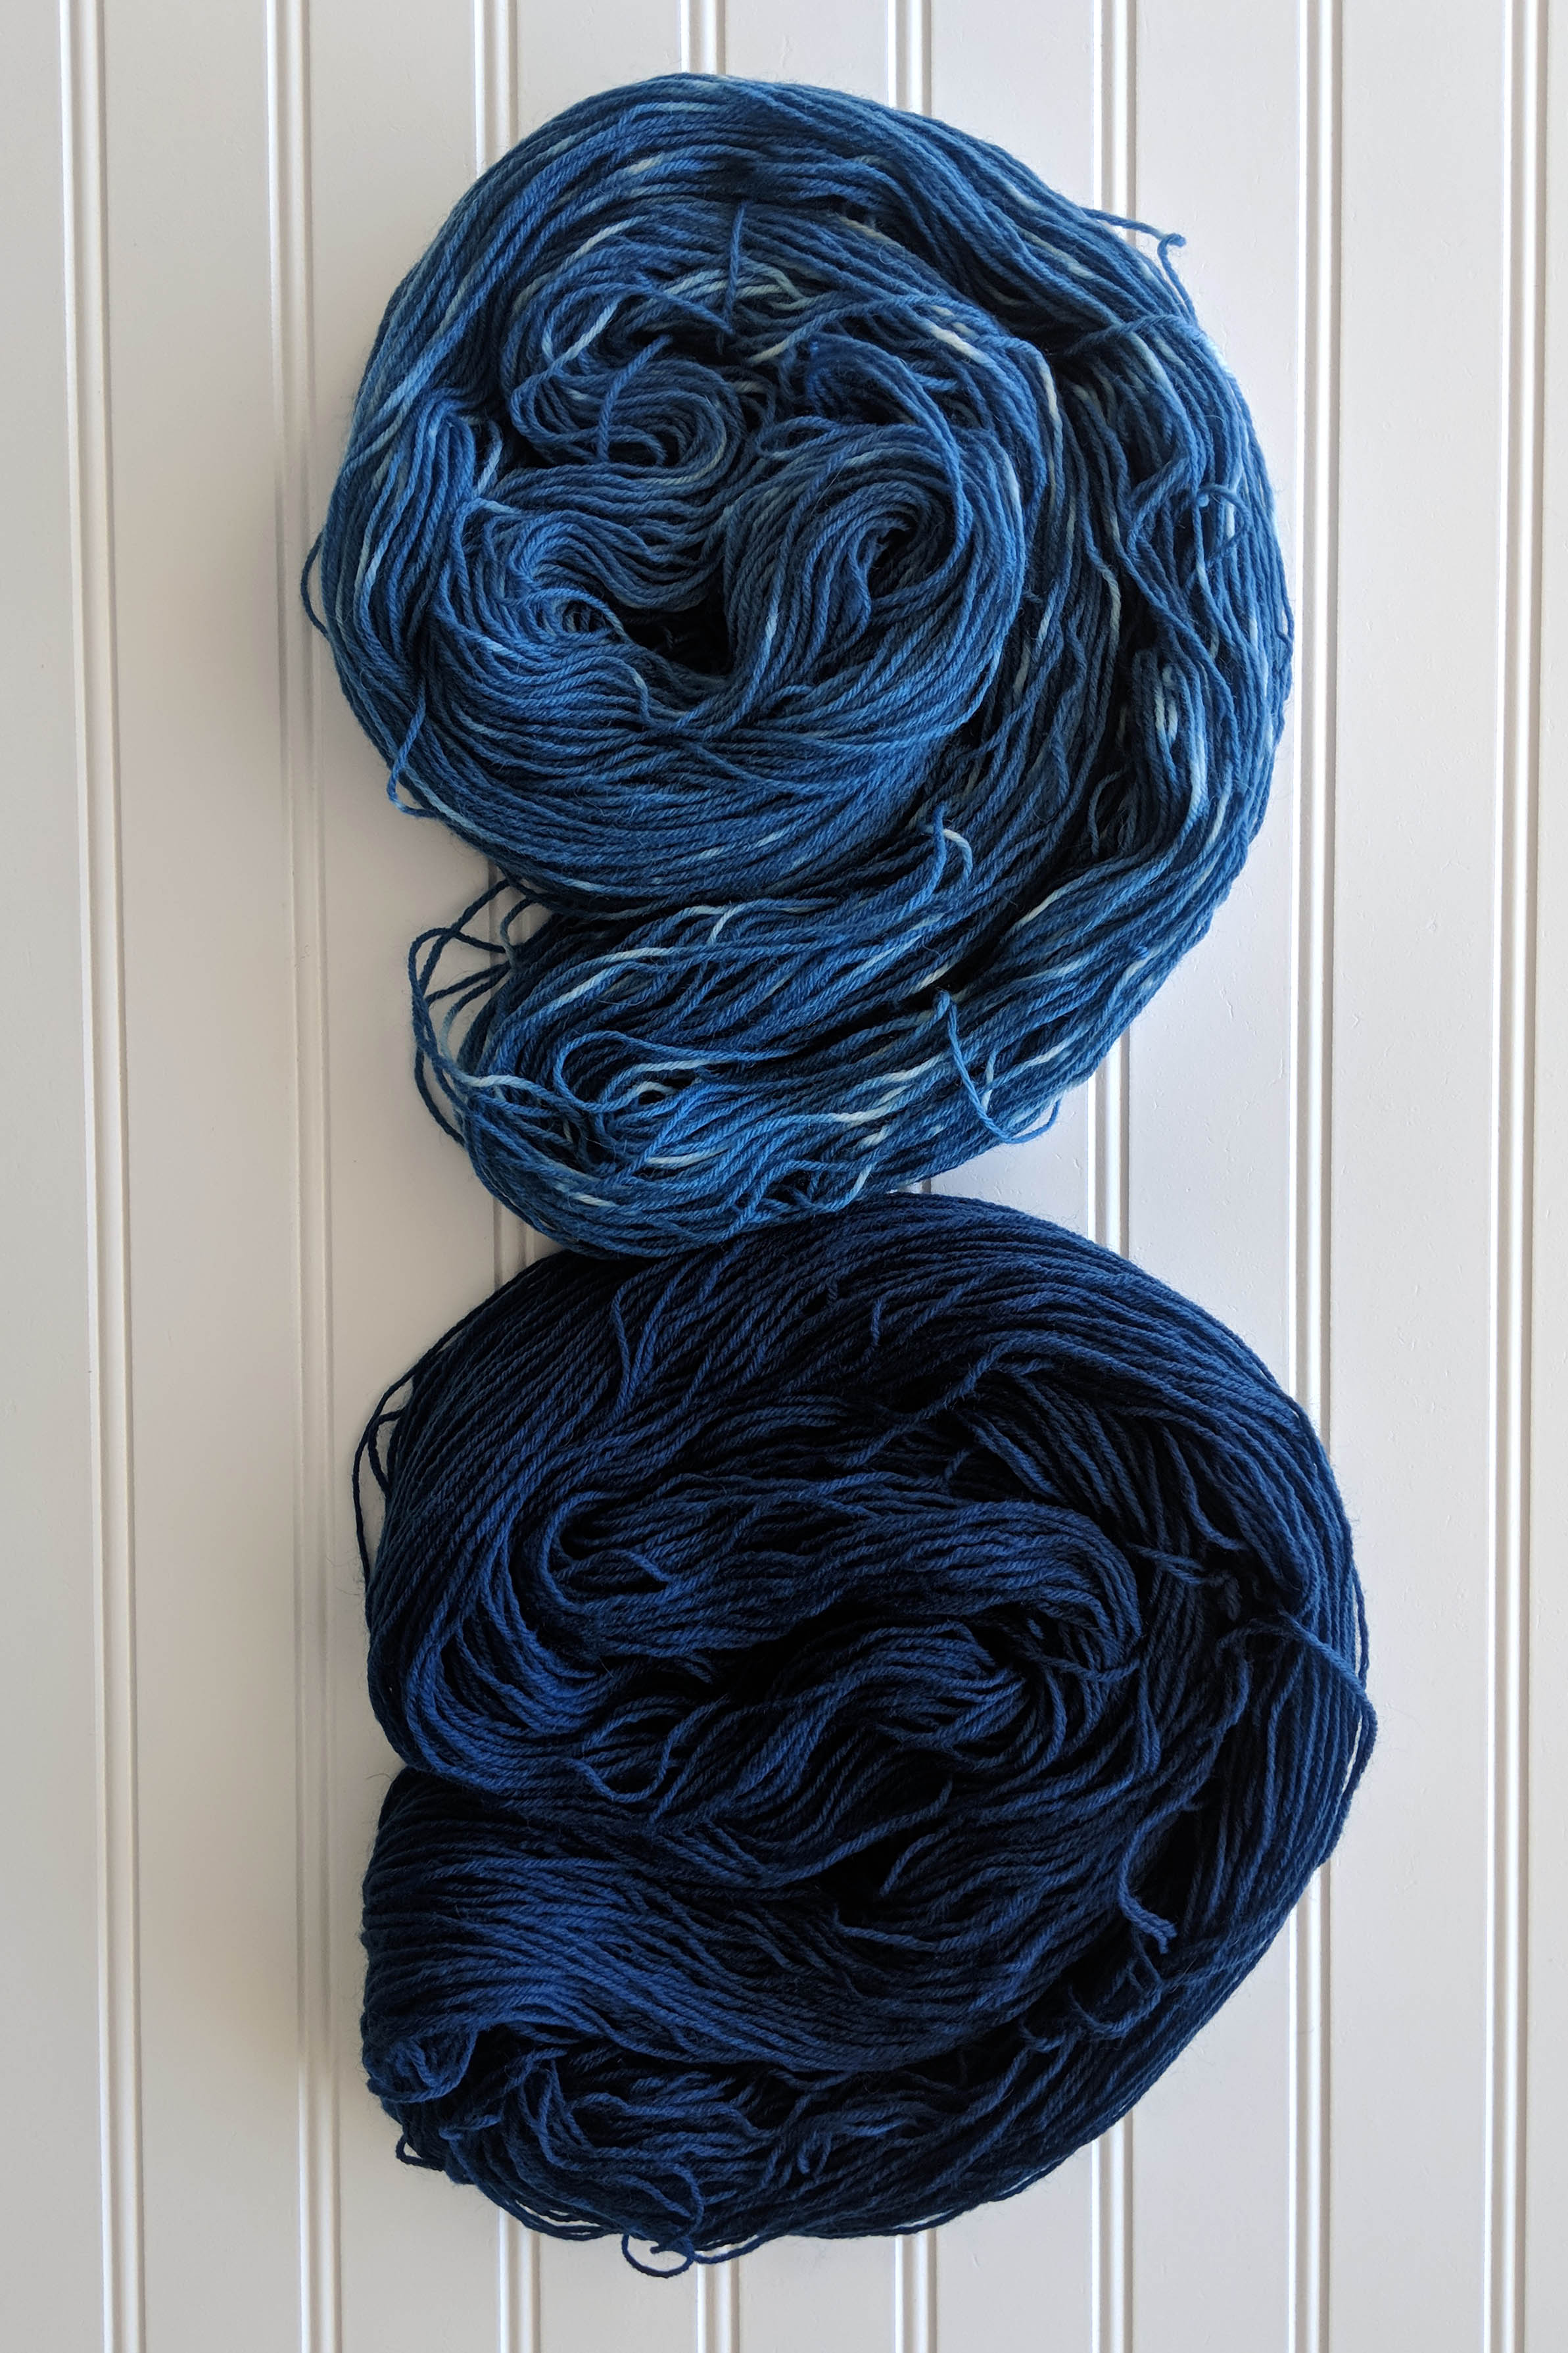
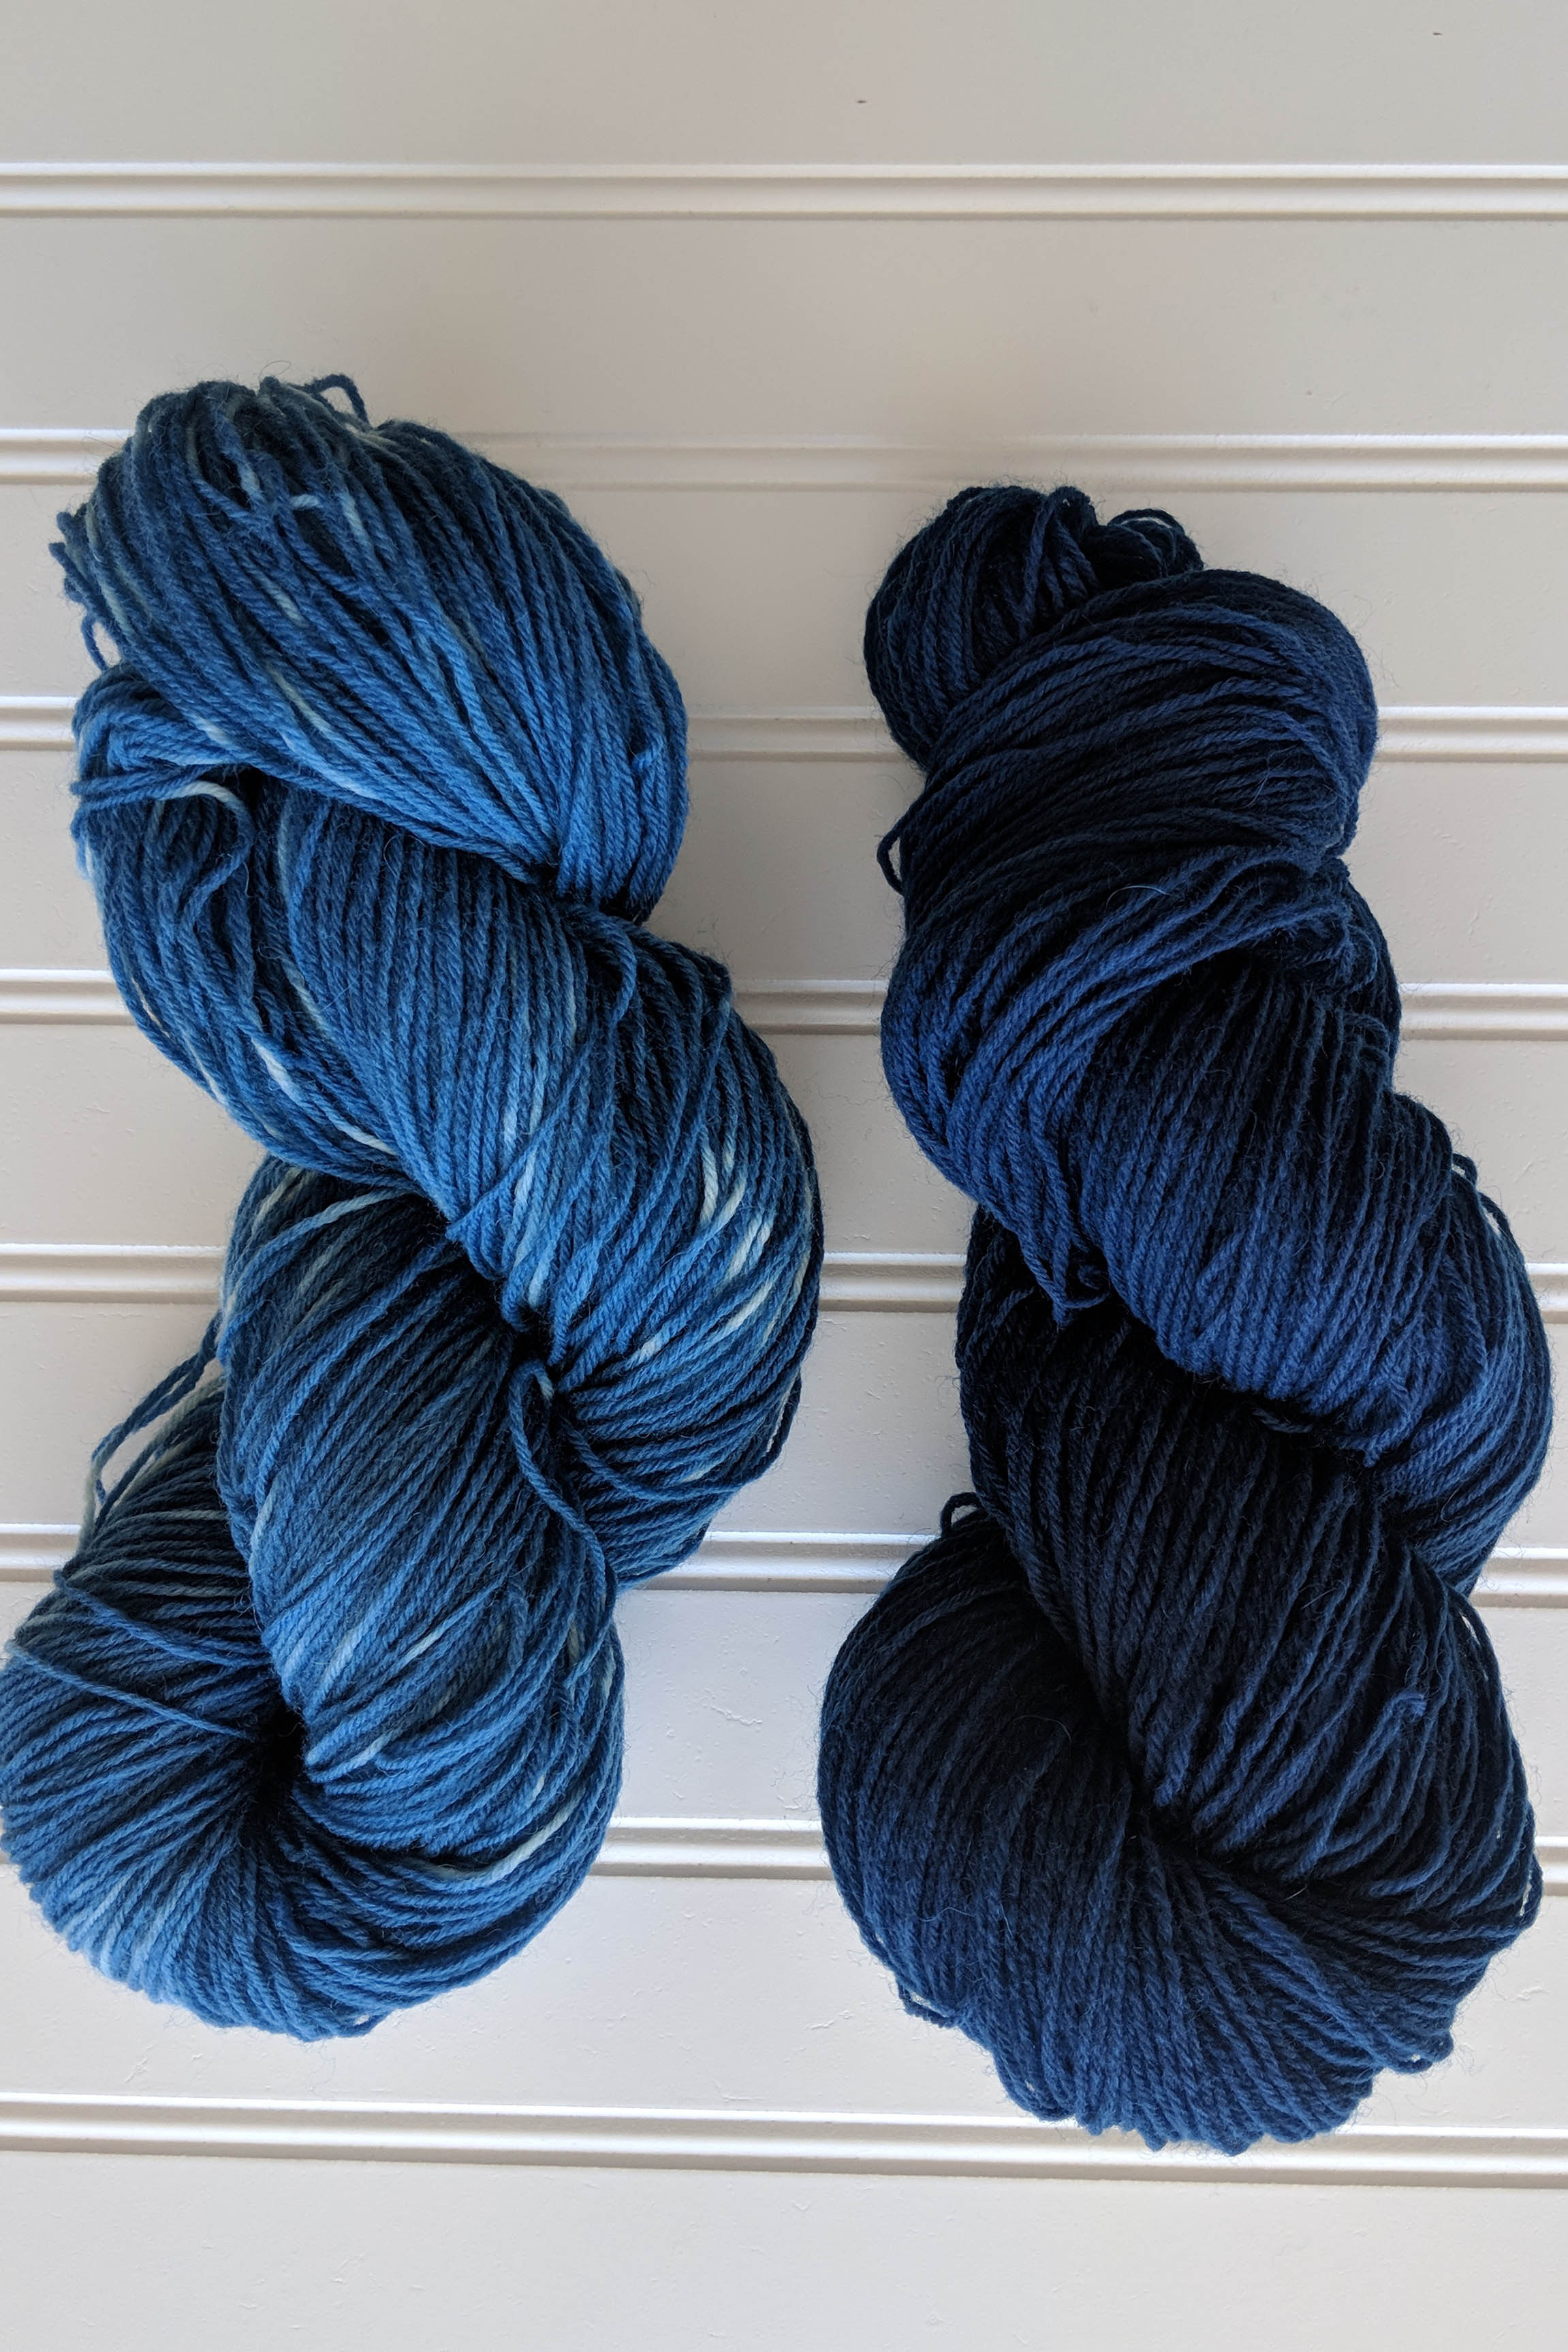
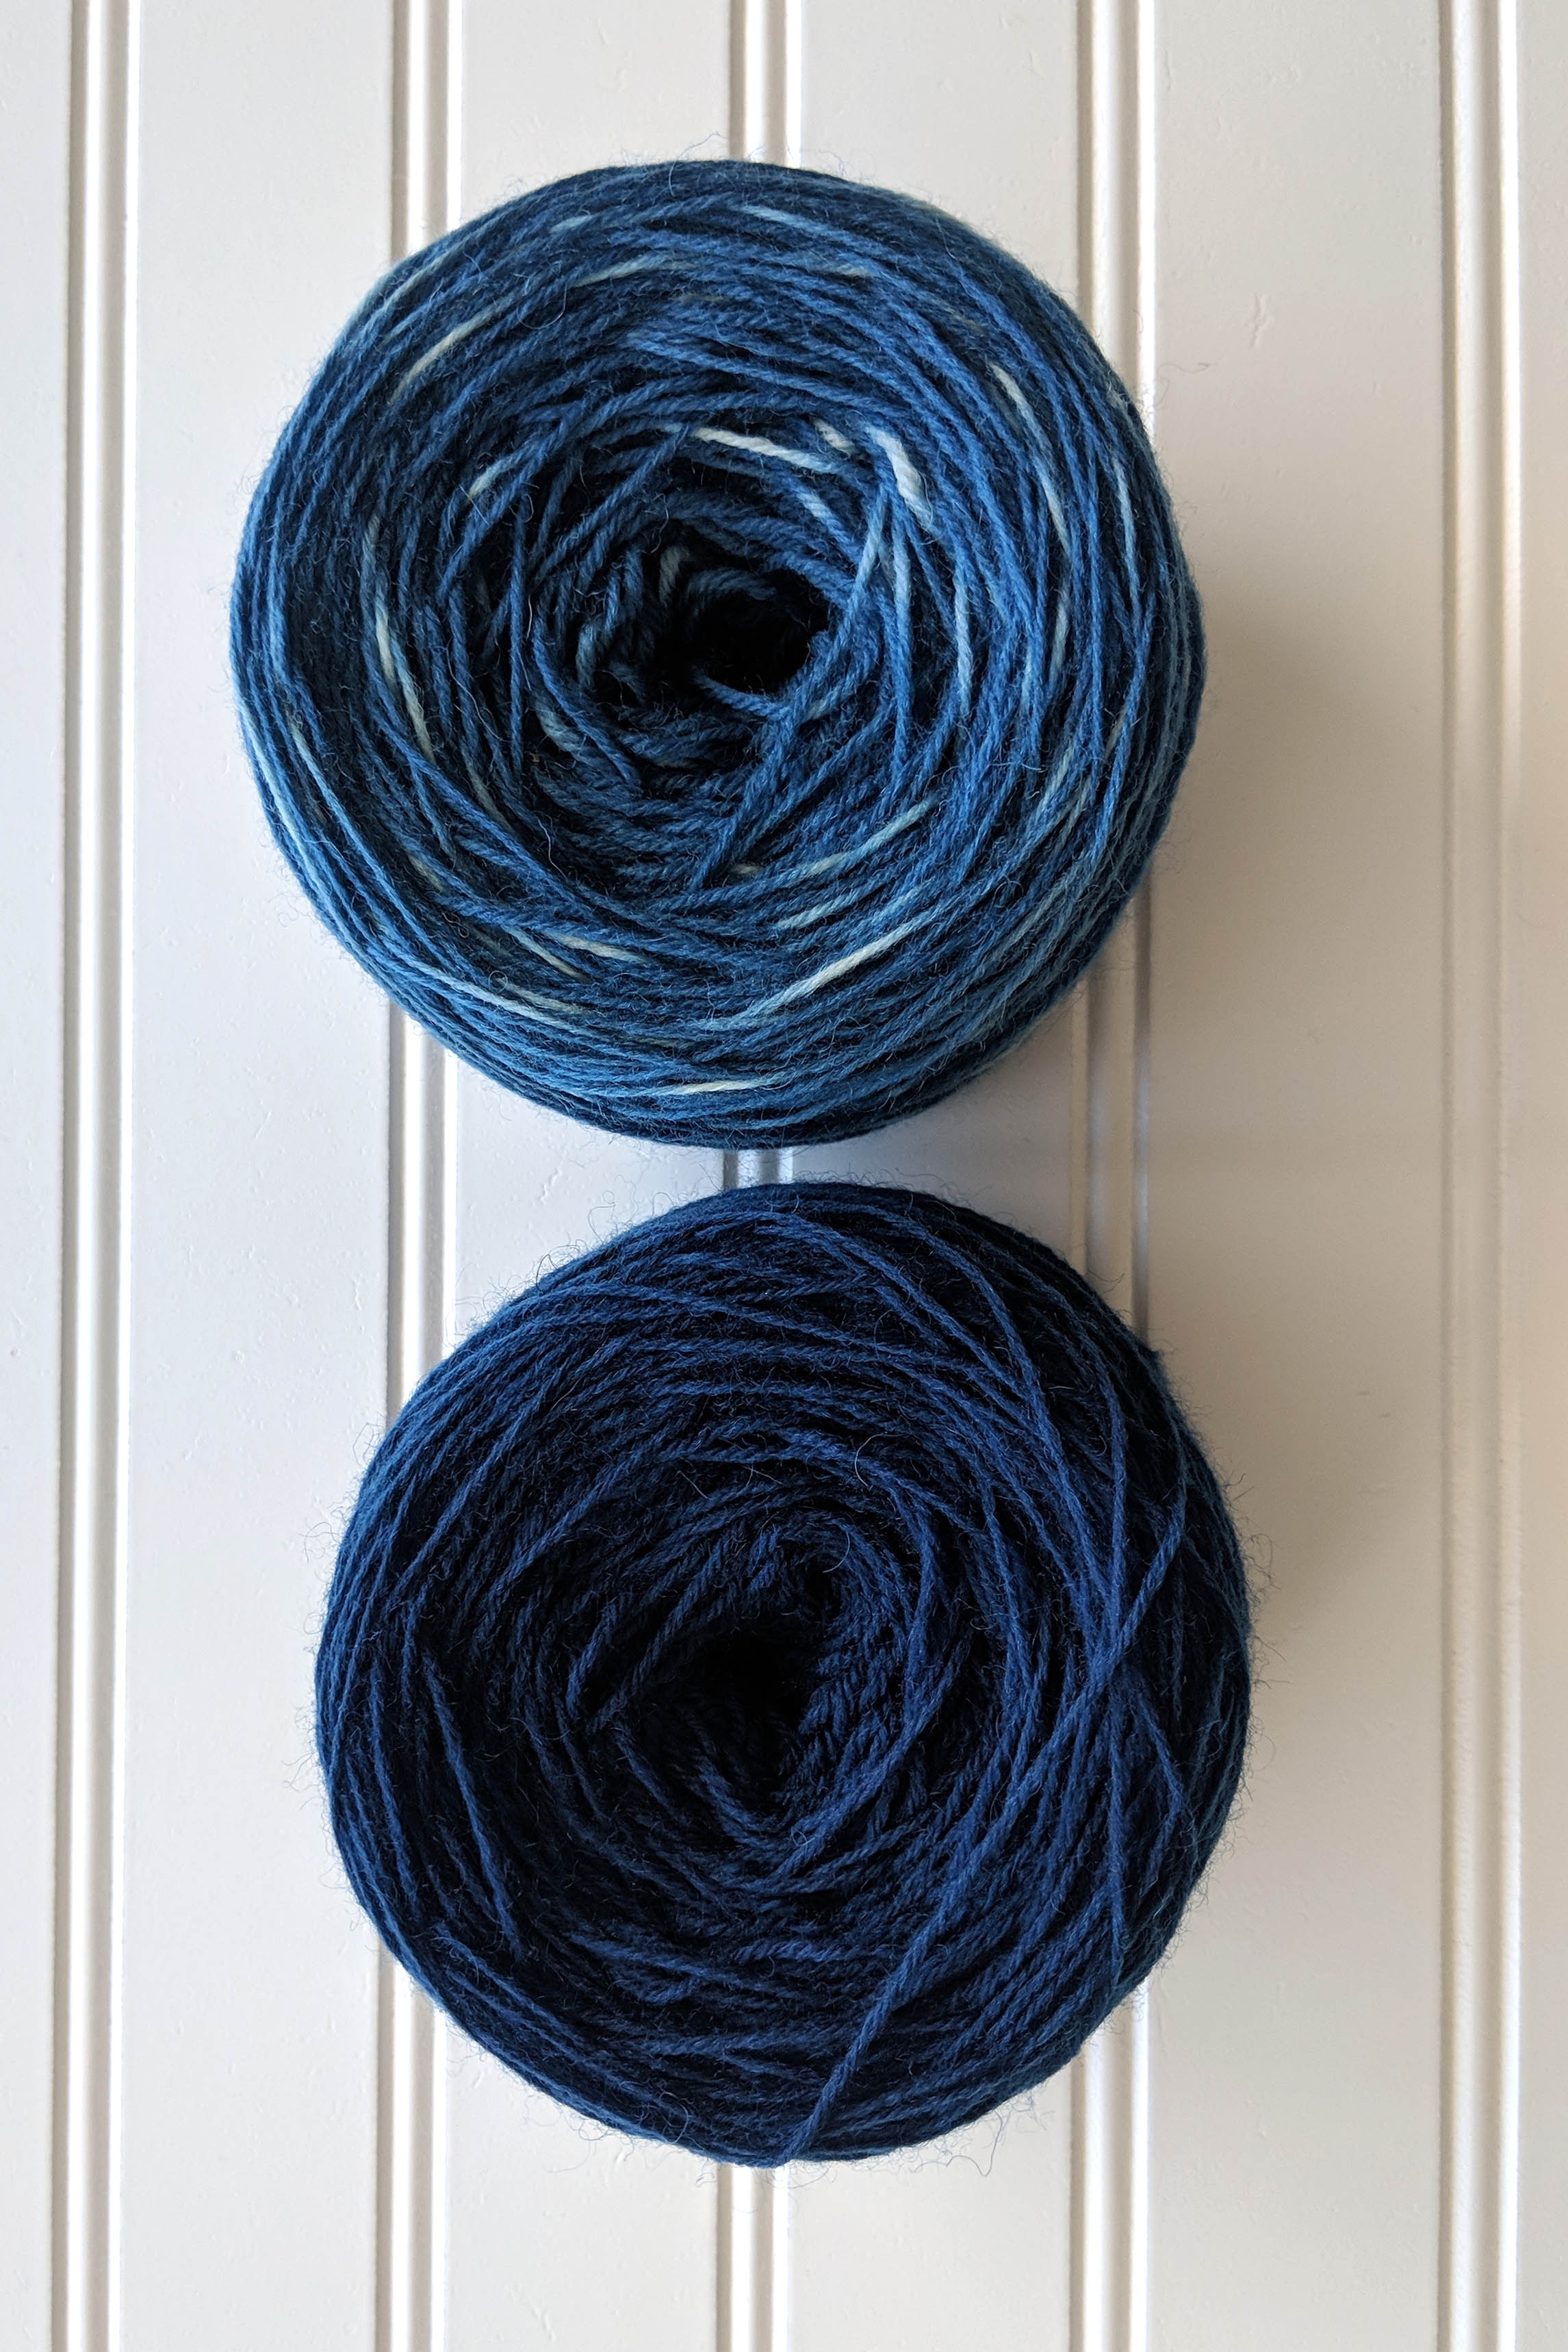
I’m planning to use one skein for warp and one for weft in a weaving project. Stay tuned!