U-S-A!

I have caught the Olympics fever big time this year. This past weekend, I did little more than drink coffee, binge-watch Olympic events, and of course, knit non-stop.

It’s important to have good knitting and tv companions. Charli is a big fan of the snowboarding half-pipe.

Ralph Lauren designed the closing ceremony knitwear and outfits for US Olympic team members, including this spectacular stranded hat. I’ve already seen some incarnations of this over on Ravelry.

Image result for us olympic ski hat
credit: Ralph Lauren

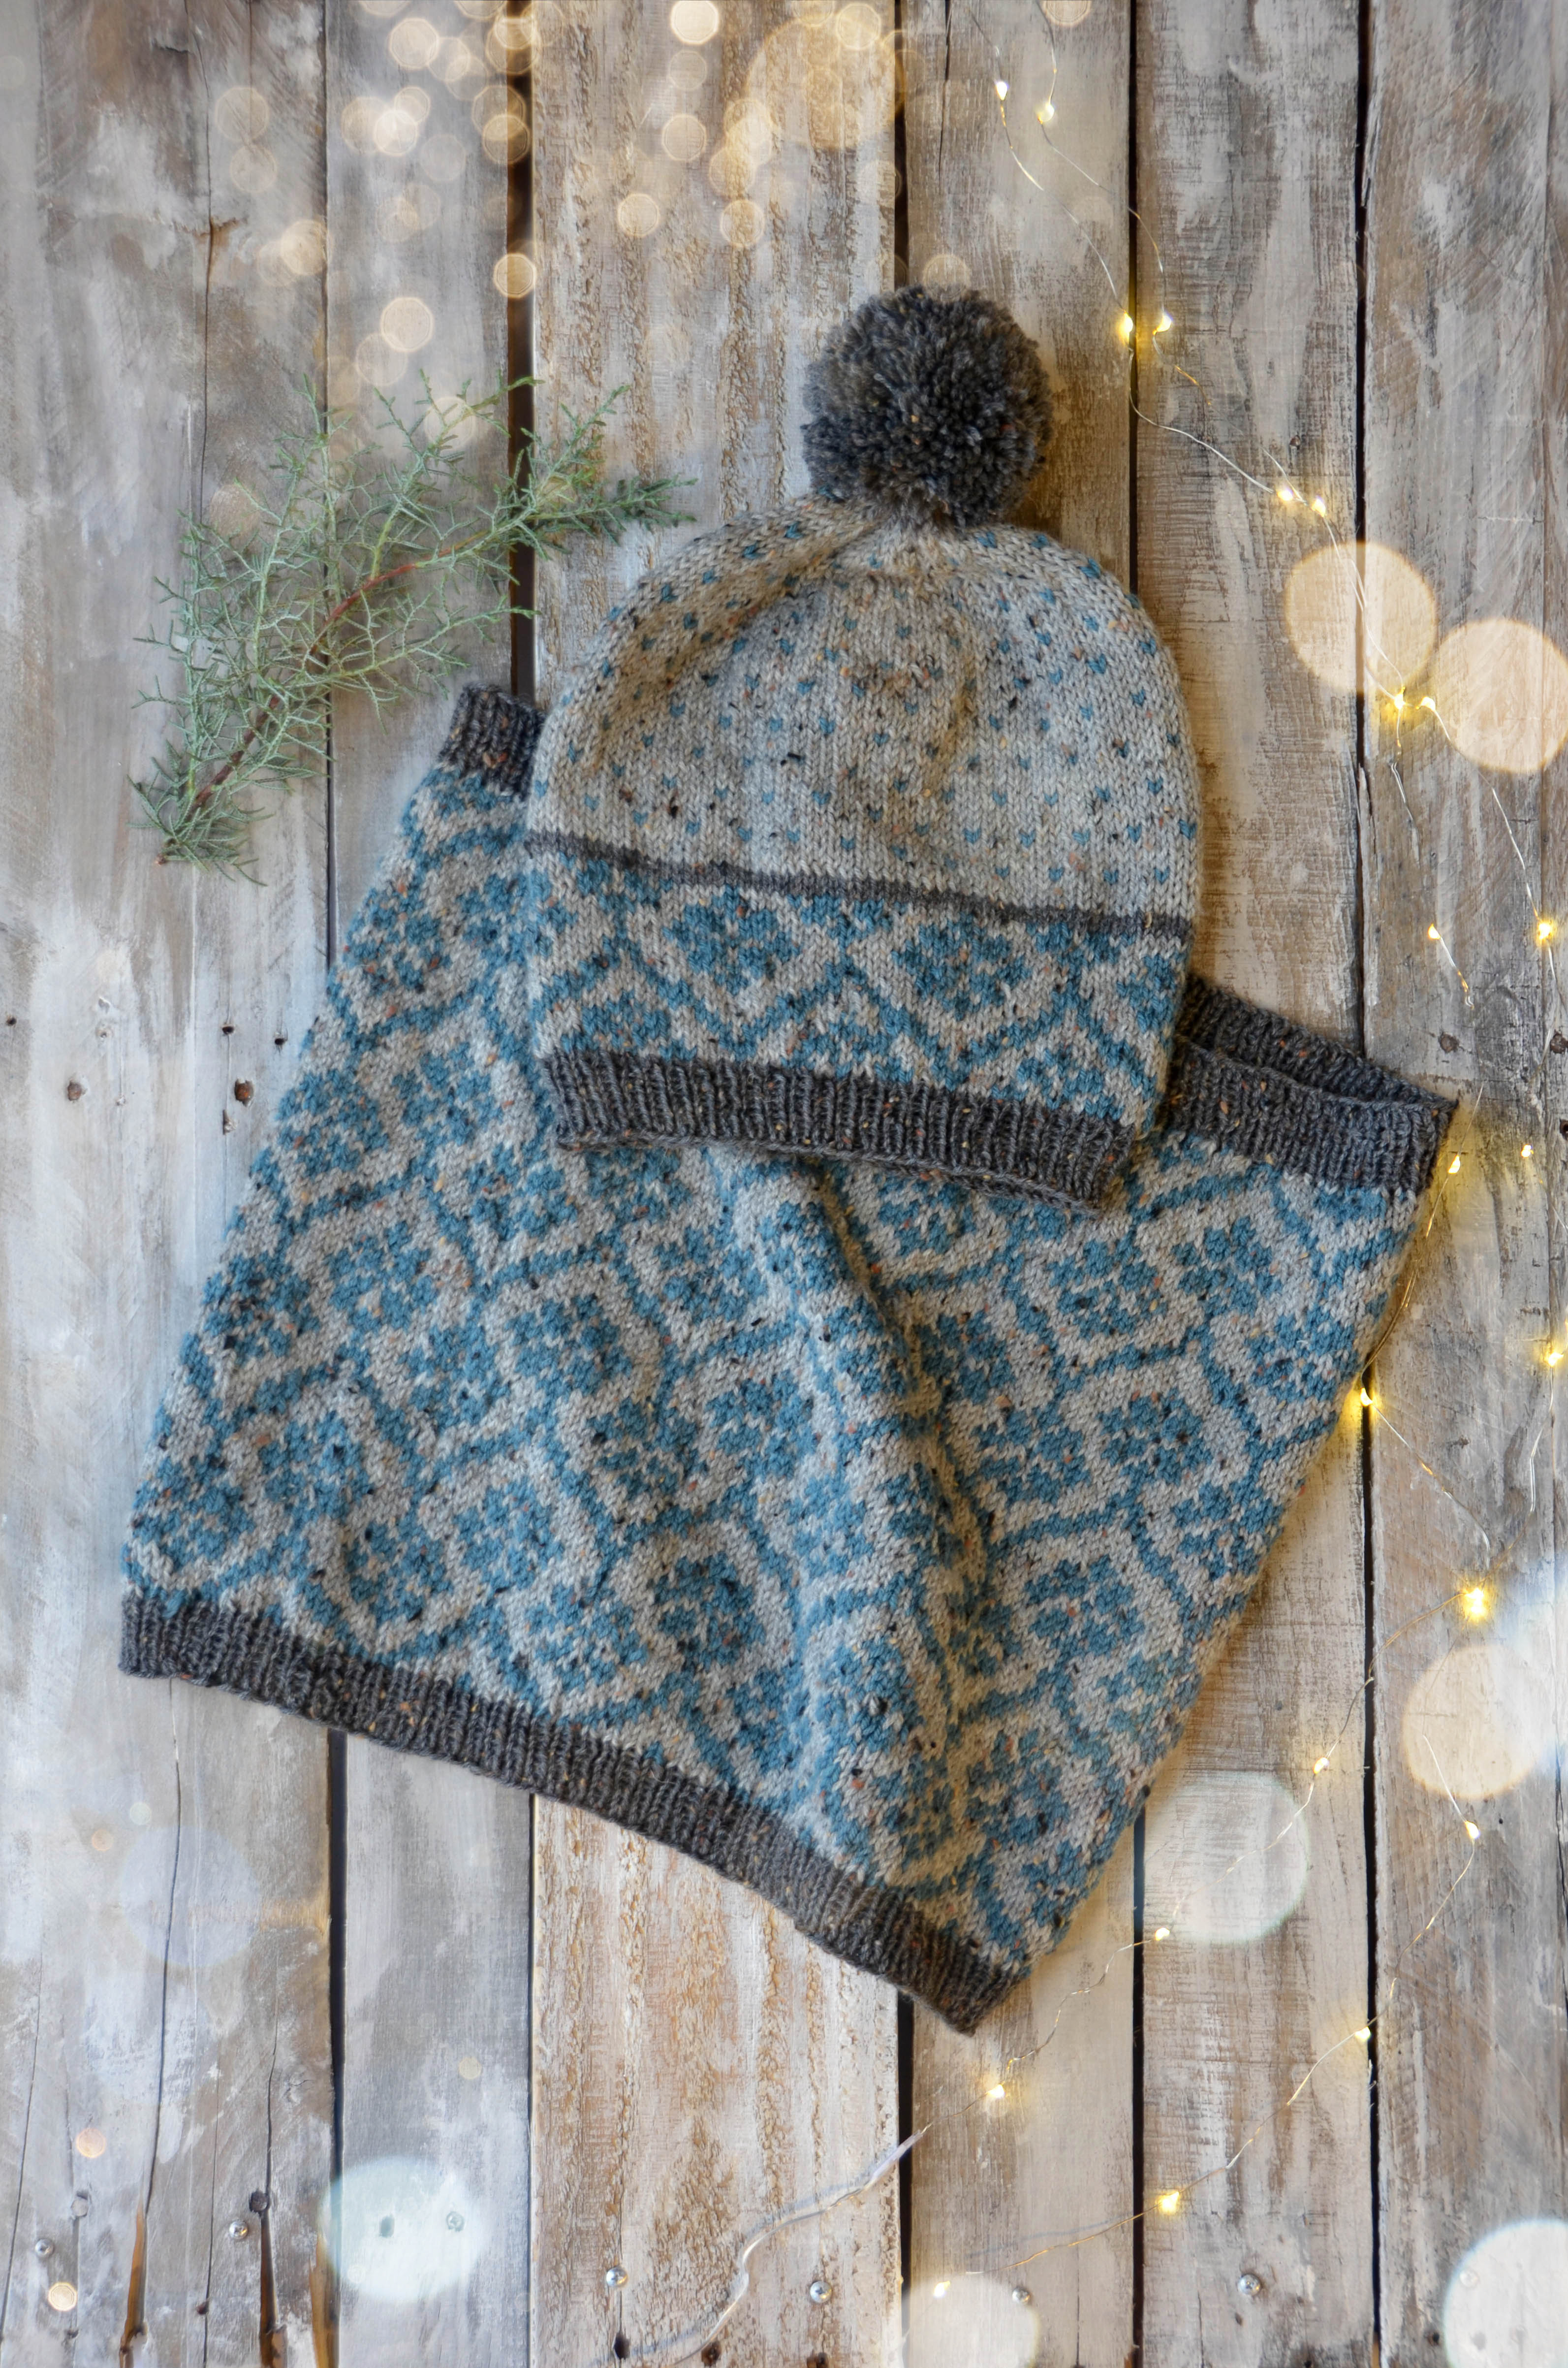
It’s a great hat. I love the balance of color and the jaunty double tassel thing that’s going on at the top. But stranded knitting can be intimidating and also time consuming. If colorwork is your cup of tea (confession: it’s mine!), then I would recommend these colors in Deluxe DK Superwash for your take on this hat:

838 Twilight
837 Christmas Red
828 Pulp

But if you’re in the mood for a simpler project with just as much patriotic bang for your buck, how about the USA Hat & Cowl in Uptown Bulky Amplify:

U-S-A U-S-A

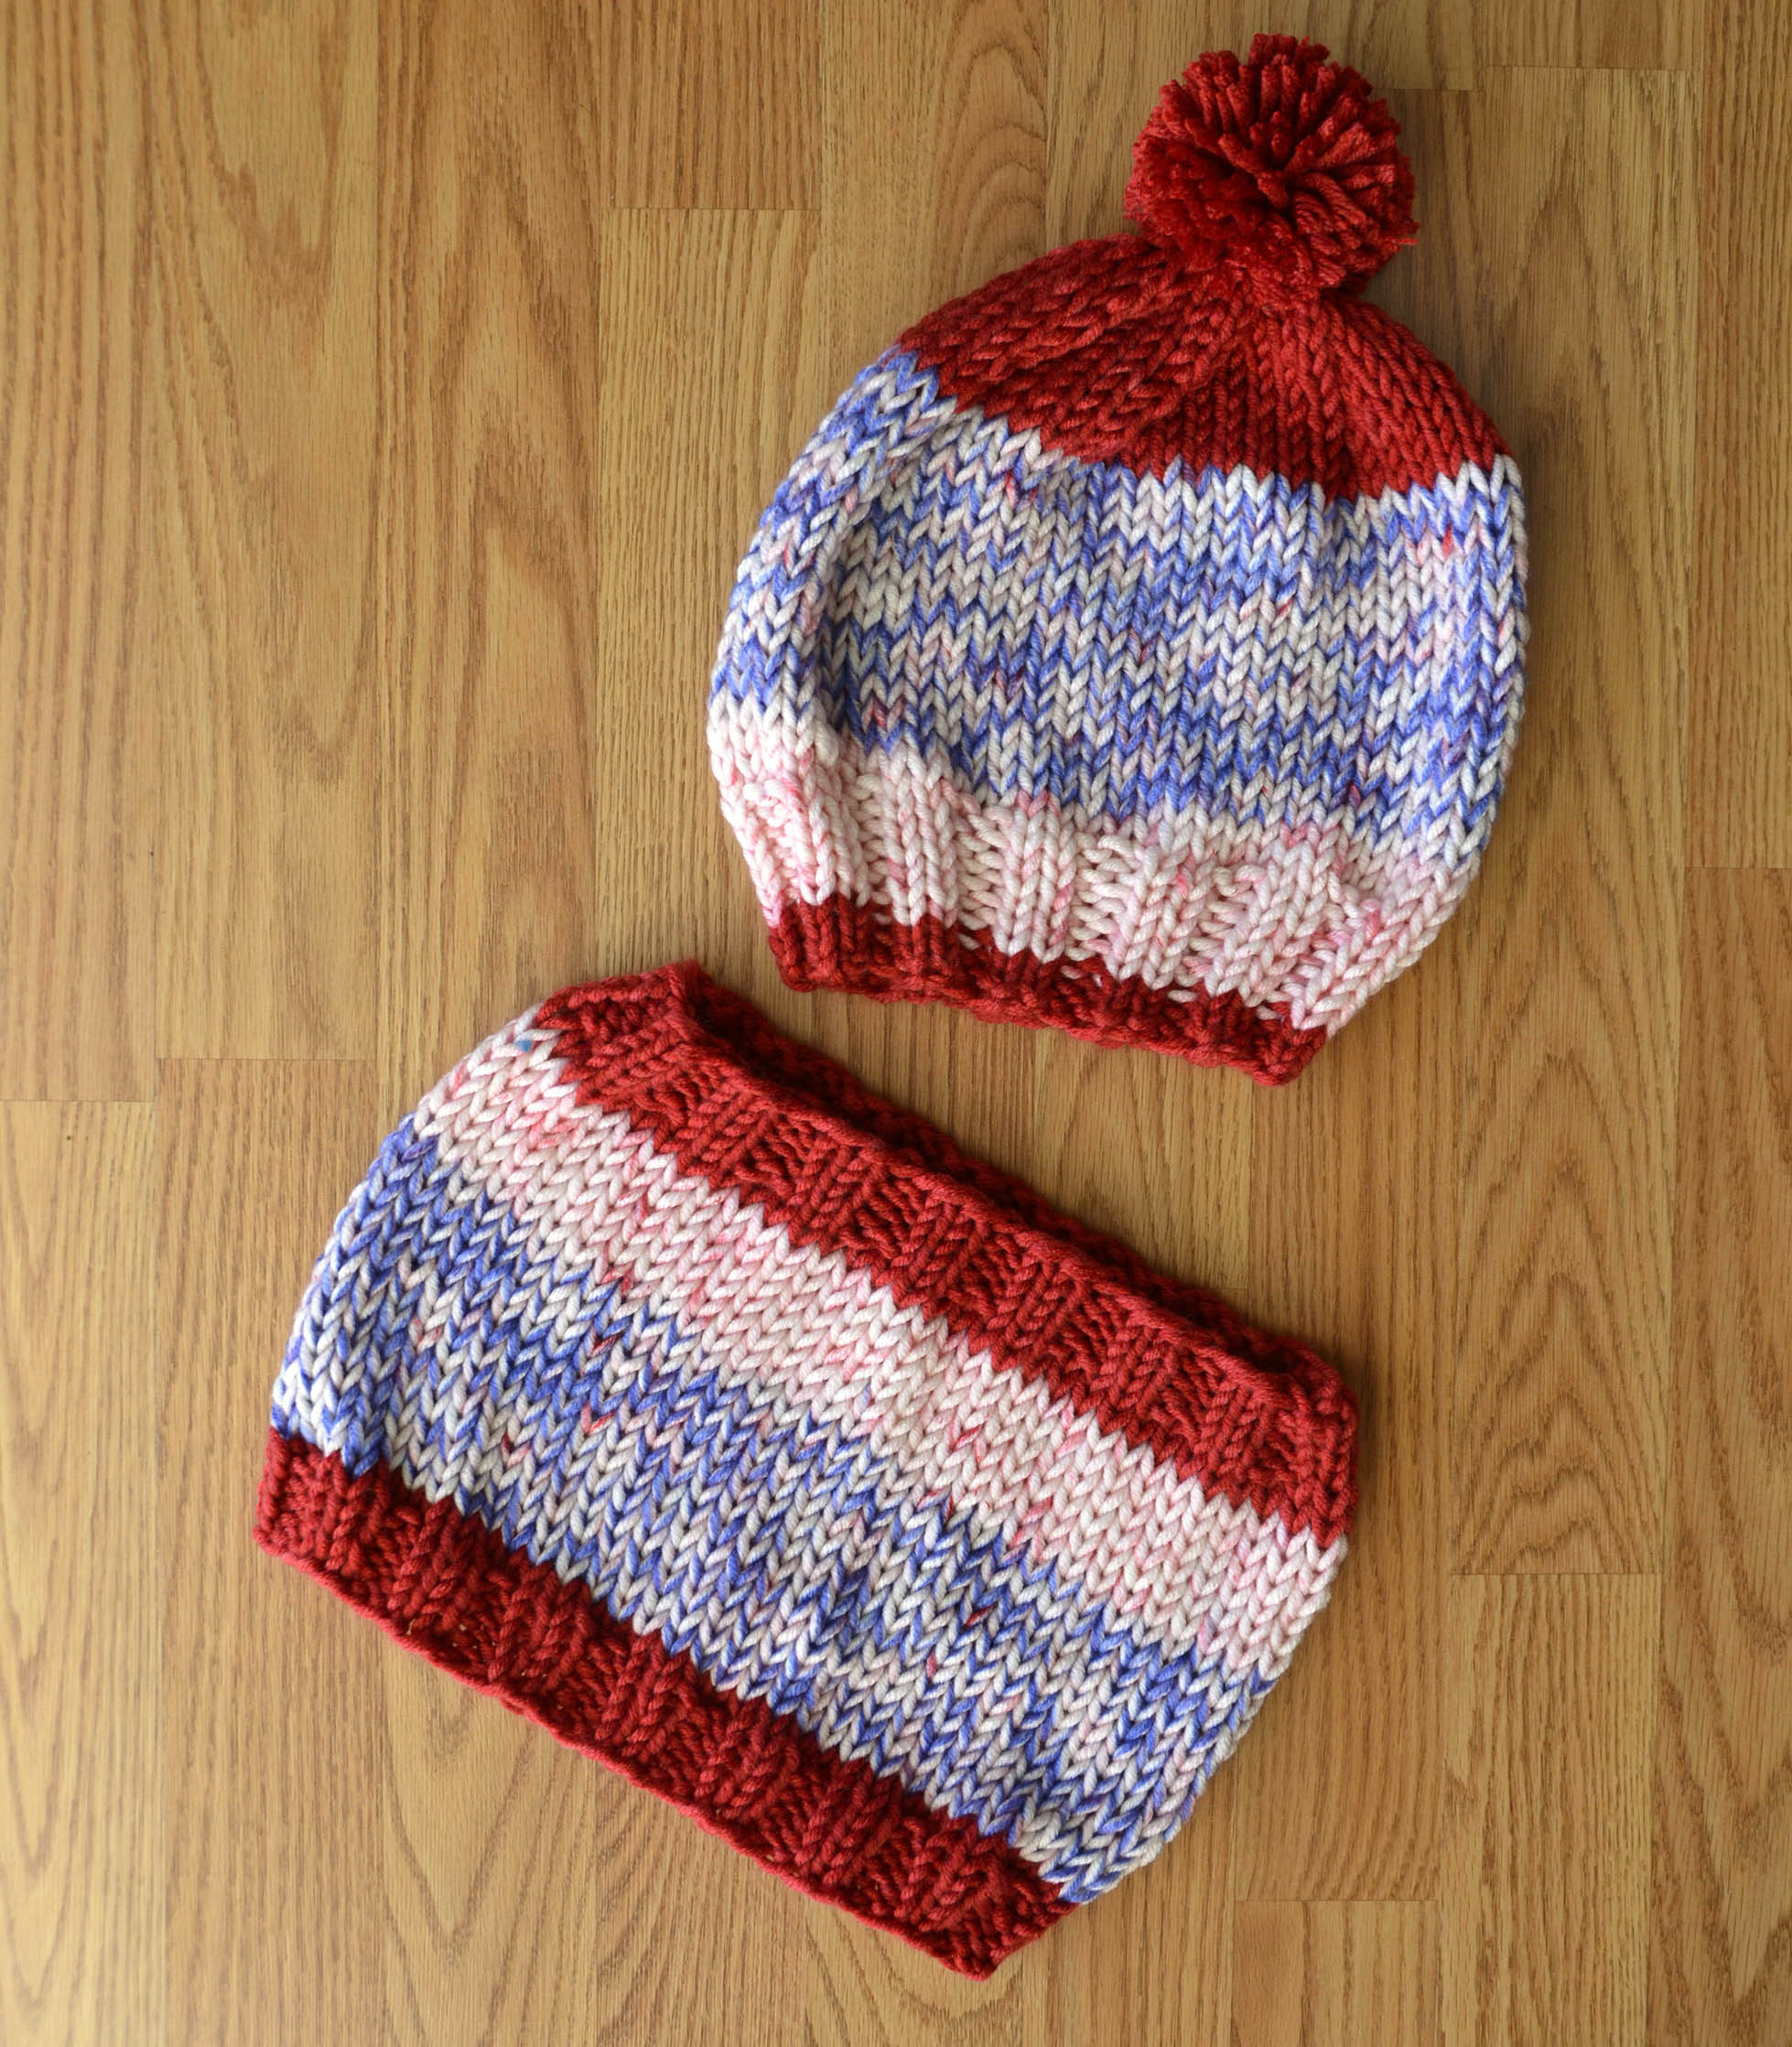
With just one skein of self-striping Amplify you can make thisĀ  patriotic hat and cowl set. And on size 11 needles, this set goes so quickly you could make this project several times over before the closing ceremonies next weekend.

What’s on your needles this week as you cheer on your country?

Tutorial – Knitting Pleats

Today we launched the first of our spring pattern collections, Papyrus: In the Conservatory.

Note the giant spring the model is holding. It’s a “spring” collection. :/

As the cover promises, this collection contains patterns all containing peplums, pleats, and ruffles, all knit in new yarn Papyrus. There is actually just one project that utilizes pleats, and that is the Kaizen cardigan.

The pleats are added just to the sleeve cuffs here for a touch of feminine playfulness to an otherwise classically shaped cardigan.

Though I did my best to give accurate written instructions of how to make the pleats, this is one of those techniques where pictures really do speak a thousand words. There are a few photos of how to join pleats included in the pattern file, but the following is a much more detailed instruction.

This small swatch shows the cuff prior to the pleat joining. Stitches are reduced by almost two thirds after the pleating process.
First, the edge stitches are worked.
Next, the following 3 stitches (the eyelet column) will be slipped to a double pointed needle.
Eyelet column is now on a spare needle.
Next, the following 3 reverse stockinette (purl) stitches are slipped to a second spare needle.
Now the first 2 stitches of the row on the right needle. We’re going to be ignoring those stitches. After that, we have dpn 1 with the Eyelet Column sts, dpn 2 with the purl sts, and then the working left needle with all remaining stitches.
Rotate dpn 2 counter-clockwise, so that the wrong side of these sts is against the wrong side of the 3 sts after it (the 3 sts on the working left needle)
Wrong sides are now together. Slide the sts from this dpn toward the tip.
Place dpn 1 behind dpn 2 without rotating. Align the tips of all 3 needles in preparation for joining.
Now we’re going to be working k3tog – 1 st from each needle. Insert the tip of the right needle into the first st on the front needle.
Continue by inserting the tip of the right needle into the first stitch on the middle needle, and then the back needle.
Yarn over and pull through all 3 stitches.
Slip the stitches from the needles – k3tog complete. You will be working k3tog 2 more times to finish this pleat.
All com-pleated. Sorry, I couldn’t resist.

If you thought this looked complicated at the beginning, I hope I’ve changed your mind. It’s just a matter of arranging some stitches and working some k3togs.

Happy knitting!


Free Pattern Friday – Porthole Cowl

My friends, winter is showing no signs of letting up, even here in North Carolina. We were blasted with 5-6″ of snow the other day. If you’re from a northern state as I am, that may not seem like much. But in the south it is a significant amount and is cause for much celebration and hot cocoa. And as we all know, any reason to pile on more knitwear is quite welcome.

Our free pattern this week is the Porthole Cowl, knit in a soft wintery shade of self-shading Major.

Pattern link here.

This cowl is knit in the round, showing off the shading of Major as it works it’s way upward in a bounty of texture and “porthole” lace. The color is quite subtle in color 118 Silver Blush. If you like more in-your-face-color, there are many options to choose from. Some of my favorites are:

112 Firecracker
131 Egg Hunt (a brand new colorway!)
102 Underwater

Happy crafting – stay warm out there!

This Blanket’s So Bright I’ve Got to Wear Shades

Self-shading yarn never gets old for me. It’s so pretty and fun to watch the colors that emerge from a ball of colorful yarn. One of my favorite patterns in our Poems yarn is the Southwest Sky Afghan.

Three gorgeous colorways of Poems come together in this modular garter stitch piece. In each colorway of Poems, there are around 6 different shades, meaning in this blanket where there are 3 colorways, there are 18 different colors in the project! I believe that most any color combination could look really great in this throw. But it can be tough to just visualize what this might look like, so we thought it would be fun to see some other color combinations actually knit up.

Here are some small samples of three alternate colorways:

Colors 606 Time Travel + 604 Port of Spain + 591 Vesuvius
Colors 616 Chevron + 609 Enchanted Forest + 615 Cruise
Colors 613 Shoreline + 612 Romance + 614 Piquant


The examples above either fall into the same color family (generally), or value-wise are similar. It could be fun to pick out only brights, or purples, or go for highly contrasting – sky’s the limit!

Day 10 of Winter

On Day 10 of Winter, we bring to you the Templetop Revisited Hat and Cowl set.

Oh, how I adore stranded knitting in our Deluxe DK Tweed! Crisp, defined colorwork has its place. But when the yarn has more character like our tweed, it softens the lines of the patterning and gives more interest.

This title of this design has the caveat of “revisited” because the original Templetop Cowl indeed exists. The first incarnation of this design was knit in Amphora, another yarn with one of my favorite characteristics: halo.

With smooth, plied yarns, knitting is crisp, even, and predictable. But when a yarn has a special characteristic such as tweedy bits or loft, stitches are less cut and dry and more organic. They have a mind of their own, so to speak. And they become more like real life, too, where we can’t always control things down to every last detail. There is a level of relief that comes with that acceptance, where we just let things be how they’re going to be, and this is ultimately why I love yarns with character. They mirror our own lives in ways that we might not realize at first.

Golly, you never knew yarn and knitting could get so philosophical, right? You can find the Templetop Revisited kit on our website here.


Day 9 of Winter

It’s hardly winter without stockings, amiright? Three balls of yarn make three stockings in the Stripe Stockings kit. Knit in Deluxe Bulky Superwash, these will virtually fly off your needles.

The knitting in these is relatively simple – mostly stockinette with a bit of garter and an i-cord bind-off. There are enough details to keep a seasoned knitter entertained, but are simple enough that they would also make a good first sock project.

One feature that I’d like to explain more in detail is the afterthought heel. Unlike the common short-row heel which is knit as the rest of your sock is knit, an afterthought heel is added later after the rest of the sock is complete. There are various reasons for choosing this type of heel. My reasoning for doing so in this project was both to keep my stripe sequence uninterrupted and also to make the most of my yarn.

Grab your needles and yarn and let’s get to learning!

First, knit a stockinette swatch. I am knitting my swatch in the round just like the stockings, but this technique can just as easily be done worked flat in rows.
Next, get ready with your waste yarn. This waste yarn is temporarily going to hold the place of where your heel will eventually be.
Leaving your working (green) yarn where it is, knit across the heel stitches with the waste yarn. Your pattern will specify how many stitches this is. Typically, it is half of the total sock stitches.

Continue to knit the rest of the sock/swatch. Knit across the waste yarn stitches and on around.

Bind off your swatch.
Next, we’re going to place the stitches from the row above and also the row below onto separate needles. I like to use a smaller needle for this step. Pick up stitches with the tip of your needle, going through the front leg of each stitch. By doing this, the stitches will be oriented correctly when you go to knit the first round.
My 10 stitches from the row above the waste yarn are now on a needle.
Insert a second needle through the front leg of each stitch below the waste yarn.
Now we’re ready to remove the waste yarn.
With a spare needle, carefully pick out the waste yarn.
Waste yarn be gone!
Now it’s time to knit the heel, and return to your larger dpns. This first round is usually a plain/knit round.
This photo shows what happens in that gap where the waste yarn was if you simply knit across and ignore it.
Pick up a stitch from the side of the row where the waste yarn was. It’s best not to pick up the very outermost part of this loop, but to pick up the half of the stitch just inside the opening.
Place this picked up stitch on the needle and knit it together with the next stitch, closing the gap. Depending on the pattern and yarn, I might do this twice at each side of the gap. It’s best to experiment and see what looks best with your particular yarn and stitch pattern.
And here’s what that gap will look like now. No holes!
Knit the rest of the heel as instructed. It’s like a heel magically grew out of your knitting.

I also like this technique for set-in pockets on a top-down sweater. It’s not as hard as you thought it was going to be, right?

Day 8 of Winter

Day 8 of Winter brings us Snowflake Mitts.

These warm and wooly mitts are knit from the bottom up, beginning with a cable rib and ending with an i-cord bind-off. The patterning is Fair Isle, meaning two colors are used on each round. If this is a technique you’ve never tried before, these mitts could be a good place to start.Ā  It’s always less daunting trying out new skills on a small project. Deluxe DK Superwash is the featured yarn in this project, making this pair a great gift since they are machine washable.

To celebrate the 12 Days of Winter and my love of snowflakes, I’ve written a poem.

The Snowflake Sonnet

Each year the wind turns cold and gray.Ā  Ā  Ā  Ā  Ā  Ā  Ā  Ā  Ā  Ā  Ā  Ā  Ā  Ā  Ā  Ā  Ā  Ā  Ā  Ā  Ā  Ā  Ā  Ā  Ā  Ā  Ā  Ā  For some this is a hindrance.Ā  Ā  Ā  Ā  Ā  Ā  Ā  Ā  Ā  Ā  Ā  Ā  Ā  Ā  Ā  Ā  Ā  Ā  Ā  Ā  Ā  Ā  Ā  Ā  Ā  Ā  Ā  Ā  Ā  Ā  Ā  Ā  Ā  Ā  Ā  Ā  Ā  Ā  Ā  Ā  But for those who knit and crochetĀ  Ā  Ā  Ā  Ā  Ā  Ā  Ā  Ā  Ā  Ā  Ā  Ā  Ā  Ā  Ā  Ā  Ā  Ā  Ā  Ā  Ā  Ā  Ā  Ā  Ā  Ā  Ā  Ā  Ā  Ā  Ā  Ā  This weather is far from nuisance.

In May through the fall when it’s warm,Ā  Ā  Ā  Ā  Ā  Ā  Ā  Ā  Ā  Ā  Ā  Ā  Ā  Ā  Ā  Ā  Ā  Ā  Ā  Ā  Ā  Ā  Ā  Ā  Ā  Ā  Ā  Ā  I turn to linen, cotton, and bamboo.Ā  Ā  Ā  Ā  Ā  Ā  Ā  Ā  Ā  Ā  Ā  Ā  Ā  Ā  Ā  Ā  Ā  Ā  Ā  Ā  Ā  Ā  Ā  Ā  Ā  Ā  Ā  Ā  Ā  Ā  Ā  Ā  Ā  But plant fibers aren’t fit for snowstormĀ  Ā  Ā  Ā  Ā  Ā  Ā  Ā  Ā  Ā  Ā  Ā  Ā  Ā  Ā  Ā  Ā  Ā  Ā  Ā  Ā  Ā  Ā  Ā  Ā  Ā  Ā  As I trudge to work on showshoe.

It is springy wool that I long forĀ  Ā  Ā  Ā  Ā  Ā  Ā  Ā  Ā  Ā  Ā  Ā  Ā  Ā  Ā  Ā  Ā  Ā  Ā  Ā  Ā  Ā  Ā  Ā  Ā  Ā  Ā  Ā  Ā  Ā  Ā  Ā  Ā  Ā  Ā  Ā  Ā  Throughout most months of the year.Ā  Ā  Ā  Ā  Ā  Ā  Ā  Ā  Ā  Ā  Ā  Ā  Ā  Ā  Ā  Ā  Ā  Ā  Ā  Ā  Ā  Ā  Ā  Ā  Ā  Ā  Ā  Ā  Ā  Ā  Its fabric warms me to the core;Ā  Ā  Ā  Ā  Ā  Ā  Ā  Ā  Ā  Ā  Ā  Ā  Ā  Ā  Ā  Ā  Ā  Ā  Ā  Ā  Ā  Ā  Ā  Ā  Ā  Ā  Ā  Ā  Ā  Ā  Ā  Ā  Ā  Ā  Ā  Ā  Ā  The feel of its stitches brings me such cheer.

For this year’s winter I believe I will makeĀ  Ā  Ā  Ā  Ā  Ā  Ā  Ā  Ā  Ā  Ā  Ā  Ā  Ā  Ā  Ā  Ā  Ā  Ā  Ā  Ā  Ā  Ā  Ā  Ā  Ā  Knitted mitts adorned with a snowflake.

Day 7 of Winter

Day 7 of Winter brings us the Slip Stitch Cowl in three chilly shades of Deluxe Worsted.

The pattern is written for the smaller size as shown, and also a large size, long enough to wrap around your neck twice. The yarn included in the kit is enough to knit either two small cowls, or one large. So – bonus!

The main body of the cowl is super-duper simple. The complex looking color pattern is just slipped stitches. Colors are changed every two rounds, and only one color is used per round. It hits that sweet spot of knitting where the pattern is just a bit more than stockinette – enough to keep you interested – but easy enough that you can work on it anywhere.

My favorite detail of this cowl is the picot edging along both edges. This could have been done with a knitted picot bind-off, but I chose to use a crochet picot instead. For me, it’s just less fiddly than doing its knit counterpart. Let’s learn how to do it!

If you need a little closer view on any of the following images, just click on it and it will open in a new browser window.

In my swatch, you can see that I’ve already done the picot edging along the lower edge. I’m going to be using a contrast color for the top edge so it’s easier for you to see.
Begin by pulling up a loop onto your hook. Be sure to work through both loops of the knit stitch from the cowl as you do this.
Step 1: Chain 3. To make a chain, first yarn over as shown.
To complete the chain, pull the yarn over through the loop already on your hook.
All 3 chains complete.
Step 2: Slip stitch into the same knit stitch from the cowl body. To do this, first insert your hook into the stitch, going underneath the same two loops again.
Yarn over and pull through the knit stitch.
Then pull this second loop through the first loop on the hook to complete the slip stitch.
Step 3: Skip the next knit stitch from the cowl body, and slip stitch into the next knit stitch.

Repeat Steps 1-3 for the edging. So you’re going to be working [slip stitch, chain 3, slip stitch] into every other stitch along both edges of the cowl. No big deal, right?

Here’s my swatch after a few more little picots.

Again, you can find the kit for this cowl on our website here (link). Here’s to learning new things!

Day 4 of Winter

Day 4 of Winter brings us the matching Latticework Hat and Scarf set in washable Adore yarn.

Though there are some traditional 2×2 cable panels in both hat and scarf, most of the crossed stitches are actually twisted stitches.Ā  Right and left twist stitches are a way of crossing stitches that doesn’t require a cable needle. And with just a bit of confidence, 2×2 cables can be crossed without a needle, as well.

I love love love twisted stitches and use them frequently in designs. Through the magic of (simple) needle acrobatics, a lovely texture can be made across your knit fabric. These types of stitches were used a few years ago in our Uptown Afghan Knitalong. Here is the video showing how to do right and left twists.

Remember, each of our 12 Days of Winter projects come packaged in a very giftable bag tied with ribbon. So if you’re shopping for one of your knitting buddies, these might just fit the bill.

I have no plans of taking this off any time soon. It’s freezing in our office!

Day 3 of Winter

Let me set the scene for you: It’s snowing outside. You’re curled up on a sectional sofa with freshly made hot-cocoa (with a nip…and marshmallows), the sun just set, and your favorite furry friend has his head on your lap. You have no worries, no place to be, you’re on vacation, and you can sleep as late as you like tomorrow morning. The fire is crackling, but it’s still a bit drafty. Cool enough that knitwear is very much required. You’re just about to turn on the first episode of a TV series you are quite sure will be binge-watched. You have just cast on for your next sweater project that you’re fantasizing about wearing this year still. And last but not least, you’re already wearing your Cozy House Socks that were started just yesterday because they go crazy quick!

Sound like a dream? Well, at least one part of that fantasy can be very real. Knit in Deluxe Chunky Naturals, these socks are a truly quick project. I know, because I personally knit the sample over part of a day! Each sock pictured took about 60g of a 100g skein, leaving plenty of room for giant man feet or to make the leg a bit longer.

These socks are knit from the top down with a gusset and short-row heel. The cable pattern is both written and charted. You can find this the pattern for this kit, Series 1 Day 3 of our 12 Days of Winter collection here (link).