A Winter Wonderland Wall Hanging

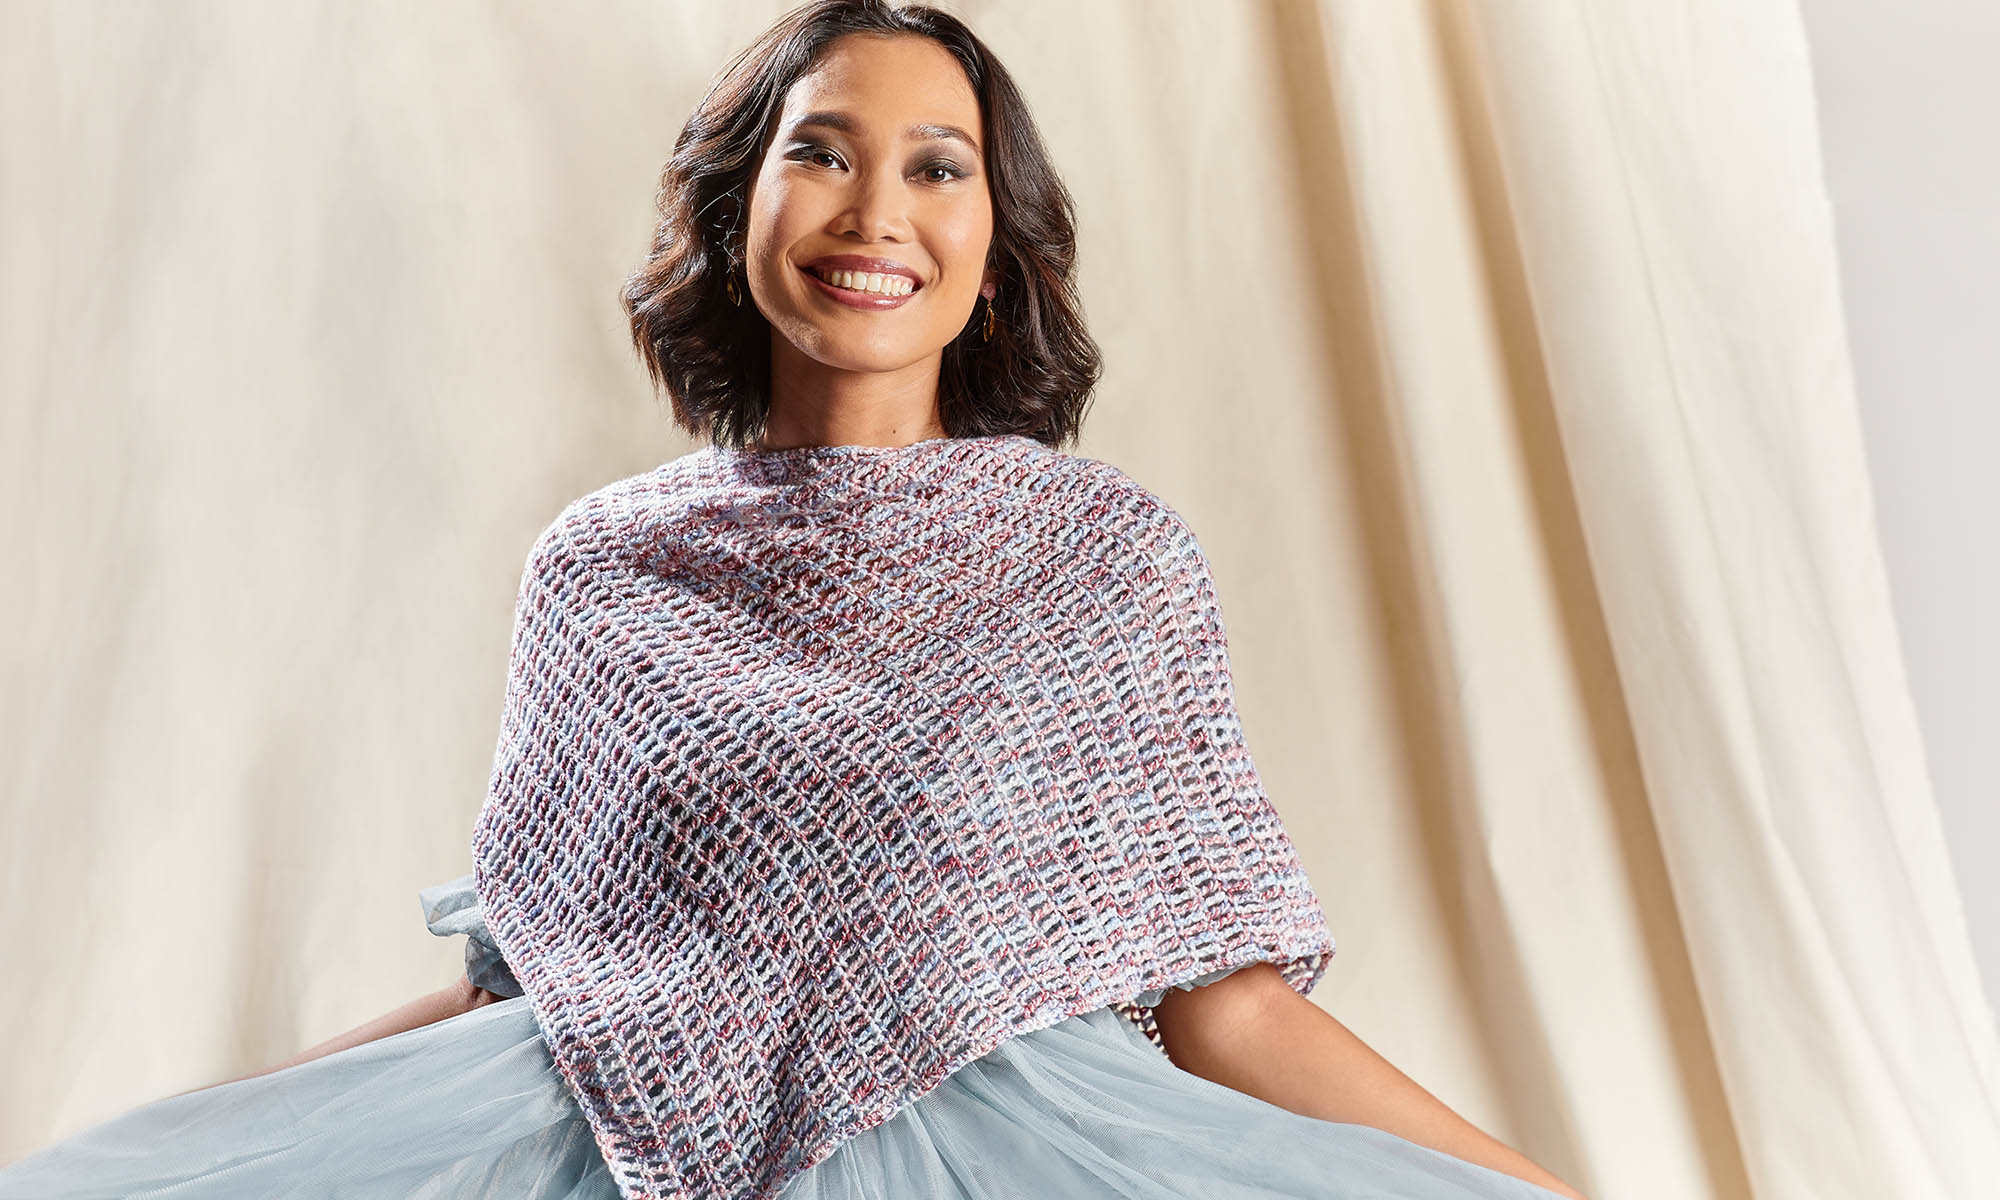
Winter is the season of magic and mystery. The cold weather is a shock to the senses, and beautiful snowfall is one of nature’s quiet little miracles. For yarn crafters, it is a season full of project inspiration. From cozy sweaters, to snuggly scarves, winter calls us to create.

At Universal Yarn, we offer an expansive line of yarns suited to all types of yarn crafters. The patterns we release are primarily for knitters and crocheters, but we celebrate all fiber arts. Occasionally, we work with indie designers, fiber artists, and social media influencers to create unique projects using our yarns to help inspire our customers. This winter, I wanted to commission a creative project and blog post featuring a yarn craft that is resurging in popularity: locker and latch hooking. We worked with a local artist, April Lee, for this project.

A wall hanging made using a variety of yarns from Universal Yarn in the locker hooking technique.
Our Winter Wonderland wall hanging, made by April Lee.

April Lee is a custom fiber artist based out of Charlotte, NC, and has been a lover of fiber arts since she was 15 years old. During the pandemic, April tried out the locker hooking craft, and the rest was history. In 2021, she launched Latched By Lee, LLC, which is a custom fiber art business specializing in one-of-a-kind art pieces using various textiles. Every item is handmade using latch and locker hooking techniques. Here is what April had to say about locker and latch hooking.

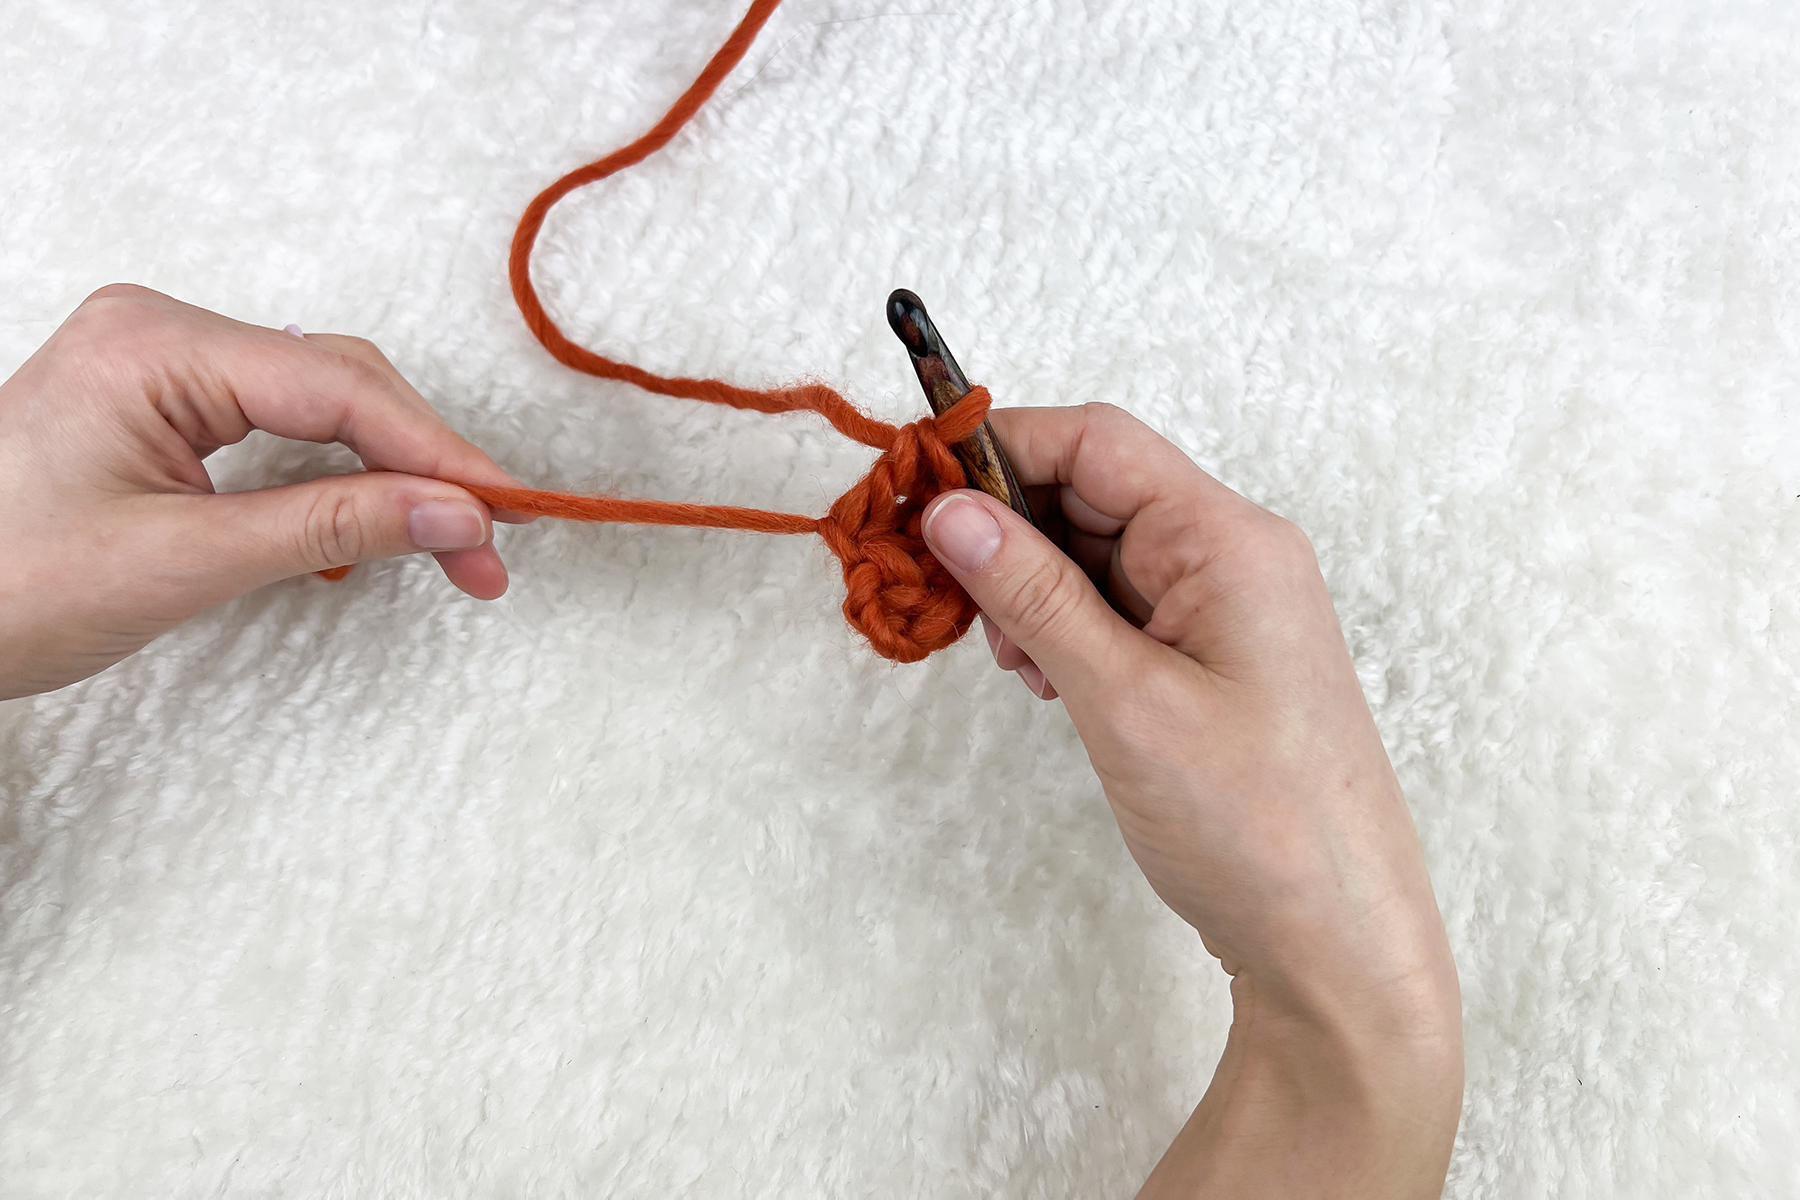
‘Locker hooking is a technique that uses a tool with a crochet hook on one end, and a needle eye on the other. It creates loops of yarn that are pulled through the backing of a mesh canvas to create a design. The loops are locked into place using the yarn that is threaded through the needle eye. Locker hooking originated in England in the 19th century, and at that time was primarily used to make rugs. Stripes of fabric that were no longer suitable to use for clothing were used to create floor mats, rugs, and quilts. Since then, locker hooking has expanded greatly. You can create wall hangings, bracelets, baskets, purses, chair cushions, pillows, and much more! I love exploring all of the different things I can create using the locker hooking technique.’

A close up image of the Winter Wonderland Wall Hanging using a variety of yarns from Universal Yarn.
Cliffs Of Moher was used to make the trees and candy canes, while Bella Chenille was used for the snow, and Uptown Worsted was used for the background.

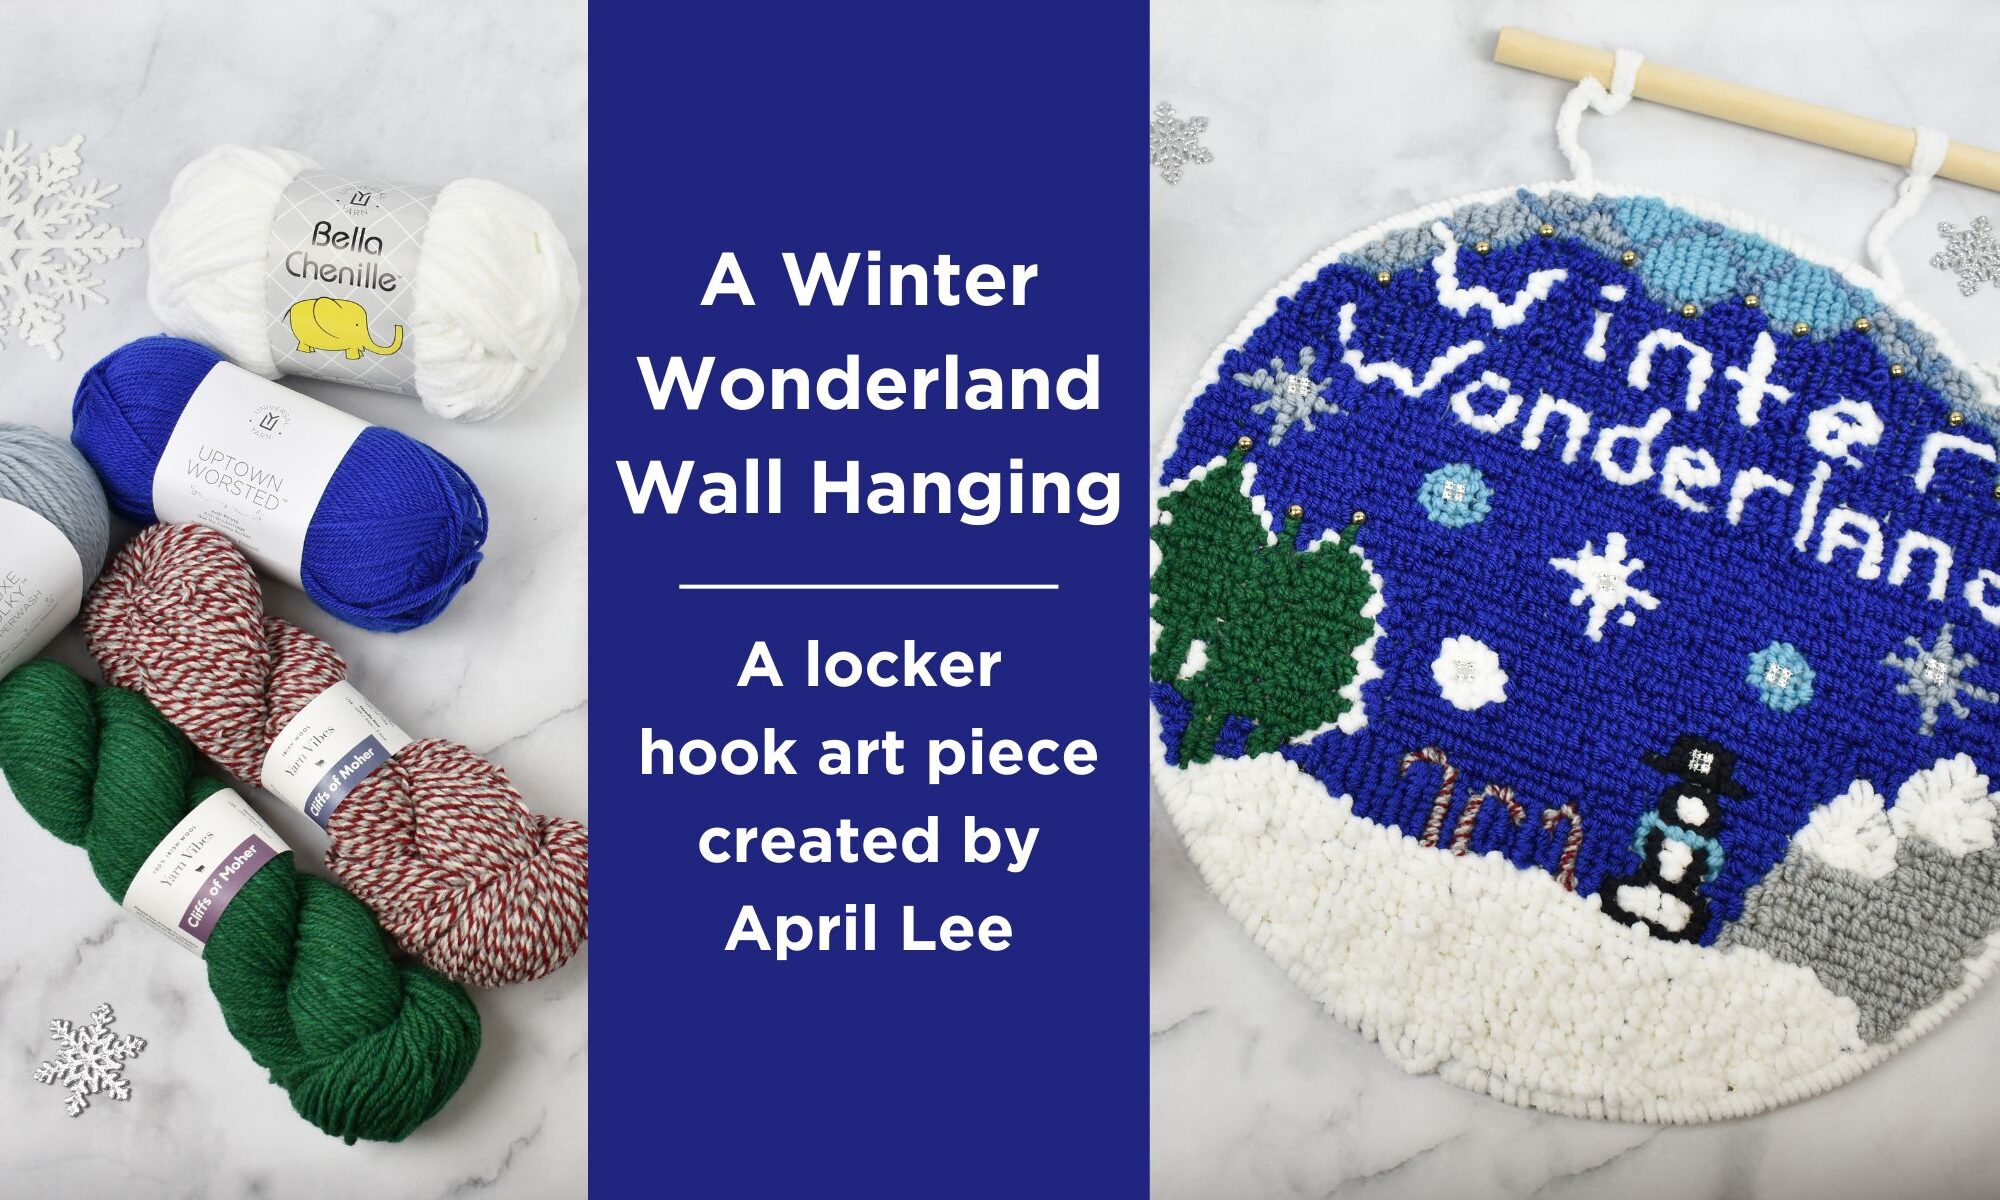
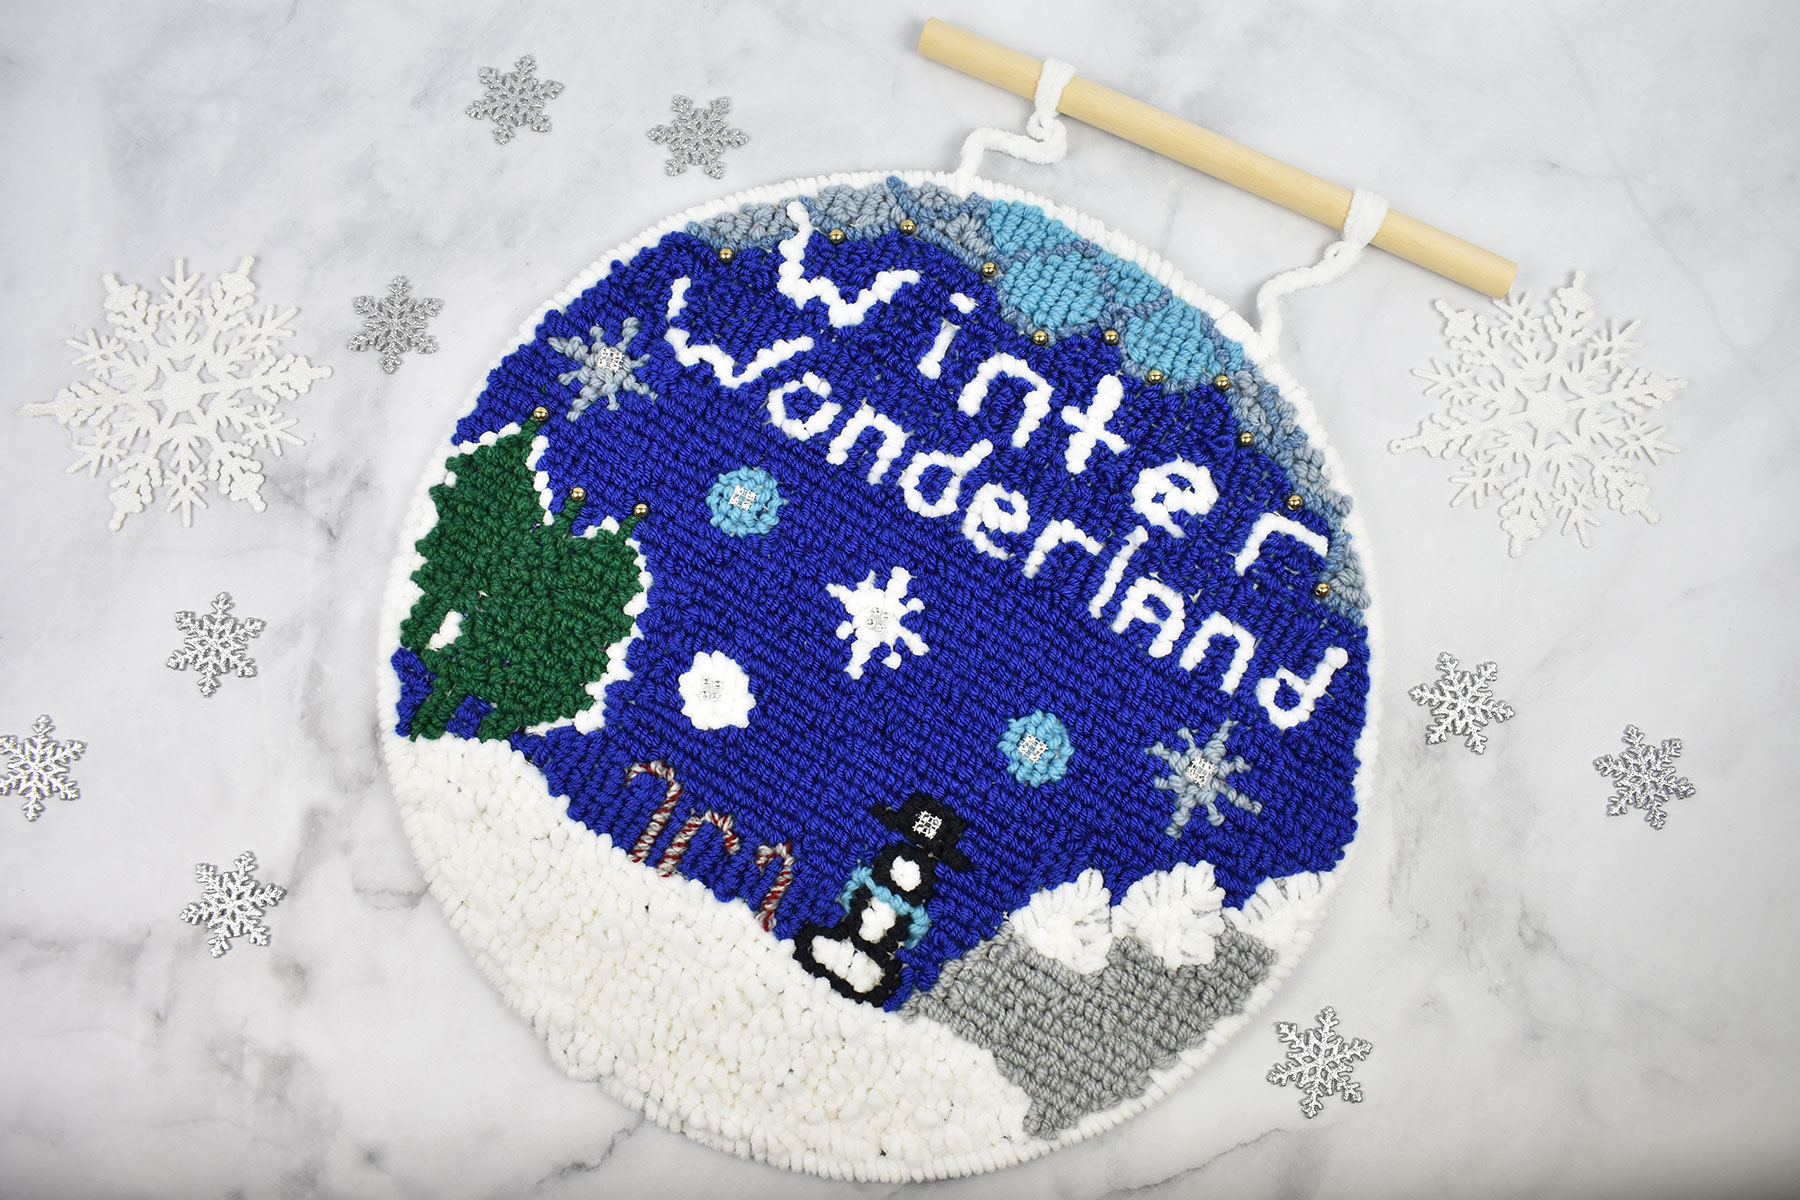
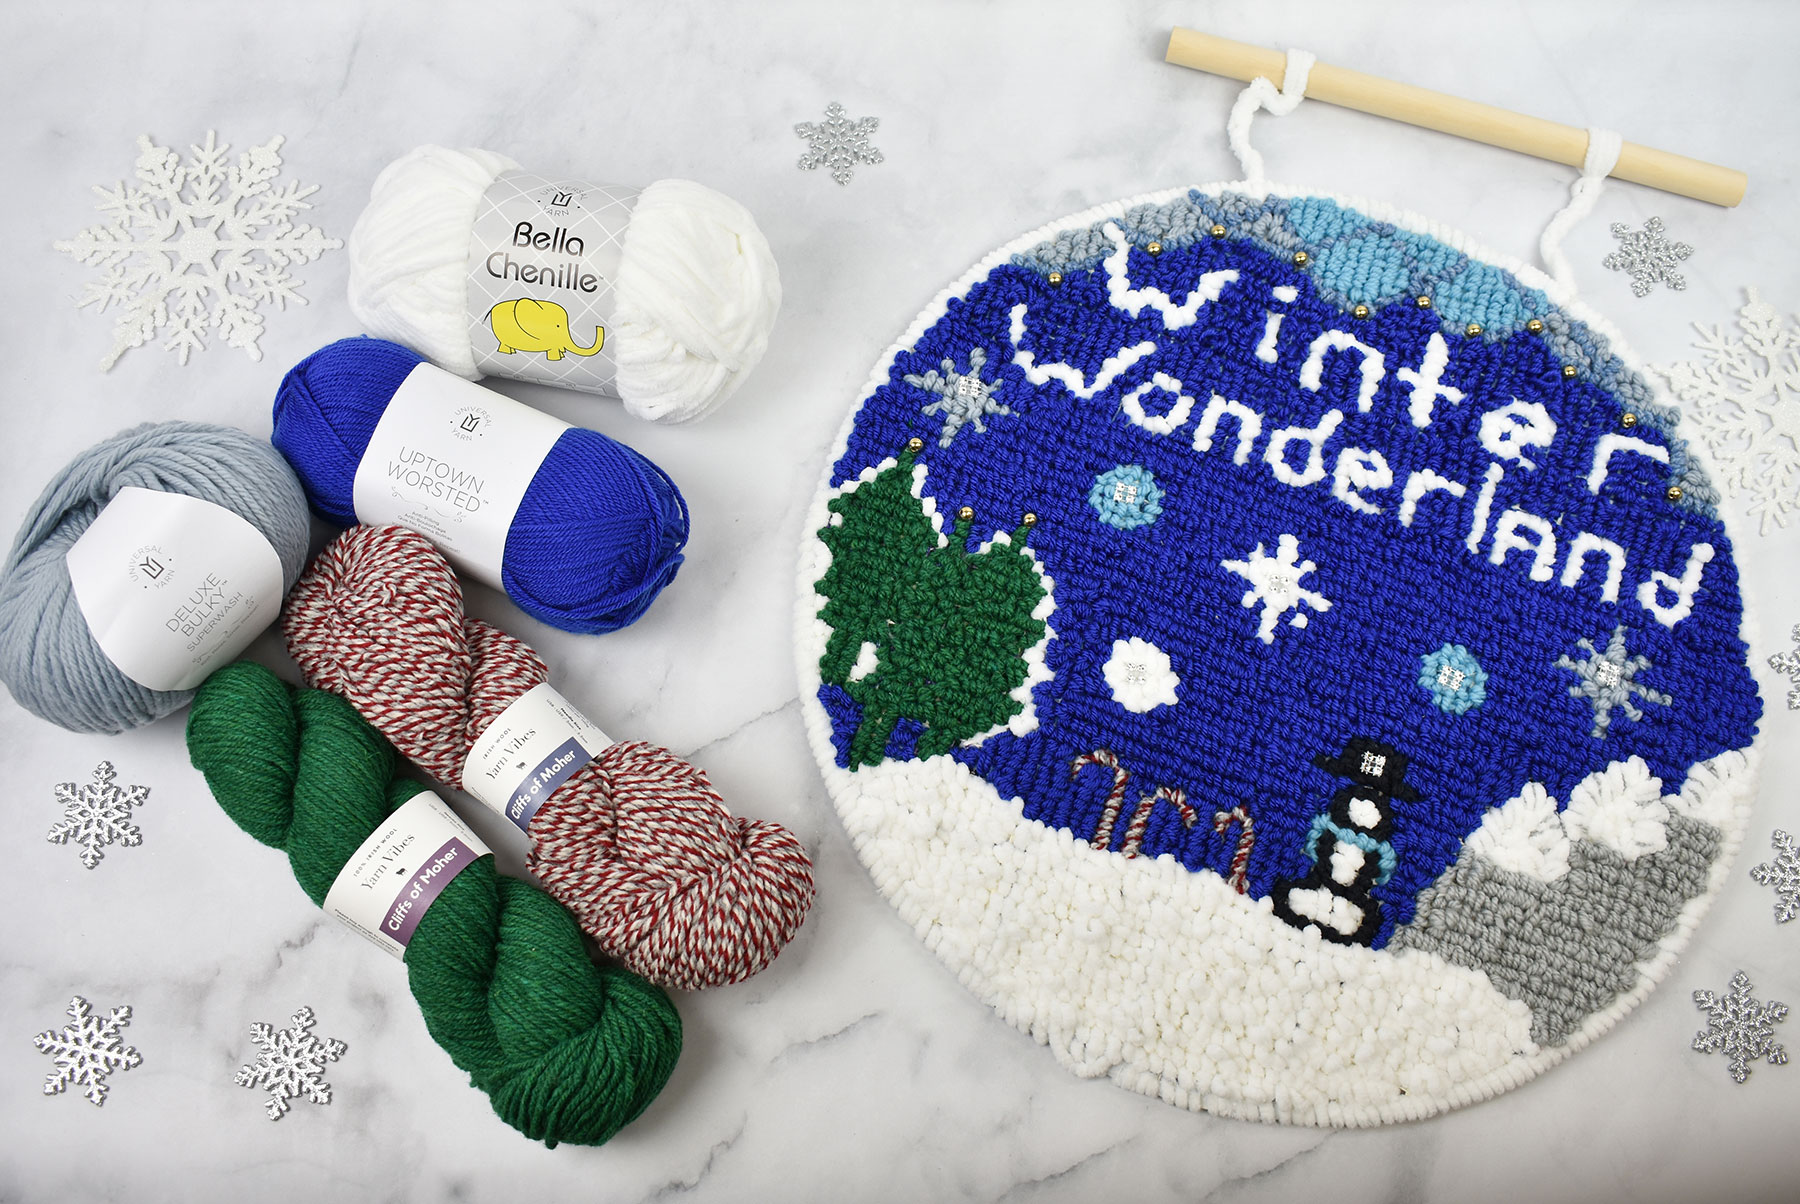
We asked April to create a wall hanging art piece inspired by the idea of a winter wonderland. April chose a variety of our yarns to use for this project, and I have to say I was SO intrigued to see how all of these different fibers would work together in the piece. Here is what April had to say about some of the yarns that were used.

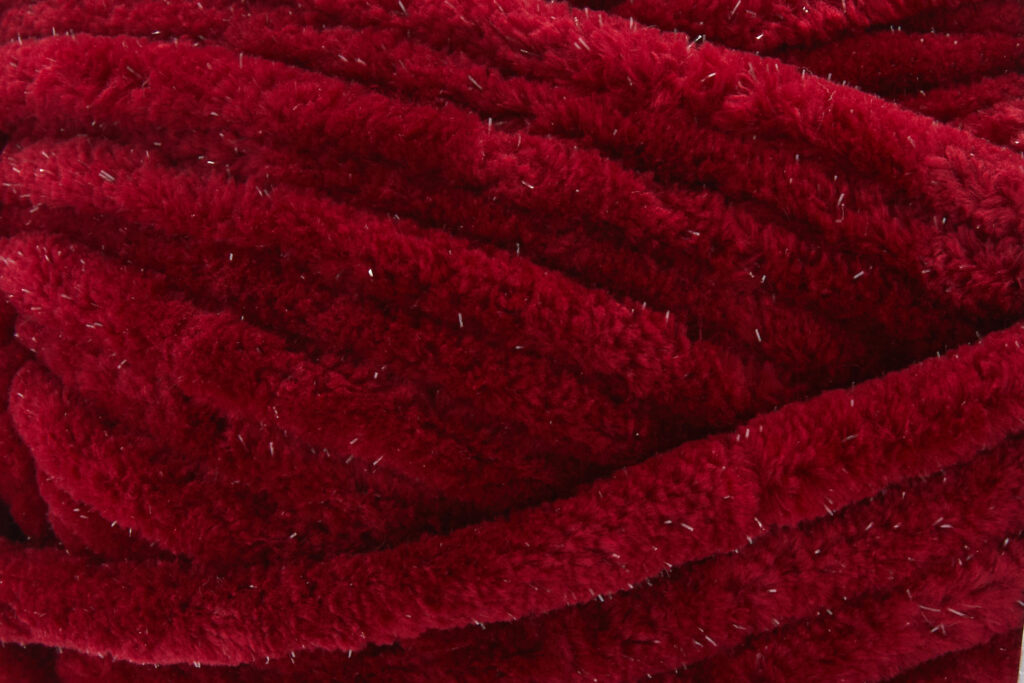
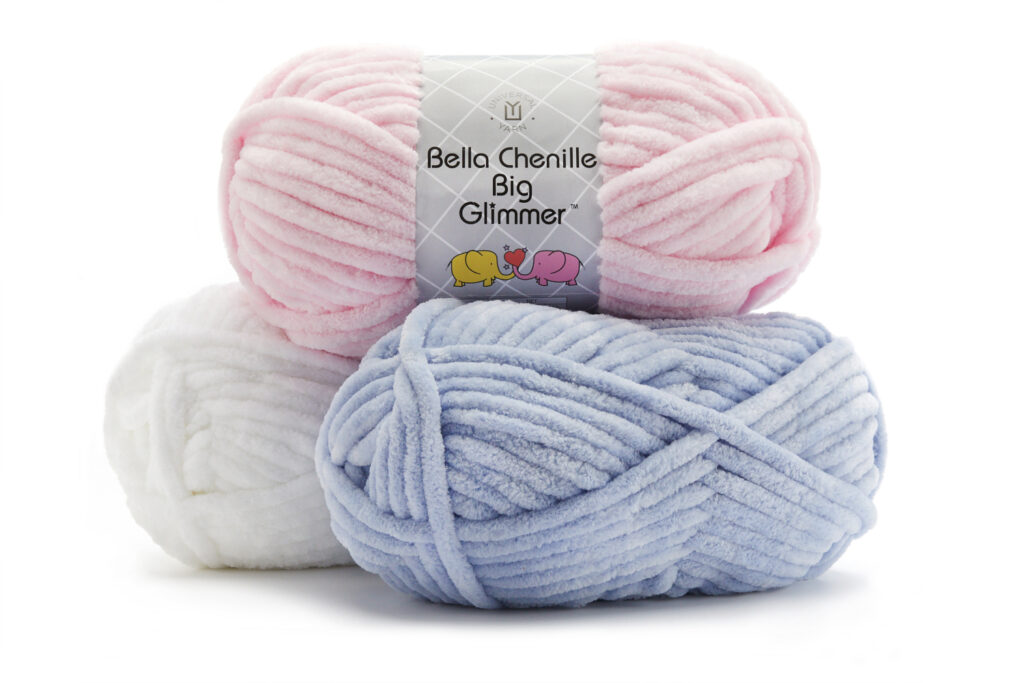
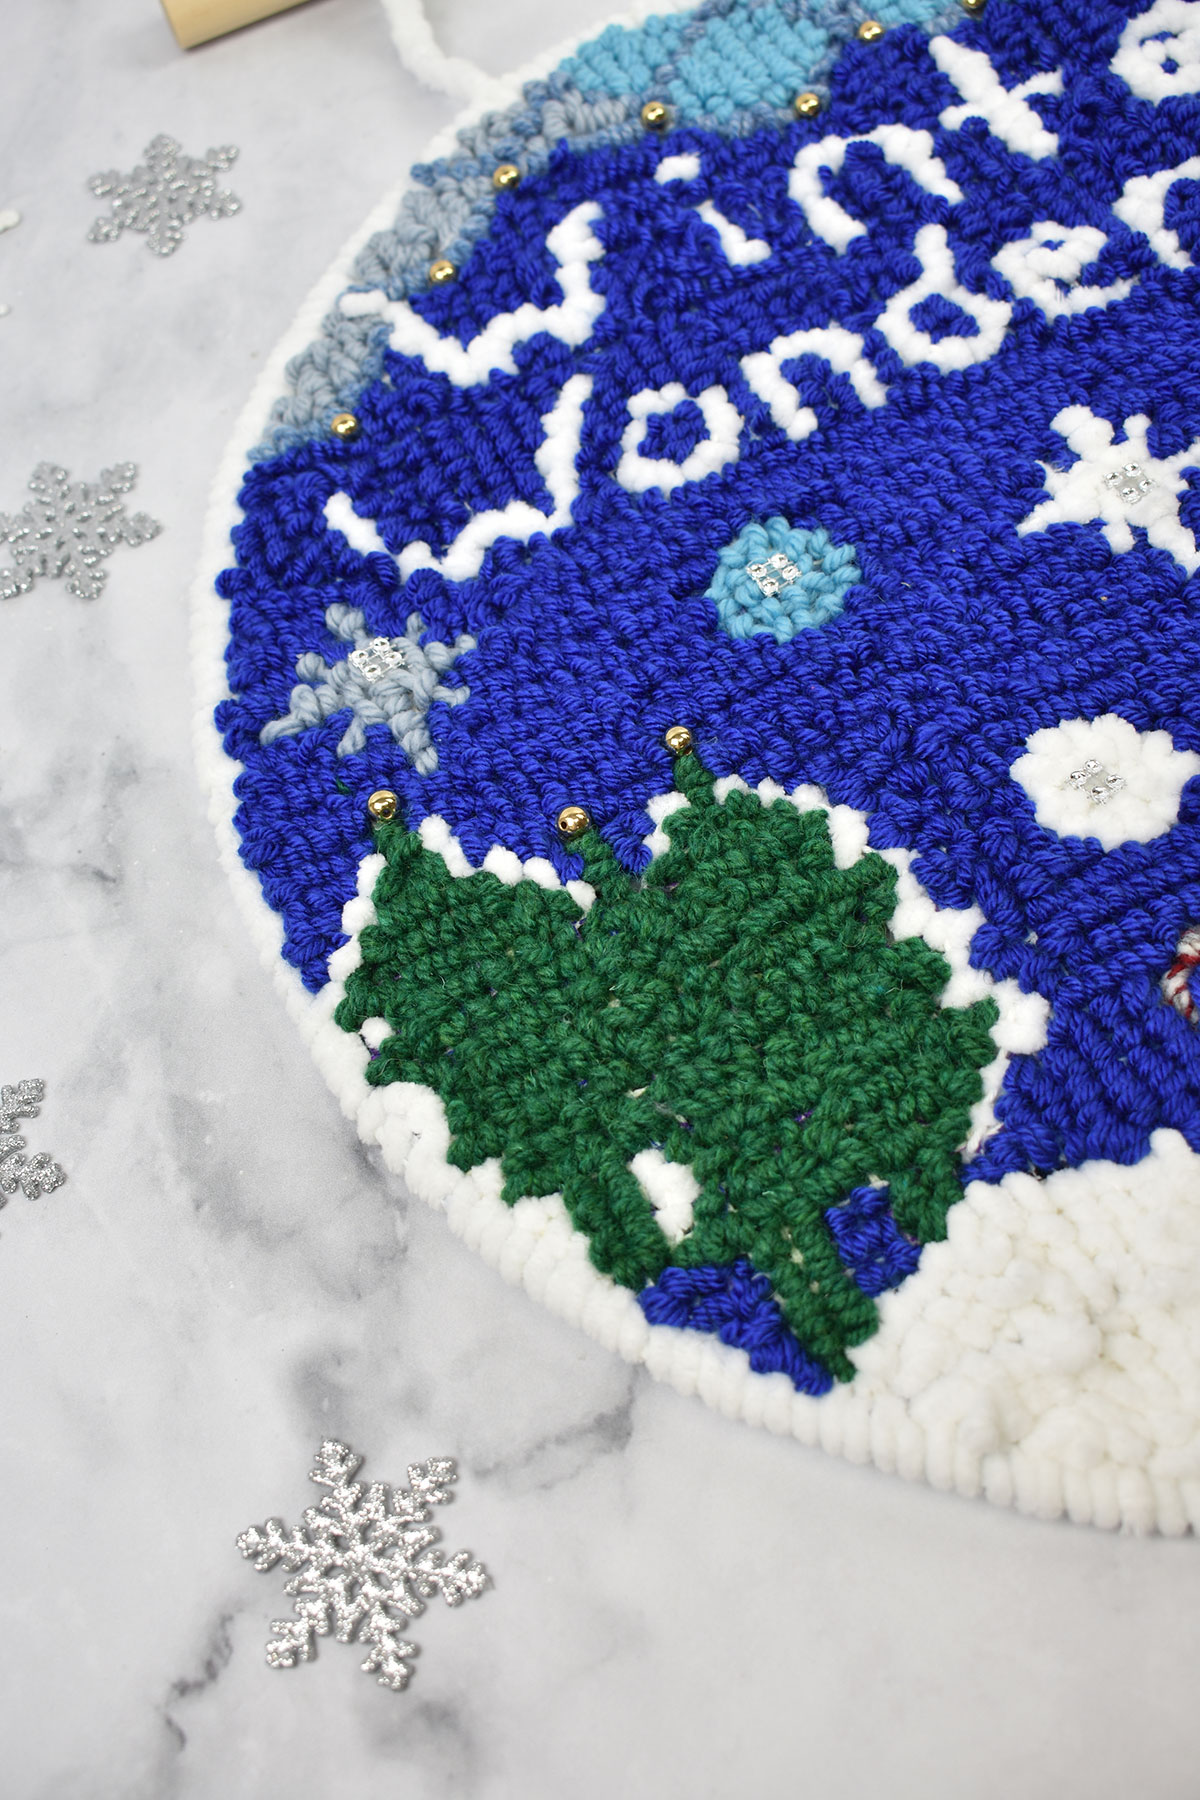
‘I thoroughly enjoyed using the various types of yarns from Universal Yarn to create this project. Bella Chenille’s polyester fibers are the perfect fit to create a fluffy and realistic looking snow texture. The Cliffs Of Moher yarn from Yarn Vibes was one of my favorites because the wool created tight loops that gives a different feel on the canvas. A helpful tip while locker looking is to double up thinner yarns to make the loops more secure, and it also helps to close any gaps on the canvas.

A close up image of the wall hanging made in the locker hooking technique.
I loved April’s choice to add some sparkle to this piece with the rhinestones and beads. Winter is the season of sparkle!

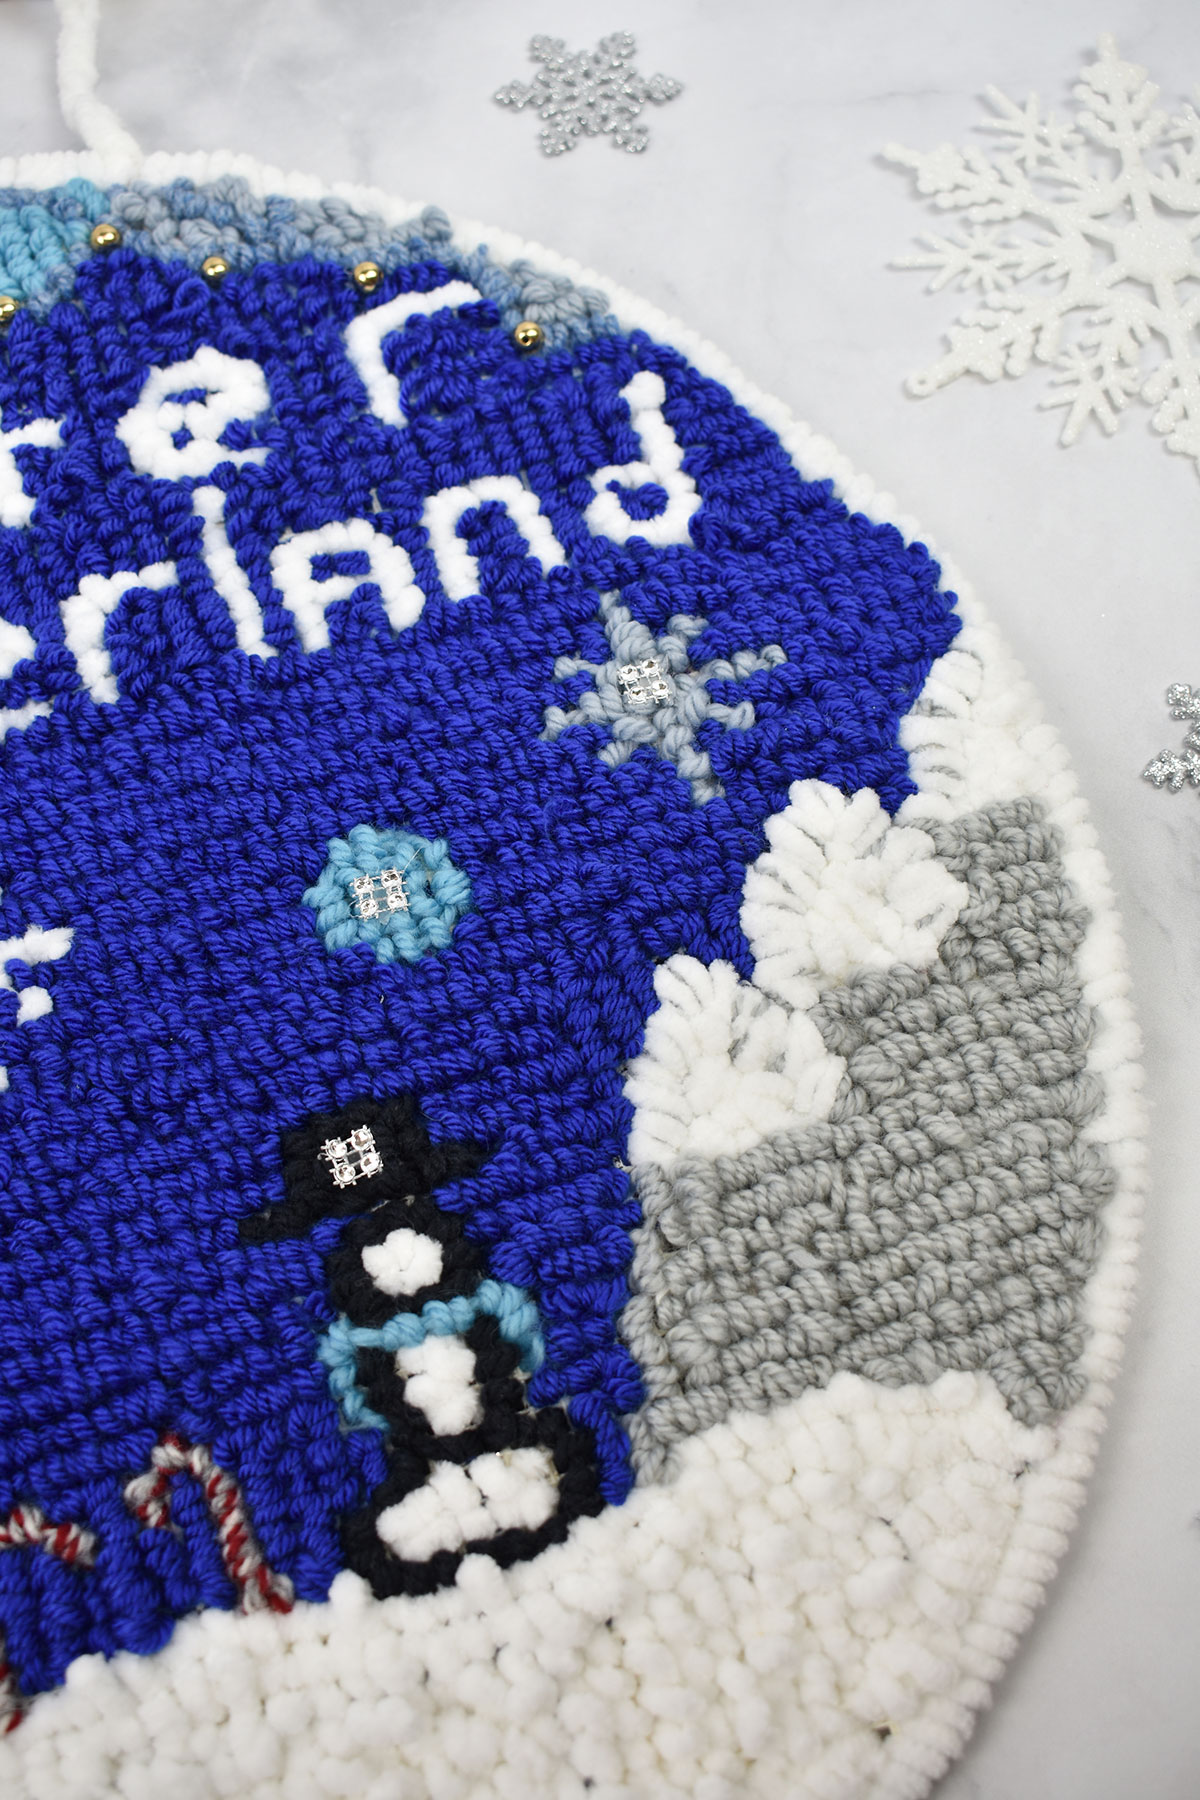
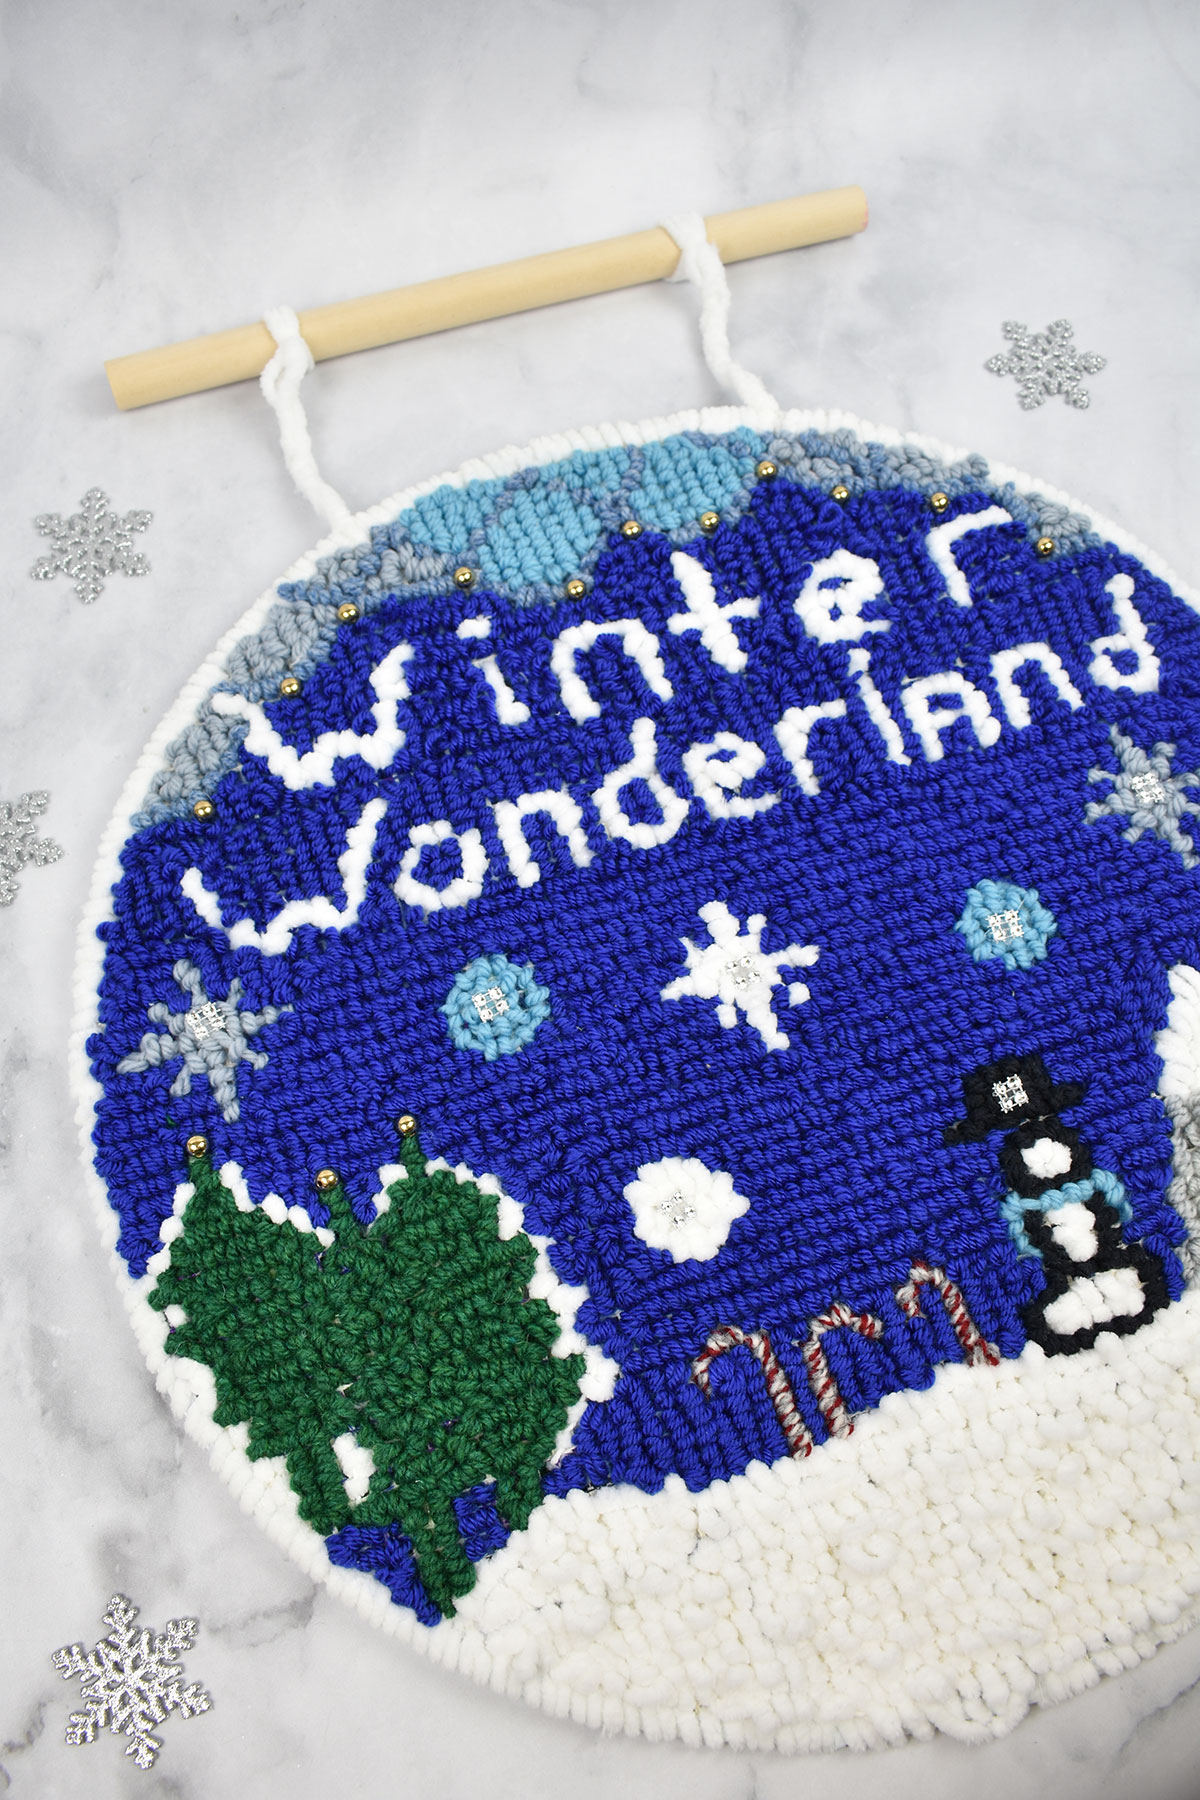
Deluxe Bulky Superwash was very smooth, making for a great transition when locking loops in place. I used the Rico Design Soft Merino Aran virgin wool yarn to create the snowcapped mountains. Terrain was essential to this project because it added layers and dimension to the piece. For the background, I used Uptown Worsted in Royal Blue, and it did not disappoint. The blue allows for the other colors to shine and gives the true winter wonderland appearance. I appreciated the tightly woven Ricorumi yarn because I used it as the locking yarn (the yarn through the needle eye) to help secure the loops in place. Finally, I added a few beads and rhinestones for embellishments to give a ‘pop’ to the piece, because what is a winter wonderland without some sparkle?

A close up image of the locker hook wall hanging featuring yarns from Universal Yarn.
You can really tell how the different yarns create a unique texture with the locker hooking technique. Cliffs Of Moher is 100% wool and makes tighter loops than the acrylic fibers of Uptown Worsted do.

Overall, I really enjoyed creating this piece and exploring the different textures of the yarn. Universal Yarn has quality yarn that can be used for many different yarn crafts.’

A picture of a locker hook wall hanging and a variety of yarns from Universal Yarn.
This picture shows the piece along with some of the different yarns that April chose to use!

To get started with locker hooking, April recommends some materials that you will need: a latch hook mesh canvas with 3.75″ squares, a locker hooking tool, the yarn of your choice, and of course, your creativity! If you are local to the Charlotte area, April offers classes and workshops throughout the year. Her next class will be in March 2024 at the Craft Fest hosted by Petty Thieves Brewing. You can find out more about April’s work on her website www.latchedbylee.com and be sure to follow her on Instagram @latchedxlee .

I hope that this post has given you some winter wonder-ful inspiration to try something new. This could be a great hobby to explore in between large knitting or crochet projects, and to use up some of your stash yarns! Learning a new craft can also be a fun way to beat the cold weather blues. Wishing you all a fabulous 2024!

Happy Crafting,

Aubrey

Tutorial – Magic Circle

Sample Swatches of crochet stitches lay in an arrangement next to three crochet hooks. The heading "AJ's Crochet Corner, Tips and Tricks" is present.

Crocheting into a magic circle makes evenly placing your starting stitches a snap! This technique offers a way to place as many stitches as you need into a perfectly circular shape with the tug of some yarn.

Using a magic circle takes away the guesswork involved with a different method of creating a circular base, where you create a chain, then slip stitch to form a ring. Because this other method with a starting chain has a fixed circumference, it may leave a gap in the center if you make it too big, or be impossible to work into if it’s too small. With the magic circle being adjustable, these sizing problems while starting a project magically disappear!

One thing that can be a bit tricky is that not everyone calls this method a “magic circle” as seen in the Paradise Pouch. When getting started with a pattern, you may also read “adjustable ring,” as seen in the Cotton Candy Swirl, or a blend of both called a “magic ring.” It can also be called a loop, as in “magic loop” or “adjustable loop.” Lastly, you may see it represented visually in a chart, denoted by a swirled shape before any stitches start, like in the Spice Market Shawl. Now that you know what to look for, let’s take a look at how to do it! There are just 6 simple steps to do to create a magic circle.

Step 1: Create the circle.

Create an initial loop by laying flat, if it helps, or held in your hand. Place the tail behind the working yarn, and pointed to the left.
Pinch yarn where it overlaps to hold the loop in place while you work.

Step 2: Insert hook.

Reach your crochet hook into the loop.

Step 3: Yarn over.

It may feel strange to tension the yarn while pinching the circle. You may try holding it as seen above or switch to holding the circle with your thumb and middle finger to tension with your pointer finger. I have a habit of starting like this then switching my grip when I begin chaining and stitching as normal (as shown, beginning in step 5).

Step 4: Pull through.

Pull the working yarn through the loop with your crochet hook.

Step 5: Chain, then stitch into the middle of the circle. The pattern you are following will indicate how many chains, then stitches to create.

Here I chain 3, then double crochet 4 times into the loop to demonstrate the technique. But you can do this with any number of, or type of stitches!

Step 6: Close the circle.

Release your hold on the circle, and pinch the tail of the yarn.
Pull the tail of the yarn until the circle is completely closed.

It’s as easy as that! From here, you continue following the pattern as normal, and will weave in the tail along with any other ends as a finishing step. I hope you find this tutorial helpful, and that you feel inspired to try a new project in the round!

That’s all for now, and Happy Stitching!
Ashley Jane

12 Days of Winter – Series 6 Edition, Part III

This is part 3 in a four-part series highlighting designs from our 12 Days of Winter, Series 6 edition.

Hey everyone! Another year has flown by, and it’s time for our annual 12 Days of Winter blog celebration. I’m a big fan of the winter season. This time of year brings with it an ethereal sense of happiness that is quite unique. The days are short and often dark, plants are dying, the weather is cold, and yet – things like delicious warm comfort foods, sparkling holiday lights, parties, and (if you’re lucky enough) gorgeous falling snow fill the air. It’s a time of endings and beginnings, and a perfect opportunity to start a brand new project to welcome the new year.

Speaking of brand new projects, I have some inspiration for you! Today, I’ll be sharing three of the projects from our 12 Days of Winter Kit Collection, Series 6. The Frozen Pond shawl, Keepsake Cover, and Snow Dust stole. All of these kits were designed by Rachel Brockman, our Creative Lead. Rachel has a way of creating unique designs that cater to a variety of skill levels, while always having thoughtful details that make them special. The thing that ties all three of these designs together? Lace stitches.

A close up image of a person facing away from the camera and looking down. They are wearing a hand knit shawl in a dark blue color on their shoulders.
The Frozen Pond shawl is perfect to drape over your shoulders on a chilly day.

Lace knit stitches result in some of the most gorgeous patterns you can imagine, and they are actually what first drew me to taking up knitting as a hobby. I remember seeing a book full of patterns for Victorian inspired lace shawls, and I was instantly intrigued. The eyelets, twists, and turns created by lace stitch patterns are lovely, and they are a perfect match for the winter season, as they often share the same sense of delicate and ethereal beauty.

A close up image of the details of a hand knit blue shawl with lace stitches.
The Frozen Pond shawl lace detail, doesn’t it look like pretty trees?

Frozen Pond is an asymmetrical shawl knit using our sinfully soft Nymph yarn. Nymph is a DK weight blend of cotton and polyamide, with a soft, fuzzy halo that adds dimension to any project. Boomerang shaped shawls like this one have great drape, and are easy to style in a variety of ways. The Frozen Pond shawl’s name was inspired by the dark blue colors of iced over water in the winter. I love the way the diamond pattern of the lace has shapes that look like trees, and I imagine they’d line the perimeter of the aforementioned frozen pond.

The lace pattern worked in this shawl will require some attention on your part while knitting. However, in between the sections of lace you’ll get to relax with some garter stitch, perfect for when you want to knit while watching TV in the evening. We’ve included both written instructions and charts for this pattern, so you are able to utilize what works best for you.

A person stands holding up a large hand knit blanket in a blue, magenta, and green striped colorway.
The Keepsake Cover has candy colored stripes, making this a perfect holiday gift project.

The Keepsake Cover is a joyful blanket pattern knit using three colors of our Uptown Worsted yarn. This 100% anti-pilling acrylic yarn is a workhorse, perfect for projects like blankets that will get a lot of wear and tear. A combination of ribbing, cables, and lace make up the motif that is worked throughout the Keepsake Cover. The diamond shape in this pattern reminds me of Christmas tree ornaments, with the eyelets created by the lace resembling the light bouncing off the ornaments as they hang on the tree.

A close up image of the details of a hand knit striped blanket with lace and cable details.
The Keepsake Cover is perfect for getting cozy with a cup of hot cocoa!

This pattern also includes written instructions, as well as a chart to help you visualize the cable and lace motif. If you’re not familiar with how to read knitting charts, a pattern like this one is the perfect way to learn. It may seem intimidating at first, since this pattern has both cable and lace stitches, but after your Keepsake Cover is complete, you’ll be a chart reading expert! Here is a link to a blog post where we discuss more on how to read knitting charts, which might be particularly helpful to those of you who are brand new to the skill.

The Snow Dust stole (or wrap!) is an excellent example of the delicate, cobweb quality you can achieve by knitting lace stitch patterns. This accessory is practically the winter season as a wearable item, and you’re sure to look like a snowy dream while you wear it! Snow Dust is knit using our Cotton Gold yarn, which is a laceweight cotton thread yarn, with small sequins and metallic fiber strung throughout. It looks gorgeous worked on its own as you can see from Snow Dust, but also makes an excellent carry-along yarn to add sparkle to other projects.

Snow Dust features simple stitches like knits and purls, as well as yarn overs and basic decreases (‘slip, slip, knit’ – ssk and ‘knit two together’ – k2tog) to create the lace repeat. This would be a great project choice for someone who wants to get really comfortable with knitting lace, because the rectangular shape of the wrap means they can simply focus on the knitting. The end result of the lace stitch pattern reminds me of the quiet, sparkling beauty of the outdoors right after a snow fall. This wrap would be perfect for a night out to the theater, or a fun dinner with friends.

A close up image of a person standing away from the camera and looking down. They have a hand knit wrap in a white color with lace stitches draped over their shoulders.
The lace details in Snow Dust look like little bird tracks in fresh fallen snow!

No matter which of these projects you want to create, the lace stitches in these patterns add texture, delicate details, and depth to the overall result. Don’t fret if you’re still a beginner when it comes to lace patterns. Practice makes perfect, and once you master all the basic stitches, you can apply them to the Frozen Pond shawl, the Keepsake Cover, or the Snow Dust wrap!

Remember, these exclusive kits can be purchased at local yarn store retailers near you. Not in stock at your local shop? Ask them about drop shipping – order through them, and we ship to you! Each kit comes with the pattern, the yarn required to make it, and a printed version of the pattern. Use our store locator to find your nearest Universal Yarn retailer!

Tune in tomorrow for the final installment of our 12 Days of Winter, series 6 blogs!

Happy Crafting,

Aubrey

Collection Spotlight: Soft Simplicity

A pile of sweaters and accessories on a red fabric background, with the words "Soft Simplicity".

Happy September! While I’m not one to wish away the summer, I cannot help but feel so excited about the things we’re sharing this autumn season. Even if it’s still hot out, the sun is setting earlier and even a few leaves are beginning to turn. These things signal what may collectively be a knitter’s favorite season: autumn! And what better way to celebrate than with a lovely new pattern collection? Say hello to Soft Simplicity!

A woman wearing a blue-grey cardigan knit from Universal Yarn Minou. The words "Soft Simplicity" are in the upper right corner. This is the cover of an ebook.
The cover of our latest ebook, Soft Simplicity.

This collection features projects that make our gorgeous yarn, Minou, the star of the show. Minou is our take on eyelash yarns – and there are few yarns out there that can compare! This kitten-soft yarn features fluffy strands of baby alpaca and merino wool that jut gently out of the nylon thread base. The strands are just about 1/4″ long – just enough length to make a statement without being over the top.

A rectangular, wooden bowl with several balls of Universal Yarn Minou in three colors. It is resting on a red fabric background.
Minou in shades 108 Tanager (red), 107 Heron (grey-blue/green), and 101 Borzoi (cream).

Because Minou is so fluffy and furlike, it’s a great choice for soothing, simple stitches. It’s a match for garter and stockinette stitch on its own, or as a carry-along with your other favorite yarns. You’ll see it featured as a single strand, held together with another yarn, and in stranded colorwork in this collection. Let’s take a closer look.

A woman seated on blankets and pillows wearing red pants and a camel-color vest with red details, knit using Universal Yarn Minou.
The Feathered Vest.

First up: the Feathered Vest. This vest is casual and cozy. In the early days of Autumn, wear it as a top that just hints at cooler days ahead. When it’s a bit chilly, it makes a fabulous layering piece. The knitted vest has made quite a resurgence in the past year or two, and we don’t see any reason that should change. I knew this collection wouldn’t feel complete without one. Rather than stick to a solid color, I opted for a pop along the hem and neckband. It’s just enough color to elevate this piece from drab to fab.

This vest is constructed seamlessly from the bottom up in one piece. The front and back are separated at the underarms and worked flat. Then, the shoulders are joined using the three-needle bind-off. Finally, stitches are picked up along the armhole and neckband for a tidy finish.

A person wearing a fluffy pair of brown socks knit with Universal Yarn Minou and Bamboo Pop Sock Solids. They are sitting with their feet crossed and holding a cup of coffee or tea.
The Forest Slipper Socks.

The Forest Slipper Socks are a great addition to your sock drawer. Comfy and casual, you’ll love wearing these around the house on a Saturday morning. For this design, I actually did choose a stitch motif, and it’s faintly visible. That’s because its functionality is really what I was after. These slipper socks feature a garter rib that provides a bit of memory and stretch, which is what you want in a pair of socks. In this design, I’ve paired Minou with Bamboo Pop Sock Solids. Bamboo Pop Sock is a customer favorite, and its PBT content adds extra elasticity and helps your socks maintain their shape over time. Because you hold a strand of each yarn together throughout the project, these work up pretty quickly, too!

These socks are knit seamlessly in the round from the cuff down. They feature a heel flap and gusset. Simple shaping forms the toe, then the toe is closed using Kitchener stitch. It’s the most complex pattern in the collection, and it would be helpful if you are already familiar with basic sock techniques before diving in because it can be a little tricky to read your knitting (more on that later!).

A woman glances downward and to the side while wearing a blue-grey cardigan knit in Minou over a white tank top. She is standing and holding the cardigan edges.
The Pacific Cardigan.

Next up is my favorite piece in the collection: the Pacific Cardigan. This minimalist cardigan is open, features almost no shaping, and is just so easy to wear. I’m perpetually chilly indoors, so cardigans like this are perfect for me year-round. The silhouette is fairly boxy – with sleeves slightly more fitted at the upper arm, but are loose and open at the cuffs. Although it’s simple, Minou’s gorgeous color and texture take this cardi to the next level.

The body of the Pacific Cardigan is worked flat in one piece, beginning with the back hem and working up and over the shoulders. The left and right front are separated at the shoulders and worked separately. After sewing the sides of the body together, the stitches for the sleeves are picked up from around the armholes and worked in the round from the top down.

Finally, we have the Speck Cowl. A yarn like Minou simply begs to be worn around your neck – it’s just so lush and cozy! I wanted the design to incorporate low-contrast stranded colorwork, using Minou to make little specks of fluff to decorate the piece. Funny story, though, is that my very trusty sample knitter accidentally swapped the colors in the pattern. I noticed her sneak peek photo was more fluffy than my swatch, but I actually loved it. We chatted a bit and decided it would be great to show both options. So, two versions of this cowl were born! You can see both versions in the photo above – Version B (right) shows Minou as the non-dominant yarn, and the “speck” effect is more apparent. Version A (left) shows Minou as the dominant yarn – notice how much fluffier it is than Version B! I can’t choose a favorite – for the same pattern, the results are strikingly different.

The Speck Cowls are knit in the round from the bottom up. They incorporate a very simple stranded colorwork motif. The top and bottom border feature a few rows of garter stitch. This is probably the perfect “entry-level” Minou pattern. Speaking of “entry-level”, I’ve included some tips and tricks for working with Minou that are helpful whether you’re a newbie or a longtime fiber artist. I hope you find them helpful!

Tips and Tricks for working with Minou
Most of the patterns in this collection are pretty easy, featuring little more than the foundational skills of knits, purls, color changes, and basic decreases. However, being so fluffy, it can be challenging to read your work while knitting with Minou. Counting rows and picking up stitches isn’t as easy as it is with a round, smooth yarn (such as our beloved Deluxe Worsted or Bamboo Pop, for example). Here are a few tips to ensure your project goes smoothly.

  1. Work in bright light. This will make it easier to see your fabric, especially when picking up stitches or seaming.
  2. Swatch! Yes – you need to do it, and not just because your swatch will determine your sweater fit. In the case of Minou and other eyelash yarns, a swatch will help you practice simply by getting a feel for what it’s like to work with the yarn.
  3. When swatching, it can be difficult to count the number of rows and stitches you’ve worked. Take notes regarding the exact number of stitches and rows you knit, and measure the piece you knit rather than counting individual stitches or rows (see next tip!)
  4. Use a row counter, especially when shaping the armholes or neckband. Often, our patterns tell you to work until the piece measures a specific length. We typically include a little buffer of even length to account for any differences with the row gauge. If you use a row counter, you’ll easily be able to track exactly how many rows you worked to achieve the specific length, and thus can ensure the sides and front/back of the piece are perfectly symmetrical.
  5. If the pattern is knit flat, like the body of the Pacific Cardigan, use a removable marker to denote the Right Side and Wrong Side of the work. Because the yarn is fluffy, reverse Stockinette stitch and Stockinette stitch can end up looking very similar, so this tip is especially helpful.
  6. Take your time! We all know knitting isn’t a speedy endeavor, but it’s especially important to slow down when working with eyelash yarns like Minou. This will help you process everything you’re doing more easily, and you’ll be less likely to make mindless mistakes. (Learn from me, I’m the queen of mindless knitting mishaps!)
  7. If you make a mistake, take a deep breath. Although it can be difficult to see your stitches with Minou, the flip side is that it will also hide your mistakes very well. Now, I’m not advocating that we just ignore every knitting mistake we make – it’s good practice to fix your knitting. If you need to frog any part of your work, just take it slow and be careful not to rip back aggressively so as not to damage the yarn. With that said, it is also very much okay to embrace the imperfection and move forward.

Thanks for joining me today as I dished about our new collection, Soft Simplicity. I hope you enjoy each pattern and find the tips and tricks for working with Minou helpful. Be sure to check out all of the ways we’ve been using Minou, too! You can see all of our offerings at this link.

Have a wonderful, fiber-filled day!

-Rachel

Day 10 of Winter – Series 5 Edition

This is part 10 in a 12 part series highlighting designs from our 12 Days of Winter, series 5 Edition.

Are you new to lace knitting, or are you already a fan? Either way, you’re in for a treat today as we take a closer look at the oversized, extra cozy Evergreen Shawl!

Beautiful and oversized, you’ll be so cozy in the blanket-y shawl.

First, though, let’s chat about this lovely design and all the special details. When I wear shawls, I love an oversized one, especially in the winter. You can wrap them around your neck and shoulders a couple of times – and you can’t have too many layers, wouldn’t you agree? 😉 I chose Deluxe Worsted, our classic, 100% non-superwash wool yarn, in the color 12296 Green Leaf for this piece. Since the shawl is covered in lacy fir trees, the color seemed like the perfect fit.

Just take a look at how large, yet still elegant, this Everygreen Shawl is!

In this pattern, you’ll get to indulge in the following techniques:

  • yarnovers
  • basic increases and decreases
  • right and left twists
  • knitting flat

This shawl does indeed have perhaps the simplest of shapes: a right triangle with decreases along one edge. The straight edge of the shawl has a gorgeous lace diamond motif, which although beautiful, does cause stitch counts to fluctuate throughout the pattern. So, as you’re decreasing along one edge to shape the shawl, you’ll also need to ensure that you maintain the stitch patterns as established. It’s a nice balance of rhythm and engagement, perfect for someone who wants to stay focused through a knitting pattern.

Although I’d consider this pattern Intermediate level, don’t fret if you’re a beginner who’s craving a challenge.  I’m the very last person to discourage someone from trying something new. So, if you have little or no lace experience, or even if you have a bunch, I have a few handy tips for knitting lace that will get you started on the right foot.

The lacy tree motif makes this shawl perfect for winter. Just imagine yourself in a snowy forest with those pops of green peeking out beneath the piles of snow atop the boughs.

My first tip is to sharpen your chart reading skills. This pattern includes helpful charts and written instructions, but I find that charts are a great way to visualize exactly what you’re doing. Back in our first series of the 12 Days of Winter Kit collection, before we even knew it would be a tradition, I shared some tips for reading charts. You can find that blog post at this link.

My next tip is to use sharp needles. I have so many favorite needles that it’s hard to choose a brand. I’m a bit of a needle nerd and I love everything from Addi Lace Tips to any of the ChiaoGoo lines and have had great experiences with Hiya Hiya Sharps. But in truth, your favorite needle brand probably has an option for sharp tips and that’s what you really want. Why? Simply because it makes working those decreases much easier! In this pattern, usually, you’ll only work two stitches together; however, some lace patterns have you work more than that – three, even four together (as in the Dusk Poncho). And if you must do a purl decrease through the back loop, you’ll thank yourself for the investment, trust me!

Insert lifelines as you knit to give you a safety zone if you make a mistake and must rip back your work.

My final tip for lace knitting is a lifeline – because it’s a lifesaver! I feel like a pro whenever it comes to correcting mistakes in cable knitting or most textured stitches, however, I always find correcting mistakes in lace to be a bit more tricky. As a result, I often tink back (knit backward – get it?) my work or simply rip back until I get to the row where I made the mistake. When you have lots of decreases and yarnover increases, it’s really easy to lose your place. My suggestion is to insert a lifeline. What’s a lifeline? It’s simply a strand of yarn to place through your stitches as a safe spot to unravel your work if needed because all of those stitches will be secure with a strand of scrap yarn threaded through.

Option 1: This is probably the most preferred method, especially if you’re knitting lace. Before you start knitting your row, thread a piece of scrap yarn that’s about six to eight inches wider than your work and simply glide the tapestry needle through each live stitch without removing the needles. You’ll work just below the knitting needle, as pictured in the example photo above. The ideal place for a lifeline is before a fresh row repeat – this way you know exactly where to start once you unravel your work.

You can always insert a lifeline after you work your rows, too.

The second option is great for moments when you’ve forgotten to insert a lifeline…or if you were overly confident only to find out you made a mistake later. Oops! And I have to say, I’m GUILTY! Have no fear, though, because you can still insert a lifeline any amount of rows below (see above photo). This time, all you’ll do is thread the tapestry needle the same way you did in the first option I described. Then, carefully thread the needle through one leg of each stitch across the row. Picking up each leg of the stitch from below is a bit trickier, but if you take your time you’ll be good to go, I promise. Then you can rip back all the way to the lifeline and your stitches will remain secure.

The tip detail shows how the tree motif transforms into a chevron lace motif, and the final shaping is just so pretty!

That’s it for my lace knitting tips and I hope you find them to be very useful. If you have any questions don’t hesitate to reach out to us because we’re always happy to help. Do you have any lace tips you’d like to share? Let us know in the comments below!

Remember, these exclusive kits can be purchased at local yarn store retailers near you. Each kit comes with the pattern, the yarn required to make it, a mini Universal Yarn project bag, and stitch marker. Use our store locator to find your nearest Universal Yarn retailer!

Happy crafting!


Day 8 of Winter – Series 5 Edition

This is part 8 in a 12 part series highlighting designs from our 12 Days of Winter, series 5 Edition.

I love the winter season because of many things; seasonal drinks and items come back, joy seems to fill the air, and I always have fun shopping for holiday gifts! Another thing that I look forward to each season is winter-themed decorations! From driving by houses that shine brightly with different lights and figurines, to seeing what special and unique decorations each person sets up or creates, it’s clear to me that you can never go wrong with adding a little bit of spice and flair into your home with decorations for the season. Our Trio of Trees designed by Aubrey Busek is the perfect way to add seasonal décor to your home!

Trio of Trees

Let’s take a closer look: the Trio of Trees are made up of three elegant and timeless patterns that can be recycled year after year (which is such a huge plus!). The trio features a Linen Stitch Tree, a Striped Tree, and a Slipped Ornaments Tree. Each tree brings its own unique character to the table and can easily become a staple decoration in your home for the season. Featuring our Cotton Gold yarn as well as our Dona yarn, these two yarns held together and worked up create some magic to get you ready to jump into the winter season!

Slipped Ornament Tree

Each tree uses a different stitch pattern, which is fun because you are getting a “stitch sampler” with each tree you make! The Slipped Ornament Tree is my personal favorite, because it reminds me so much of a classic winter tree that we so often see during this time of the year. In this pattern, a special stitch called a Long Stitch is used. The yarn is wrapped twice around the needle, giving a “draped” effect throughout the tree. The delicate sequins strung through our Cotton Gold yarn creates a gorgeous shimmer that, when incorporated with the saturated colors of Dona, will have your guests do a double take and stop to admire this miniature forest in your home!

Linen Stitch Tree

You know those winter decorations that your family brings out year after year, no matter how “old” it gets? That is exactly what I think about when I see the Linen Stitch Tree. This specific tree instantly sends me back to sweet memories in the winter seasons spent with my family, decorating our home and getting ready for the upcoming events. The minimalist Linen Stitch tree offers a mix and match vibe to your holiday décor. You simply work knit stitches and slip stitches with yarn held in front to create a woven effect and provide texture to the tree.

Striped Tree

Look at how it subtly glistens! The Striped Tree features a stockinette stitch pattern worked all the way up the body. A strand of each Dona and Cotton Gold are held together throughout the tree, and the Dona colors (Blue Hint, Balsam, Alabaster) are changed every four rows. The glimmer from Cotton Gold creates a dream-like aura of snow falling from the sky, which is fitting for the season! Although they are all effortless to make, the Striped Tree is the most minimalist pattern in my opinion because it is just stockinette stitch the whole way up! It is the perfect final addition to the Trio, because it adds the right amount of sophistication while still looking simple.

These trees are each knit in the round from the bottom up. A picot edge is picked up and worked after finishing to create ‘skirts’ on the bottom of each tree edge, and the tree tops are stuffed with poly-fill before finally placing around the Styrofoam bases. Remember to check your gauge! It is so important for accuracy and so it fits in the styrofoam cones properly. They are the perfect addition to your home for this winter season, and will be for years to come! These trees will make your friends, family, and guests feel welcomed in your home, in the holiday spirit.

Remember, these exclusive kits can be purchased at local yarn store retailers near you. Not in stock at your local shop? Ask them about drop shipping – order through them, and we ship to you! Each kit comes with the pattern, the yarn required to make it, a mini Universal Yarn project bag, and stitch marker. Use our store locator to find your nearest Universal Yarn retailer!

Cheers!

Talya Ozbelli

Day 6 of Winter – Series 5 Edition

This is part 6 in a 12 part series highlighting designs from our 12 Days of Winter, series 5 Edition.

There’s something about the winter season that immediately brings my mind to cuddly stuffed animal friends, perfect for gifting during the holidays. Last year for the 12 Days of Winter, I designed Coco, a bunny with a removable hat and scarf knit in our popular Uptown Worsted yarn. We recently released a new member of our Bella Chenille yarn family: Bella Chenille Big Glimmer. This slightly shimmery version of our Bella Chenille Big yarn immediately brought to mind the idea of a snowy stuffed animal for this year’s 12 Days of Winter kits. I quickly got to work designing, and soon enough, Marshmallow the polar bear was born.  

Marshmallow says ‘Hello new bestie!’ – Knit using Bella Chenille Big Glimmer in color 601 Drift. Marshmallow’s sweater is knit in Bella Chenille colors 121 Indigo and 125 Oatmeal

Techniques you’ll explore in the Marshmallow pattern are:

  • Knitting small circumferences in the round
  • Increasing and decreasing often to create small 3-dimensional shapes
  • Embroidery
  • Casting on stitches and joining pieces after working

Designing a small (ish) item using such a chunky yarn like Bella Chenille Big Glimmer has its challenges indeed. Even more than that, chenille yarns can be a bit fiddly to work with, especially when you want things to look precise. So, I’ve decided to give you some tips for working with chenille yarns like our Bella Chenille and Bella Chenille Big Glimmer, so that the process of making Marshmallow or any other chenille project is tons of fun!

My first tip for working with chenille yarns would be to keep your gauge tight, to stop ‘worming’ and help prevent inconsistencies in the fabric. Worming happens when the strand of yarn coils back on itself, creating loose-looking loops in the fabric. For making a stuffed toy a tighter knit gauge is ideal, so that the finished friend is firm and well stuffed all around! Remember that the needle size listed on the yarn ball band is just a suggestion, and you should opt to use whatever needle size will achieve a gauge that matches what the pattern calls for. In Marshmallow’s case, gauge is very important. Not only will keeping a tight gauge aid in making the stitches look uniform and help prevent worming, but this pattern also uses nearly the entire skein of Bella Chenille Big Glimmer. So, you will need to be extra mindful while you work!

So cuddly!

It is no secret: chenille yarns fray. Once you cut the end of yarn, you will notice that the polyester fibers tend to want to come loose from the thread base. This can be frustrating, messy, and leave you with a less than ideal yarn tail for weaving in ends. My top tip for fixing this is to secure the end of the yarn with something that will stop the fraying! My favorite method for this is using a fabric sealant product like Fray Check, which I use very often when I am sewing fabrics that unravel easily. This liquid creates a coating on whatever it is applied to, preventing the fibers from being able to unravel. Make sure to use these types of products in a place with adequate ventilation, as they do tend to have smelly fumes, and let it dry completely before you work with it.

My next tip for working with chenille yarns is using the right type of needle. Everyone has preferences in types of needle materials, whether you like plastic needles, wooden needles, or metal. In my experience, mixing a plastic needle with a synthetic fuzzy yarn like chenille can result in difficulty sliding stitches, more ‘sticky’ feeling knitting, crampy hands, and hot, sweaty feeling yarn. A smooth wooden or slick metal needle is a more ideal choice for yarns like chenille. The stitches will glide much more easily as you work and be easier to manipulate. The Marshmallow pattern requires a consistent amount of increasing and decreasing as you go along to create the 3D shapes, so having a needle that easily works over 2 or more stitches at a time is necessary. Marshmallow is knit in the round, beginning with his legs. Whether you choose to use double pointed needles, or a magic loop method is entirely up to you! Magic loop is surprisingly easy to master, and we have a tutorial for it! Click this link to learn how to knit in the round using Magic Loop.

My final tip for working with chenille is using an angled tapestry needle with a large eye for embroidery and weaving in ends. I like these Tapestry needles from Clover for yarns like chenille. It’ll pass through the stitches more easily , you’ll be able to see the needle amidst all of the chenille fluff, and it’ll offer more control with the yarn and stuffing. Last year during the 12 Days of Winter, I made a video tutorial for embroidering Coco’s face. The same principles apply to Marshmallow, just on a more ‘jumbo’ scale. In fact, I used scrap Uptown Worsted yarn for Marshmallow’s face embroidery. Here is a link to the video where I give tips on embroidering a stuffed animal face.

Marshmallow just wants a hug!

There you have it – some of my top tips for working with chenille yarns! These aren’t the only tips and tricks, of course. The more you work with chenille yarns, you’ll discover what works best for you. If you have any other tips you’d like to share, feel free to leave them in the comments below, we’d love to hear!

Our exclusive 12 Days of Winter kits like Marshmallow can be purchased at local yarn store retailers near you. Each kit comes with the pattern, the yarn required to make it, a mini Universal Yarn project bag, and stitch marker. Use our store locator to find your nearest Universal Yarn retailer! Kits not in stock at your local yarn store? Ask about drop shipping – order through them, and we ship to you!

Happy Crafting,

Aubrey

Day 4 of Winter – Series 5 Edition

This is part 4 in a 12 part series highlighting designs from our 12 Days of Winter, series 5 Edition.

Happy Saturday! I hope your weekend is off to a great start, with a slow morning, warm cup of coffee, and of course, a yarny project! The 12 Days of Winter Kit Collection is one of my favorite design projects each year. We started it during my first year here at Universal Yarn, and I cannot believe we’re already in its fifth rendition! So far, we’ve created more than sixty wintry, giftable projects that are perfect for the holidays. Color me impressed! Each year, these collections are full of accessories, and some of my favorite contributions have been cozy socks. This year it’s no different – I’m simply smitten by my slipper sock design, the By the Fire Slippers.

These slippers are a cozy dream! They feature rich textures in the form of cables, twisted stitches, moss stitch, and smocking. A contrast color is used to add thoughtful details including the graft at the toes, the smocking, and – my favorite part – the split, double-thick cuff.

The By the Fire Slippers are knit using Deluxe Worsted Superwash – a superb choice for thick and quick socks! This durable wool yarn will stand the test of time while keeping you warm and comfortable. Plus, because it’s a 100% superwash wool yarn, the slippers are a cinch to care for. And if we’re being honest, easy-care knits make the best gifts because sometimes those we love don’t always remember to handwash!

For this project, I chose the lovely neutral #748 Oatmeal Heather as the main color and paired it with beautiful, velvety red #751 Pomegranate Heather for the contrast color.

A sweet detail of the contrast color toe graft and the moss stitch across the bottom of the feet.

You’ll get to explore the following techniques while making these slippers:

  • knitting flat
  • knitting small circumferences in the round
  • cables
  • right and left twists
  • three-needle bind-off
  • picking up stitches
  • Kitchener Stitch
  • smocking
  • mattress stitch

The By the Fire Slippers have an engaging, but deceptively simple construction. They begin by casting on what will become the heel, and that piece is worked flat for the width of the ankle, then the piece is joined in the round for the foot. Decreases are worked for the toe, and then the live stitches are grafted together using Kitchener Stitch and the contrast color. The back of the heel is sewn closed, and then it’s time to work the cuff. To create the cuff, stitches are picked up around the opening for the foot and worked flat using the main color. At a certain length, the contrast color is joined and continued flat. Loops are picked up with a spare needle from the picked-up edge of the cuff, and then the piece is folded inward and closed with a three-needle bind-off. The mattress stitch is used to close the front edges of the cuff. Finally, you add the special contrast color smocking and a slip stitch crochet edging to the front for a perfectly polished pair of slippers! As a helpful treat, we’ve created a video on how to work mattress stitch, so you’ll be ready to conquer this wonderful pattern!

I hope you enjoyed the video and feel prepared to finish your own By the Fire Slippers! They’ll make such a great gift for yourself or a loved one. My husband has already requested a pair, so I’m sure I’ll be making them again. Do you plan to knit these slippers for a loved one? Tell us for whom in the comments!


Remember, these exclusive kits can be purchased at local yarn store retailers near you. Not in stock at your local shop? Ask them about drop shipping – order through them, and we ship to you! Each kit comes with the pattern, the yarn required to make it, a mini Universal Yarn project bag, and stitch marker. Use our store locator to find your nearest Universal Yarn retailer!

Happy crafting!


Pattern Inspiration to Celebrate World Ocean Day

It’s World Ocean Day! The ocean is our planet’s life source. Covering about 70% of the Earth’s surface, our oceans produce more than half of the world’s oxygen, absorb carbon from the atmosphere, and are home to at least a million species, though we don’t really know the true number. We can all agree that a resource so vital to our well-being should be cared for and celebrated. So, in honor of World Ocean Day, we’re sharing some sen-sea-tional patterns inspired by our oceans and a few tips on simple actions you can take to help preserve this precious resource.

Seastar in Cotton Supreme

Did you know that sea stars can live up to 35 years? Amazing! These colorful invertebrates are one of the most recognizable sea creatures, so it’s no surprise that so many designers have created patterns inspired by them. In fact, we have three super cute patterns where starfish are the star of the show.

Our own Aubrey Busek took inspiration from these aquatic creatures when she designed Seastar (pattern link) for our Seaside Supreme ebook. This graphic sweater is a statement knit featuring intarsia and lace. It is knit using our popular Cotton Supreme yarn. I love that this pattern is written with both long and short sleeve options, making it easier to personalize.

As fiber artists, we have the power to create many long-lasting, durable items that are inherently less wasteful. For example, that handmade sweater is destined to last much longer than any sweater you buy in a department store. It’s an heirloom piece that you can wear for years and pass down, minimizing some of the waste created by fast fashion. Is there a sweater in your wardrobe you don’t wear often anymore, or perhaps that doesn’t fit the way you imagined? Instead of taking that sweater to the thrift store, consider unraveling it and recycling the yarn for another project. You can even make dryer balls from old sweaters and non-superwash yarn, like our Deluxe Worsted.

If you want something a little more whimsical that’s a nice complement to your collection of seashells, consider making the cute and free Seahorse and Starfish set (pattern link) by Michele Wilcox. Like Seastar, this pattern uses Cotton Supreme. One skein will take you very far with this pattern. I think it would be adorable to string several of them together to create a garland or mobile to decorate your home, reminding you of the ocean even if you live far from it!

Looking for a cute scrubby pattern for yourself or a loved one? Look no further than the Starfish and Shell patterns (link) by Rico Design using Creative Bubble. This yarn is perfect for creating scrubbies that are more durable and eco-friendly than disposable rags or sponges. They work as well for scrubbing your countertops as they will for exfoiliating your skin. Plus, your little one will love these projects as bath toys!

Narwhal & Seal from the Ricorumi Wild Wild Animals book.

I’ve always been fascinated by the Arctic. It amazes me that life can exist in parts of the world so frigid and seemingly barren. Yet, some creatures have evolved to be perfectly equipped to brave the harsh climate. With a knack for creating charming patterns, Rico Design pays homage to polar-dwelling seals and narwhals in the Wild Wild Animals pattern book (link). Both of these crochet amigurumi projects use Ricorumi Cotton DK. The Narwhal pattern is even available as a kit! Eco-conscious tip: instead of using poly-fil for your stuffed animal projects, try using scrap yarns and fabric instead!

One of my favorite books as a young child was The Rainbow Fish by Marcus Pfister. This cute storybook about sharing mesmerized me with its beautiful illustrations. Perhaps thanks to that book, I’ve always been excited to spot a fish in any body of water and had a fishtank of my own growing up. I still love visiting the aquarium to marvel at their colors, shapes, and sizes. With that inspiration in mind, I designed the free Betta Swetta Set (pattern link) in Adore. This duo was inspired by all of the fishies in the ocean.

The Atlantic Ocean, as seen on a rainy November day at Daytona Beach.
If you want to learn more about World Ocean Day, you can explore the website here (link).

Many of the species these patterns celebrate are threatened, and it’s our responsibility to do what we can to preserve the health of the ocean. You can create reusable bags for carrying the grocery items that will allow you to say “goodbye” to plastic bags for good. As I mentioned earlier, many of the handmade washcloths, towels, and other home items are more durable than store-bought or disposable options. Plus, you probably have the skills to mend your handmade items (and store-bought items) on your own, making them last even longer! If you’re looking for more inspiration, don’t miss my recent blog post about our most eco-friendly yarns and accompanying patterns.

I hope you’re feeling inspired to honor the ocean today, and every day! Do you have any tips you’d like to share on how to make your crafting more environmentally friendly? Do you have a favorite type of project that helps eliminate waste? We’d love to know!


Day 10 of Winter – Series 4 Edition

This is part 10 in a 12 part series highlighting designs from our 12 Days of Winter, Series 4 Edition.

It’s Day 10 of the 12 Days of Winter Kit Collection, Series 4! Today is all about a nice throw to keep you warm and cozy all winter long. Say hello to the Lantern Throw. If snuggling up under a thick blanket with a cup of cocoa and a good book sounds like the perfect winter evening, you won’t want to miss this plush project!
The generous size of this blanket is perfect for sharing and is sure to cover your toes.
Chunky projects seem to be all the rage, and it’s no wonder, because projects made with super-bulky yarn work up satisfyingly fast. That’s certainly the case with the Lantern Throw. Blanket projects, even when knitting with worsted weight yarn, can be a big undertaking with progress that feels somewhat slow. However, add in some nice, thick yarn and it’s as though you’ve hit fast-forward. That’s why I chose to use Be Wool for this design. I love just that you can get such a large blanket out of less yarn than it takes to make most sweaters.
Snuggle up to this cozy blanket – it’s irresistable!
Be Wool is a super soft, bouncy blend of 60% acrylic and 40% wool. It’s perfect for homewares because it’s machine-washable and easy to care for. We suggest US Size 17 (12 mm) needles for this yarn in order to create a fabric that isn’t too dense and has just the right amount of drape without sacrificing structure.
Chunky braided cables add to the beauty of this otherwise simple design.
The Lantern Throw is decorated with oversized cables throughout. The specific type of cables are Braided Cables in a motif in which each cable mirrors another. If you haven’t knit braided cables before, or if you are completely new to cable knitting, fear not because I’ve got your back. I’ve created a thorough tutorial where I show you exactly how to knit the cables used in this pattern.
I hope you enjoyed that tutorial and that it gets you on the right track for knitting your own Lantern Throw. Remember, you can find the Lantern Throw and the rest of the 12 Days of Winter kits at your local yarn store. Click here to find a shop that carries our yarn near you. 

Happy knitting!