Honeymoon

I’ve seen it in myself many times before, and it’s been so much fun to see it in my coworker, Katie: the New Craft Addiction Honeymoon Period. After we had a little learning session here in the office with basic warping and weaving, Katie took home the 15″ Cricket to play with. It was quite evident from the three (yes, 3!) scarves Katie finished over the course of just one week, that Katie had been bitten by the weaving bug. Today, I want to talk about two of these scarves.

Both scarves were taken and adapted from Jane Patrick and Stephanie Flynn Sokolov’s book, “Woven Scarves”, and both used an 8 dent reed.

WovenScarves_cover

The first was based on the “Chunky Check” pattern from the book. It’s a plain weave technique that’s all about strategic color change in both warp and weave. Katie used our Ready to Dye angora blend yarn for warp and weft. Half was undyed, and half was dyed using…get this…Crystal Light packets! I’ve heard of Kool-Aid dyeing before, but never Crystal Light. Makes sense it would work in the same way!

Houndstooth_1

Here’s an in-progress pic. Katie is obviously a natural – her selvedges look perfect.

Houndstooth_2

Off the loom. Katie opted for hemstitching at each end with tied fringe. This scarf took only about a third each of her two Ready to Dye hanks.

_DSC9774_retone _DSC9772_retone

And beauty shots here in the office. Katie gets tired of hearing me harp about the importance of blocking. But look what a difference it makes! With a few exceptions, I never consider a knit, crochet, or woven project to be complete until either wet or steam blocking have happened.

Scarf number two is based on the Posh Plum scarf from “Woven Scarves”. This project is another excellent illustration of how plain weave can often look anything but plain. Two yarns, in this case Llamalini and Whisper Lace, both from our Fibra Natura collection come together in an indescribable harmony. Colors are 204 Cloudy Morning in the Whisper Lace, and 101 Birchbark in the Llamalini.

Because Whisper Lace is a laceweight yarn, working this project on an 8 dent reed made for an extremely light, airy scarf.

striped_1 Striped_2


Here it is on the loom, and just off the loom. Katie also went with hemstitch and fringe finishing on this scarf. After handwashing, it measures 80″. Can you believe she used less than a ball/hank of each yarn?

_DSC9778_retone _DSC9777_retone _DSC9776_retone _DSC9780_retone_DSC9775_retone

As you can see, Heather really likes this scarf; lots of glamour shots! I must say, I covet this one myself.

Stay tuned for next time when Weaving Wednesdays breaks into fall projects!


It’s Contagious

Ever since I started the weaving blog and bringing in my finished projects, my coworker Katie has been coveting the Cricket. Katie works just one door down from me in the office and is the (very important) (and very patient!) customer service lead for our small Universal team. A couple of weeks ago I brought in the loom and got to teaching Katie how to weave.

Katie is very good at understanding the mechanics of things. She taught me how to use one of those little i-cord crank gadgets because I just couldn’t quite get it on my own! So, I knew learning how to warp and weave would be a snap for her.

blog2

Here I am, explaining how important it is to put some kind of spacer between the warp as it’s rolled onto the back beam. It turns out, the brown paper my reeds came wrapped in make an awesome spacer!

blog1

I felt a little like Tom Sawyer convincing Katie to whitewash a fence as I passed off the duty of threading the reed – not my most favorite part of warping!

blog3

After we finished warping the 5-dent reed with Uptown Worsted, we started in doing plain-weave with the super-bulky Classic Shades Big Time. I planned on making a cover to fit a 12″ pillow form. We warped the loom 13″ wide to account for draw-in and seaming. Weaving with a yarn as bulky as the Big Time made this my quickest project yet. The two sides of the pillow cover were done in under an hour total of weaving time.

I decided to sew the cover using my machine, but this could just as easily be done by hand. First I zig-zagged the ends of each of the two cover pieces, and then cut them apart.

blog5


I planned a button placket and hemmed that by hand using an invisible whipstitch.

blog6


Then I pinned both pieces right-sides together and stitched around three sides.

blog7

I decided to go a different direction with the buttons, but was still glad for the placket. After some buttons and button loops, the final pillowcase:

BigTimePillow_open

And as a pillow:

BigTimePillow_blog

All in all, this project took around 2-3 hours to complete. Not bad, eh? Katie had such a blast, that I haven’t seen the loom for the last couple of weeks. She’s been weaving like a maniac and doing some super-fun projects. Next time, I can’t wait to share some of her finished scarves with you!

Ladies Who Lunch

Do you think I just came up with that out of the clear blue sky? Ladies Who Lunch? Nope, not me; but I love it! This is the title of the scarf project for this week’s weaving Wednesday, taken from Jane Patrick and Stephanie Flynn Sokolov’s book, Woven Scarves, 26 Inspired Designs for the Rigid Heddle Loom.

WovenScarves_cover

If you haven’t seen this book, I’m here to tell you it is inspiring, creative, and full of beautiful scarves all woven on rigid heddle looms. As I was deciding on a project for the blog and happened upon the Ladies Who Lunch scarf, I knew we had two yarns that would be just perfect: Felicity, a shiny ladder yarn with a unique a luscious wool slub; and Whisper Lace, the sweetest wool/silk laceweight yarn in our Fibra Natura line.

I don’t want to give away too many details since this is a pattern in a book. But here are some in progress photos.

Felicity_1

In order to direct-warp to the loom I altered the warping plan slightly. Suzy, my yellow lab, may or may not approve of this plan. It’s hard to tell with her sometimes. I typically clamp my Cricket to a bench while I’m weaving. Here, this bench is in front of the door to my weaving/sewing/yarn room, blocking Suzy from entering. For this, she absolutely does not approve.

Felicity_2

While warping the Whisper Lace (dark gray yarn), I left empty slots where I would later attach the Felicity (ladder yarn).

Felicity_3

Felicity_4

Yes, Suzy, it’s almost time to un-dog-block the door.

I’m pretty sure I said some unfair things about plain weave a couple/few blog posts ago. We had started out with a couple of simple projects and I was all raring to learn new tricks. But you know, plain weave doesn’t have to be “plain”. With some simple color changes and interesting yarn choices, it can be anything but “plain”! I am so sorry plain weave, I never meant to hurt your feelings.

Felicity_5

As you can see, this is really just plain weave plaid. But with the textural difference between the  two yarns, this piece of weaving is really fun!

Felicity_6

Felicity_7

We’ve been working with machine washable cottons over the last few projects which has been nice! But this scarf is on the delicate side and required a gentle handwashing. After tying some simple fringe and said washing, ta-da:

Whisper Lace Felicity scarf on blog

Incidentally, Heather Hill who does most of the blogging around here also does most of our in-house photography. She’s responsible for making things look super-awesome. Thanks Heather!

Whisper Lace Felicity scarf with balls blog


The scarf pictured took just one ball of Felicity 02 Autumn’s End and one ball of  Whisper Lace 111 Charcoal. The price is right, and the weaving is fast.

See you next time with some more speedy weaving, color-shading style!


Feeling Loopy

Here in North Carolina, the high daily temperature has been pretty steady around 95 for weeks now. Just the thought of wool makes me sweat. Last time on our weaving feature, I showed how successful even a novice like me can be weaving little hand towels with our Garden 10 cotton yarn. Today, I’m continuing the cotton trend with a different yarn, Cotton Supreme. Cotton Supreme is  a worsted weight, super-soft cotton, awesome for knitting, crochet, and weaving alike.

ball 2


I’ve been itching to try out some other techniques from the Weaver’s Idea Book, and decided on “loops”. Jane has a great little tutorial on making loops, or pile in your weaving.  But first I had to decide how these loops might be functional in a piece of weaving. I decided that in Cotton Supreme, an all-over loops pattern would feel really great on the face as a washcloth, or could also work well as a dusting cloth.

To start, I made a few calcuations. The suggested sett for a worsted weight yarn is 8 epi. I decided to warp on a 10 dent reed instead, ensuring an extra sturdy piece of fabric. If I’m going to be using this for face scrubbing or dusting, I want to be sure it’s plenty solid.

I decided to aim for a finished size of 9″ square, not including fringe, so I warped 91/2″ wide, assuming a 1/2″ shrinkage. At 10 epi x 95 ends, that’s a requirement of just 53 yards of Cotton Supreme. It occurred to me that I could make at least 2 washcloths at this size from just 2 skeins!

I also planned to have fringe not only at either end, but also at the sides. For this, I needed a couple of floating warps, something for the weft yarn to pass around creating extra length for the side fringe. I could have gone about this a couple of different ways. Because I did not plan on tying my fringe, I wanted to keep the side loops intact throughout the woven piece. For each floating warp, I tied a piece of strong cotton (leftover Garden 10 from our last project!) around the back beam, and then passed it through the outermost slot on each side of the heddle. When I tied the warp onto the front beam, I also tied on the floating warps.

DSC_0009

DSC_0011

After a few picks with scrap yarn, I was all set to weave loops. Every time I made a pass with my shuttle, I was sure to go around those floating warp threads to catch extra yarn for my side fringe.

DSC_0013


As you can see for the first washcloth, I used color 611 Turquoise for the warp, and then coordinating 617 Seafoam for warp. For the second, I reversed the colors. Because of the loops, more yarn is required for weft than warp, but 2 skeins of yarn was plenty for these 2 washcloths. My pattern was 2 picks of plain weave, 1 row of loops. Although a little tedious, the loops came easier every time I worked a row of them. For the second washcloth, I decided to do 3 picks of plain weave between rows of loops so I could be doing the loops coming from the right hand side of the work every time, rather than having to get up every few rows to work a down-heddle row of loops.

DSC_0020


At the beginning, end and sides of the piece, I added hemstitching to keep the fringe in place.

DSC_0016 DSC_0015 DSC_0019

This project went so quickly! After completing each piece, I simply cut it from the loom. The hemstitching held things in place until I made it over to my sewing machine. For extra insurance that all those edges stayed in place, I did a simple zig-zag stitch around the perimeter.

DSC_0022

A rotary cutter and cutting mat made for easy and even trimming of fringe:

DSC_0023

I really like the texture on the backside of the weaving too!

DSC_0024

After sewing and trimming fringe, the washcloths took a trip through the washing machine and dryer. As with most weaving projects, these really came to life after washing! They didn’t shrink in width, but shrank in height by about 1/2″. The loops kind of settled into place and the pieces softened up even more.

Cotton Supreme Washcloths closeup_blog

At this sett, 10 epi, a bigger version of these would make an excellent bathroom rug. Or made to the right size, this same fabric could work really well as a cover for one of those hardwood floor brooms.

Cotton Supreme Washcloths_blog

What else could loops work well for? I’d love to hear your ideas!

Join me next time for a lightweight summer scarf project!


Summertime Towels

A couple of weeks ago, I was so proud of myself for making a sampler and feeling like I had a plan for my Garden 10 towels. I was able to try out some different pick-up patterns and see how the resulting fabric looked on both sides, determining whether or not I thought it would make a good pattern for towels. This experiment led me to choose the pattern for my first towel. But…I’m getting ahead of myself here.

First, did you know Garden 10 comes in cones? I set out to warp up the Cricket using a cone of Garden 10 in white. It was so easy to warp from the cone because it sits upright all on its own without rolling away like a ball of yarn. Plus, the yardage is super awesome, at over 3000 yards.

I decided to plan conservatively for my towels and shoot for 3. After some quick calculations, I warped my loom  the same as the sampler (20 epi using a 10 dent reed/2 epi), but warped it 14″ wide. I began and ended in a slot (an odd number of ends) so my pick-up patterns would be balanced. I decided that the measurement I wanted for the towels (before washing) was 14″ wide x 24″ long, not including hems. The length of my warp was 100″, which included 1 1/2″ at the end of each towel for hems, and an inch between towels.

For the first towel, I picked a simple 3/1 weft float pattern from my sampler. To add a little visual interest, I decided to repeat the 6 row pattern 4 times, and then add a few rows of plain weave in between, and also at the sides. You can see where I did a 1 up, 1 down pattern on most of the pick-up stick, and then did an inch of plain weave pick-up at the edges.

GardenTowels3.5

After I did my first repeat (6 rows x 4 + plain weave), I measured this repeat and recorded all of this in my Weaving Journal (!).

GardenTowels1

After measuring the repeat, I knew I’d need 10 total repeats to achieve my desired length. To keep track, I stuck a straight pin between repeats and made a hatch mark in my journal.

One nice thing about weaving with Garden 10 doubled, is the ability to stagger the woven in ends.

GardenTowels2

After finishing up border and hem on towel 1, I added 4 rows of plain weave with some scrap yarn and then went right into towel 2. Once I’m done with all 3 towels, I’ll take the whole lot straight over to my sewing machine and secure the ends.

GardenTowels3

And this is where my attention span wavered from my sampler. Waffle weave is something I’ve had in my head couldn’t really be achieved on a rigid heddle without a lot of trouble. After a quick internet search, I landed upon this great post over at Cotton Cloud’s blog. It’s just a 6 row repeat, so easy to memorize. I seem to have failed to take a photo of this towel in progress on the loom, but here’s a pick-up stick shot!

GardenTowels5

I didn’t end up being overly impressed with the waffle weave-ness of this pattern, but I still like it for an alternative texture.

Onto towel 3. Once again, my wandering brain decided it was time for a new weaving trick. I flipped to chapter 2, Finger Controlled Weaves in The Weaver’s Idea Book. Danish Medallions caught my eye, so I decided to go for it! First I had to decide how wide I wanted my medallions to be. I decided I wanted to go for a fairly squared shape, so after weaving my plain weave in between the “outline” yarn, I did a little measuring. I could see that by skipping 4 warp threads, I would achieve my desired shape. First I located the very center of my warp, and counted out from there, placing straight pins where I wanted my first row of medallions to be.

GardenTowels6

All the straight pins were probably overkill – I could have just counted. But I like visual reminders for when my brain goes haywire!

Garden Towels7

Jane Patrick has a great photoguide for working Danish Medallions. I got the hang of it right away! Like any new technique, it felt tedious in the beginning. But after the first few I found my rhythm and didn’t want to stop. I did 3 repeats of the medallions, making the middle row offset.

Next, I decided it was time for yet another new to me technique, stripes. I’m a sucker for yellow and white stripes – they’re so cheerful! Changing colors every 2 rows was super easy. Every other row, all I had to do was “link” the 2 colors so there wouldn’t be floats at the sides.

GardenTowels8

For me, it was just like twisting yarns in intarsia knitting. Again, I used straight pins to keep track of the length of my towel. Every 12 stripes, I made a hatch mark in my journal and moved the pin up.

At the other end of my third and final towel, I did another 3 repeats of medallions, added in my 1 1/2″ hem, and 4 rows with waste yarn.

GardenTowels9

Then the fun part – unrolling all the towels!

GardenTowels10


Now to the finishing. My first step was to secure the ends of each towel. I did this with matching thread and the zigzag stitch on my sewing machine.

GardenTowels11

I made sure the needle went between the yellow waste yarn so it could easily be cut away.

GardenTowels12


Here they are all cut apart, before hemming.

GardenTowels13


I folded in the edge of each hem by a little less than a third and pressed with my steam iron,

GardenTowels14

And then up one more time,

GardenTowels15

And then lots of pins!

GardenTowels16

I chose to use a narrow zigzag in order to catch the edge of the hem, rather than a straight stitch. If I was really going for fancy, I would have hand stitched each hem.

GardenTowels17


I then washed and dried the towels, warm water, nothing special.

Dishtowels corners flipped_crop

Dihtowels stacked 120dpi A

Dishtowels folded_crop

It’s my mom’s birthday this week. These little towels will make a great gift and will work perfectly as hand towels in her newly painted half-bath. There’s nothing like a handmade gift for someone you love, right?

Catch up with me next time on Weaving Wednesday. There will be weaving (duh!), more cotton, and a fun new trick!


Picking up the Pace

Our last couple of projects have been completely reliant on colorful yarn and plain weave.  Sometimes there is nothing more beautiful than simplicity. But I get bored and like to learn new tricks. Luckily, the 15″ Cricket is lots of fun and is capable of much more than plain weave. The first thing I did when considering where to begin in this adventure was to purchase a copy of Jane Patrick’s The Weaver’s Idea Book.

Pick Up with book 2_blog

I knew I wanted to try some pick-up patterns, and I knew I wanted to make dishtowels with Garden 10, our high quality mercerized Egyptian Giza cotton. The finger controlled lace weaves in Chapter 2 really grabbed my attention, but I knew I needed a more firm fabric since my goal was towels. Chapter 3: Pick-up on the Rigid Heddle Loom was my destination. Over 50 pages of jam-packed information in this chapter, including helpful sidebar tips made me feel like  had a friend by my side the whole time I was weaving. So, Step One: Warp the loom. Instead of flying by the seat of my pants like I did for the last 2 scarves, I decided to consult the handy Master Yarn Chart over at Interweave when deciding what sett to use for my towels. I found what I was looking for on page 1. As I said, I’m using Garden 10 which is a 10-weight crochet thread. The chart told me that for this weight of yarn, the sett ranges were from 16-24 epi. I decided to go with 20 epi by threading a 10-dent reed with 2 ends per dent.

Warping double

I discovered that by threading through each slot and hole, I saved myself the extra step of having to sley the reed – yay! Step Two: Grab paper and pen and start recording. I’m pretty good at reading my knitting and crochet work, so I don’t always take notes as I’m going. Sometimes I’ll go back after my work and write patterns. But I’m a beginning weaver. And even if I was a pro, there’s no way I or anyone else could remember all the details of a piece of cloth. This is something I should have started from the very beginning:  a weaving journal.

WeavingJournalPage

Helpful things to include are yarn specs, sett, number of ends, and weaving width. For this sampler, I also took notes on each pattern I did, colors, and number of reps. When I go to make my dishtowels, if there’s a particular piece of the sampler I want to use as an all-over design, I’ll know just how to recreate it. Step Three: Start weaving! I know I’m going to want to have hemmed edges for my towels, so the header was essential to my sampler. For the beginning header, I wove using a single strand of Garden 10 so my hem wouldn’t be too bulky. After about a 2″ header, I started in by sampling many of the patterns in Chapter 3. Each pattern required the use of a single pick-up stick, included with the Cricket. Using a pick-up stick is super easy! heddle down

First, place the heddle in the down position. This raises the warp threads in the slots to the top, and the warp threads in the holes are lowered. You will be working with those slot warps that are on top. placing pick up stick_1

Then, working behind the heddle toward the back of the loom, pick up threads according to the pattern. For the first several patterns in my sampler, I did a simple 1 up, 1 down repeat. What this means, is that with the pick-up stick, you “pick up” or place the next thread on the stick, then place the stick over the next thread, and so on. placing pick up stick_2

Here’s another angle.

placing pick up stick_3

And, here we are with the pick-up stick all ready to go. I must say, as a person who is often a poor planner, I’m pretty pleased with my sampler! By going through each of the exercises laid out by Jane, everything started making more sense – the mechanics of how the warp and weft work together and all the possibilities there are! Just like the warp, in order to have a balanced weave, I used doubled-up Garden 10 for the weft also. The aqua and white in the sampler are Garden 10, and the yellow supplemental weft in some of the patterns is Cotton Supreme. The worsted weight soft cotton adds a really nice pop. I may do some of this just on the ends of my towels! After finishing up my sampler, I sewed my hems and threw the whole piece into the washer and dryer.

PickUp_FrontandBack

On the left side of the above picture is the right side of the weaving, the right side of the graphic is the wrong side of the weaving. Again, because I’m making towels, I wanted to be sure that both sides looked good. Although I really love the look of the right side of the top few patterns, I feel like the floats on the back are going to be problematic for towels. About the first two-thirds of the patterns of this sampler (bottom to top) are weft floats, meaning the weft yarn “floats” over the surface. The top third of the patterns are warp floats, meaning it’s the warp yarn that does the floating.  I found it quite intriguing that “warp floats in pairs” looked very similar on the right side as “3/1 and 5/1 floats” looked on the wrong side! Fun! And speaking of weaving with Garden thread, here are a couple of projects by Linda Davis of the Tail Spinner. Sept2013 002 (640x428)

First we have an awesome plaid using Garden 10. Linda is also doing 20 epi (same as my sampler), but she’s using two 10-dent heddles in order to keep her ends single.

July2013 002 (419x640)

This next project uses Garden 5, a little heavier weight of our Garden thread. This was woven using a 10 dent heddle with plain-weave in the ends and a pick-up pattern in between. Nice work, Linda!

See ya next time with my finished Garden 10 towels!

Pink & Plaid

One of the super fun parts of my job is getting to see projects other people are making in our yarn. Recently, Linda Davis, owner of Tail Spinner in Richlands, NC sent us photos of a fantastic weaving project. Although not woven on a rigid heddle loom (as most of our projects  in this column will be), I had to show this beautiful throw to the world! Made in Deluxe DK Superwash this throw will be able to be machine washed.

Claire

Meet Claire, a high school student local to Linda. Claire doesn’t knit or crochet (yet!), but her favorite subject in school is environmental science. Here are some details on this lovely project, courtesy of Linda:

In our county, each senior is required to do a project their Senior year to learn about something which they had never done before.  Claire’s grandmother has a countermarch, 8-shaft loom that she wants to give to her, and Claire was very intrigued by the thought of weaving.  So, she decided that learning to weave would be a great project.  She found out that I taught weaving after some investigating, and she called me last September to see if I would mentor her for her Senior project.  I said I would be glad to, and we proceeded on with her journey.  Her first project was done on the rigid heddle loom.  She created a moebius scarf using chenille and ribbon as the warp on an 8-dent heddle and weaving loosely with a simple fingering wool.  Then, we moved on to doing the throw on the 32-inch, four-shaft table loom, using a 10-dent reed.  She used the Deluxe DK Superwash for both the warp and the weft.  The throw is basically a sampler using a point twill.  She had to choose the yarn and the colors and decide the repeats of color throughout the warp and then figure out the weft repetitions.  Another of Claire’s assignments was to select the patterns she wished to use and alternate them every nine inches.  She chose a Bird’s Eye repeat over 6 ends: 3/2/1/2/3/4; and then, she mixed up the patterns using 2/2 and 1/3 twills.  So, she essentially designed the whole piece, which ended up being 30 inches wide and over 60 inches long.
seniorproject 006 (640x428)

Thanks Claire and Linda!

Weaving Wednesday – everyone loves rainbows!

I have this sort of love affair with linen. Anytime I’m asked what my favorite fiber is my response is always linen. If I could marry linen and have little linen babies, I might just do that. You get the picture.

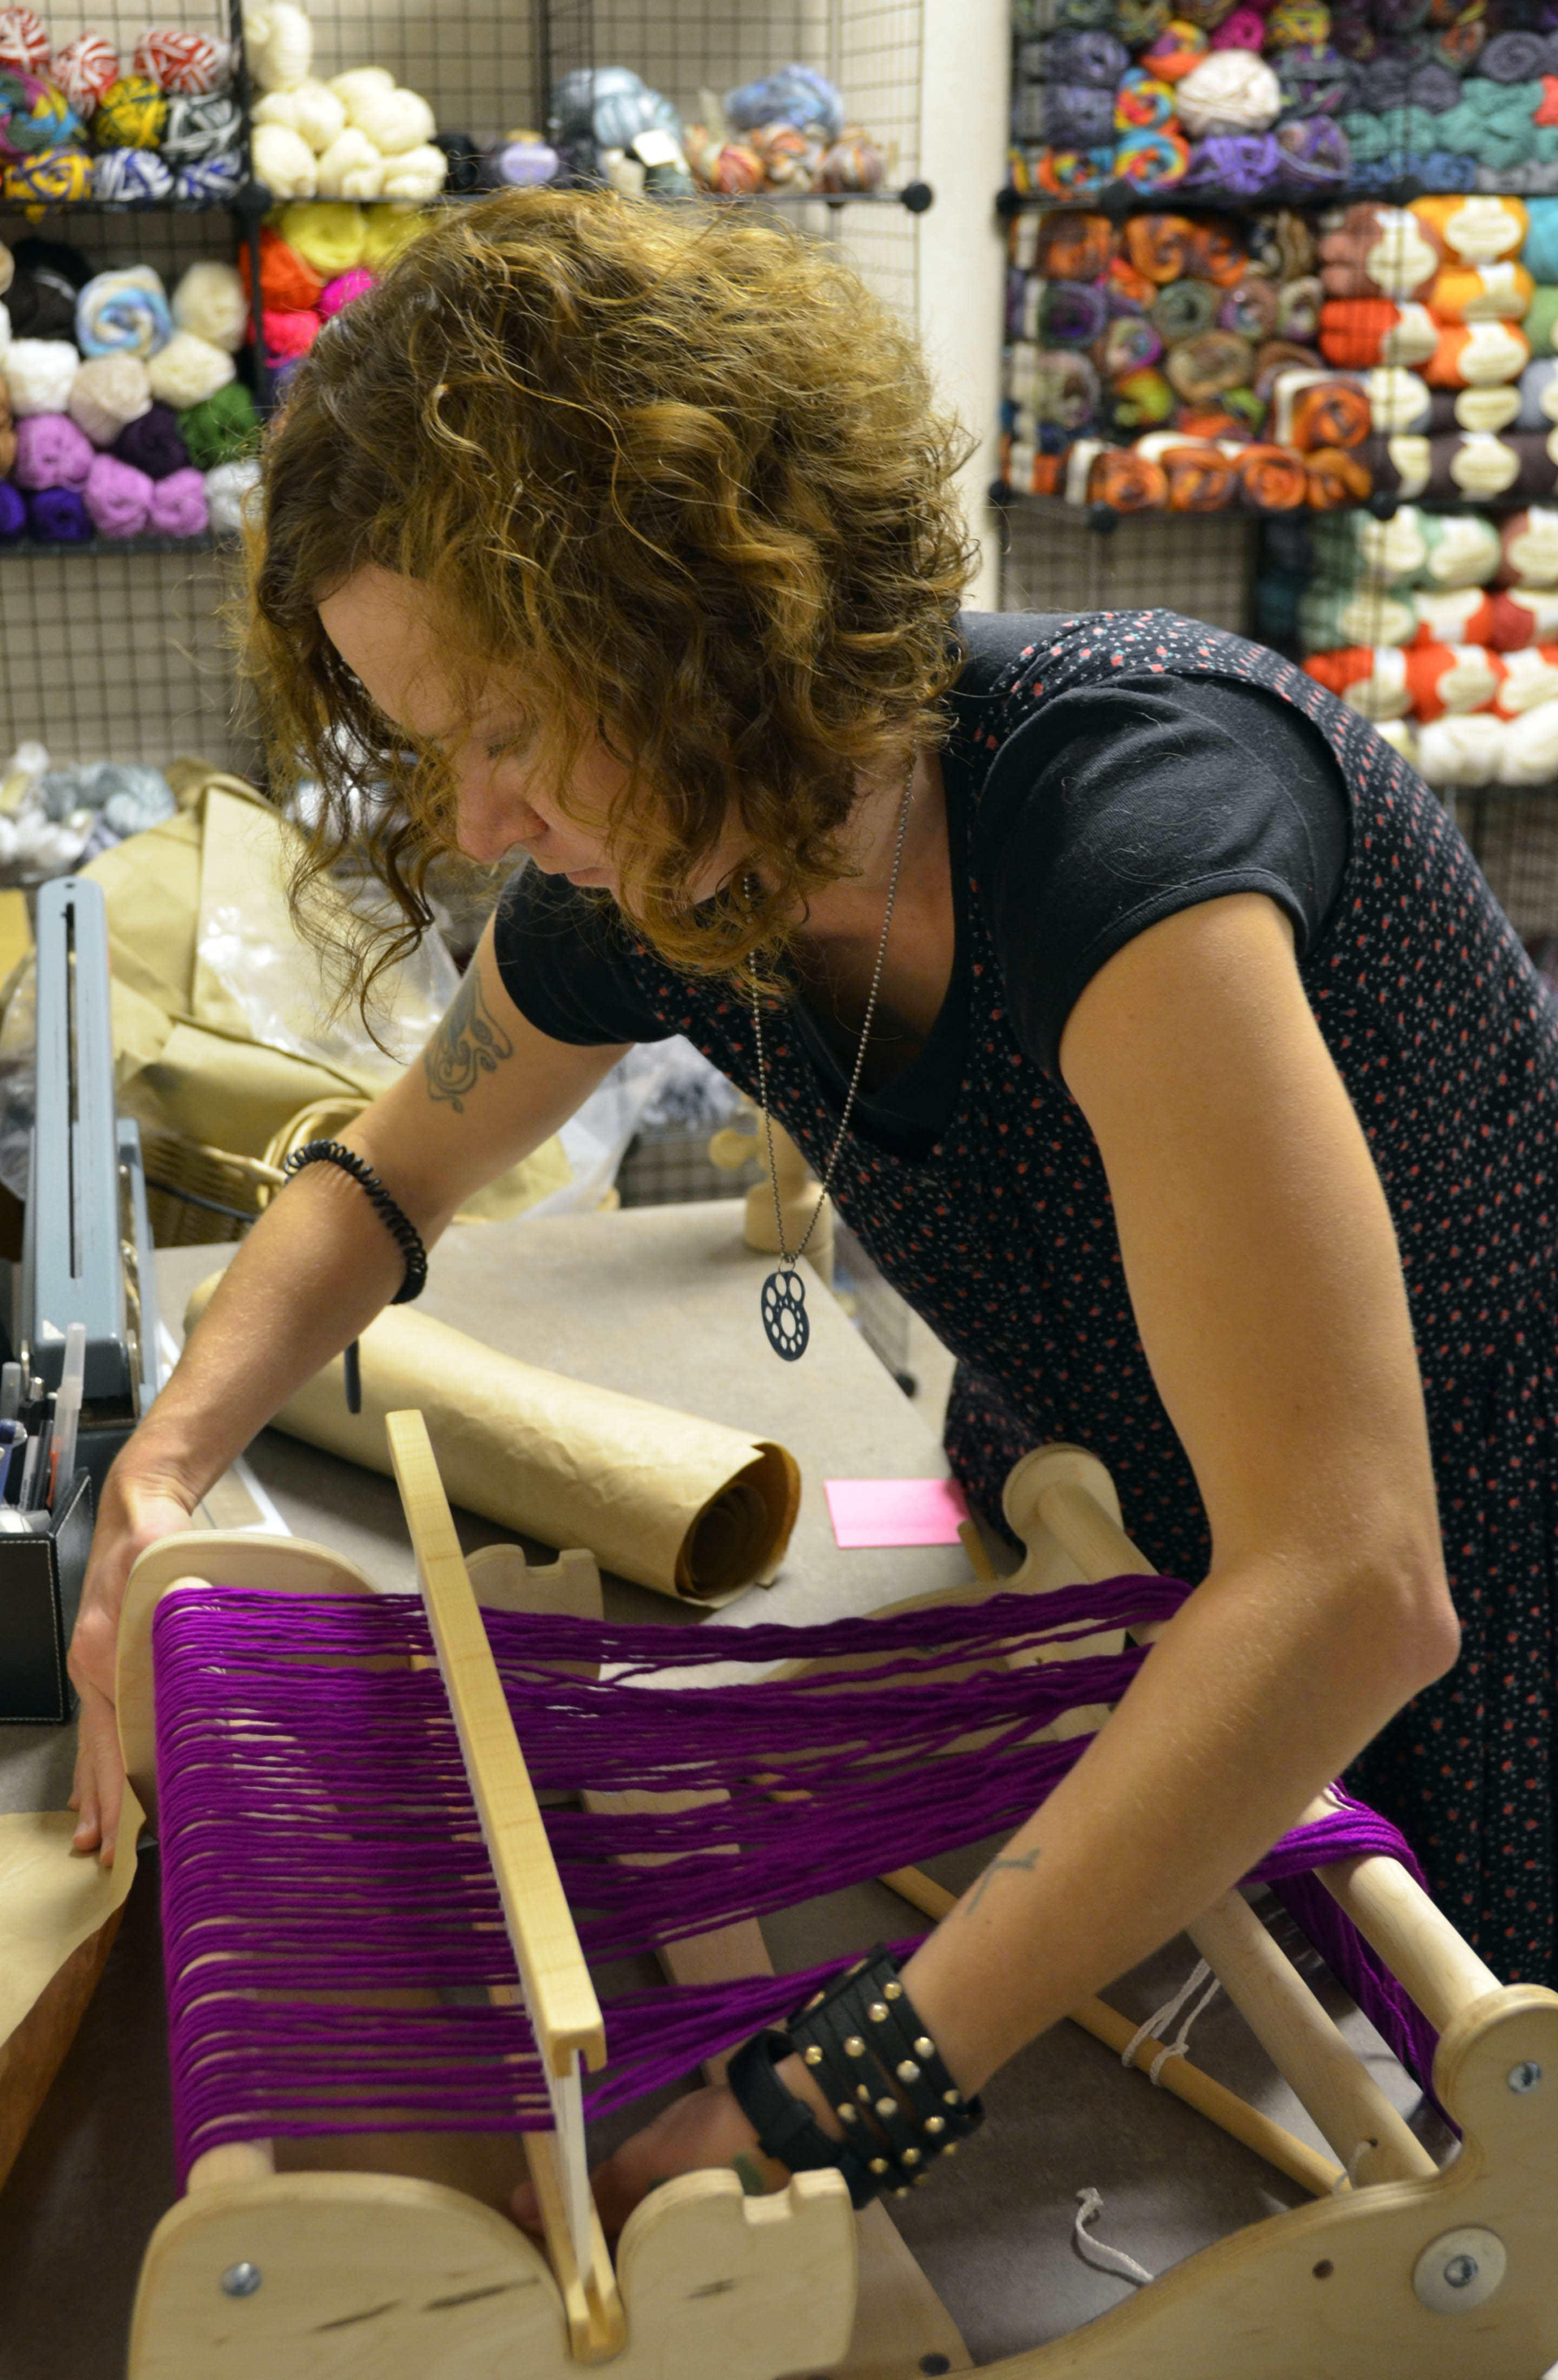
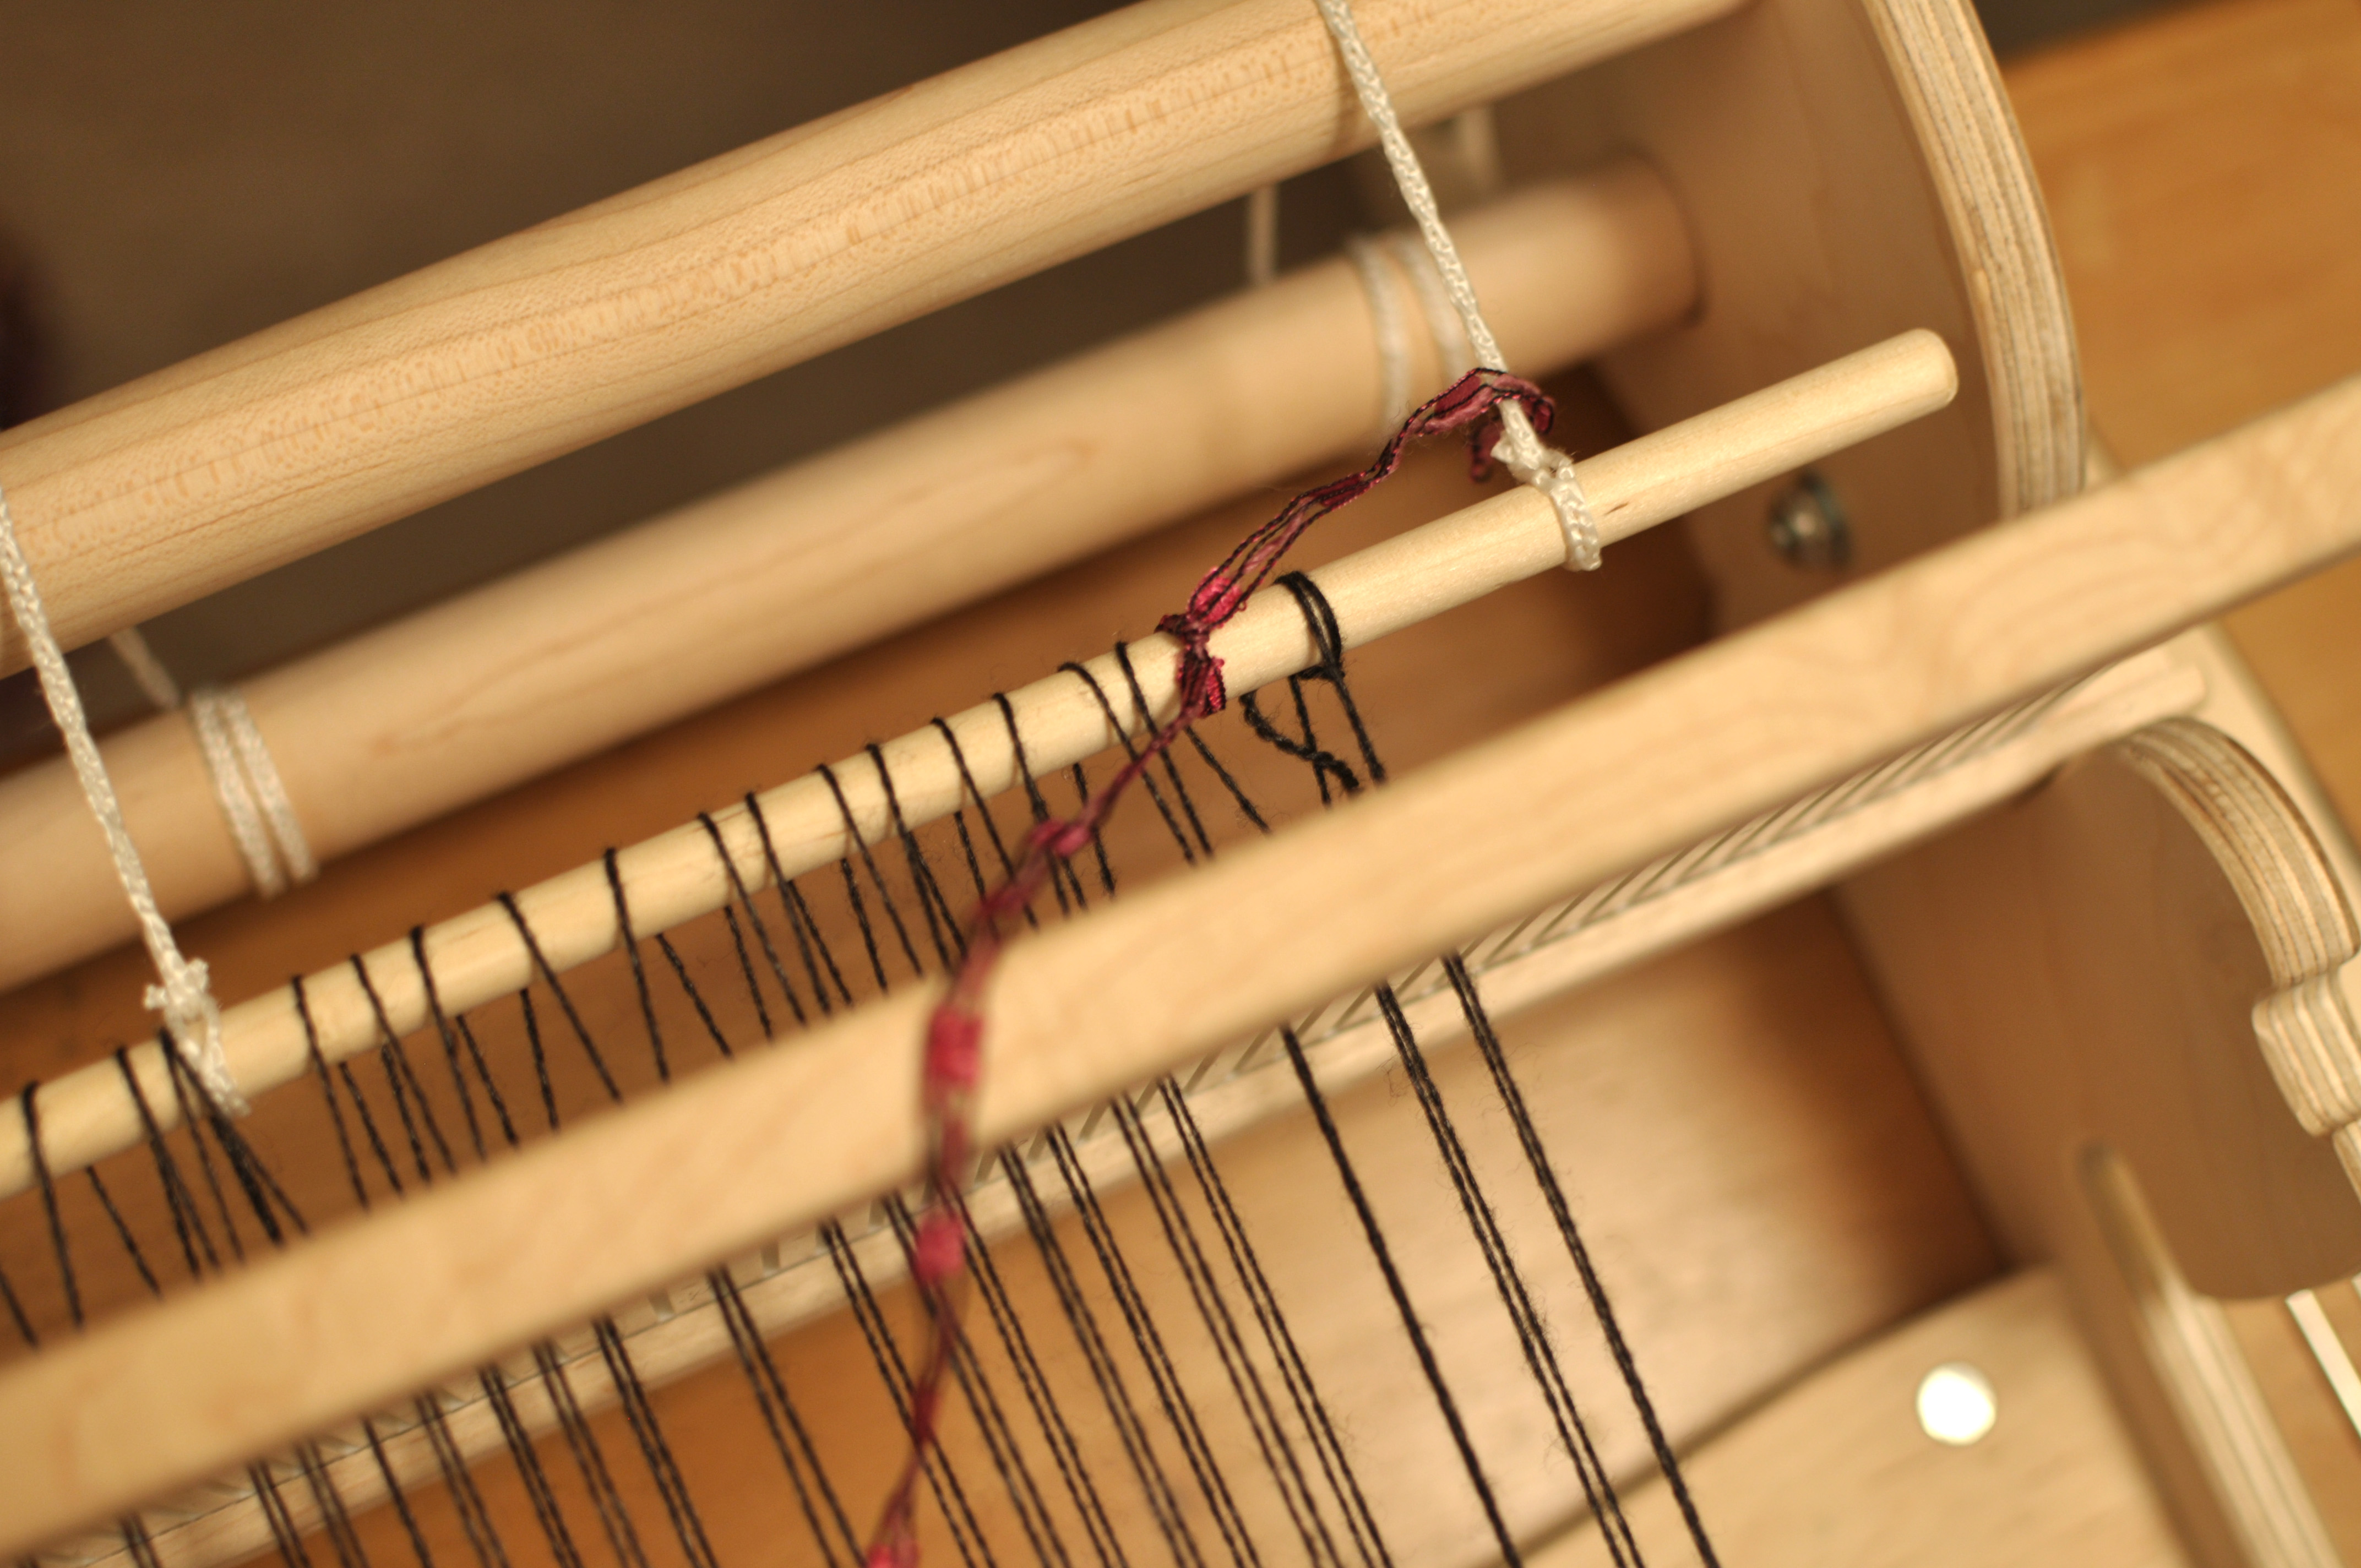
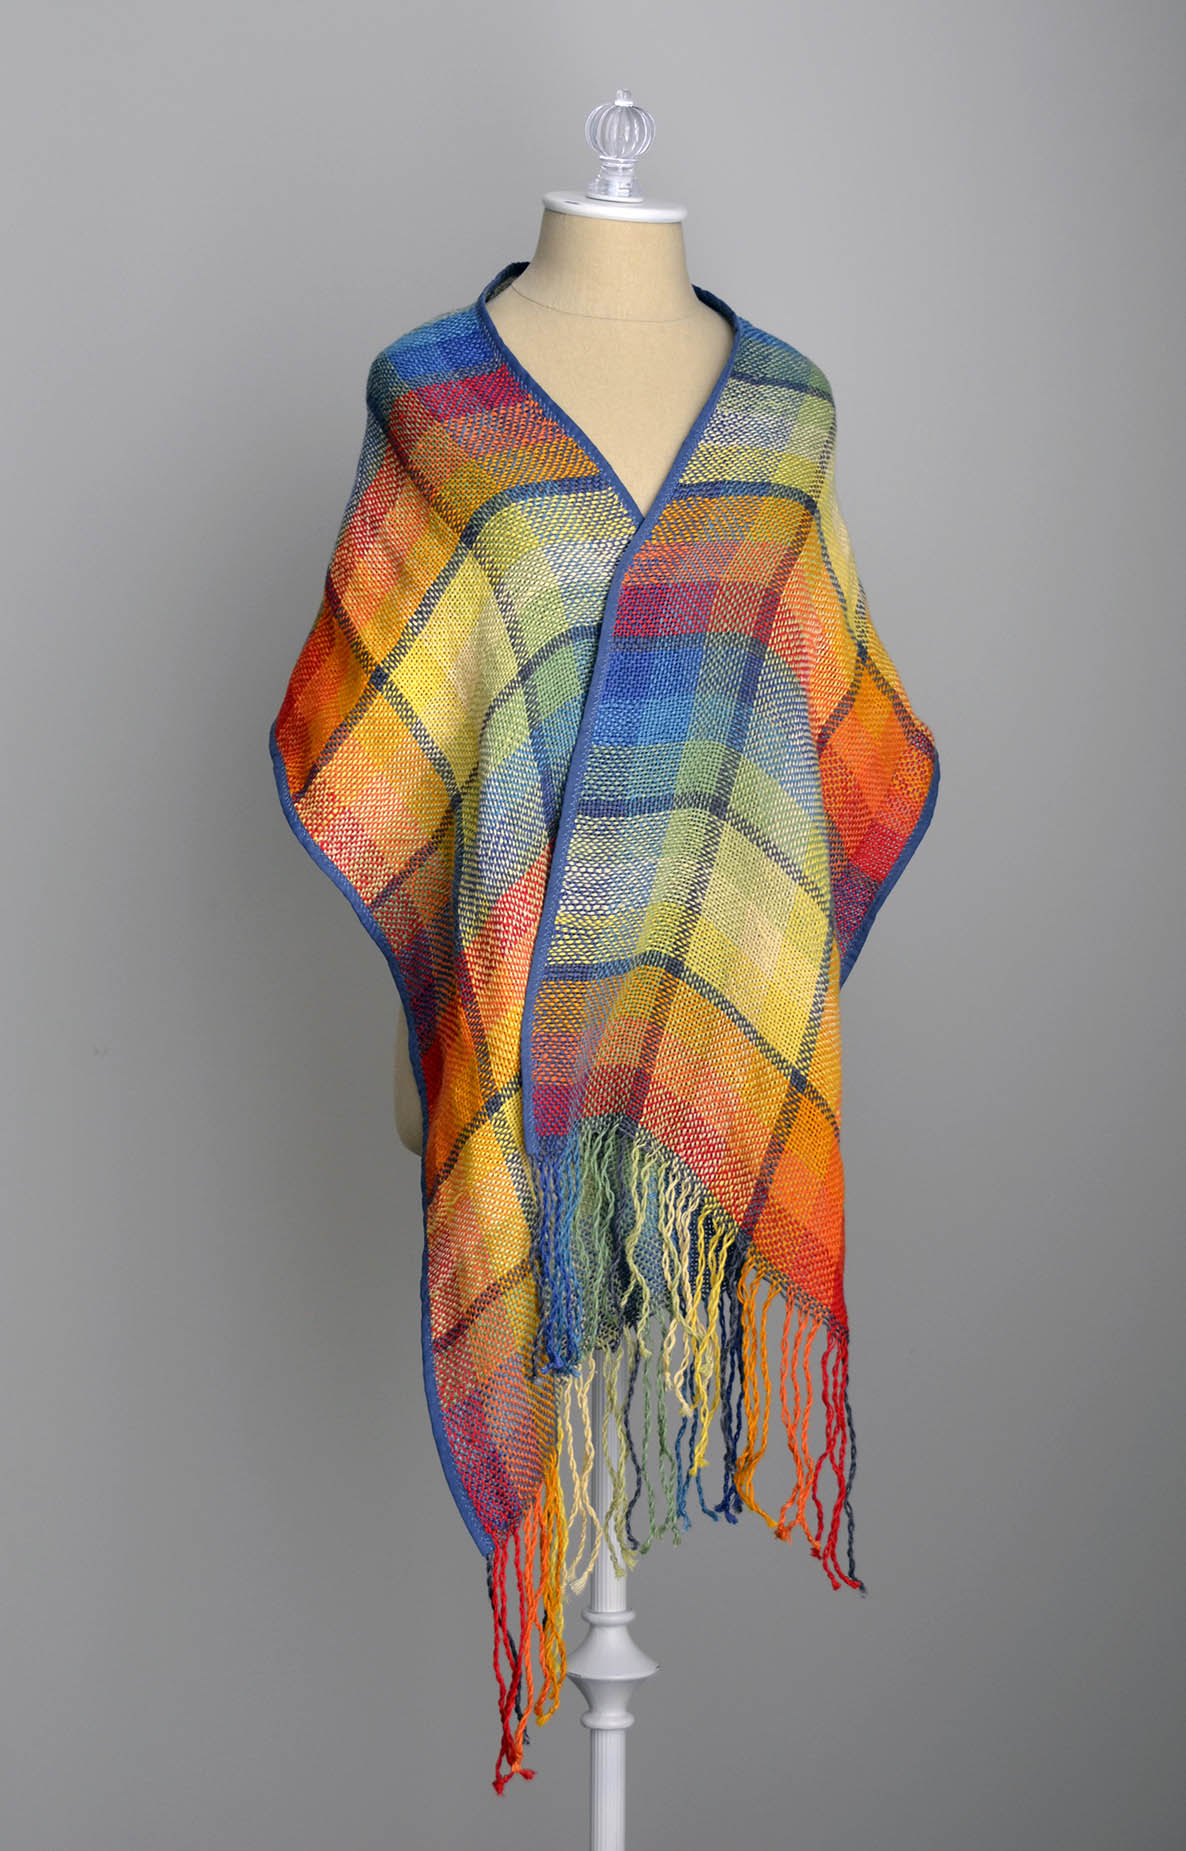
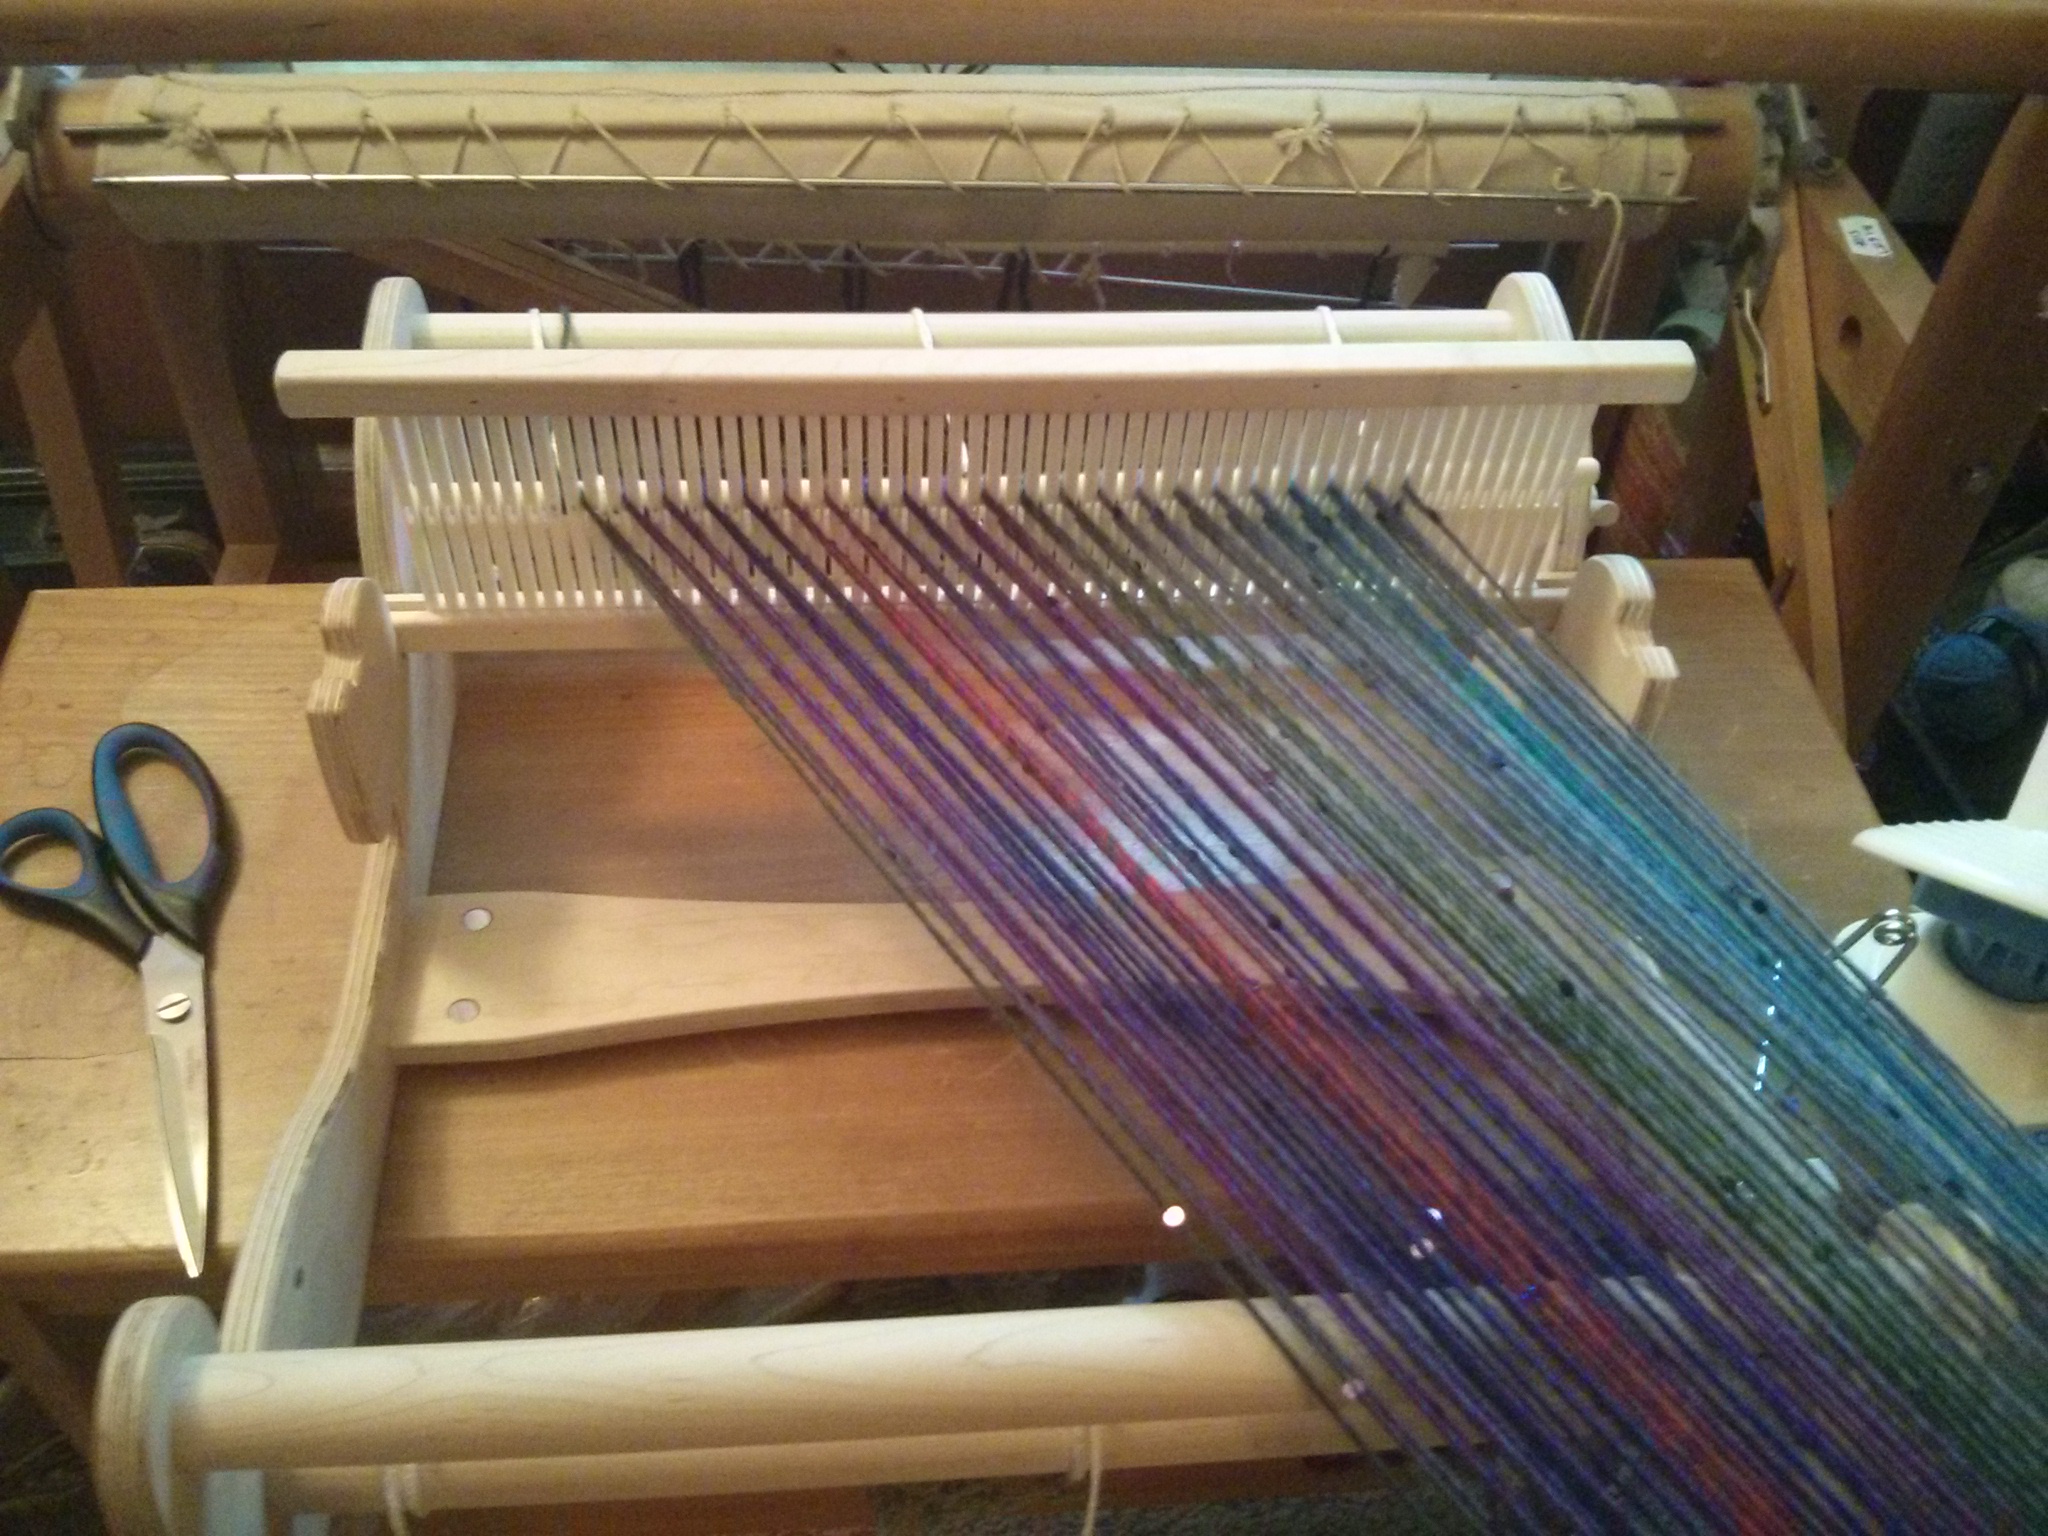
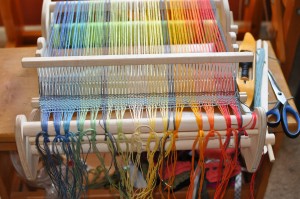
We recently added 6 glorious new shades to Flax, our 100% linen yarn in the Fibra Natura line.  When I started out to do this Weaving Wednesday project, my first inclination was to do a sort of sophisticated plaid, using mostly the new Flax shades. I had a skein of every color of Flax laid out on the floor, grouping them together, ungrouping; just playing around. Before I knew it, I had a rainbow all lined up begging to be used! Unable to say no to the pretty arrangement, I immediately began direct-warping my 15″ Cricket.

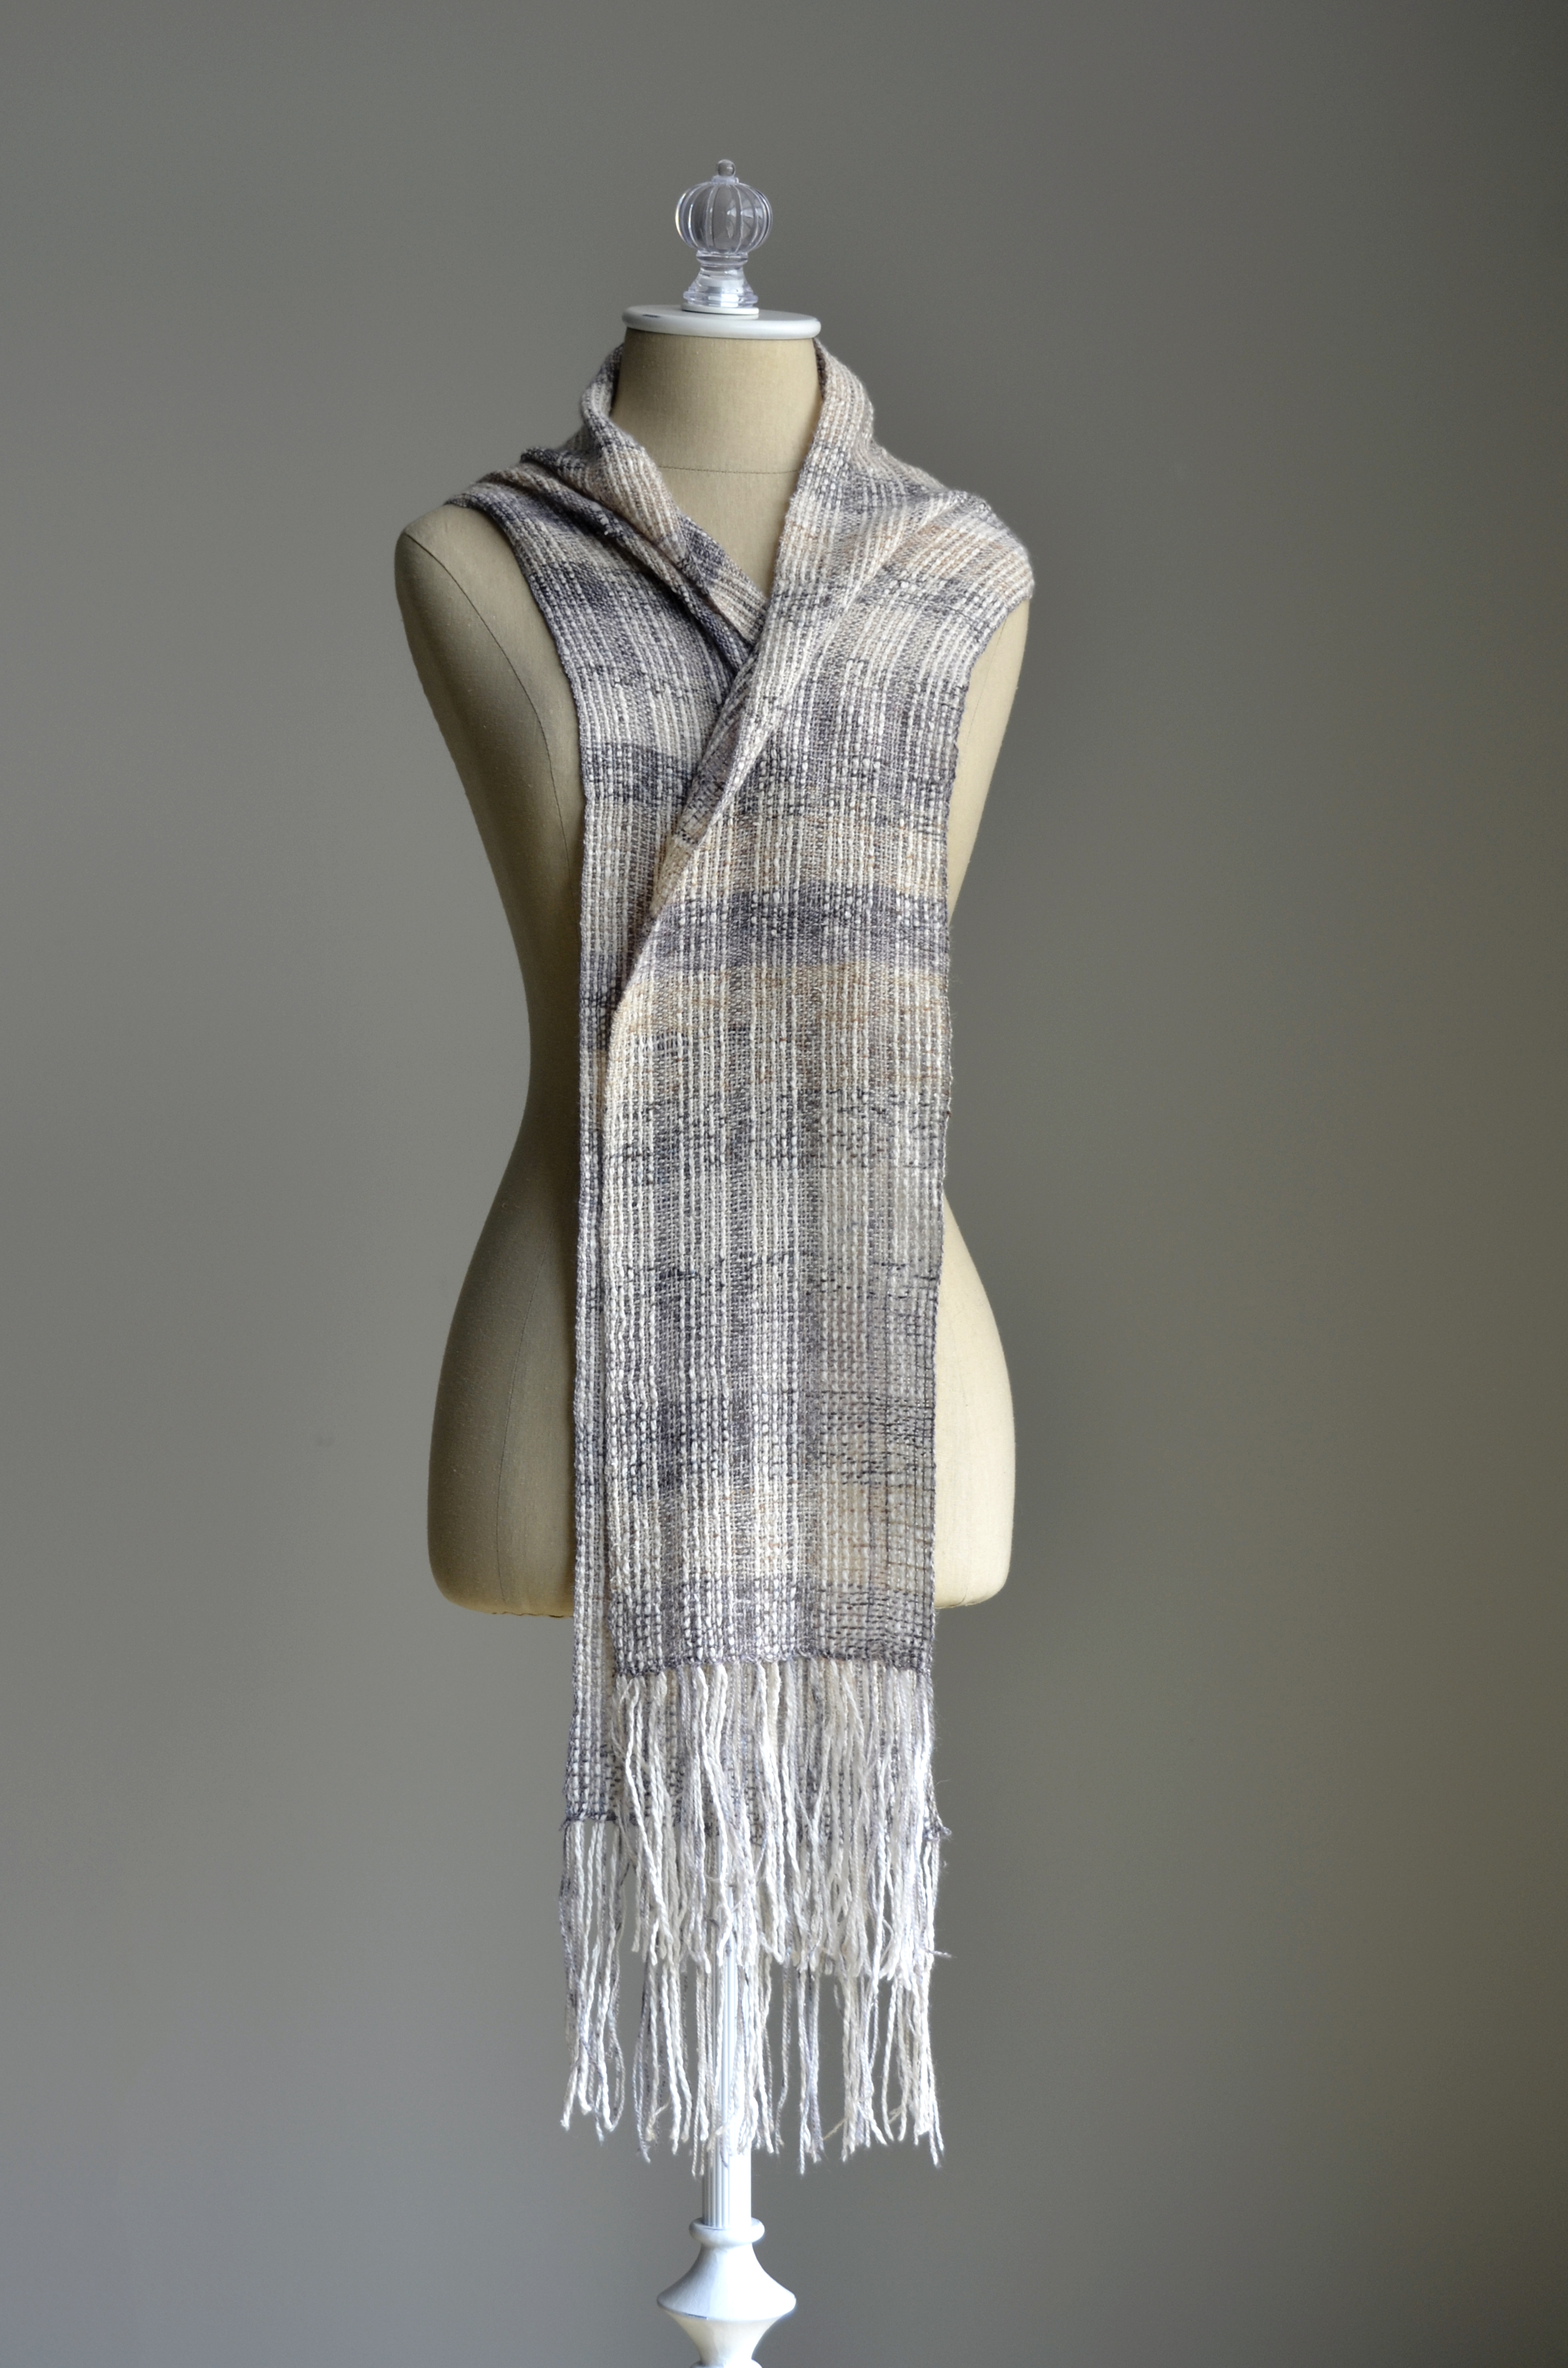
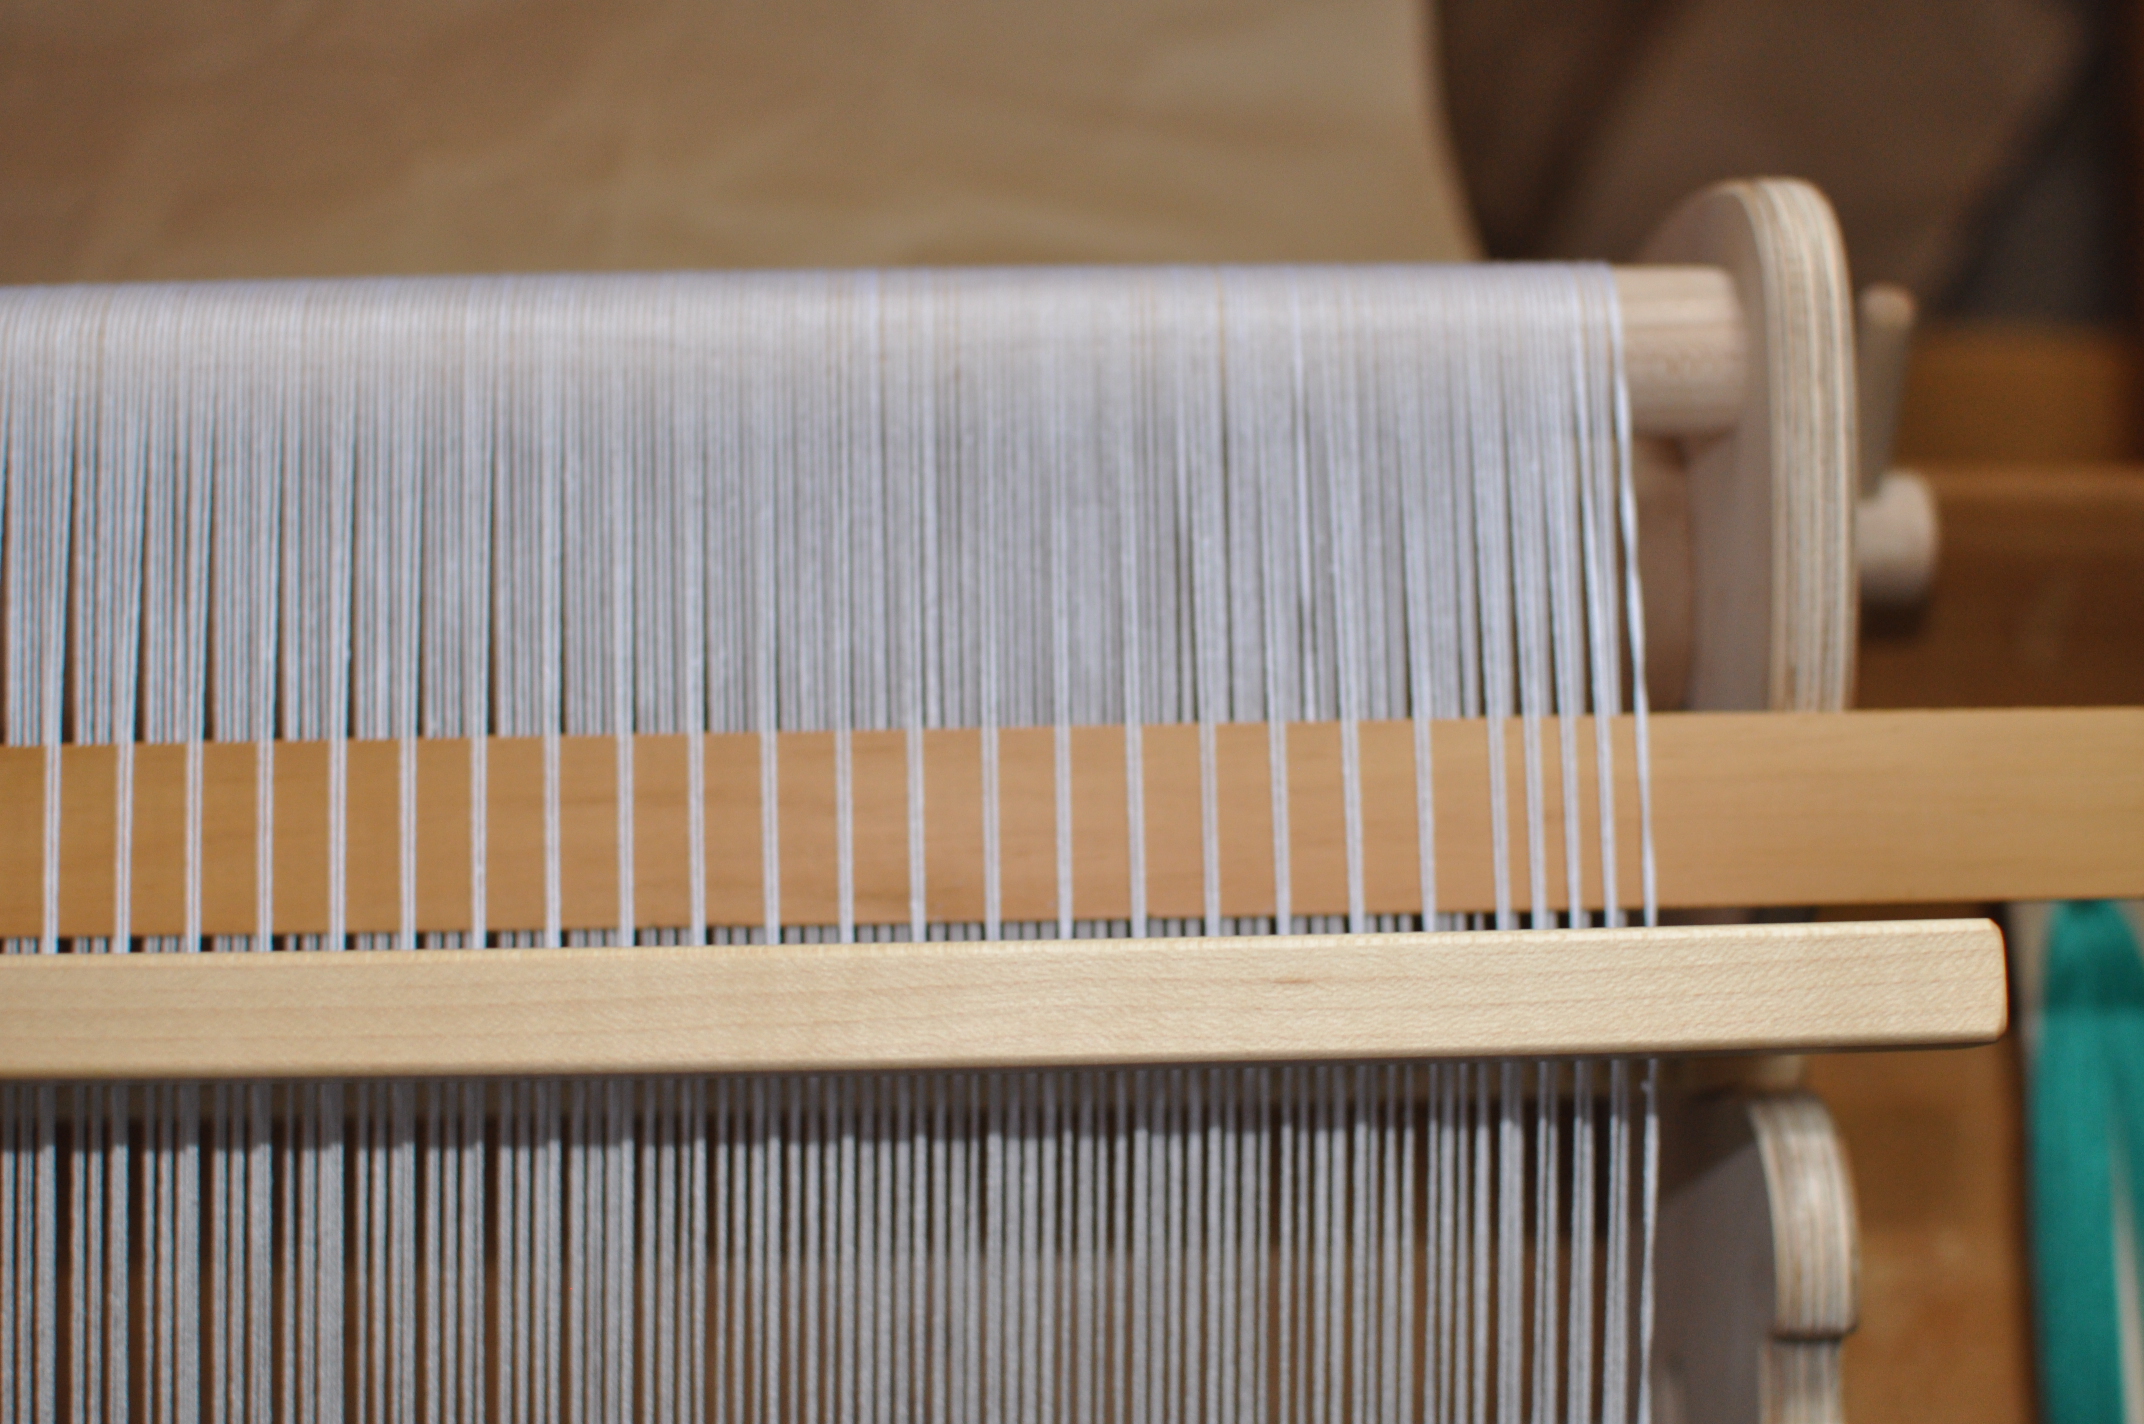
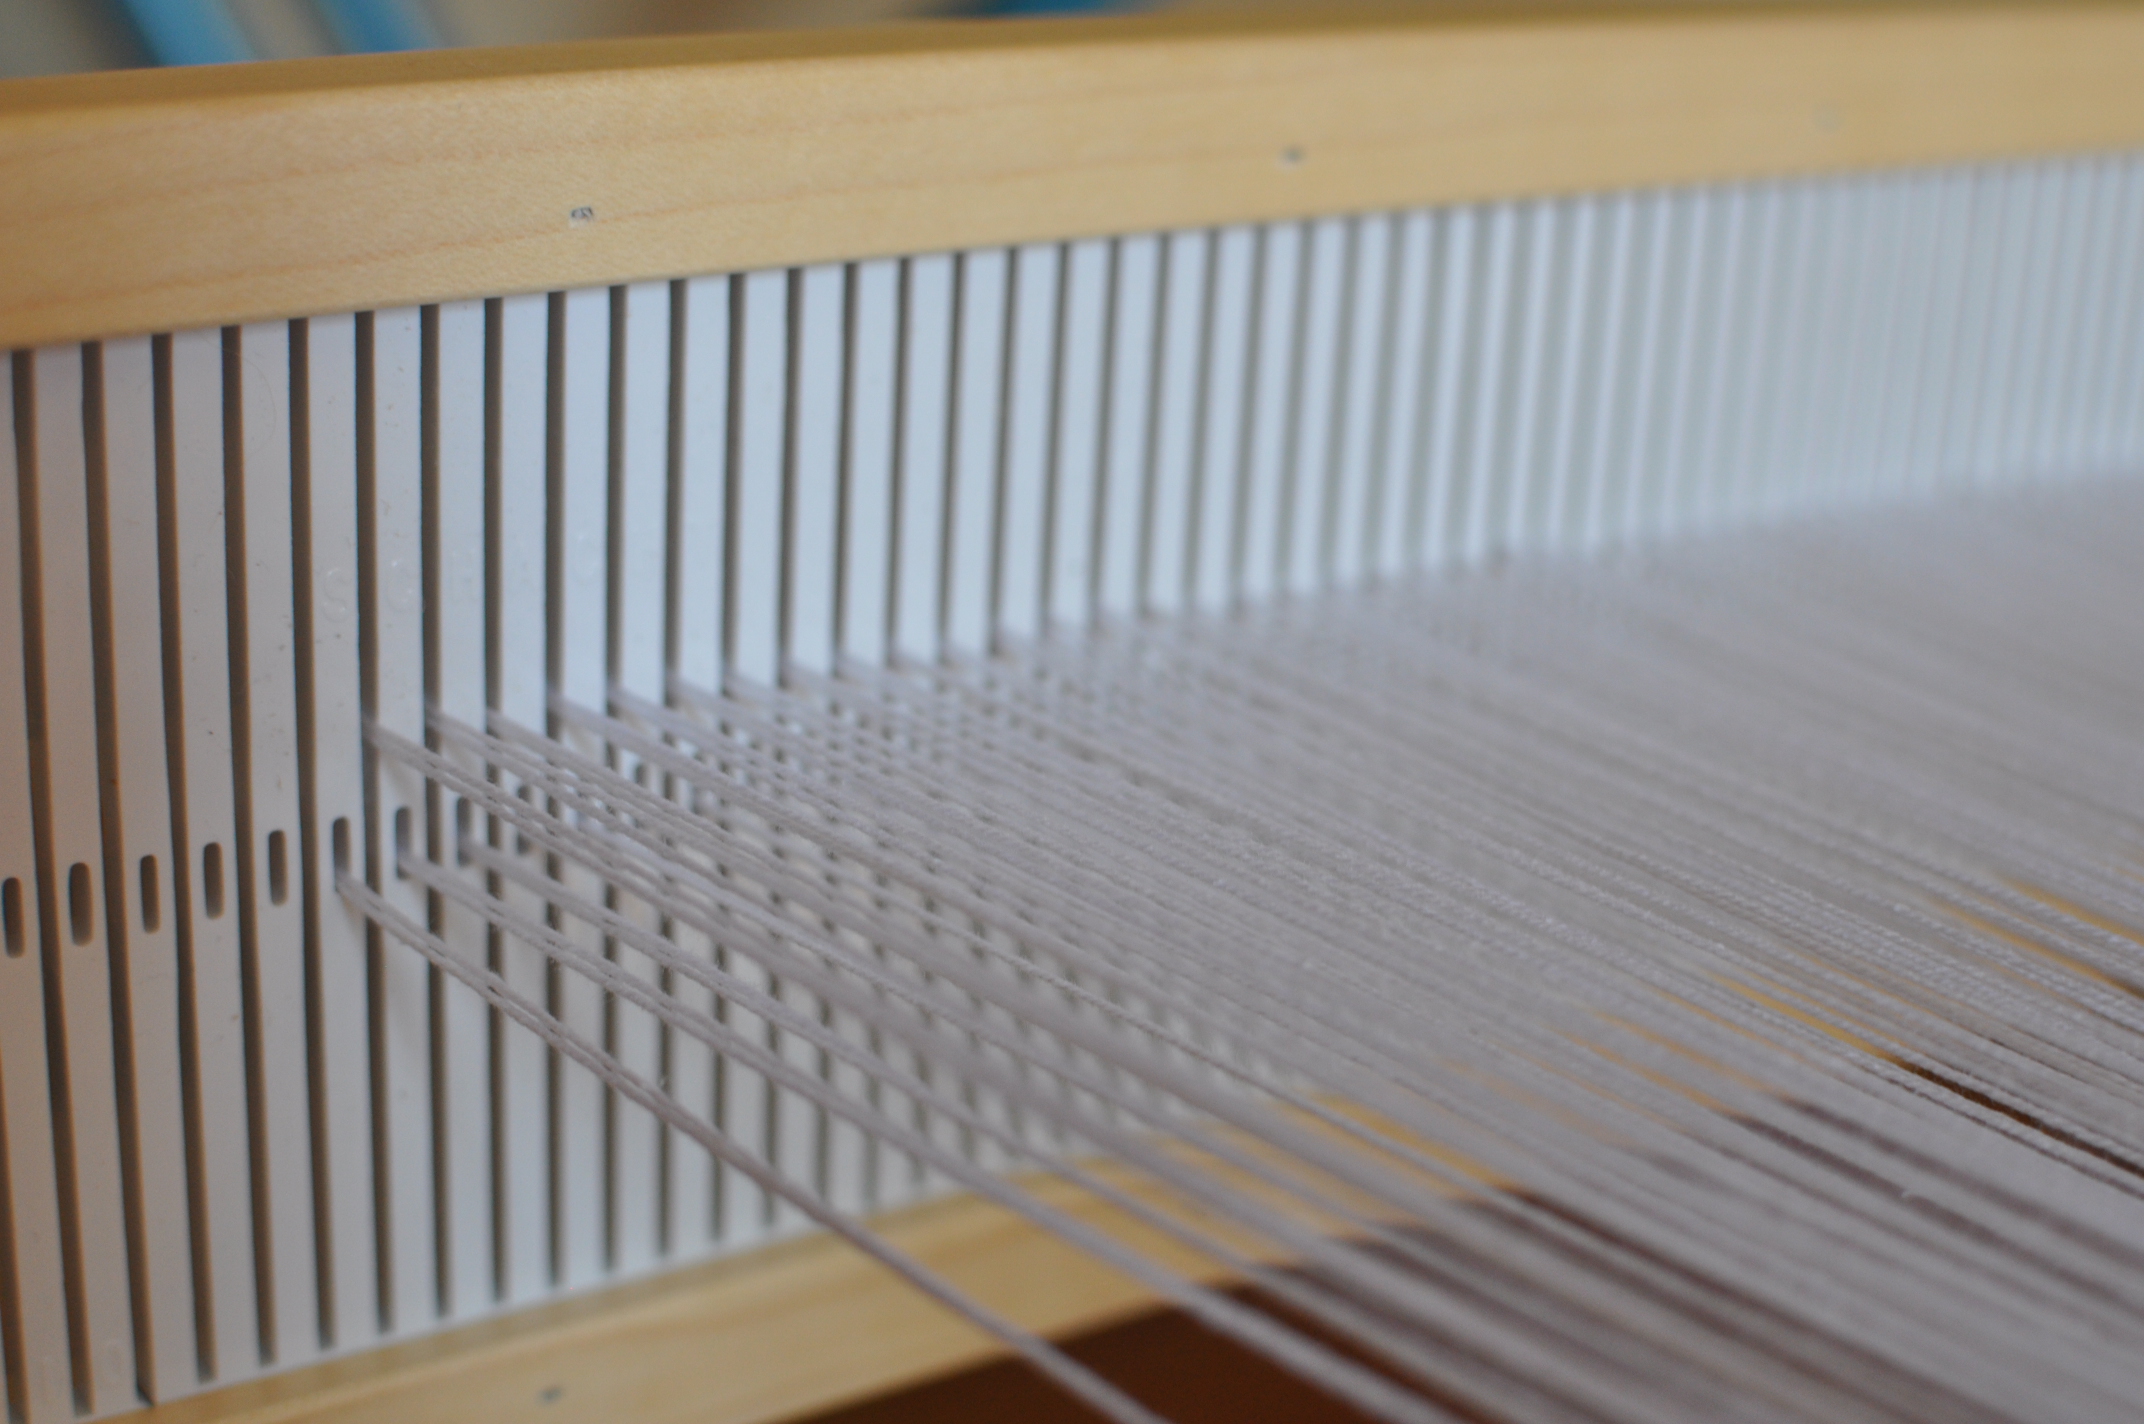
I like my scarves wide. I decided to use up every last hole on my 8 dent reed and make the most of my 15″ weaving width. For anyone wanting to reproduce this scarf, here are the specs:

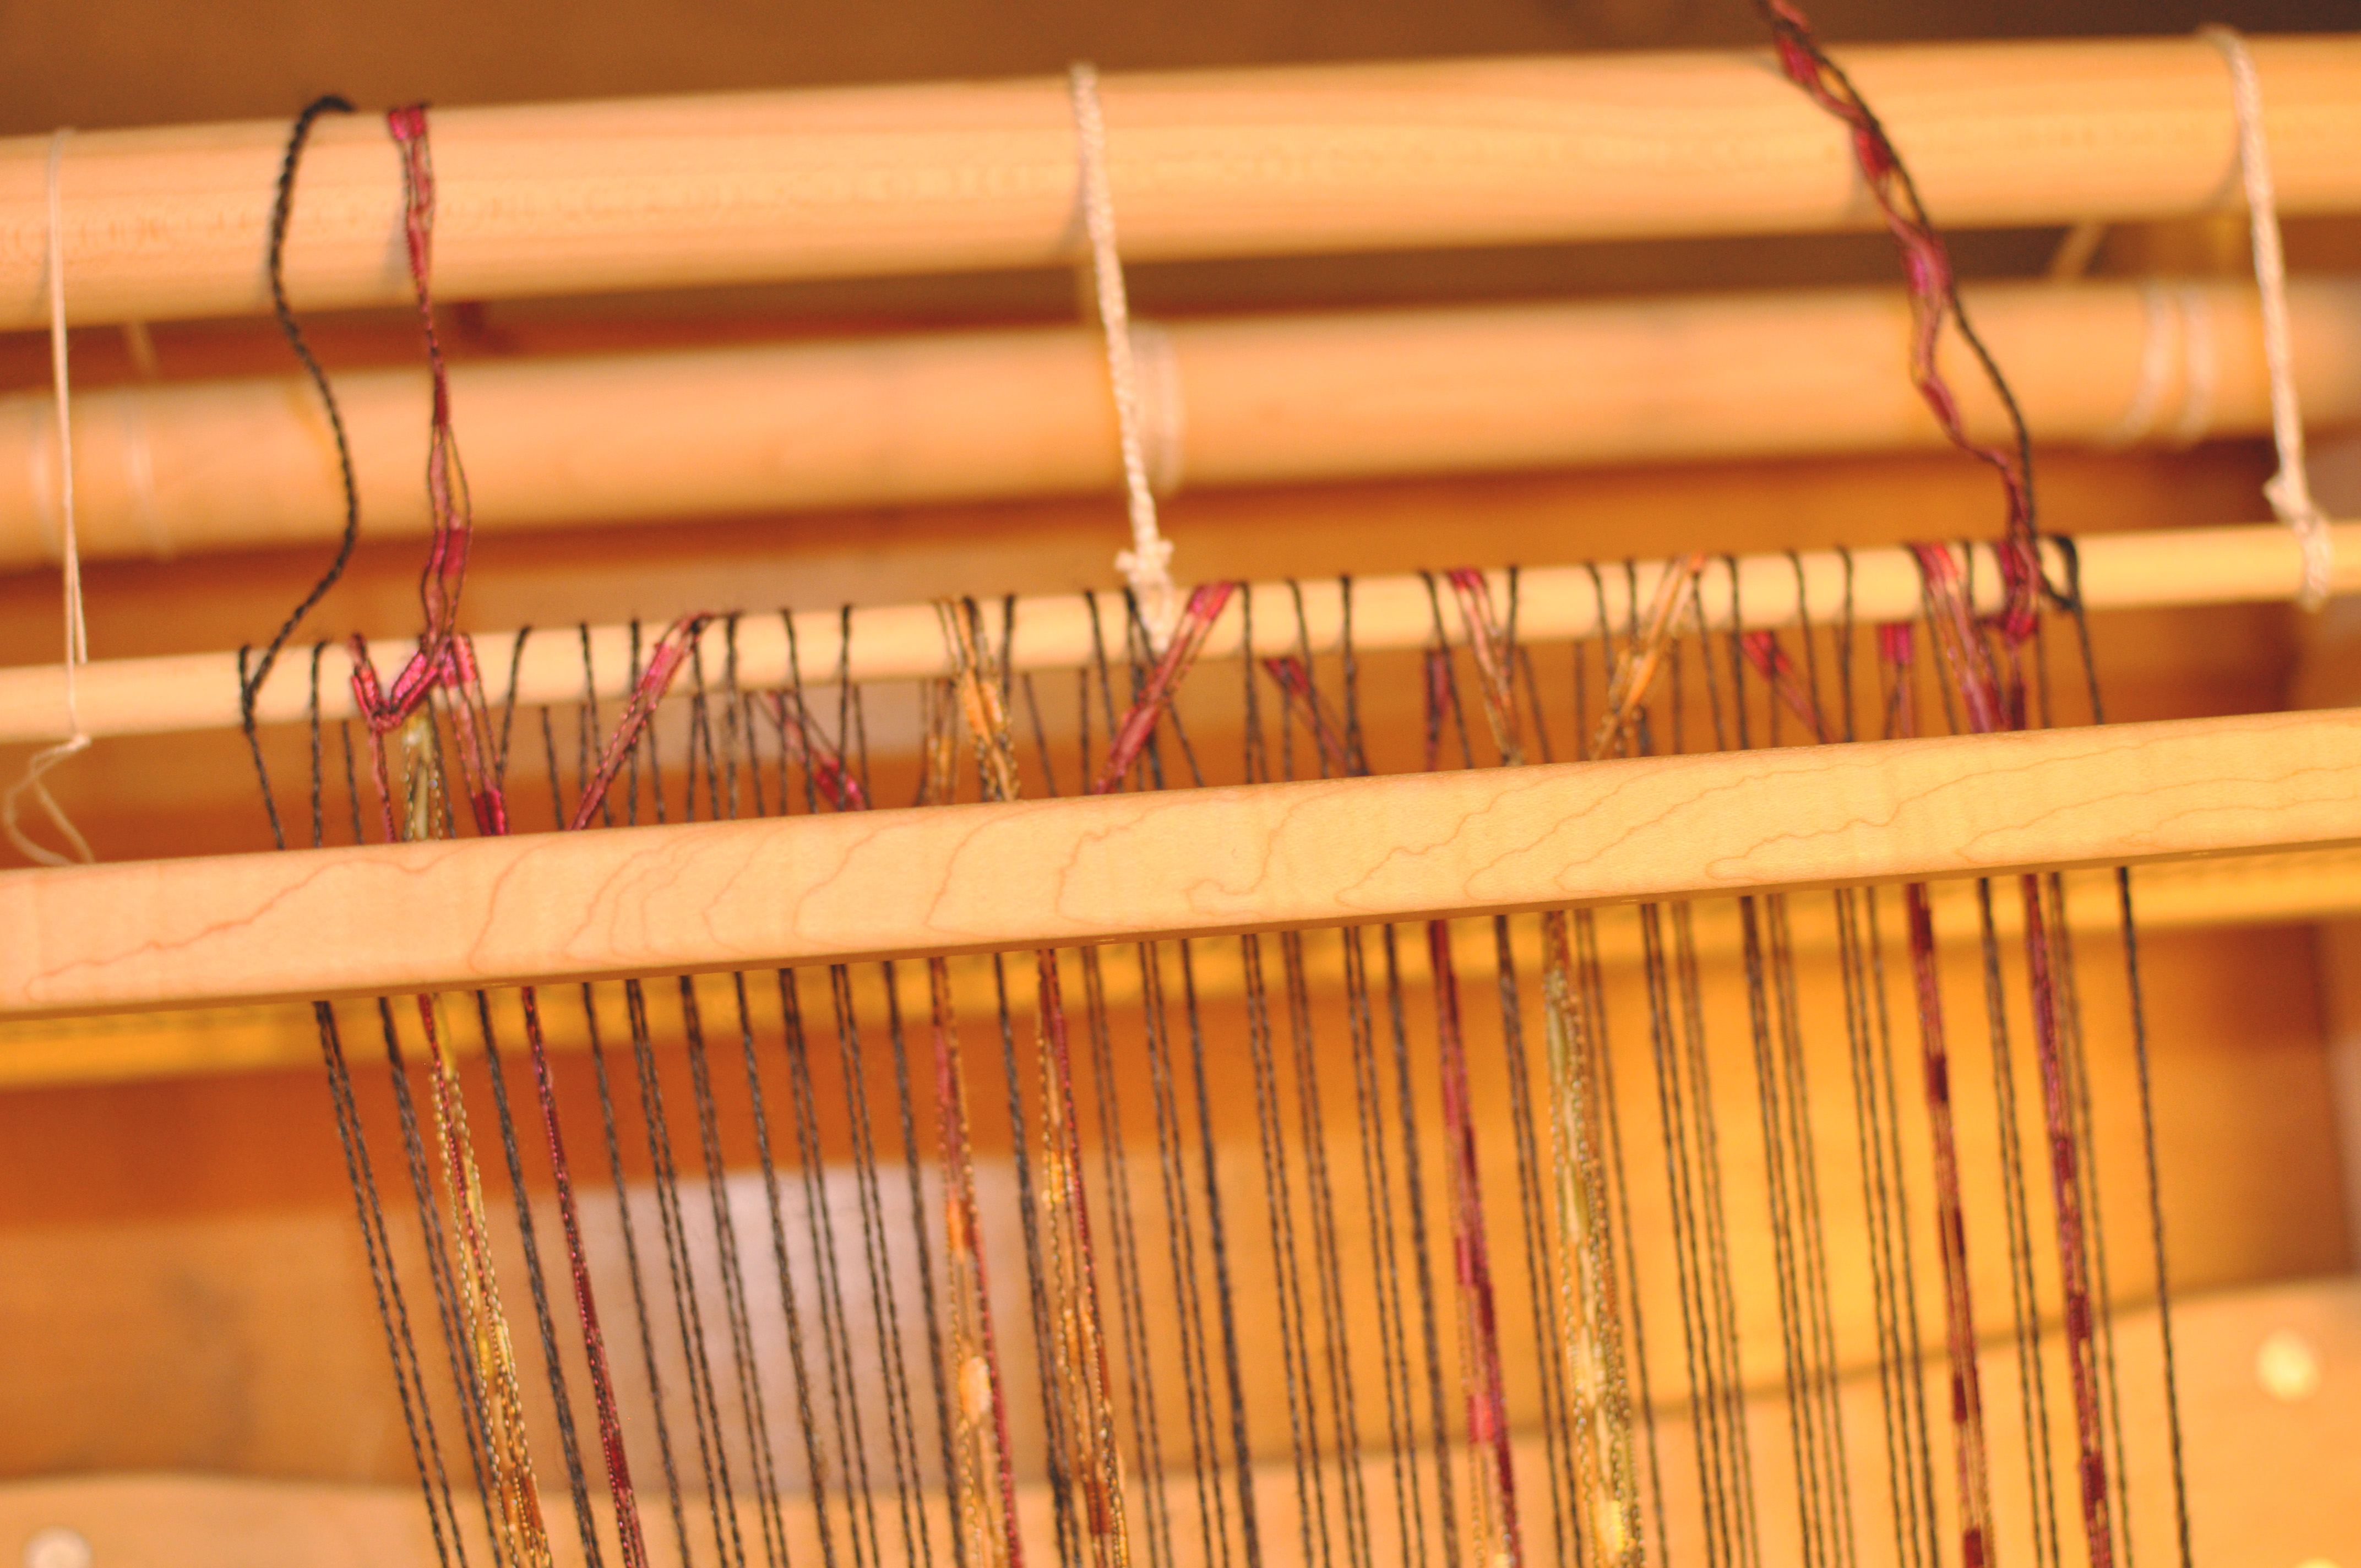
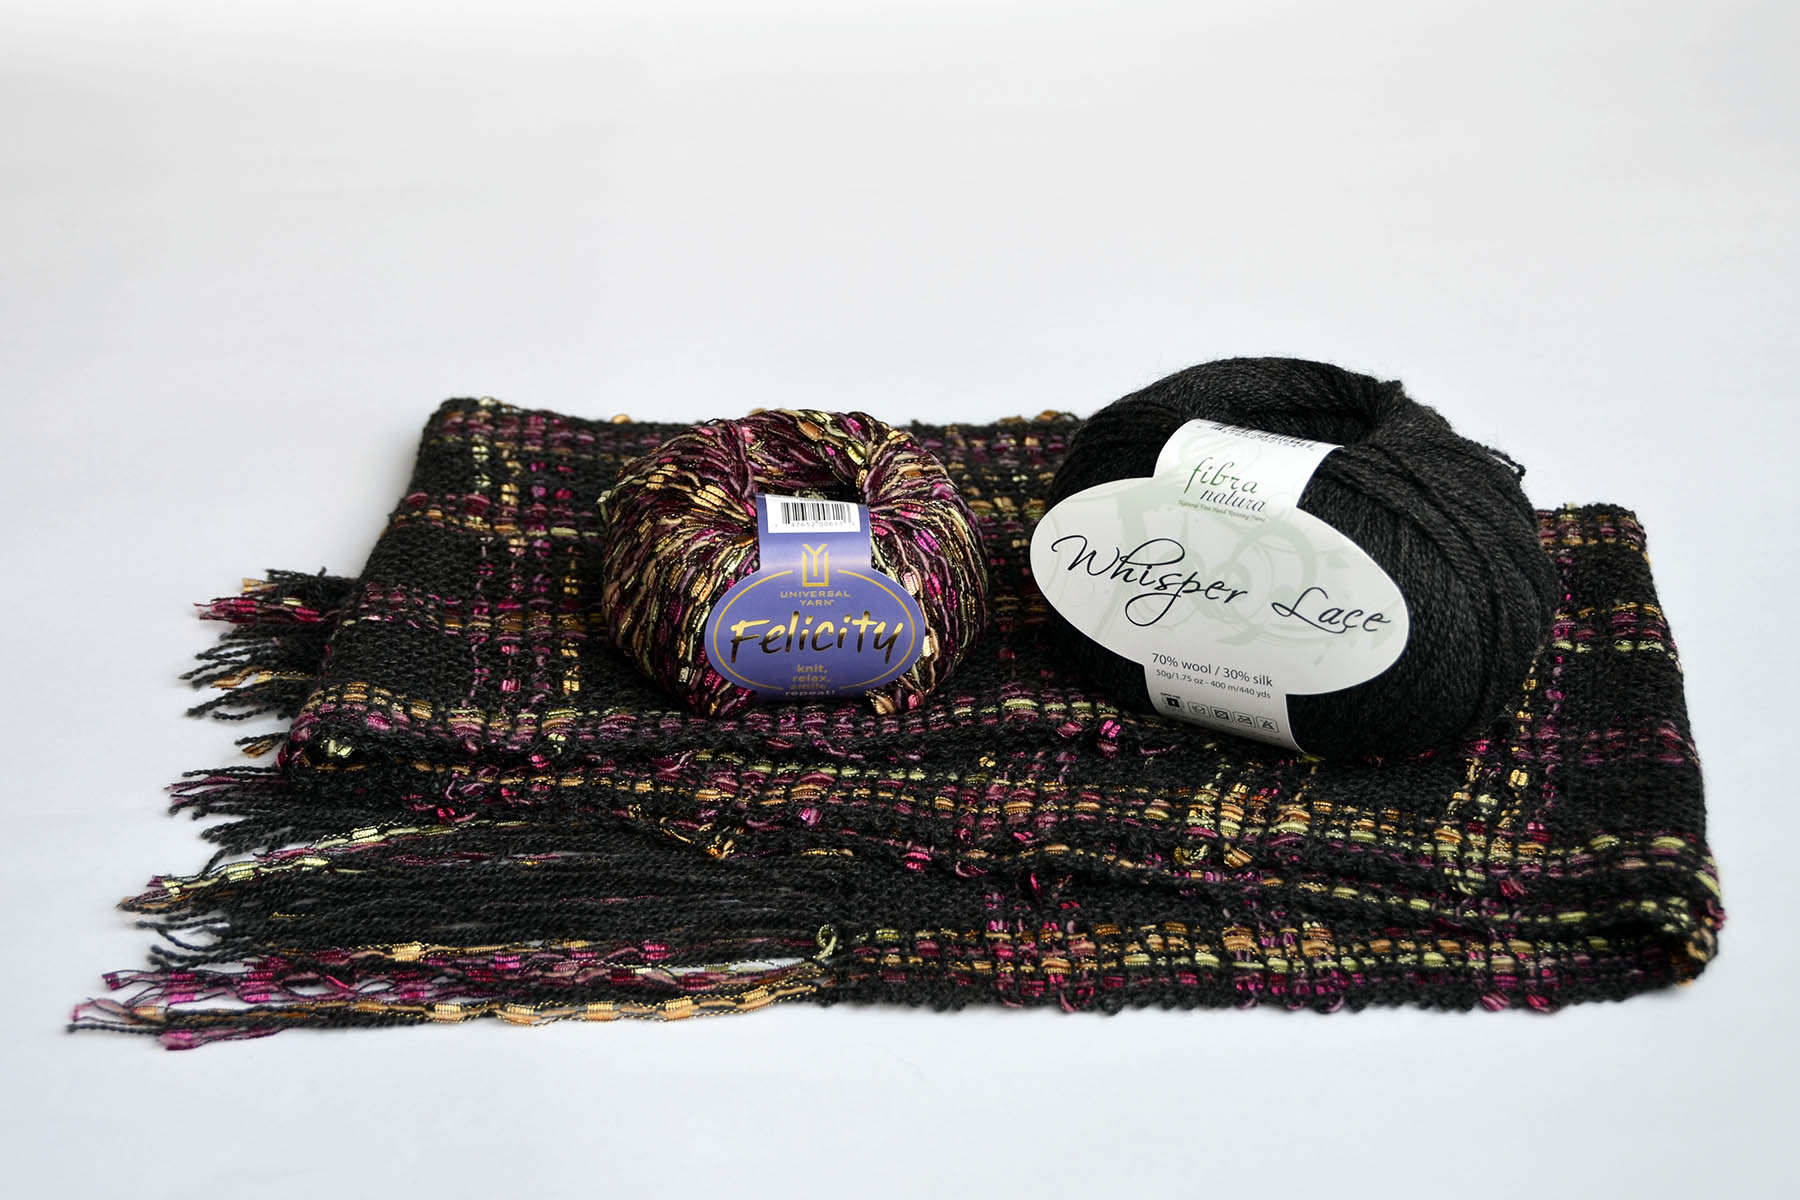
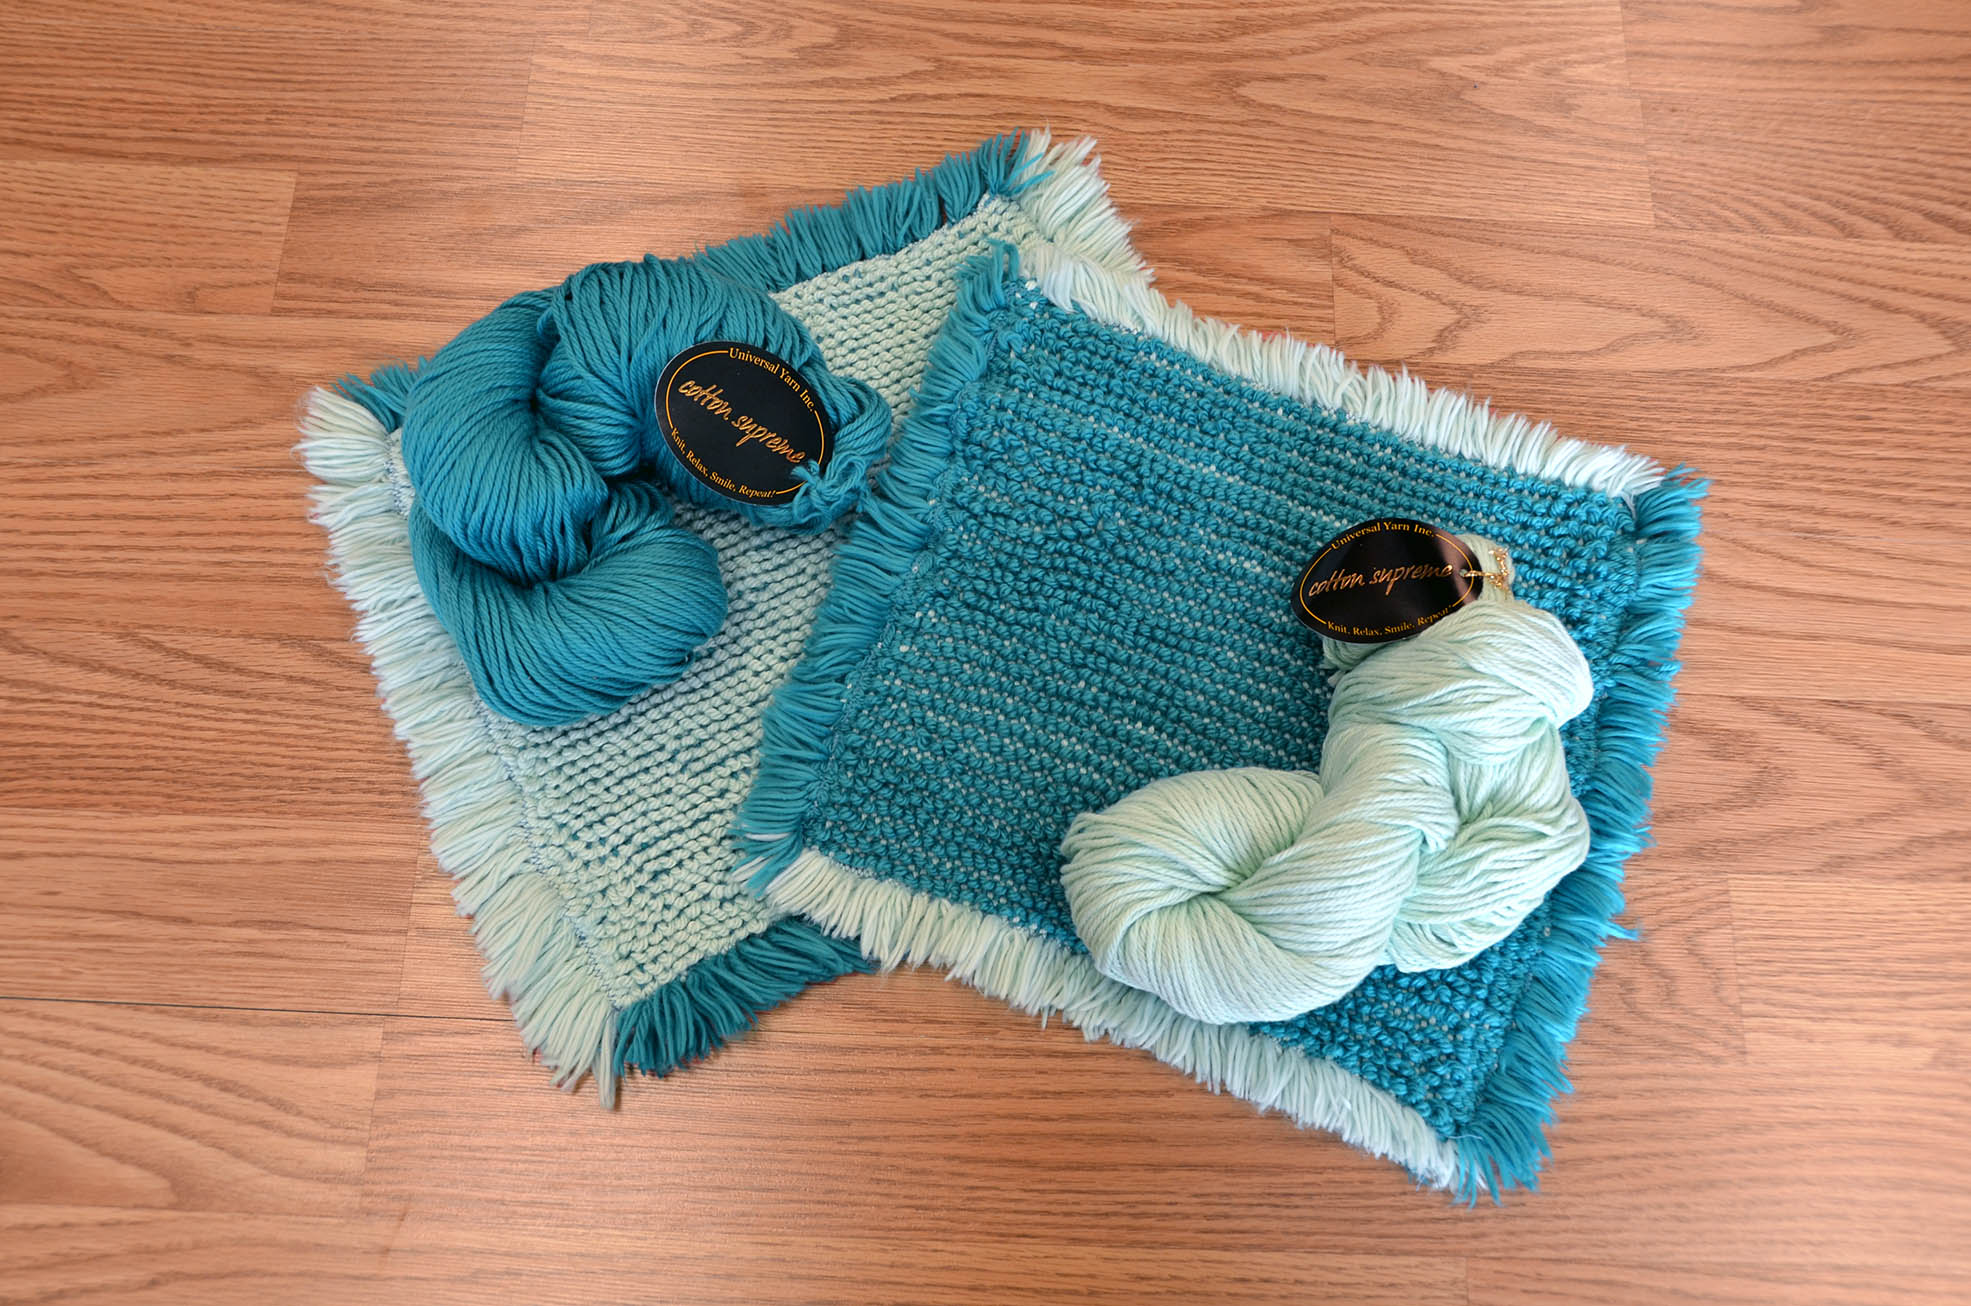
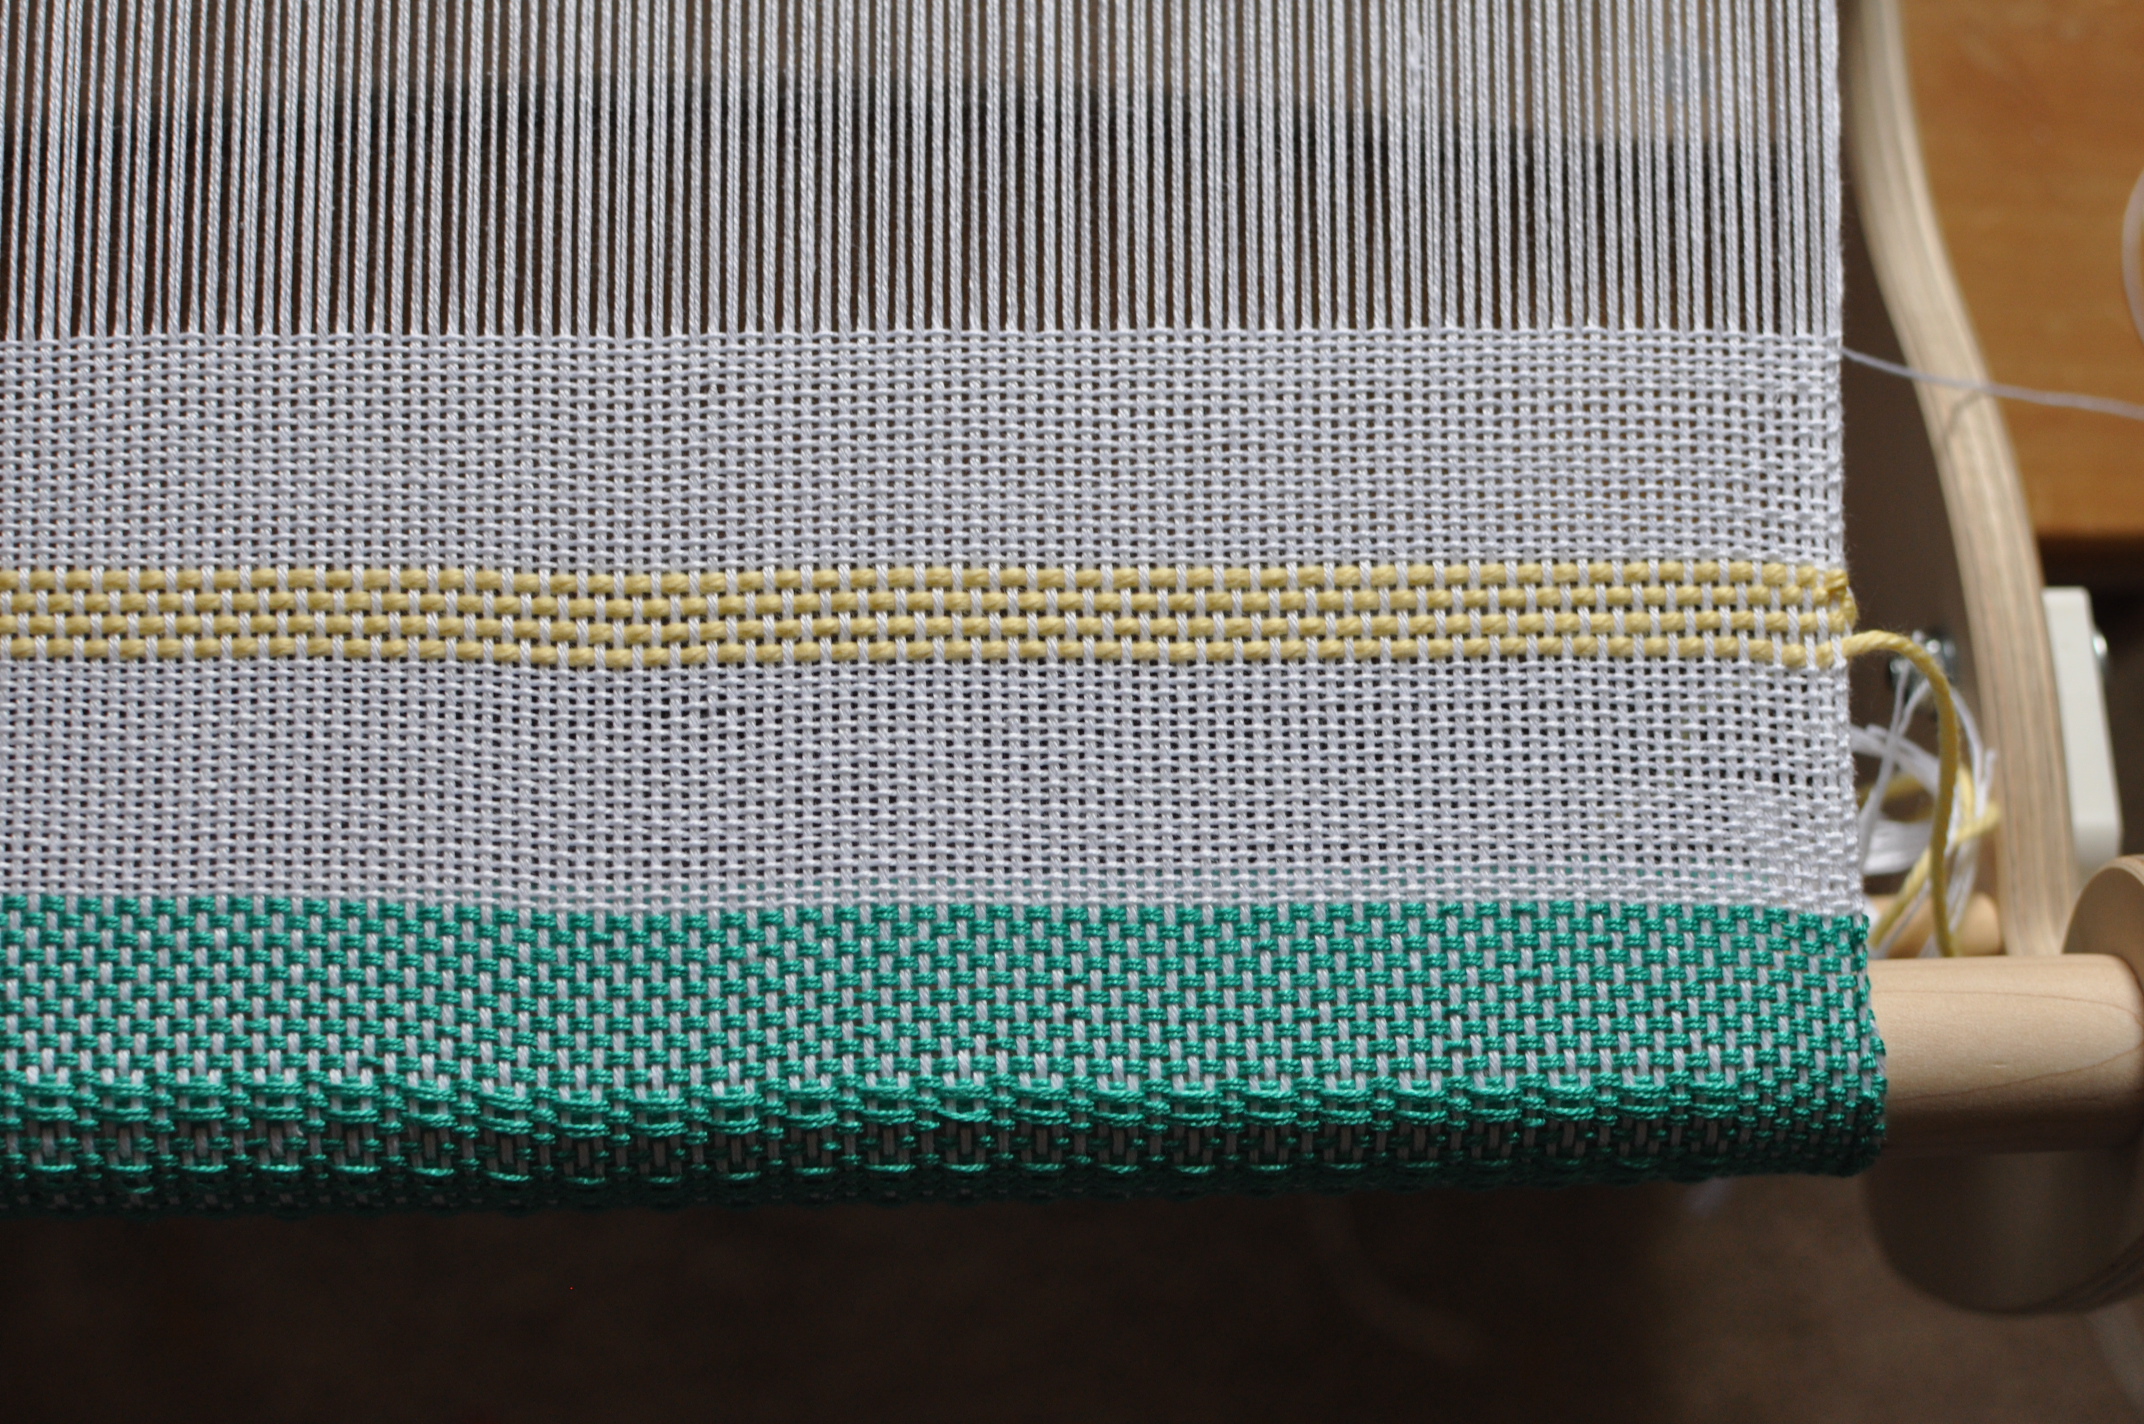
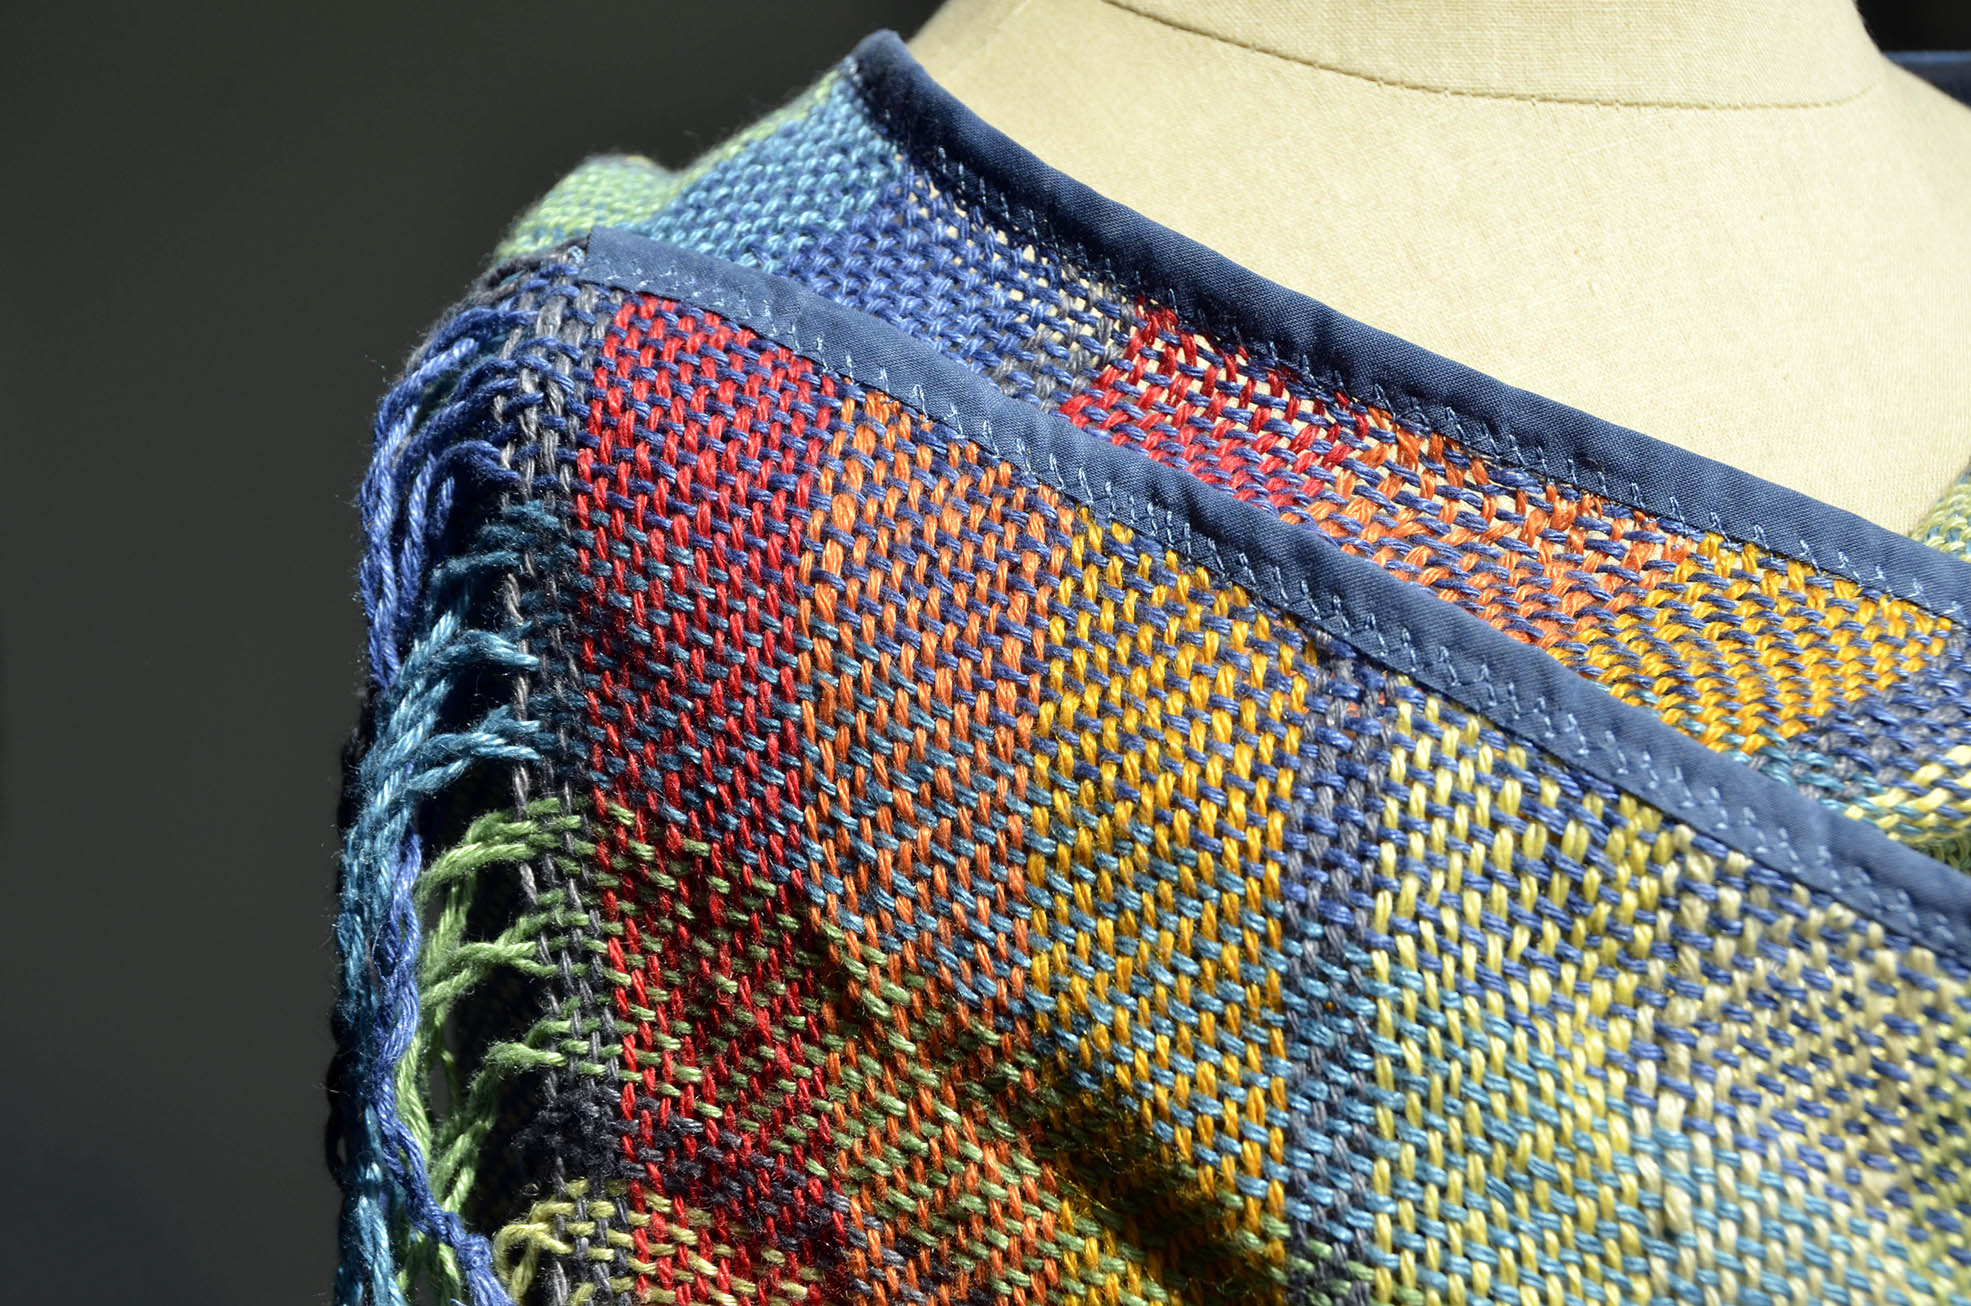
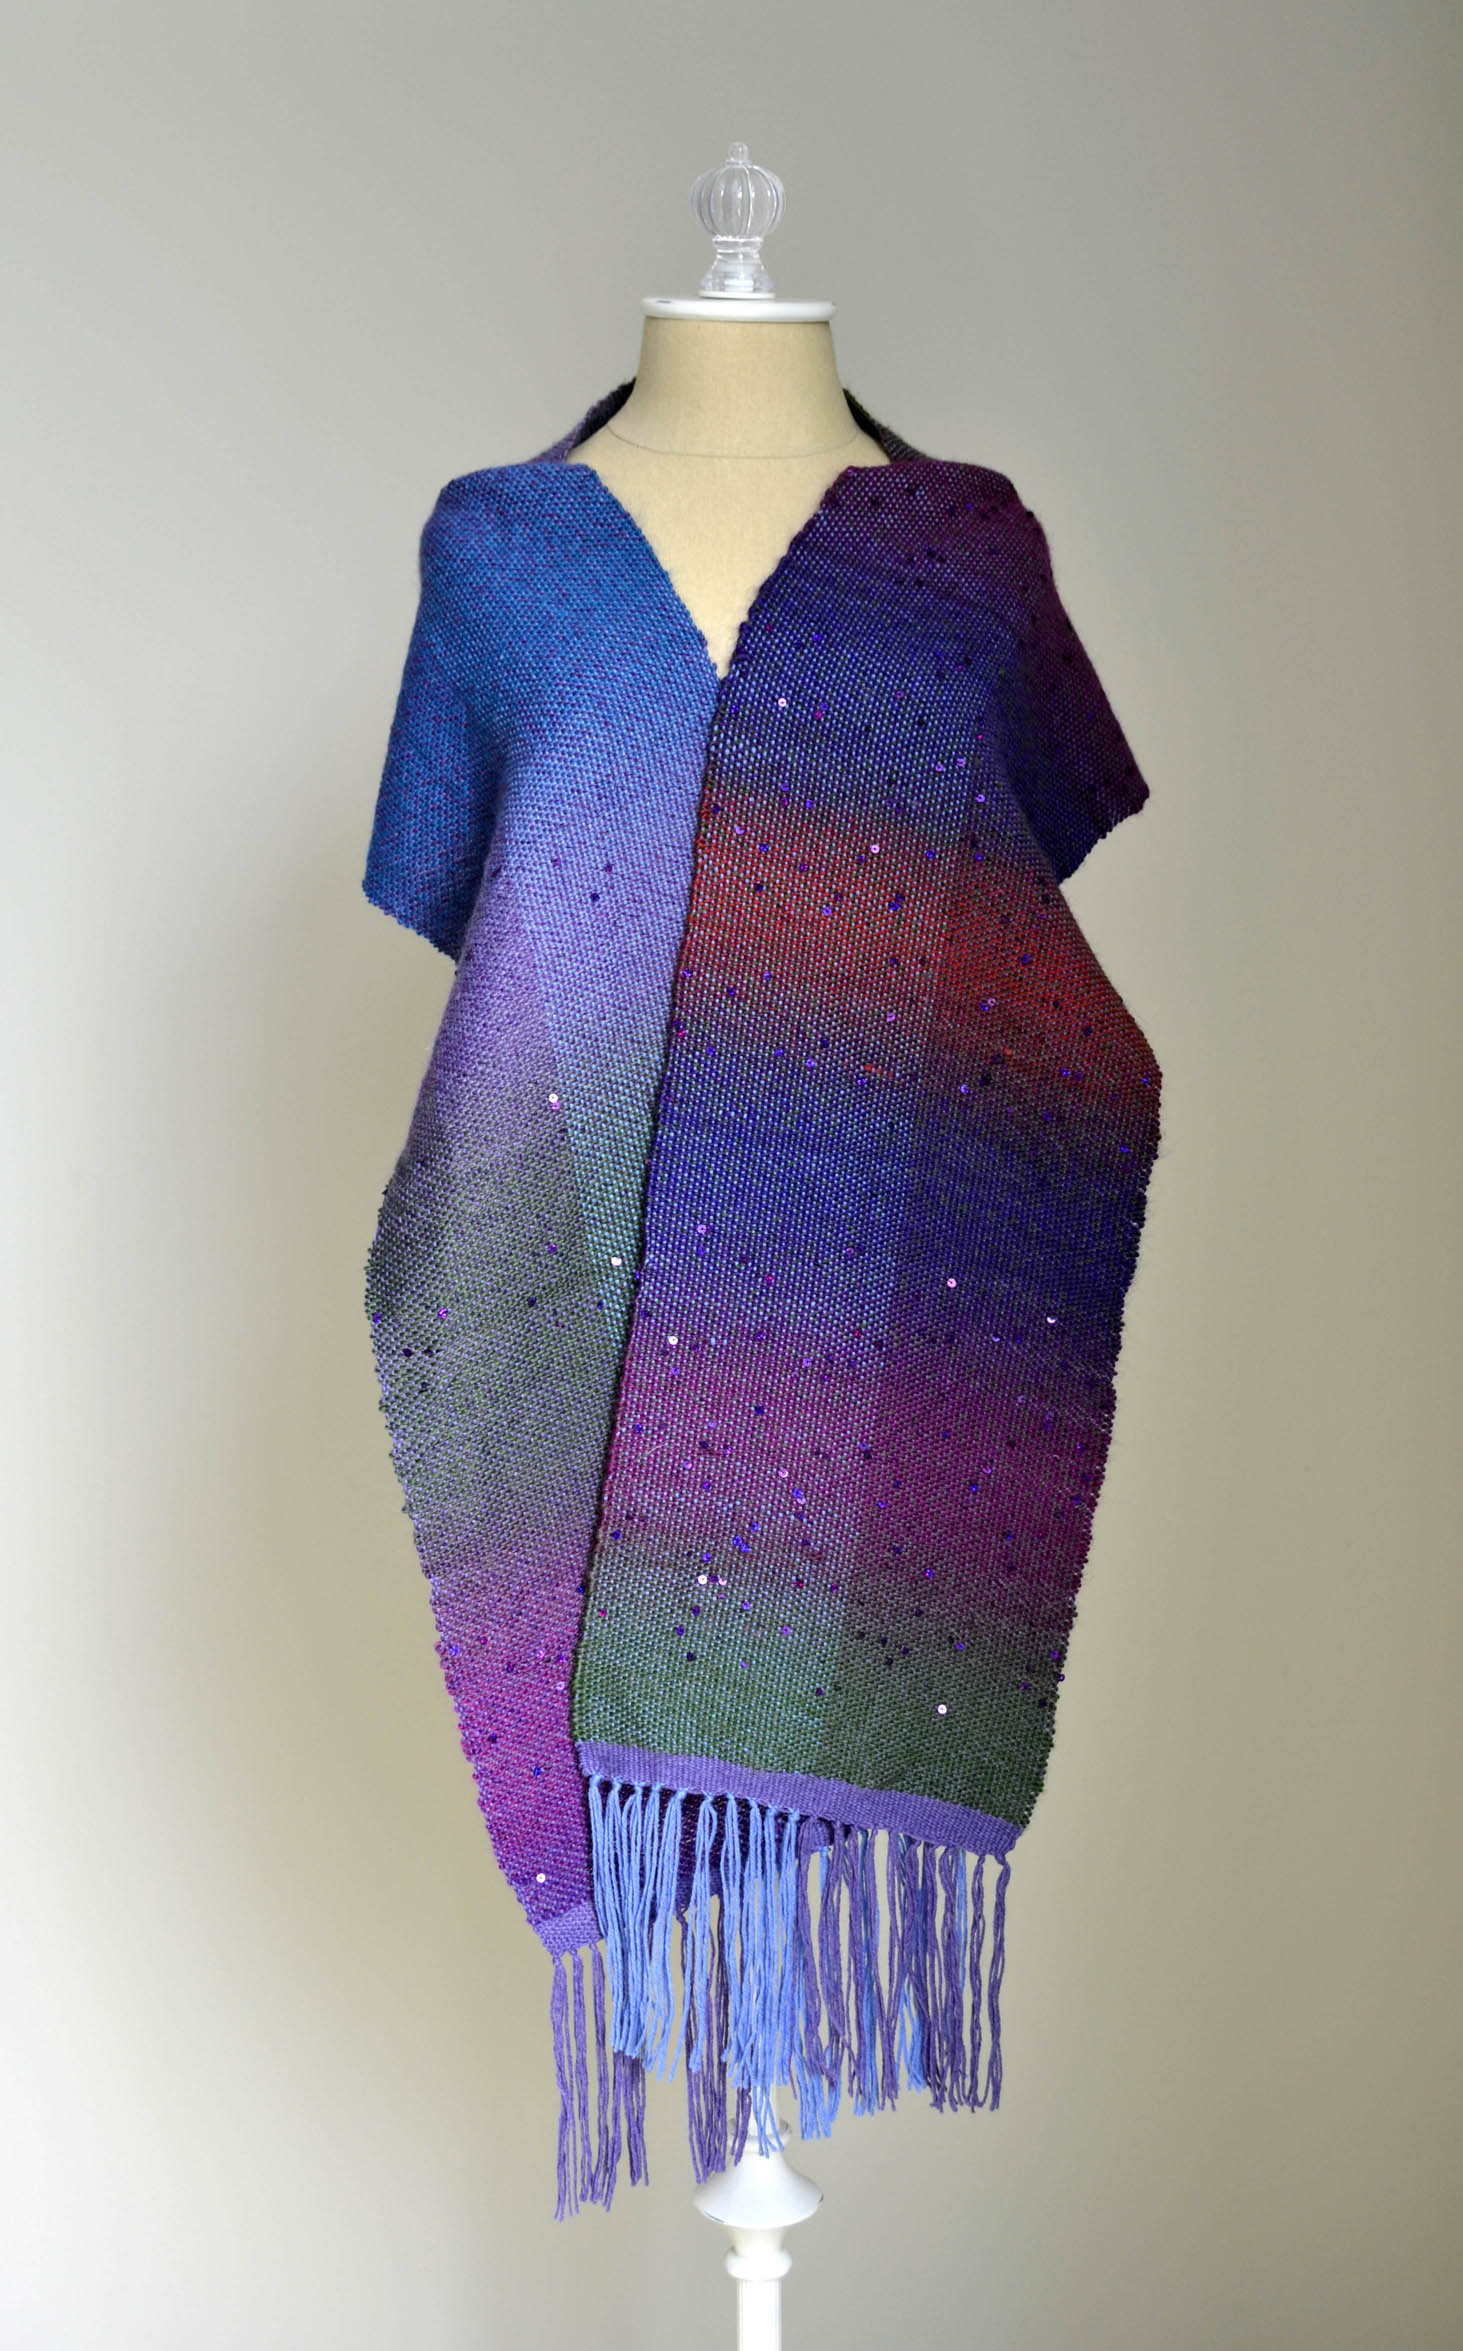
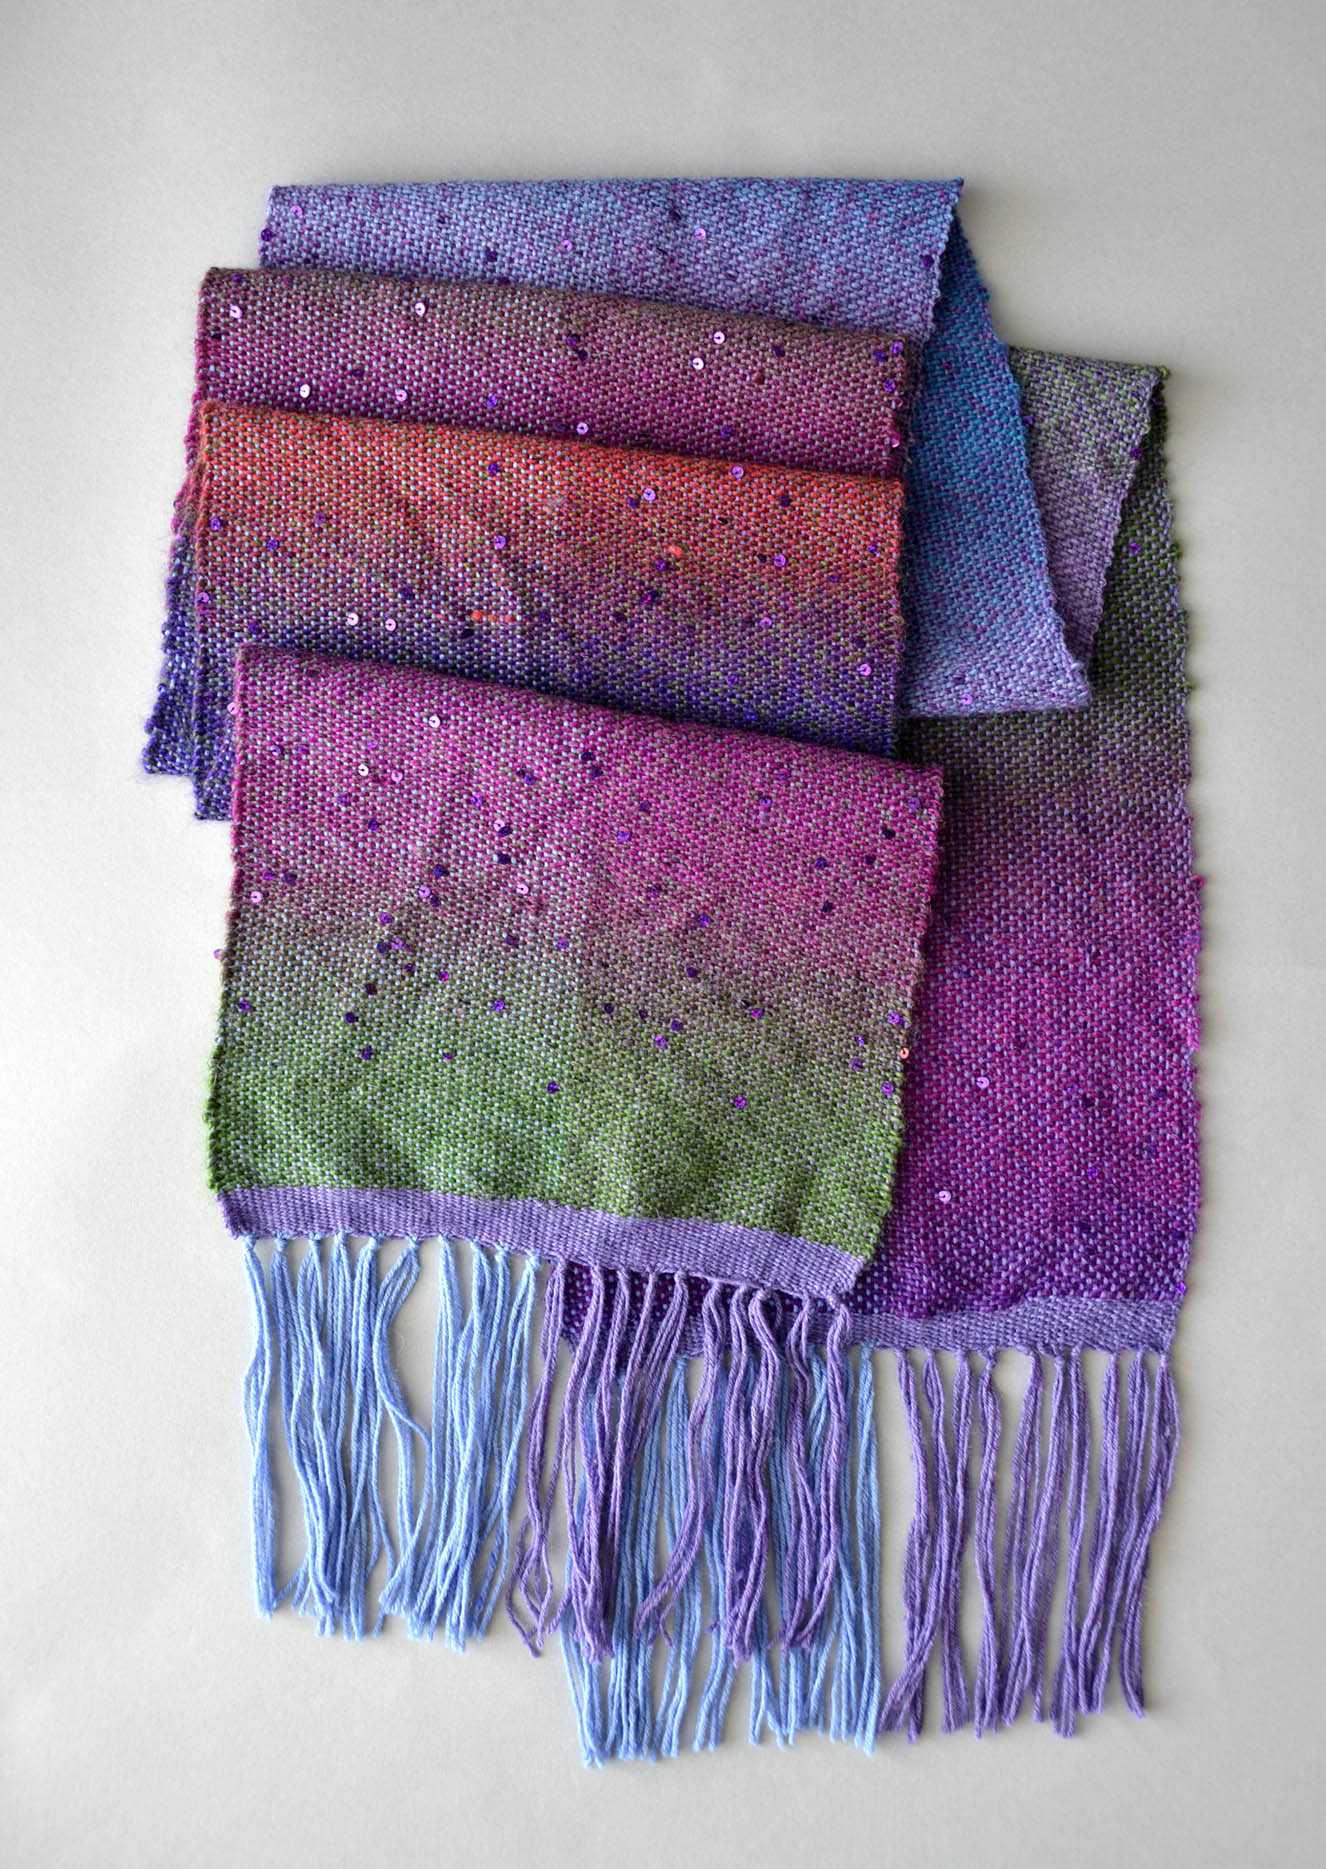
Colors used:  102 Poppy (A) , 03 Orange (B), 02 Tangerine (C), 01 Lemon (D), 101 Butter Cream (E), 104 Wild Lime (F), 12 Tarragon (G), 11 Adriatic (H), 103 Regatta (I) and 18 Pewter (X). Pewter is the only new color I ended up incorporating. I decided the rainbow needed to be tamed with a dose of neutral. I used only about 1/3 or so of each 50 g skein. If I had it to do over again, I would have warped 3 times as long so I could have gotten 3 scarves!

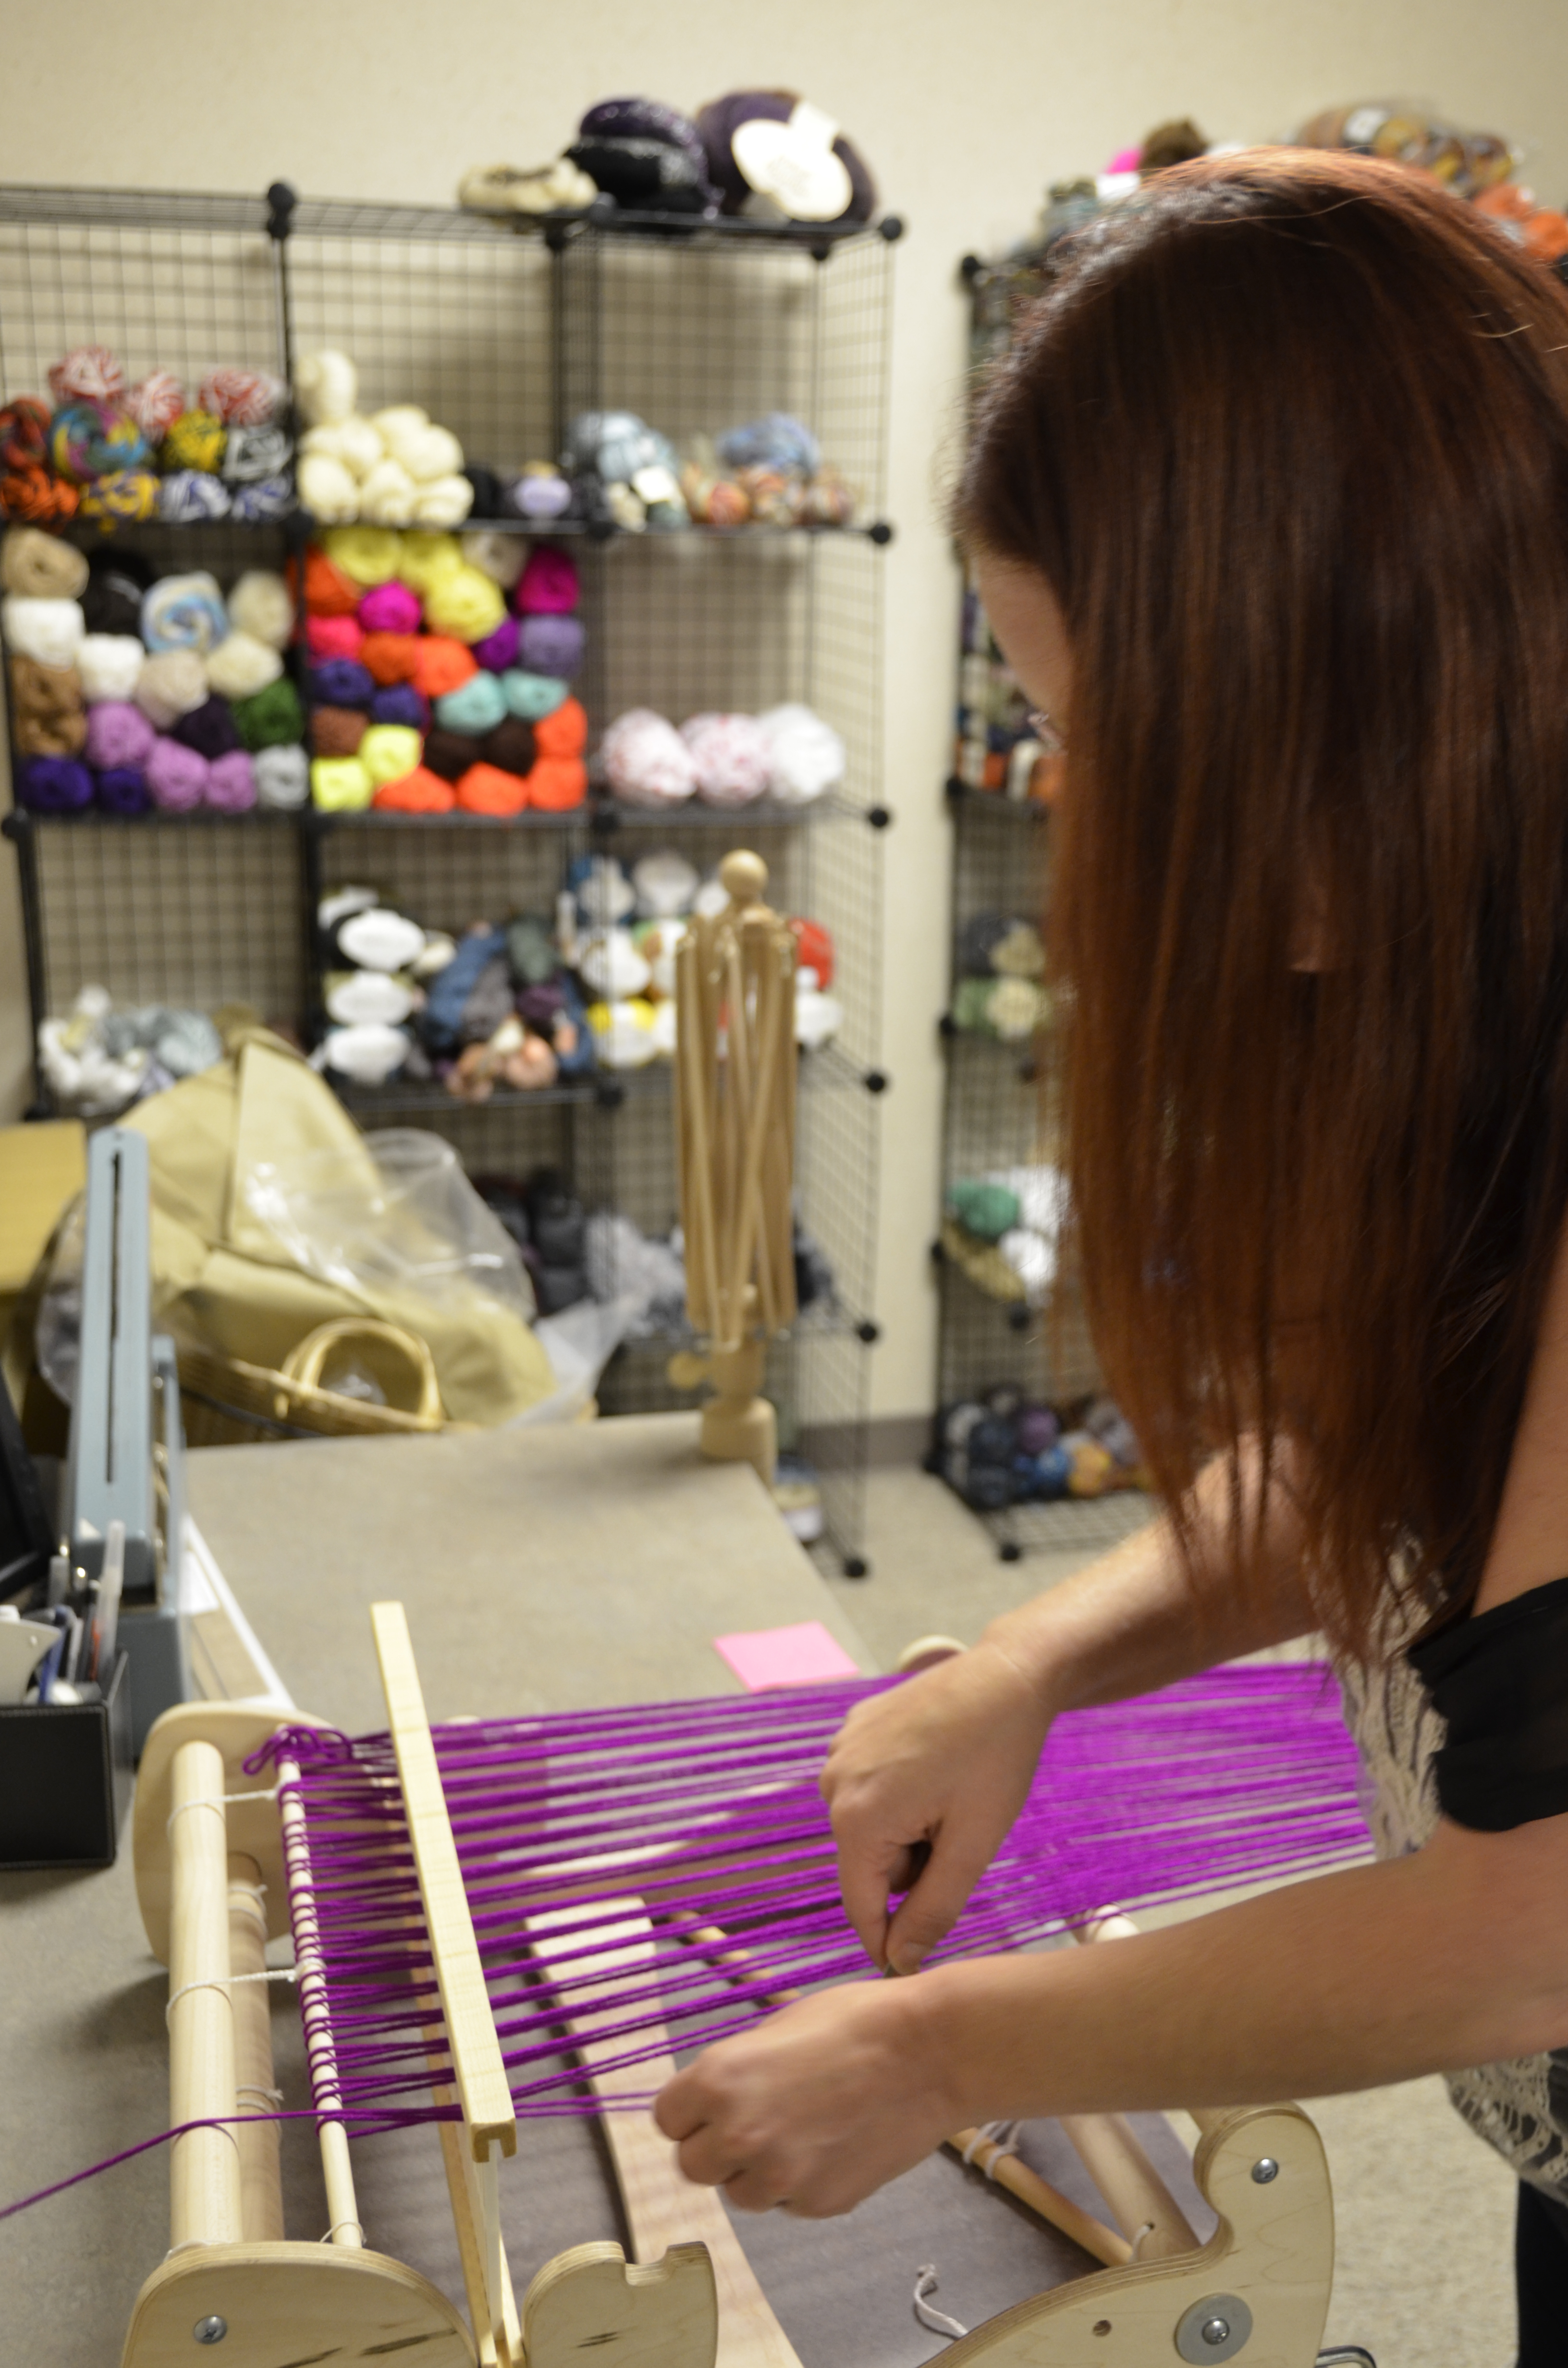
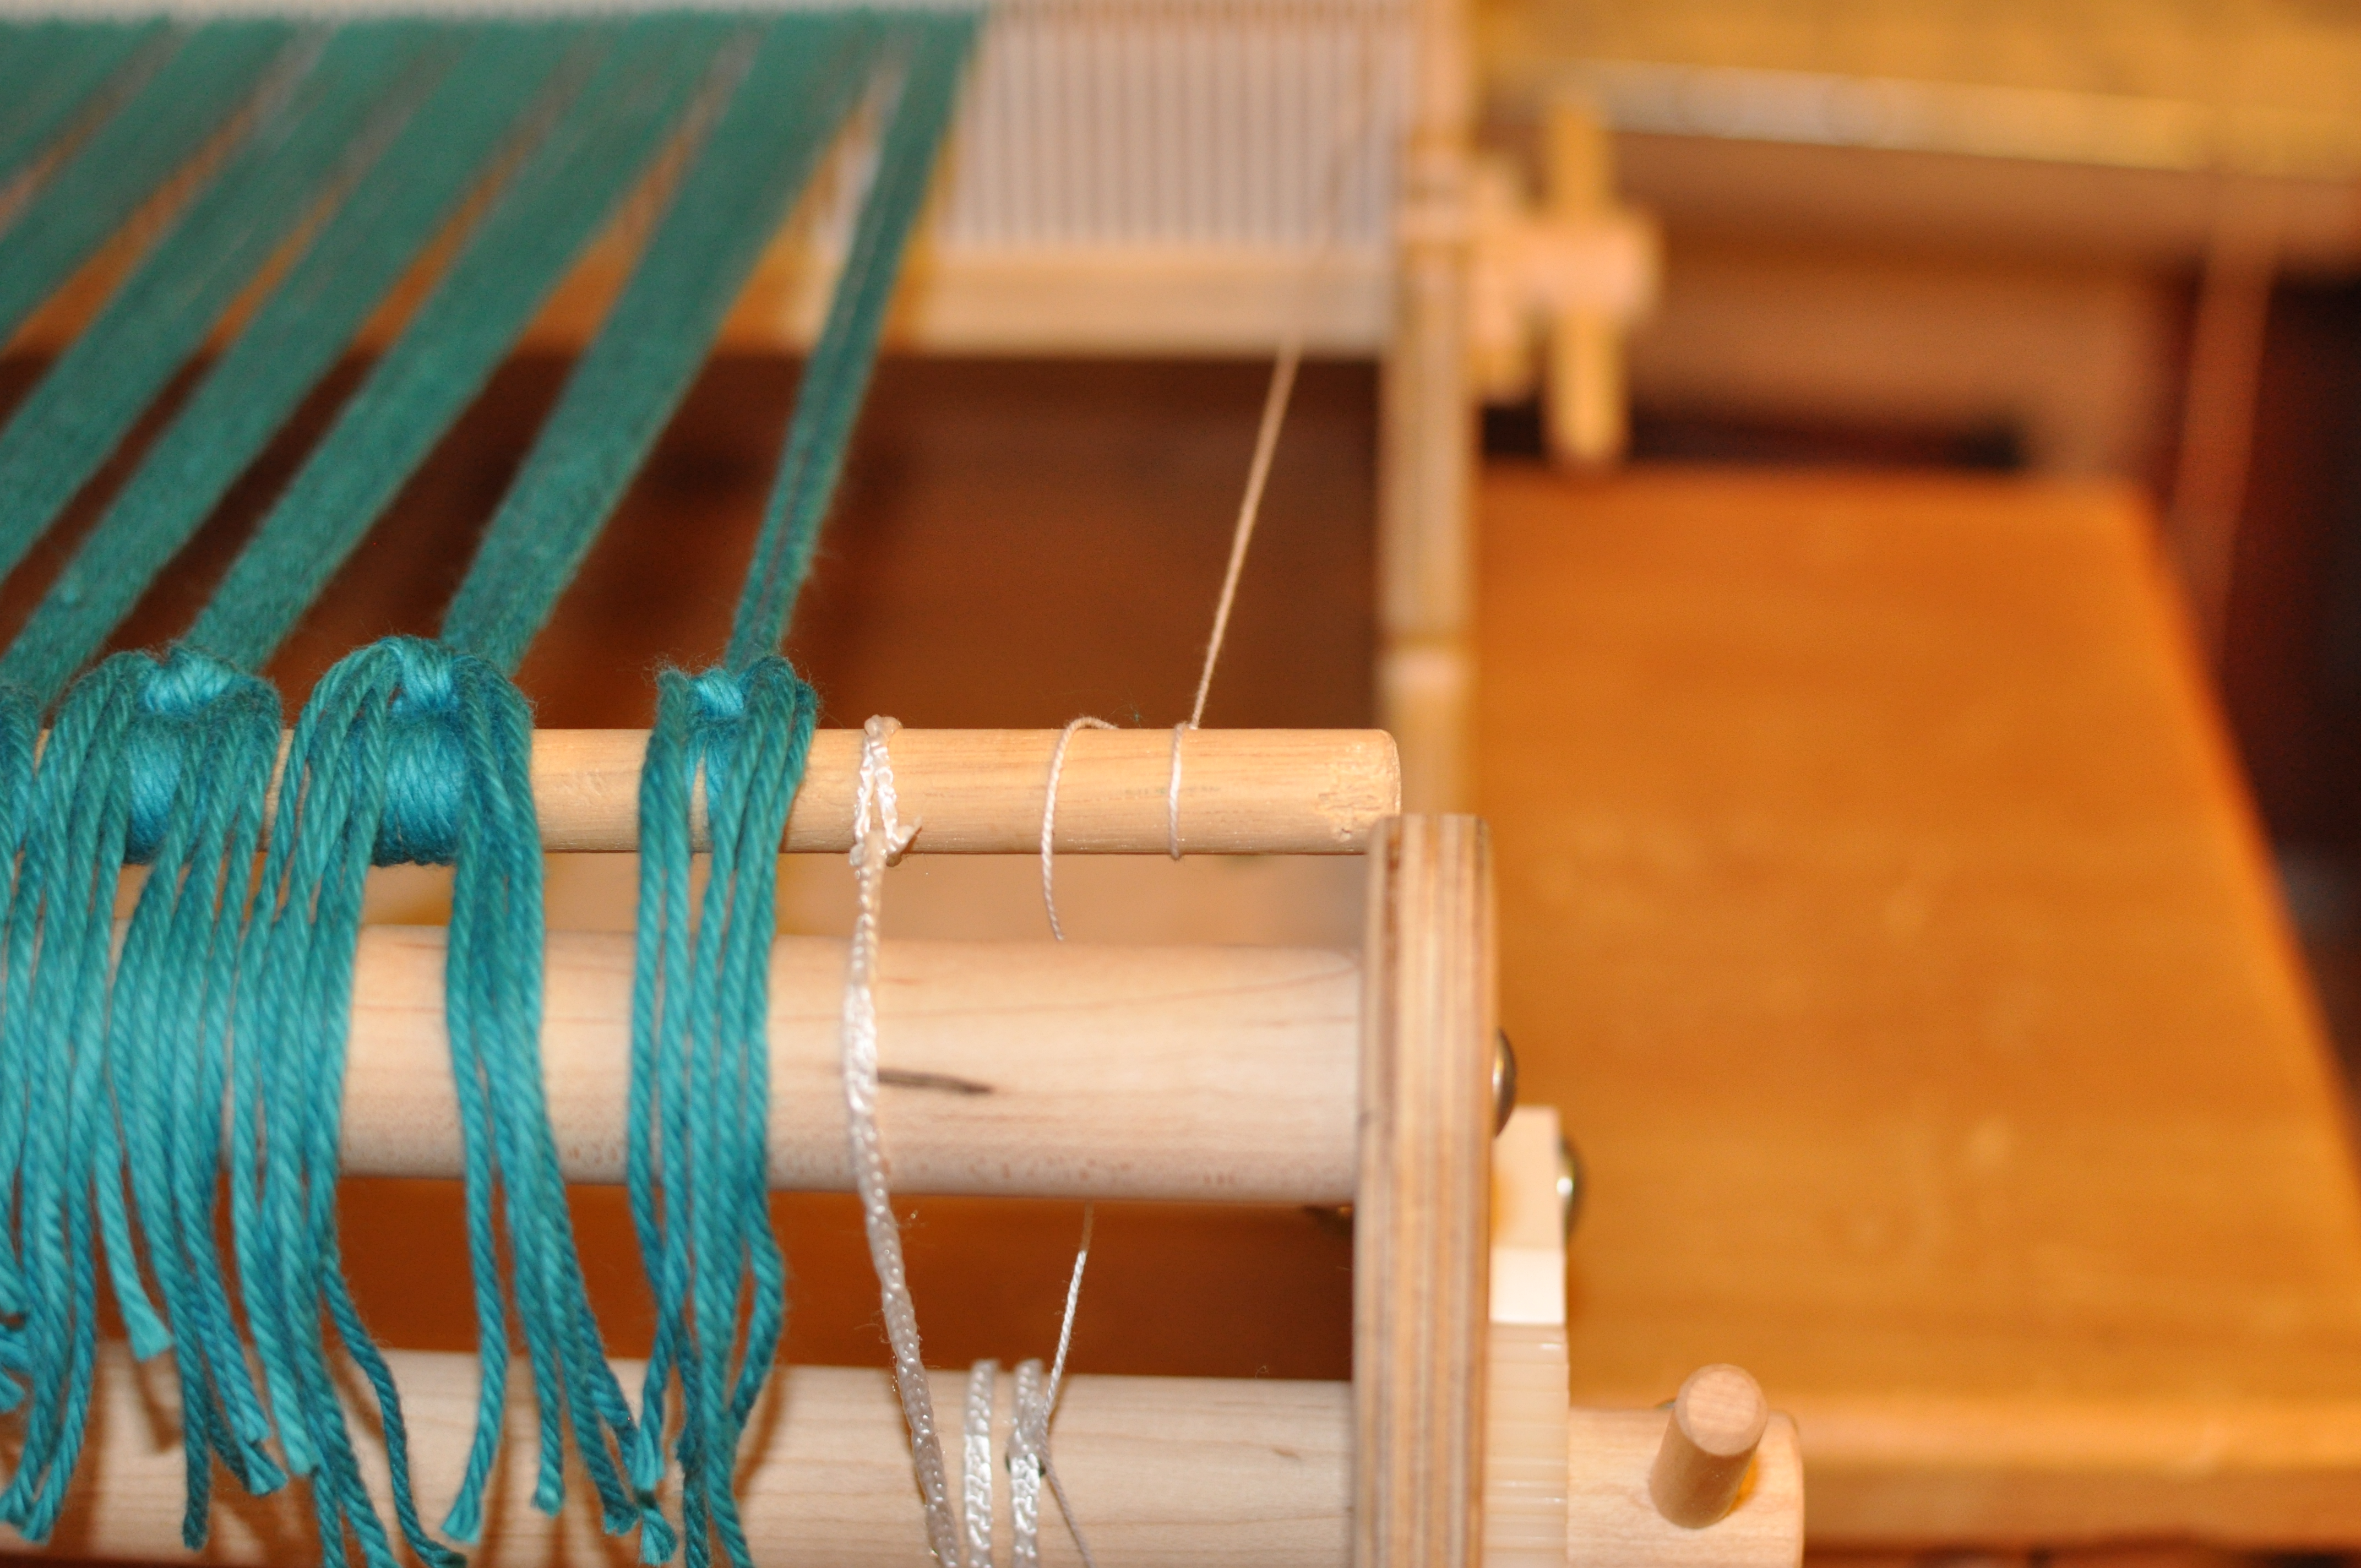
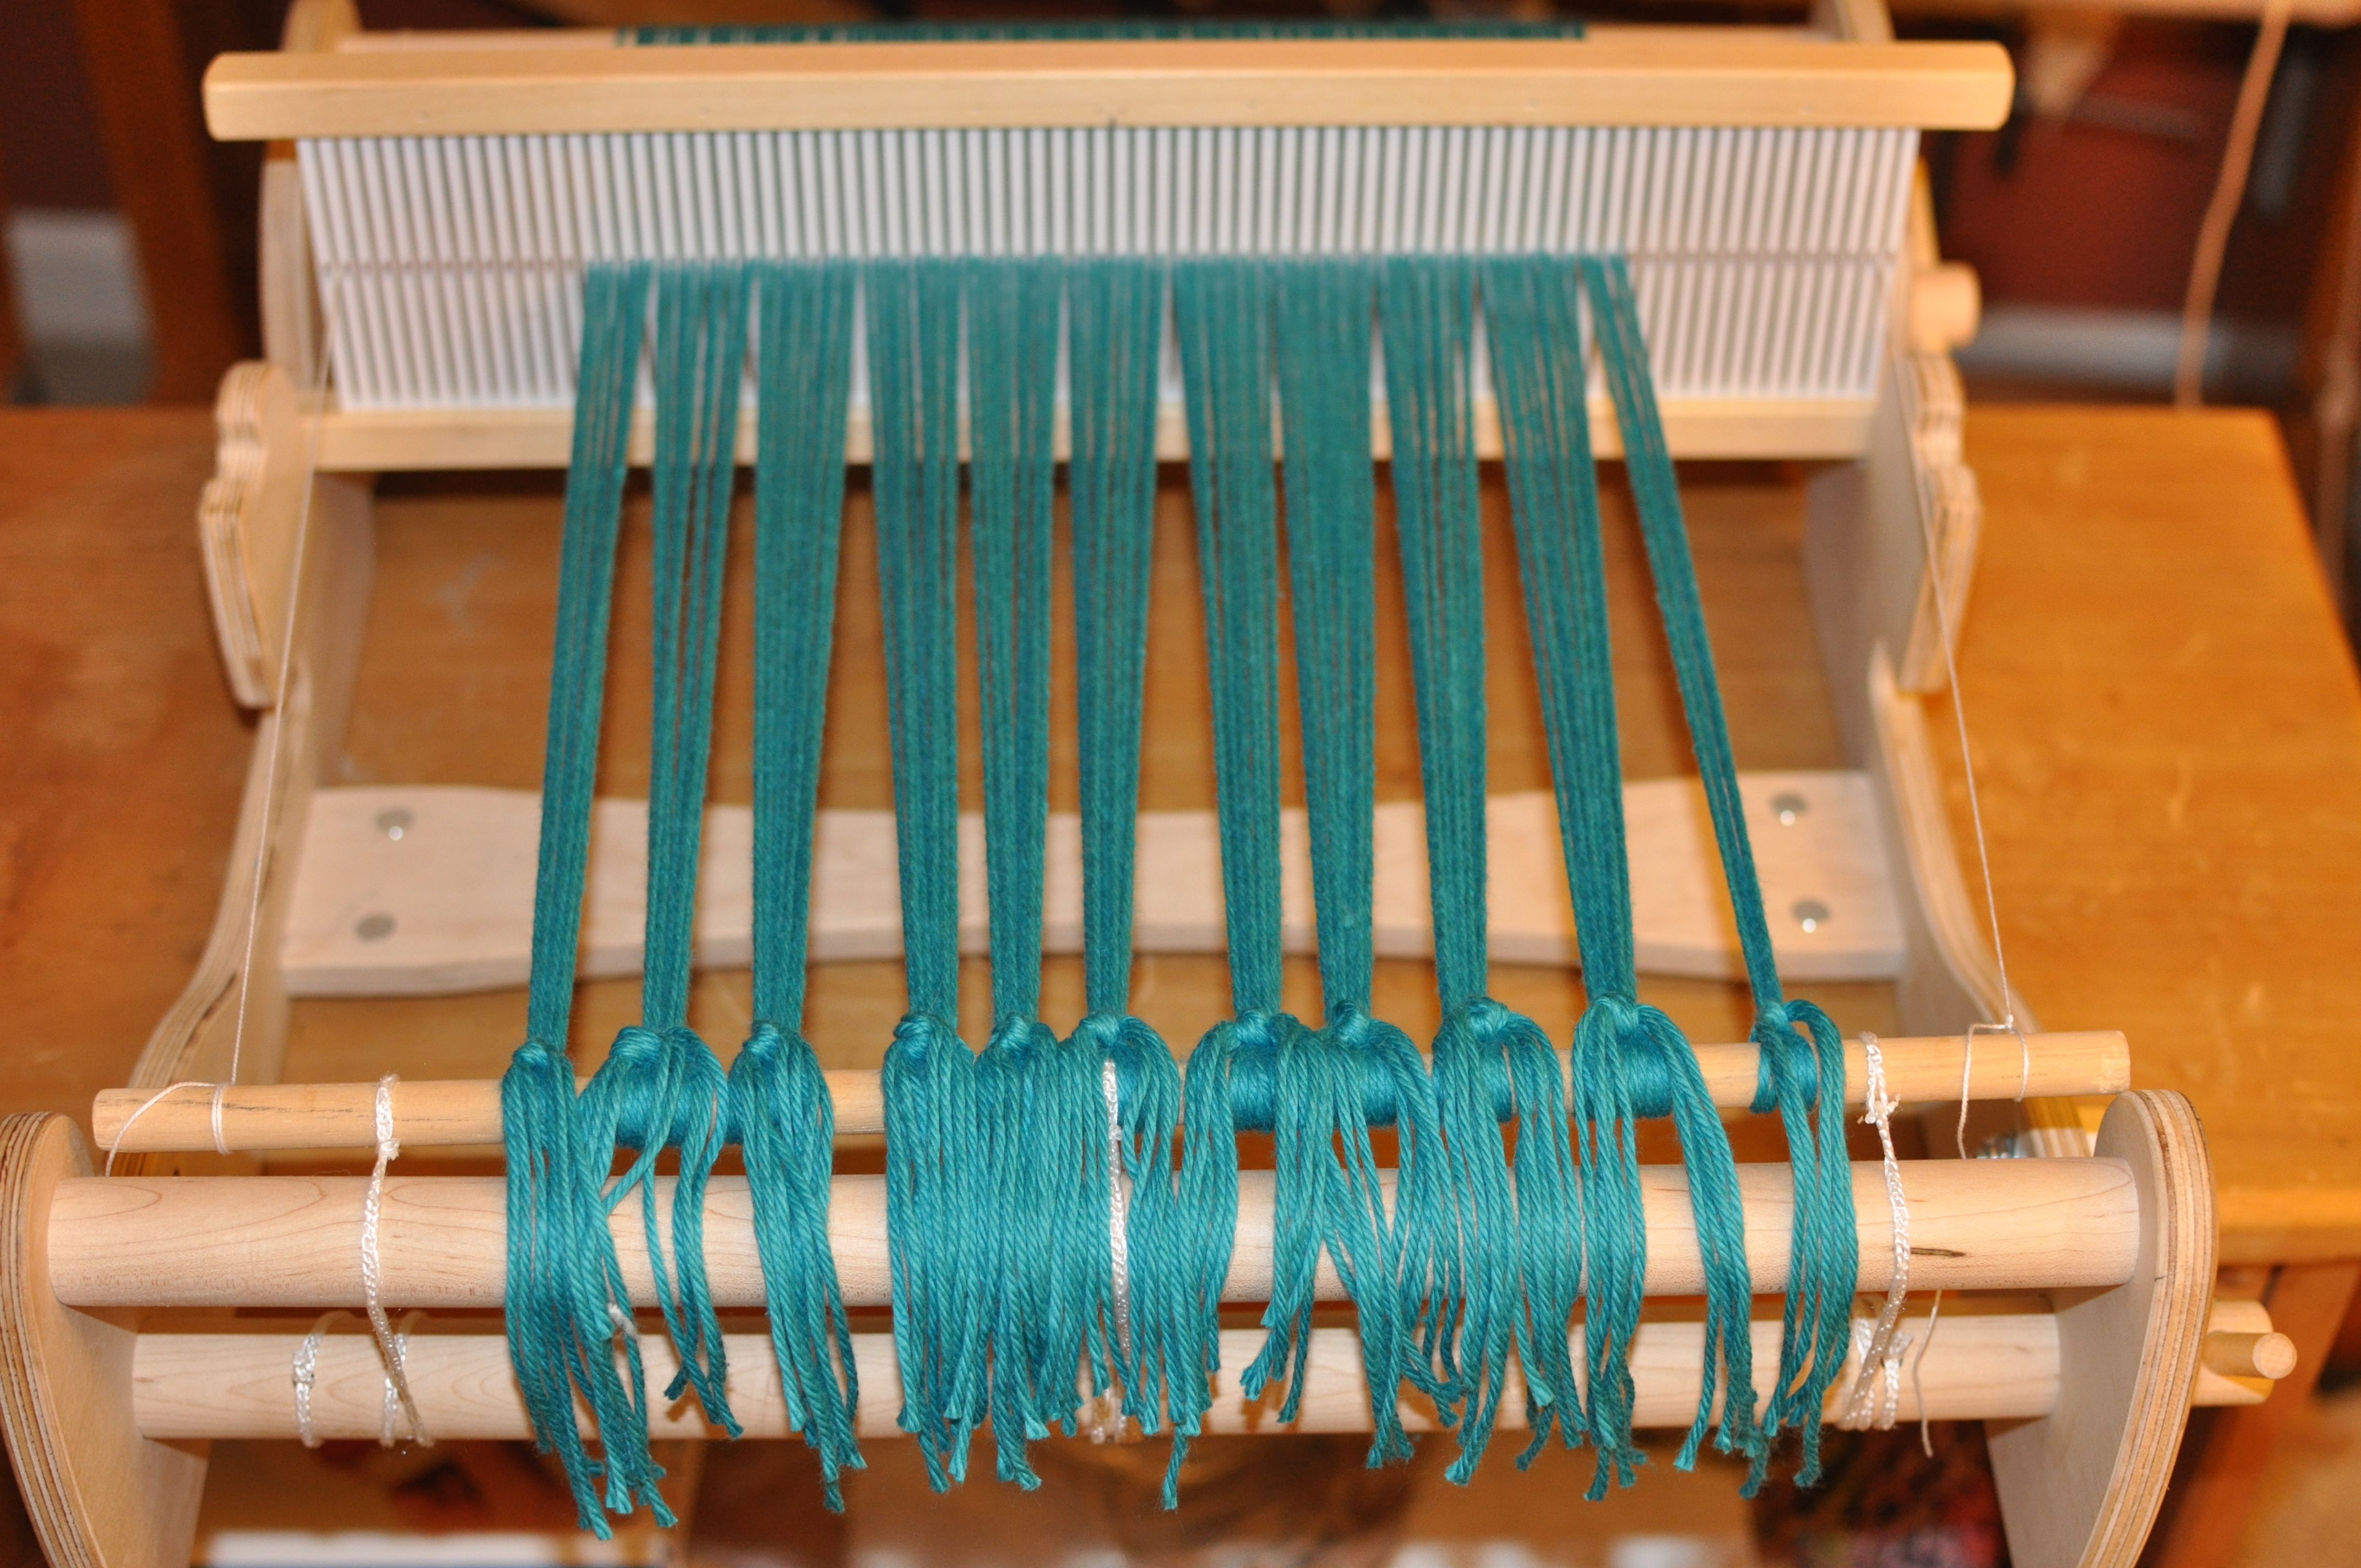
Because I wanted a very drapy scarf, I went with the 8 dent reed. I’m going to touch more on choosing reed size in future posts. But briefly, a good rule of thumb is to go with a reed size that is half of the WPI (wraps per inch) of your yarn if you want a fabric of “average” density. Because I wanted a more open scarf, I chose a reed that had fewer than half the WPI so there would be more space between strands. My threading went: 12A, 12B, 12C, 4X, 12D, 12E, 12F, 4X, 12G, 12H, 12I; then at each end I did 2 double strands of X. My warp length was about 100″; I also like my scarves plenty long.

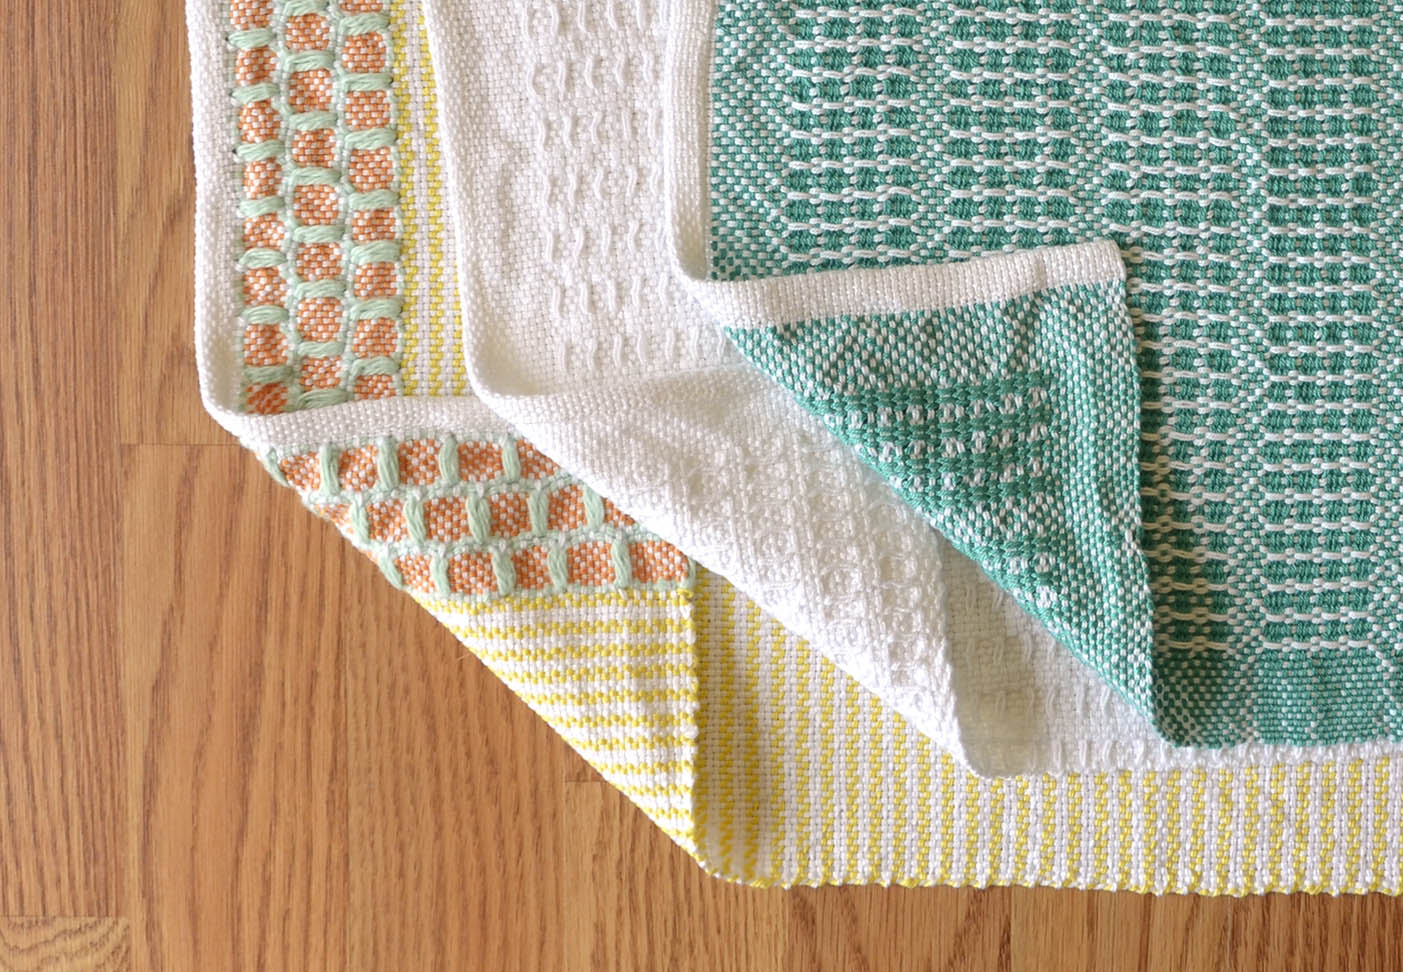
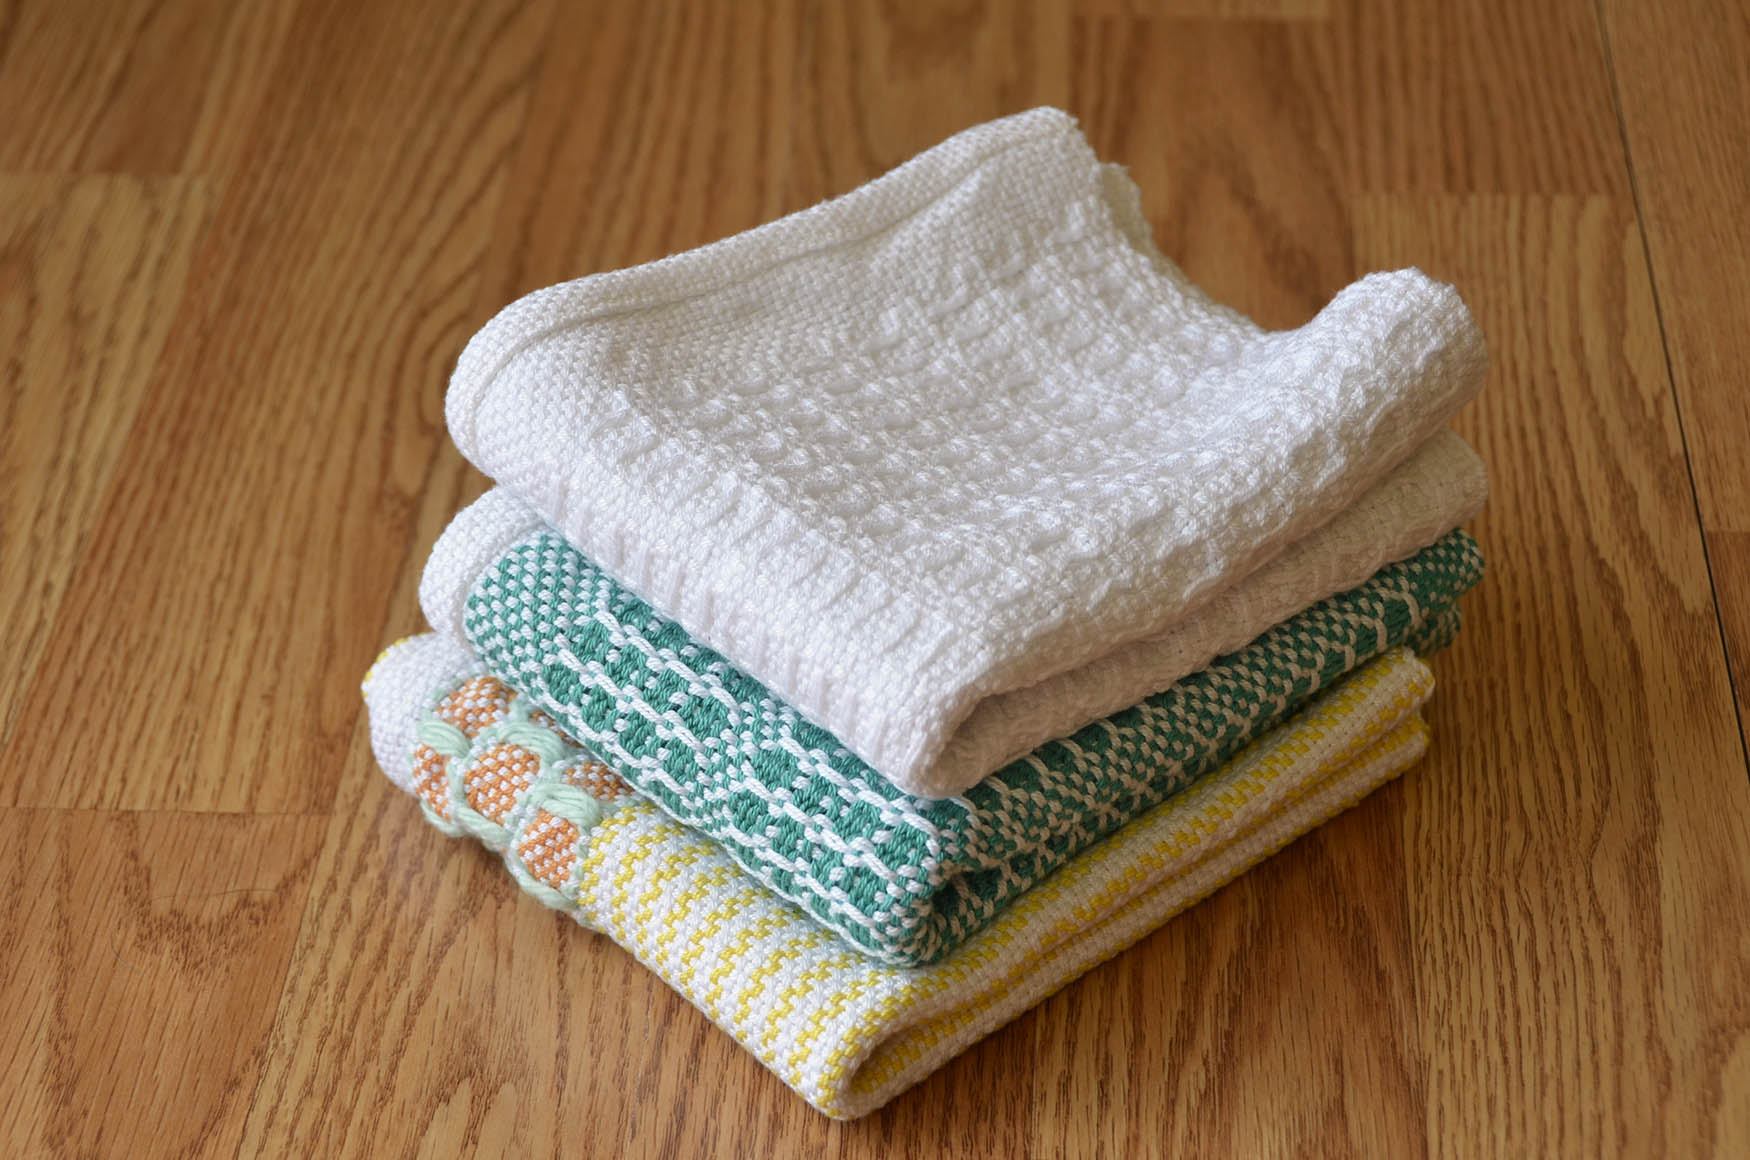
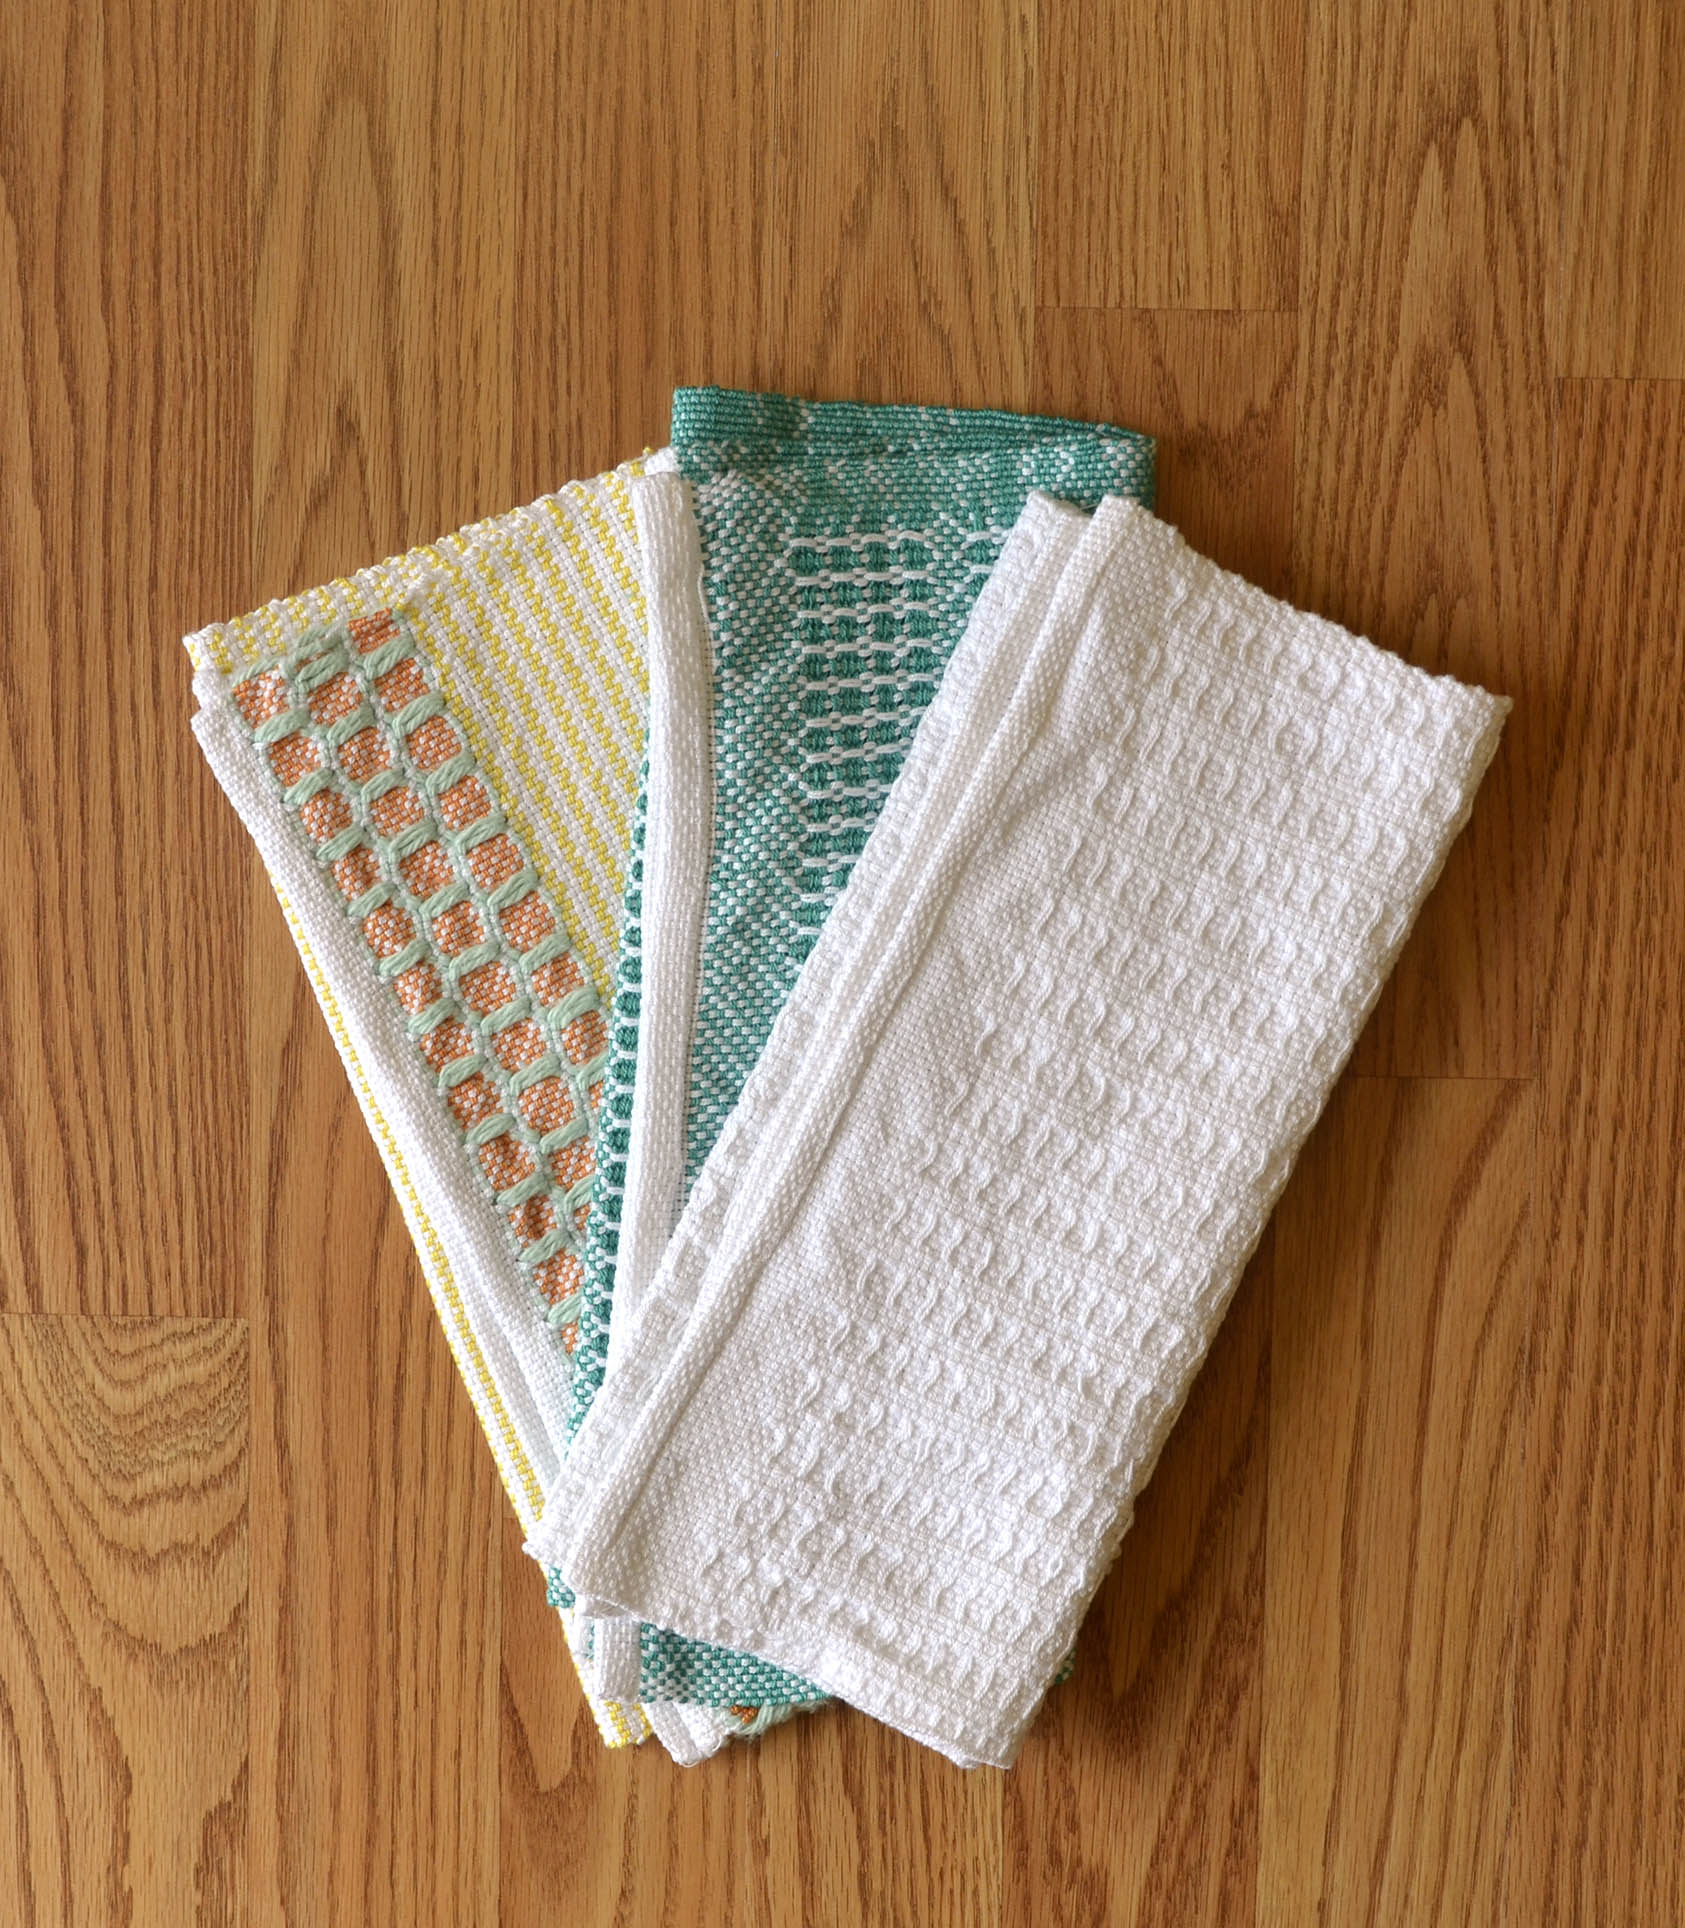
Be sure to click on each image for a nice close-up!

RainbowScarf_1

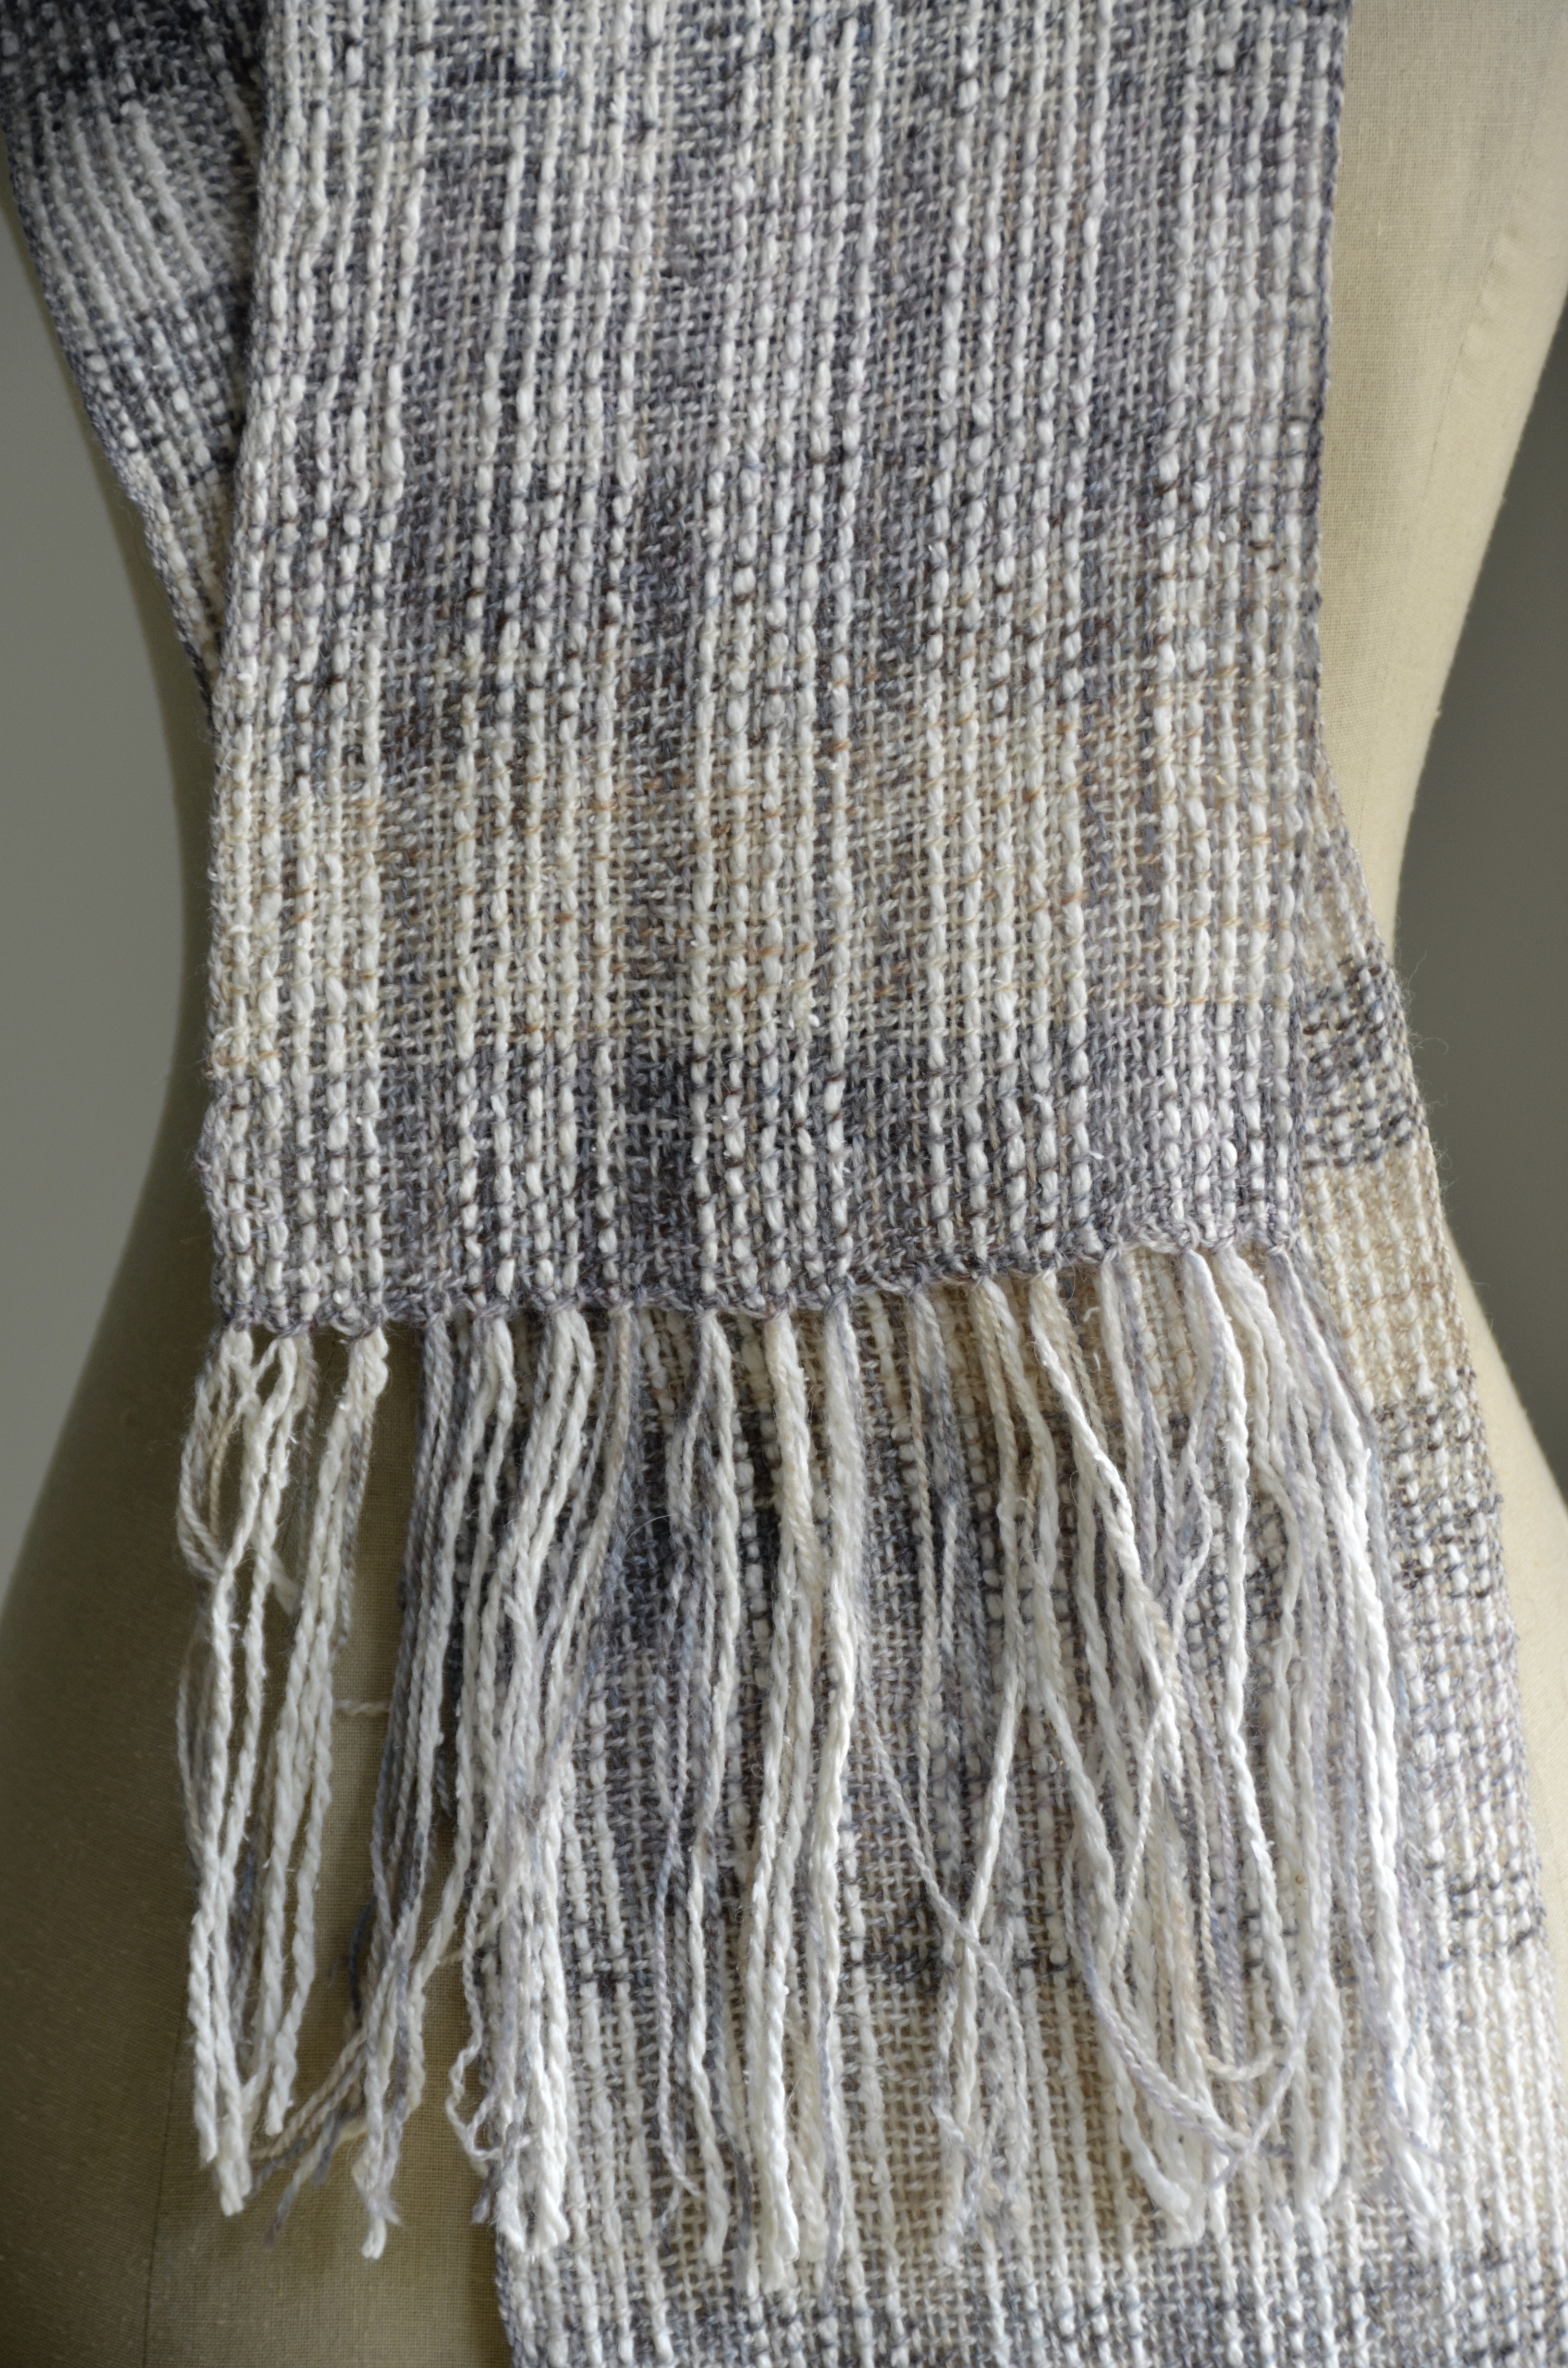
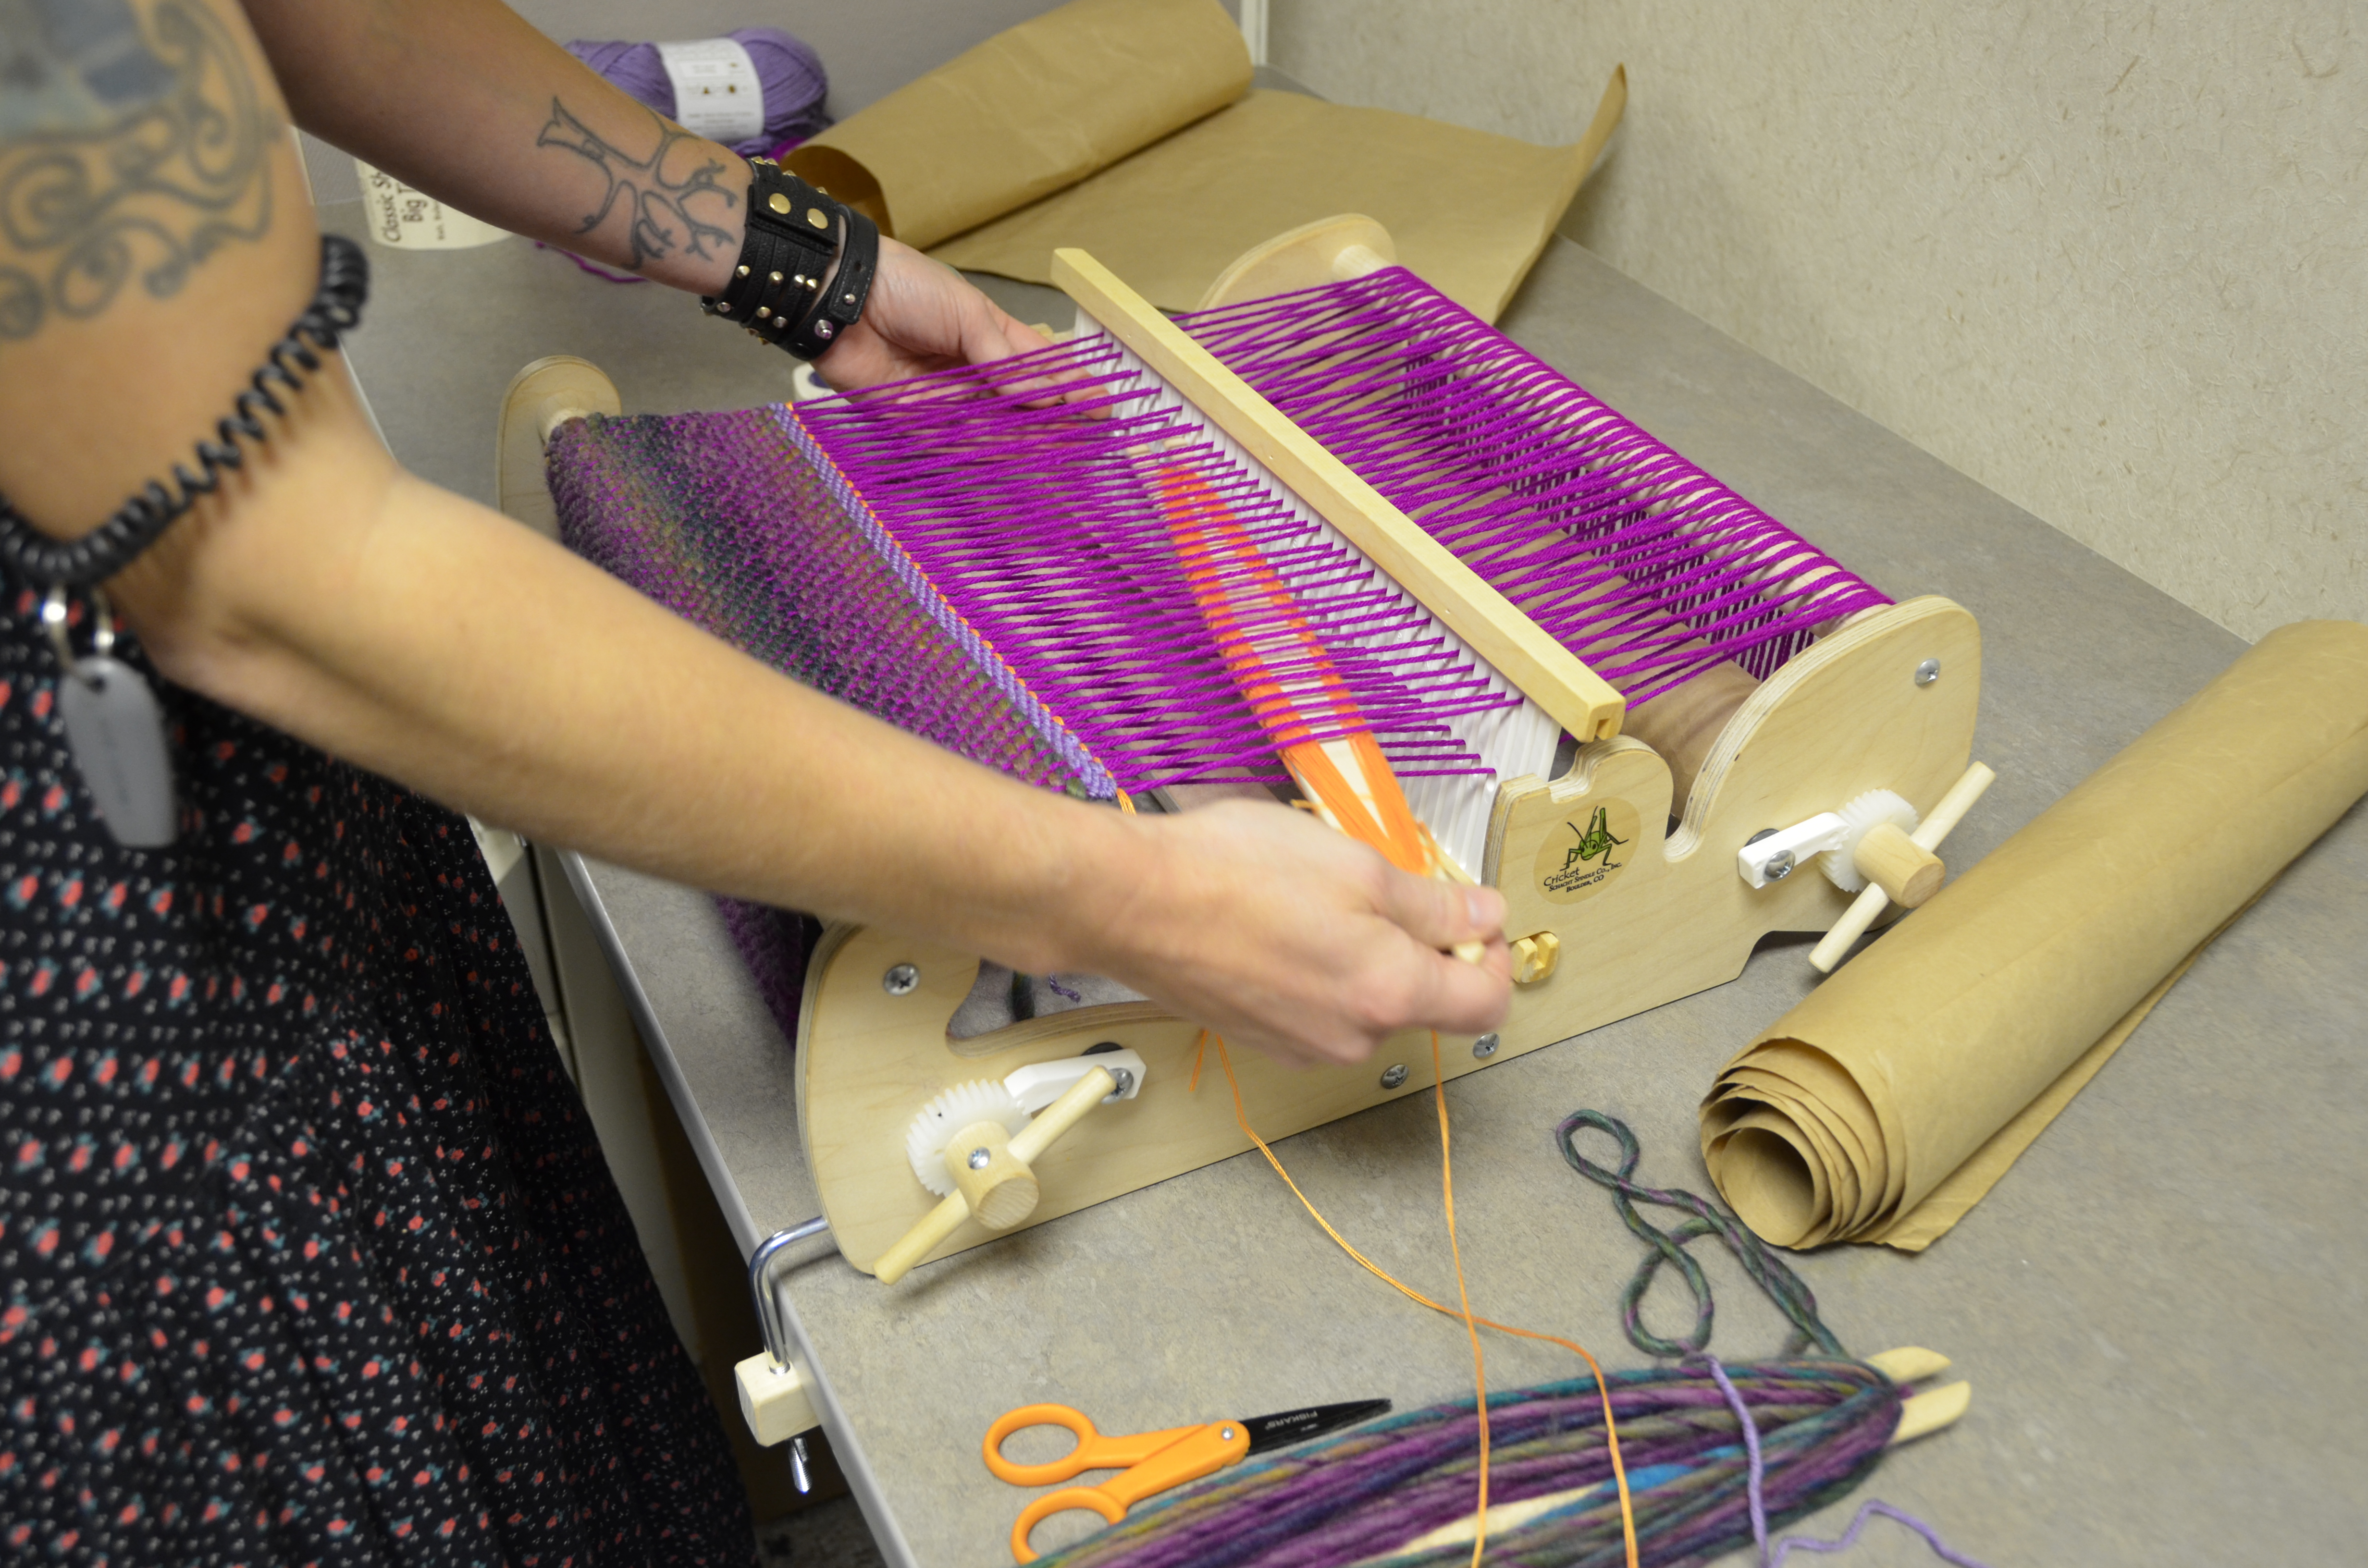
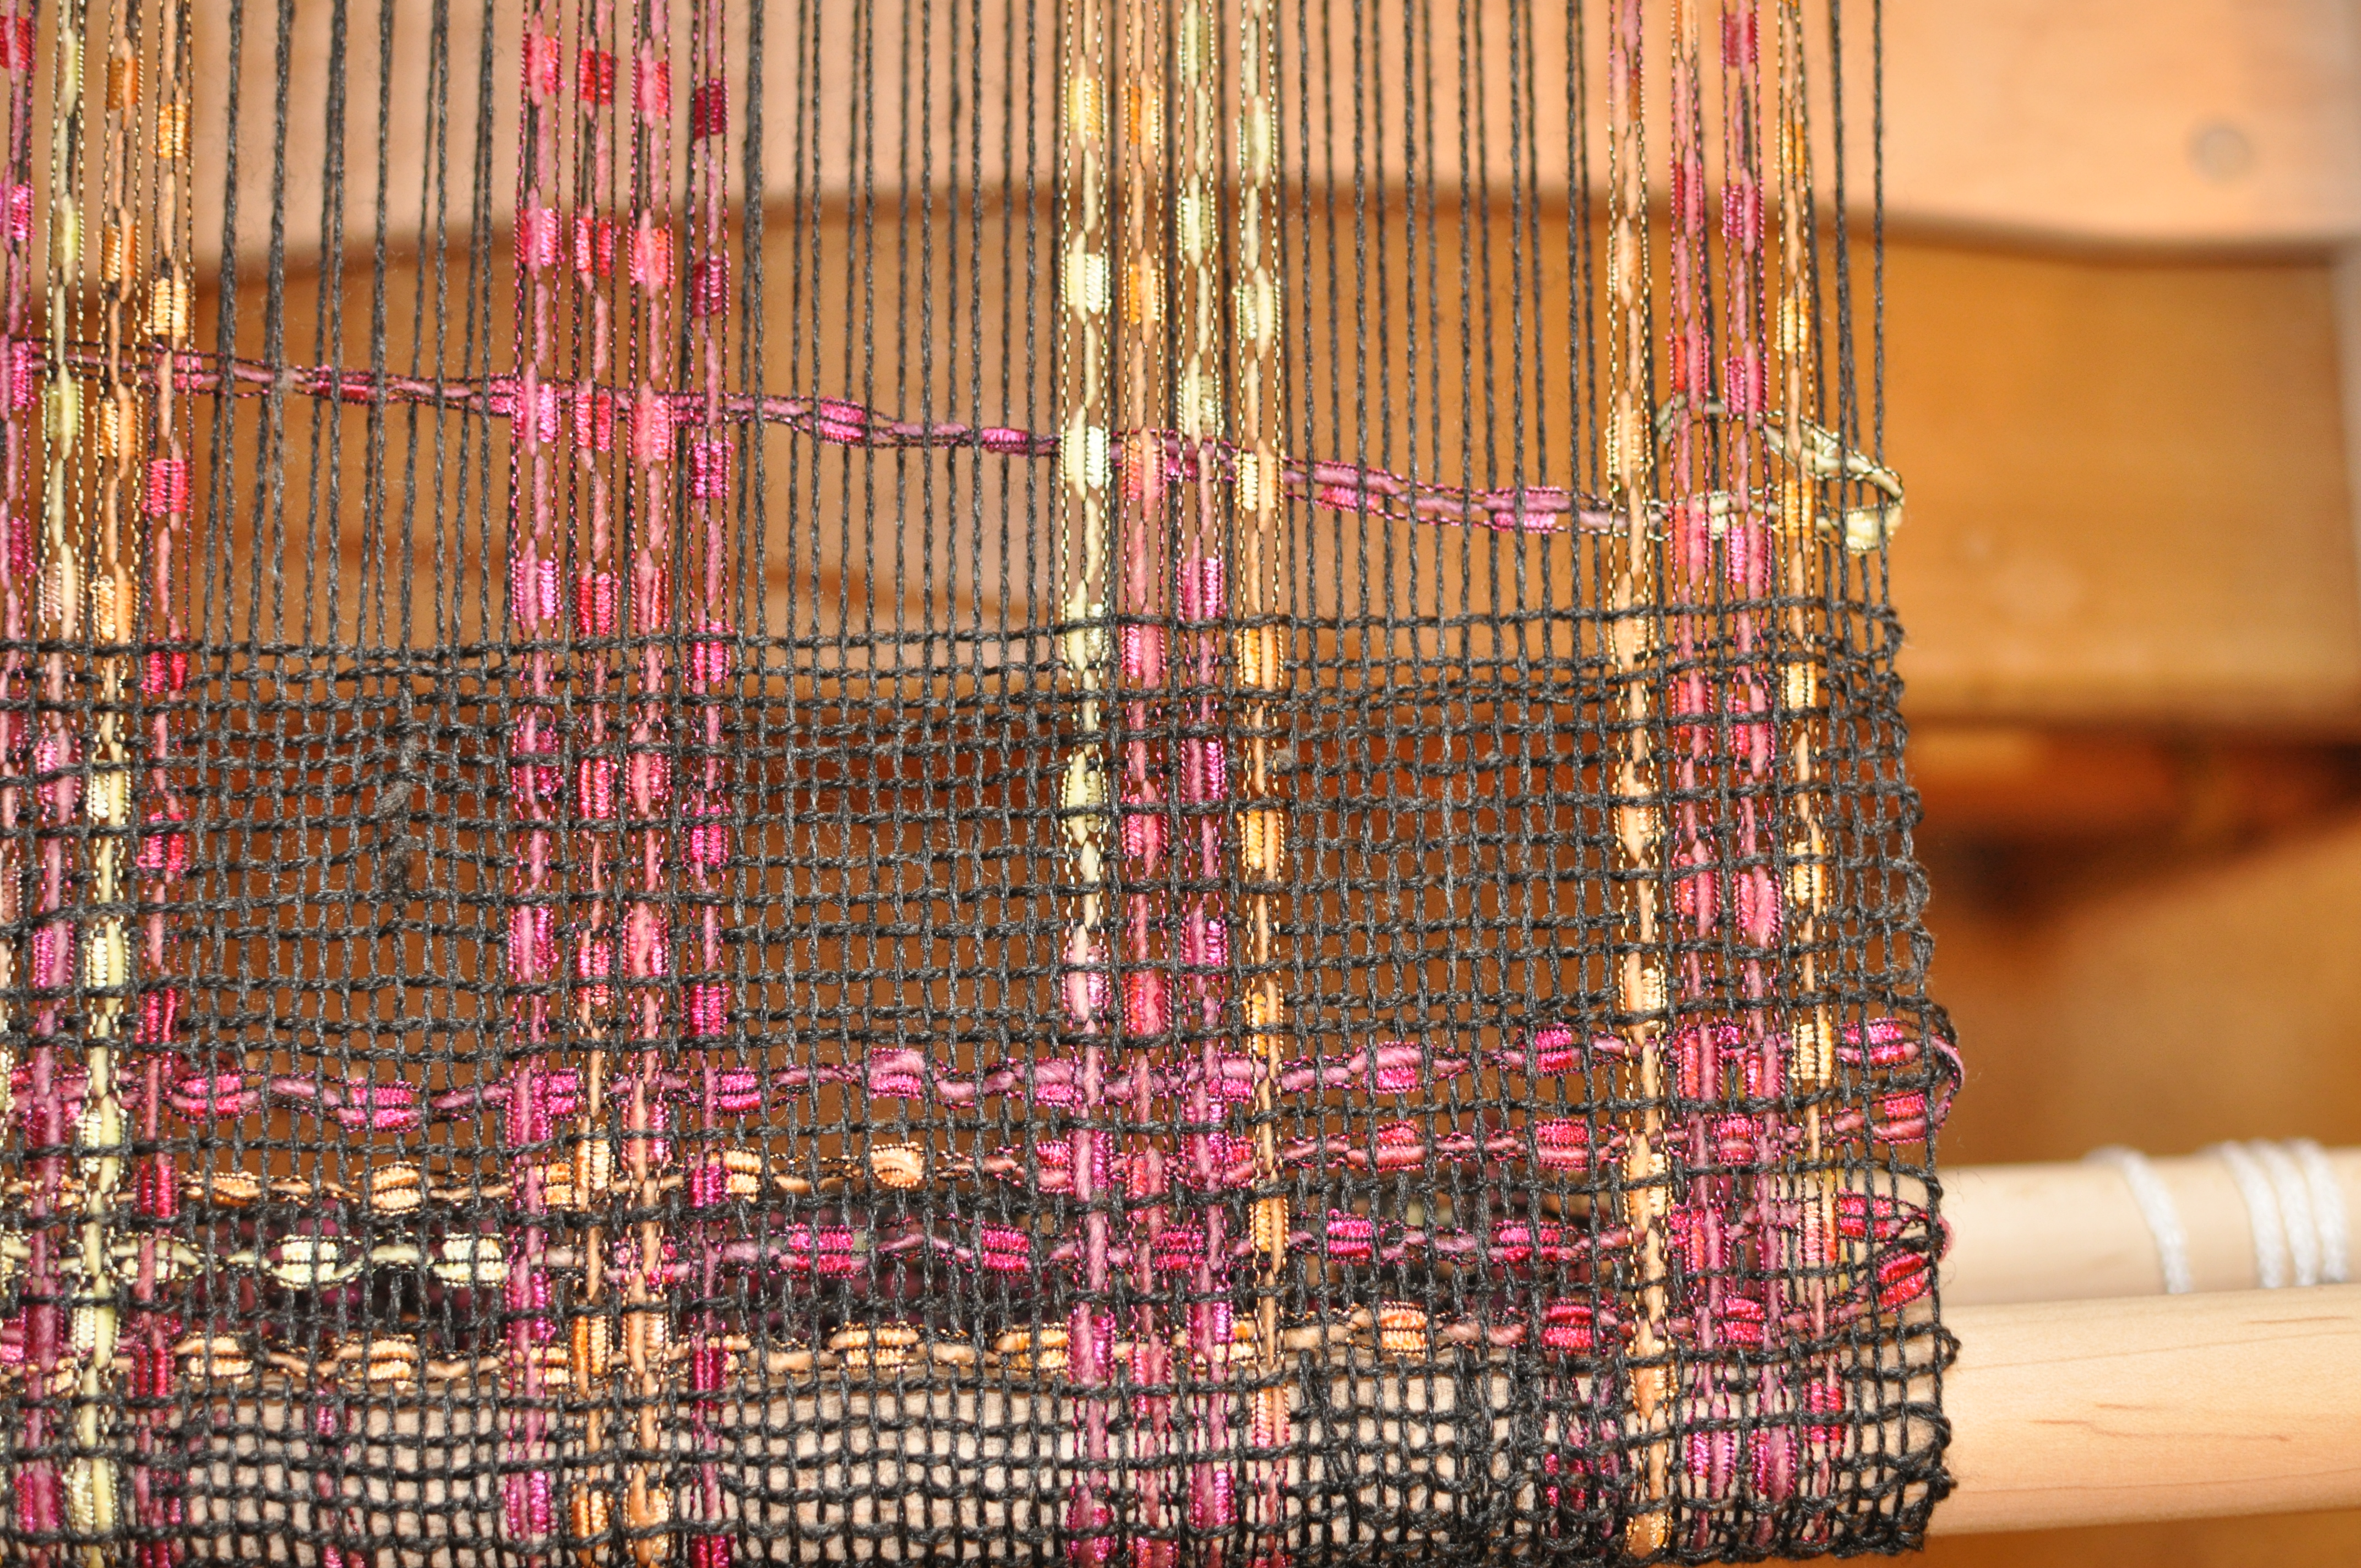
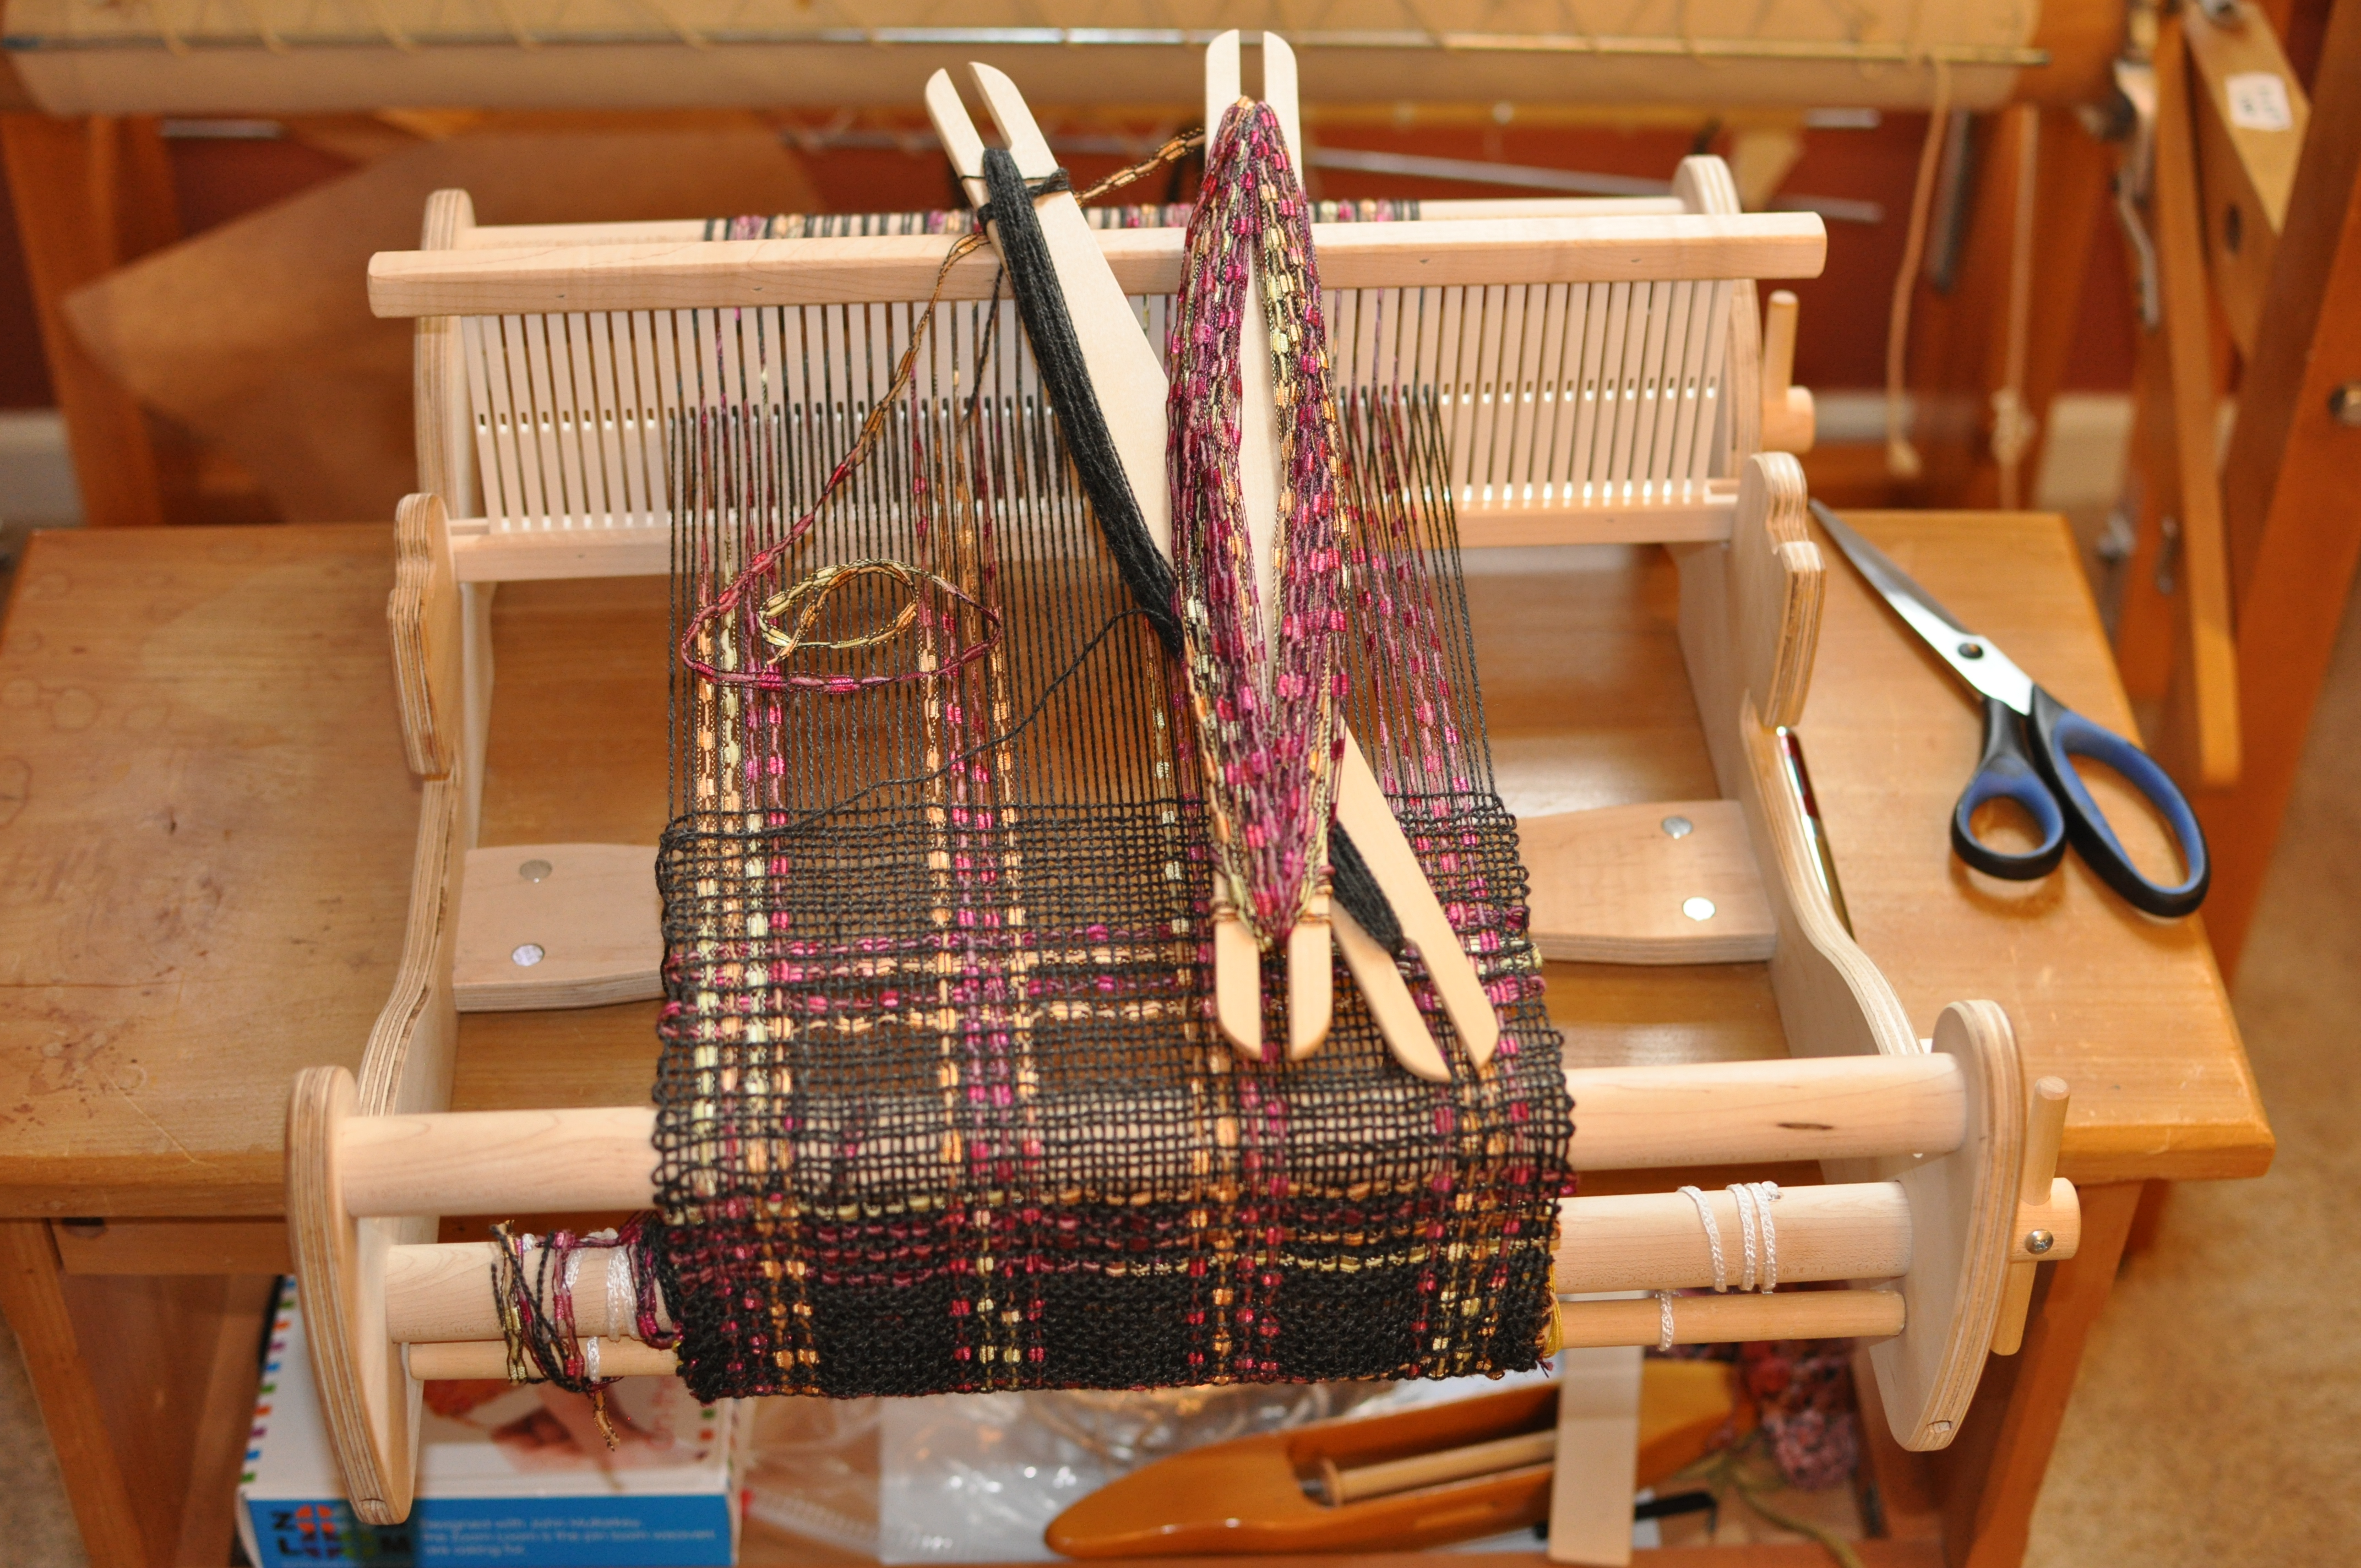
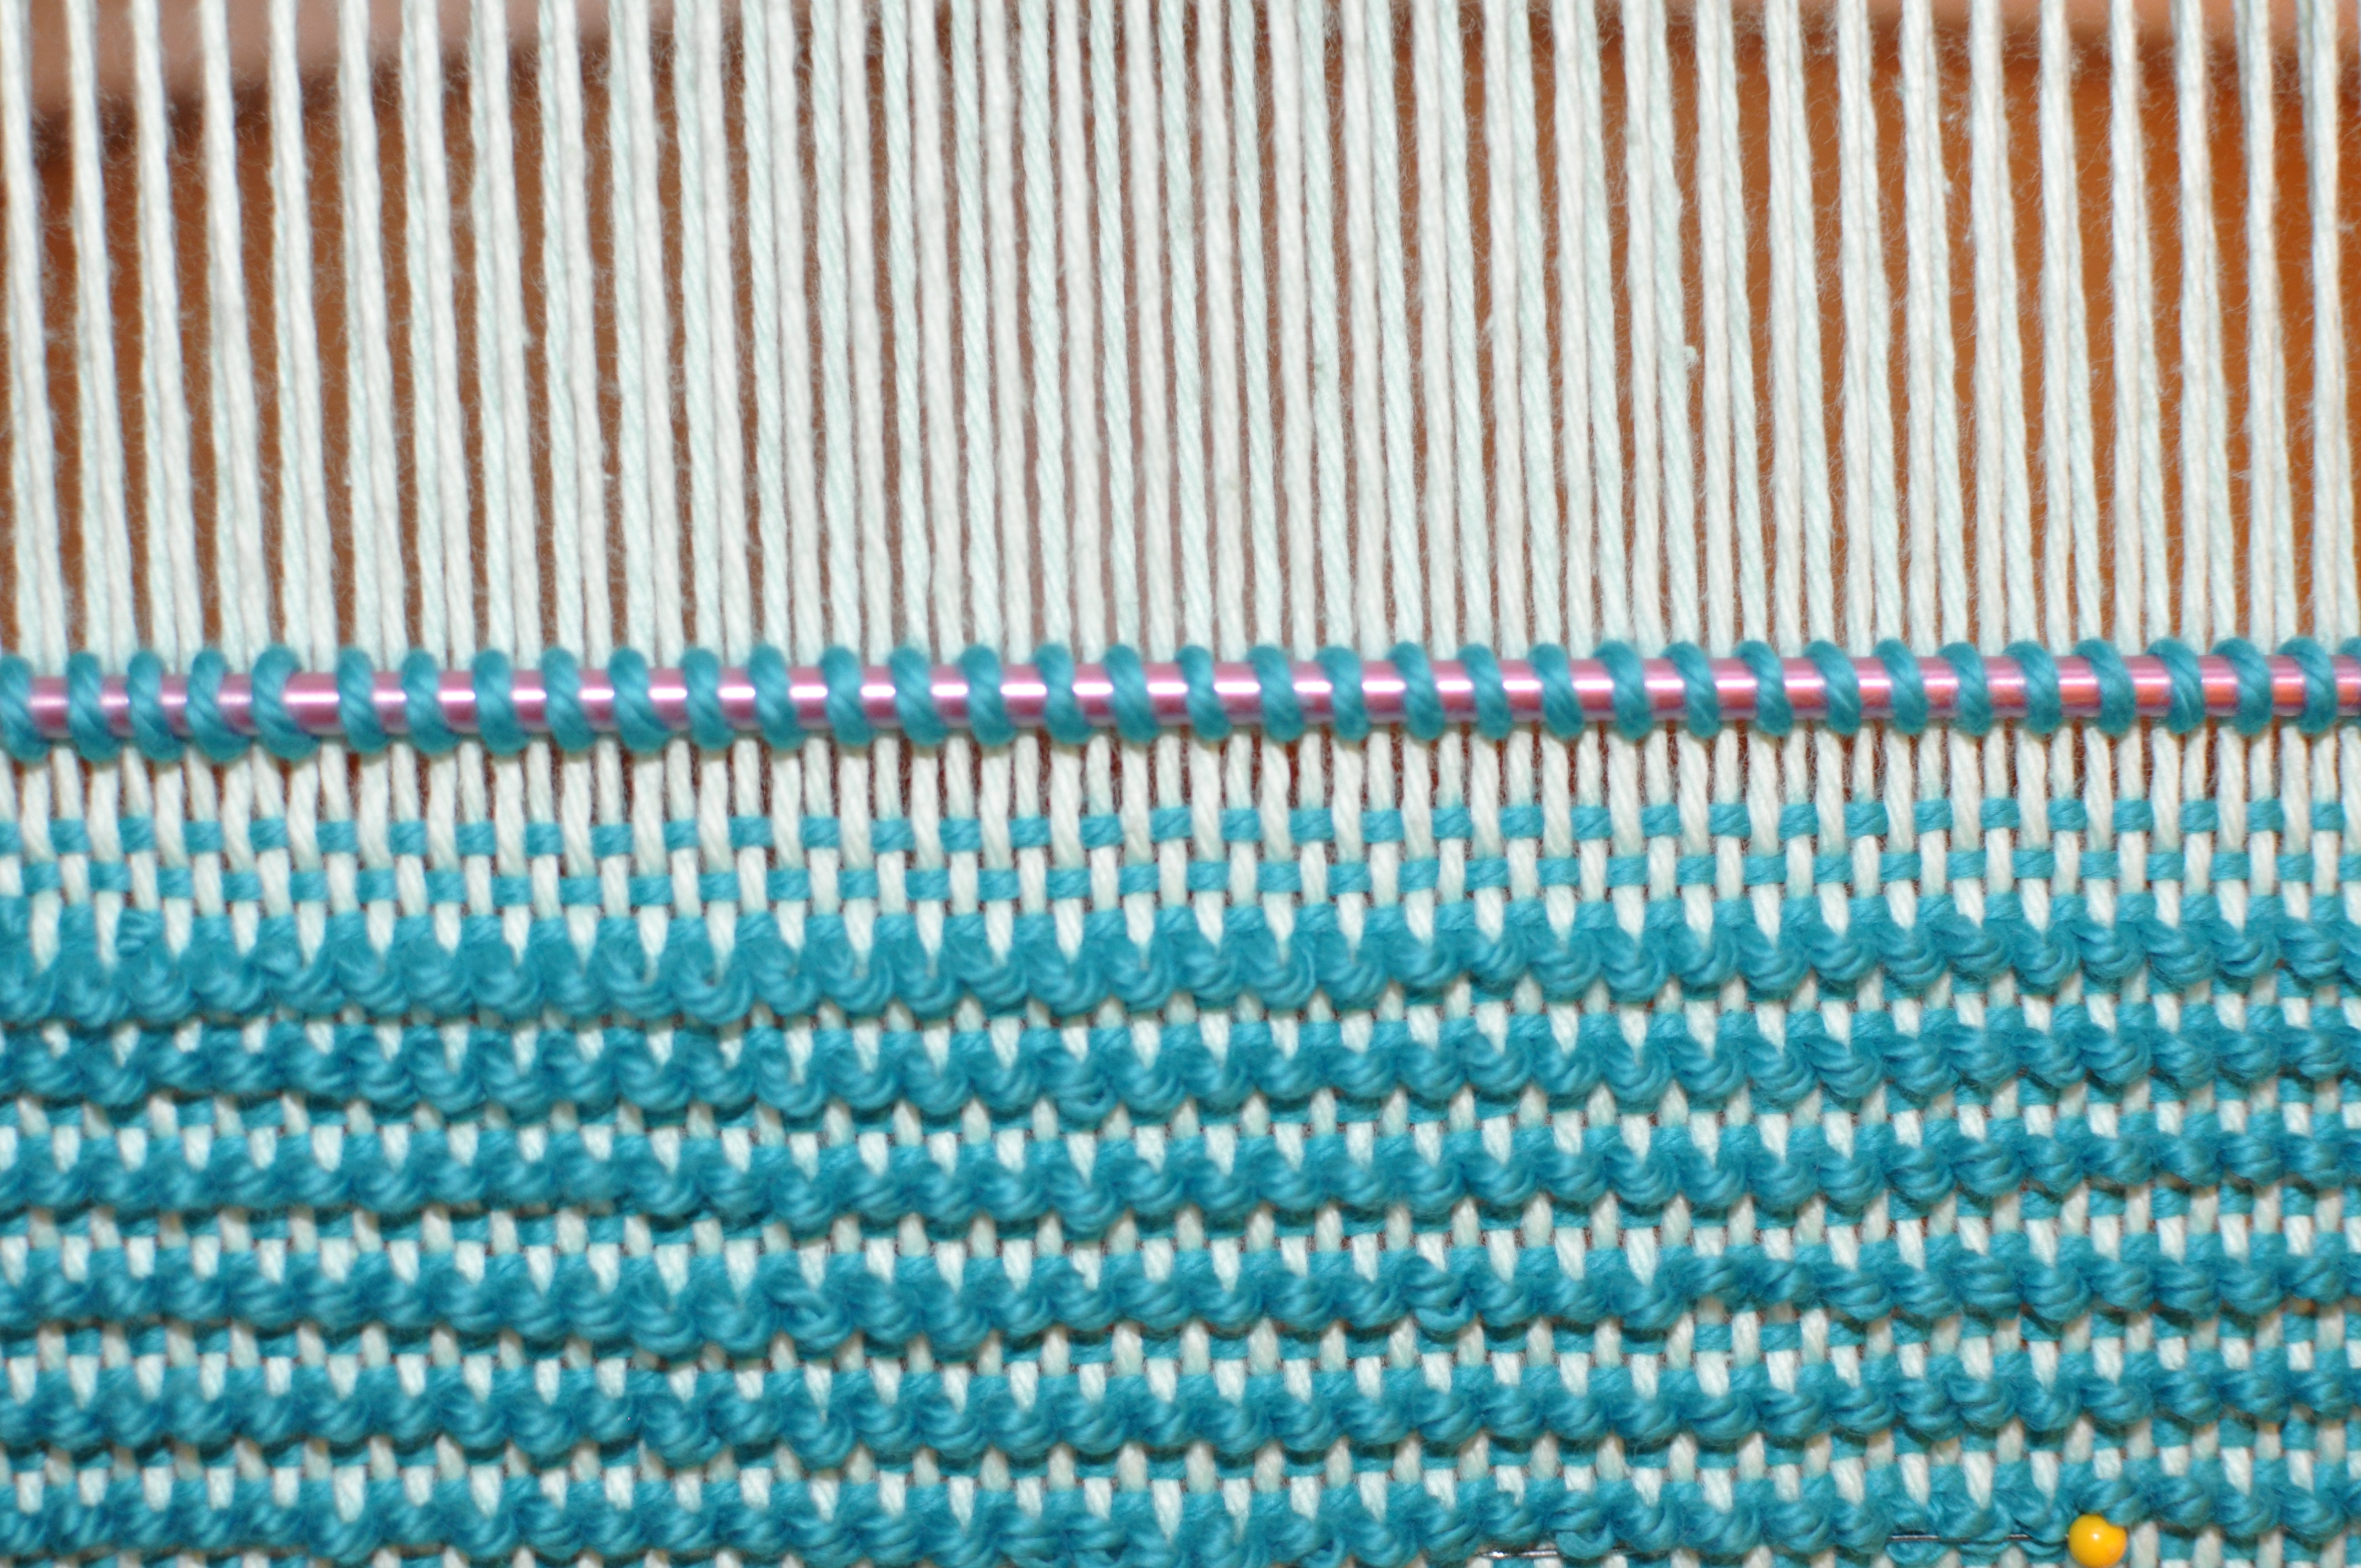
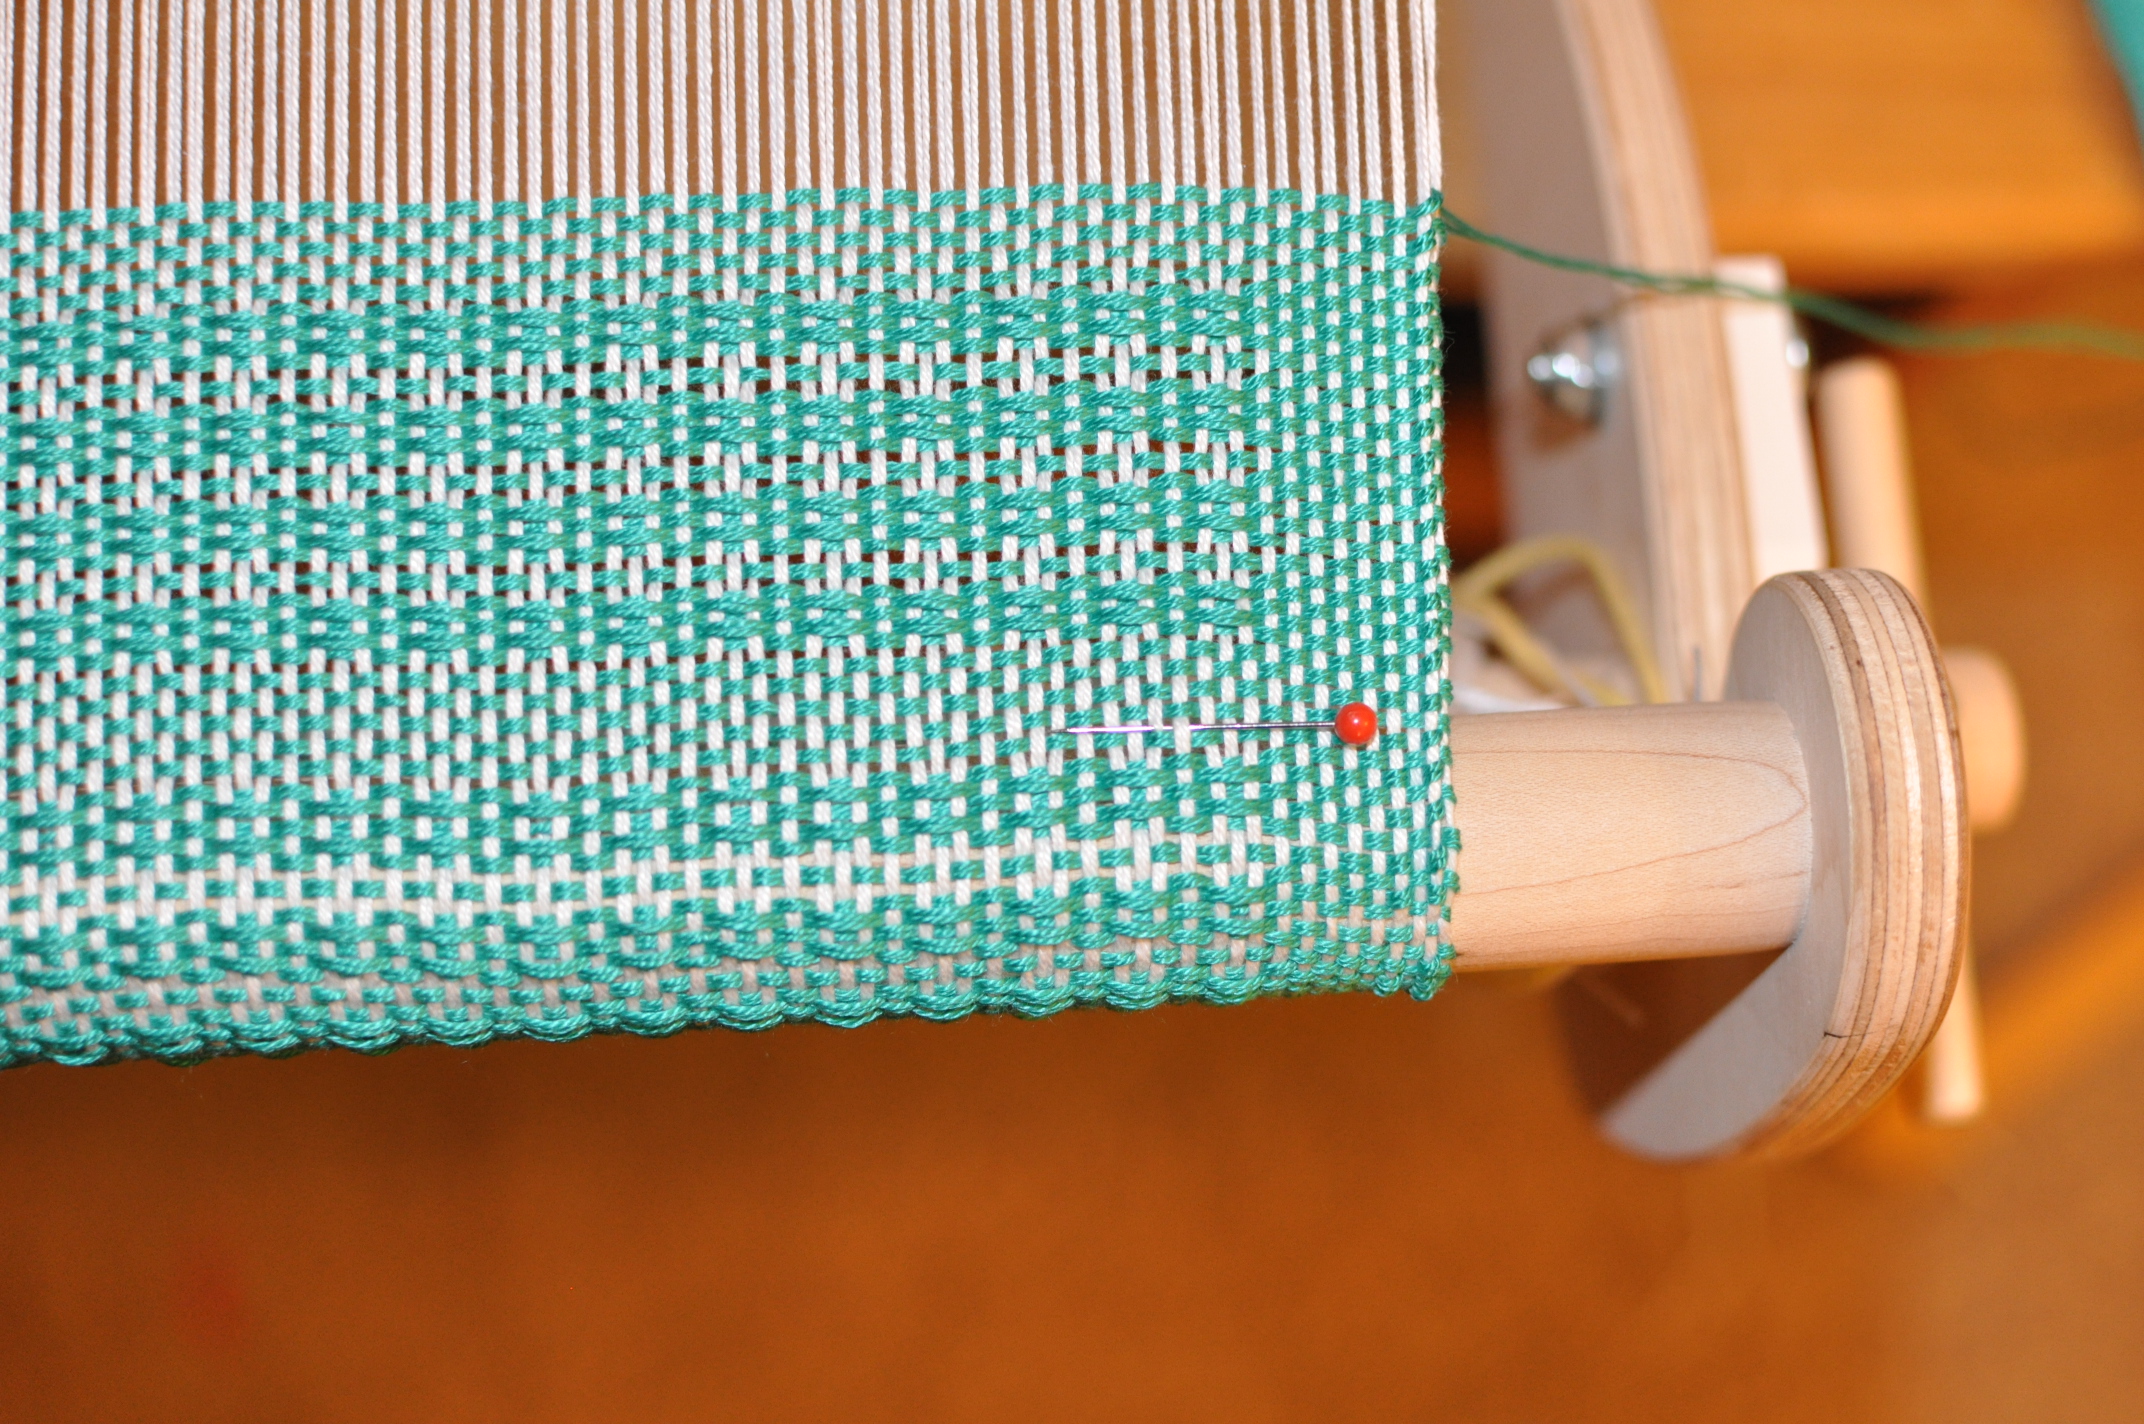
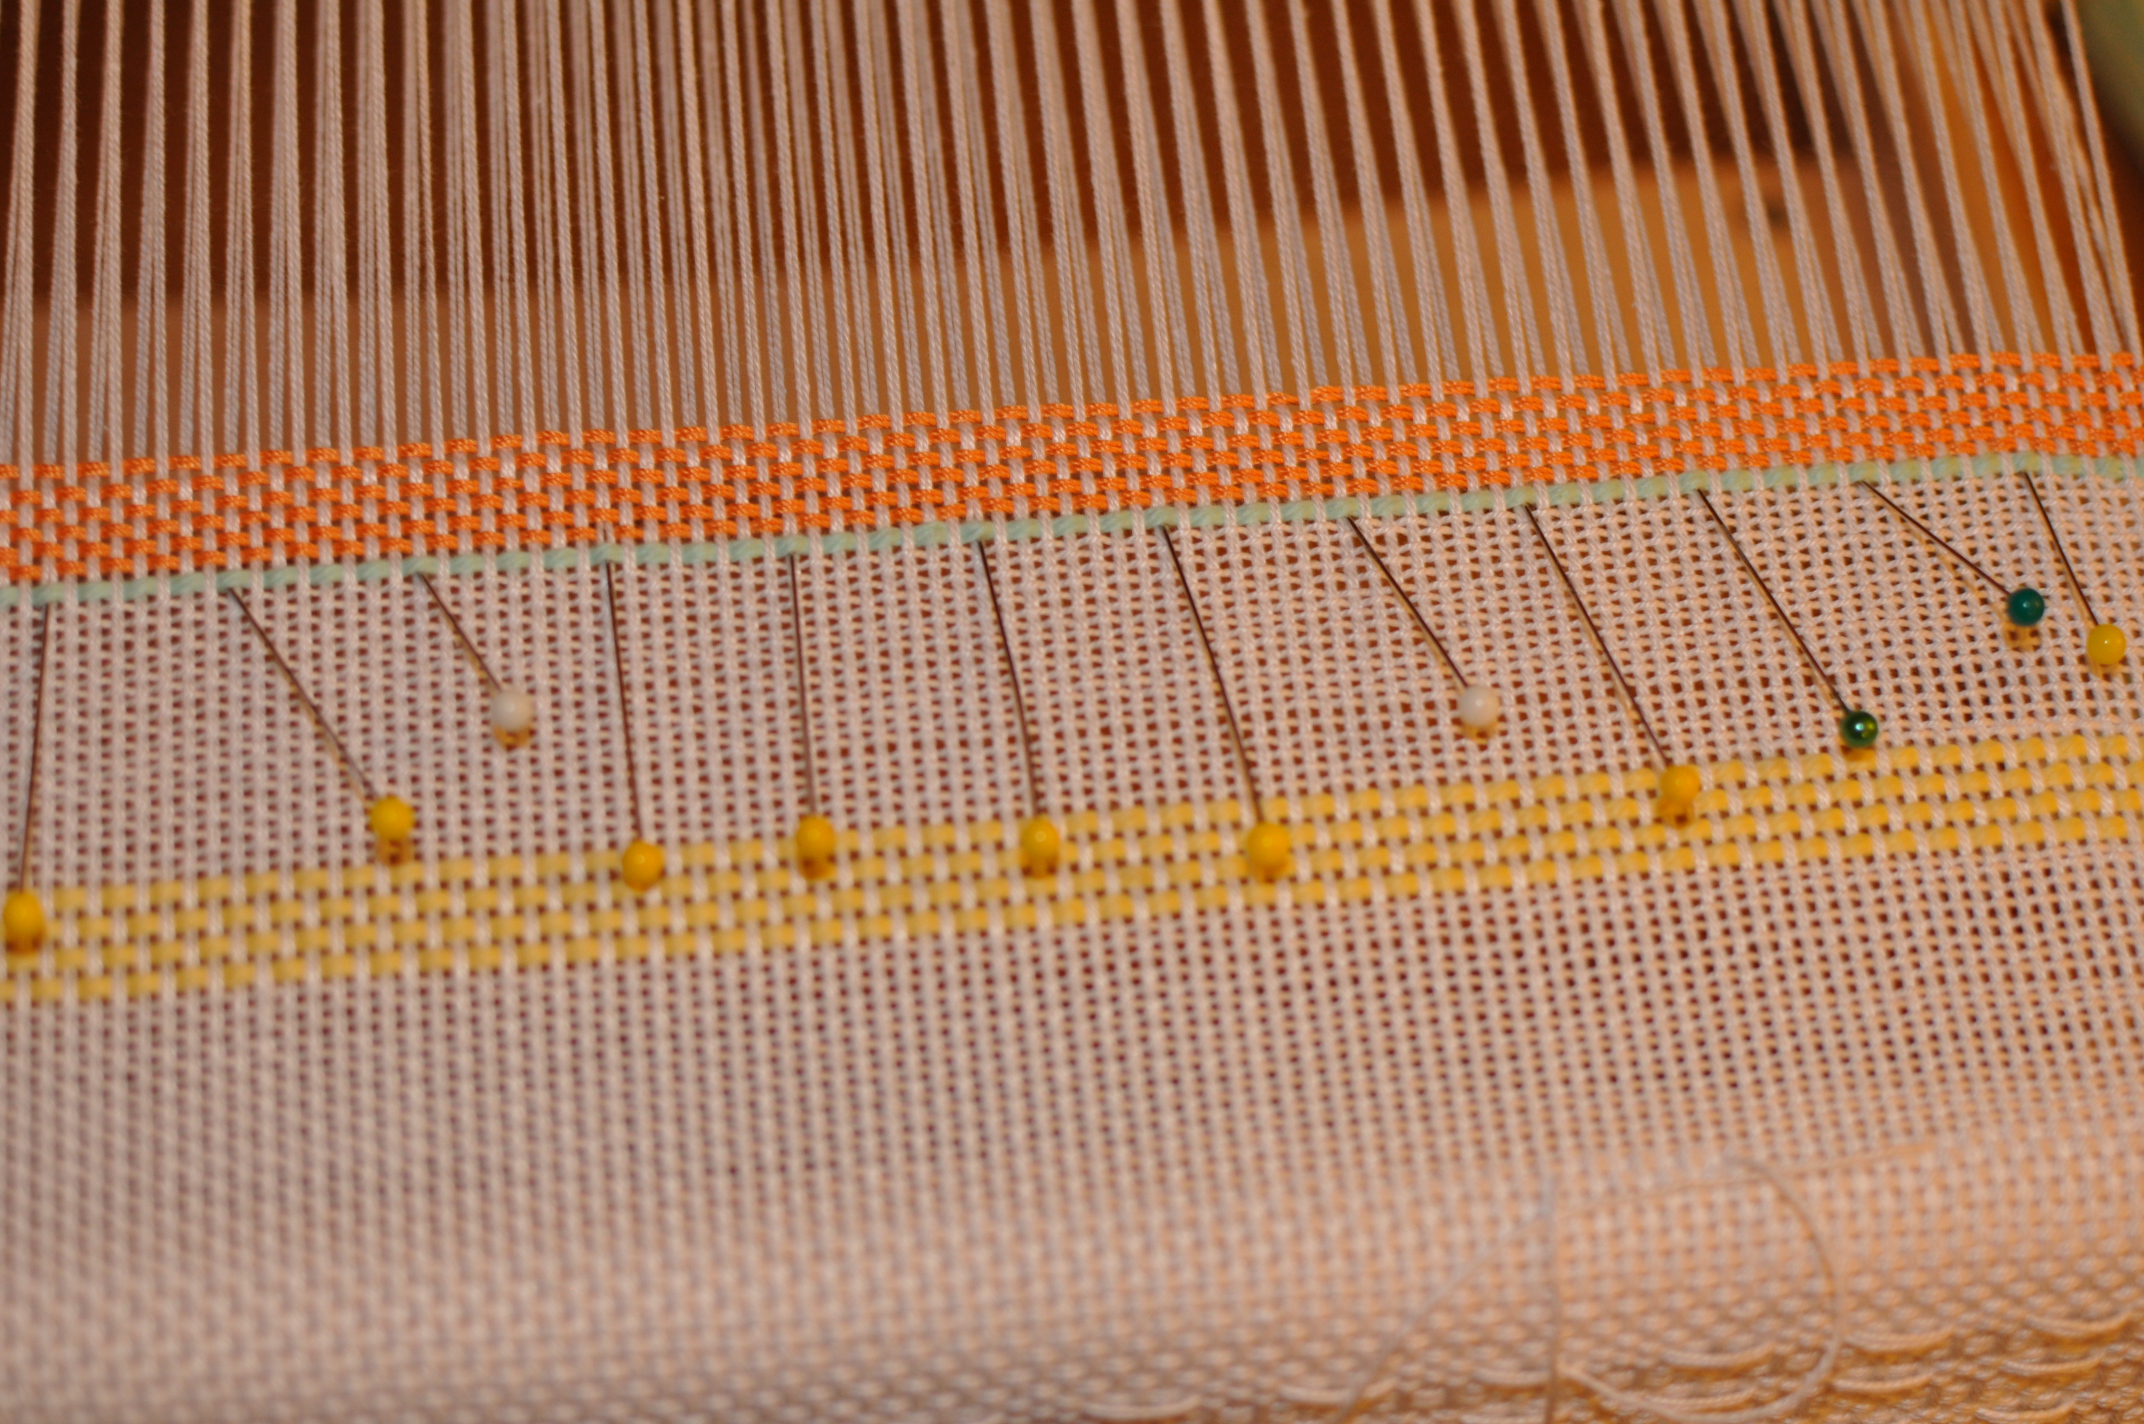
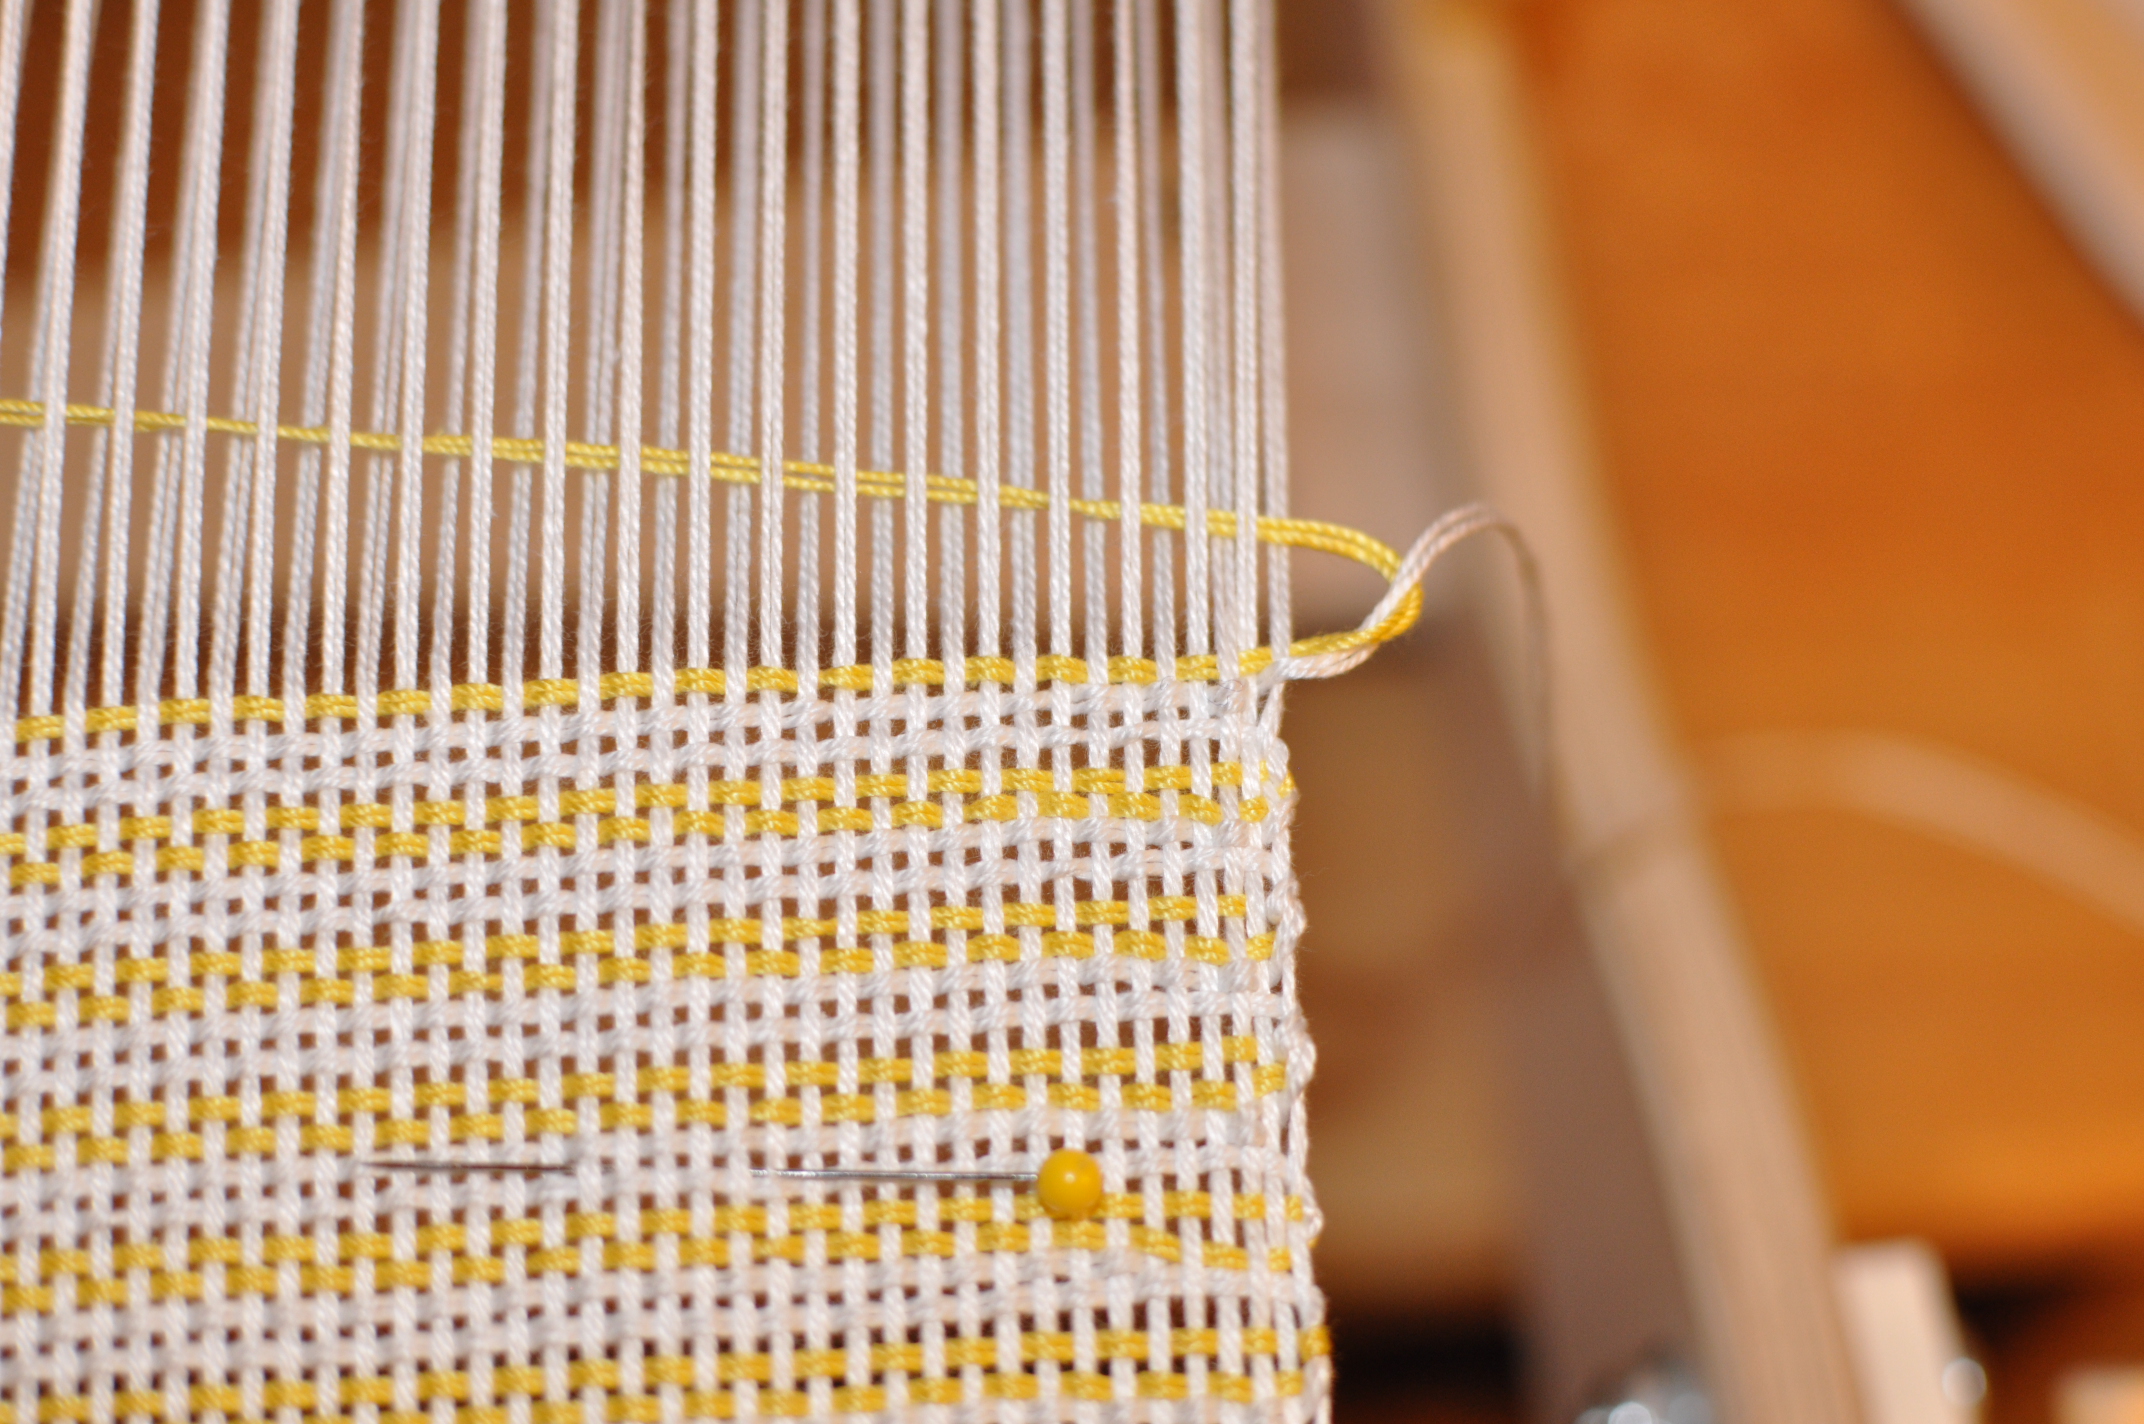
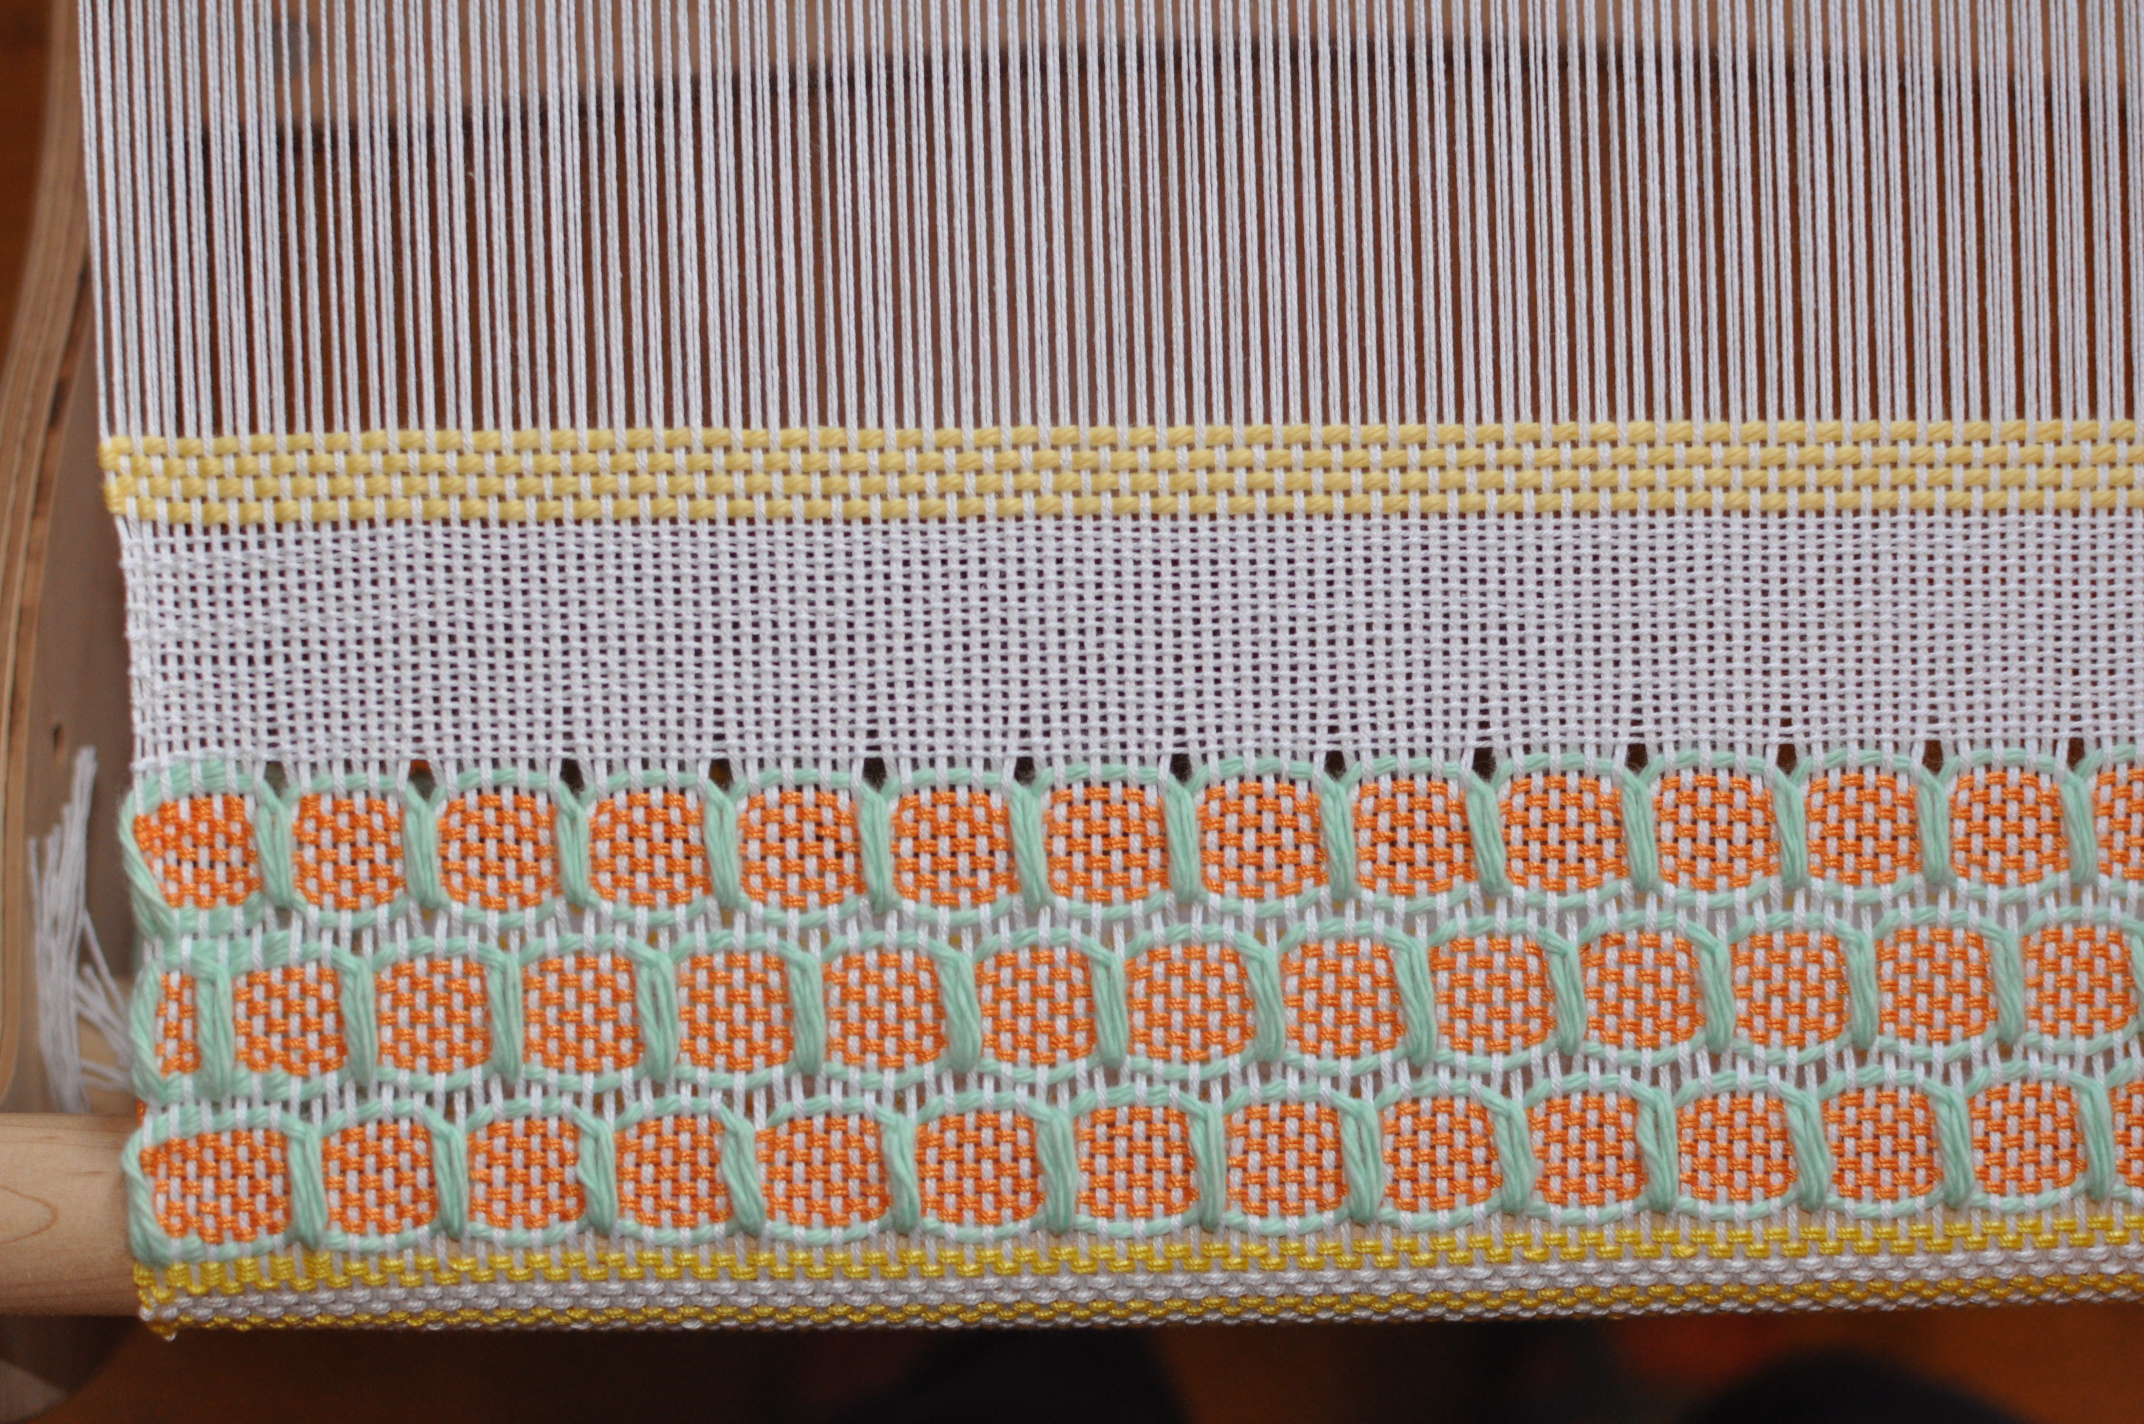
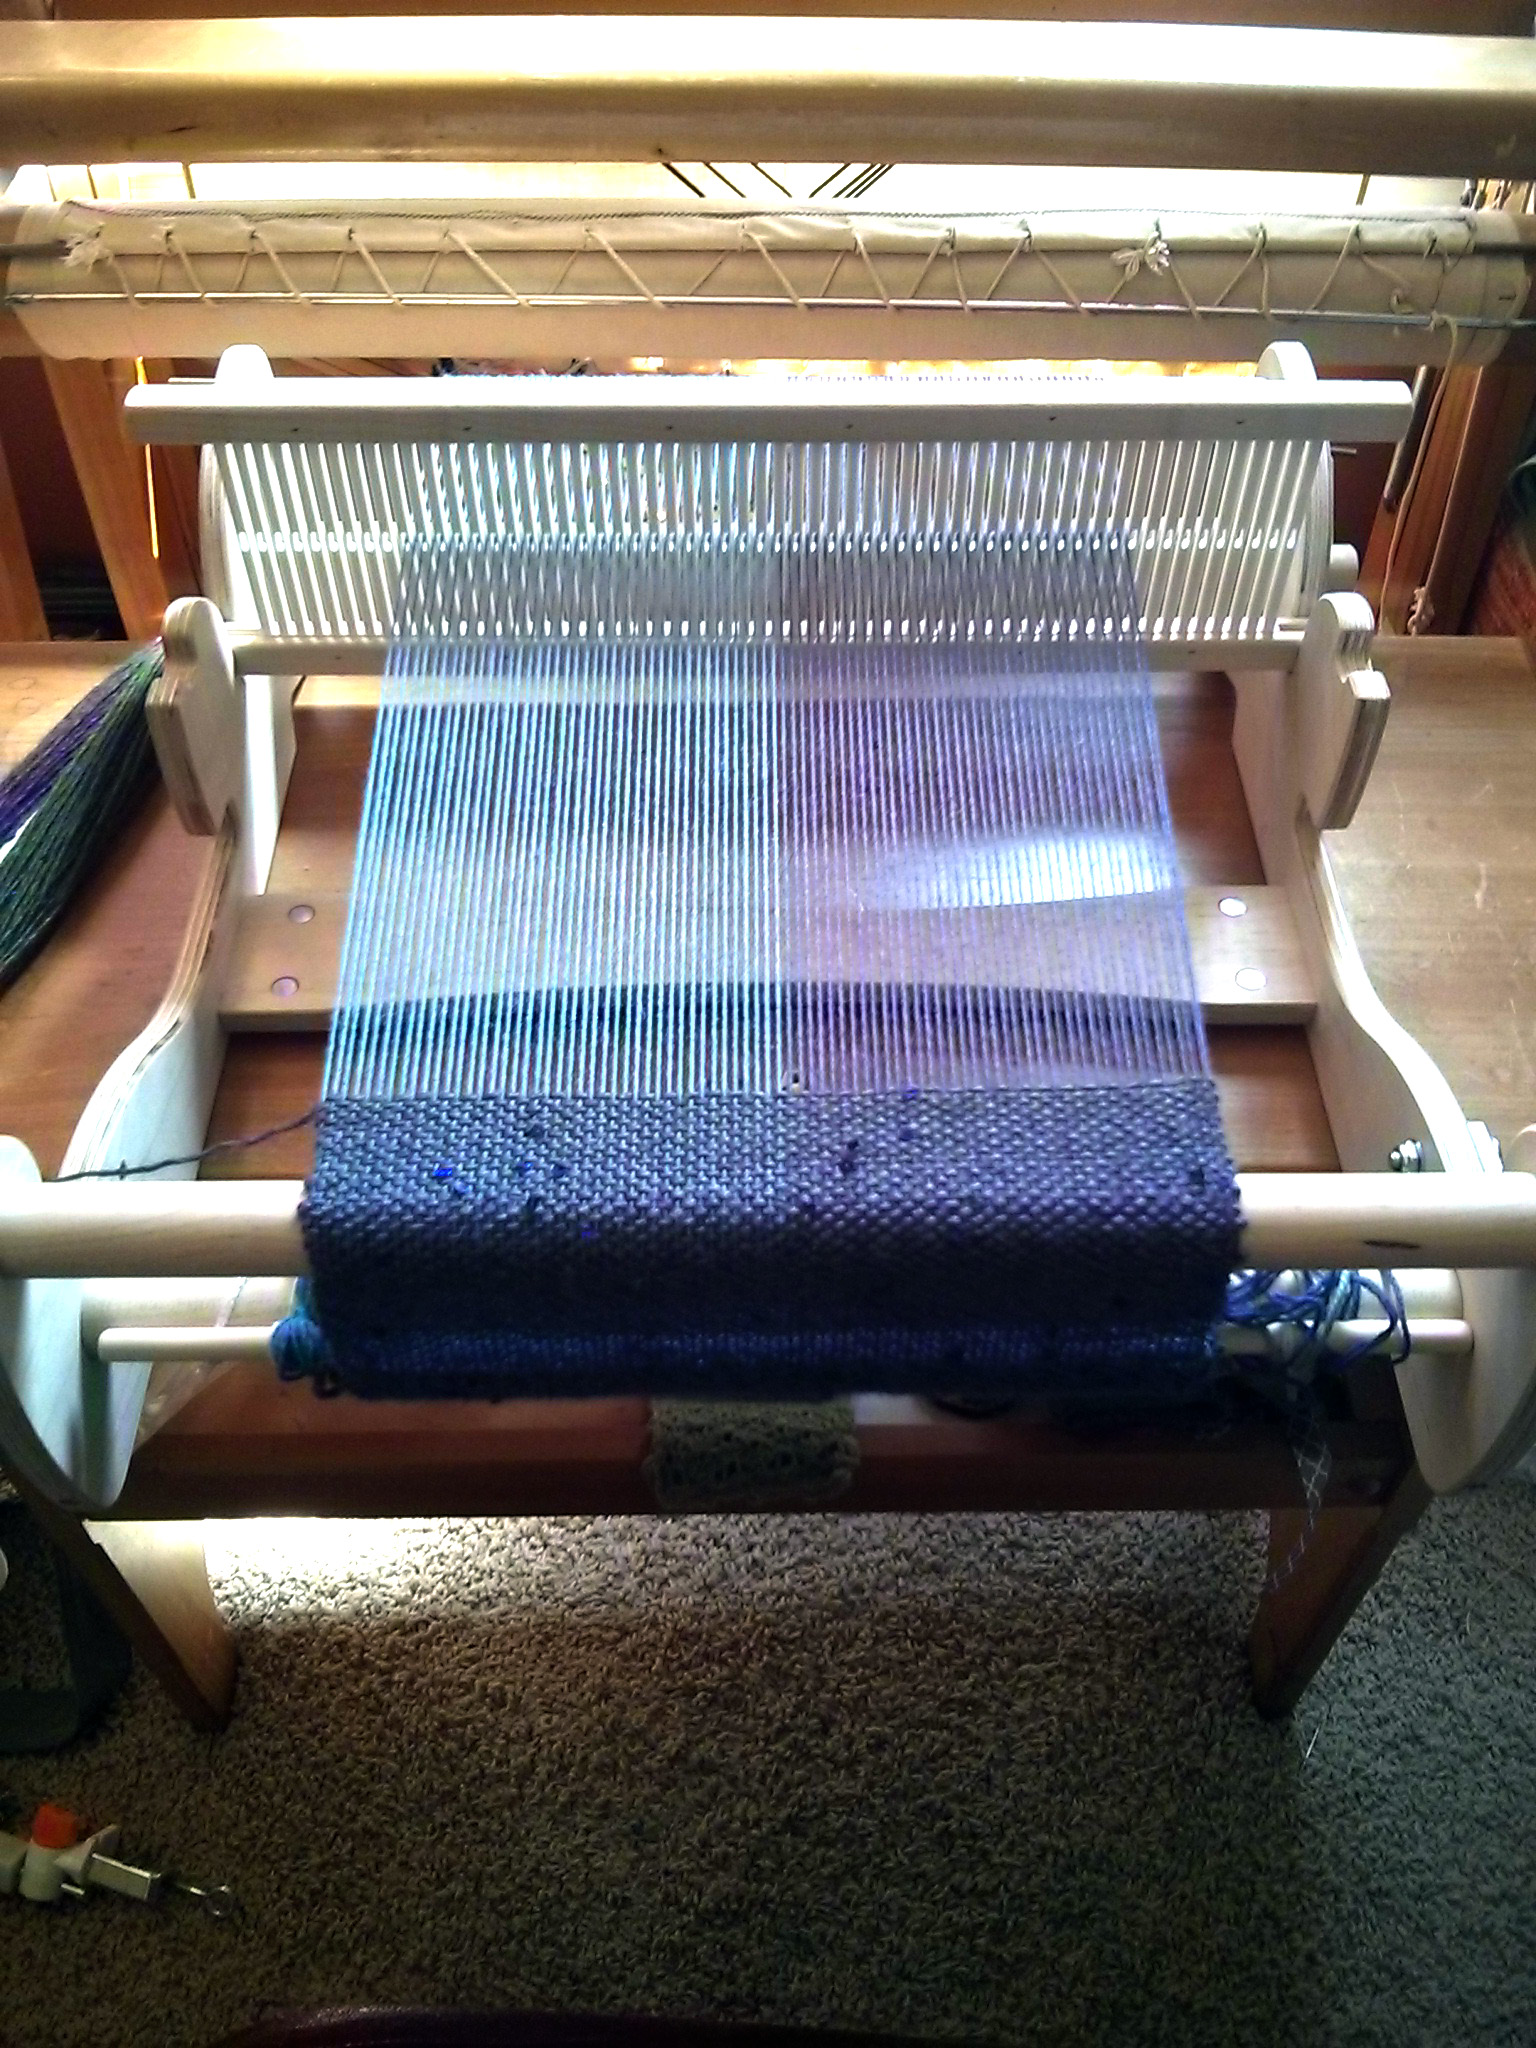
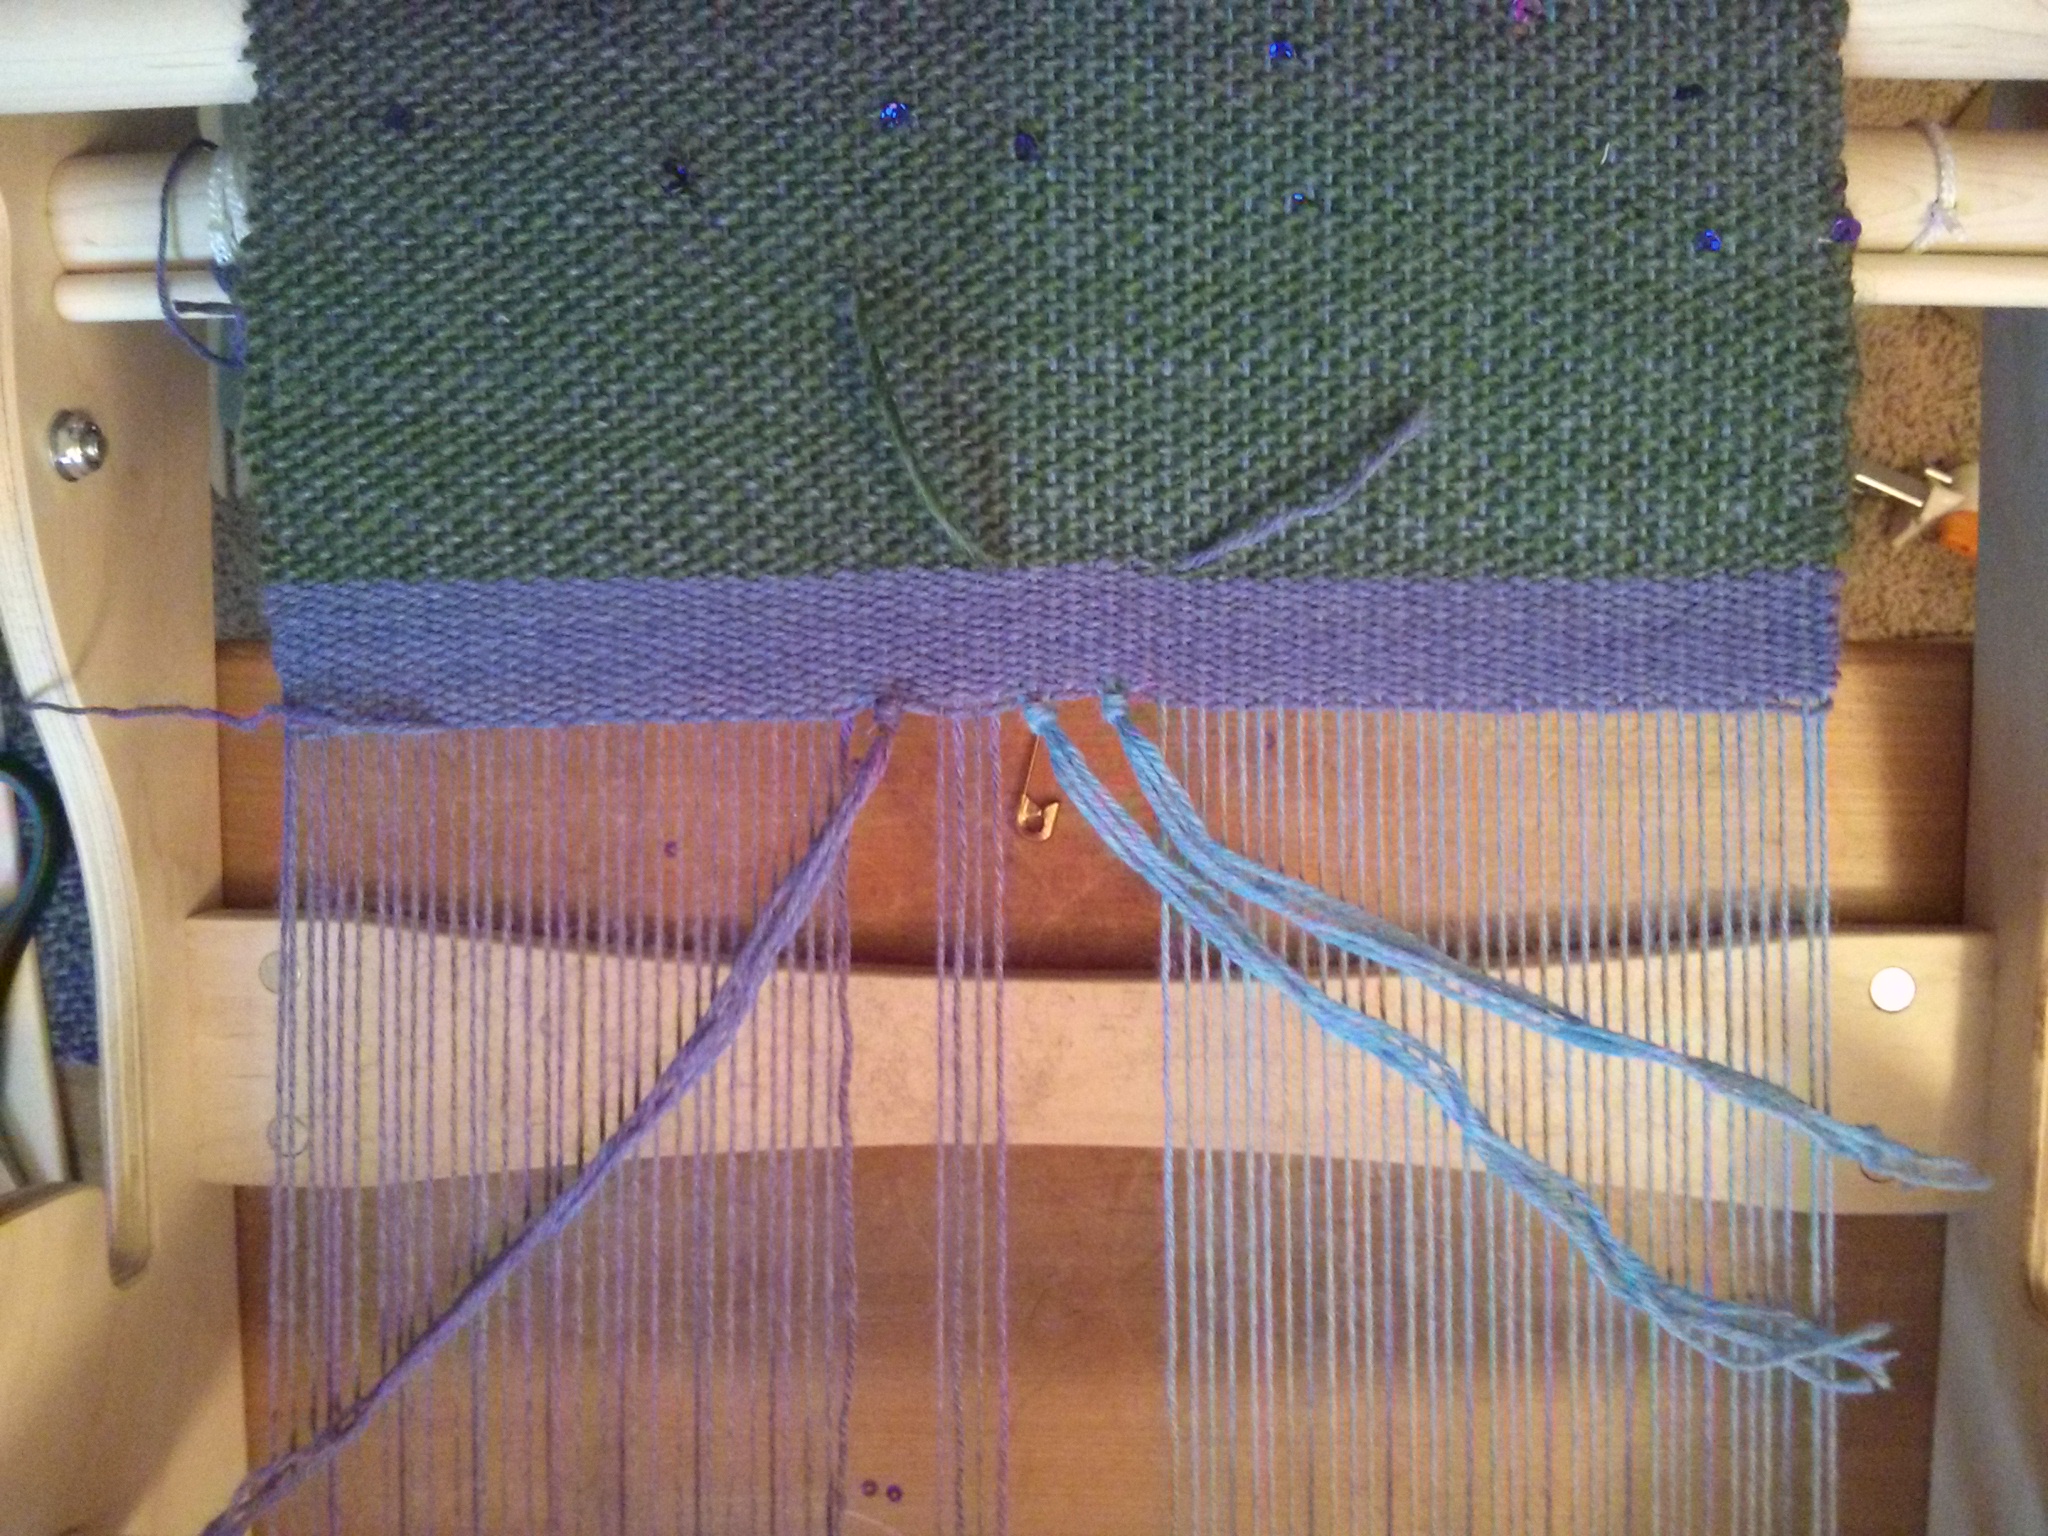
I wove a few picks with scrap yarn and then started right in with my color progression without doing a header. I decided I wanted natural looking ends without the structure of a header. Because I like to do things the hard way, I decided to weave according to my warp, in the same order, thereby making checks. Because there’s so much going on with color in this project, I decided to stick with plain weave. I started out with 4 picks of X, then 12 I, 12H, 12G, 4X, and so on.

Because the warp threads are spaced on the airy side and my goal was to have checks of color that were as tall as they were wide, I was very conscious of my “beating” of the weft thread. Instead of firmly pushing the weft down, I was sure to have a gentle hand and simply push it into place. After a couple of color changes, I measured the work on the loom to make sure I was on track. I could see my touch was a little too gentle, so I started again, pushing a bit harder. Hand weaving isn’t an exact science; it takes the right touch, just like any other craft.

Which brings us to our next lesson: adding in new colors to a row.

RainbowScarf_3_weavinginends

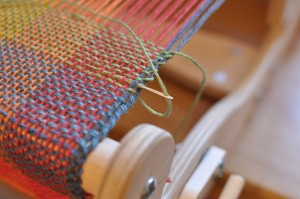
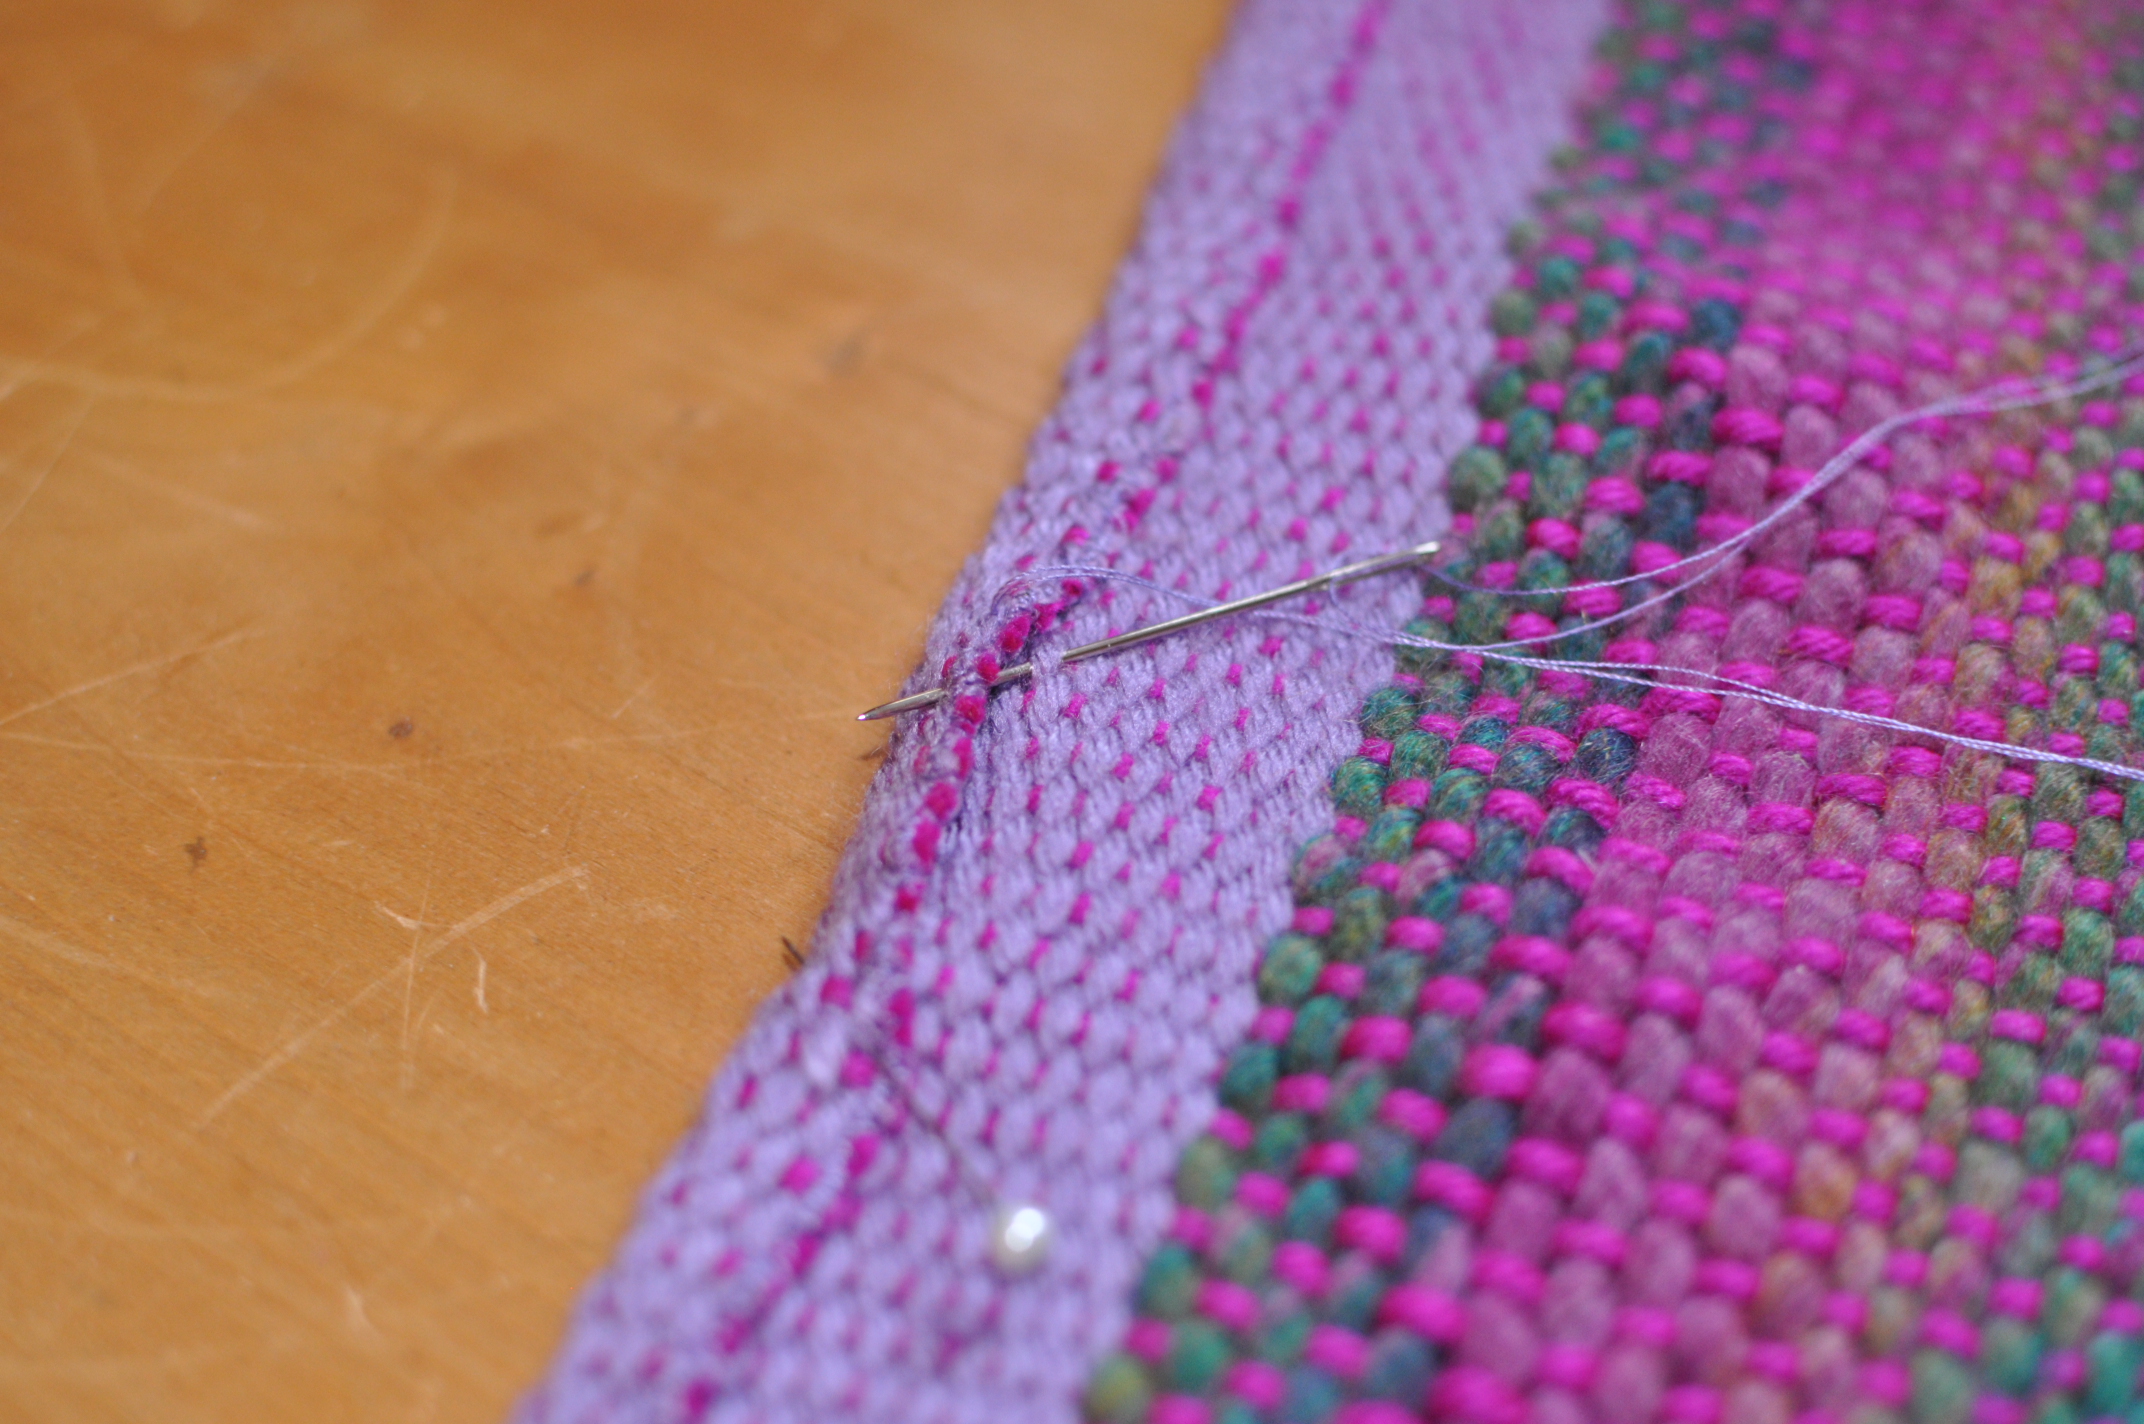
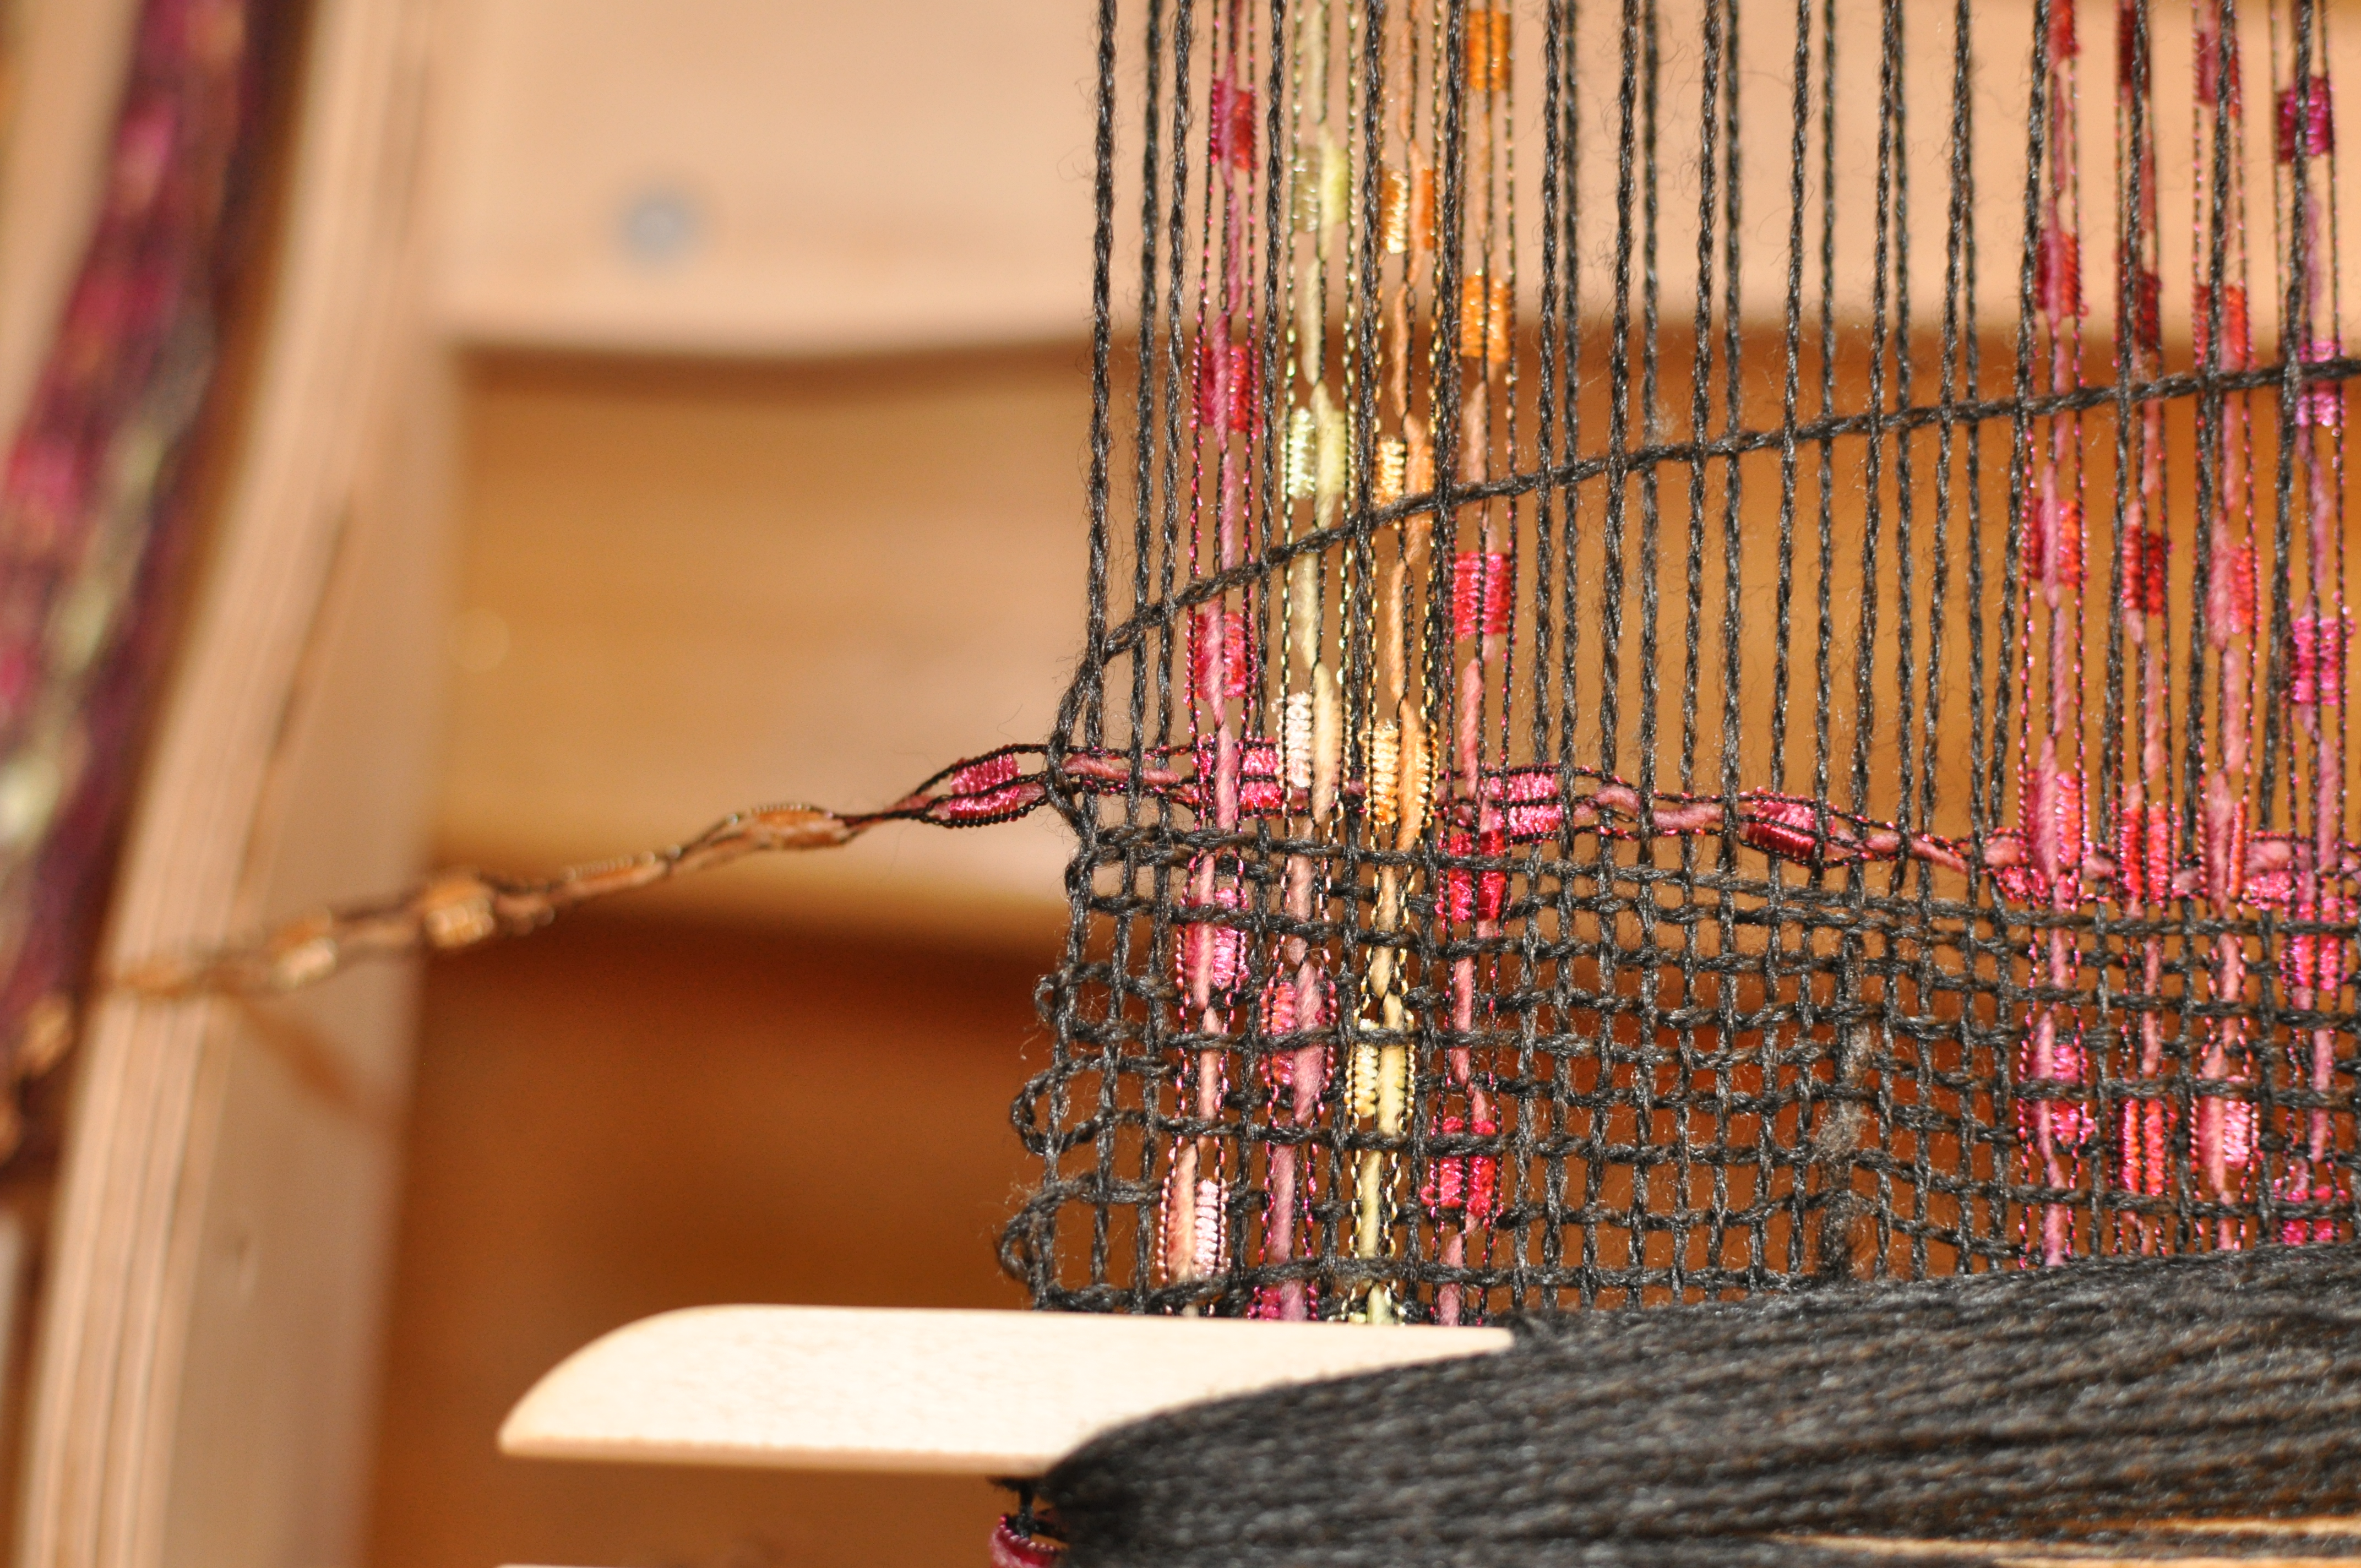
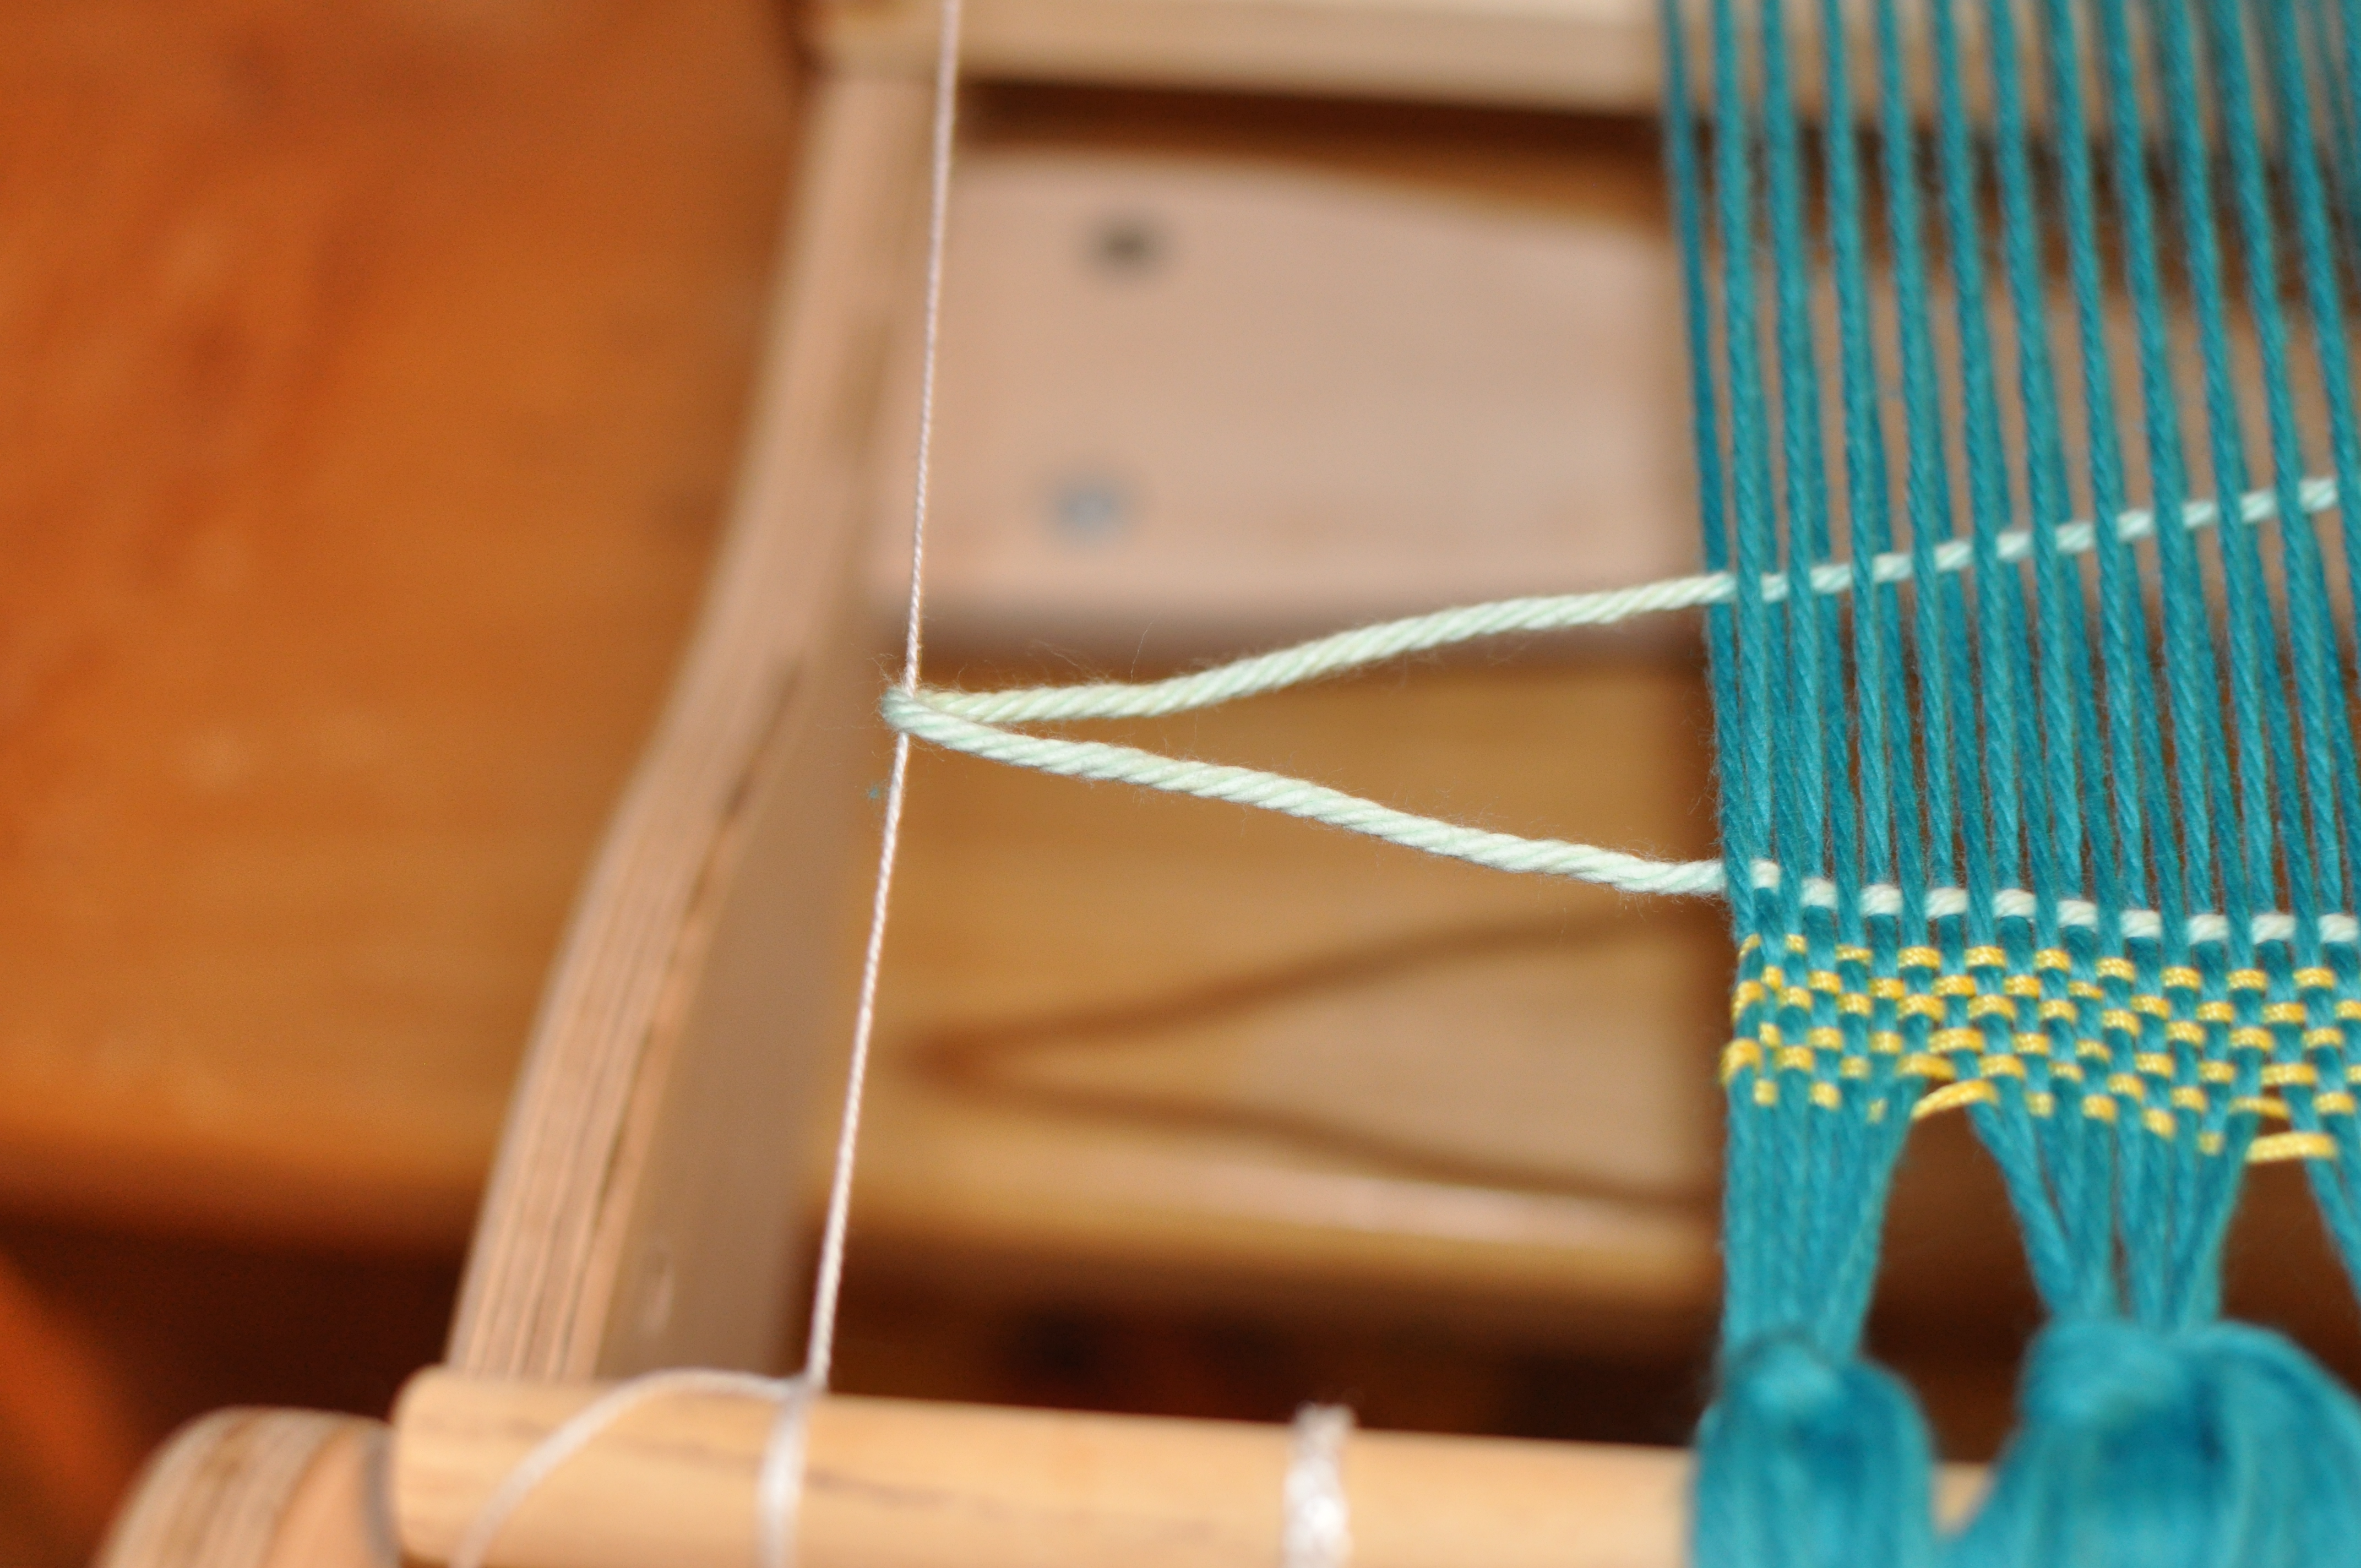
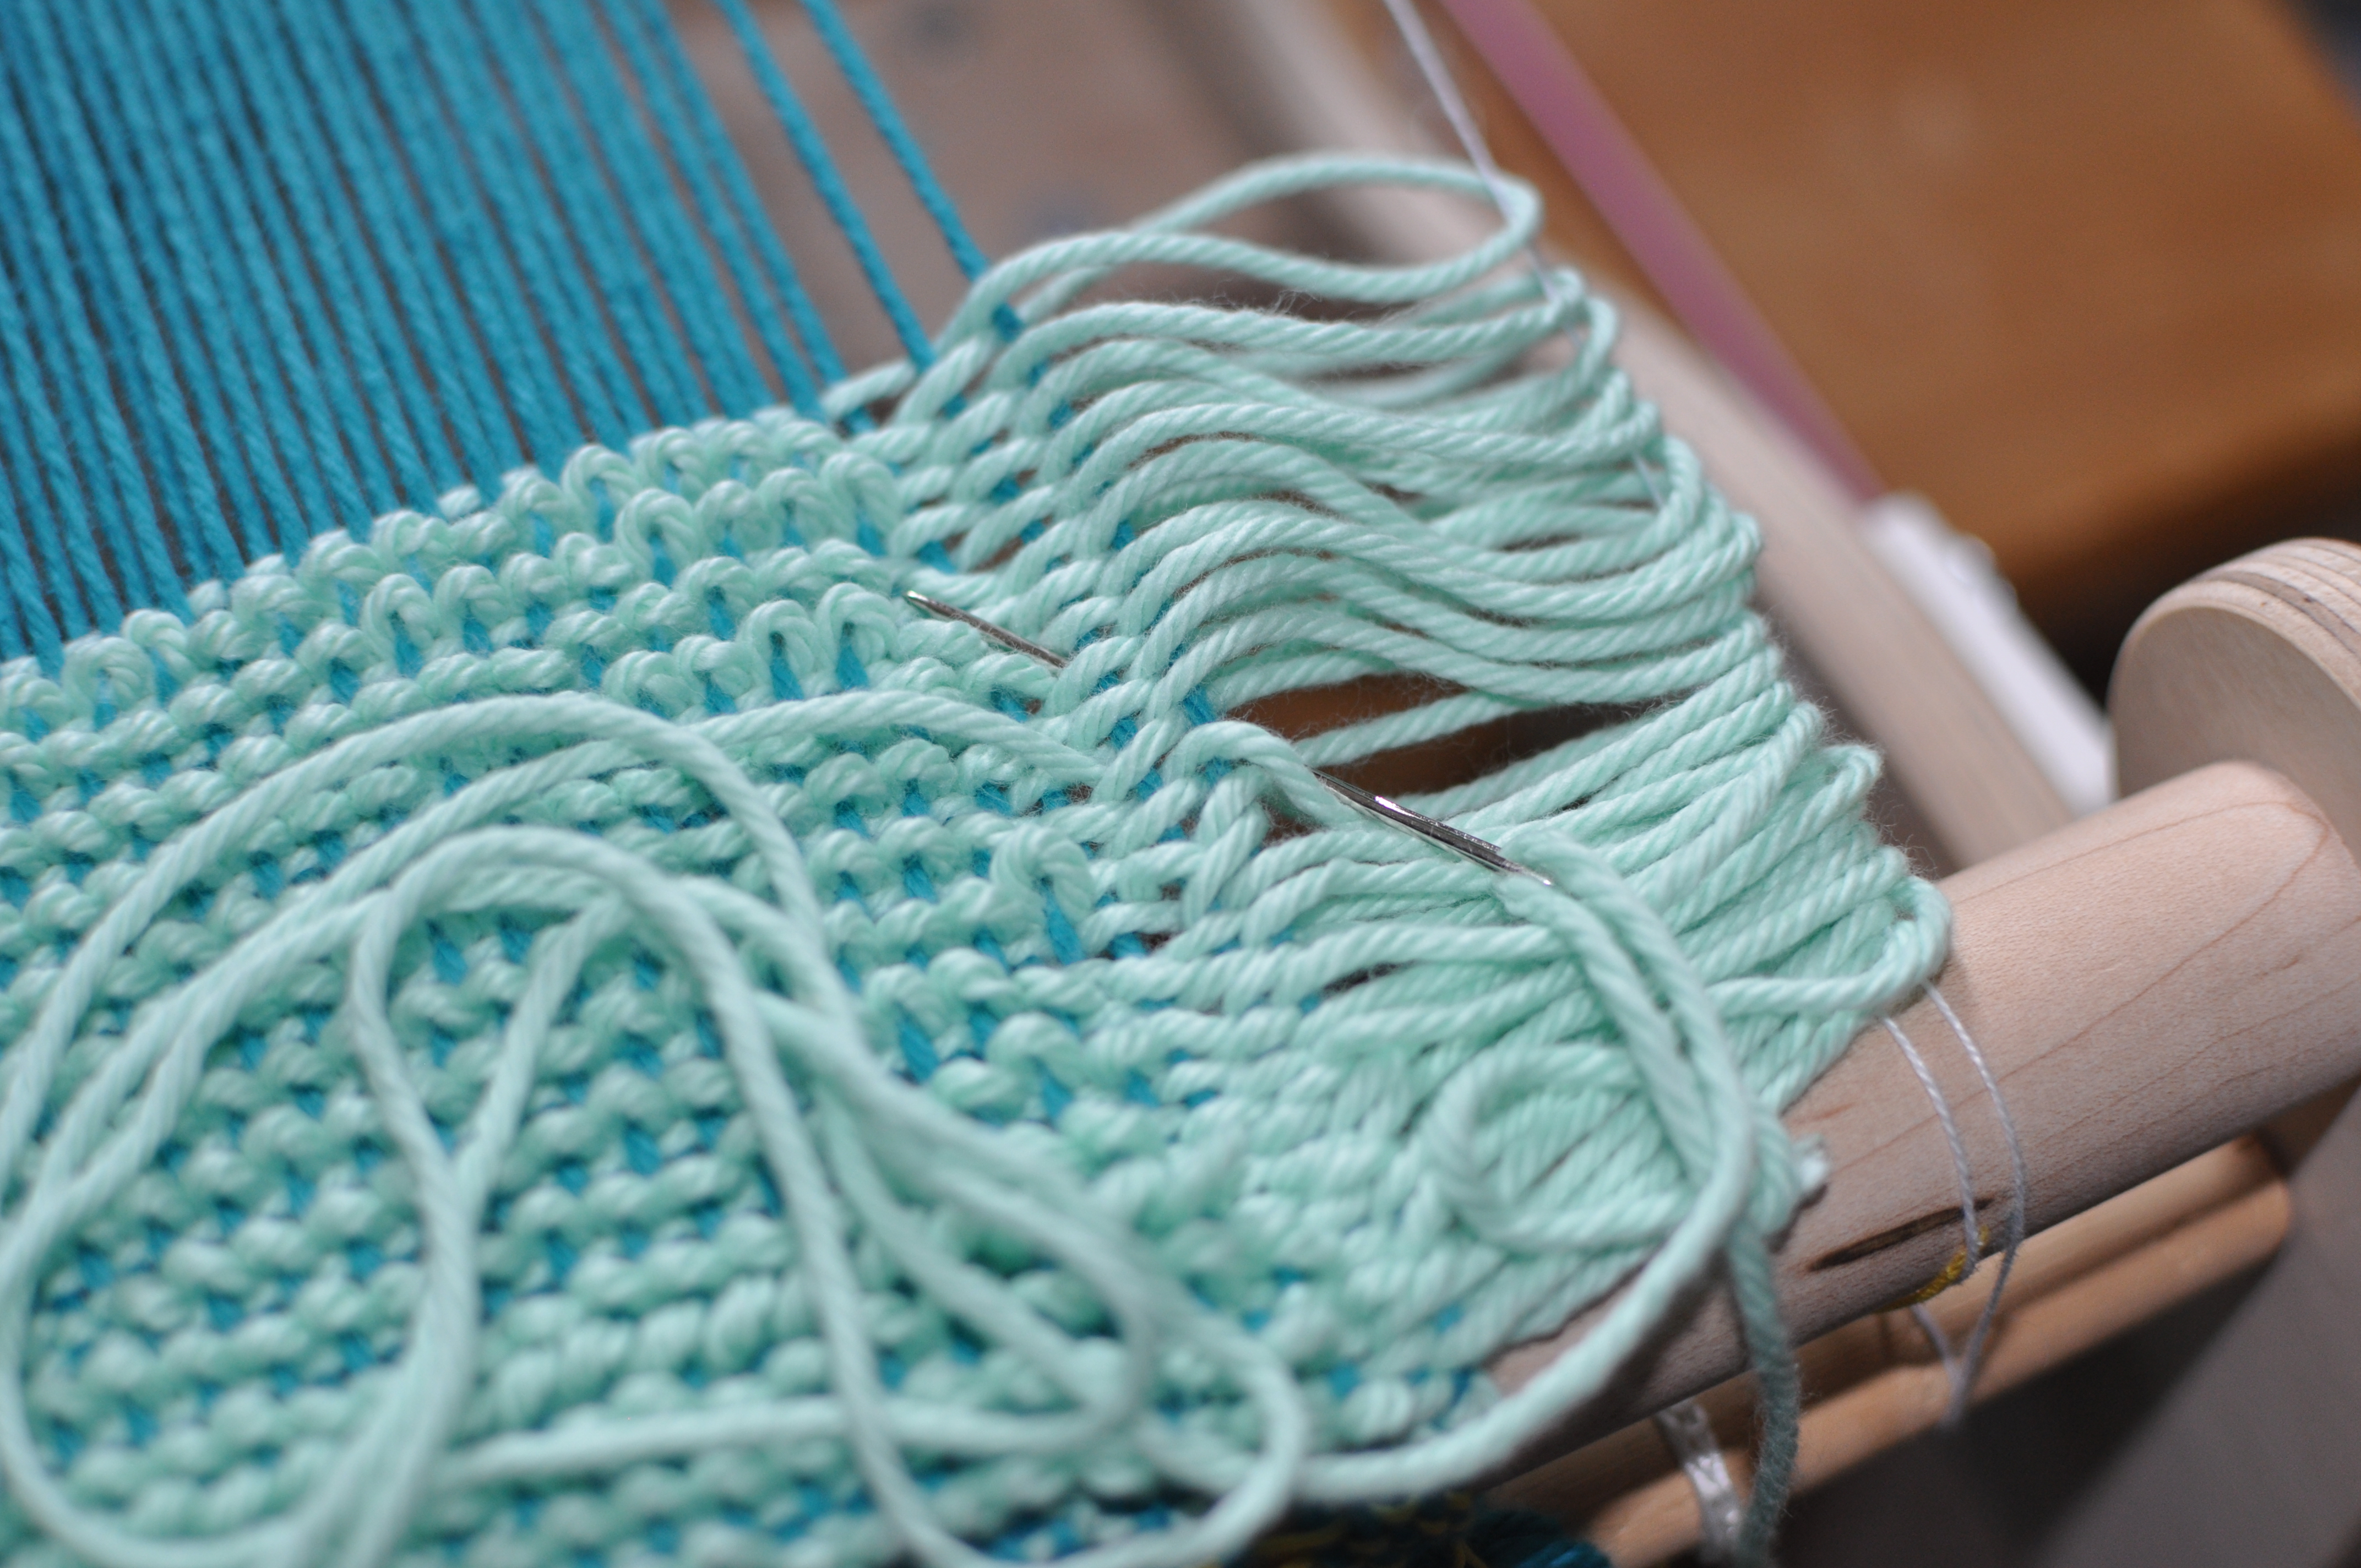
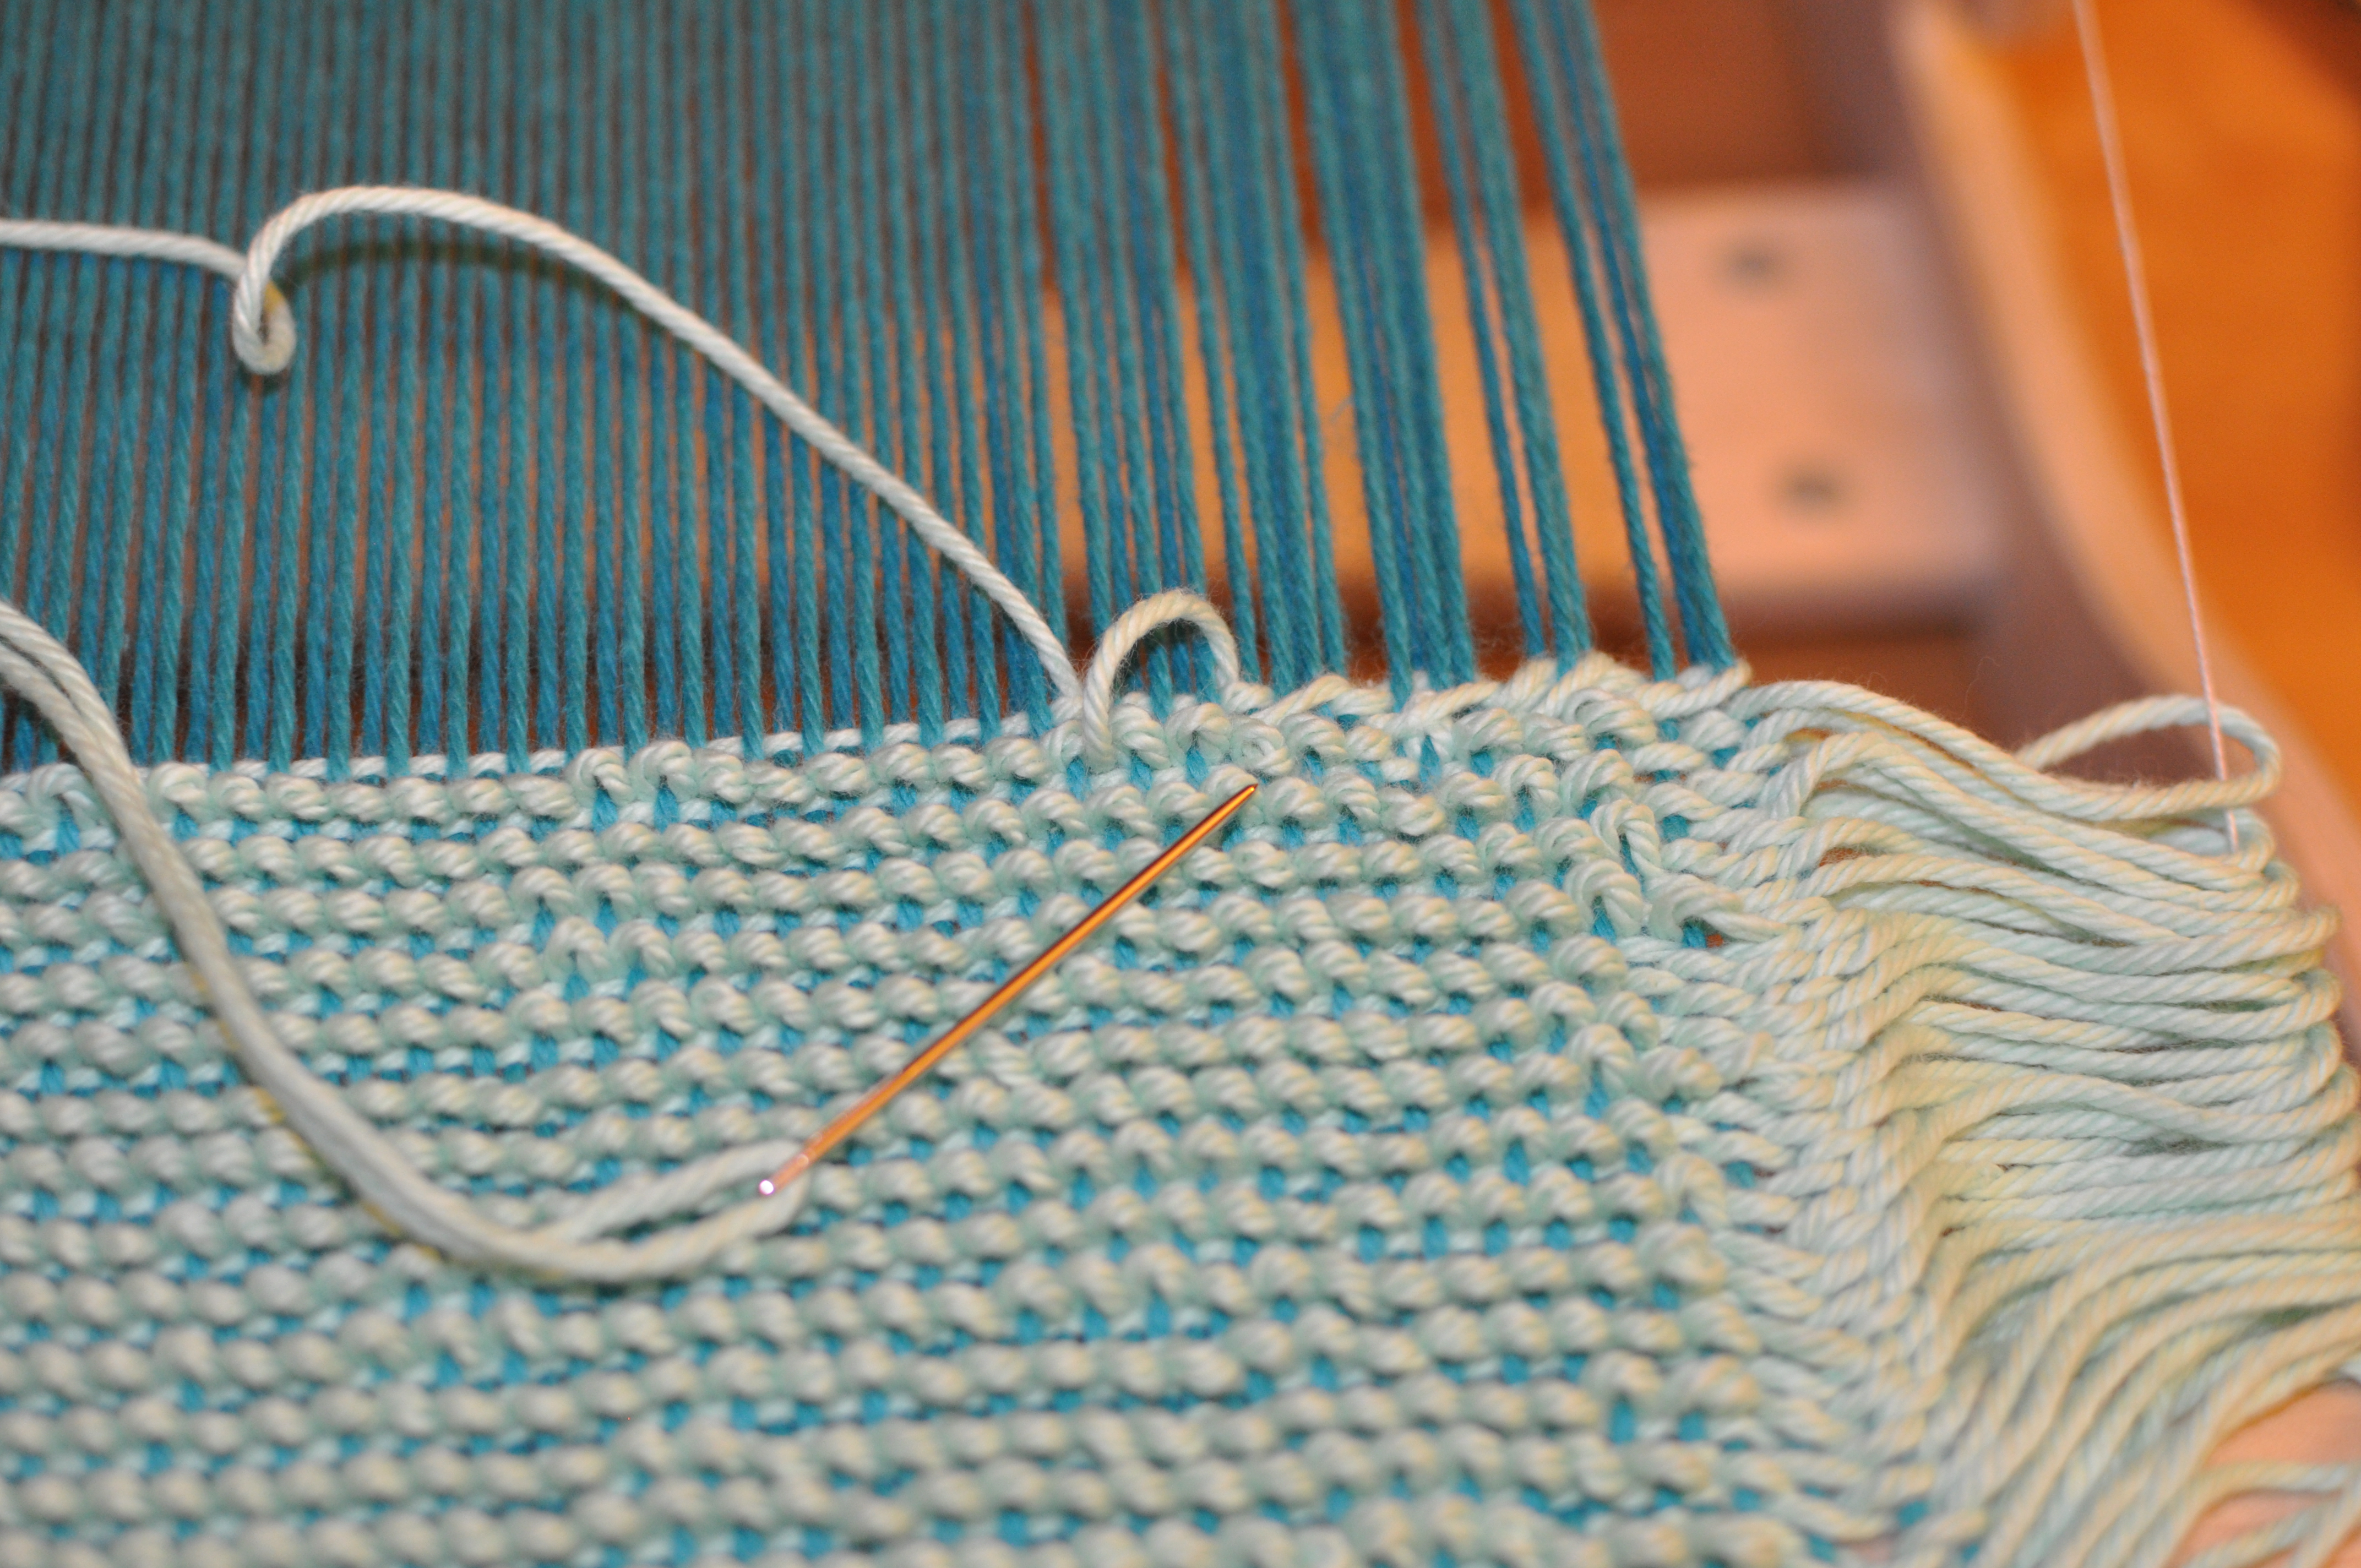
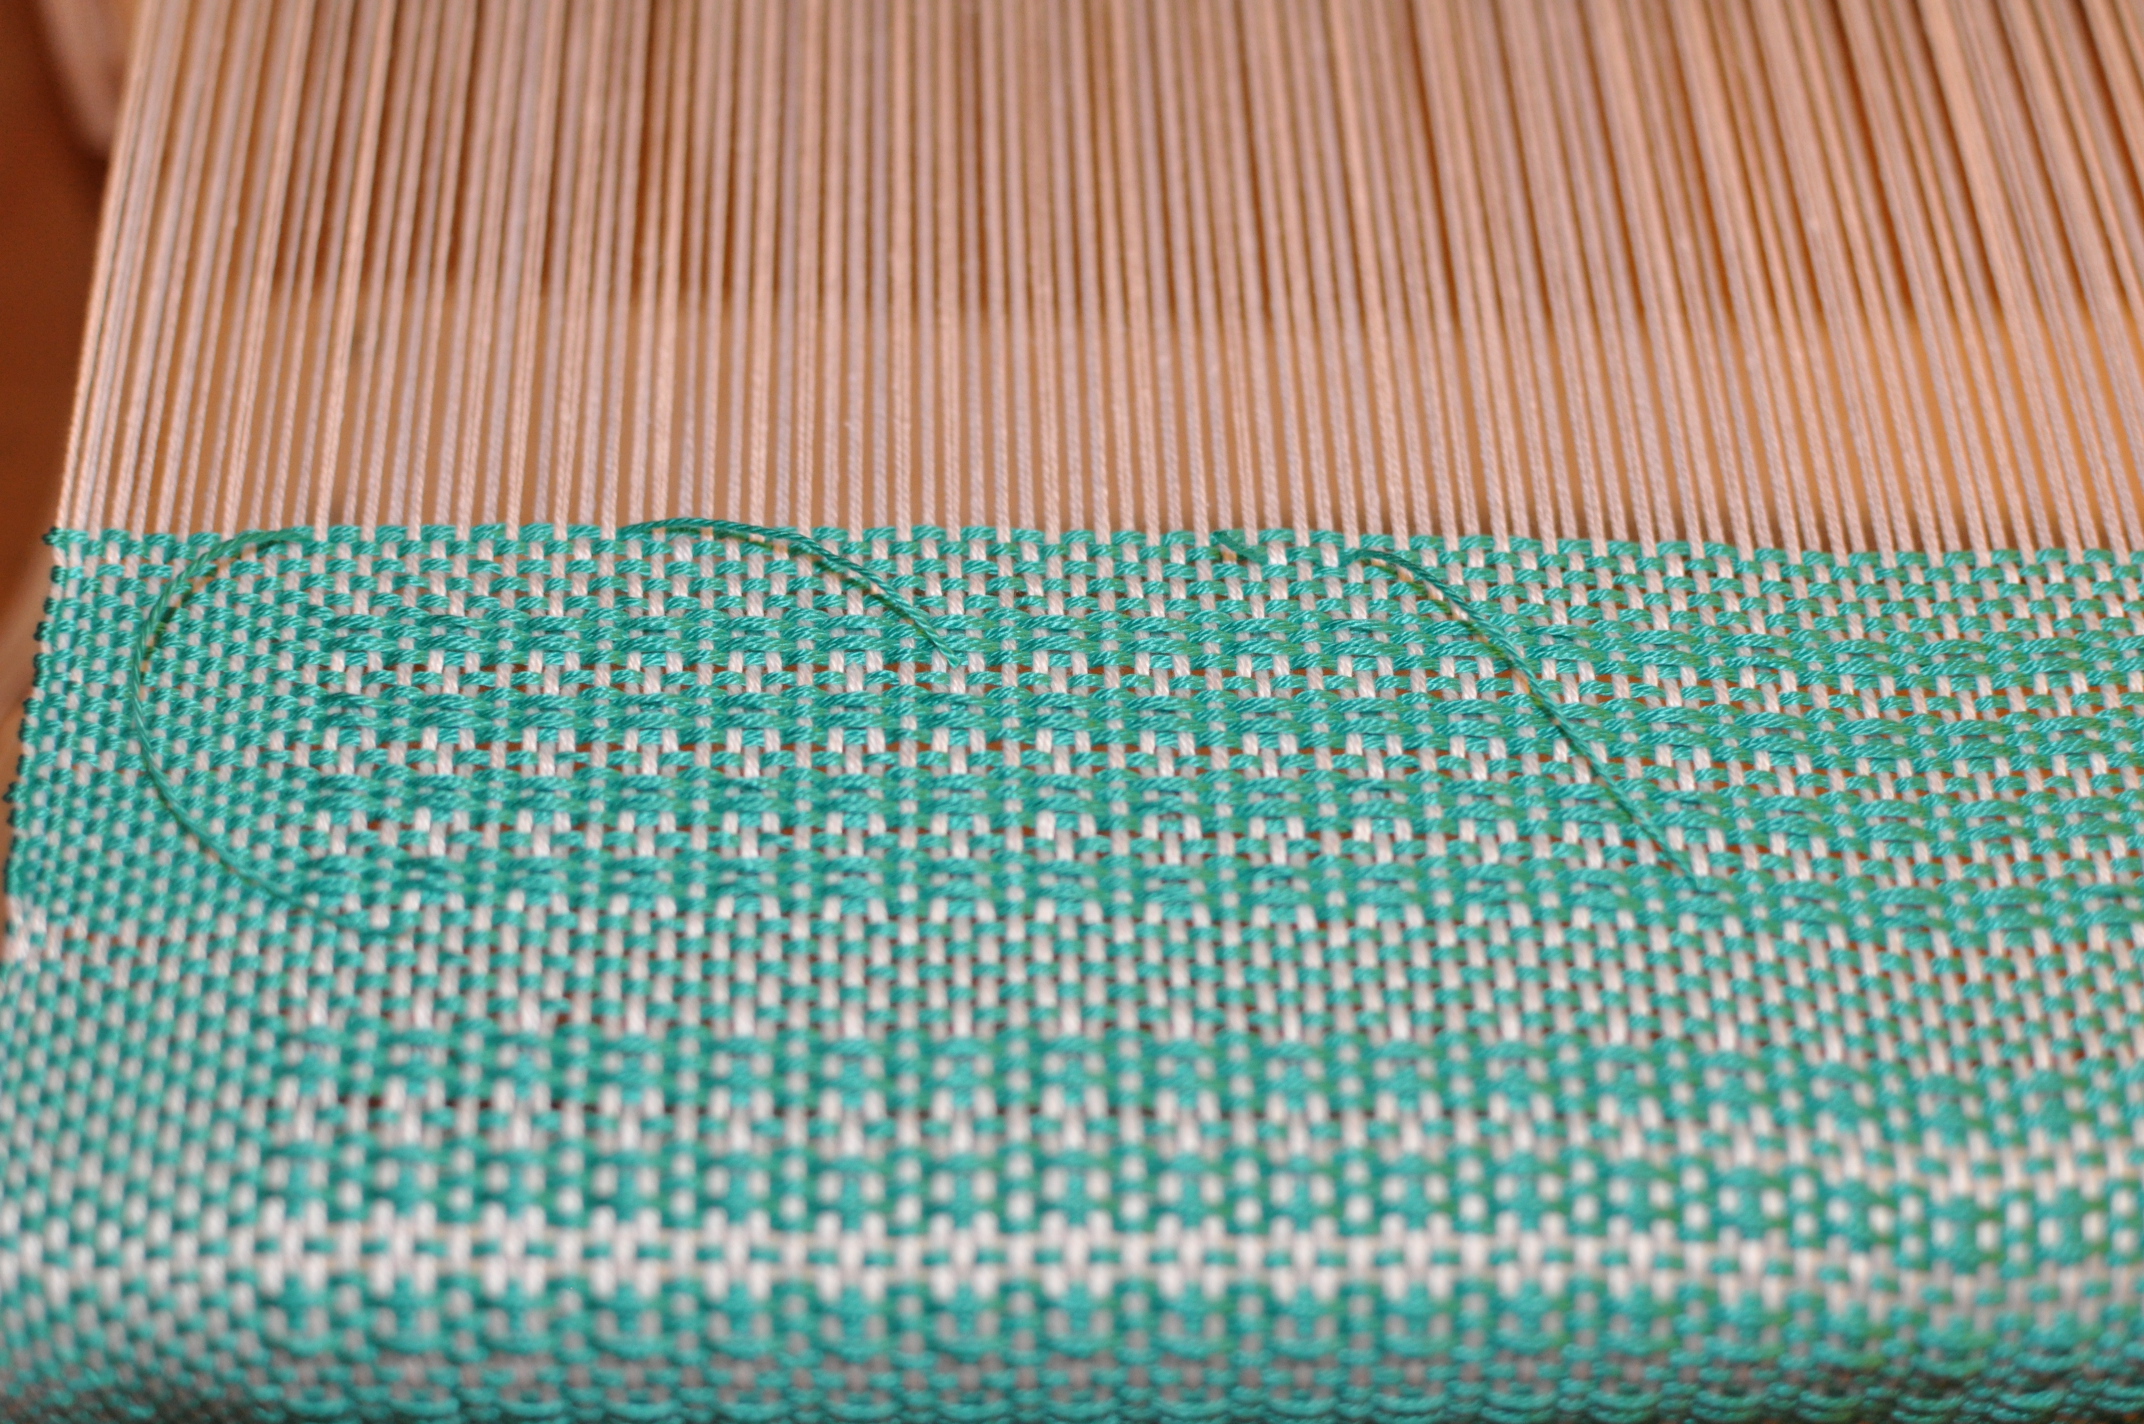
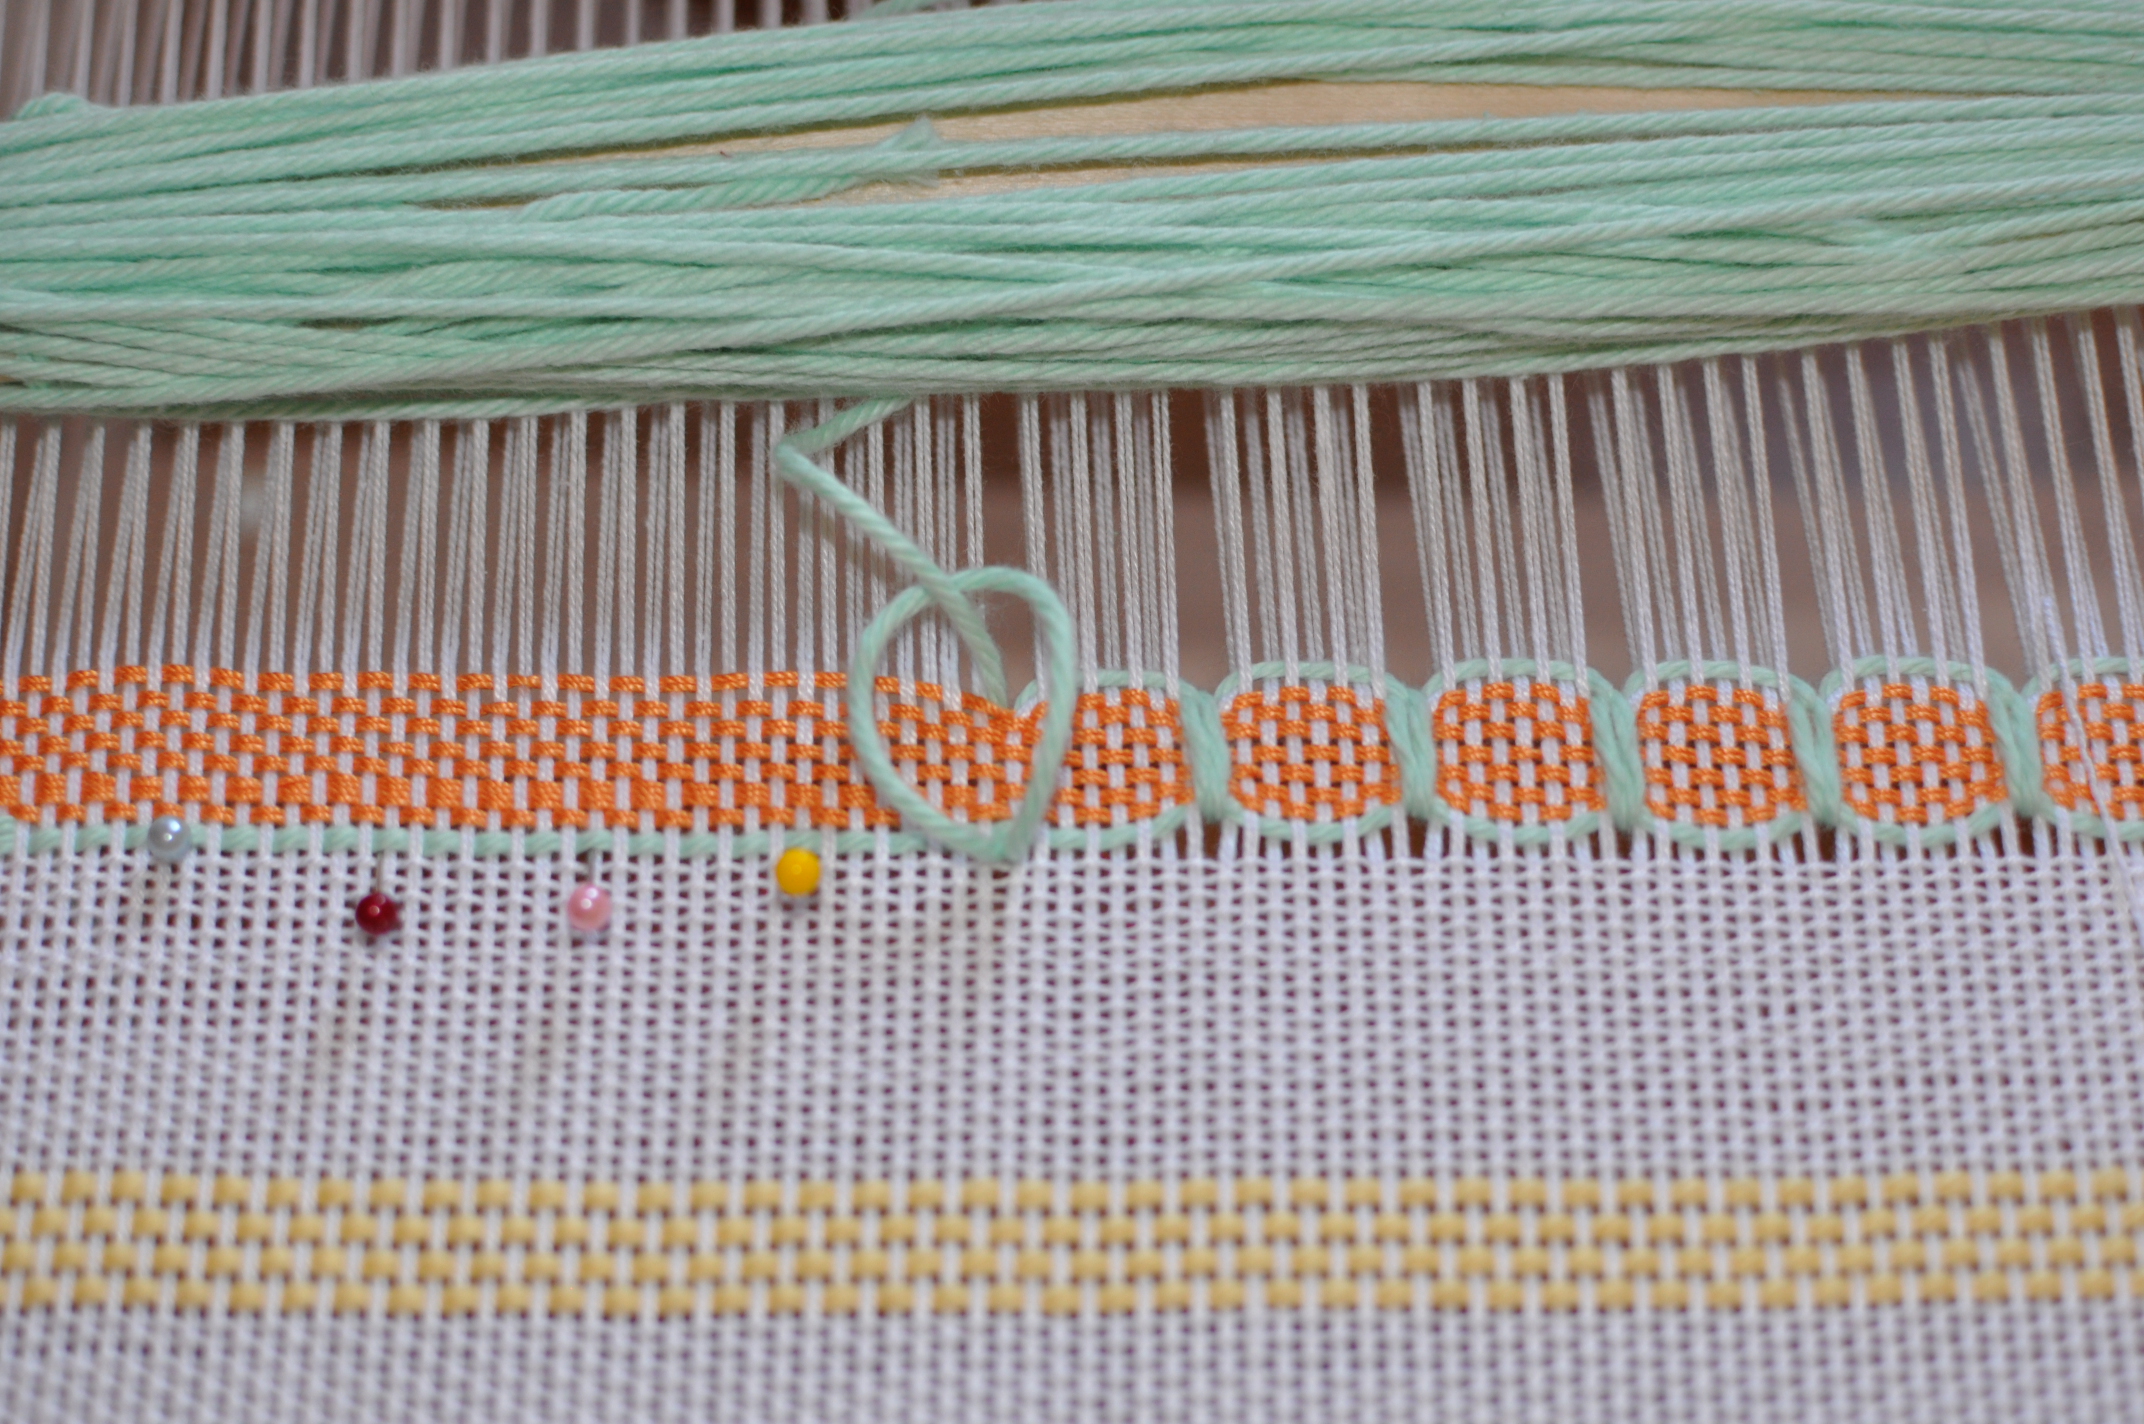
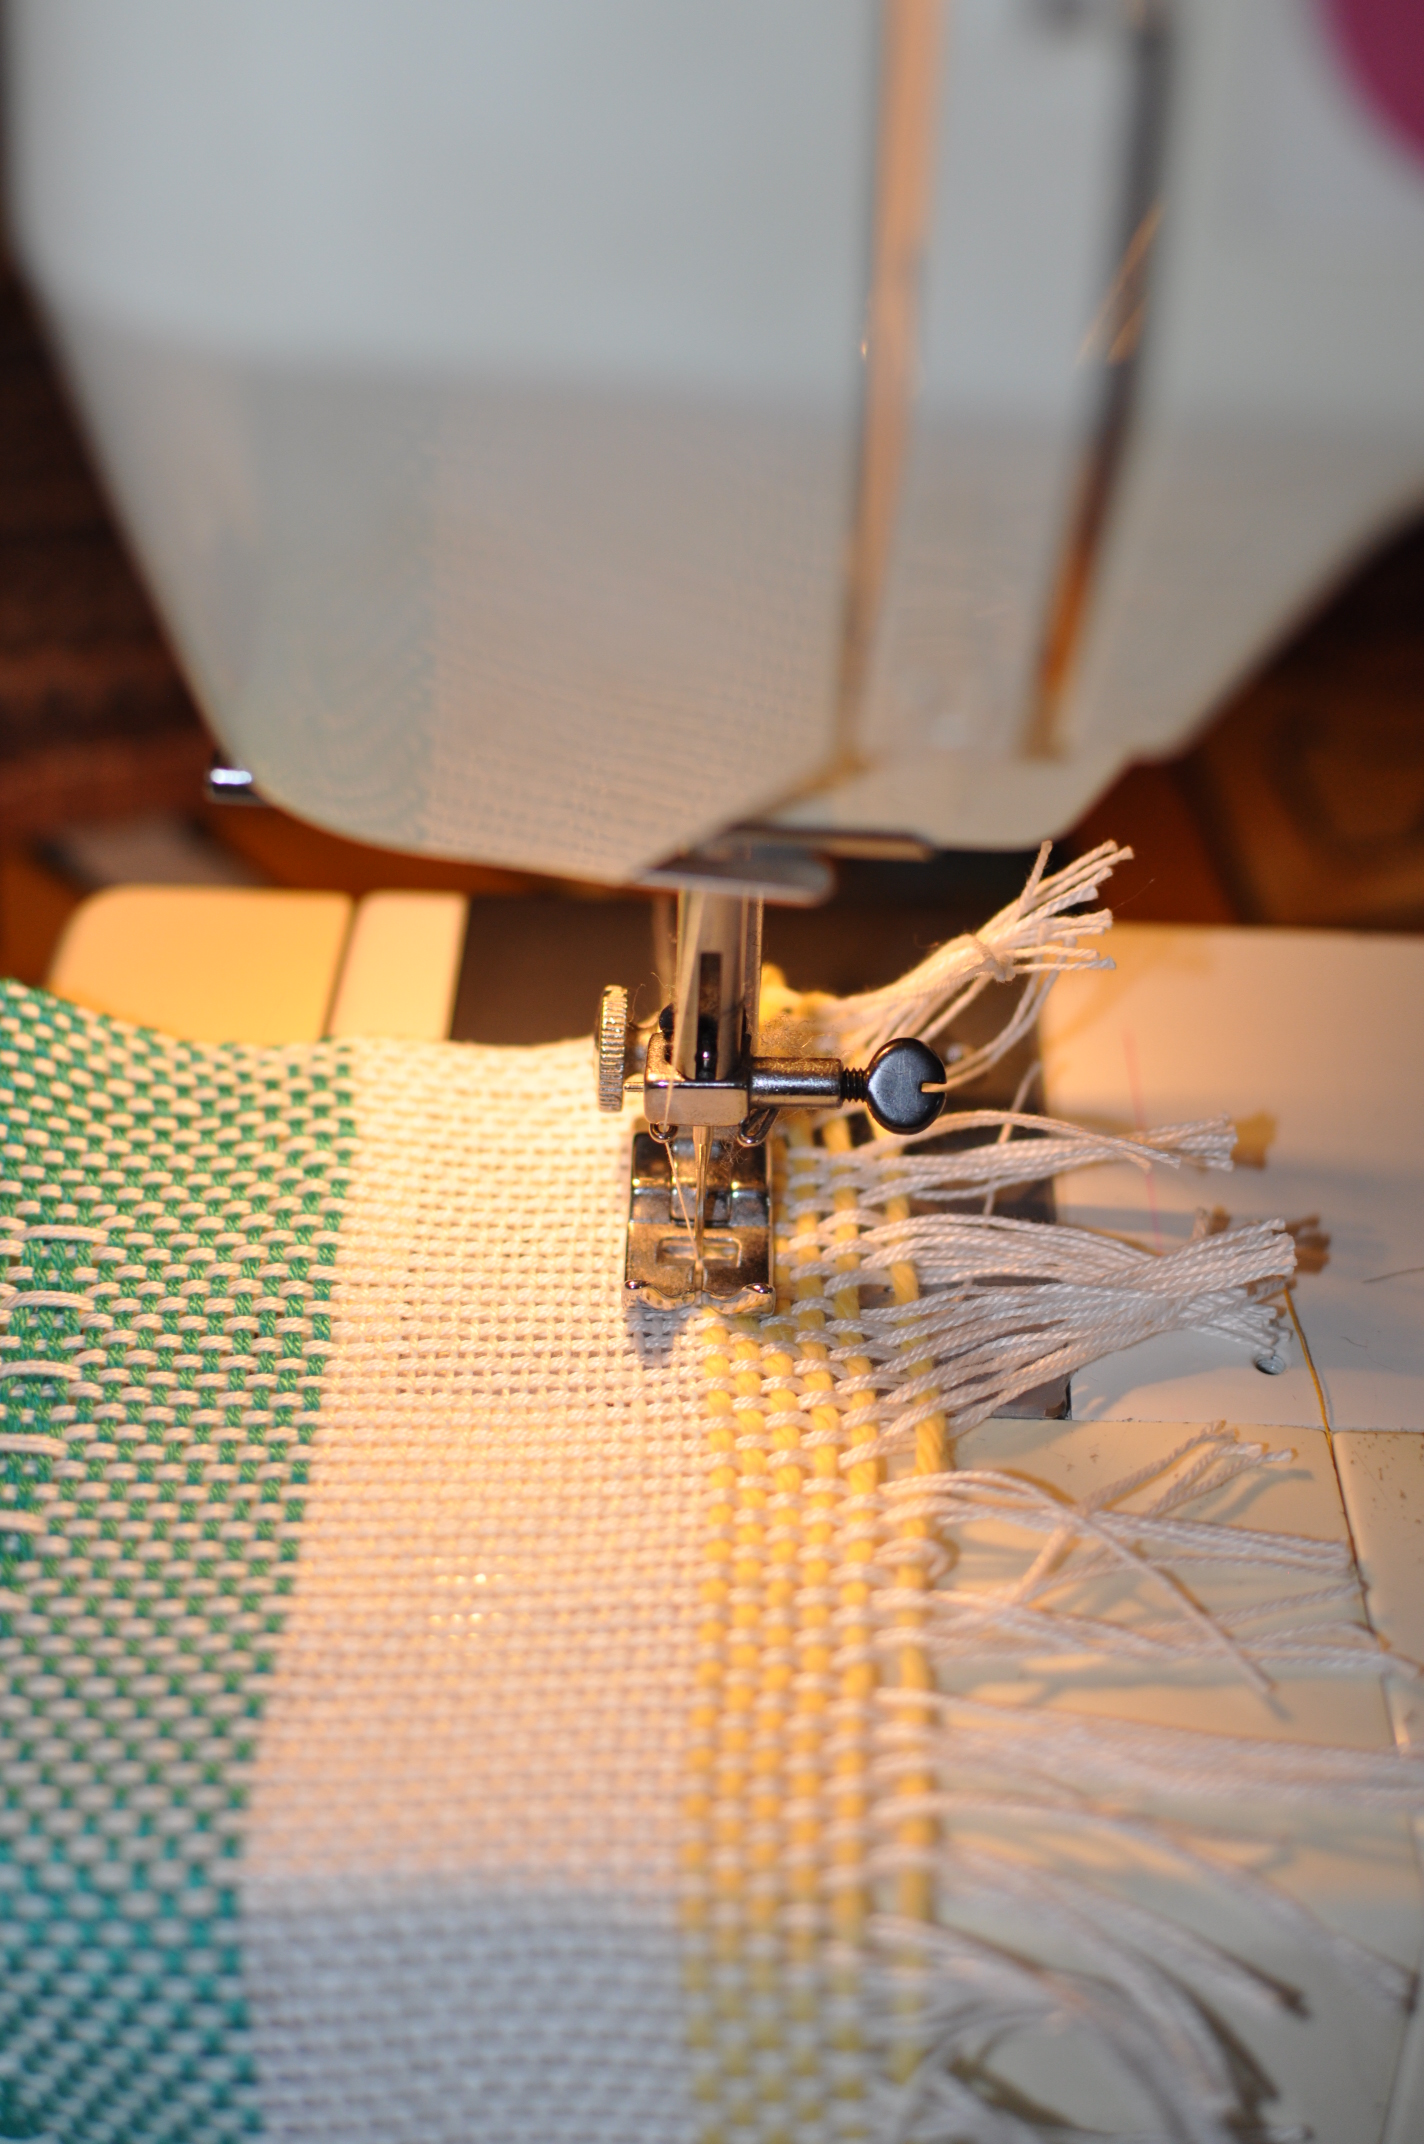
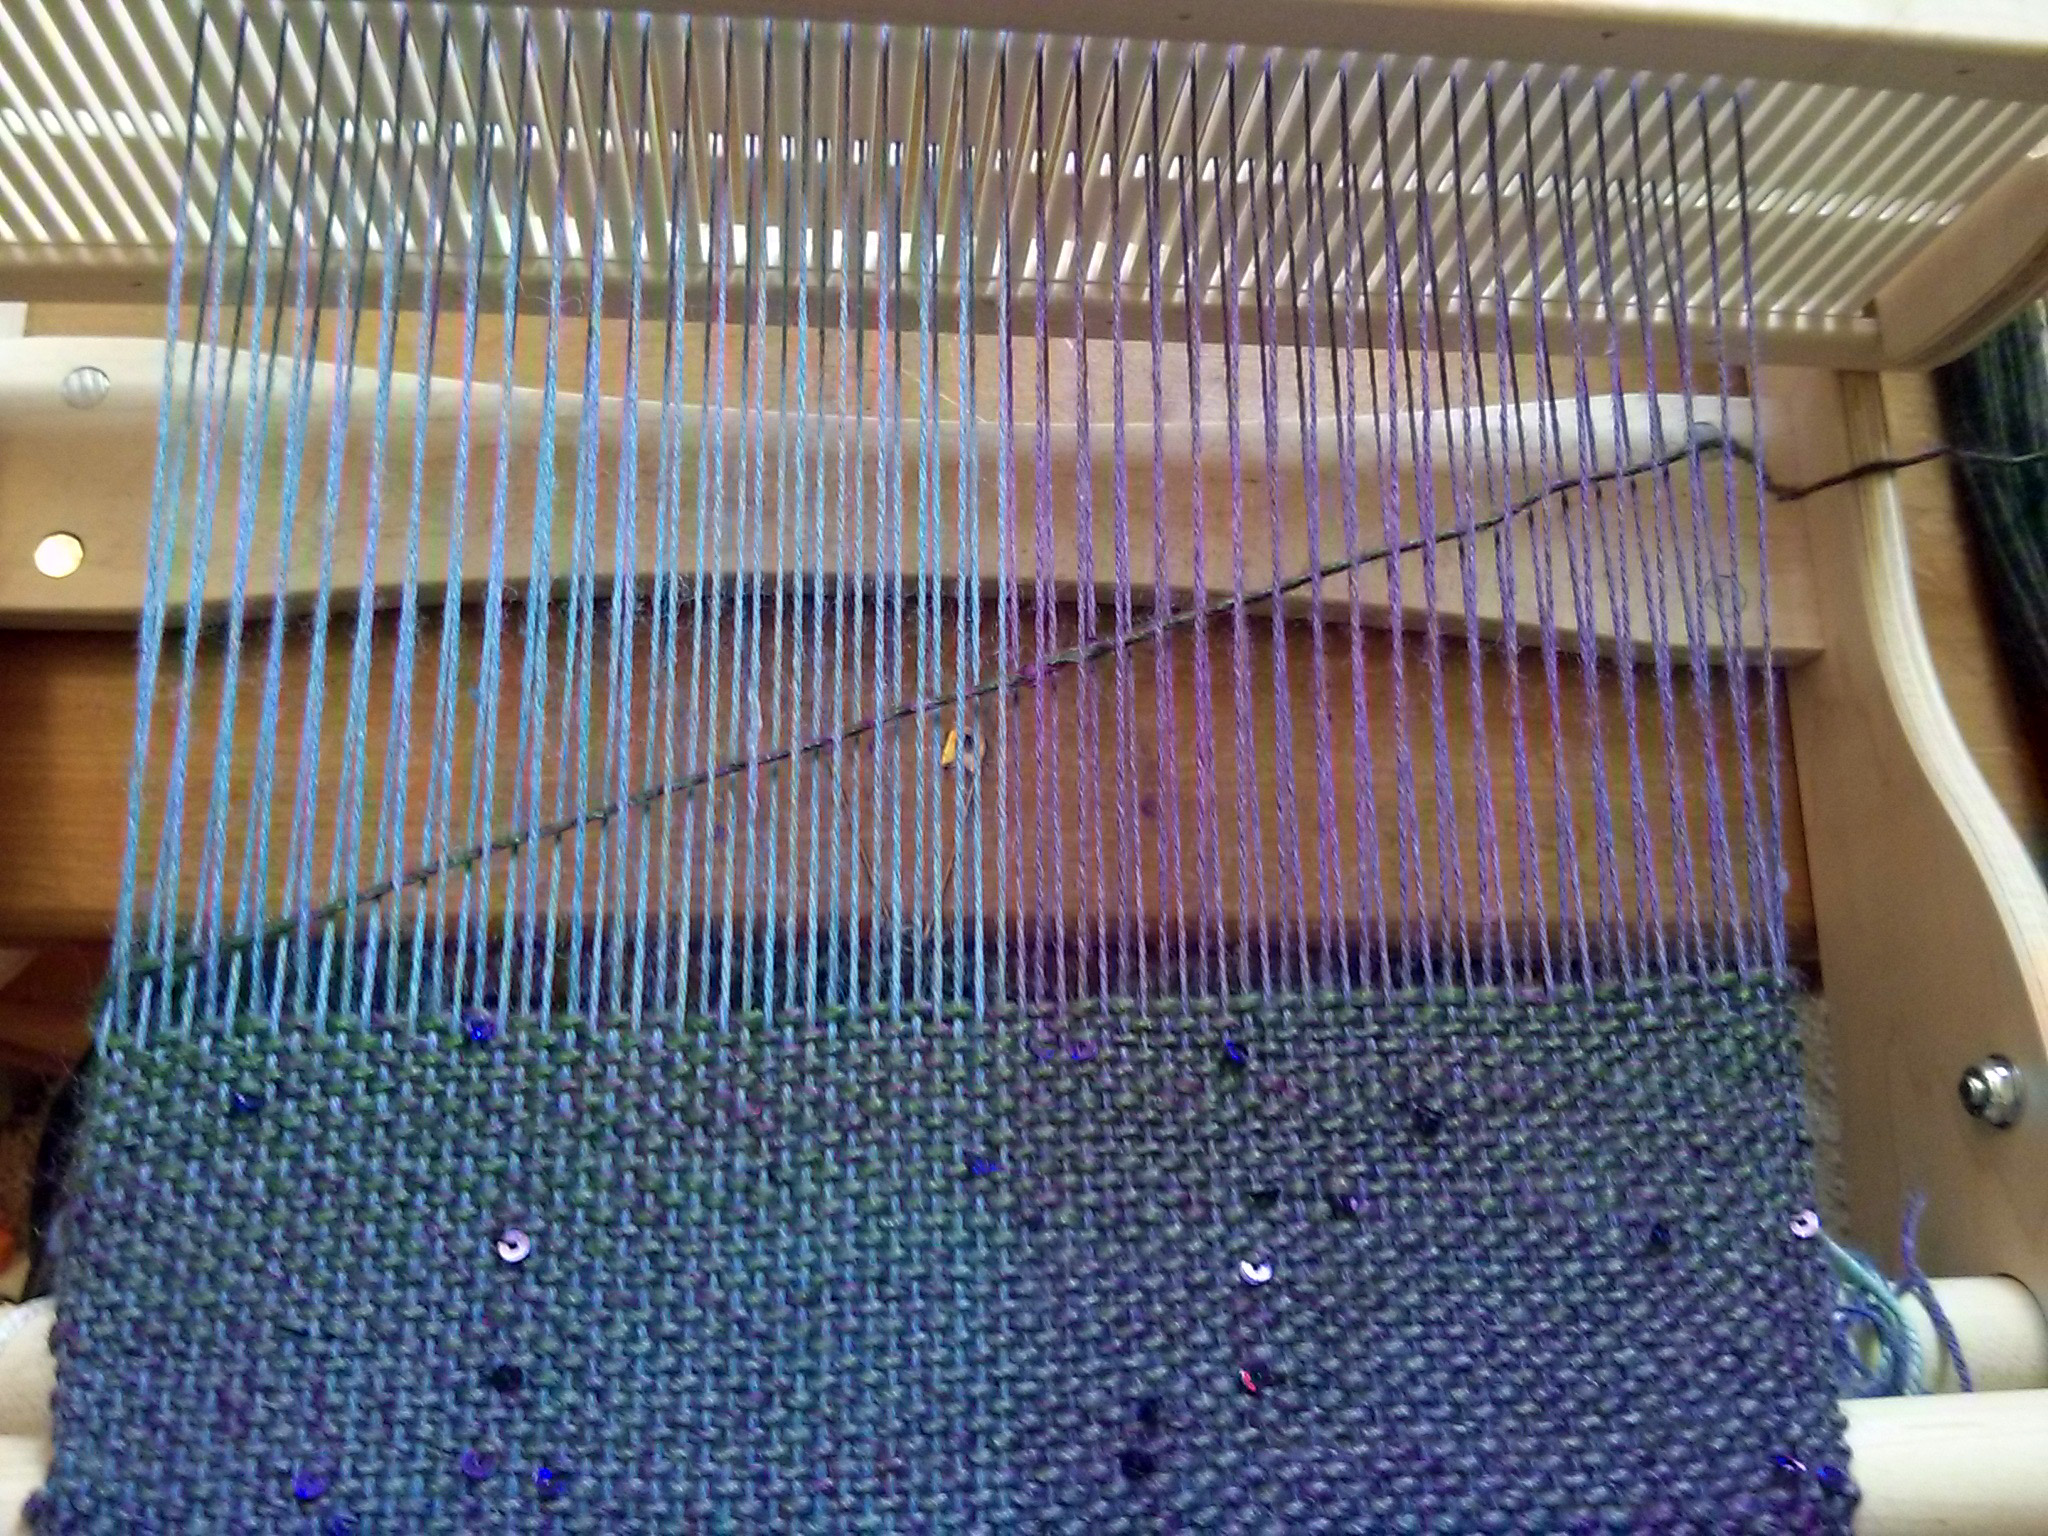
Every time I started a new color, I began from the opposite side (right or left), so the ends wouldn’t be all grouped on one side of the scarf. I wove a few rows, and then wove in the ends. It’s easier to do this while the piece is still taut on the loom and also nice to not have a bazillion ends to deal with at the finish. I have a special tapestry needle that I use whenever I’m working with Flax. It has a large enough eye that the strand easily passes through, but with a sharp point. Plant fibers are slippery and require special care when dealing with.

When weaving in the ends on my scarf, I basically “wove” this strand in, following the strand just above it, but actually pierced the yarn as I wove. So, not only is this strand “woven” in, it is also further secured through the center of the strand above it. Once woven in, I clipped it but left a couple of inches. After washing, I then clipped all the strands close to the piece.

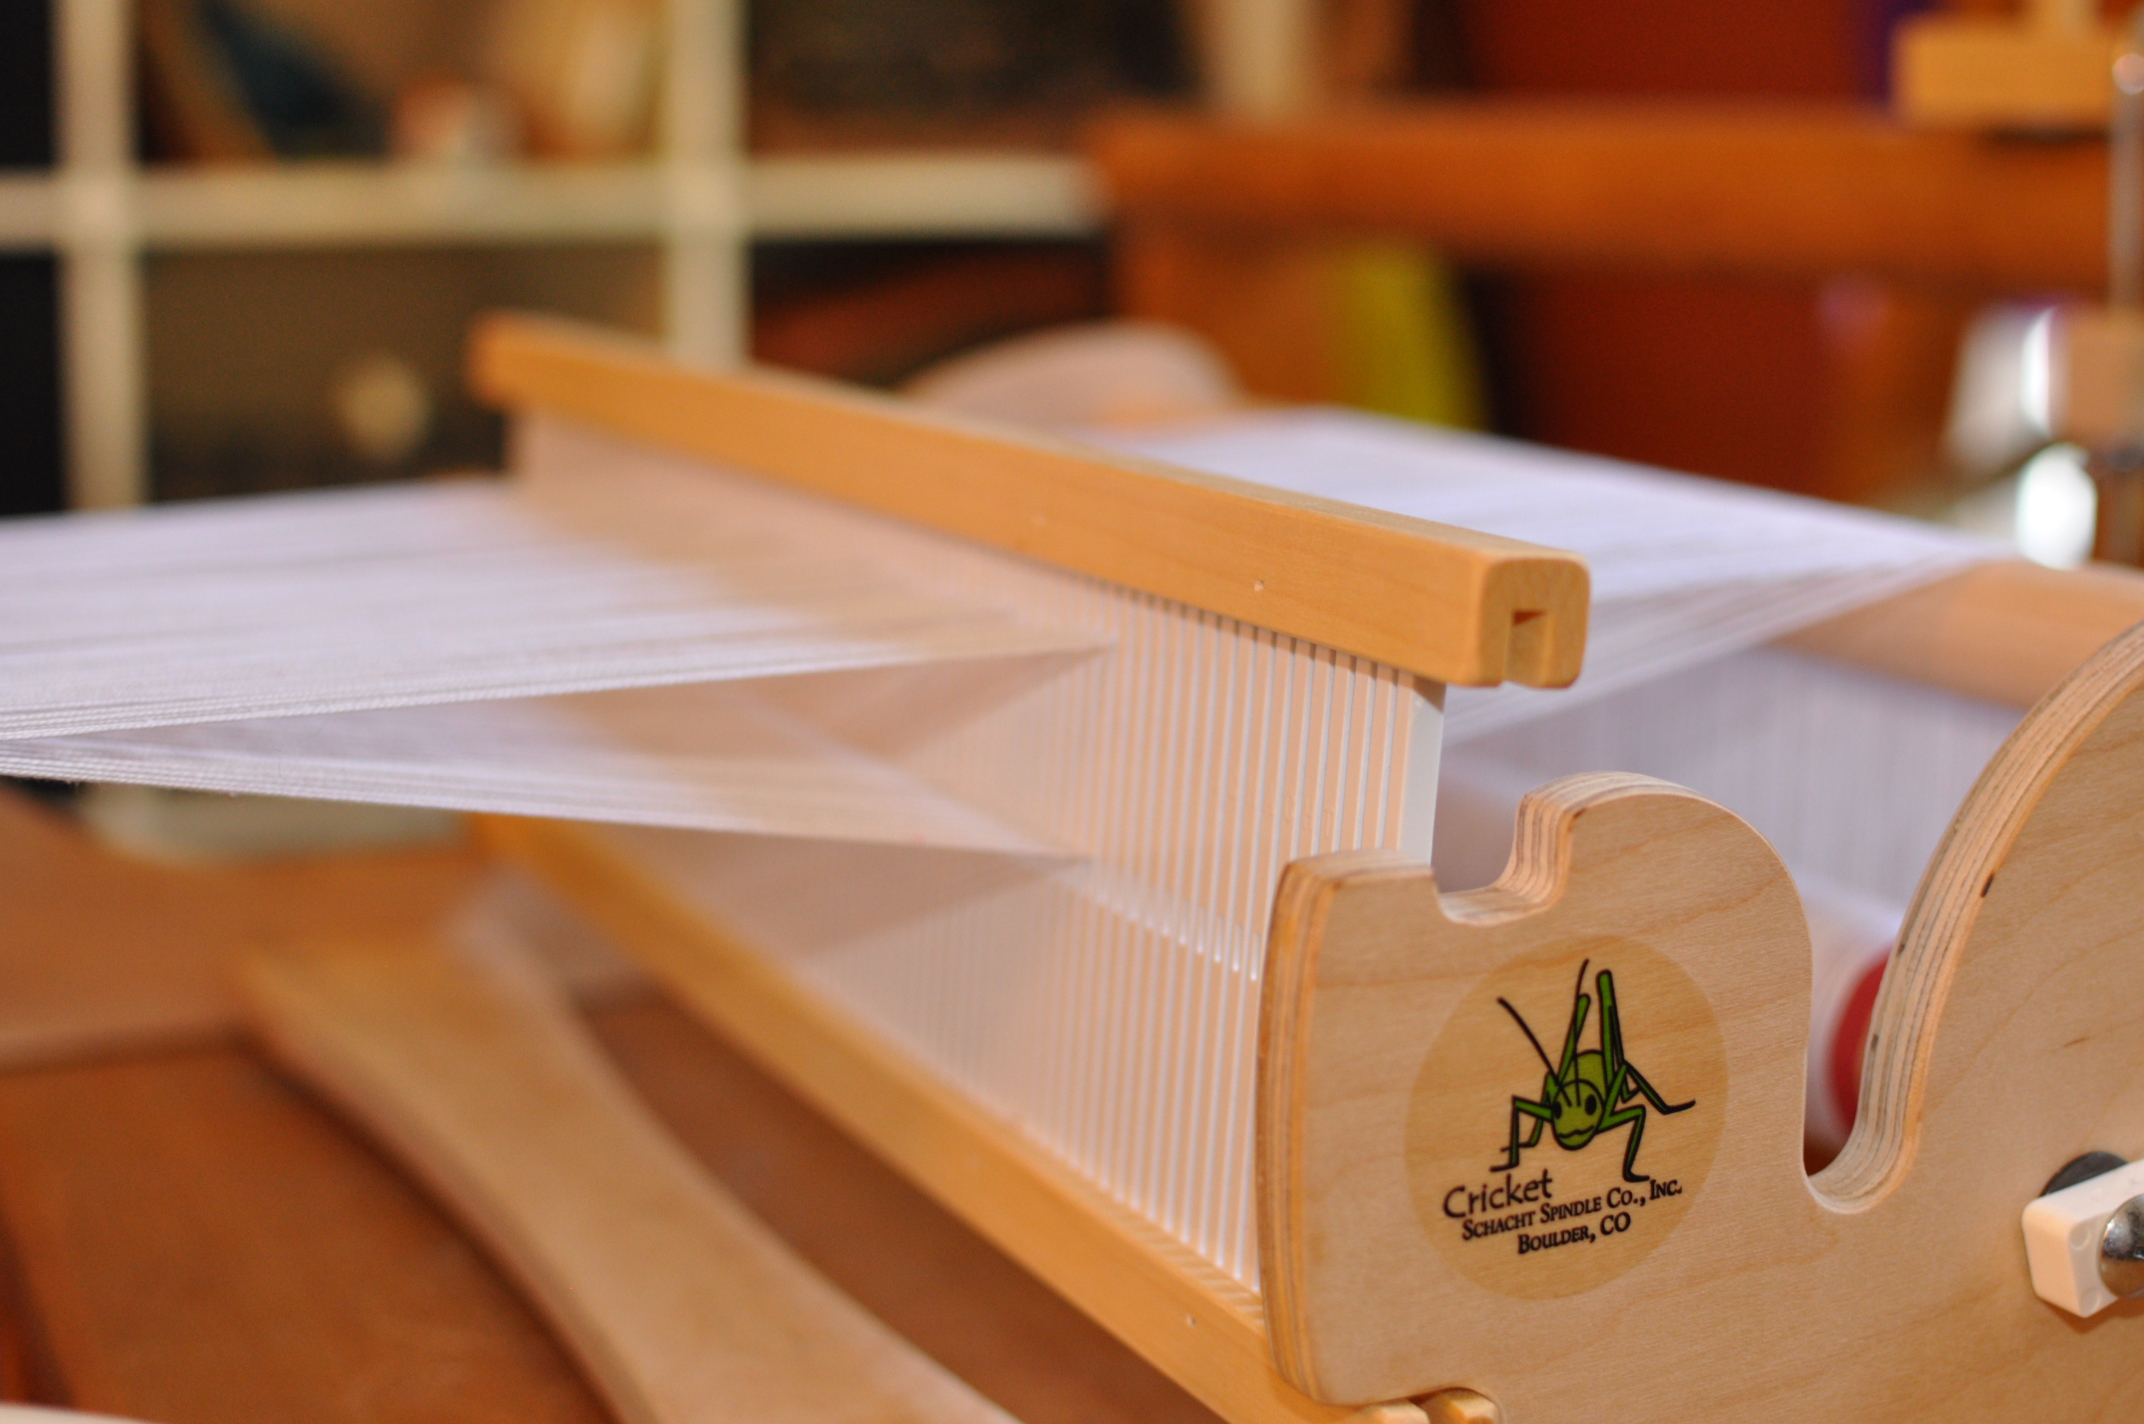
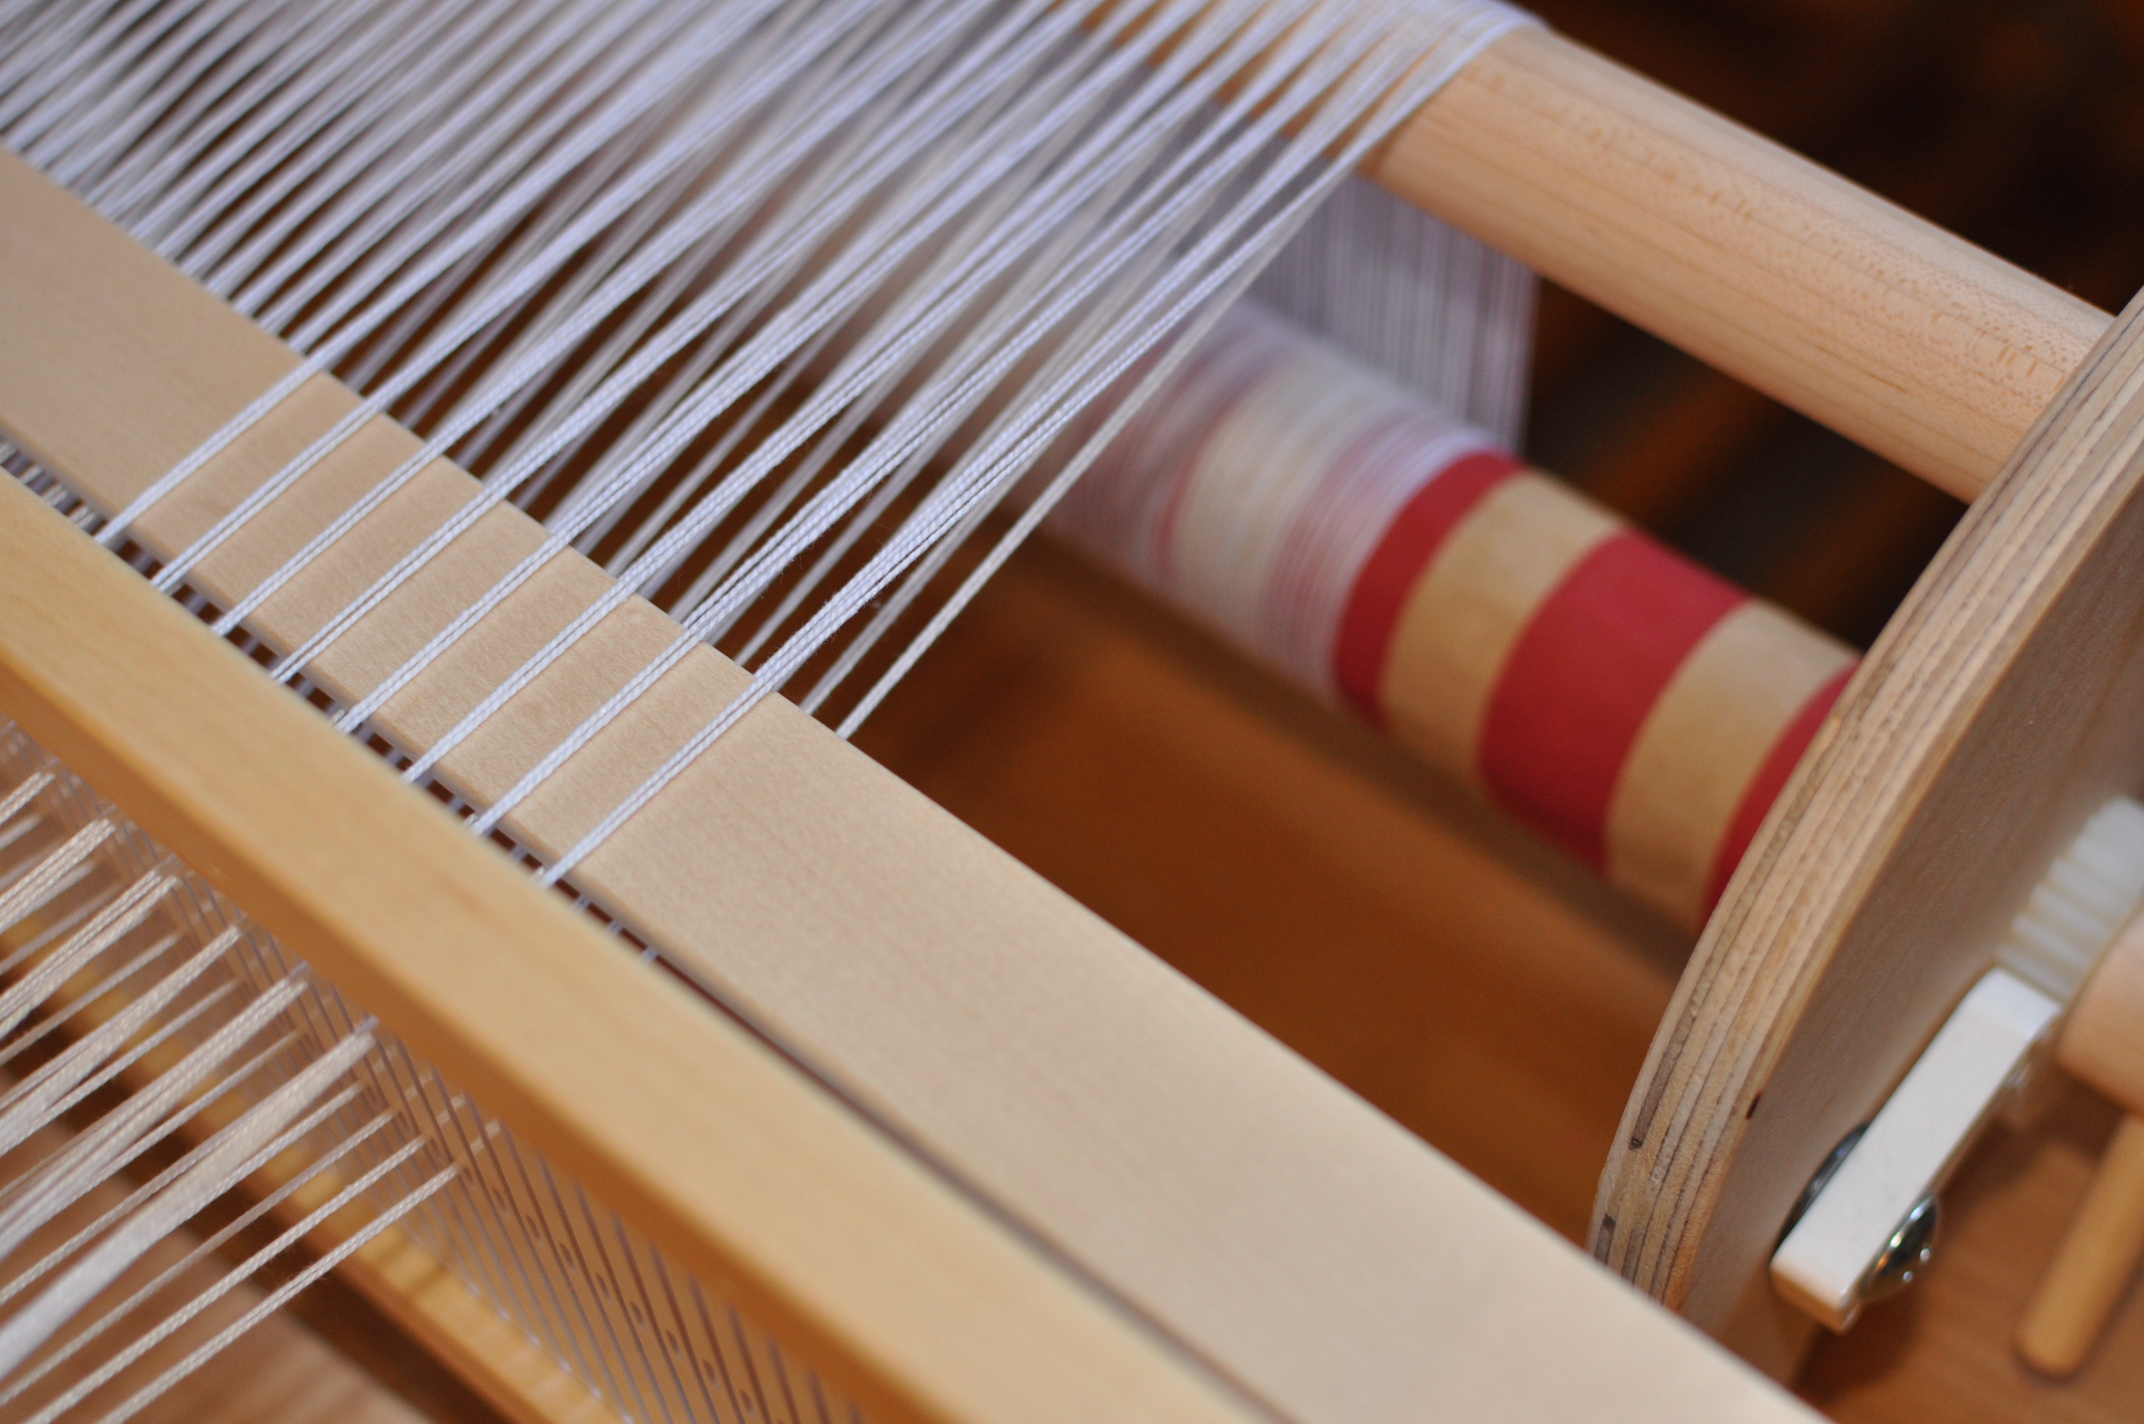
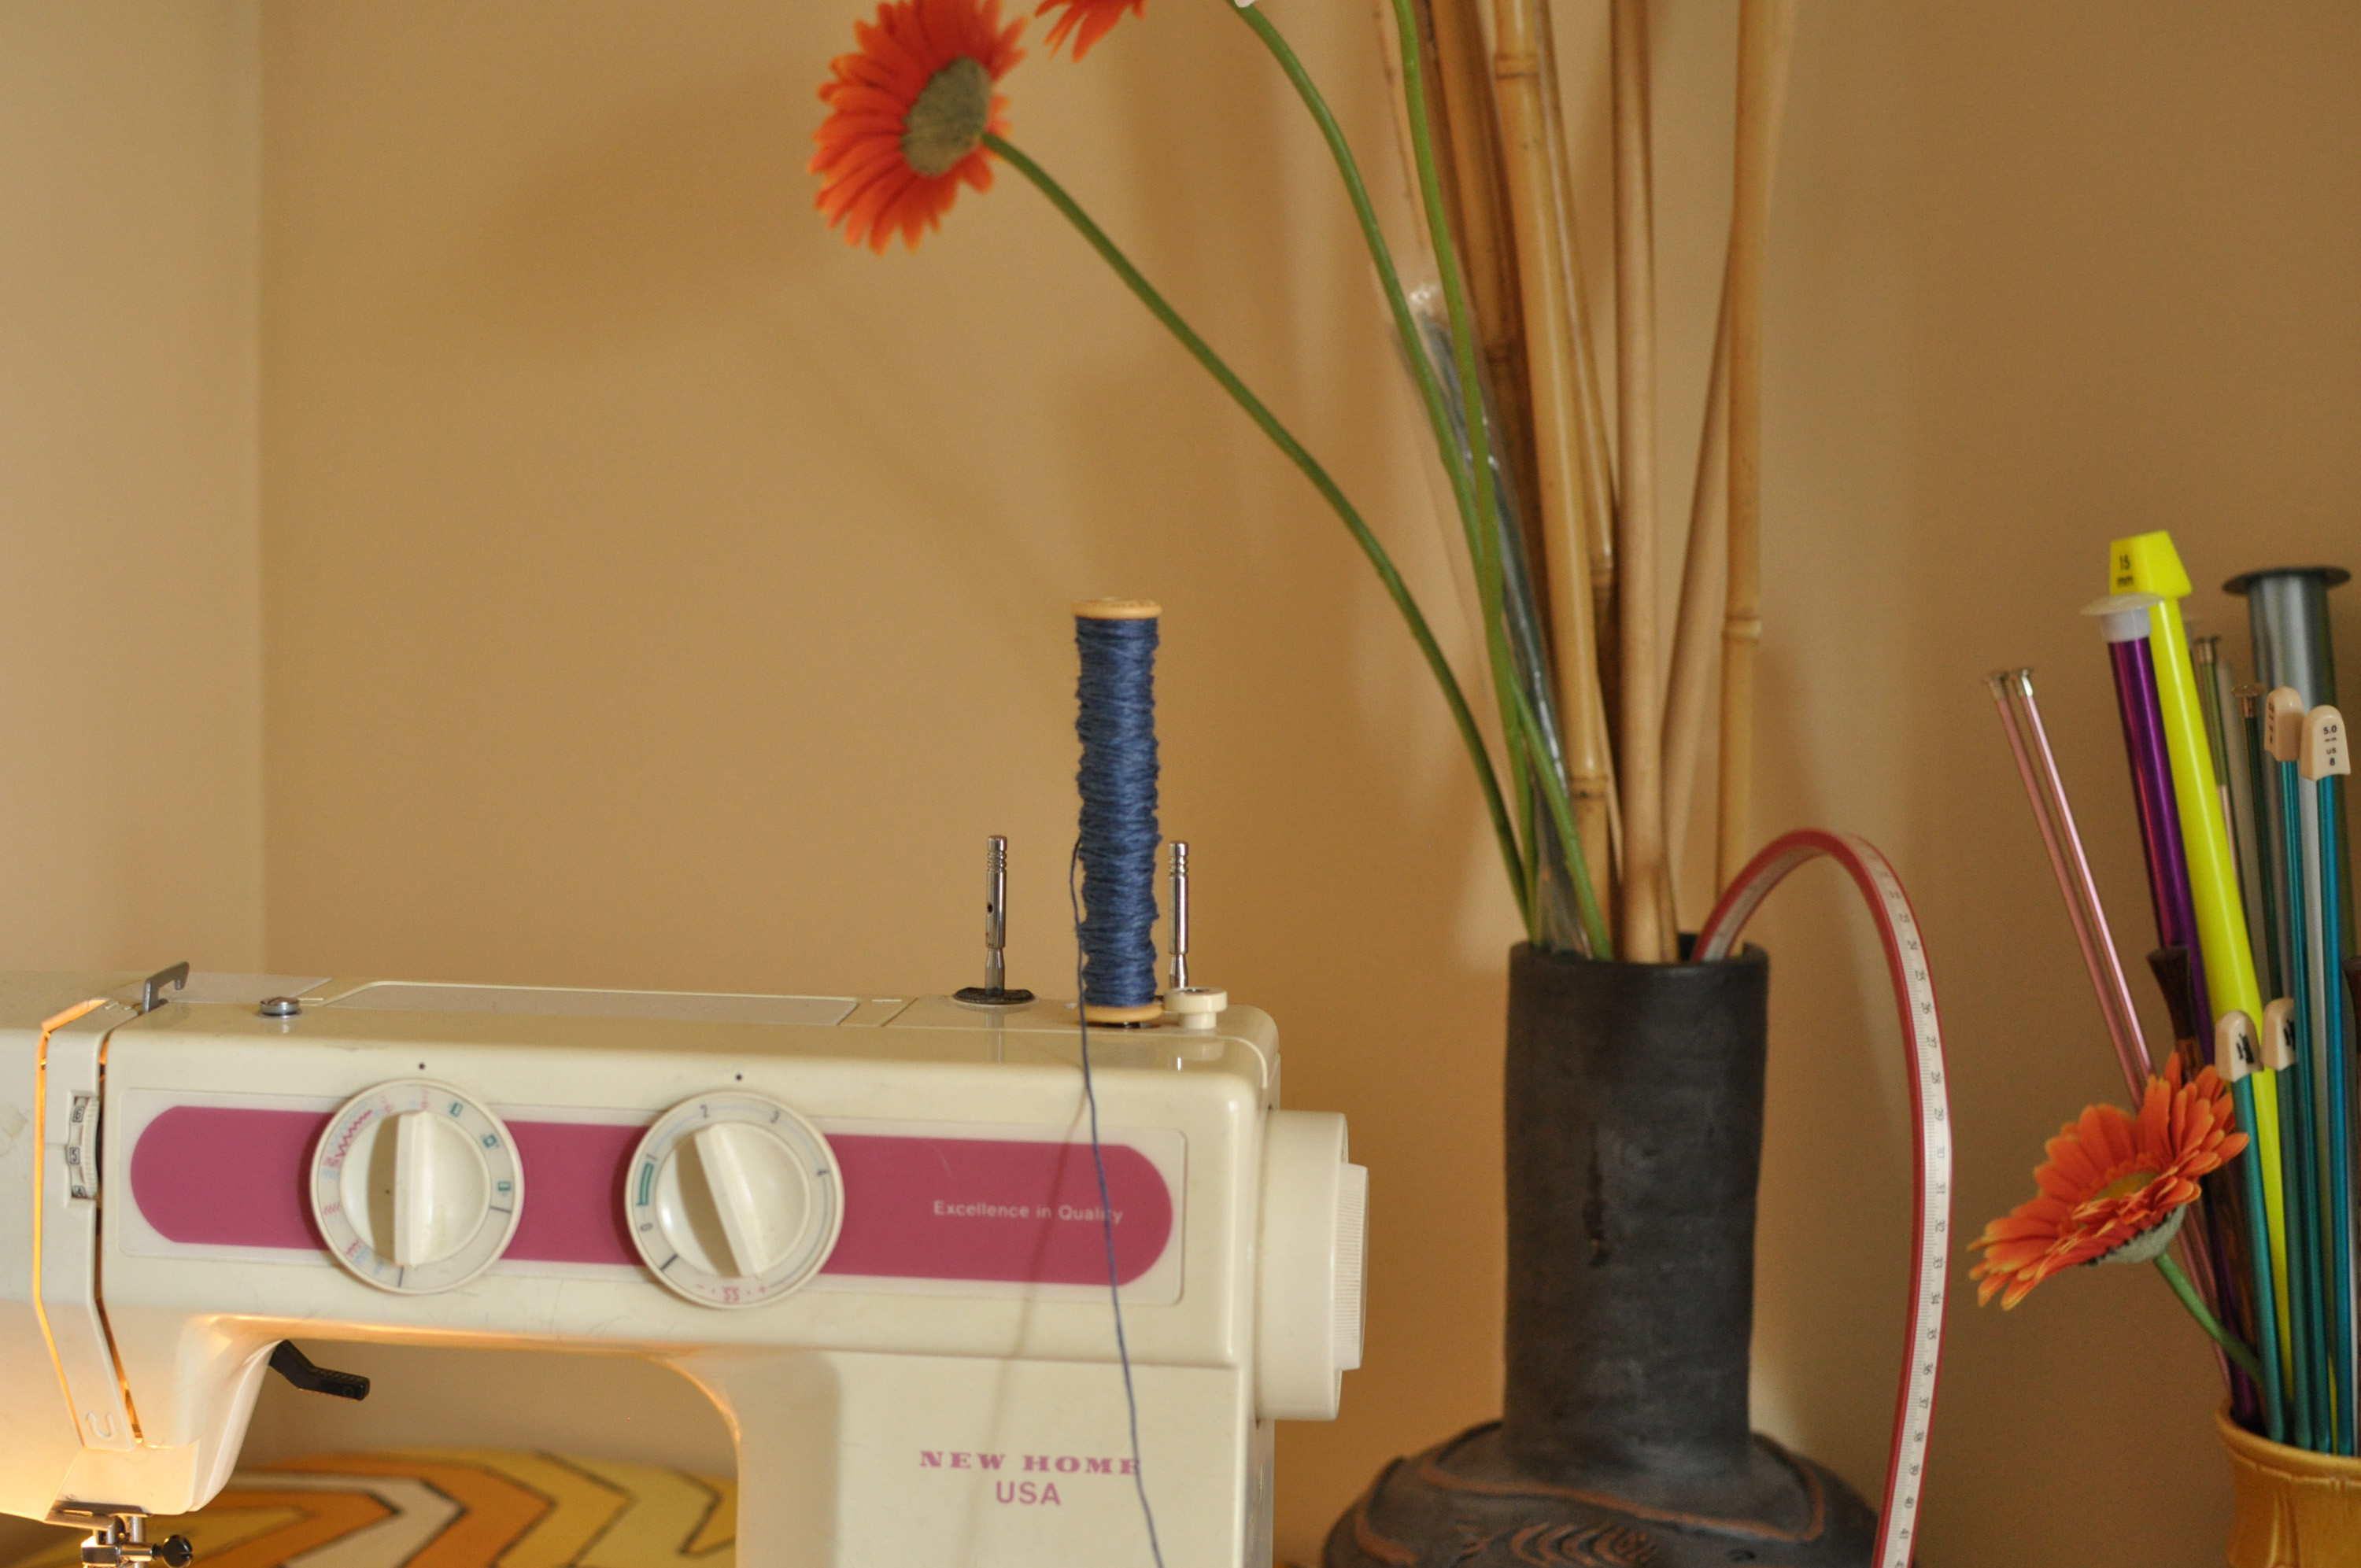
You may have noticed a fun looking thing back in photo #1, which is a special shuttle called a boat shuttle. The Cricket comes with stick shuttles which work just fine, but it only comes with 2. Since I was weaving with 10 different colors, that wasn’t going to work for me, as having to rewind a shuttle every other color sounded like a lot of work. Schacht also sells boat shuttles, and these are really handy for weaving with many colors. Inside the “boat”, fits a little plastic bobbin. You can purchase these bobbins by the dozen typically, and they’re pretty inexpensive. You can wind them by hand, but I love to use the bobbin winder on my sewing machine.

RainbowScarf_2

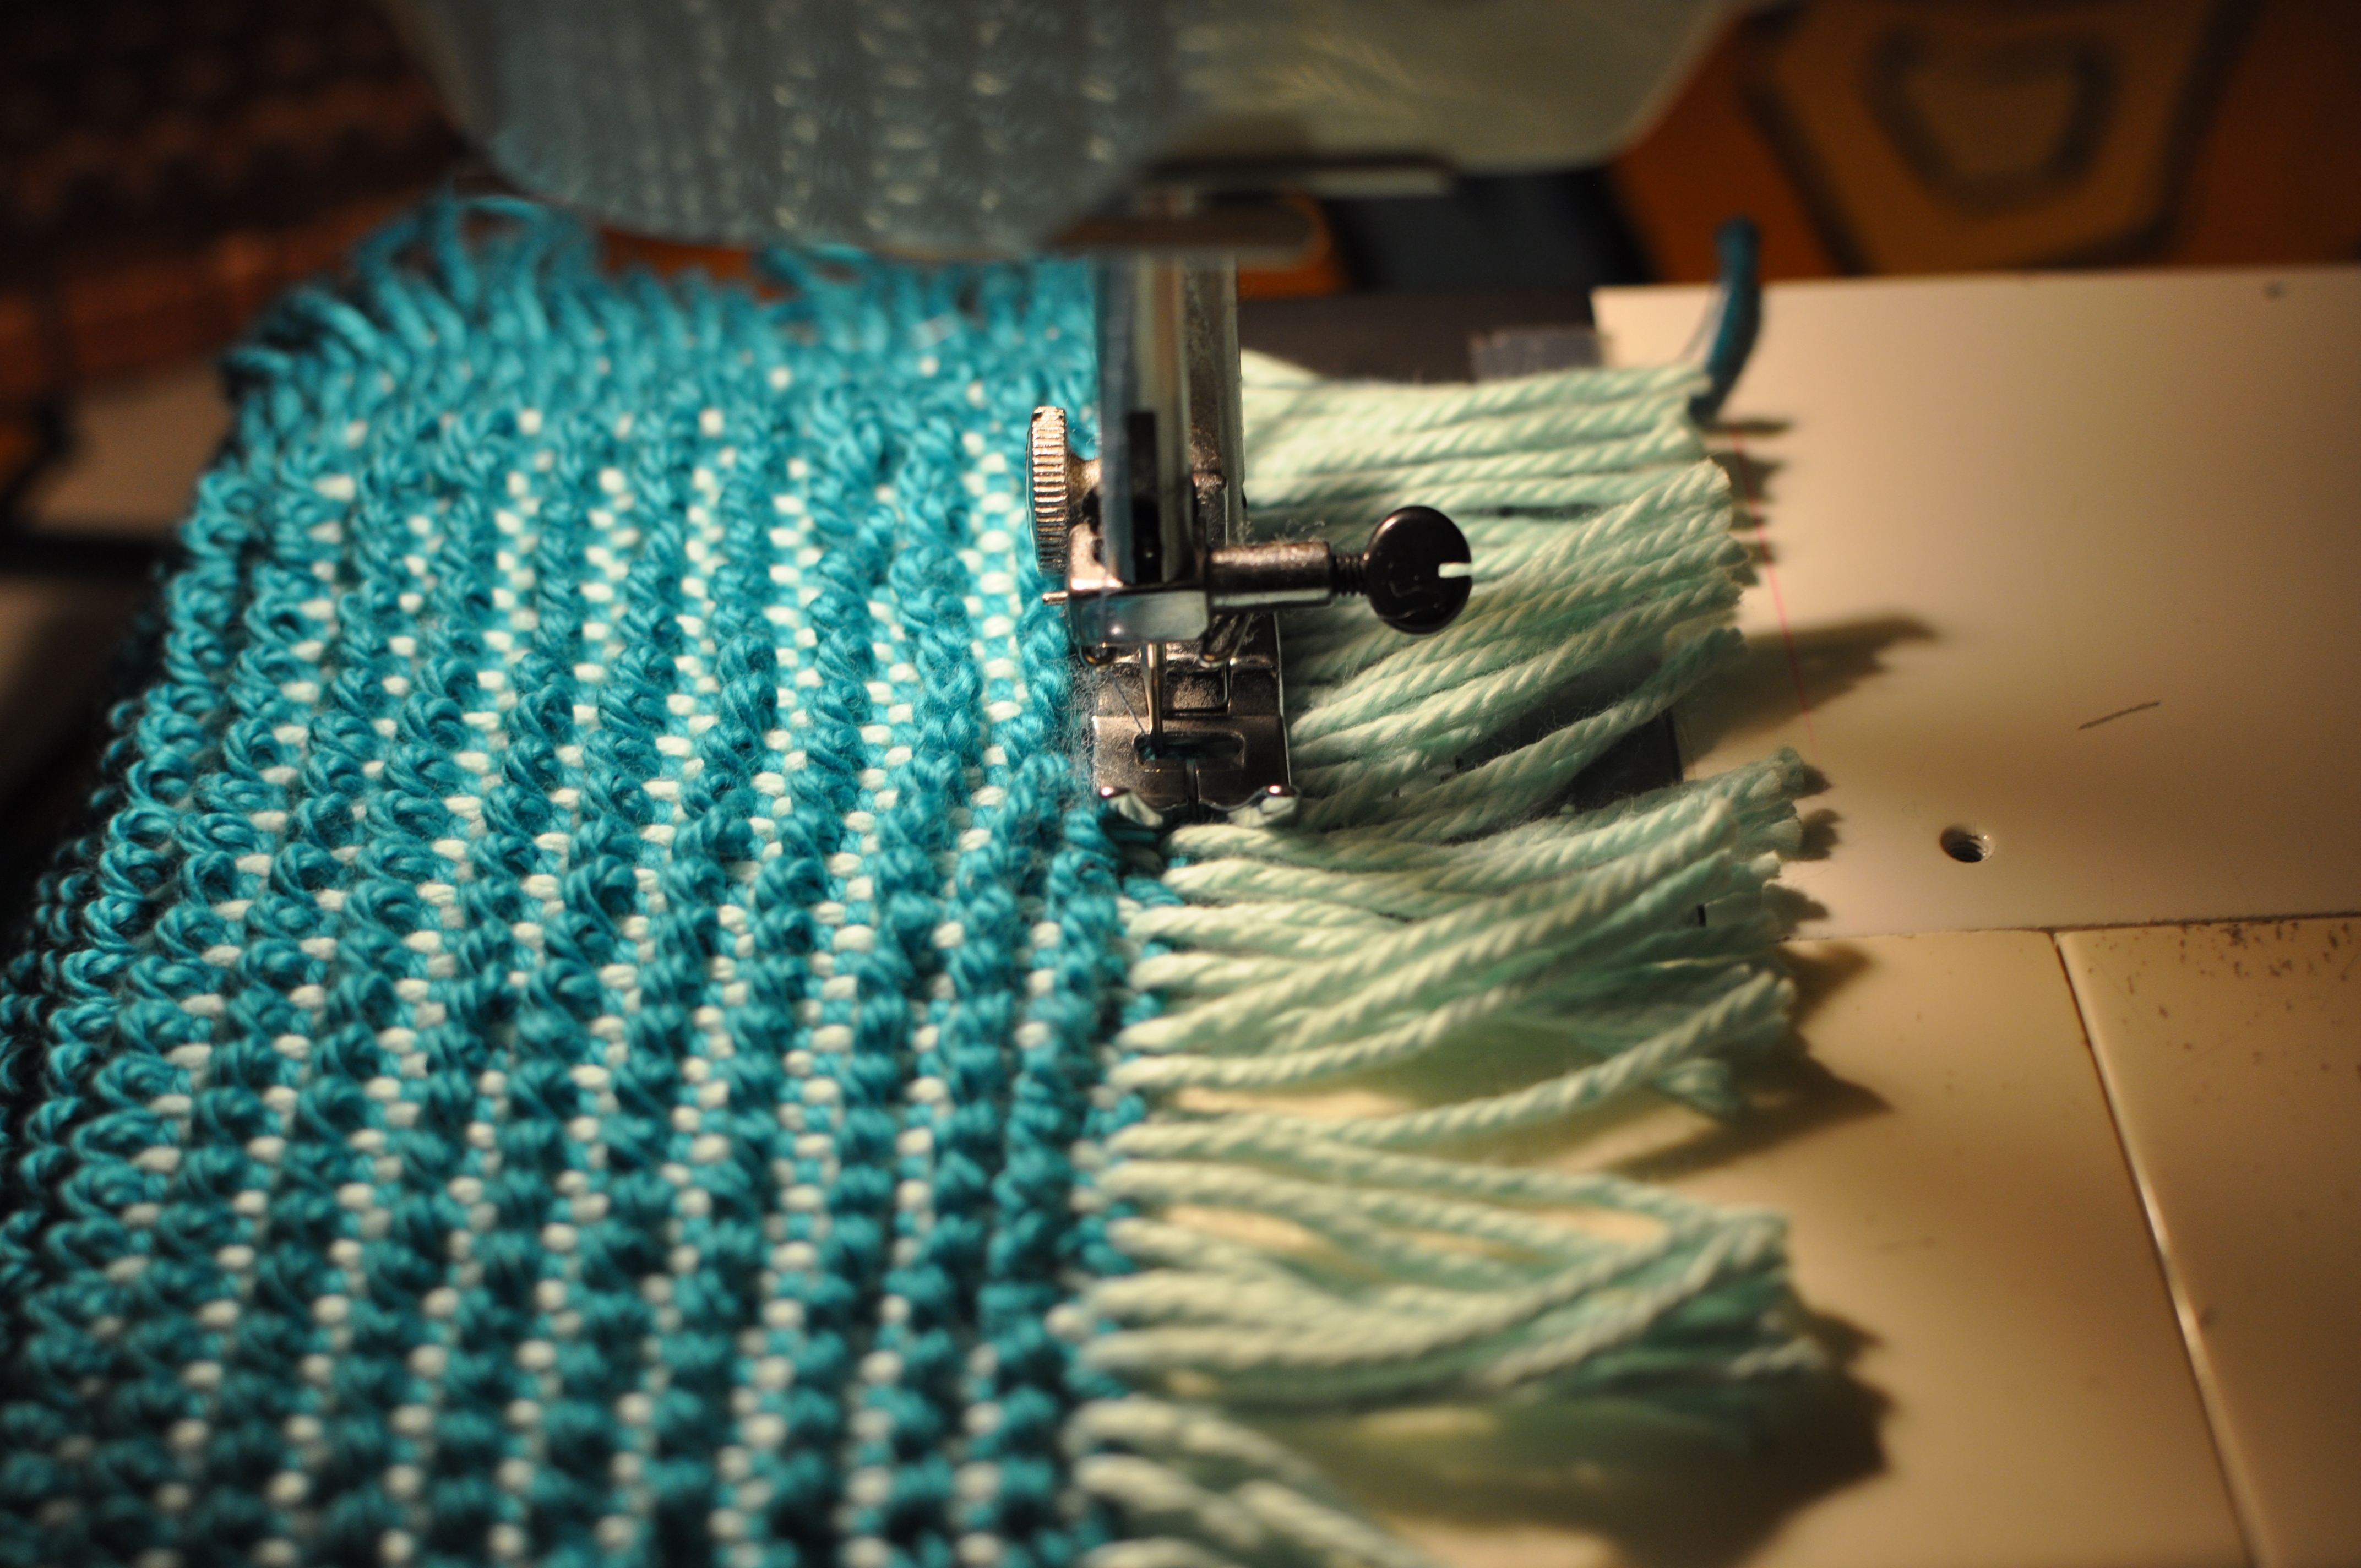
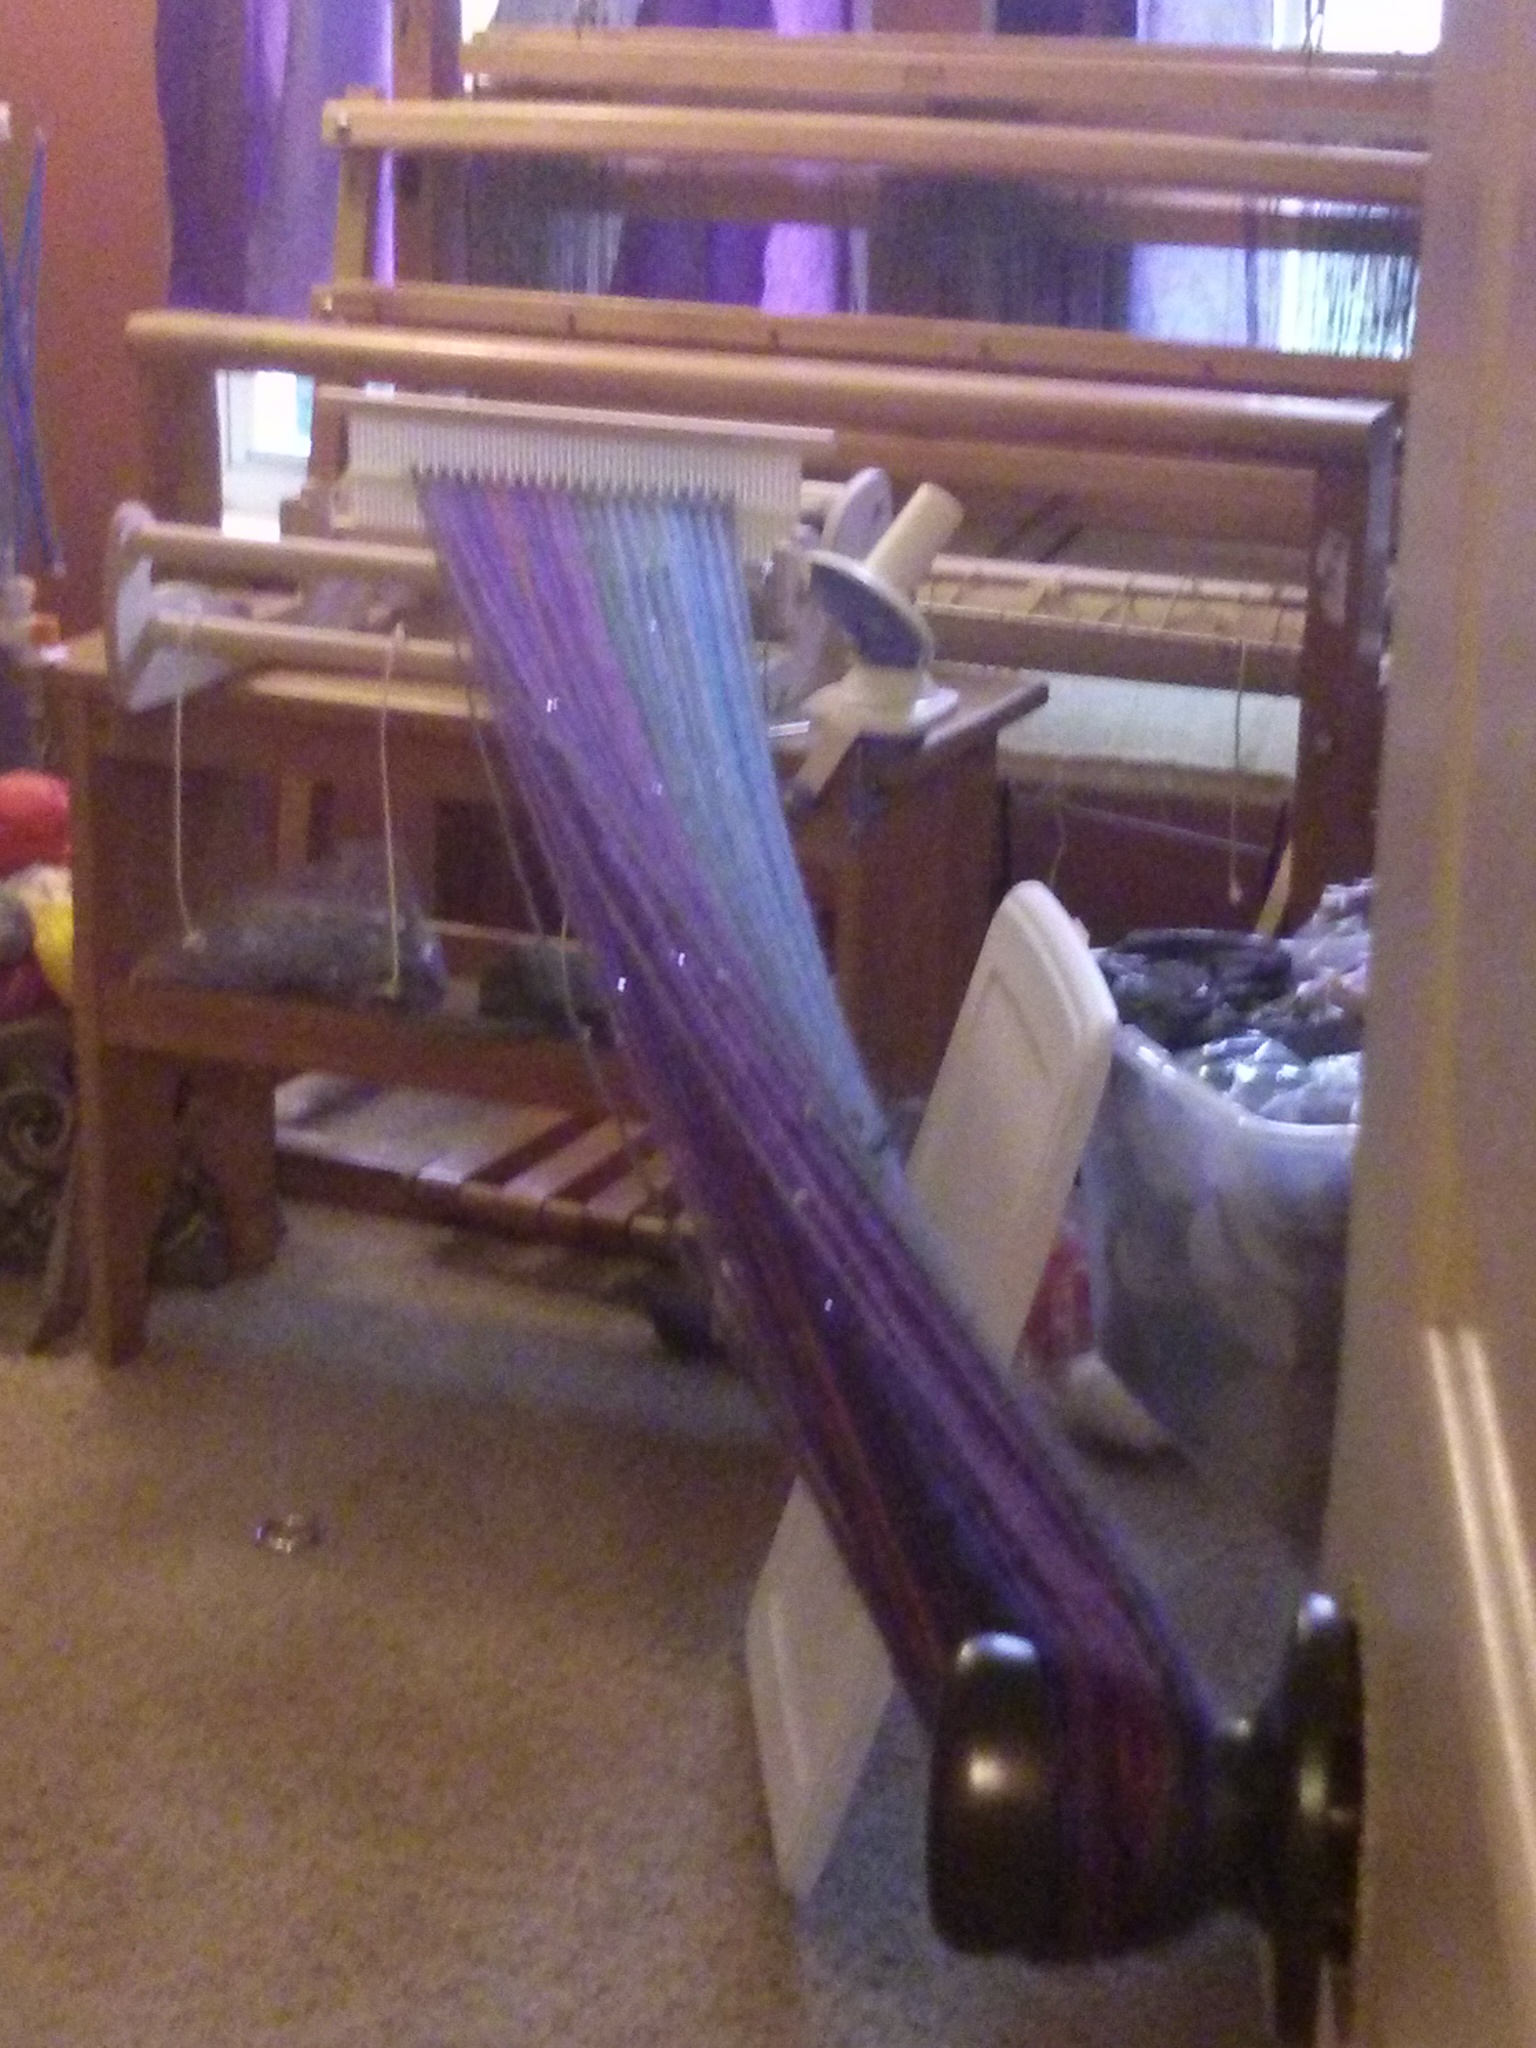
After doing 5 repeats of my striping/check sequence, 75″ of weaving, it was time to call it quits. I’d decided prior to starting the project that I was going to finish with twisted fringe. I separated my warp strands into groups of 4, and twisted it up. Although I don’t have any in-progress pics of doing that on this particular scarf, here’s a handy quick video of the technique:

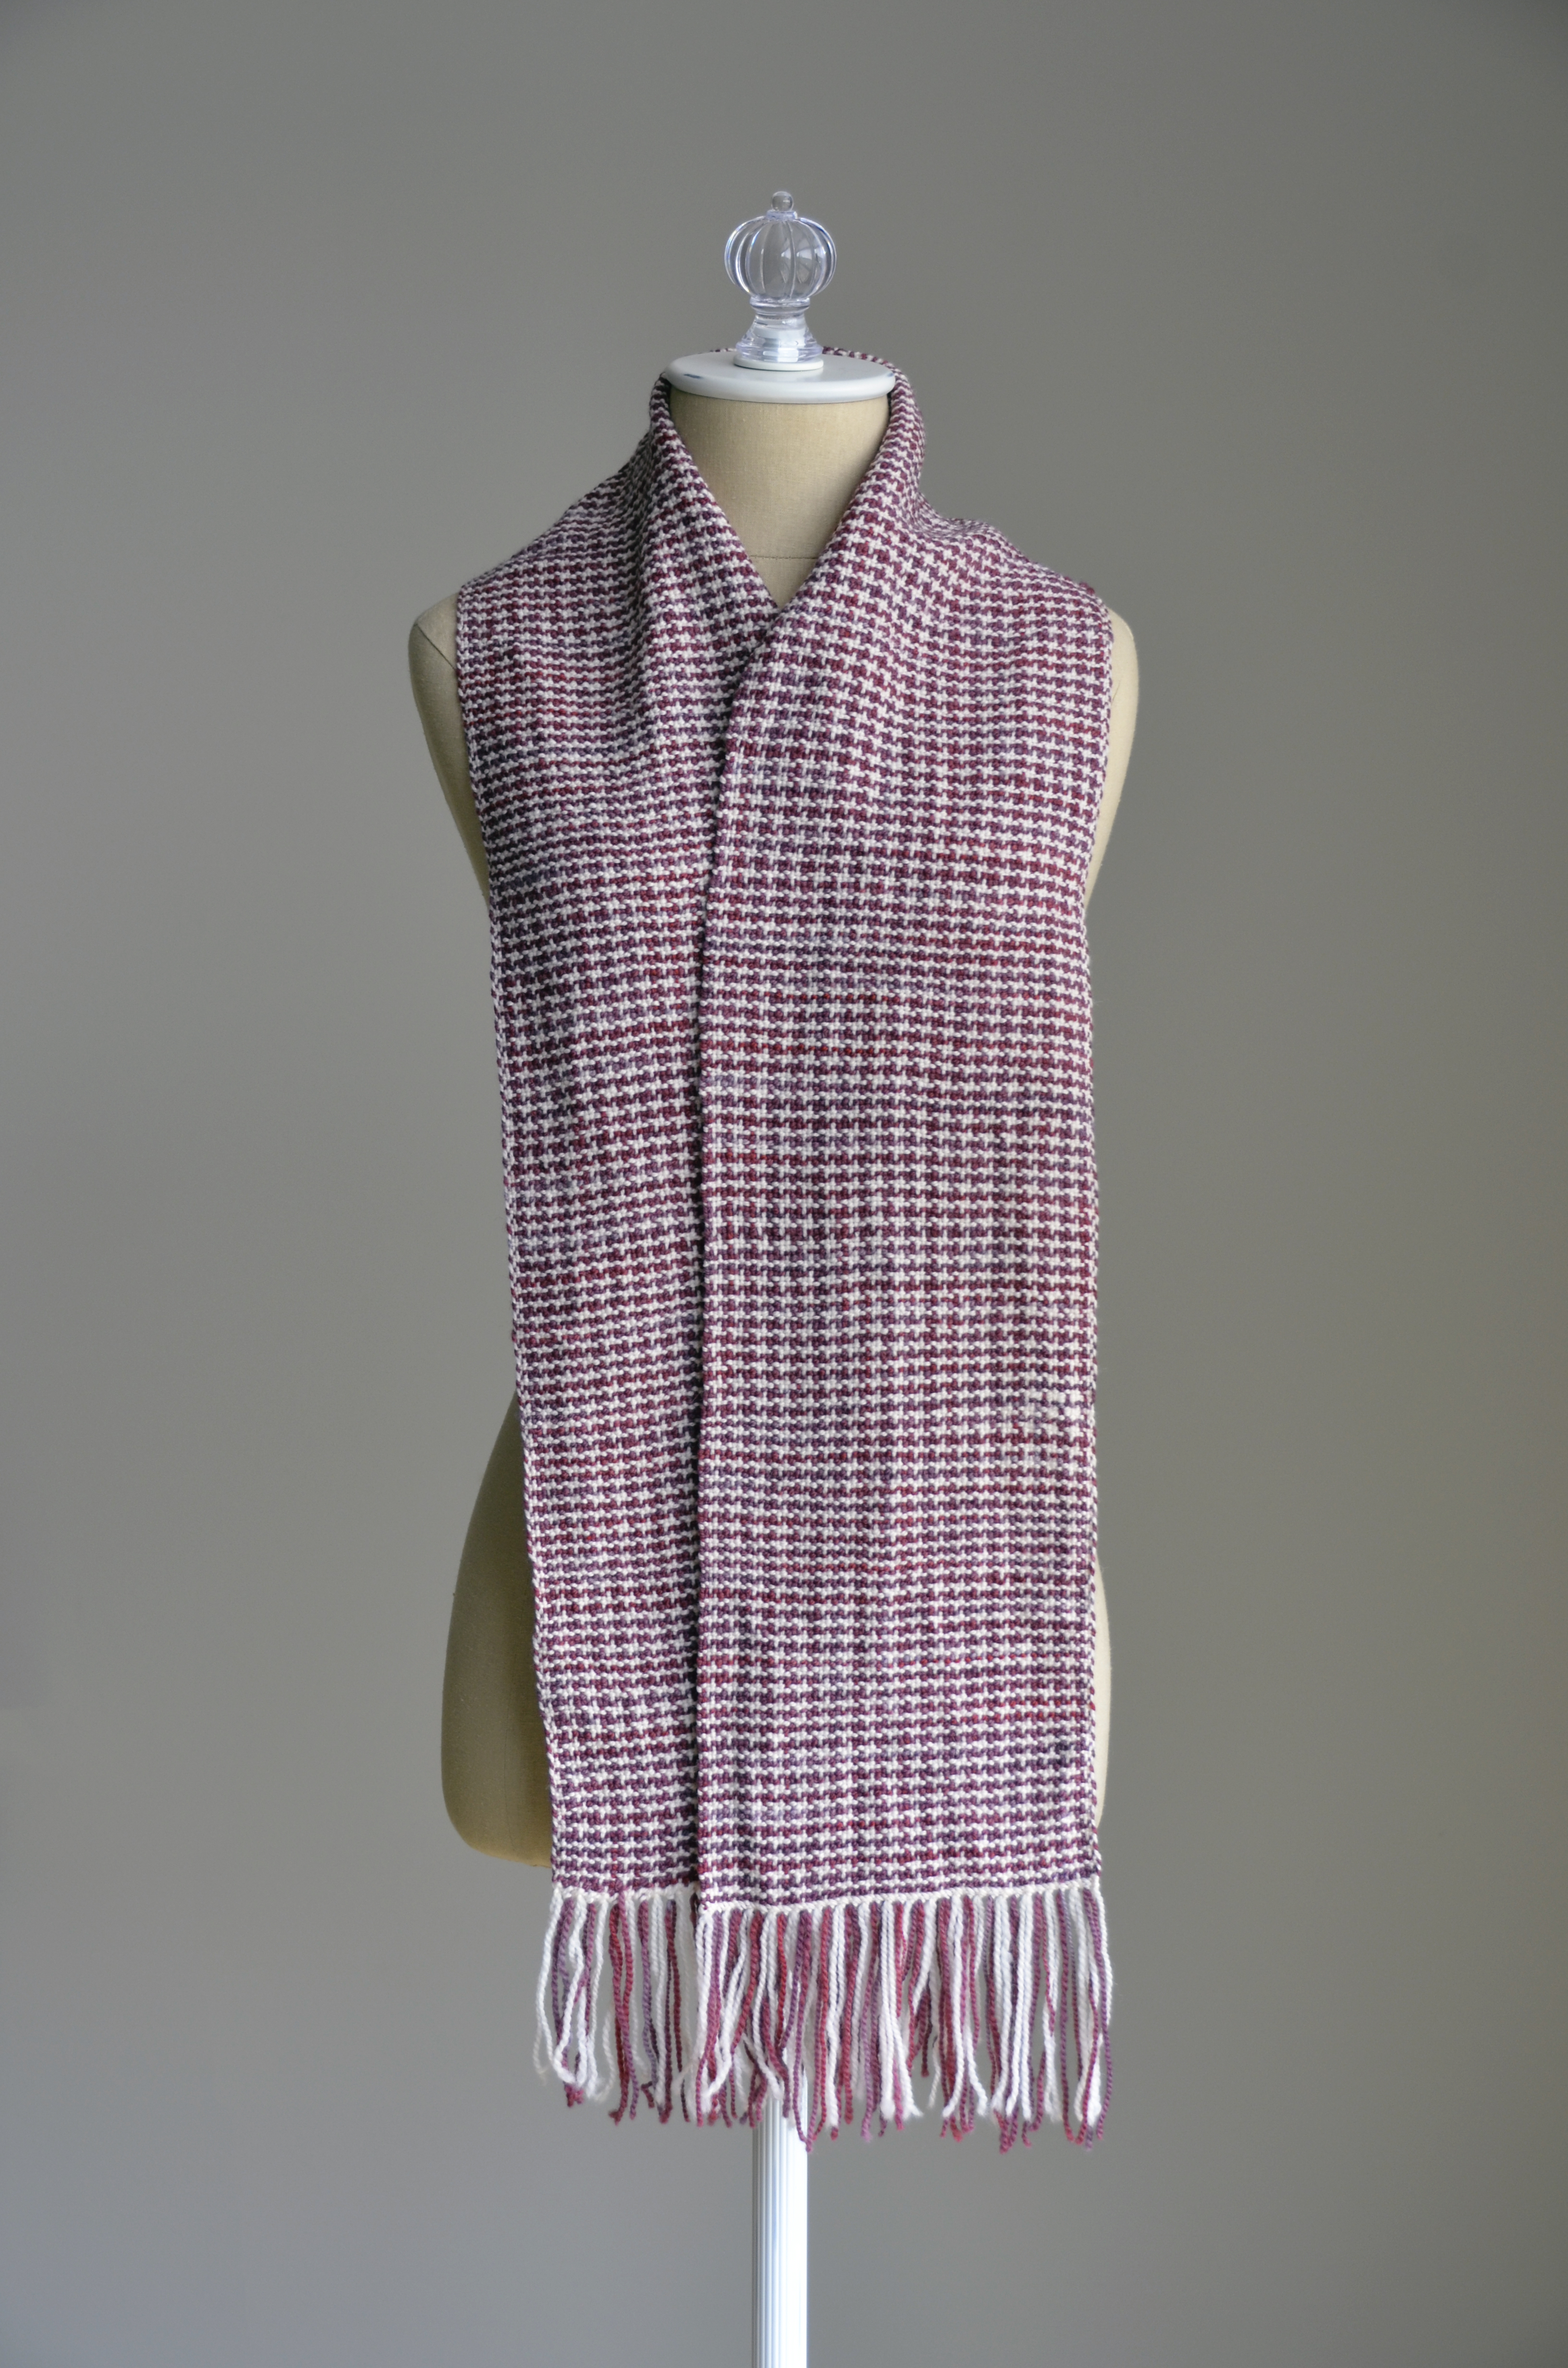
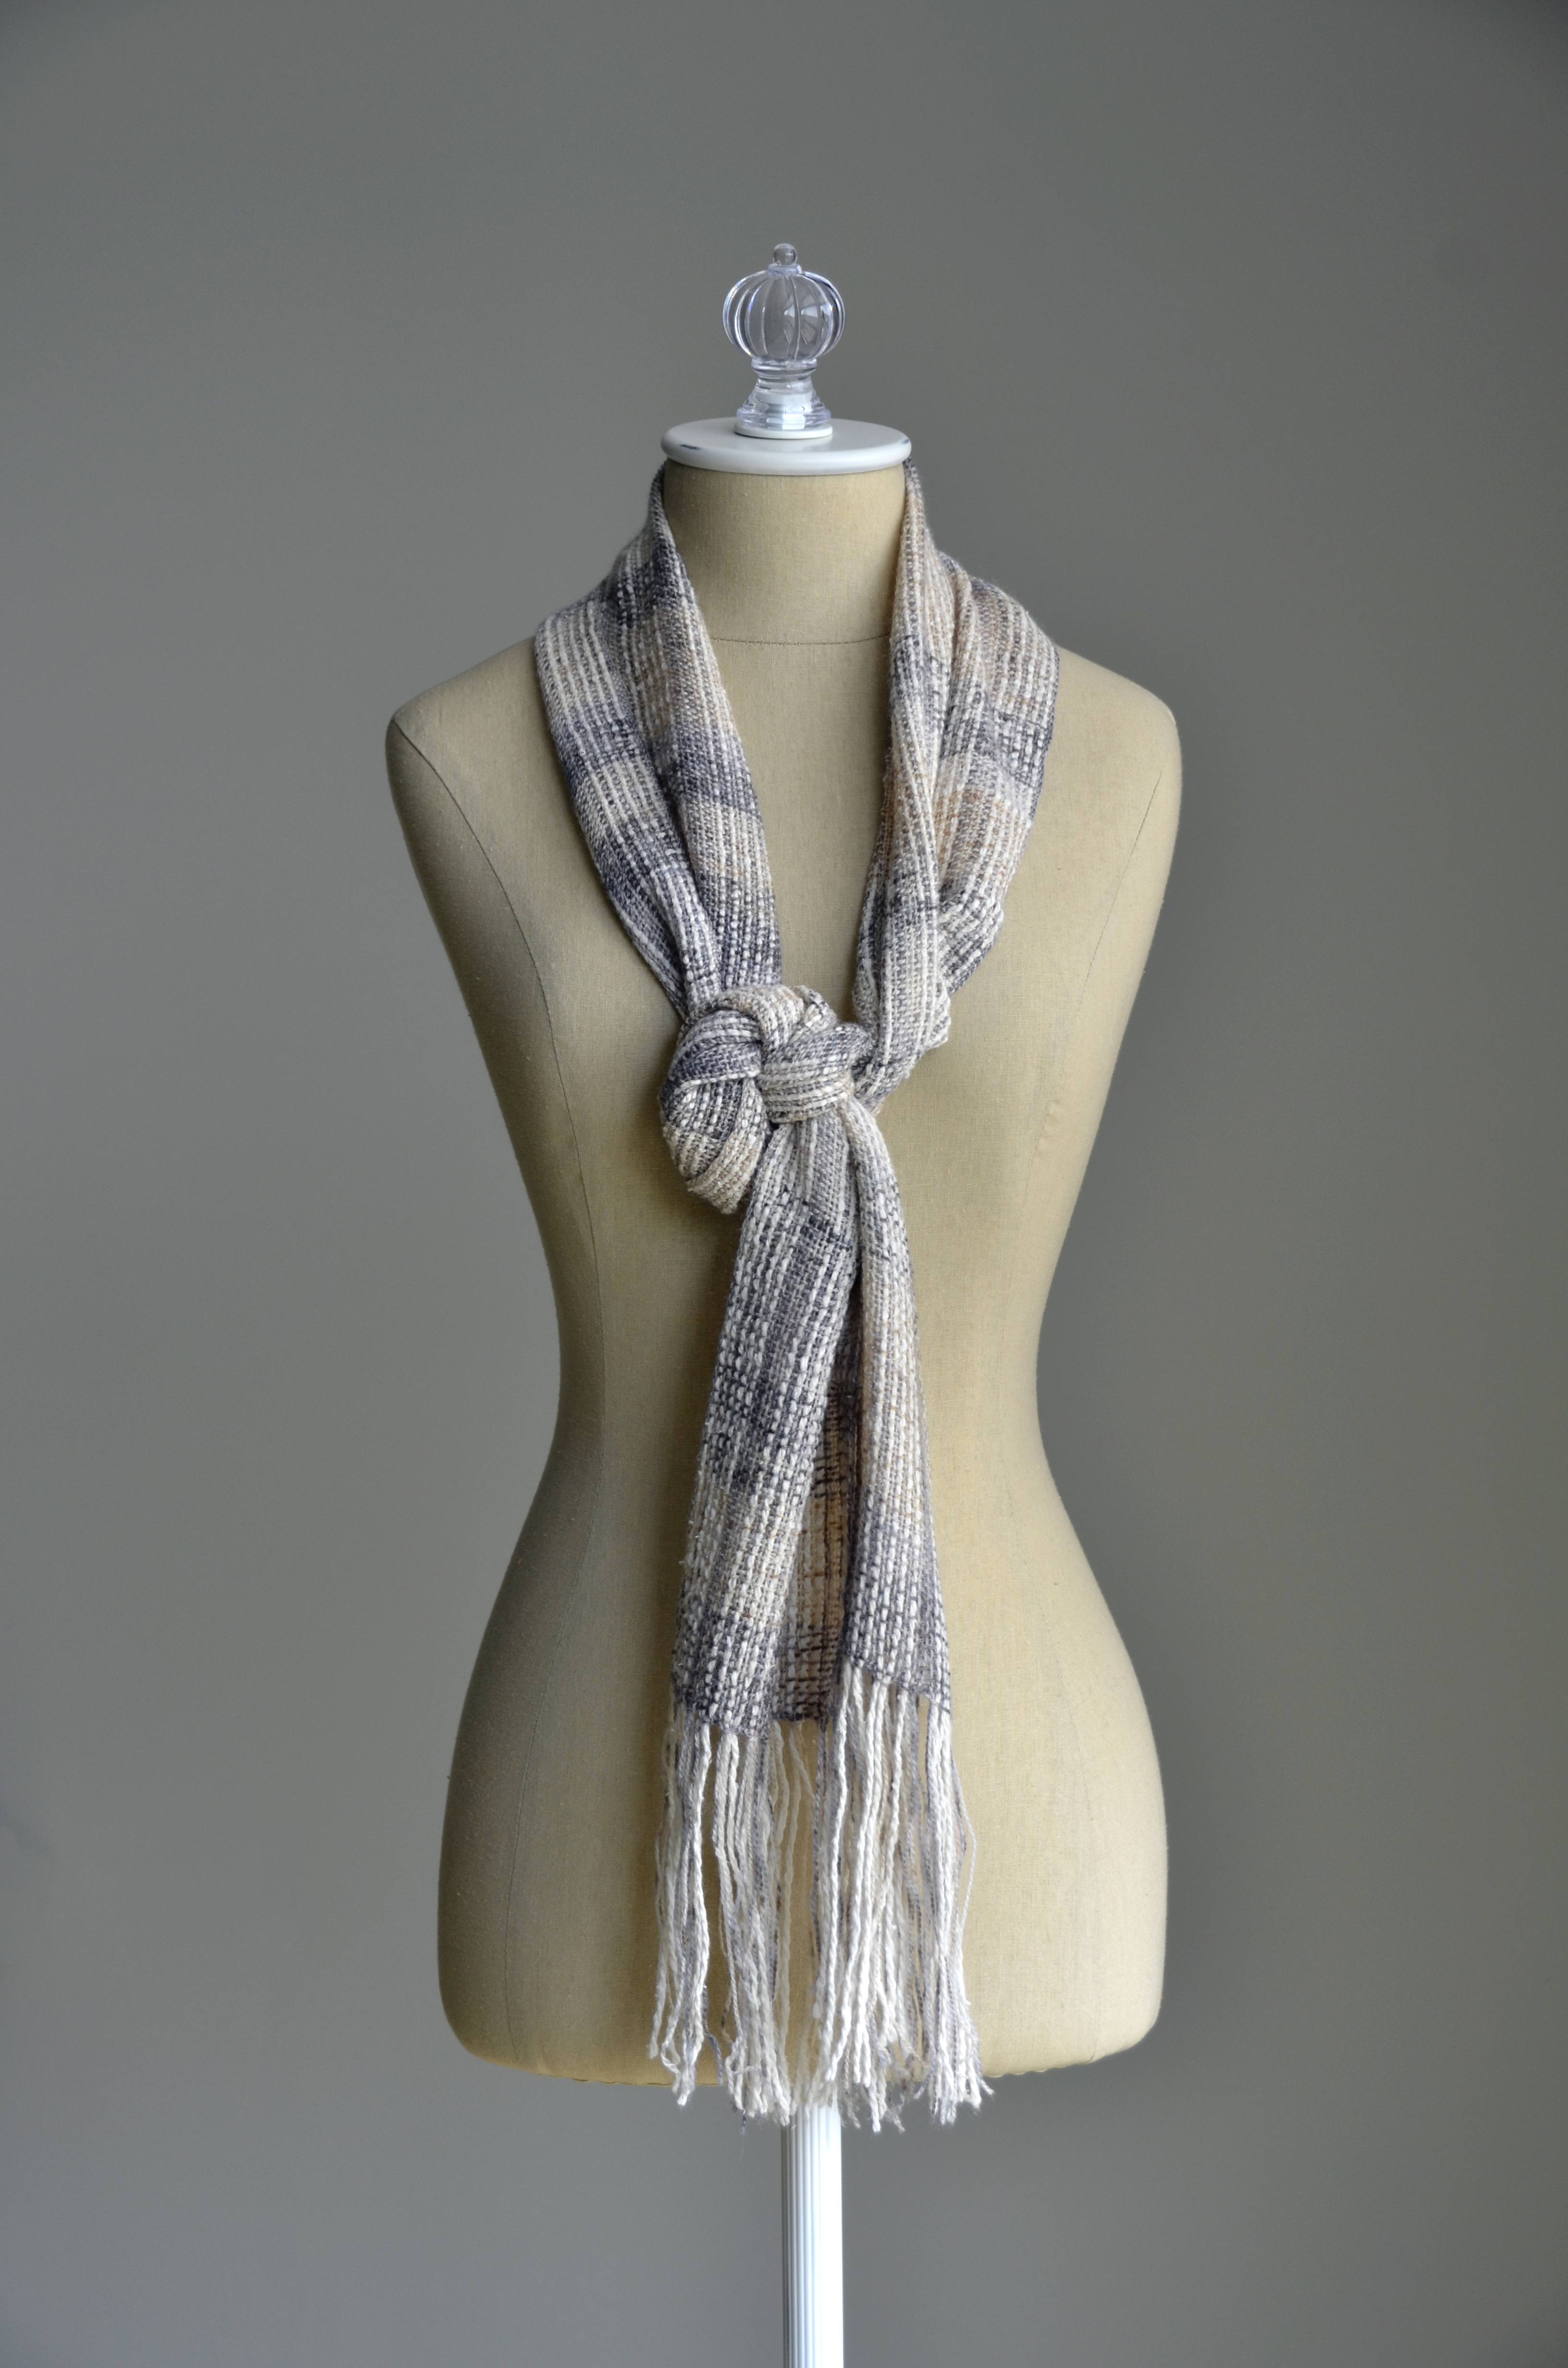
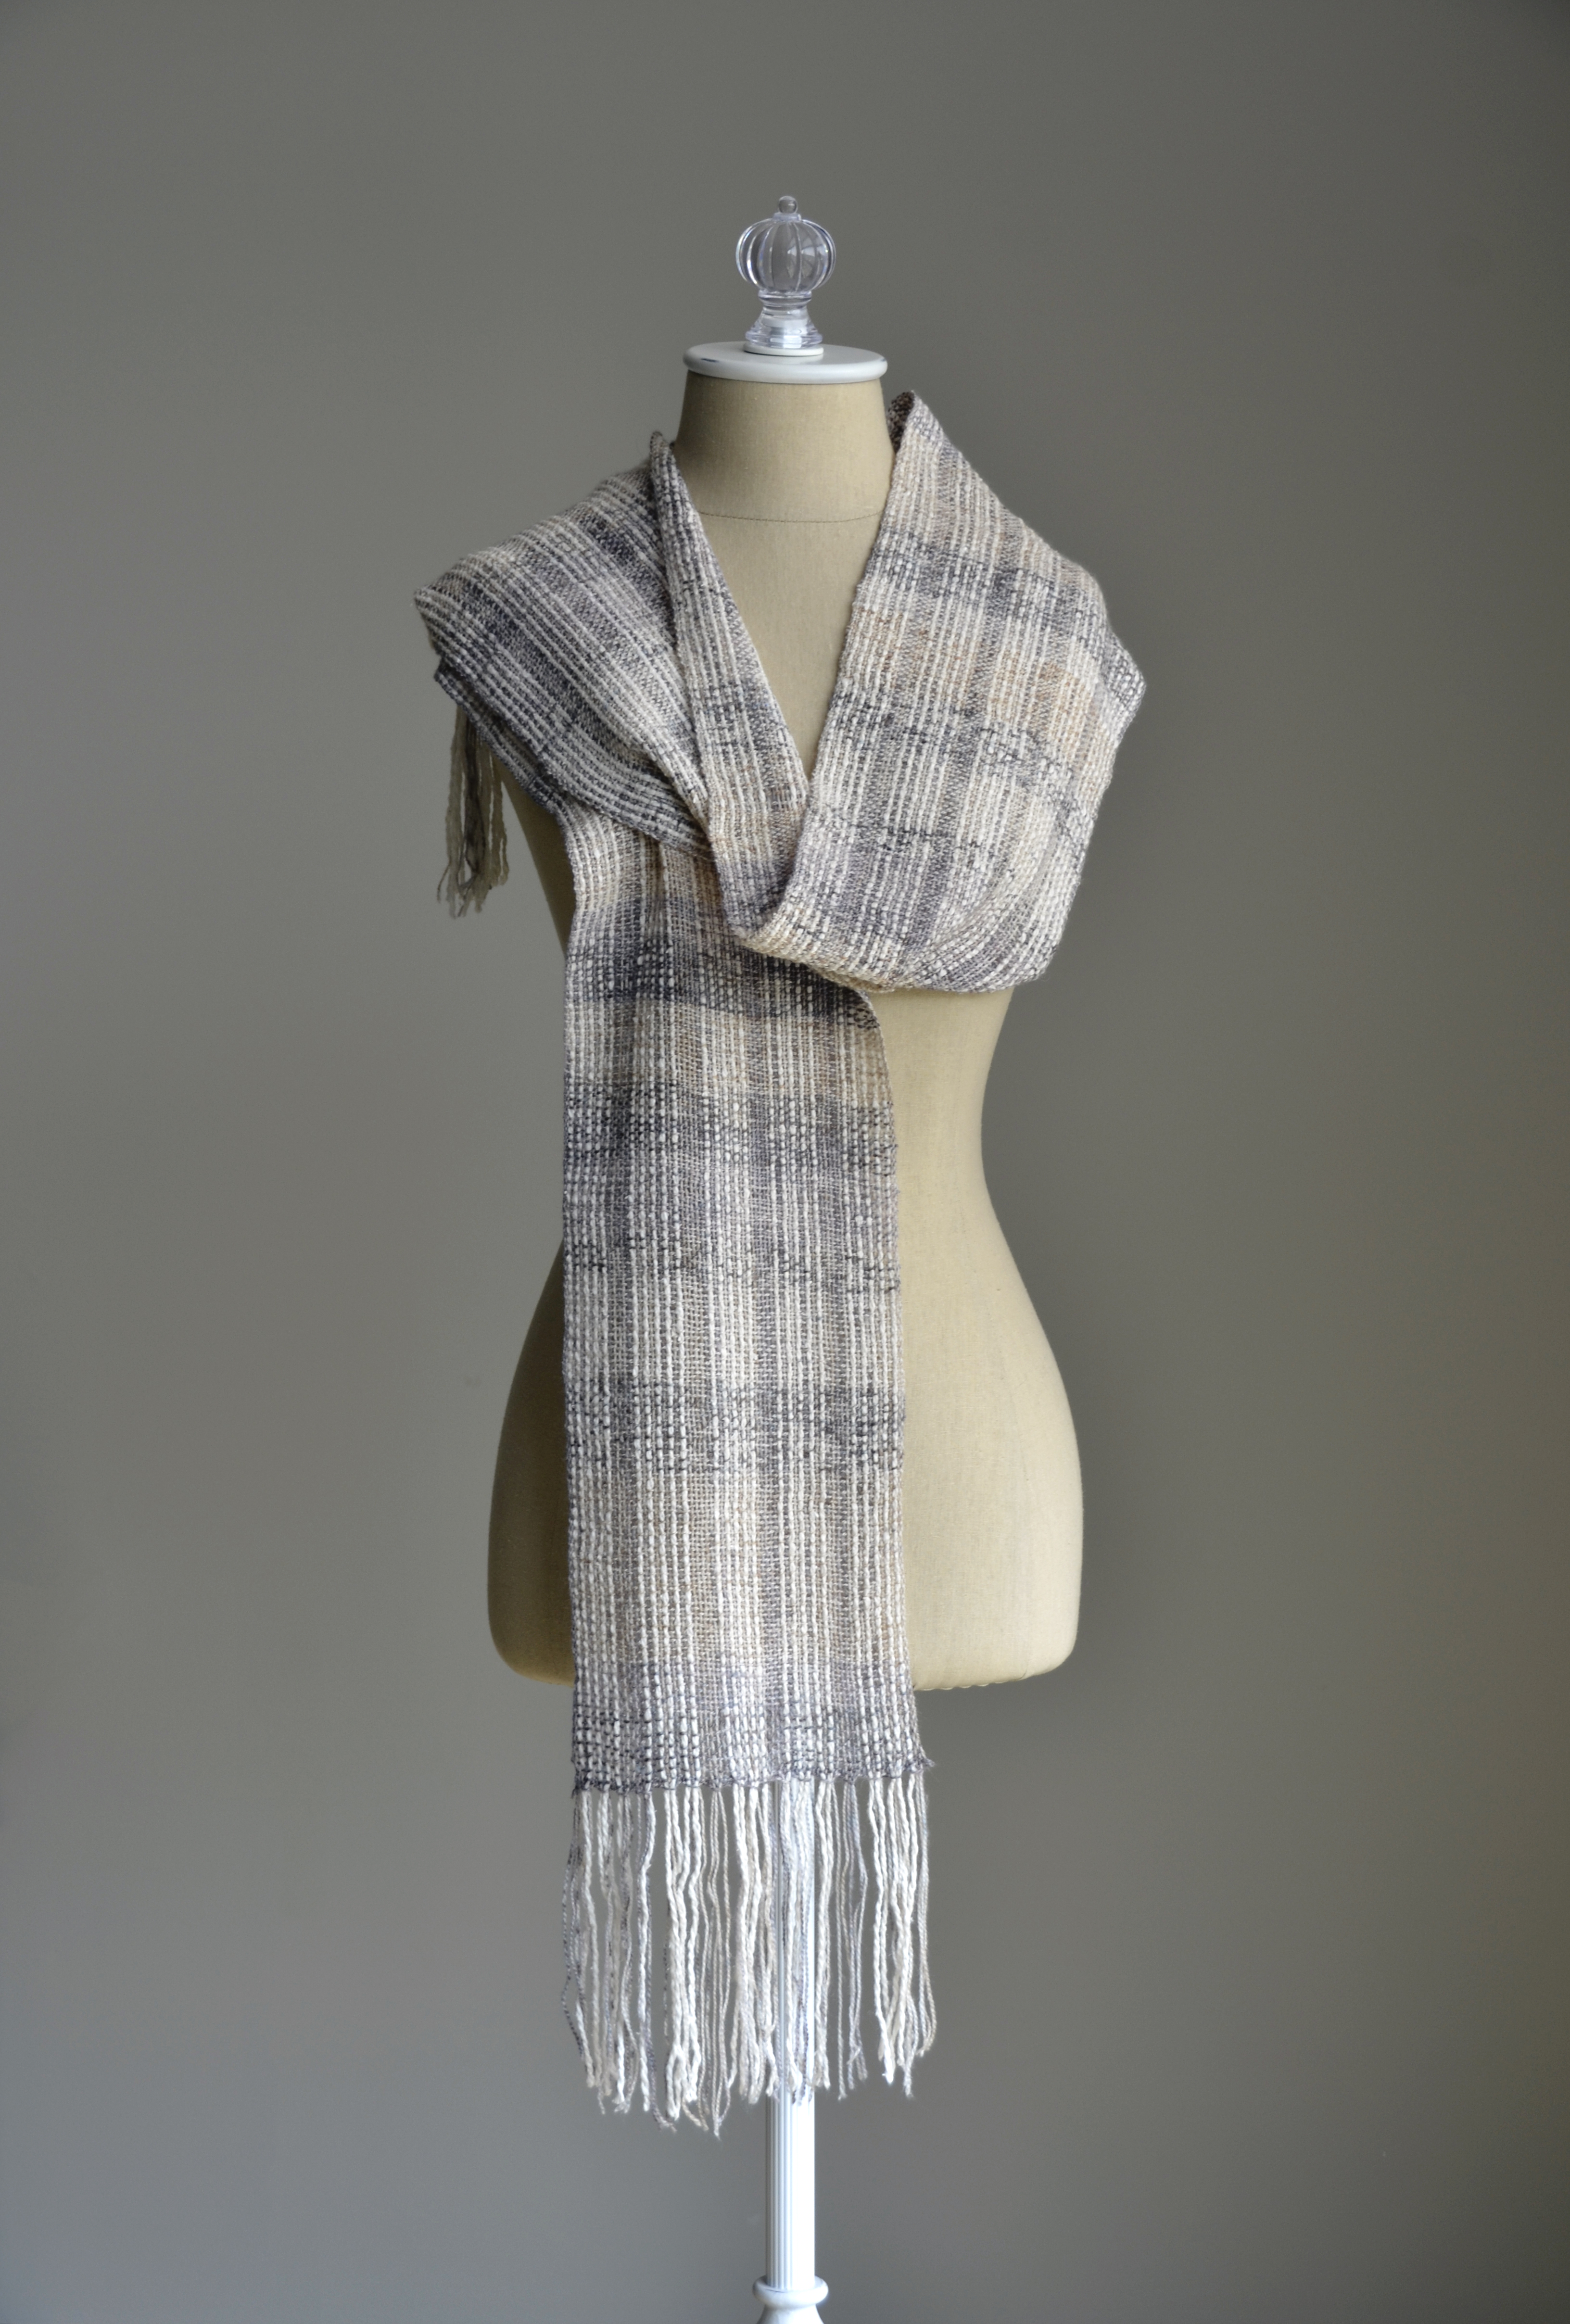
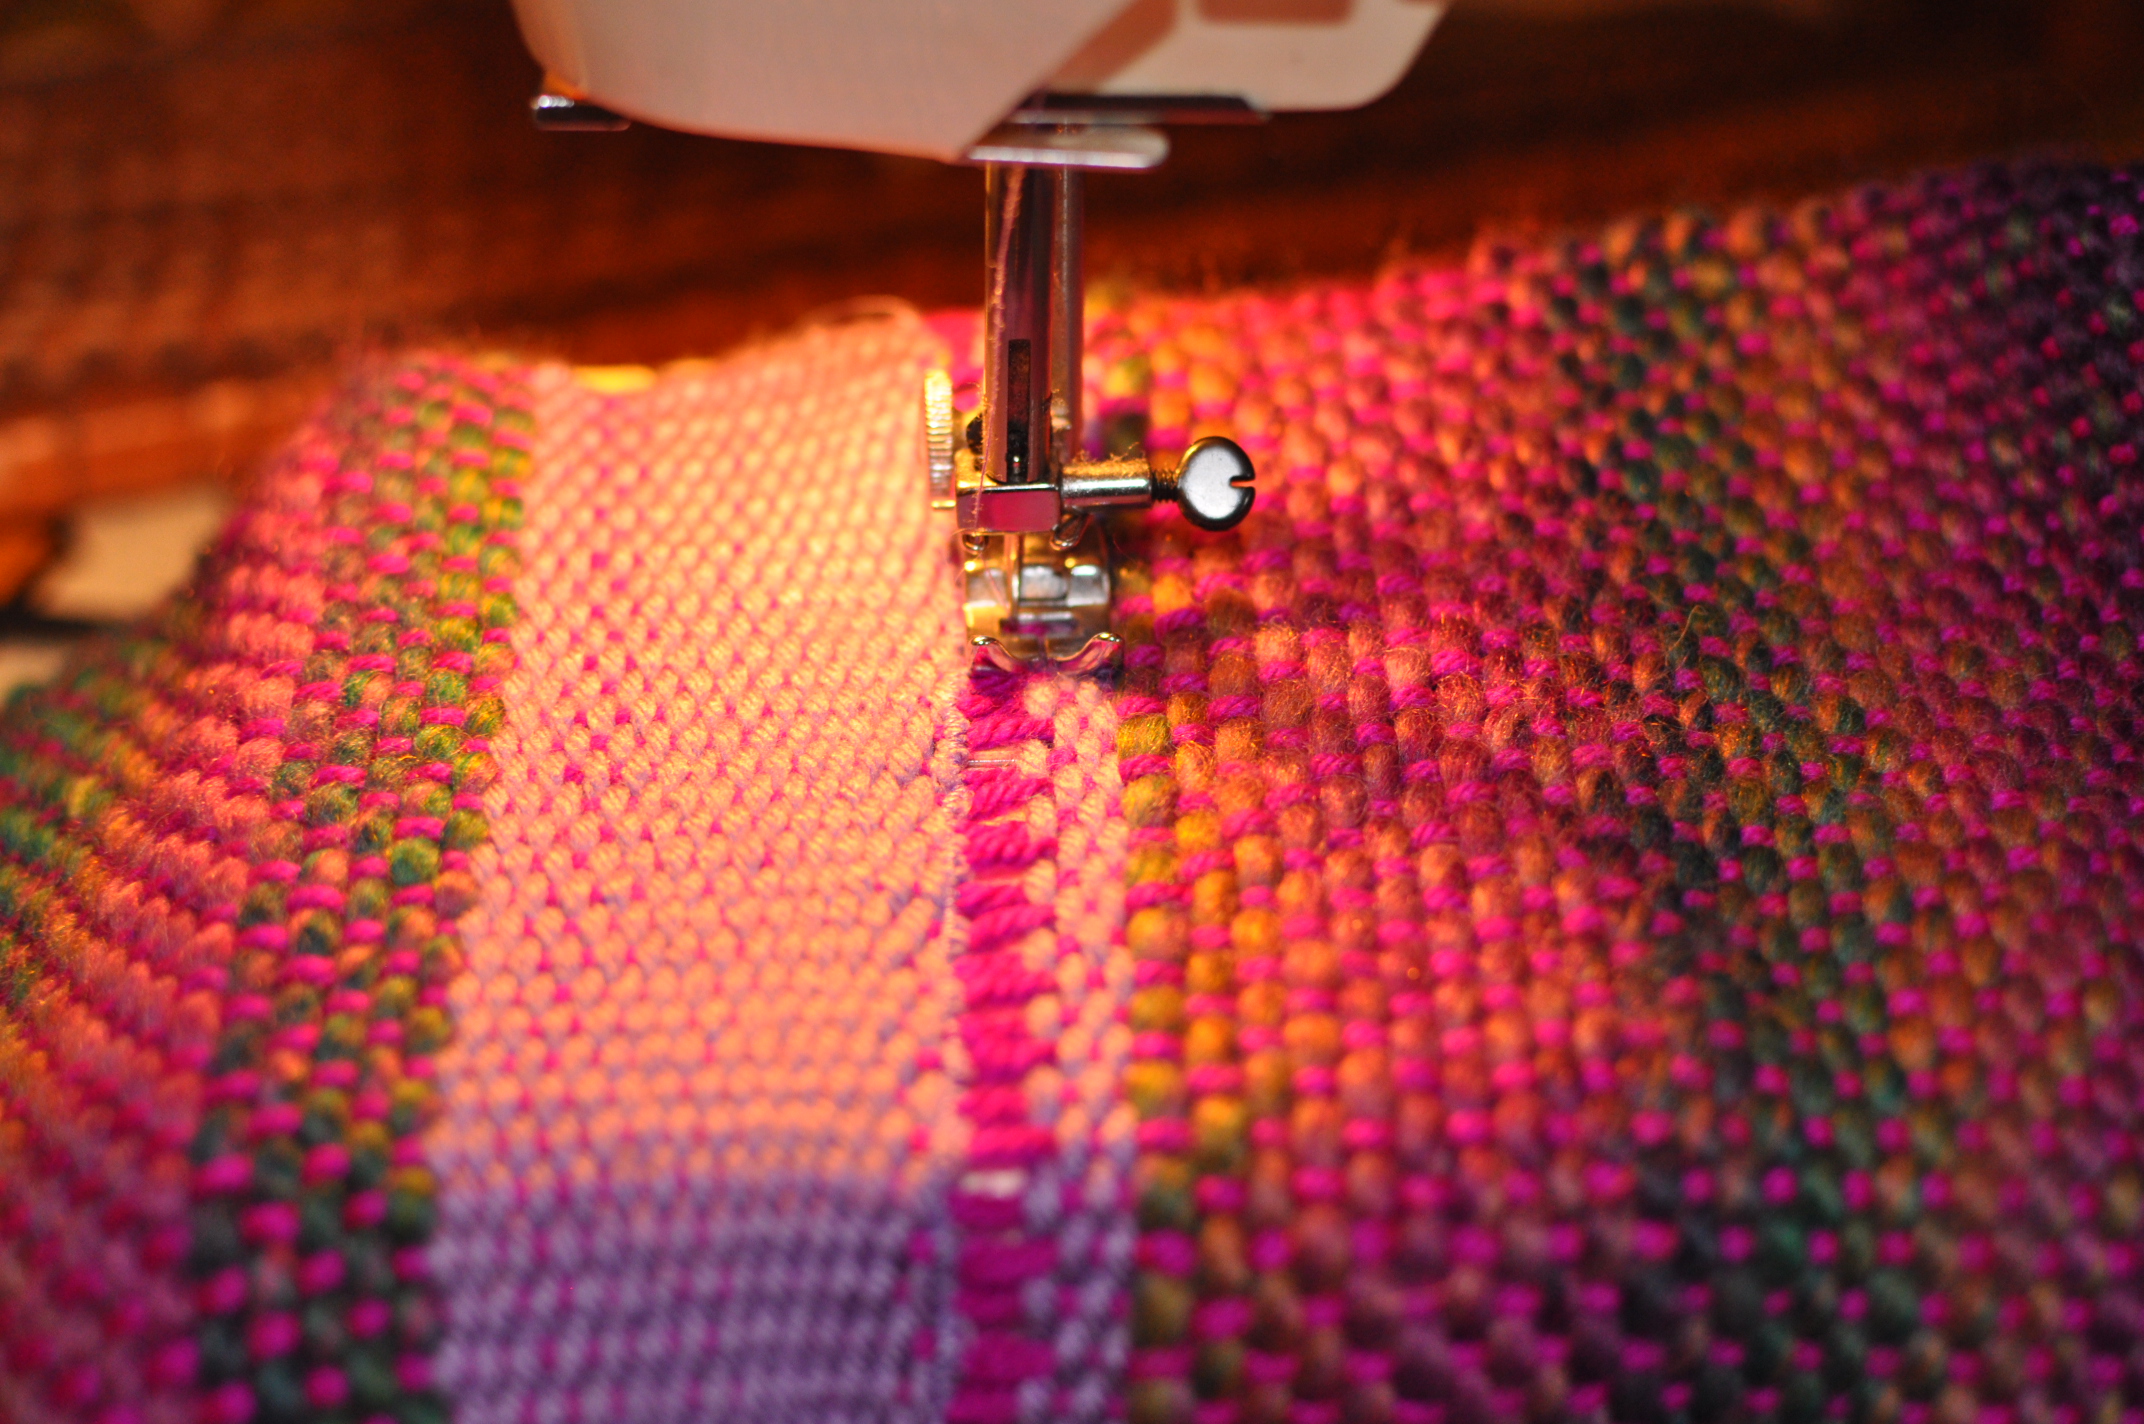
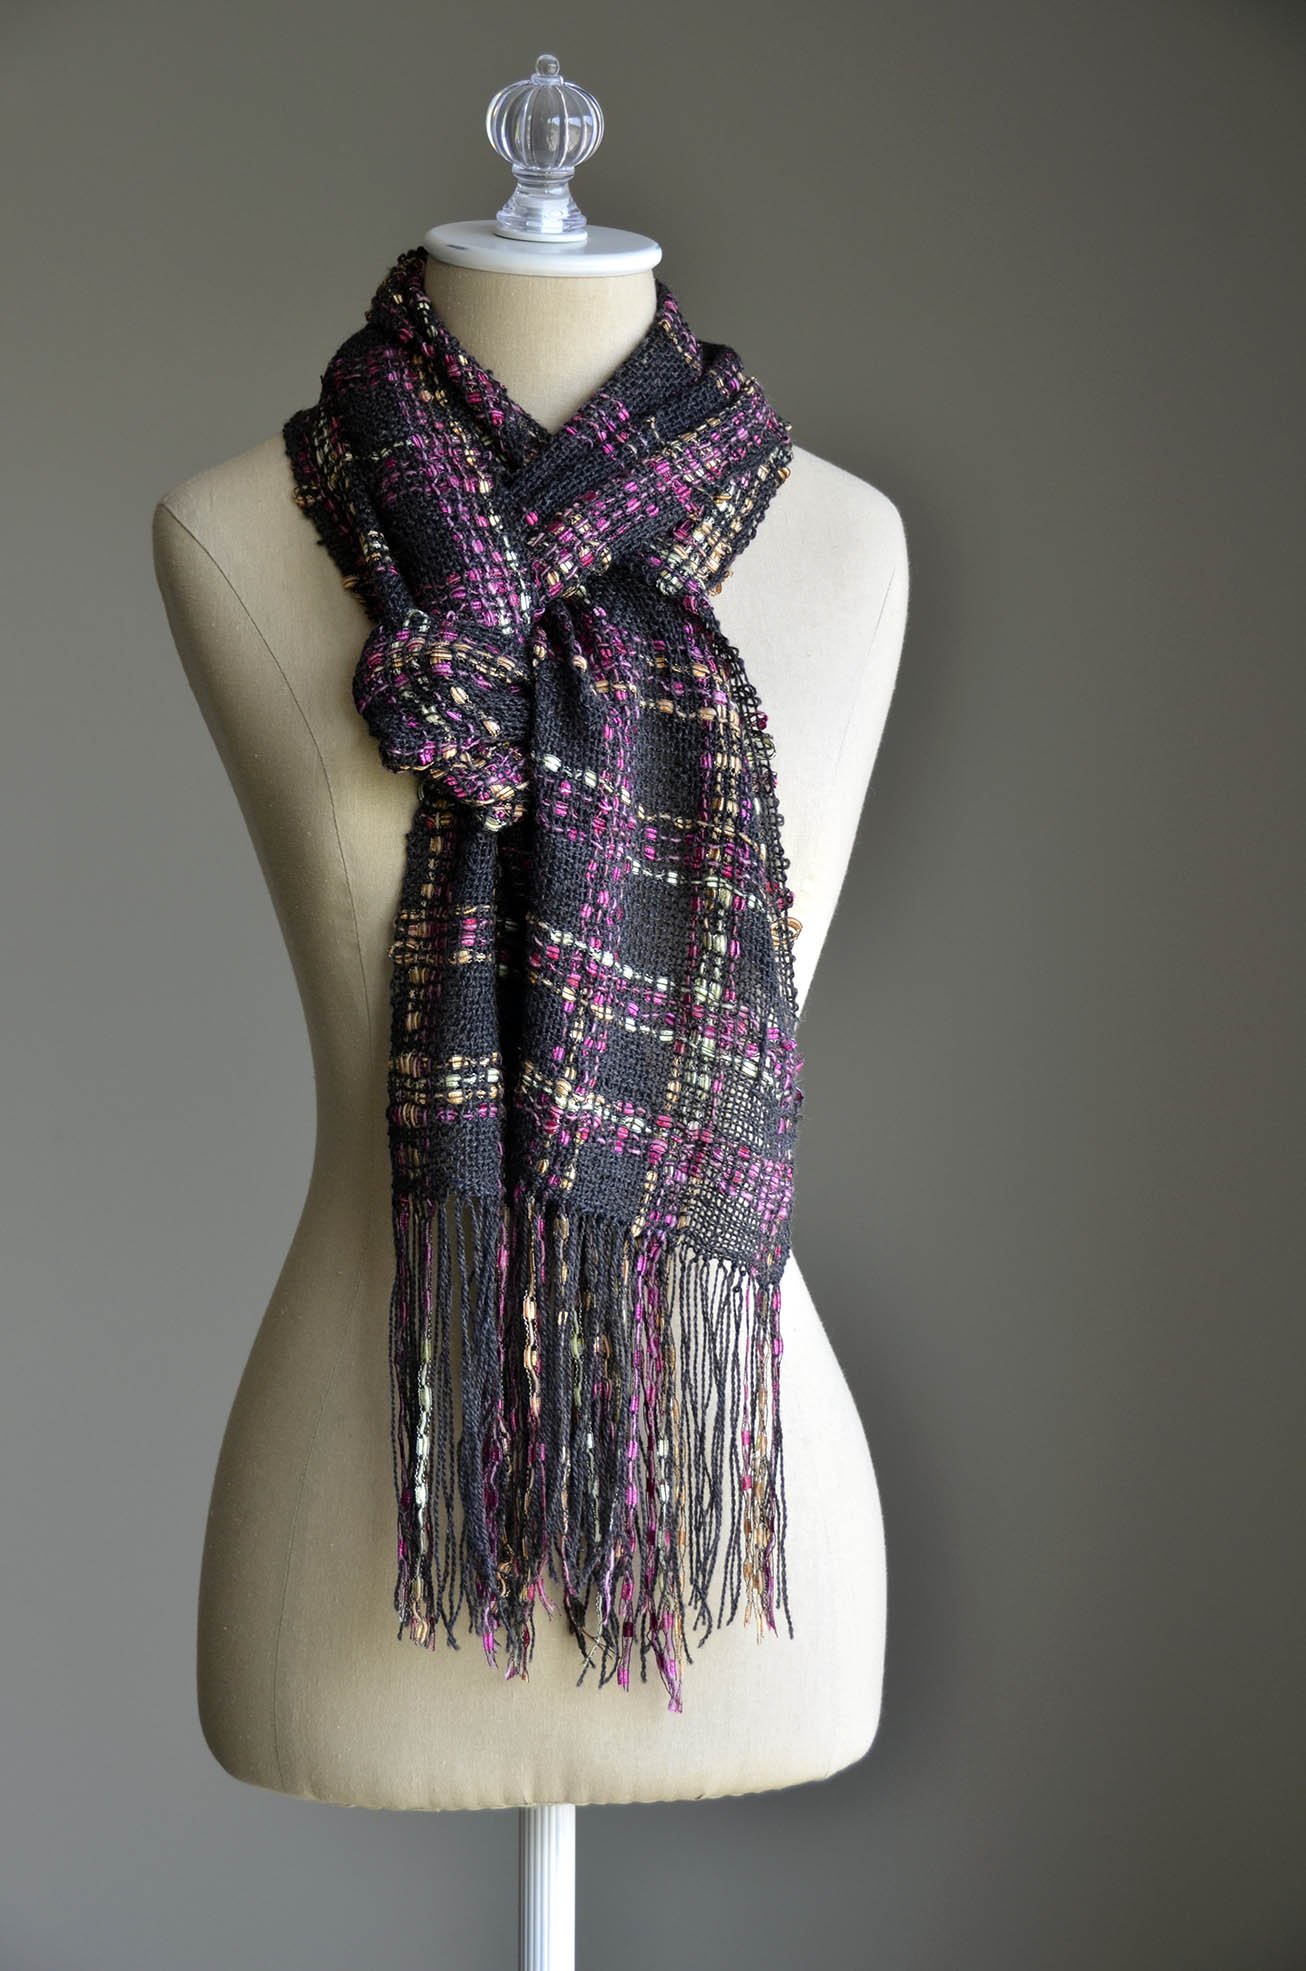
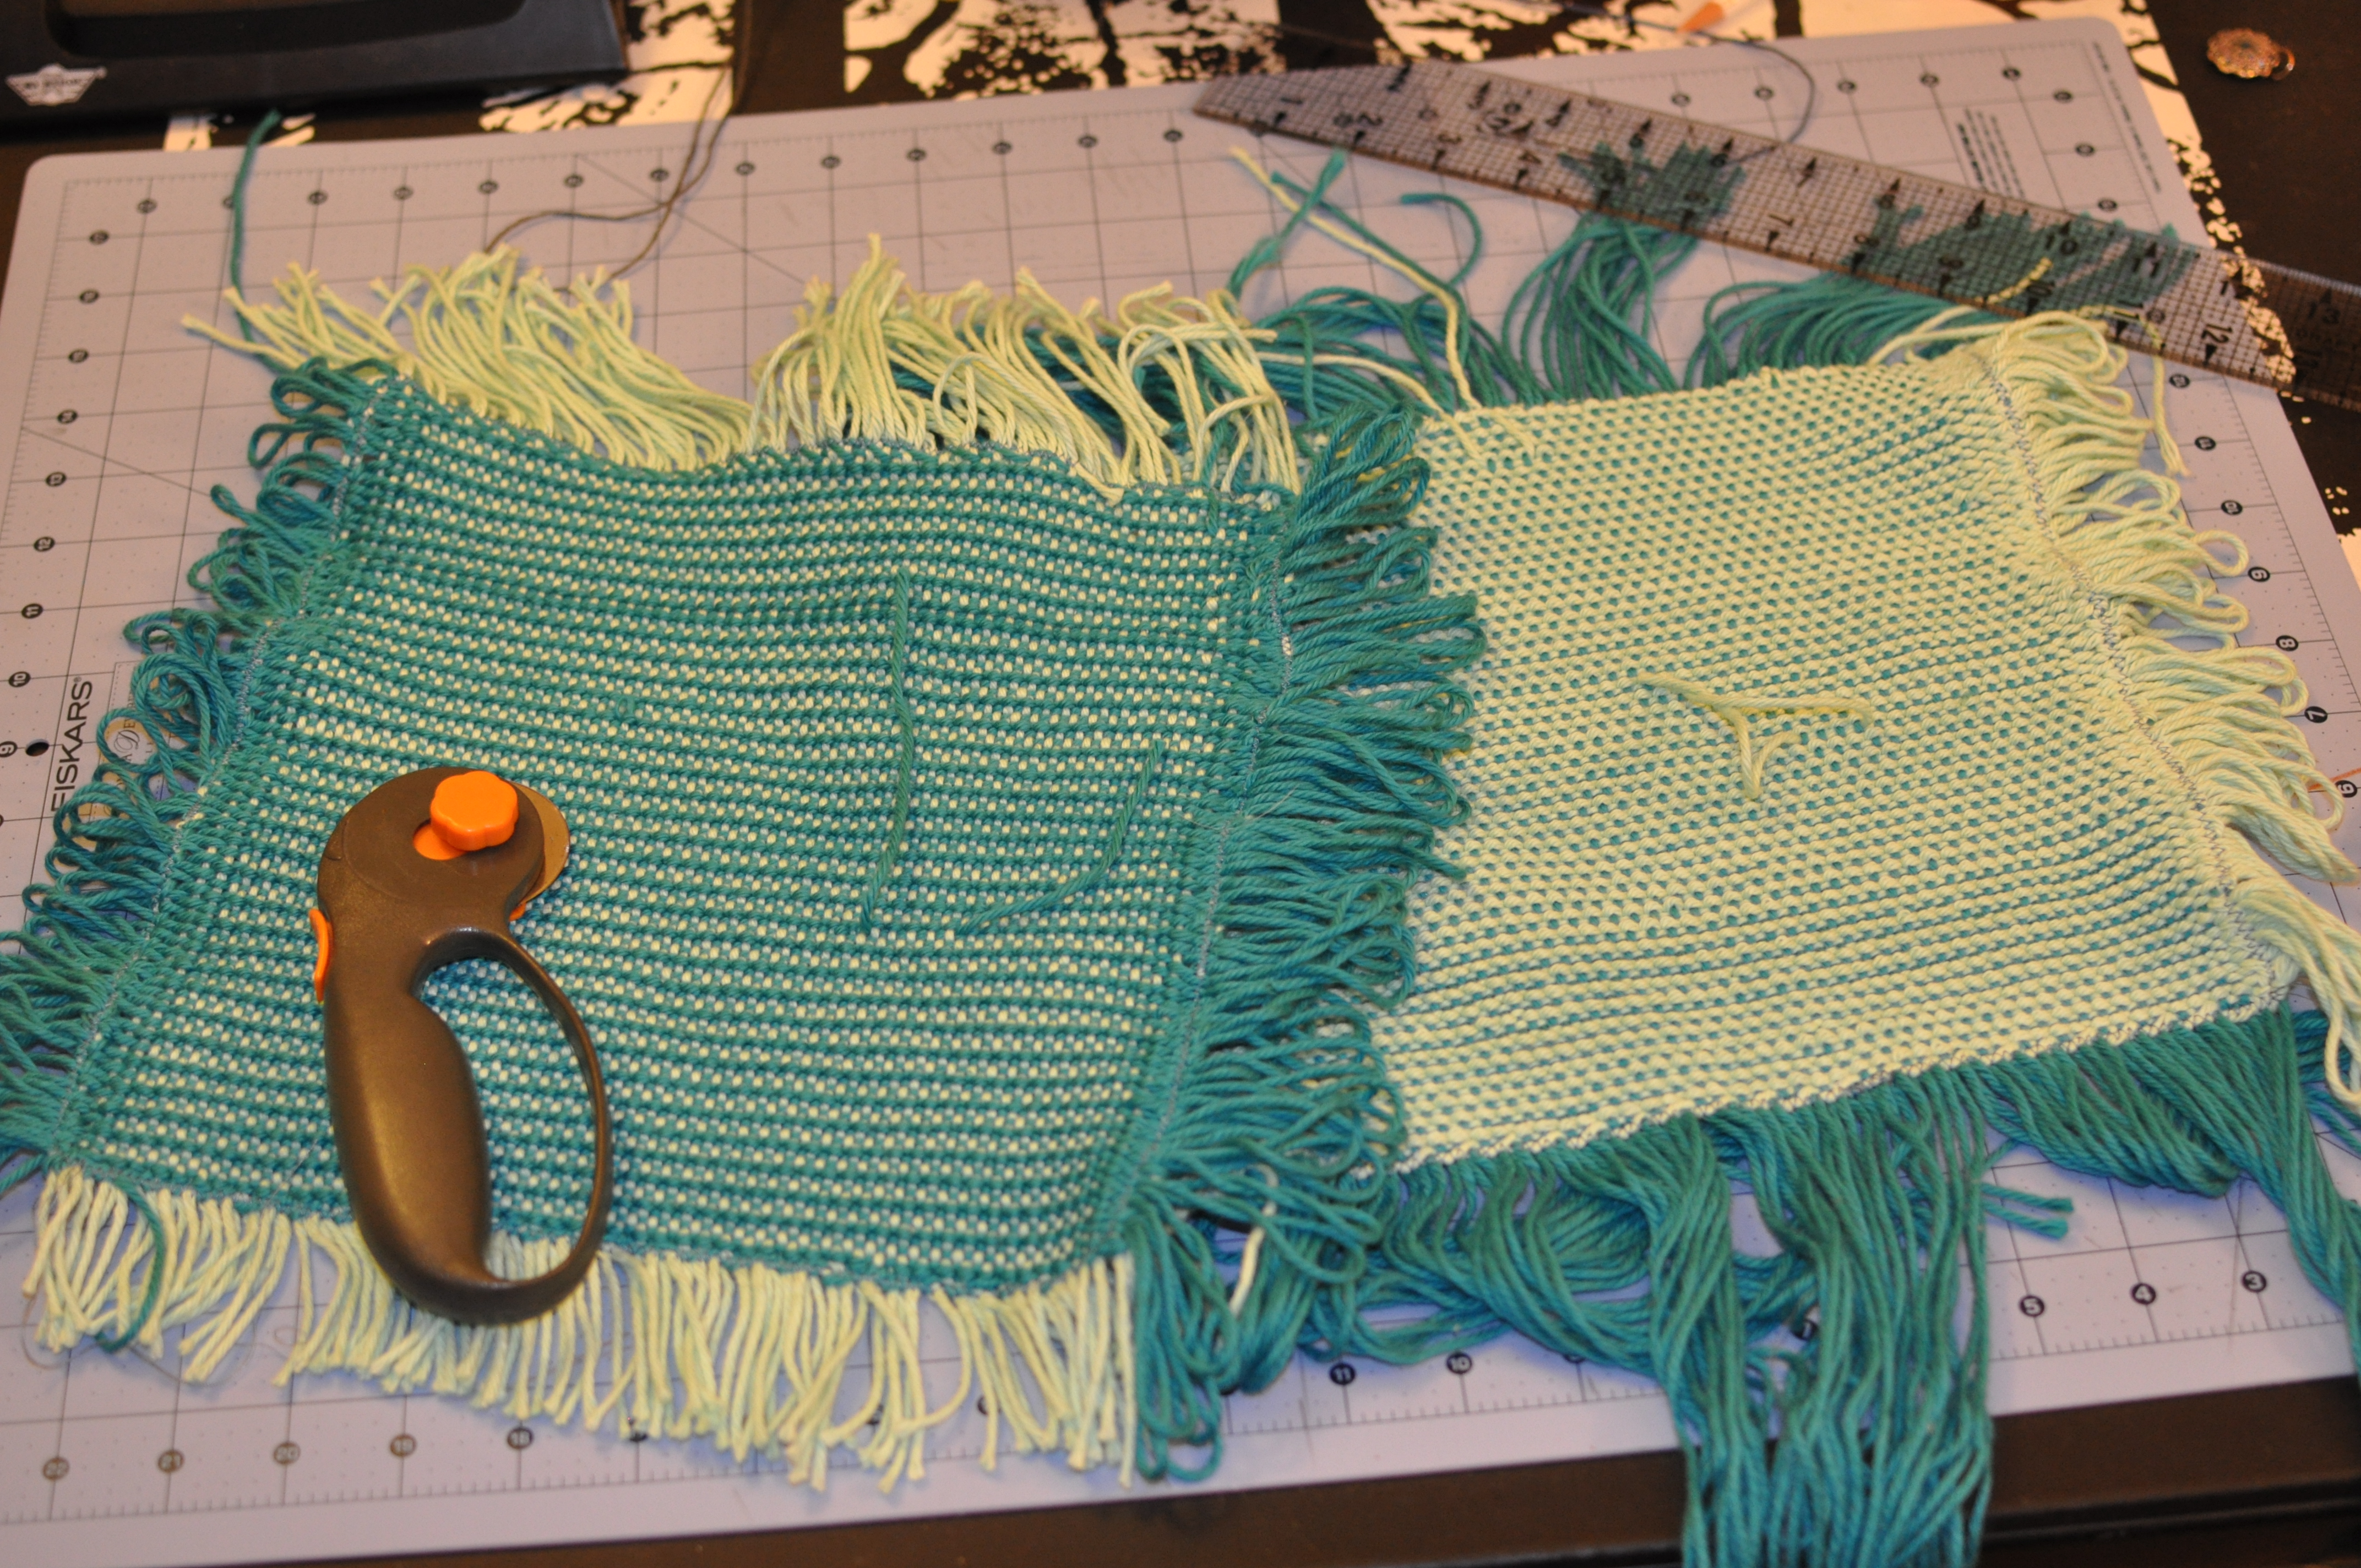
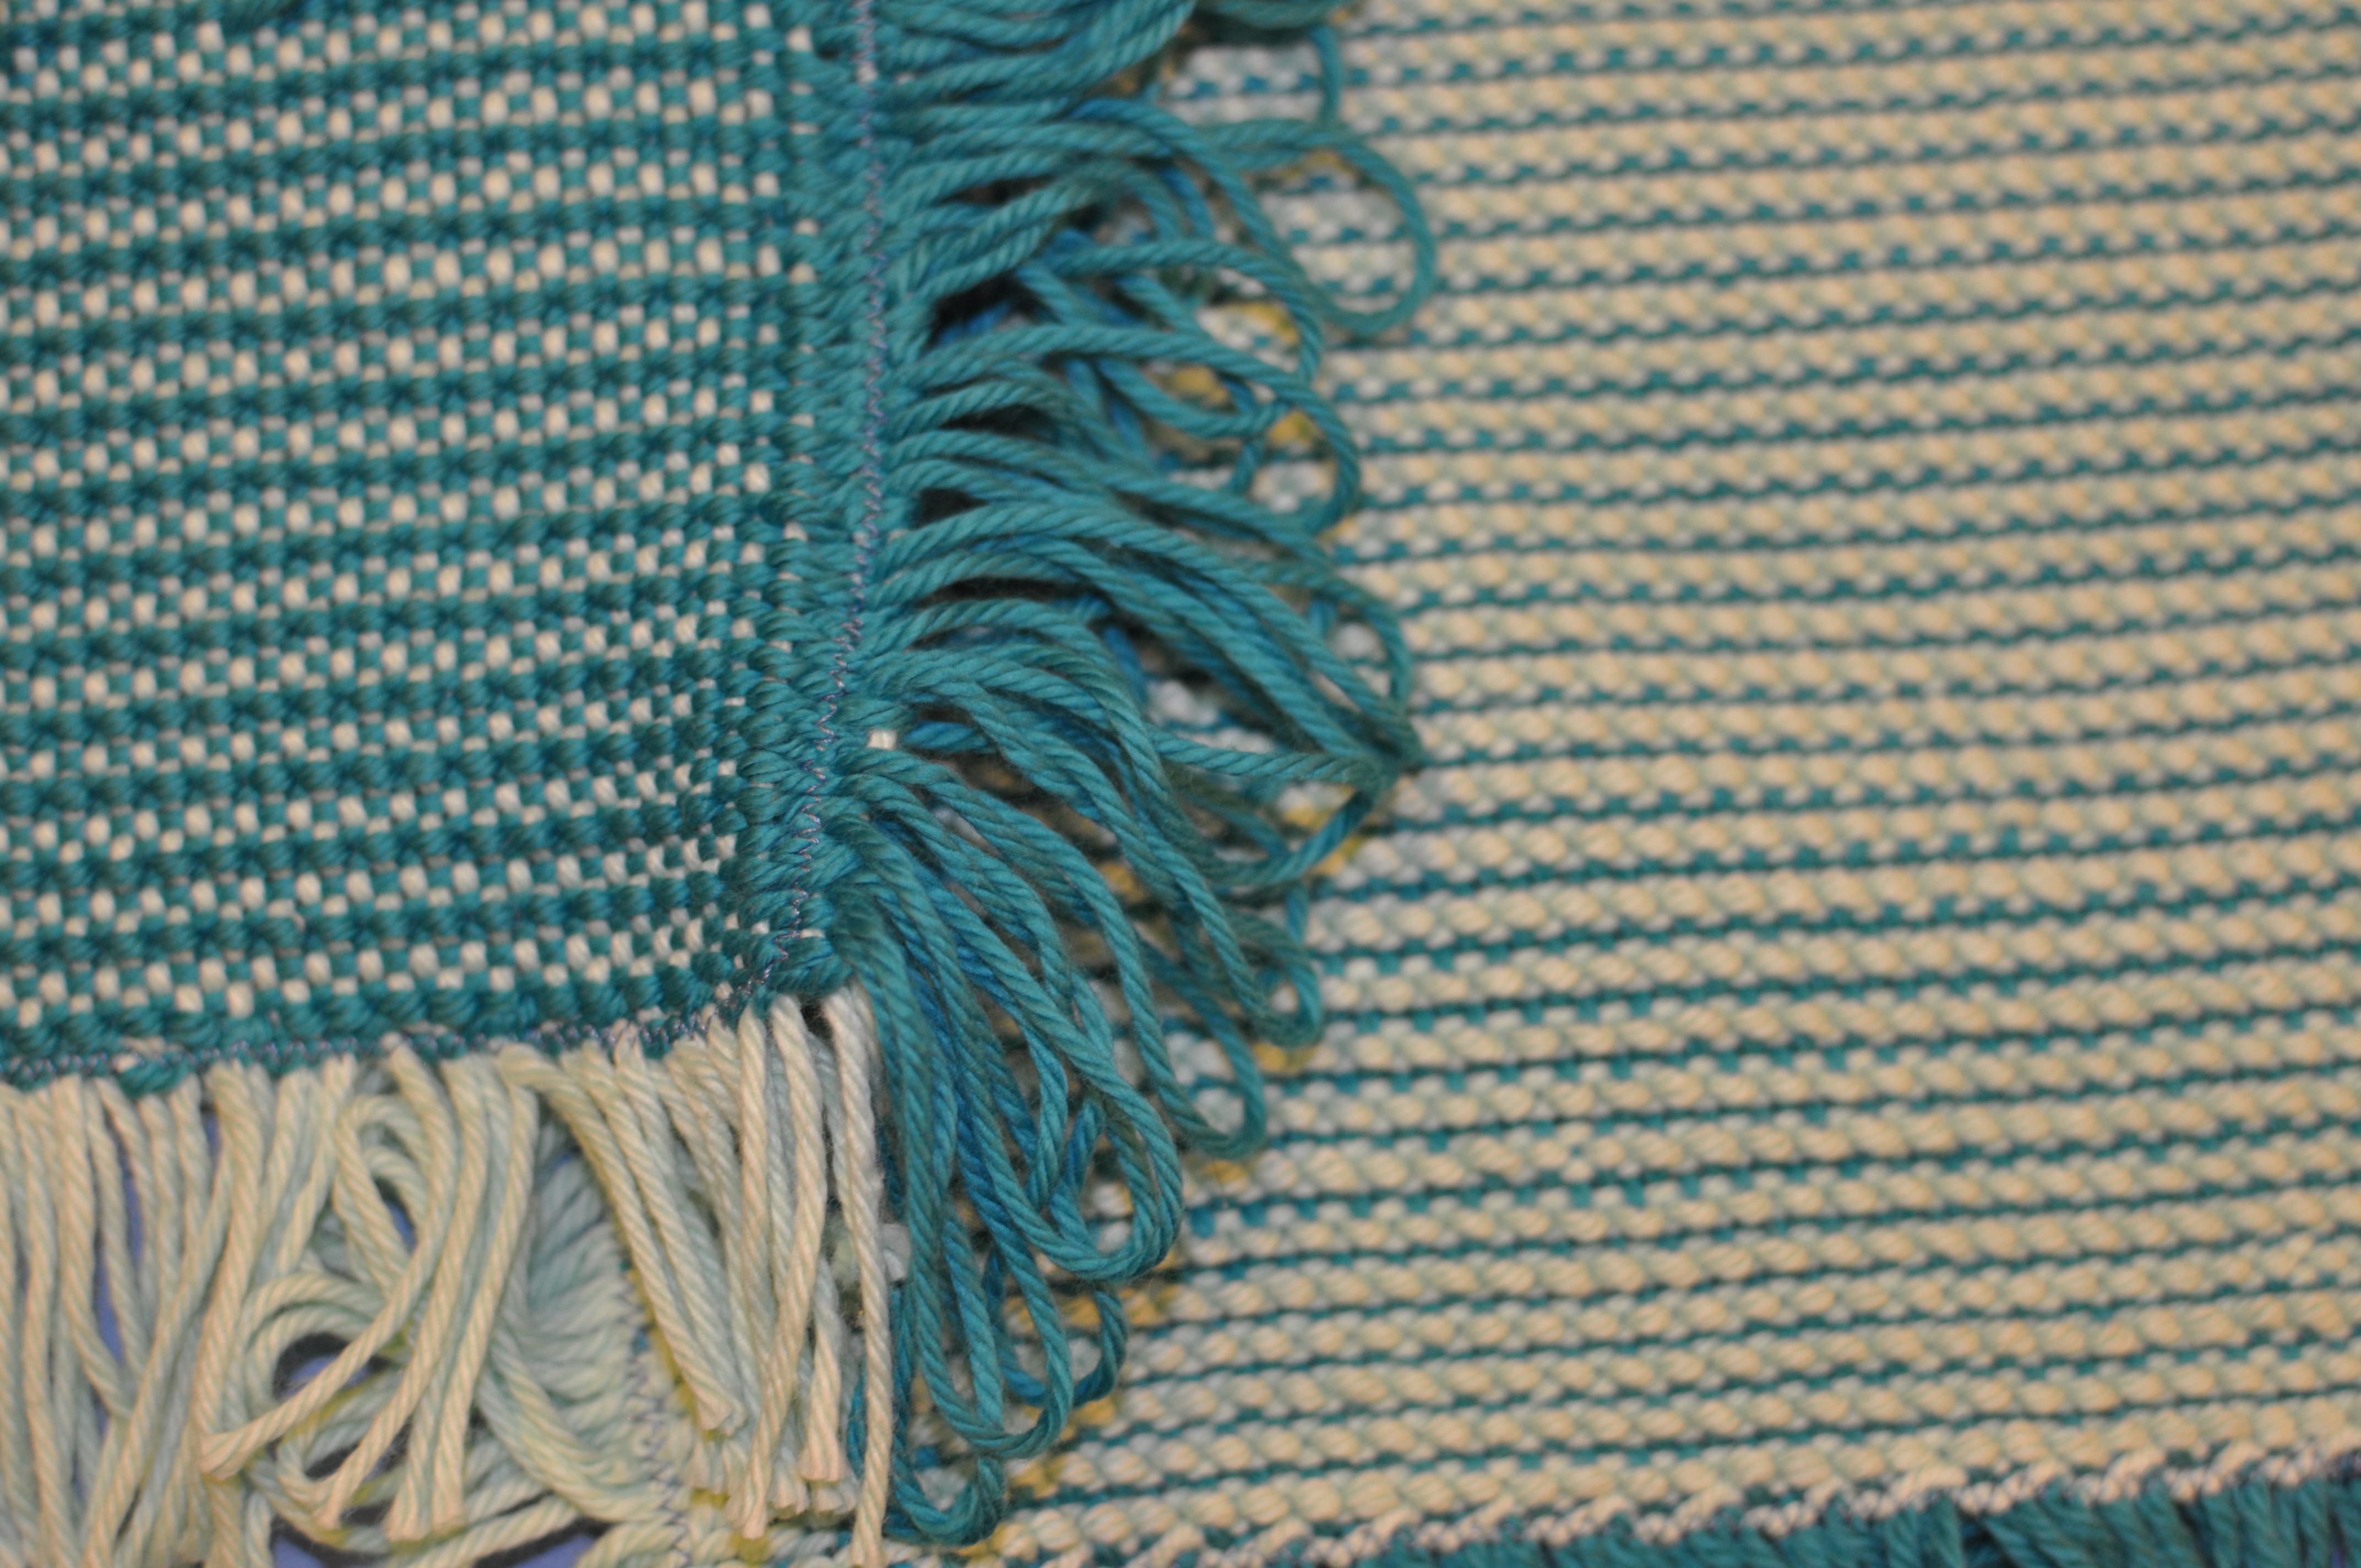
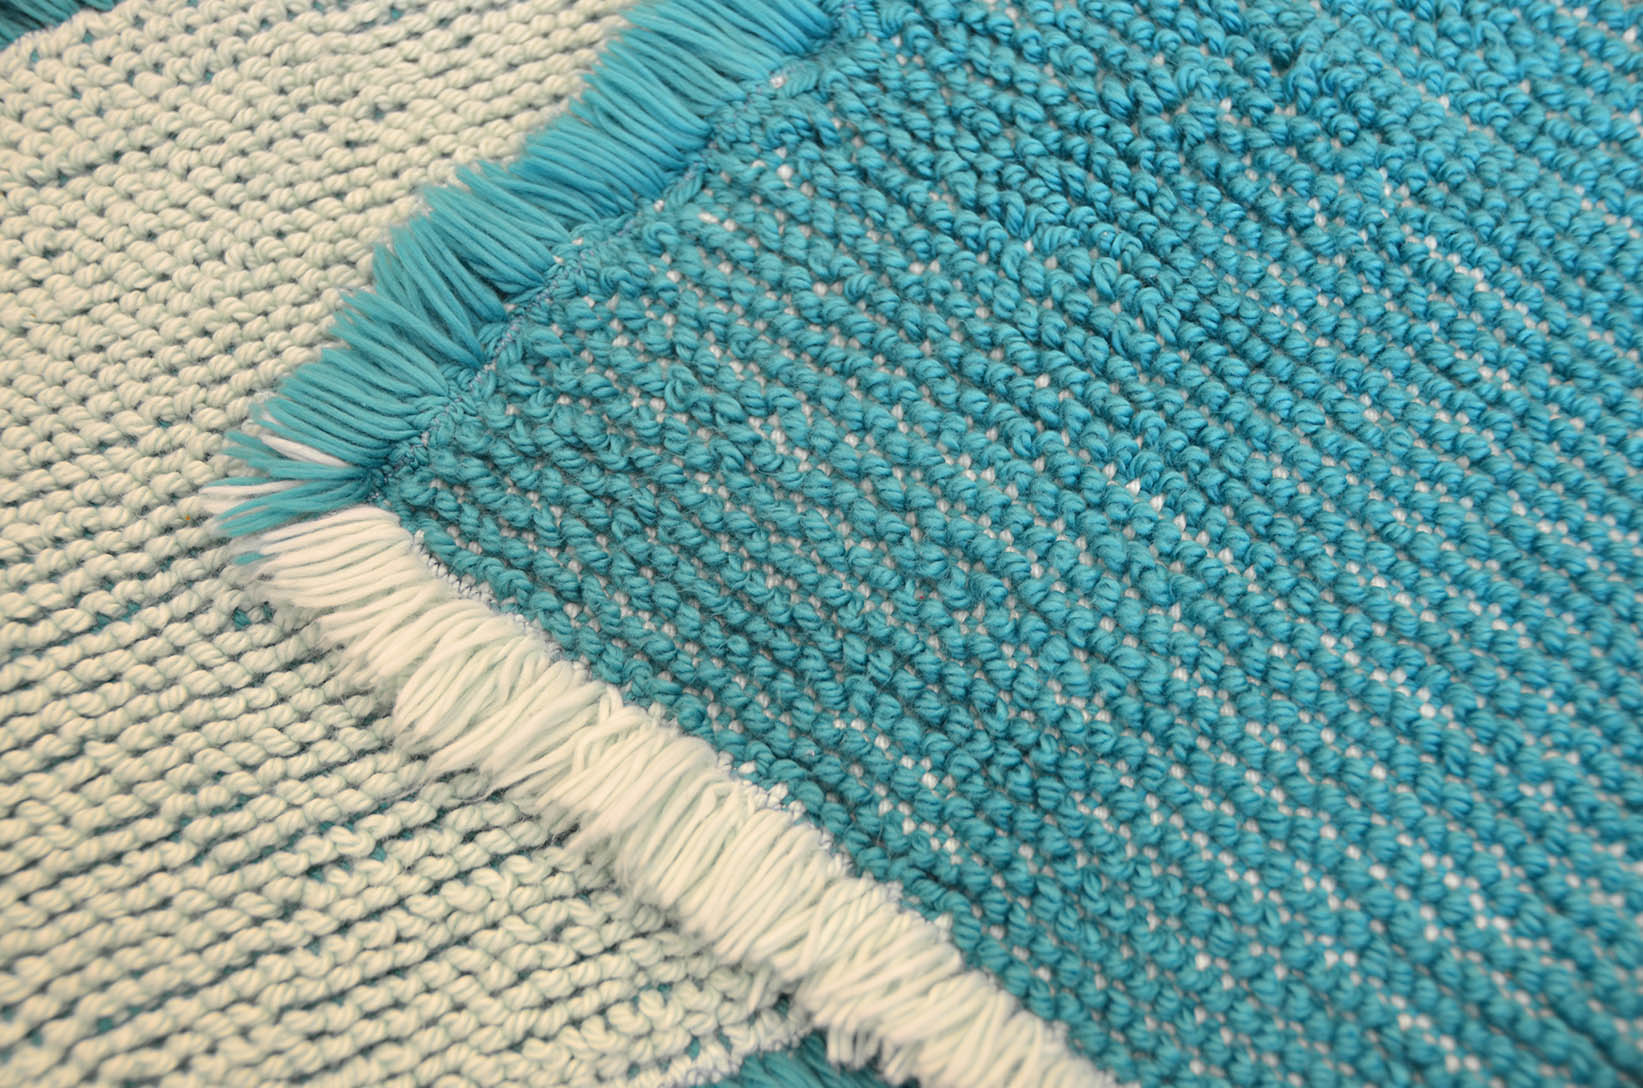
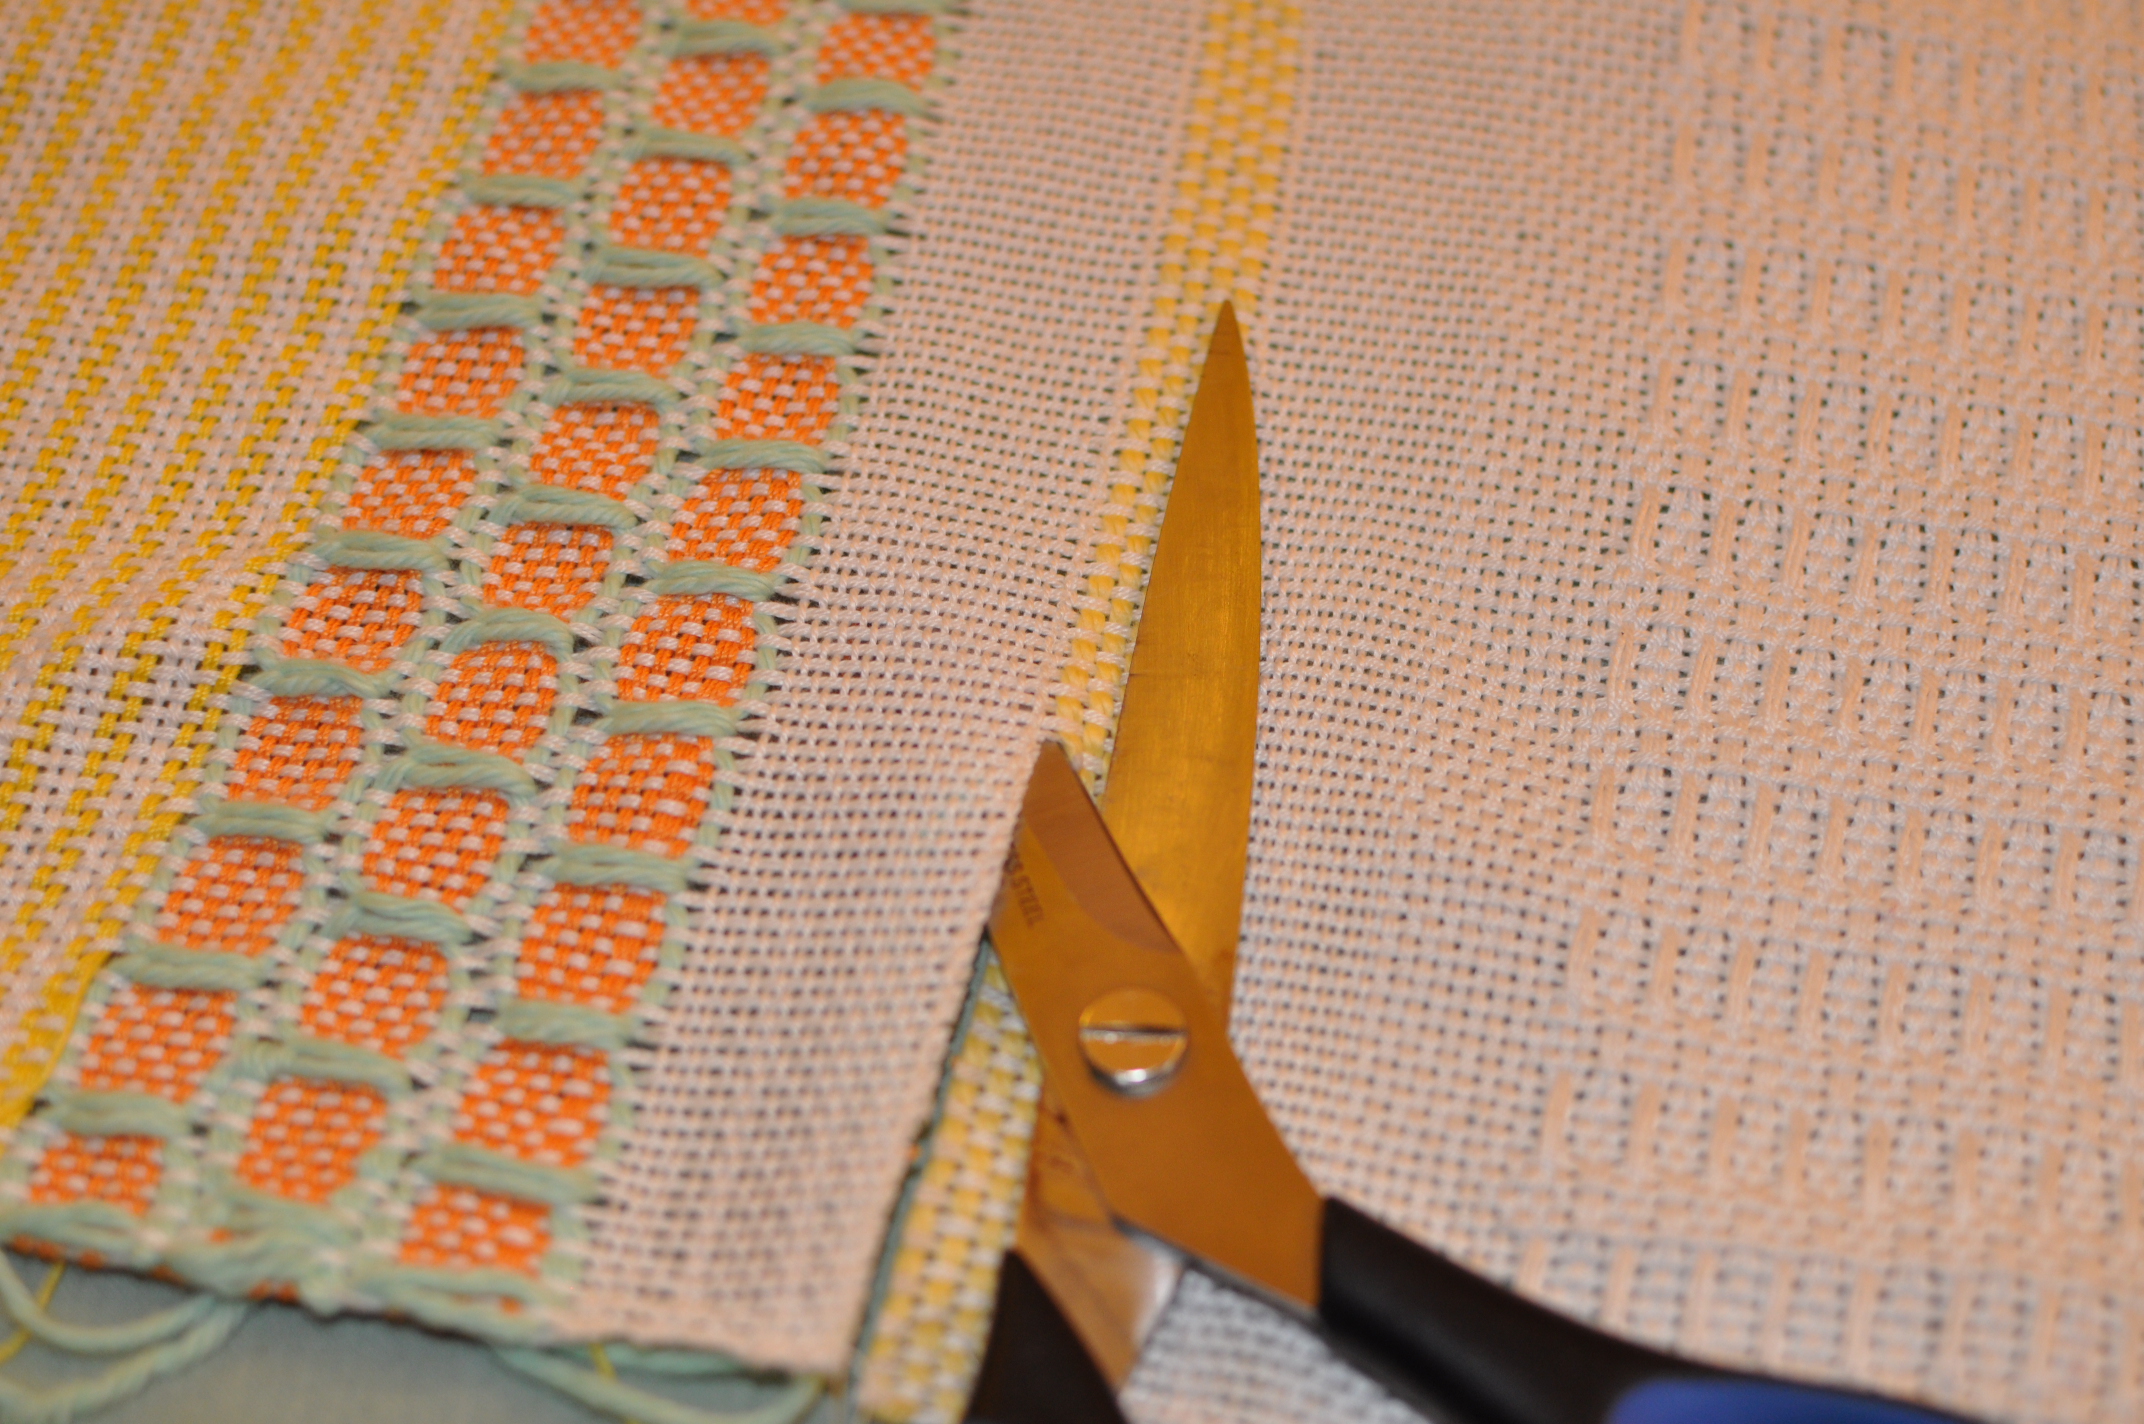
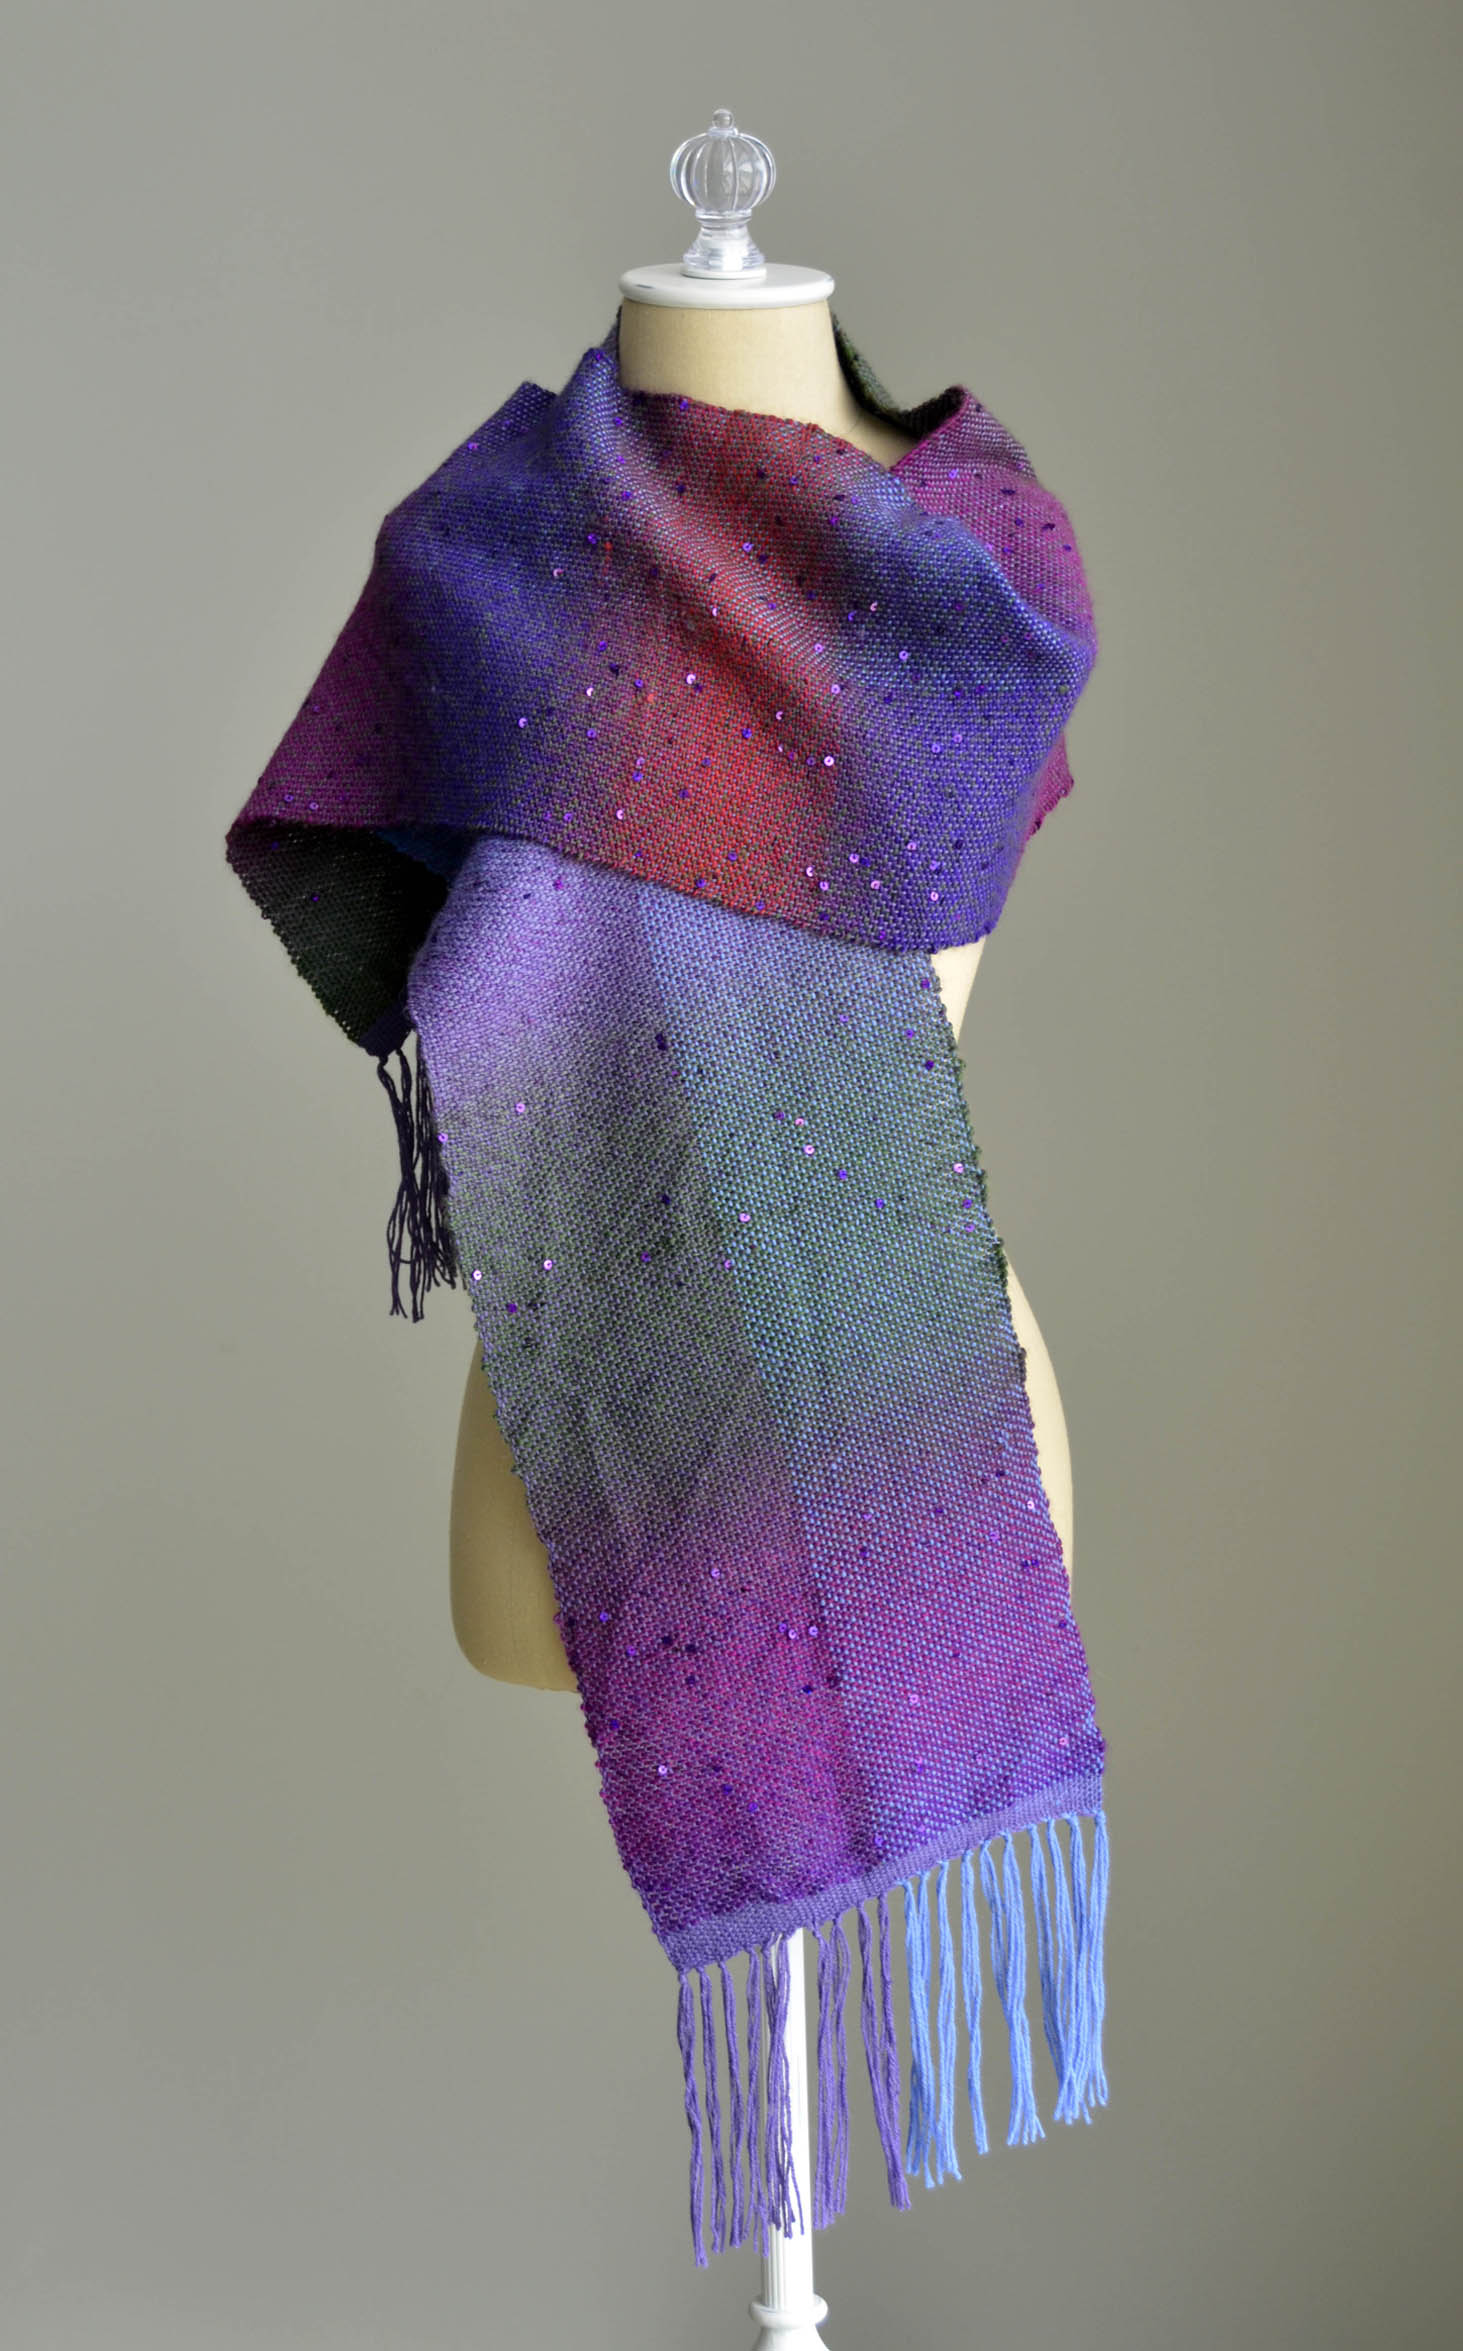
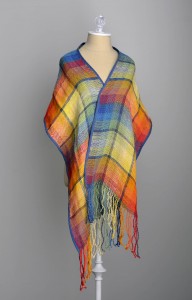
After twisting all my fringe I threw my scarf (with the woven-in ends still hanging off the scarf, unclipped) into the washer on a gentle cycle and warm water. Even though the yarn label says not to machine dry, I’ve had good experiences washing and drying knitting projects in Flax, so I threw my scarf in without hesitation. It came out soft and with incredible drape. The finished size on the loom was 15″ x 75″; final size after blocking was 13.75″ x 72″. Because the weaving was so loose, there was fairly little draw-in, which is what I wanted! The only thing I wasn’t crazy about were my edges. To be fair, they didn’t look so great on the loom either, or before going into the washing machine.

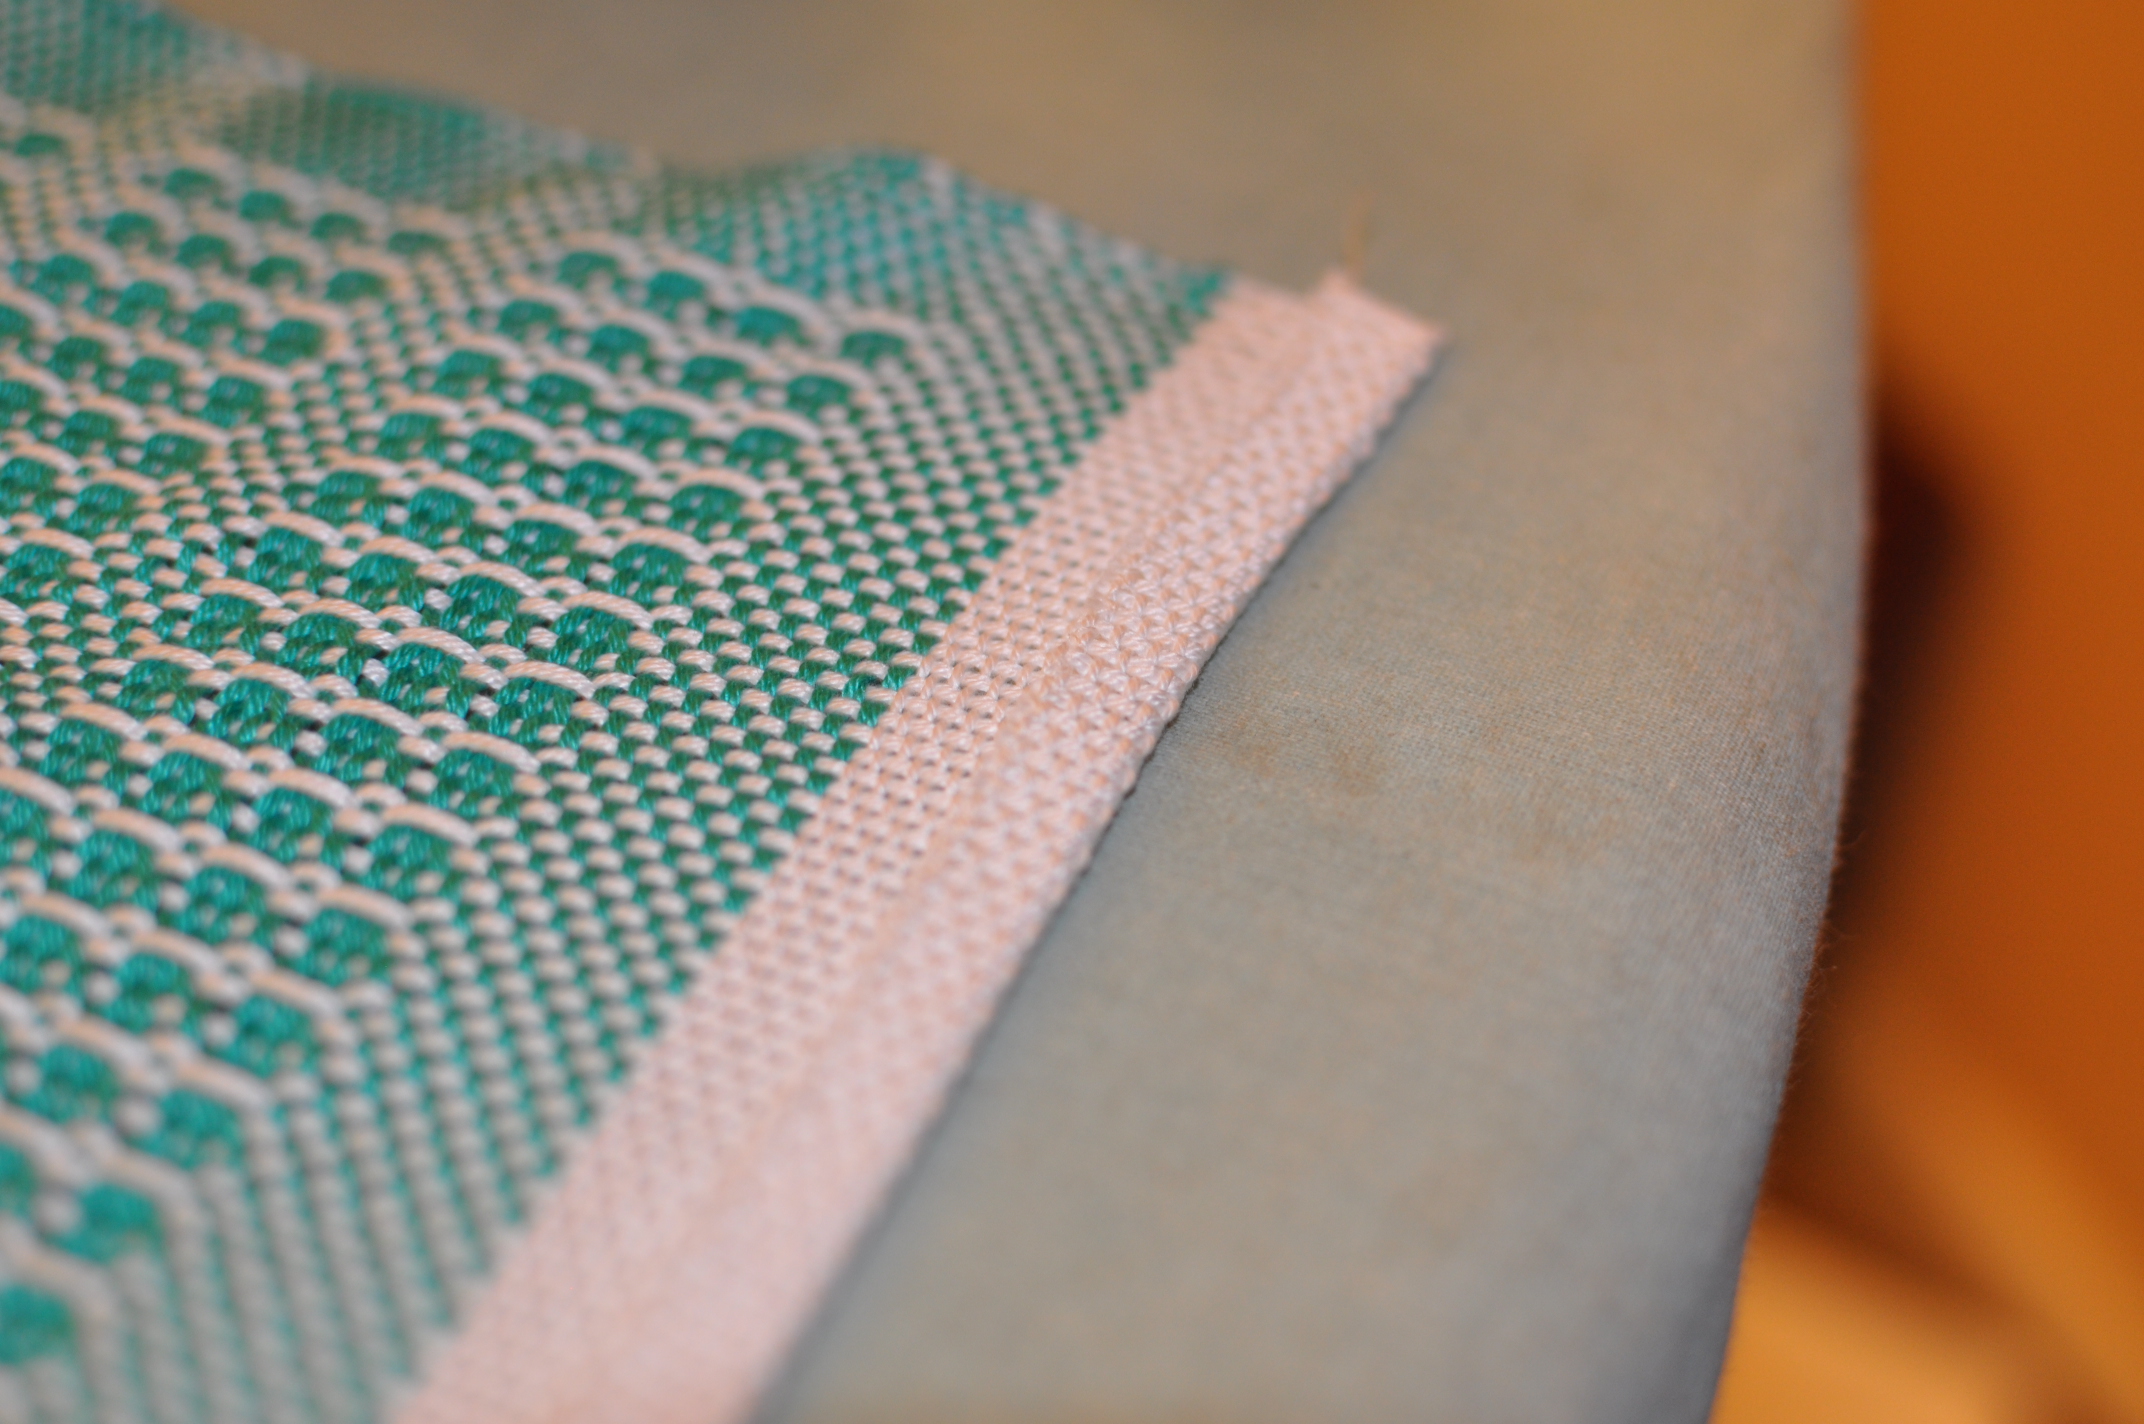
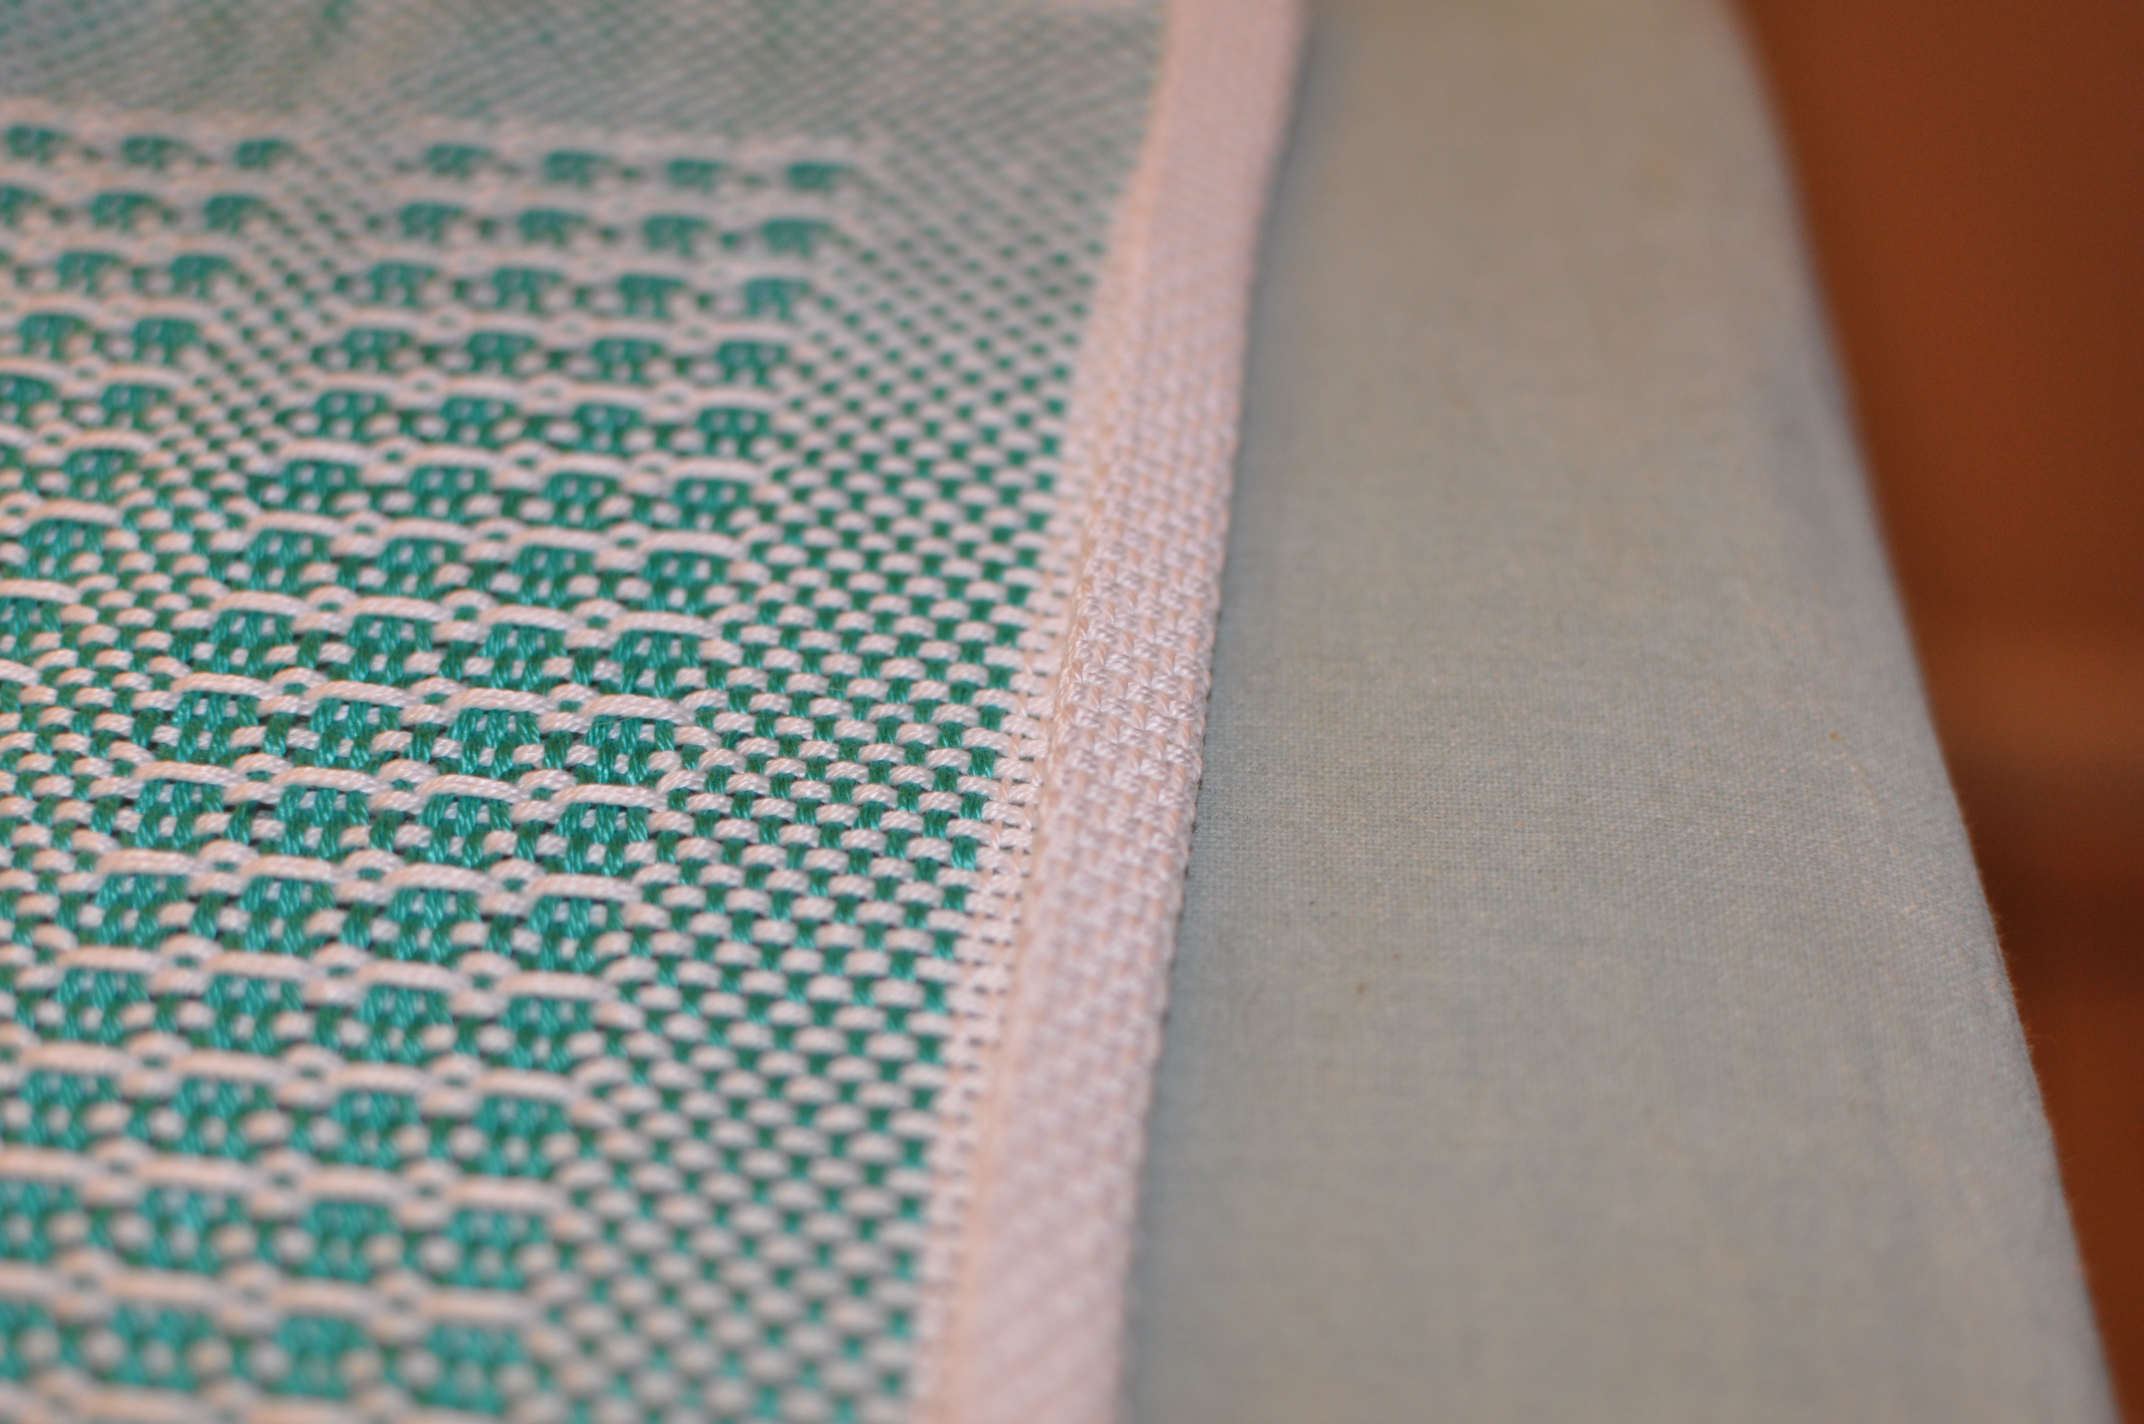
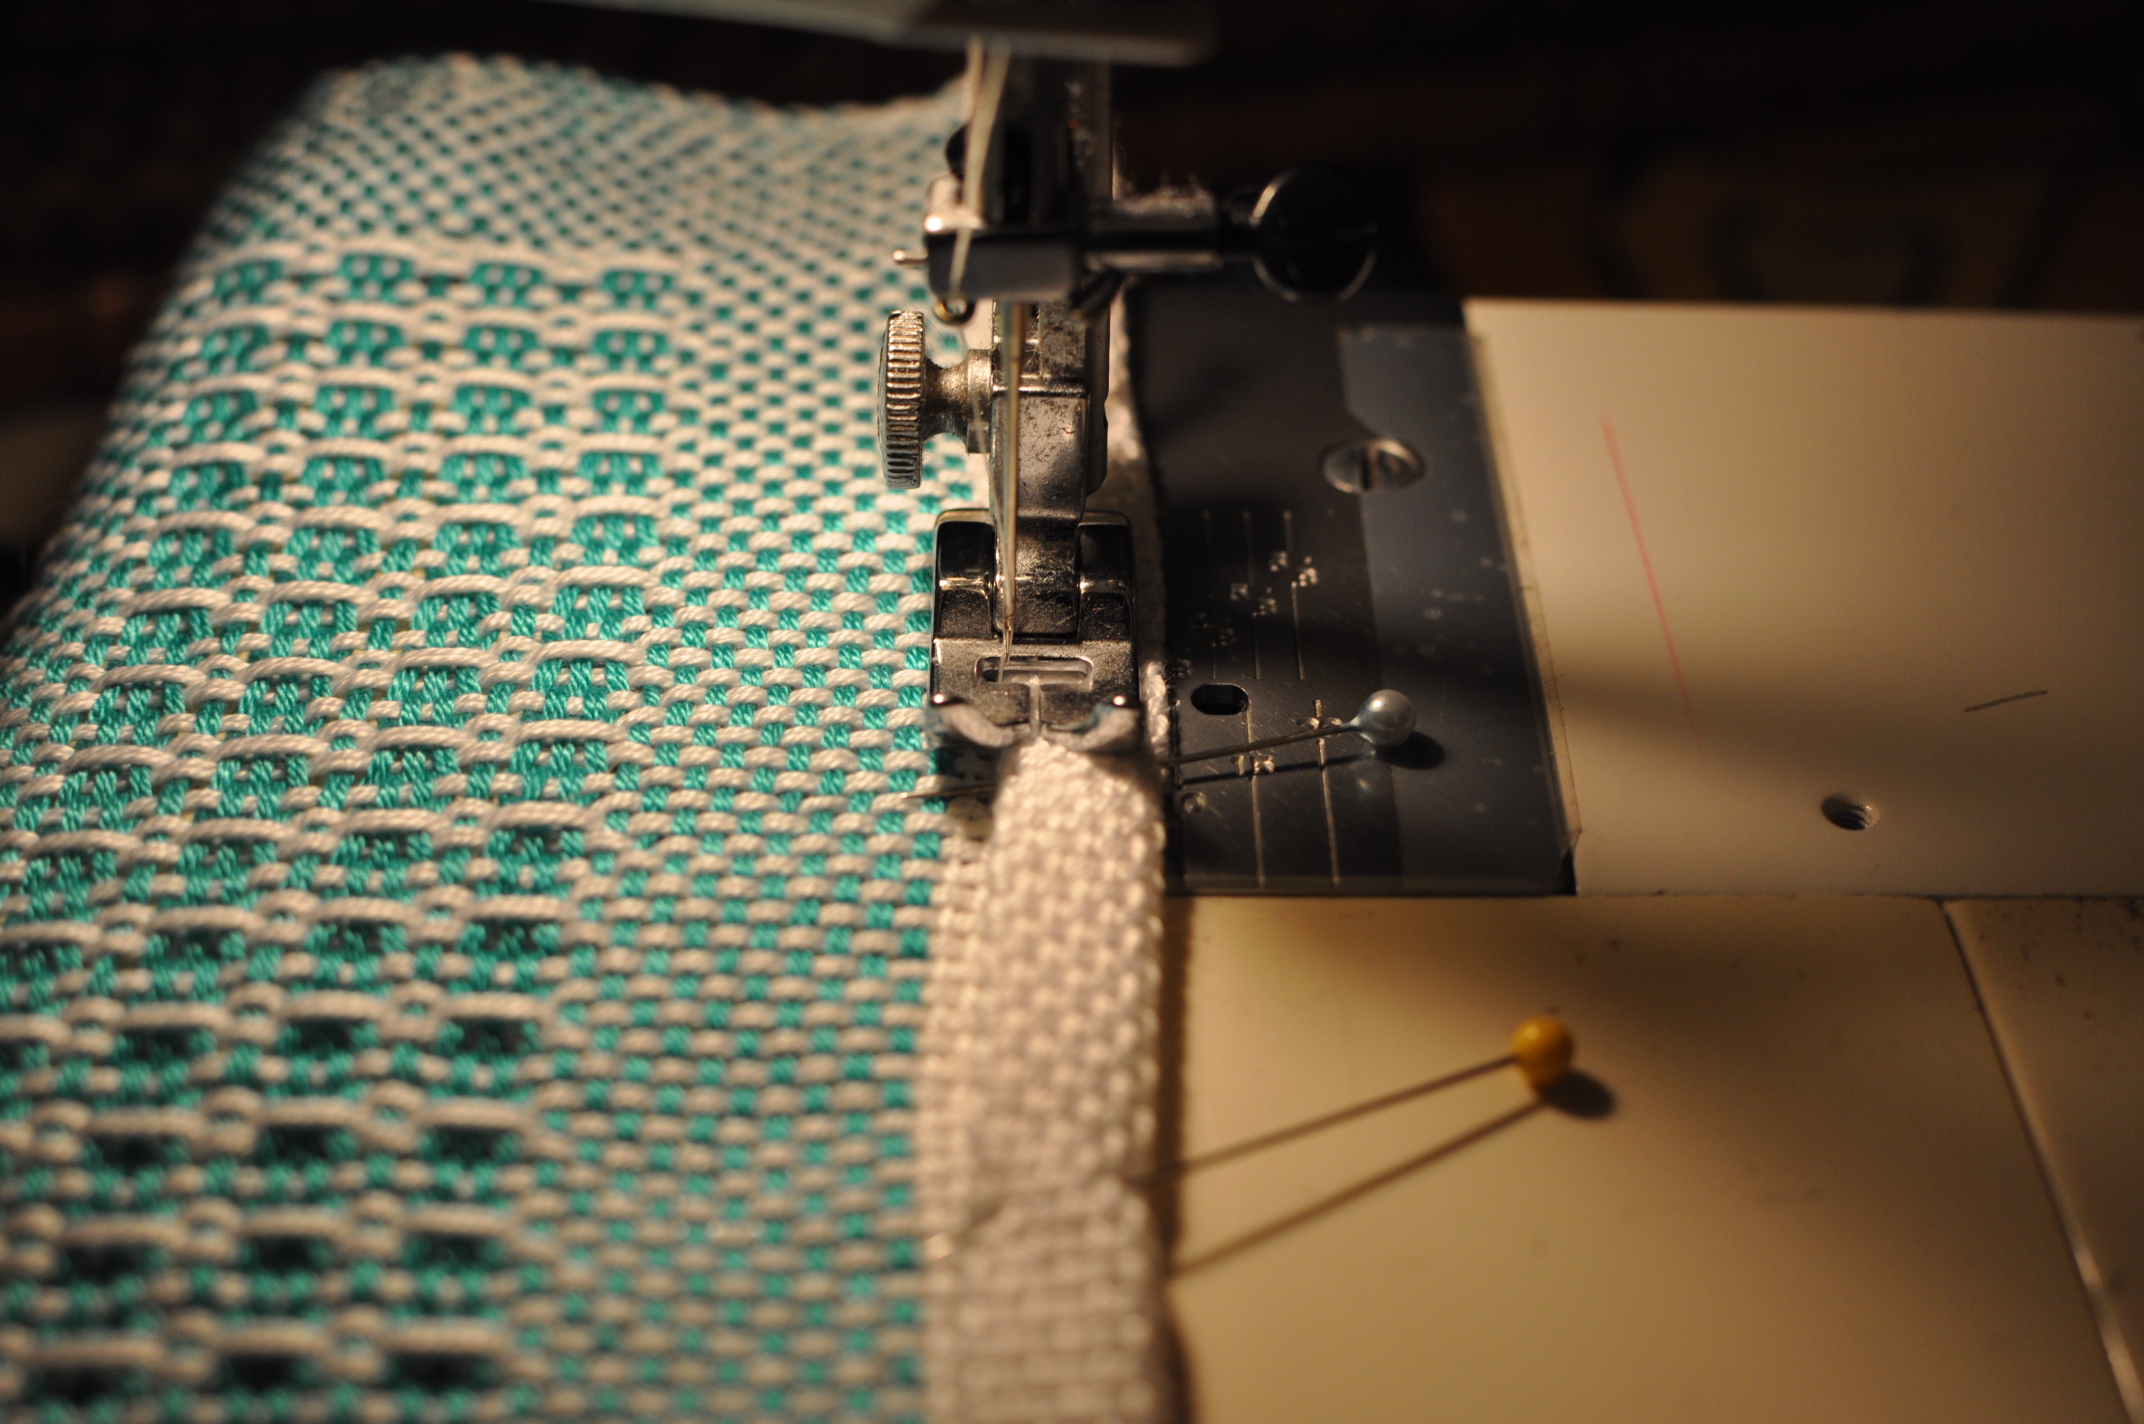
Not to be discouraged, I decided it was time to break out the sewing machine once again. I had the perfect piece of fabric in my stash – a nice lightweight grey-blue rayon blend. I cut 2 strips (straight on the grain, no bias) that were 75″ long x 1.5″ wide. I folded in the sides, sandwiched my edges, folded under the edges, and sewed it onto the sides of my scarf, much like a single-fold quilt binding.

Flax Scarf 8 retone blog

I’m wearing this new scarf draped around my neck this very moment. Although it’s sweltering here in North Carolina right now, this is the perfect thing to give me a little warmth in our air-conditioned offices.

Flax Scarf 4 retone blog

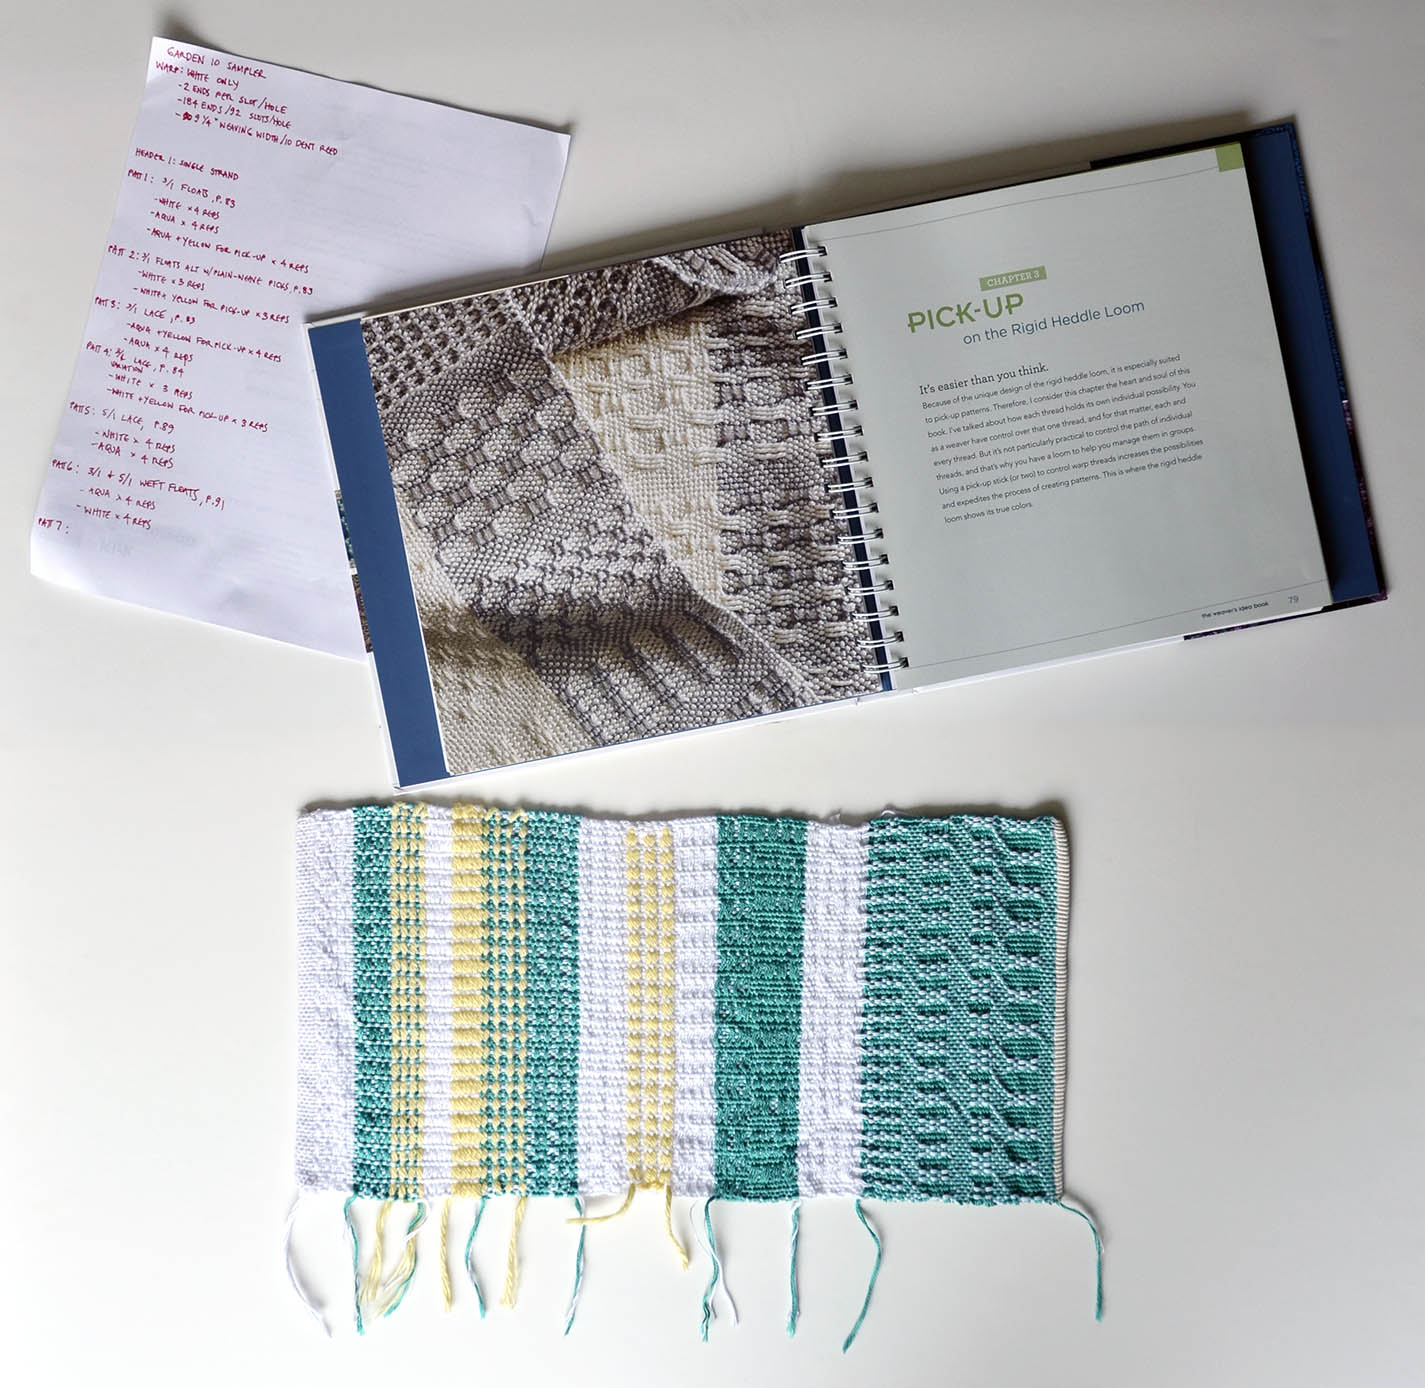
Getting tired of plain weave? So am I! I love the look of a plain woven fabric, but I’m ready to move on. Join me next time for Garden thread and pick-up patterns!

Let the Weaving Wednesday Fun Begin!

Knitters and crocheters, I’m not going to lie: this new section of our blog is here purely to enable you to use more yarn. Well, and to make pretty things and entertain you, of course!

I first started weaving about 5 years ago after already knowing how to knit and crochet. After some struggles character building with a homemade frame loom, I scored a 4 harness floor loom on Craig’s List. I happily used it for a year or two, weaving up rugs and towels and other assorted goodies. Weaving can be very freeing and meditative, and it’s a great way to use up leftover odds and ends from other projects. But I moved 2 years ago and had to pack up the loom. It sat neglected and unassembled for this entire time until I moved again a couple of months ago. My significant other was kind enough to put her back together again and I am once again able to bask in the glory of all her harnesses, treadles, and heddles.

But there is still the problem of time. Warping a large loom takes a fair amount of it. Between work and all my knitting and crochet projects, I have little time for other kinds of craftery. Which is sad! But, this story has a happy ending. After TNNA in Indianapolis earlier this month, I was lucky enough to get my hands on a Schacht 15″ Cricket rigid heddle loom.   I had been lusting after a small tabletop loom for some time, and am so happy I finally acquired the Cricket!

Not 24 hours after returning from my trip, I got to work warping my new loom. Because it’s been so long since I’ve woven anything, I wanted to start simple. I decided to use a single yarn for both warp and weft, and to do just a plain weave scarf.

SequinsWarp_1SequinsWarp_2

(Pardon the cell phone quality pictures here)

For my yarn, I chose the very colorful, very sequiny Classic Shades Sequins Lite color #408 Jubilant – so sparkly! The awesome thing about the Cricket is the ability to direct-warp, which is super duper speedy. It took me about 15 minutes to attach my warp.  As I mentioned, I’m using the 15″ Cricket. I decided I wanted a scarf about 10″ wide. I figured the fabric would draw in somewhat, maybe 10% or so. I used an 8 dent reed (which means there are 8 ends per inch), and attached 88 ends (11 inches). I knew I wanted a long scarf, so I measured the warp at about 90″, which as you can see, is the length from the back of the loom to the doorknob!

I began weaving and soon realized my error: sequined yarn does not make the best warp yarn. Oops. Because the warp yarn must pass through the reed constantly, yarn with stuff on it doesn’t work so well. The sequins kept getting caught up, and I was getting frustrated. Rather than  power through it (weaving is supposed to be relaxing!), I cut off my warp and started again. A 5 dent reed would probably have worked fine, but I just had the 8 dent at the time I was doing this scarf.

After taking a quick survey of my stash, I decided upon 2 different colors of Saki Bamboo Solids , colors 204 Violet and 209 Denim Blue. Just for kicks, I did one side in Violet and the other in Denim Blue. A sock weight yarn such as this will typically fare better in a tighter sett (more ends per inch), but I decided to stick with the 8 dent anyway since it was what I had. Because it really does take 15 minutes or less to warp this loom, I was back to weaving in almost no time!

SakiWarpedLoom_retouch ArcedWeft_retouch

It took me several inches to really find my weaving “rhythm”. As with most beginning weavers, my edges were less than perfect. I remembered a trick I had learned with my floor loom as to how to deal with the weft yarn. As shown above, I aim the yarn in a 45 degree (approximate) angle, and then beat the weft down. With a little practice at being as consistent as I could, those edges improved immensely! I’ll be sharing other tips as I learn them over the coming months, so stay tuned for more edging advice!

I wove my colorful scarf over the course of just a couple of days. It took me around 3 1/2 hours to weave, and took 1 ball each of the Saki Bamboo Solids and just 1 ball of the Classic Shades Sequins Lite. I decided to stick with simple fringe for the ends.

TyingFringe

The scarf did draw in about 10% as I’d estimated (yay!), and I ended up with a 10″ wide x 76″ long, not including fringe. That’s another awesome benefit to the Cricket – there’s hardly any loom waste.

And here are a few glamour shots:

CS Sequins Lite Scarf 1_blog CS Sequins Lite Scarf 2_blog CS Sequins Lite Scarf 3_blog

When weaving my header, I forgot how many rows I wove when I got to the end. I guessed, and I guessed wrong, so one header is taller than the other. Oops! The edges aren’t perfect, but they’re charming, right? All in all, I’d call this a win!

Stay tuned for next time, I’ve got something yummy brewing for new colors of Flax!