Free Pattern Friday – Interlacement Sweater

It’s Free Pattern Friday!

interlacementsweater2_deluxeworsted_hires

Today, the Interlacement Sweater in Deluxe Worsted.

The weather’s cooling down, and you know what that means.

https://vine.co/v/eQTpUzPxedi

At last!  Sweater weather! Who doesn’t love sweater weather?

Revenge will be mine.
That was a rhetorical question.

interlacementsweater4_deluxeworsted_hiresWell, we have something pretty and polished for you.  The Interlacement Sweater is designed for our Deluxe Worsted 100% wool (220yds/100g), which means it would work equally well in Deluxe Worsted Superwash or Deluxe Worsted Tweed Superwash if you’re looking for something you can toss in the washing machine.

Knitted flat and seamed, this pattern is written and charted and contains a schematic.  The lace inserts are right and left twists – no cable needle required.

We hope you enjoy this lovely project, and that you get to enjoy the Autumn breeze at least once this weekend.

Happy crafting!

corgi-in-sweater
Yes! Sweater weather!!

Free Pattern Friday – Storytime Cardi

It’s Free Pattern Friday!

ddk-tweed-storytime-cardi_square

Today, the Storytime Cardi in Deluxe DK Tweed Superwash.

Is it storytime, then?  I think it is!

dw-tweed-and-dk-stacked-100Once upon a time, there was a yarn named Deluxe DK Tweed Superwash.  It was just a bit smaller than its big sibling, Deluxe Worsted Tweed Superwash.  DK wondered, “What can people make with me?  I’m littler than you are!”

And DW answered, “Ah, but you’re just right for so many things!  Lots of people want a littler yarn for littler people!”  And DW was right!  People did want DK for kid projects.

Continue reading “Free Pattern Friday – Storytime Cardi”

Catawba River Poncho – Picking up Stitches

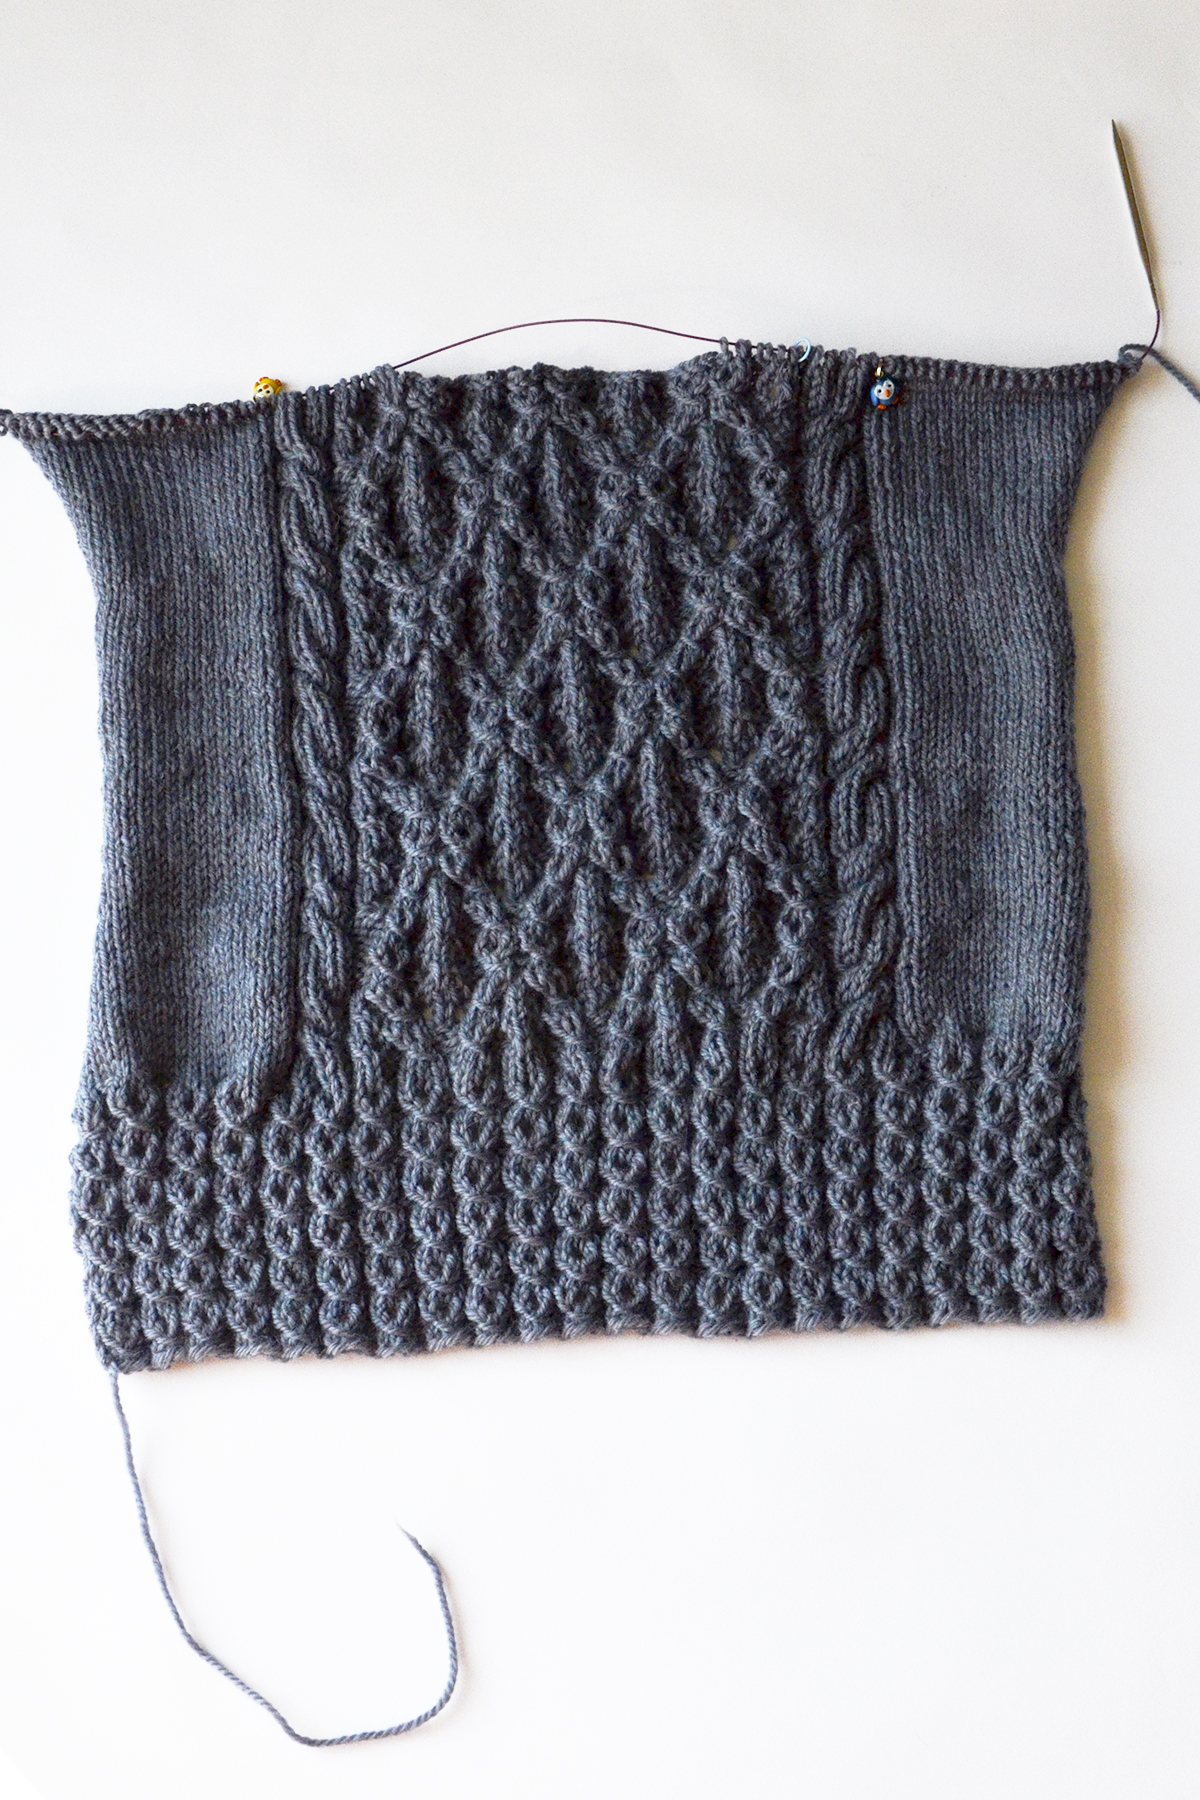
Greetings knitalongers! After joining shoulder seams on my Catawba River Poncho last week, I’m all set to pick up stitches for my side ribbing.

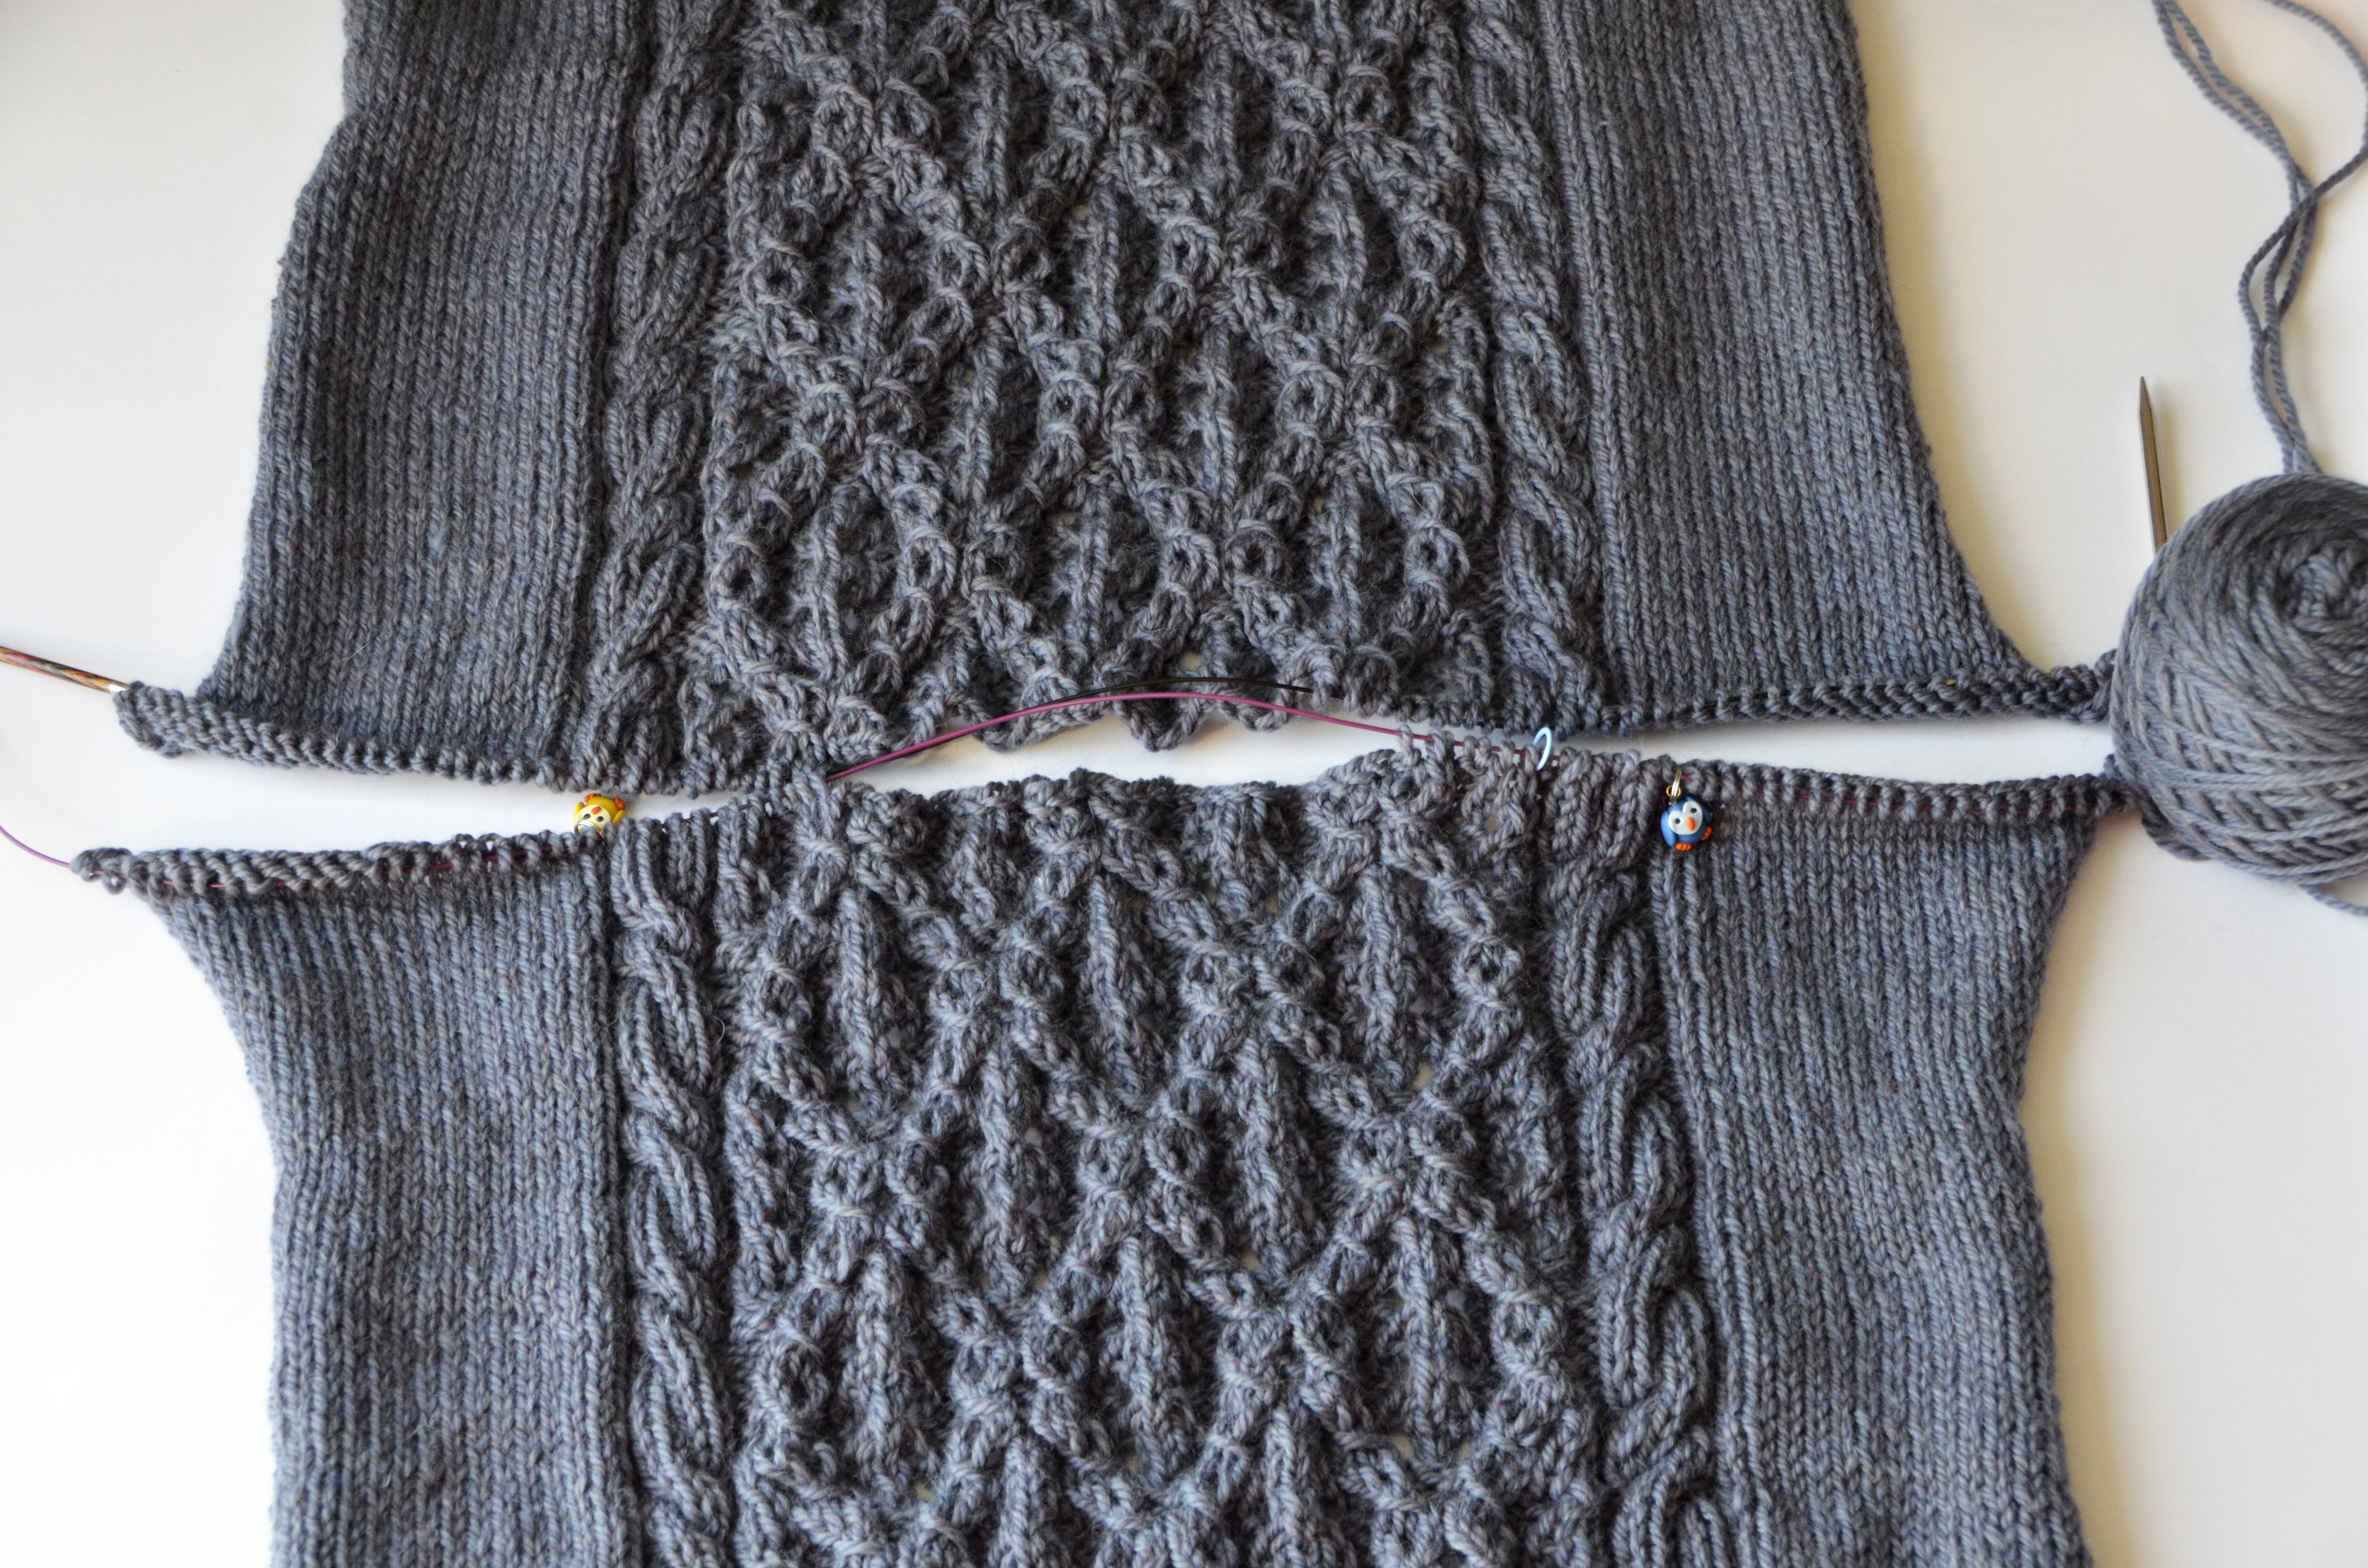
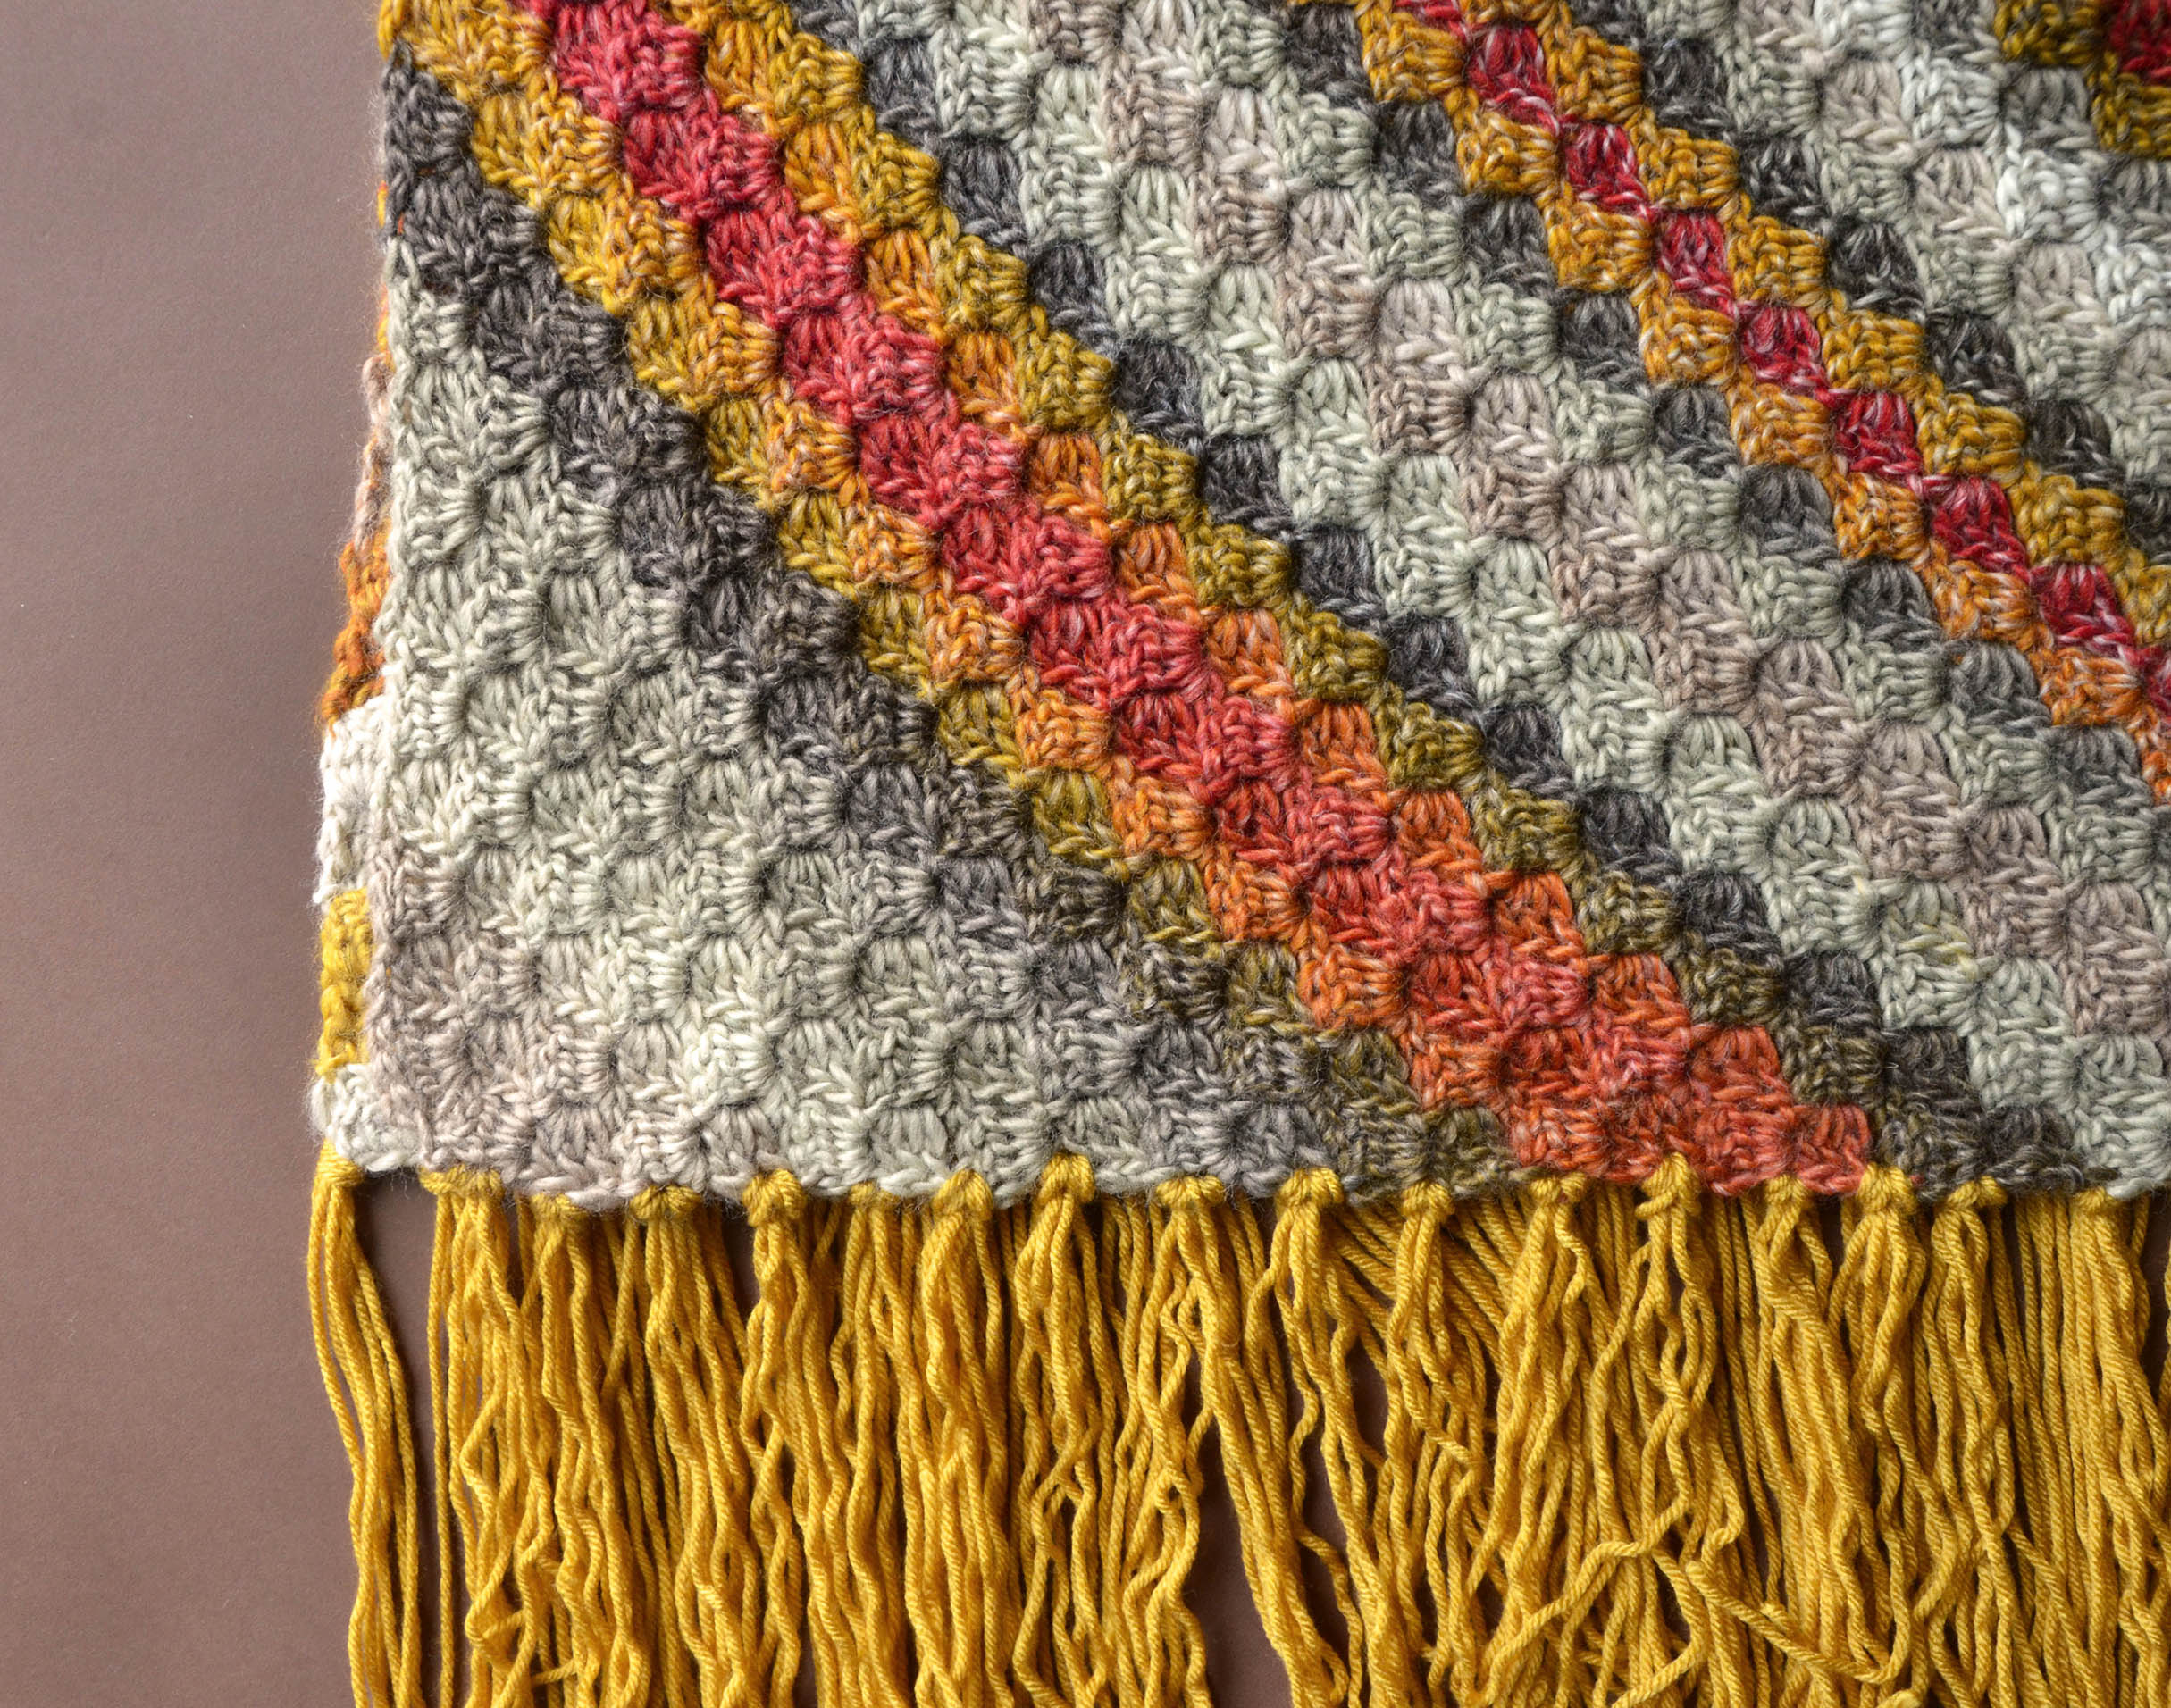
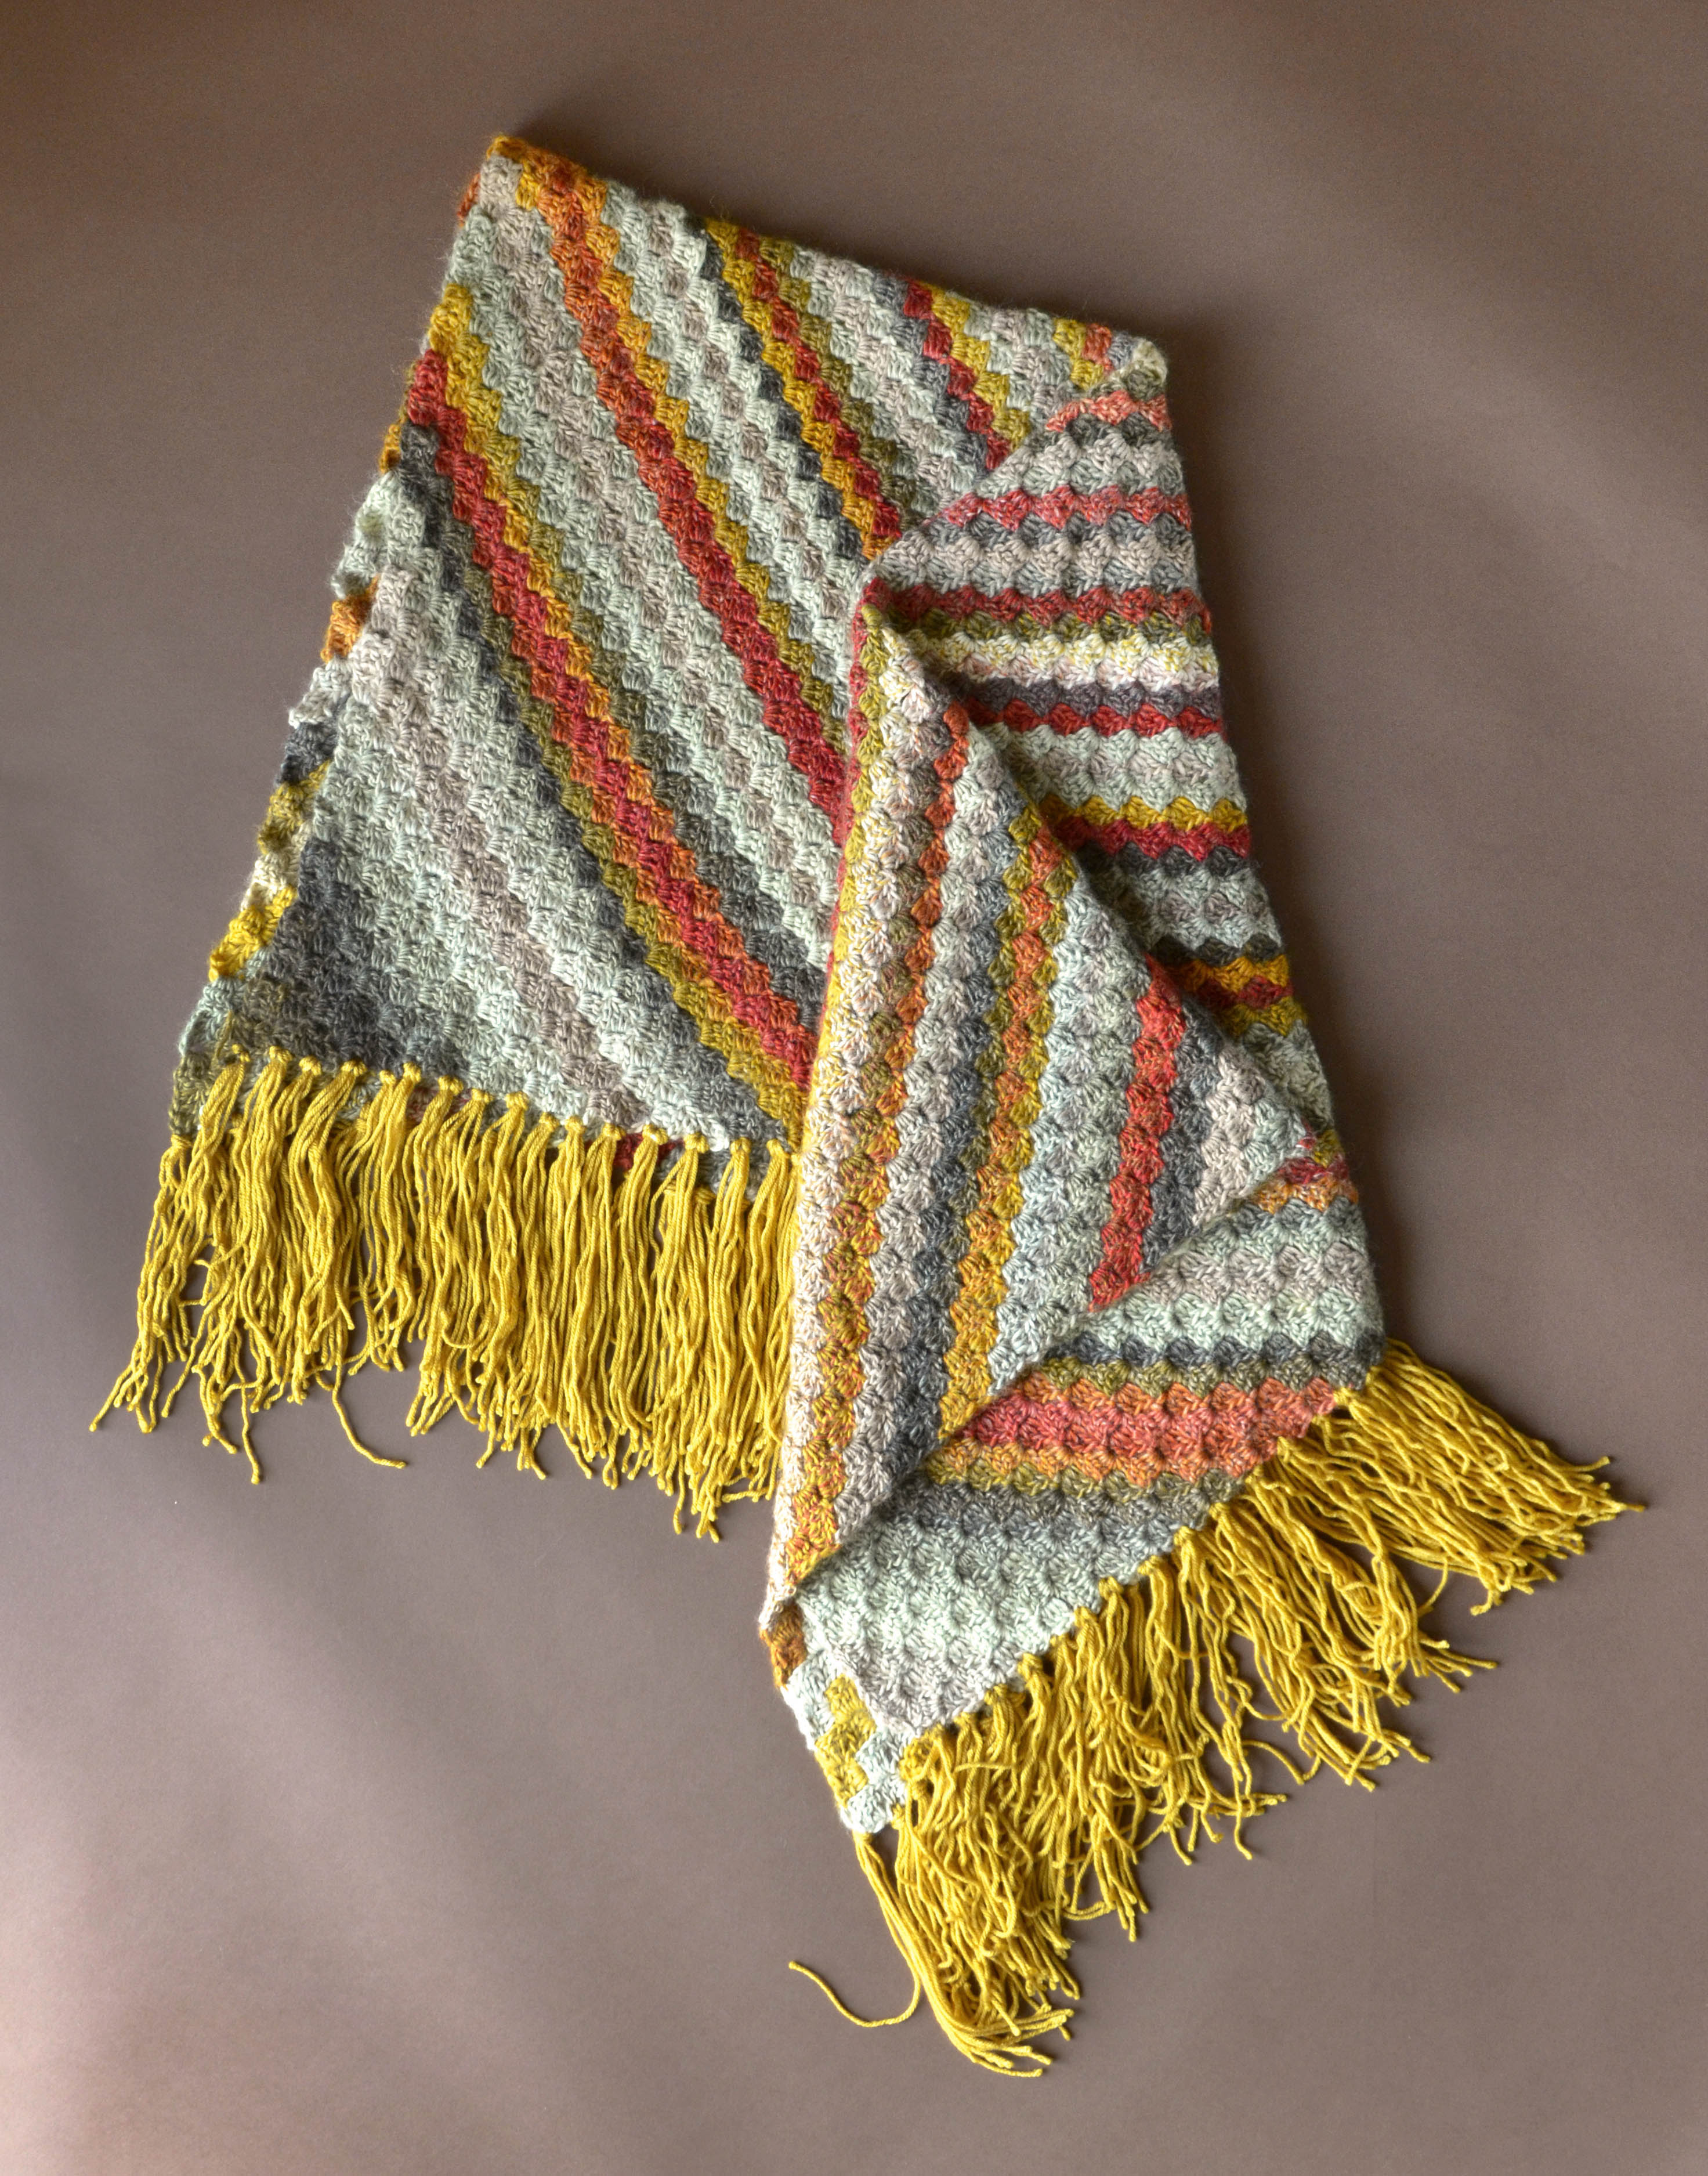
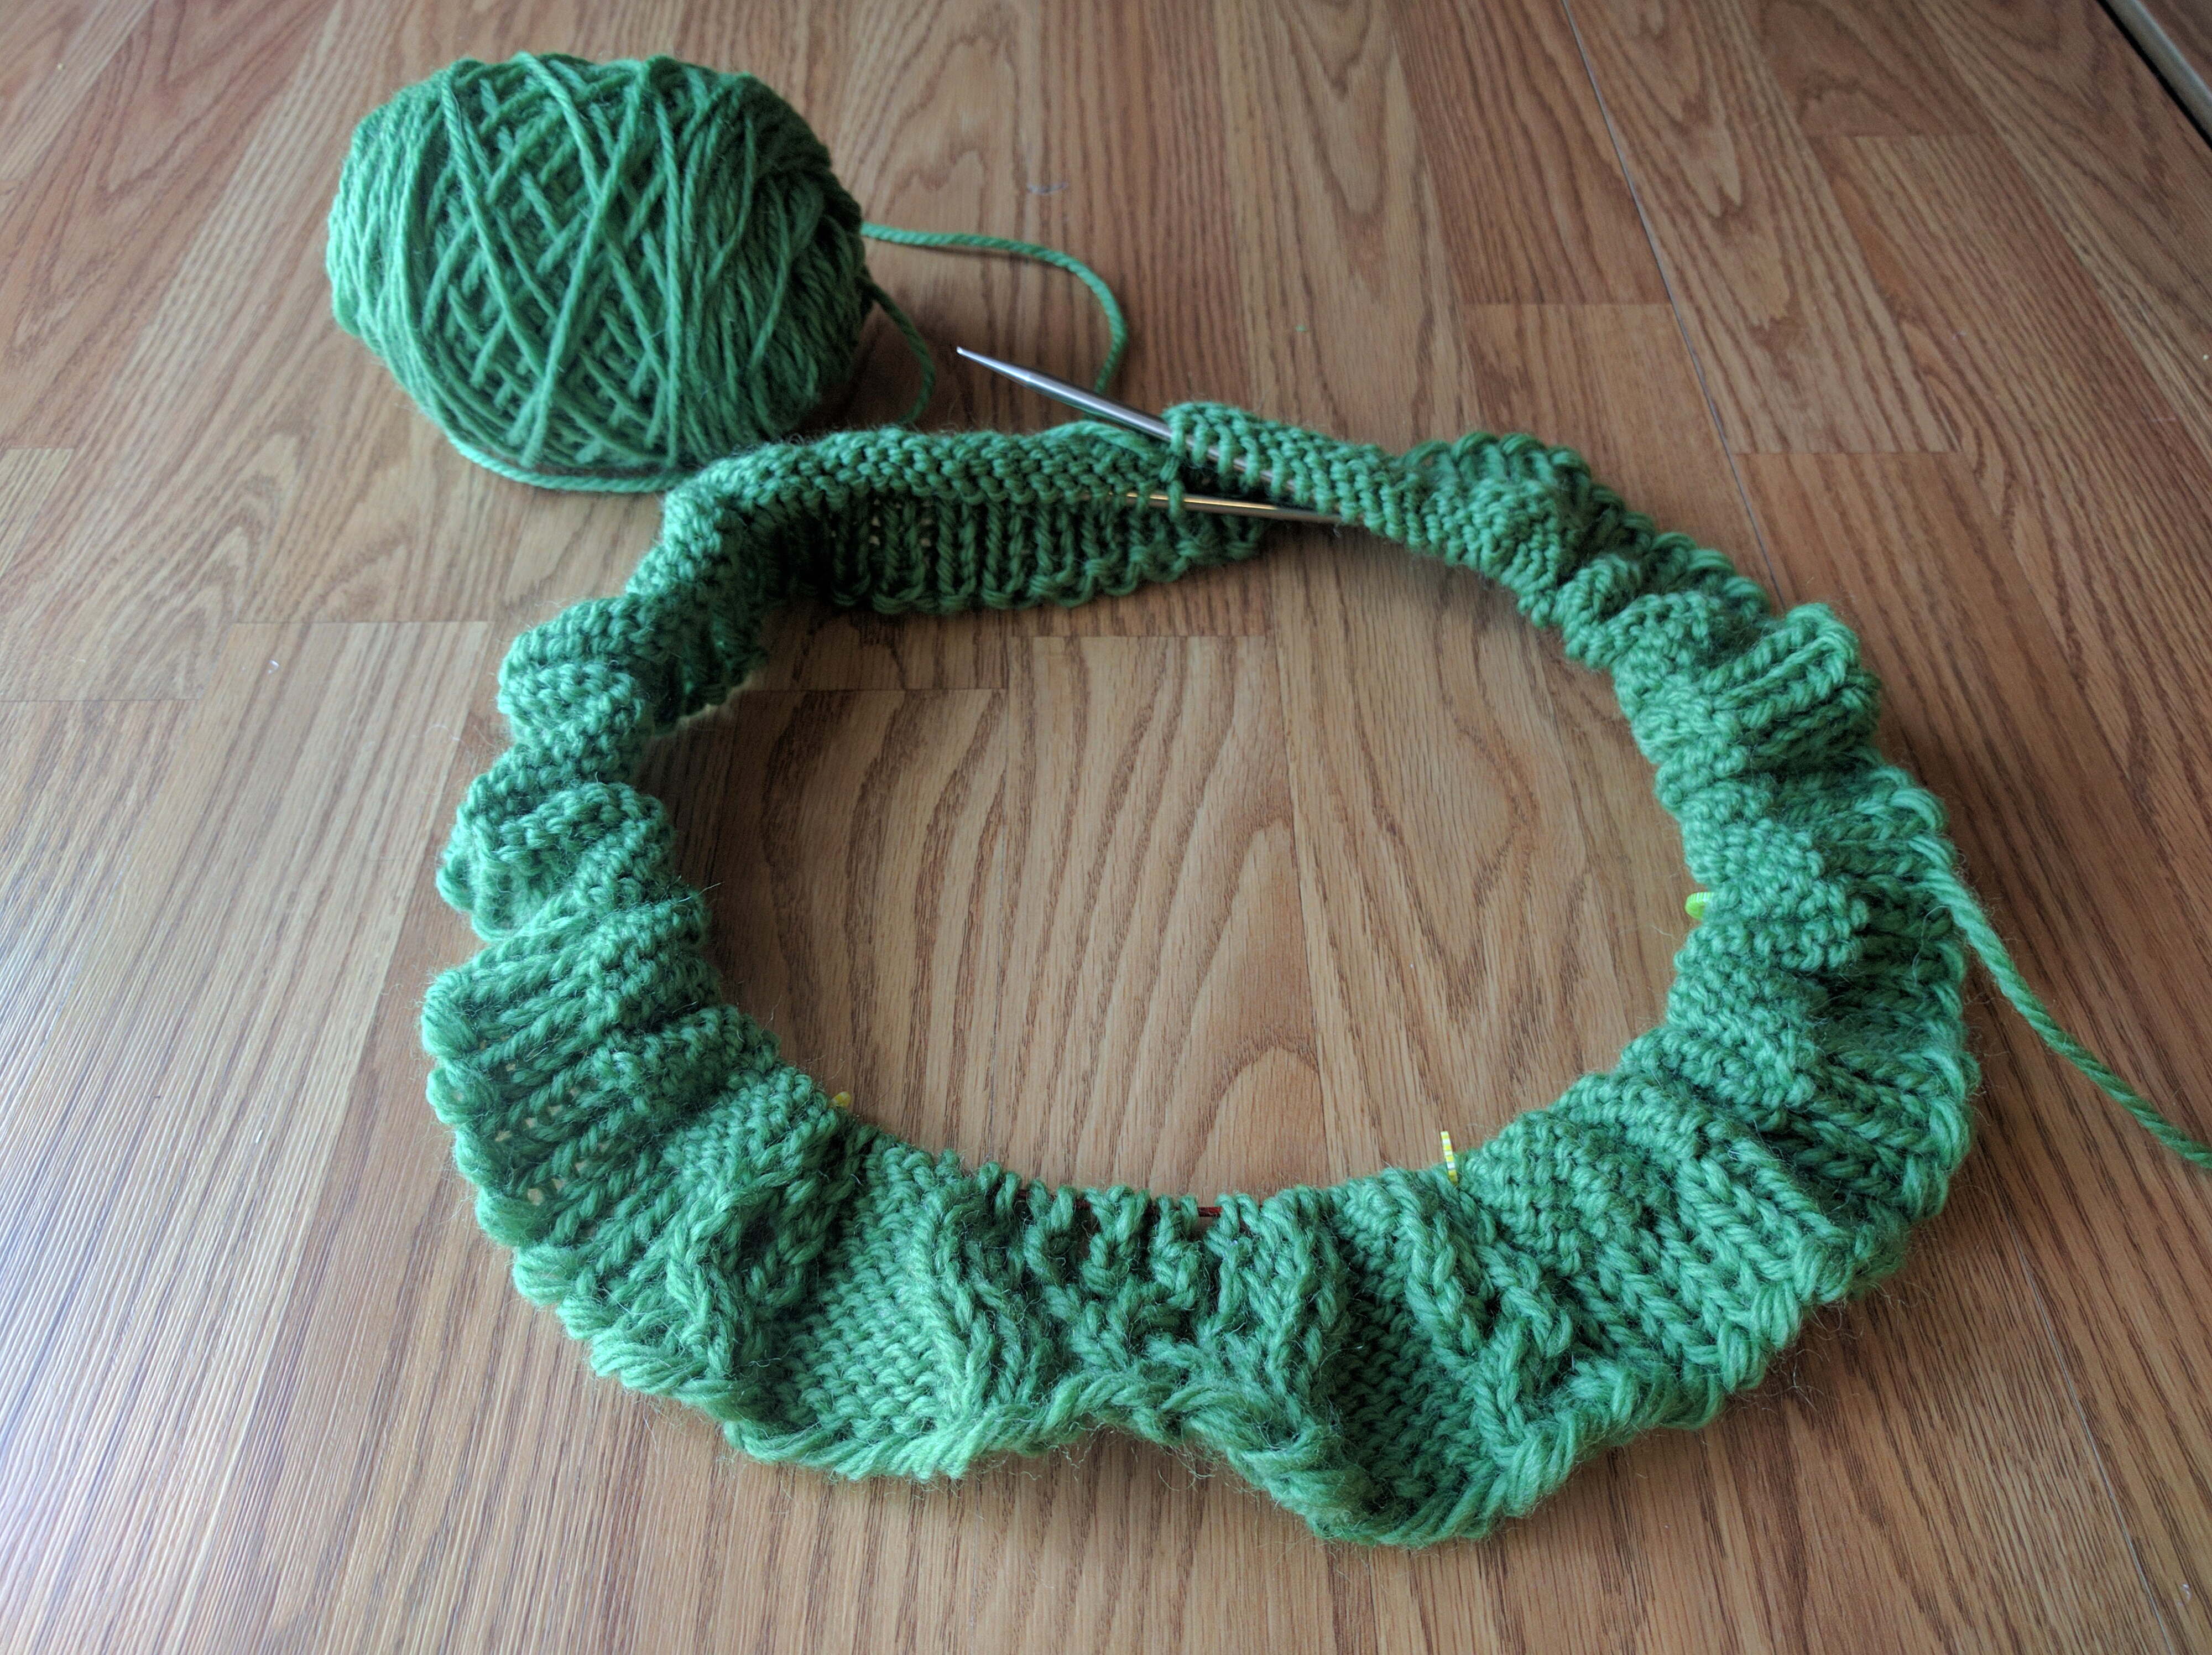
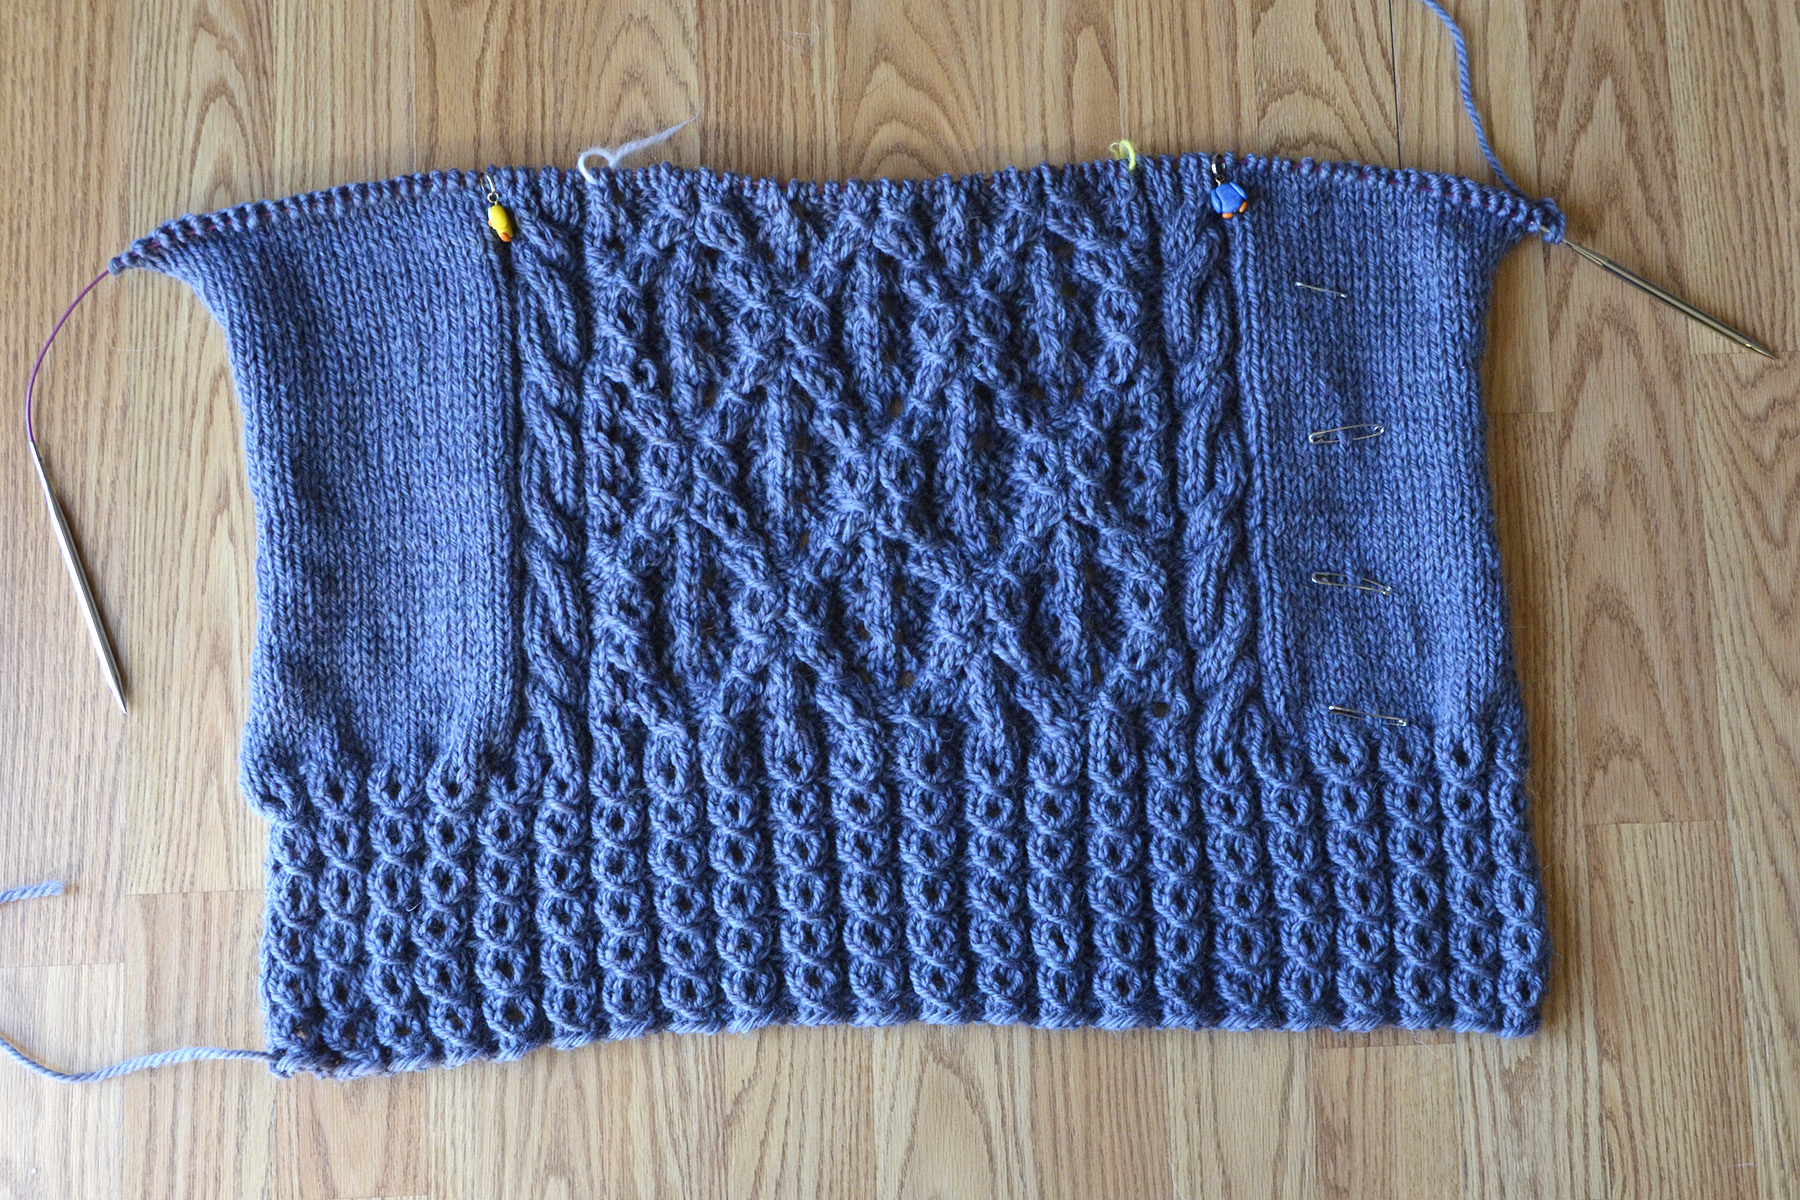
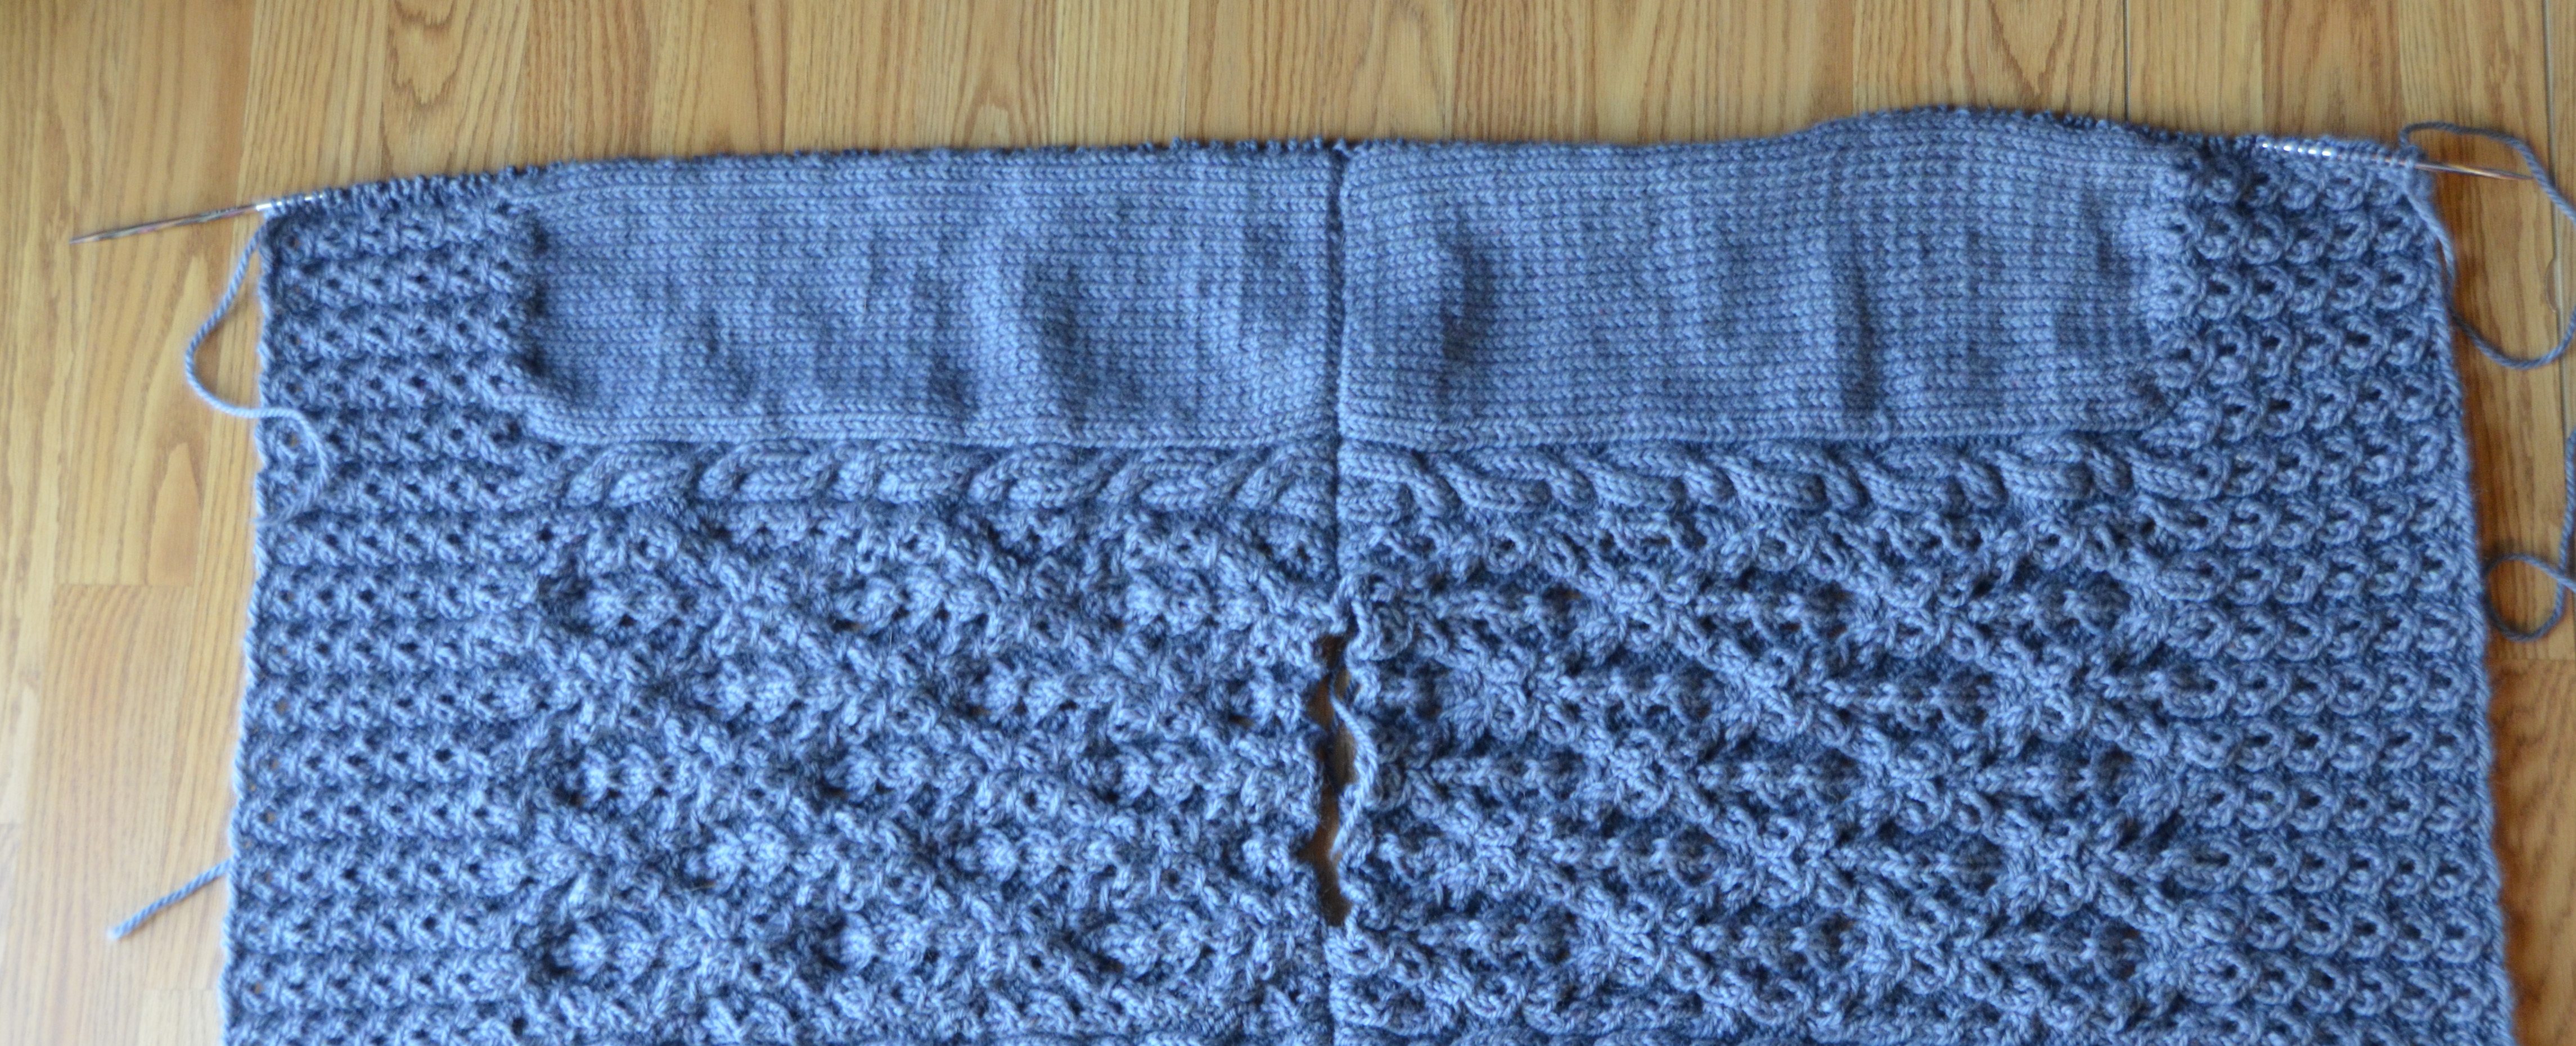
At this stage, my poncho is starting to look like a wearable thing. Which is exciting! All that’s left now is the side ribbing and then the collar. The side ribbing is more of the mock eyelet ribbing pattern, the same stitch pattern that’s used on the hem.

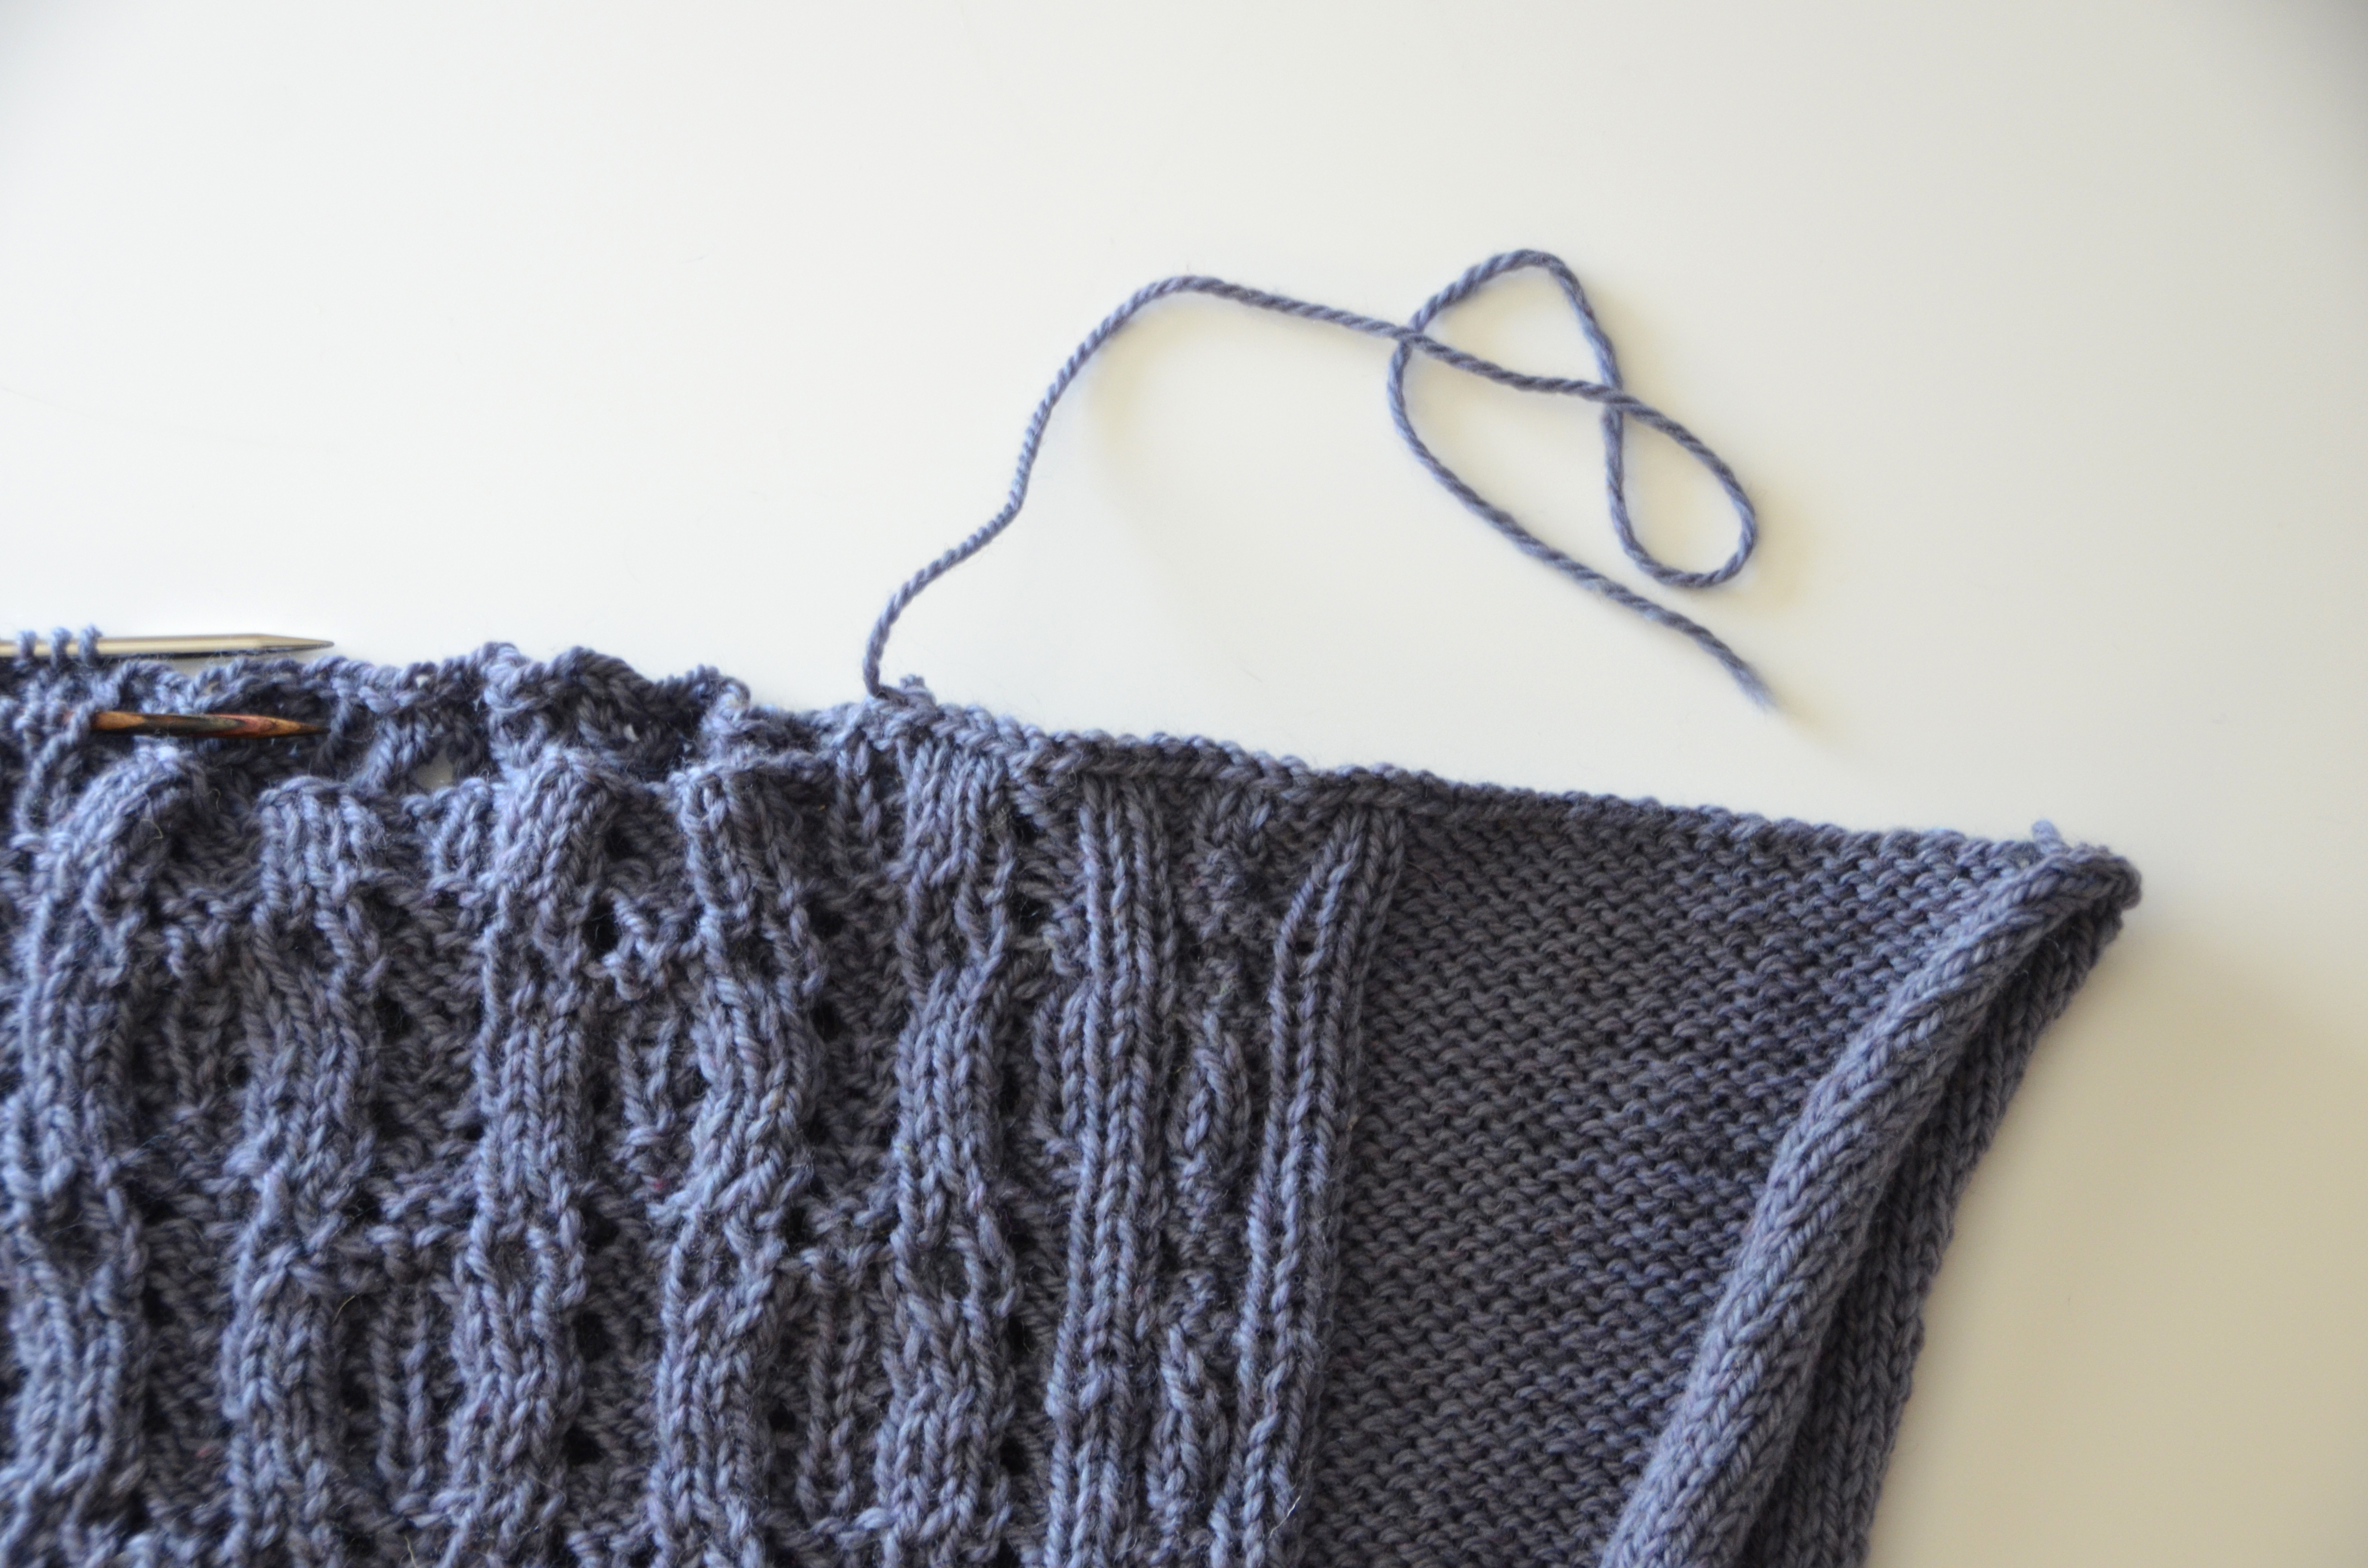
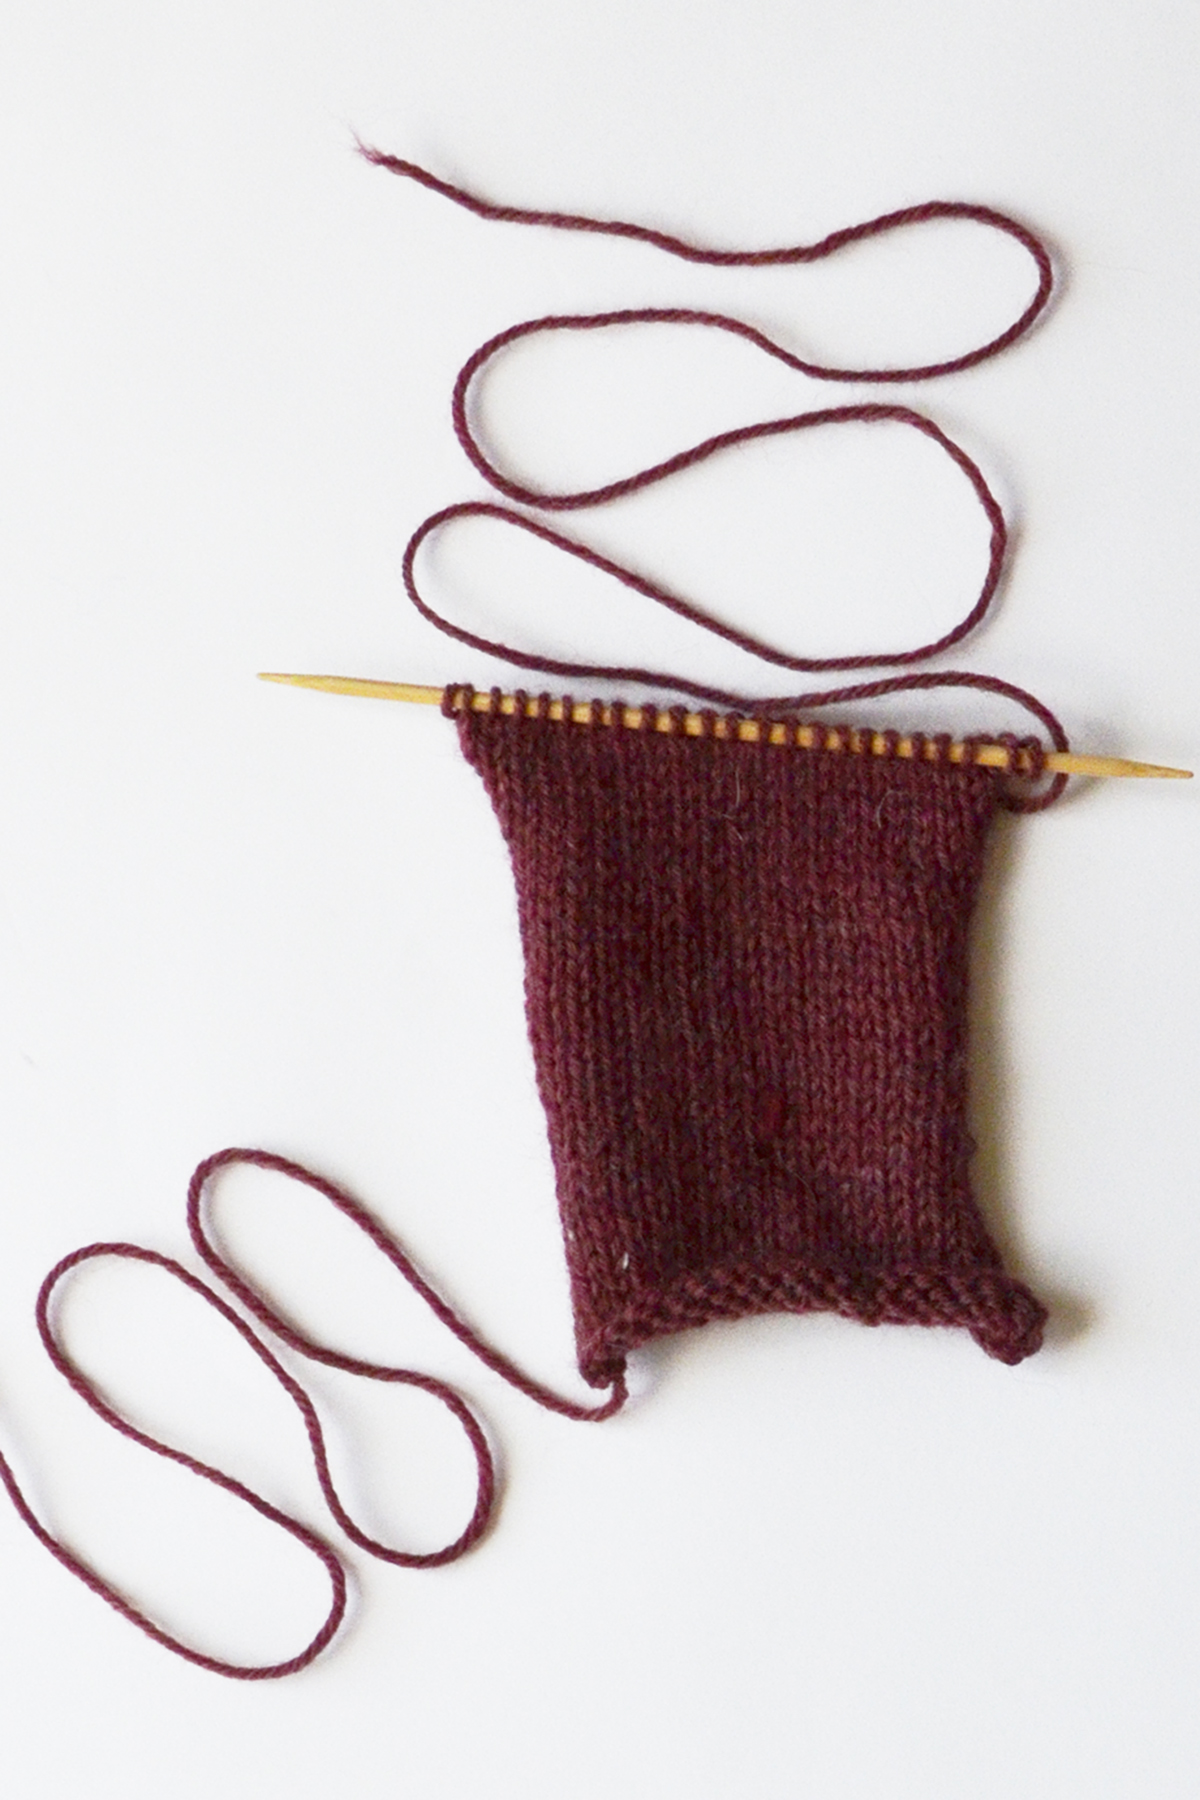
As you can see before the ribbing is added, I have an unattractive rolled stockinette thing going on here at the sides of my piece. But this will soon change.

PickingUpStitches_1

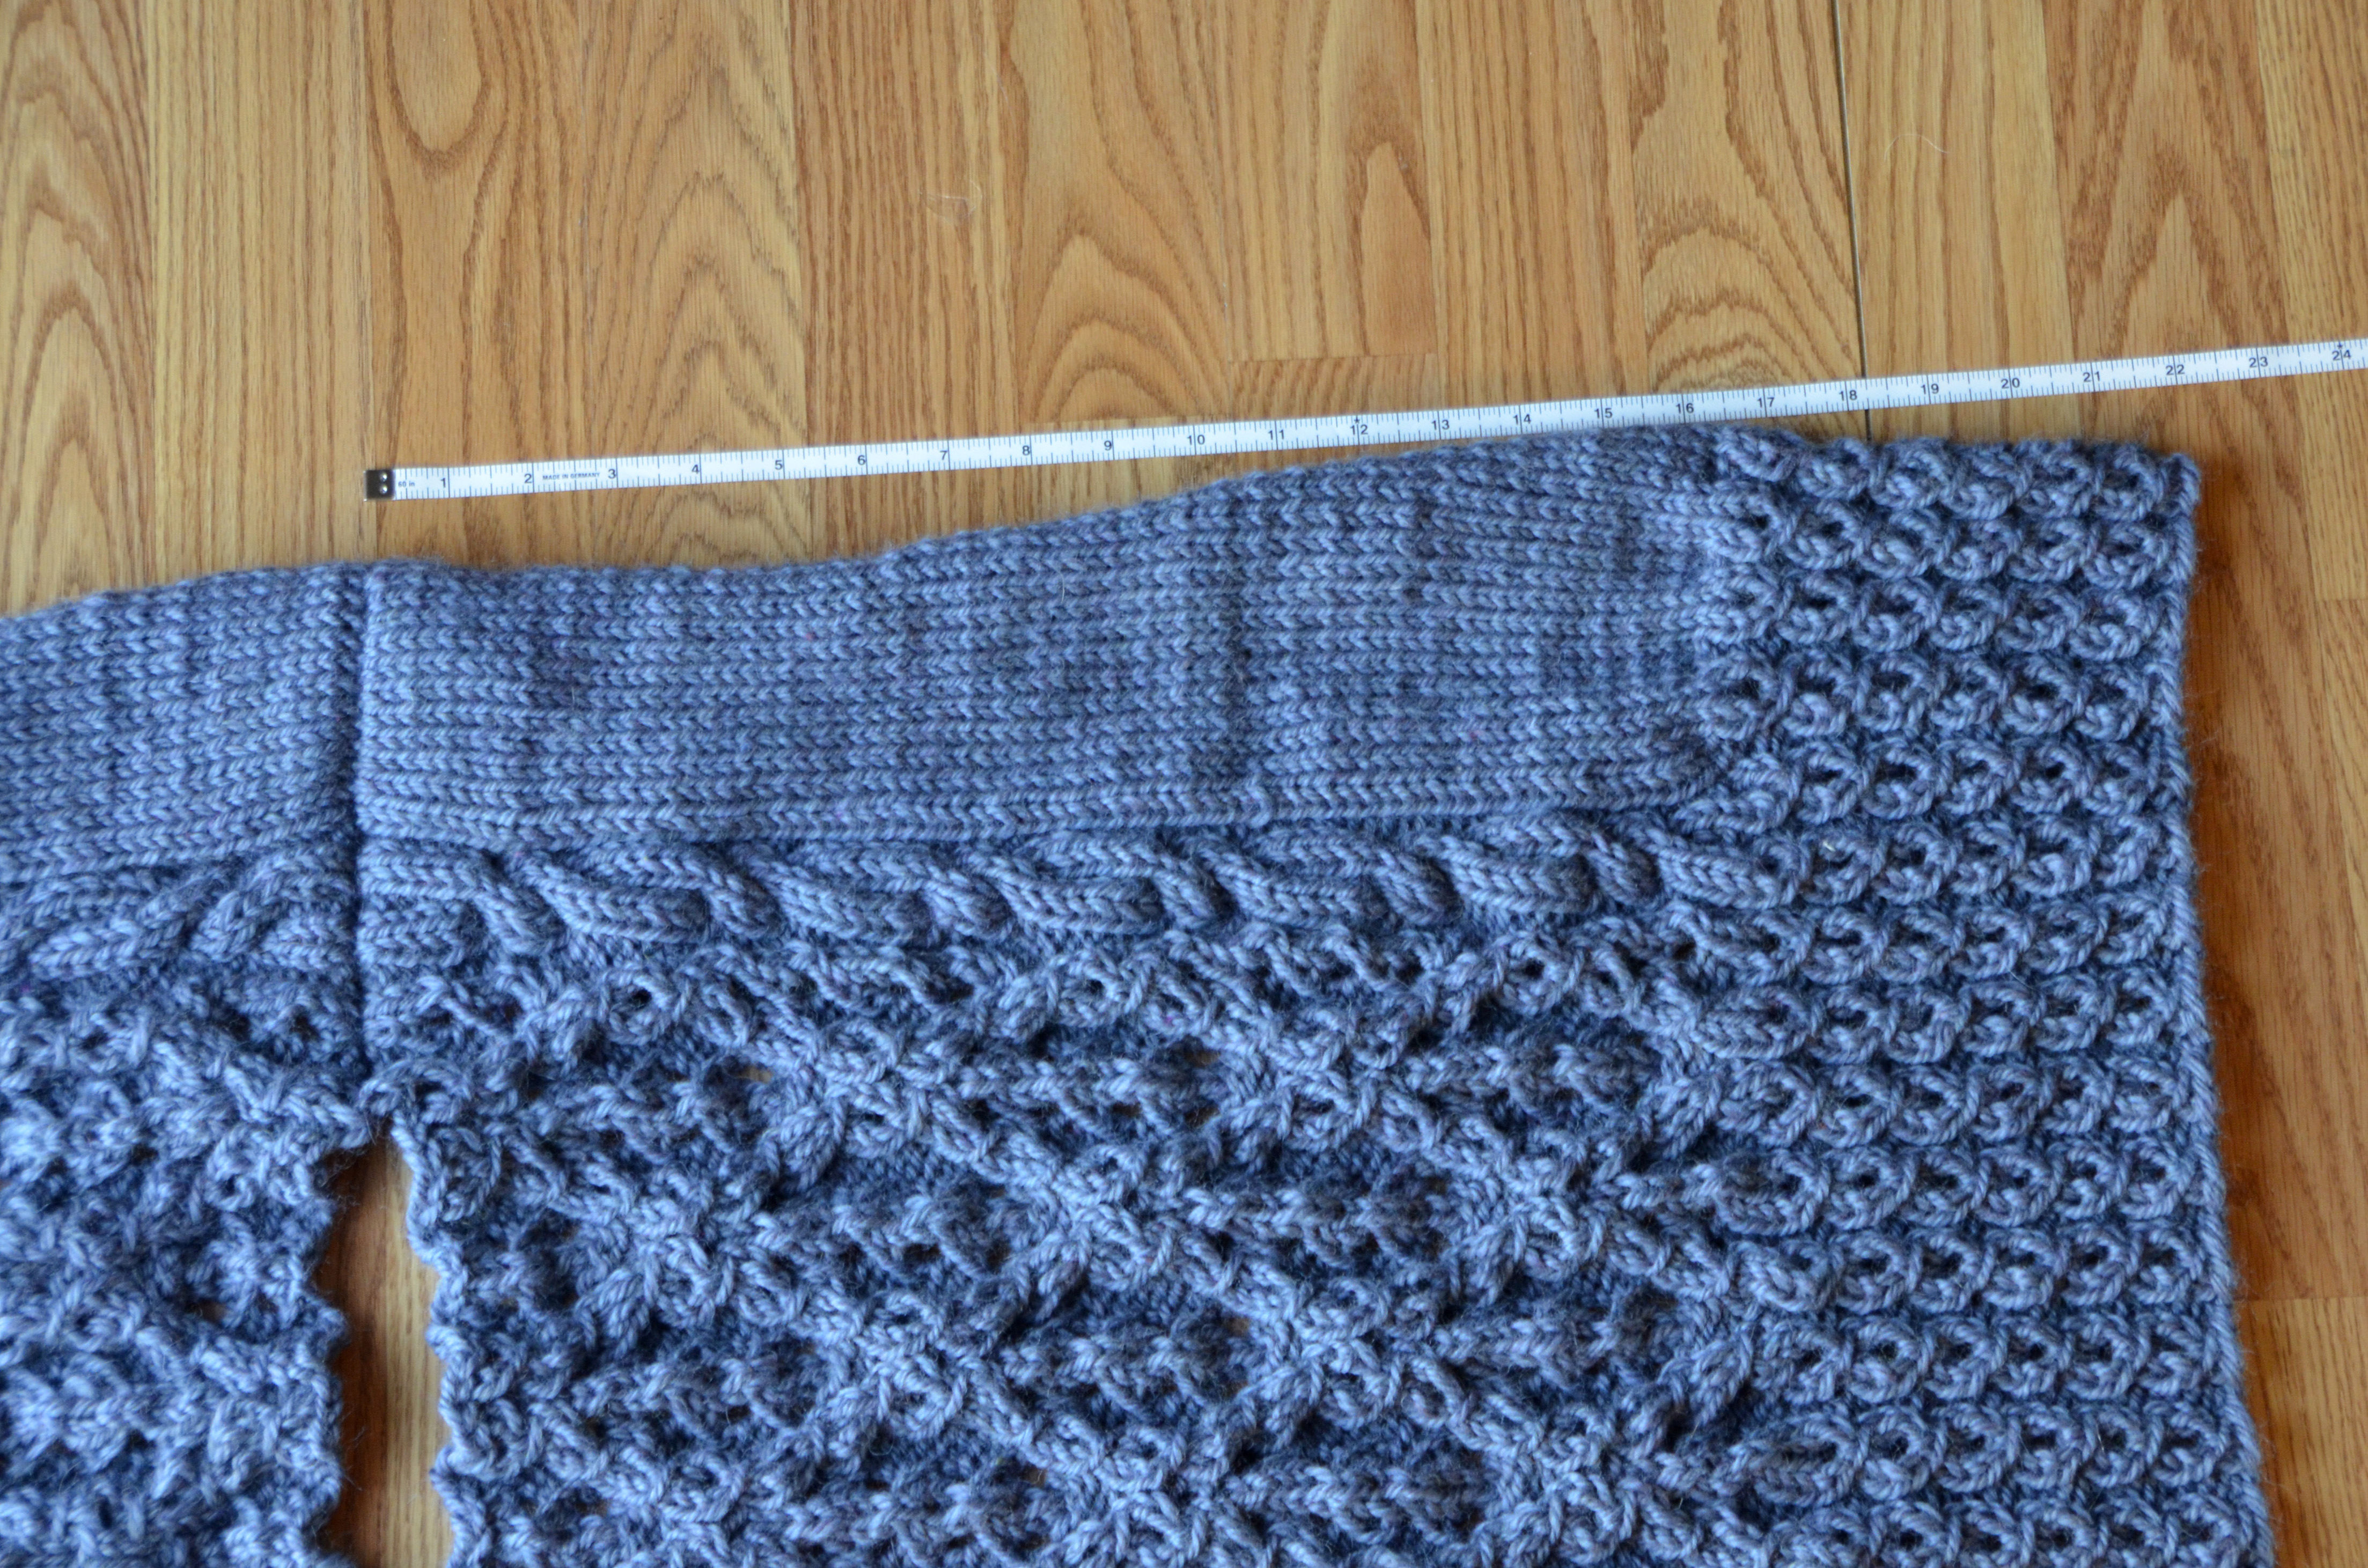
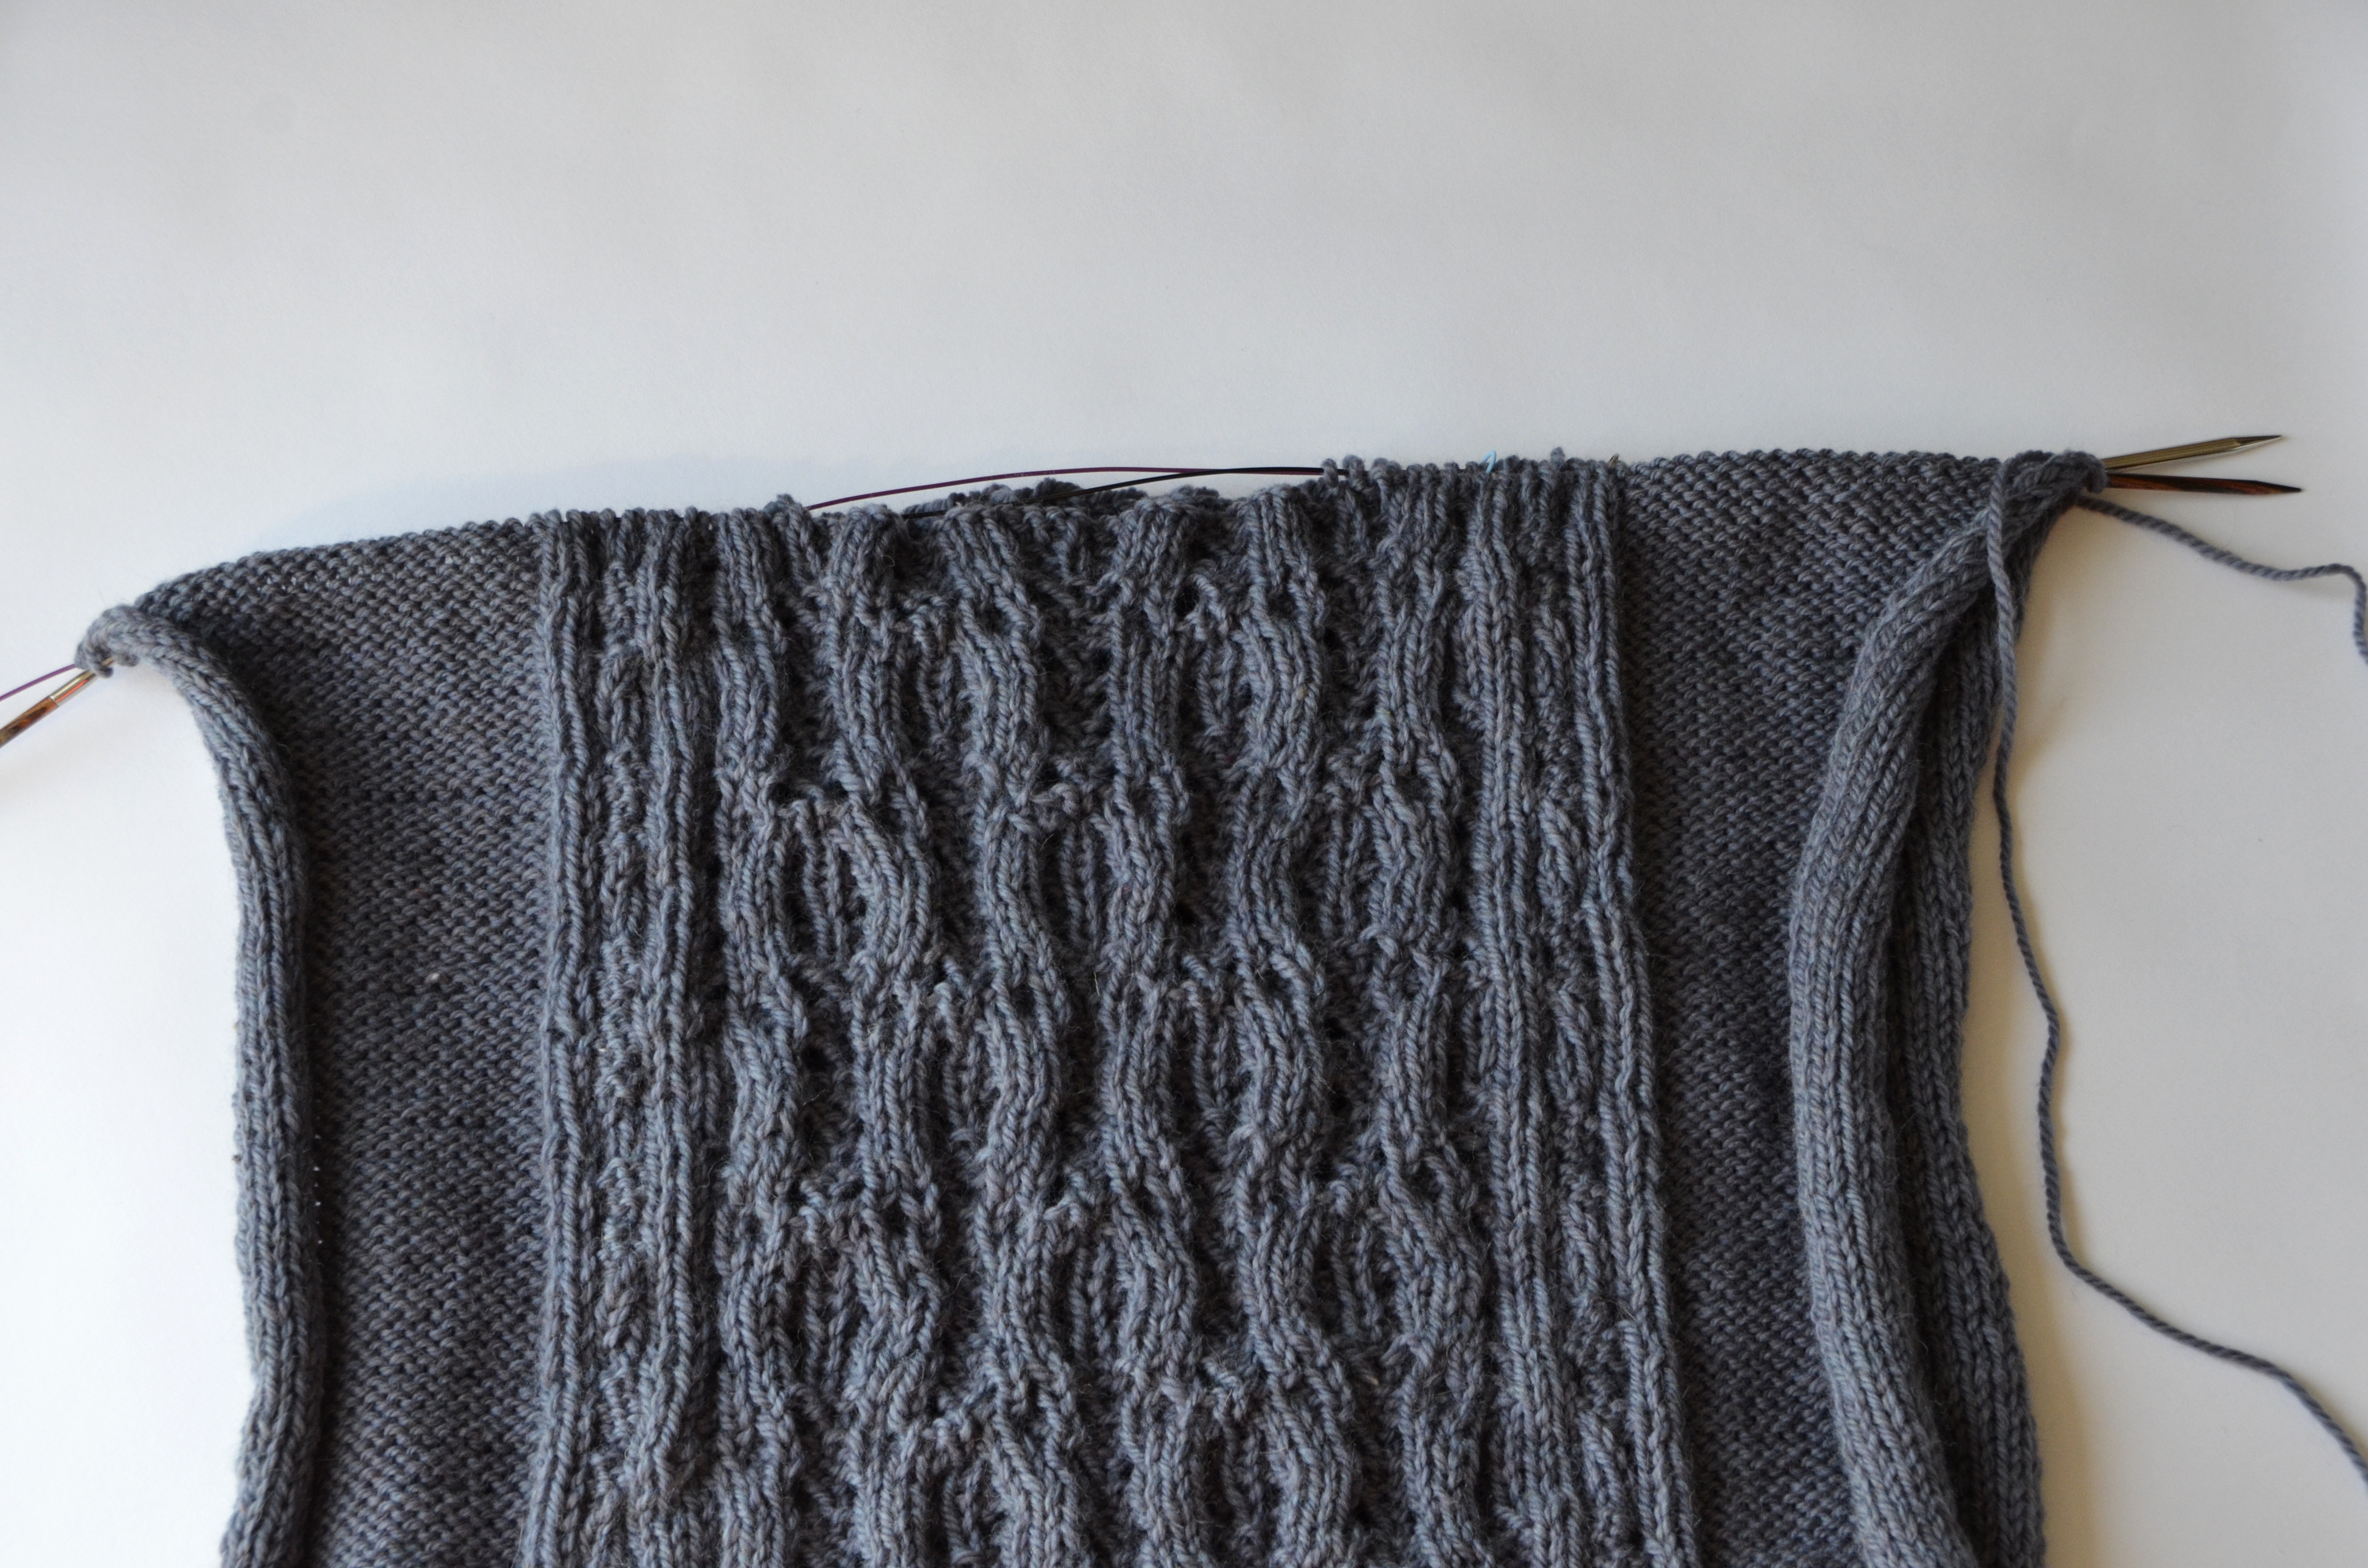
The instructions in the pattern state to “pick up and knit 162 (167, 177) sts. To pick up and knit stitches, I am going to pull through loops of yarn and place them on my knitting needle to form my base row.

But first things first. How in the heck do I figure out how to pick up that many stitches evenly along this thing? It can seem like daunting task, but I’m going to share a few of the little tricks I like to use when doing this.

I’m making the small size, which means I need to pick up and knit 162 stitches. I’m going to break this down into more manageable numbers.

My usual method is to cut the length in half, then in half again, and again, until I get to a small enough section that doesn’t hurt my head. If I wanted in the illustration below, I could have halved the 20 stitch sections to 10, but I’m comfortable with 20 stitches at a time.

PickingUpStitches_3.5

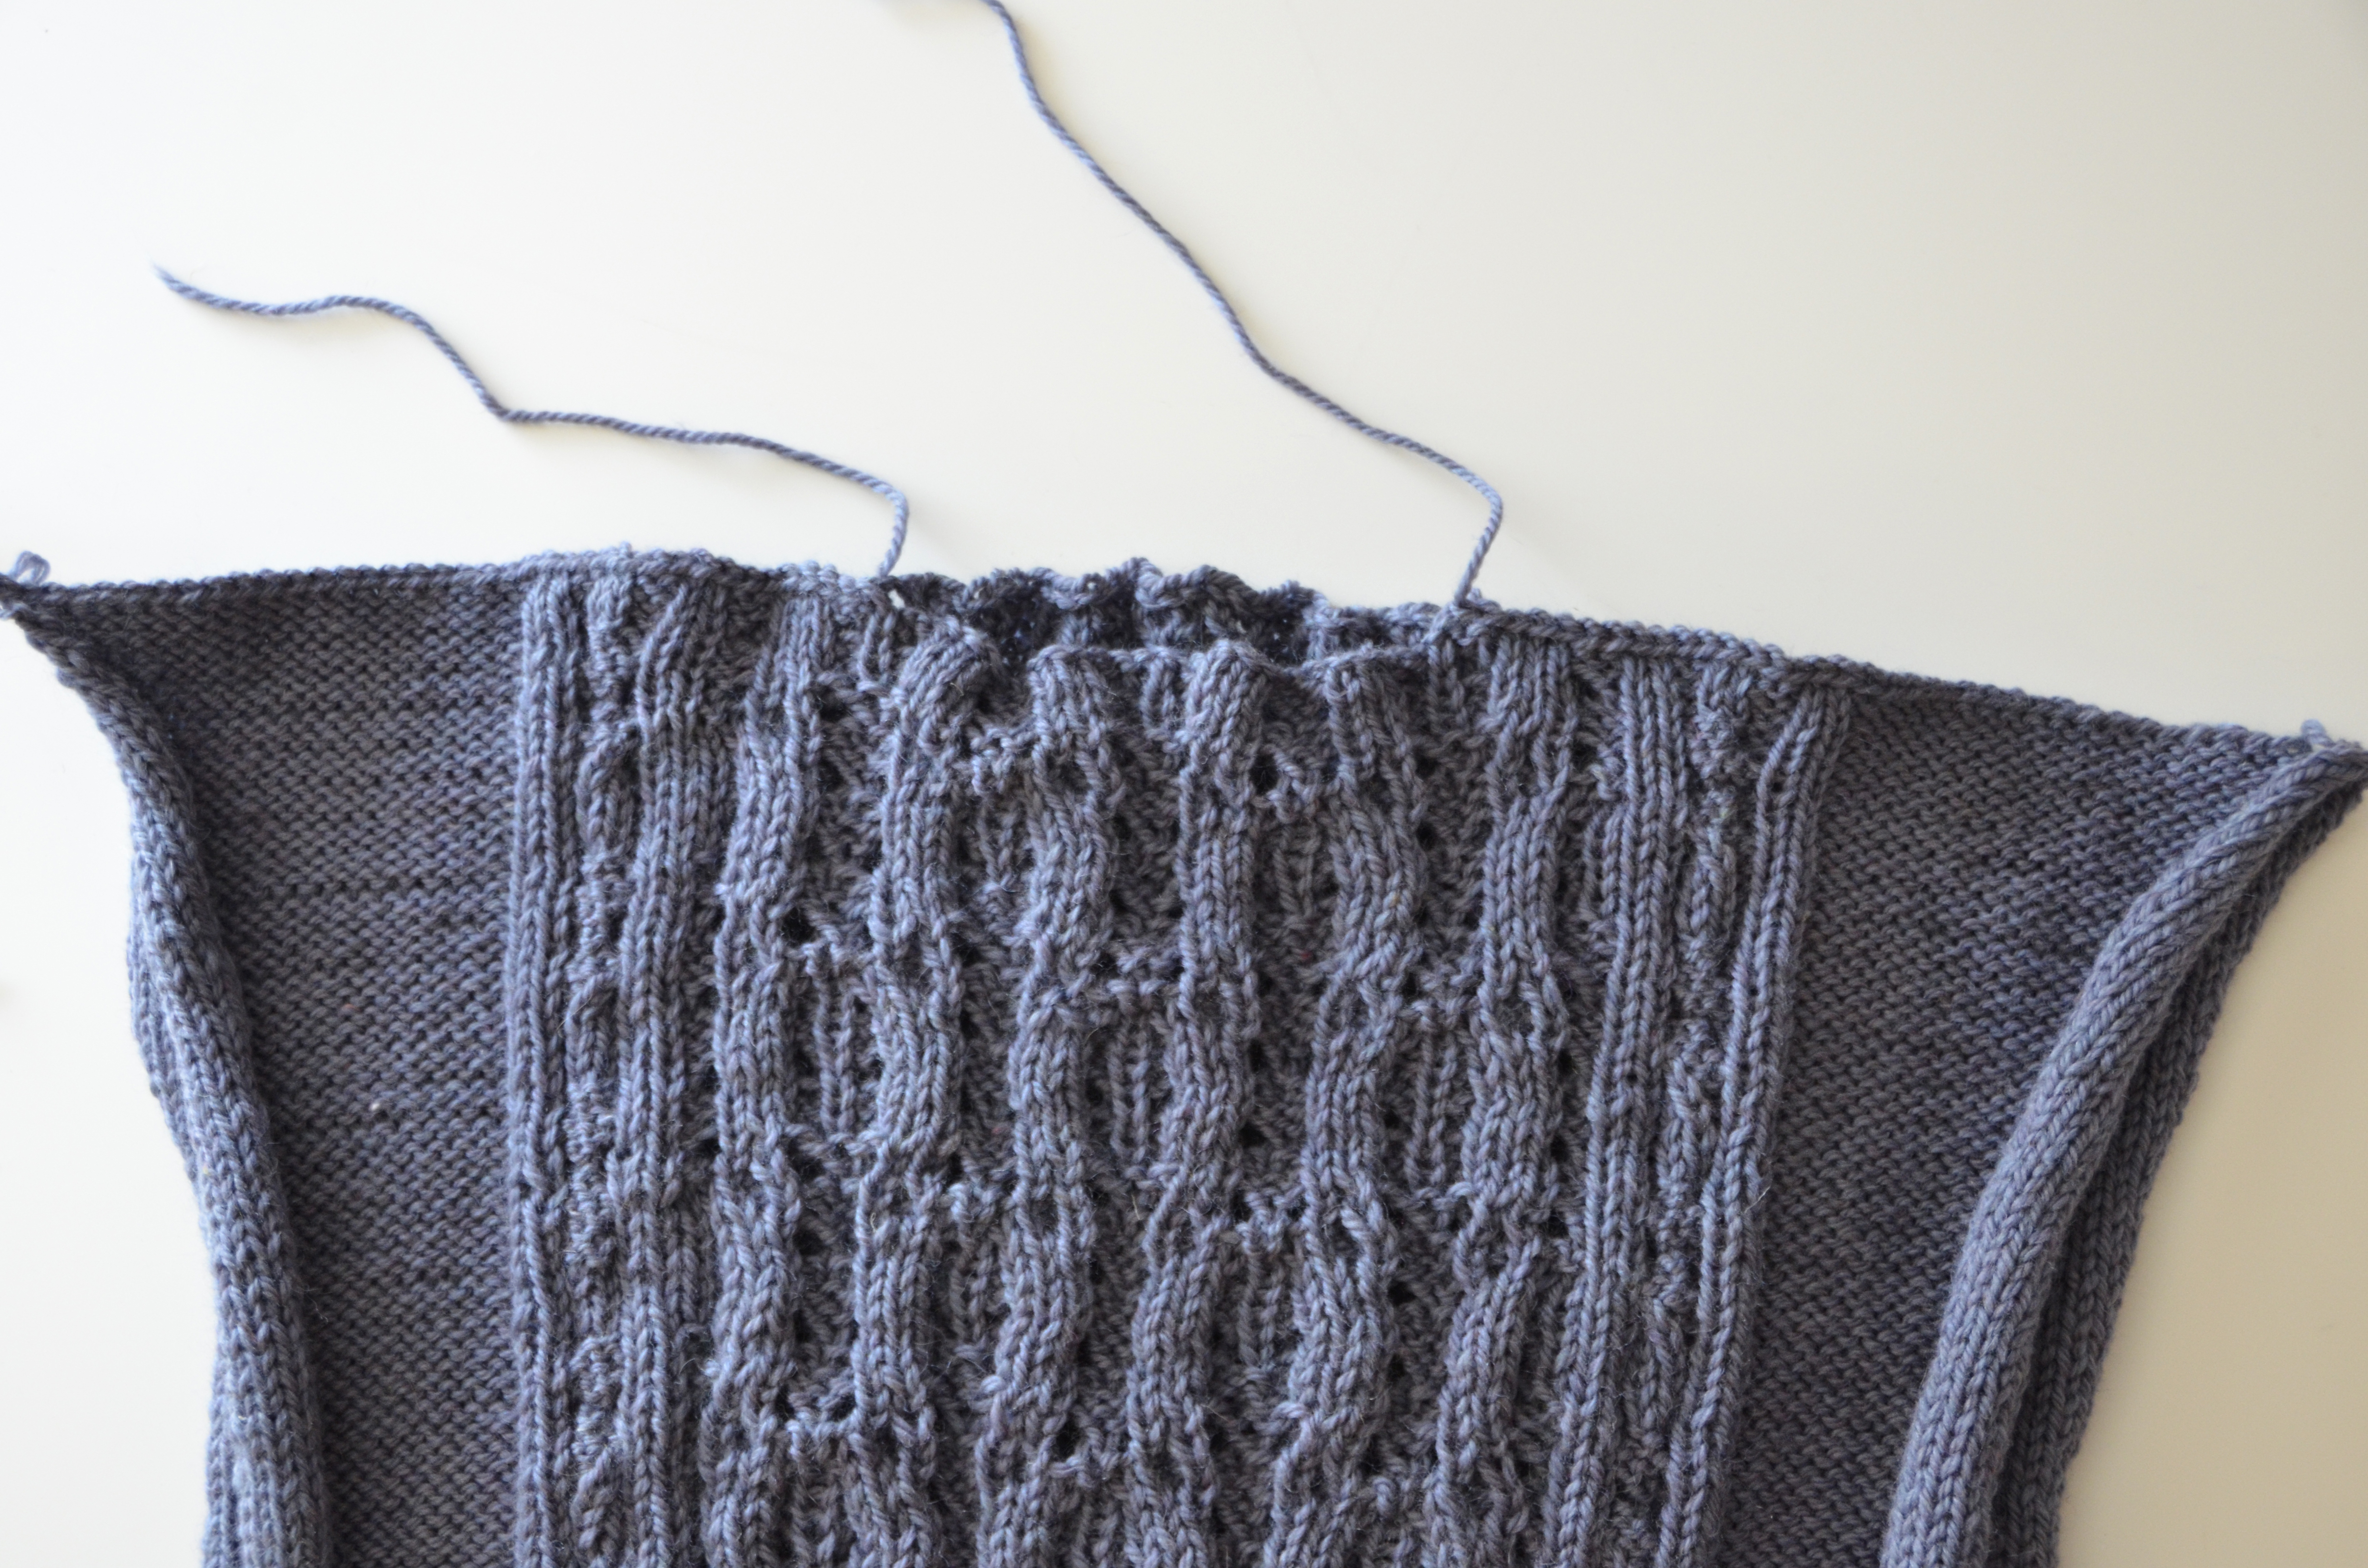
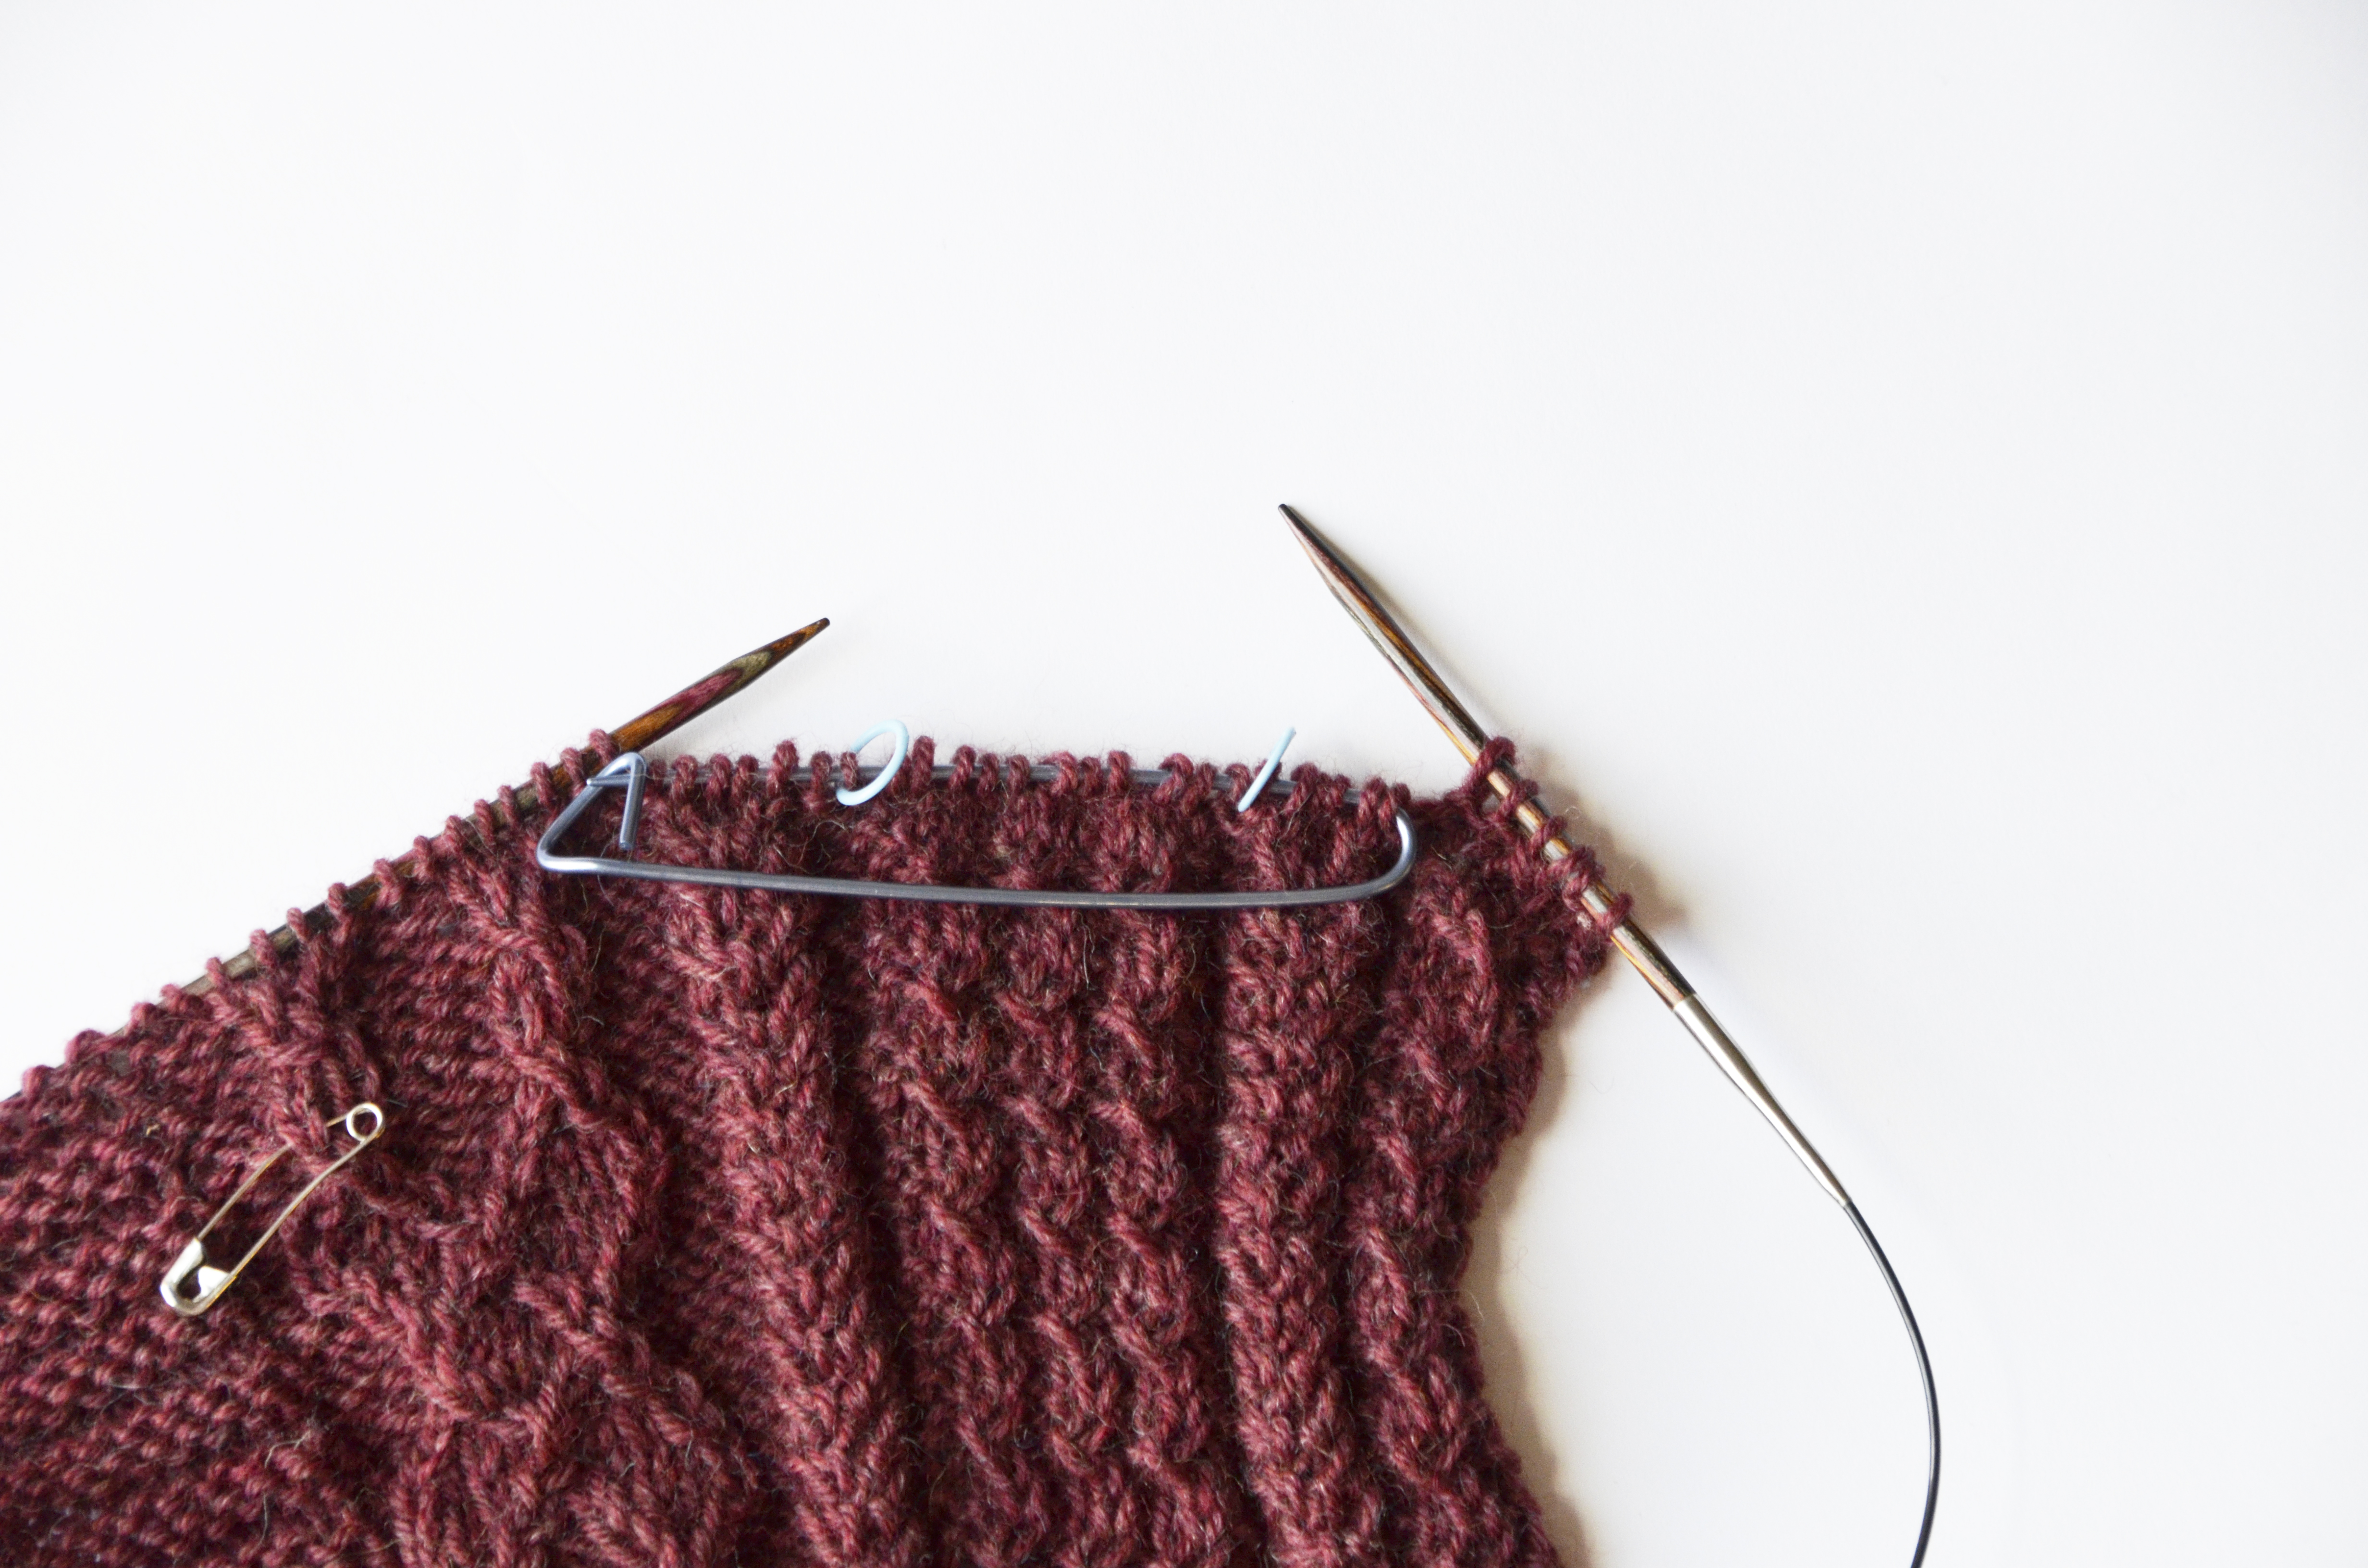
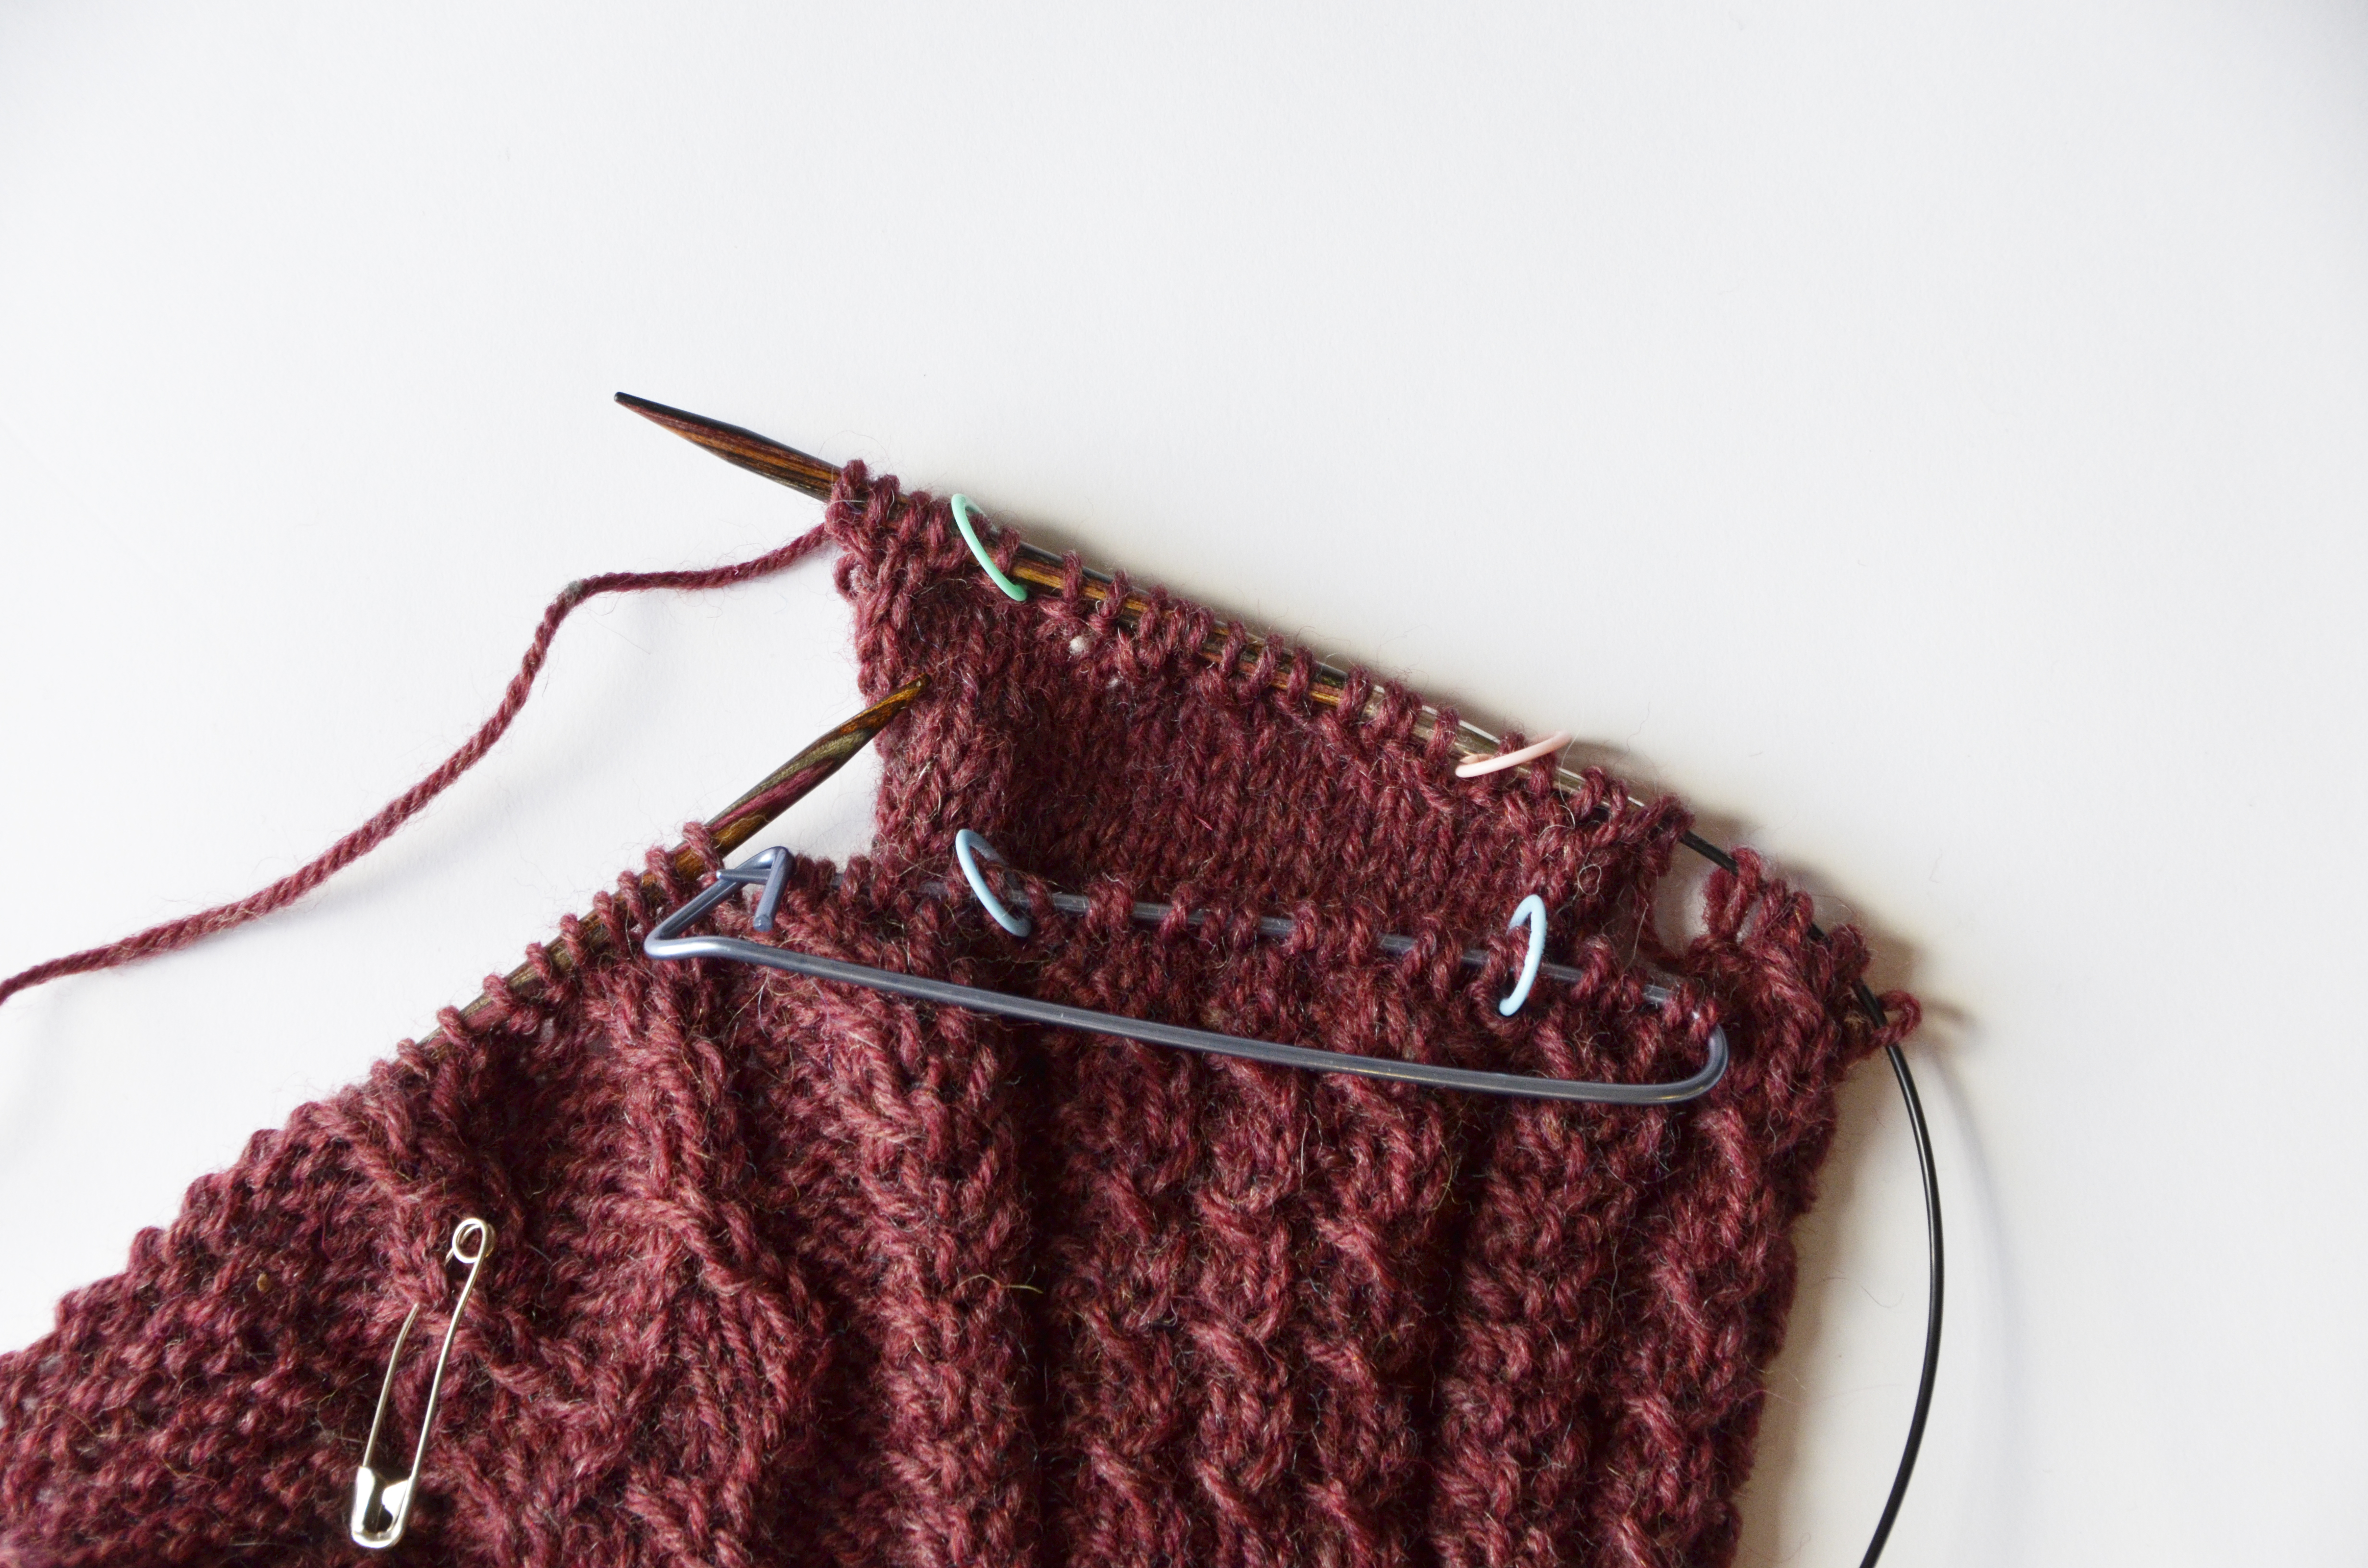
162 / 8 sections  = 20.25 stitches per section. I’m going to solve this by making 2 of my sections 21 stitches instead of 20. In the scheme of things, a stitch here or there rarely makes much of a difference. I placed safety pins at each of my divisions

Next, I need to figure out the rate at which I’m going to pick up my stitches. I counted the rows in a couple of my 20-stitch sections, and found that each of these had 24 rows. I will be picking up 20 stitches over 24 rows.

Now I’m going to put some of my fancy math skills to work with fractions! 20/24 can be reduced to 5/6. This means I’m going to be picking up 5 stitches for every 6 rows. For you, this number could be the same, but it could also be different. It all depends on your row gauge.

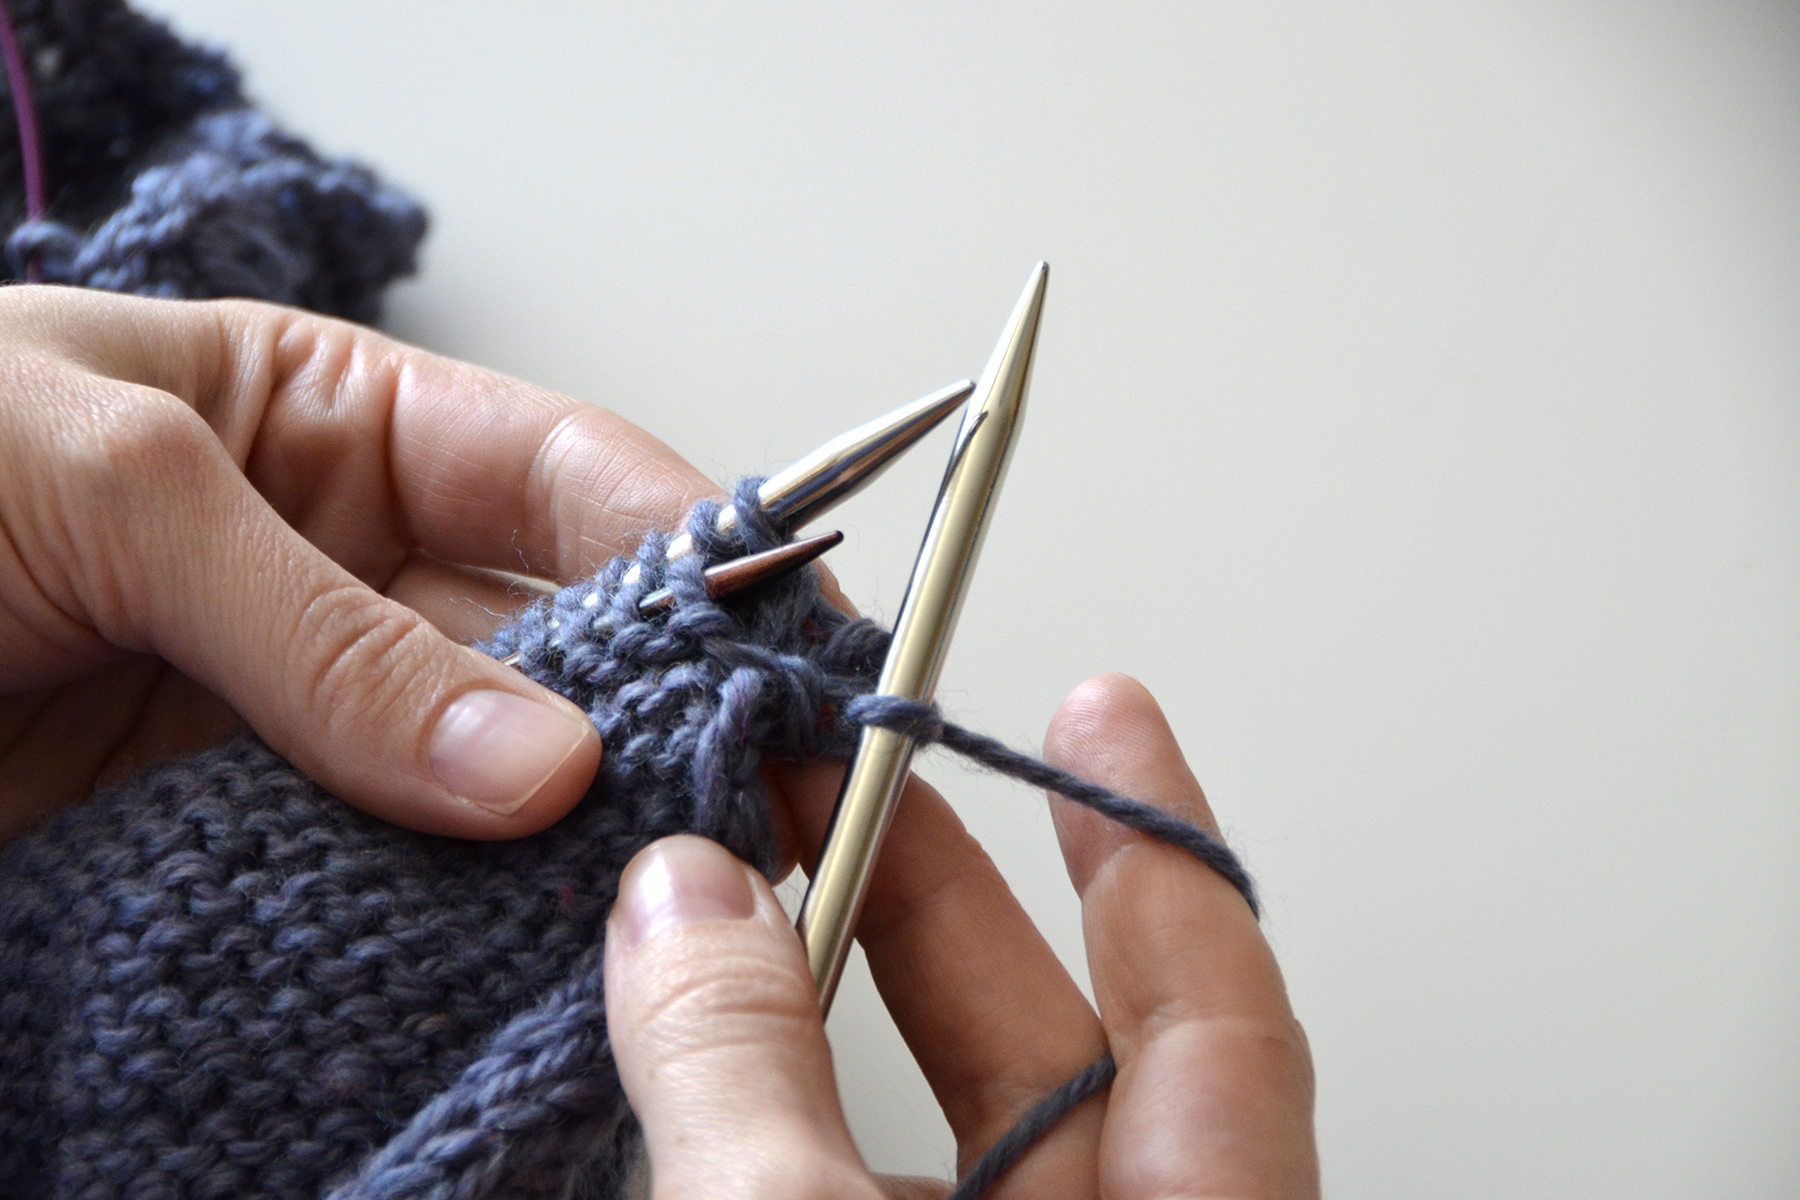
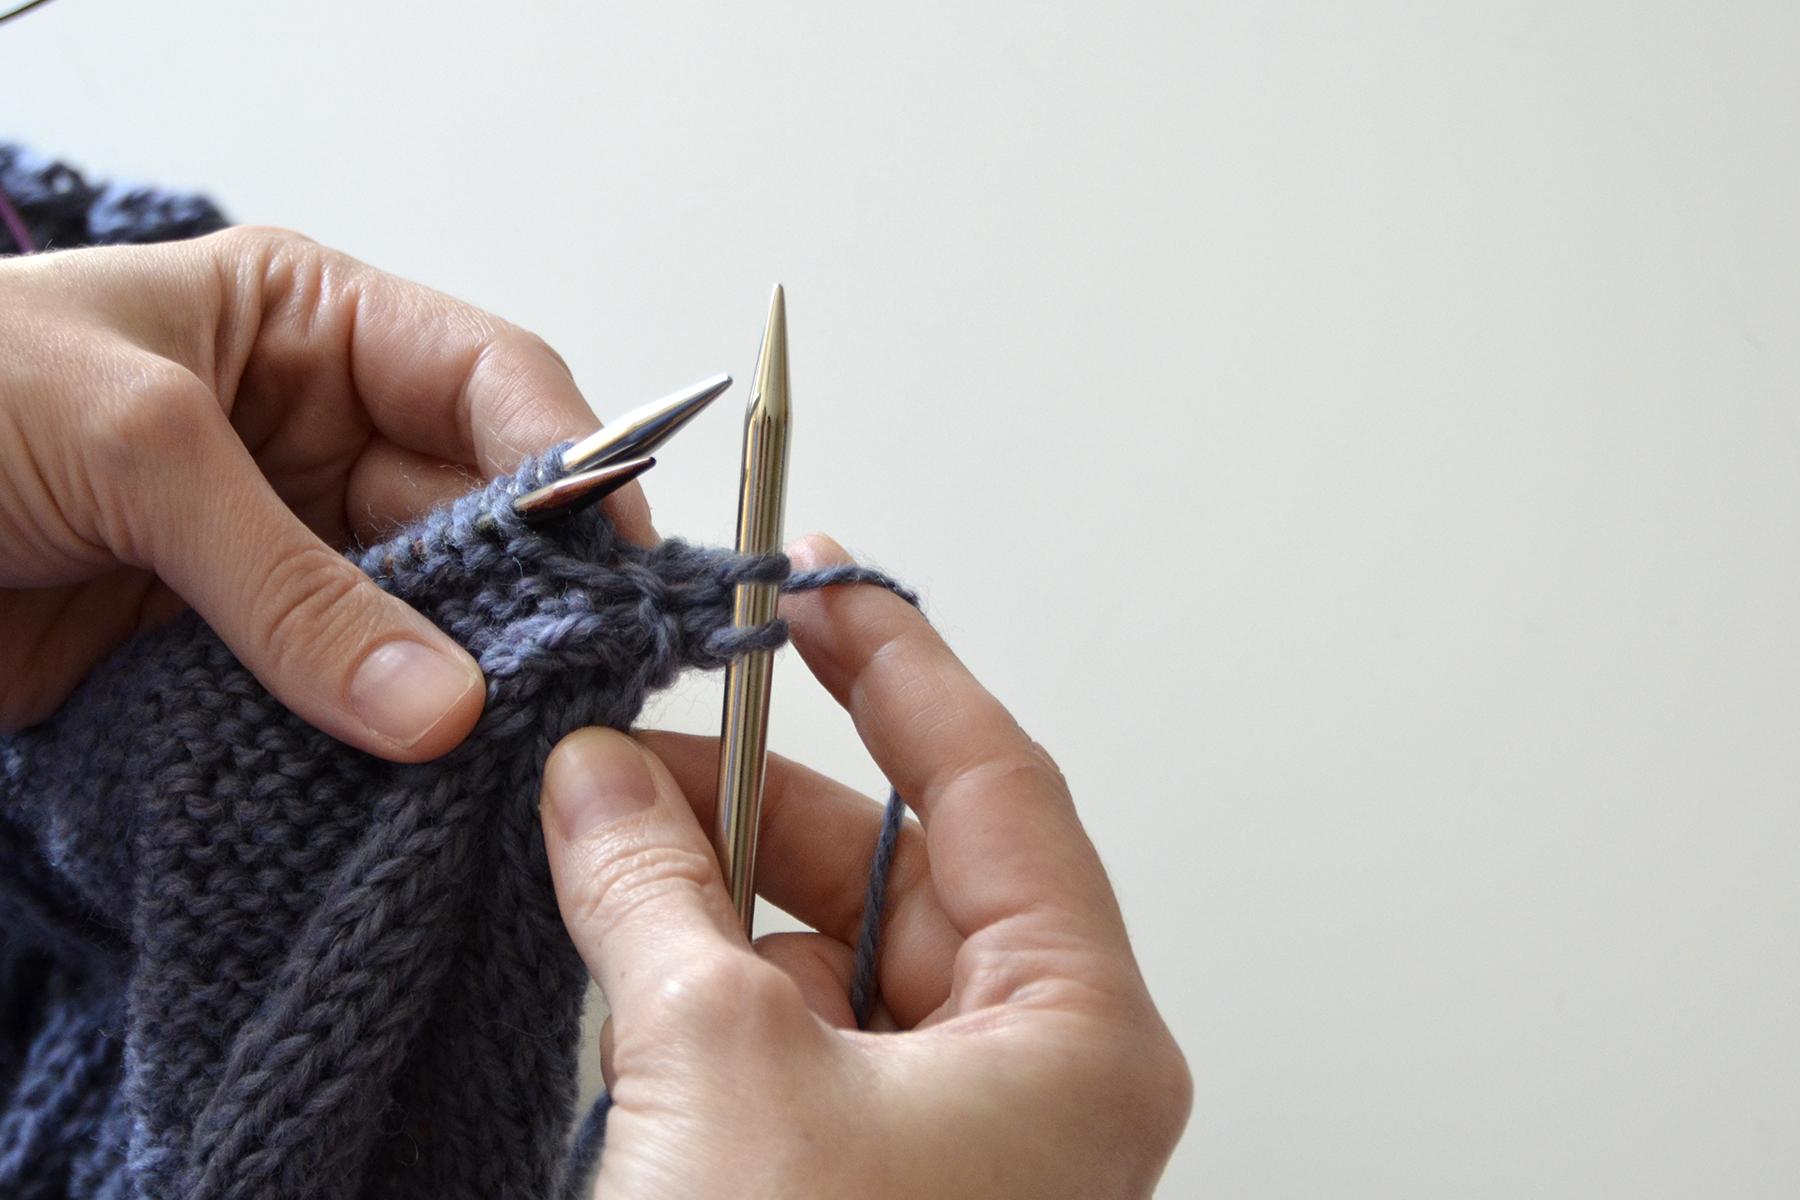
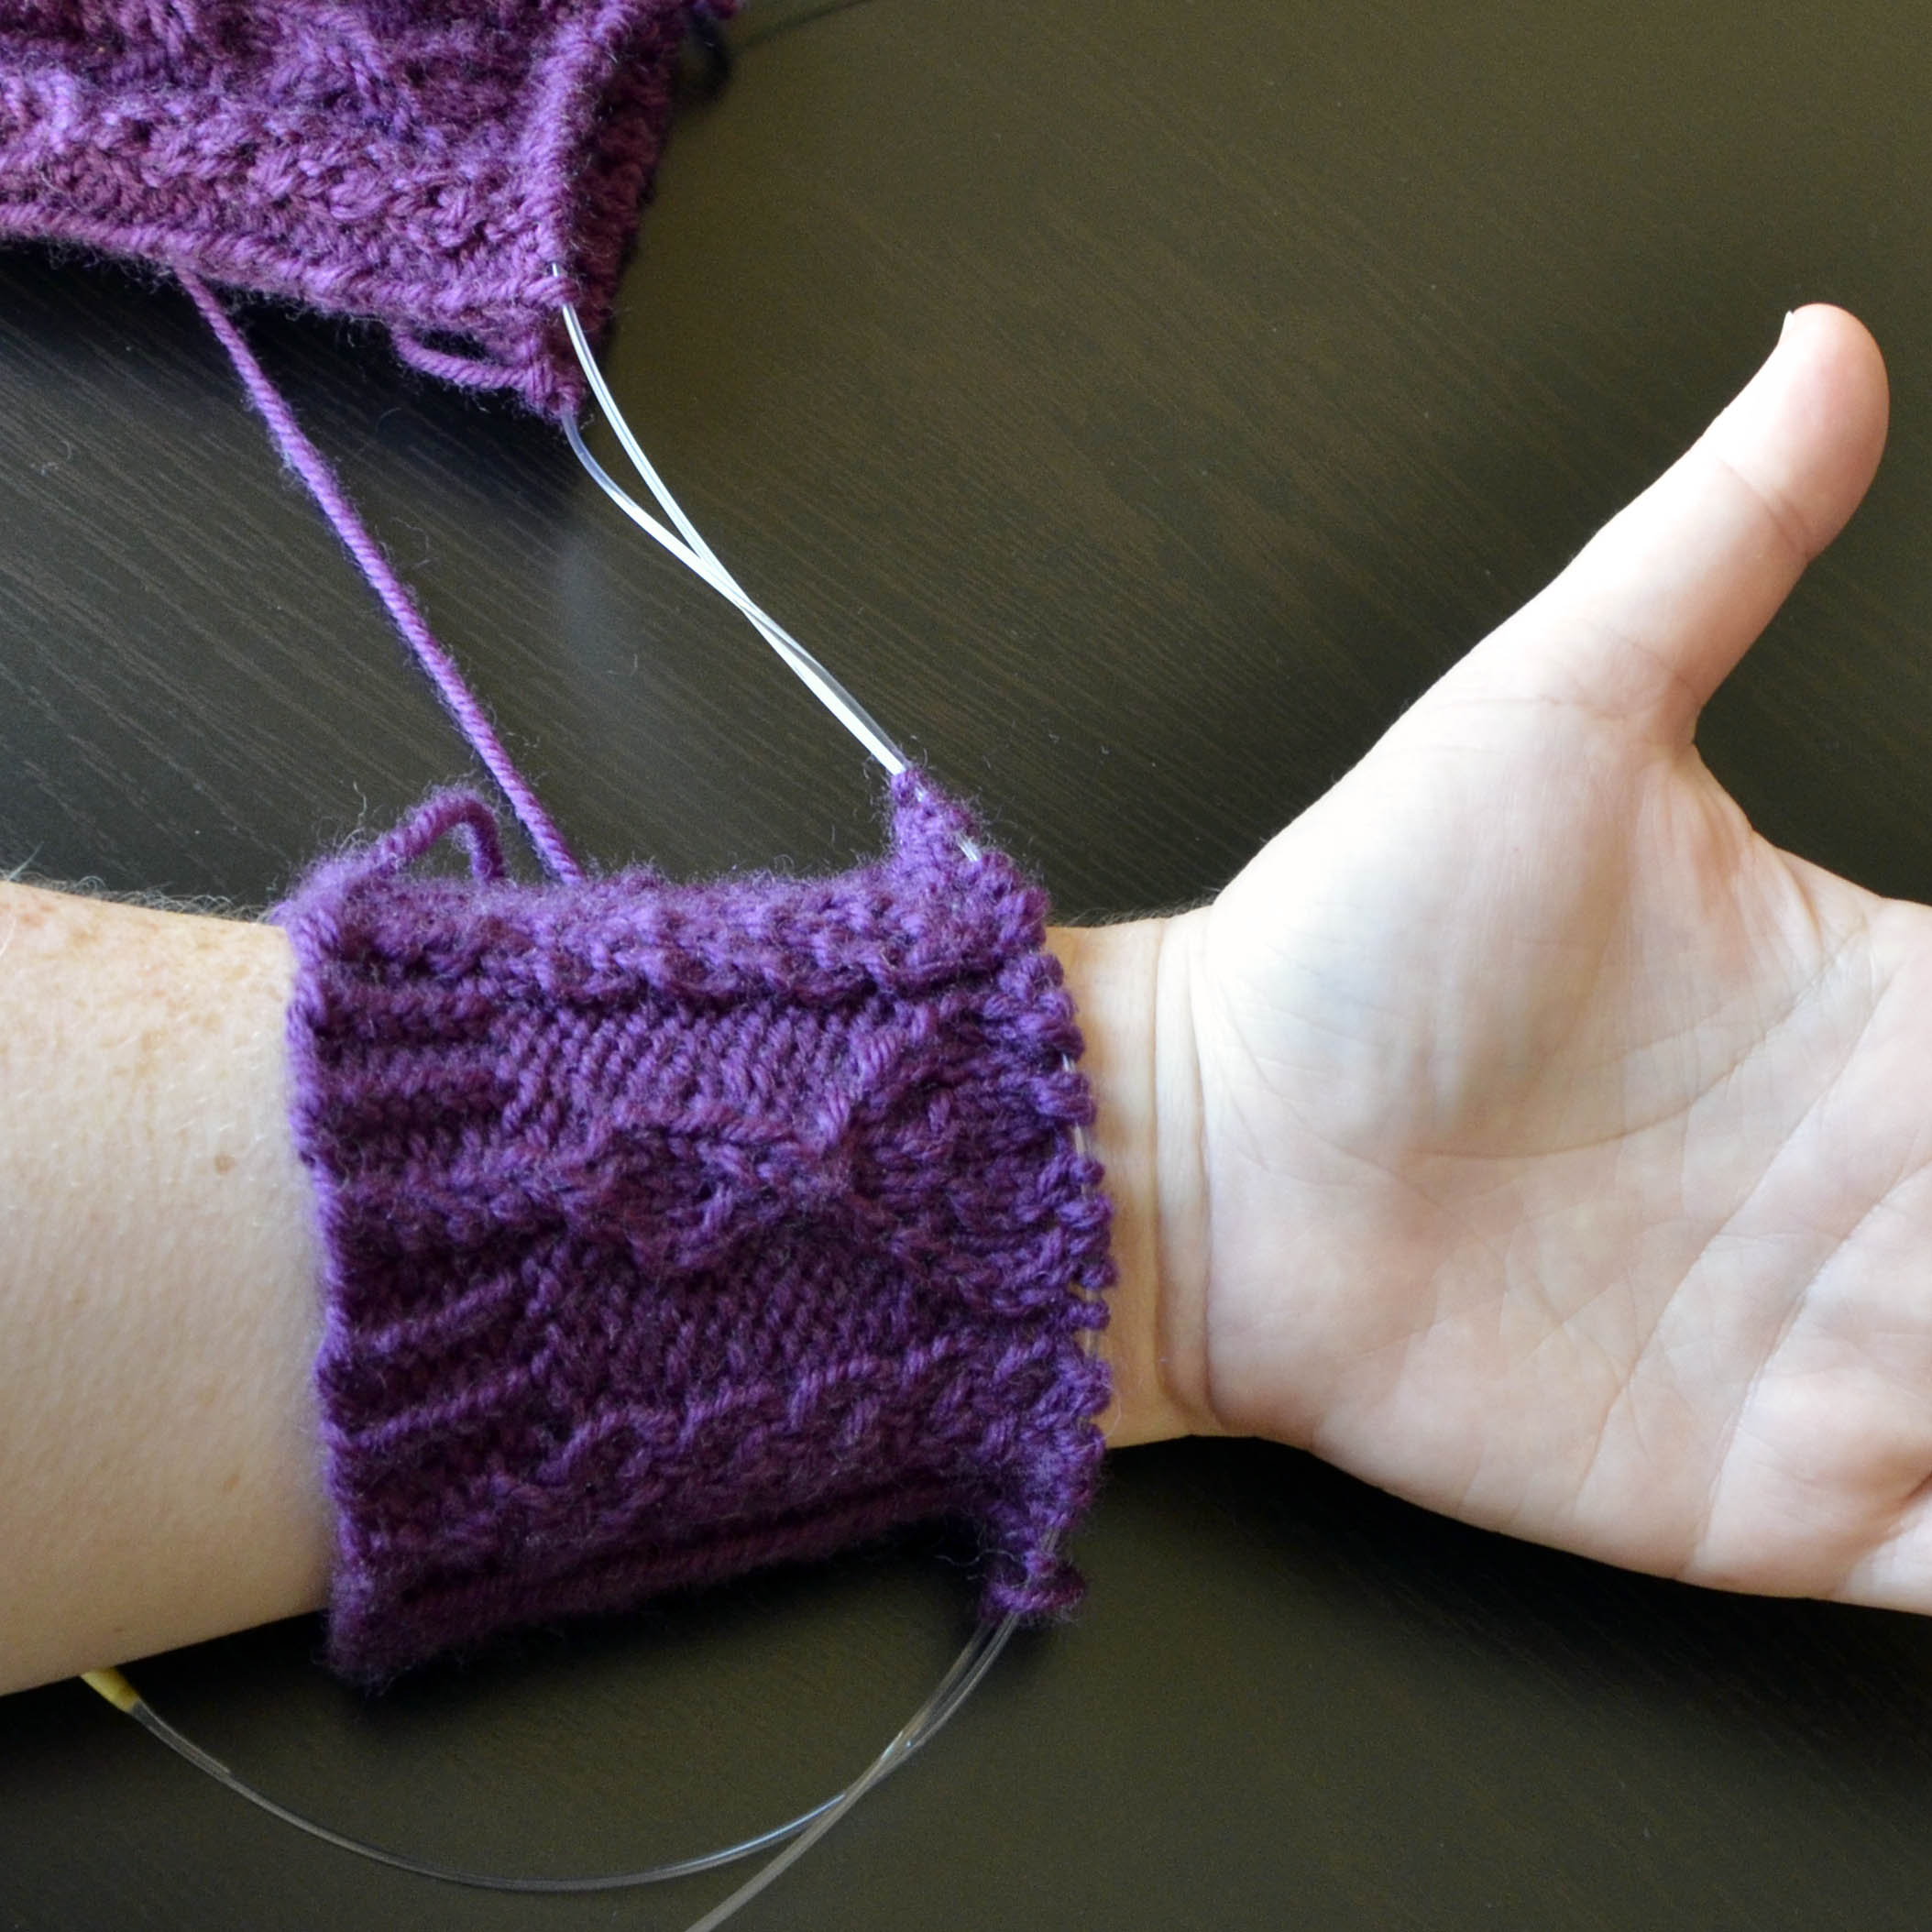
To pick up and knit, I’m first going to start at the right-hand side of the piece. In most cases when I’m picking up stitches, I like to pick up between the outermost stitch and the next stitch in. In a super chunky yarn, I might pick up in the center of the outermost stitch to reduce the bulky of the seam. But Deluxe Chunky isn’t too heavy, so I’m going one stitch in as usual.

PickingUpStitches_4

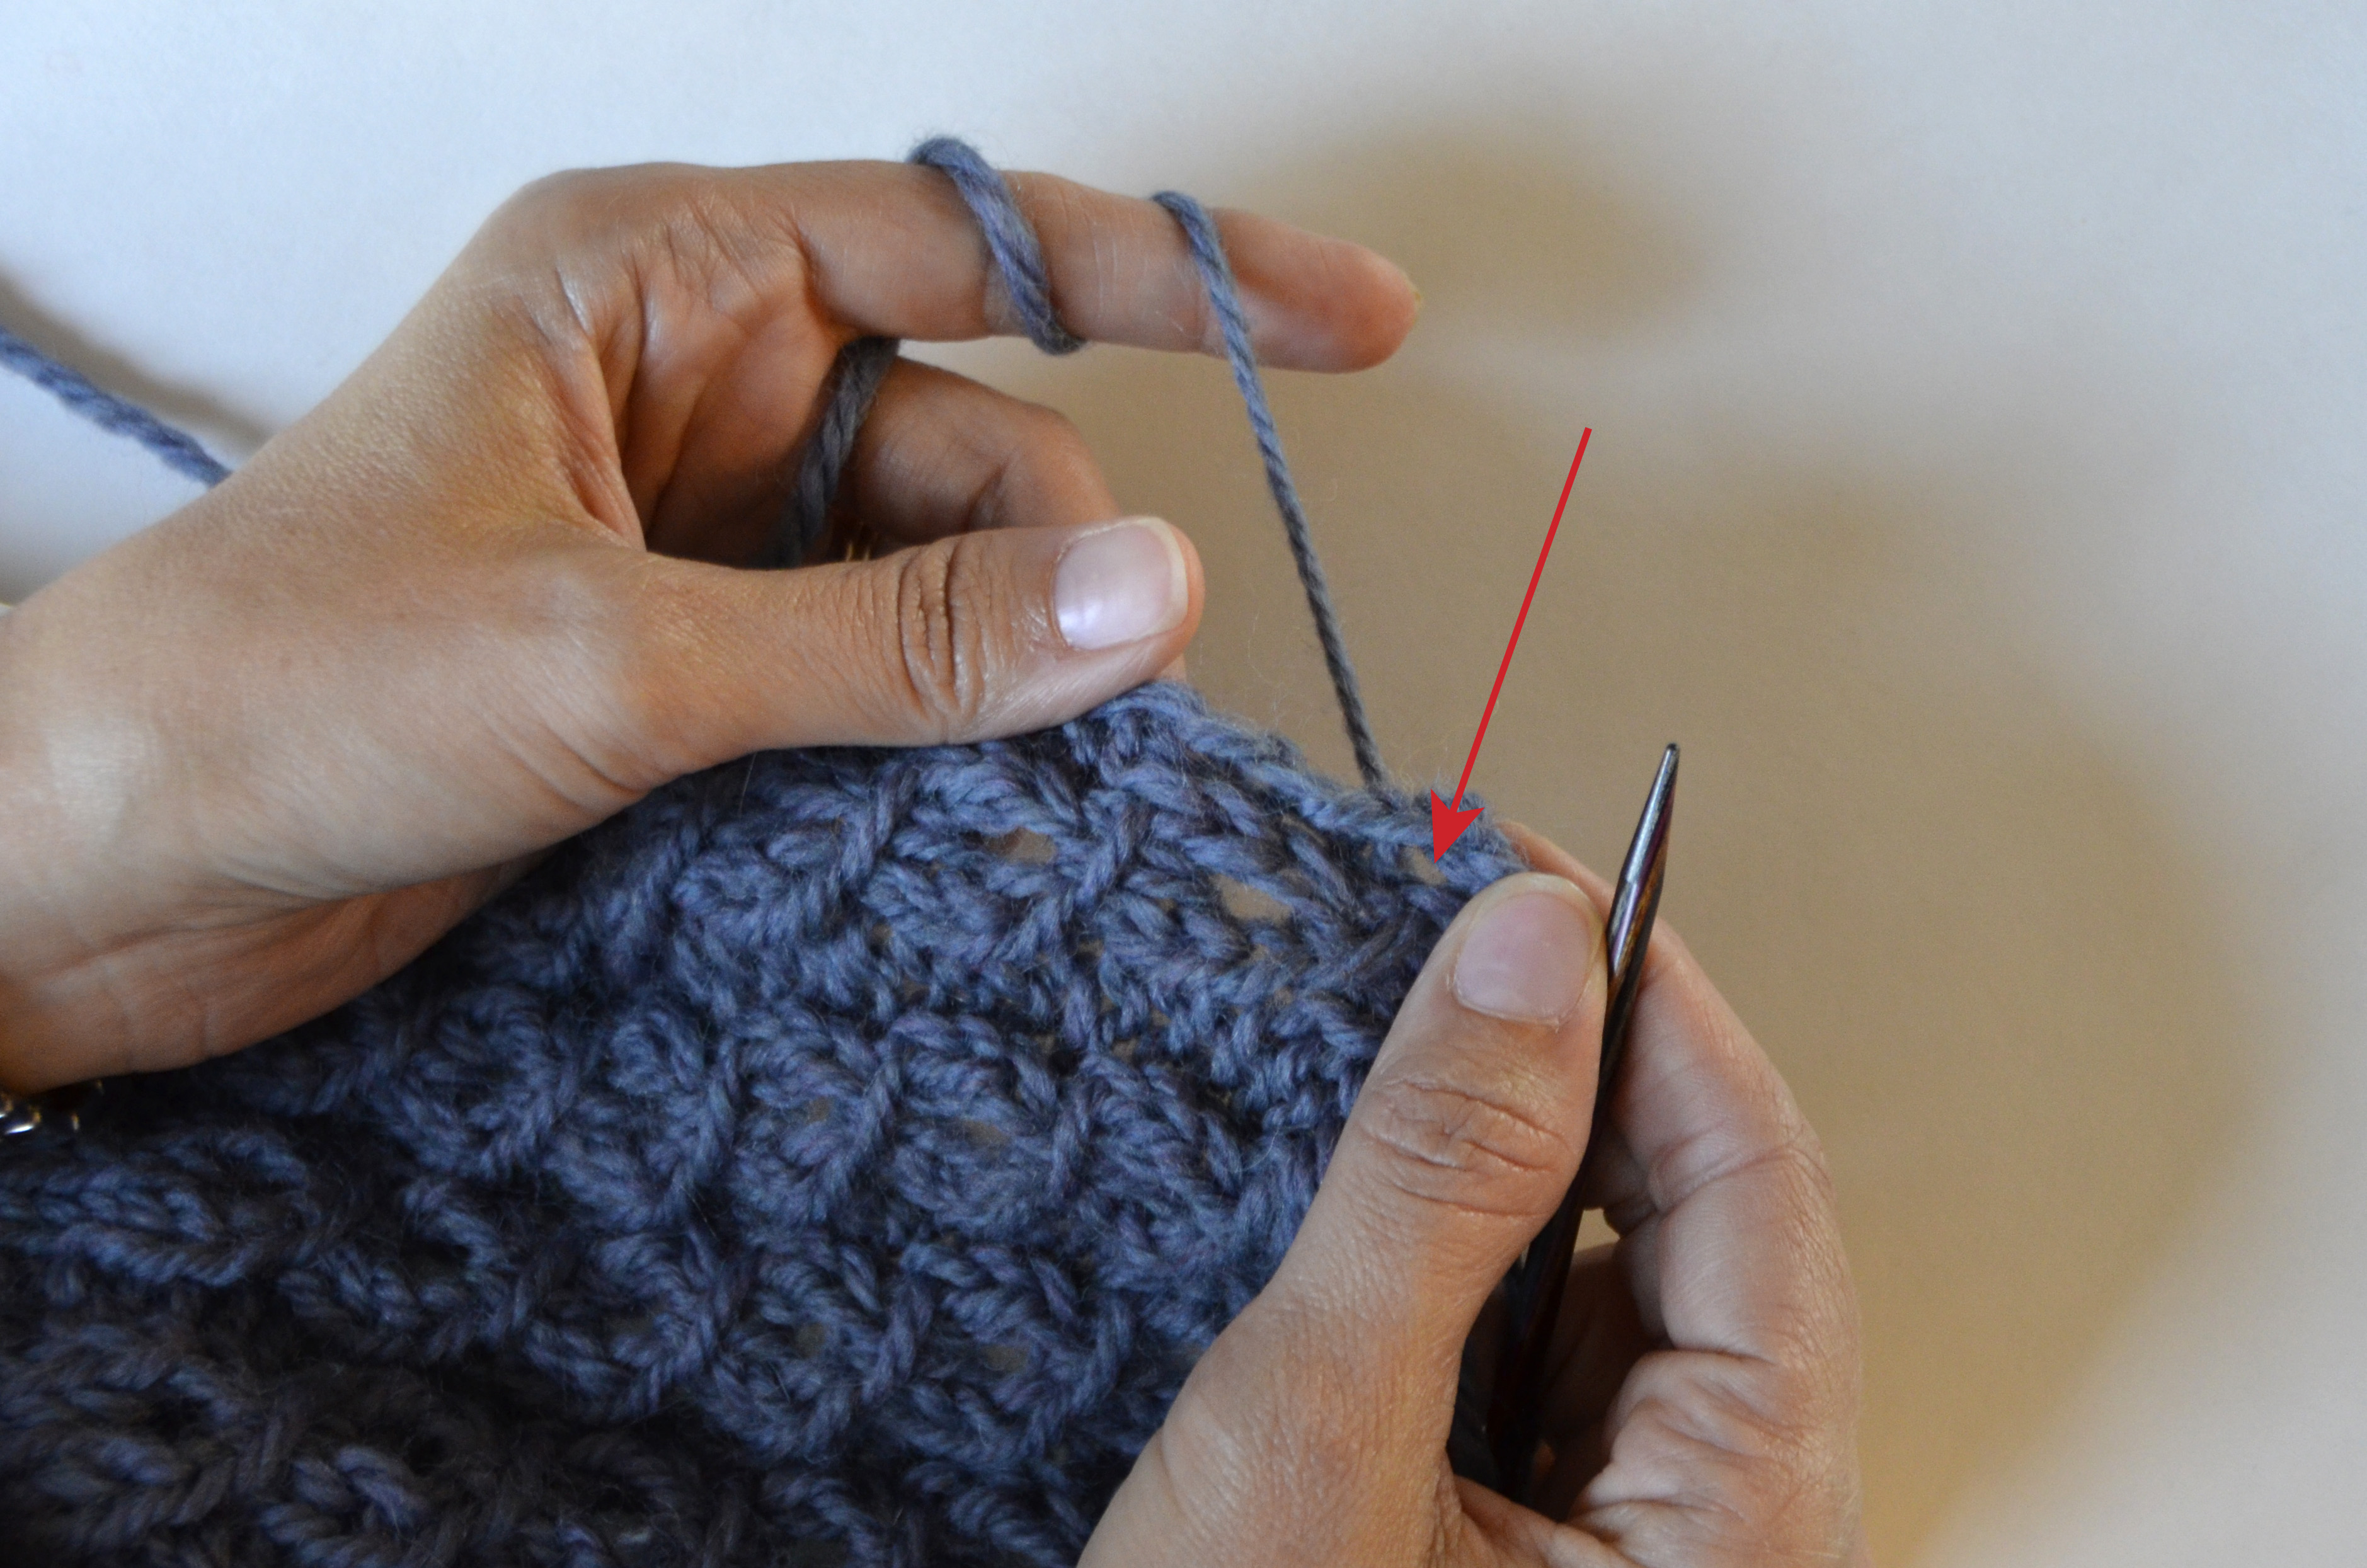
Insert your needle into the space between those first two stitches. Wrap yarn around the needle,
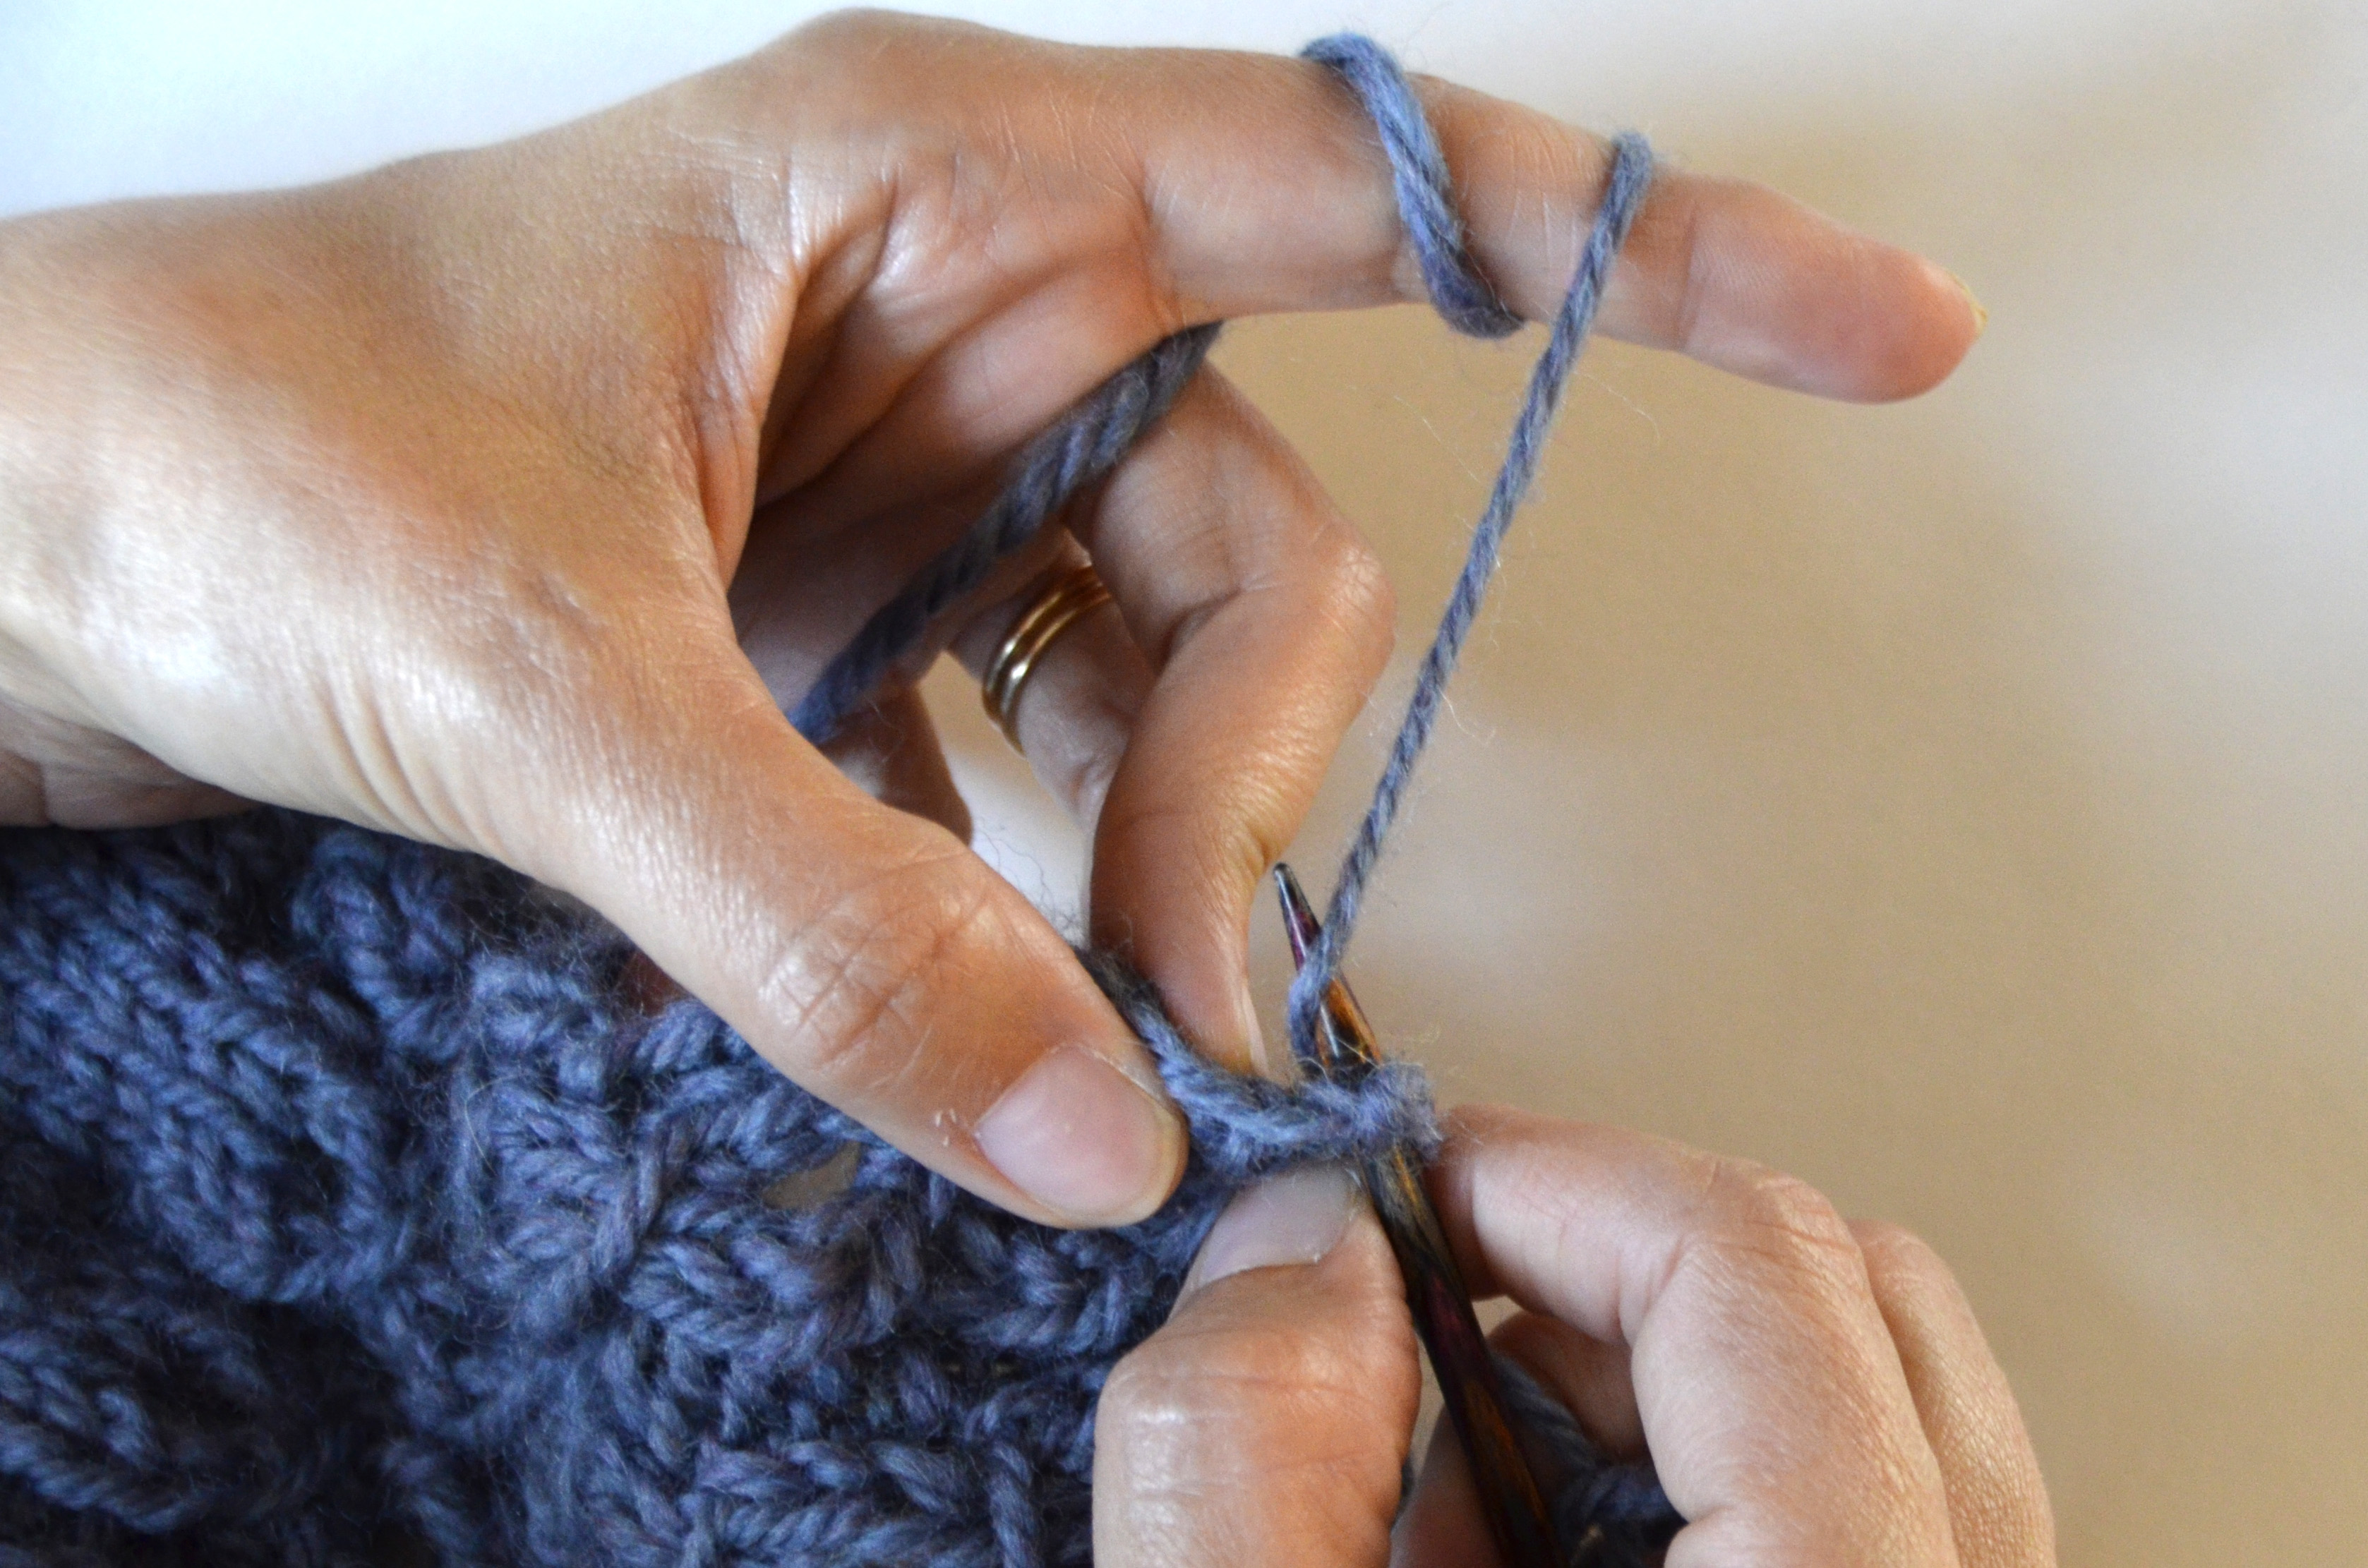
PickingUpStitches_5

And pull through.

PickingUpStitches_6

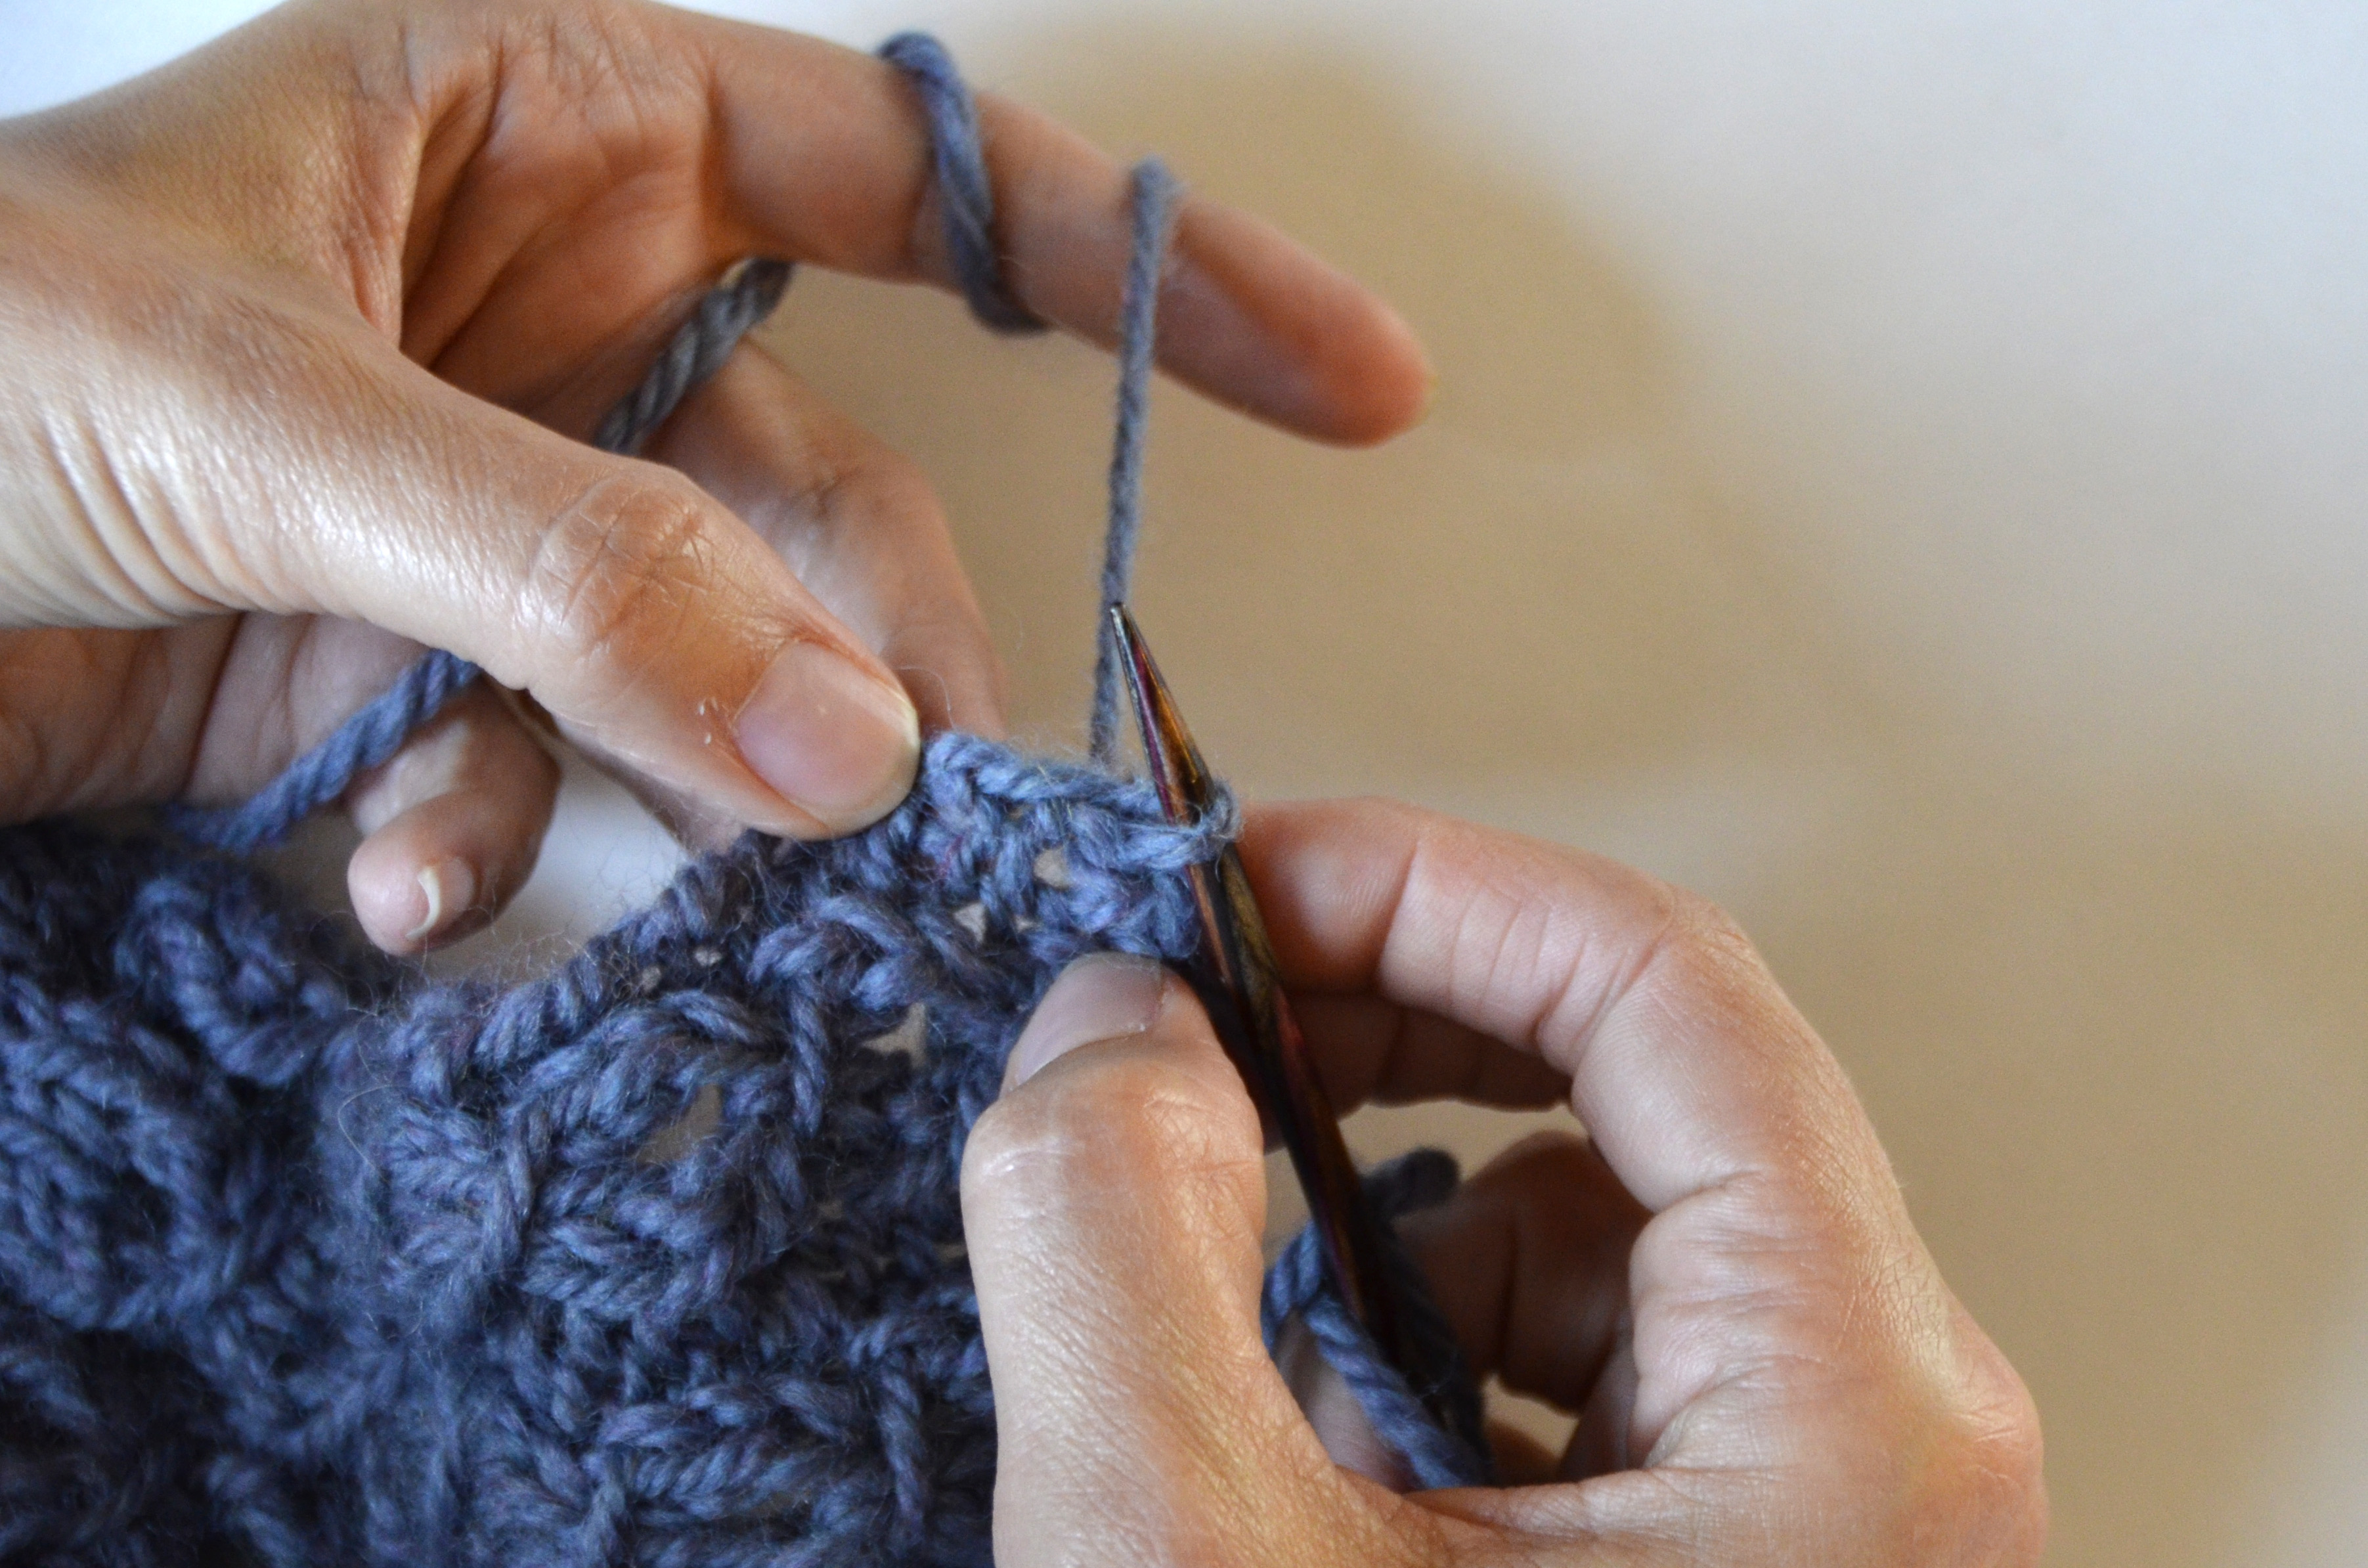
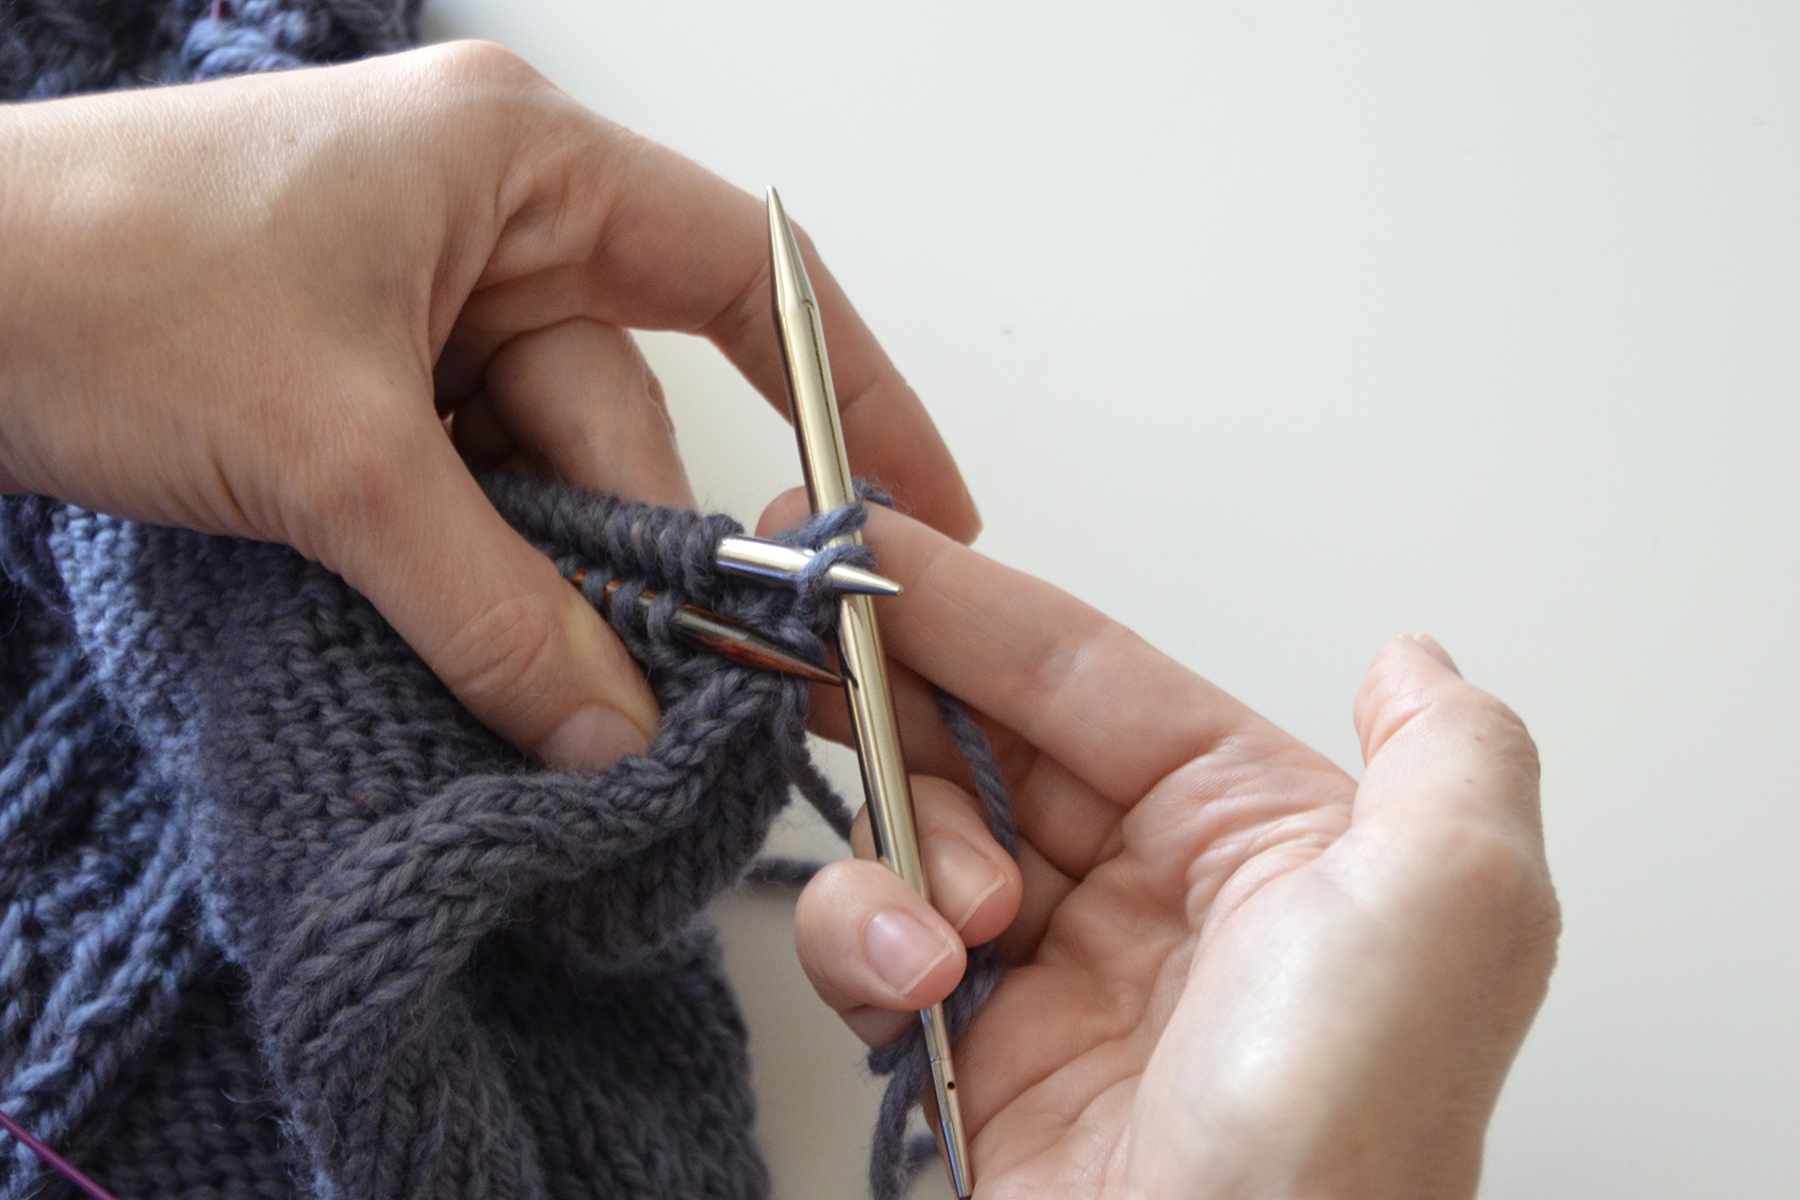
Here we are with a few picked up stitches on the needle.

PickingUpStitches_7

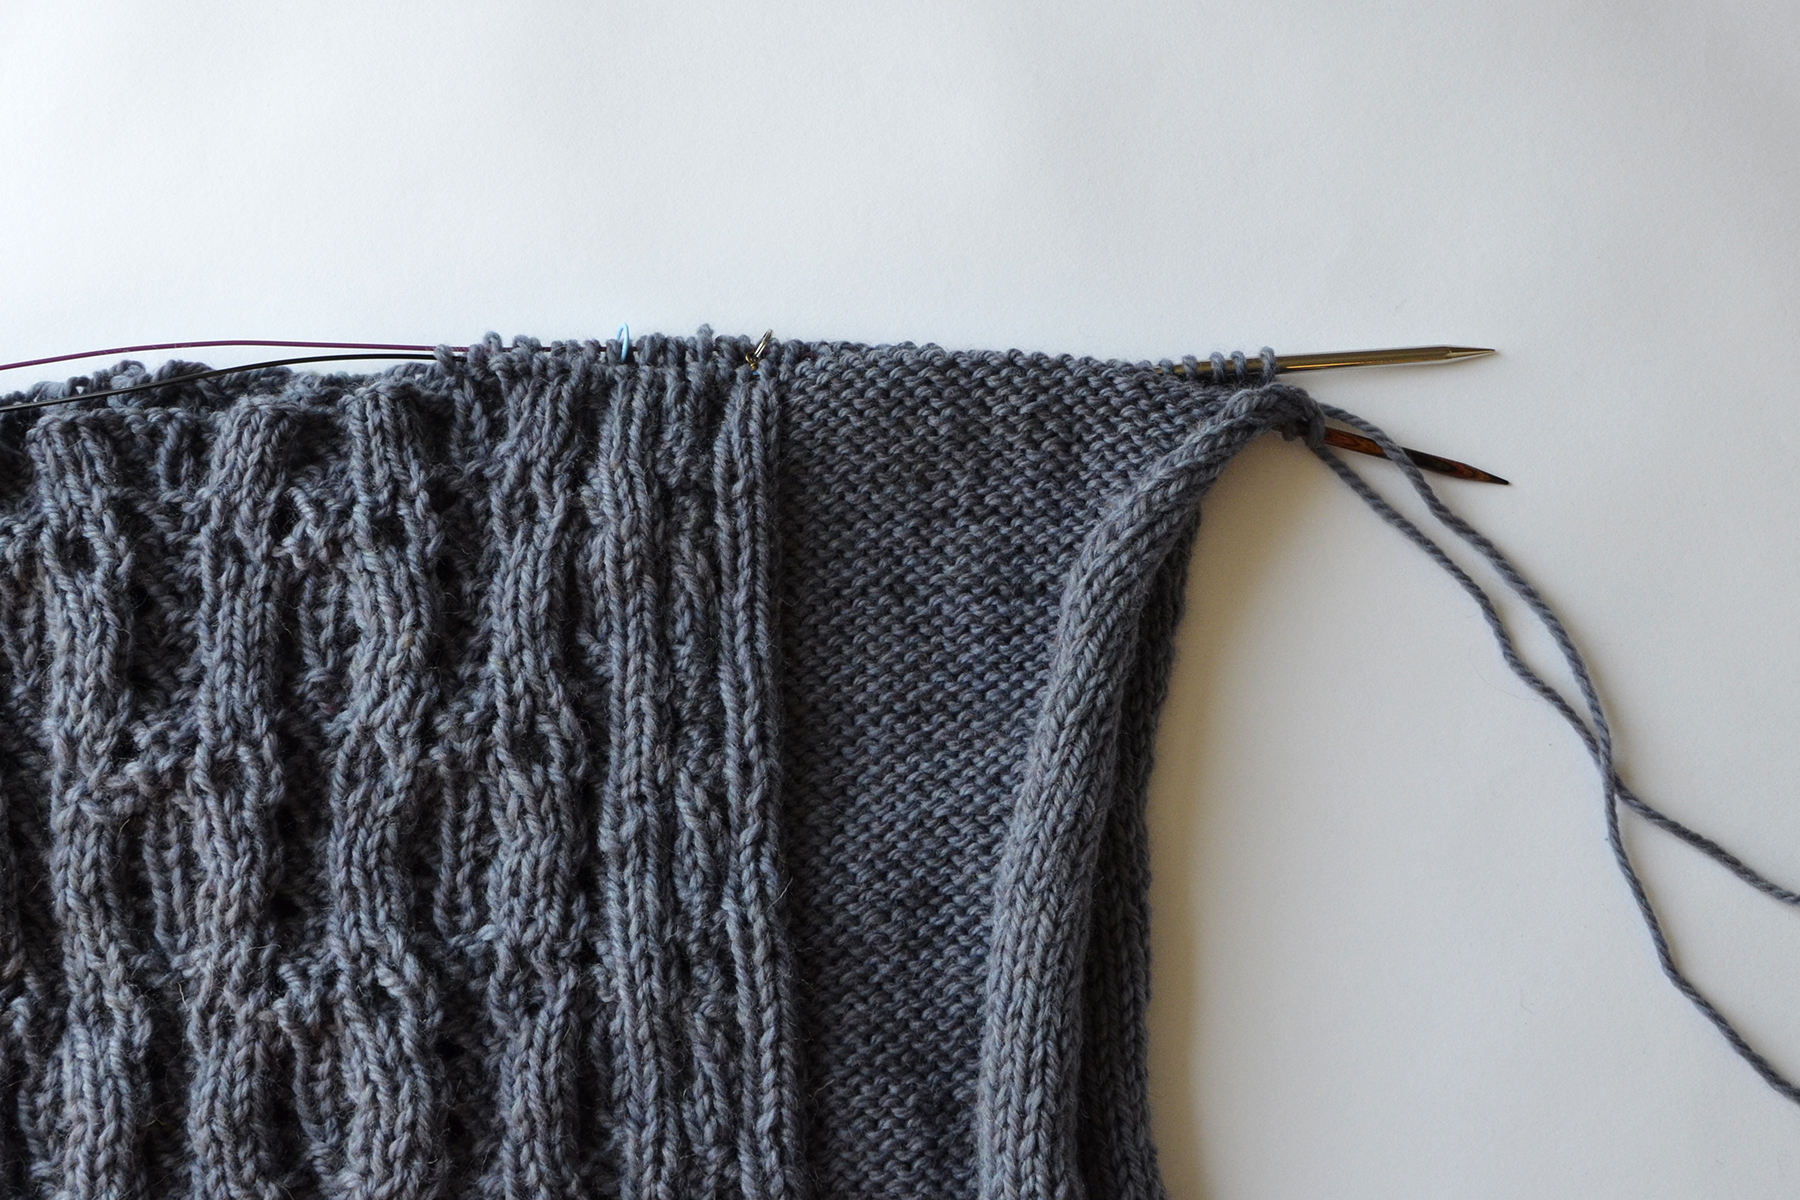
And with the first 21 stitches on the needle. My markers make it easy to see my sections and to count back to make sure I have the right number of stitches.

PickingUpStitches_8

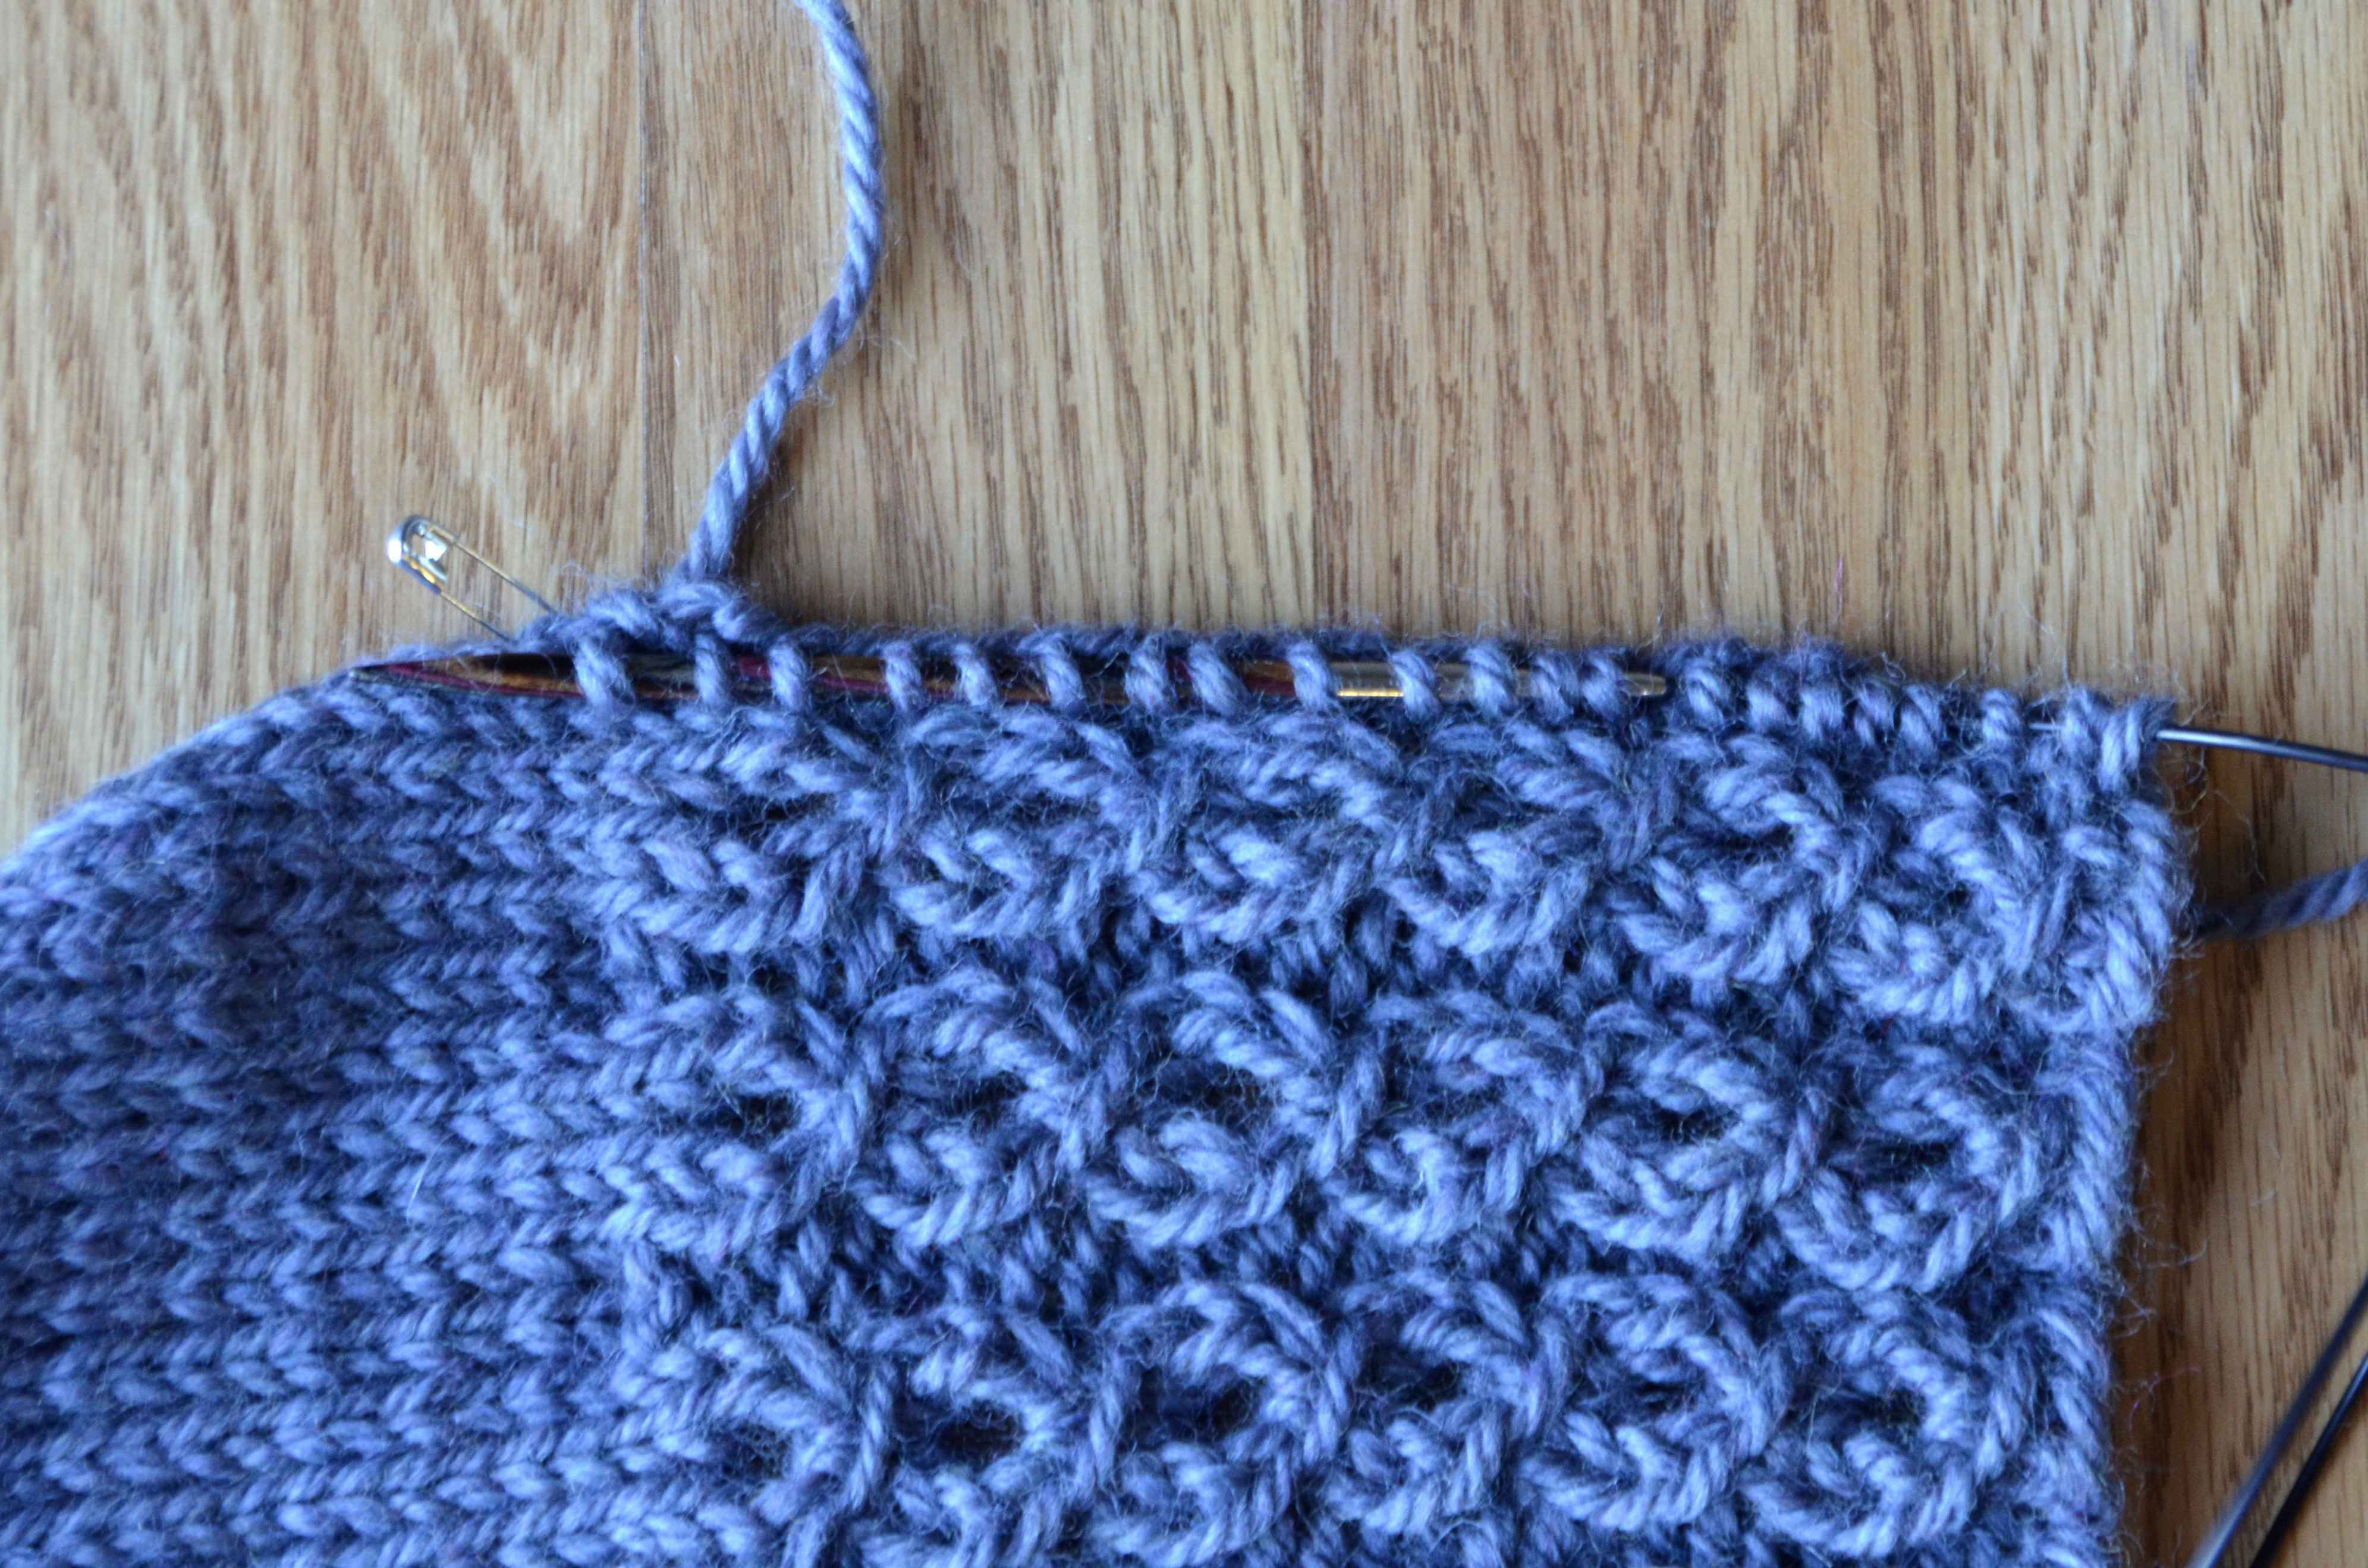
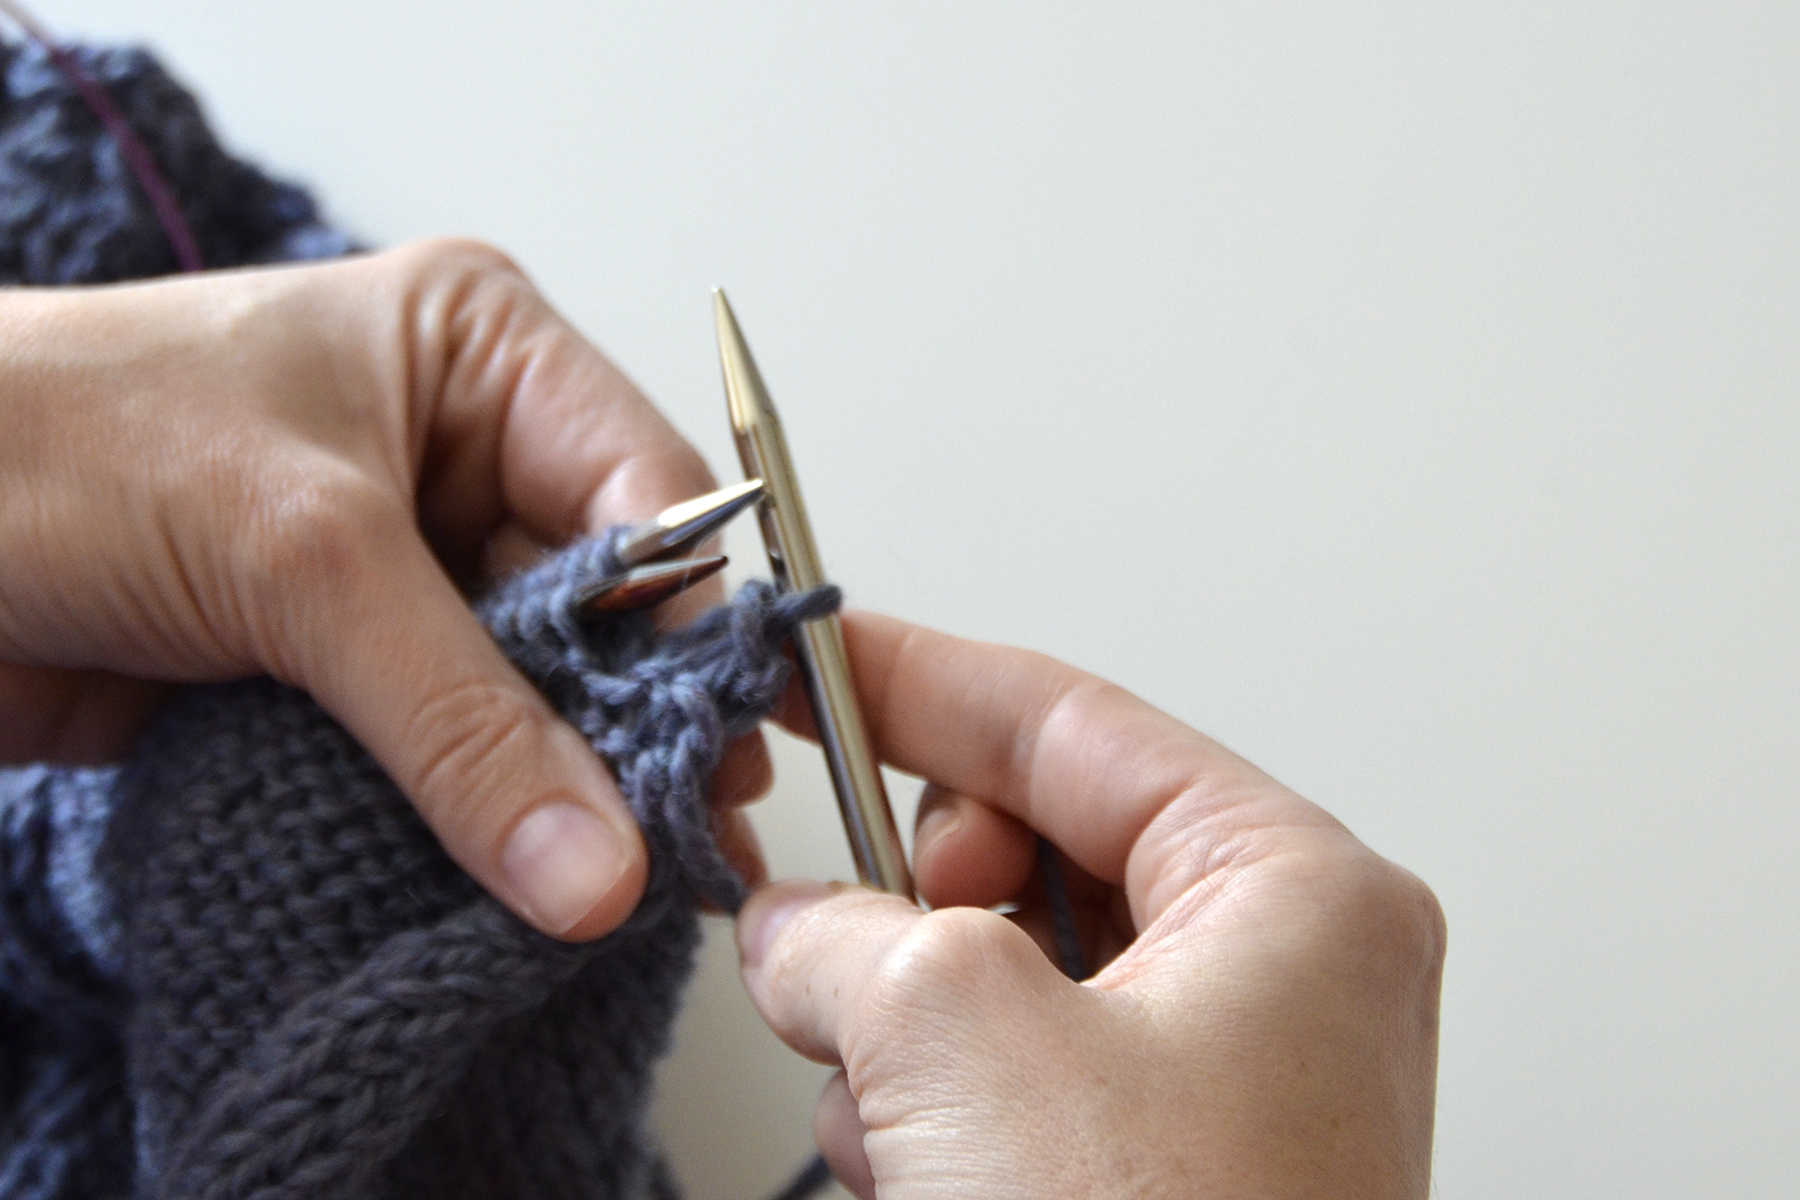
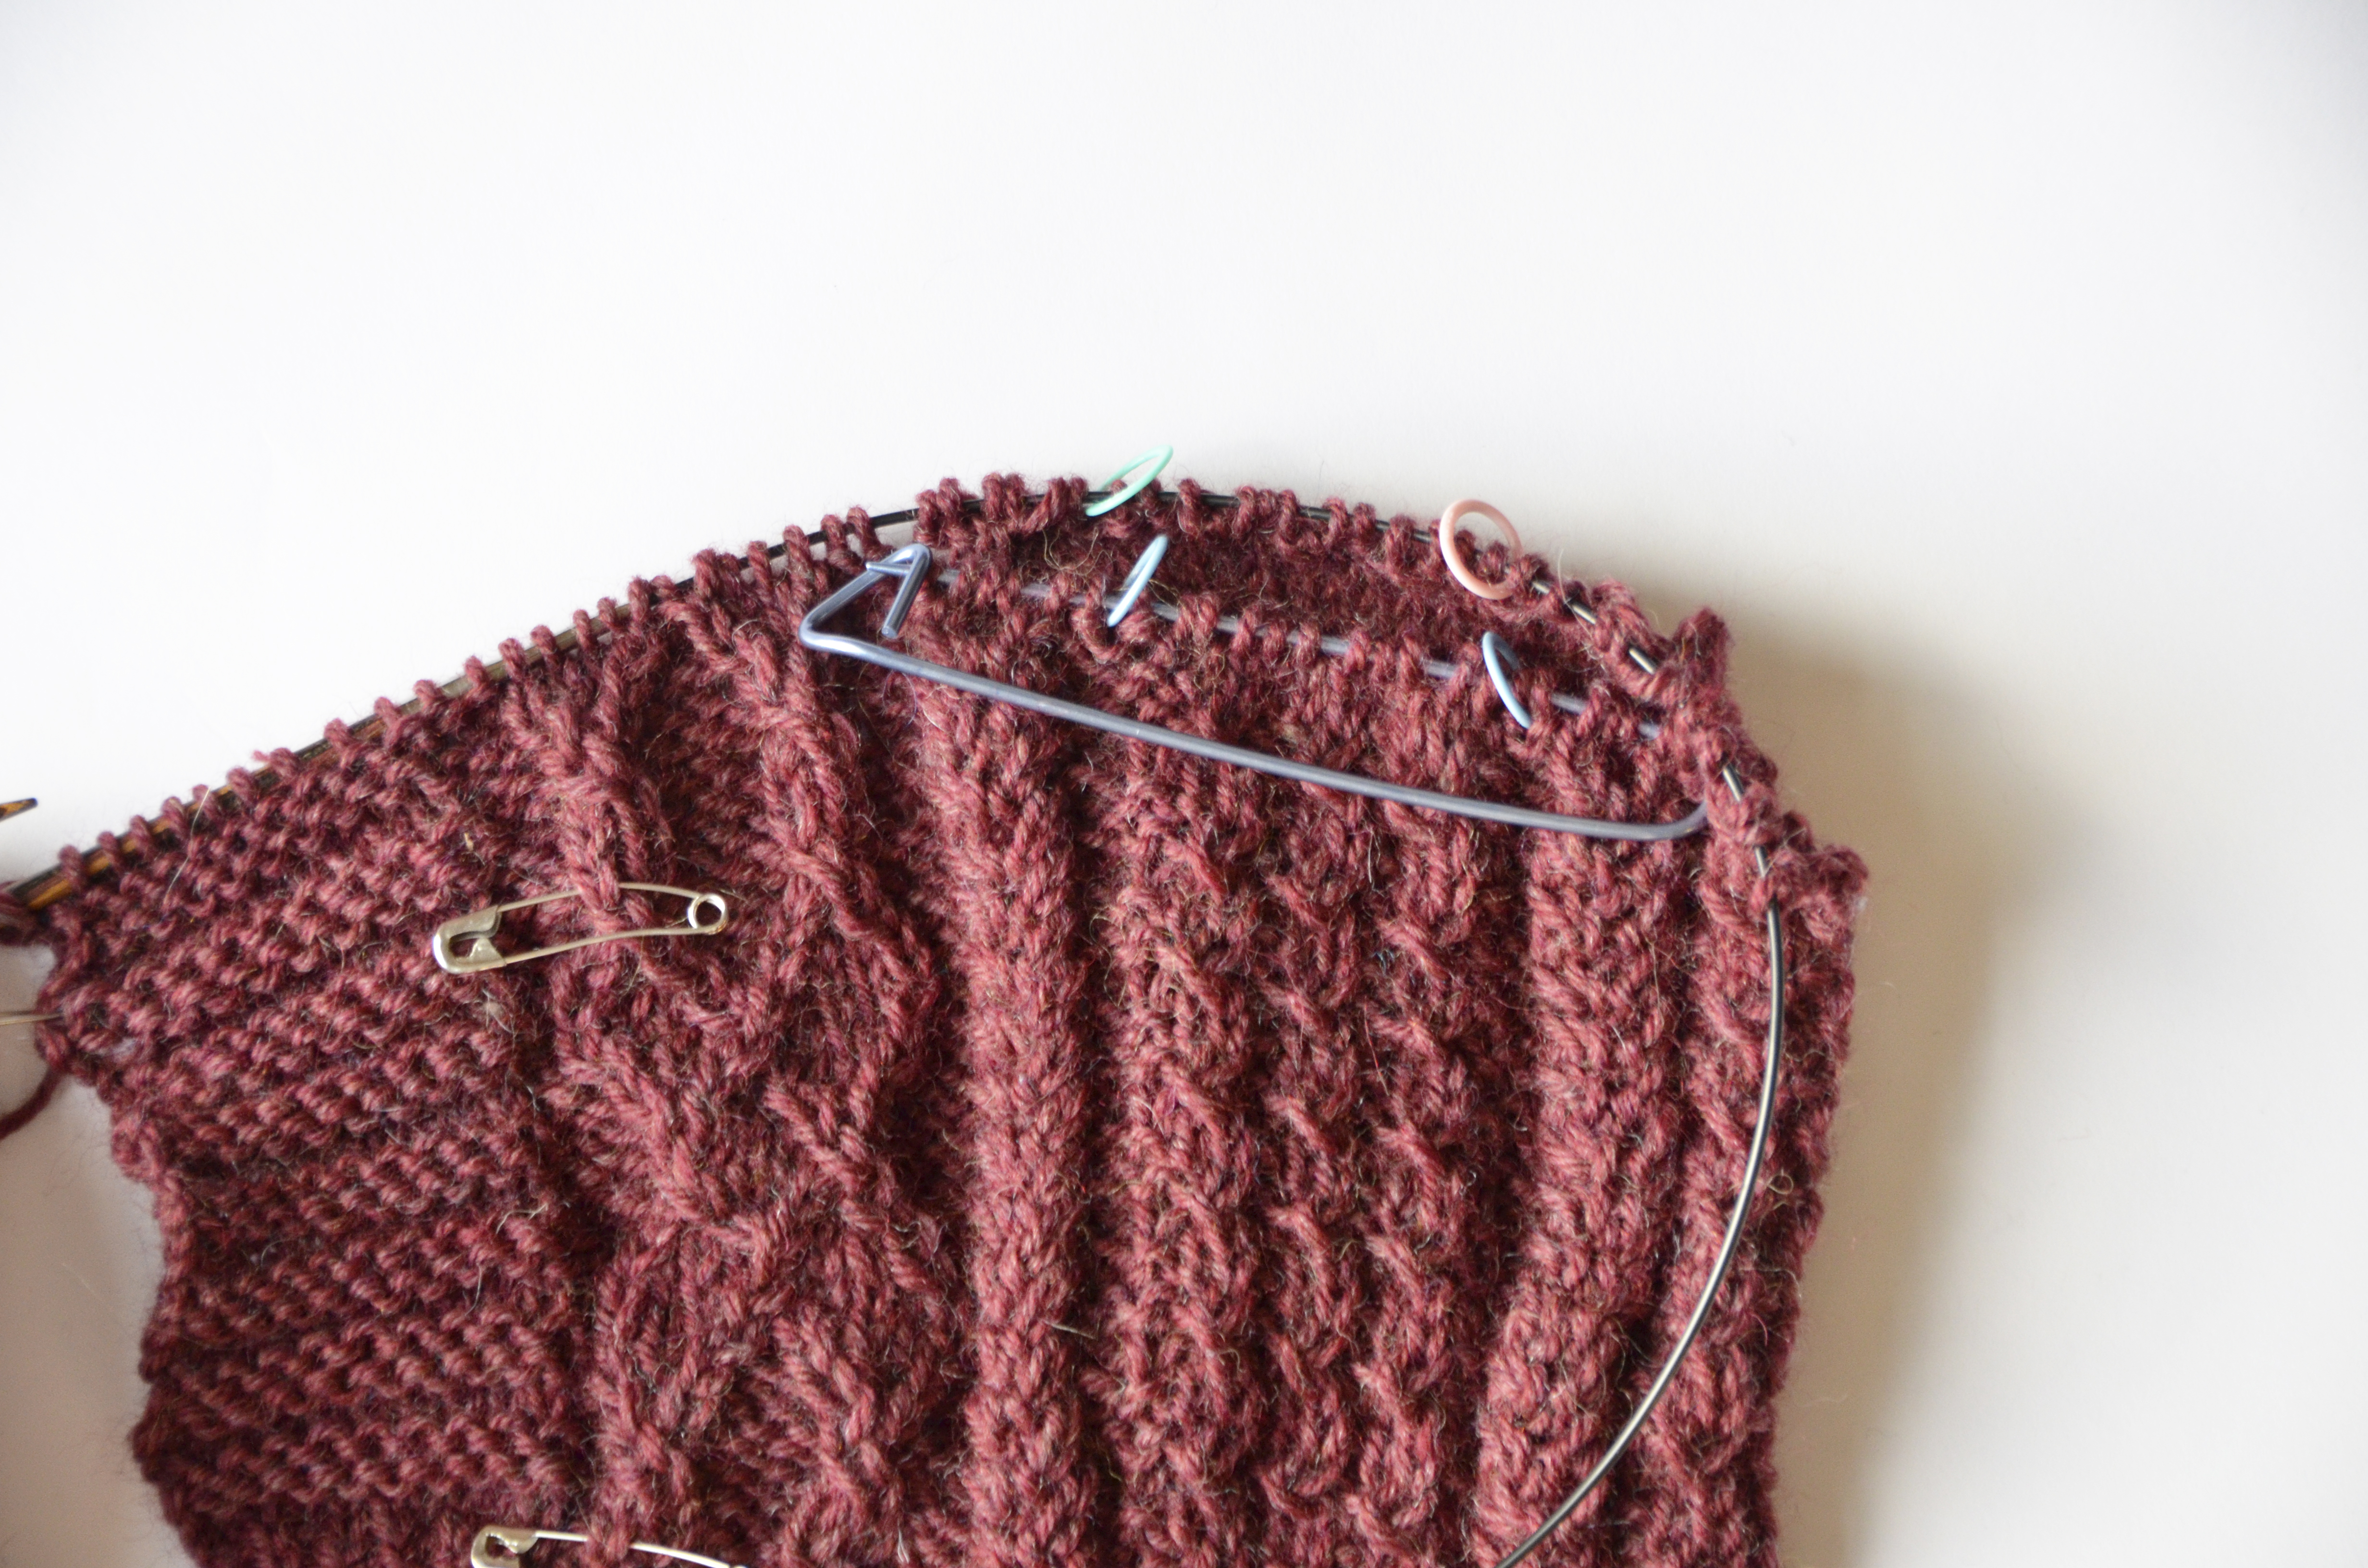
Here are all the stitches on the needle:

PickingUpStitches_9

What you can’t see here, is that I picked up an extra stitch on one half of the piece. If this happens, it’s no big deal. Just k2tog or p2tog over the next row to adjust.

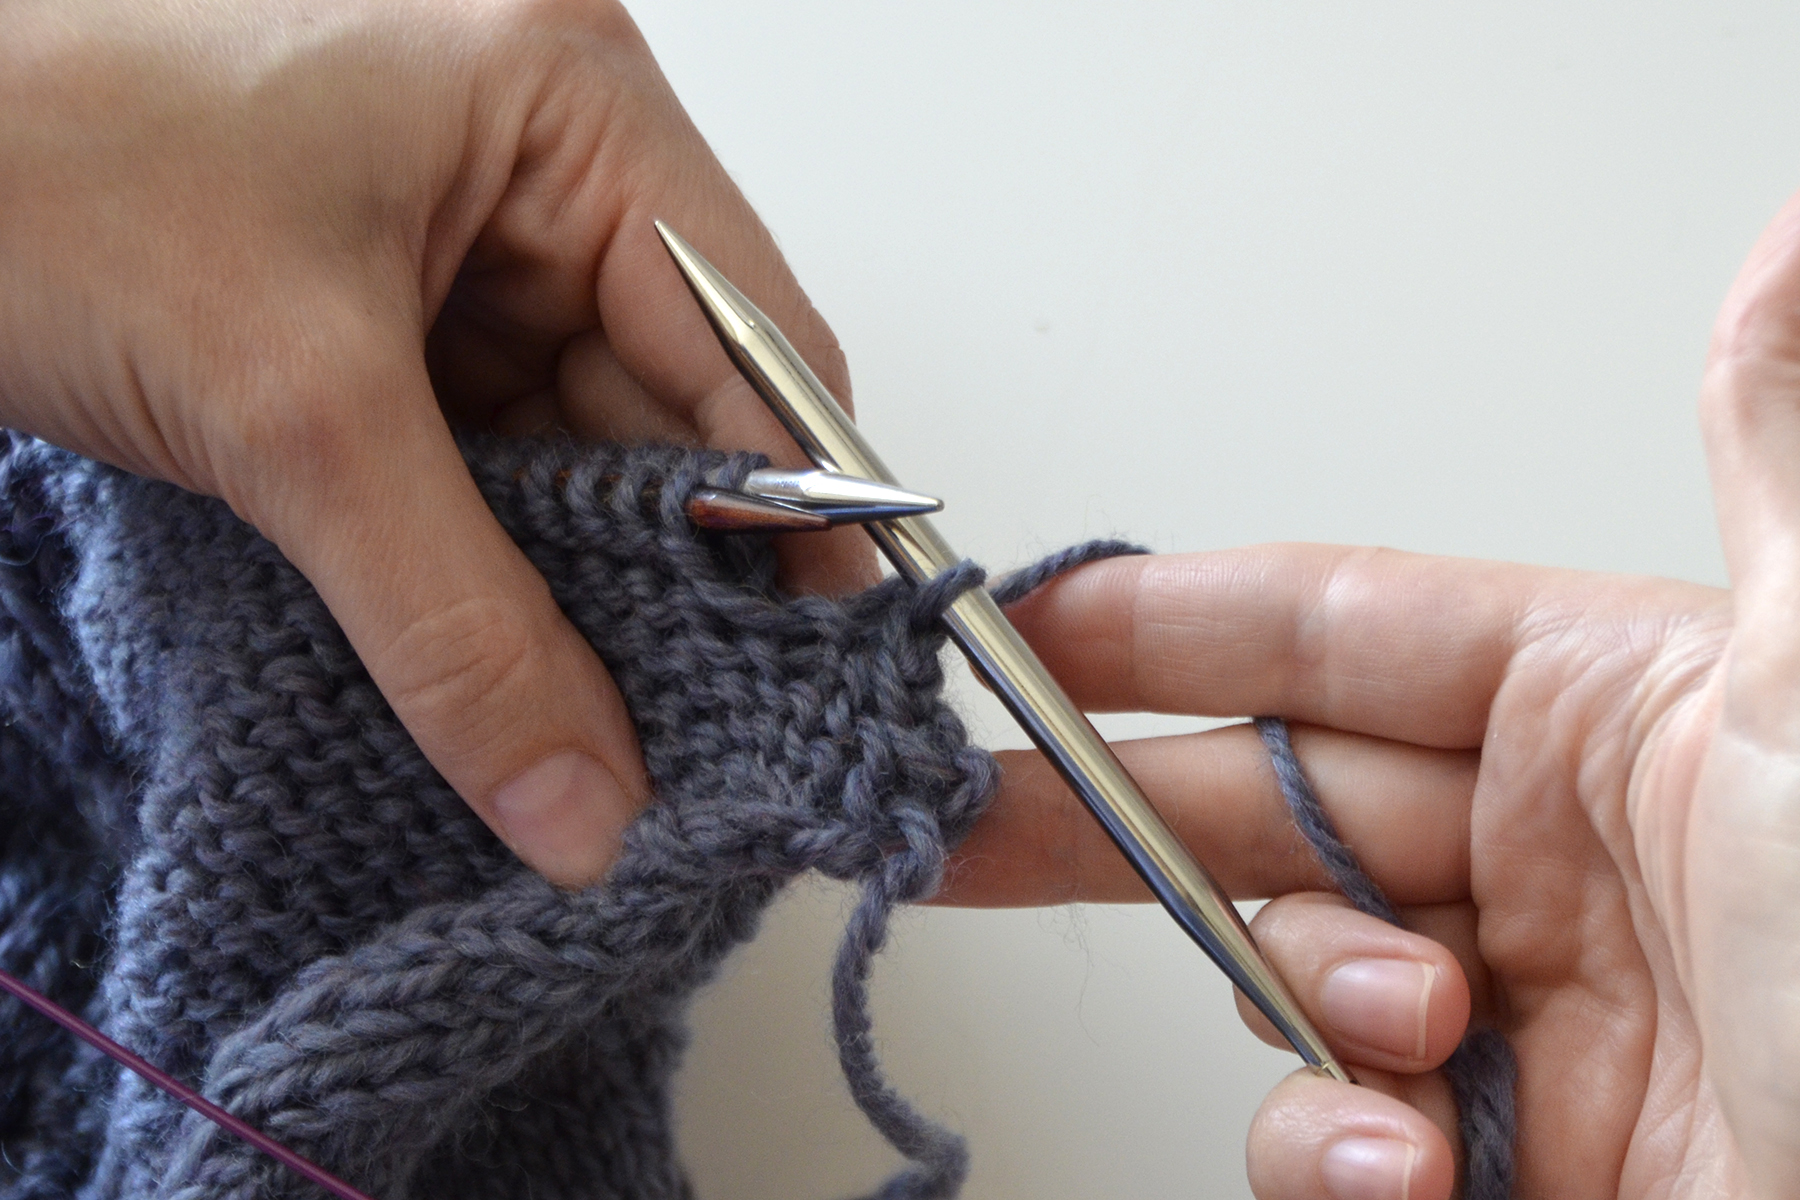
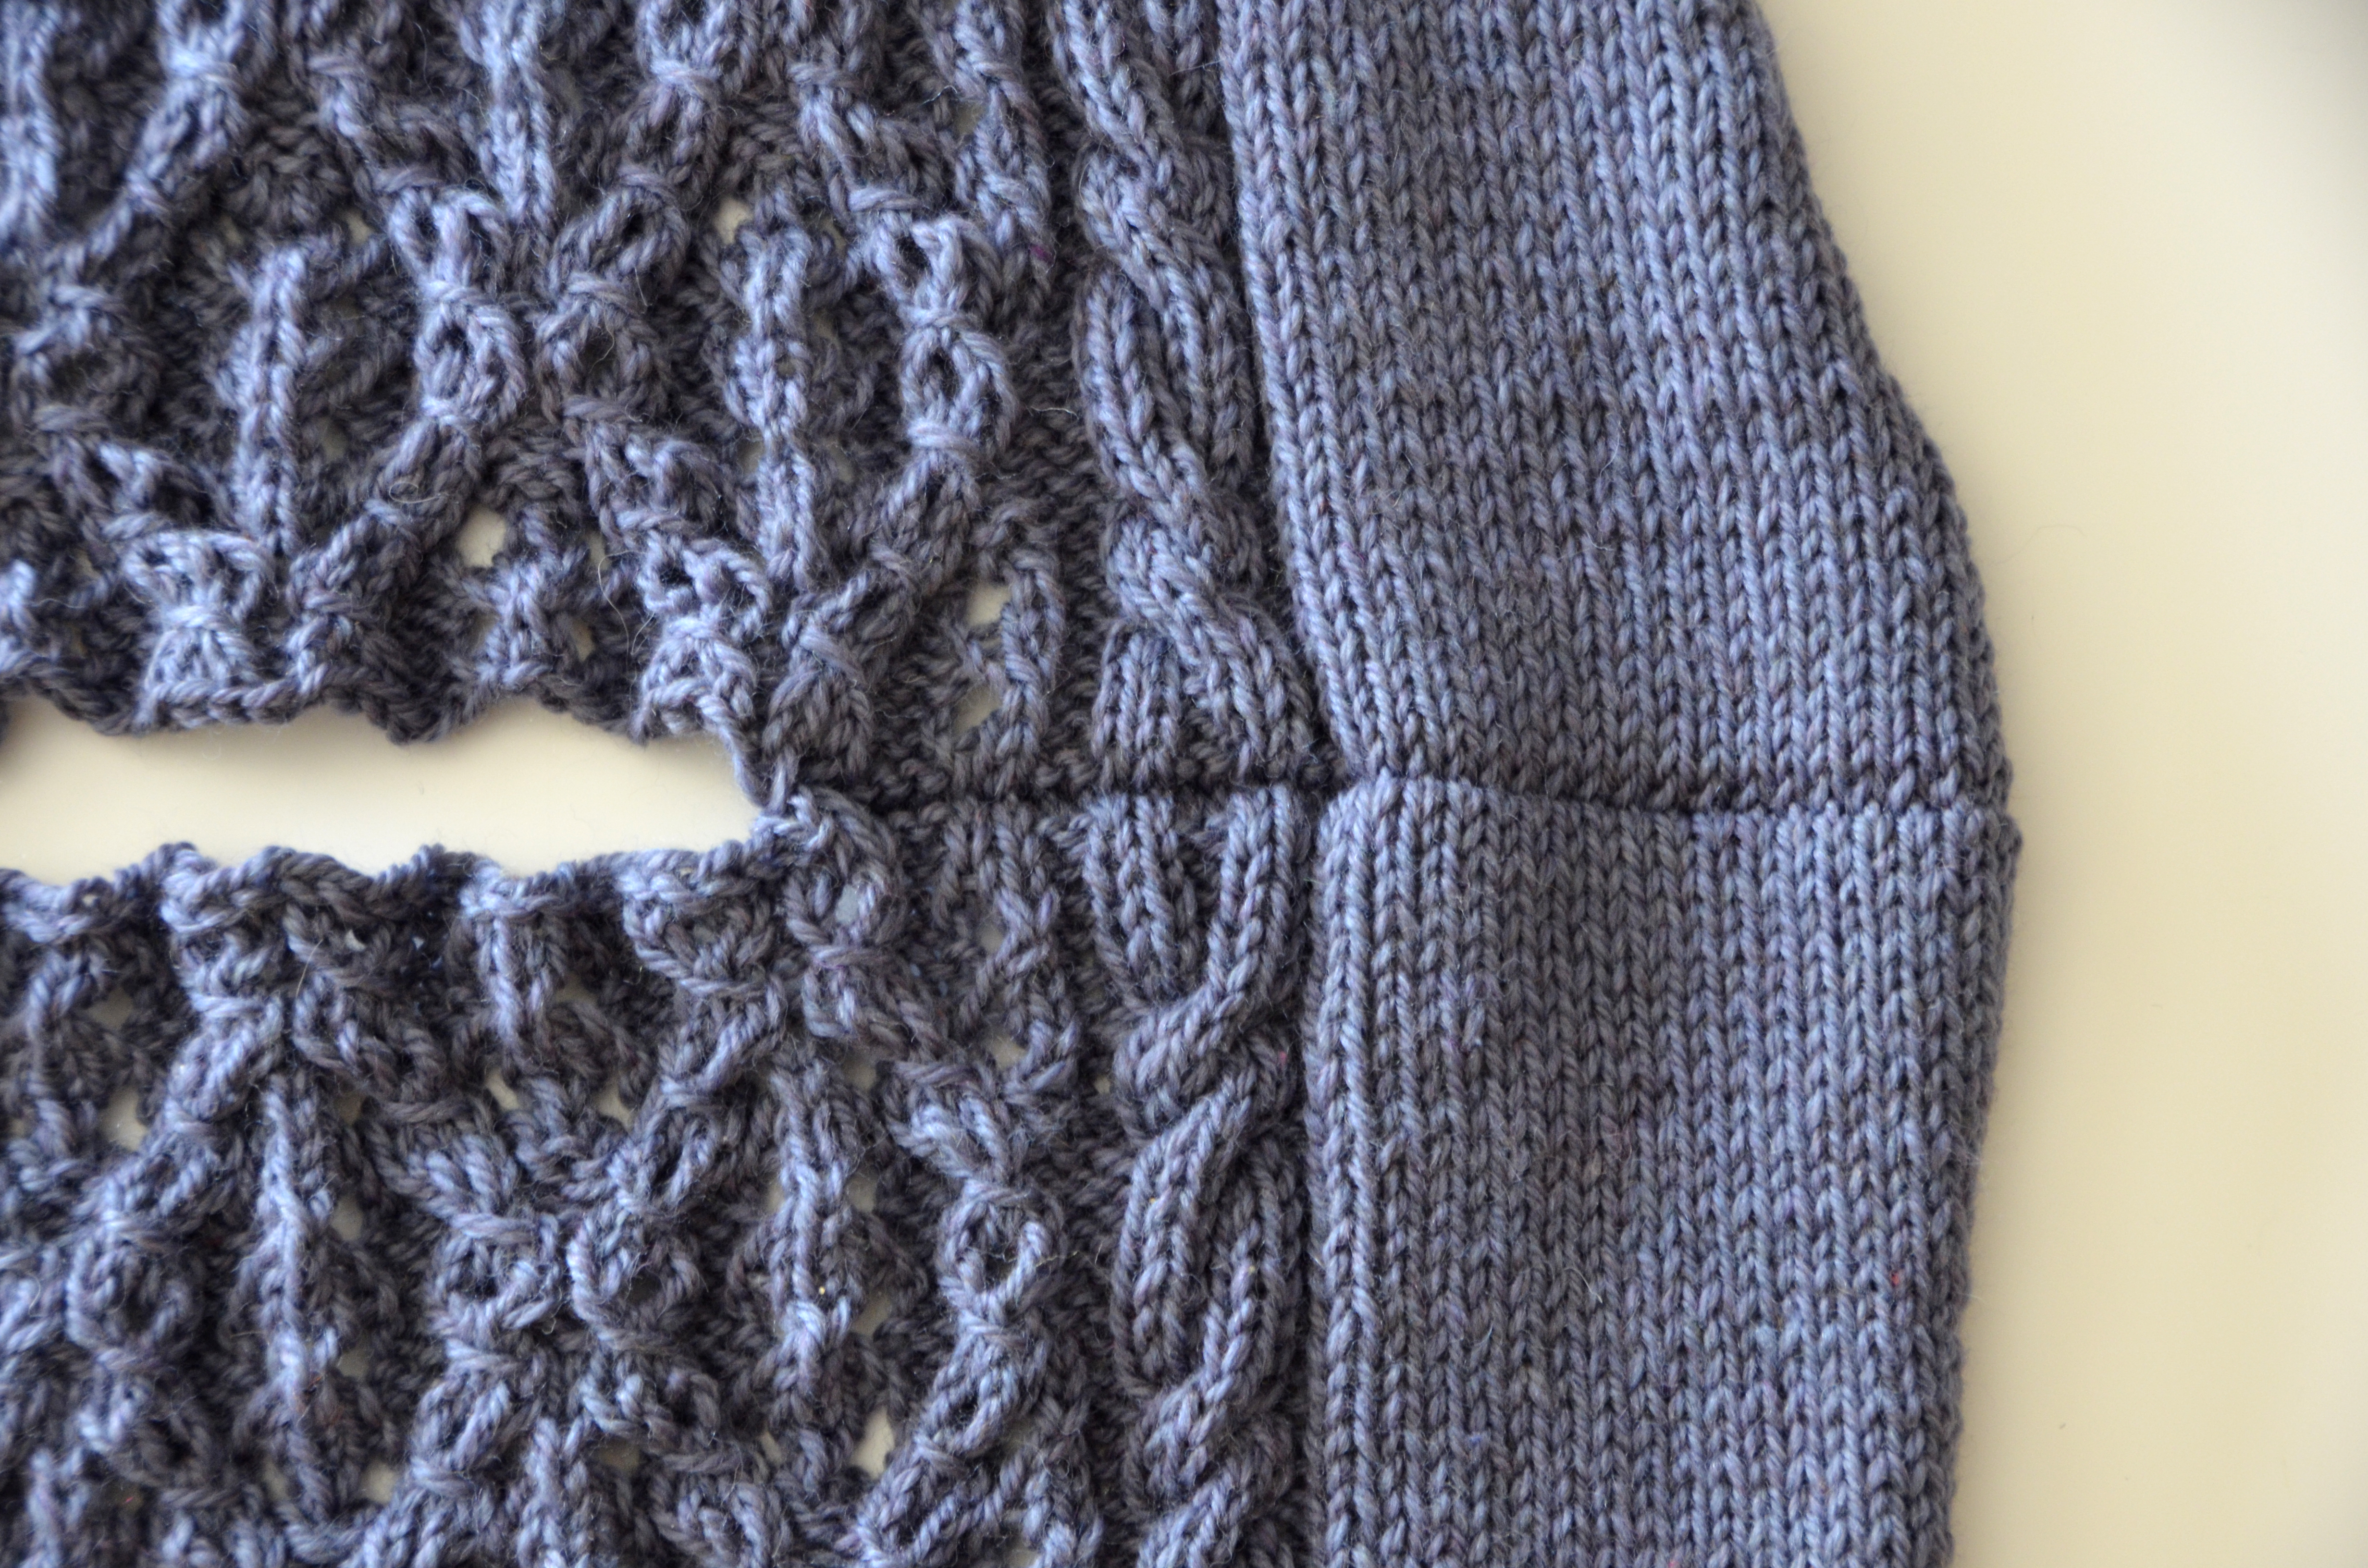
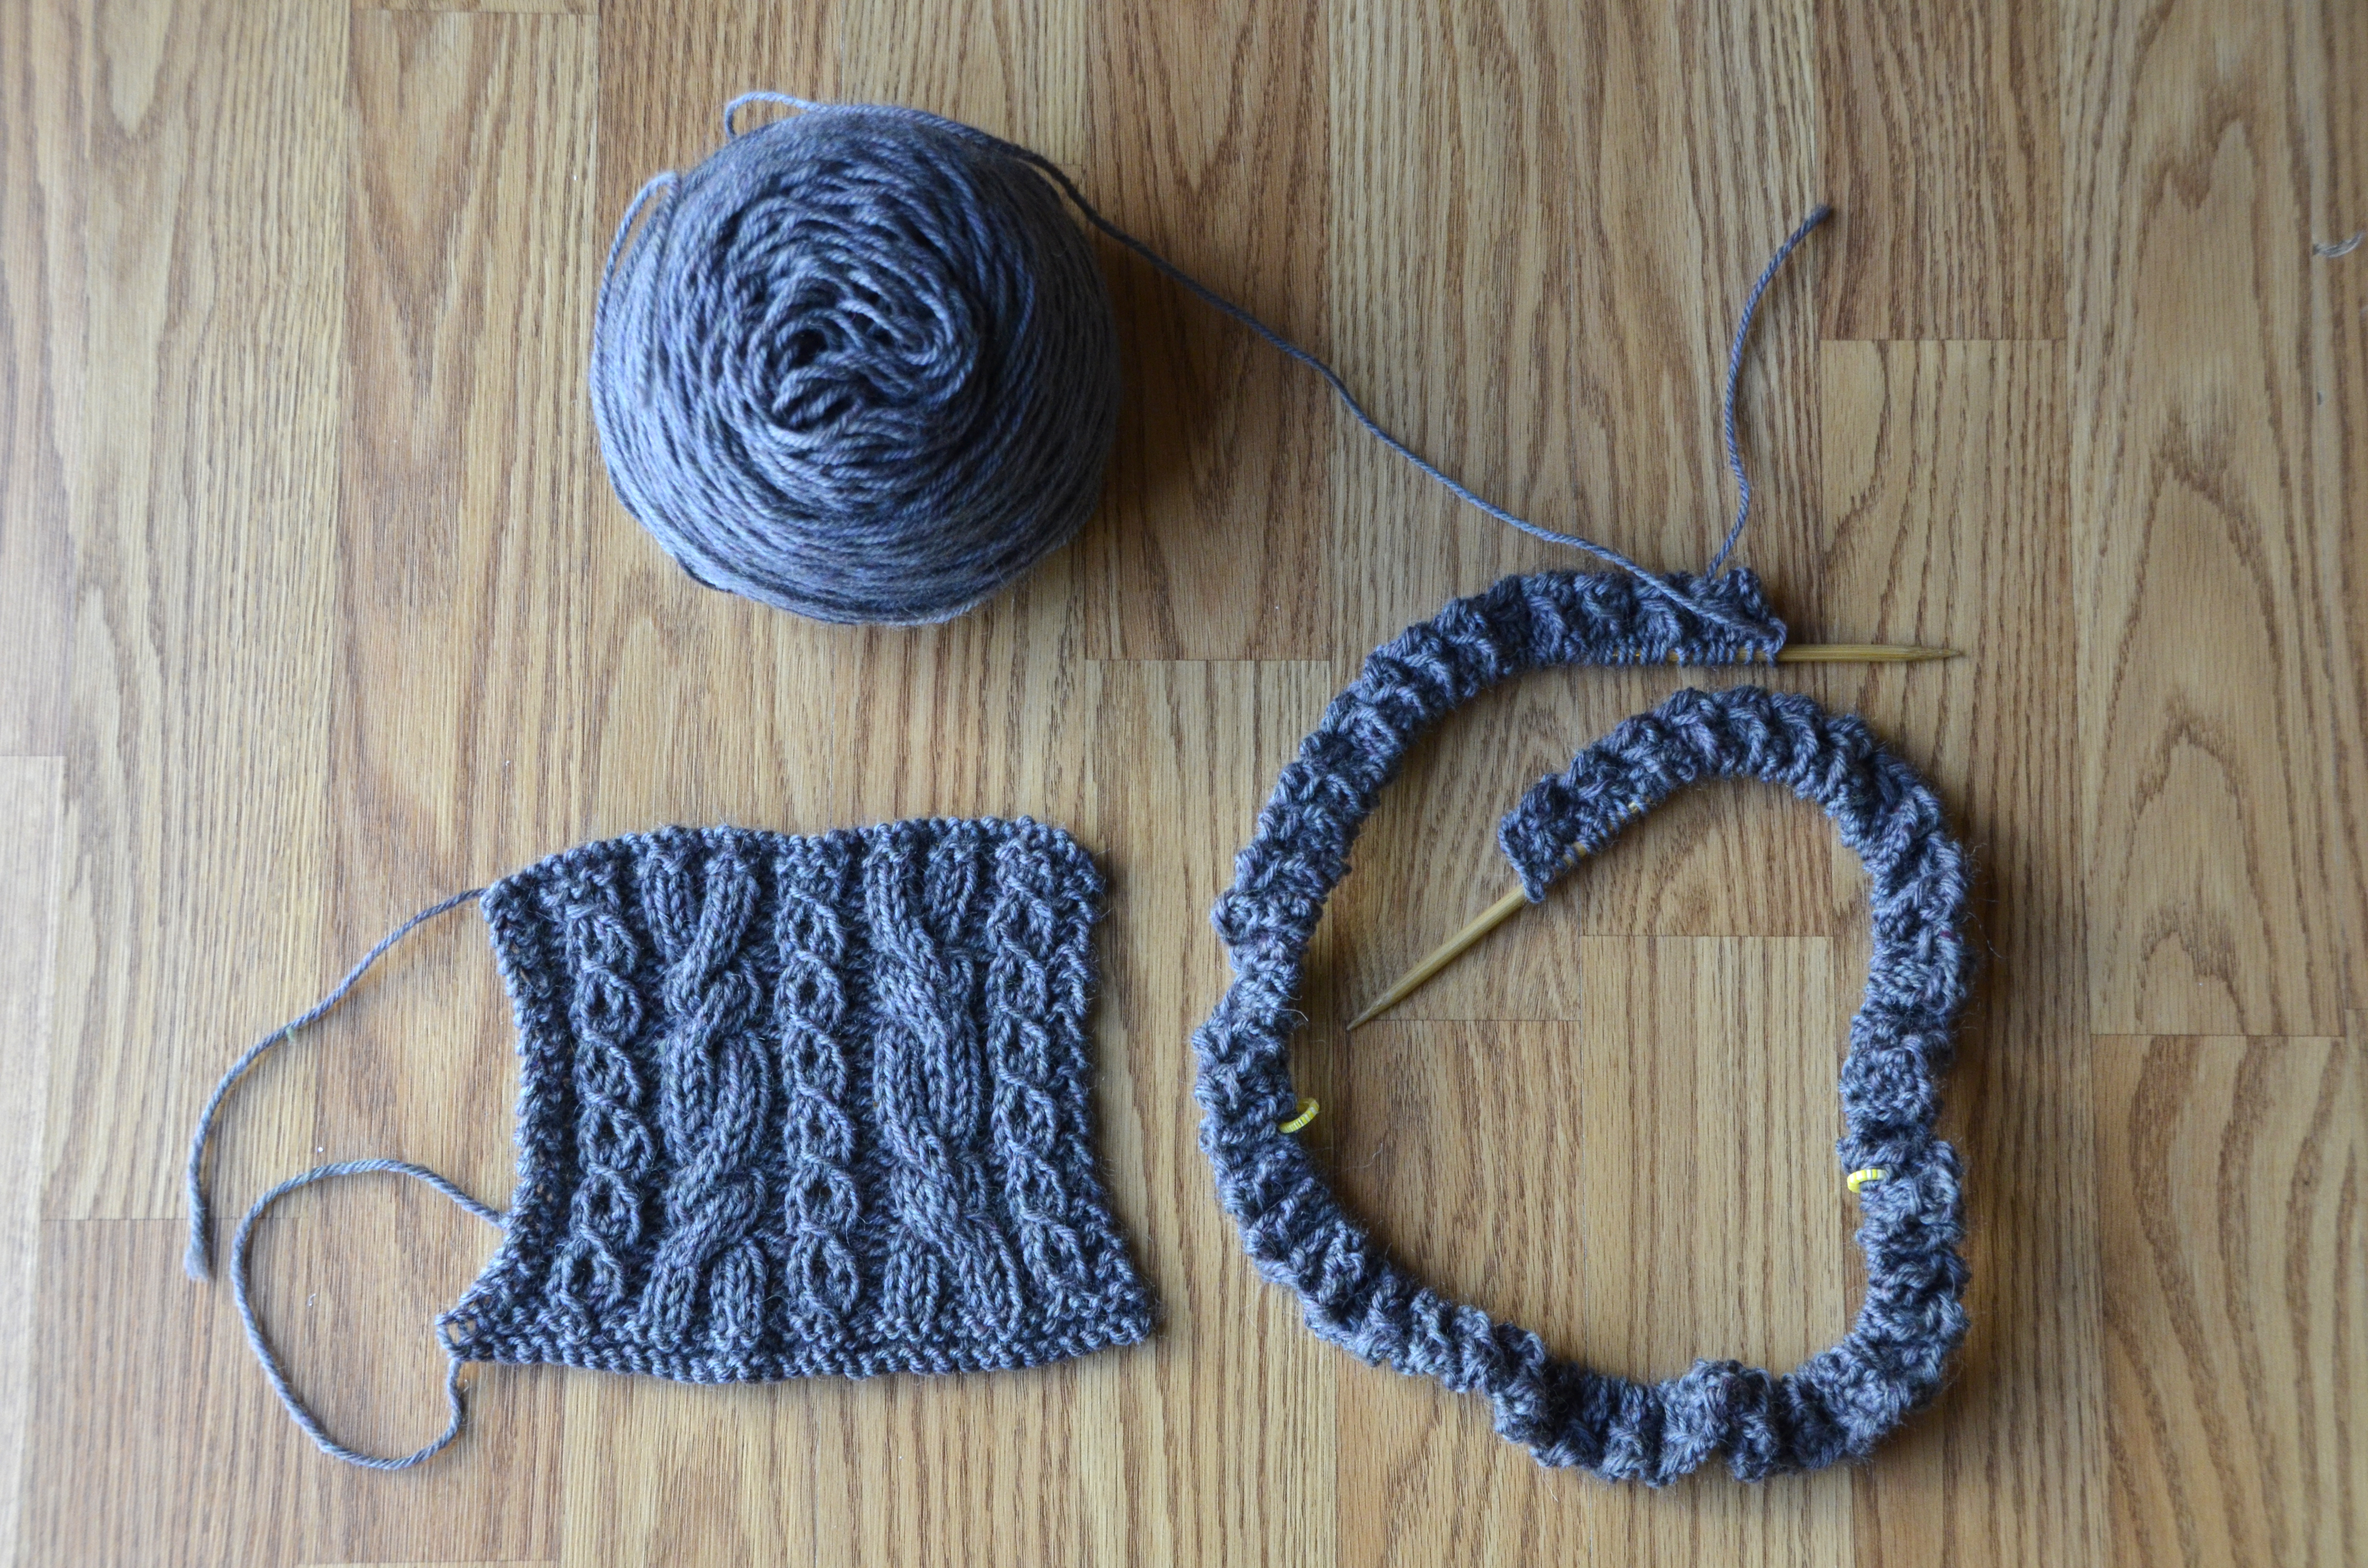
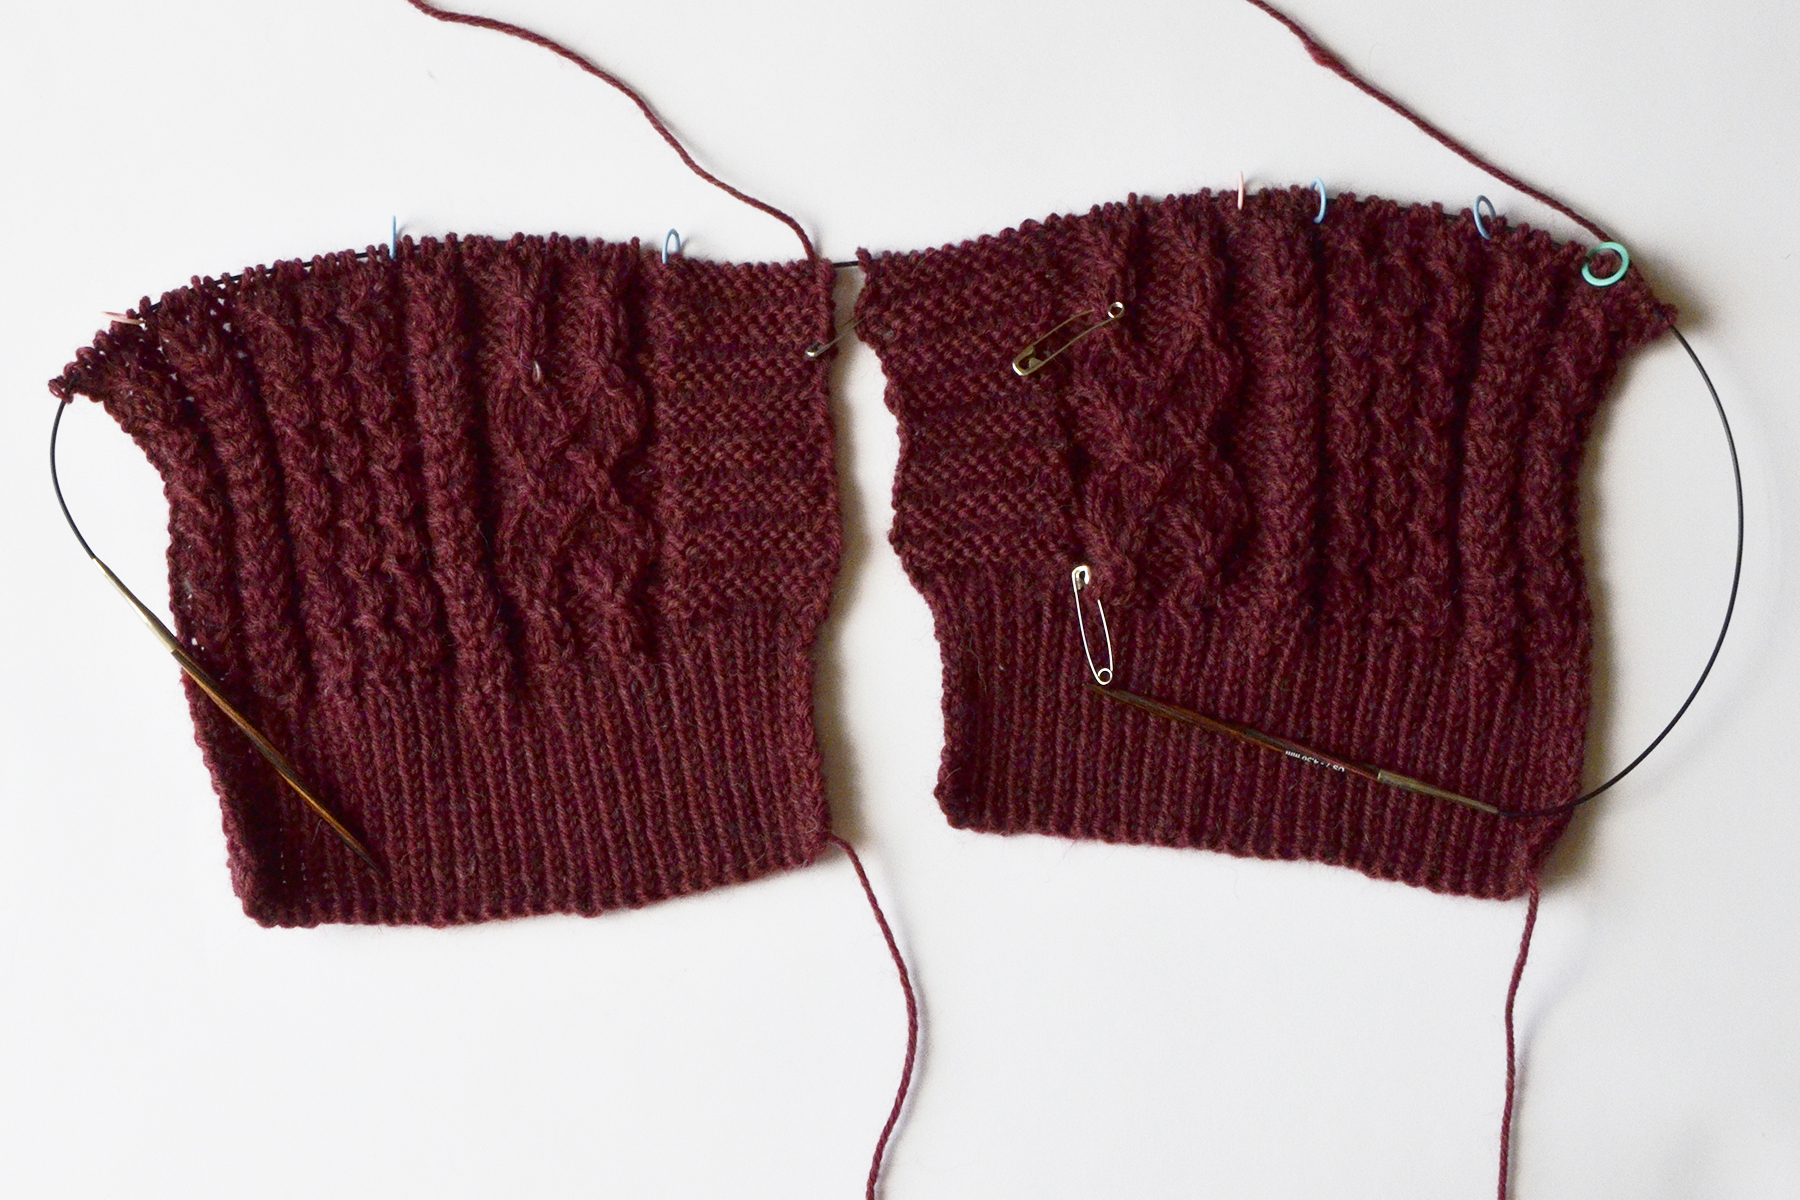
And, the edging completed:

PickingUpStitches_10

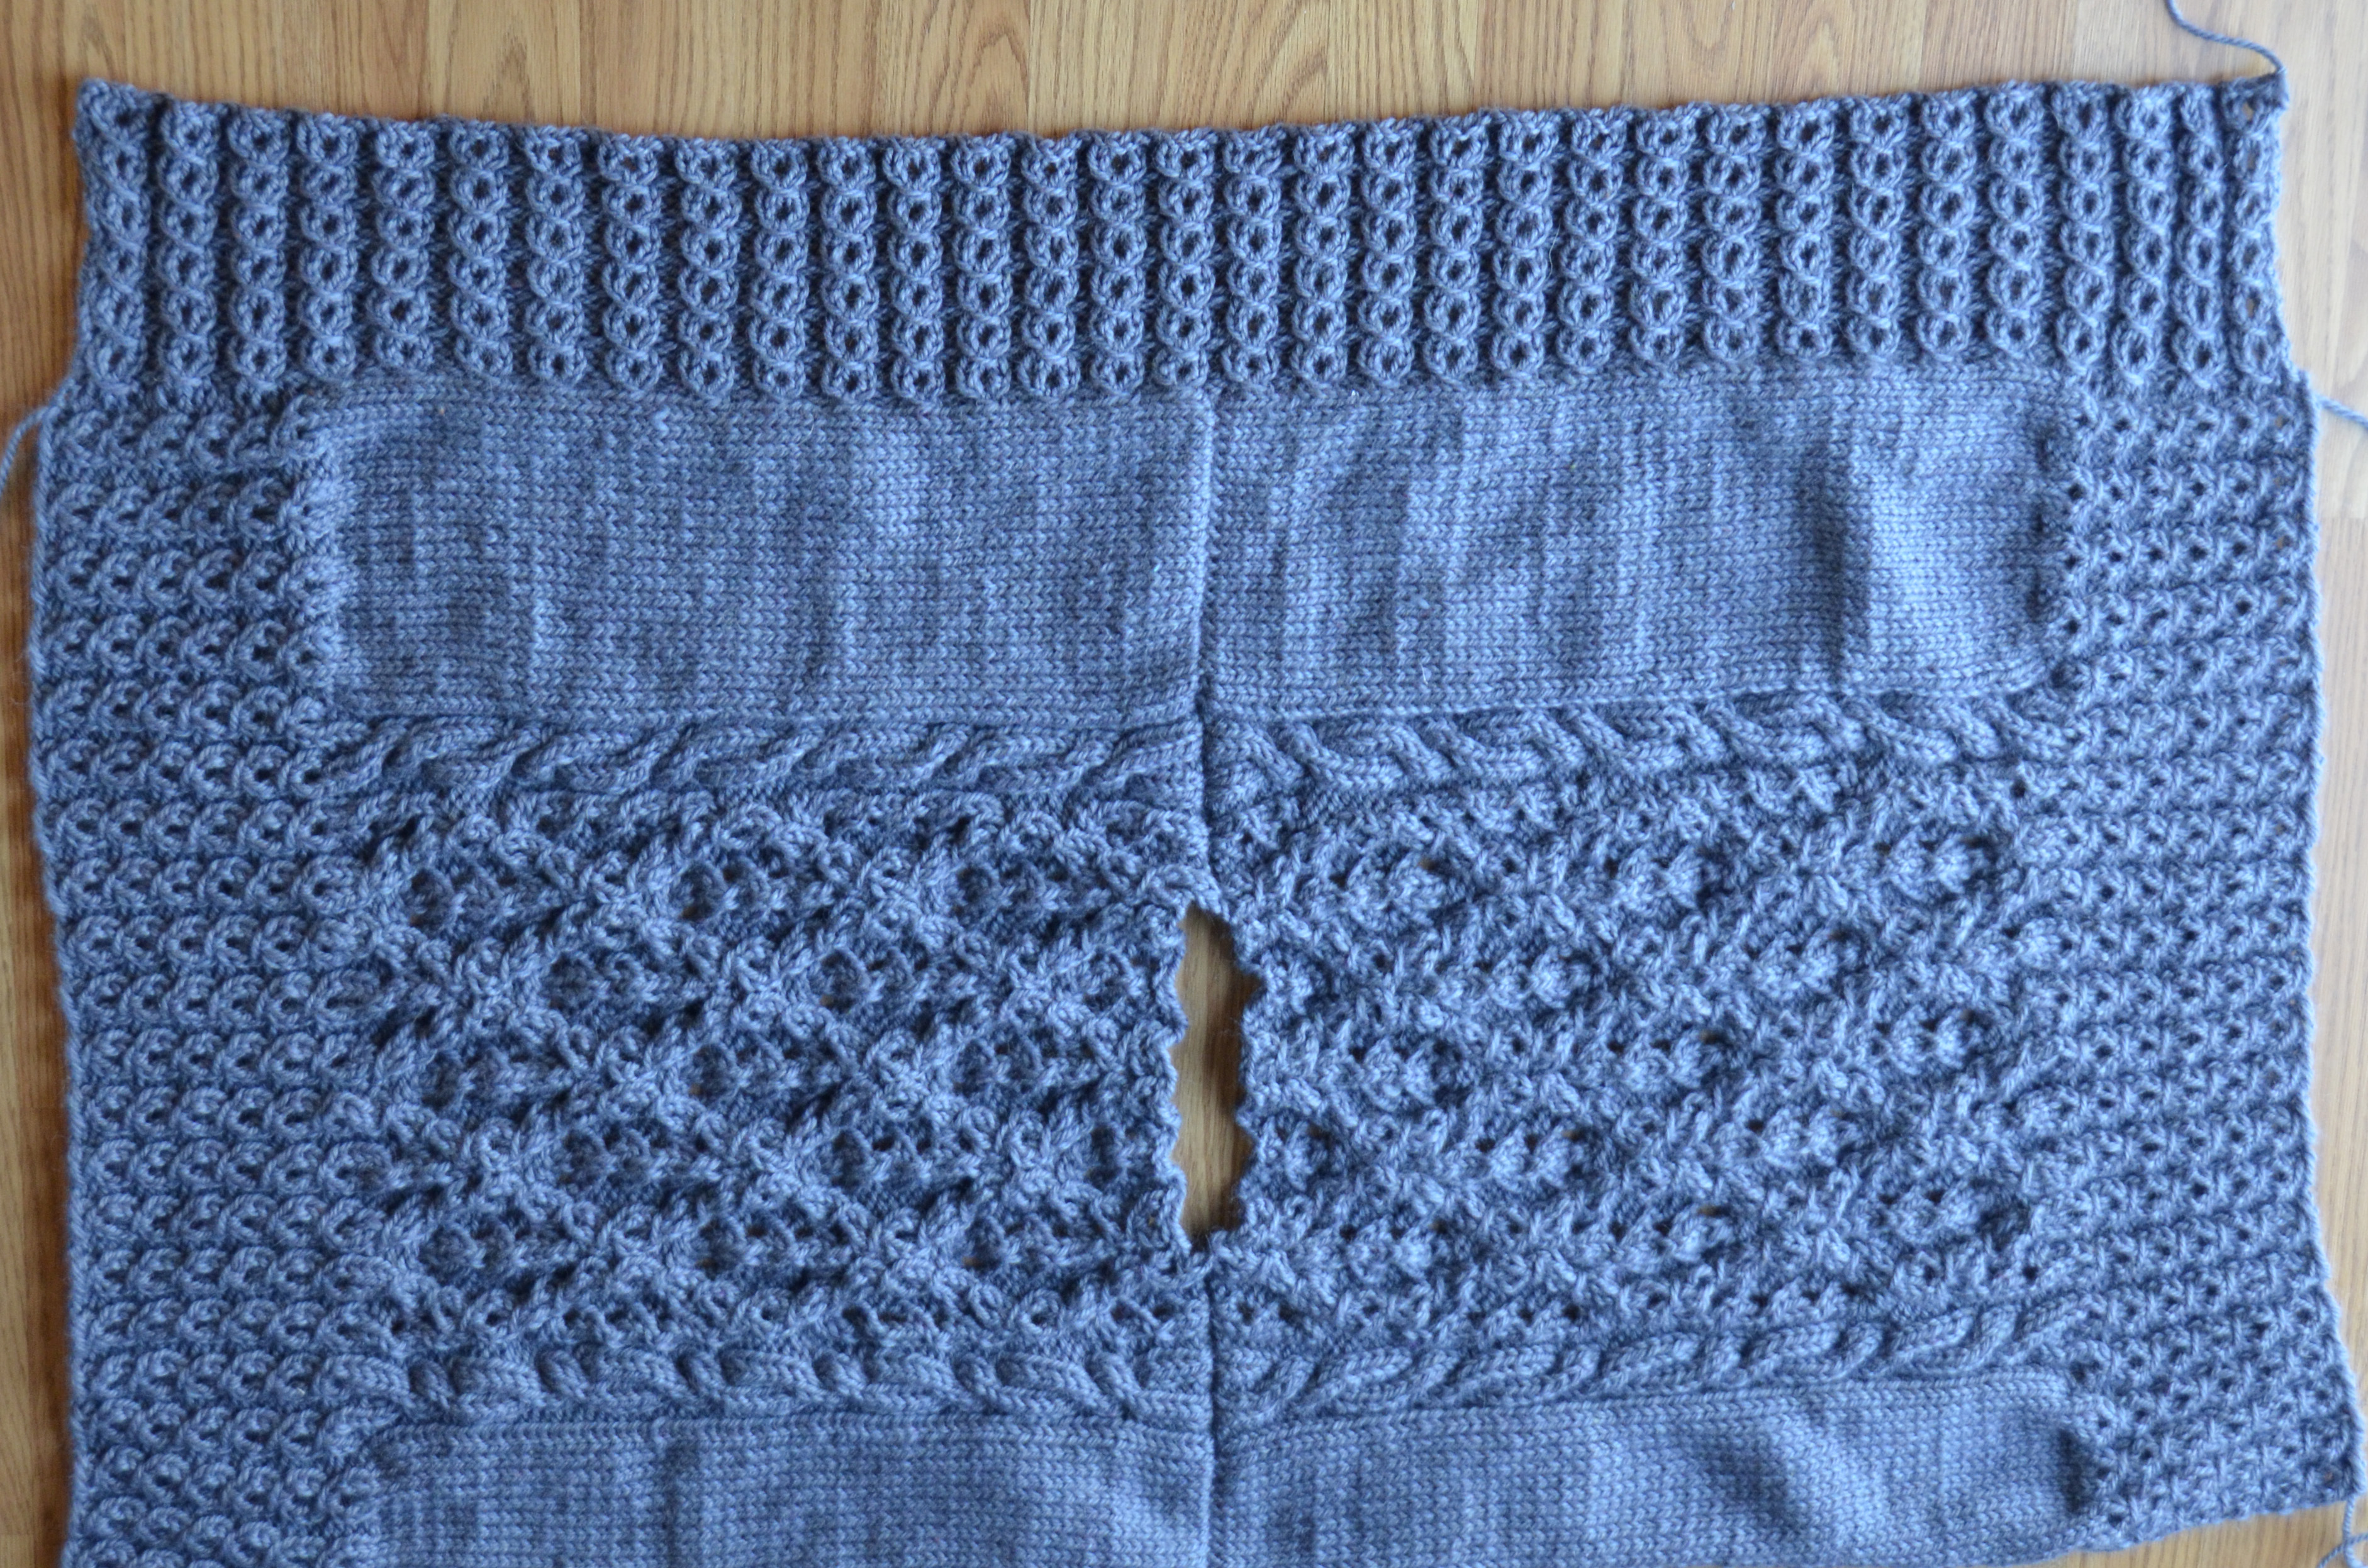
All that’s left is my other side edging, a collar, some blocking, and it’s done!

As I was sitting outside enjoying my evening the other night, I could smell the autumn in the air for the first time this year. It’s coming, people. It’s coming! How is your knitalong project coming?
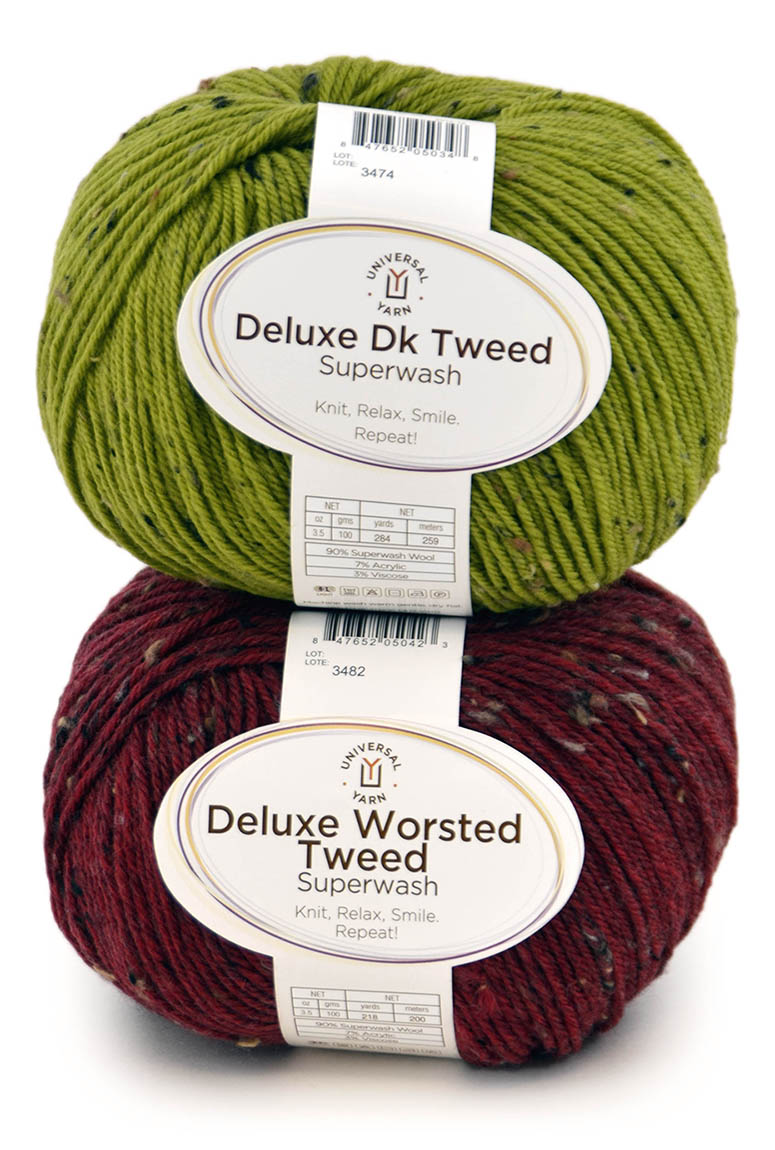
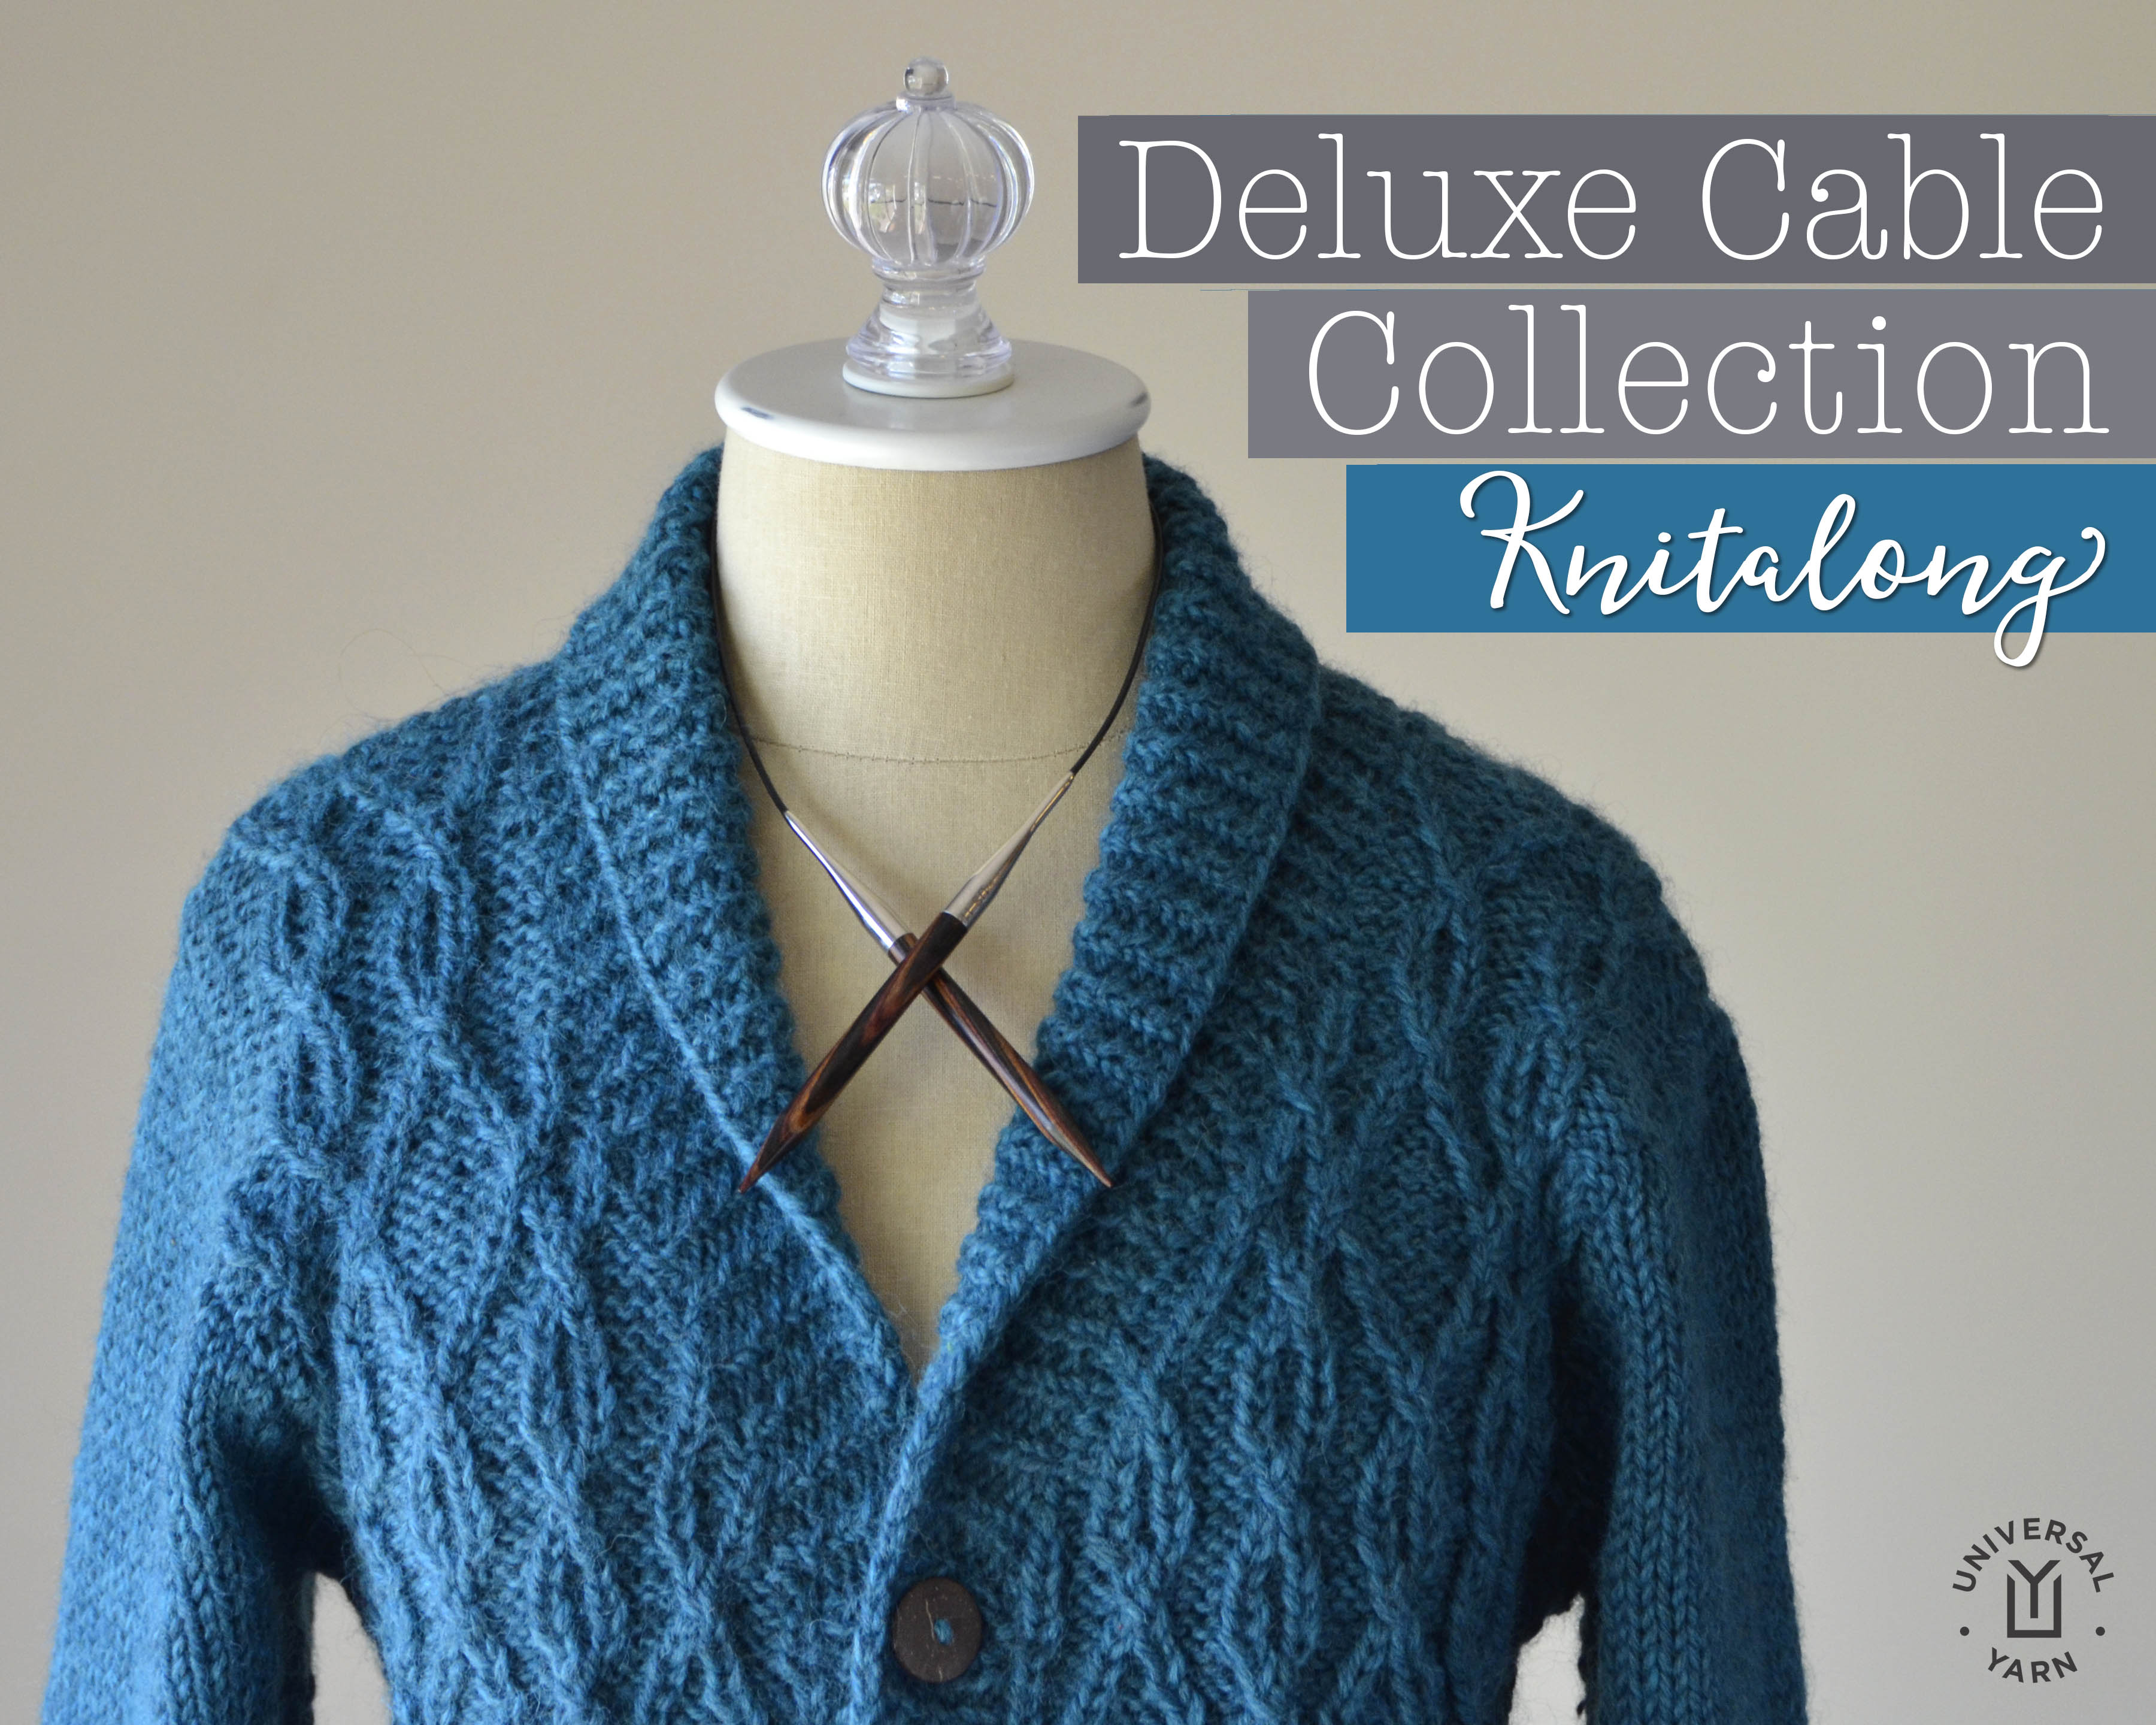
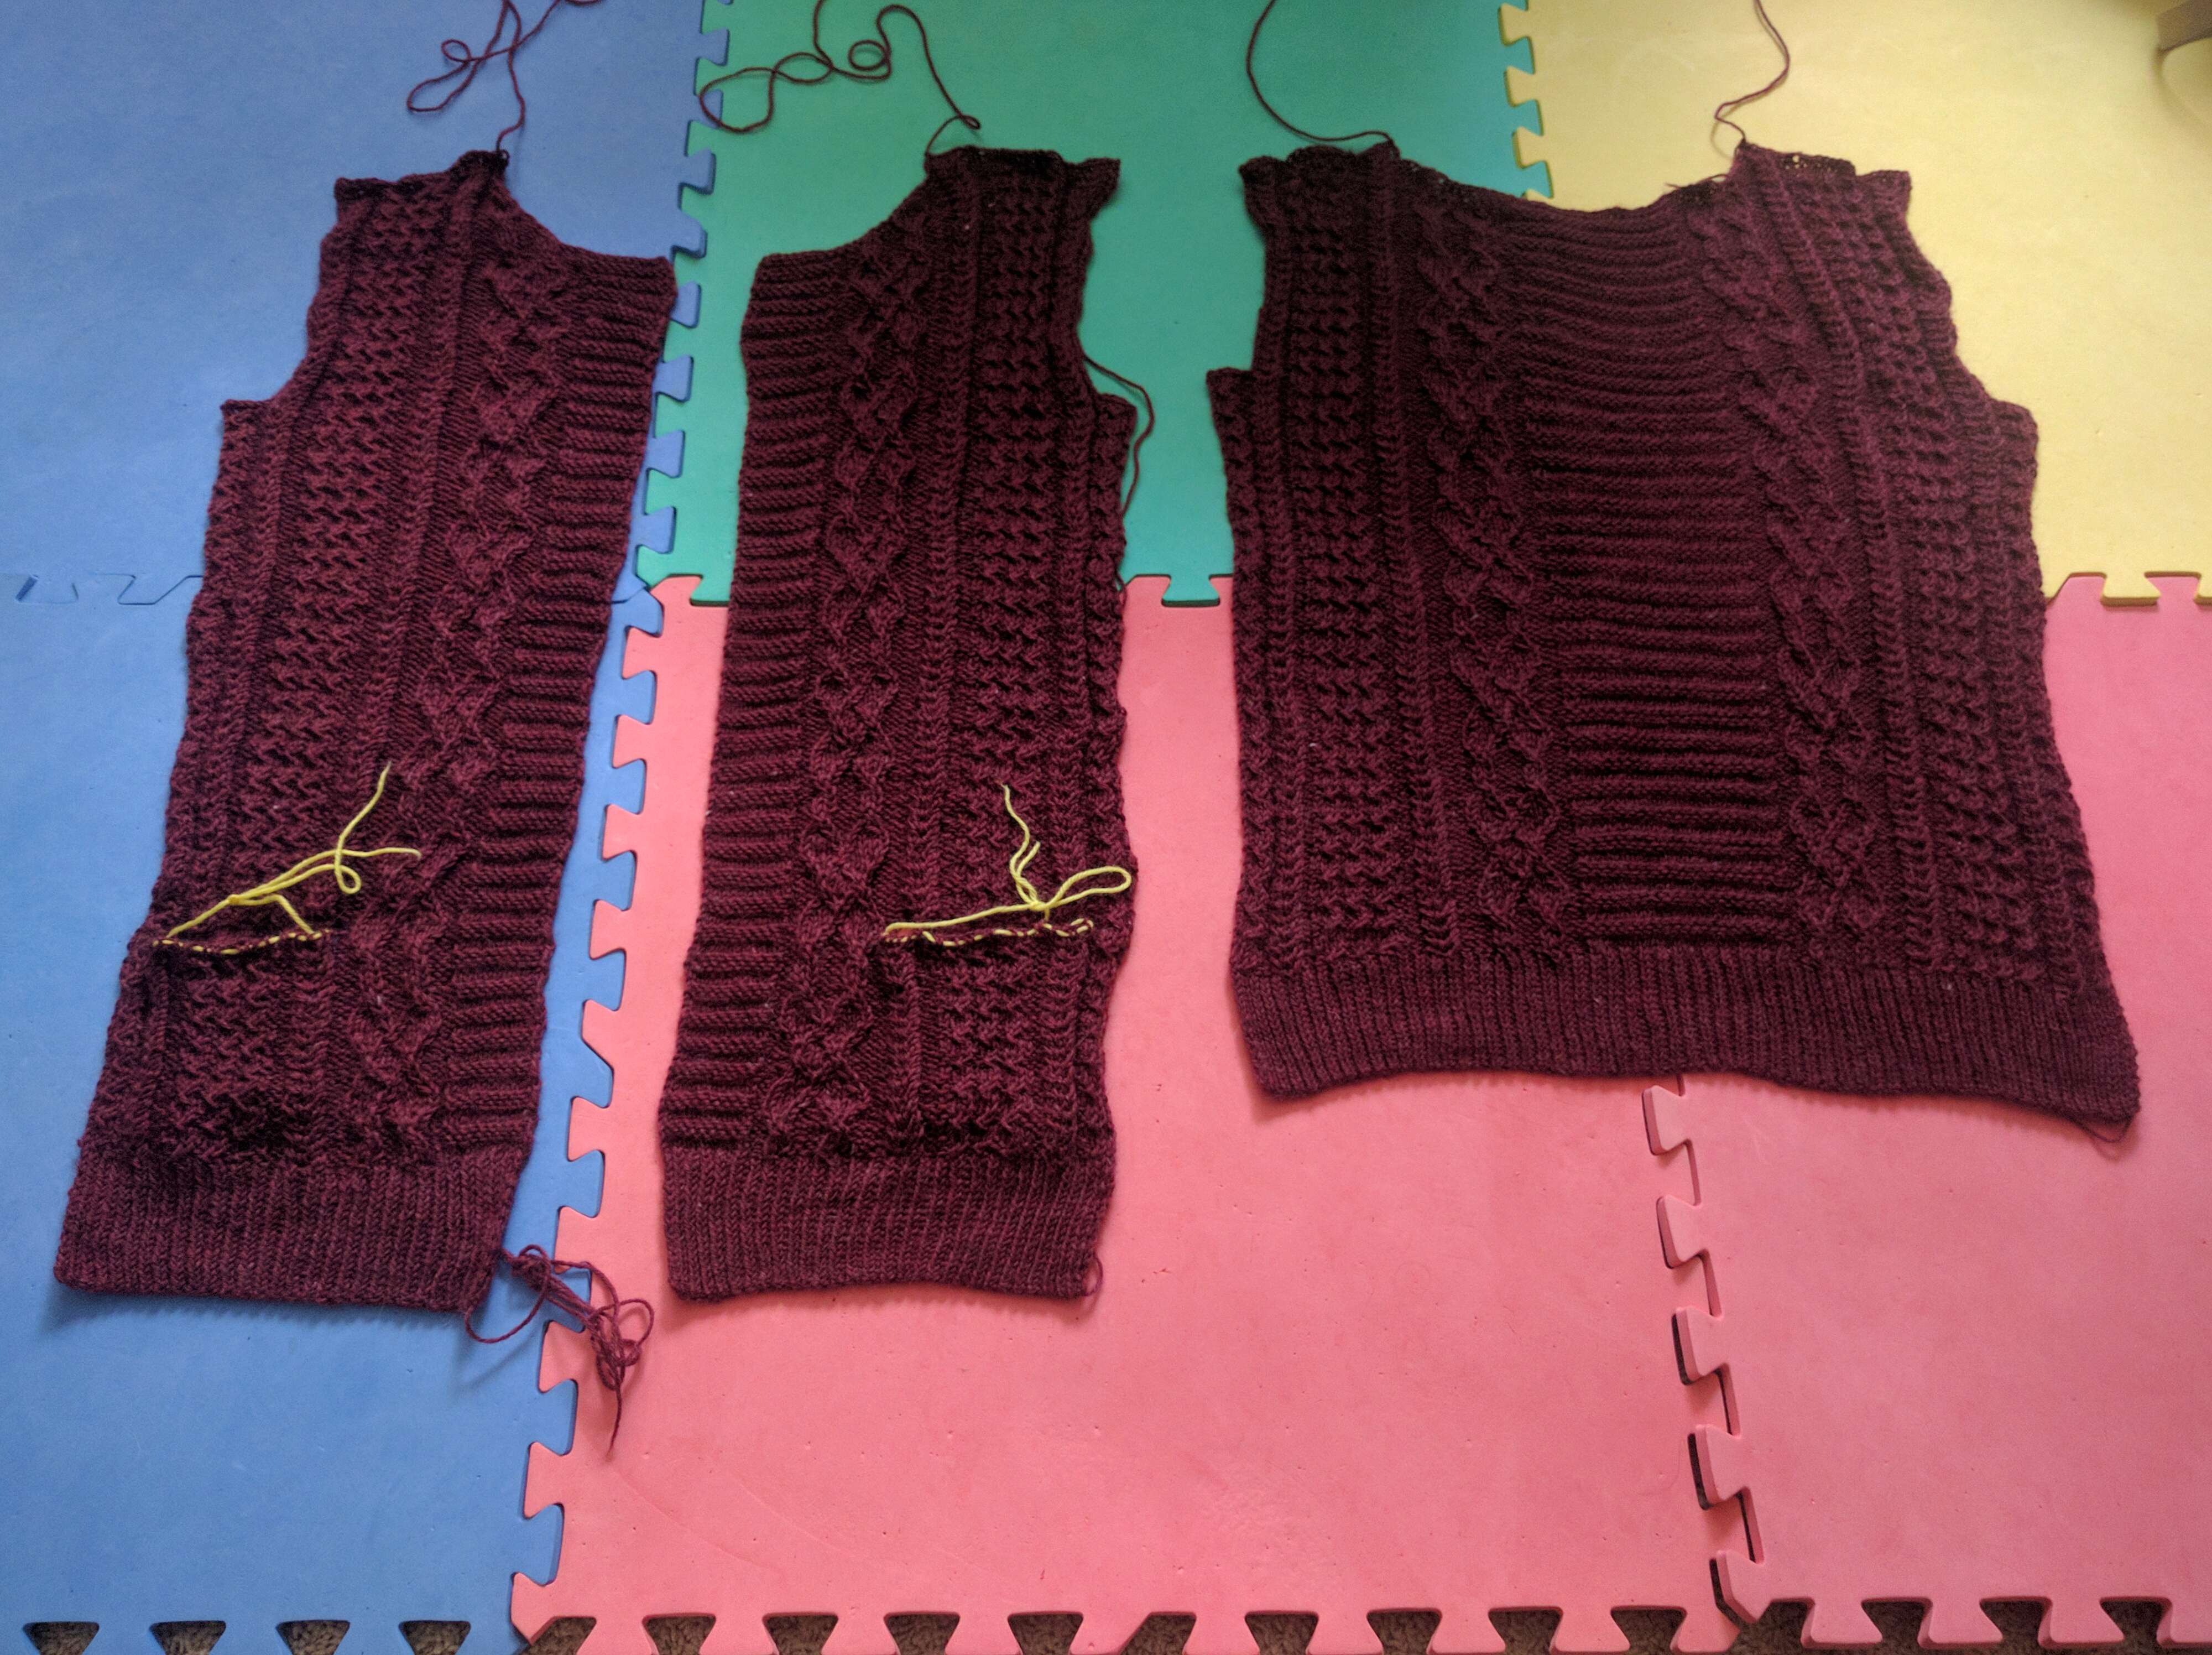
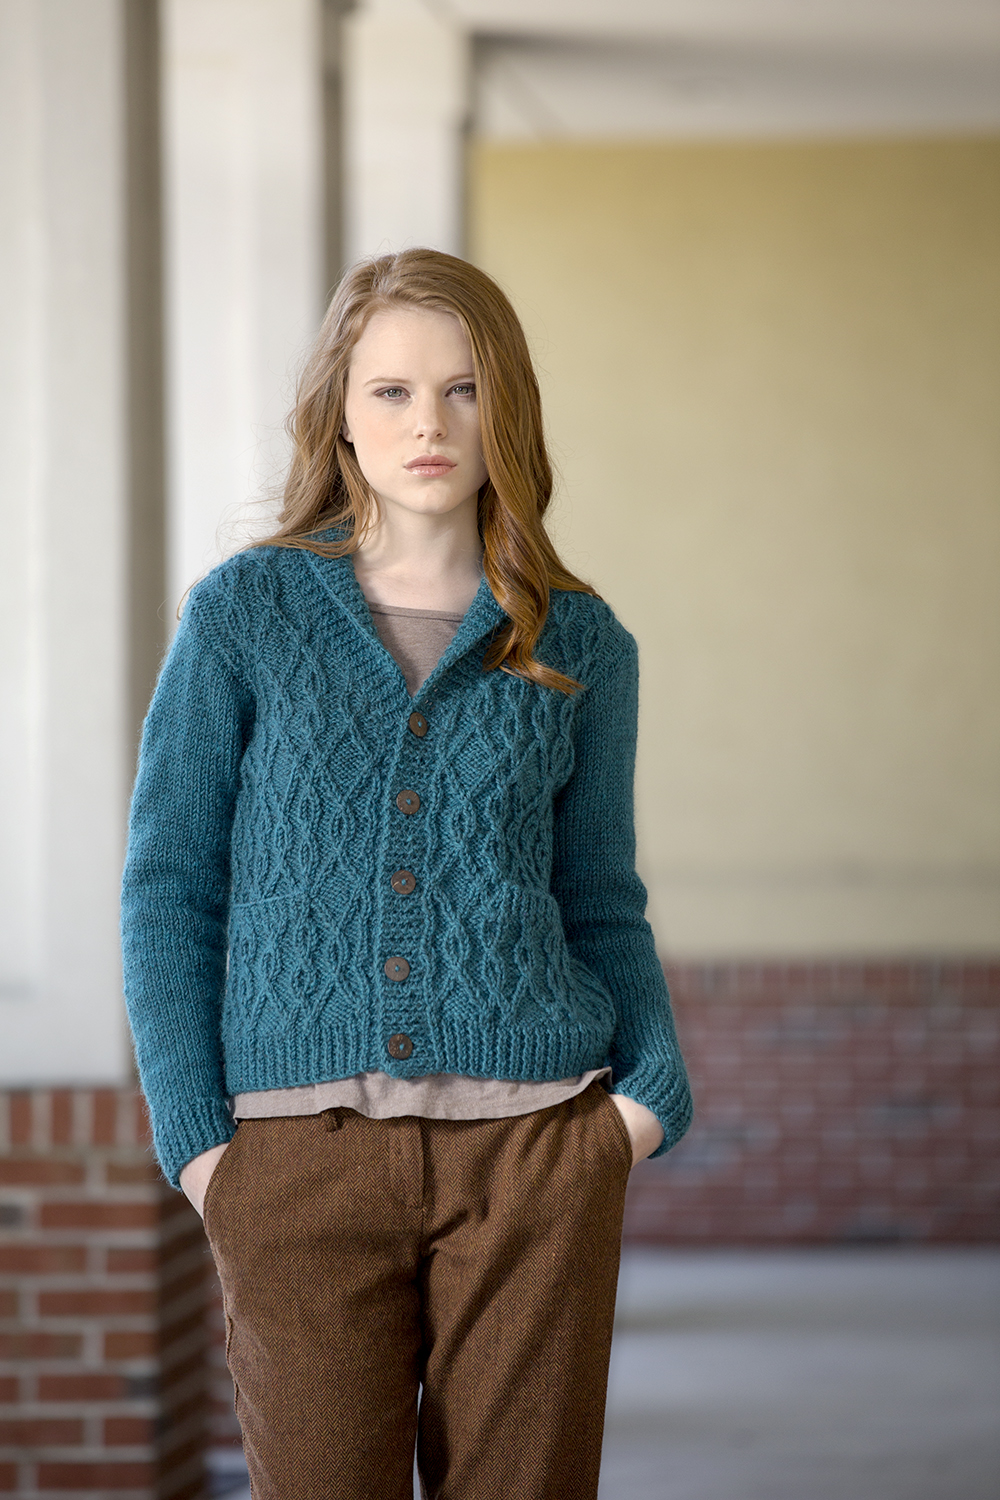
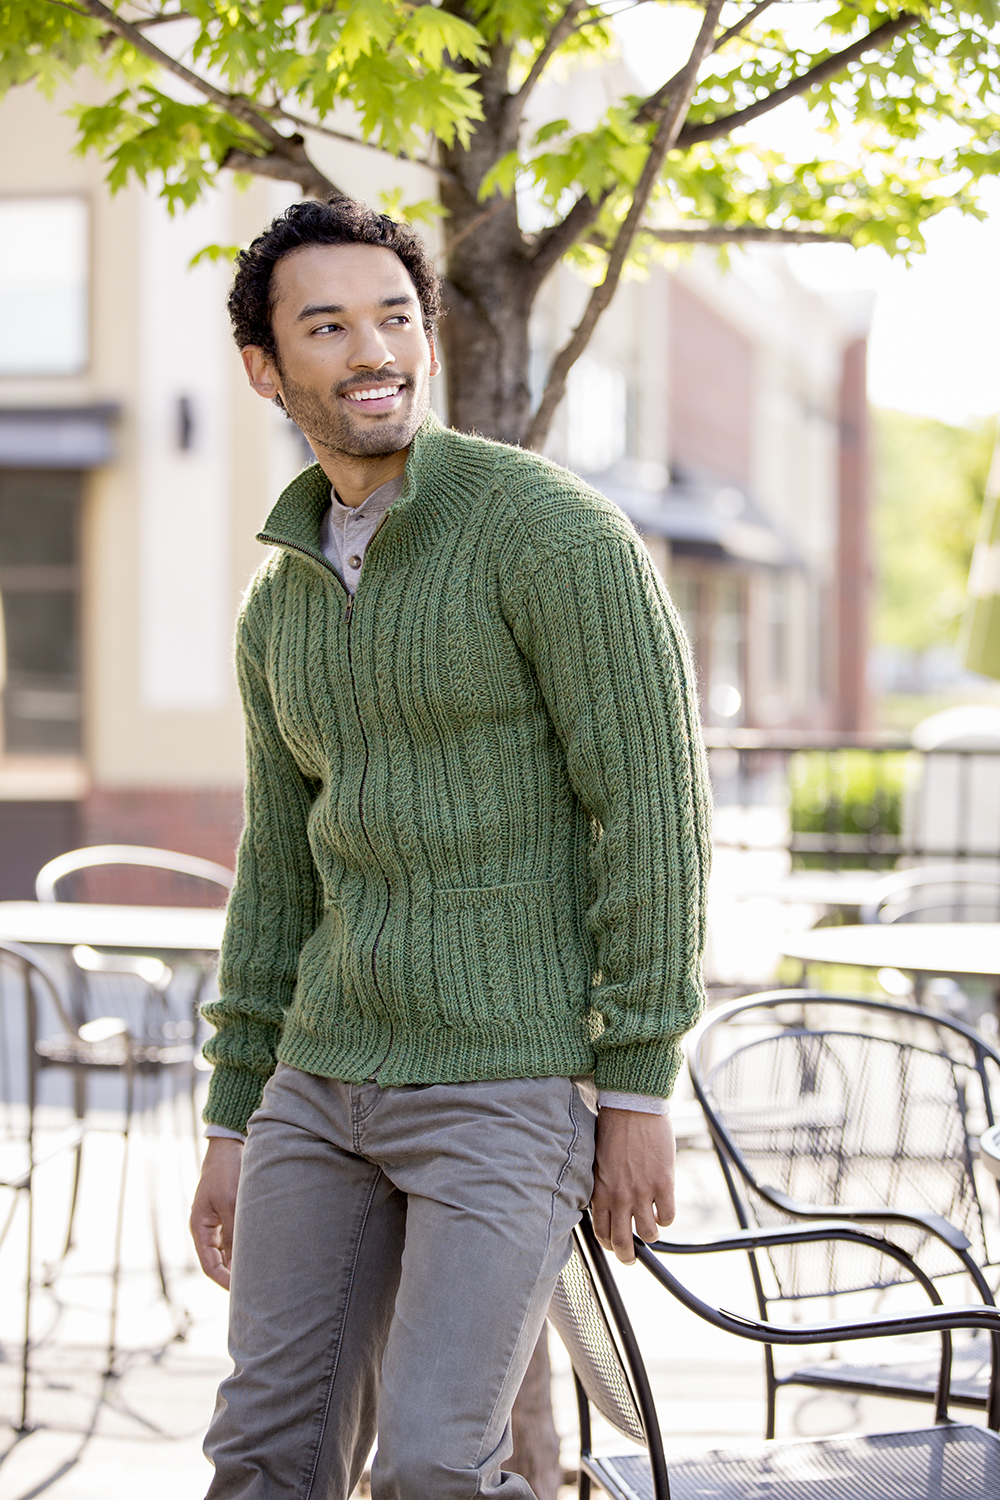
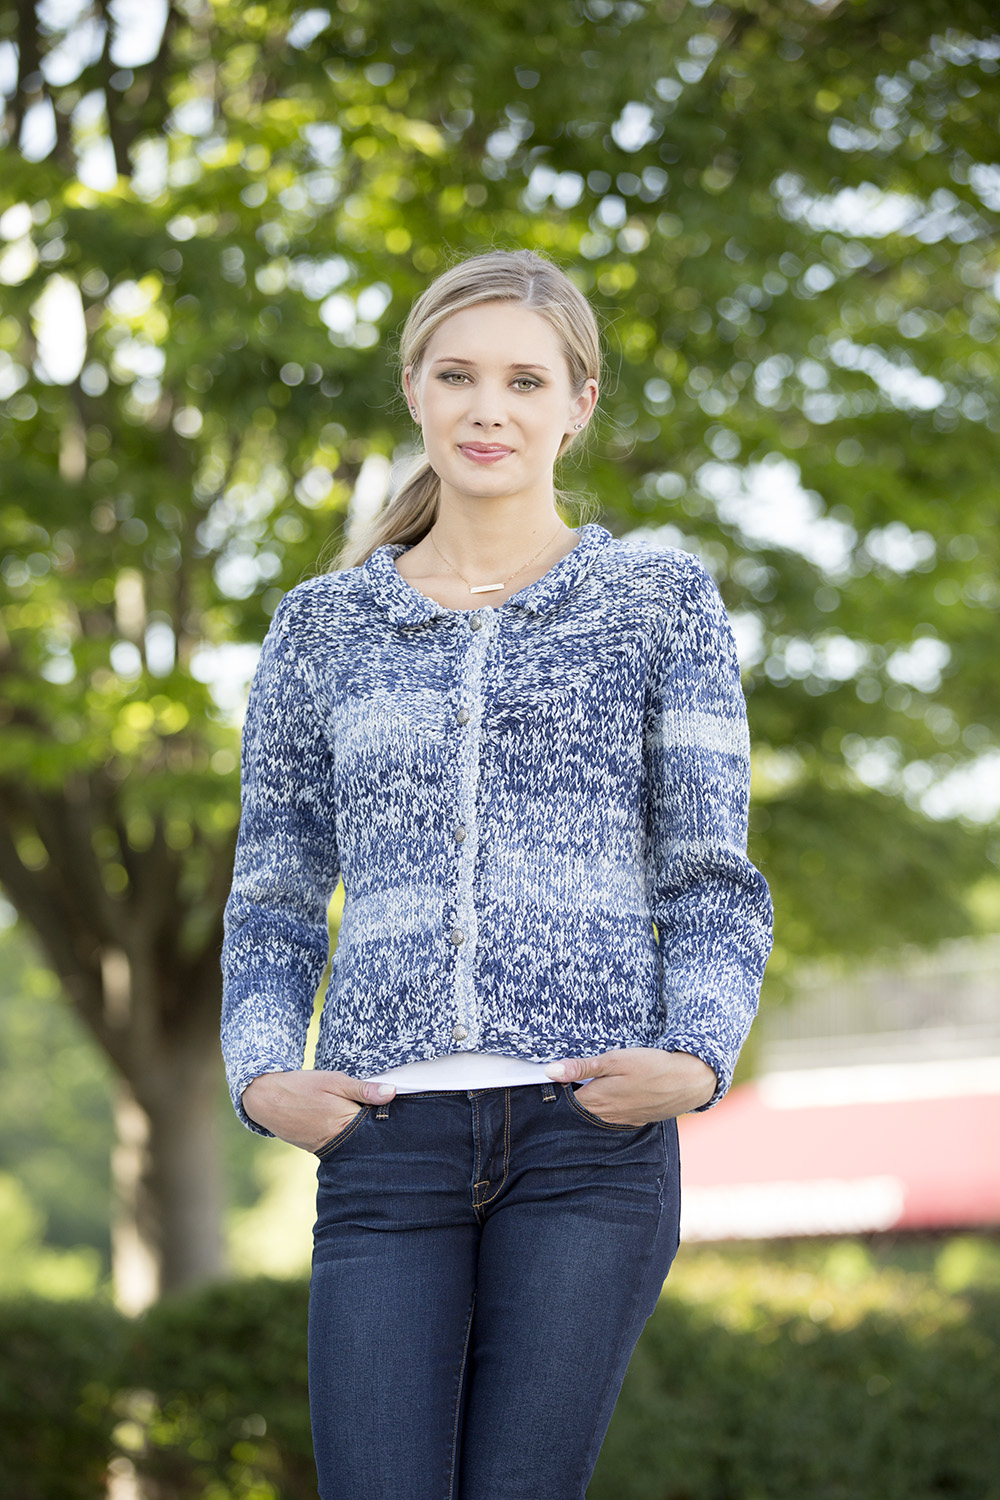
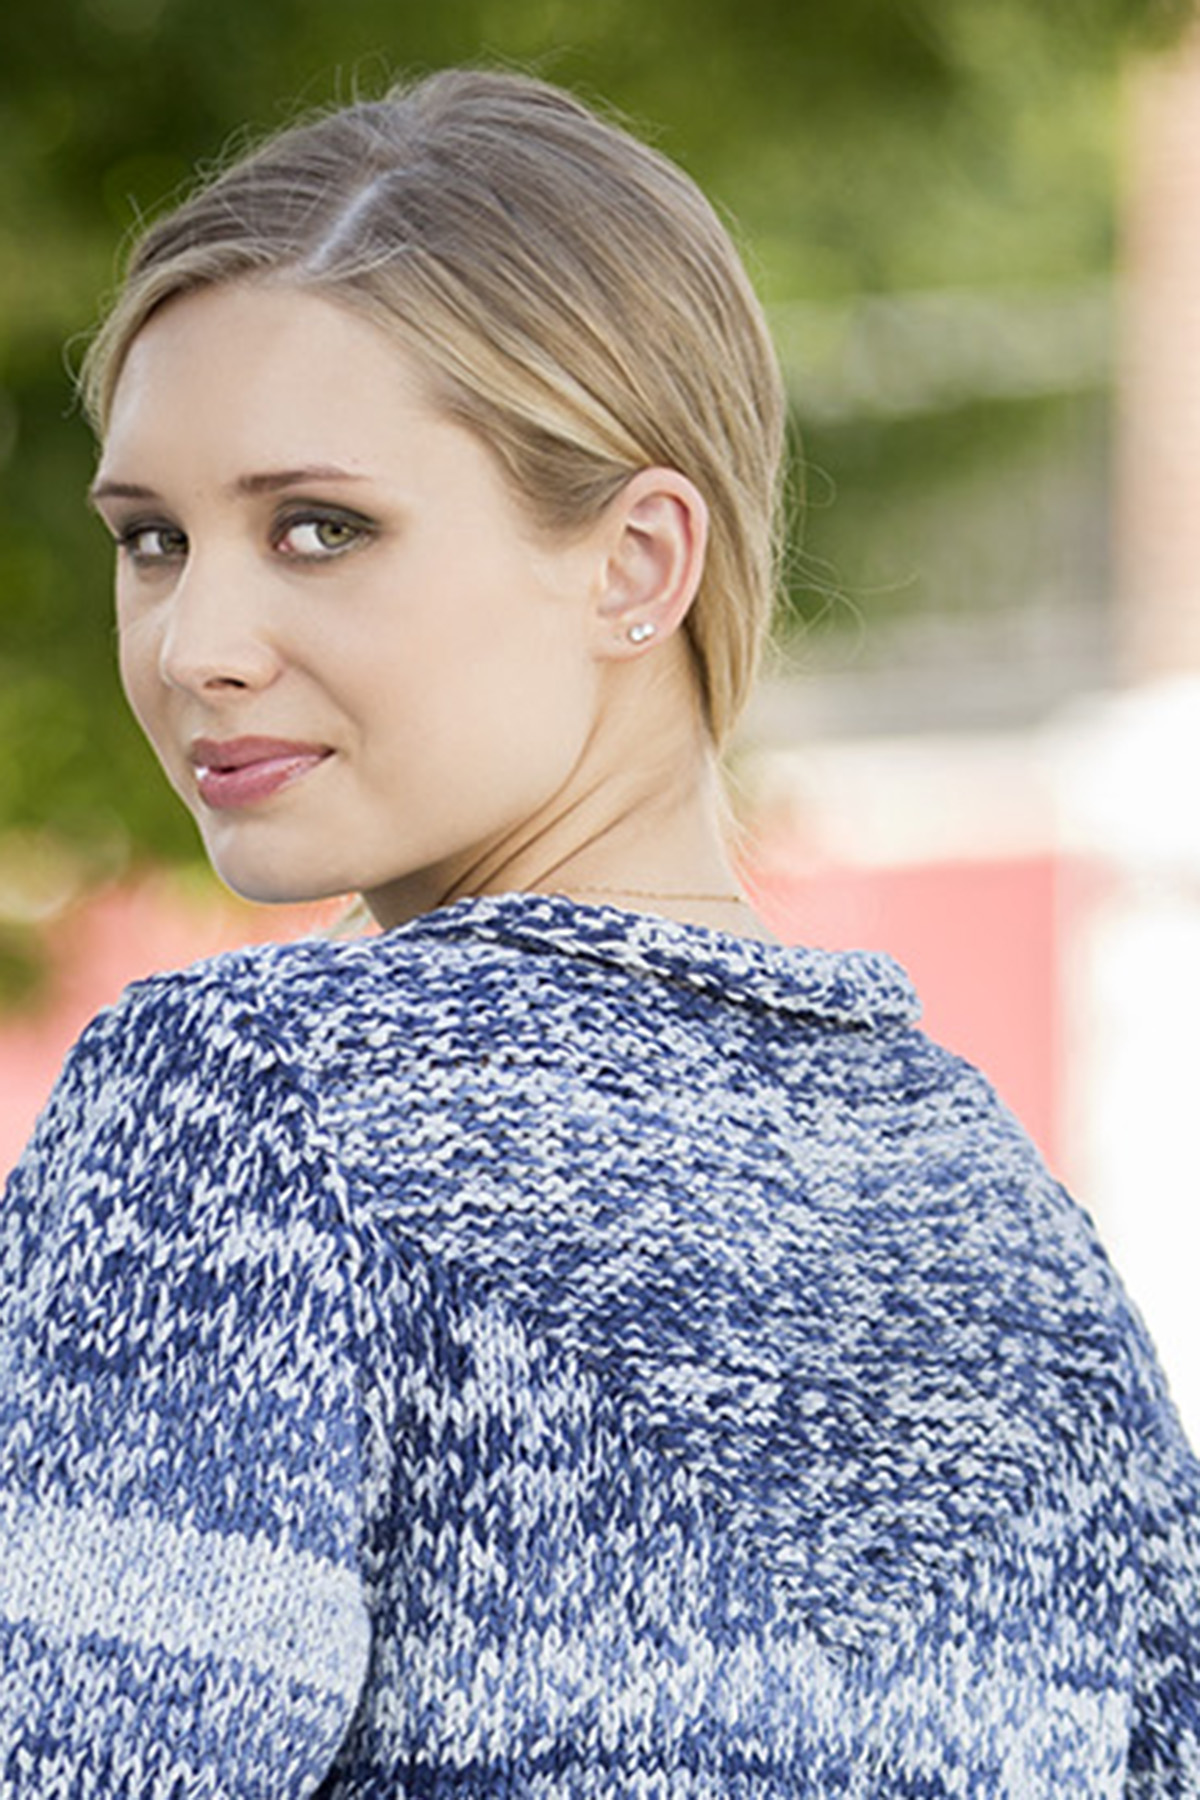
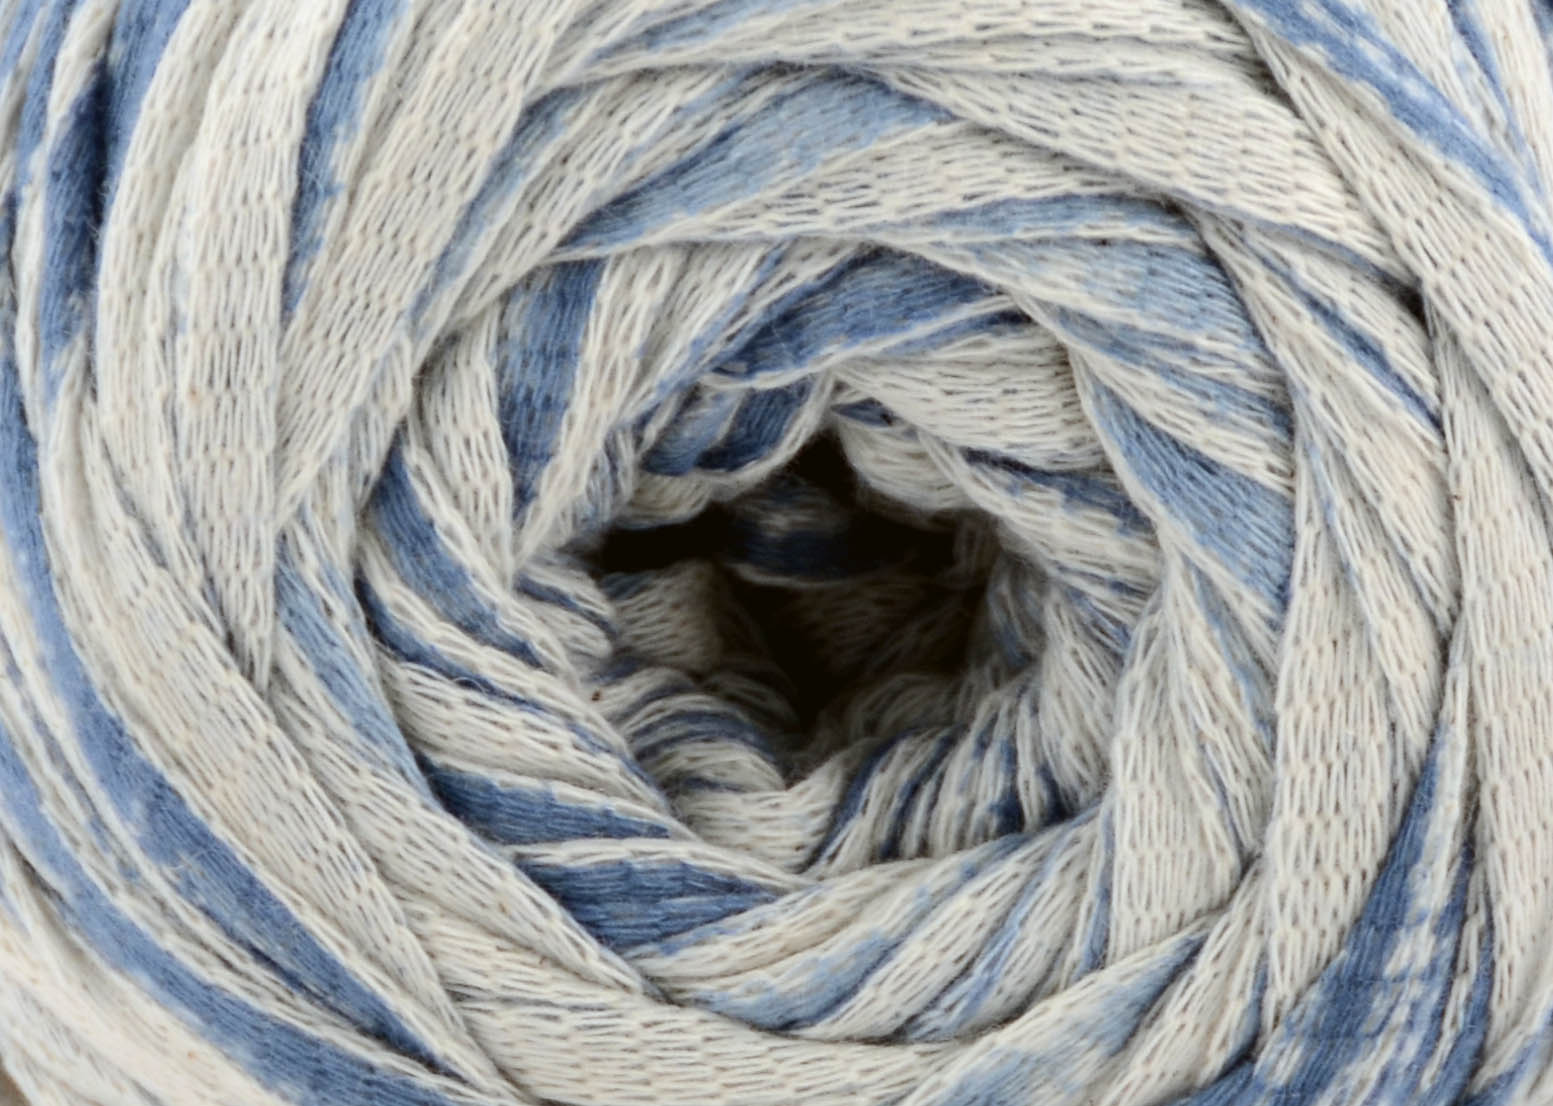
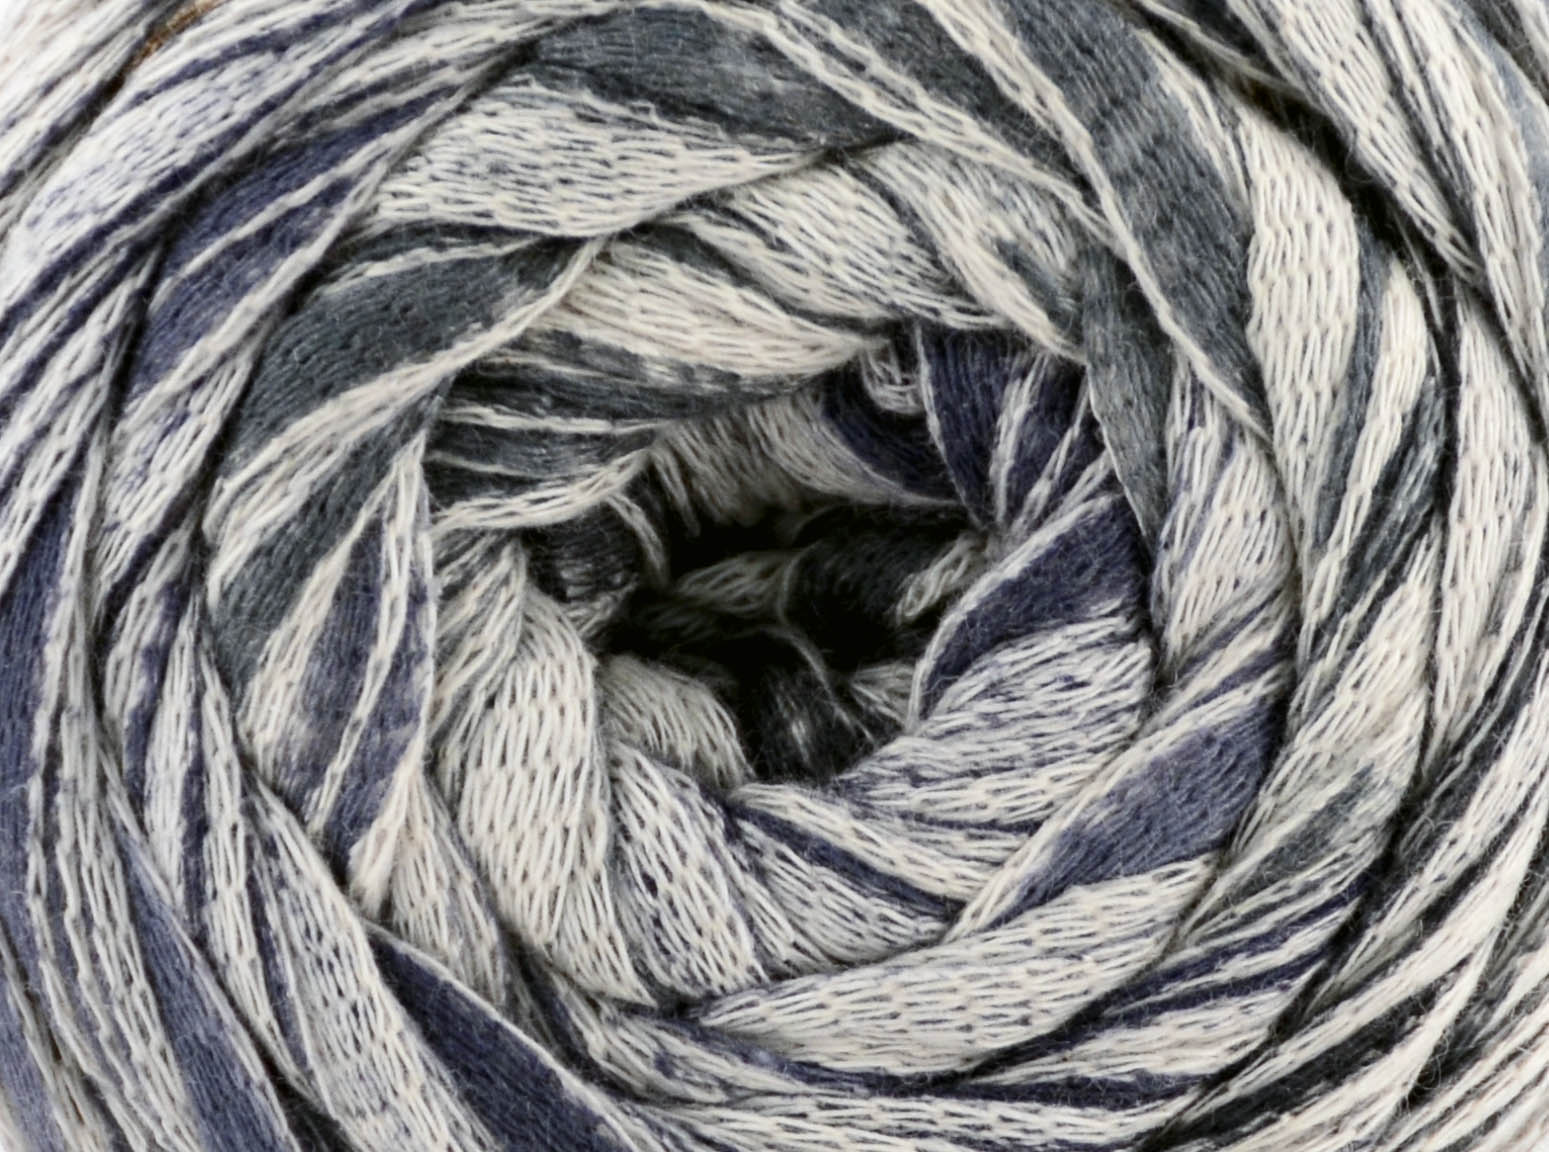
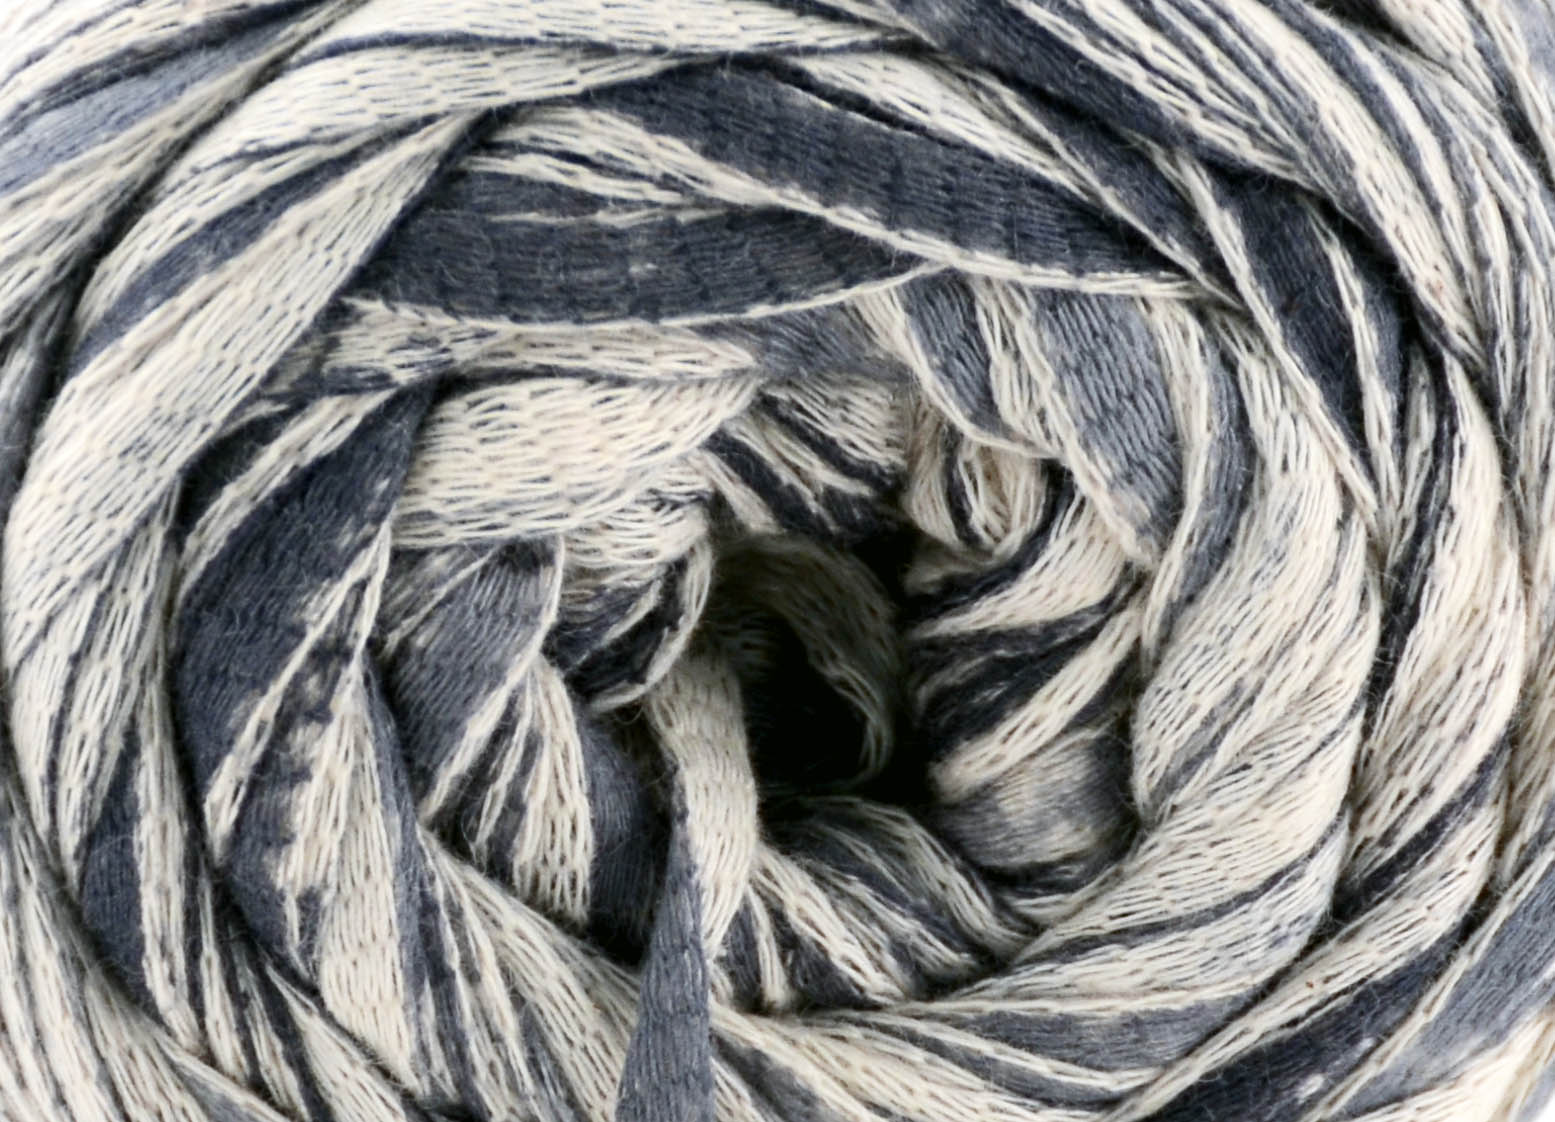
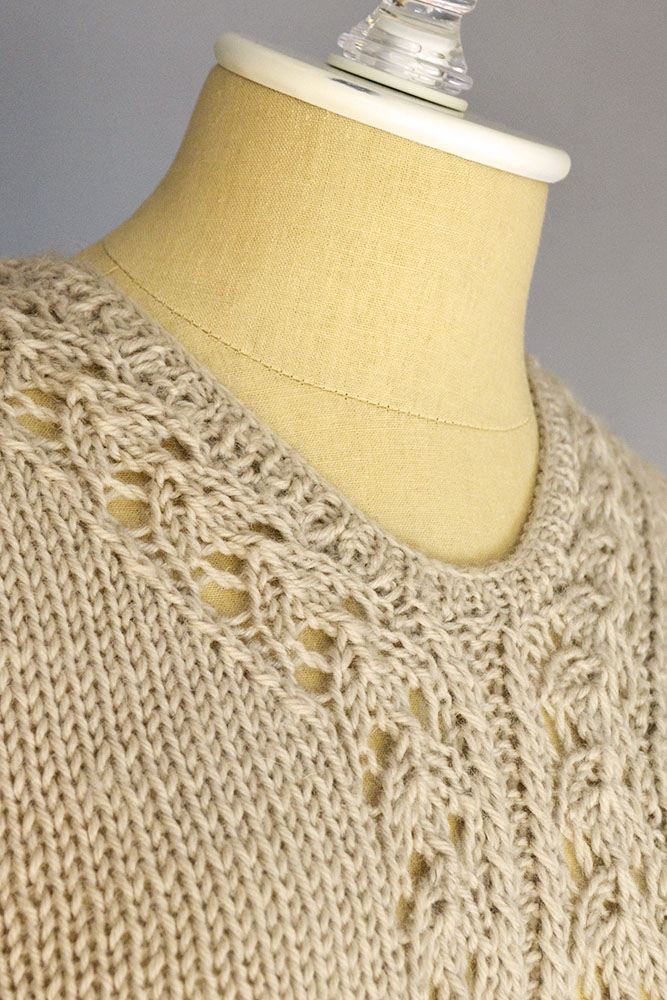
Free Pattern Friday – Sunbeam Tunic

It’s Free Pattern Friday!

Good Earth Multi Sunbeam main hi-res

Today, the Sunbeam Tunic in Good Earth Multi.

And now, the weather.

Hurricane Hermine 2016-09-01t22-31-18-9z--1280x720__790188.nbcnews-ux-1080-600

That’s Hurricane Hermine, bearing down on us like a very wet, very angry freight train.  Chance of rain: 100%.  Chance of us holing up with some good yarn: also 100%.  It’s time to bring a little sunshine indoors until this all blows over.

Good Earth Multi Sunbeam detail square

The Sunbeam Tunic in Good Earth Multi features sunny motifs to brighten up a dreary day.  Good Earth Multi linen/cotton blend (170yds/100g) is a great choice for this – the plant fibers let the tunic drape and fall without bunching up or grabbing onto an inner fabric layer.   Thsi should keep you busy enough to forget about the weather, but on a size 9 (5.5mm) hook, it won’t take forever to finish.

If you’re in the path of the storm, we hope you stay safe, warm, and dry.  We wish you all sunbeams and rainbows!

Happy crafting!

Good Earth Multi Sunbeam side hi-res

Catawba River Poncho – Joining Shoulders

Our Deluxe Cable Collection Knitalong has been going strong for about 3 weeks now. If you’ve been thinking about joining, you can begin by reading through some of the blog posts here. It’s not too late to start! You can take part in sharing and conversation over on Ravelry in our knitalong group here.

Knitalong graphic hi-res

Today I want to cover a technique used in the Catawba River Poncho, the 3 needle bind-off. In this pattern, it is used to join the shoulder seams of the front and back pieces.

Here is my front piece of the poncho. My neck stitches have been bound-off already, and my shoulder stitches are sitting on the needle.

3ndl_1

And here are my front and back pieces with shoulders touching. They’re ready to become one!

3ndl_2

To begin, place the pieces with right sides together. You can see that I left my yarn attached to one of my pieces – one less end to weave in later!

3ndl_3

It’s important for each shoulder to be on a needle. I’m going to be knitting a stitch from each needle together to join them.

3ndl_4

Insert your right needle through the first stitch on the front needle, then through the first stitch on the back needle. Here, I’m just using the needle from the other end of one of my working circular needles. But if you find this awkward, you could use a spare double point or straight needle.

3ndl_5

Step 1: Knit the 2 stitches together and slip to the right needle.

3ndl_6

Step 2: Knit the next 2 stitches together and slip to your right needle – you now have 2 stitches on your right needle.

3ndl_7

Step 3: Bind off 1 stitch by passing the first stitch on the right needle over the second stitch.

3ndl_8

3ndl_9

Repeat steps 1-3 for a 3 needle bind-off. Here’s what it looks like after a few stitches have been bound off:

3ndl_10

Here is my first shoulder after joining:

3ndl_11

Both shoulders:

3ndl_11.5

You can see that this method produces a ridge, which is why it’s typically worked with wrong sides of pieces held together. But every now and then I like to use it as a design element and work it with wrong sides together.

And here’s my shoulder viewed from the right side:

3ndl_12

There are a few reasons I love a three needle bind-off. For one, I don’t have any seams to sew. I don’t really mind sewing seams, but I don’t just totally love doing it, either. I’d always rather be knitting than sewing a seam.

Second, a three needle bind-off makes it easy to line up pattern stitches, such as in the Catawba River Poncho. I could acheive the same look with a mattress stitch seam, but I prefer this method when possible.

Third, I find it easier to get a seam with good tension as opposed to a sewn seam. Oh, and fourth, a 3 needle bind-off makes for a very stable seam. Shoulder seams see a lot of stress. Especially in a piece like this worked in a bulky weight yarn, think about how much stress will be placed on the shoulders as the garment is hanging down from it.

Next time I’ll be back to talk more about this poncho! I’m going to be picking up stitches along the sides for my eyelet ribbing.

Are you knitting along? I would love to hear how you’re doing!

Free Pattern Friday – Corner to Corner Throw

It’s Free Pattern Friday!

Classic Shades Corner to Corner Throw 1 hi-res

Today, the Corner to Corner Throw in Classic Shades.

We are so, so lucky to work with so many amazing LYSes.  Case in point:  we can enjoy the talents of  Alice Gossette and Kat Koeller of The Thankful Ewe in New Bremen, Ohio.  This dynamic duo have appeared here before, with the free Summer Shawl in Bamboo Pop.  They’ve graciously shared this design with us as well.

Classic Shades Corner to Corner Throw detail blogIt’s called the Corner to Corner Throw because it’s crocheted… wait for it… corner to corner!  We love how they coordinated Classic Shades 731 Natural Glow with solid Uptown Worsted in 328 Dijon for the fringe.  It’s a great choice that takes the throw up a notch.

Working corner to corner means that the bands of color change height as the rows lengthen and shorten, an excellent use of self-striping yarn.  It’s a simple way to give even more interest to an already striking pattern.

We hope you find time to work on something beautiful this weekend, either for yourself or for someone you love.

Happy crafting!

Classic Shades Corner to Corner Throw flat blog

Deluxe Knitalong – Status Updates

How are my fellow knitalongers doing? We’re all plugging away on our Deluxe Worsted Cable projects here in the office. I think we’re all enjoying the laid back nature of this knitalong. There is no pressure. No deadline. No rules, really. Just fun and learning!

If you haven’t joined us yet but think you’re in the mood for some cable knitting, it’s not too late to start! You can begin by picking a project from our latest ebook: Deluxe Worsted Cable Collection. You can read back through my other blog posts talking about the knitalong:

Deluxe Cable Collection Knitalong (launch post)

Deluxe Knitalong: Gearing Up

Twists and Cables

The Mighty Spit Splice

Set-in Pockets, Part 1

You can also find all posts related to this knitalong by going the home page of our blog (https://blog.universalyarn.com/) and locating the category “Deluxe Cable Collection Knitalong” on the left side of the page. And be sure to join the discussion over on Ravelry in our dedicated knitalong group.

Let me catch you up with how we’re doing with our projects over here.

Remember Angie who has never done cables before? She is now the proud owner of her very own Cold Mountain cabled hat. She also might kill me for posting this goofy picture of her.

ColdMountain_goofy

Angie made a couple of mods to this hat. She decided to knit the brim shorter than the original so it is not folded. She also eliminated the lace part and stuck with stockinette instead. I’m so proud of Angie – her cable and hat look so good. She’s waffling on a very important finishing decision: to pom-pom or not to pom-pom.

ColdMountain_flat

Heather is making progress on her two-at-a-time Tillery Socks.  She’s modeling them on her arm here so we can see the patterning better. Seeing them like this, I could definitely imagine these being turned into fingerless mitts or mittens, too.

Tillery socks on hand

Jen has cast-on for her Ballantyne Tee, modified to be knit in the round. This project is a nice balance of mindless reverse stockinette along with a little bit of patterning to keep things interesting.

Ballantyne_1

Tori has also opted to go for a one-piece project. Instead of knitting fronts and back separately, she cast on for the body to work it as one. Here’s her Eastover Vest after a few rows, sitting next to her swatch:

Tori's Eastover

If you remember, Jannie is a very new knitter, and this will be her first garment project. So exciting! She started swatching for her Greensboro Cardigan using Deluxe Worsted Tweed Superwash. Jannie was mostly getting the patterning right, but we discovered one little thing – over the twist cable stitches she was knitting these stitches on wrong side rows instead of purling them. But she’s not discouraged and is ready to continue on swatching and practicing the stitch pattern. Good attitude!

Greensboro_1

Yonca started on her Cumberland Poncho using Smoke Heather in Deluxe Worsted.  As is her usual way when working sleeves, fronts, or any other identical pieces, she’s working both rectangles of the poncho on the same needle at the same time. Unfortunately, Yonca discovered an issue with some of her twisted stitches so she’s going to have to rip out and start over. But as we all know, ripping is just part of the process sometimes! Luckily she’s not too far along.

Speaking of ripping, I’ve got quite a bit of this to do myself. I happily bound off the fronts of my Wesley Heights (modified to be a cardigan) the other day. I washed my fronts along with the back piece and laid them out on my blocking mats. So tell me, what’s wrong with this picture?

WesleyHeights_fronts_oops

Er, yeah. Even though I made myself a very clear note that to match length from the back piece, I needed to work 3 pattern repeats + 14 rows, somehow I managed to work 1 entire extra pattern repeat before moving to my armhole shaping. I thought I was ready to start seaming and knitting a collar. But alas, to the frog pond I go.

I’m also making progress on my Catawba River Poncho. Look out for tutorials related to this over the next couple of weeks.

Catawba_inprog_2

And I decided I also need a Dilworth Shawl in a nice bright color:

Dilworth_1

And that’s it from us? How are you doing? I’d love to hear about it!

Set-In Pockets: Part One

As part of our ongoing Deluxe Cable Collection Knitalong, today I bring you a tutorial on adding set-in pockets to a sweater.

There are two cardigans in the collection that are written to have set-in pockets. We have the Tallulah Cardigan:

TallulahCardigan_132_hires

And the Greensboro Cardigan:

Greensboro_095_hires

First, let me explain what the”set-in” part of set-in pockets means. There are several ways to incorporate pockets into a piece of knitting. In addition to the set-in method, the other common way to add a pocket is to sew on a patch pocket. With patch pockets, you complete your garment, knit a pocket, and sew it to the outside of your knitting. It can be nice to place the pocket exactly where you want it, but for a sweater that’s patterned, it can be tough to make a patch pocket look nice.

With a set-in pocket, you sew a liner separately. Then, when it’s time for the pocket opening in your garment, you put the pocket stitches on hold and then begin working from the liner set of stitches.

The most beneficial aspect of the set-in pocket, and the reason I chose it for both projects above, is that it makes your pocket blend seamlessly into a heavily patterned garment. Let me explain the how and why!

To show you just how easy it is to put pockets on virtually any cardigan or sweater, I decided to knit the Wesley Heights sweater from the collection (which is written to be a pullover) and turn it into a cardigan. I’m basically making a Greensboro Cardigan with Wesley Heights patterning.

Here are the fronts for my cardigan. I’m working them two at a time on a single circular needle.

SetInPockets_1

I’ve reached the height where I want my pocket opening to be. I have knit a pocket liner for each pocket in the same yarn in simple stockinette stitch. The liner will be going on the inside of the sweater and won’t be seen, so stockinette works fine. It will also provide a smooth surface for my hand to slide into.

SetInPockets_2

First, I knit part of my row  up to where my pocket opening will be.

SetInPockets_3

The next step is to place some of my sweater stitches on a holder. I will eventually come back to these stitches and knit my ribbed pocket edging.

SetInPockets_4

My liner is 25 stitches wide, so I put the next 25 stitches from my front piece on hold also. Next, I work the next row of my twisted pattern stitch over the liner stitches. I am incorporating the liner into my main sweater pattern so it will look like a pocket magically grew out of my sweater.

SetInPockets_5

After working in pattern across the liner, I simply finish my row and the rest of my front piece like usual.

SetInPockets_6

You can see that the liner is sitting behind my sweater front. Once I’ve finished the front, I’ll come back and knit my pocket edging and sew down the liner to the inside. And I’ll show you how – stay tuned!

Free Pattern Friday – Jean Jacket

It’s Free Pattern Friday!

JeanJacket_denims

Today we have the Jean Jacket, knit in Fibra Natura denims.

This design was generously shared with us from Laurel Murphy. Thanks, Laurel!

There are some sweet details in this jacket, including waist and shoulder shaping. My favorite detail added by Laurel are the reverse stockinette stitch triangles on the front and back yoke sections.

JeanJacket_backdetail

These subtle bits of texture give a nod to western wear, while keeping the overall look of this jacket modern, versatile, and so wearable.

denims ball cut out hi-res

Denims is a fantastic yarn for transitional seasons. It is made of 70% cotton and 30% wool, giving it both breathability and warmth. And because it is a bulky weight yarn, projects don’t take forever, either.

Available in 6 denim washes, you can find just the right shade to go with your favorite pair of jeans.

denims 106 hi-res denims 105 hi-res denims 104 hi-res denims 103 hi-res denims 102 hi-res denims 101 hi-res

What are you knitting to prepare for the cooler months ahead?


Color Pooling: Finishing with Twisted Fringe

Last time on Weaving Wednesday, I showed you how I warped for my Bamboo Pop color pool scarf. Over the last couple of weeks, I had a chance to do the actual weaving which went incredibly fast.

Weaving_1

After weaving a few picks with scrap yarn, I did a bit of hemstitching with my weft yarn, Whisper Lace.  I left a good 12″ before beginning this in order to have long enough ends to do my fringe. I did a simple plain weave throughout the entire scarf, beating with a light hand to give my finished scarf nice drape.

Weaving_2

This scarf was a joy to weave. The motions and weaving were simple and the colors a delight to watch. Each time I advance the warp and a new section of color came into view, it gave me a little lift.

Fringe_1

After hemstitching at the end of my scarf, I cut it free, leaving the beginning end still attached to the loom. I then trimmed all the fringe evenly, to about 11″.

Fringe is the easy and obvious way to go when ending a scarf. It eliminates the need for a hem. Fringe also adds a nice little bit of heft, allowing a scarf to hang nicely. An easy way to spruce up your fringe is to make it twisted. I’ve done this by hand before on a few projects, but it’s tedious and I don’t enjoy doing it. This time around, I decided to splurge and bought myself a battery operated fringe twister. Sometimes, you just need the right tool for the job.

See the two little prongs jutting out from the top of my tool? The item actually came with 4 prongs, but I removed 2 of them for this project.

Fringe_2

Each of my stripe sections of the scarf is comprised of 8 strands. I’m making 2 twisted fringes for each stripe, so each fringe is made up of 4 strands. To use my fringe tool, I attached 2 strands to each prong.

Fringe_3

I didn’t get a good photo of this step, but those little metal pieces in the top of the prongs will extend, grabbing onto the yarn, and then retract back down.

Fringe_4

Next, I push the button on my tool into position 1, which twists each strand independently. To get consistent twist on all my fringe, I counted to 30, (sort of in rhythm to the noise of the tool) as the tool was spinning.

Fringe_5

Once the strands are nice and twisty, I push my button down into position 2. This rotates the entire top of my tool in the opposite direction than the prongs rotated, twisting the strands around each other. During this step, I found that counting to 20 made a perfect balance of countertwist.

Fringe_6

Then, release the ends of the yarn from the metal prongs and tie in an overhand knot. The twist stays twisted!

Fringe_7

After I made all the twisted fringe on the final end of my scarf, I cut the beginning end from the loom. To keep this end of my scarf from moving around, I just set a heavy book on top.

Fringe_8

After handwashing and laying flat to dry, I had myself a very colorful scarf!

Pooling-Scarf-Flat-1

My finished scarf, before fringe is 62″, and is about 78 ” with fringe. With one ball of each color of Bamboo Pop and 1 ball of Whisper Lace, I could have gone about 20-30% long if I had wanted.

Pooling-Scarf-2 Pooling-Scarf-3

I’m extremely happy with how this scarf turned out. It’s quite lightweight with amazing drape. It’s so very wearable. I could envision this in many different color combinations of our Bamboo Pop.

Join me next time for a lace weaving adventure with our anniversary namesake yarn, Universe!