Ready to Wear

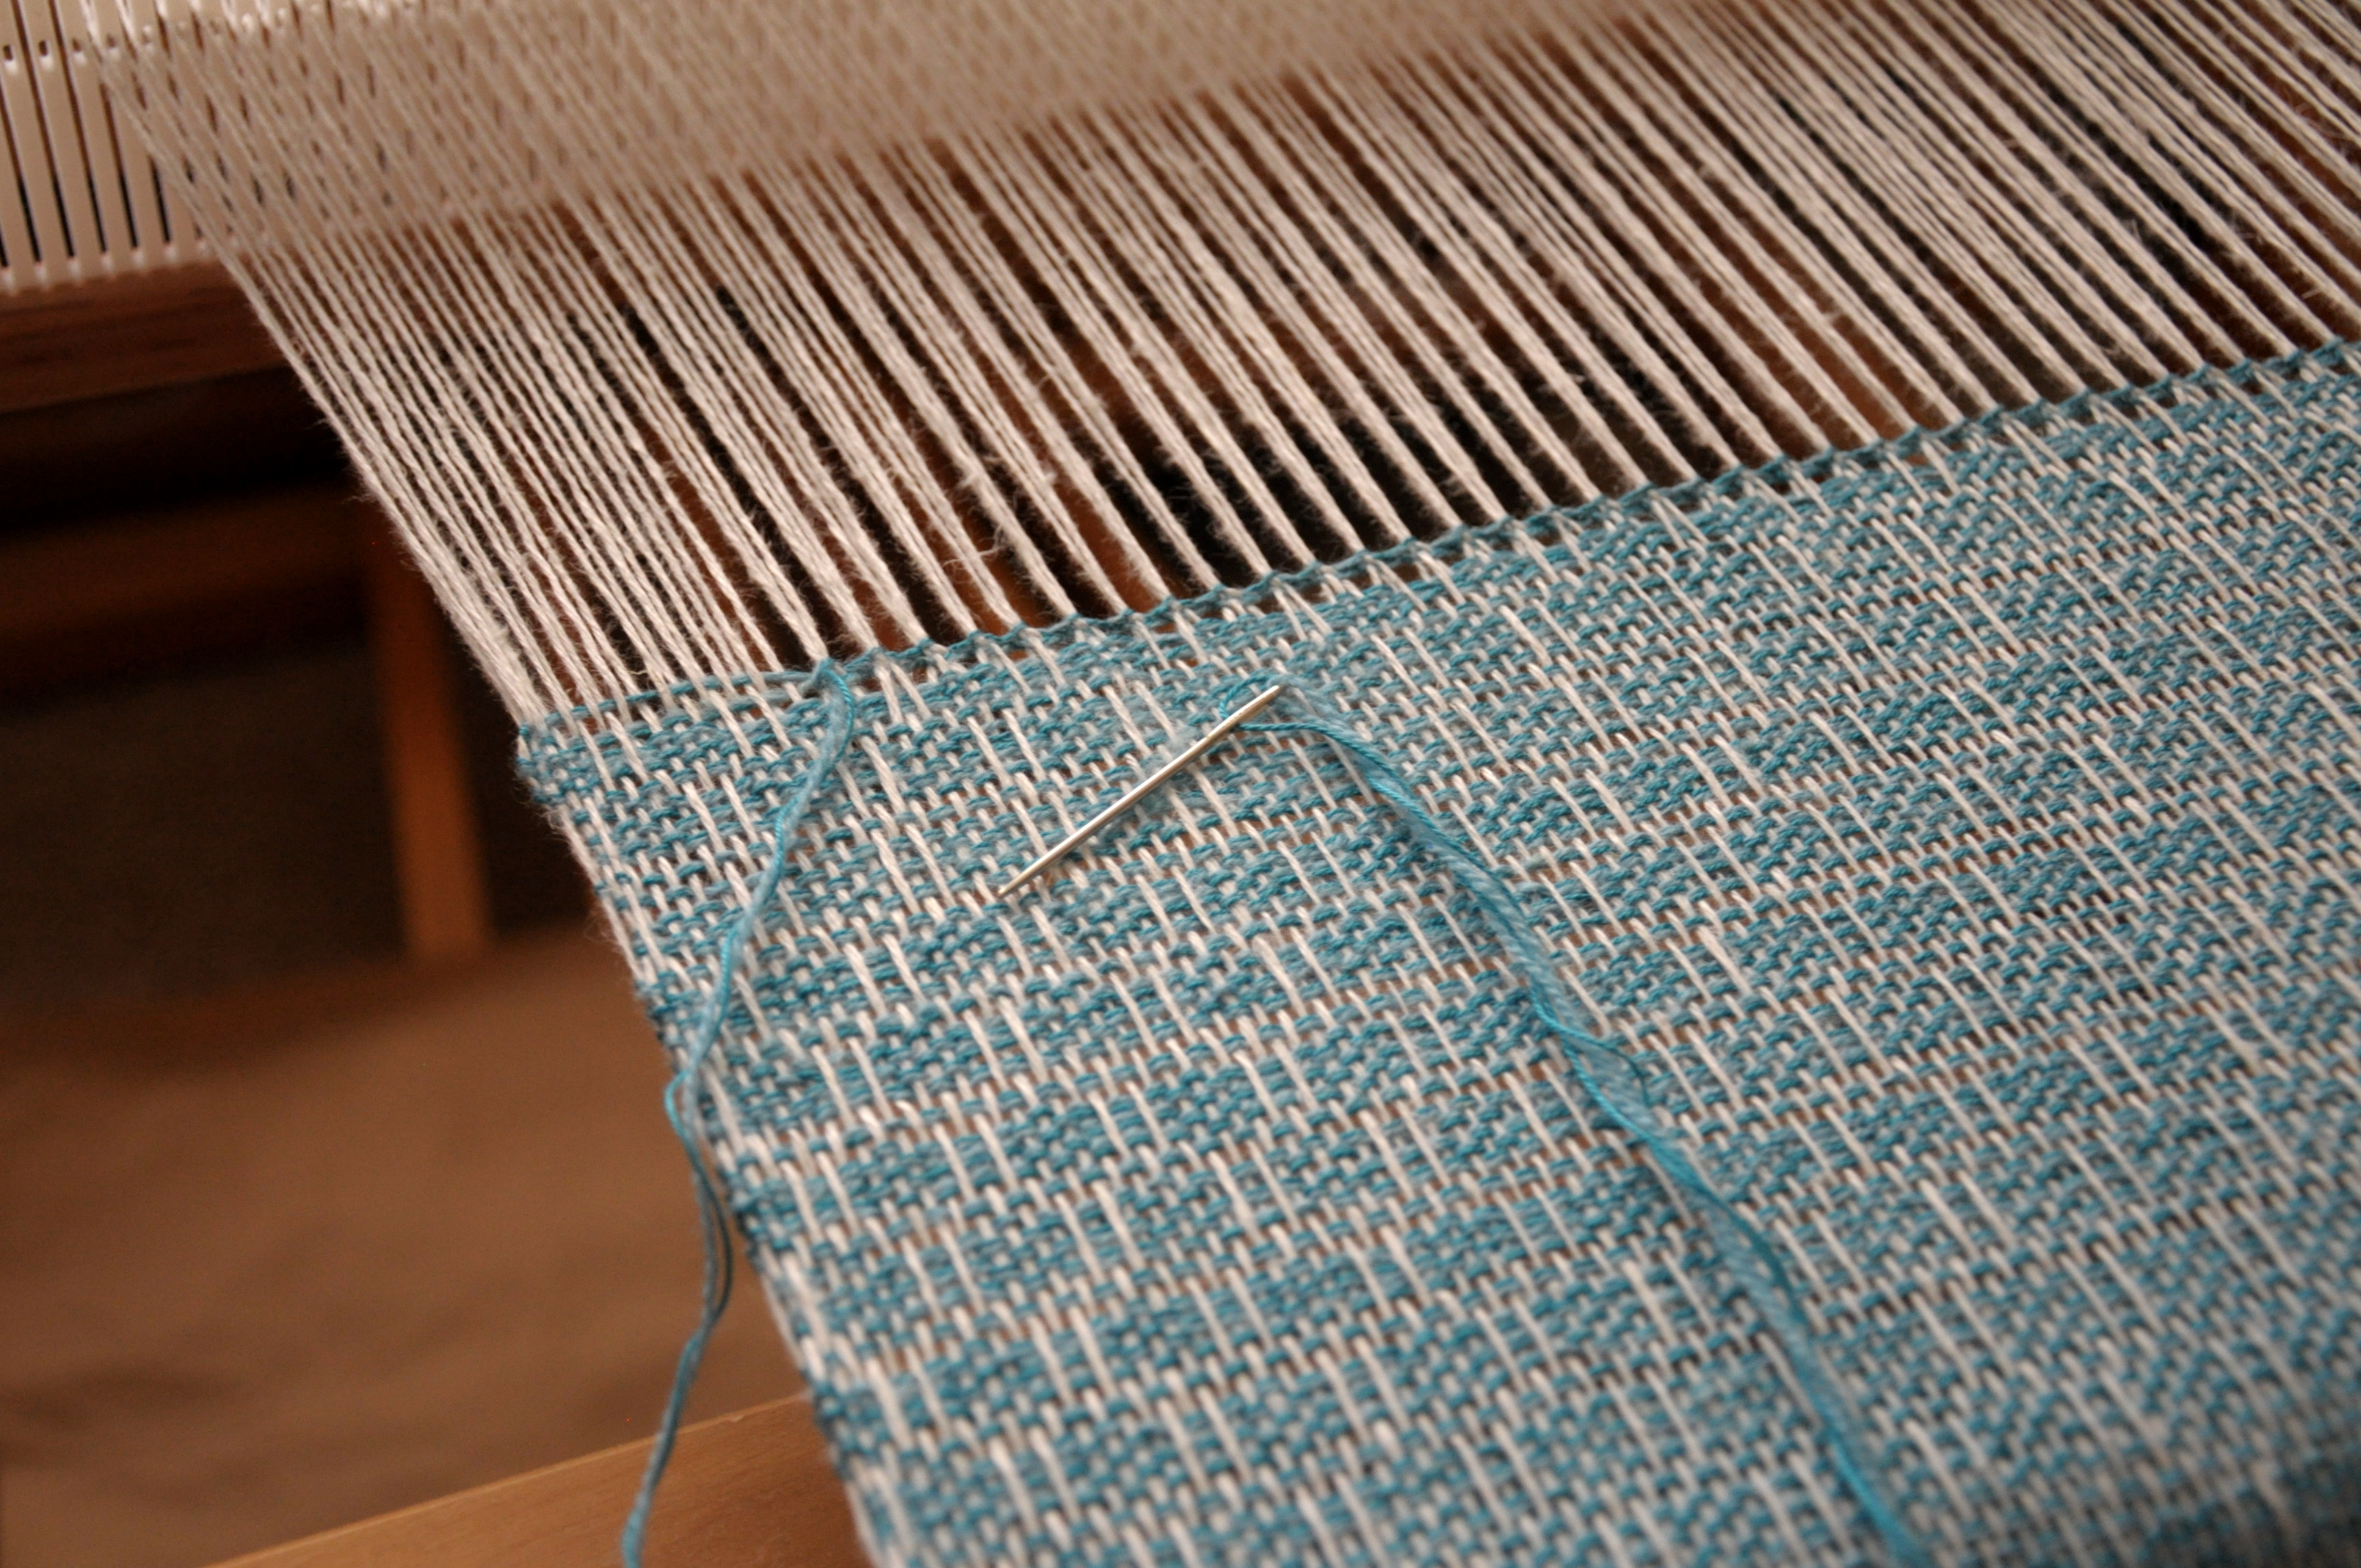
In case you missed the first few posts in this series on my Flame Lace Top, you can find the warping post here,  how to make string heddles here,  actually weaving the fabric here, and taking the fabric off the loom here.  I’m using Flax as warp, and Whisper Lace with Garden 10 held together as warp.

After taking my fabric off the loom, I decided to machine wash on gentle and then laid flat to dry. After lightly pressing the fabric with my iron, I was all ready to start sewing and cutting:

Sewing_1

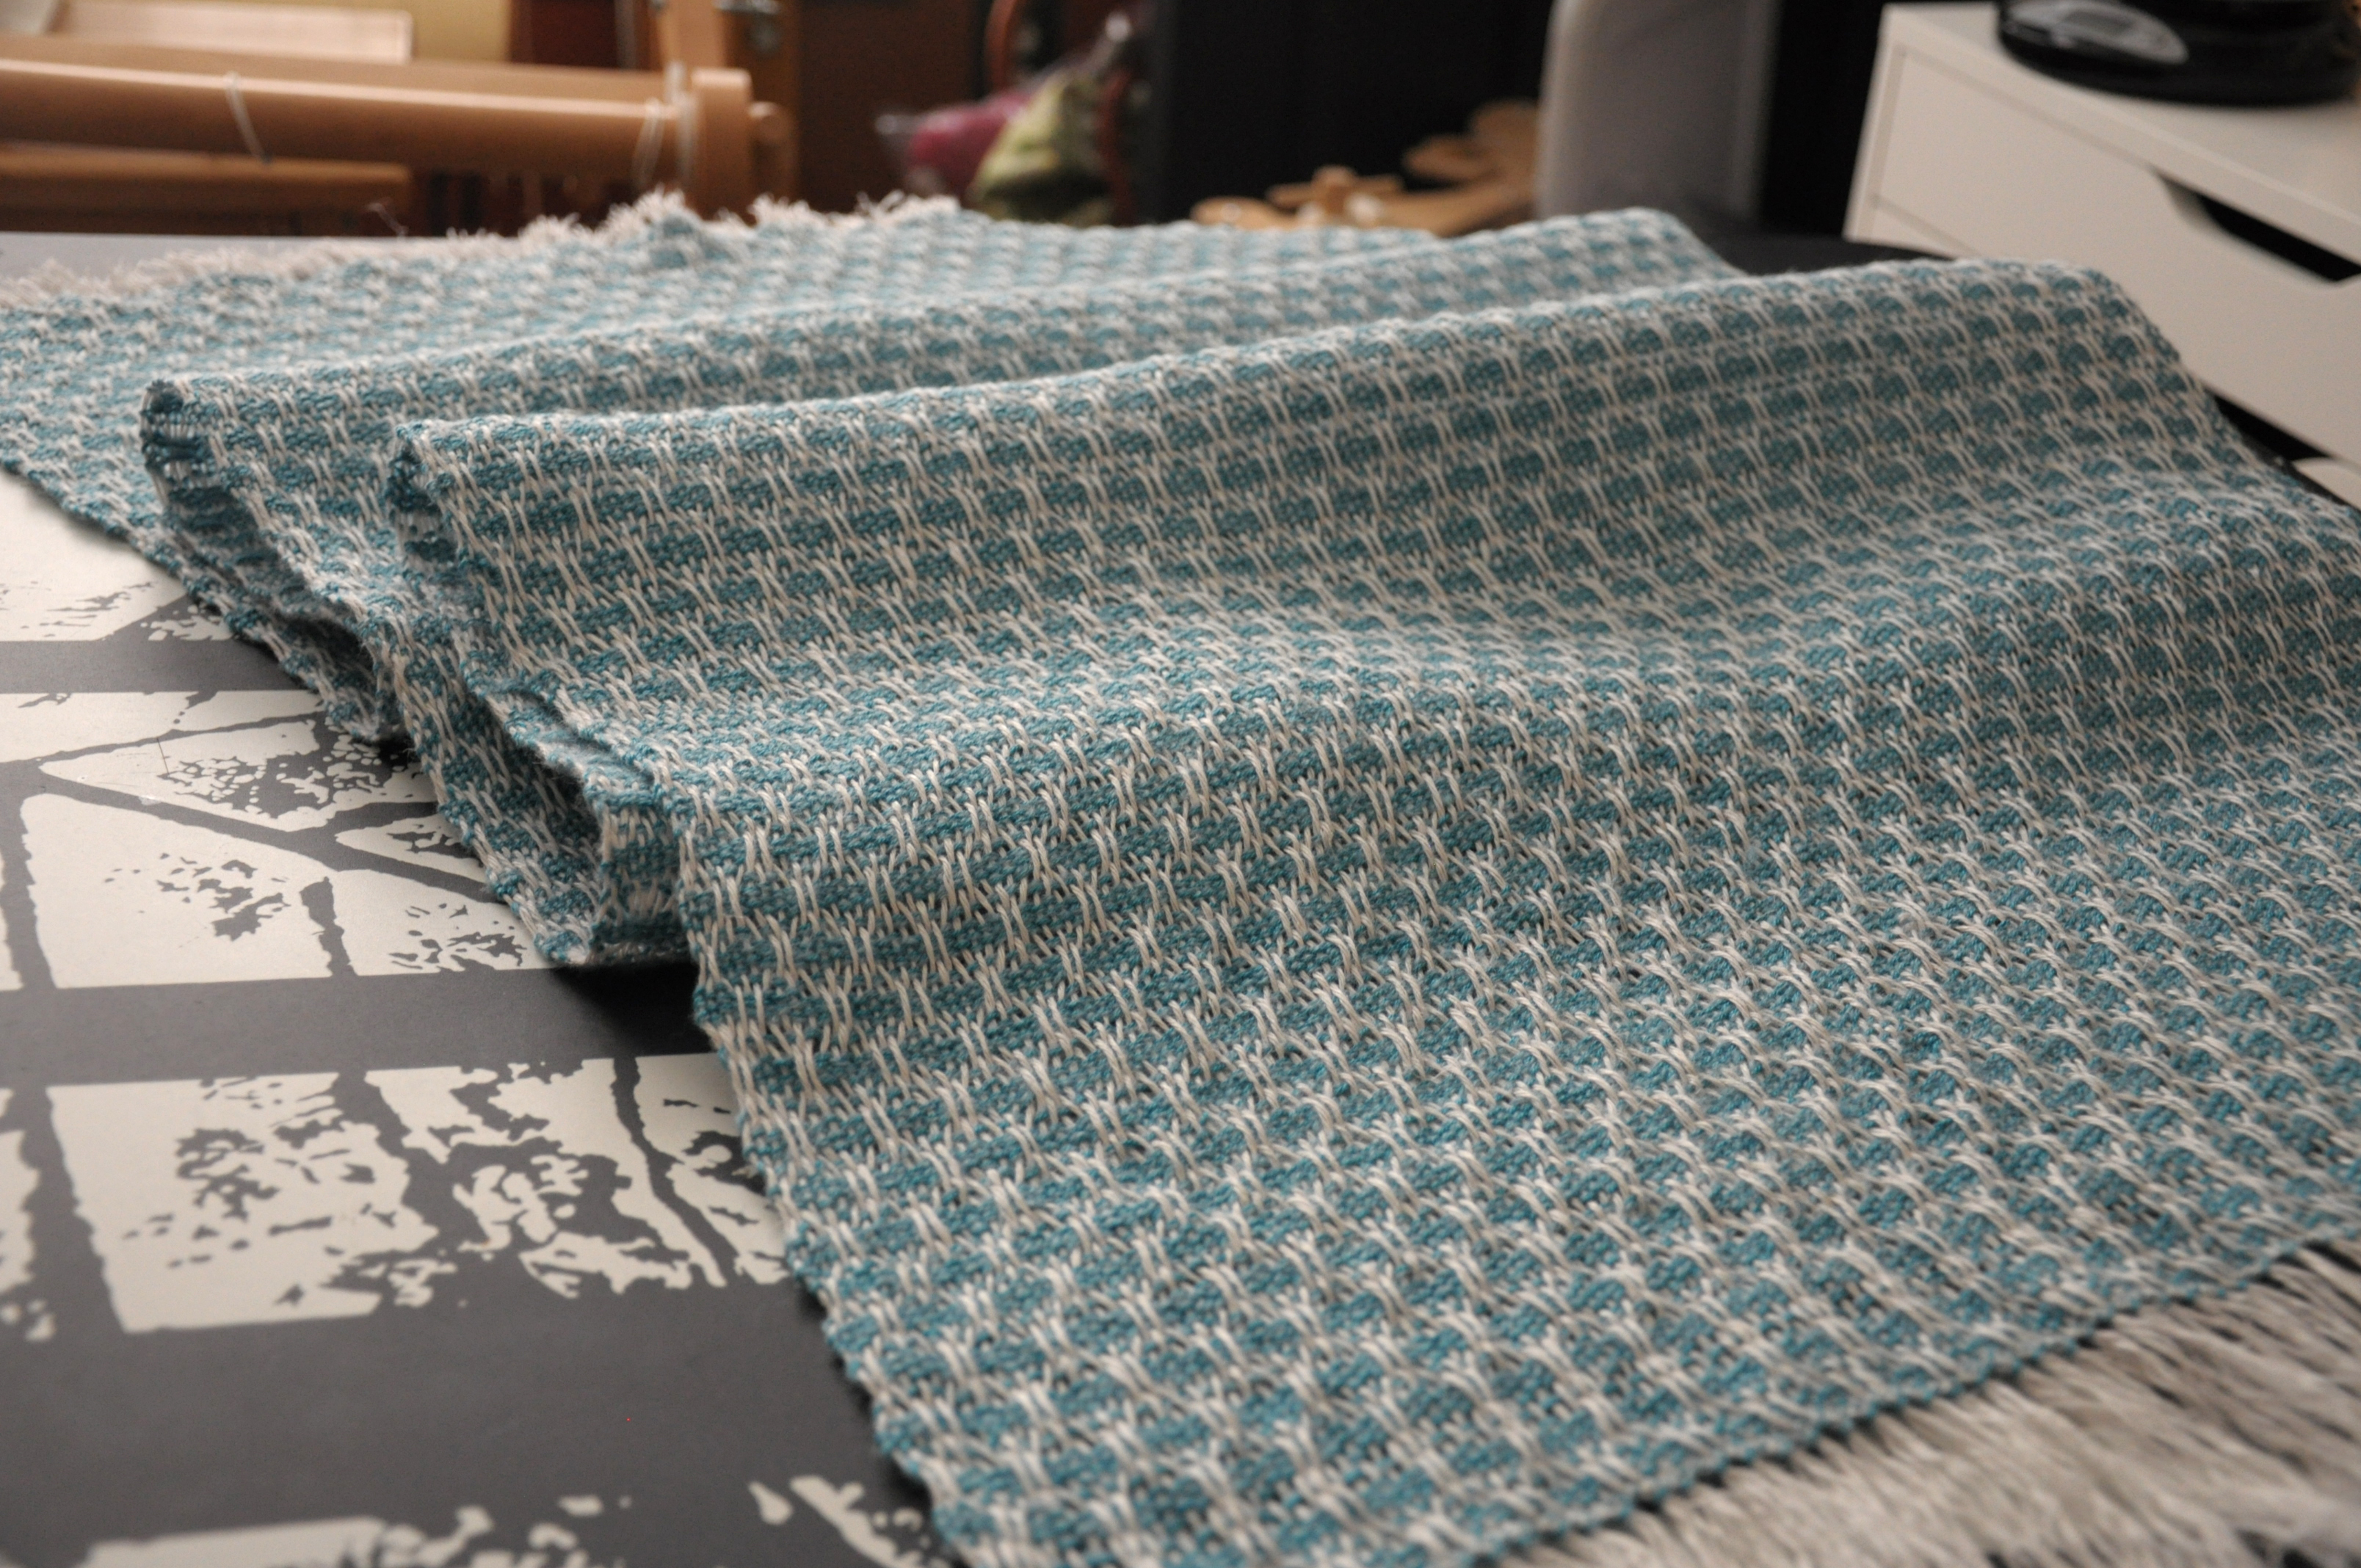
What really drew me to the Flame Lace project in the Simple Woven Garments book was the weave structure. Though I think the garment in the book is really cute, I’m not a big fan of that shape for my body. Going into this project, I knew I was going to make some changes. But I didn’t fully decide on those changes until I got started. And even then I made improvisations along the way.

The first thing I decided to do differently than the original was to shape my armholes. The easiest way for me to determine my armhole depth and shape was to grab a top I already own and use that as a guide. I’m a big fan of using wrapping paper that has grid lines on the back for things like this.

Sewing_2

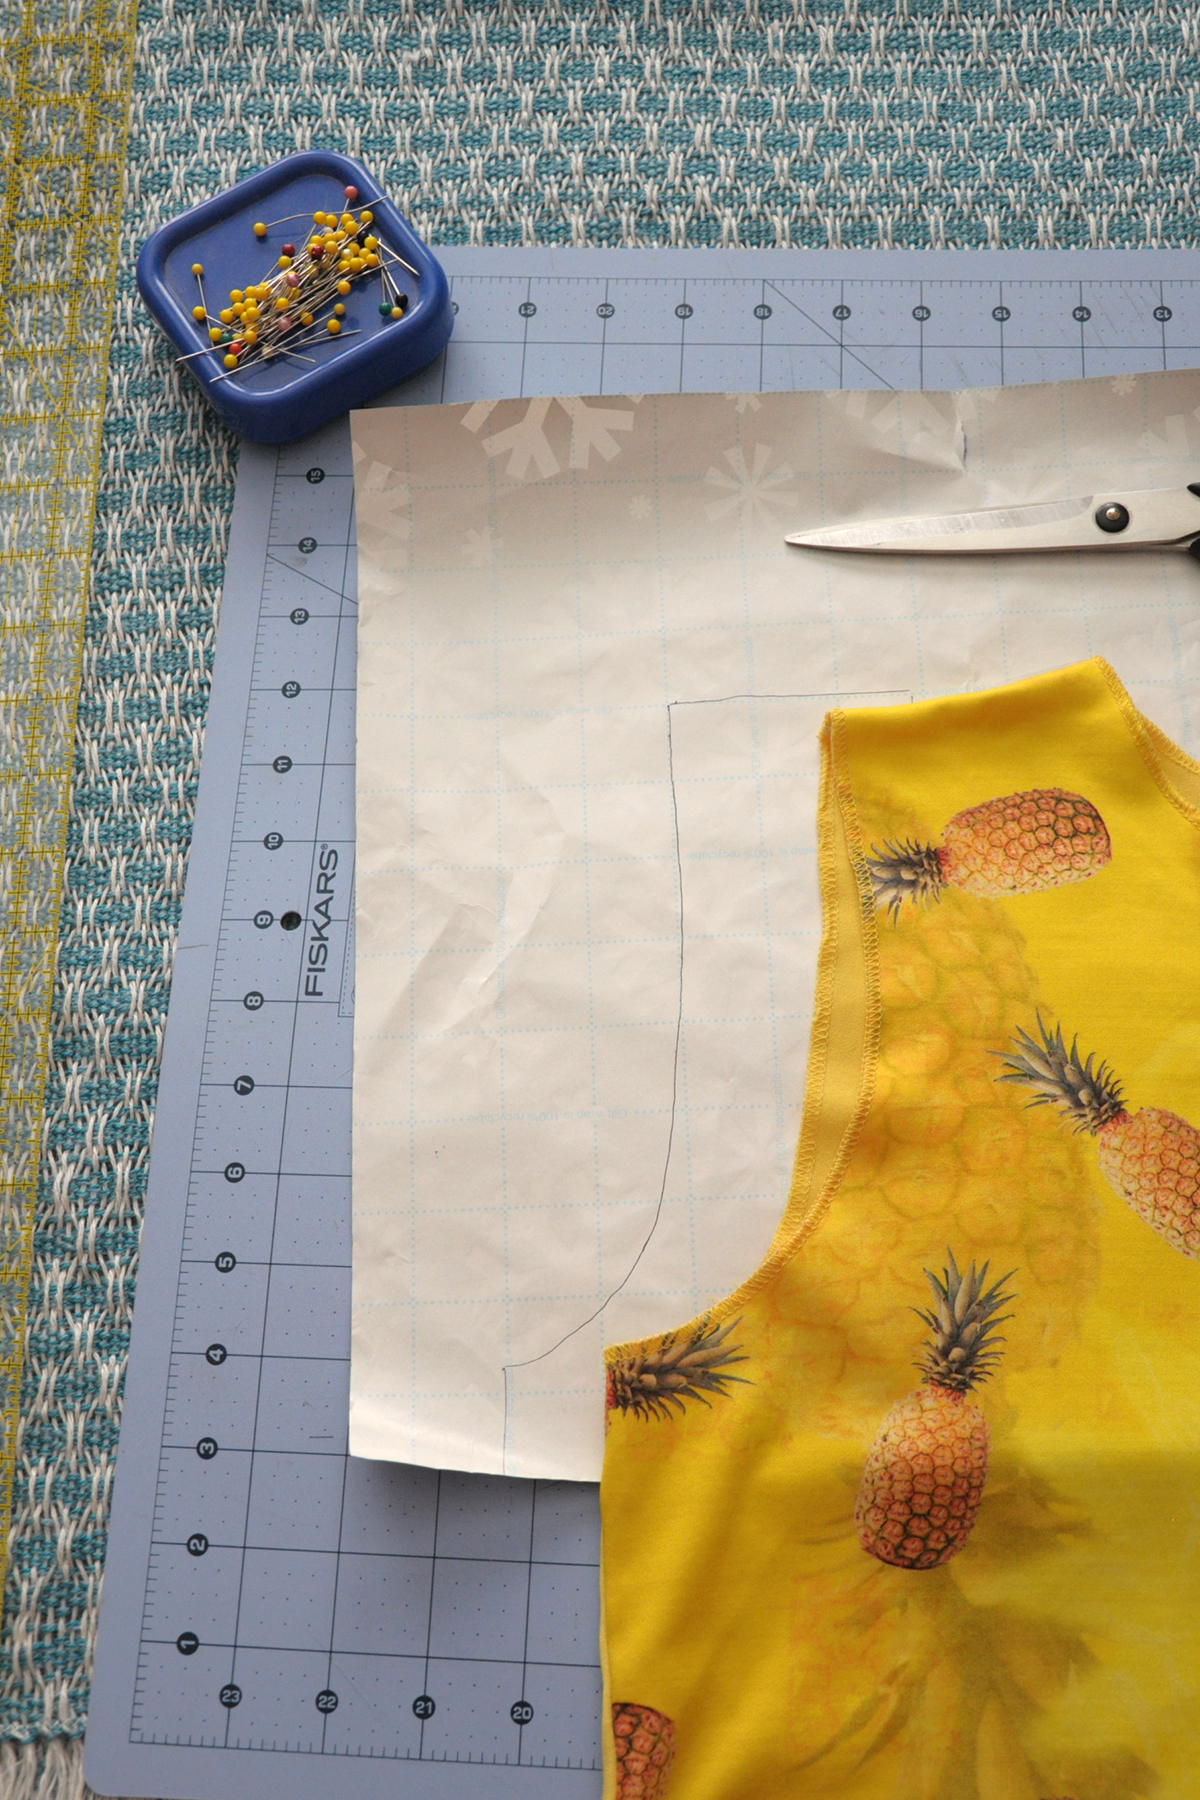
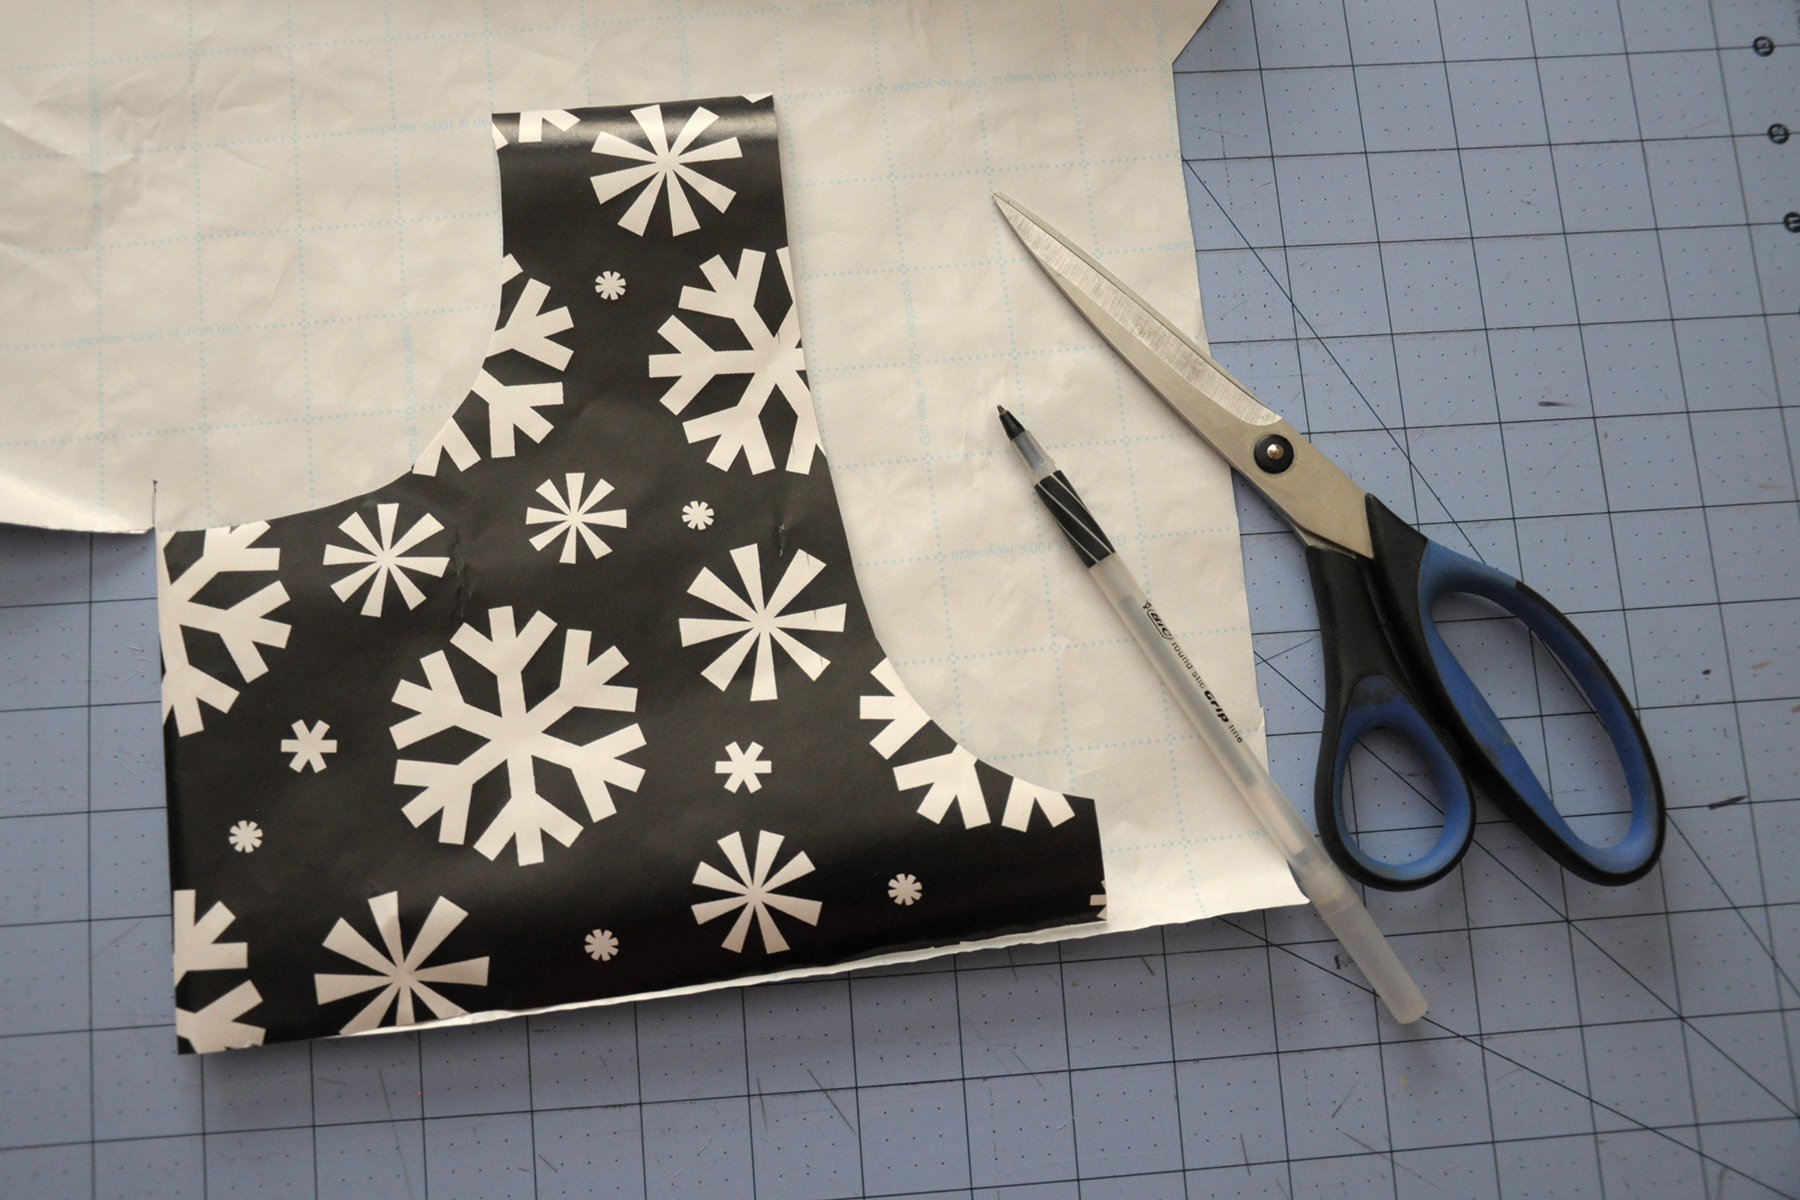
To make a template for my armholes, I laid my top on the back side of the wrapping paper and traced one side. I opted to freehand the neck hole, as I wanted it to sit a bit lower than the one on the shirt I was using as an armhole guide. After cutting out the first side, I folded the paper in half and traced to get the second side – an easy way to make sure it was symmetric.

Sewing_3

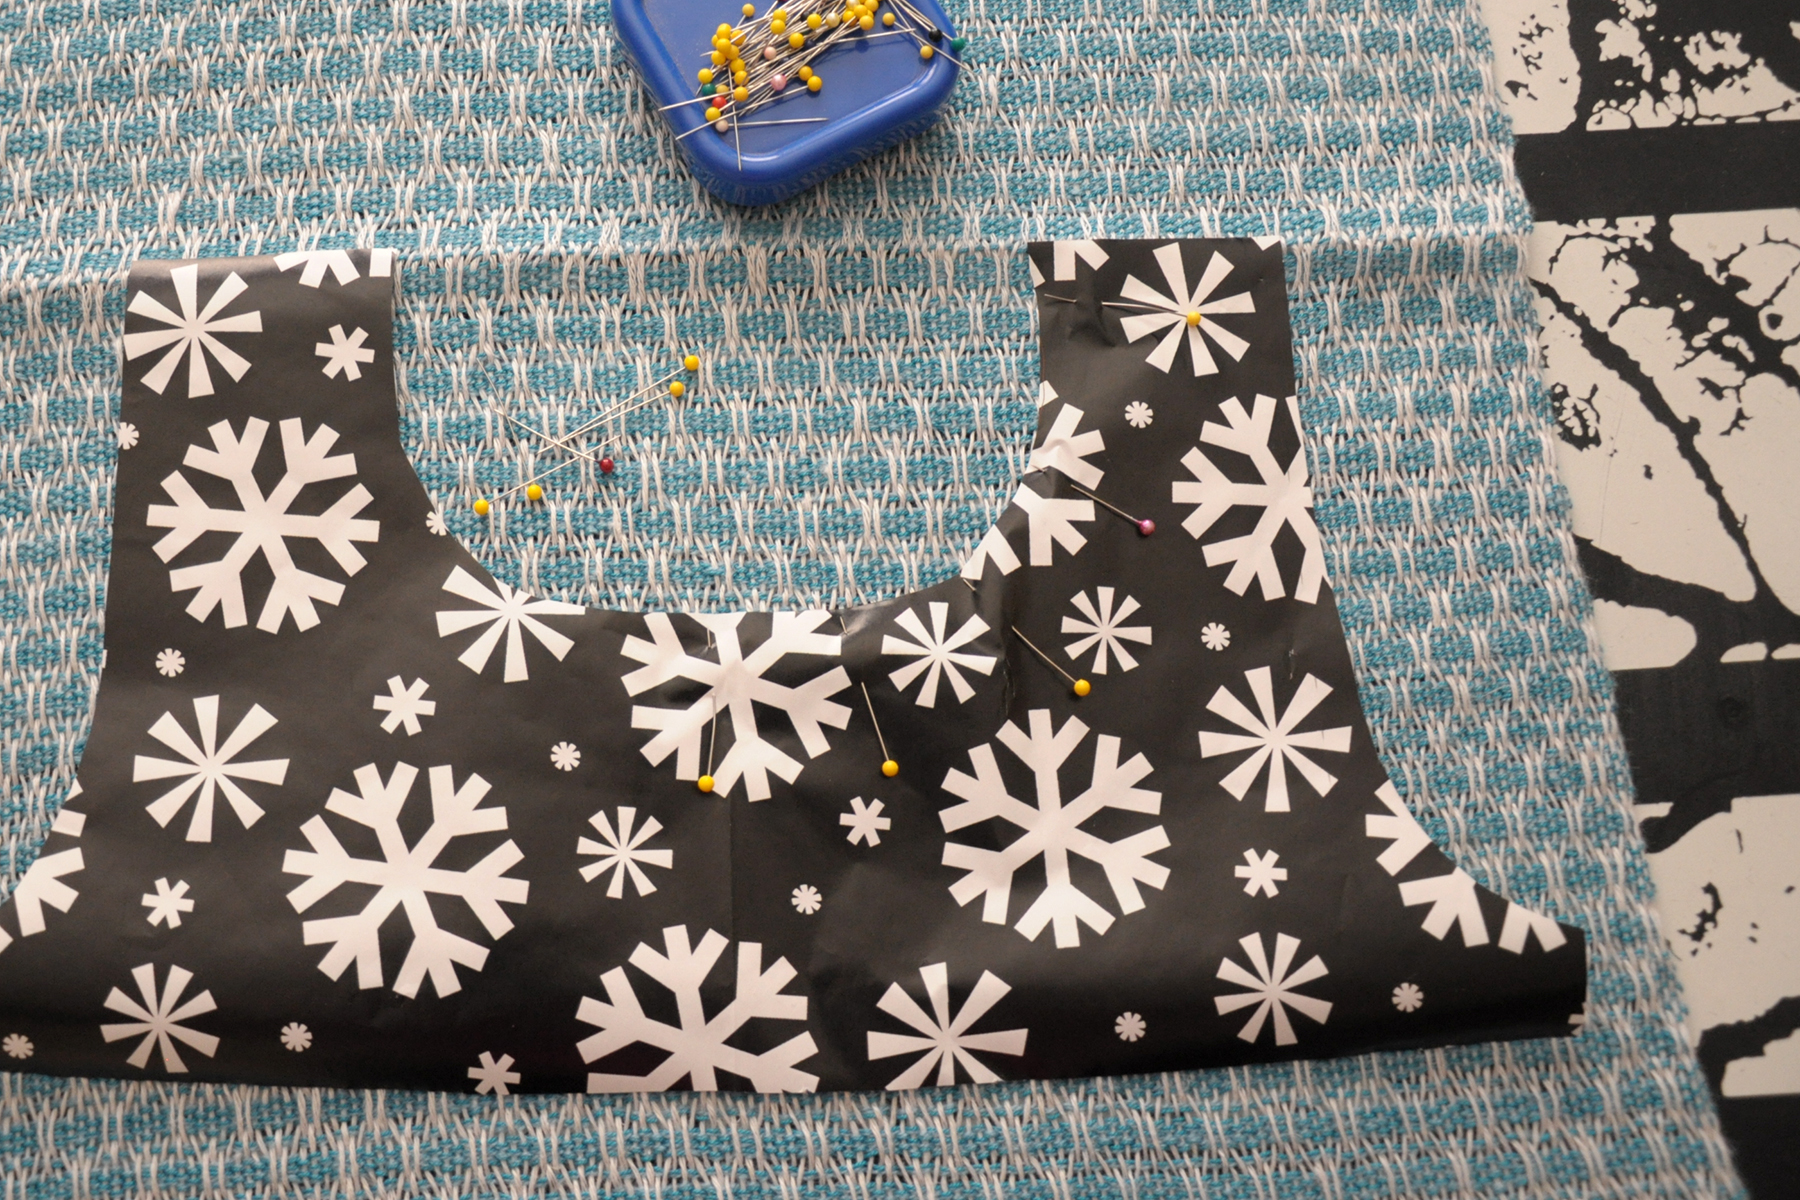
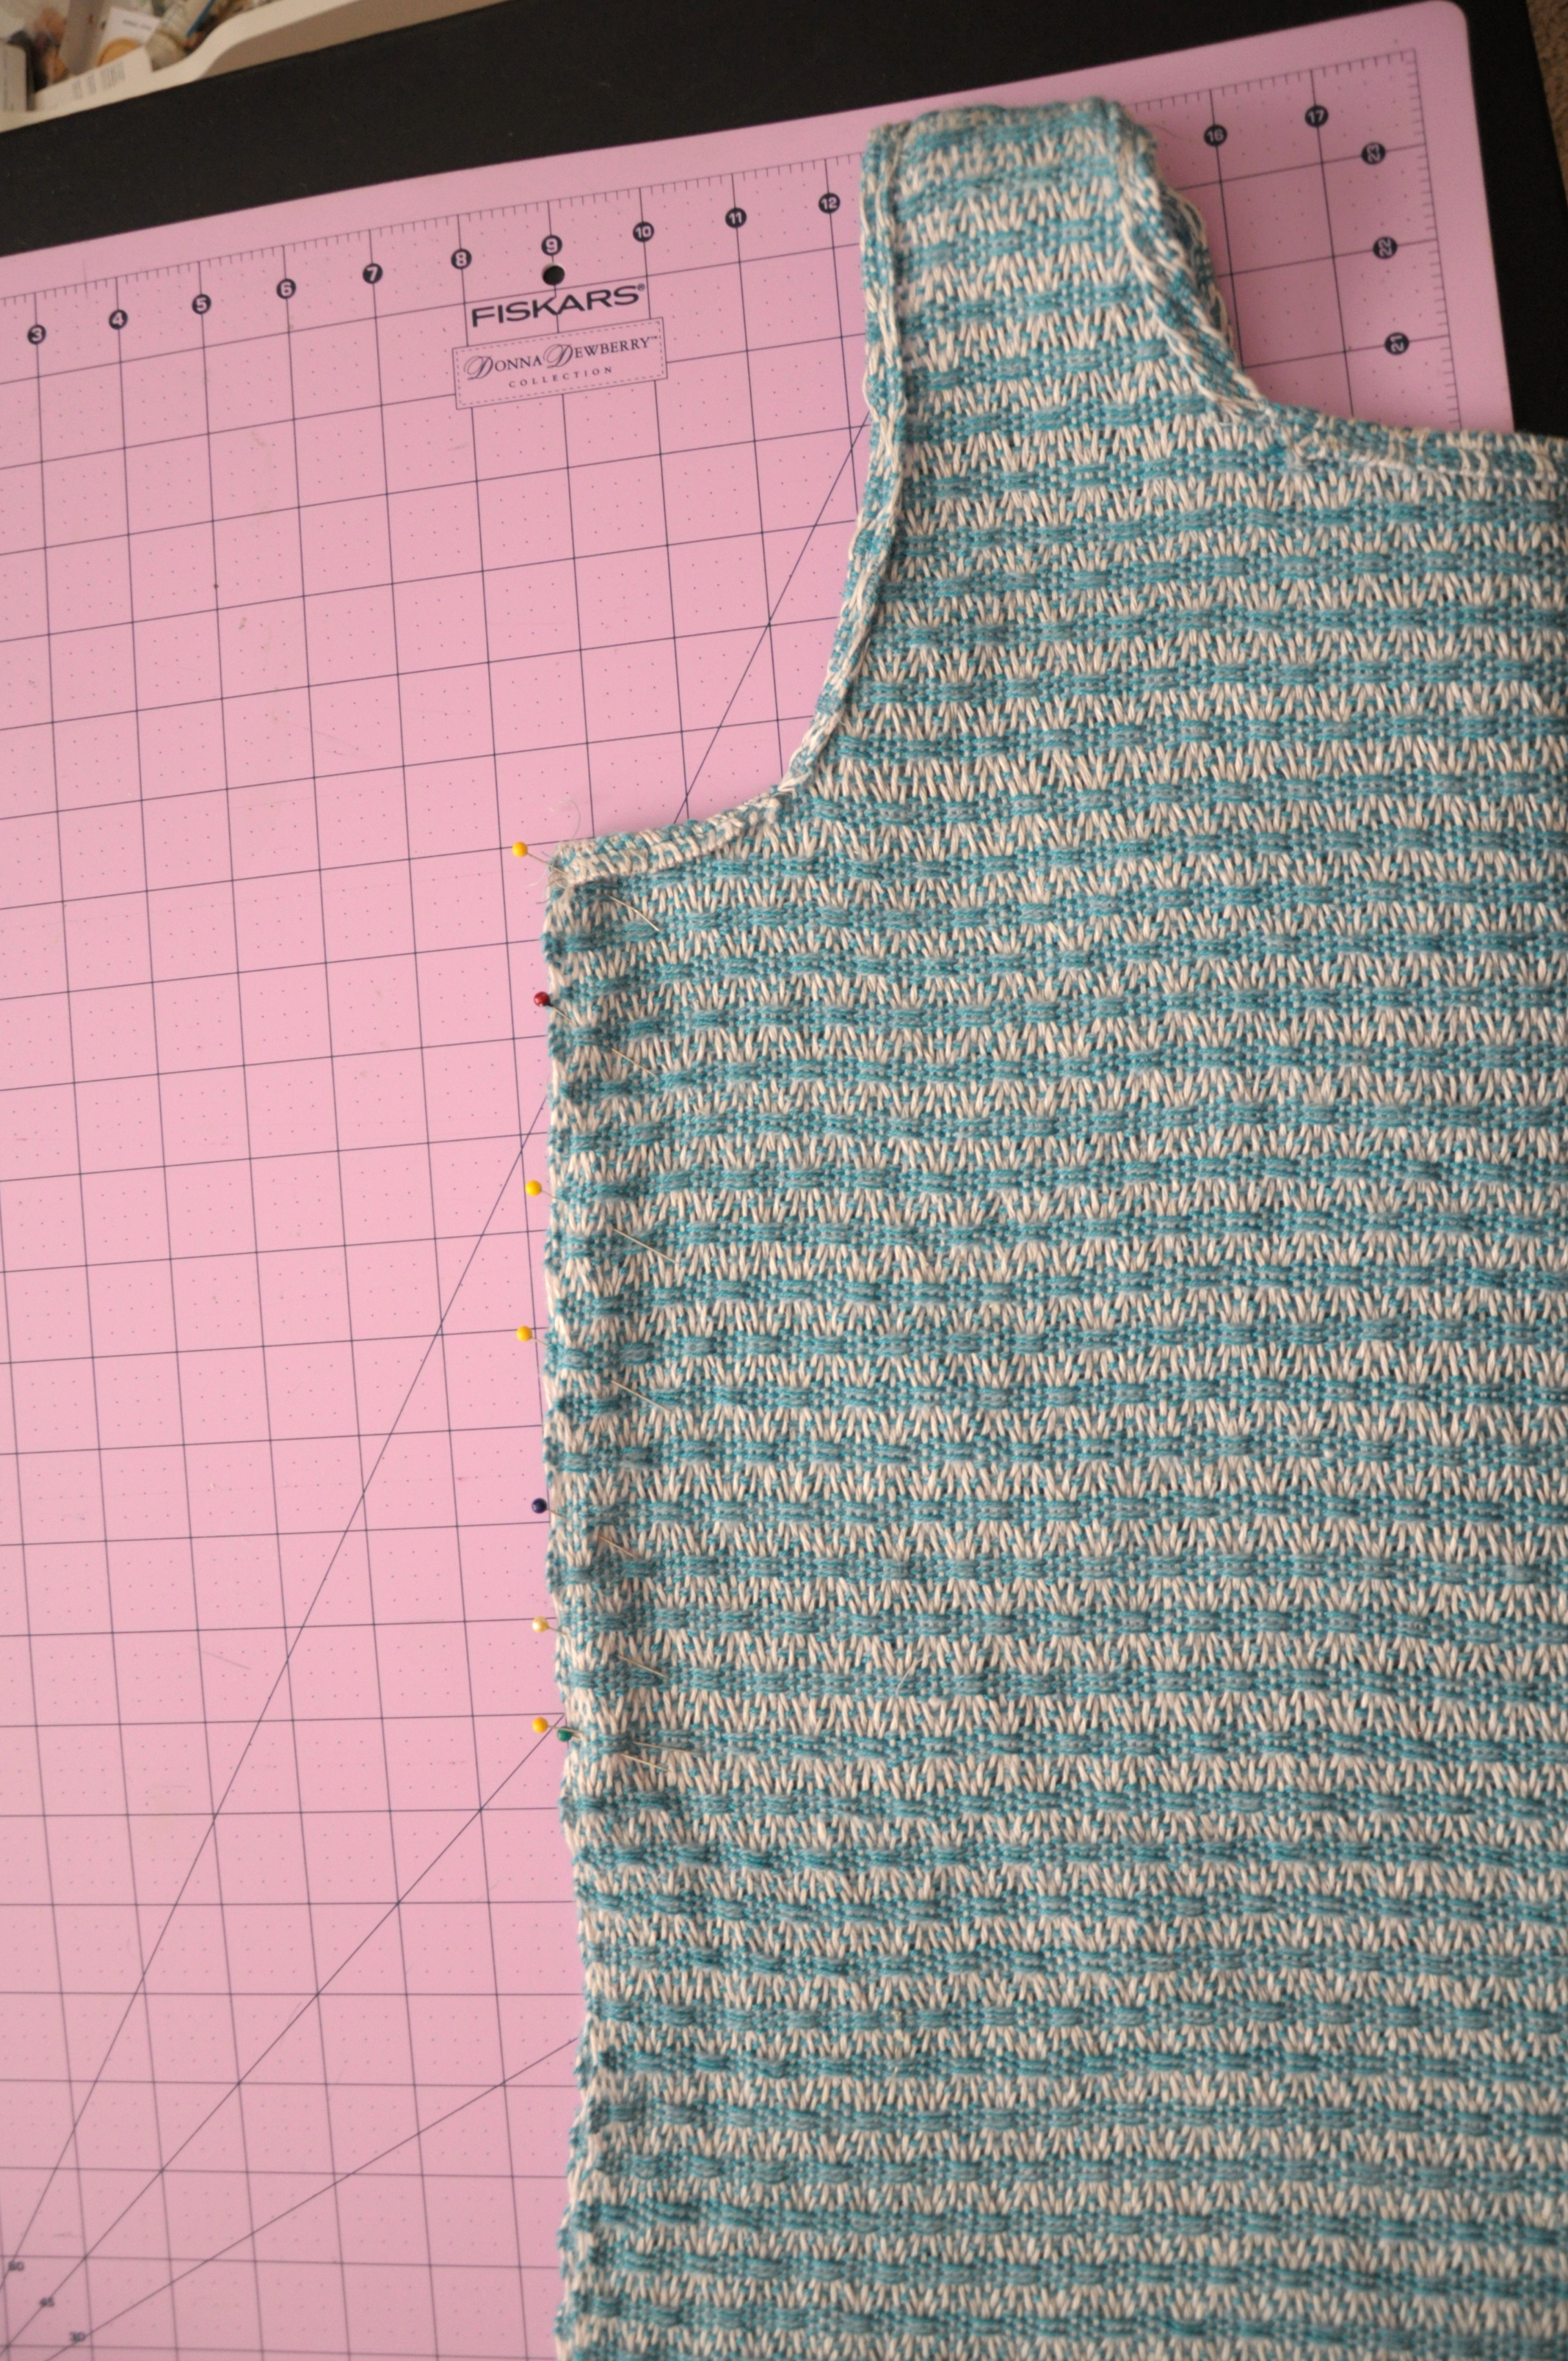
After cutting out my armhole template, the next step was to pin it to my fabric. But before I could do that, I needed to determine where the shoulder seam would be. Rather than cut out separate pieces for front and back from my fabric, I was using the entire length of the fabric for my top.

I decided as I was tracing my armholes that a hi-lo hem would be cool. I opted for about a 5″ difference in front and back hems, folded my fabric, and then pressed it with my iron to indicate my shoulder seam.

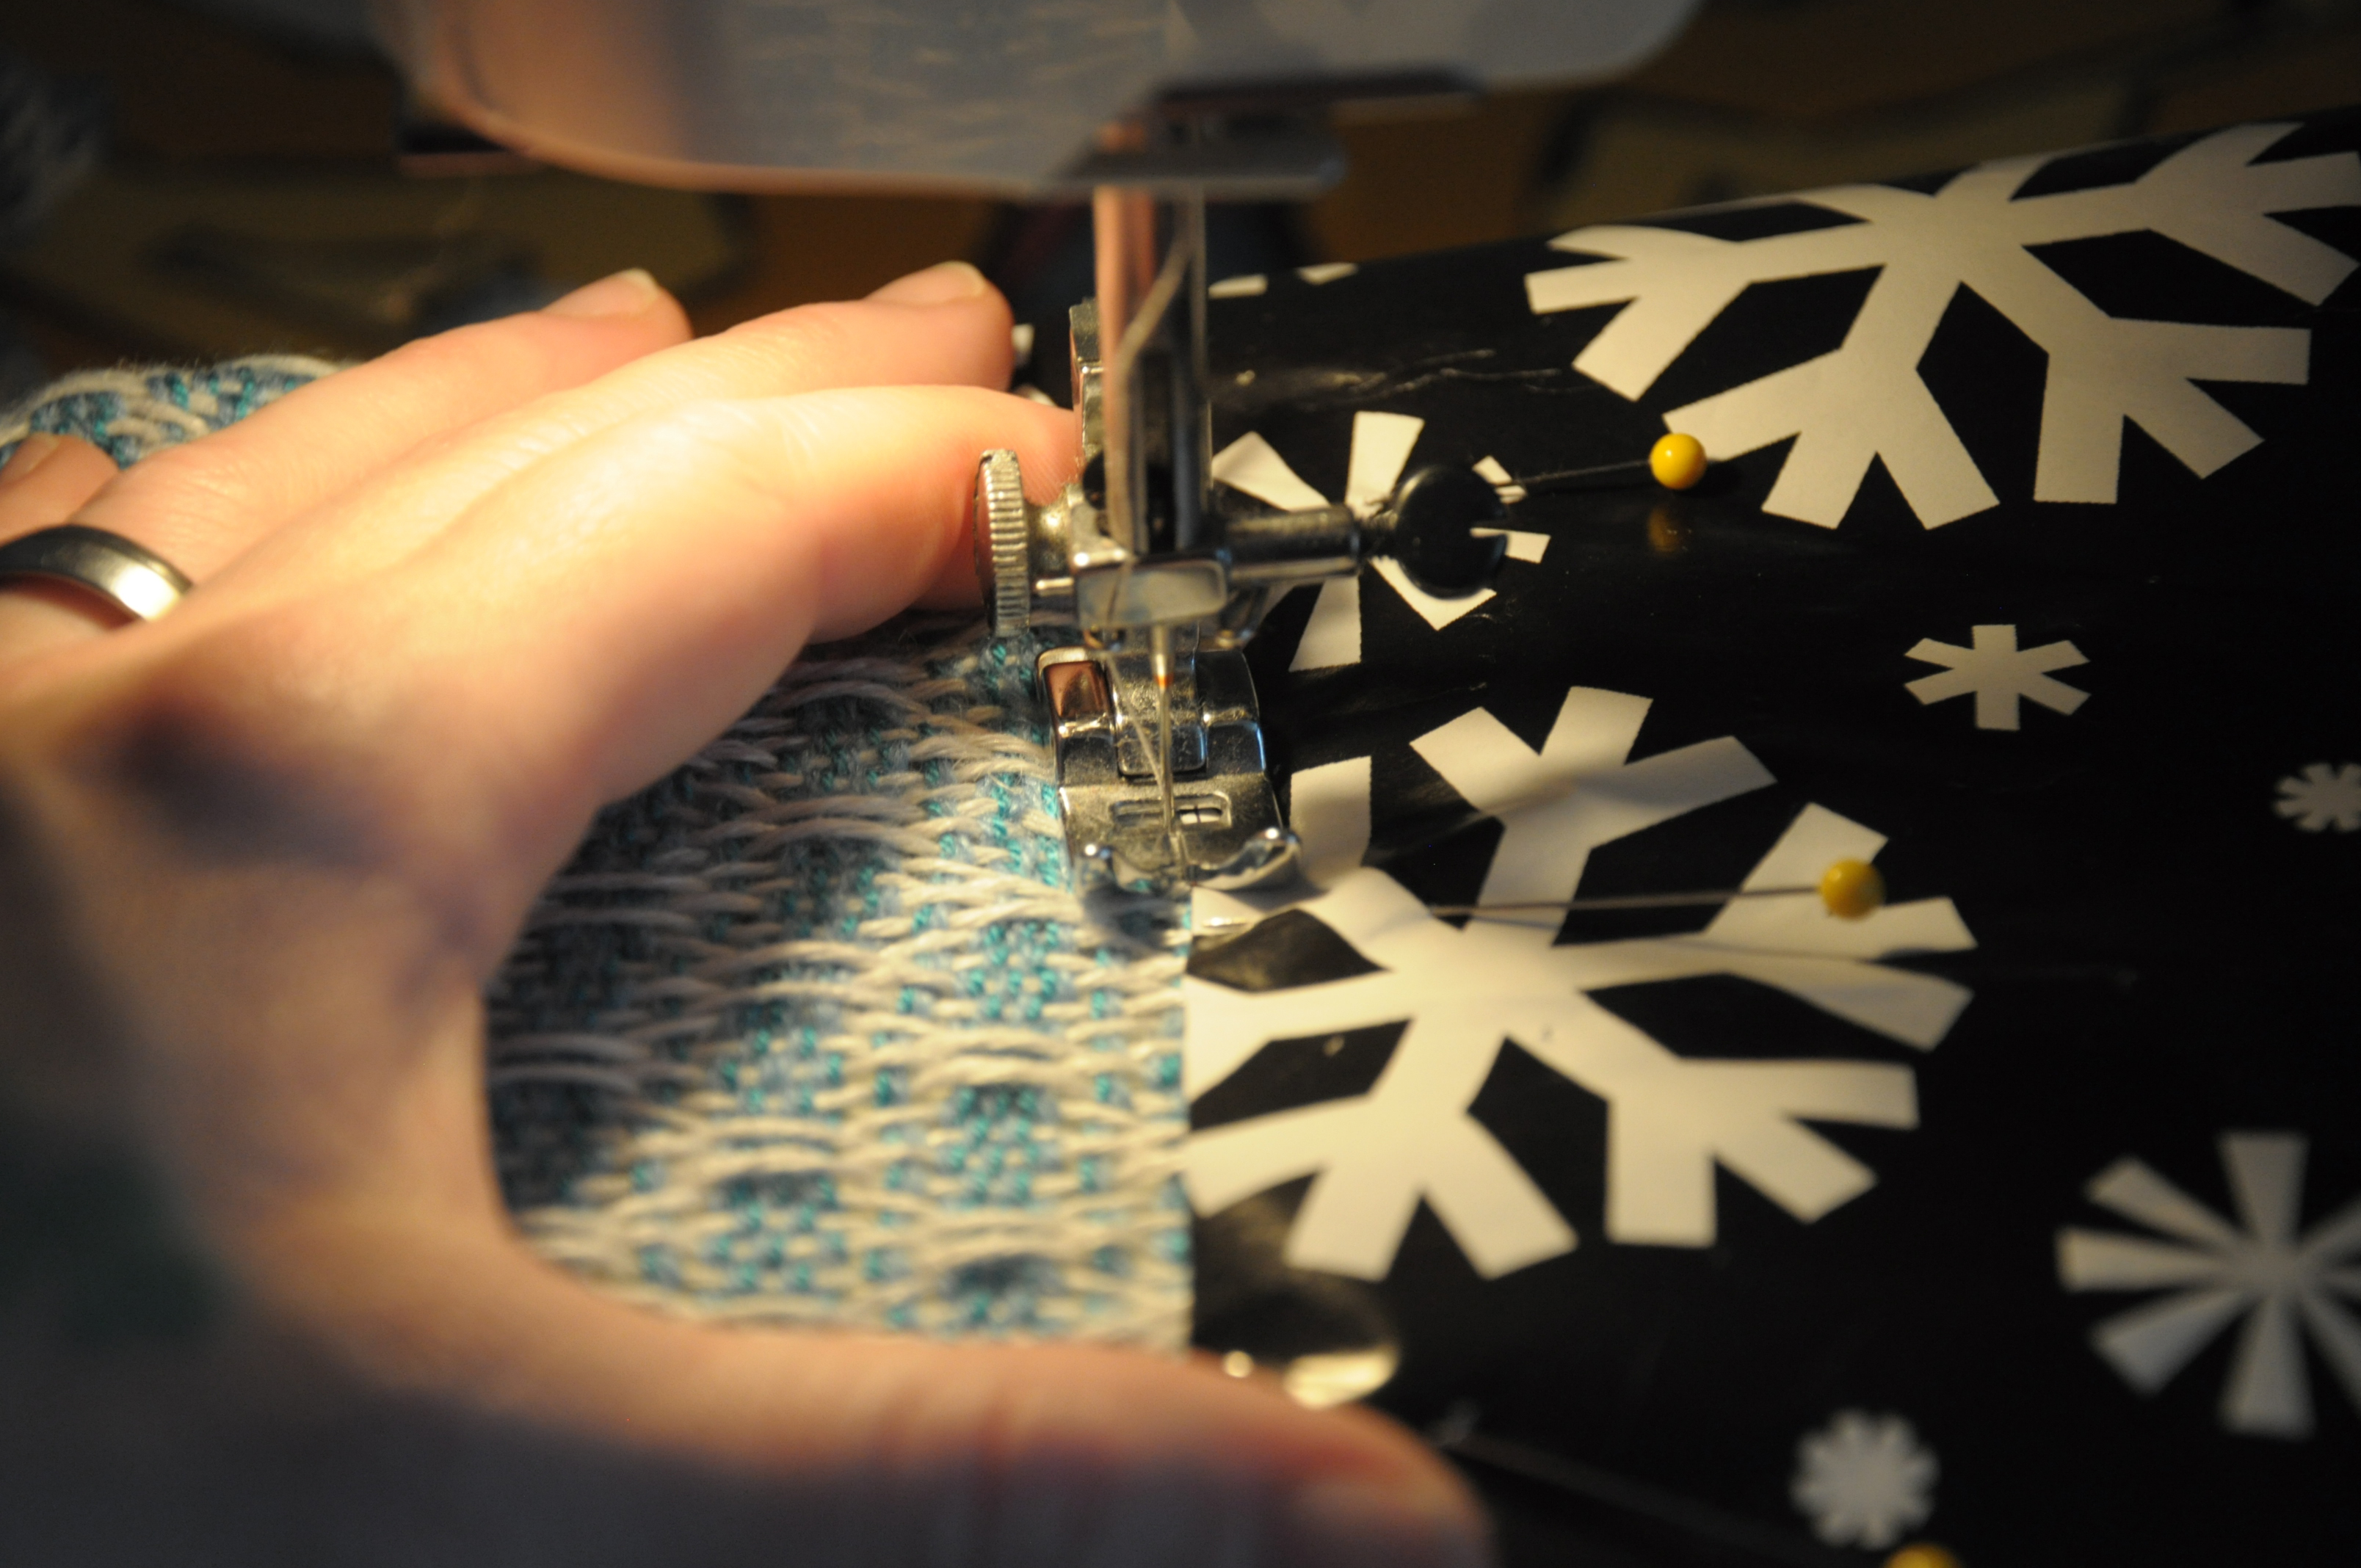
Then I pinned my template to the fabric:

Sewing_4

My two best tips for sewing: don’t skimp on ironing or pins.

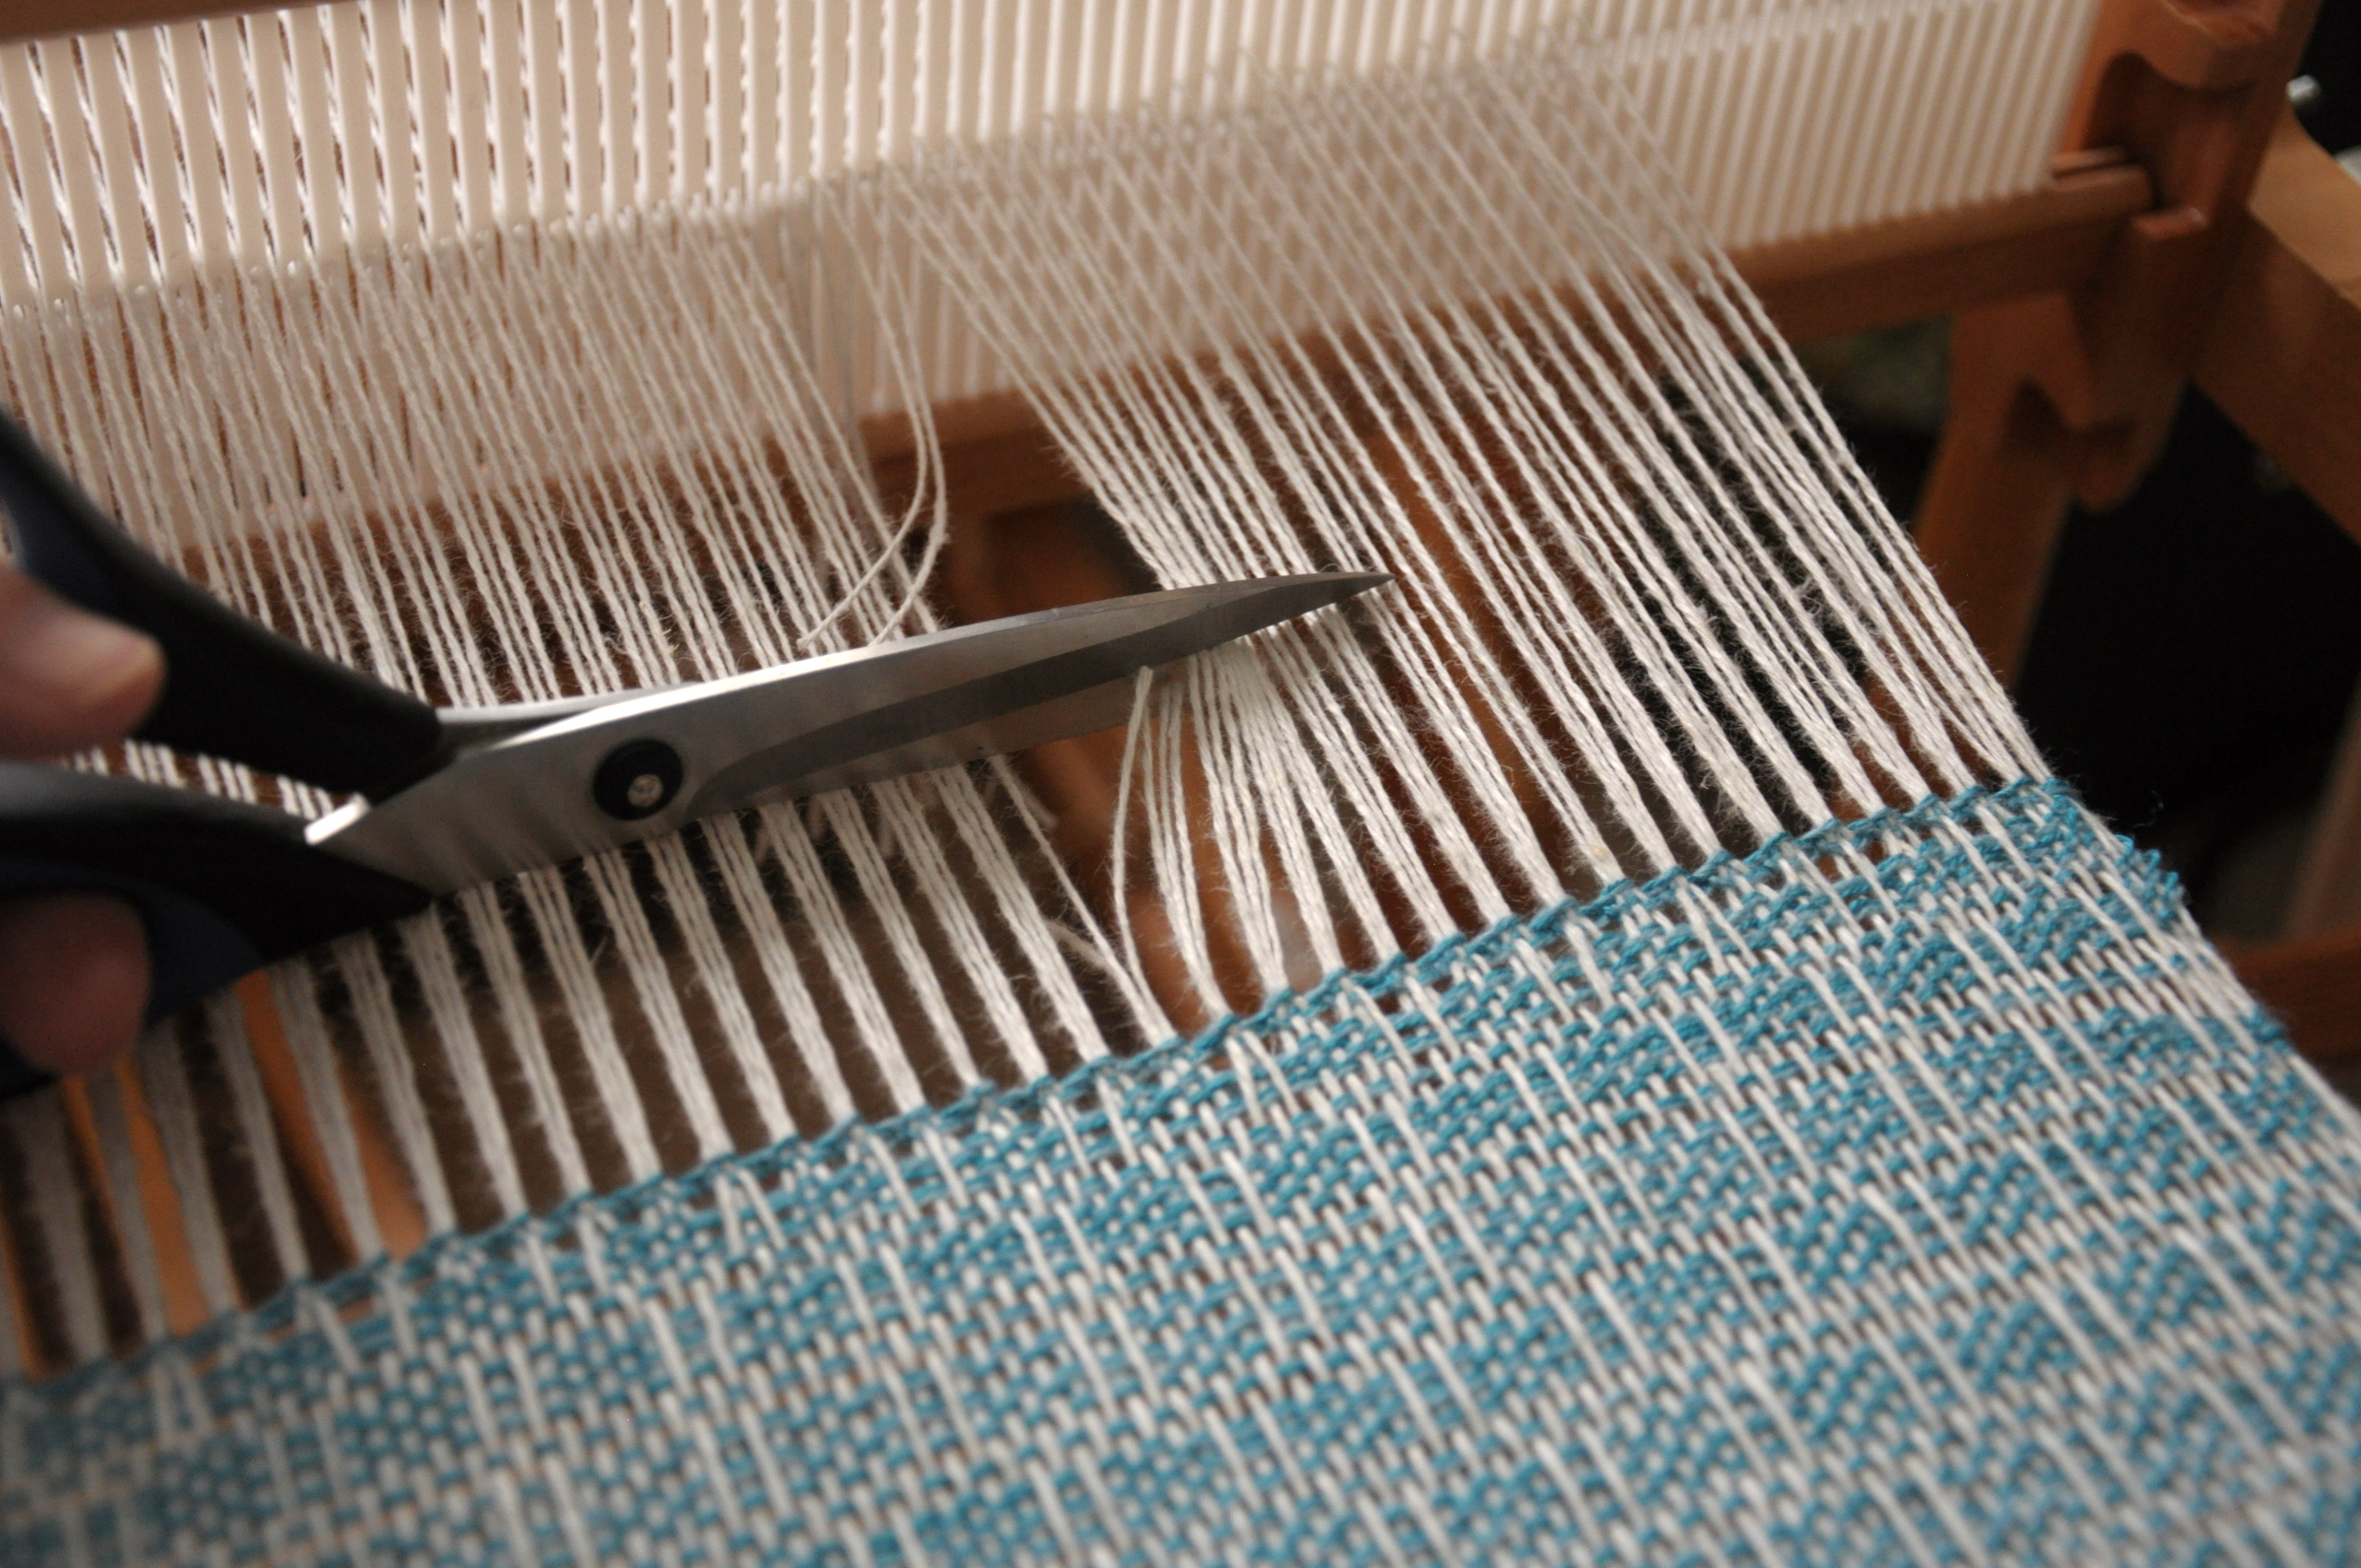
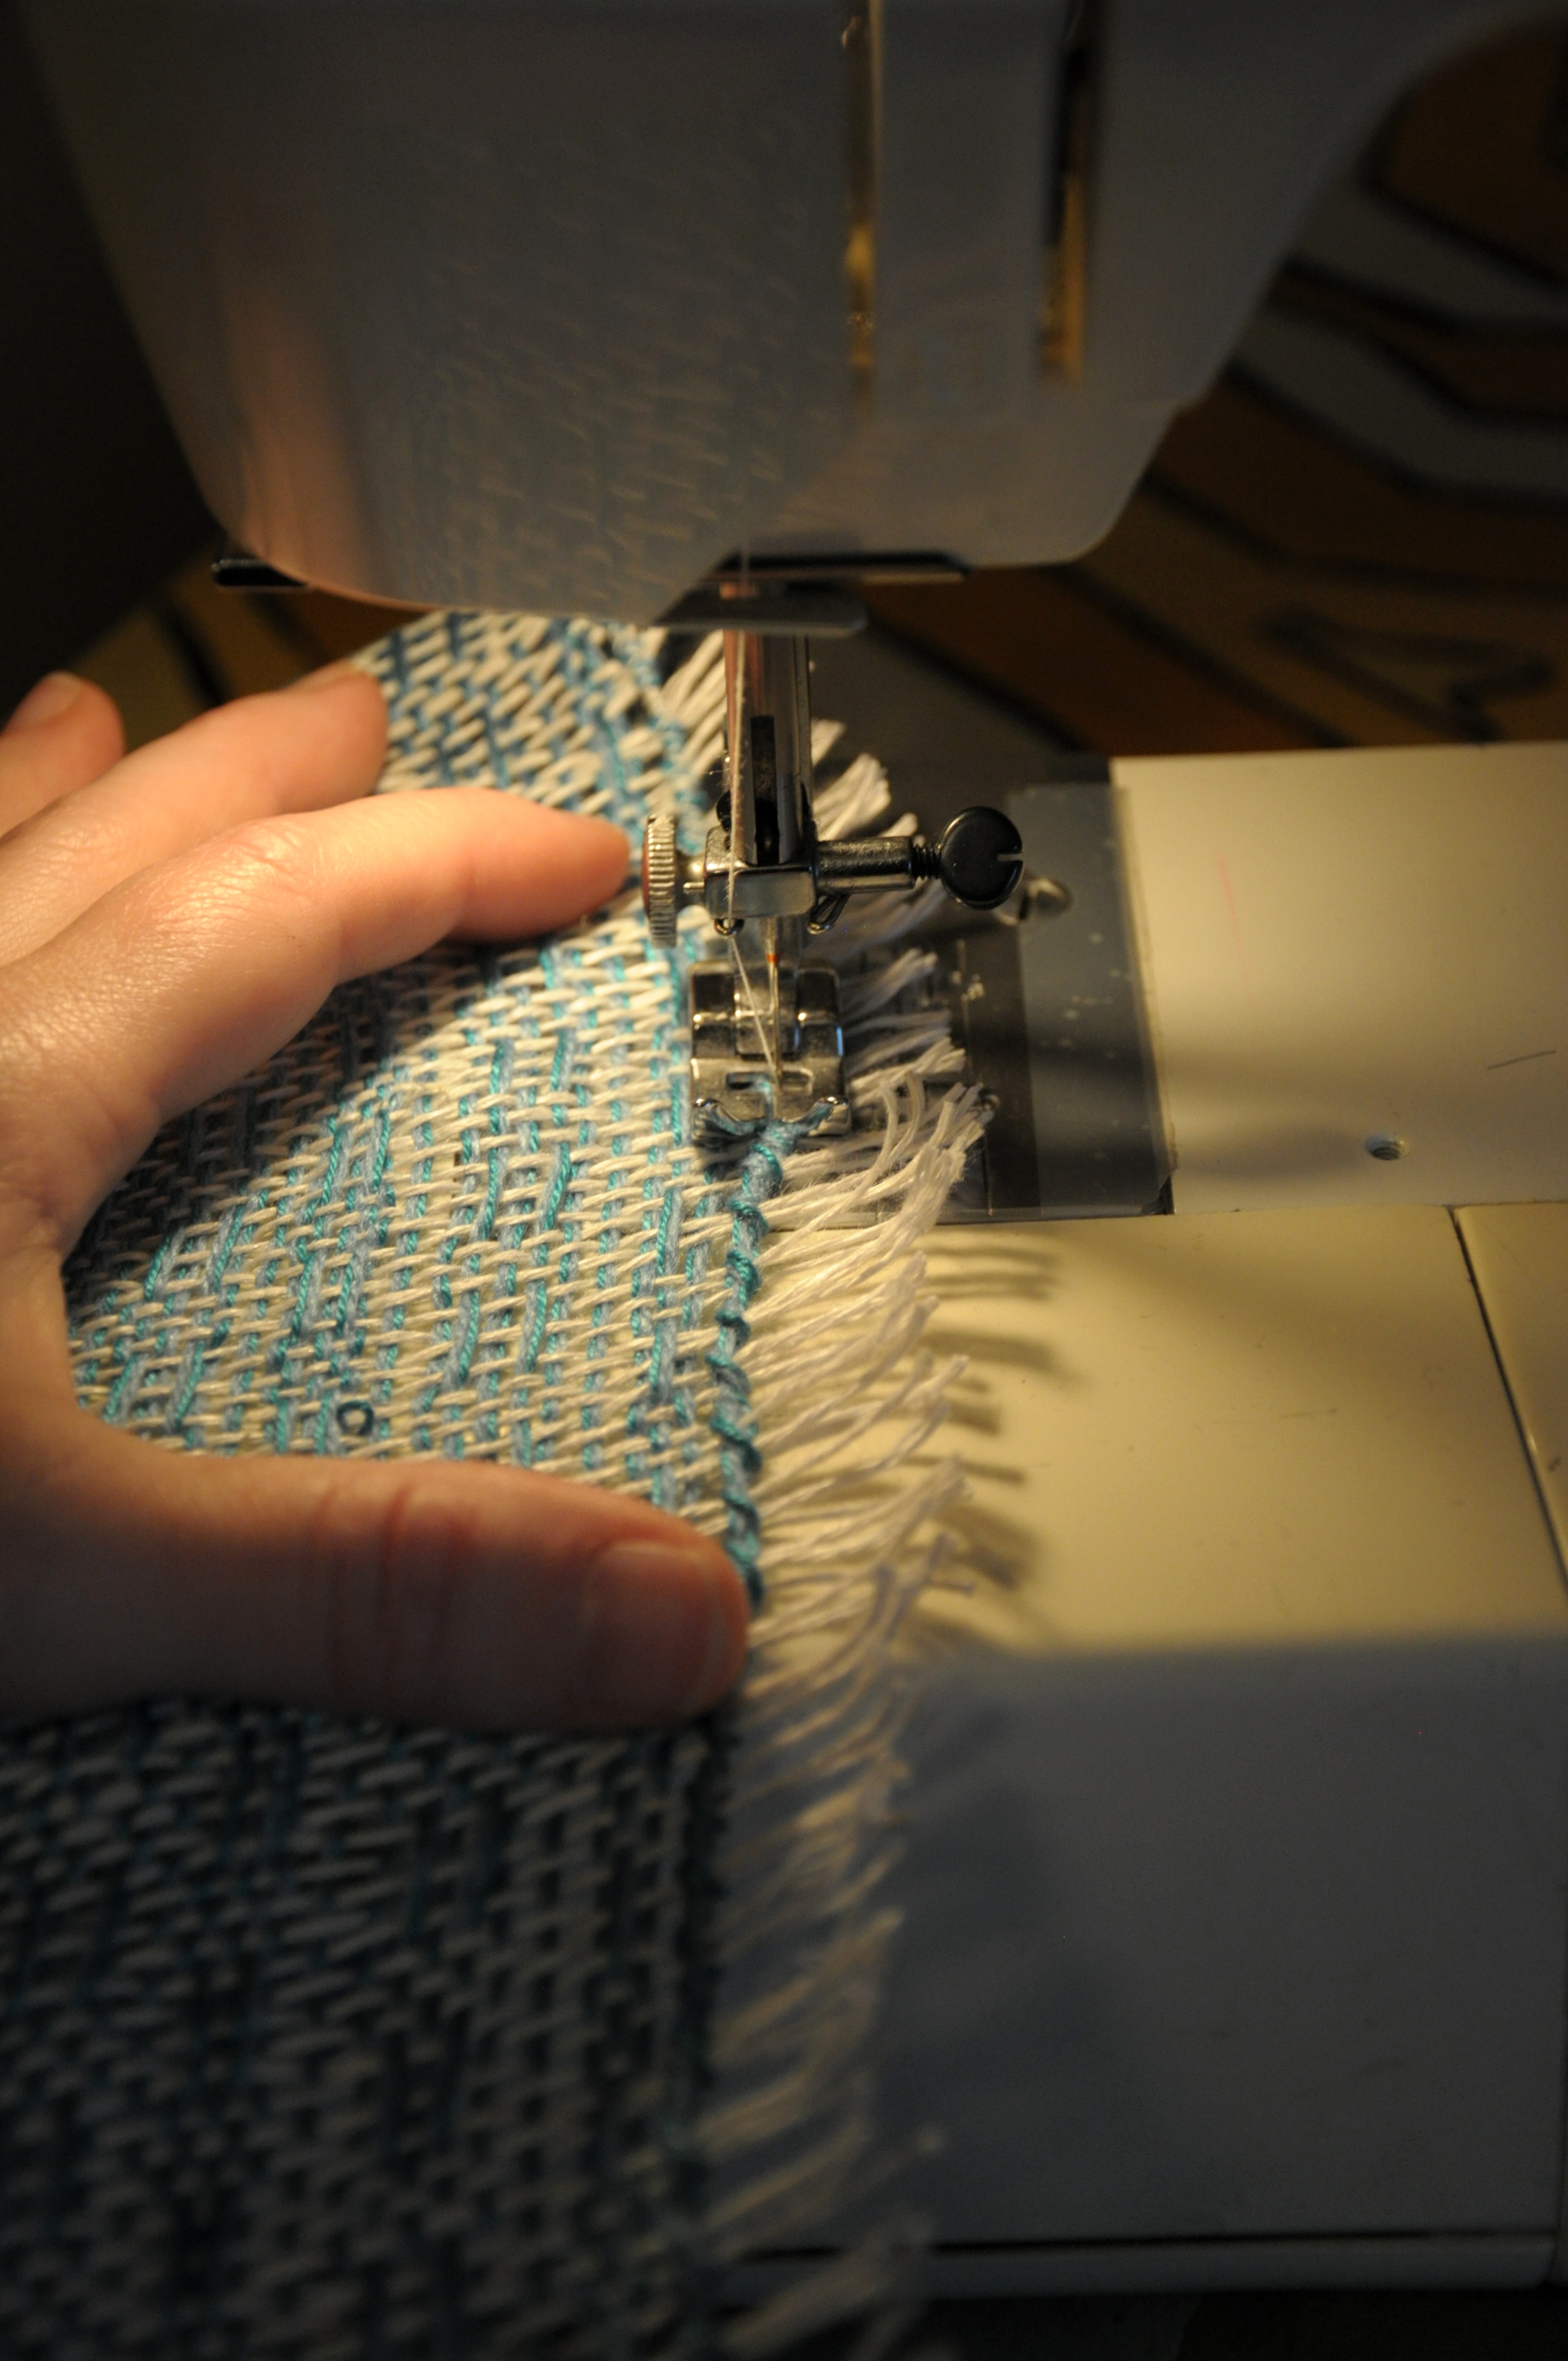
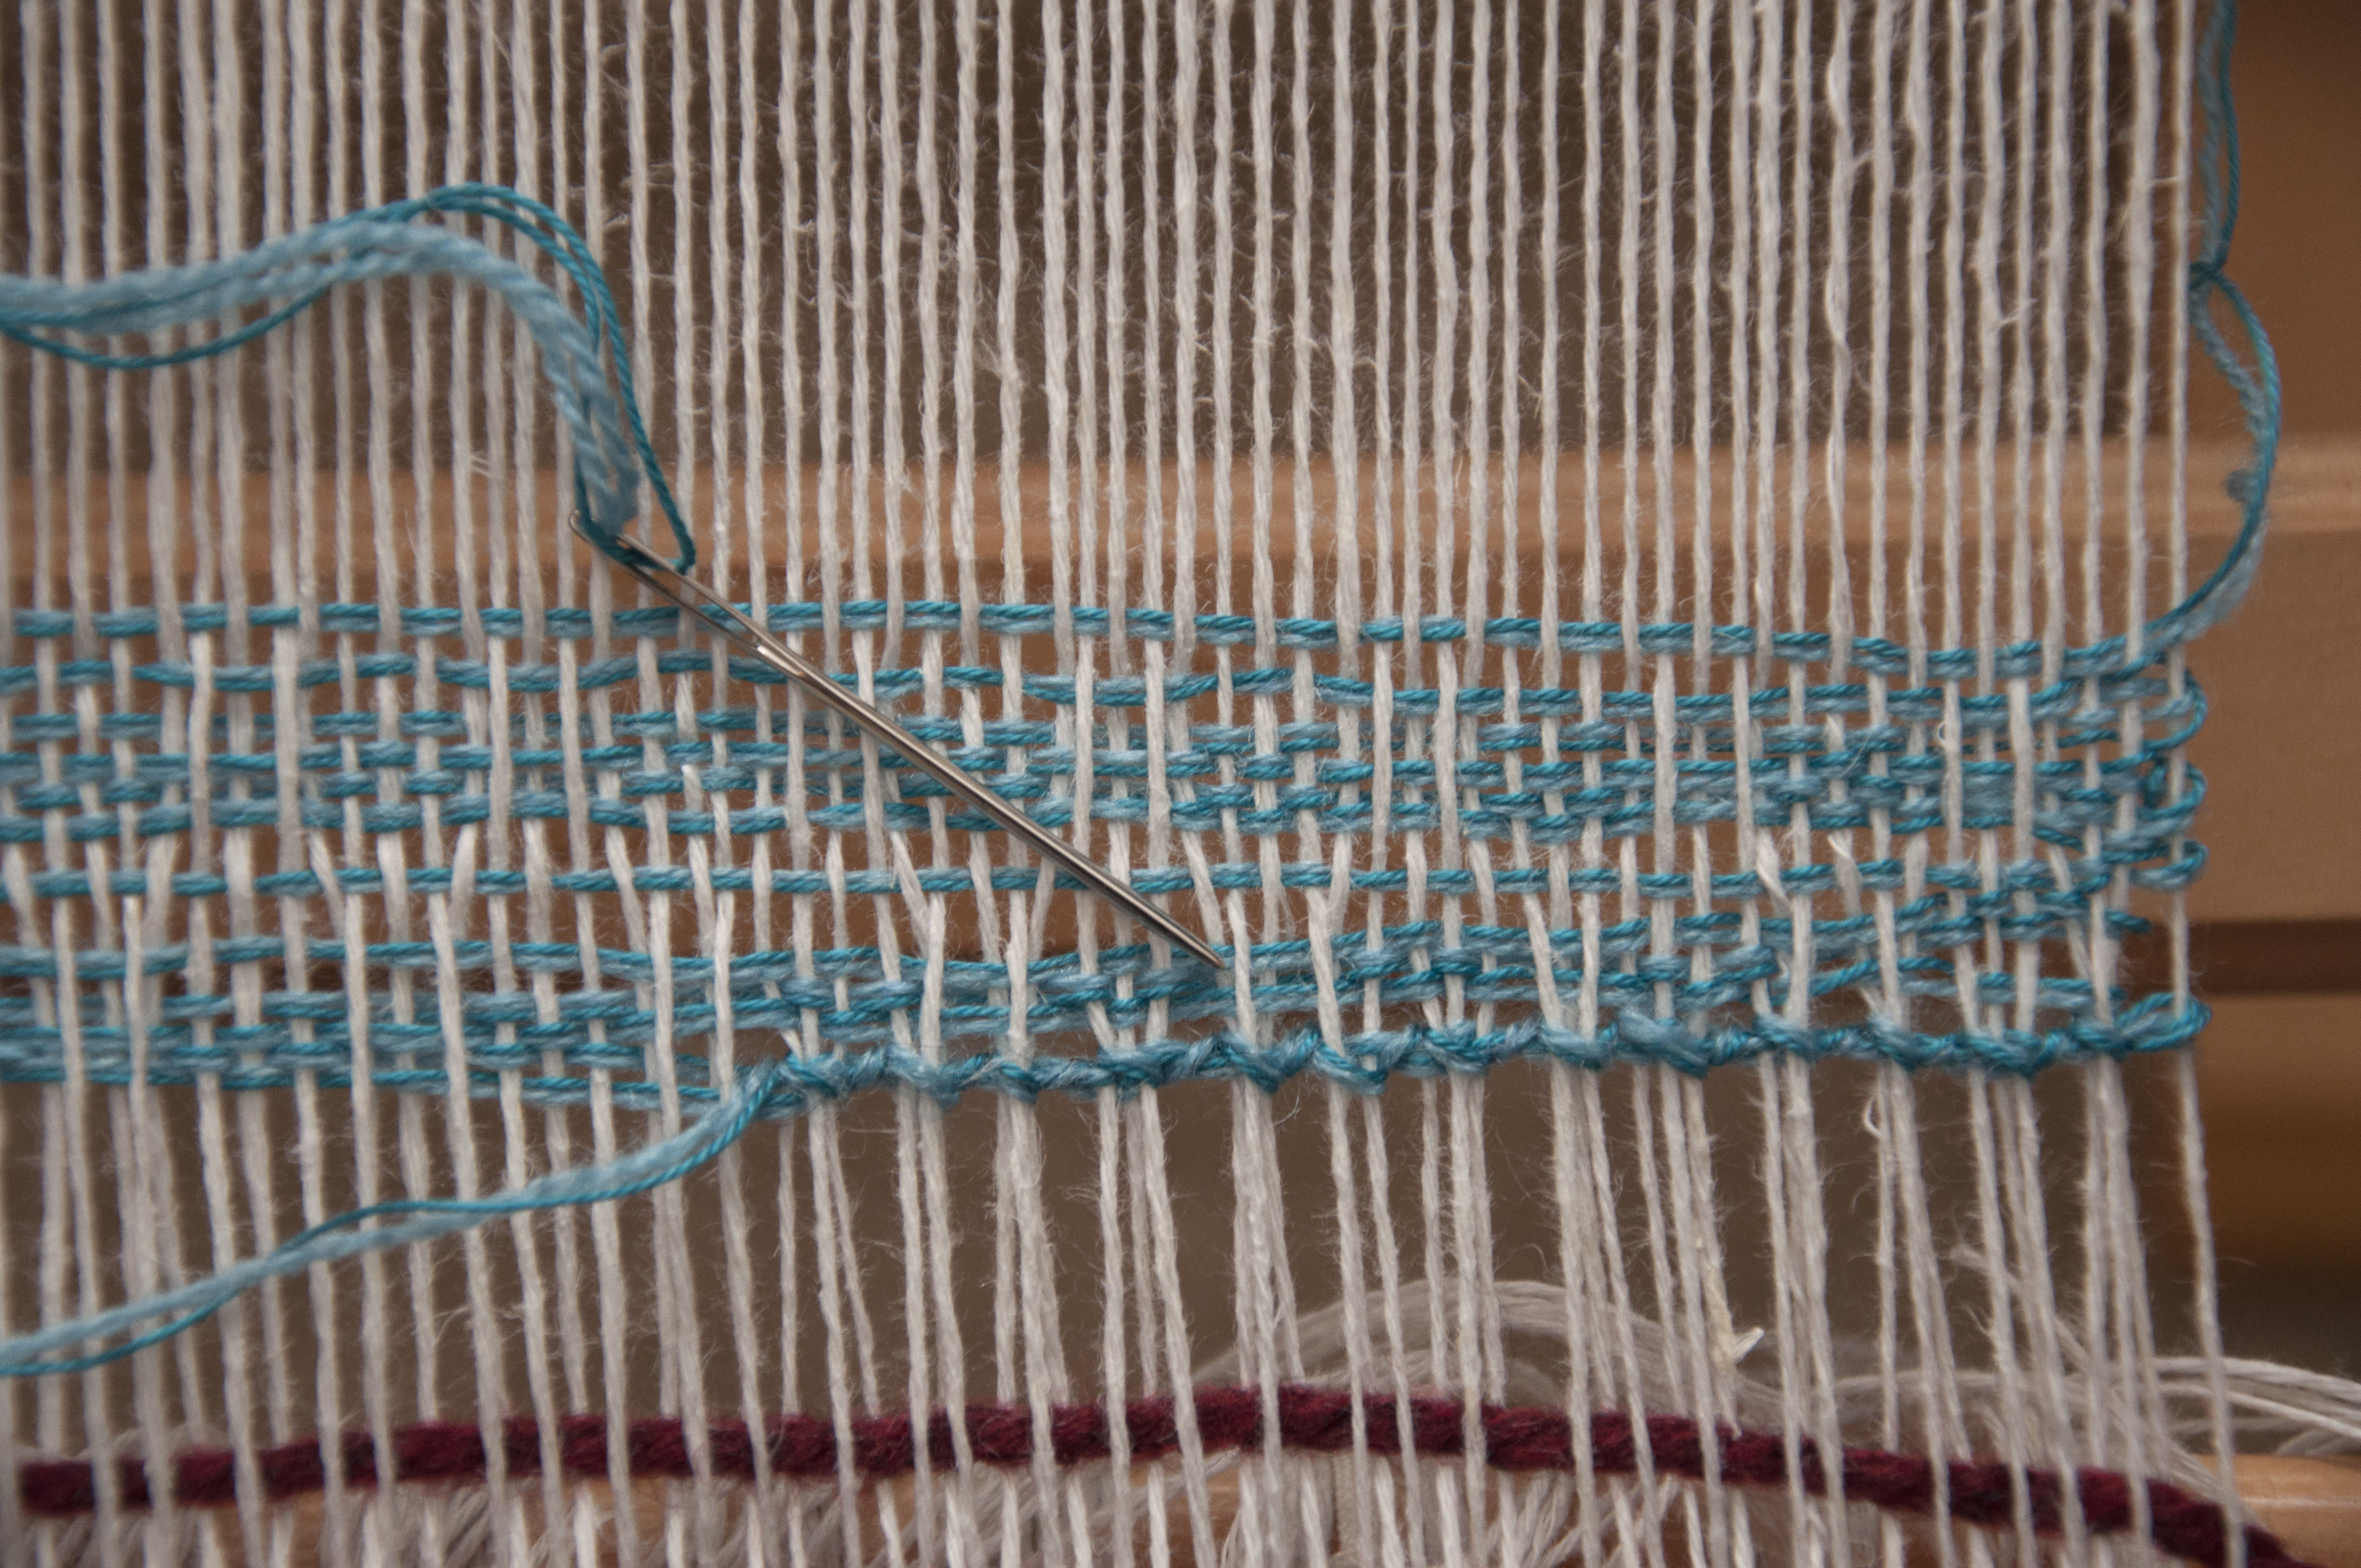
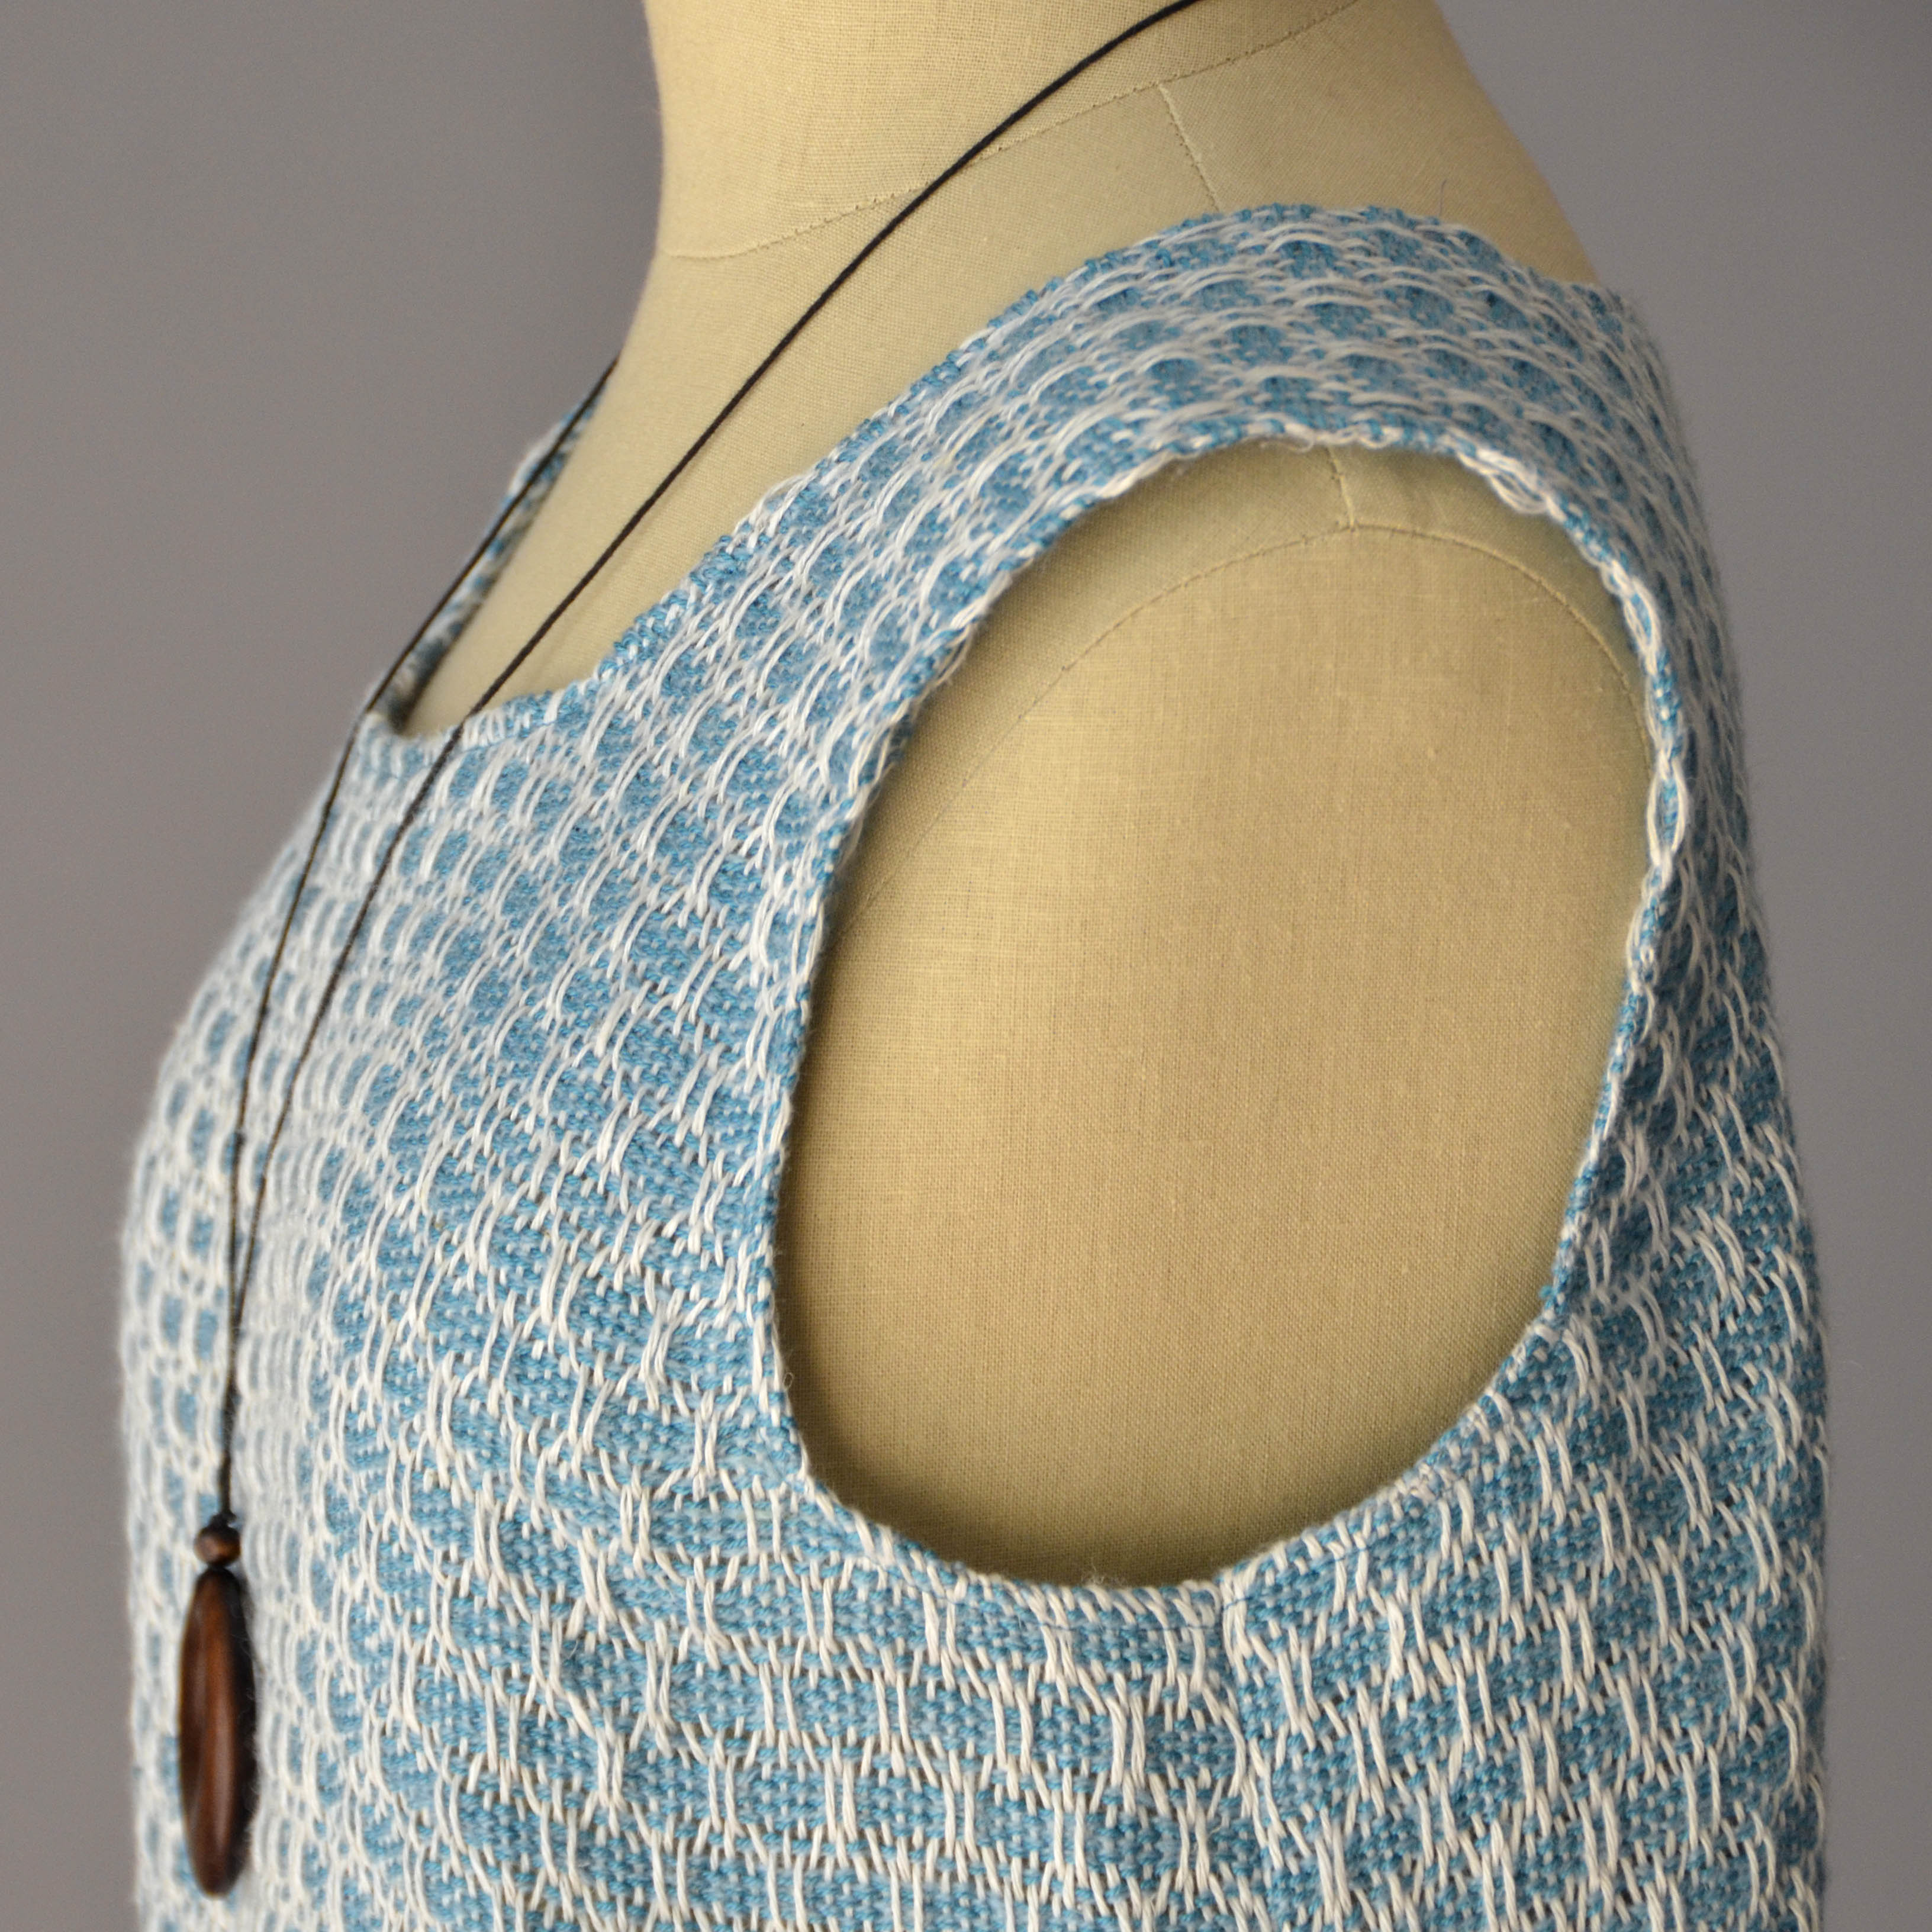
Now, before any cutting can happen, it’s important to secure the fabric with the sewing machine. If I was cutting store-bought fabric for a garment, I would simply pin the pattern to the fabric and cut. But because I’m using my handwoven fabric that has a much lower thread count (fewer threads per inch) than most commercial fabric, I needed to take care that the weaving doesn’t come apart.

My first step was to sew a folding guide line for myself. I sewed a straight line of stitching just along the sides of my template:

Sewing_5

After removing the paper, I sewed two more lines, but this time with a narrow, short-length zigzag stitch. These are the really important lines, because they’re securing the threads of the weaving and preventing them from unraveling. I used my presser foot as a measuring guide for my lines The foot is about 1/4″ to 3/8″ wide from the center of the needle to the outside edge, making my total seam allowance be about 5/8″.

Sewing_6

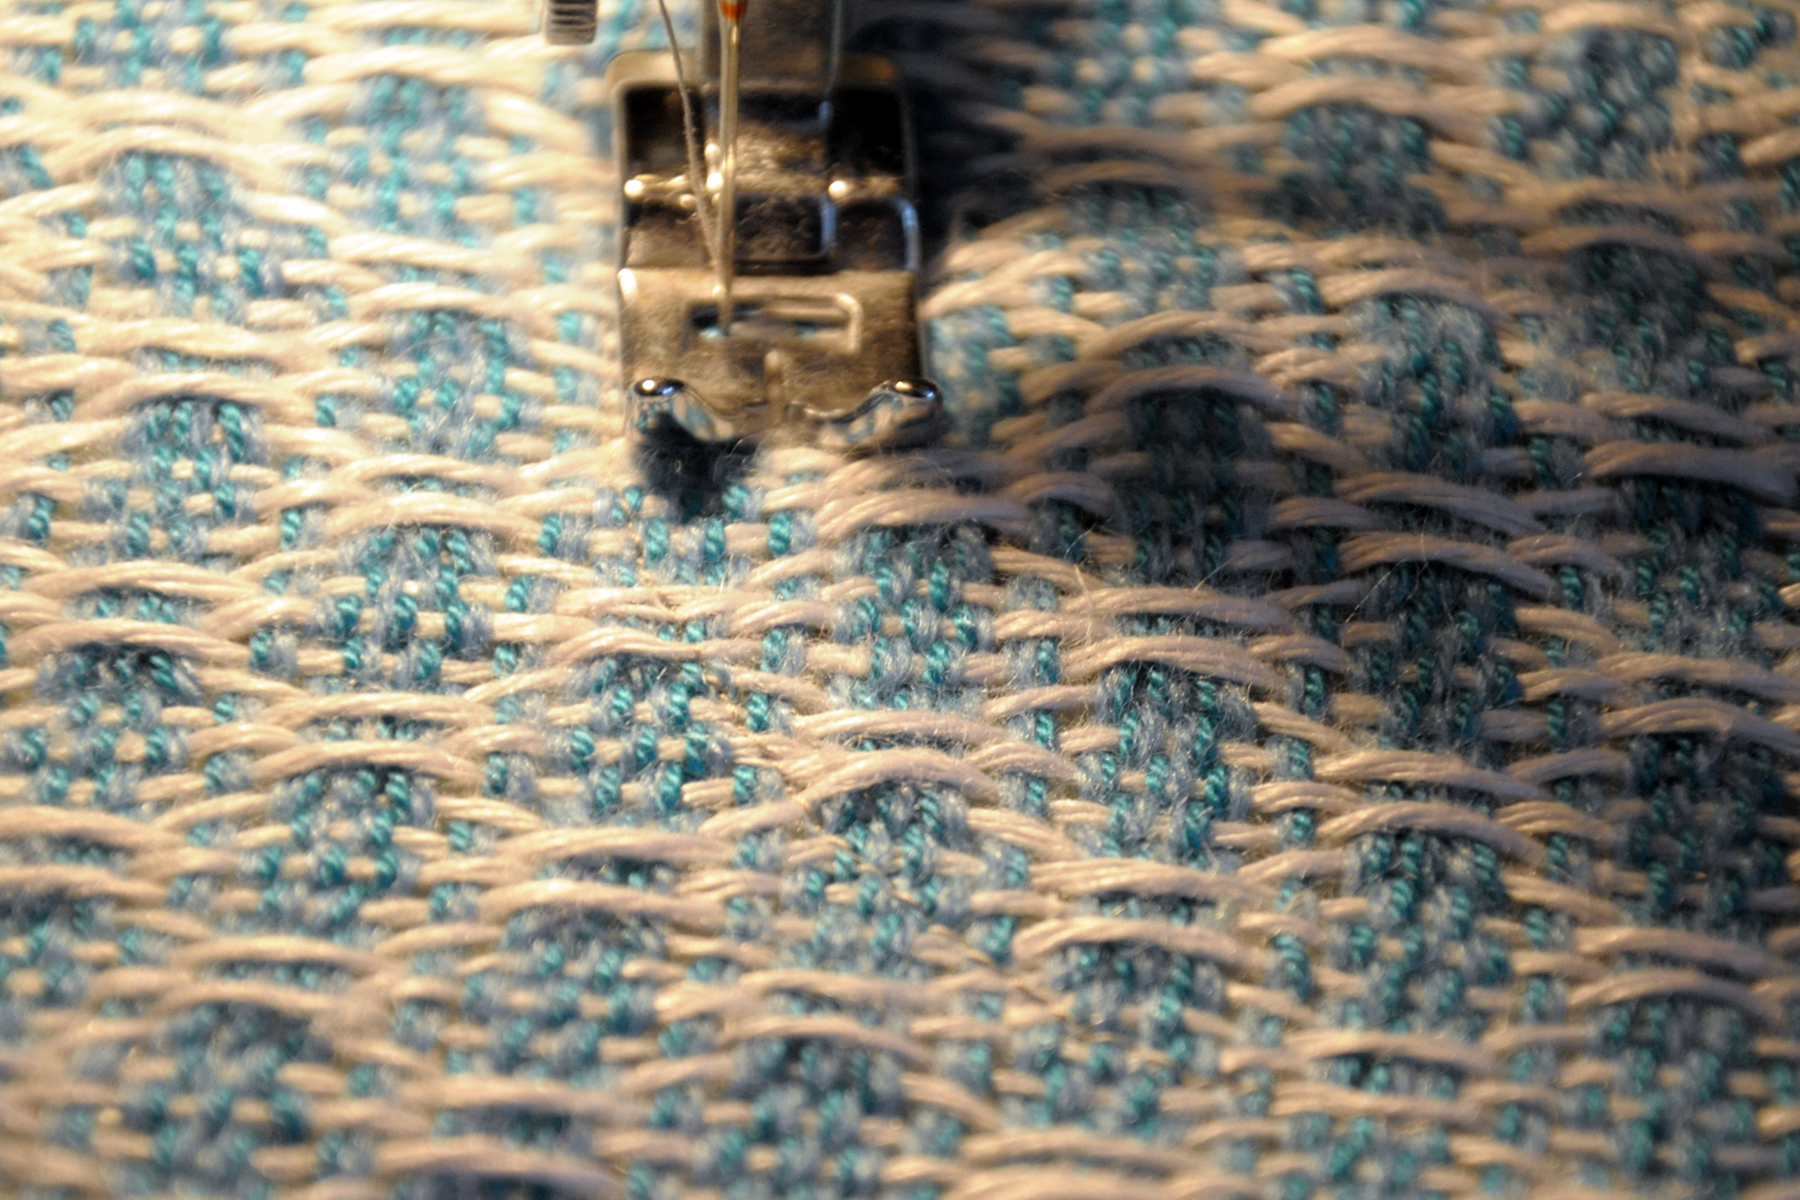
I’m using light gray thread – can you see it? I barely could and had a splitting headache by the time I was done from squinting so hard. I wanted the thread to blend into the fabric and it blended too well!

Can you see it now?

Sewing_7

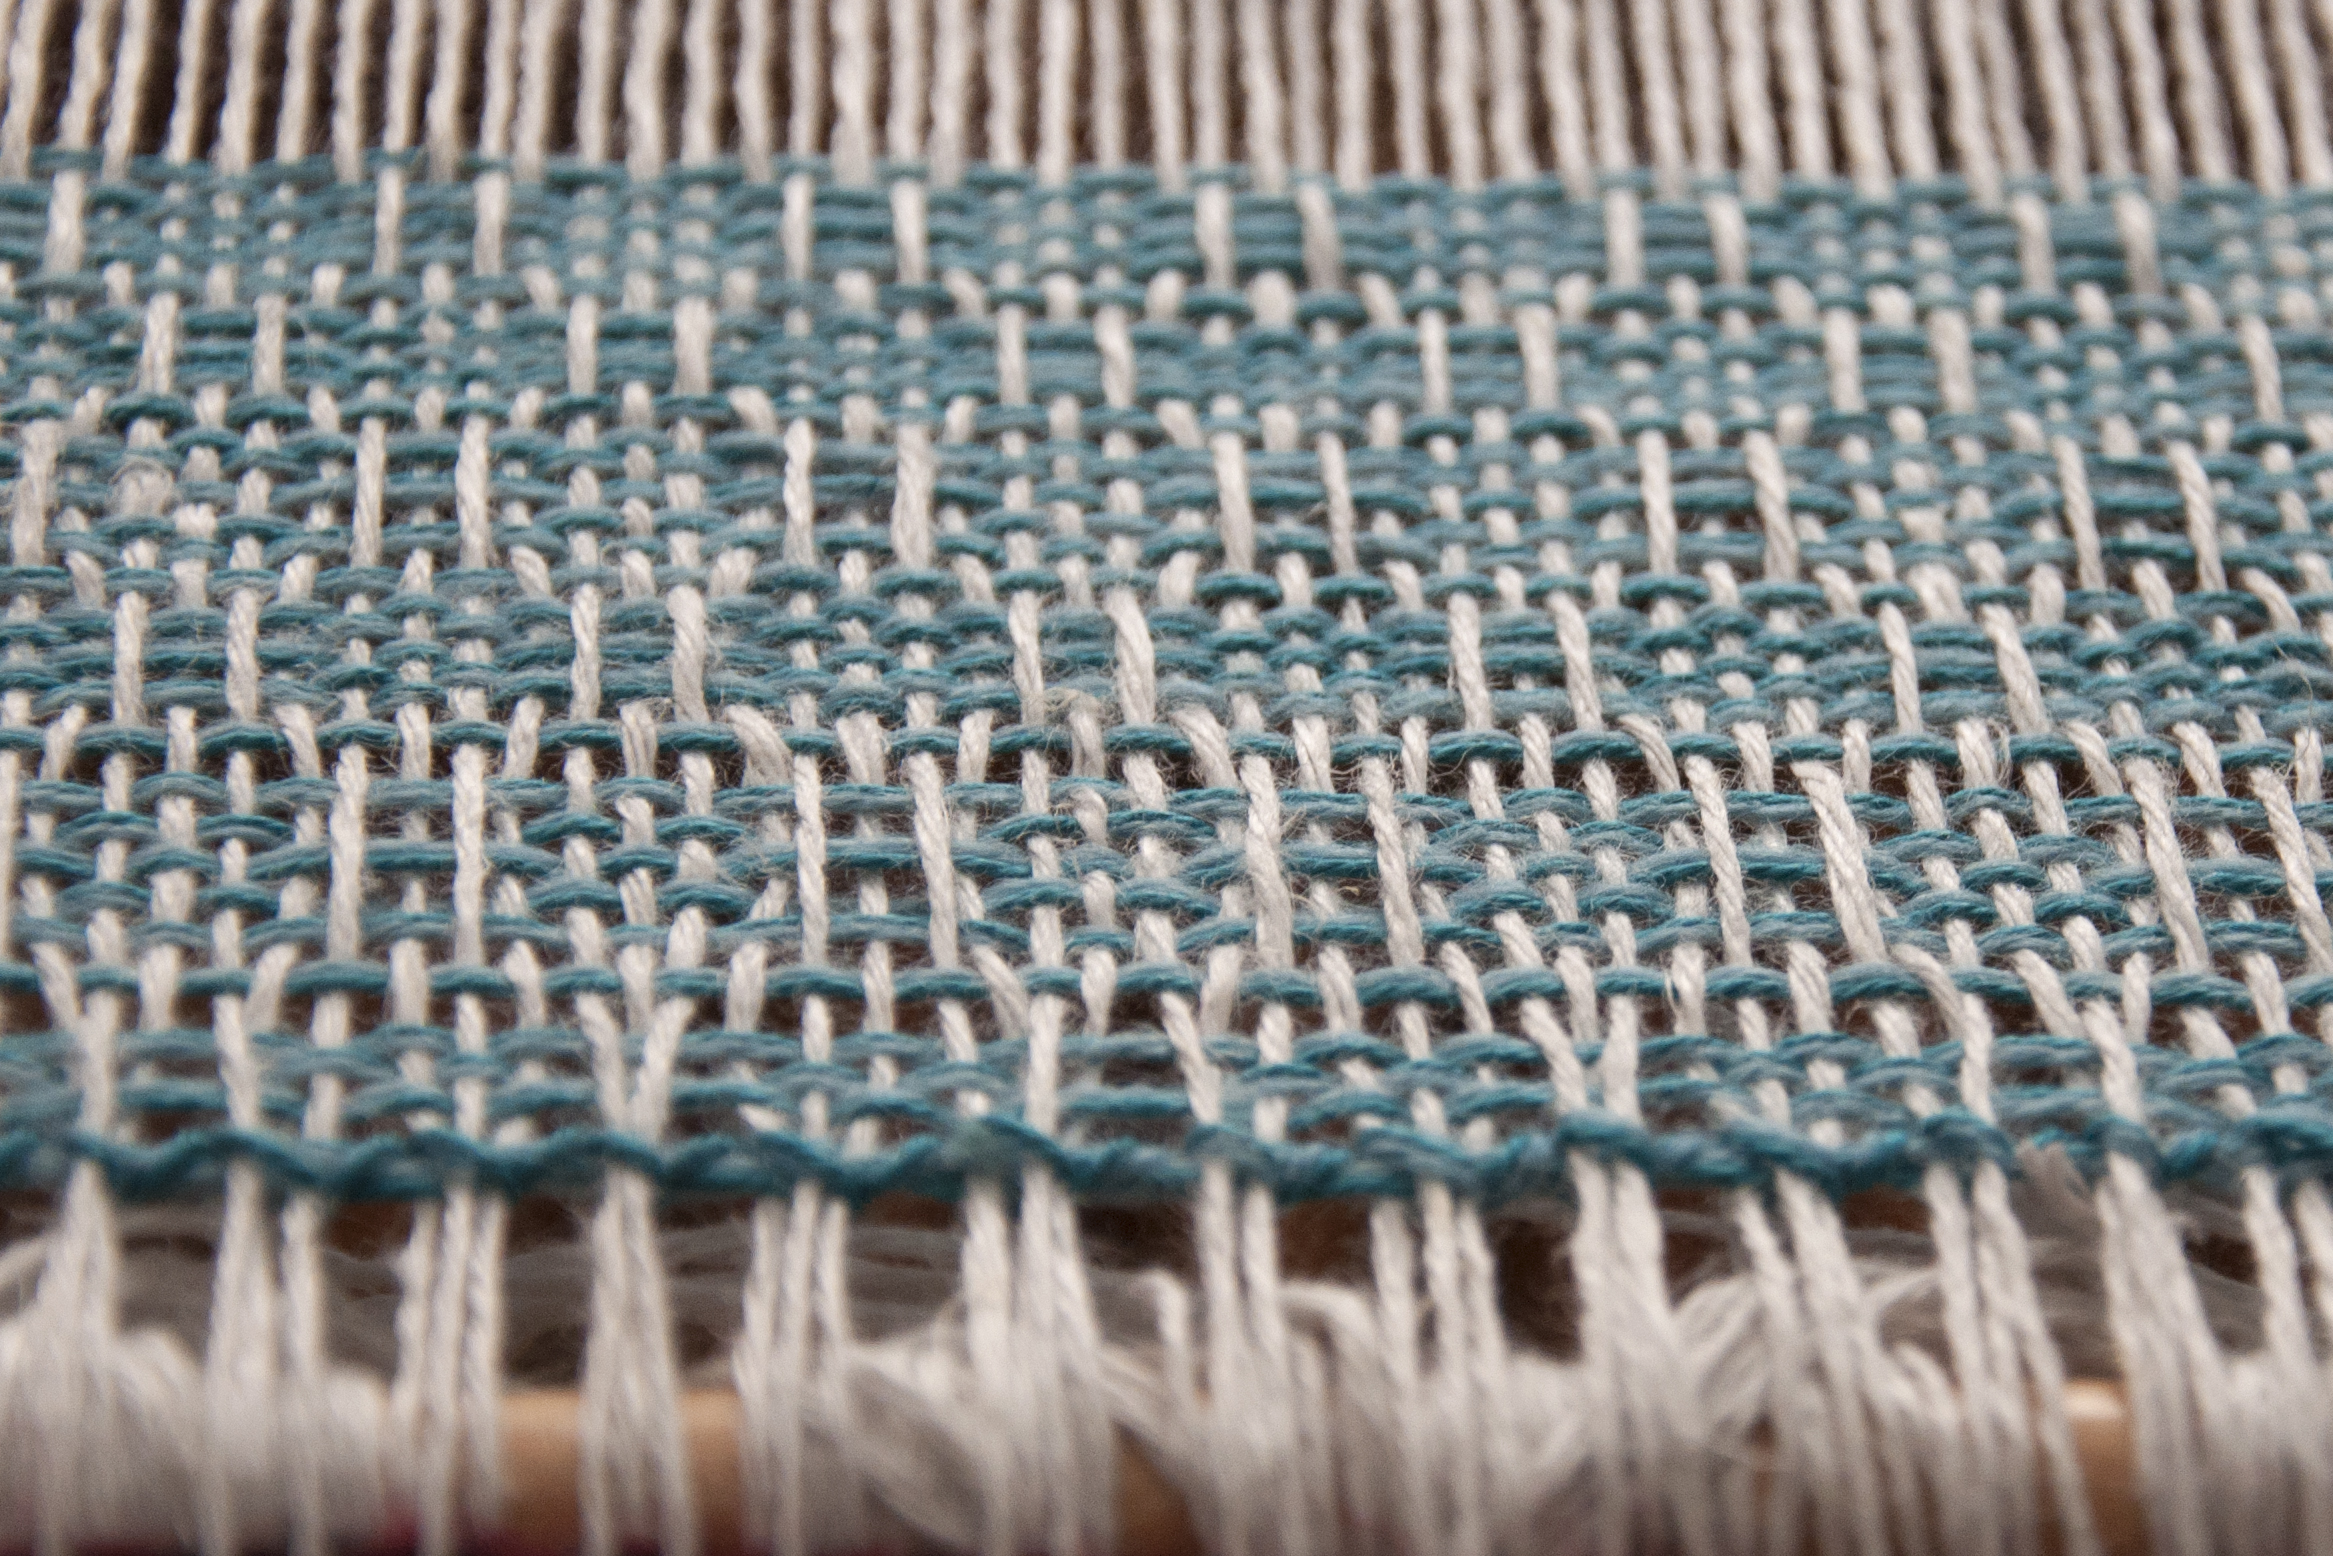
Now that these important lines were stitched I could safely cut out my neck and armholes. I made sure to cut outside  all lines of stitching, right up against the last zigzag line.

Sewing_8

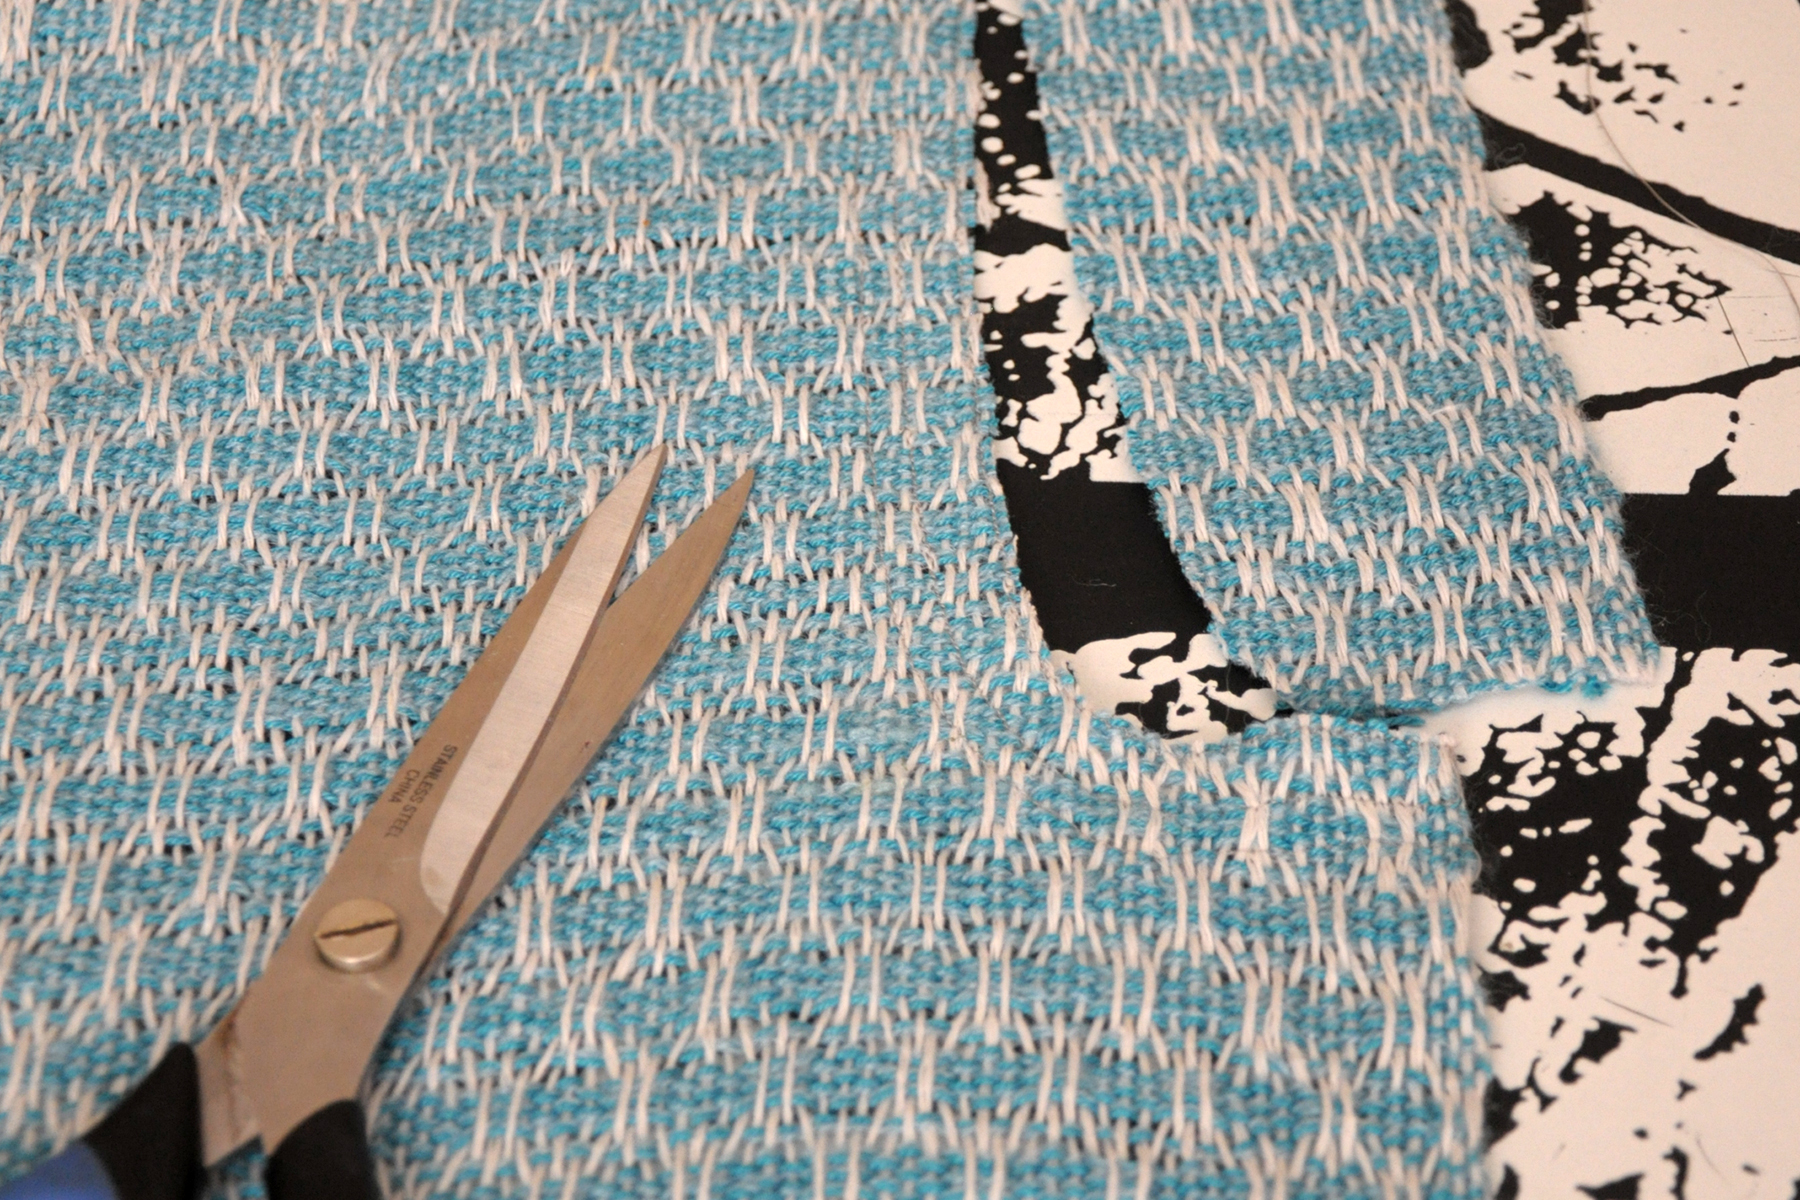
Once the neck and armholes were cut out, I had to prep the curves so I could fold them under. If you’ve ever sewn a garment with curved lines, you know that you have to snip the curves so they can be eased to the inside of the garment. Again, because I was working with hand woven fabric, I had to secure the fabric before making these snips. I set my machine to a very, very short straight stitch, and made 2 parallel lines of stitches on either side of where I intended to cut. That way, when I cut through the fabric, it wouldn’t unravel.

My apologies – I seem to have forgotten to photograph this step!

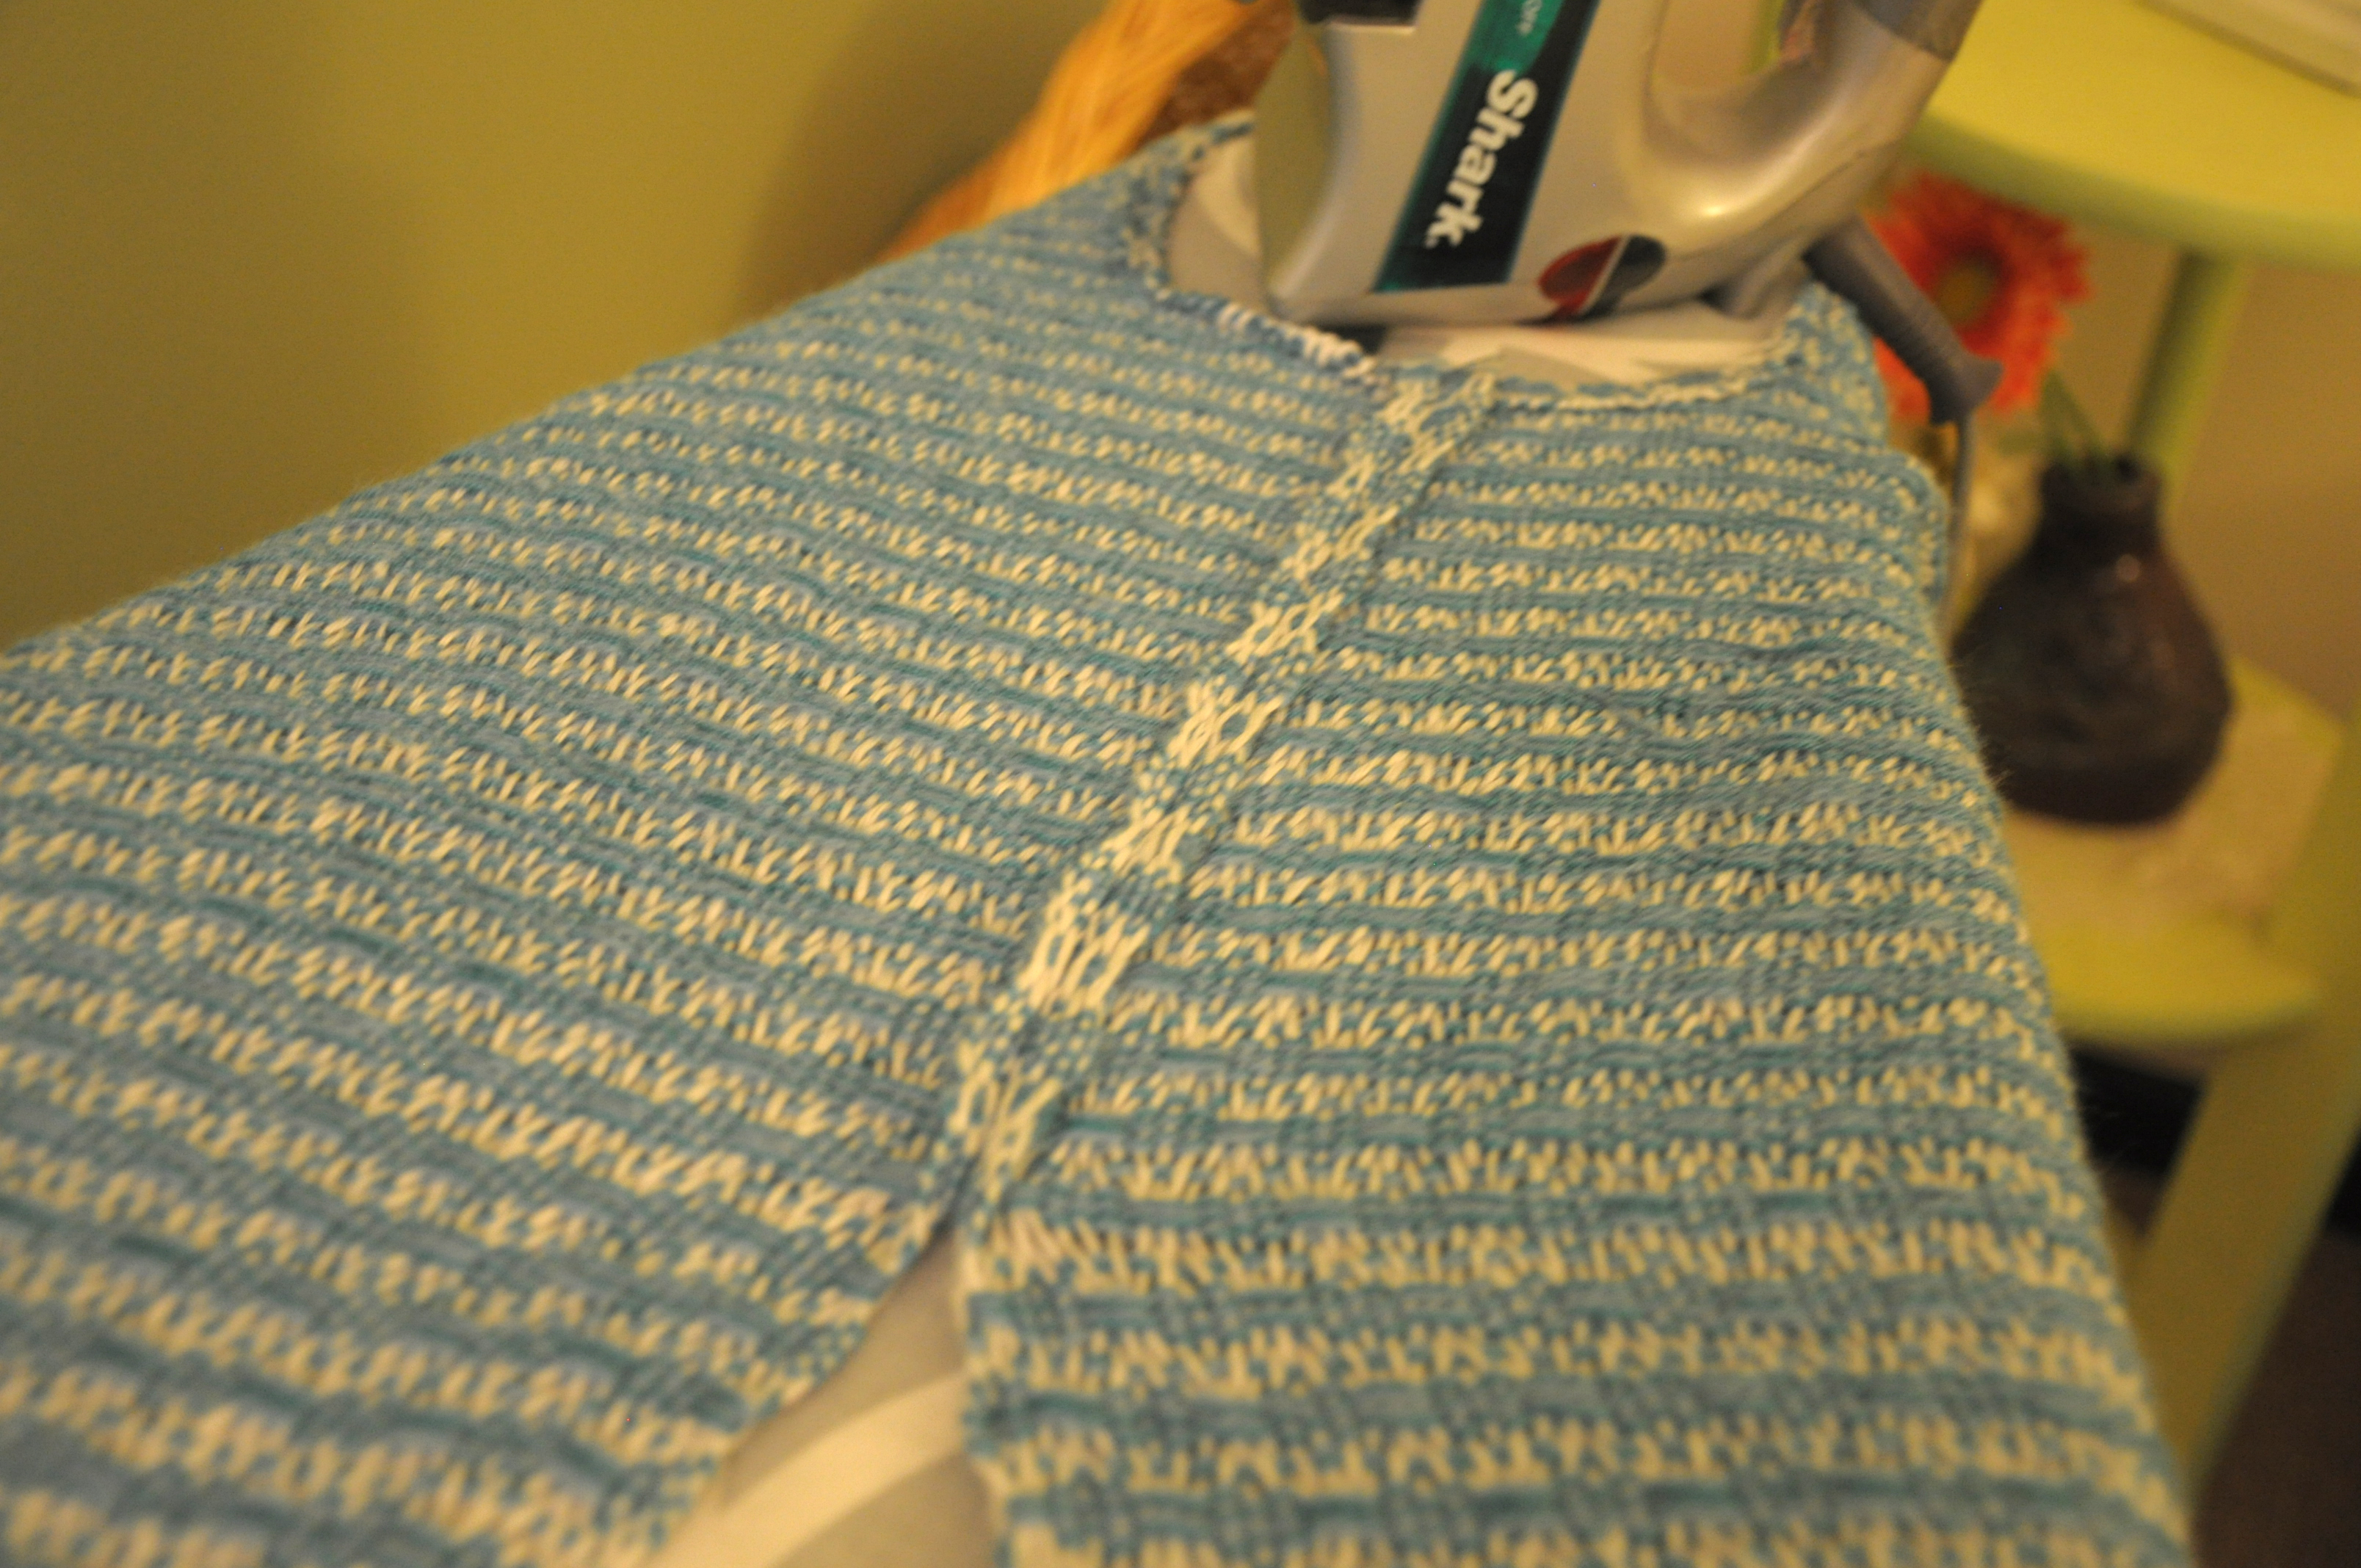
Anyway, next, it’s onto the ironing board again. And more pins! For a double-rolled hem, I first pressed in my openings on my very first straight line of sewing. Remember, my guide line? Then,  I pressed in again on my first zigzag line.

Sewing_9

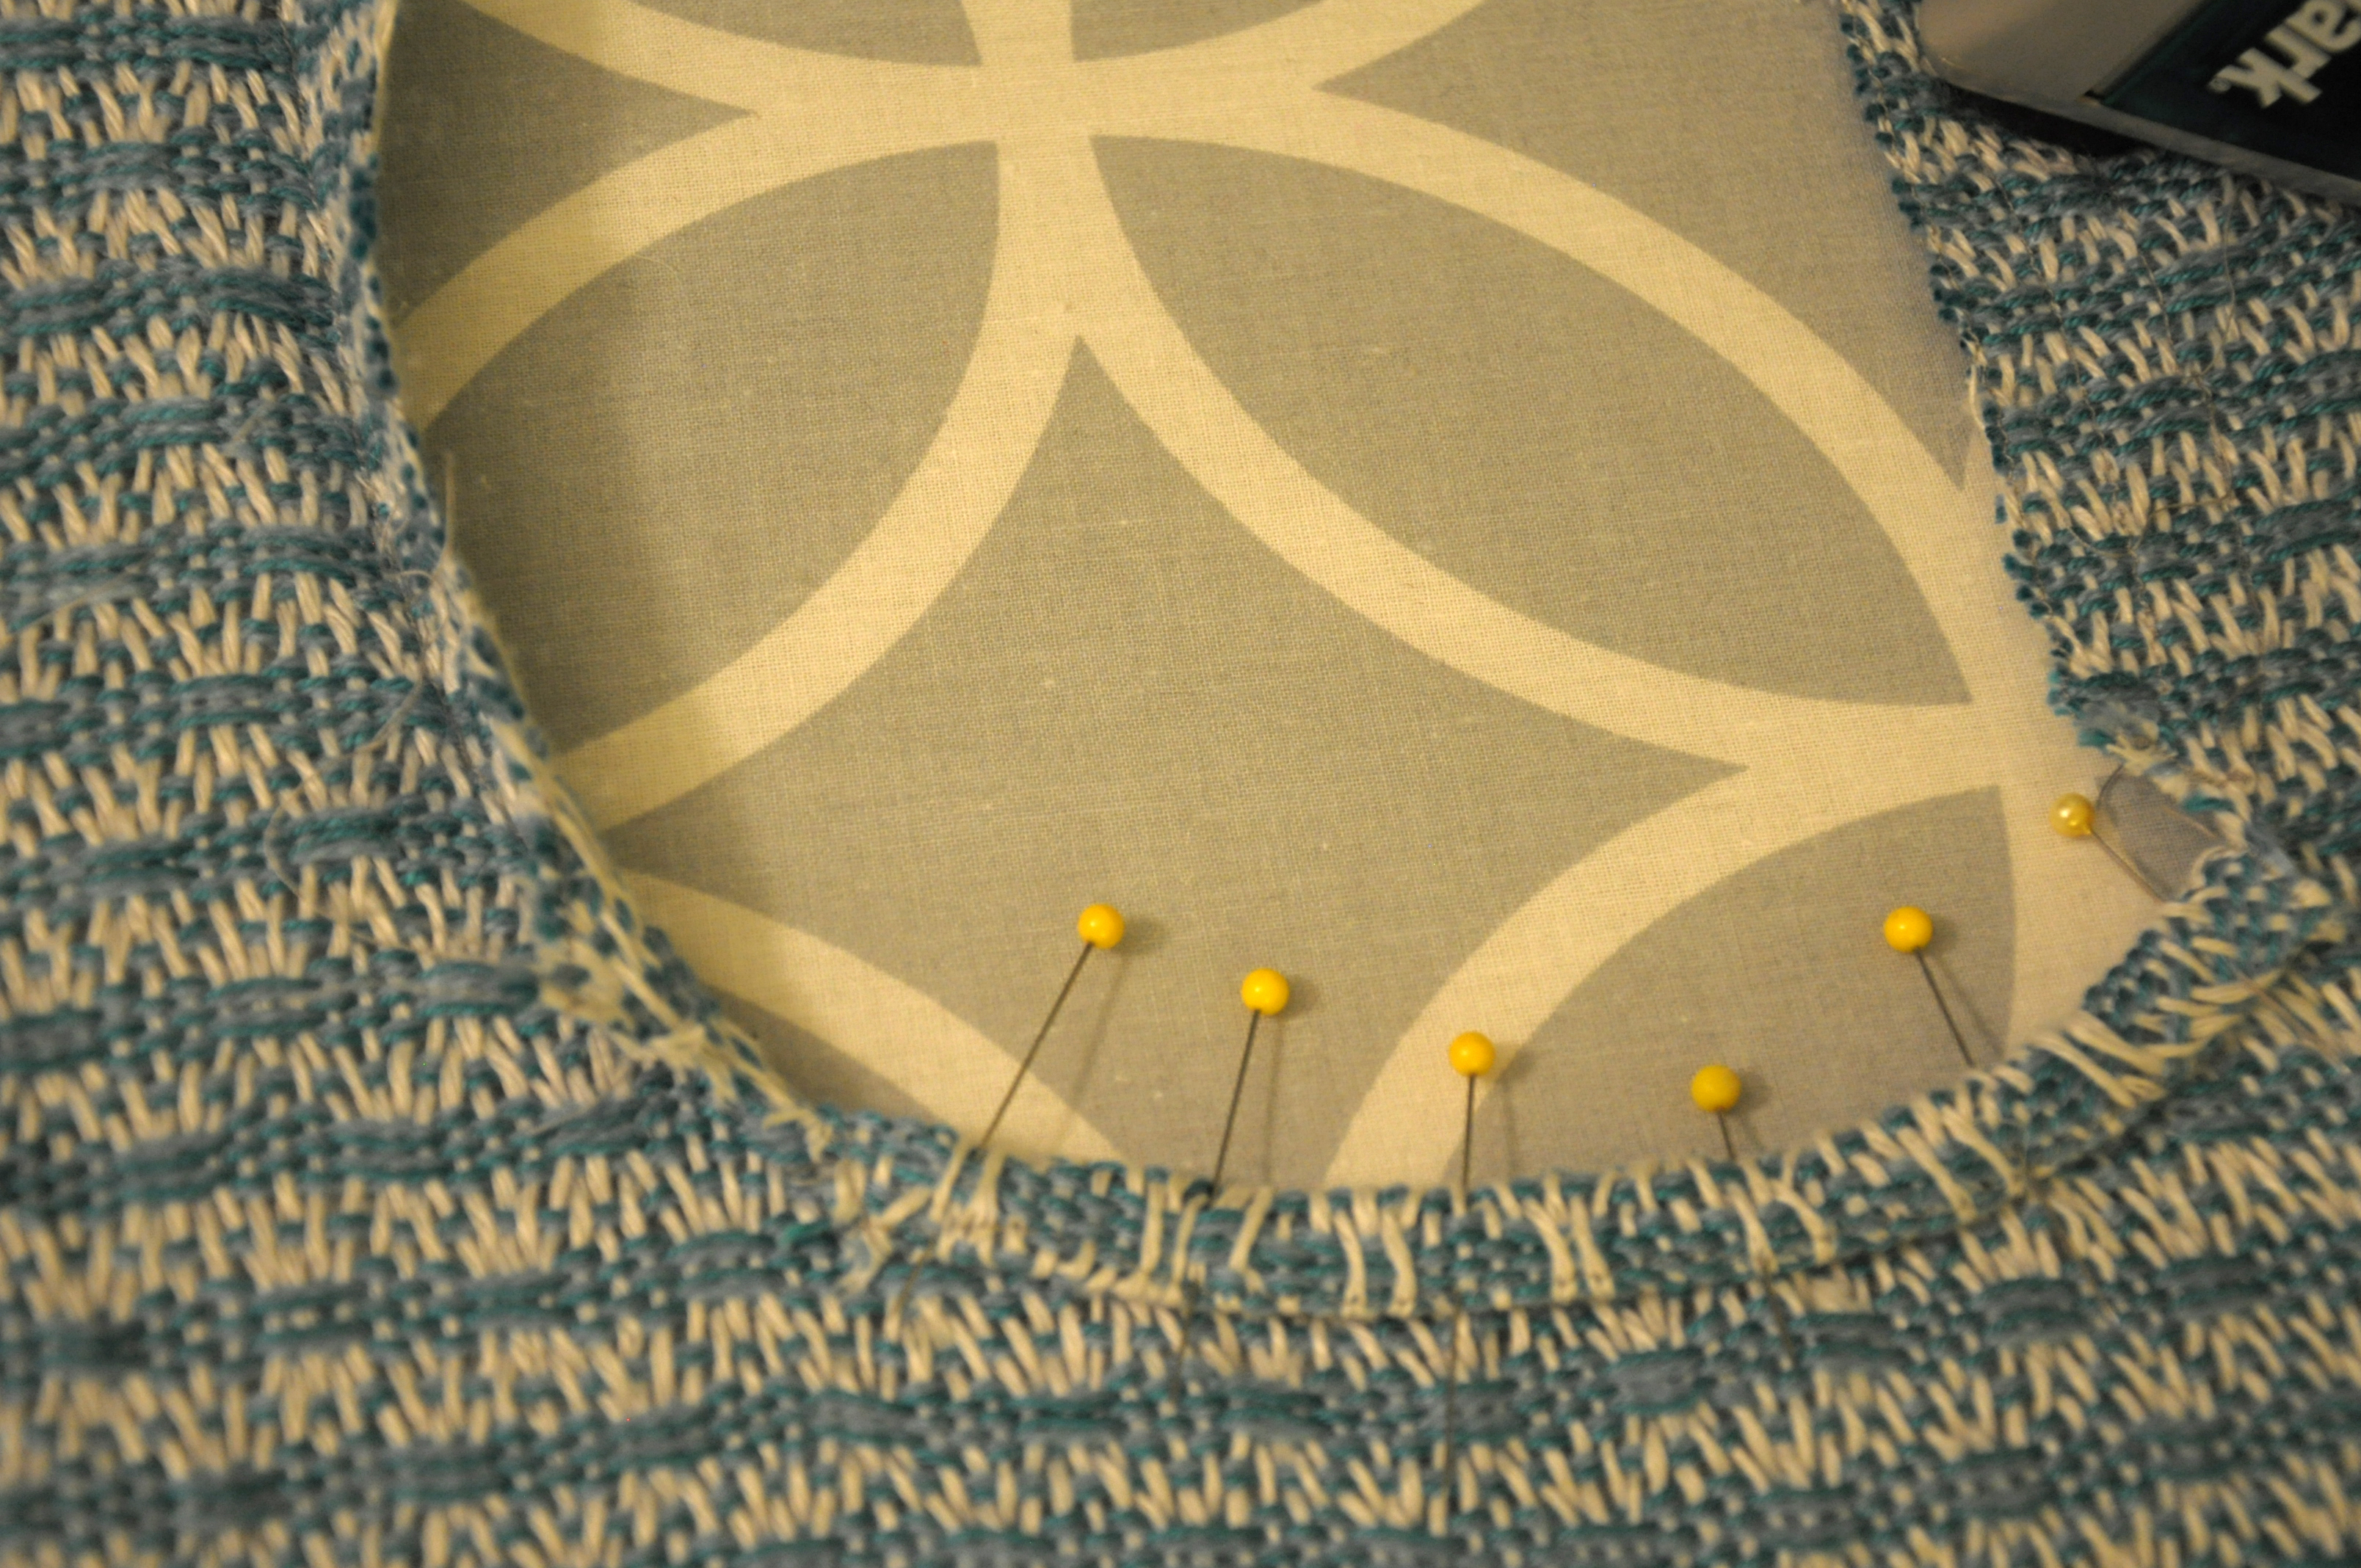
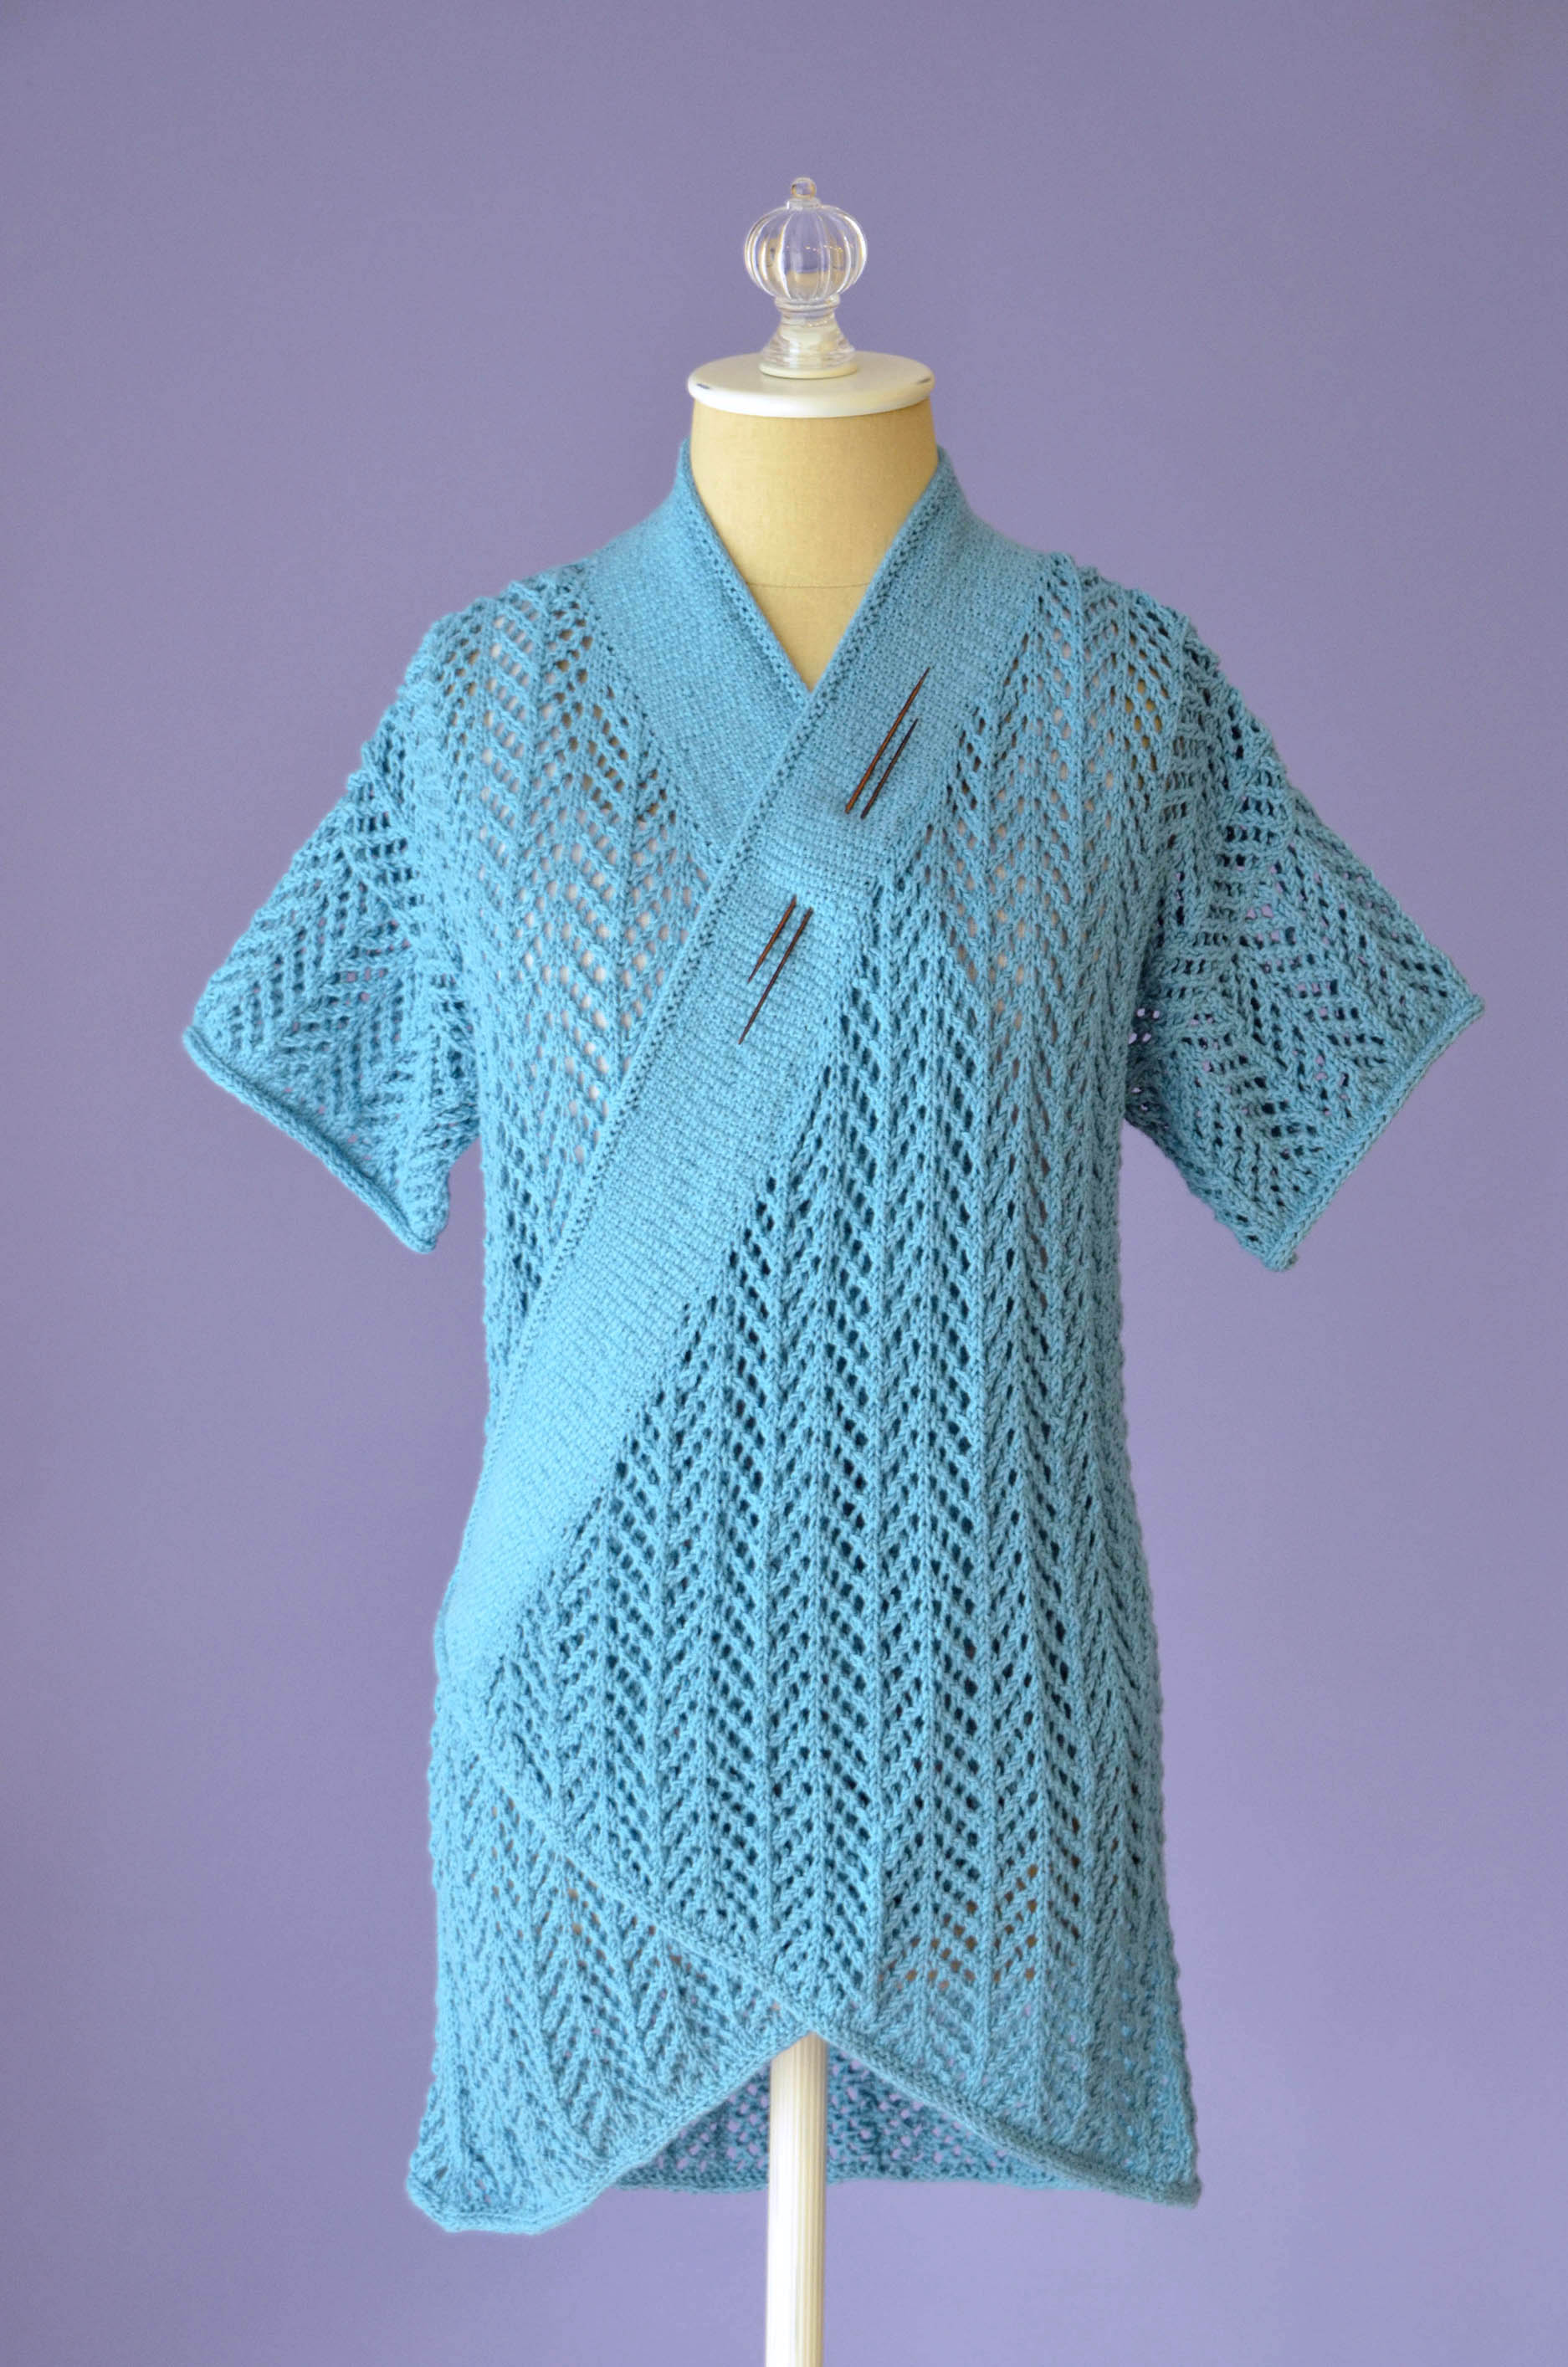
Once I pinned and sewed my neck and armhole openings (this time, with thread I could actually see), I tried it on Betty to see how we were coming:

Sewing_10

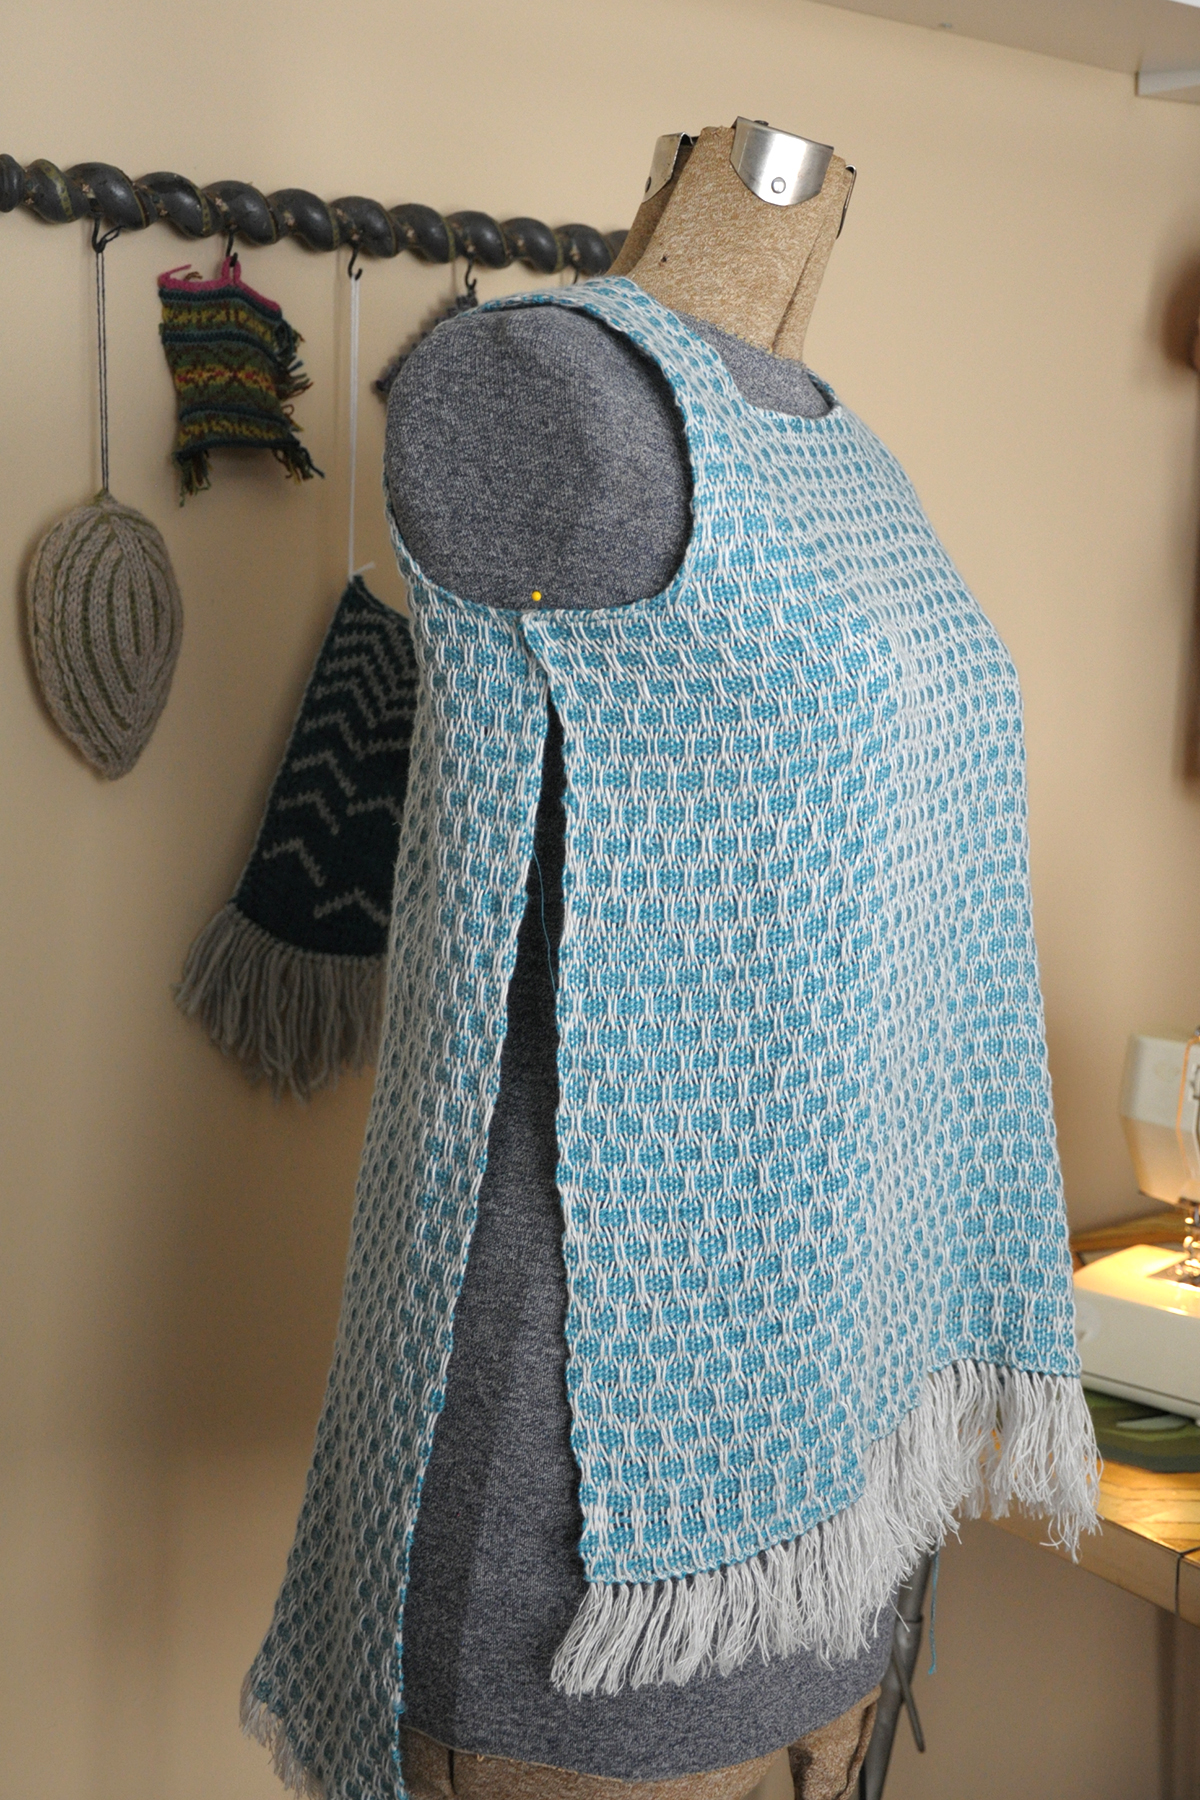
Hey, it looks like it could actually be something! To wear!

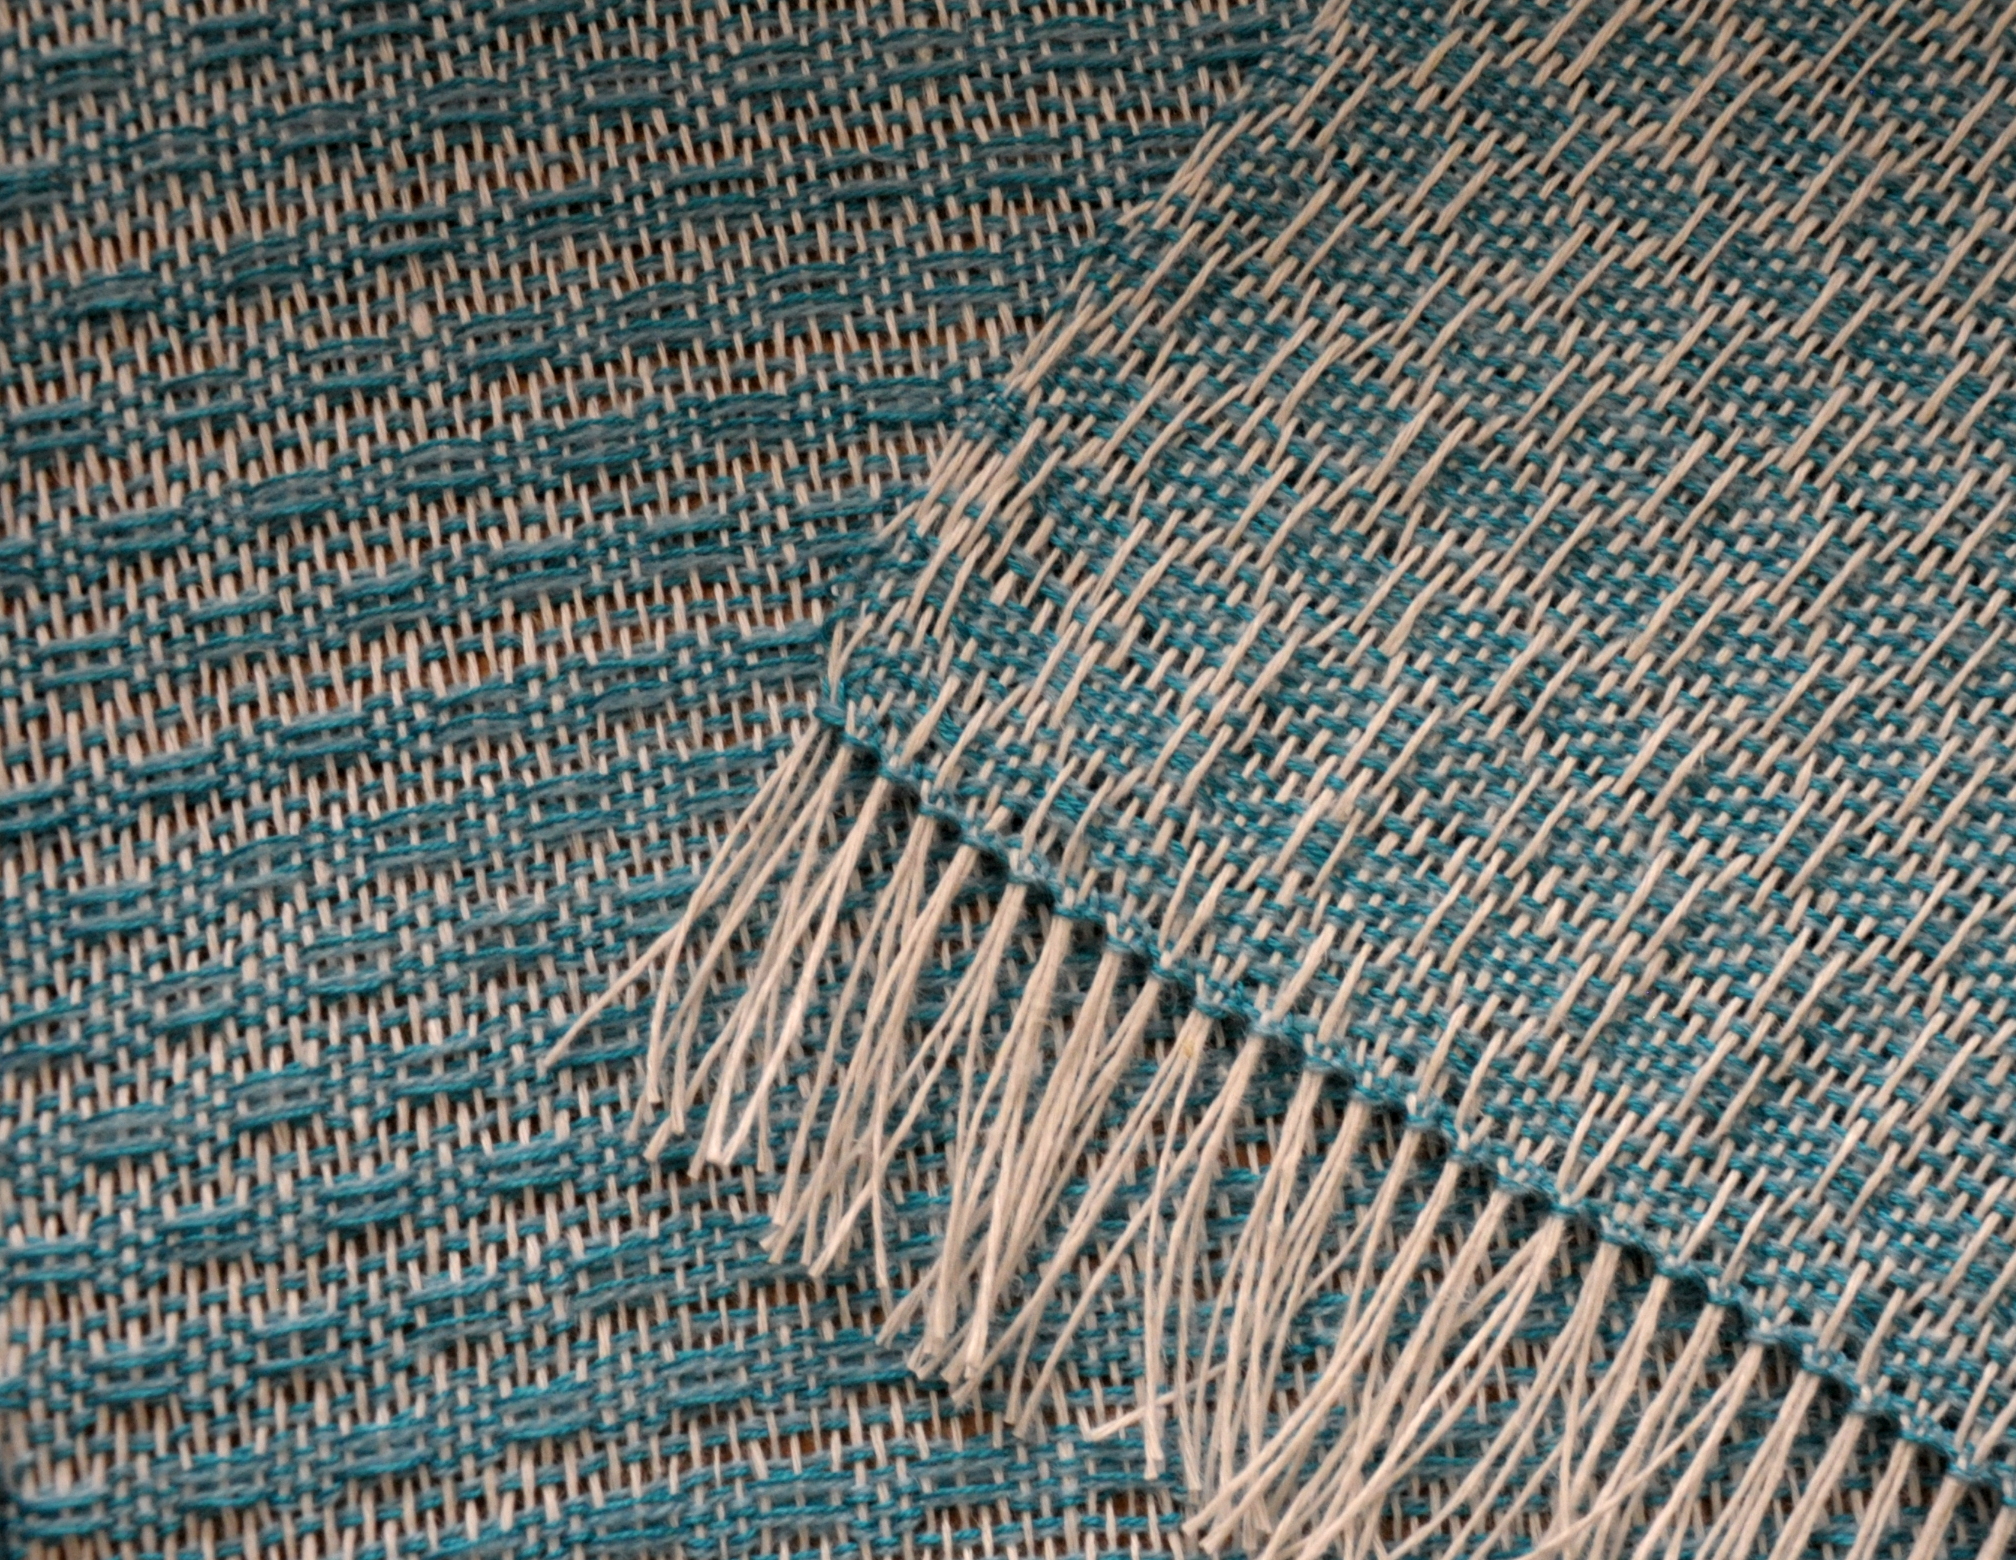
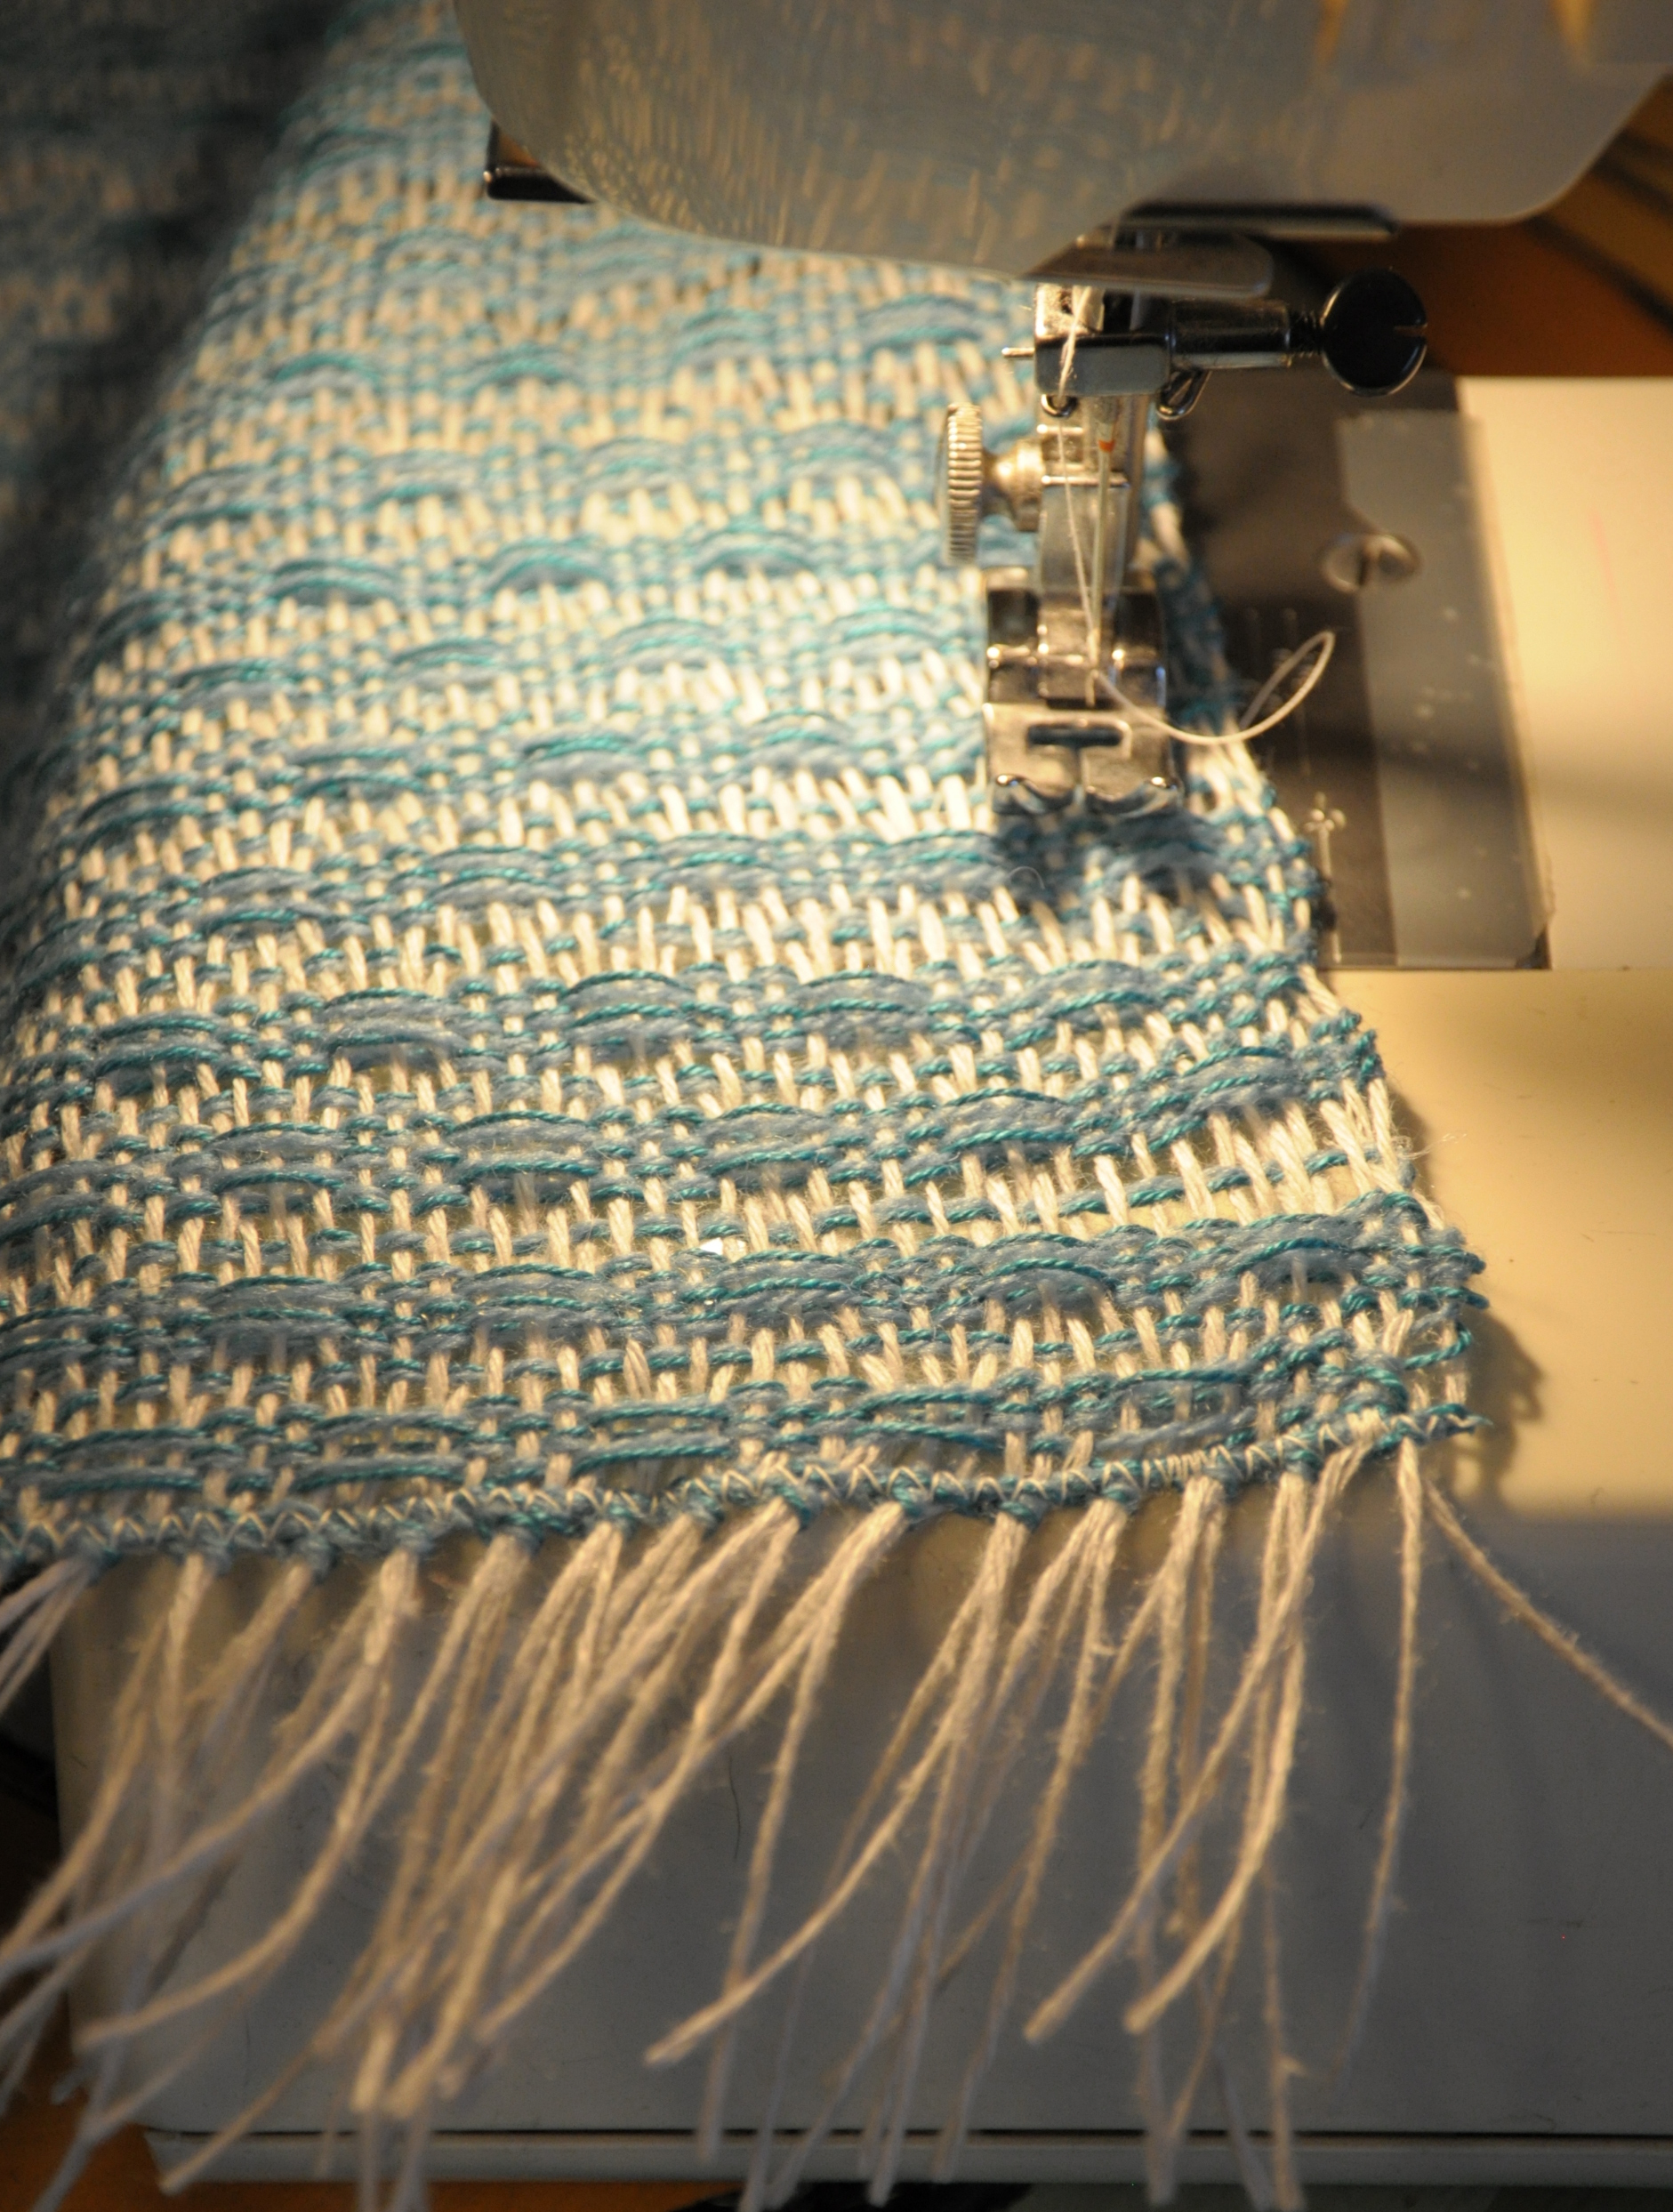
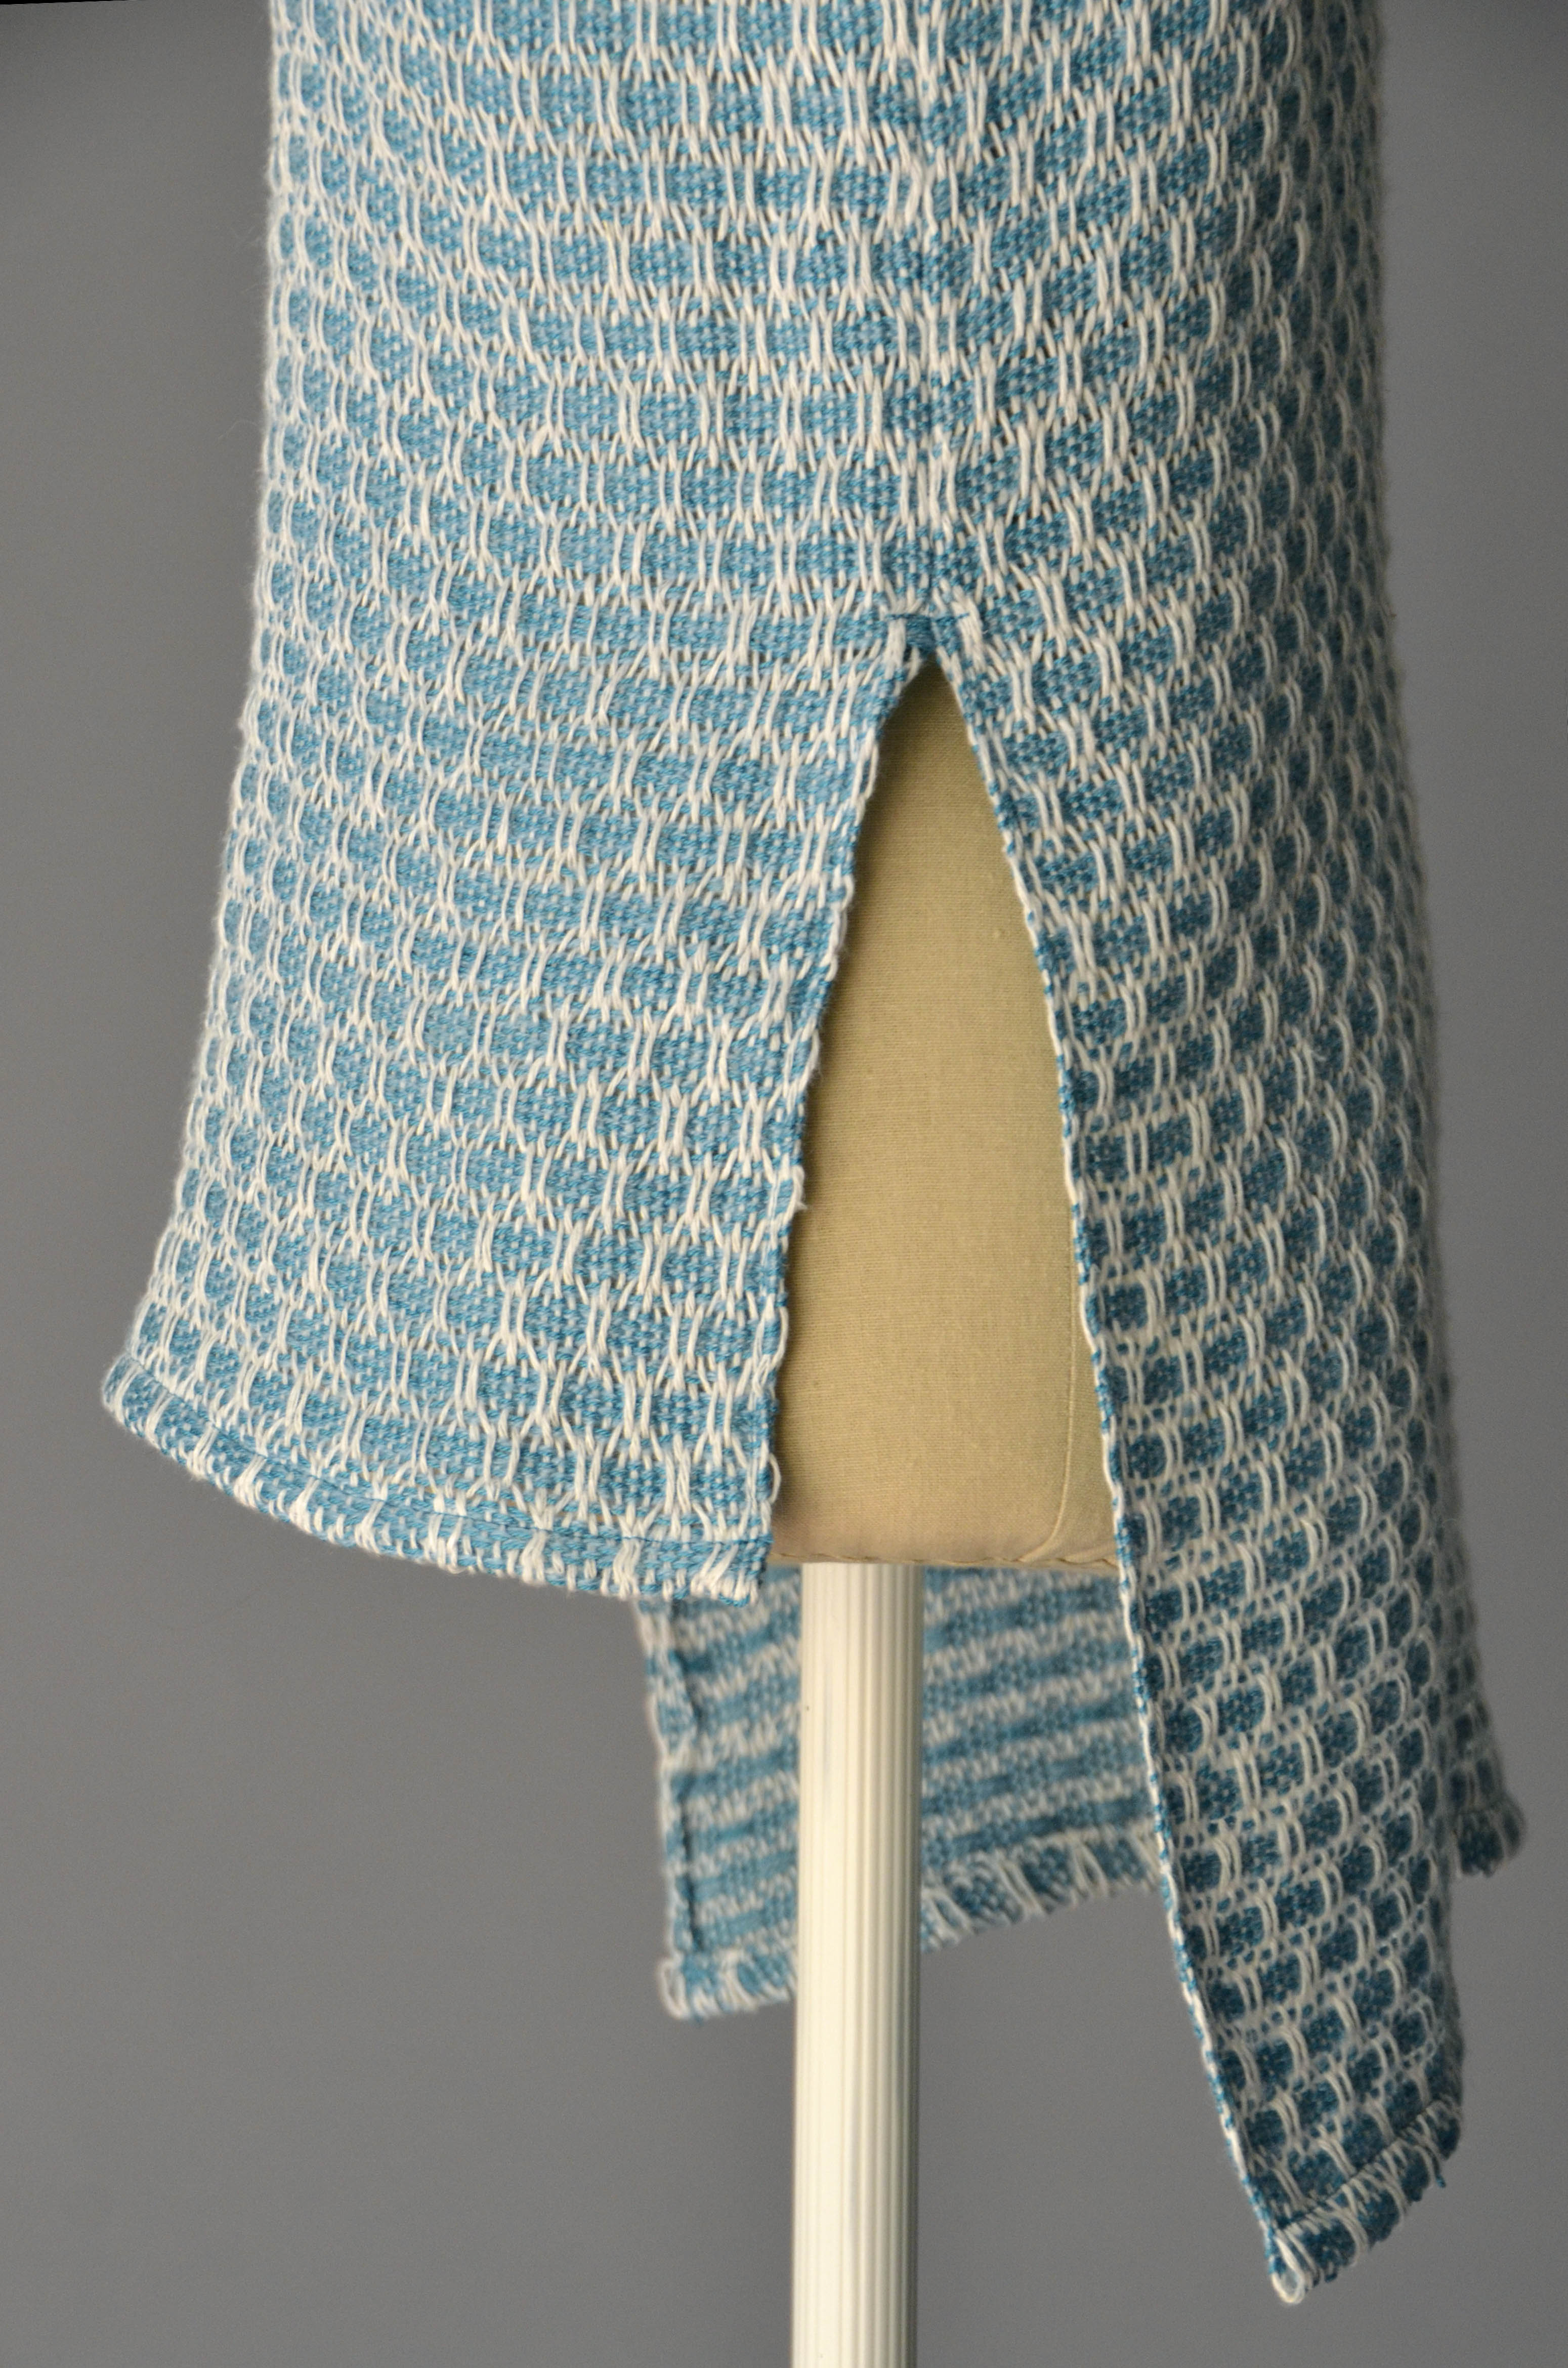
There were just a few things left to do. First I trimmed away that fringe. Fringe is actually in style right now and I could have left it, but opted to cut it away instead.

Next, I needed some side seams. Because the sides of the fabric are the selvedges, I found no need to do double rolled hems because the edges are “finished” already.

The final width of my fabric after washing, by the way, was about 19 1/2″. Which means, if I were to sew the sides together with 1/2″ seam allowances (taking up a total of 2″ in seams), then my finished top would be about 37″. Perfect! I have a 34″ bust, so having a few inches of ease in this woven top will work well, since woven fabrics really don’t have any give.

My hips, however, are significantly larger than 34″. I’m a pear shape and my hips are about 39-40″. I couldn’t sew the full length of my side seams or I won’t be able to fit into this baby.  I also could have made the top shorter than intended so that it sat above the fullest part of my hips, but I didn’t want to do that.

Instead, I opted to sew only part of the side seam and give myself side vents to accommodate my curves.

Sewing_11

After sewing the side seams, I pressed them open. Remember my other rule – don’t skimp on the ironing. I then made a single-fold hem on the unsewn portion of the sides, and made a double-fold hem on the bottom. After that, more ironing! It’s important to iron sewn seams to sort of settle them into place. It also makes them look more finished. I like to shoot a little steam on seams of knitted items too to help them relax.

Sewing_12

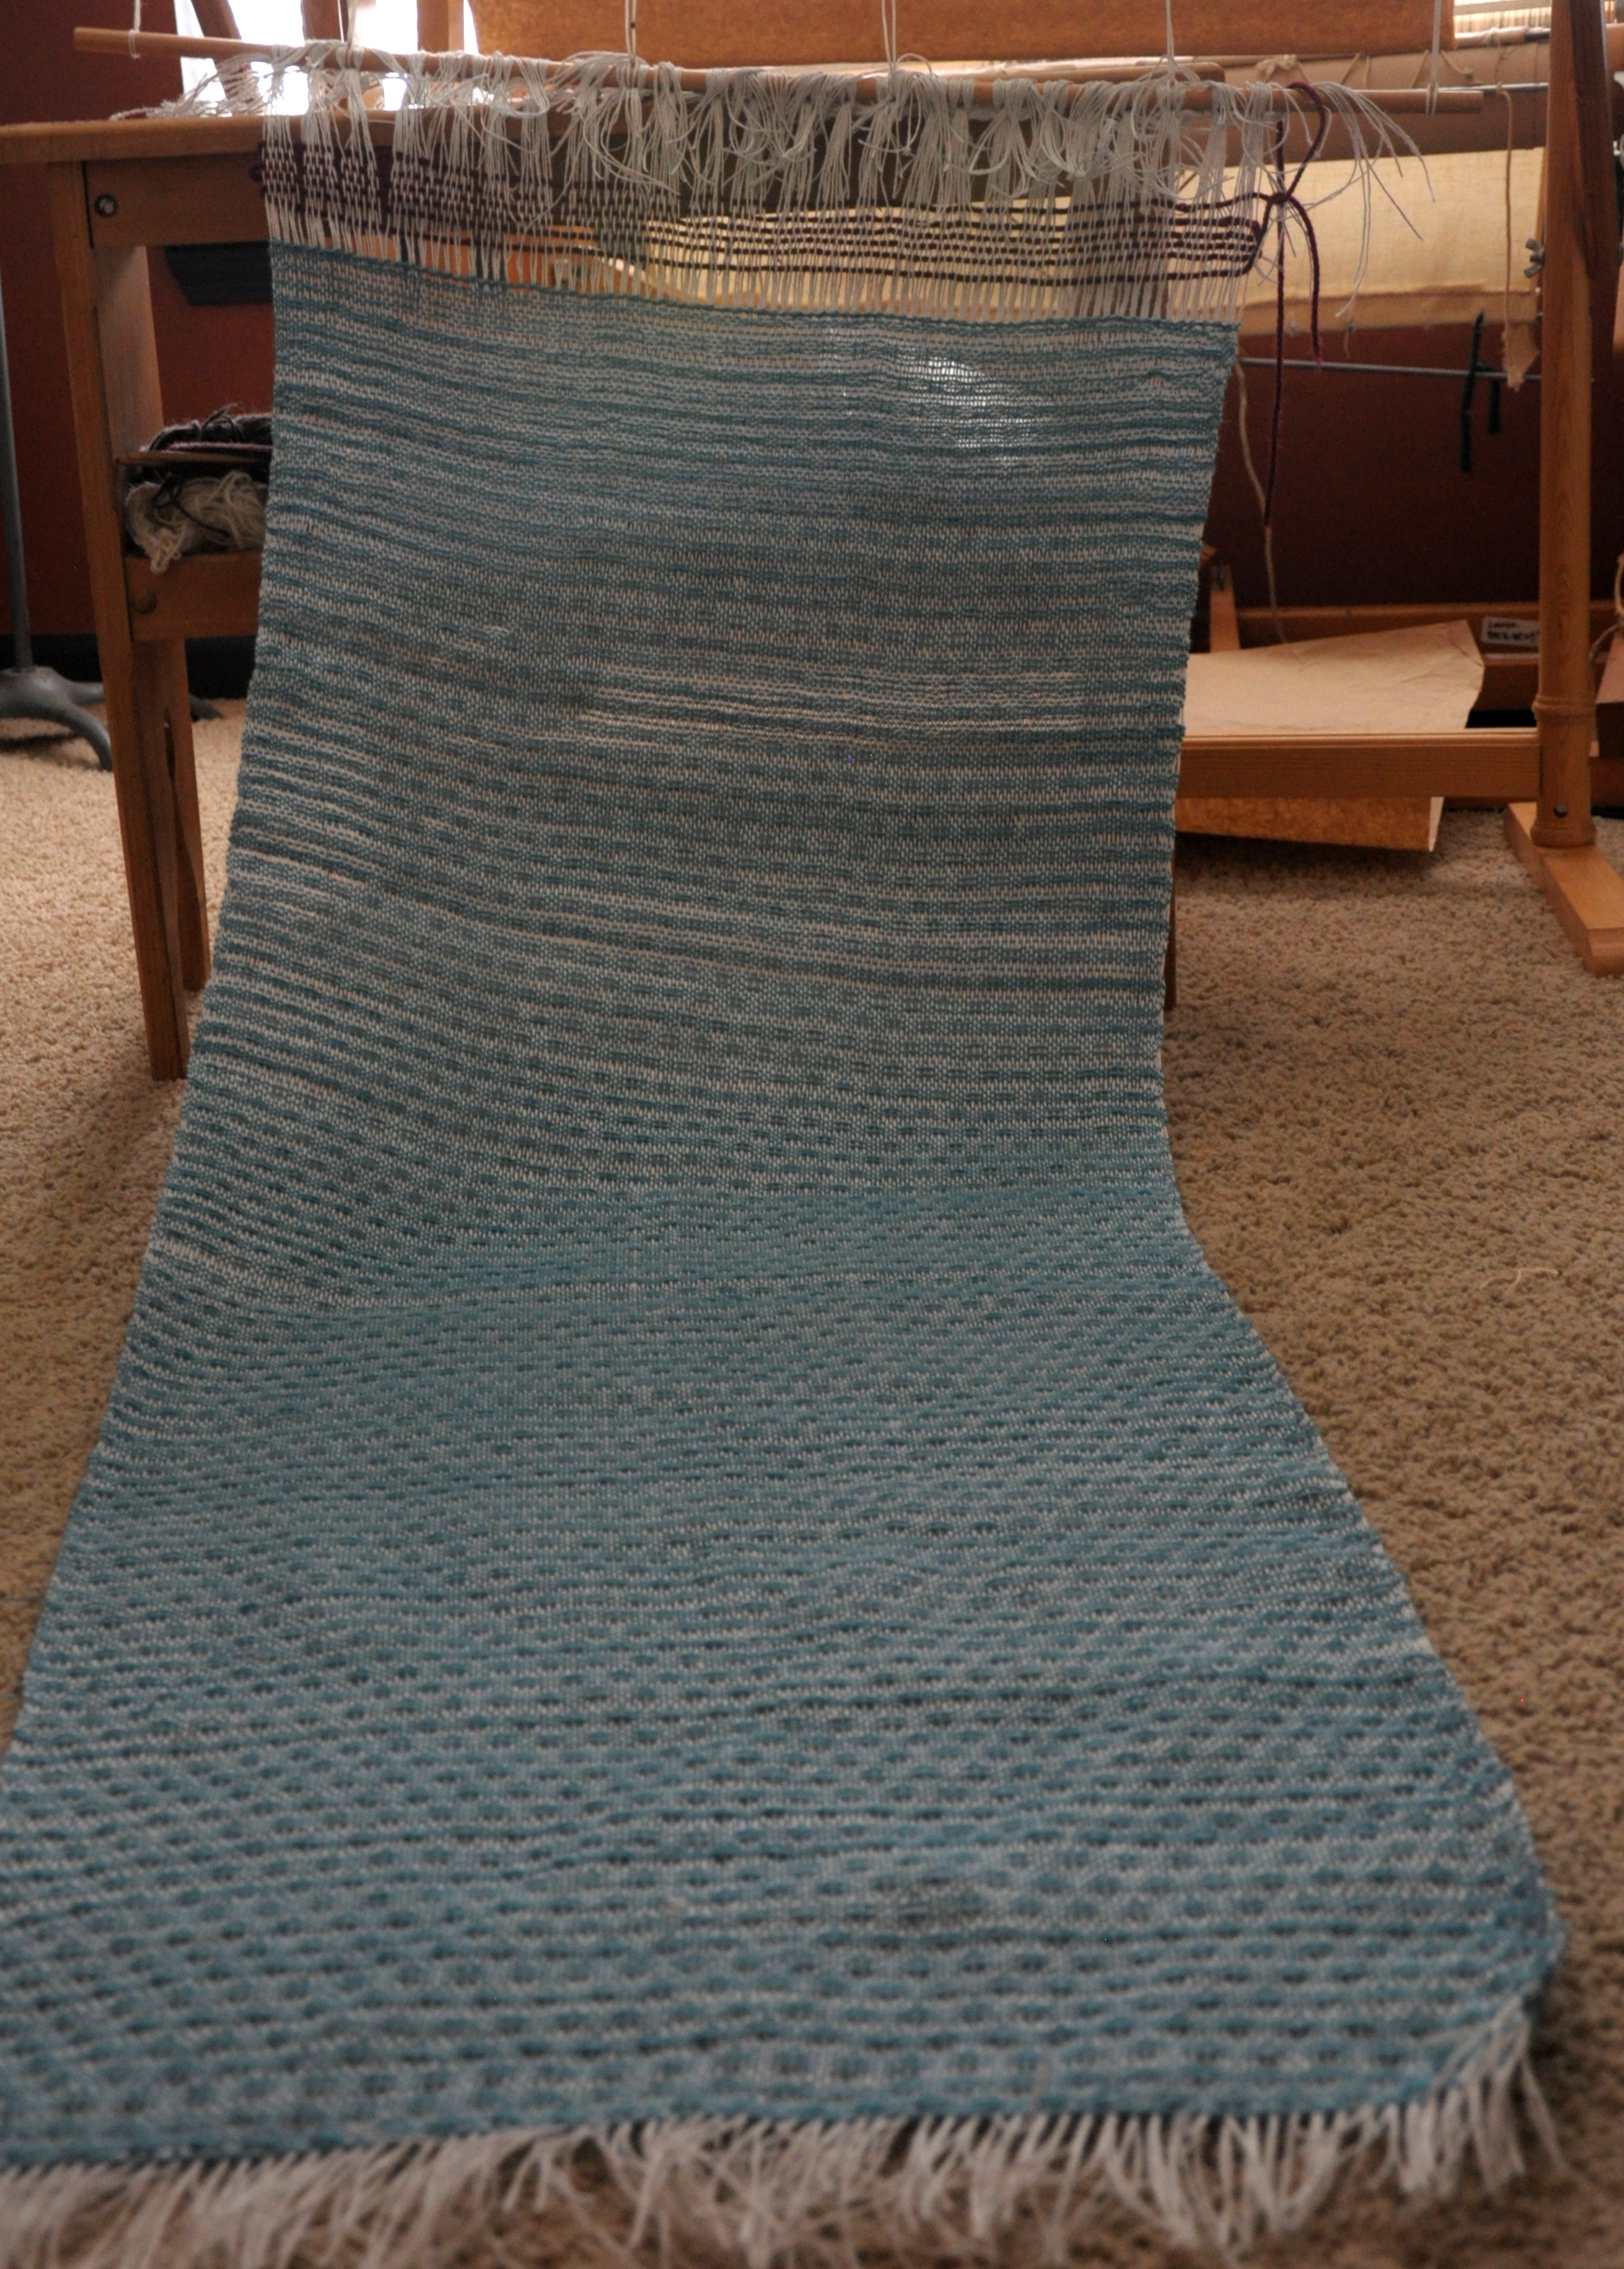
And here are some final shots:

Flame Lace side closeup square hi-res

Flame Lace hem hi-res

Flame Lace on form hi-res

Flame Lace on Amy crop hi-res

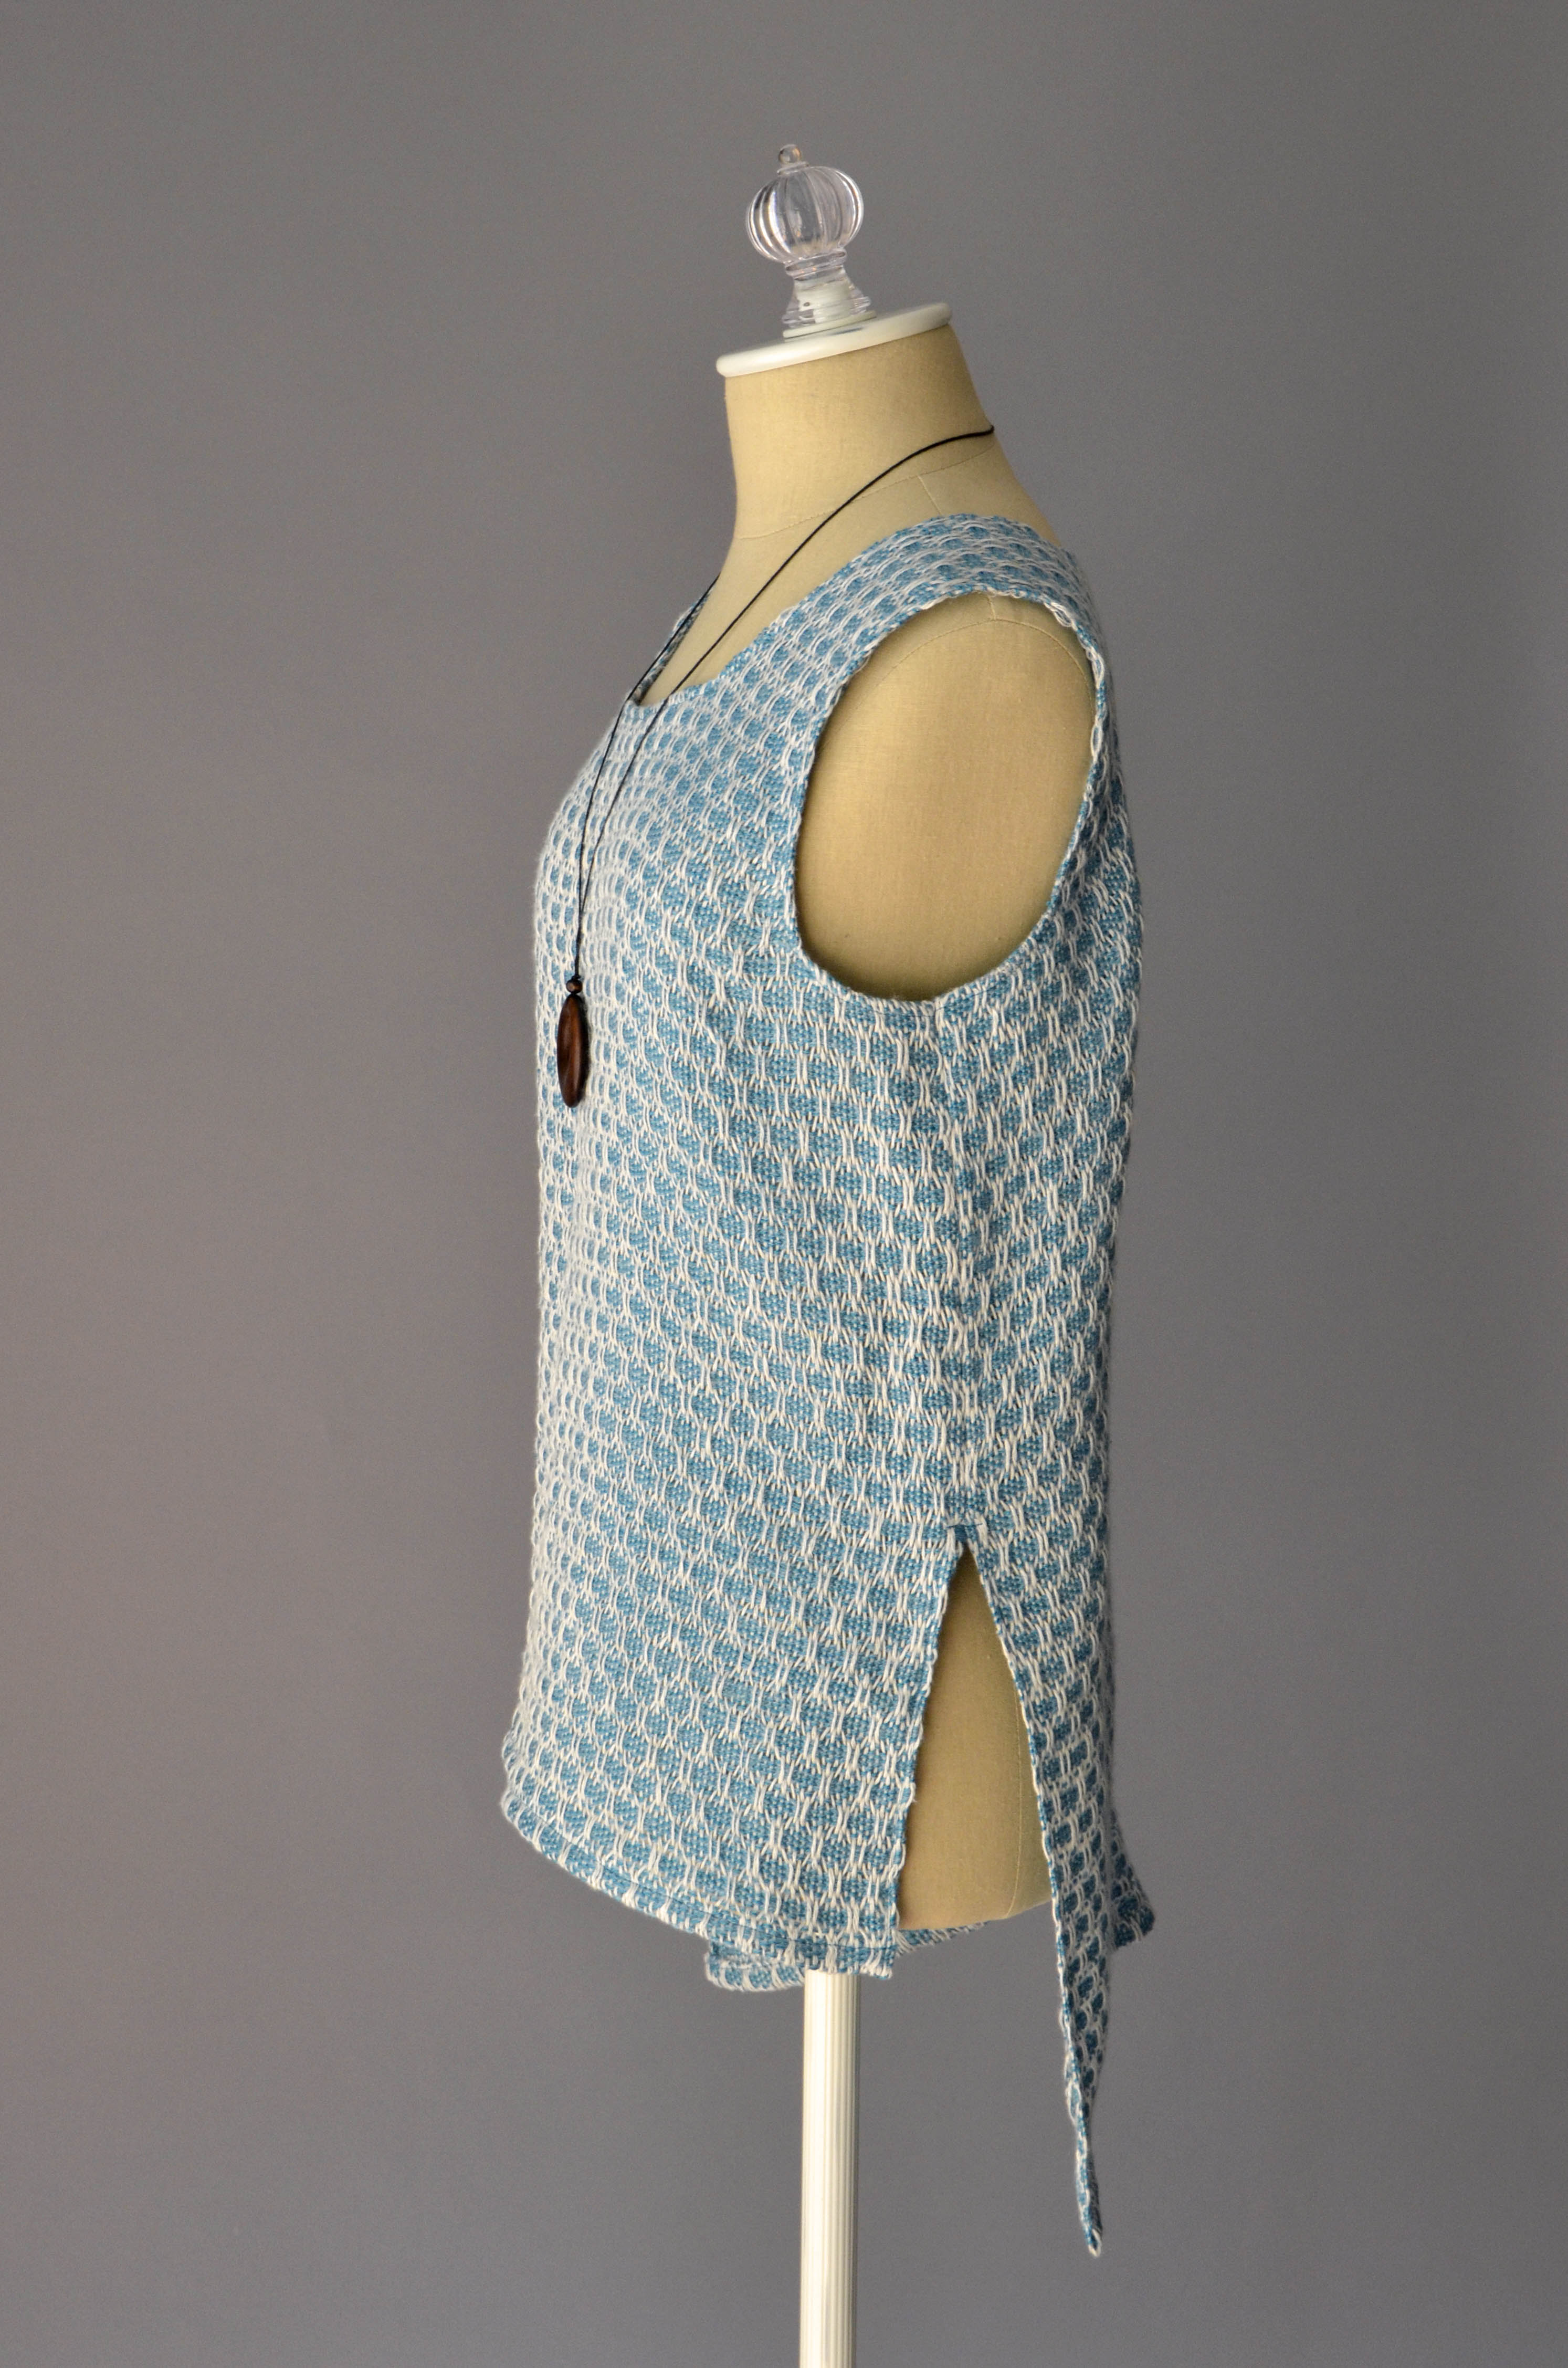
All in all, I’m please with how this turned out. Though I have quite a bit of sewing experience, I’ve done very little sewing with my own hand woven fabric, which is definitely a whole different ballgame than sewing with purchased fabric. This project has definitely sparked ideas for more garments. Now all I need is to find the time to implement them!

Join me next time as I explore how to make the most of Bamboo Pop multi colorways and planned pooling!


Free Pattern Friday – Summer Shawl

It’s Free Pattern Friday!

SummerShawl

Today, the crocheted Summer Shawl in Bamboo Pop.

This pattern comes to us courtesy of Alice Gossette and Kat Koeller of LYS The Thankful Ewe in New Bremen, Ohio.  It’s another example of why you should stop in at your local yarn shop – there are some really great ideas waiting for you there!

This is a five ball project in Bamboo Pop (292yds/100g) – 2 balls of 109 Clover for the large triangle, then 1 each of 108 Lime Green, 118 Marmalade, and 107 Ocean for the stripes nearer the top.  The designers note that the top stripe took almost all of the blue, so you might want to snag an extra ball, just in case.

I love the inclusion of the vibrant band of gold.  This would be an easy one to customize with your own personal palette, or to add a variegated color to.  Color 203 Golden Seas strikes a nice balance between all of the colors included here.

We hope you have a fantastic weekend, and find time to kick back with a project and take care of yourself.

Happy crafting!

TTE_bambooPopShawl2

Free Pattern Friday – Stitch Sampler Cloths

It’s Free Pattern Friday!

Java Washcloth Set social media

Today, Stitch Sampler Cloths in Java.

We’re very excited about Fibra Natura Java (219yds/100g), our new 100% hemp yarn.  This is a perfect application for it too – it works great for home decor projects.
This is the first Free Pattern Friday we’ve done in this yarn, although we do have a few free patterns in Java that haven’t yet been highlighted.  Have you seen the Crochet Baskets at right?  Love ’em!

Java Washcloth 104 Pistachio squareThese cloths are designed to be basic samplers for those who are just getting their feet wet (no pun intended).  The cloth in color 104 Pistachio, right, uses increases and decreases, but the other four are strictly knit and purl.

All are written and charted, so they do double duty for those who want to try out reading charts without the risk of losing a stitch in a big lace project.  My reason for knitting them is simpler: the cloths are just plain pretty!

We hope you have a safe and happy Independence Day holiday.

Happy knitting!

Java Washcloth 101 Parchment square   Java Washcloth 102 Hazelwood square

Java Washcloth 103 Walnut square   Java Washcloth 105 Horizon Pink square

Off and Running

I am delighted to say that the fabric that will become my Flame Lace top is finally off the loom! As much as I enjoy the meditative process of weaving, it always feels so good to near the end of a project. In life and crafting, I’ve found that there are all types of people: starters, enjoyers, tinkerers, thinkers, finishers, and on the list goes. I can dabble in many varieties of creativity, but I fall staunchly into the “finisher” category. I enjoy the process, but I love to see things through to completion.

In case you’ve missed the first few posts in this series on my Flame Lace top (from Simple Woven Garments,) you can find the warping post here,  how to make string heddles here,  and actually weaving the fabric here.  I’m using Flax as warp, and Whisper Lace with Garden 10. held together as warp. Today, I finished the final inches of weaving and prepared for taking my fabric off the loom.

Luckily, I recorded my notes on what I did for hemstitching at the beginning of the piece so I could match it at the end. The older I get, the more things I write down, or I can expect to never remember them again! The hem on this top is eventually going to be folded under and sewn, so this isn’t crucial, but I’m all about the details. Having the notes about precisely what I did at the beginning allowed me to do the same at the end of the piece.

Hemstitching_1

While doing my hemstitching, I went over 3 warp threads and under 2 weft threads. Because I’m headed straight to the sewing machine after this, all I need to do now is snip this baby free from the loom.

Hemstitching_2

Oh, what a good feeling!


After unwinding my fabric a little bit, I had my first good chance to take a peek at the back side of the fabric. I like it! In the photo below, the right side of the fabric is on the right, wrong side is on the left. The wrong side is still quite attractive. I’ll have to file this away in my brain as a good possibility for a scarf, where both sides will be seen.

Hemstitching3

Here is the full length of the fabric. And as I sit here now typing with my fabric soaking in water, I realize I completely forgot to measure my fabric just off the loom.  C’est la vie, eh?Hemstitching4

Now to secure the ends before washing. A simple zig-zag stitch on my sewing machine will do the trick.

Hemstitching5

Hemstitching6

I can’t even tell you how excited I am to see how this fabric looks after washing. That’s when the true nature of the fabric reveals itself. As pretty as it was to look at taut on the loom, I just know it’s going to be full of character once it’s all settled.

Join me next time when this rectangle of criss-crossed yarn becomes something wearable!


Free Pattern Friday – Spring Pullover

It’s Free Pattern Friday!

Bamboo Bloom Handpaints Spring Pullover square hi-res GRAPHICS

Today, the Spring Pullover in Bamboo Bloom Handpaints.

What a great look for Spring, eh?  Cap sleeves, open neckline, and some lovely waist shaping for a more polished look.

You can juuust see the double eyelets accenting the neckline.

Bamboo Bloom Handpaints Spring Pullover detail_blog

This pattern is knitted flat.  Turn the hem up and stitch it to the inside for a nice non-rolly stockinette edge.   This is a great piece for warm weather, and the bright colors of Bamboo Bloom Handpaints really help set a bright mood.

We hope you find something colorful and fun to do this weekend.

Happy knitting!

UY YMN Bamboo Bloom

Free Pattern Friday – TNNA Cardi

It’s Free Pattern Friday!

Today, the TNNA Cardi in Bamboo Pop.

Here’s how this sweater happened.

“You know what we ought to do at this year’s National Needlearts Association Summer Show?  We ought to all wear matching outfits.”

“Yes!  And they should all be sweaters in our yarn!”

“Yes!!  And we should make them for the entire show staff!!”

Sometimes we get a little carried away.  But hey, go big or go home, right?  And thus was born the TNNA Cardi.

Continue reading “Free Pattern Friday – TNNA Cardi”

Free Pattern Friday – Chasing Vines Cowl

It’s Free Pattern Friday!
Today, the Chasing Vines Cowl in Cotton True Sport. We’ve had a recent rush of rain here, and everything is green and growing and glorious.  I was reminded of this again when looking at these photos from Jonas Farms, home to many a happy horse here in North Carolina. Their hay fields ready to be cut…
Hay fields at Jonas Farms, May 2016
And after more than a thousand bales have been put up.
“Last stack of over 1000 bales picked up in two days.”
Breathe deep, and imagine the glorious smell of cut grass, times infinity.  You can’t help but think of green and growing things. Enter the Chasing Vines Cowl. Continue reading “Free Pattern Friday – Chasing Vines Cowl”

Playing With Sticks

If you’ve been following along on my latest adventure in weaving,  you read about warping a wide rigid heddle loom for the Flame Lace Top, and then rigging up string heddles for a second pick-up stick. The warp is Flax. The weft is one strand of Whisper Lace and 1 strand of Garden 10 held together.

This week is all about the fun pretty stuff: woven fabric! Once I got my pick-up sticks taken care of and my shuttle wound, I set to the soothing rhythm of weaving. I started right in with the 2 pick-up-stick pattern, and practiced a couple of repeats before hem stitching:

FlameLace_1

Out of the 12 rows of the pattern repeat, 4 of these involve use of the pick-up sticks. It took me just a few repeats to get the hang of it and after that it was smooth sailing.

FlameLace_2

Weaving is such a good opportunity for me to unwind. Music streaming, audio books, or just sitting with my own thoughts is such a relief after a hectic day.

FlameLace_3

Join me next time when I take my finished fabric off the loom and do – gasp – cutting and sewing with it!


Free Pattern Friday – Beachhouse Tank

It’s Free Pattern Friday!

BeachhouseTank_hires

Today, the Beachhouse Tank in Good Earth Adorn and Good Earth Solids.

http://www.thekitchn.com/summer-refreshment-sweet-basil-90805
This is the life.

I love this tank.  I can easily imagine myself sitting on a dock, wearing sandals and linen pants with with this top, sipping a lemonade while gazing out at the water through oversized sunglasses.  Maybe I’ll wear a Yashi sunhat, too.  Bliss.

(Have you tried adding basil to lemonade?  Sooo good, and we’re coming in to the season for fresh basil.  Here’s a recipe if you want to give it a try.)

BeachhouseTank_back_blogThe pattern calls for Good Earth Adorn (MC) and Good Earth Solids (CC), both cotton/linen blends that come 170 yards to the hank.  It’s a great yarn for summer, and perfect for this drapey A-line top.

Laurel Murphy’s design is worked in pieces and seamed. The straps are knit on the front piece only and then seamed to the back bind-off edge, as shown here.

We hope you have a relaxing and refreshing weekend, finding an opportunity to enjoy some fresh air and breathe deeply.

Happy knitting!


Free Pattern Friday – All-Star Pullover

It’s Free Pattern Friday!

Cotton Supreme Little Star Top blog square

Today, the All-Star Pullover in Cotton Supreme.

Recently we had a shop mention that we hadn’t had a Free Pattern Friday in Cotton Supreme lately.  Well, we can’t have that; we love this yarn!

I don’t know about you, but I’ve knitted with some cottons that left my hands feeling like they’d been through the wringer.  Nobody should feel like crafting is something to slog through.  It should be a pleasure.  Fortunately, I’ve never had that problem with Cotton Supreme (180yds/100g).  It’s easy to work with, machine washable, and the colors are to die for.  All of which makes it a great choice for this little kid’s pullover.  Knit it flat, seam it up, and send your little all-star out to play.

This one would be really easy to customize, too.  Can’t you imagine this in team colors?  Or… and this is just my inner geek talking… move the intarsia star to the chest and you’ve got a little Captain America.

Captain America colors blog
Sky Surf 927 and White 502, and add 509 Red if you wish. I could knit this all day.

I’m filing this idea away as a potential gift for superhero-loving parents and kids.

We hope you have a safe Memorial Day weekend.

Happy knitting!

Cotton Supreme Little Star needles crossed_Instagram