Natural Dye Series: Goldenrod & Deluxe Worsted Naturals

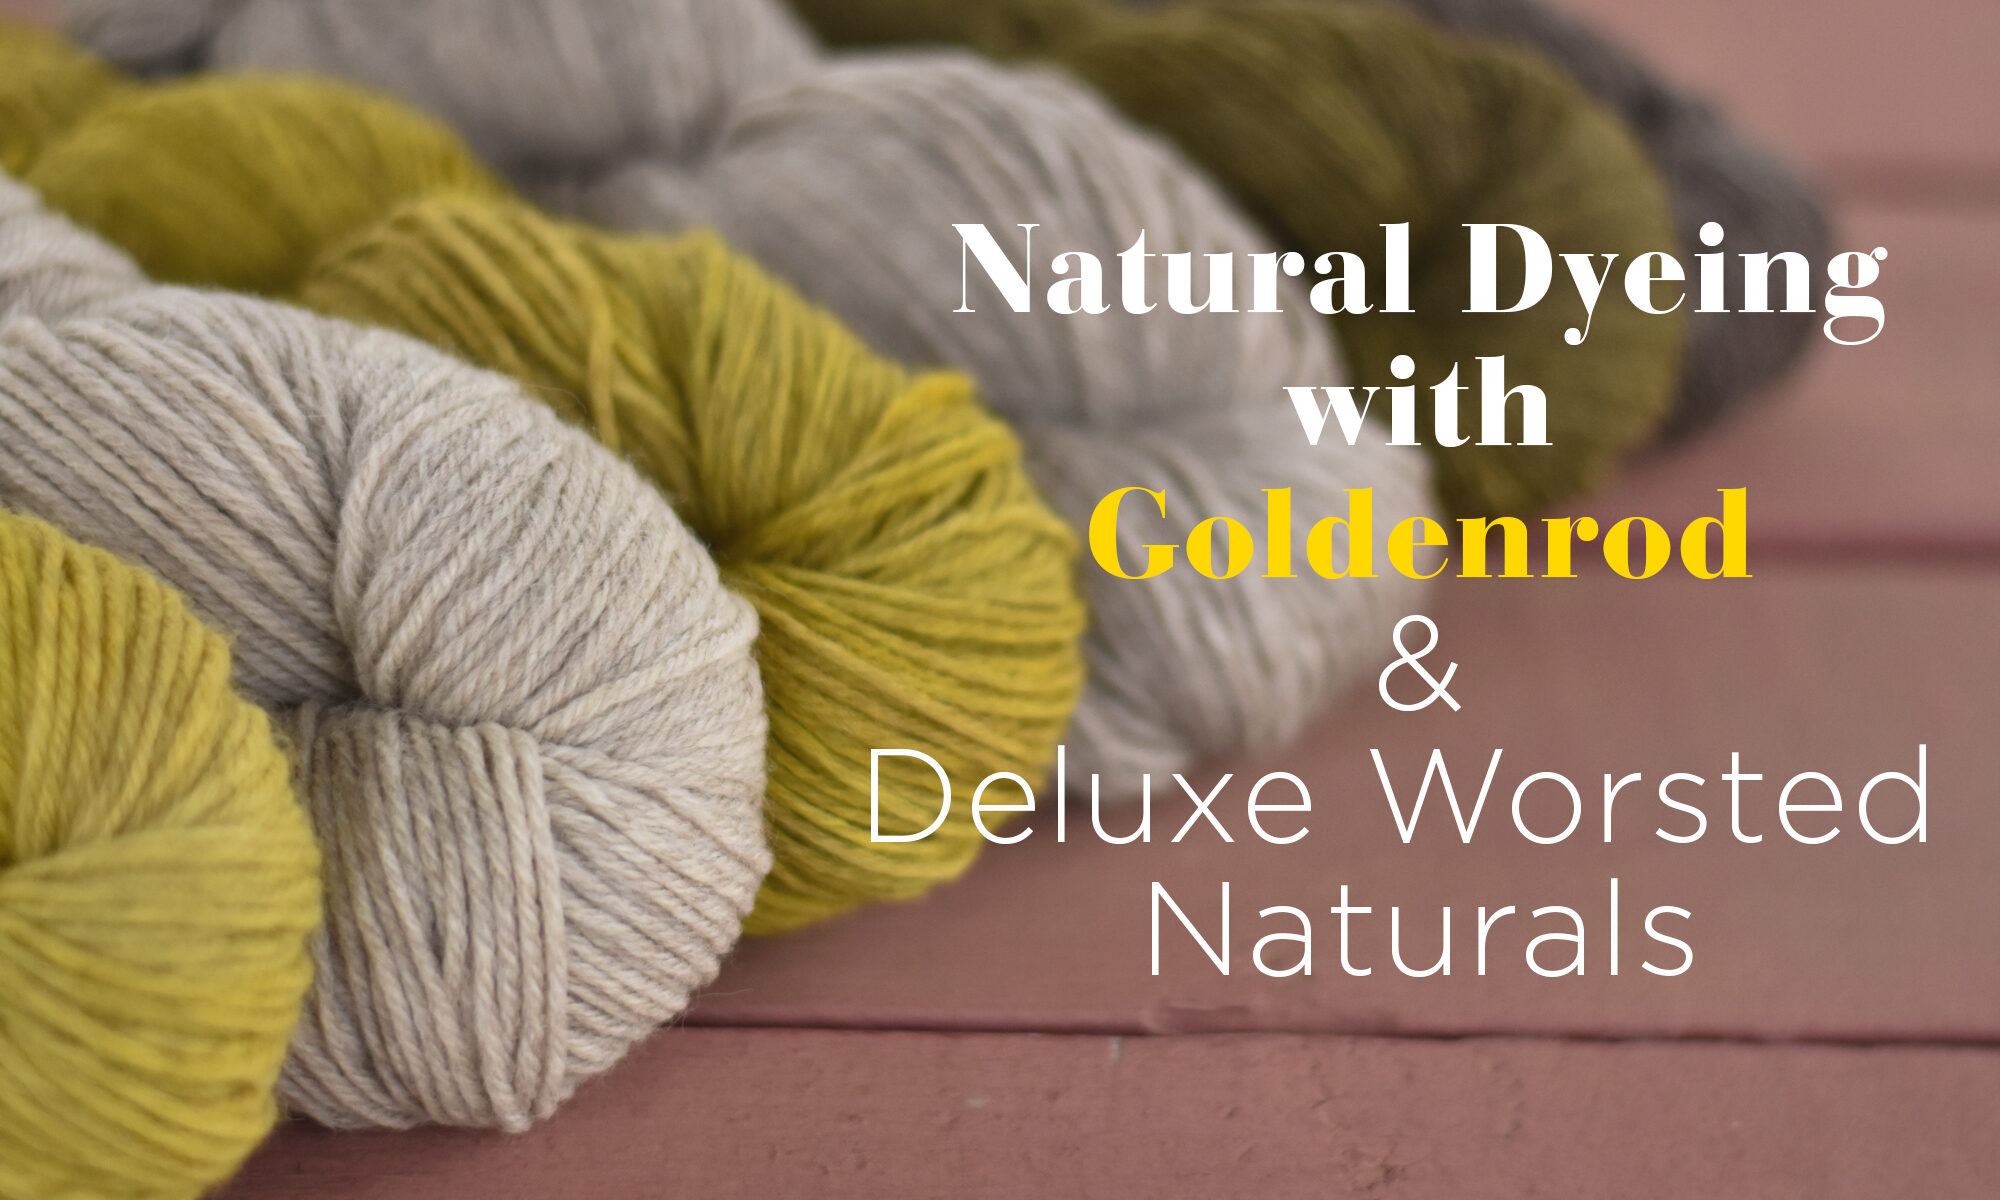
Hi everyone! It has been a while, and by that, I mean literal years since I’ve shared some of my adventures in natural dyeing. In the past, I’ve shared posts about dyeing with lichen, marigold, and even azaleas (link to other posts in our Natural Dye Series), but today we’re going to take a look at one of my favorite sources for natural dye: goldenrod!

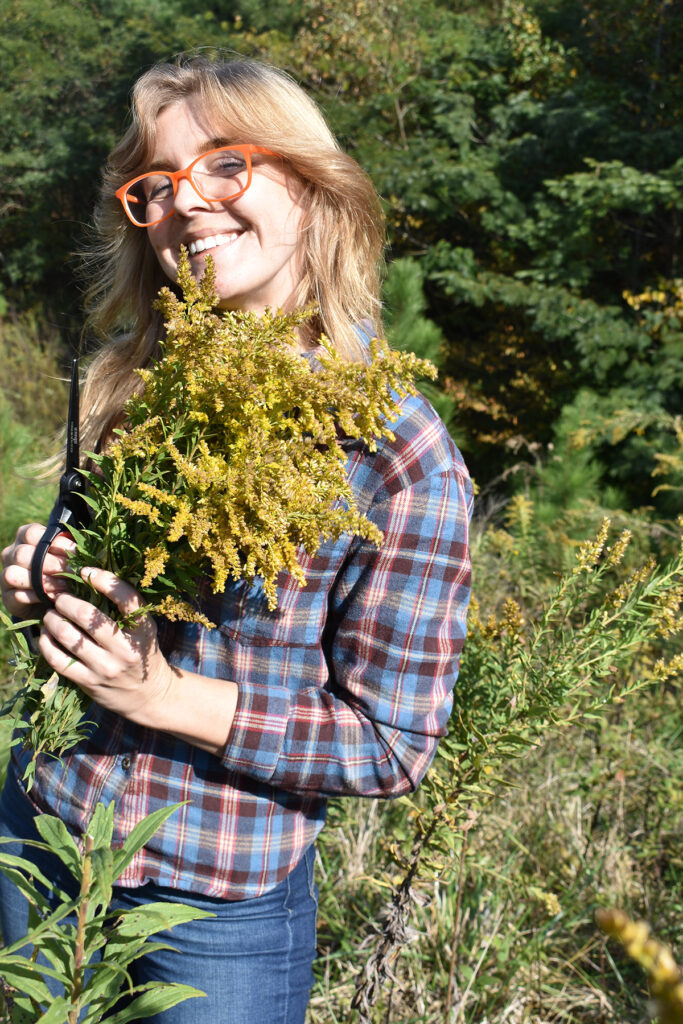
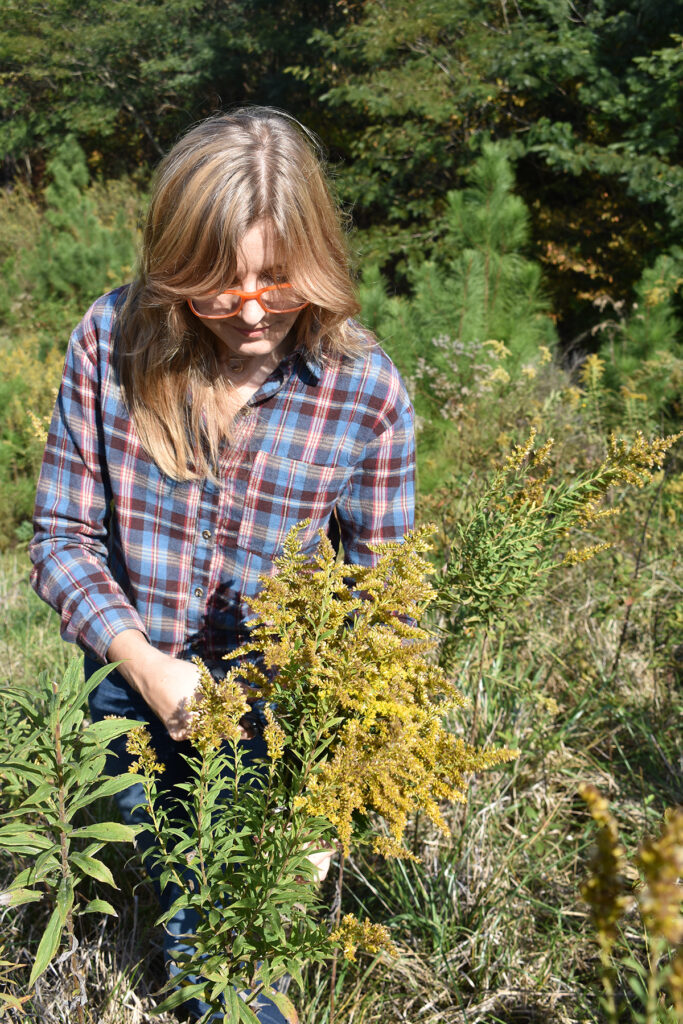
I recently learned that goldenrod is often mistaken for ragweed, a plant guilty of causing brutal allergies. It’s interesting because the two look dramatically different in my opinion, but apparently the confusion exists! I’ve heard this from our own AJ, and just over the weekend, a friend of mine told me the same thing. That’s too bad because goldenrod is a beautiful plant that attracts pollinators, and it deserves all of the love. The sight of these yellow flowers along the roadside always brings me joy and gives me the itch to dye yarn. Our office happens to be extremely close to some fields of goldenrod that bloom in late October, so I couldn’t resist the opportunity to cut some flowers and play!

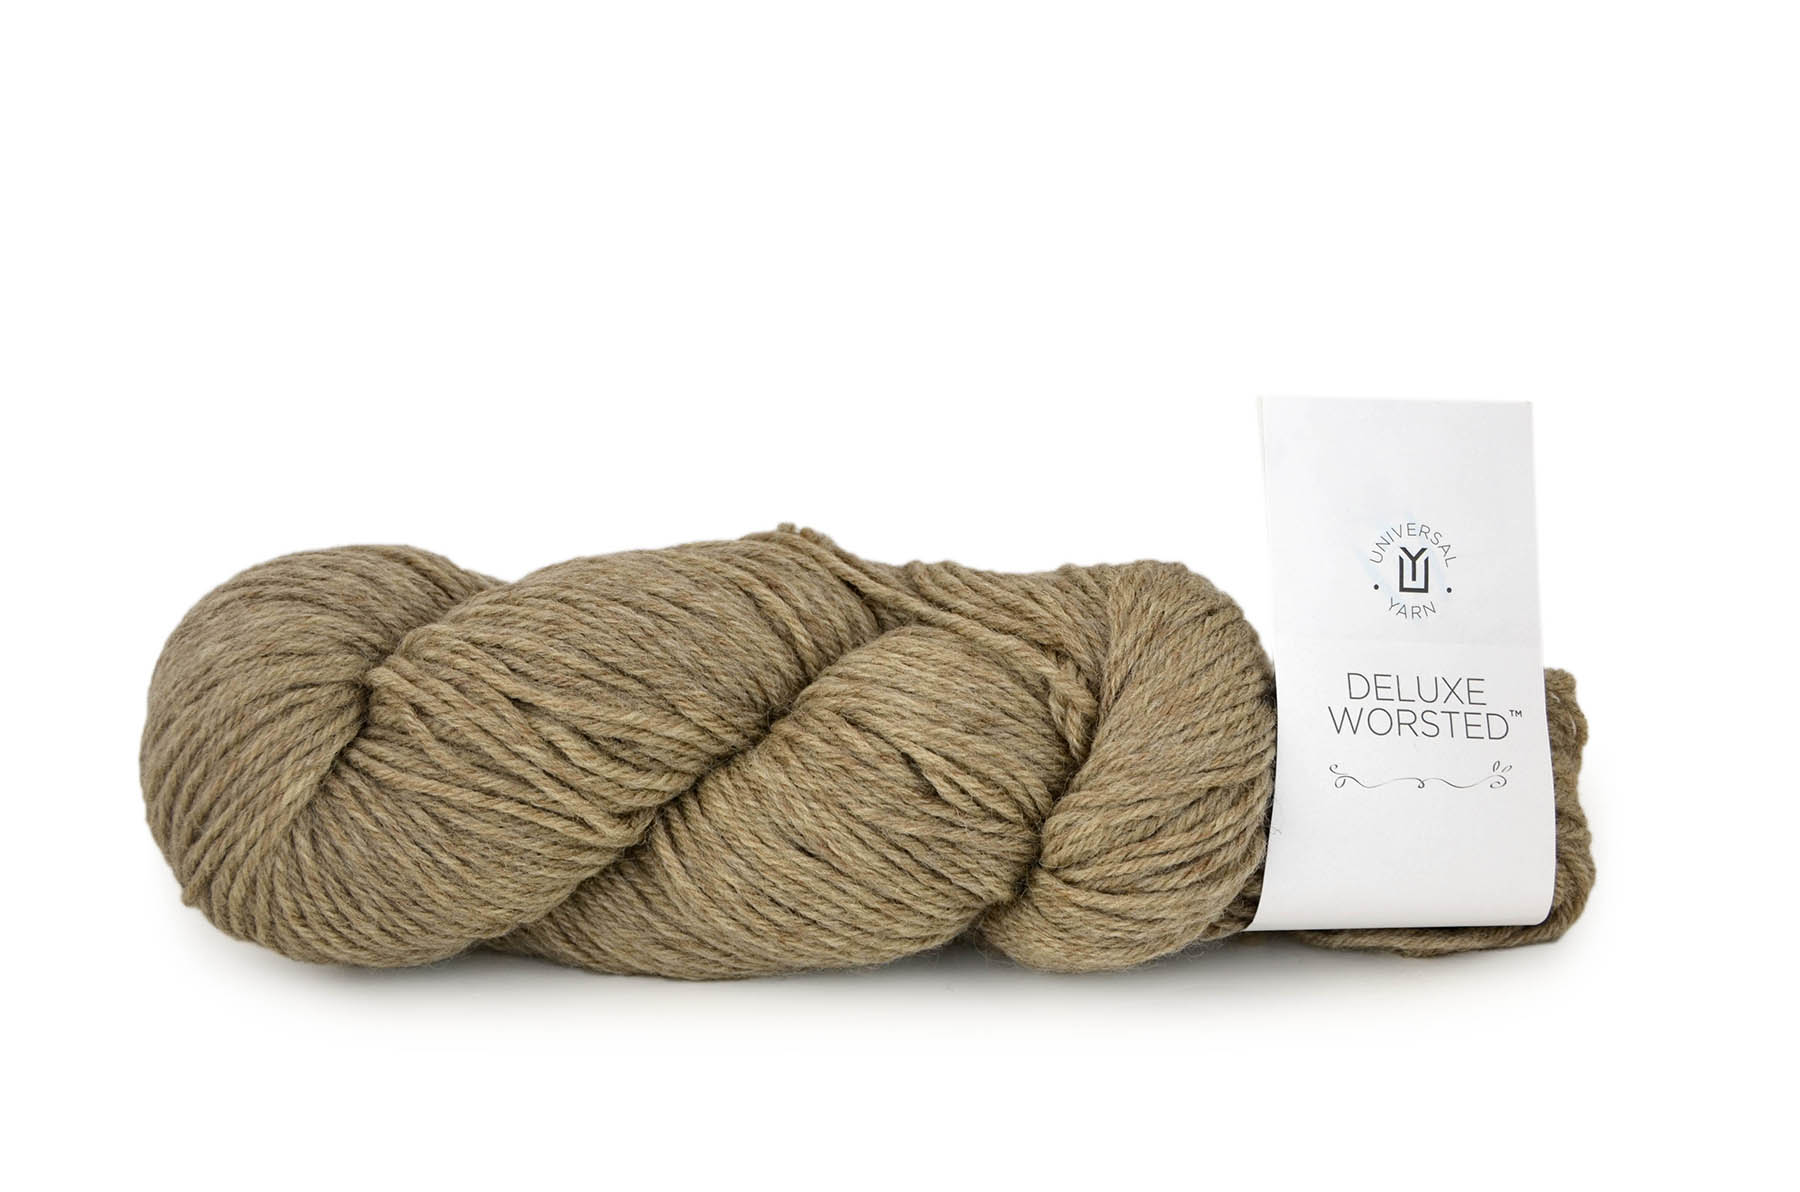
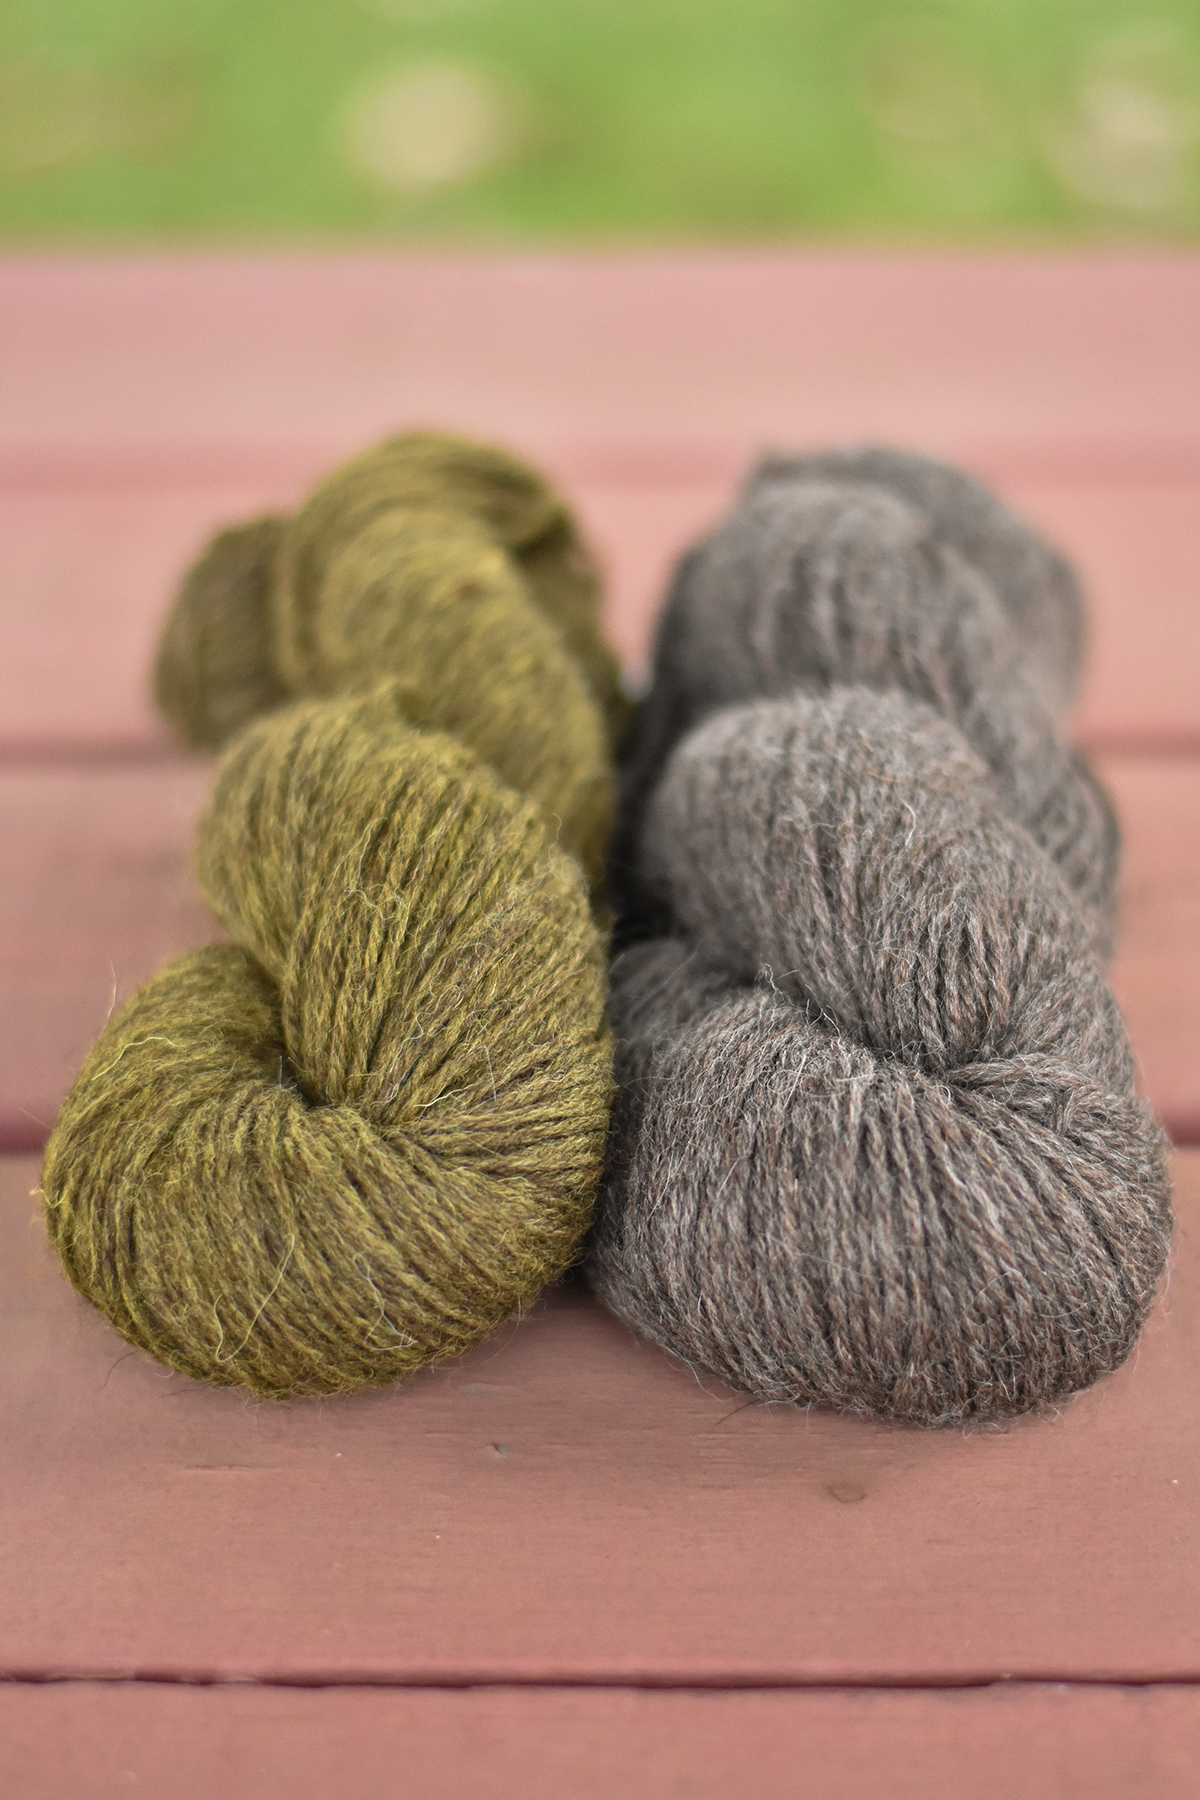
Unlike my previous posts about natural dyeing, this time I wanted to try something different, so I opted for our 100% non-superwash wool, undyed Deluxe Worsted Naturals. A woolly classic, this yarn comes in five gorgeous natural shades – from light cream to deep brown. Their heathered appearance got me wondering how neat would it be to see how they compare when dyed together. I certainly wasn’t disappointed!

Although 40001 Cream would make a great base for dyeing, it’s pretty similar in color to our Ready to Dye selection and I really wanted to try something different. So for this experiment, I chose 40002 Millet, 40003 Musket, and 40004 Pewter. I figured these shades would yield the most interesting results thanks to their heathered appearances. They work well together as a gradient undyed, and the natural dye made that gradient all the more magical!

I’m not going to get into a tutorial today, because I followed the same steps I used for marigold dyeing. You can see that post for instructions here (link). I will say the primary difference is that I left some of the greenery on the plants, created the dyebath, and strained it before adding the yarn. Since I dyed three skeins or 300 grams, I needed at least 300 grams of goldenrod to ensure the dye would be saturated enough to have an effect.

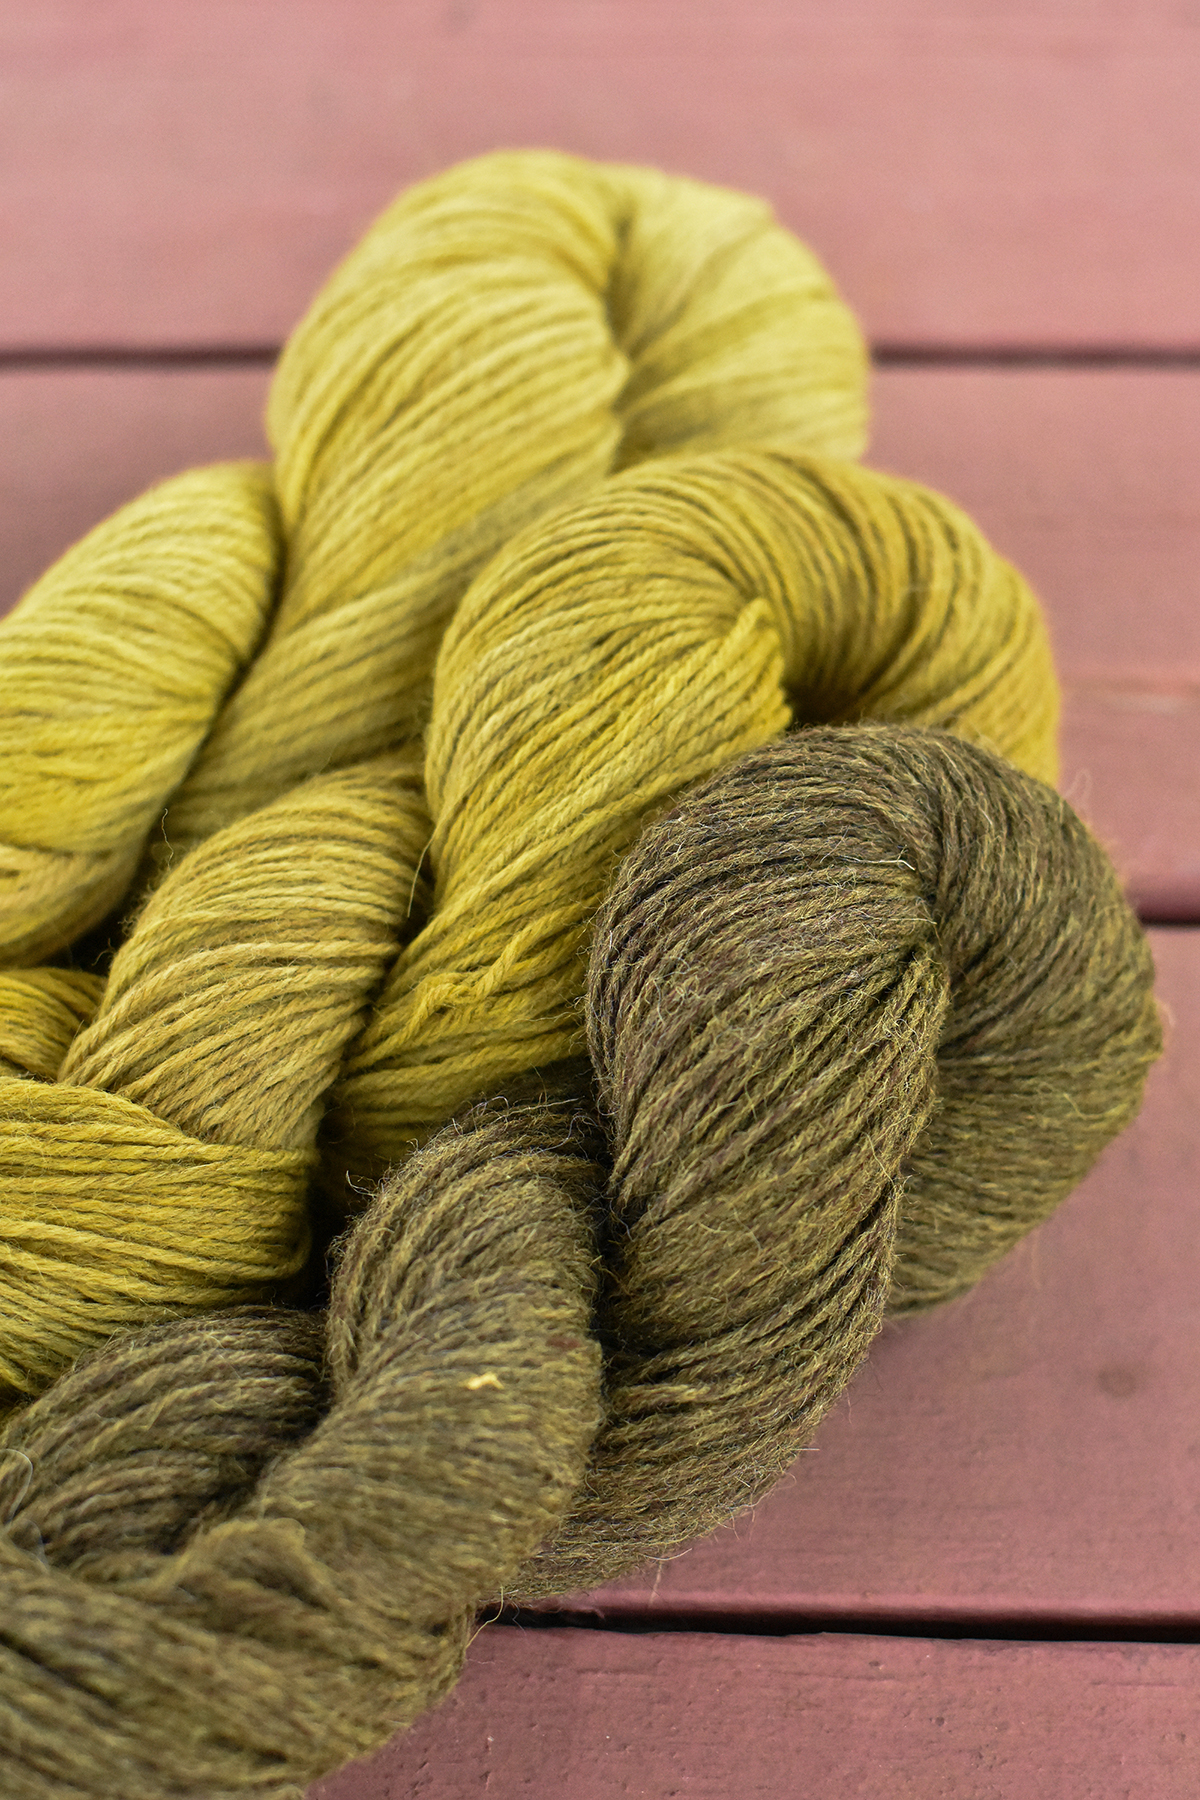
Honestly, I’m so smitten with the results. I can’t believe how beautifully they turned our – er, I can, but I’m still awestruck! I want to drop everything and knit a beautiful scarf, cowl, or shawl that takes advantage of the gradient. They make such a beautiful trio. Let’s take a look at how each skein compares to its undyed counterpart.

40002 Millet

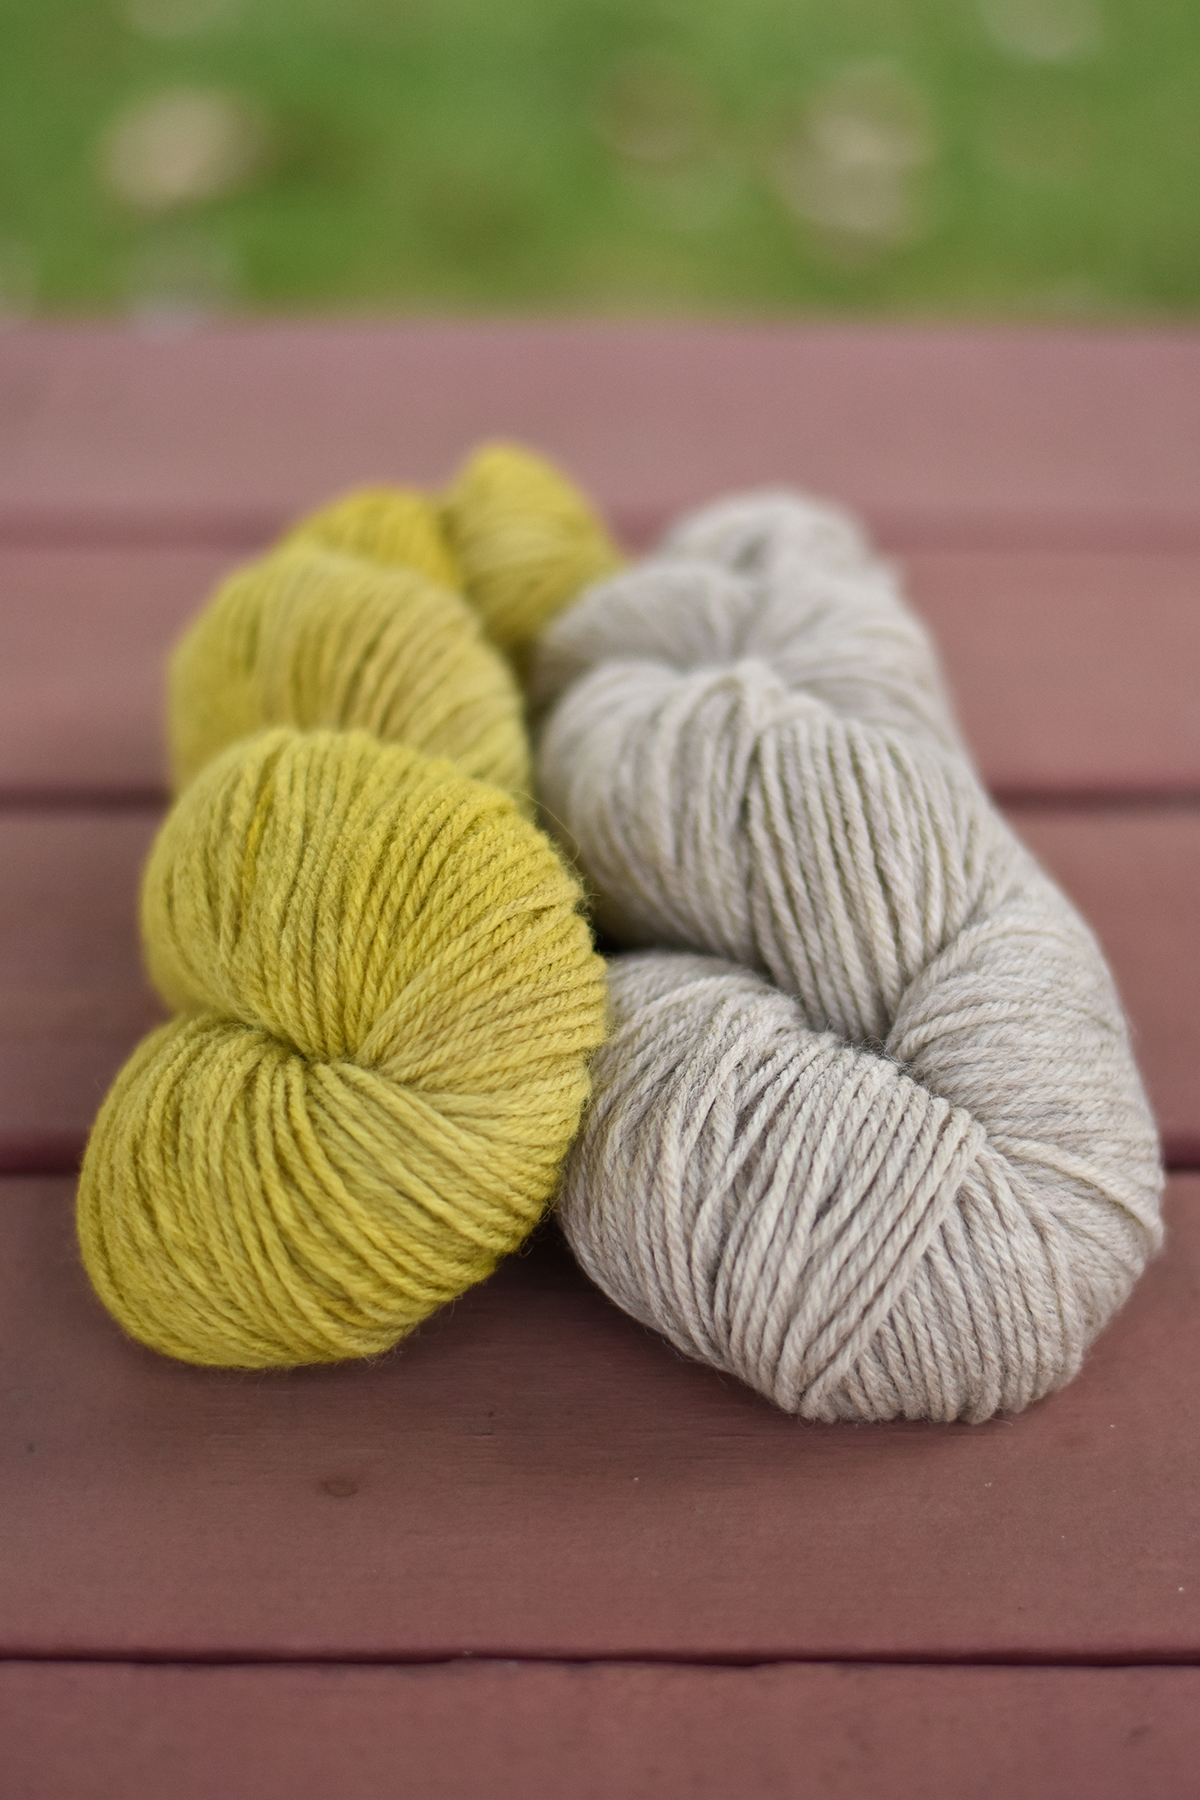
Starting with the lightest we have 40002 Millet. This will always be one of my favorite shades of Deluxe Worsted. It took the dye like I expected. It is the brightest of the bunch and most closely resembles the goldenrod blossoms.

40003 Musket

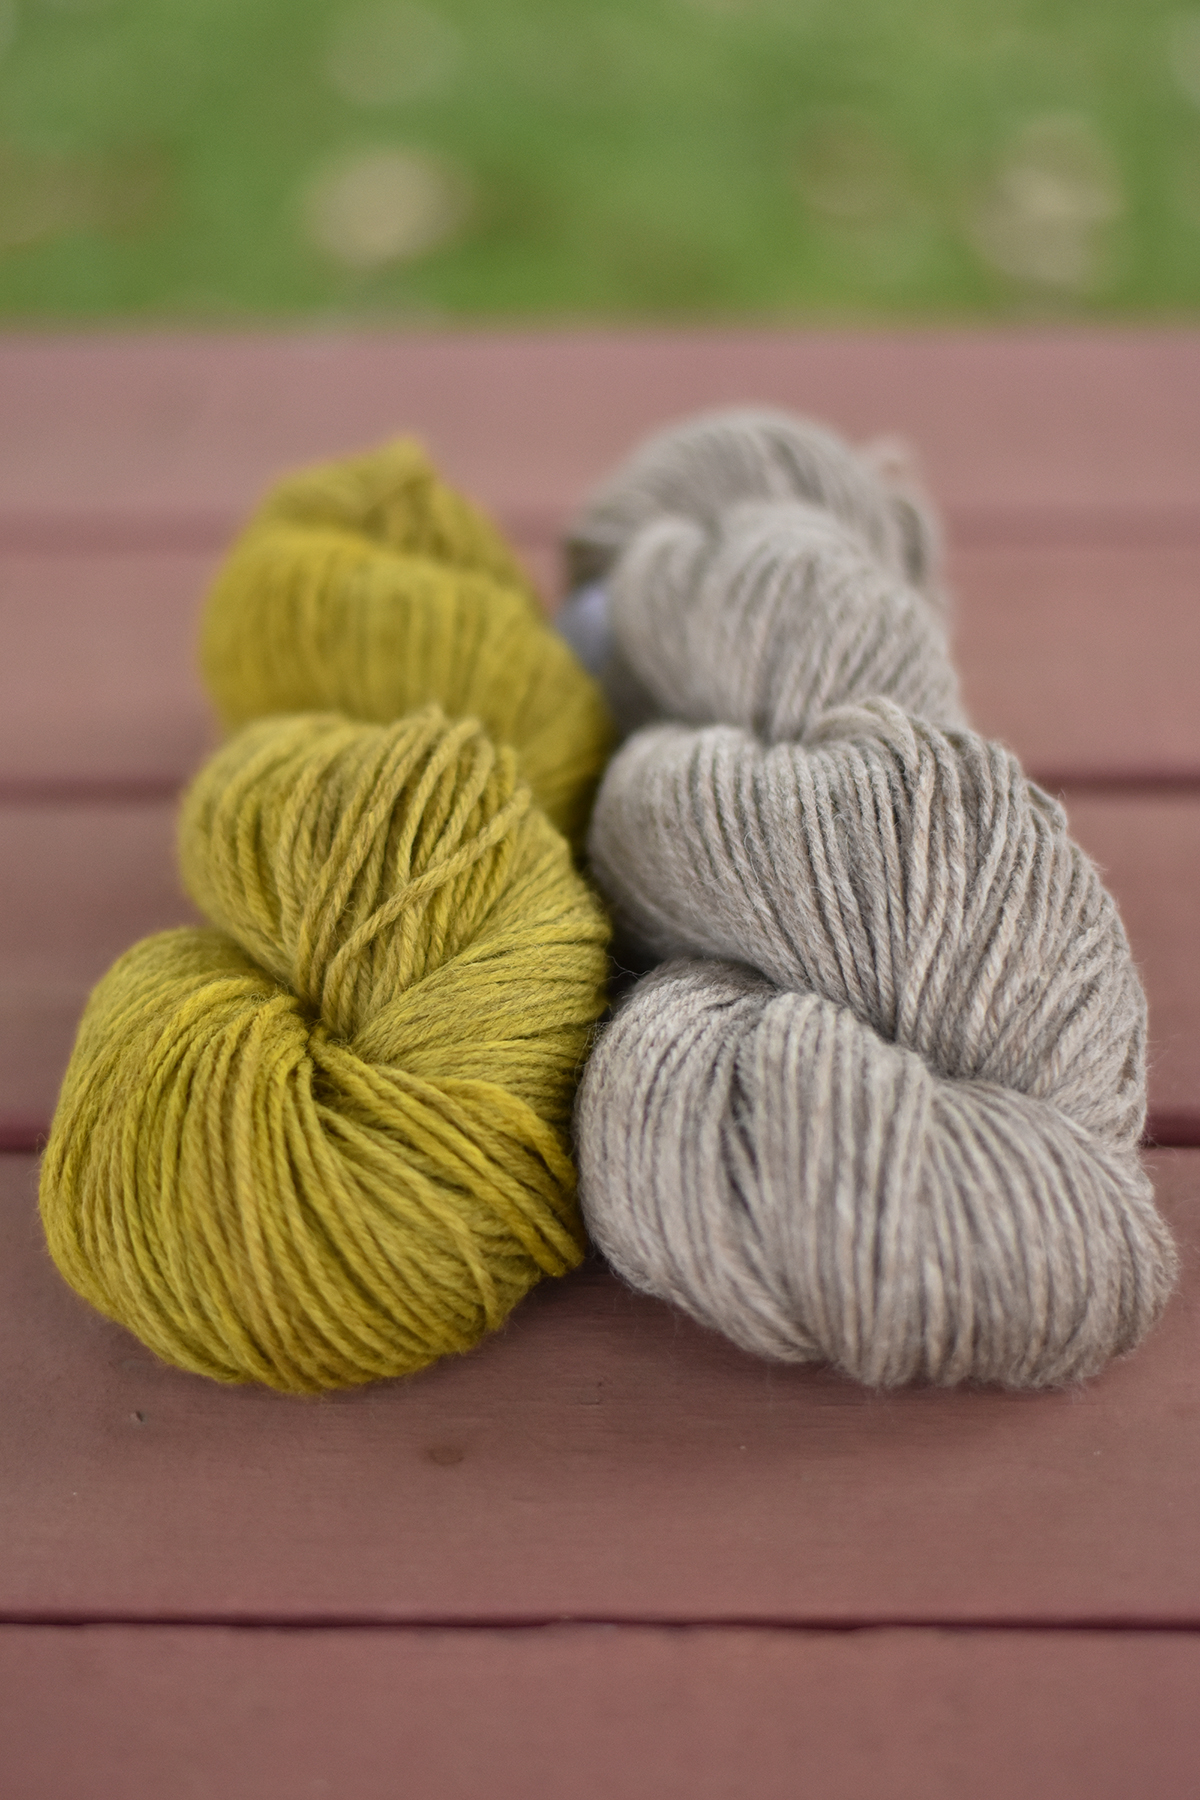
Next, we have 40003 Musket. I think I prefer this result over the Millet – it just has a bit more depth to it that I find very interesting. The gold reminds me of whole grain dijon mustard (yum!) and I’d love to see this knit up into some plump cables.

40004 Pewter

Finally, we have what must be my favorite: 40004 Pewter. I mean, wow! This was the hue I was most unsure about. I wondered whether the dye would really show up at all. To my pleasant surprise, it certainly took and created a color that reminds me of antique brass.

Top to Bottom: 40002 Millet, 40003 Musket, 40004 Pewter

And there you have it – the results of my exploration in dyeing with goldenrod and Deluxe Worsted Naturals! Which color is your favorite? How would you knit or crochet them? Let me know in the comments!


A Crocheter’s take on Elevated Essentials

Hello There!

This week I’m taking a look at our fabulous Elevated Essentials collection. From the moment I saw the photos I instantly fell head-over-heels in love. In a word, the overall style is Luxe. With chic neutral tones and texture-rich detailing in each of the finished pieces, it’s easy to see why the descriptor used in the collection name was “Elevated.”

Carillon in Deluxe Worsted Color 40002 Millet

The yarn used for each of these looks is our Deluxe Worsted and Deluxe Worsted Naturals, which are 100% Wool and come at the affordable price point of $8.25 per skein. Based on the natural composition and budget-friendly qualities, this yarn is deemed the essential yarn to have in your stash.

Deluxe Worsted in 12501 Oatmeal Heather

My favorite sweater is the Eilhart pullover, which gives me some serious craft envy when I see all of the gorgeous cables. Crochet has some ways to mimic this iconic look but when I consider this particular pattern I just don’t think it would compare.

Eilhart in Deluxe Worsted colors 40001 cream, 40003 Musket and 12180 Eggplant

The pattern has a hypnotic flow to it, creating a sleek silhouette drawing the eye down, while intertwining in the center and sides perfectly. The other design element that I love is the deep contrast in color for the sleeves and neck. I would normally think of this style as playful like a baseball tee, but instead it stripped away notions of playtime and had me ready to grab some needles and get to work. The ribbing is enough to be interesting but doesn’t compete with the stunning bodywork. In fact, I feel it further frames the intense center detailing with the drastic color change and subtle texture.

Compare the cables seen above with the crochet ones below. It just wouldn’t quite do the trick.

Image: Blog Post “How to Crochet Cables + Good Beginner Crochet Patterns”by Heather Mann on We Crochet

Let’s not get too caught up in the could you/couldn’t you debate though, and instead continue on to appreciate another marvelous piece.

Moria in Deluxe Worsted 12502 Smoke Heather and 1900 Ebony

The Moria Cape – the name alone stirs up my nerd-brain into a fantastical frenzy, but the design is simply breathtaking. The play on color creates a unique optical illusion that feels as whimsical as its namesake, and don’t event get me started on the perpetual Cable-Envy that this collection offers.

Moria in Deluxe Worsted 12502 Smoke Heather and 1900 Ebony

Well that’s all for now. The next time I’m back it may very well be to announce that the Crochet Corner is being abandoned for a Novice Knit Nook!

Happy Stitching Y’all, Ashley Jane

Day 5 of Winter

Today we’re introducing the Nutmeg Hat and Mitten Set. The neutral set is incredibly wearable for men and women alike. Personally, I love working with undyed wool. It is rustic in appearance and goes with nearly anything. While I’m a lover of color, I equally adore the natural shades of wool. You can see more of our Deluxe Worsted Naturals collection here.

This set features all over cables and a contrasting cuff. I wanted to give this set a professional finish, so I used the long-tail tubular cast-on method.

I can easily recall a time when I felt intimidated by the Tubular cast-on method. Like many things in knitting (and in life), we often perceive new things to be more challenging than they really are. This cast-on method is one of those things. If you look at the Nutmeg set, you’ll notice that the 1×1 Ribbing seems to run seamlessly from the right side to the wrong side. Notice the lack of a cast-on edge in the photo below. You can’t tell where it was cast-on. That is the beauty of a tubular cast-on.

It takes more time than most other methods and it feels a bit fiddly at first, but it’s well worth it. It’s by far my favorite method when I’m using 1×1 Rib.

If you’d like a closer look at each photo, simply click it.

To begin, place your yarn over the needle, leave a long tail as you would with a traditional long-tail cast on. You can use a slip knot, however; I do not so that the cast-on stitches are as invisible as possible.

Hold your yarn in place with your index finger.

Separate your tail and working yarn with your thumb and your index finger. You’ll do the same way you would for a regular long-tail cast-on.

Notice that I’m tensioning my yarn the same way that I would for a regular long-tail cast on.

Working from front to back, bring your needle under the yarn around your thumb.

Bring the needle up through the center.

Working from front to back, bring the needle over the yarn around your index finger and dip underneath it, then underneath the yarn around your thumb.

Correct the tension in your yarn. You now have two stitches. Notice how there is not a bump across that stitch? This will be a knit stitch.

The motion for a purl stitch mirrors the knit stitch.

Working from front to back, bring the needle over the yarn around your index finger, dipping below it and bringing the needle back through the center.

Working from back to front, bring the needle over the yarn around your thumb, dipping below it and then below the yarn around your index finger.

Correct your tension. Notice that this stitch has a purl bump. This is a purl stitch.

Continue in this manner, alternating between knit and purl stitches until you have the required number of stitches.

Notice the difference between the knit stitches and the purl stitches.

Once you have the correct number of stitches, carefully turn your work. I highly recommend using your index finger to hold the last stitch you cast on in place. Now you’ll begin working the first foundation row.

Once you’ve turned your work, grab your working yarn and slip the first stitch purlwise with your yarn in front.

Bring your yarn to the back.

Knit the next stitch through the back loop. This will untwist the knit stitch.

Continue to slip the purl stitches with your yarn in front and knit the knit stitches through the back loop to the end of your work. Turn your work. Now you’ll begin the second foundation row.

Just as in the previous row, slip the purl stitches purlwise with yarn in front.

Knit the knit stitches normally–there is no need to knit them through the back loop because these stitches should no longer be twisted.

Repeat the last two steps to the end of the row

On the next row, simply work in K1, P1 ribbing by purling the purl stitches and knitting the knit stitches.

This is what your finished cast on should look like.

Once you’ve finished casting on, you can join your work in the round (as would be the case for the Nutmeg Hat and Mitten Set). There will be a small space you’ll want to seam. Typically I do this just before weaving my tail into the project.

This method works for projects that are knit flat or in the round. It gives your projects such a neat finish. It’s also much more stretchy than a traditional long tail cast-on.

You can find the link to the Nutmeg Hat and Mitten set here.