You can read through the entire tale of the moto jackets on previous blog posts here, here, here, and here. It took a few near all-nighters, but the moto jackets got finished by my goal of TNNA last weekend. Yay!
Here are myself and Yonca wearing them in the booth:
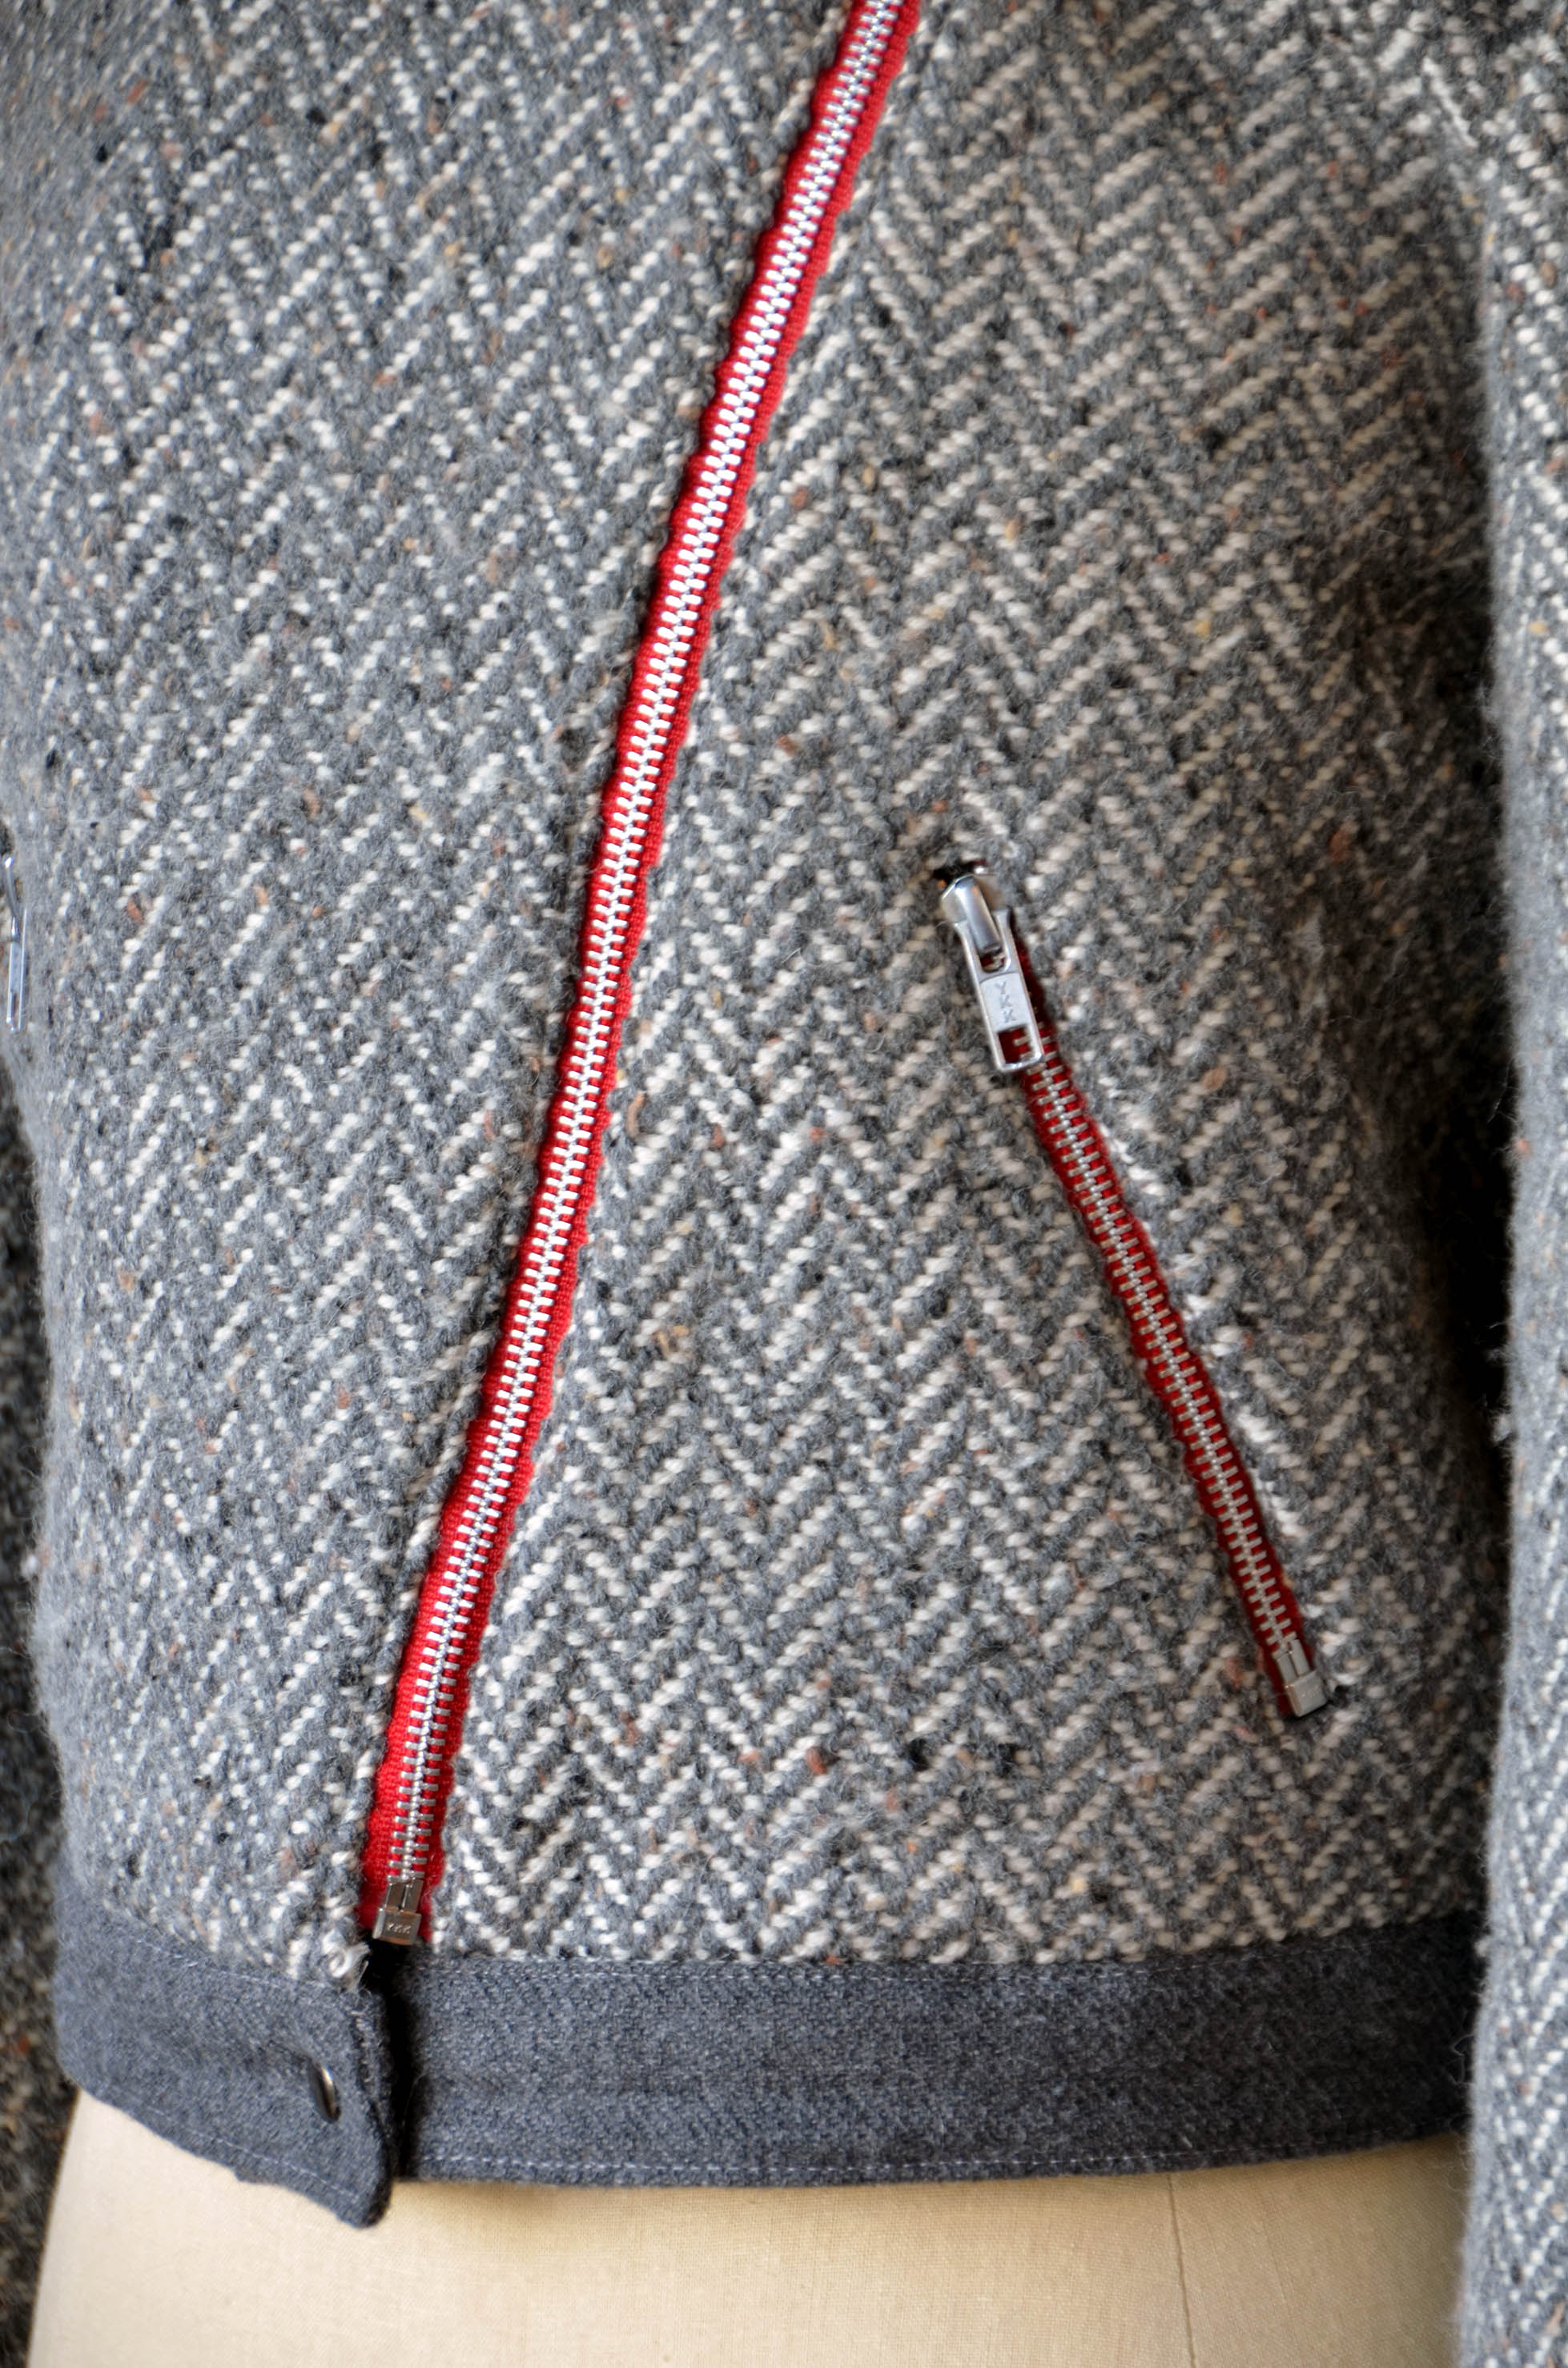
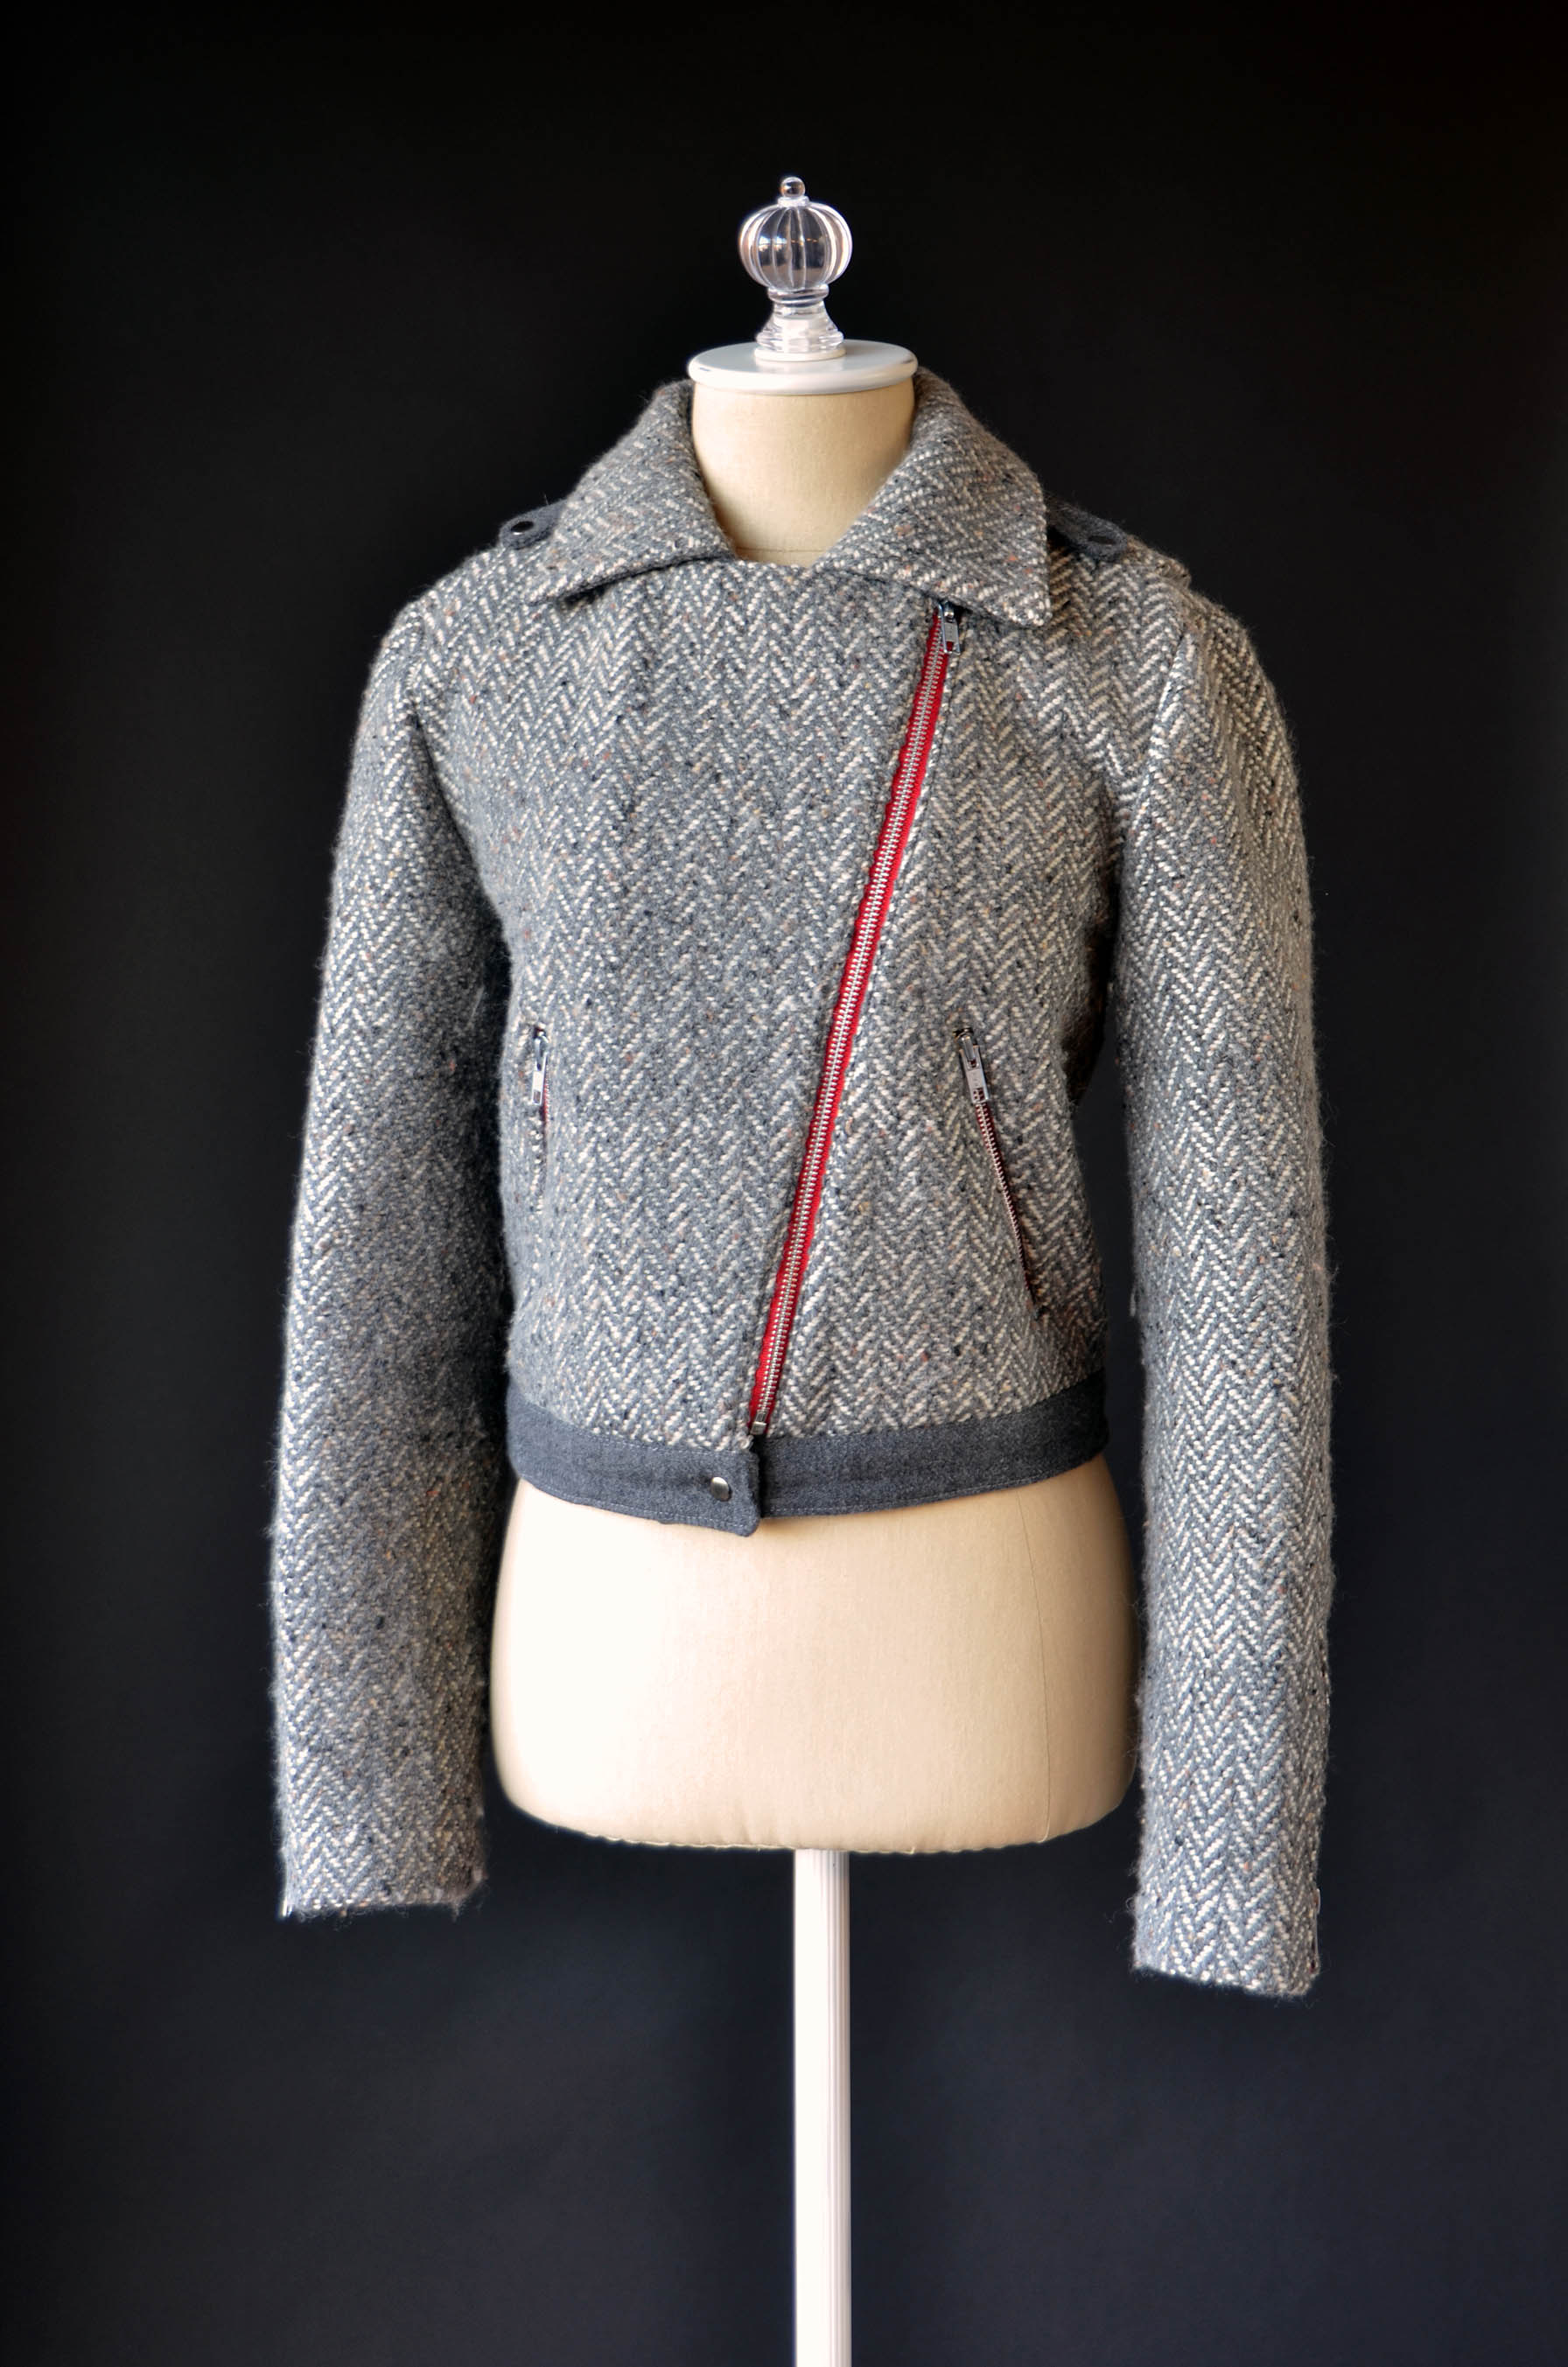
I love Yonca’s choice of red zippers!
For those who aren’t familiar with TNNA, it stands for “The National Needlearts Association” and is our industry trade show. The winter show took place in San Jose just this past weekend. It’s an opportunity for our LYS customers to swing by our booth and see all our new yarns, colors, and designs. We love meeting customers in person – thanks to everyone who attended!
After returning from our long weekend, Heather kindly snapped some detail shots of the jackets.
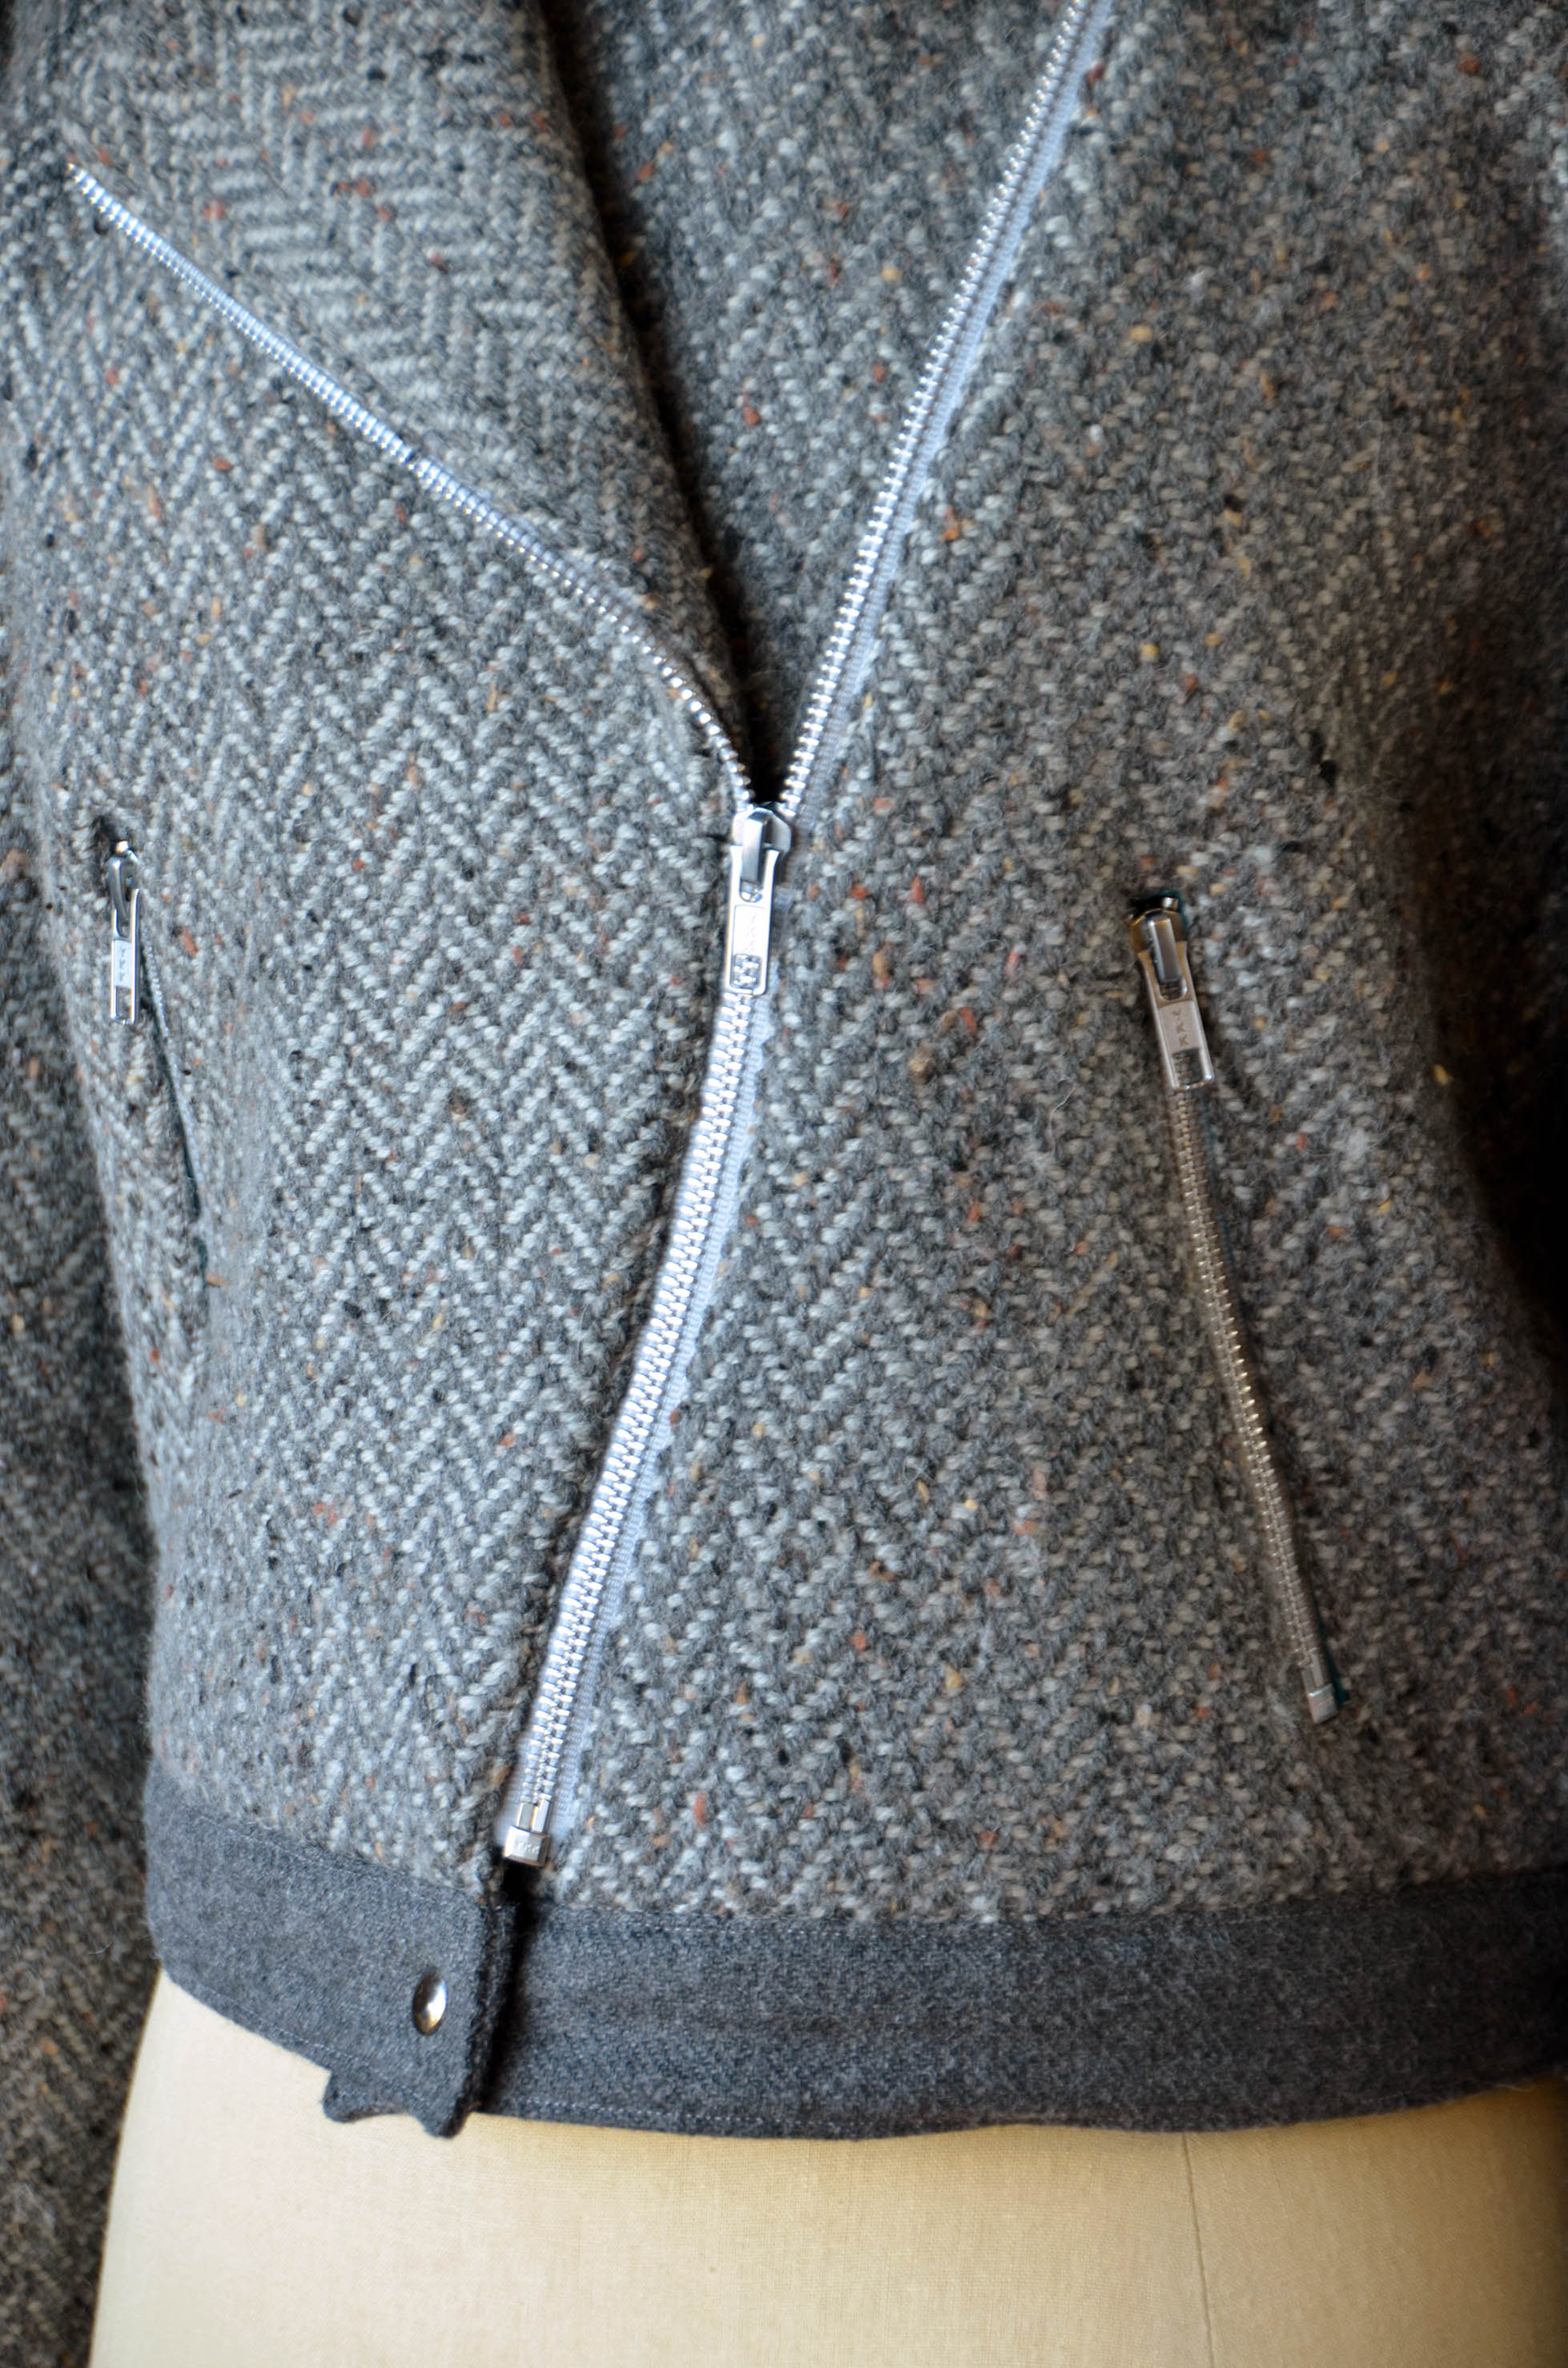
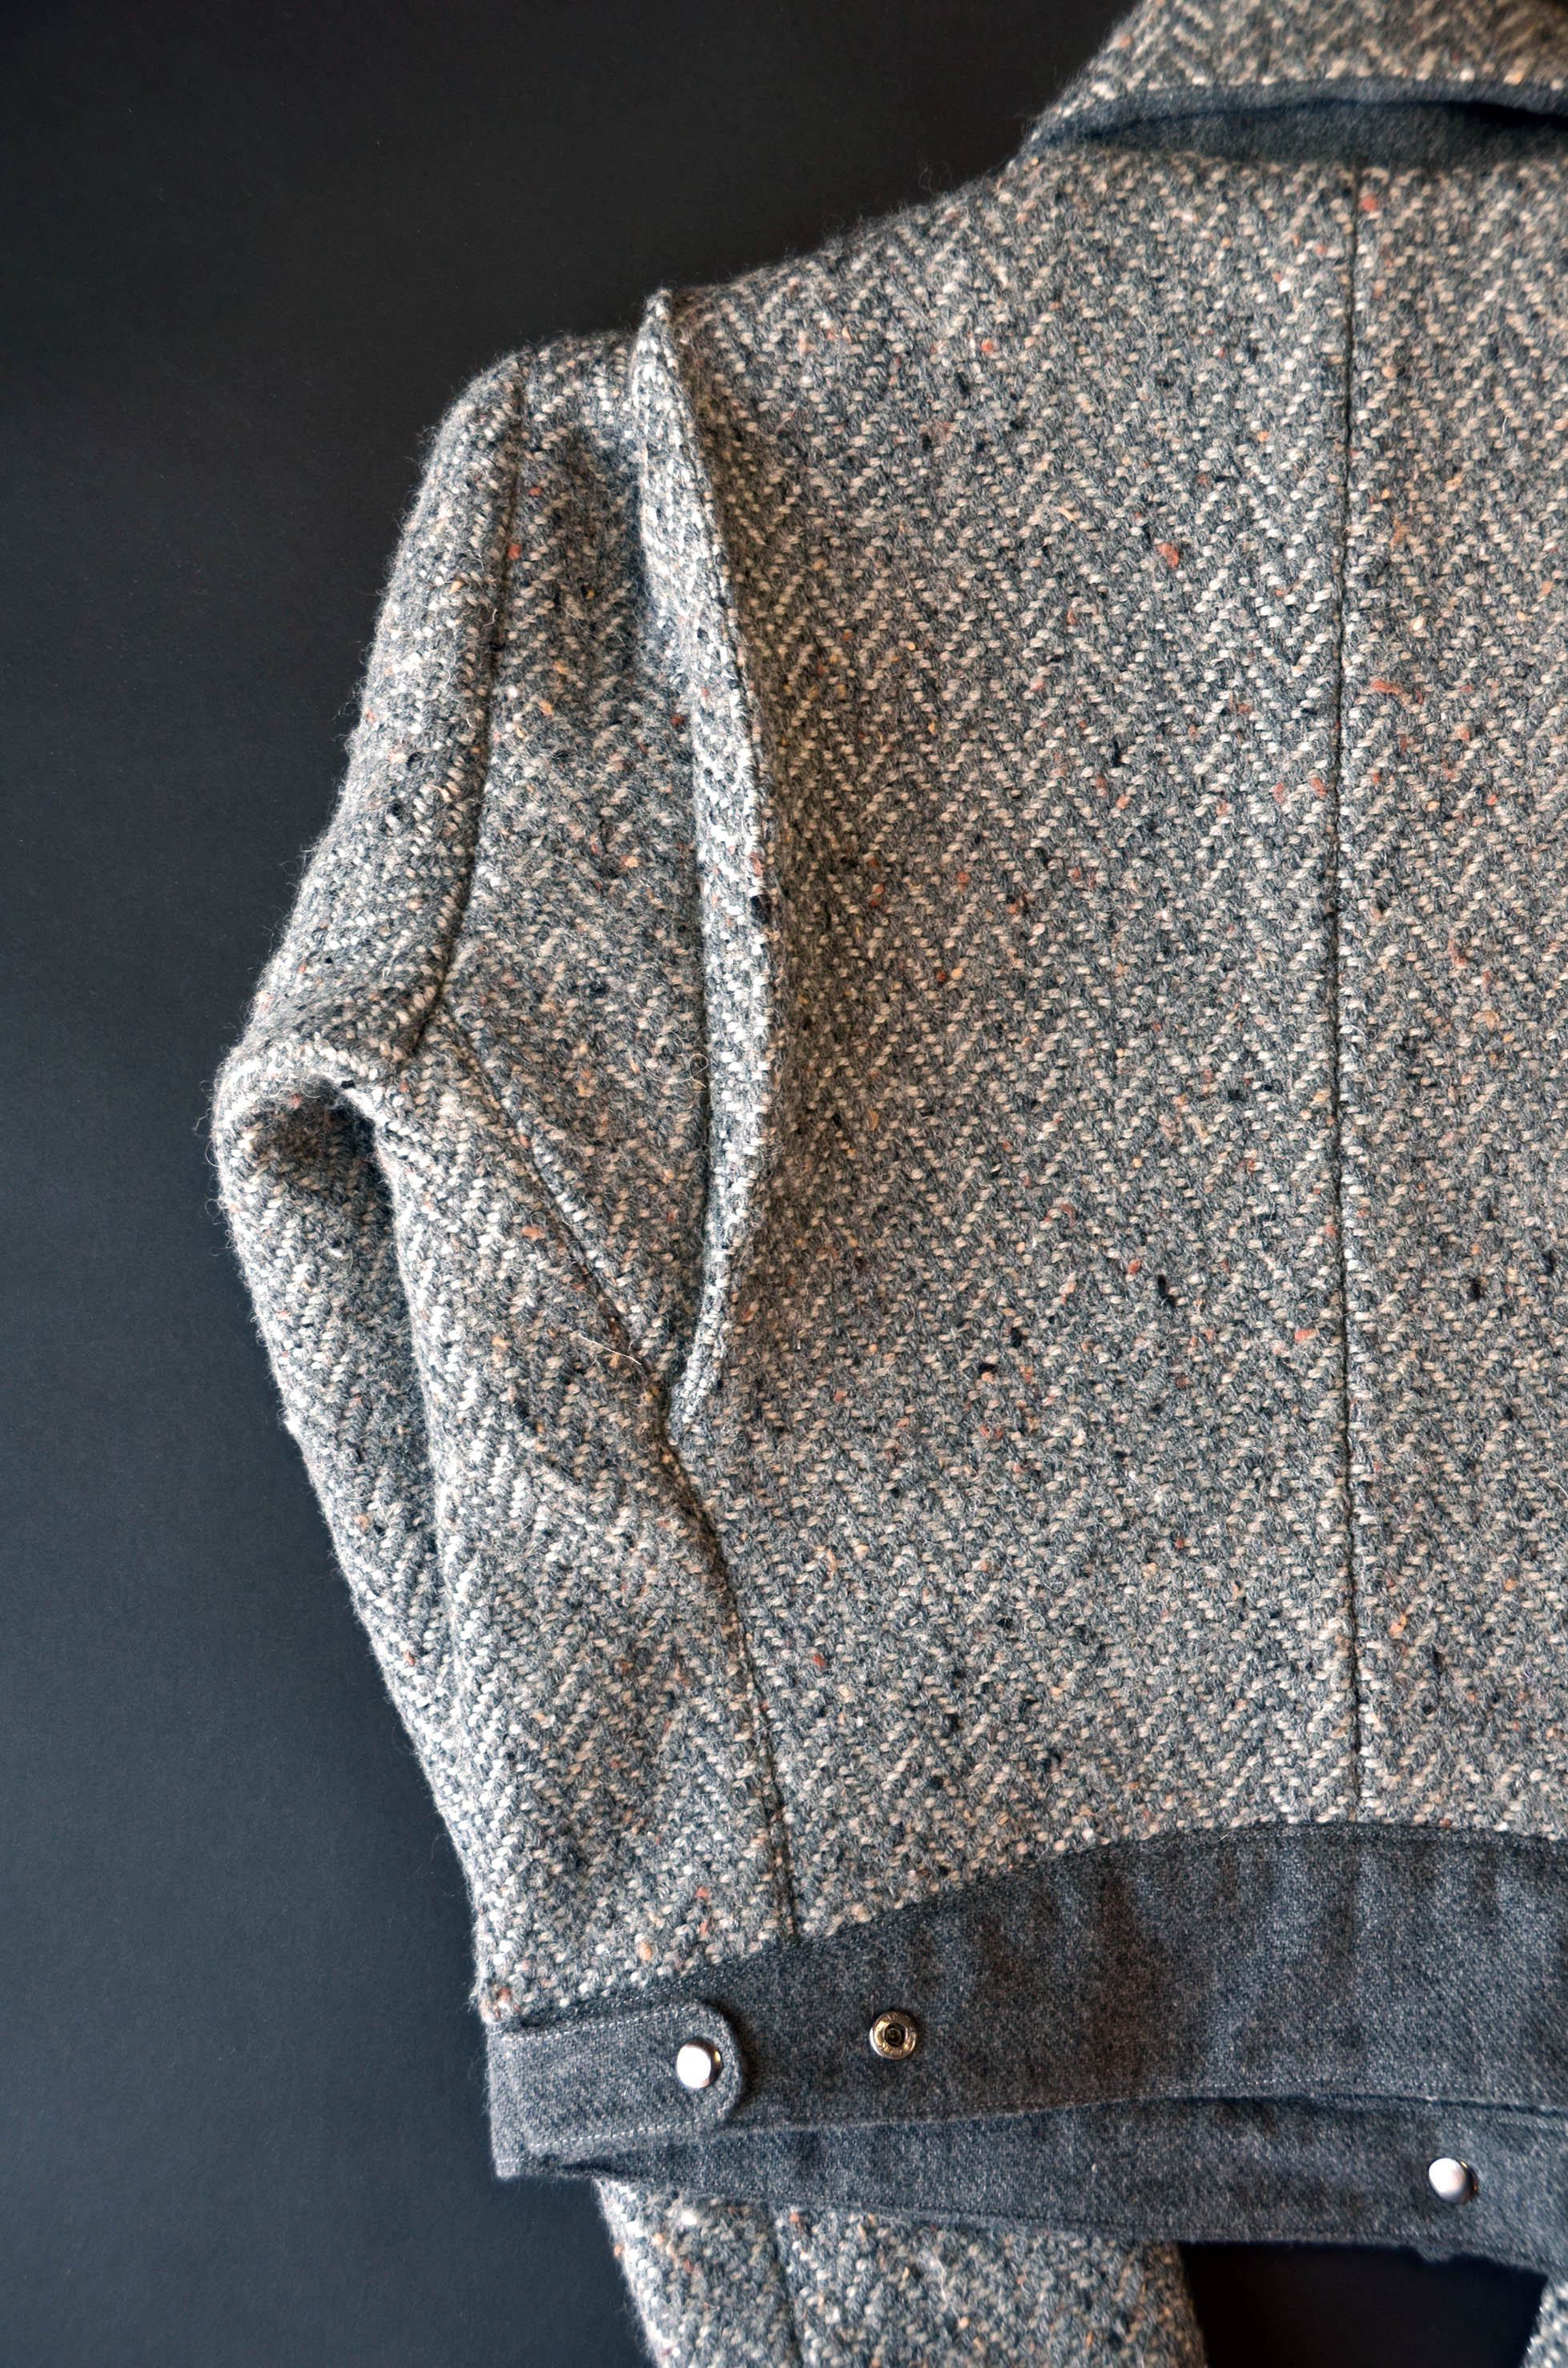
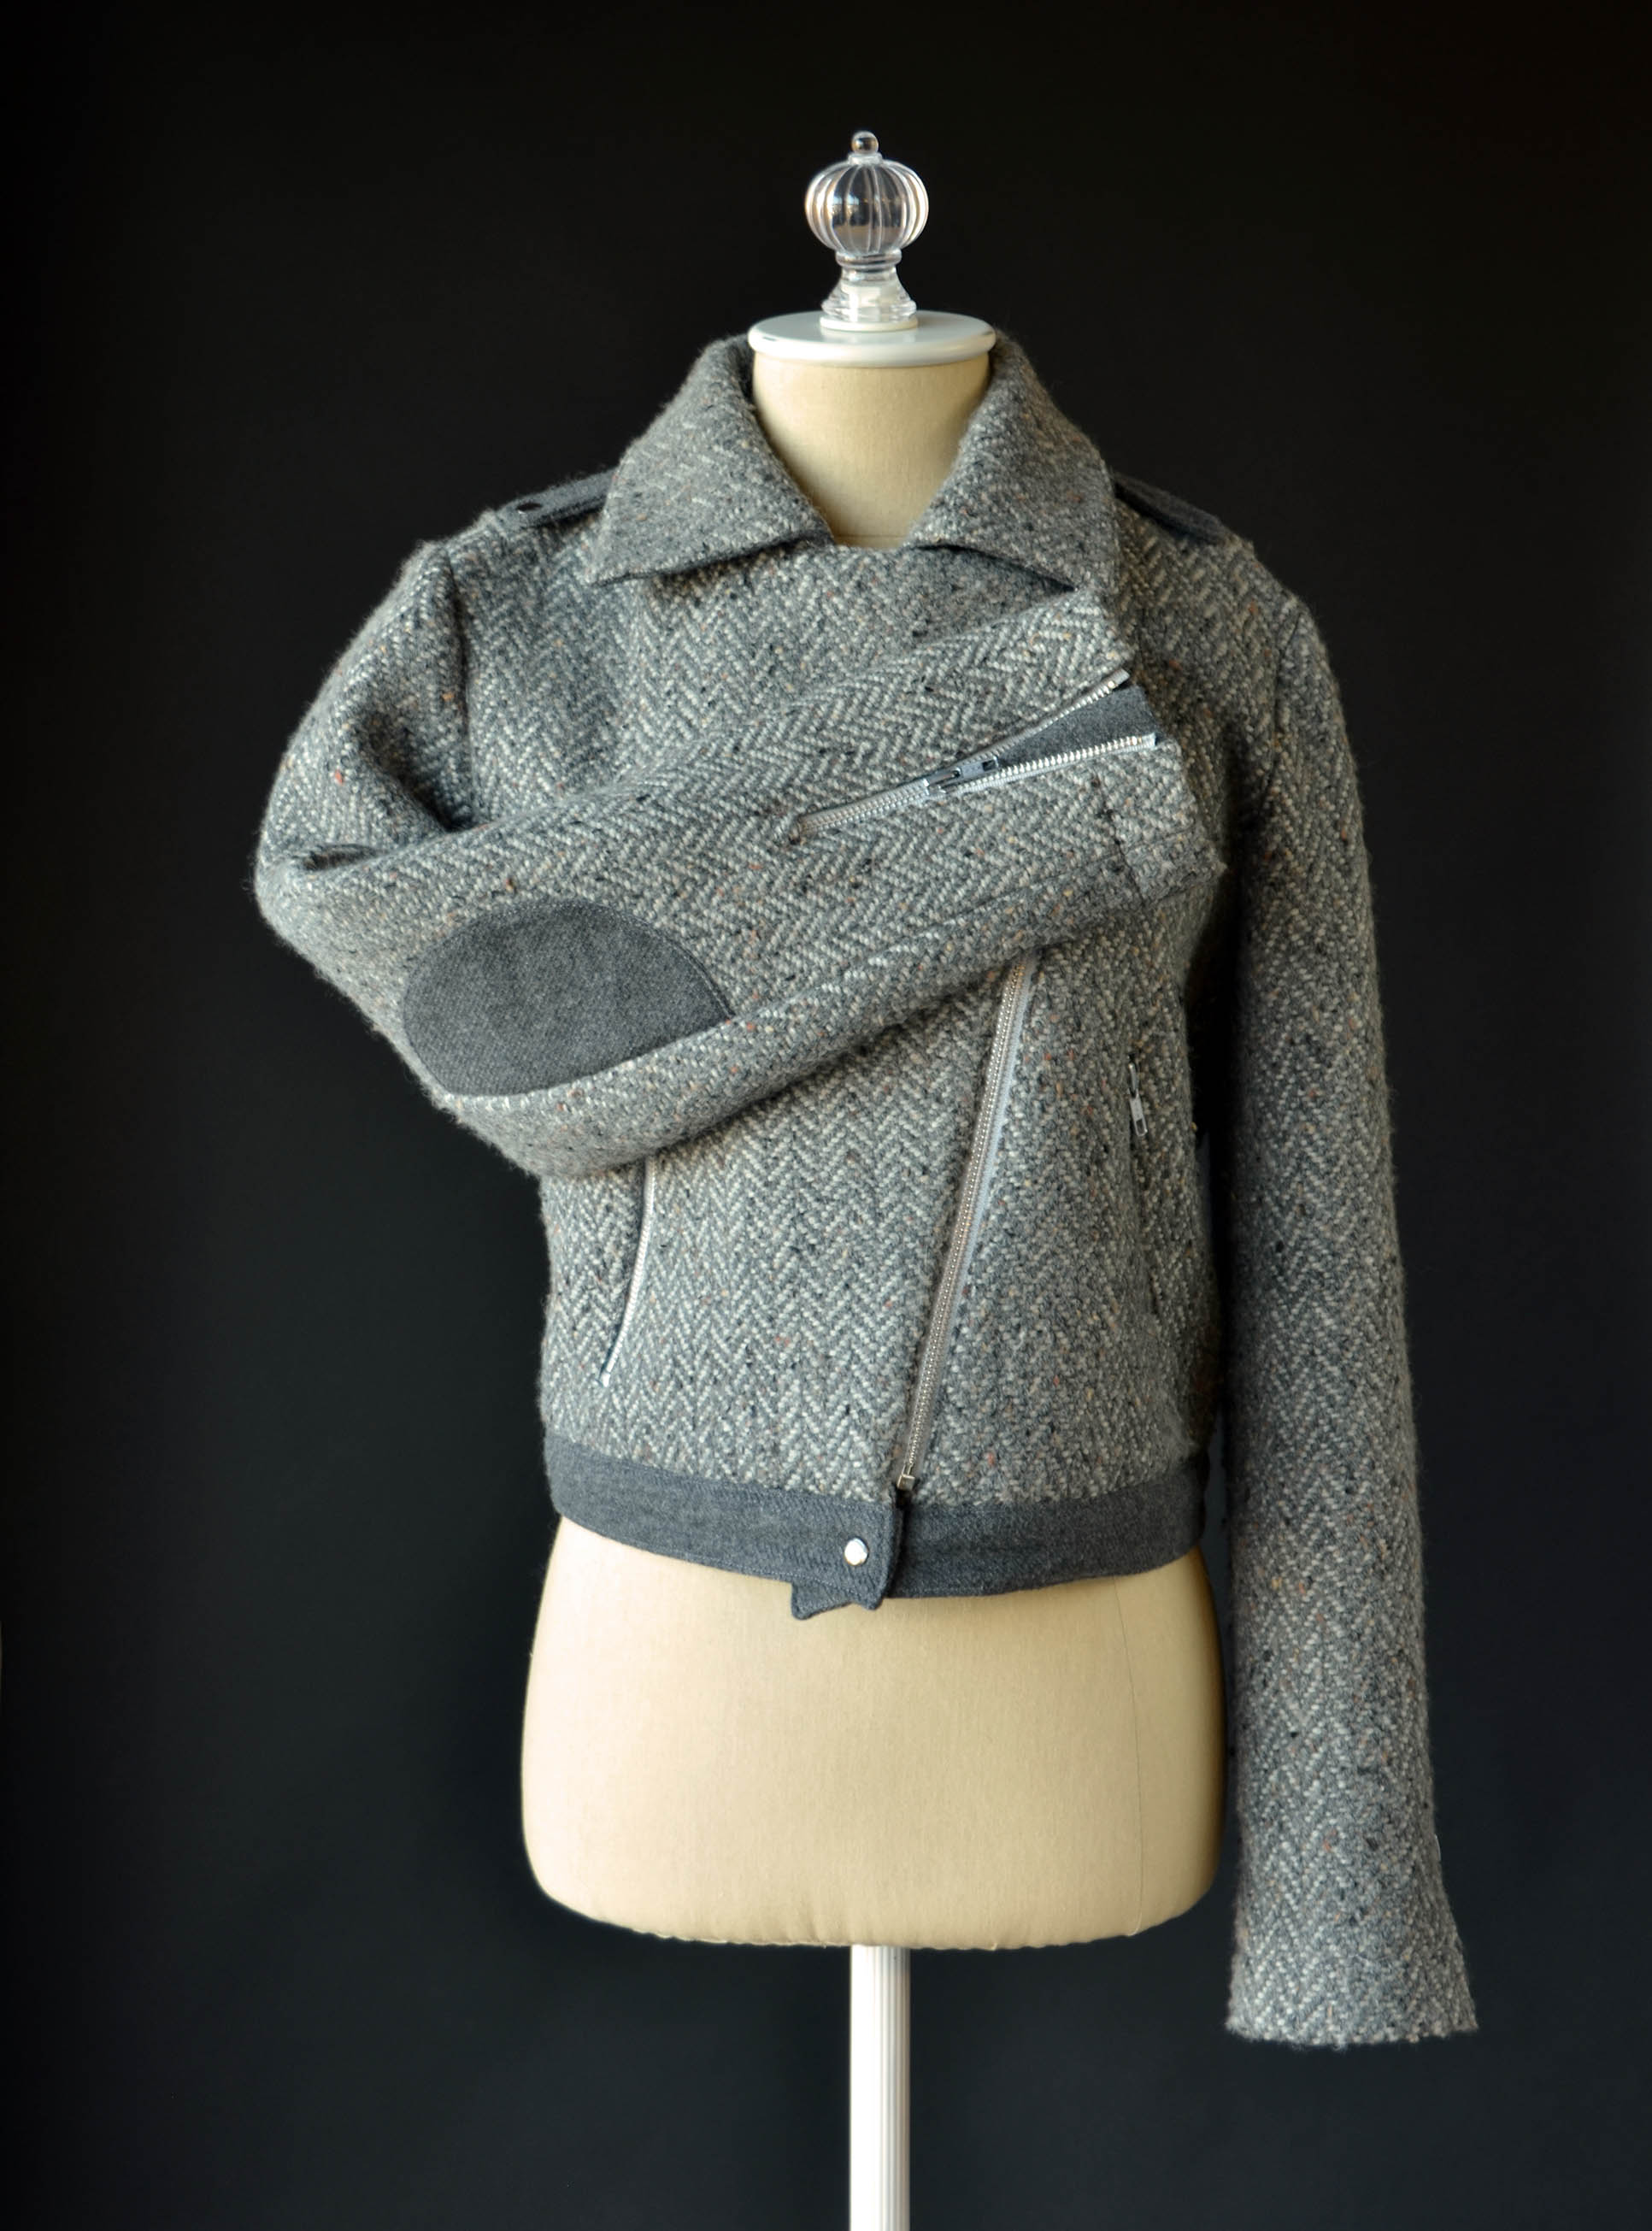
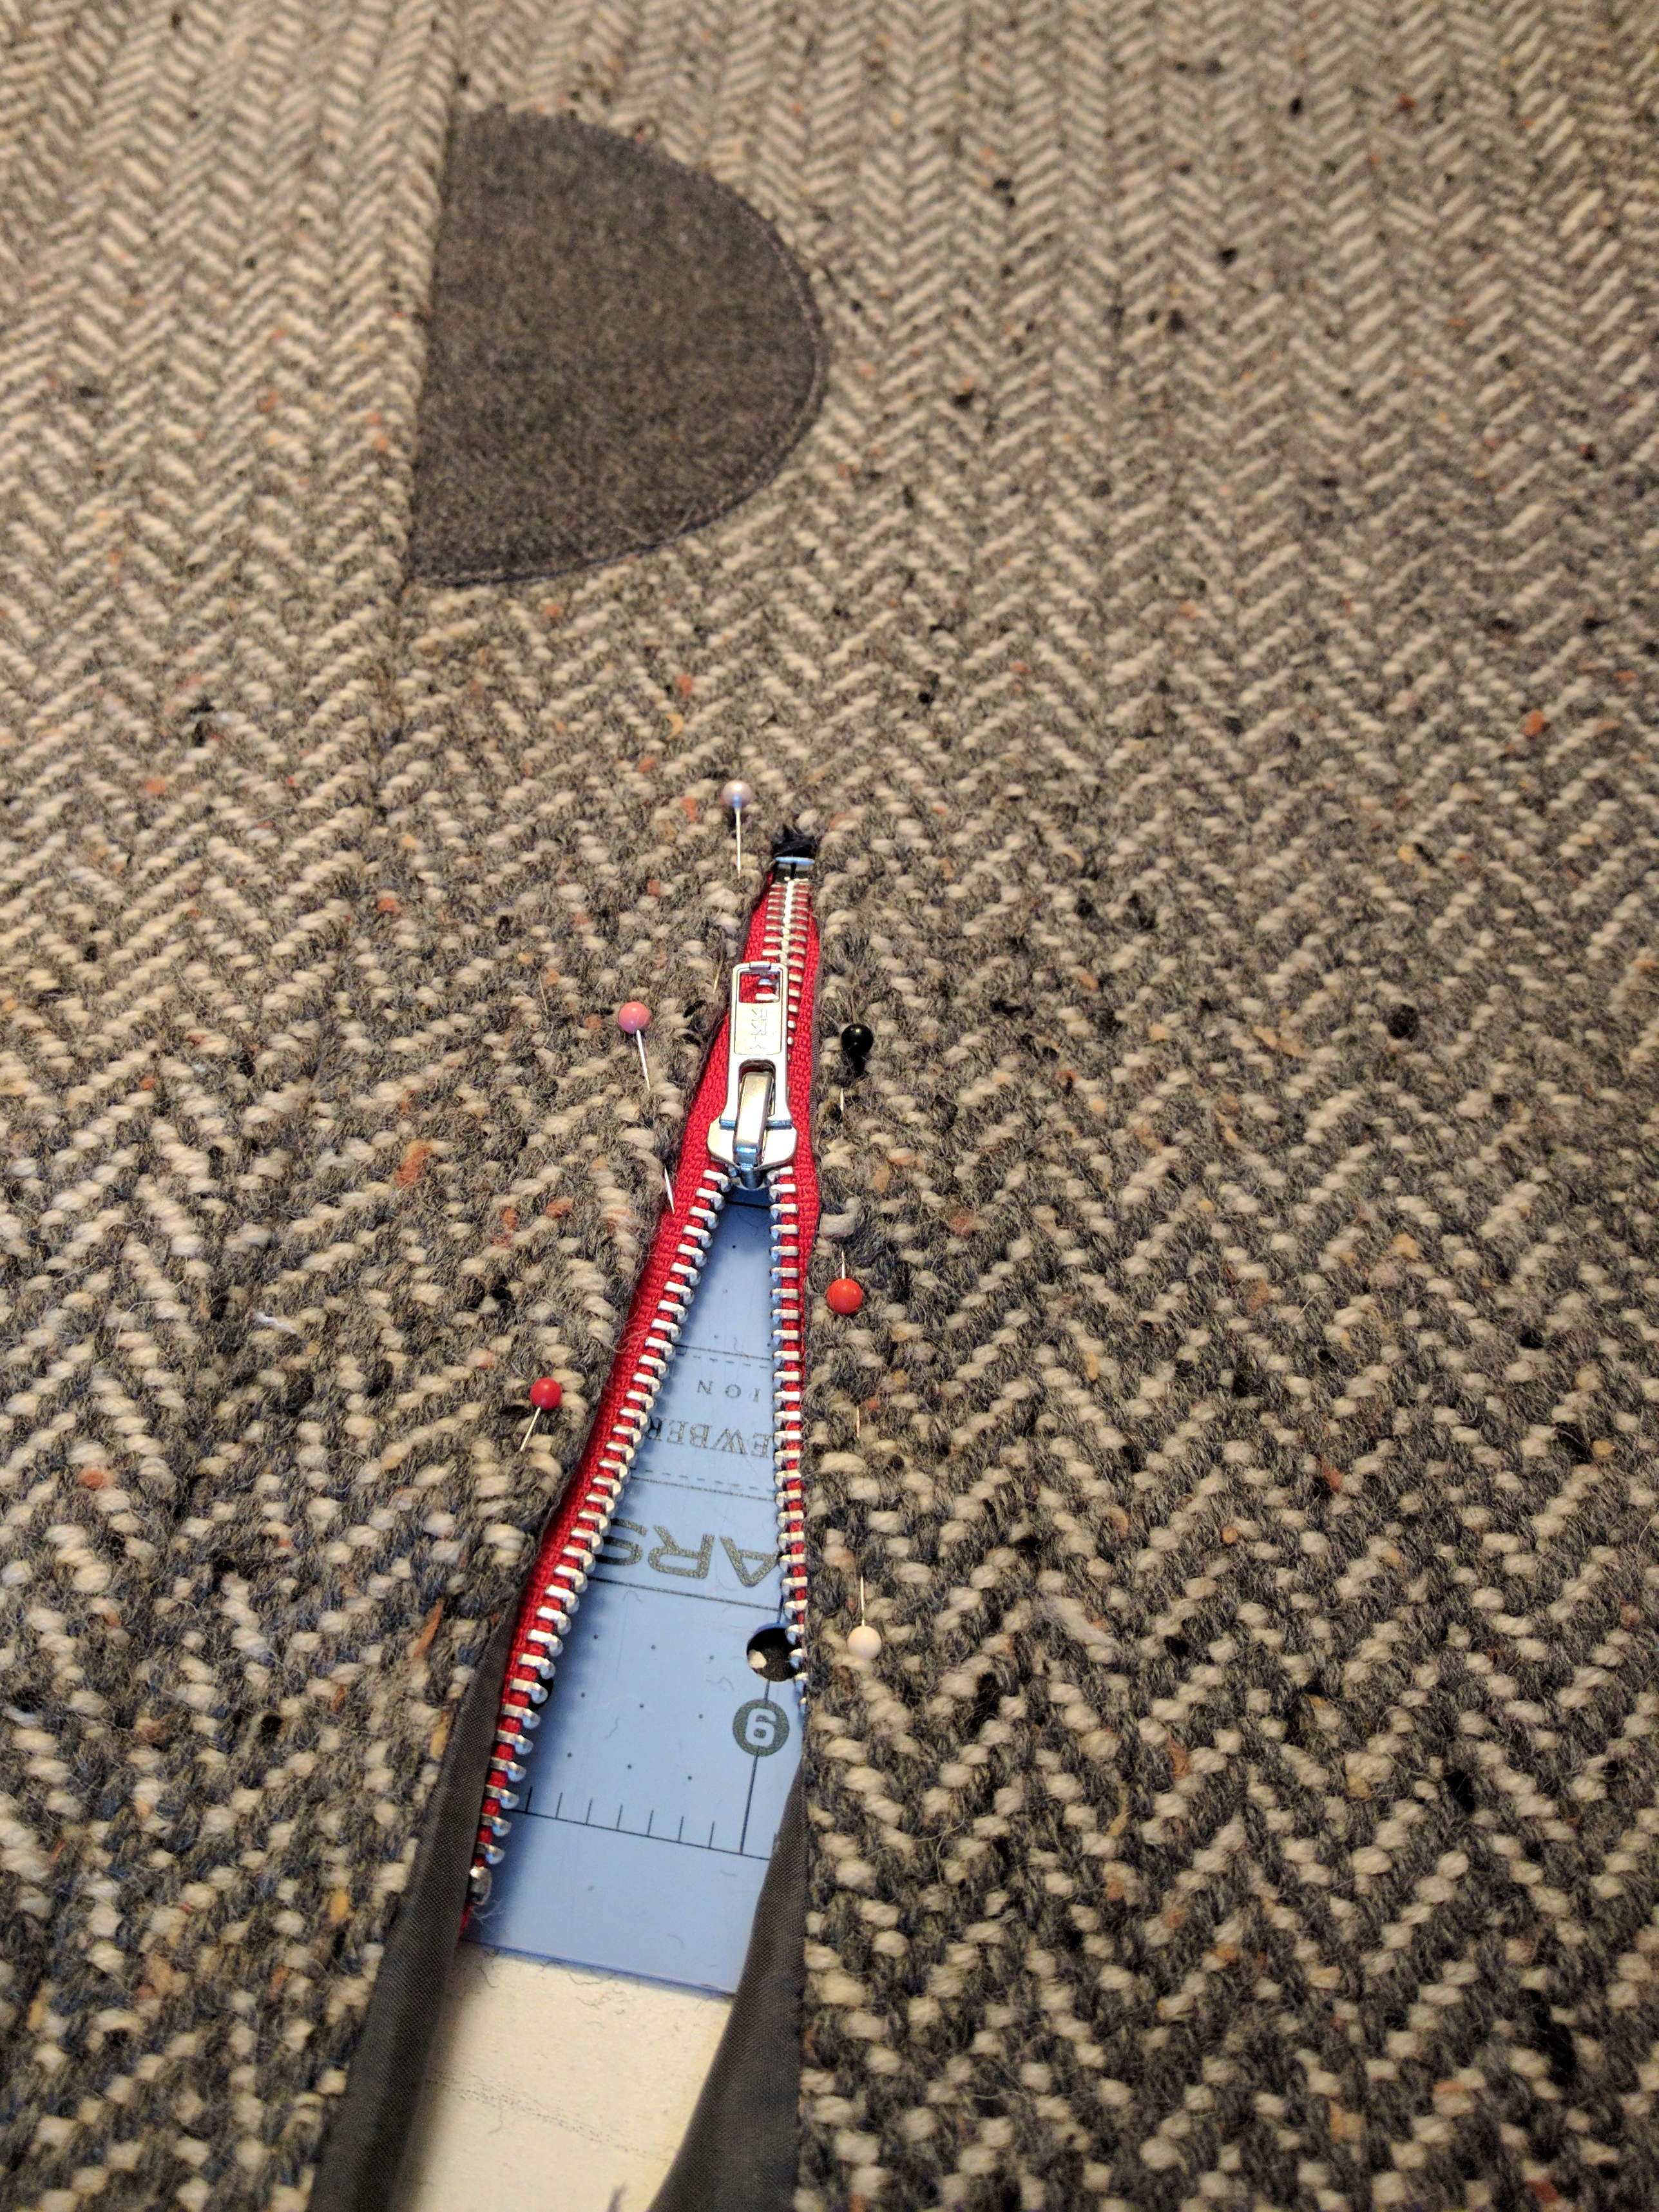
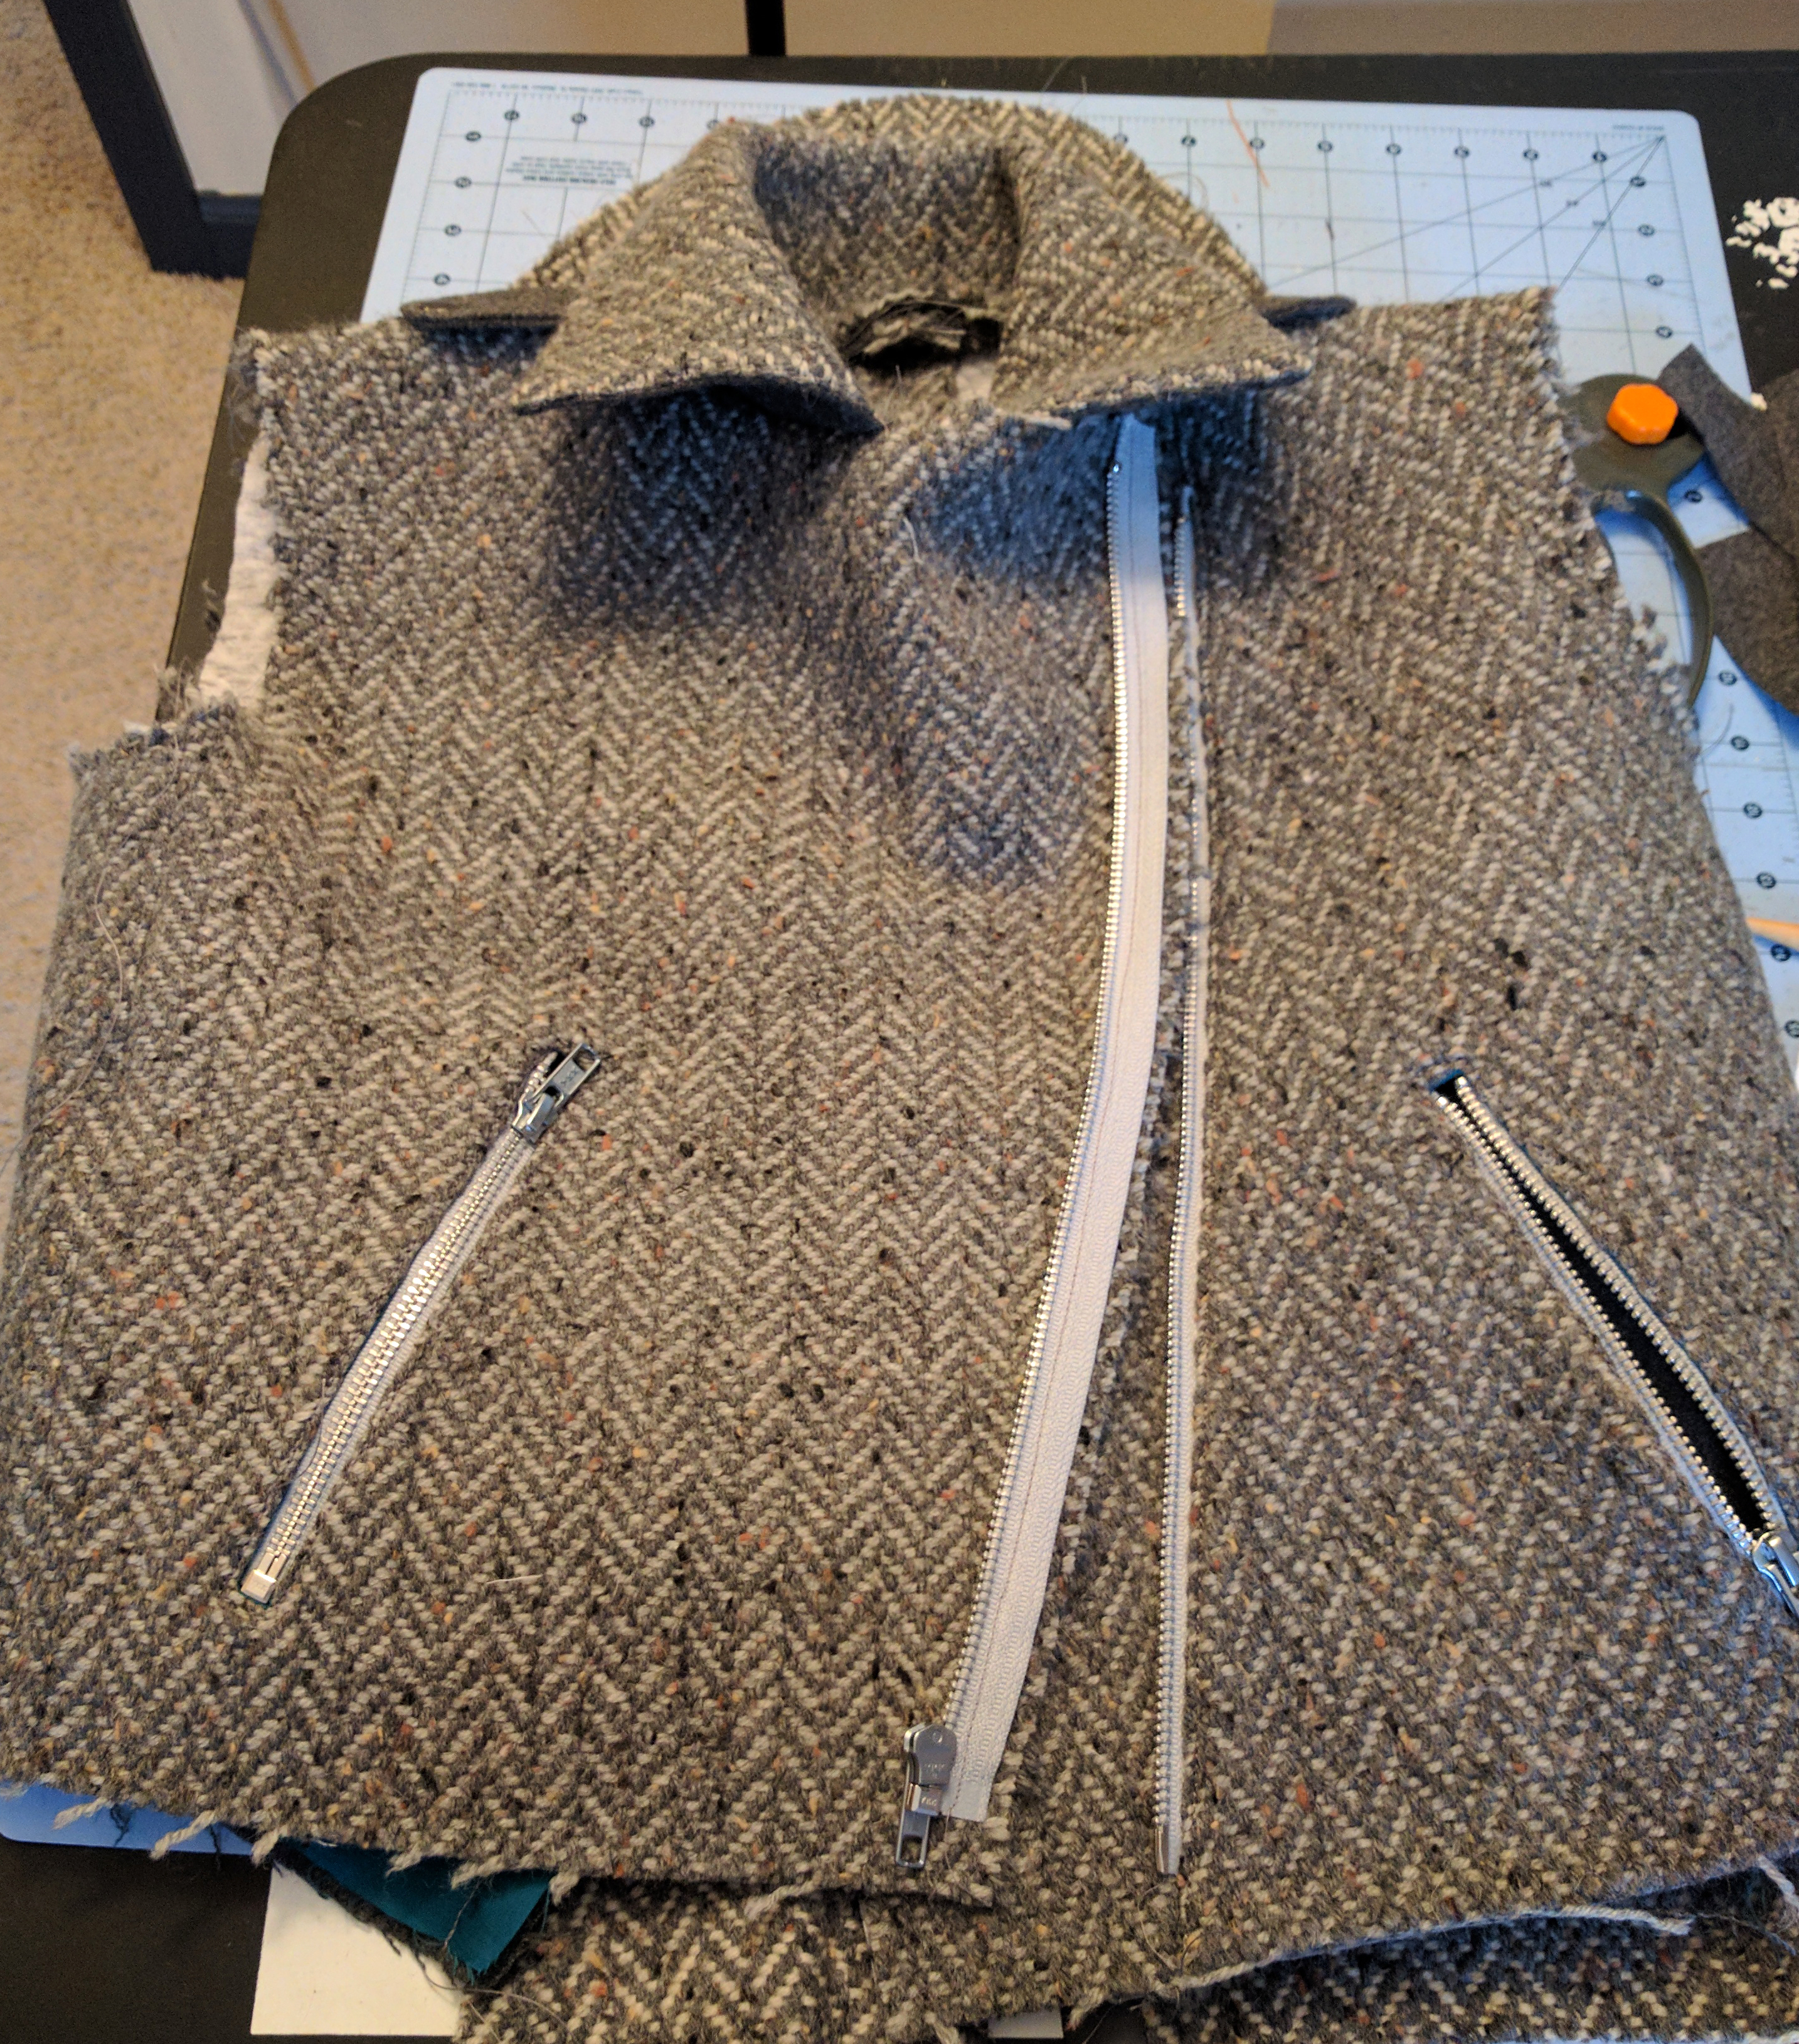
Each jacket has 5 zippers – that was 10 total zippers to shorten. Whew!My pop of color is on the inside of my jacket in the form of teal lining. Mmmm.I really do love this pattern that includes details like these pleats. They’re both stylish and functional, allowing for ease of movement in the back and shoulder area of the wearer.
The gray contrast fabric at the waistband, elbow patches, and a few other locations is a wool blend that was purchased.It’s amazing what a difference the details can make!
Next time, I’m going to be back at the rigid heddle loom with some of our Ready to Dye yarn and some experimentation!
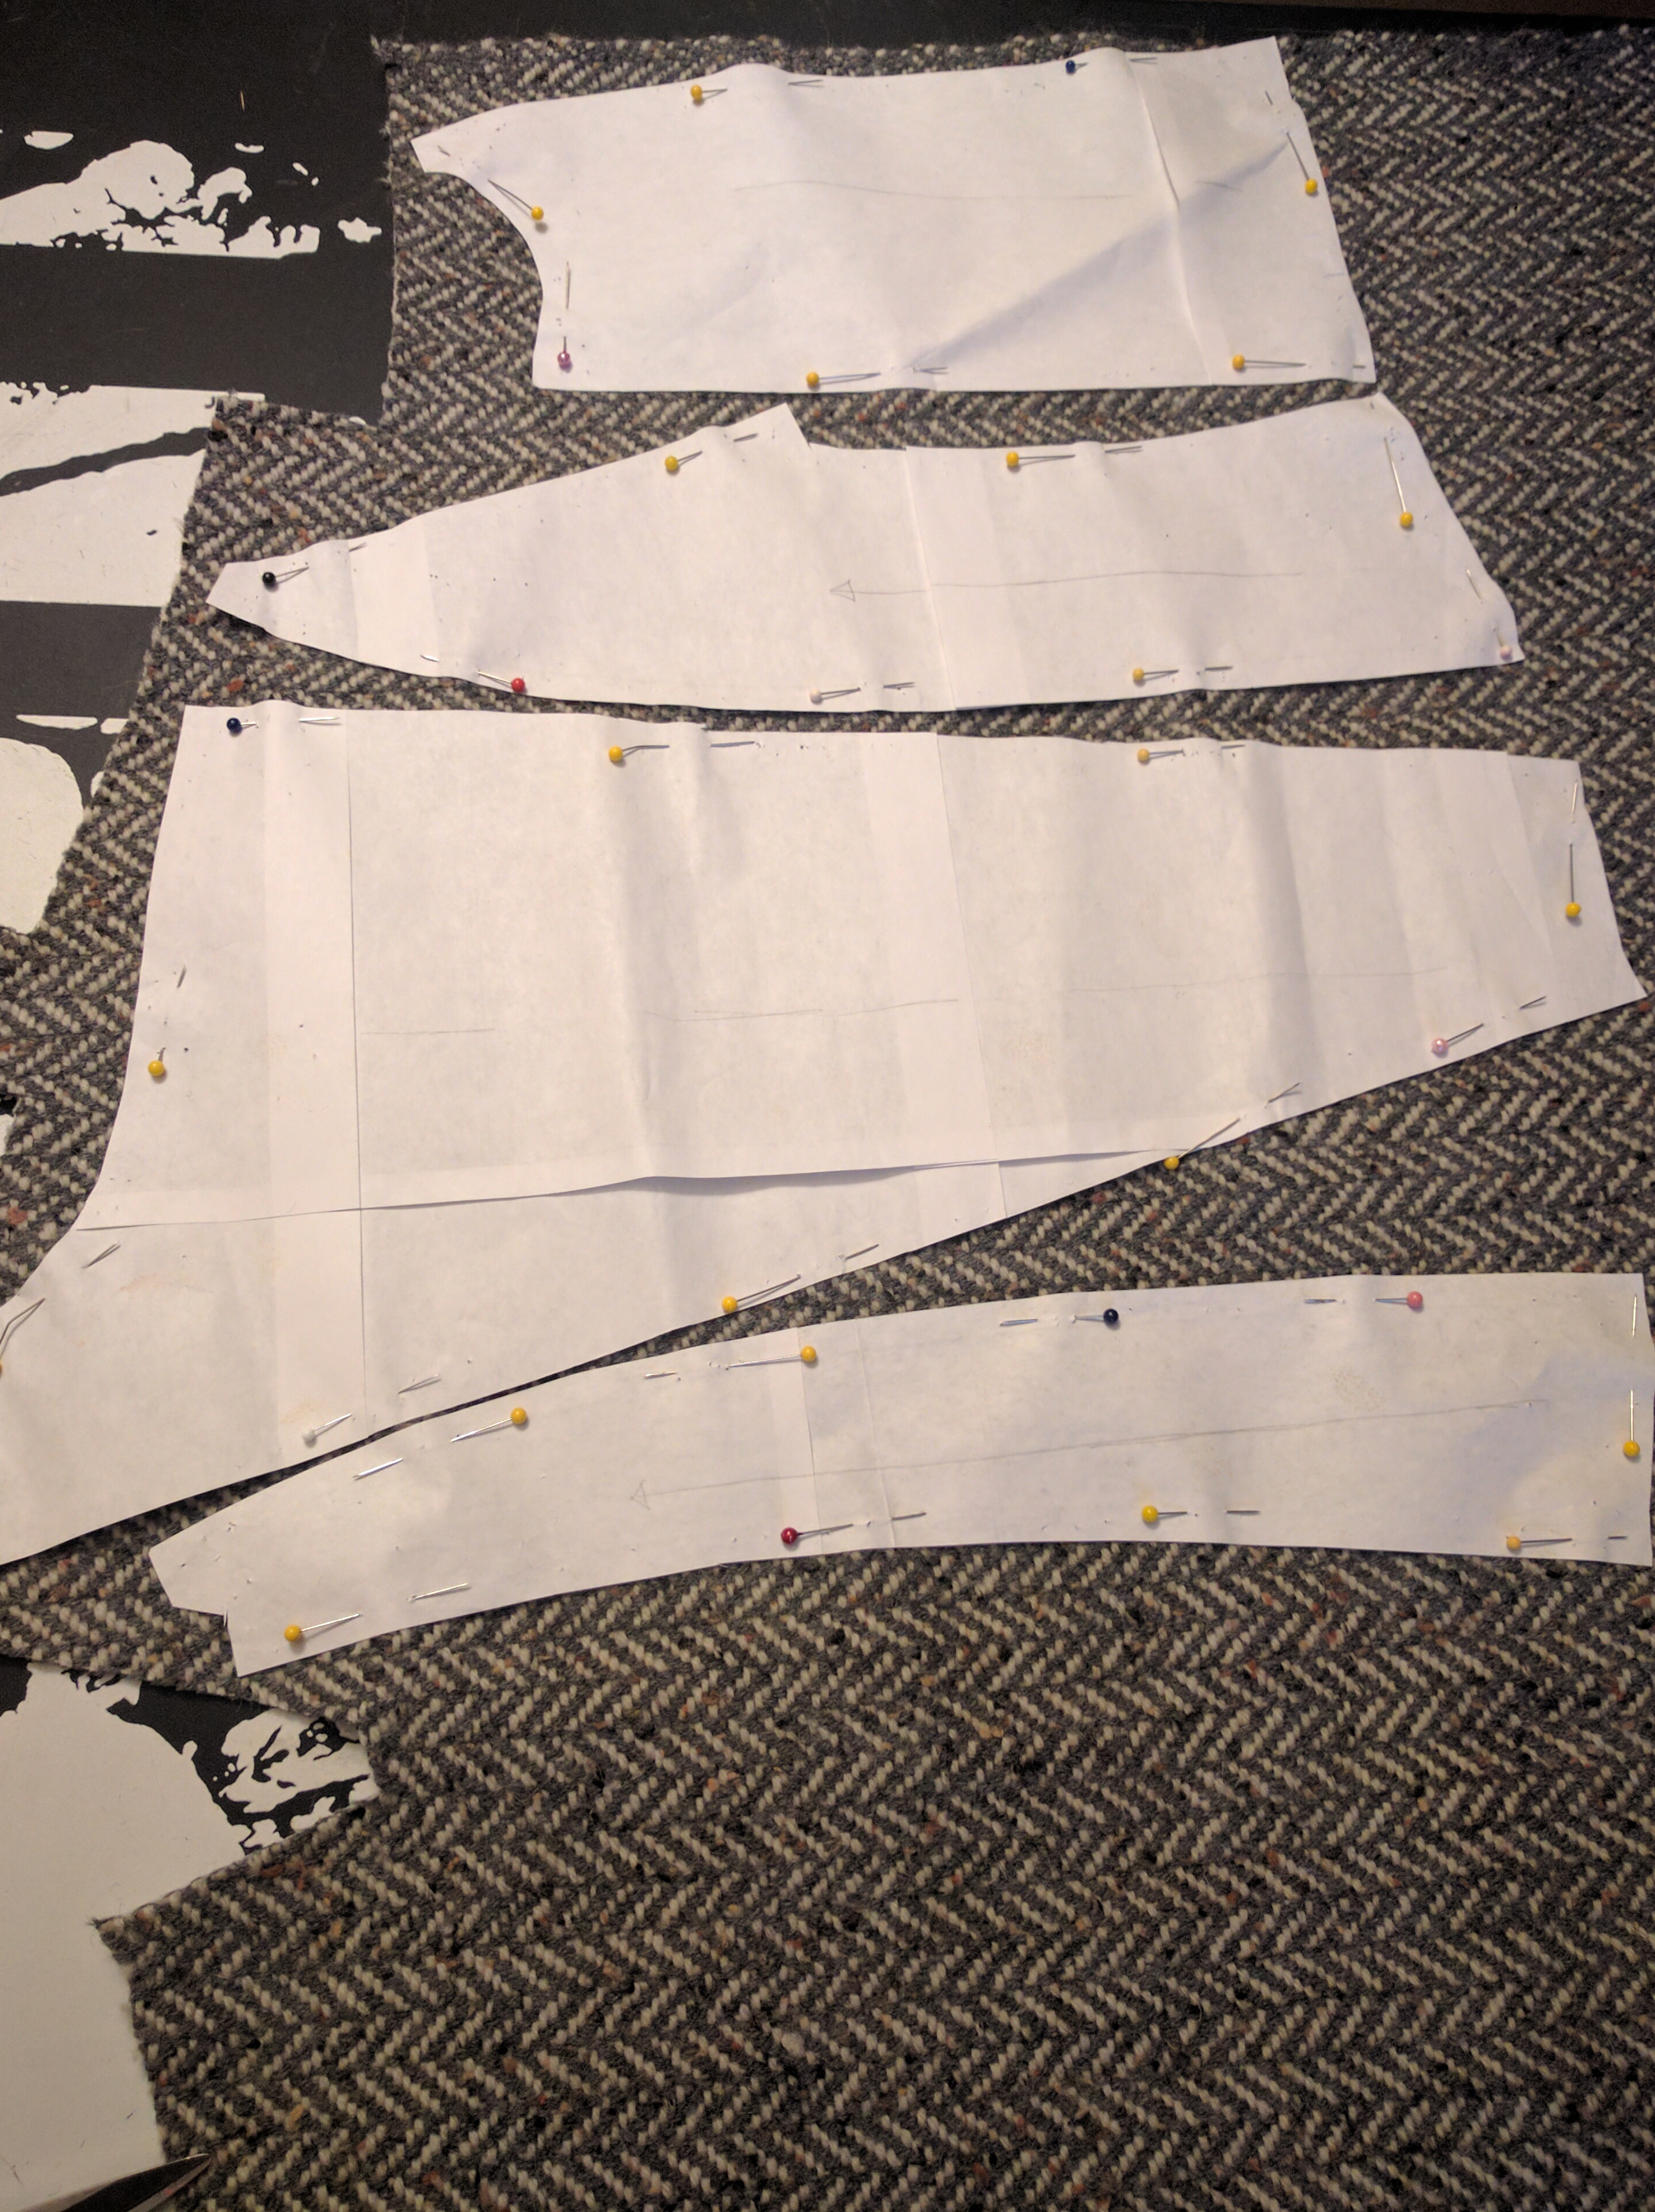
The first step was to interface all of my handwoven fabric. I got enough lightweight fusible interfacing for all my yardage. The reason for doing this is so that when I cut into the fabric for my pattern pieces, it will prevent the edges from coming unwoven.
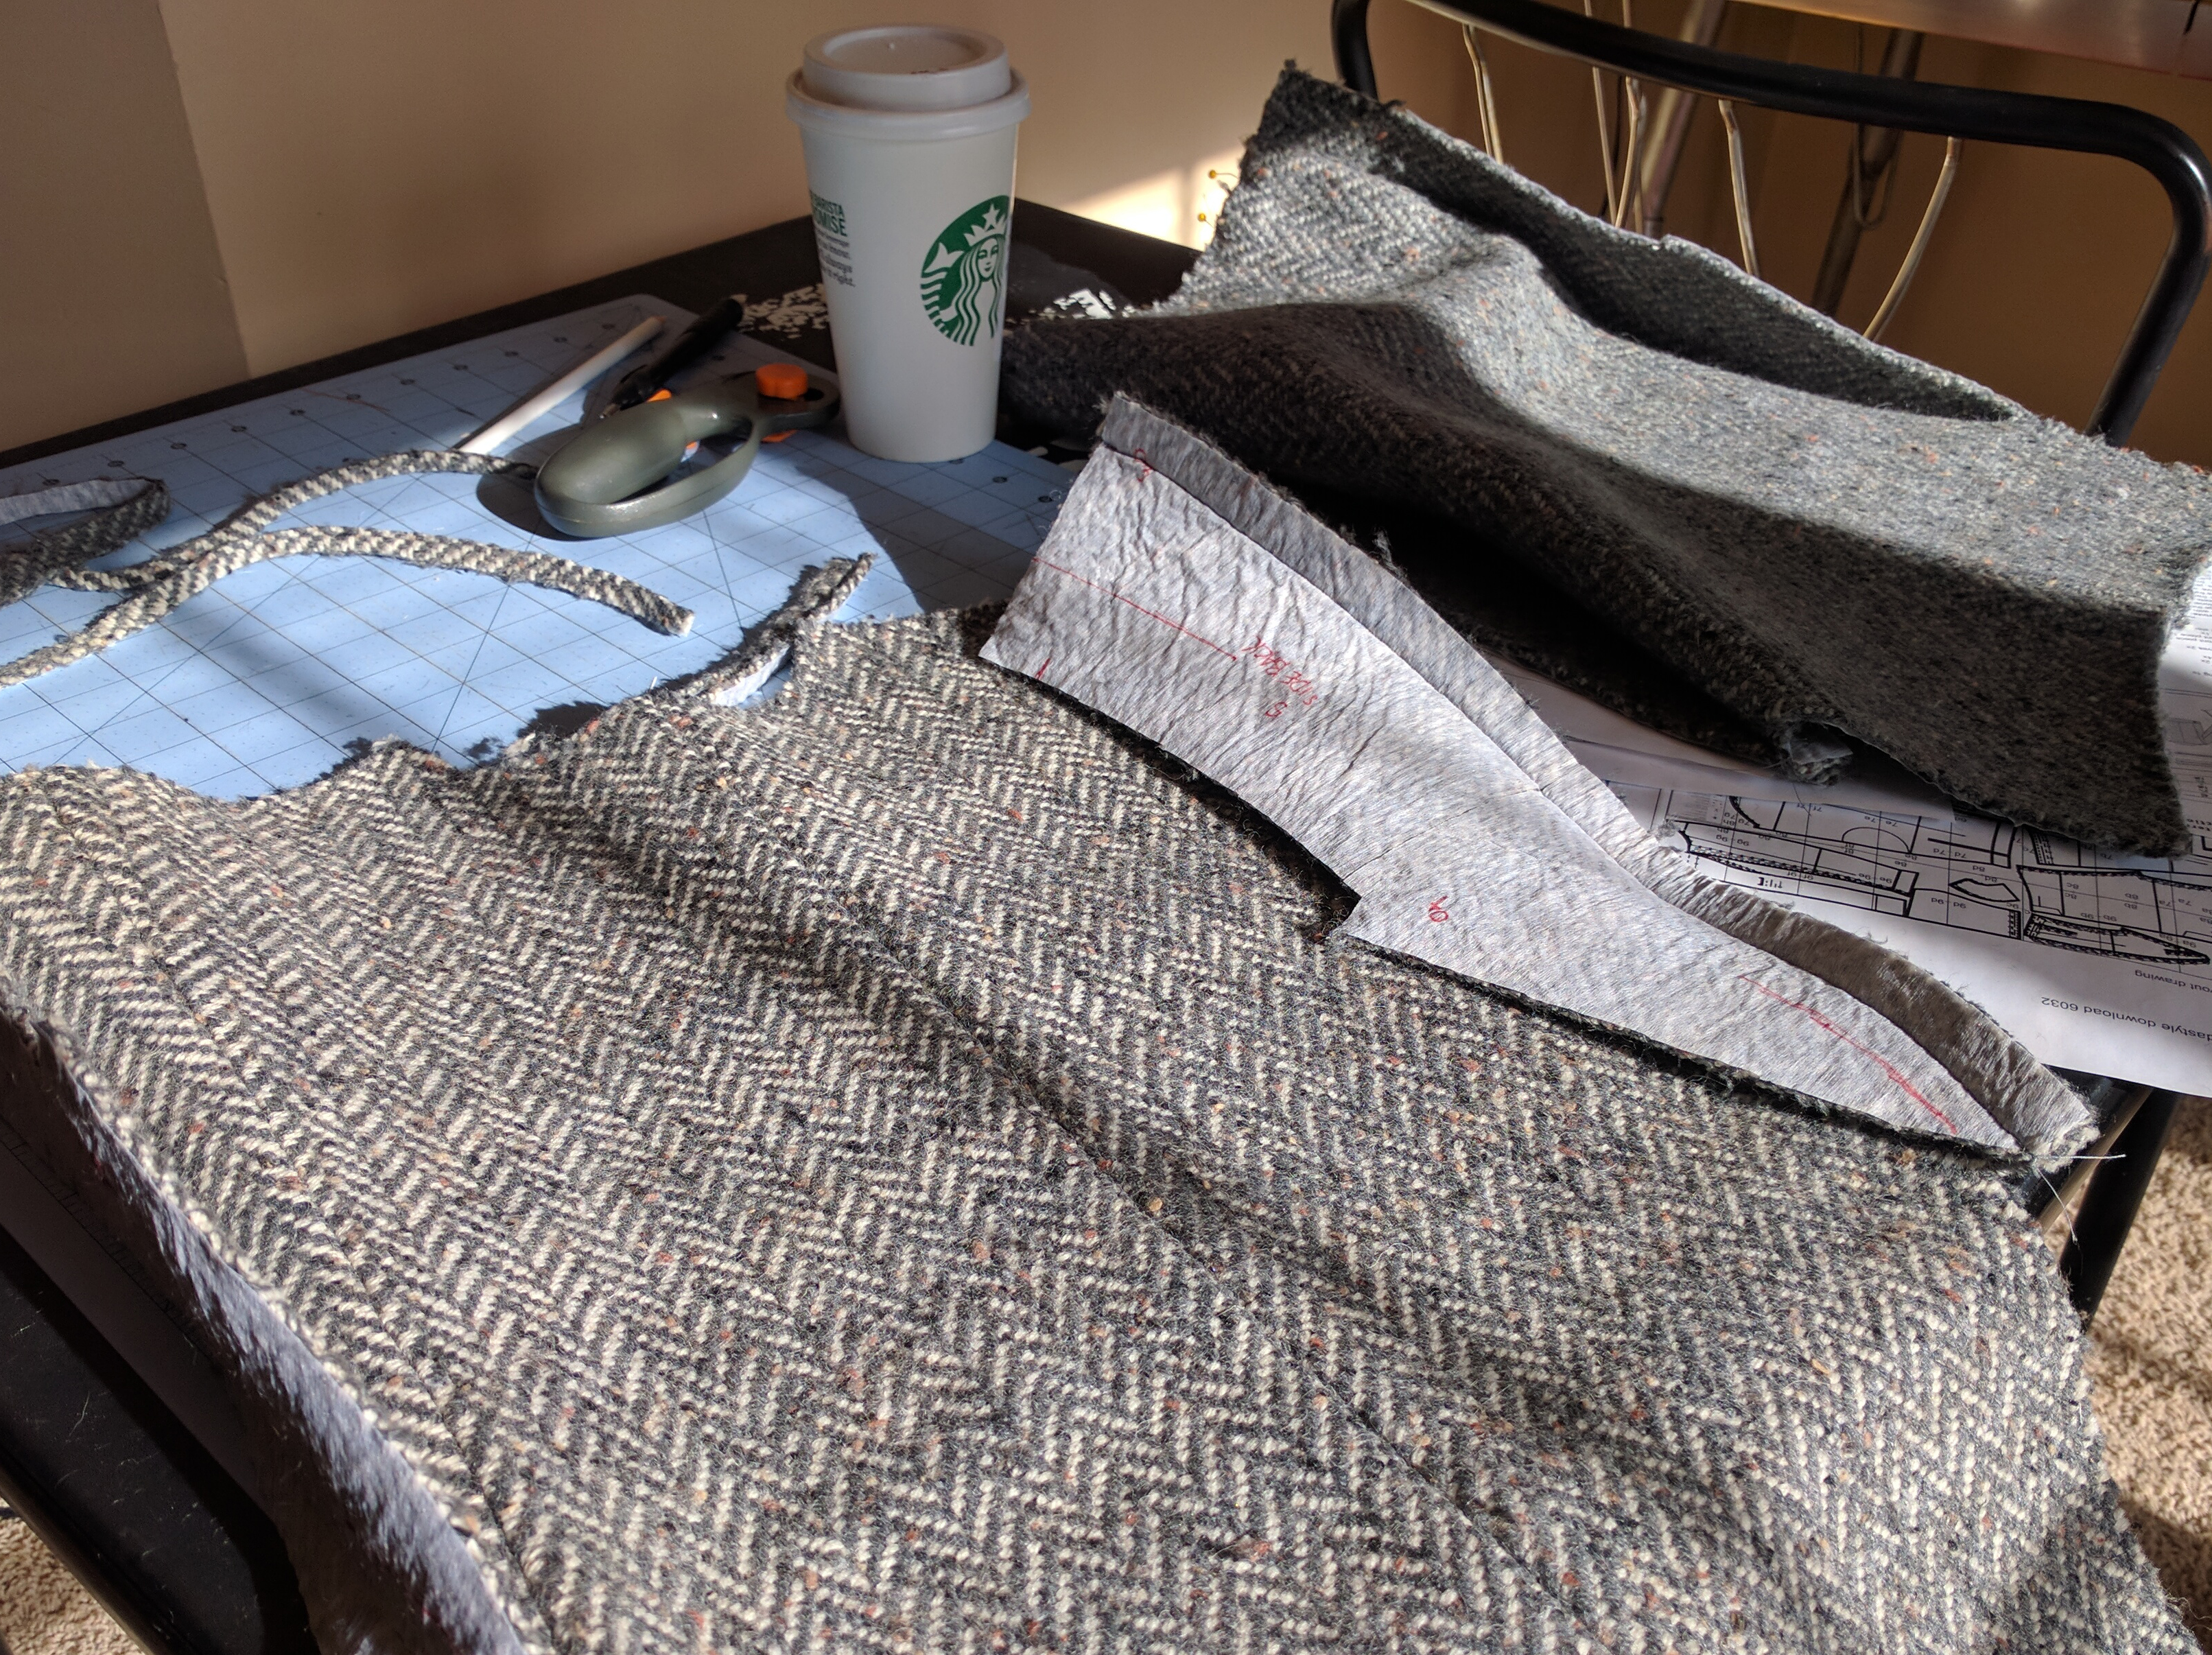
Two jackets-worth of pattern pieces and lining is a LOT of cutting!
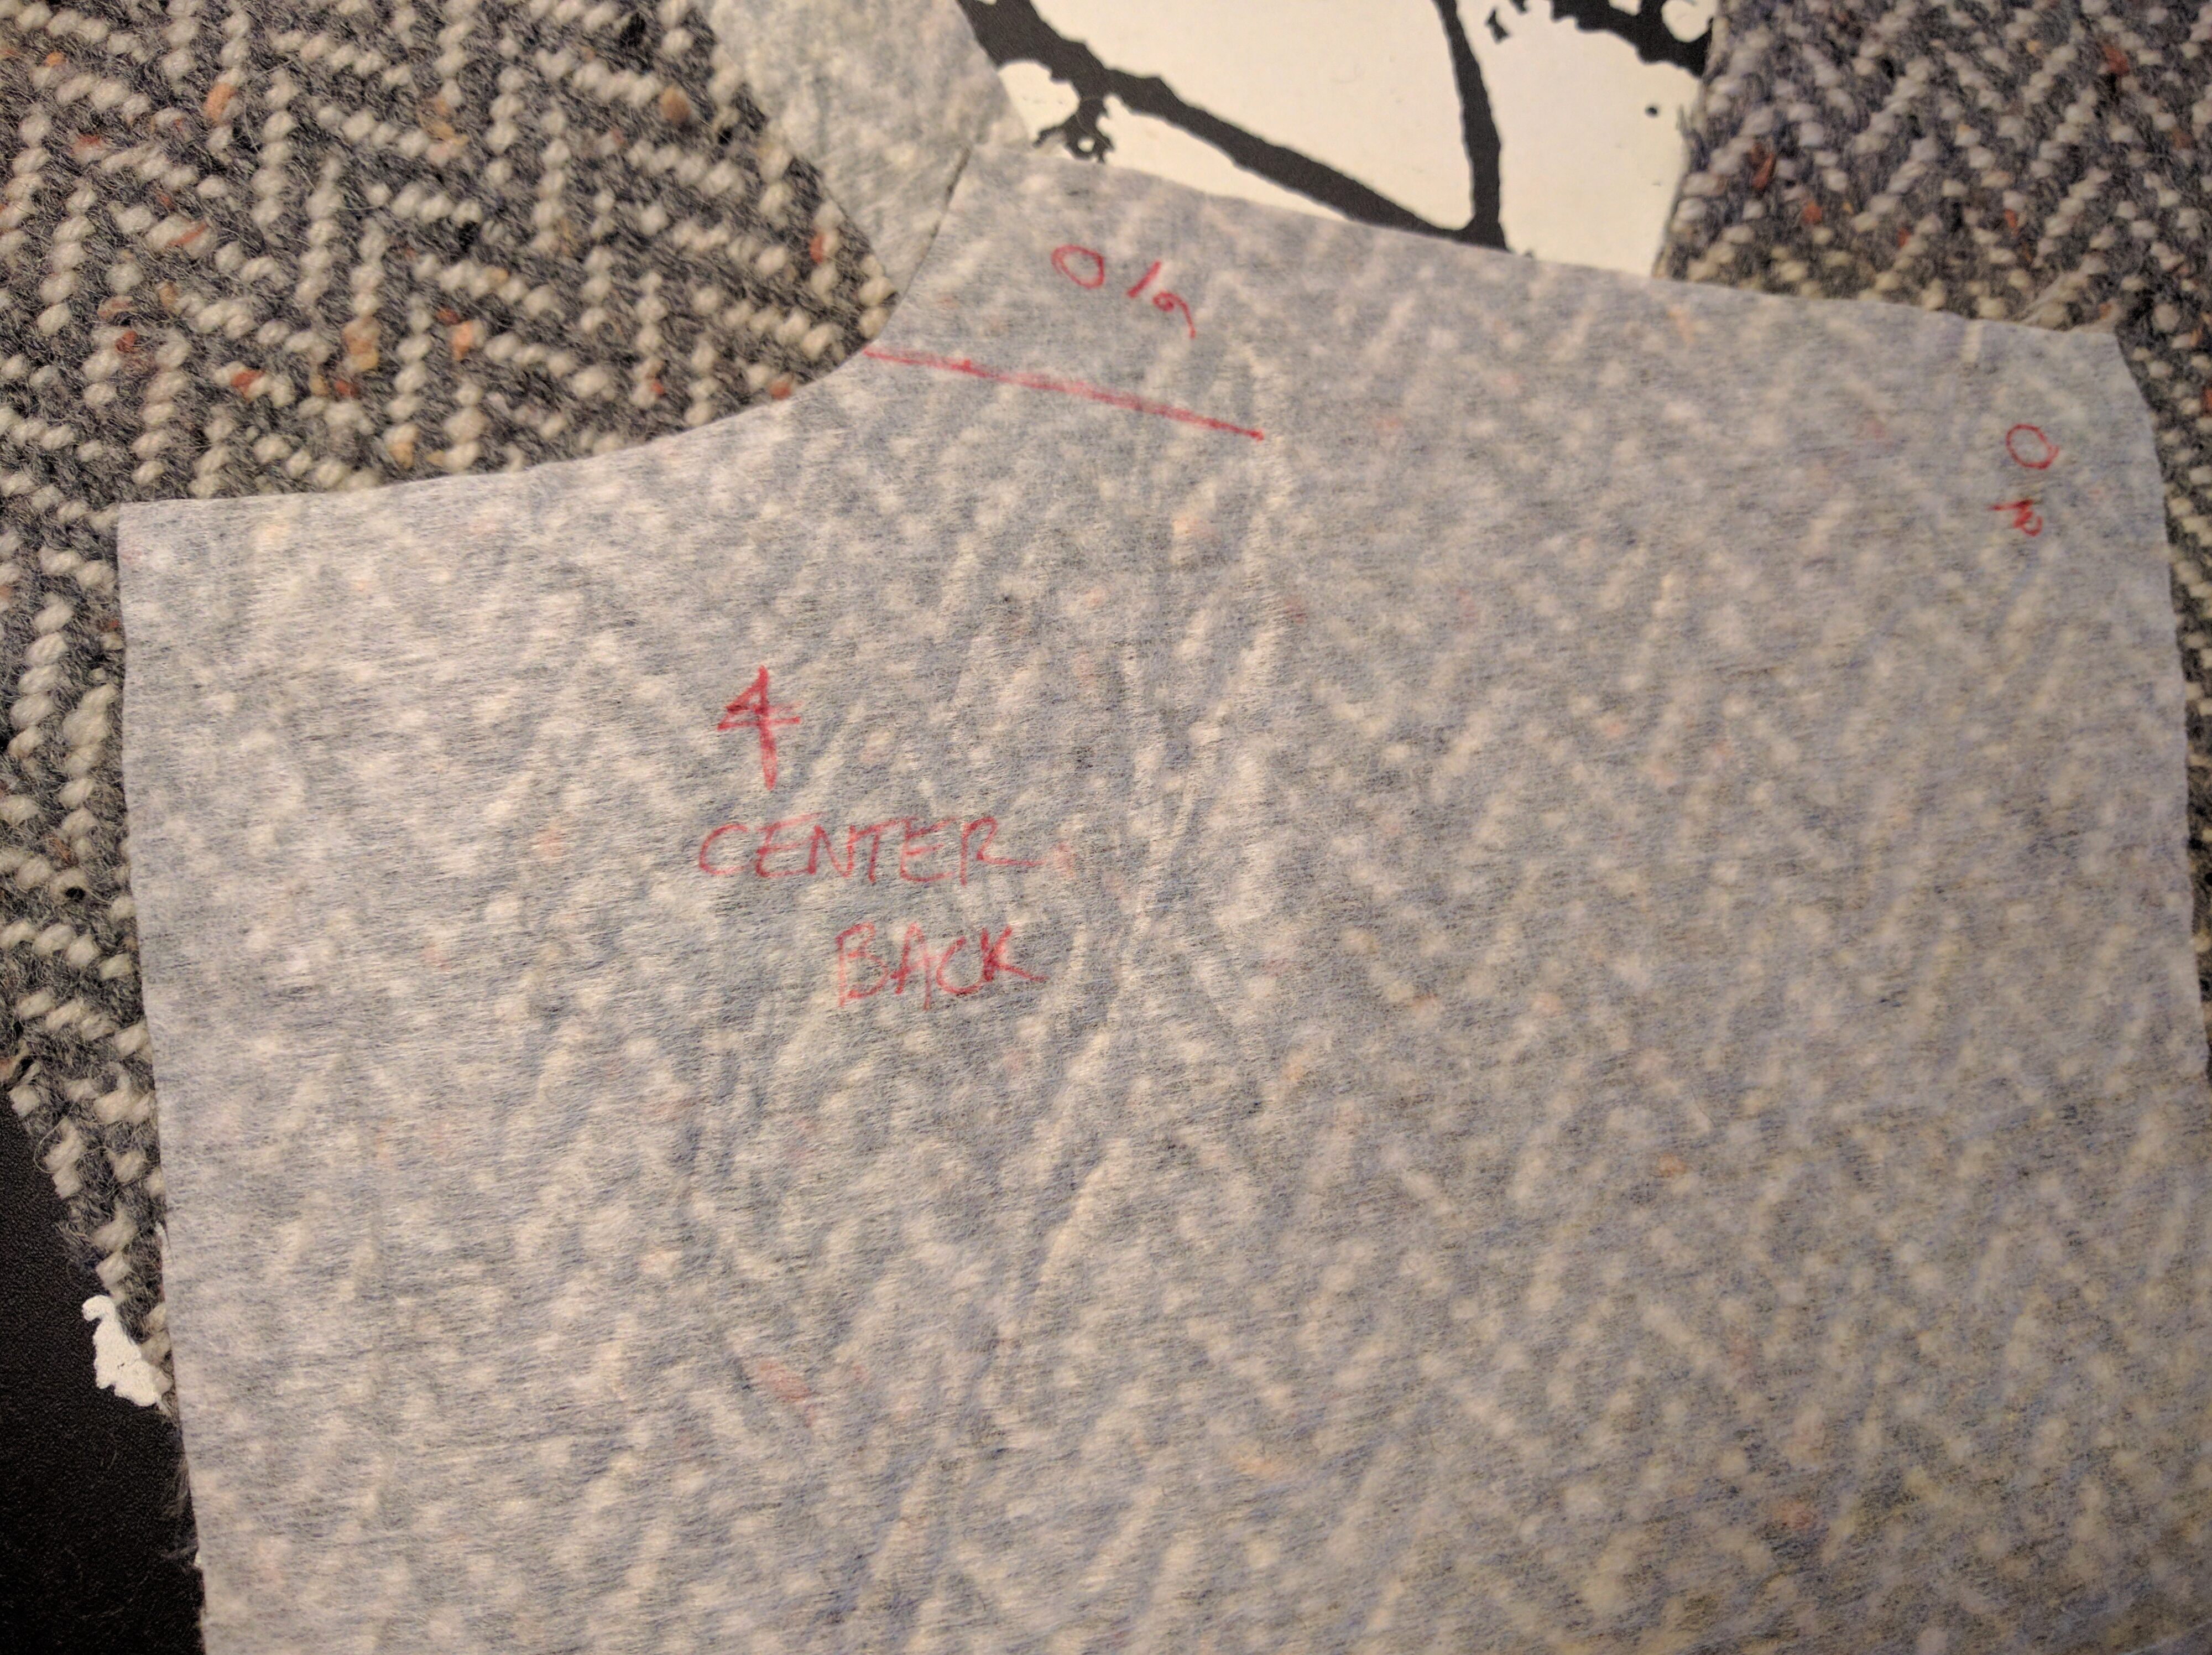
Every bit of fabric is precious since I wove it, so a certain strategy is involved when laying out those pattern pieces.
With the interfacing on the back of my fabric, it made it easy to make pattern markings and actually be able to see them.
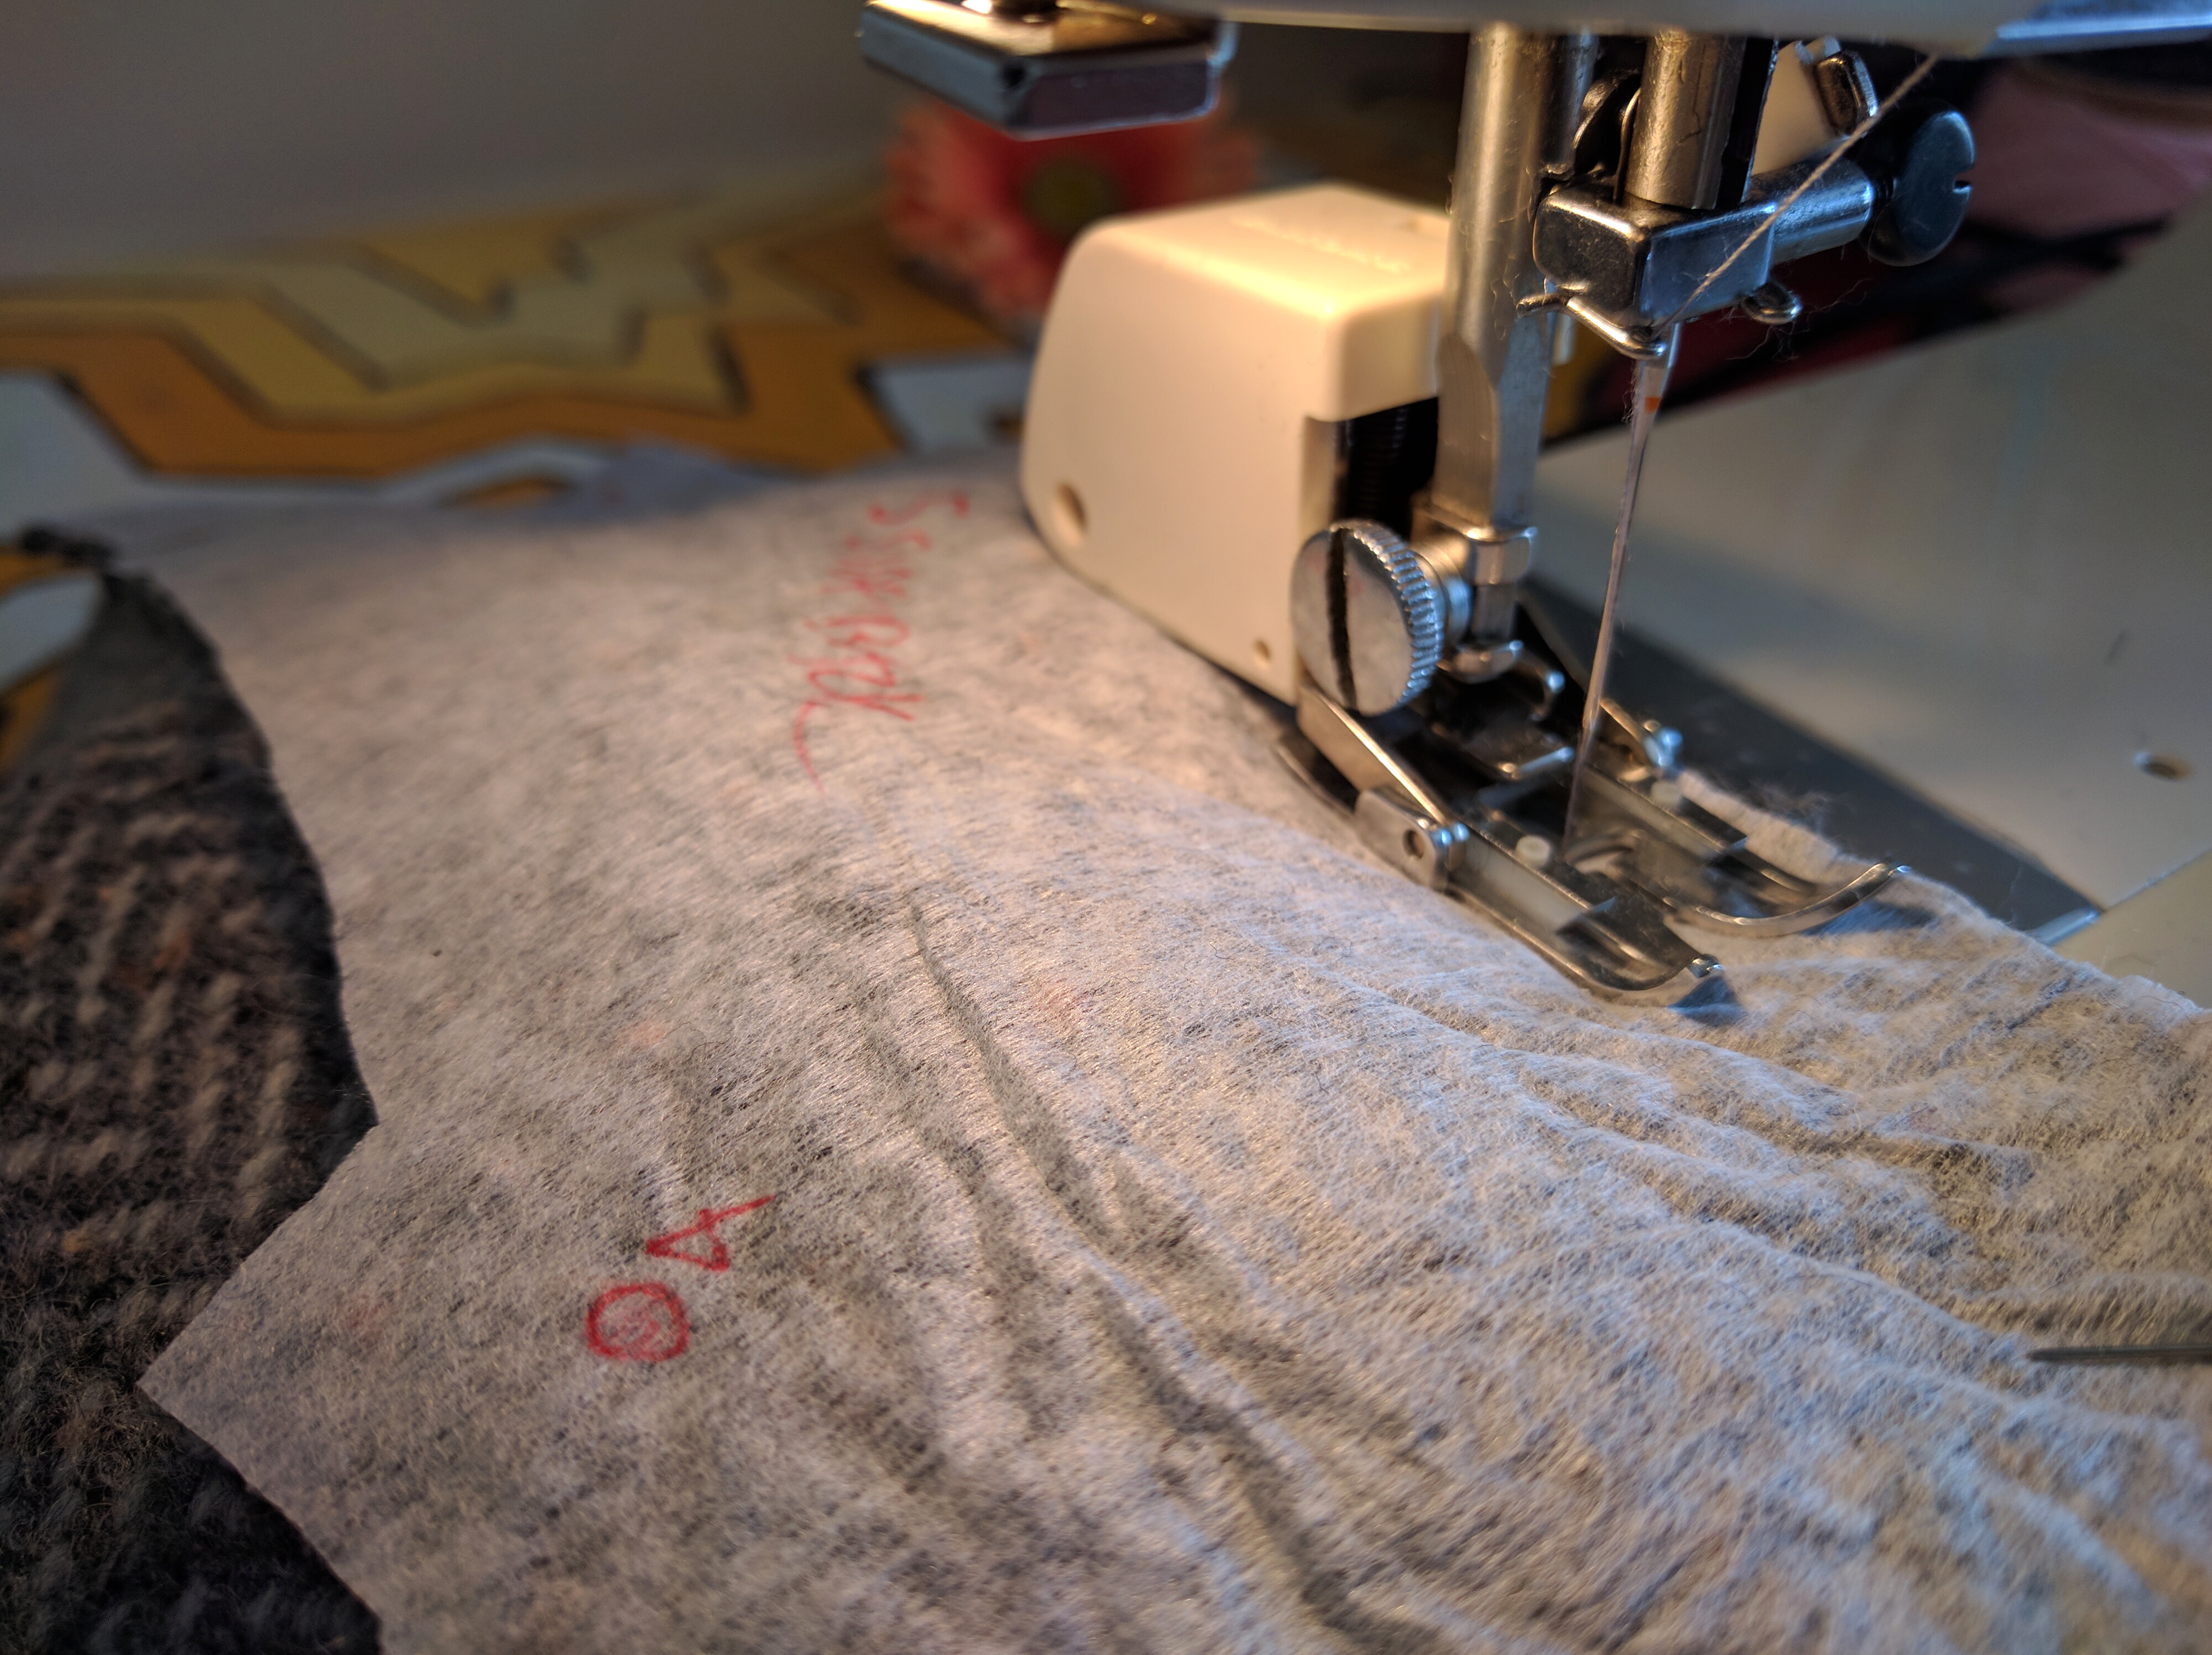
I used a special foot on my sewing machine called a “walking foot” for some of the bulky seams. It helps to manage bulky layers of fabric so that they feed evenly through the machine.
Sewing moto jackets requires a lot of coffee.
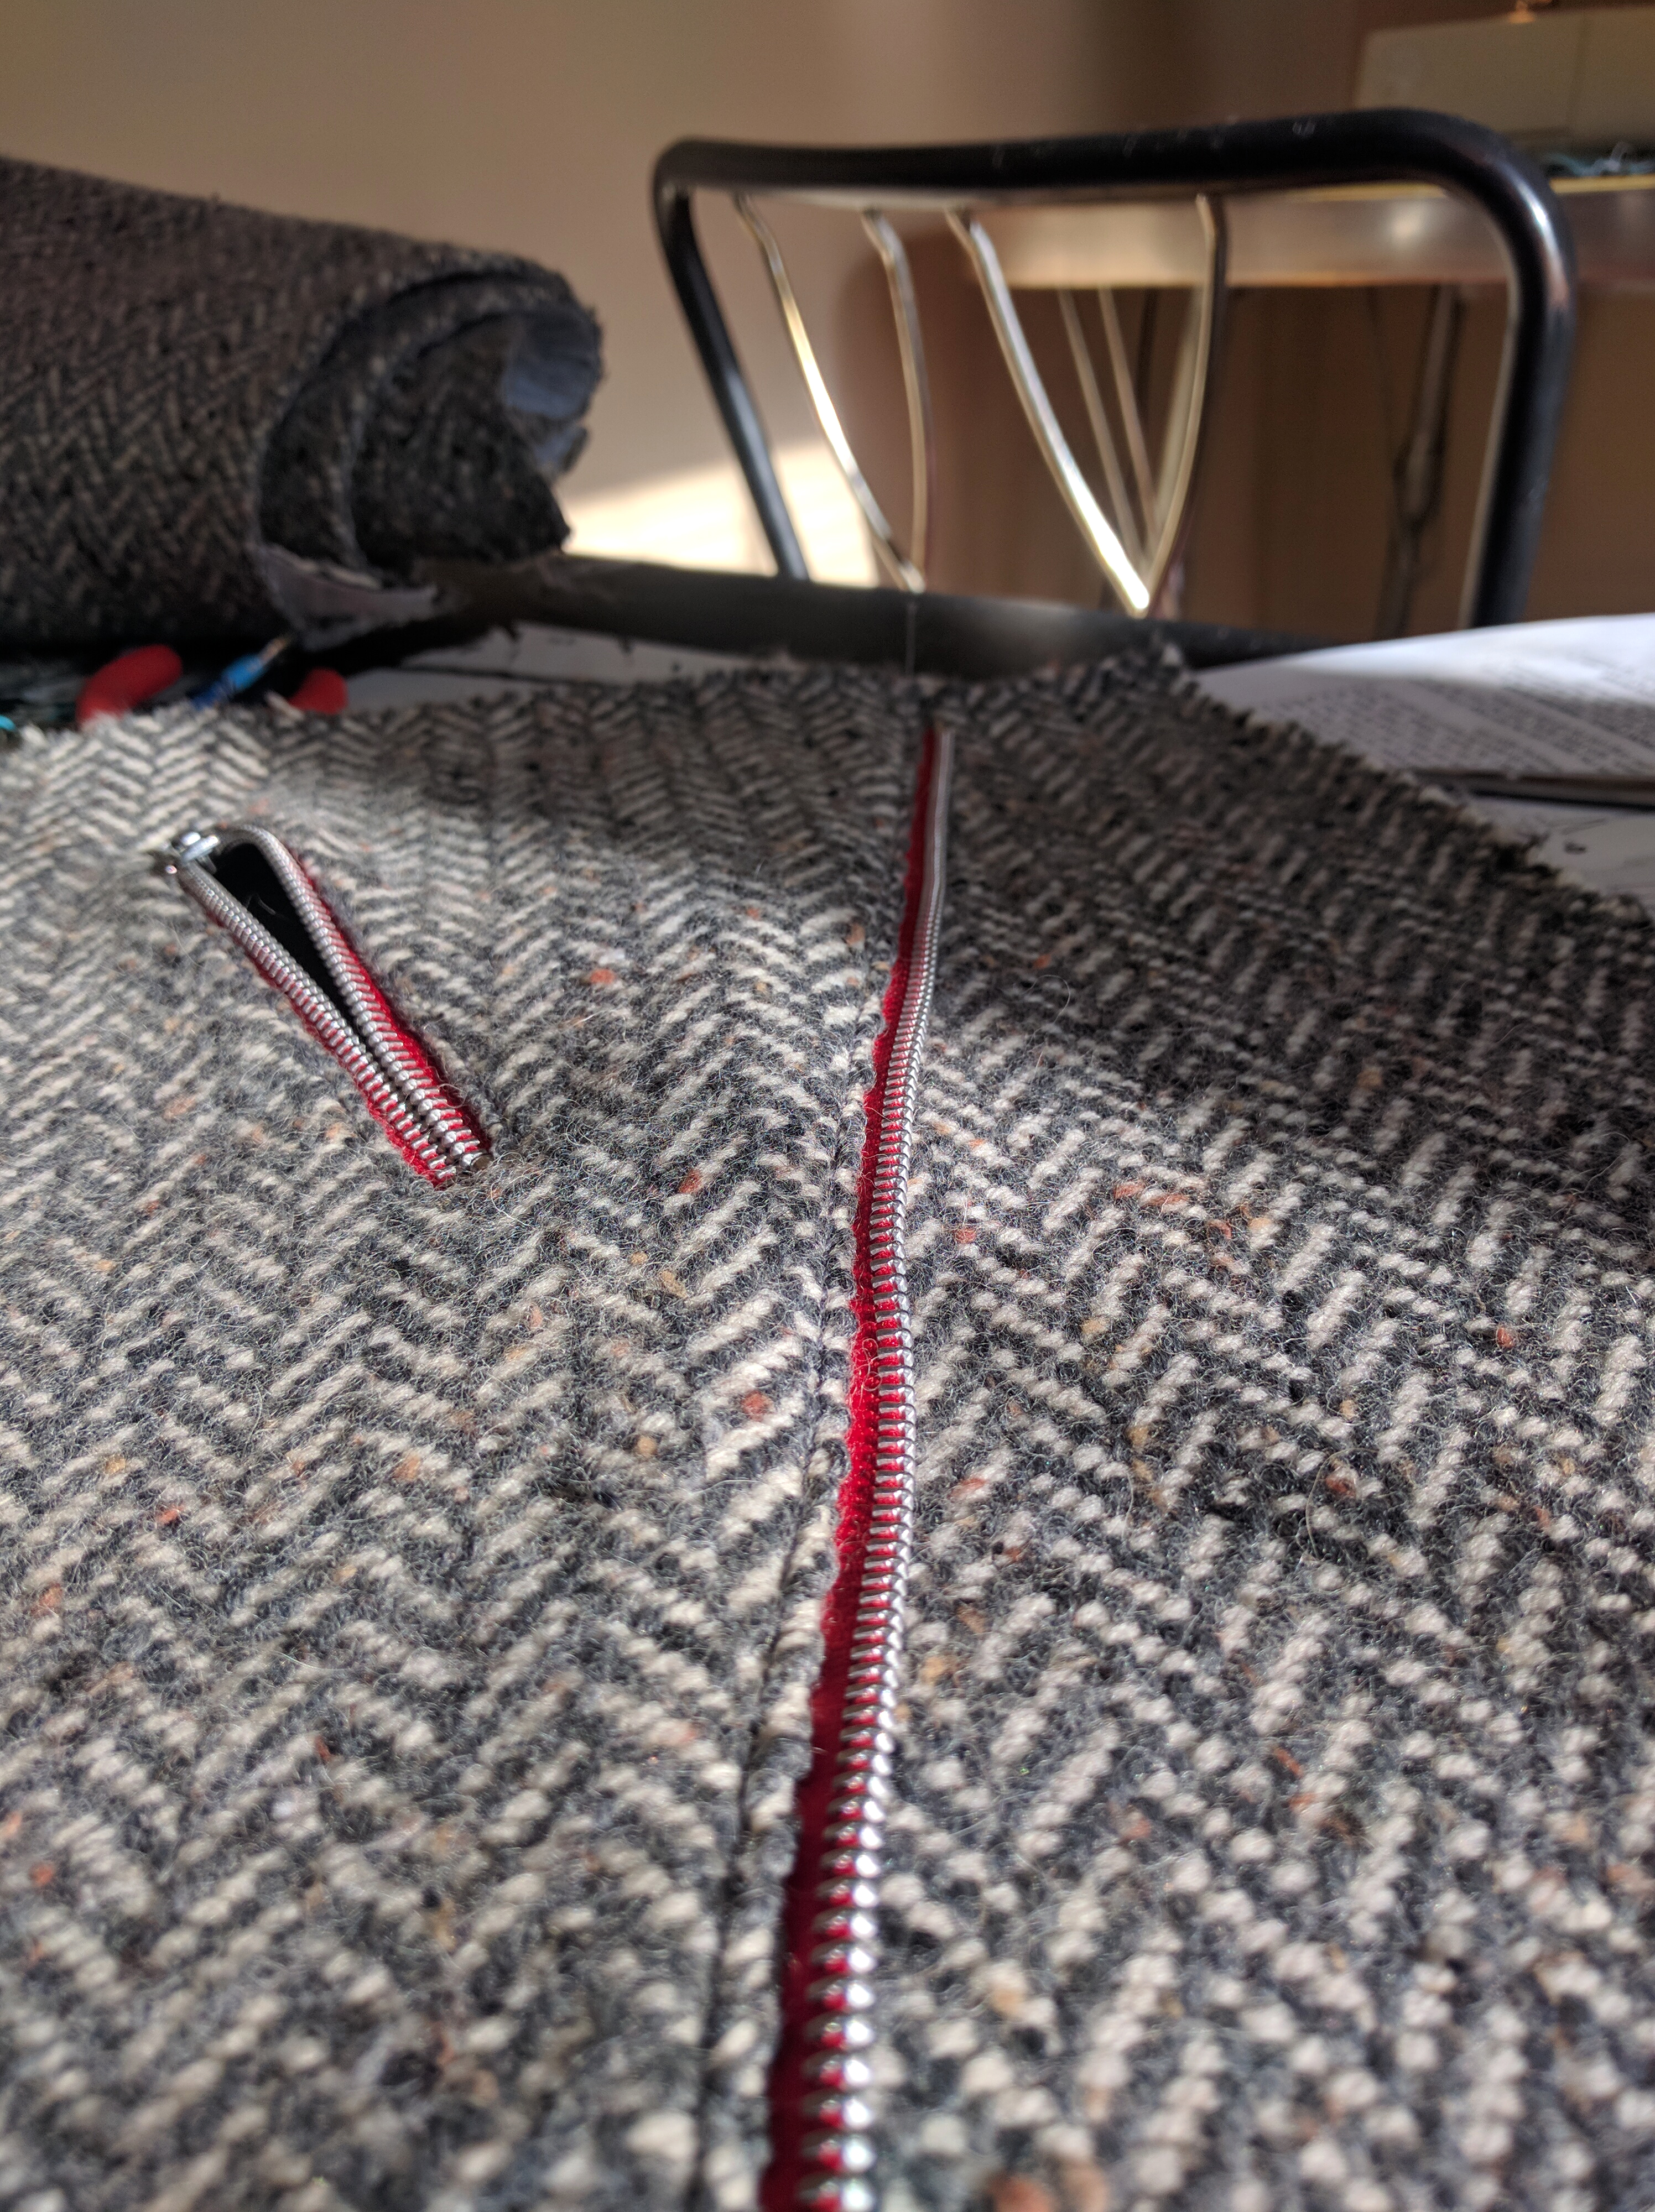
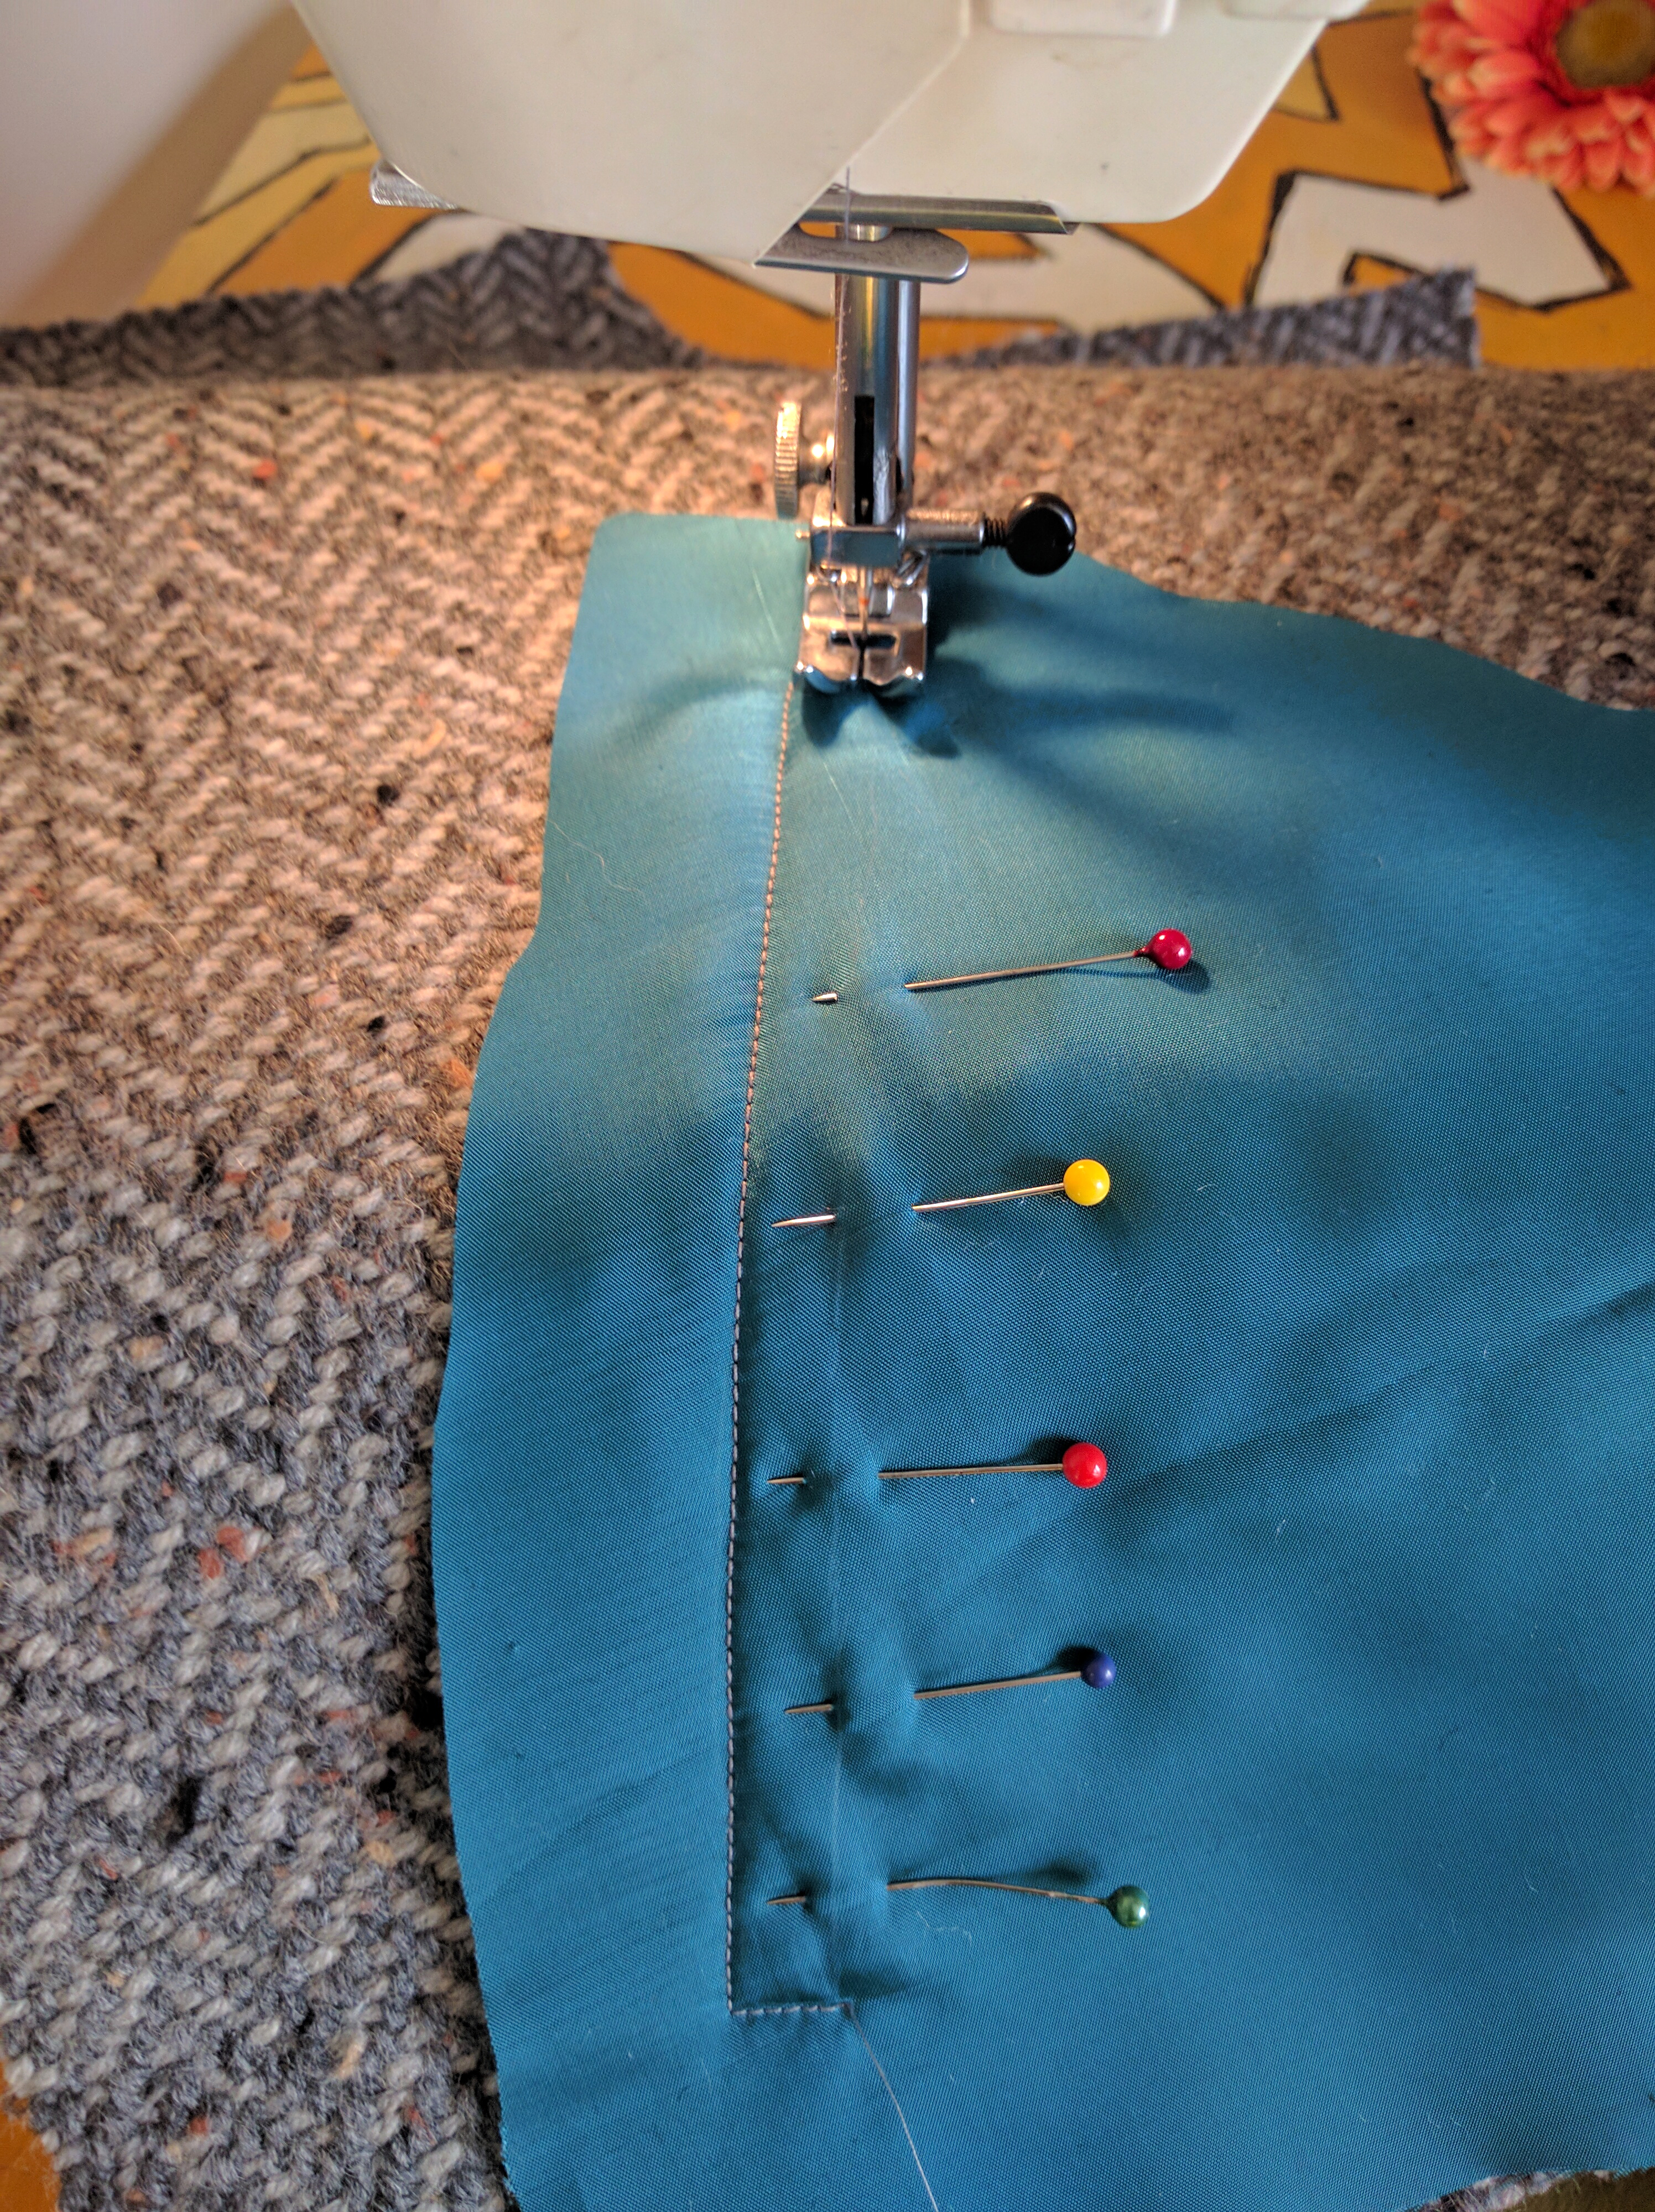
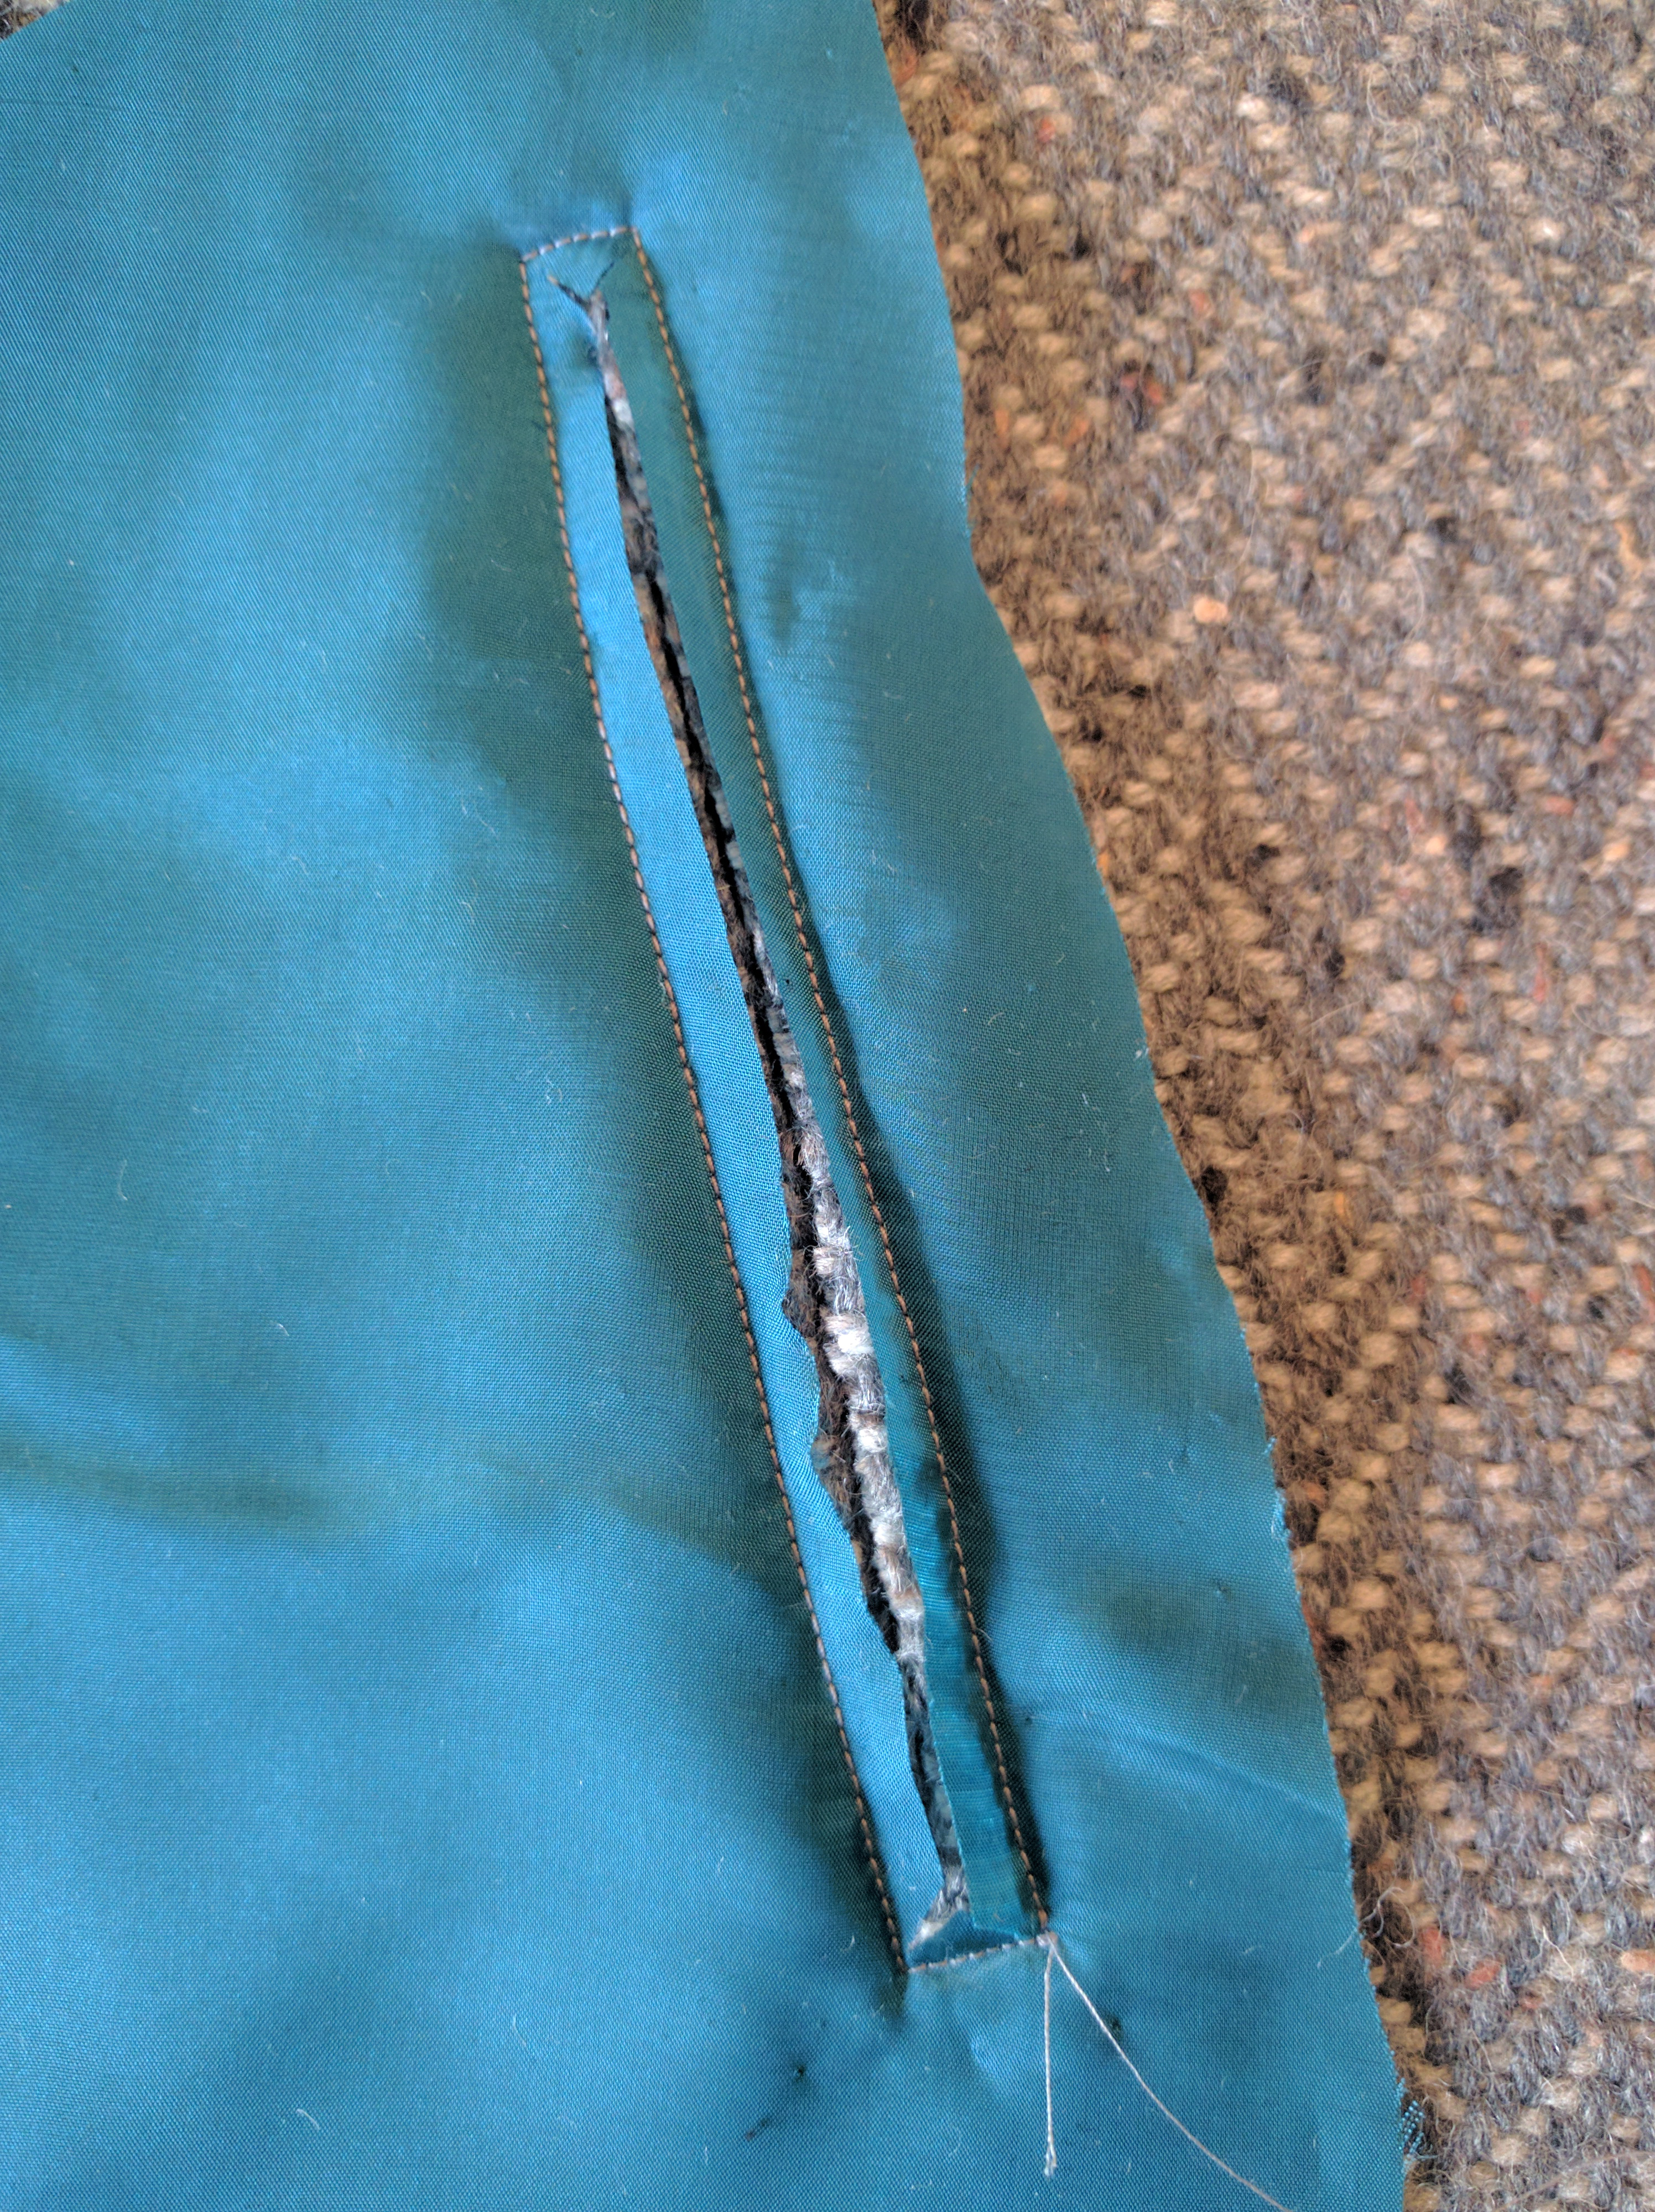
Since this is a weaving column, I’m taking it easy on sharing every single detail of the sewing process. But zipper installation fascinates me, so here are some in-progess shots of the pocket zippers. Above, I’m sewing the lining onto the right side of the fabric.
Then the pocket opening is slashed down the center.
Next, the lining fabric gets pulled to the wrong side and pressed. It’s so clean and tidy looking!
And finally the zipper is pinned underneath and sewn down. I love a good zipper installation. Which is good, since each jacket requires 5 zippers. Whew!
Here we have something that is actually beginning to resemble clothing. Yay!
It’s like magic that this can turn into a moto jacket, right?
If you’re planning on being at TNNA in San Jose this weekend, stop by the booth and check out the finished jackets. Otherwise, I’ll be back on the blog next week for final photos and wrap-up.
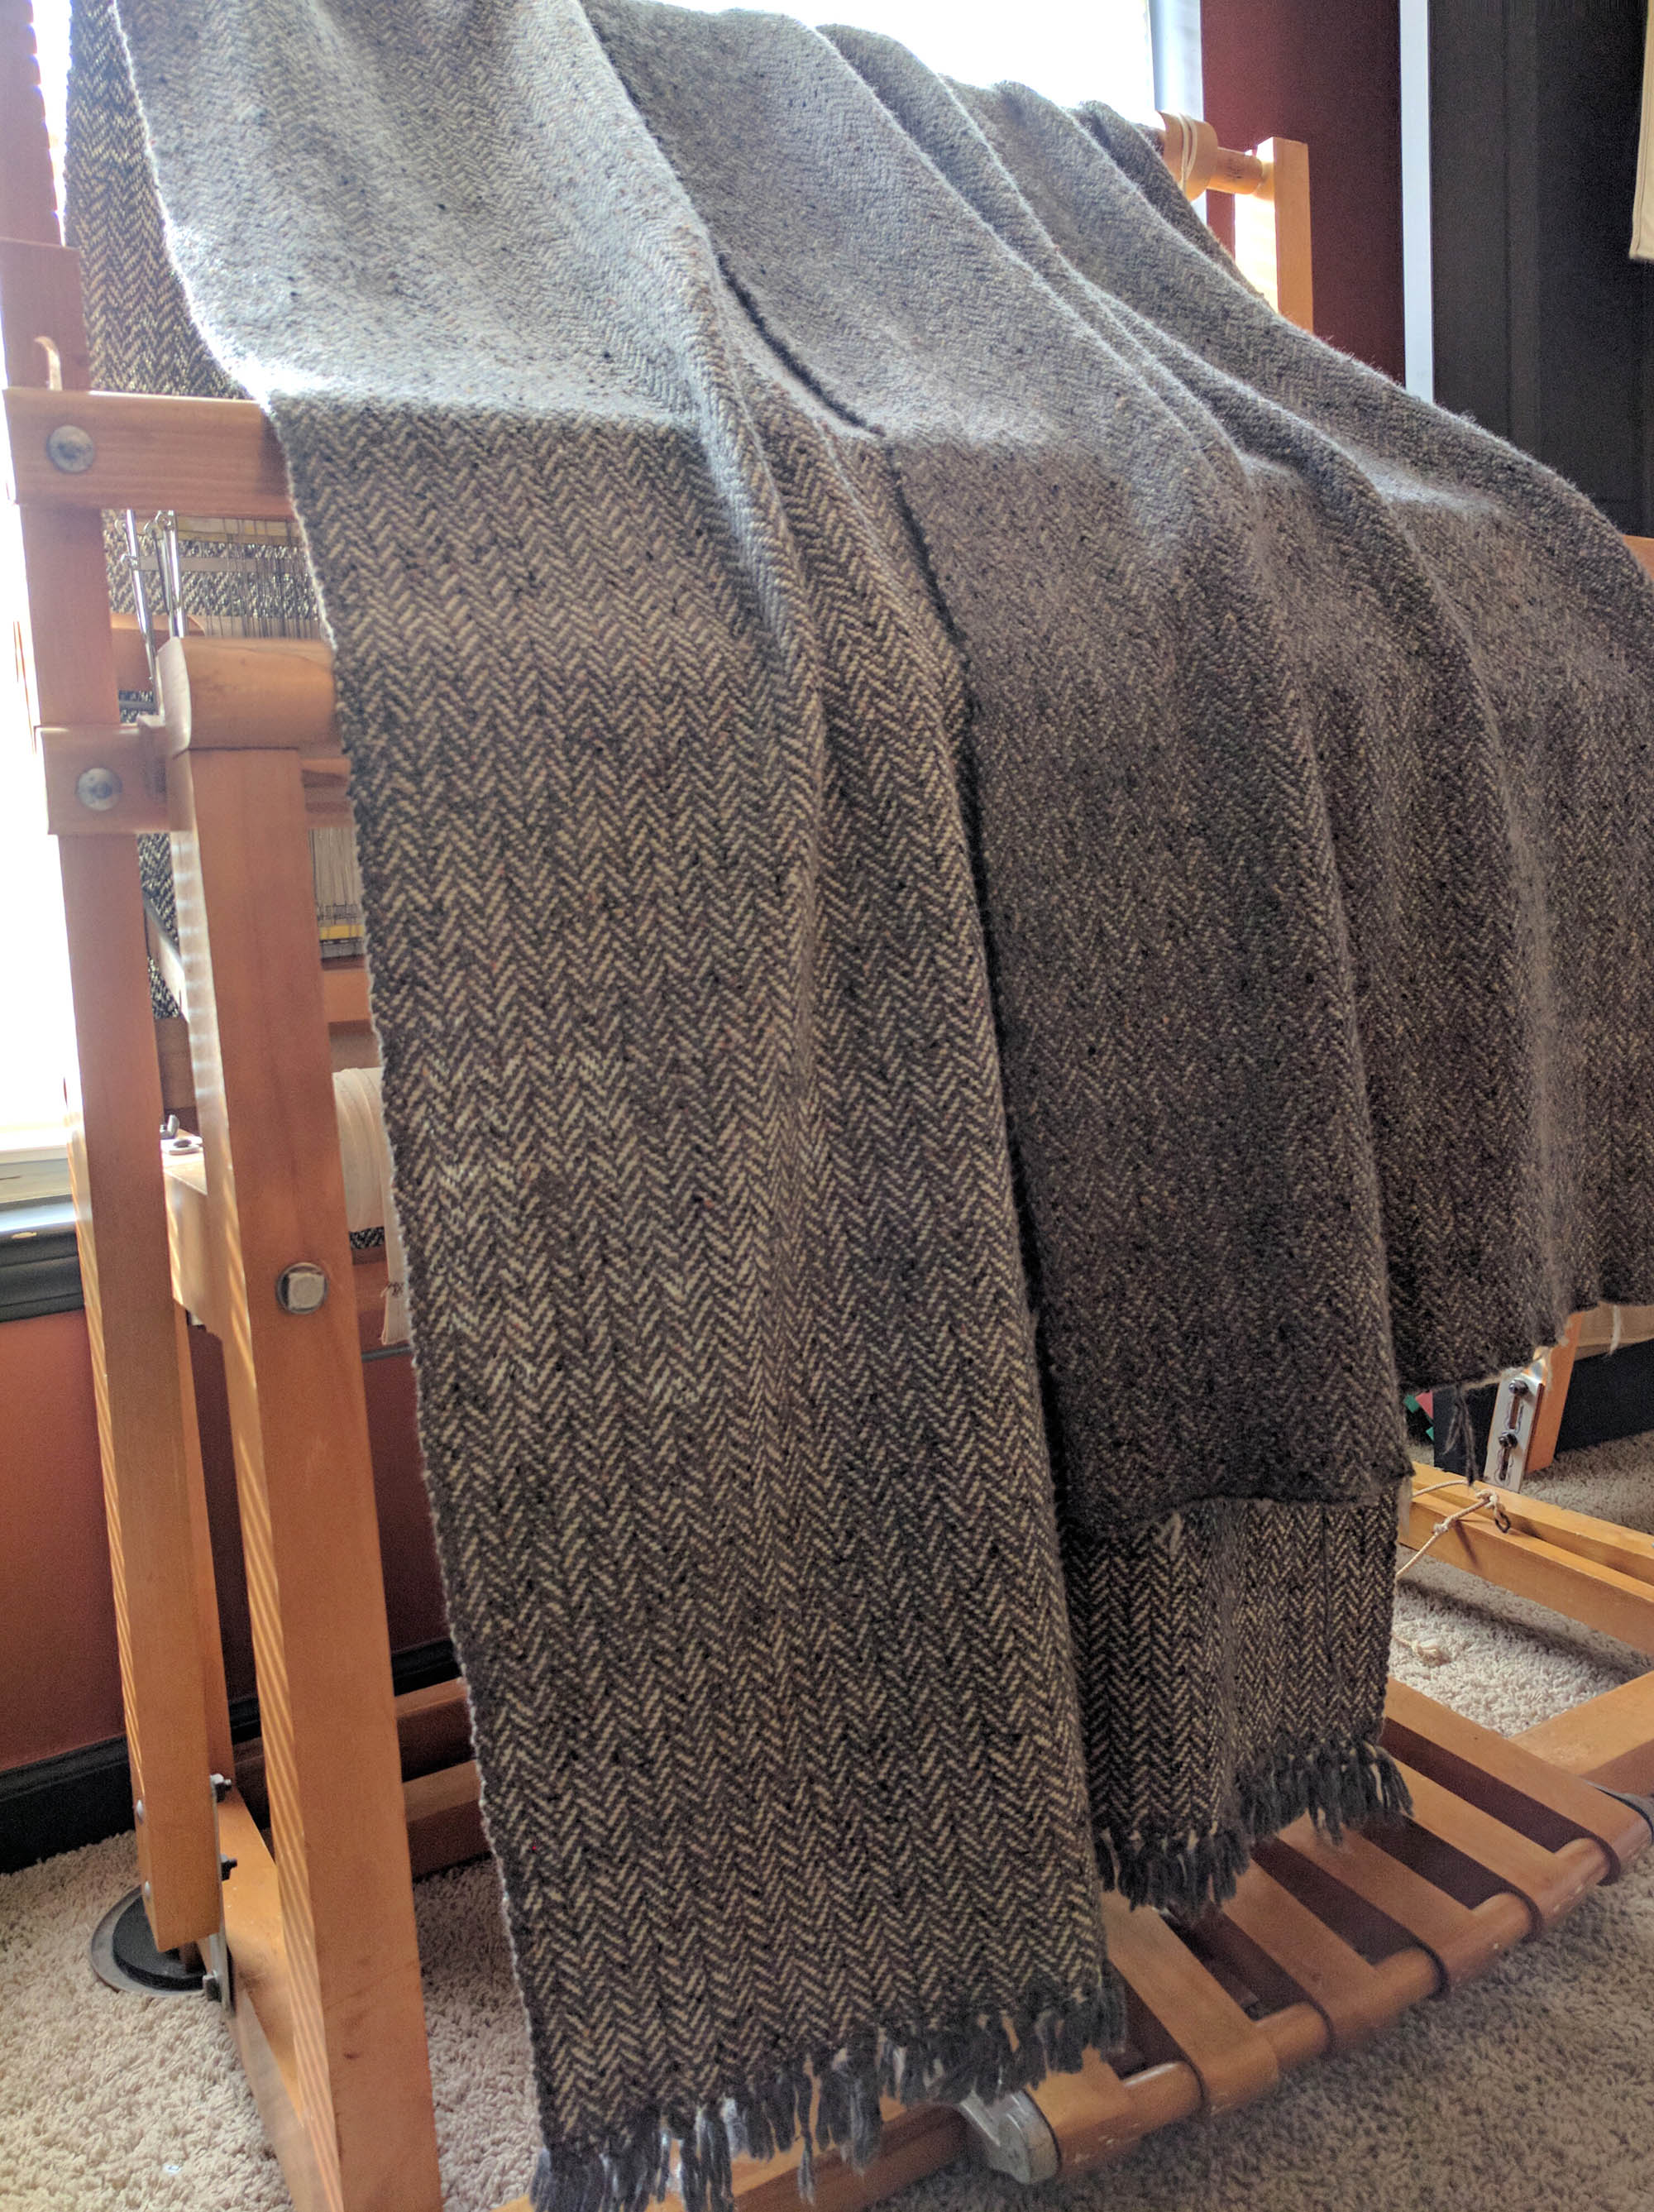
After my successful sampling with my herringbone scarf a couple of weeks ago, I got set to wind a much larger warp – enough to make fabric for two moto jackets. I neglected to get photos of the warping process. I used the warping board I’ve shared photos of on this blog before. And this warp was so long, I almost didn’t have enough warping pegs!
Here are the specs for this giant piece of fabric I’m about to weave:
My pattern calls for 2 1/4 yds of 55″ wide fabric. Because my loom has a maximum width of 36″, I had to do a few calculations in order to get the total square yardage I need. What I came up with was a really long warp!
280″ of tweedy goodness.
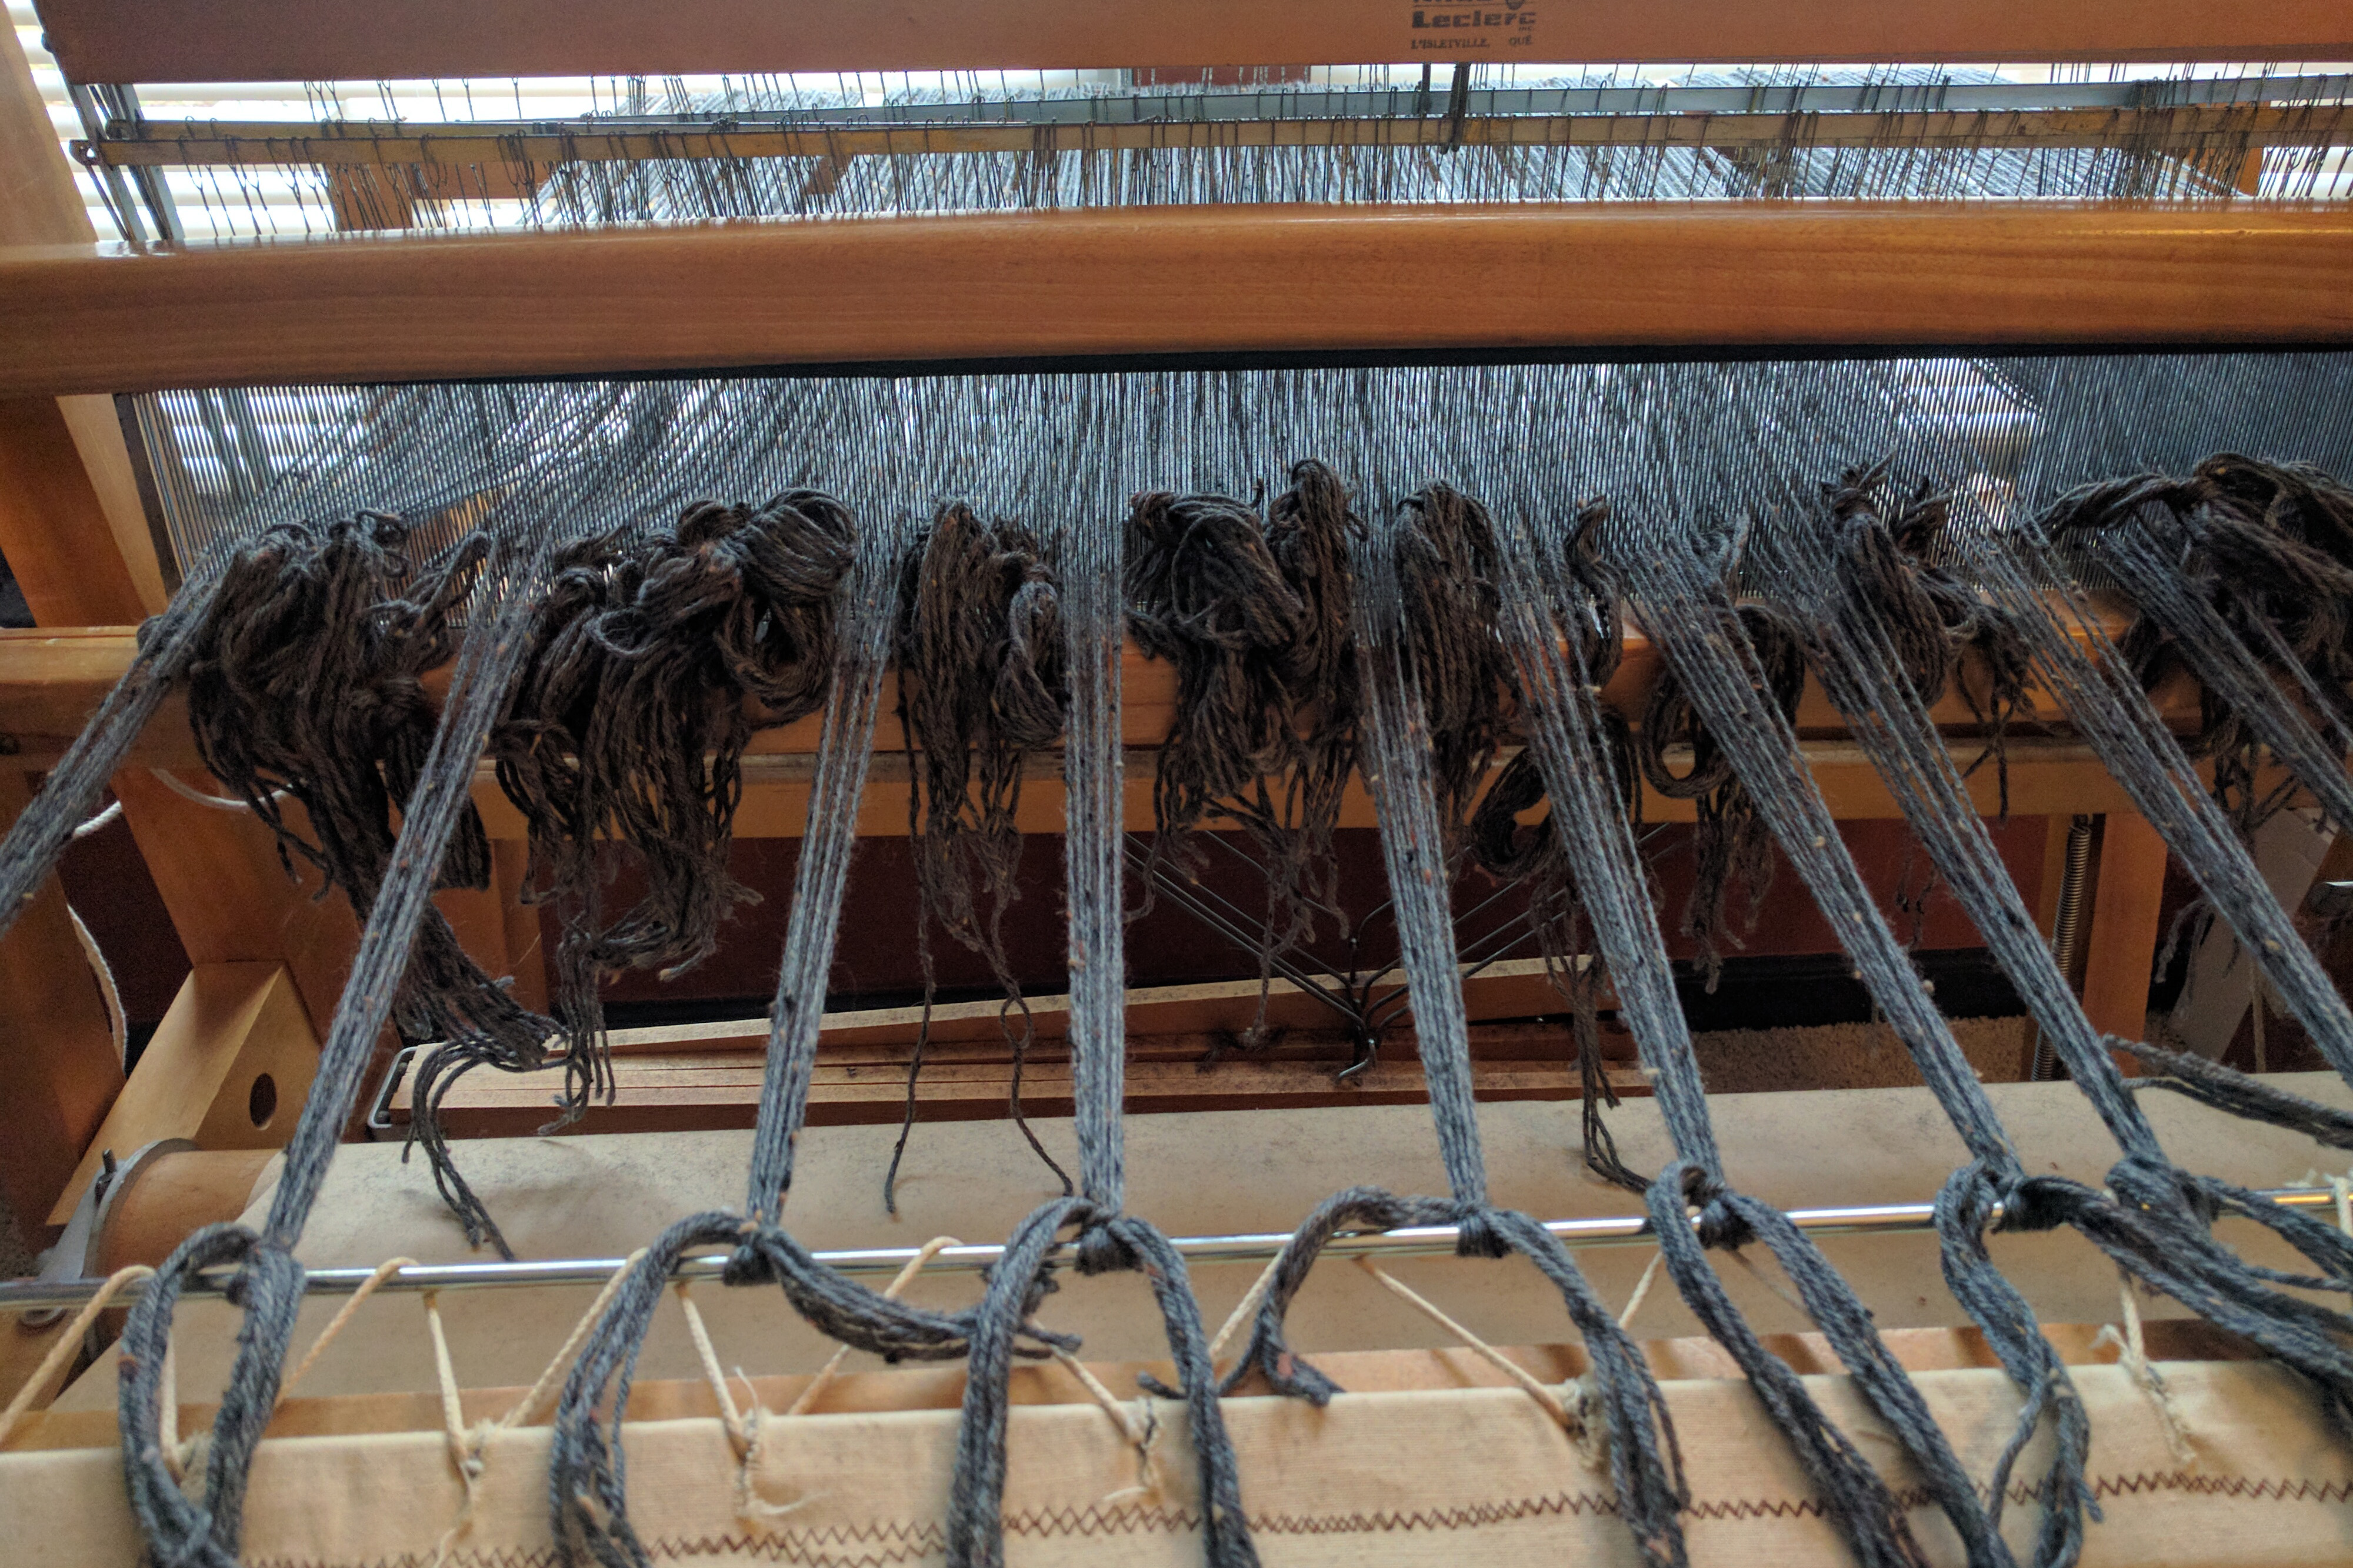
432 ends means 432 heddles to thread. And then, 432 ends to feed through the reed. Whew!
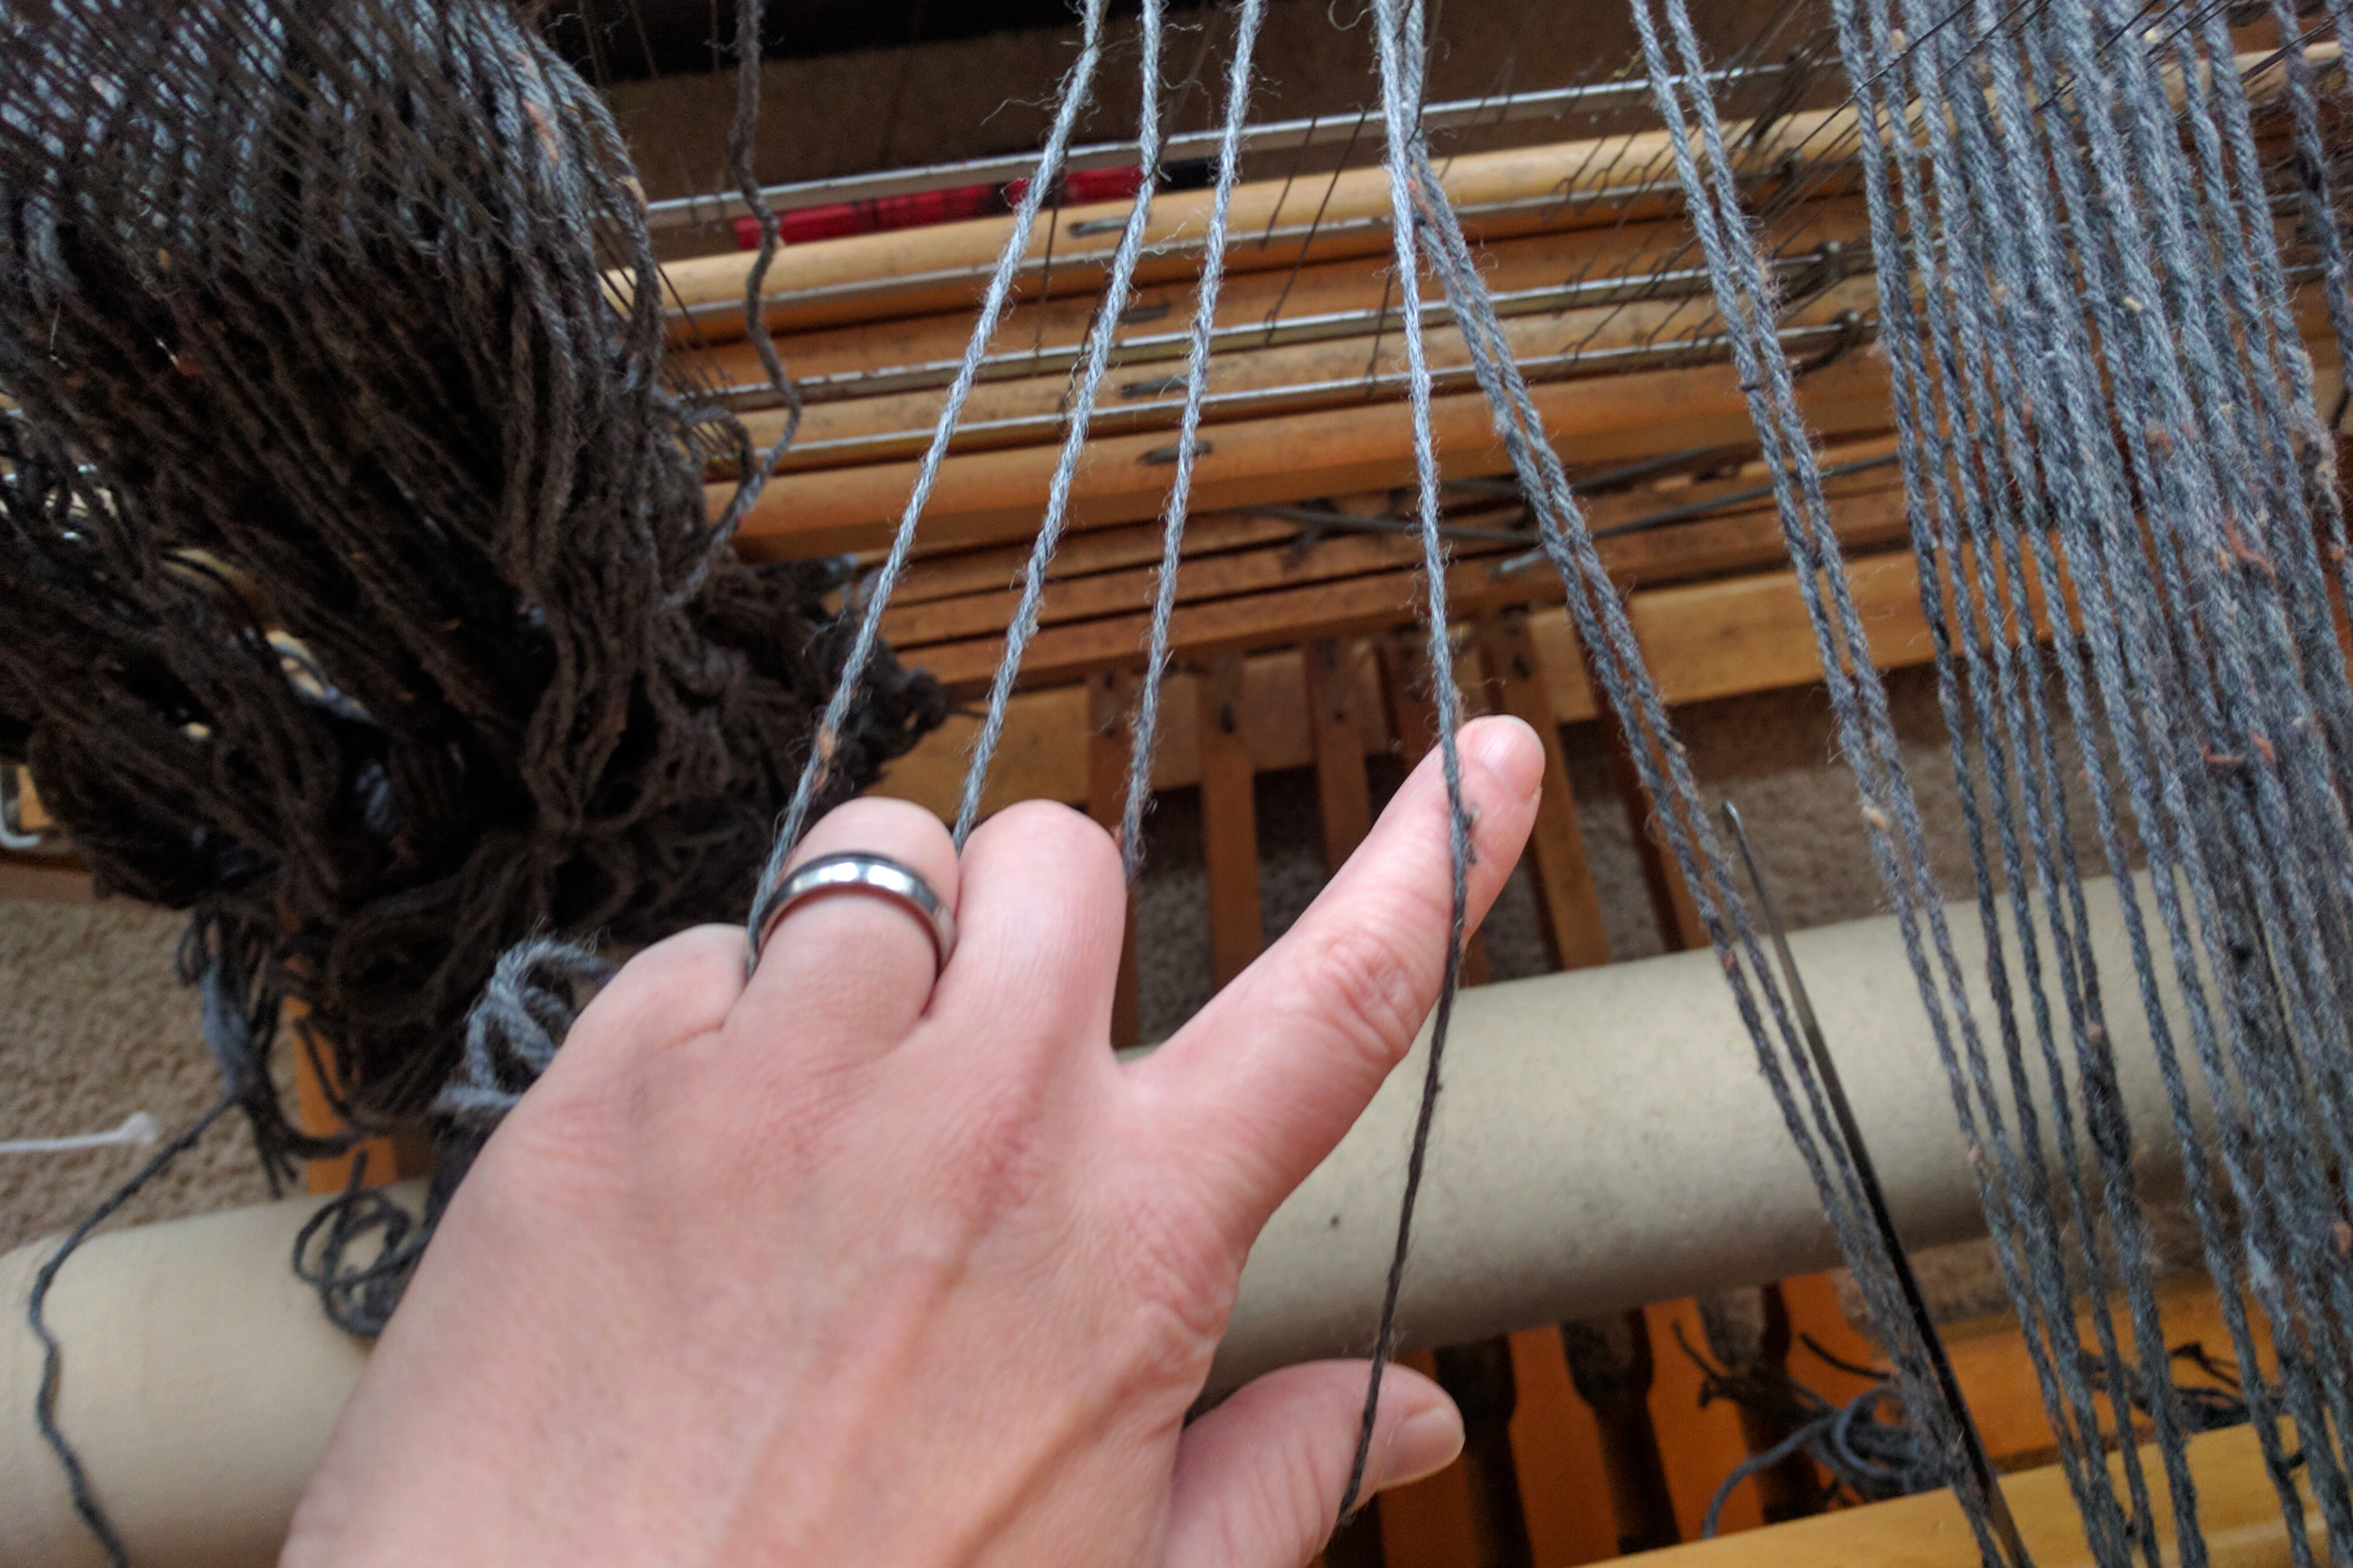
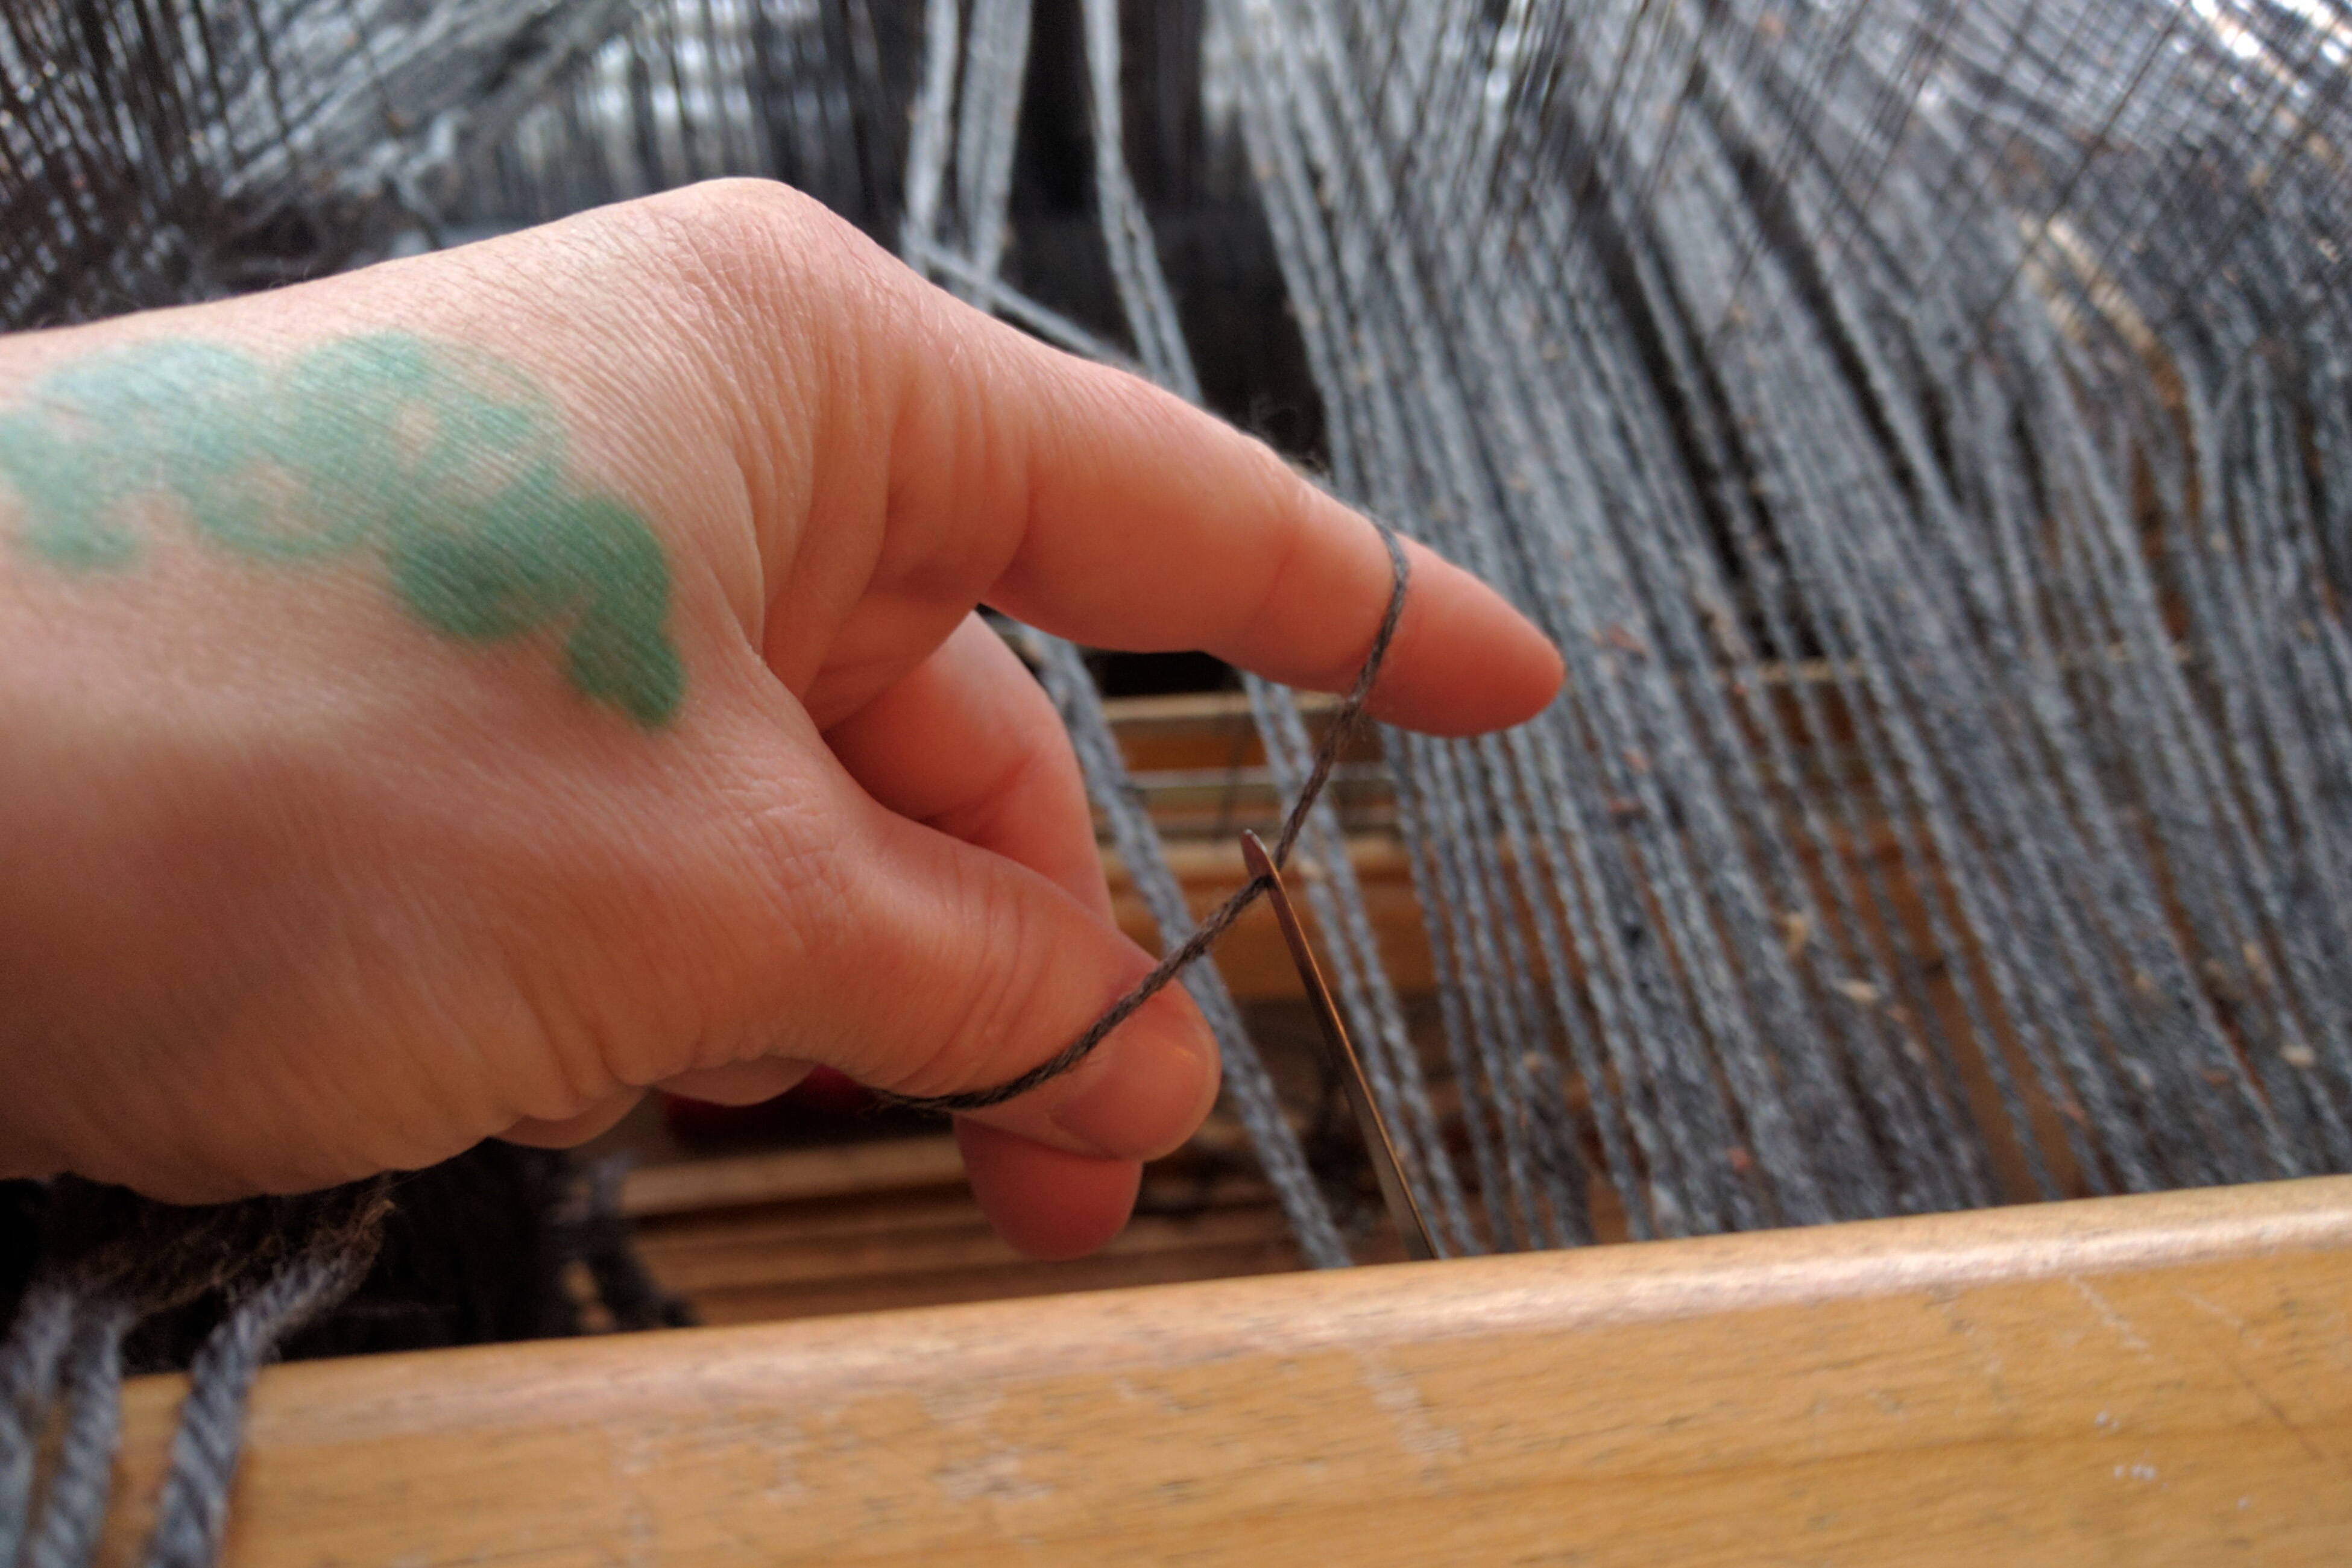
When I’m threading the reed, I like to do it 4 ends at a time. I take my left hand and grasp the next 3 ends as shown below, holding my hand behind the reed.
It’s important to make sure the ends coming from the heddles go into the reed in the correct order.
Then I feed the next end from my left hand and grab it with my threading hook. It’s a good way for me to stay organized during this process.
Opposable thumbs are really awesome.
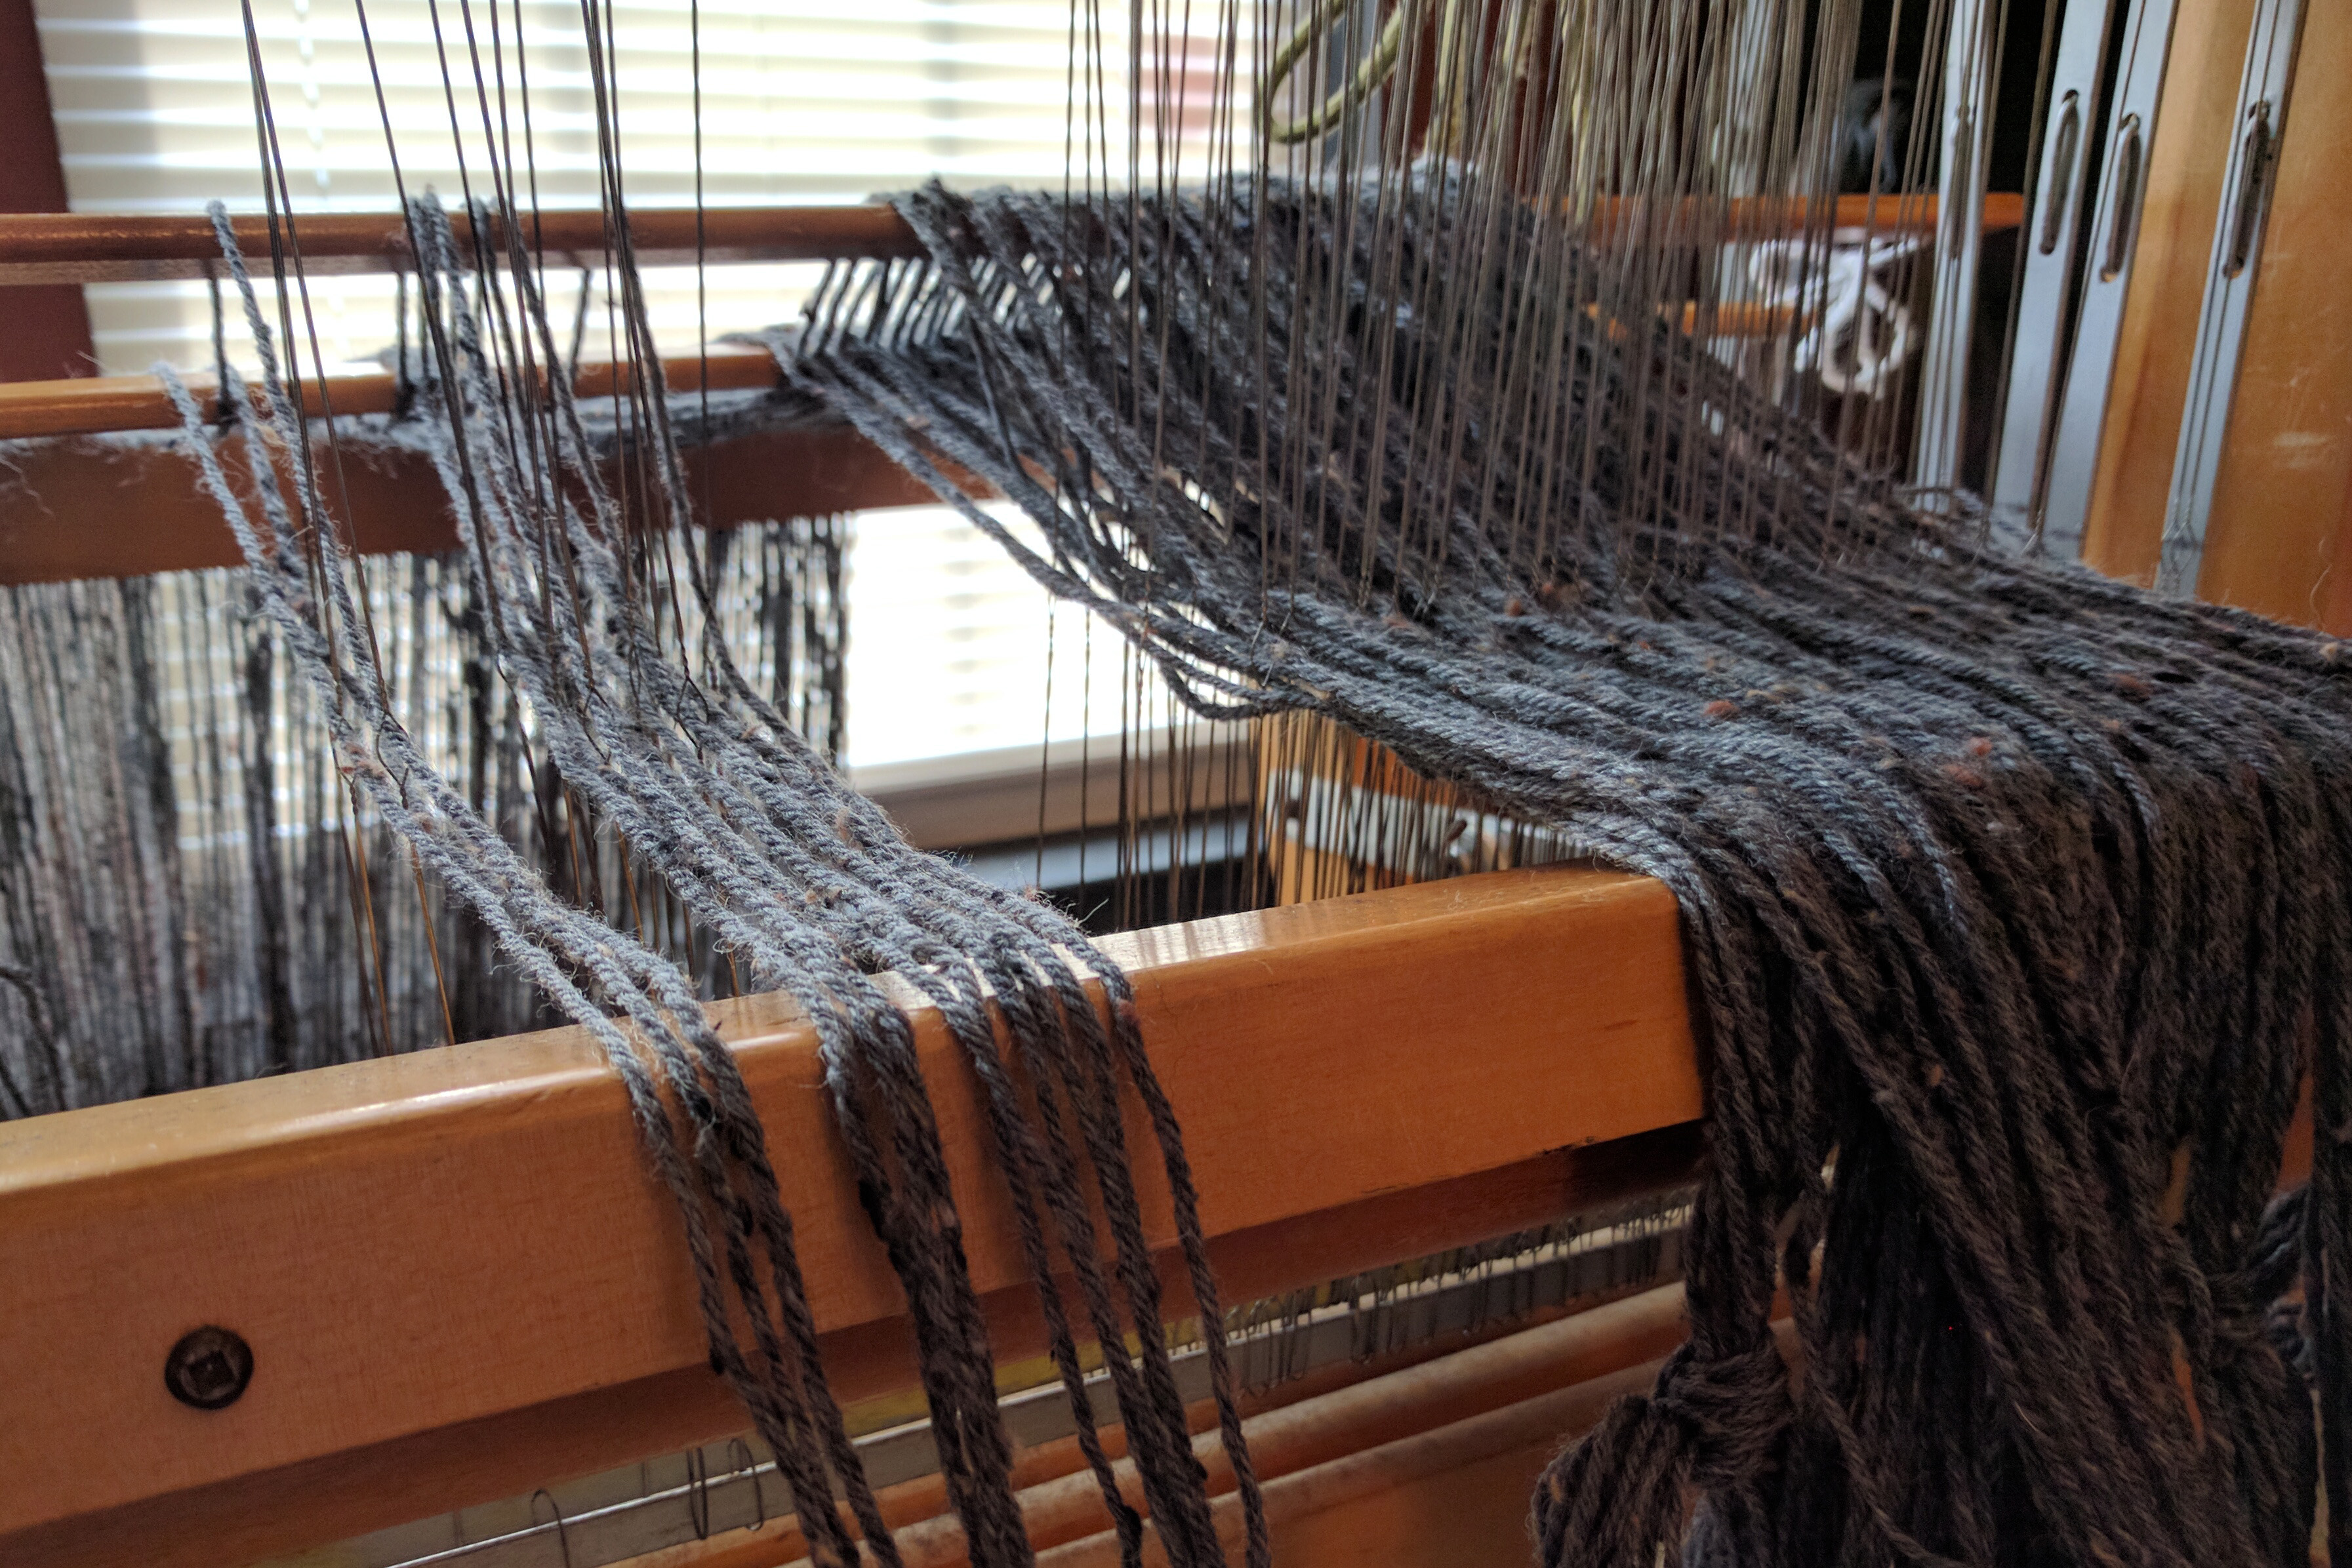
Tying onto the front apron rod means I’m almost ready to weave!
Gotta be evenly tense here.
I’m just getting started here. Once I’ve woven this giant piece of fabric, it’s onto jacket making. And this project is going to go quickly since my deadline is next month’s TNNA show. Stay tuned!