This is part 4 in a 12 part series highlighting designs from our 12 Days of Winter, Series 4 Edition.
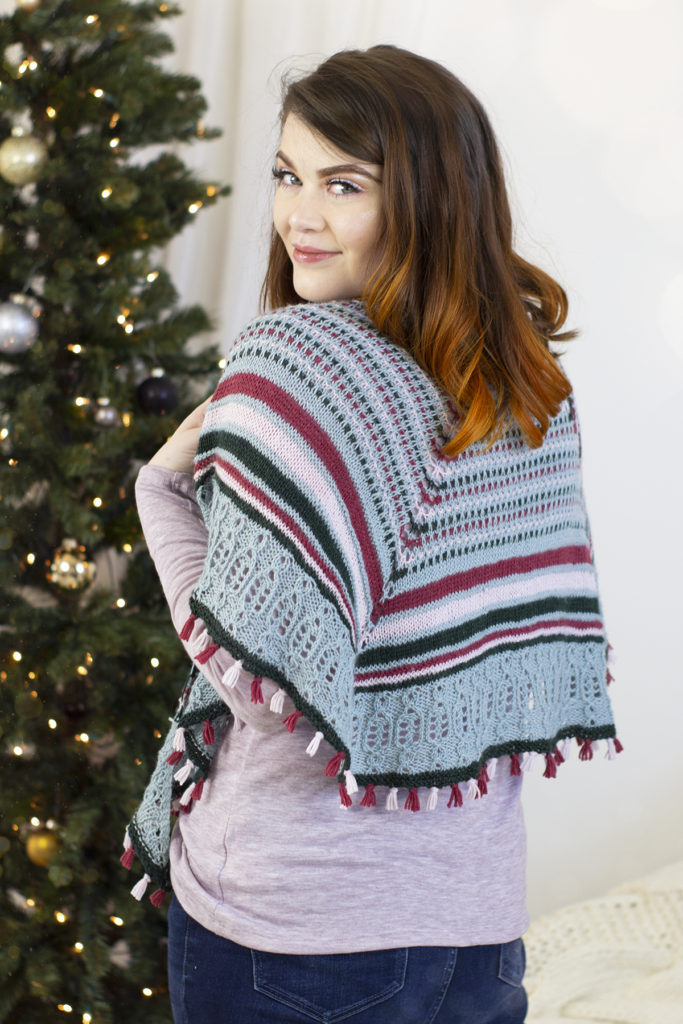
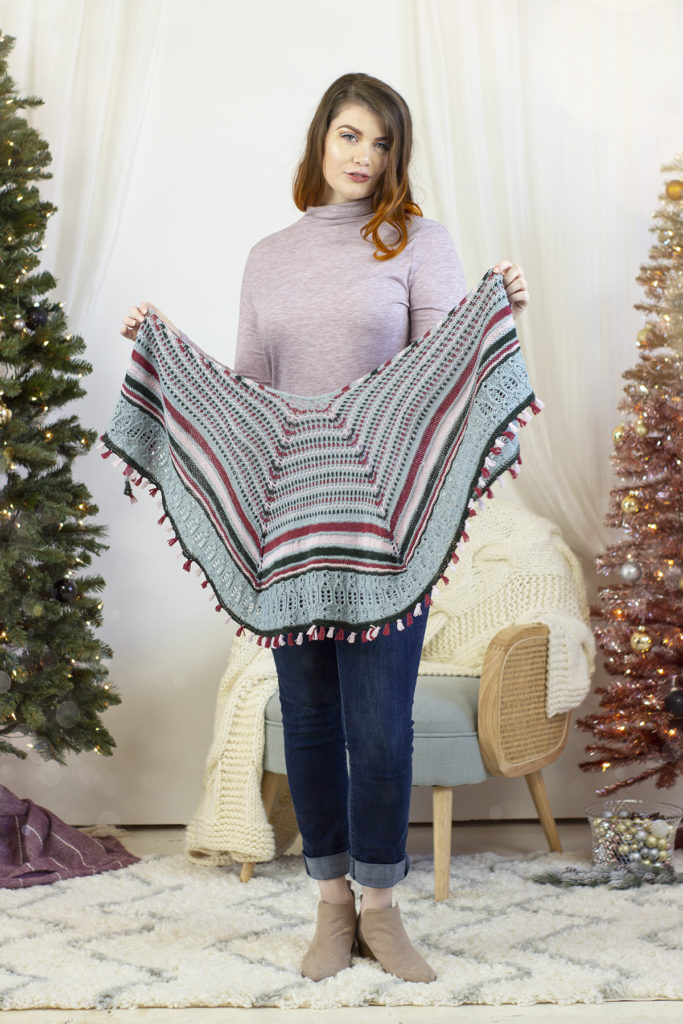
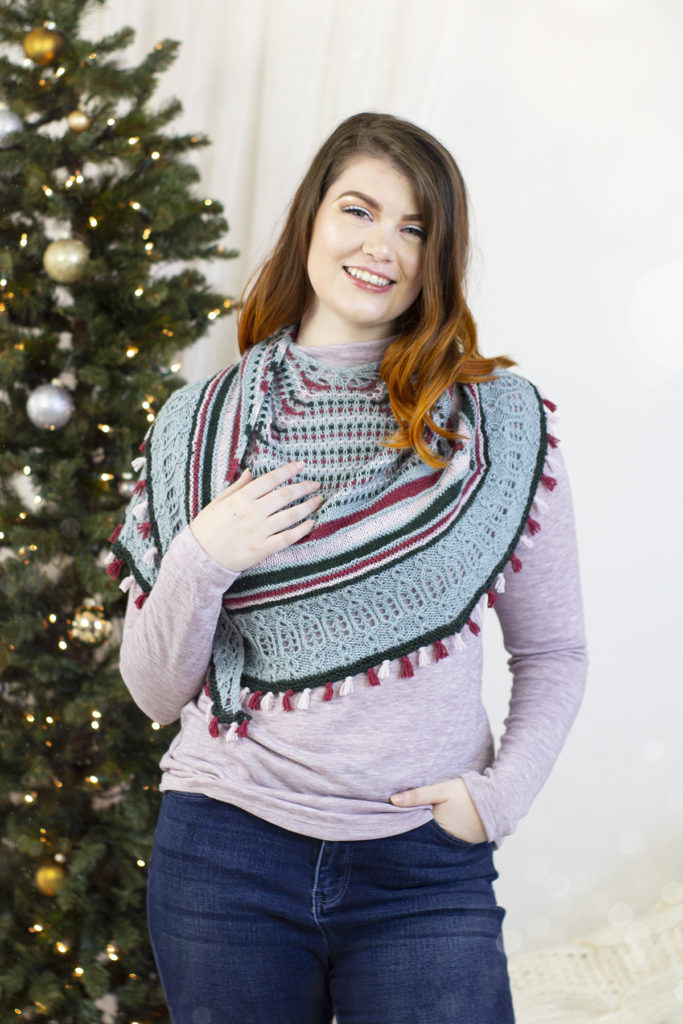
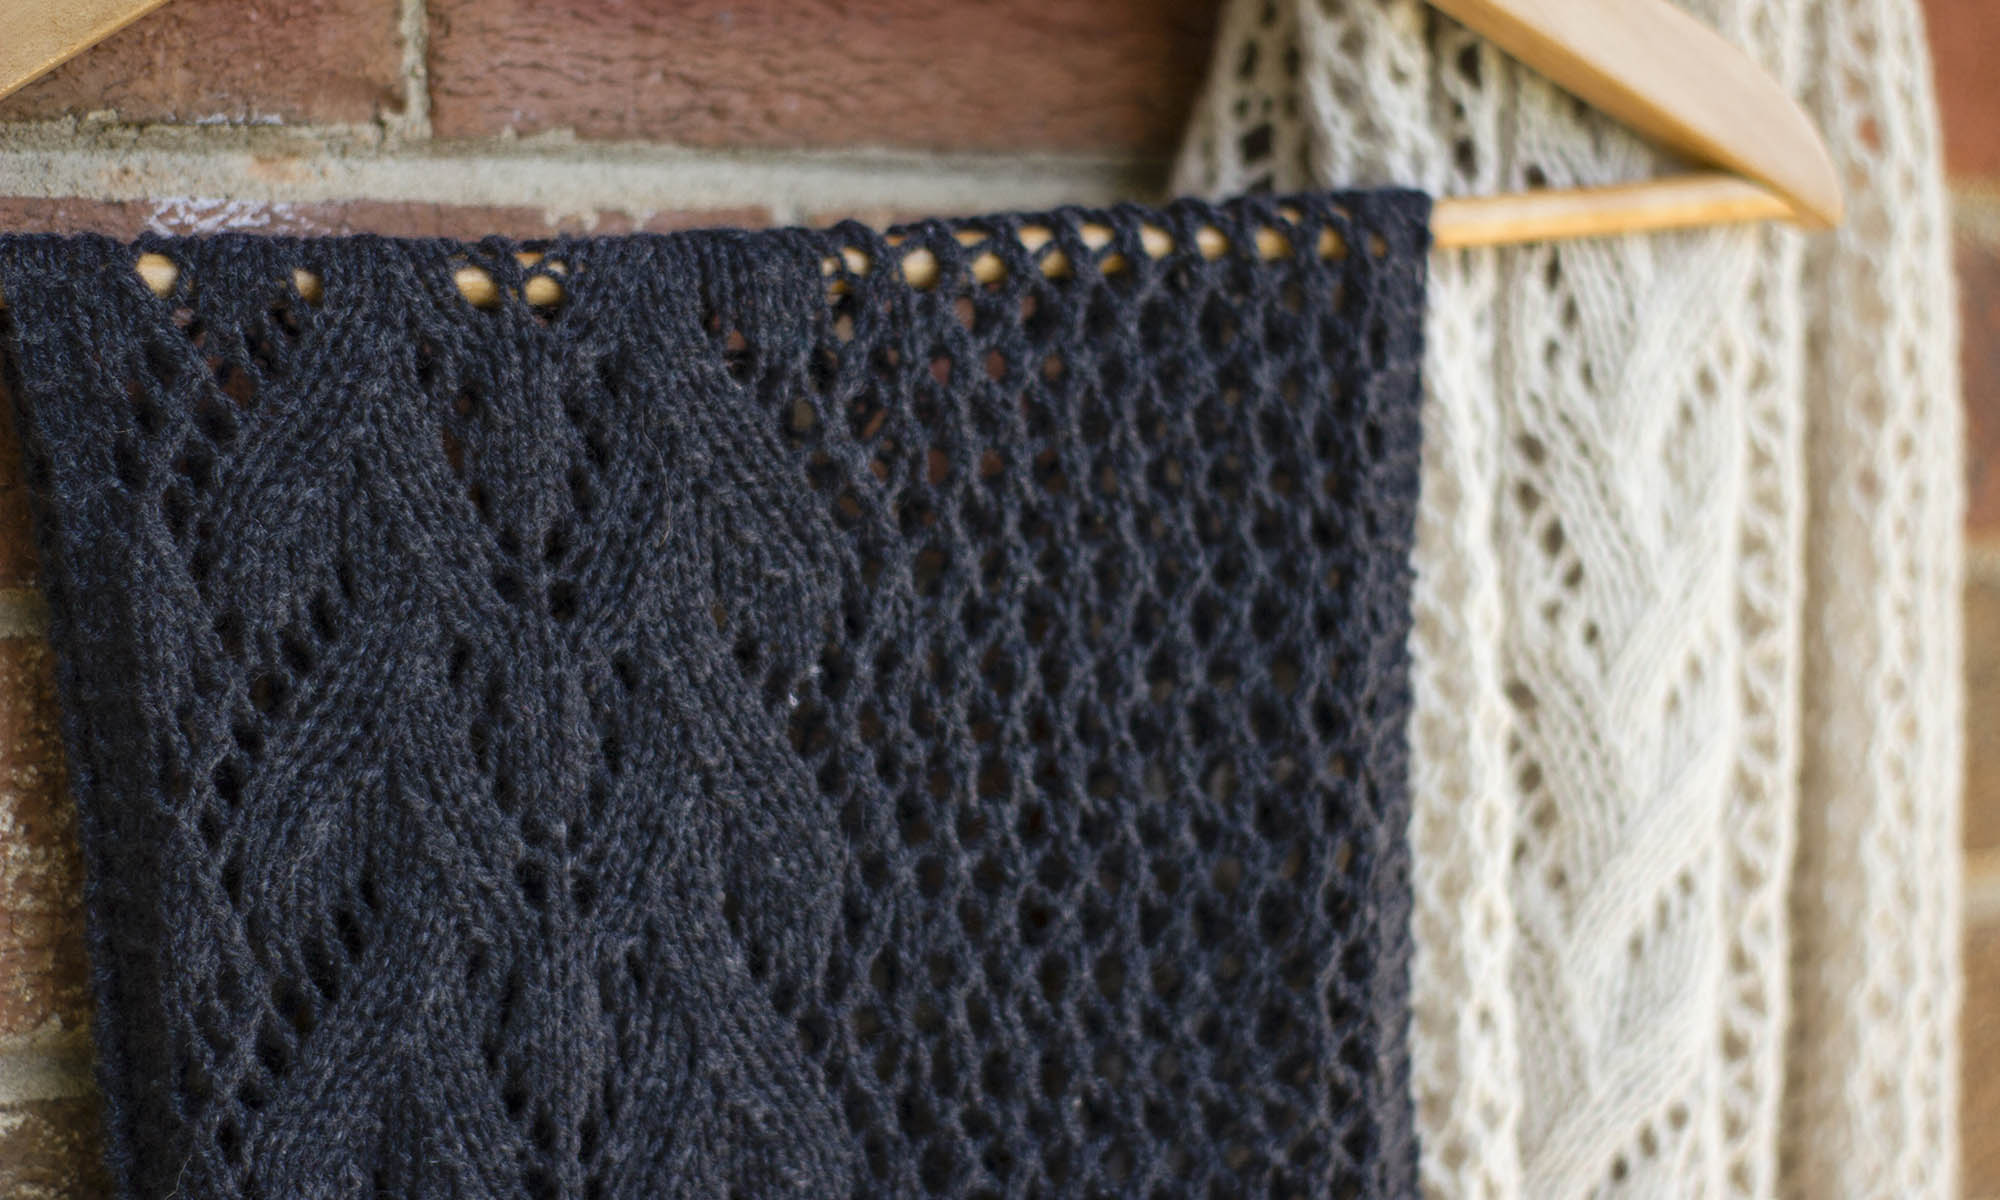
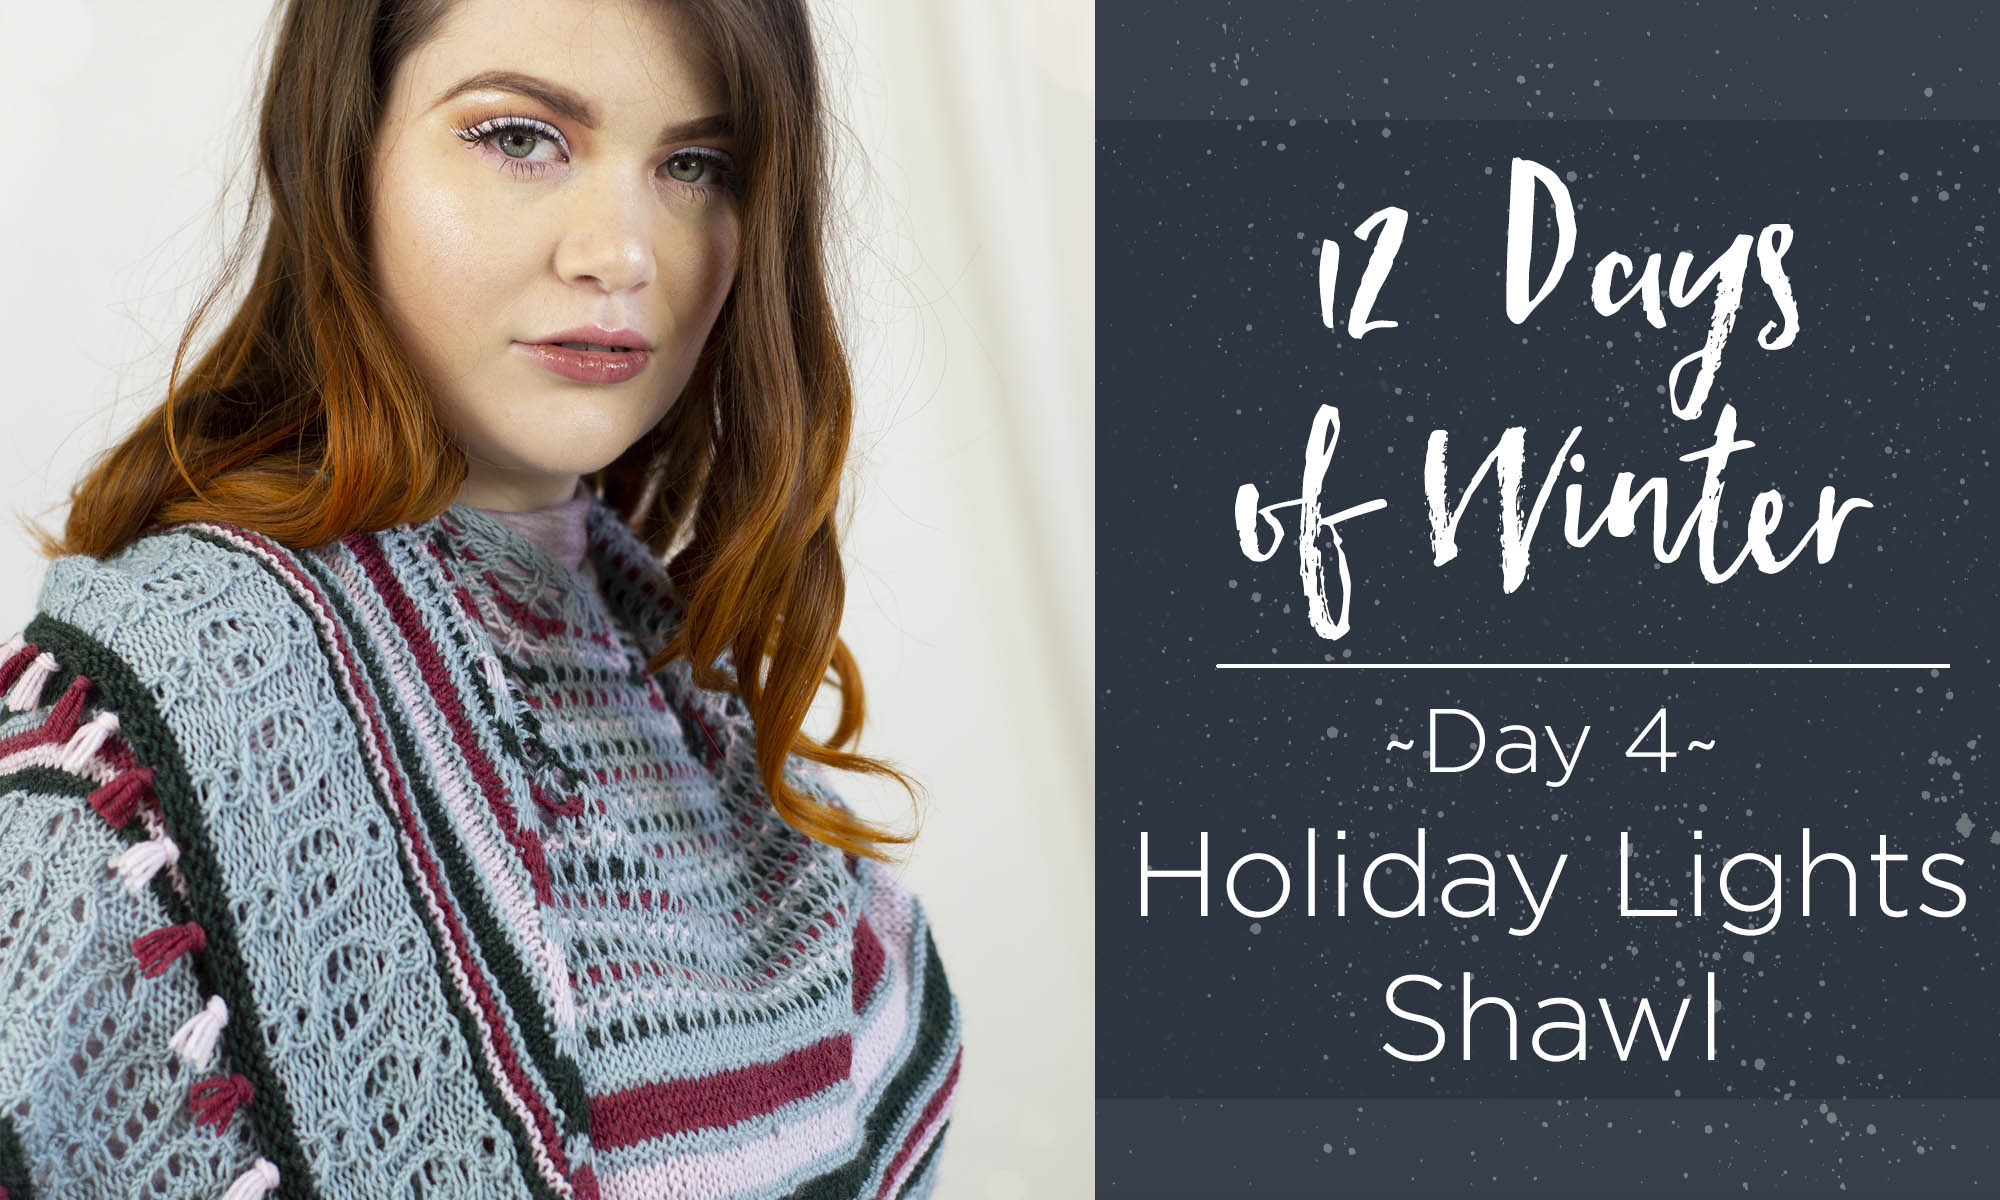
It’s Day 4 of the 12 Days of Winter Kit Collection! Today I’m excited to share a fun and festive design knit in luxurious and lightweight Bella Cash. Say hello to the Holiday Lights Shawl!
A sampling of stripes and textural stitches make this project an addictive knit!
If the name didn’t give it away, the shawl was inspired by strings of holiday lights that are so abundant during the season. I think festive lights are something we can all appreciate. Whenever I pass by a home brilliantly illuminated with thousands of little lights I feel such a childlike sense of awe and wonder. It just feels so magical to me!
The Holiday Lights Shawl features a semi-circular shape.
There are three elements that remind me of lights in this fun pattern. Slip stitches and texture to create the effect of dappled lights throughout the first section of the shawl. Following the first section of “lights,” addictive-to-knit stripes incorporate garter stitch for a graphic and bold effect.
You can wear this shawl wrapped bandana-style around your neck. This is my favorite way to style shawls.
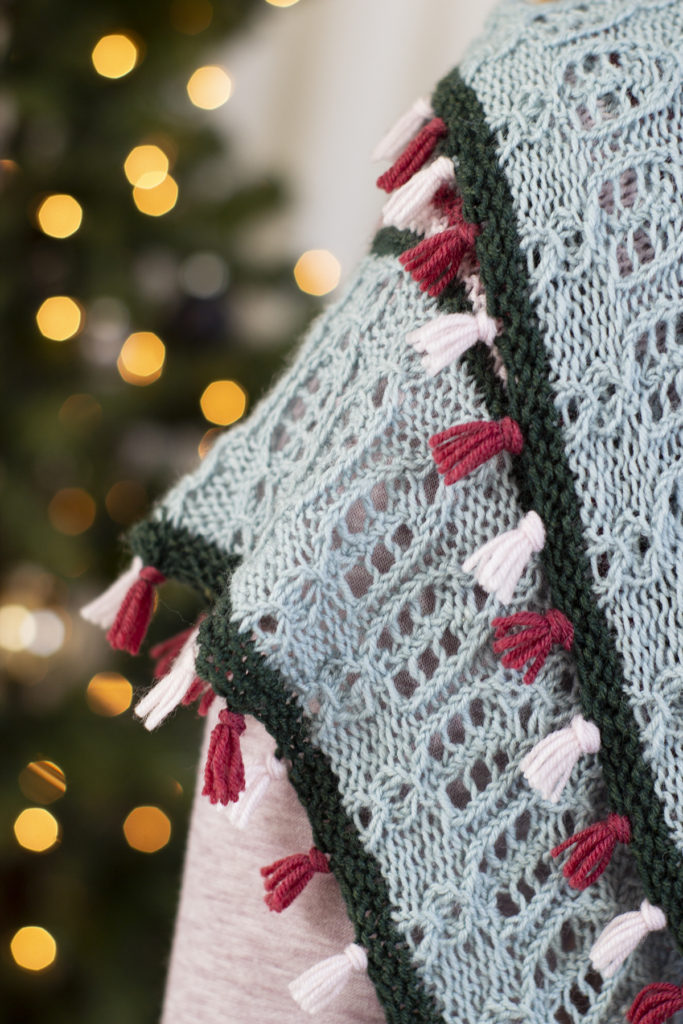
The second set of lights adorn the border of the shawl and use a touch of lace, twisted stitches, and one of my favorite decorative stitches: the lifted knot stitch. Before I move onto the final string of lights (can you guess what that might be?) I want to share a little tutorial for working the Lifted Knot Stitch (LKS).
I hope you enjoyed the tutorial and that it makes things a bit easier as you knit. Now, the final touch: the mini fringe across the bottom edge. Soft and festive, the fringe reminds me of little gleams of lights during winter nights.
Peppermint-colored mini fringe decorates the bottom of the shawl.
Remember, you can find the Holiday Lights Kit and the rest of the 12 Days of Winter kits at your local yarn store. Click here to find a shop that carries our yarn near you. Happy knitting!
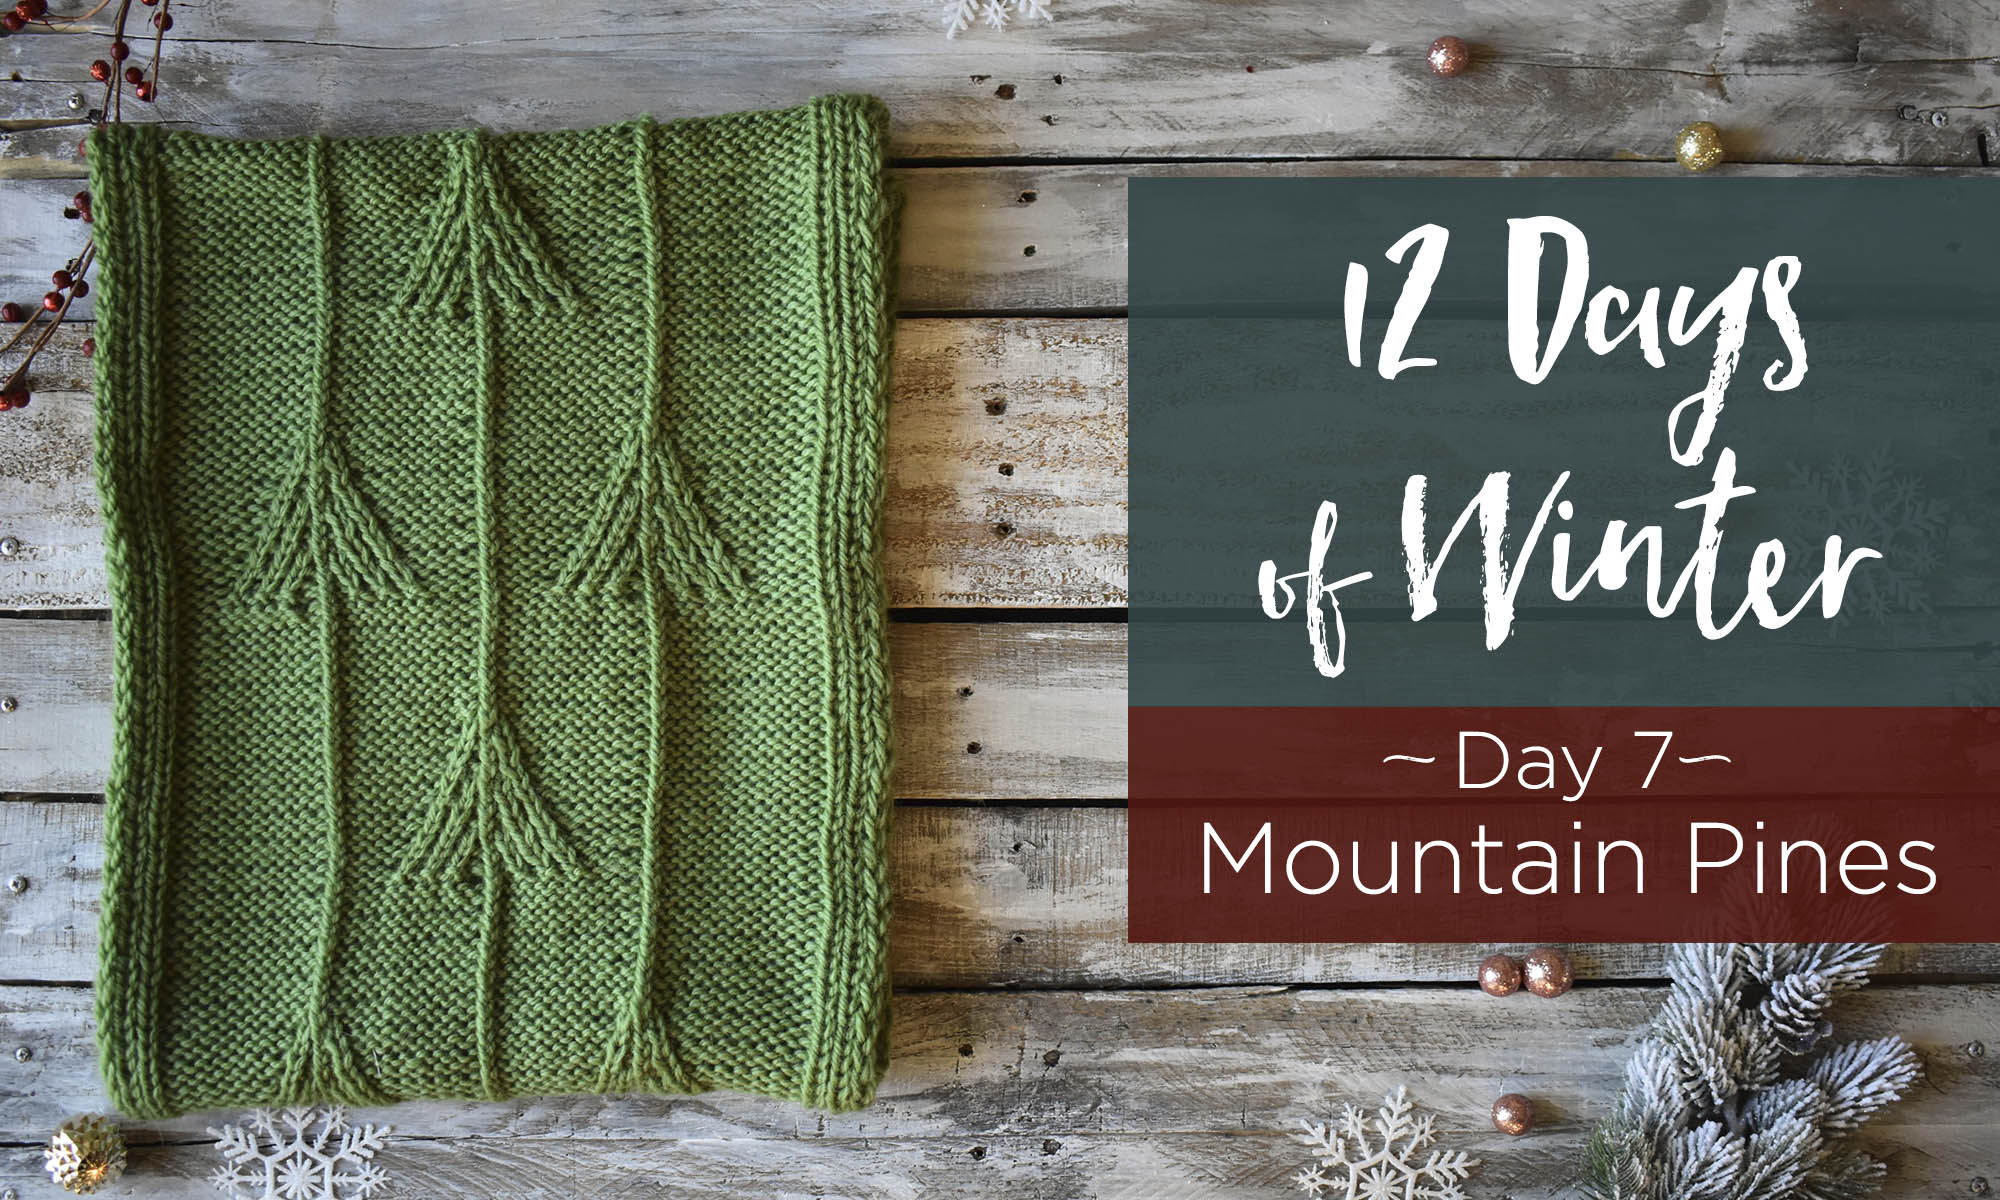
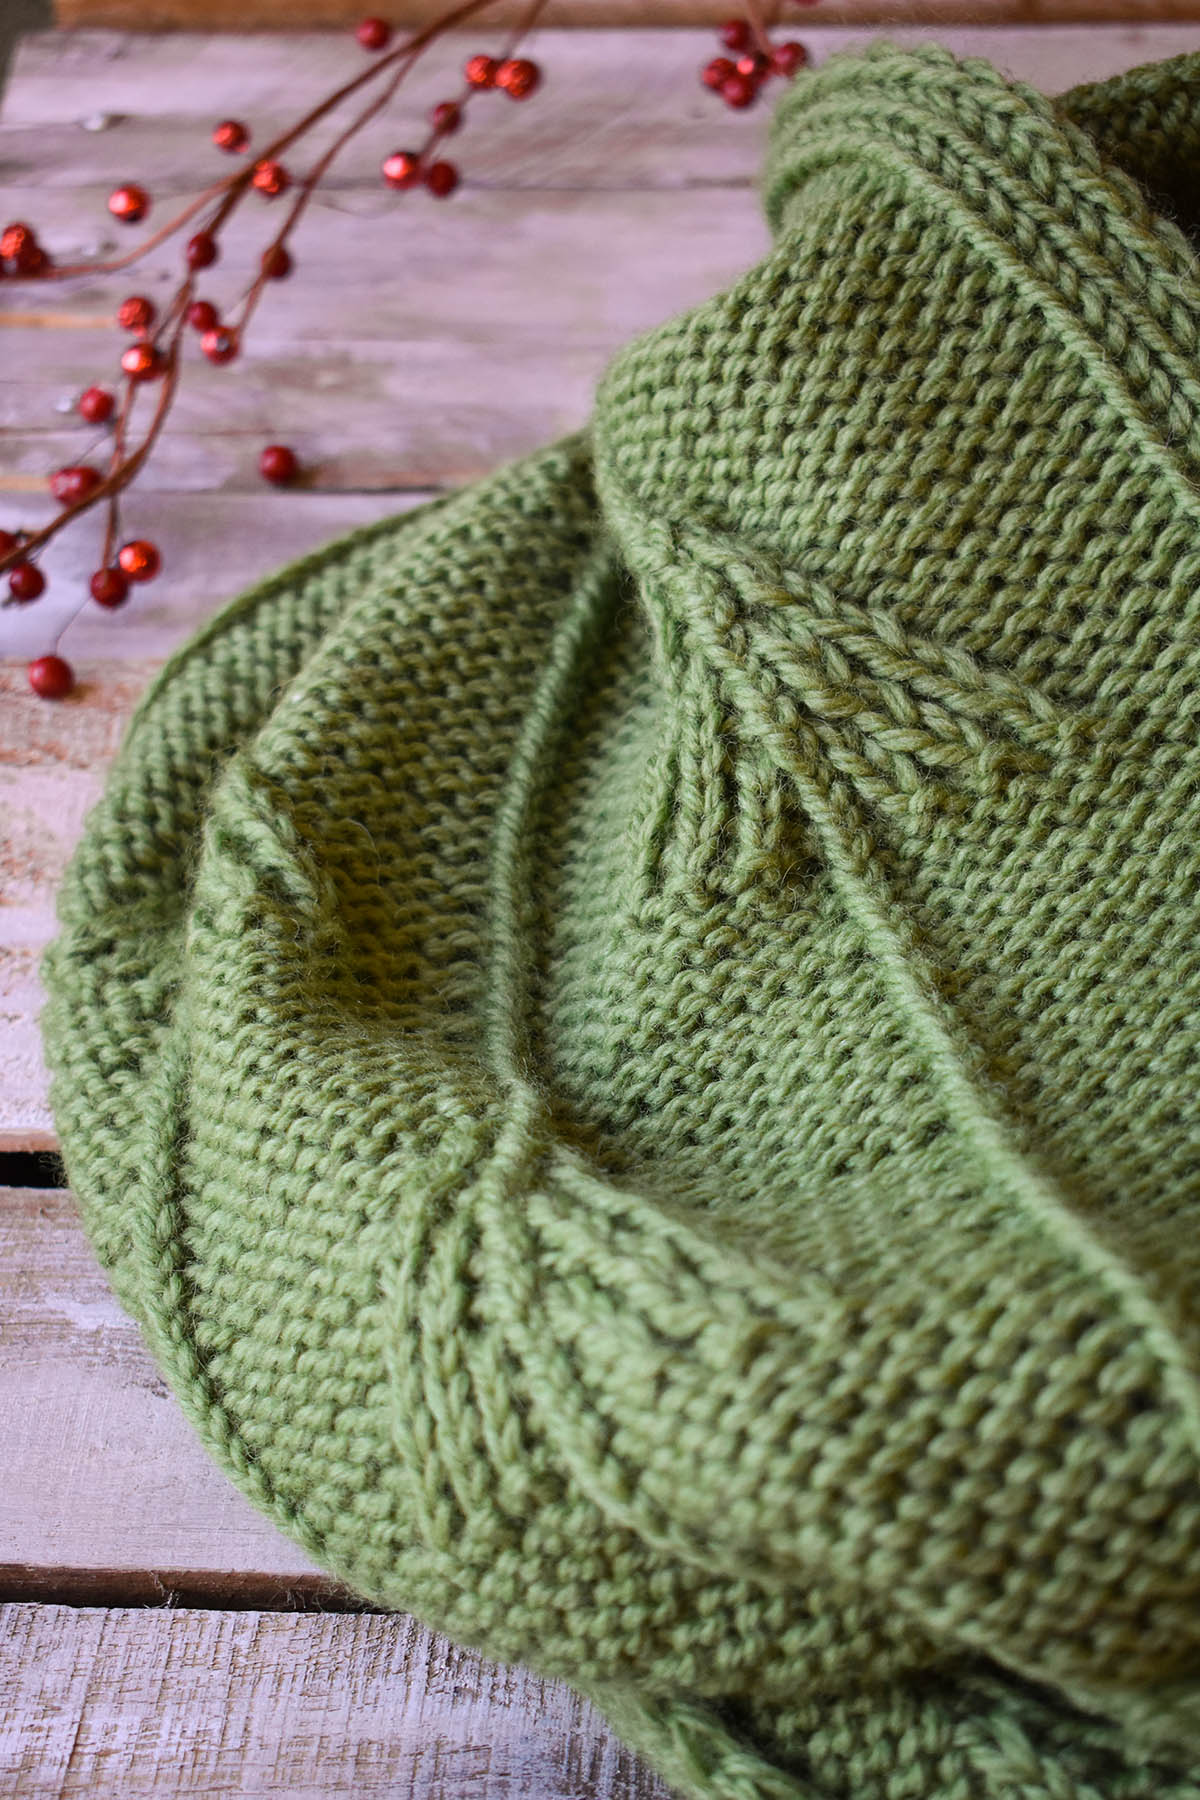
This is part 7 in a 12 part series highlighting designs from our 12 Days of Winter, Series 3 Edition.
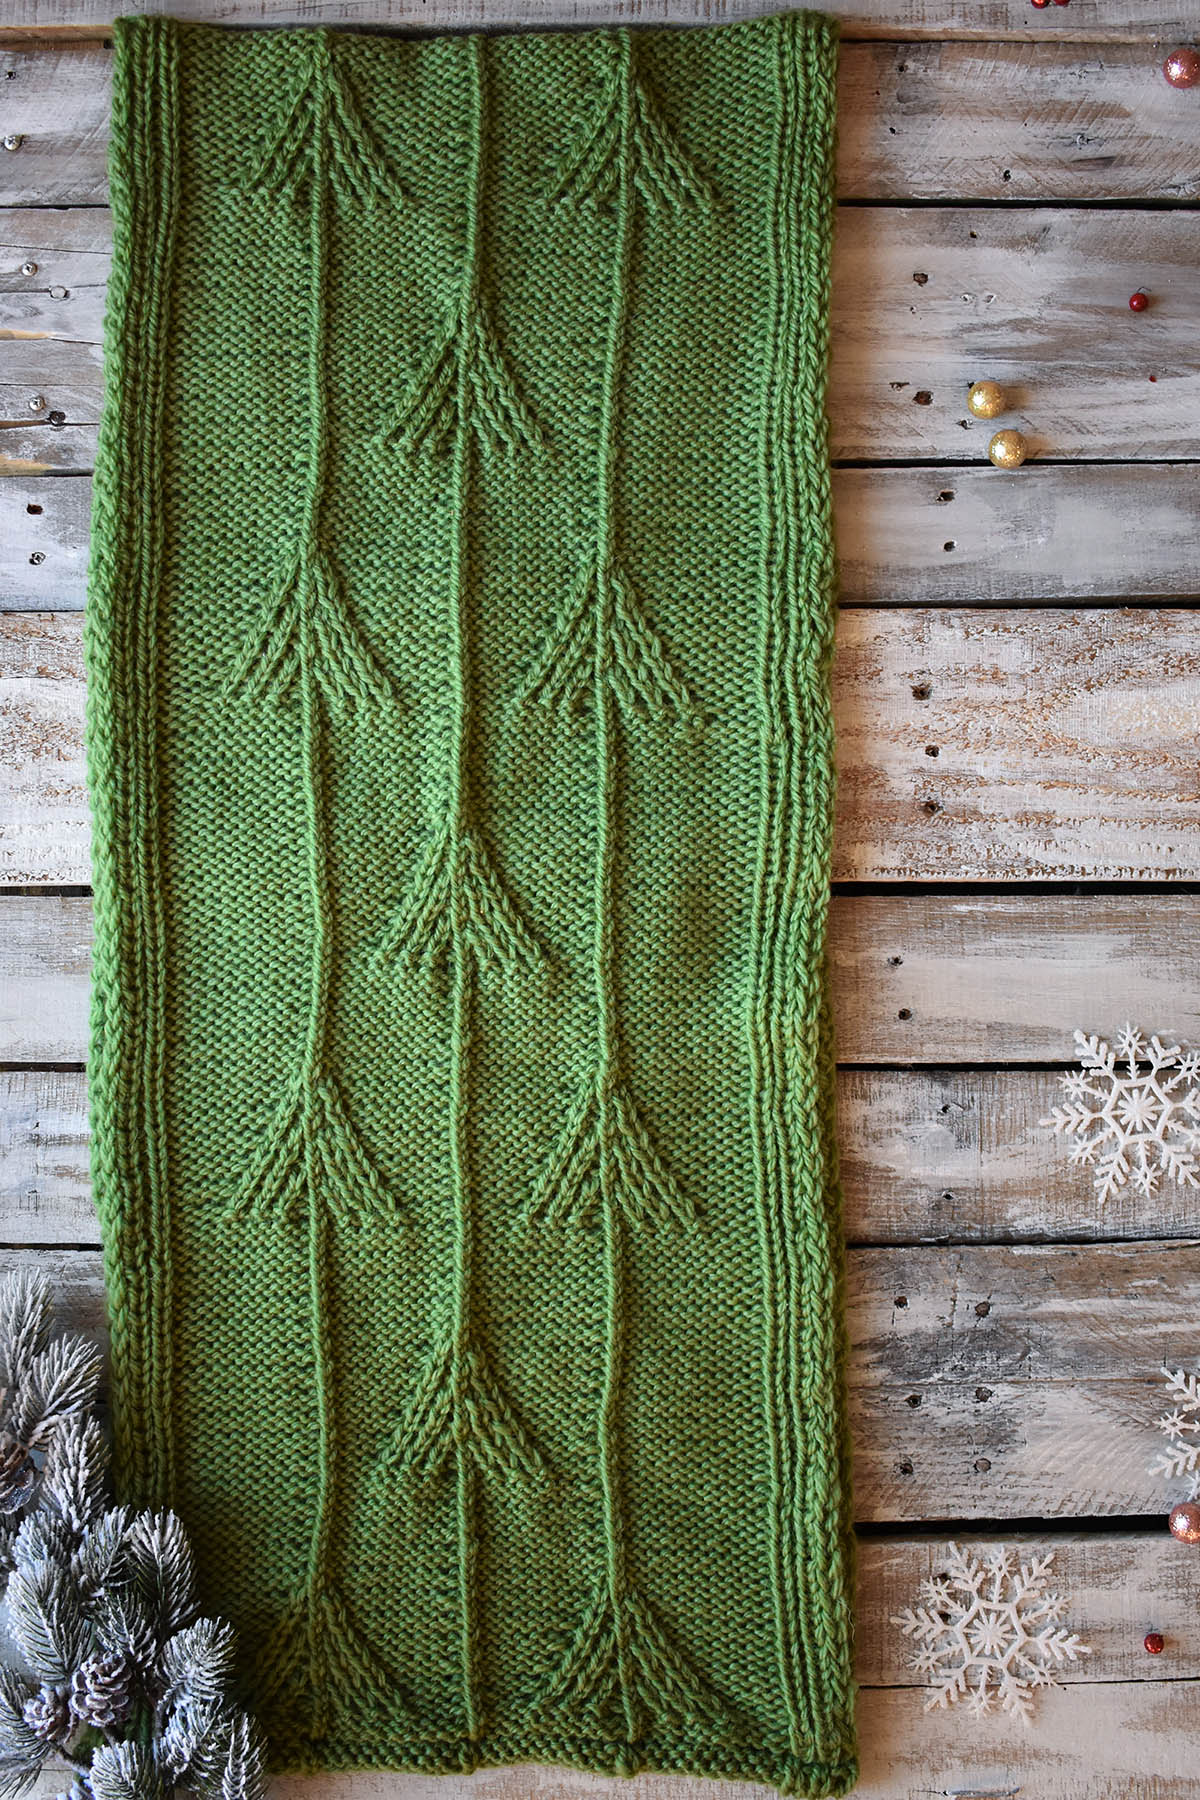
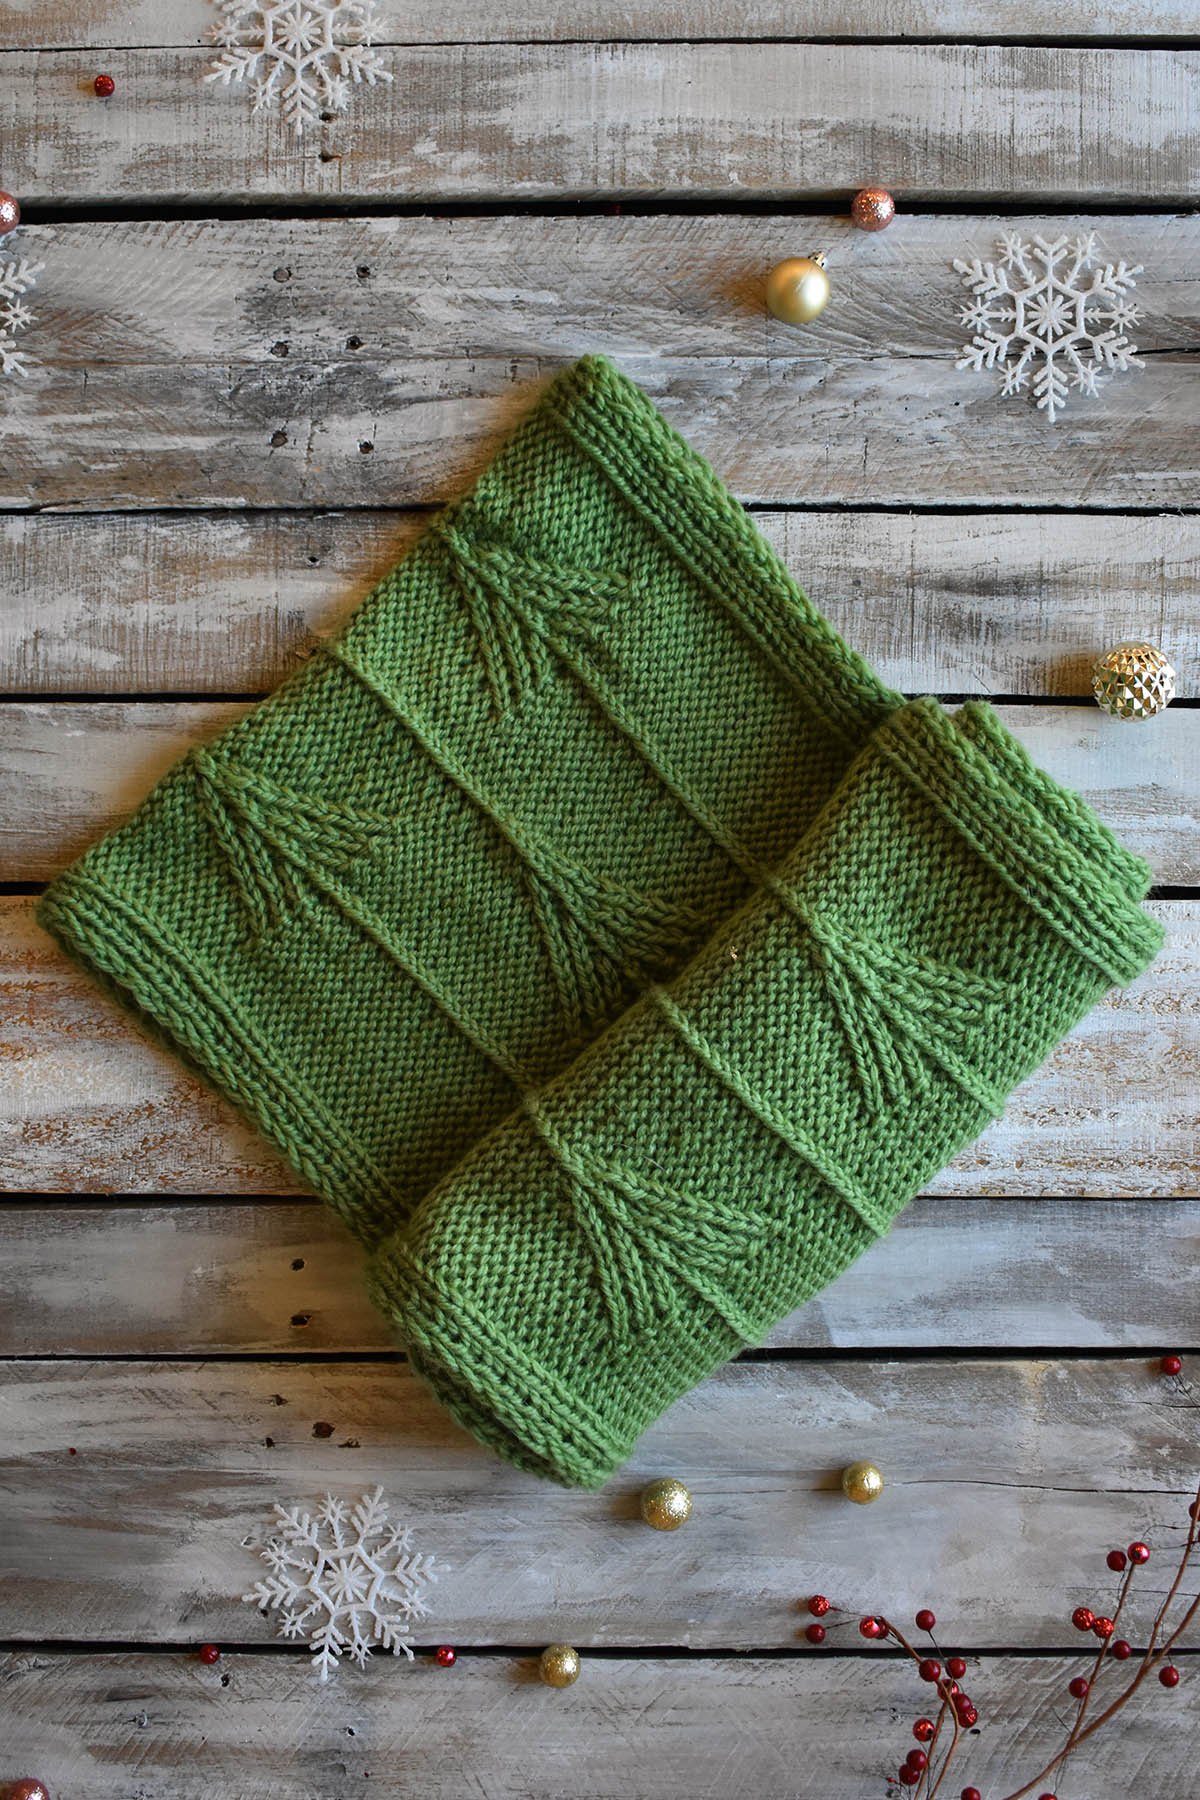
We’re a week into the 12 Days of Winter Kit Collection for 2019, and we hope you’re enjoying everything we’ve shared so far. Today we’re introducing an earthy green cowl that’s sure to hold your interest. Say Hello to the Mountain Pines Cowl, designed by Jennifer Sadler. This deliciously squishy cowl features twisted stitches that form the shapes of evergreen trees. Knit in soft, plump Deluxe Chunky, this is a fairly quick project that will keep you warm all winter long.
Jennifer, who is based in Asheville , North Carolina, got her inspiration from pine trees. Here is what she had to say:
“Here in the North Carolina mountains, pine trees are easily found – there are actually six different kinds of pine trees native to the state. I love how in the winter they stay green, adding a touch of color to an otherwise brown landscape, and when it snows, the branches let the snow pile up, creating a pillow of white on top of the green needles. The Mountain Pines Cowl pays homage to those green monster trees.
The pine tree motif is much simpler than it looks to knit. It uses twisted stitches, and no cable needle! Once you’ve experienced the ease of twisted stitches, you’ll want to incorporate them into your knitting as much as possible – they create a wonderful visual texture, with hardly any extra work.”
-Jennifer
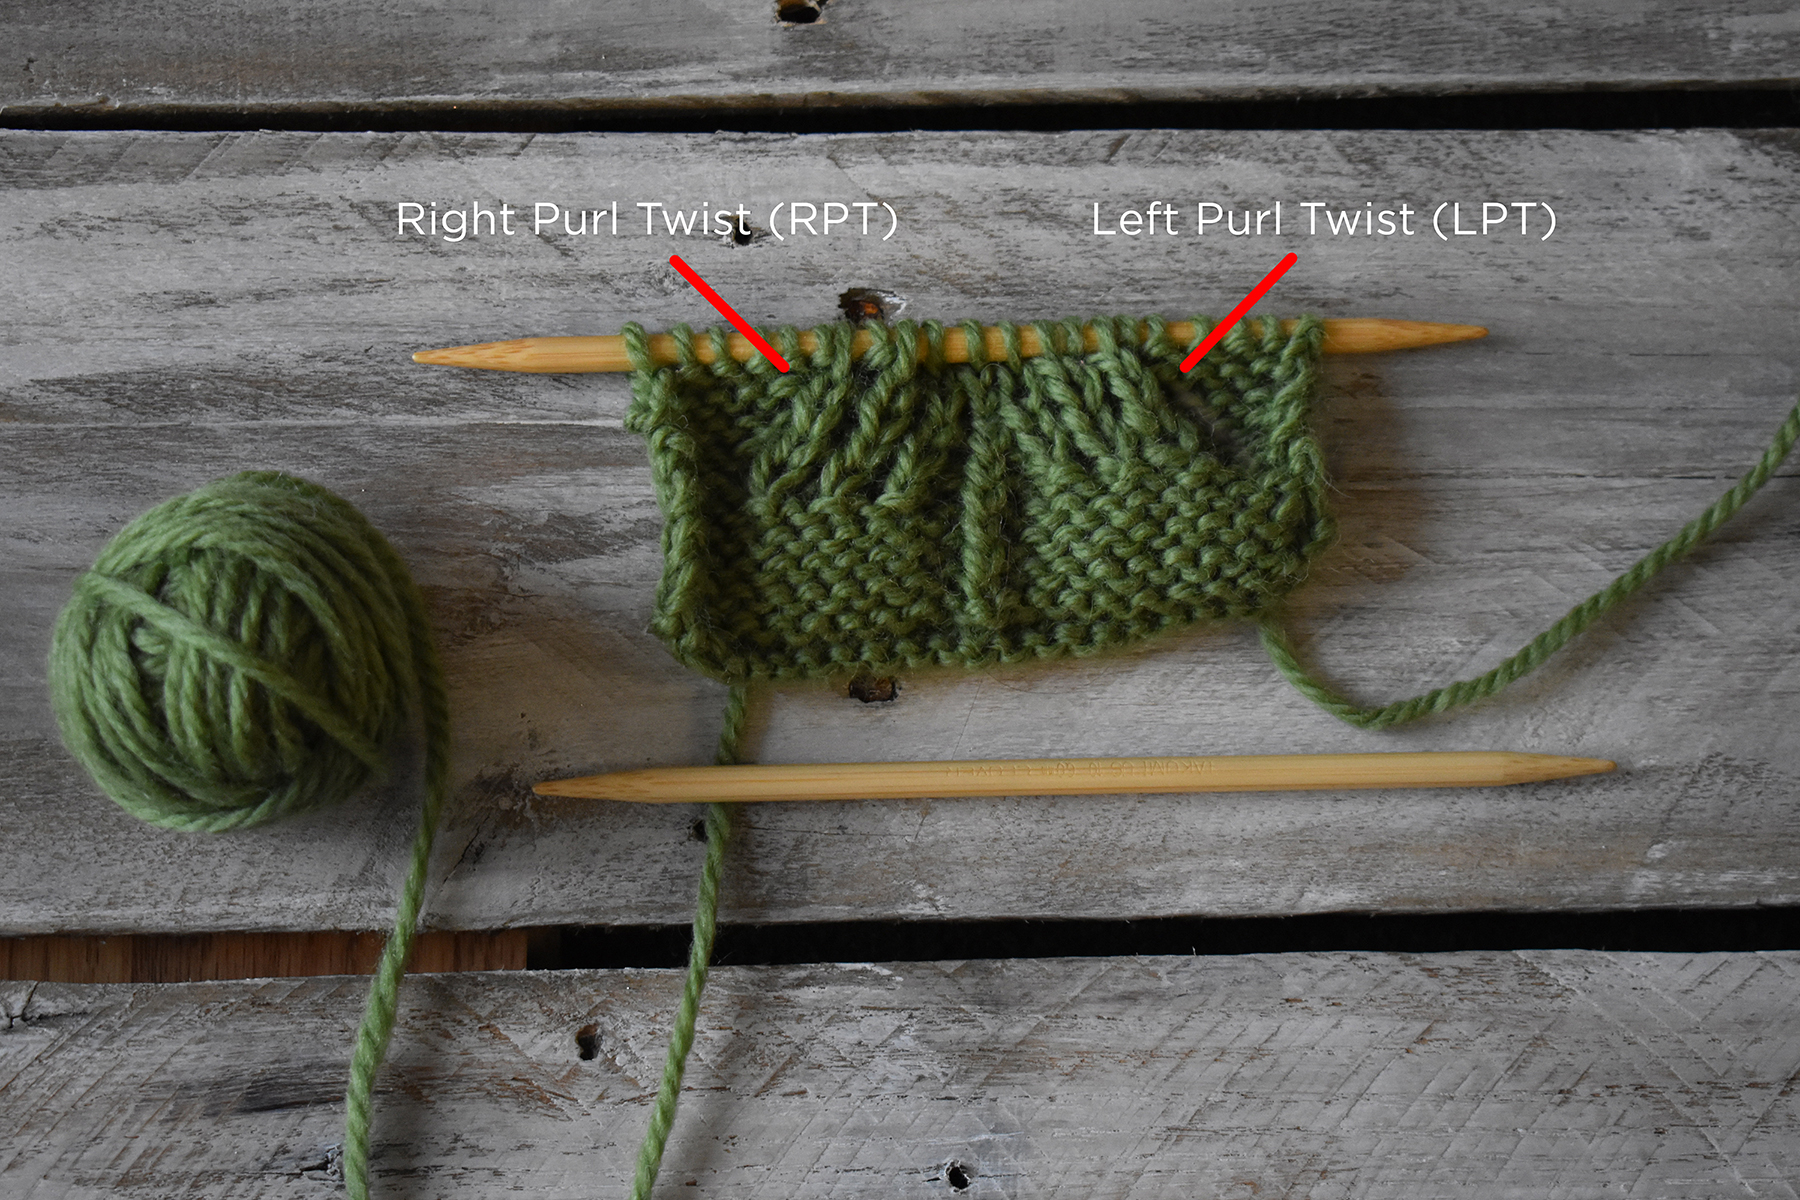
I couldn’t agree more with Jennifer – twisted stitches are a joy to work, especially when you get the hang of them. It eventually feels intuitive and you’ll be glad to have this skill in your toolbox. The Mountain Pines Cowl uses purl twists, so that’s what we’ll focus on in this tutorial. You’ll learn the Left Purl Twist (LPT) and the Right Purl Twist (RPT). The Left Purl Twist (LPT) leans to the left, and the Right Purl Twist (RPT) leans to the right. We’ll cover the LPT first, followed by the RPT.
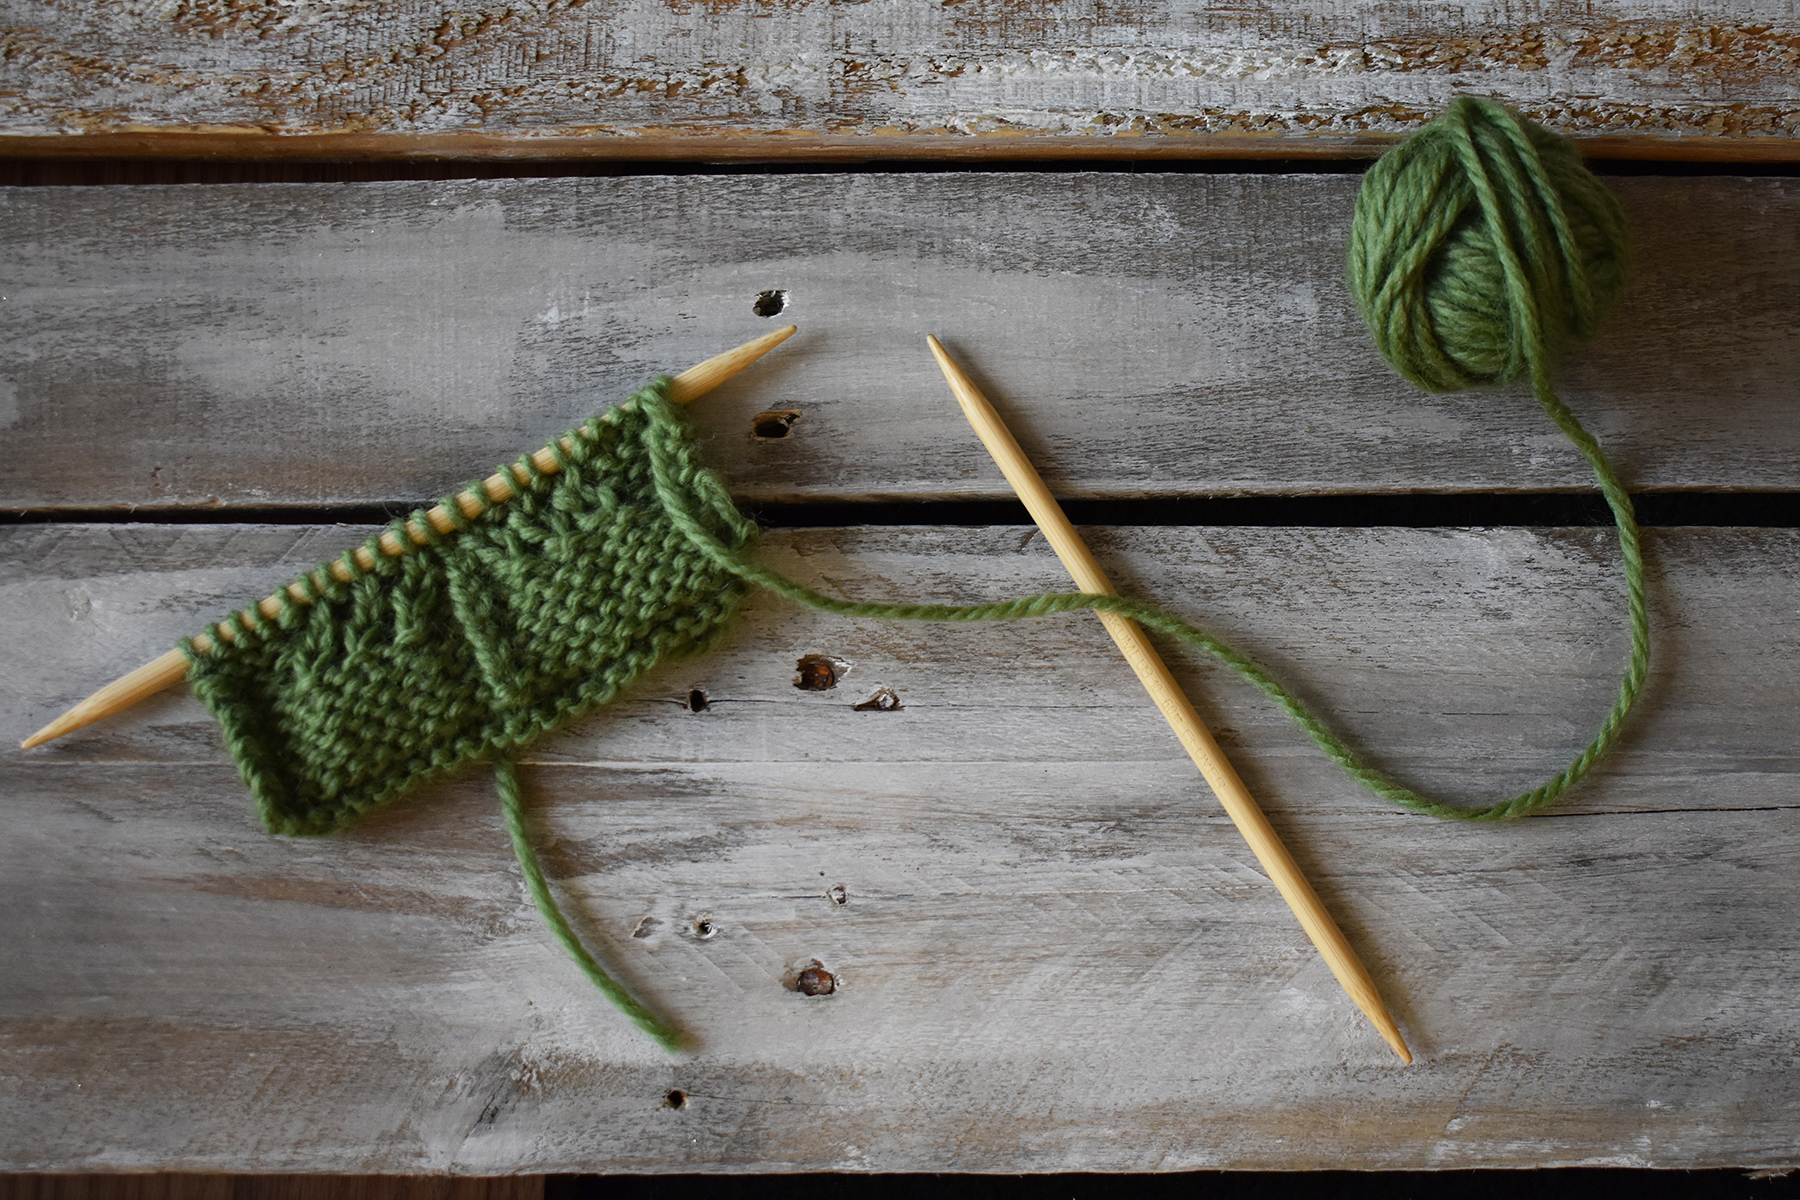
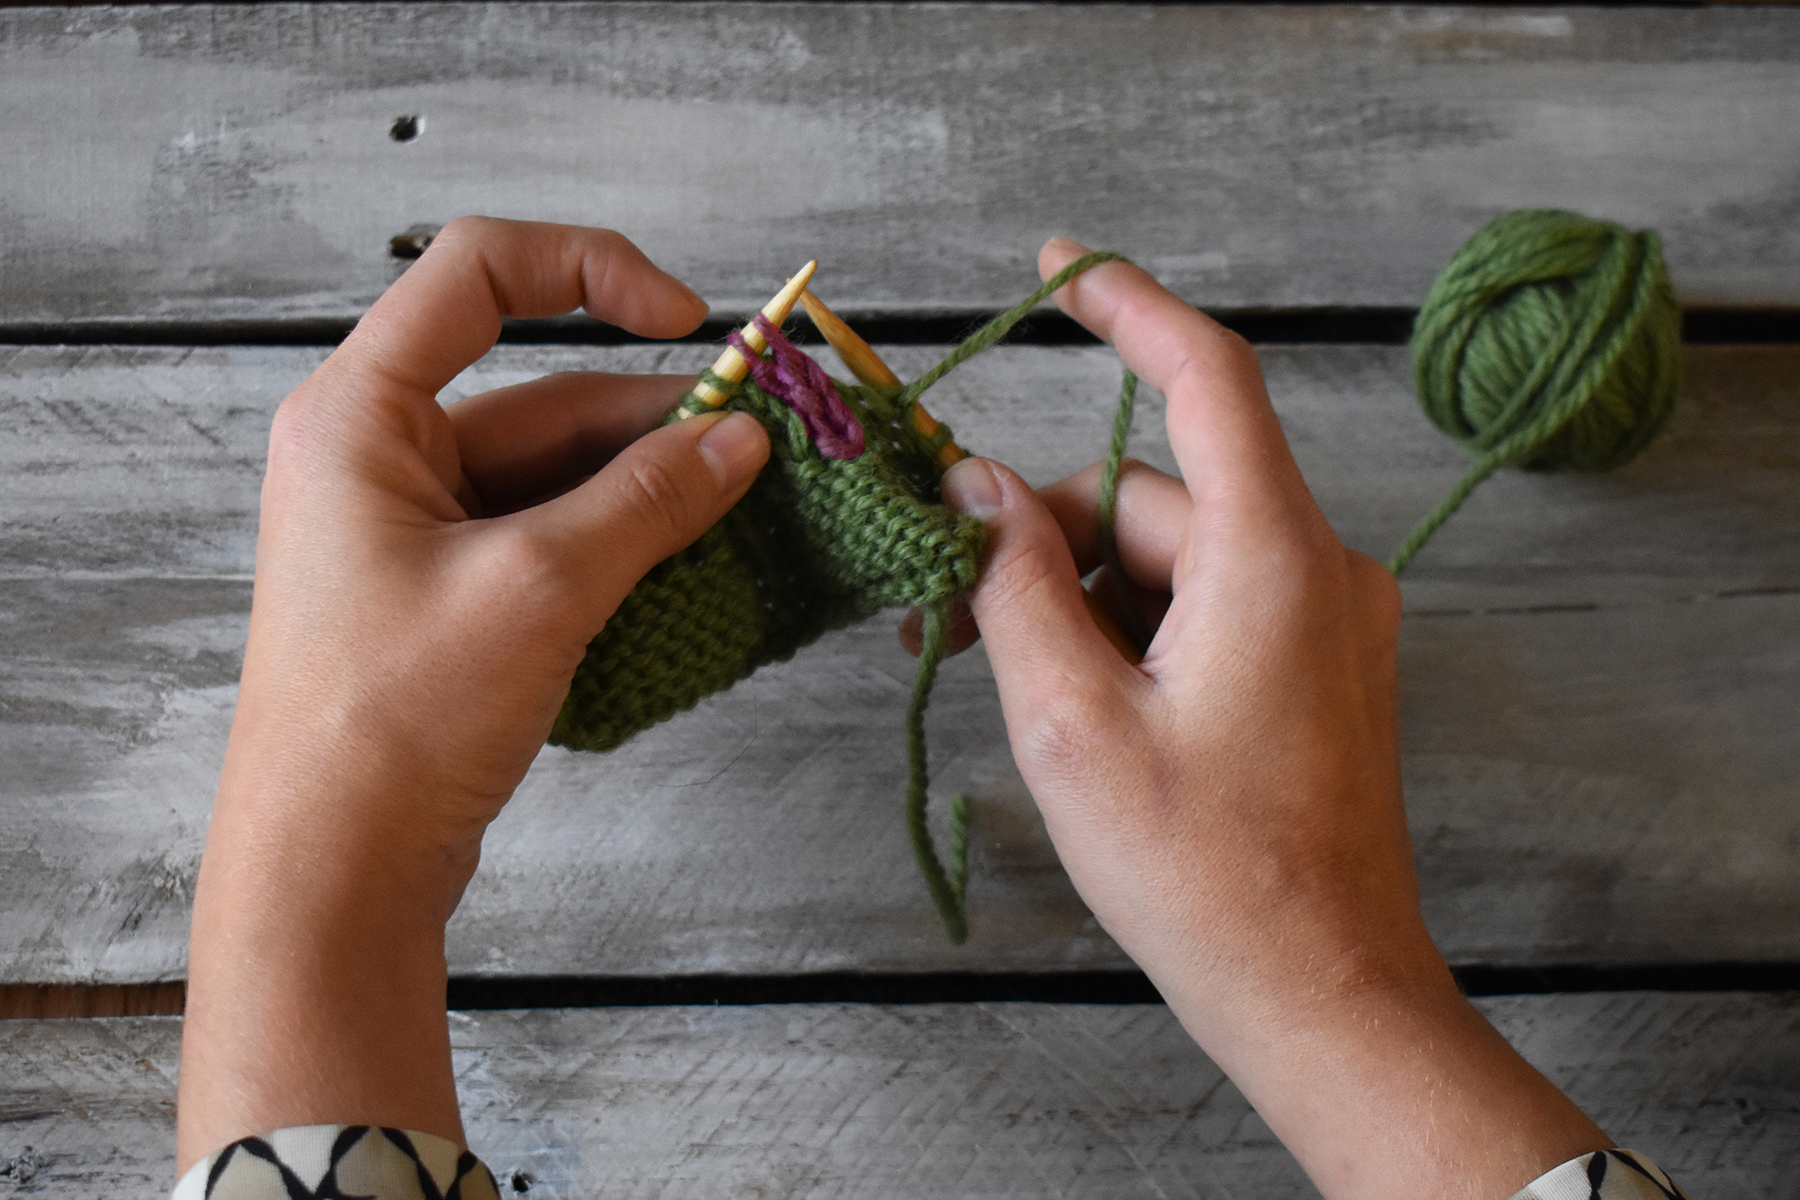
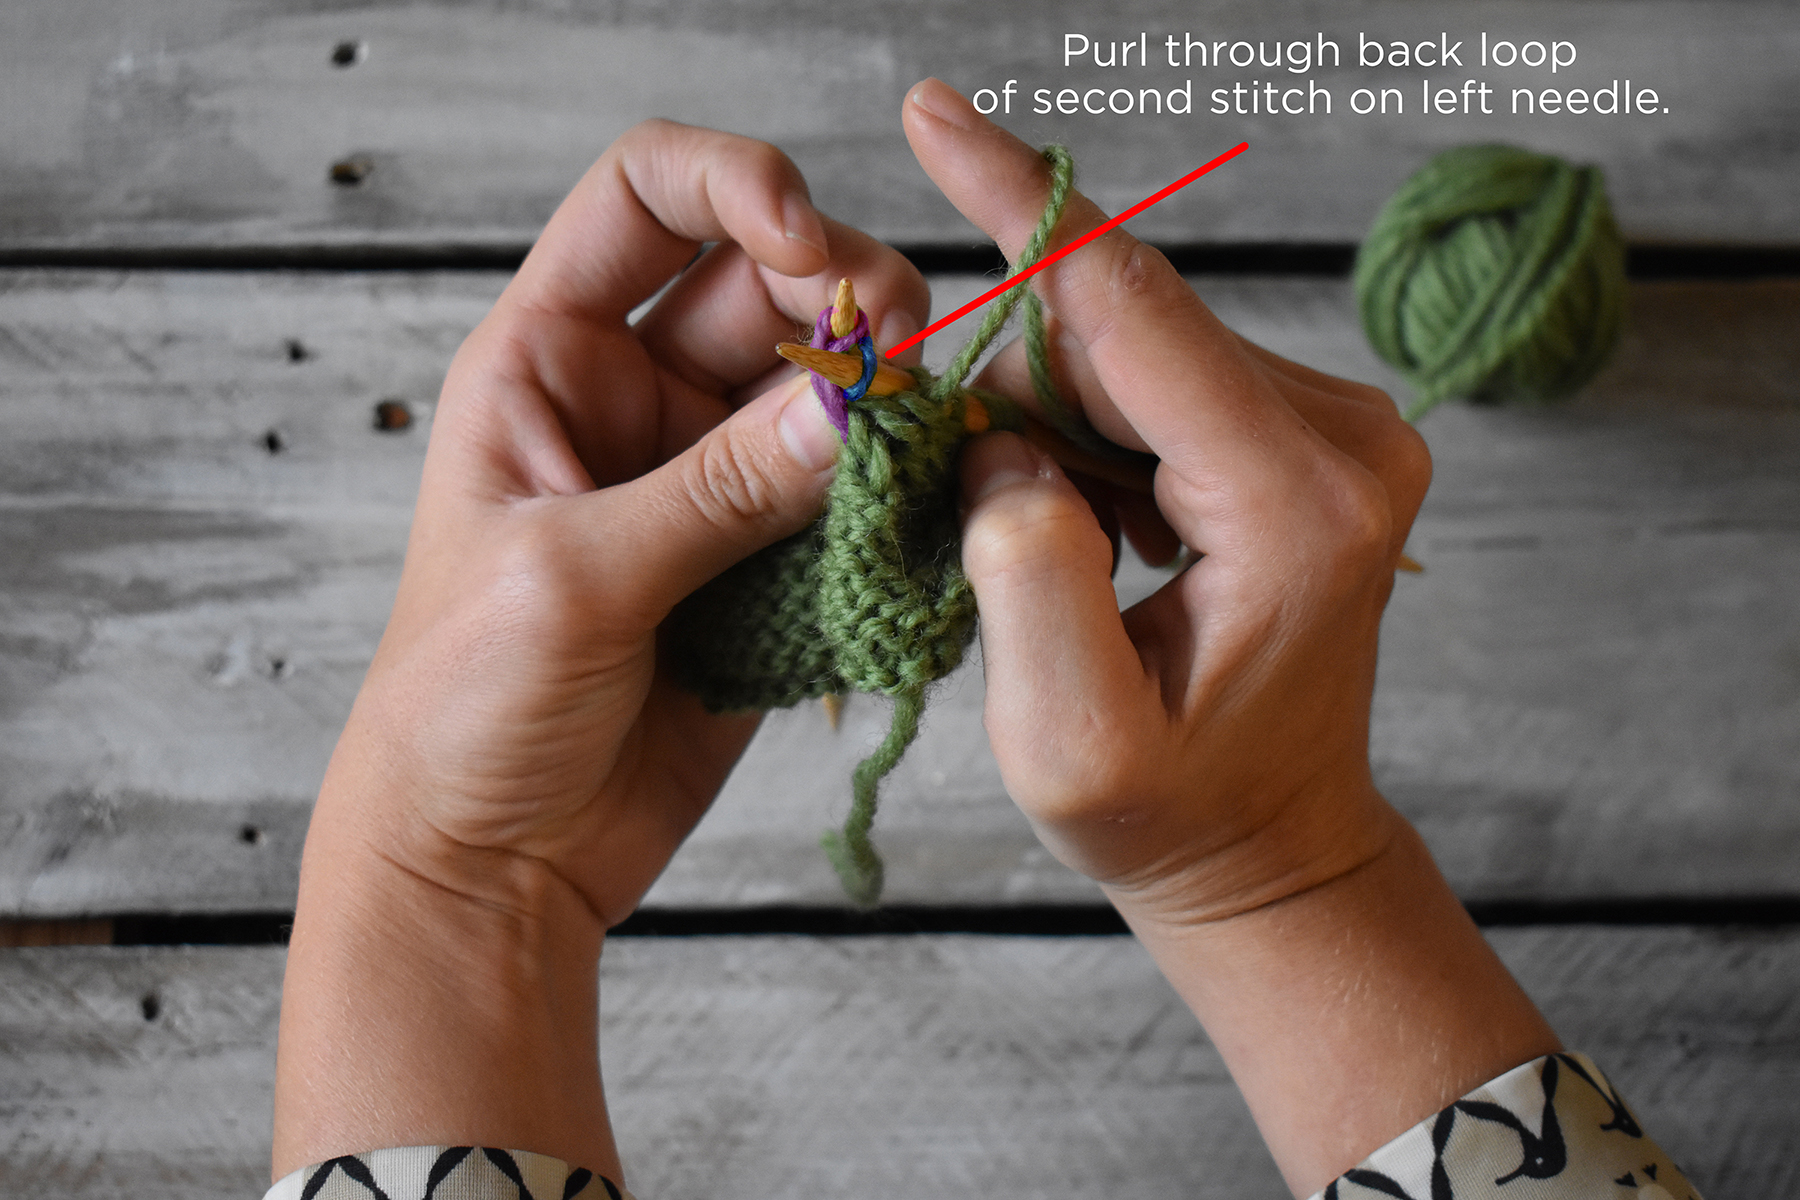
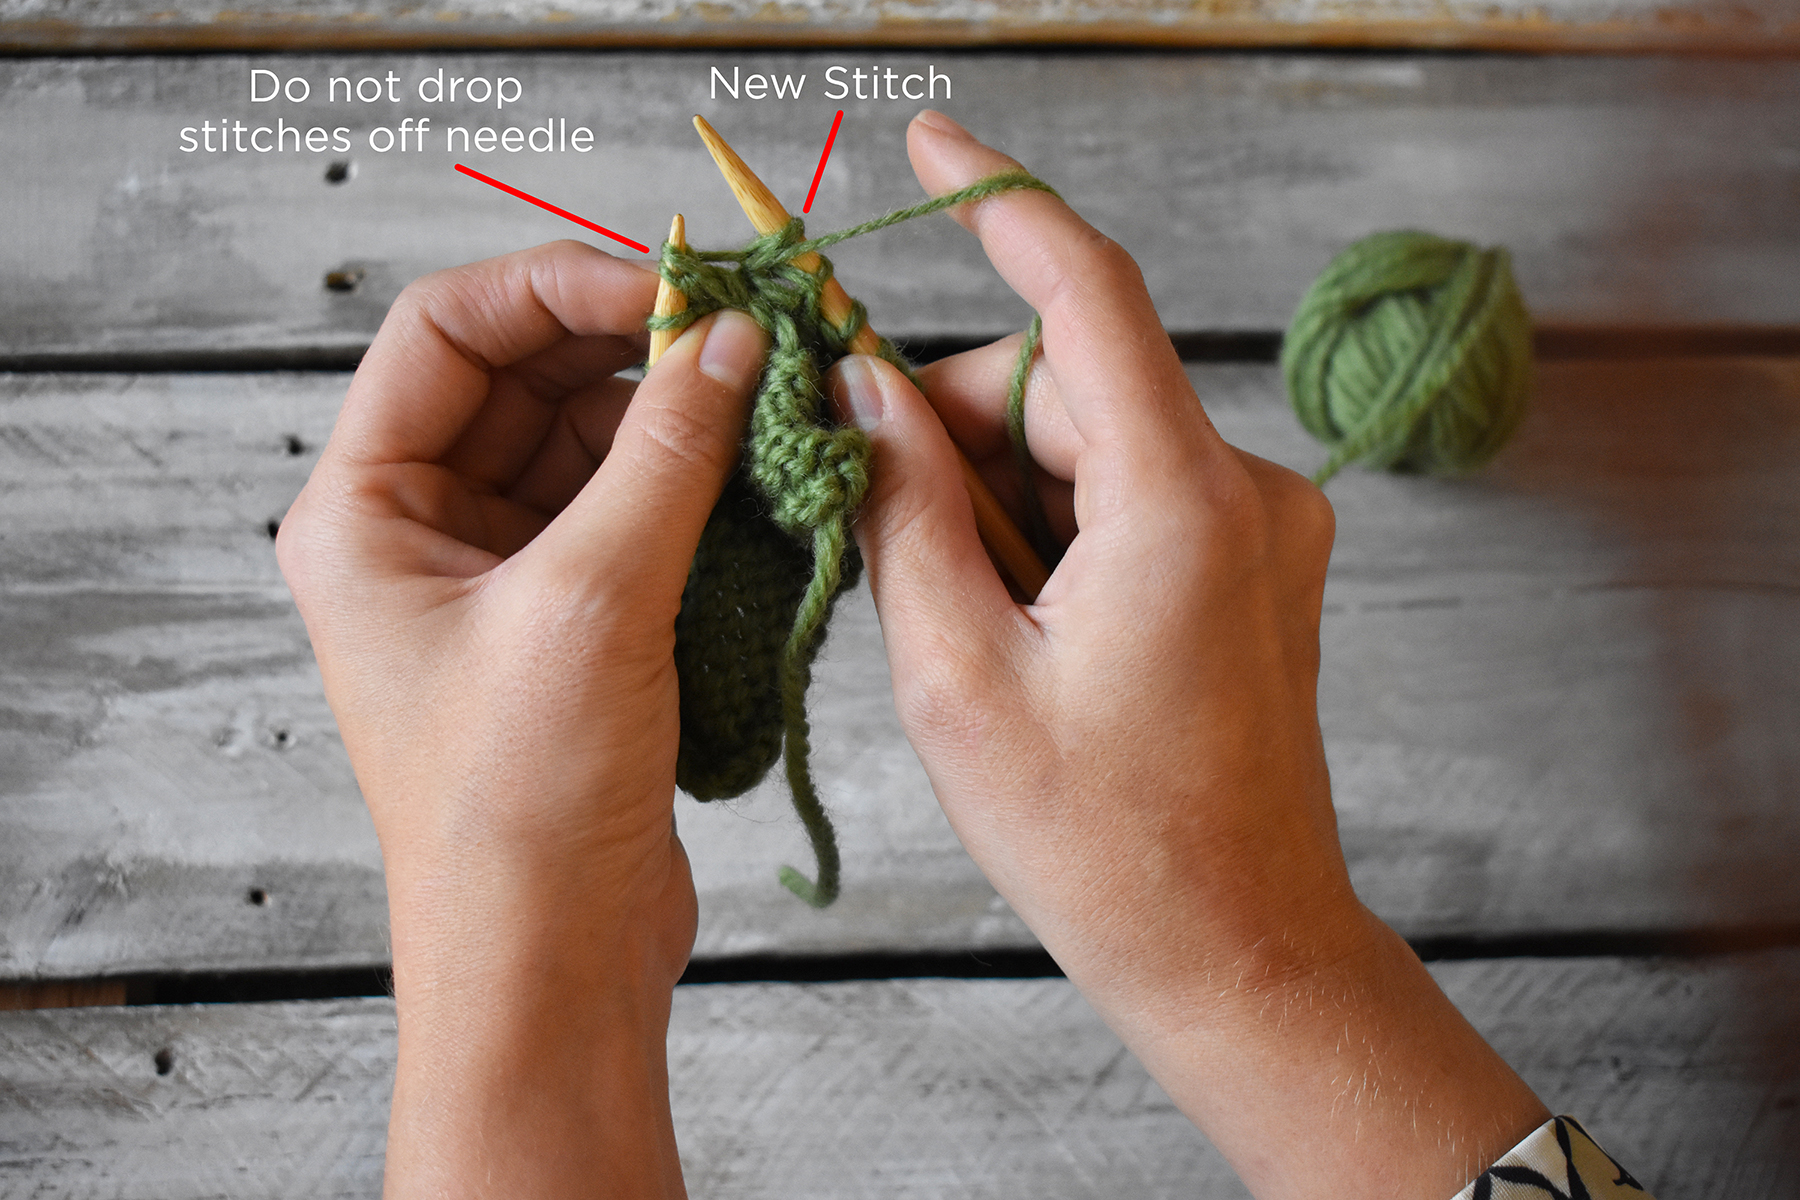
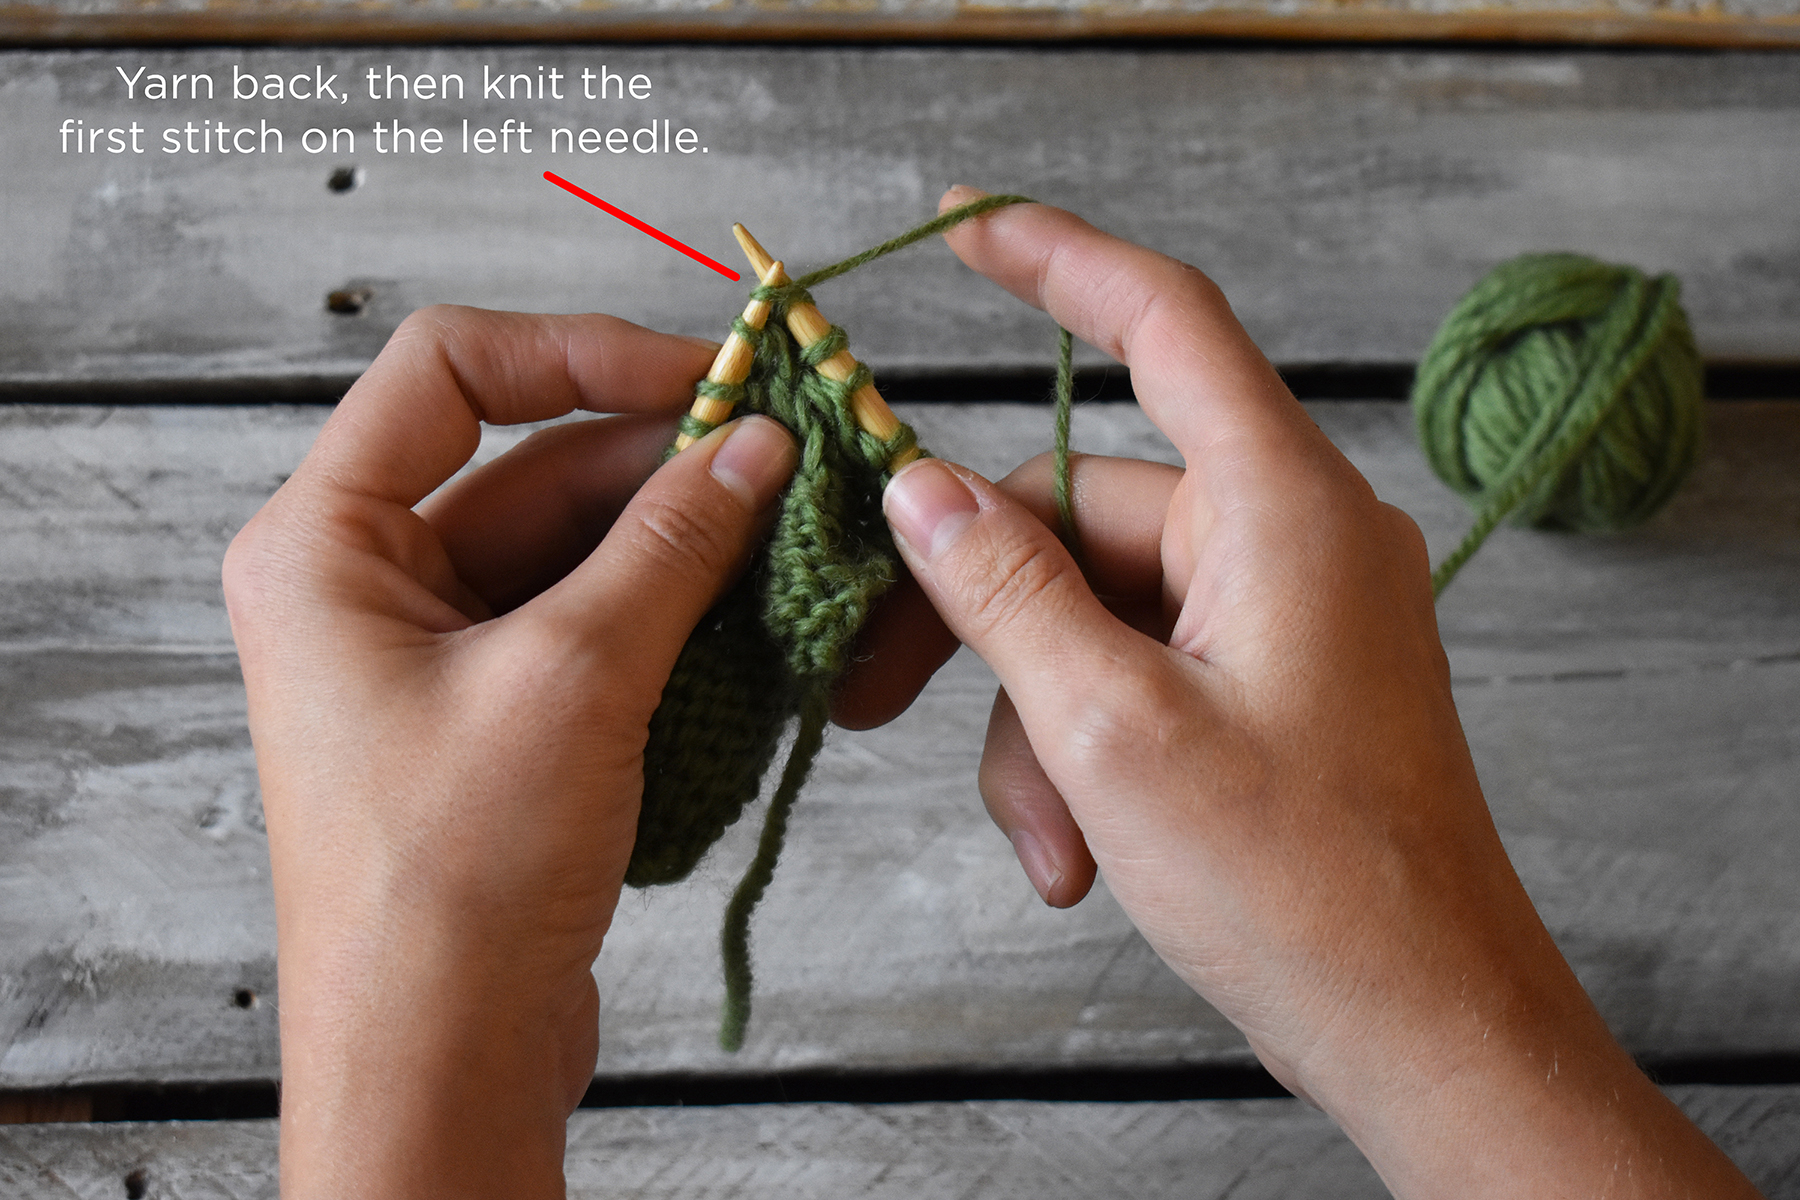
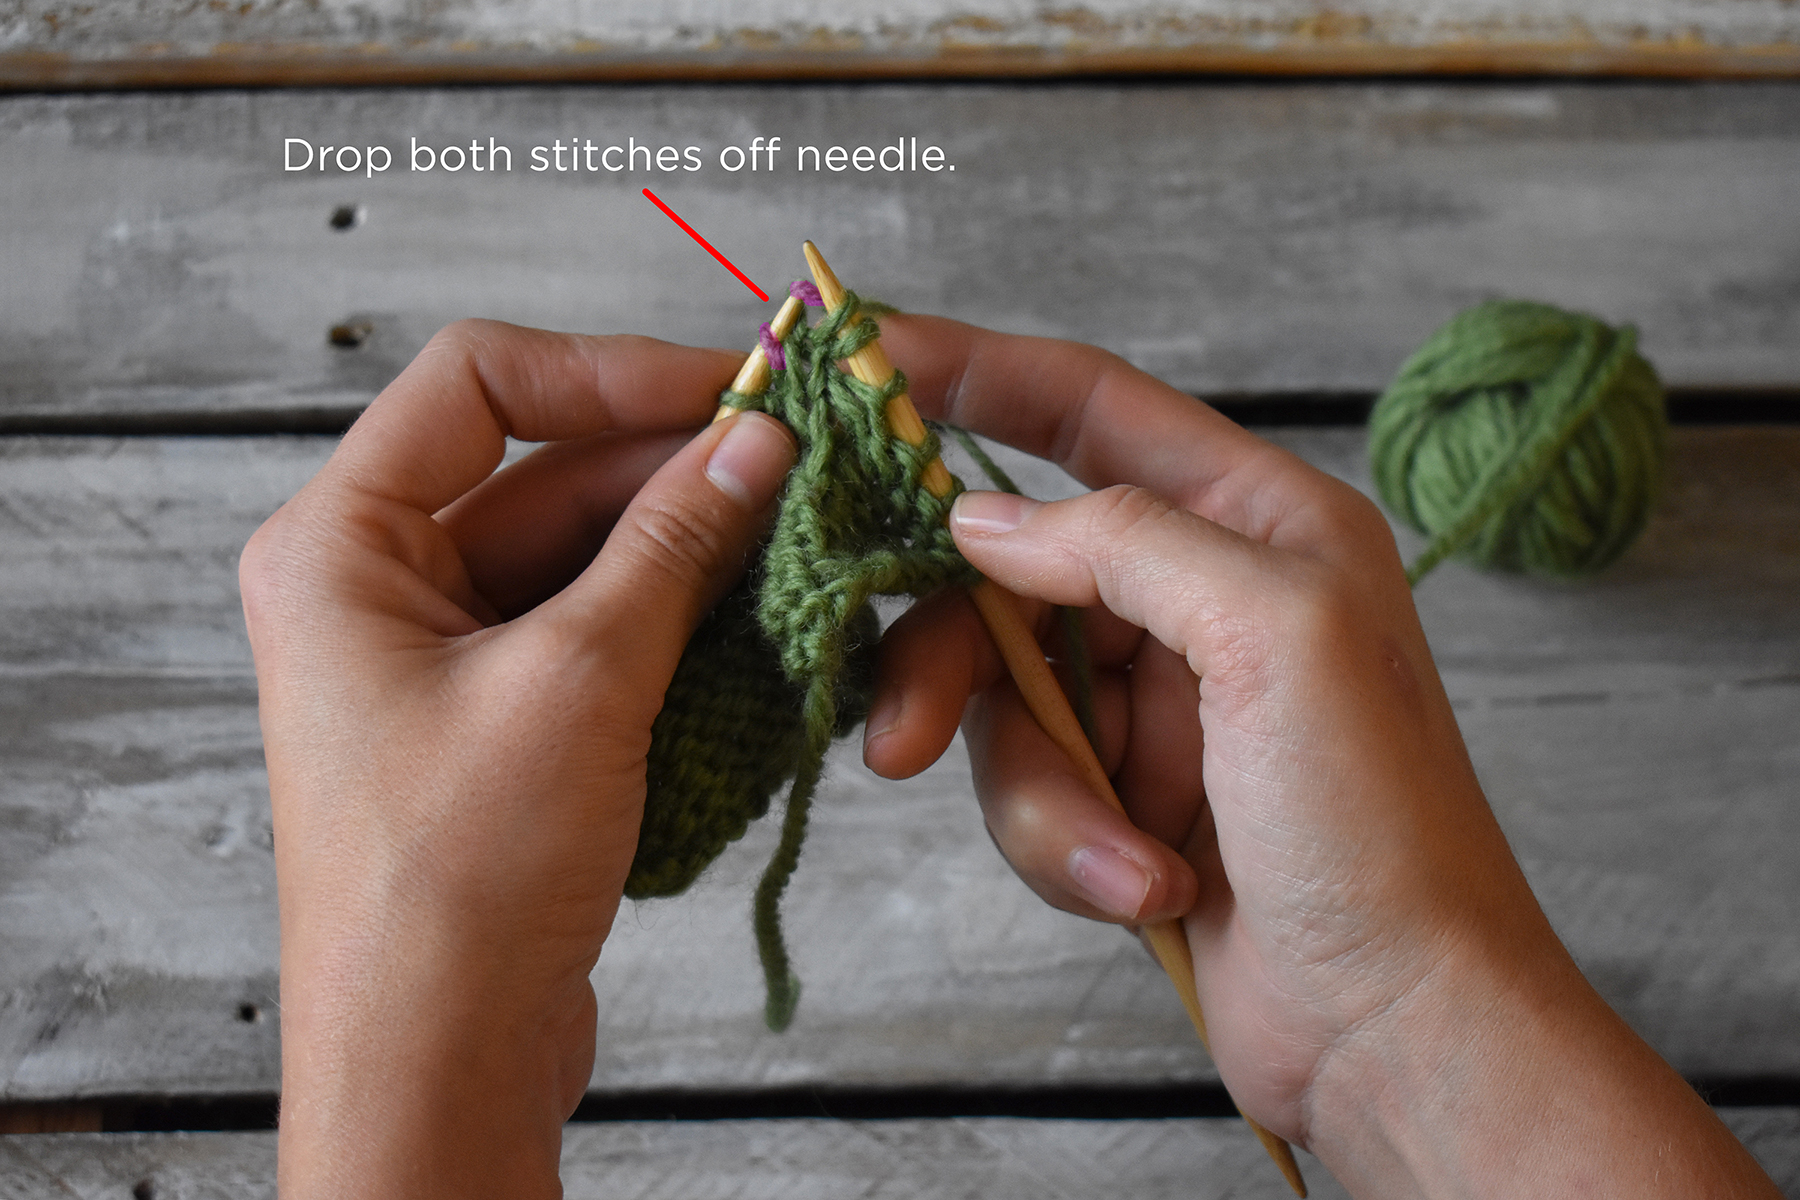
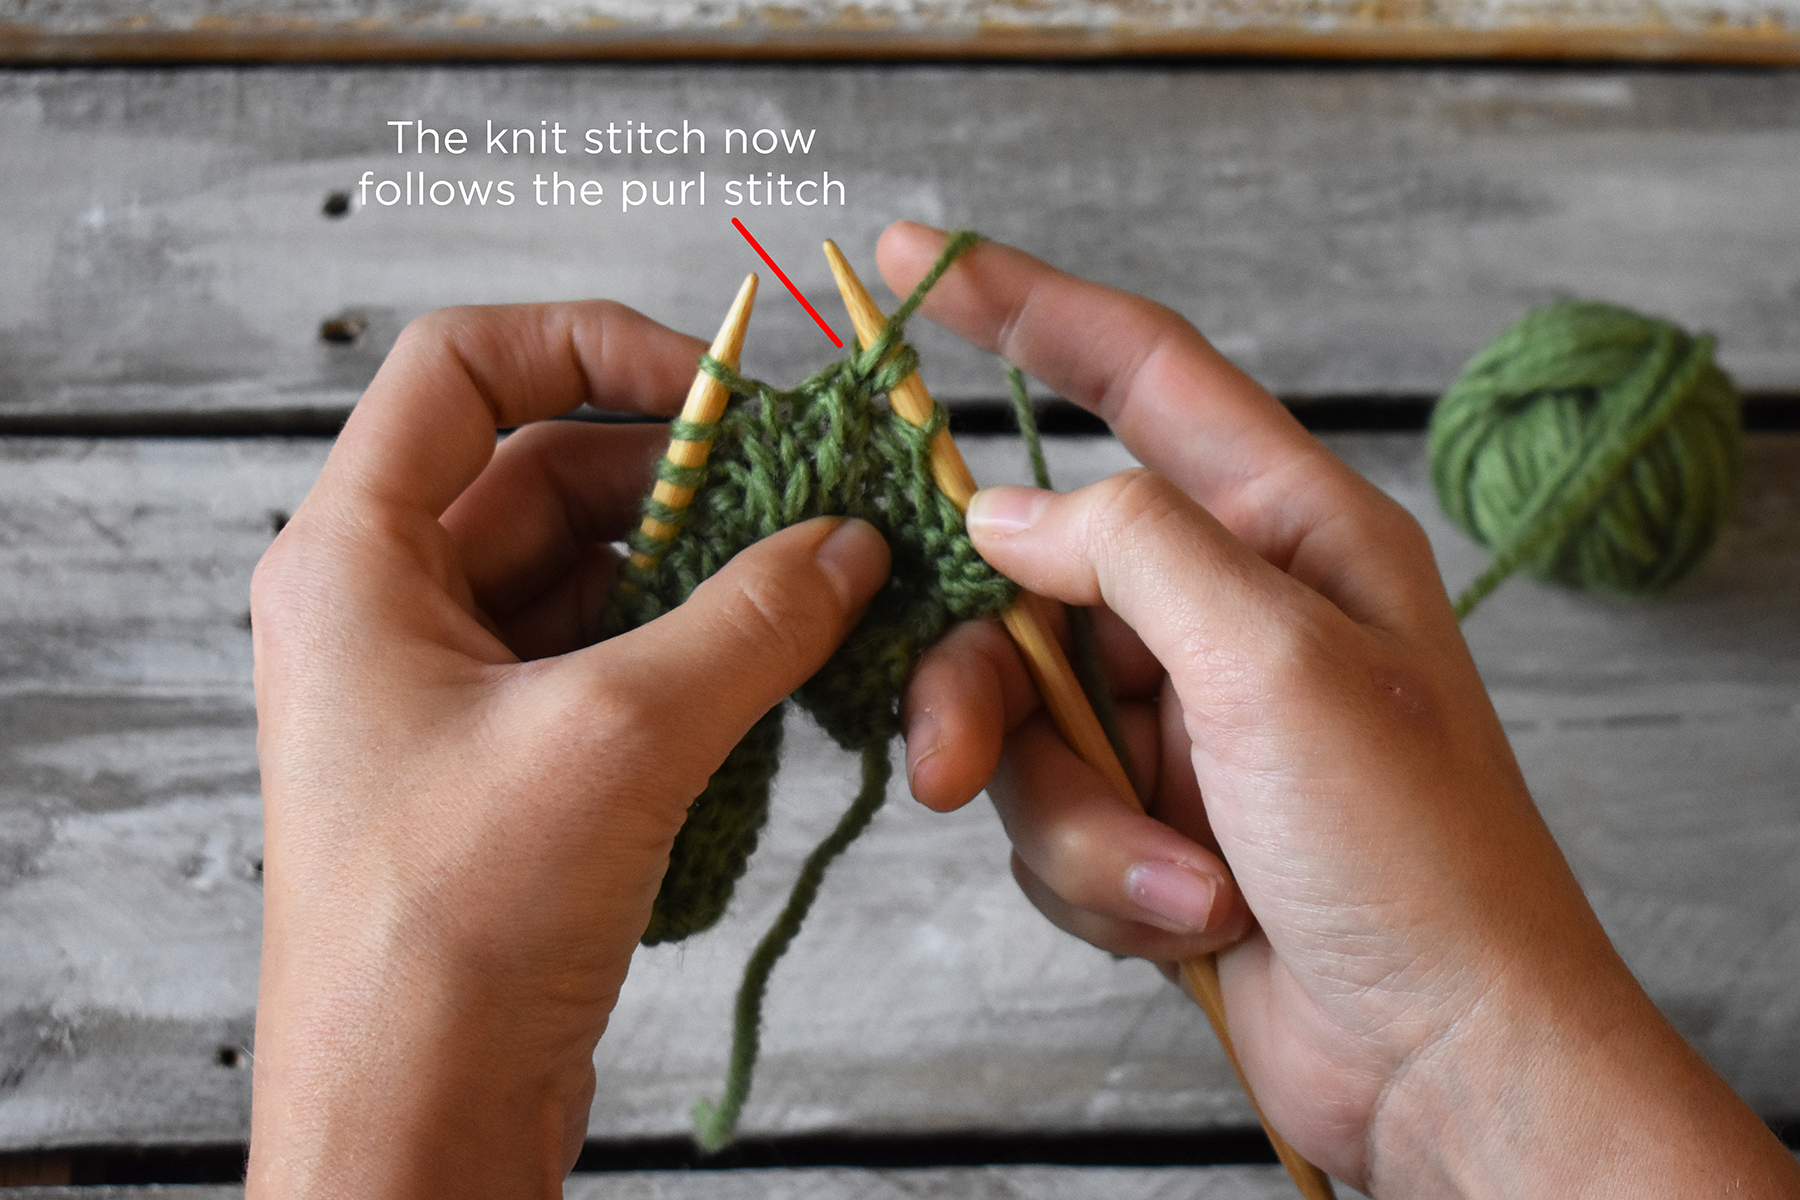
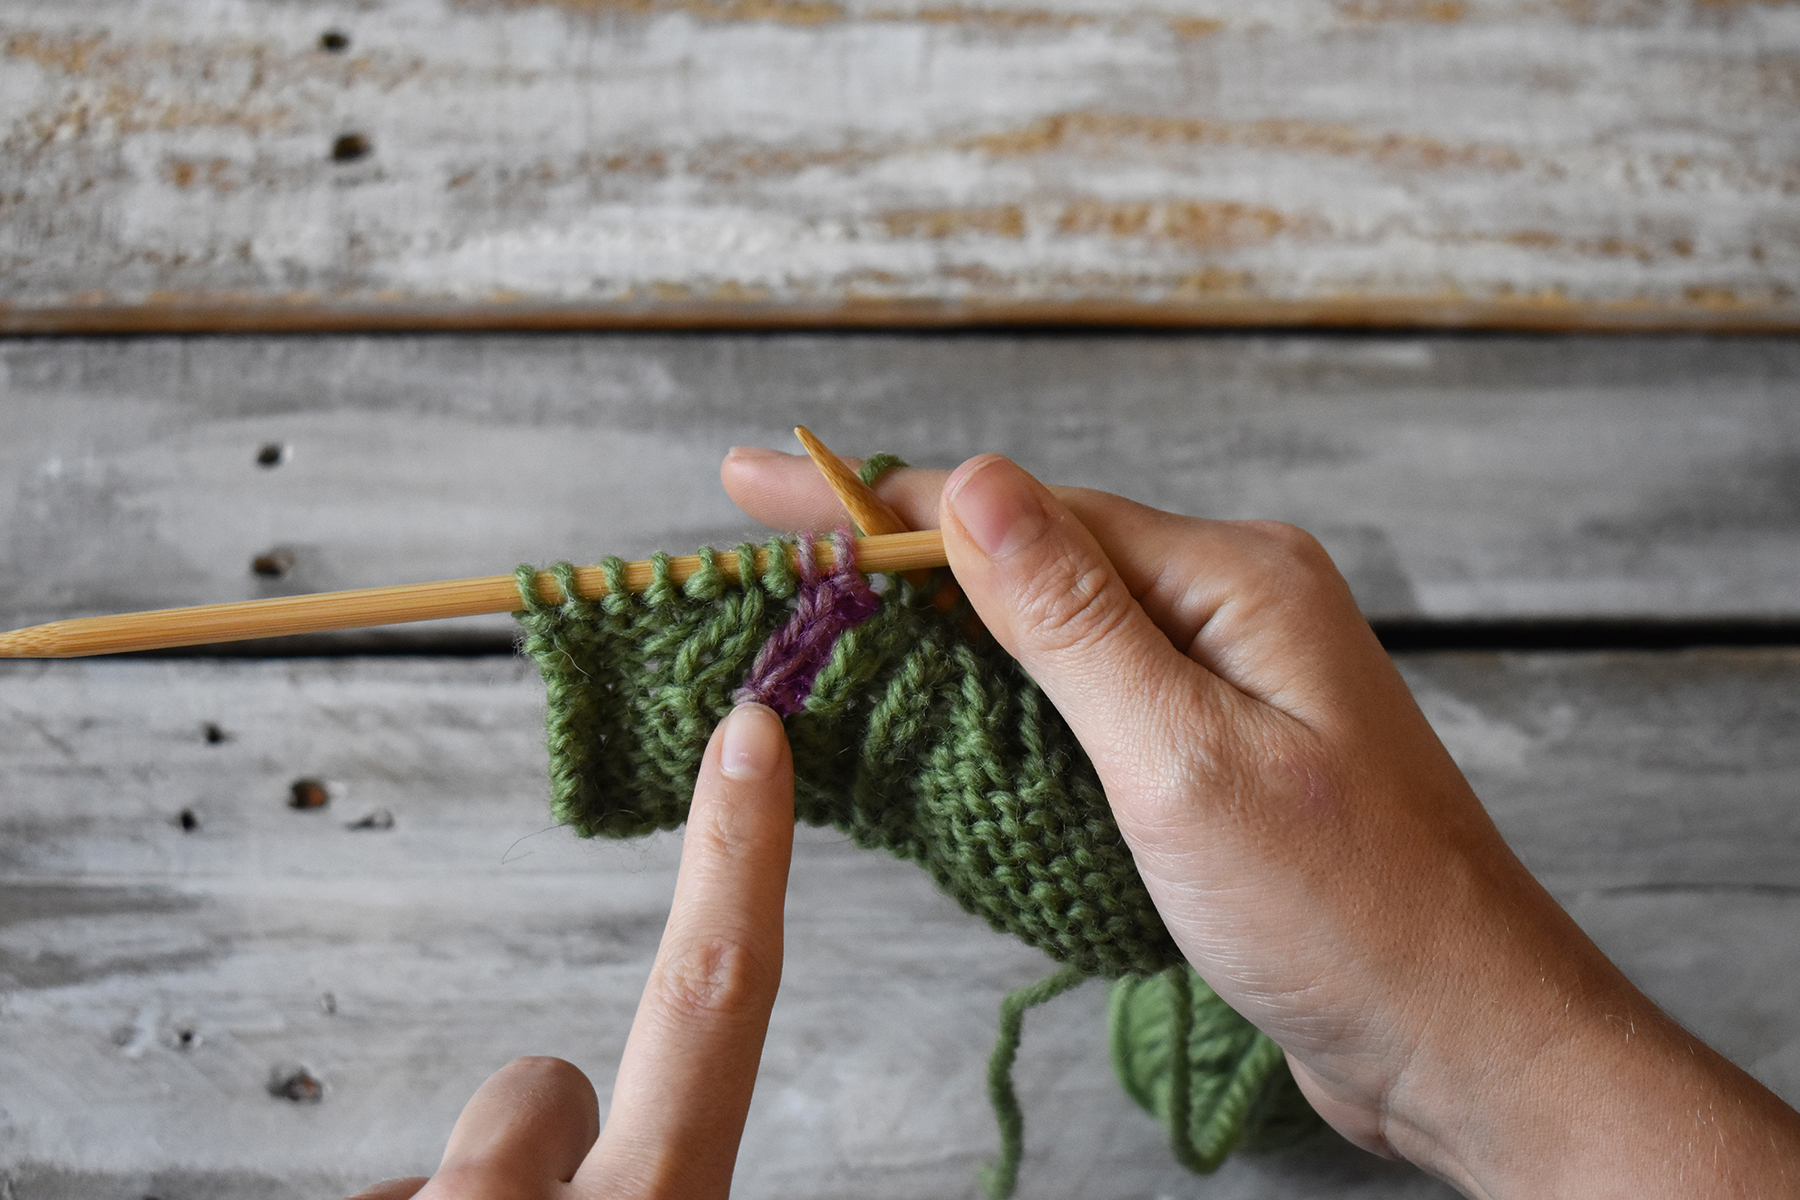
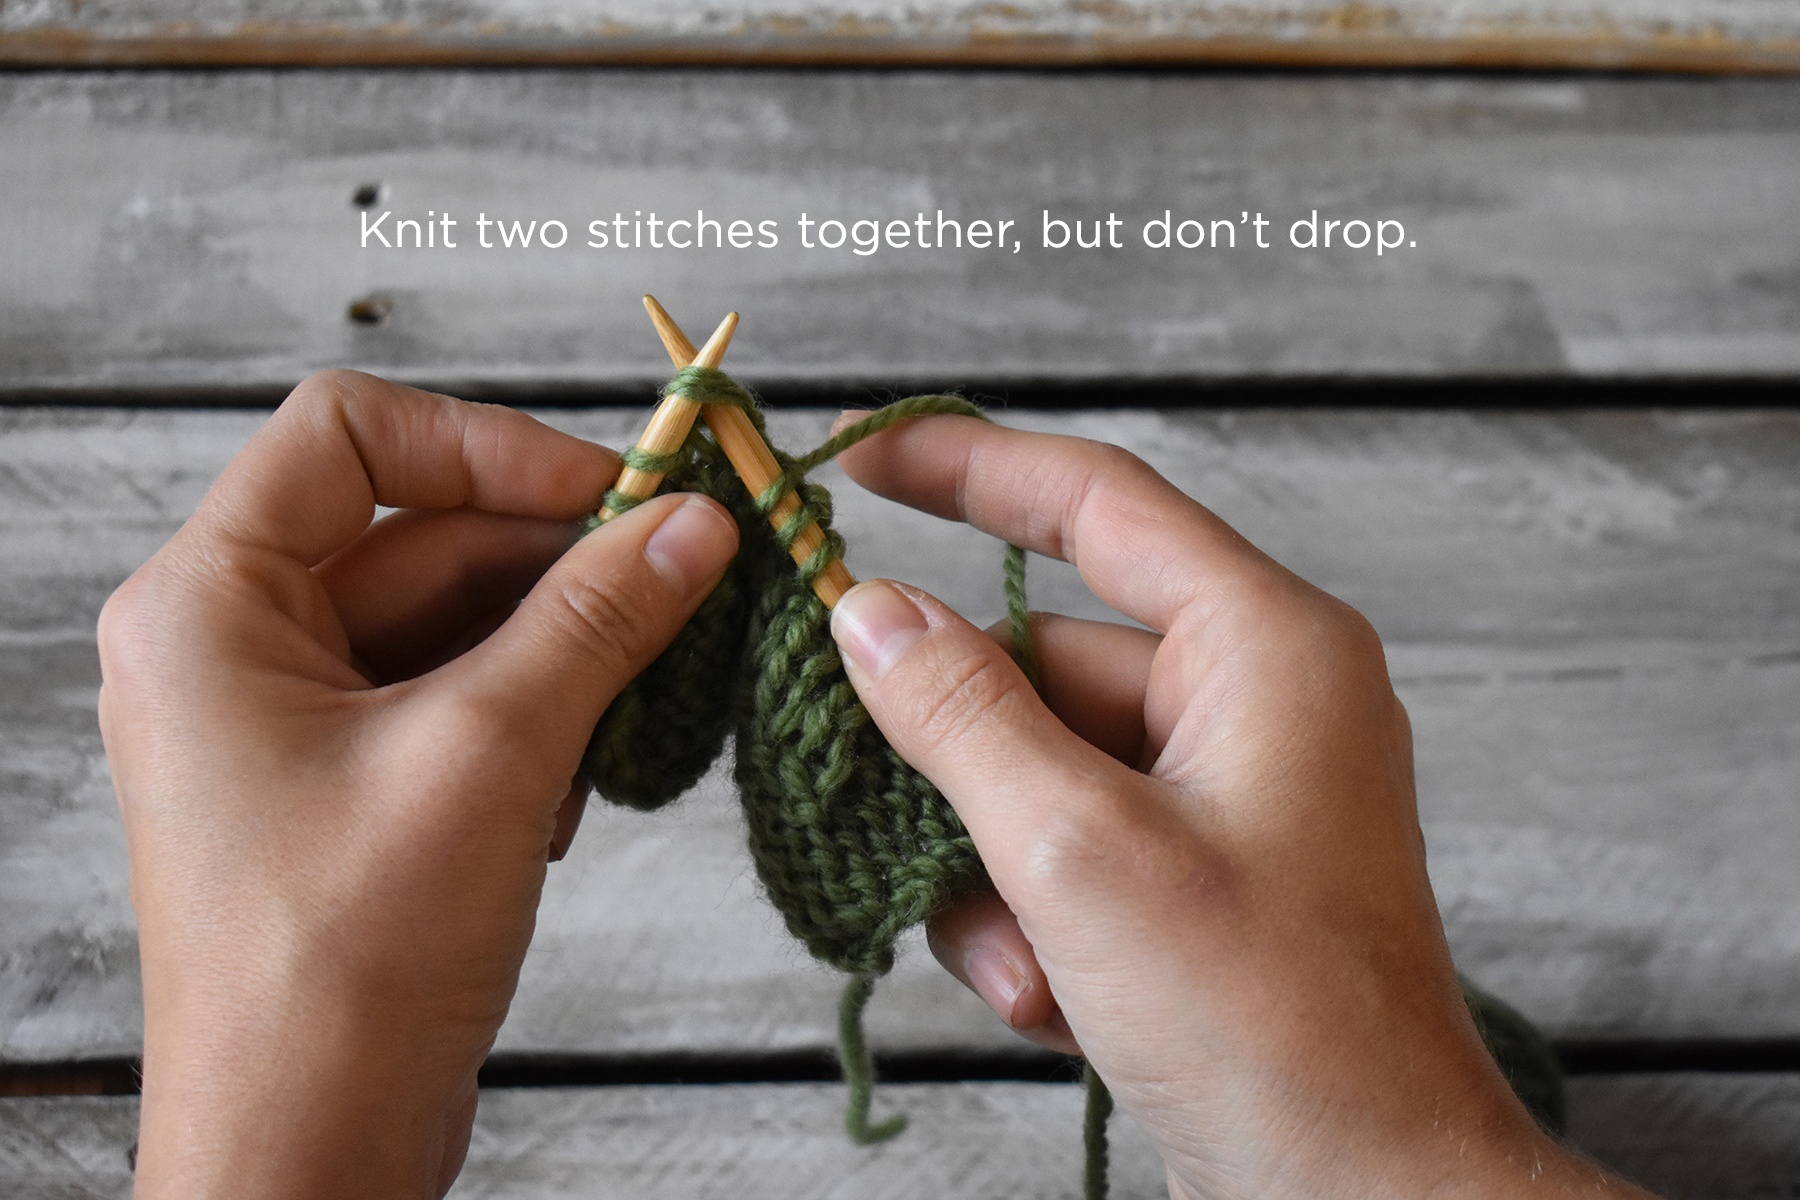
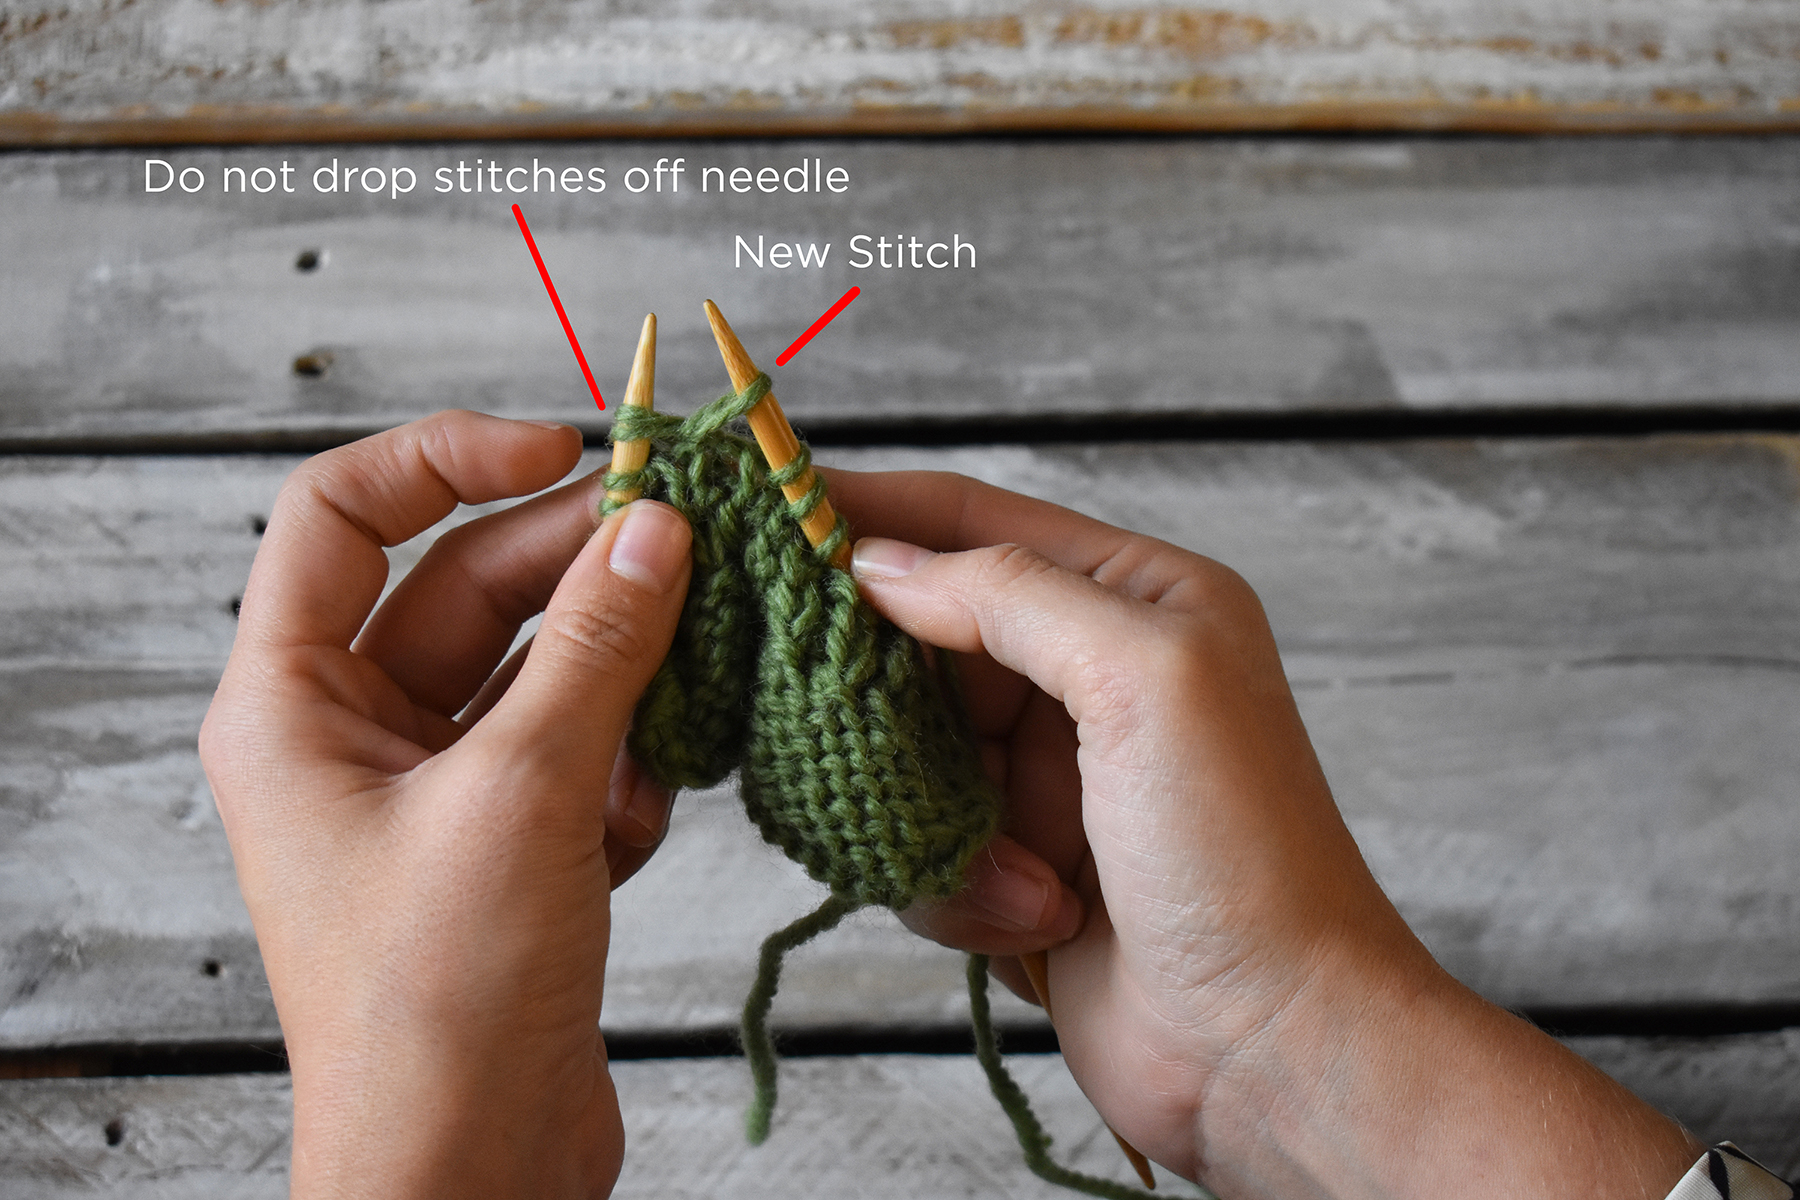
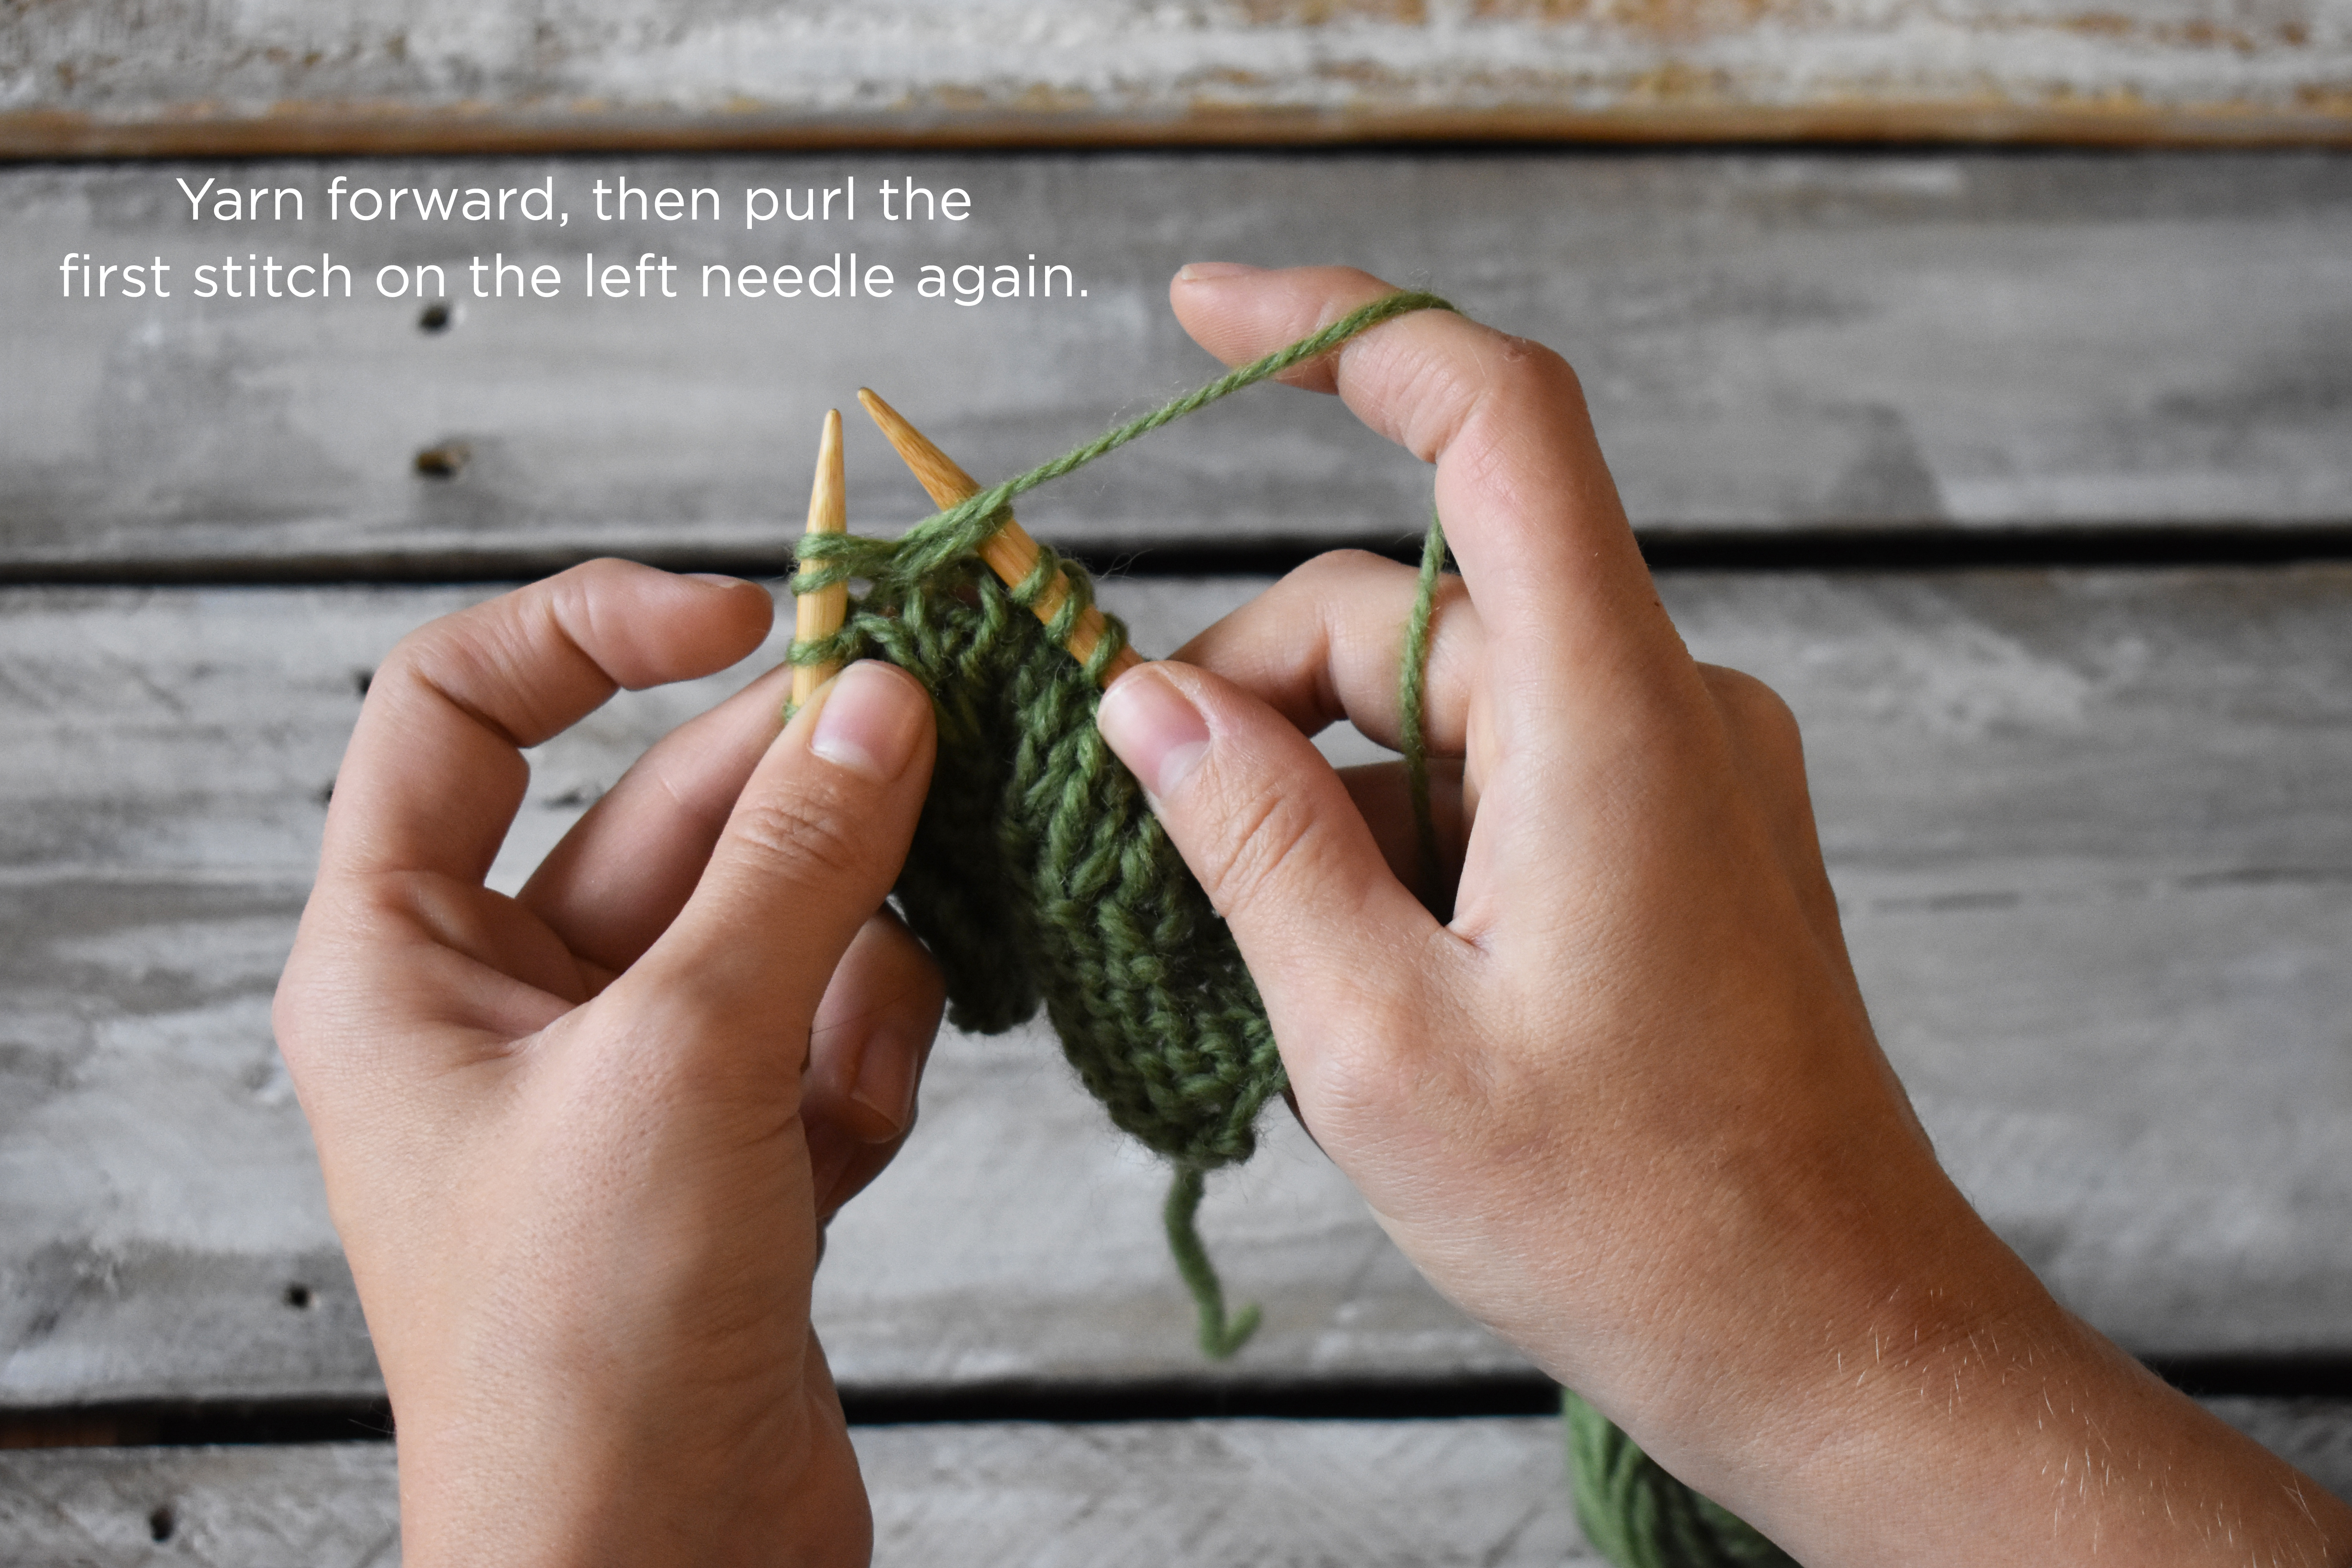
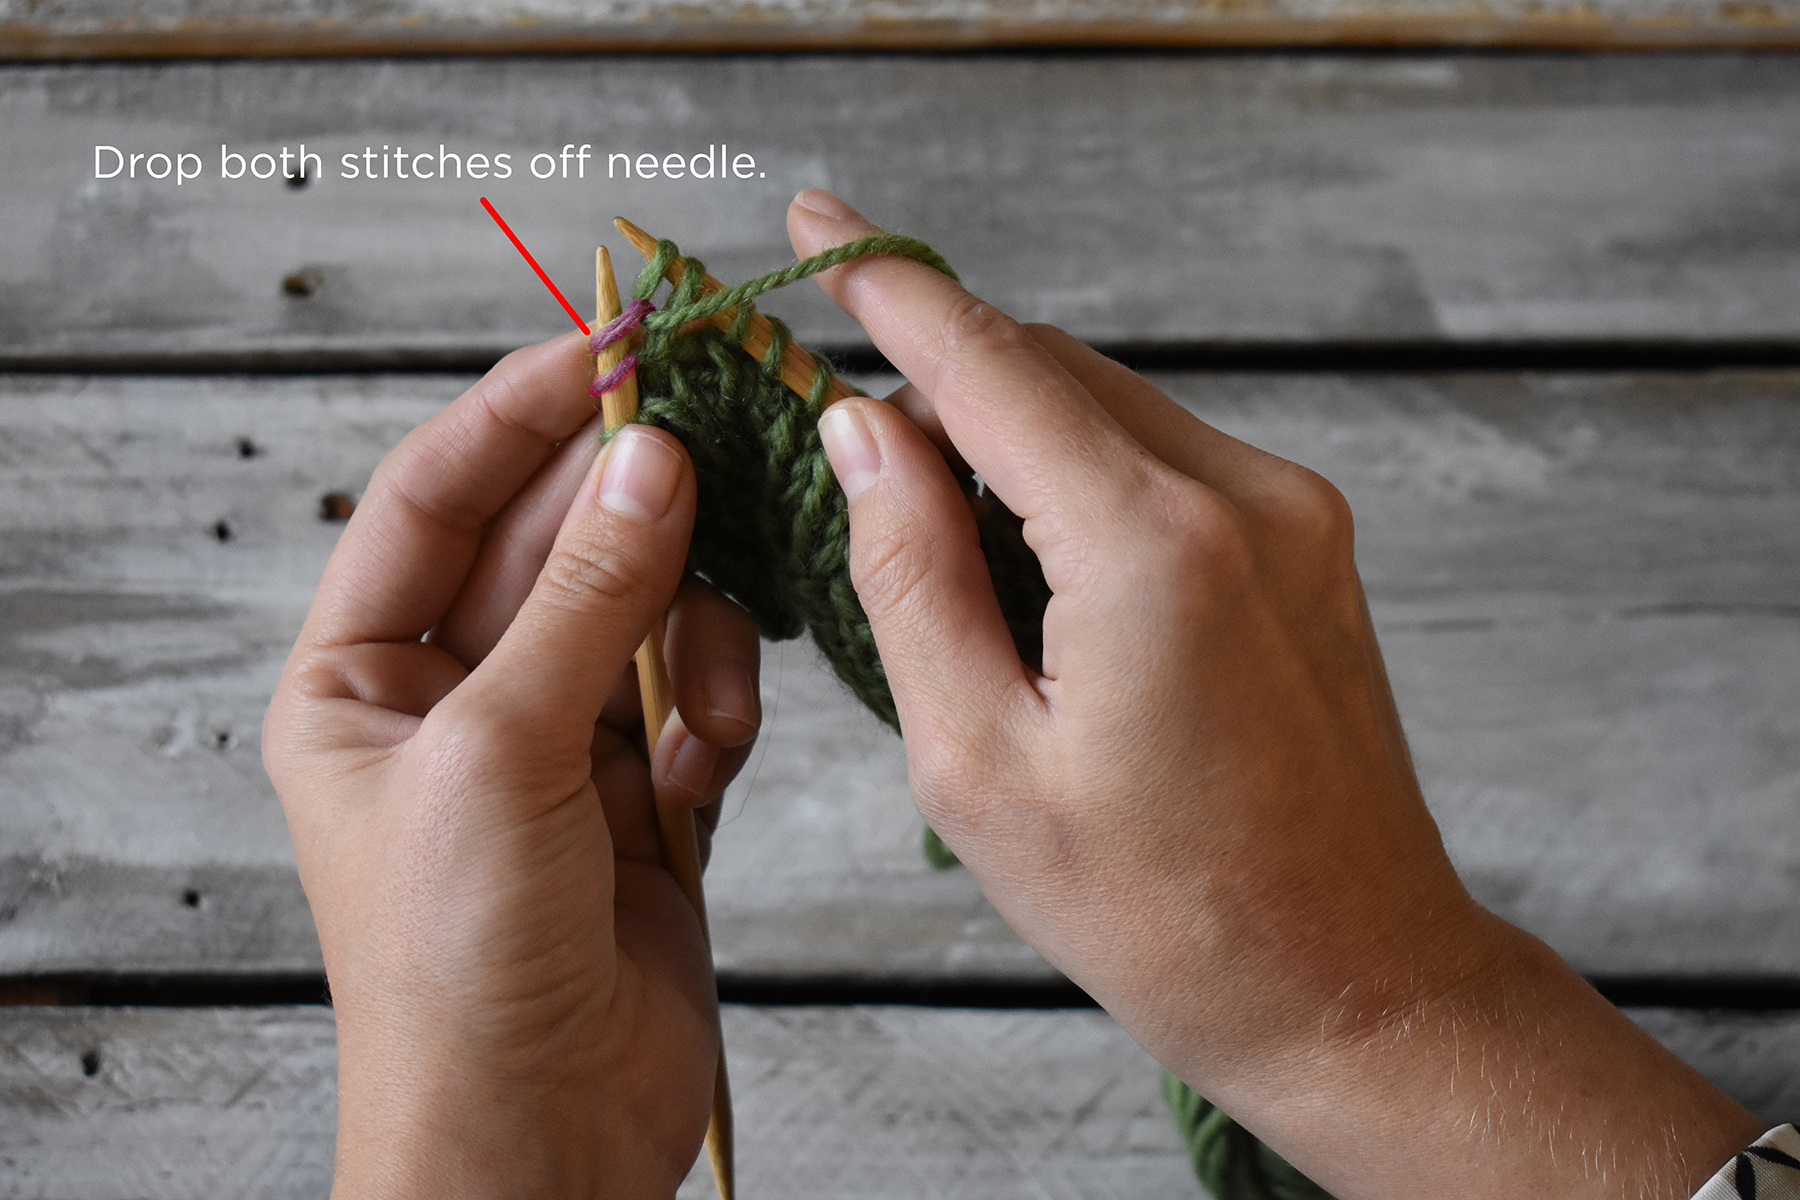
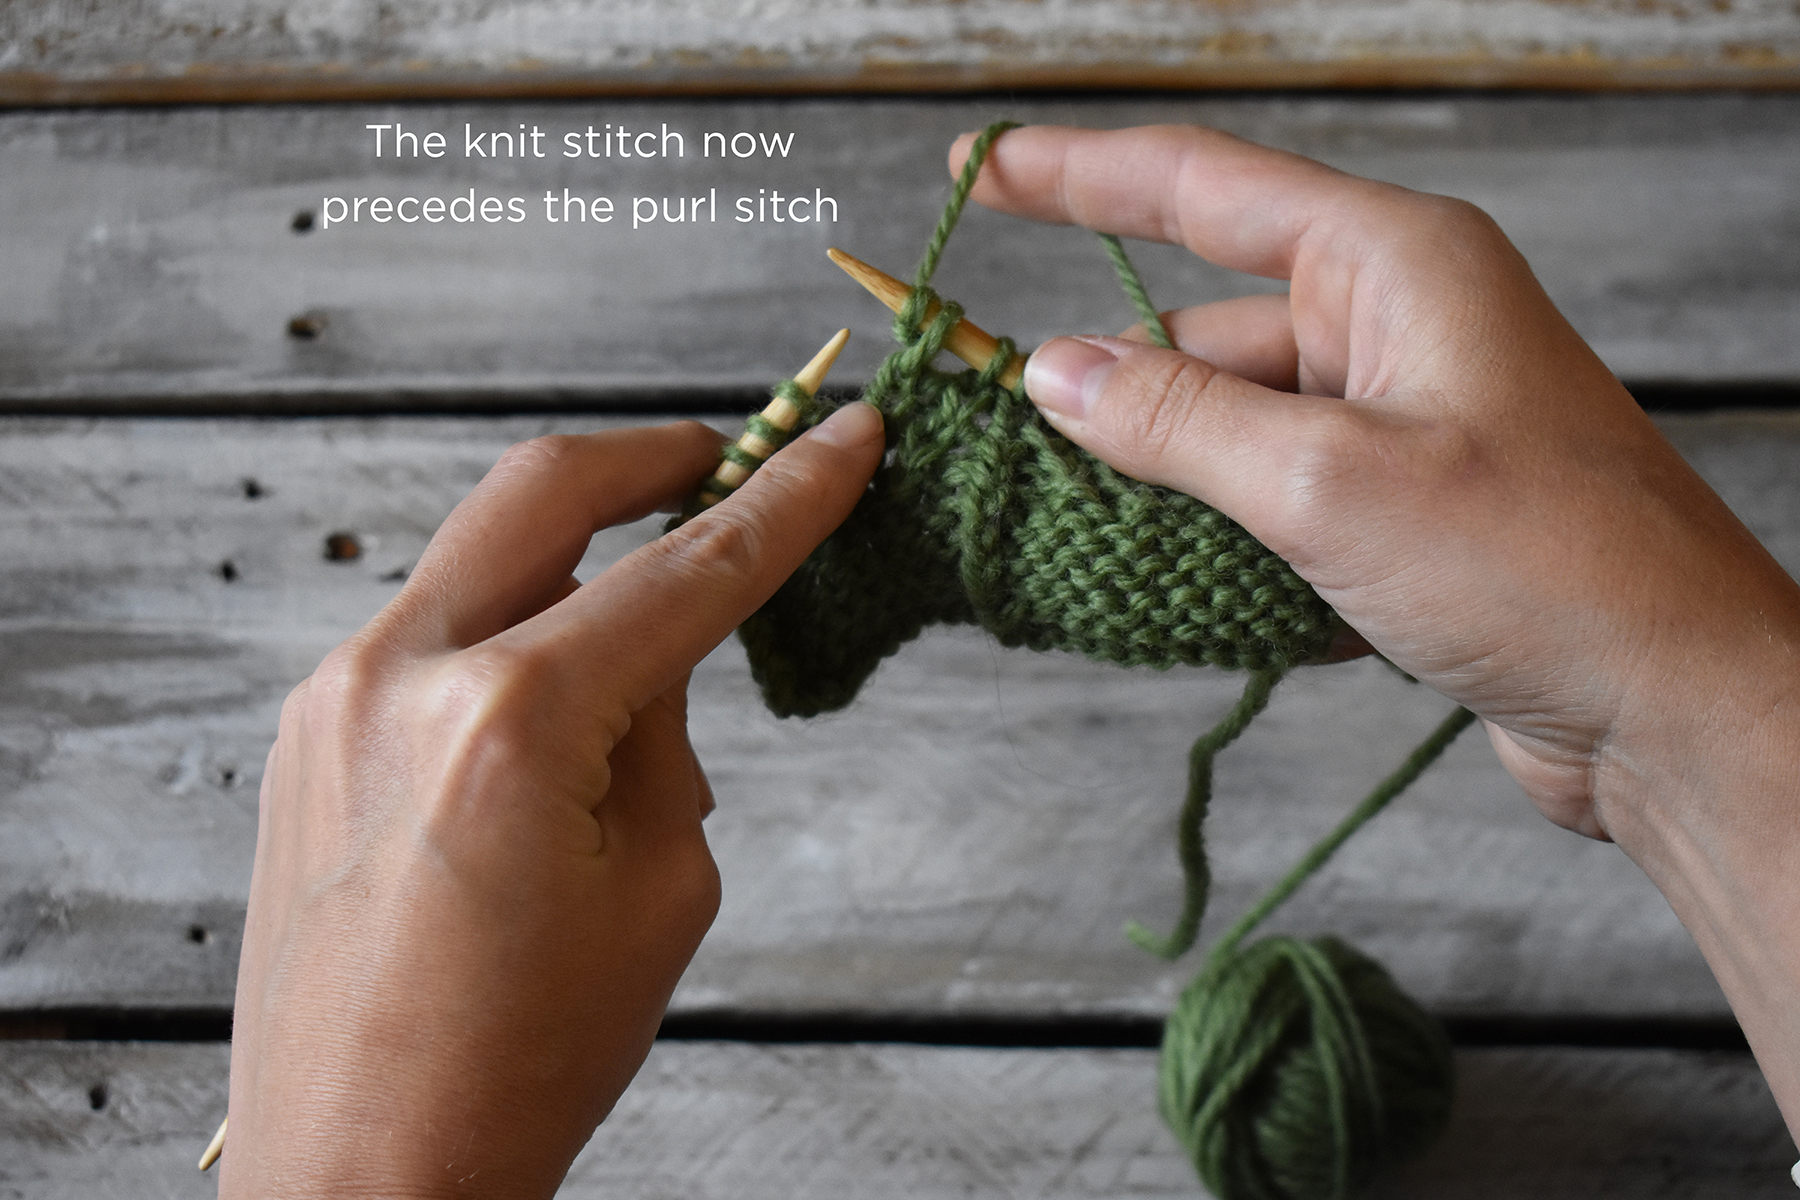
Left Purl Twist Start by making a swatch. Swatches are not only crucial for getting the finished item you want but are also great for practicing new stitches. Work in your pattern until you’ve reached the two stitches you need to twist. I’ve highlighted these stitches in purple so it’s easier to see. As you can see we have a knit stitch and a purl stitch on the left-hand needle. We want to change their positioning by moving the knit stitch over the top of the purl stitch.Admittedly, the LPT is just a bit more complex than the RPT. It might feel a little fiddly until you get the hang of it. Remember the order of the stitches from the previous photo? The order of the stitches from right to left was Knit, Purl. For the LPT, the first step is to purl the second stitch on the left needle through the back loop. This stitch is highlighted in blue. As you can see, the first (knit) stitch on the left needle remains in place. After you purl the second stitch through the back loop, do not drop the first and second stitches off the left needle. Next, move your yarn to the back of the work and knit the first stitch on the left needle. Now you can drop both the first and second stitches on the left needle. These stitches are highlighted in purple. After you drop them, you’ve completed the LPT. Notice how the stitches have changed position, and the knit stitch now leans to the left, over top of the purl stitch. Well done, now on to the RPT!Right Purl TwistWork in your pattern until you’ve reached the two stitches you need to twist. I’ve highlighted these stitches in purple so it’s easier to see. Here we have a purl stitch that precedes a knit stitch. We want to change the position of these stitches, so that the knit stitch leans to the left, over the purl stitch. Begin by knitting two stitches together, but do not drop the stitches from your needle. As you can see, the two stitches remain on the left needle, but there is now a new stitch on the right needle. Bring your yarn to the front, then purl the first stitch on the left needle. Now you can drop the two stitches on the left needle – I’ve highlighted them in purple so it’s easier for you to see. And that’s it – you’ve completed your RPT. Notice how the knit stitch now precedes the purl stitch.
I hope you find this tutorial helpful, and I hope that it drums up excitement for you to start knitting this lovely cowl. Like Jennifer, I’m a big fan of coniferous trees, so this design sings to me!
Remember, you can find the 12 Days of Winter Kits at your local yarn shop. Happy crafting!
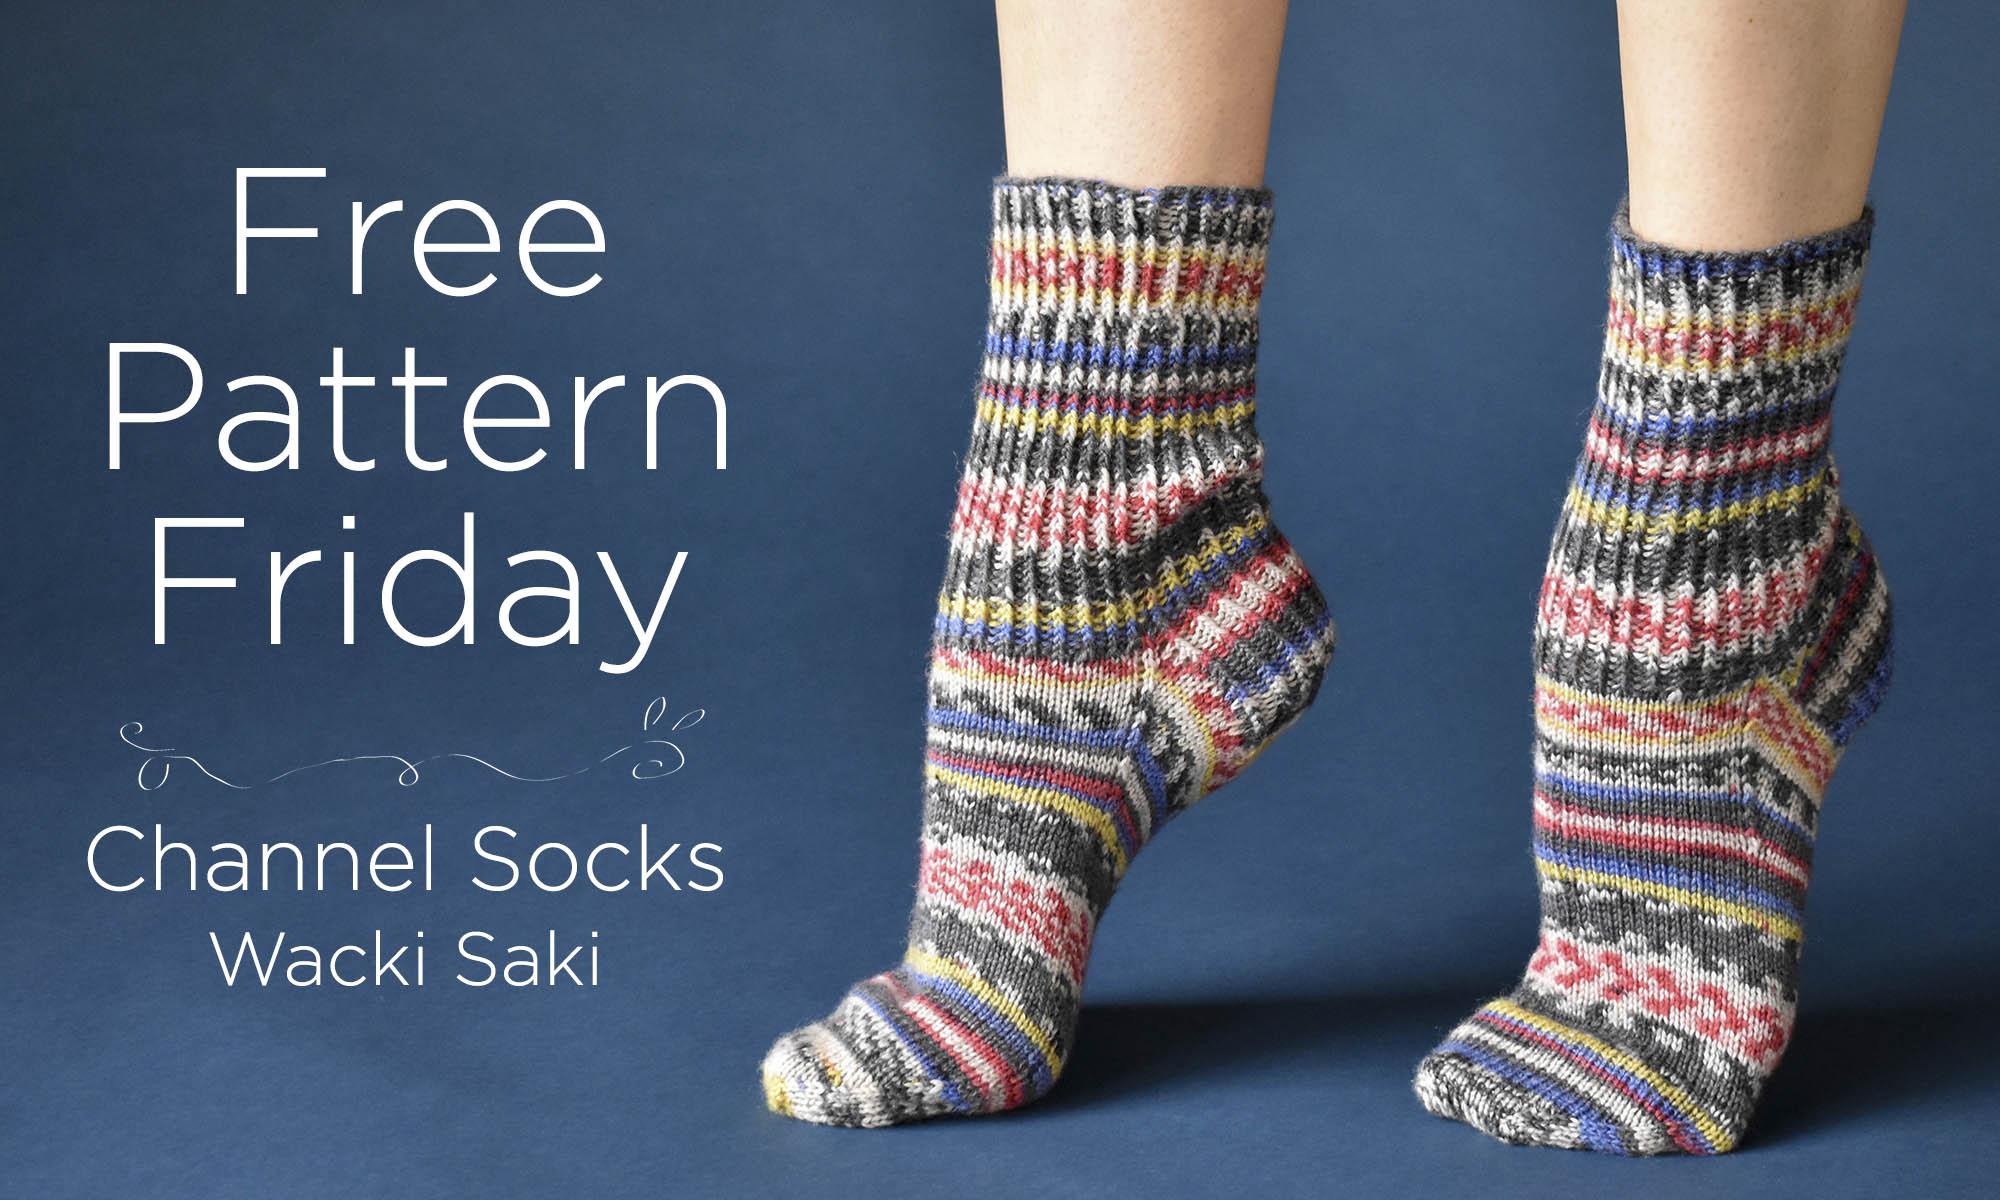
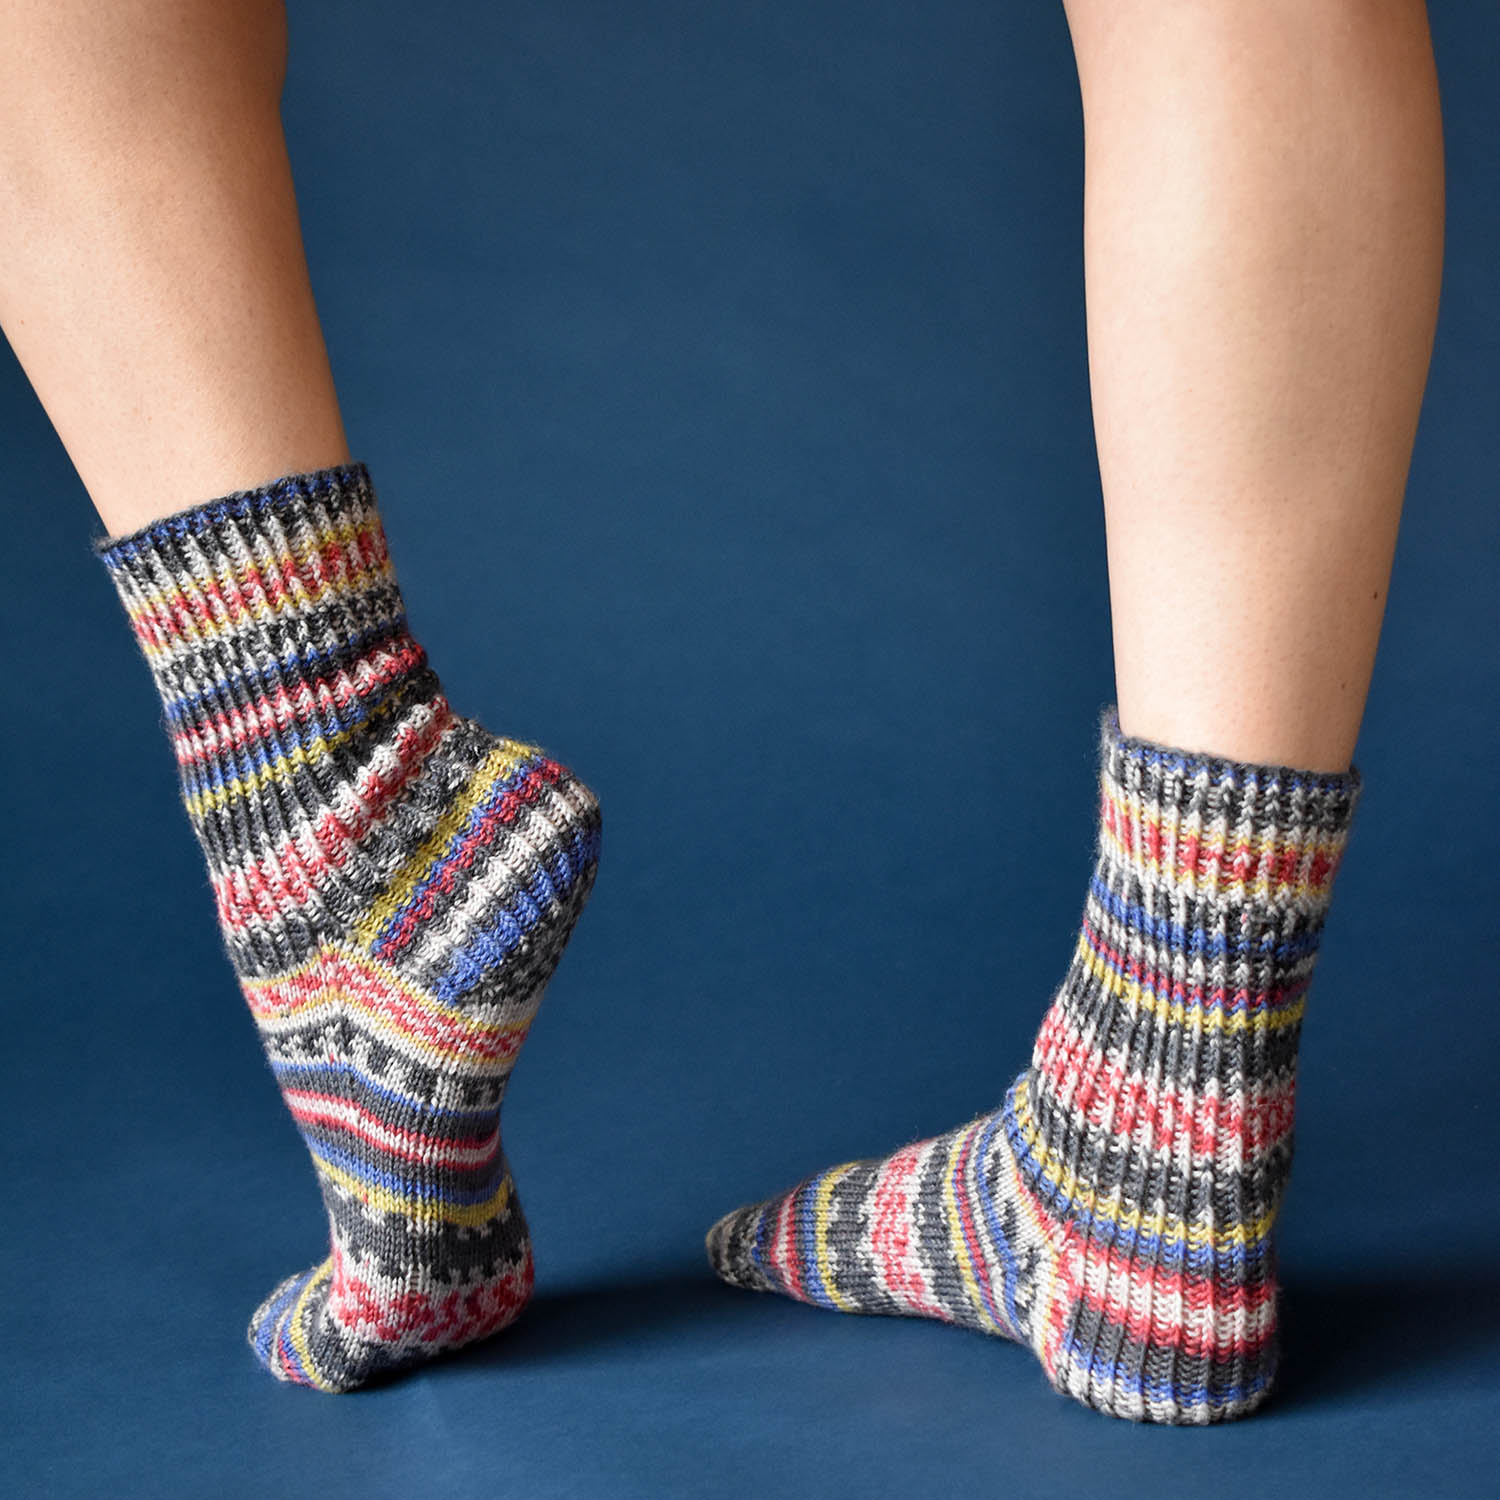
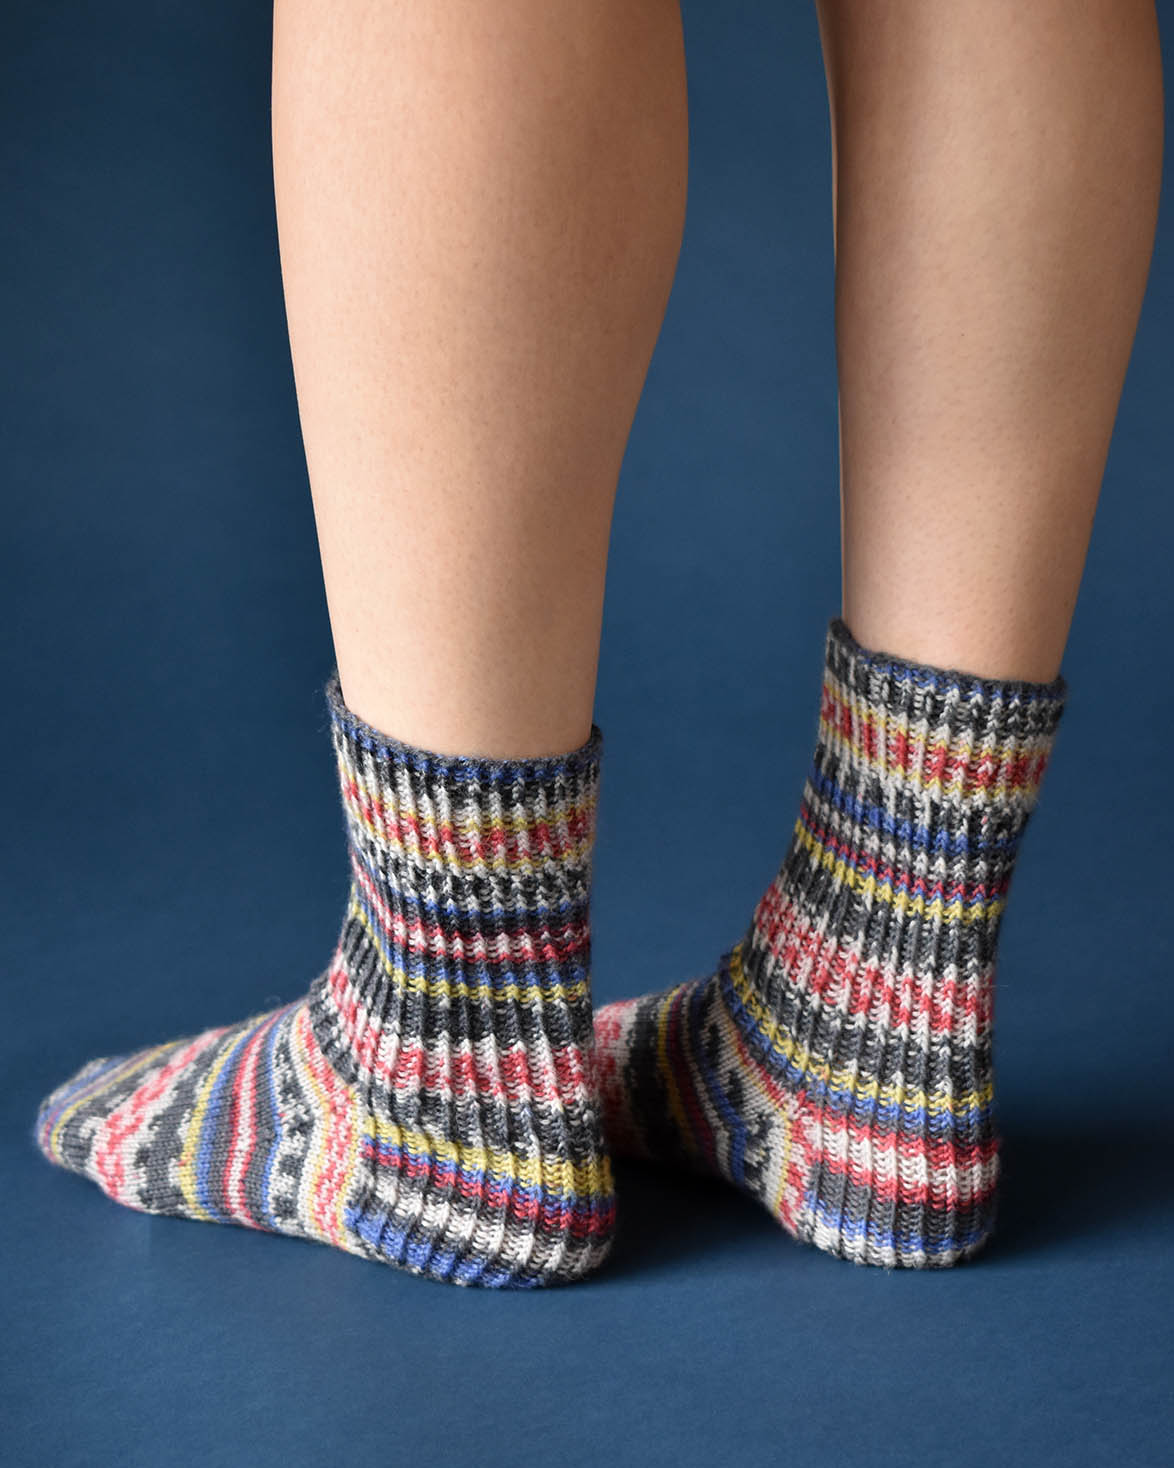
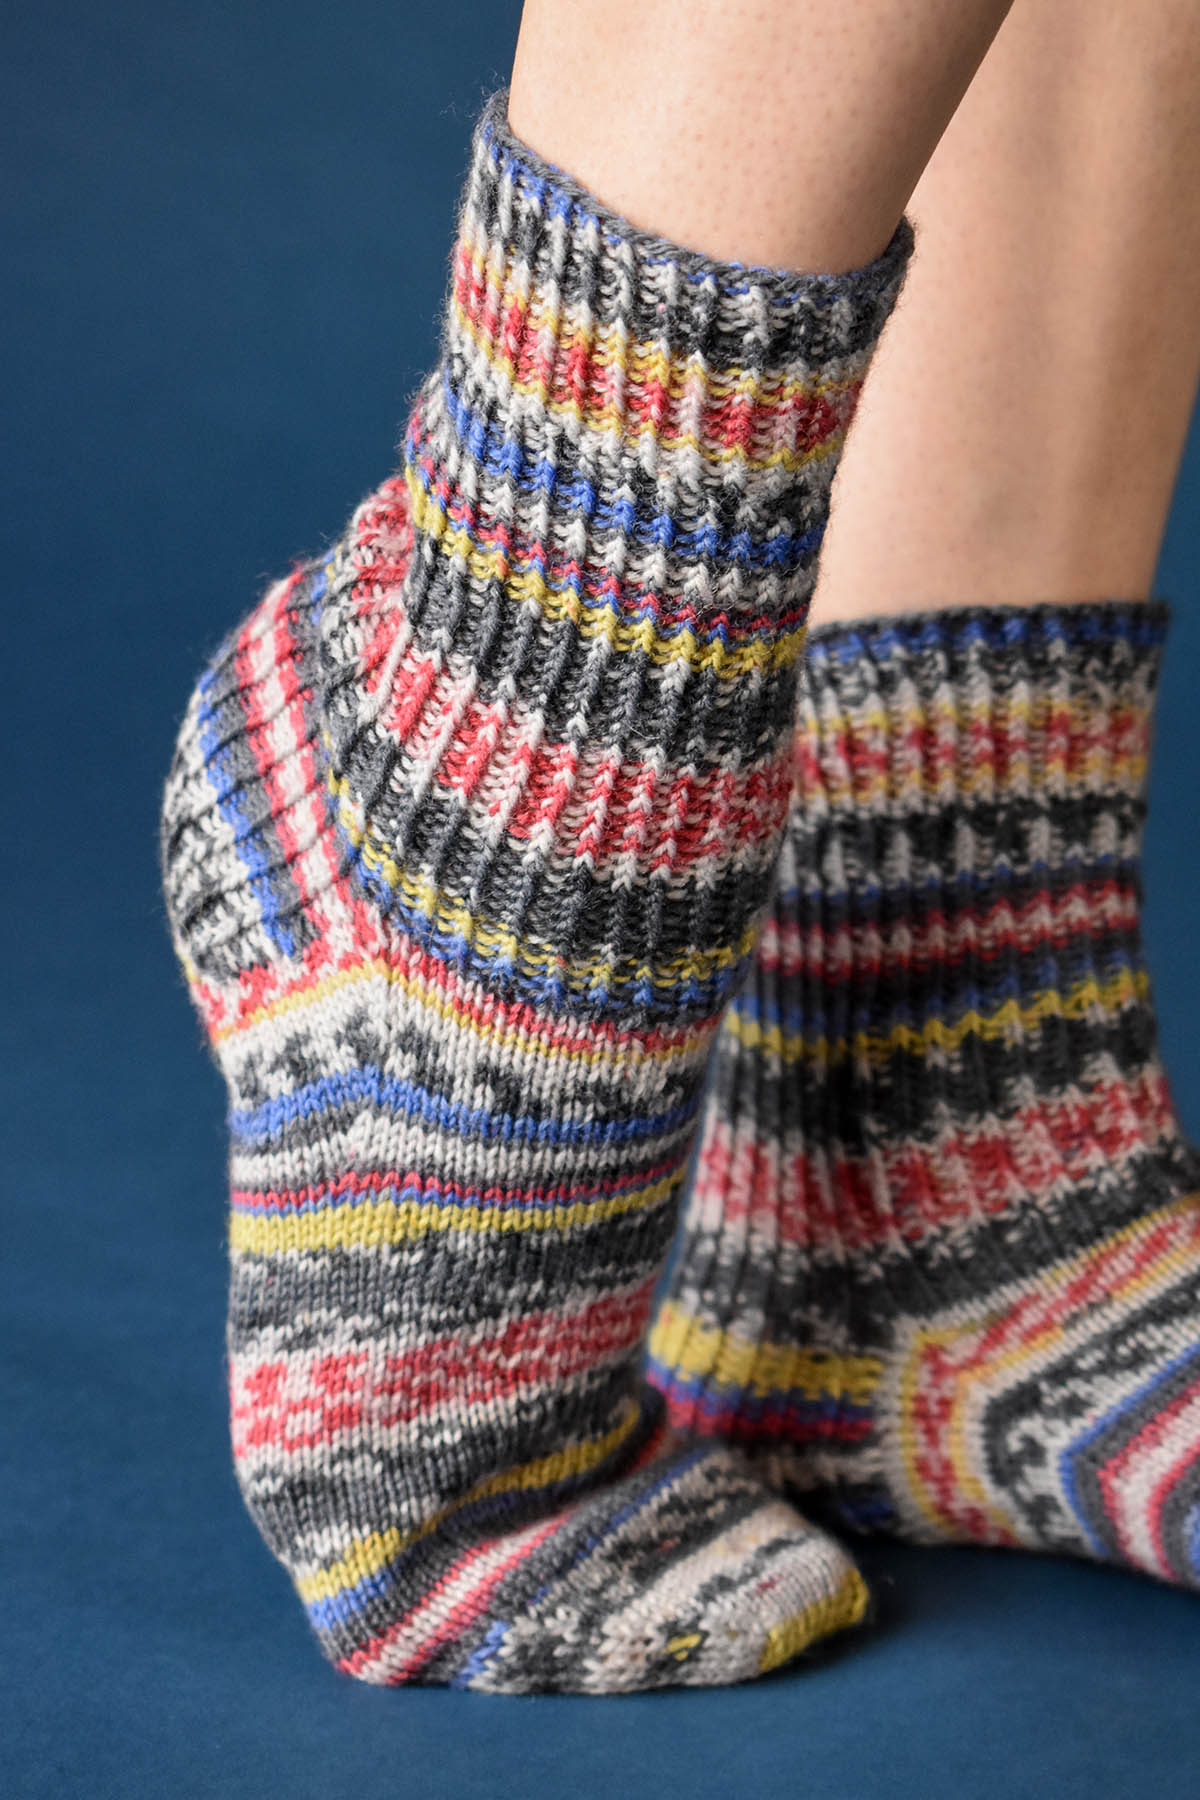
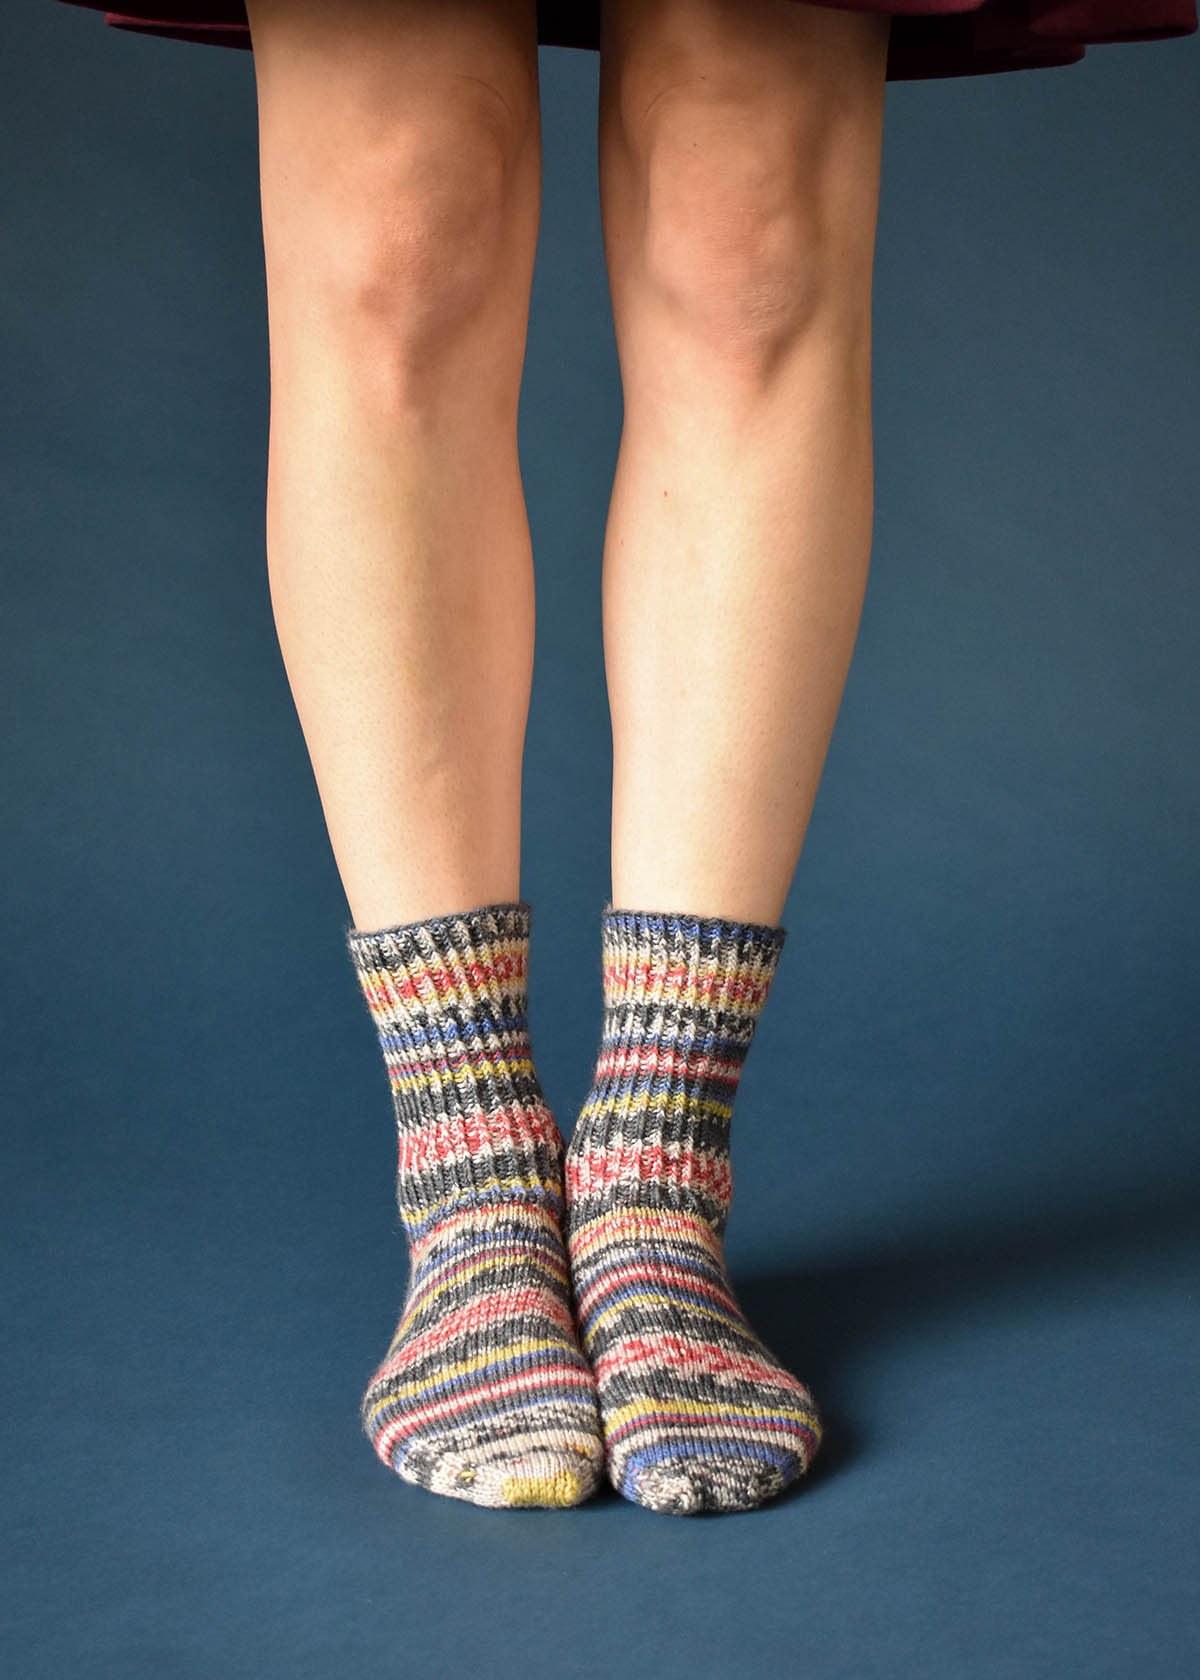
It’s Free Pattern Friday!
Today, Channel Socks in Wacki Saki (pattern link here).
We love Wacki Saki for its bold patterning. Here, Rachel Brockman wisely went with a simple pattern that lets the yarn colors do the heavy lifting.
Worked cuff down, these socks feature a heel flap and gusset.
The twisted stitch ribbing flows right onto the heel.
The stockinette feet are comfy, while the twisted stitches on the leg create a snug fit. These beauties will stay up!
Super fun colors to match your personality. Have happy feet all day!
Saying “happy feet” gives me an excuse to share this video, which brings me joy because it’s a puppet tap-dancing, so of course you never actually see him below the waist. I choose to believe that he’s wearing crazy socks on those webbed flippers.
We hope you dance your way through this weekend.
Happy crafting!
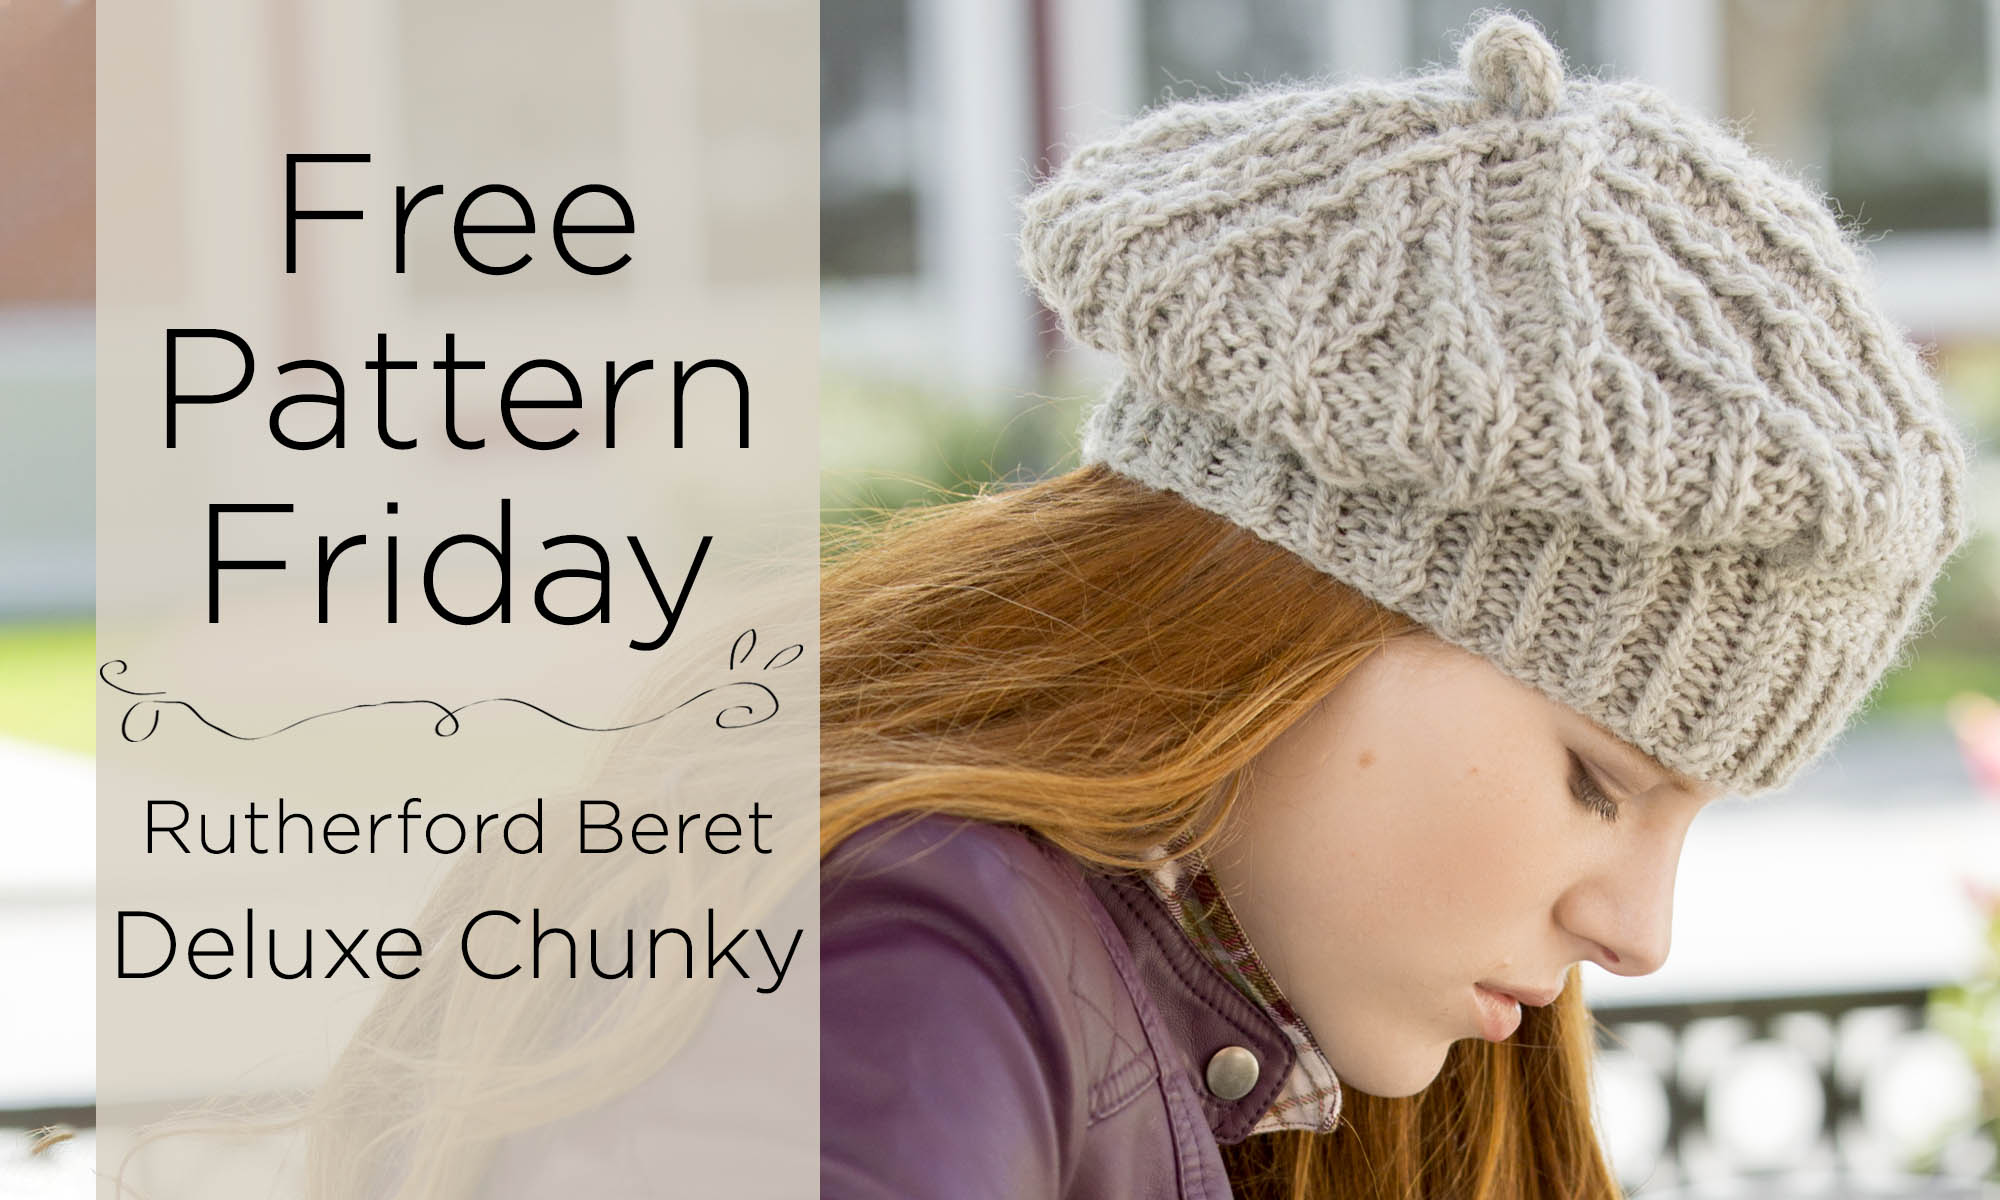
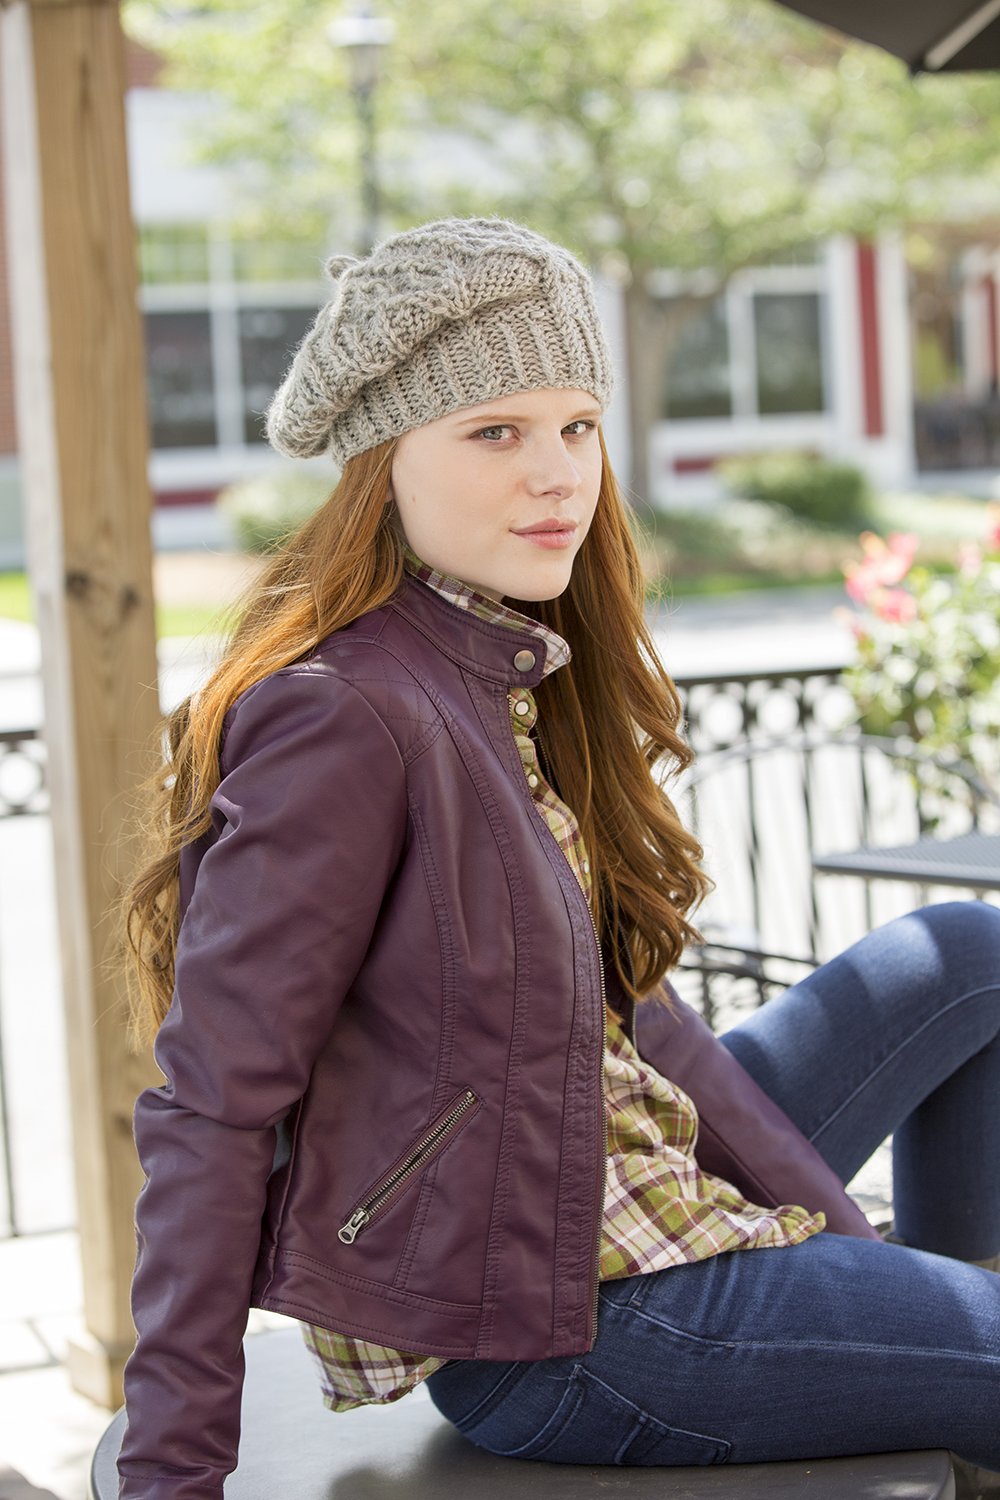
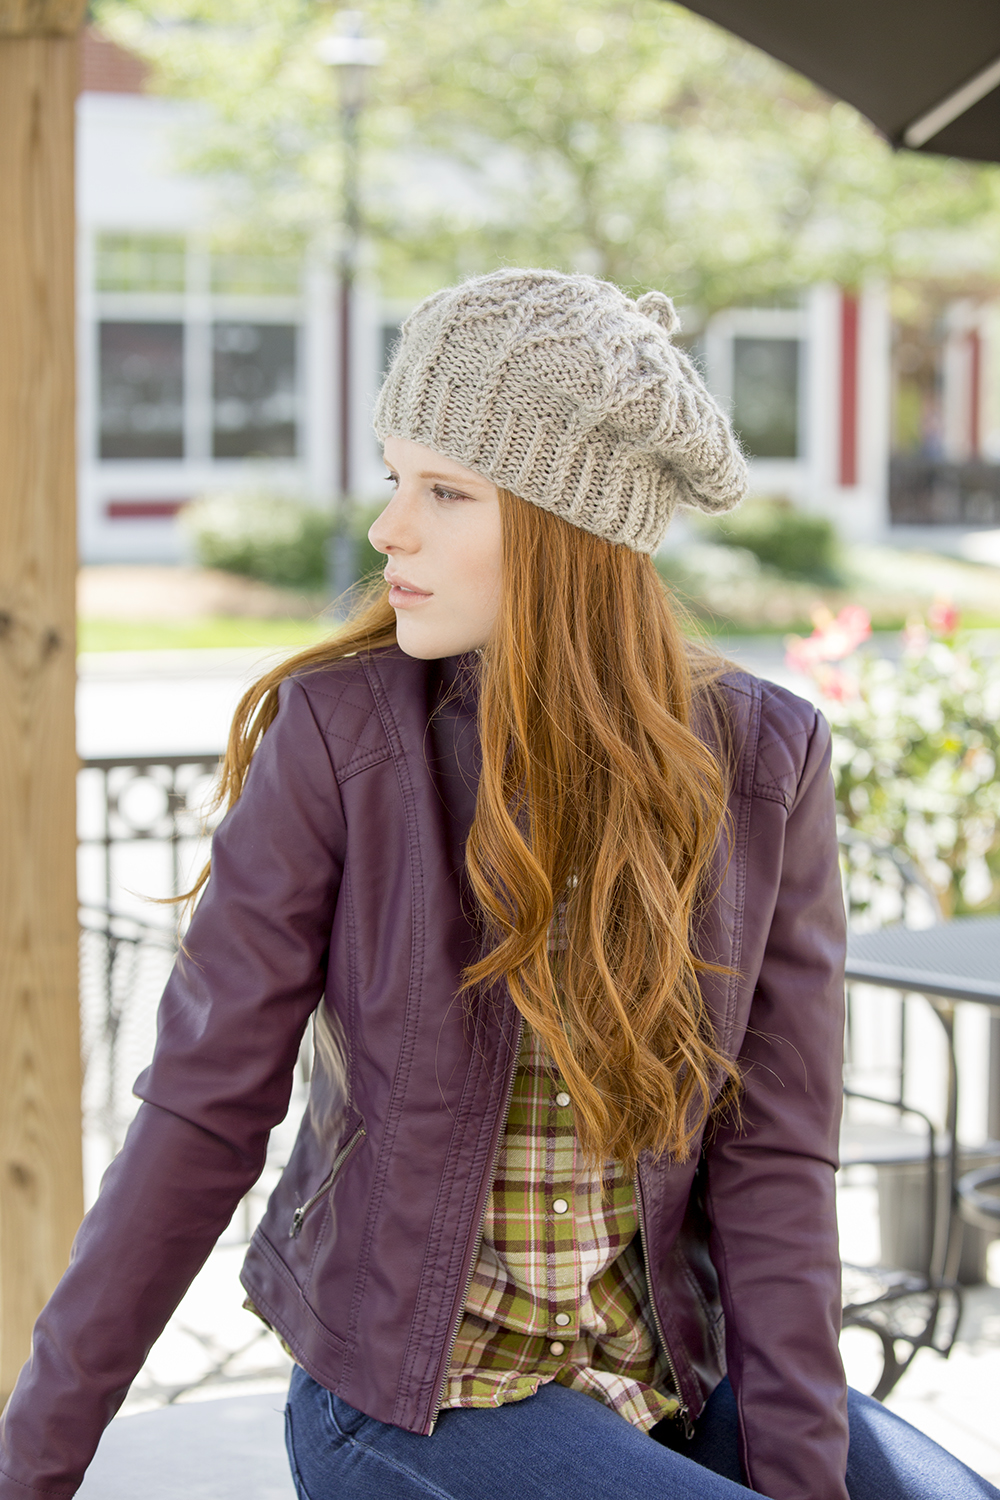
It’s Free Pattern Friday!
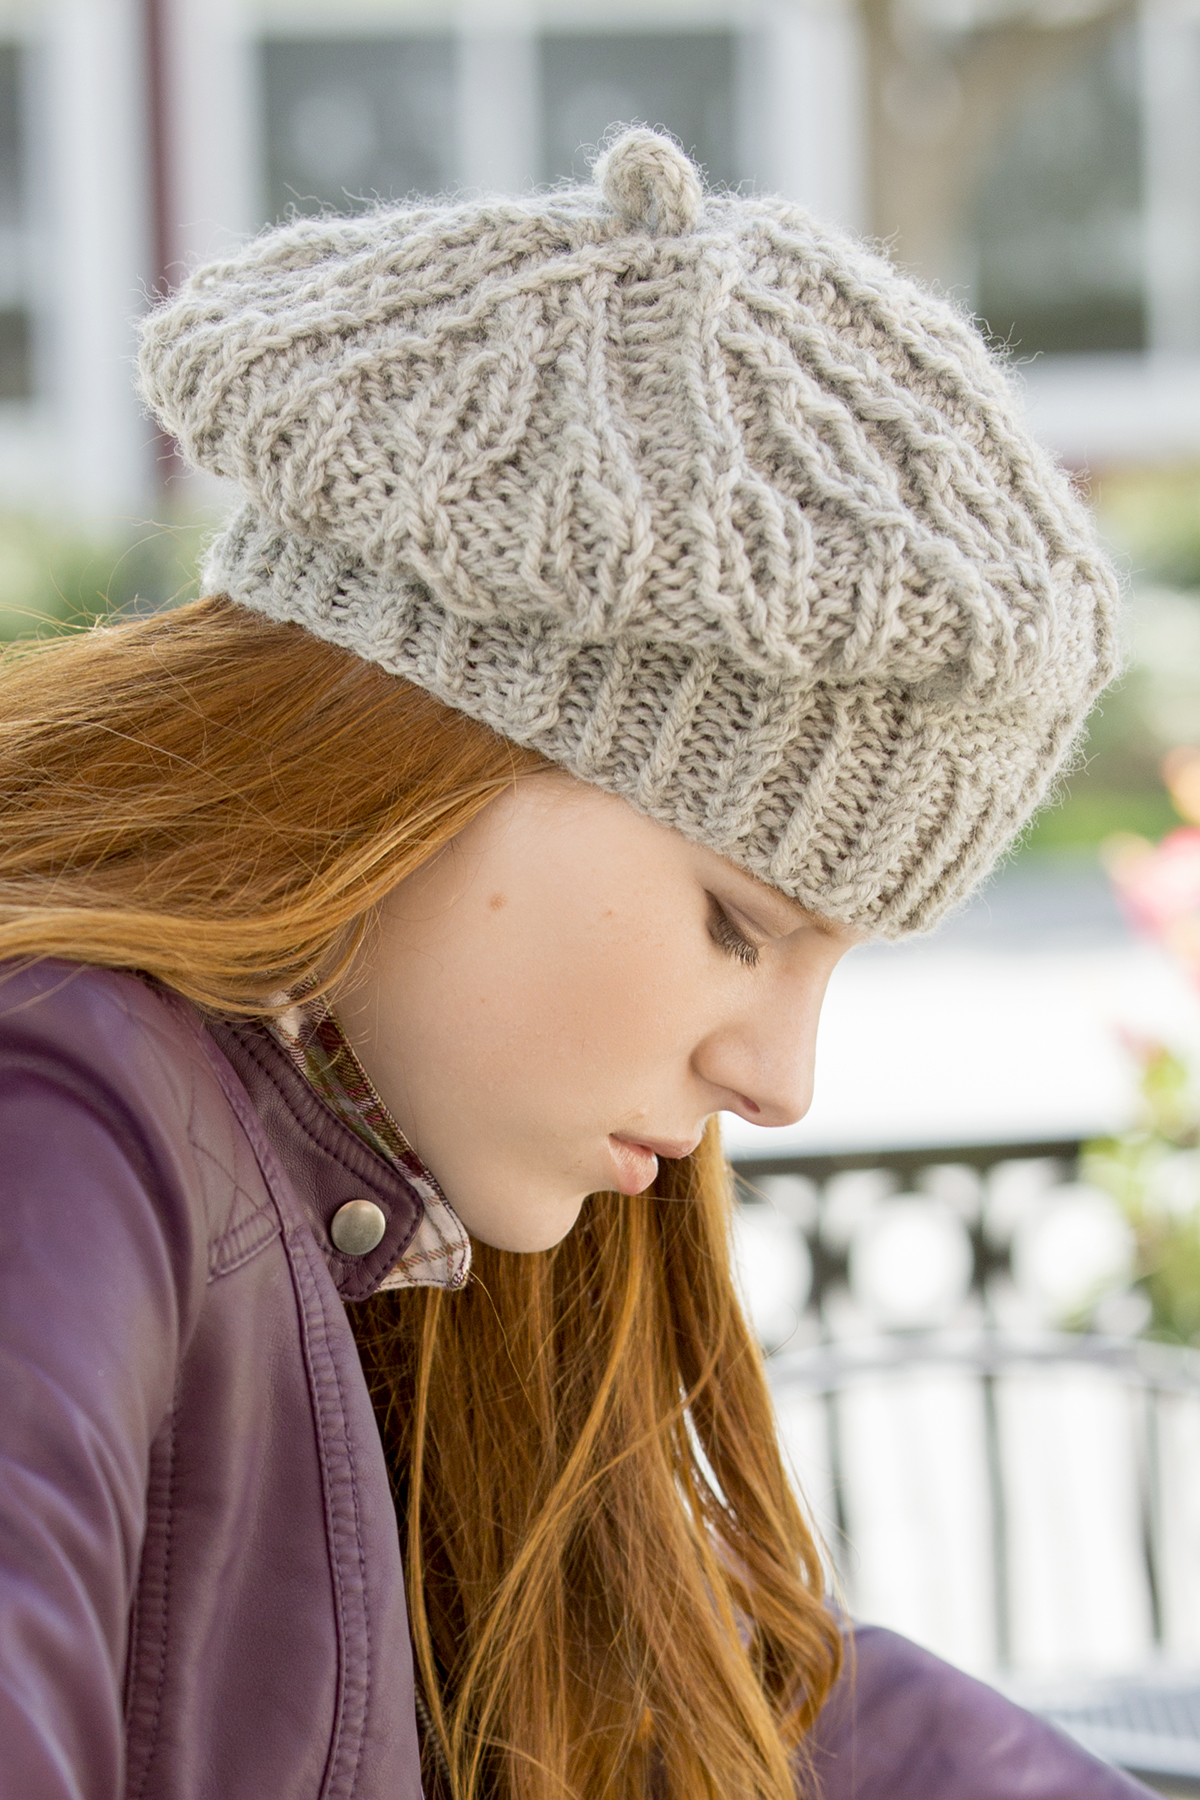
Today, the Rutherford Beret in Deluxe Chunky (pattern link here).
This month we’re taking a look back at some favorite patterns in our Deluxe yarns. This one’s a favorite of mine, based on personal experience. Will you permit me a selfie?
Amy Gunderson’s Rutherford Beret was originally released as part of the amazing Deluxe Cable Collection. It’s a mammoth e-book of cabled knit patterns, including this little one-skein beauty in Deluxe Chunky 100% wool. We even did an office knitalong with it – super fun!
I say “one skein” but mine only took 3/4 of a skein, max. On US size 10 (6mm) needles, with only single-crosses for the cables, this is the definition of “instant gratification knit.” Deluxe Chunky has over 120 colors, so I’m thinking about making another one, maybe in a heathered color this time.
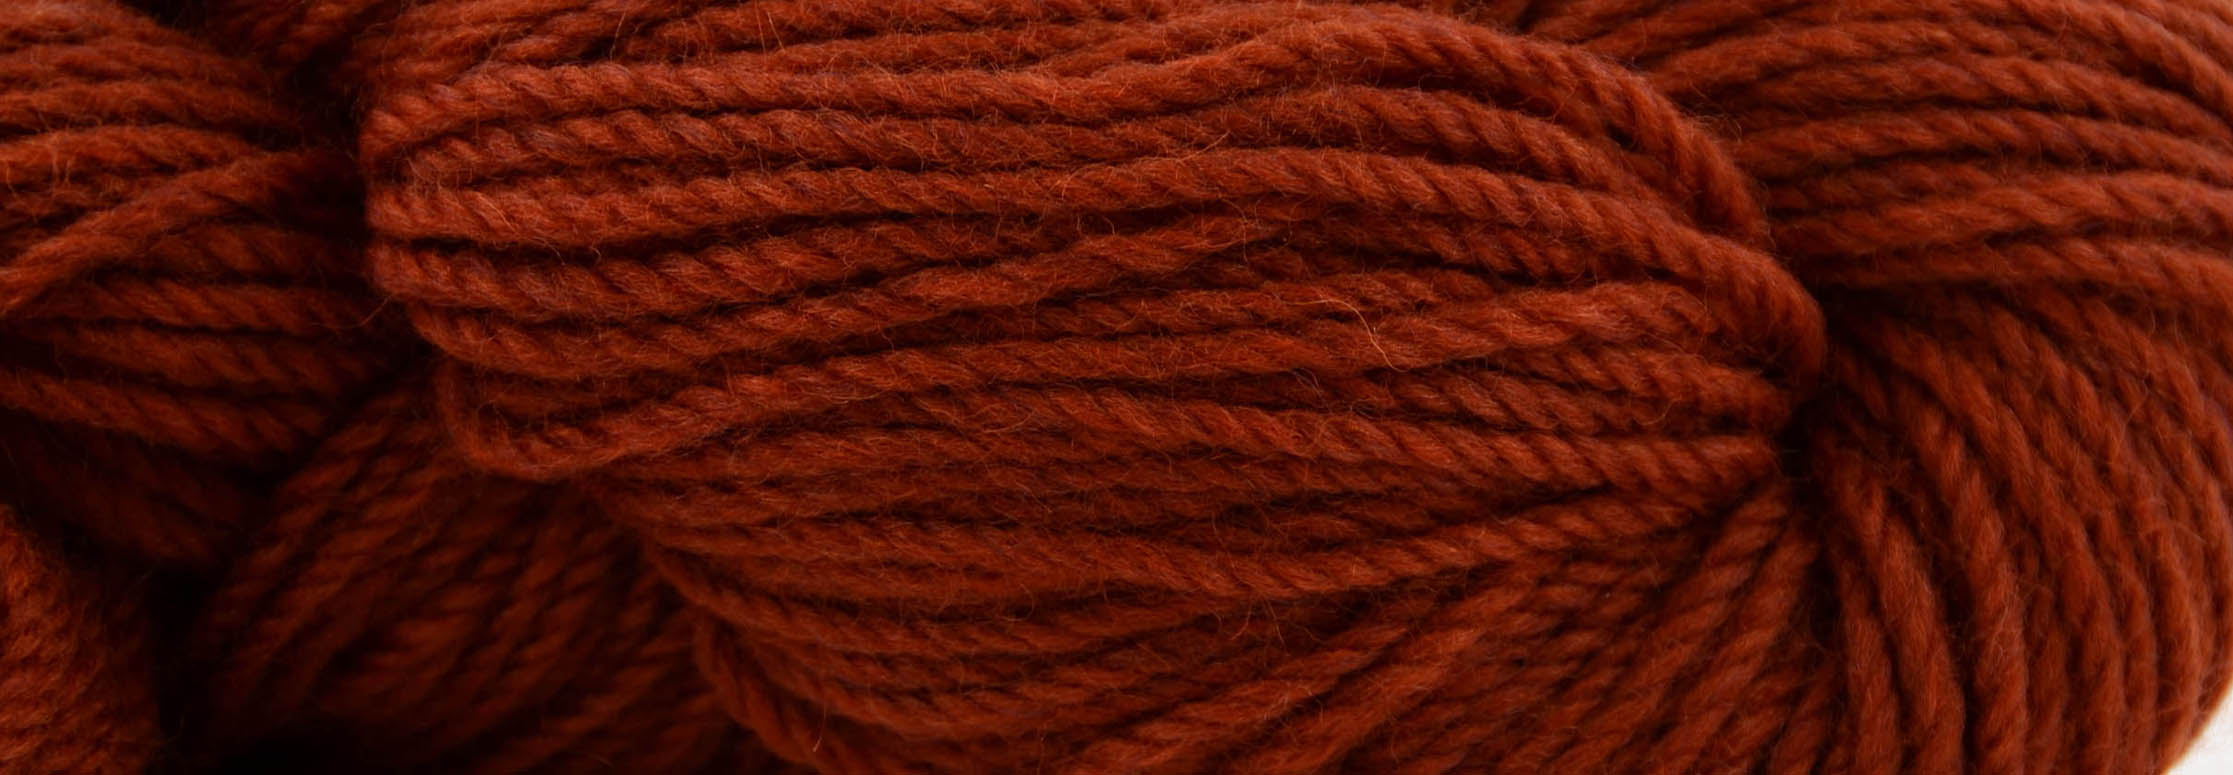
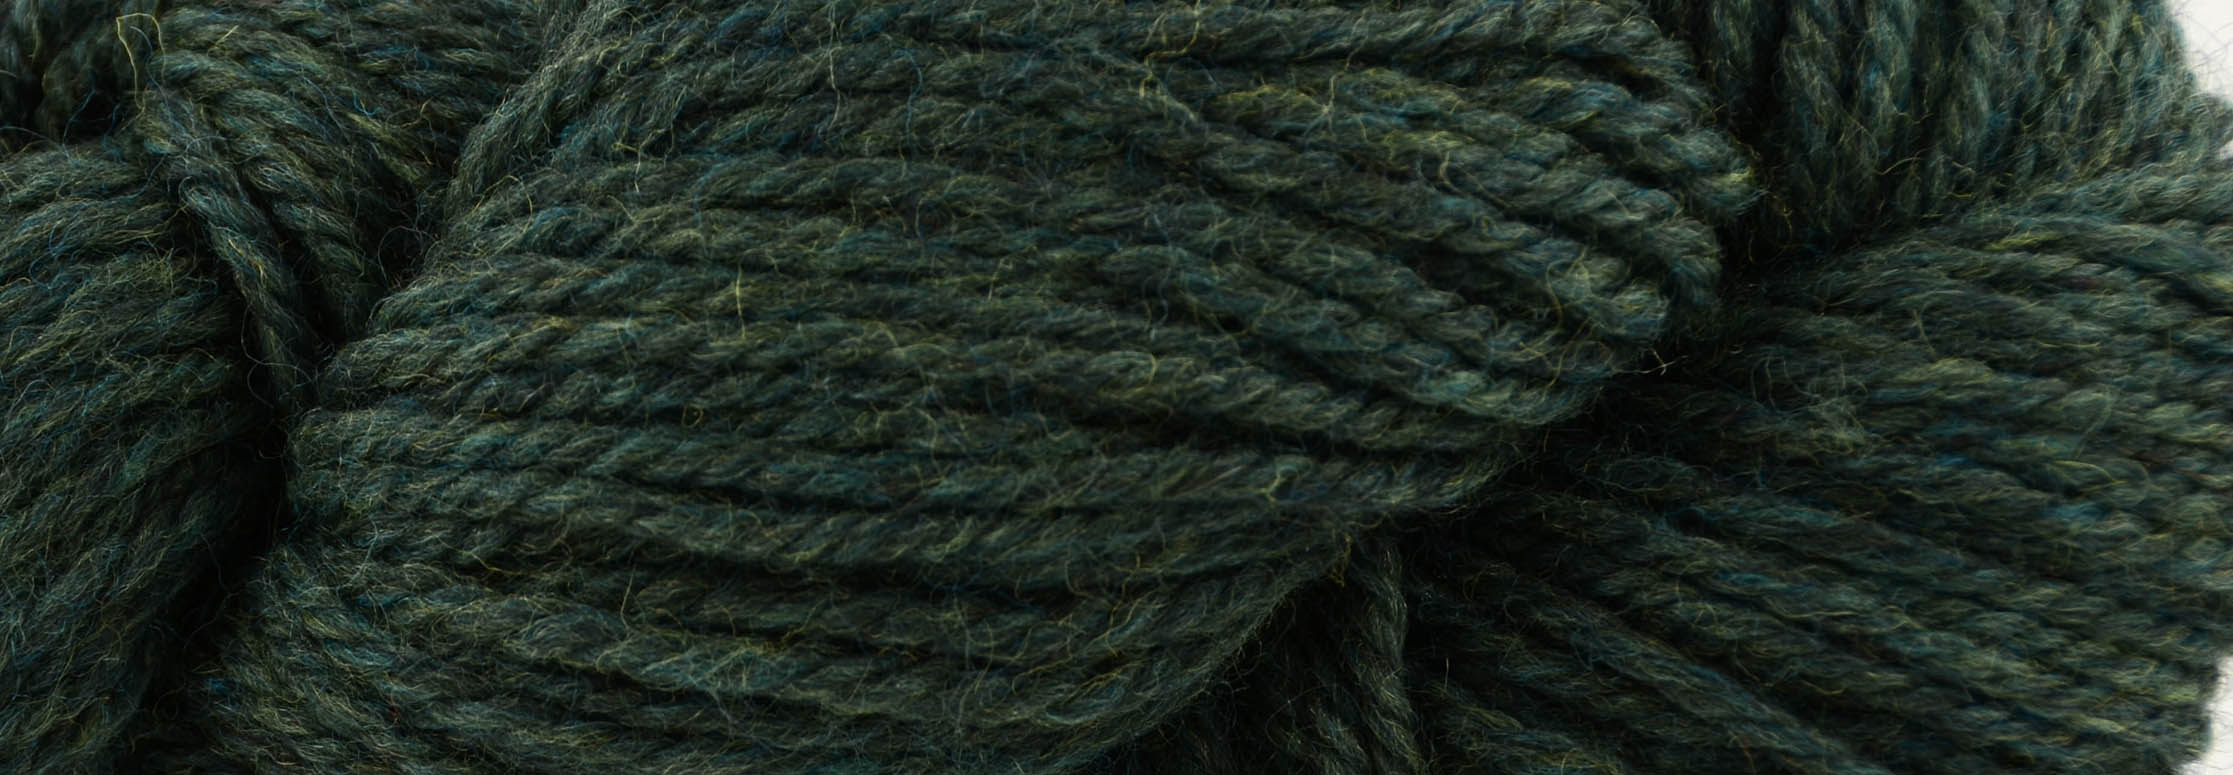
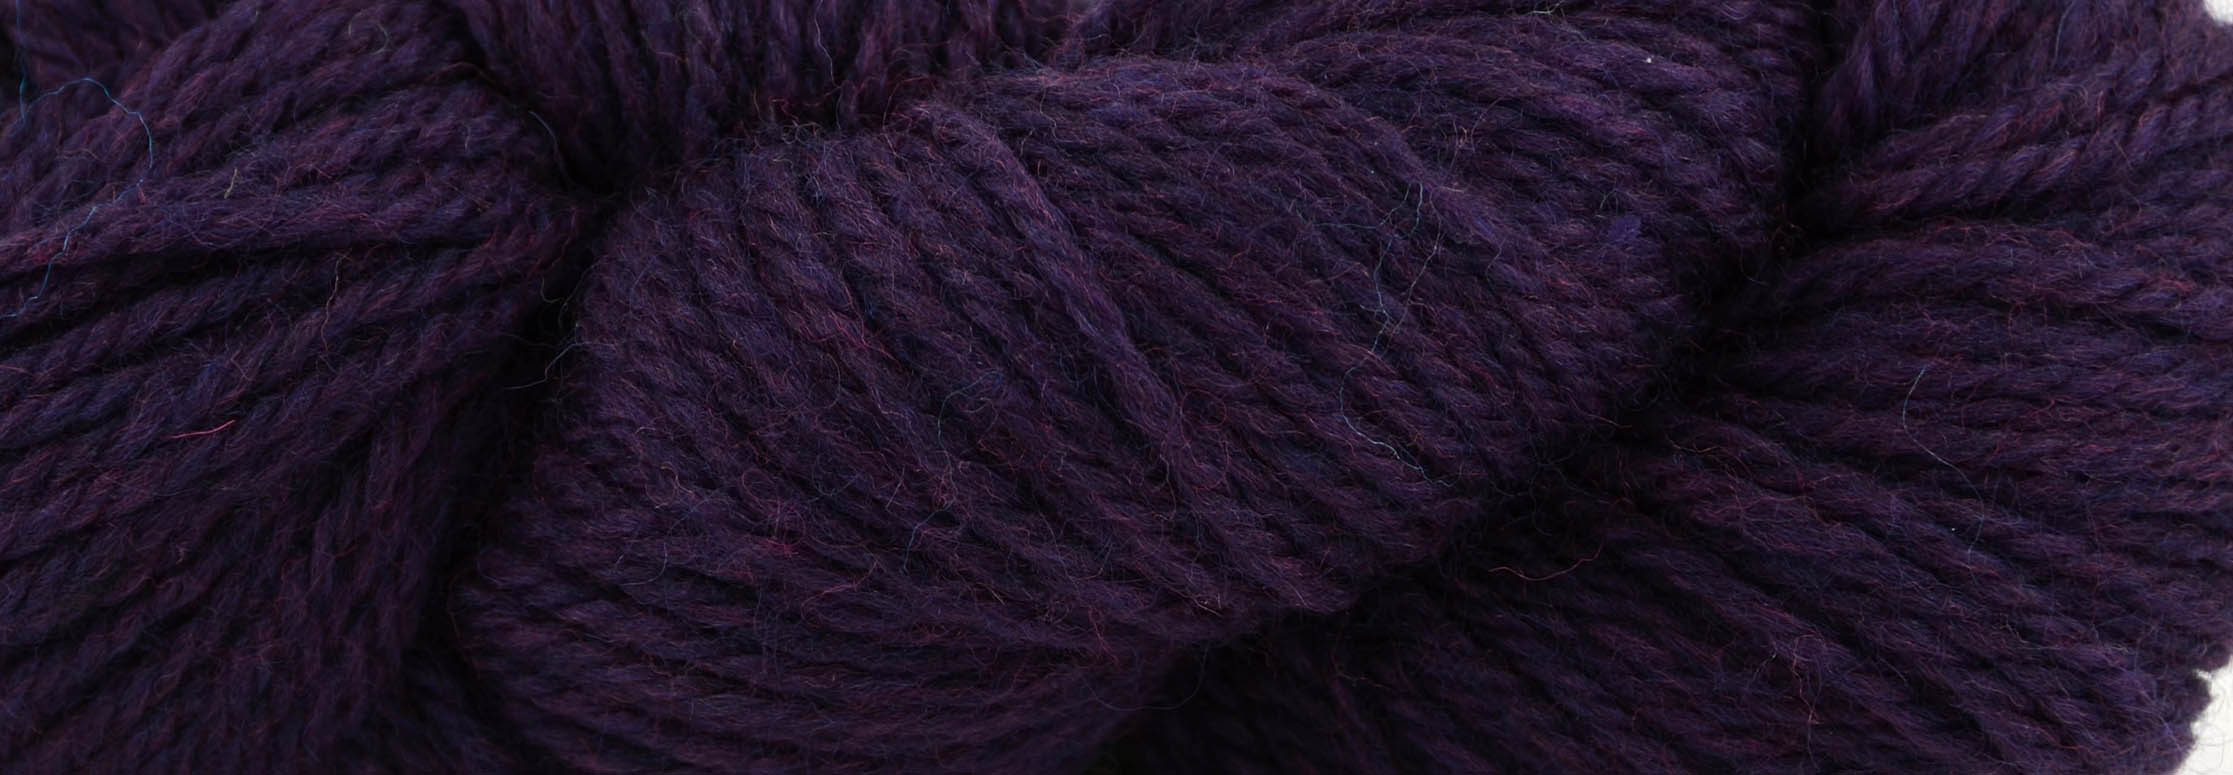
Deluxe Chunky 91905 Rust HeatherDeluxe Chunky 91908 Woodsy HeatherDeluxe Chunky 91909 Mulberry Heather
“Too many pretty colors” is a good problem to have!
We hope you have a fantastic weekend. Happy crafting!
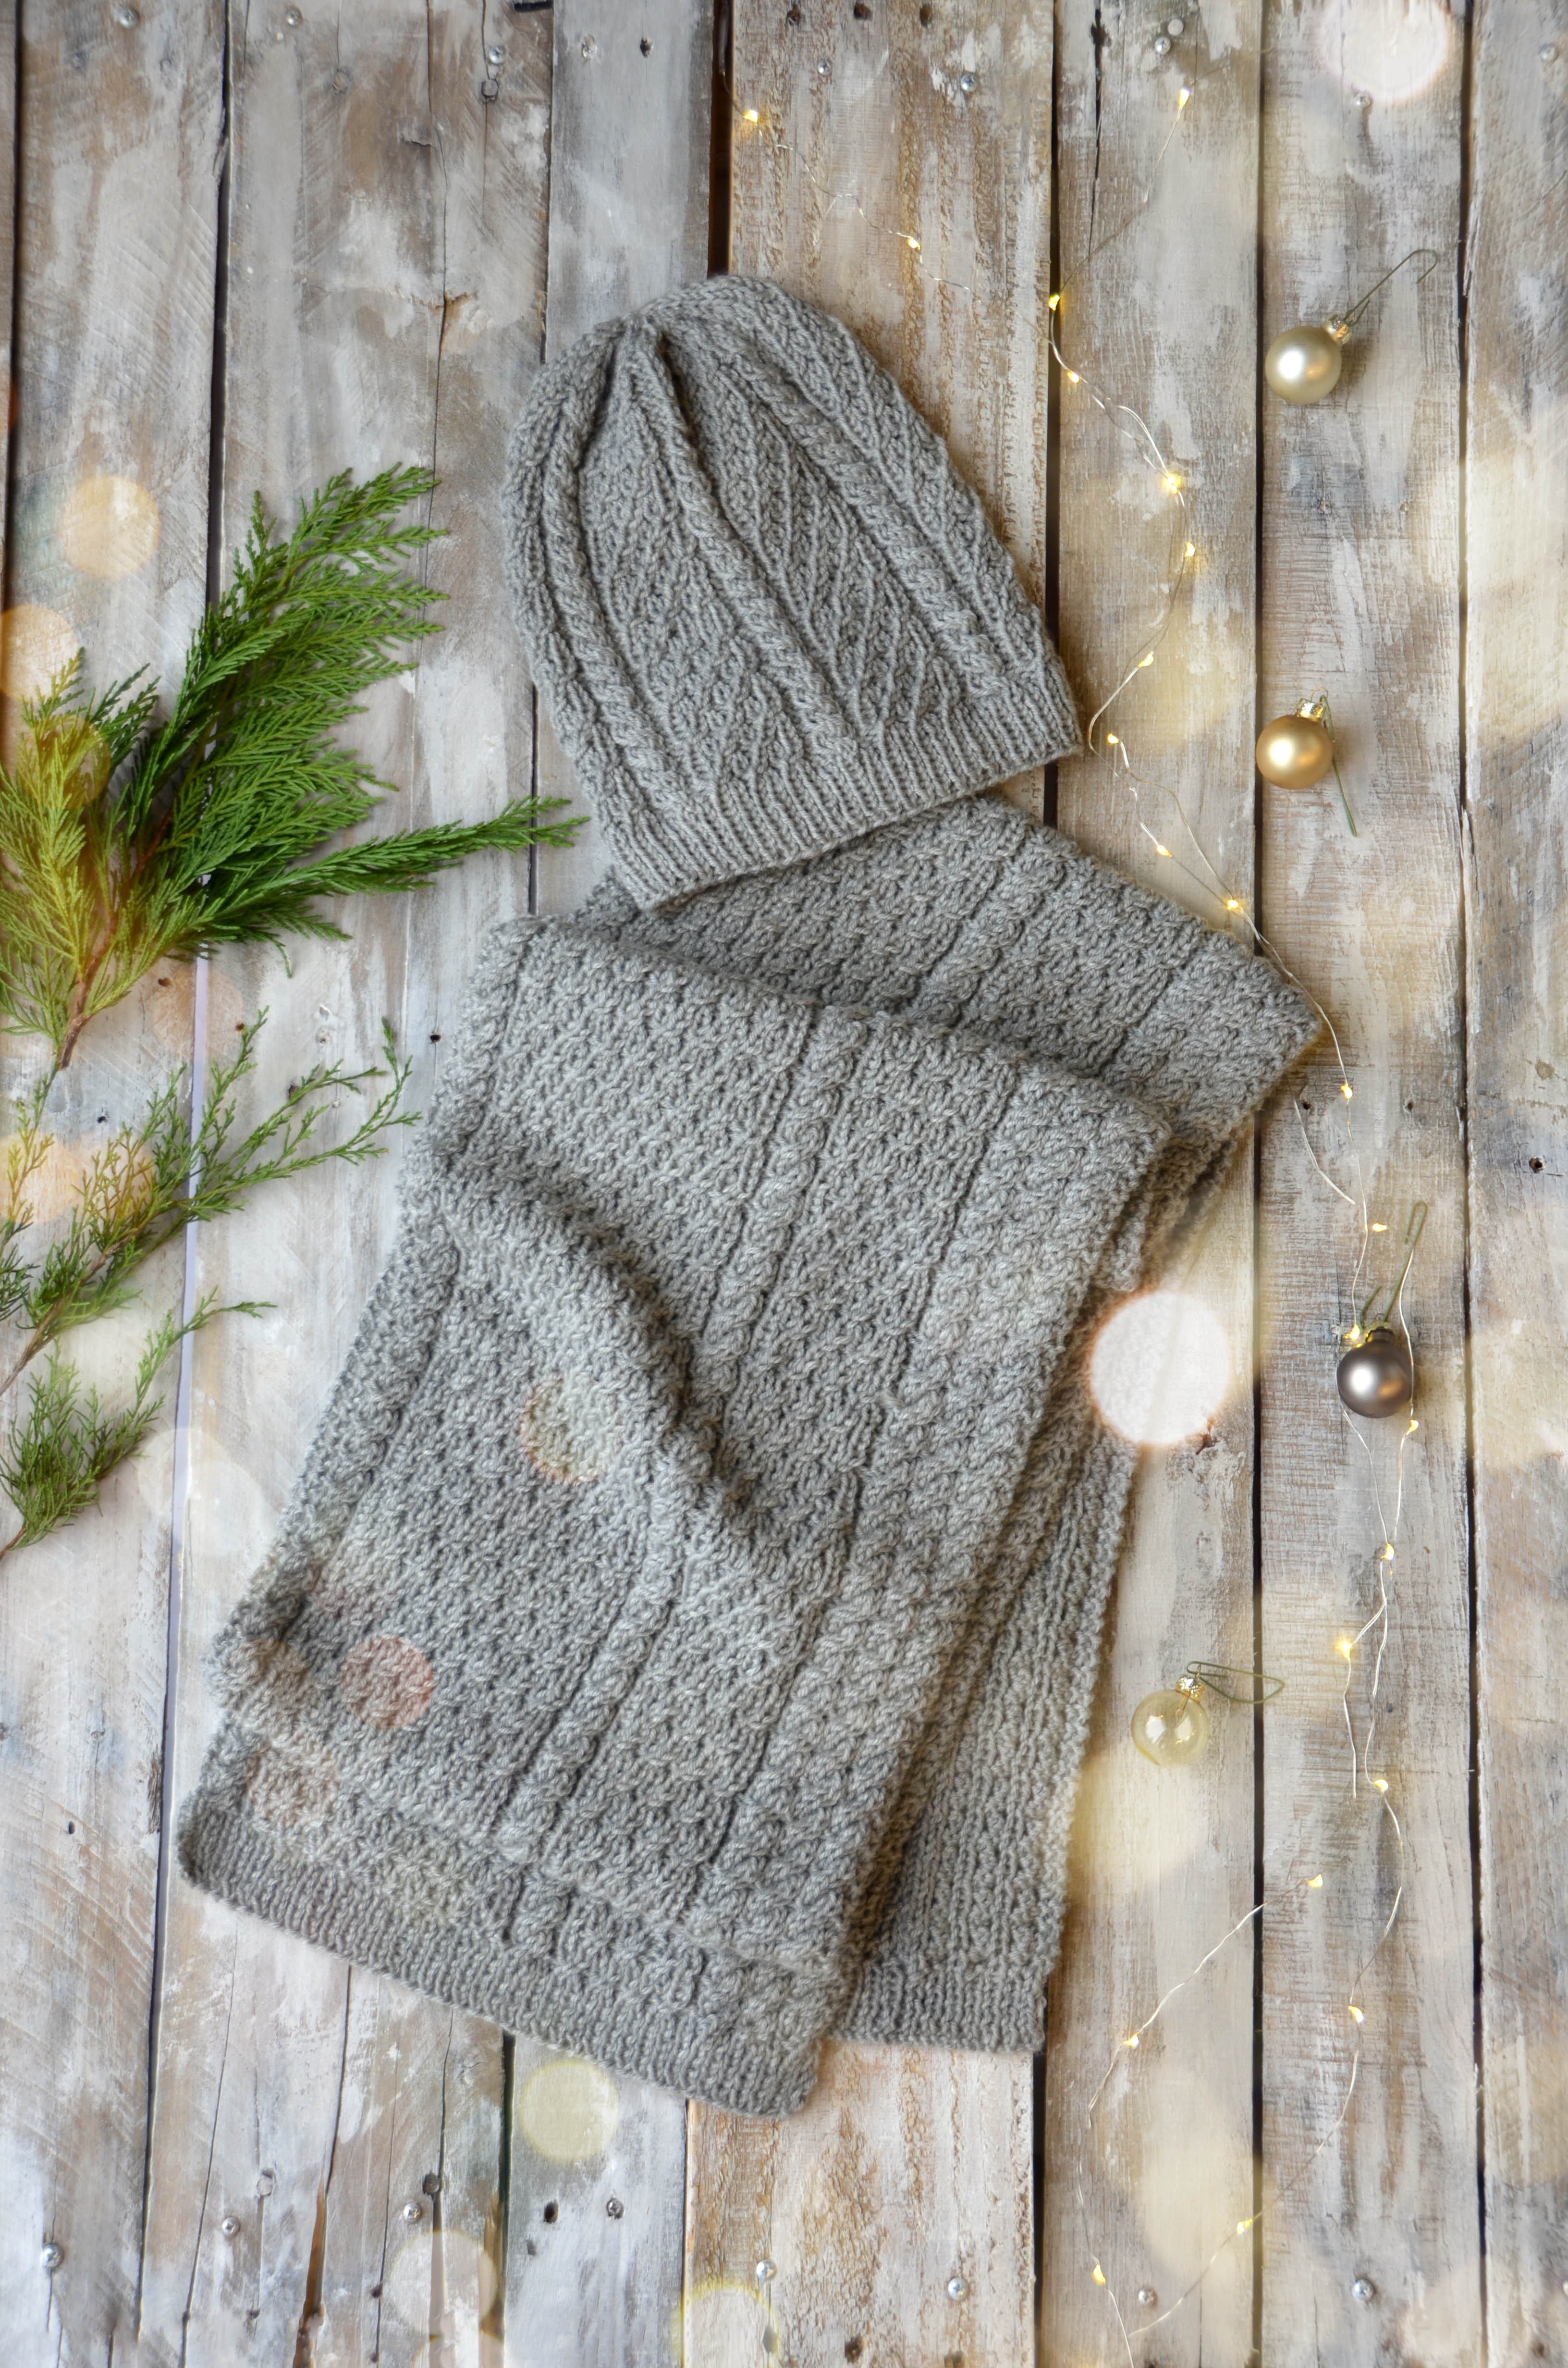
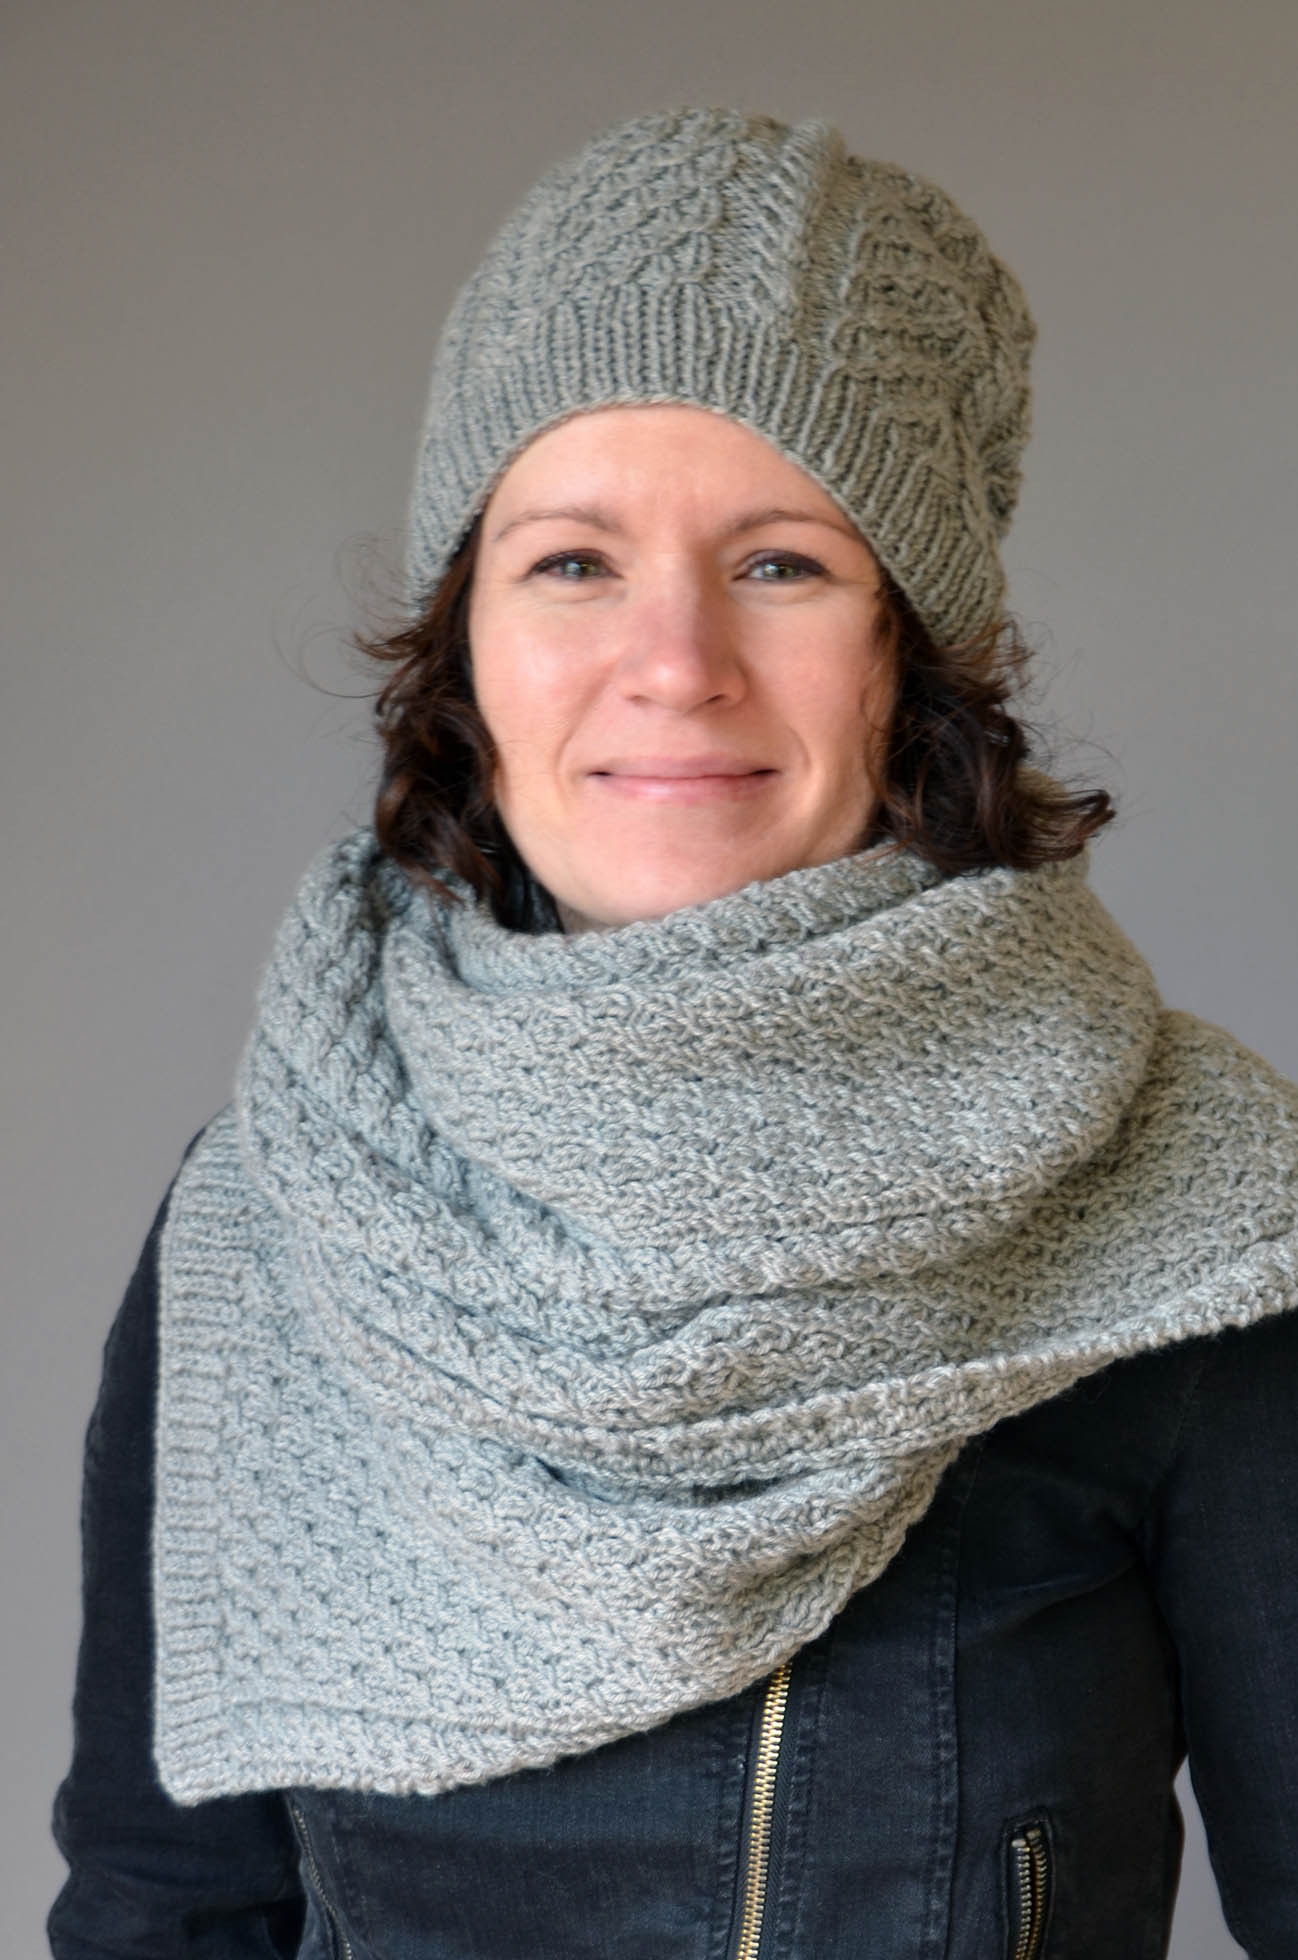
Though there are some traditional 2×2 cable panels in both hat and scarf, most of the crossed stitches are actually twisted stitches. Right and left twist stitches are a way of crossing stitches that doesn’t require a cable needle. And with just a bit of confidence, 2×2 cables can be crossed without a needle, as well.
I love love love twisted stitches and use them frequently in designs. Through the magic of (simple) needle acrobatics, a lovely texture can be made across your knit fabric. These types of stitches were used a few years ago in our Uptown Afghan Knitalong. Here is the video showing how to do right and left twists.
Remember, each of our 12 Days of Winter projects come packaged in a very giftable bag tied with ribbon. So if you’re shopping for one of your knitting buddies, these might just fit the bill.
I have no plans of taking this off any time soon. It’s freezing in our office!