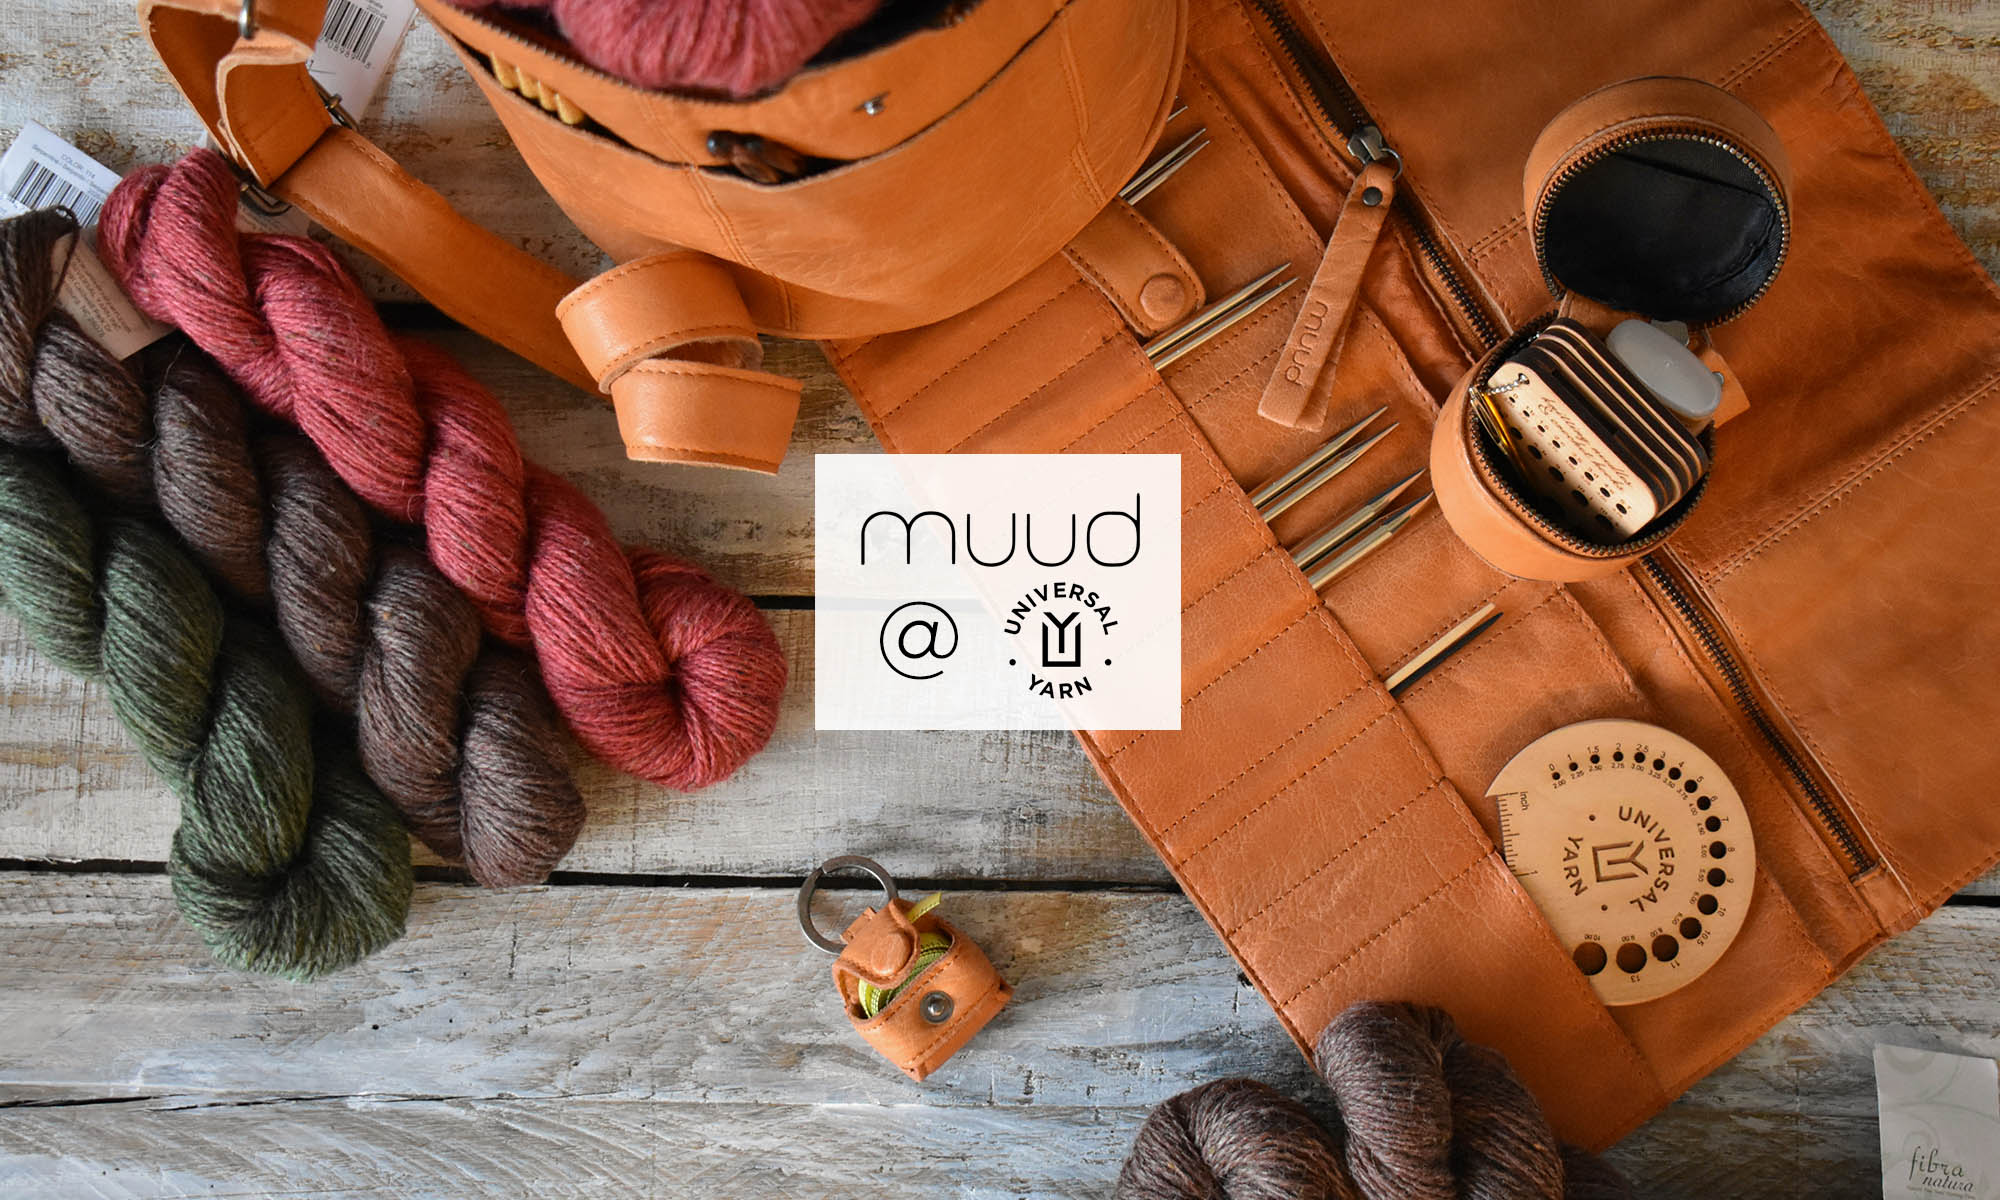
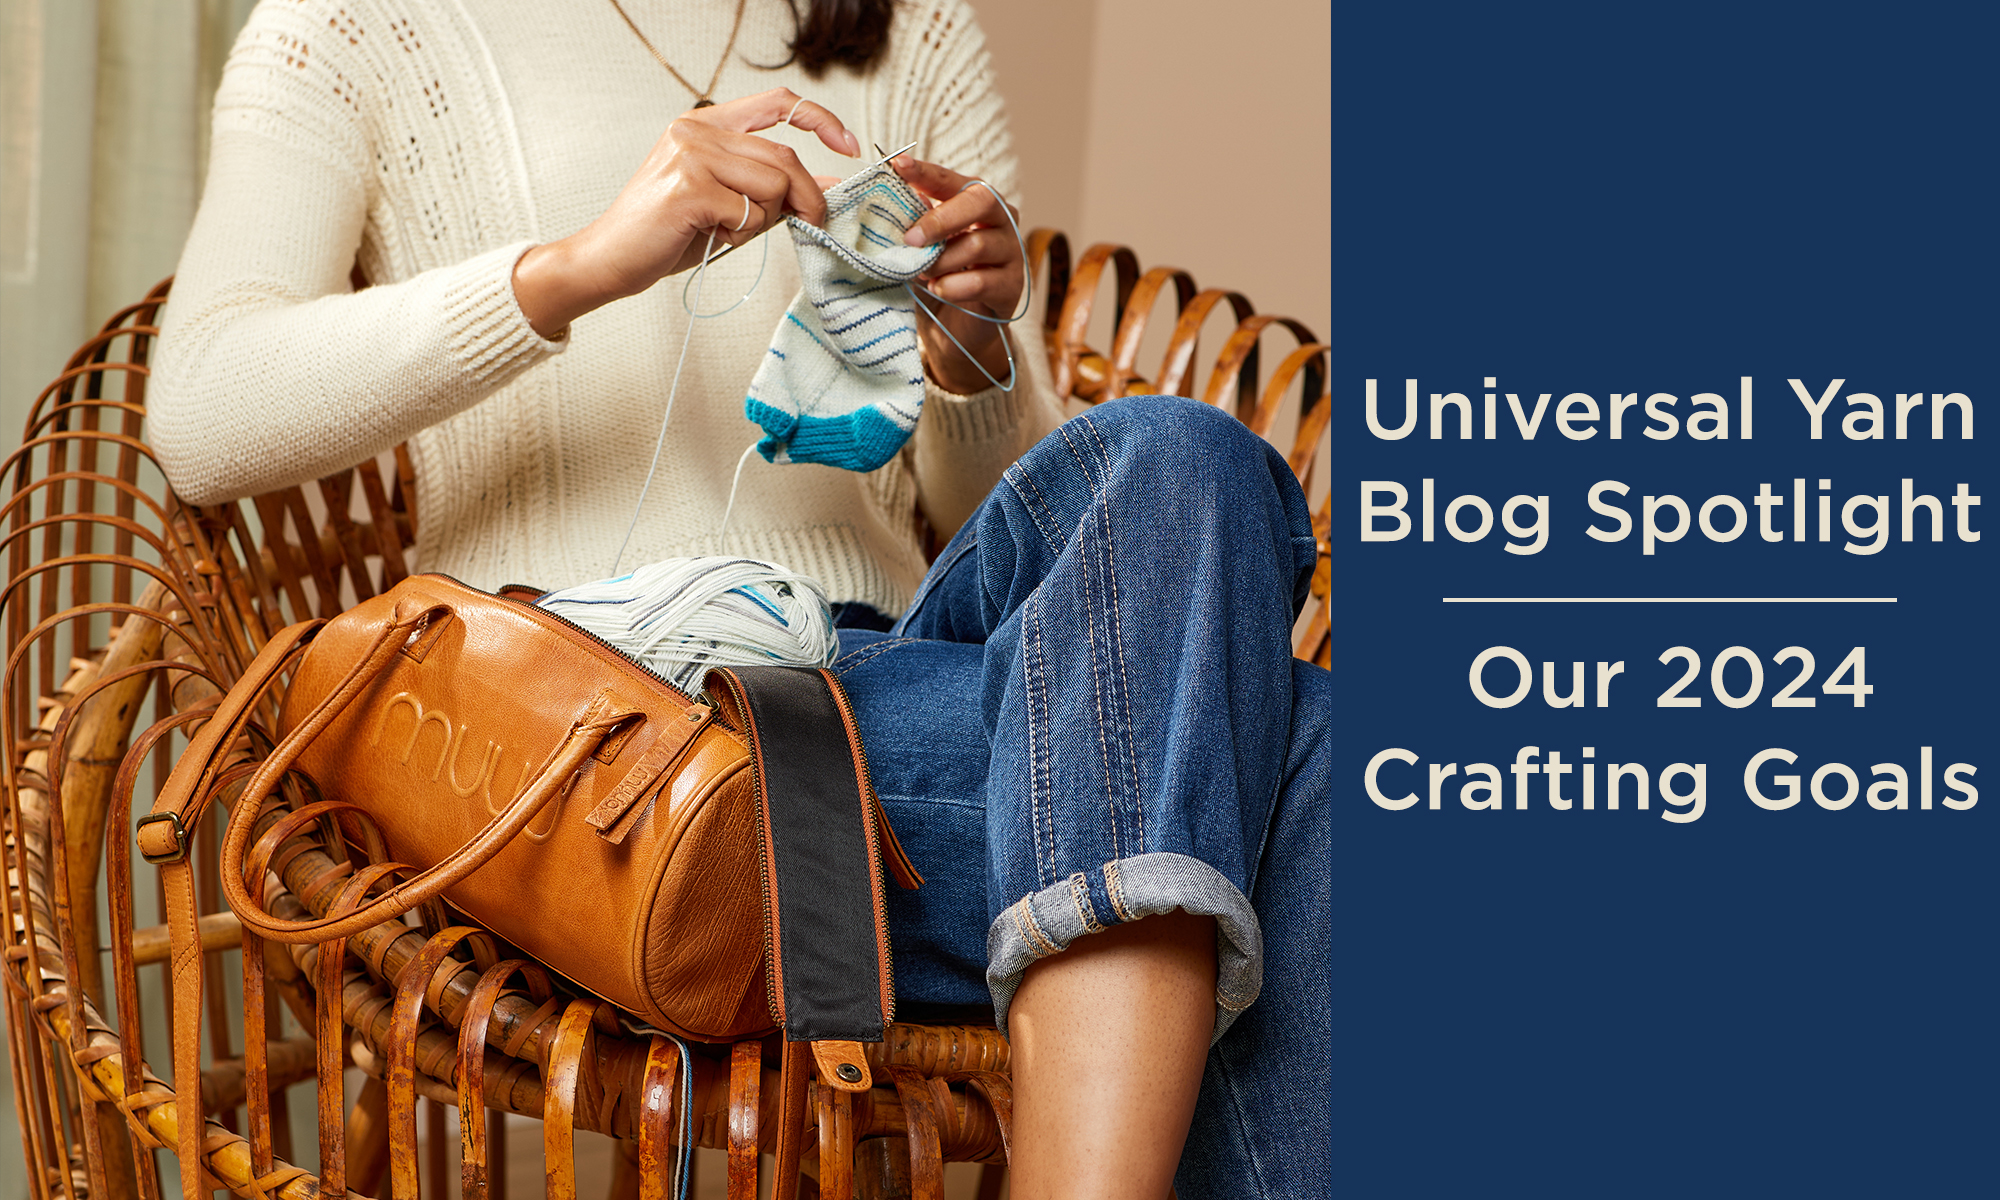
We hope you accomplished all the crafting goals that you set out for in 2023, but if not, 2024 is a new opportunity! Our team has gathered together to come up with exciting personal crafting goals for the new year, and we want to hear yours as well. We invite you to take a peek below to check our teams aspirations for the year ahead!
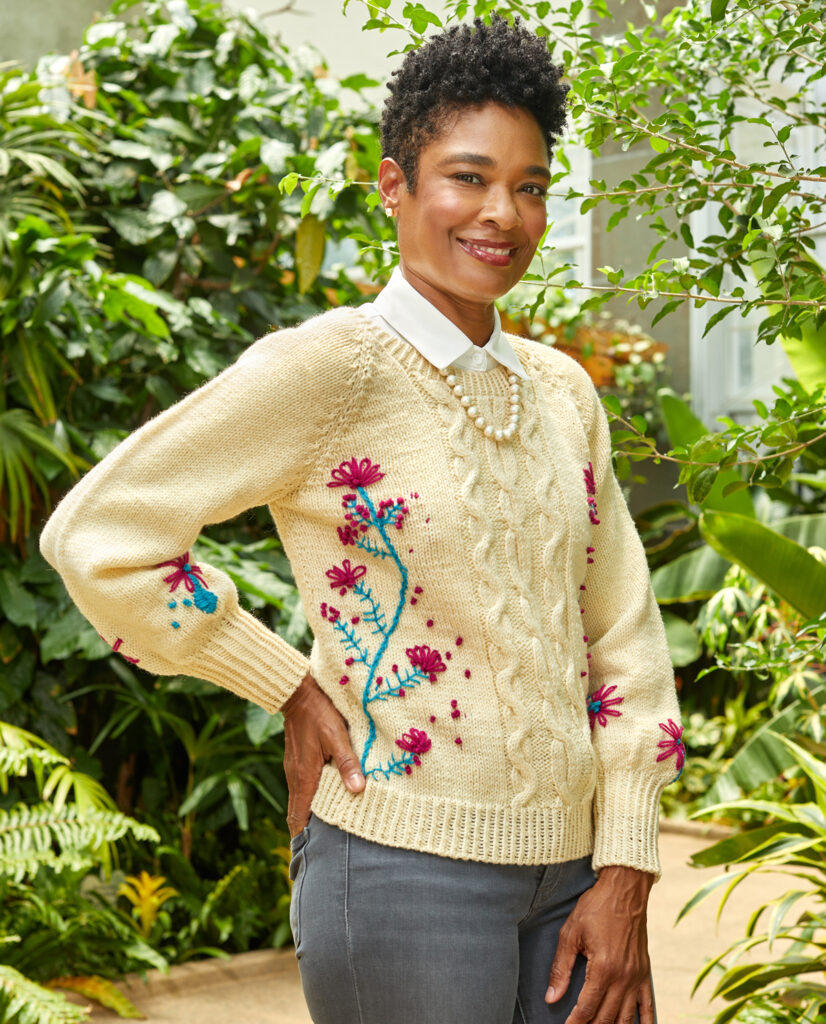
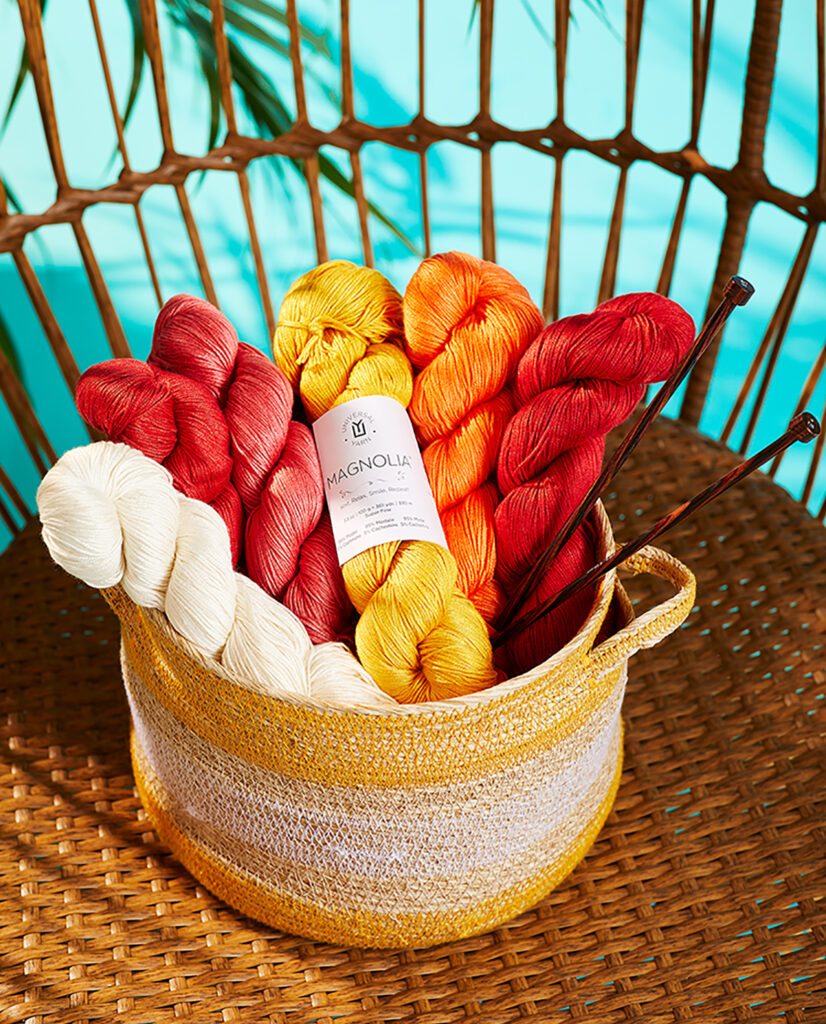
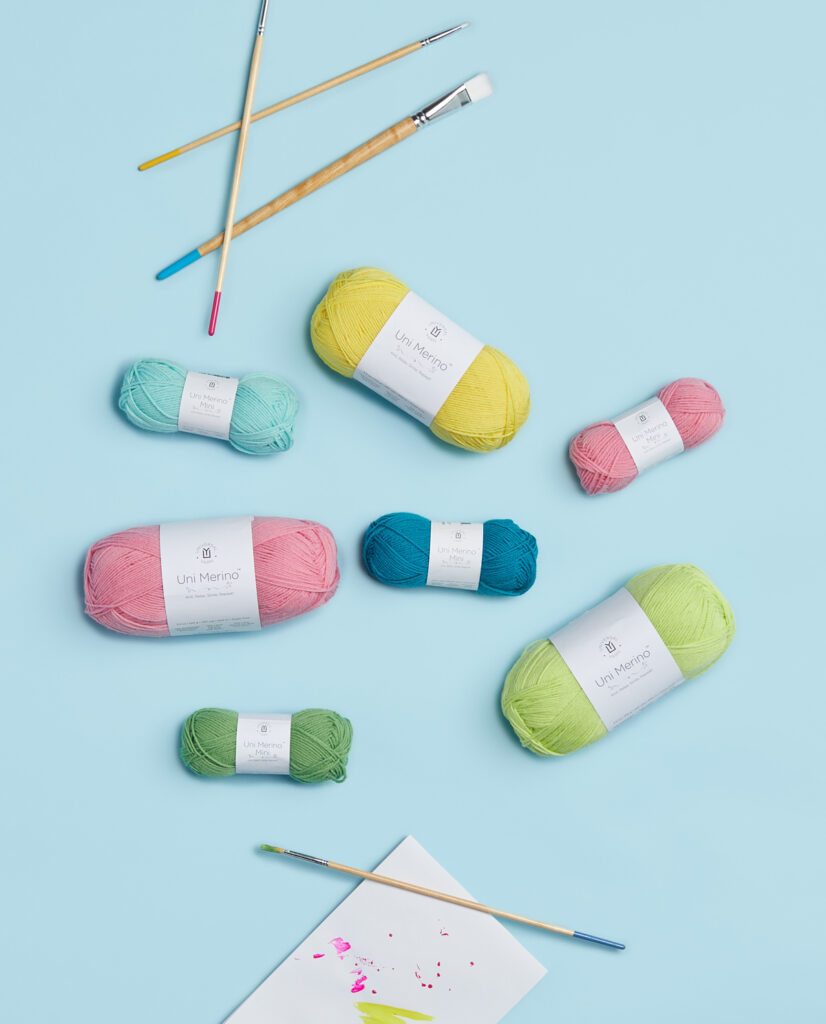
Aubrey: “In 2024, I hope to get back into doing more hand embroidery on knitwear and ready-to-wear clothing! I loved designing the Verbena Pullover and getting to do the hand embroidery on that sample, so it would be exciting to expand my knowledge of hand embroidering on knits this year. We have some yarns in our line that will work fabulously for this, like Magnolia. This fingering weight yarn is delicate enough to show off complex embroidery designs and has a silky-smooth finish. Embroidery adds a touch of uniqueness to your projects or your everyday clothes, and the customization element makes them feel extra special and artistic.”
Verbena PulloverMagnolia
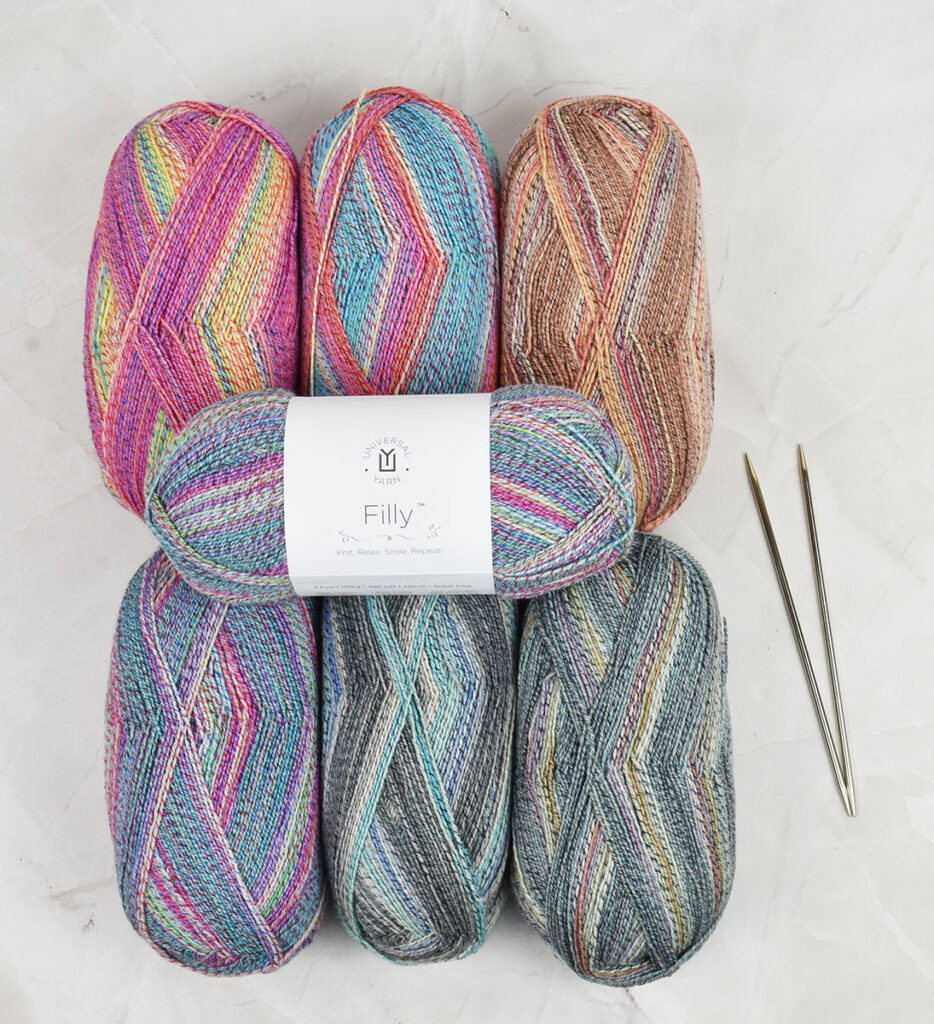
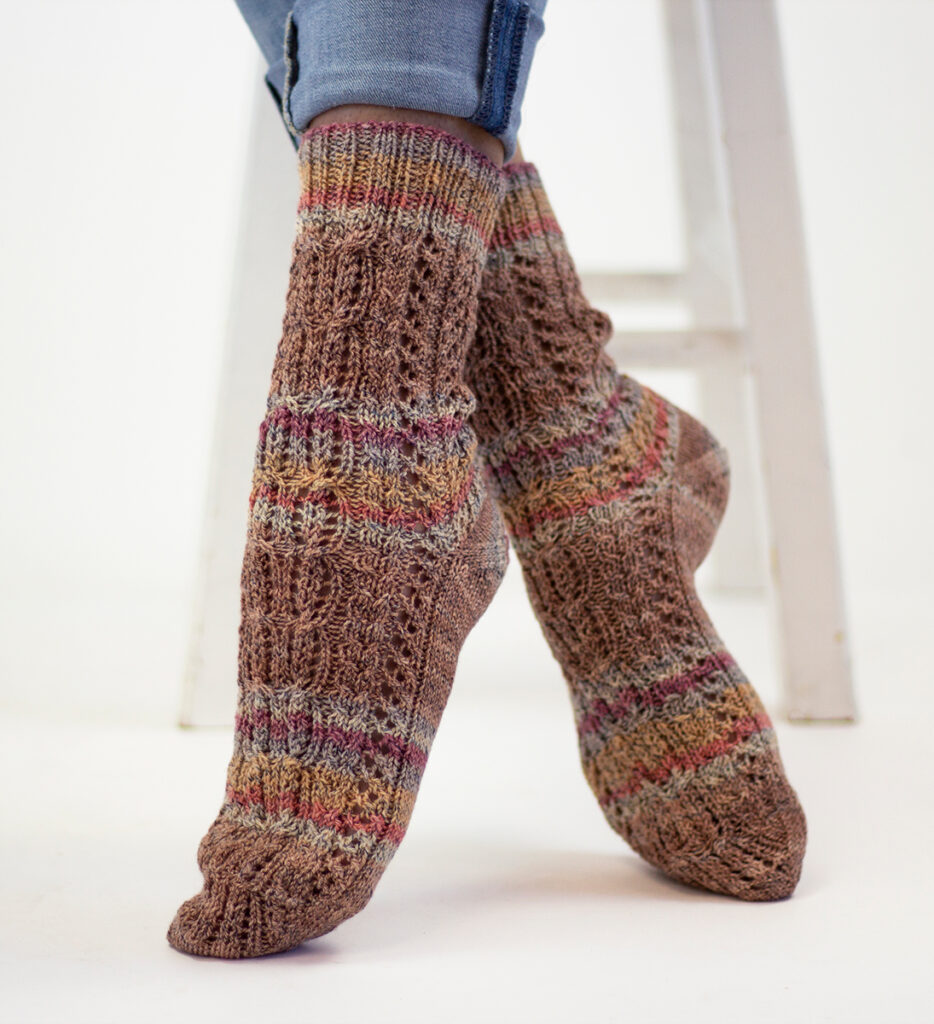
Ashley Jane: “I am a crocheter, but I have been taking on more and more knit projects. This year, my big resolutions are to try some new projects that would help me grow my knitting skills! First up, I want to try out the Forager Socks, designed by Rachel Brockman. They feature some beautiful lacework, which I have yet to try, so I am very excited about them. These socks call for Filly, which is a blend of 46% cotton, 33% superwash merino, 12% polyamide, and 9% PBT. It comes in 6 self-shading hues that are perfect for springtime. I think the color choices, along with the open lace design will make for a perfect warm-weather pair.
FillyForager Socks
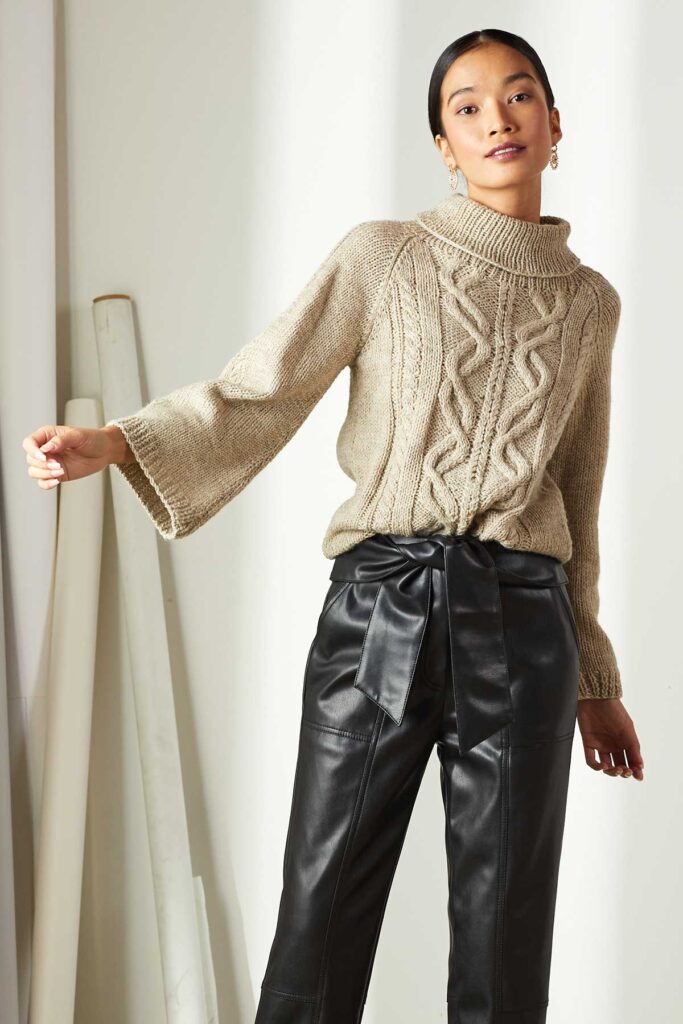
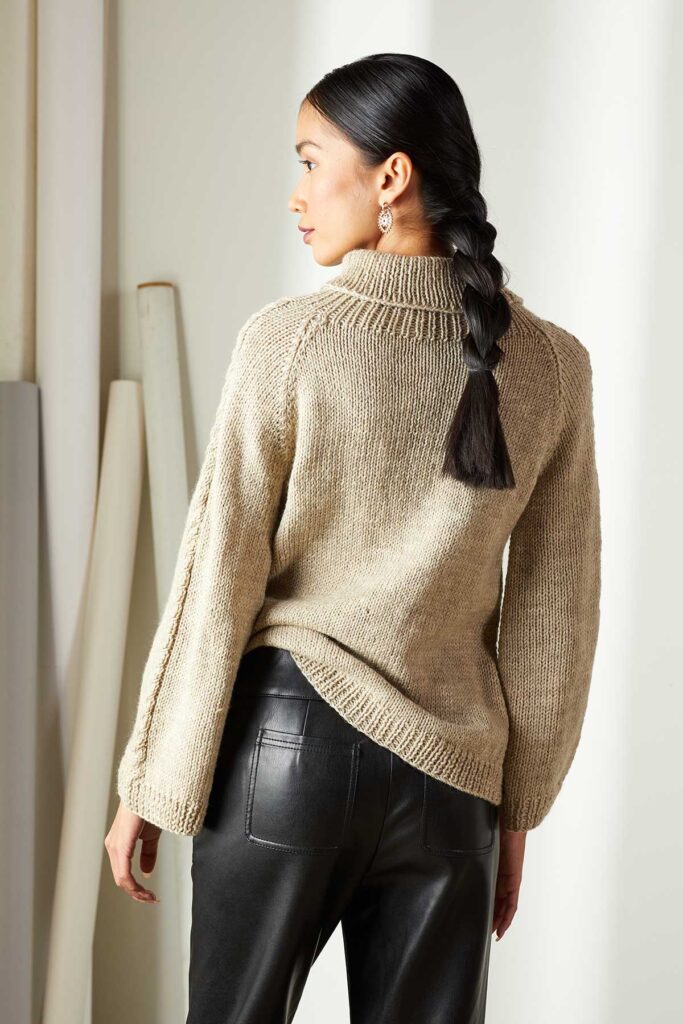
The other skill I want to try is cables, so I want to make myself the Carillon sweater, designed by Aubrey Busek Gray. I adore the twisting design on the front, and the overall elegance of this piece, which is enhanced by the 100% wool yarn, Deluxe Worsted. This yarn is available in over 80 colors, some of which are natural, undyed marvels. While the cabling may be a new challenge for me, I think the hardest part of this sweater will be choosing a favorite color!”
CarillonCarillon
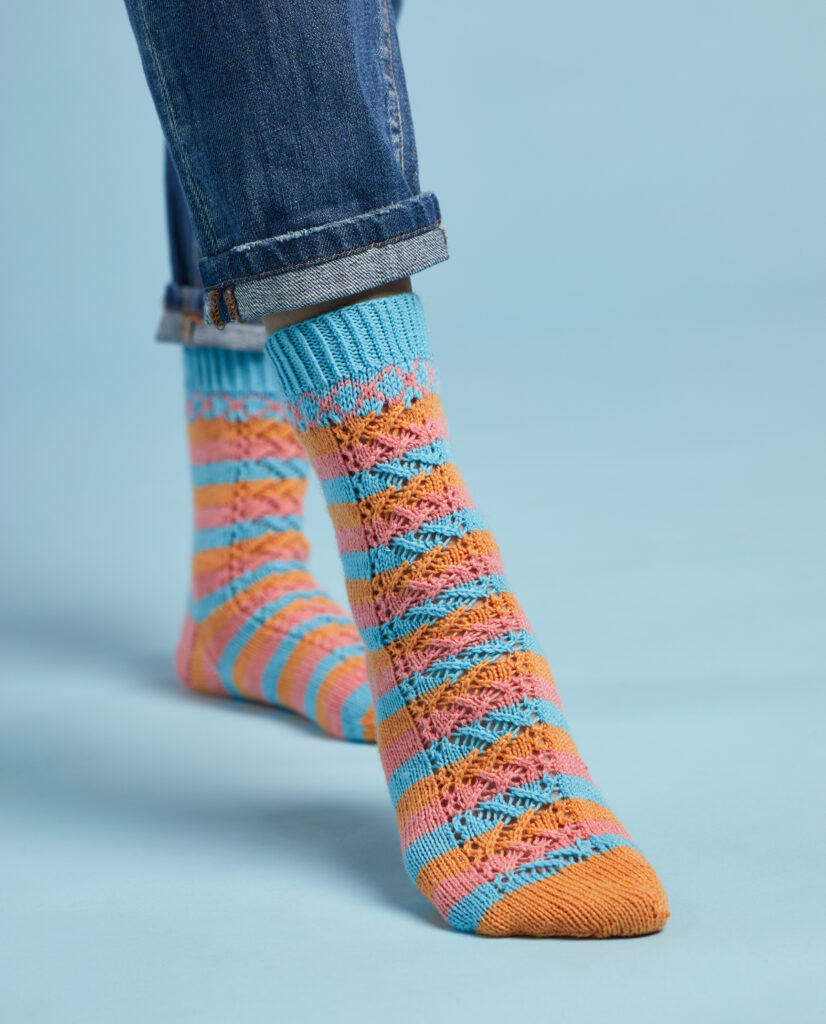
Afifa: “I knit my very first pair of socks last year and am now obsessed and want to hone my sock-knitting skills. I am excited to work on the Tempera Socks designed by Aubrey Busek. I love the combination of stripes and lacework in this pattern. The pattern is designed for Uni Merino, a blend of soft superwash merino wool and nylon, perfect for socks. With the wide range of shades available, the potential color combinations are endless. Here’s to having a drawer full of hand-knit socks by the end of the year!”
Tempera SocksUni Merino and Uni Merino Mini
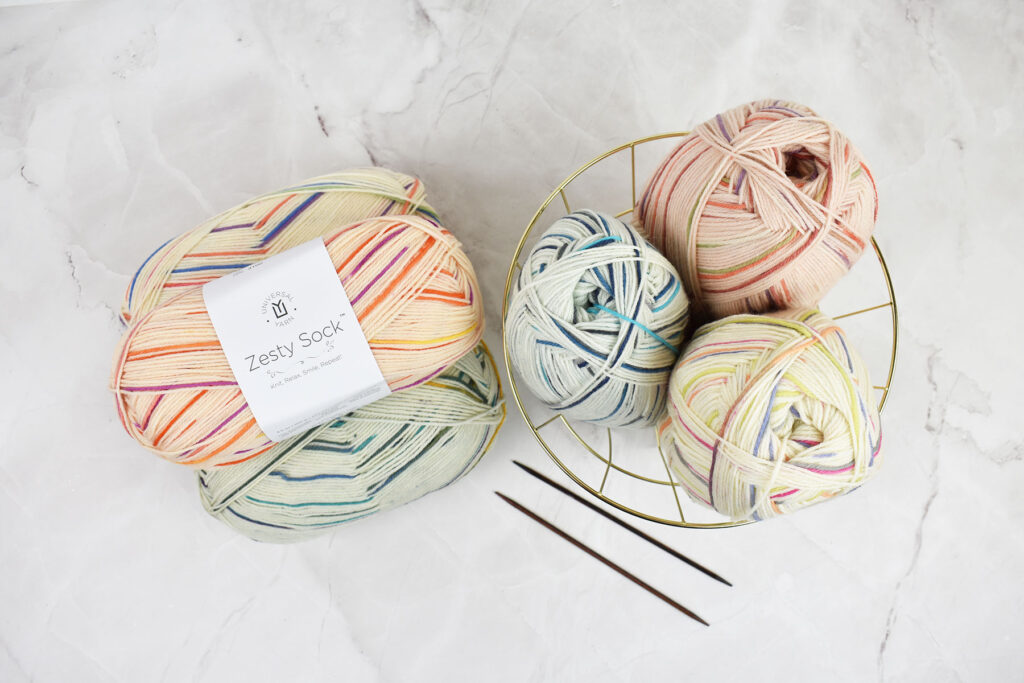
Robert: “As someone who never crafted much before my time here, 2023 was full of trying new things. As 2024 continues, I would like to take more time to weave and crochet, as I find these crafts relaxing. Universal Yarn has a beautiful display of yarns, but I am eyeing Zesty Sock for a few squares on the Zoom Loom.”
Zesty Sock
We want to hear from you! What are your crafting goals for 2024? Let us know in the comments below.
We love to see customer projects! Make sure to follow us on Instagram and Facebook to see the creativity that exists in the crafting community. Plus, use #universalyarn when using our yarn for a chance to be shared in stories or on our feed!
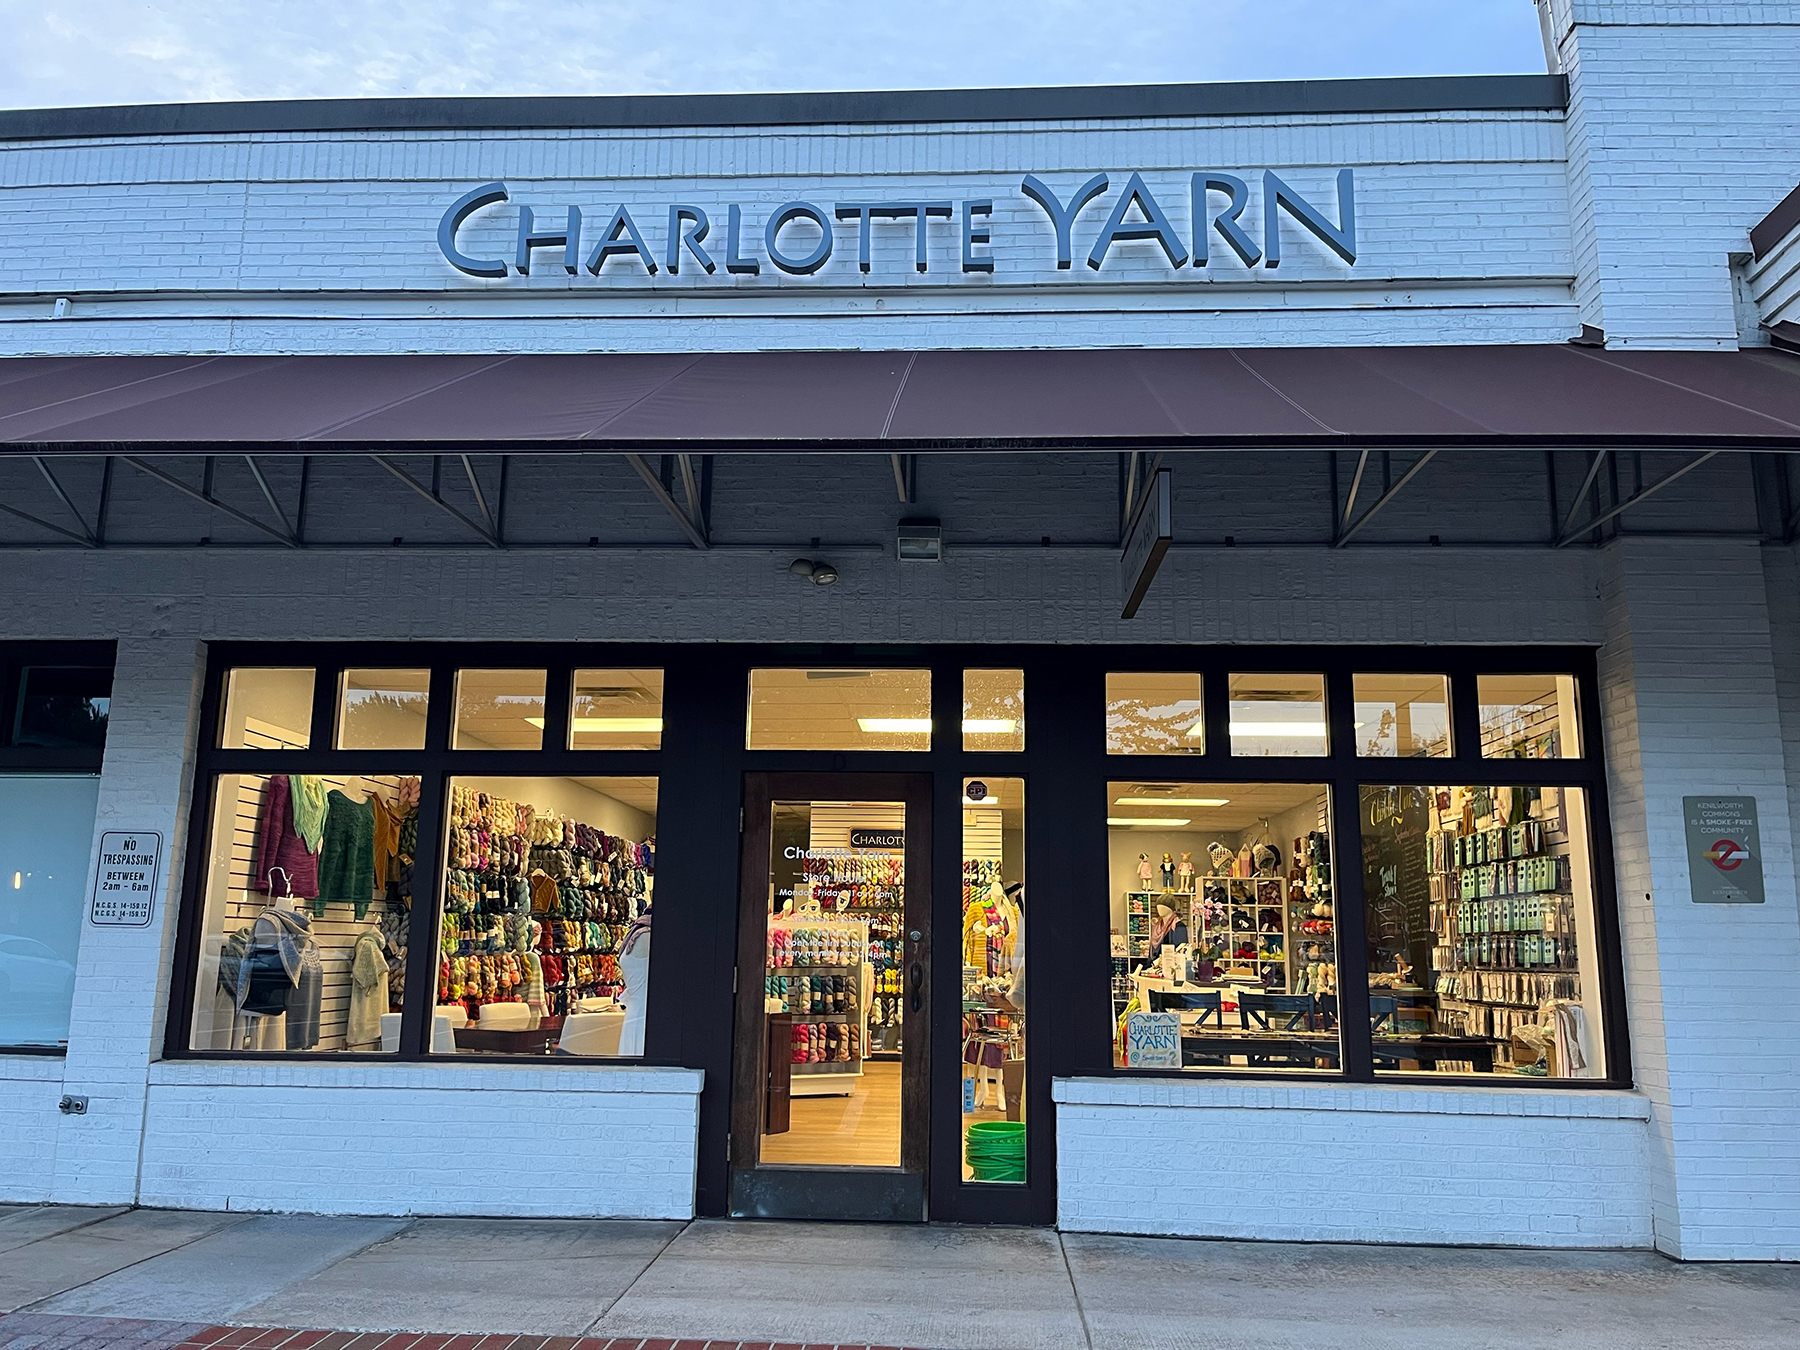
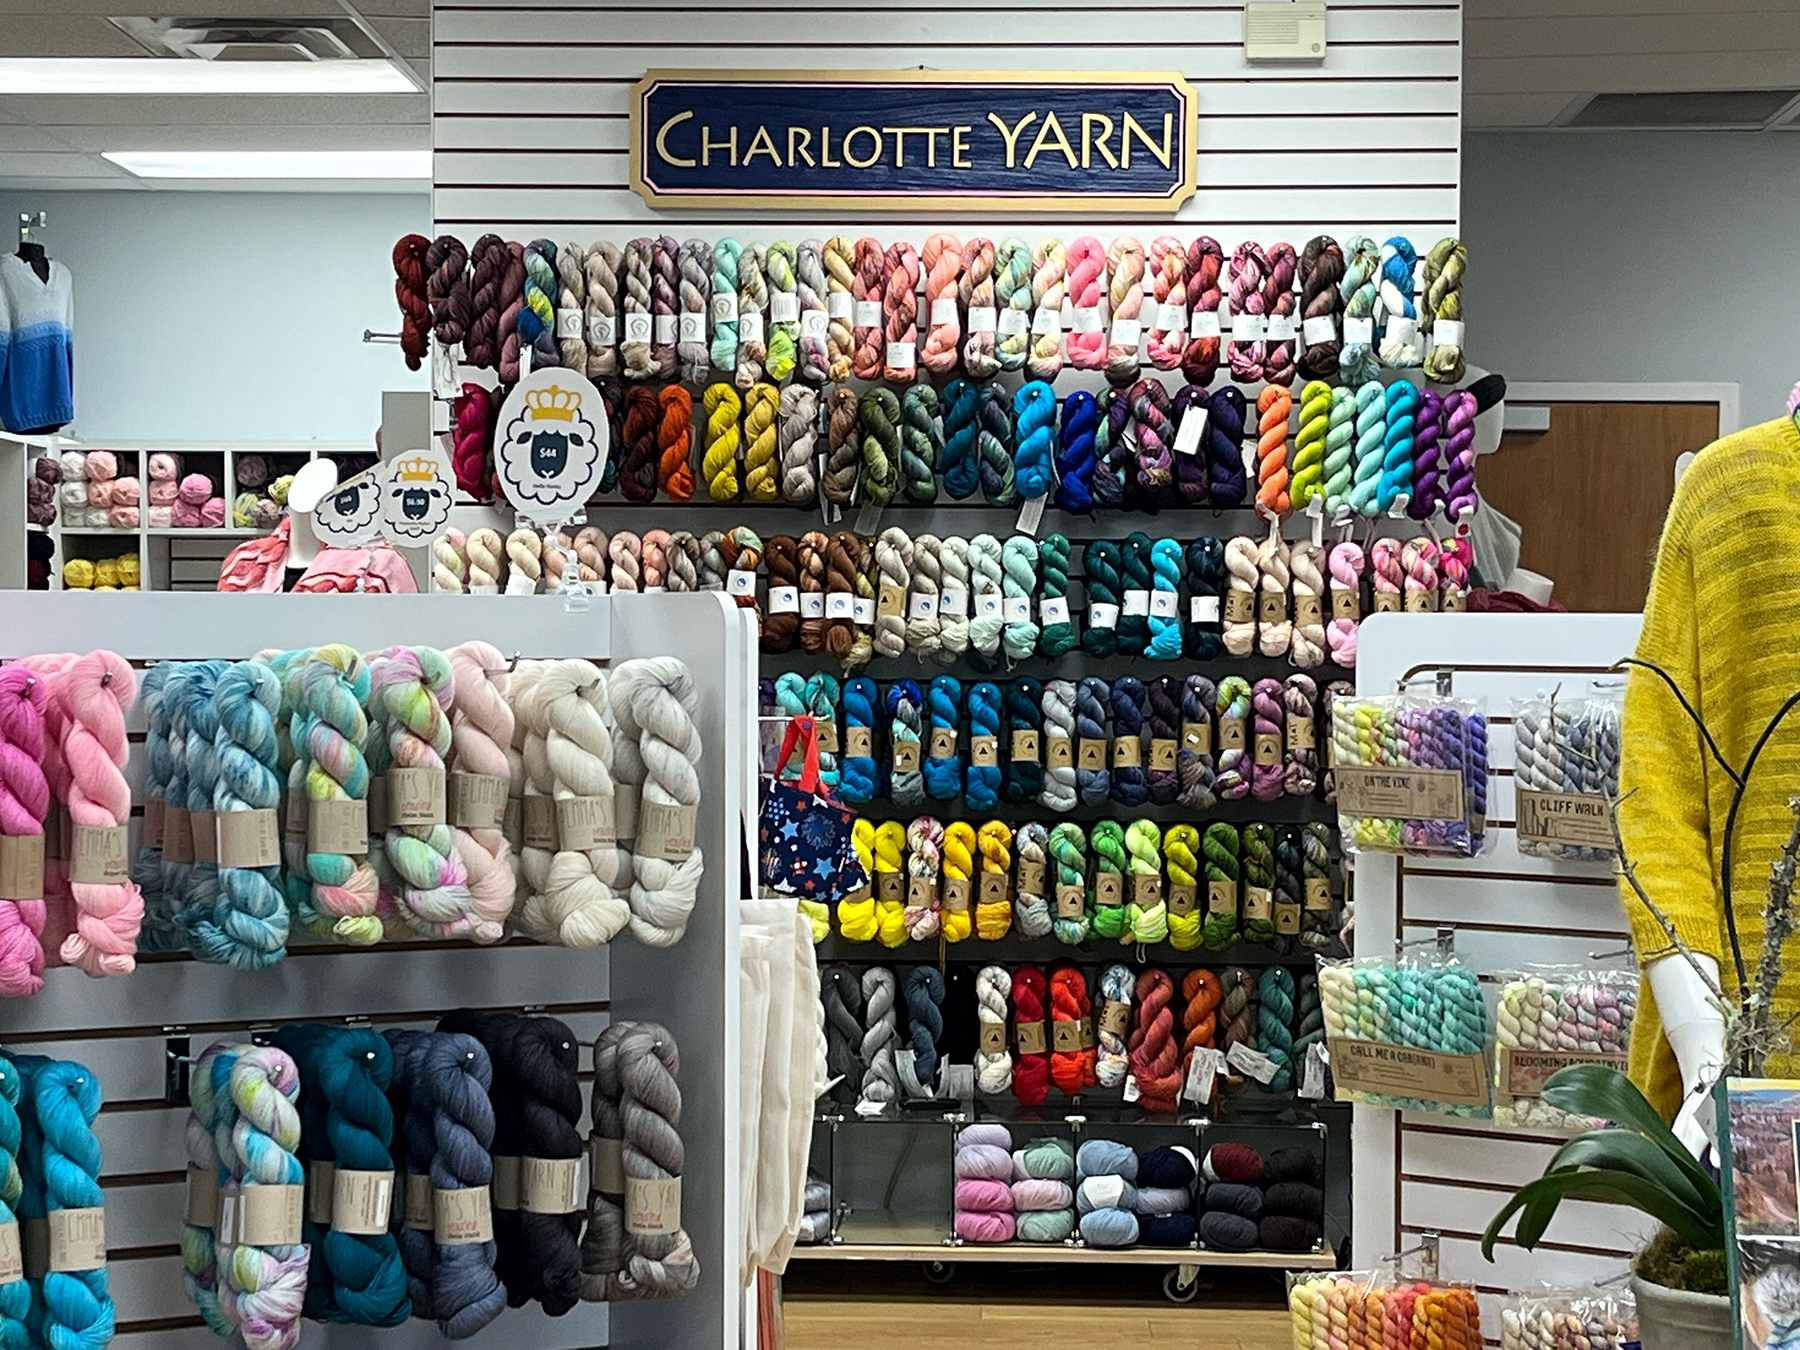
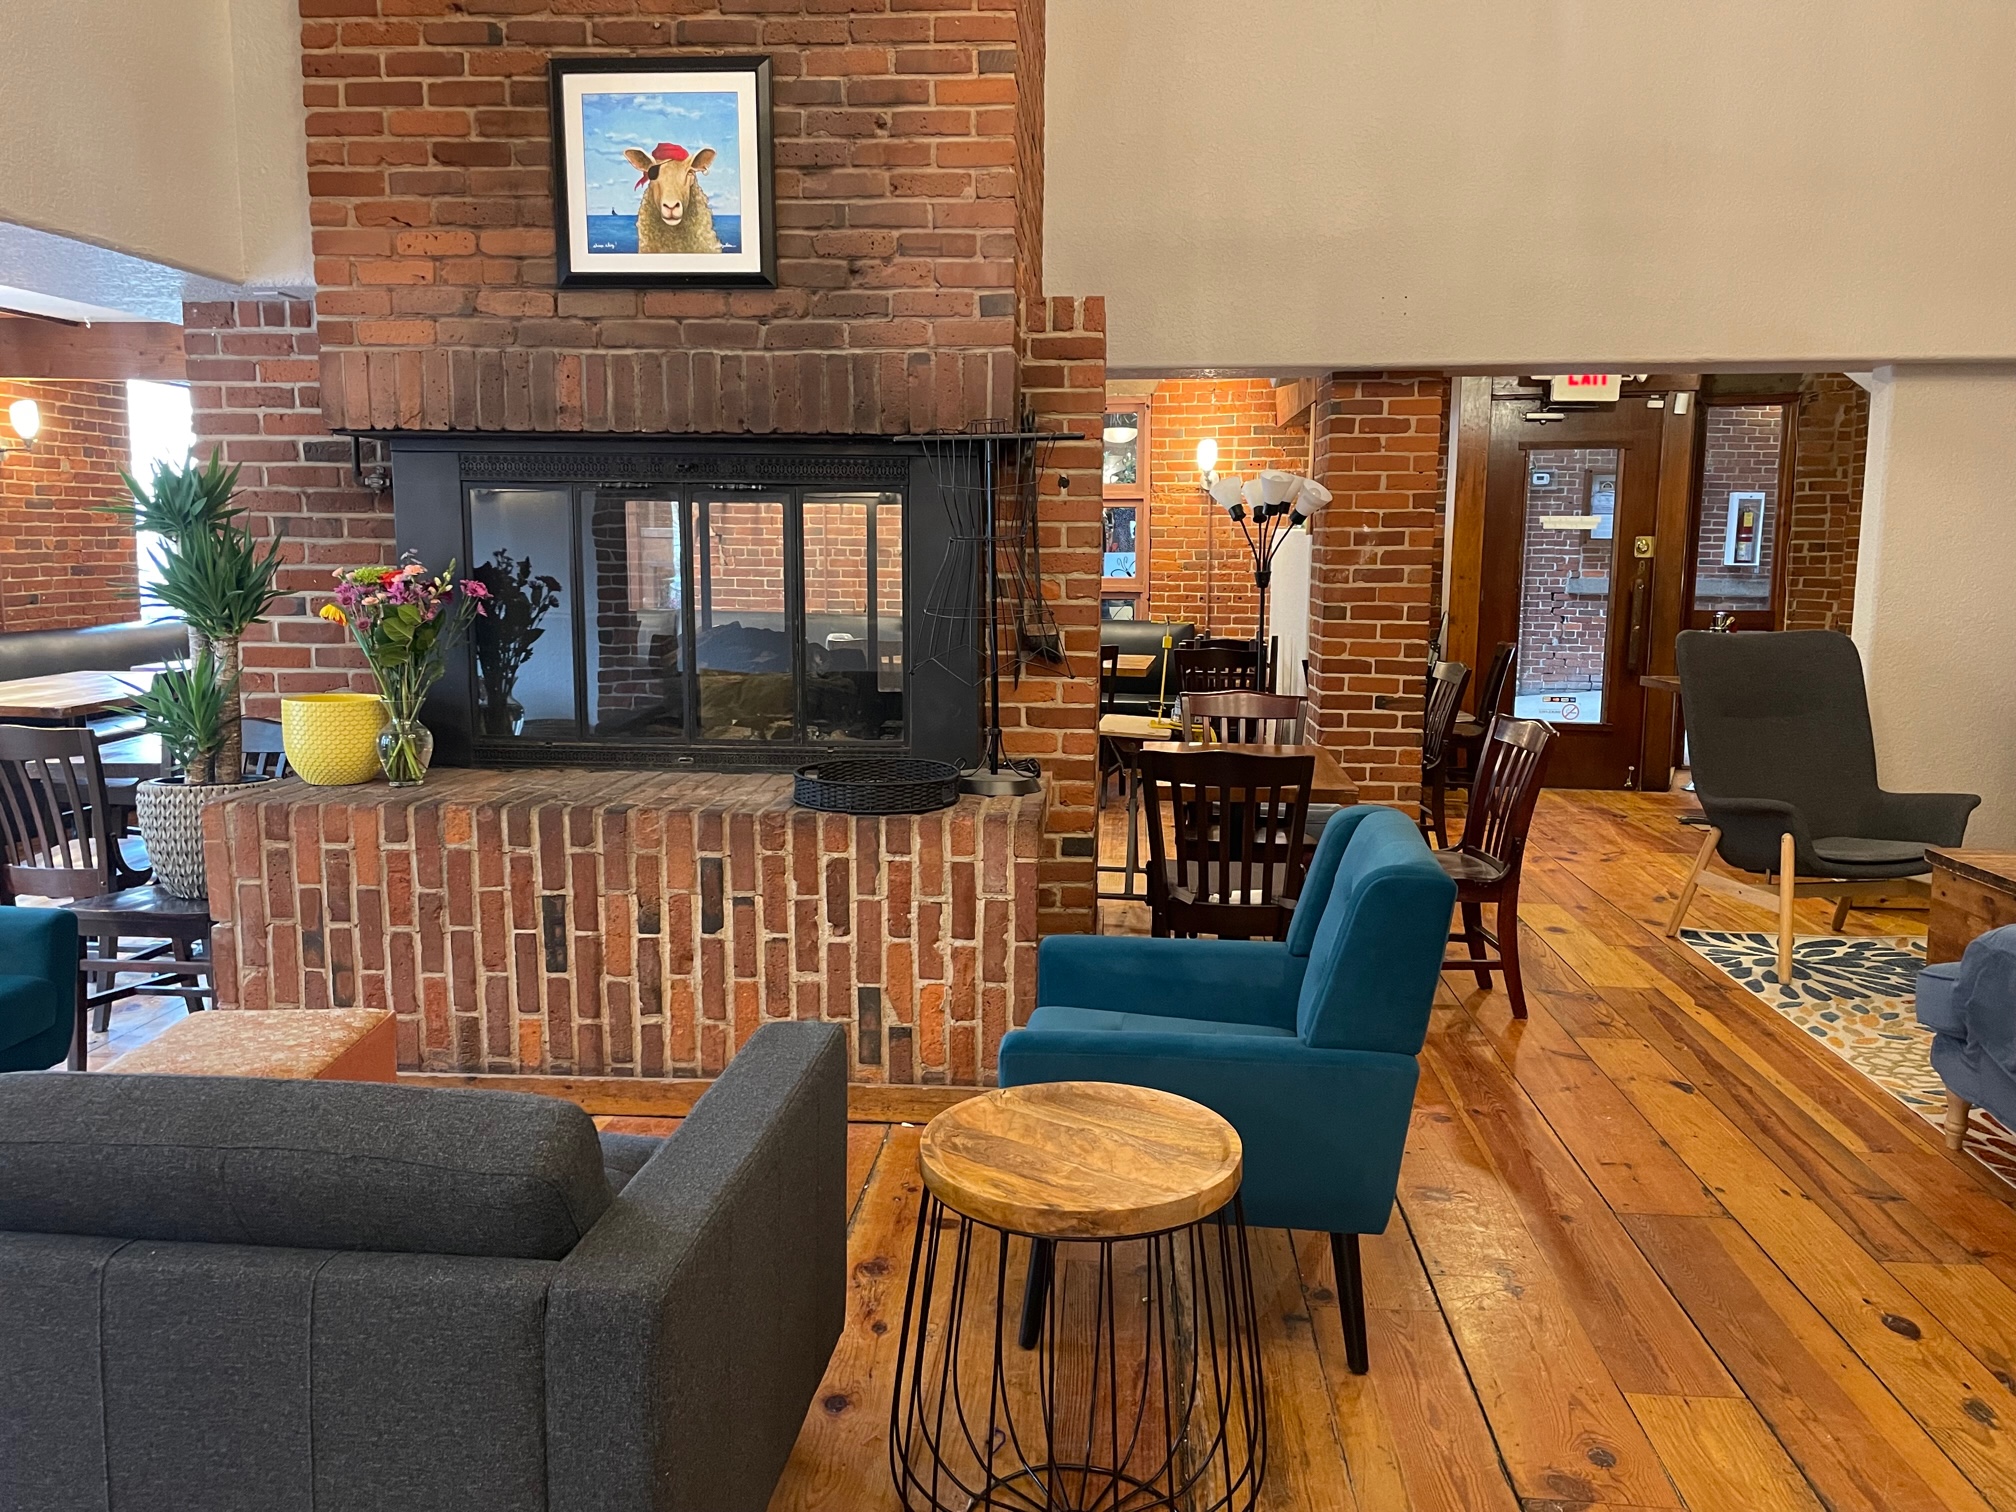
Our featured yarn shop of September is close to home, just over twenty miles from our headquarters! Nestled in the Dilworth neighborhood close to the big city lights of uptown, you will find Charlotte Yarn. This beautiful shop, owned and operated by Remi Haygood, is the city’s longest-tenured yarn store. Let’s learn more about Charlotte Yarn and all they have to offer!
Charlotte Yarn opened in 2005 when Remi, determined to start her own business, finally got the opportunity to. Through her hard work and dedication, she is proud to own the oldest yarn shop in Charlotte, NC.
As we’ve heard since starting our “Meet a Local Yarn Shop” series, owning a yarn store is anything but easy. Remi said her biggest challenge was “being a single mom and balancing work with raising her daughter.” But plenty of joys come along the way, too. With a community of fiber artists in the Charlotte area looking for a yarn shop to call home, Remi has been able to provide that, which is truly incredible. Seeing a group of crafters show off their finished objects and become such a close-knit family (pun intended) makes it all worthwhile.
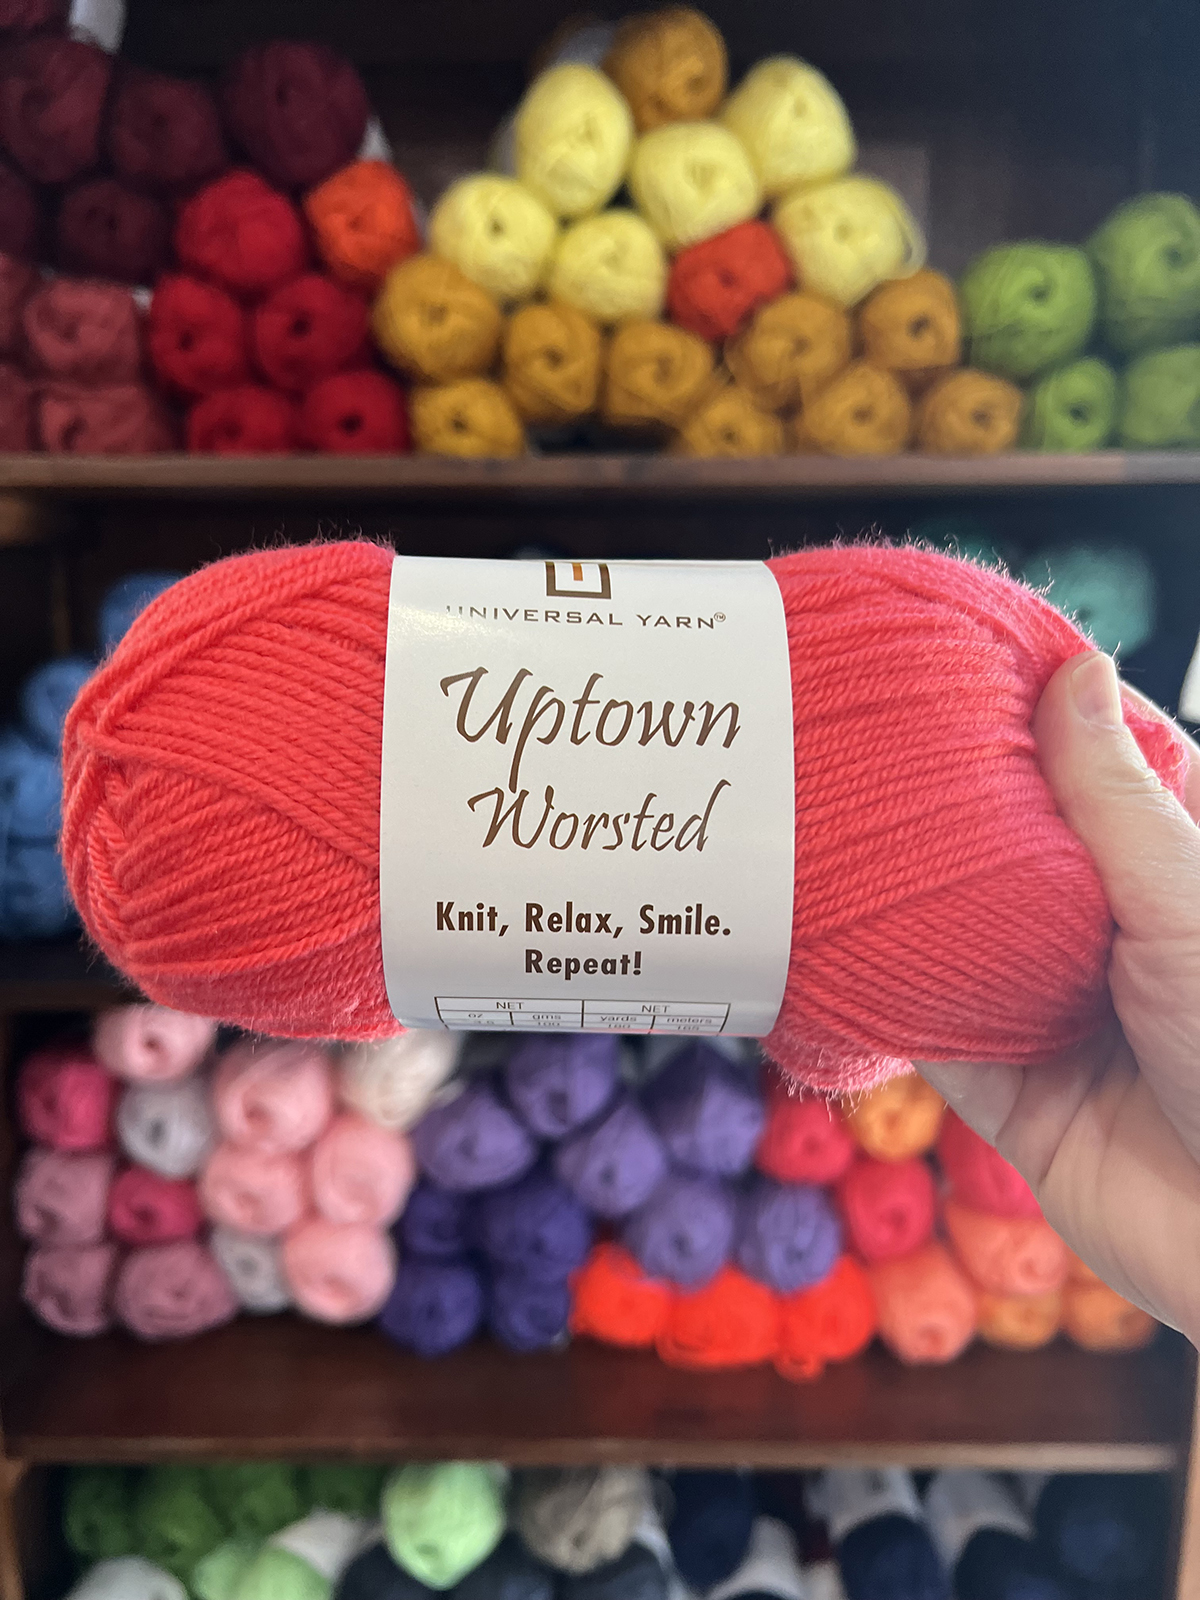
Let’s get to the fibers! Remi carries many of our yarns in her store but names Cotton Supreme and Uptown Worsted as the favorites. These yarns are perfect for baby projects, sweaters, and blankets, making them popular choices for projects at many local yarn shops. Remi also noted that her customers love working with fingering-weight merino wool yarns for cold-weather-creations.
We have loved working with Remi and her store throughout the years and are pleased to hear her feedback for our team. “Everyone that works there is a great representation of the company. They truly care about their customers and supporting their quality yarn.” We appreciate Remi and her kind words!
Charlotte Yarn has many classes to support the fiber artists in their community. We love to see beginner crocheting and knitting classes available, as well as more targeted lessons like “Cable Fingerless Gloves” and “Christmas Tree Washcloth” on their website. Additionally, there are some more advanced options like “Fern and Feather Sweater” and a “Tunisian Crochet Washcloth” class. If this is the first you are hearing about Charlotte Yarn, we encourage you to follow them on Instagram today!
We are so honored to learn more about Remi and her store, Charlotte Yarn! Join us in October for our next local yarn shop feature.
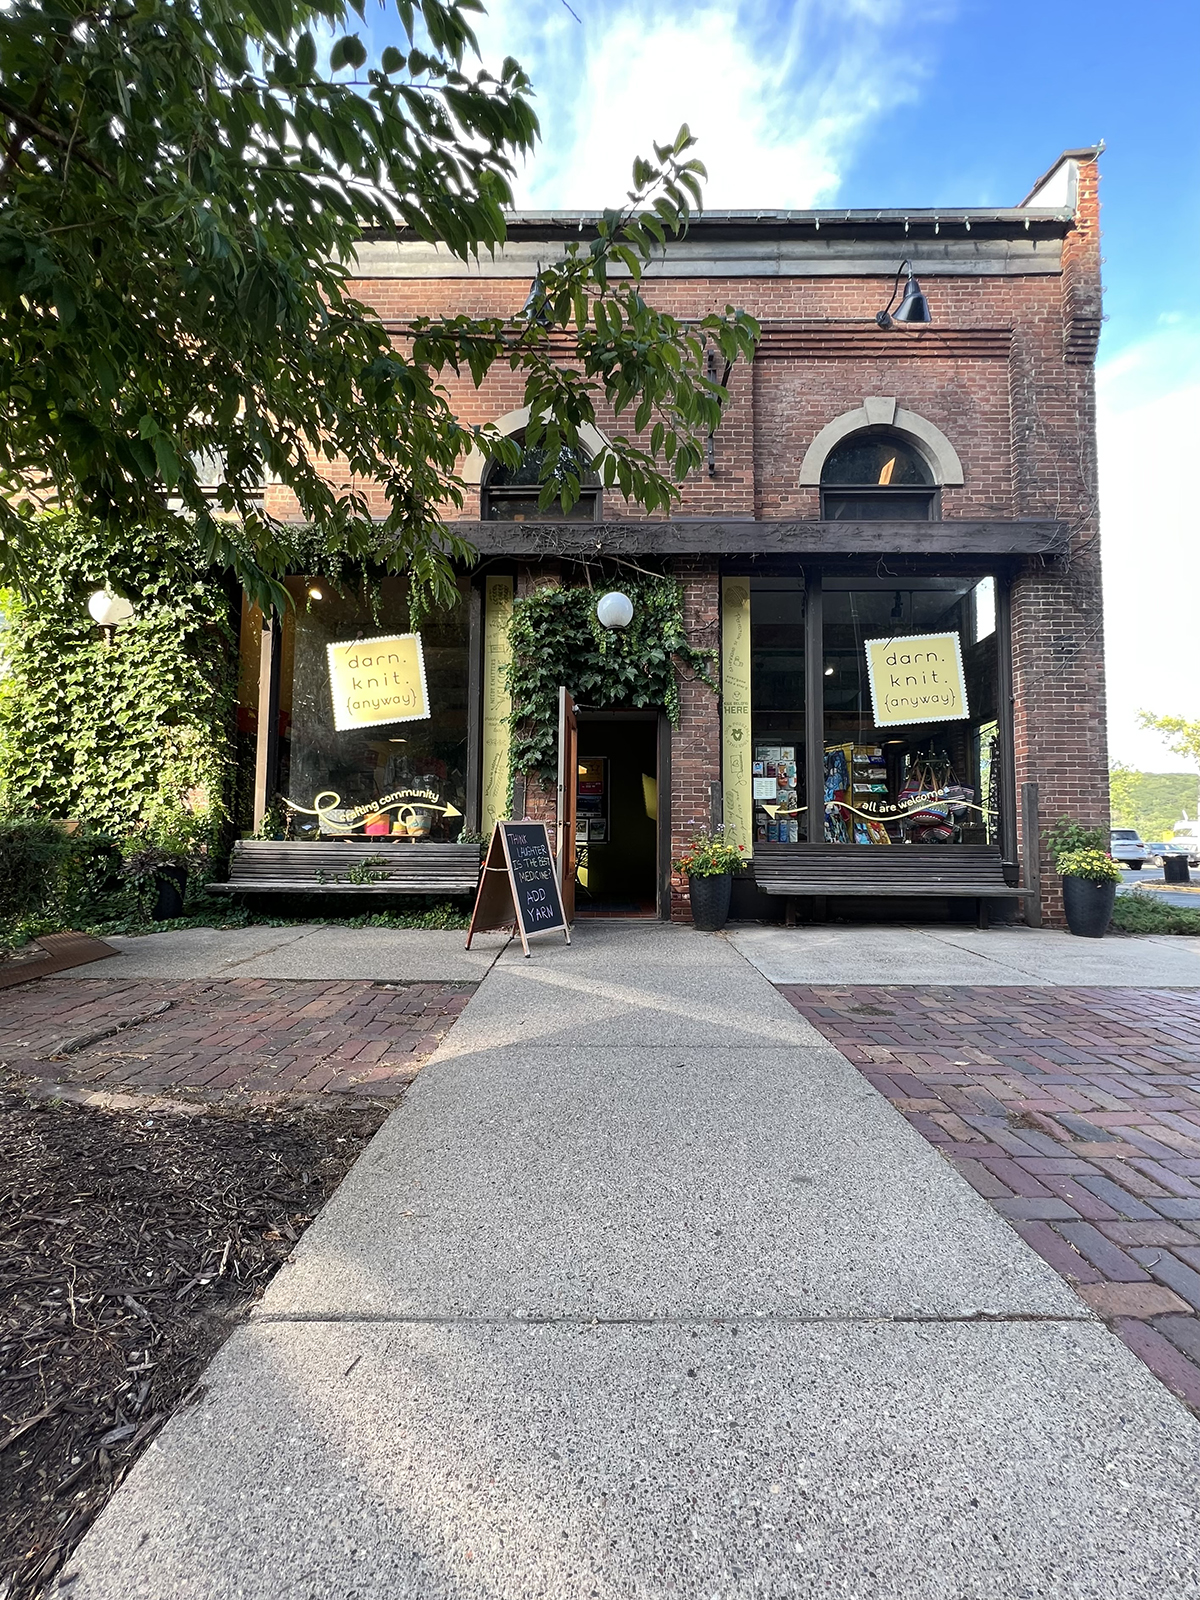
From a sandwich board full of inspirational quotes to a shop full of friendly fibers, say hello to Darn Knit Anyway! We are very excited about this month’s local yarn shop feature, and you should be too! Located in Stillwater, MN, this incredible shop is just minutes from the Wisconsin border and Minnesota’s largest city, Minneapolis. Let’s learn more about Aimee and her sensational store!
Beautiful entrance to Darn Knit Anyway
Aimee Pelletier owns Darn Knit Anyway, but that wasn’t always the case. Commercial interior design was her previous occupation, but all it took was a drive by a storefront available for leasing, and everything changed. Four months later, her yarn shop opened up and has been operating for fourteen years!
Below you will see the Maker’s Lounge, a space that Aimee created in 2022 just for her customers. This space is open whenever the shop is open and is a great way that Darn Knit Anyway is fostering a community around their shop.
The Maker’s Lounge, created in 2022
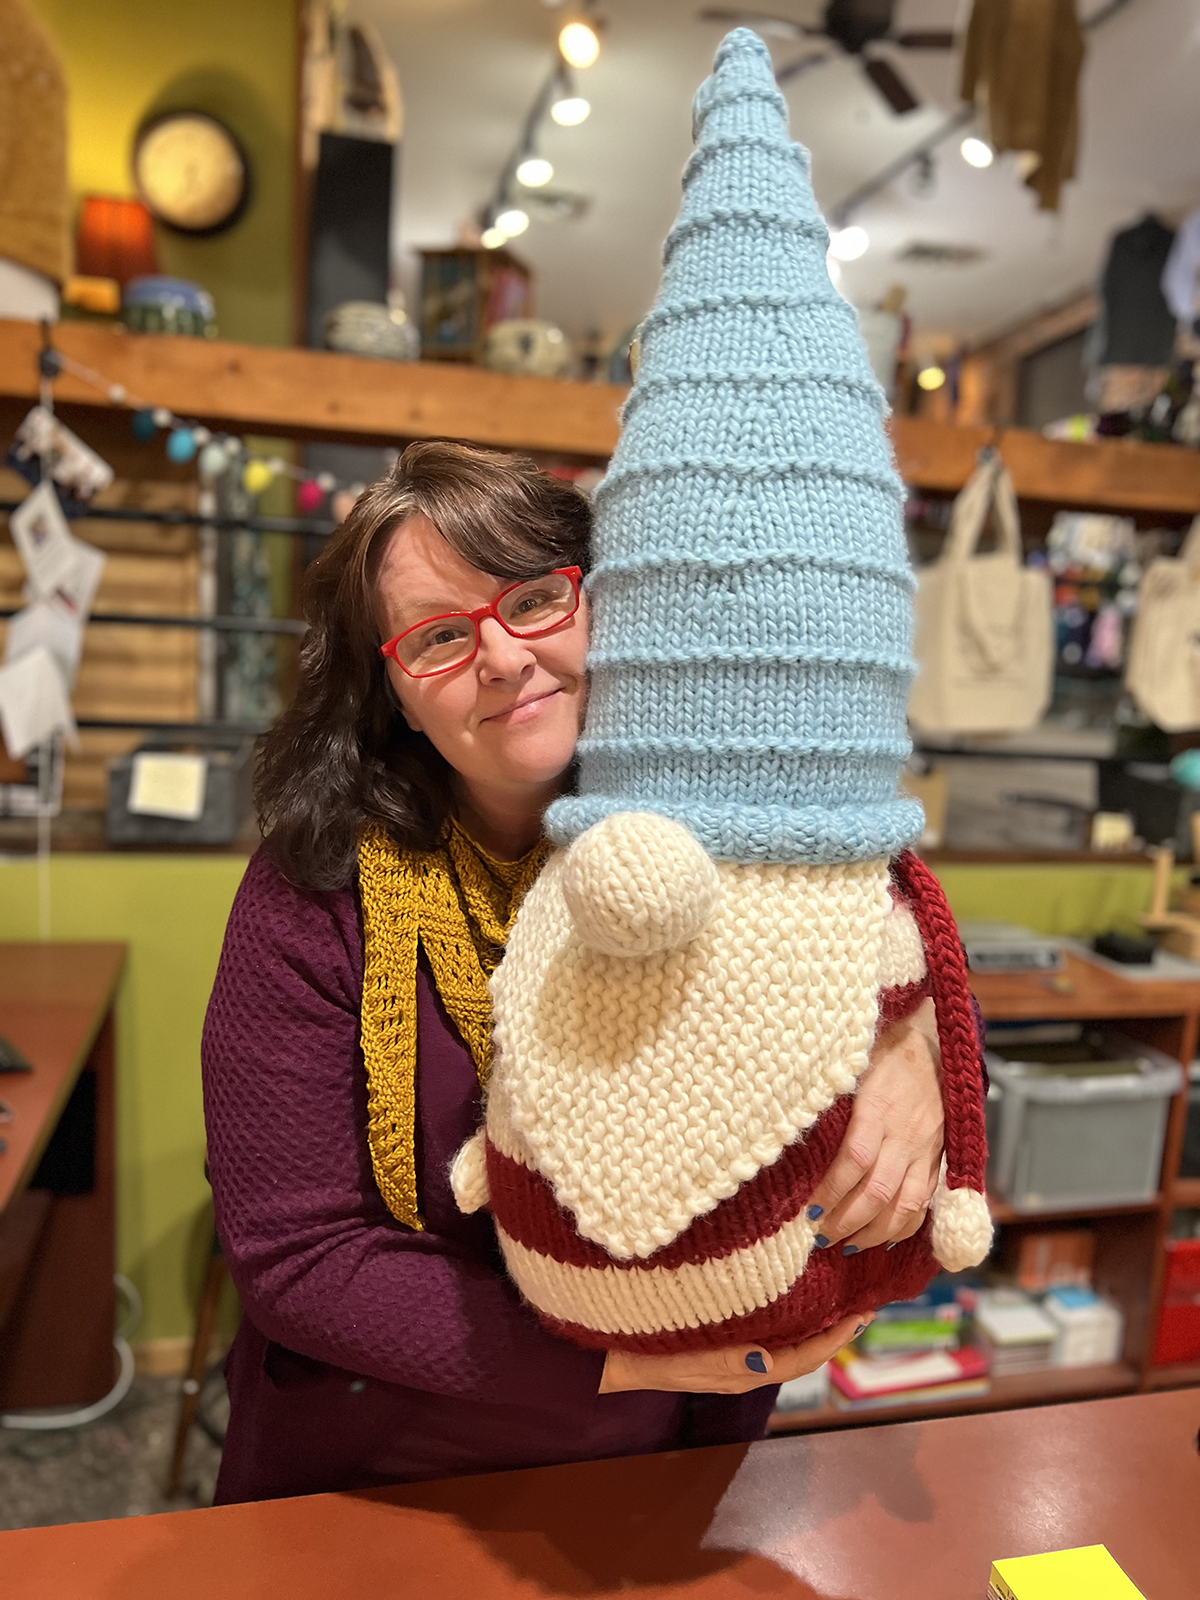
We all know Minnesota is known for very cold winters, so it came as no surprise to us to hear that some of the most popular yarns at Darn Knit Anyway are our warm and cozy offerings! As seen below, shop owner Aimee is holding a woolly gnome created with super bulky Be Wool. Plus, who can forget Uptown Worsted! This versatile yarn is on the shelves of many of our shops across the country, including Darn Knit Anyway!
Gnome being held by Aimee, using Be WoolUptown Worsted is on the shelves of Darn Knit Anyway
Kits are another hot commodity at Darn Knit Anyway, especially the Easy Does It Winter, featuring Creative Melange Chunky from Rico Design. This soft yarn is self-shading, so the beautiful colors will come to life as you knit!
We are so happy to see Aimee’s shop stocked with our yarns, and we love to see their exciting content on their Instagram!
Easy Does It Winter Kit in Creative Melange ChunkyBeautiful hat knit in Be Wool Multis
If you’re looking for a shop full of fun activities, Darn Knit Anyway is definitely for you! From monthly stitch socials to weekend retreats, you can find all types of fiber art happenings at her store.
Additionally, this shop offers classes for beginner knitters and crocheters, allowing anyone to grow their skillset. Last but not least, Darn Knit Anyway offers an Epic Sweater Camp!! It is three days of fun that is in person and virtual. Join them in 2024 for their 4th year of camp.
We are so grateful for the opportunity to learn about Aimee’s incredible store. To find out more about Darn Knit Anyway or shop online, please visit their website!
Stay tuned for more local yarn shop features each month!
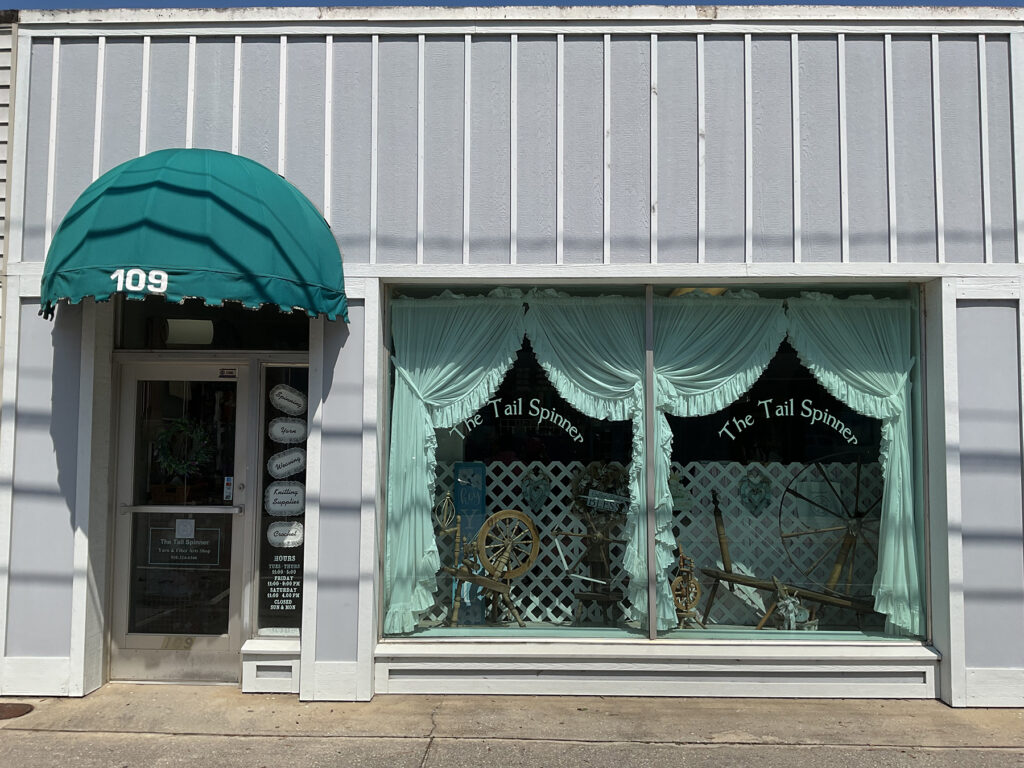
As you make your way to the coast of North Carolina, you might endeavor to a small town just north of Jacksonville. Richlands, North Carolina, to be exact. It may not be a bustling town, but there’s more than enough reason to stay if you’re a fiber artist. The Tail Spinner is our featured local yarn shop for July, and we can’t wait for you to learn more about the owner, Linda, and her store!
What are you waiting for? Let’s head inside The Tail Spinner!
When growing up, shop owner Linda Davis’s father told her she was “born to the needle”. She recalls the days of “sitting in front of the TV in 1973, and a PBS show came on with Elizabeth Zimmerman”. So it’s no coincidence we are now talking about her local yarn shop.
As Linda was preparing to open her shop by taking community college classes in business, she was demonstrating spinning from one of her Angora rabbits at the State Fair. One young lad was fascinated by this and began calling Linda the “tail spinner,” the rest is history. Since 2005, The Tail Spinner has been the destination for fiber artists in Richlands and beyond.
Throughout her time of ownership, Linda says the greatest joy of running the shop is seeing those finished projects! It’s an answer we hear often, and it shouldn’t be a surprise. There’s nothing more rewarding than seeing a customer leave with a skein of yarn and come back with a beautiful creation.
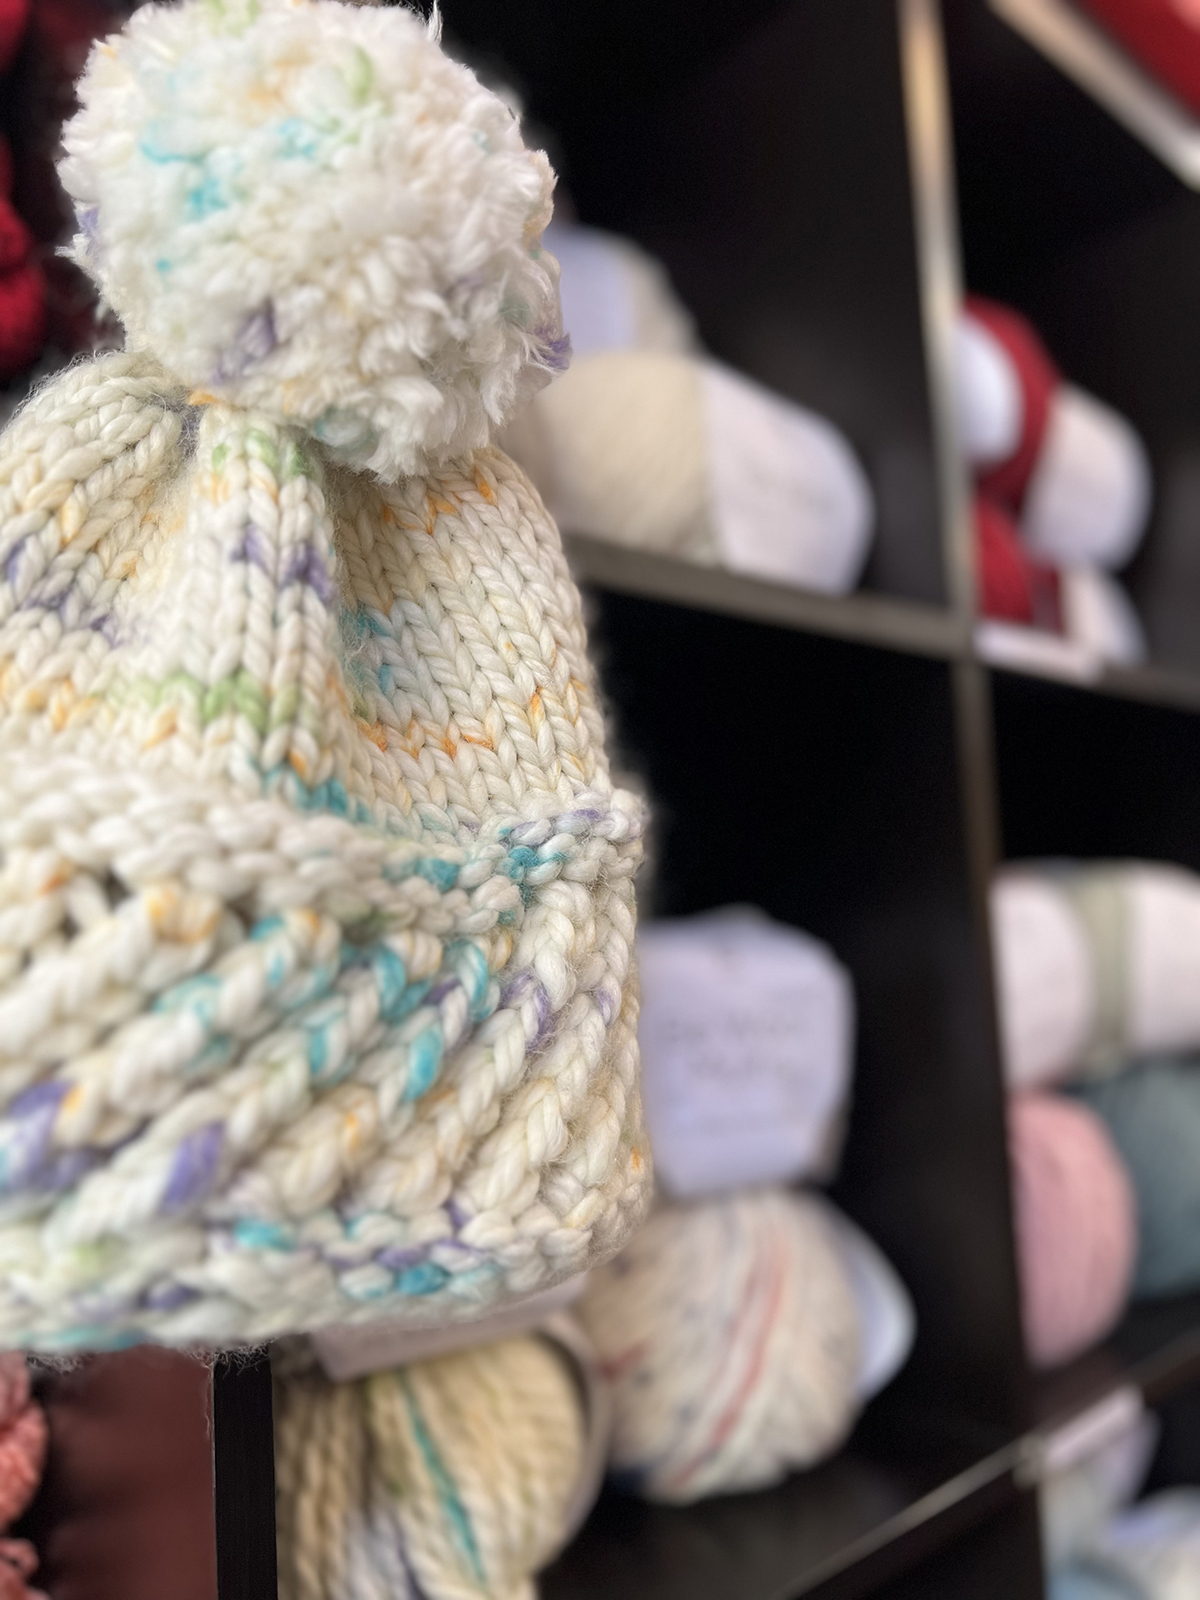
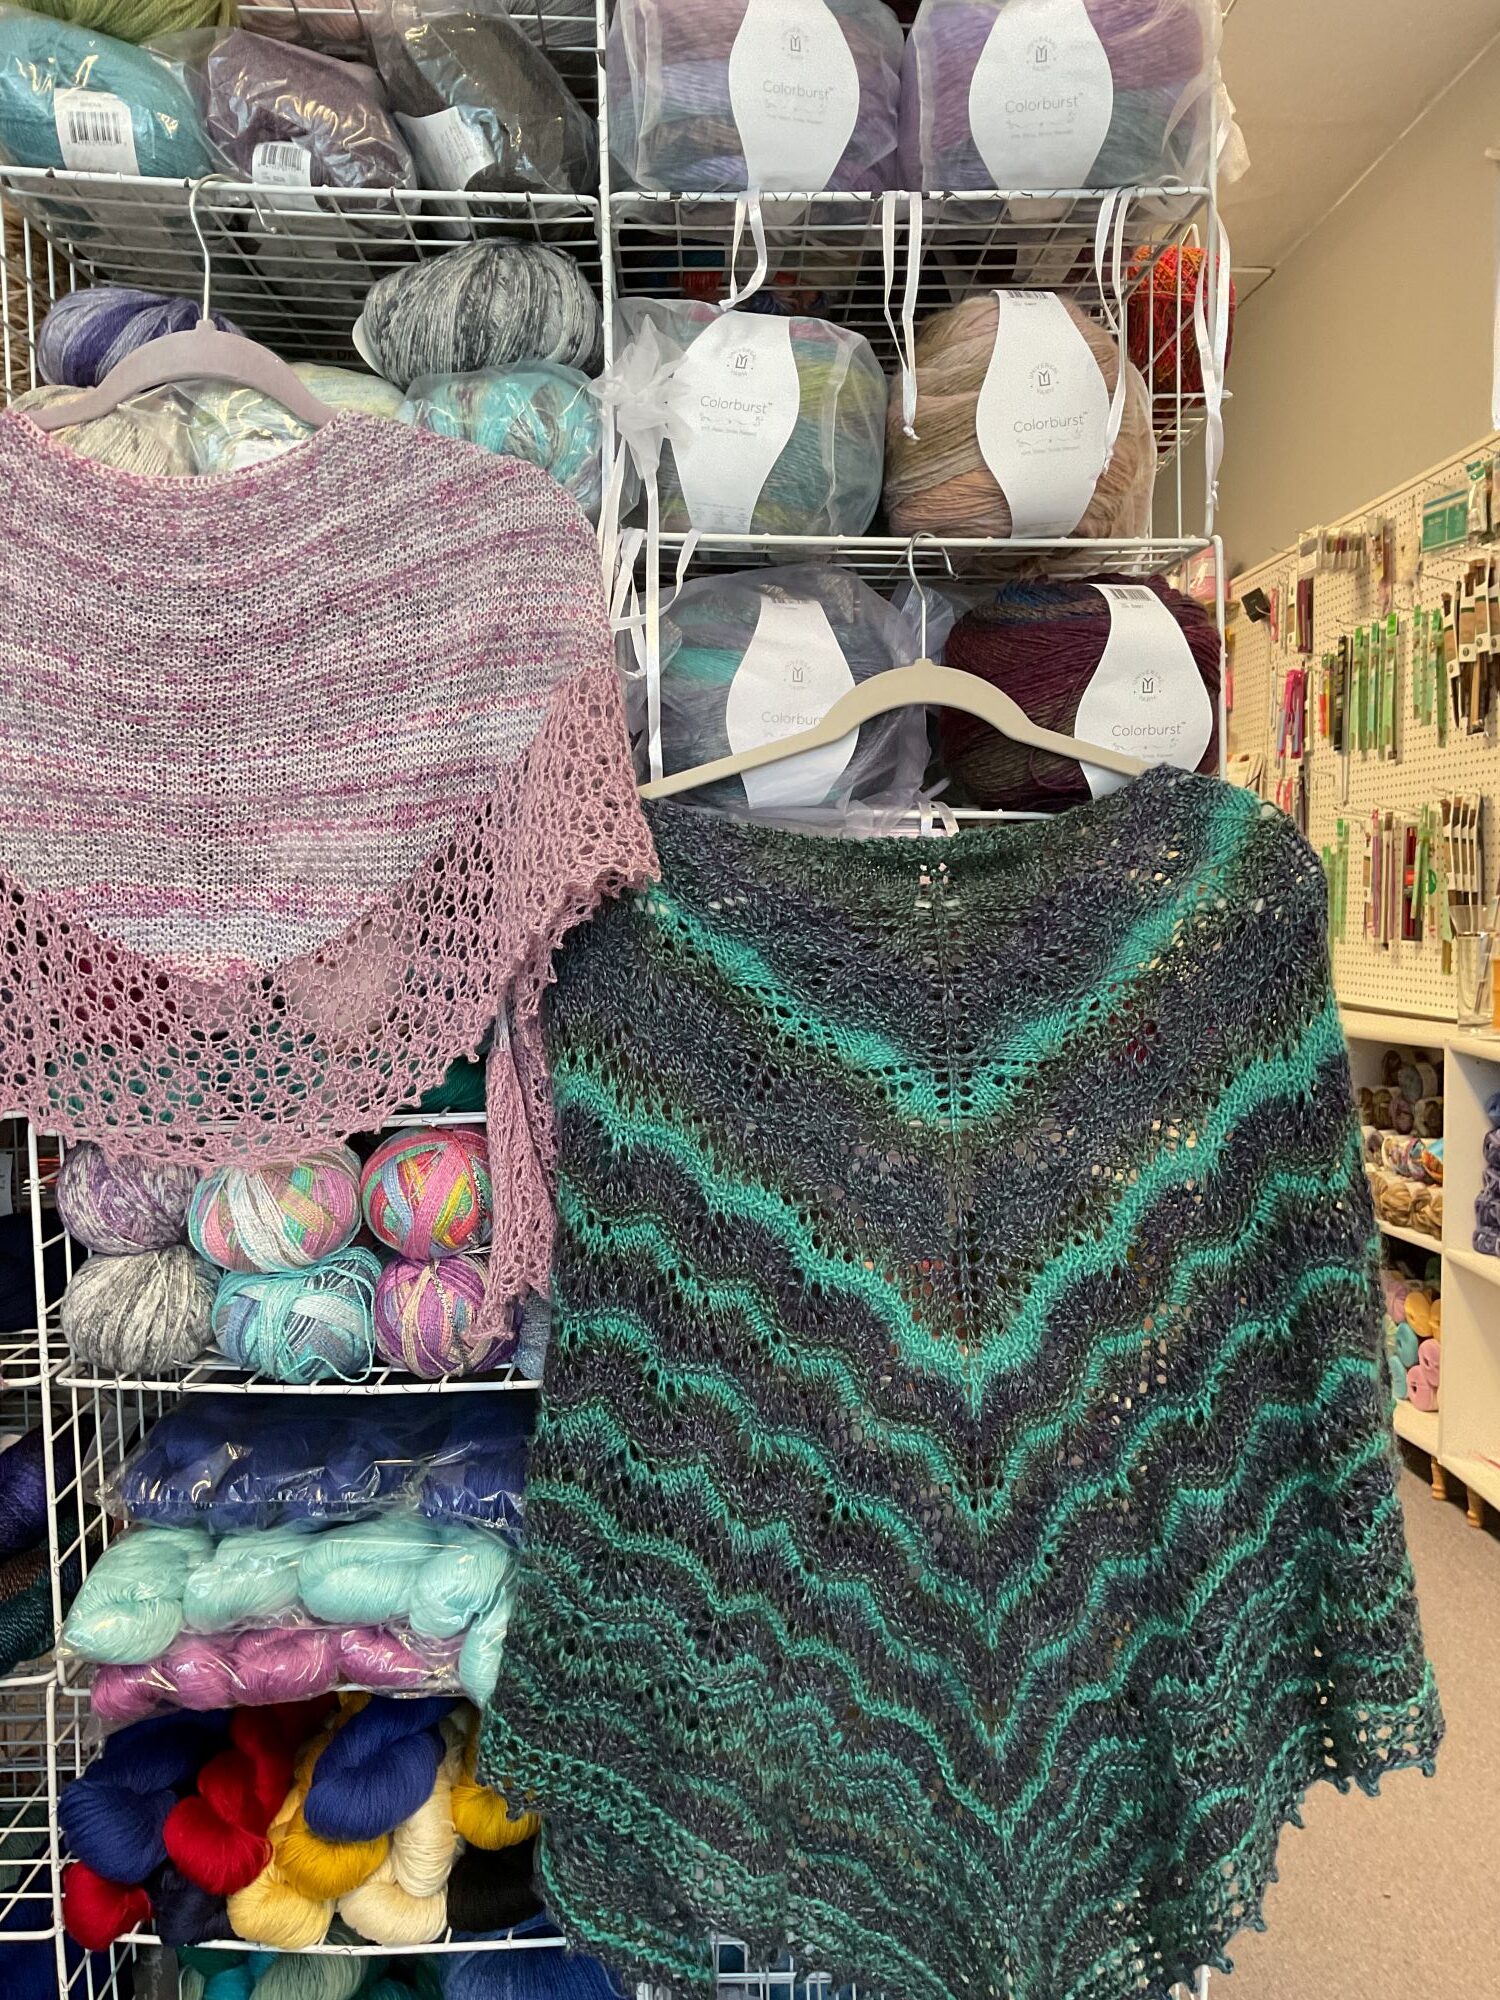
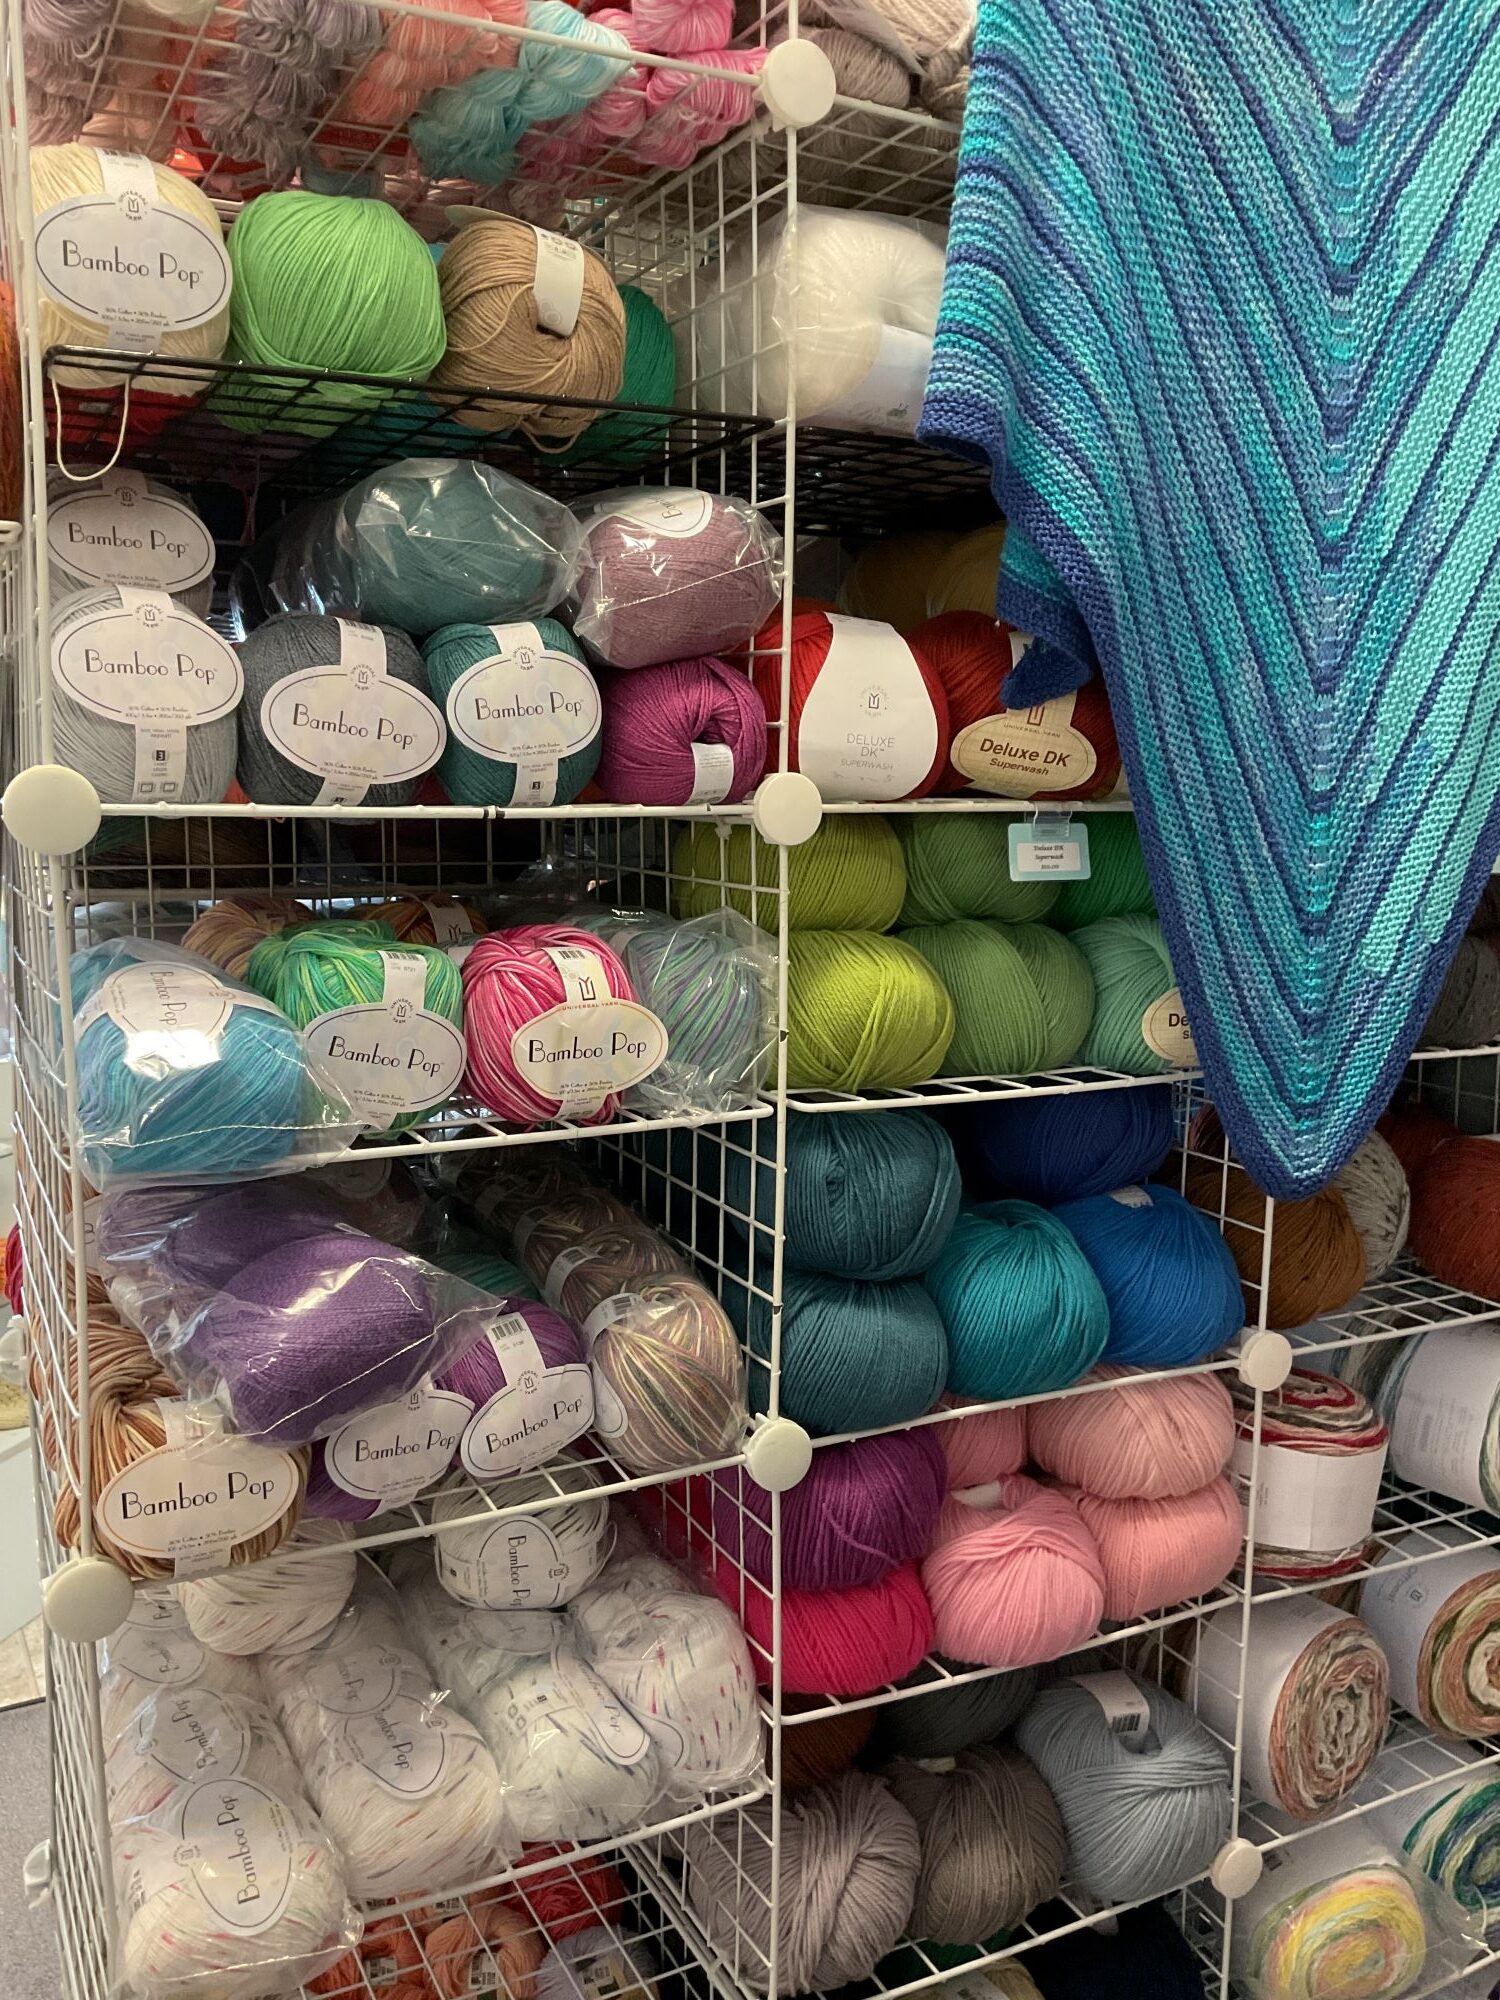
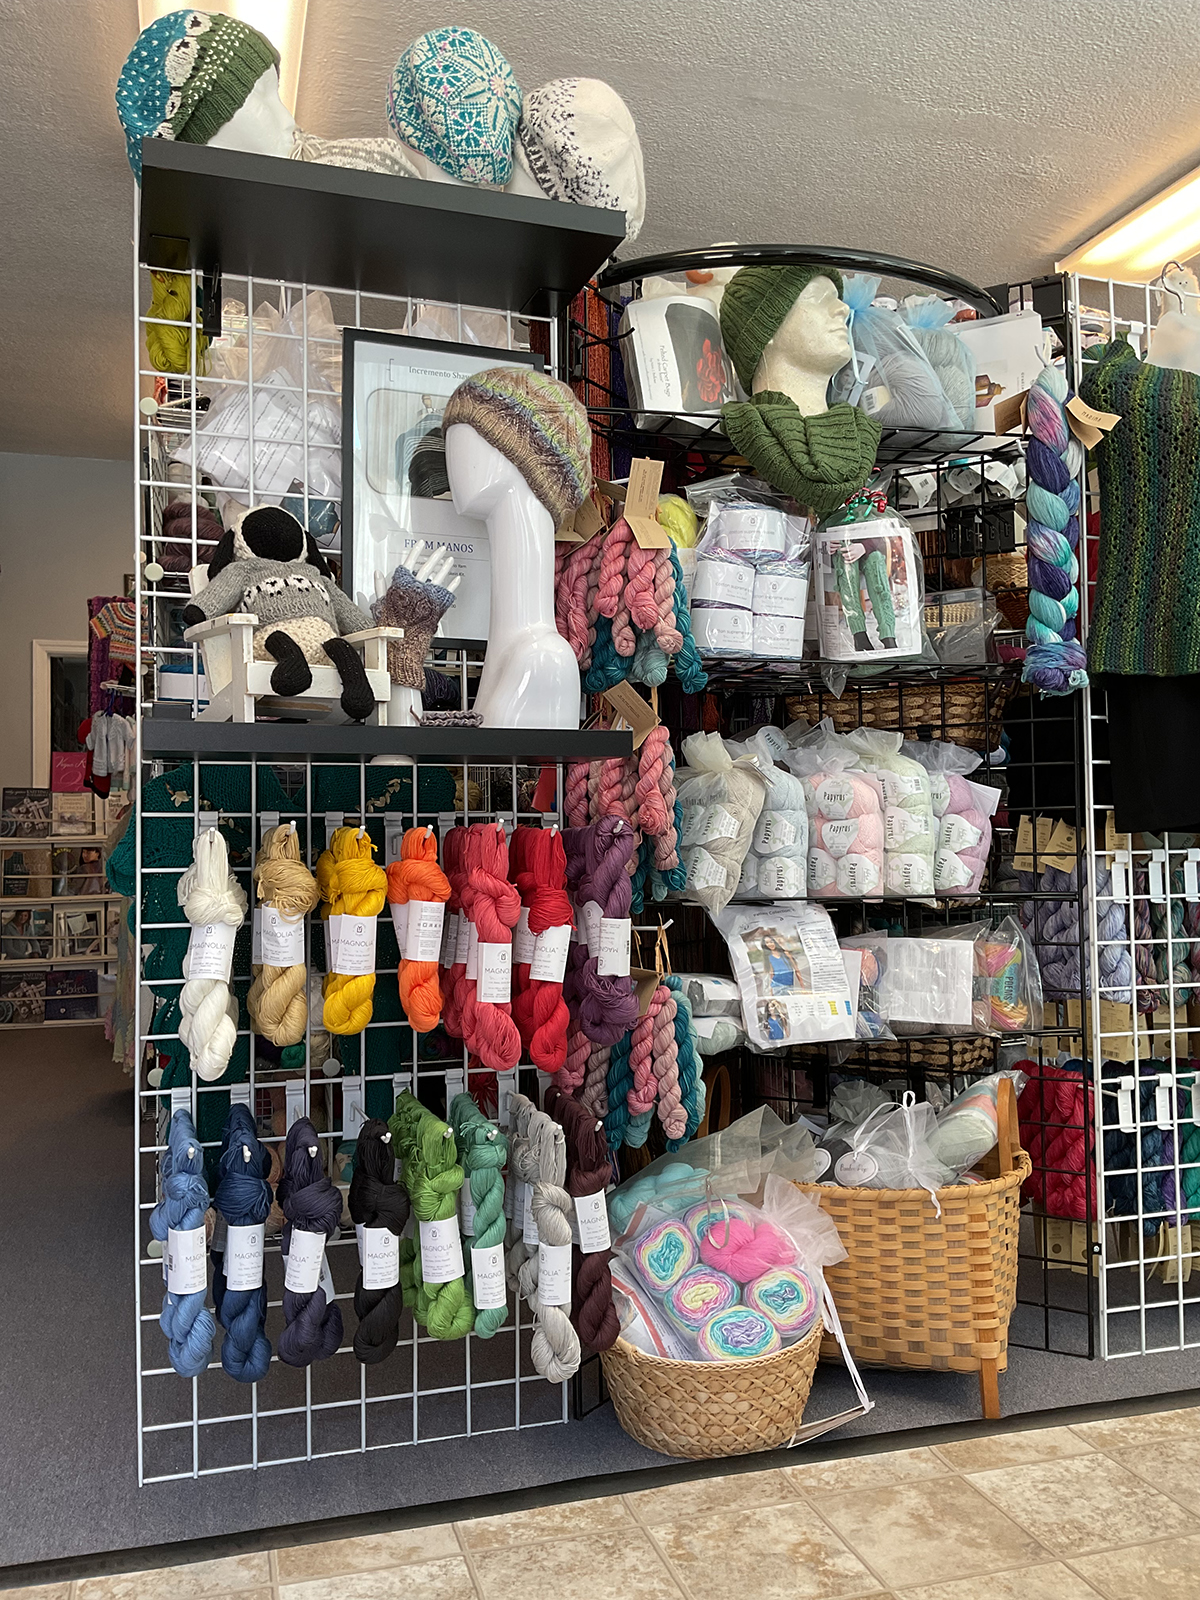
A beautiful shawl in ColorburstCustomer-favorite Bamboo PopSilky smooth Magnolia
The Tail Spinner has a variety of unique yarns, including some favorites from Universal Yarn, like Bamboo Pop, Colorburst, and more! Linda notes that shopping for a curated collection of fibers for her store is challenging due to the options available. “One of my biggest challenges, though, is not to buy every yarn I see and touch!” Relying on customer opinions is what she has decided to lean into, and that has certainly paid off.
The Tail Spinner is a great place for those who love to weave!
We are pleased to say The Tail Spinner has participated in Universal Yarn’s Trunk Show Program. These trunk shows allow shops to get pattern samples to show off at their store. “I’ve hosted at least two or more trunk shows per year, and customers love to see yarns in finished projects.”
We are so excited The Tail Spinner let us learn more about their one-of-a-kind store. It’s truly a pleasure of ours to see the way each and every yarn shop provides a community to fiber artists everywhere.
The Tail Spinner does offer shipping, so head to their website and shop your favorite yarns from Universal Yarn today!
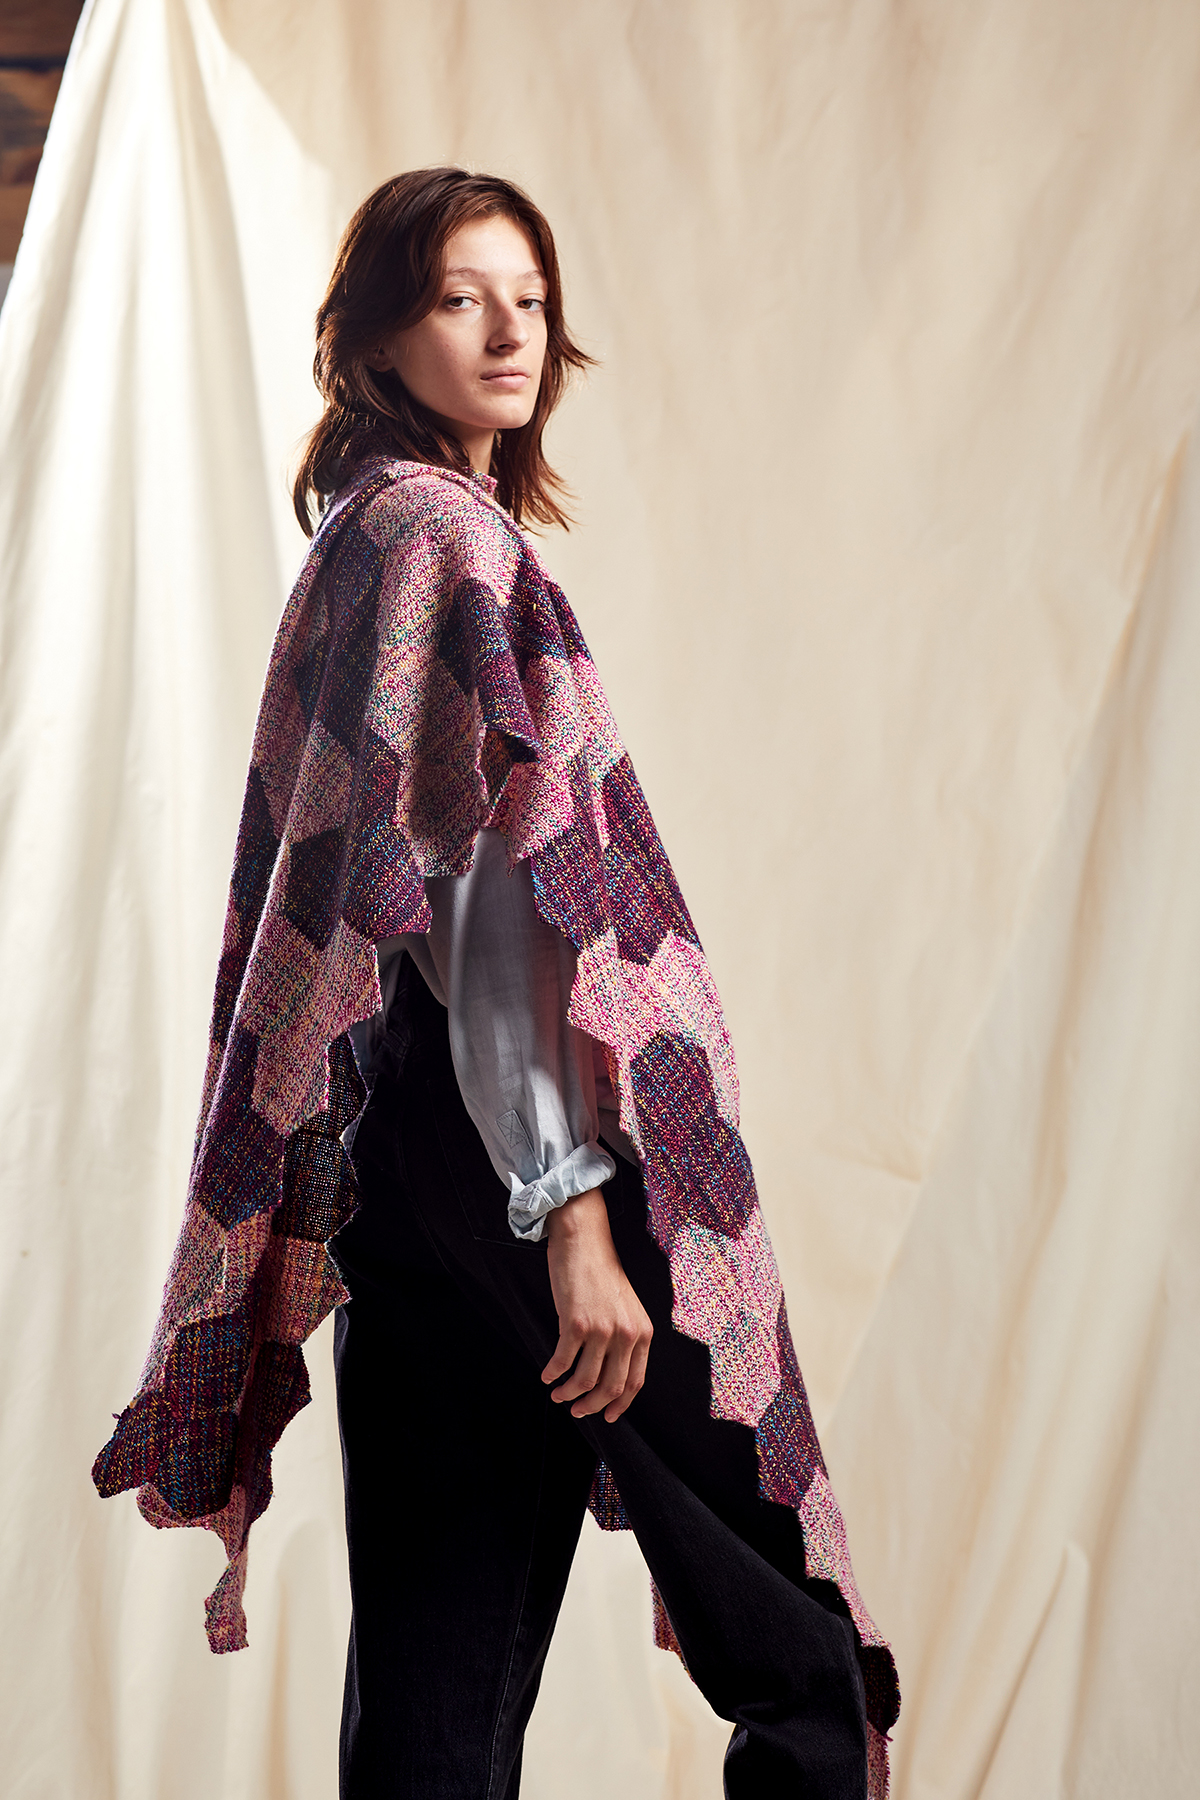
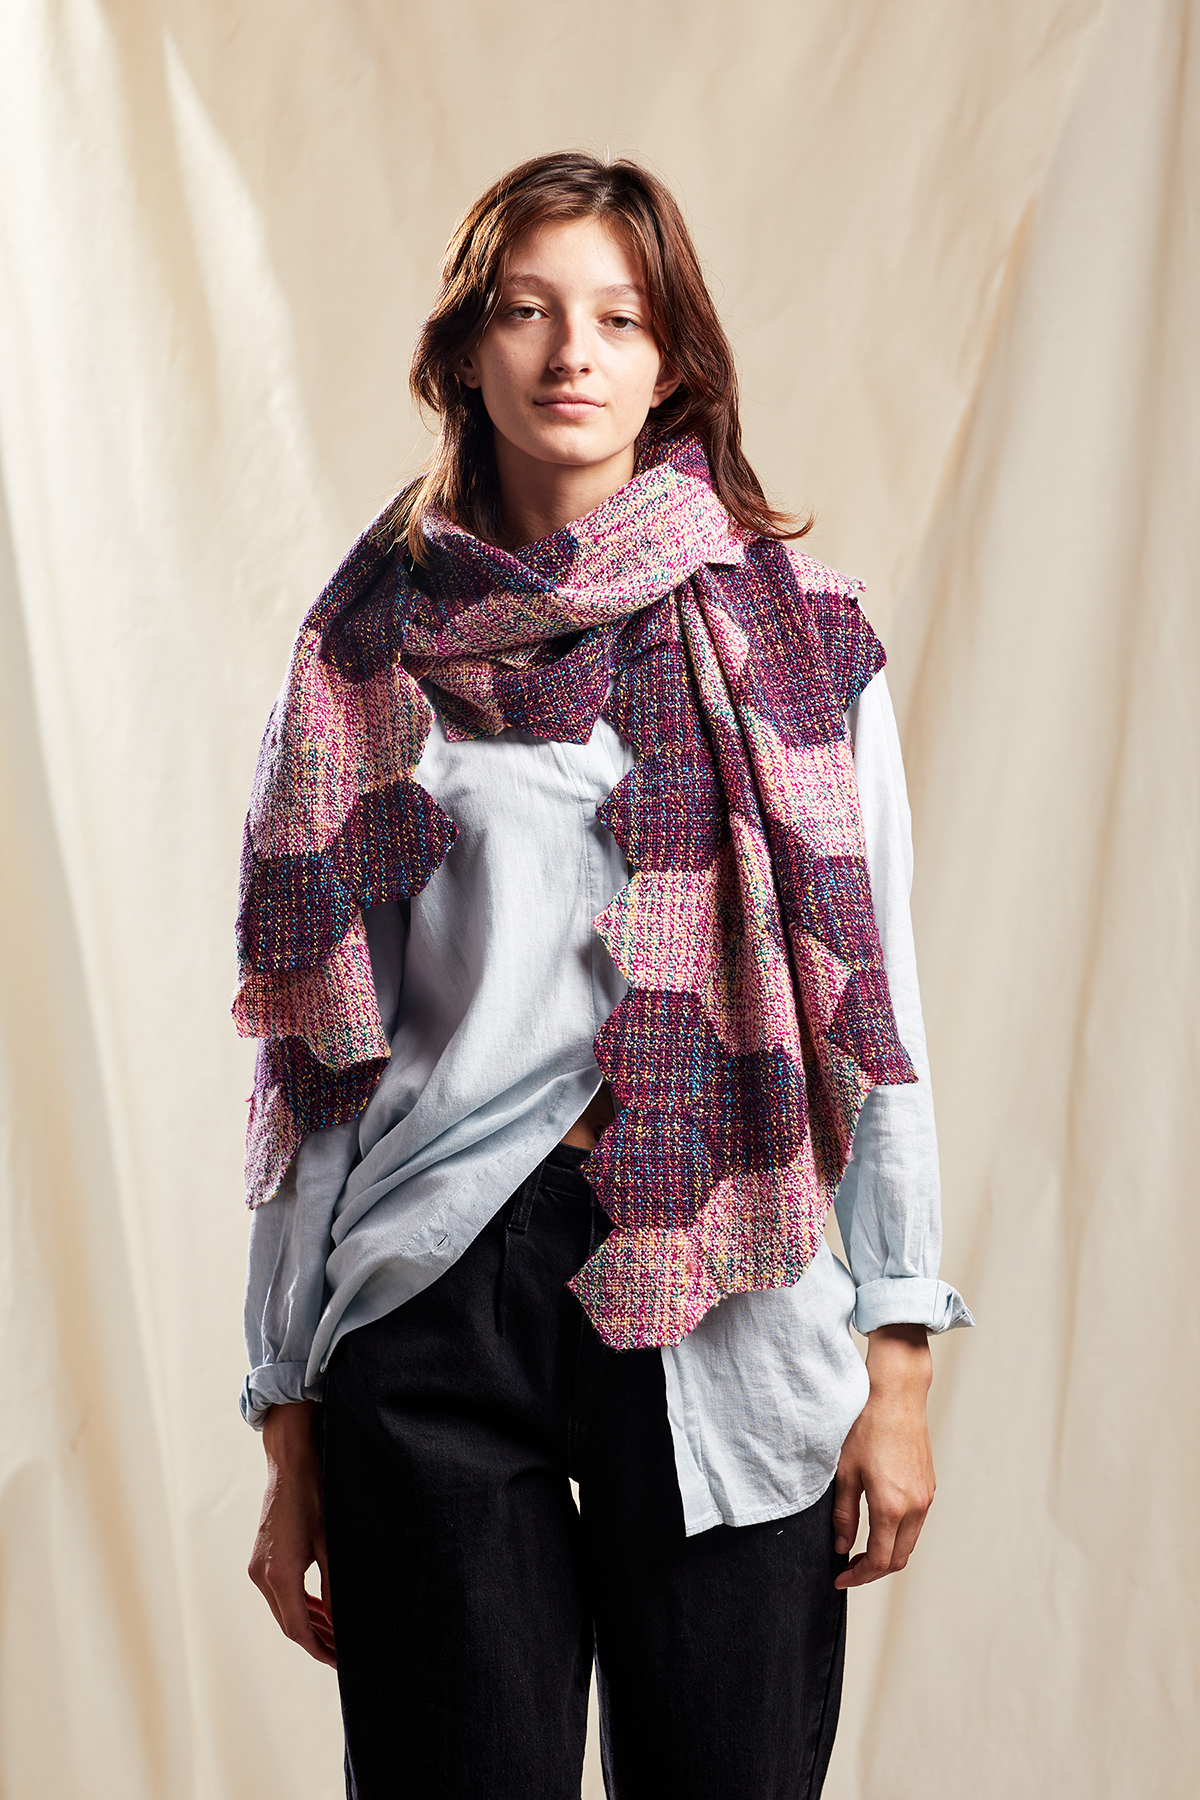
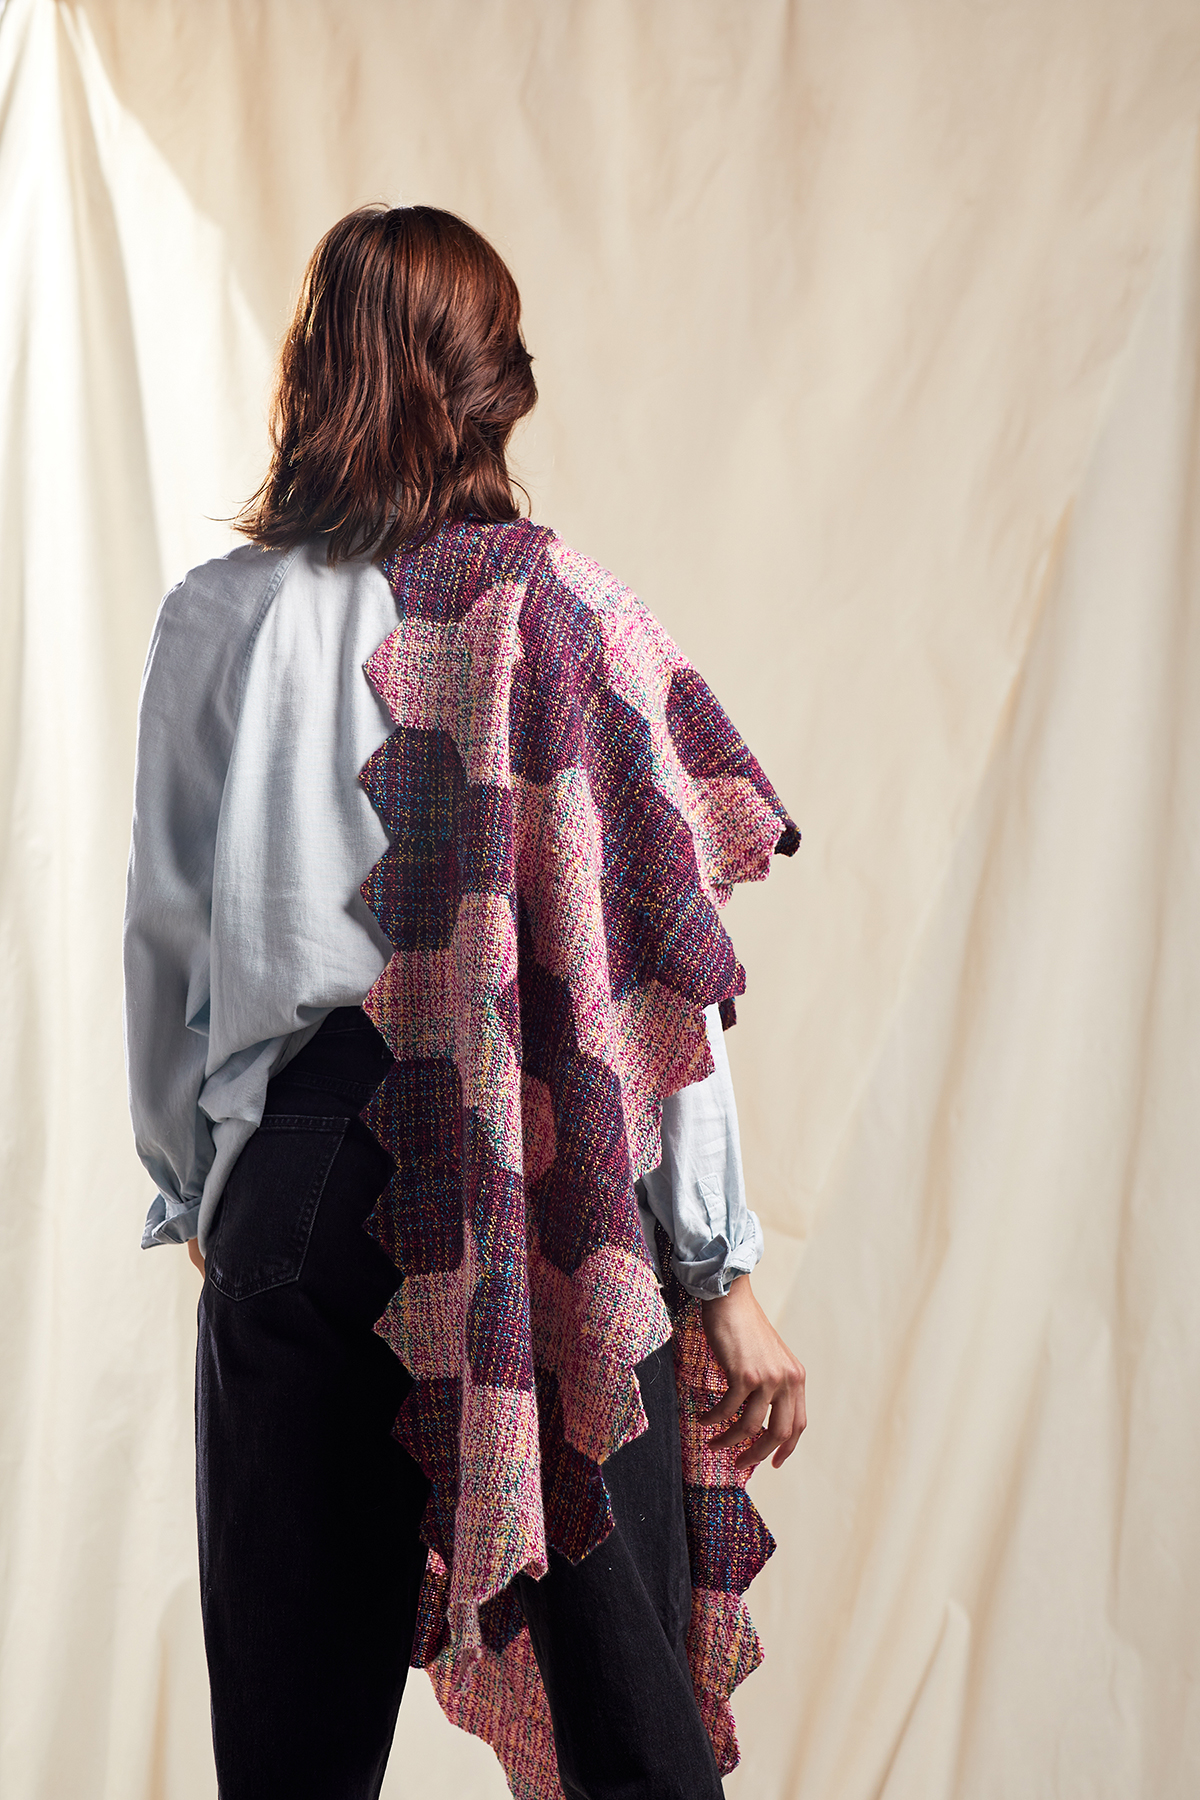
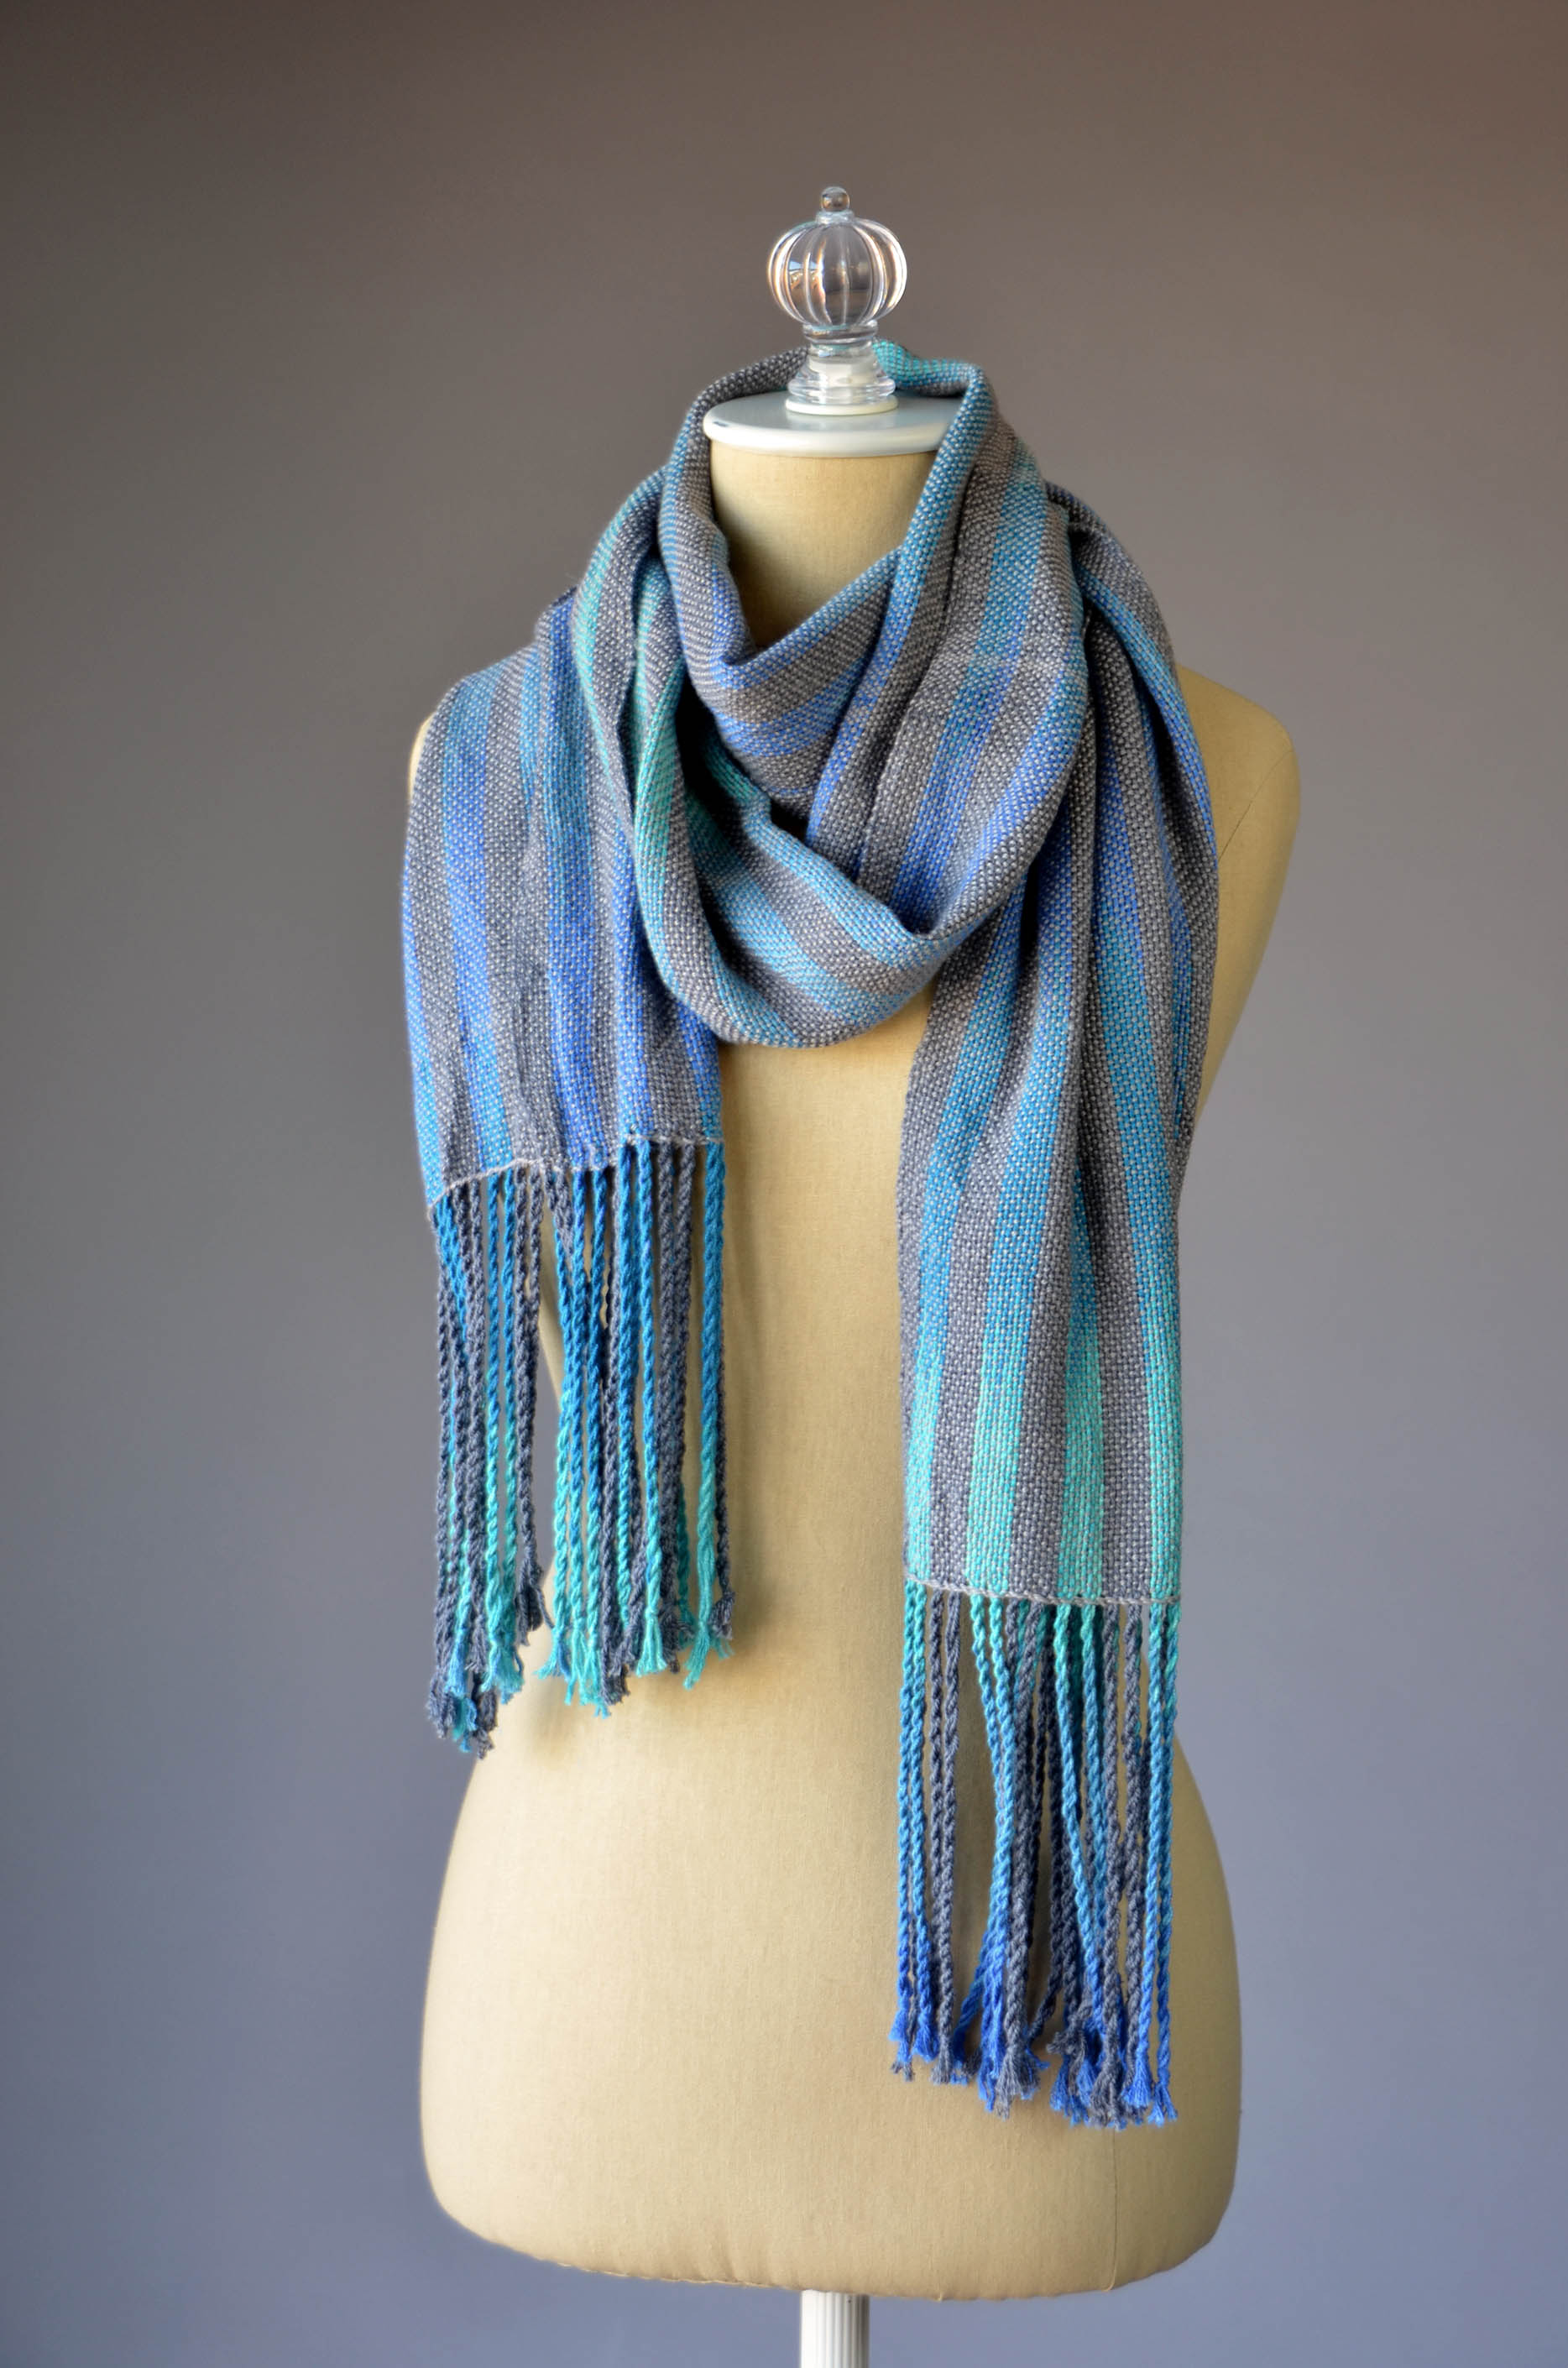
Have you seen our recently published free pattern, the extra special Pebbled Pathways in Cobblestone? Well, today we’re going to give it some well-deserved spotlight!
Pebbled Pathways (pattern link) has been in the works since late Spring, and I am so excited to finally be able to reveal this unique, gorgeous pattern! It is designed by Gabi van Tassel, who is known for her stunning pin loom designs. Her work has been published regularly in weaving publications, includingLittle Looms andHandwovenmagazines. We touch base on a semi-regular basis, and she always has wonderful things to say about our yarns and is such an enthusiastic fiber artist. As soon as we received Cobblestone, I knew I wanted to partner with her for a truly special project. I essentially sent her yarn, asked for some kind of wrap, and this colorful stole is the result! But, in addition to asking her to create this design, I asked her to write a guest post for our blog. So enough of what I have to say…let’s hear from Gabi herself!
From Gabi:
“It was a thrill when I received a small package from Universal Yarn a few months ago, with some brand-new Fibra Natura yarn and the question “Would you like to weave something with this?” I sure would!
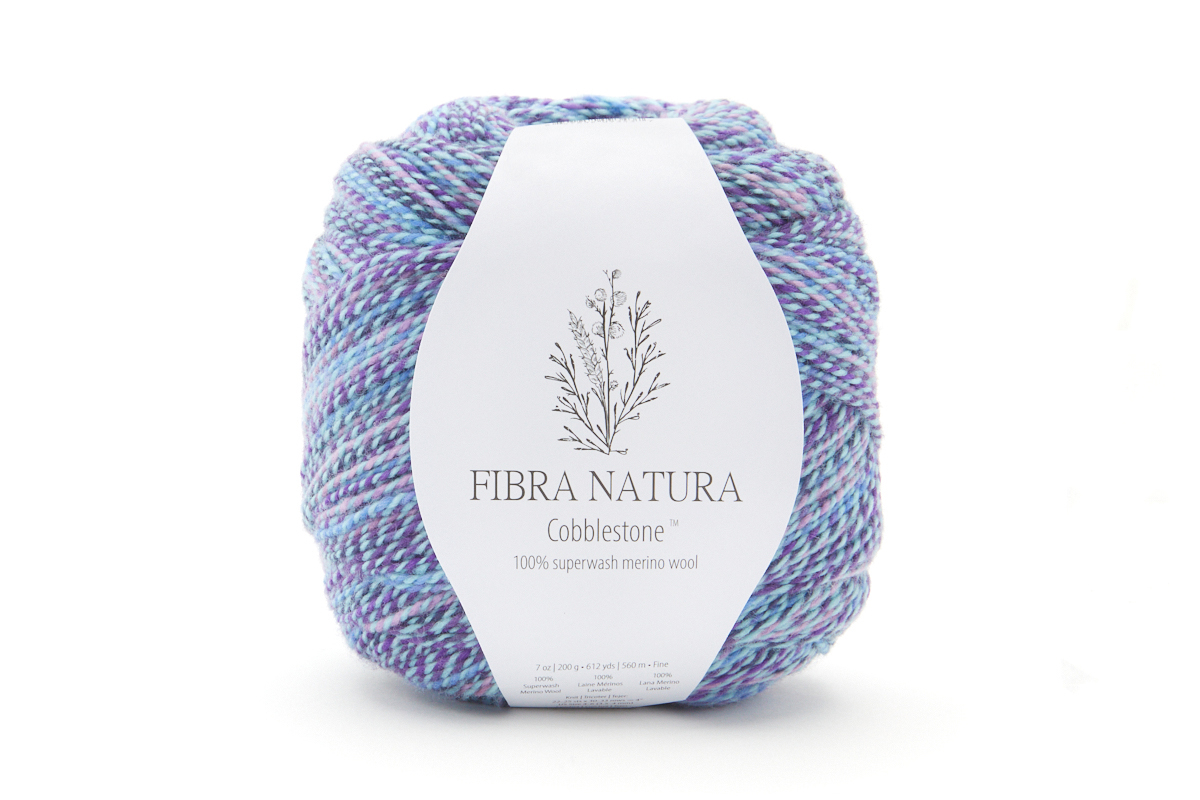
Cobblestone in #102 Precious Jewels
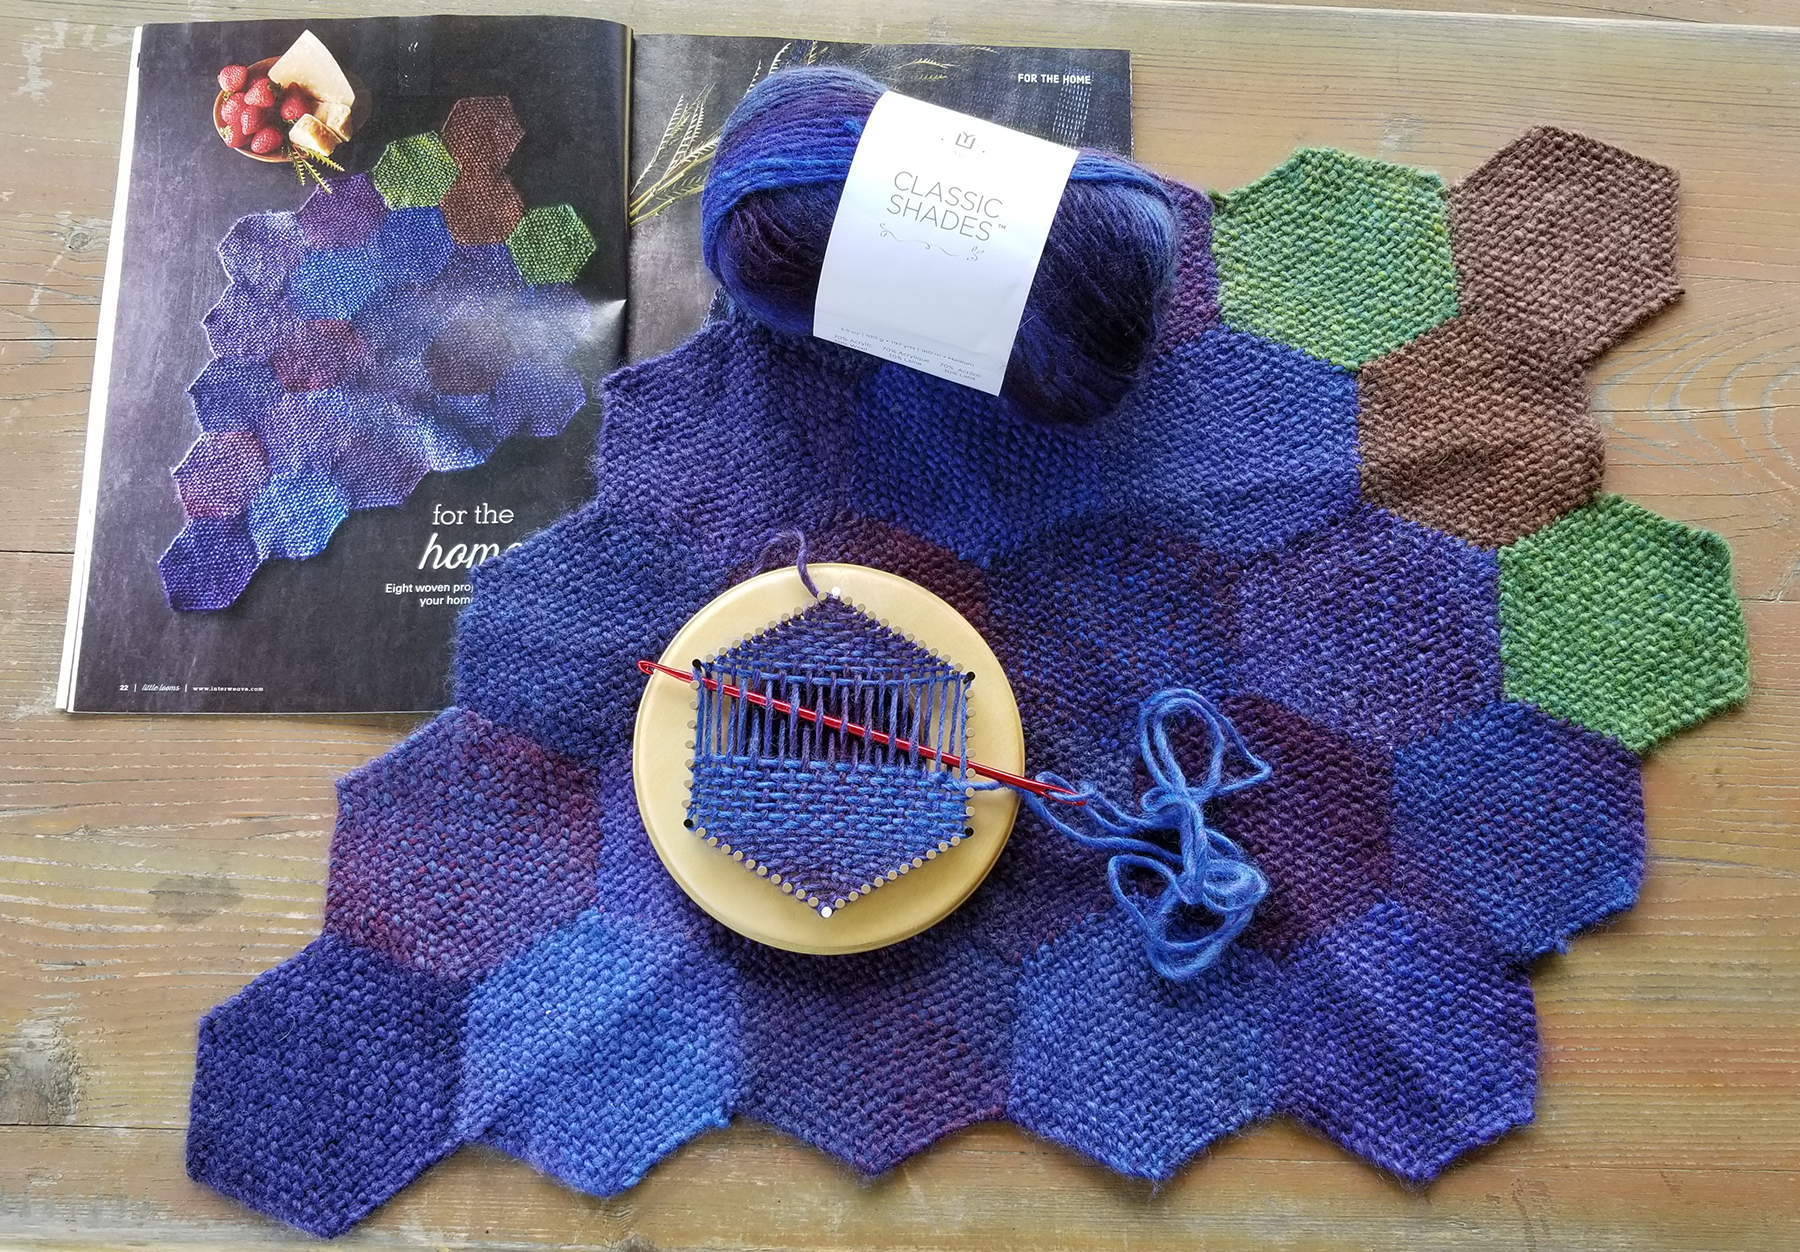
But let me quickly share with you how we got here: Among other crafts, I like to weave hexagons on pin looms. My first design using Universal Yarn was a Grape Table Topper, published in Easy Weaving with Little Looms 2018. I used Universal Yarn Classic Shades [now discontinued, but Colorburst is a great substitute] at the time, which provided the perfect color run to express grapes.
Back to the package that I received: The yarn was a sample of the new Cobblestone yarn, which hit me like a rocket with inspiration. The name reminded me of the old streets in Germany, where I grew up. I always loved the calming geometry of those streets, and I often thought about how each of these stones was carefully put in place by skillful crafty hands. I wanted to capture that meditative thought in a shawl with the new yarn.
In case you are not familiar with pin loom weaving, it is a form of weaving where the crafter uses a small handheld loom to create shaped fabric pieces. Traditionally, pin looms wove 4” squares, but today there are many shapes, including rectangles, triangles, diamonds, and hexagons, in multiple sizes.
Just because these looms are small, doesn’t mean that you can’t craft serious projects. Pin loom weaving is modular weaving. Join the smaller woven units to make any item that you can imagine … for example, Pebbled Pathways!
Hexagon Pin Loom
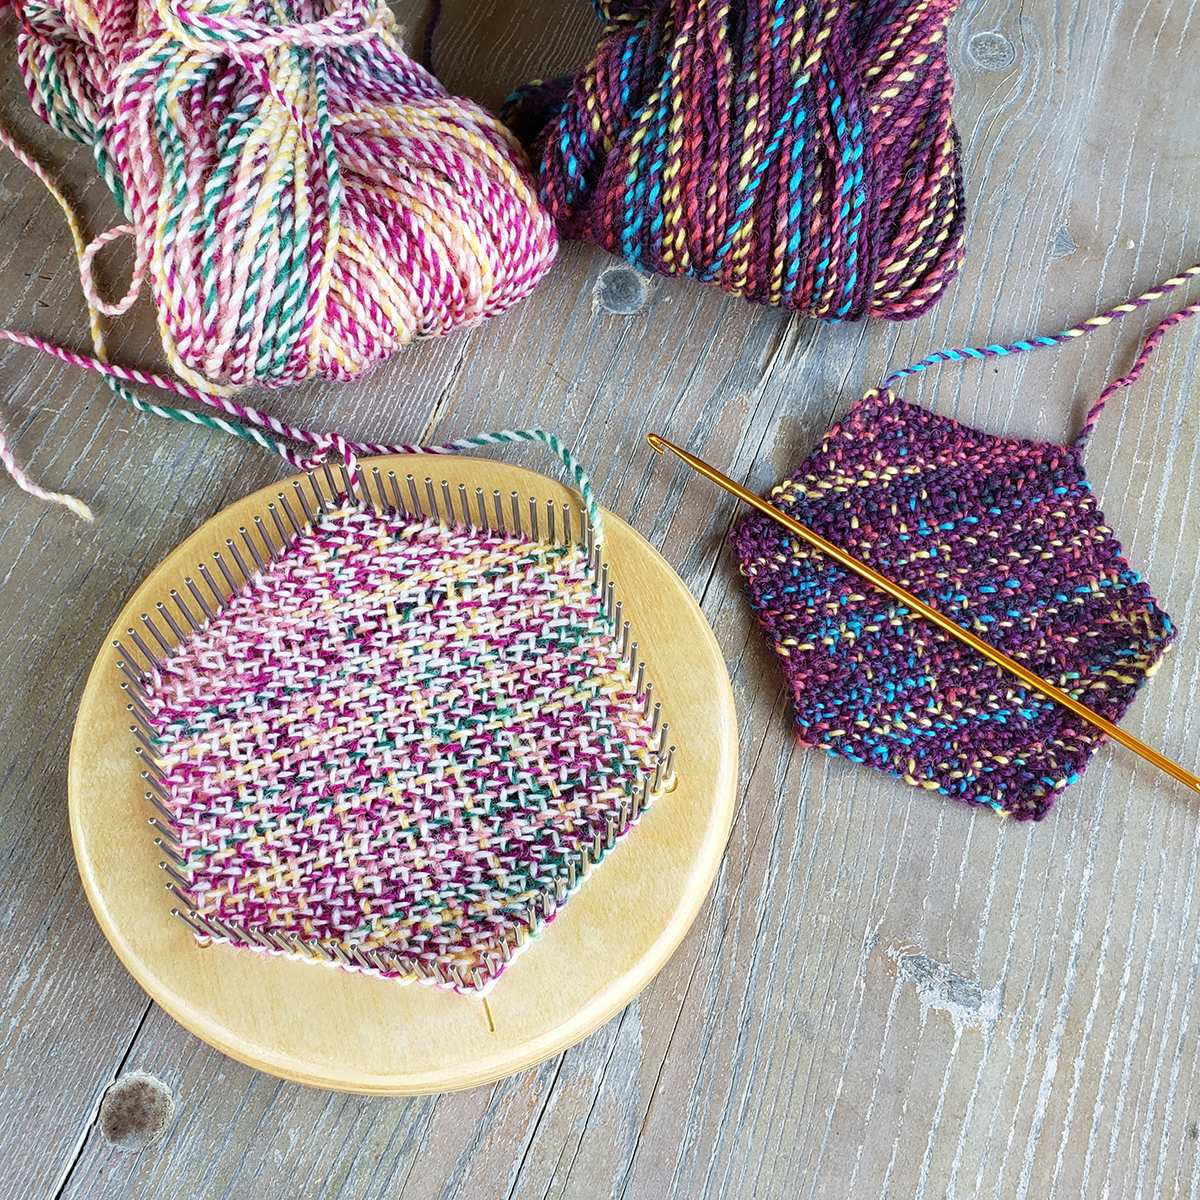
The shawl is designed to make the best use of two balls of Cobblestone. The put-up is a generous 200-gram ball boasting 612 yards of 2-ply, 100% merino wool. The project requires one ball each of colors 103 Mardi Gras and 104 Tulip, with about 1 oz of each left over in the end. You can choose any other two colors of course. I recommend that you pick colors with contrast, to maintain the cobblestone characteristics in the design.
Weaving is easy. All of the hexagons are plain weave, worked on the Original TURTLE Loom™ in “F-fine sett”. The vivid color changes of the variegated yarn make each hexagon unique. The colors are well-curated and distributed in a way that the hexagons blend in with each other to make a smooth fabric.
The yarn is a delight to weave. It is soft and glides well while pin loom weaving. It has just the right amount of elasticity, not stiff and not too stretchy. The light twist is perfect to gently bloom into a nice, soft fabric with a good drape.
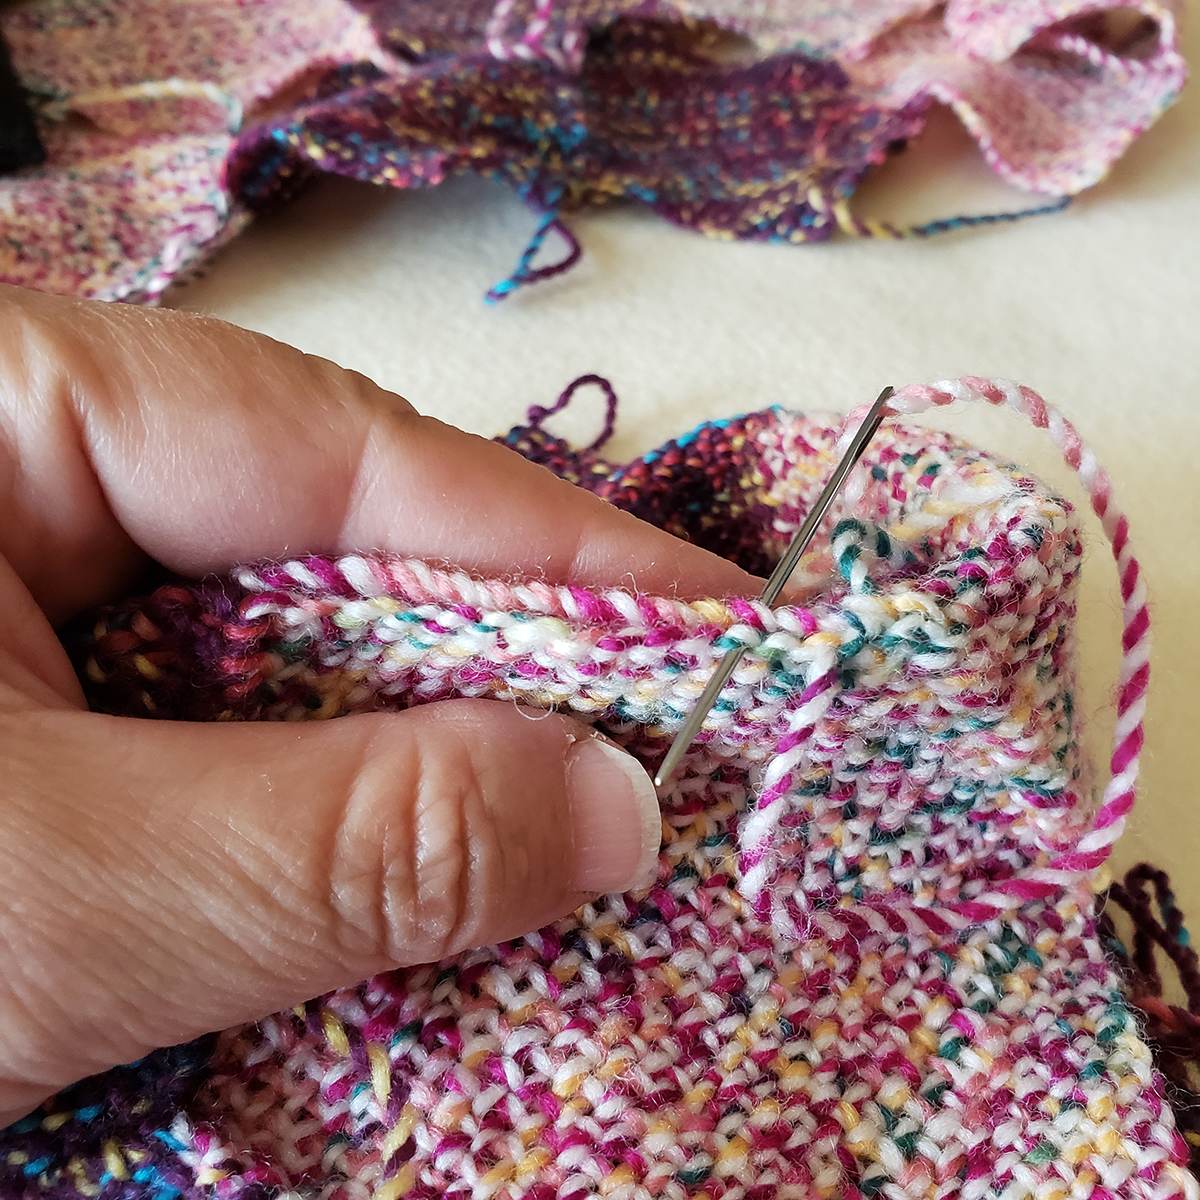
Crafters sometimes hesitate the task of joining pin loom woven shapes. However, hexagons are actually easy to join because they have smooth edgings. The sides are short enough to hold by hand: just match up two hexagons by their sides and sew them together with about 10-12 whip stitches.
If you would like some help with joining hexagons, check out the video “Joining 101: Sewing Two Hexagons Together” (https://youtu.be/PuD2wv1DdIo). Or, if you are interested in the mattress stitch, see the joining part of “Making an Elf Basket”.
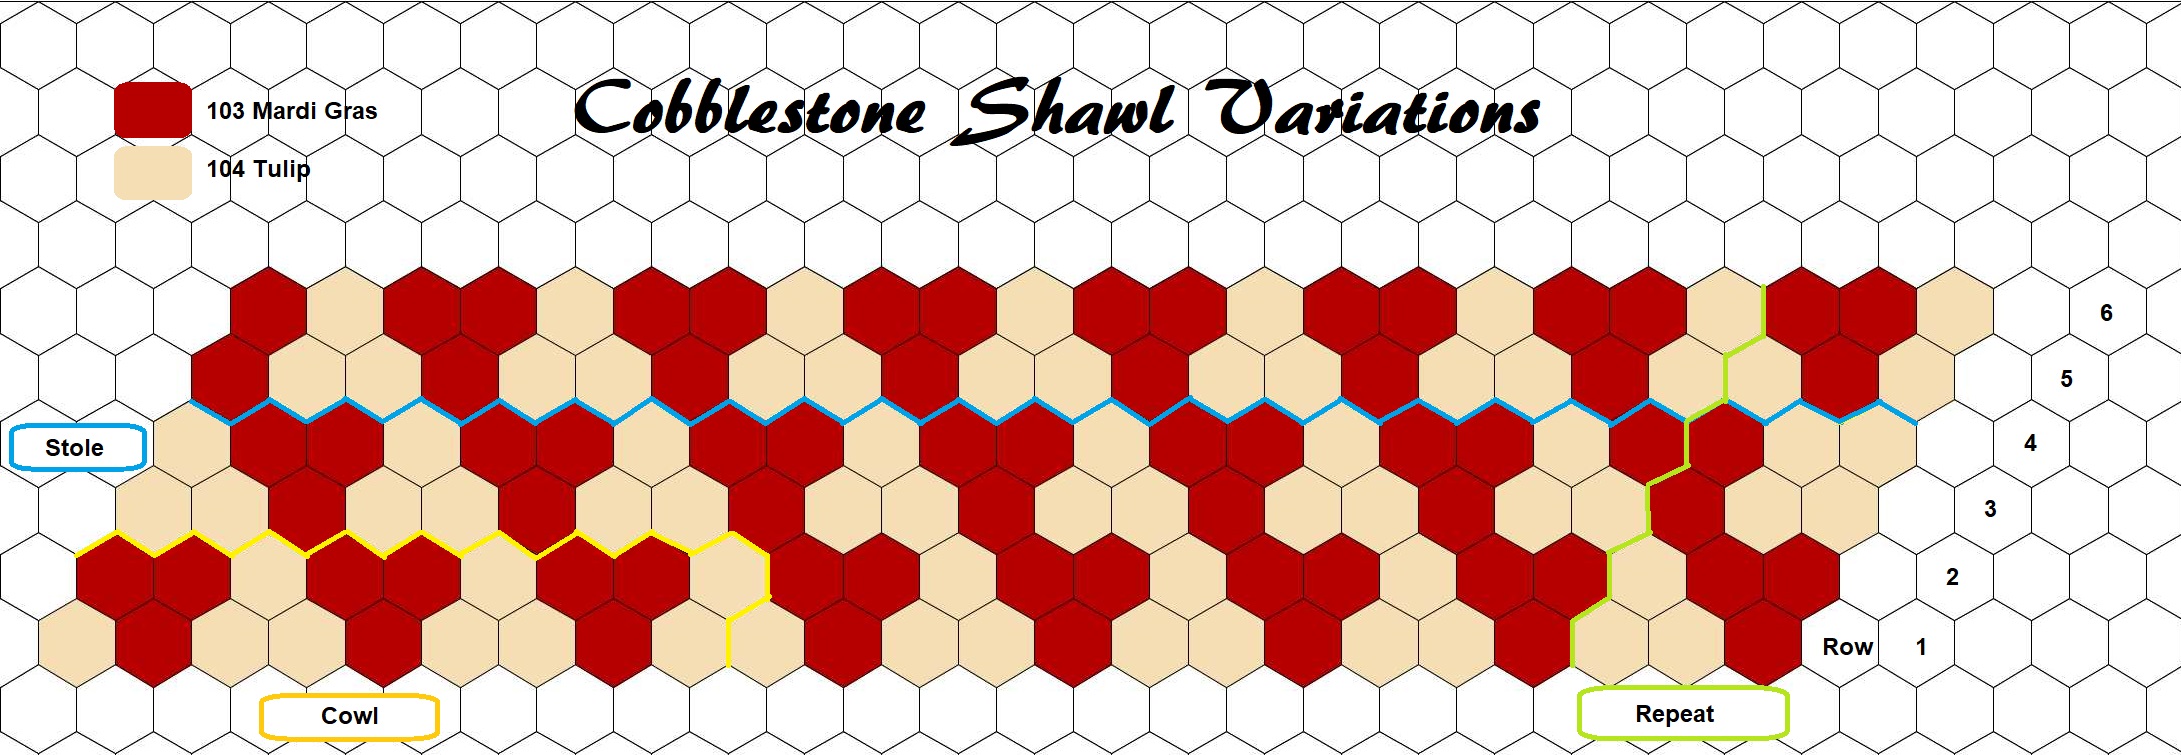
If you don’t feel like weaving through two whole balls of Cobblestone, let the modular character of pin loom weaving come to the rescue! You can make a slimmer wrap by weaving only four rows instead of six (blue marks).
You can shorten or extend the length of the shawl by easily adding or subtracting a repeat of three hexagon columns (green marks).
Or – if you wish to make a small project at first – you can make a cowl, two rows high and nine hexagons in the round (yellow marks). Now, if you decide to make a cowl … and you like it … make another one for a friend … make a few as holiday gifts … Did I mention that there is a rabbit hole here?
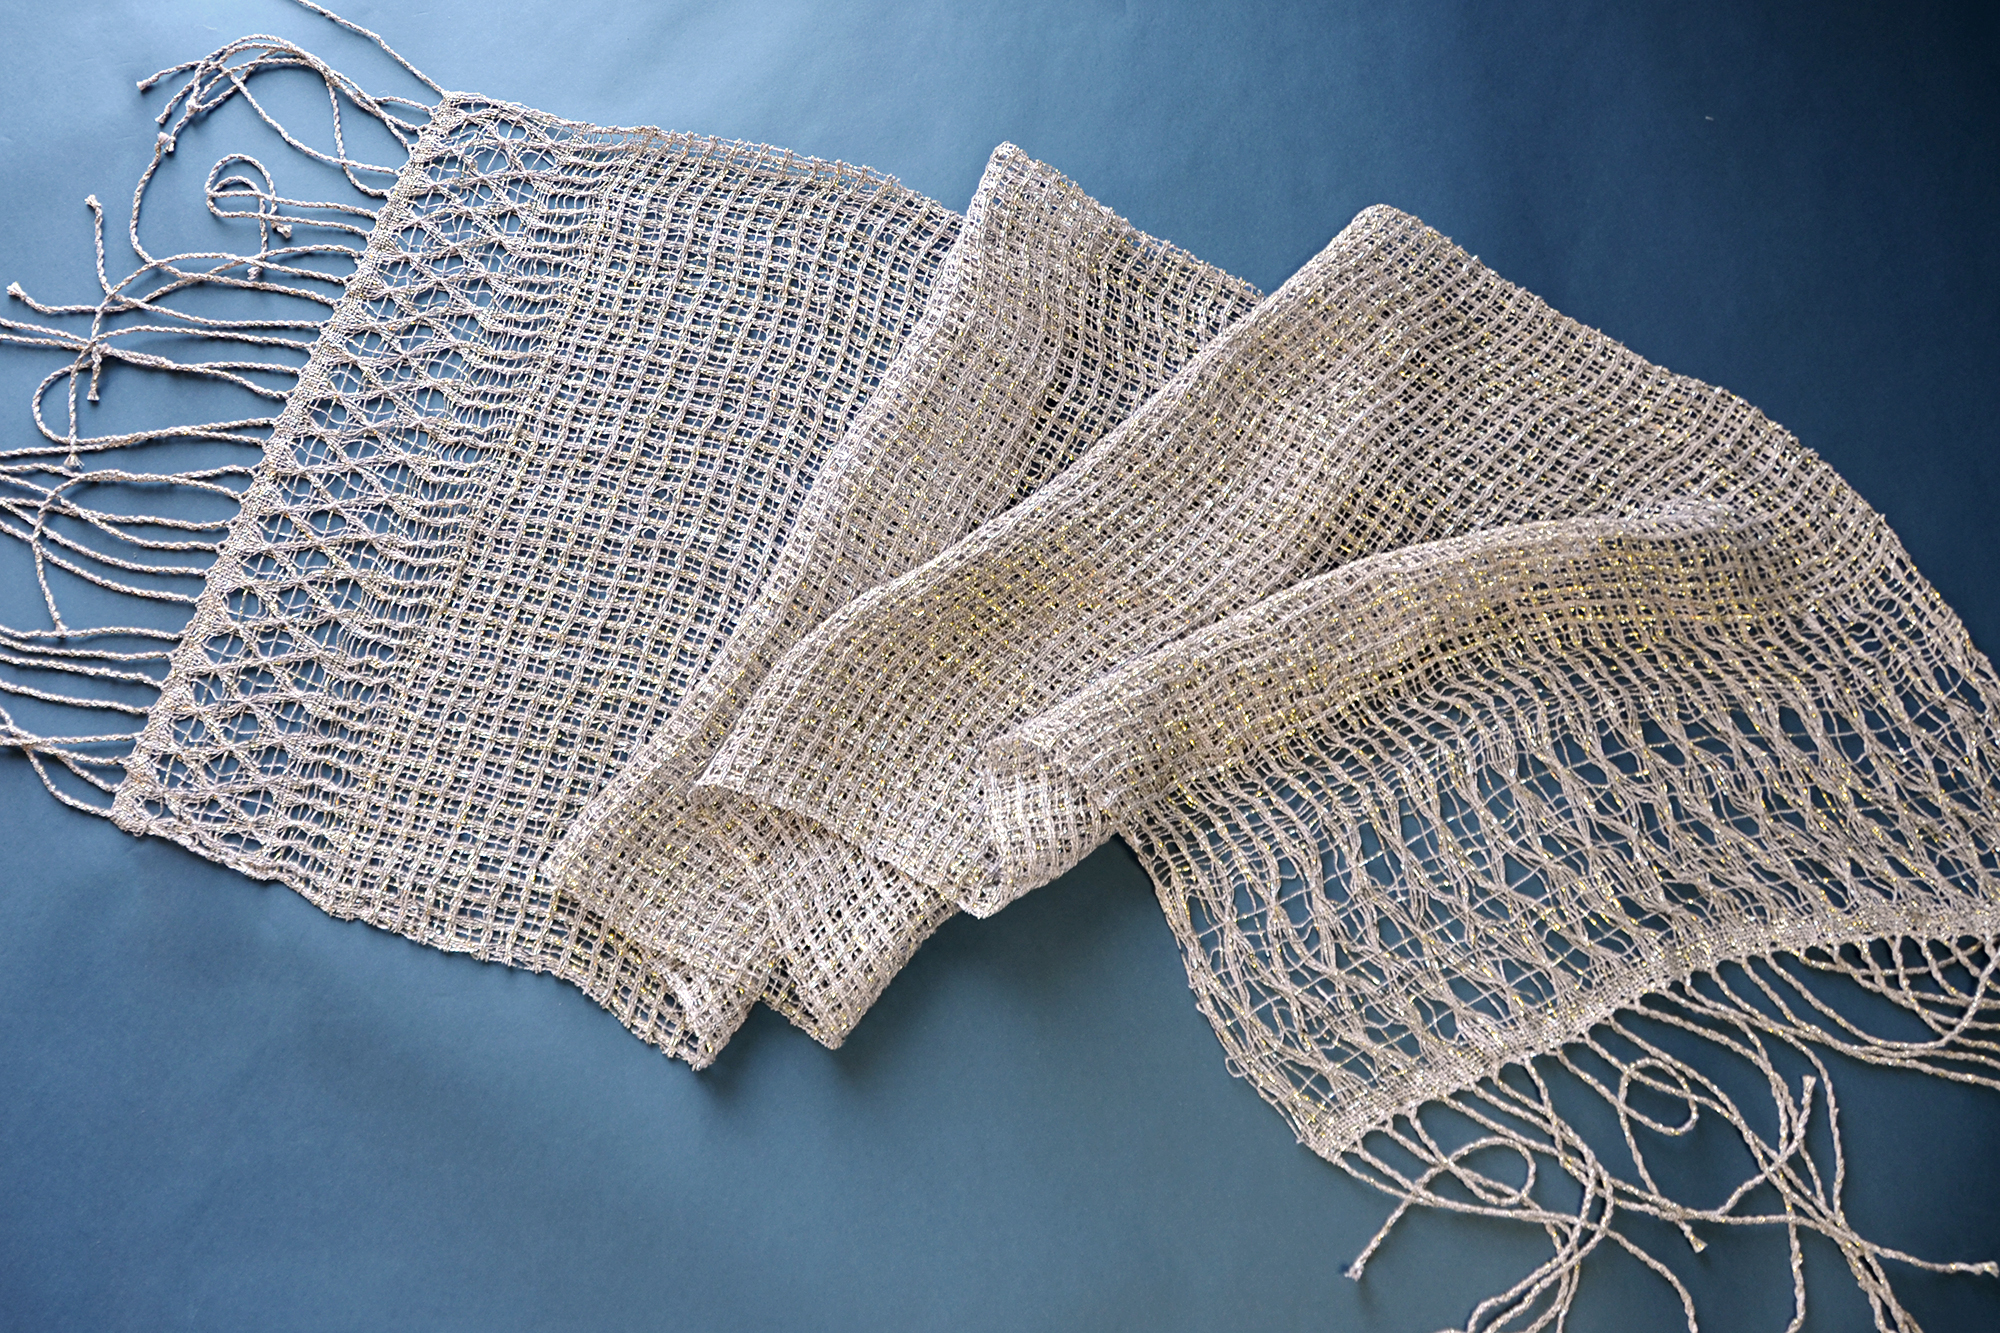
Sparkle Windows woven scarf by Amy Gunderson
Many of Universal’s yarns are well-suited for weaving, and the Pebbled Pathways wrap just might be the beginning of more “oh, look what you can make” weaving projects. There is already Amy Gunderson’s beautiful Sparkle Windows shawl in Universe.
Next, Bamboo Pop is a popular yarn in the rigid heddle looms community because of its ease to weave, the lovely drape, and the stunning color effects. Then, there is also Ravello for a project with a touch of luxurious cashmere. Or, you could try the very practical Rico Design Creative Bubble that inspires pin loom woven kitchen and bath accessories.
Got a loom? Let’s weave! “
Me again (Rachel)! I’m so glad Gabi was able to share not only this beautiful design, but her thoughts on the inspiration, our new Cobblestone yarn, and even more yarns to explore weaving with! We have a small, square pin loom here in the office, and I am pretty tempted to start playing with it. The idea of a fringed scarf or cute cowl is awfully tempting!
I hope you love Pebbled Pathways as much as we do. Have you woven before, or are you now inspired to? Let us know in the comments!
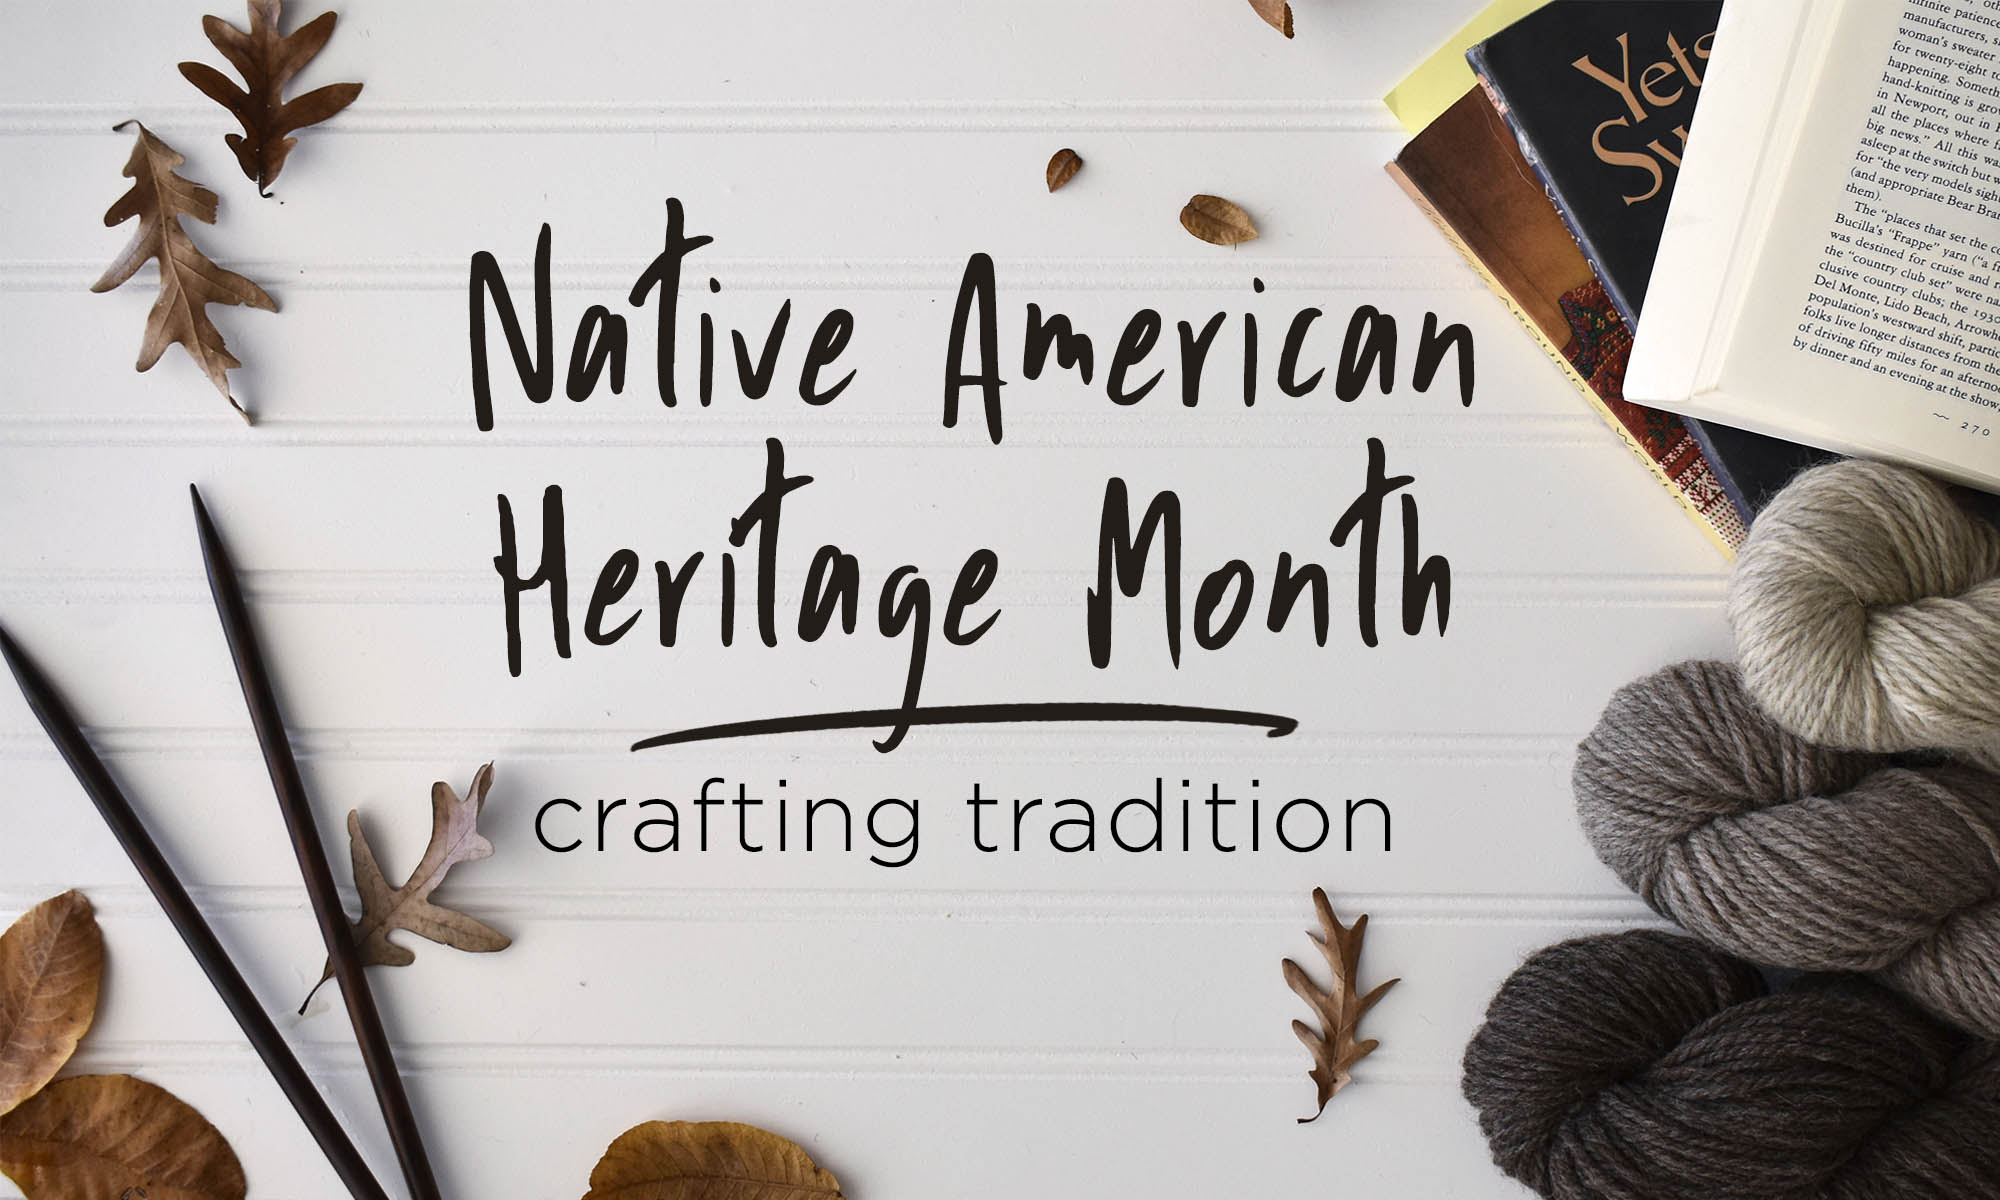
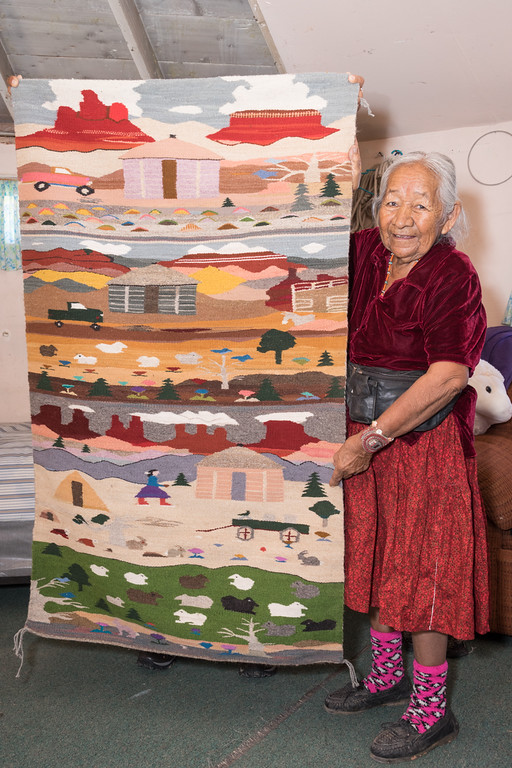
Today is Thanksgiving – since it is a national holiday in the United States, many of us will be spending the day with friends and family. Not only is today Thanksgiving, but November is also Native American Heritage Month. As such, I’m taking some time to talk about the incredible textile work of indigenous Americans.
Disclaimer: this is in no way a comprehensive overview. I am touching on only a few things. I could go on for much longer than I will, and I’ll happily include some information for further reading.
When I initially decided to use today’s post as a platform to touch on Native American Heritage Month, my brain went to knitting – it always does. I wanted to look into traditional Cowichan sweater knitting. Okay – I know we’re based in the US, and that today is a US holiday, but the first tradition I’d like to talk about originates in Canada. Anyway – these iconic sweaters originate from the Coast Salish people of British Columbia.
Indian Sweater Making By The Charlie Family, ca 1946. Image from: Royal BC Museum Archives
During the mid-nineteenth century, European settlers introduced domestic sheep and the craft of hand-knitting to the region. In an excellent overview of the history of Cowichan Knitting (pdf link), Margaret Meikle explains that native women skilled in handcrafts likely taught themselves to knit, working from samples available to them from the European settlers. Although the first Cowichan sweaters were solid-colored, Fair Isle sweaters influenced the colorwork these sweaters are known for early in the twentieth century.
In her book Knitting Around the World, Lela Nargi explains that the yarn used to create these sweaters as thick, handspun, single-ply, and naturally colored. These sweaters are as utilitarian as they are attractive. They are hardy and perfect to withstand cold, wet climates. They also feature beautiful patterning – each symbol with a story behind it.
Yetsa’s Sweater
In the children’s book, Yetsa’s Sweater(pictured above), author Sylvia Olsen demonstrates how the sweaters are personal. In the book, Yetsa’s grandma explains that the sweaters tell a story about family. I’d recommend checking out this book if you’re looking to share your love of knitting with young people in your life, but there is no shame in reading it as an adult!
Yetsa’s Bolero; pattern by Sylvia Olsen
If you now find yourself dreaming of a Cowichan-style sweater, I also discovered that Sylvia Olsen also wrote Knitting Stories, a book featuring Salish-inspired designs including Yesta’s Bolero – a perfect match for Deluxe Worsted Naturals (Pewter and Millet, anyone?). There are many interpretations of Cowichan sweaters on Ravelry. One in particular I like is Jane Richmond’s West Coast Cardigan – which she describes as being “inspired, in respectful admiration, by the Cowichan Sweaters that are abundant on Vancouver Island and are a tradition of the Coast Salish people” and clarifies that the design is not a real Cowichan sweater, only inspired by this traditional style. For her design, I’d recommend holding two strands of Deluxe Chunky Naturals together as one to obtain gauge.
In Alaska, the Tinglits Chilkat people created beautiful Chilkat blankets. Made for movement, these blankets feature long-fringed borders that swayed beautifully with the dancers who wore them during ceremonies. The designs displayed on the blankets are the crests of the family or groups for whom they were woven. These weavings were made from mountain goat hair that was handspun and dyed naturally. The art of Chilkat blanket weaving was a dying craft, but Jennie Thlunaut (pictured above) is single-handedly credited for keeping the tradition alive.
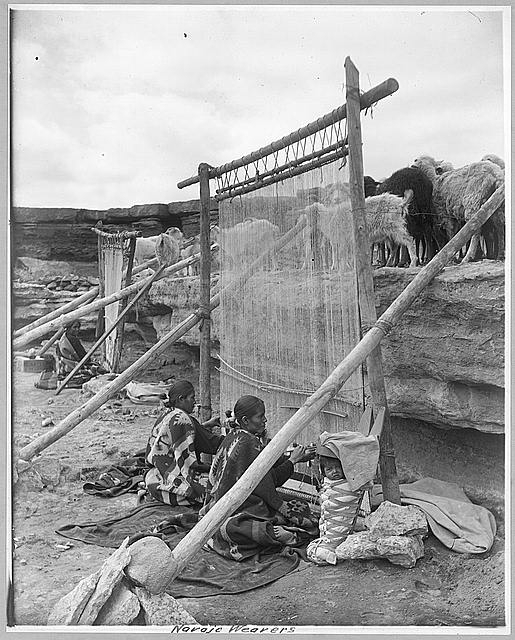
Navajo Weavers, ca 1914 from Library of Congress
Based on my reading, it seems well understood that the Pueblo people were weaving centuries before the European invasion of North America. Their weavings were made from plant fibers, such as cotton and yucca, but it was not uncommon for human, dog, and wild animal hair to be incorporated, too. When Spanish settlers introduced Churro sheep to the region, wool began to replace cotton in textiles. When the Pueblo and Navajo people encountered one another during the seventeenth century, the Pueblo shared their knowledge of weaving with the Navajo.
Navajo weaving master Clara Sherman
Because the Navajo were largely nomadic, working with sheep and wool was well-suited to their lifestyle. The Navajo primarily created garments and blankets; however, in the late nineteenth century the political climate was harmful to the people and changed the purpose of their craft. This is when Navajo rugs became popular, and they remain that way today.
Danielle Hena, a curatorial intern at the Wheelwright Museum, explains that “stories, curiosities, and beauty are carried within each textile: stories from history, curiosities that will continue to be curiosities, and beauty that was transferred from a weaver’s vision to the viewers.” She perfectly sums up what makes the rich textile heritage of indigenous people so unique.
Feeling inspired? I know I am! I’d like to share an inspirational resource I uncovered while writing this post: the organization Adopt-a-Native Elder’s Rug Program. This organization facilitates a market for Navajo elders to sell their beautiful handwoven rugs. I thought this was pretty neat and I couldn’t resist sharing.
Still, if you want to make things with your own hands, there are plenty of resources out there! For example, Amy is an avid weaver and occasionally posts about the topic on our blog. You can find her weaving posts here (link). You may also be interested in a pattern – if so, check out the Sparkle Windows Scarf. This thing is gorgeous! Finally – check your local yarn shop for weaving classes. Our customers have shared projects woven using many of our yarns, and it’s such a lovely way to see it transformed.
Herringbone scarf using Deluxe DK Tweed, designed by Amy Gunderson
I hope you’ve enjoyed this post, have learned something from it, and feel inspired!
If you’re interested in reading more, here are the resources I’ve used for this post:
On Cowichan Knitting
Cowichan Indian Knitting by Margaret Meikle (link)
Knitting Around the World: A Multistranded History of a Time-Honored Tradition by Lela Nargi; (pp. 217-225)
Yetsa’s Sweater by Sylvia Olsen
On Weaving
For more information about Jennie Thunaut and Chilkat Blankets, I recommend exploring Masters of Traditional Arts, an ongoing interdisciplinary project produced by Documentary Arts focusing on the recipients of the National Heritage Fellowship (link here).
Unpacking a phrase: The Chilkat Blanket by Christy Christodoulides (link)
Three Southwest Weaving Cultures; adapted from Beyond the Loom: Southwestern Weaving Traditions exhibit, Colorado University Museum (link)
Wheelwright Museum Blog – Archives of Navajo Textiles (link)
You may have heard that Mother’s Day is nearly upon us. It’s kind of hard not to know, as commercialized as this holiday has become over the years. But mothers do need to be celebrated so truly I’m glad for the reminder as the day approaches.
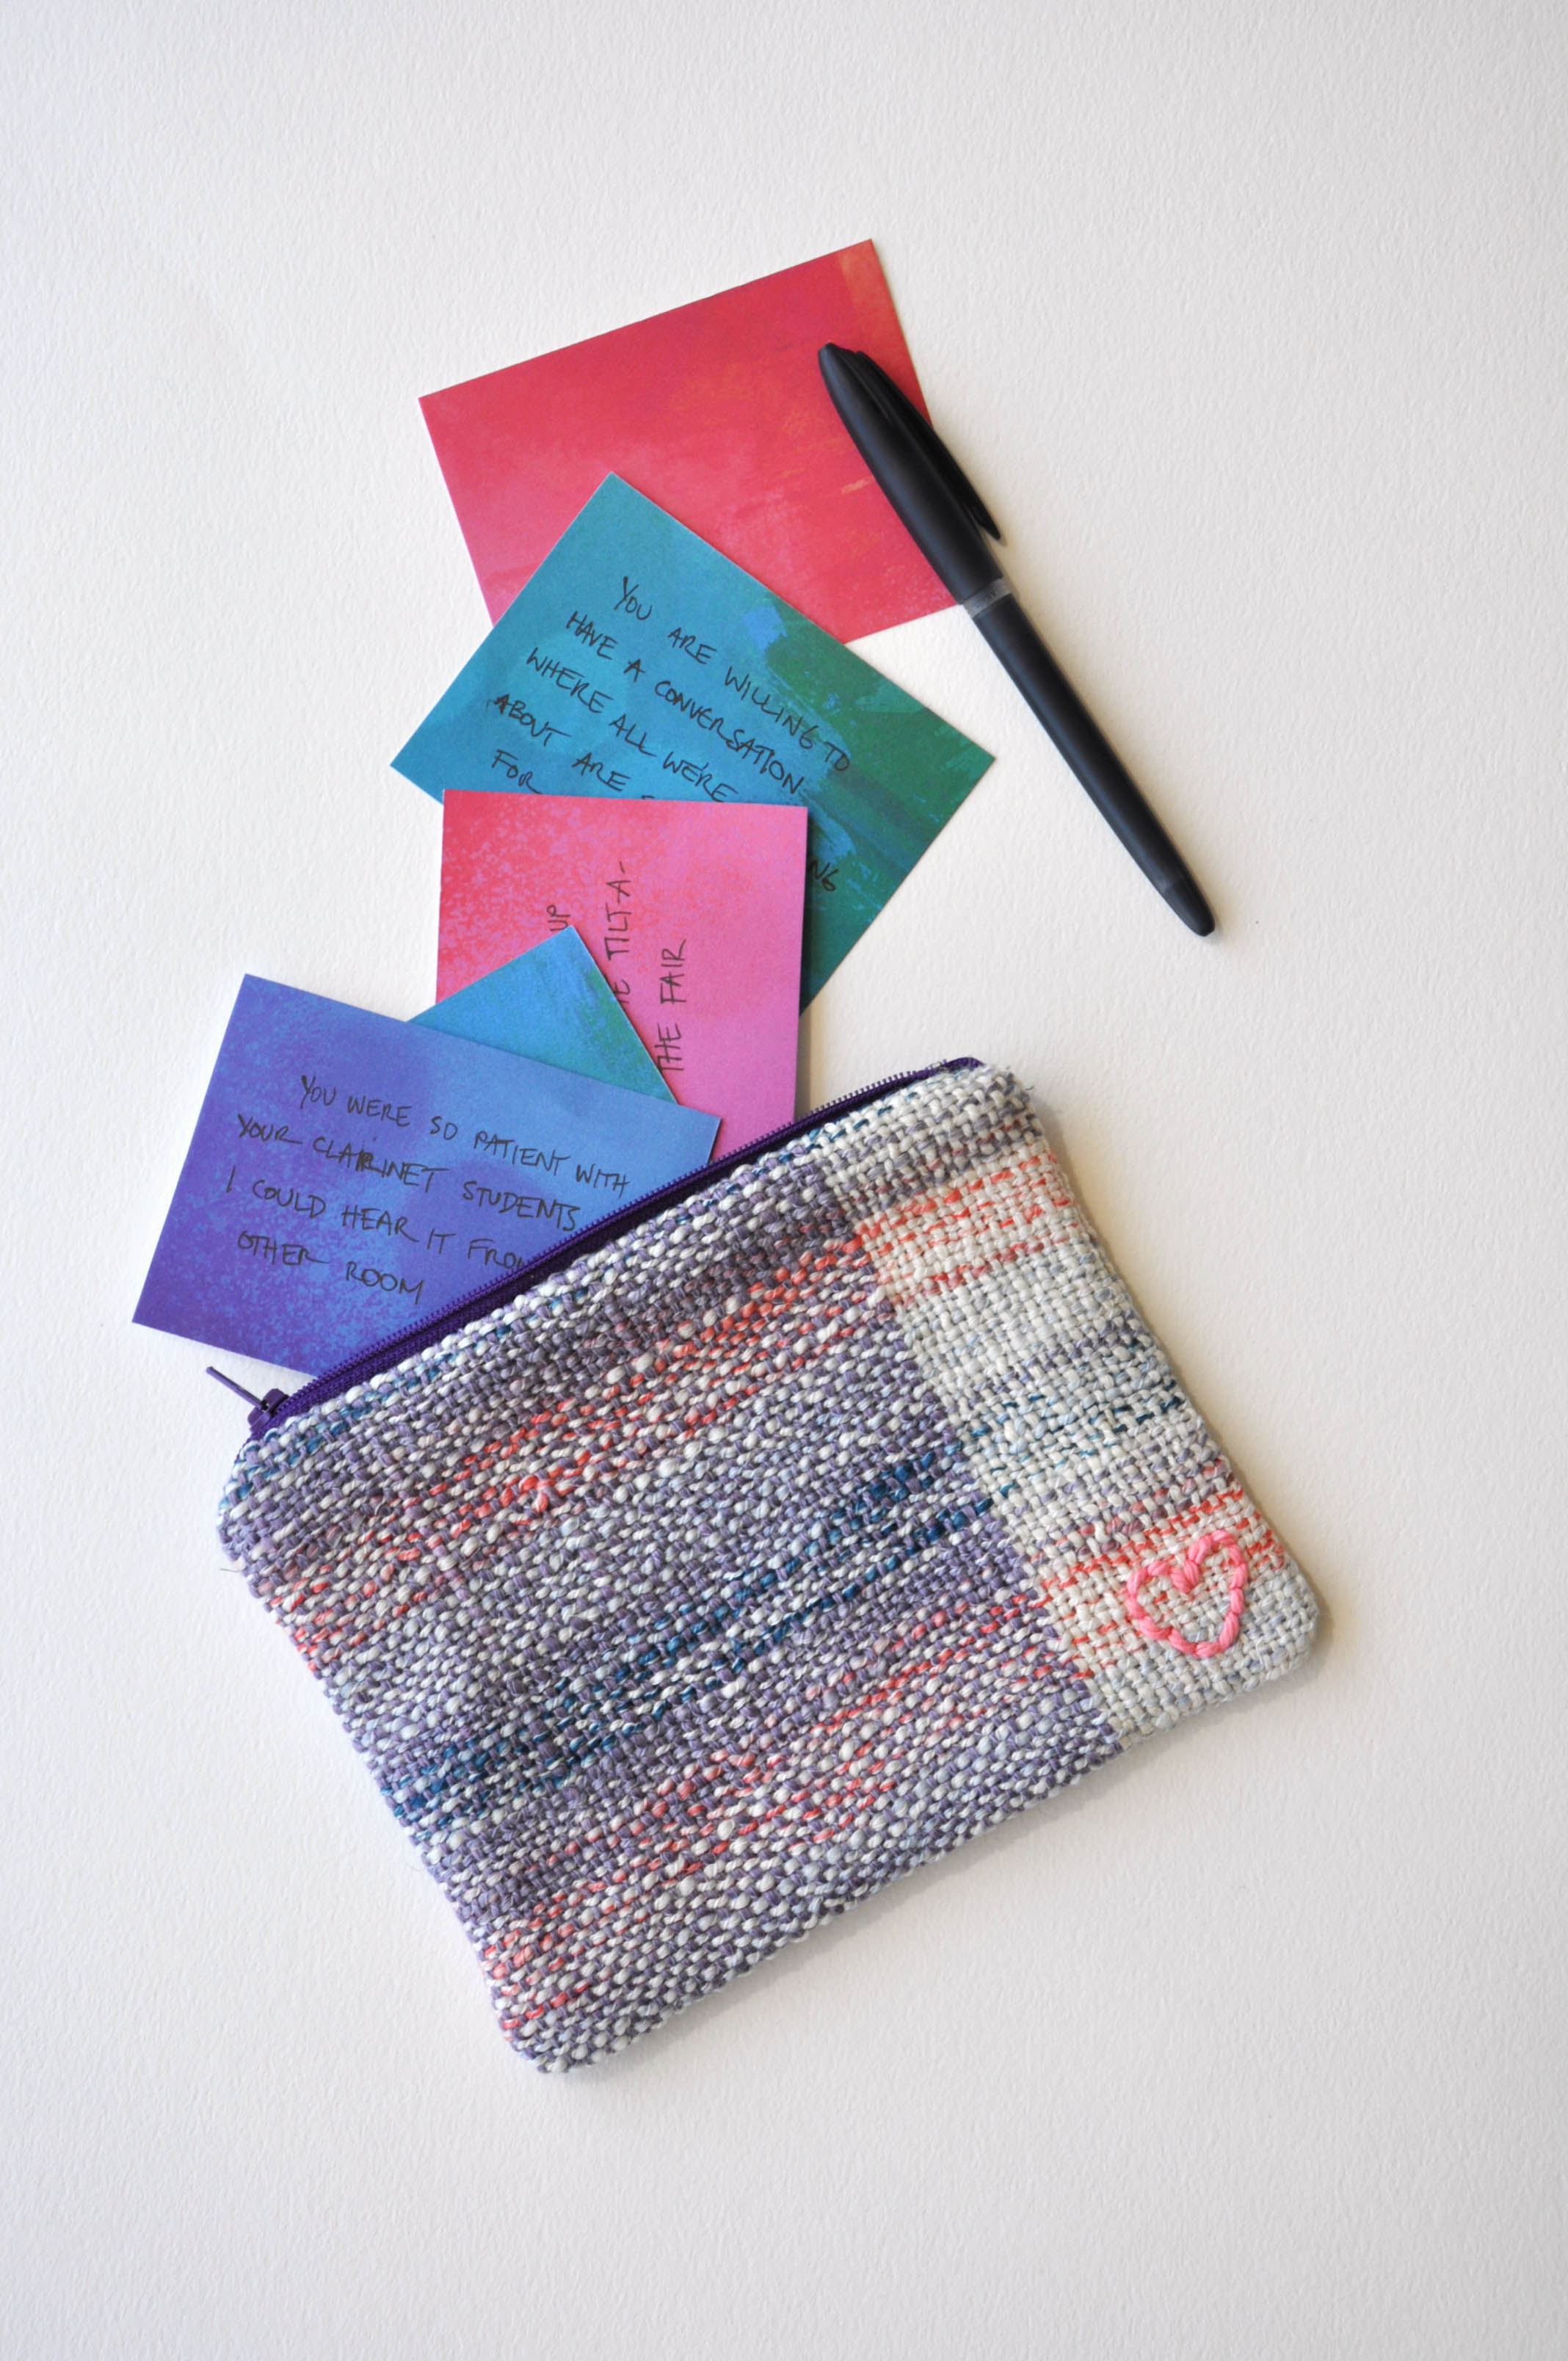
Over the years I’ve given a wide variety of gifts to my mom for this special day. I usually try to give her something handmade, because she’s my mom, and I know she appreciates the thought behind it. At this point in her life, I can think of all kinds of things she doesn’t really need. She doesn’t need a scarf or a hat or a sweater. She doesn’t need knick-knacks or other little trifles, though I’m sure I could find something that would amuse her. What she does treasure are memories.
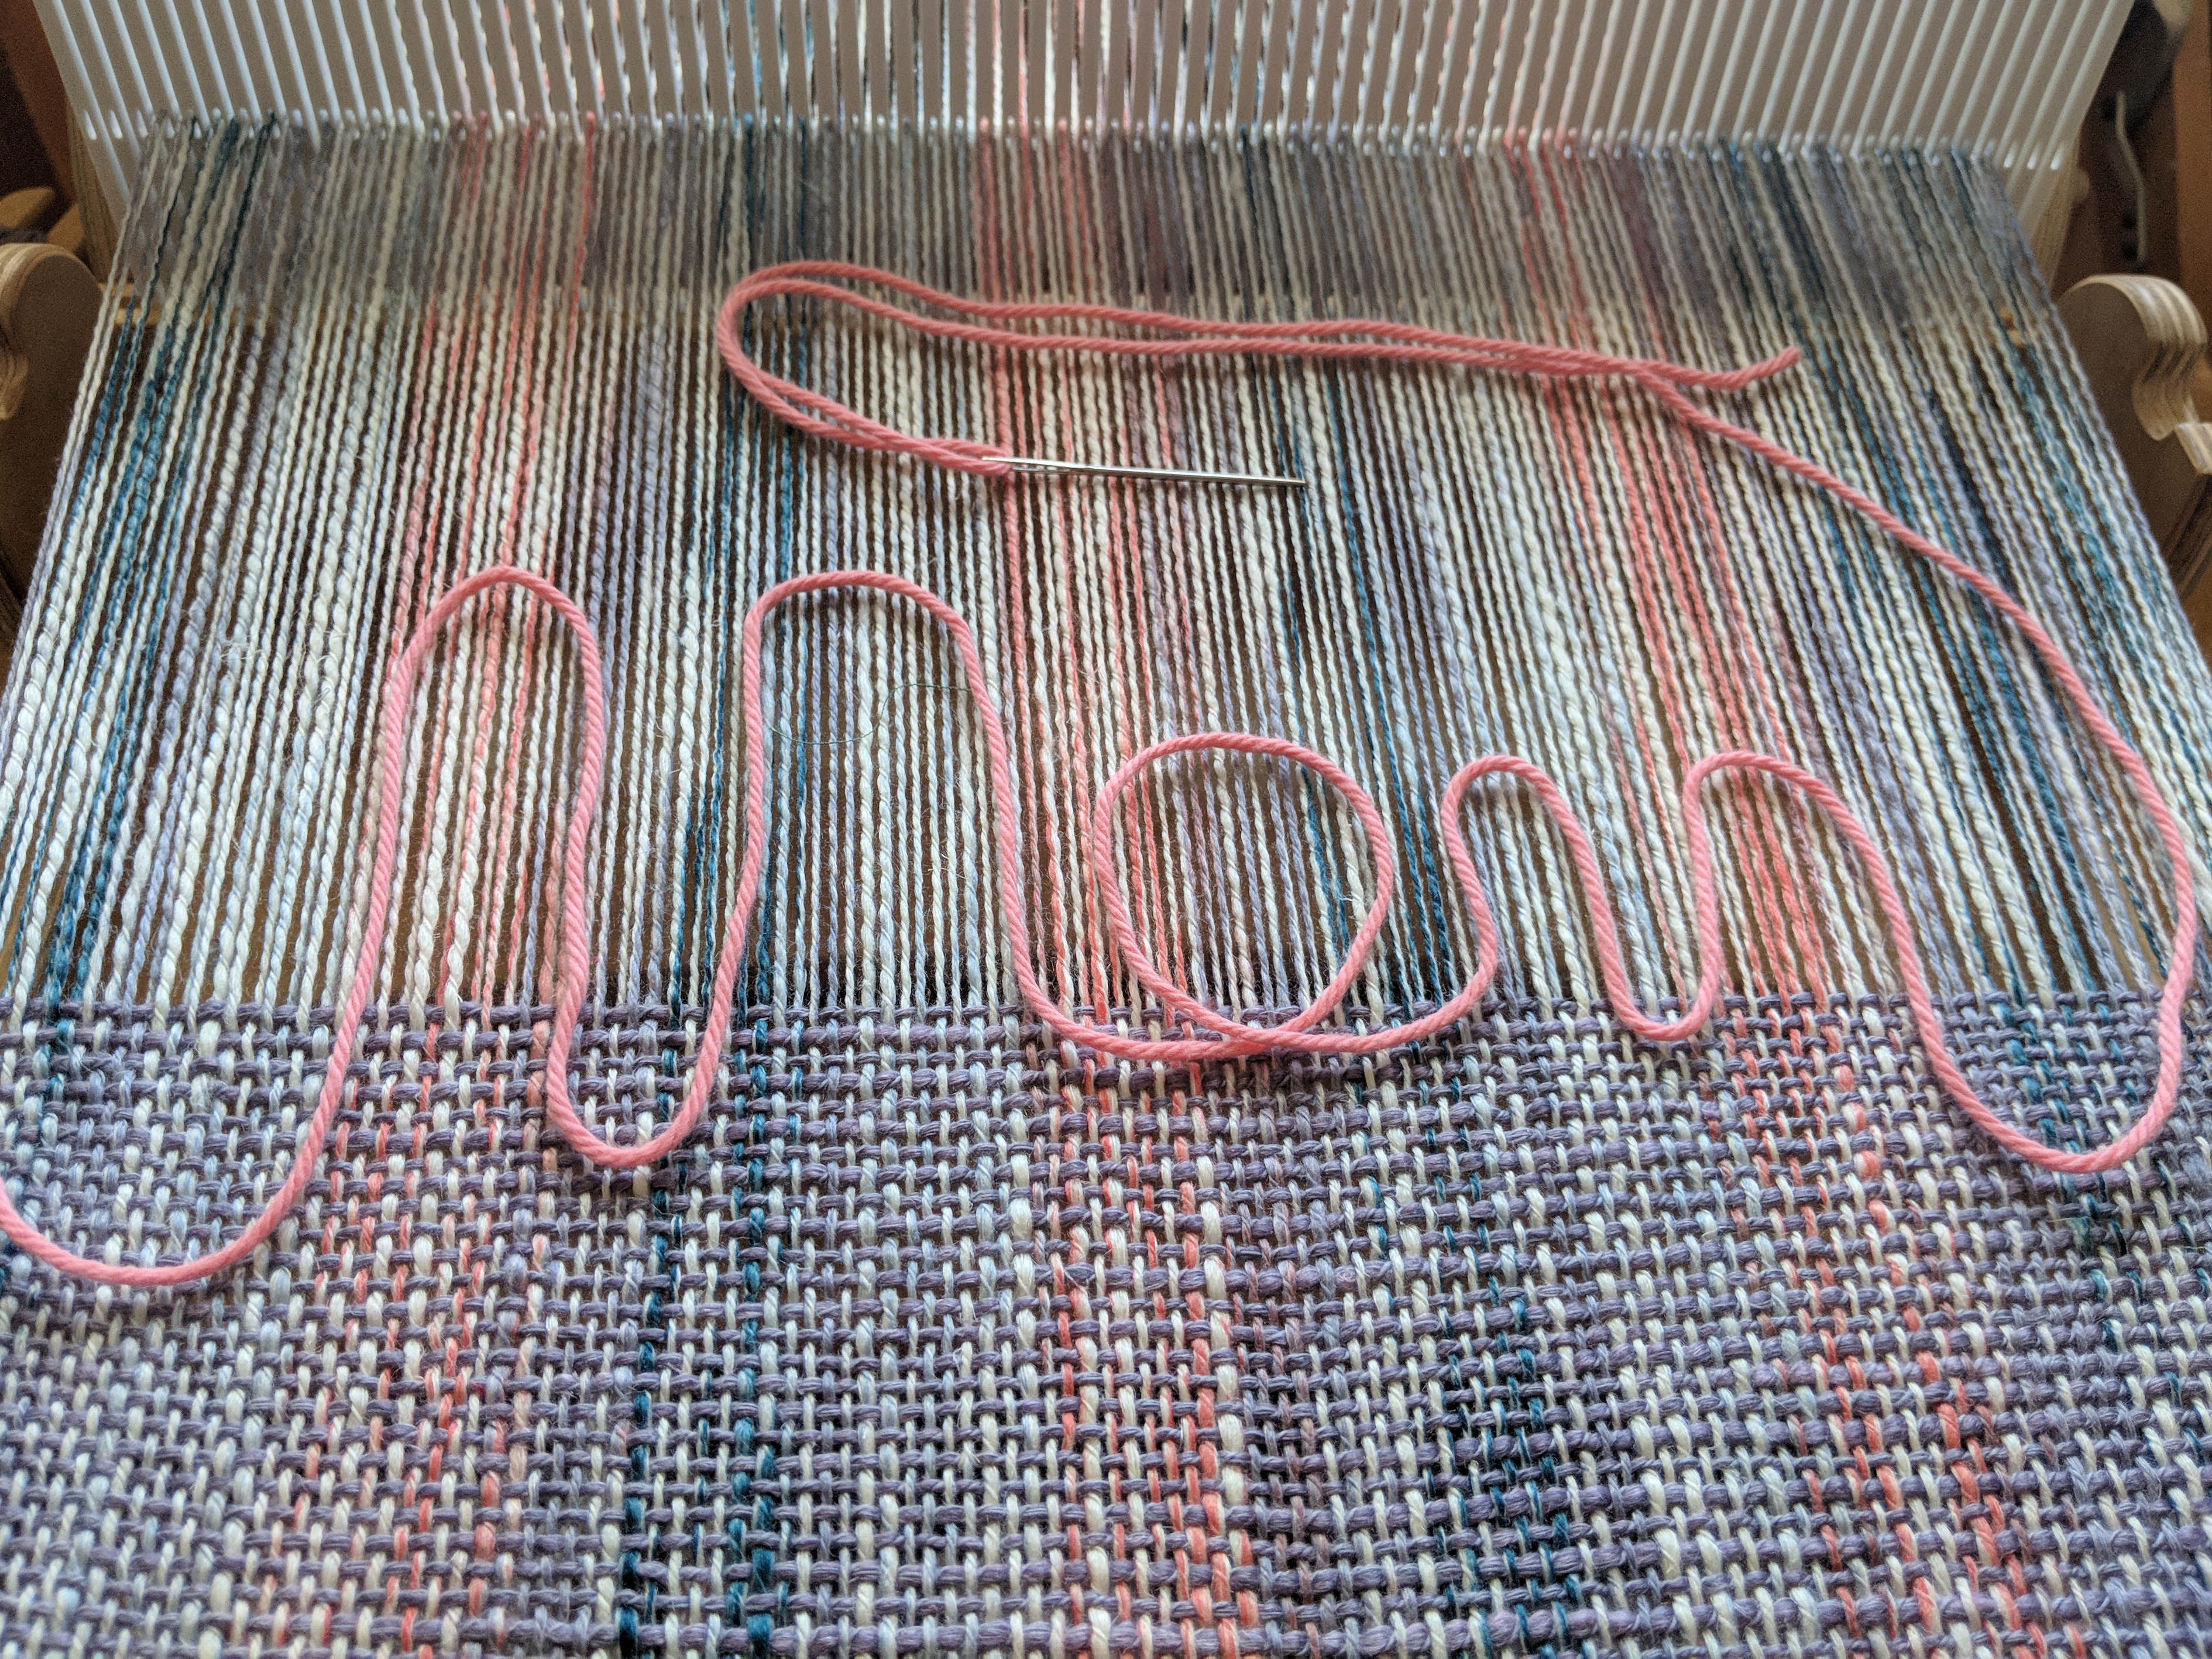
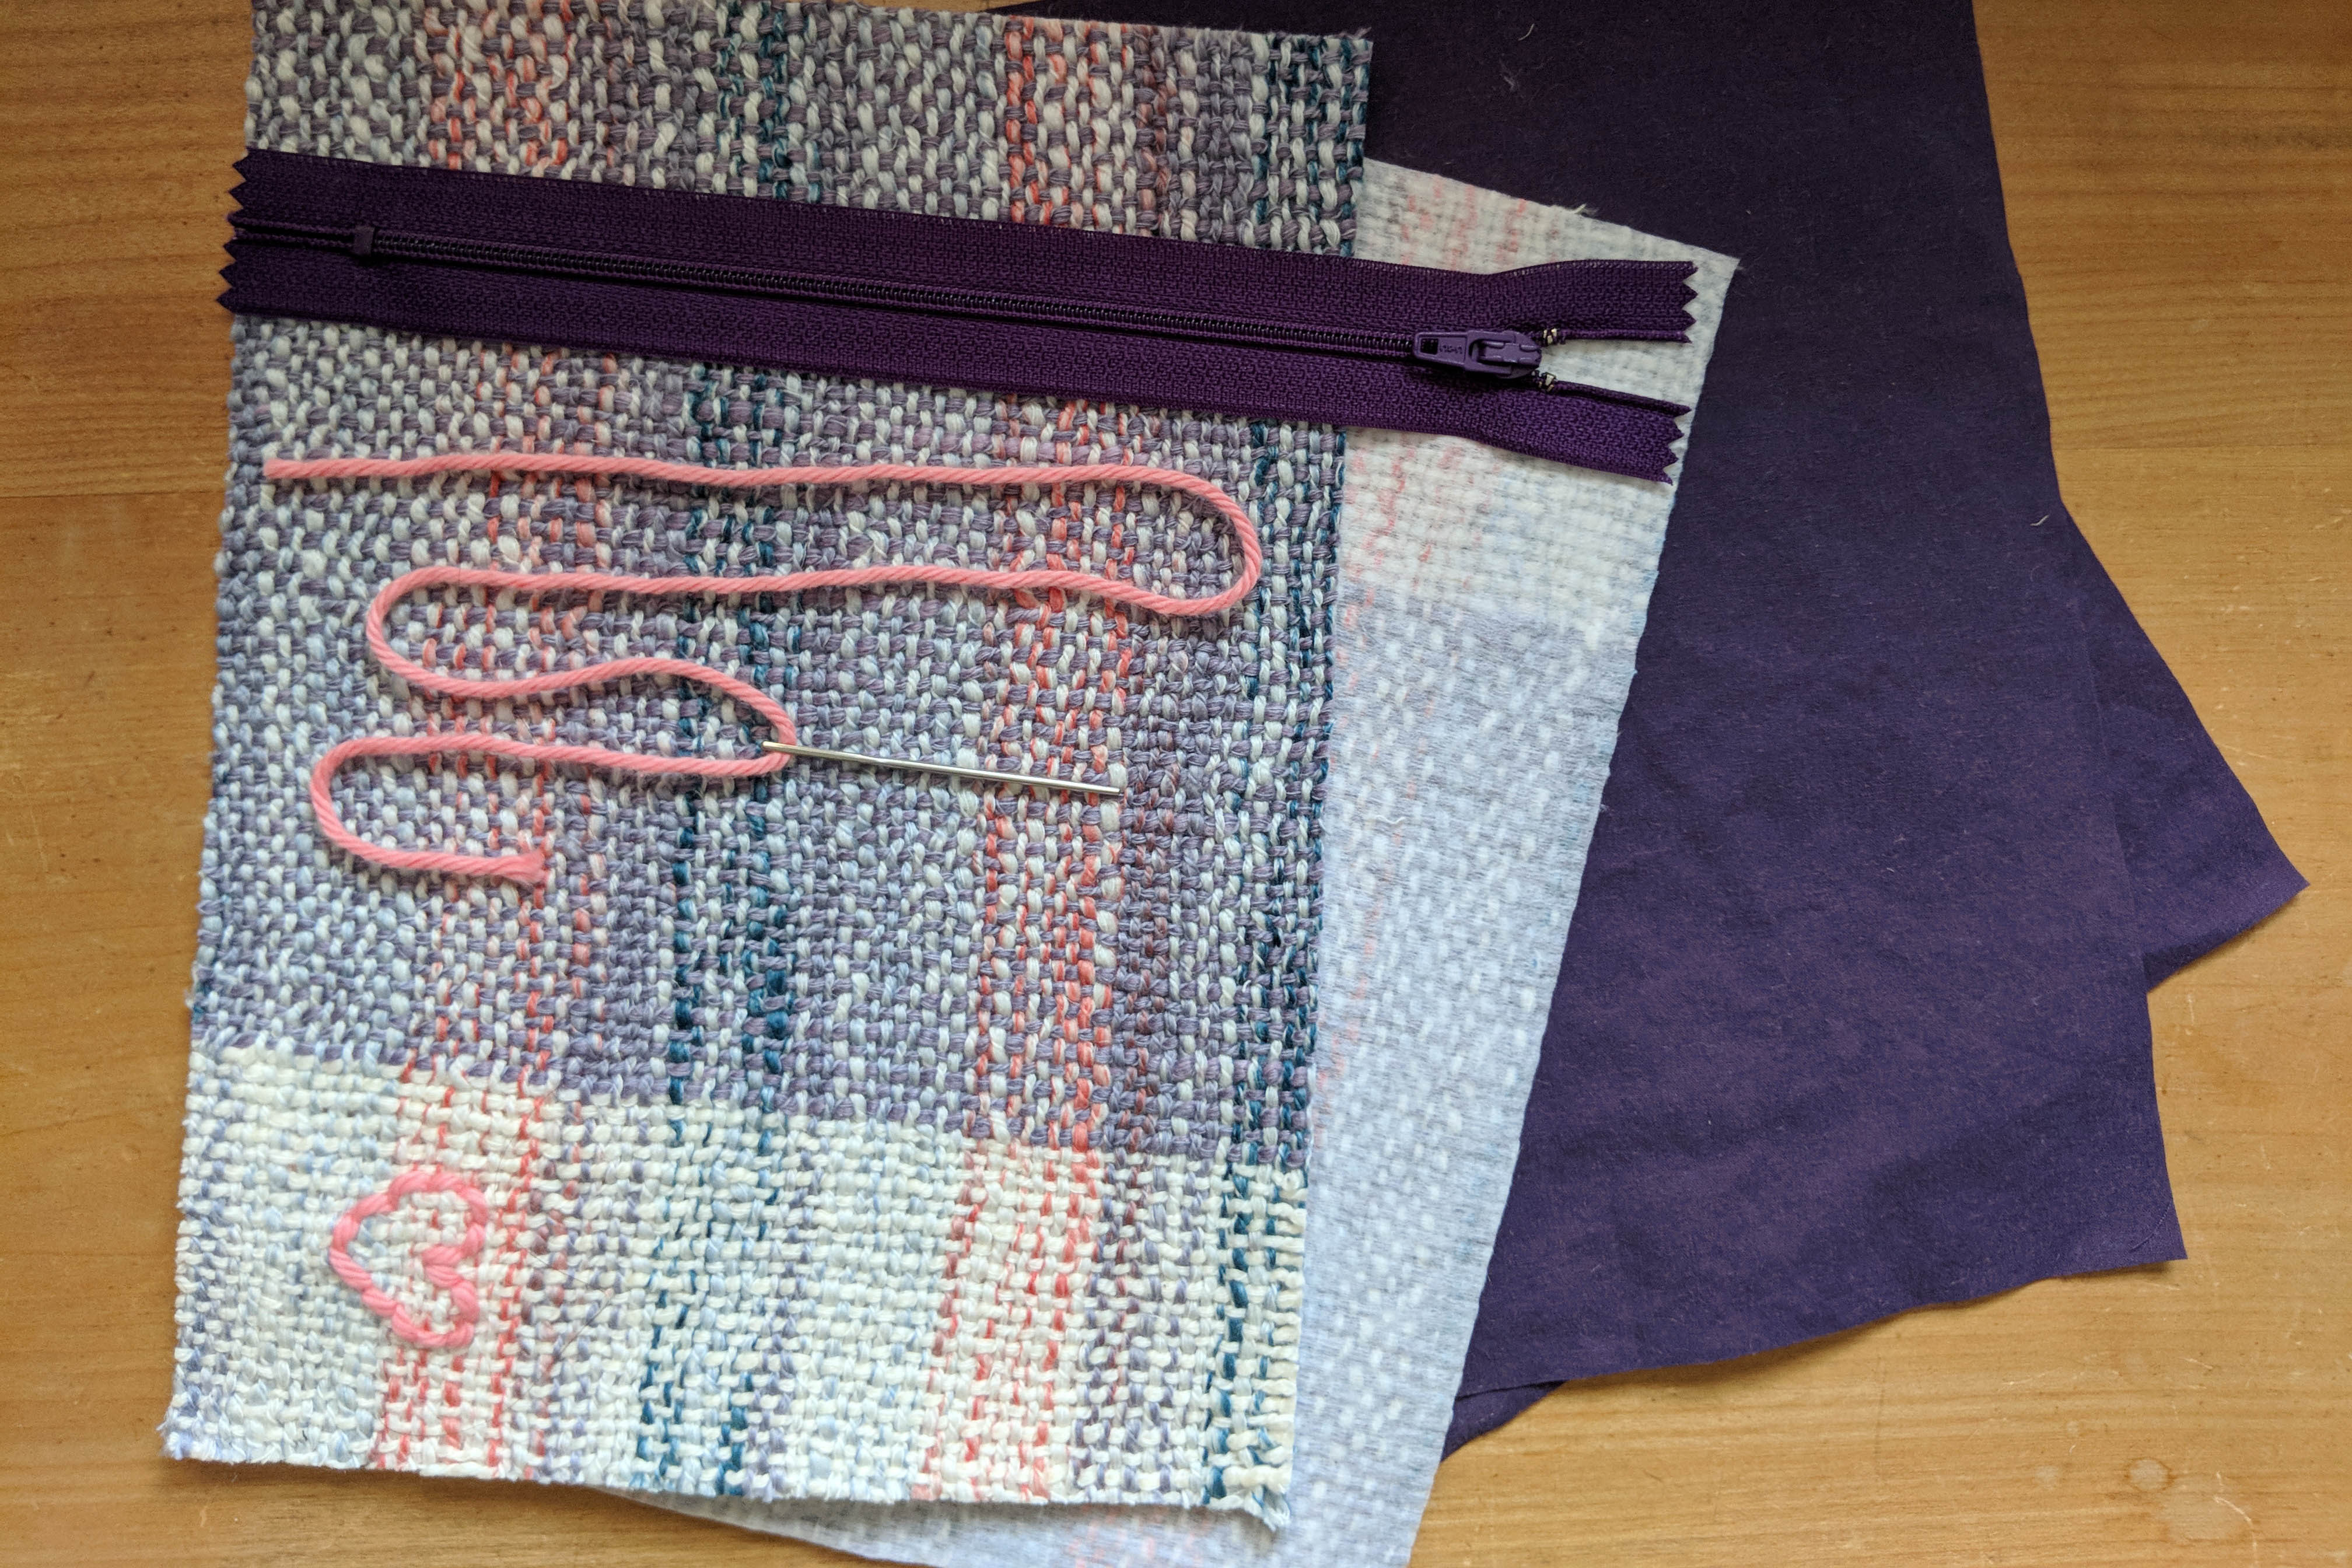
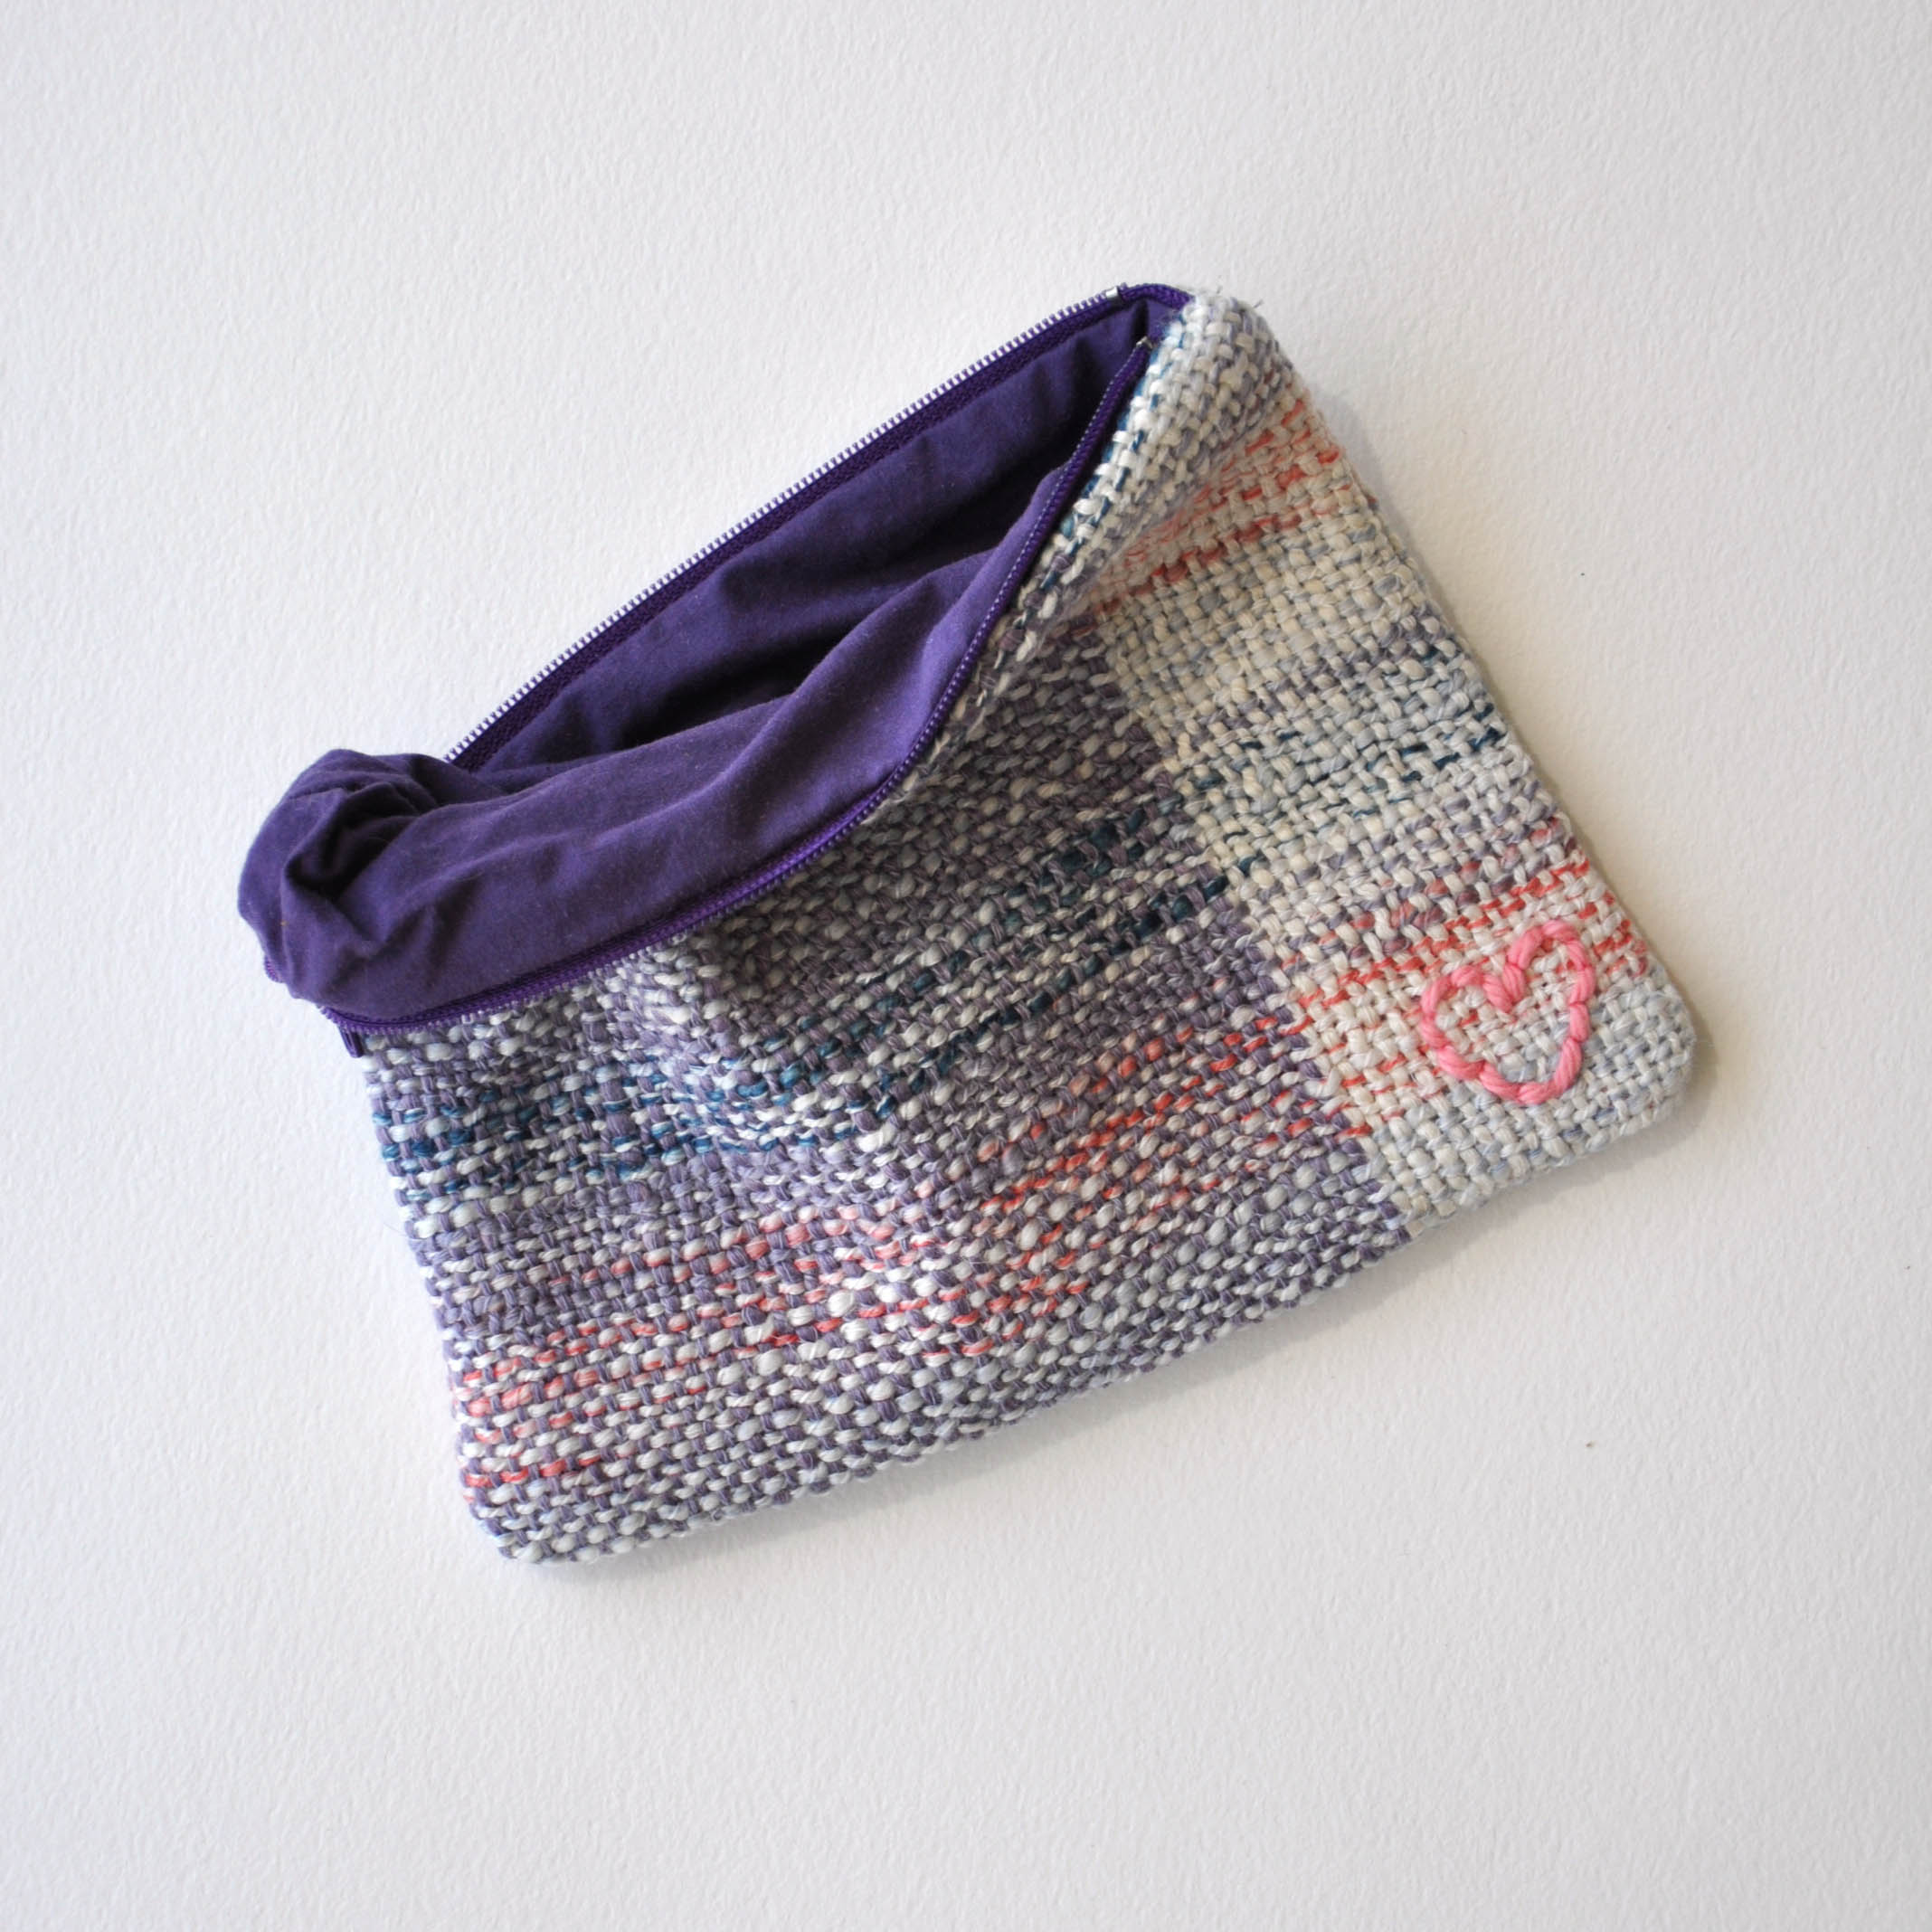
I decided to make her a little something to hold these memories, and settled on a small woven pouch. My life is so busy it’s tough to find a spare moment. Weaving goes so quickly, especially on a rigid heddle, so this made it easy to decide how I would make the pouch.
For anyone wanting to duplicate this, here are the specs for my piece of woven fabric:
Sett: 10 epi/10 dent reed
Weaving width: 14″ (though I didn’t end up using the full width of my fabric in the pouch. You could easily get away with less width, depending on your desired finished pouch size)
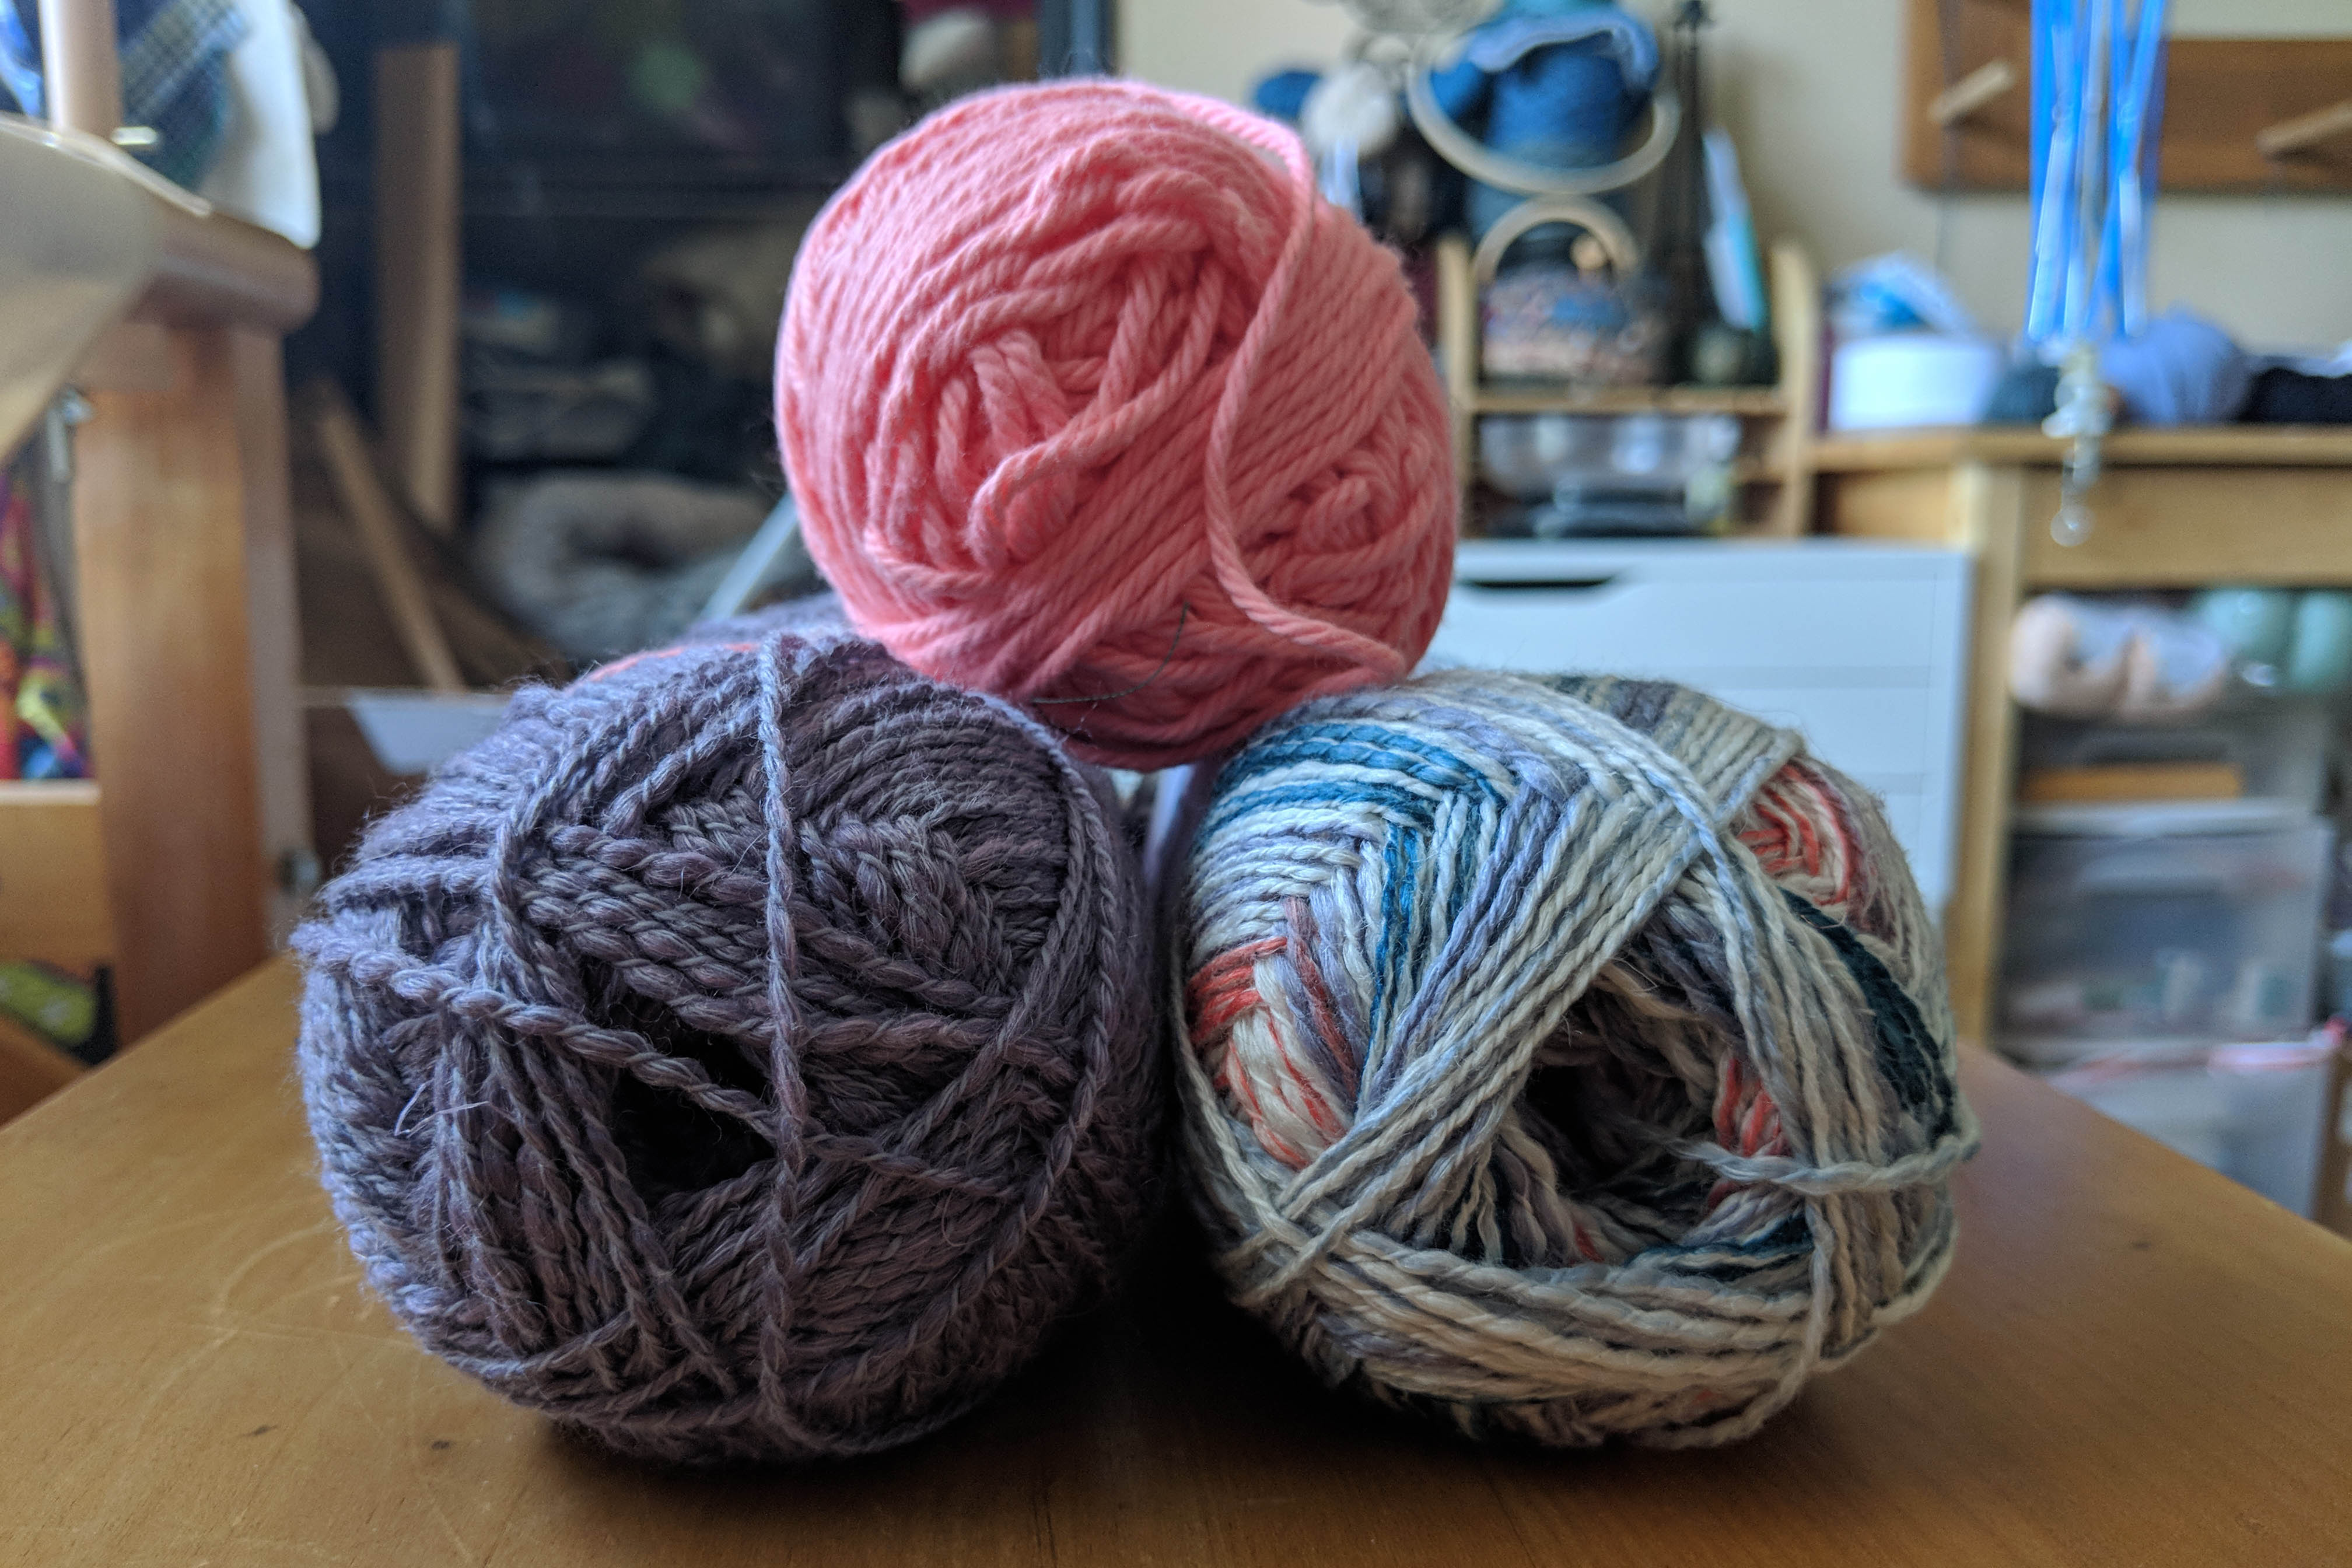
I warped with Unity Beyond, using the direct method.
I then wove about 3 inches of plain weave with #109 Natural, switched to #107 Purple Fog until the last bit of warp, and then finished out with 3 inches of #109 Natural.
I cut my fabric from the loom, finished the ends with a machine zig-zag, and then washed and pressed my fabric.
For the pouch pattern, I roughly followed this very simple tutorial: (link). If you’re not super comfortable sewing, this would be a great project for you. And if you’re more experienced, this will be a total breeze.
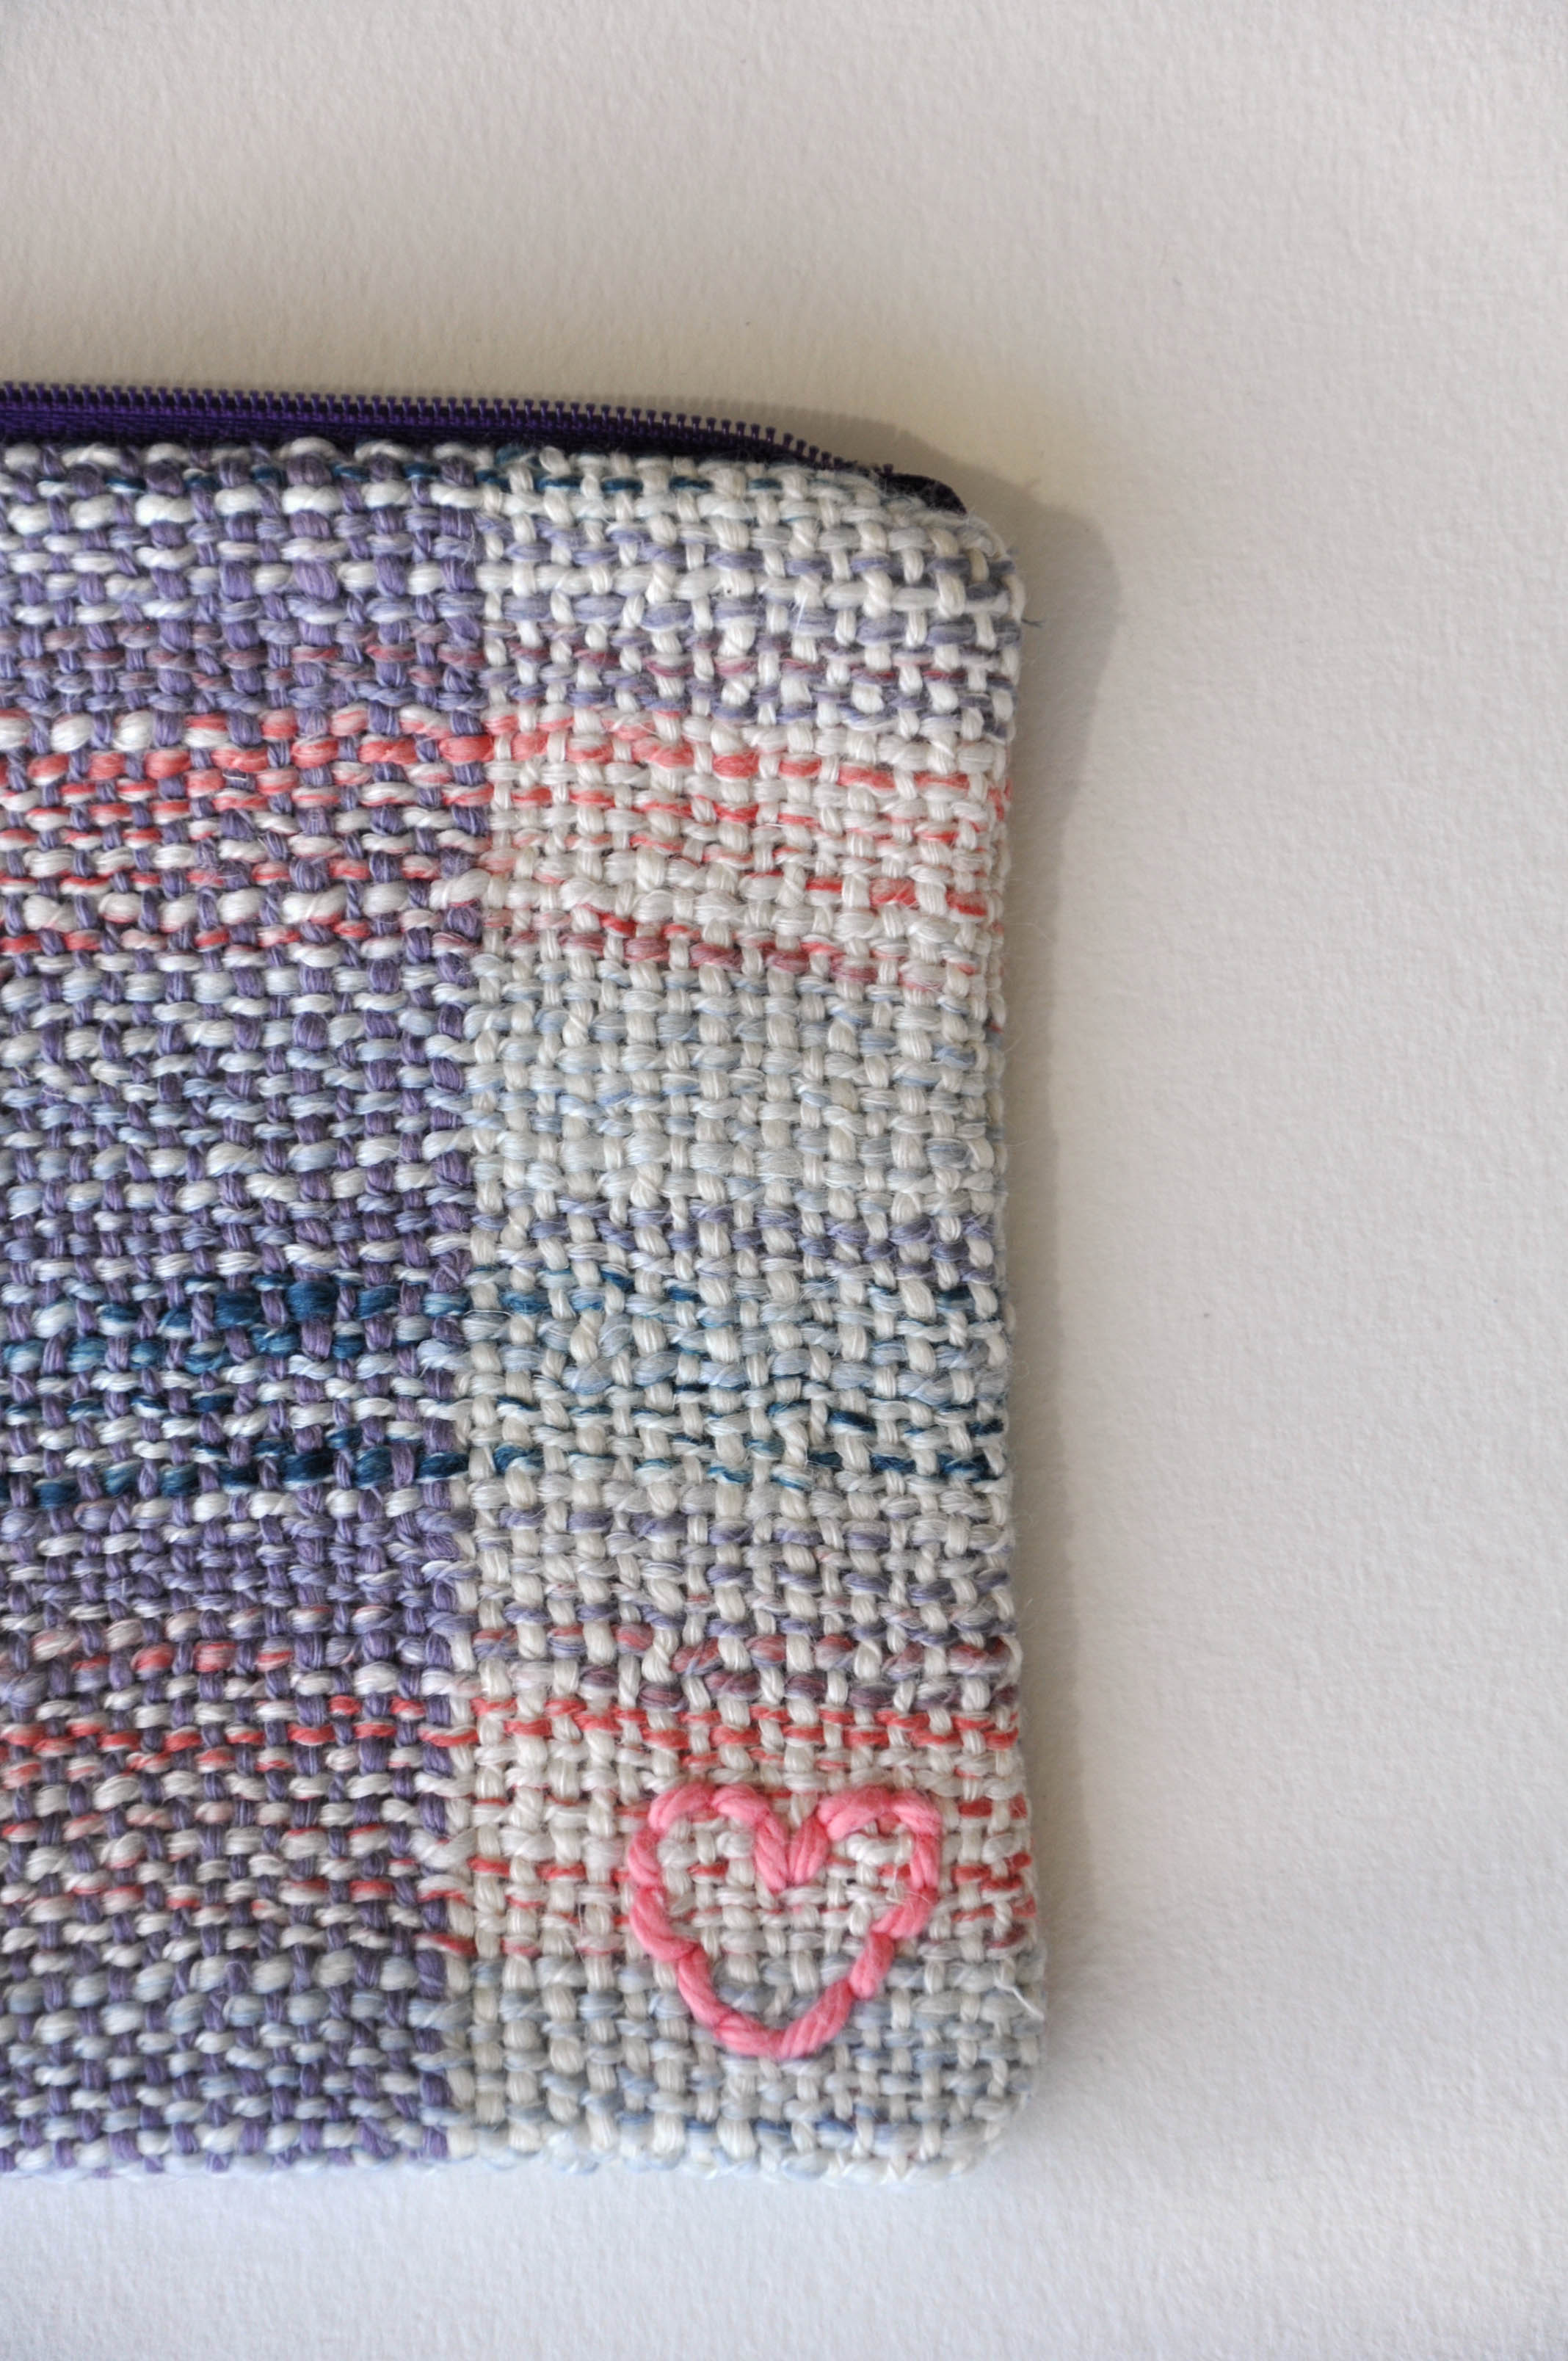
Before getting to the sewing part, I had decided that I wanted to add a little personal touch. I had a little ball of Cotton Supreme in my stash that coordinated well, and decided on a little heart. My embroidery skills are quite rudimentary, so use your imagination to come up with something better than this!
One thing to keep in mind with handwoven fabric, is that your weaving will likely want to come apart if you cut into it. Handwoven fabric, especially using handknitting yarns, does not have as high a thread count as commercial fabric on a bolt. Before cutting into my fabric, I used a fusible interfacing which I just ironed onto the back side of the fabric. The interfacing has an adhesive which helps to secure the fibers in the yarn.
After doing this, I cut out two pieces from my woven fabric 7″ x 9″. I also cut two lining pieces from some stash fabric (an old pillowcase, actually!) also 7″ x 9″.
At this point, I followed the tutorial that I mentioned above (here it is again: (link) And voila, just a short time later, I had a pouch:
In the papercrafting section at my local store, I found some pretty watercolor looking paper in a cardstock weight that coordinated with the colors of my yarn. I cut some pieces that were about 3″ x 4″. I spent some time one evening writing down positive memories about my mom, one memory per card. It was fun and quite therapeutic.
One memory was: “when you threw up after riding the tilt-a-whirl at the fair”
I think my mom will enjoy reading through these, perhaps being reminded of things she’s forgotten or things she never thought I noticed.
Whether you’re a parent or a child, I hope this Mother’s Day is a good one for you!
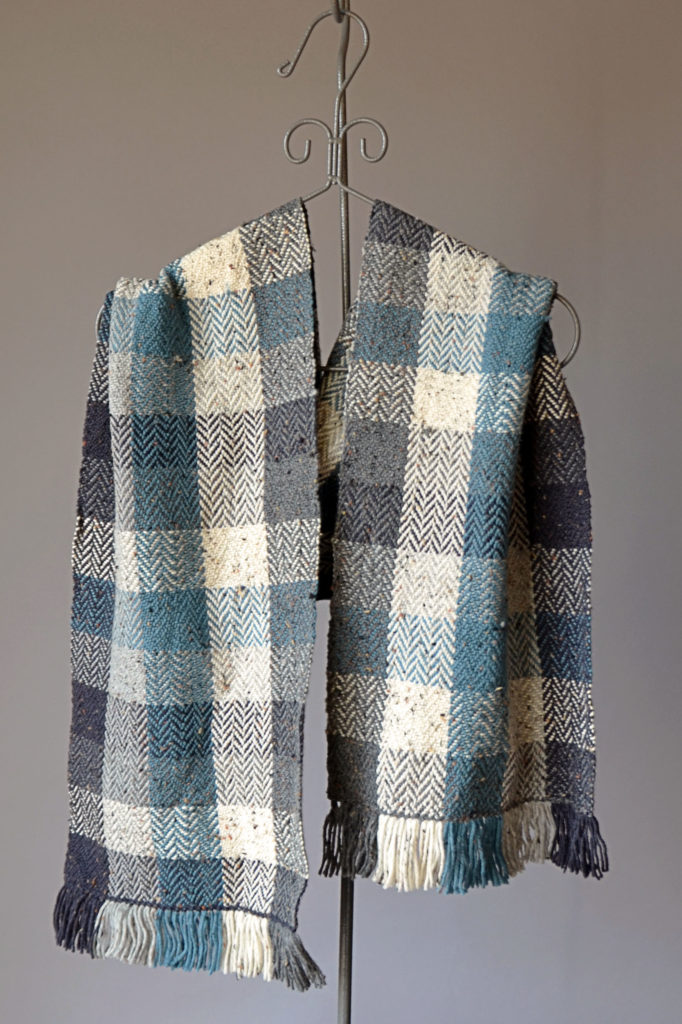
Last year, I wove a scarf utilizing the variegated effects of Bamboo Pop. You can find that post and all of my warping and weaving photos here.
This is the first version of the color pool scarf.
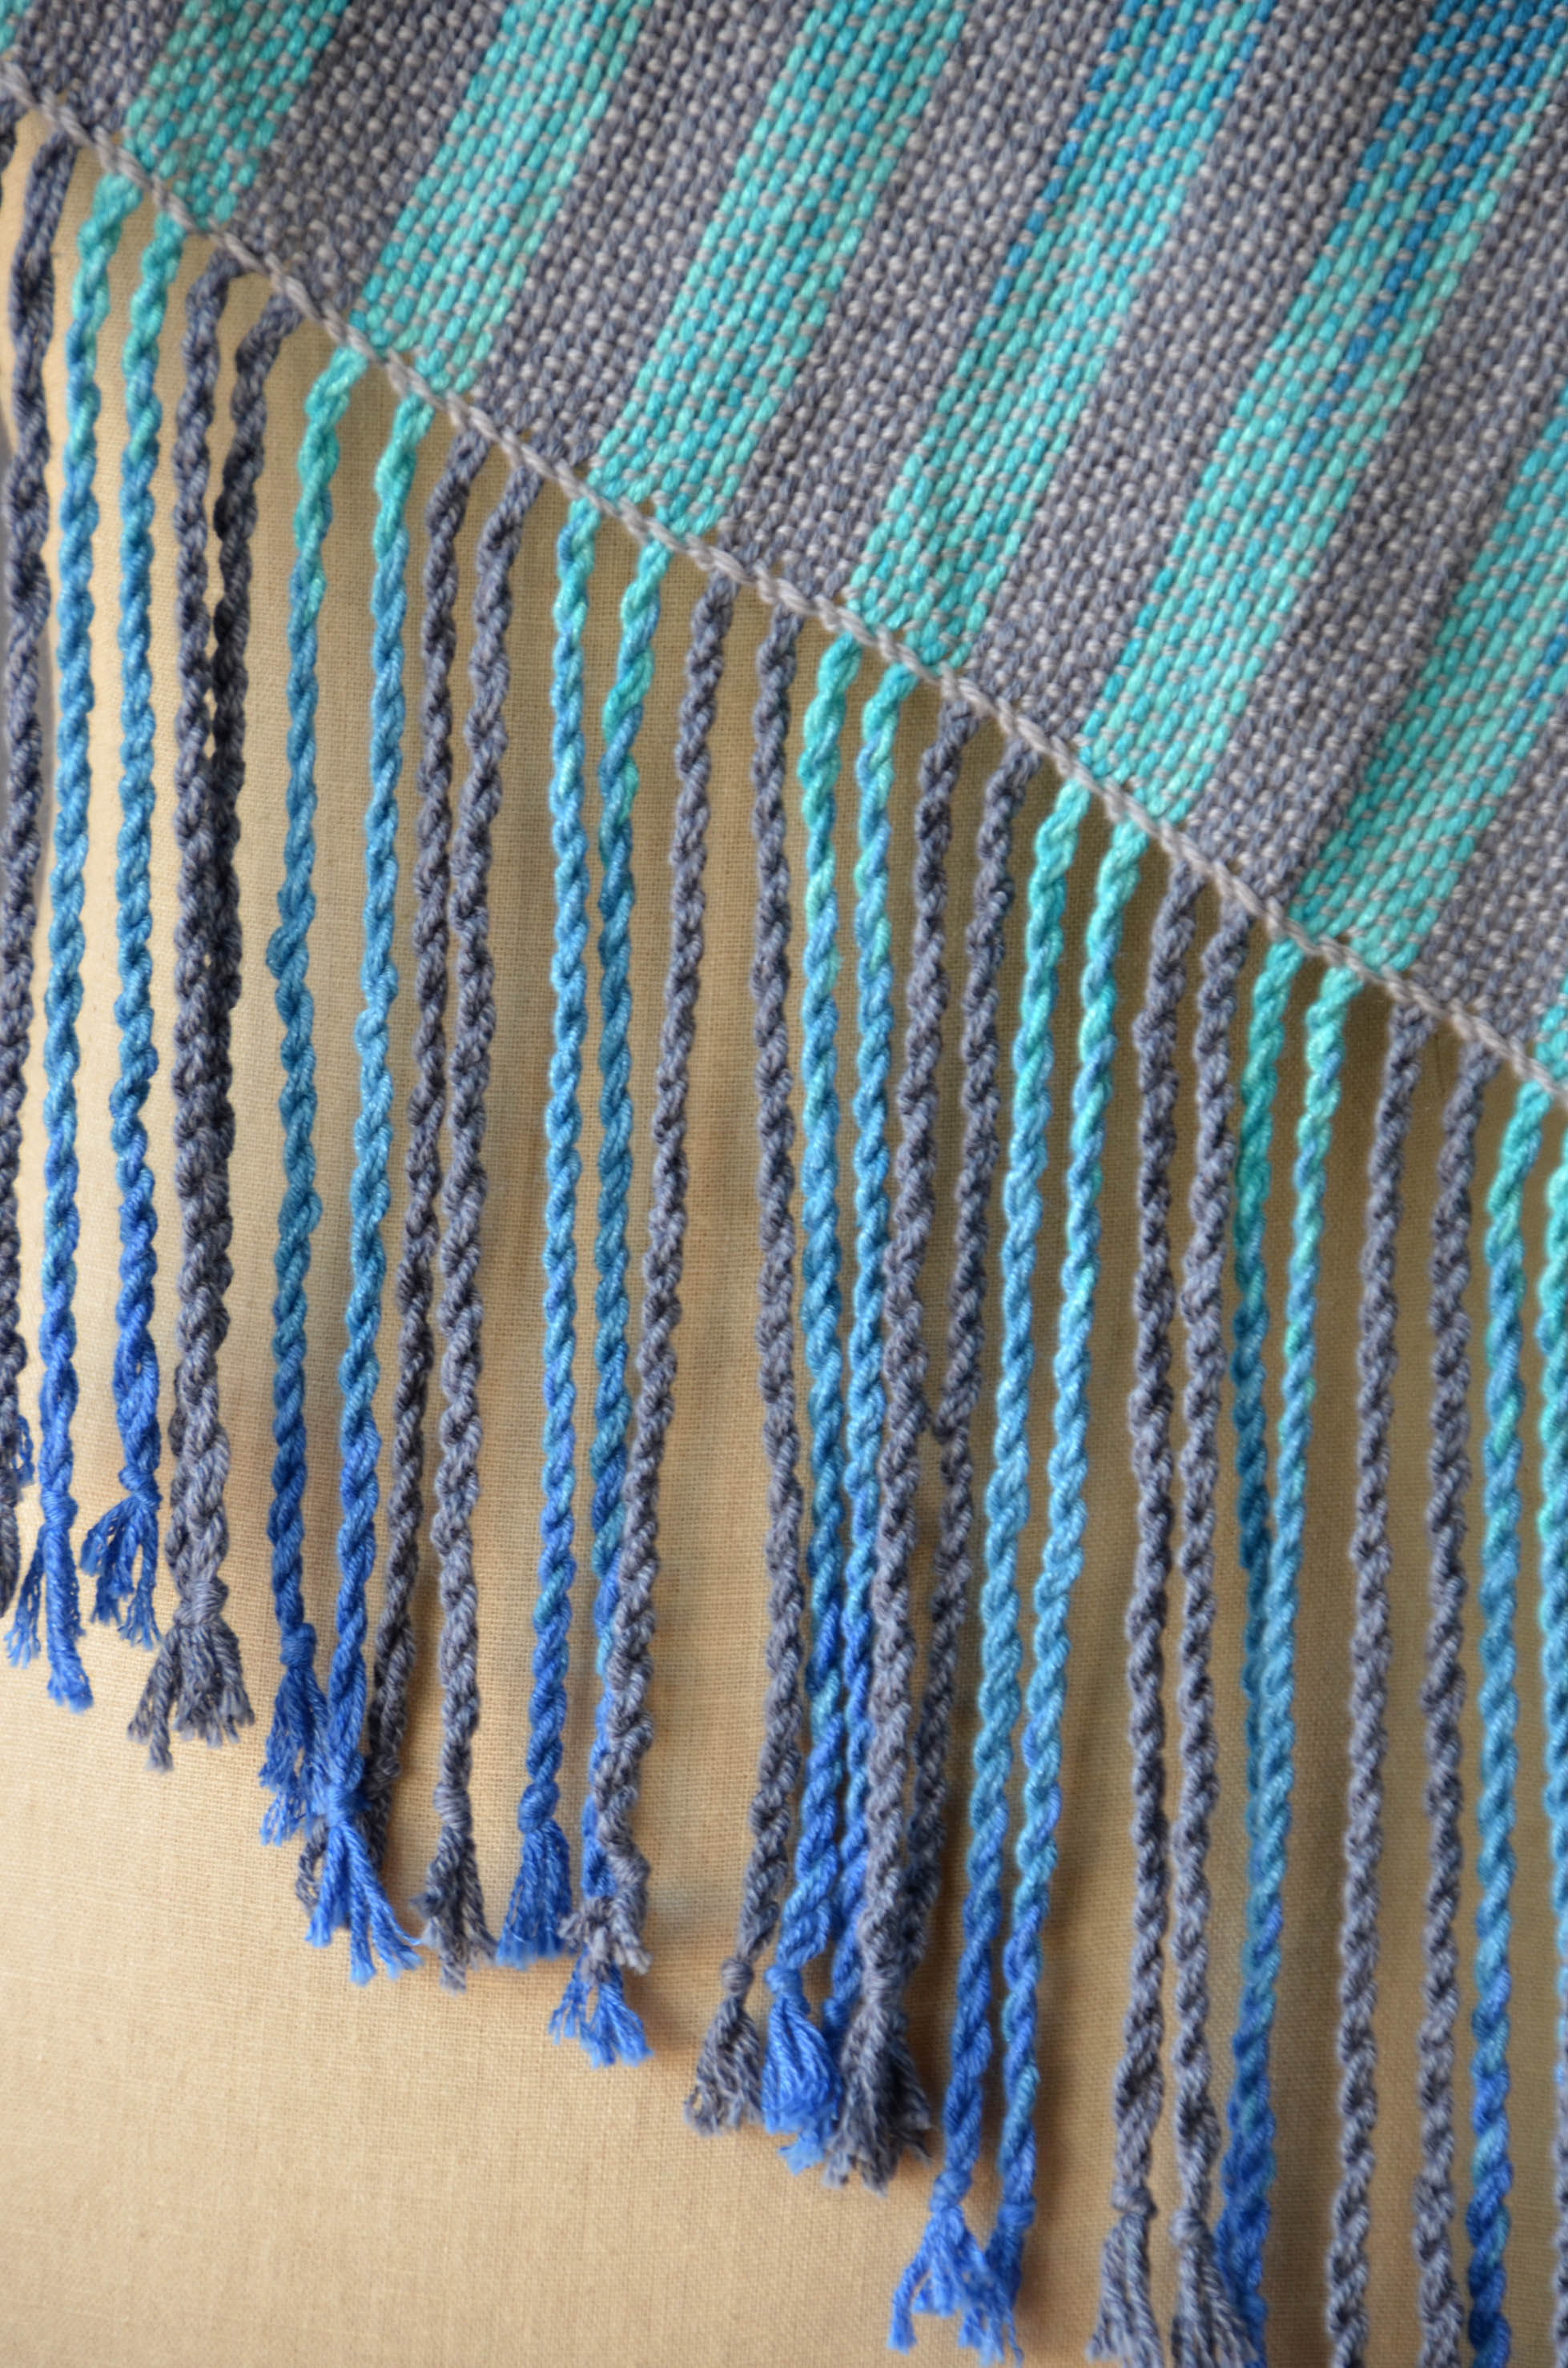
For my second go at this scarf, I decided to try one of our tonal multis in Bamboo Pop. I chose 205 Brilliant Blues + 120 Graphite for the warp. I wove with Whisper Lace 104 Fog as weft. This project takes just one ball of each color for a substantially sized scarf.
So soothing.
This blue-gray version is a more understated look than the original. I was hoping to show that this fun technique can be used to achieve more or less impact – it’s all about contrast.
I love the twisted fringe finish with hemstitching. It’s so tidy!
You can see both scarves in person at Stitches United next month. Stitches United is a new kind of multi-craft stitches. In addition to knit, crochet, and yarn, there will also be sewing, weaving, beading, and a lot more! If you’re in the Hartford, CT area at the end of April, you should definitely check it out.
See you next time here on the blog with more fun weaving!
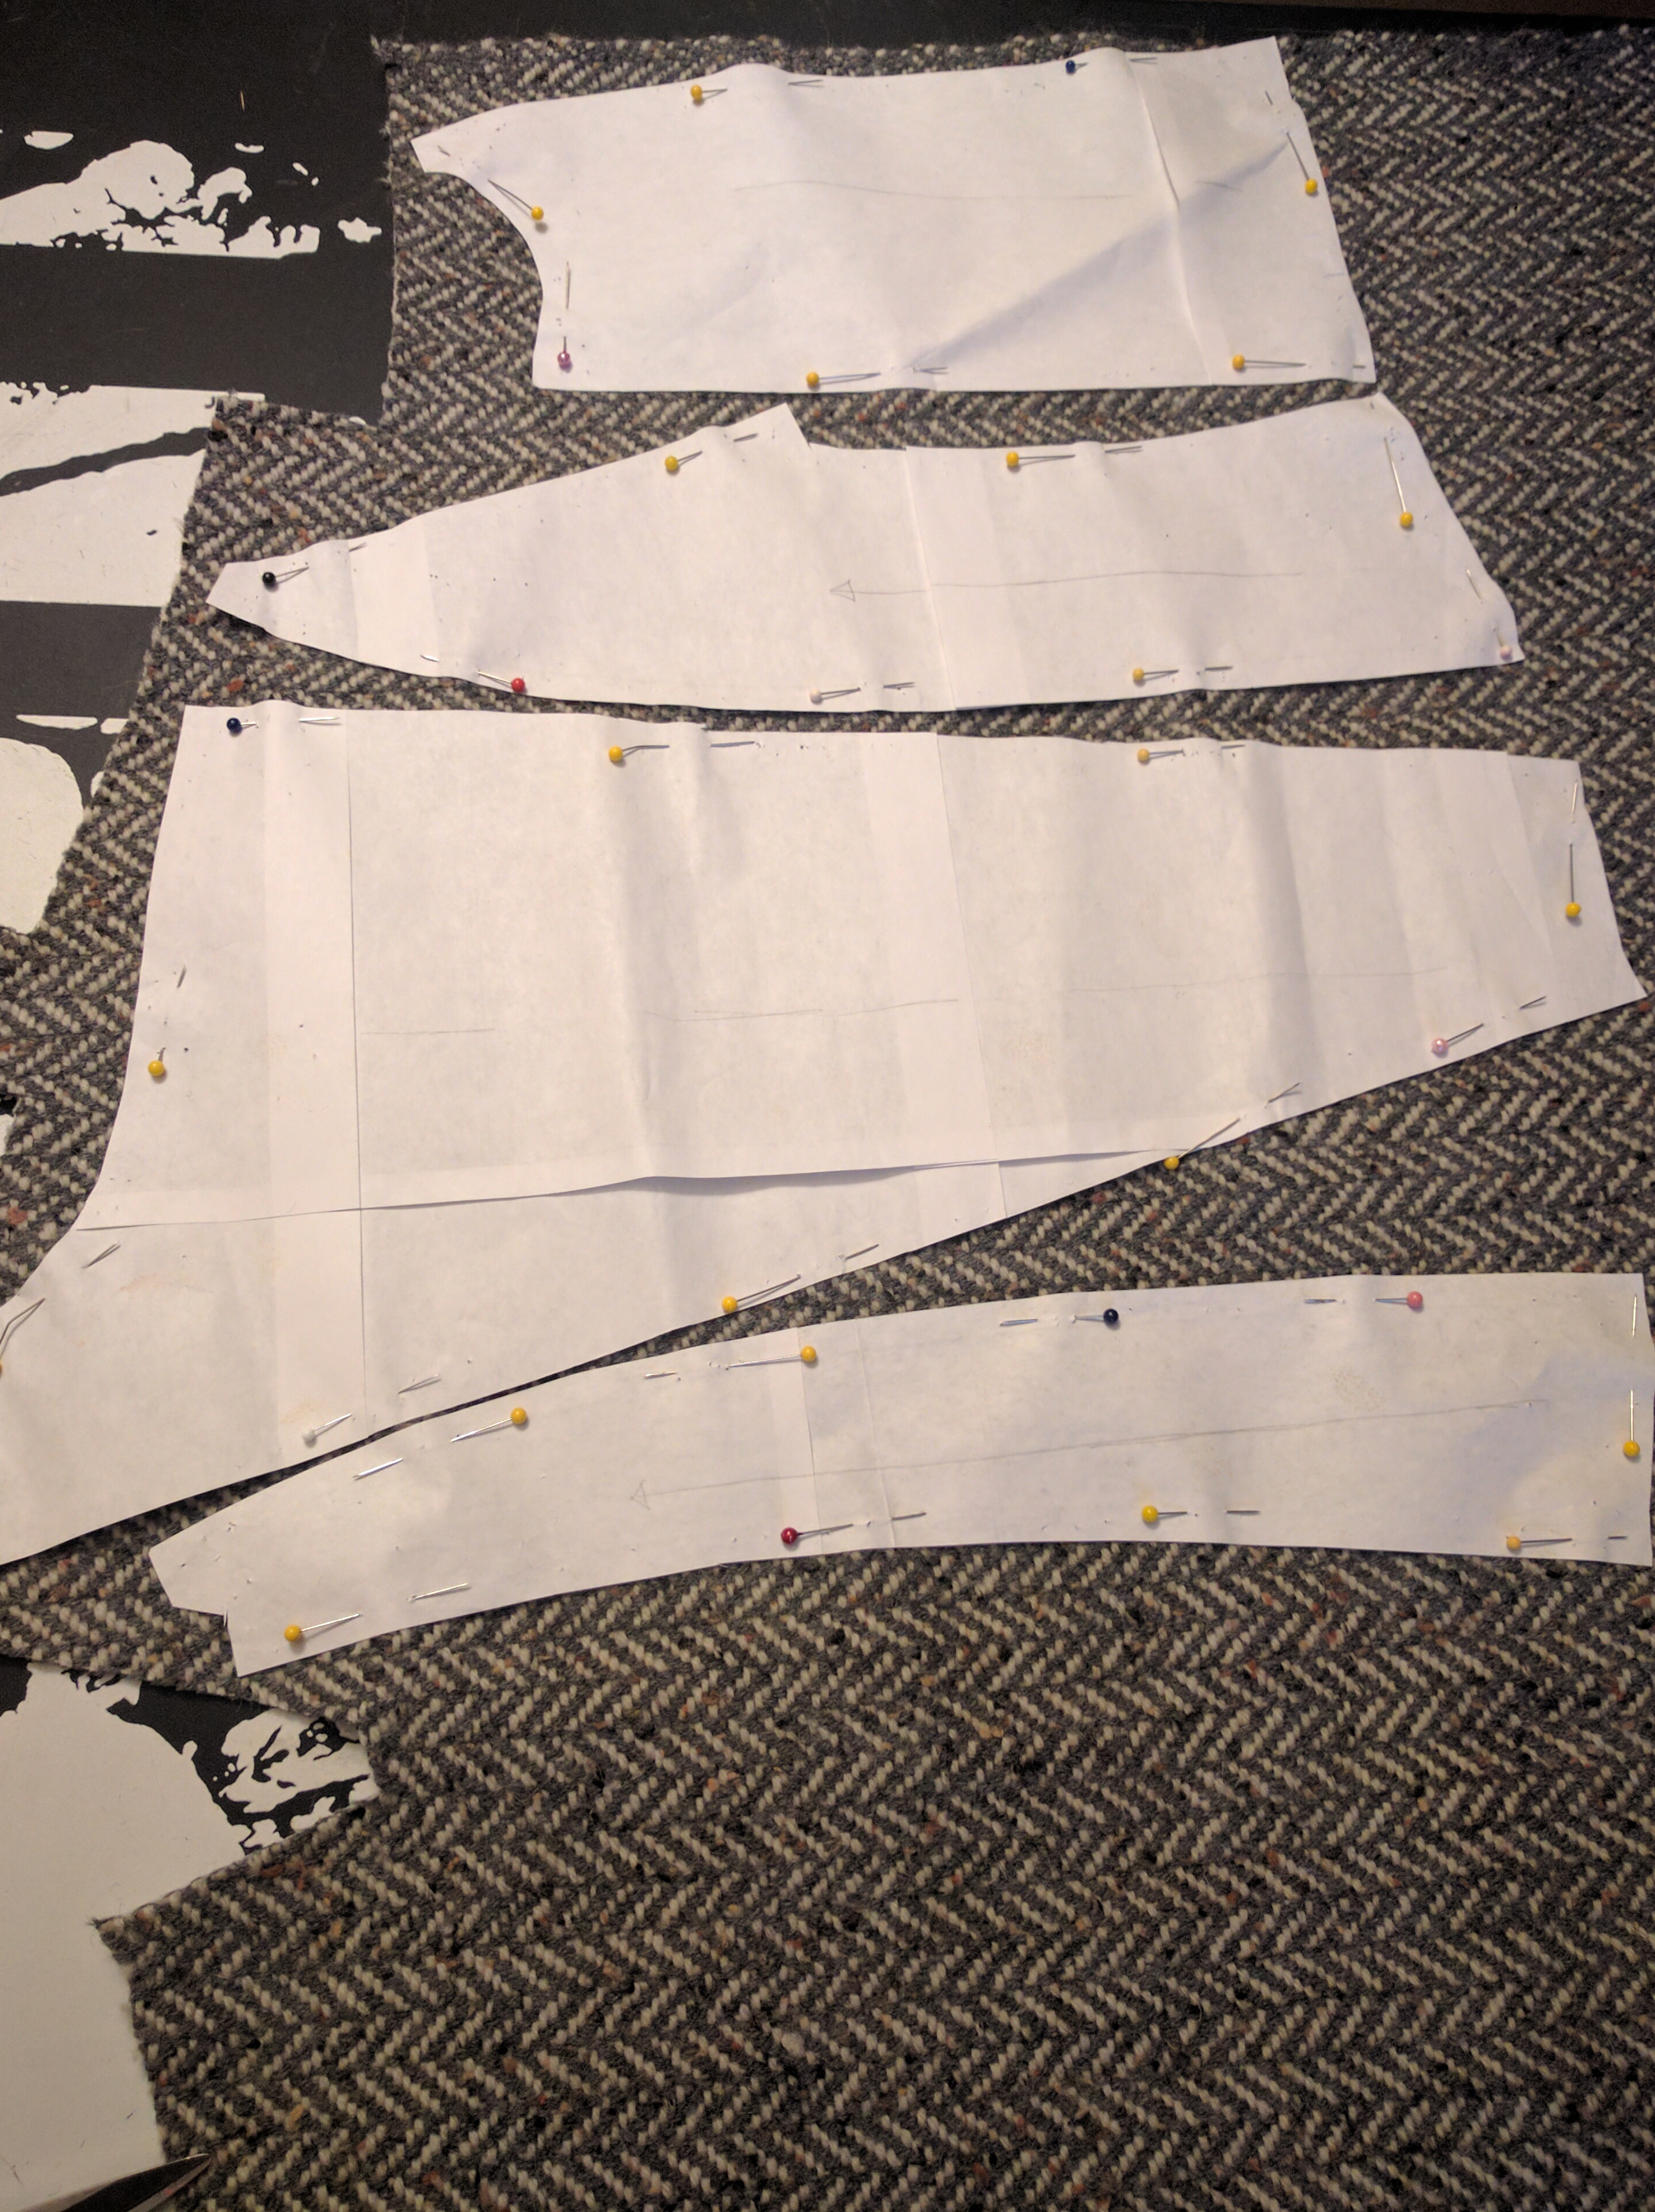
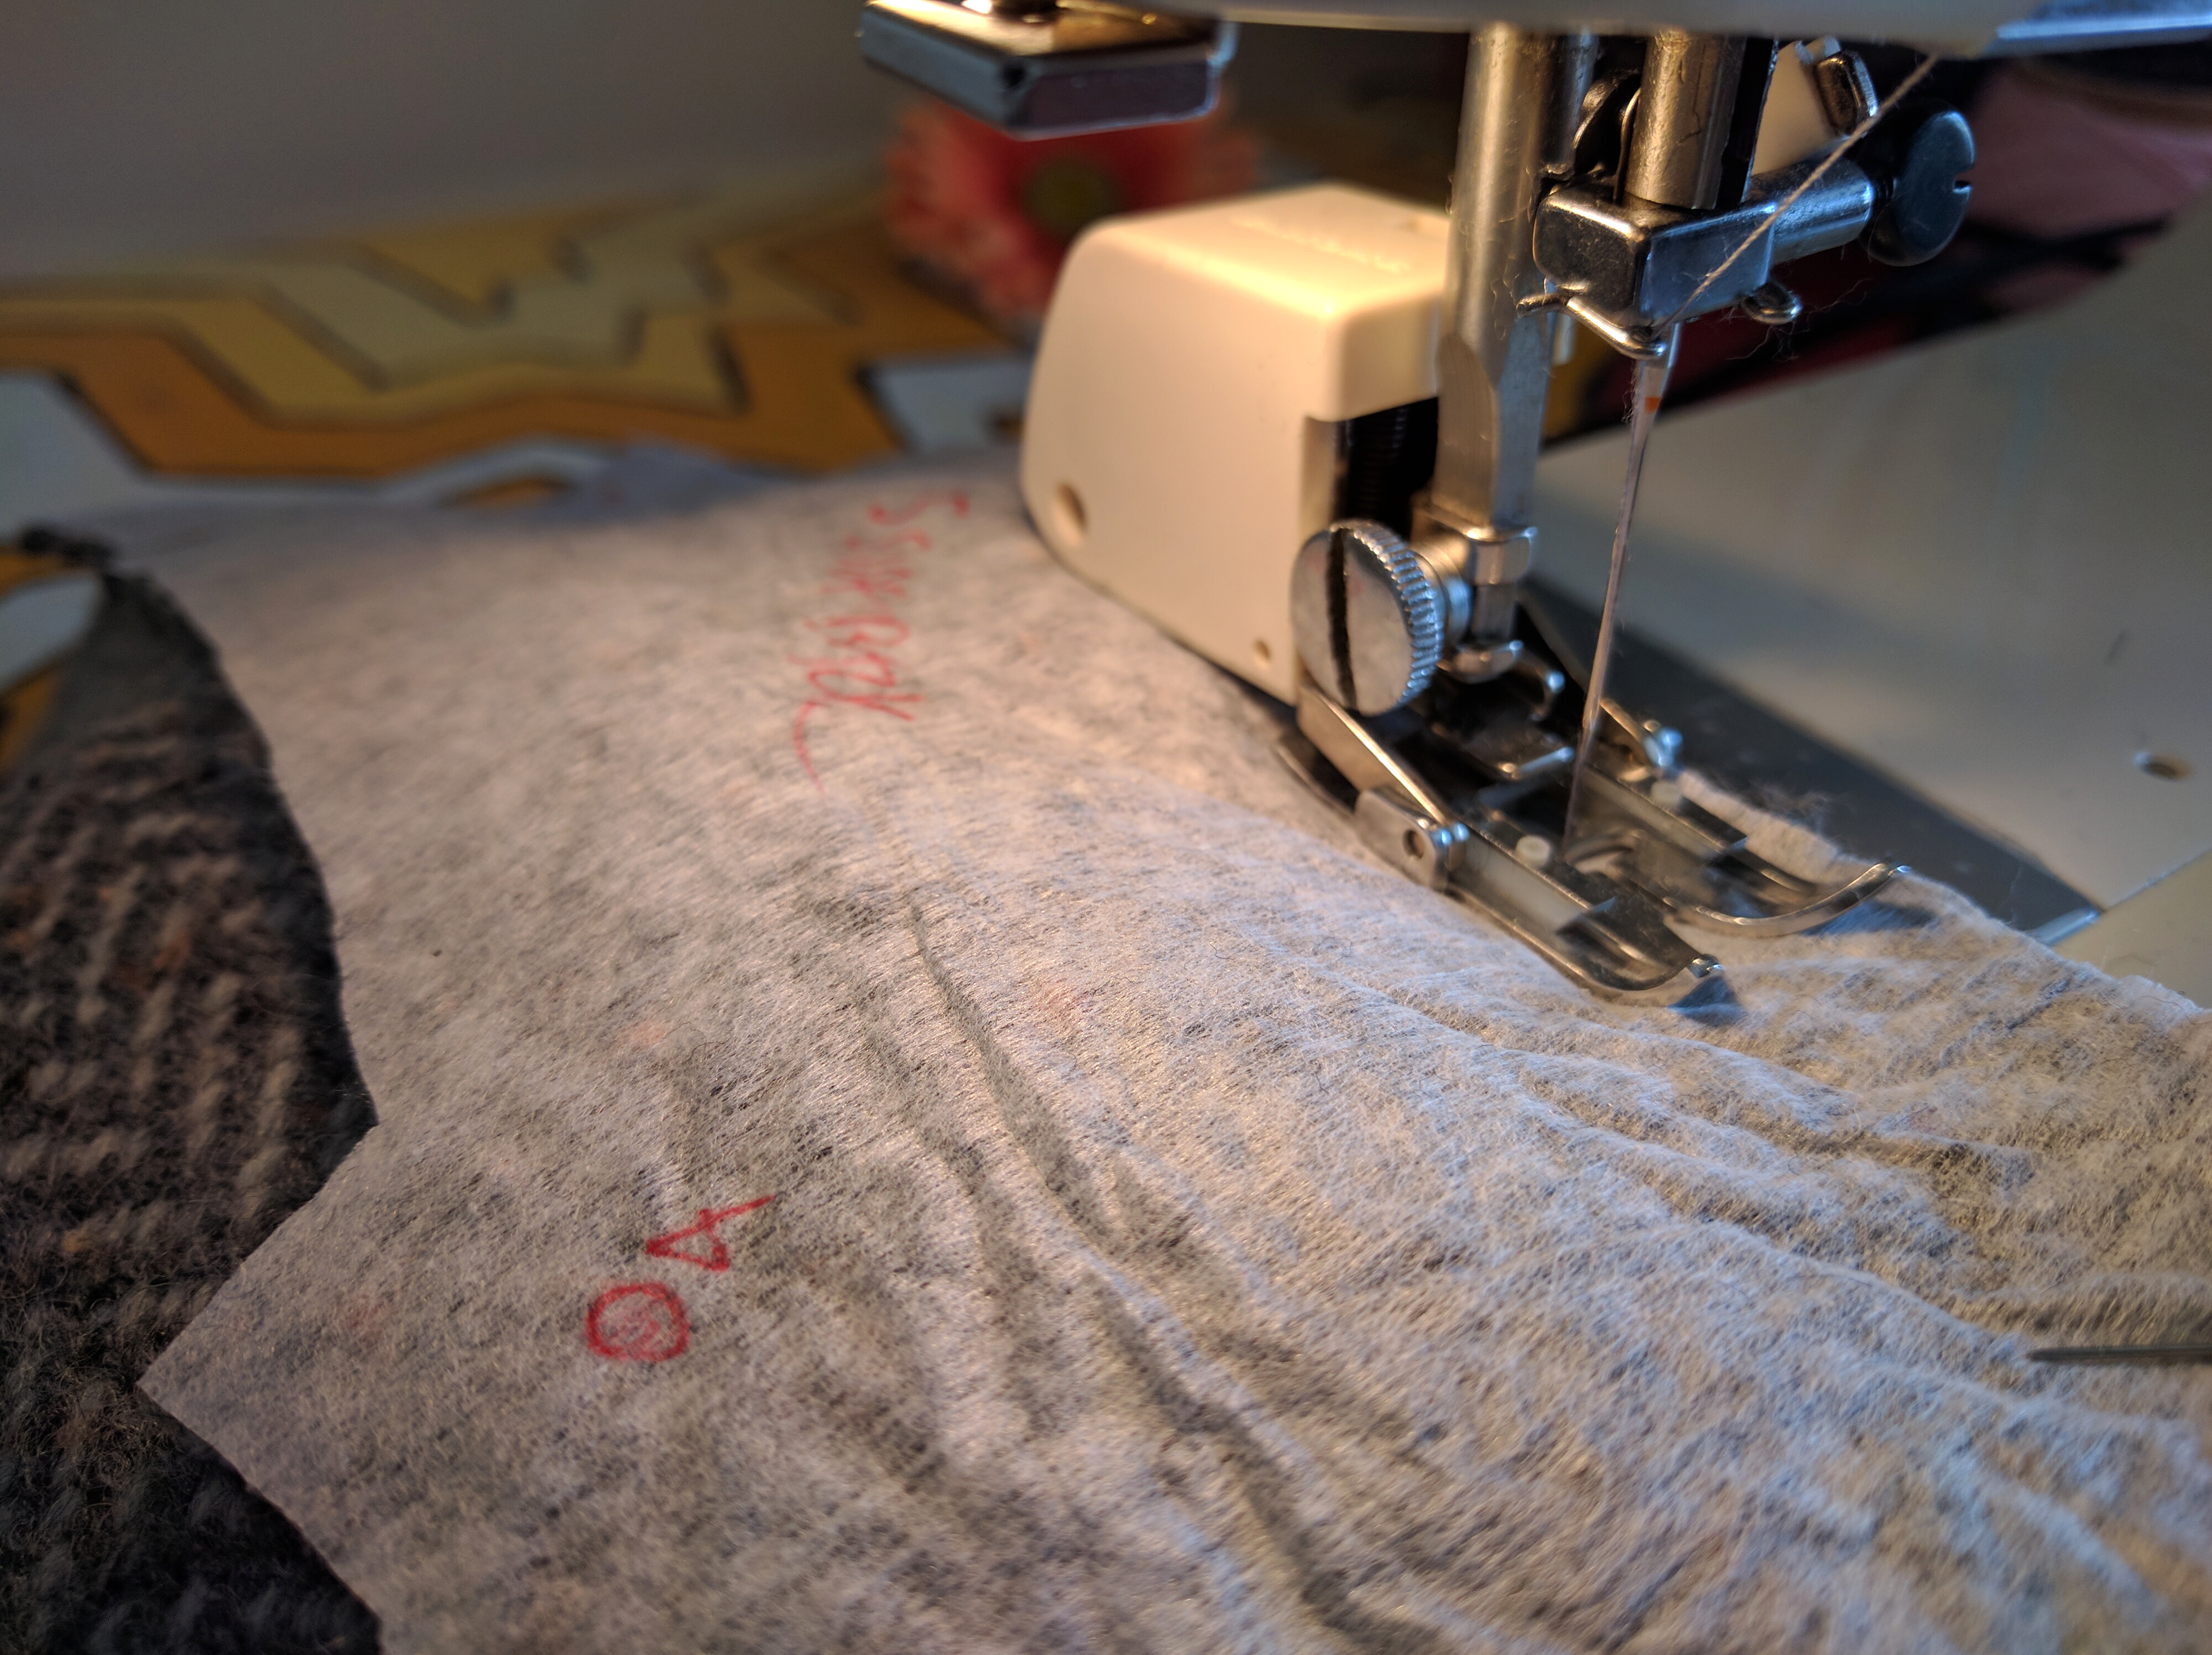
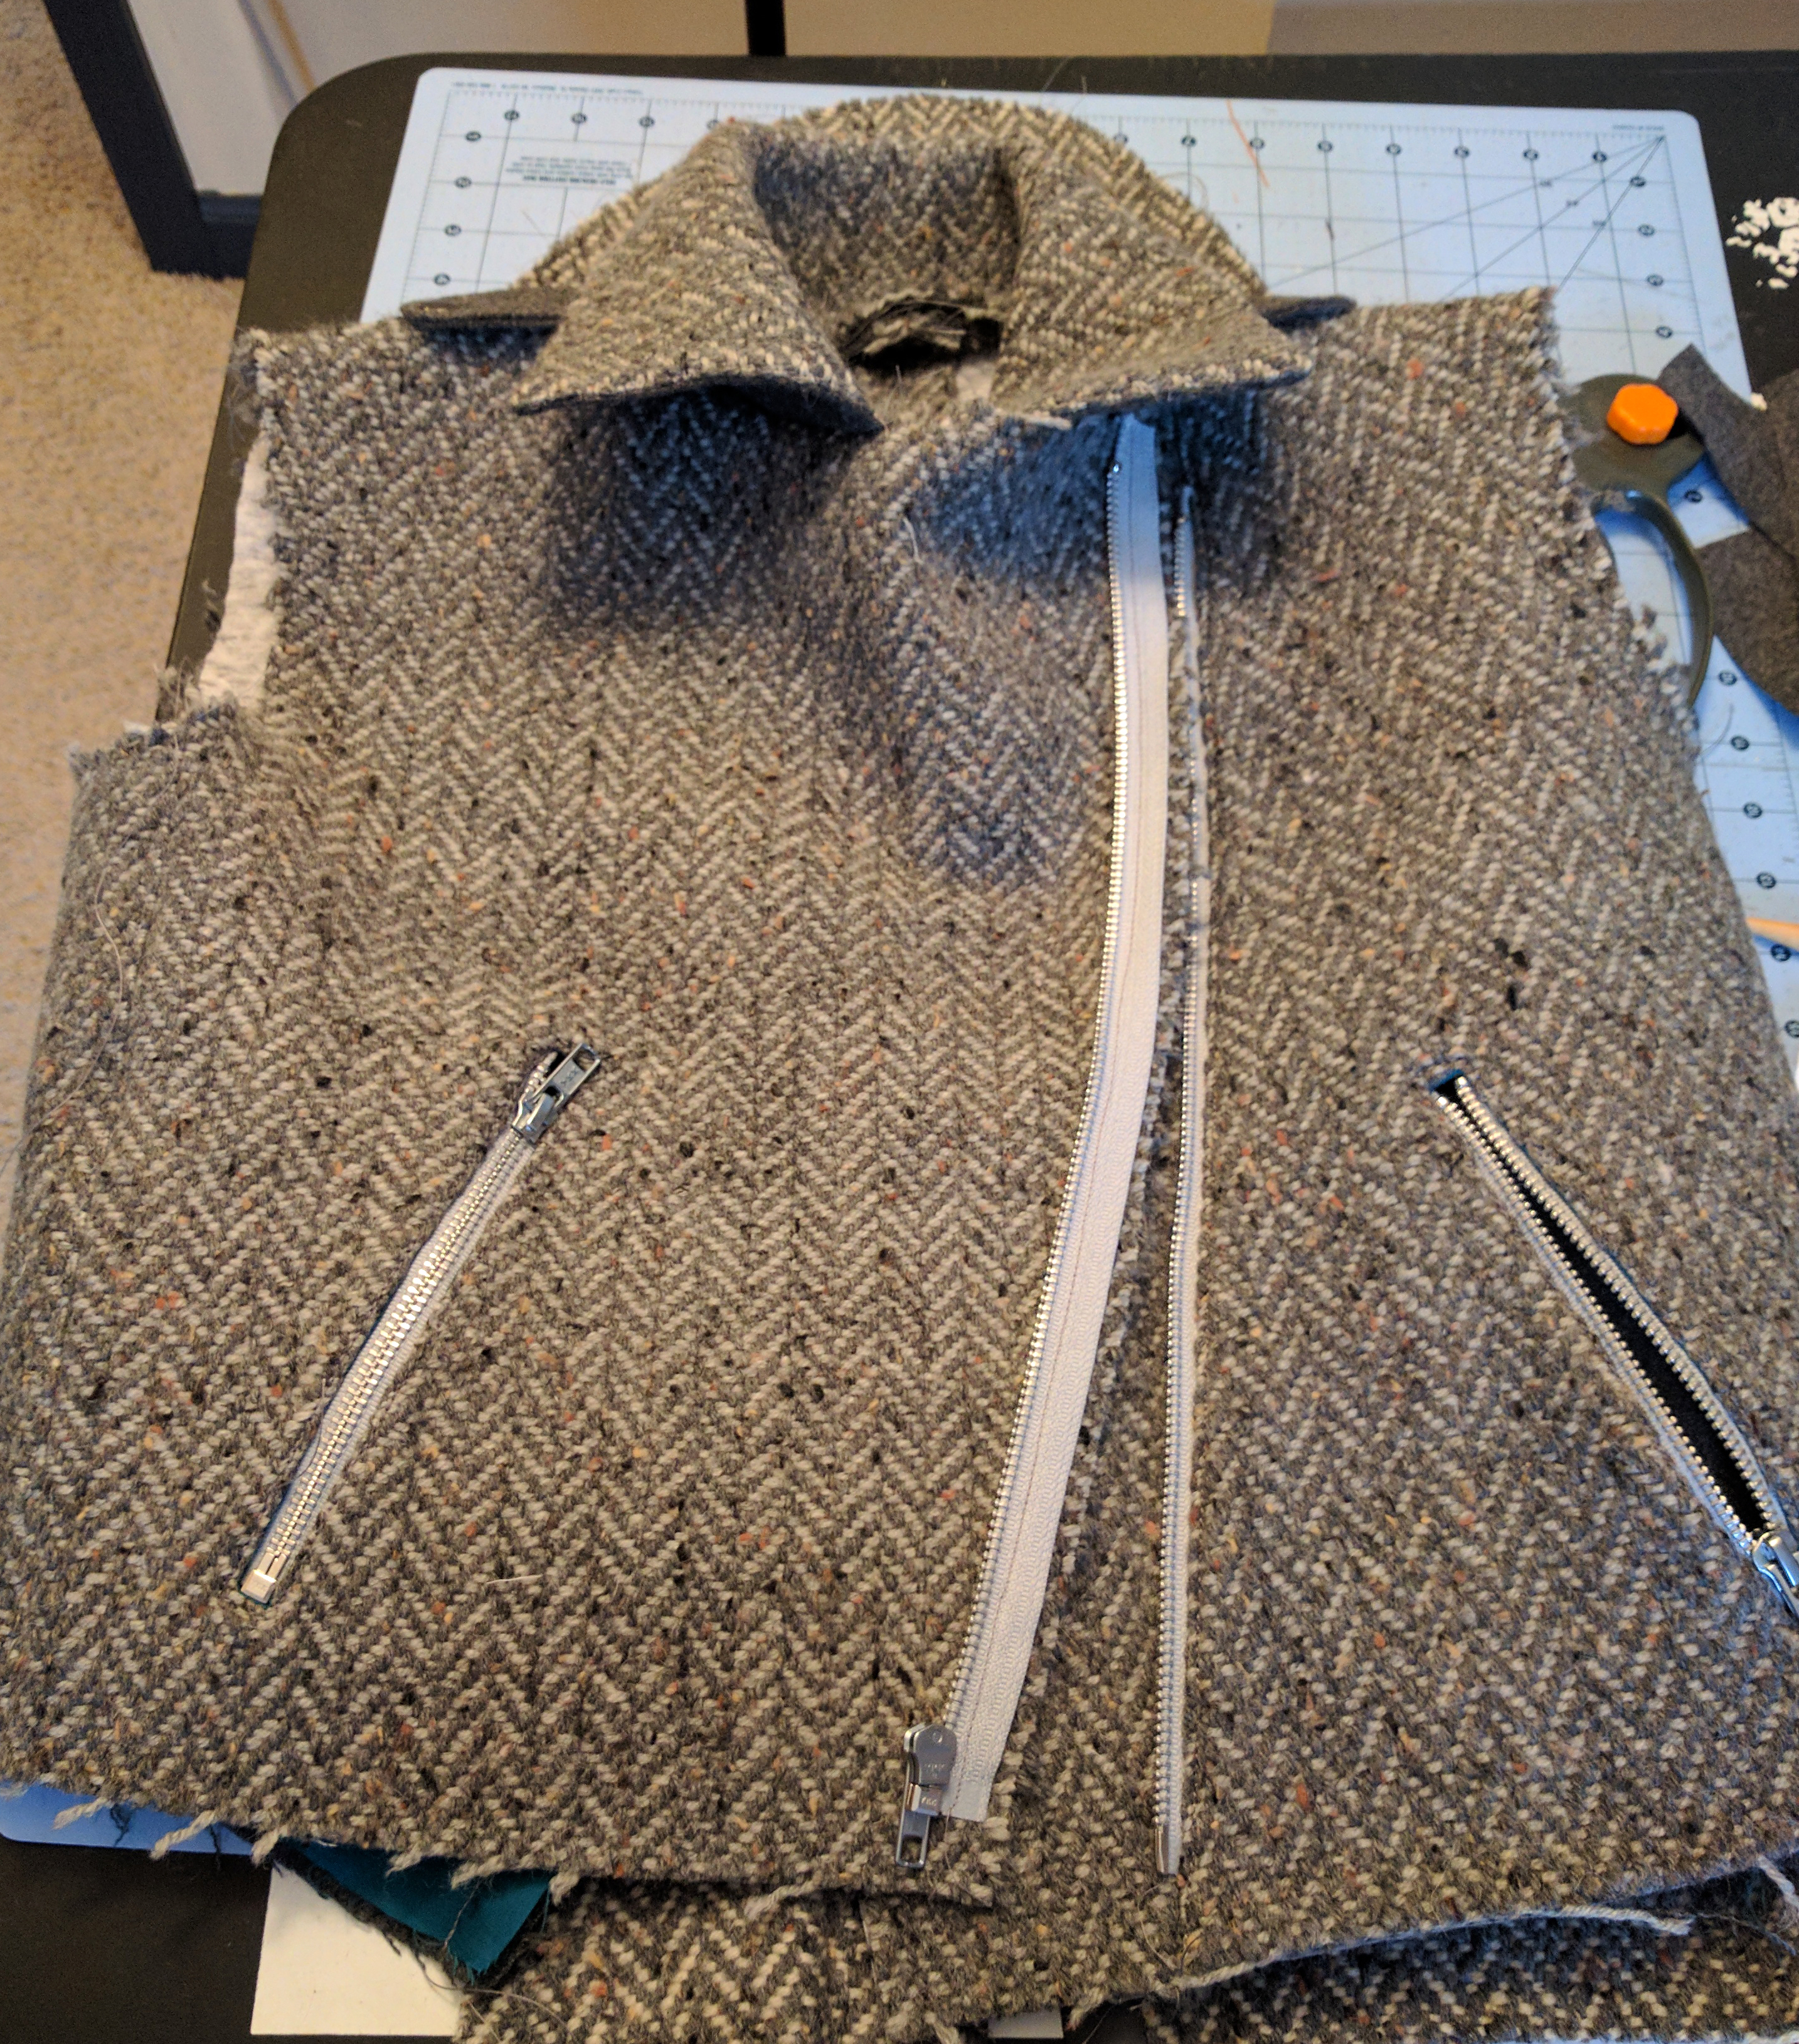
The first step was to interface all of my handwoven fabric. I got enough lightweight fusible interfacing for all my yardage. The reason for doing this is so that when I cut into the fabric for my pattern pieces, it will prevent the edges from coming unwoven.
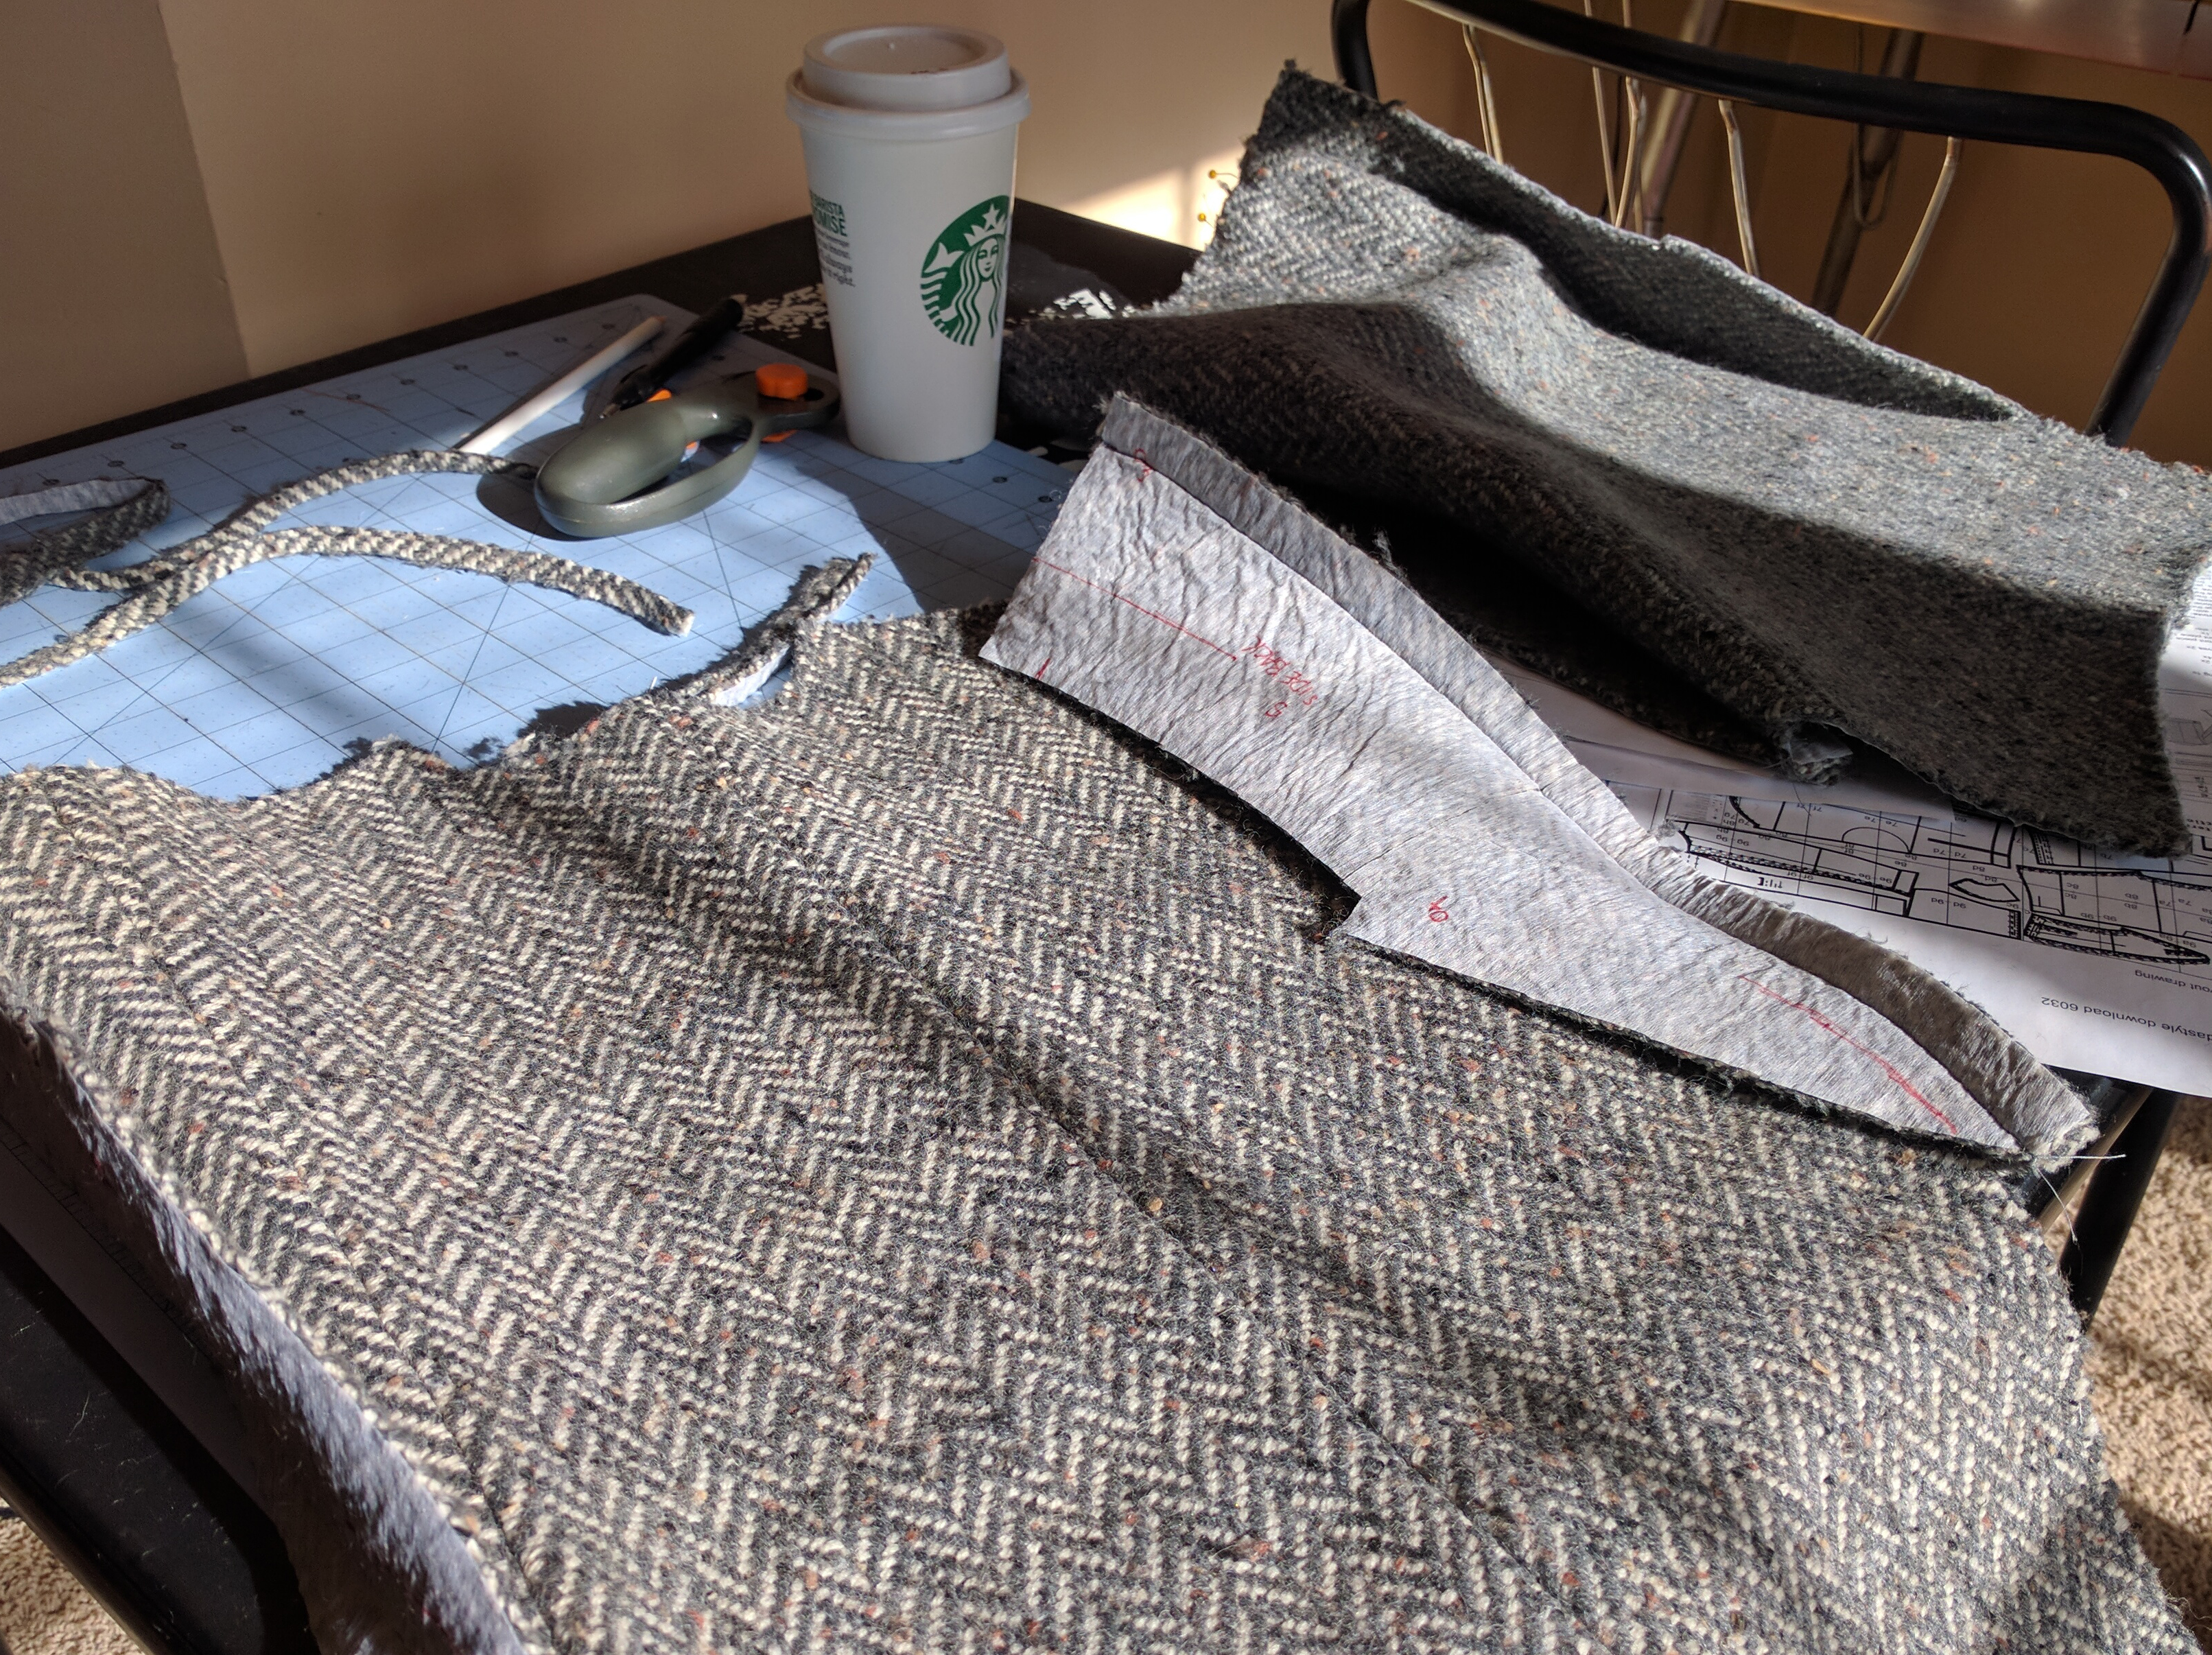
Two jackets-worth of pattern pieces and lining is a LOT of cutting!
Every bit of fabric is precious since I wove it, so a certain strategy is involved when laying out those pattern pieces.
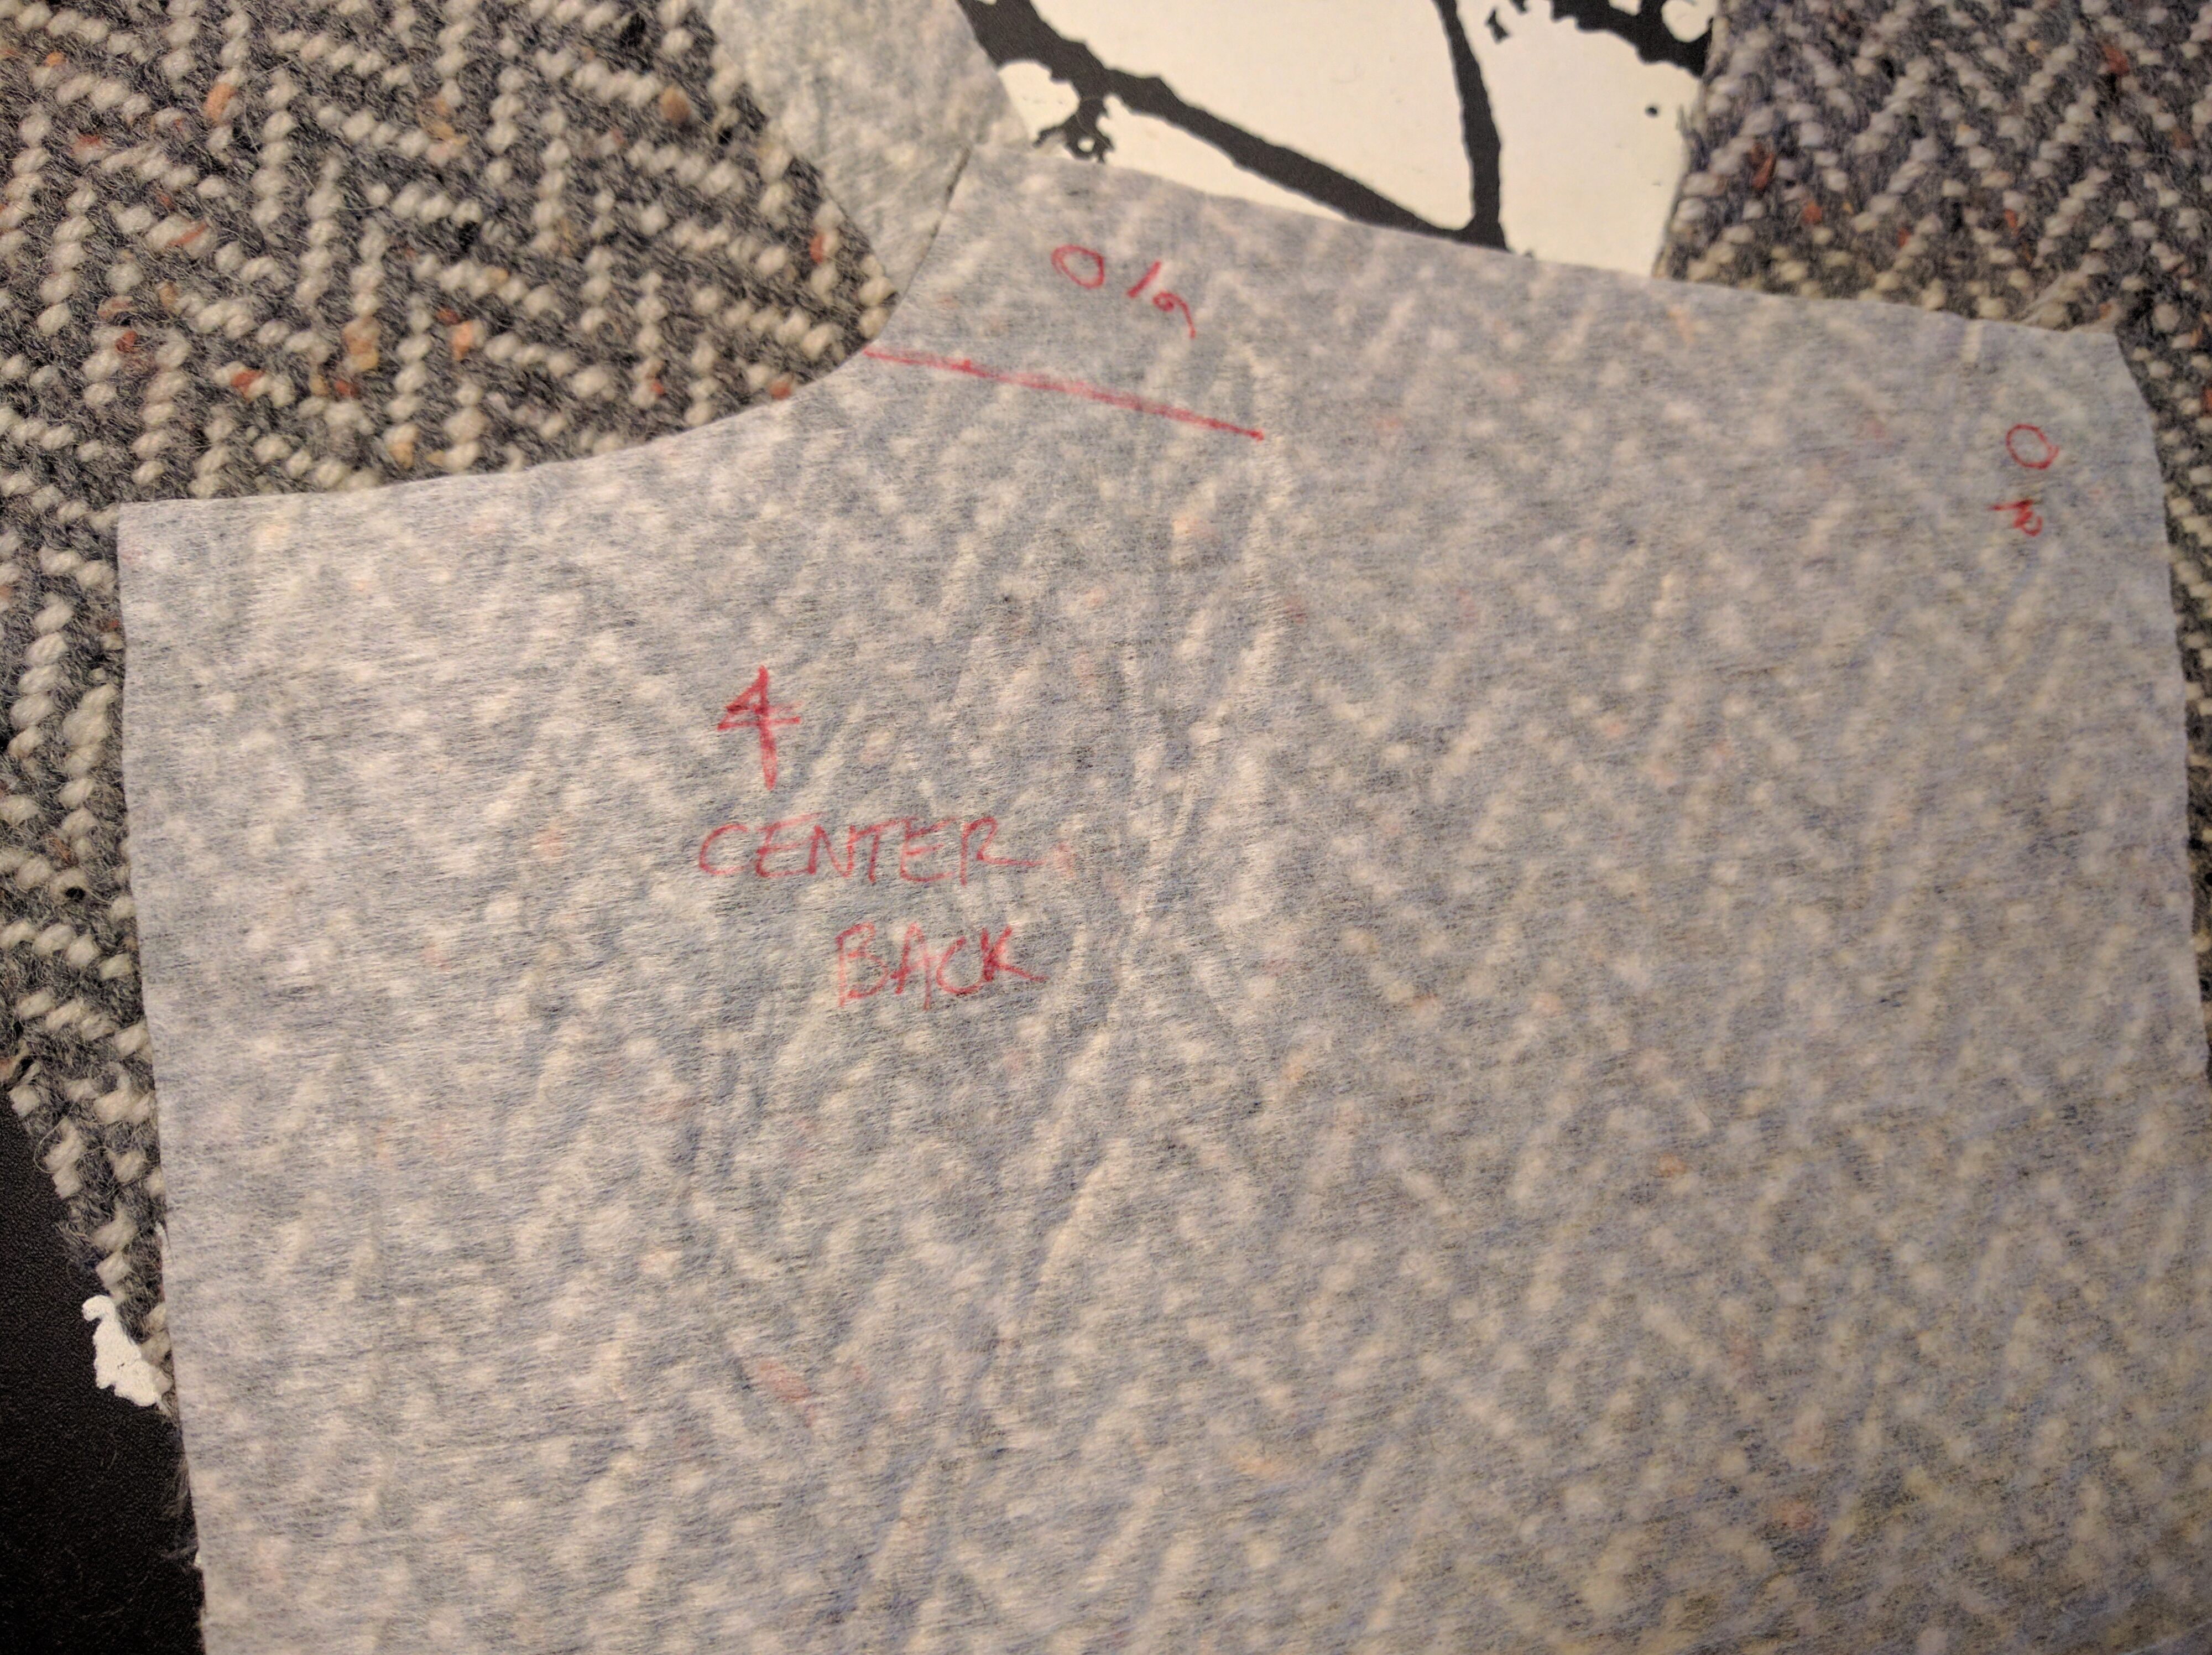
With the interfacing on the back of my fabric, it made it easy to make pattern markings and actually be able to see them.
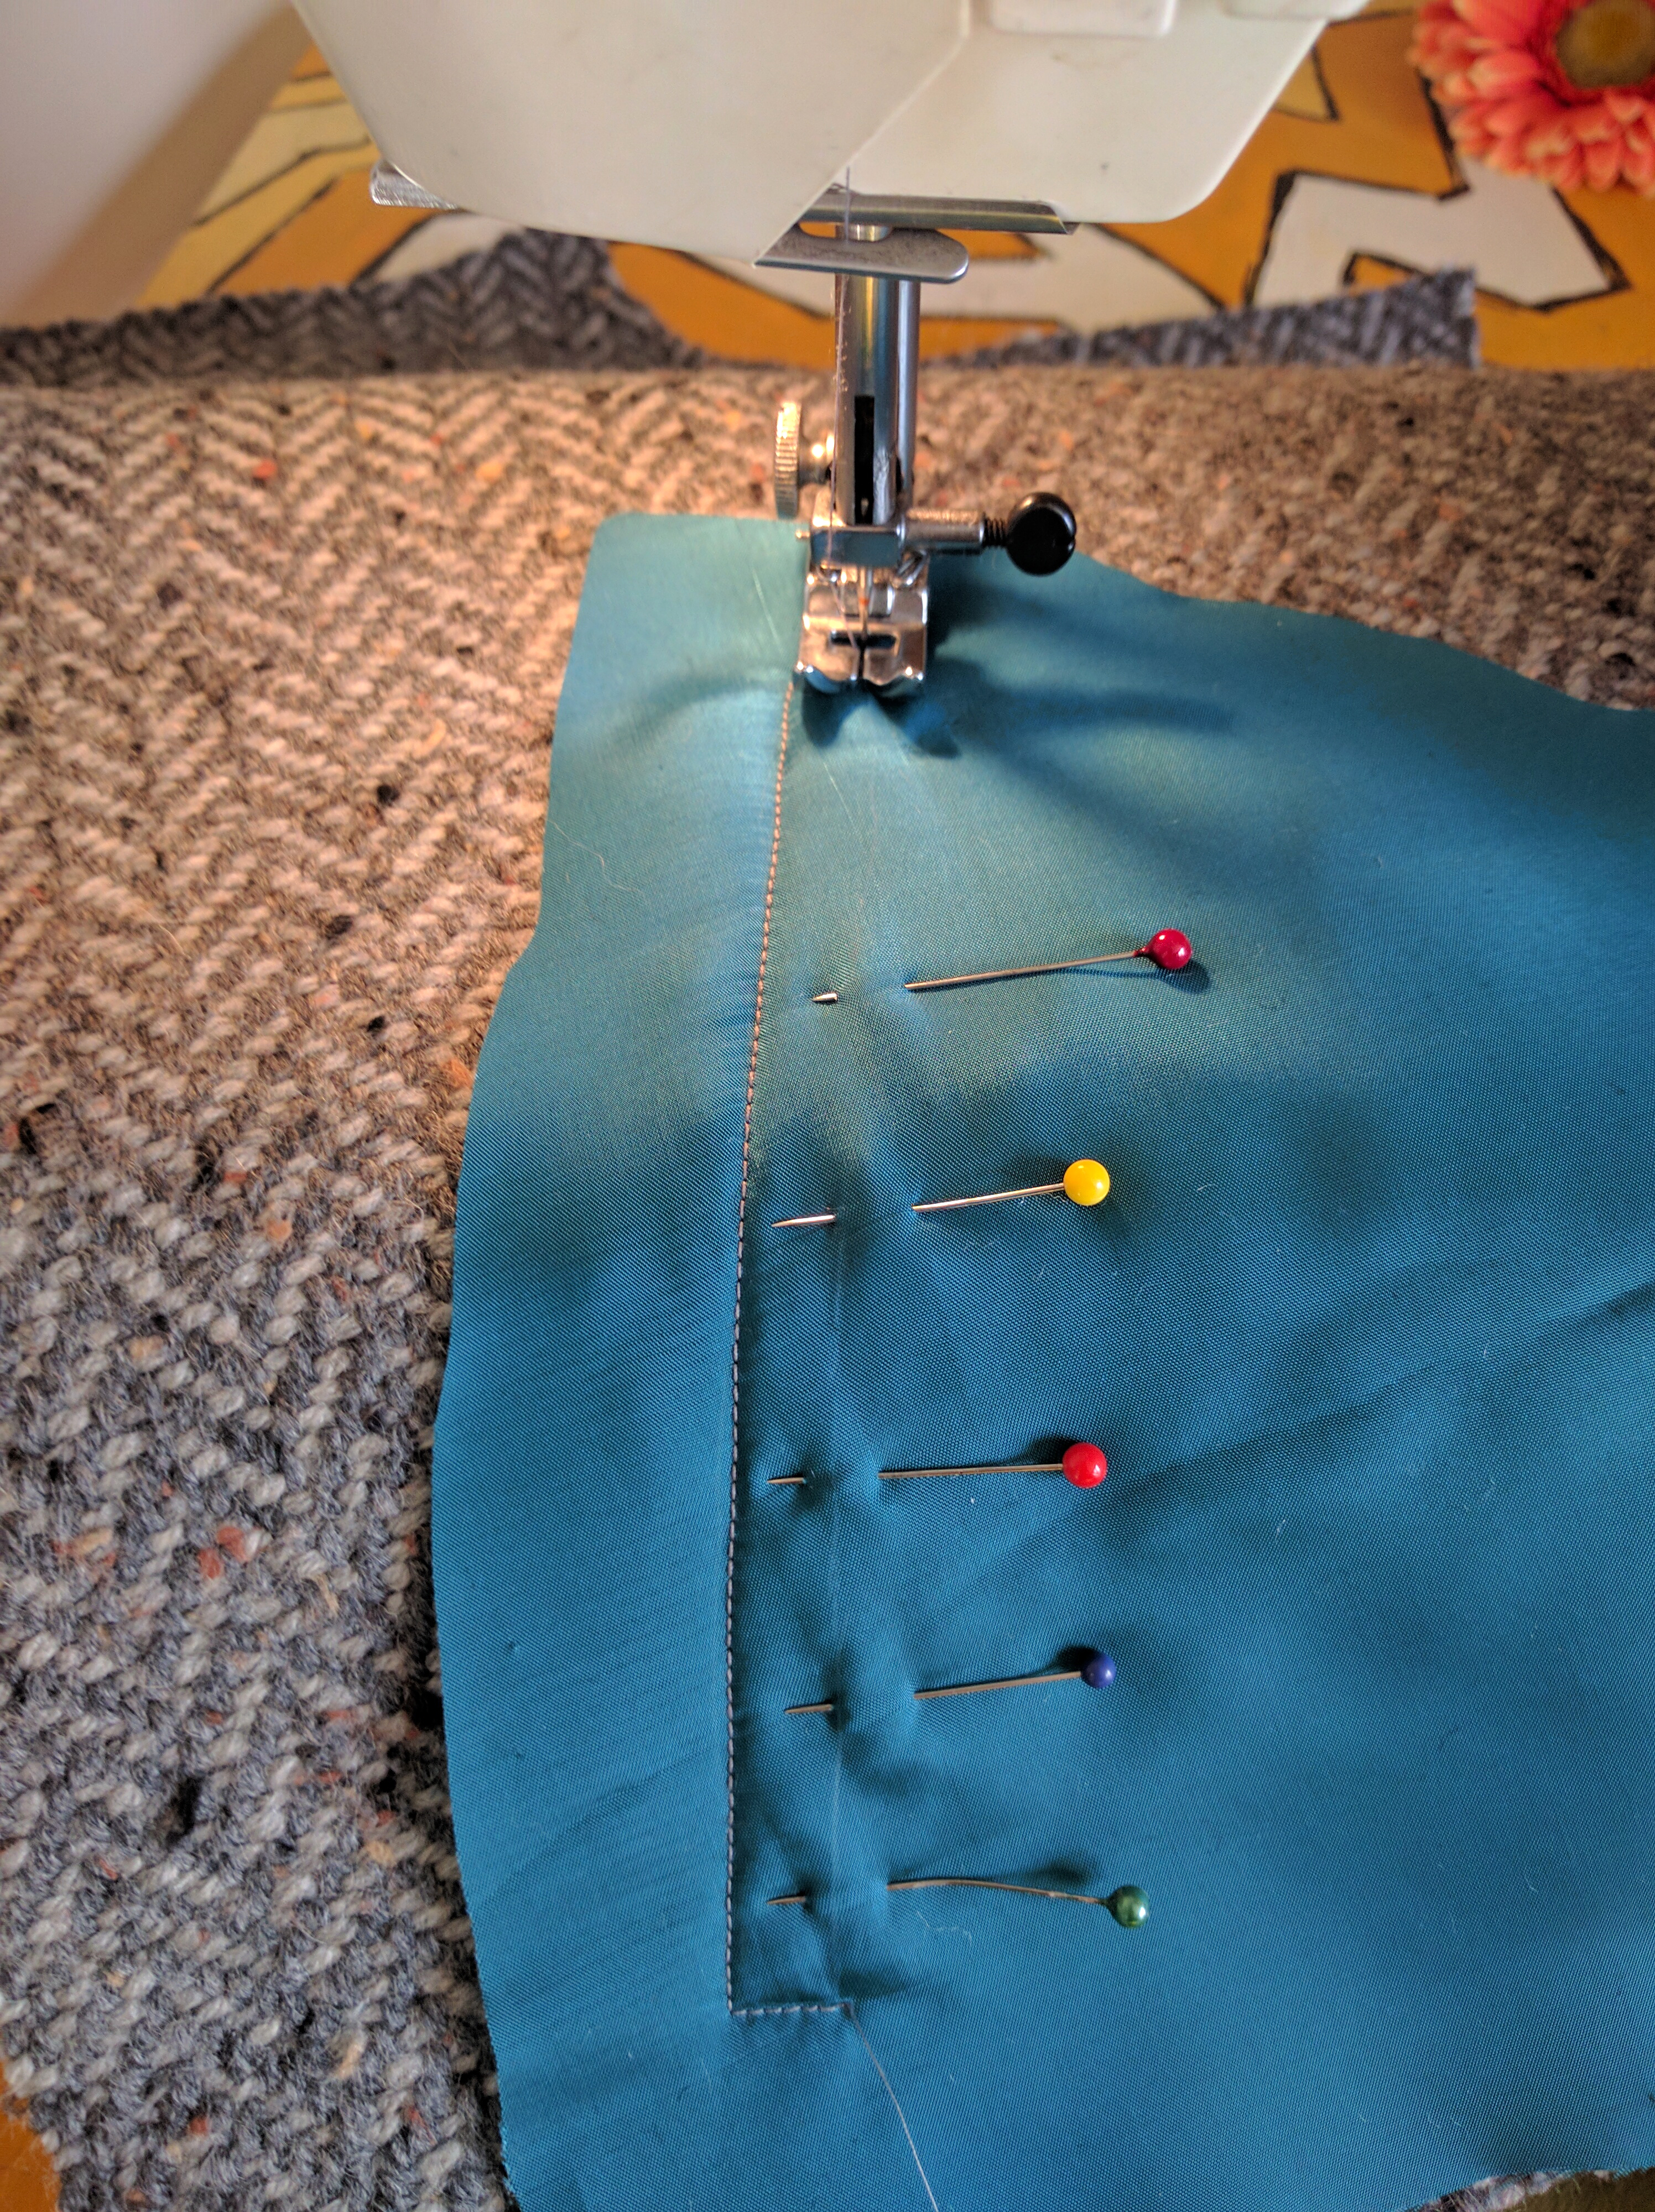
I used a special foot on my sewing machine called a “walking foot” for some of the bulky seams. It helps to manage bulky layers of fabric so that they feed evenly through the machine.
Sewing moto jackets requires a lot of coffee.
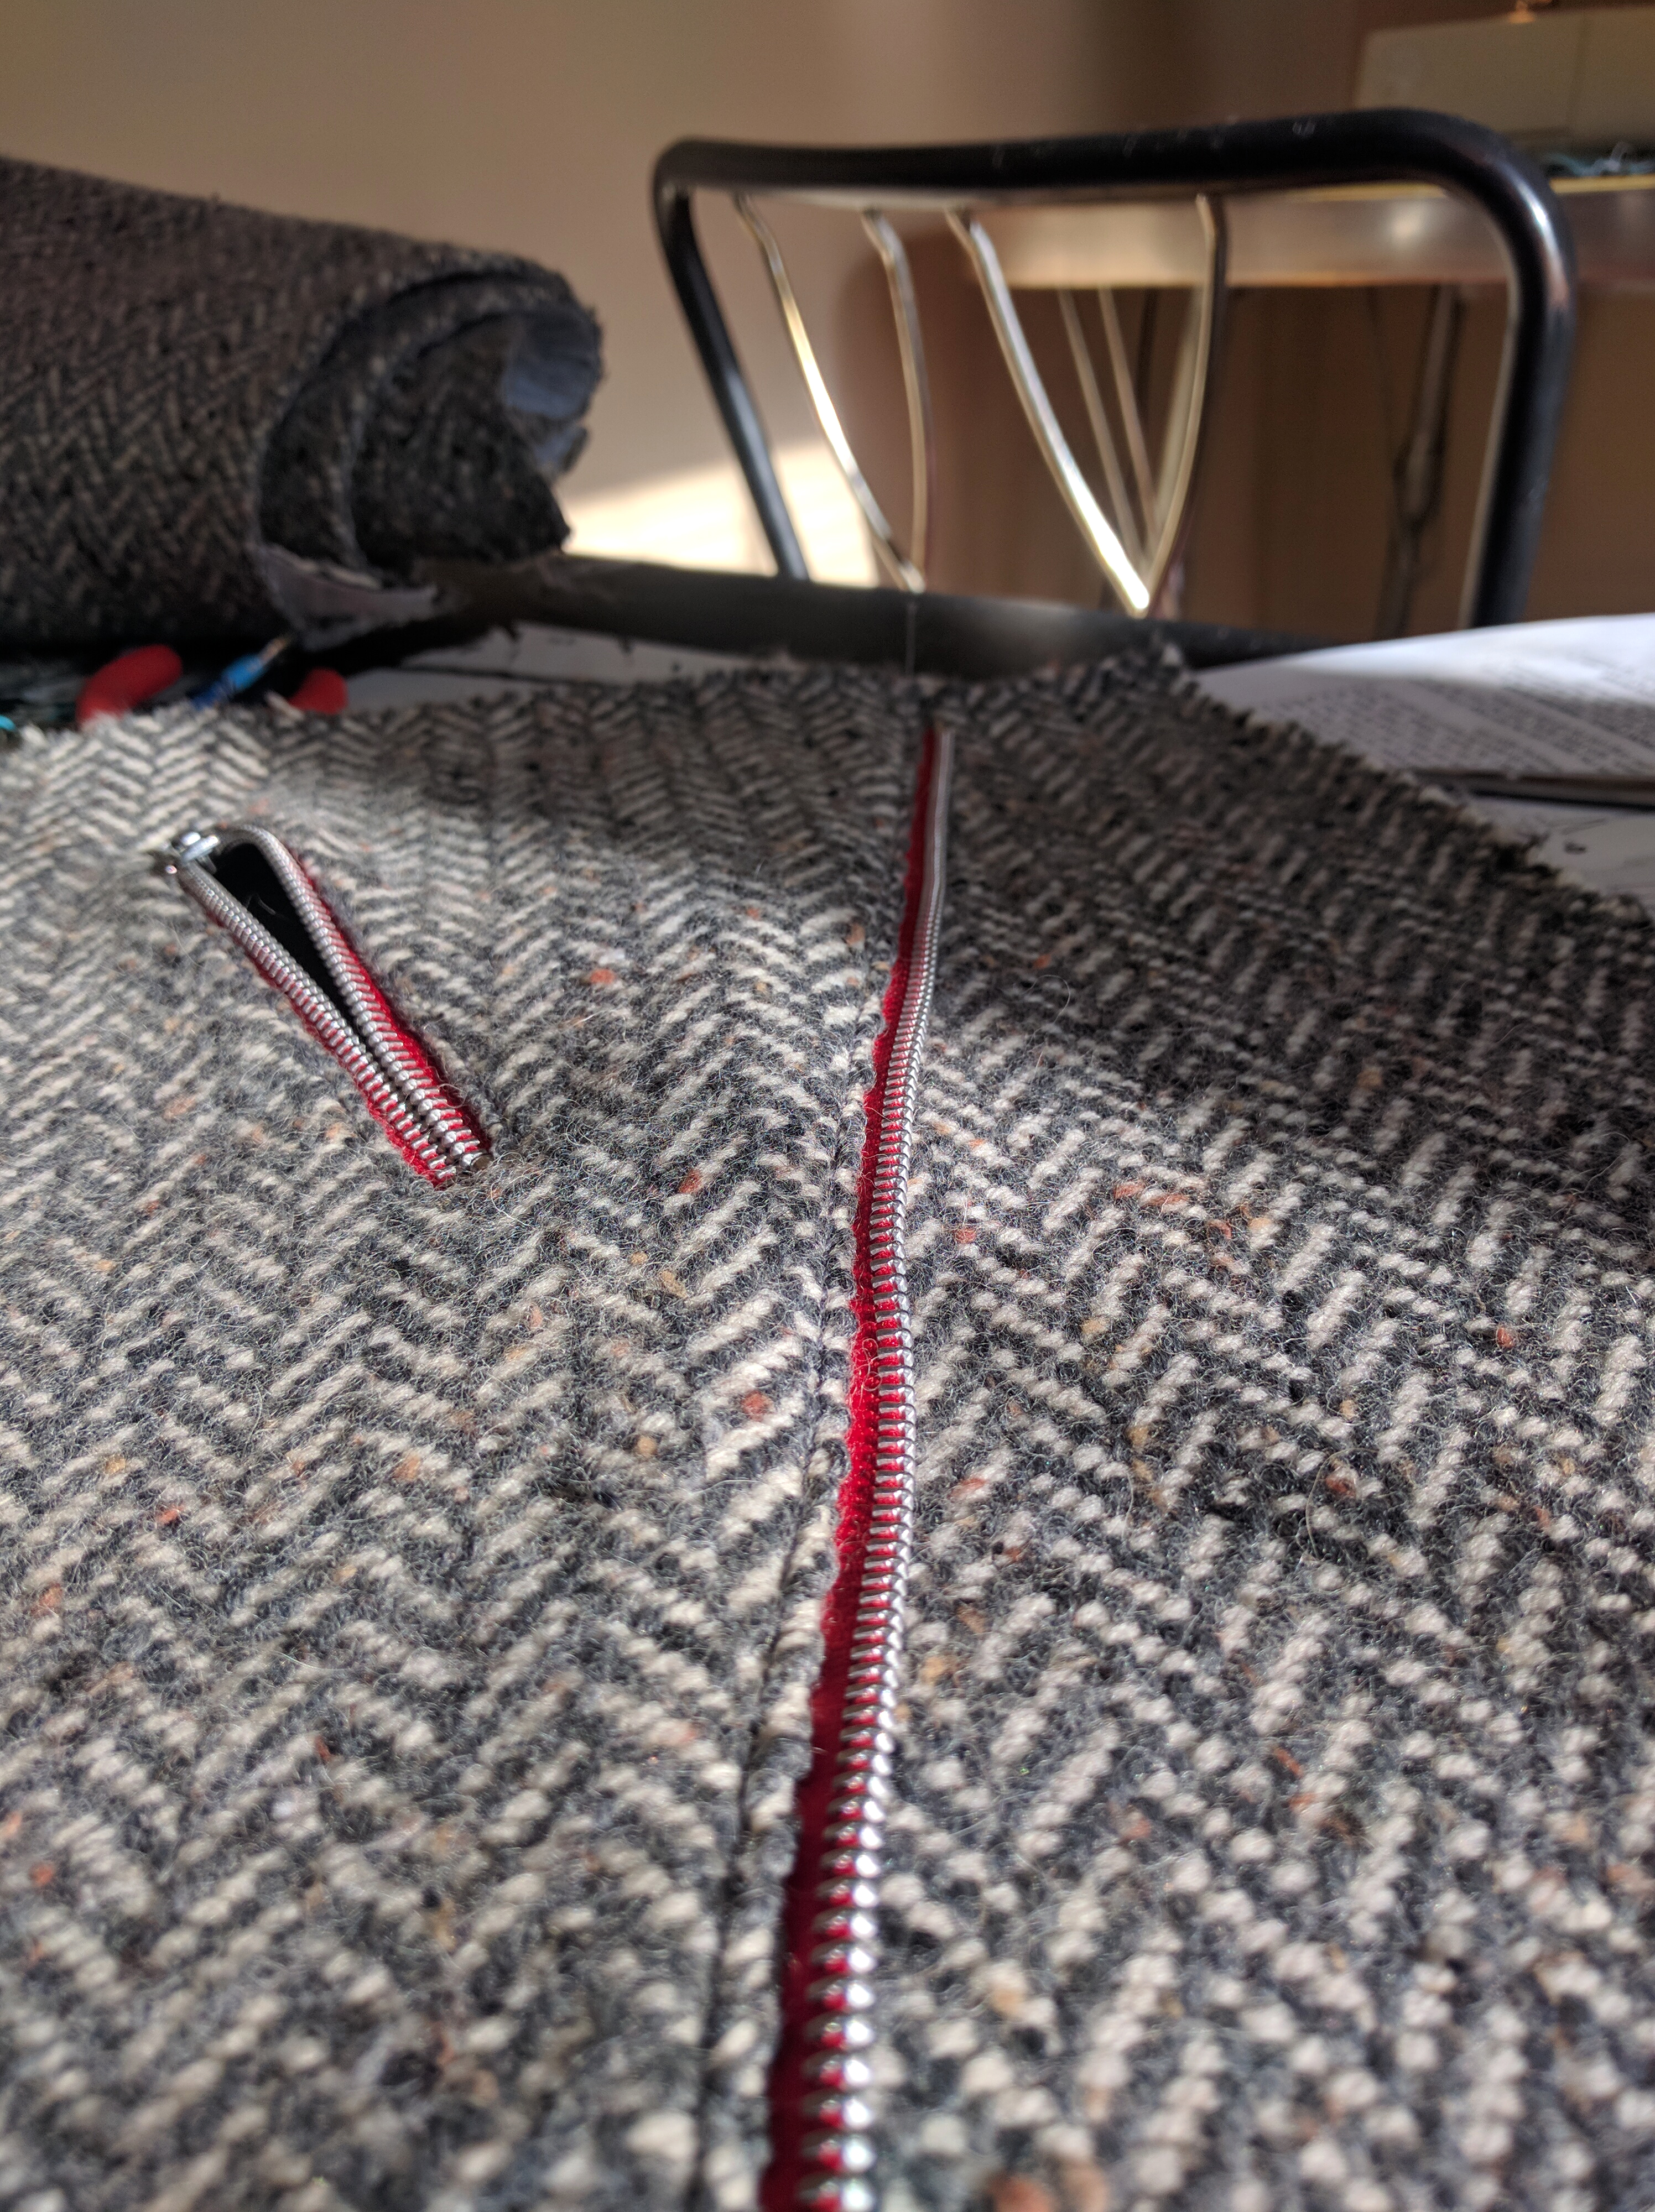
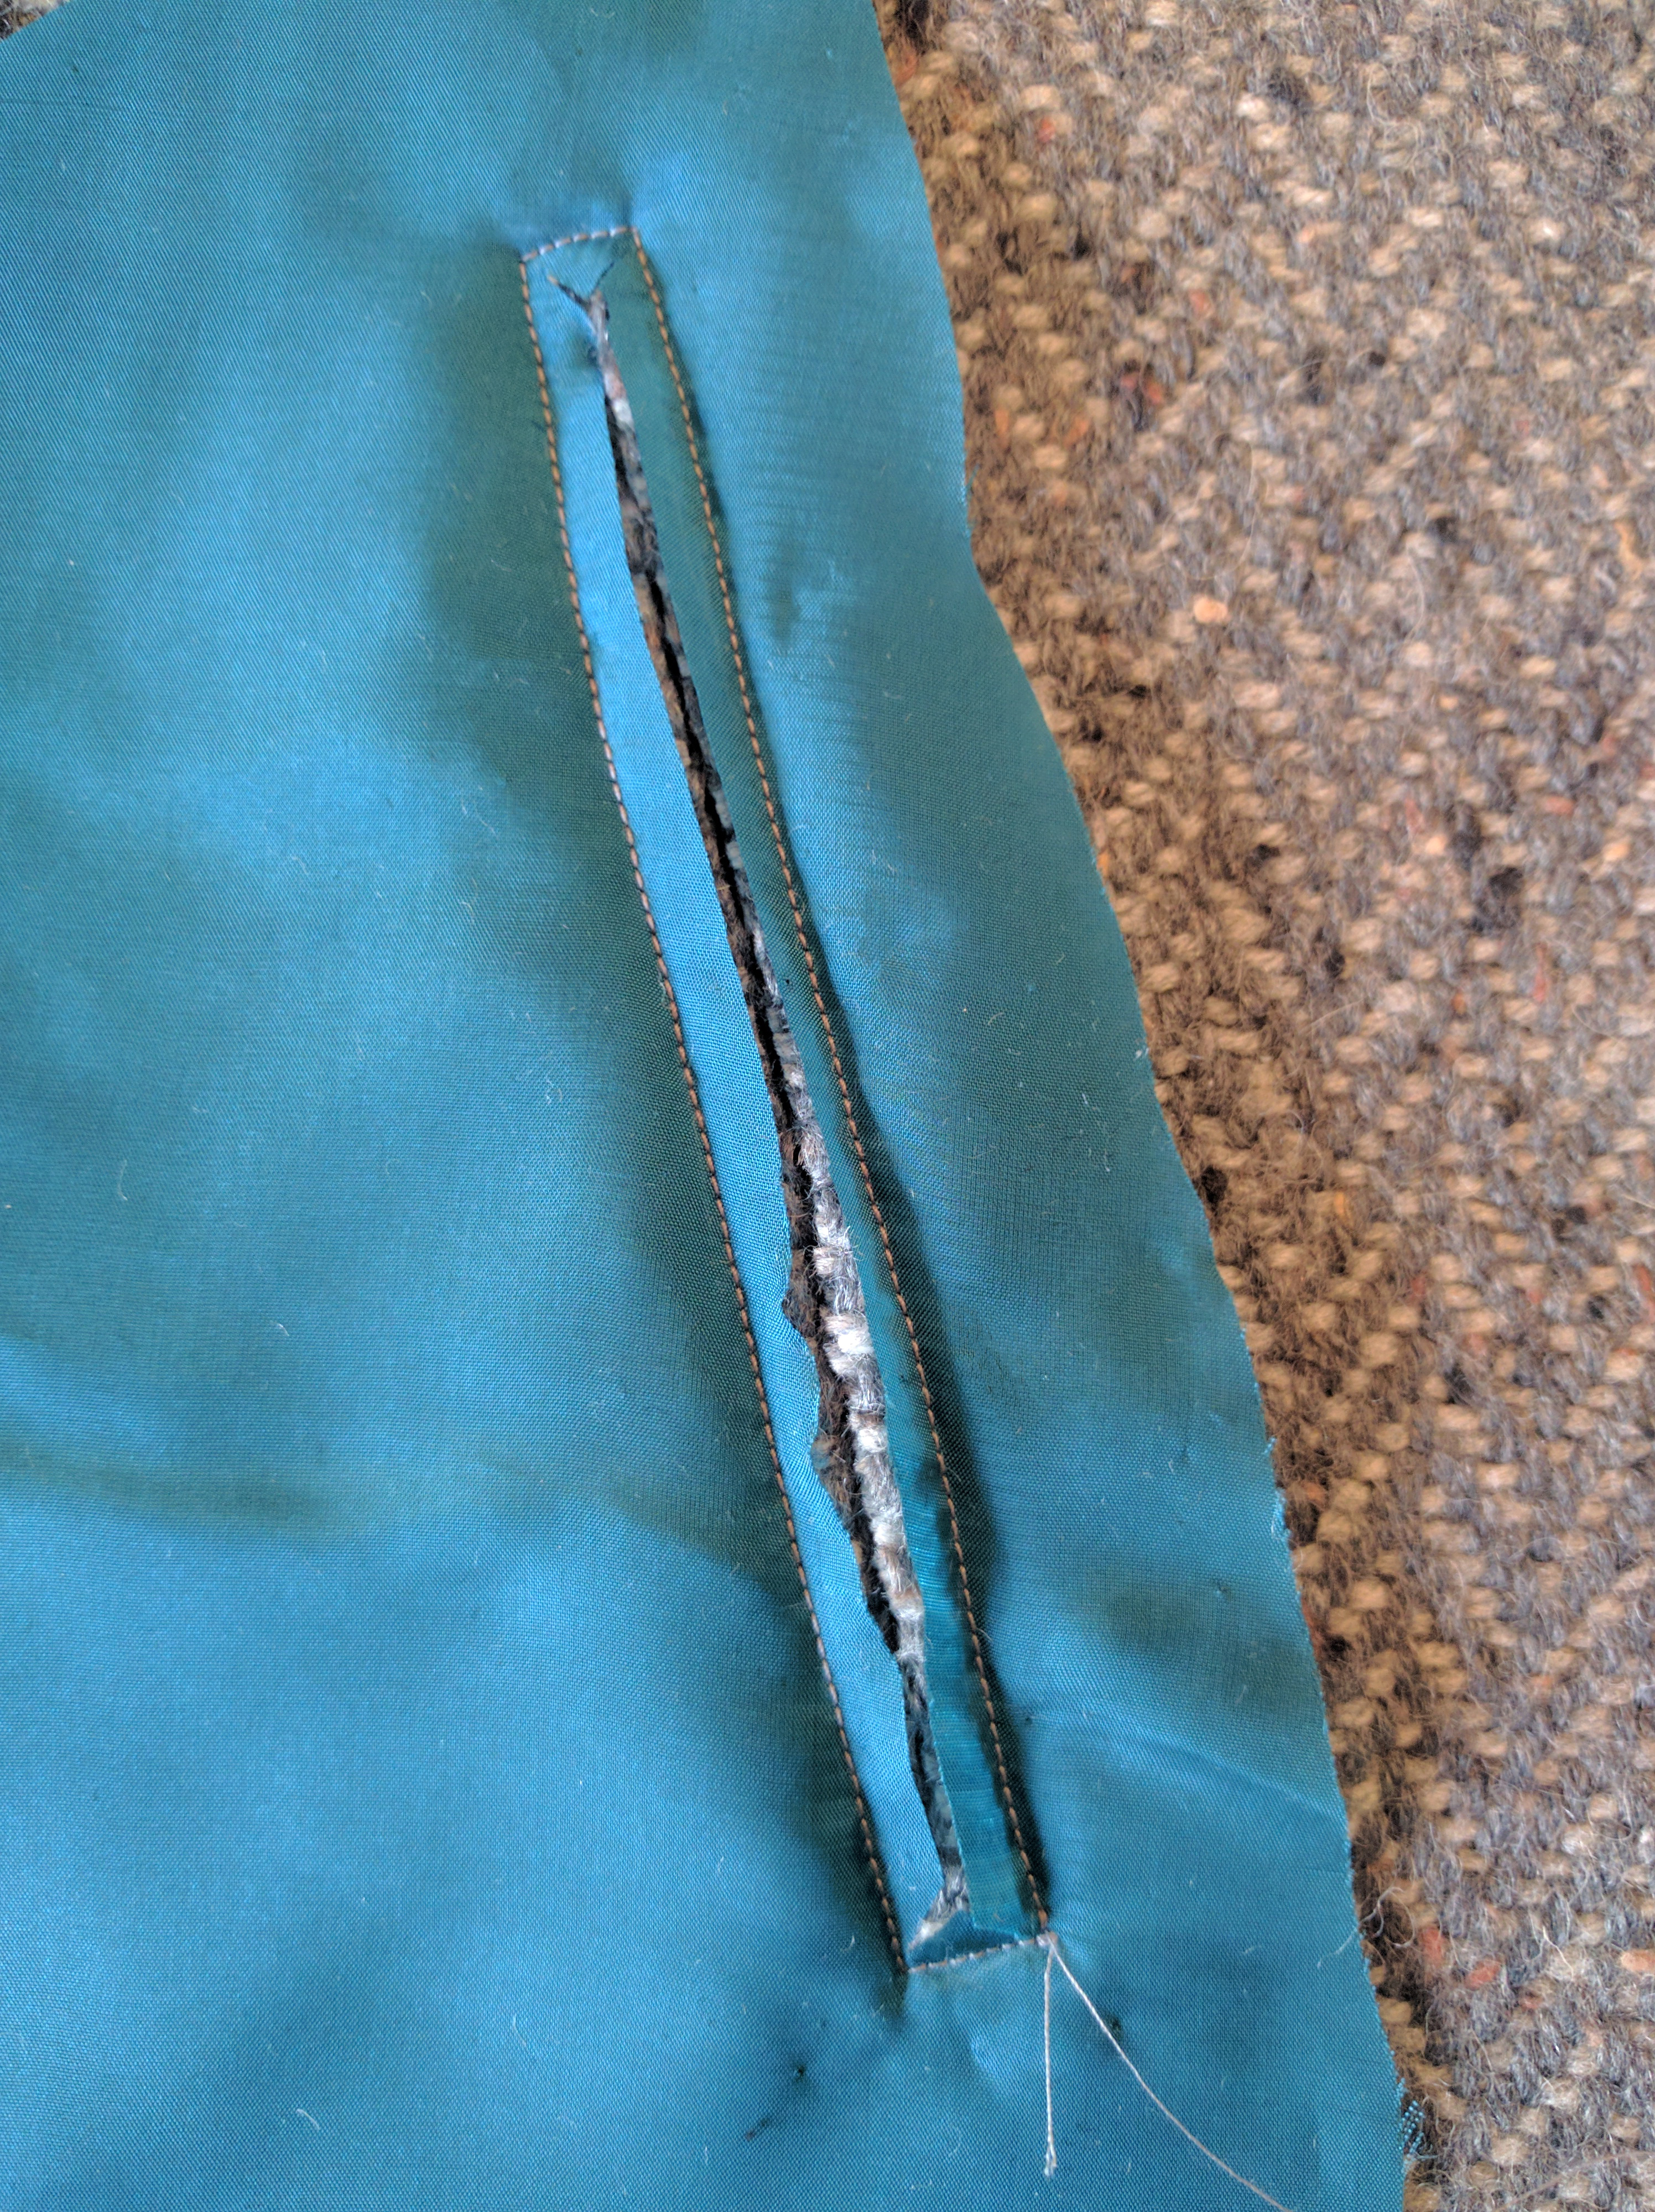
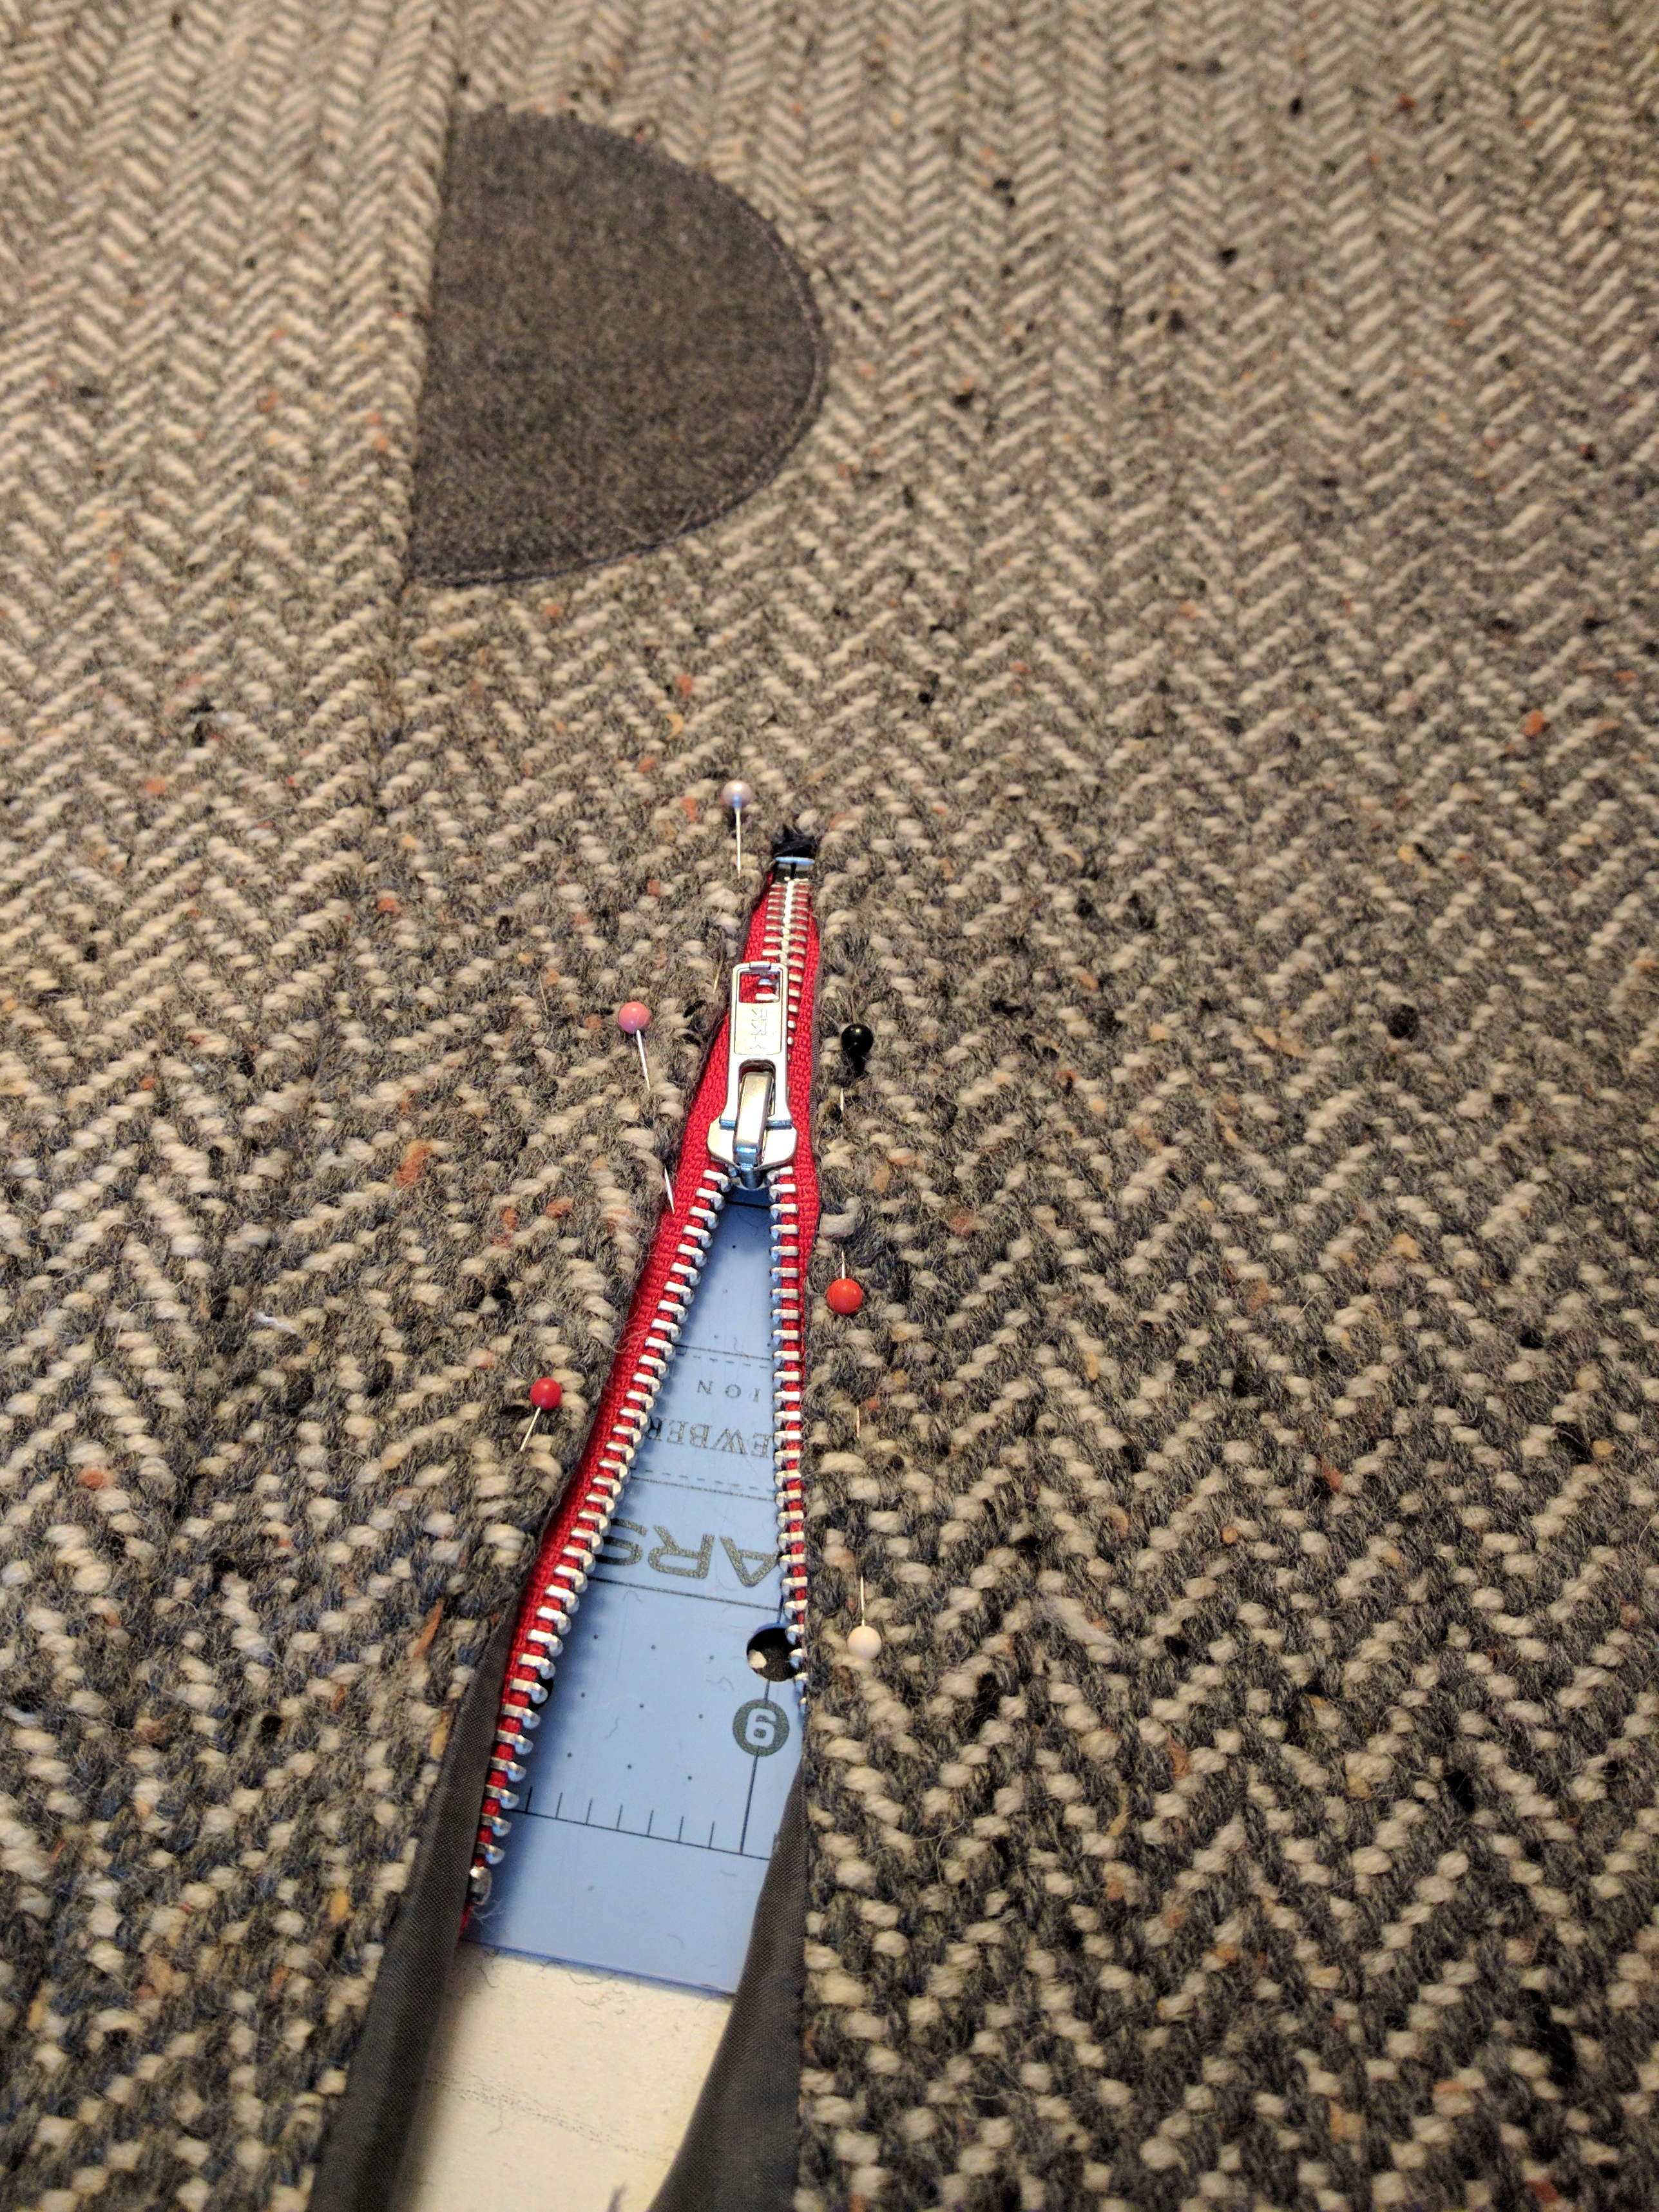
Since this is a weaving column, I’m taking it easy on sharing every single detail of the sewing process. But zipper installation fascinates me, so here are some in-progess shots of the pocket zippers. Above, I’m sewing the lining onto the right side of the fabric.
Then the pocket opening is slashed down the center.
Next, the lining fabric gets pulled to the wrong side and pressed. It’s so clean and tidy looking!
And finally the zipper is pinned underneath and sewn down. I love a good zipper installation. Which is good, since each jacket requires 5 zippers. Whew!
Here we have something that is actually beginning to resemble clothing. Yay!
It’s like magic that this can turn into a moto jacket, right?
If you’re planning on being at TNNA in San Jose this weekend, stop by the booth and check out the finished jackets. Otherwise, I’ll be back on the blog next week for final photos and wrap-up.
And the adventure continues! You can read the first two posts in my moto jacket series here and here.
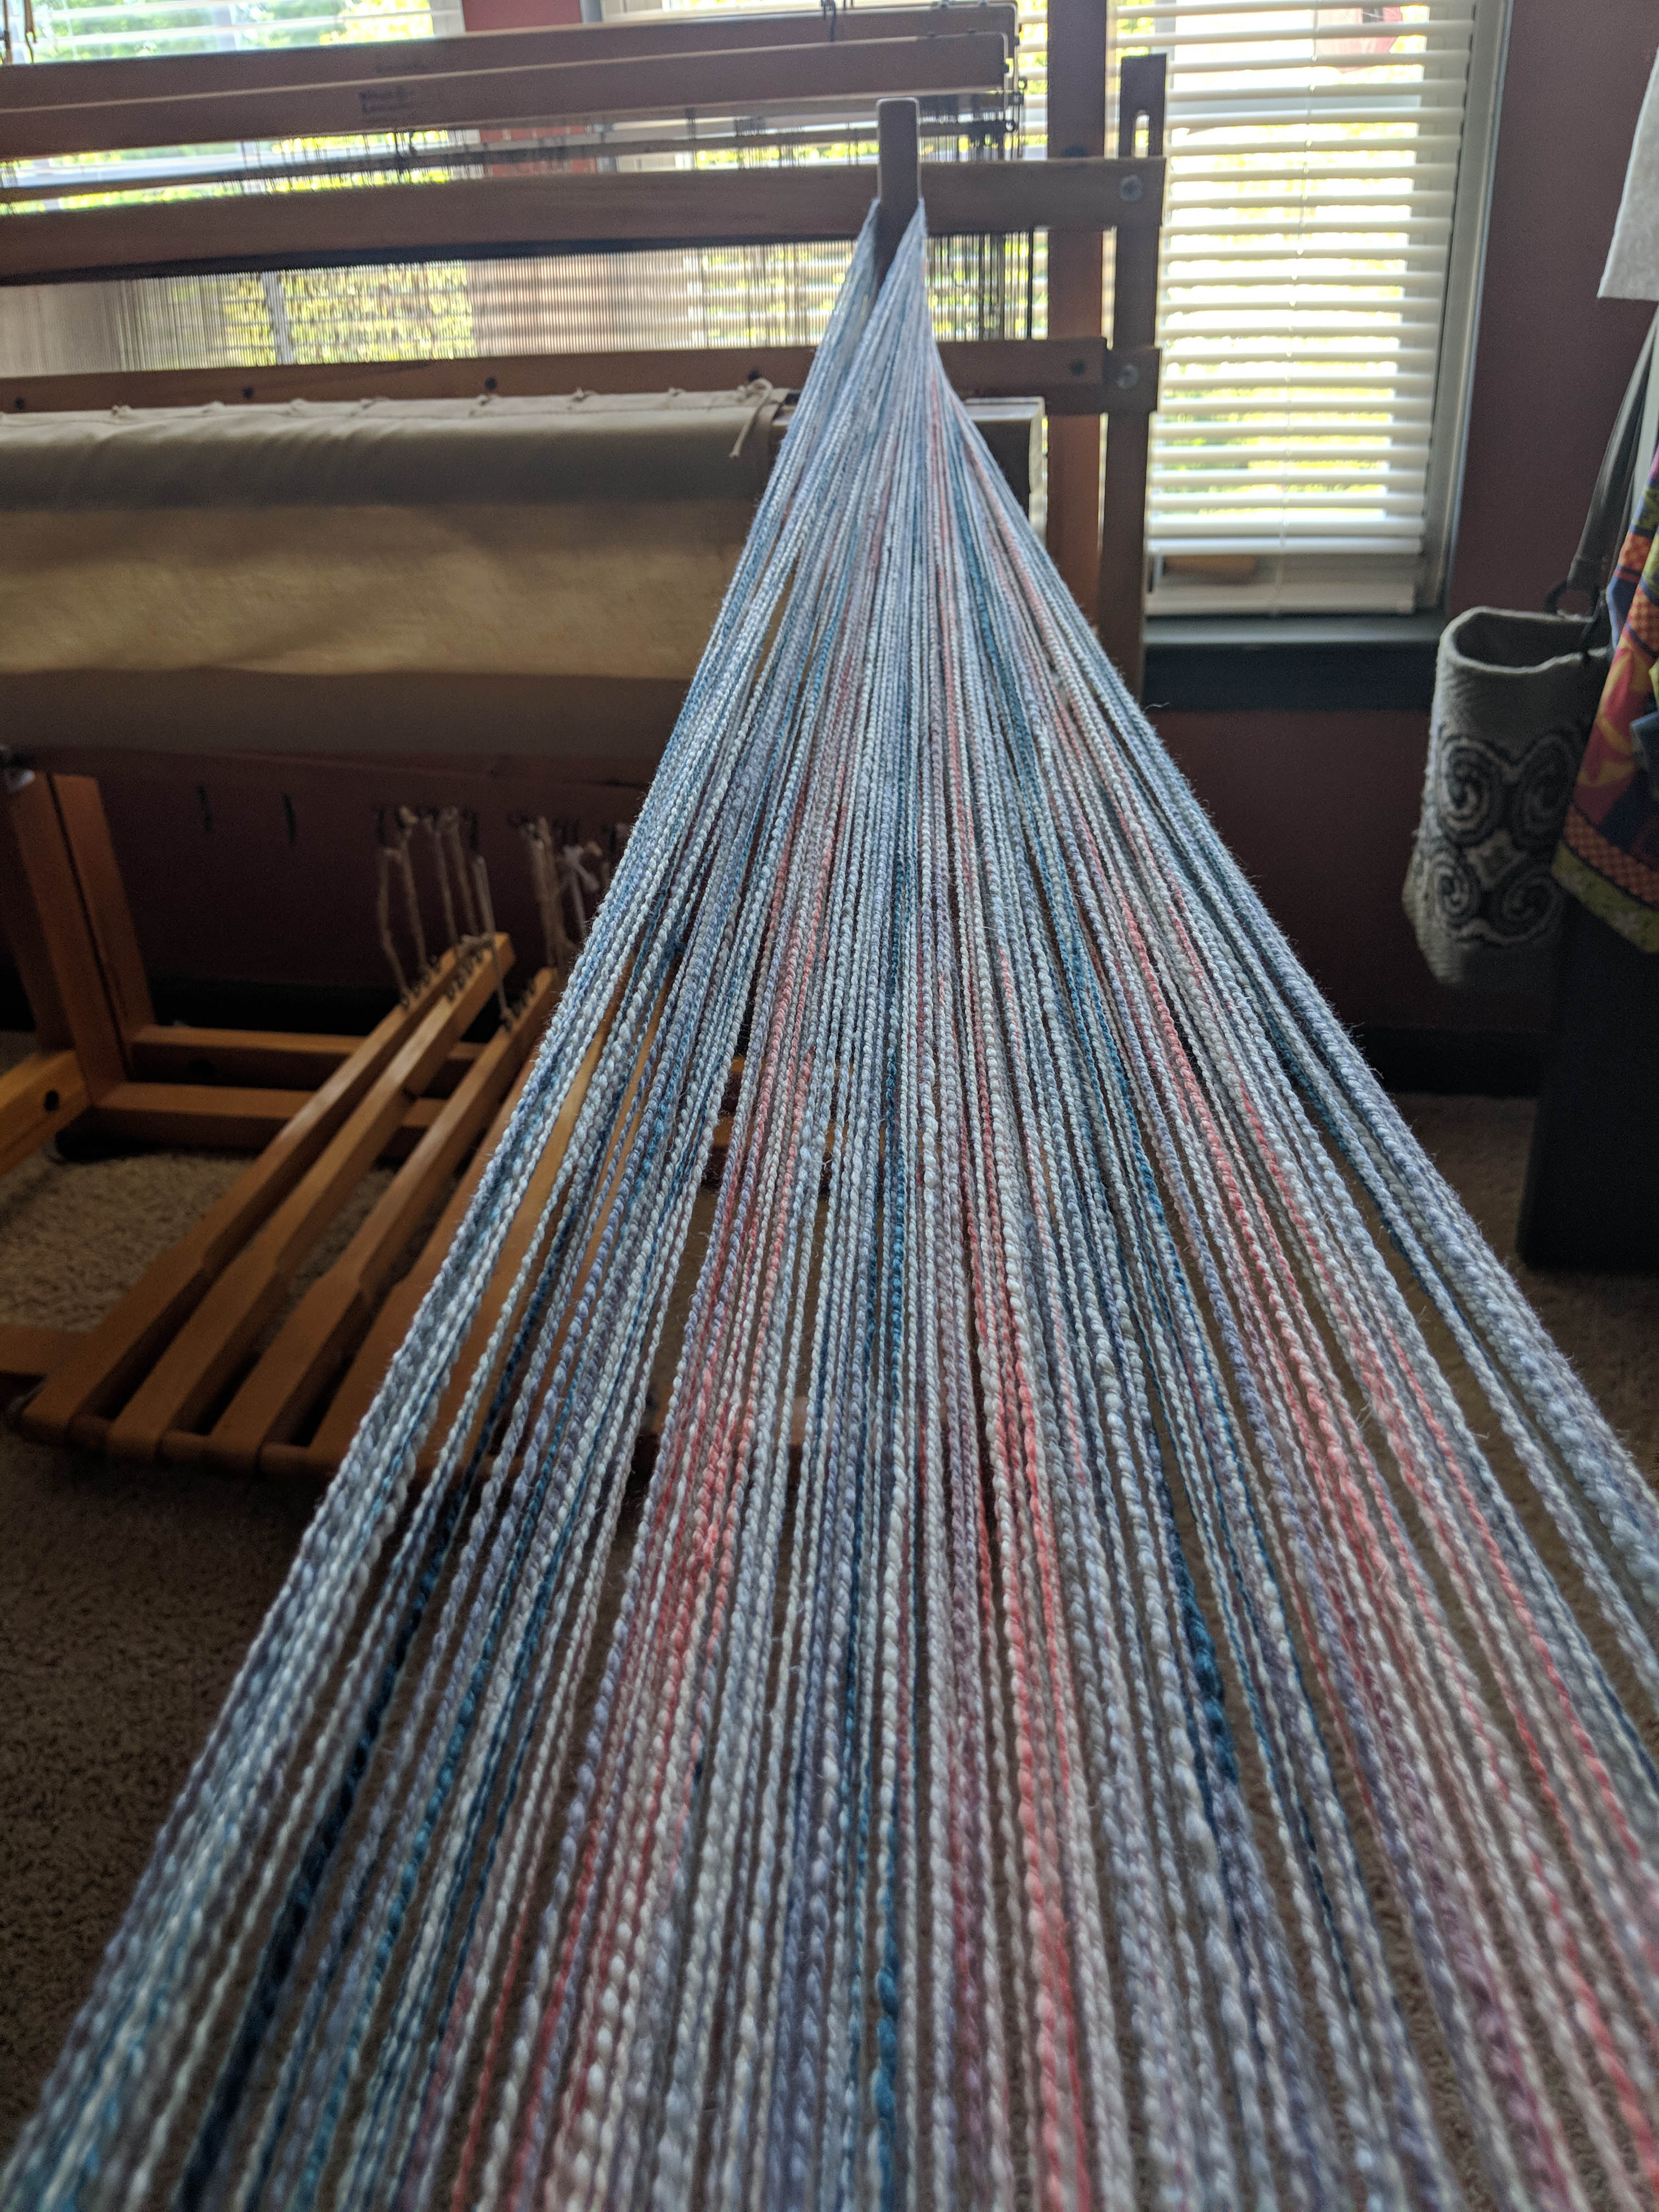
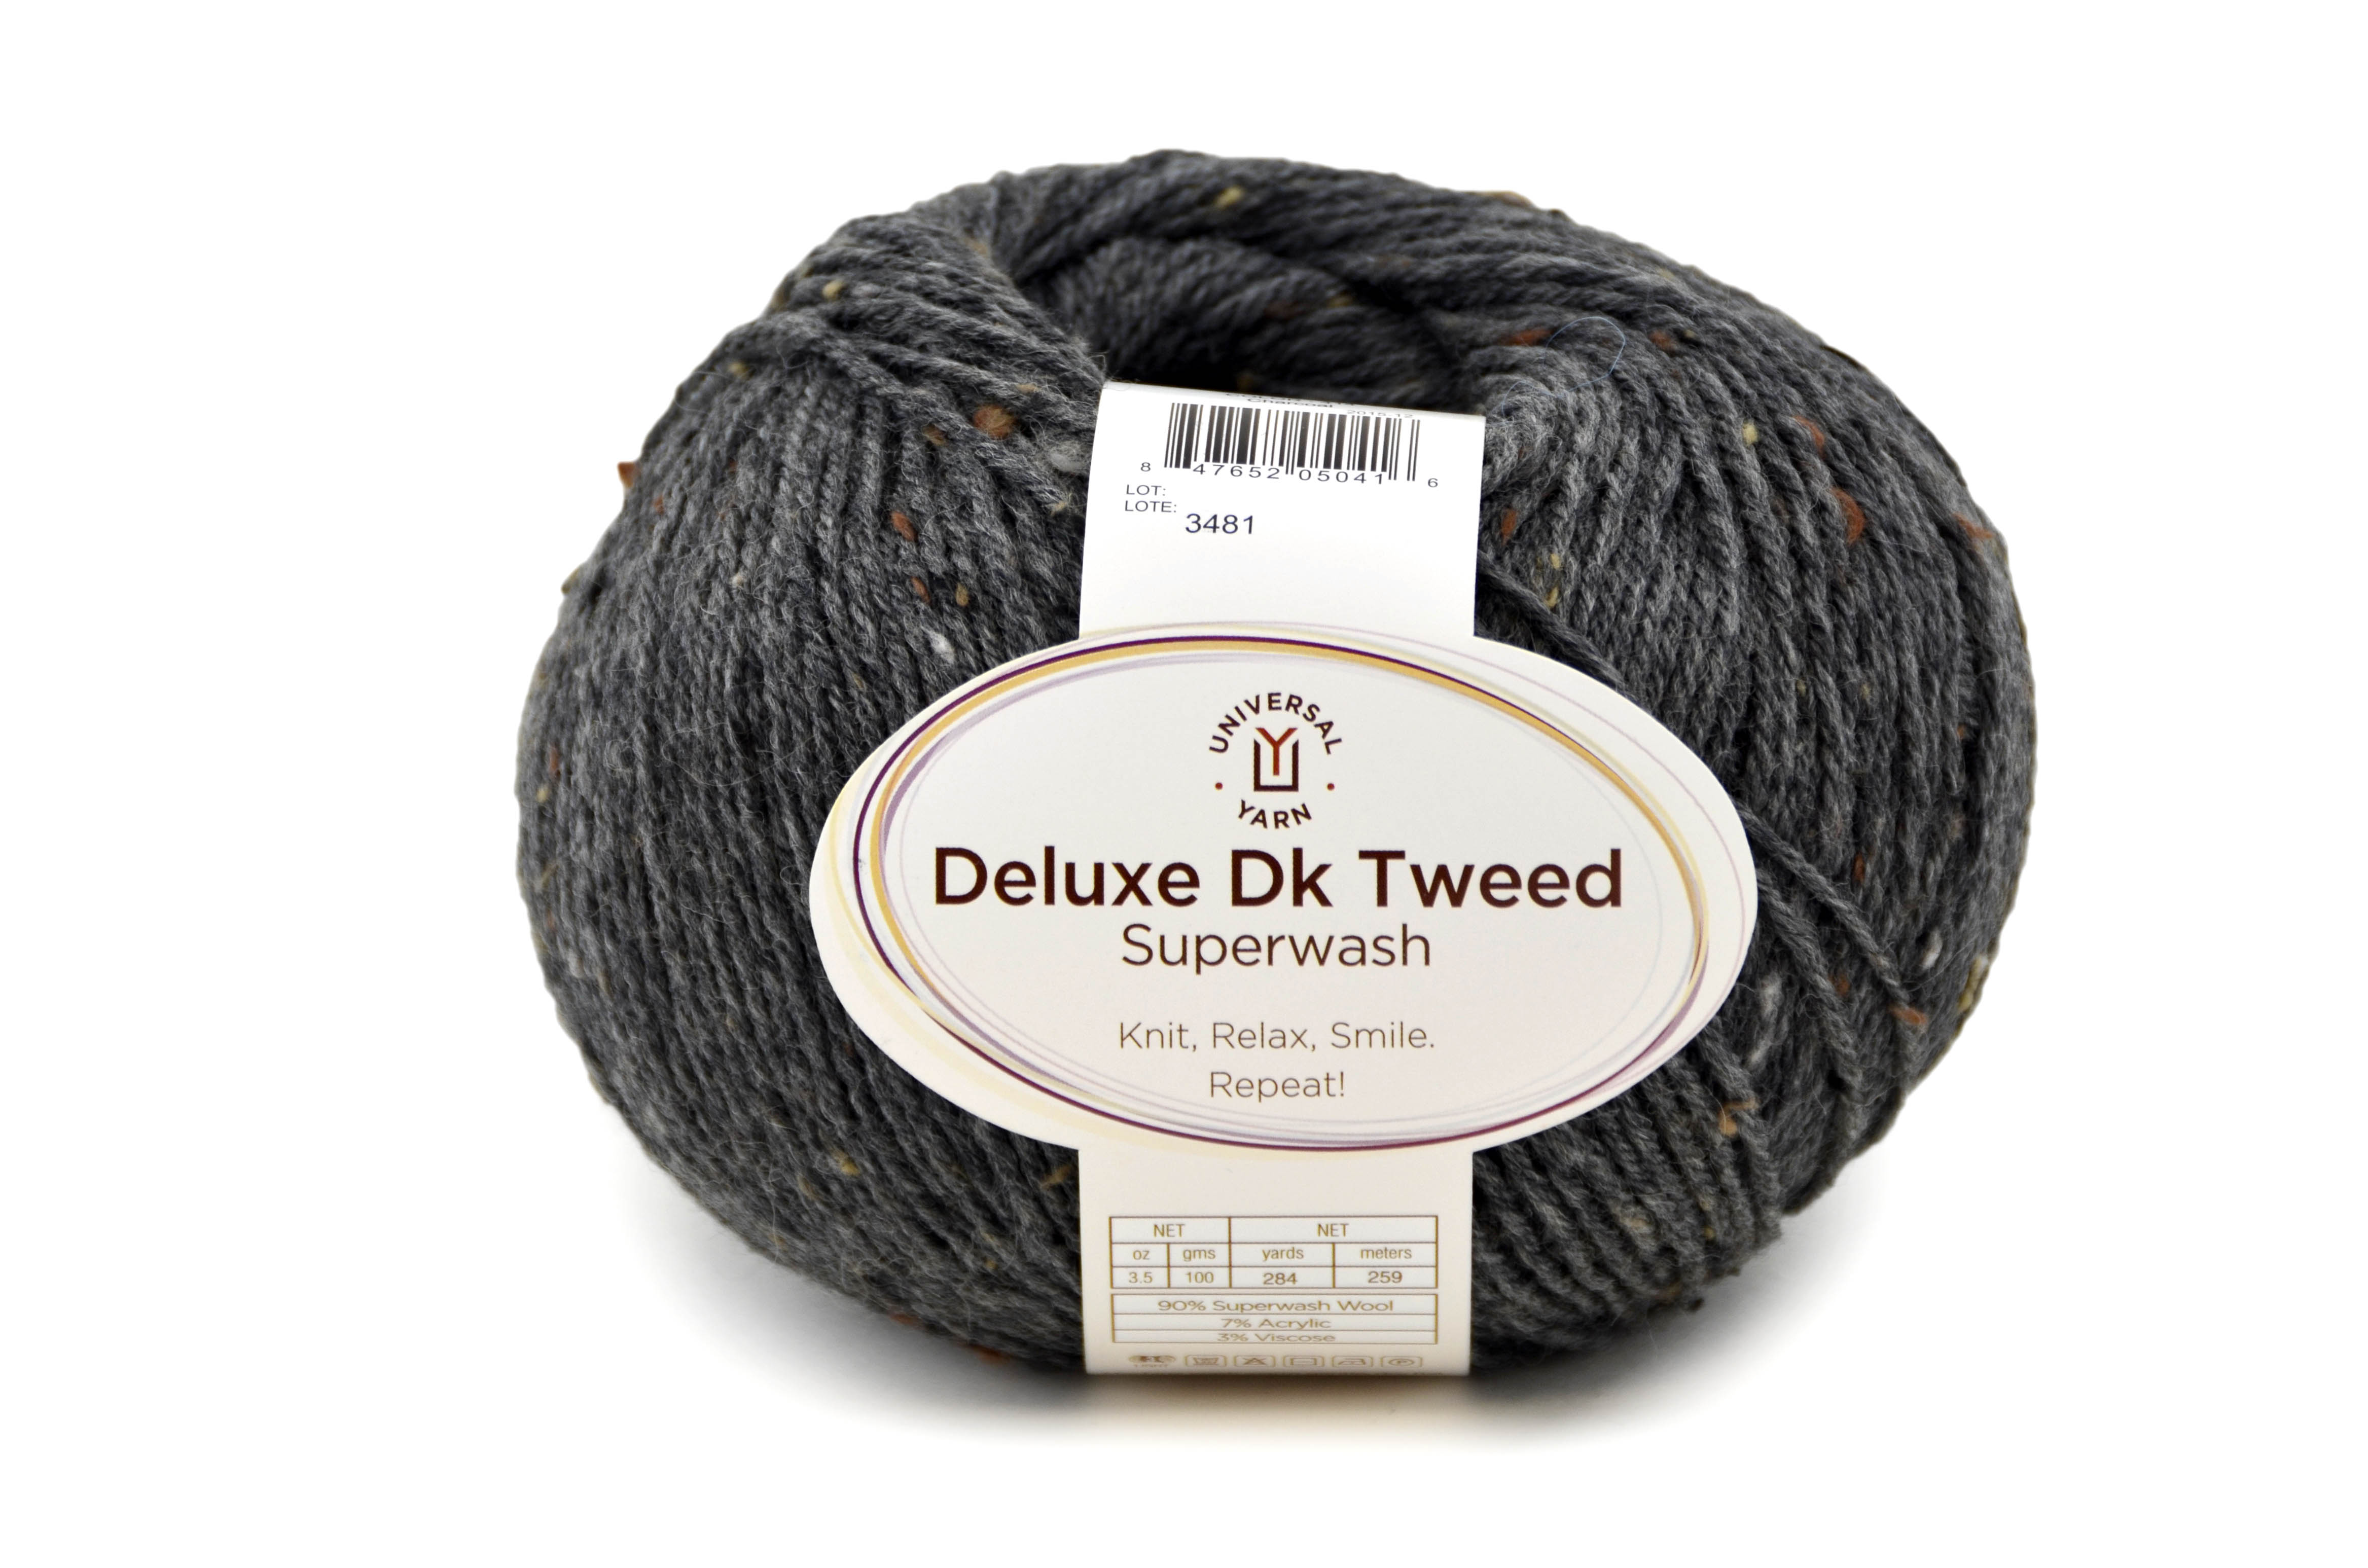
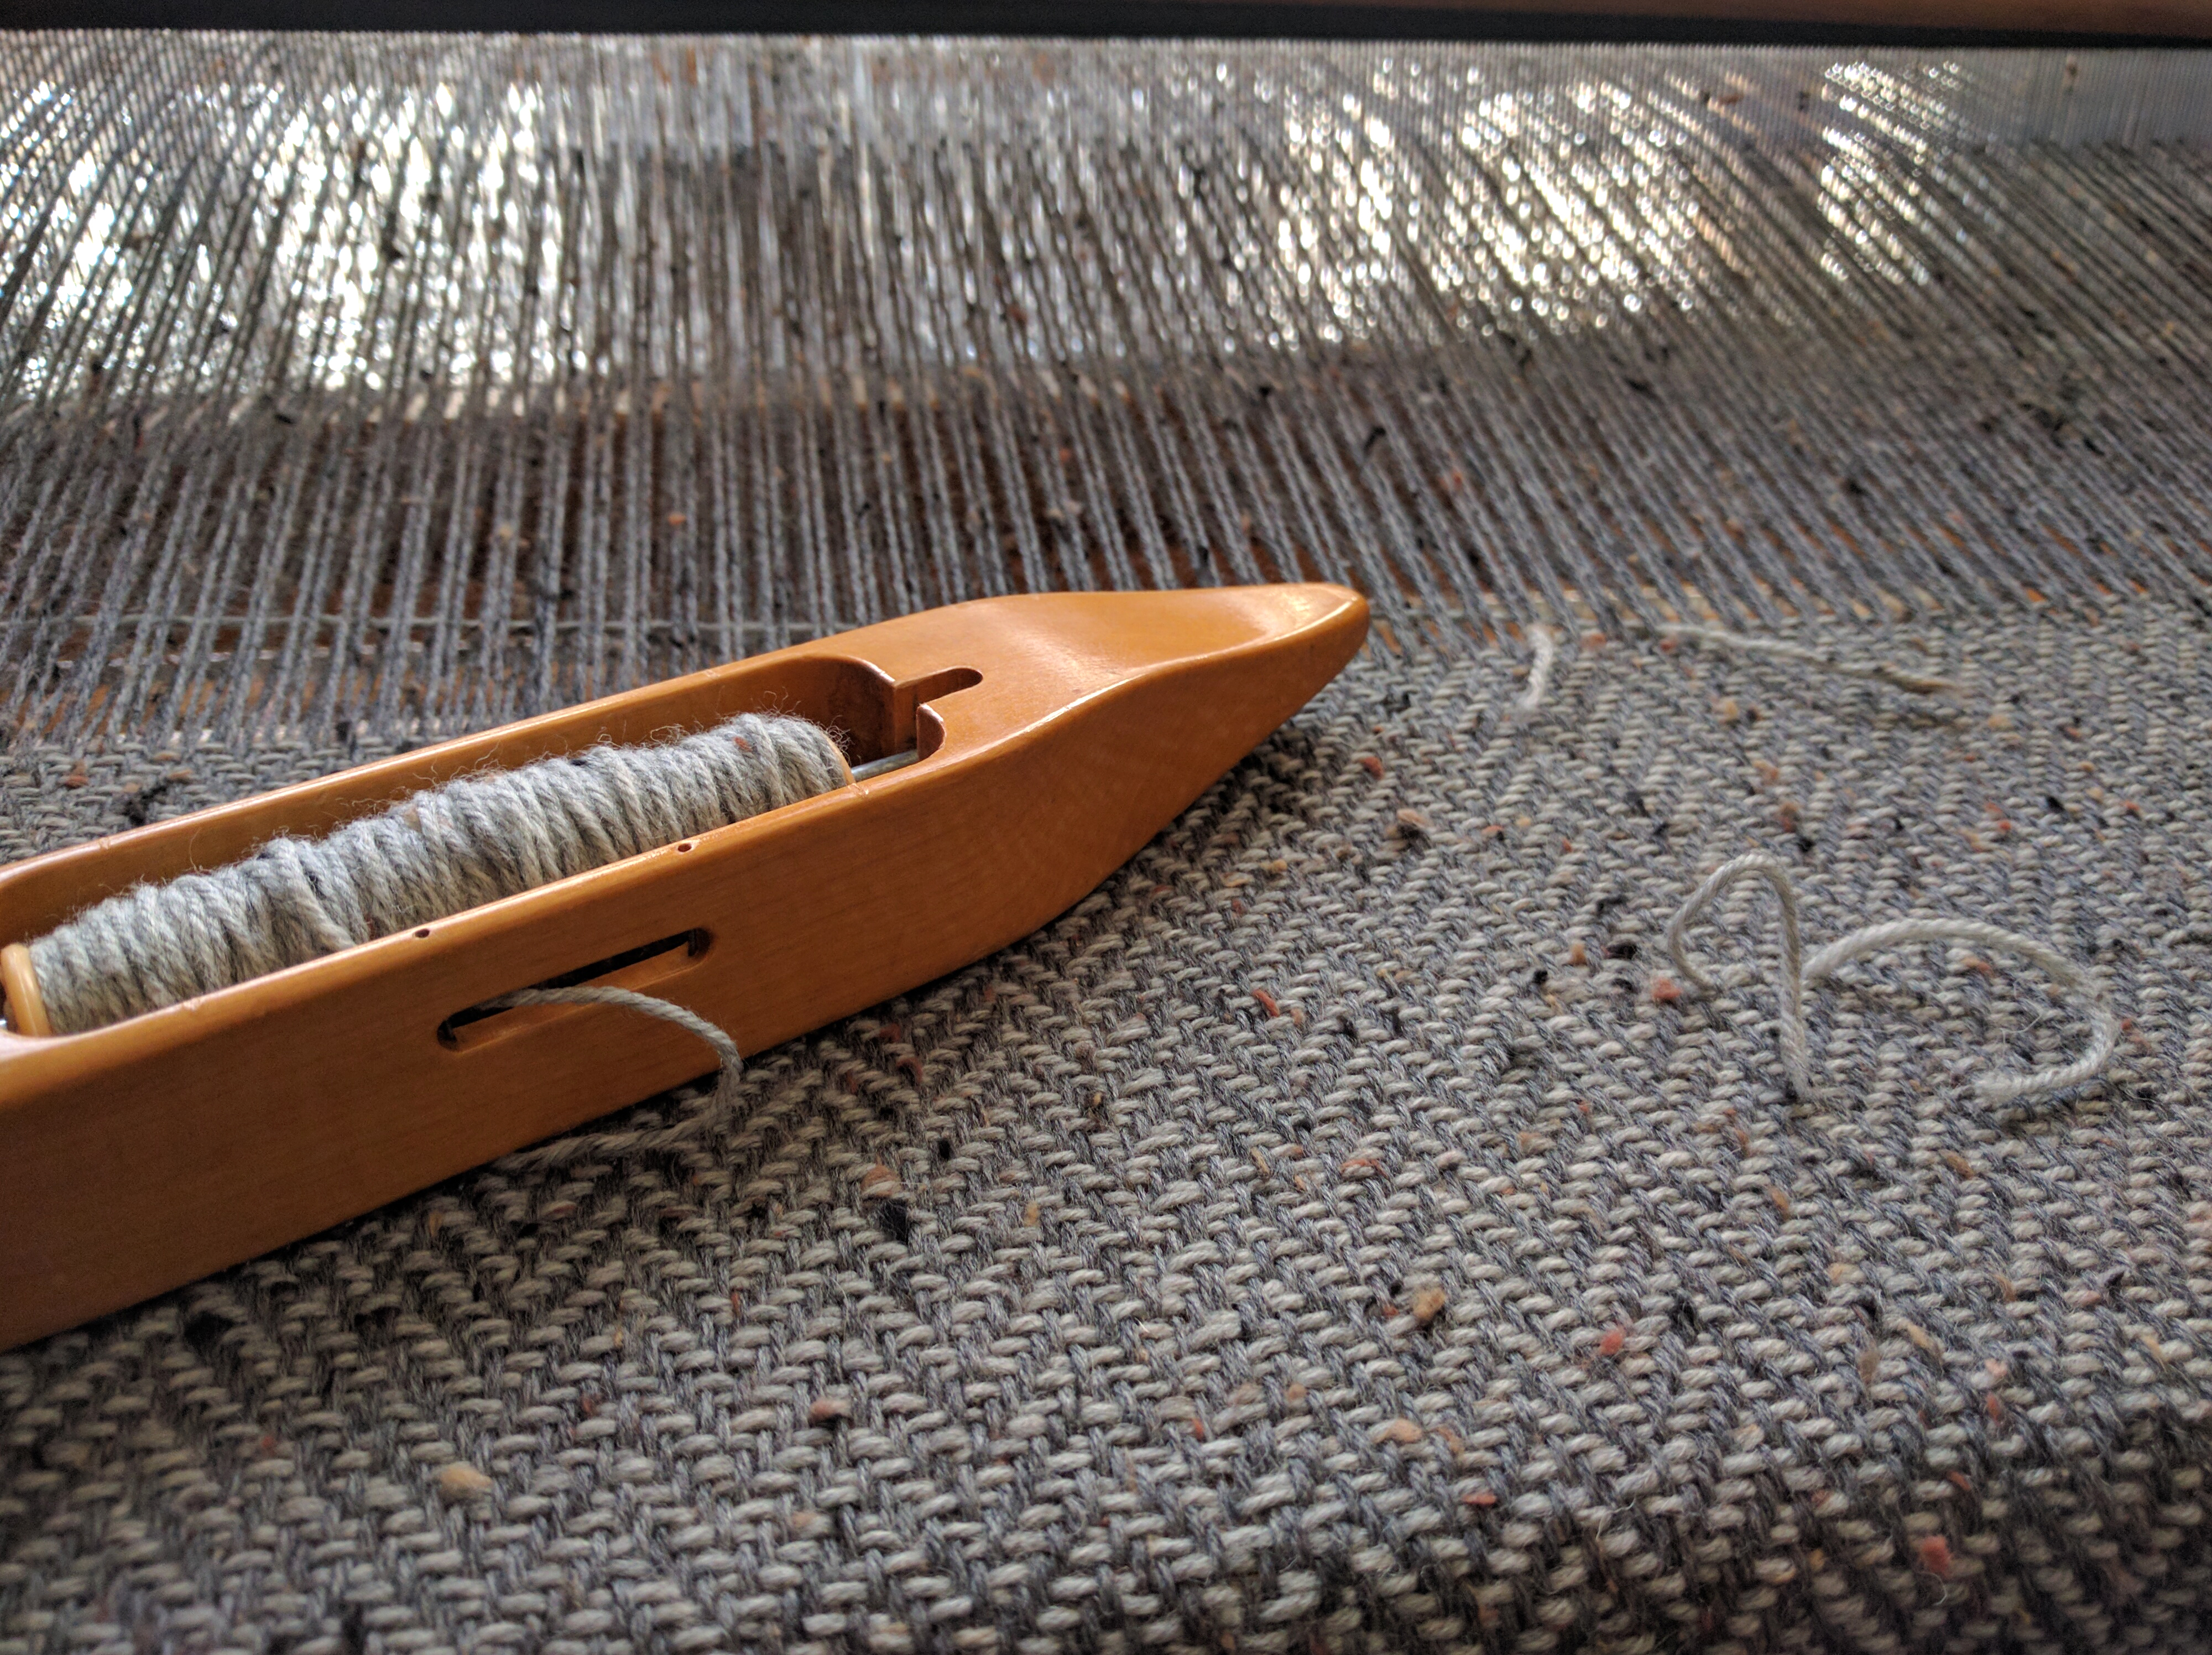
After warping my loom with my monstrously long and wide warp – 280″ long x 36″ wide using Deluxe DK Tweed Superwash, I was delighted to weave the fabric. I wove the same herringbone pattern that I used in my sampler scarf (seen here).
This piece of fabric I’m weaving will be for two jackets. My warp is color 414 Charcoal in Deluxe DK Tweed, and the photo below shows color 413 Smoke as the weft.
One bobbin of yarn lasted for about 3″ on my 36″ wide warp.
Back when I was winding my warp, I thought to tie some bright thread around some of the warp threads at the halfway point. I’m going to be changing my weft color halfway through since the jackets will be slightly different in color. This thread reminds me it’s time to switch colors!
This contrasting thread tied to the some of the warp threads lets me know I’m at the halfway point.
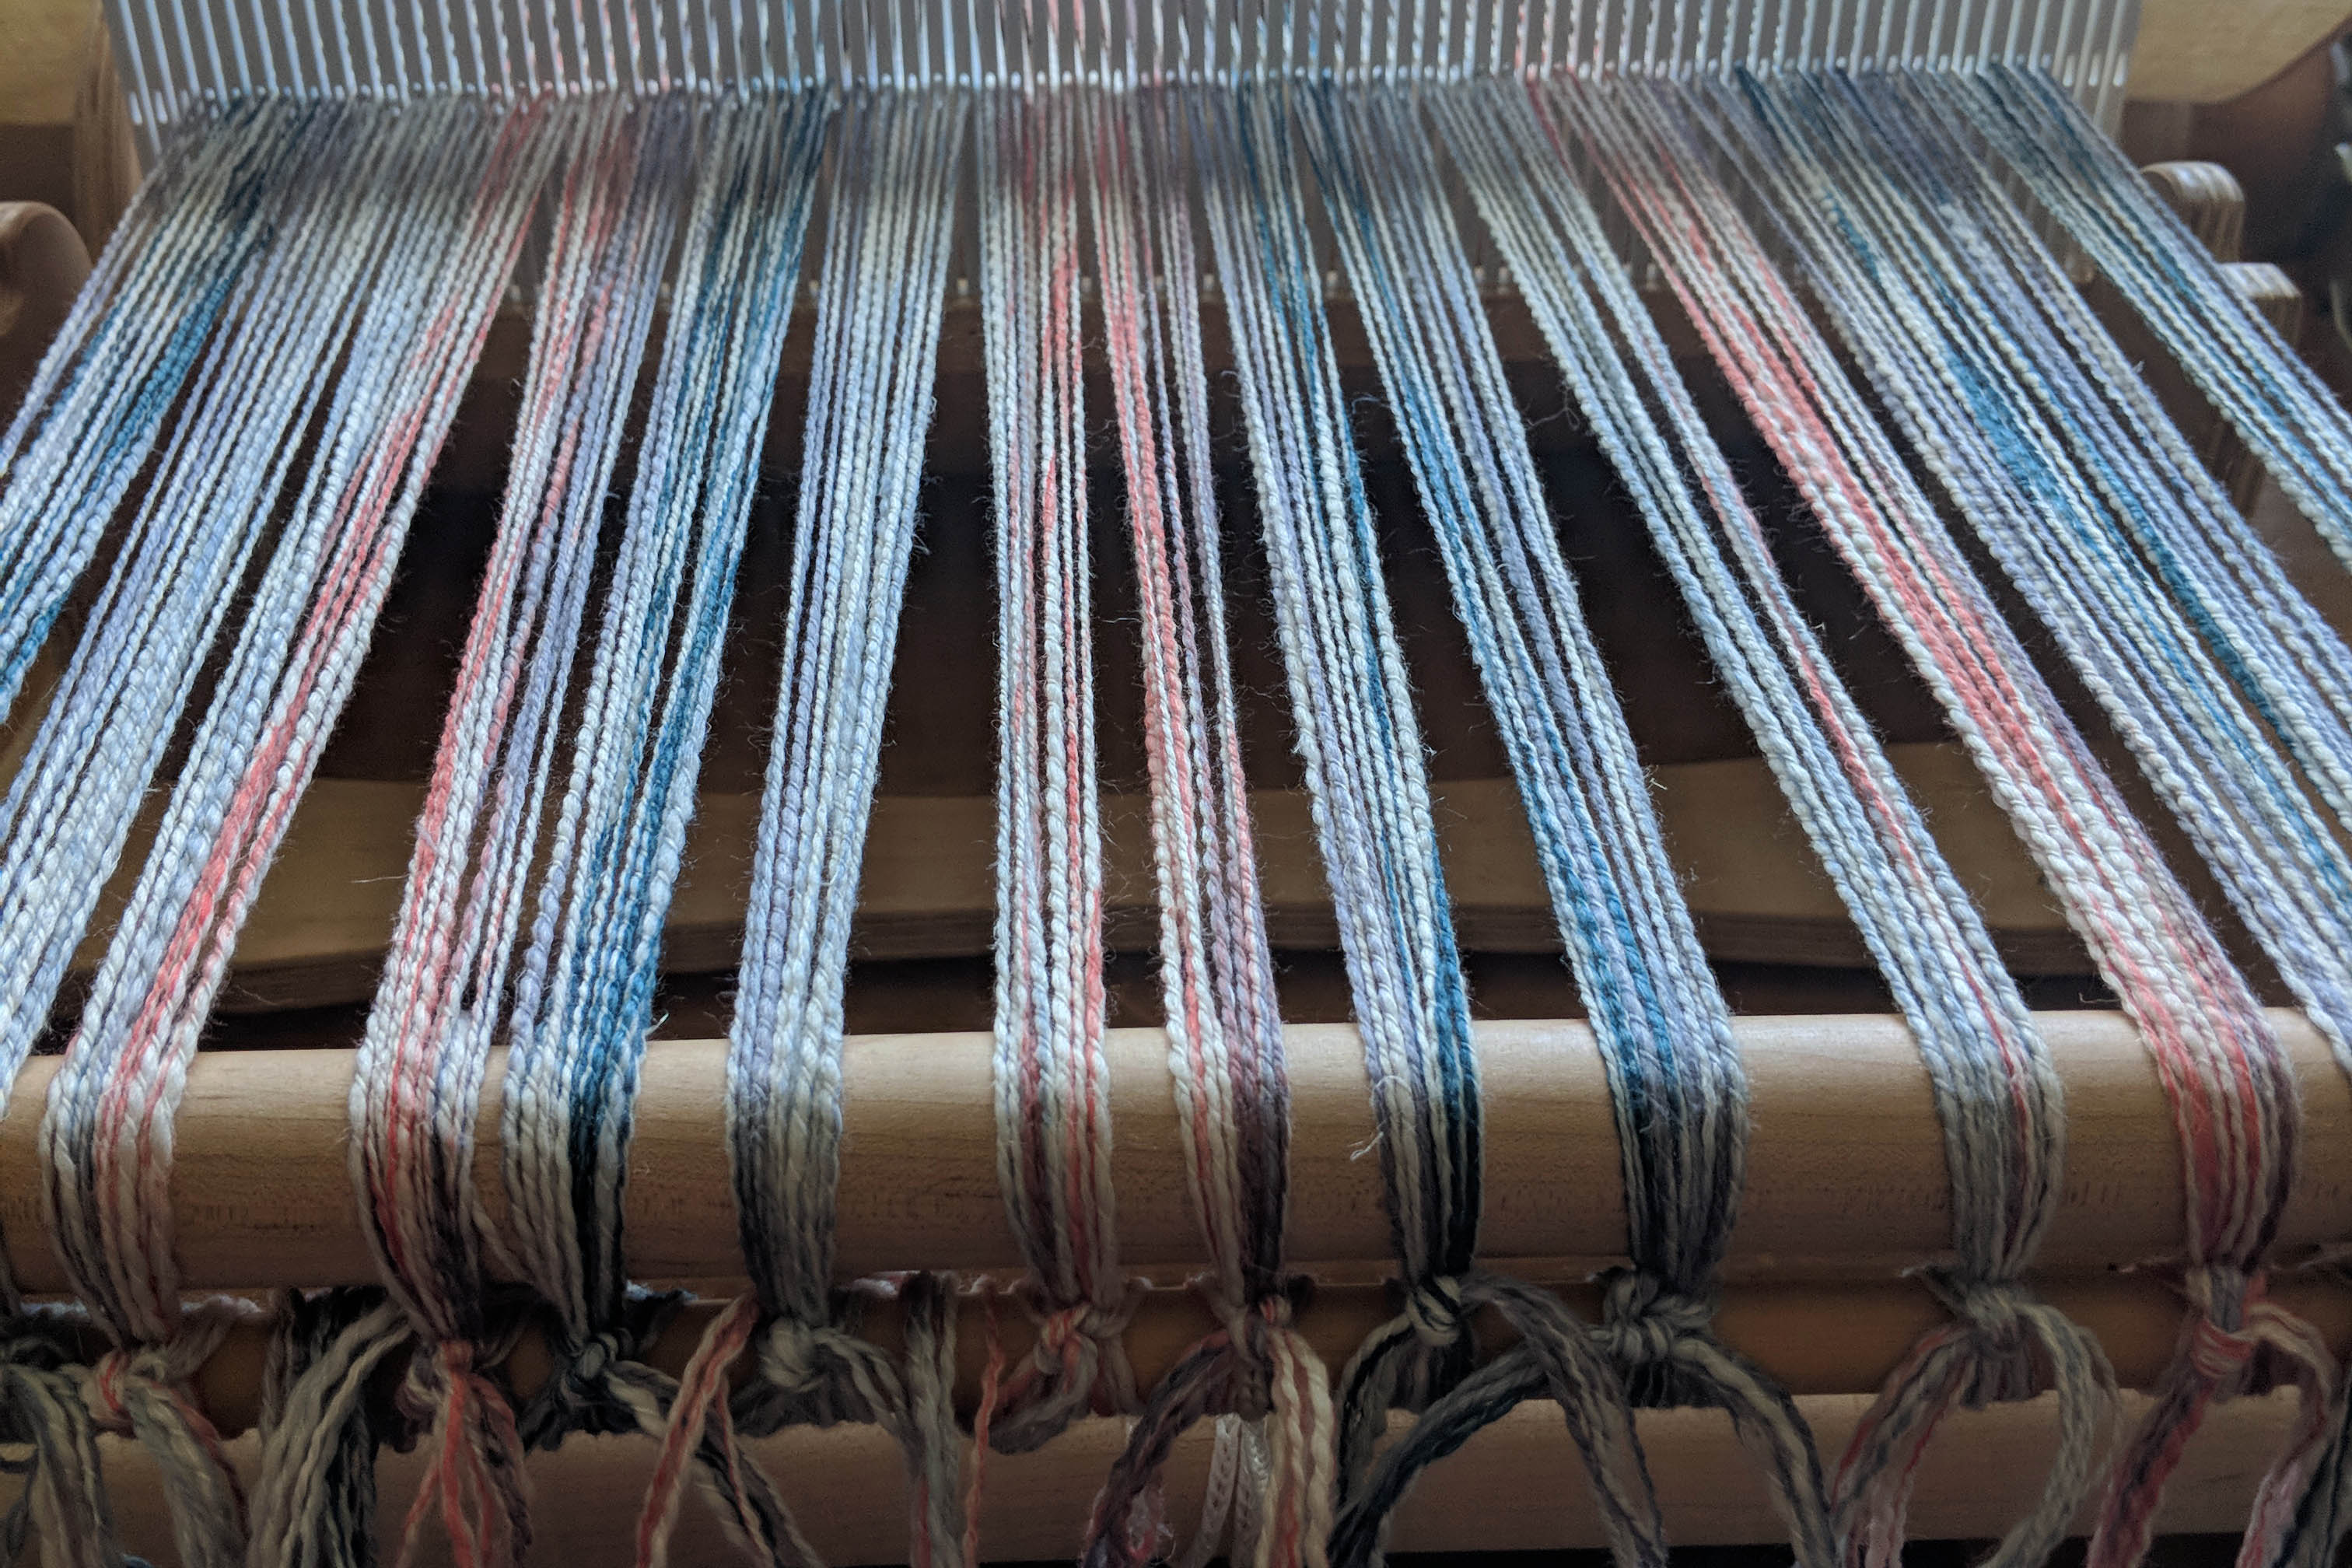
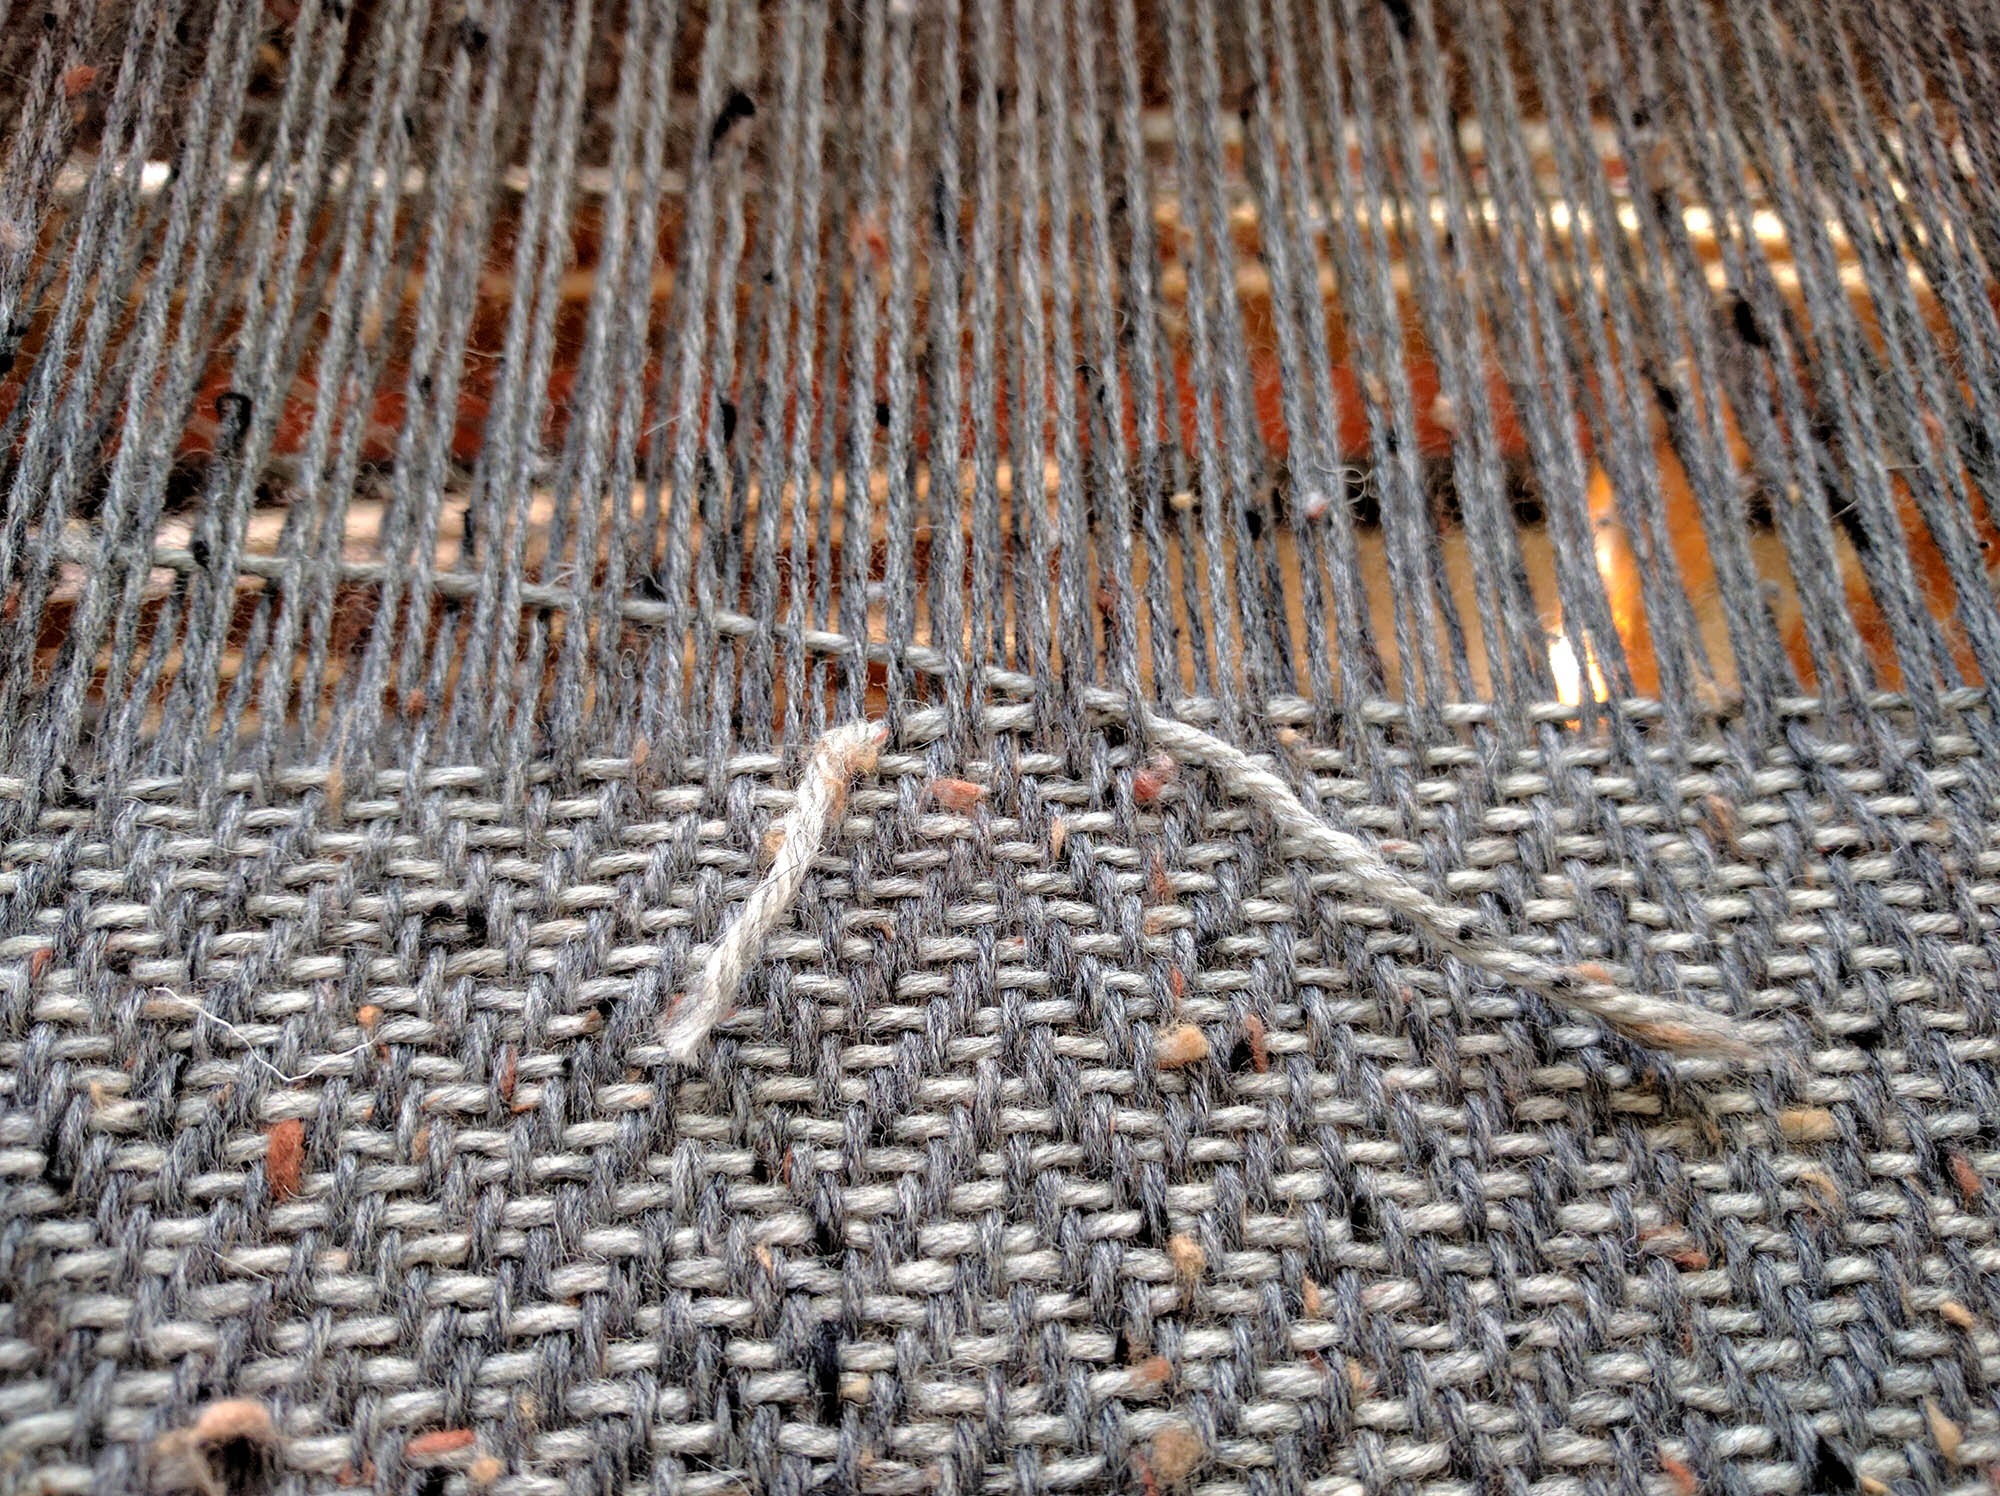
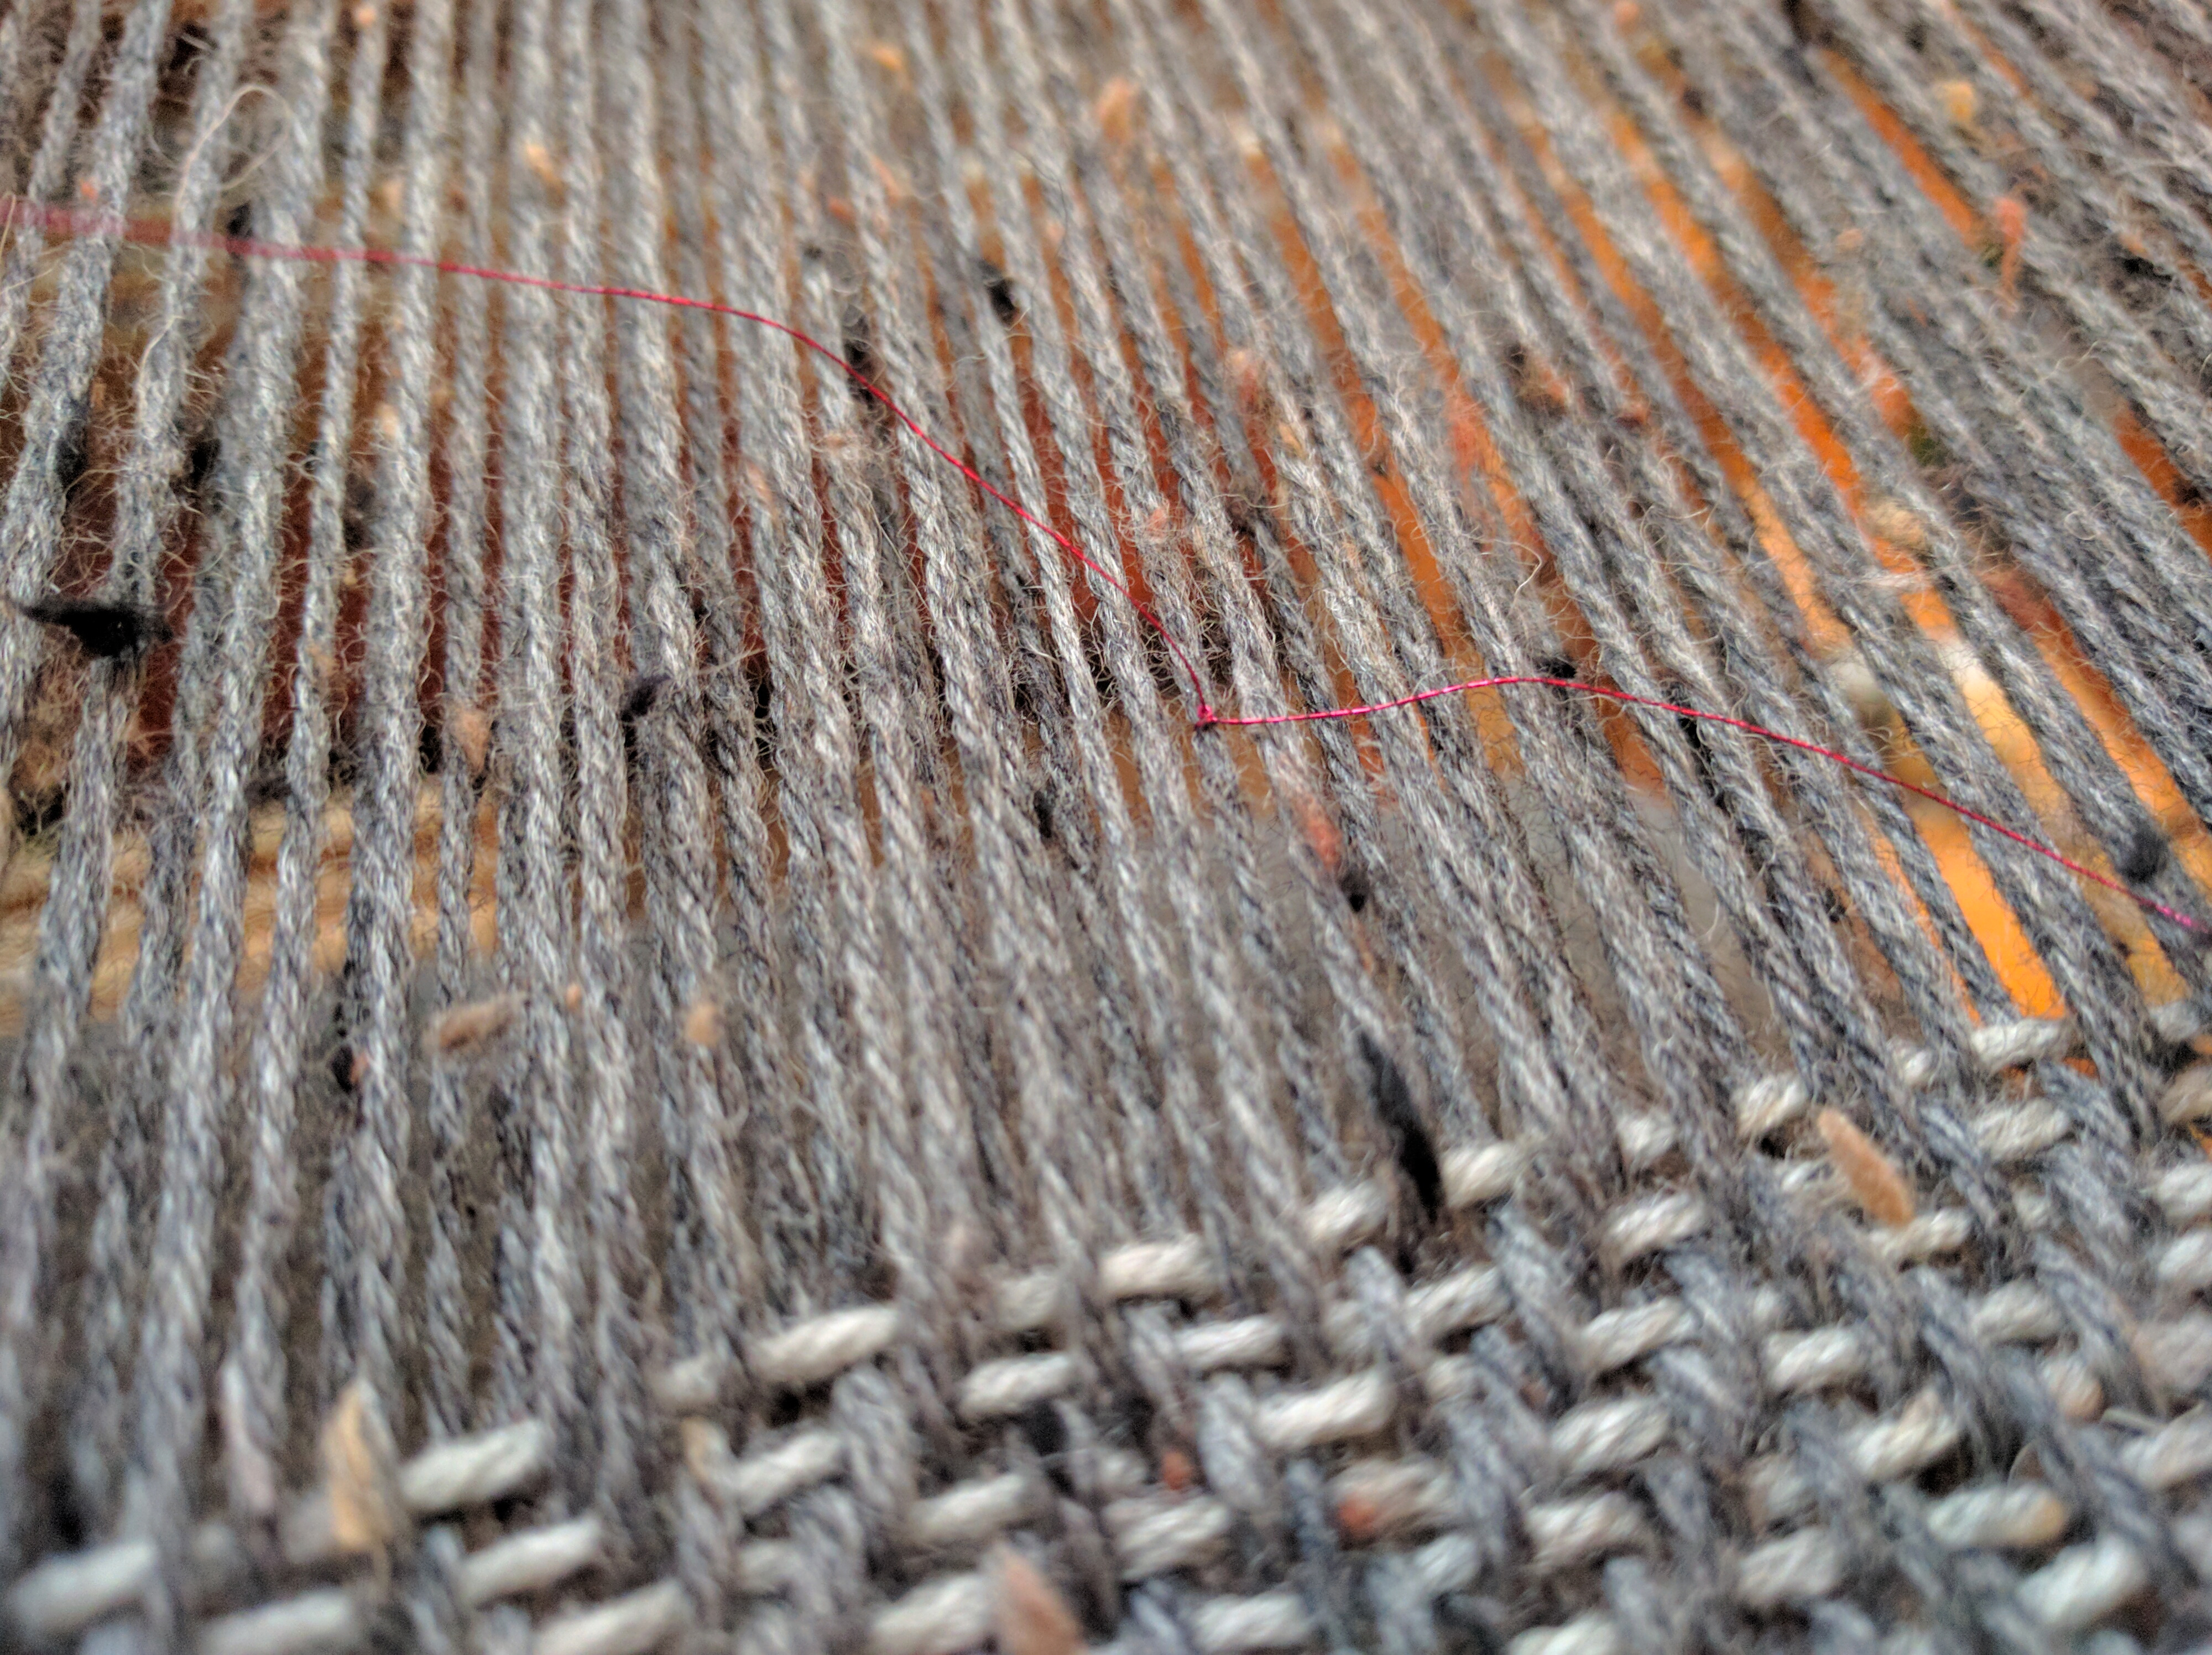
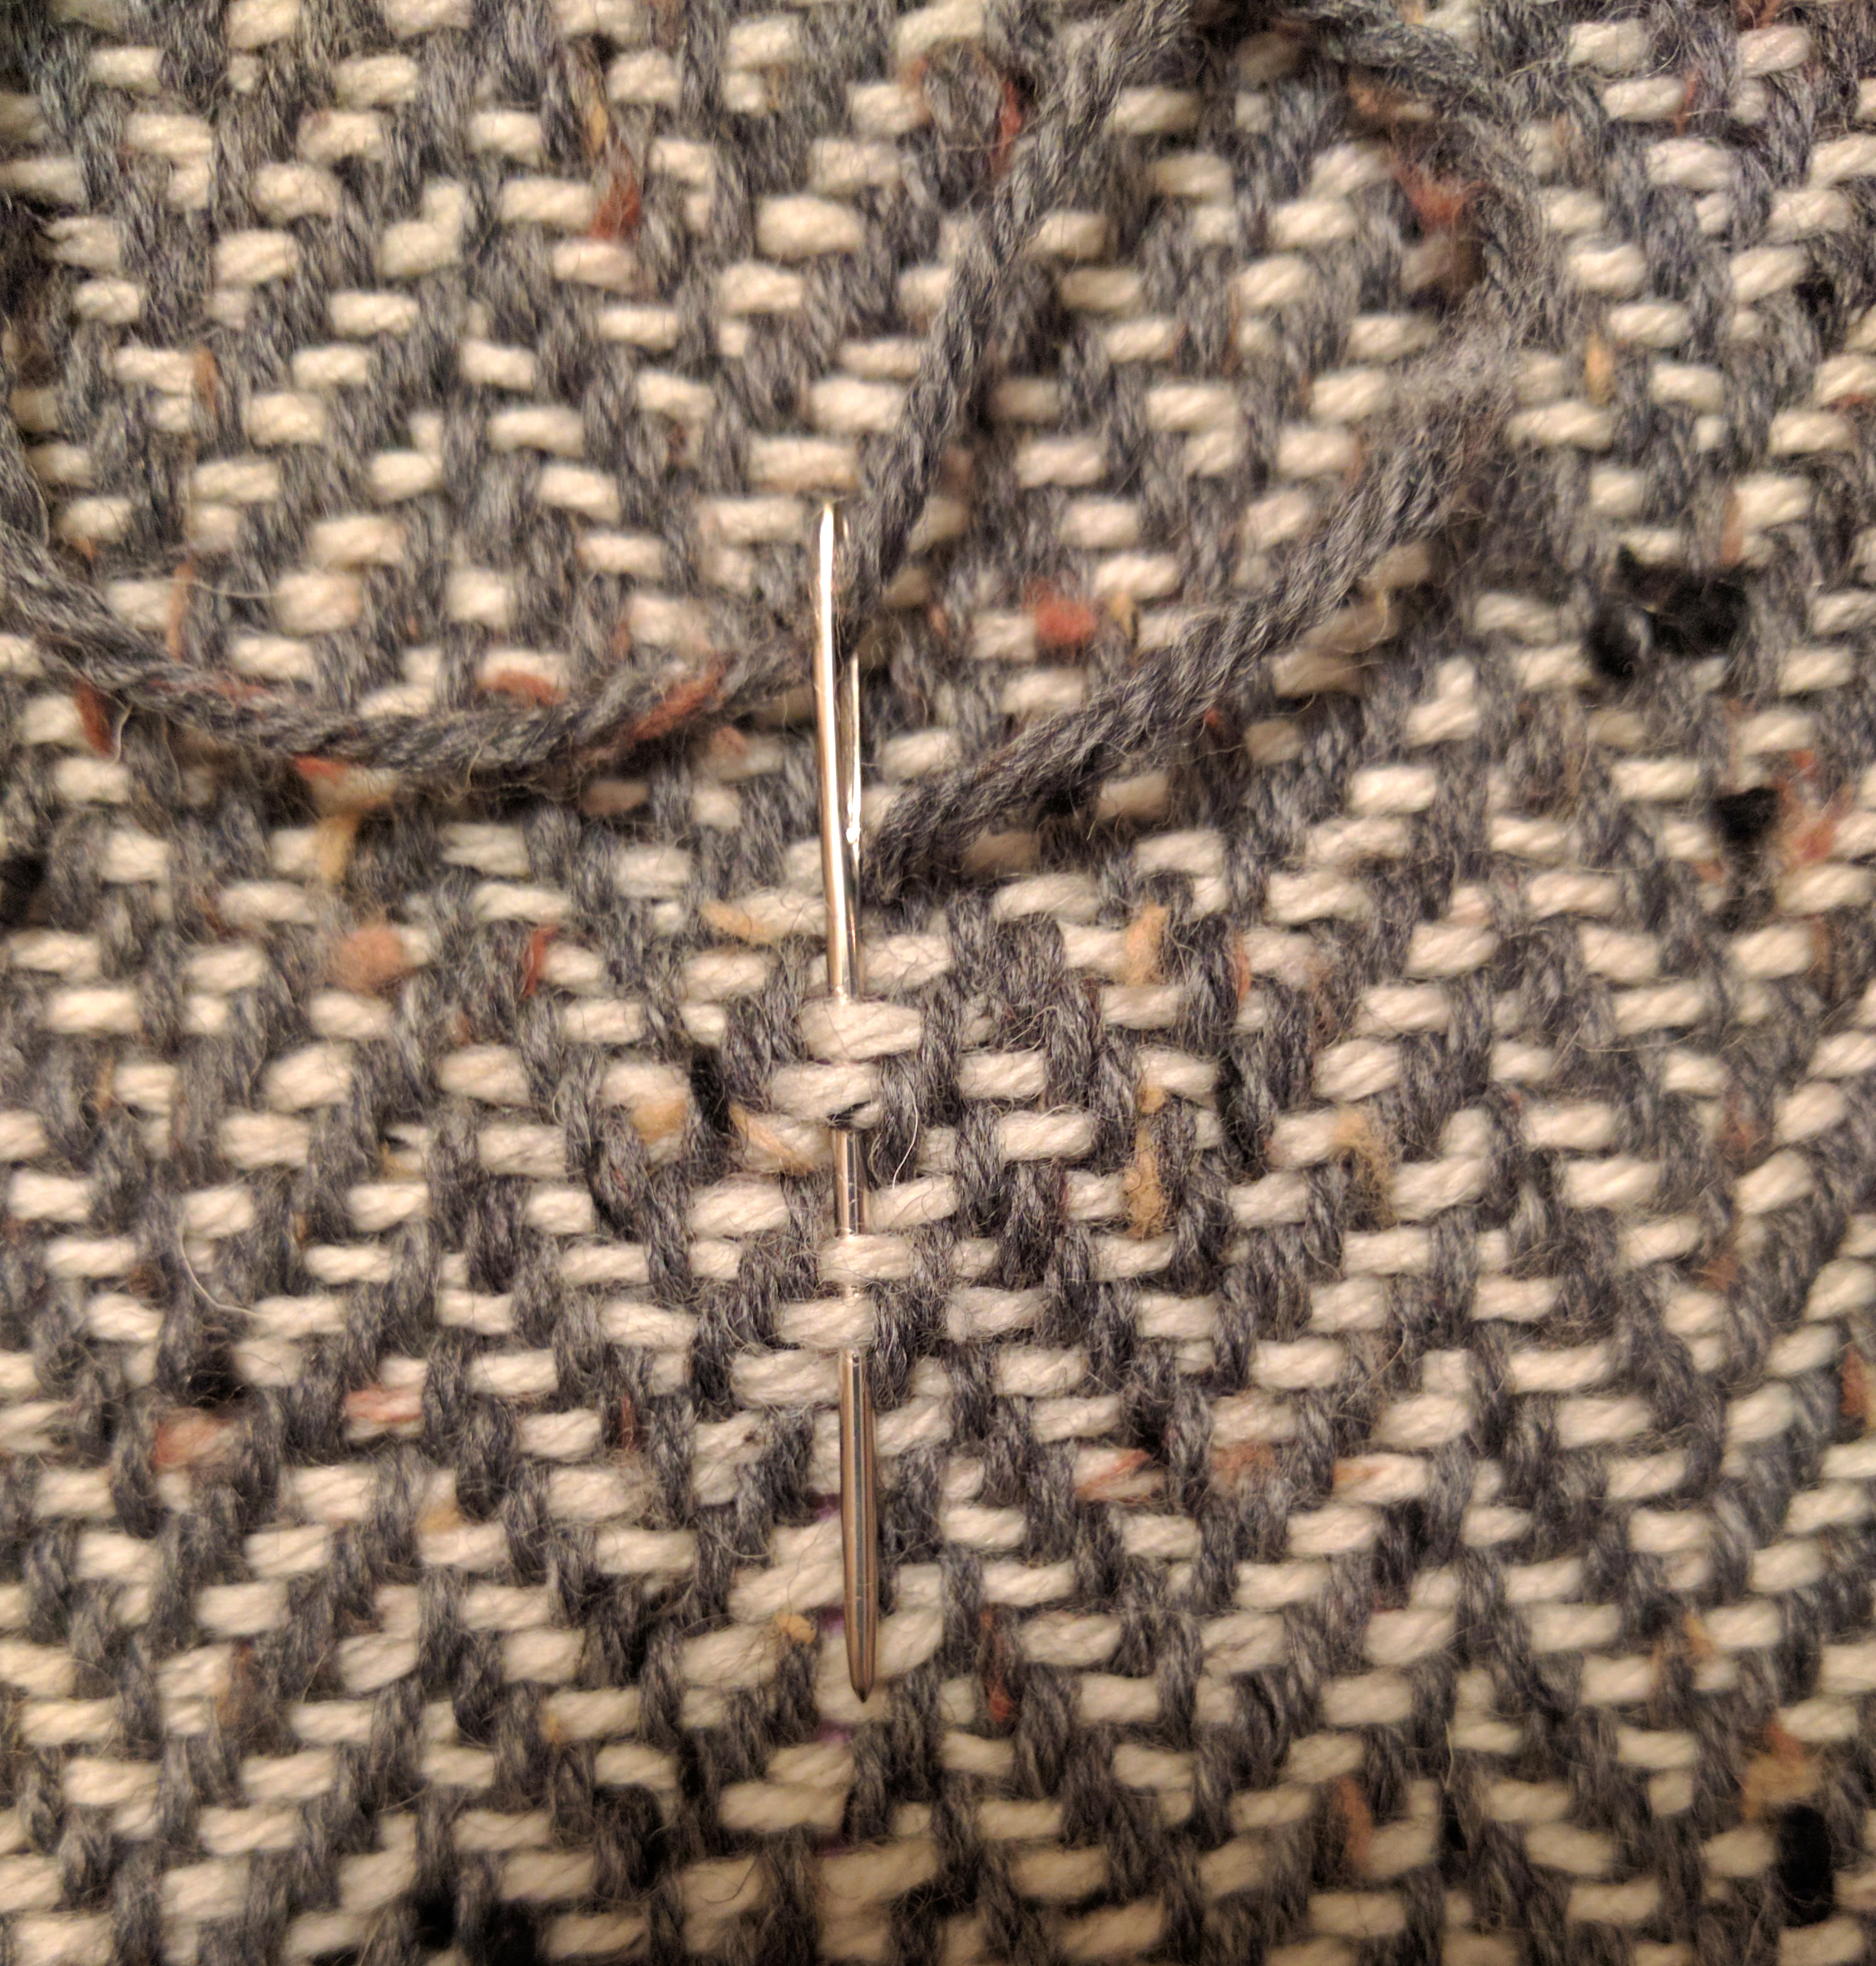
Not too long into the second half of my warp, I realized I had a couple of problems. I managed to mis-thread two heddles, which resulted in a glitch in the patterning. See below for one example.
Uh oh!
I could have fixed the problem right there – I could have broken the warp thread, threaded an afterthought heddle and tied on a new strand, but I opted to leave the mistakes in place and fix them after the fact.
If I had noticed sooner, I would have fixed them right away. But because I had made it this far and knew I’d be doing some repair work anyway, I figured I might as well do the whole length at the same time.
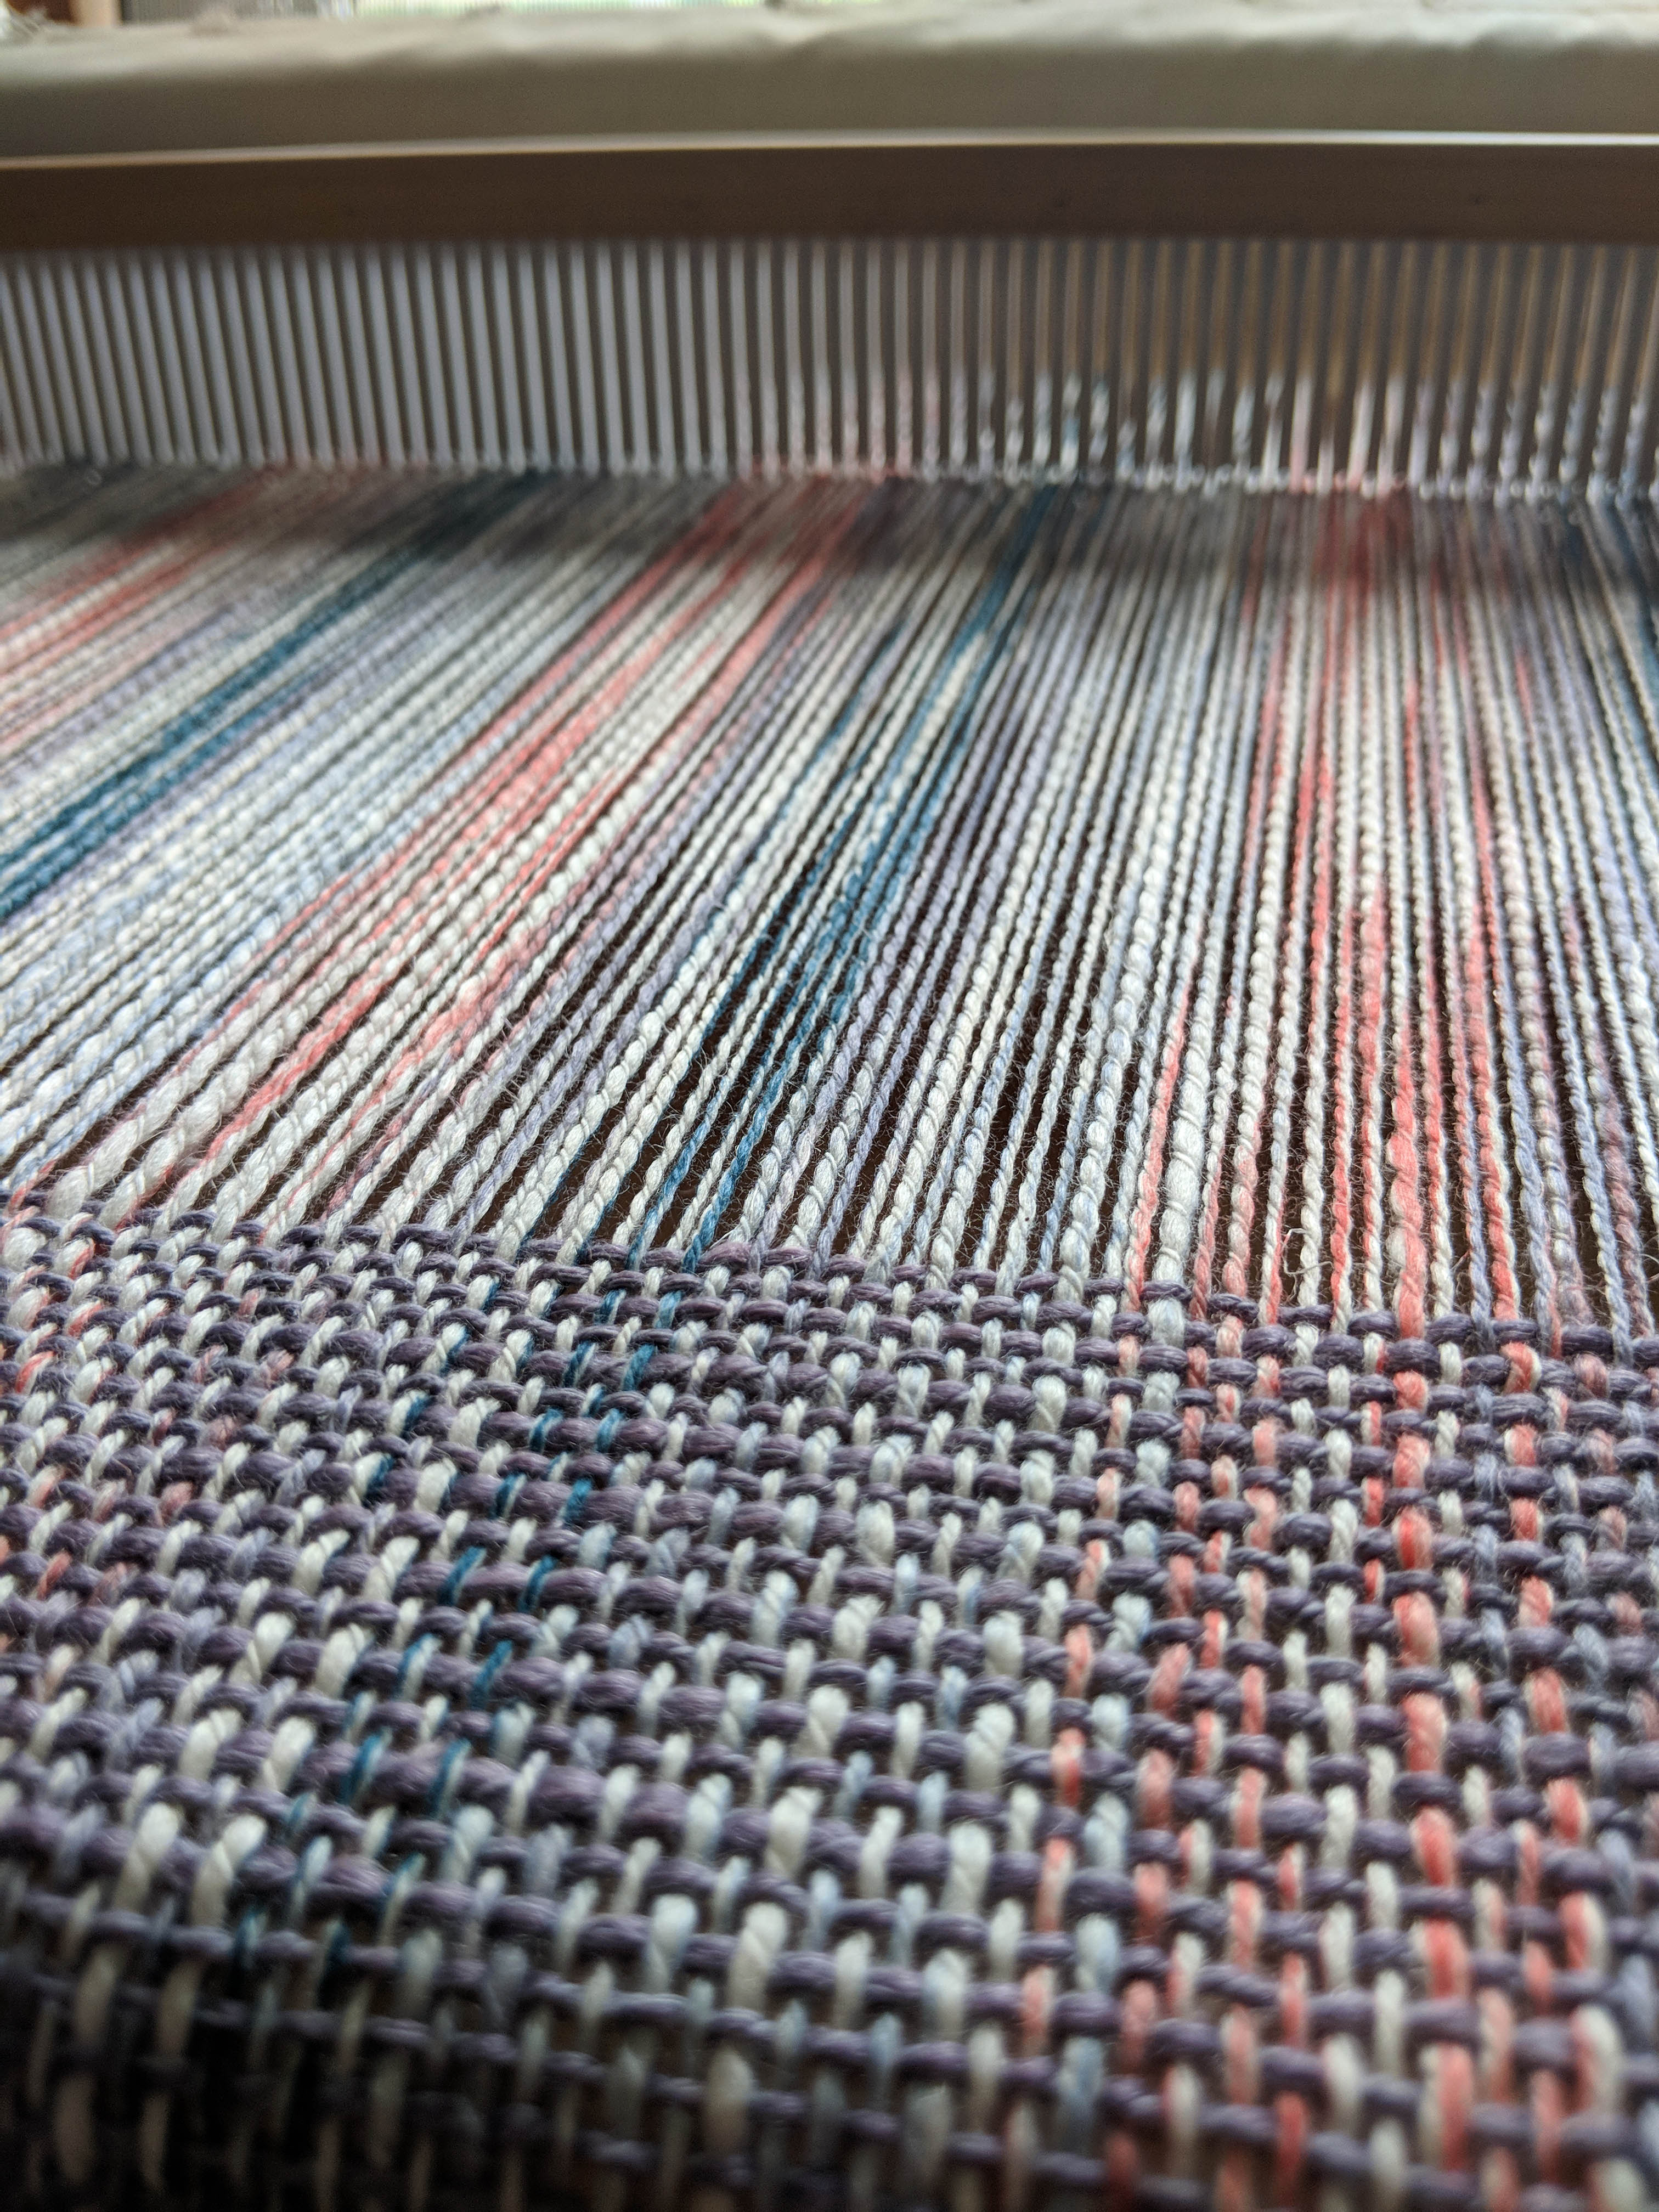
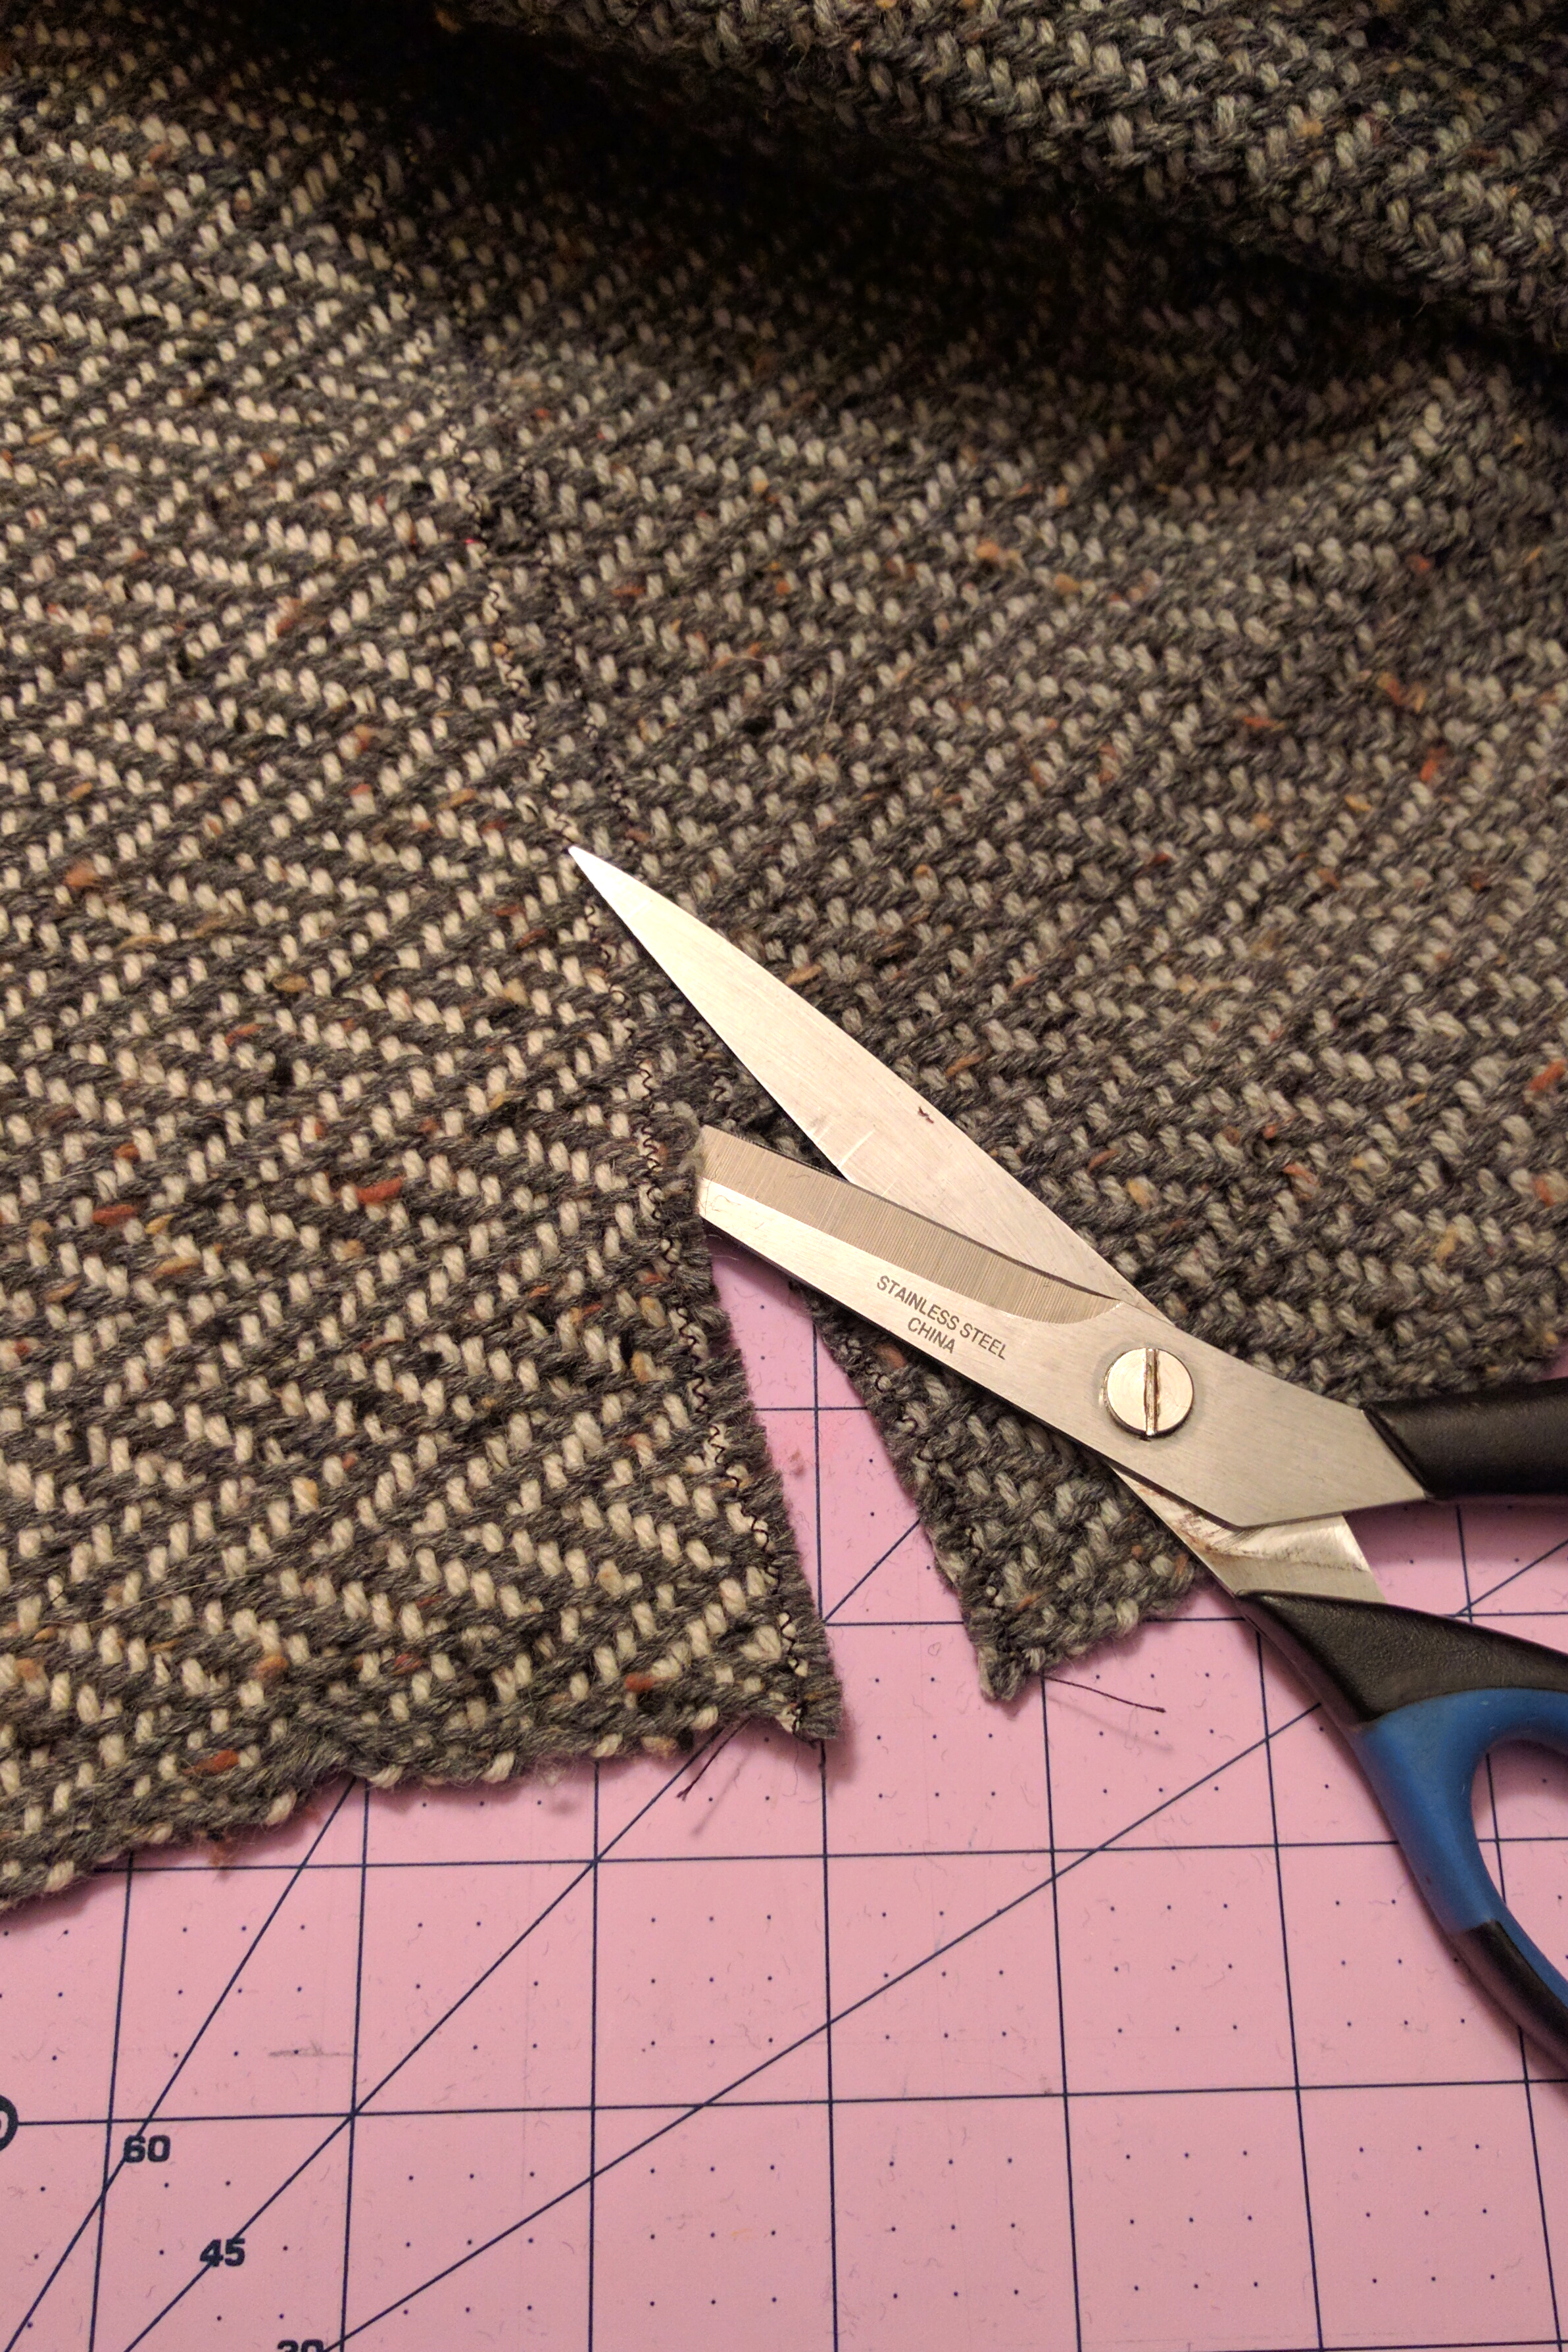
Cutting doesn’t have to be scary!
After cutting my fabric from the loom, I simply knotted the warp ends together – no hemstitching. I then zig-zagged the edges with my sewing machine, and also sewed lines at the halfway point. I figured it would be a lot easier dealing with two 3 yard pieces of fabric rather than a 6 yard piece. I then cut the fabric apart at that halfway point.
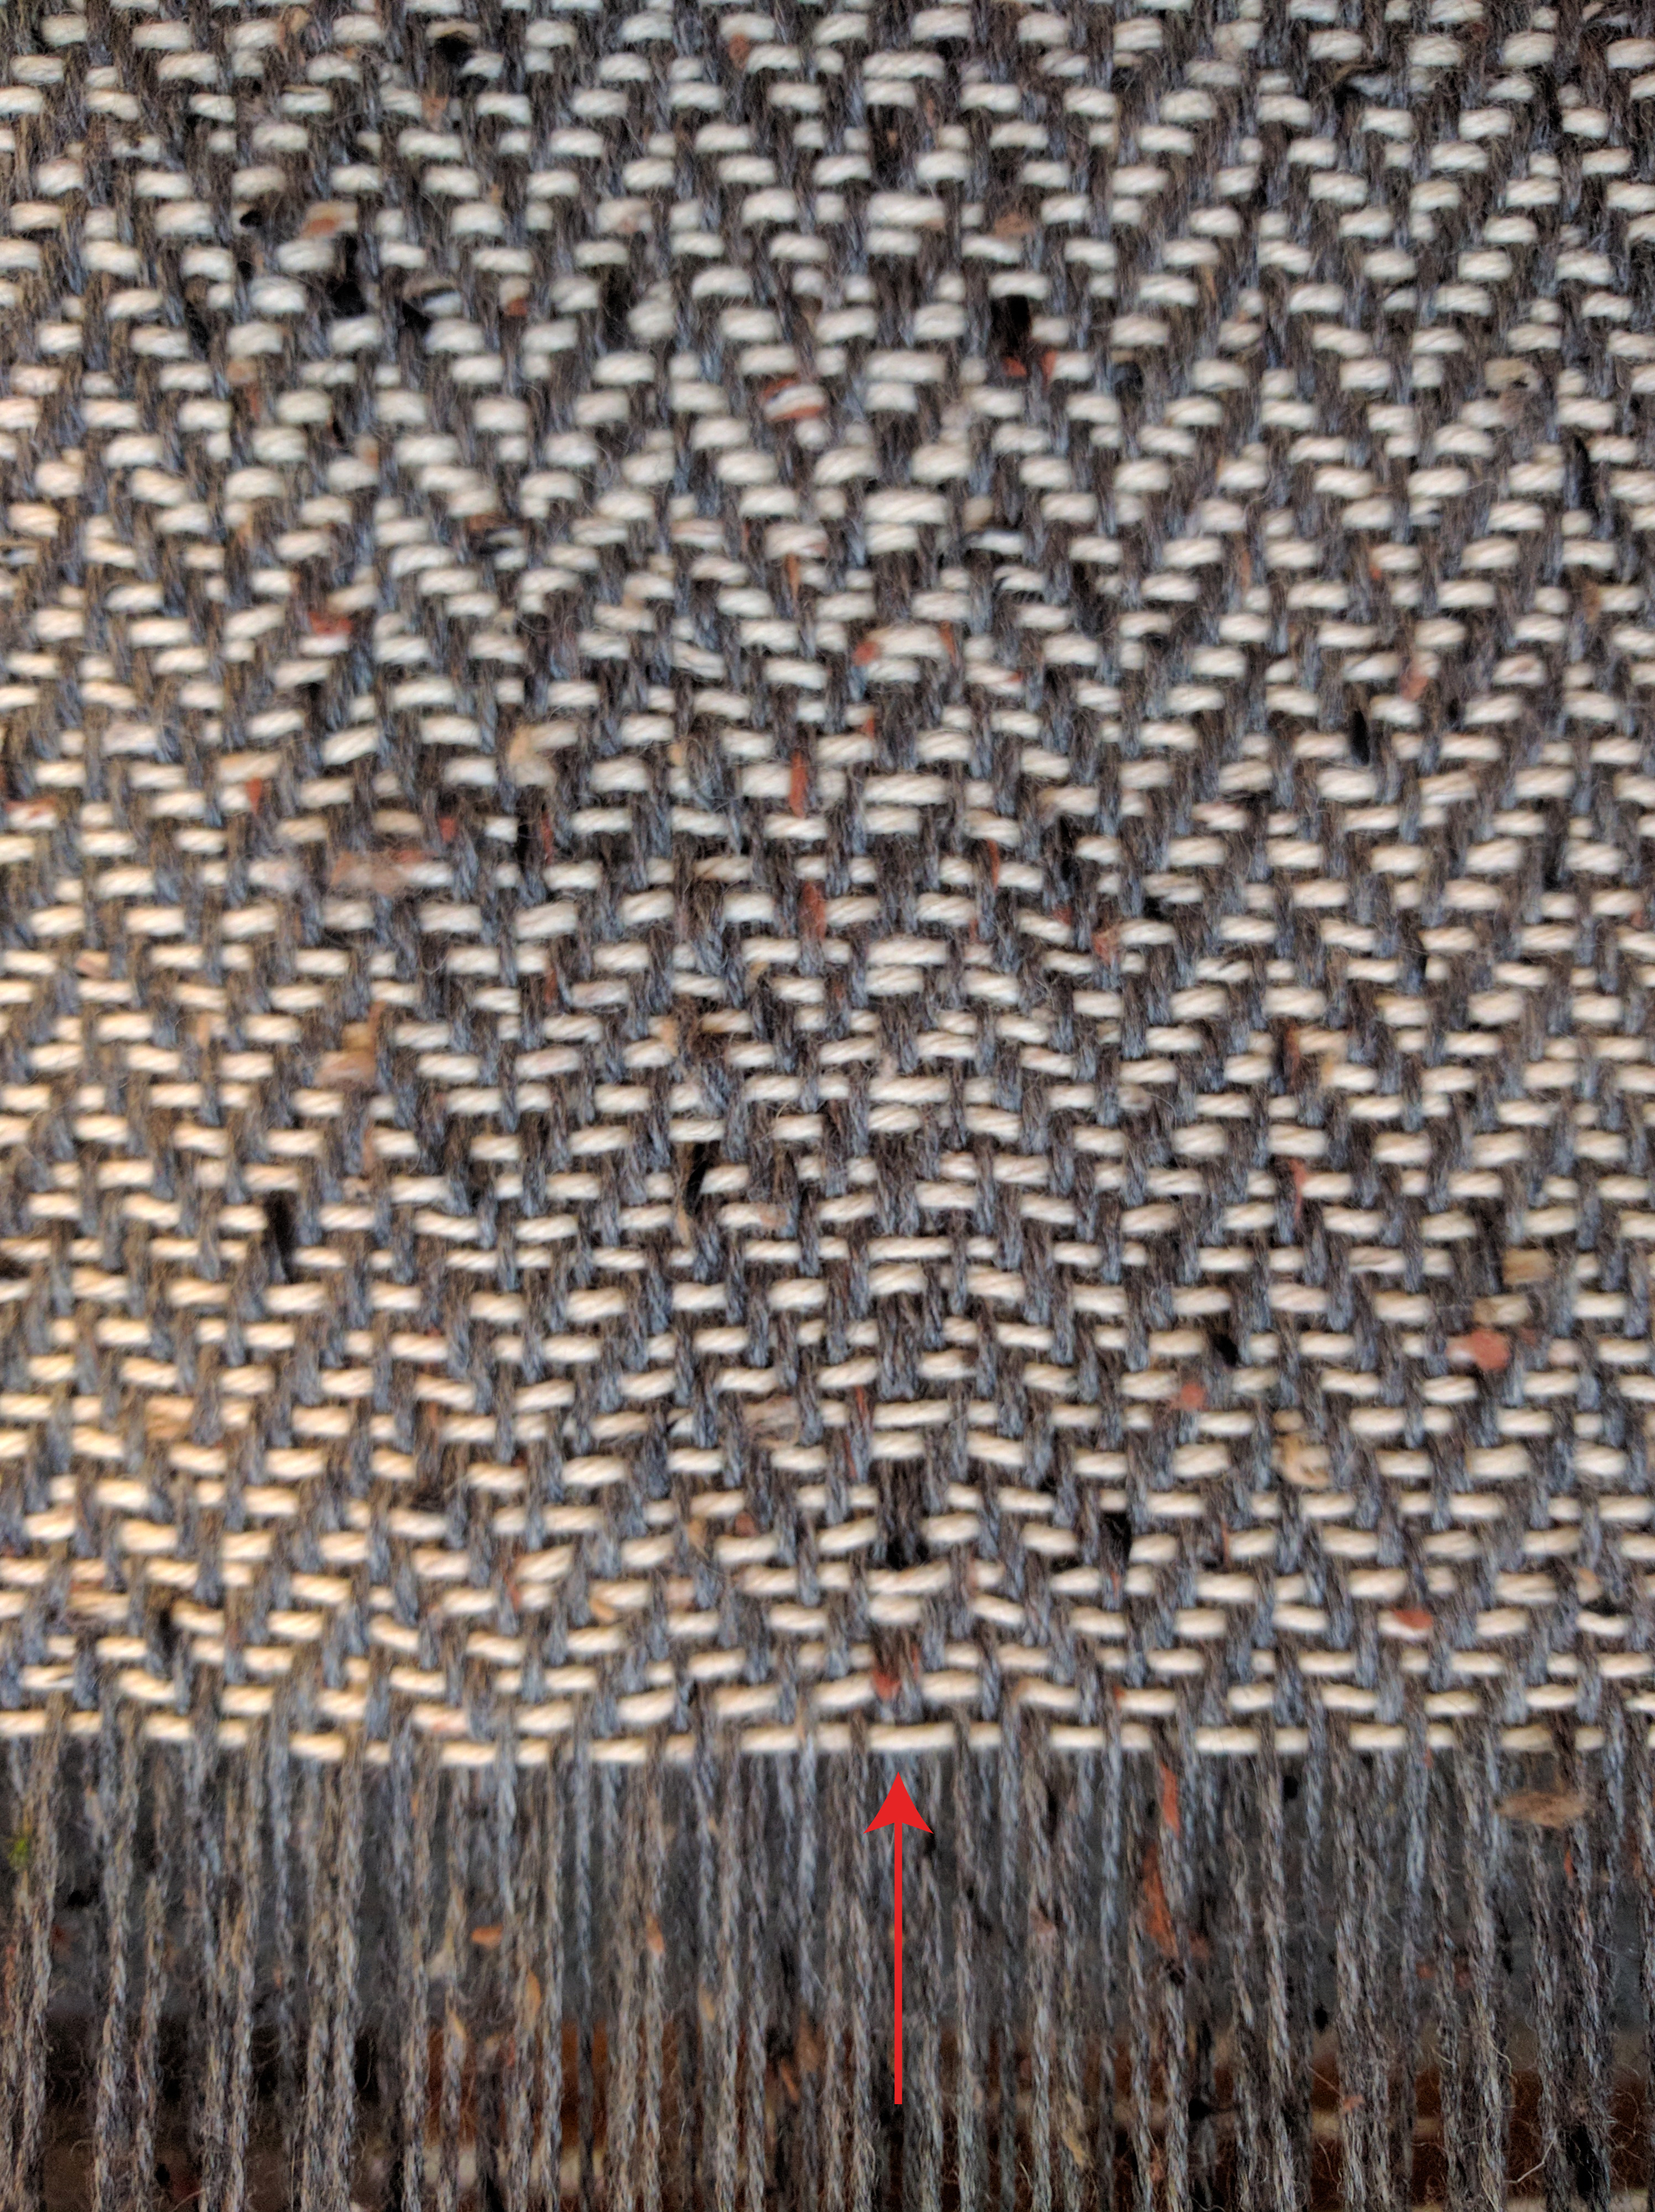
Fixing my warp mistakes.
After my two halves were cut apart, I threaded a tapestry needle and wove the correct placement for my mistaken threading. It was a little tedious, but very doable and wasn’t nearly as bad as I thought it might be.
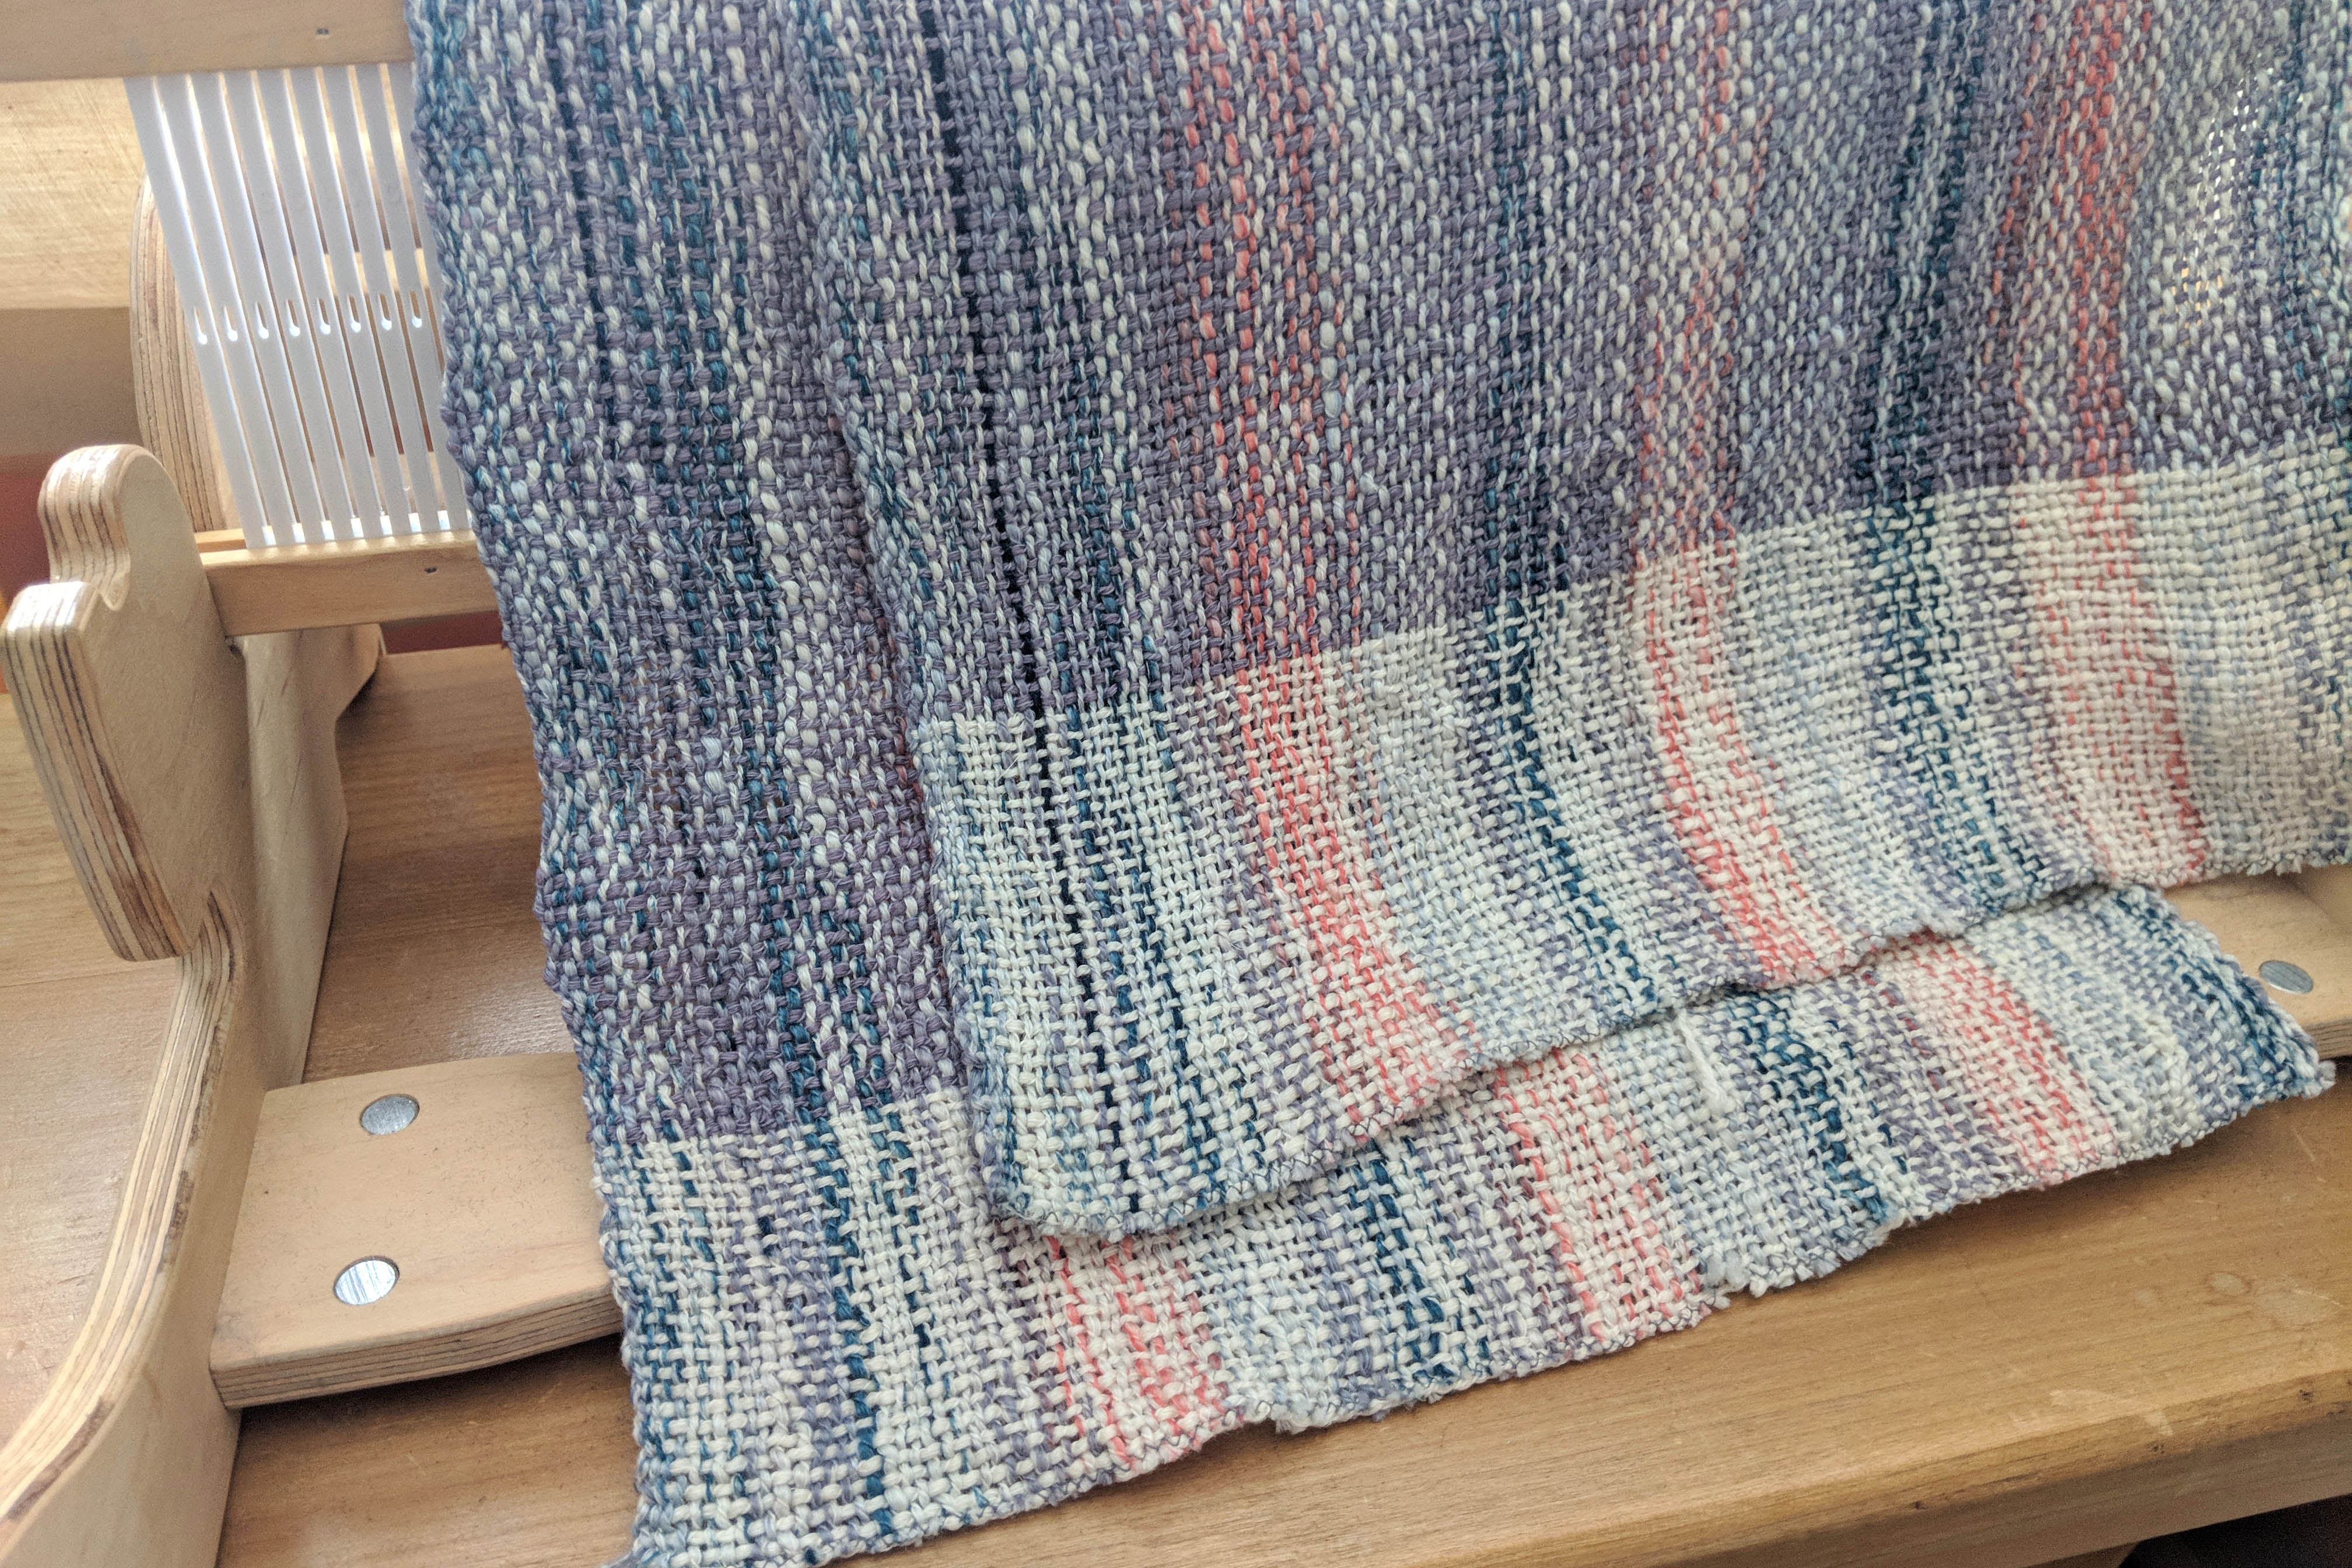
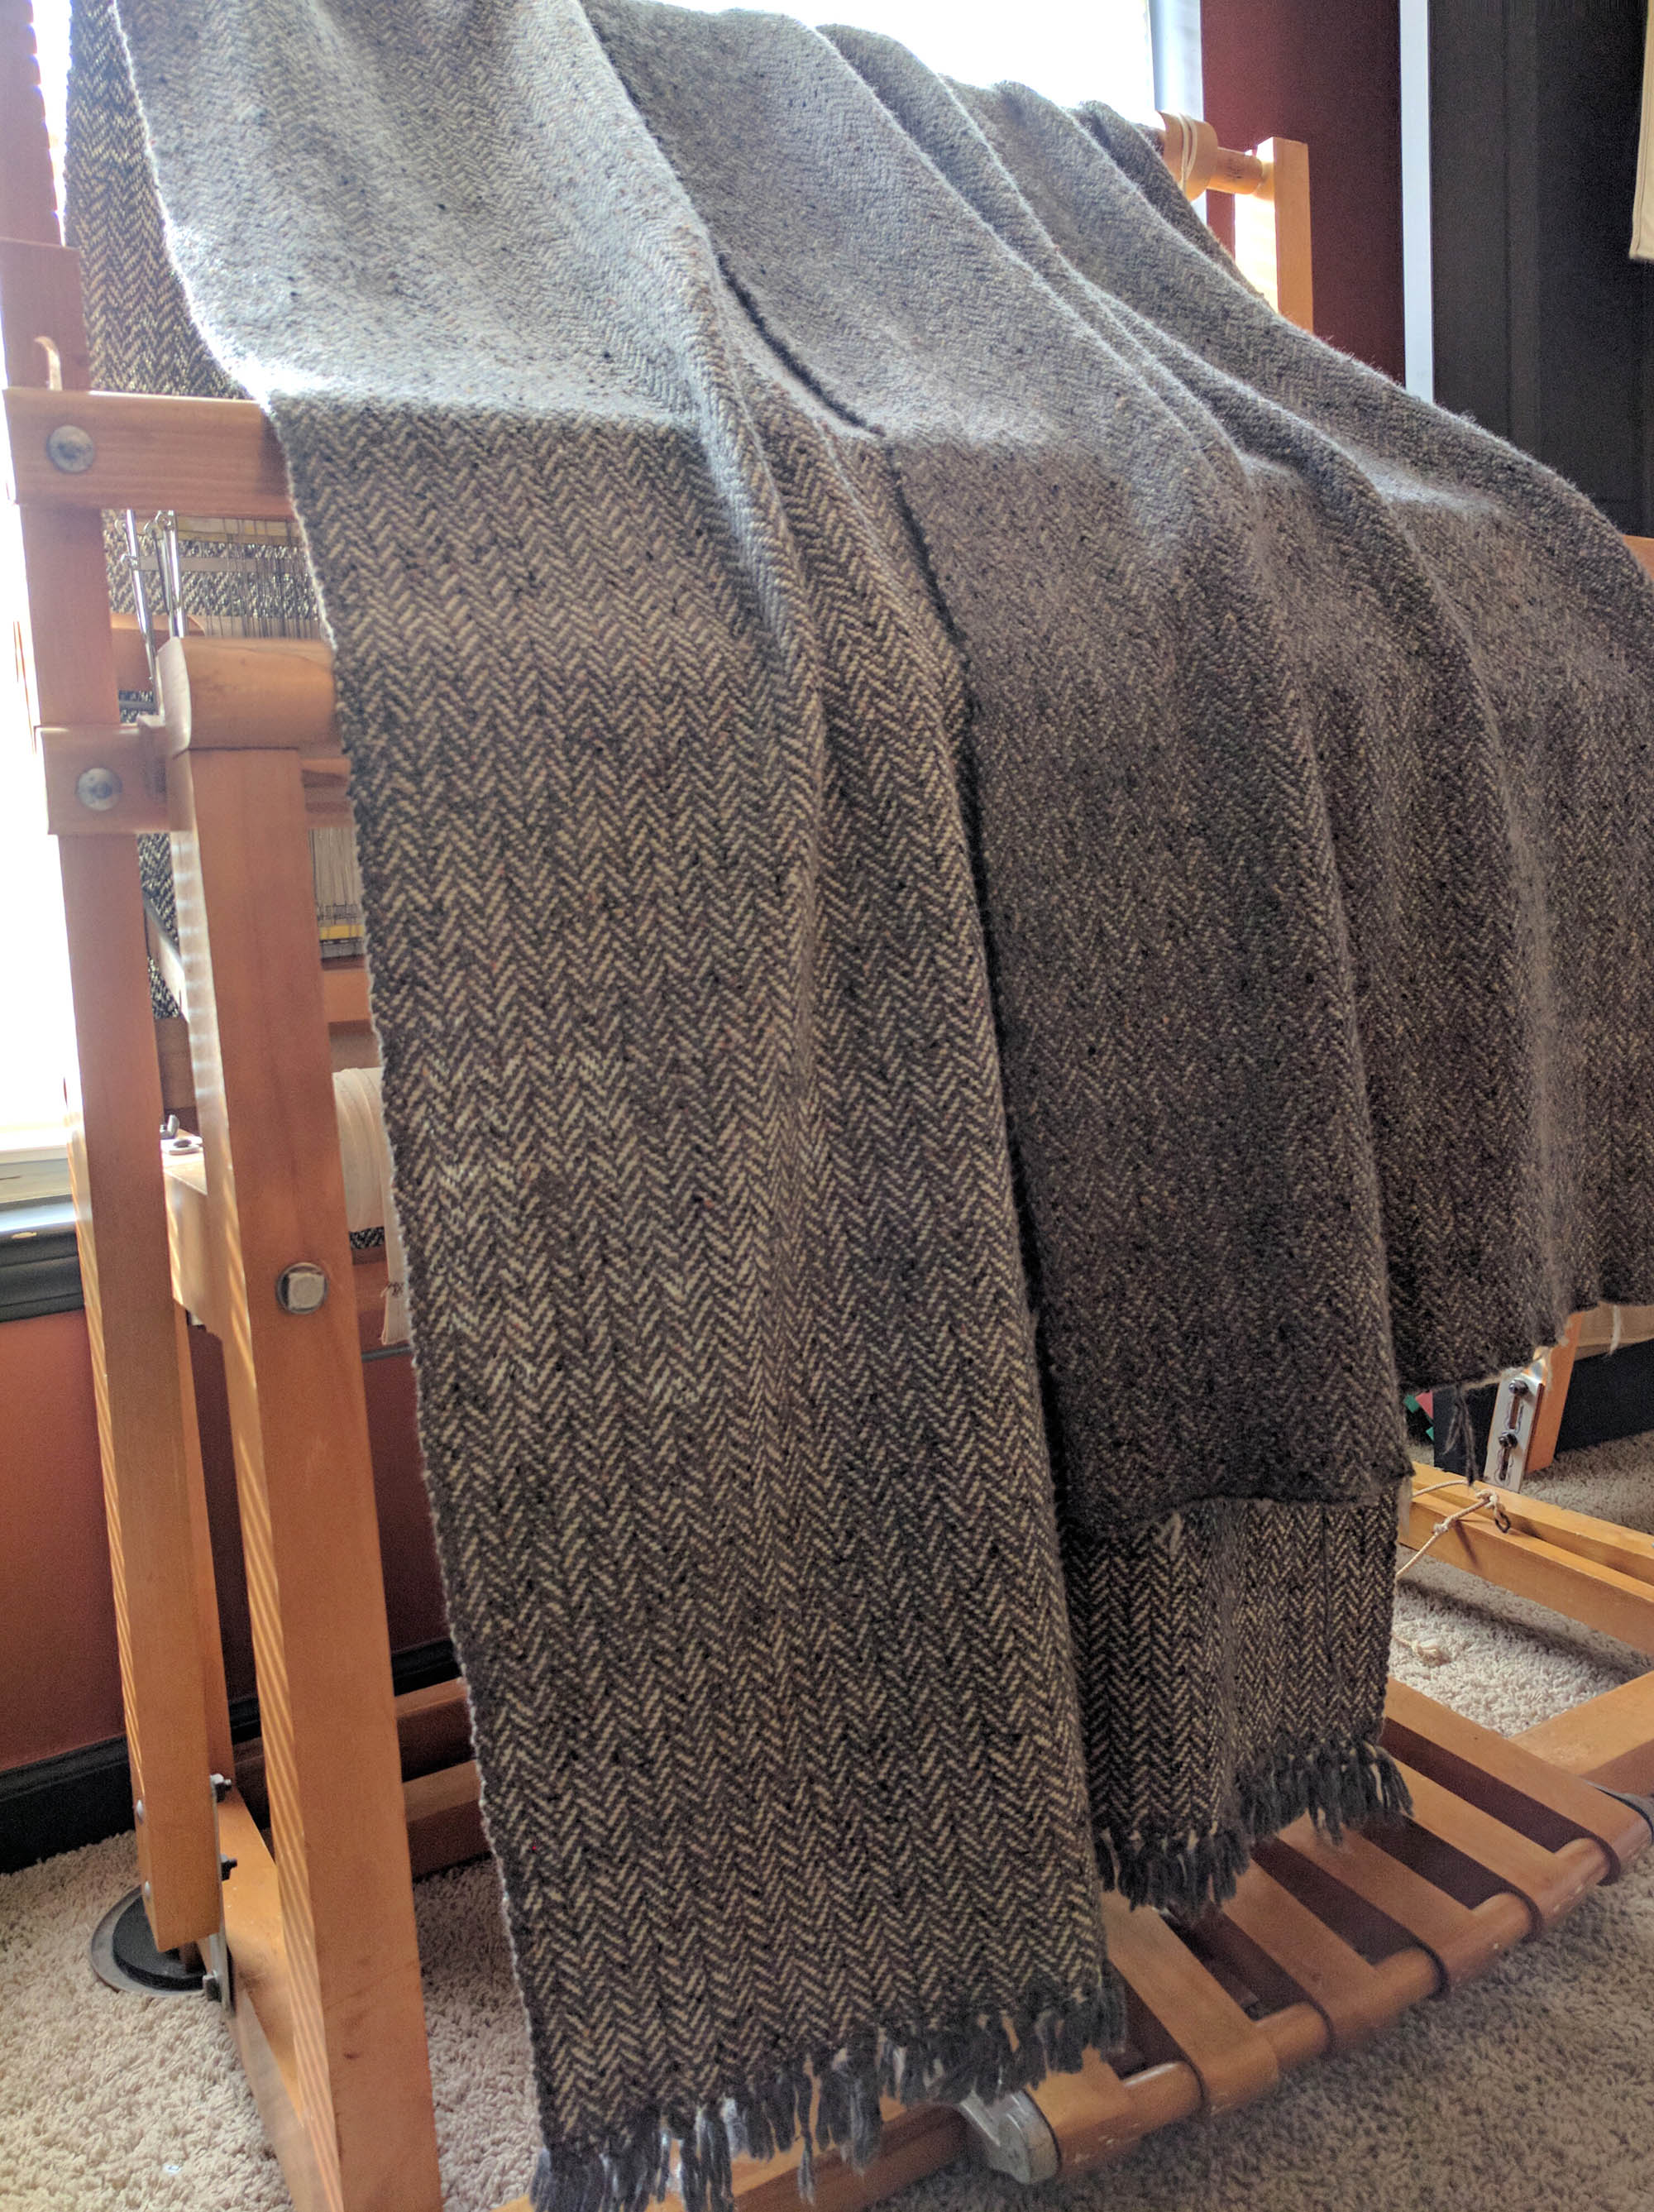
And here are my yardages basking in the sunlight prior to washing. I threw both of the pieces of fabric into my machine and washed and dried them on gentle cycles. Because I wove a fairly dense fabric, the fabric changed very little after finishing. But I already knew that would be the case since I was a good little weaver and did a sampling first.
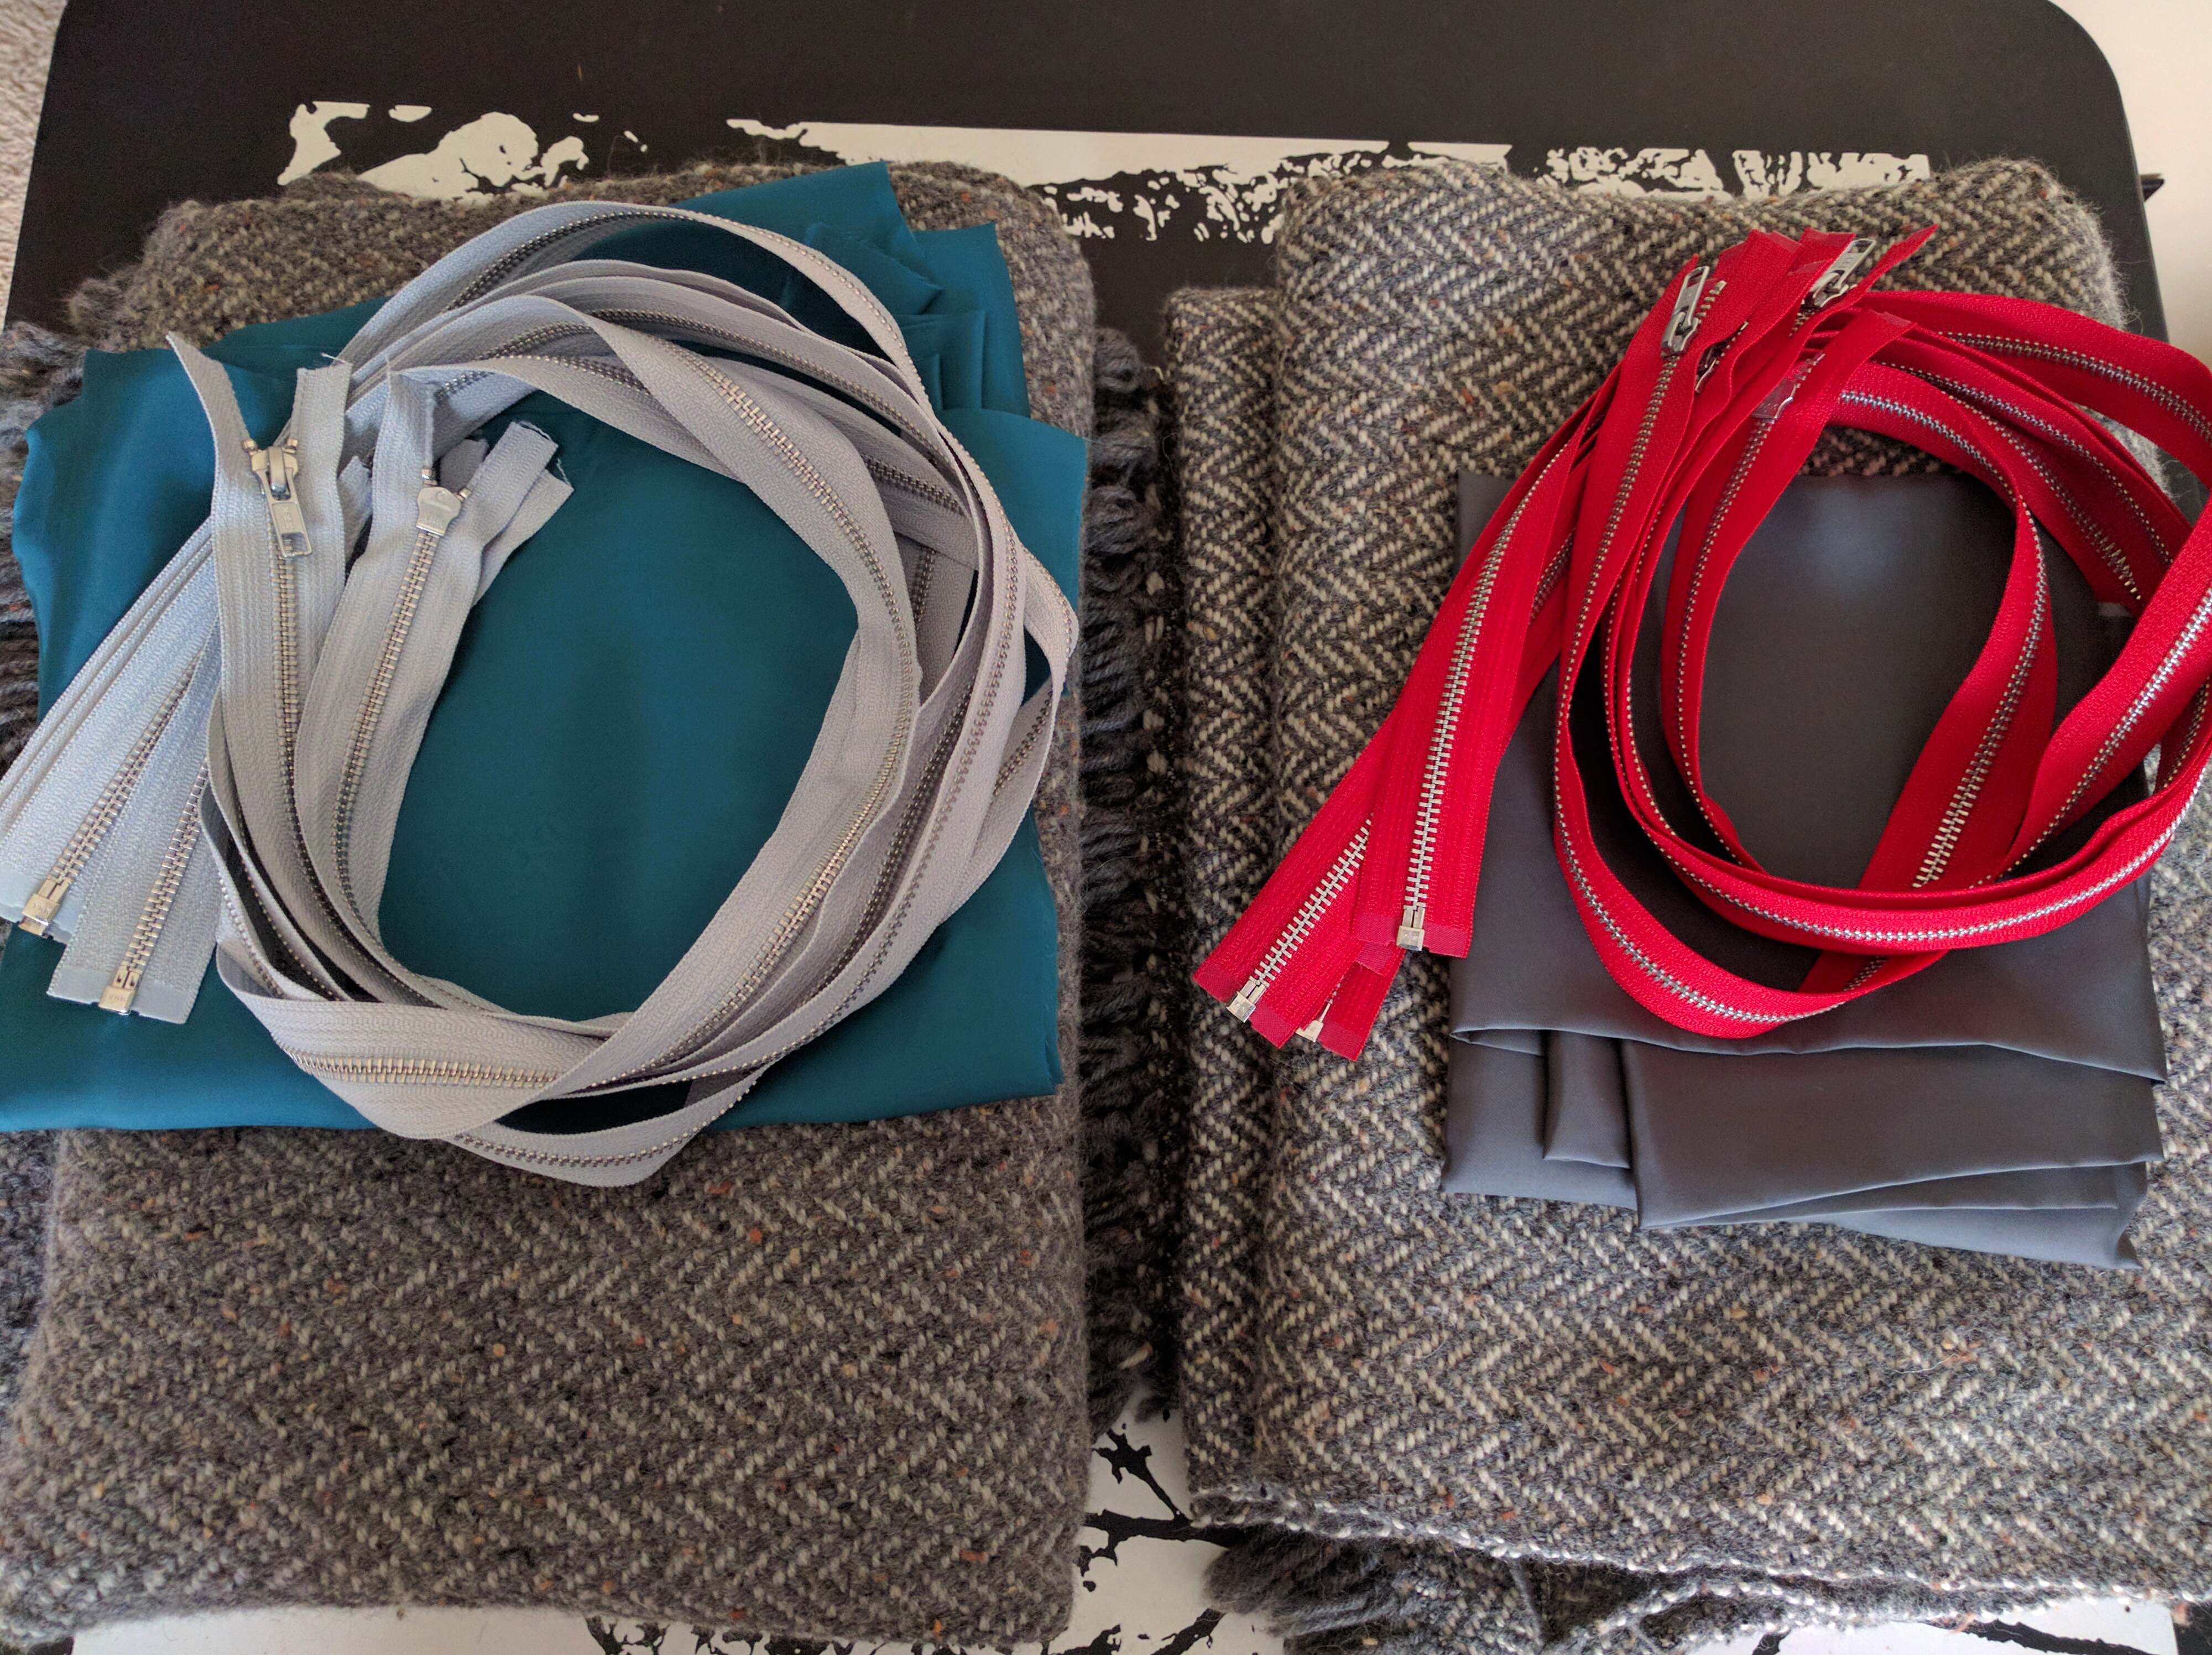
Zippers, lining, fabric: go!
My jacket will be made from the stack on the left – gray on gray fabric, teal lining, and gray zippers. Yonca chose cream to go with her gray for the fabric, matching gray lining, and bold lipstick red zippers.
My goal is to be finished with these jackets by next weekend’s TNNA. So if you’re planning on attending, stop by our booth and check them out. Otherwise, I’ll be back in a couple of weeks here on the blog with all the sewing details.