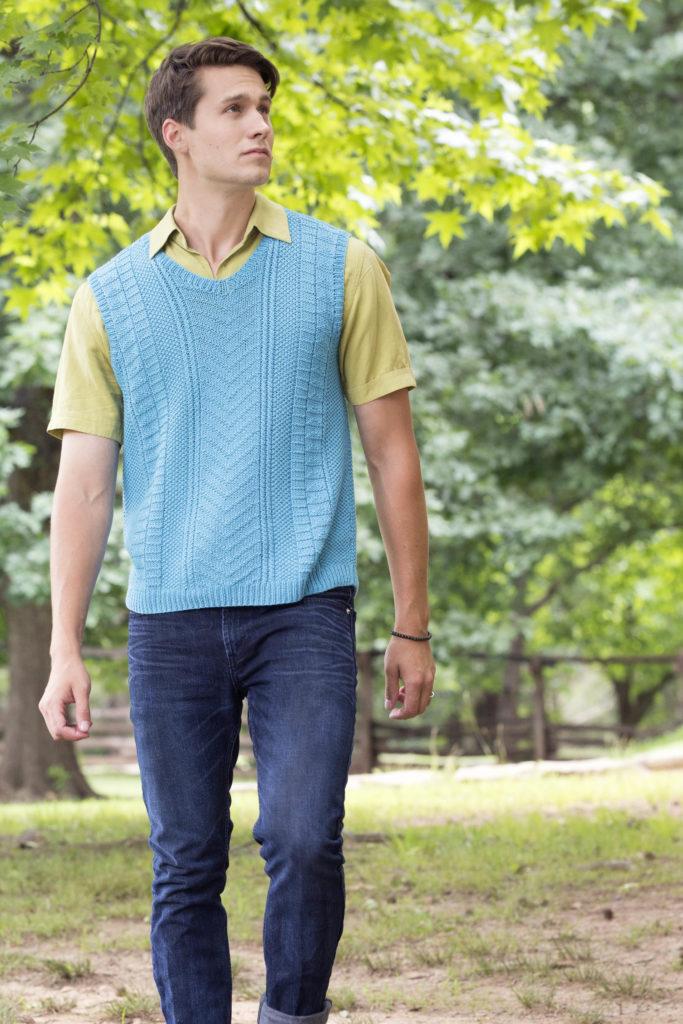
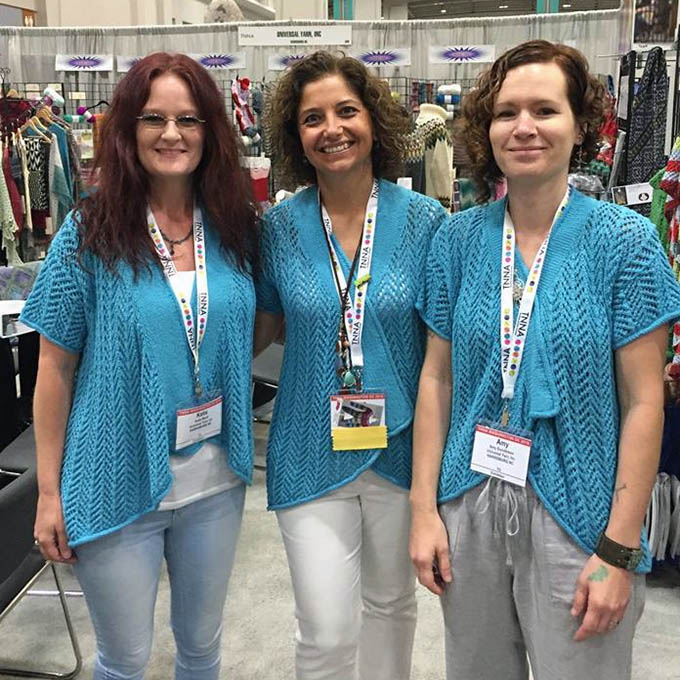
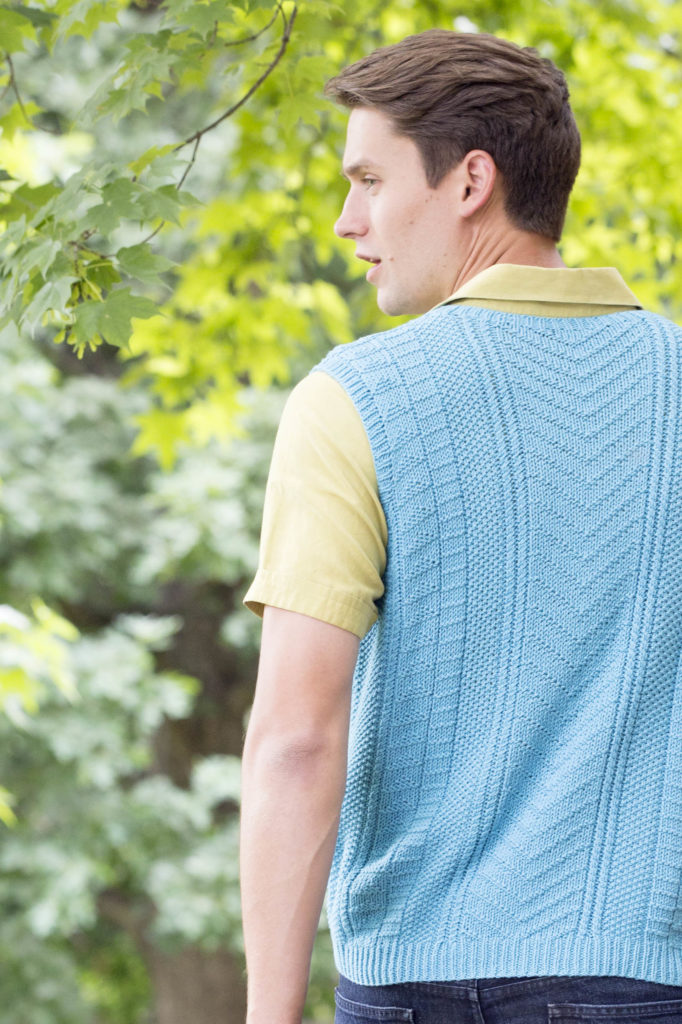
This vest was inspired by an idea we had a couple of years ago. In 2016, we designed the TNNA Cardi and all wore it to the National Needlearts Association’s tradeshow, the event where we get to meet with our LYS owner friends and show them what’s new for the sesaon.
Katie, Yonca, and Amy are ready to show off some yarn!
The cardi looked and fit great, but wasn’t really tailored to the guys attending. This year, we’re fixing that!
The TNNA Vest is also knitted in Bamboo Pop color 107 Ocean (gotta match!), but it replaces lace with different stitch patterns. The V panel in the center recalls the diagonal lace of the original cardi. The largest size (4X) only takes 5 balls – Bamboo Pop goes a long way!
We’re heading to the show next week. If you’ll be there, swing by booth 1032 and say hi. We’d love to see you!
Papyrus is one of those yarns that we can’t get enough of – a textured cotton/silk combination that’s light and interesting. Crafters seem to like it too, and are putting it to good use. I really hadn’t thought of using Papyrus for Amy Gunderson’s Silver Blossom Tee, but after seeing the beautiful job that Raveler Sally9 did on hers, it’s going in my queue.
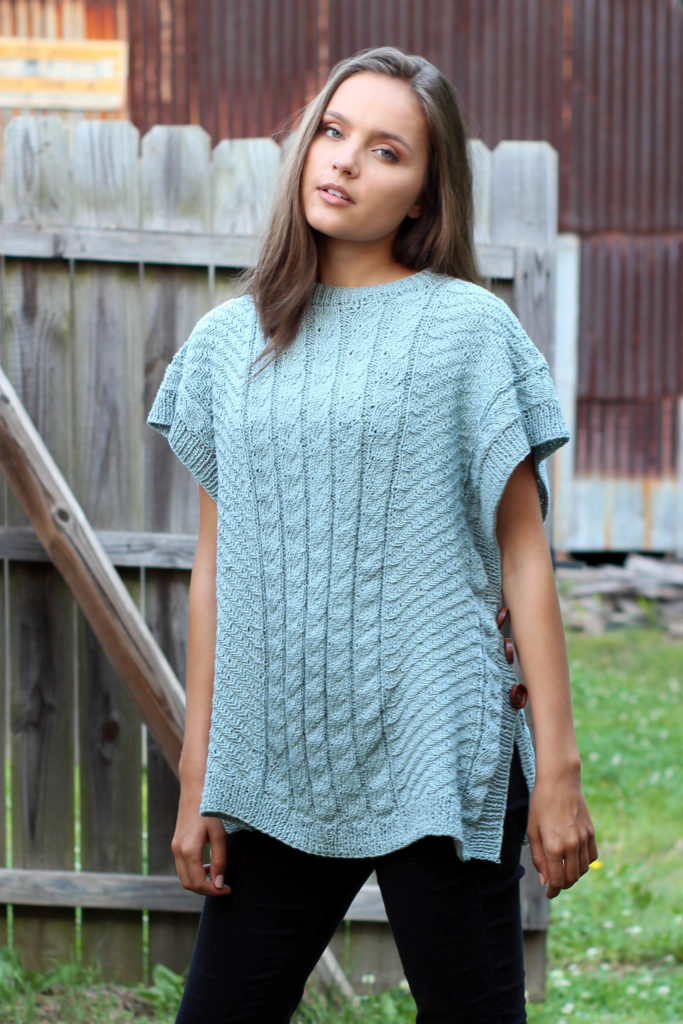
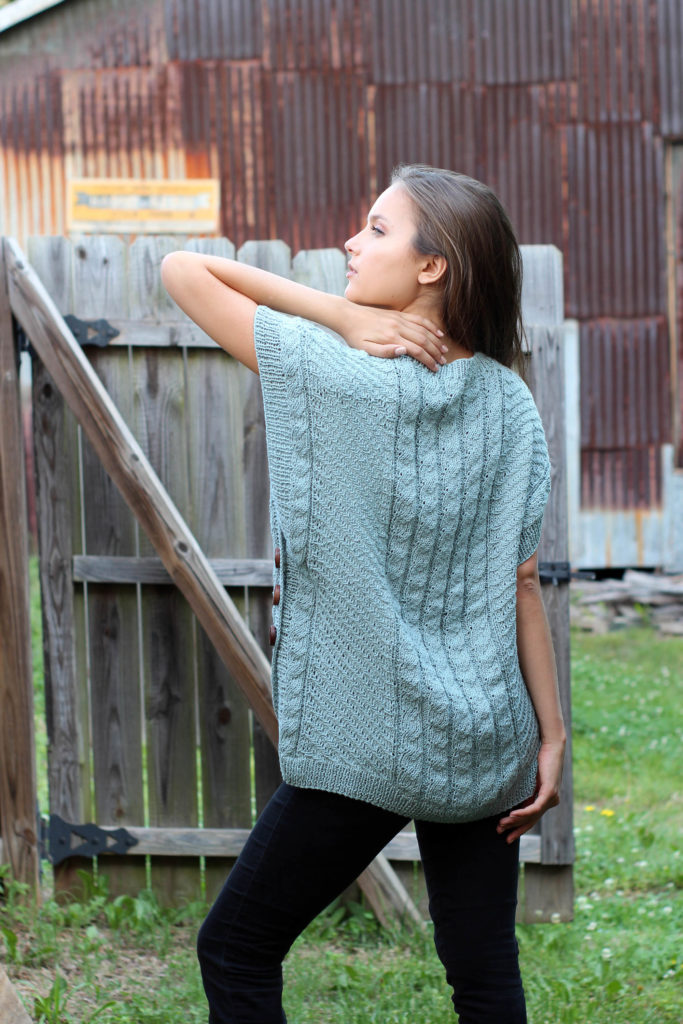
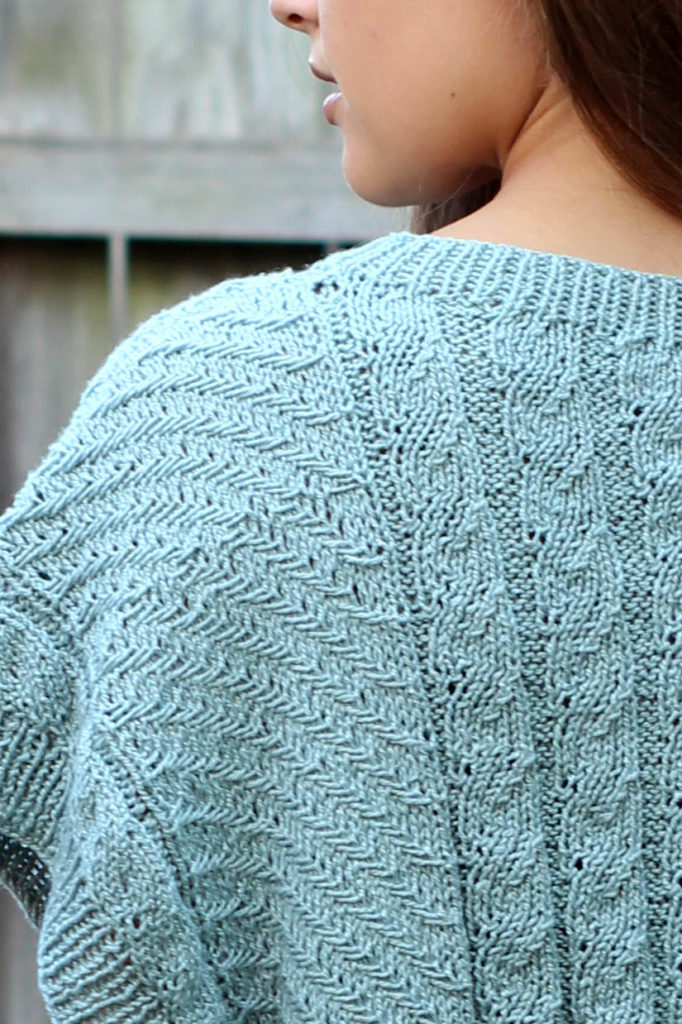
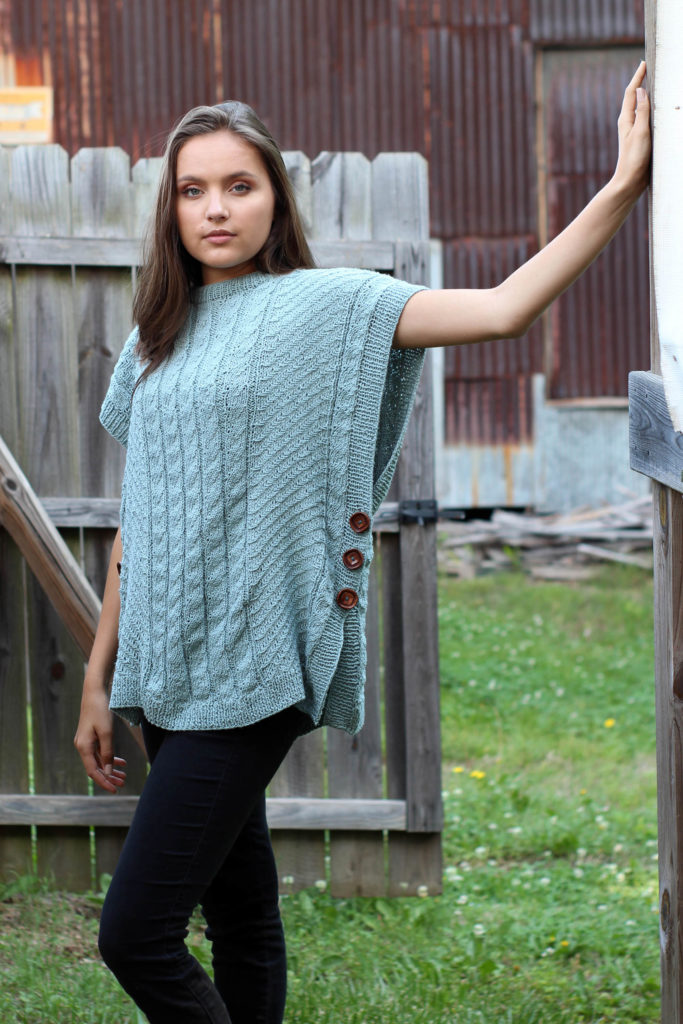
The Pathways Poncho looks more complicated than it is. The key here is mock cables, giving the illusion of cabling with no actual cable needle required.
Knit the front and back flat, then join the two pieces and add edging and buttons, and you’re done. With the yarn’s cotton content, this piece will work well in warmer weather.
We hope you have a fantastic knitting, full of fun projects.
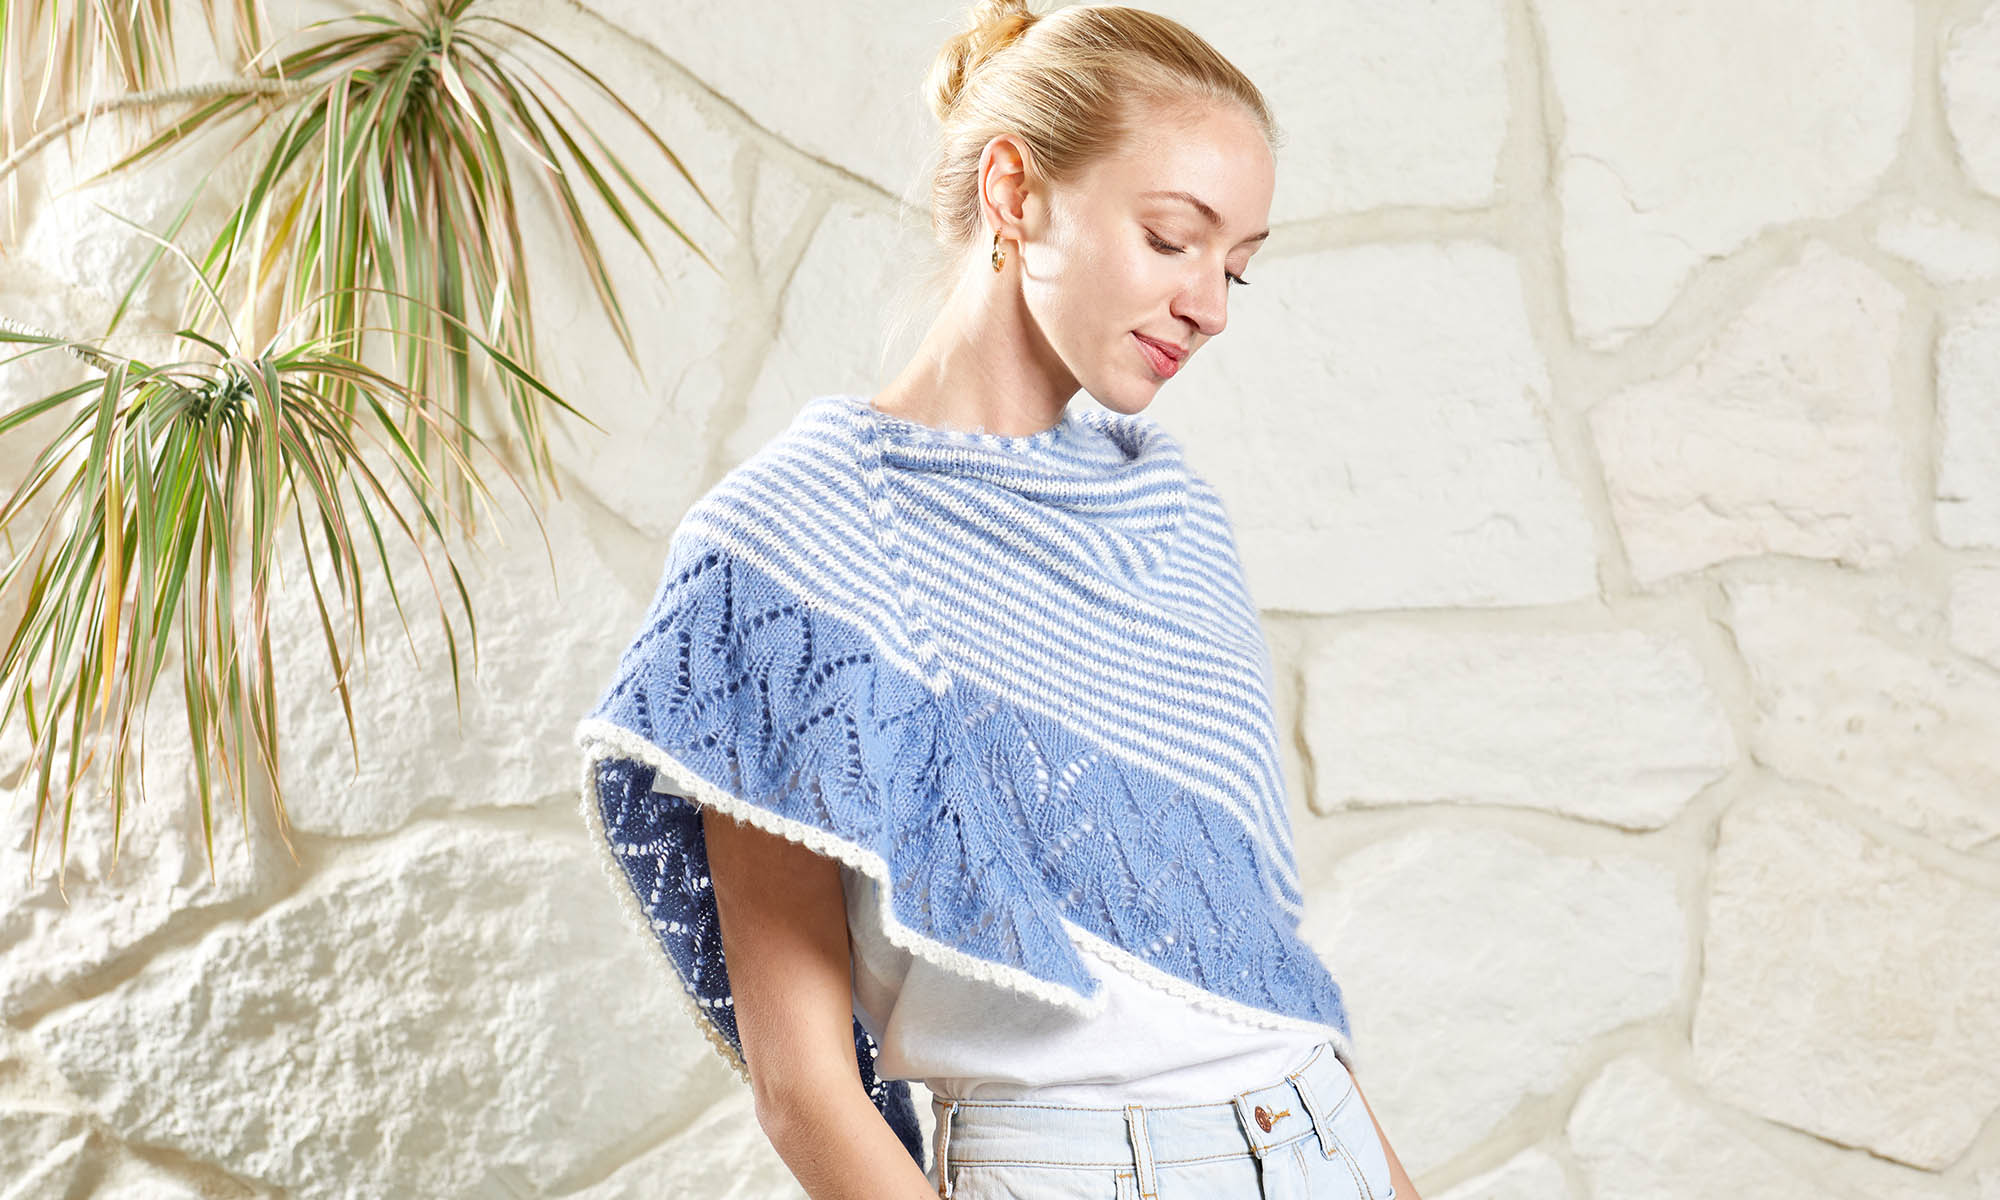
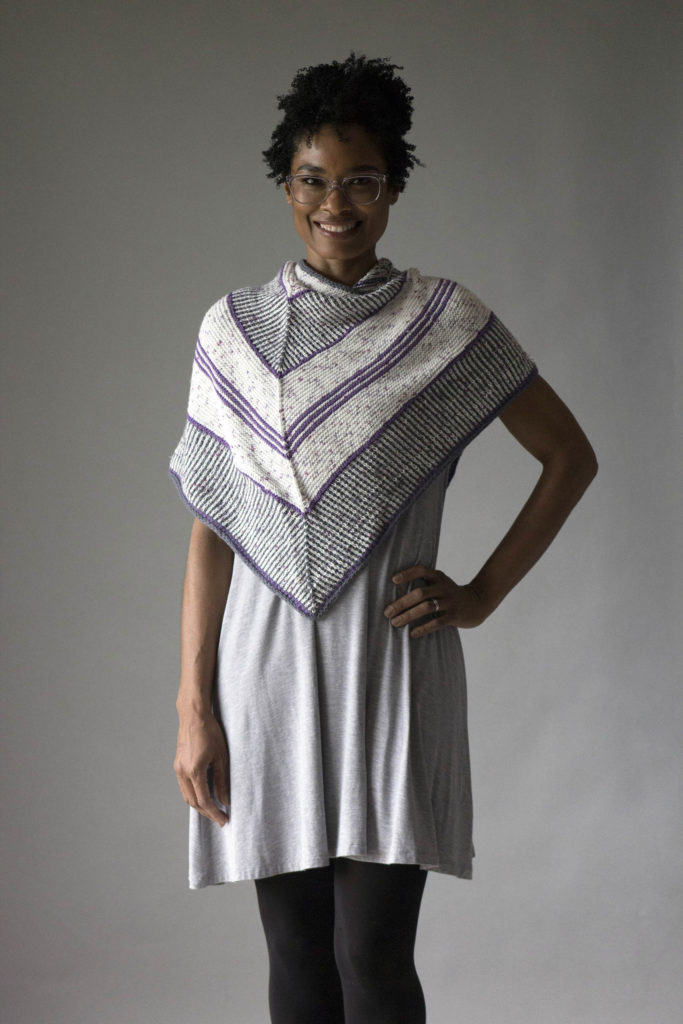
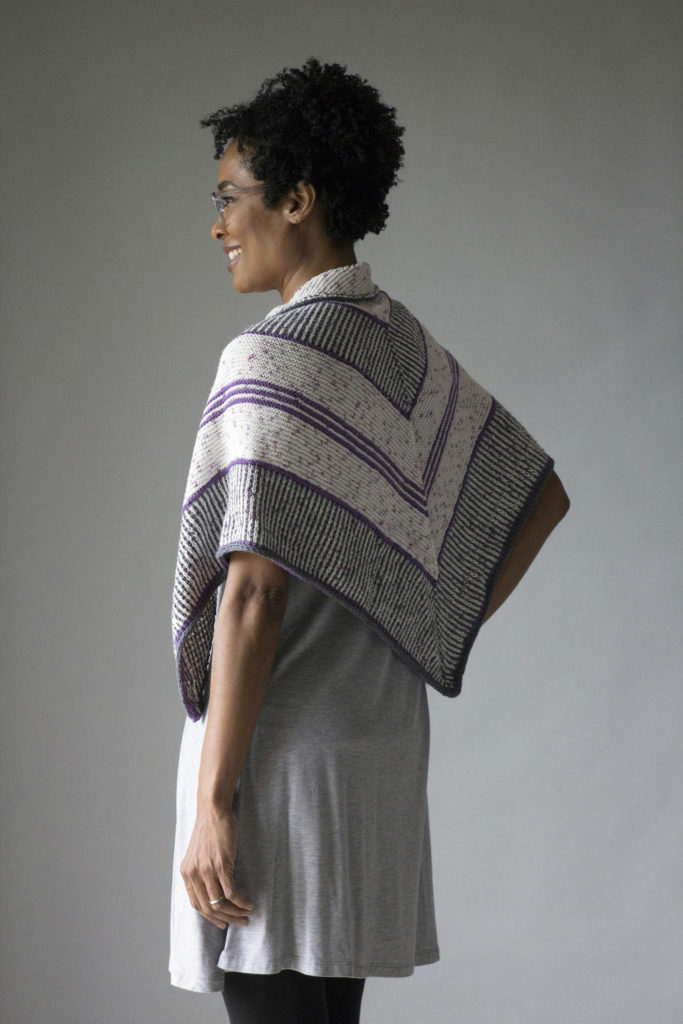
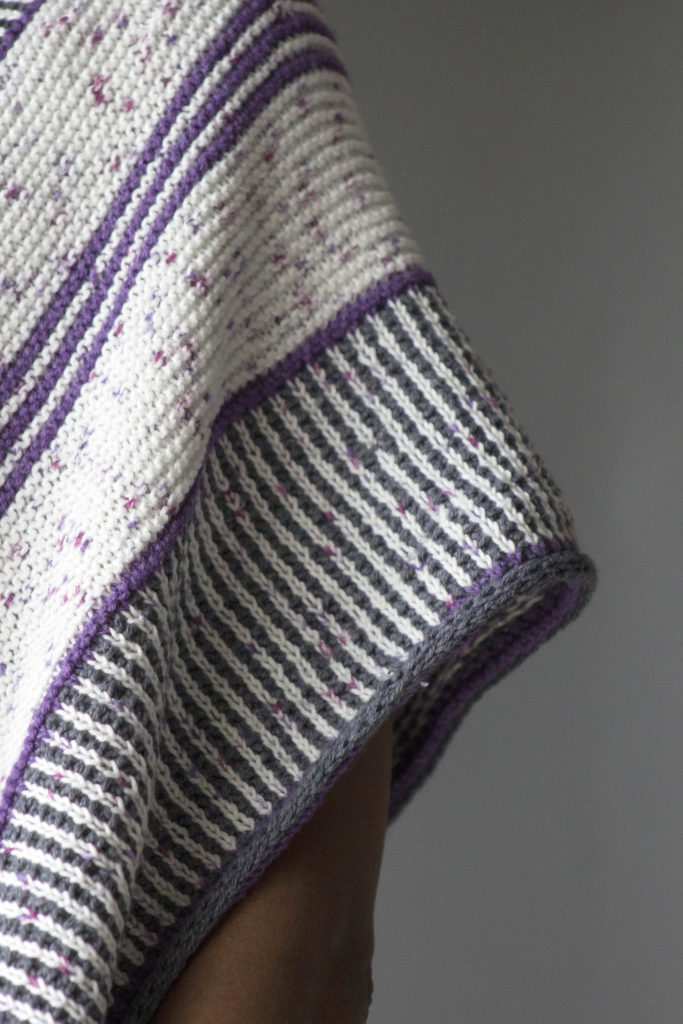
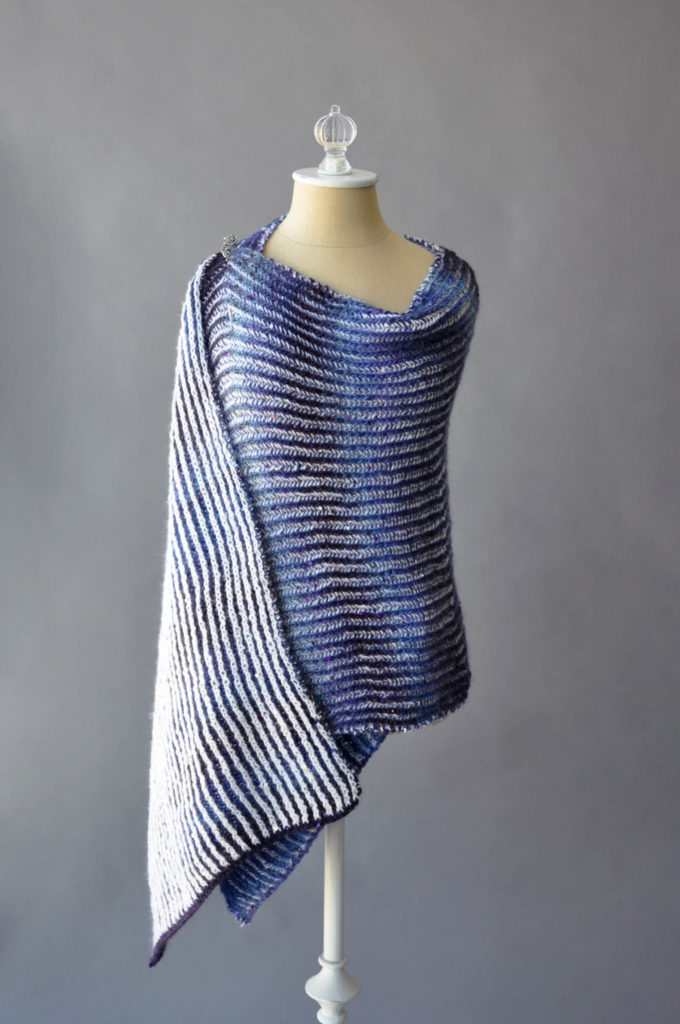
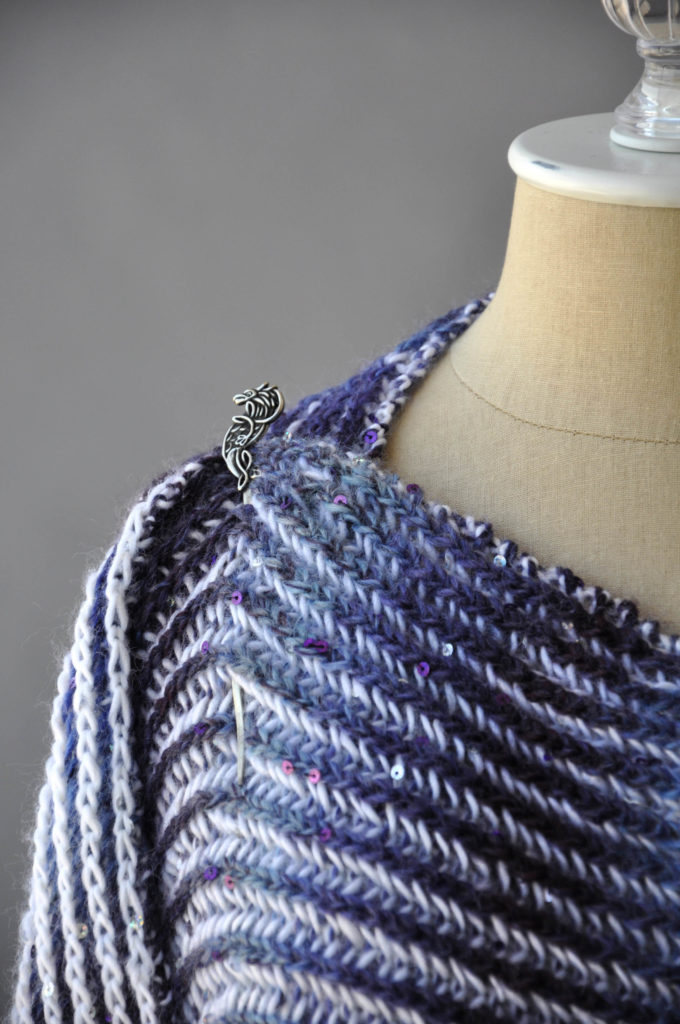
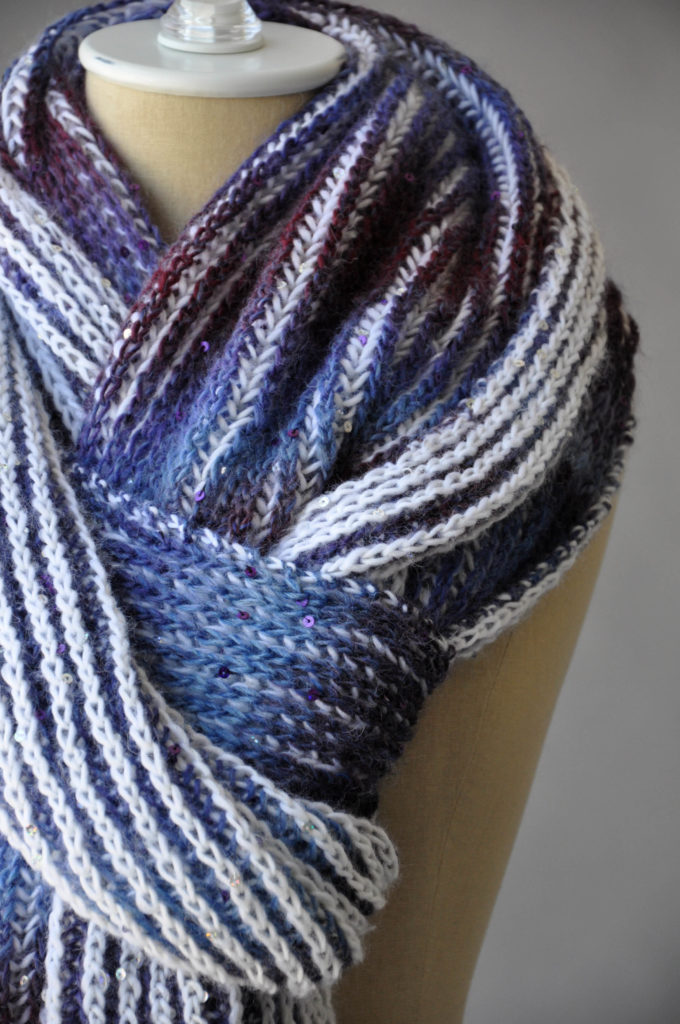
This is Amy Gunderson’s design, but she kindly let me name this shawl Right Turn. At the time, it reminded me of a particularly colorful city street. However, I may have mis-named it. Sure, it looks like it veers sharply, but that’s not what the construction actually does.
You start at the top, and do an increase on either side of the center spine and at each edge. So really, it’s more like a gradual broadening of the horizon as you keep going.
Begin with garter stitch, then move to slip-stitch to easily make the two-color stripes. Back to garter, then polish it off with an i-cord bind-off.
It’s made in Bamboo Pop, a great summertime yarn that has 52 colors. It’d be easy to have the stripes accent whatever color is most prevalent in your wardrobe.
The weather here can’t decide what it wants to do. One minute it’s Spring, the next it’s Summer. We need something that will straddle the line.
The Cassia Cardigan is a geat layering piece over a tee.
Knit this piece flat in three pieces – the back, and each half of the front. Then seam and add the solid border (shown in Good Earth cotton/linen).
Although the stitch pattern for this cardi is simple, you’ll still want to pay attention. The detailed decreases that makes this such a striking piece occur at different rates in different places. We’d recommend a read-through before starting to ensure smooth sailing later on. Actually, we always recommend that, but we’re sometimes guilty of diving in first and winging it. It’s just human nature when you have a beautiful project ready to go.
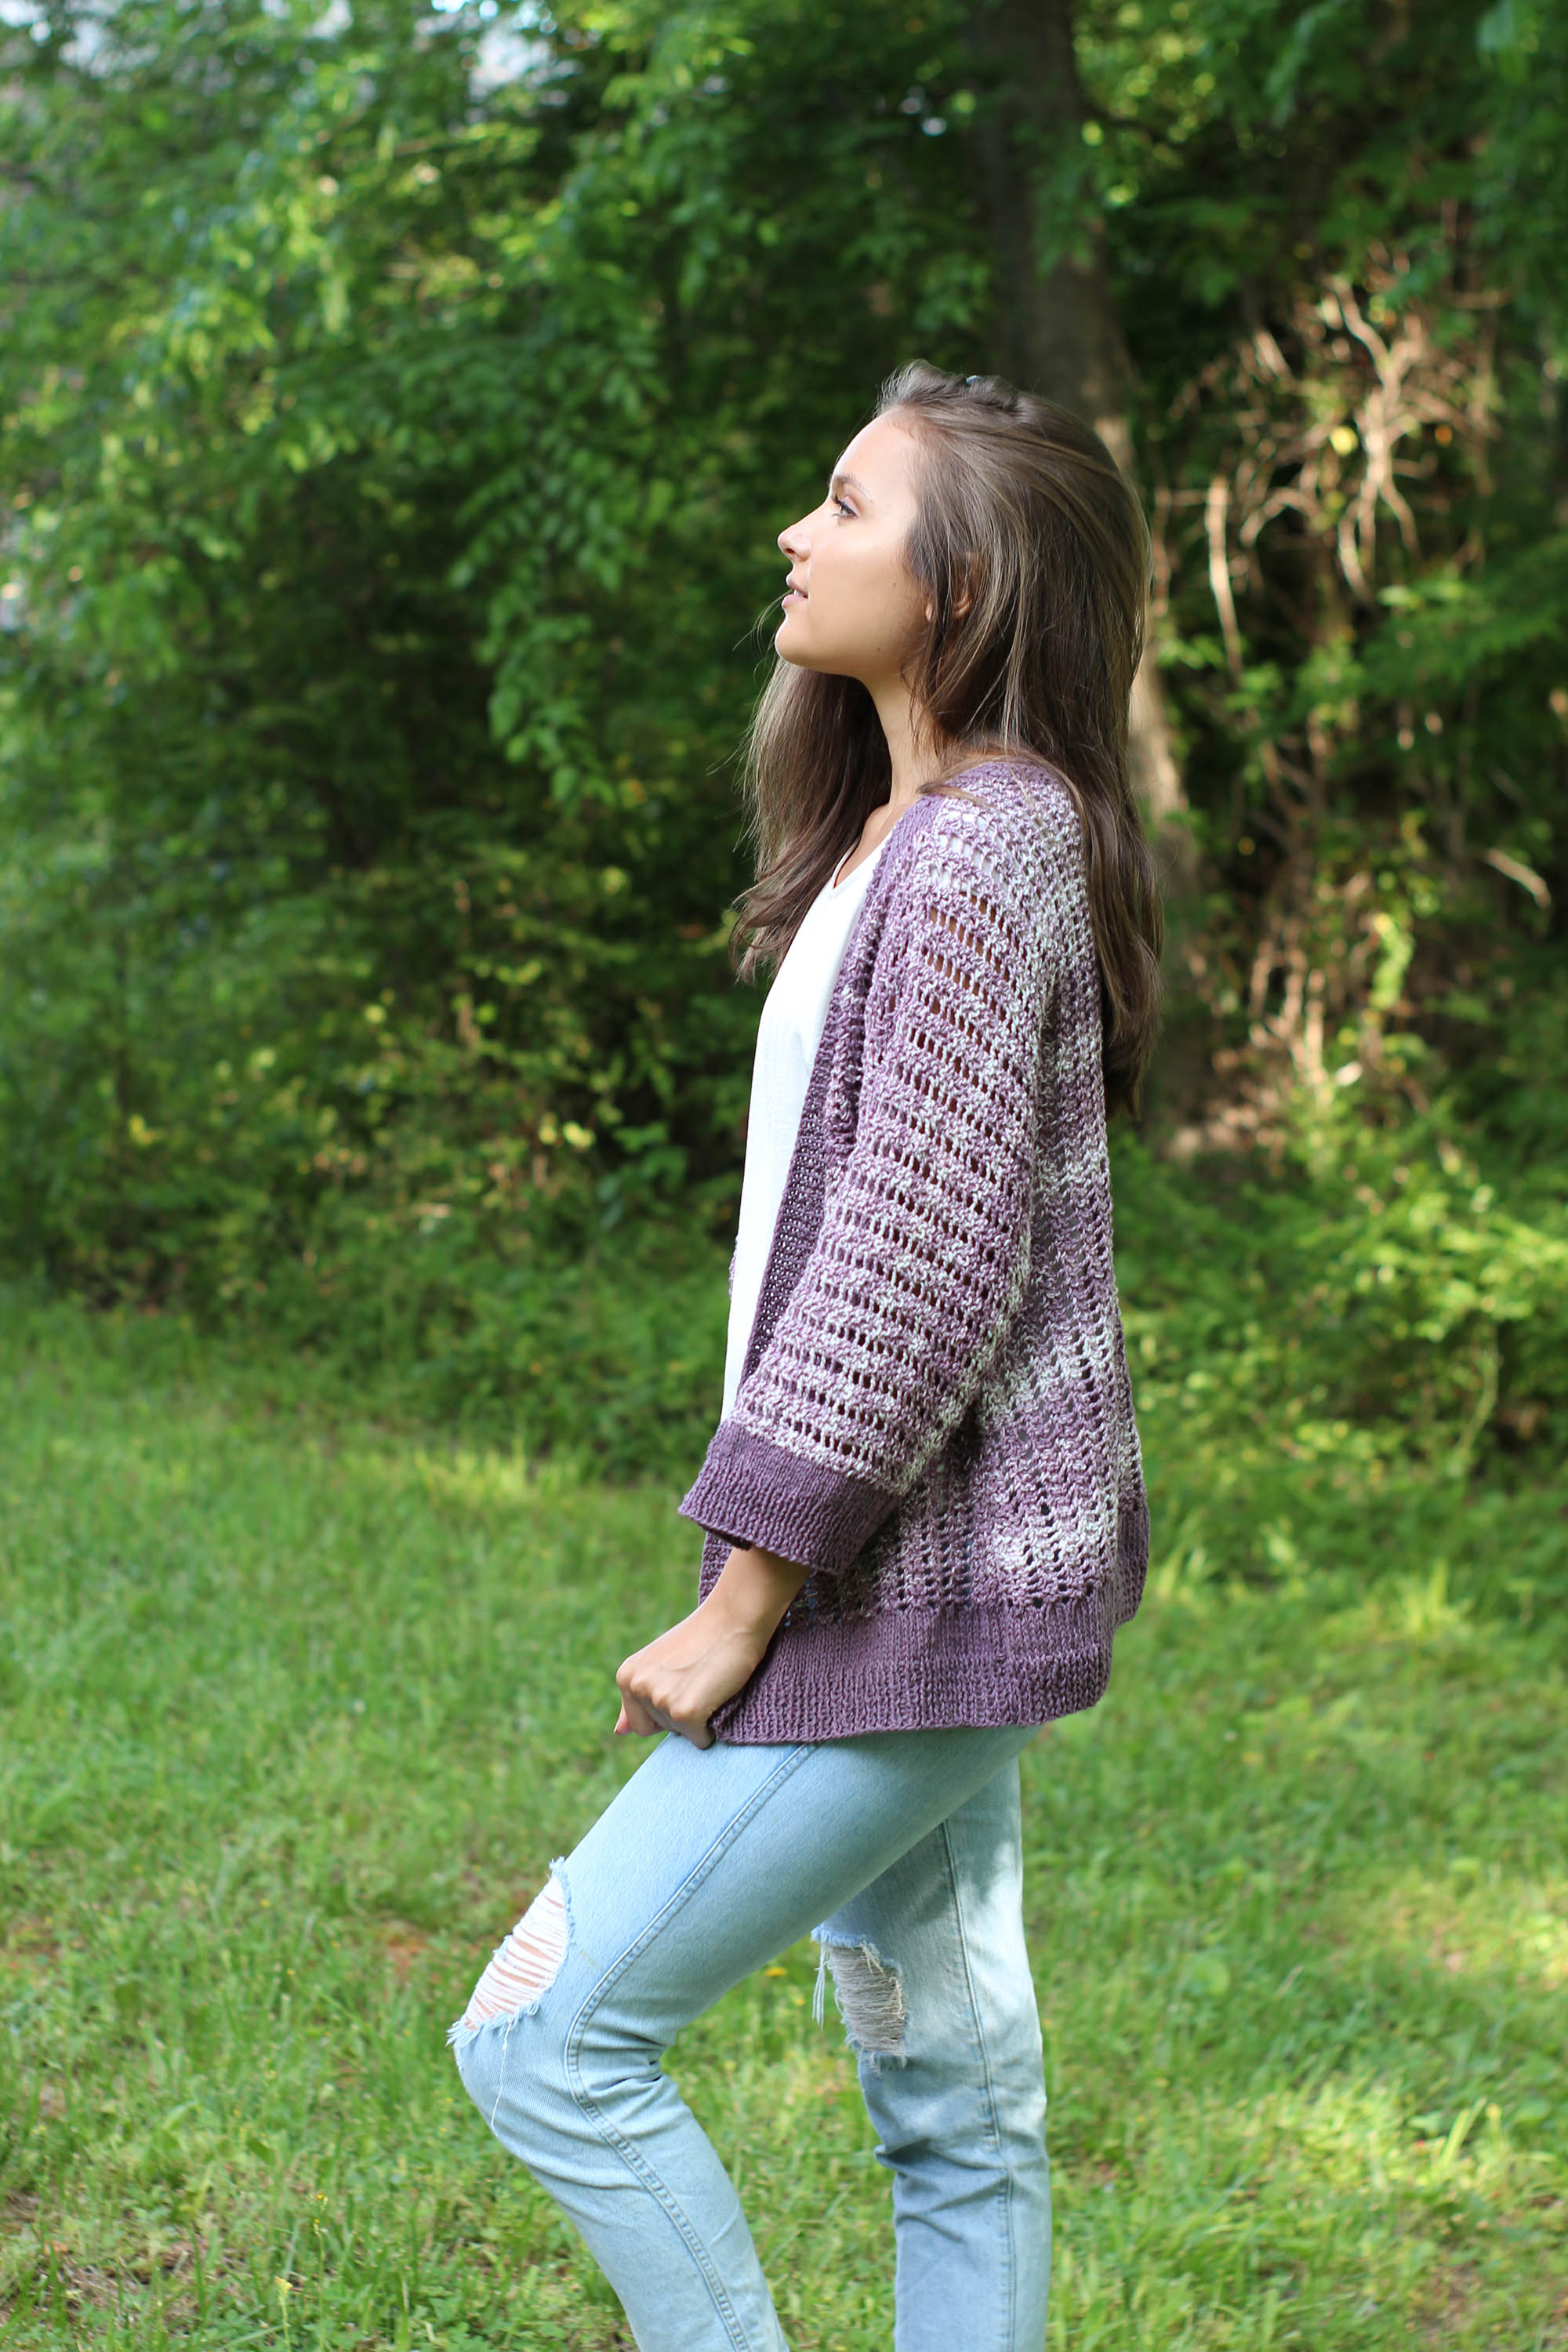
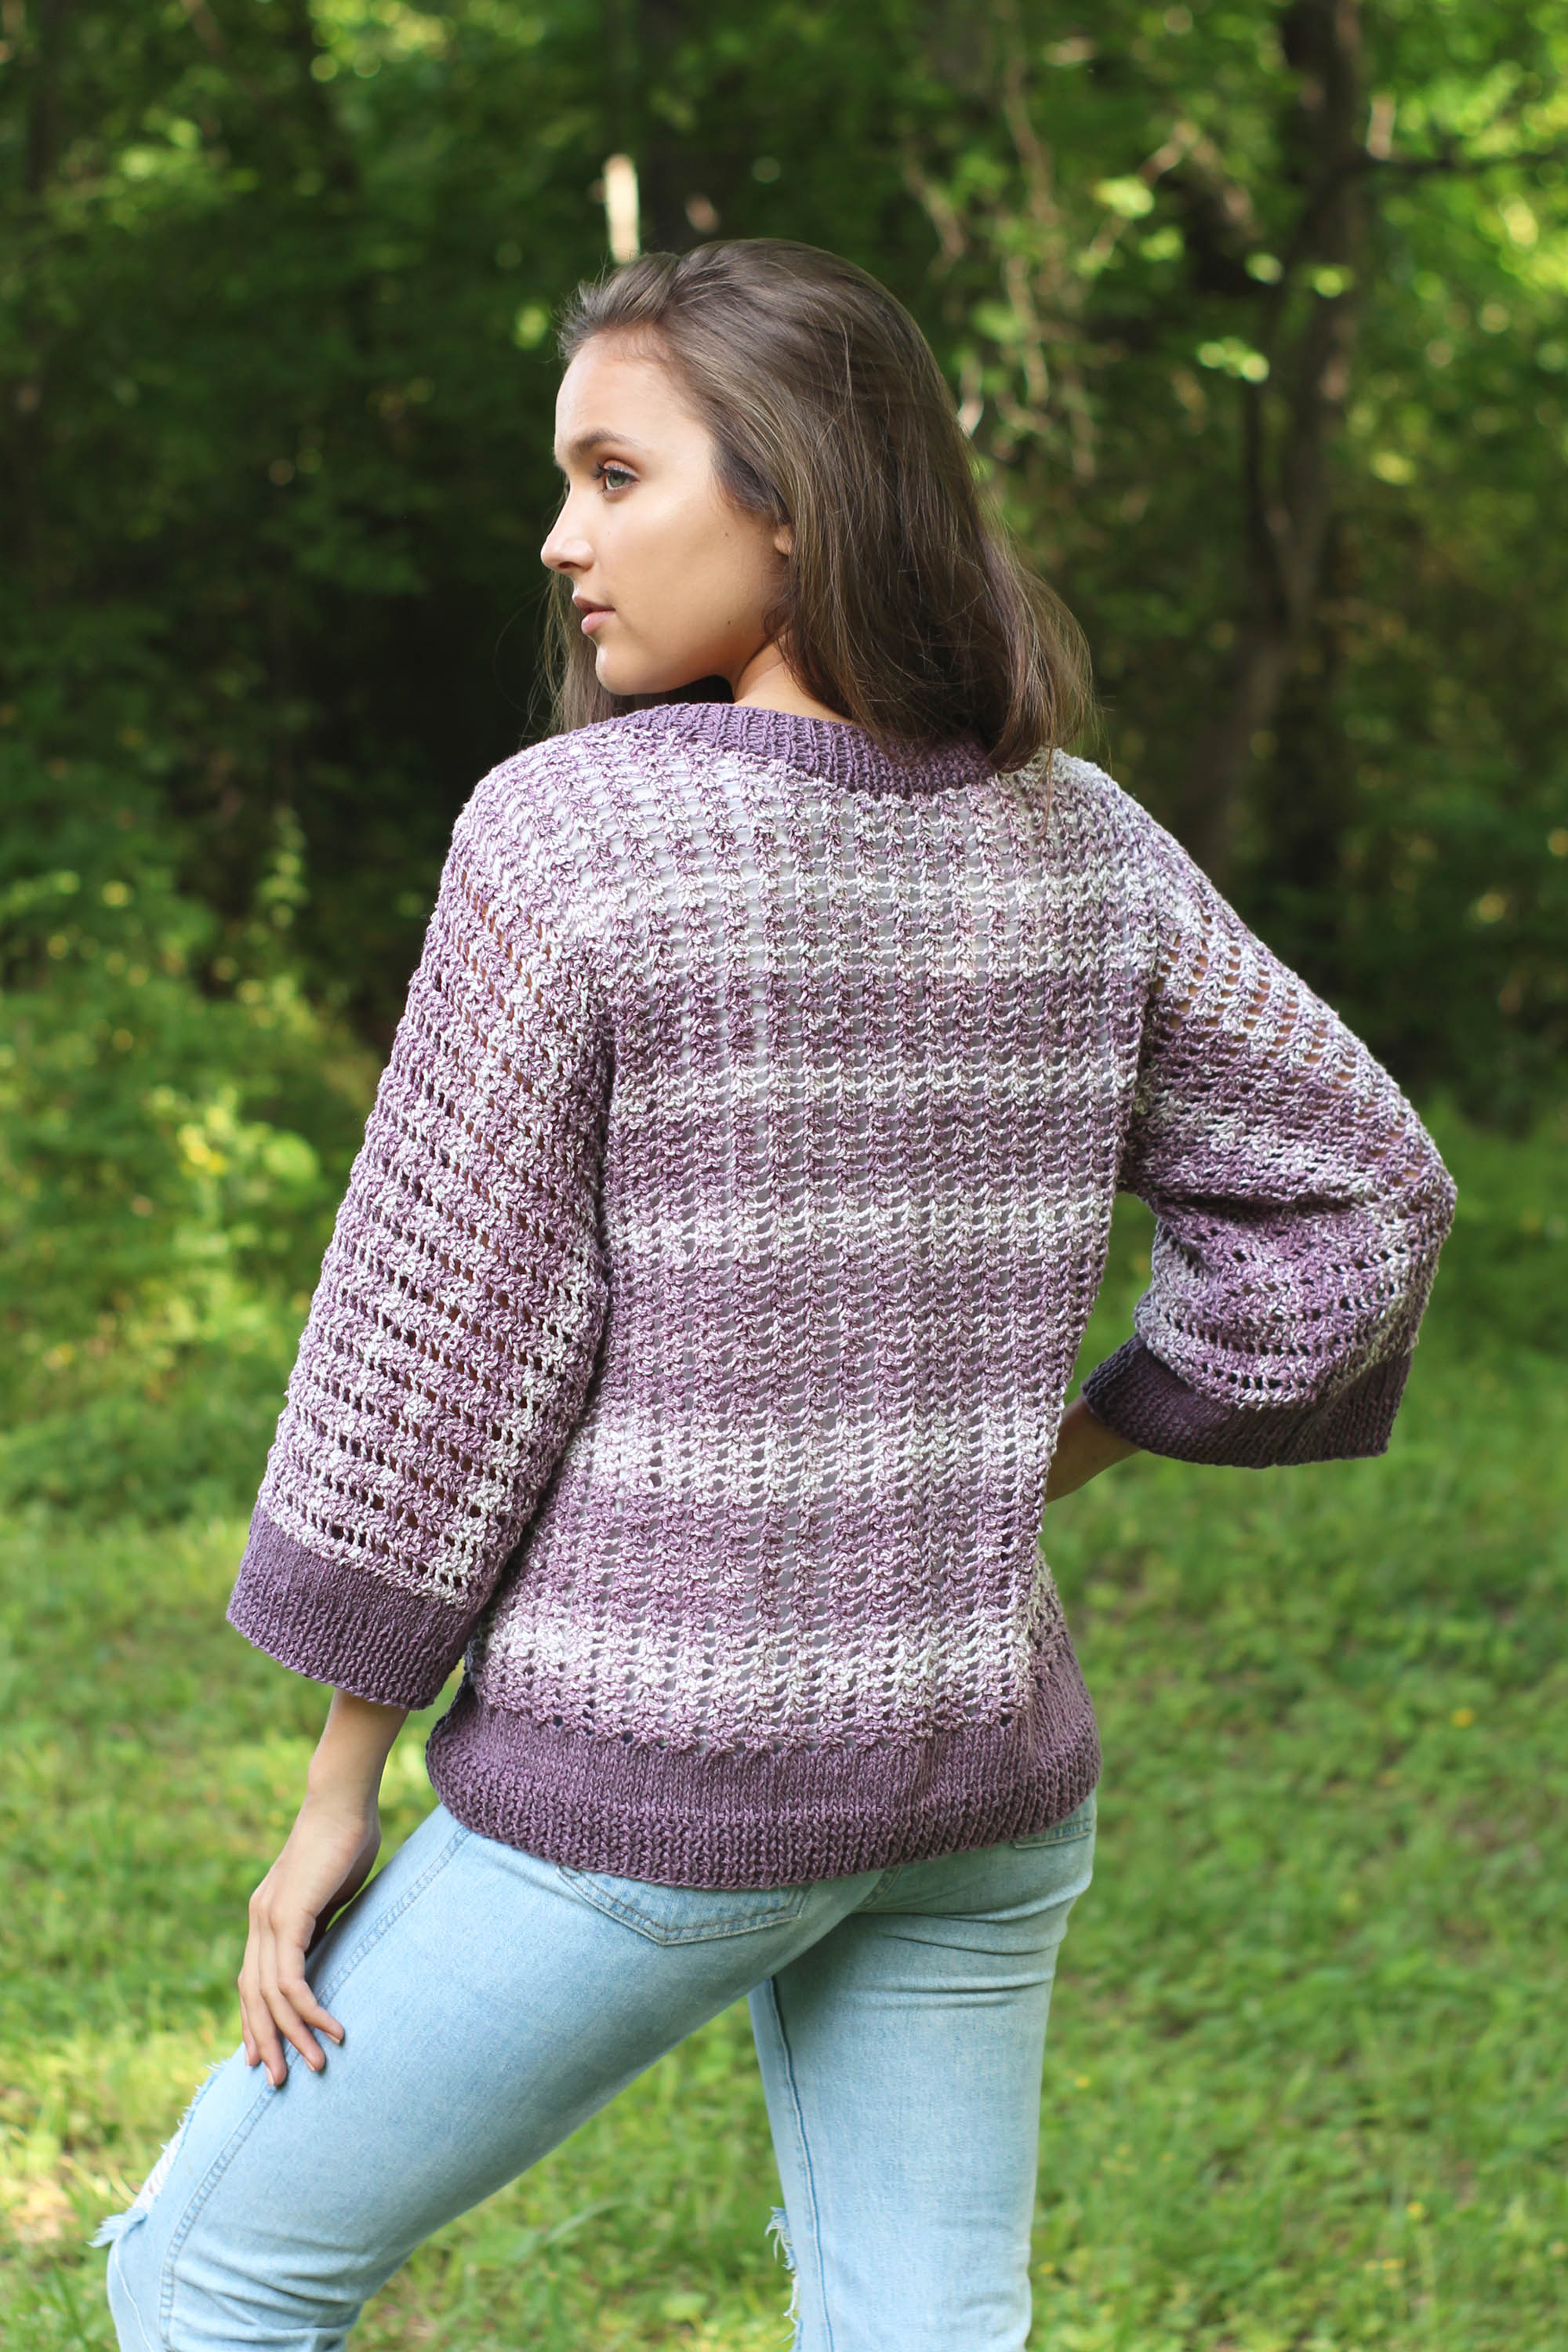
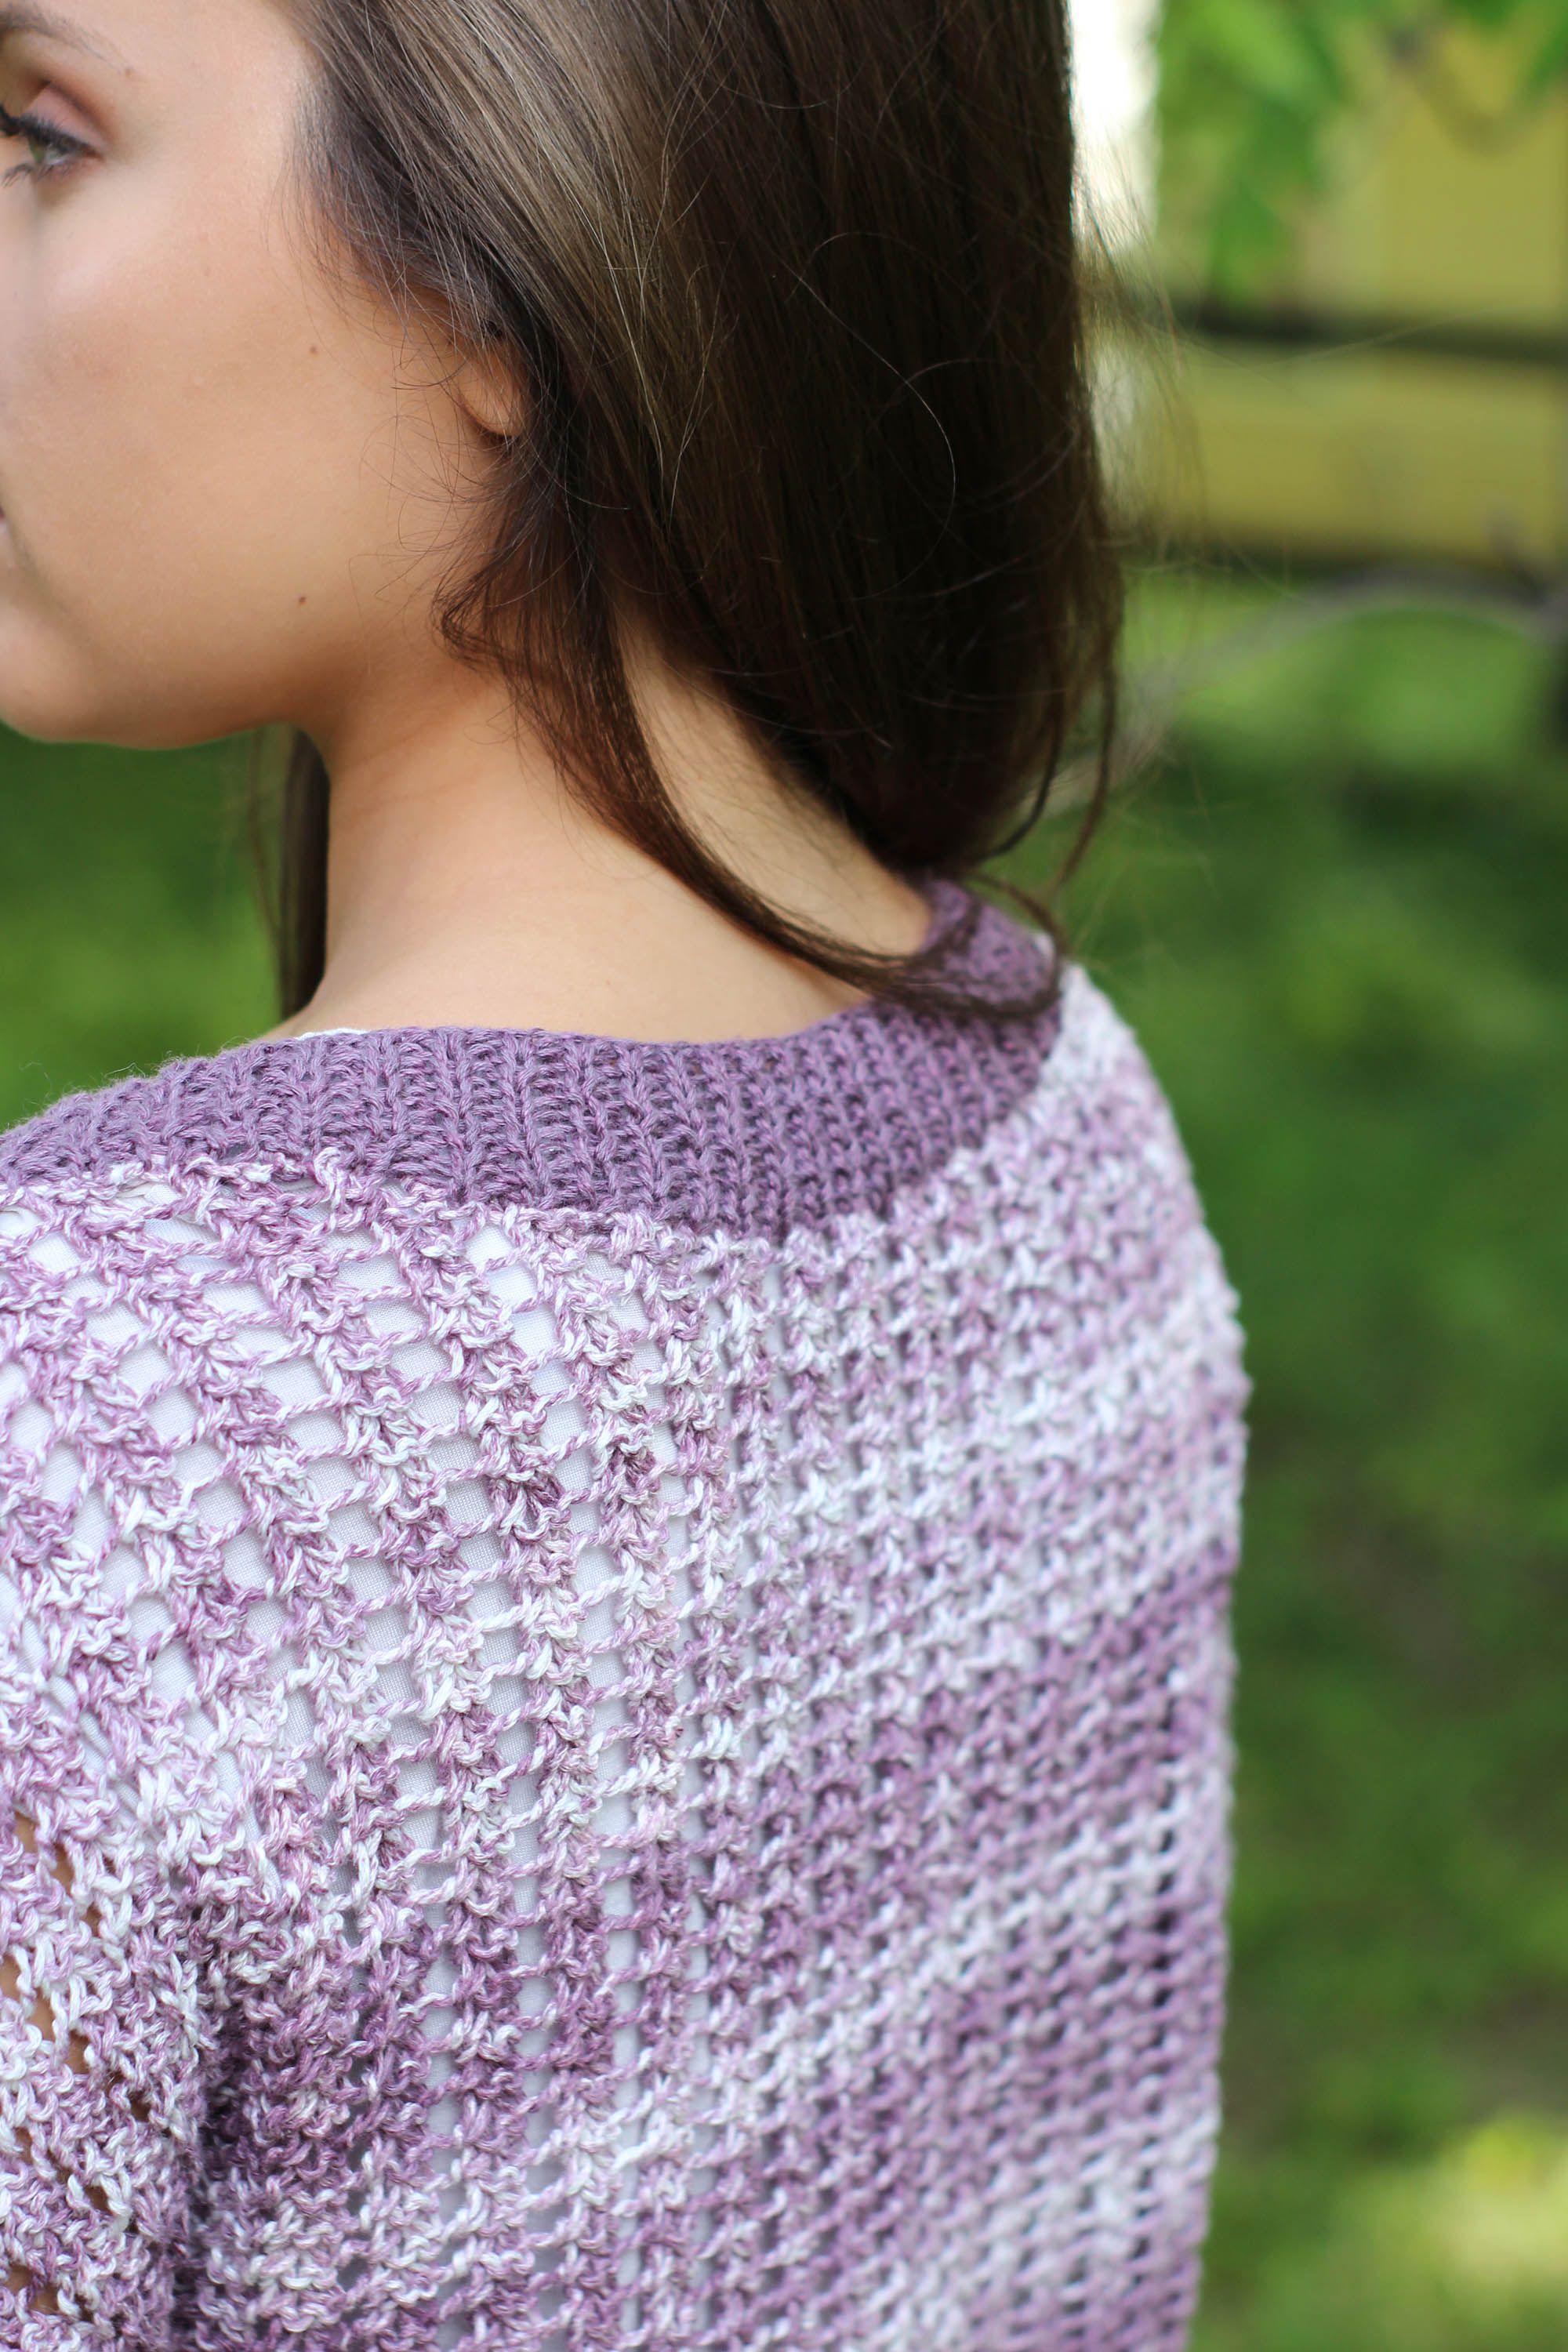
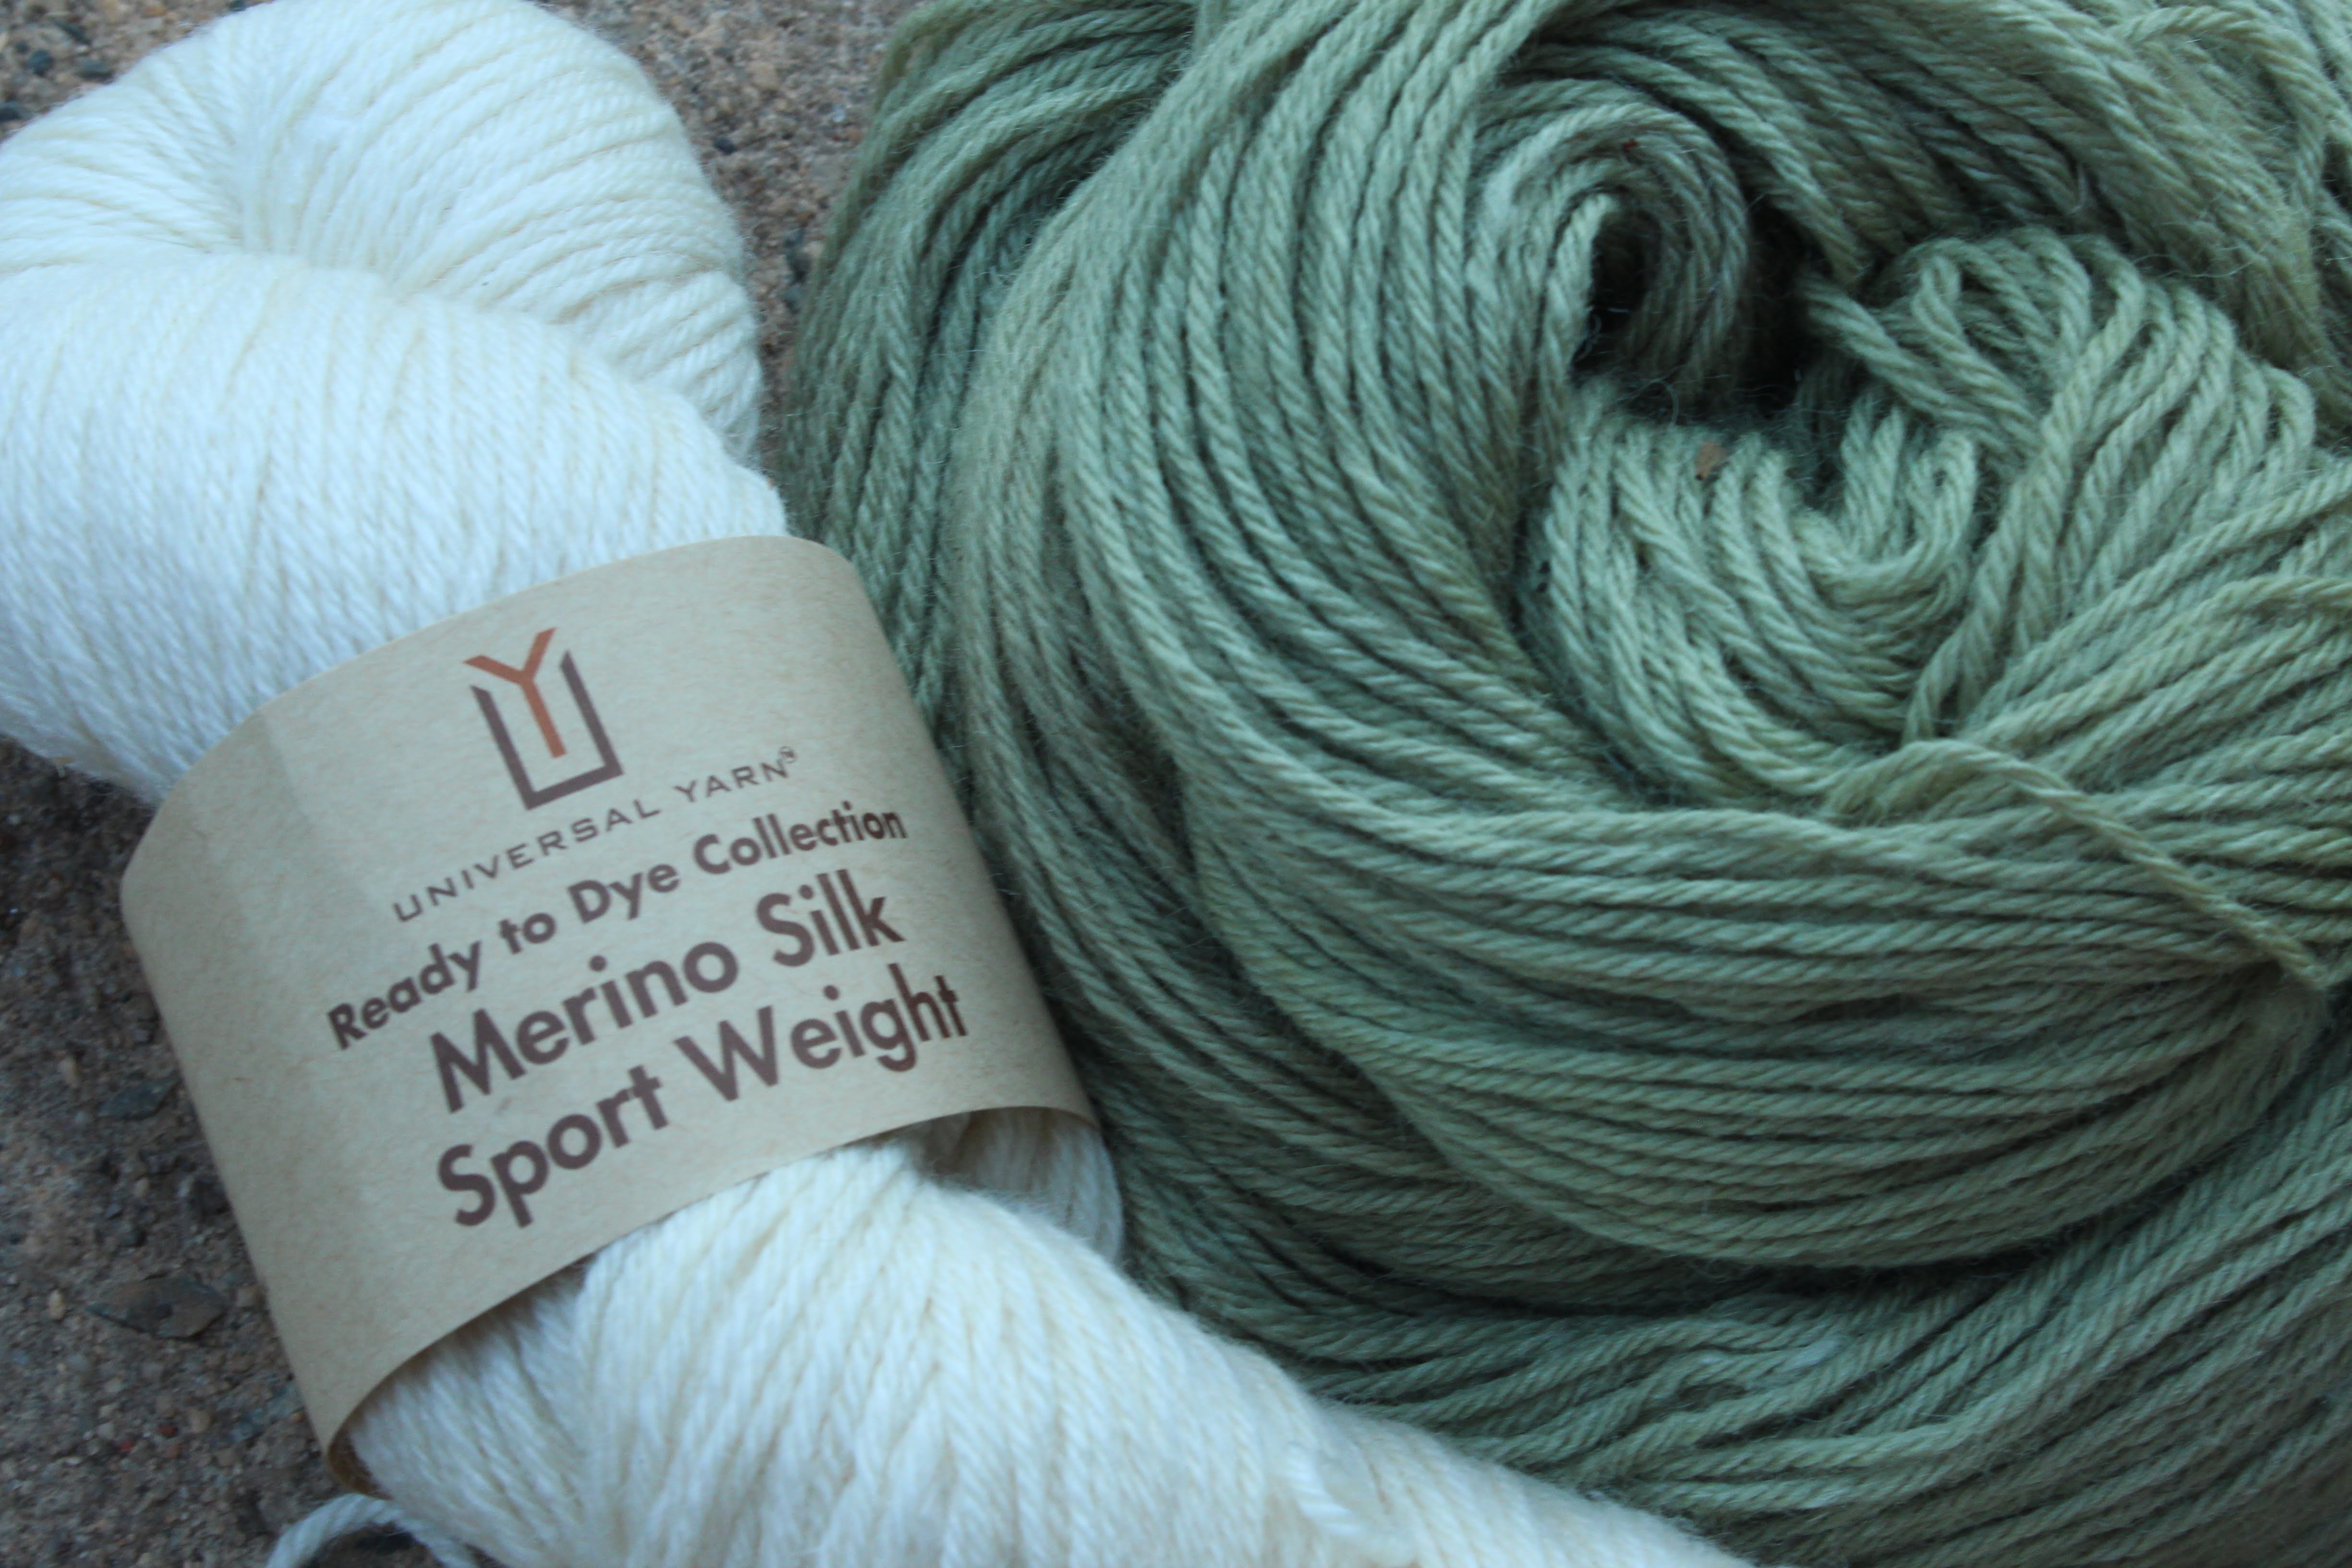
You might remember that back in October I introduced the first post about my adventures in naturally dyeing our Superwash Merino Worsted Weight yarn. In that post (link), I gushed about how much I love the warm hues of autumn. Well, it’s spring now – though it certainly feels like summer here in Charlotte. That means it’s time to play with some yarns that are a bit more warm-weather friendly.
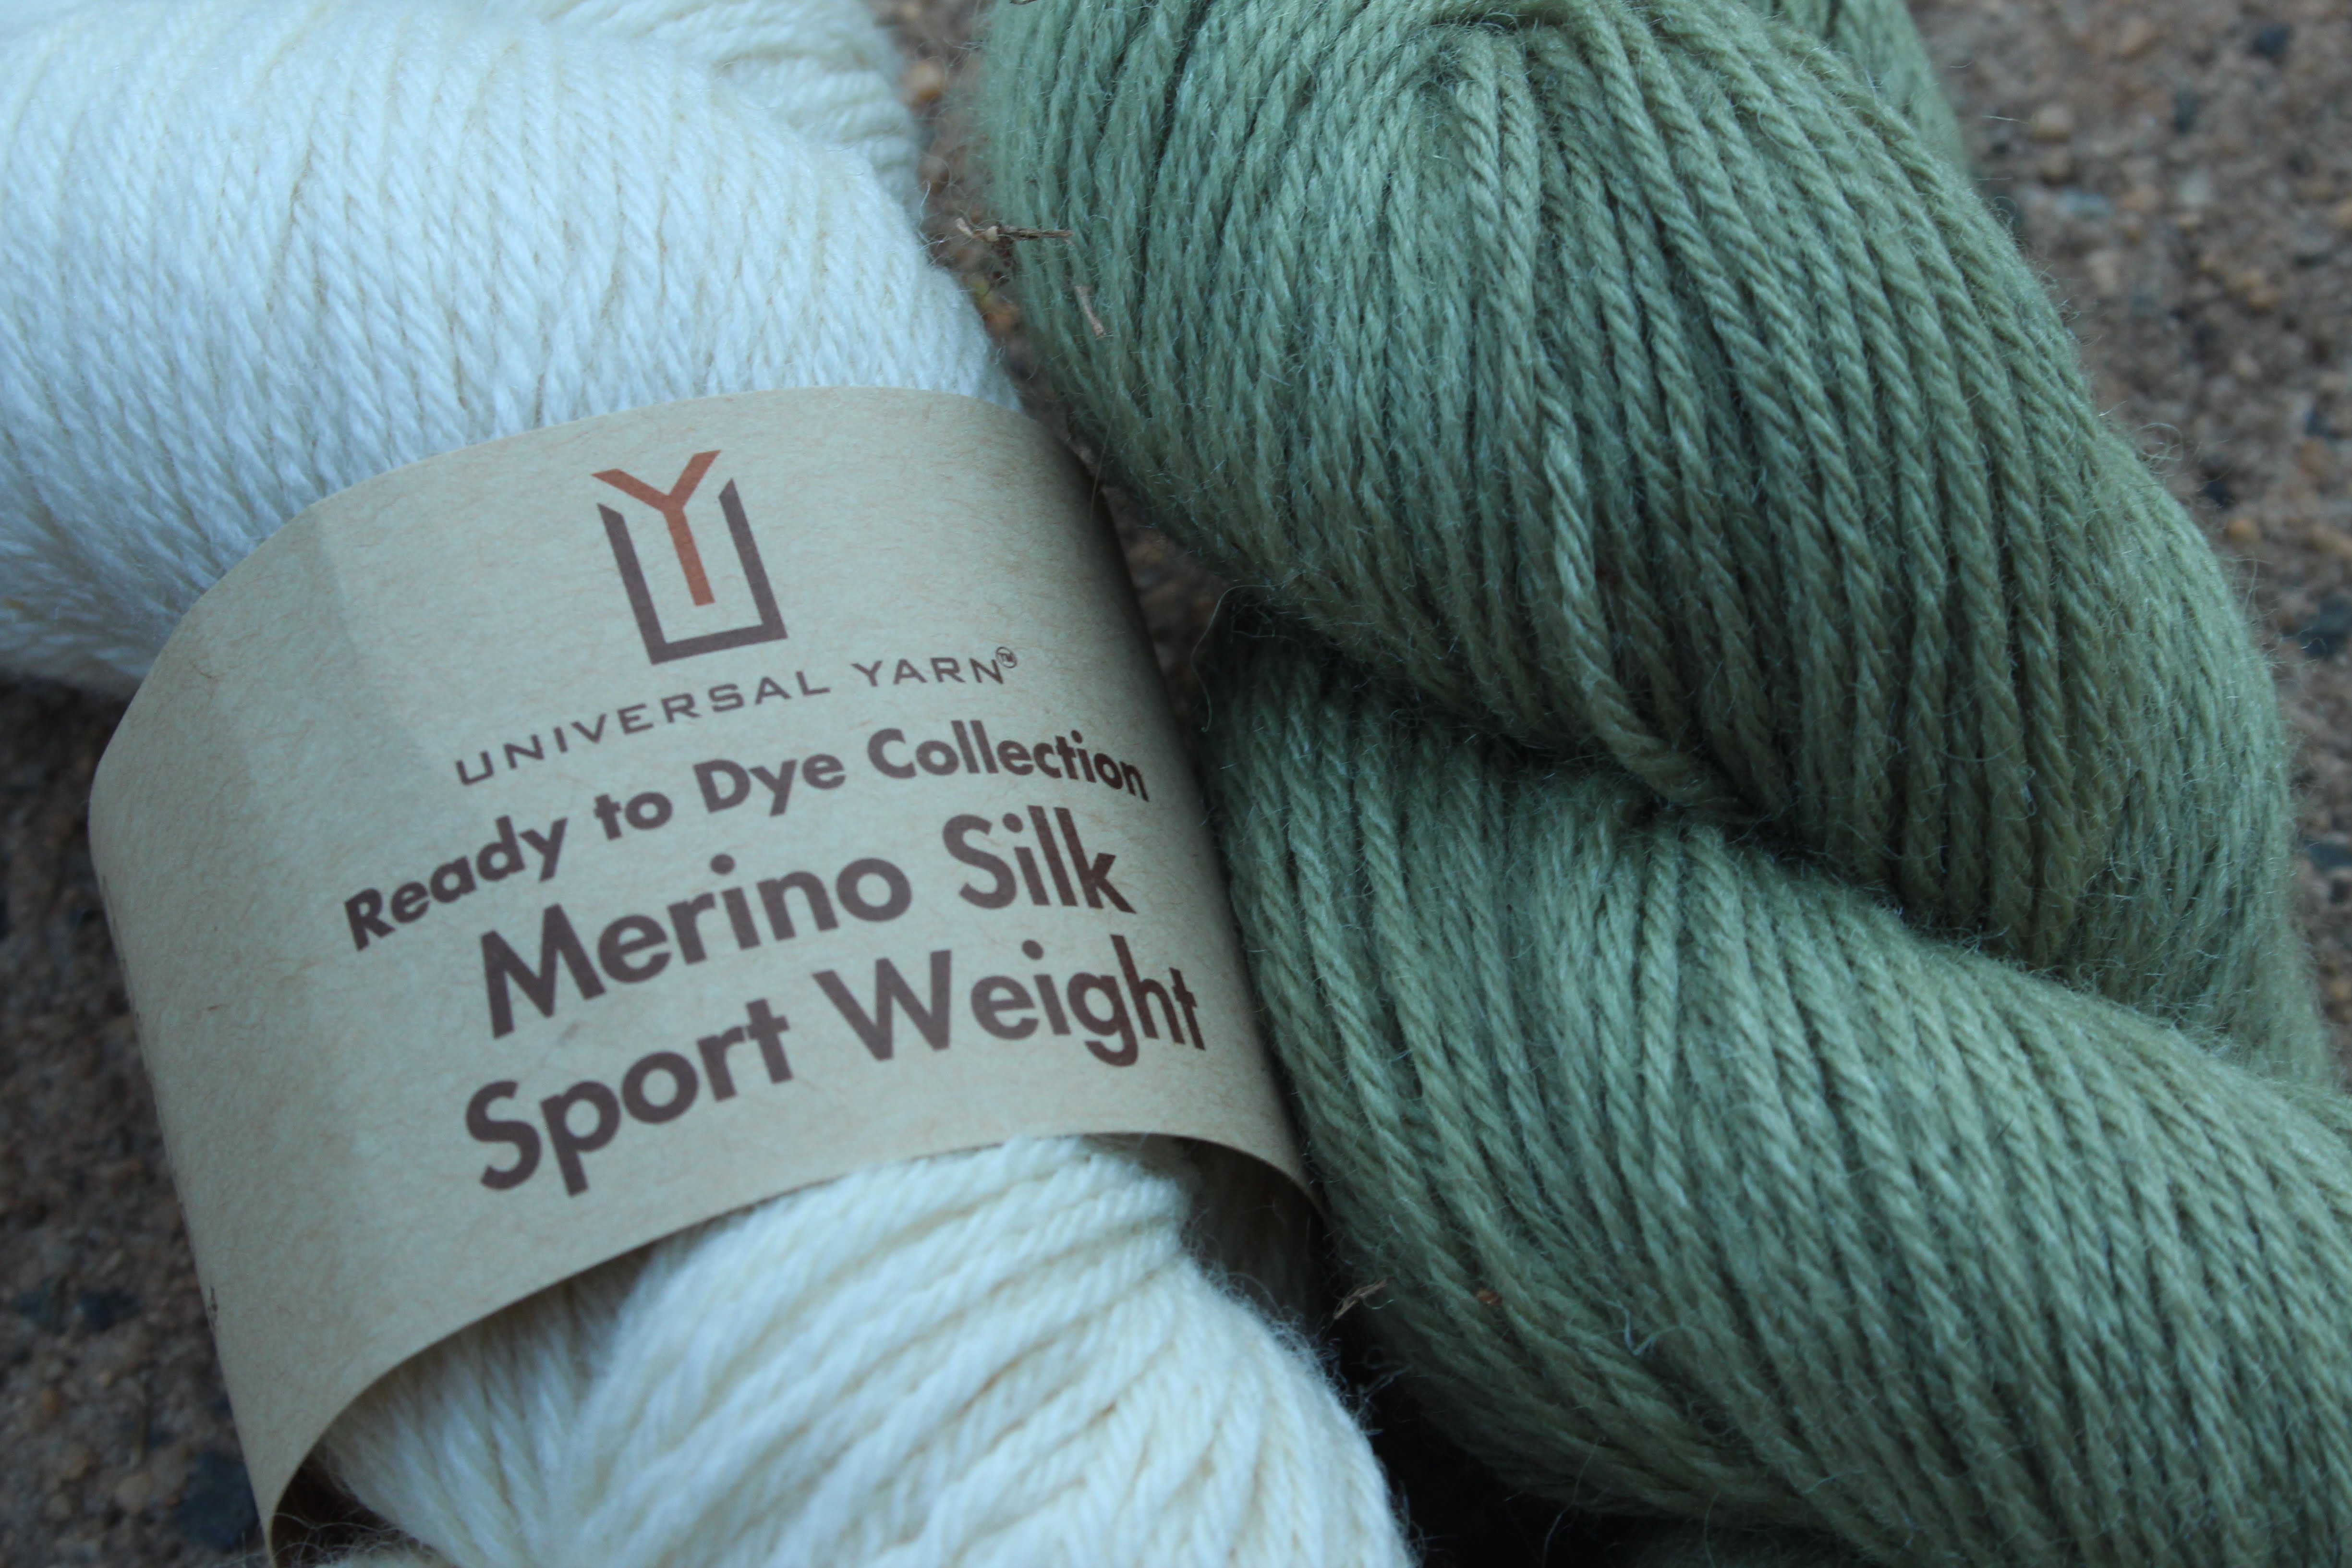
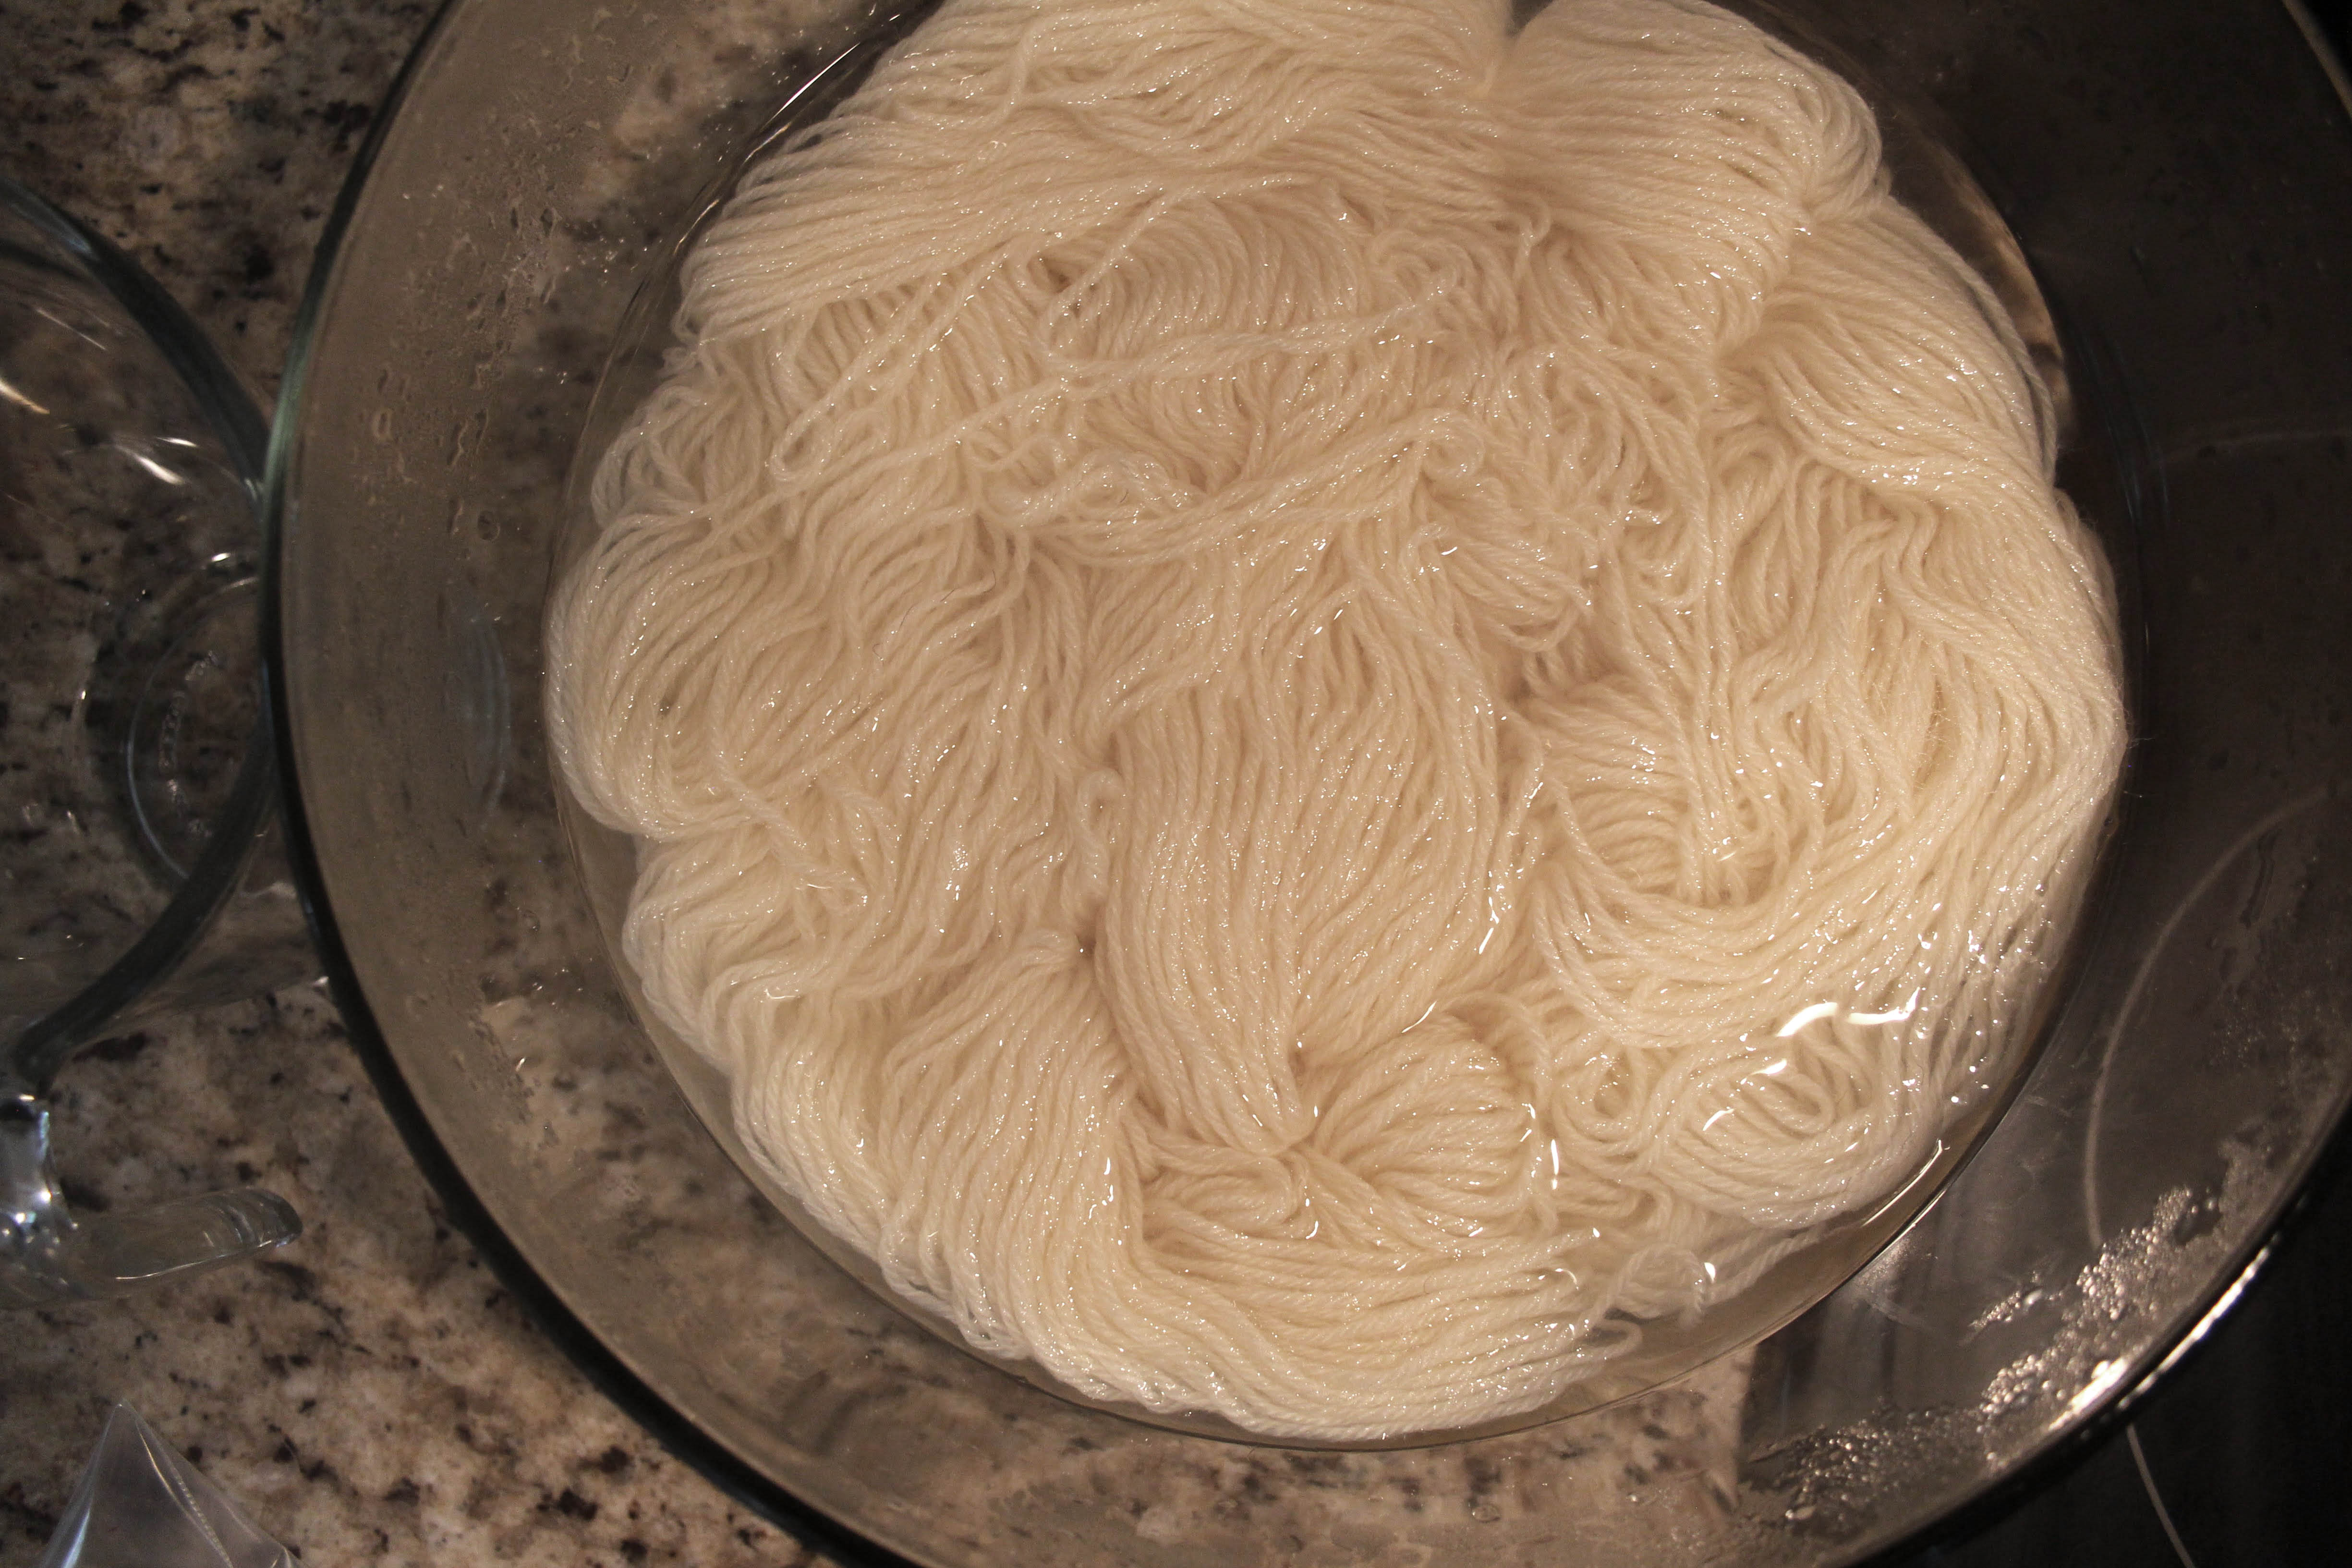
Today I’m using our soft and silky Universal Yarn Ready to Dye Merino Silk Sport Weight. It’s a gorgeous sportweight yarn with enough silk to make it appropriate for garments and accessories to throw over your shoulders on summer nights.
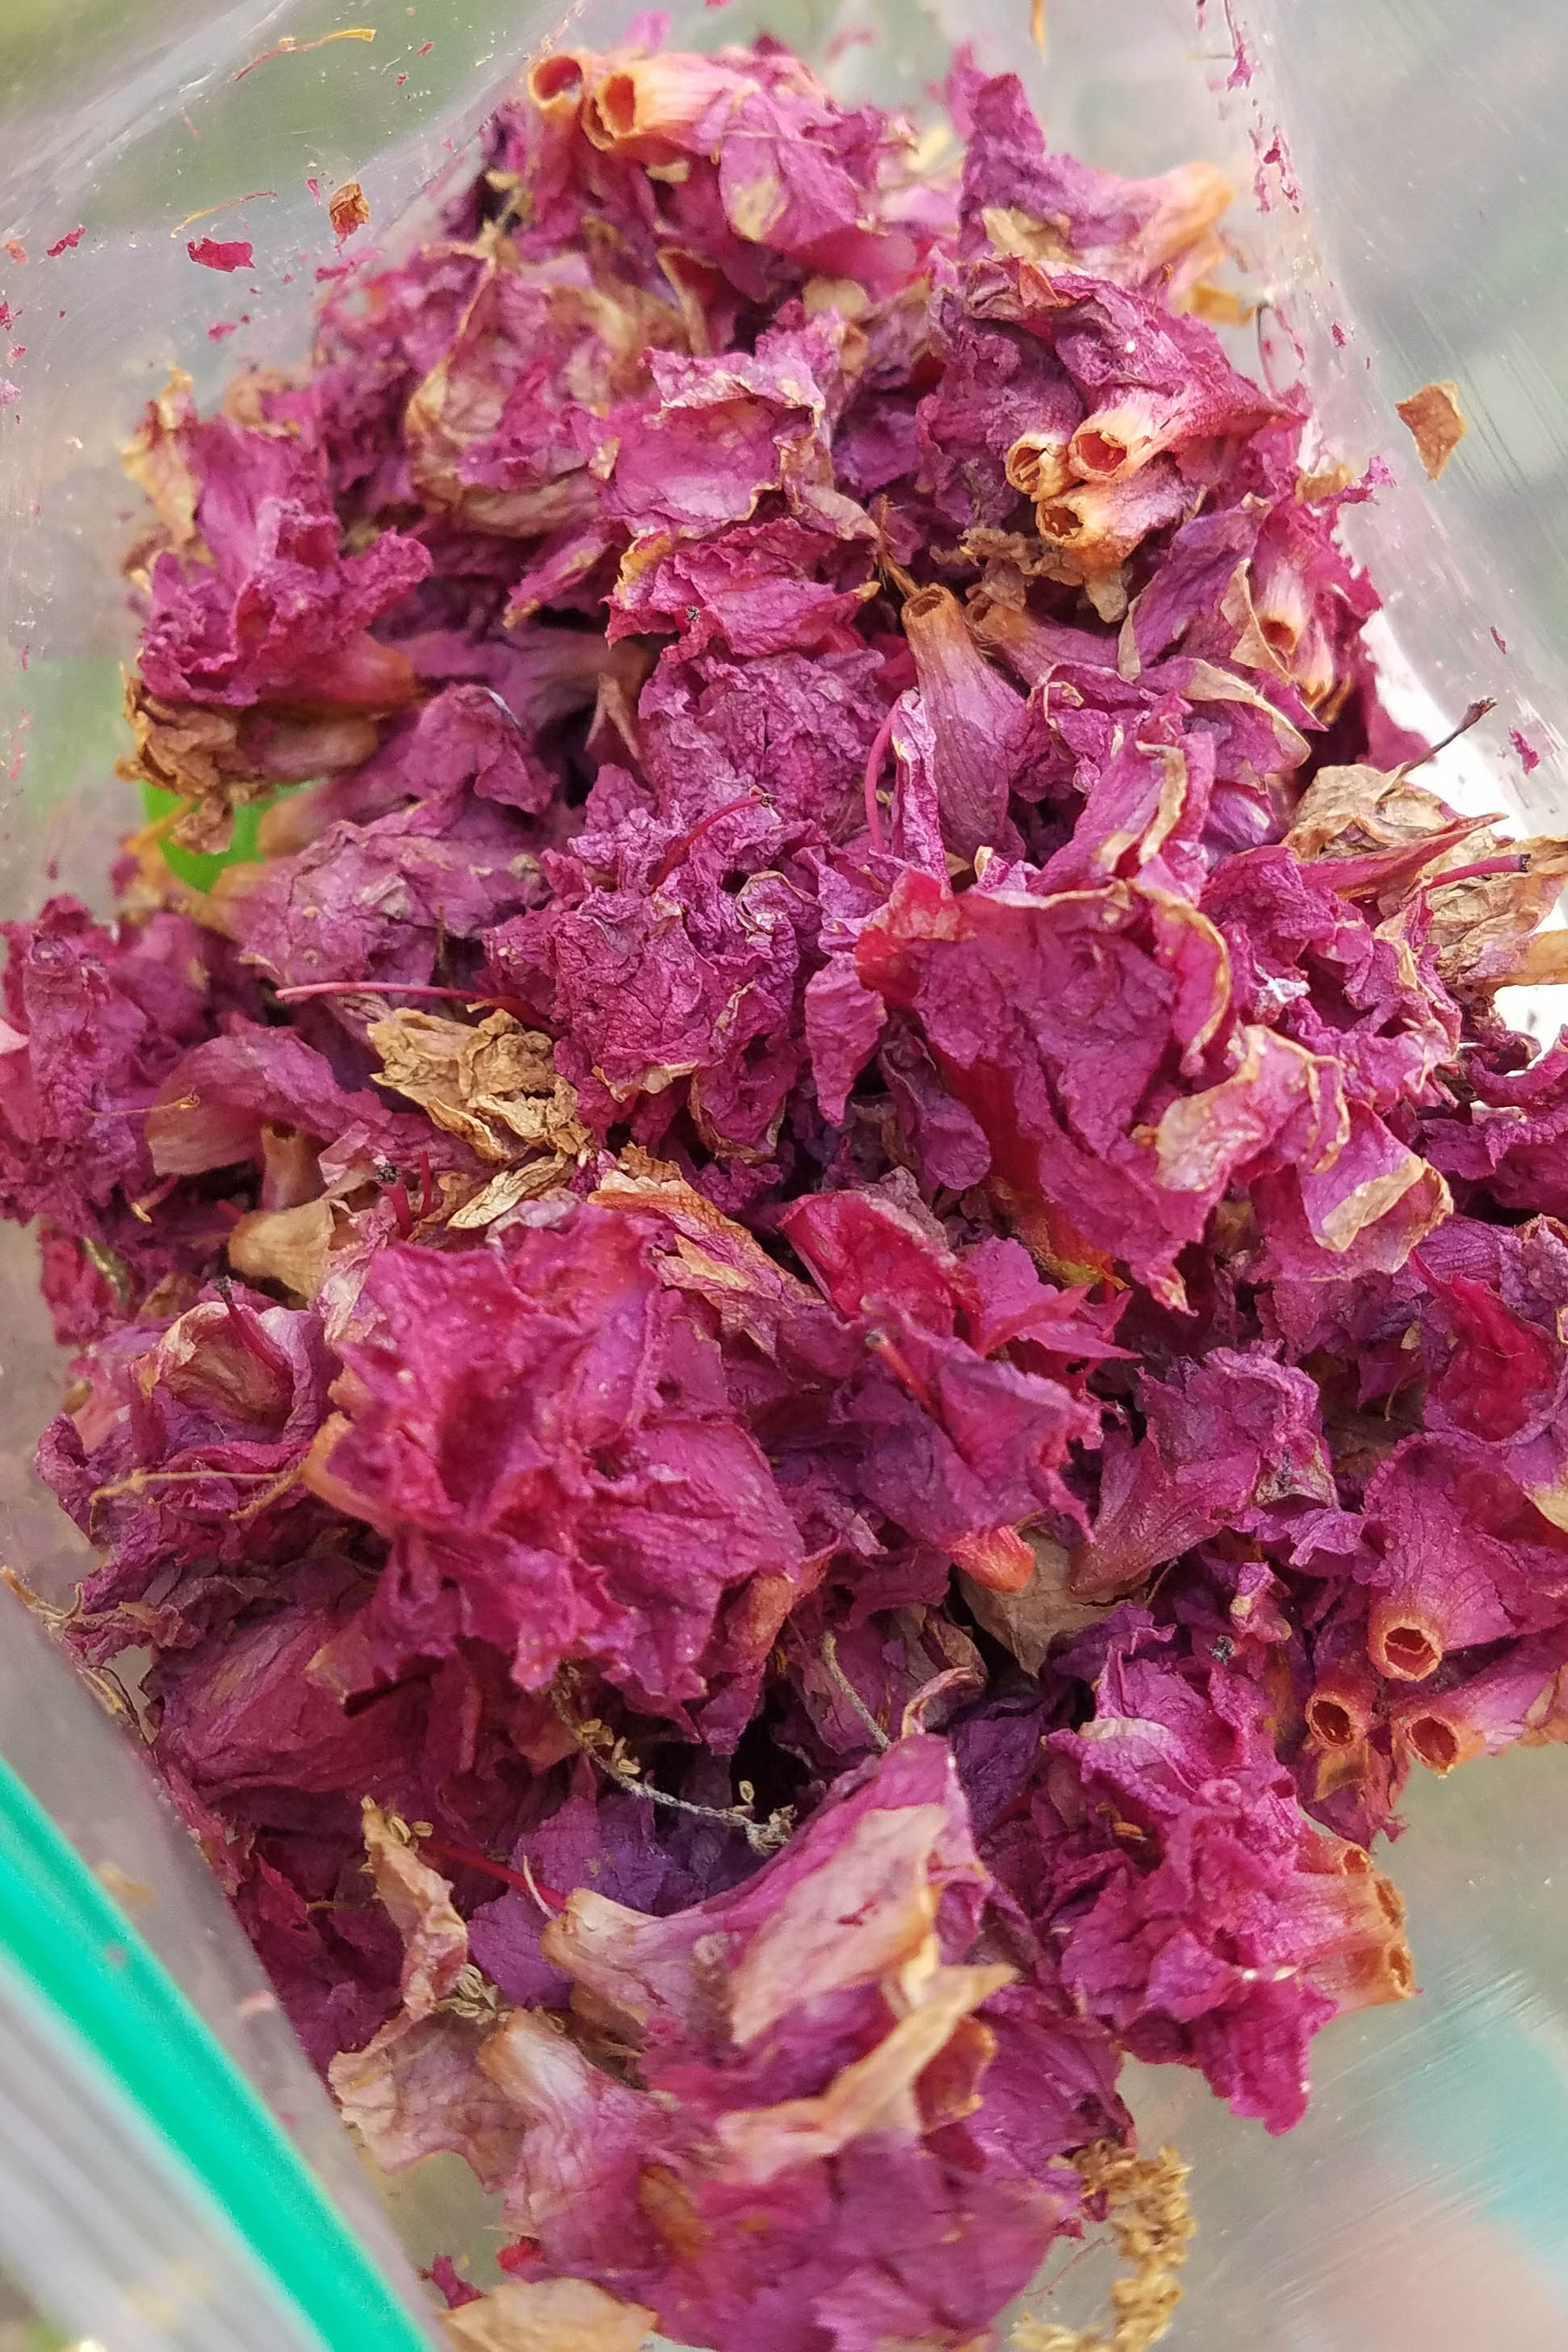
Whenever possible, I like to harvest dyes from the plants growing in and around my yard. I can choose what to grow, and there are endless ways I can experiment. Natural dyeing is, without a doubt, full of surprises, and you’ll understand what I mean when you see the results of my adventure with azalea dye.
I have a few azalea shrubs around my house. Just weeks ago they were full of brilliant pink blossoms, but now they’ve dried. I was plucking some weeds from my herb garden when it hit me: I have so many dried blossoms! Why not try to dye with them?
I grabbed a freezer bag and stuffed them full of the dried blossoms. Side note: If you use a freezer bag like I did (why didn’t I just grab a bowl?!), remember to simply rinse it and re-use it!
After collected my blossoms, I weighed them. I took into consideration the weight of the bag and ended up with approximately 37g. I could have collected more – I barely put a dent in my shrubs!
For today’s tutorial you’ll need:
1 skein of Universal Yarn Ready to Dye Merino Silk Sport Weight
Approximately 30-40g of dried azalea blossoms
Alum – you can find this in the baking/spices section of your grocery store.
Two stainless-steel pots that you don’t plan to use for cooking – I purchased mine for a few dollars at a thrift store.
Tongs – they don’t need to be stainless steel but choose some that you won’t use for cooking.
A kitchen scale – I can’t recommend this one enough. Although it isn’t essential, if you’re a knitter, you should have one! It’s useful for much more than dyeing.
Measuring cups/tablespoon
White distilled vinegar
Salt
Water
Step 1: Create a mordant and soak your yarn. You can find specific instructions for creating a mordant in my first post (link here). If you’ve been following along and have a jar of mordant already, simply reuse the solution.
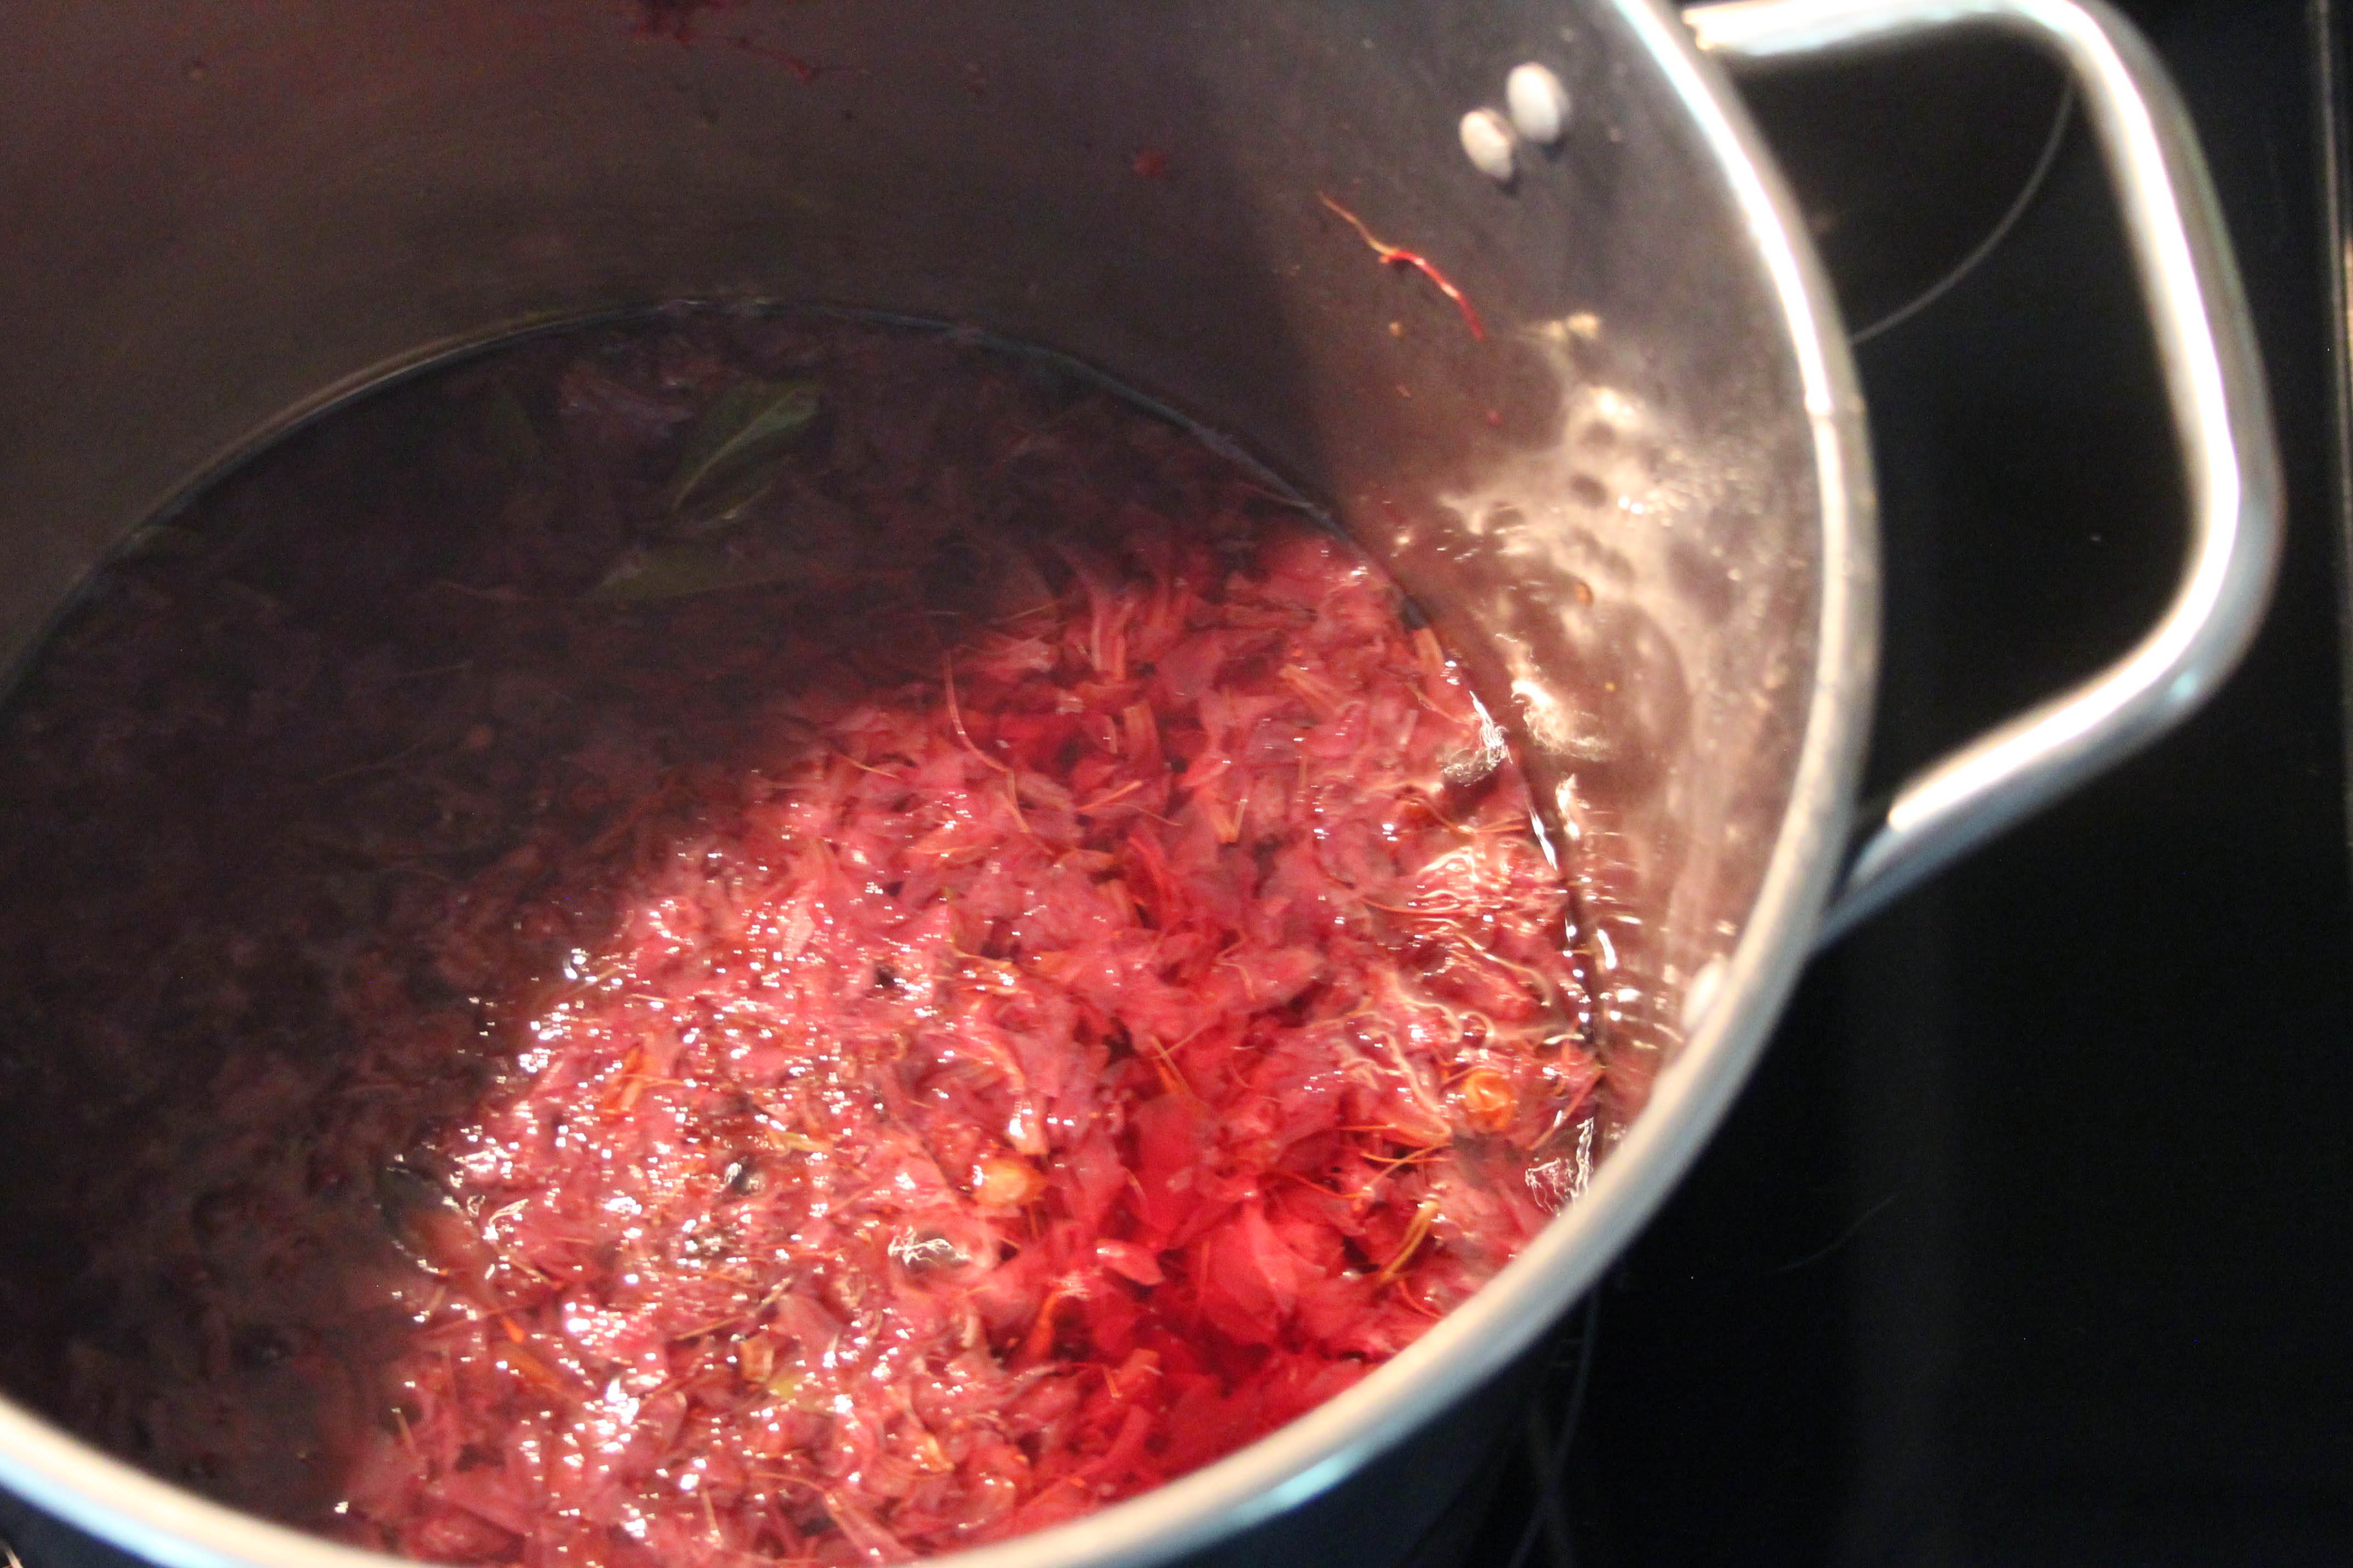
Step 2: While your yarn is soaking, prepare your dyebath.
Fill your stainless-steel pot with enough water to allow your yarn to flow freely.
Dissolve 1 tbsp of salt into the water.
Pour ½ cup of vinegar into the water – salt and vinegar help to brighten the dye.
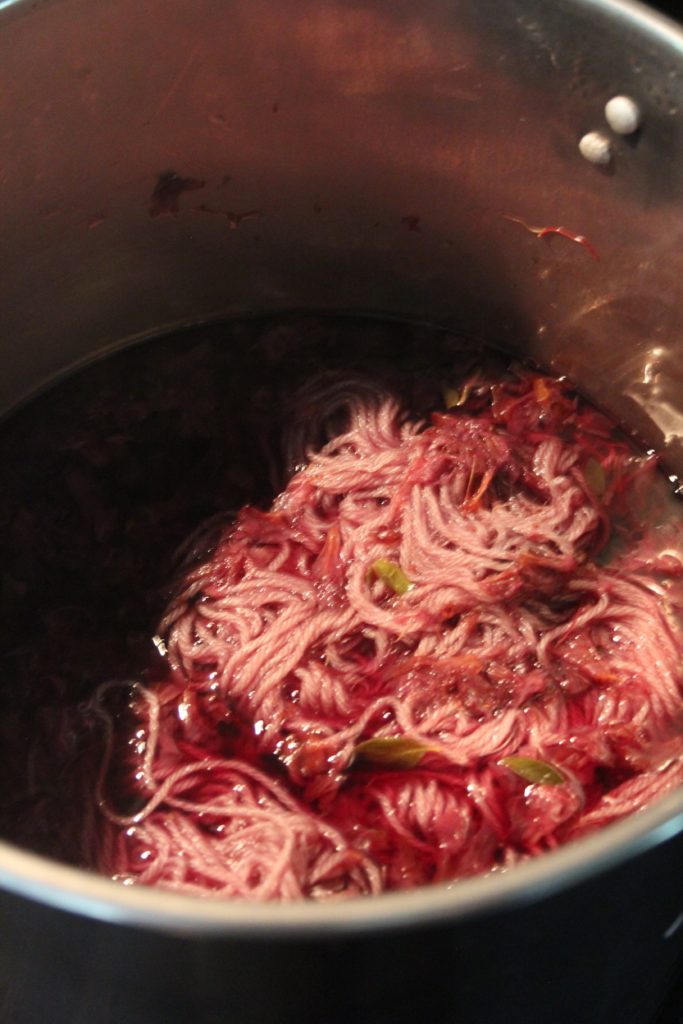
Add your azalea blossoms and use the tongs to stir the pot.
Bring to a simmer over your stovetop. Allow simmering for 30 minutes to an hour.
Lower the temperature so that the water is just under a simmer. If you want a specific temperature, you’ll want the water to be about 190 degrees F.
You can see that the dyebath turned into a rosy color.
Step 3: Remove your yarn from the mordant bath, gently squeezing the excess mordant from the yarn.
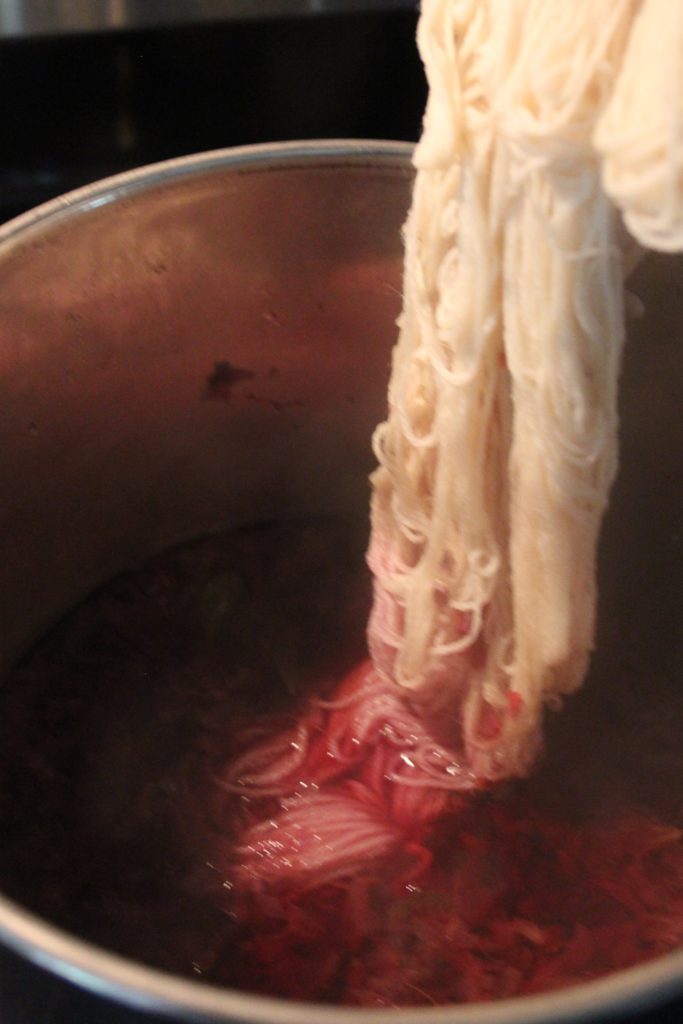
Step 4: Carefully place your yarn into the dyebath.
Step 5: Allow the yarn to soak in the dyebath for about an hour. Turn off the heat and set the pot aside. Do not remove the yarn yet.
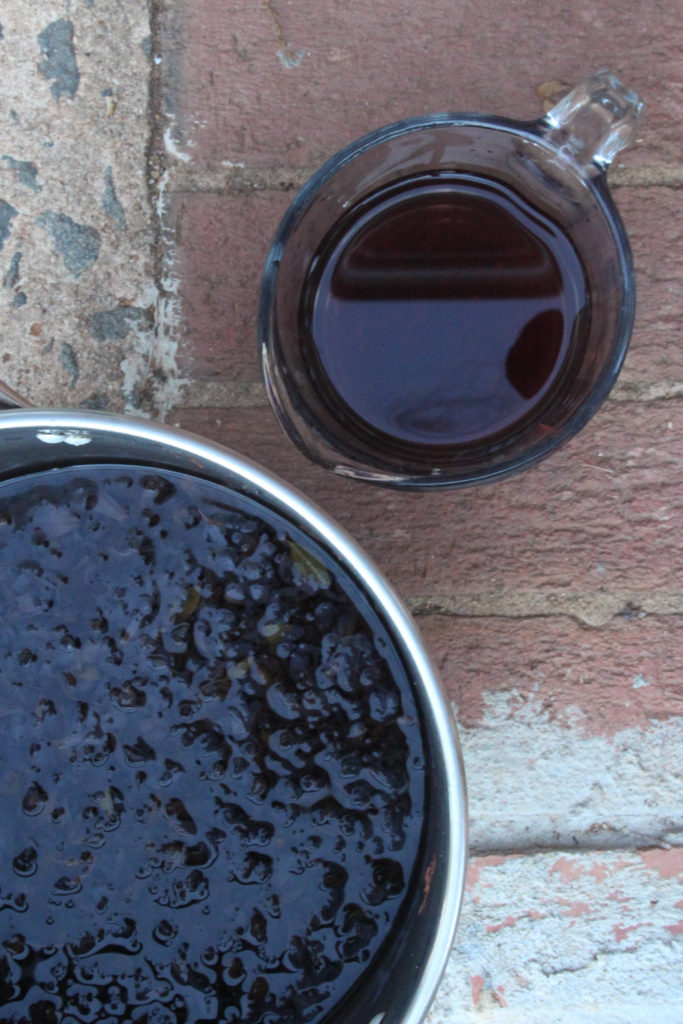
Step 6: Allow the yarn to cool in the dyebath – I let mine cool overnight.
Step 7: Remove your yarn and rinse thoroughly. I recommend stepping outside and giving it a few vigorous shakes to remove the remaining plant matter.
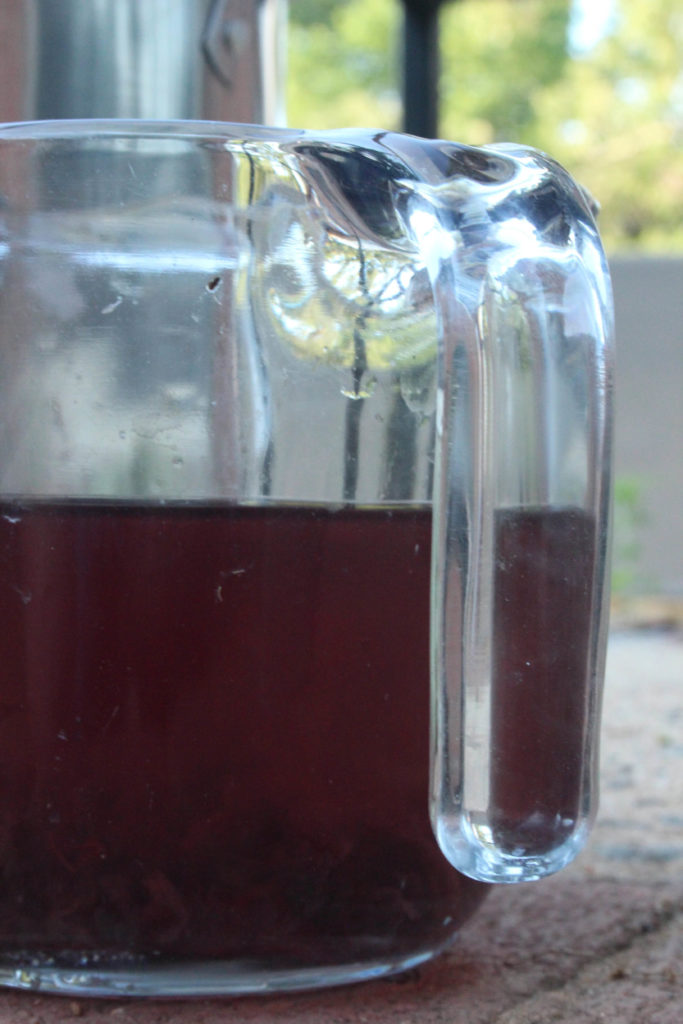
Before I reveal the yarn, I want to take a moment to emphasize how surprising natural dyeing can be. As you can see, the color of the dyebath was initially pretty pink. After about an hour it looked much more like a silvery-purple. I was really excited about those results. Even when the water cooled it remained a deep purple.
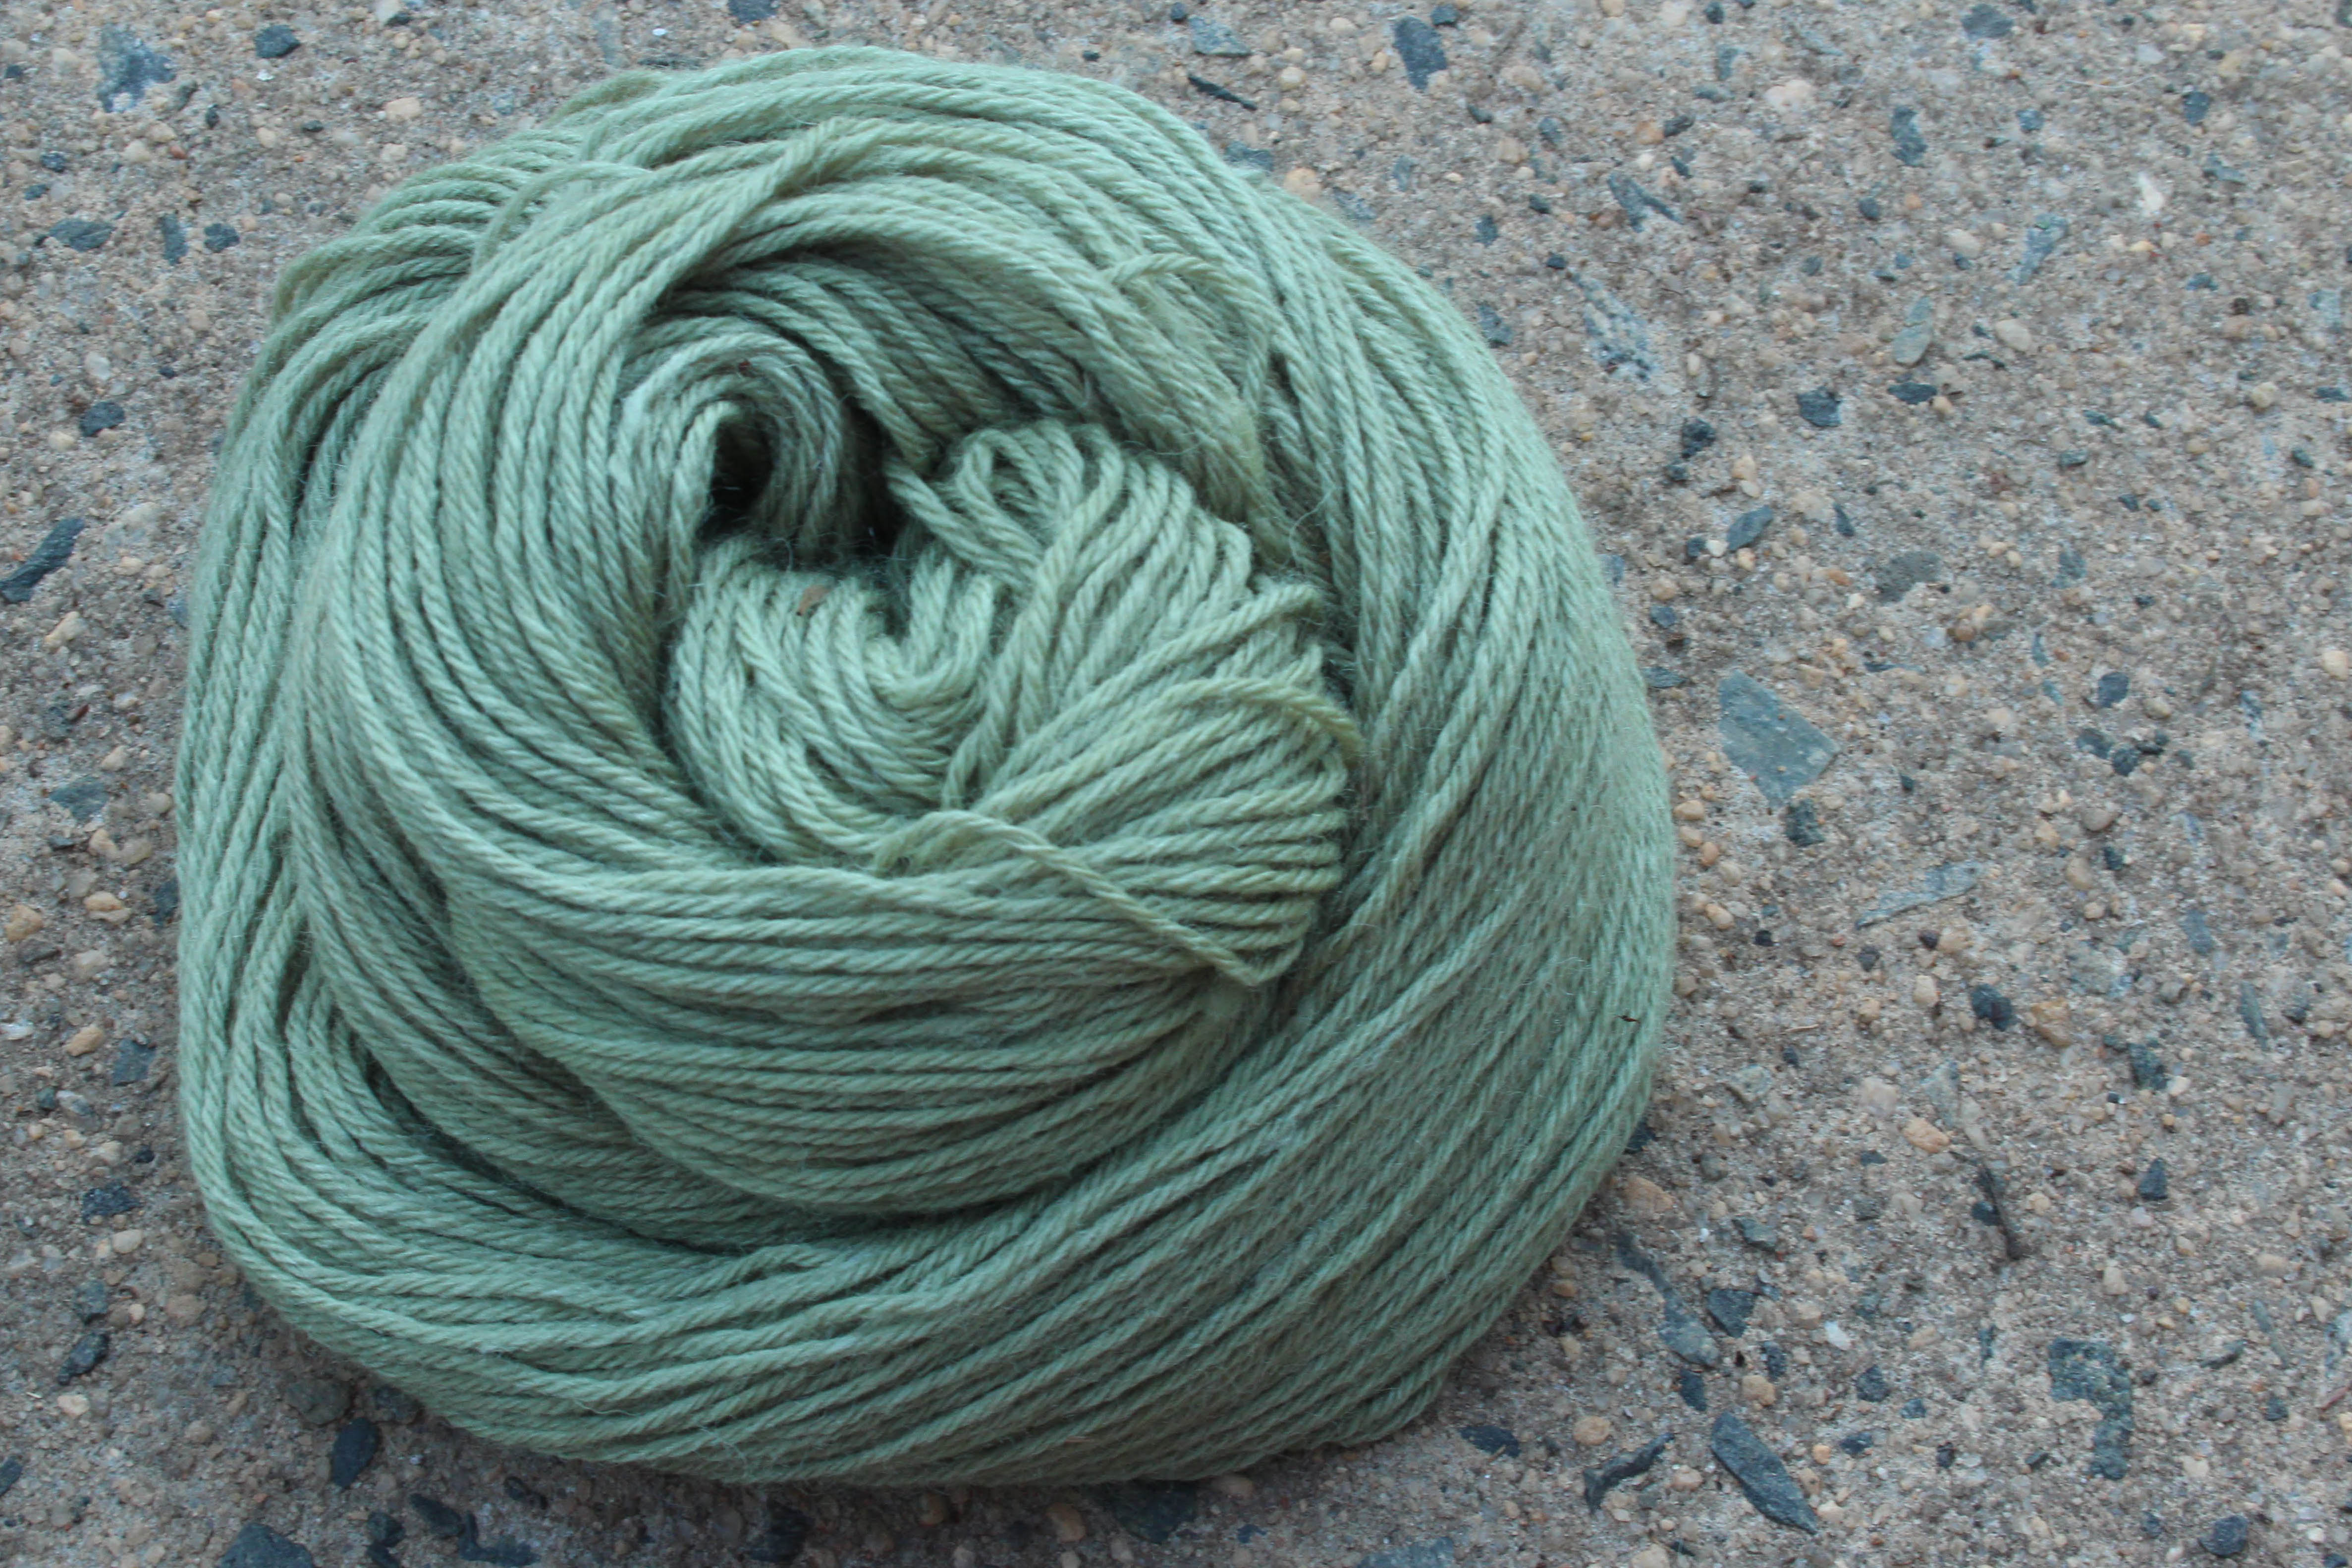
So, you might imagine my surprise when I discovered that my azalea dye turned into this…
Isn’t it the loveliest shade of green? I’m over the moon about the results of this dye experiment, and I’m sure I’ll be using azaleas for dyeing again soon. The transformation is pretty stunning.
I’m a big fan of one-color brioche, but I had never done two-color brioche before tackling Rachel Brockman’s Sweet Little Cowl in Cottonwood. I don’t know why I thought it was going to be hard. It’s not. Rachel shares another brioche pattern here, this one knitted flat.
The great thing about the Nebula Stole is that it’s reversible – it’ll look stunning with either side facing out, which opens up a world of possibilities in styling.
You may have heard that Mother’s Day is nearly upon us. It’s kind of hard not to know, as commercialized as this holiday has become over the years. But mothers do need to be celebrated so truly I’m glad for the reminder as the day approaches.
Over the years I’ve given a wide variety of gifts to my mom for this special day. I usually try to give her something handmade, because she’s my mom, and I know she appreciates the thought behind it. At this point in her life, I can think of all kinds of things she doesn’t really need. She doesn’t need a scarf or a hat or a sweater. She doesn’t need knick-knacks or other little trifles, though I’m sure I could find something that would amuse her. What she does treasure are memories.
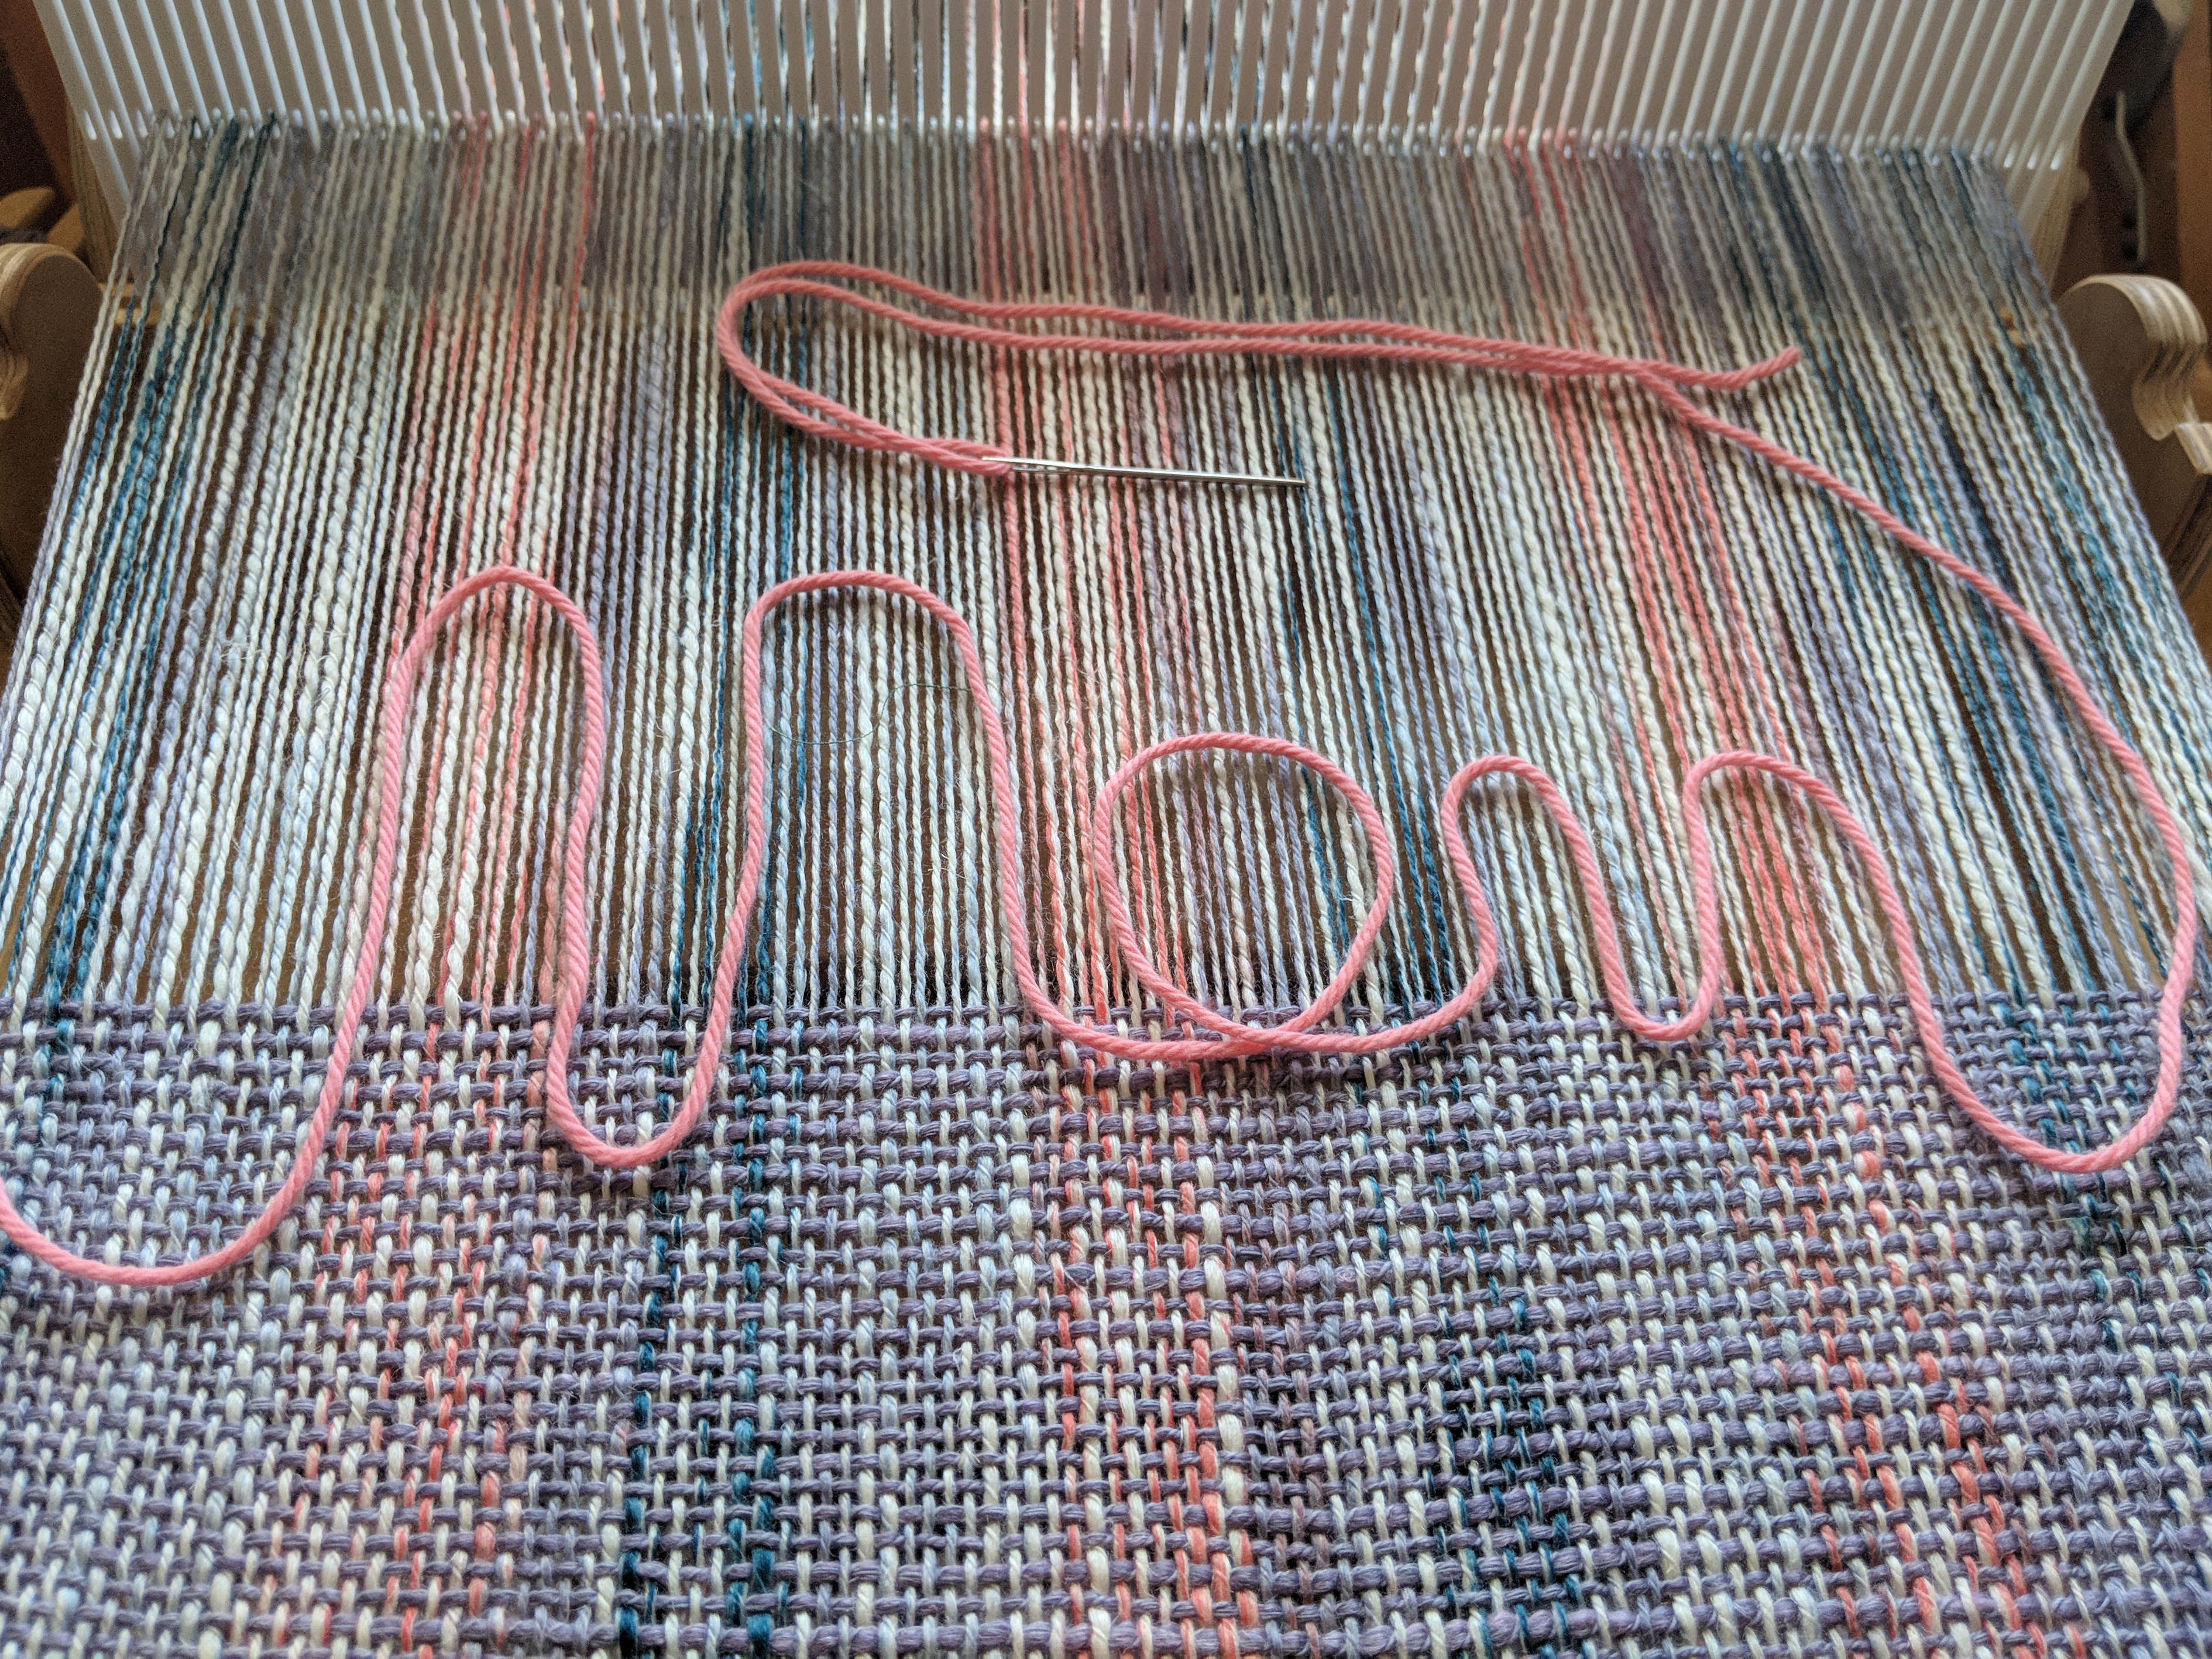
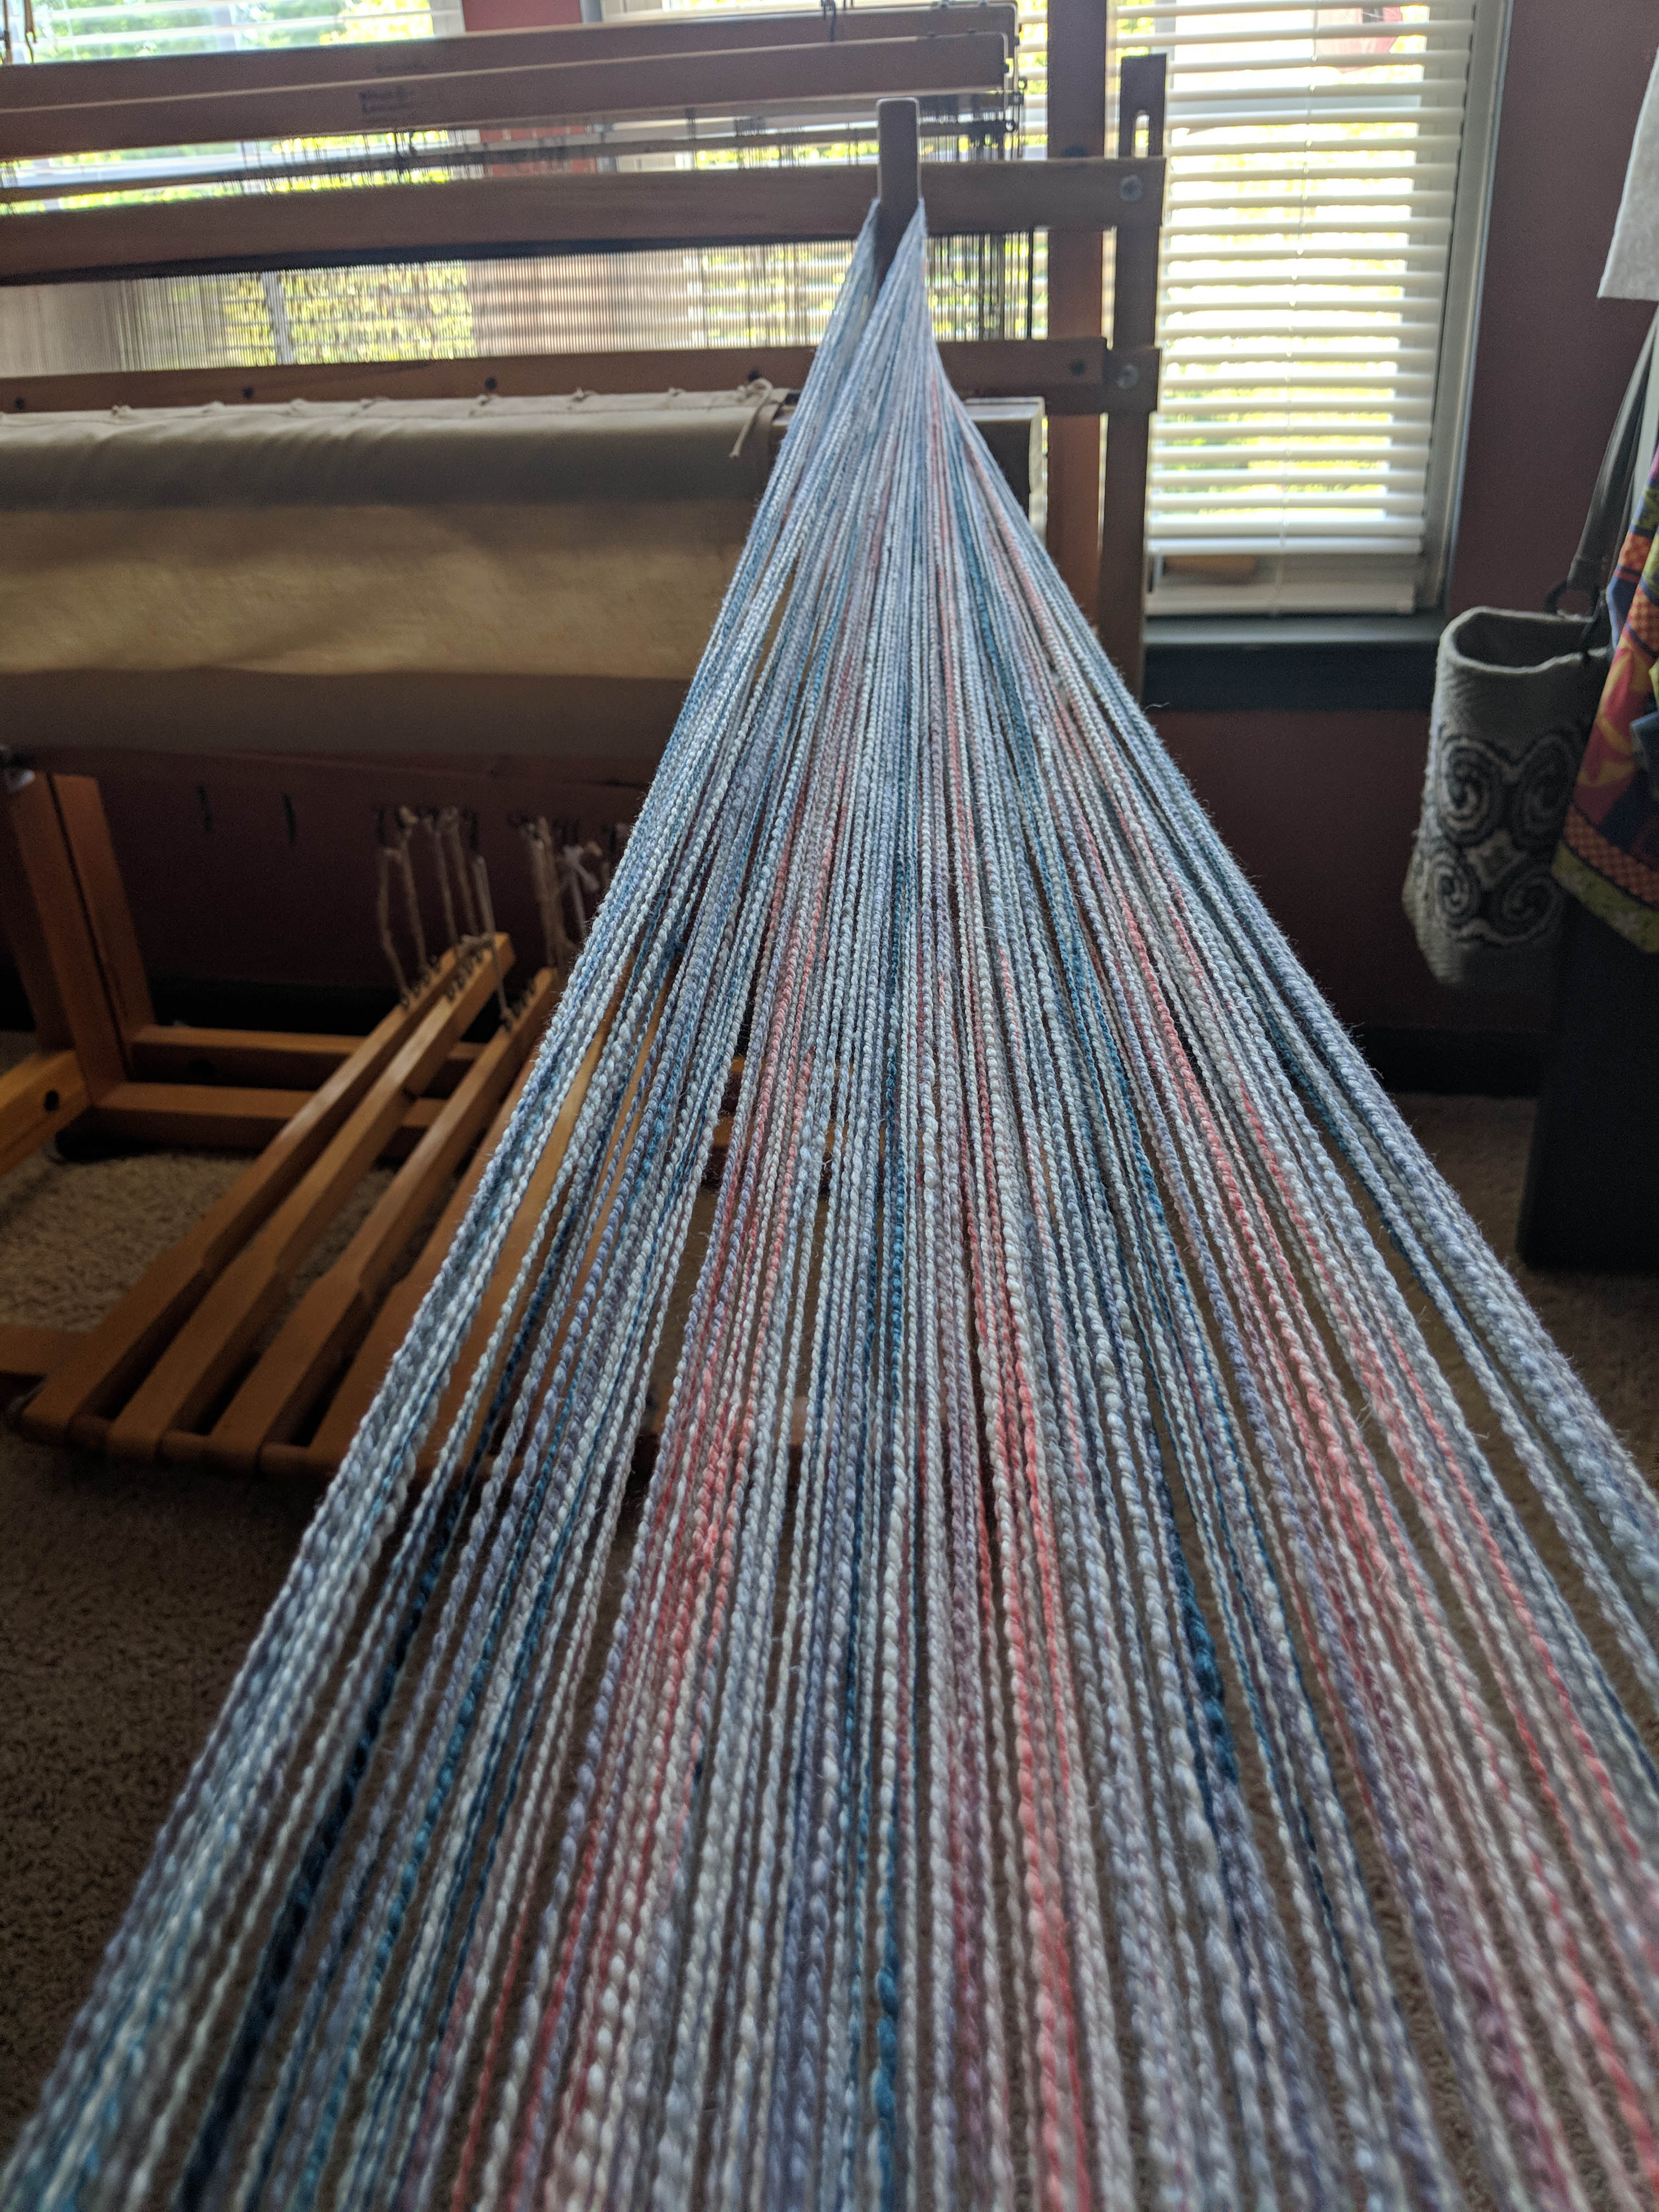
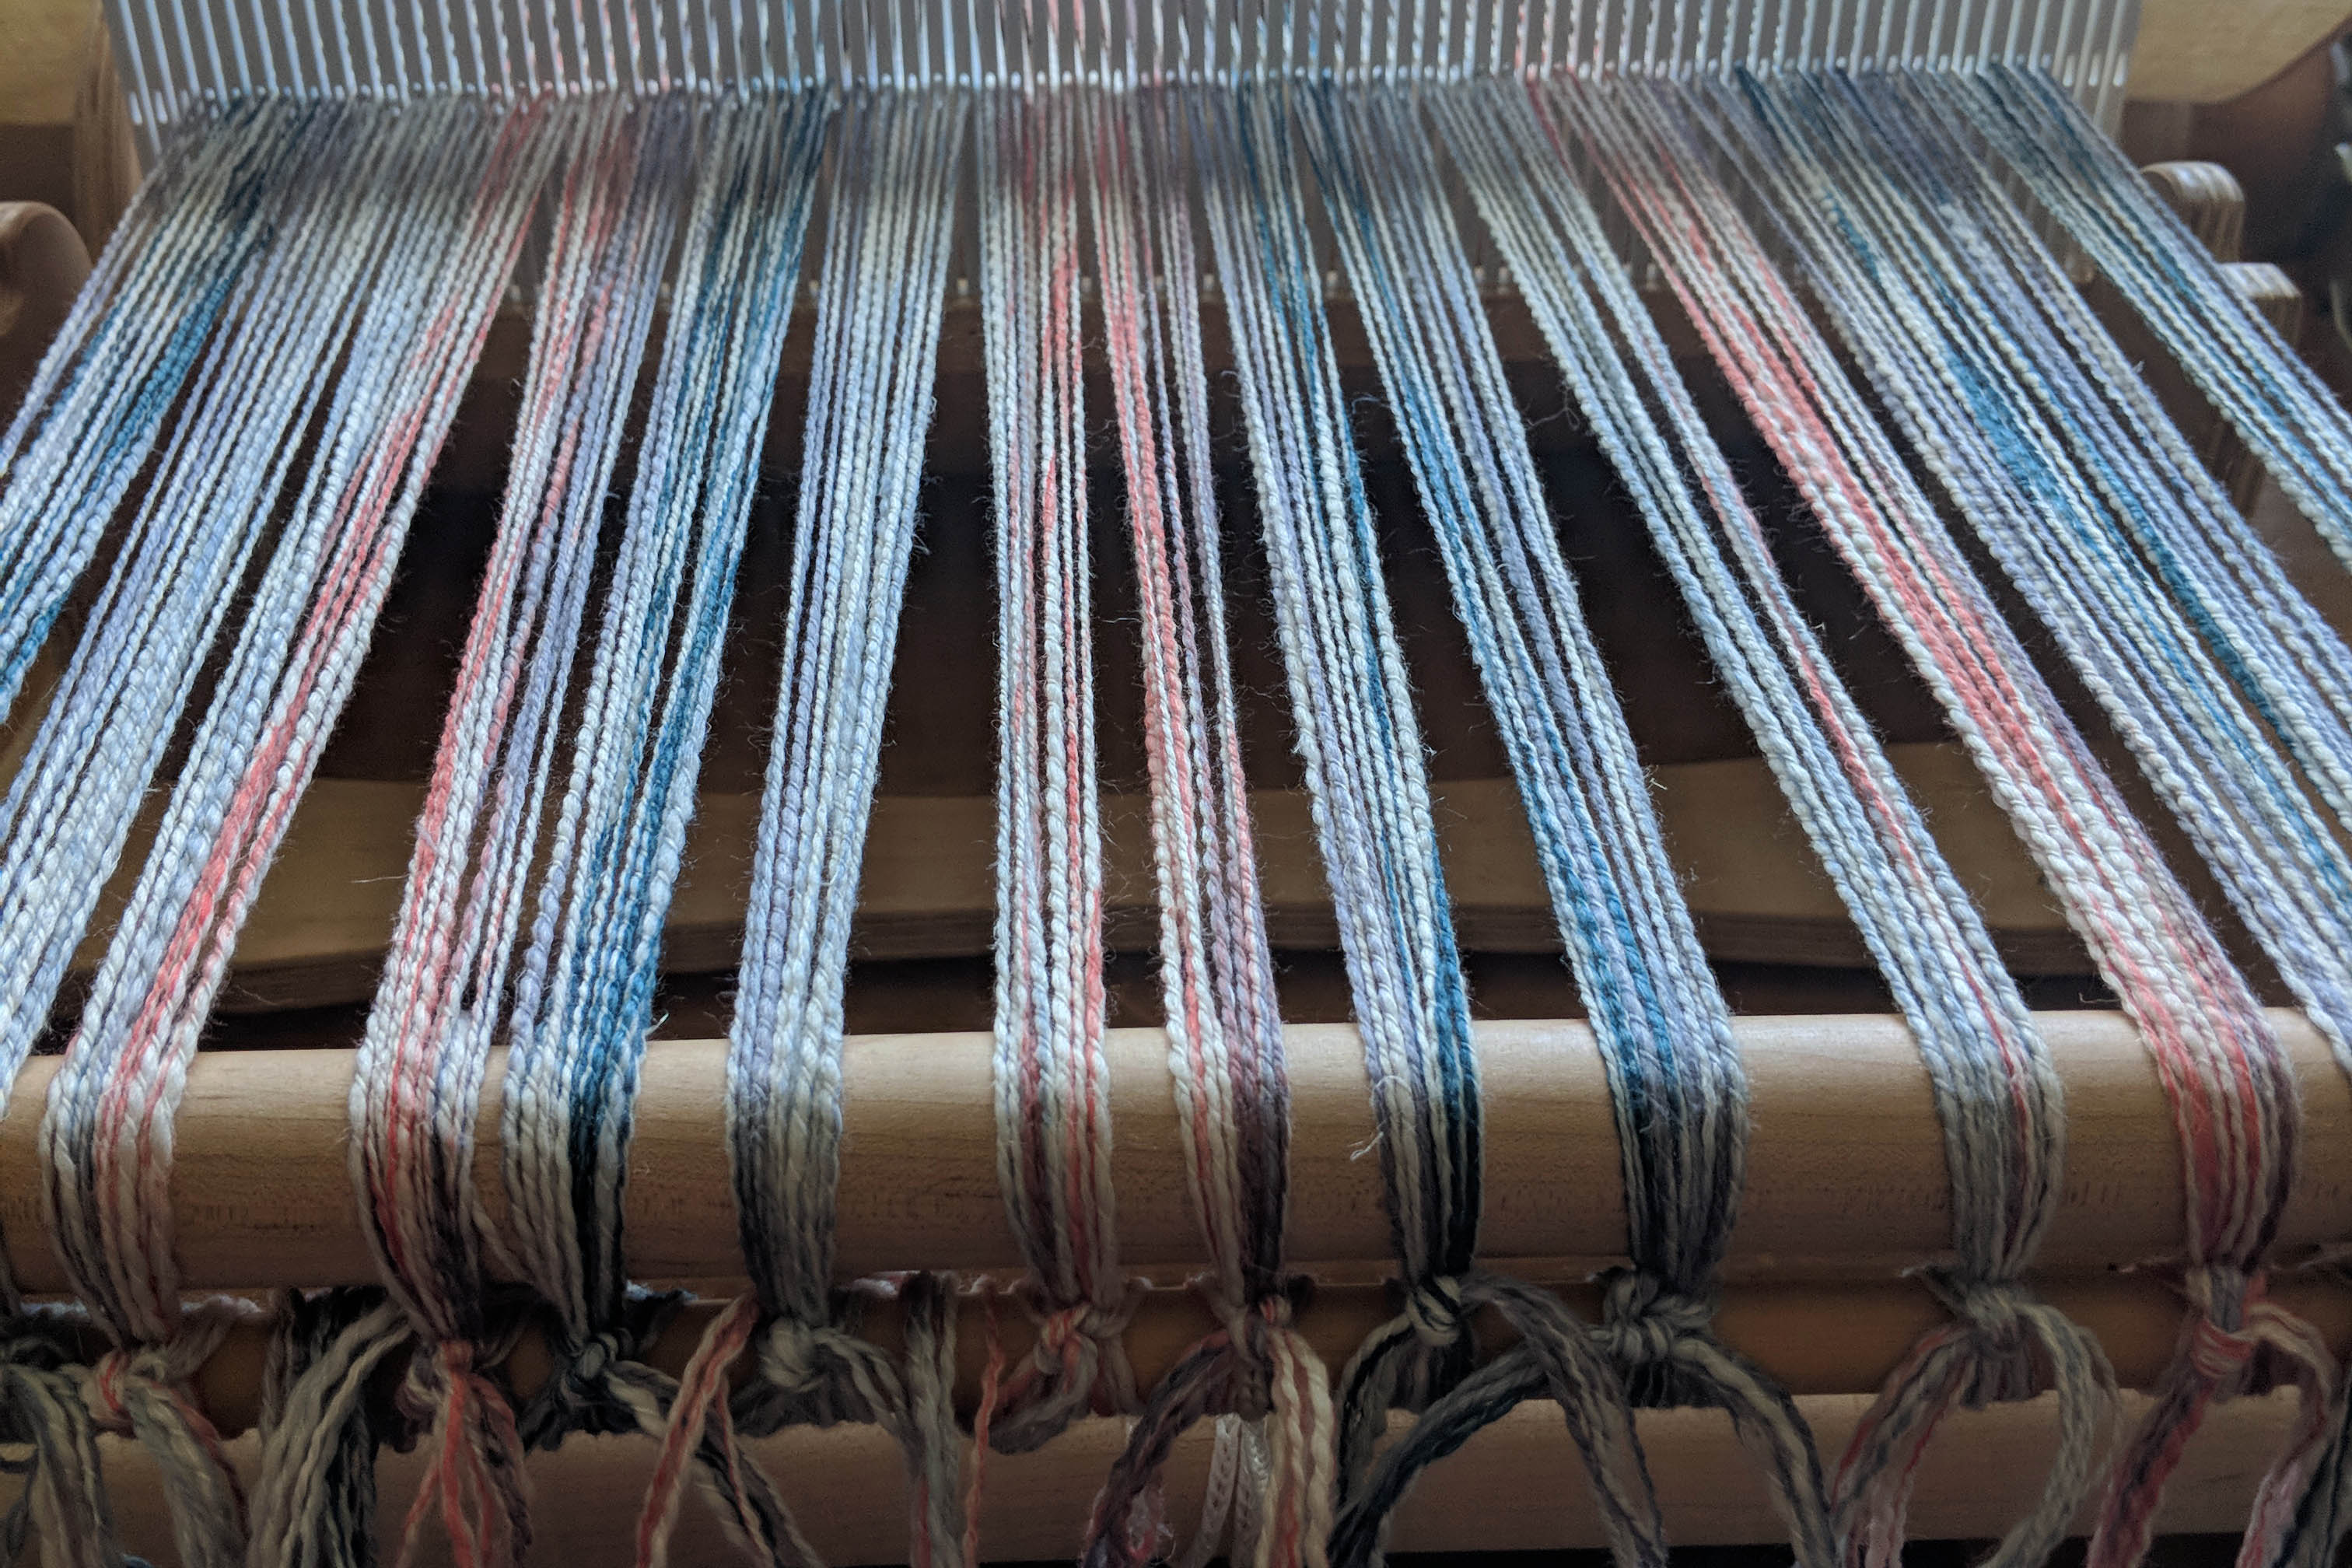
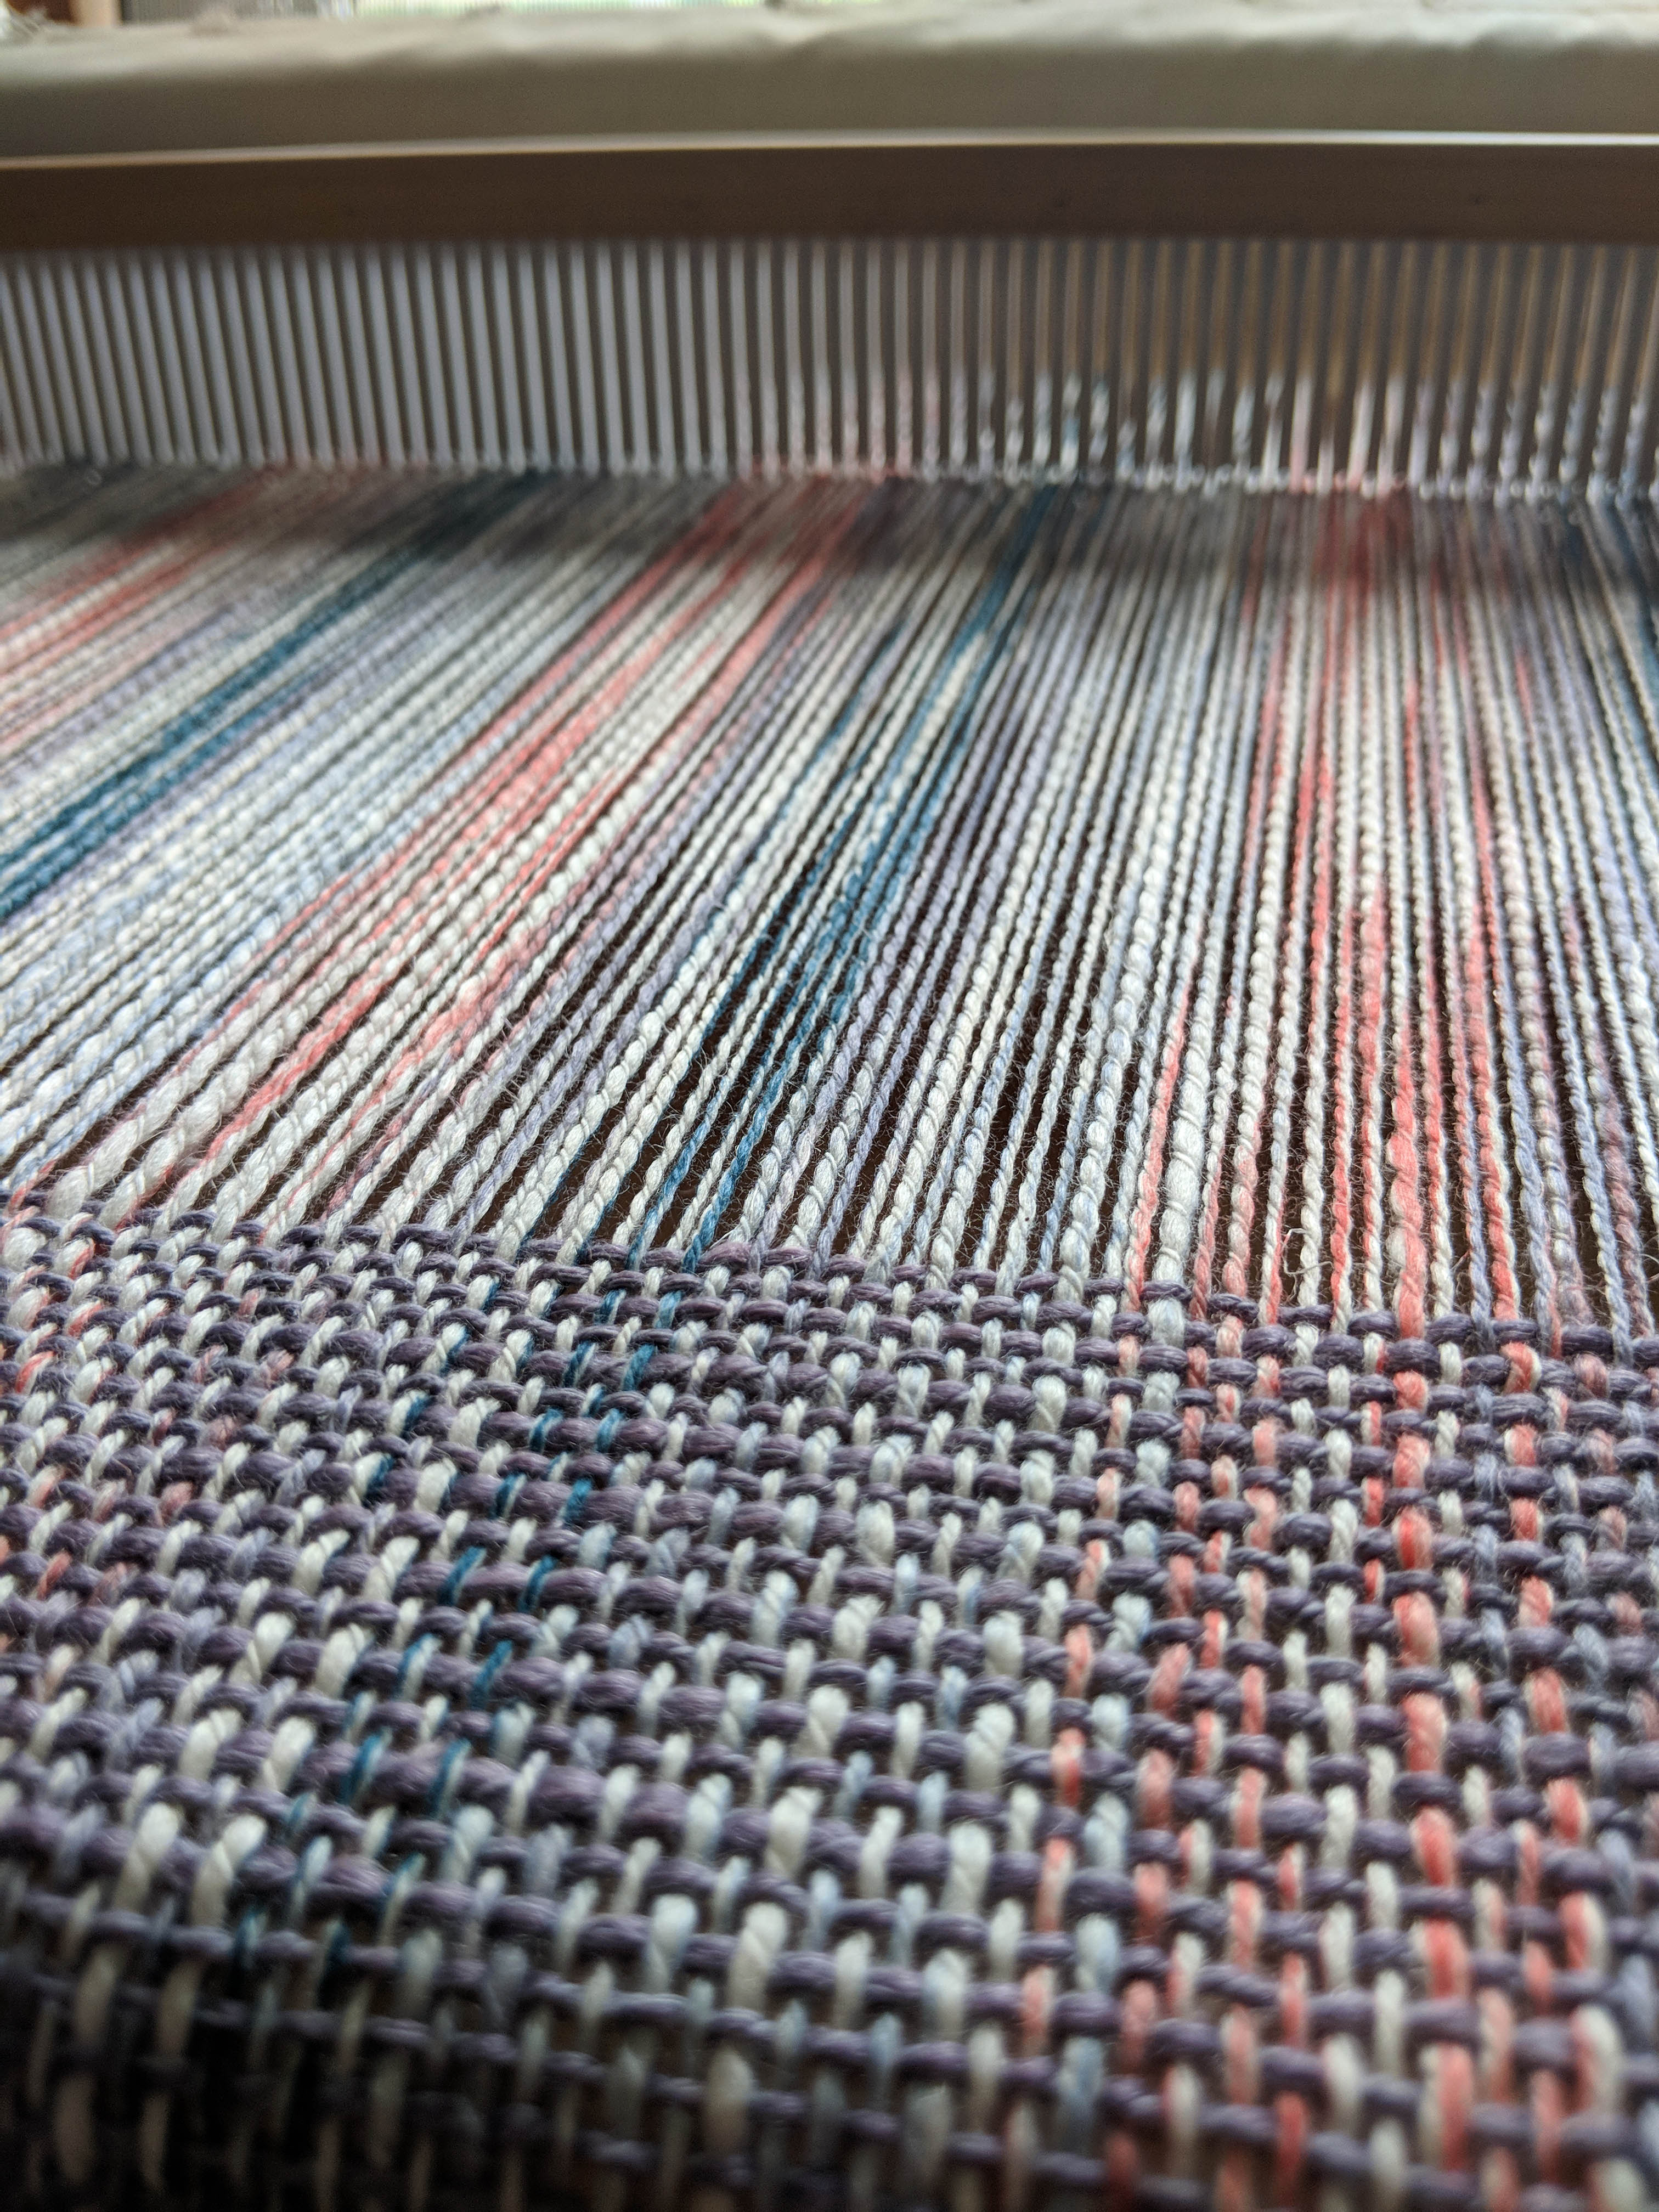
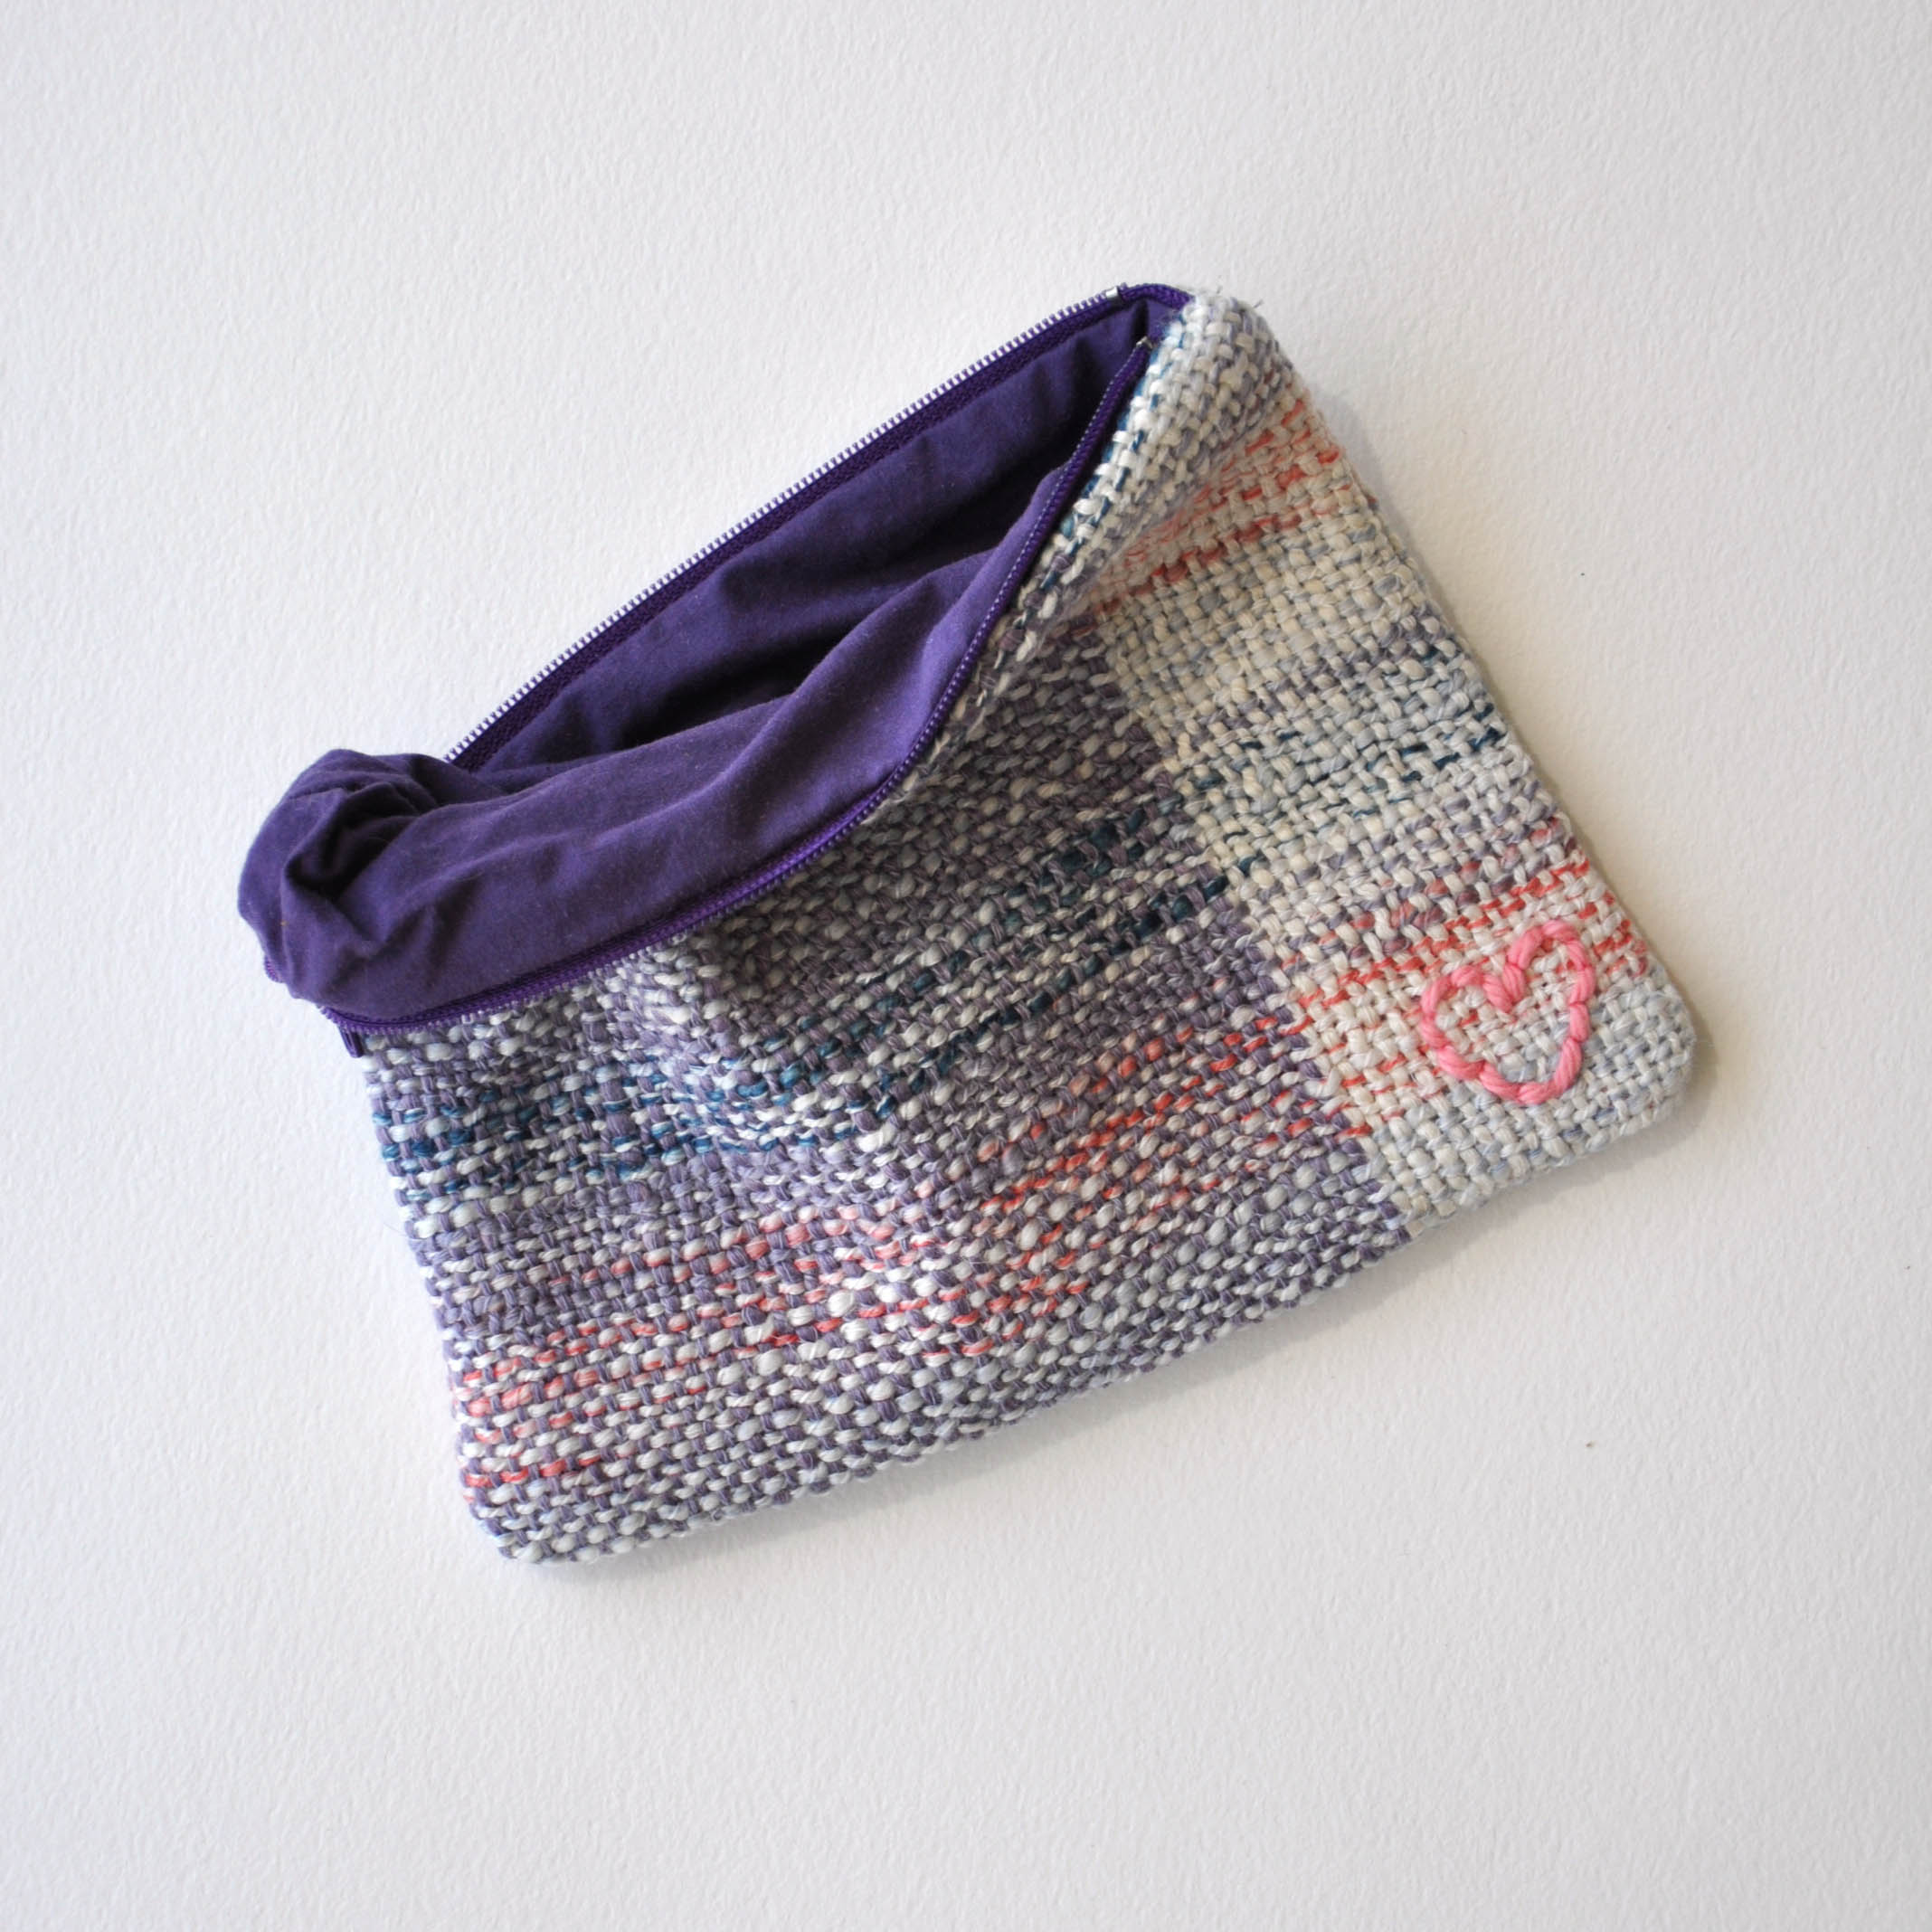
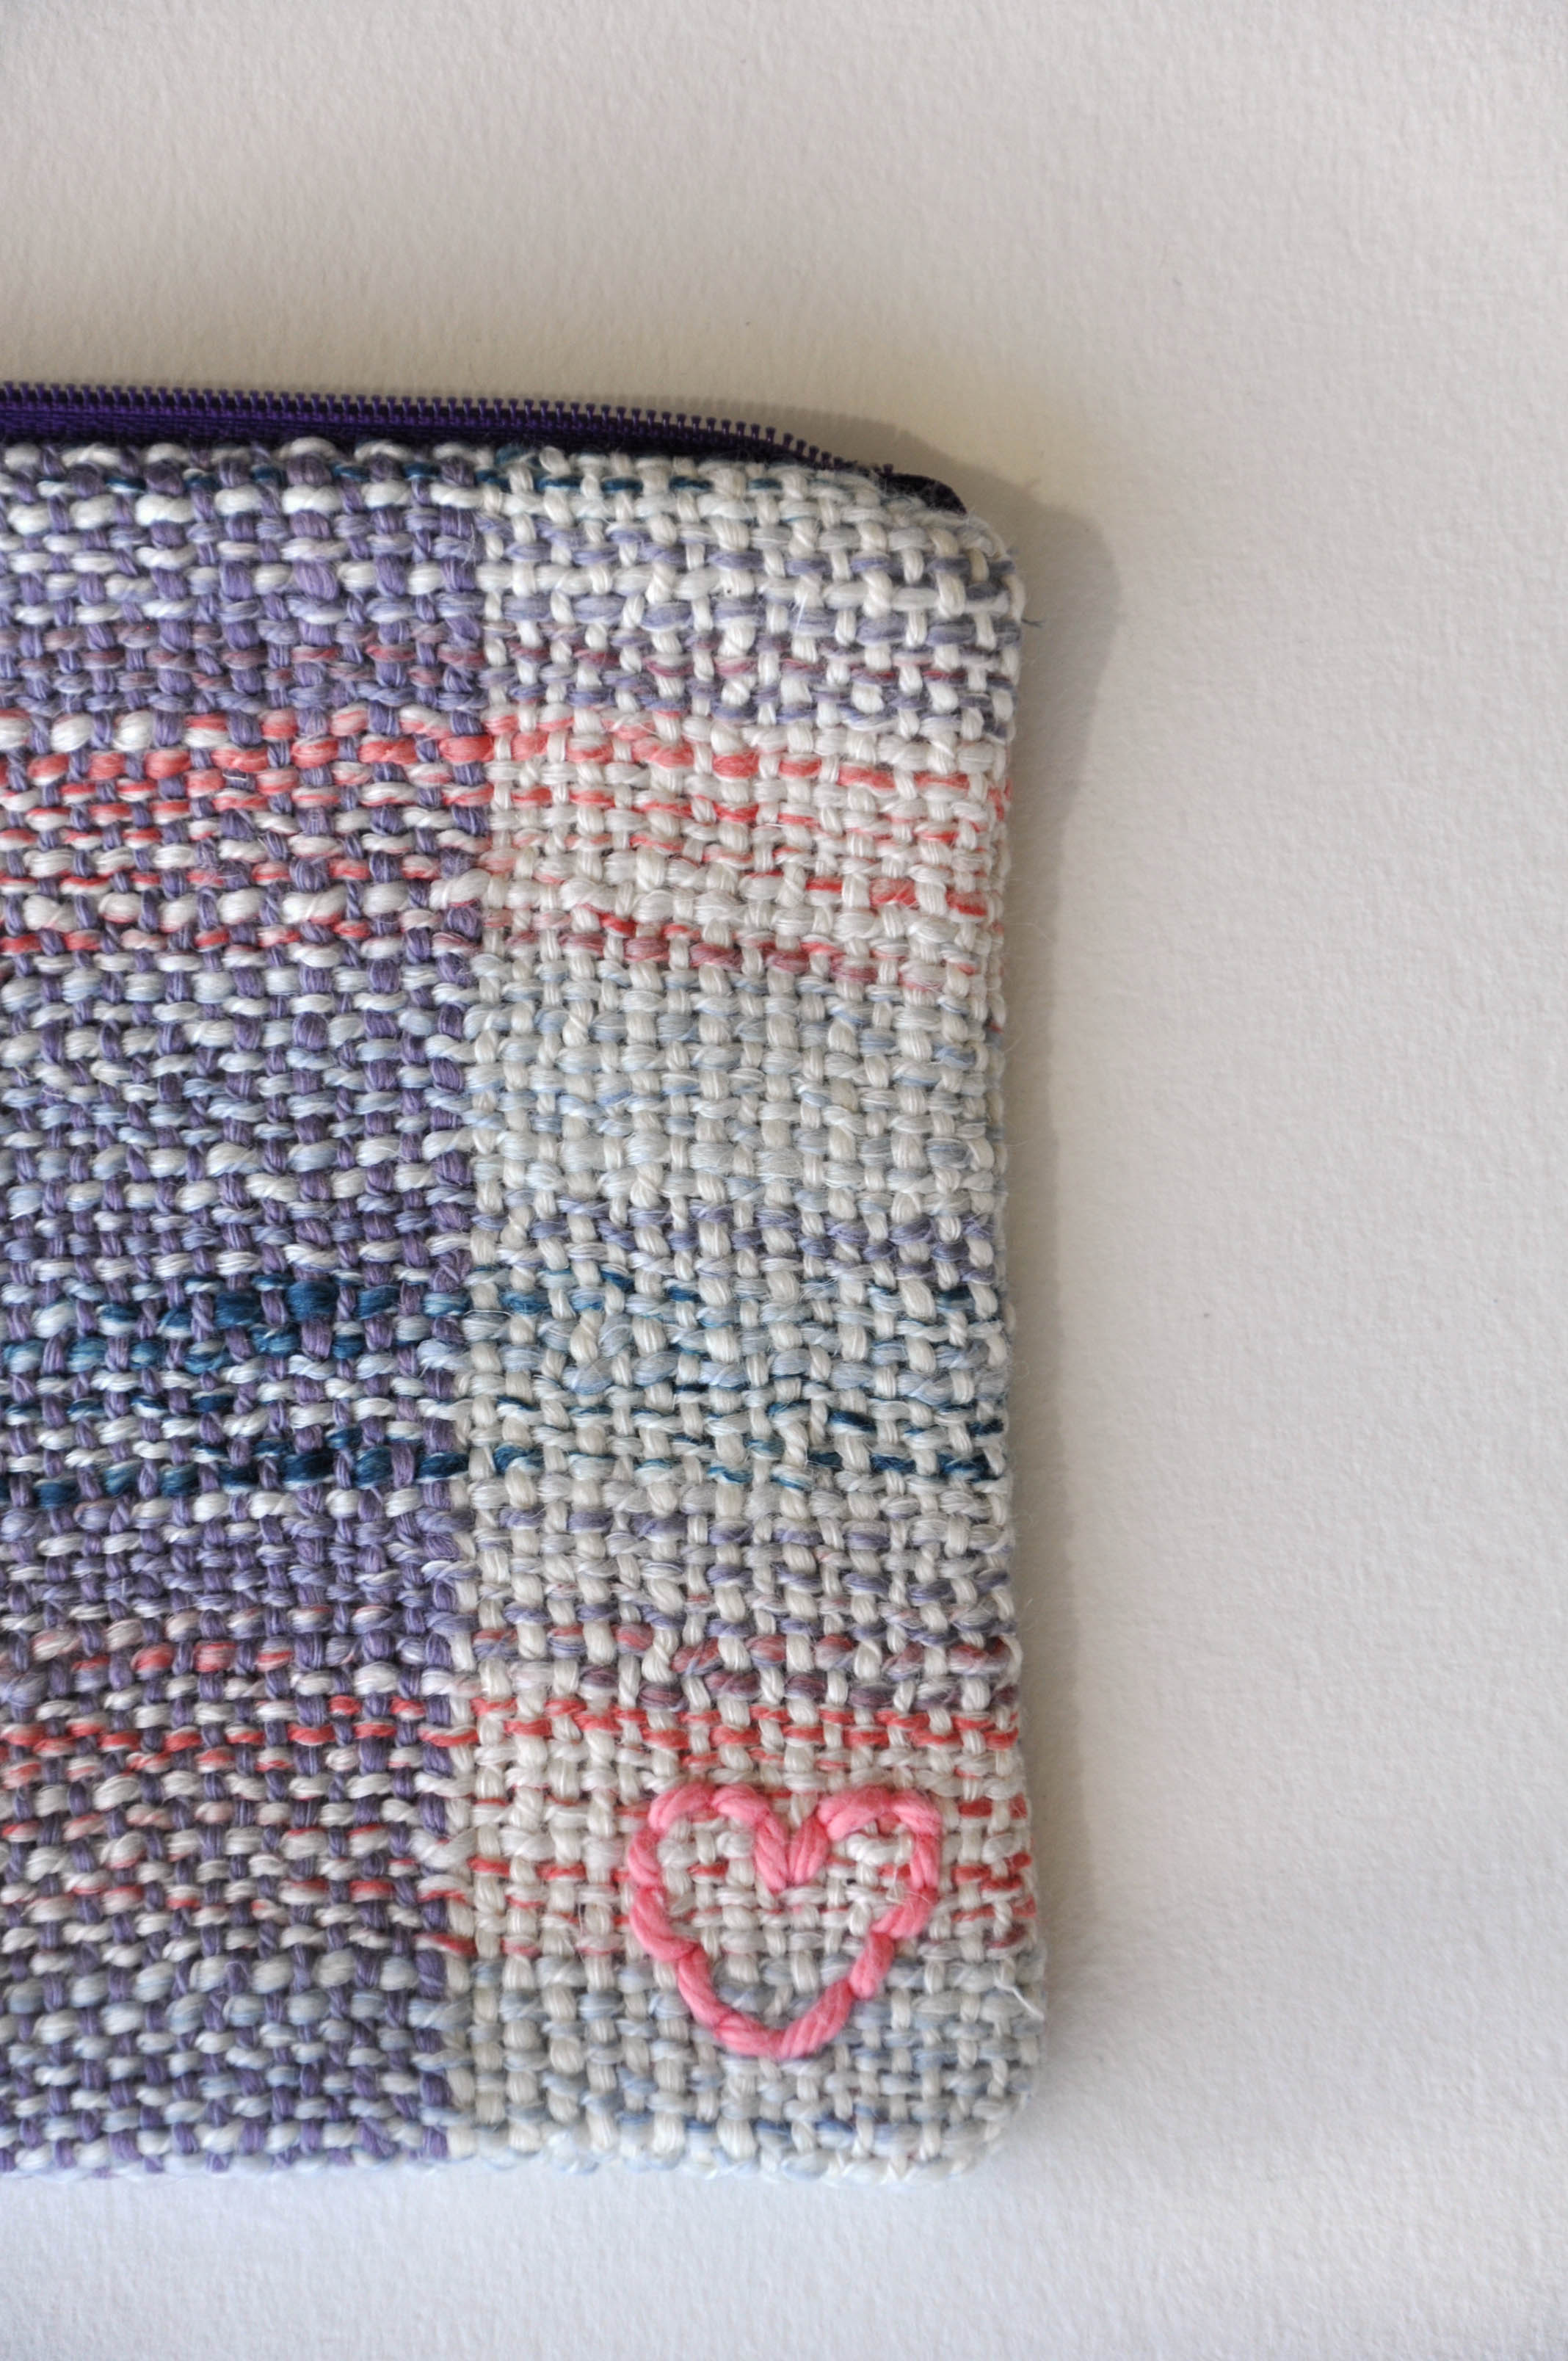
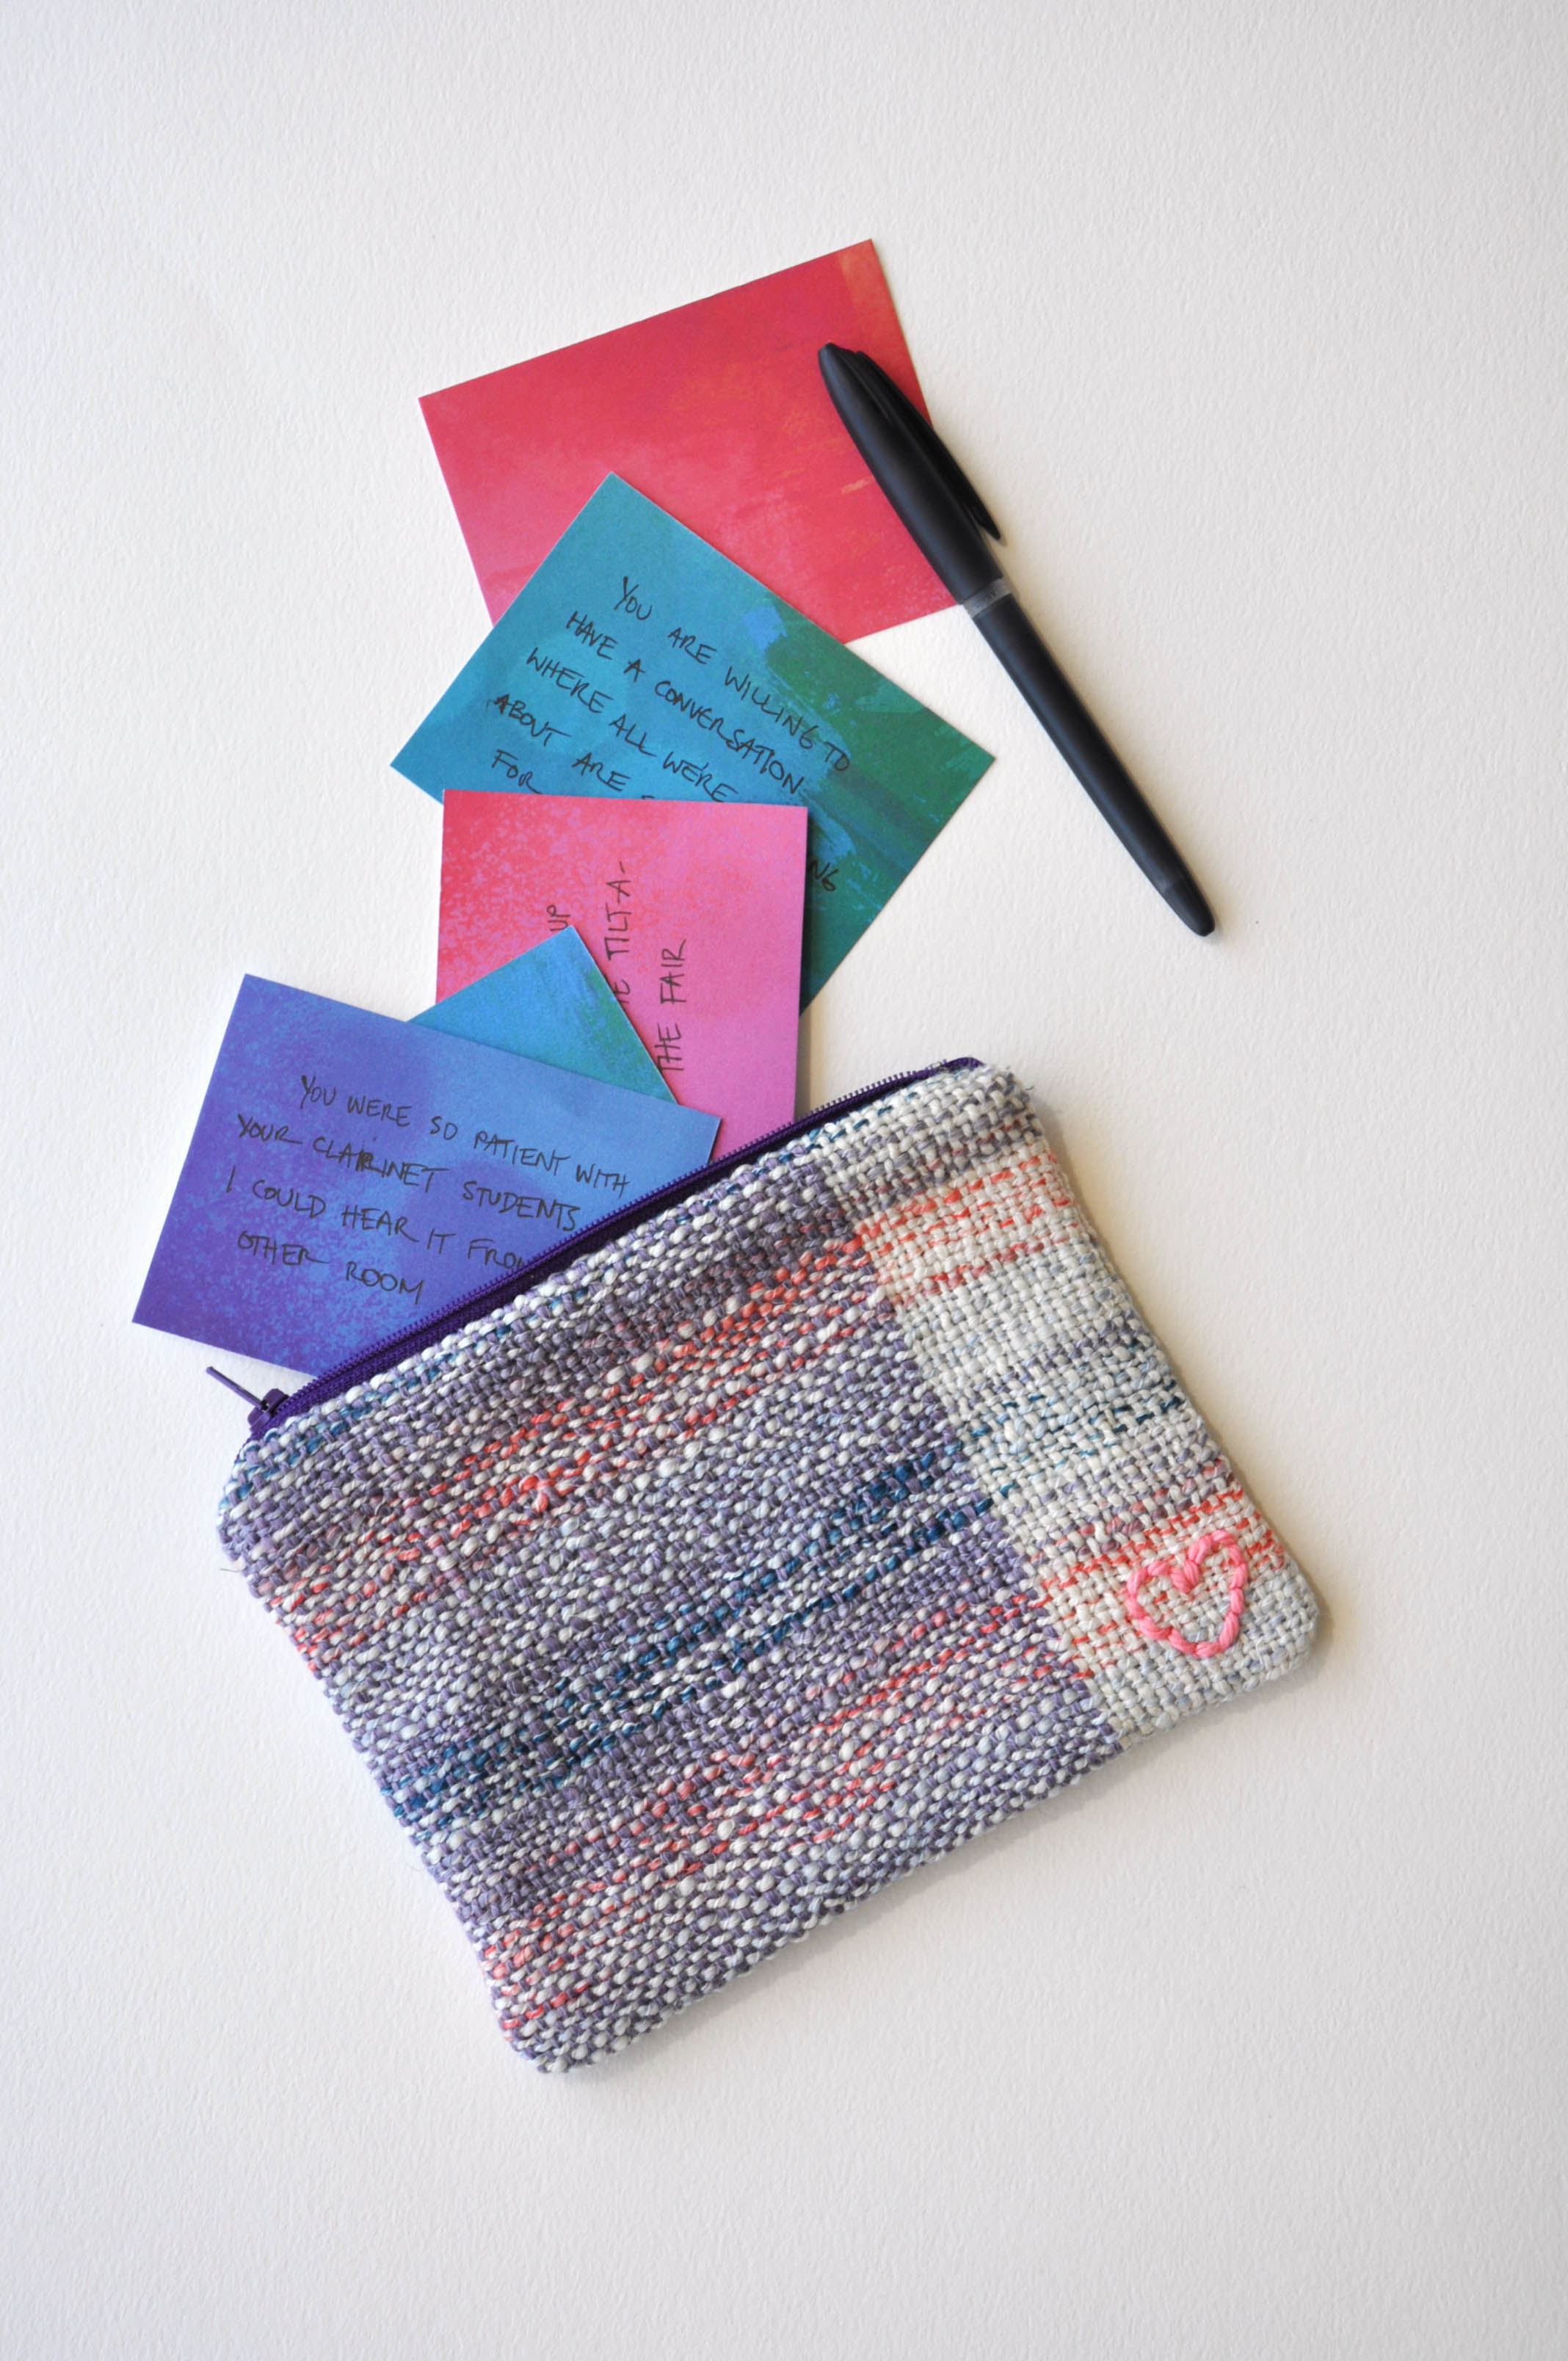
I decided to make her a little something to hold these memories, and settled on a small woven pouch. My life is so busy it’s tough to find a spare moment. Weaving goes so quickly, especially on a rigid heddle, so this made it easy to decide how I would make the pouch.
For anyone wanting to duplicate this, here are the specs for my piece of woven fabric:
Sett: 10 epi/10 dent reed
Weaving width: 14″ (though I didn’t end up using the full width of my fabric in the pouch. You could easily get away with less width, depending on your desired finished pouch size)
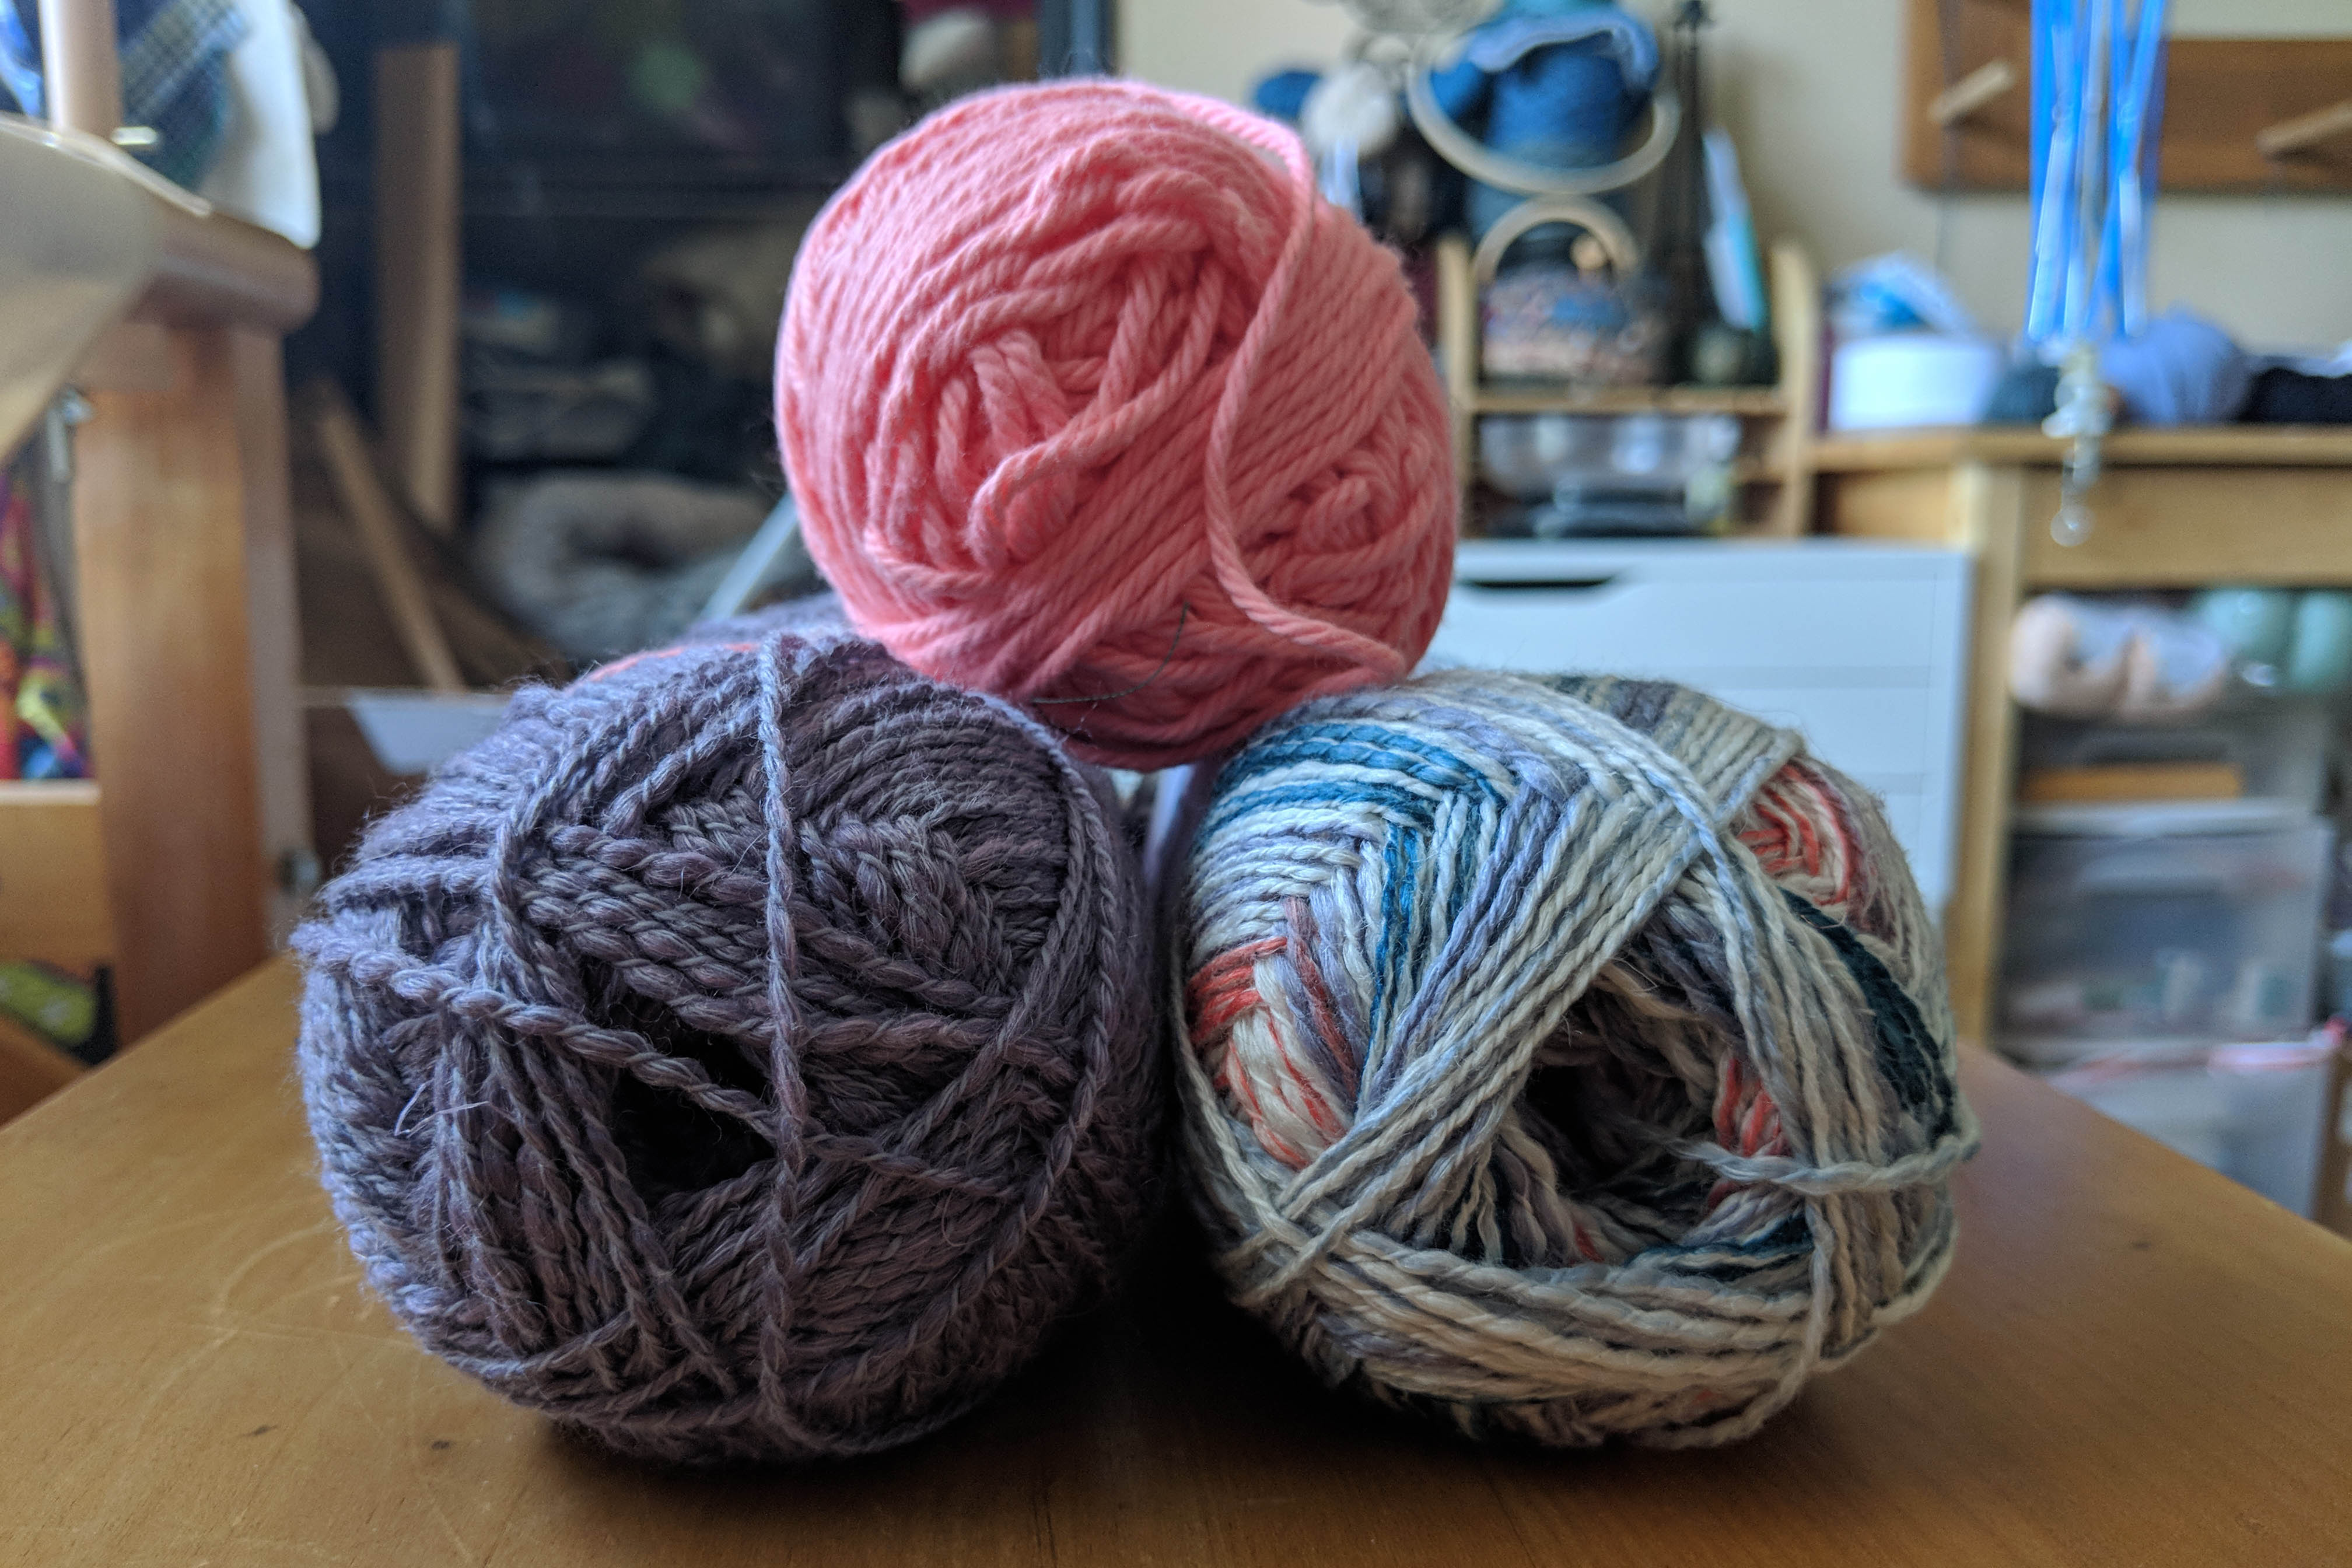
I warped with Unity Beyond, using the direct method.
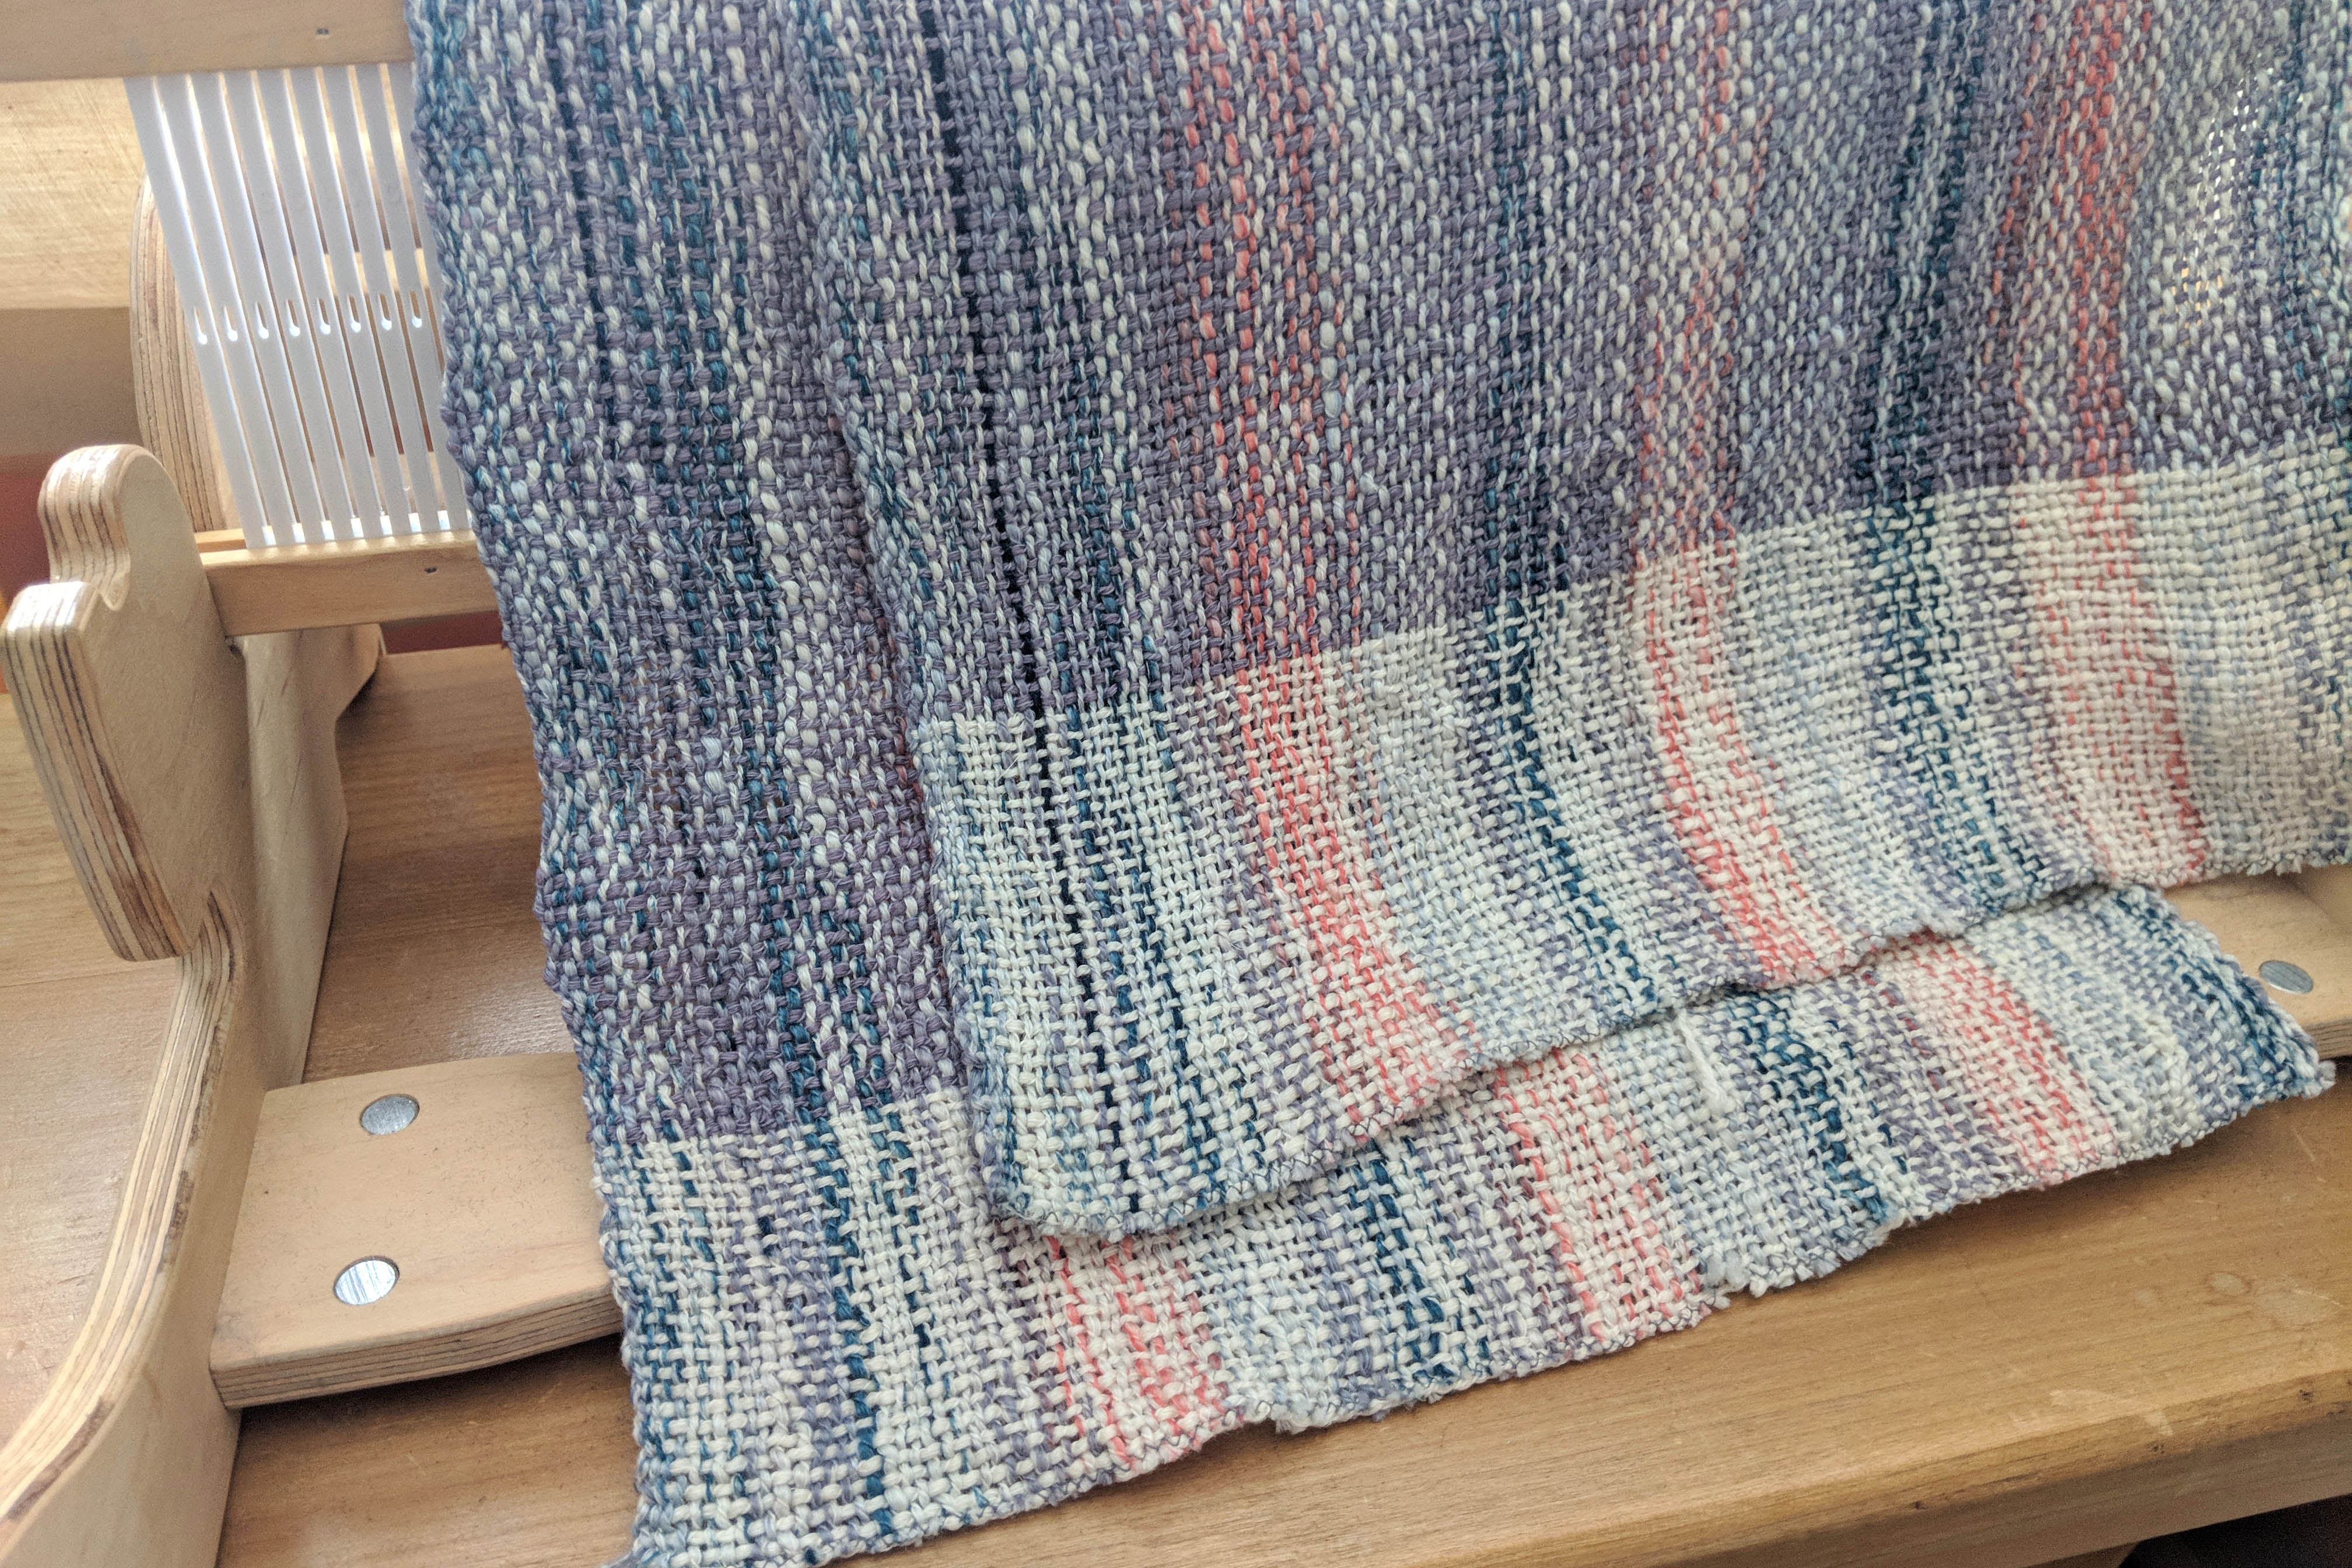
I then wove about 3 inches of plain weave with #109 Natural, switched to #107 Purple Fog until the last bit of warp, and then finished out with 3 inches of #109 Natural.
I cut my fabric from the loom, finished the ends with a machine zig-zag, and then washed and pressed my fabric.
For the pouch pattern, I roughly followed this very simple tutorial: (link). If you’re not super comfortable sewing, this would be a great project for you. And if you’re more experienced, this will be a total breeze.
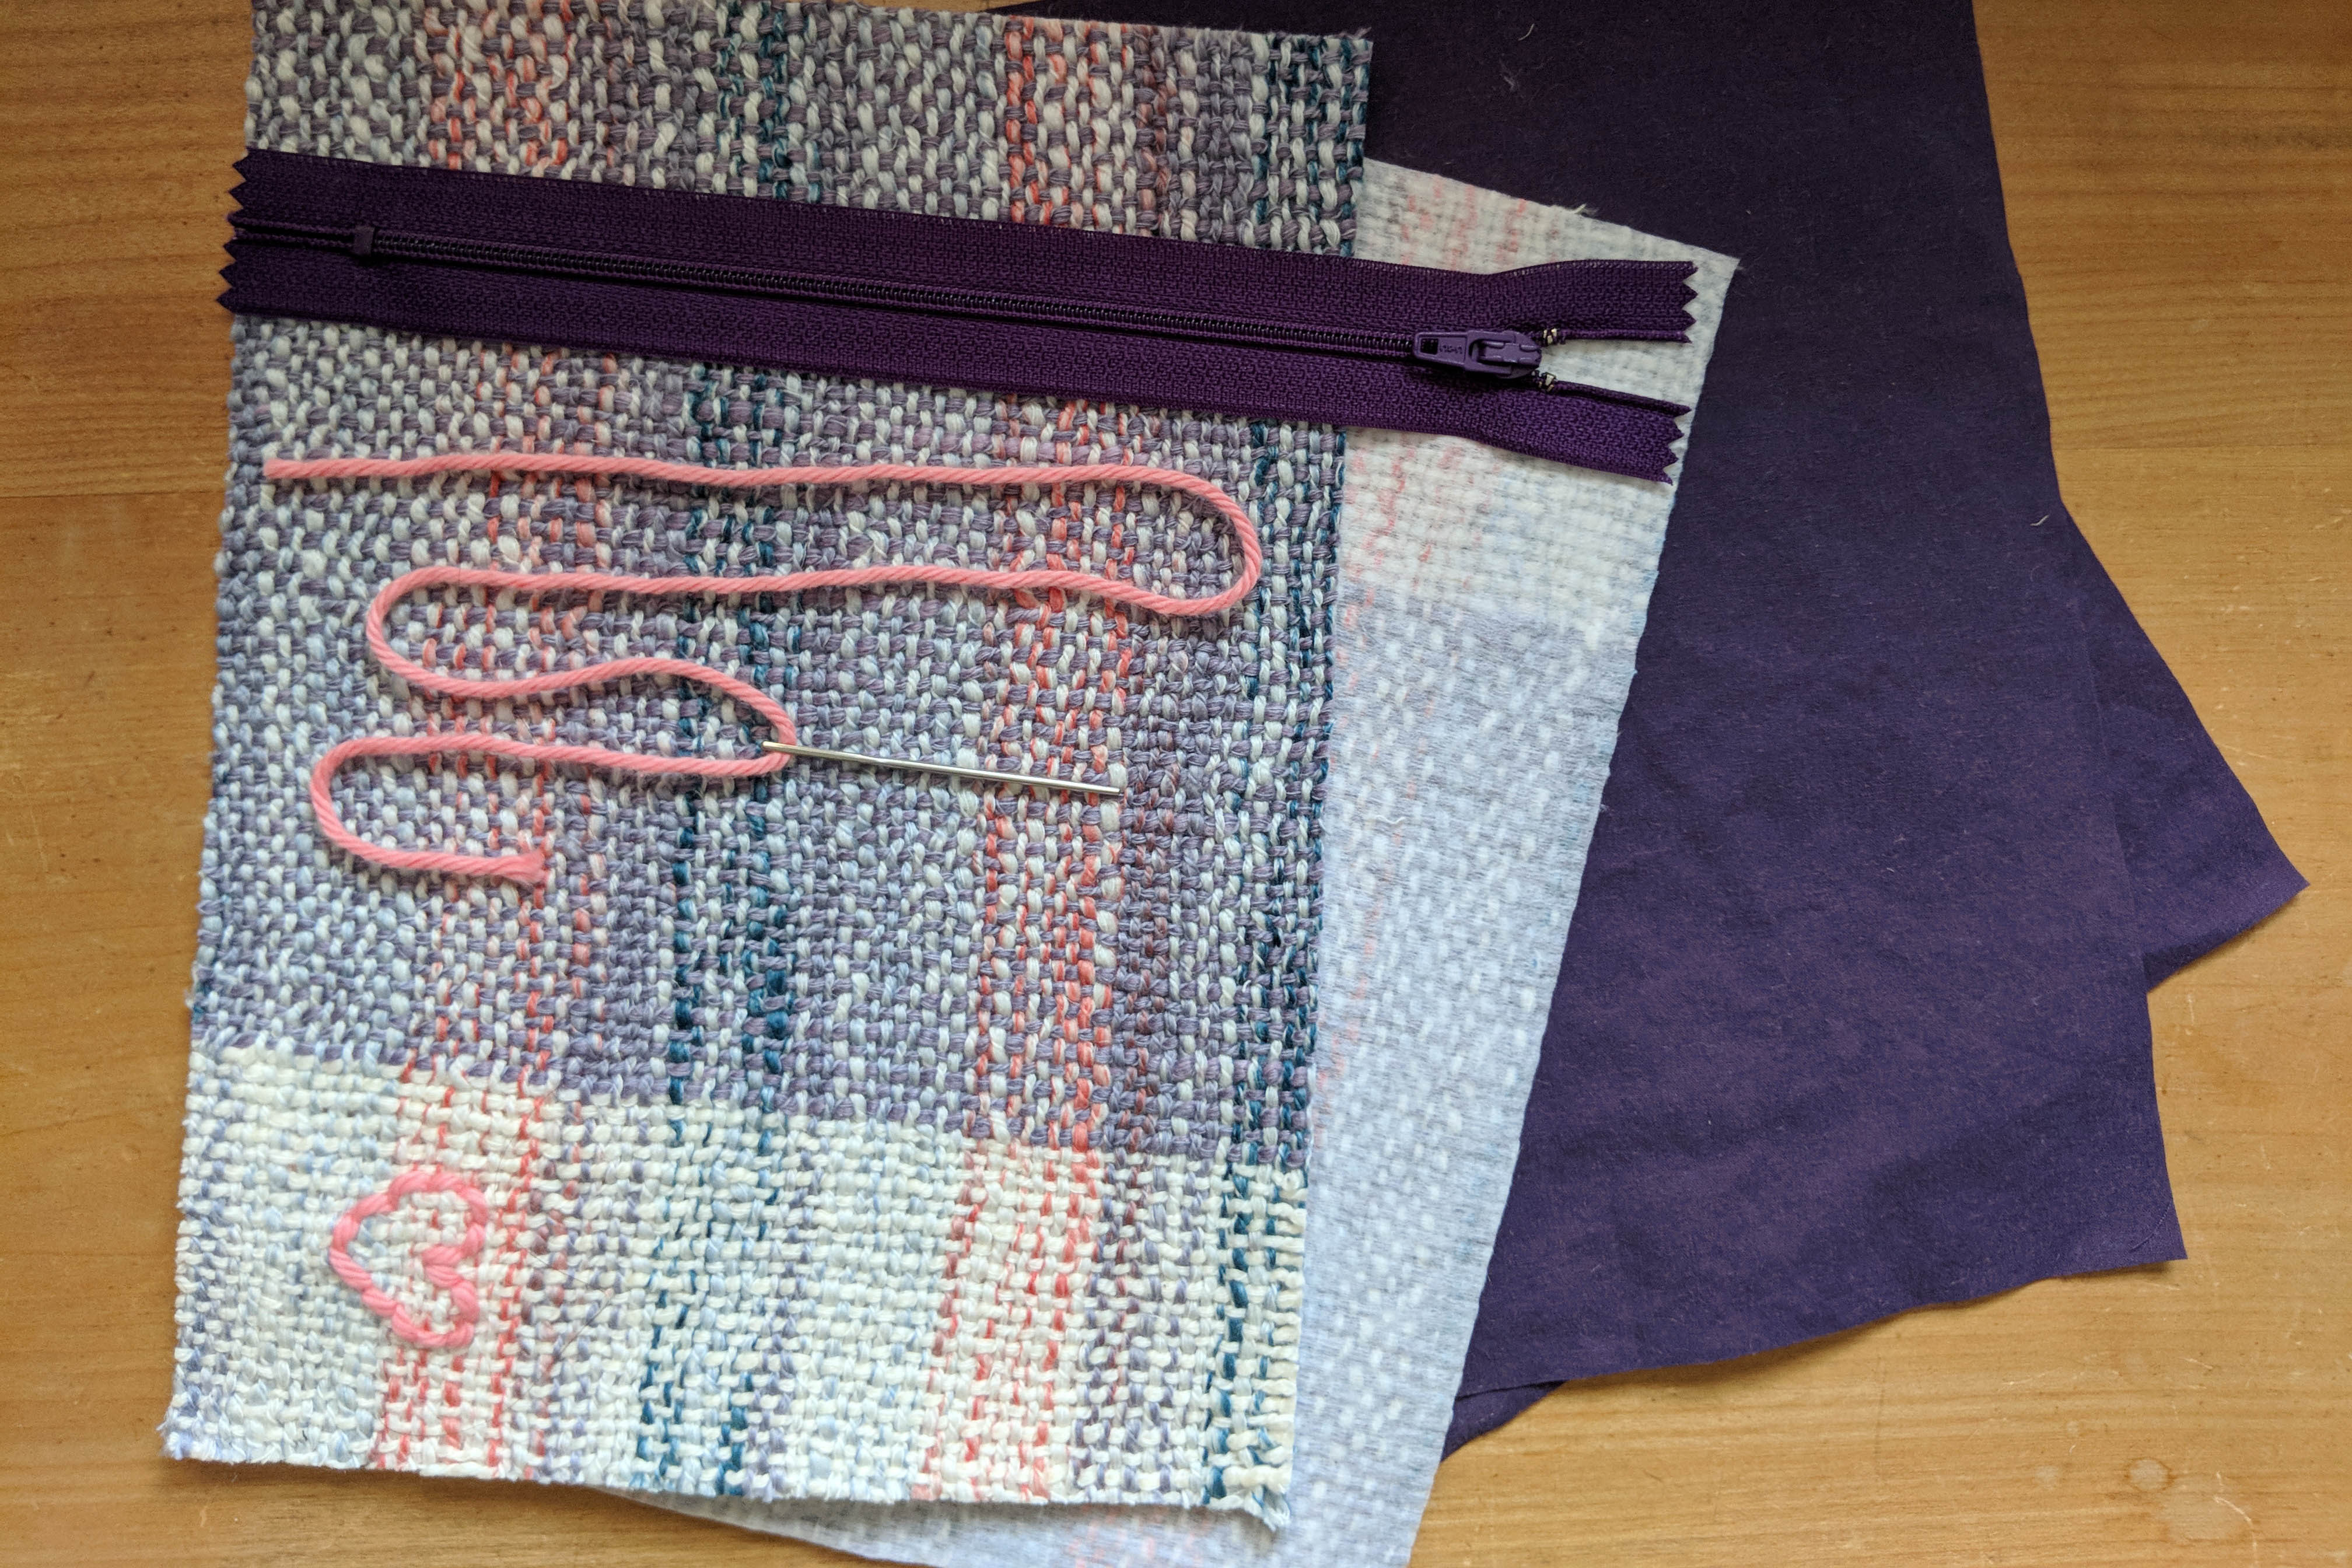
Before getting to the sewing part, I had decided that I wanted to add a little personal touch. I had a little ball of Cotton Supreme in my stash that coordinated well, and decided on a little heart. My embroidery skills are quite rudimentary, so use your imagination to come up with something better than this!
One thing to keep in mind with handwoven fabric, is that your weaving will likely want to come apart if you cut into it. Handwoven fabric, especially using handknitting yarns, does not have as high a thread count as commercial fabric on a bolt. Before cutting into my fabric, I used a fusible interfacing which I just ironed onto the back side of the fabric. The interfacing has an adhesive which helps to secure the fibers in the yarn.
After doing this, I cut out two pieces from my woven fabric 7″ x 9″. I also cut two lining pieces from some stash fabric (an old pillowcase, actually!) also 7″ x 9″.
At this point, I followed the tutorial that I mentioned above (here it is again: (link) And voila, just a short time later, I had a pouch:
In the papercrafting section at my local store, I found some pretty watercolor looking paper in a cardstock weight that coordinated with the colors of my yarn. I cut some pieces that were about 3″ x 4″. I spent some time one evening writing down positive memories about my mom, one memory per card. It was fun and quite therapeutic.
One memory was: “when you threw up after riding the tilt-a-whirl at the fair”
I think my mom will enjoy reading through these, perhaps being reminded of things she’s forgotten or things she never thought I noticed.
Whether you’re a parent or a child, I hope this Mother’s Day is a good one for you!
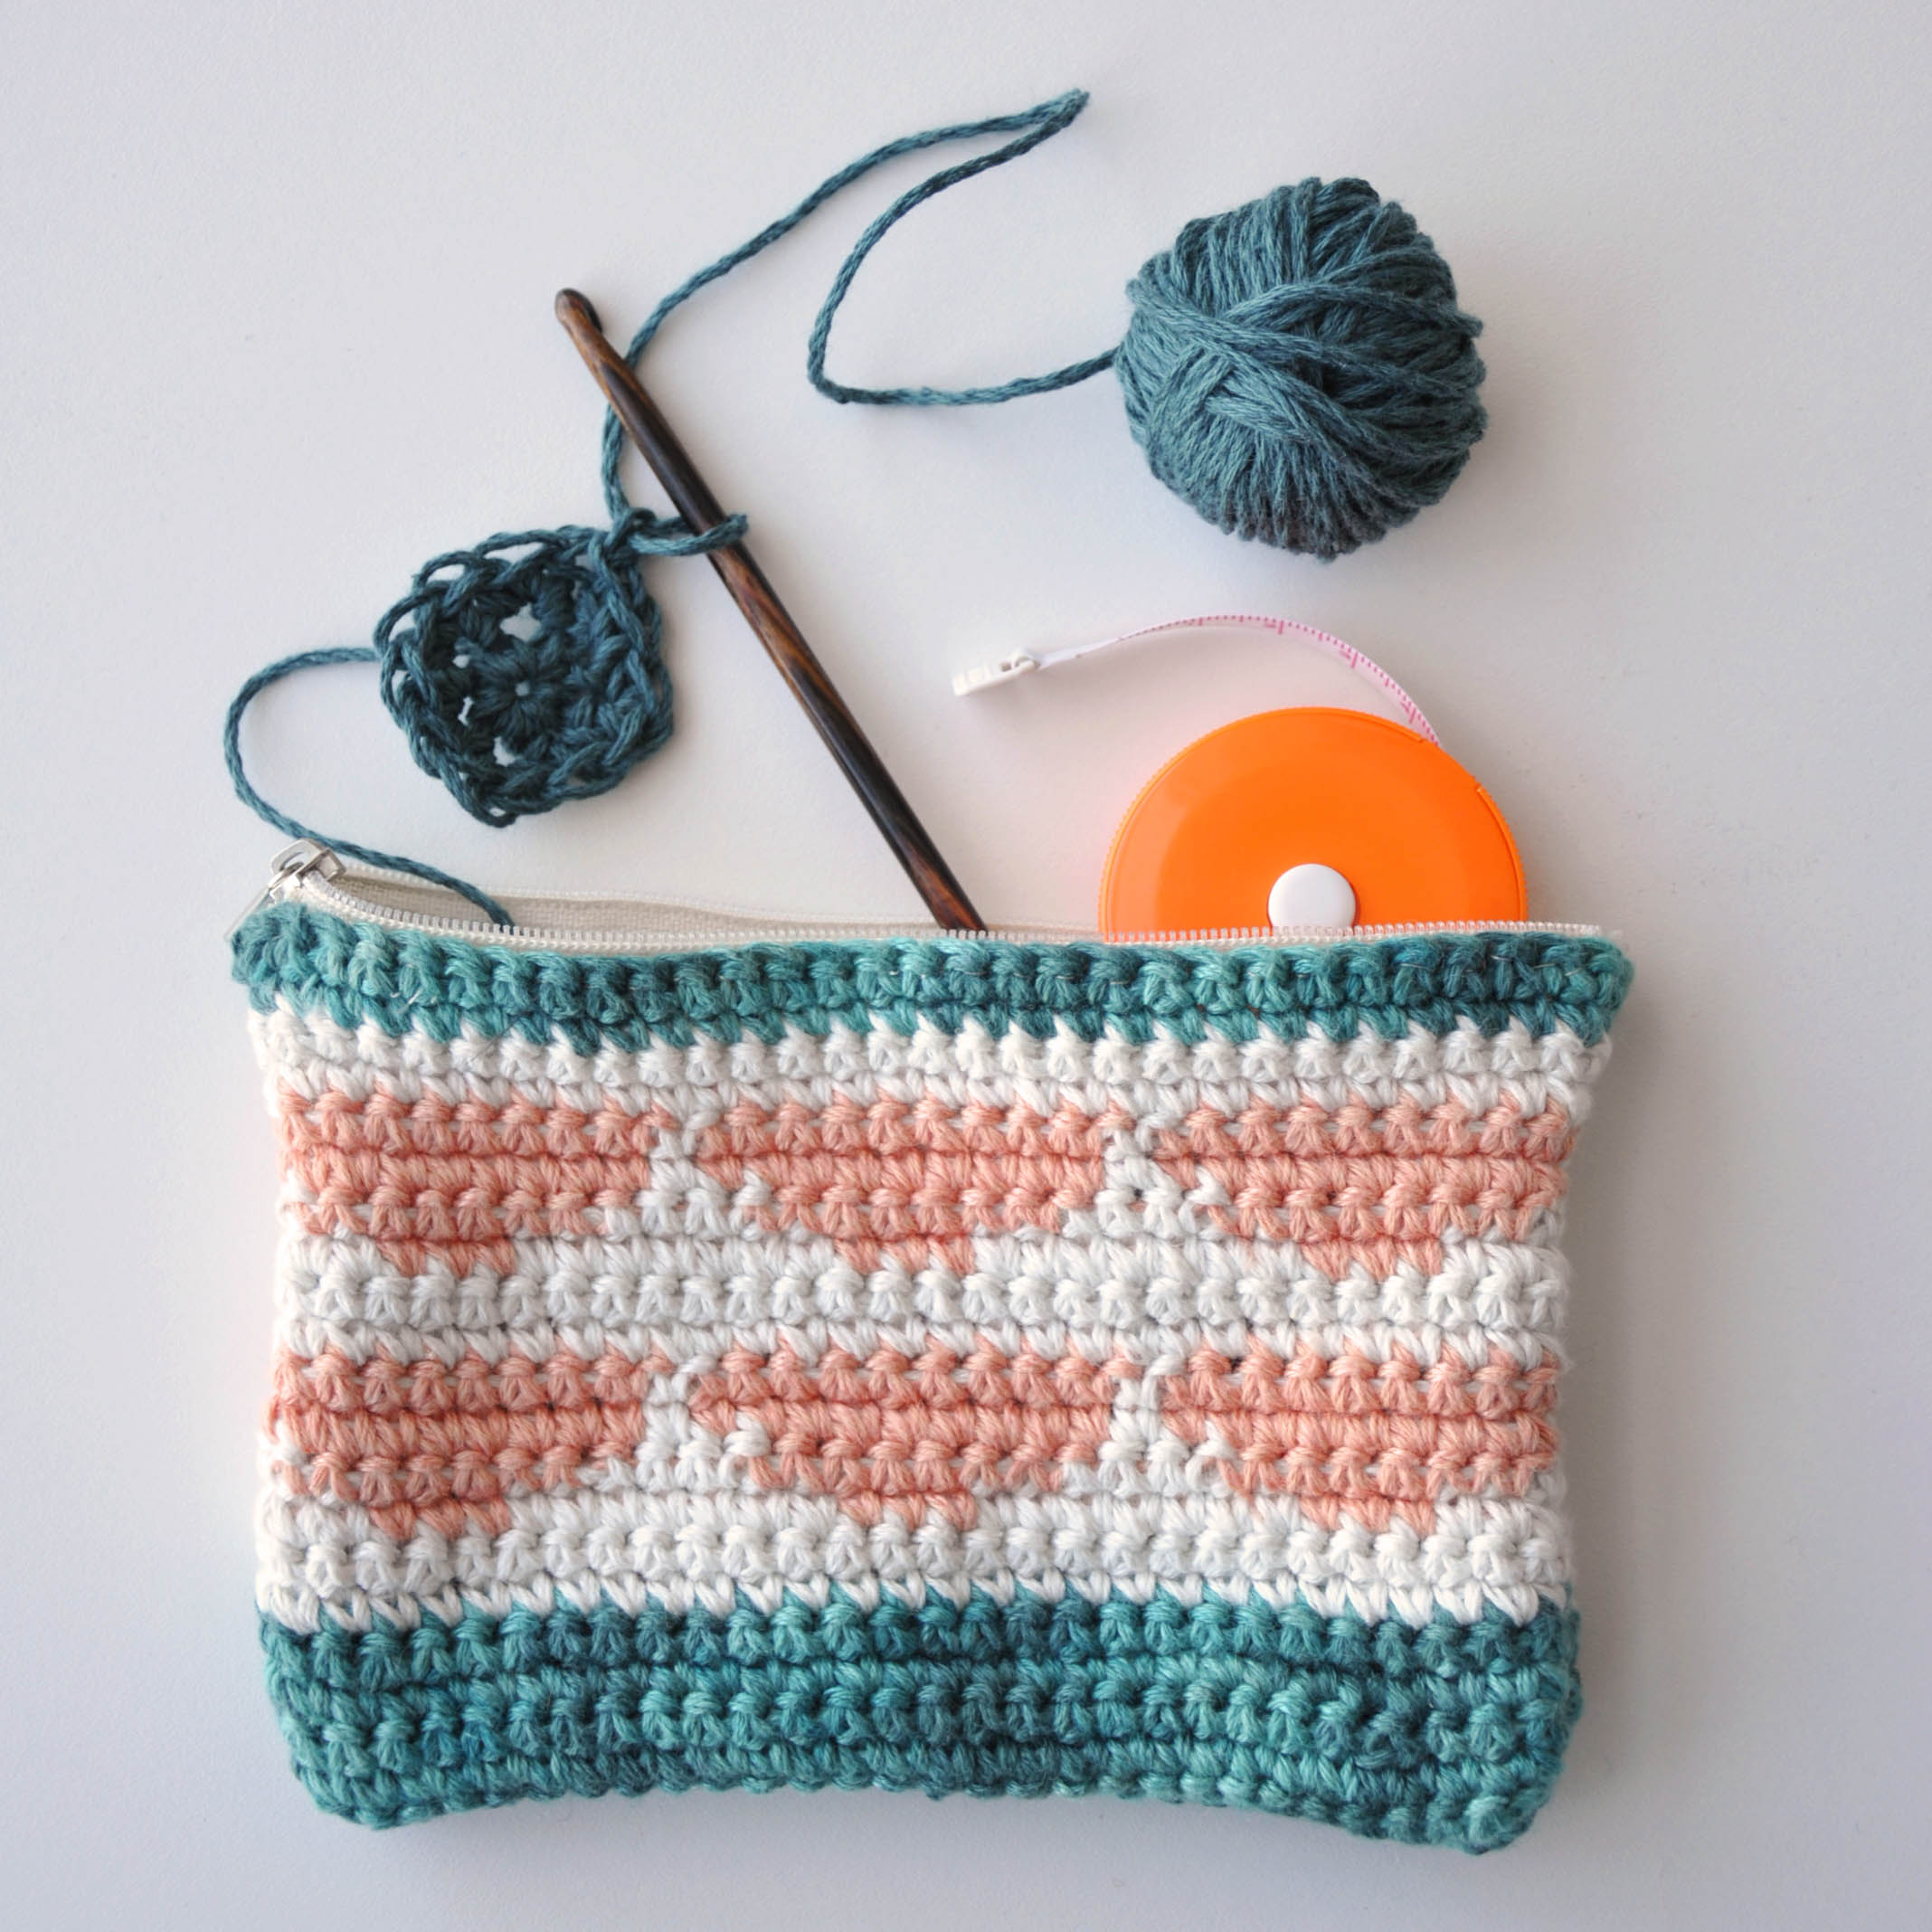
I’ll tell you, we’re lucky to have found designer Rachel Brockman. Here, she has created a practical and cute little notions pouch in Good Earth cotton/linen blend.
The pouch is worked in two separate rectangles which are seamed together. Then add the zipper, and voila!
The orange sections are a 10-stitch repeat that’s charted in the pattern. For those who loved last week’s Spring Stripe Rug but wanted some practice on tapestry crochet first, this is a great little project that uses the same technique.
We hope you have an awesome weekend. Now I’m off to fix up a little Springtime Citrus Cooler – the Citrus Pouch gave me a craving!
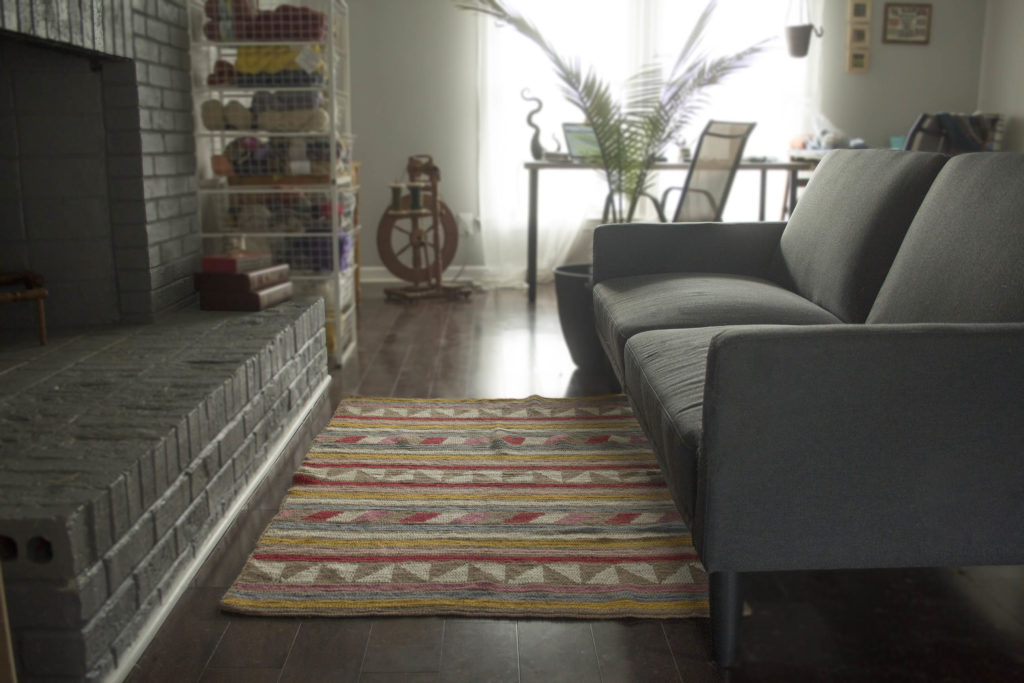
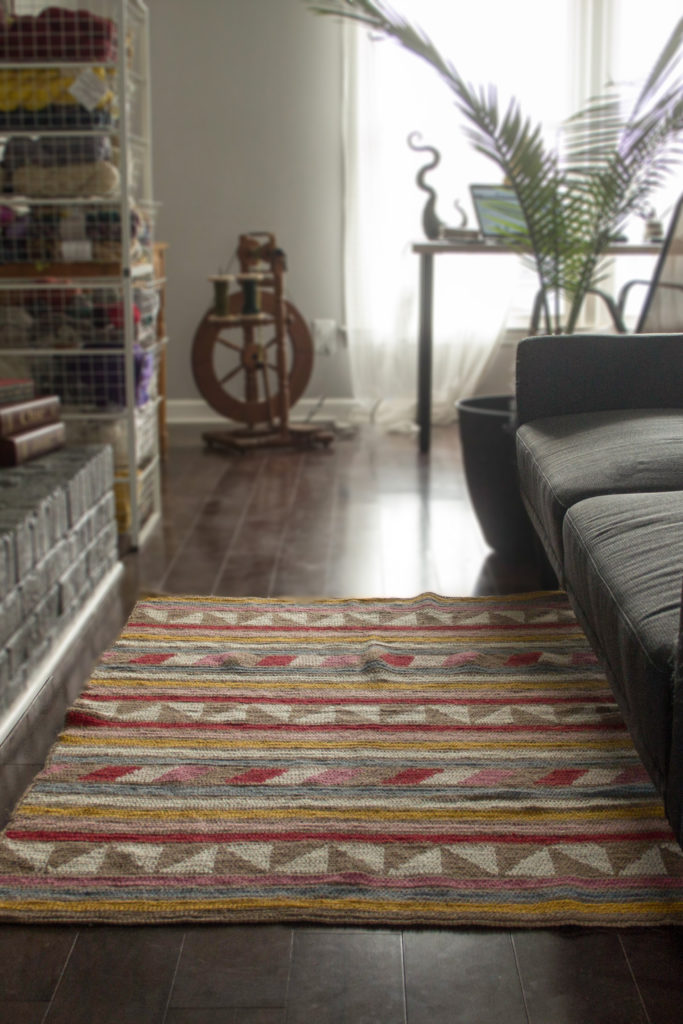
I love this rug because it uses my favorite stitch – half double crochet. This was the very first crochet stitch I learned, after the base chain. I love it in a self-shading yarn like Poems or Classic Shades. Just hdc-ing around and around until the ball runs out makes a very pretty cowl. And since this is a stitch I’m comfortable with, this rug might be the perfect project for branching into crochet colorwork!
I’m already a fan of 100% hemp Java for home decor projects. I was about to cast on for a larger version of the Java Jive Rug Mug to put under the cat’s food and water dishes in the kitchen, but… this week’s pattern has me wondering if crochet wouldn’t be even better. It’s always great to brush up skills on a beautiful project.
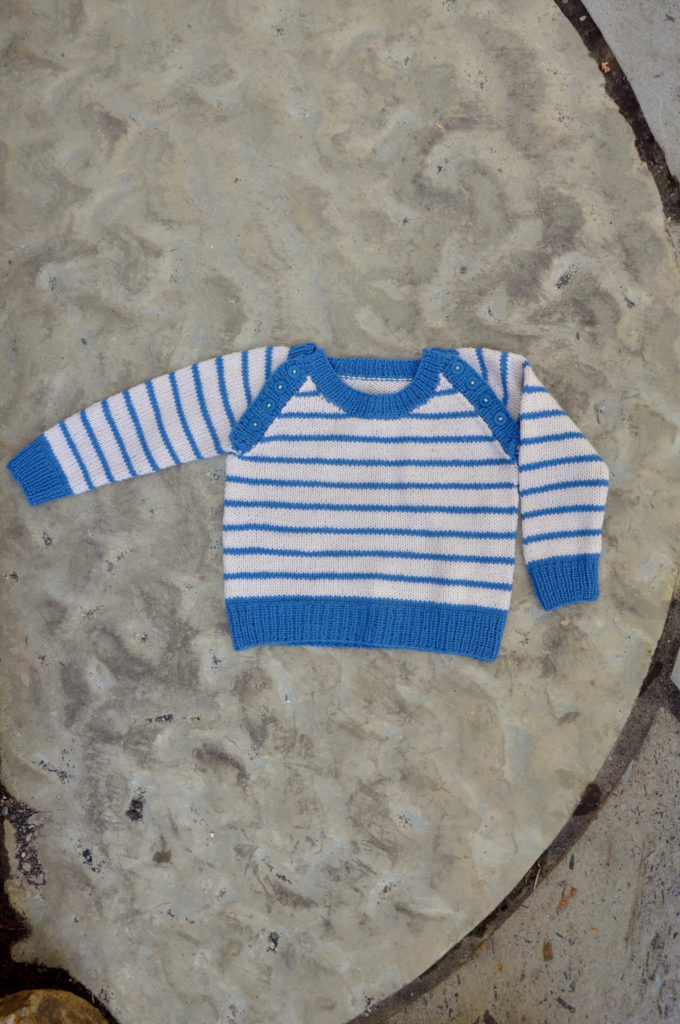
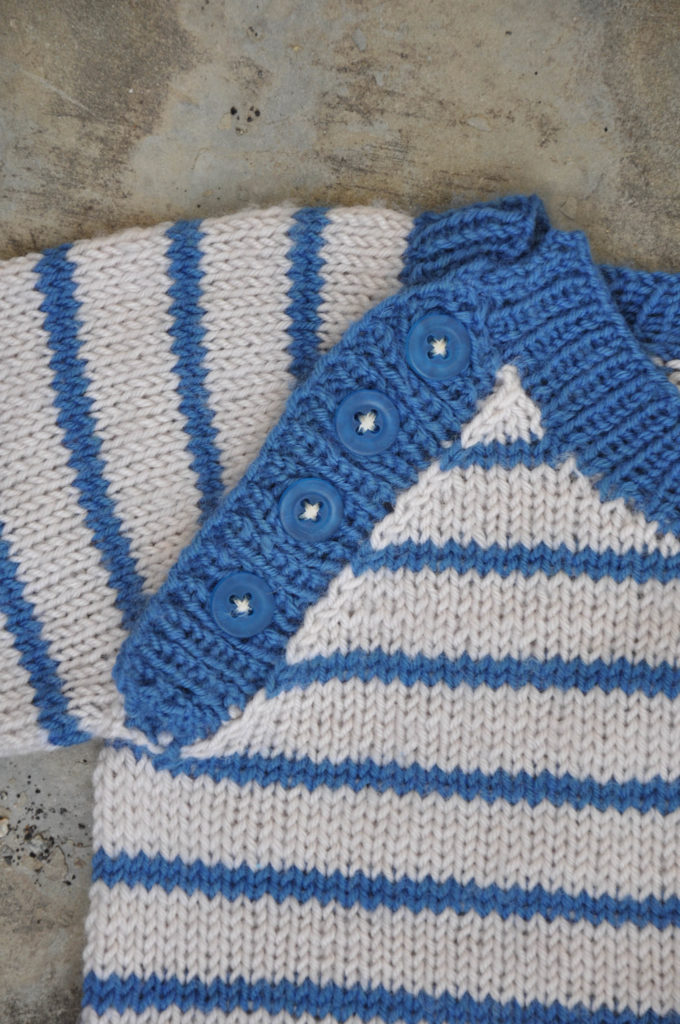
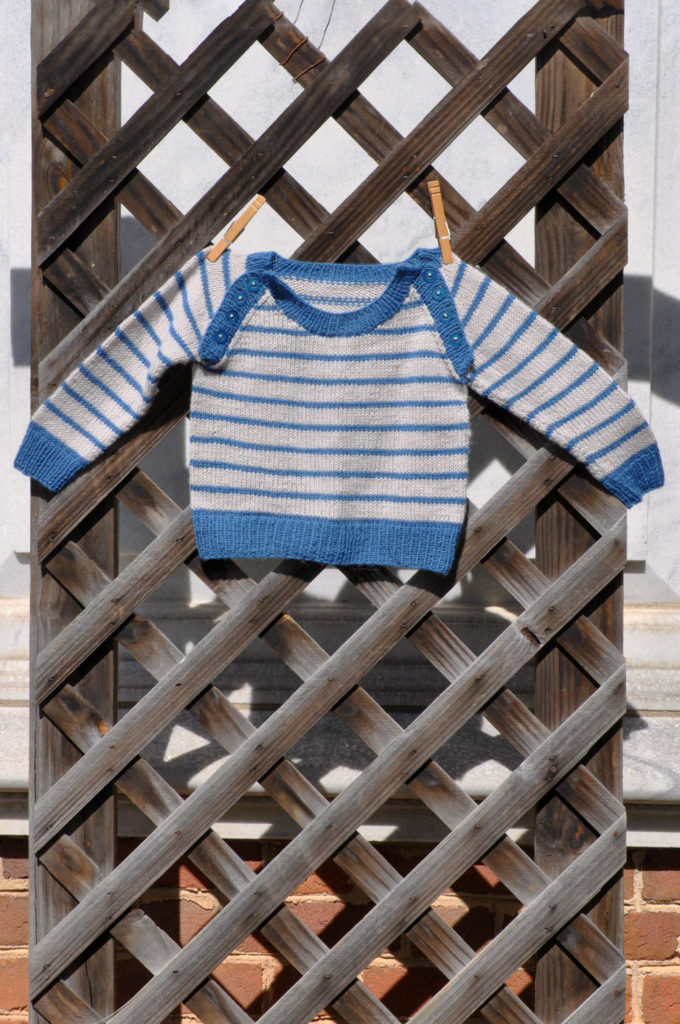
Don’t you love it when cute and practical meet? The cute: this striped sweater with its nautical feel, sized from 3 months to 4 years.
Work it in the round up to the armholes, then divide it for shaping. Near the end, you’ll add the ribbed buttonbands at the arms for a nice finish.
The practical: that buttonband! I don’t know if you’ve ever tried to get a wiggly baby’s head through a neckhole, but it’s kind of like… well… I’m just going to leave this here.
Yep, that’s about right.
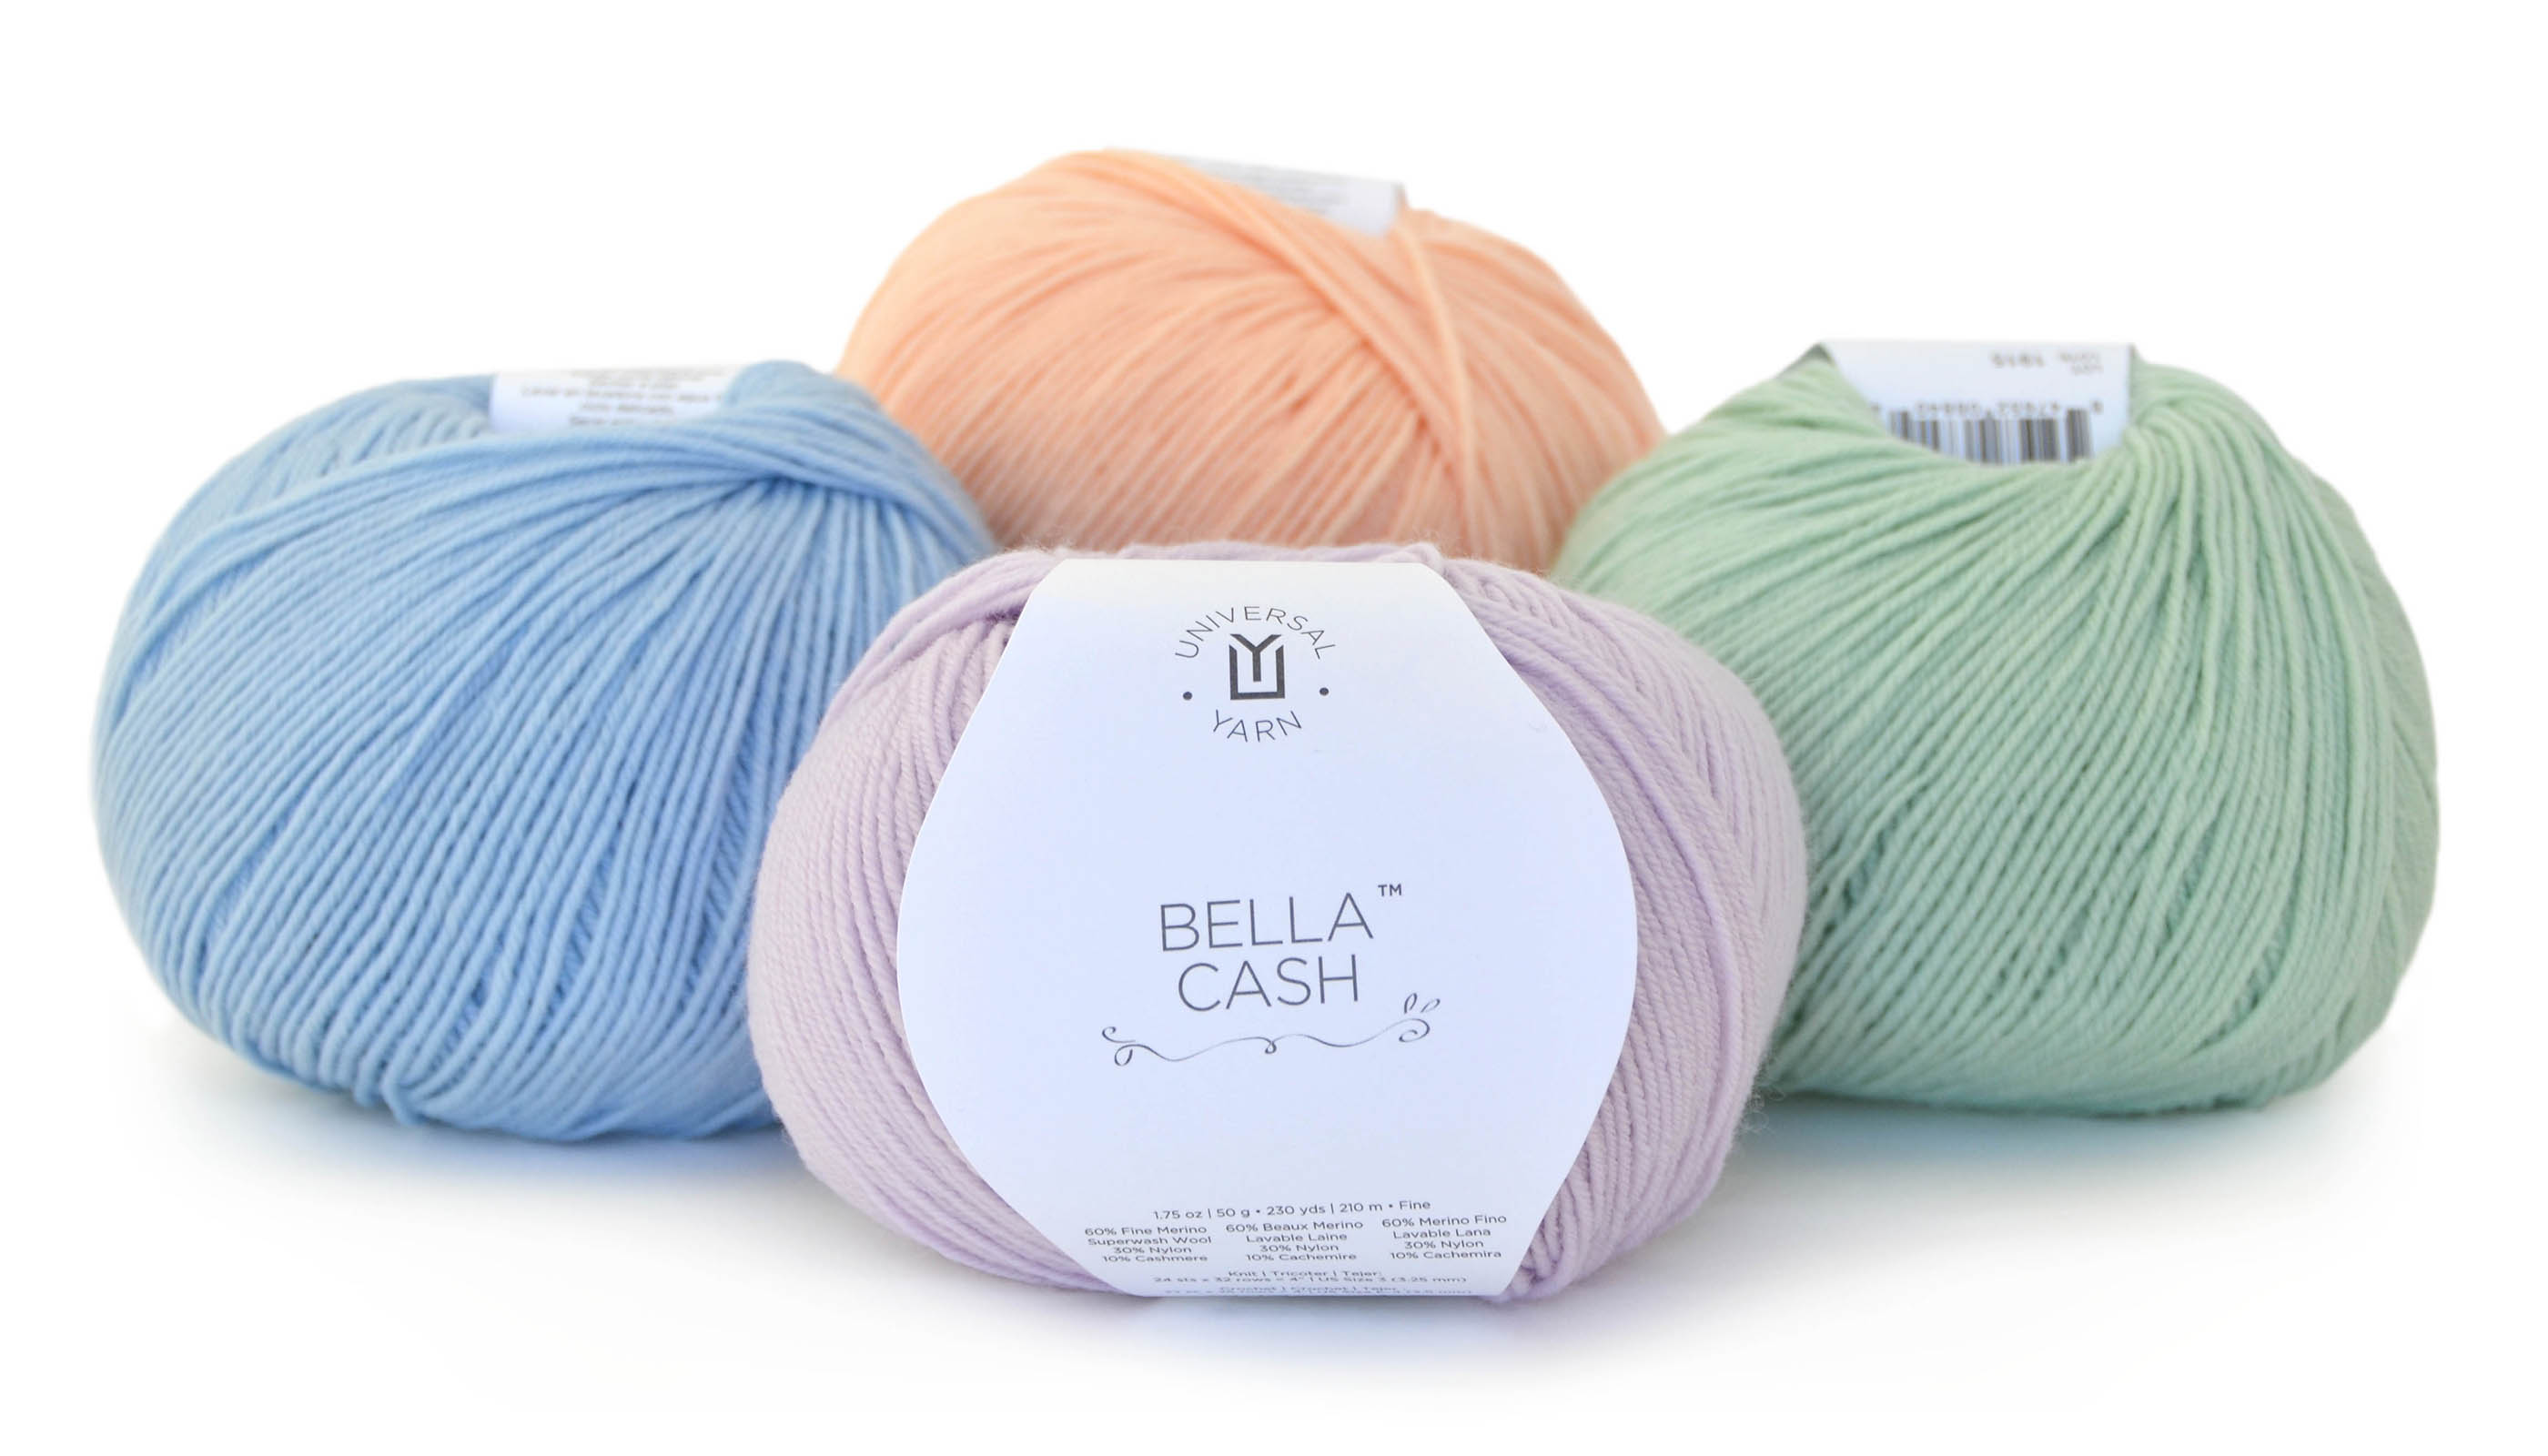
As a parent, I’m also delighted by the choice of Bella Cash for this. The yarn is machine washable, but with its cashmere content it’s also baby-shower-worthy. Its palette has a good range of pastels and other kid-friendly tones, too.
All in all, this pullover gets the knitter/mom seal of approval. Now if you’ll pardon me, I have to go watch some more cat videos. It just never gets old.