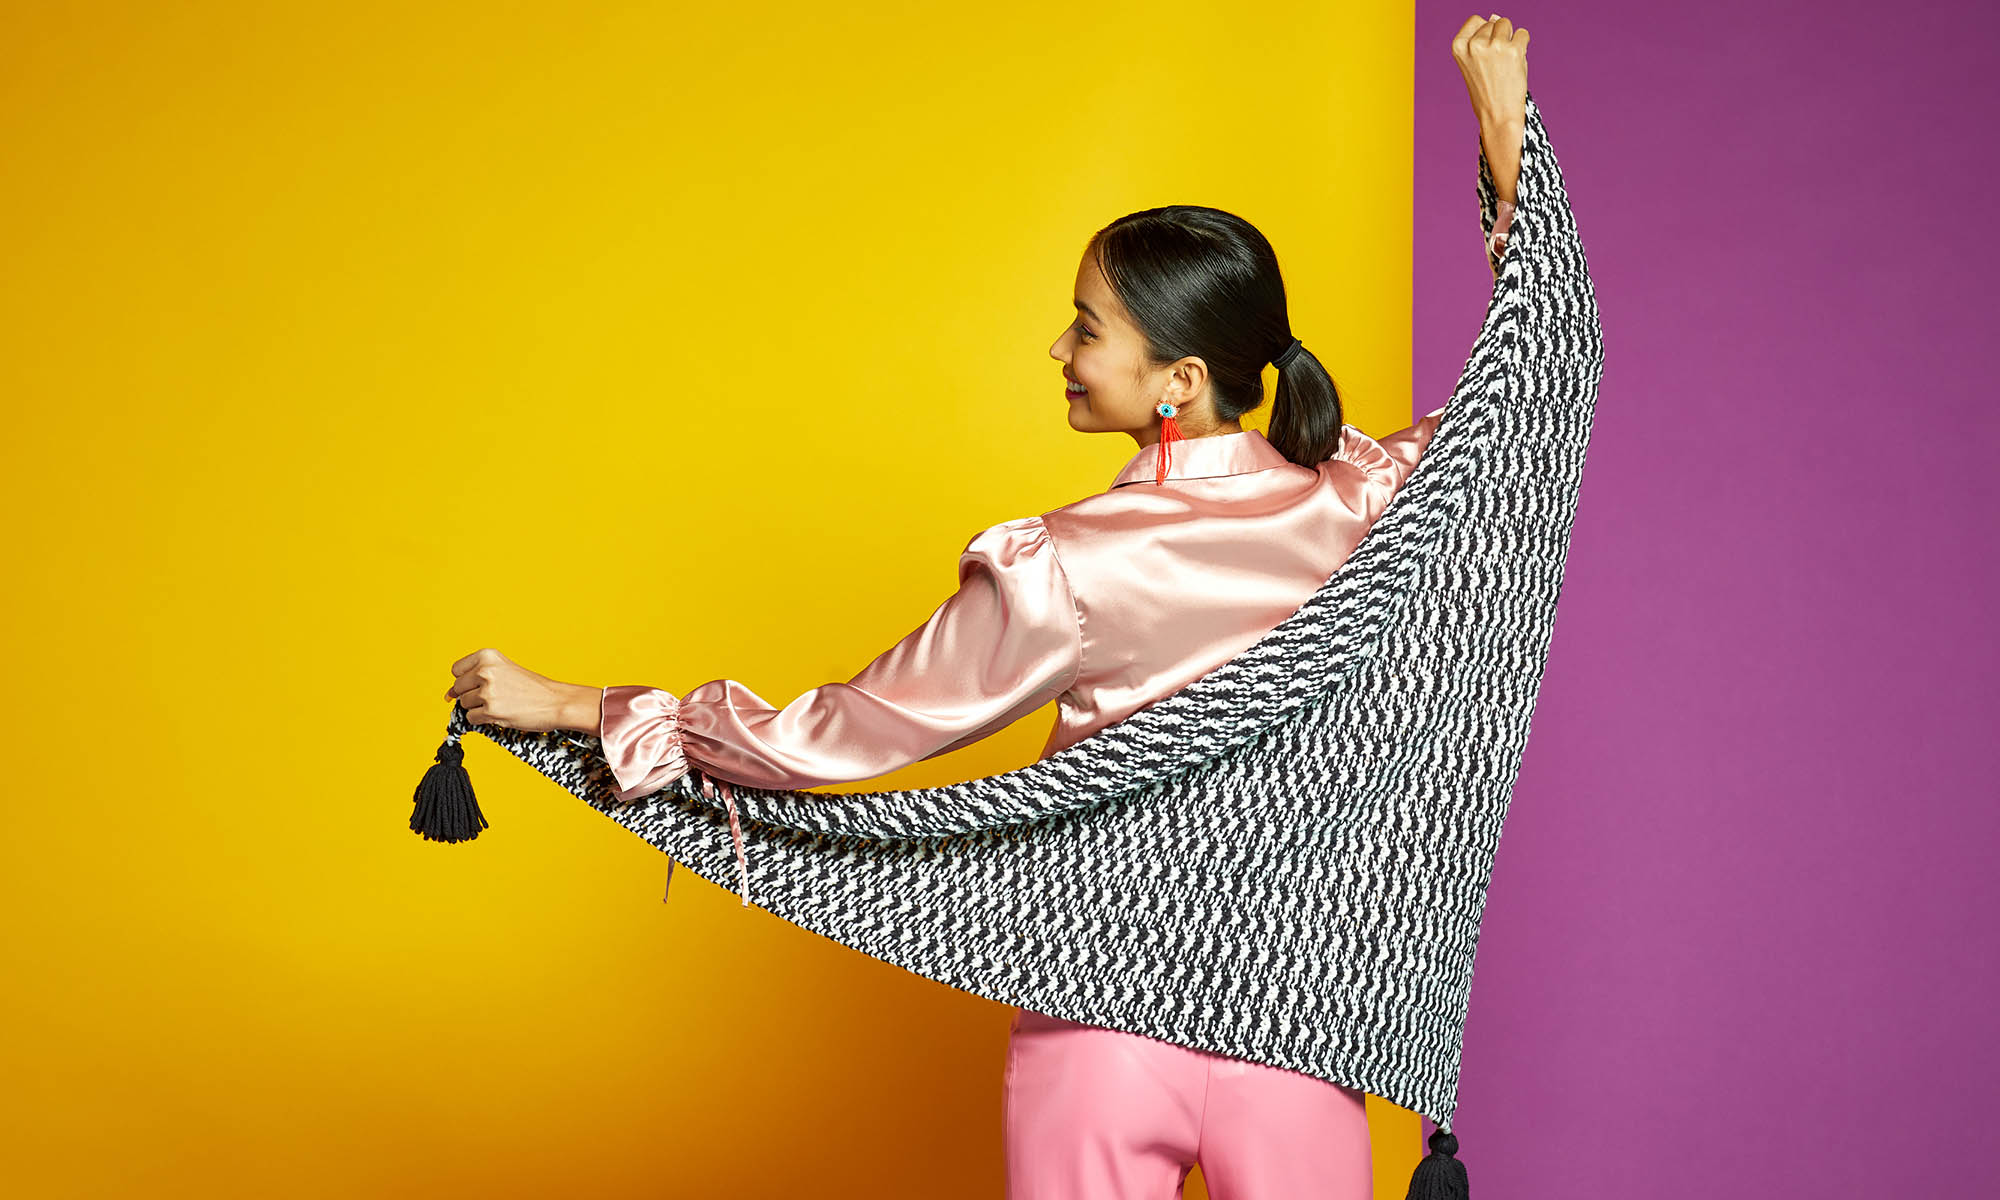
This is part 2 in a 12 part series highlighting designs from our 12 Days of Winter, Series 3 Edition.
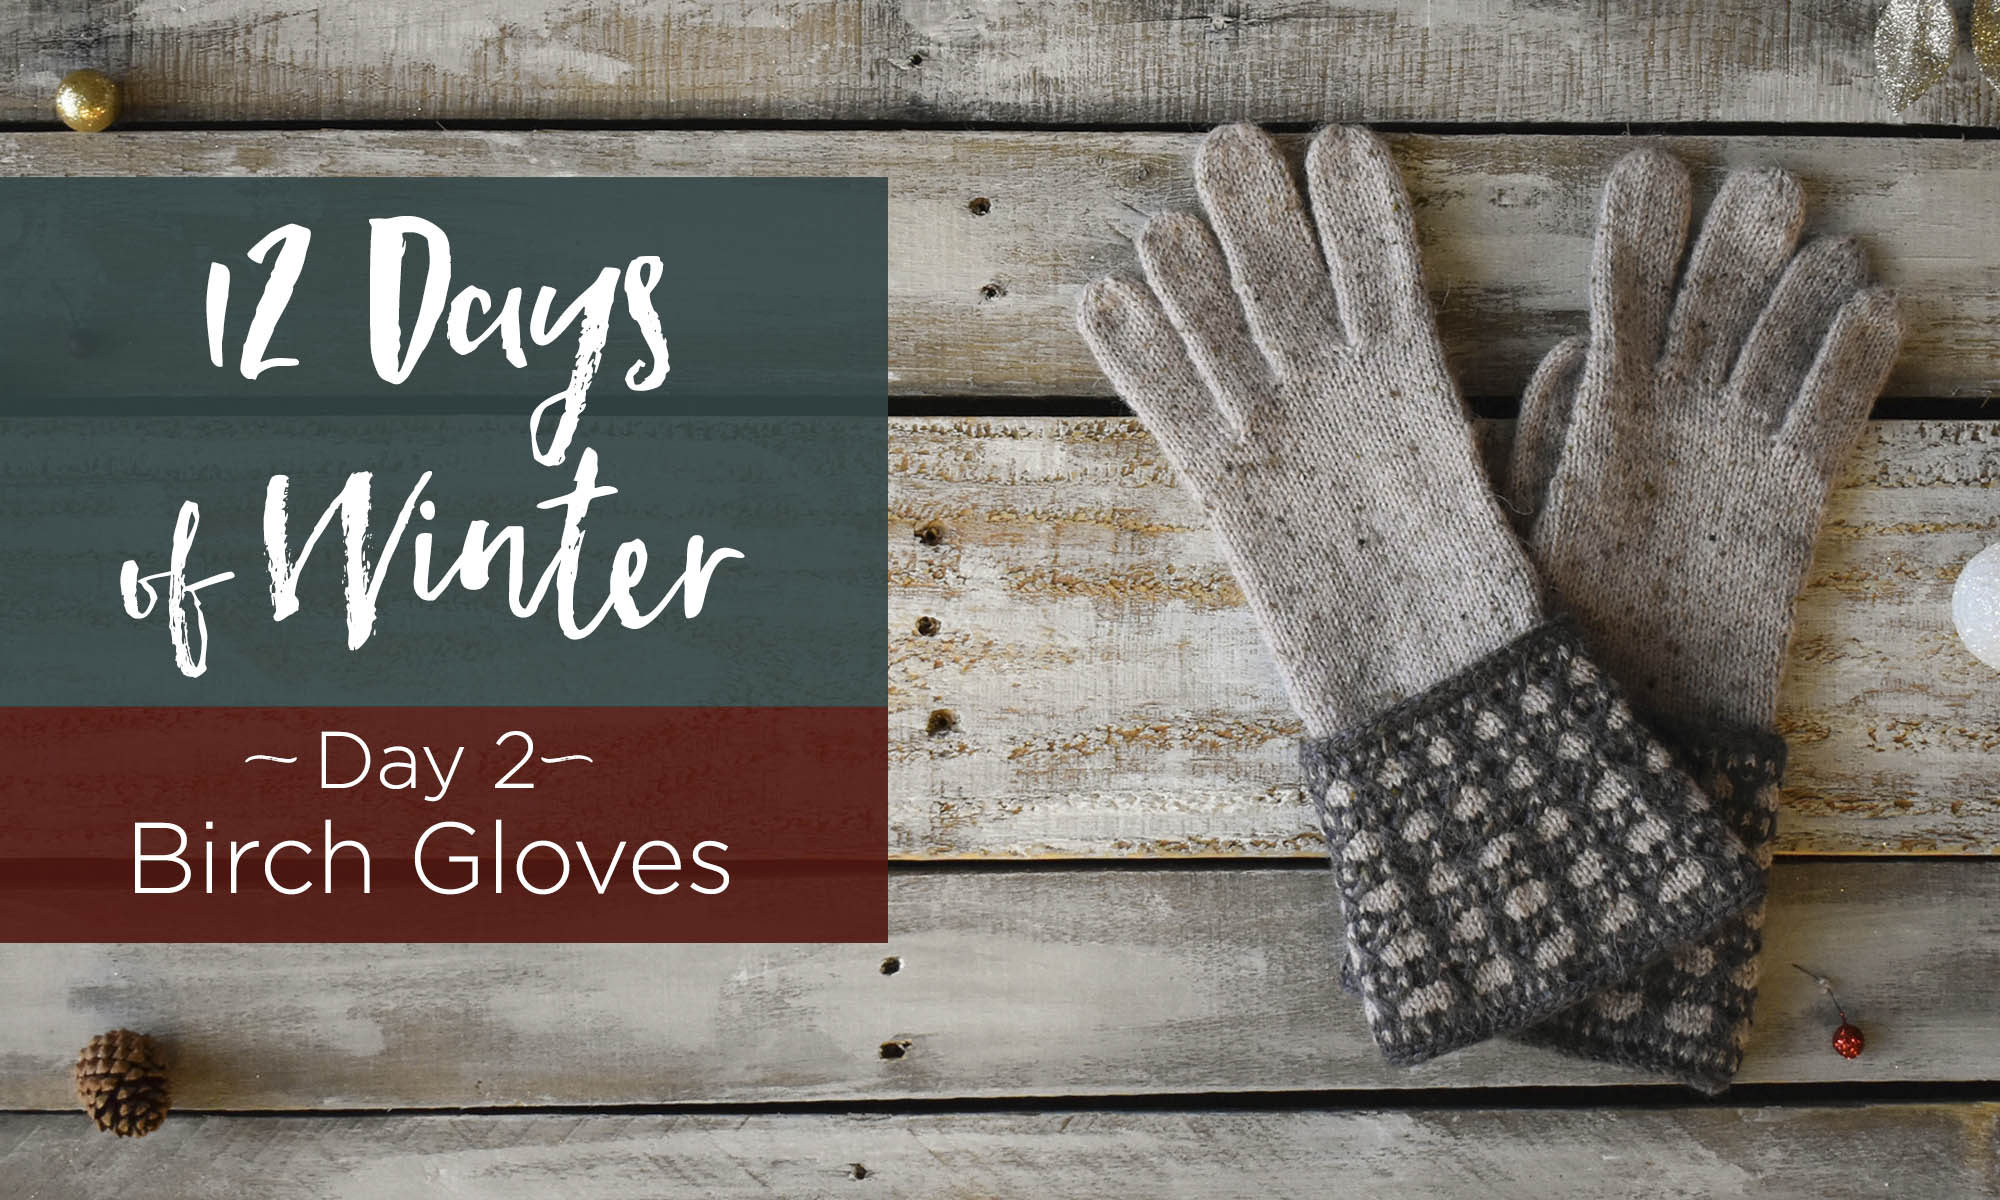
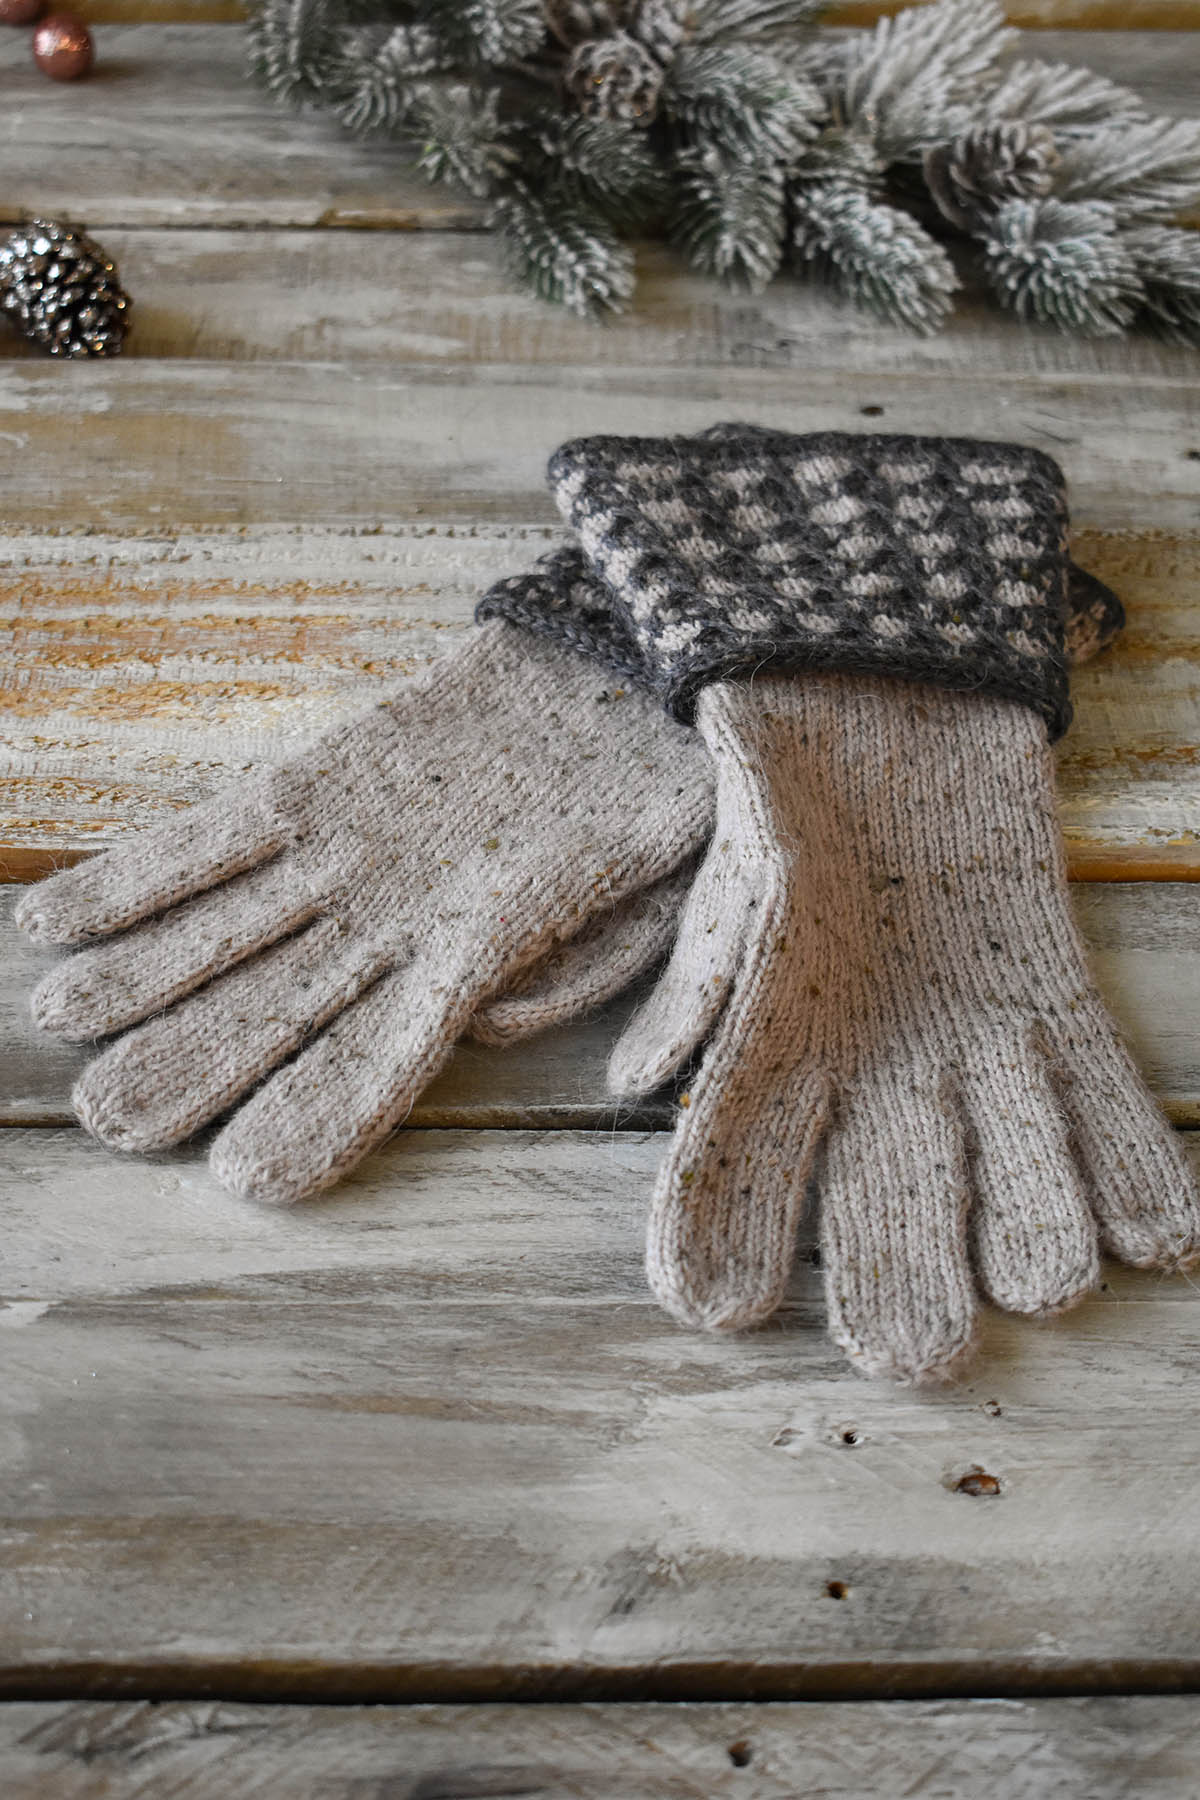
Happy Day 2 of the 12 Days of Winter Kit Collection! We know you are all eager to see what we’ve whipped up for the second day of the series, and we are thrilled to share with you – the Birch Gloves. Everyone needs a pair of elegant long gloves in their wardrobe, and hand-knitting them means these are perfect for yourself or made up as a gift for a loved one. Designed by Adrienne Larsen, the Birch Gloves are guaranteed to be cherished for seasons to come!
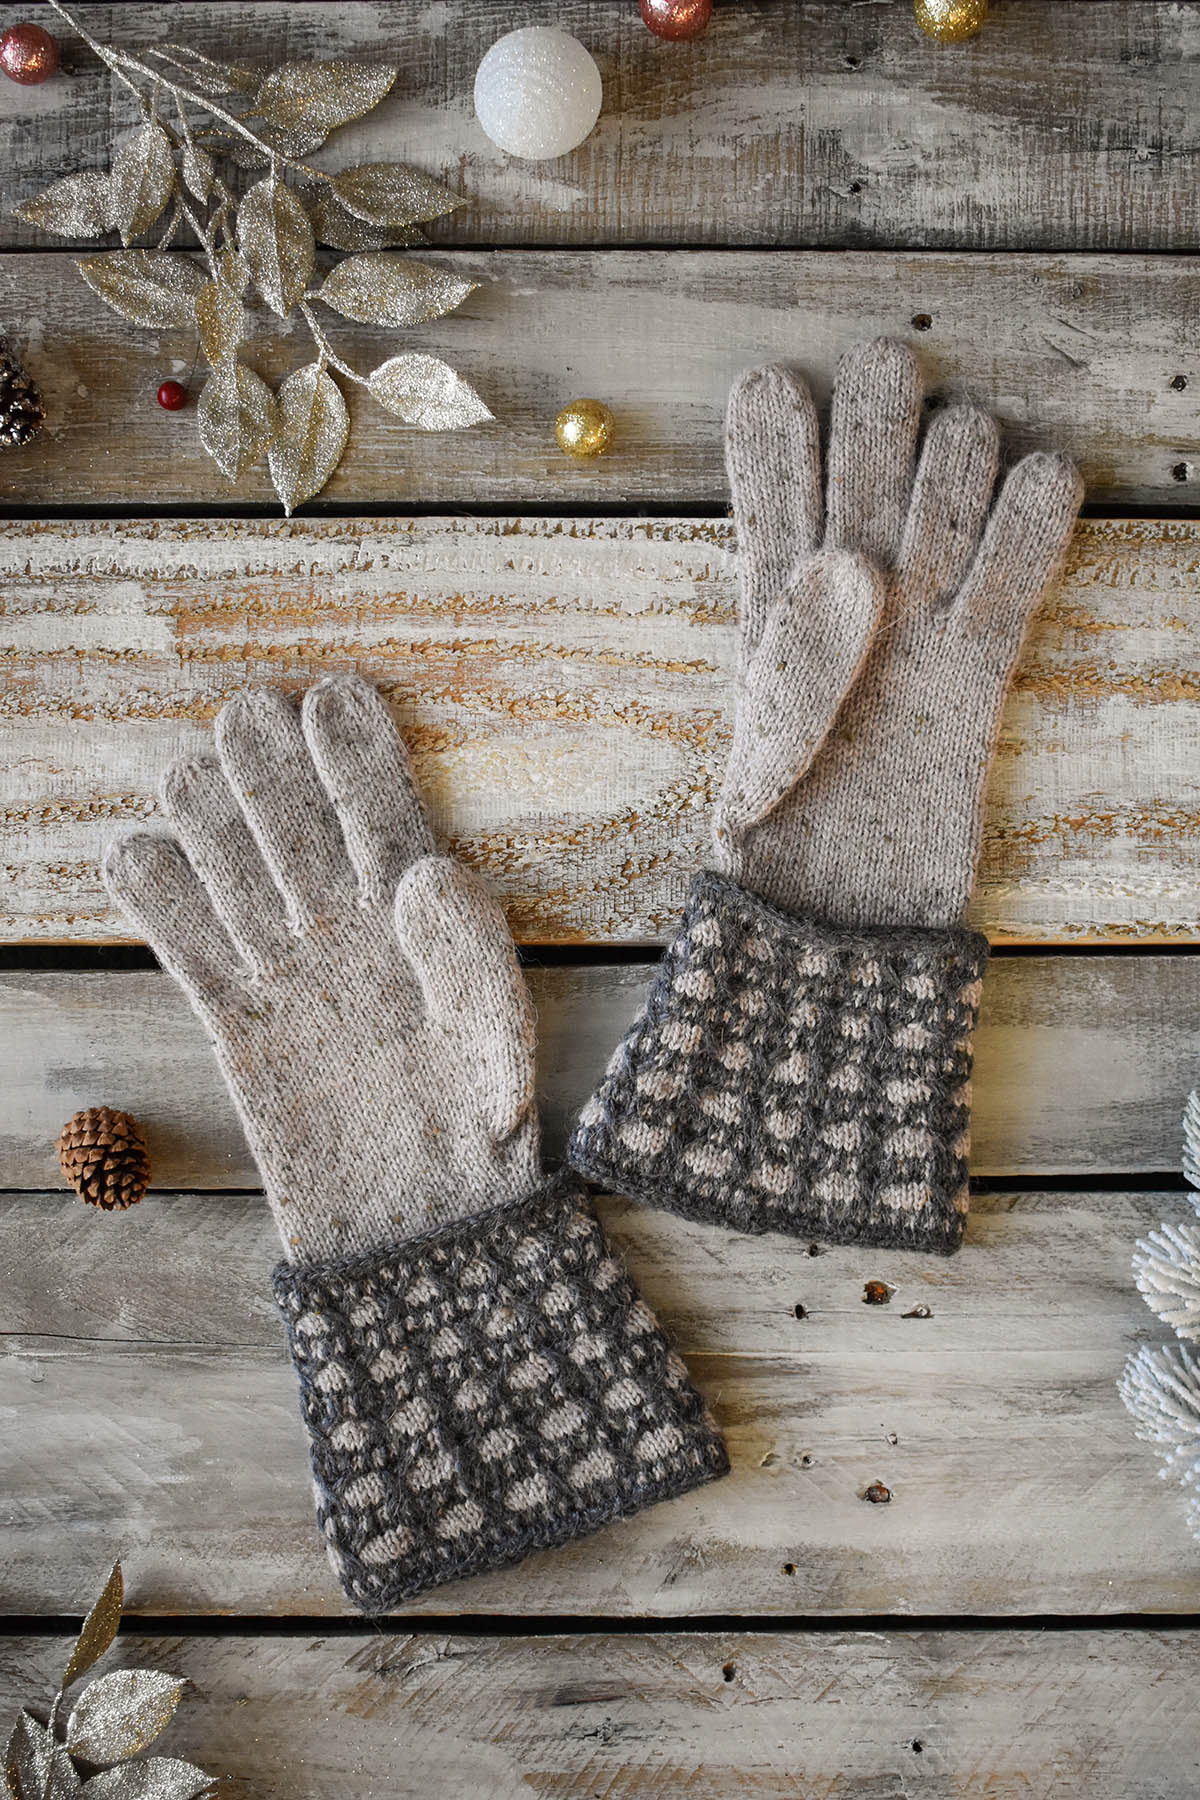
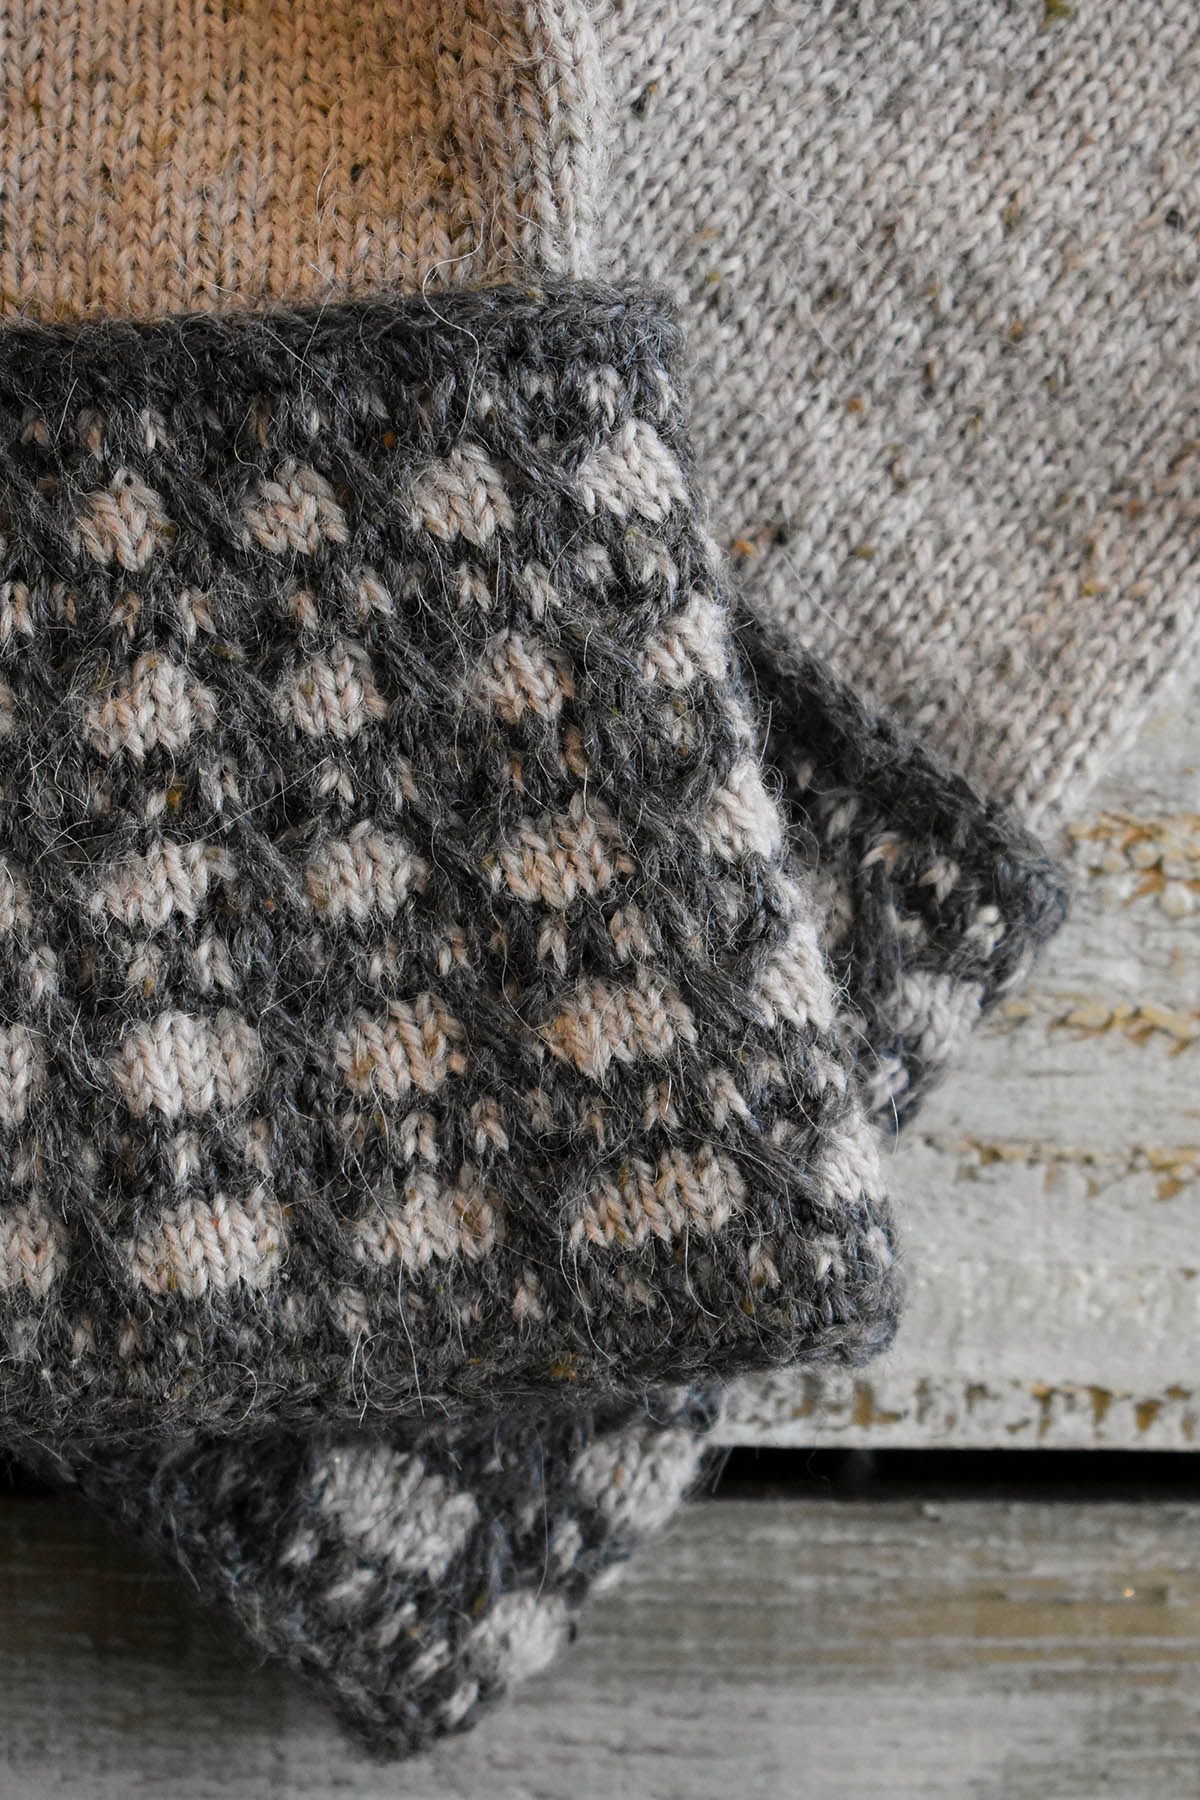
Knit in our Kingston Tweed yarn, this project features two different colors; 102 Calcite and 112 Basalt. These gloves are a gauntlet style with a flared cuff that gives a refined appearance to any outfit. Wool and alpaca fibers are blended into the yarn, meaning the Birch Gloves will also keep your fingers warm and toasty – maybe while out at a holiday market or off to see the Nutcracker ballet! The neutral colors of the yarn for this project are also certain to pair well with any sweater you choose.
The Birch Gloves feature cables and a slip stitch colorwork pattern for the cuffs, and the beautiful Kingston Tweed yarn is on serious display for the hands and fingers in stockinette stitch. Knitting the cuff and glove separately, you seam them together with an I-cord edge that adds a tidy finish. Both the cuffs and glove are knit in the round, working from the bottom up. Construction-wise, this is sure to be a fun project to take on and maybe a new method of knitting gloves to learn!
Whether you choose to knit the Birch Gloves for yourself or as a gift for someone special, these are guaranteed to be loved by everyone around. We hope you are inspired to kick back with a mug of warm Cider or Gløgg , turn on your favorite holiday film, and get to knitting these stunning gloves! You can pick up your 12 Days of Winter Kits including the Birch Gloves Kit at your local yarn shop.
Everybody in the whole cell block Was dancin’ to the Jailhouse Rock
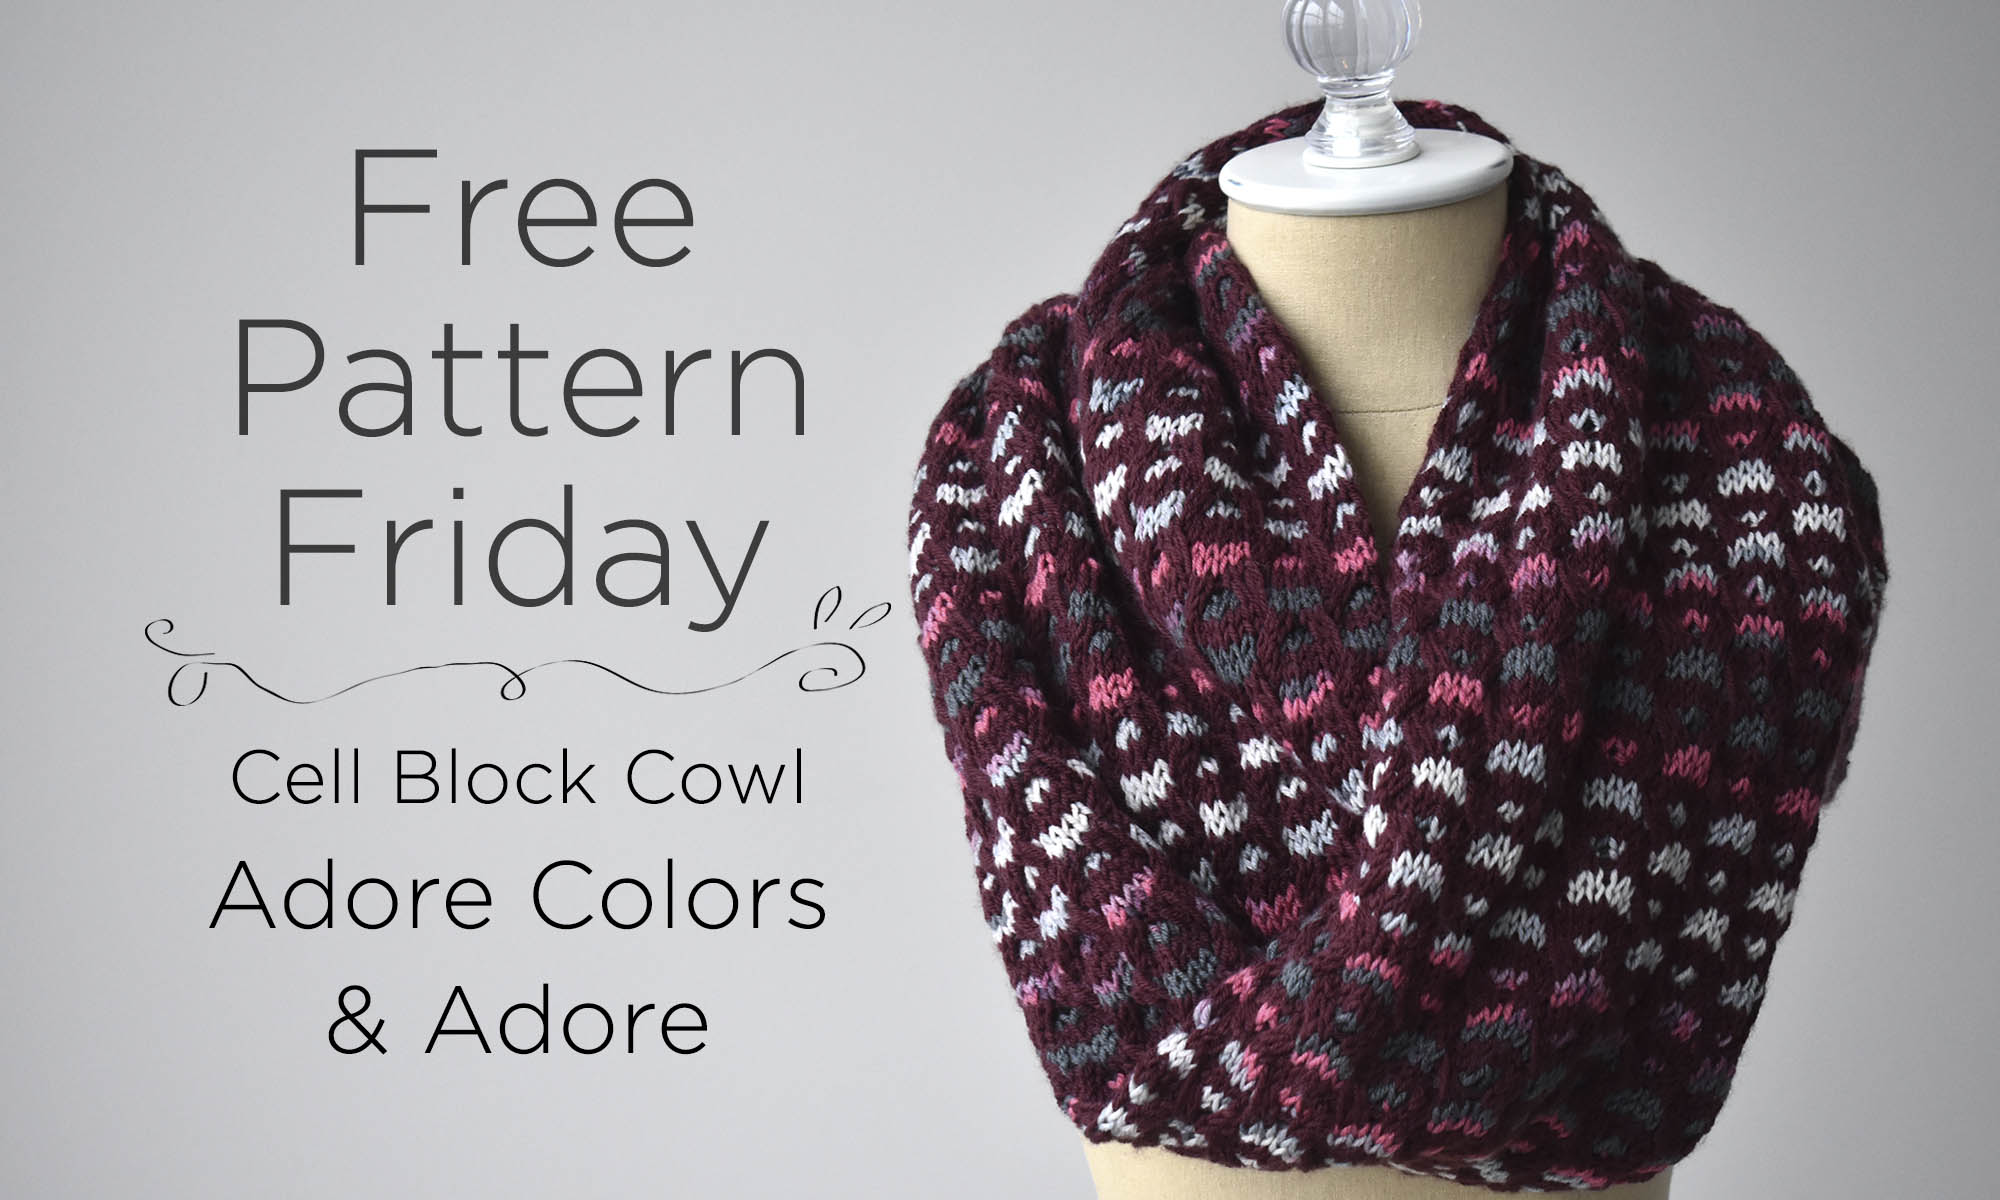
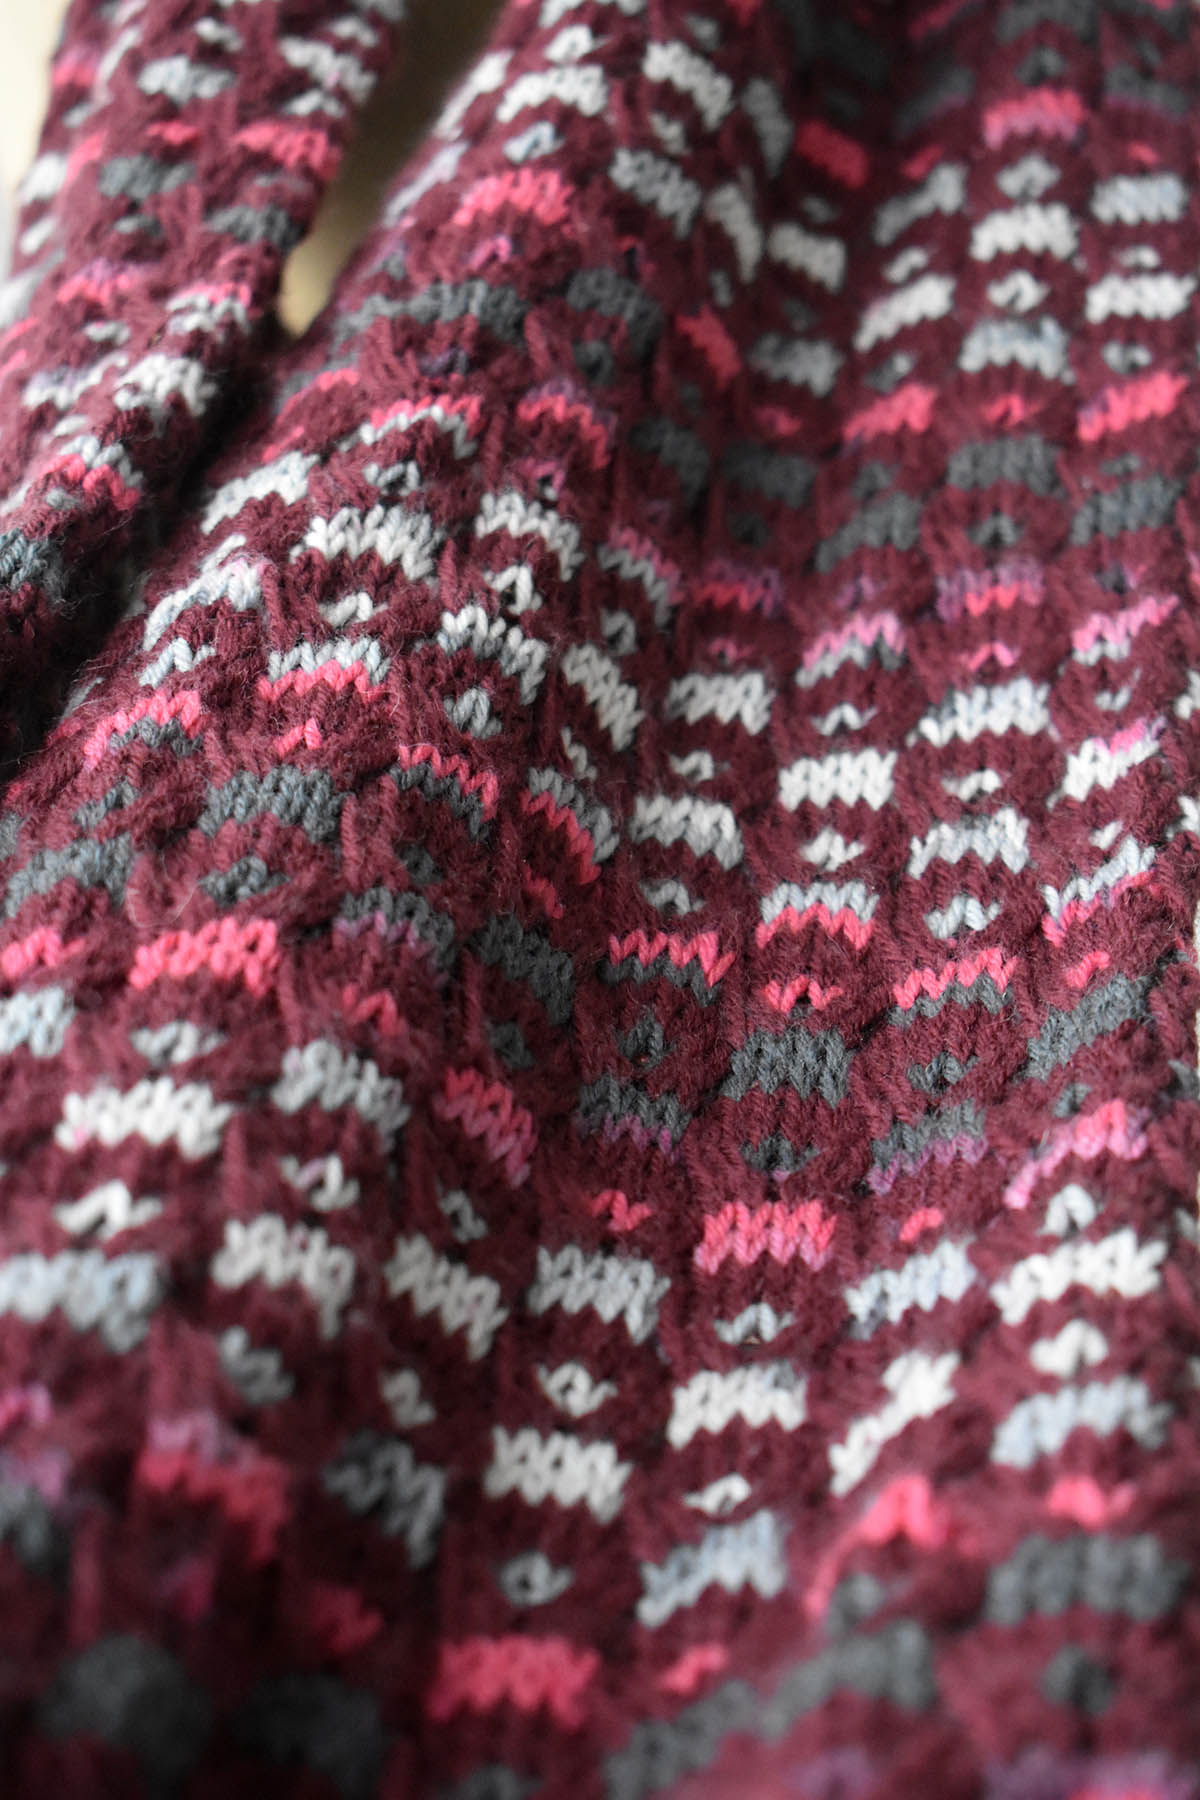
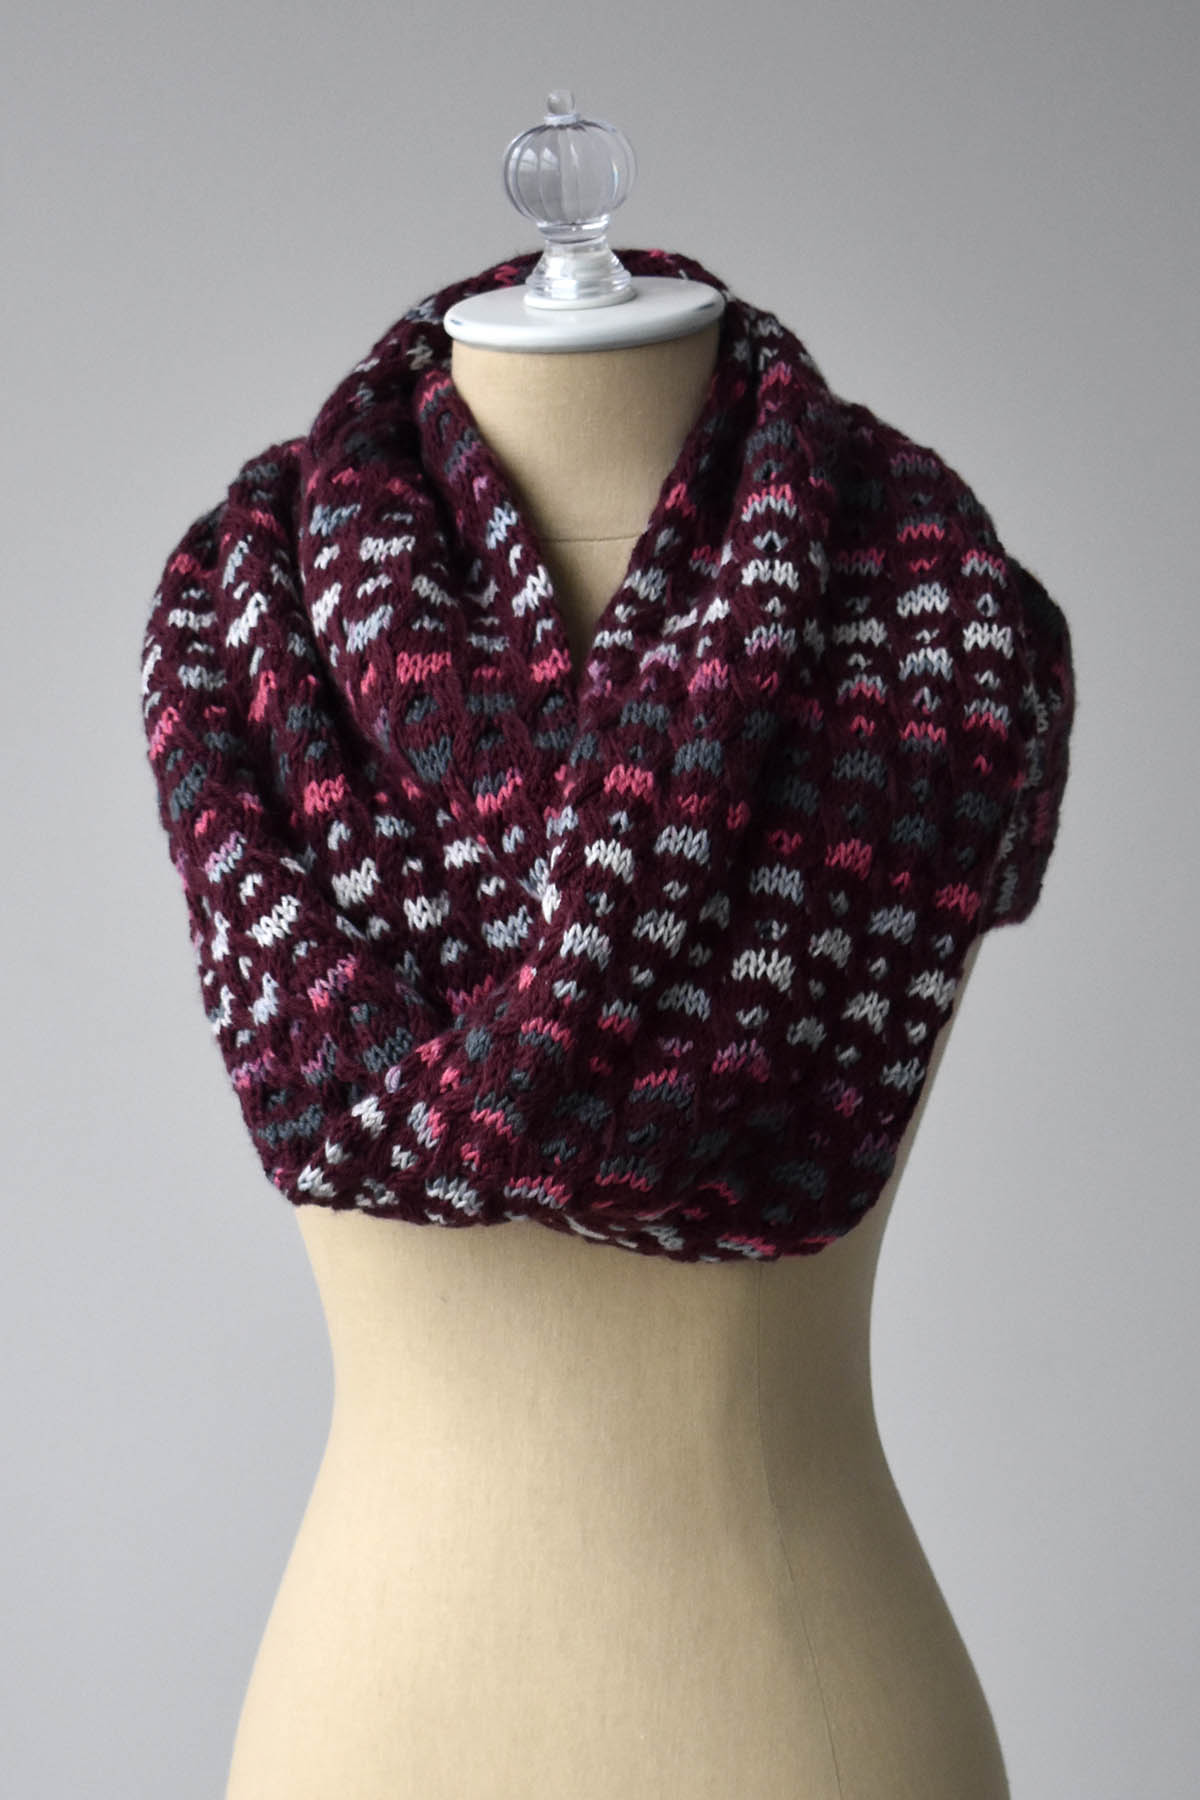
No, it’s from the way the solid Adore surrounds striped Adore Colors to create cells of color.
Although what you sing while you knit it is your business.
Slipped stitches create the pattern here – no need to work more than color at a time. Using a striped yarn as the background gives it that extra burst – Uptown DK Colors would be a good choice to use, as well.
Looks complex, but in reality, it’s very easy. Knit a tube in the round, slipping stitches where appropriate, then seam up the ends. Voila!
We hope you have a wonderful weekend. Savor your freedom before Monday rolls back around! Happy crafting!
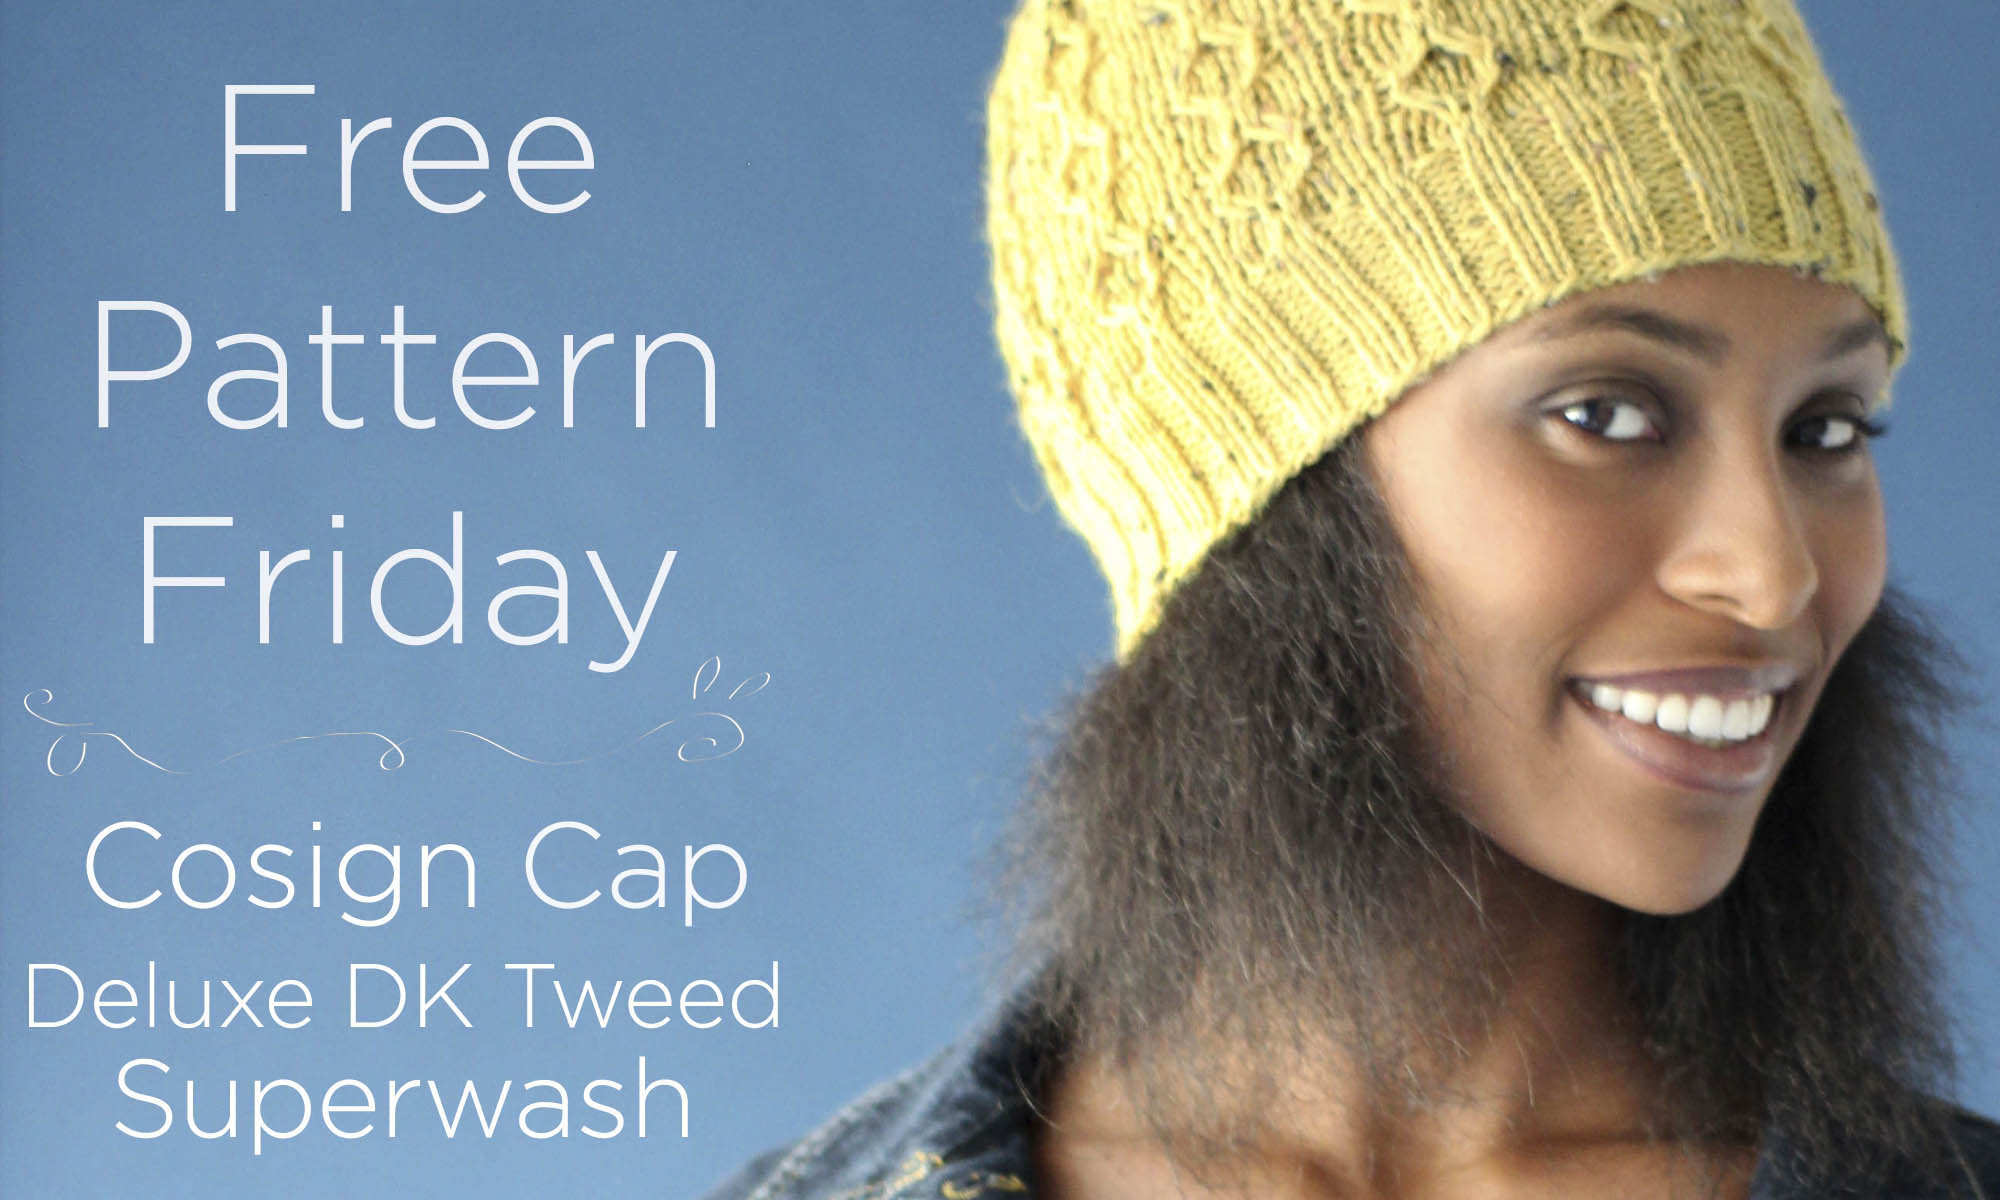
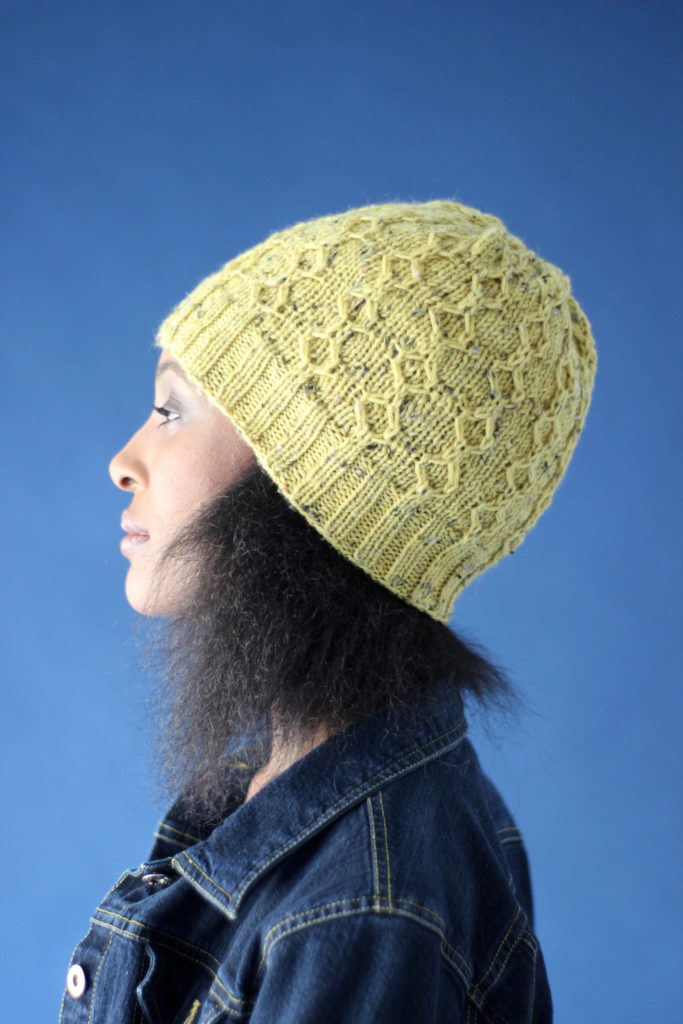
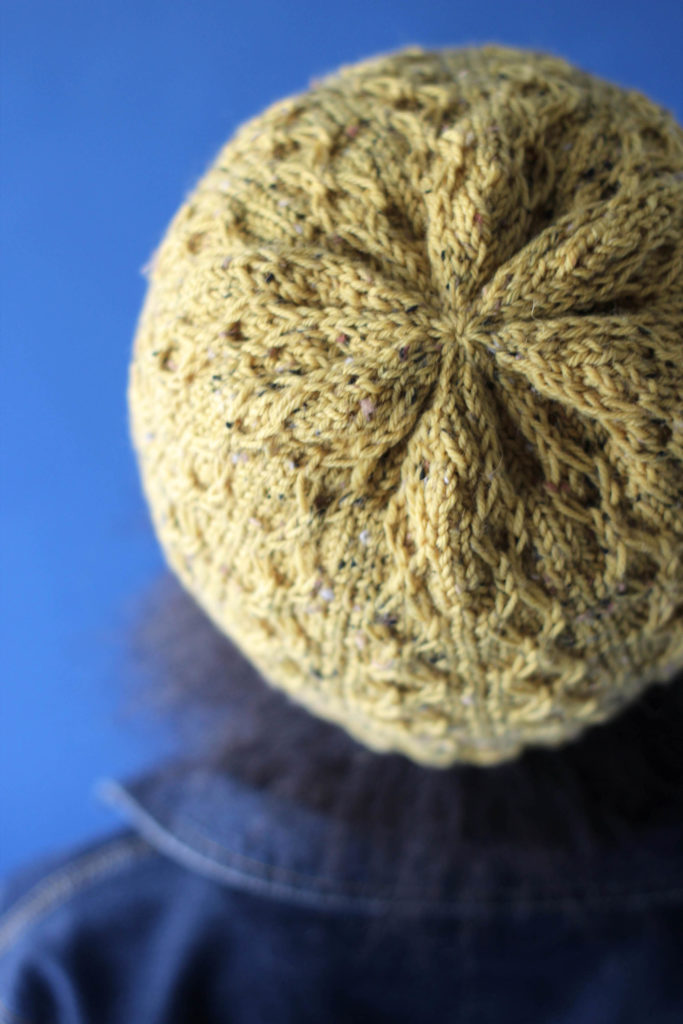
Why cosign? Two reasons. 1, when I first saw this hat it was sideways, and the patterning looked like little cosine waves. 2, someone mentioned that they loved this pattern, and I immediately cosigned on that.
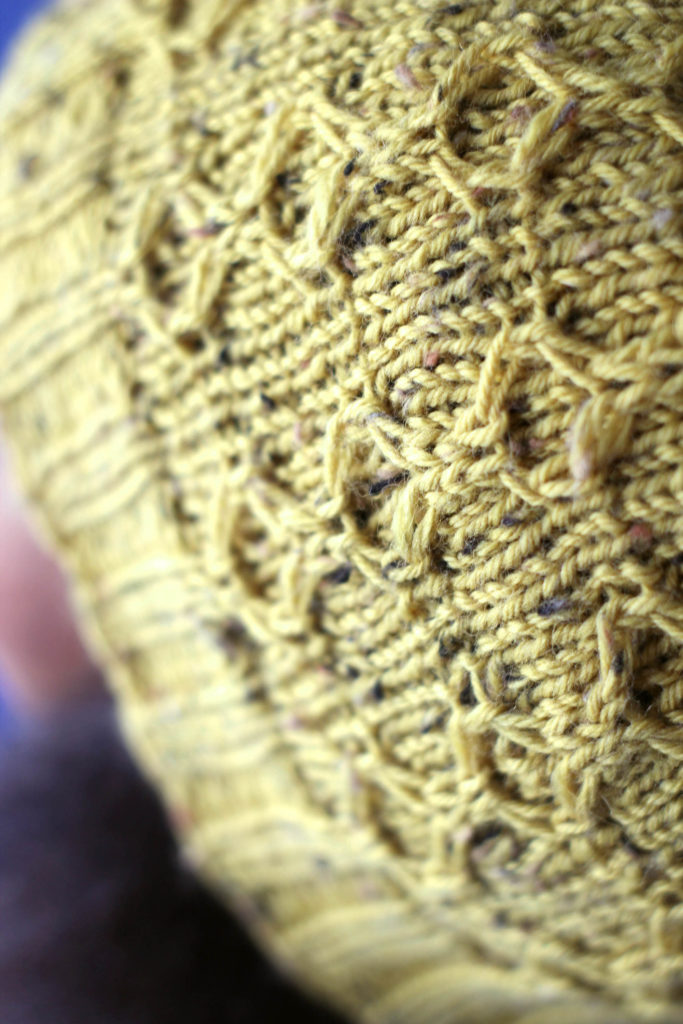
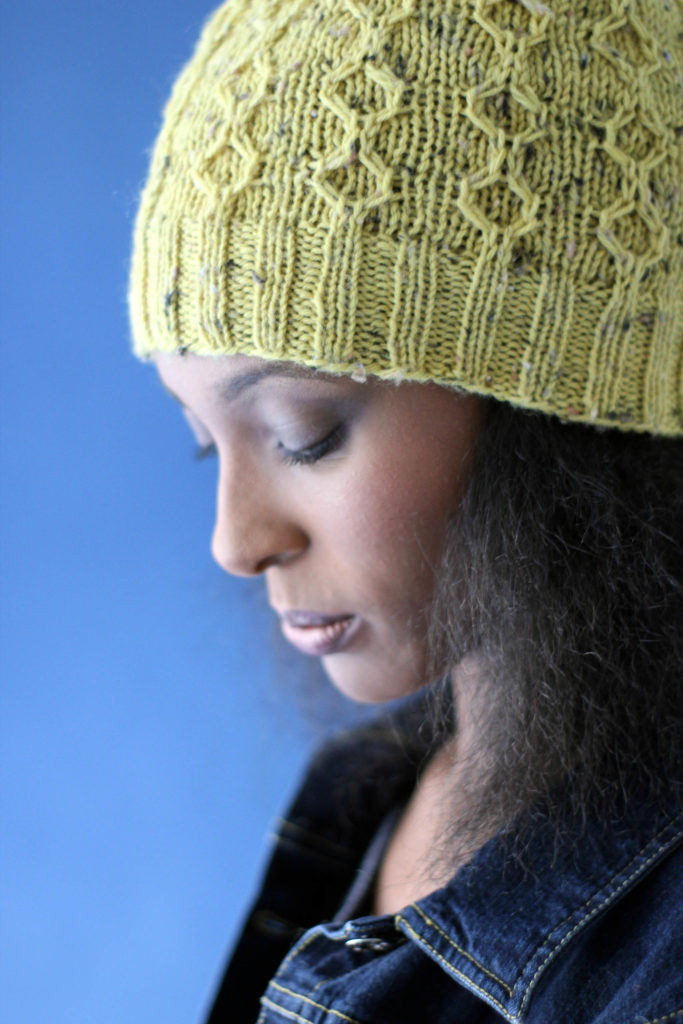
The pattern is written and charted, and contains a variation on cabling you might not have seen before – the right slipped cross and left slipped cross. You’re using a cable needle as with traditional cables, but instead of knitting both stitches, there’s a slip involved.
It creates an elongated stitch that slants left or right. Neat effect, and a useful tool to add to your cabling repertoire.
The crown keeps using slipped stitches without cabling, to continue the elongated stitches into the gathered top. A lovely finish to a charming topper, made even more charming by the little nubs in the Deluxe DK Tweed Superwash. Only one ball required.
We hope you have a wonderful weekend, full of beauty and warmth.
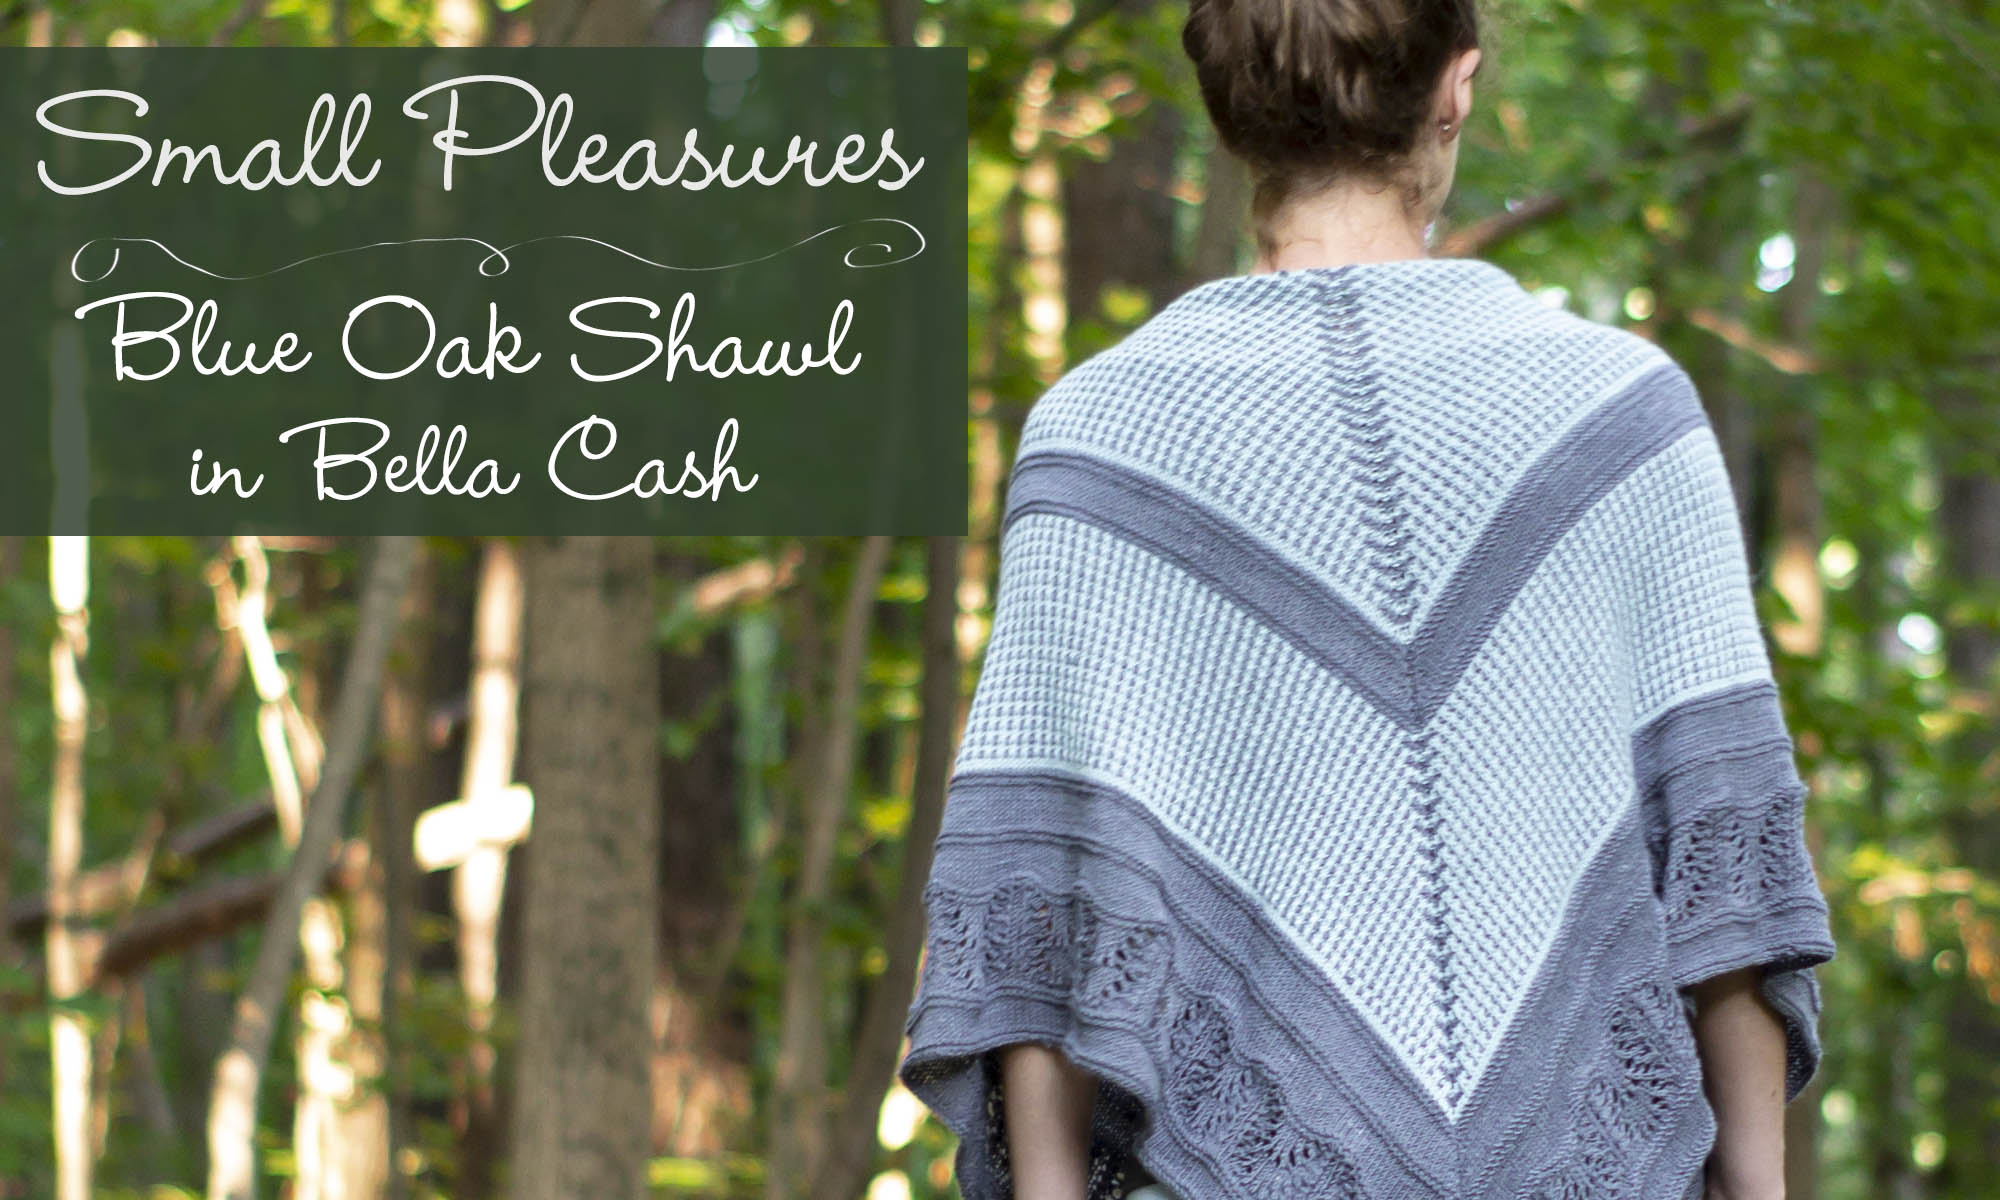
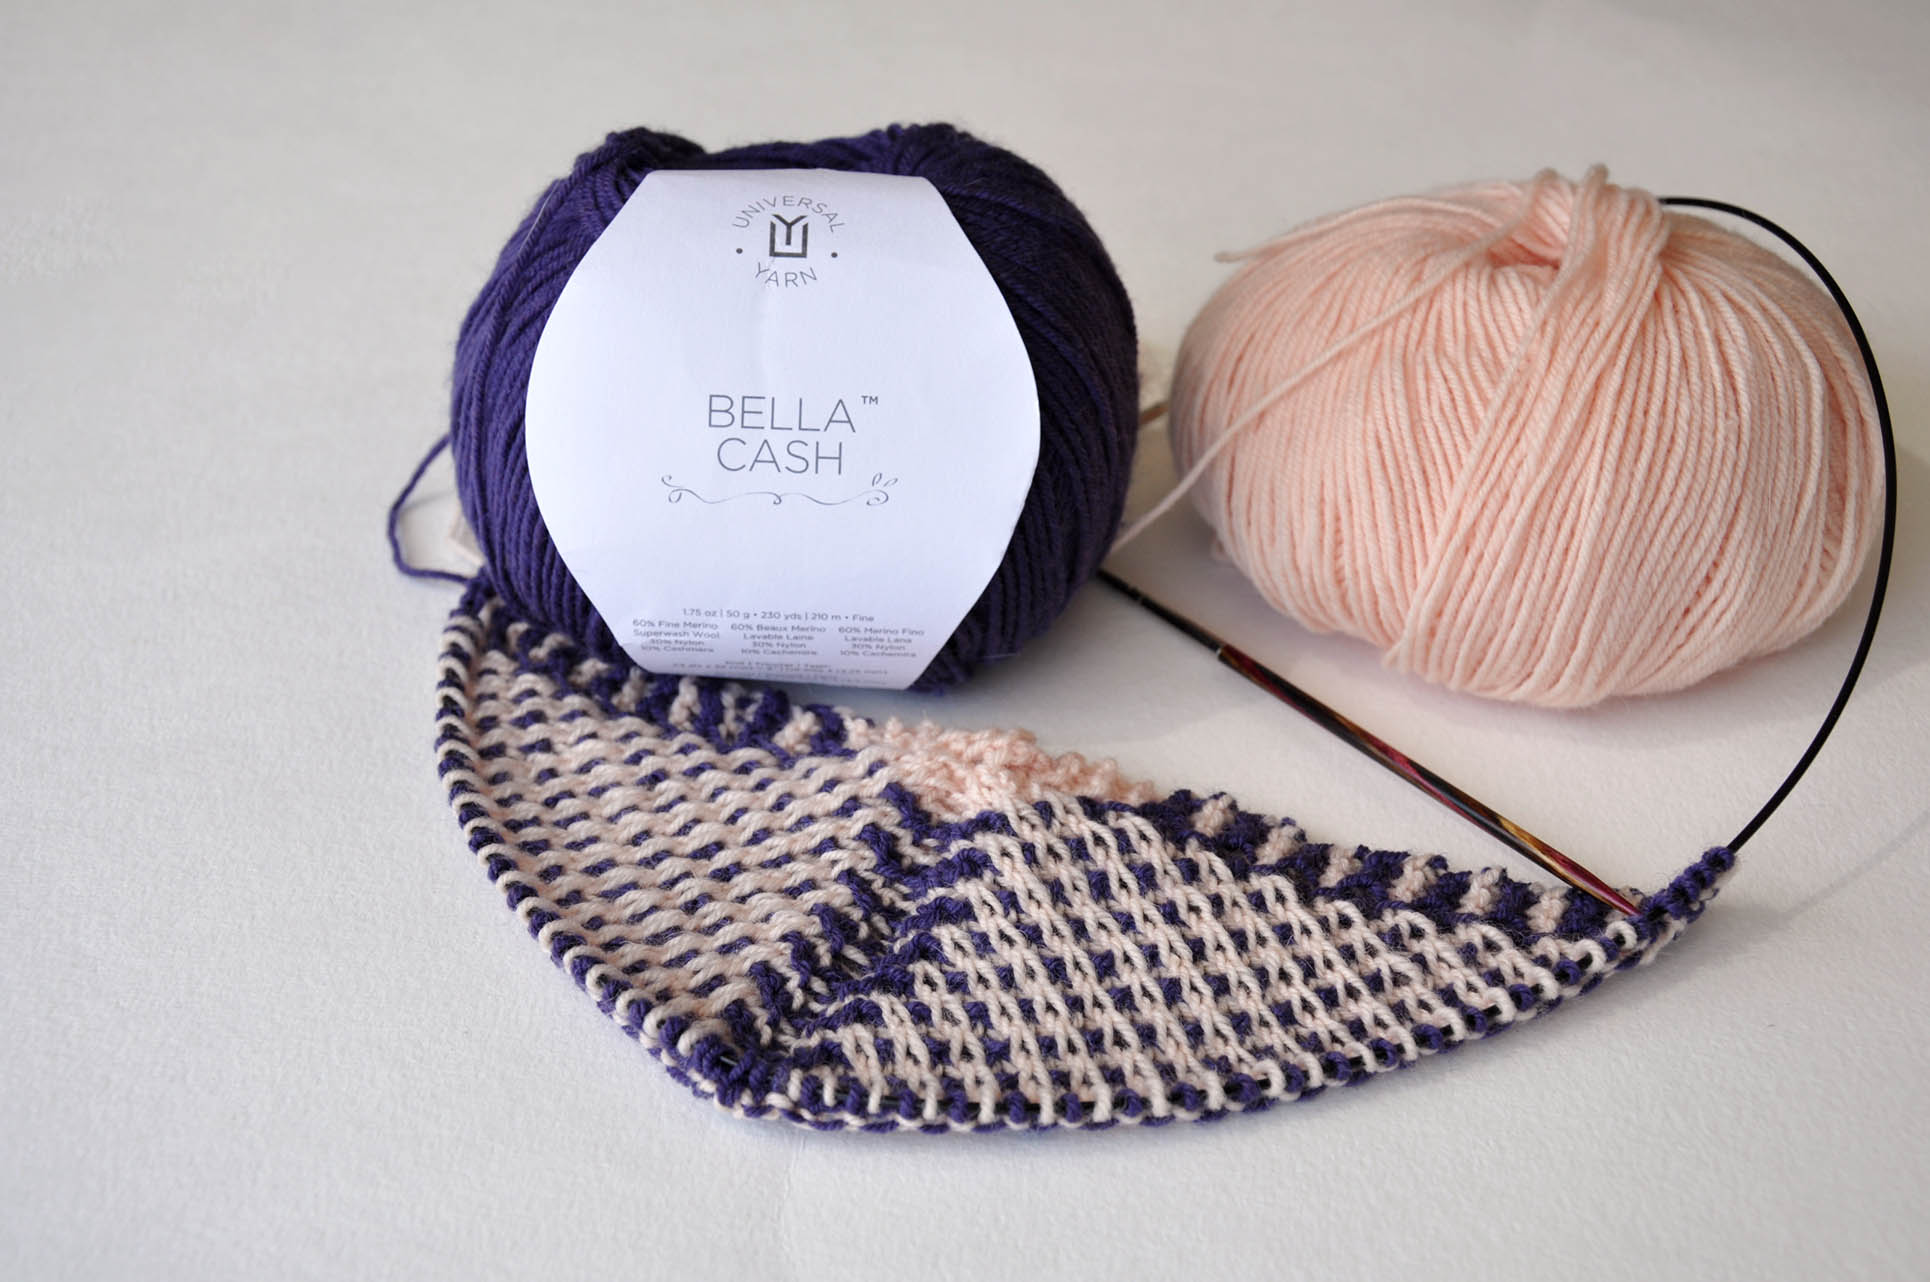
A couple of weeks ago, I very briefly mentioned our new e-book, Small Pleasures. It’s a set of designs using what is fast becoming a favorite, Bella Cash.
This collection is perfect for me, because I am all about the accessories. I like instant gratification, and I’m always paranoid that I’m going to get to the end of a sweater and I will have miscalculated somewhere and it won’t fit. Not that this has ever happened to me. Ahem.
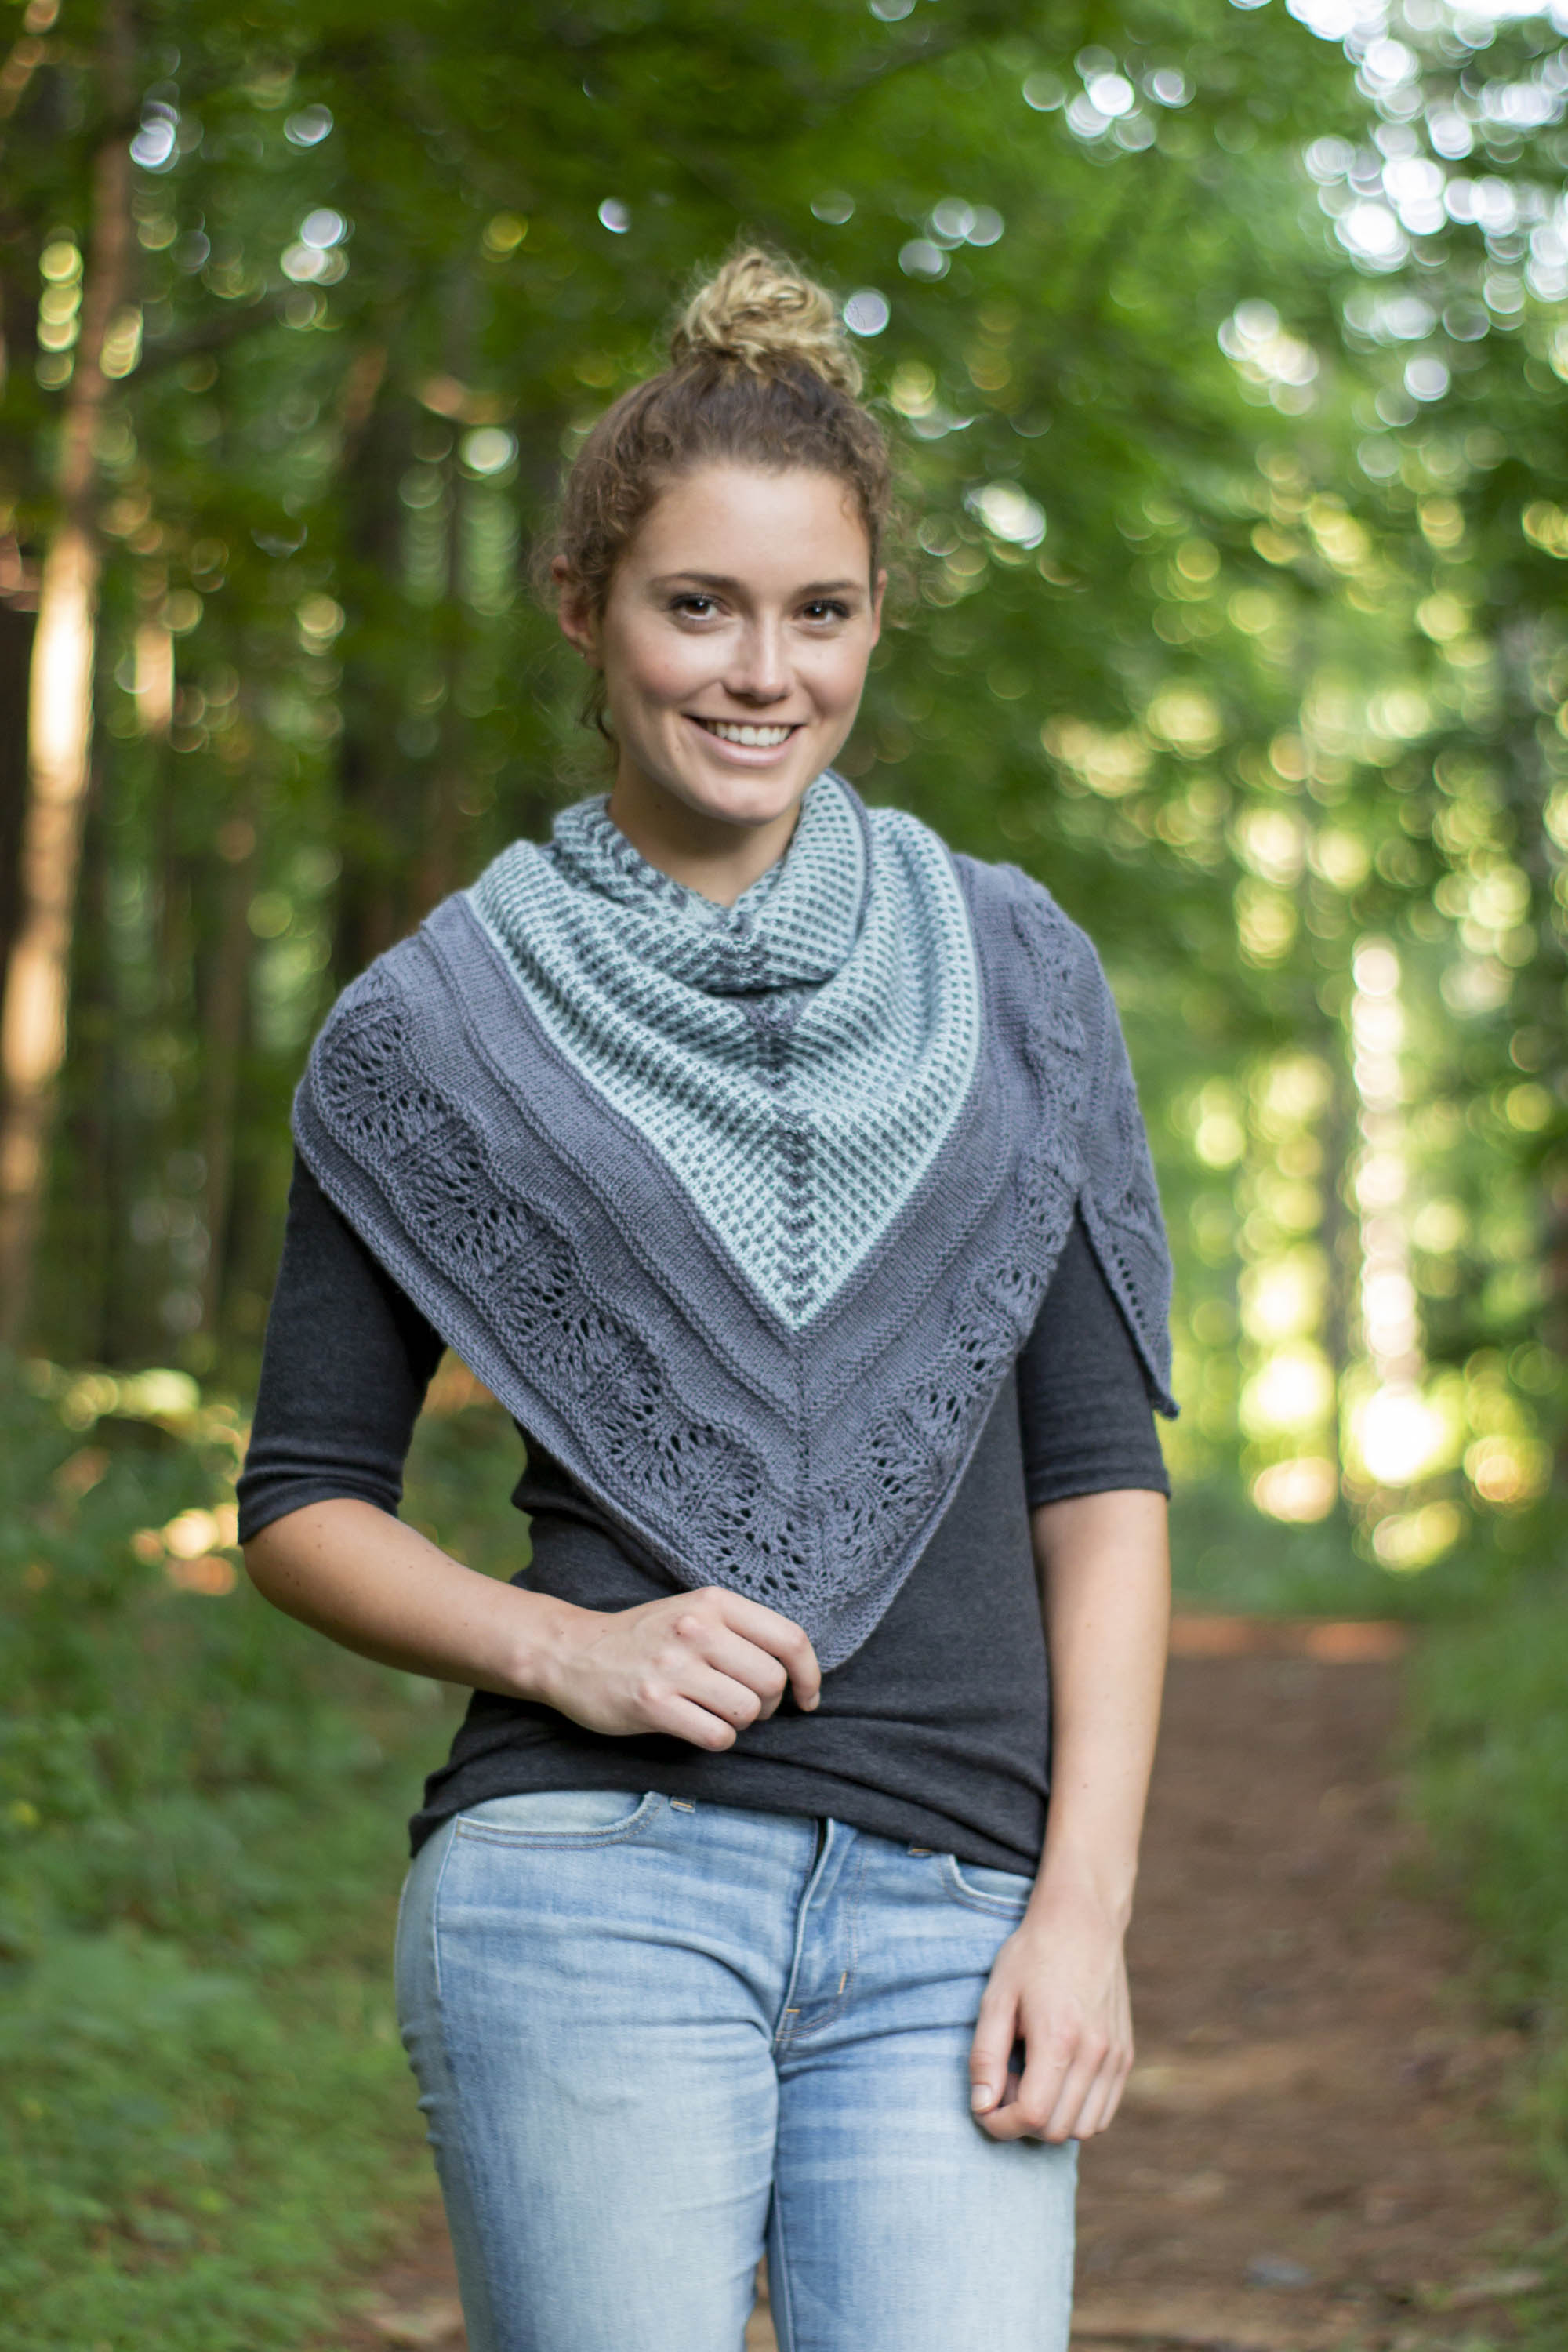
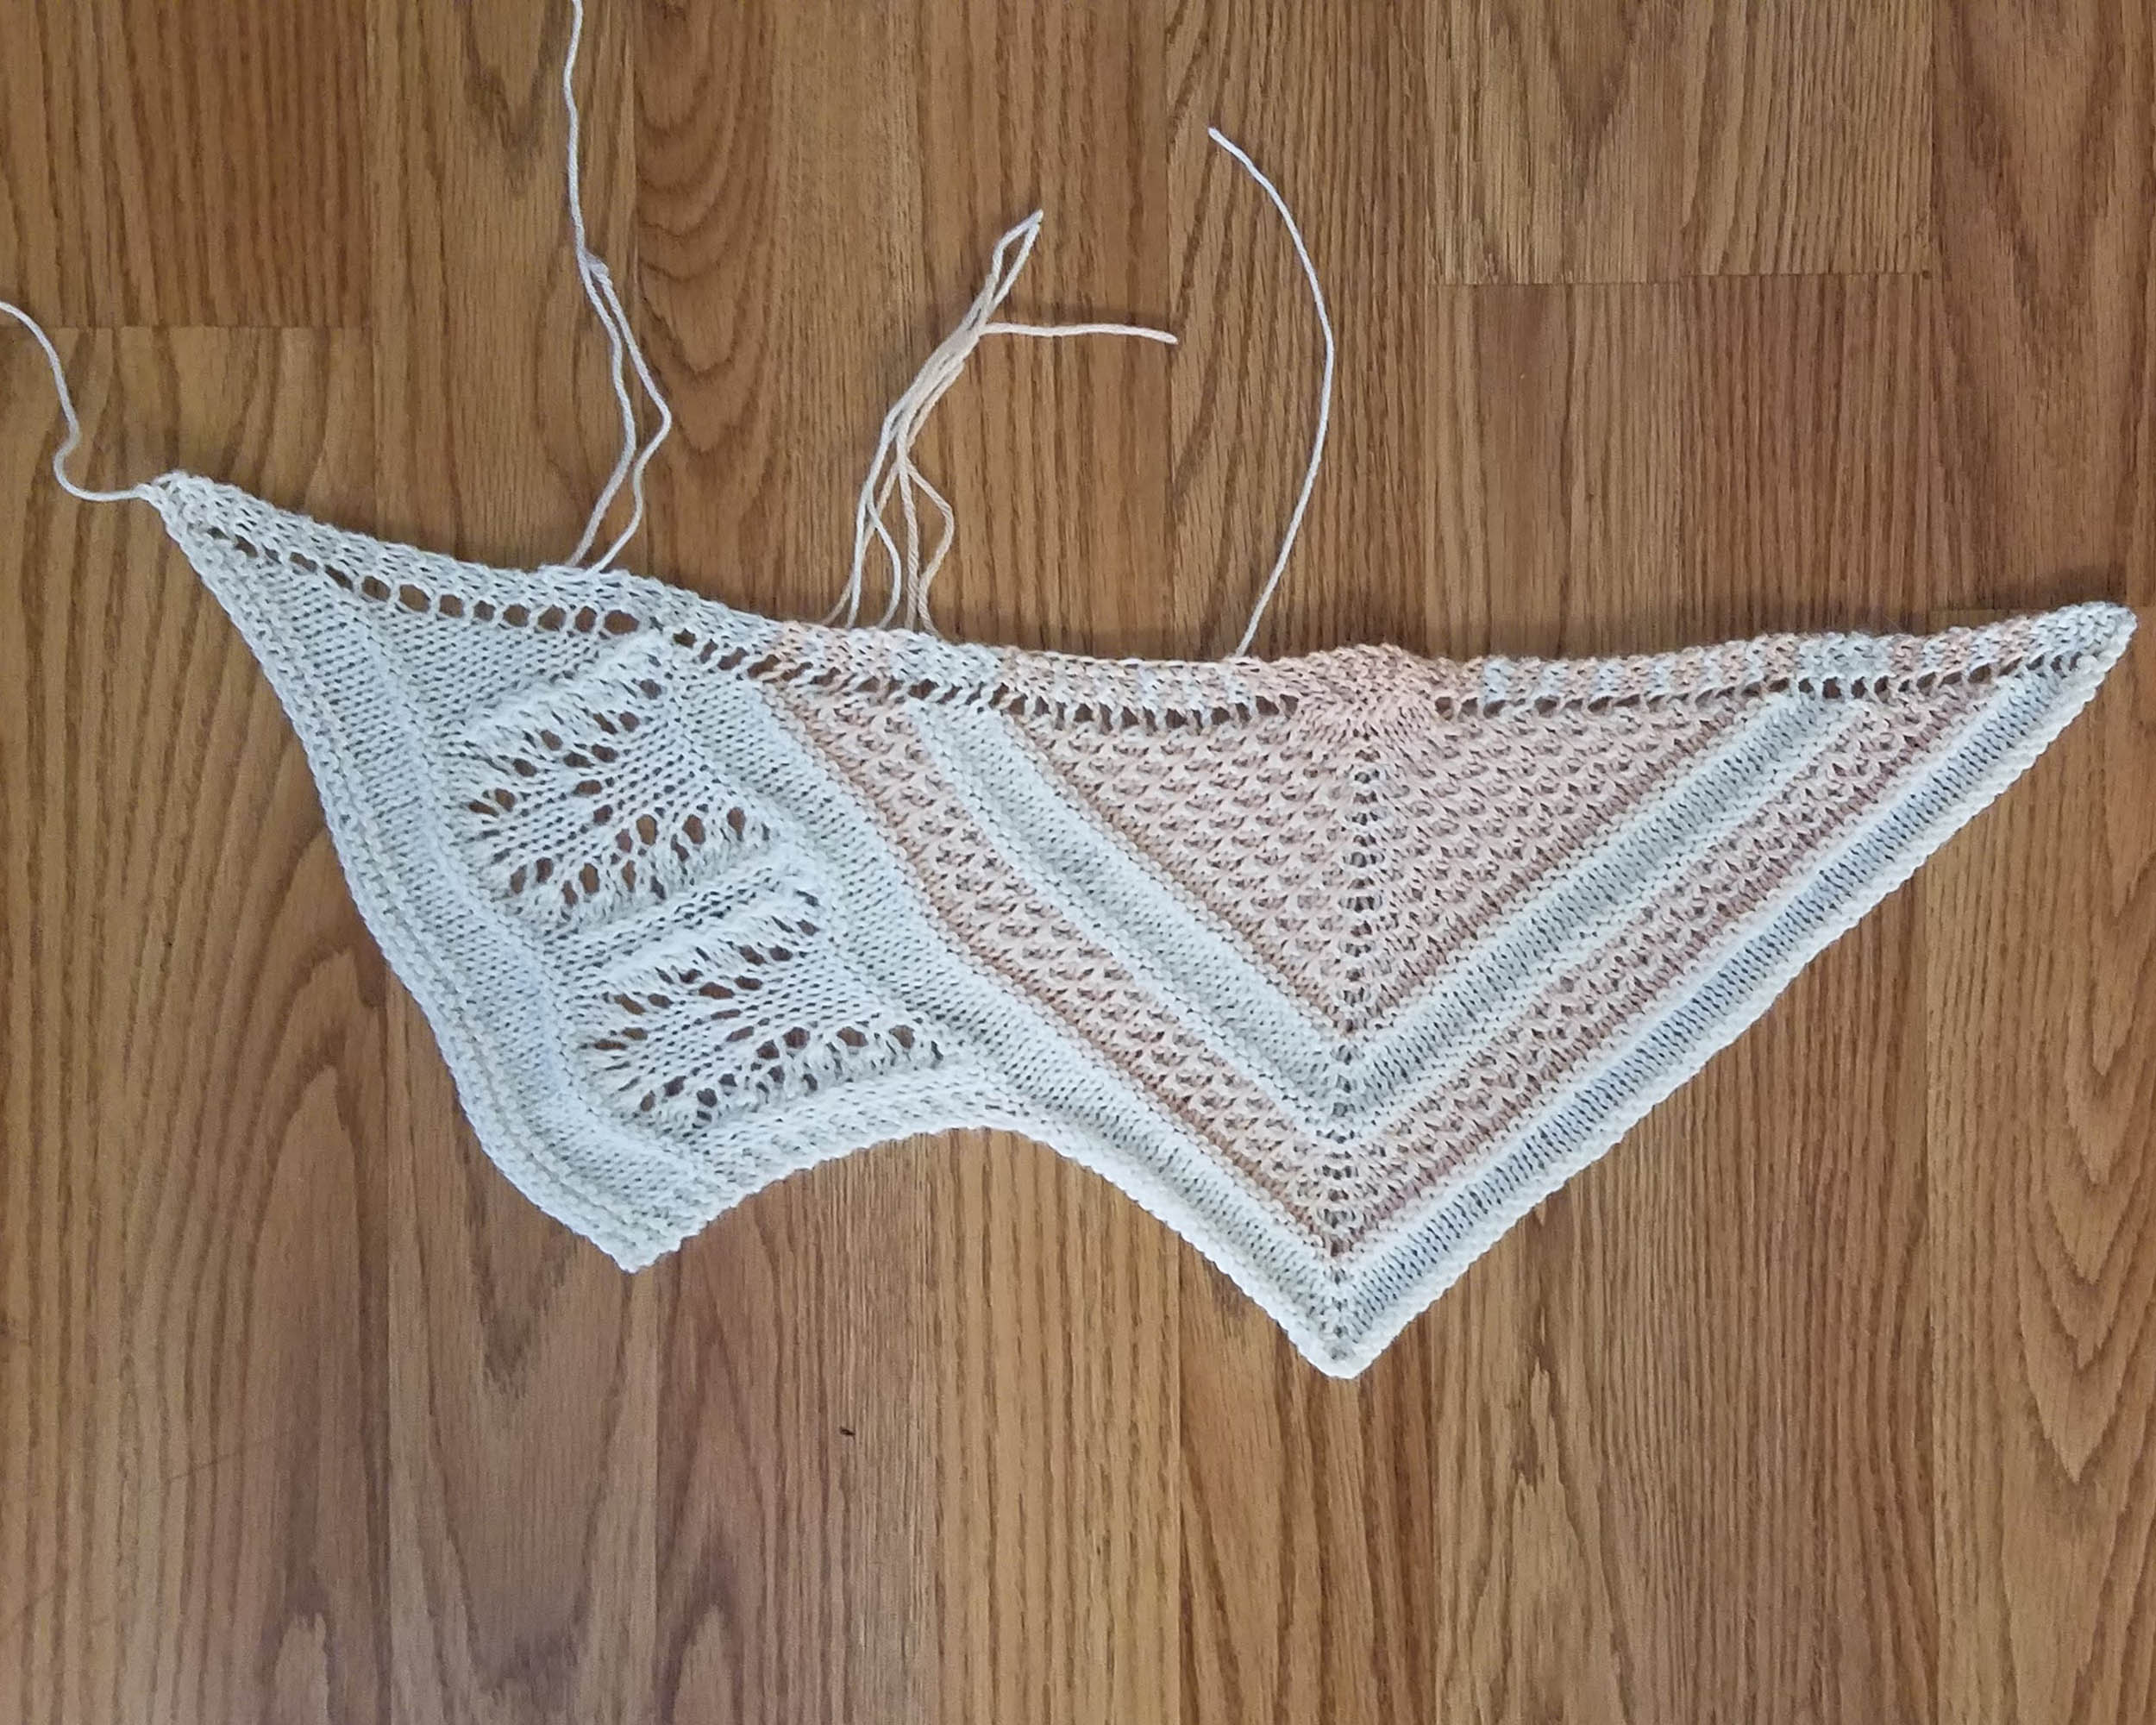
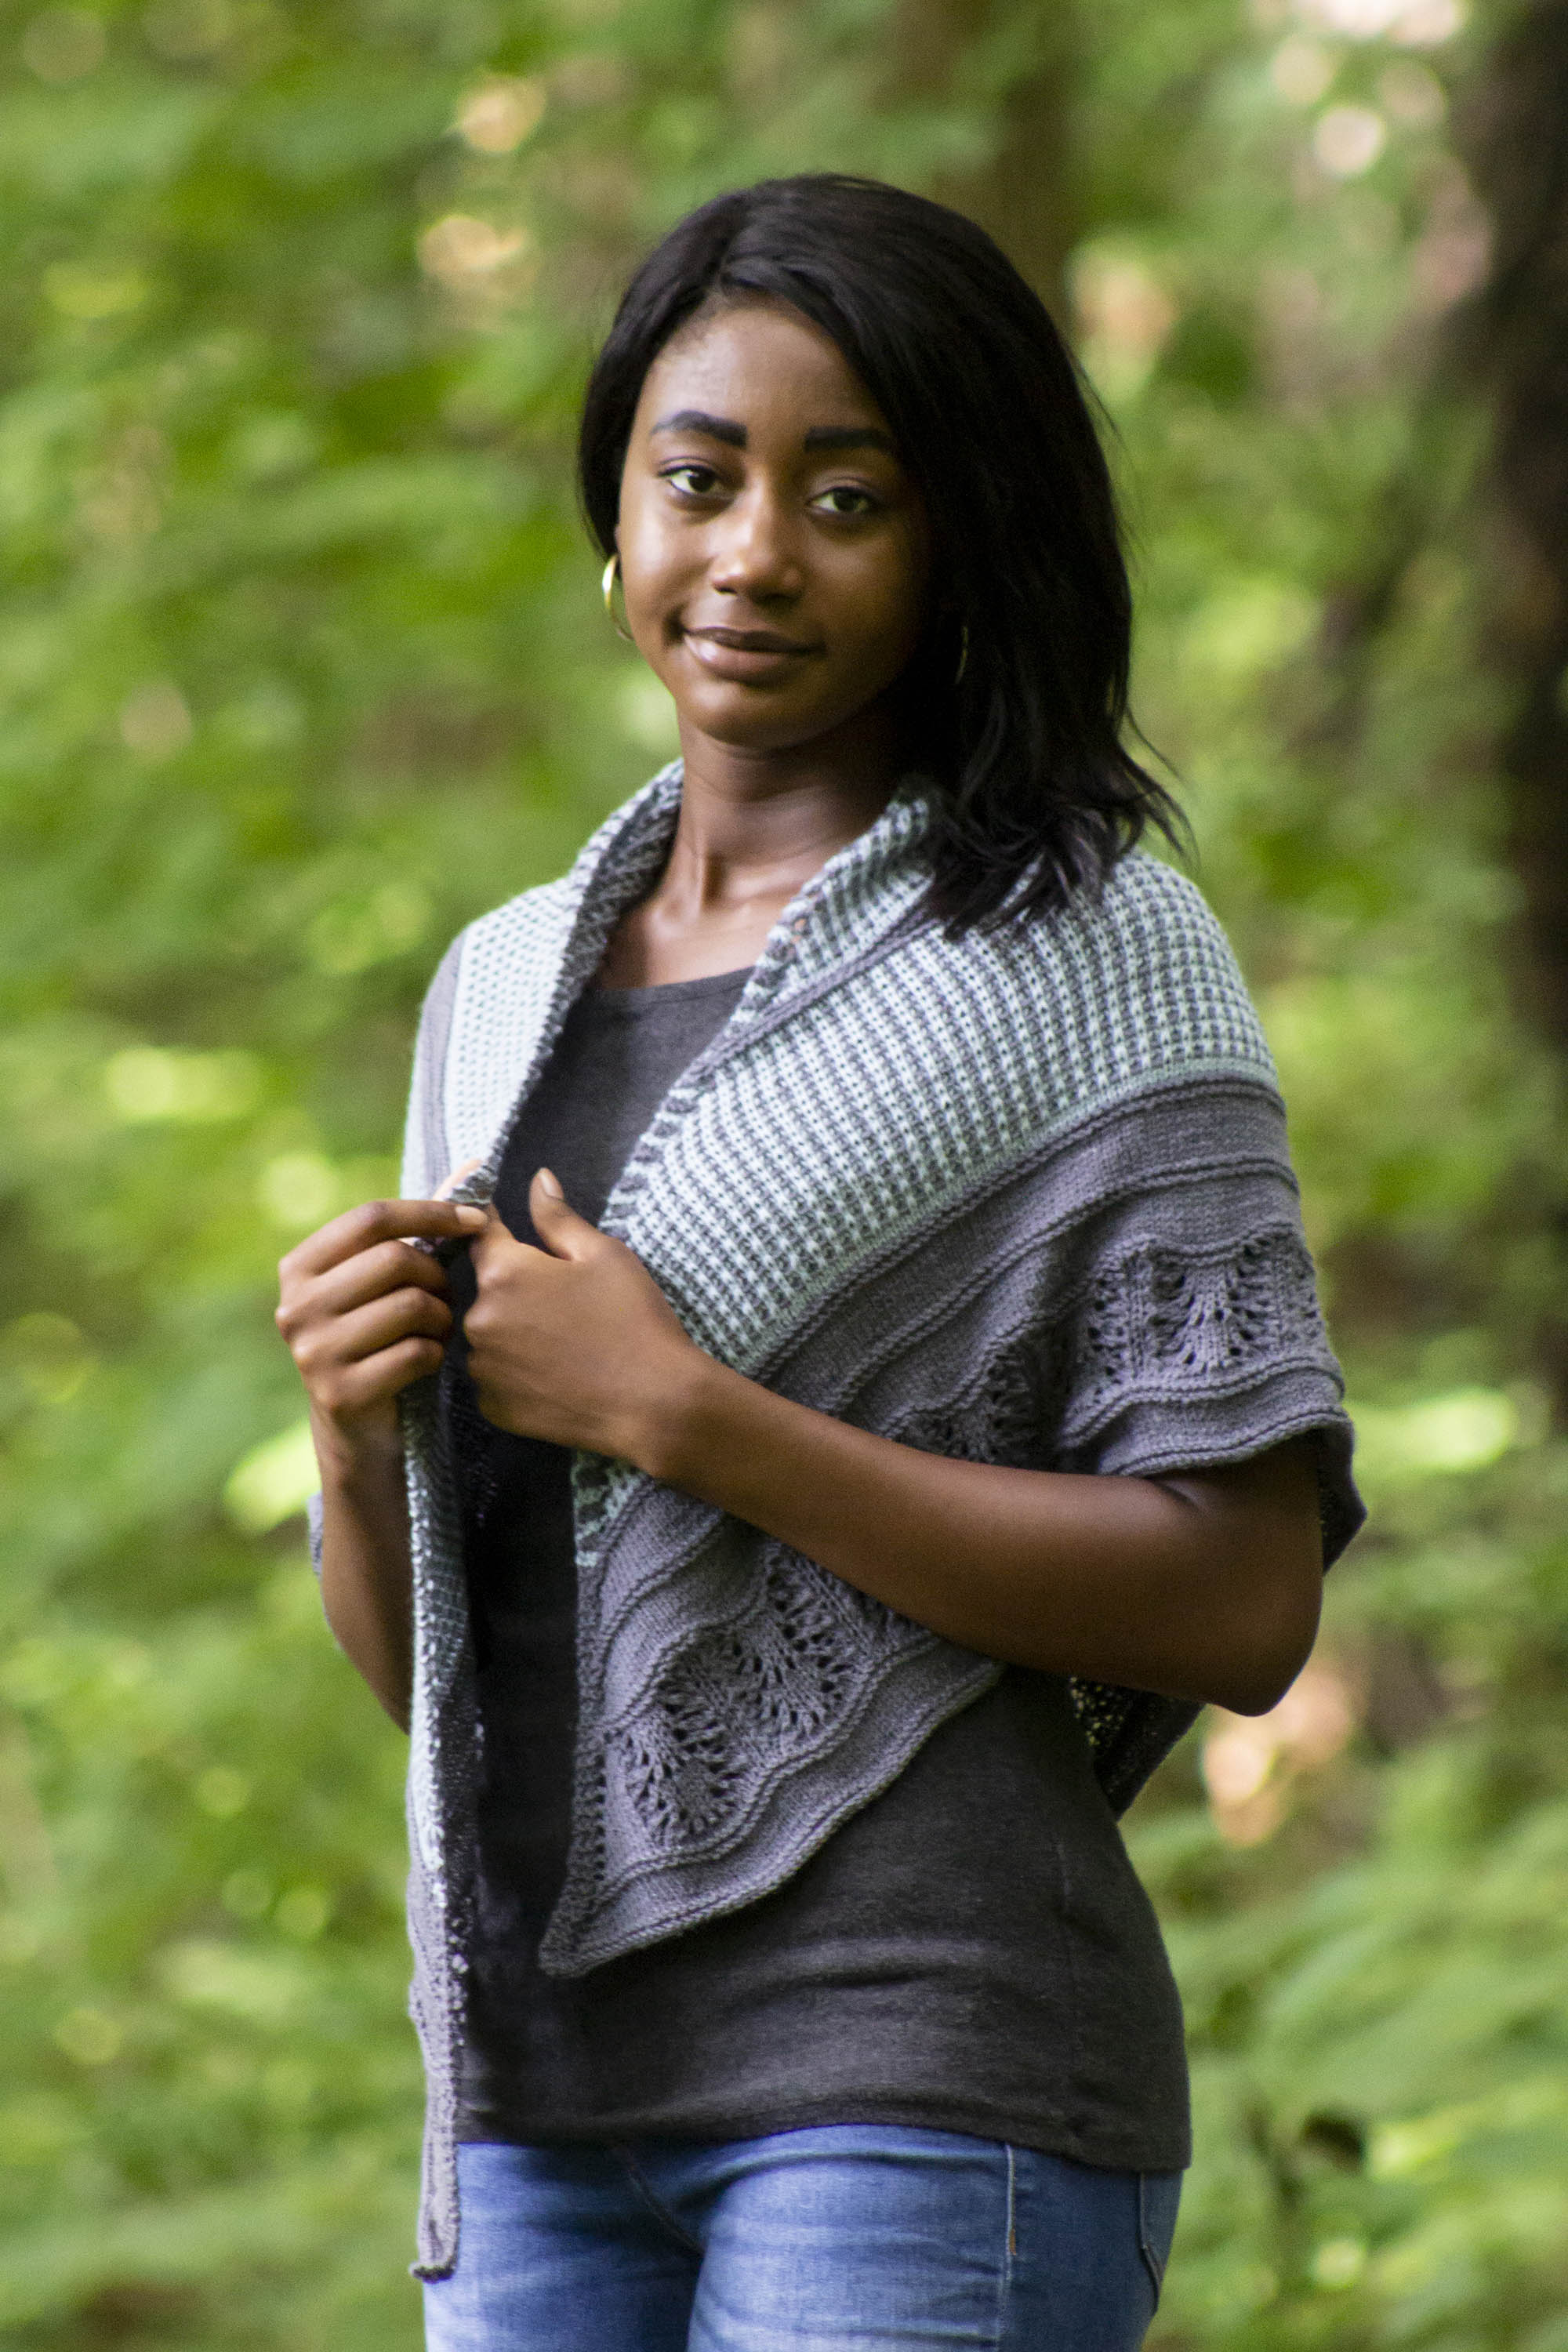
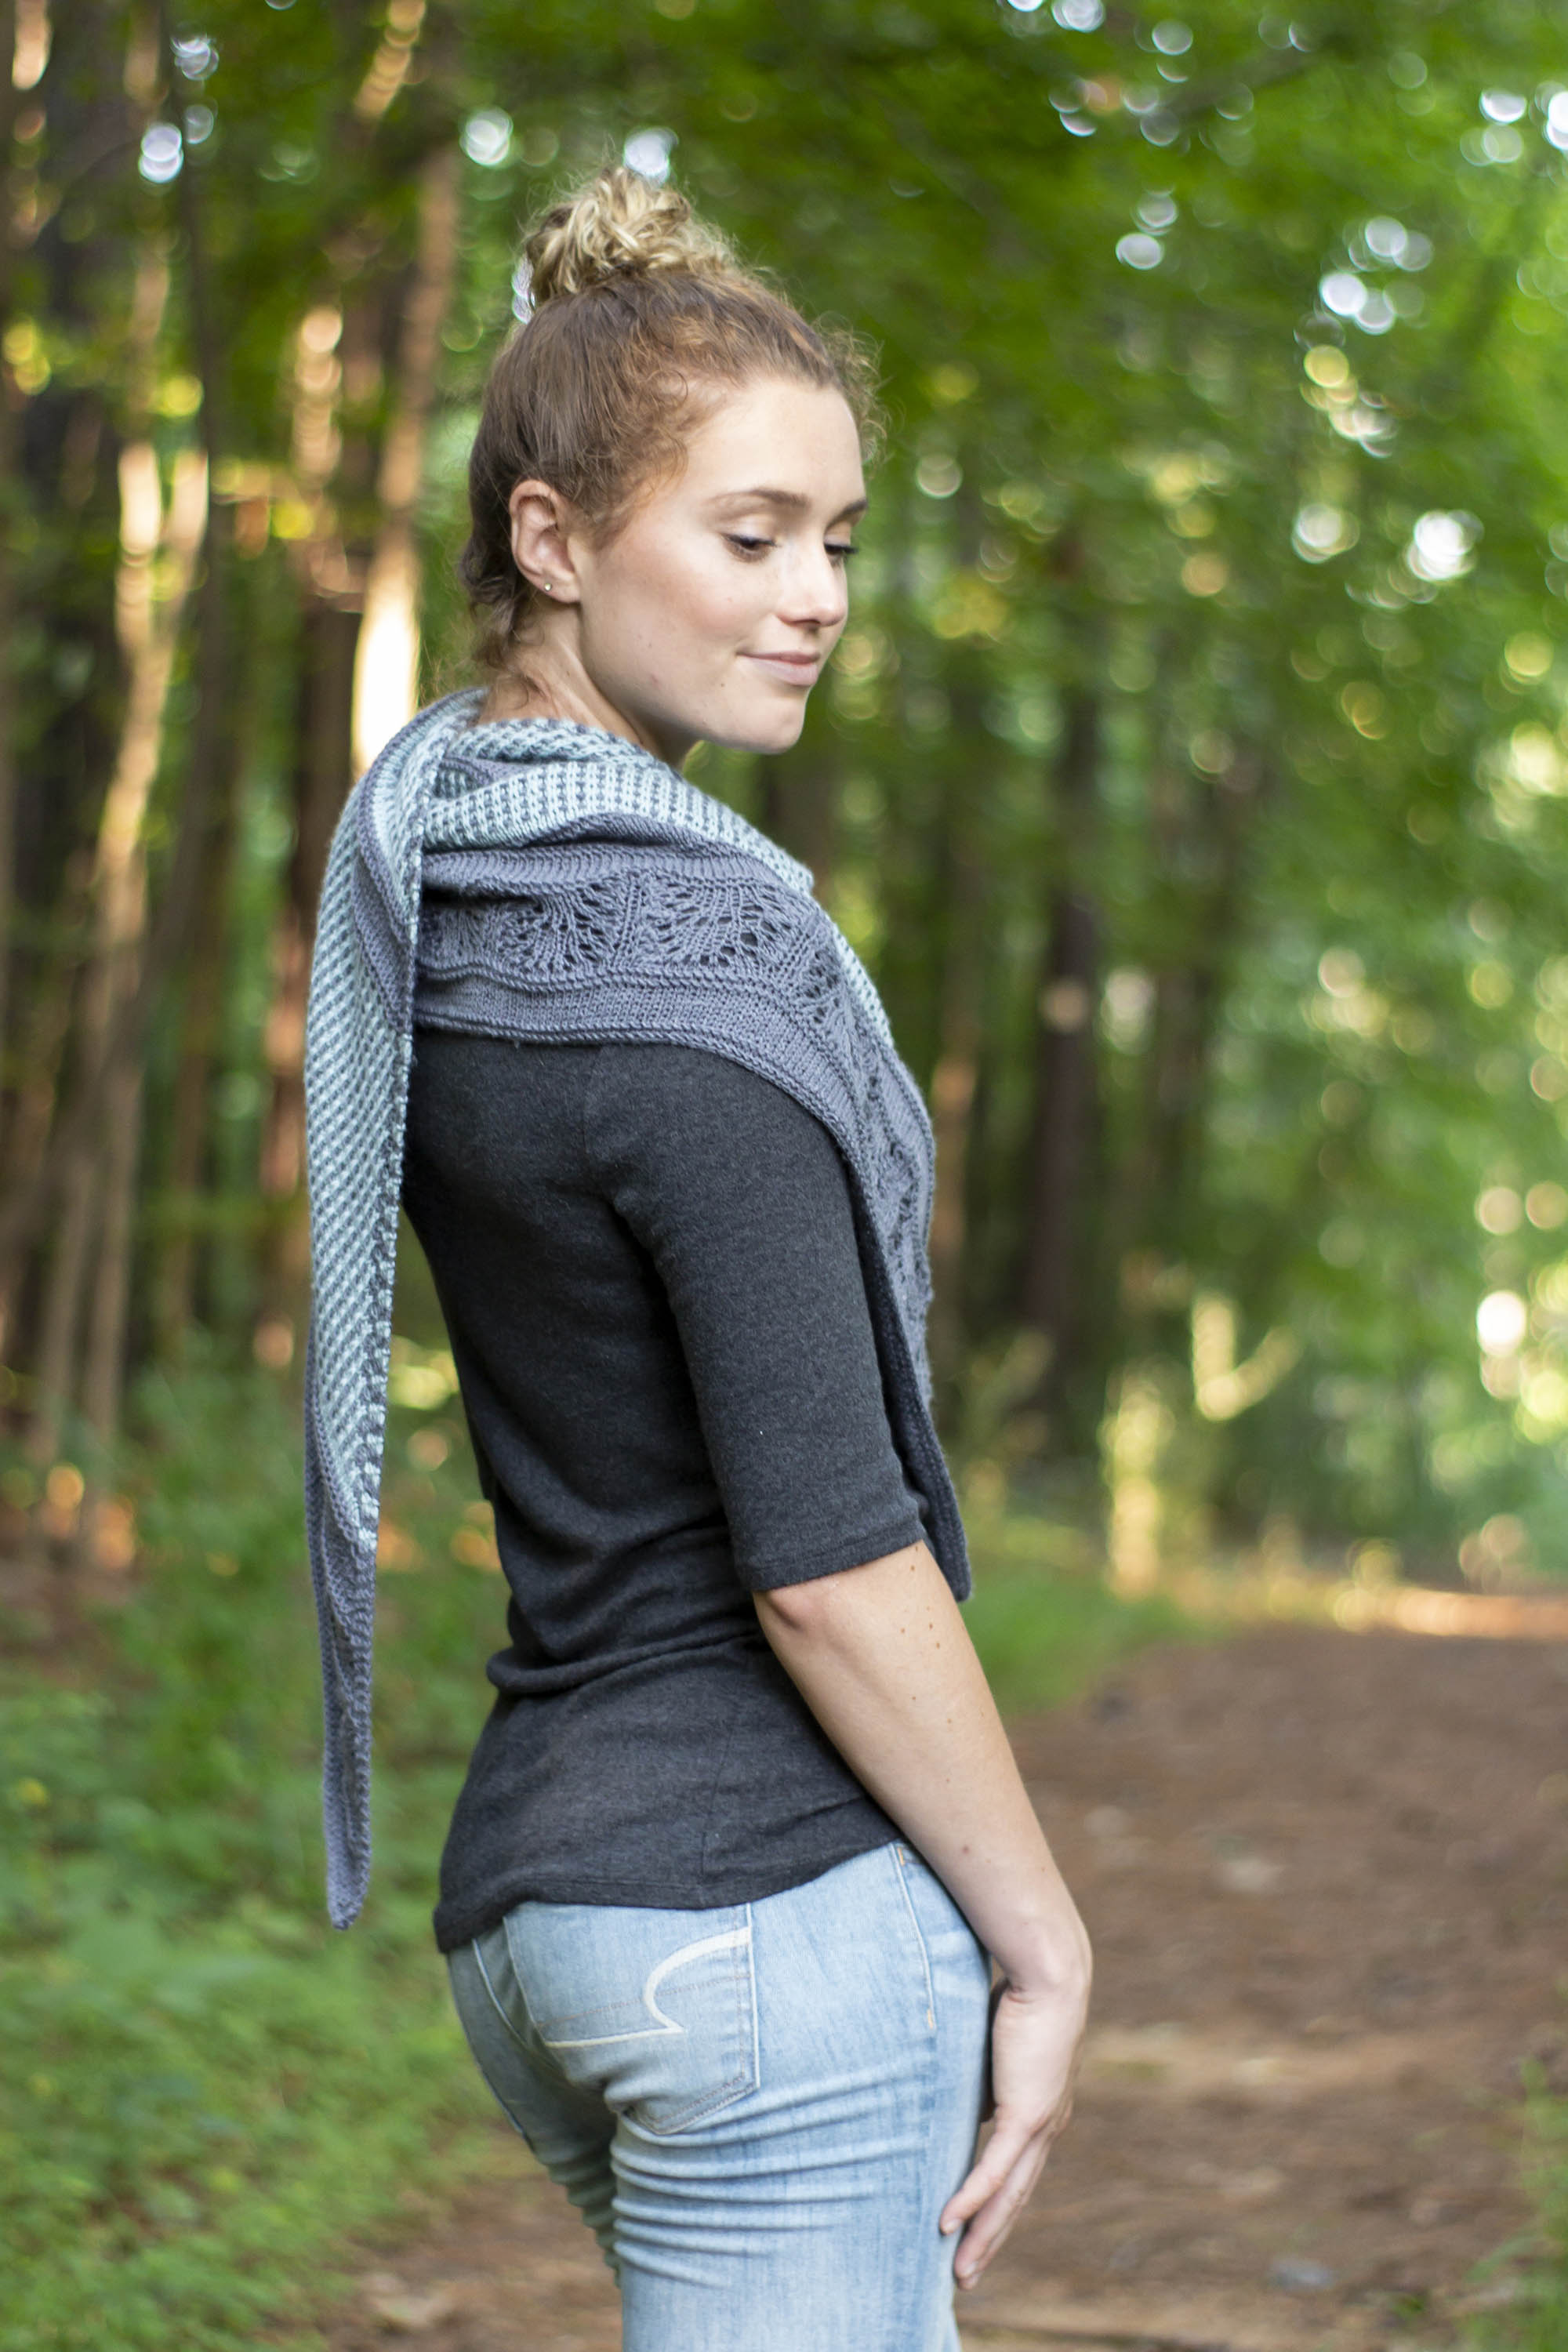
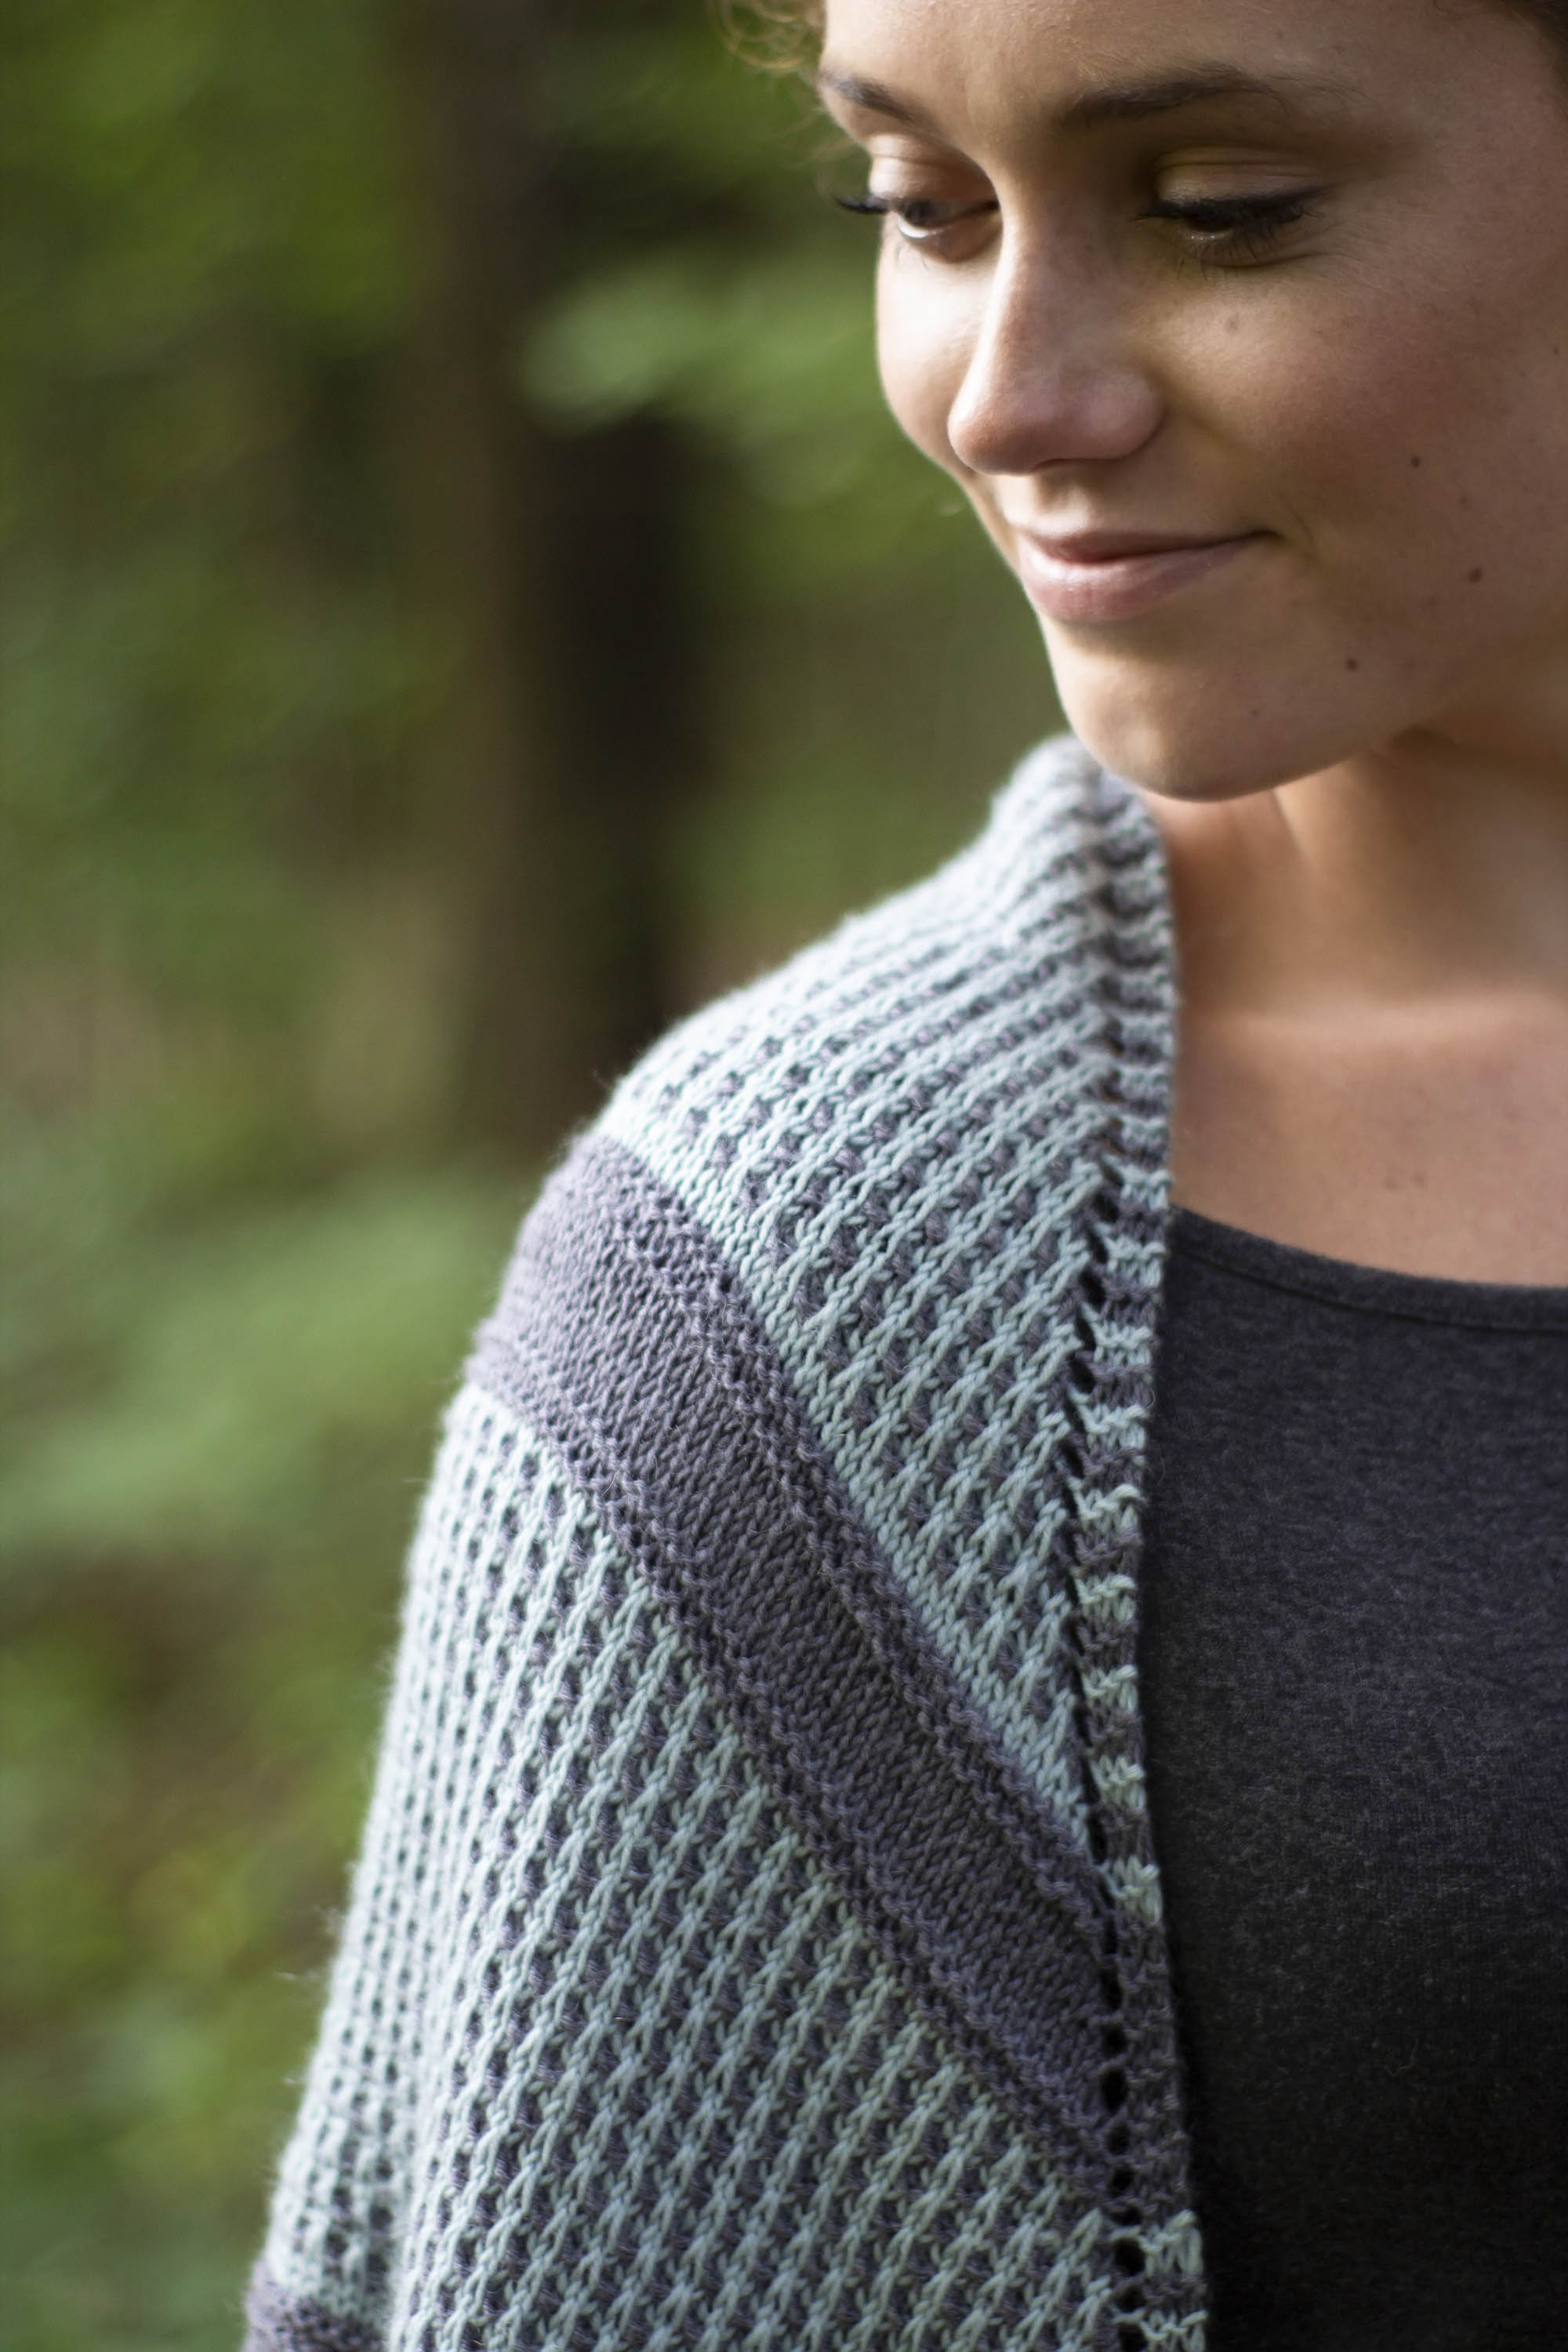
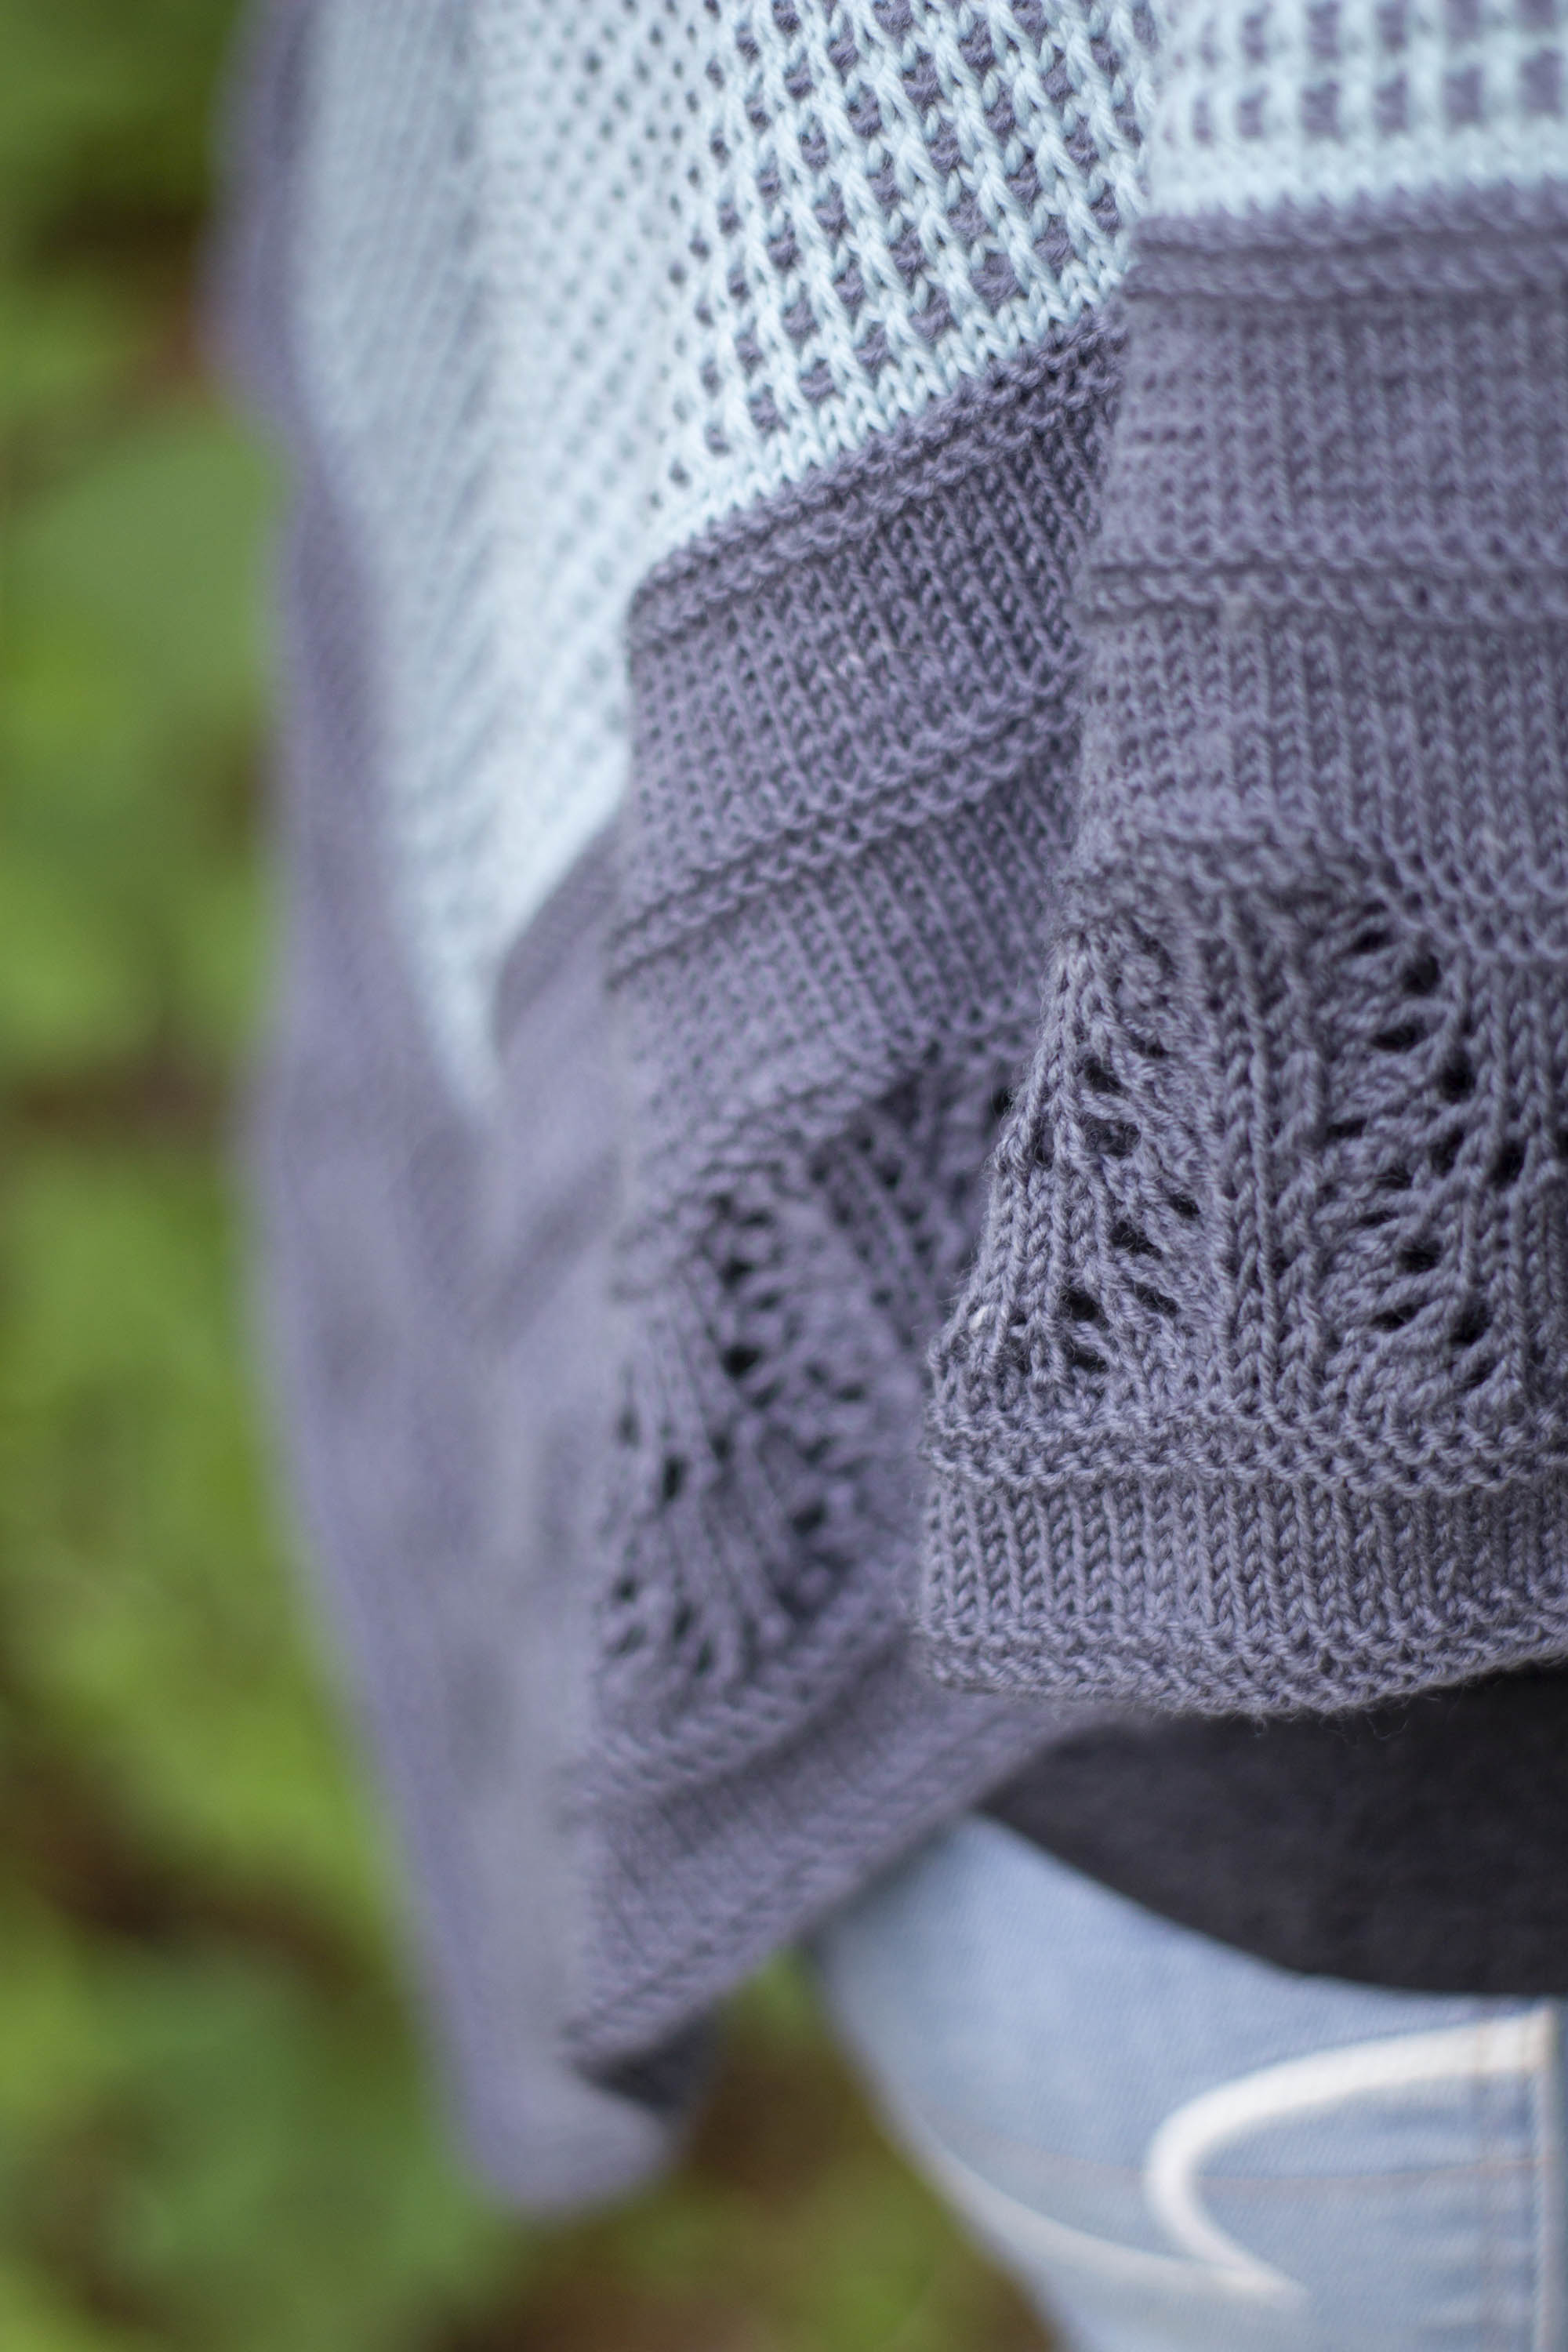
But let us not dwell on the failures of the past, let us move on to newer and more beautiful things – namely, my new shawl obsession, Blue Oak.
I asked designer Rachel Brockman about this, and she kindly shared her original swatch and concept.
“It all started with my playing with slip stitches and stripes, but wanting it to have a little something special. I’m a sucker for triangular shawls, too. They are easy to wear and soothing to knit. It was never my plan to make this in pink and white, as shown in my swatch – but I think it gets my design through quite well and I was thrilled about the final results.”
Rachel’s concept for the edge lace was inspired by the Blue Oak tree. The triangular shape of the shawl itself mirrors that.
Soothing indeed.
It sits nicely on the shoulders worn loose to the front…
…and is long enough to wrap for other styling options as well.
The grain pattern in this top-down piece is just a 4-row 2-stitch repeat. I cast on for this yesterday and knitted a bit, and it only took about five rows after the garter tab before I didn’t have to think about it any more.
Colors: 122 Amethyst and 119 Apricot.
The pattern is broken up by a band of contrasting color in the middle and in the ending lace. Everything in the pattern is written and charted, except the grain pattern, which needs no chart.
Rachel offers some Bella Cash color suggestions:
“My choices for a personal project would have to be 126 Forest combined with 106 Oat or 116 Sage, as used in the sample. Of course, there is always 121 Cabernet and 124 Mustard (shown) if you’re feeling the Gryffindor love!”
Well, now I’m not sure whether to keep going with what I’ve got, or maybe go Ravenclaw blue. Decisions, decisions.
The Blue Oak Shawl is available on Ravelry as a single pattern, or as part of e-book Small Pleasures. This won’t be the last time we talk about this e-book. I’m a sock fiend, and there’s a pair in there I’m dying to cast on for.
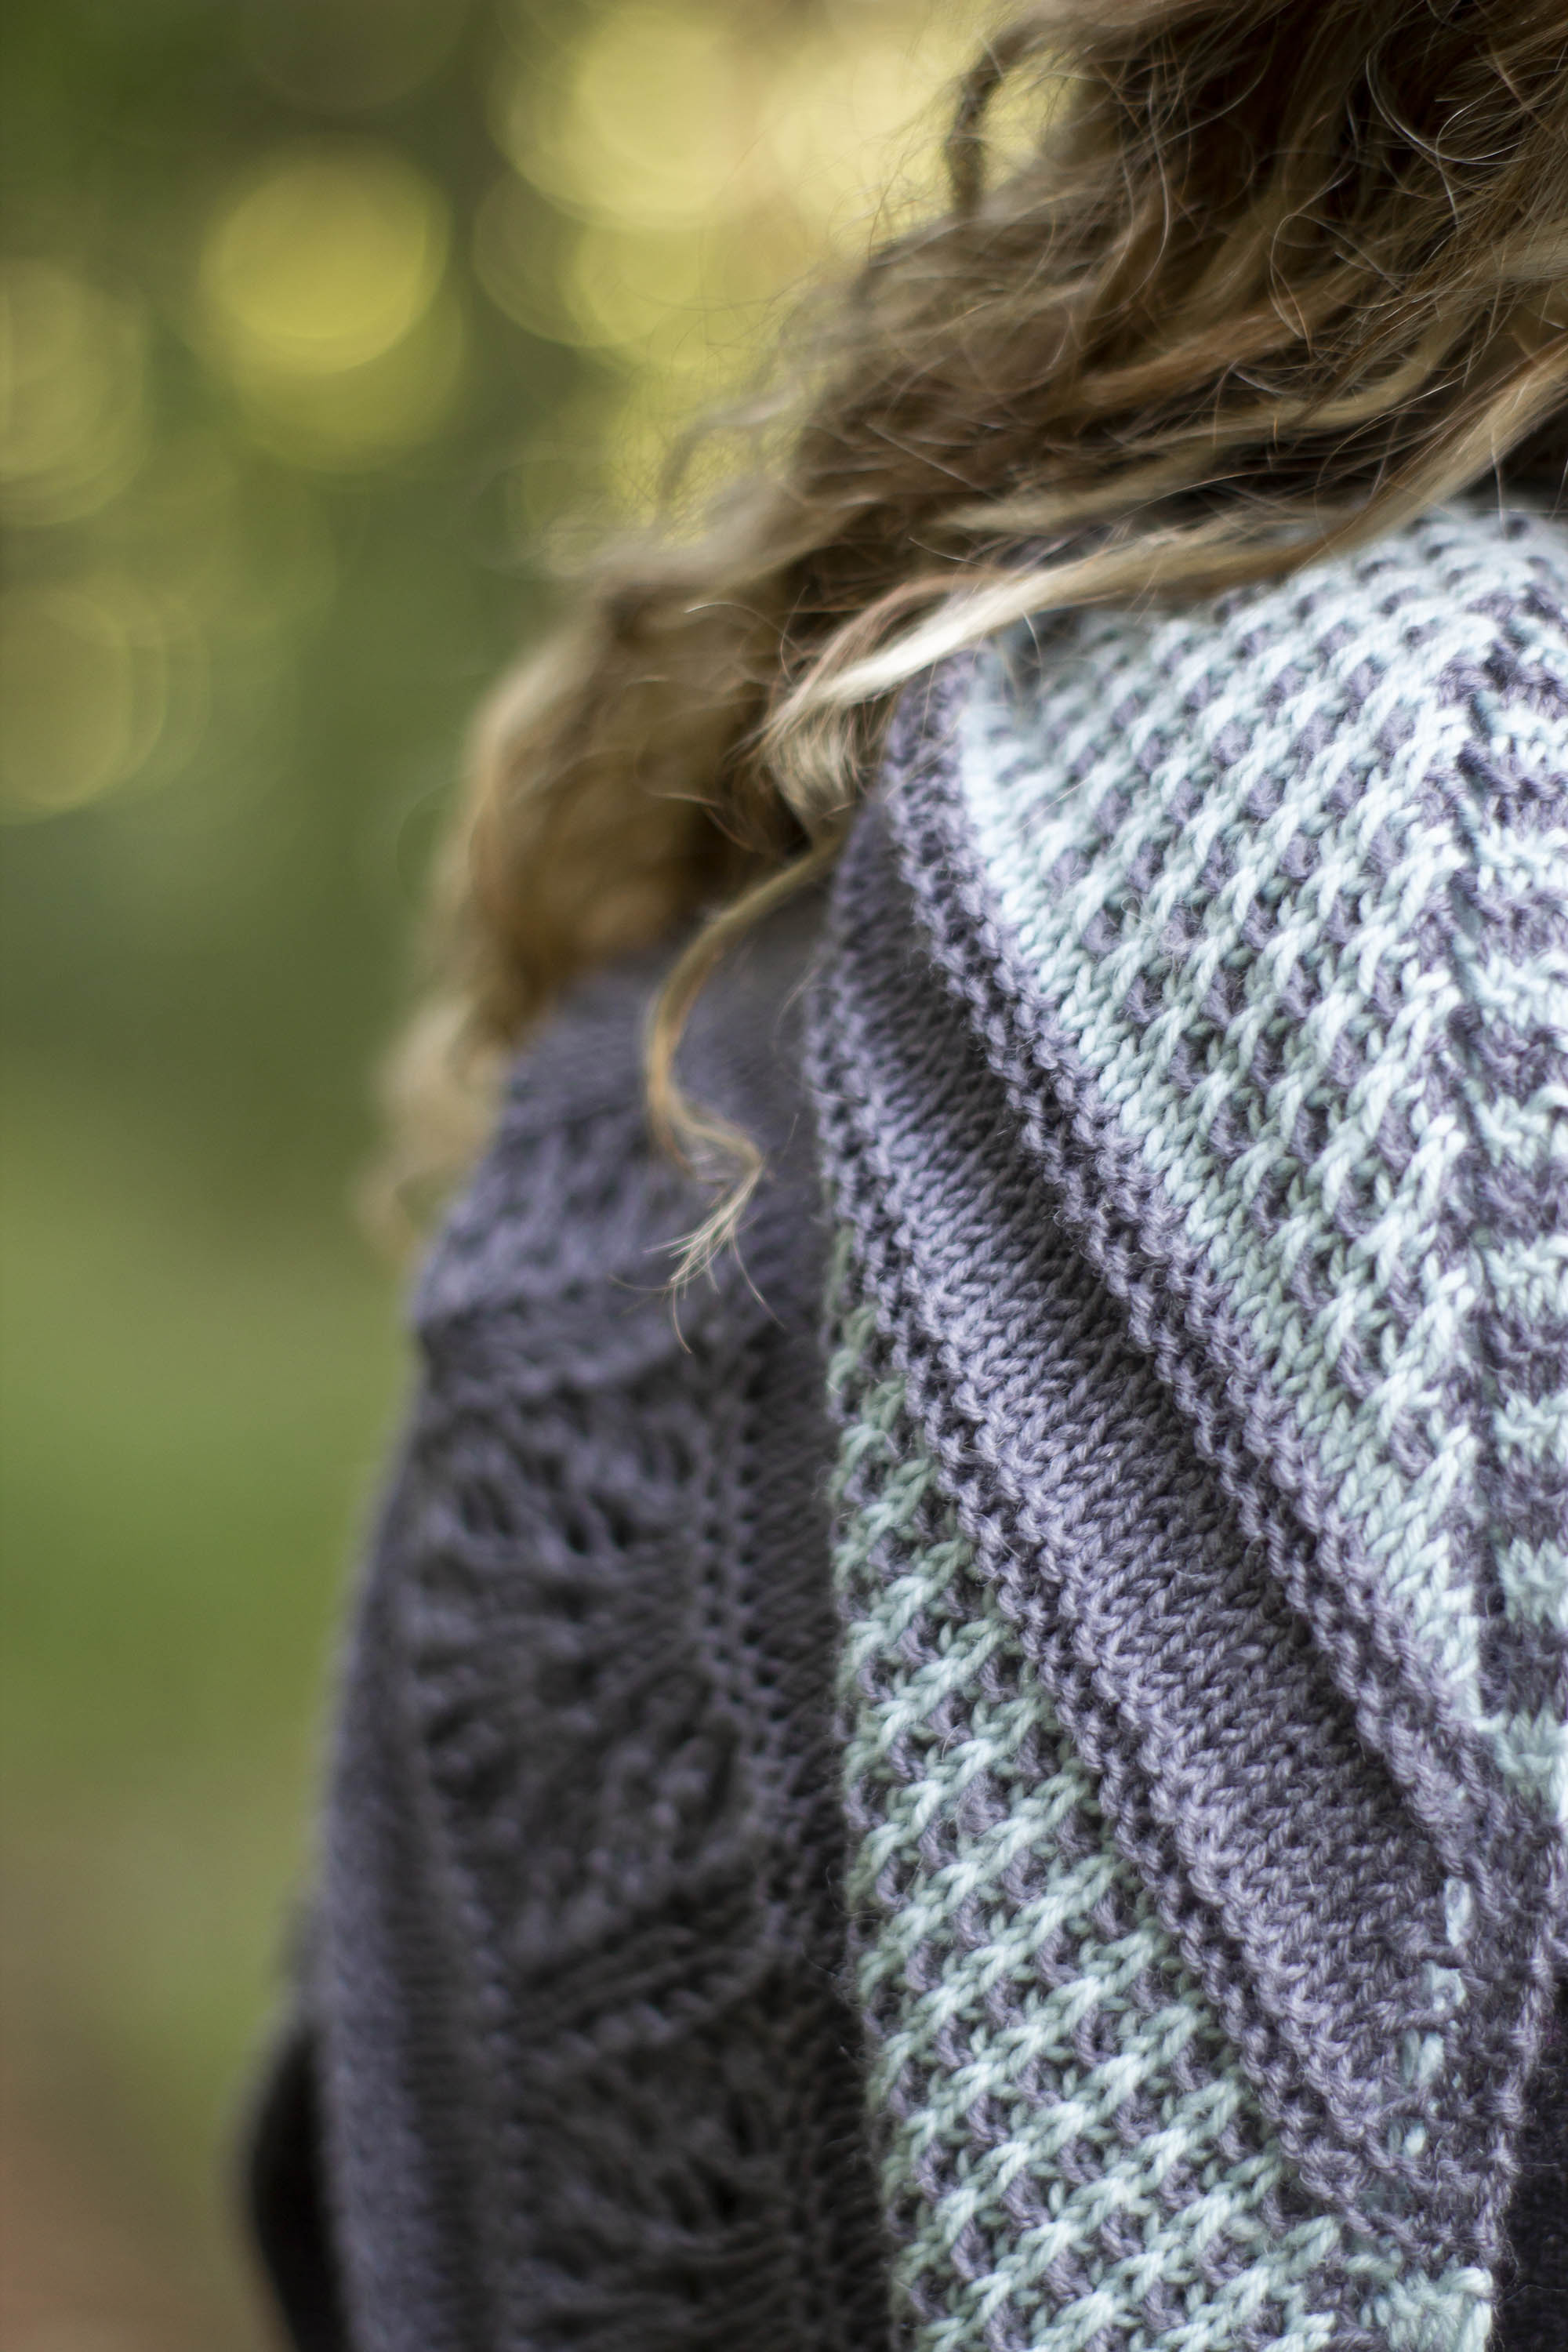
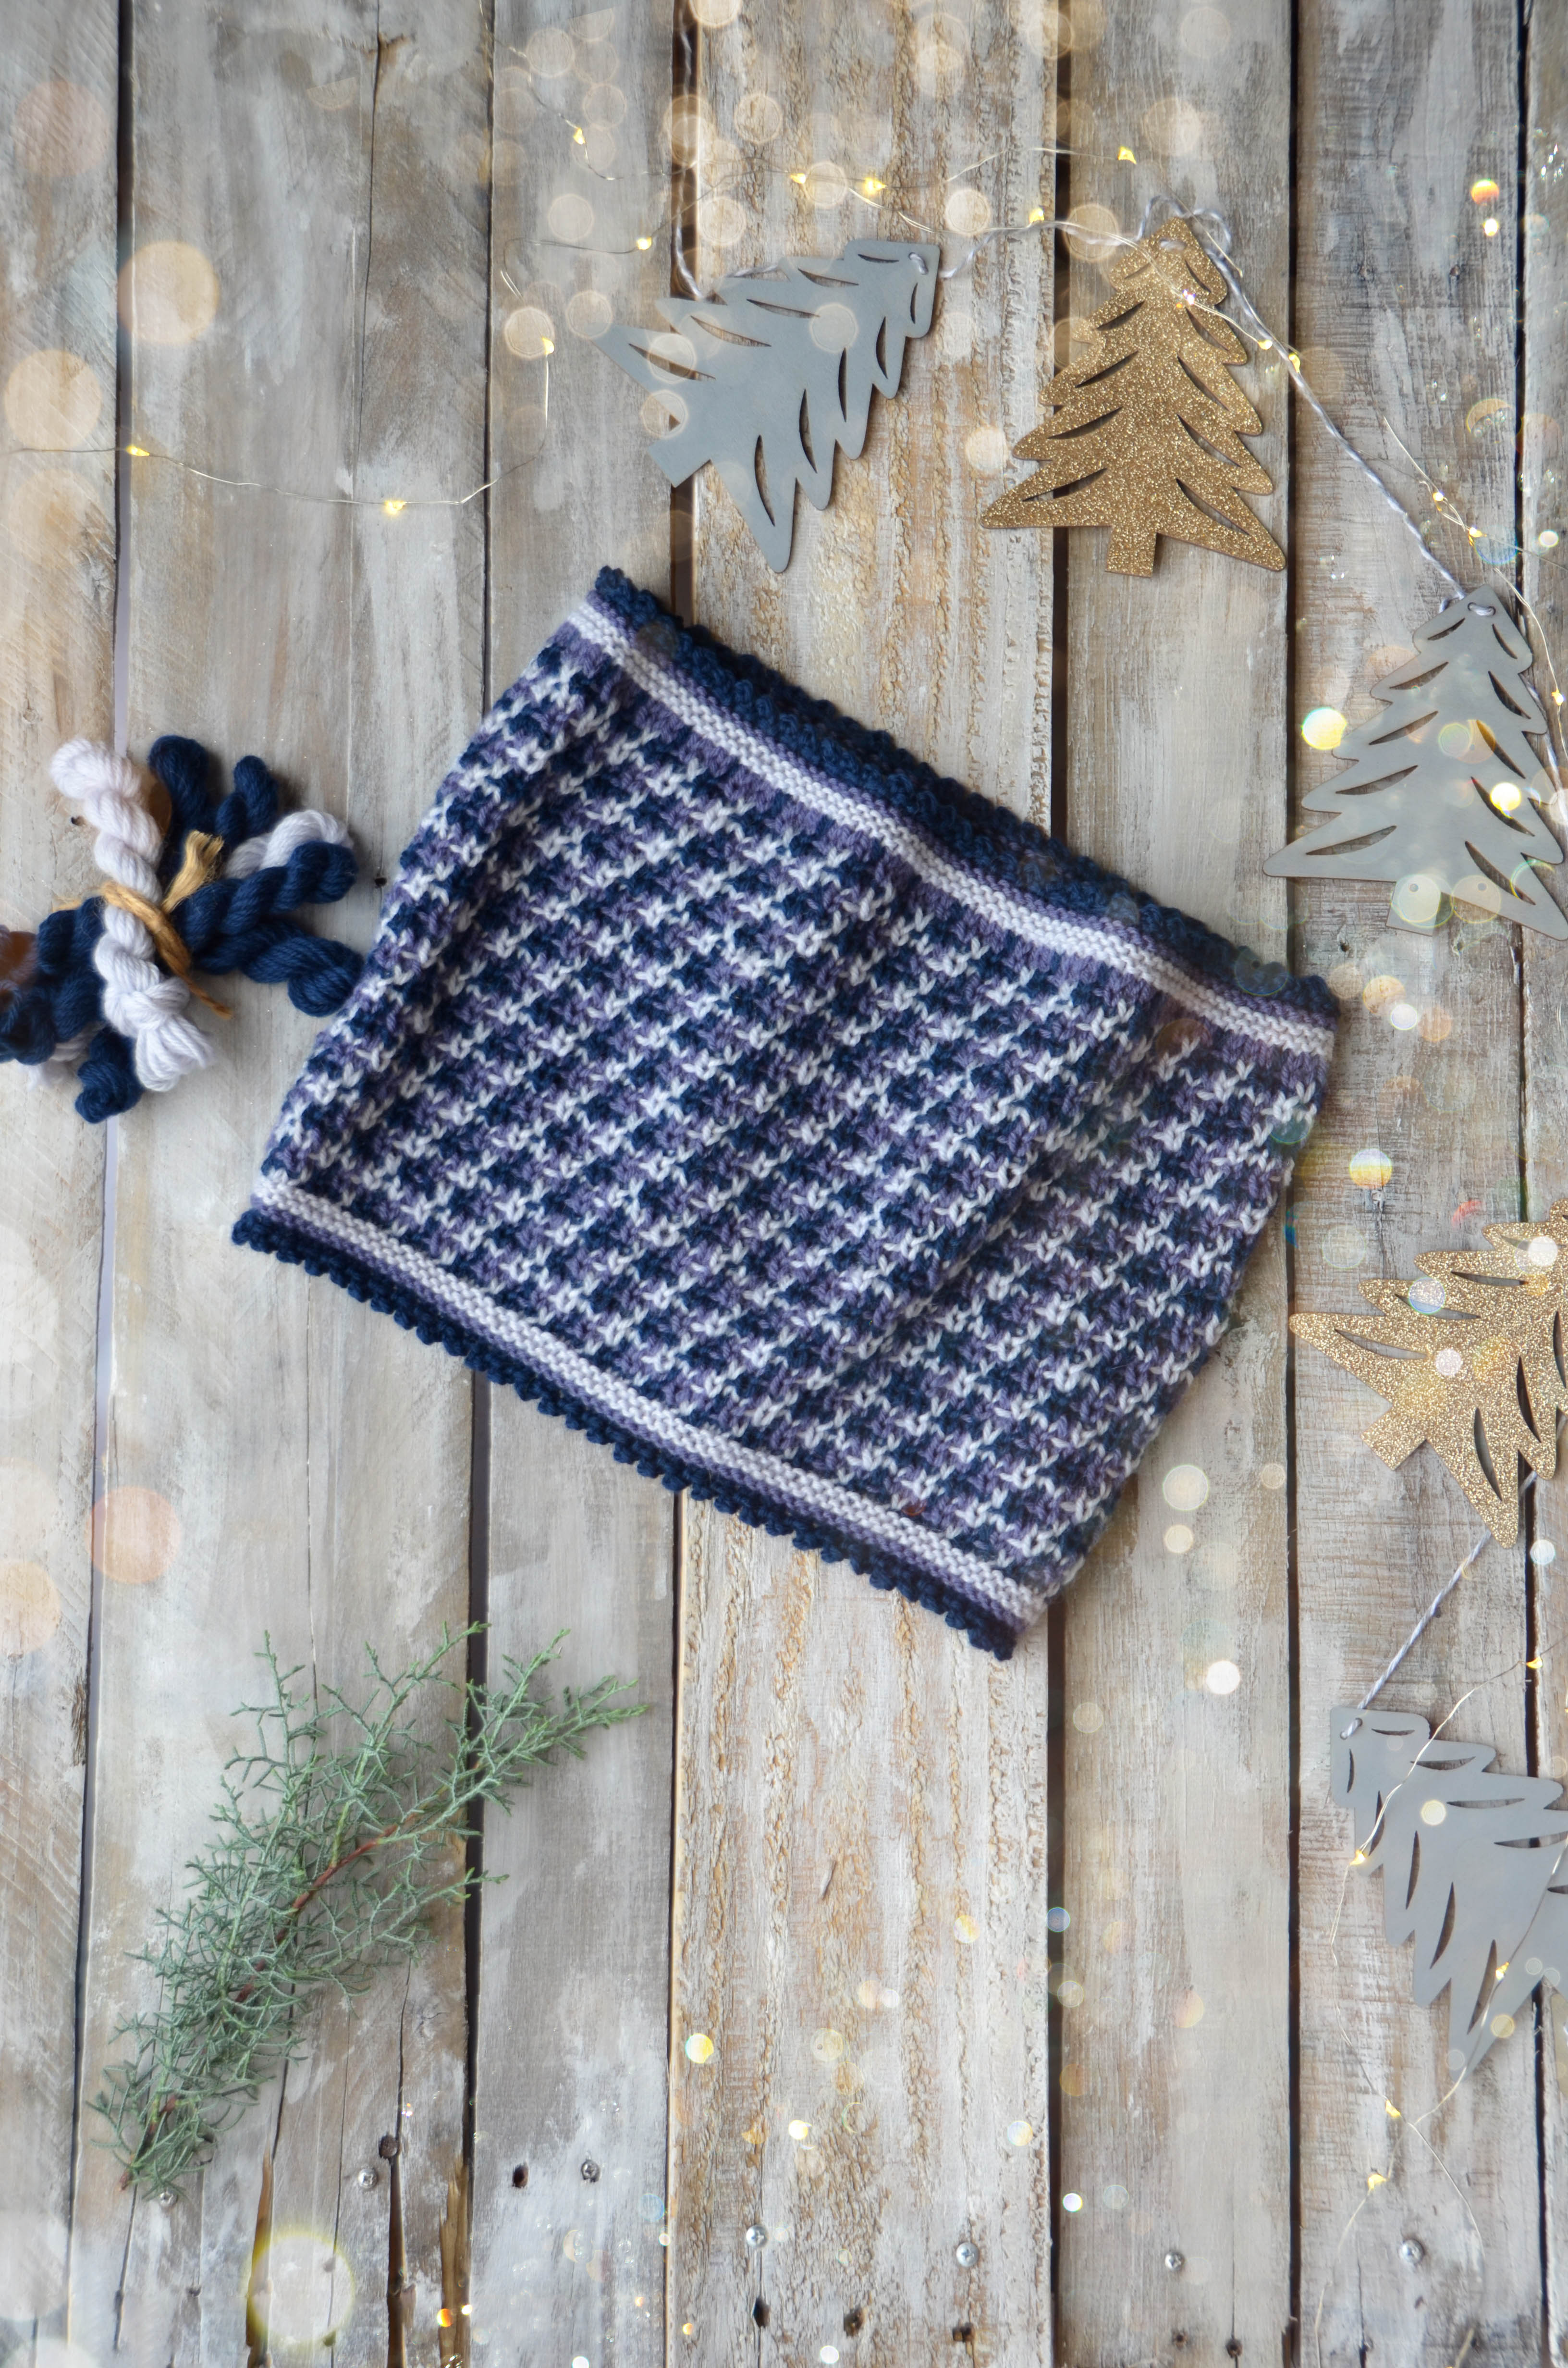
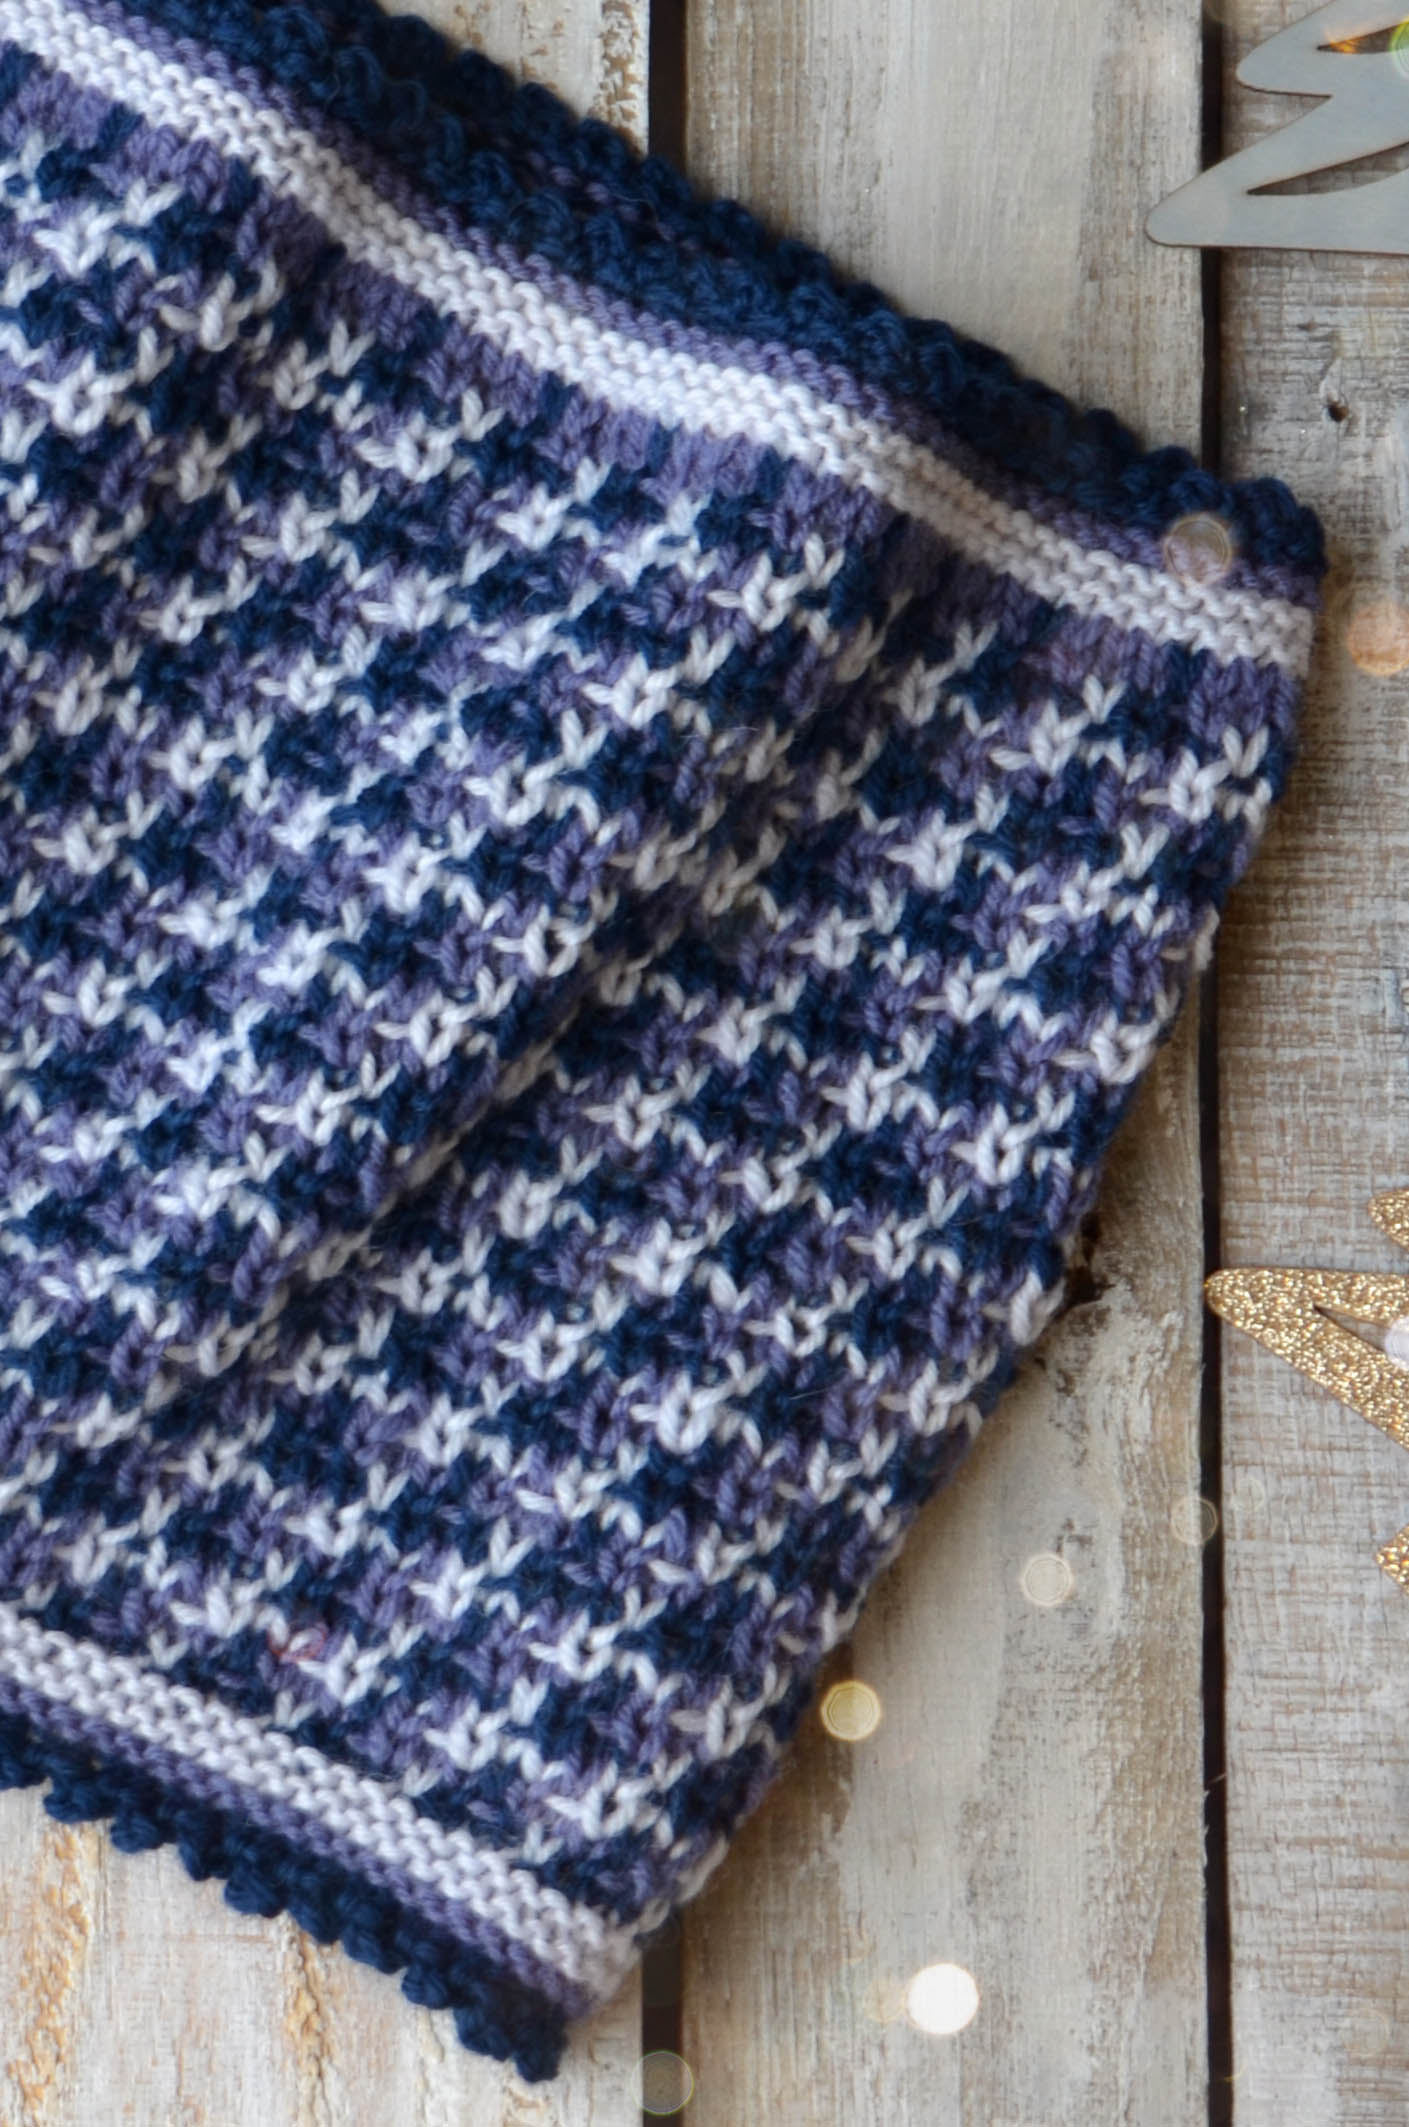
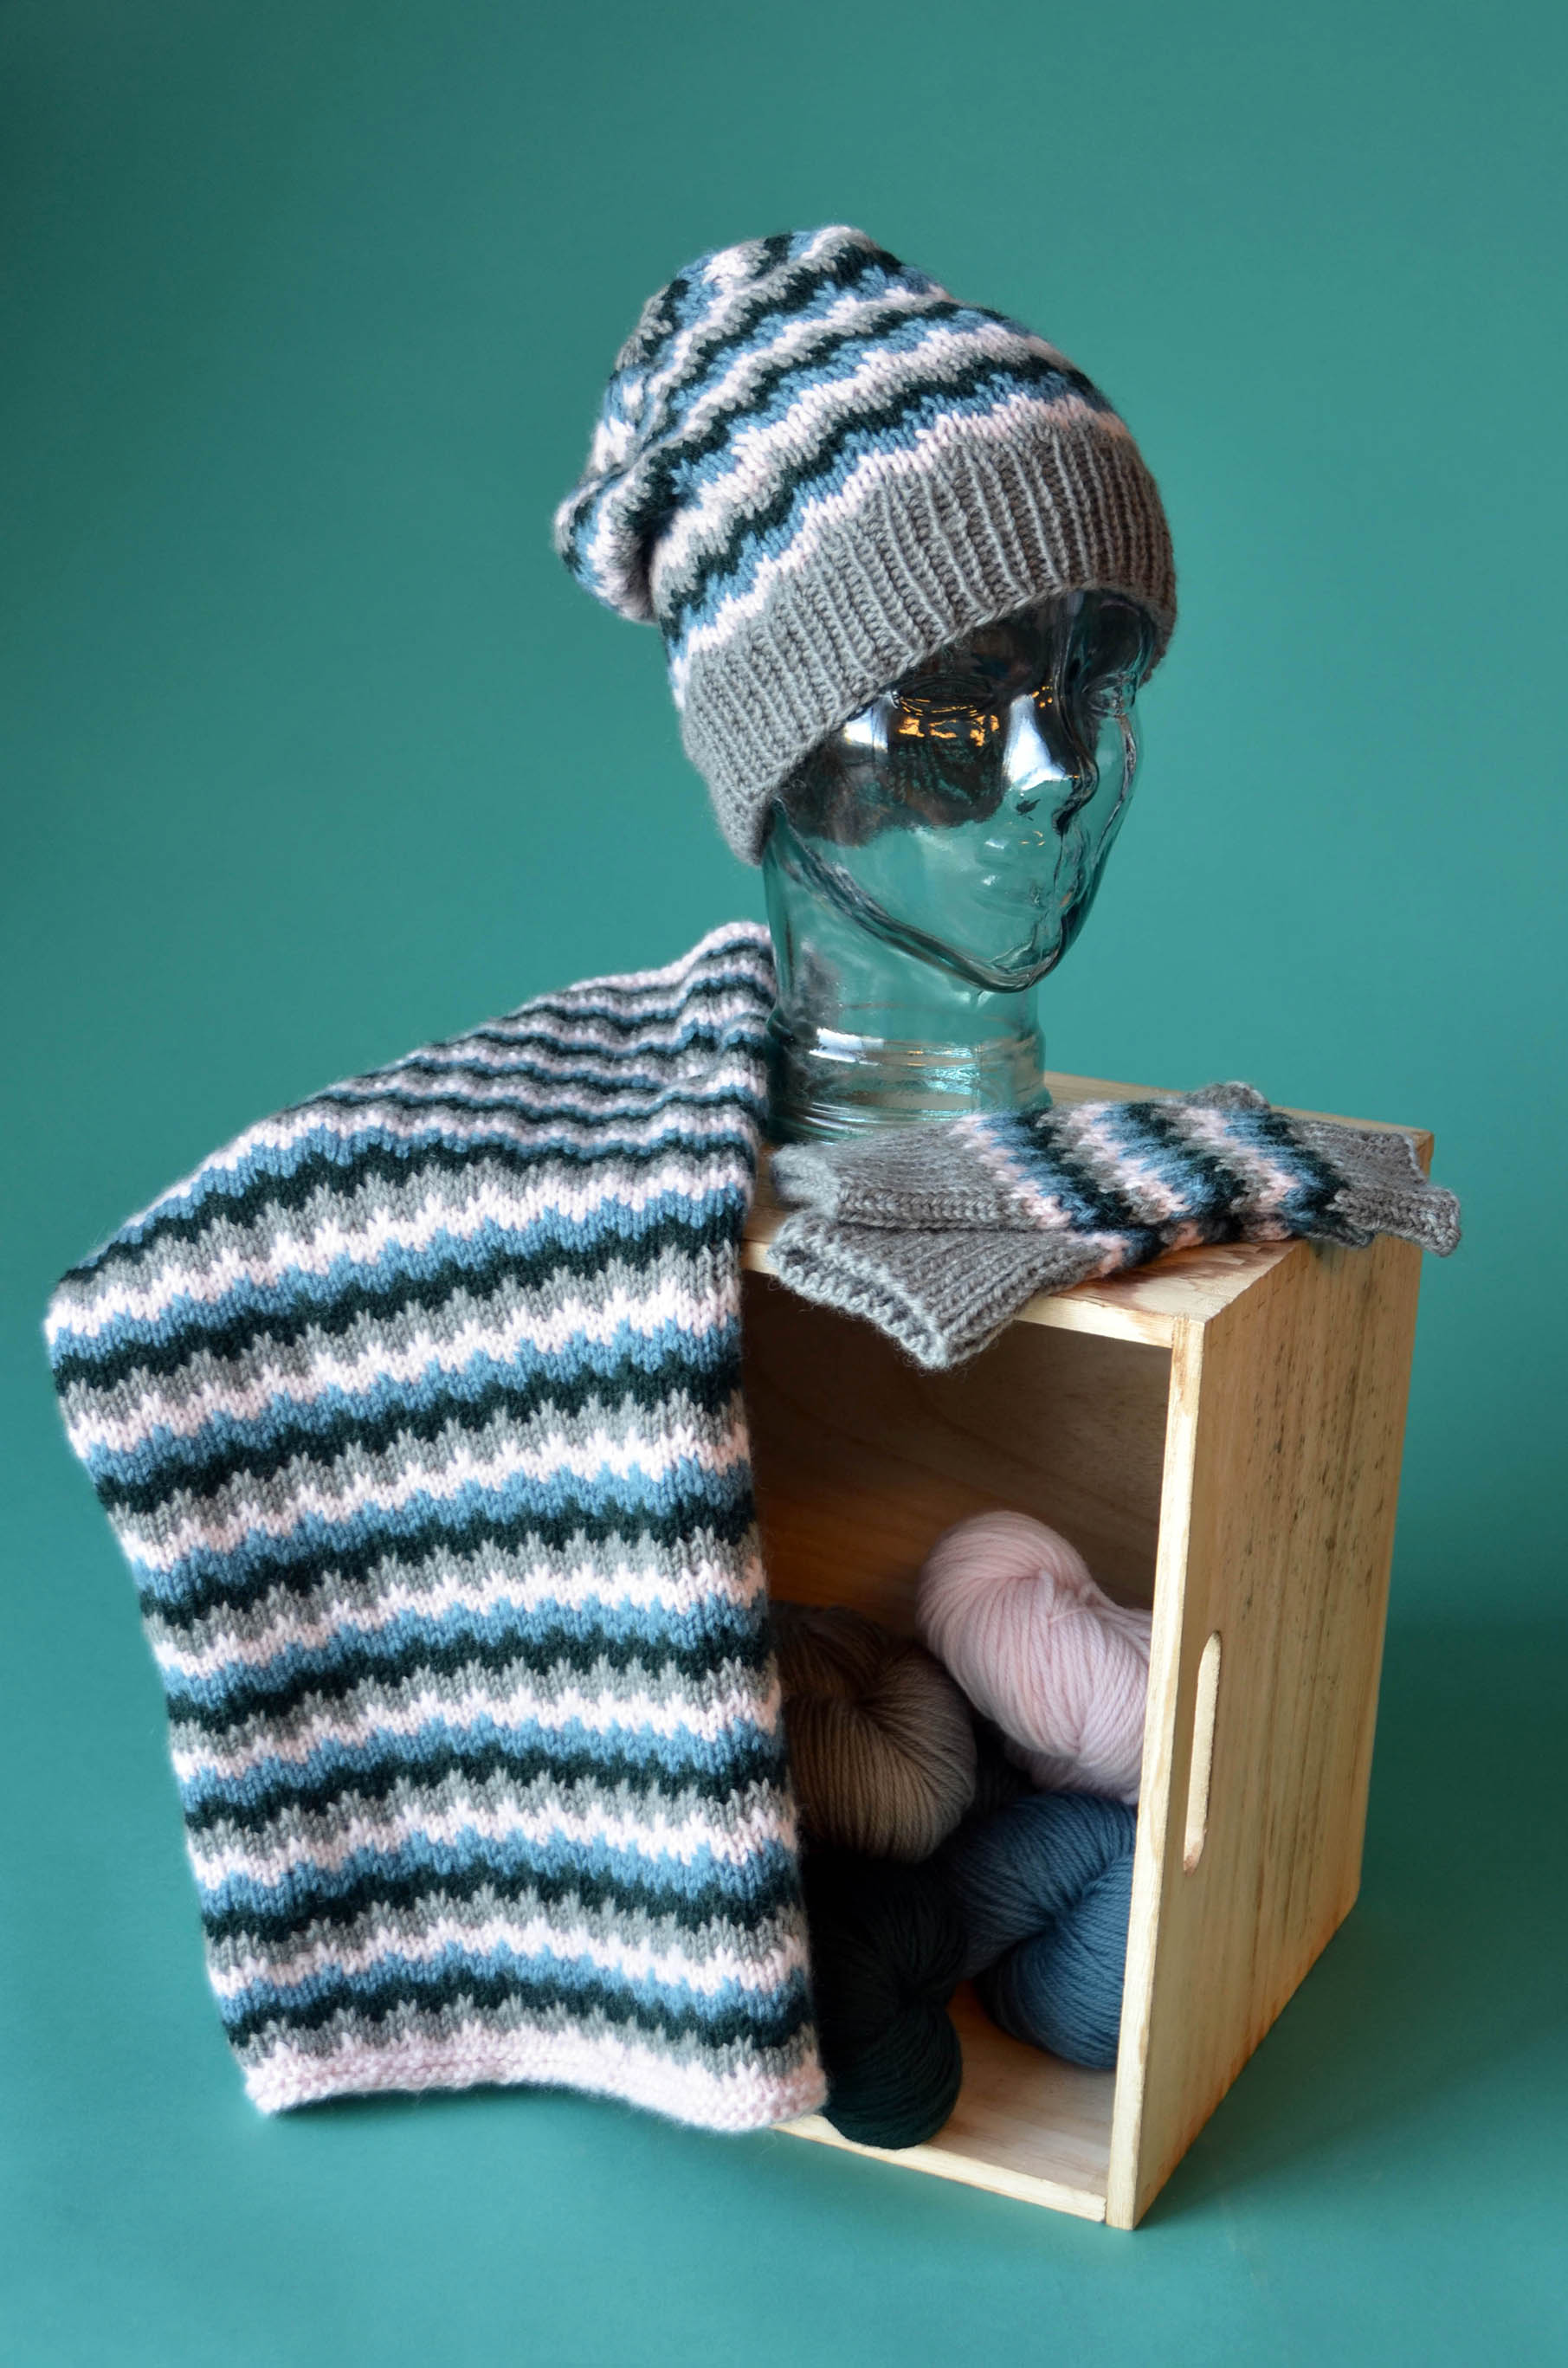
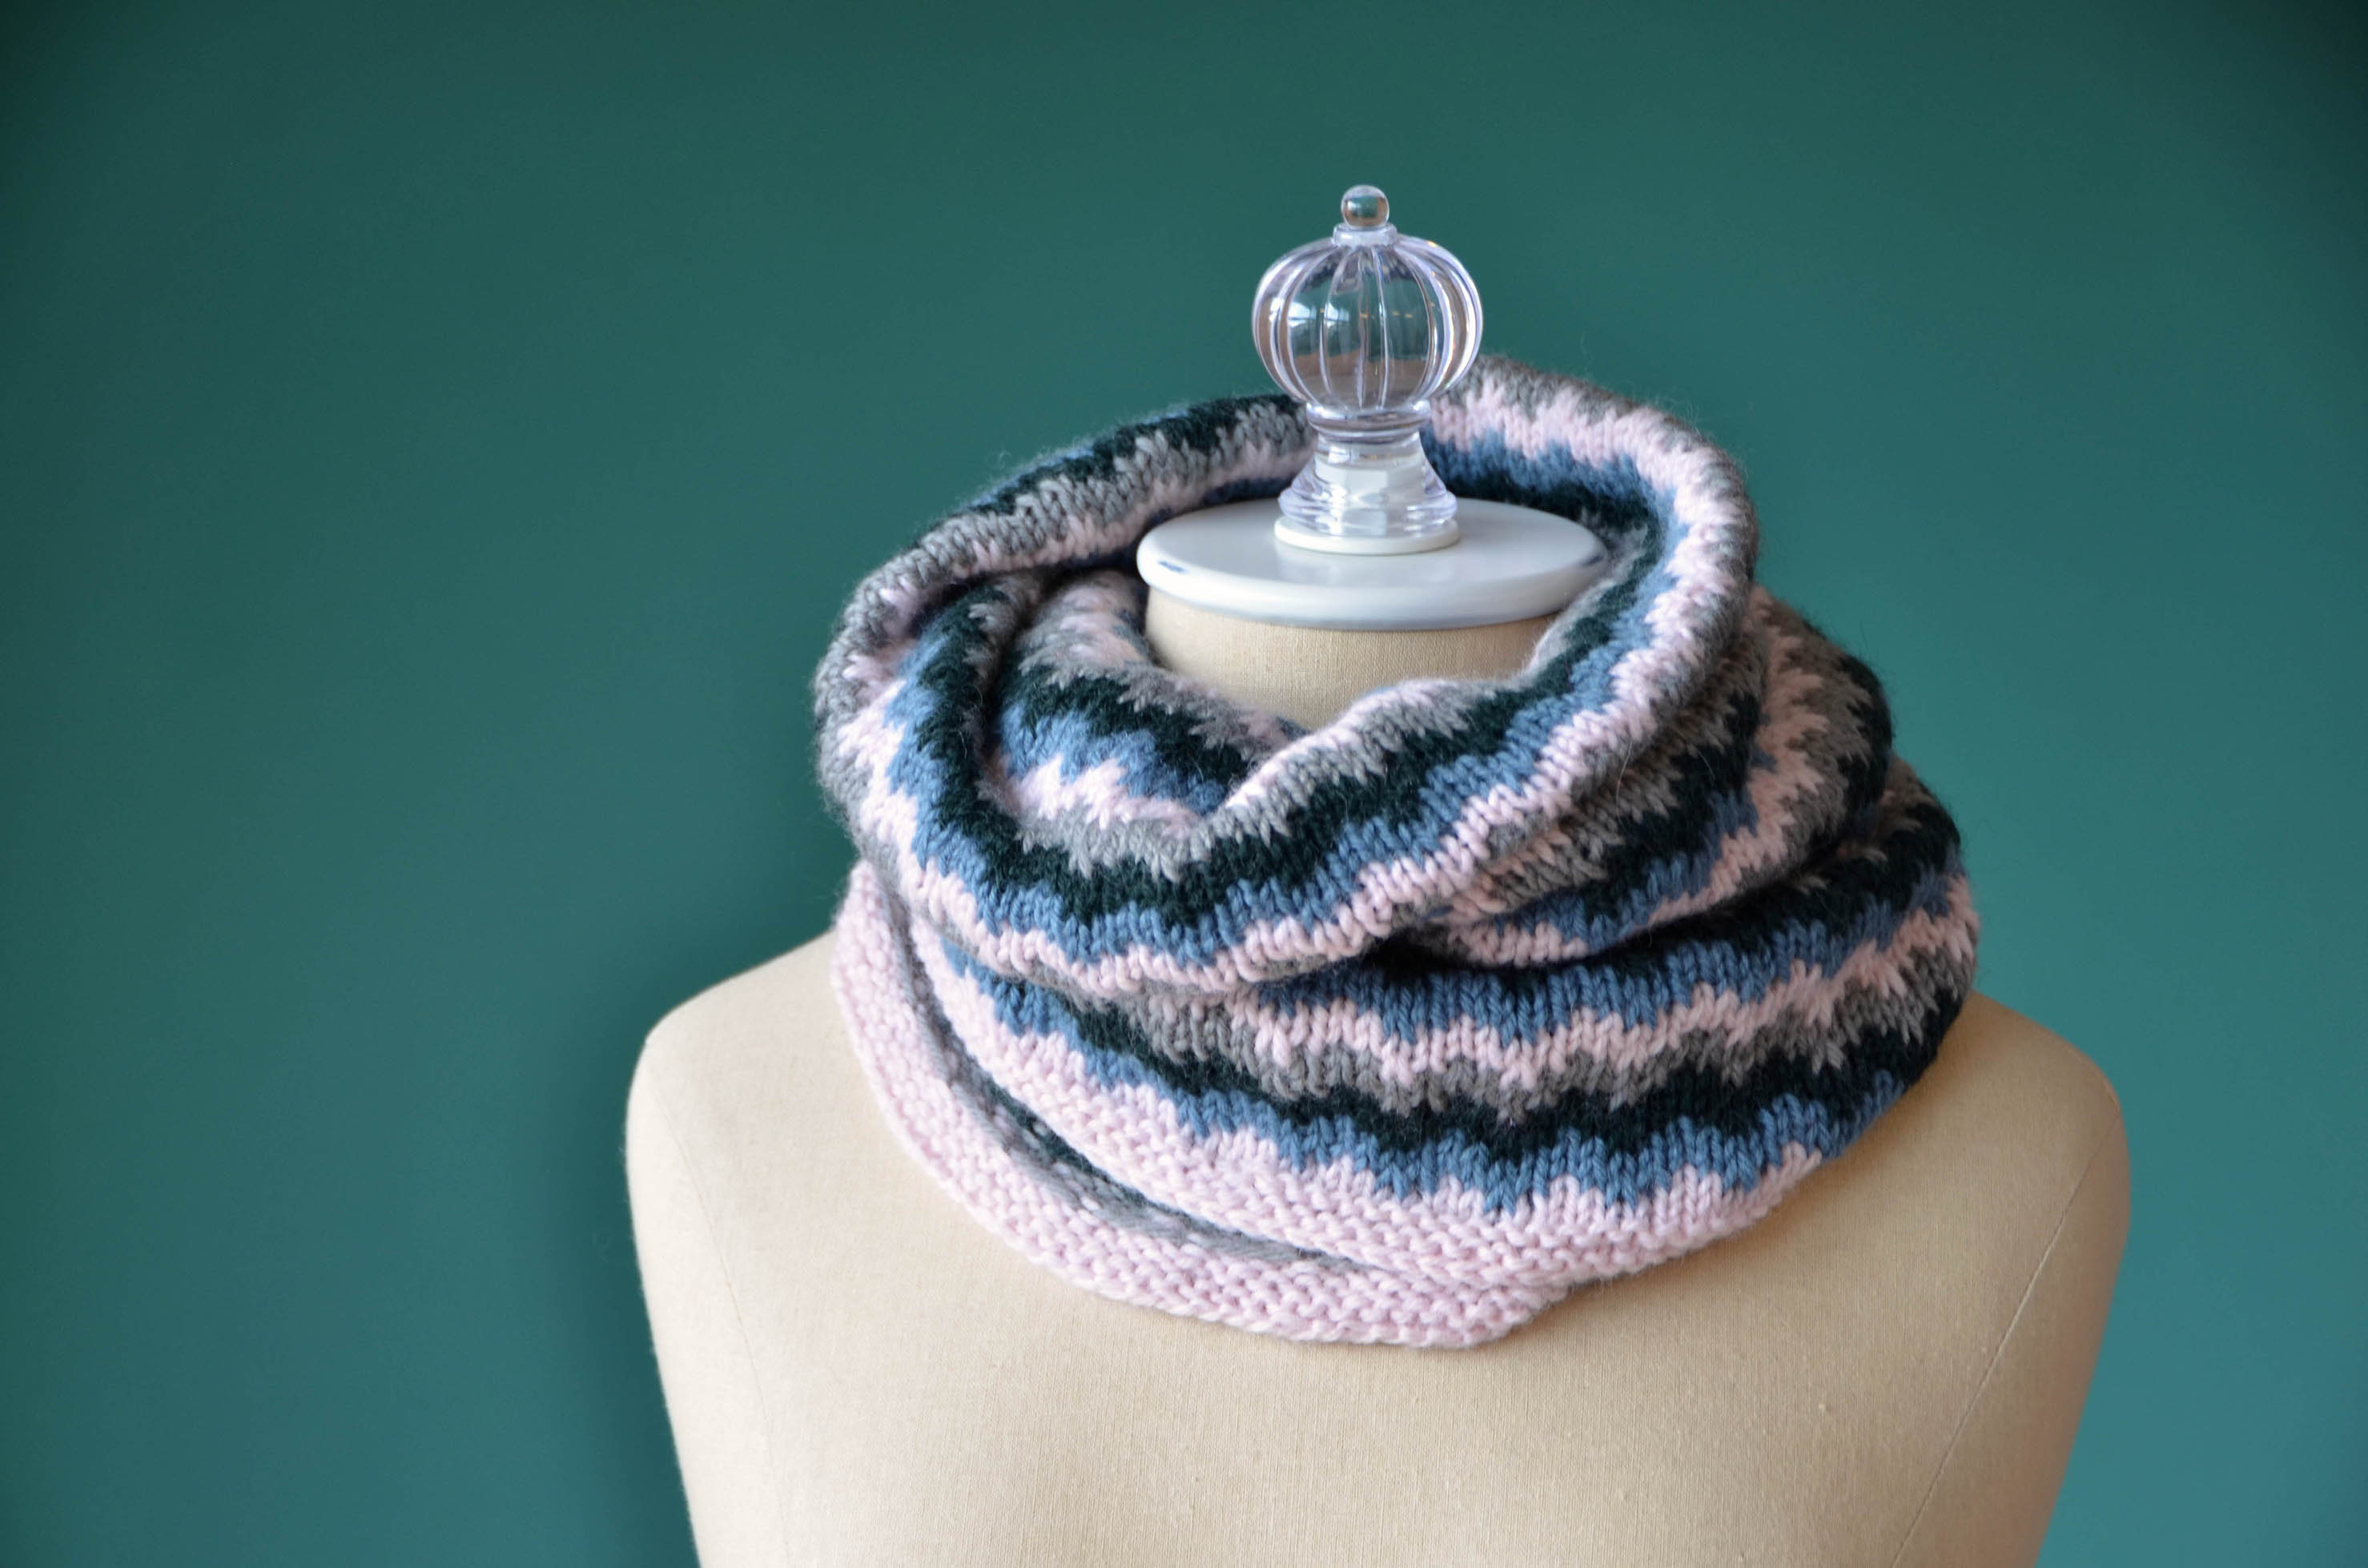
The pattern is written for the smaller size as shown, and also a large size, long enough to wrap around your neck twice. The yarn included in the kit is enough to knit either two small cowls, or one large. So – bonus!
The main body of the cowl is super-duper simple. The complex looking color pattern is just slipped stitches. Colors are changed every two rounds, and only one color is used per round. It hits that sweet spot of knitting where the pattern is just a bit more than stockinette – enough to keep you interested – but easy enough that you can work on it anywhere.
My favorite detail of this cowl is the picot edging along both edges. This could have been done with a knitted picot bind-off, but I chose to use a crochet picot instead. For me, it’s just less fiddly than doing its knit counterpart. Let’s learn how to do it!
If you need a little closer view on any of the following images, just click on it and it will open in a new browser window.
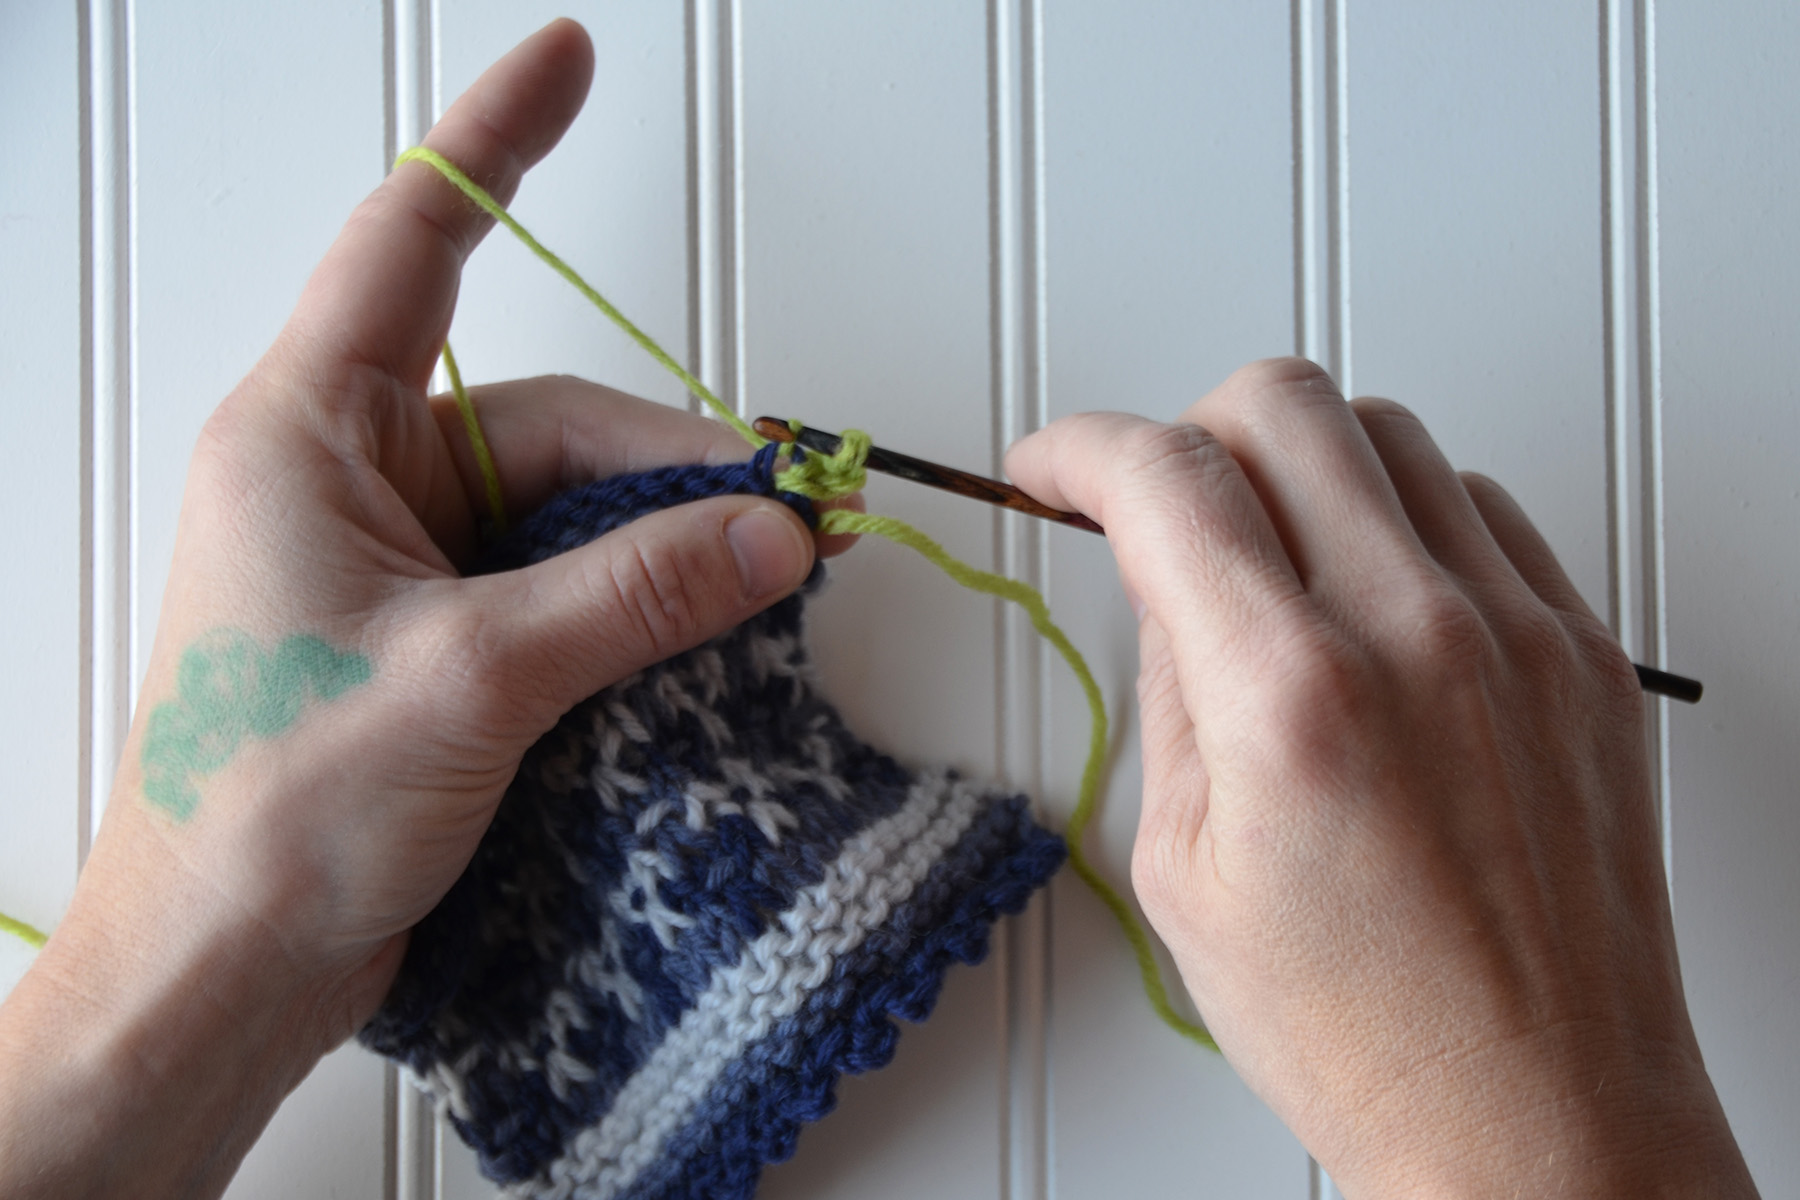
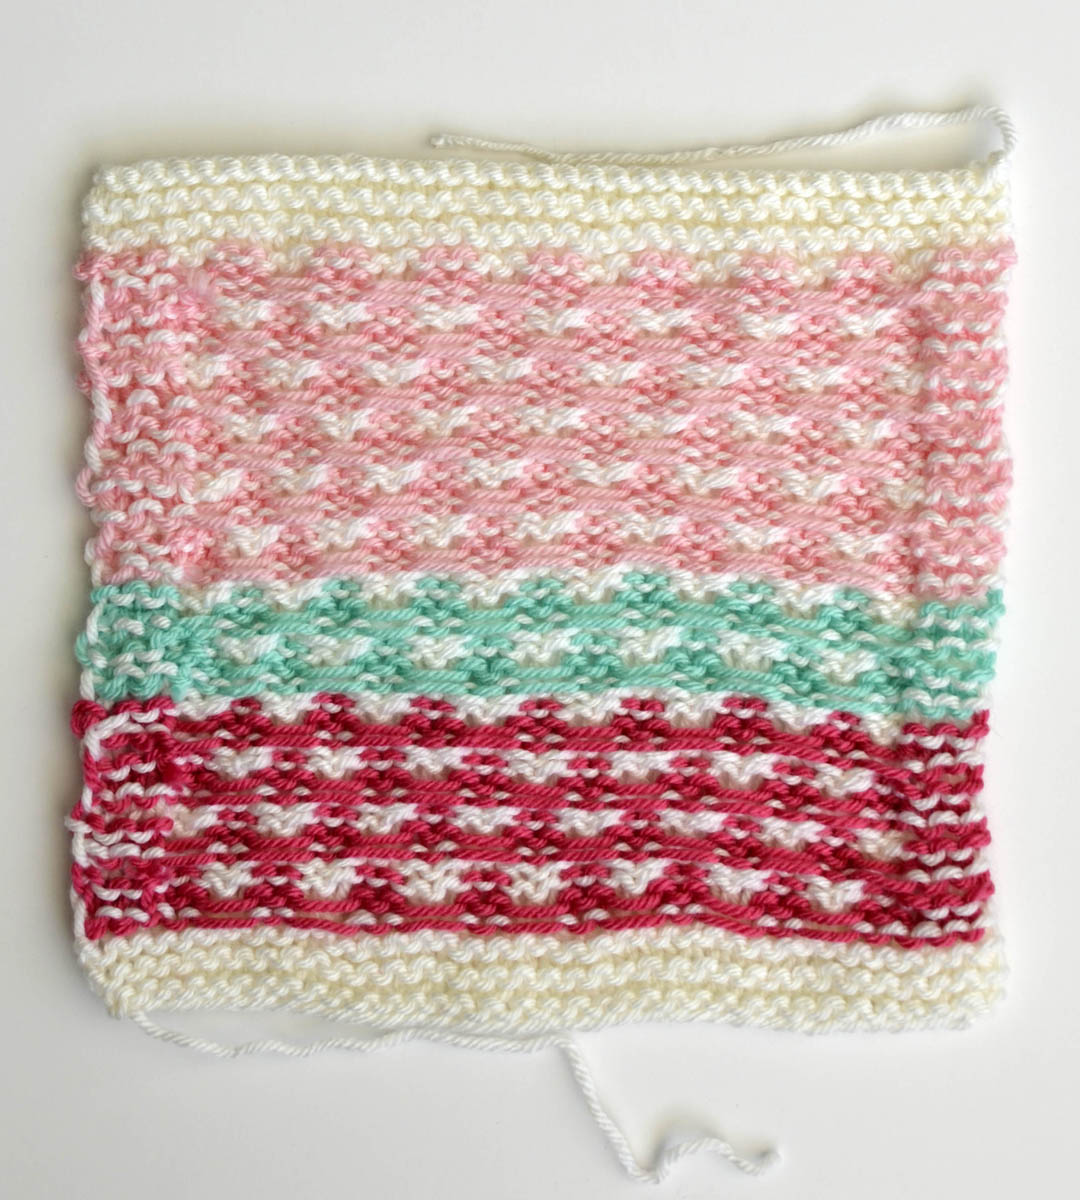
In my swatch, you can see that I’ve already done the picot edging along the lower edge. I’m going to be using a contrast color for the top edge so it’s easier for you to see.
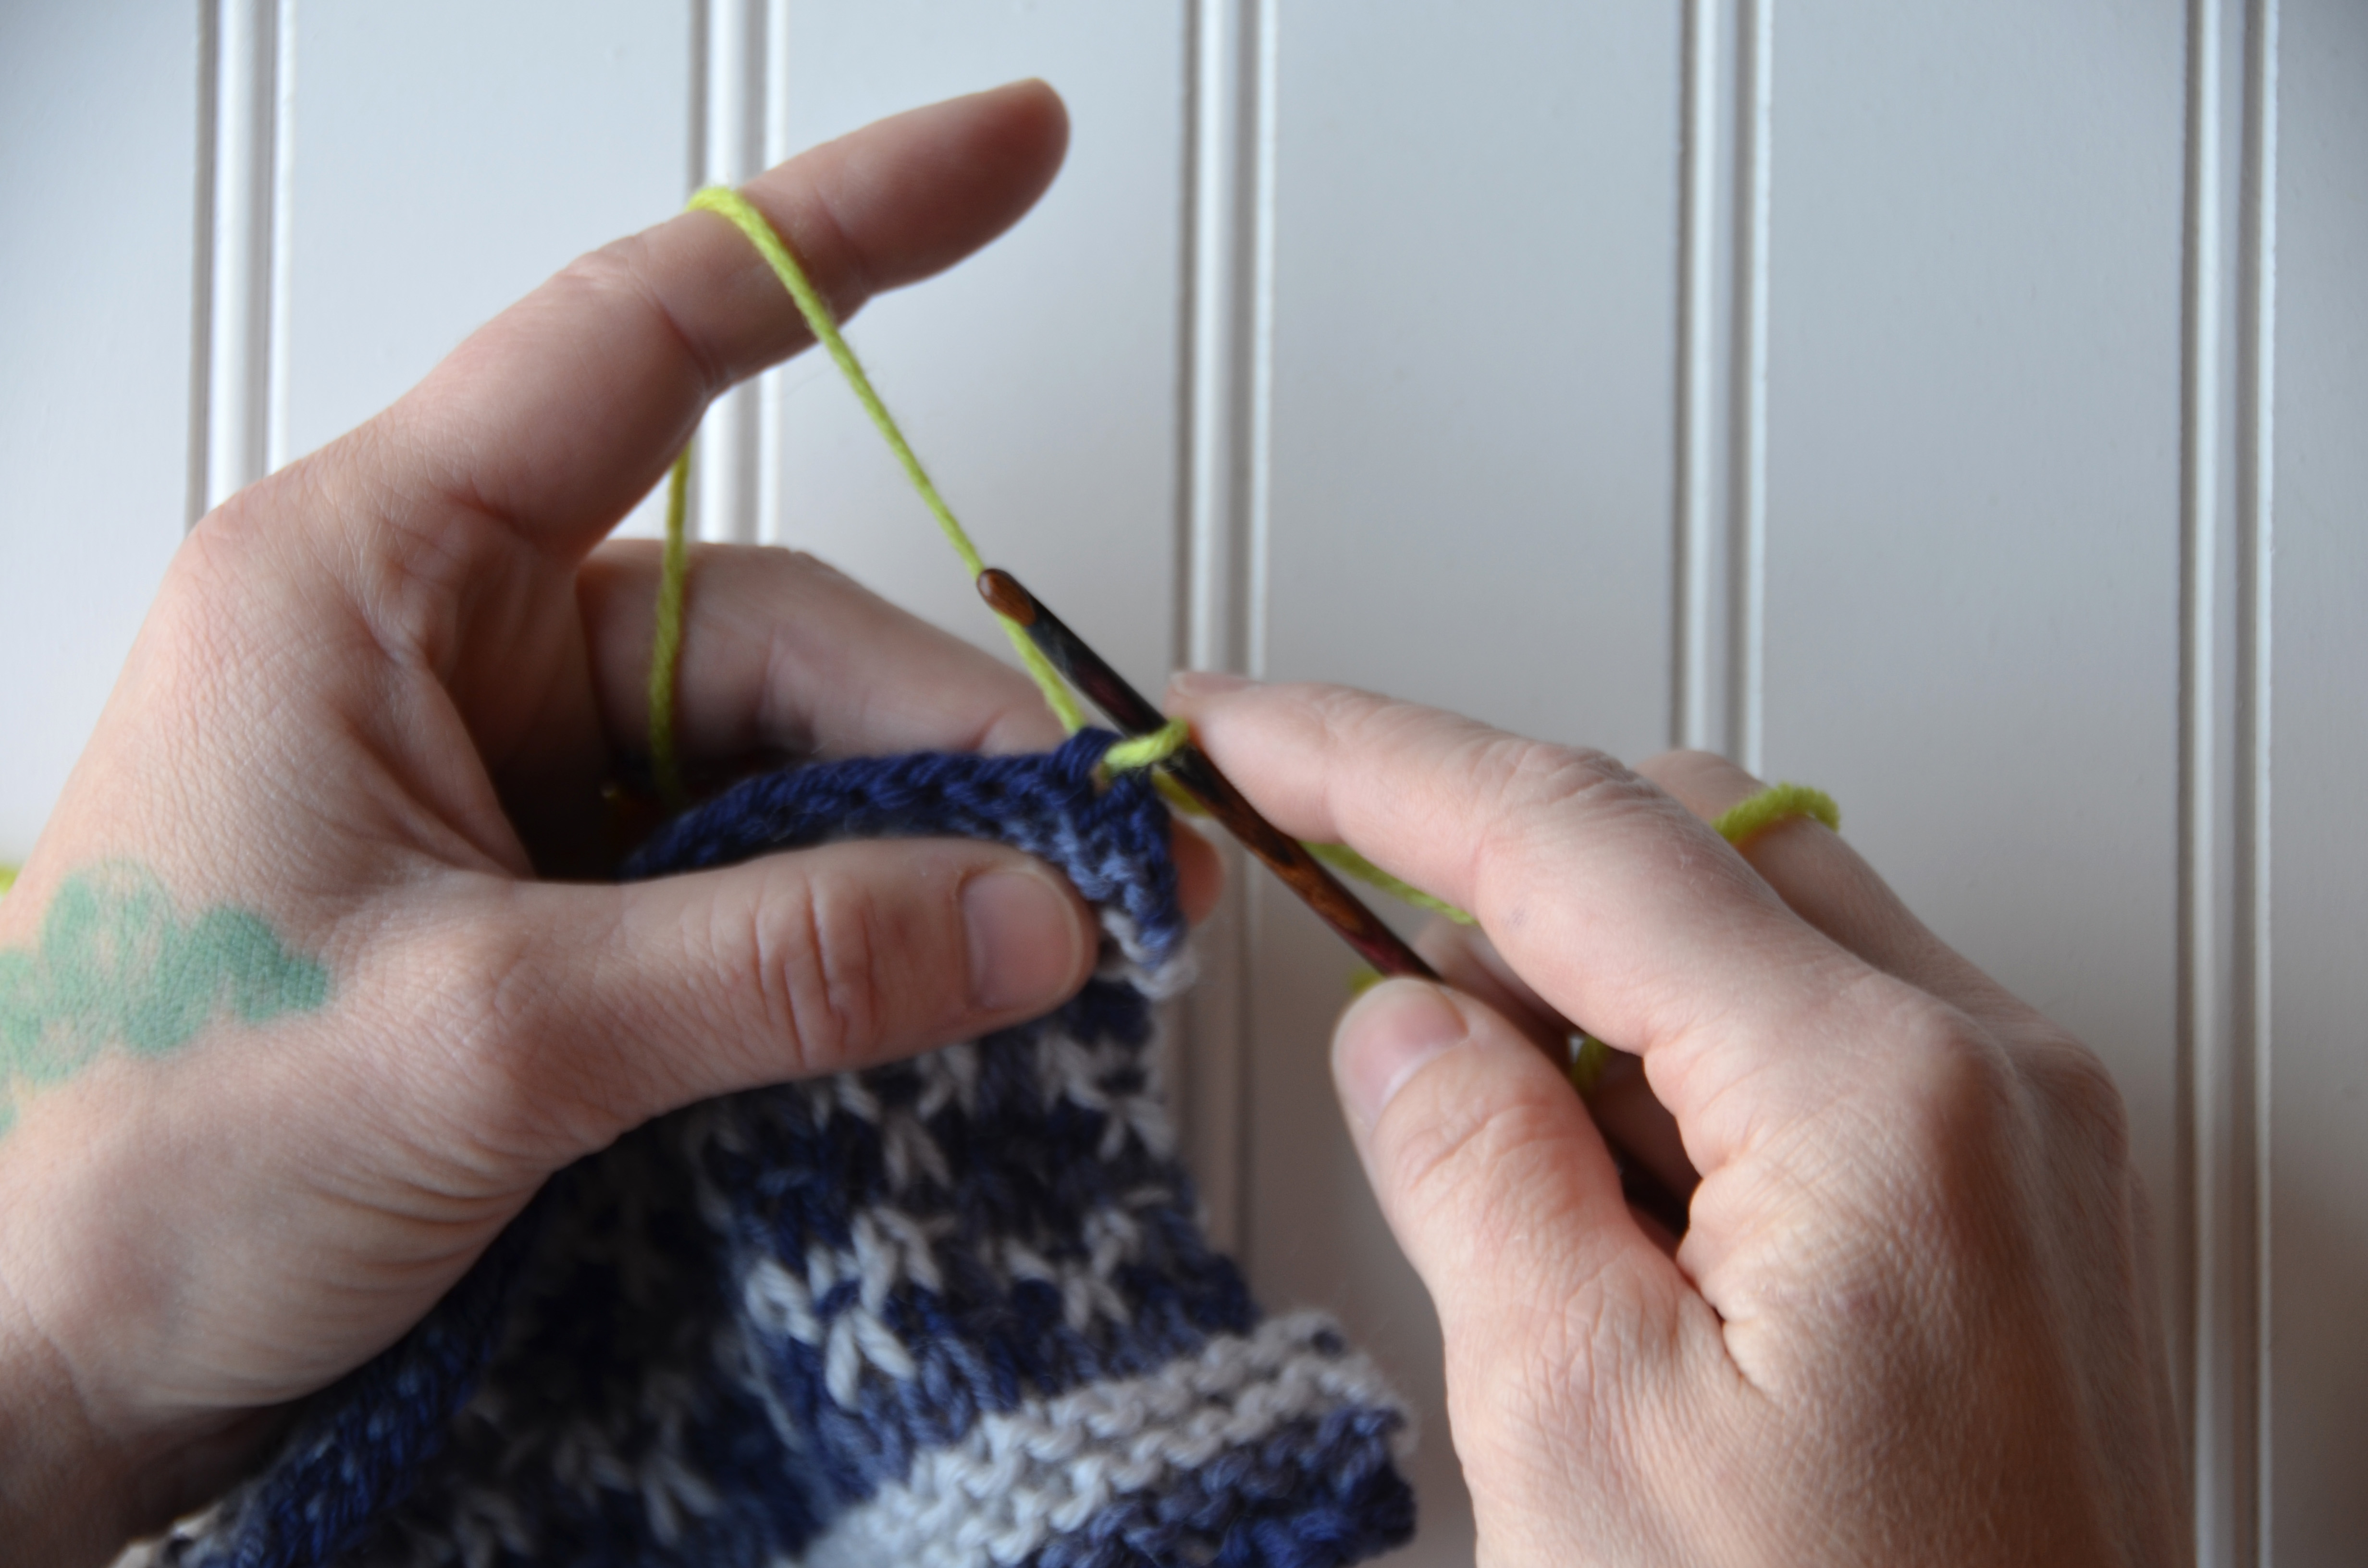
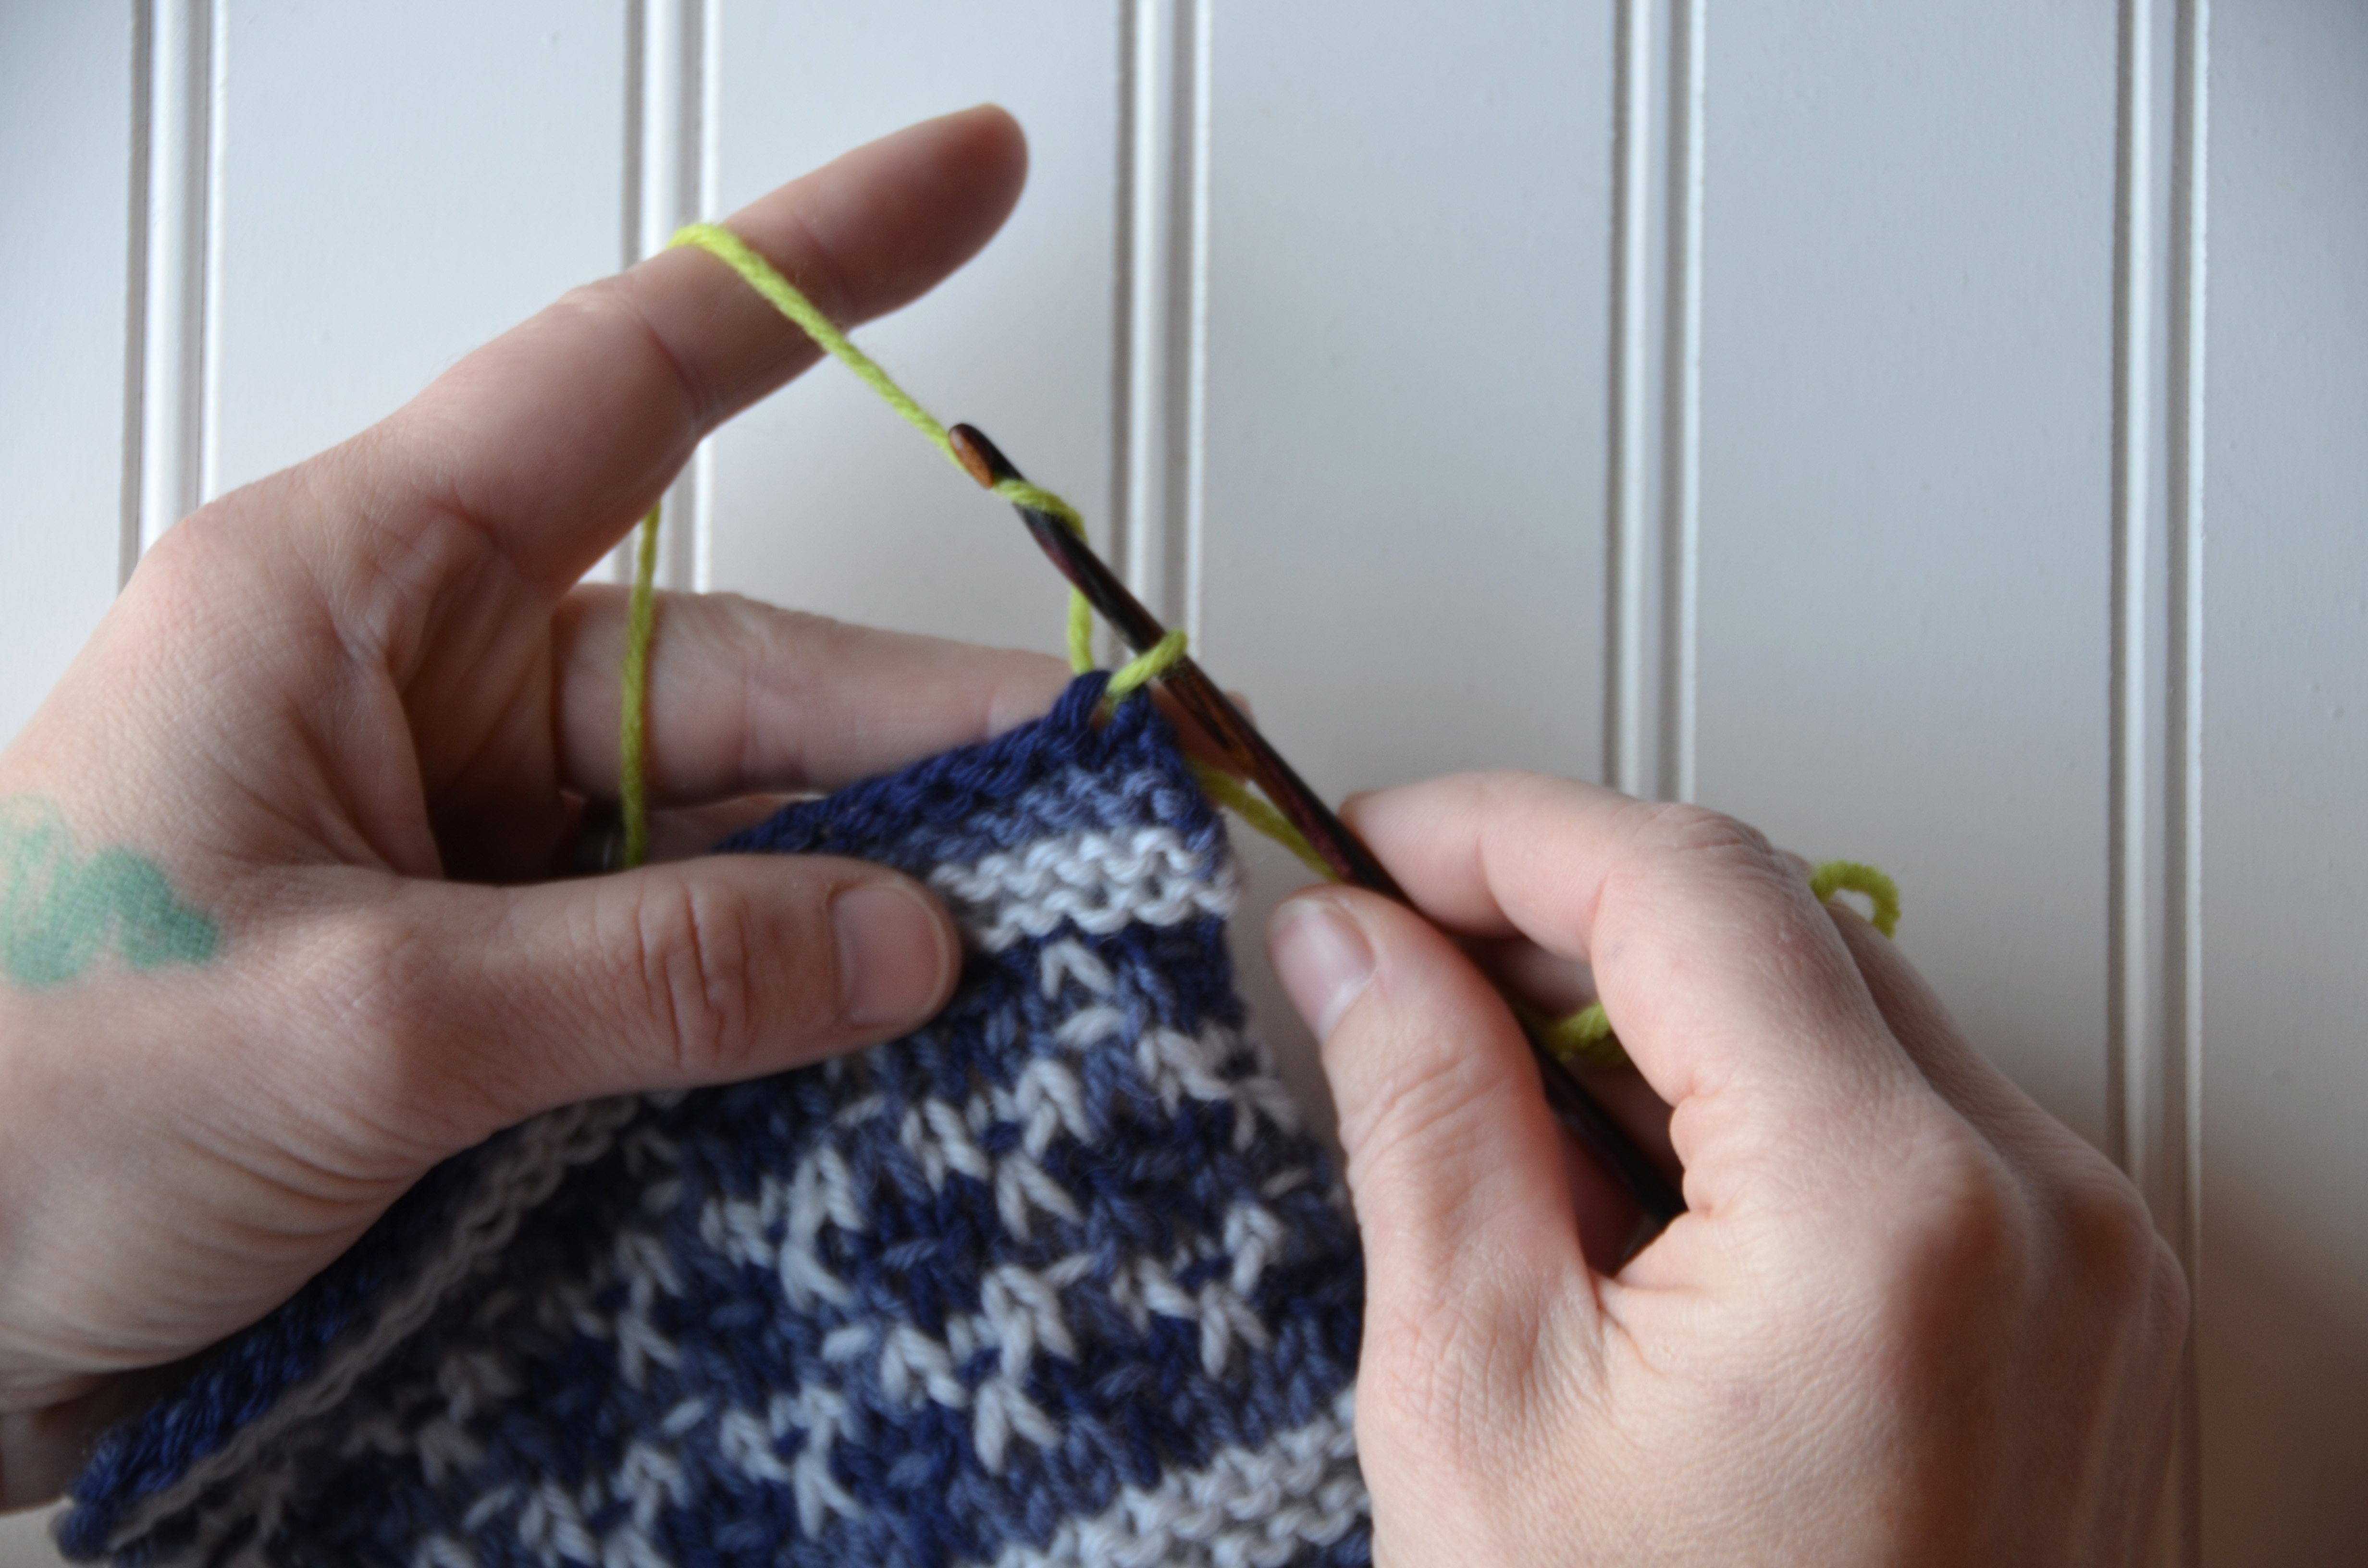
Begin by pulling up a loop onto your hook. Be sure to work through both loops of the knit stitch from the cowl as you do this.
Step 1: Chain 3. To make a chain, first yarn over as shown.
To complete the chain, pull the yarn over through the loop already on your hook.
All 3 chains complete.
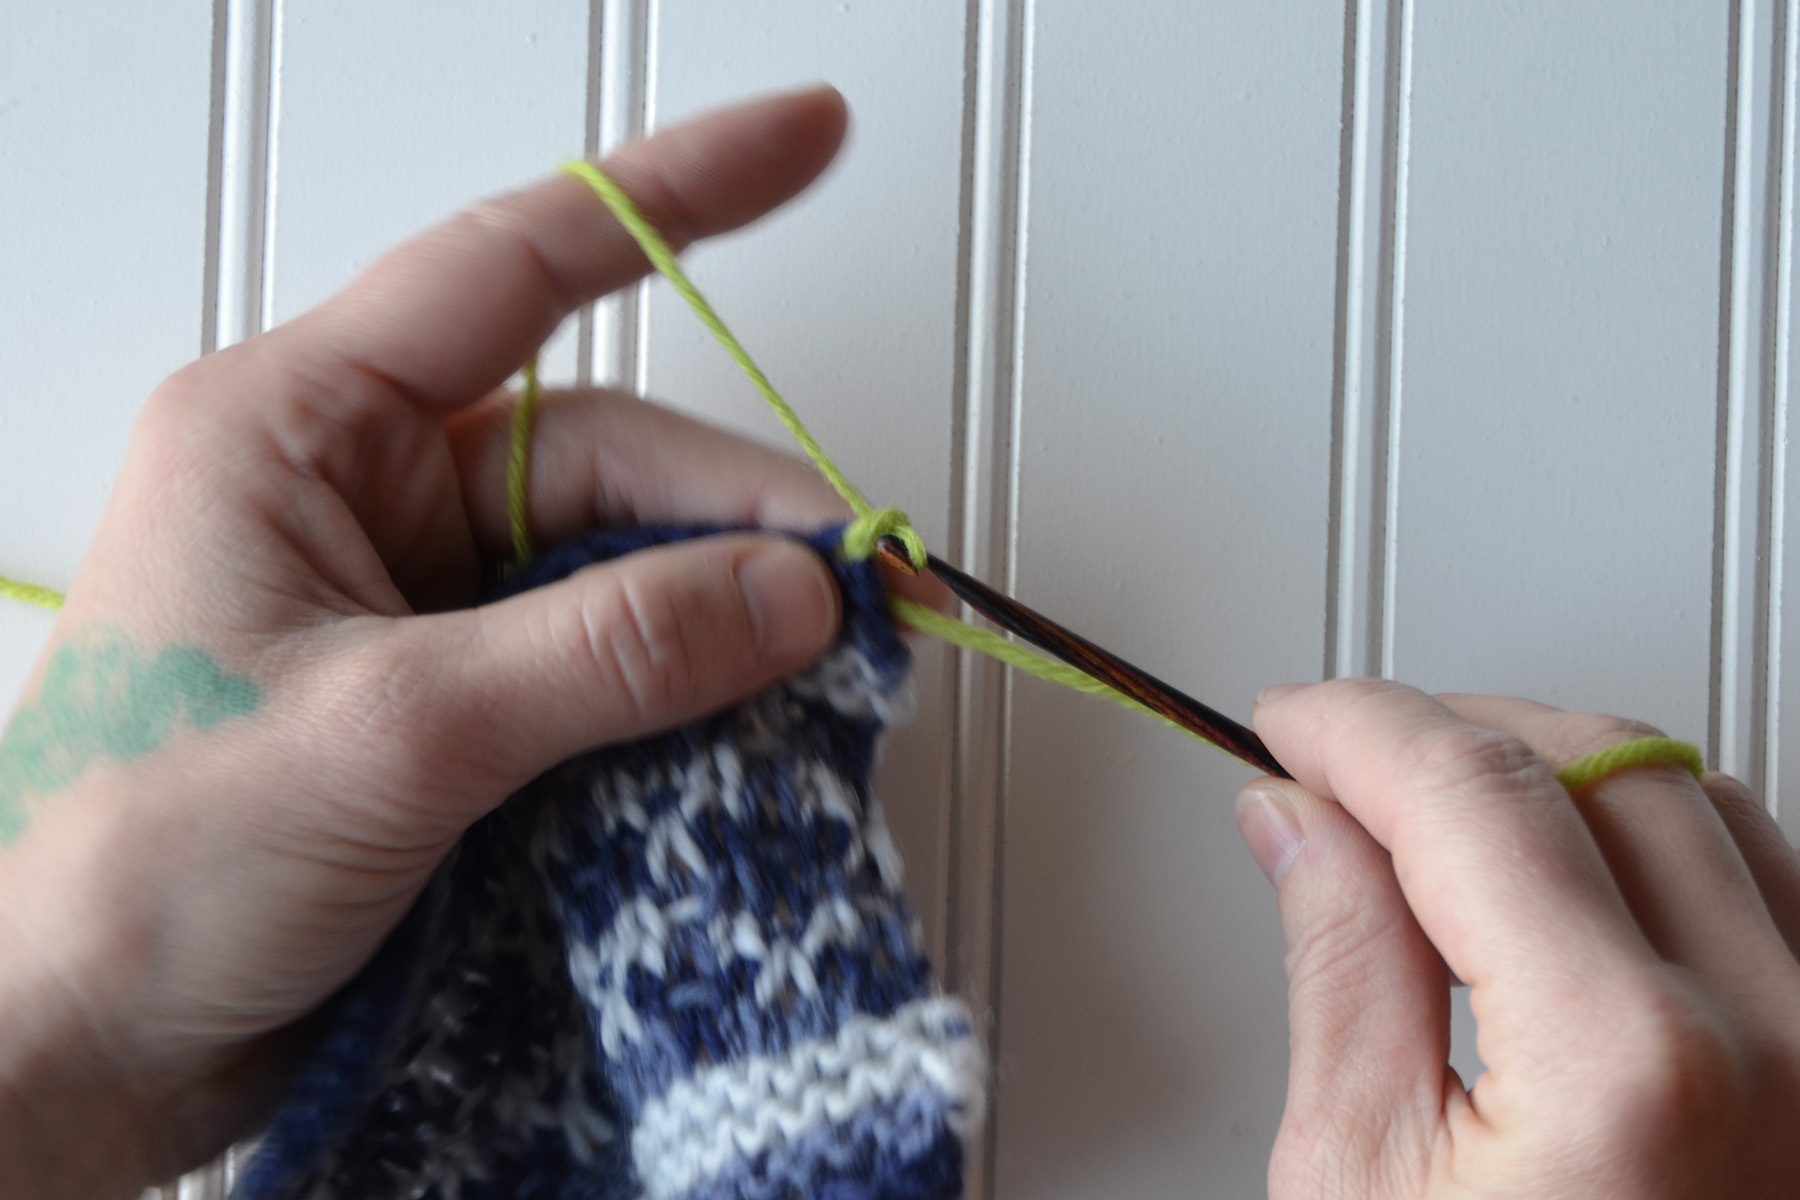
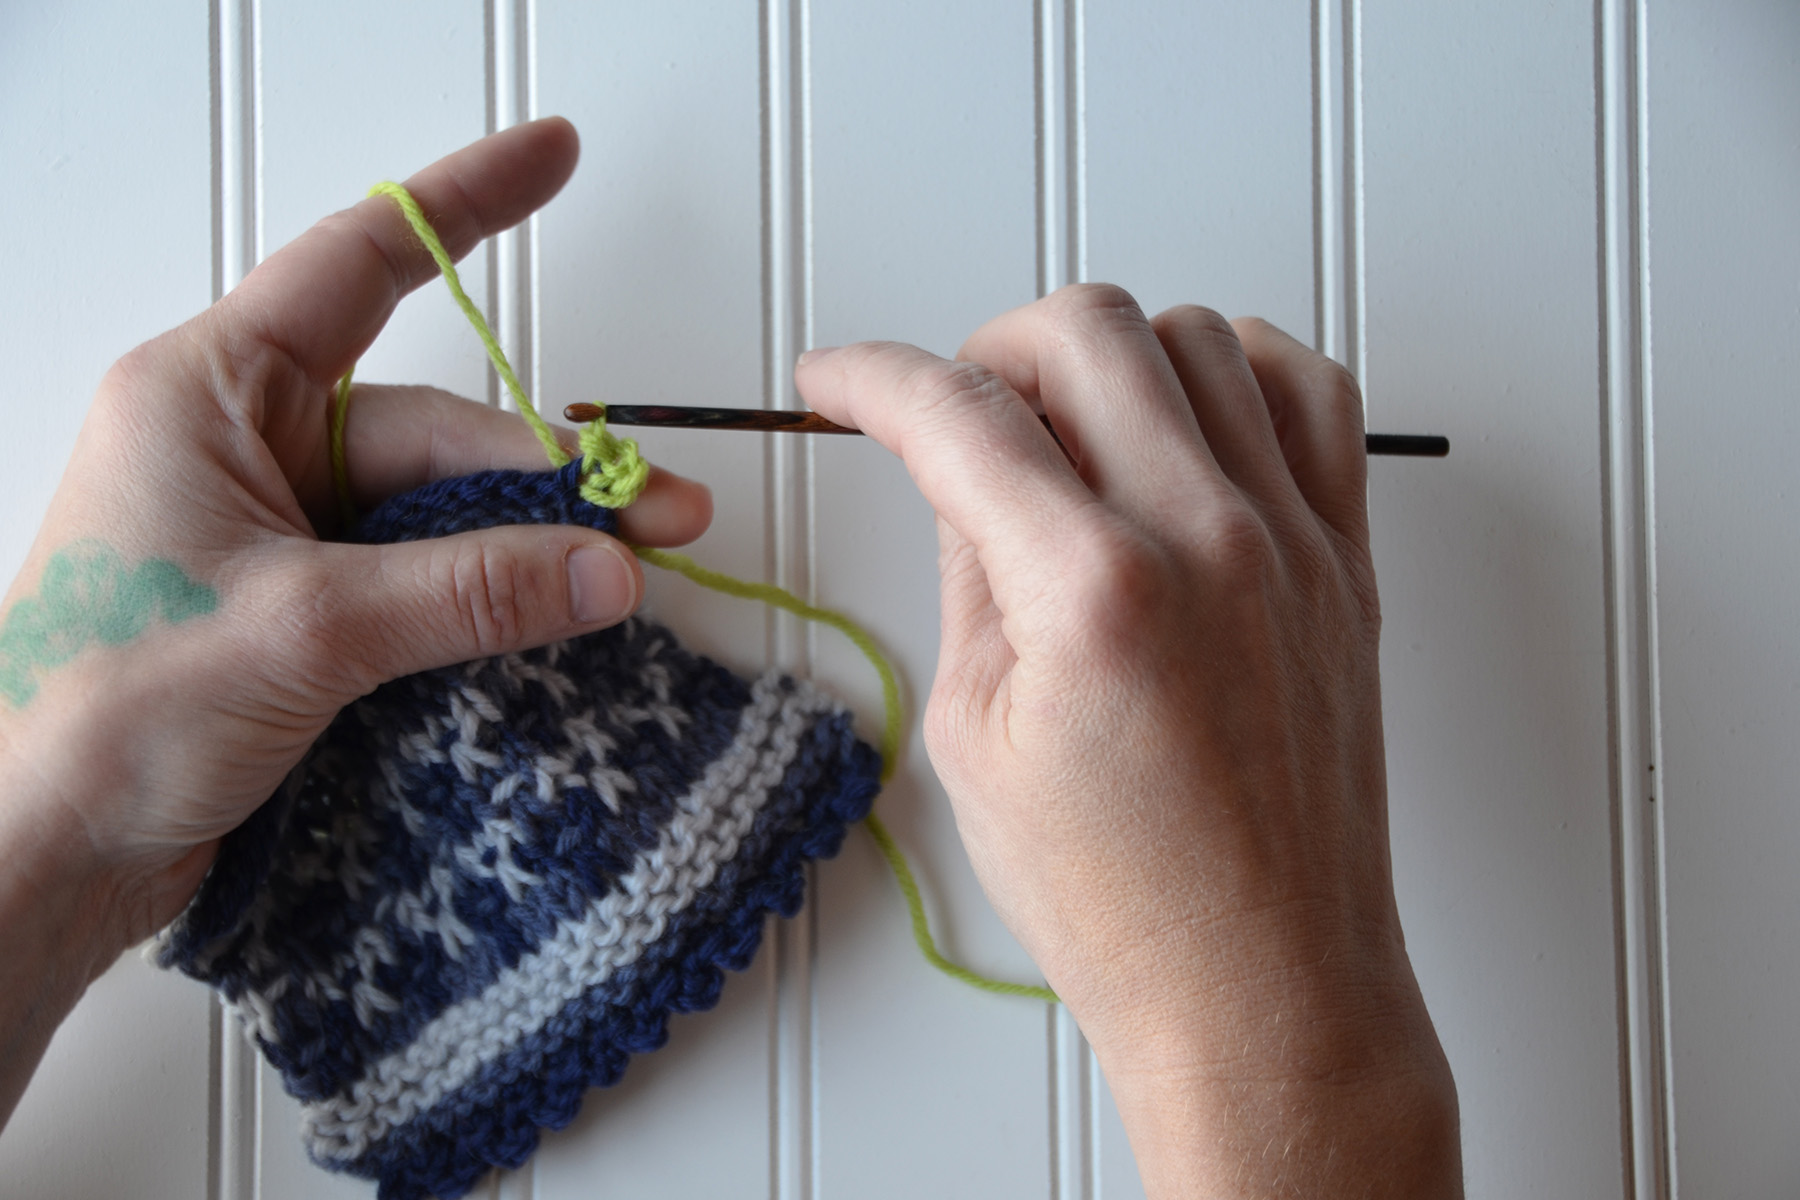
Step 2: Slip stitch into the same knit stitch from the cowl body. To do this, first insert your hook into the stitch, going underneath the same two loops again.
Yarn over and pull through the knit stitch.
Then pull this second loop through the first loop on the hook to complete the slip stitch.
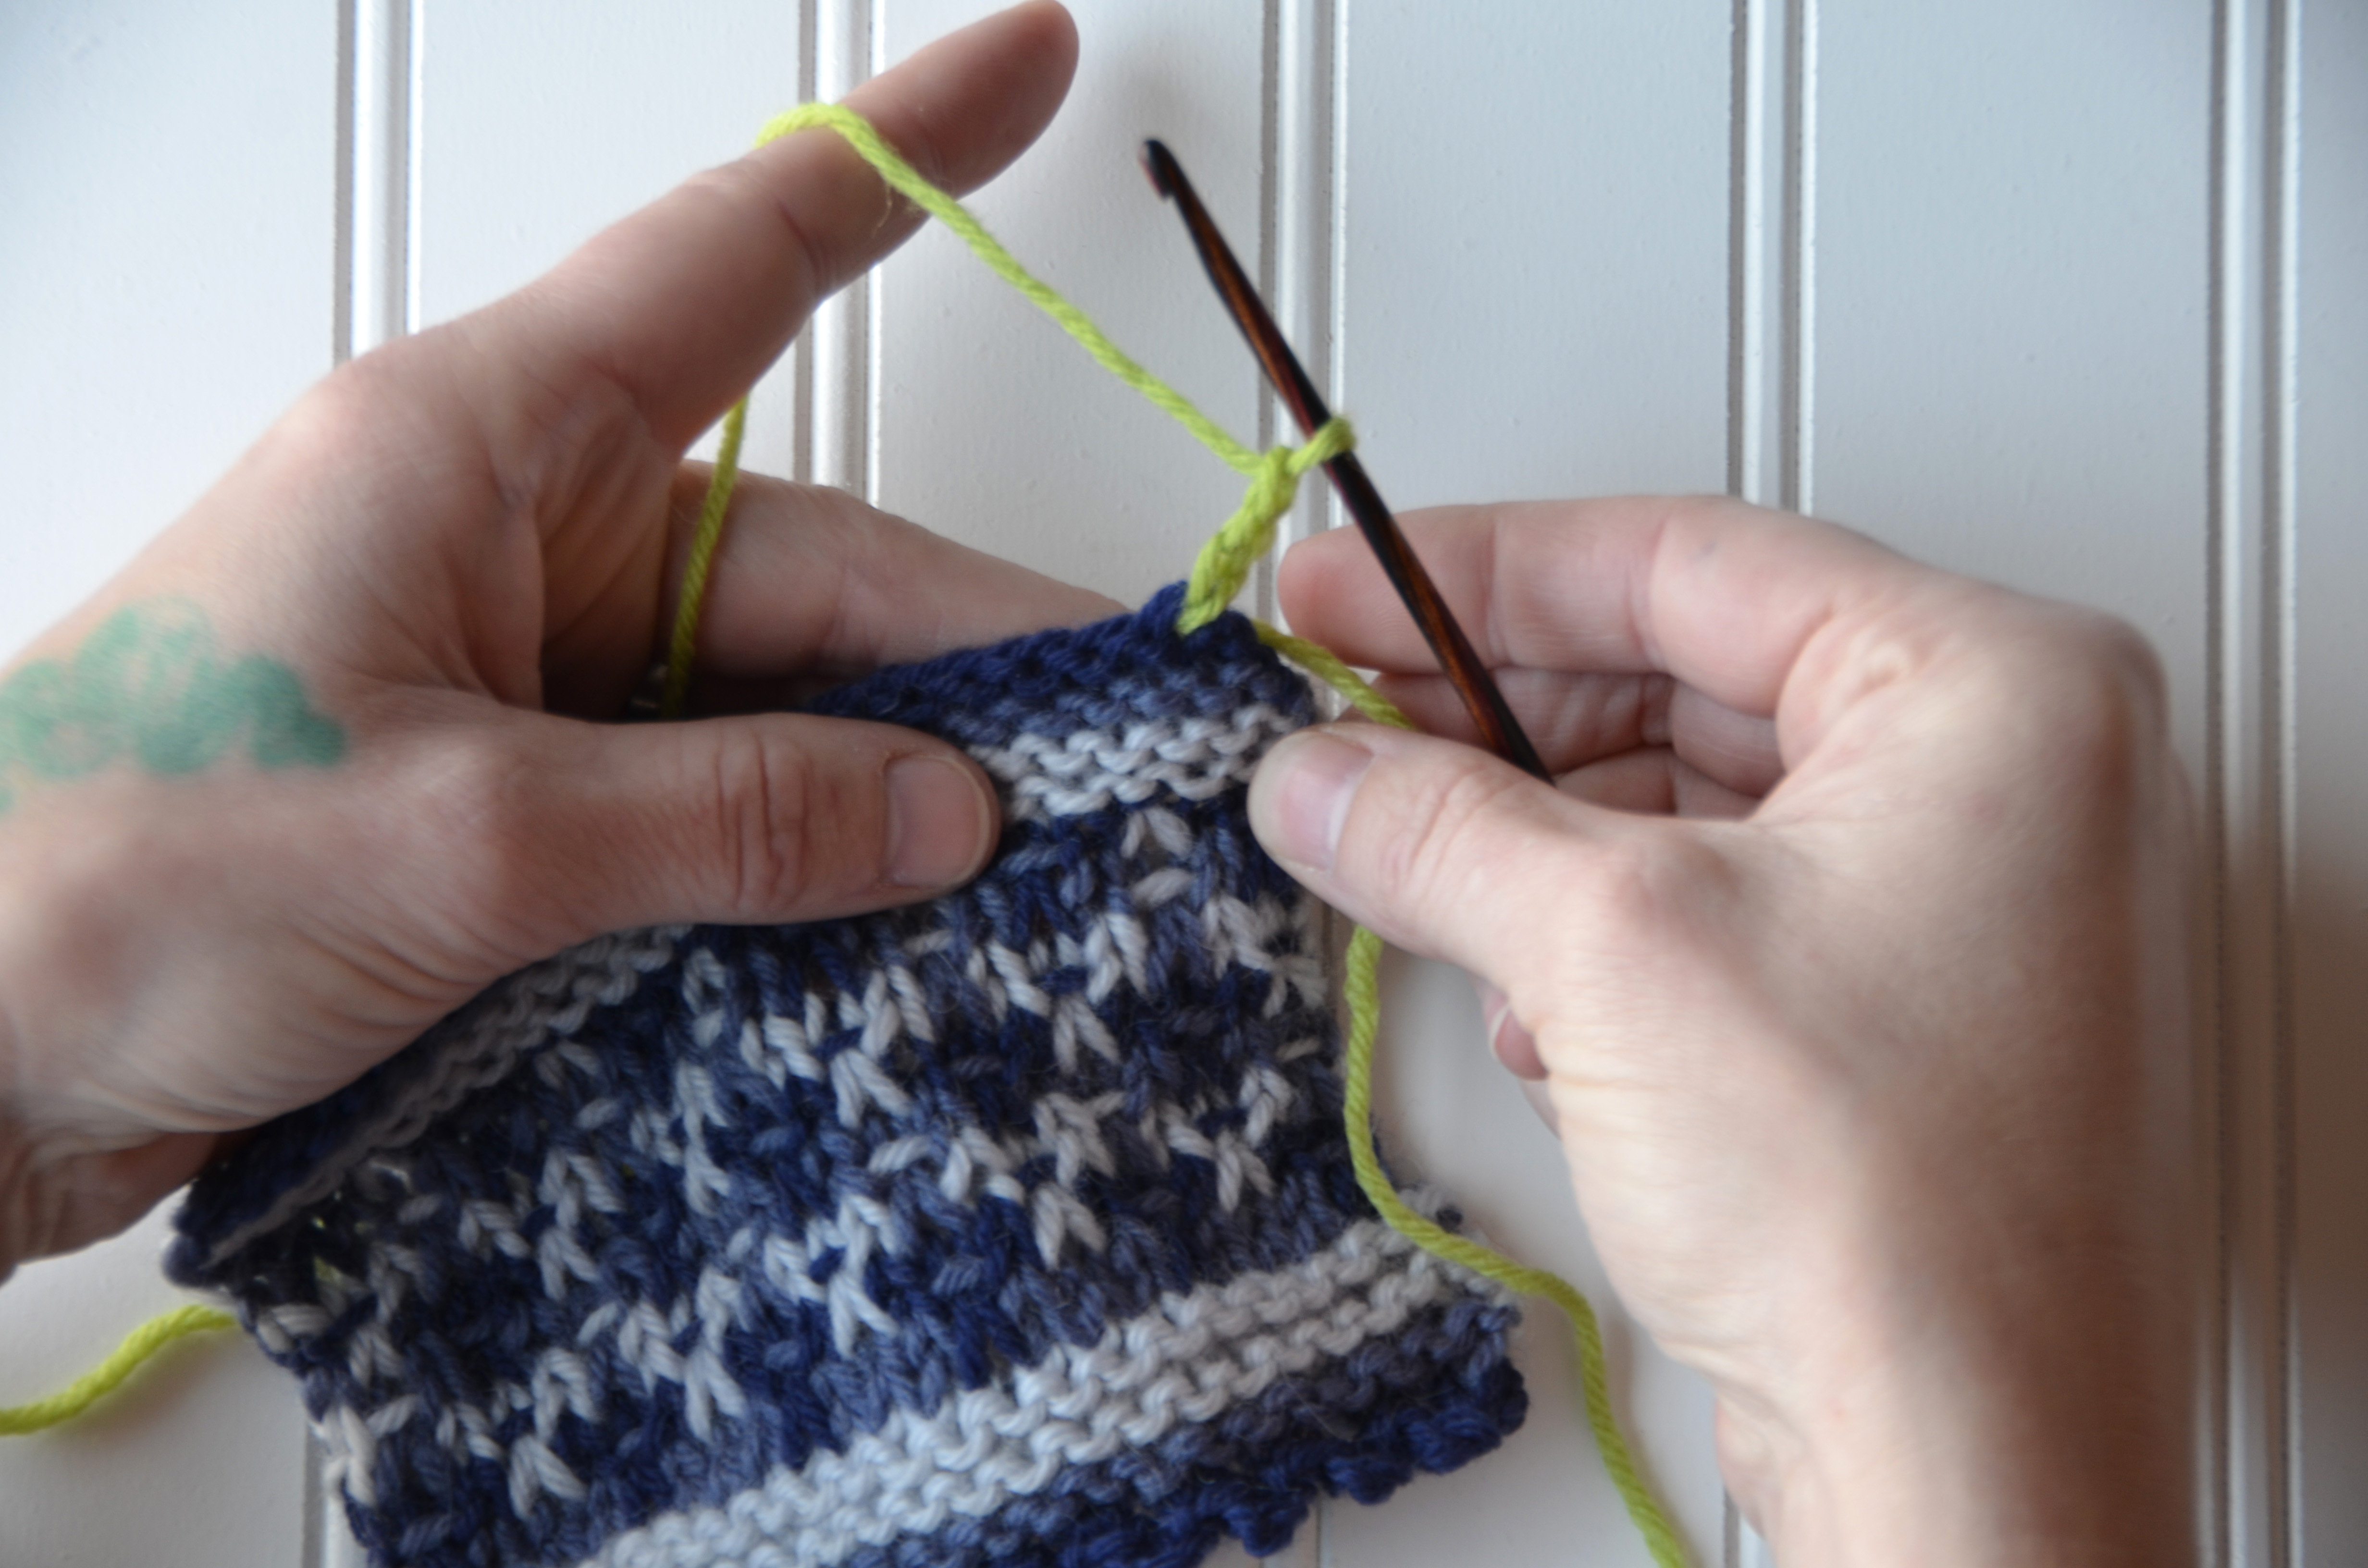
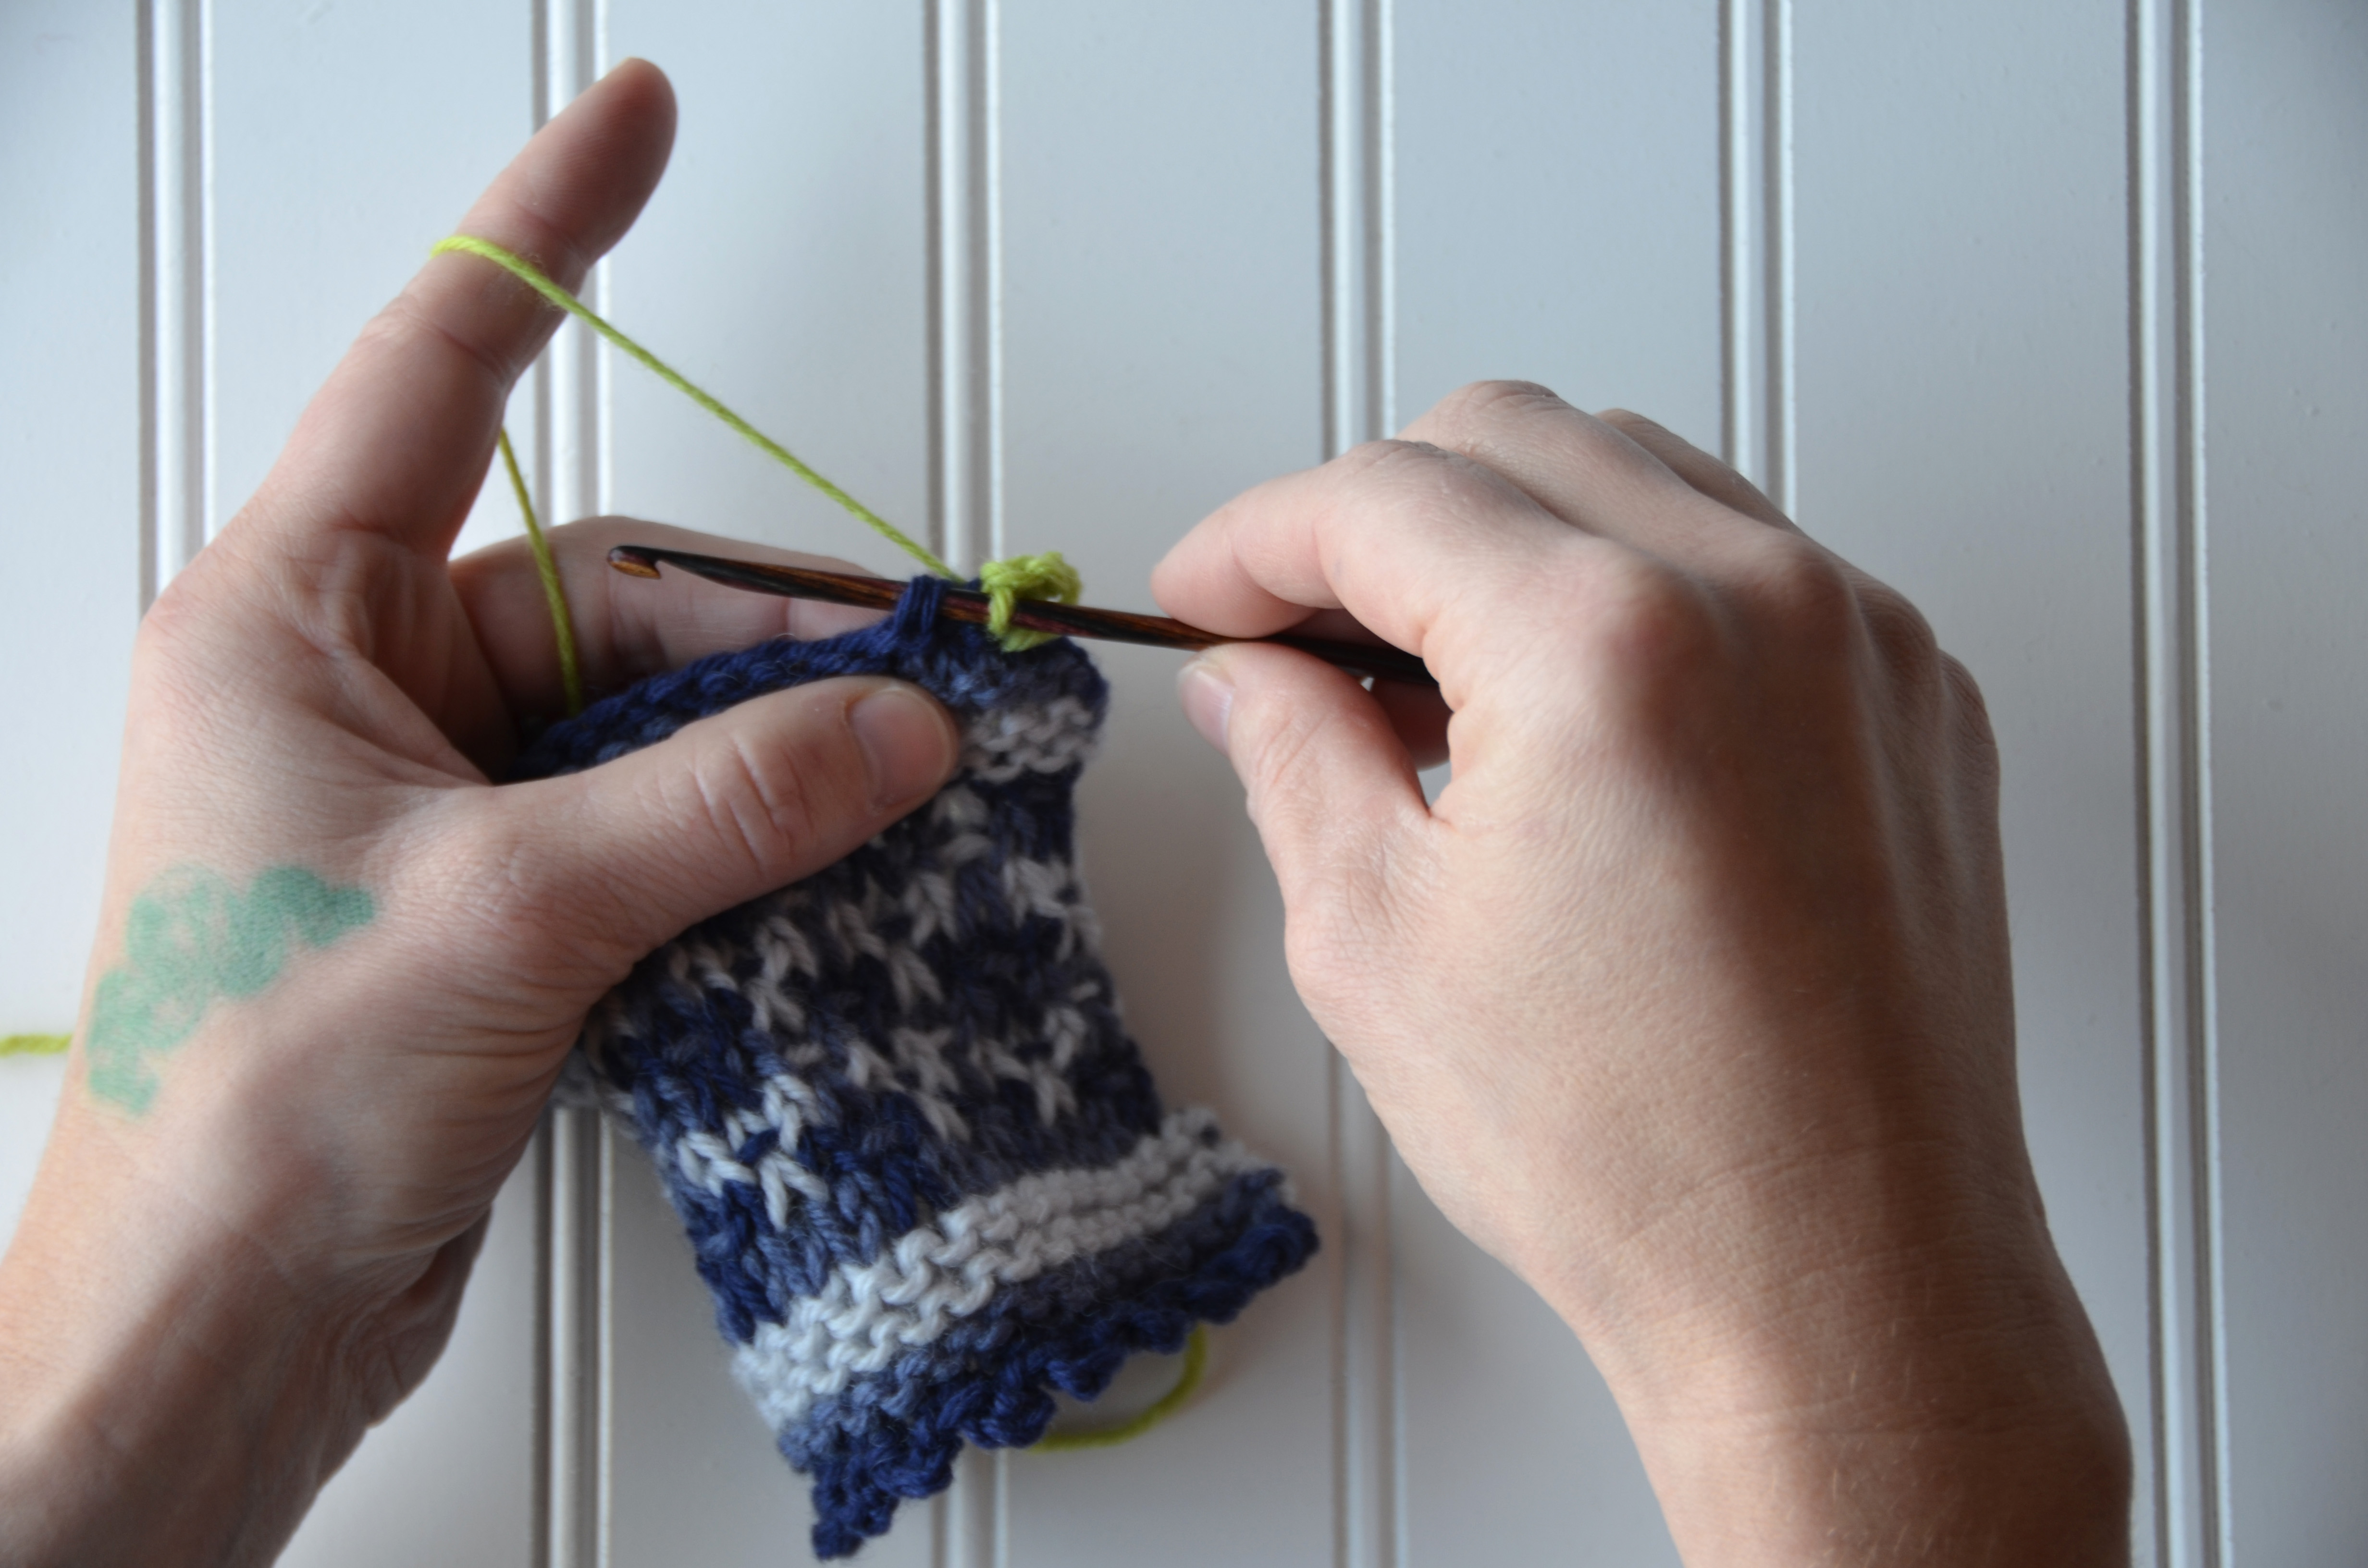
Step 3: Skip the next knit stitch from the cowl body, and slip stitch into the next knit stitch.
Repeat Steps 1-3 for the edging. So you’re going to be working [slip stitch, chain 3, slip stitch] into every other stitch along both edges of the cowl. No big deal, right?
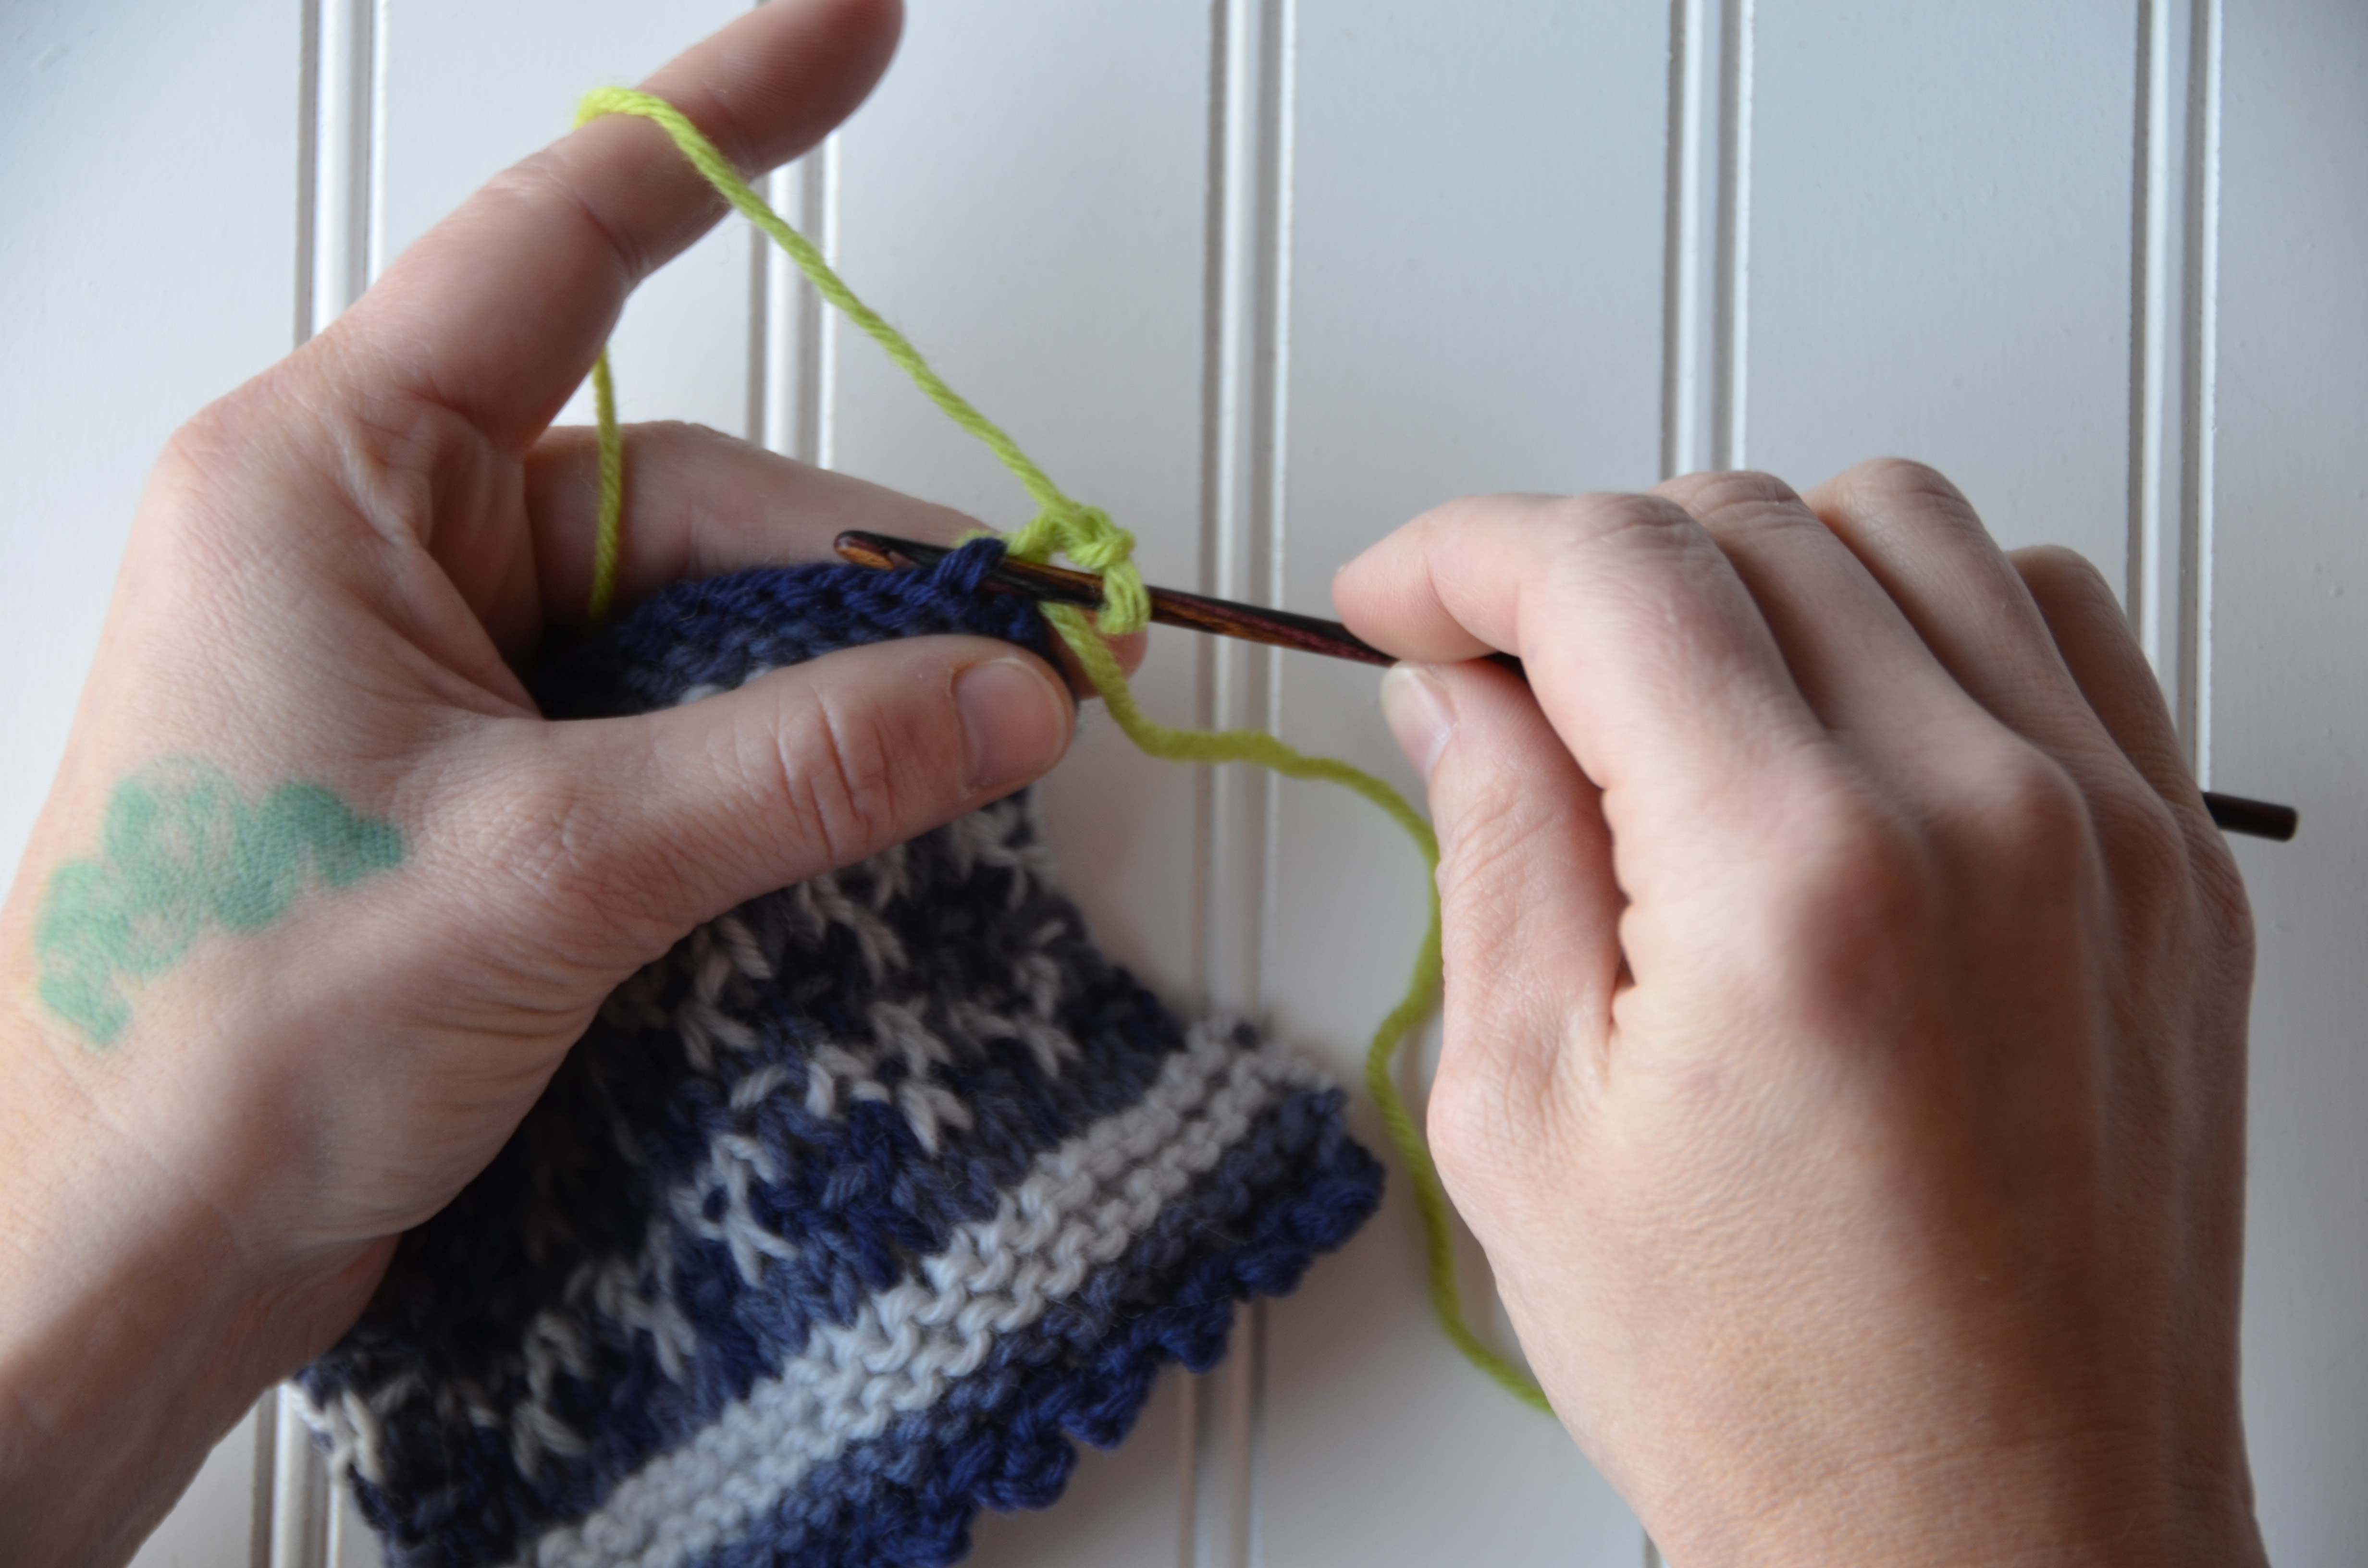
Here’s my swatch after a few more little picots.
Again, you can find the kit for this cowl on our website here (link). Here’s to learning new things!
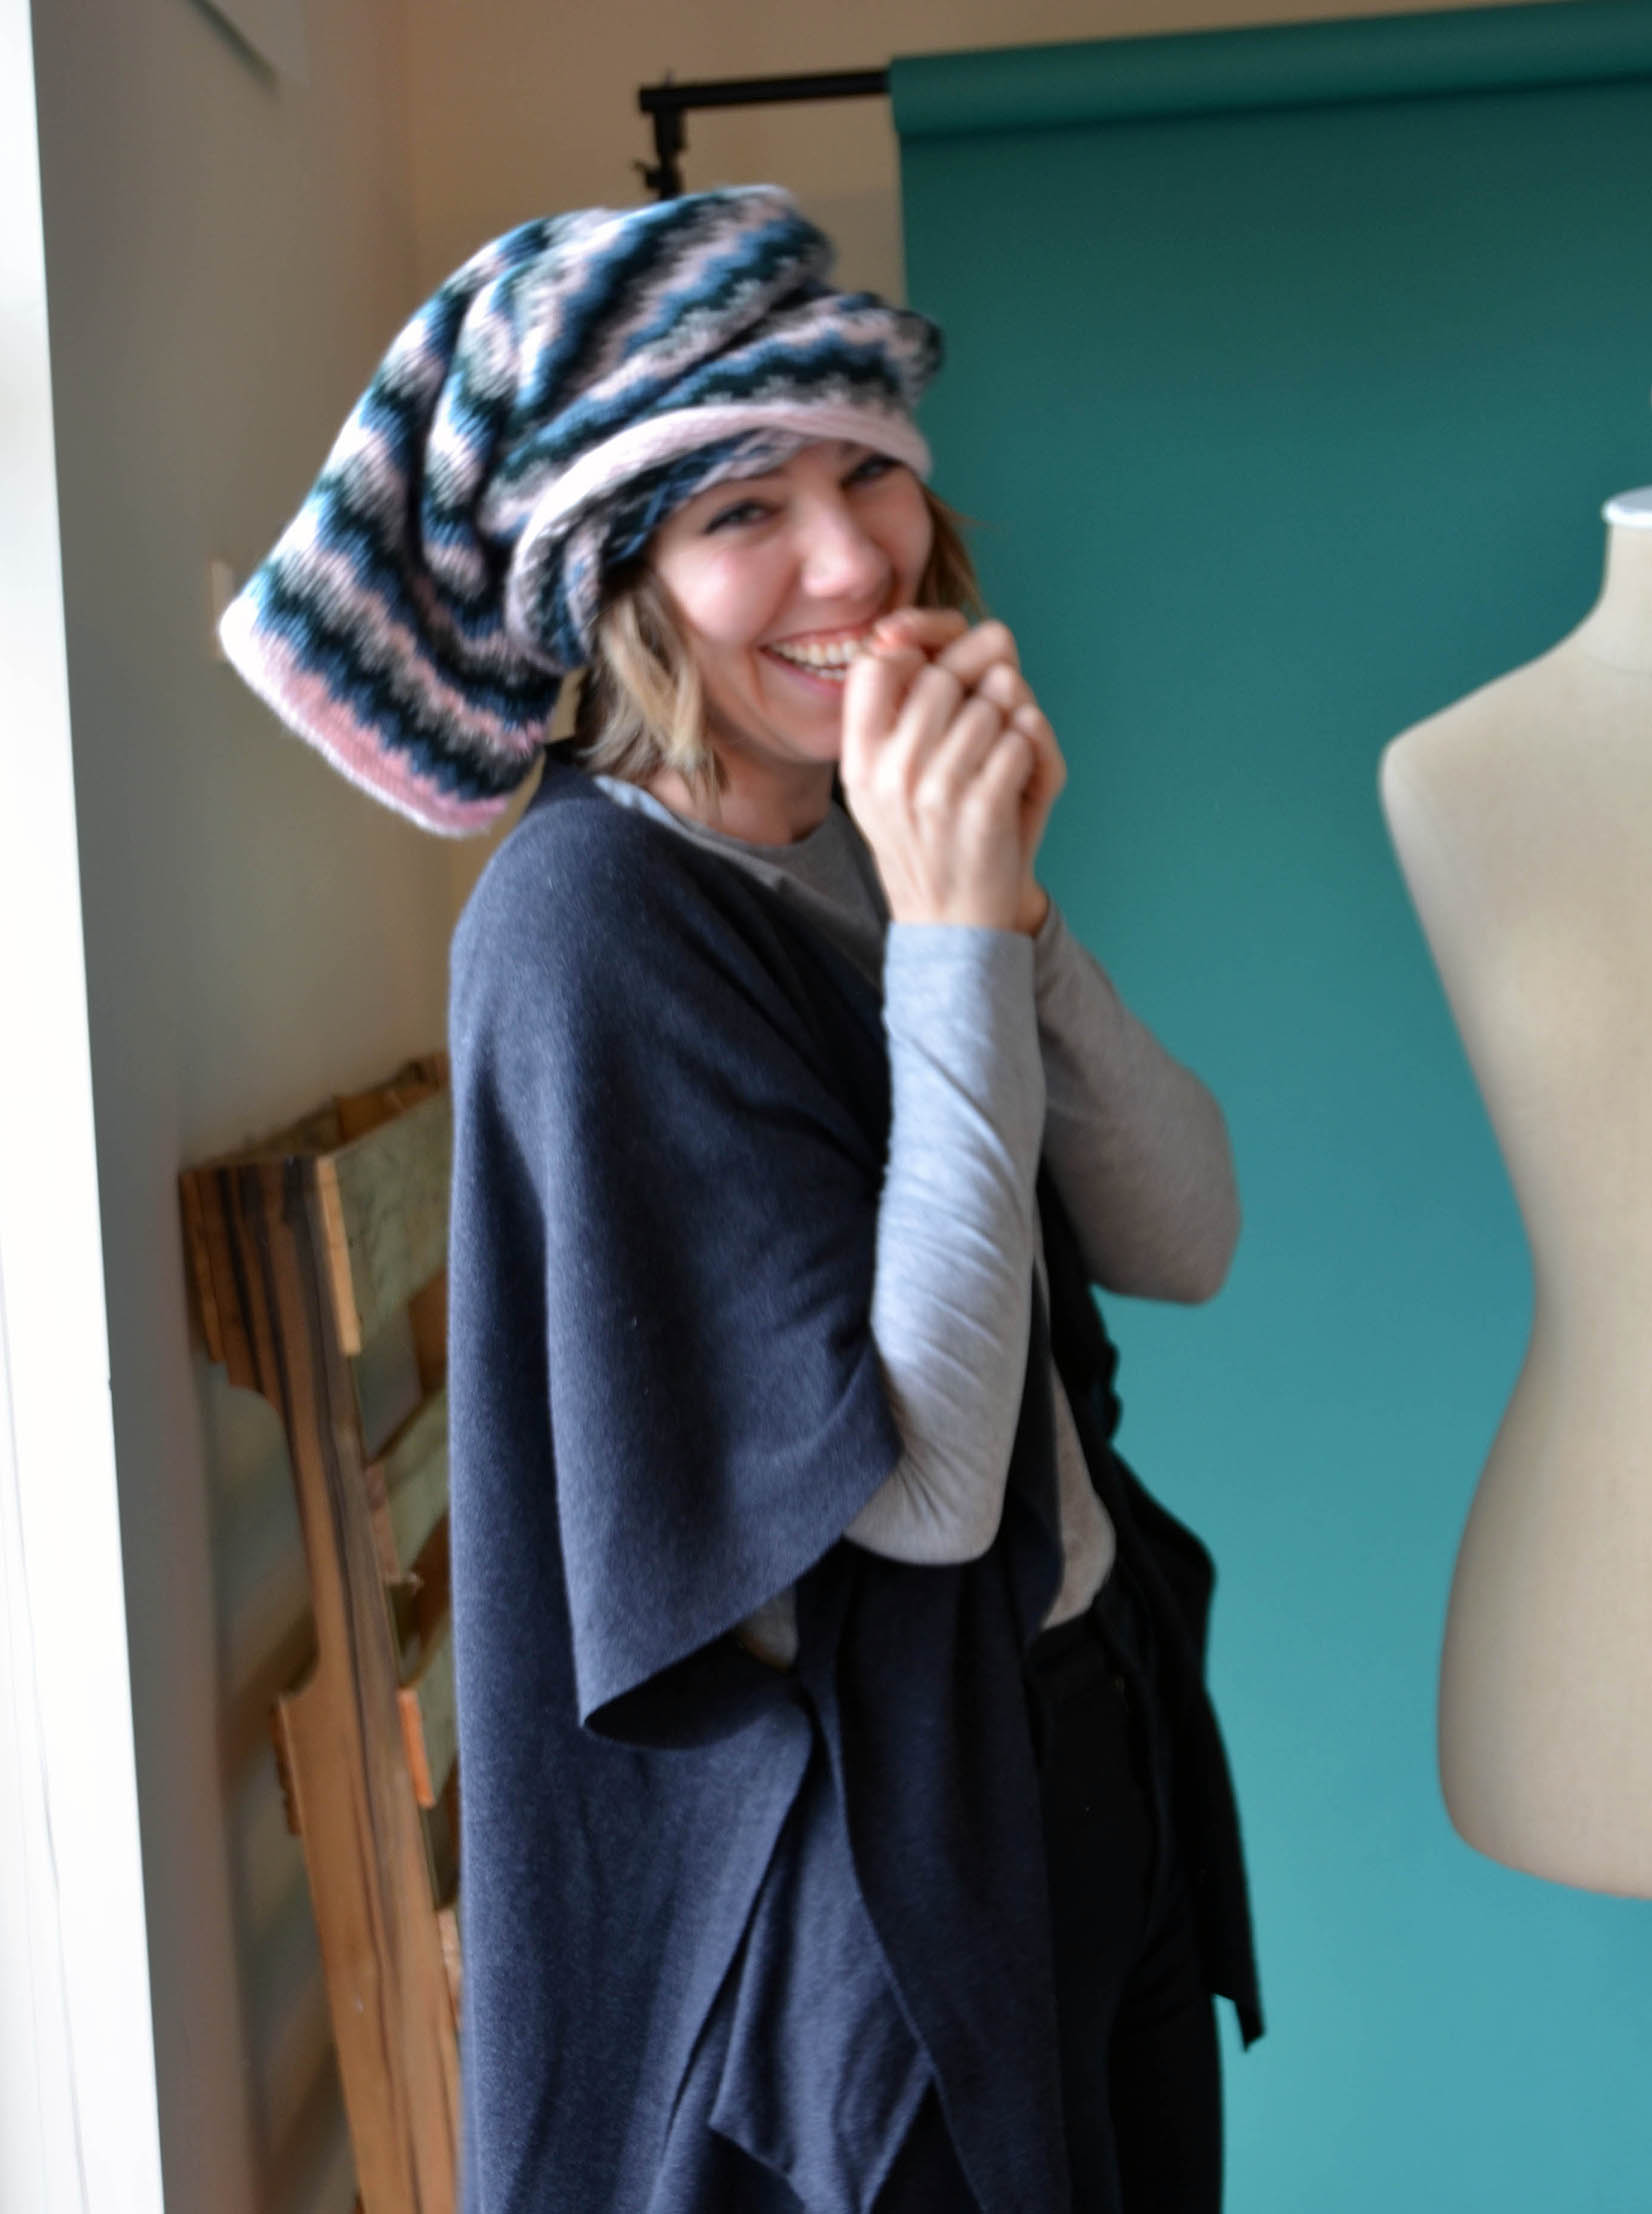
The cowl looks great doubled over and scrunched – or if you’re in a silly mood like designer Tori Gurbisz, wear it however you please. Very “Cat in the Hat,” Tori. You’ll definitely turn heads.
How’d we do with lace? I have to say, that last square went pretty quickly for us in the office, with no major malfunctions. I feel like we’ve mastered that technique. Good thing, too, since we’re on to something new!
Block Five is called “Check It” for obvious reasons – it uses slipped stitches to create a colorful checkerboard. It’s a clever way to create blocks of color without a lot of picking up and dropping of yarn as you go. As usual, Amy Gunderson has provided us with a video to demonstrate.
Here’s a view of the back side that shows the stitches slipped across the wrong side of the work.
I’m very excited about this block. Slip stitch is such an easy way to create a colorful design!
We’d love to see what you’ve done – share it here, on Facebook, or in our Ravelry group. We’ll see you in two weeks with another great block!