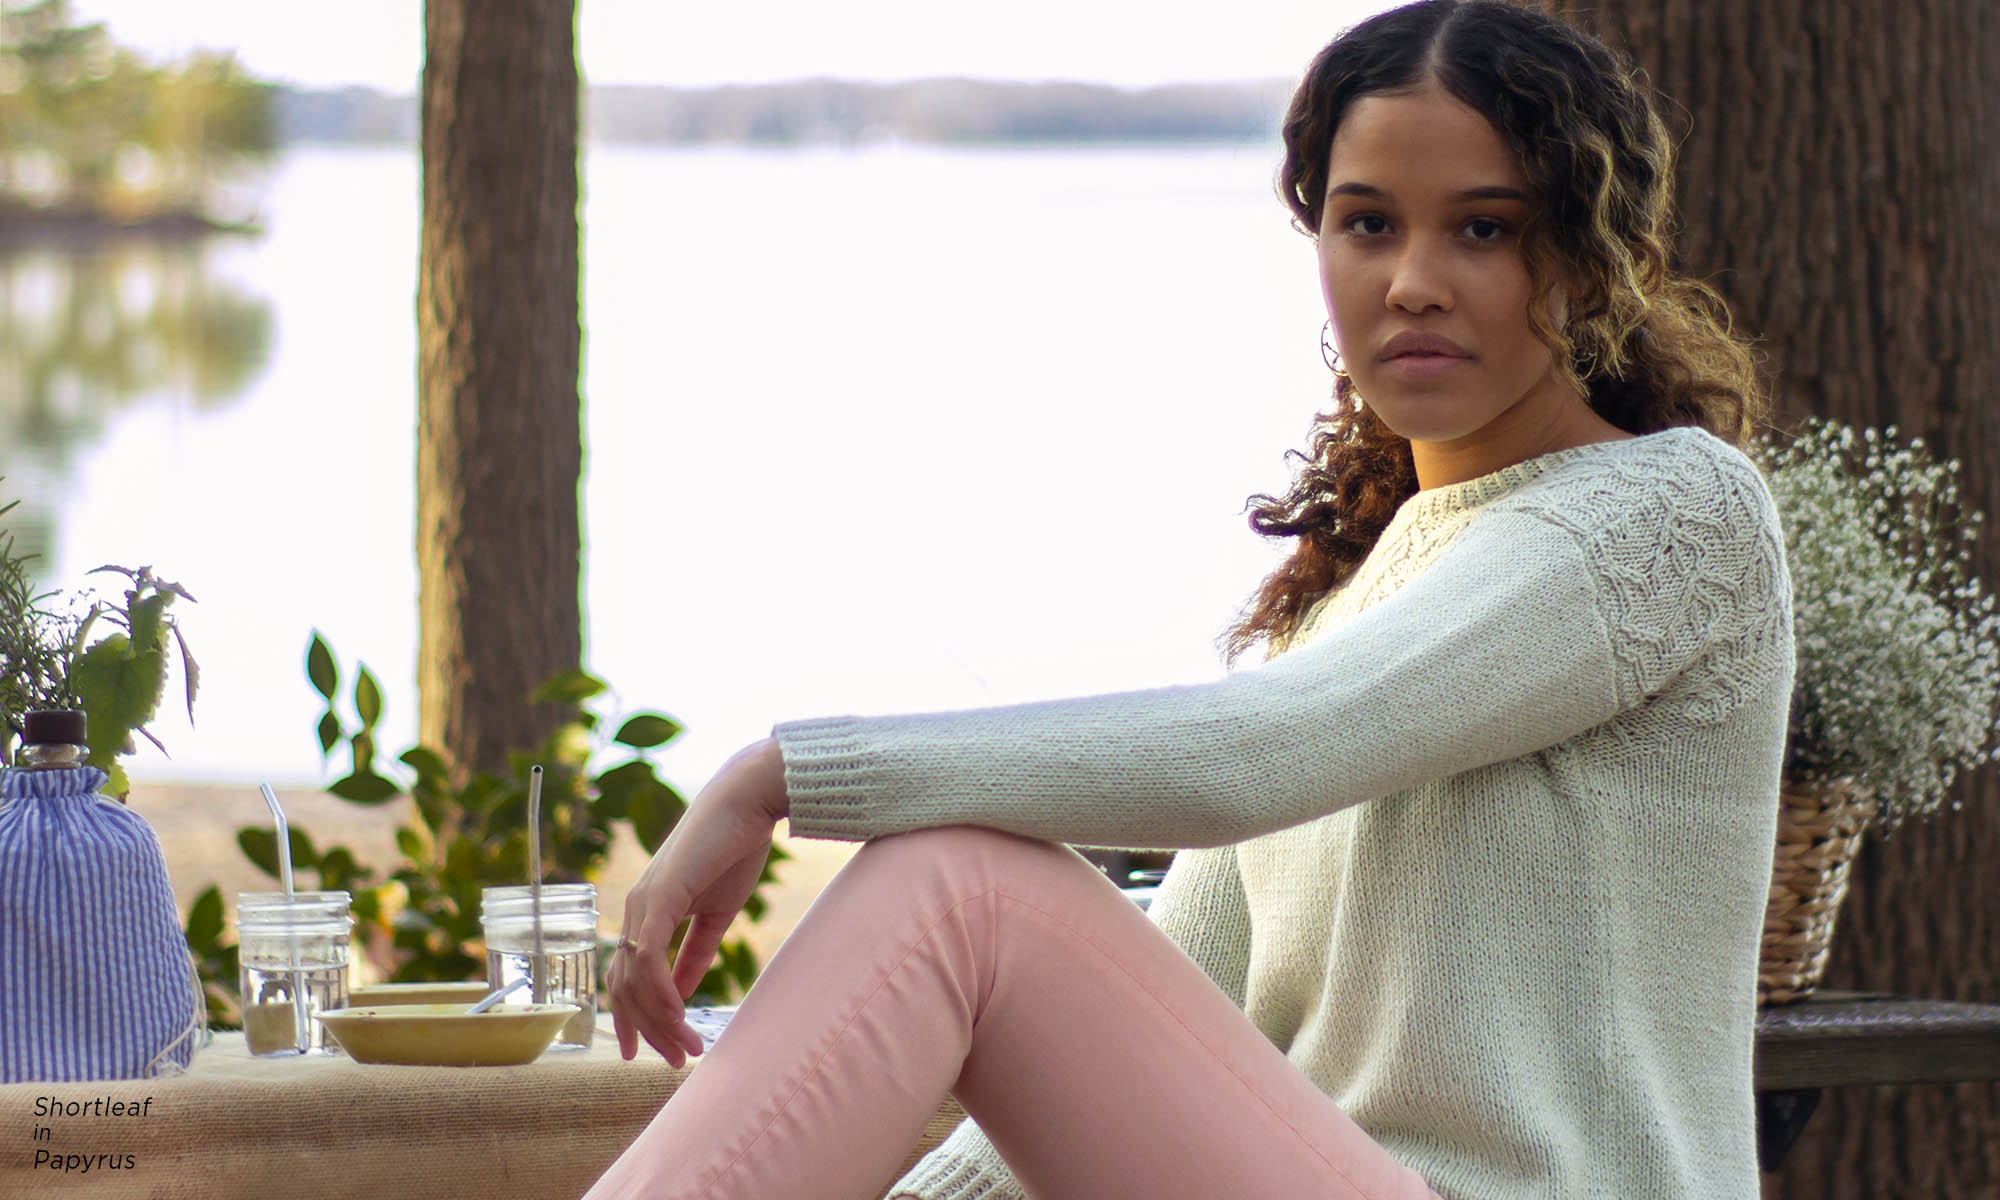
This is part 5 in a 12 part series highlighting designs from our 12 Days of Winter, series 5 Edition
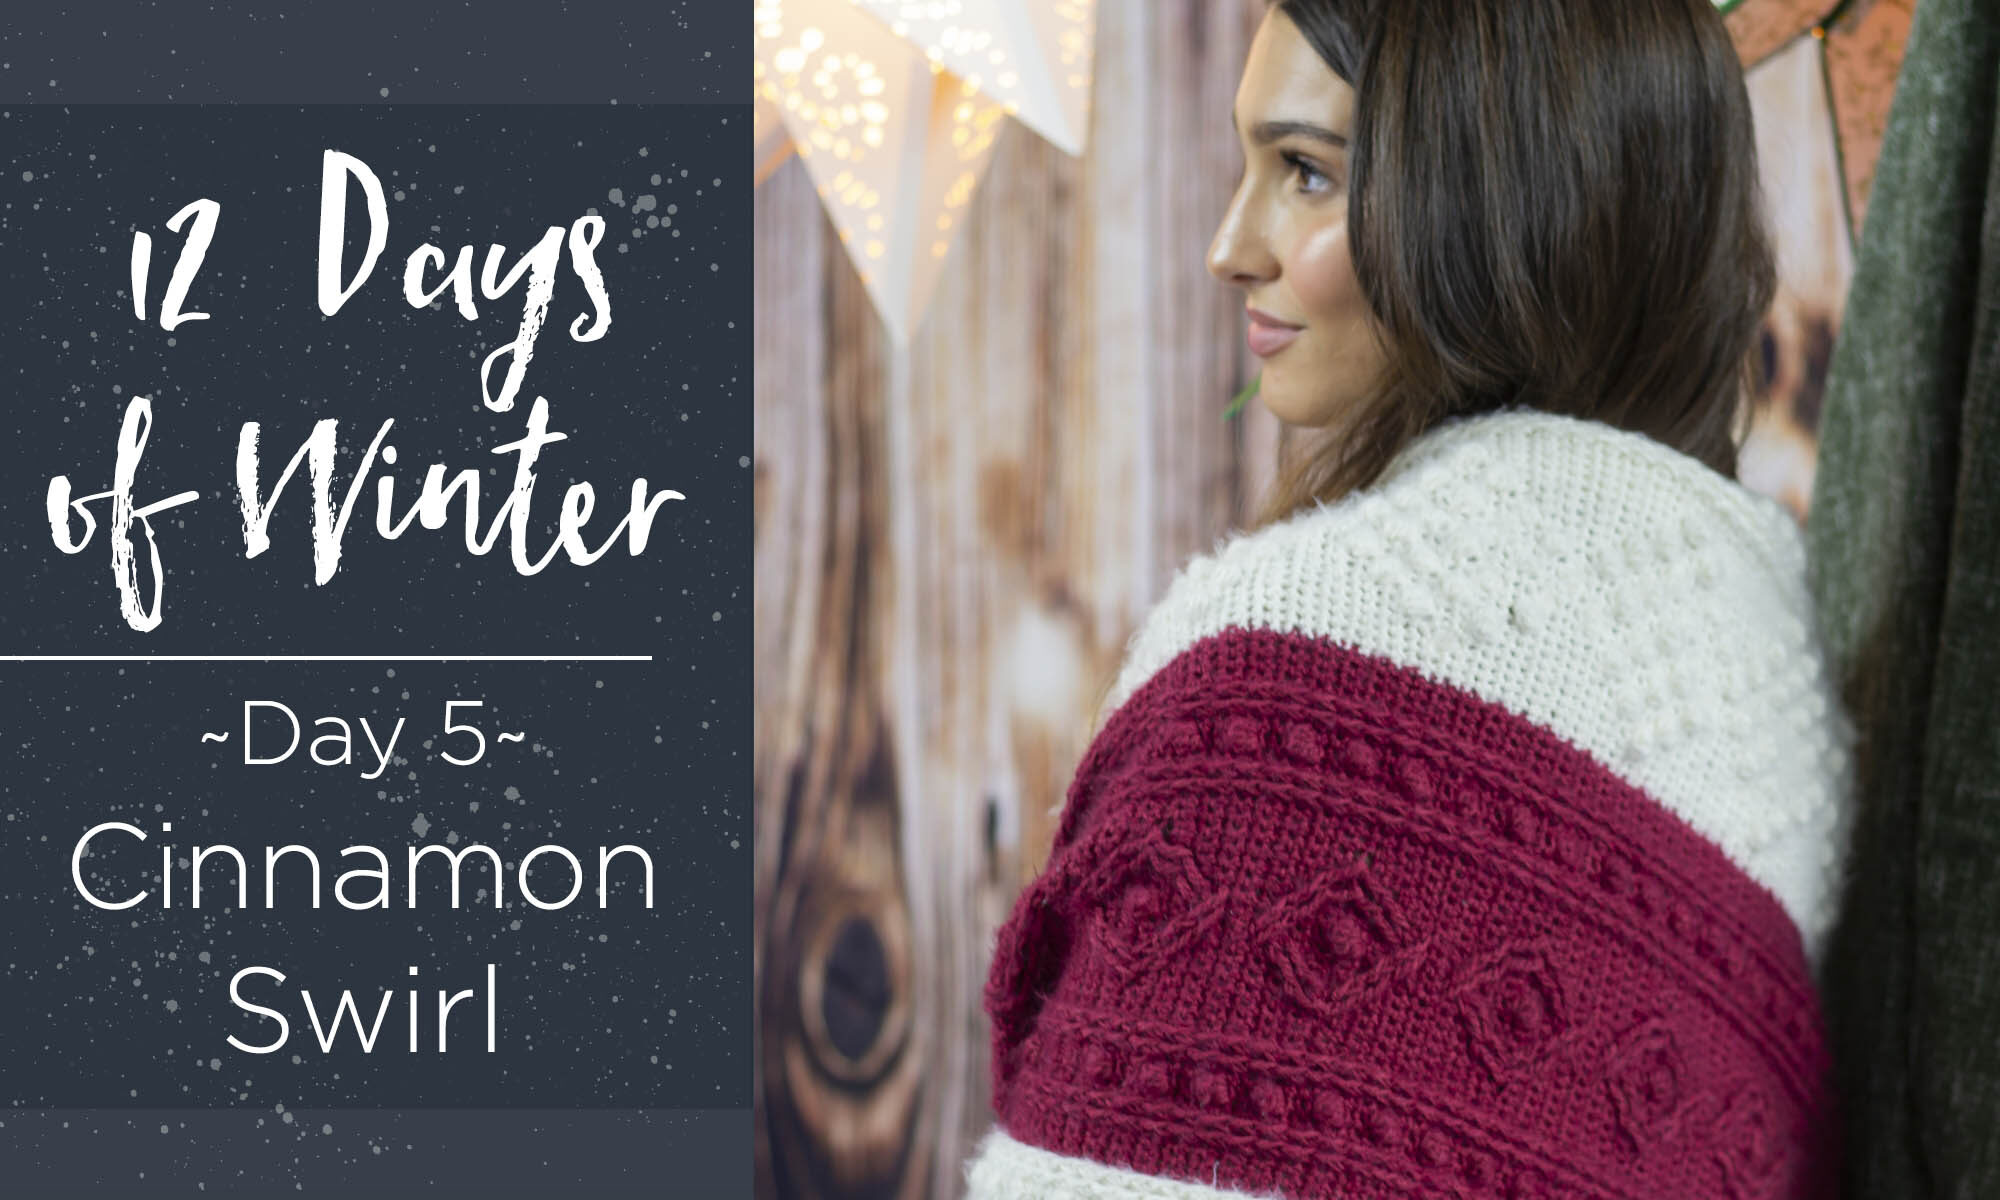
Hello there! I’m so thrilled to bring you our 5th day piece, the Cinnamon Swirl Stole. It’s made with ultra-soft Nymph, and is available in both a crochet version and a knit version , so it feels extra special. Nymph is a blend of Cotton and Polyamide and is genuinely one of the softest yarns I have worked with in a long time! The finished project feels cozy and luxurious – the perfect item to treat yourself. As an extra bonus each of these kits comes with a bonus project bag and stitch marker!
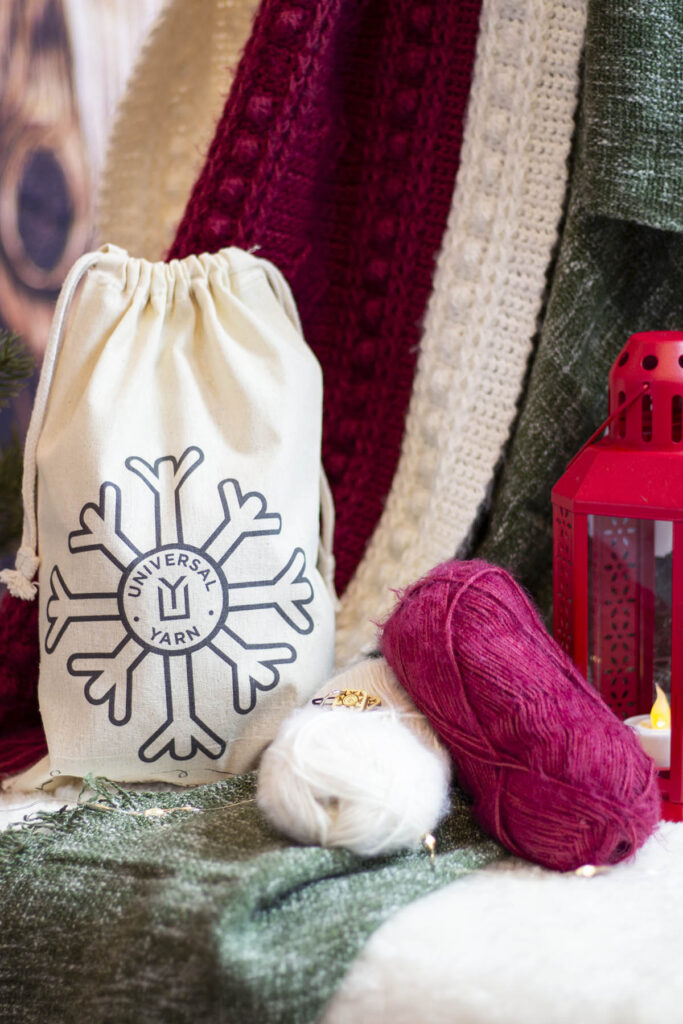
Nymph with bonus kit items – a project bag and stitch marker!
I had the opportunity to design this as a crochet piece first, serving as the inspiration for the knit kit. We will spend some time in this post talking about a special technique involved for crochet – how to join panels as you work.
Cinnamon Swirl, Crochet Version
Before we do that though, can we just take a moment to “Ooh!” and “Ahh!” over the knit companion to this piece!? It’s stunning! this knit version is all worked in one panel using an Intarsia technique for the colorwork, while the crochet version makes one panel at a time, but they attach as you go.
Cinnamon Swirl, Knit Version
To accomplish the crochet join technique, you’ll execute what the pattern calls a “Slip Stitch Sequence” at the end of every other row. This will connect the new panel to the existing one with a practically invisible effect. It lets you achieve the same look as intarsia, while being able to focus on one set of pattern repeats at a time.
Cinnamon Swirl, Crochet Version
The pattern works from the bottom up, and you add new panels on the right hand side of existing ones. To do this, you join the new yarn at the bottom right corner of an existing panel, with the right side facing you, then chain the amount needed for the new one. you’ll turn the row like normal and work back towards the existing panel, then slip stitch to it to finish the row, and slip stitch one row up before turning to start the next row.
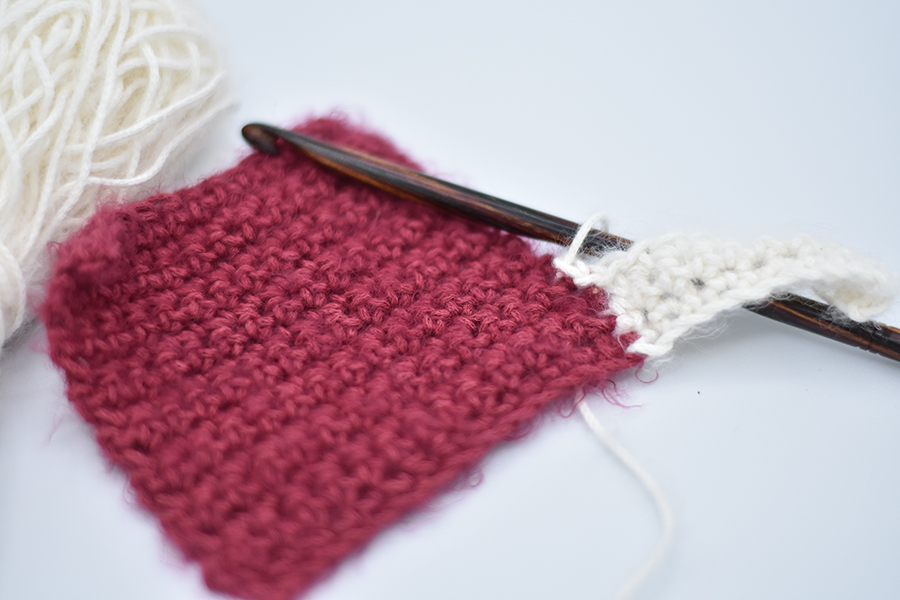
Swatch of the Panel Join from our tutorial
To make sure we don’t leave anybody hangin’ on this technique, we have recorded a tutorial for you! To follow along you’ll want to start out with a swatch of 15 sc sts x 16 rows, using an H/8 (5.0 mm) hook and the yarn Nymph. Have the second color handy along with your hook and press play. This will be a wonderful opportunity to try out this sequence before diving into the pattern.
Tutorial of the Panel Join “Slip Stitch Sequence”
I hope that this tutorial has been helpful to you, and I can’t wait to see how your beautiful Cinnamon Swirl Stoles turn out! Remember, these exclusive kits can be purchased at local yarn store retailers near you. Not in stock at your local shop? Ask them about drop shipping – order through them, and we ship to you! Each kit comes with the pattern, the yarn required to make it, a mini Universal Yarn project bag, and stitch marker. Use our store locator to find your nearest Universal Yarn retailer! Warmly, Ashley Jane McIntyre
This is part 4 in a 12 part series highlighting designs from our 12 Days of Winter, series 5 Edition.
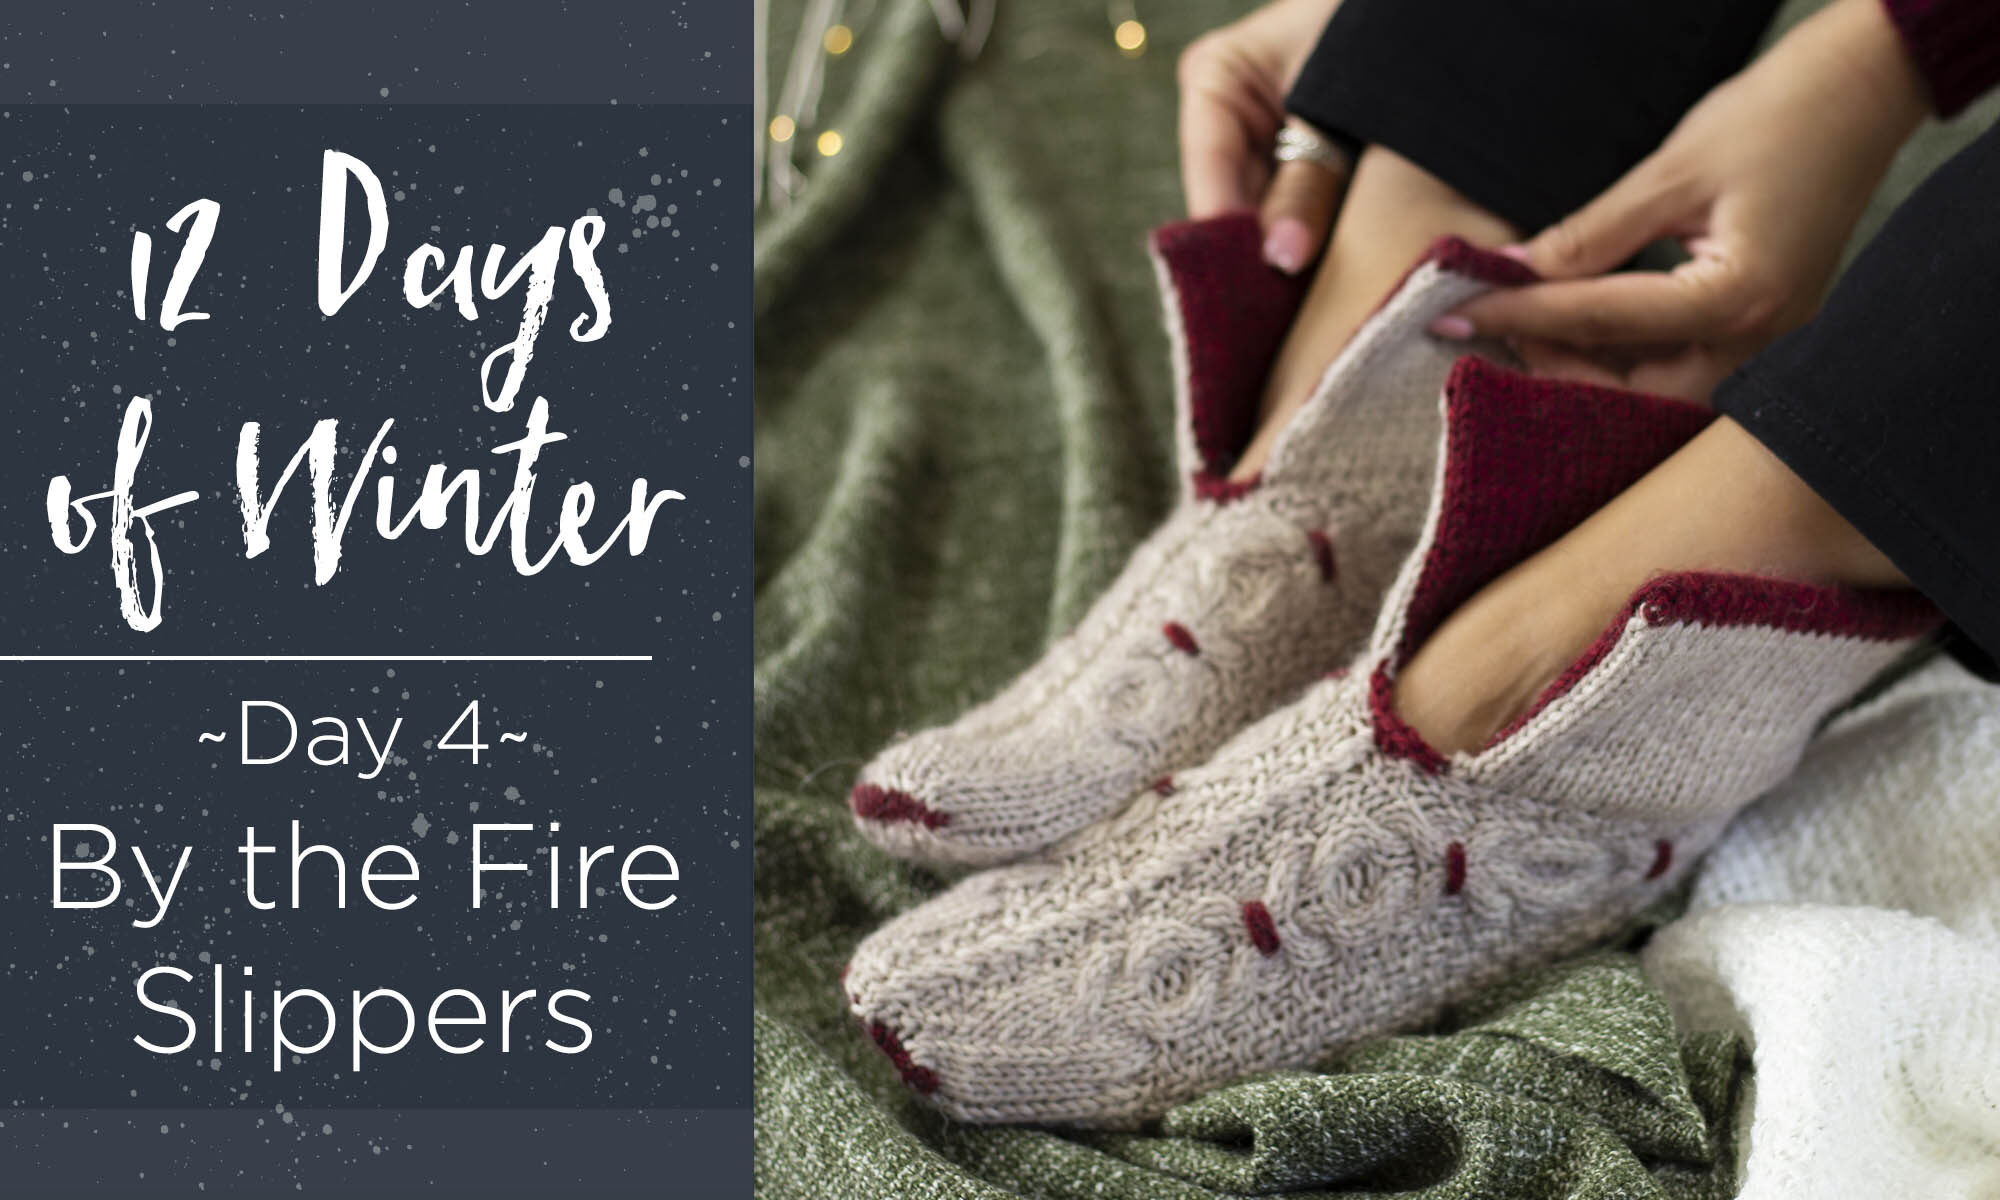
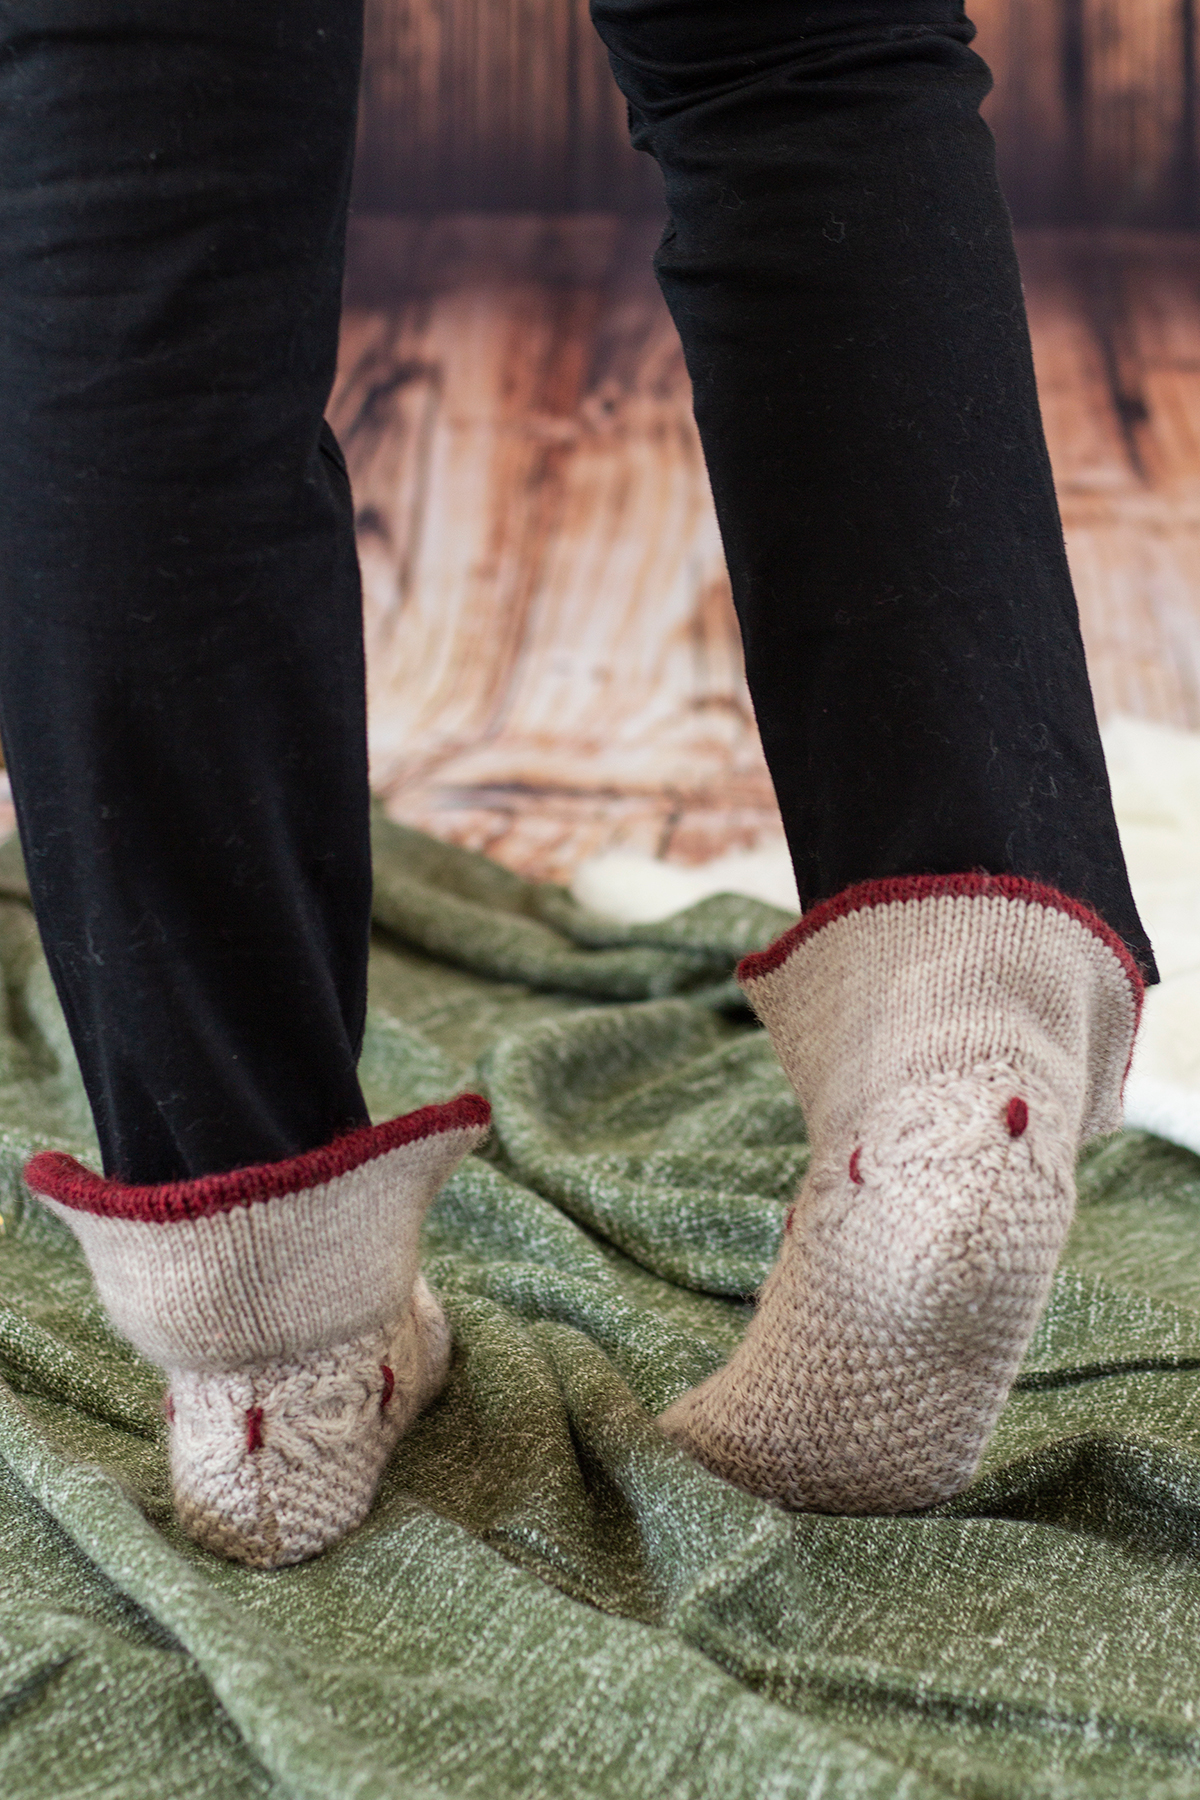
Happy Saturday! I hope your weekend is off to a great start, with a slow morning, warm cup of coffee, and of course, a yarny project! The 12 Days of Winter Kit Collection is one of my favorite design projects each year. We started it during my first year here at Universal Yarn, and I cannot believe we’re already in its fifth rendition! So far, we’ve created more than sixty wintry, giftable projects that are perfect for the holidays. Color me impressed! Each year, these collections are full of accessories, and some of my favorite contributions have been cozy socks. This year it’s no different – I’m simply smitten by my slipper sock design, the By the Fire Slippers.
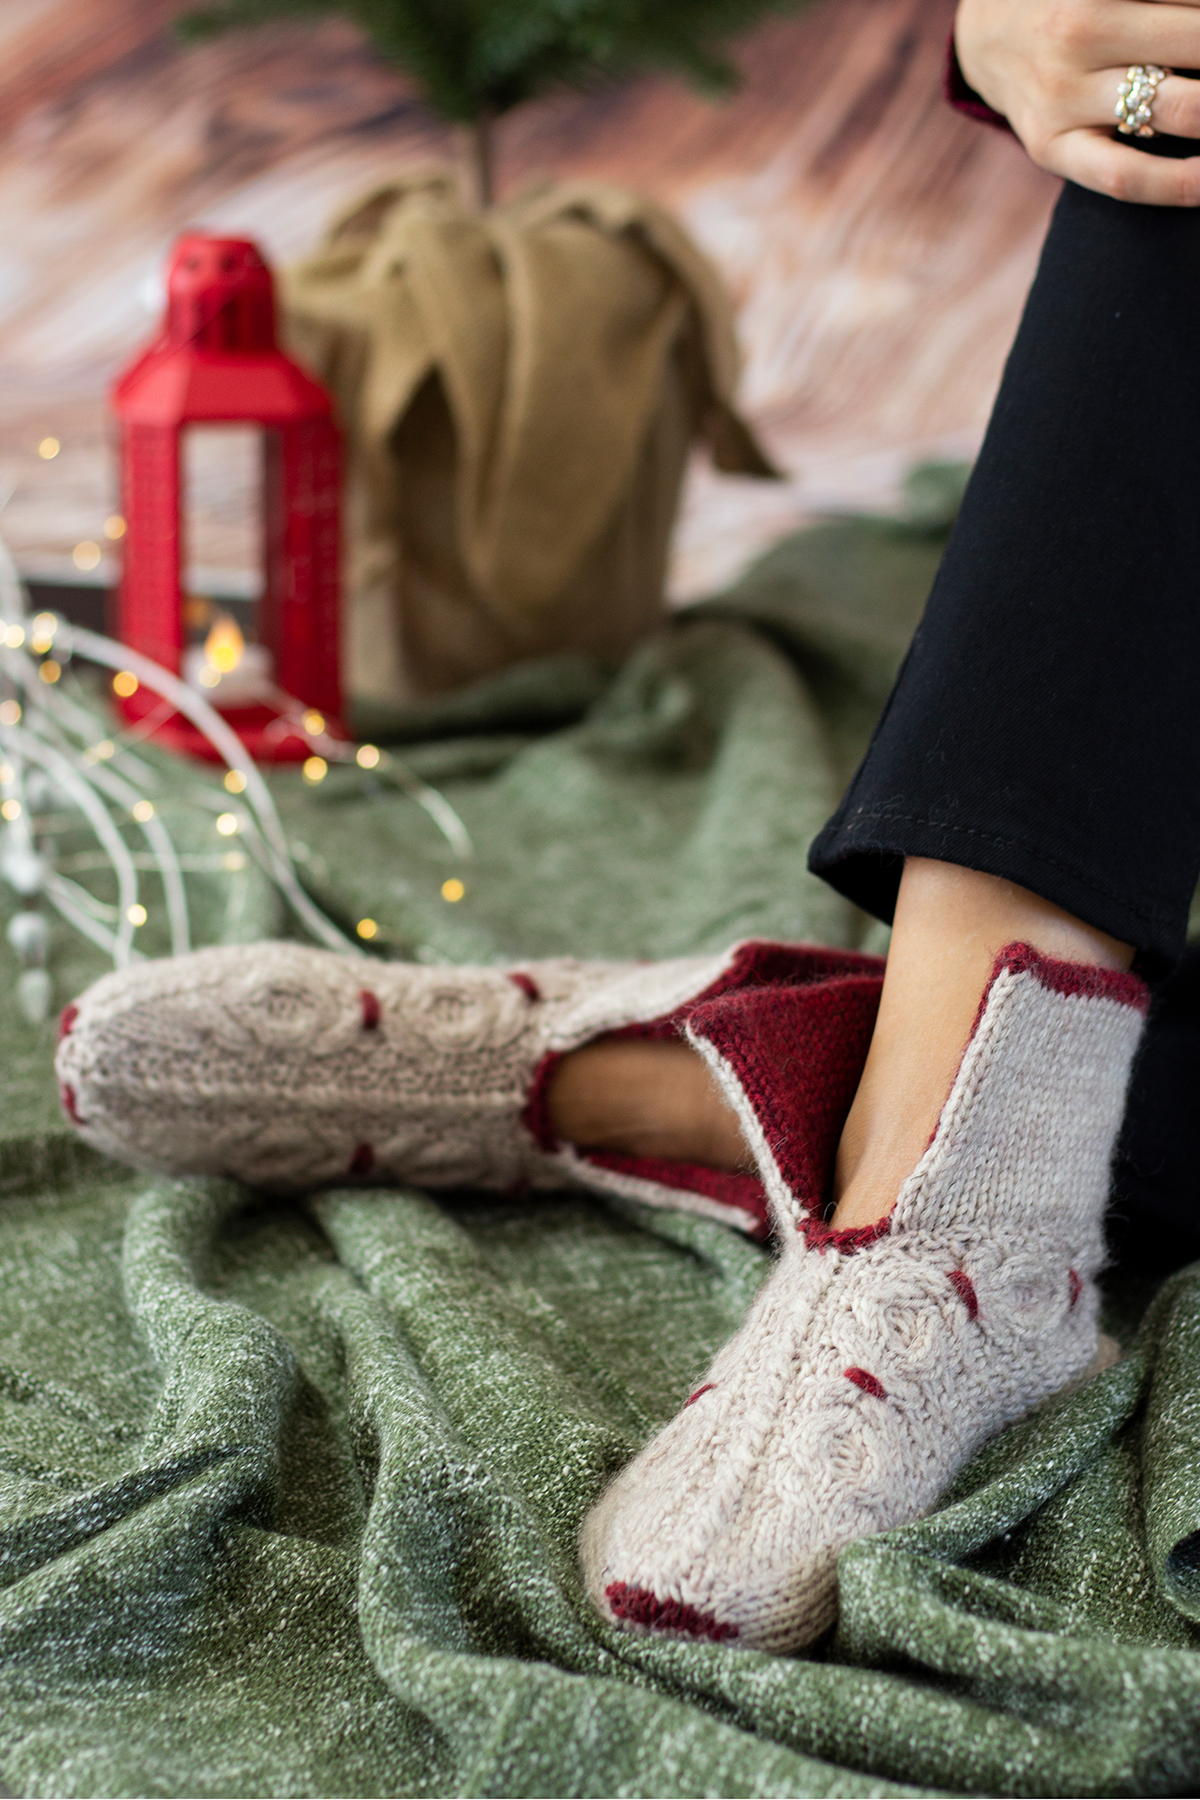
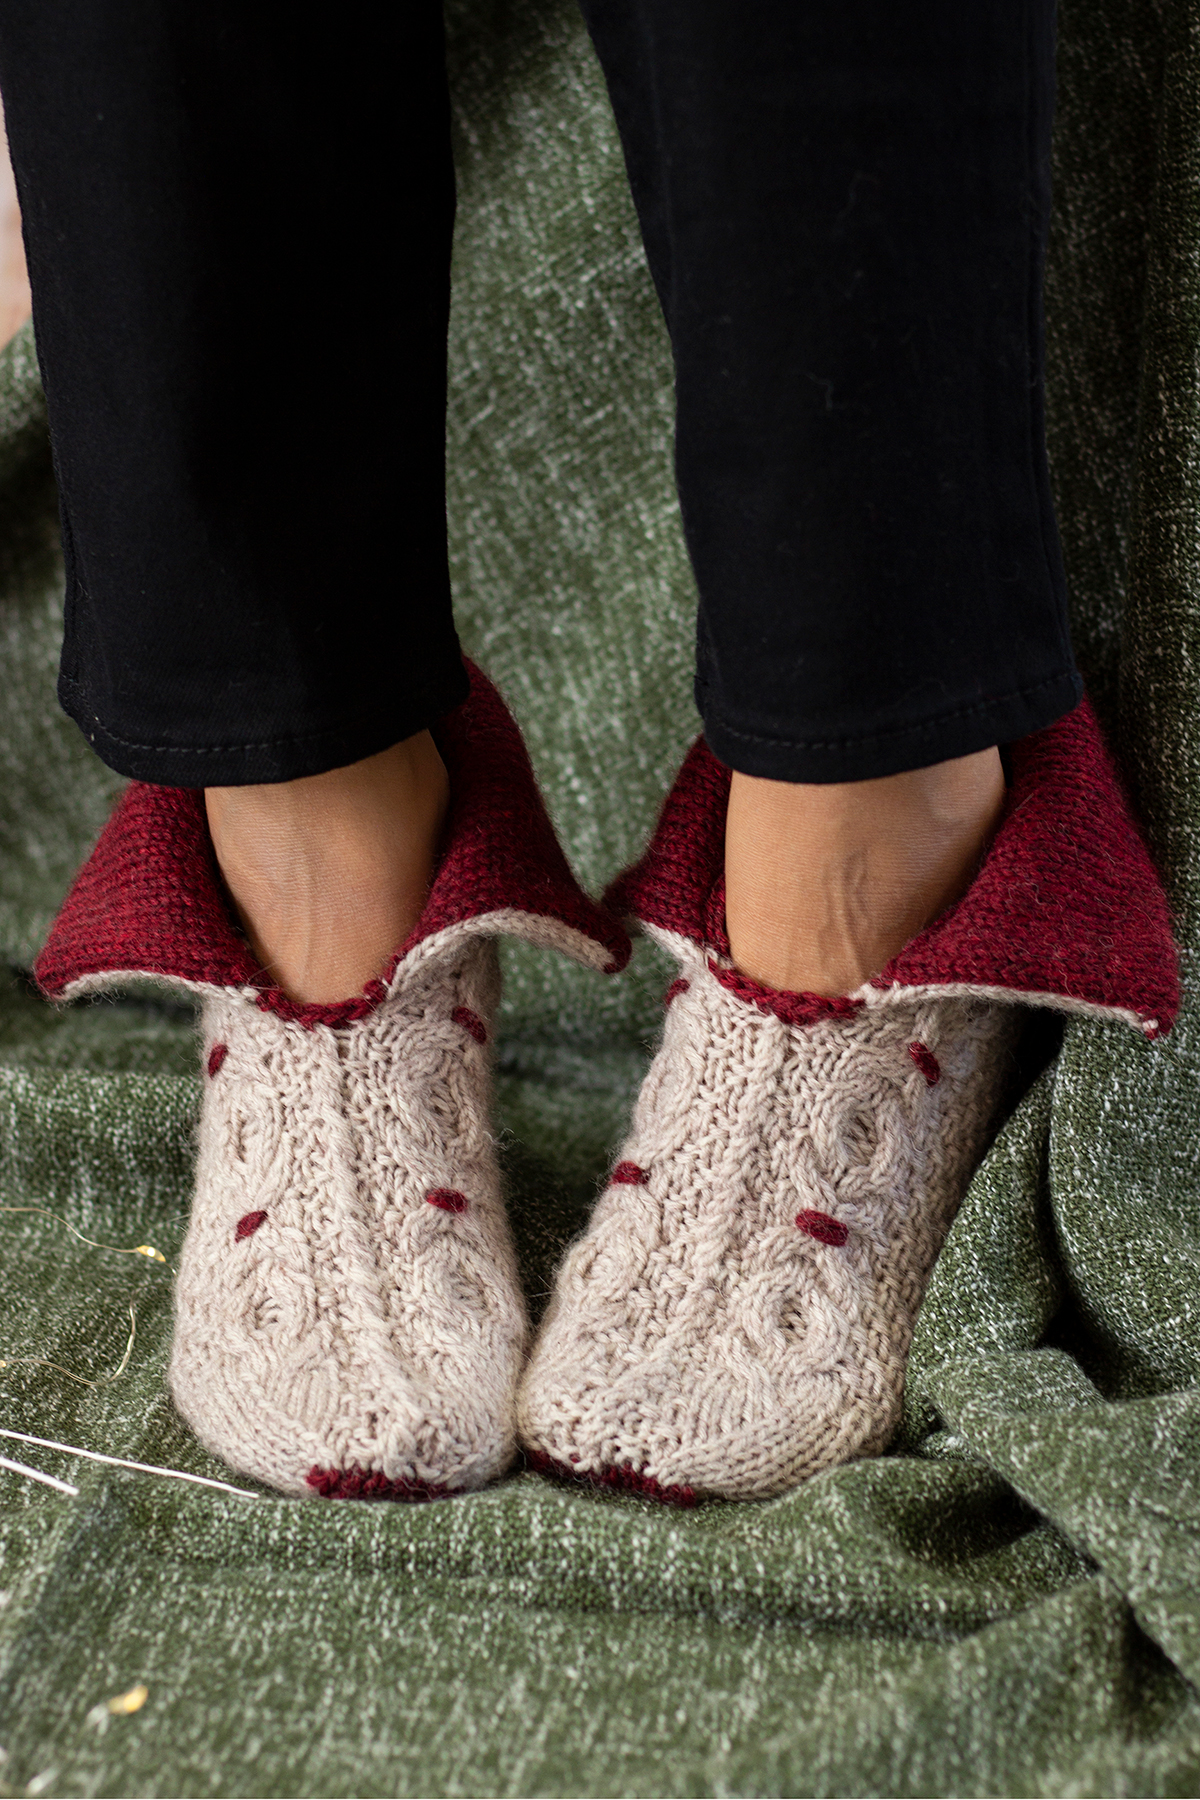
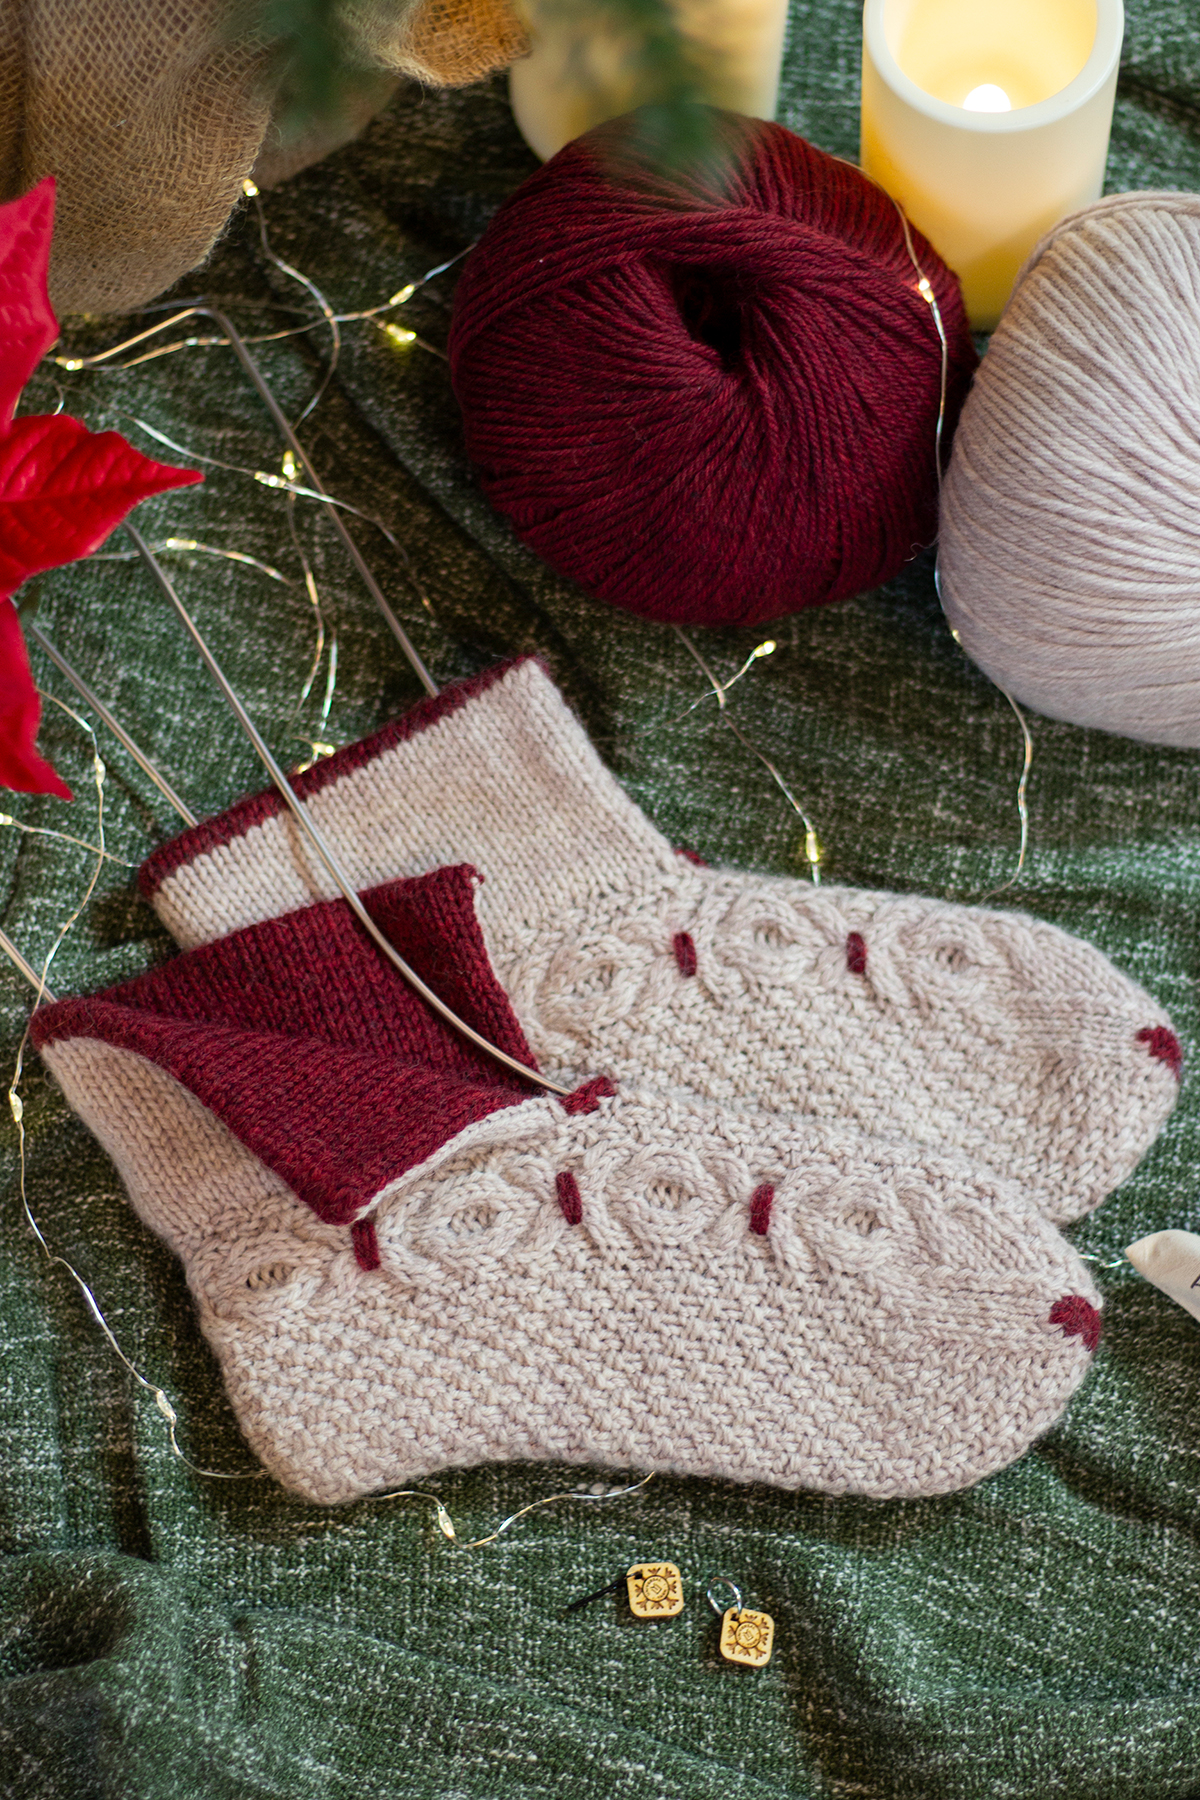
These slippers are a cozy dream! They feature rich textures in the form of cables, twisted stitches, moss stitch, and smocking. A contrast color is used to add thoughtful details including the graft at the toes, the smocking, and – my favorite part – the split, double-thick cuff.
The By the Fire Slippers are knit using Deluxe Worsted Superwash – a superb choice for thick and quick socks! This durable wool yarn will stand the test of time while keeping you warm and comfortable. Plus, because it’s a 100% superwash wool yarn, the slippers are a cinch to care for. And if we’re being honest, easy-care knits make the best gifts because sometimes those we love don’t always remember to handwash!
For this project, I chose the lovely neutral #748 Oatmeal Heather as the main color and paired it with beautiful, velvety red #751 Pomegranate Heather for the contrast color.
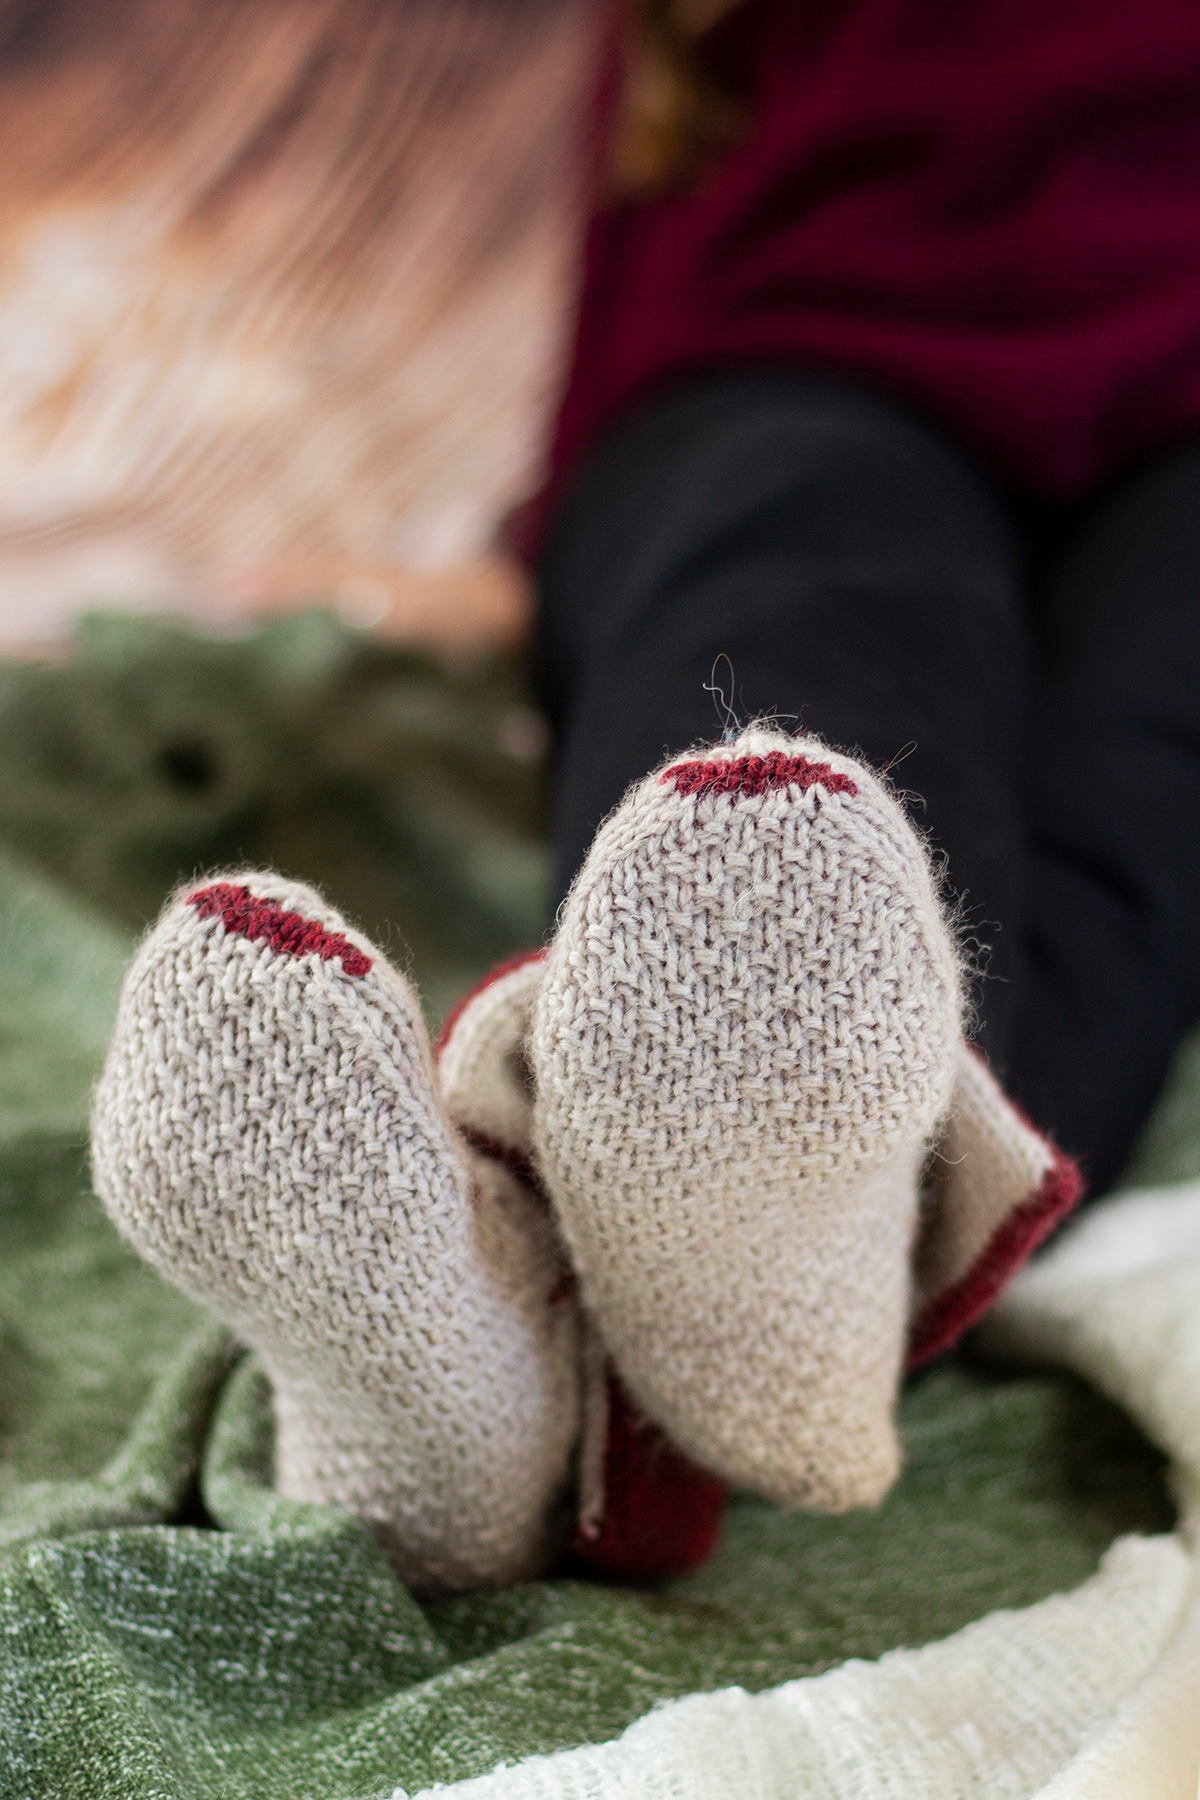
A sweet detail of the contrast color toe graft and the moss stitch across the bottom of the feet.
You’ll get to explore the following techniques while making these slippers:
knitting flat
knitting small circumferences in the round
cables
right and left twists
three-needle bind-off
picking up stitches
Kitchener Stitch
smocking
mattress stitch
The By the Fire Slippers have an engaging, but deceptively simple construction. They begin by casting on what will become the heel, and that piece is worked flat for the width of the ankle, then the piece is joined in the round for the foot. Decreases are worked for the toe, and then the live stitches are grafted together using Kitchener Stitch and the contrast color. The back of the heel is sewn closed, and then it’s time to work the cuff. To create the cuff, stitches are picked up around the opening for the foot and worked flat using the main color. At a certain length, the contrast color is joined and continued flat. Loops are picked up with a spare needle from the picked-up edge of the cuff, and then the piece is folded inward and closed with a three-needle bind-off. The mattress stitch is used to close the front edges of the cuff. Finally, you add the special contrast color smocking and a slip stitch crochet edging to the front for a perfectly polished pair of slippers! As a helpful treat, we’ve created a video on how to work mattress stitch, so you’ll be ready to conquer this wonderful pattern!
I hope you enjoyed the video and feel prepared to finish your own By the Fire Slippers! They’ll make such a great gift for yourself or a loved one. My husband has already requested a pair, so I’m sure I’ll be making them again. Do you plan to knit these slippers for a loved one? Tell us for whom in the comments!
Remember, these exclusive kits can be purchased at local yarn store retailers near you. Not in stock at your local shop? Ask them about drop shipping – order through them, and we ship to you! Each kit comes with the pattern, the yarn required to make it, a mini Universal Yarn project bag, and stitch marker. Use our store locator to find your nearest Universal Yarn retailer!
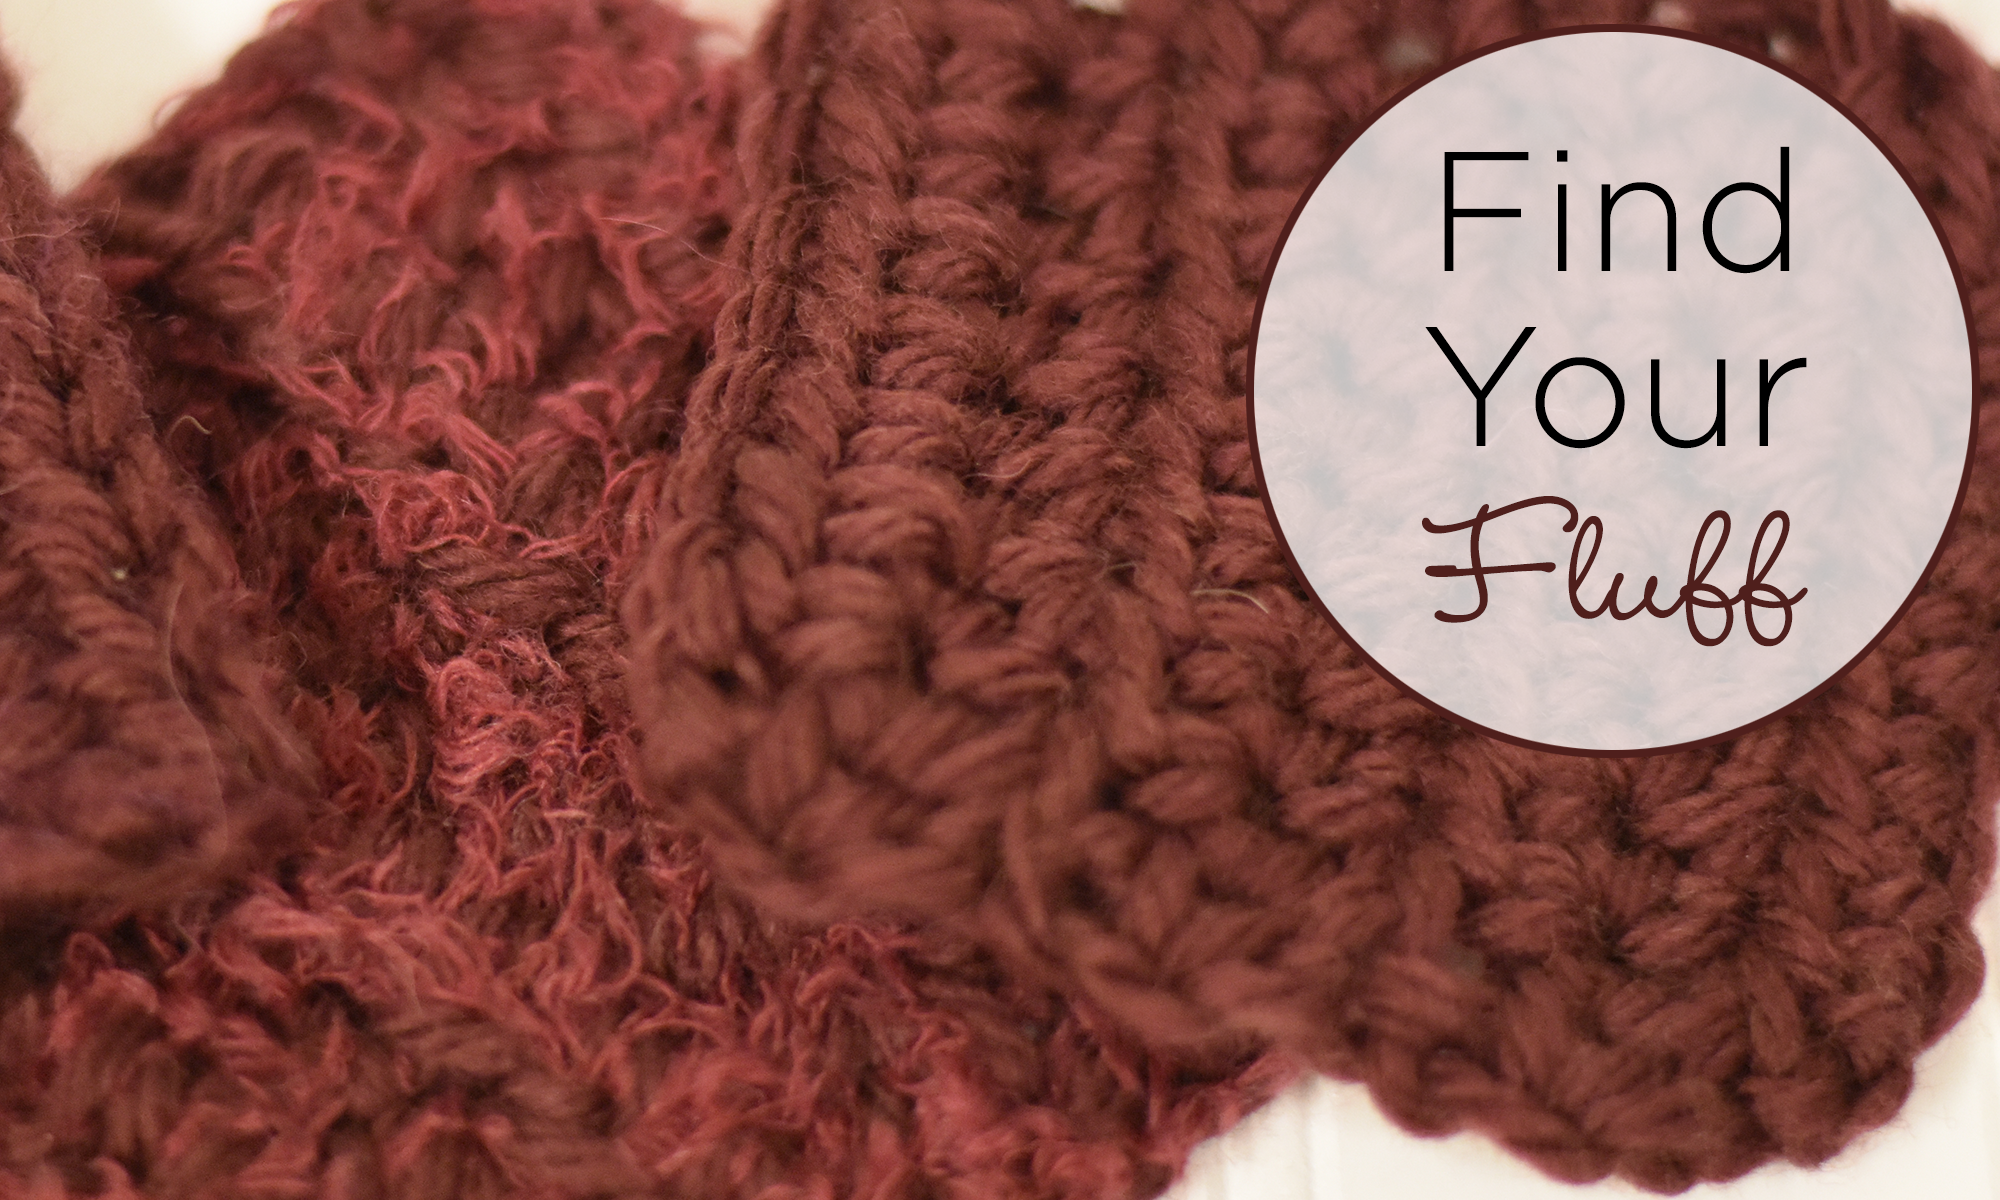
As the weather cools down I’m starting to plot all of the dreamy ways I can make an extra cozy sweater. I’ve really been liking some of the pieces I’ve seen that carry soft fluffy yarns along with a base, like this gorgeous sweater, Love Note, by Emily Wessel seen on the blog Tin Can Knits.
Just the thought of a soft halo of Mohair, or something equally as fluffy, brings a huge grin to my face. So, I’ve set out on a mission to find my perfect fluff! I already knew that our yarns Penna or Minou would be perfect place to start when experimenting. Both are a fine enough weight to carry along with any other weight yarn, and have their own unique textures and compositions that add something special to a project. The other piece to this puzzle is determining the base yarn. I chose Deluxe Bulky Superwash to have some fun with mixing and matching a big squishy yarn. I grabbed my size L/11 crochet hook and got right to it!
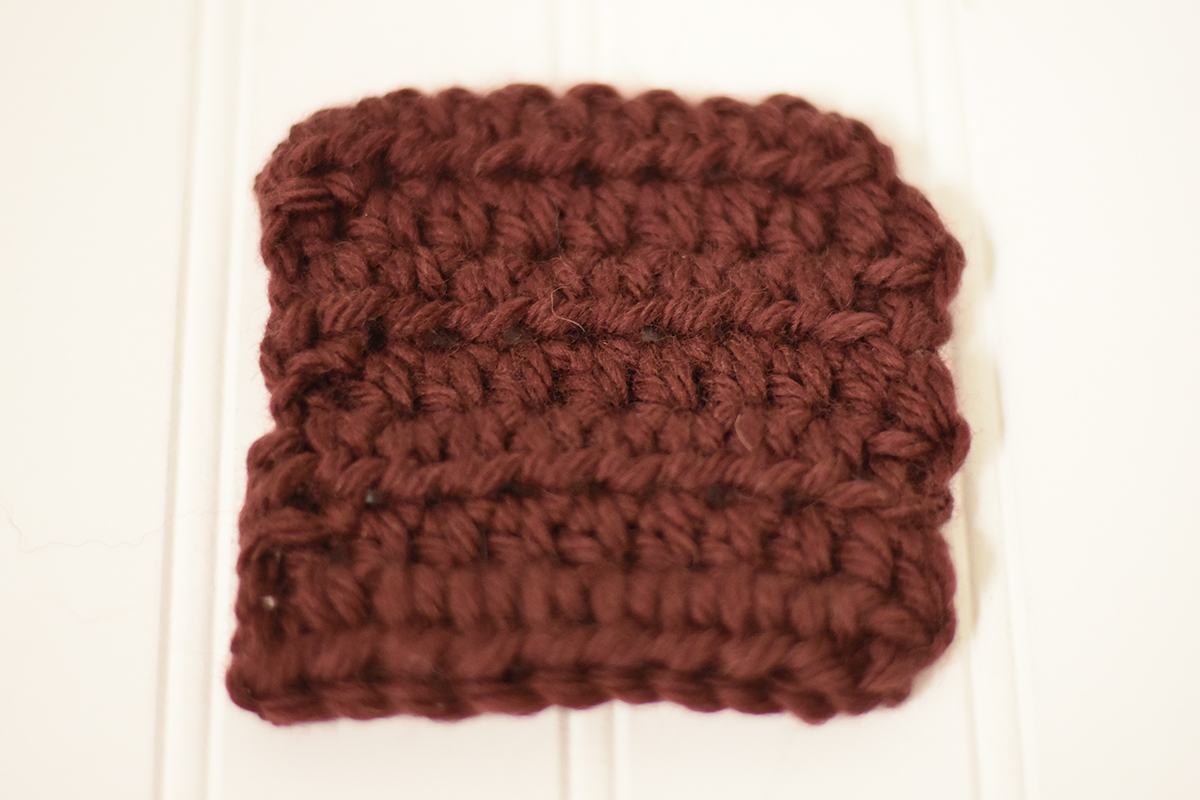
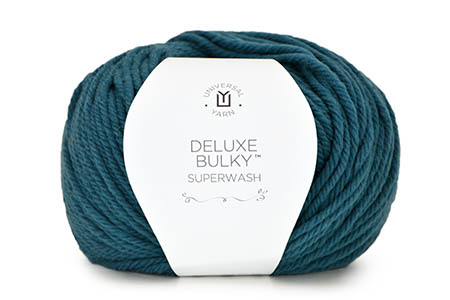
Deluxe Bulky Superwash is 100% superwash wool, and is already a can’t-stop-touching-it yarn. Giving it a bit of extra “oomph” is an easy choice albeit a bit unnecessary! Check out how it works up by itself. I really enjoy working with this yarn because anything you make with it feels quick and the stitches are so easy to see.
Deluxe Bulky Superwash color 939 Burgundy
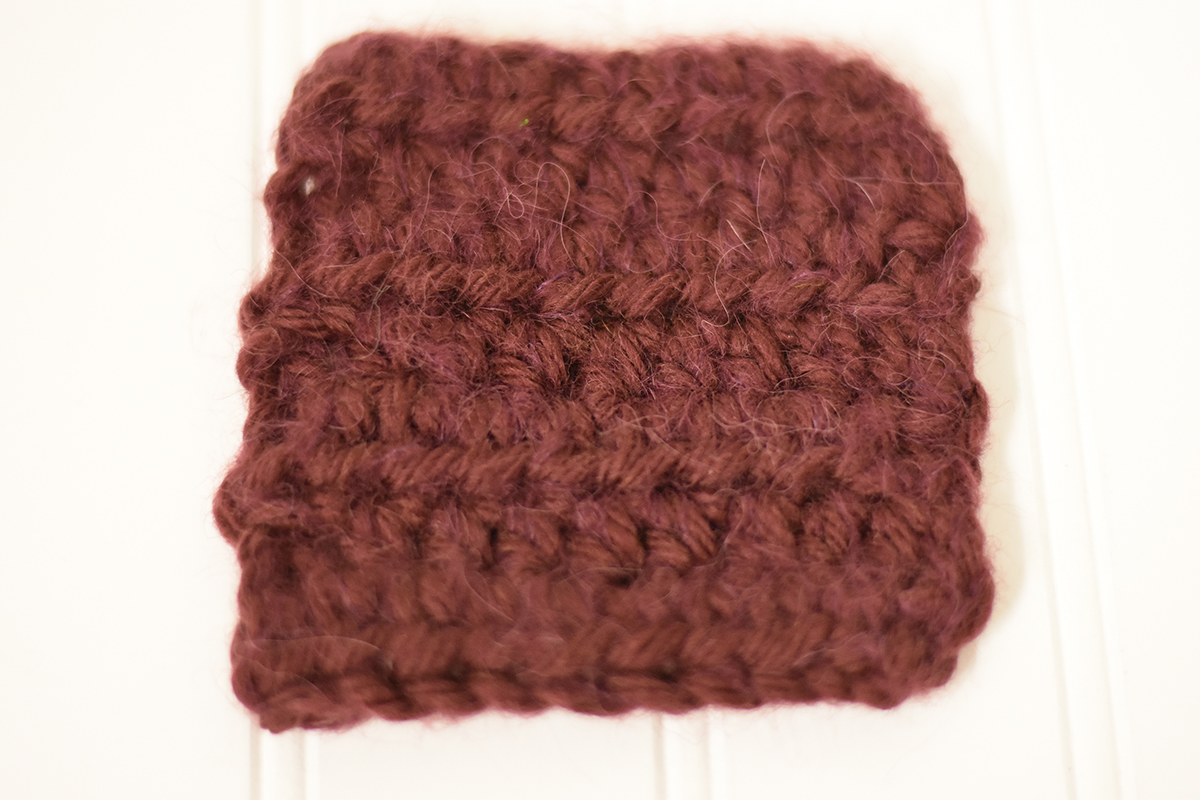
The first combination I tried was mixing Deluxe Bulky Superwash with Penna. I was most excited to try this out because Penna is a luscious blend of 50% Suri Baby Alpaca, 28% Extra Fine Merino, and 22% Nylon. Holding a ball of it is like holding a teeny personal cloud!
This combination had exactly the feel I was hoping for, although visually it doesn’t have quite the impact that carrying with a finer weight yarn would have. To achieve both a soft feel and a billowy halo appearance, I think I would try this out again with a sport weight yarn like Donnina. Despite the larger base, there is definitely still an extra element of visual interest in my swatch along with the heavenly feel.
Deluxe Bulky Superwash color 939 Burgundy + Penna 114 Bordeaux
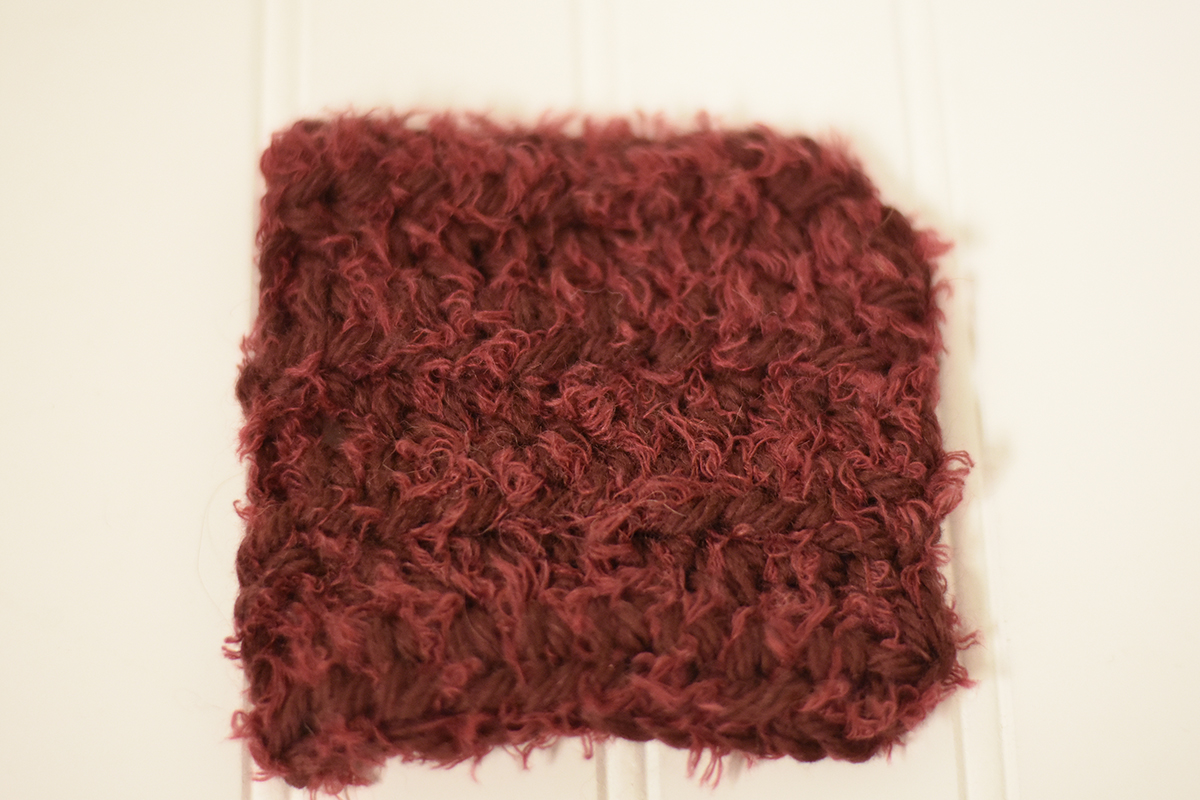
The next combination was to carry Minou along with Deluxe Bulky Superwash. This yarn is a lovely take on eyelash yarns, having all the fun texture elements while incorporating ridiculously soft materials. Minou is composed of 40% Baby Alpaca, 8% Merino Wool, and 52% Nylon. Holding this yarn is like hugging a cute lil’ kitten!
This combination definitely added some extra softness to the base, but I was most excited about the visual effect! The Minou added a cool, modern look to the swatch compared to the look of the Deluxe Bulky Superwash by itself.
Deluxe Bulky Superwash color 939 Burgundy + Minou color 108 Tanager
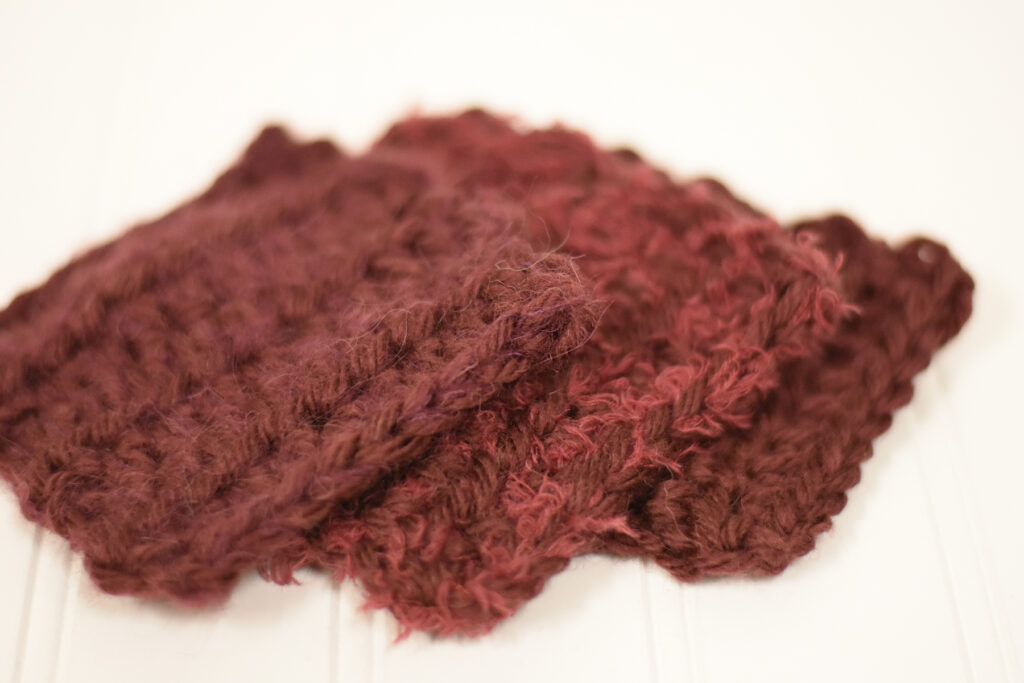
When it’s all said and done I love all of it! It’s really hard to say which combination I would use for my big fluffy dream sweater. I like the Penna combination most for it’s overall feel, but I really like the Minou for it’s look!
Left to right: DBS + Penna, DBS + Minou, DBS by itself
What combination would you try out? Aside from the obvious texture decision, what about colors? Would you try out mixing, or matching like I did? There are SO many fun possibilities when trying to find your fluff!
This is a fun and fast project that you can work up in a matter of hours! Using our super chunky Be Wool and Be Wool Multis always leads to full, soft, and quick work.
I recommend this as a great beginner crochet project! This cowl features V stitches, and a faux ribbing created using front and back post work. If you haven’t tried these stitch techniques a go before, definitely jump in. They are easy-peasy but look somewhat complex. It will be sure to have your friends asking the fun question “Oh my gosh, did you make that!?”
The Kobuk Cowl is named after the Kobuk Valley National Park in Alaska. The natural colors featured in this design reminded us of the cool blue waters, arctic chill, and rusted golden landscape seen in this majestic place. The second I tried in on I, was itching for some colder weather adventure. Granted, I may not make it all the way to Alaska this season, but I’ll be dreaming about it when I hike around the beautiful mountains in North Carolina!
Well there you have it! Have you ever been out to a National Park? Which one? I’d love to hear about your experience! That’s all for now, Happy Stitching! AJ
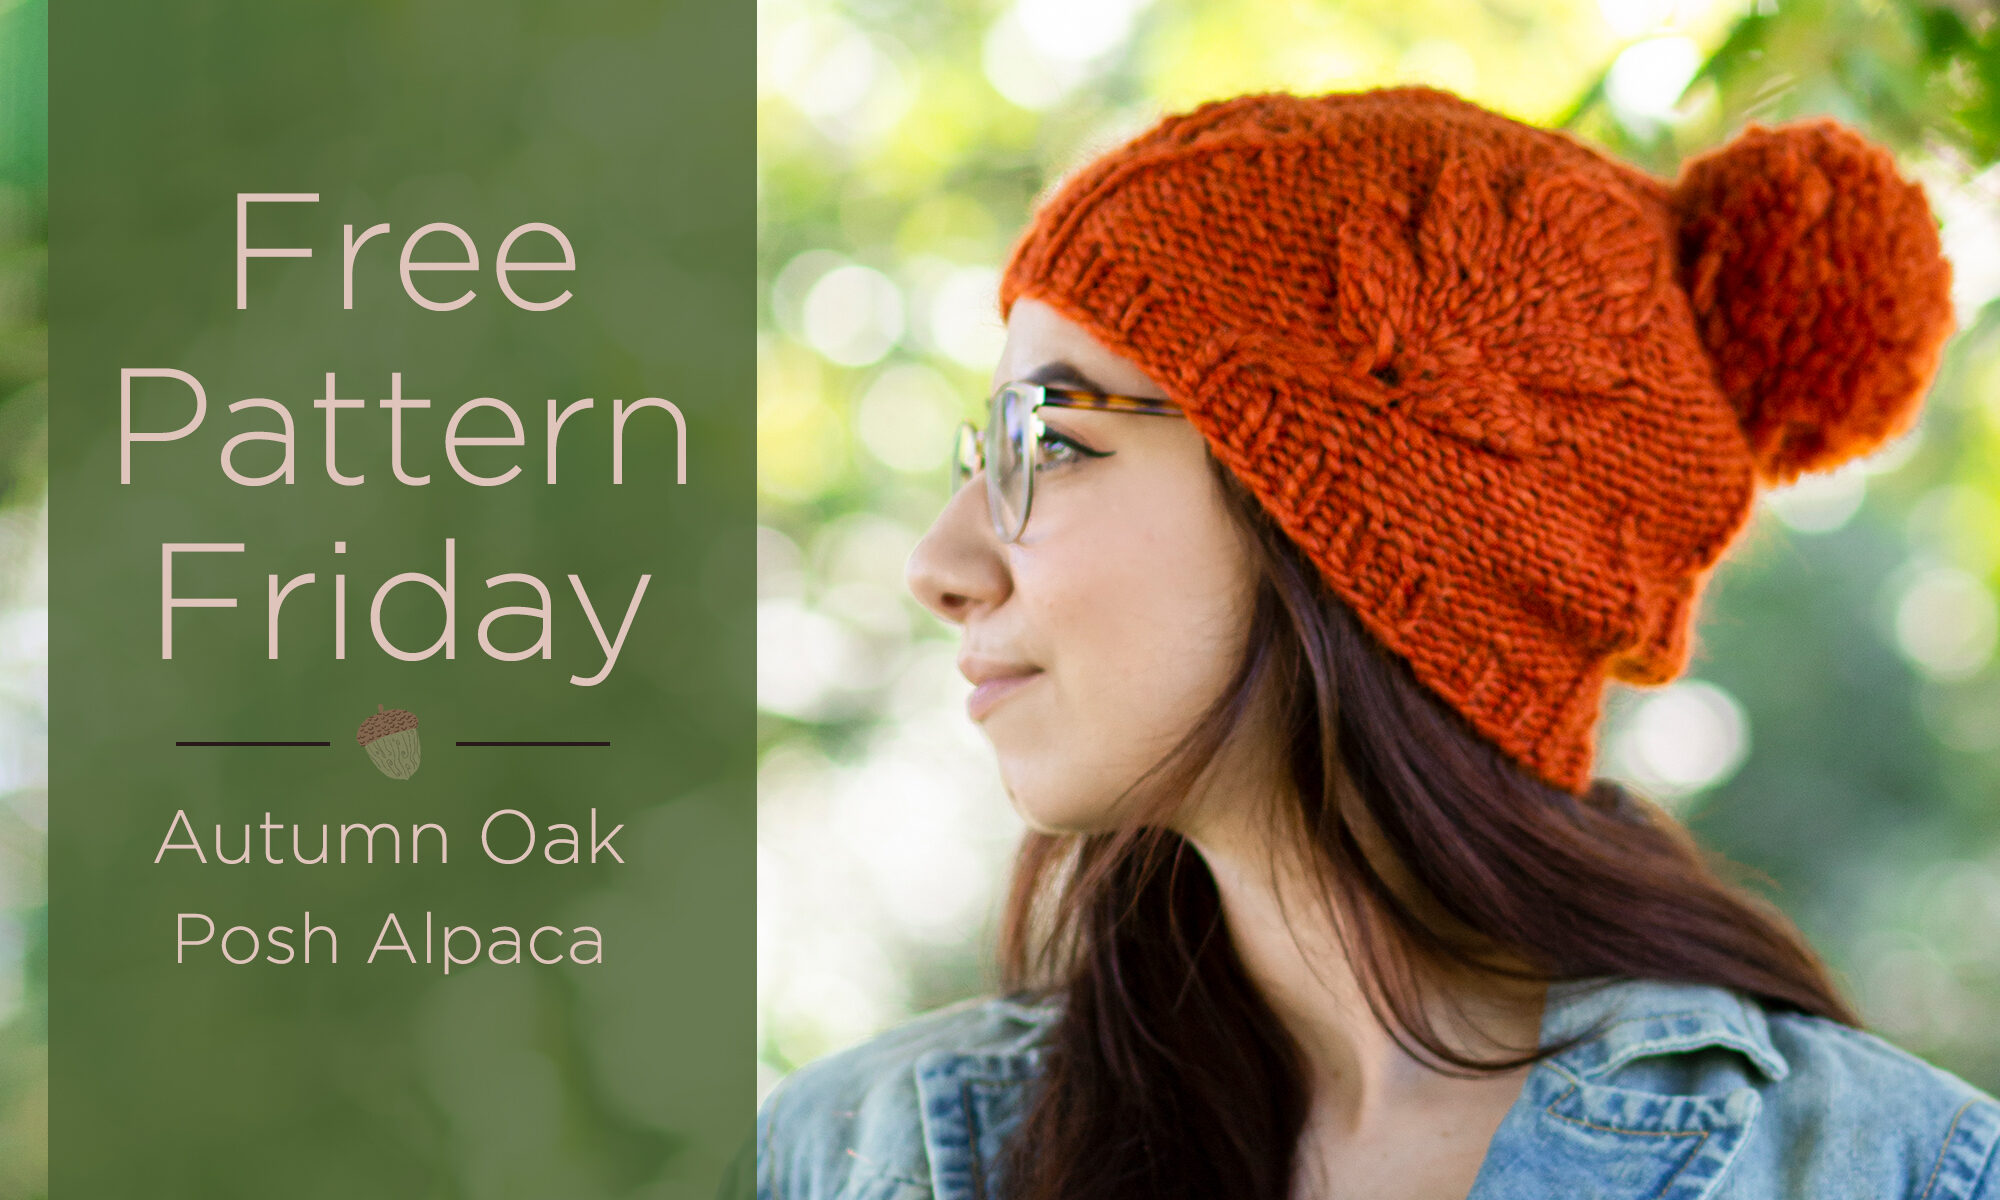
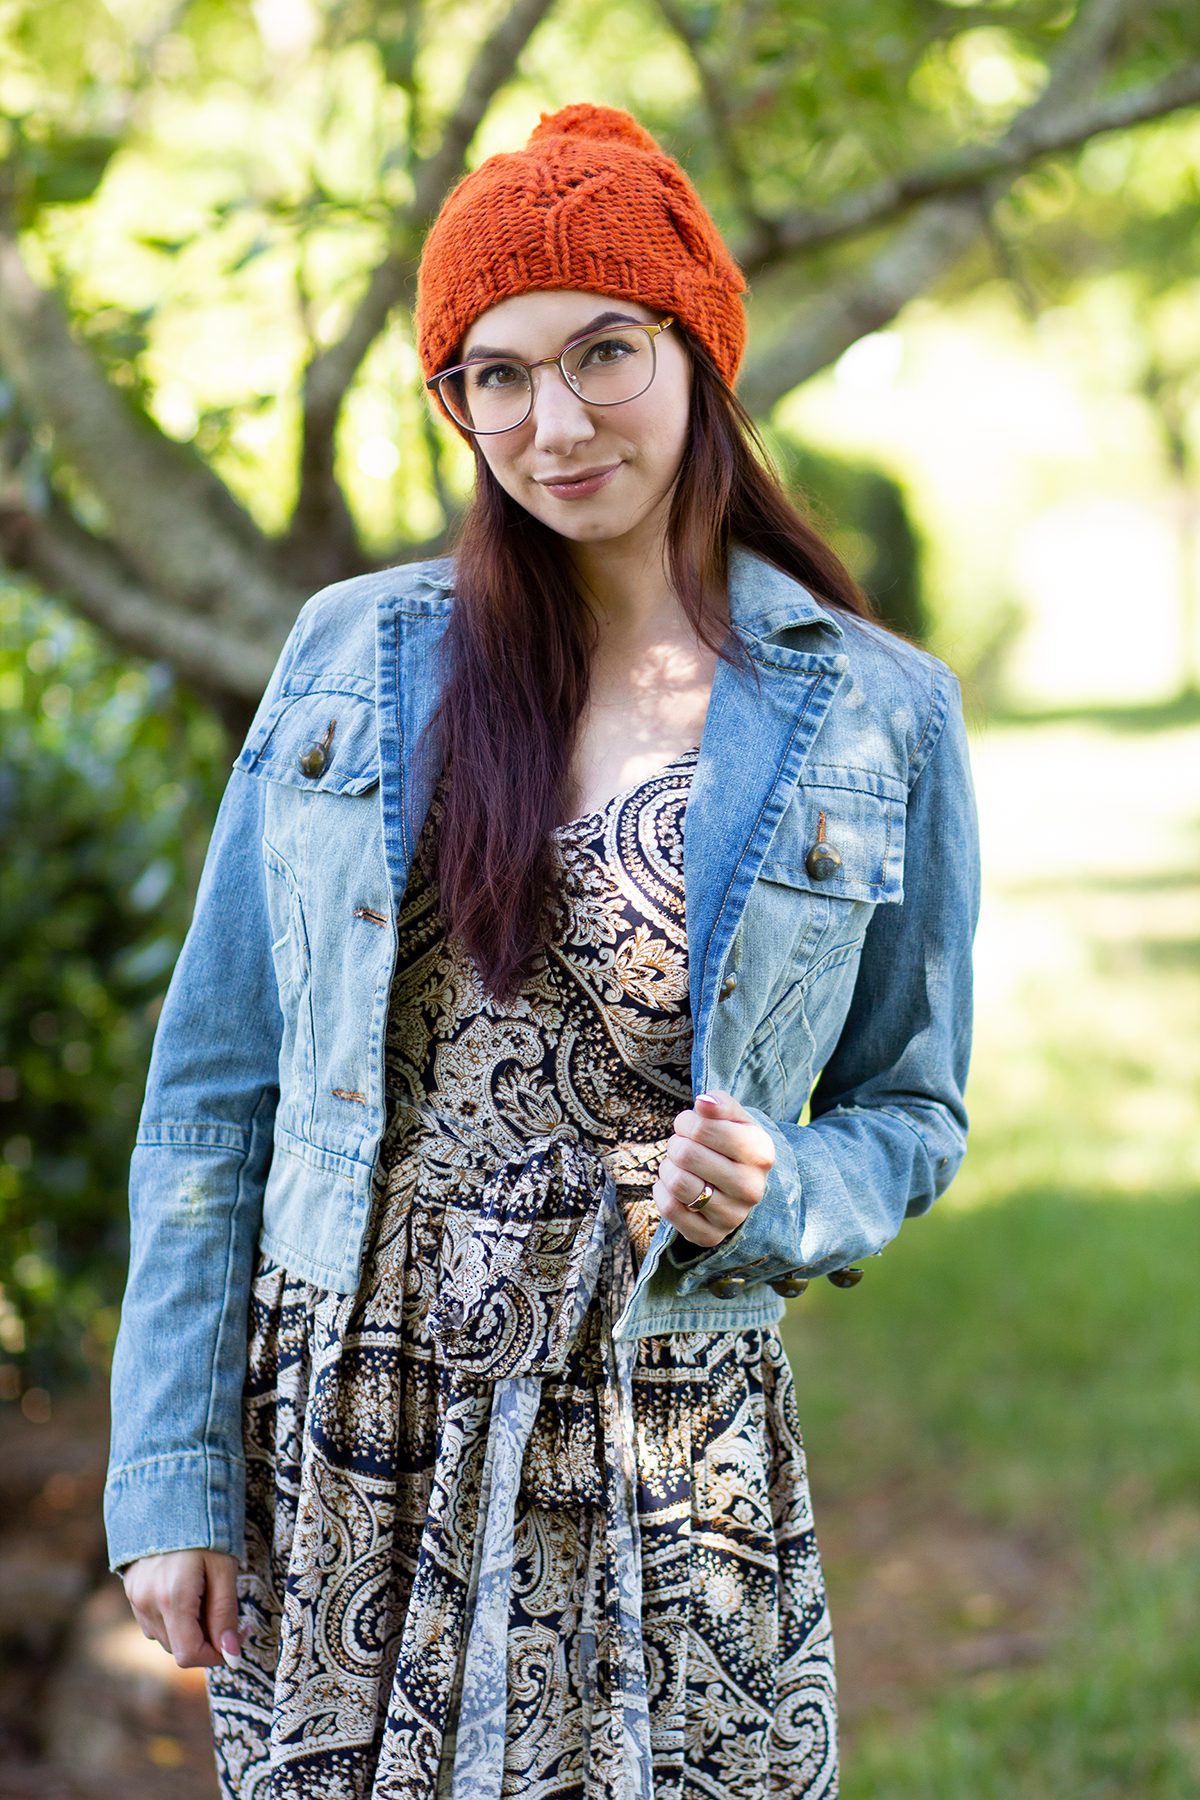
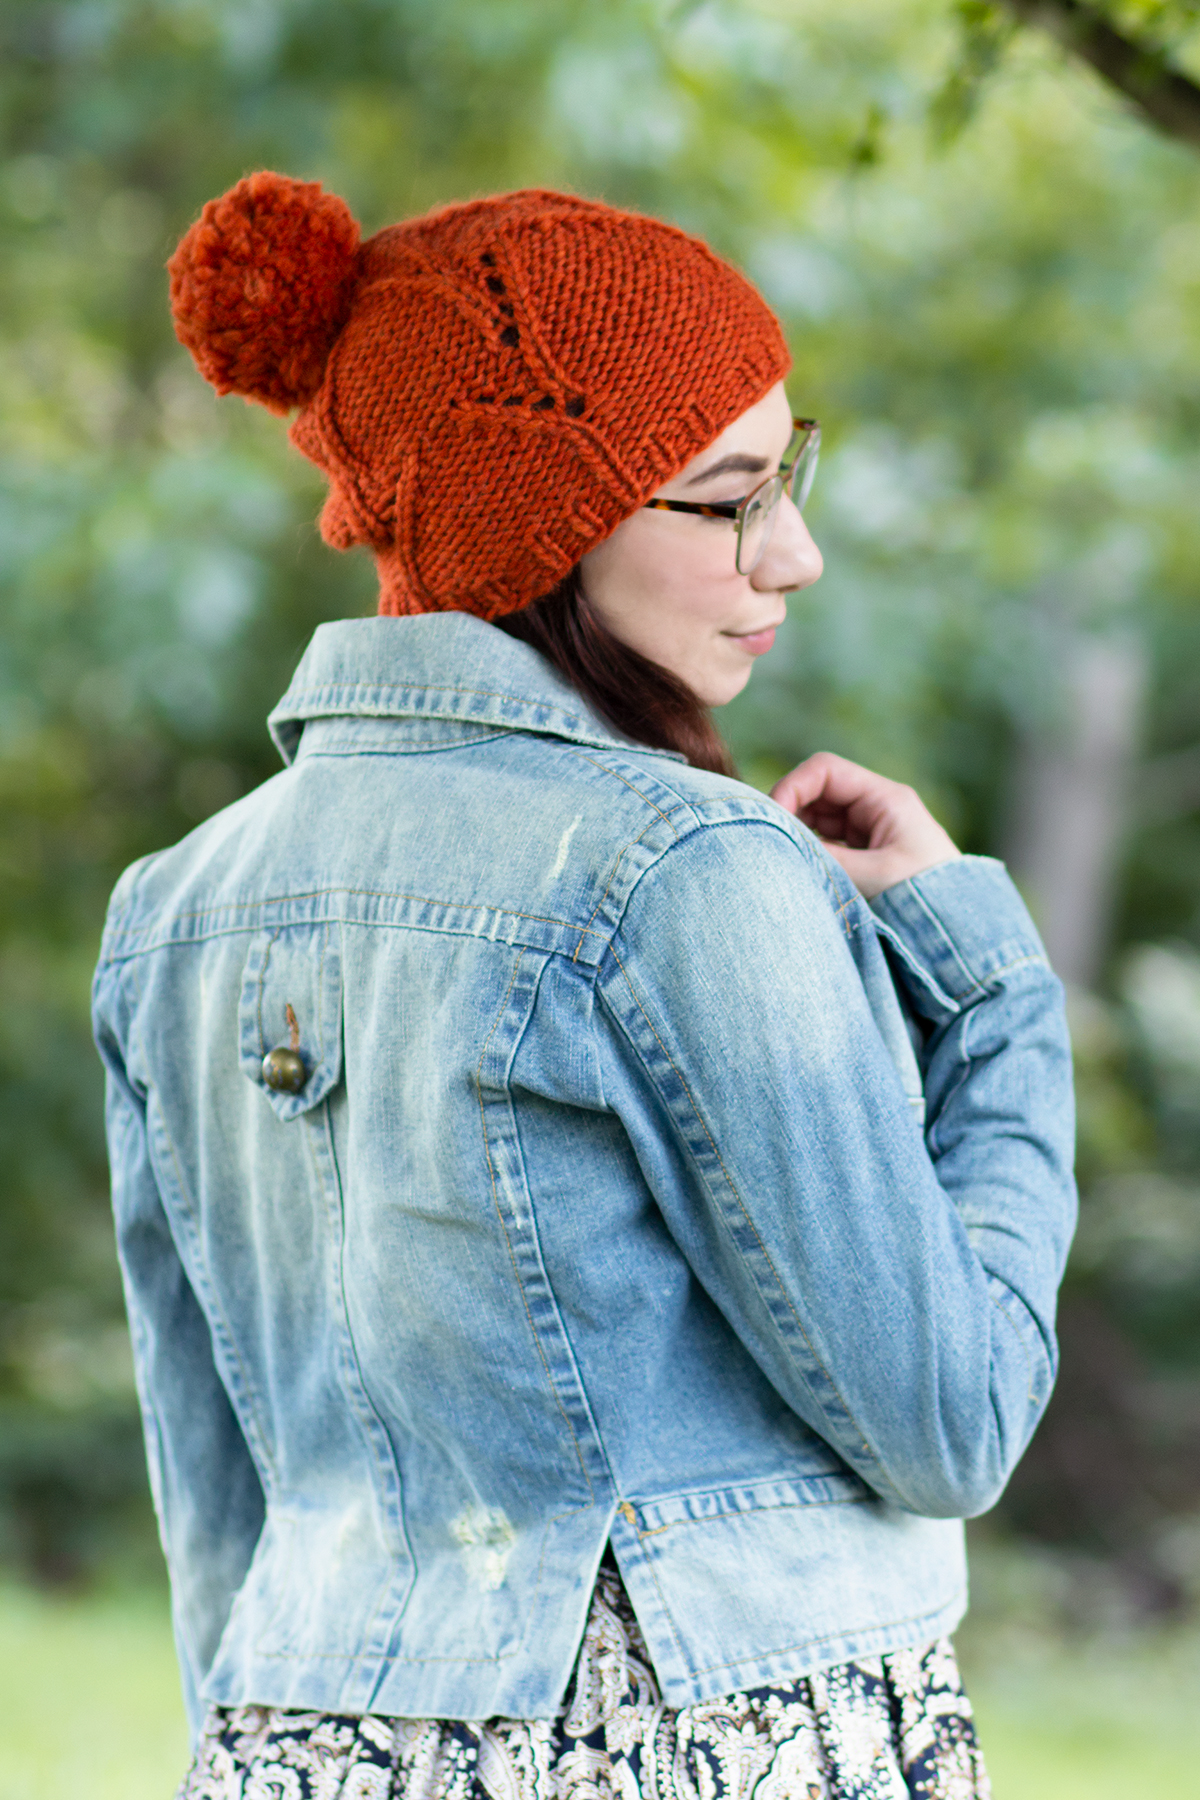
Aubrey looking spectacular in the new Autumn Oak Hat!
It’s September, which means the official end of summer is mere weeks away and the season of all things woolly is upon us. For me, that means hats, hats, and more hats! I’m sure I’ve said this before, but hats are one of my favorite things to design and knit. I love everything about the process – they’re an excellent playground for a variety of techniques, quick to work up, and make wonderful gifts. That’s why I’m thrilled to share my latest design with you: the Autumn Oak Hat (pattern link).
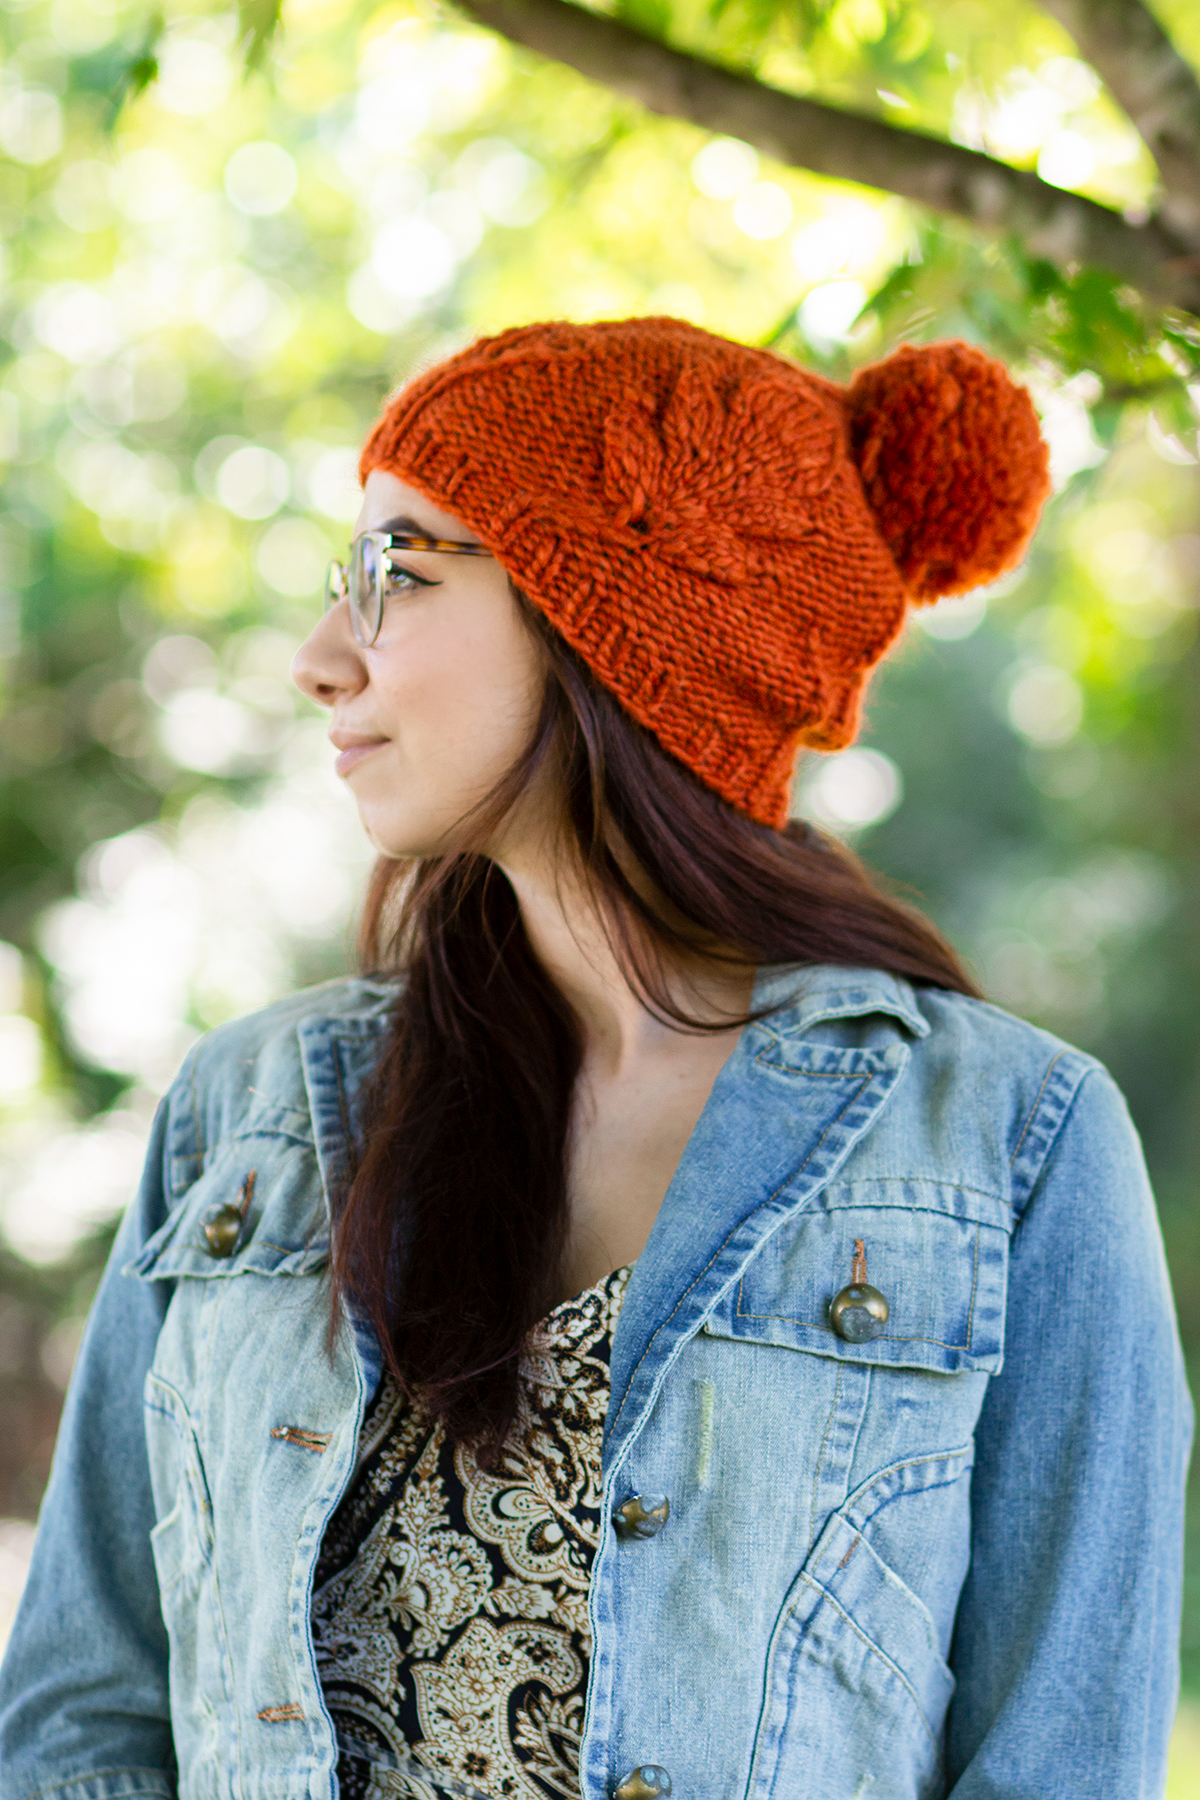
The large leaf motif nods to the rounded lobes of White Oak leaves.
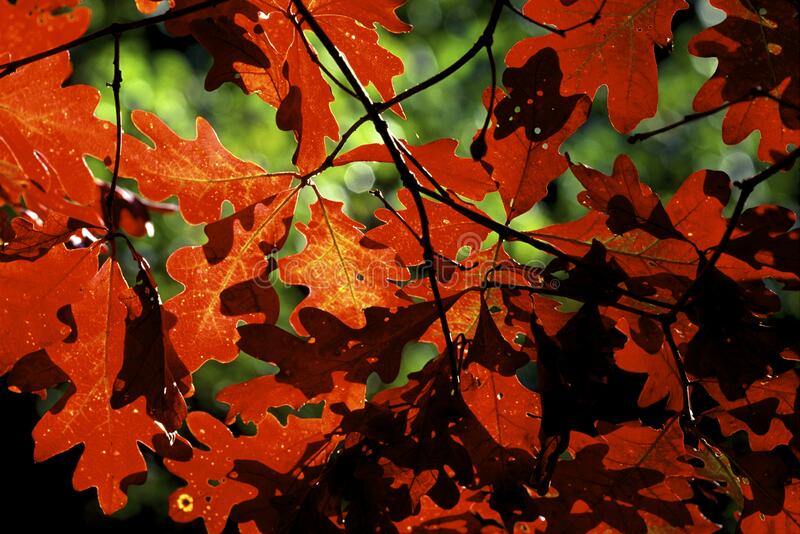
Autumn Oak is knit using plush and cozy Posh Alpaca, a blend of wool, superfine alpaca, and acrylic. This single-ply yarn is a super bulky weight but feels surprisingly light and springy. The palette is full of gorgeous neutrals and autumnal hues, and the colorway that simply sings to my heart is #112 Carotene, used in the Autumn Oak Hat. Orange, especially burnt orange, is perhaps my most favorite color, so I knew I needed to design something with it. This autumnal orange immediately conjured images of brilliant fall foliage, especially that of oak trees.
Fiery, red-orange leaves of a White Oak tree.
The Autumn Oak hat features a singular, large leaf motif that simply pops off the background of reverse stockinette stitch. It is complemented by twiggy lace motifs around the rest of the hat. These elements make this an engaging pattern that offers a bit of a challenge in a small package – again, hats are a perfect playground for learning new skills!
The lace motifs flow elegantly into the crown shaping, making this piece look great at every angle. It’s topped with a fluffy pom pom, and let me tell you, Posh Alpaca makes a really plush and fluffy pom pom!
Even though Posh Alpaca only contains 98 yards, it goes a long way. This hat is just a one-ball project, even with the pom pom. It works up fast, so you can knit one for yourself and for your friends and family in no time! It would look gorgeous knit up in any of the other colors, but I’d love to see versions of it using the colors inspired by trees: #101 Birch, #102, Oak, and #111 Hemlock. Whatever color you choose, you simply can’t go wrong!
I hope you love this hat as much as I loved designing it. Let me know which color you’d choose in the comments!
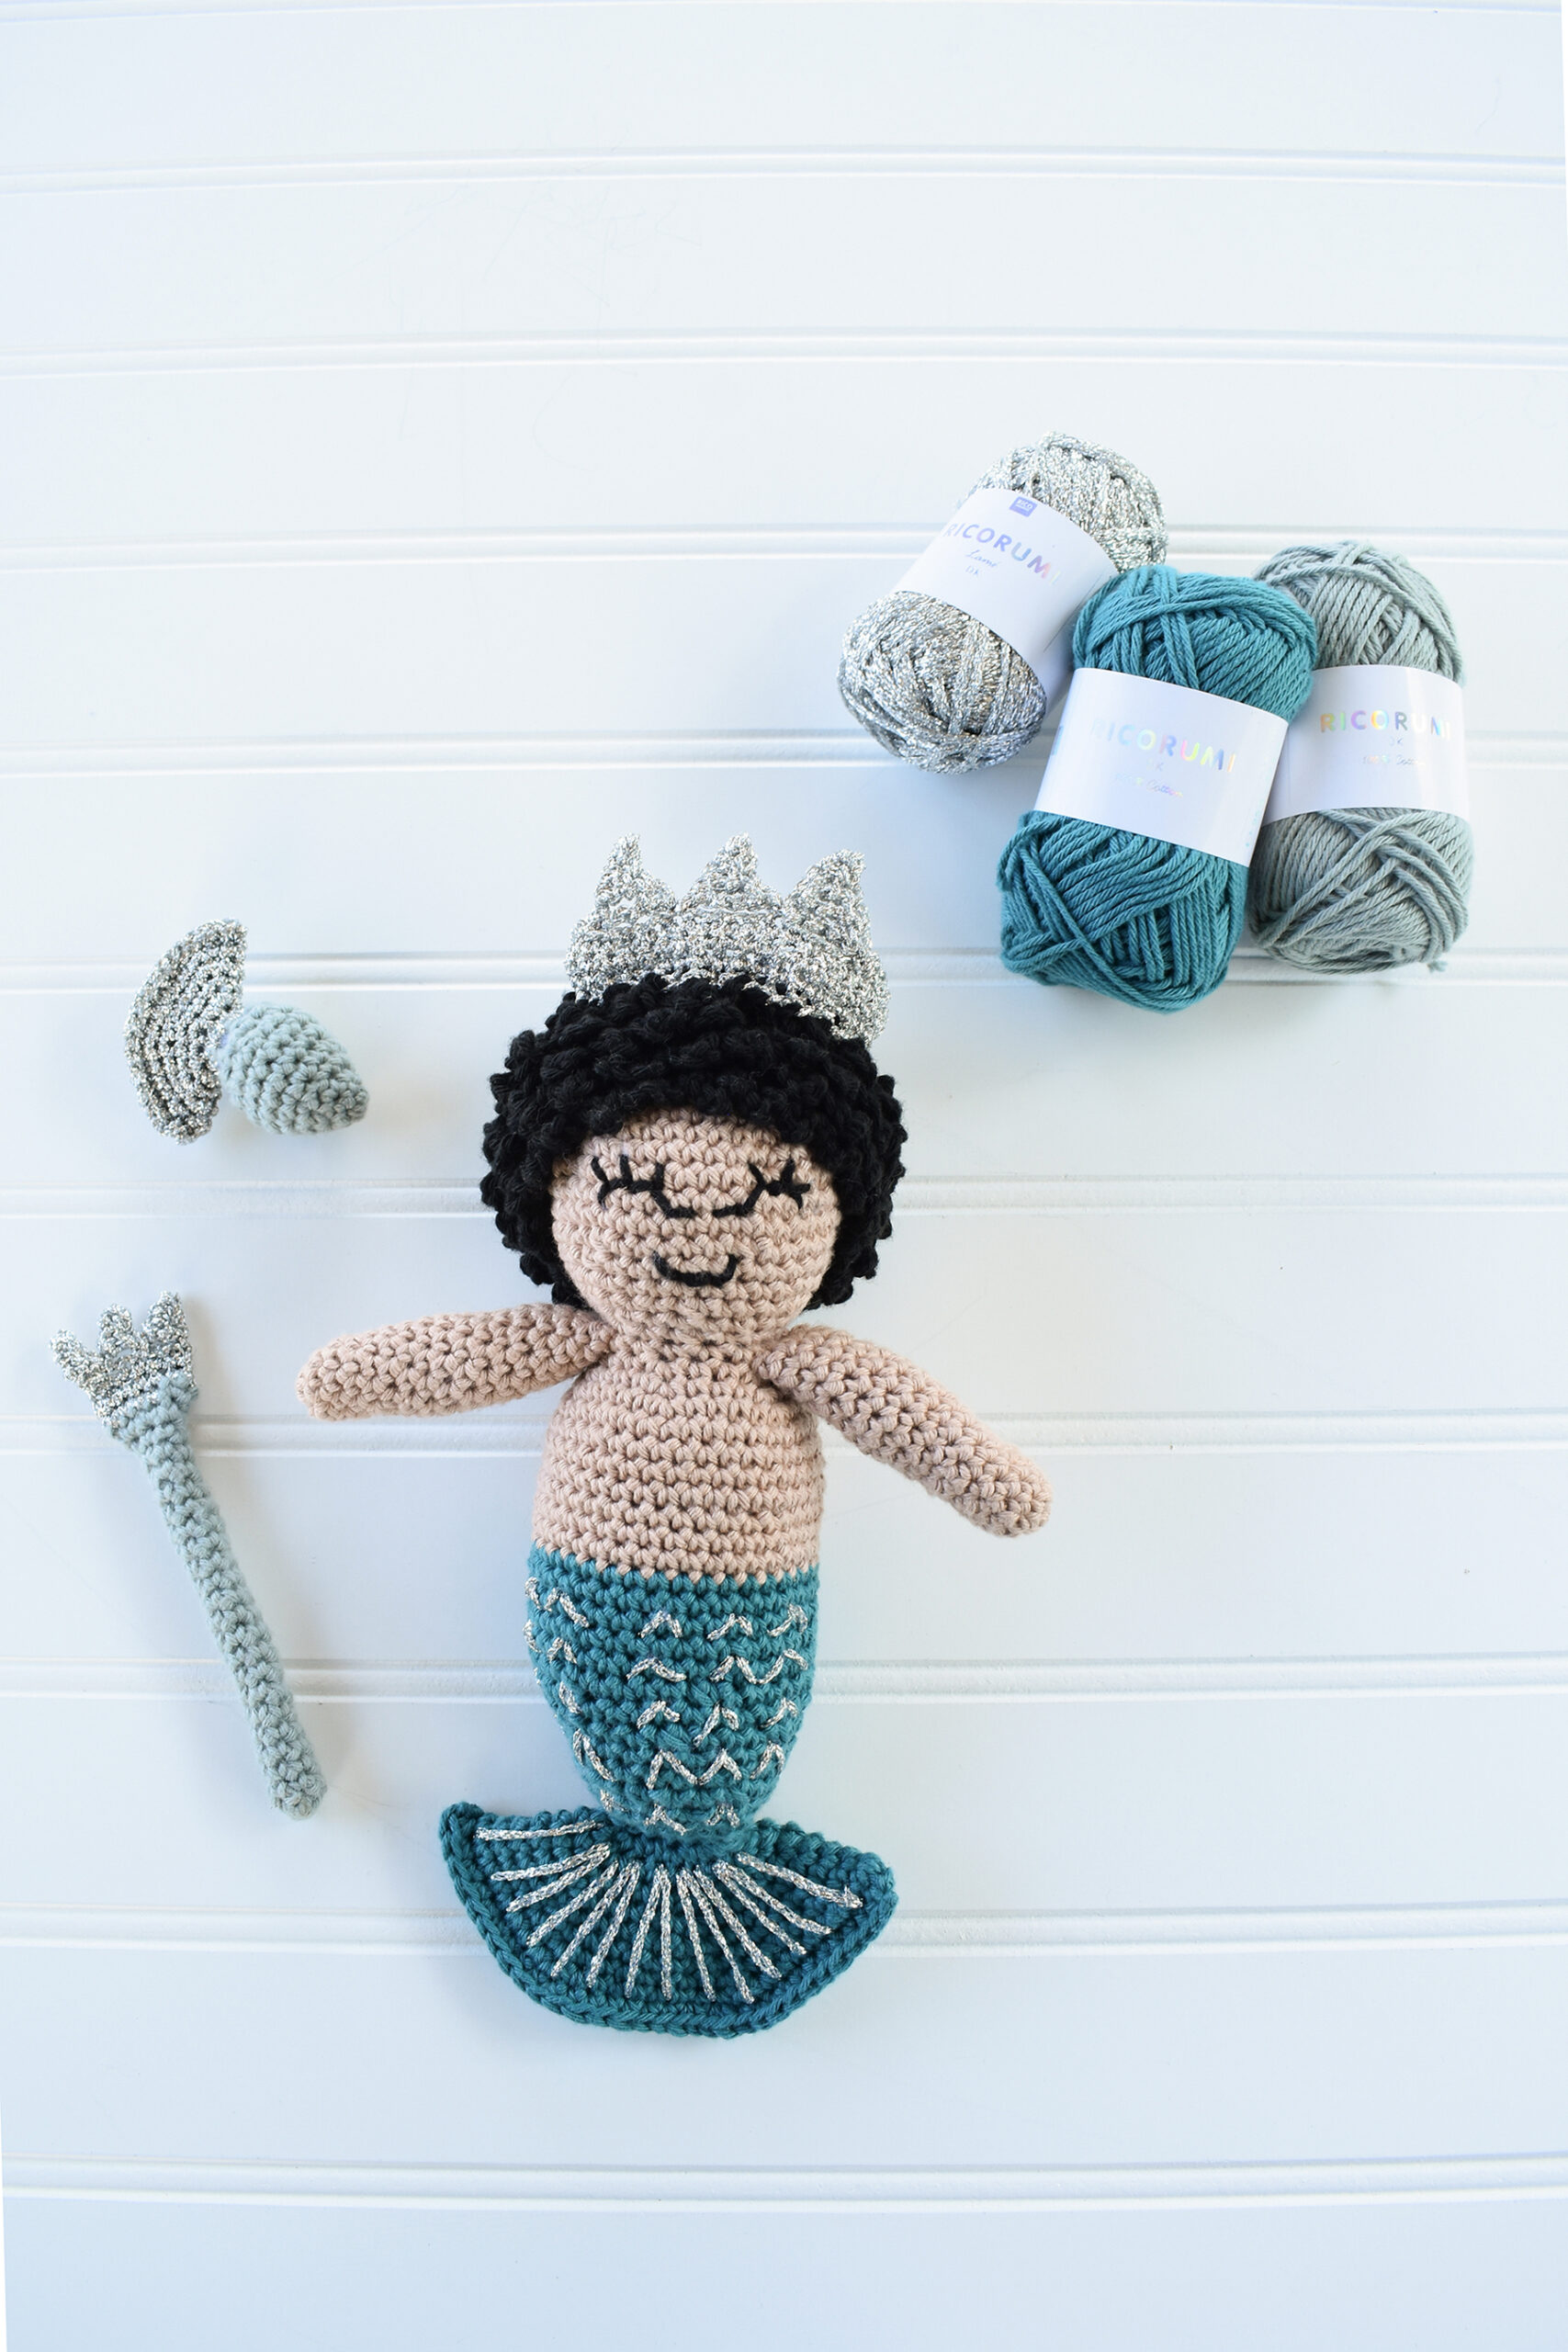
My name’s Ashley Jane, also known as AJ here at Universal Yarn. I’m avid crocheter, lover of dogs and all things outdoors, drinker of teas, and the newest member to the design team! My first few weeks here have been a whirlwind of learning our product line, organizing and revamping our Trunk Show Program, and making the cutest ever sample of our Ricorumi Kits!
Ricorumi Kit, Neptune
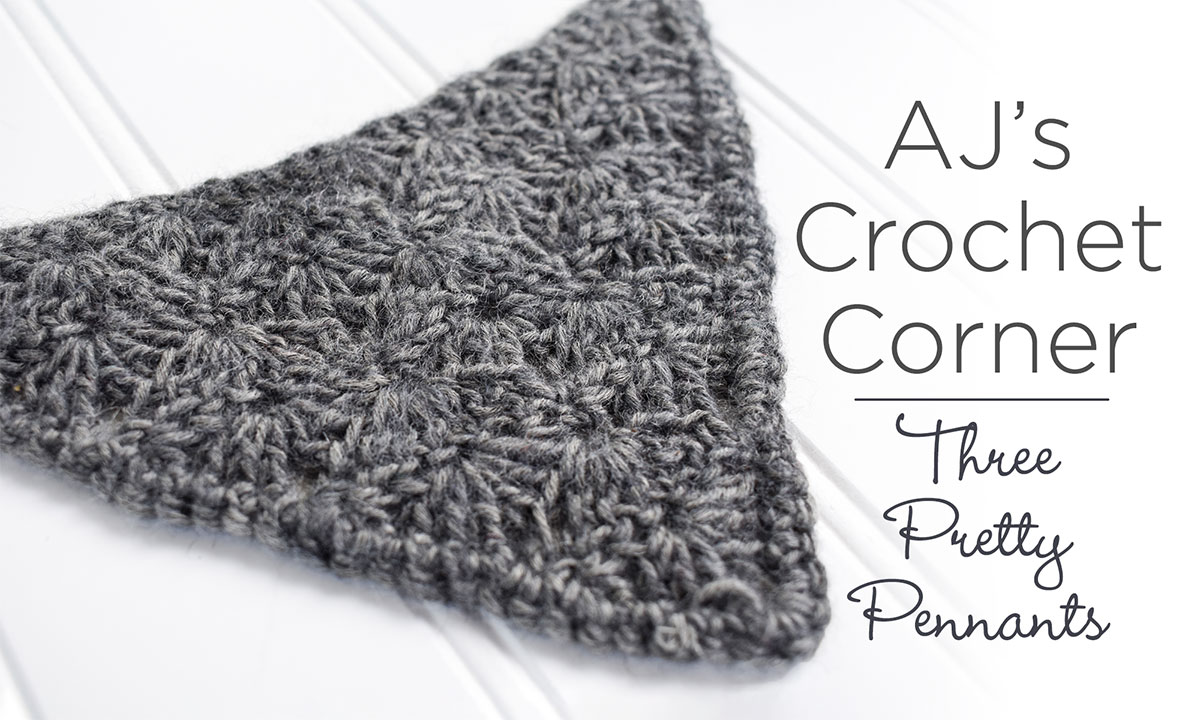
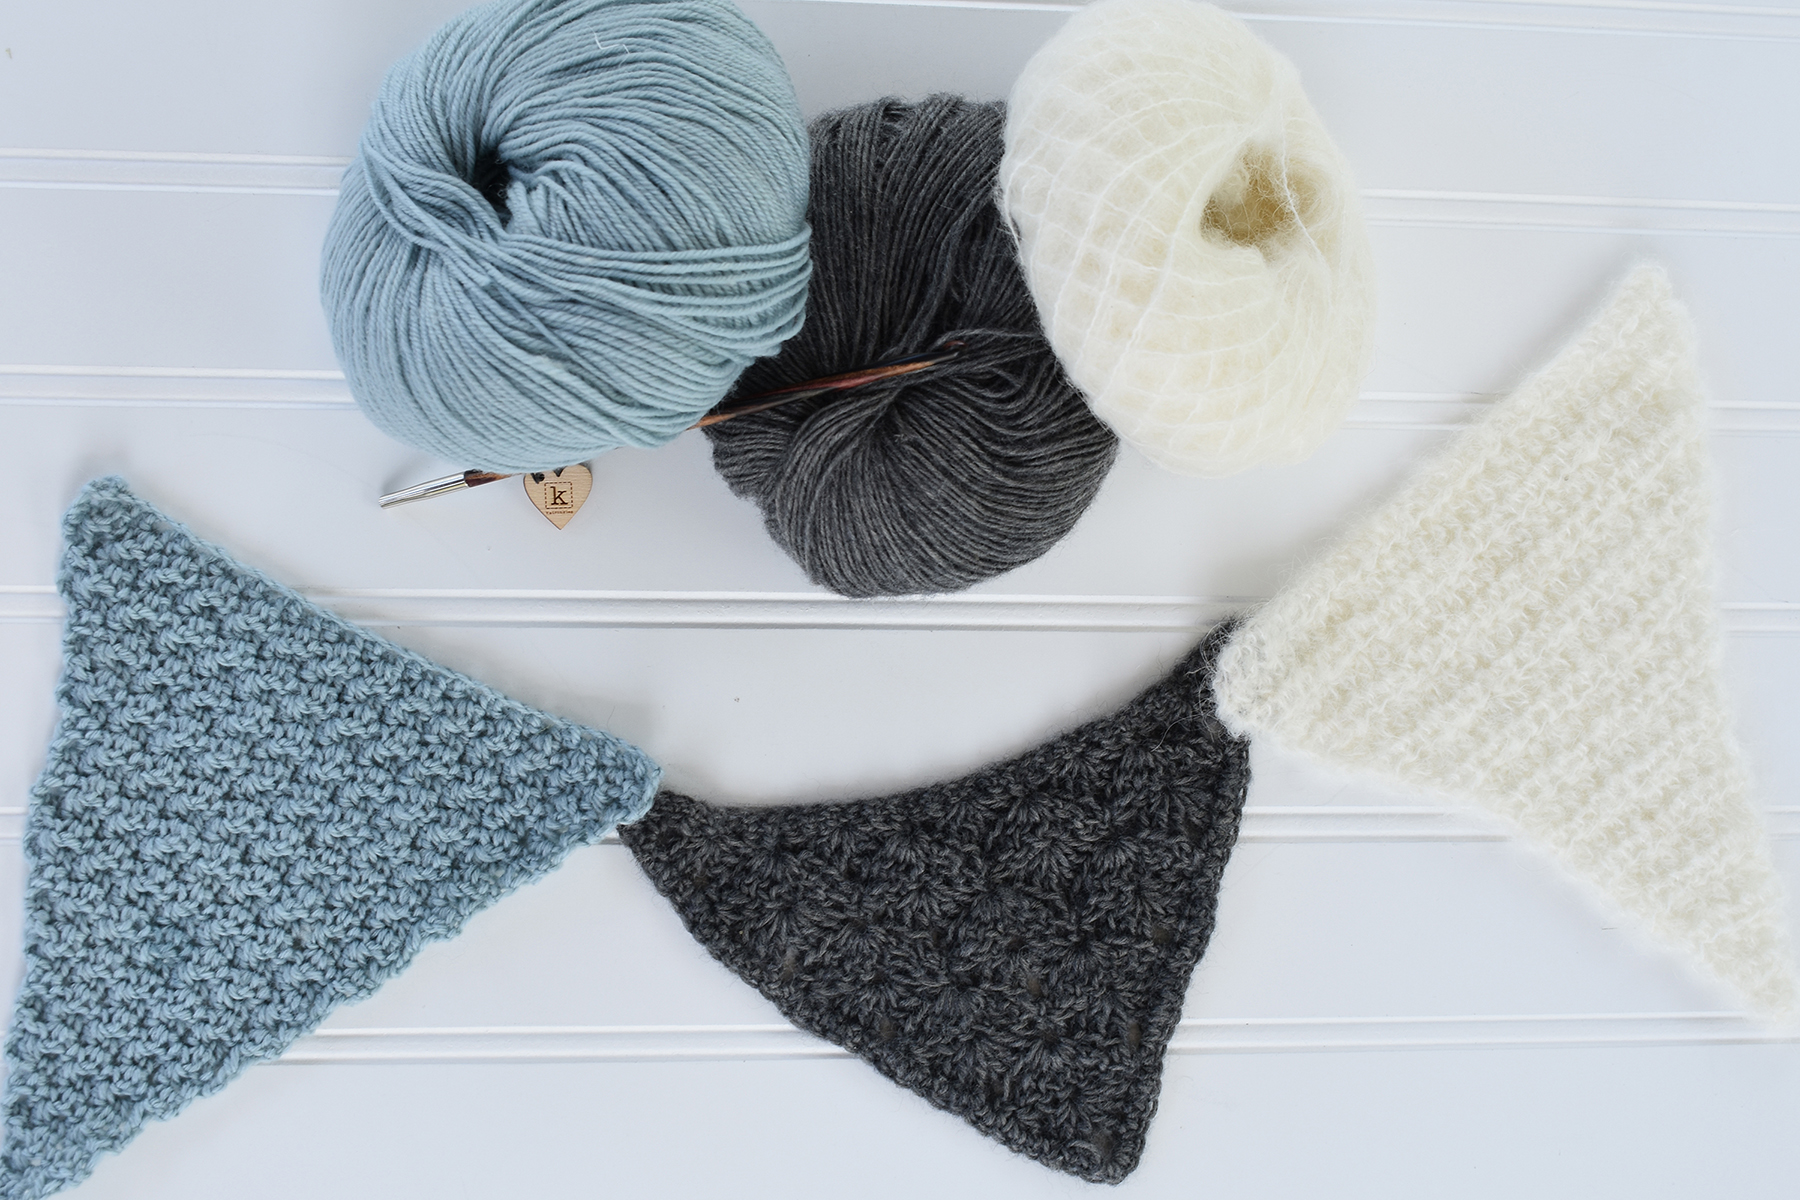
While settling into my new role, I have had the chance to stitch and swatch a few of our yarns to get to know them. I narrowed down my selection to Bella Cash, Ravello, and Penna. I wanted a chance to play around with some of our softer yarns while seeing what types of texture and feel I could produce with crochet. I loved my results – keep reading on to see my take on these fabulous fibers.
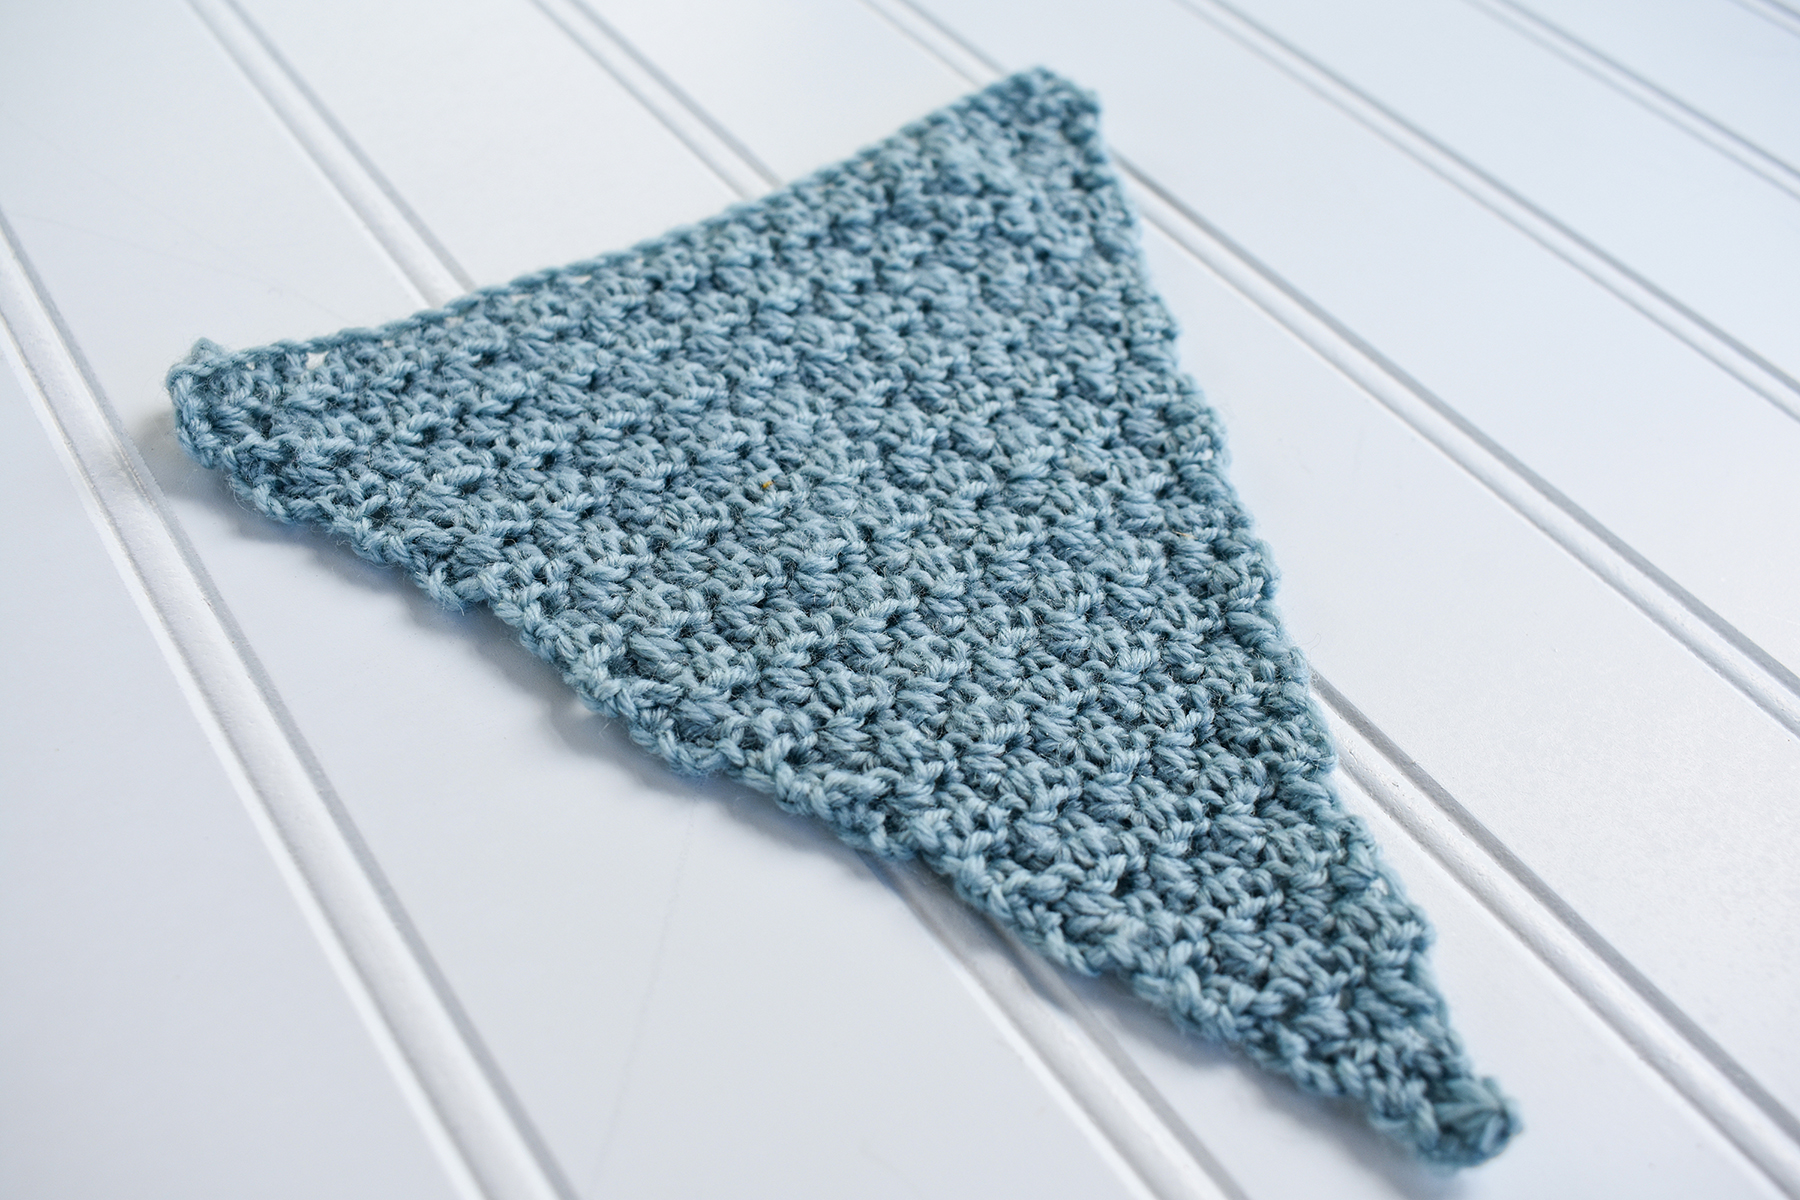
Sample Pennants in Bella Cash 116, Ravello 115 and Penna 106Bella 123
Bella Cash: Grippy on the hook, and springy to the touch. Using a 3.75 mm hook, I tried out the Lemon Peel stitch to see what type of texture I could get while working with it and wasn’t disappointed. Made from 60% Superwash Merino, 10% Cashmere, and 30% Nylon, this fine-weight yarn has great structure and stitch definition. Plus it feels nice and soft, and the hook size I used created a thick but malleable fabric. Bella Cash is easily one of my favorites to work with so far and would be fantastic in a full sweater with some texture and fine detailing, like the Bellissima Cardi, or the Holiday Lights Shawl.
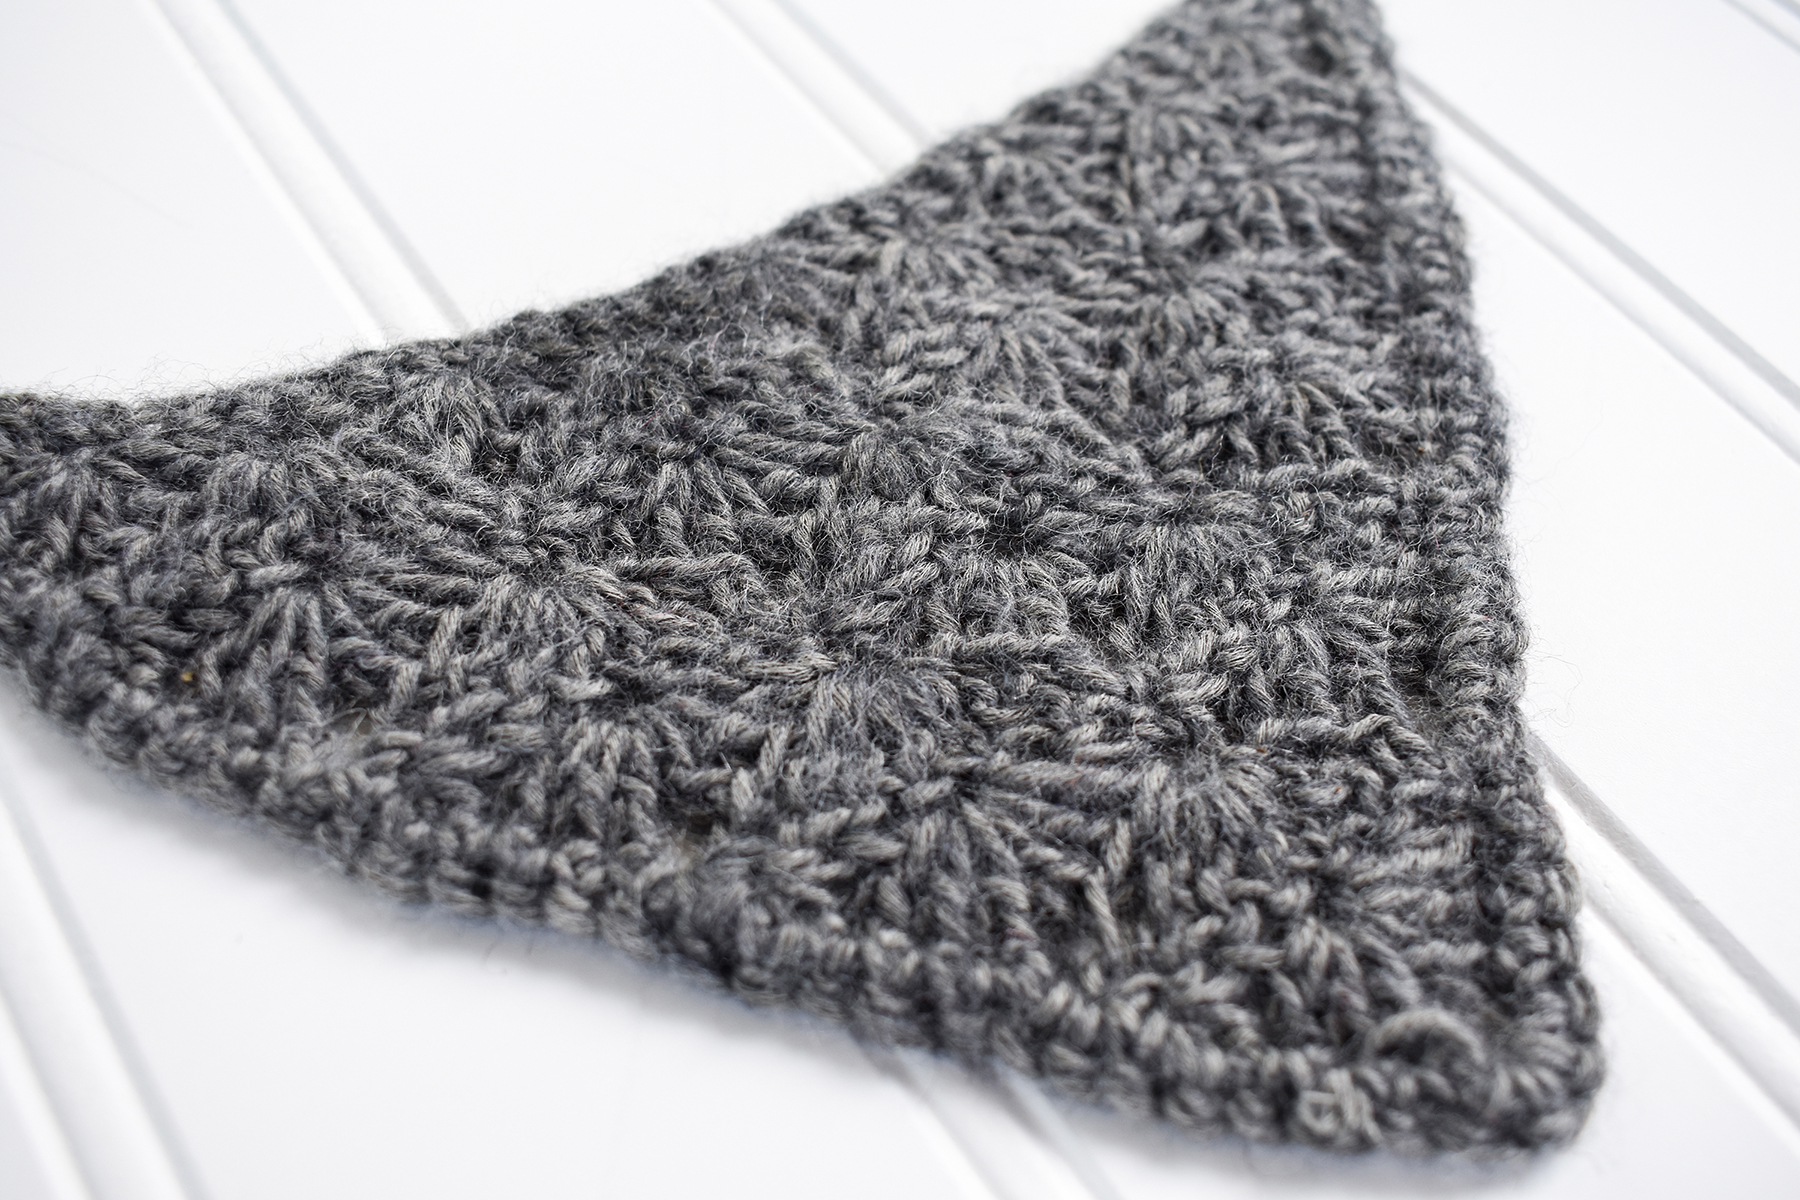
Bella Cash 116Ravello 111
Ravello: Smooth to work with, and wonderful for making textures that have a nice light fluff to the finished piece. Using a 3.75mm hook for this fine weight yarn, the fabric has a delightful drape, and a soft airy quality to it. I played around with petal and reverse petal stitches for the pennant below. I loved it so much that I’ve decided to make my first Universal Yarn pattern from it, so be on the lookout for the Petal Shawl, coming soon! With a blend of 75% Cotton, 16% Extra Fine Merino and 9% Recycled Cashmere this yarn is lovely for summery tops like the Riviette Tank or the Lorelei sweater.
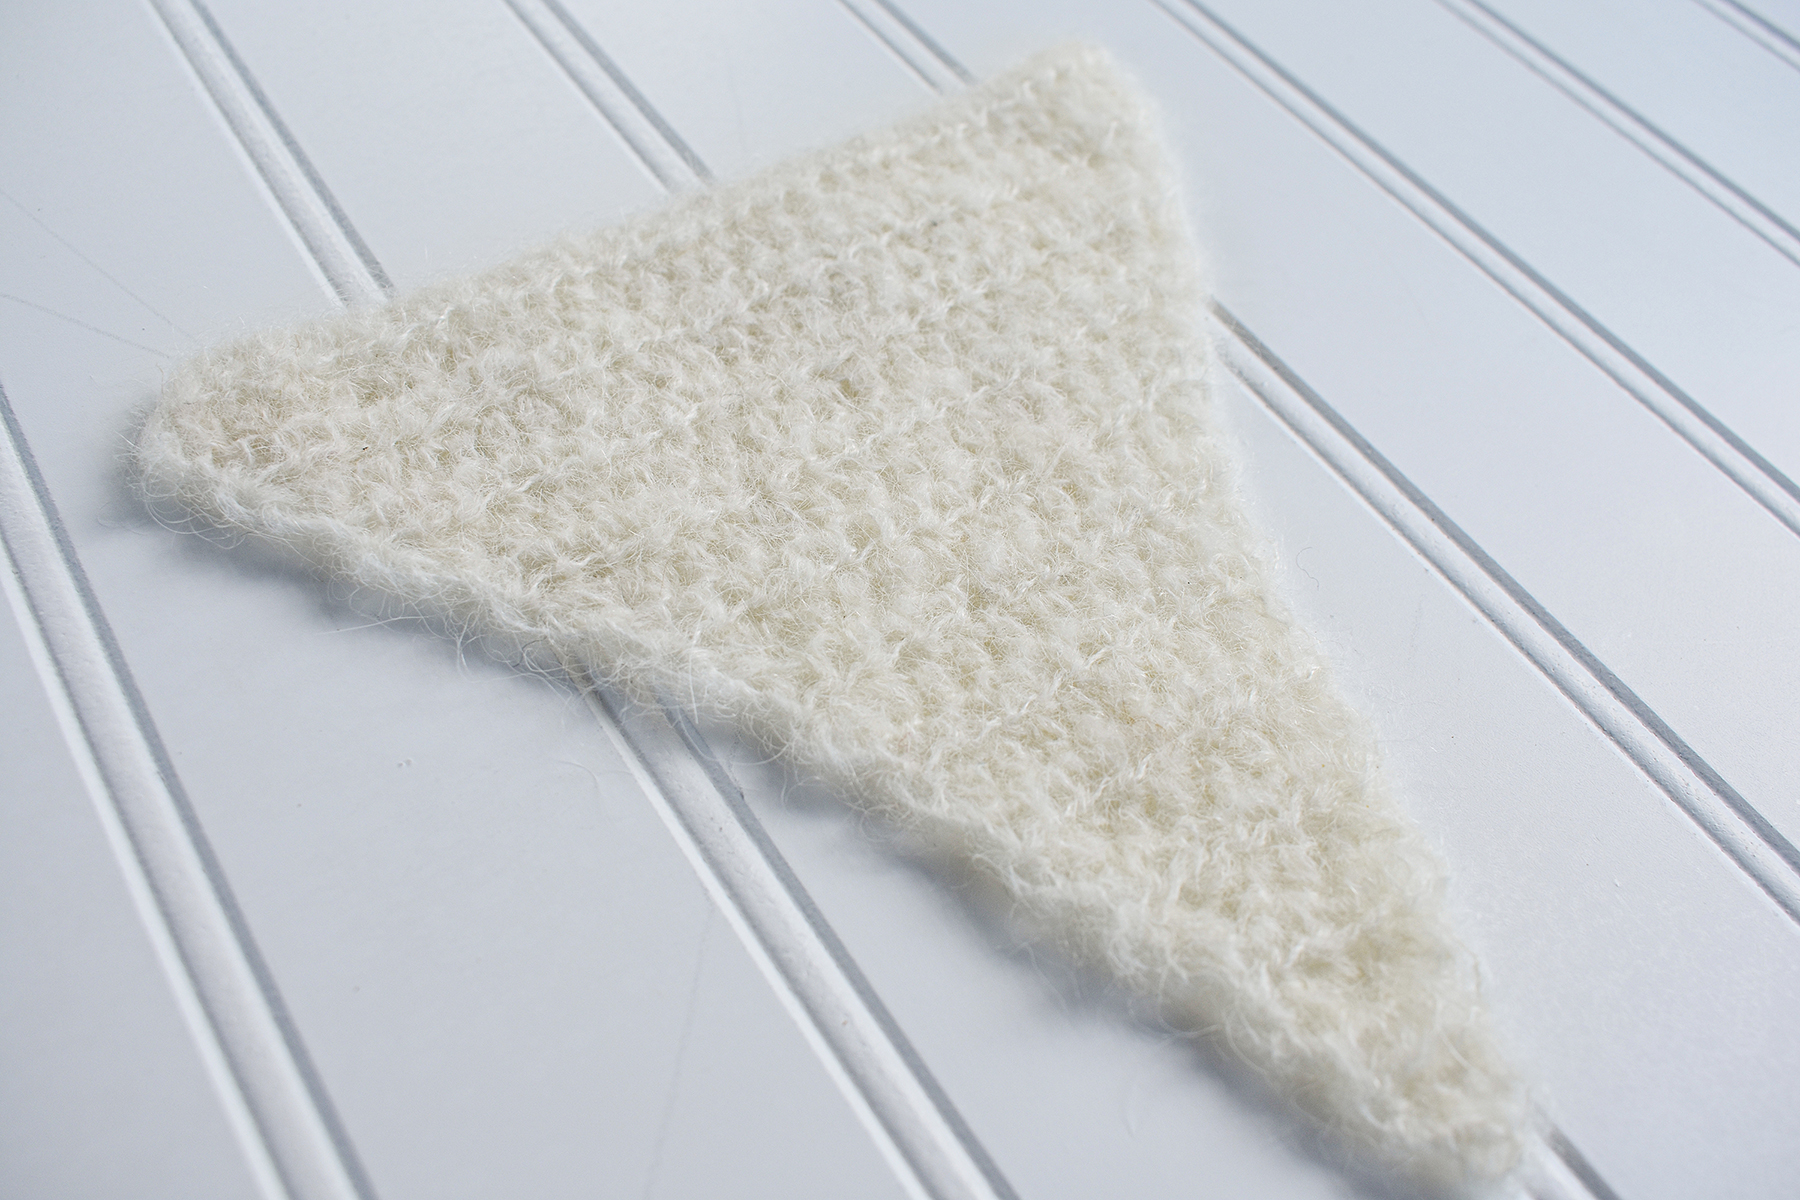
Ravello 115Penna 106
Lastly, Penna: Fluffy and Fun! This lace weight yarn is quite fine with lots of airy soft fibers, made from 50% Suri Baby Aplaca, 28% Extra Fine Merino, and 22% Nylon, so the stitches stand out in almost a ghostly fashion. Each twist and turn of your stitch can be seen through the fluff which I find looks beautiful with basic stitches, so I chose to whip up a simple pennant of Half Double Crochet’s using a 3.75 mm hook. An easy way to incorporate Penna into a piece is to hold it with another yarn like the Ariosa pattern suggests. This adds just the right amount of softness for that cozy, can’t-stop-touching feel. By itself, this is a standout yarn for lacework as seen in the Pluma stole.
Penna 106
All in all, these yarns are unbeatable for their quality and price points. I look forward to experimenting with more yarns and trying them out with crochet and other crafts.
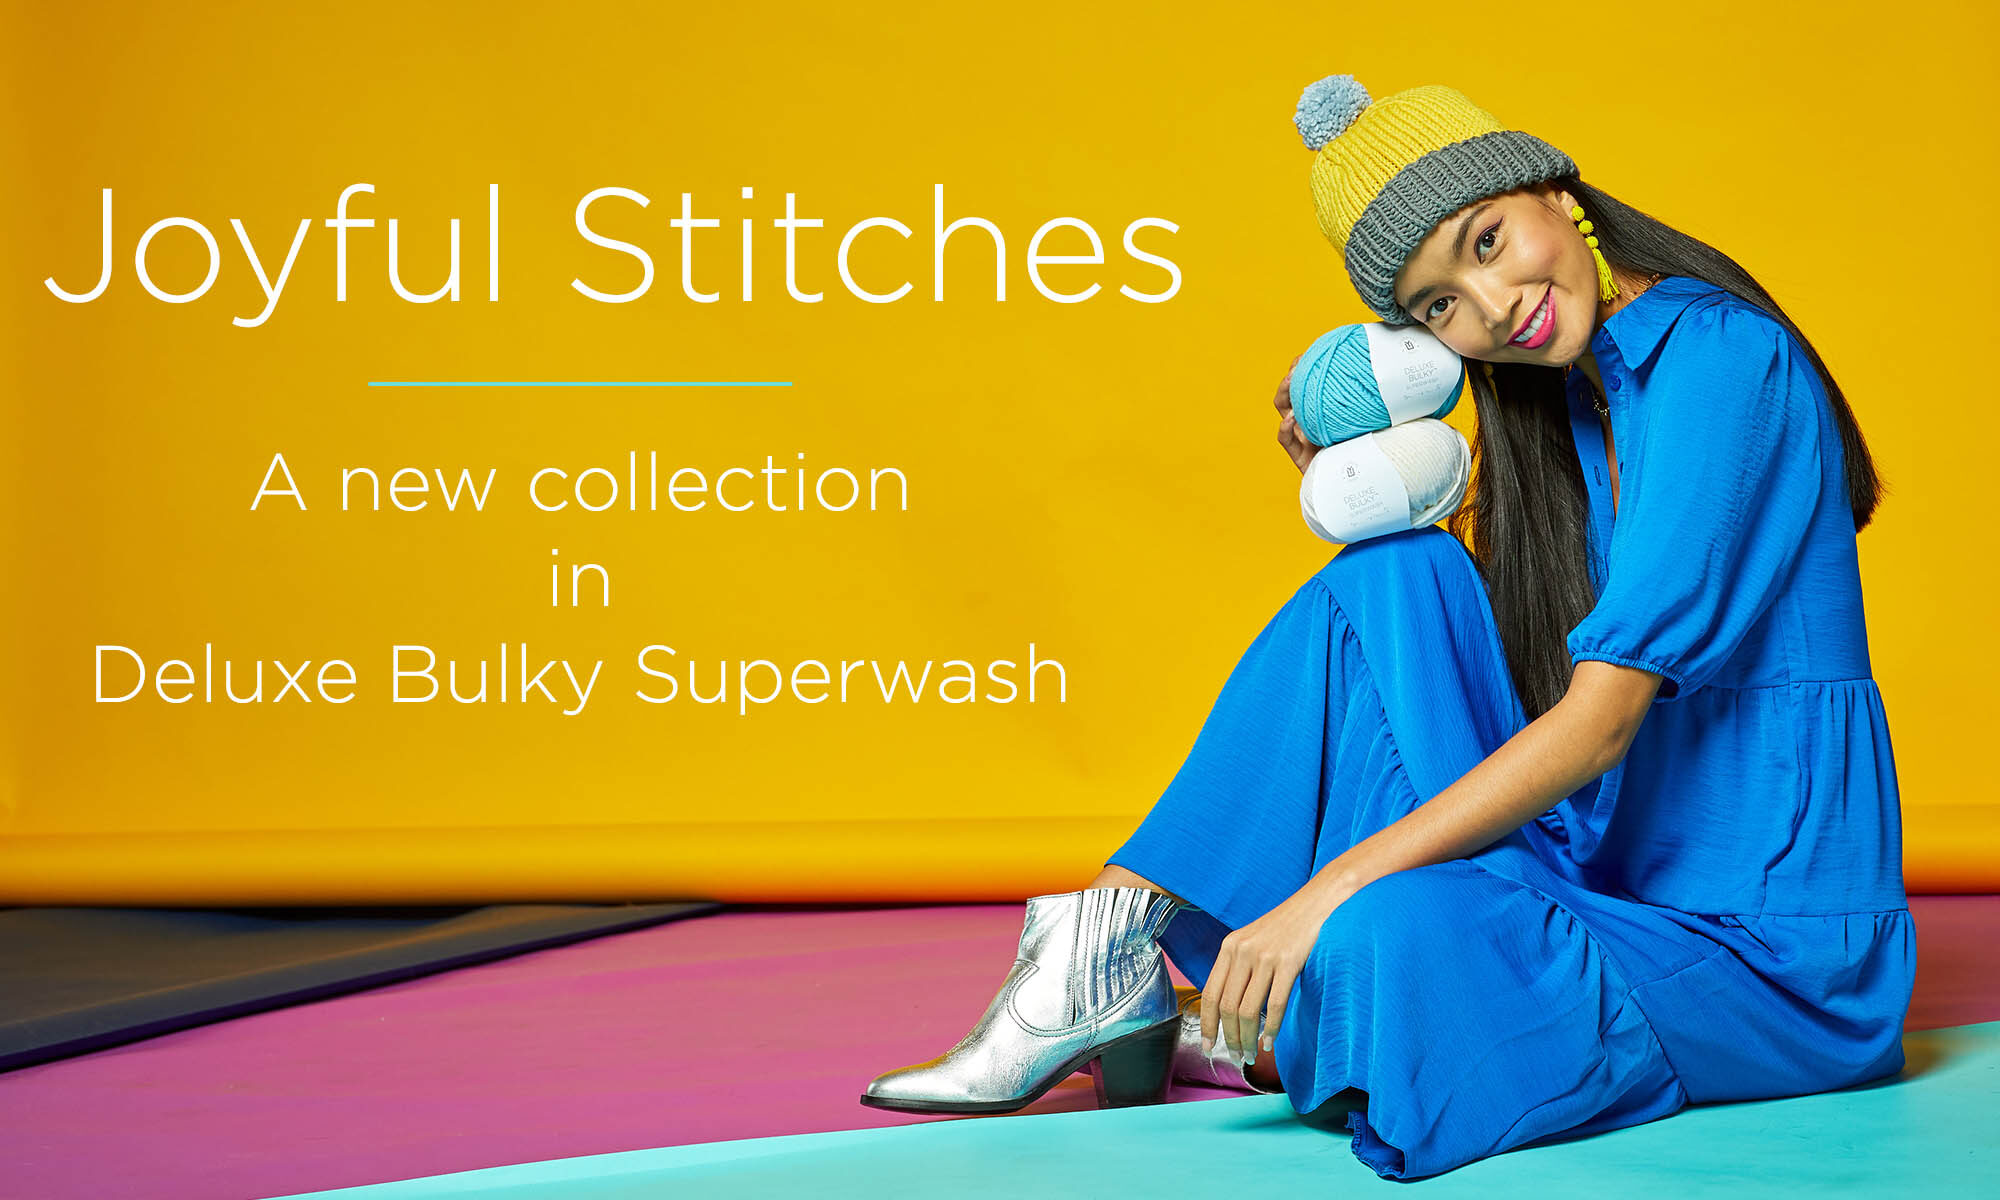
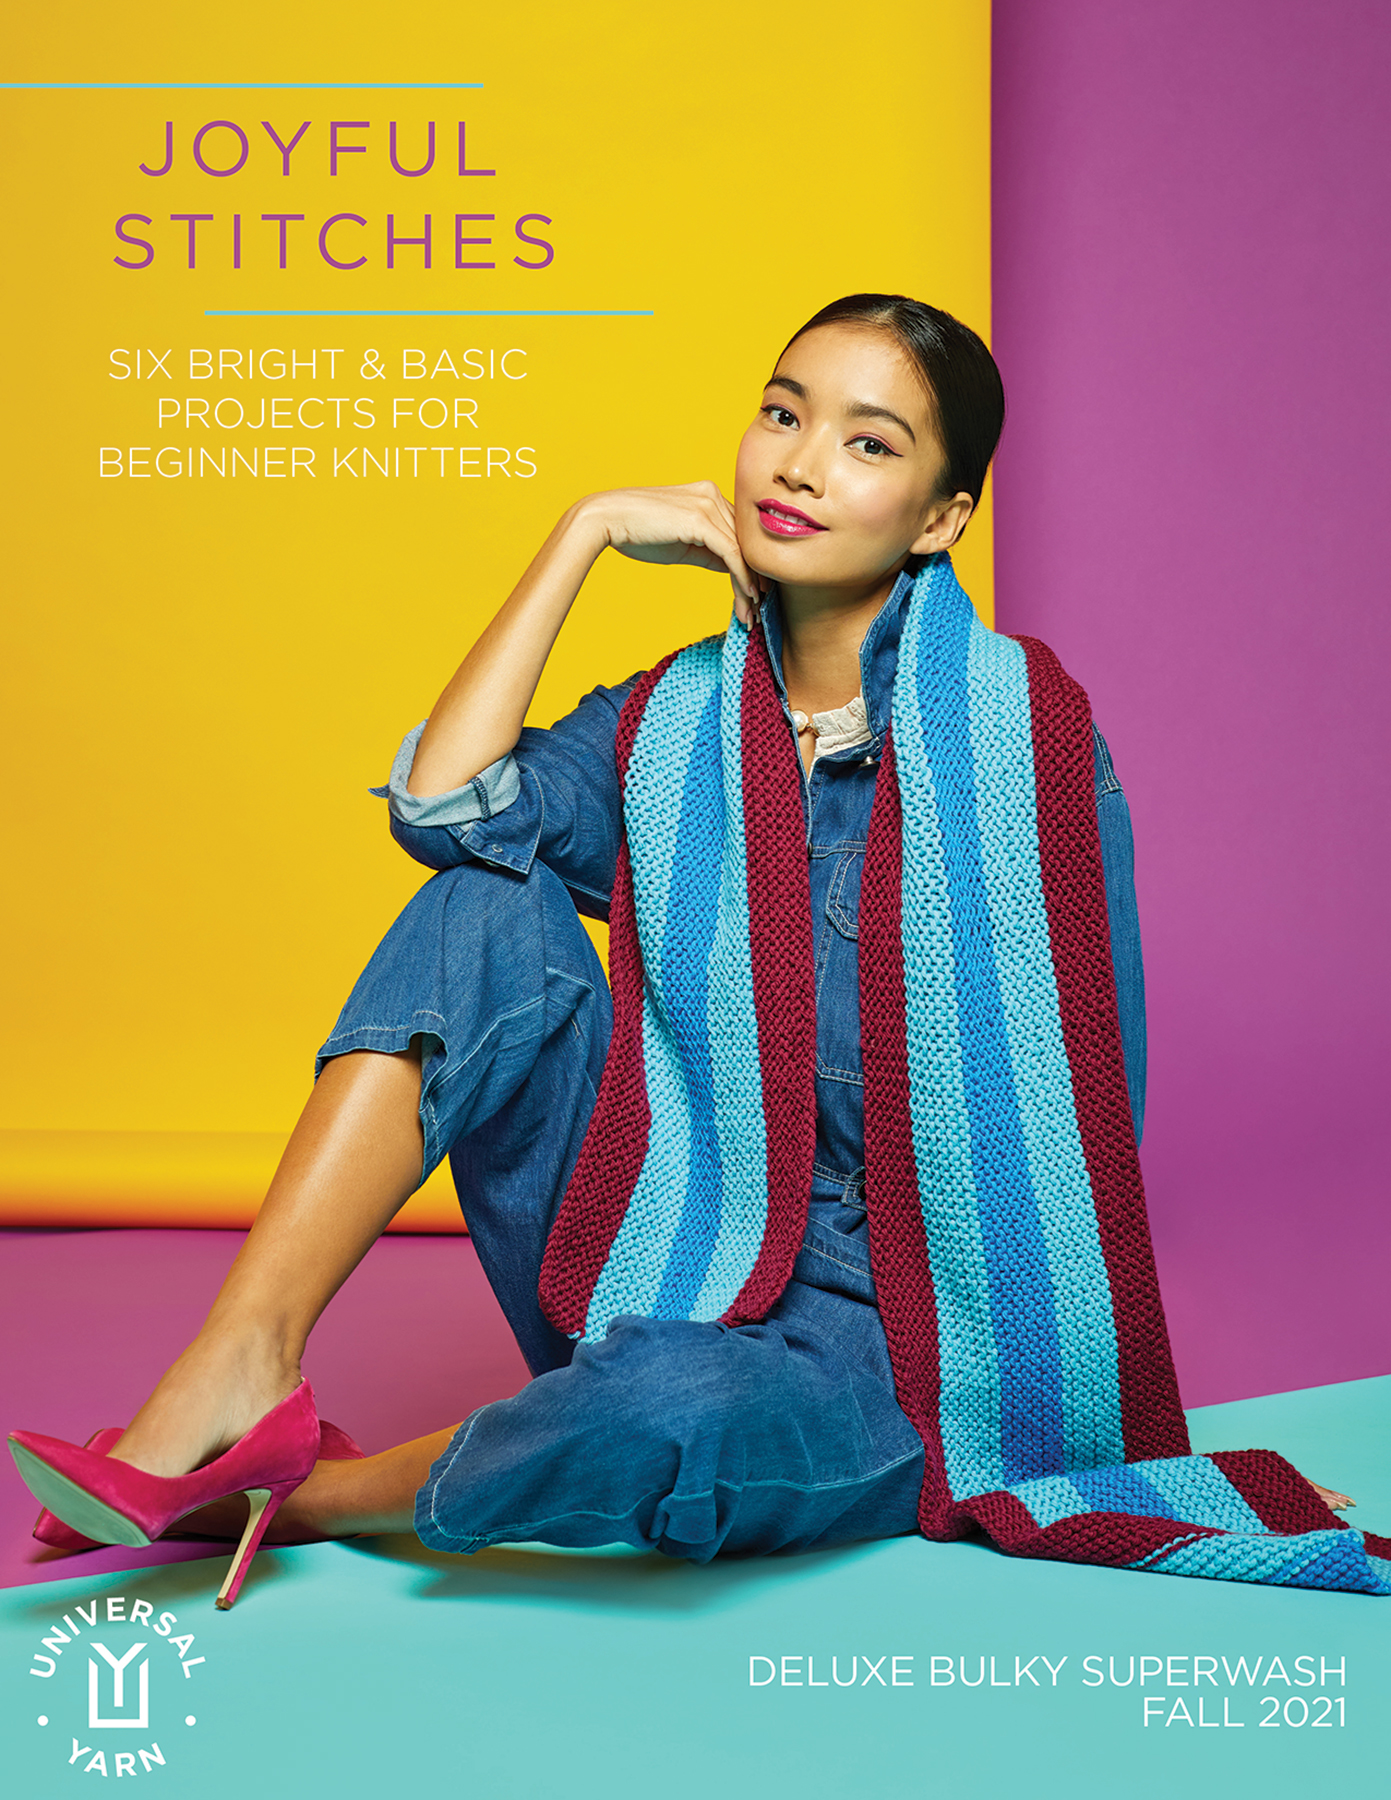
Today I’m excited to introduce our latest collection of patterns: Joyful Stitches! The e-book contains six quick-knit projects using Deluxe Bulky Superwash.
At this point, it goes without saying that the past year has been tough on the world with the presence of coronavirus. We have all made big adjustments in our lives, and with social distancing in mind, many of us have been spending more time in the comfort of our homes. The needle arts industry has seen significant growth throughout this time. More and more people are dipping their toes into the world of knitting and crochet, and as a company, we’ve said “hello” to many new customers, even during a time of so much self-isolation. It’s not surprising, either. Longtime crafters know how knitting and crochet can introduce comfort during times of stress, and newbies are figuring that out!
With all of that in mind, Joyful Stitches was born! My plan for this collection was simple: create fun staple items that are a breeze to knit. These patterns feature knit and purl stitches only, but introduces basic shaping and knitting in the round, too.
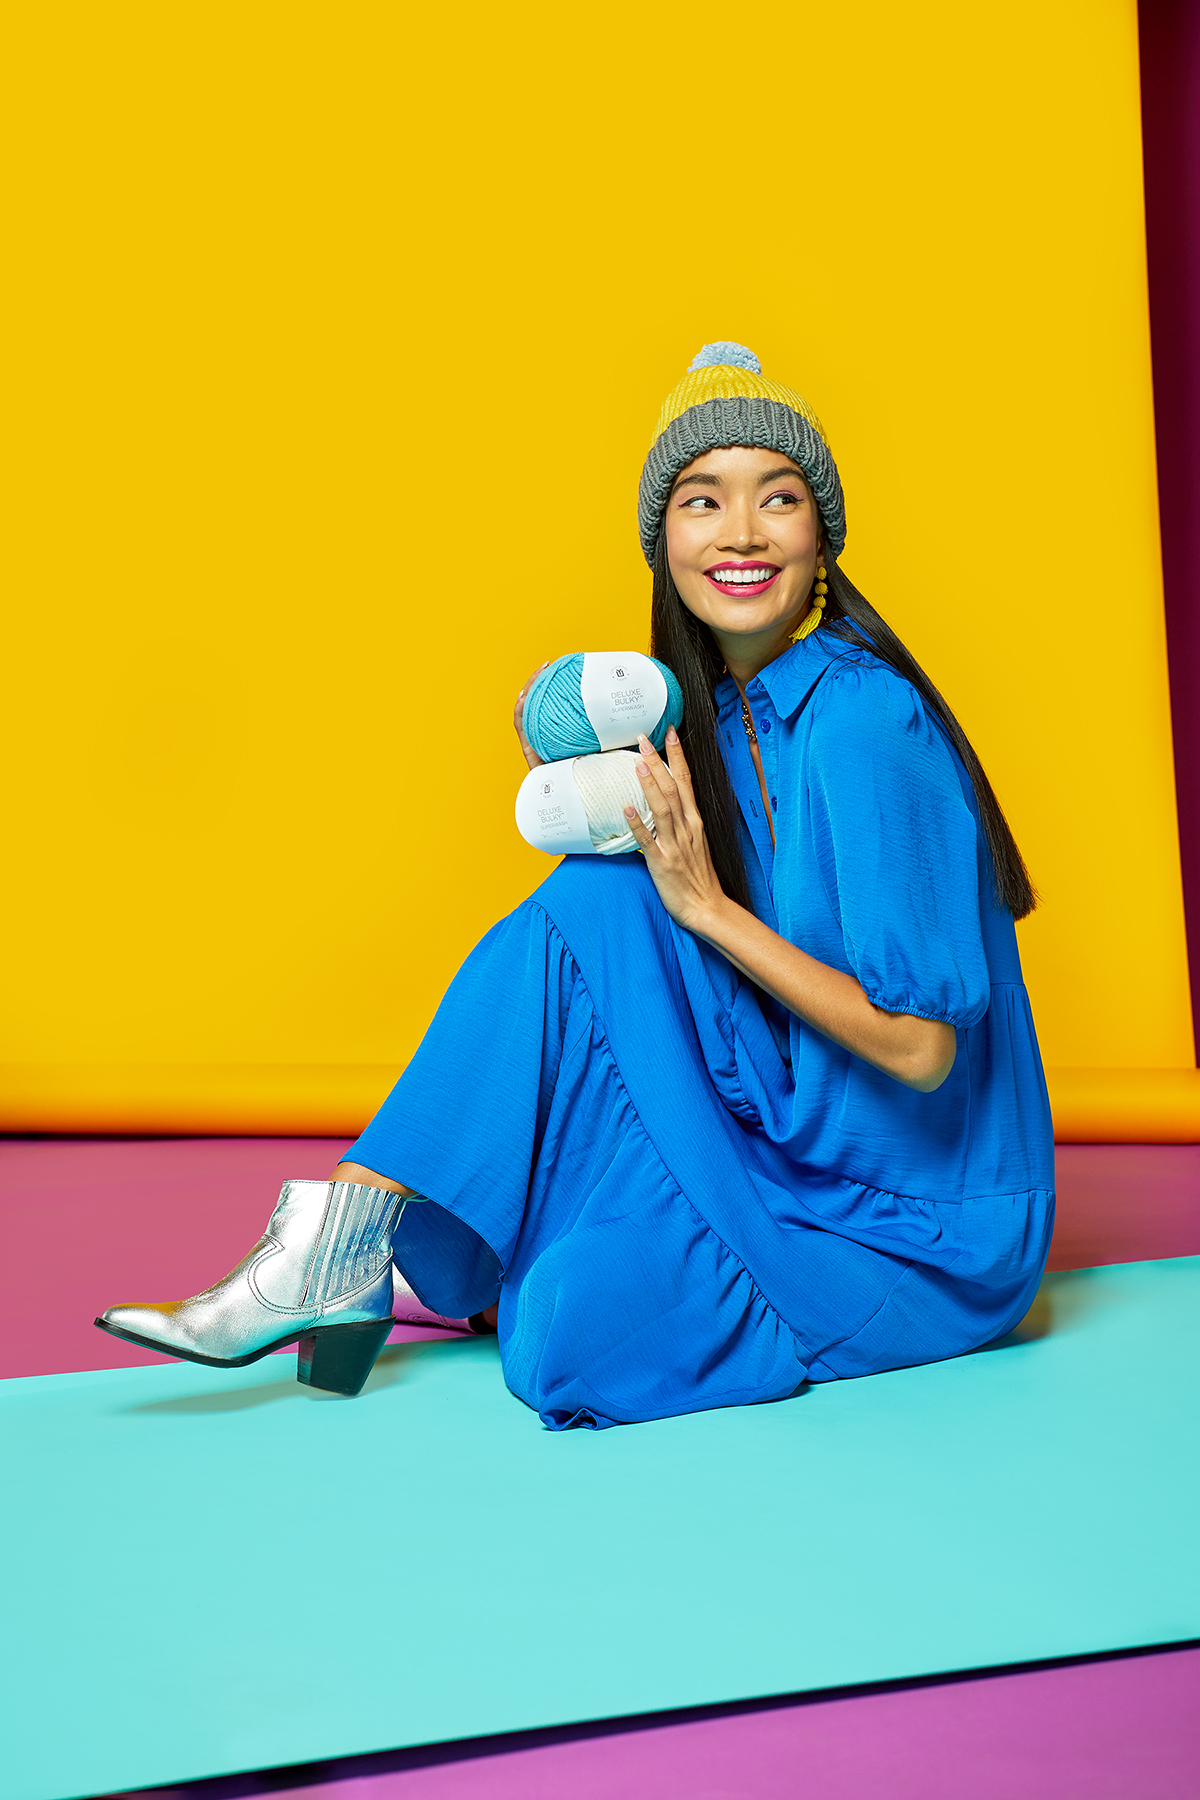
Why Deluxe Bulky Superwash? Many new knitters enjoy using heavier-weight yarns. It’s very easy to see stitches clearly and the pieces work up at a satisfying speed. Our Deluxe Bulky Superwash is 100% wool that’s machine-washable, making it easy to care for. Whether you’re knitting for the first time or you’re a longtime knitter, you’ll love working with this plump, bouncy wool yarn. Now that you know why we chose this yarn as the foundation of the collection, let’s take a look at the patterns!
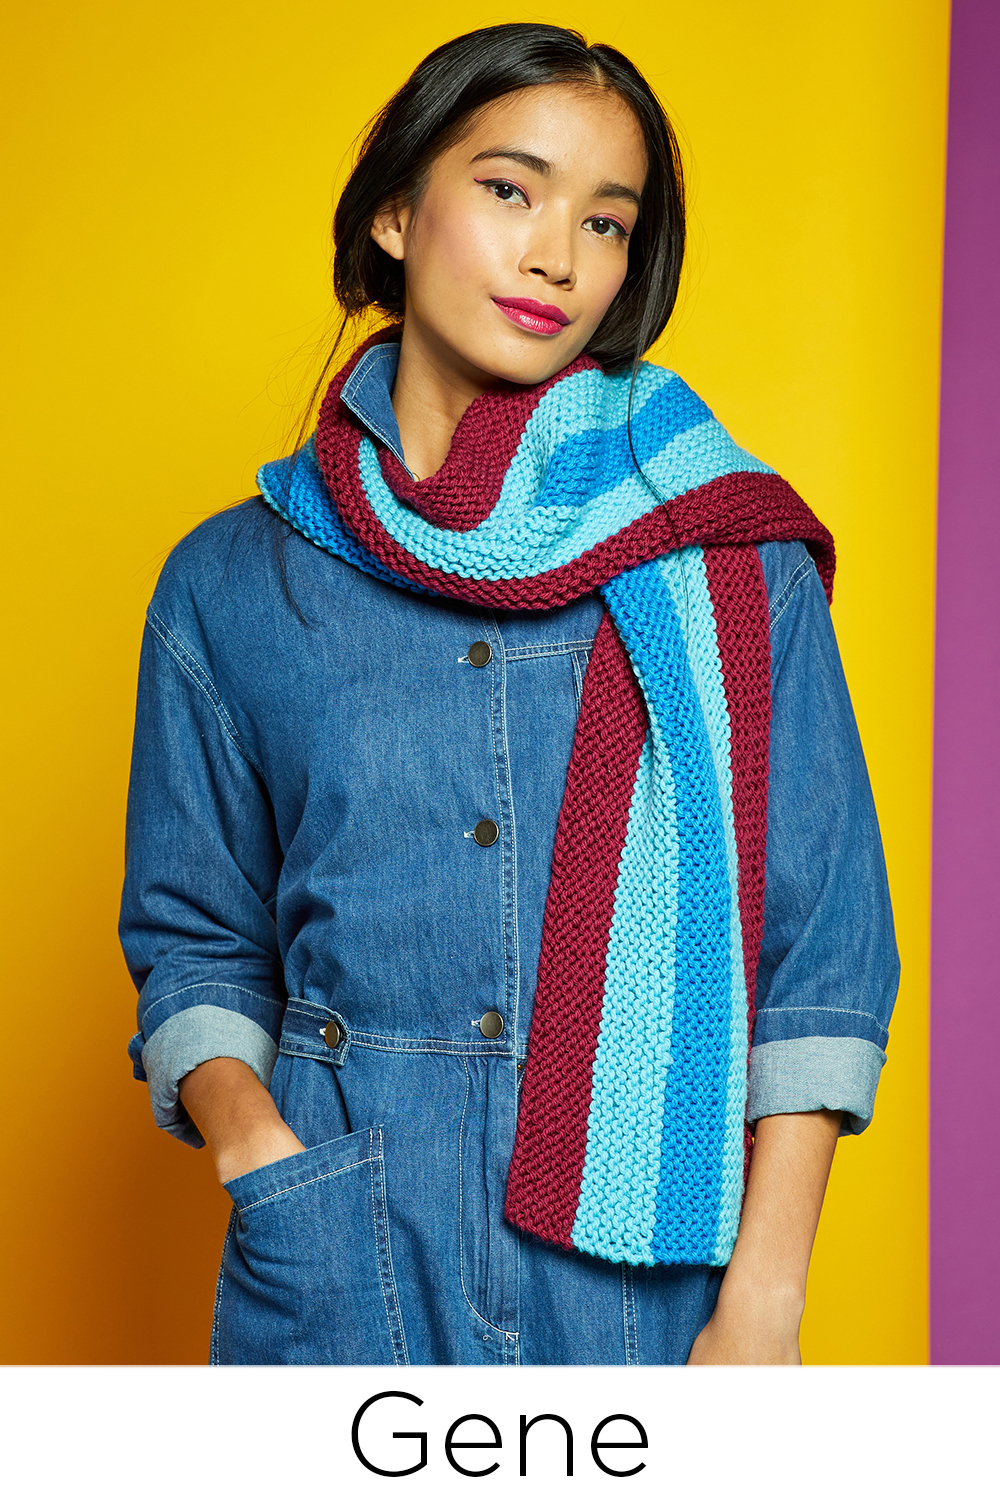
Gene in Deluxe Bulky Superwash #939 Burgundy, #917 Summer Sky, & #916 Nitrox Blue
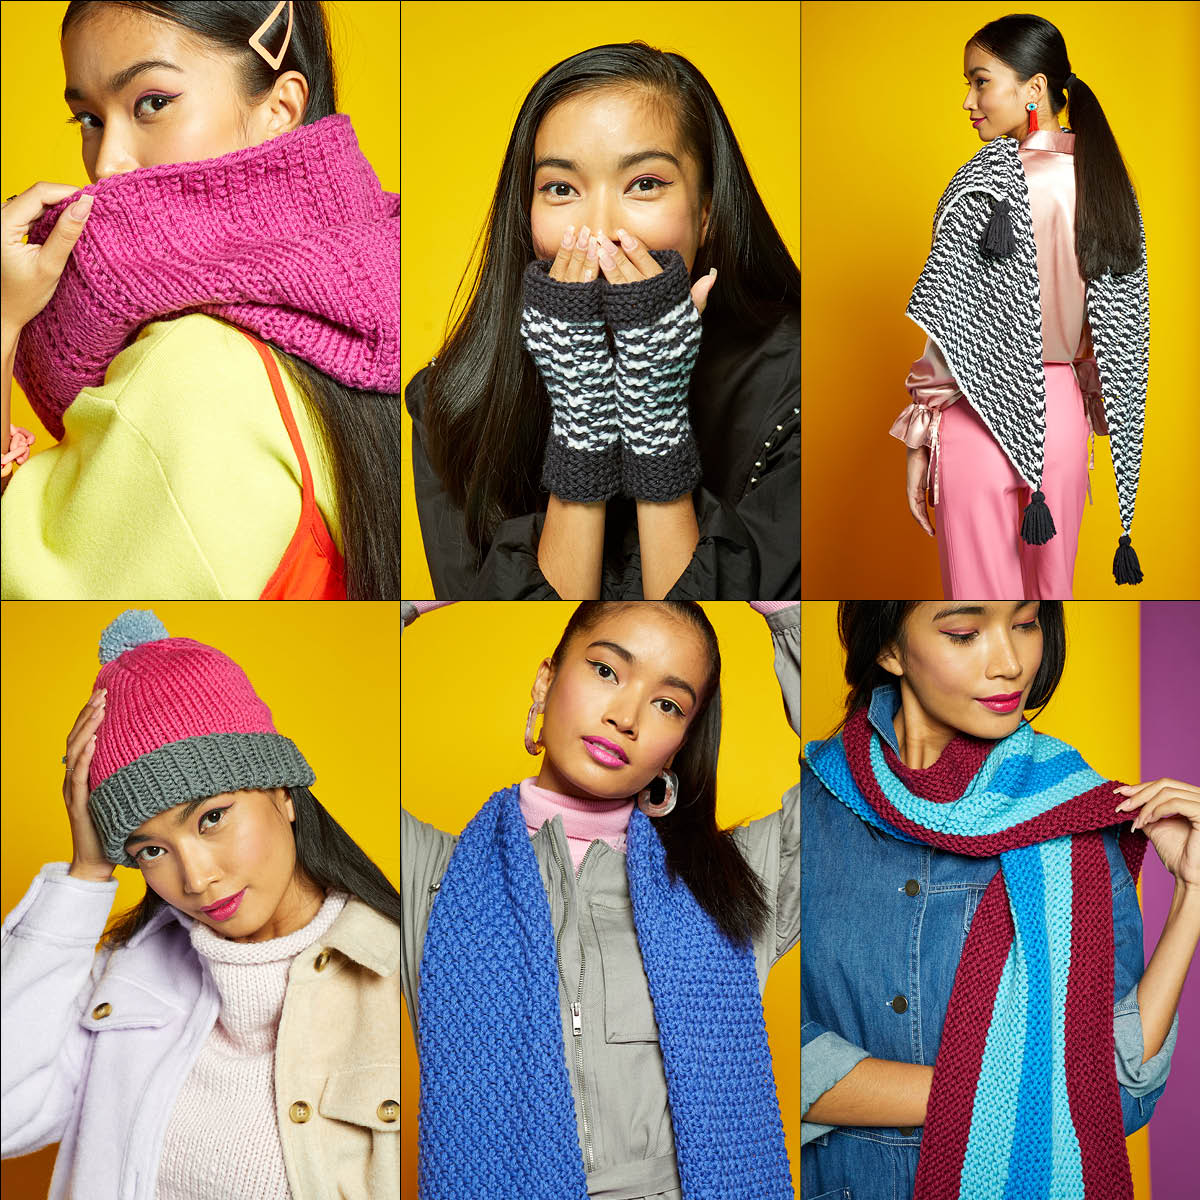
I’m going to introduce these patterns in order of ease and skill level, starting with Gene. Although it’s probably the simplest pattern in the collection, it might just be my favorite. I love the bold colors and graphic stripes, which were inspired by Color Field painter, Gene Davis. All you need to know for this pattern is how to work the knit stitch – that’s really it! Worked sideways, you cast on the length of the scarf. That makes it super easy to modify. I’ve written the pattern for two lengths, but you can easily make the scarf shorter by casting on fewer stitches. After you’ve cast on, all there is to it is knit a few rows, change colors, and repeat. This garter stitch glory will be your go-to winter accessory!
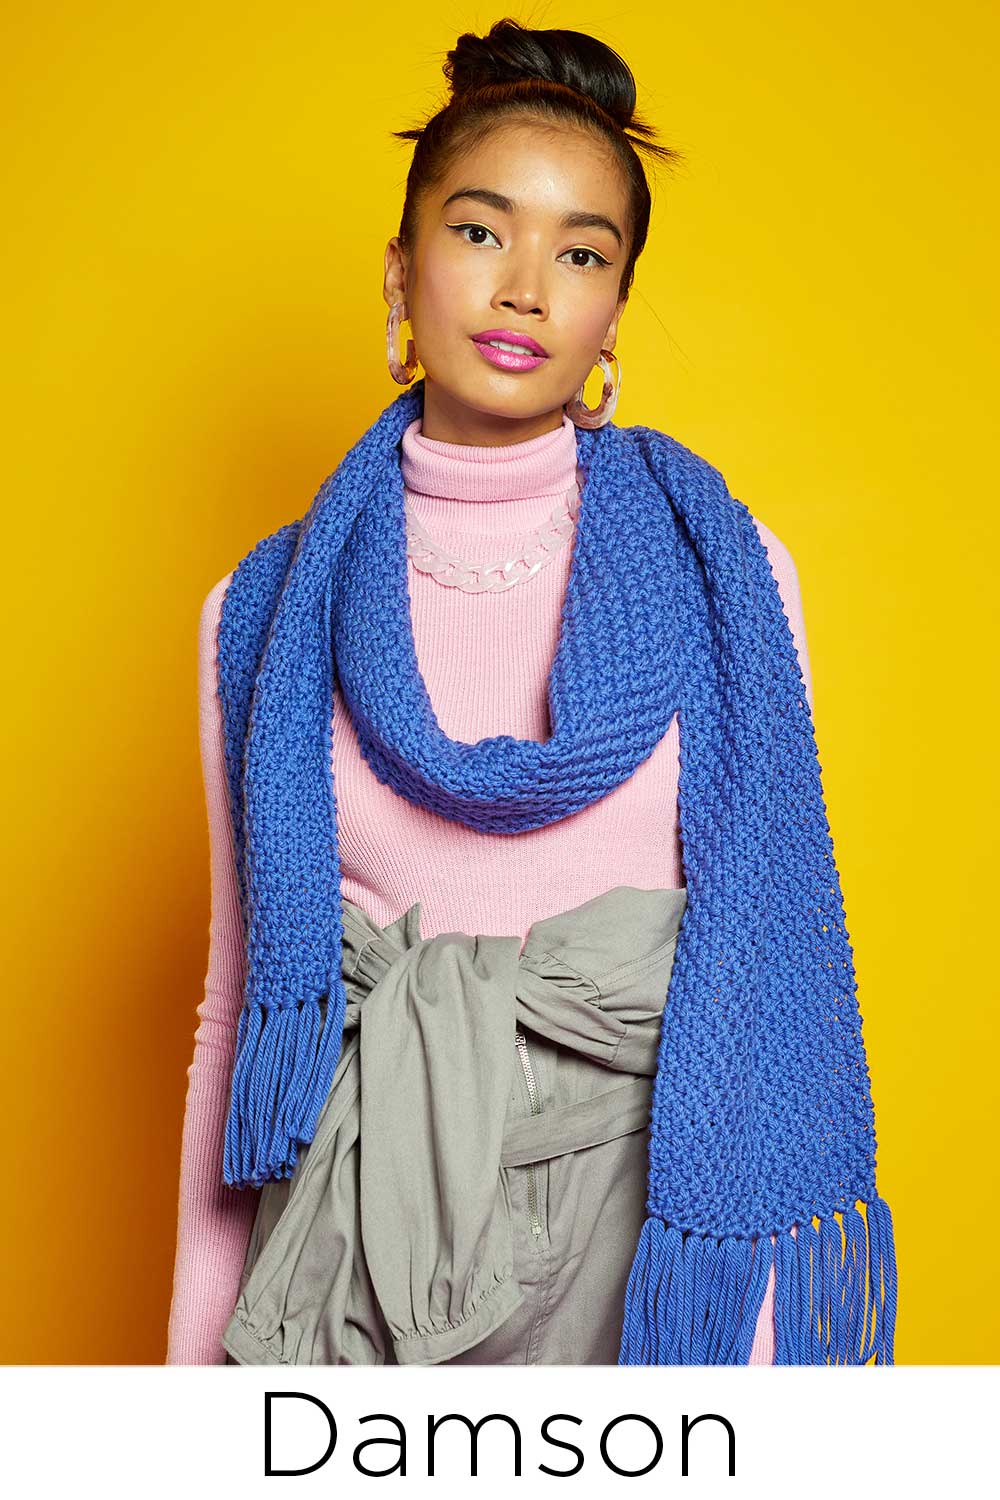
Damson in Deluxe Bulky Superwash #919 Purplish Blue
Next up we have Damson. I’m categorizing this pattern as slightly more difficult than Gene, simply because you’ll need to know how to both knit and purl, plus you’ll get to apply fringe at each end of the scarf. Damson is blanketed with Moss stitch – a personal favorite of mine. This simple texture is created with a four-row repeat that you’ll quickly memorize. It creates a gorgeous, reversible texture, making it easy to style and wear. If you’ve never made fringe before, you’re in for a treat. Fringed scarves have a boho feel, but personally, I also think fringe makes the scarf look more “complete”. Like Gene, Damson is easy to modify. I’ve also written this one to have two lengths, but you can customize the length of your scarf by simply stopping when you reach your desired length or just keep on knitting for a scarf length that will remind you of the Fourth Doctor (minus the amazing stripes, of course).
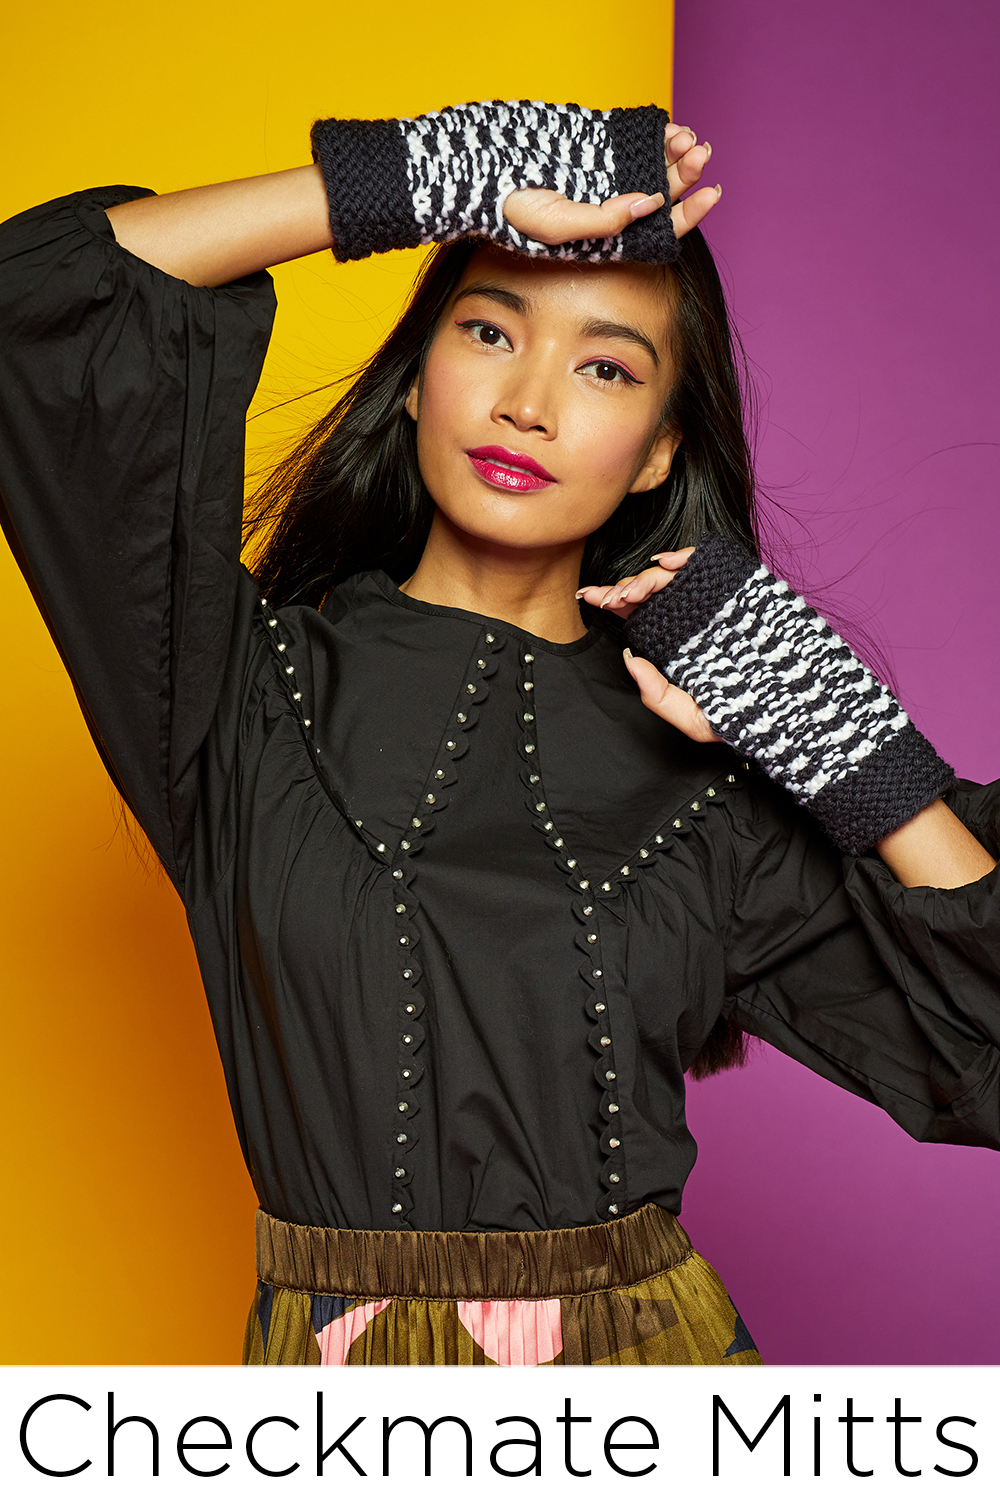
The Checkmate Mitts in Deluxe Bulky Superwash #935 Ebony and #928 Pulp
Next up, the Checkmate Mitts. The shape and construction of this pattern are incredibly simple: make a rectangle, fold, sew the sides leaving room for the thumb, and repeat to make two mitts! If you enjoyed the easy pattern repeat of Damson, you’ll probably enjoy these mitts, too. Pairing a simple textured pattern with stripes and the effect is simply mesmerizing, creating the illusion of vertical and horizontal stripes. This pattern was inspired by the stitch patterns included in Cecelia Campchiaro’s genius book, Sequence Knitting. Sized for children and adults, the Checkmate Mitts are a perfect gift-knit. One ball of each color will be enough to create more than one pair – make a pair for yourself and for a loved one. Double the fun!
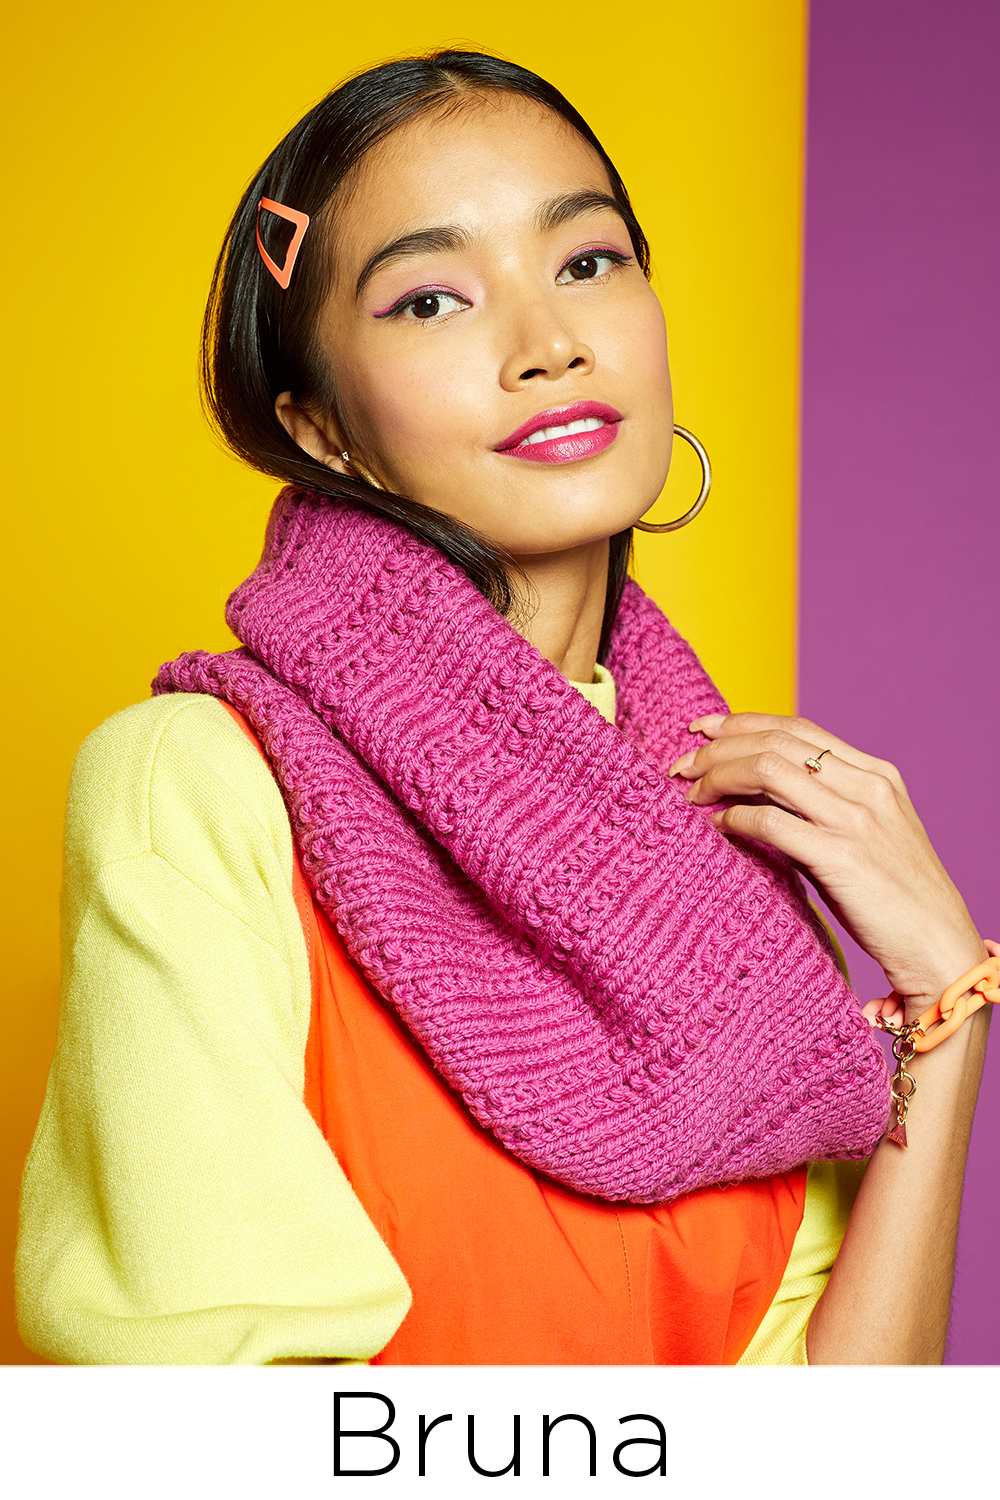
Bruna in Deluxe Bulky Superwash #920 Grape Taffy
Ready to knit in the round for the first time? Look no further than Bruna! I personally love a big, cozy cowl and this one ticks all of my boxes. It fits fairly close to the neck, yet leaves enough space for a bit of drape and breathing room. The depth is perfectly suited for folding inwards to create an additional layer of warmth, too. Bruna is comprised of a broken rib formed by a two-row repeat. This project is perfect for knit nights or catching up on your favorite tv show, as you can seamlessly knit across each round, never stopping to turn your work!
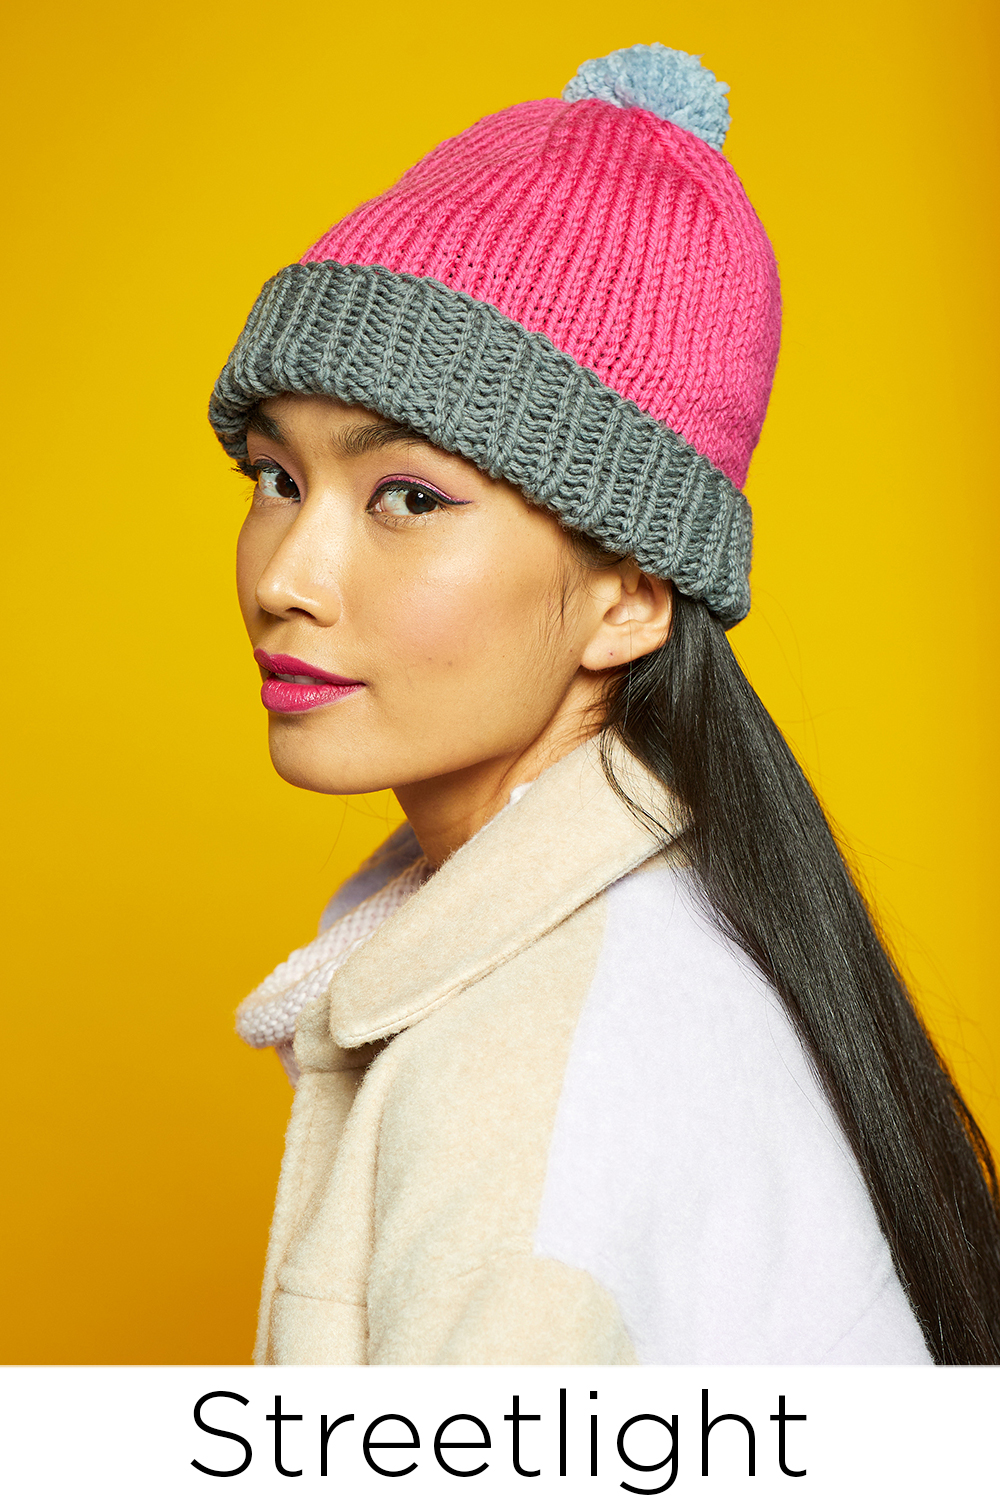
Once you’ve tackled Bruna, you’ll be ready to start your first hat project! Streetlight is a fun hat that will introduce simple shaping to your knitting toolbox. All of my favorite hats feature a deep, folded brim and Streetlight is no exception. Add a bit of color blocking and a fluffy pom pom and you’ve got a simple hat that still makes a statement! Although these days I’m predominantly a sweater knitter, I love knitting hats. They are fast, addictive, and are honestly the perfect gift. Hats are also great for charity knitting, so be sure to explore your local area for organizations that accept donations for wintry accessories! (If you don’t have a donation site locally, consider donating to the Charlotte Region Arts, Fibers, & Textiles (C.R.A.F.T.) who is currently running a community project and is accepting red hats to support a community blood drive!)
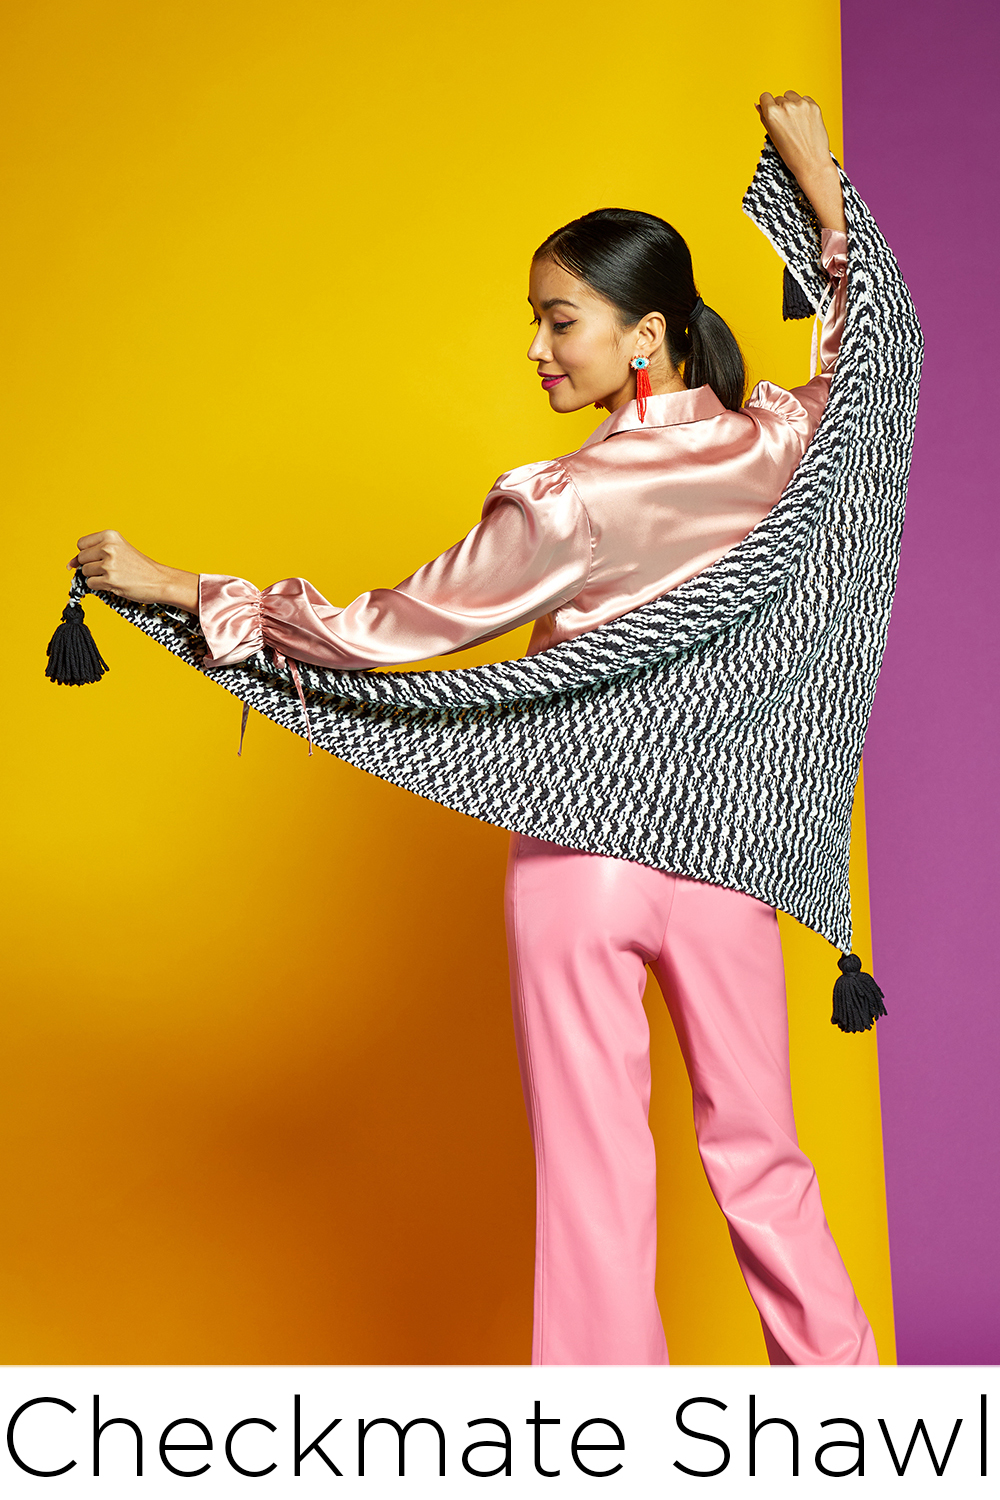
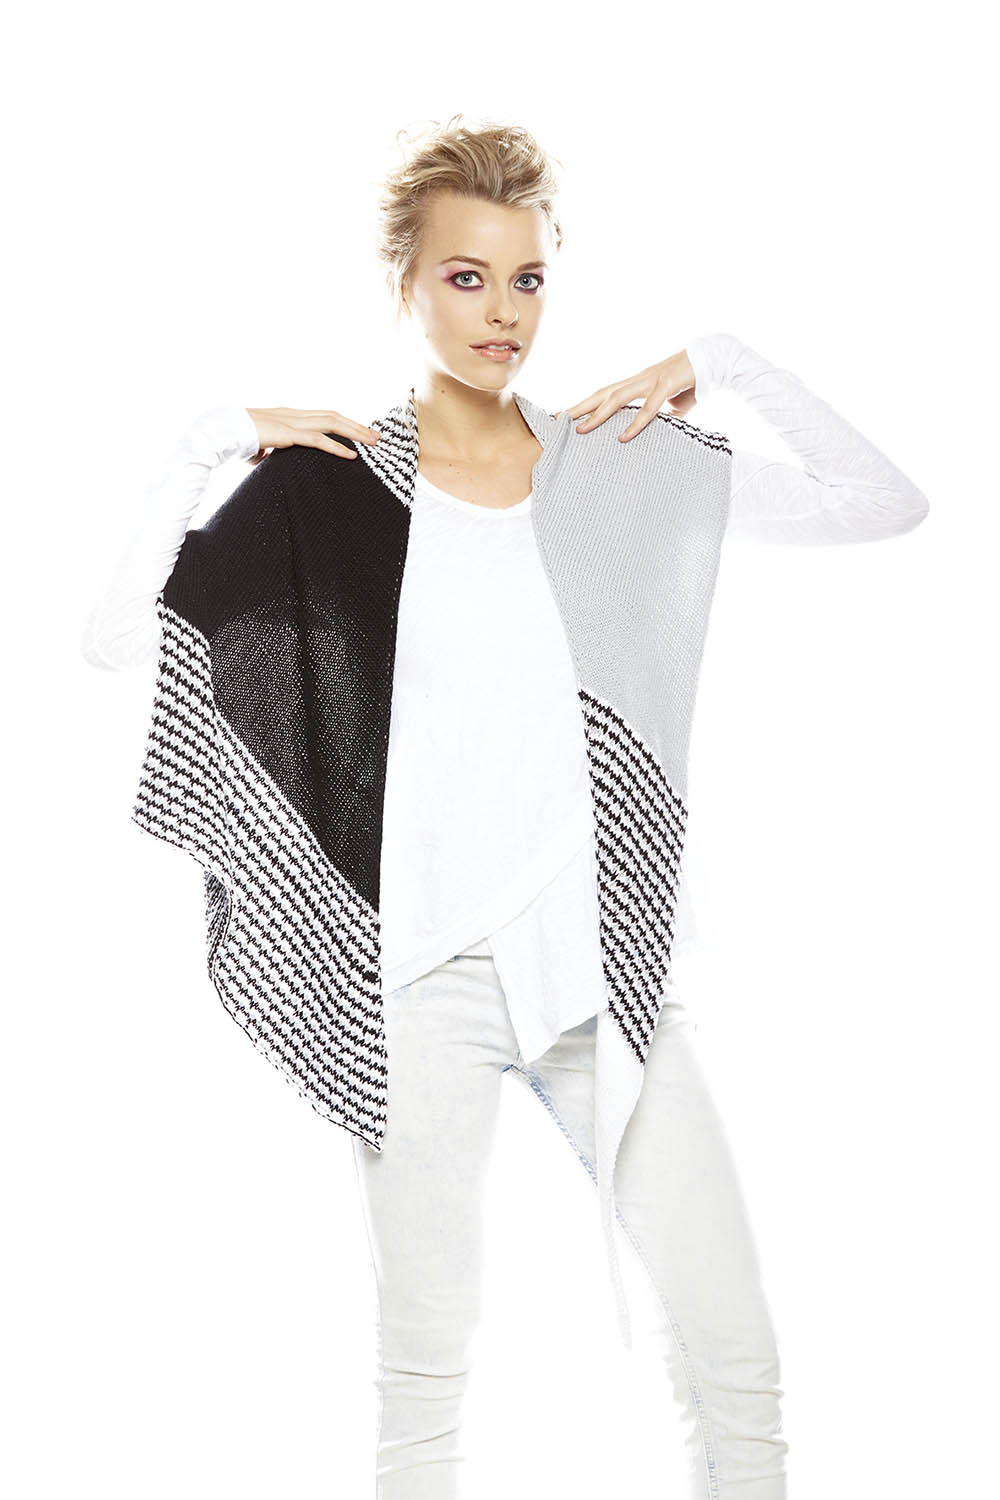
The Checkmate Shawl in Deluxe Bulky Superwash #935 Ebony and #928 Pulp
Rounding out the Joyful Stitches collection is the Checkmate Shawl – a perfect companion for the Checkmate Mitts! This shawl is the largest piece in the collection, and while it is simple, it introduces shaping while maintaining a stitch pattern. If that sounds complicated, don’t stray too far! This shawl begins by casting on at the widest edge and simply repeating the same eight rows until you reach the point. Easy peasy! I opted for tassels on each point for a touch of drama, and it really completes the look.
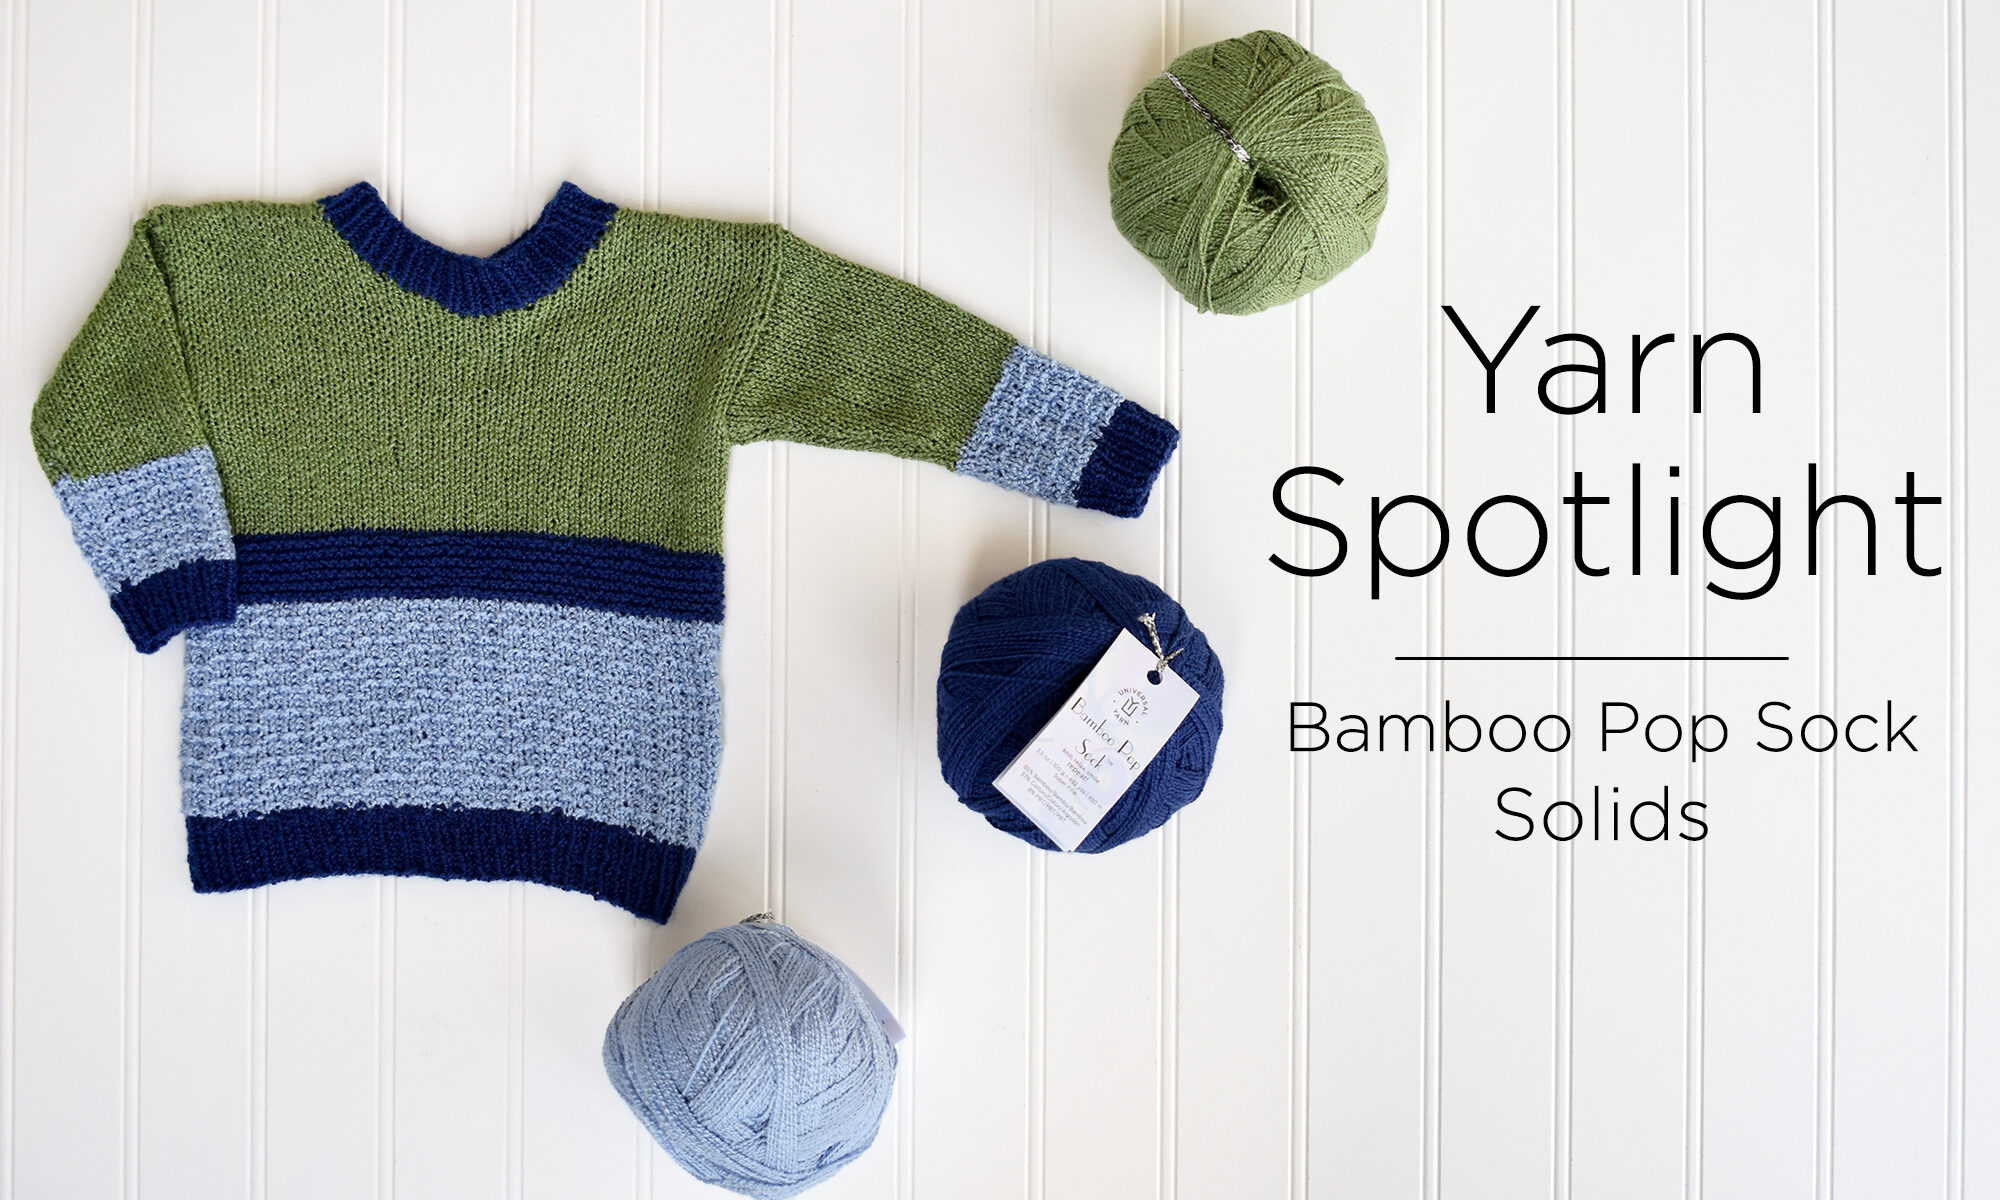
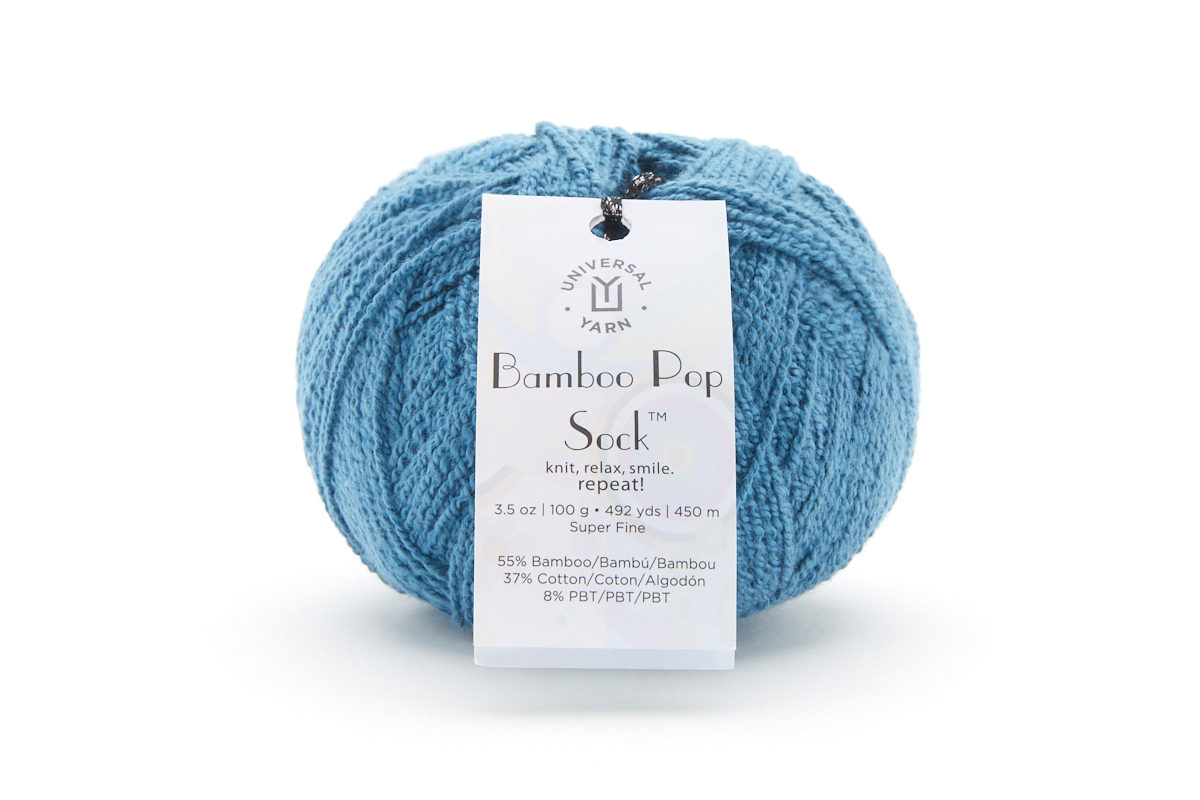
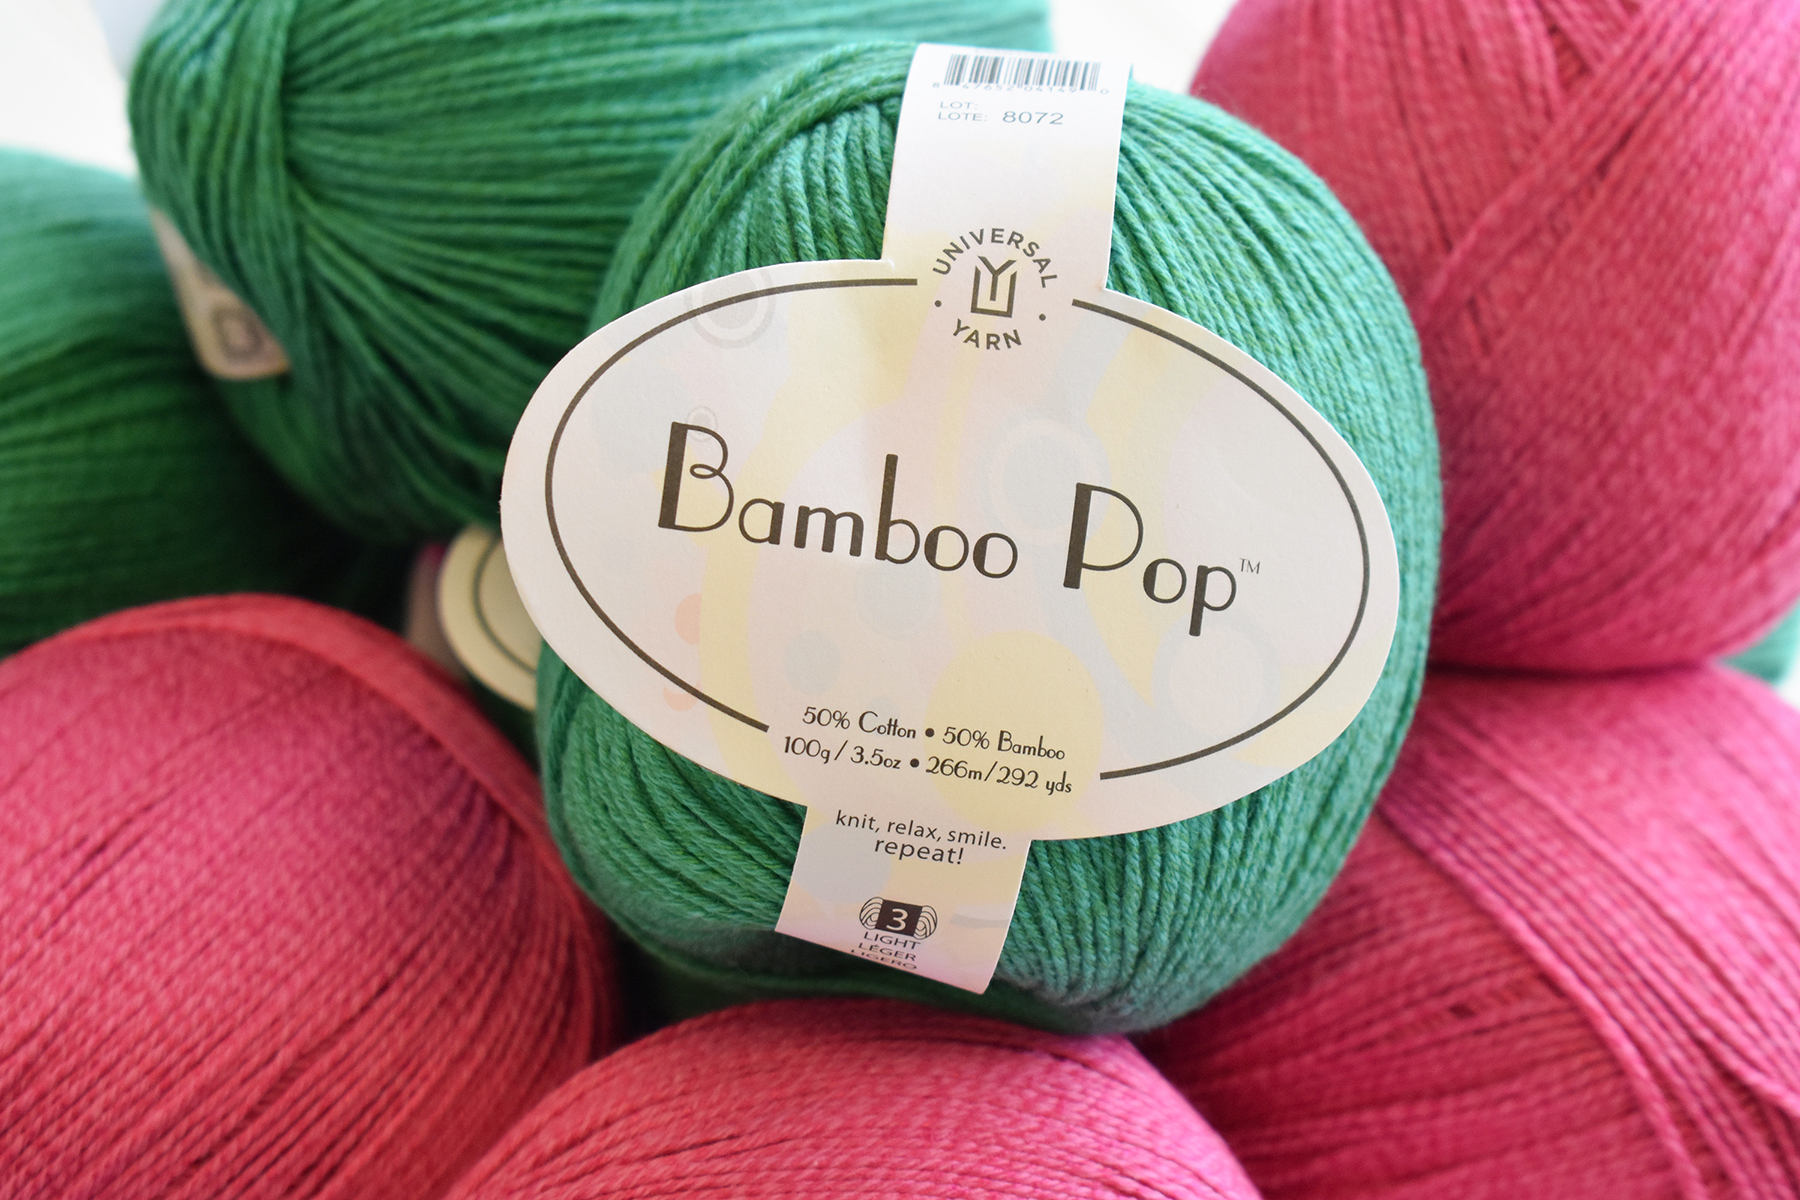
It’s early June, which means that summer is here (in my book, even if not officially!). And while there are numerous things I love about summer, one thing that’s always exciting is the introduction of new yarns for the upcoming Fall season! For the next few weeks, I’ll be highlighting some of our great new offerings, starting this week with Bamboo Pop Sock – Solids.
Yep, you heard me correctly – solids! We’ve had lots of requests from customers who fell in love with our self-shading version of Bamboo Pop Sock. When we introduced the yarn with eight splashy, self-striping colors in 2019 it was an instant hit, so we swiftly added another eight colors in solid, gradually shifting stripes. This yarn has become beloved for being a wool-free alternative to other sock yarns, so it’s great for vegan knitters or those with sensitivities to animal fibers. This yarn blends bamboo, cotton, and PBT to create a cool, comfortable, and elastic yarn. While it’s fantastic for socks, we’ve fallen in love with it for baby projects, garments, accessories, and more! To celebrate the introduction of our 22 solid colors (20 of which are available now), I want to highlight some beautiful free patterns featuring Bamboo Pop Sock solids.
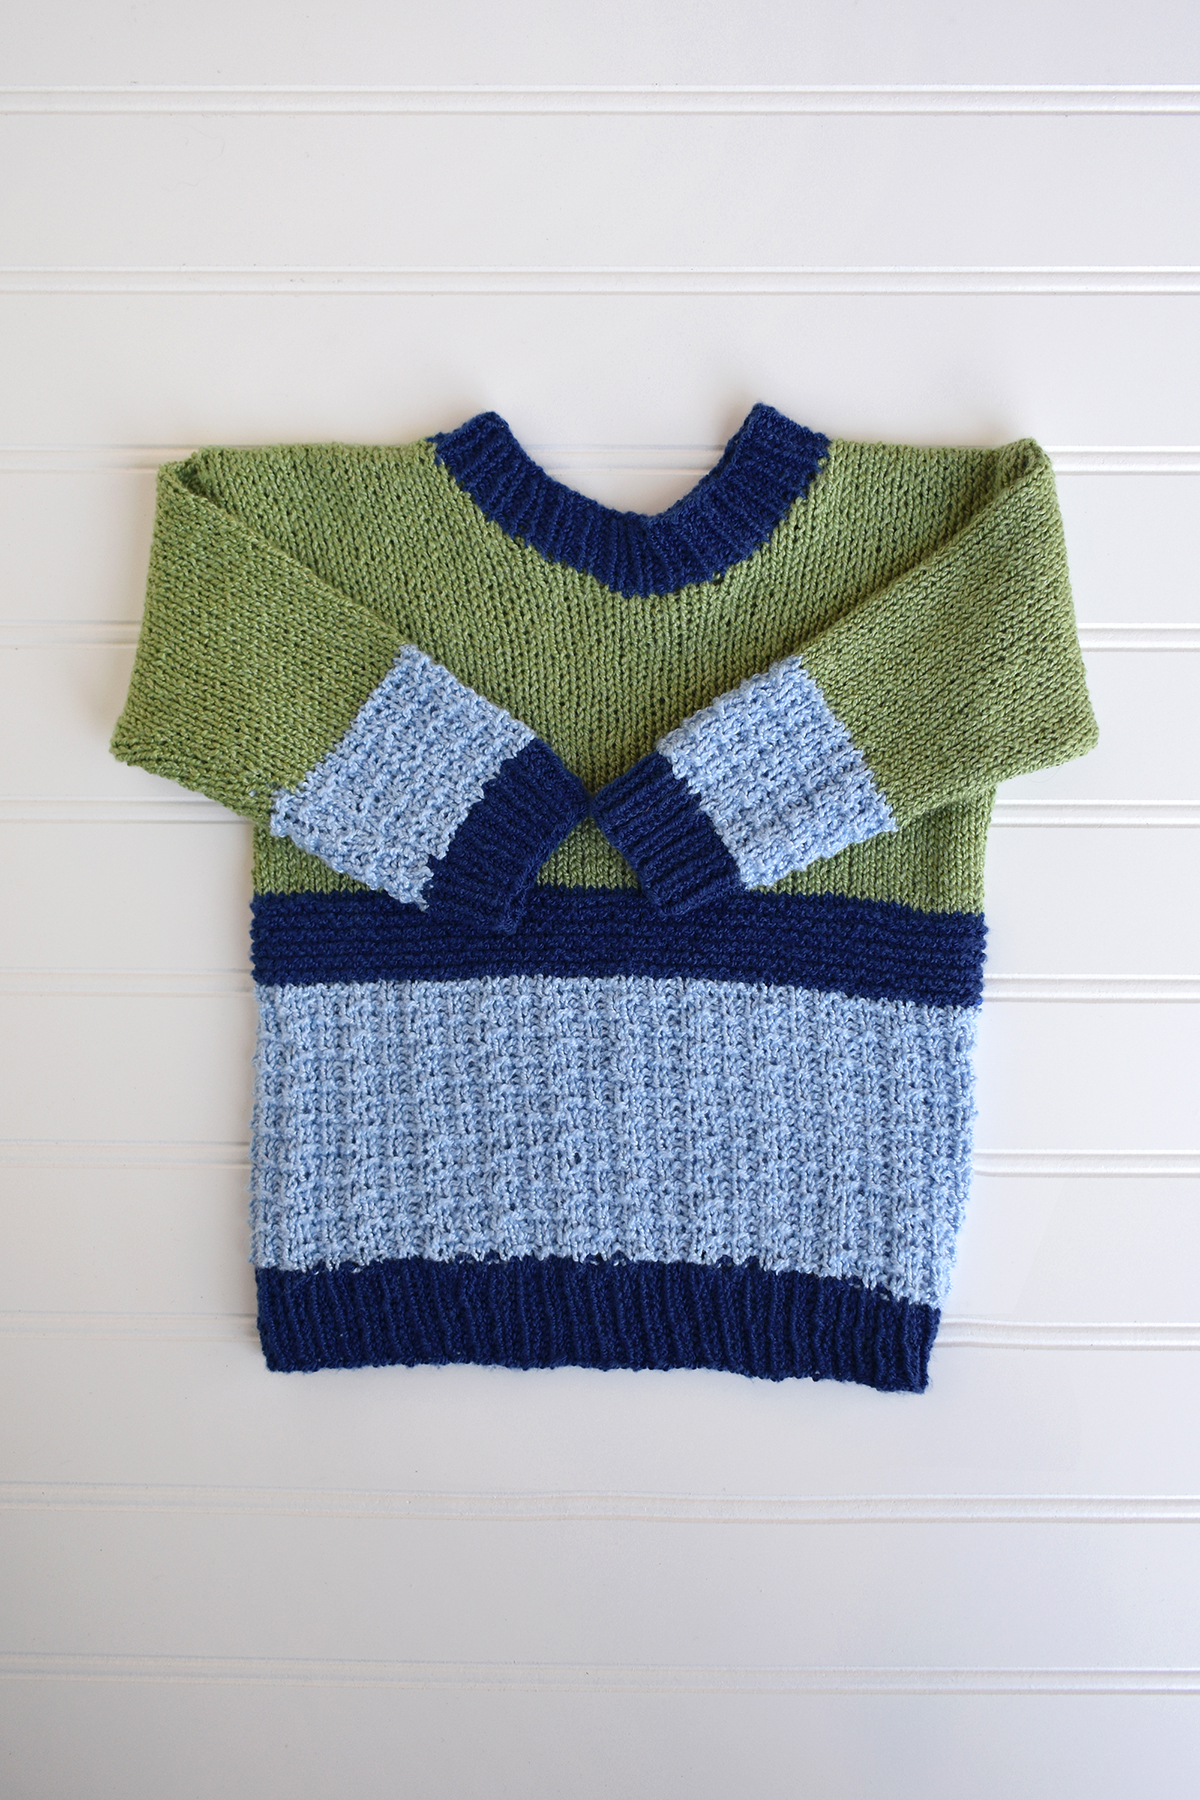
Fairway in #614 Celestial, #612 Sky, & #616 Fern
I mentioned that people began to love Bamboo Pop Sock for baby projects, like the popular Playtime Dress in color #404 Wildflowers. Aubrey simply couldn’t resist adding to the collection of baby patterns using this yarn, so she designed Fairway (pattern link). This cute little sweater features bold blocks of color and texture using colors that remind me of a sunny day playing Par 3 golf with my dad. It’s perfect! Fairway is sized from 0-6 months through 4 years, and only takes one ball of each color across all sizes.
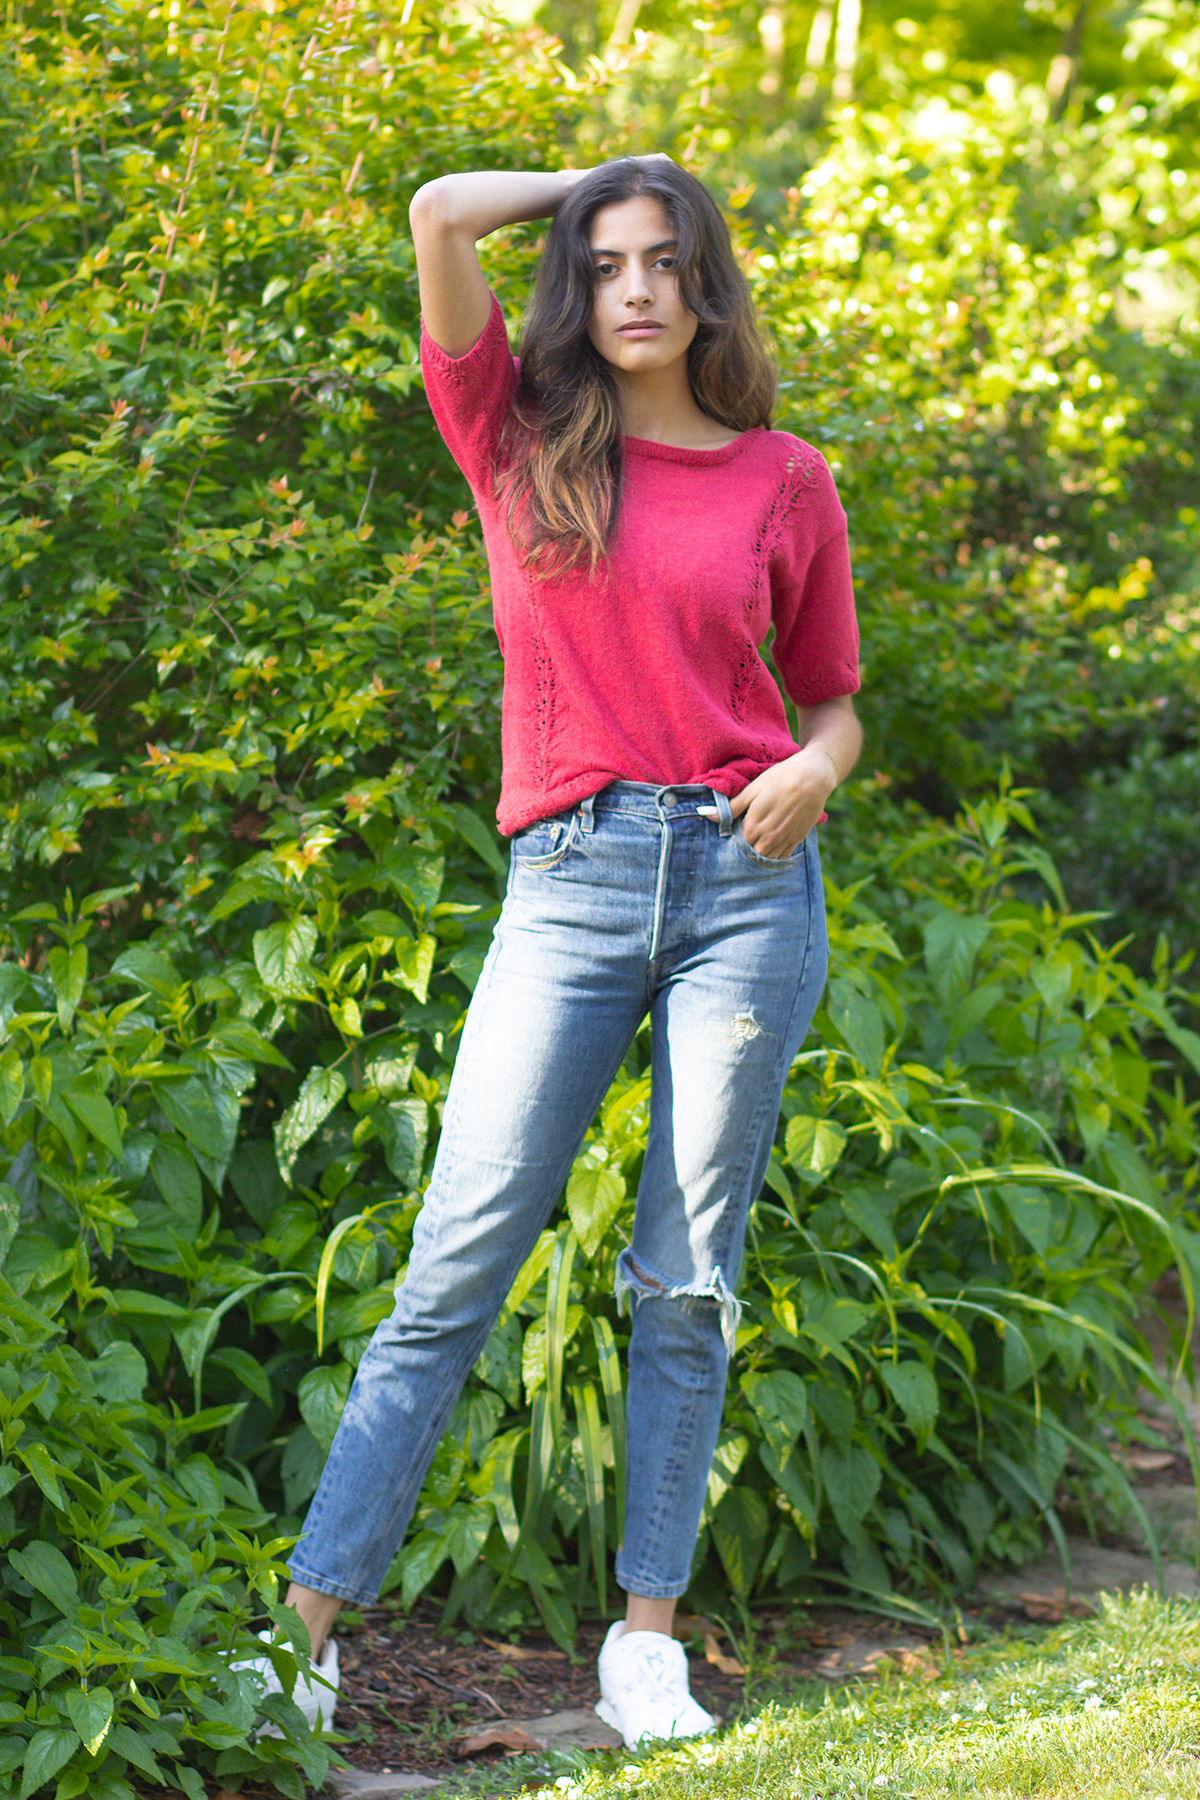
Crimson Tee in #608 Pomegranate
With an eye for feminine details, Aubrey perfectly finds the balance between elegant and casual apparel in the Crimson Tee (pattern link). It features a botanically-inspired lace motif along the hem, sleeves, and in the panels featured on the front and back. We love it styled with a French tuck (as pictured), allowing the scalloped hem to show along the sides and back.
Lace details on the Crimson Tee.
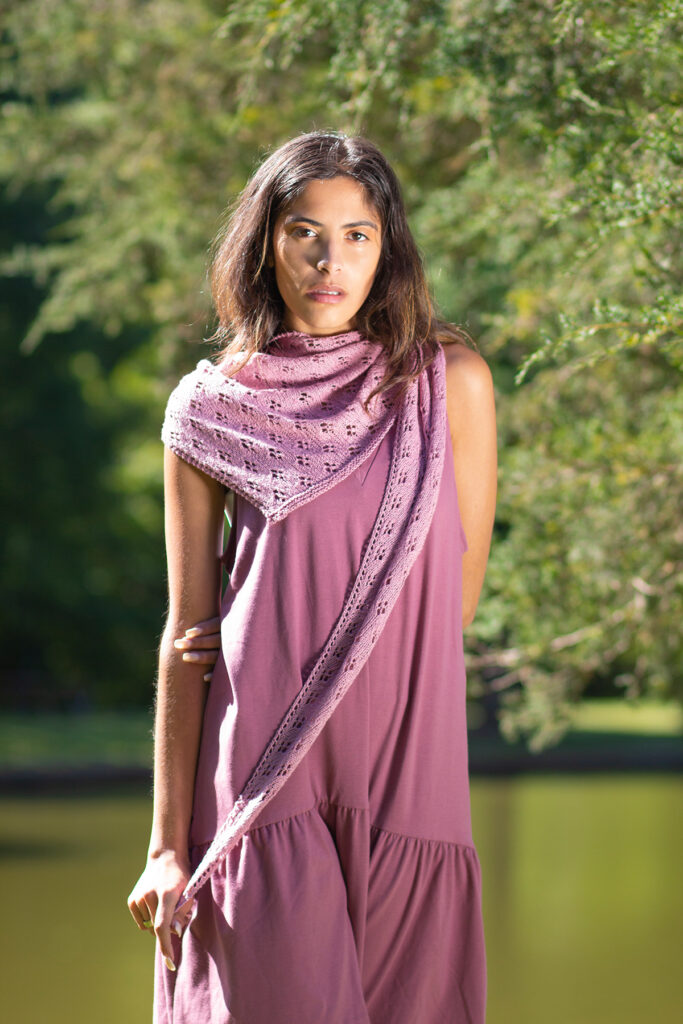
Looking for an accessory instead? Try the lovely Serendipity shawl (pattern link), also designed by Aubrey. This asymmetrical triangular shawl is knit flat on the bias, and it only takes one ball of yarn! The fabric is covered in a lovely little lace motif. The design illustrates how magical the drape of this Bamboo Pop Sock is. It creates a silky, smooth effect that perfectly hugs your neck and shoulders. Toss this shawl over your favorite summer tank or dress and you’re good to go!
I hope you’ve enjoyed a peek at new patterns in Bamboo Pop Sock! Which of these do you plan to knit first? The yarn and patterns are available now, so be sure to head to your local yarn store or our website to start your new favorite project!
If you follow us on social media you might have noticed that this week we’re putting the spotlight on one of our most beloved yarns, Bamboo Pop! Knitters, crocheters, and weavers alike love working with this yarn and it’s easy to see why. Bamboo Pop is a beautifully balanced blend of 50% bamboo and 50% cotton with a broad palette of solids, multis, and speckles. The yarn itself features the subtlest heather, gentle sheen, and creates fabric that is smooth, soft, and perfectly drapey.
Bamboo Pop in #117 Emerald and #114 Super Pink.
We have an array of patterns available to support this yarn: accessories, garments, and more! With so many options available, sometimes it can be hard to pick the perfect pattern for your next project. So, today we thought we’d kindle some inspiration by sharing our five best-selling patterns in Bamboo Pop over the last year. Let’s get started!
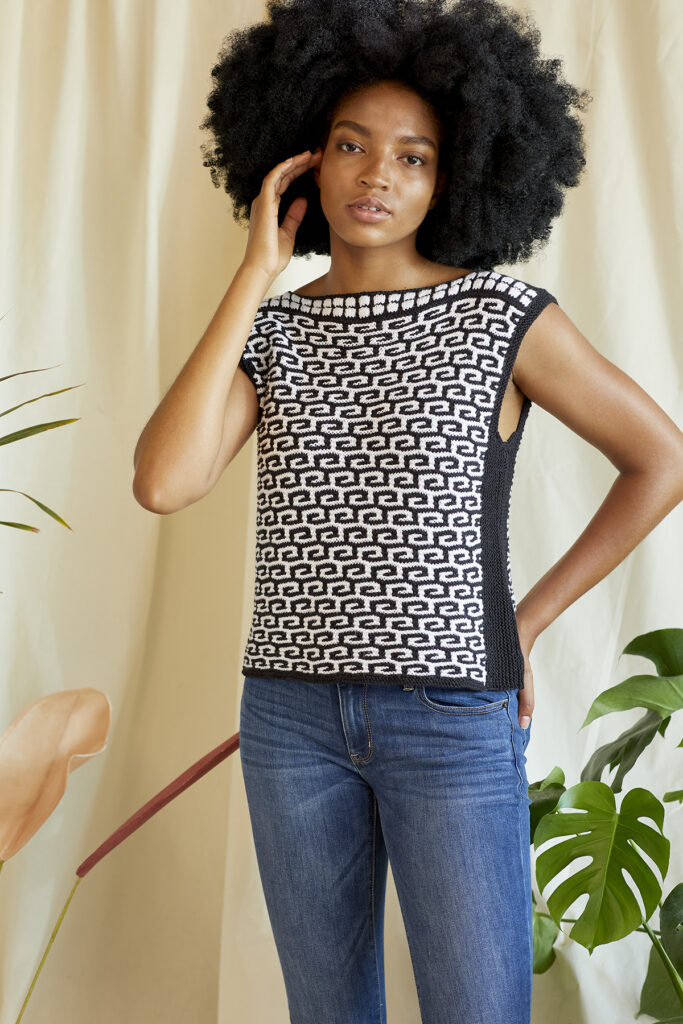
Areca designed by Yonca Ozbelli.
#5 Areca
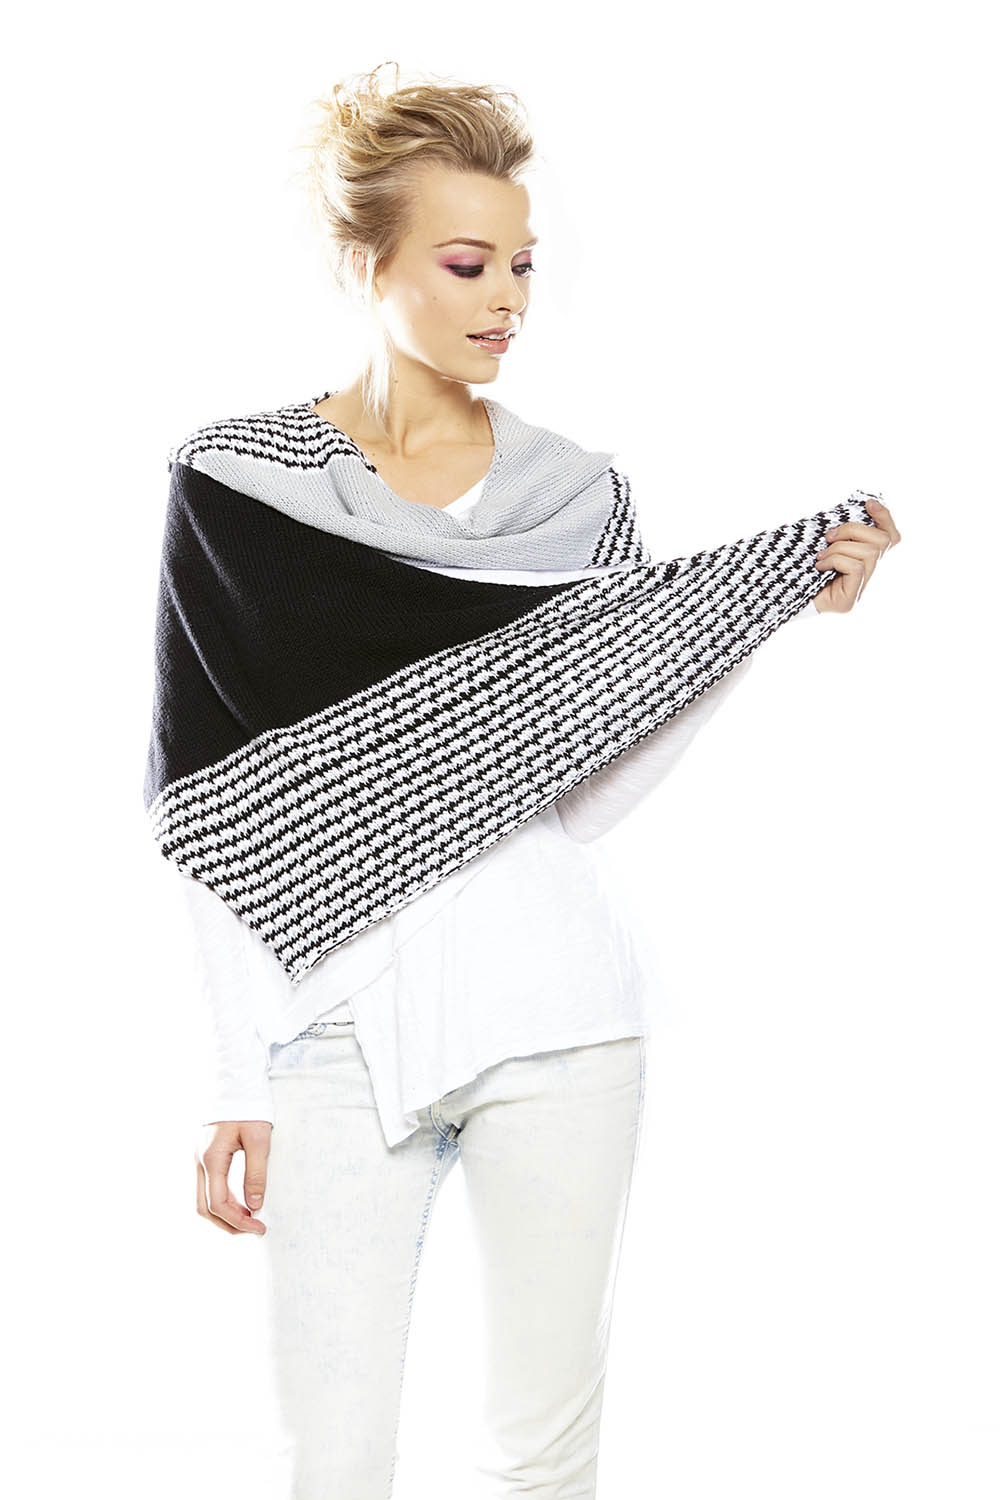
Coming in at #5 on our list is Areca (pattern link), designed by our amazing managing director, Yonca Ozbelli. Yonca has a knack for creating designs with simple silhouettes that really stand-out, and Areca is no exception. I love how this top casually caps the shoulders but isn’t a true cap-sleeve. It’s somewhere between a cap-sleeve tee and a tank, and it’s perfect for warm spring and summer days. The timeless color combination of black and white makes it so easy to pair this top with anything. Areca features graphic mosaic motifs that are offset by solid side panels. Knit flat from the bottom-up, there is actually no seaming involved! Instead, a three-needle bind-off joins the shoulders and side seams.
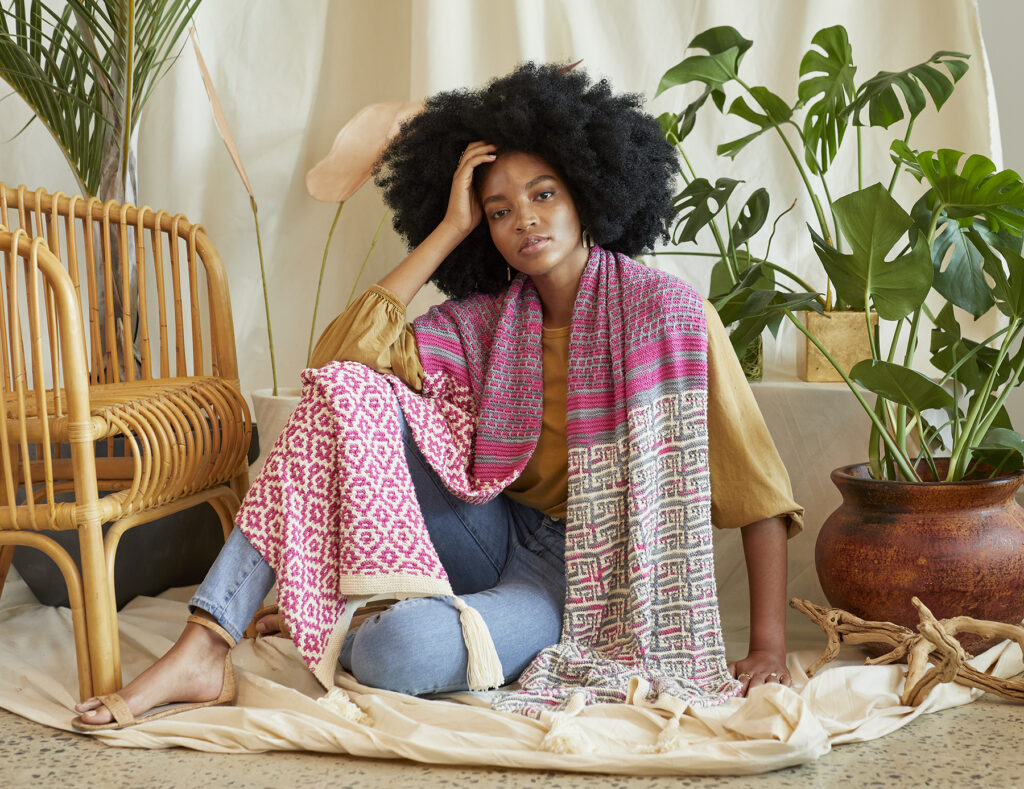
Palmetto designed by Aubrey Busek.
#4 Palmetto
Looking for an absolute show-stopper? Look no further than Palmetto (pattern link). I am so glad that Aubrey joined our design team back in 2019. She has such a thirst for learning new things, taking creative risks, making bold design decisions, and letting the “extra” in her shine through. Although by design Palmetto is a rectangular stole, Aubrey opted for a variety of engaging stitch patterns to make this eye-catching accessory. You’ll be a mosaic knitting expert by the time you finish. While the mosaic portions decorating each end demand a bit of your attention, you’ll be rewarded with rest during the garter stripes and slipped-stitch sections in the center of the wrap. Finish this piece with fun tassels on each corner, wrap it around your shoulders, and show it off to all your friends!
By the way, both Areca and Palmetto are part of the Modern Mosaic ebook (link), published in Fall, 2020. This collection as a whole tied with Palmetto for #4 on the list. The ebook compiles four delightful designs featuring mosaic knitting. Don’t miss the other amazing designs in this collection! Buy just one pattern, or get Areca, Dypsis, Palmetto, and Sabal together when you purchase the ebook!
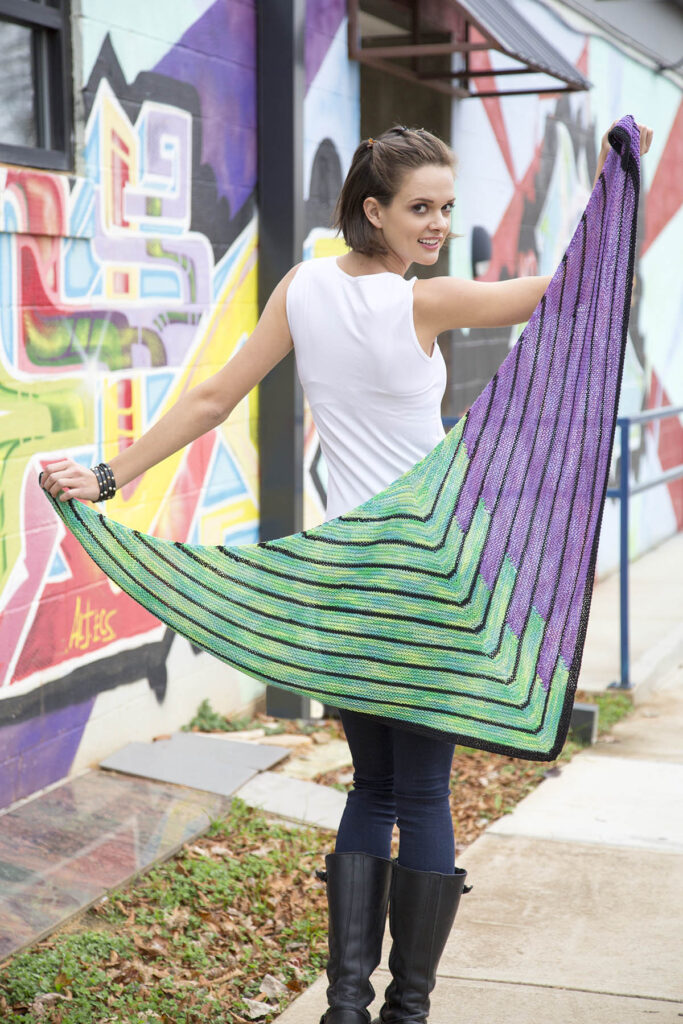
Staggered Shawl designed by Amy Gunderson
#3 Staggered Shawl
Next up is the Staggered Shawl (pattern link). Playing with color is just so fun with Bamboo Pop. The palette is broad and the variegated colorways were designed to pair perfectly with the solids. Designer Amy Gunderson loves adventurous designs and she knows how to transform simple knits and purls into something truly special. In this case, she used intarsia to create an exhilarating effect in this otherwise simple triangular shawl. It’s primarily garter stitch, so this accessory will fly off your needles, too. The Staggered Shawl has been a hit since we first published it, so much so that our customers demanded a kit (link) with options for different colors!
No. 1 Pullover designed by Amy Gunderson
#2 No. 1 Pullover
At #2 on our list, we have yet another genius design by Amy Gunderson. I remember when we first received this sweater from our sample knitter. I fell in love immediately and was so thrilled to see the Bamboo Pop multis used in such a clever way (plus, it reminds me of Fruit Stripes gum). The multi creates short blips of color breaking up the thick graphite stripes and each edge is trimmed with a tidy, stripey I-cord. Nope – you don’t need to change colors mid-row for this effect – the multis do all the work! I love the oversized and boxy shape of the body with fitted, 3/4 length sleeves. The silhouette perfectly illustrates the drape of Bamboo Pop. It’s breezy, lightweight, and perfect for springtime. The No. 1 Pullover has been a hit at shows and we’ve seen many interpretations of the design. No matter what color combination you choose, it’s sure to yield exciting results!
Kukui designed by Tori Gurbisz
#1 Kukui
Finally, at #1, our best-selling Bamboo Pop design is Kukui (pattern link), designed by Tori Gurbisz! I’m pretty sure I’ve seen someone wearing a wonderful iteration of the Kukui shawl at every Stitches show I’ve attended, and I swear I’m not exaggerating. Our local yarn stores routinely ask to borrow our sample for their trunk shows. It’s a clear favorite among all of our customers and it’s easy to see why. The slipped stitches are striking next to the blocks of solid color. It’s a boomerang-shaped shawl, meaning that it’s knit on the bias. Personally, this is my favorite shawl shape because they’re fun to knit, easy to style, and they have a more modern appeal than traditional triangular shawls (don’t get me wrong, I also really love classic triangular shawls!).
There you have it – our five best-selling patterns in our best-selling yarn, Bamboo Pop! Have you made any of these great patterns, or are you planning to add them to your queue? We’d love to know!
Oh, and one more thing – we’re sharing more Bamboo Pop inspiration on our Instagram and Facebook pages this week and next week. Be sure to follow us so you can see it all!
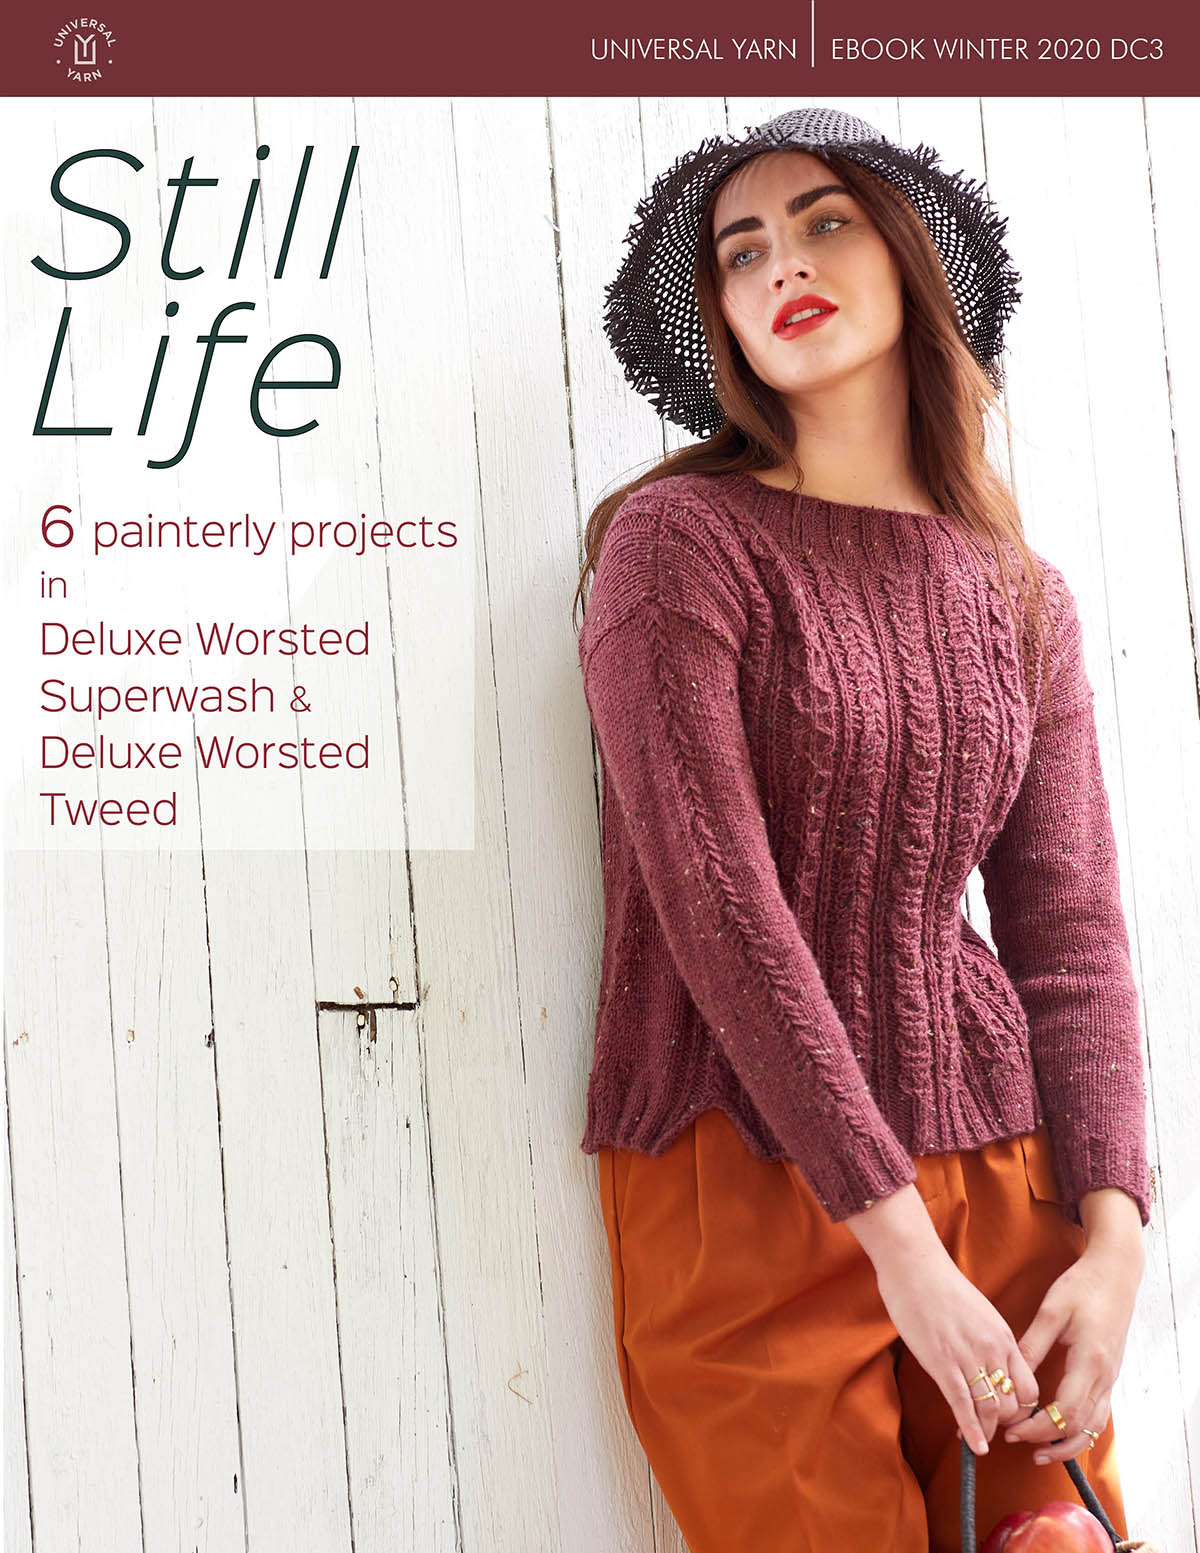
Today I’d like to highlight one of our more recent pattern collections, Still Life (link). It’s always fun to put together a pattern collection. This one is especially close to my heart because this is the last collaborative collection between our former creative director, the amazing Amy Gunderson, and myself. That means this collection has also been a long time in the making. Originally, these patterns were developed for another yarn, but sometimes things just don’t work out the way you originally planned. When we had to say goodbye to the intended yarn, we didn’t want to say goodbye to this collection. How could we? The pieces are all so beautiful. That’s why we reimagined them in our Deluxe Worsted Superwash and Deluxe Worsted Tweed. Today I’m going to share each of these projects with you and I hope you enjoy them as much as I do!
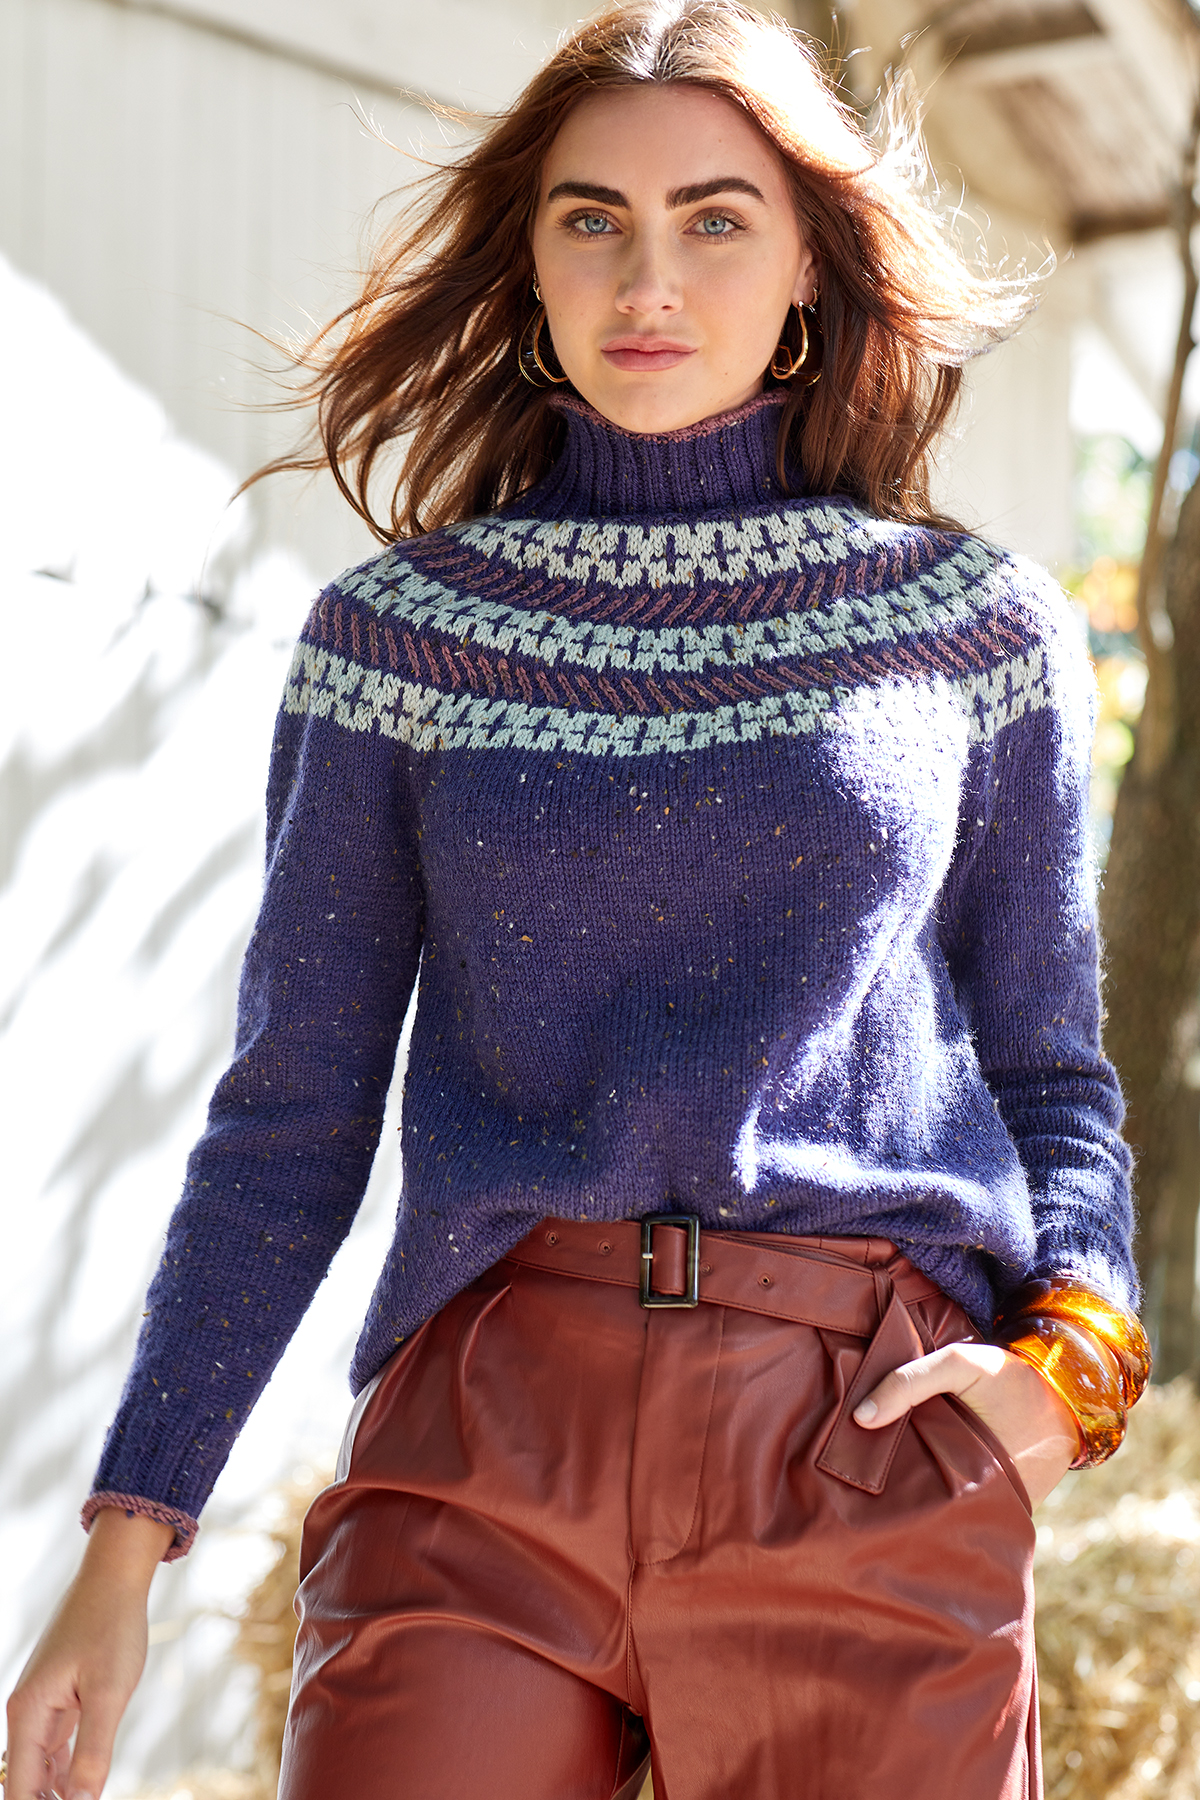
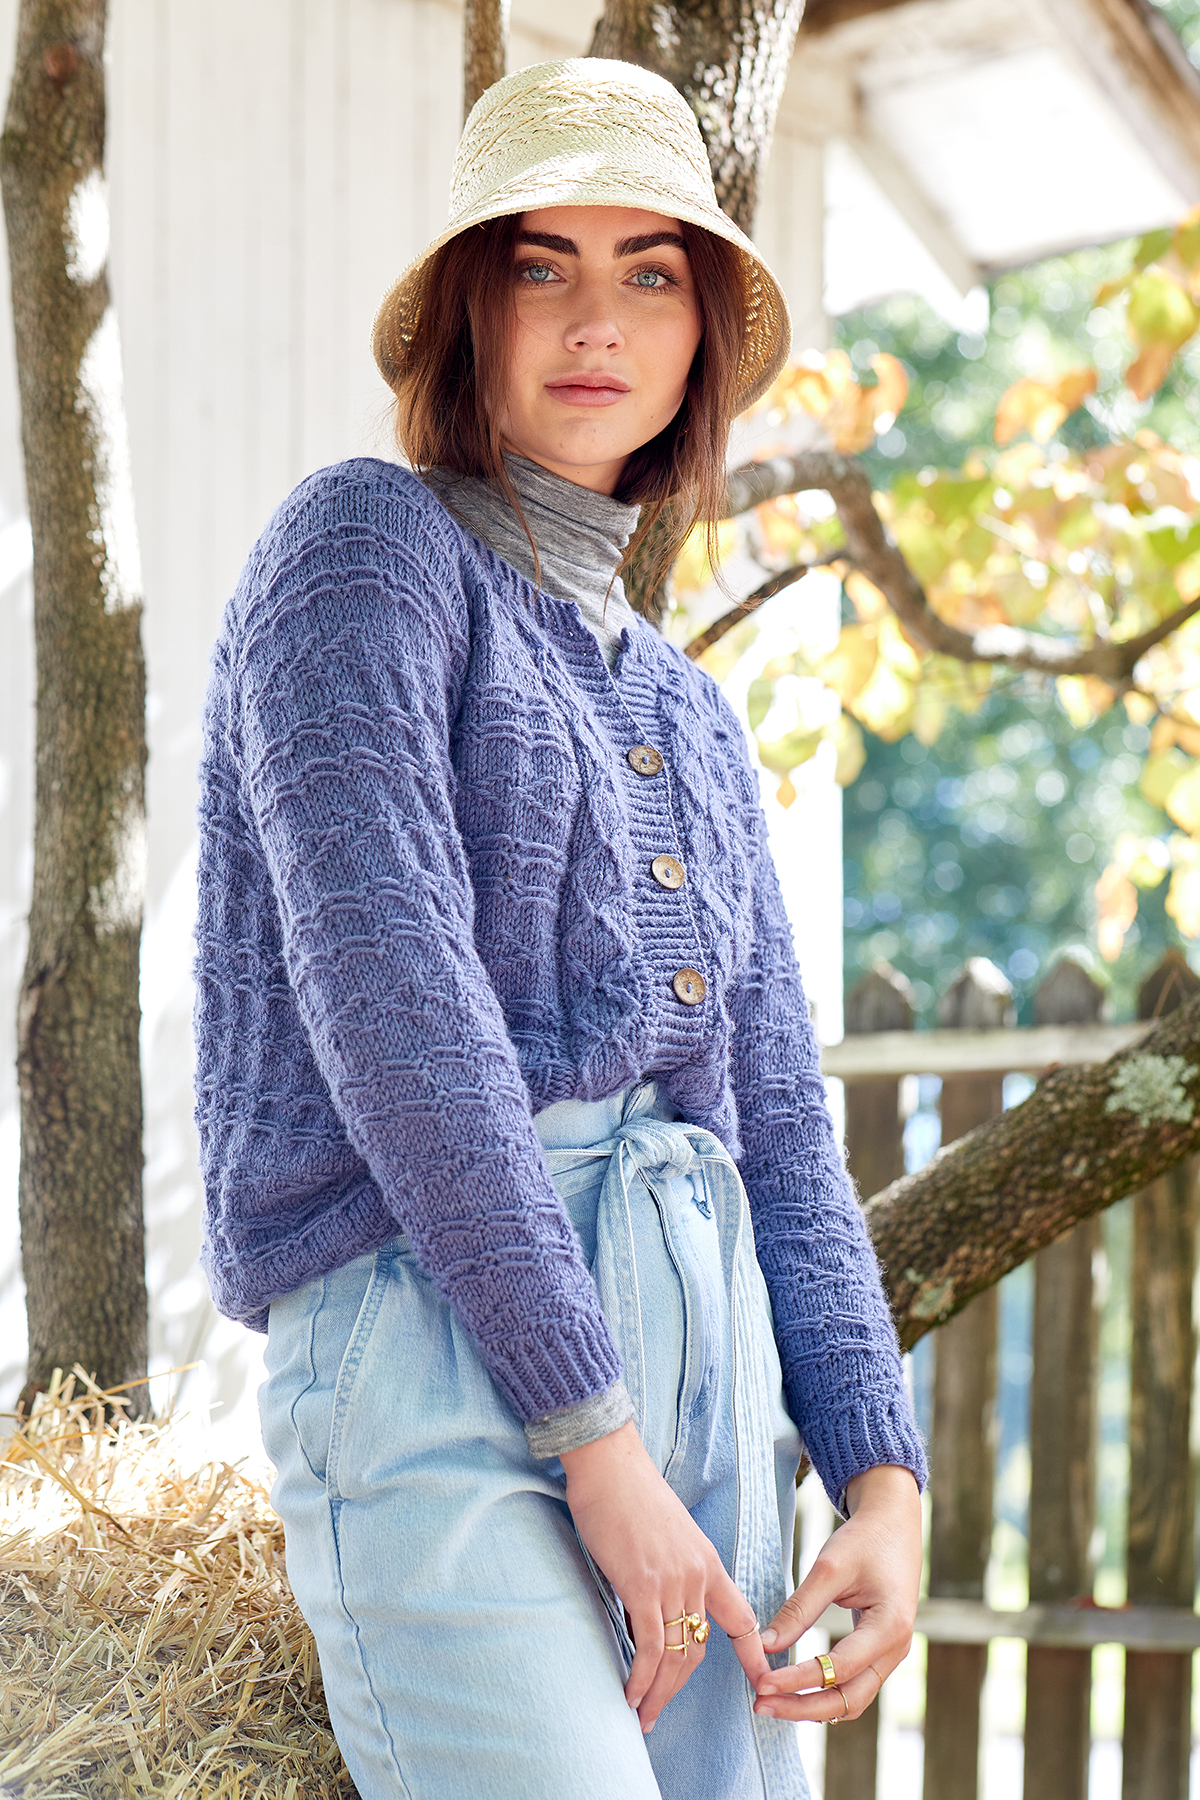
The first pattern in the collection is a contribution by Amy Gunderson. The show-stopping Chiaroscuro (pattern link). This seamless, top-down pattern features a bold slip-stitch colorwork motif across the circular yoke. I’ve always been a fan of mock-neck and turtle neck sweaters. As someone who is perpetually chilly, they maximize my comfort during the winter months. So, the high, ribbed neckband of Chiaroscuro is perfect for me. I also love the contrast color rolled stockinette trim that decorates the hem and sleeve cuffs. This is a casual piece that is begging to be knit. Our sample uses Deluxe Worsted Tweed which gives it a rustic appeal. However, if tweedy nubs aren’t your thing, simply use Deluxe Worsted Superwash instead – the yarns are totally interchangeable!
Chiaroscuro by Amy Gunderson in Deluxe Worsted Tweed
Next, we have Delft (pattern link), knit in Deluxe Worsted Superwash. This is my design, and while I don’t mean to boast, I have to say I just love it! I’ve worn the original sample of this design so much! It’s the perfect layering piece. The raglan shaping ensures a great fit. Twisted ribbing pops along with the hem and button bands, but what I love most are the horizontal bars created by using slipped stitches. Delft is another seamless pattern and is knit from the bottom up. You work the body and sleeves separately and join them at the underarms and complete the sweater in one piece.
Delft by Rachel Brockman in Deluxe Worsted Superwash
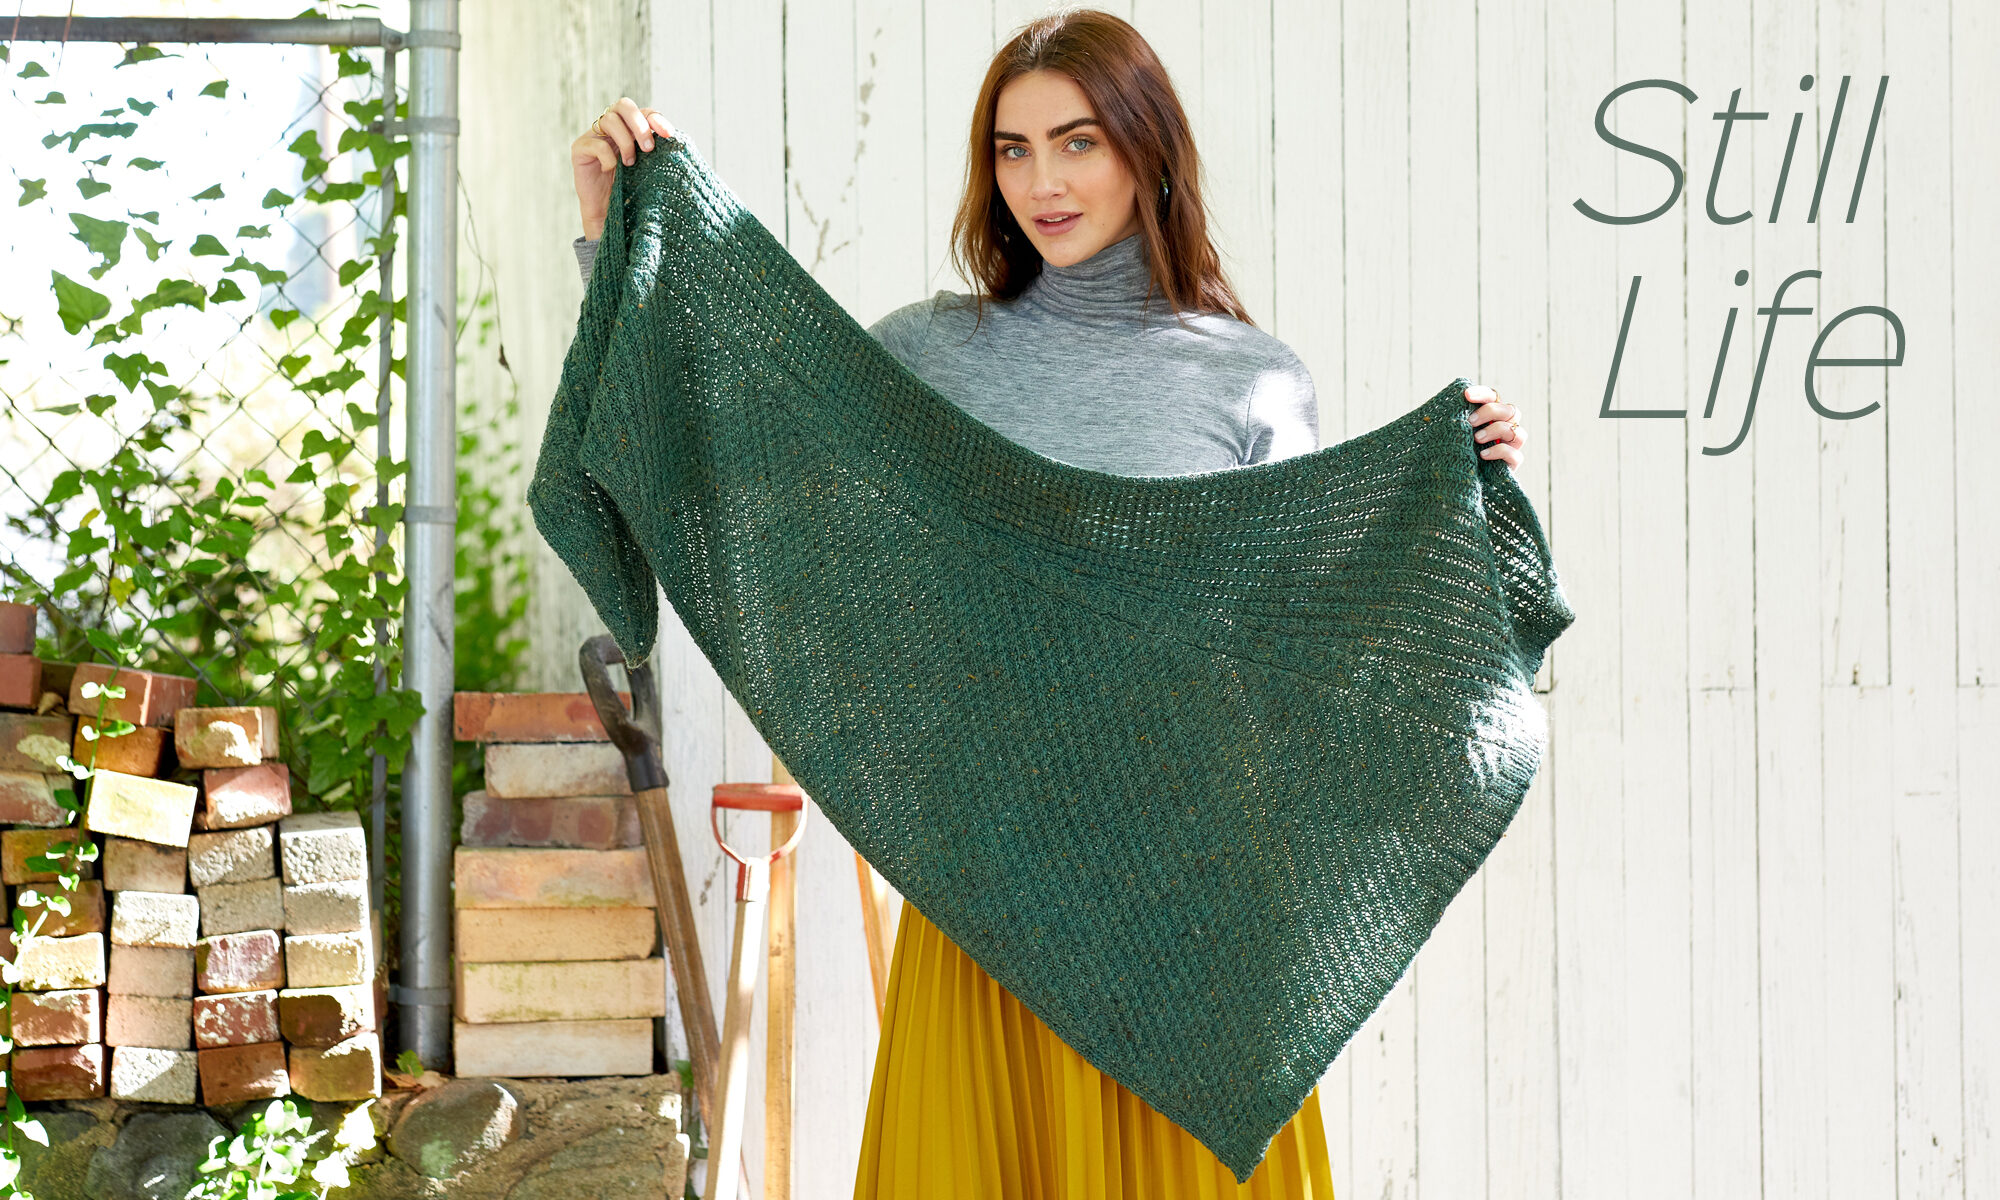
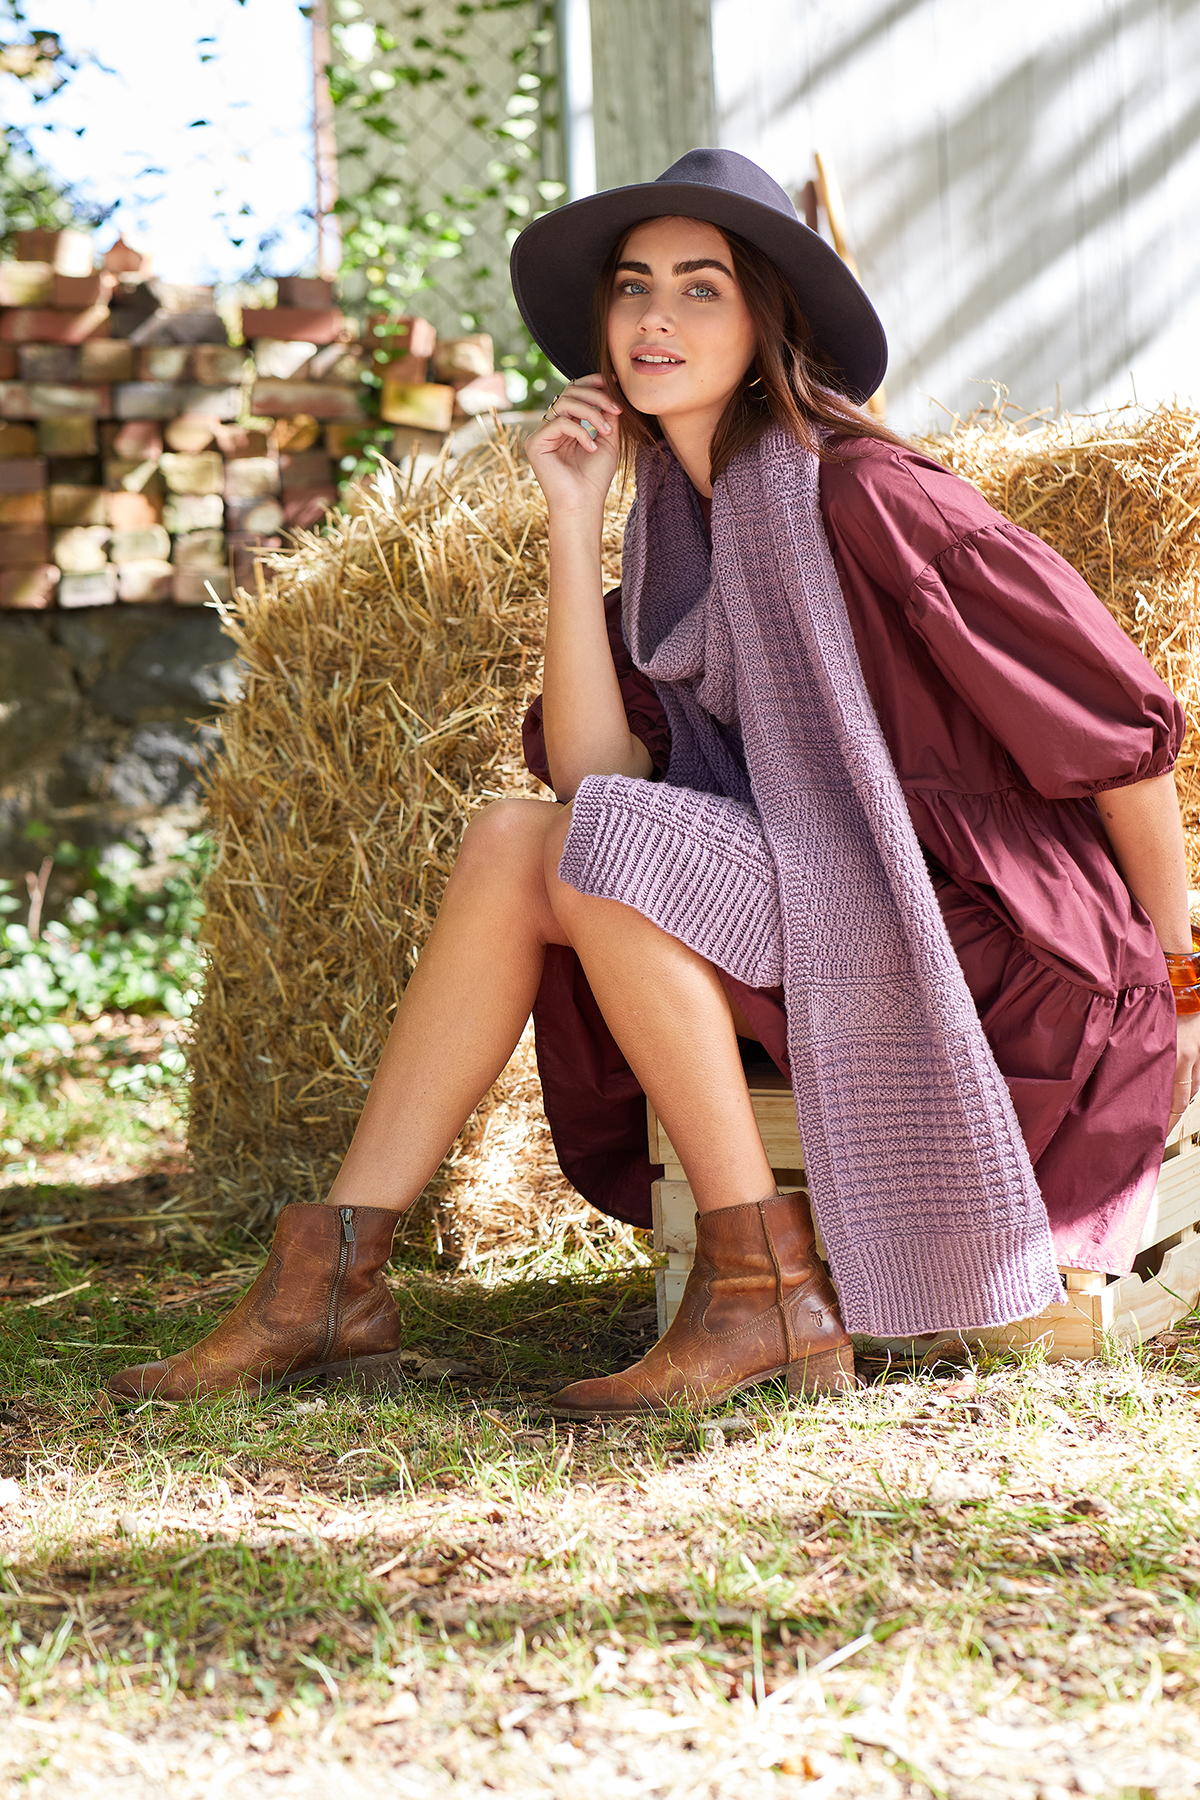
Those who love a good sampler project will enjoy Leyster (pattern link), designed by Amy Gunderson. This lengthy scarf is perfect for wrapping around your shoulders during the cool months of autumn and winter. The design is loaded with textural motifs that are a blast to knit, and you won’t get bored because the motifs alternate frequently. Leyster is an excellent project for a beginner knitter ready to tackle something more interesting than garter stitch.
Leyster by Amy Gunderson in Deluxe Worsted Superwash
Another project that uses Deluxe Worsted Superwash is the cozy shawl, Pointillé (pattern link). Like all of the designs in this collection, Pointillé is richly textured. It features three lovely colors. I love the crescent-shape of this shawl and find that it drapes around the neck and shoulders so easily. The stitch patterns are easily memorized and addictive to knit. The finishing touch is a crocheted picot trim – admittedly a design feature I can’t get enough of!
Pointillé by Rachel Brockman in Deluxe Worsted Superwash
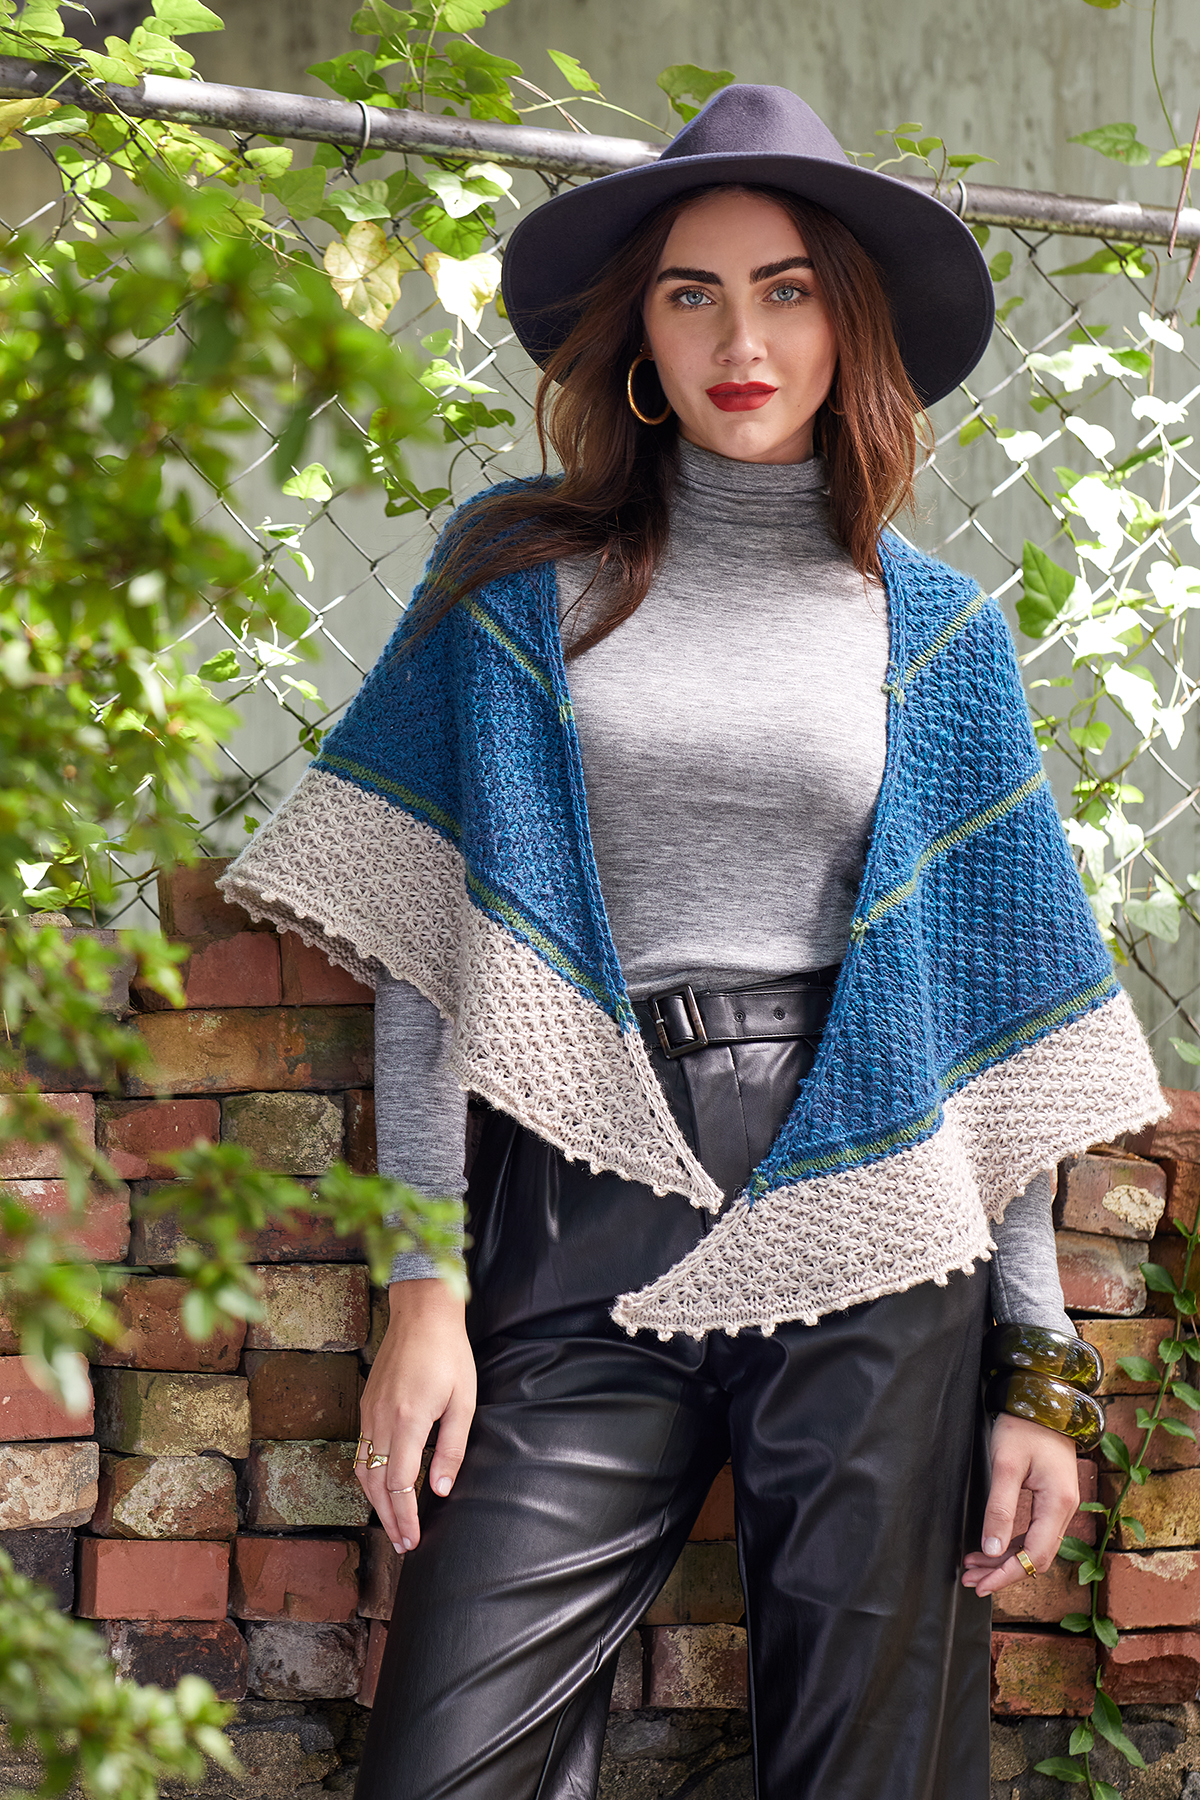
Although I always say I favor knitting sweaters and hats, shawls are also high on the list of my favorite things to knit. They come in all shapes and sizes with varied construction methods. I’ve never really been bored with a shawl. Angular, asymmetrical triangles are a popular shawl shape, likely because of their modern design appeal. Verdigris (pattern link) falls into the asymmetrical triangle category, but with a twist. Stitches are actually increased on two sides of a cable panel, breaking this pattern up into beautiful and interesting sections.
Verdigris by Amy Gunderson in Deluxe Worsted Tweed
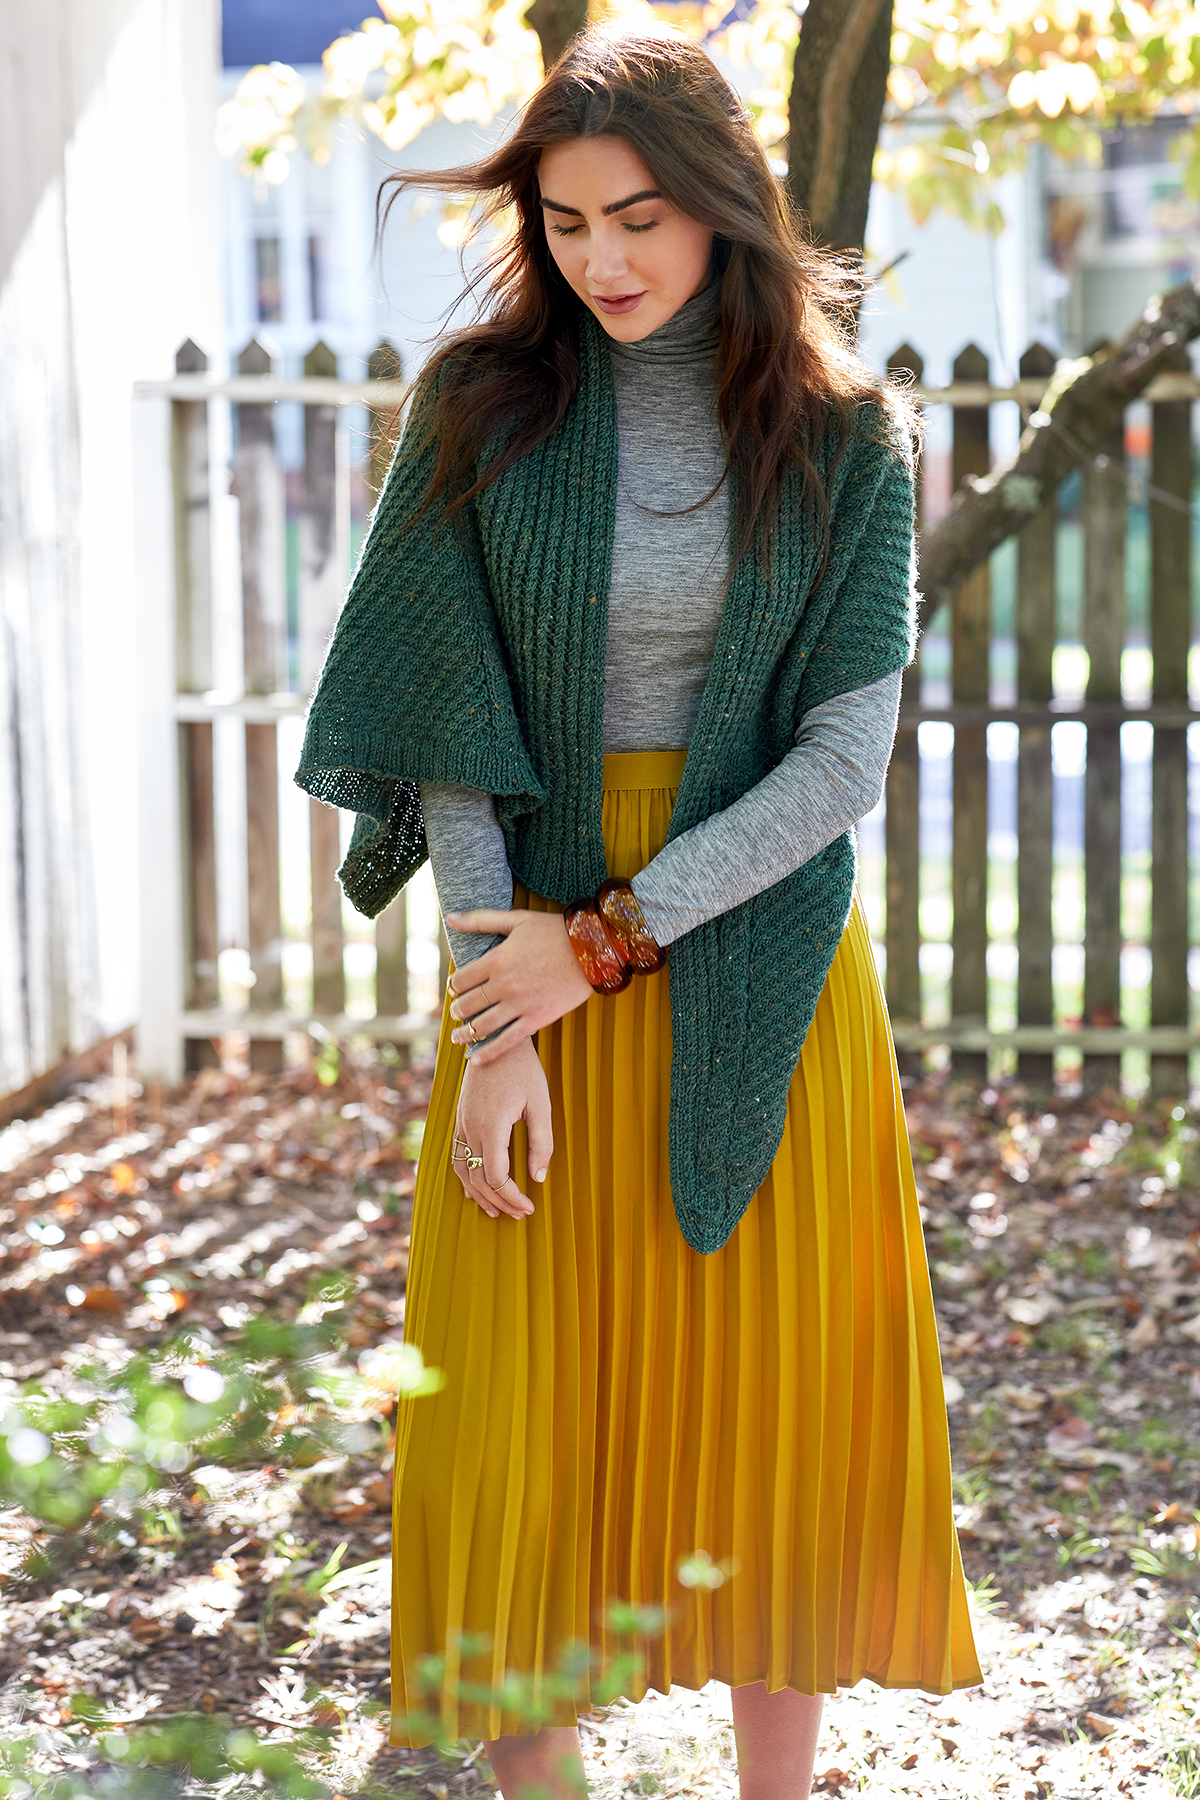
The final piece in the collection is another pullover: Vermillion (pattern link) in Deluxe Worsted Tweed. This pullover features bracelet length sleeves, slip stitches, cables, and a sweet split hem on the front. I designed the hem so that the ribbing shifts neatly into the center panels. I’m pretty sure this piece is going to be a favorite of mine to wear during the transitional seasons!
Vermillion by Rachel Brockman in Deluxe Worsted Tweed
I hope you’ve enjoyed taking a look at the patterns in the Still Life collection! We’re so happy with how this collection turned out. Which projects do you plan to put on your knitting needles? Do you have a favorite piece in the collection? We’d love to know in the comments!