
It’s Free Pattern Friday!
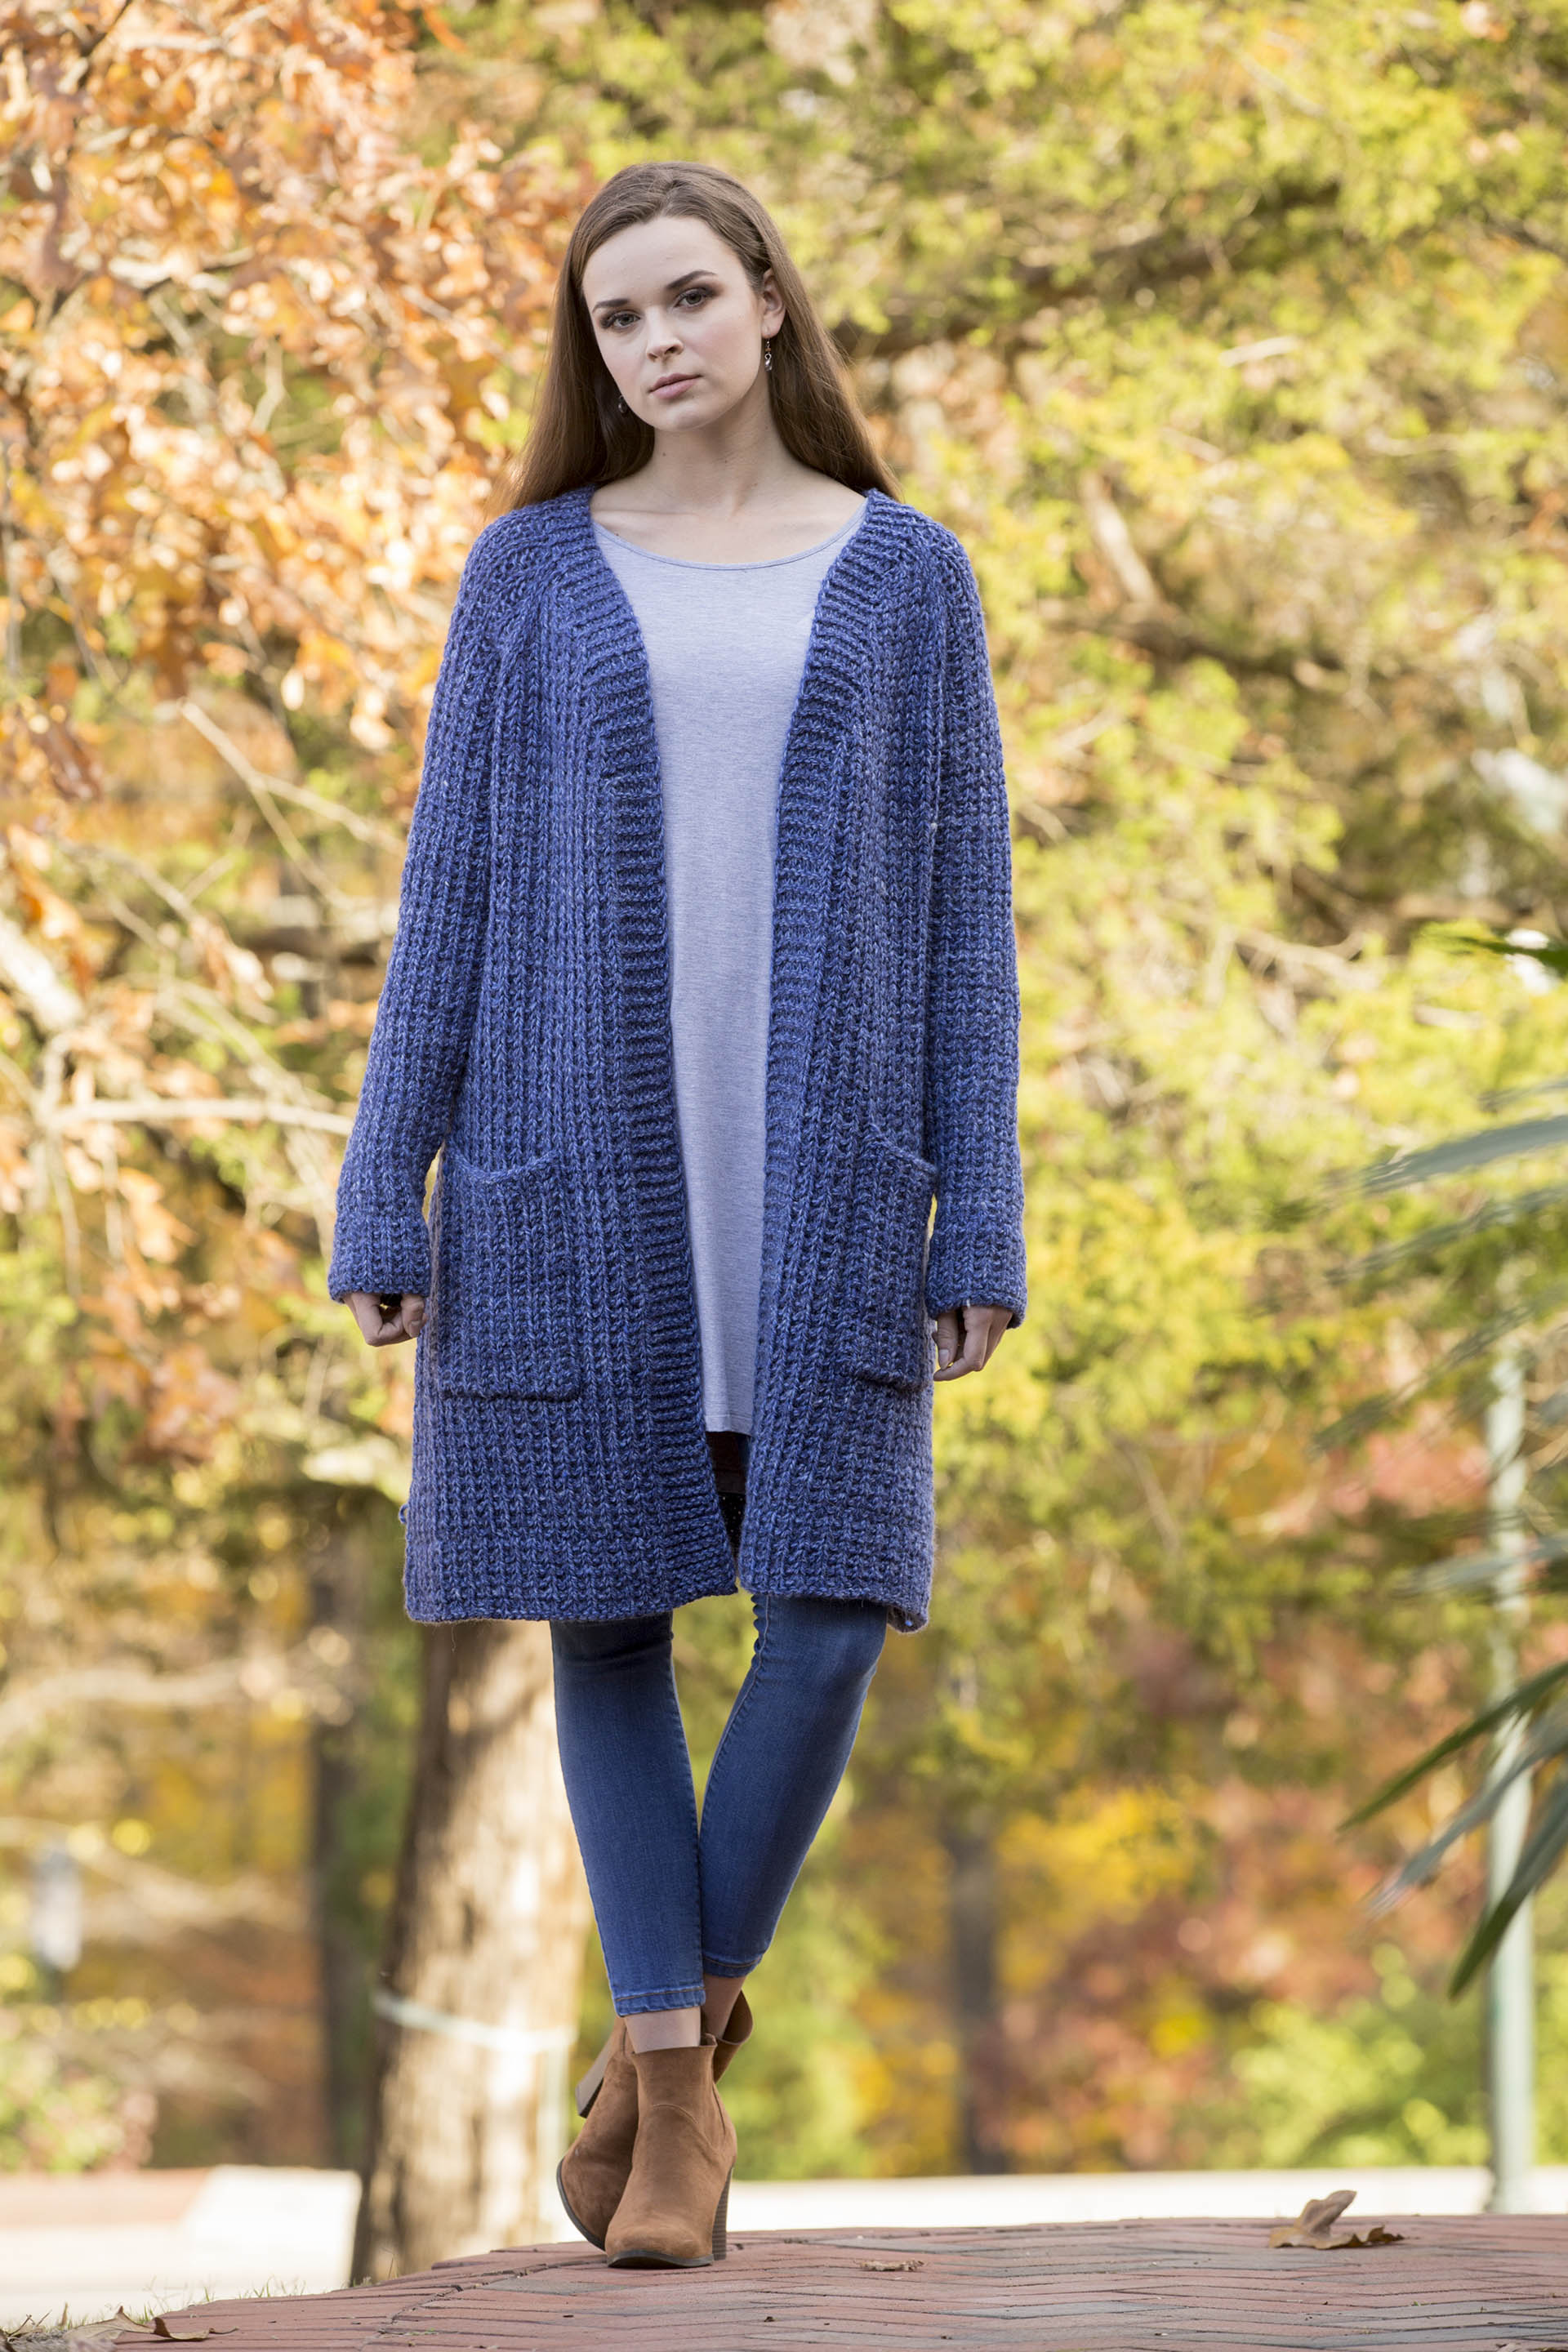
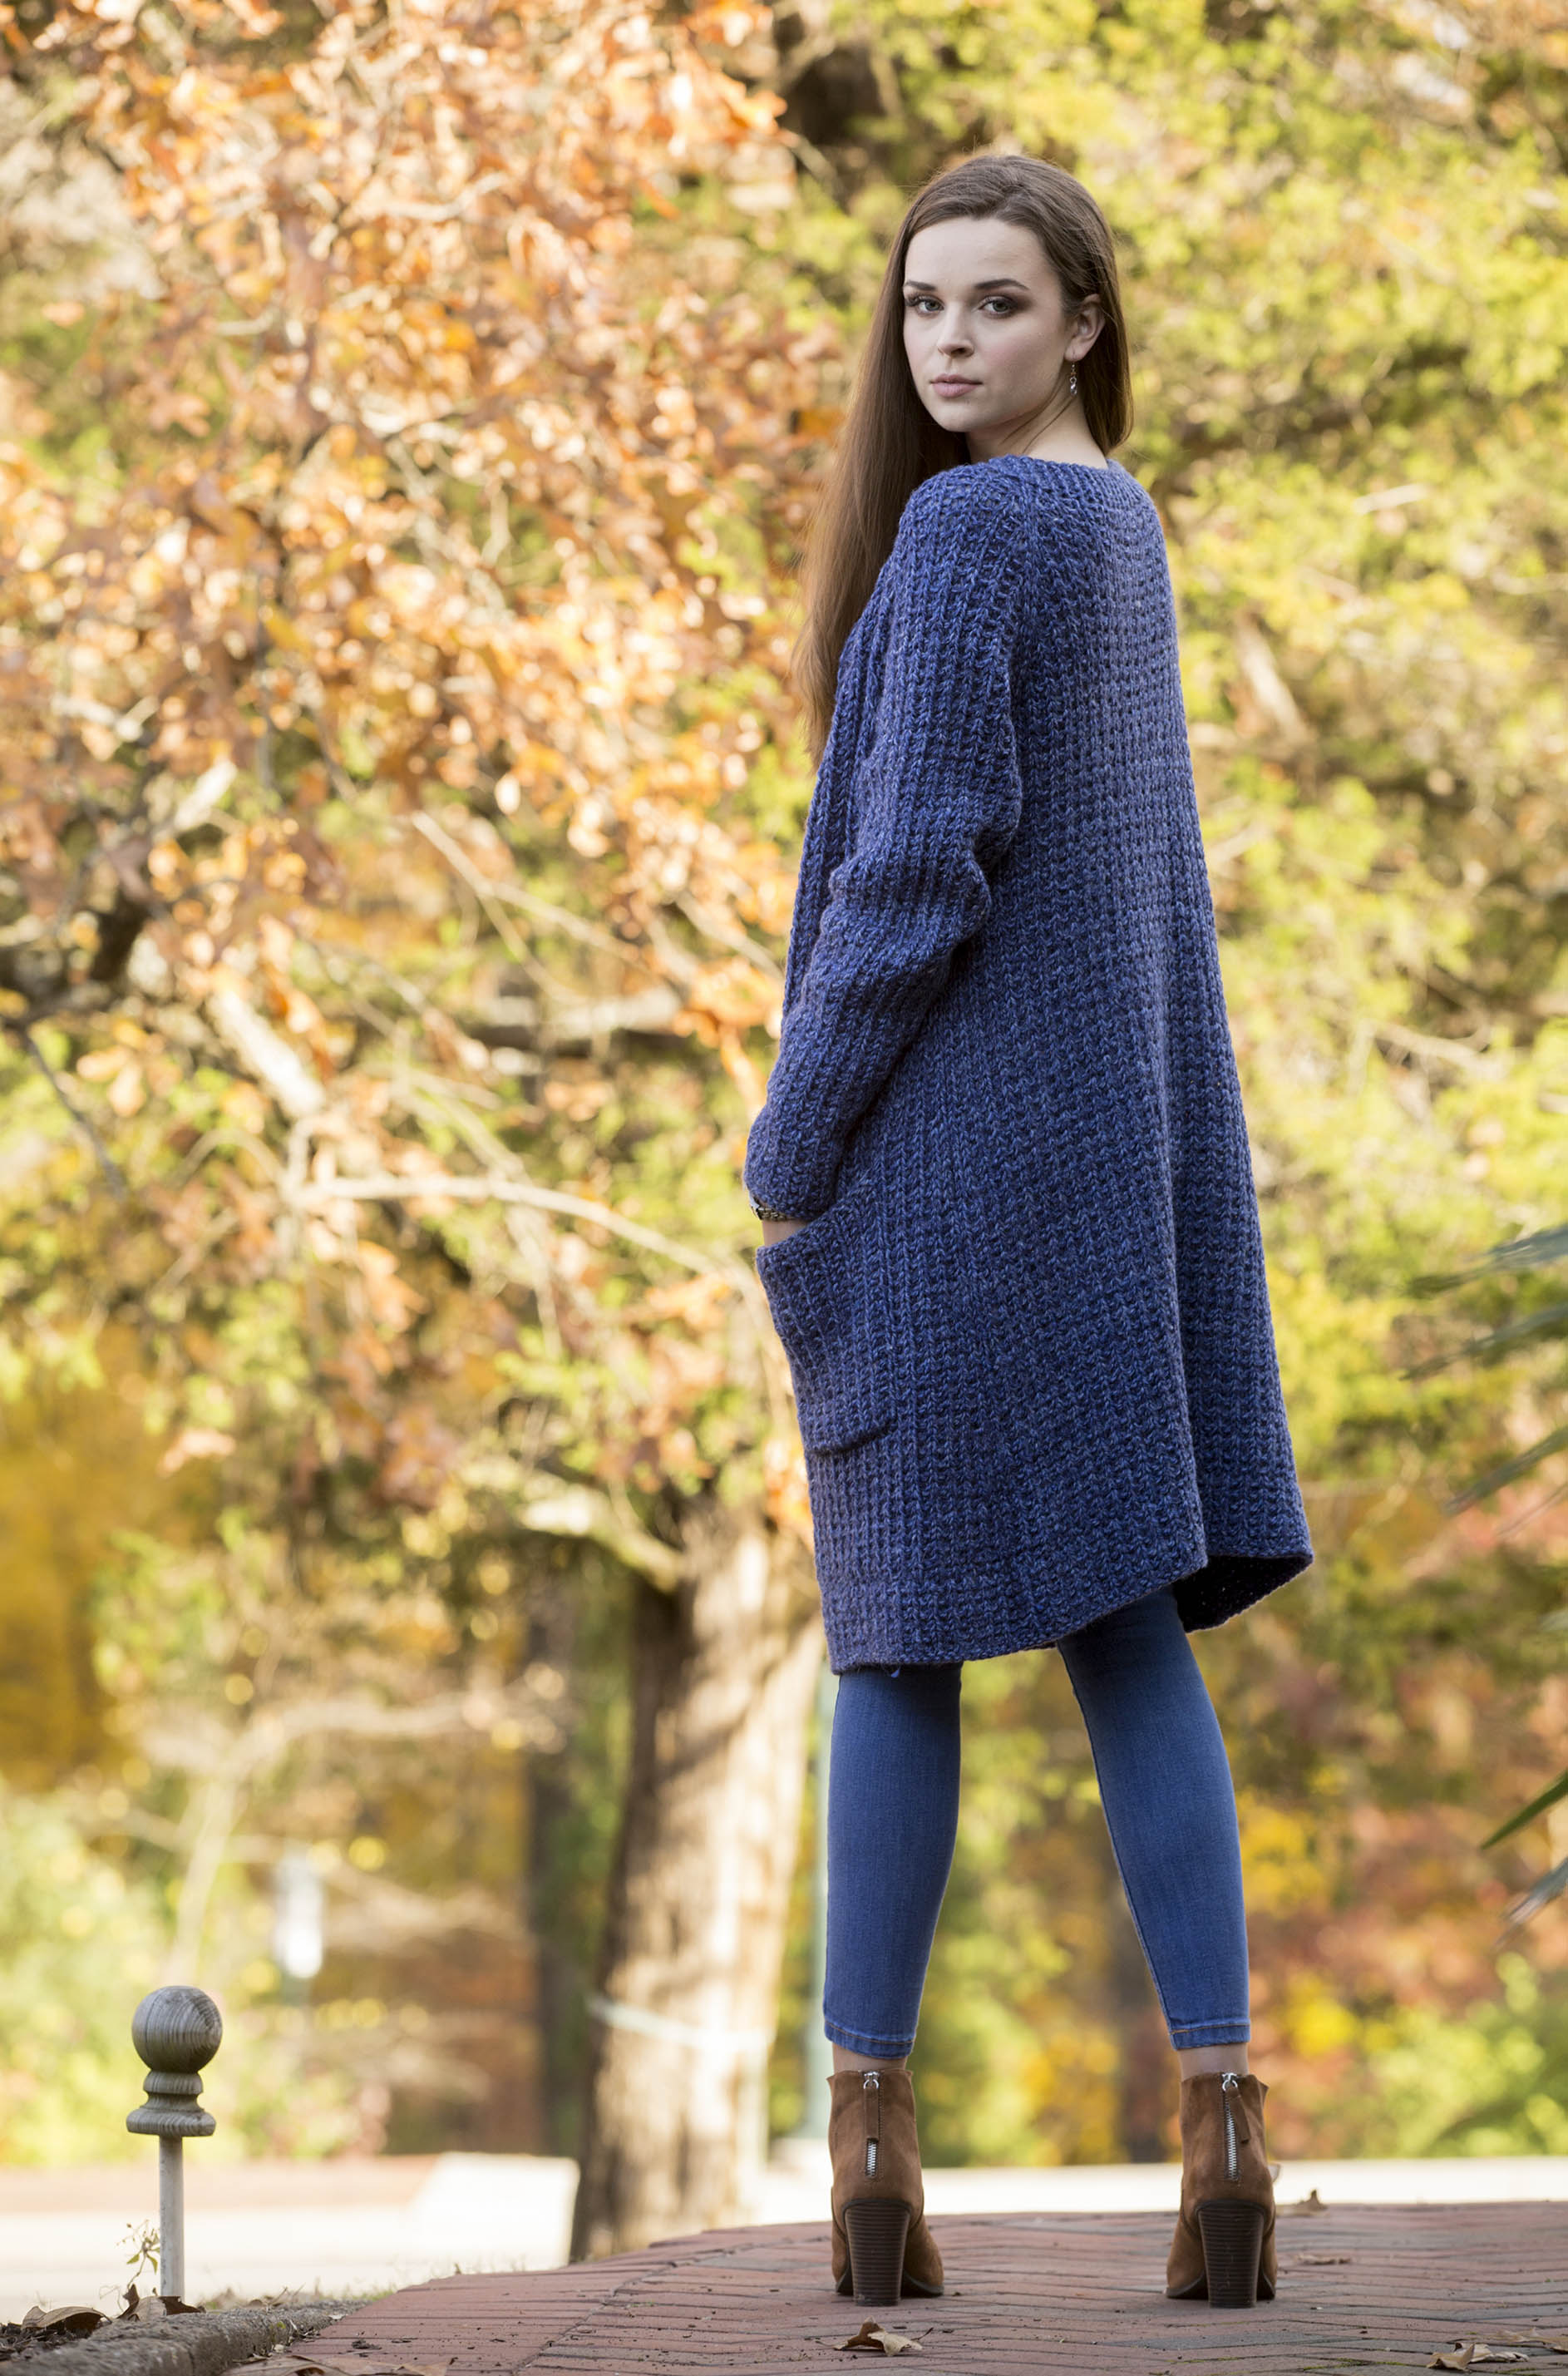
Today, Penelope’s Cardigan in Deluxe Bulky Superwash (pattern link).
If ever there were weather that called for a big, comfy sweater in 100% bulky wool, this is it. Say hello to Penelope’s Cardigan.
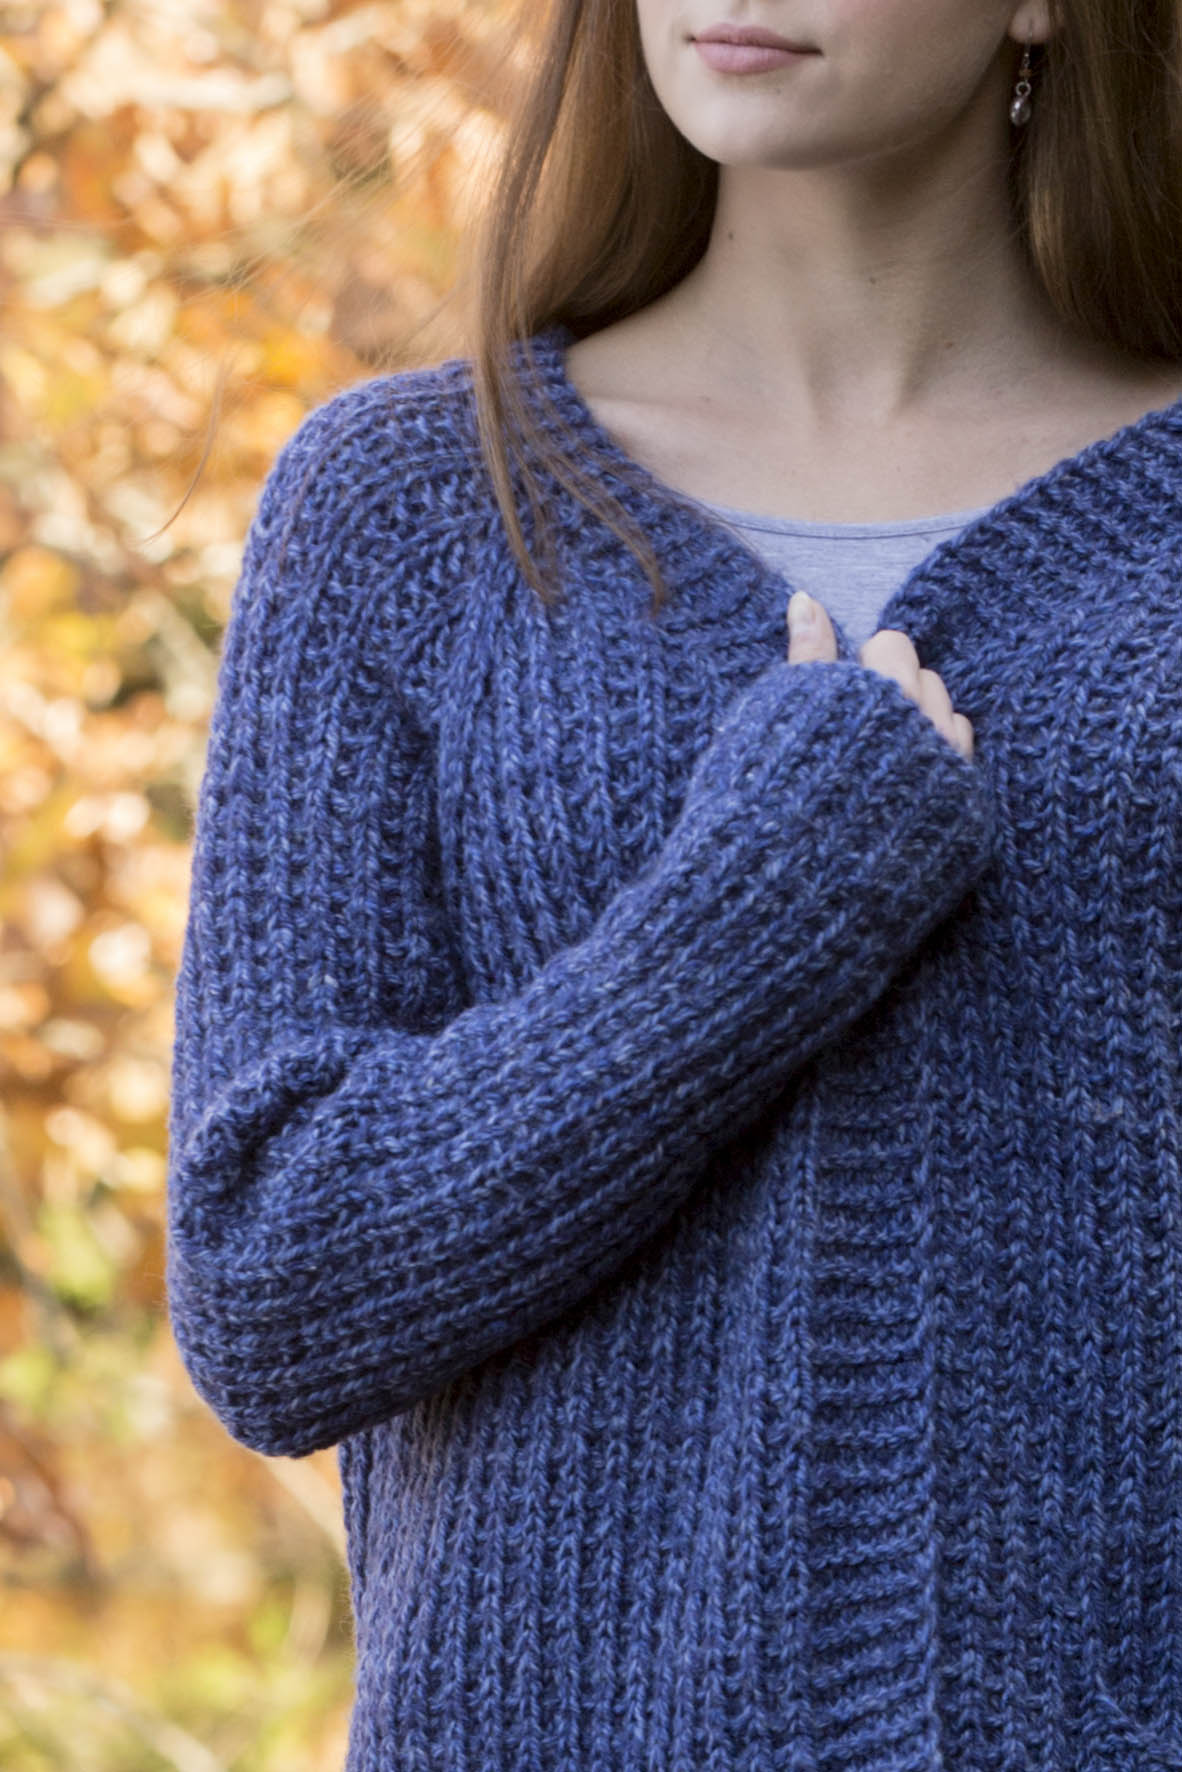
Amy Gunderson designed this warm and relaxed hug using our Deluxe Bulky Superwash on US size 10 1/2 (6.5mm) needles. Knitted seamlessly from the top down, this raglan-sleeved long cardi is perfect for a night in.
We hope you bundle up snug and cozy this weekend, with a fun project in your lap and a warm mug by your side.
Happy crafting!
Please follow and like us:
I got the yarn, and ready to knit, and the directions don’t say how many stitches to cast on! HELP! FAST!
Hi, Nancy! The cast-on is 7. You’re beginning with the left collar extension (it’s on the left hand side of the first page of the pattern):
CARDIGAN
Left Collar Extension
Cast on 7 sts.
Row 1 (RS): Sl 1 (see notes), k6.
Rows 2-42 (42, 42, 44, 44, 44, 46): Rep Row 1.
Break yarn, place sts on holder.
Hope this helps – let us know if there’s anything else we can help with!
Thank you. I saw the Stitch Guide and didn’t see cast on number.
I’m at the point “Separate Body and Sleeves.” I’m making size 1 X and have a total of 231 stitches across after the Raglan and Neck Shaping (38 rows). Yet the directions for the first RS row use 247 stitches (not counting the 30 cast on stitches. What did I do wrong? (15 ribbing, 32 front, 45 holder, 63 back, 45 holder, 32 front, 5 ribbing = 247.)
Hi Nancy,
I just checked the numbers, and I do see 231 stitches consumed in that first row. It breaks down to: 7 Collar + 32 Front + 45 Sleeve + 63 Back + 45 Sleeve + 32 Back + 7 Collar = 231
I’m not sure where you’re coming up with the 15 ribbing/5 ribbing numbers. If it helps, as you’re working Row 1 of the Separate Body and Sleeves section – of the 2 stitches at each raglan intersection – 1 stitch will go to each side of the abutting piece. For example as you knit across the Left front and encounter your first raglan marker, you will knit 1 of those stitches for the front, and then the next one will go on a holder with the following 43 sleeve stitches plus 1 raglan stitch from the following raglan section.
You can think of those 2-stitch raglan sections as “dividing lines” that are shared by surrounding sections of the sweater.
I had a typo with the 5 for the ribbing. But both were 15 because your directions say to add a stitch BEFORE you move the marker at the edge of the ribbing over (working toward the front) making the ribbing grow wider, NOT the front.
It was so messed up that I tore it all out. I’m done.
Nancy, Amy’s out of the country right now, but she’d be glad to give you a call when she’s back. If you’re moving on, that’s totally understandable, but if you want to give it another try, we’d love to help.
Hello i am at the part when under raglan and neck shaping next row where it says to continue pattern and i want to do does that mean continue the garter rib pattern?
Yes, you’ve got it. 🙂
Thank you for the clarification 😊