Afghan Knitalong – Finishing

21 Finished Blanket with title blog

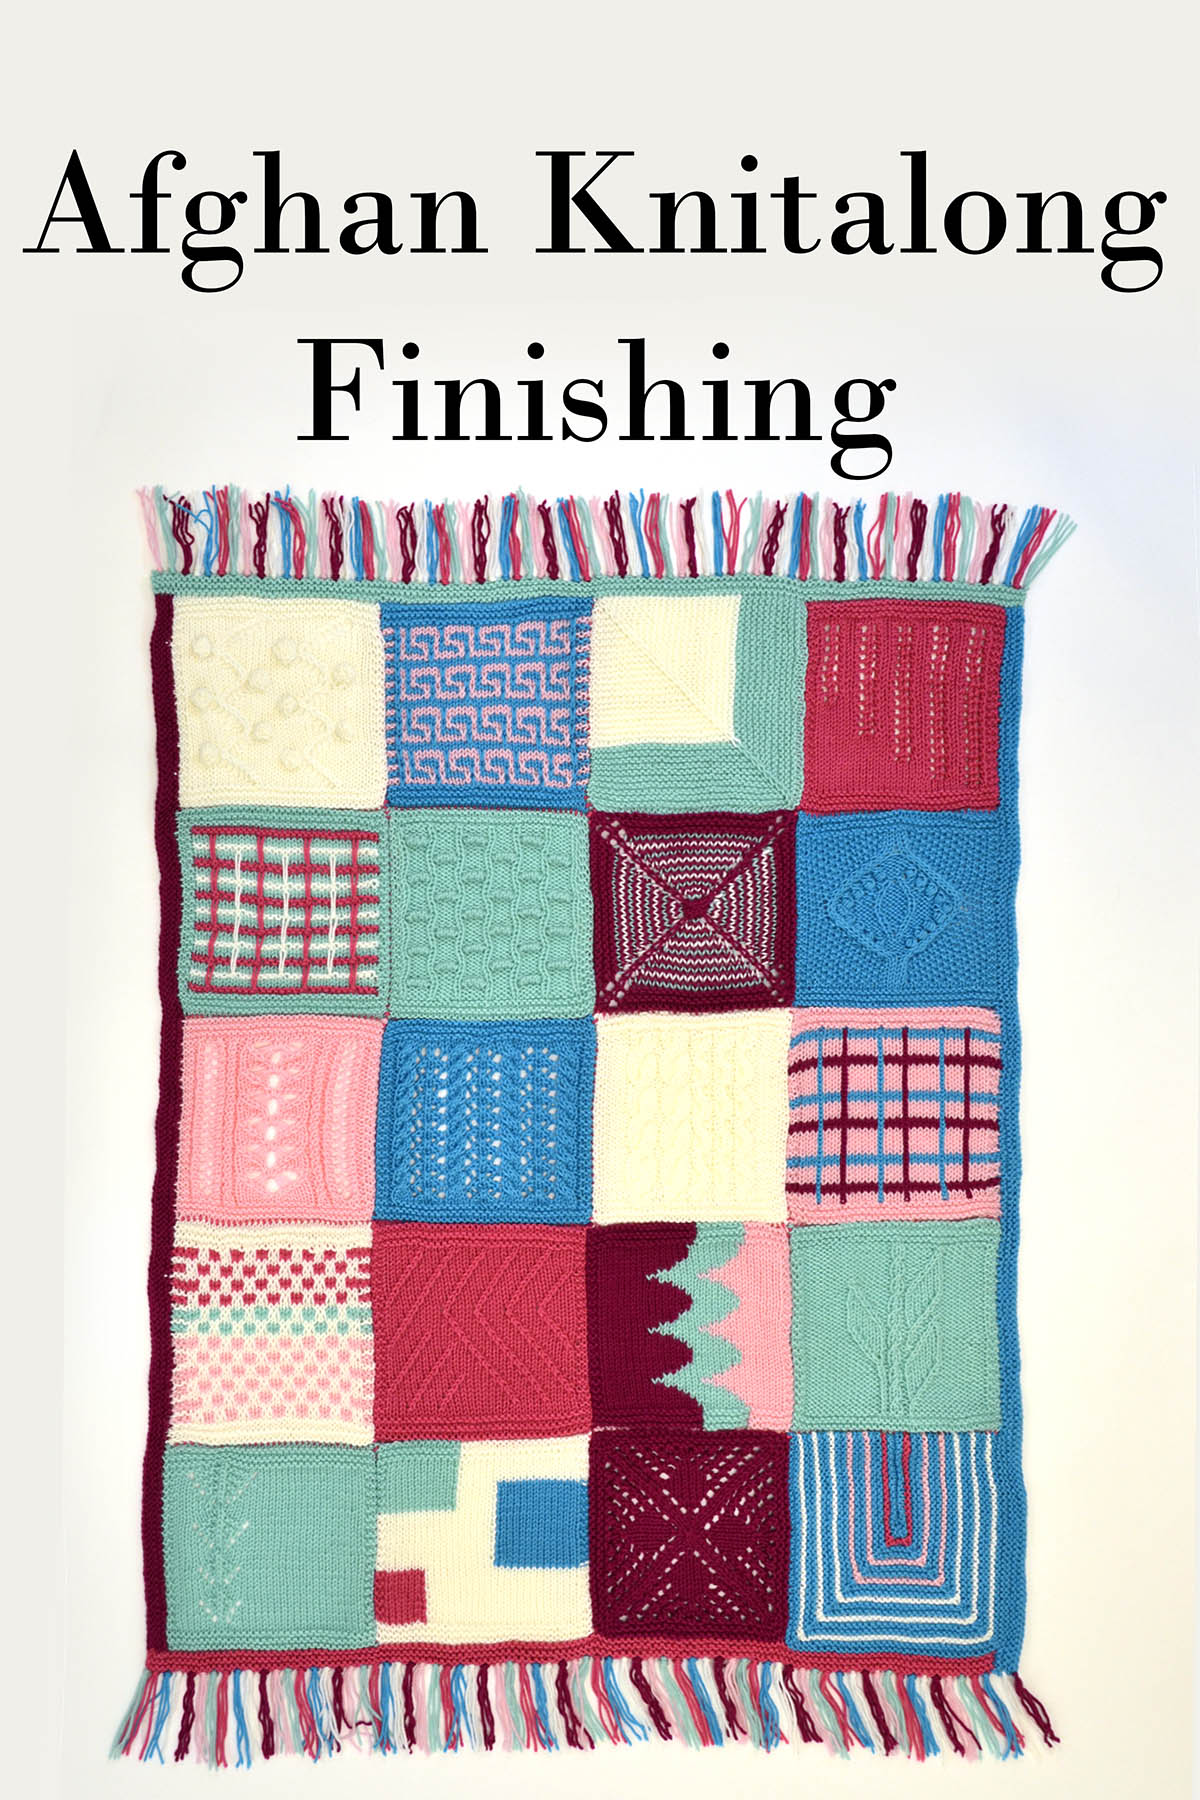
I can’t believe we’re done!  In my head, I’m hearing Frank Sinatra singing “My Way.”  Every afghan we’ve seen so far has been a unique reflection of the style of its creator.  It’s a wonderful tribute to the individual flair each of us have as crafters.

After assembling all the squares, Amy has opted to use four different colors for the border of her afghan.  She’s also attached fringe and shares a video on how that works.

Even if you haven’t finished yet, we hope you’ll share pictures of your afghans.  Seeing your work is inspiring!

You can share with us here, on Facebook, or on the Afghan Knitalong Ravelry group.  We’ve just joined Instagram as well, so we’d love to see what you’ve posted in the way of knitstagrams!

We hope you’ve enjoyed knitting along.  Happy crafting!

Afghan Knitalong – Seaming

21 Afghan Knitalong Seaming 1_blog

It’s all coming together – literally!  Time to seam up your squares into a glorious and unique creation.  Lay ’em out, decide where you want them to go, and then turn your 20 little learning blocks into one beautiful whole.  We’ve got a .pdf file with tips, and videos on not one but two methods of linking everything together.

First, Amy Gunderson demonstrates the mattress stitch, and how to use it when you have different numbers of stitches from square to square.  Grab your tapestry needle and some yarn and get to it!


Next, she shows how to use a crochet hook to slip stitch your squares together.  Slightly less invisible, but very easy to work.

I’m a big fan of mattress stitch, but I may give crochet  slip stitch a try this time. I like the idea of working straight from the ball without cutting a length of yarn.  Seems like fewer ends to weave in.

We’ll be back in just one week with details on adding a border and fringe (if you wish), and the big reveal of the finished sampler!  Can’t wait!


Afghan Knitalong – Block Twenty

Block 20 is live!

20 Bee Mine with title blogIt’s our final block and we’re going out with a bang.  Bee Mine uses traditional honeybee lace for its center panel.  What a sweet pattern!  A mix of yarn overs and dropped stitches creates the gentle symmetrical column in the center of the block.  Amy Gunderson shares a video on the technique.

So pretty!  Wouldn’t this look lovely on a scarf or along the outside of a sleeve?

That’s 20 blocks – are we done?  Yes and no.  We’ll be back after the first of the year to talk about assembling the whole afghan.  I’m going to take that time to finish up a few stragglers and start laying out my squares to see how I want them to look.

Happy knitting!


AFGHAN KNITALONG – BLOCK NINETEEN

Block Nineteen is live!

19 Tuckered Out with title_blog

Tuck in!  Block Nineteen is called All Tuckered Out because it introduces the tuck stitch.  It’s a little fold in the fabric that in this case creates a ridge.  This combines knitting back and forth as we did in the bobble and nupp blocks, but with a bit of a different spin.

Amy Gunderson has a video demonstrating this technique.

Amy mentions “knitting backwards” here, which is a technique you could use for Block 17 and Block 18.  Although we shared this as part of Block 17,  want to highlight it again here because it’s just so darned cool.

I can’t tell you how much time it’s going to save me not to have to knit back and forth over little rows.  This is a technique I’m going to practice until I’ve mastered.  This block looks like the perfect opportunity!

As always, you can share your thoughts and work with us here, on Facebook, or in our Ravelry group.    Check back in two weeks for the next block!

Afghan Knitalong – Block Eighteen

Block Eighteen is live!

18 Nupp Beginnings with title blue blog


Last time, bobbles, this time, nupps!  Block Eighteen, Nupp Beginnings uses another kind of round raised stitch to create a similar festive effect.

By the way, did everybody but me know it was pronounced “noop?”  I’ve been saying “nuhp” all these years.   However, in this video, Amy pronounces it correctly as she shows us how to work one of these little popped-up stitches.

I love knowing several ways to do similar things, like this and bobbles.  As a crafter, it’s always good to have options!

We hope you enjoy learning this nupp technique.  Feel free to share your thoughts and work with us here, on Facebook, or in our Ravelry group.    We’ll be back in a couple of weeks with a new block and a new technique!

AFGHAN KNITALONG – BLOCK SEVENTEEN

Block Seventeen is live!

17 Snowball Effect with title blog

Bobbles!  Square Seventeen is called Snowball Effect, and it’s easy to see why.  The little bobbles really do look like little snowballs rolling down a hill.

Our new block comes with not three new videos.  First, let’s look at Amy’s tutorial on the method of making bobbles called for in the pattern.

Next, knitting backwards!  This is something I’ve always wanted to learn.  So much less time-consuming than turning your work for short rows.

Finally, a new stitch!  The SSP (slip, slip, purl) method of decrease is used because the lace is worked on every row, not just RS rows. While p2tog is worked on WS rows in place of k2tog, ssp is worked in place of ssk on WS rows. The ssp is left-leaning when viewed from the RS, just like ssk.


That’s it for this round, but we’ll be back in two more weeks with more bobbles!

Happy knitting!

Afghan Knitalong – Block Sixteen

Block Sixteen is live!

16 Miter Mayhem with title blog

Building on our last mitered block,  Miter Mayhem takes the opposite approach from Block 15.  Instead of increasing outward, we’re decreasing at two corners to create the U shape.

Amy Gunderson uses a centered decrease to keep the corners nice and tidy.  Here, she demonstrates how to “slip 1, k2tog, psso.”

I like the idea of using the removable stitch marker to keep track of where your decrease should be worked.  Unfortunately, my stitch markers tend to disappear to wherever second socks go, so I often find myself short one when I need it.  Well, if I must visit my local yarn store again, I suppose I must!

Please do share your thoughts and work with us here, on Facebook, or in our Ravelry group.    We’ll be back in a couple of weeks with a new block and a new technique!

Afghan Knitalong – Block Fifteen

Block Fifteen is live!

15 Mighty Miter with title_blogBehold The Mighty Miter!

This block starts in one corner and increases along the center line, using the backward loop cast-on to grow outward.  For many of us, the backward loop was the first cast-on that we learned.  Others picked it up in the course of making buttonholes or adding stitches at the underarm of a sleeve.

If you haven’t learned it yet, here’s your chance.  Amy shows us how!

Easy as pie, eh?
The center stitch in this block is slipped on every right side row, creating that clean elongated line running through the center of the block.  It’s a nice touch for this diagonal block.

As always, you can share your thoughts and work with us here, on Facebook, or in our Ravelry group.    Check back in two weeks for a new block that builds on this technique!


Afghan Knitalong – Block Fourteen

Block Fourteen is live!

14 Well Plaid with title_blog

Block two of our month of plaid!  Where our last block used stripes raised above the fabric of the square, Block Fourteen “Well Plaid”  creates lines of color flush with the rest of the square.

Amy Gunderson achieves this by working one vertical stitch in the row in reverse stockinette, then applying the contrasting color to the purled stitch using a crochet hook.  It’s rather ingenious.  The video shows how it’s achieved.

Neat, eh?  It’s a bit like picking up one laddered stitch, except with an entirely new color of yarn.  I love the way this looks!

As always, you can share your thoughts and work with us here, on Facebook, or in our Ravelry group.    Check back in two weeks for a new technique and a new block!

AFGHAN KNITALONG – BLOCK THIRTEEN

Block Thirteen is live!

13 Afghan Knitalong Plaid to the Bone

Plaid!  I don’t know why I didn’t think about this as an option, but I love it.  Little squares within the square.

Plaid to the Bone uses elongated stitches to create raised lines that cross the surface of the stitch and give texture.  Amy shows us how that works.


Just a few extra wraps, dropped on subsequent rows.  Easy peasy.  I must confess to having gotten a little sneak at the next block, which is also a variation on plaid, and I can barely wait for everyone else to see it too.

As always, you can share your blocks (and feedback) with us here, on Facebook, or in our Ravelry group.    Check back in two weeks for the next block in the series!