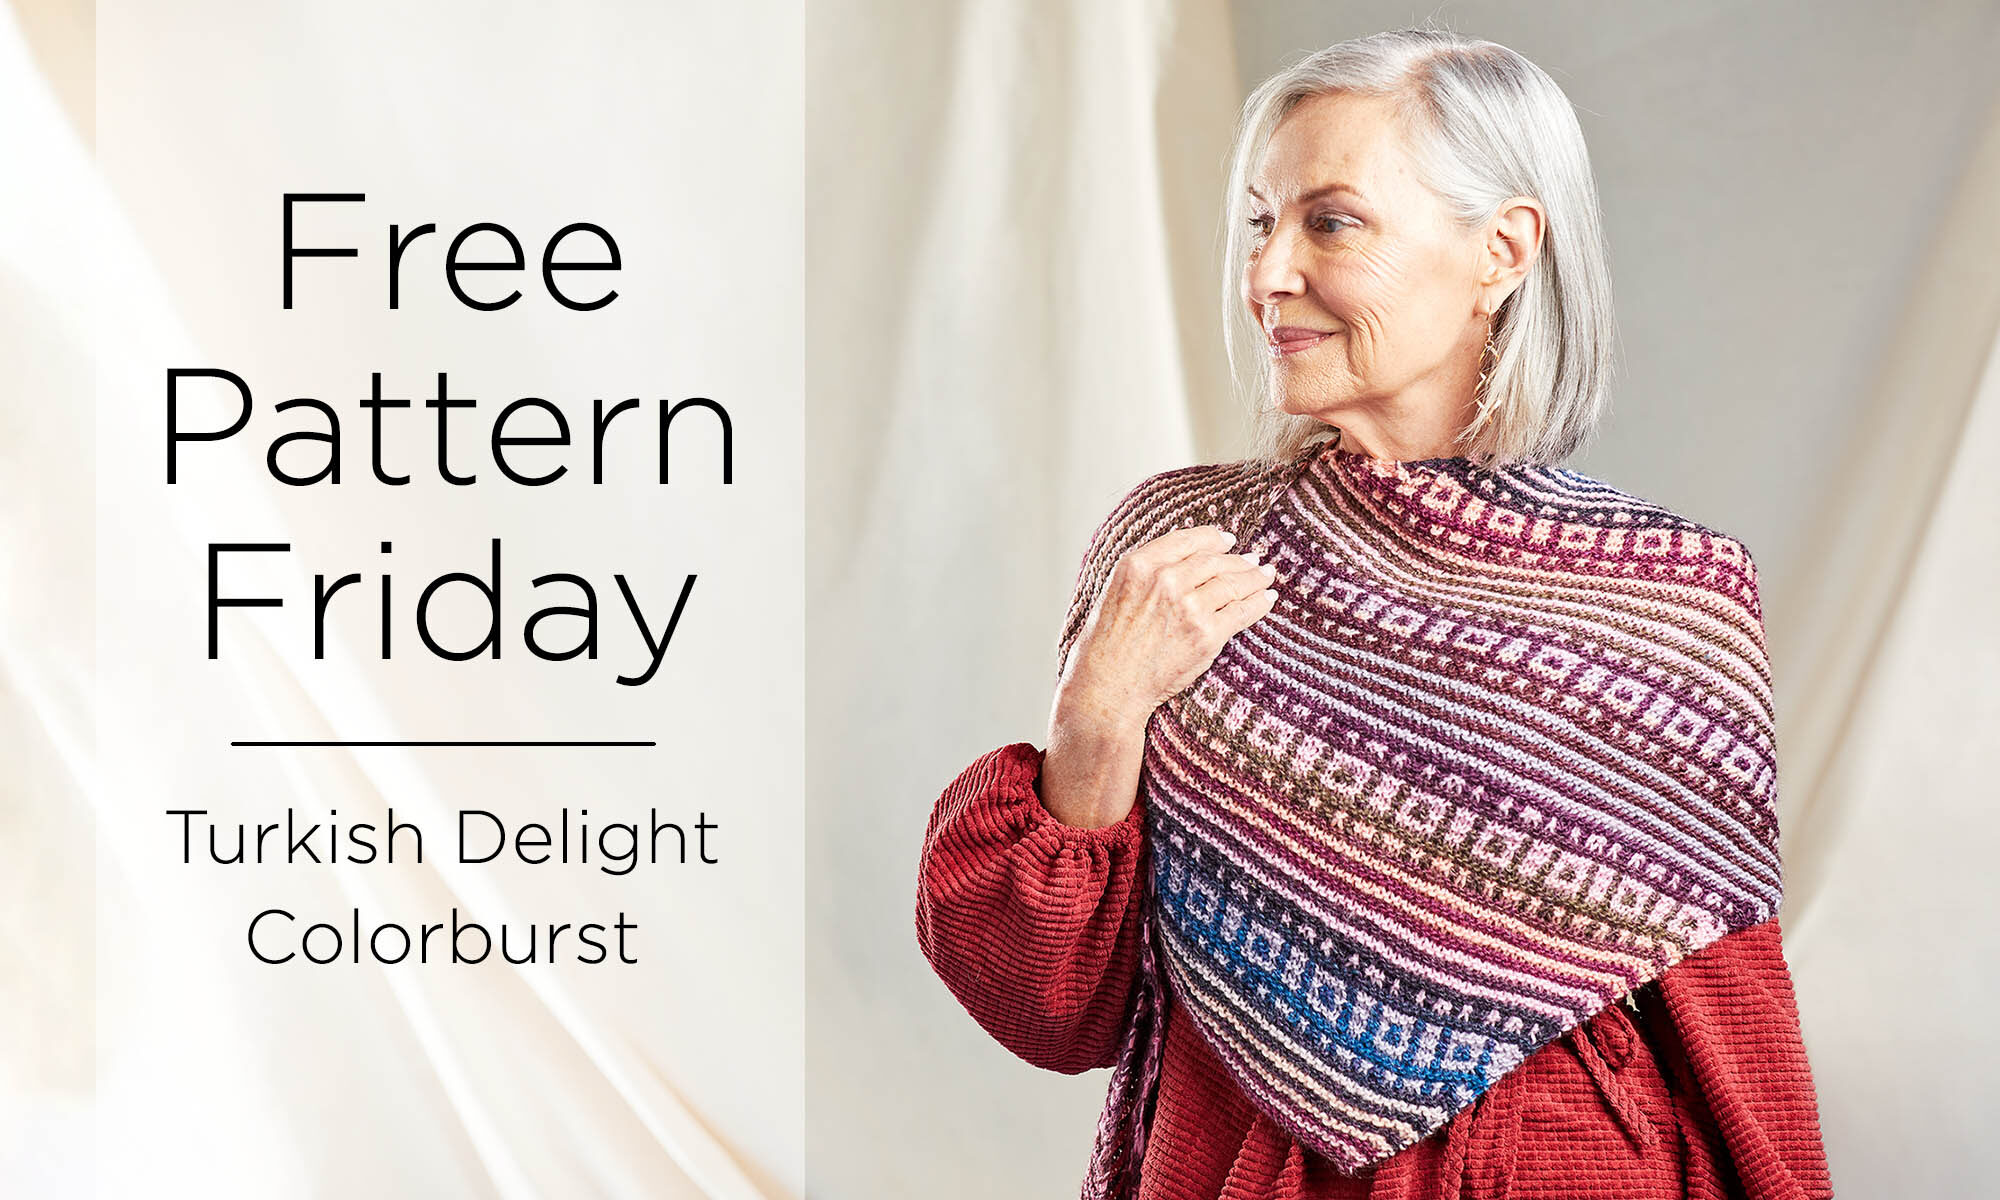
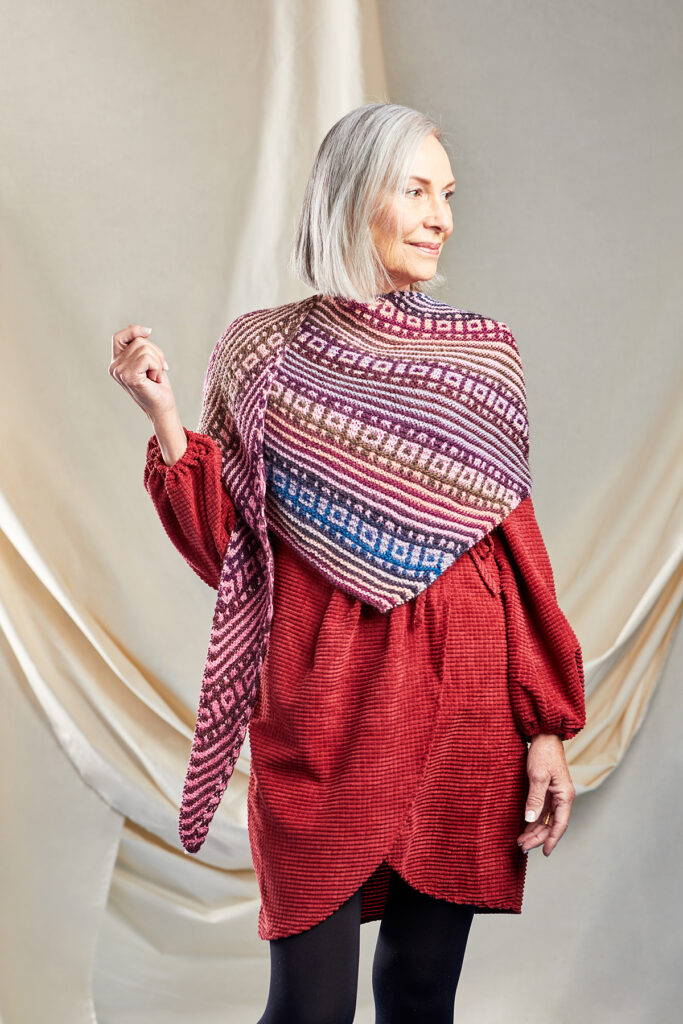
Bright but not saccarine-sweet, this is a design that marries sophistication with whimsy.
Winter doesn’t have to be drab and gray. Today’s free pattern proves that!
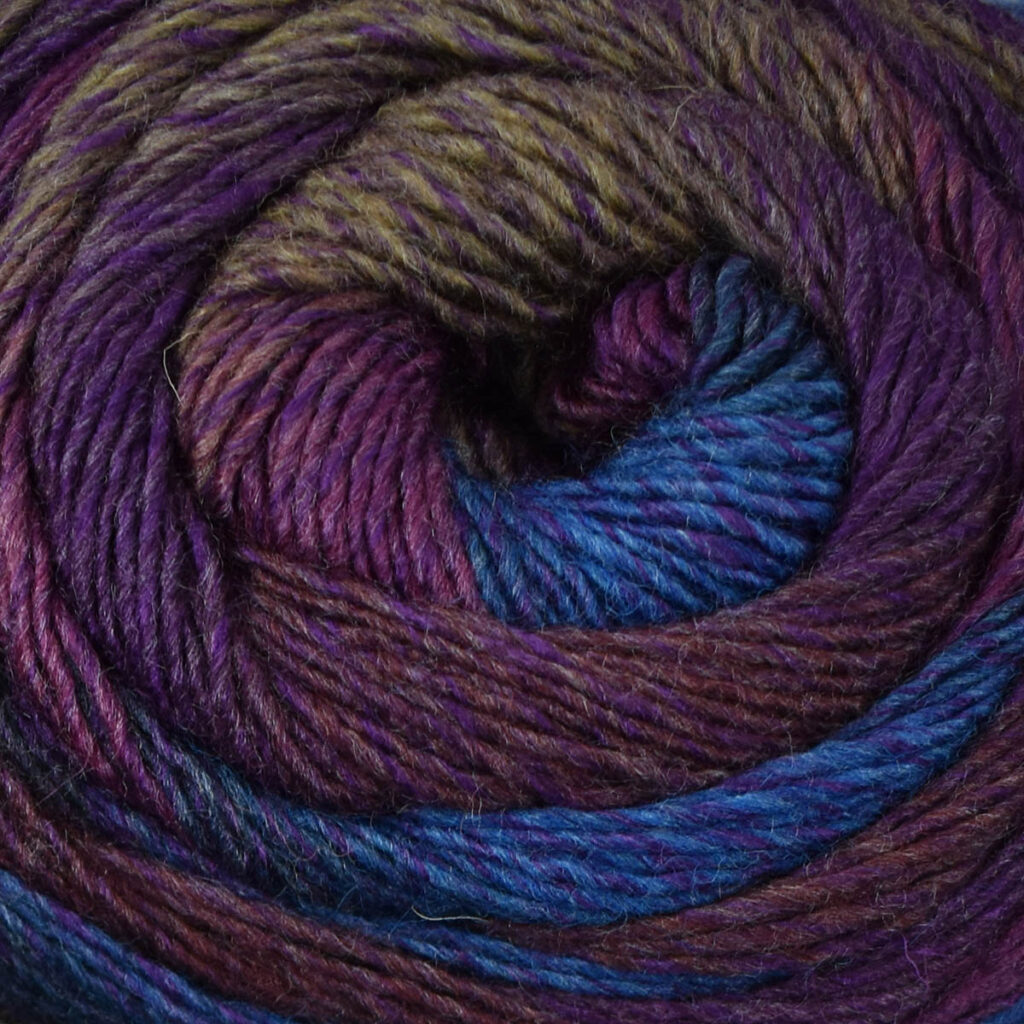
Colorburst color 119 Bursa
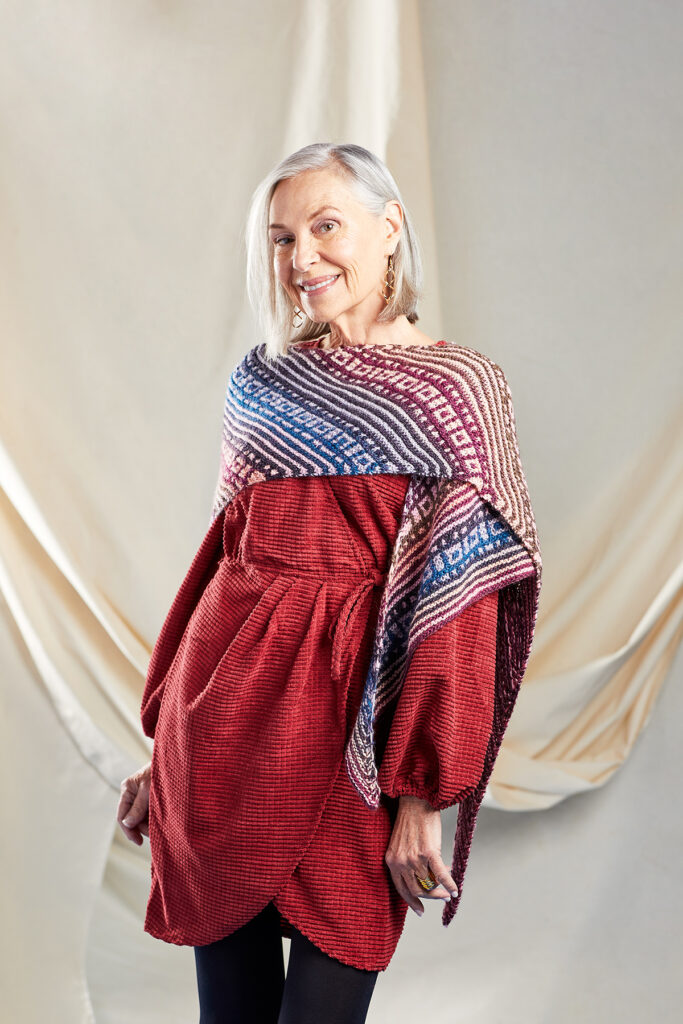
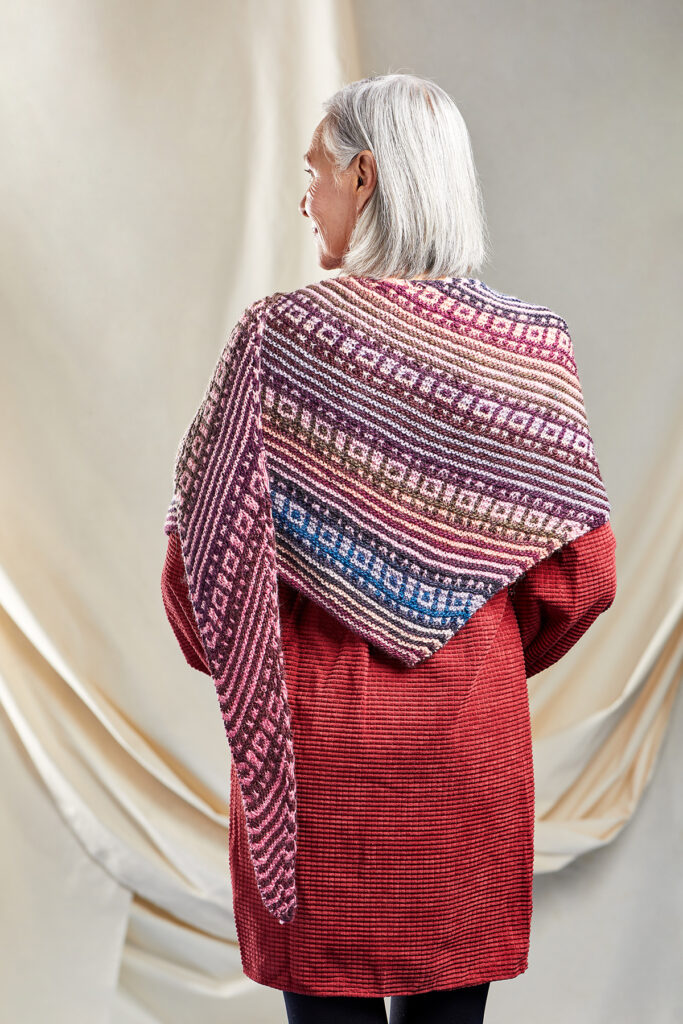
Colorburst’s big, beautiful 660-yard “beehive” style balls make it easy to create this design with just one ball of each colorway. Designer Rachel Brockman alternated two different colorsto give maximum impact. She chose one light tone – 112 Romance, and one dark – 119 Bursa, for strong contrast between the stripes.
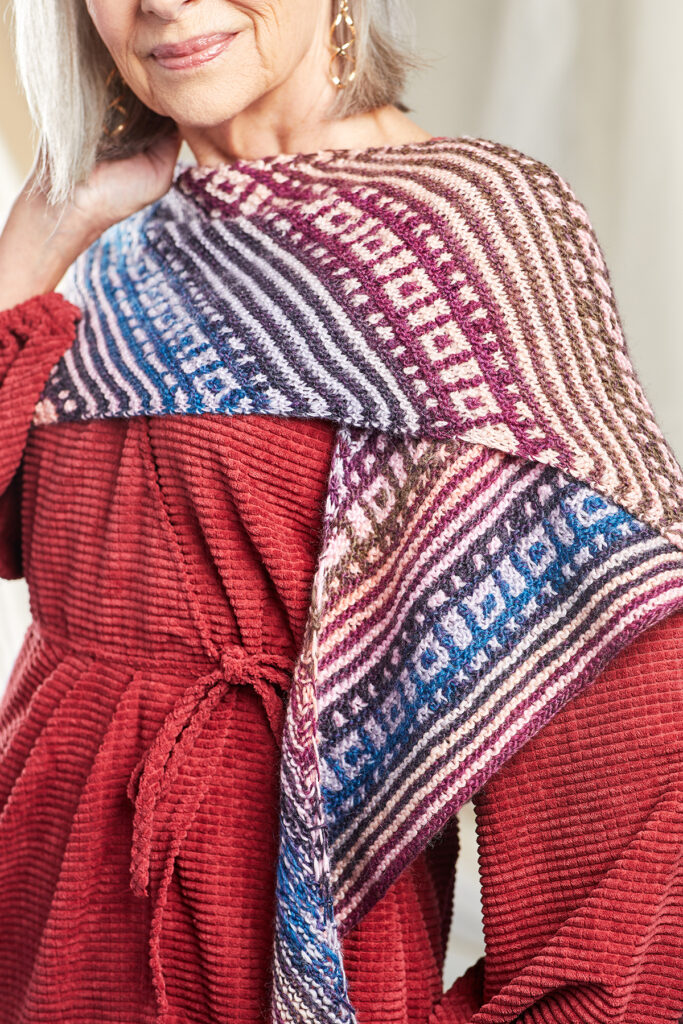
Beautiful geometry and rhythm, offset by gentle changes within the shades.
Simple stripes are broken by mosaic-knit squares, the “Turkish Delight” confection that gives the shawl its name. They add interest to an already fascinating shawl!
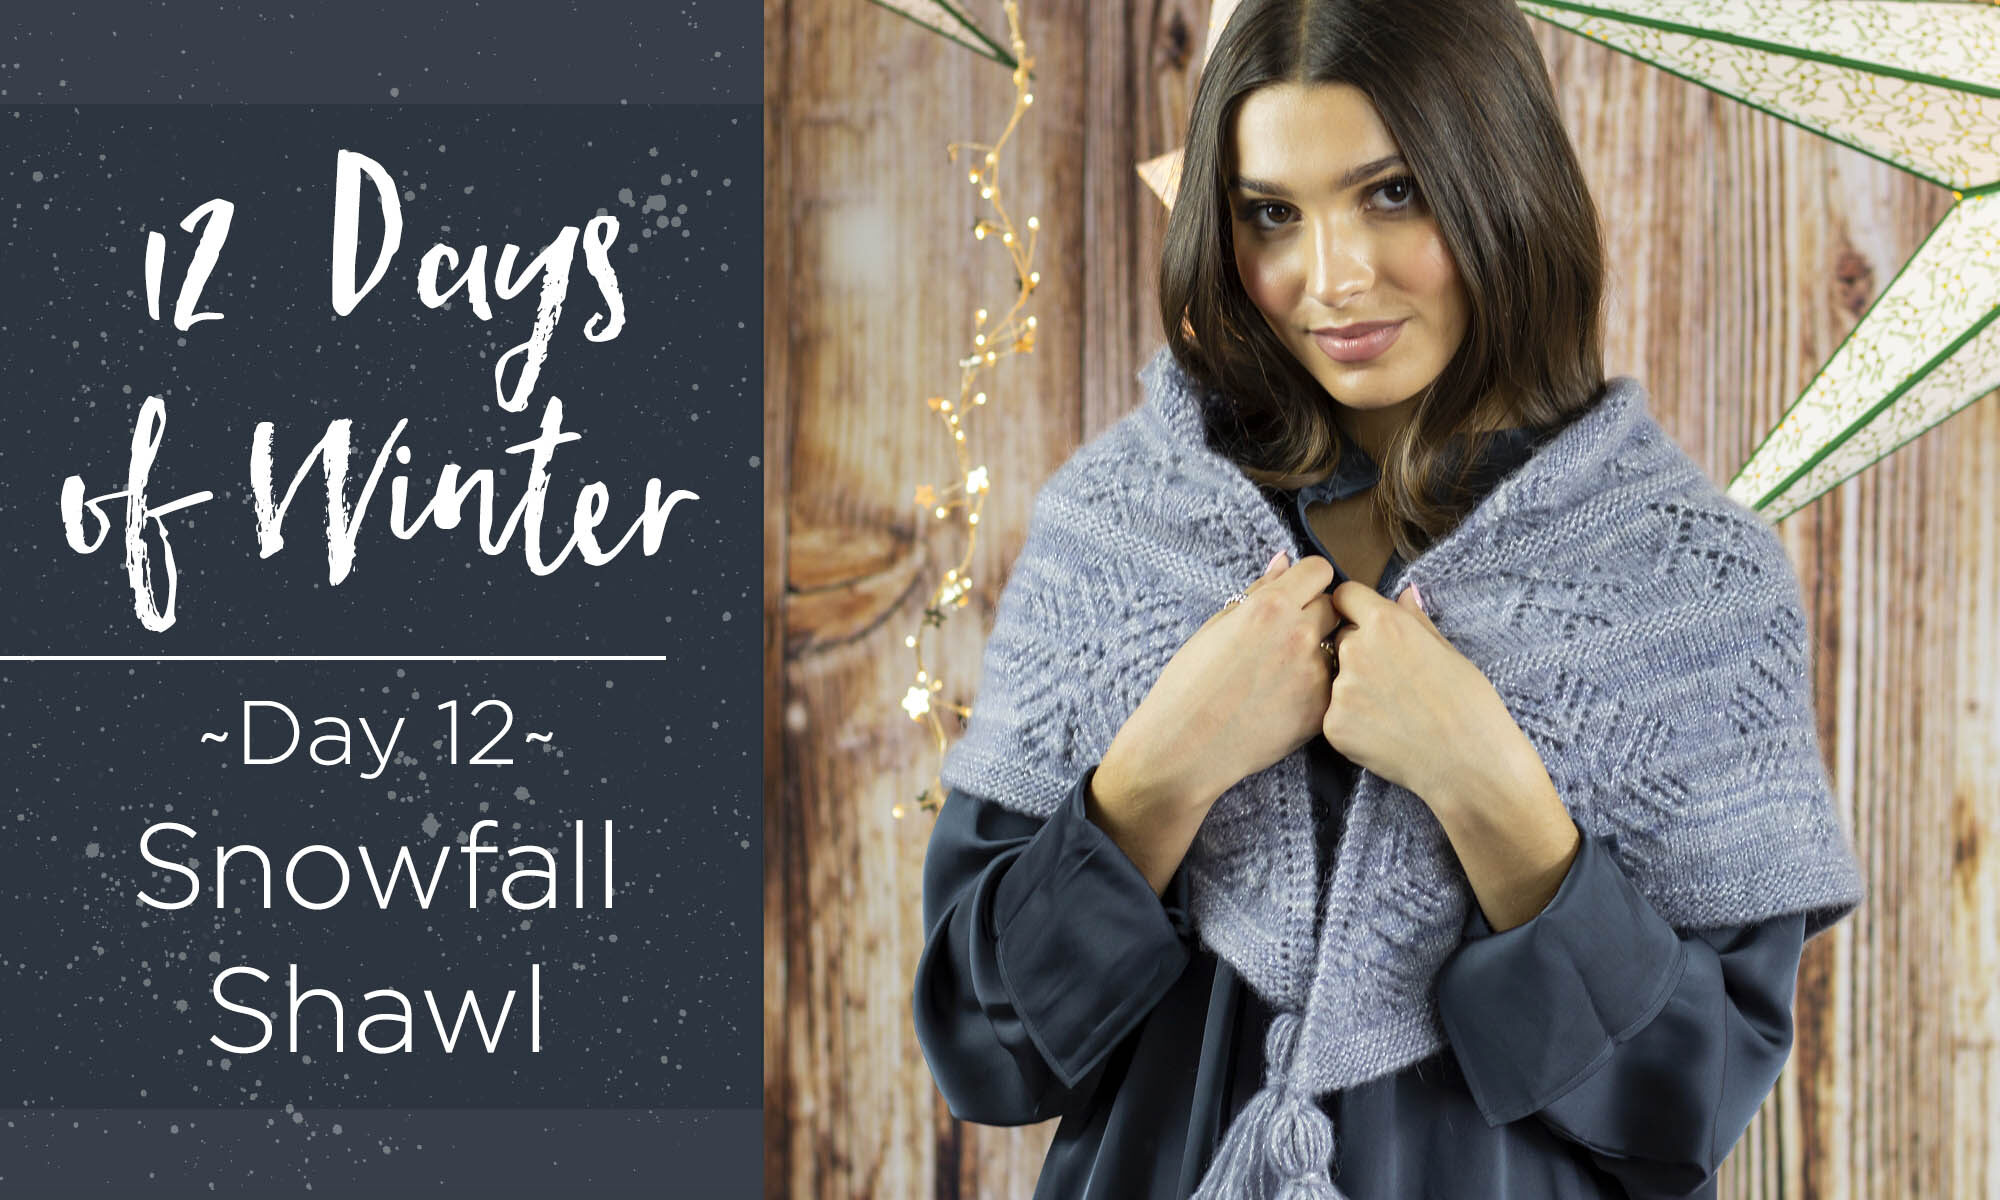
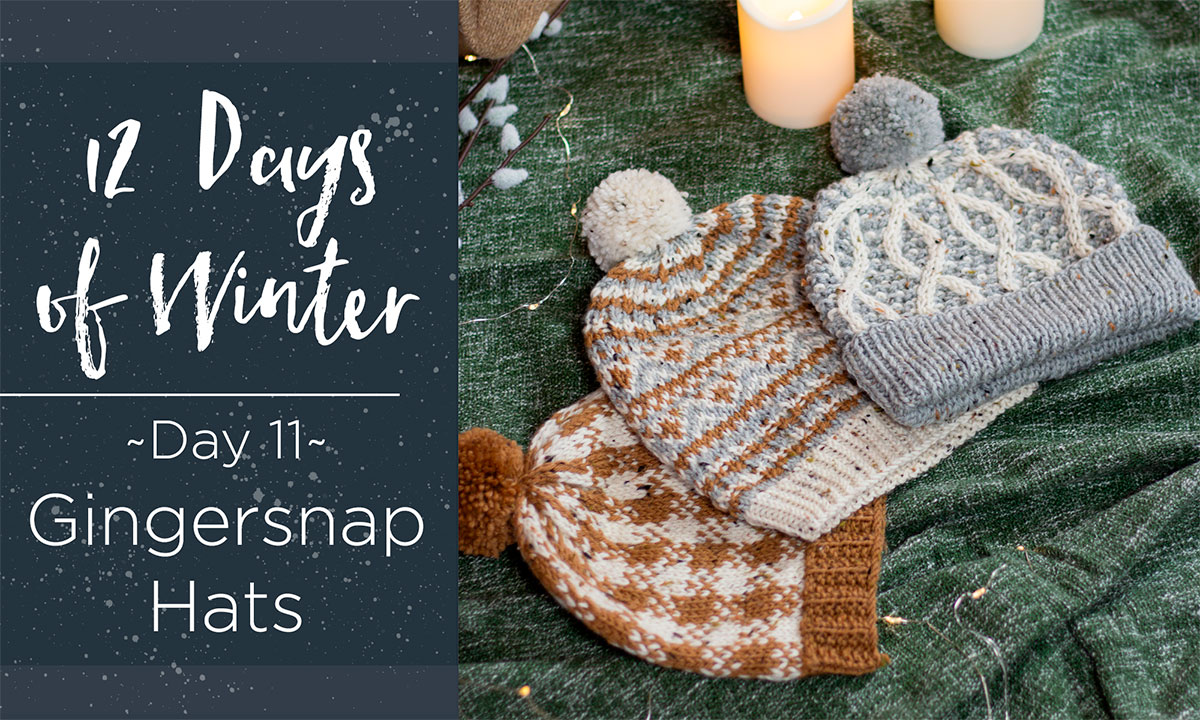
This is part 12 in a 12 part series highlighting designs from our 12 Days of Winter, series 5 Edition.
Can you believe it’s already December 12th, and this is our final blog post highlighting our 12 Days of Winter Kit collection? Time flies when you’re having fun! Some of these projects are short and sweet, so I’m sure you can tackle them as a last-minute gift that’s handmade with love, such as Marshmallow, the Sleigh Ride Set, or the Gingersnap Hats. Or, as a time saver and perfect gift for fellow fiber artists – simply pick up a kit and give it as is!
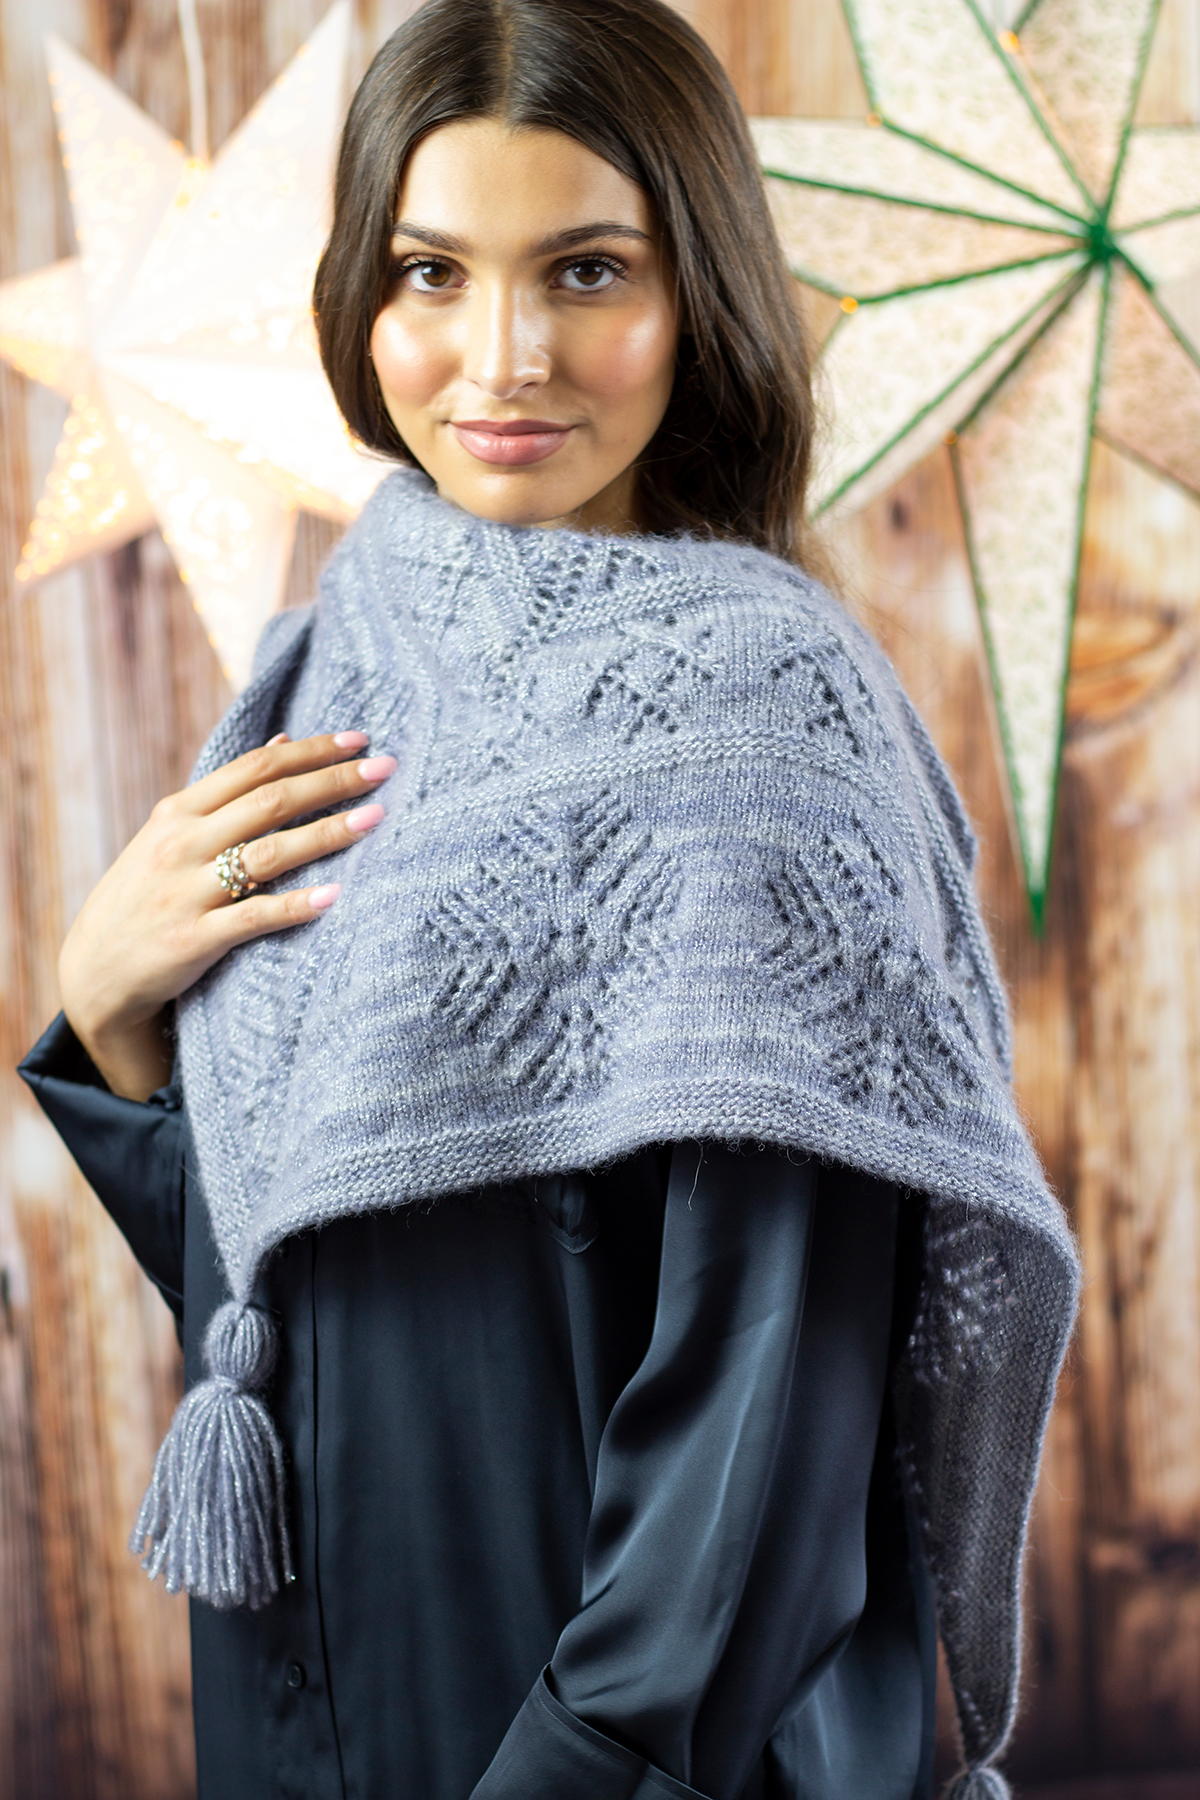
Today, I’m going to highlight the final accessory in the collection: the Snowfall Shawl. I shouldn’t choose favorites, and this is, in my opinion, perhaps our best ever 12 Days of Winter Collection (though I say that every year!). Of my own designs, I think I’m most smitten with Snowfall. It’s sparkly, hazy, and features such a lovely lace motif. It’s hard to think of a more perfect shawl for the season!
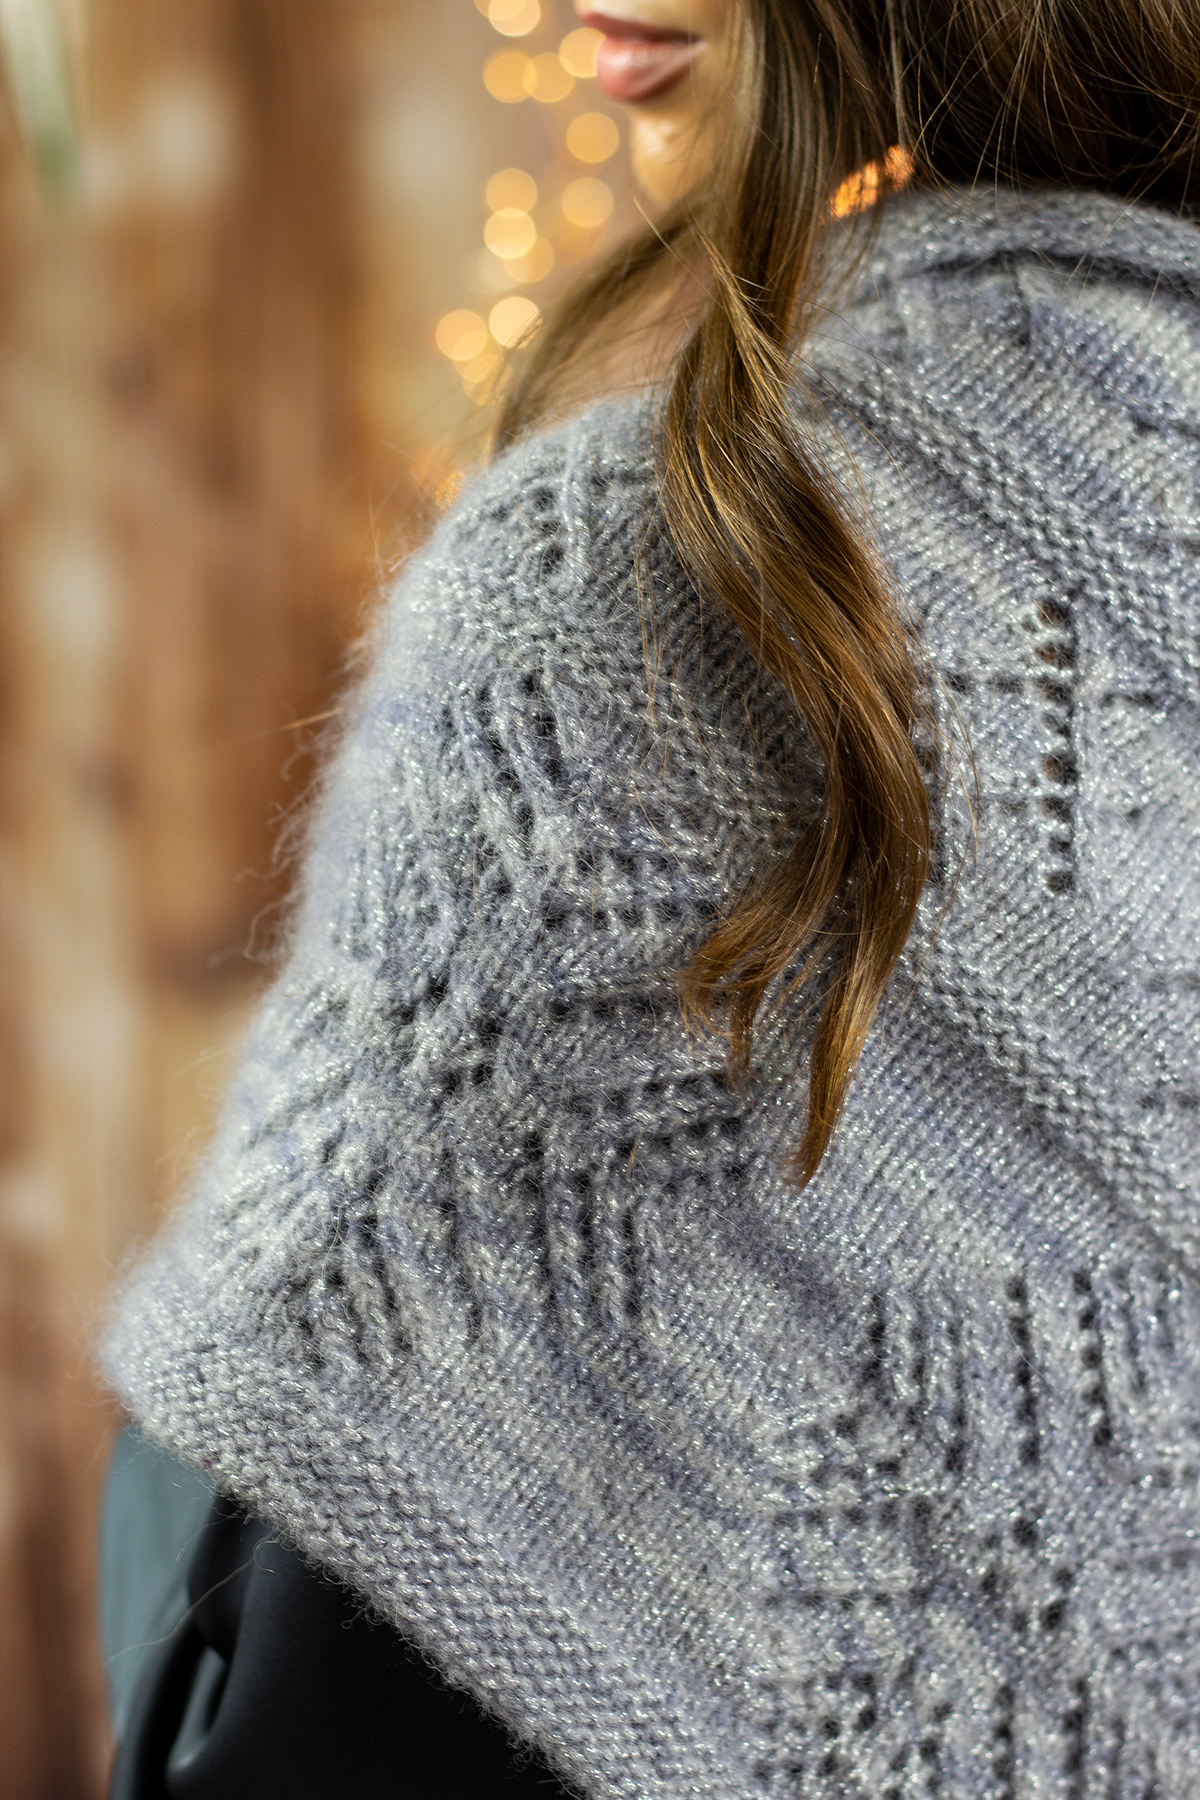
The tonal shades of Noelle and surprisingly crisp stitch definition makes for some truly dreamy lace knitting.
Snowfall is a semi-triangular shawl that’s worked from the top-down. However, unlike your traditional triangular shawl, it starts with a large amount of cast-on stitches to ensure a perfect fit over your neck and shoulders, making it especially easy to style.
You’ll get to indulge in the following techniques for this pattern:
basic decreases
yarnovers
knitting flat
garter stitch
creating tassels
I love styling my shawls with a point at the front in a “bandana” fashion. It keeps them looking modern, fresh, and oh-so-cozy!
For Snowfall, I chose Noelle for the yarn. Noelle is a DK-weight blend of merino wool, baby alpaca, polyester, and nylon. It features a tubular construction, with the softest fibers blown through the tube to create an exquisite halo. The color 301 Elida, used in the pattern, is a tonal grey with a dazzling silver sparkle.
The glimmer of Noelle perfectly complements the crystalline qualities of snowflakes.
Our 12 Days of Winter collections always lean into wintry themes: snow, coniferous trees, delicious holiday treats, and colors that vibe with the season. I really wanted to create an elegant shawl with lacy snowflakes, so I looked to close-up images of the icy natural phenomena.
How beautiful are the ice crystals in snowflakes? I’m inspired to make even more lace patterns that reflect them!
I thought about the different types of snowfall, which is why I opted for both a small and large motif. The upper portion featuring smaller flakes nods to gentle flurries, a sight that always fills me with joy. The final portion of larger, more dramatic snowflakes reminds me of heavy snowfall – the type with large flakes that tempted you to catch them with your tongue as a child. Finally, the tassels that drop down from each tip echo the movement of snow falling from the sky. Oh, how nature is so inspiring and magical!
I hope you’ve enjoyed hearing a bit about my inspiration for the Snowfall Shawl, and that you’ve had fun reading each of our posts over the past two weeks. It’s always such a pleasure to share this collection every year. Our team truly puts our heart into it – it’s a large collection and lots of work. We hope you enjoy every stitch!
Remember, these exclusive kits can be purchased at local yarn store retailers near you. Not in stock at your local shop? Ask them about drop shipping – order through them, and we ship to you! Each kit comes with the pattern, the yarn required to make it, a mini Universal Yarn project bag, and stitch marker. Use our store locator to find your nearest Universal Yarn retailer!
This is part 11 in a 12 part series highlighting designs from the 12 Days of Winter Kit Collection, Series 5.
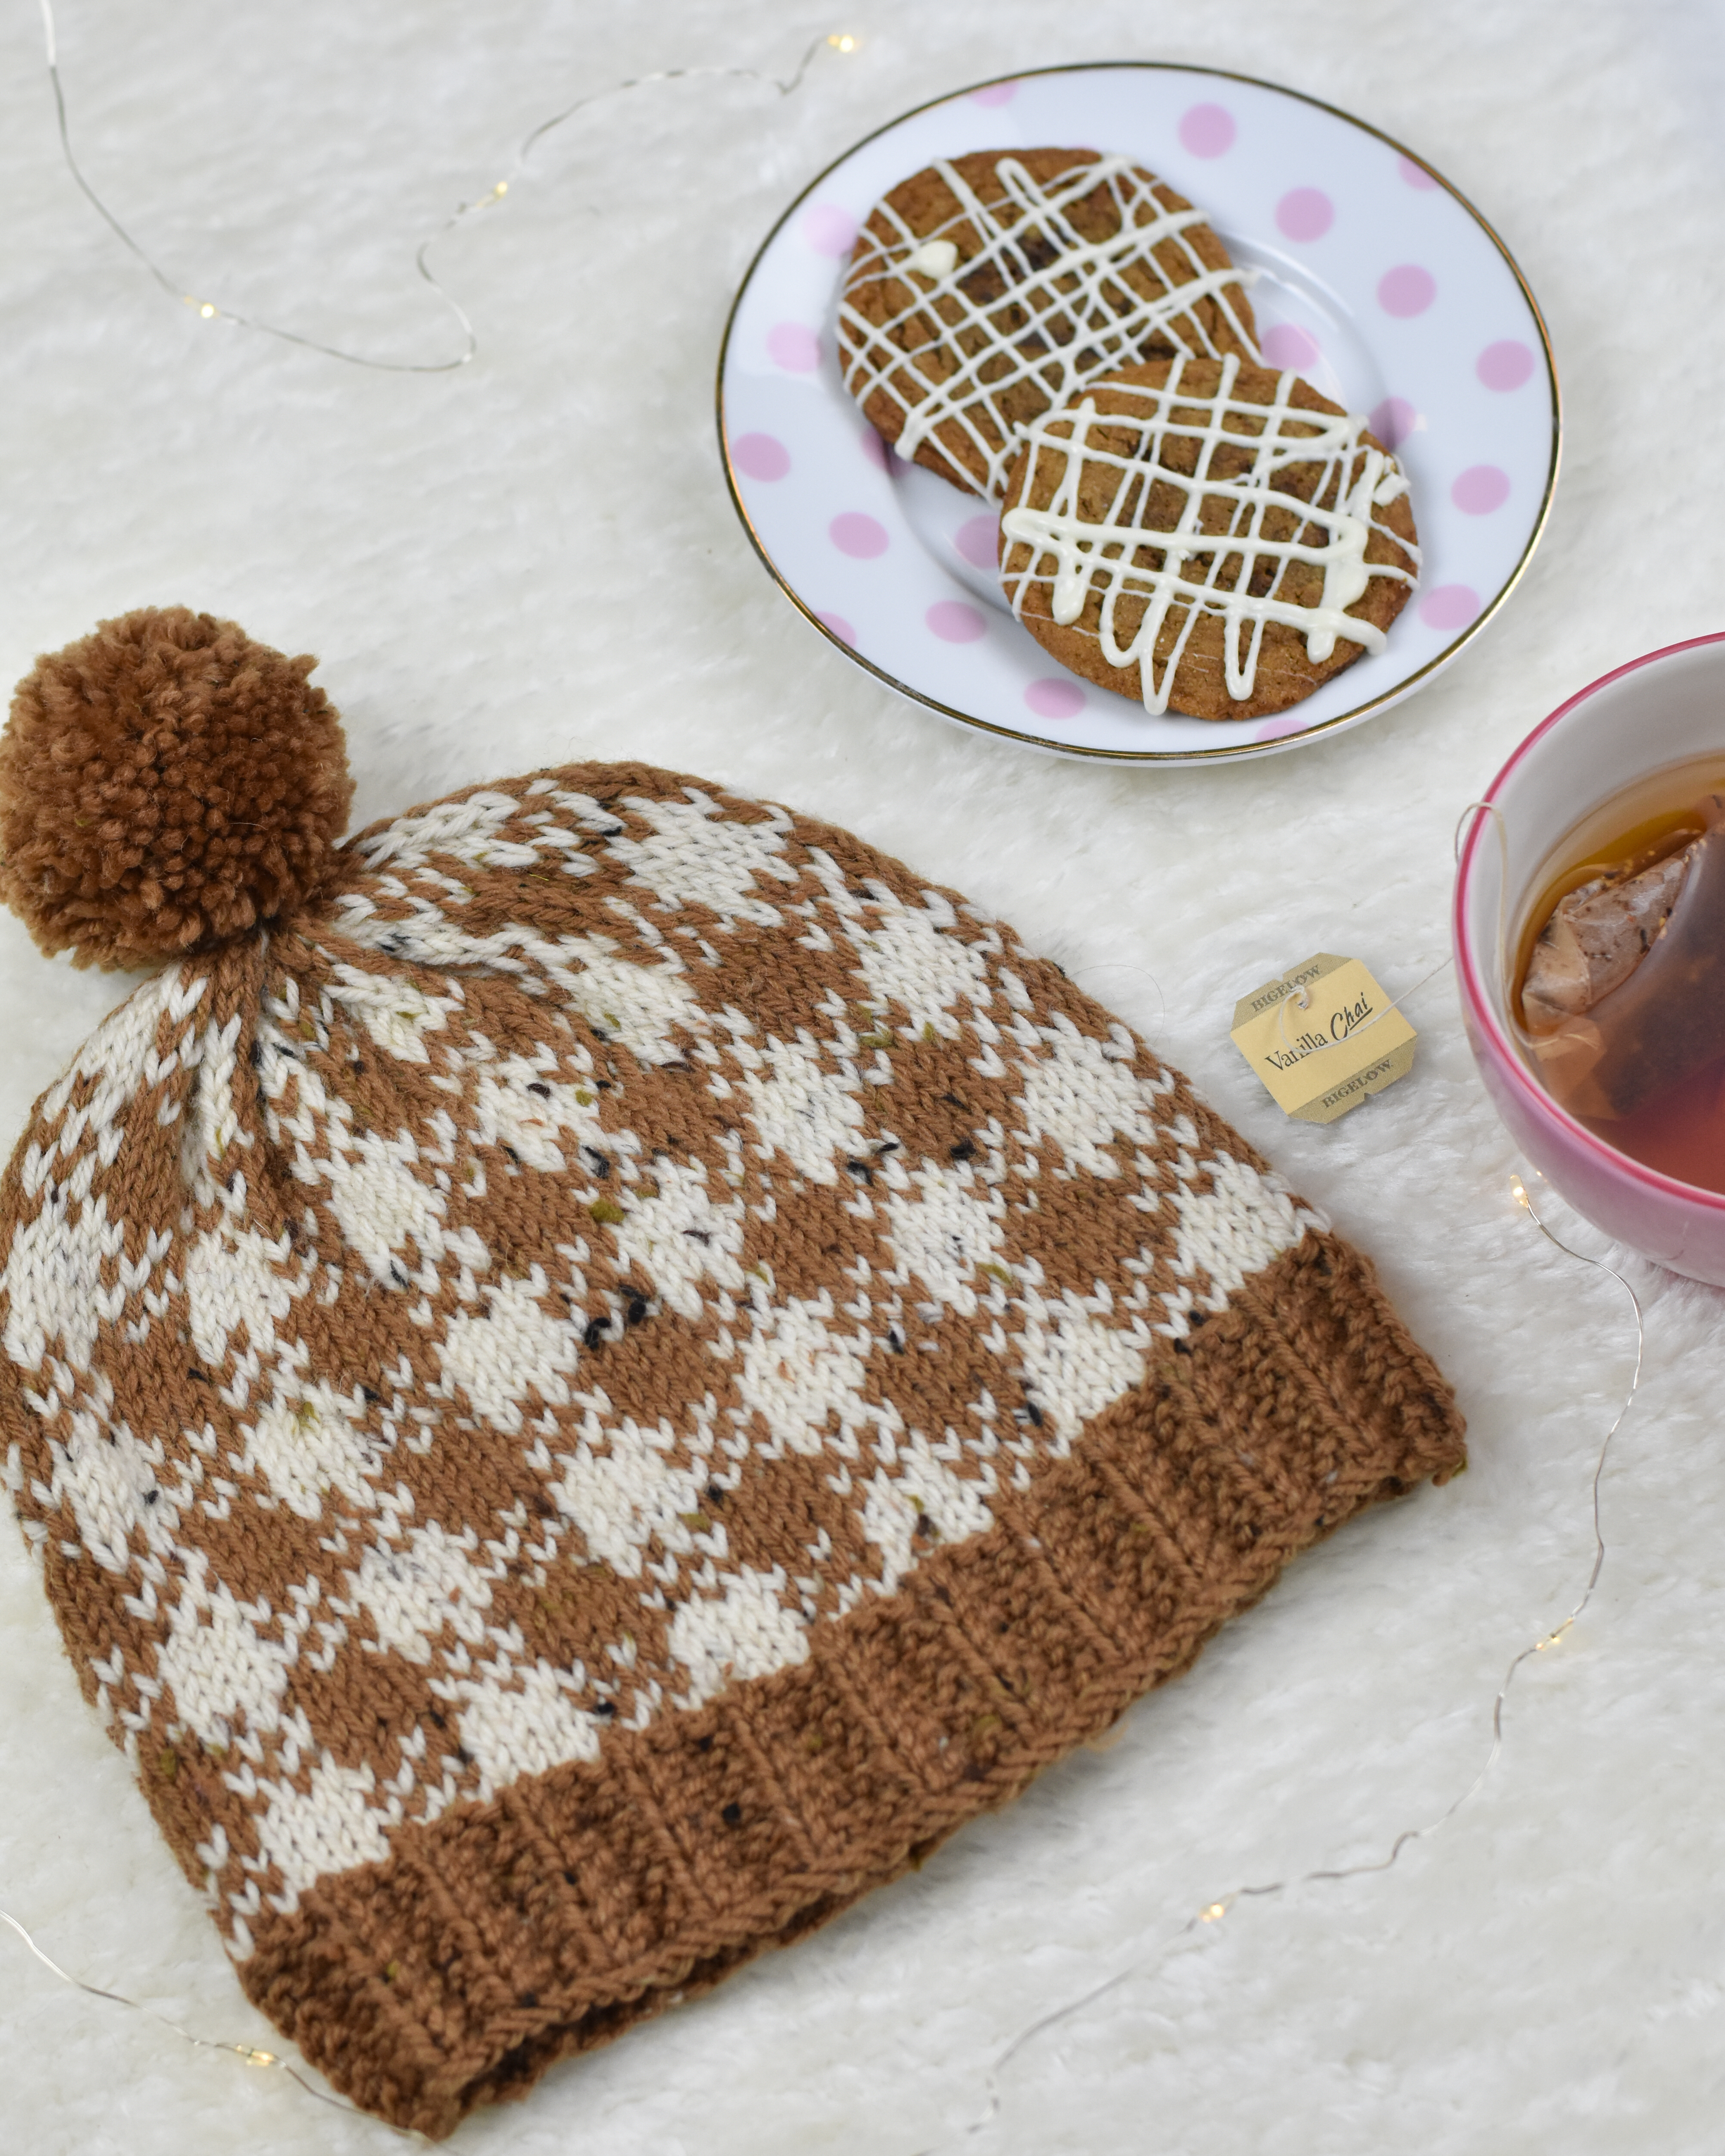
Delicious seasonal foods are one of my favorite things about winter. From mulled wine to pot pies, most of my favorite things to eat are perfect for cold weather. Cookies are a beloved treat of most families, and baking is a great way to spend more quality time with loved ones over the holidays. I absolutely love cooking and baking, I find it to be just as therapeutic and relaxing as knitting. Homemade gingersnap cookies were my inspiration for the Gingersnap Hats kit, knit using Deluxe Worsted Tweed.
Gingersnap Hats -knit using Deluxe Worsted Tweed colors 910 Porcelain, 913 Smoke, and 920 Camel
Techniques you’ll explore in the Gingersnap Hats patterns are
Knitting in the round
Stranded Colorwork
Slipped stitches
Mosaic Knitting
Cables
Making pom poms
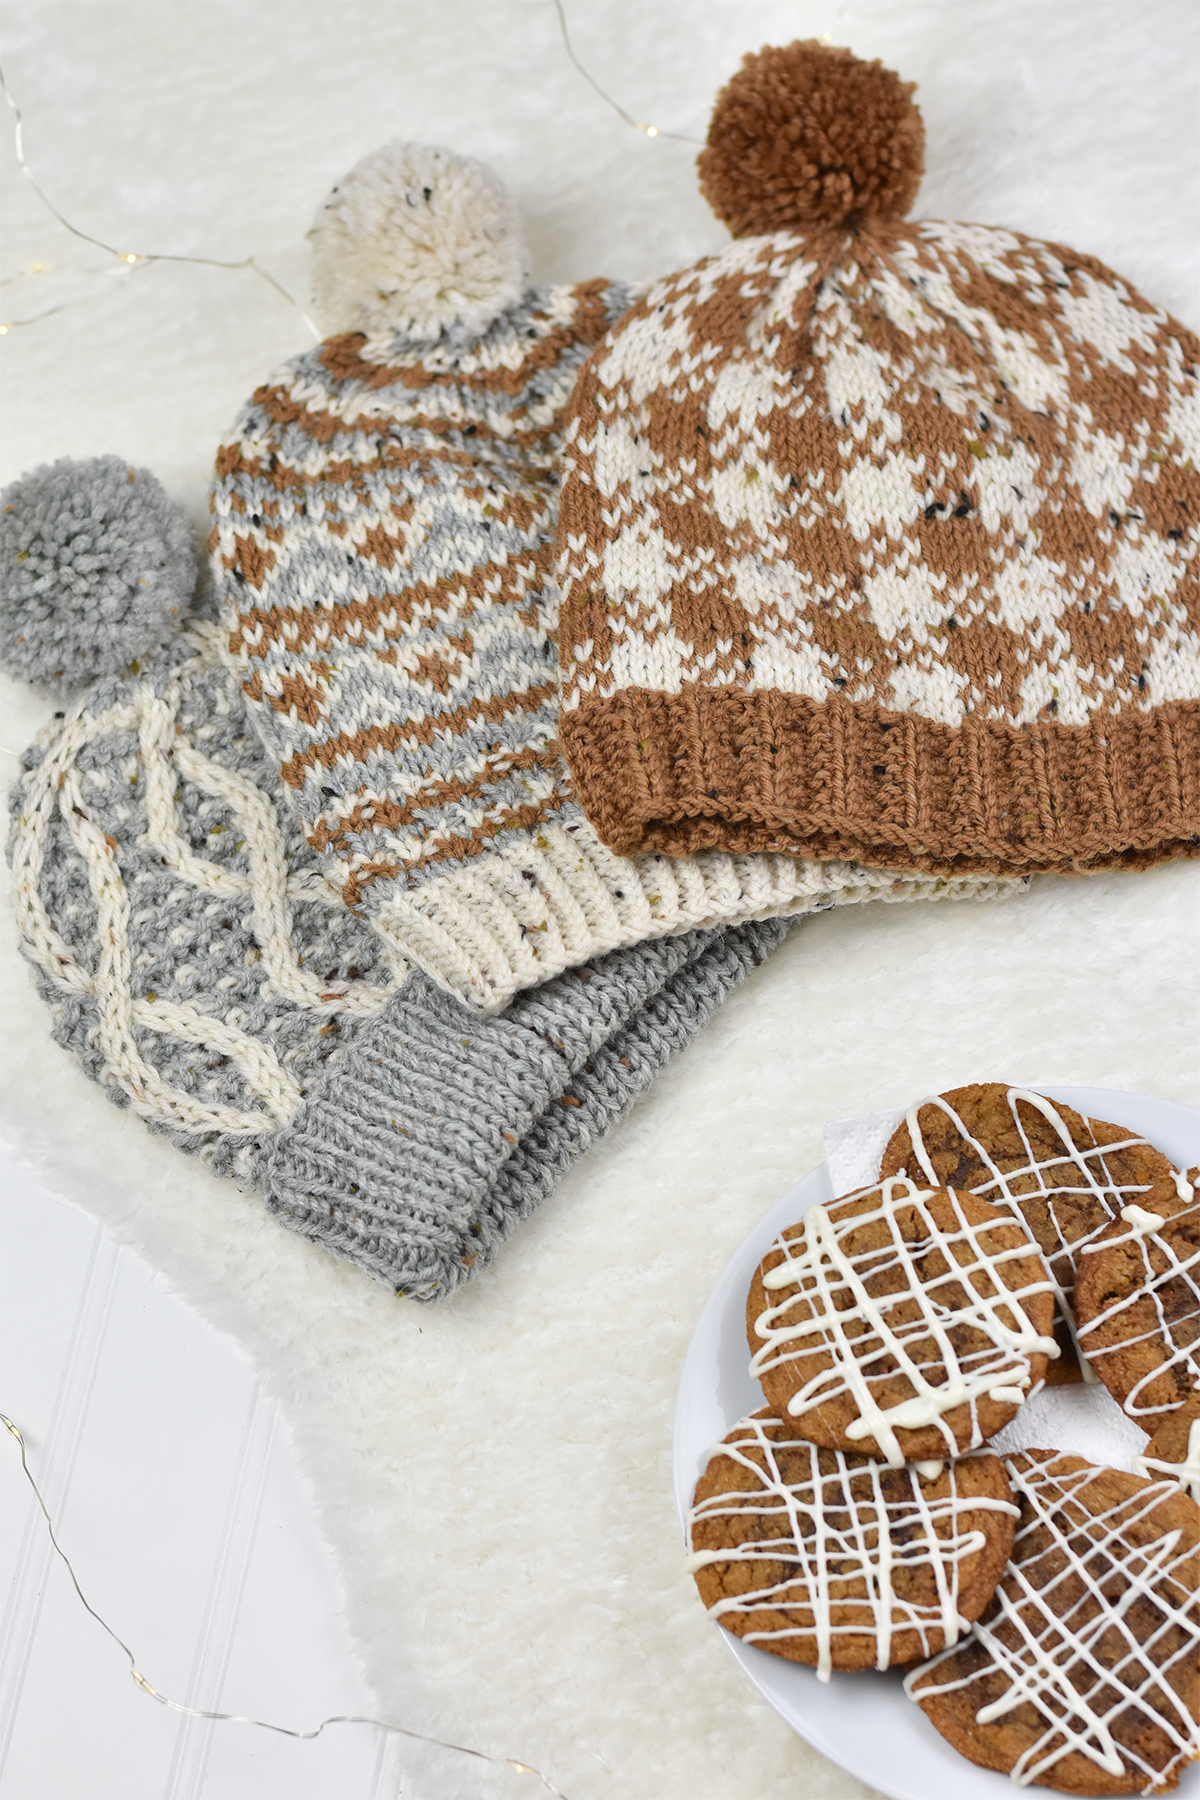
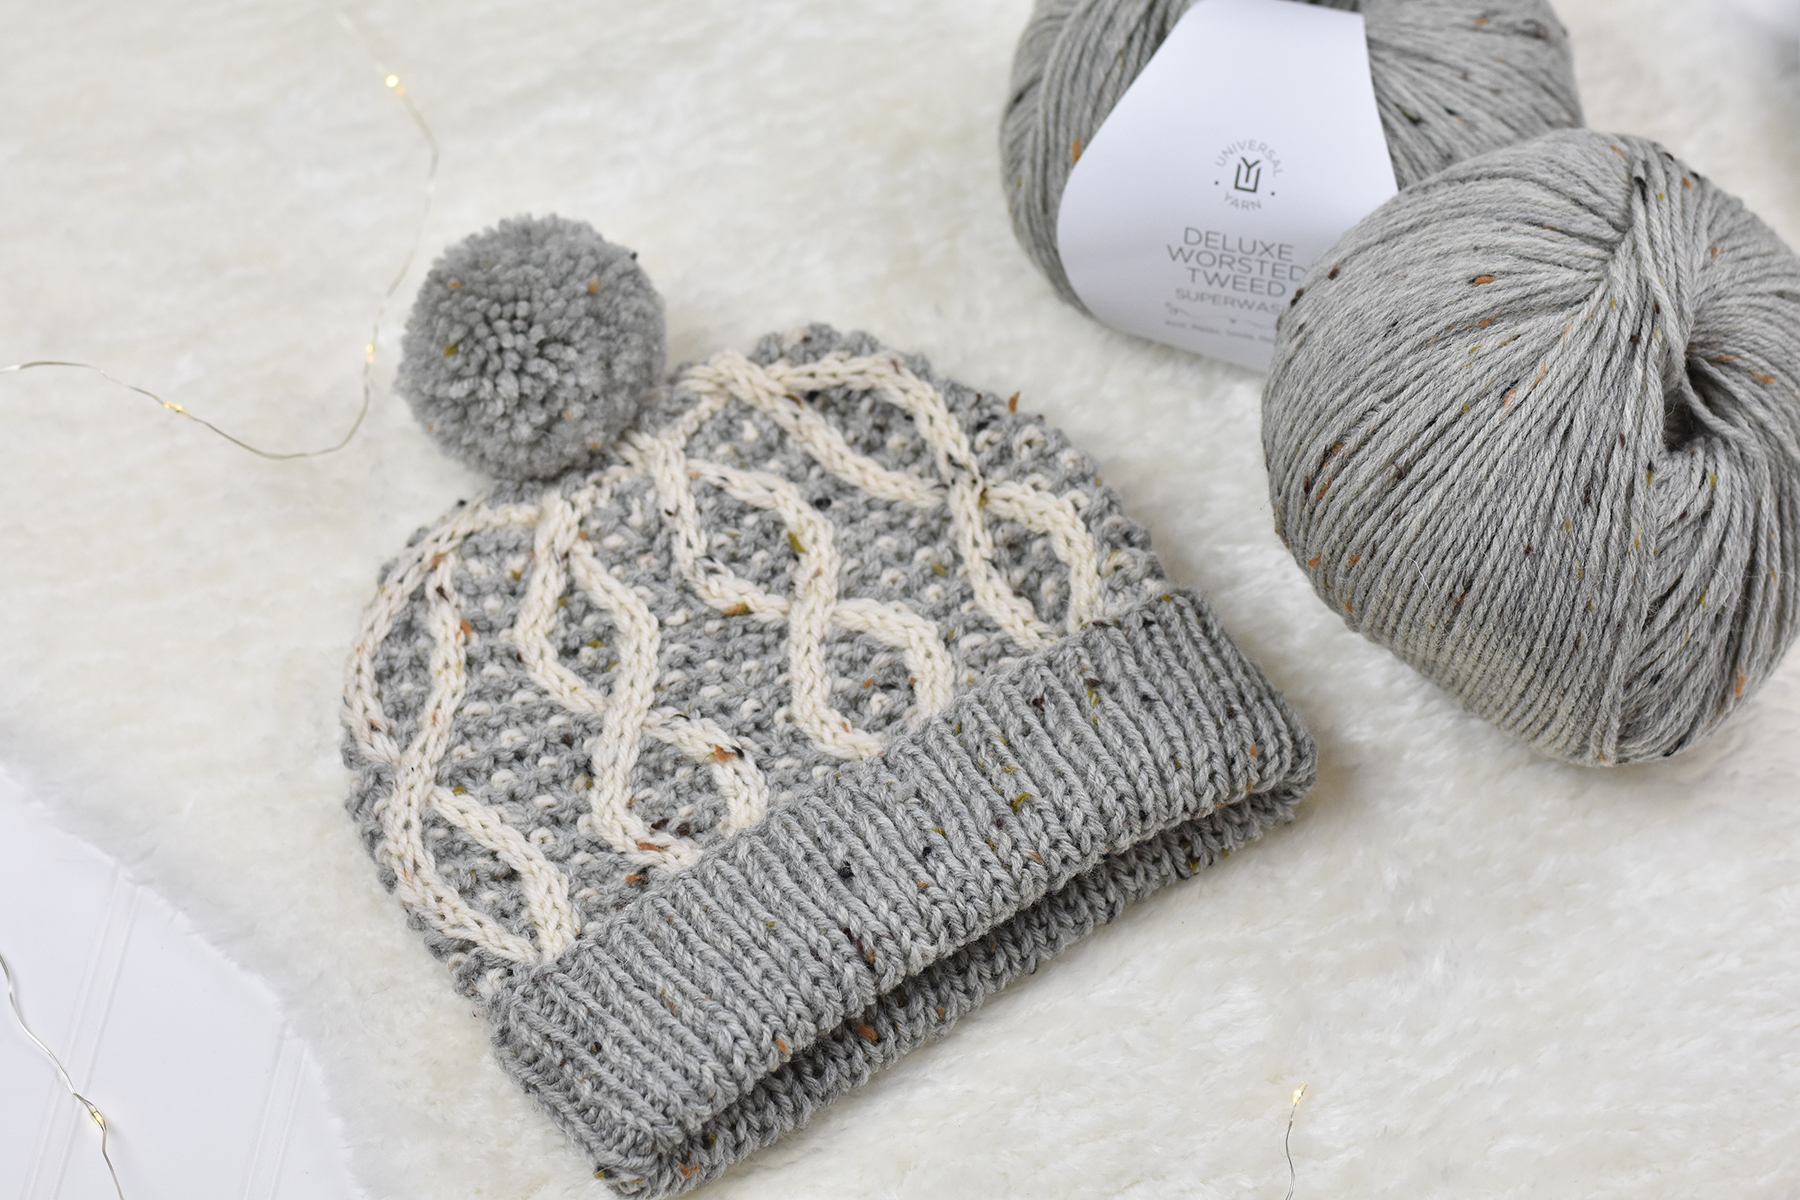
The Gingersnap Hats kit comes with the yarn you need and three hat patterns rolled into one (like a cookie!). One kit will make all three hats- meaning you can keep all three for yourself, or gift a couple to loved ones! Each hat is very different, so you’ll get to explore a wide variety of fun techniques in the whole pattern. I chose colors that felt warm, spicy, and worked well together. I love how the different shades don’t compete with one another in these hats, and each one shows off the tweedy nubs in Deluxe Worsted Tweed so well. This superwash wool based yarn is wonderful to work with and easy to care for.
Two-Color Plaid Hat
The Two-Color Plaid Hat features a broken rib hem in the color 920 Camel. I love ribbing stitches, and enjoyed playing with some different rib stitches for this hat trio. You’ll then work a buffalo style plaid colorwork pattern all over the body of the hat. It easily works into the crown shaping, creating a seamless look. Since this colorwork only uses 2 colors, it has a very bold, graphic look that makes a statement.
Two-Color Cable Hat
For the next part of the Gingersnap Hats, I designed the Two-Color Cable Hat. This hat features some knitting techniques that are really fun when worked together. First, you’ll work a folded brim using the color 913 Smoke, in a classic K1, P1 rib stitch. Then, you’ll immediately begin working the mosaic two-color cable texture. This type of knitting uses slipped stitches in one color and knit stitches in another to achieve the final texture. You’ll also work cables into the mosaic pattern. Although this may sound intimidating, you’ll only be using one color per row, making it easy to tackle! Mosaic knitting has a unique process and end-result appearance that you’ll love once you get the hang of it.
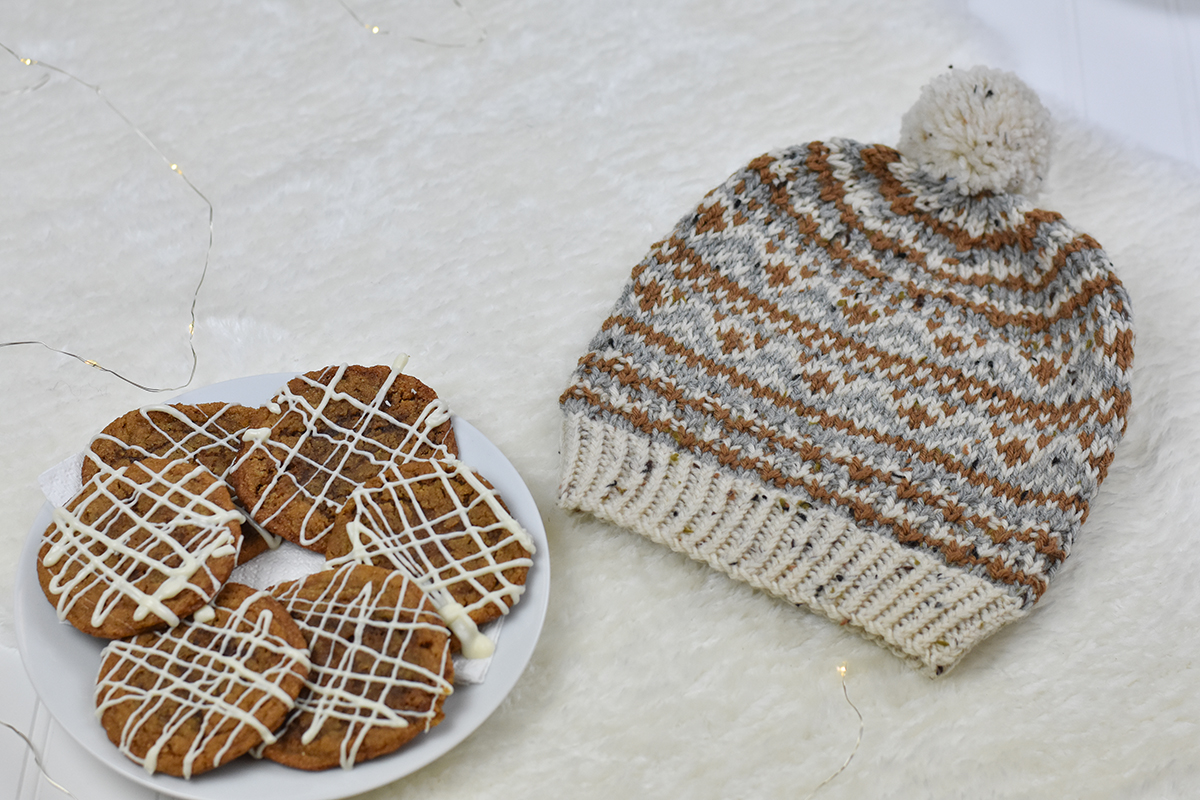
The Three-Color hat
The final hat in the trio is the Three-Color Hat. First, you’ll work a twisted rib hem (my favorite), then, you’ll use all three colors for a slipped stitch tweed-like pattern. From there, you’ll transition into the stranded colorwork section of the hat. This hat uses all three colors, so be extra mindful of your float tension here, and change needle sizes as indicated in the pattern. For the crown shaping, we return to the rhythmic tweed texture. Each of these hats is adorned with a pom pom that matches the color of the ribbing. So cute!
Deeeee-licious
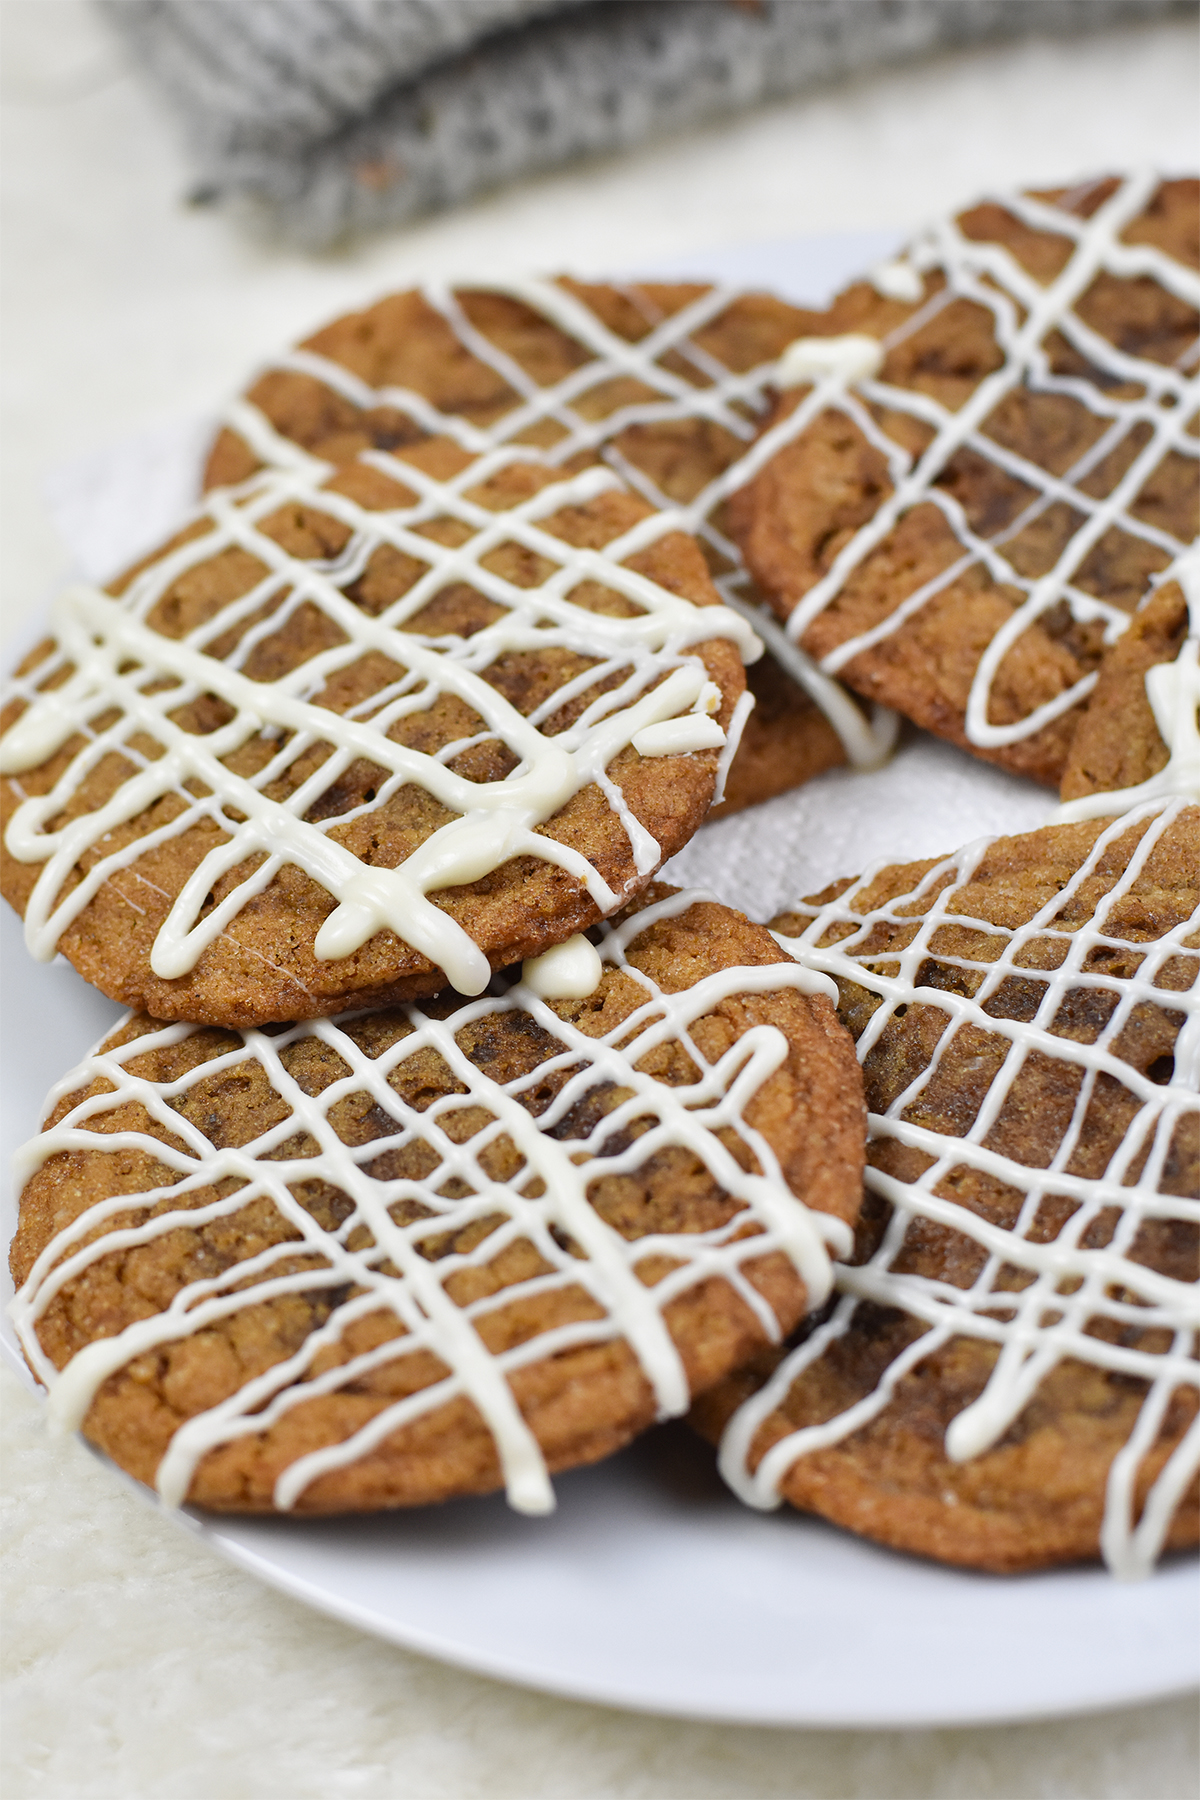
For today’s post, I wanted to share a delicious recipe for homemade ginger cookies, which inspired the Gingersnap Hats. These cookies are soft, chewy, full of spice, and drizzled with white chocolate. If you need encouragement for baking, the office staff ate all of these cookies in about 10 minutes after I finished taking these photos!
For the cookies you will need:
1 cup of sugar
3/4 cup of shortening or butter (your preference)
1/4 cup molasses
1 egg
2 1/4 cups of all purpose baking flour
2 teaspoons of baking soda
1 teaspoon ground ginger
1 1/4 teaspoon ground cinnamon
1/2 teaspoon ground nutmeg
1/2 teaspoon salt
brown sugar, cinnamon, and white sugar blend for rolling cookies before baking
white chocolate for drizzling (I like the Ghirardelli melting wafers)
How to make cookies
Combine the sugar, molasses, shortening or butter, and egg in a large mixing bowl. Using an electric mixer, beat on medium until mixture becomes light and fluffy.
Add in your dry ingredients, and use a large mixing spoon or spatula and stir to combine well.
Once well combined, cover with plastic wrap and chill in the fridge. Minimum: 1 hour
While dough is chilling, preheat oven to 350 degrees fahrenheit.
Line 2 baking sheets with parchment paper.
Pour cinnamon, brown, and white sugar mix onto a plate.
Using a cookie scoop or spoon, scoop out and roll dough into 1″ balls. Roll the dough in the sugar mixture to give a light all-over coating.
Place approx 12 cookies per sheet, leaving space between each cookie. (Recipe makes 24-28 cookies depending on size)
Bake the cookies for 10 minutes, or until they rise and fall in the oven (to retain chewy soft texture).
Remove from oven and place sheet of parchment paper with cookies on counter to cool completely. If you have wire cooling racks, you may also use these. I like leaving the parchment paper underneath for easy cleanup after drizzling chocolate!
Once the cookies are completely cool, heat your white chocolate per the package instructions.
Using a small sandwich bag, spoon the liquid white chocolate into the bag, and ziplock closed. Cut a very small hole in one corner of the bag.
Use a zig-zag motion to drizzle the white chocolate over the cookies. Make a second pass in the opposite direction.
Allow to cool completely, until the chocolate becomes hard. enjoy!!!
This looks exactly like a perfect winter’s night
Knitting/crochet and baking are two hobbies that go wonderfully together. Make your yummy treats, then relax with your WIP while you get to enjoy them! The ginger cookies pair well with a spiced tea like this vanilla chai. Tell us in the comments: what is your favorite holiday treat to enjoy while you knit or crochet?
Remember, the Gingersnap Hats and our other exclusive 12 Days of Winter kits can be purchased at local yarn store retailers near you. Not in stock at your local shop? Ask them about drop shipping – order through them, and we ship to you! Each kit comes with the pattern, the yarn required to make it, a mini Universal Yarn project bag, and stitch marker. Use our store locator to find your nearest Universal Yarn retailer!
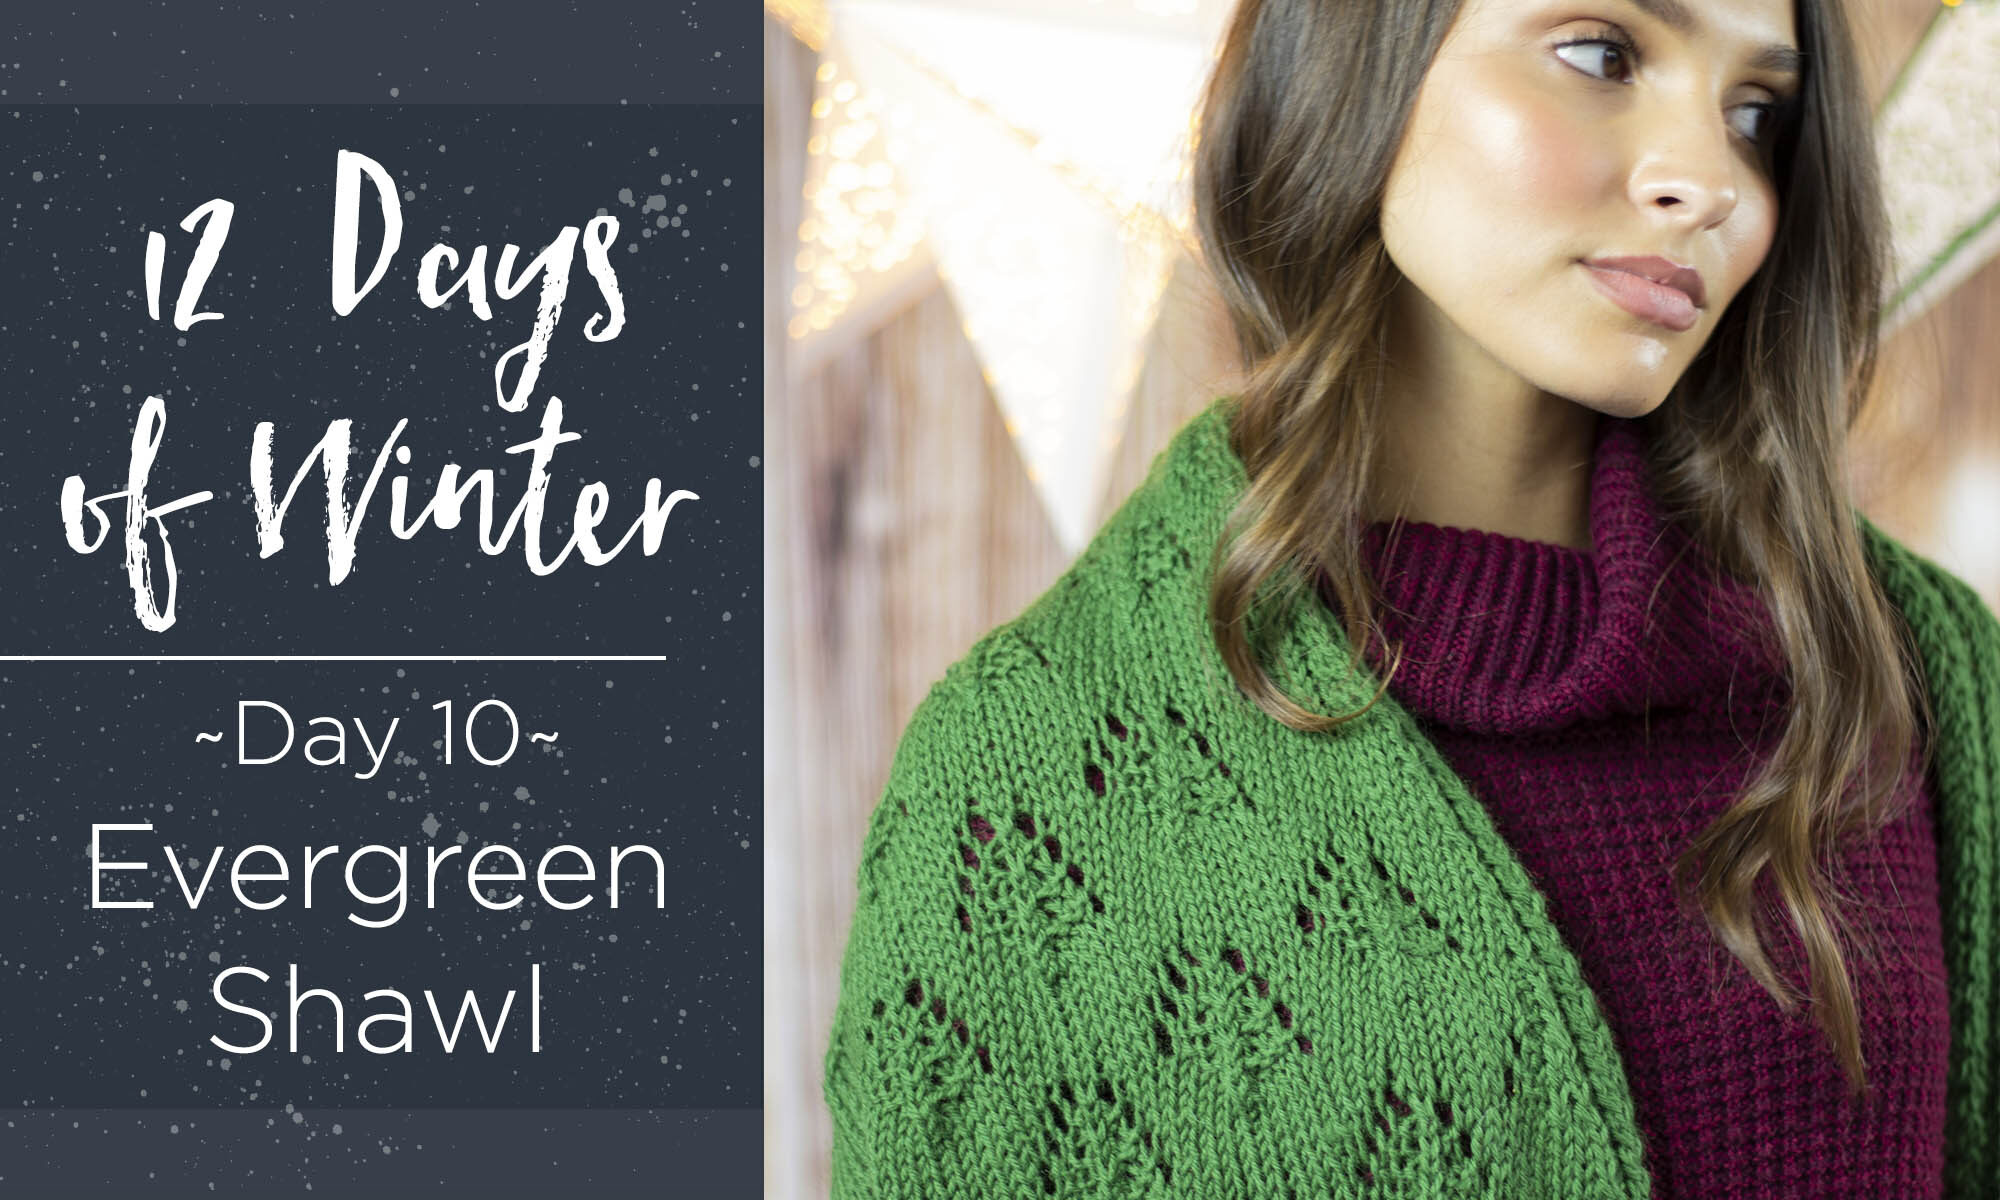
This is part 10 in a 12 part series highlighting designs from our 12 Days of Winter, series 5 Edition.
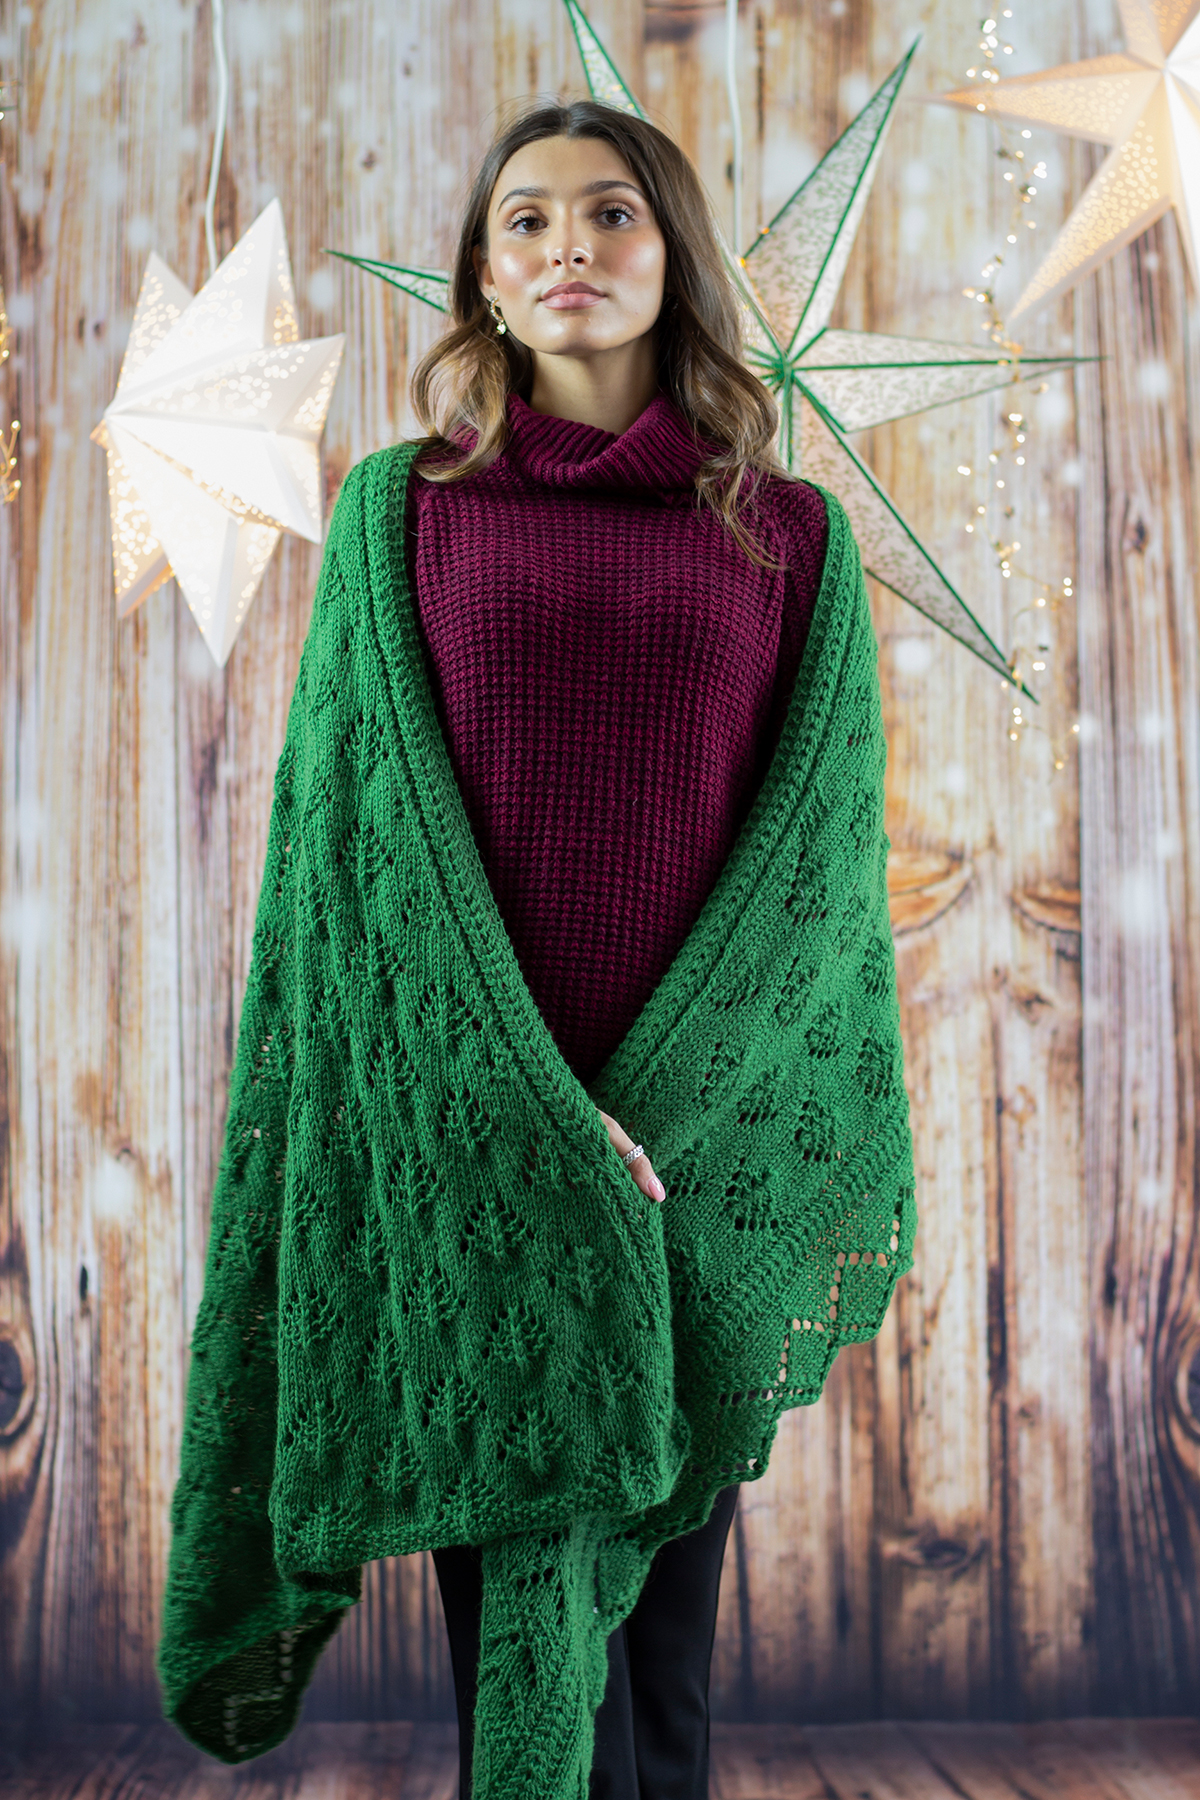
Are you new to lace knitting, or are you already a fan? Either way, you’re in for a treat today as we take a closer look at the oversized, extra cozy Evergreen Shawl!
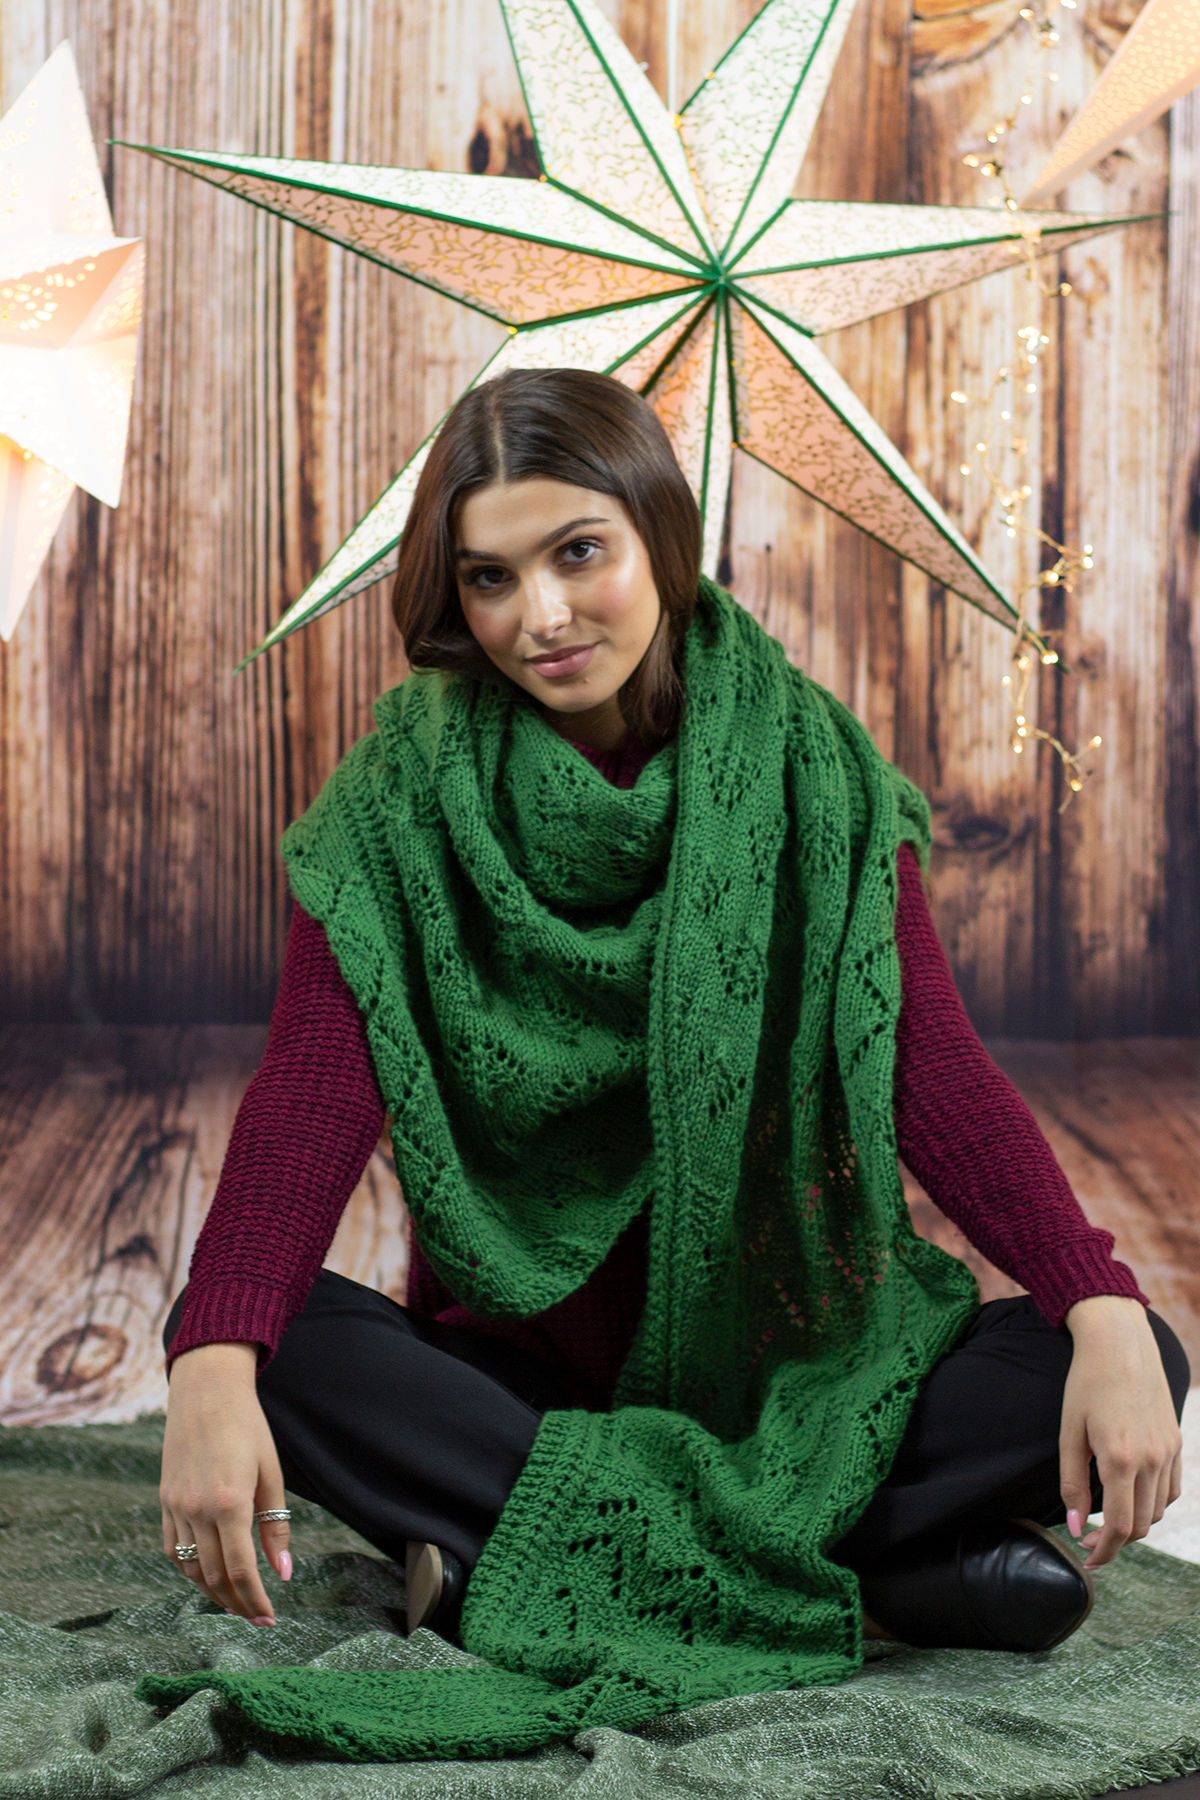
Beautiful and oversized, you’ll be so cozy in the blanket-y shawl.
First, though, let’s chat about this lovely design and all the special details. When I wear shawls, I love an oversized one, especially in the winter. You can wrap them around your neck and shoulders a couple of times – and you can’t have too many layers, wouldn’t you agree? 😉 I chose Deluxe Worsted, our classic, 100% non-superwash wool yarn, in the color 12296 Green Leaf for this piece. Since the shawl is covered in lacy fir trees, the color seemed like the perfect fit.
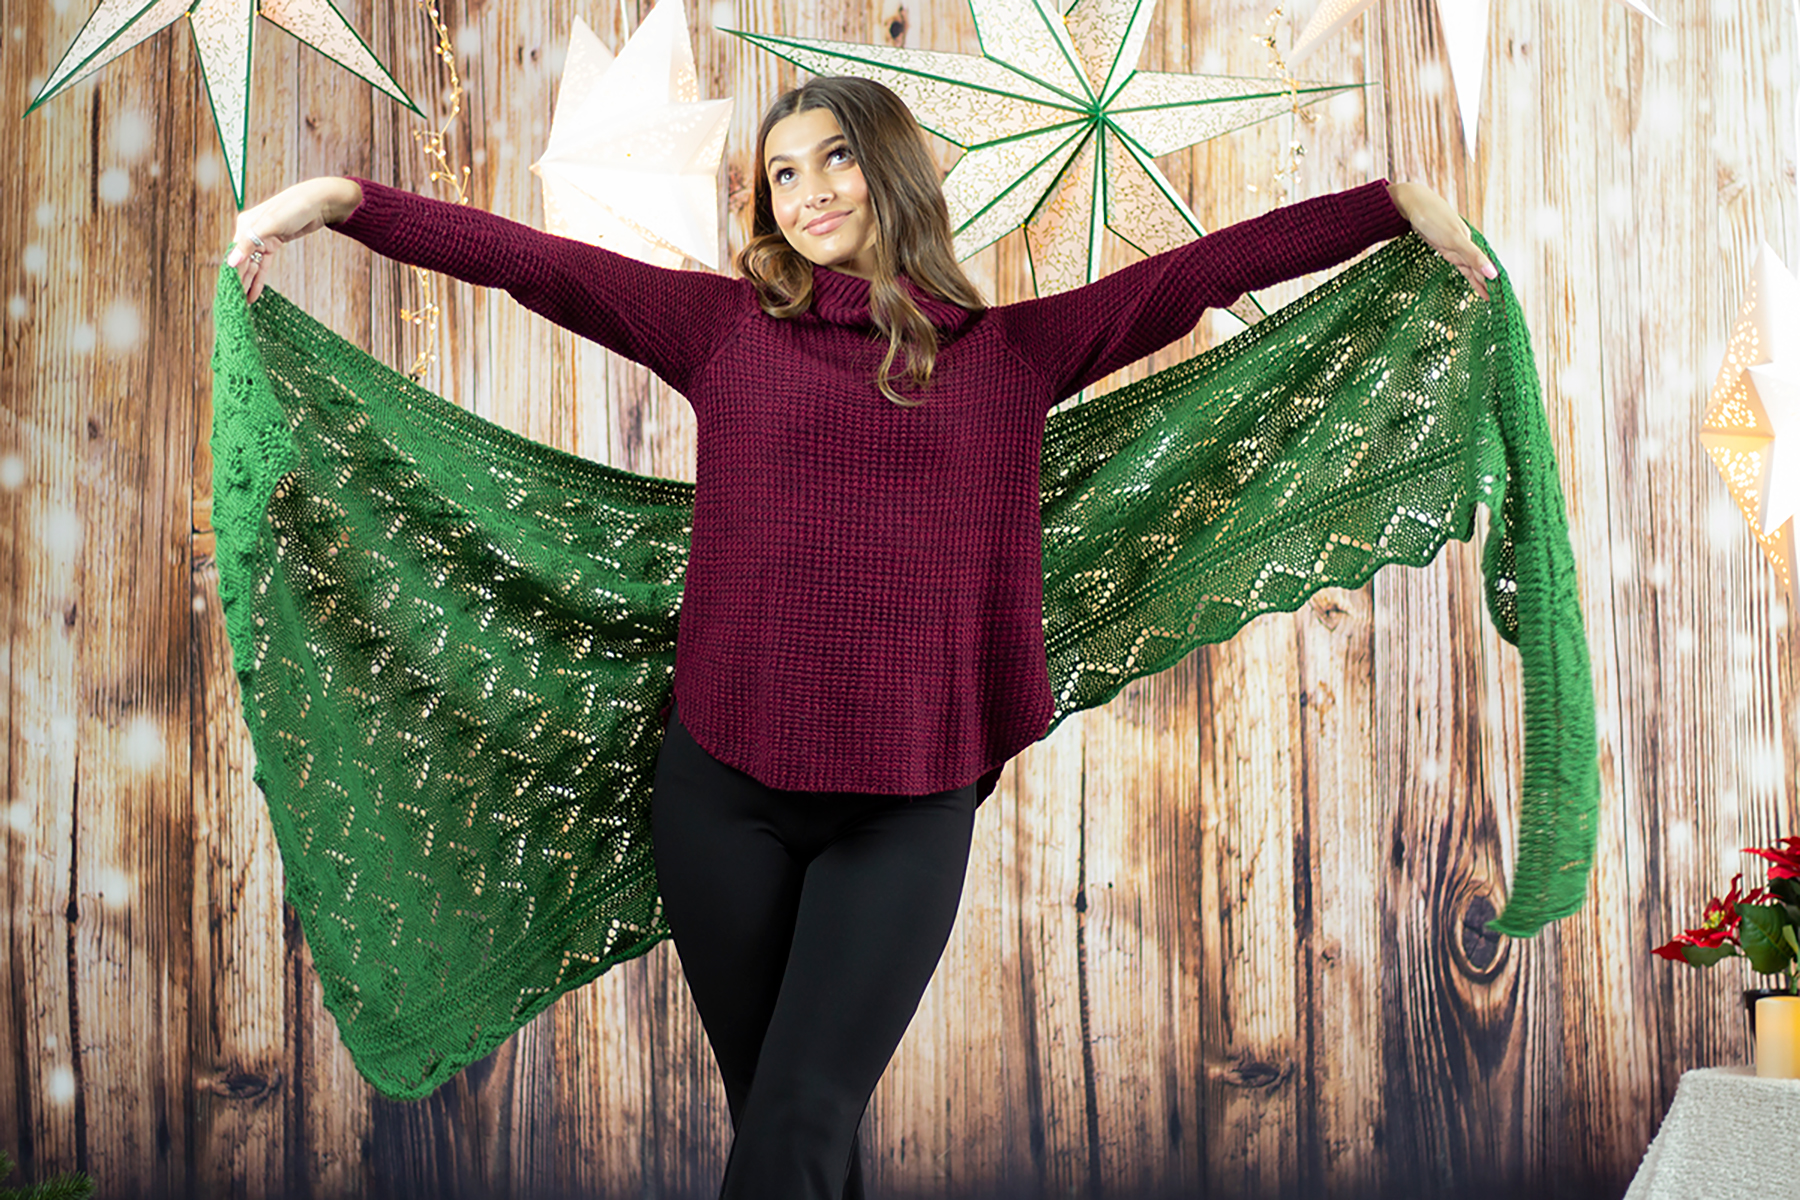
Just take a look at how large, yet still elegant, this Everygreen Shawl is!
In this pattern, you’ll get to indulge in the following techniques:
yarnovers
basic increases and decreases
right and left twists
knitting flat
This shawl does indeed have perhaps the simplest of shapes: a right triangle with decreases along one edge. The straight edge of the shawl has a gorgeous lace diamond motif, which although beautiful, does cause stitch counts to fluctuate throughout the pattern. So, as you’re decreasing along one edge to shape the shawl, you’ll also need to ensure that you maintain the stitch patterns as established. It’s a nice balance of rhythm and engagement, perfect for someone who wants to stay focused through a knitting pattern.
Although I’d consider this pattern Intermediate level, don’t fret if you’re a beginner who’s craving a challenge. I’m the very last person to discourage someone from trying something new. So, if you have little or no lace experience, or even if you have a bunch, I have a few handy tips for knitting lace that will get you started on the right foot.
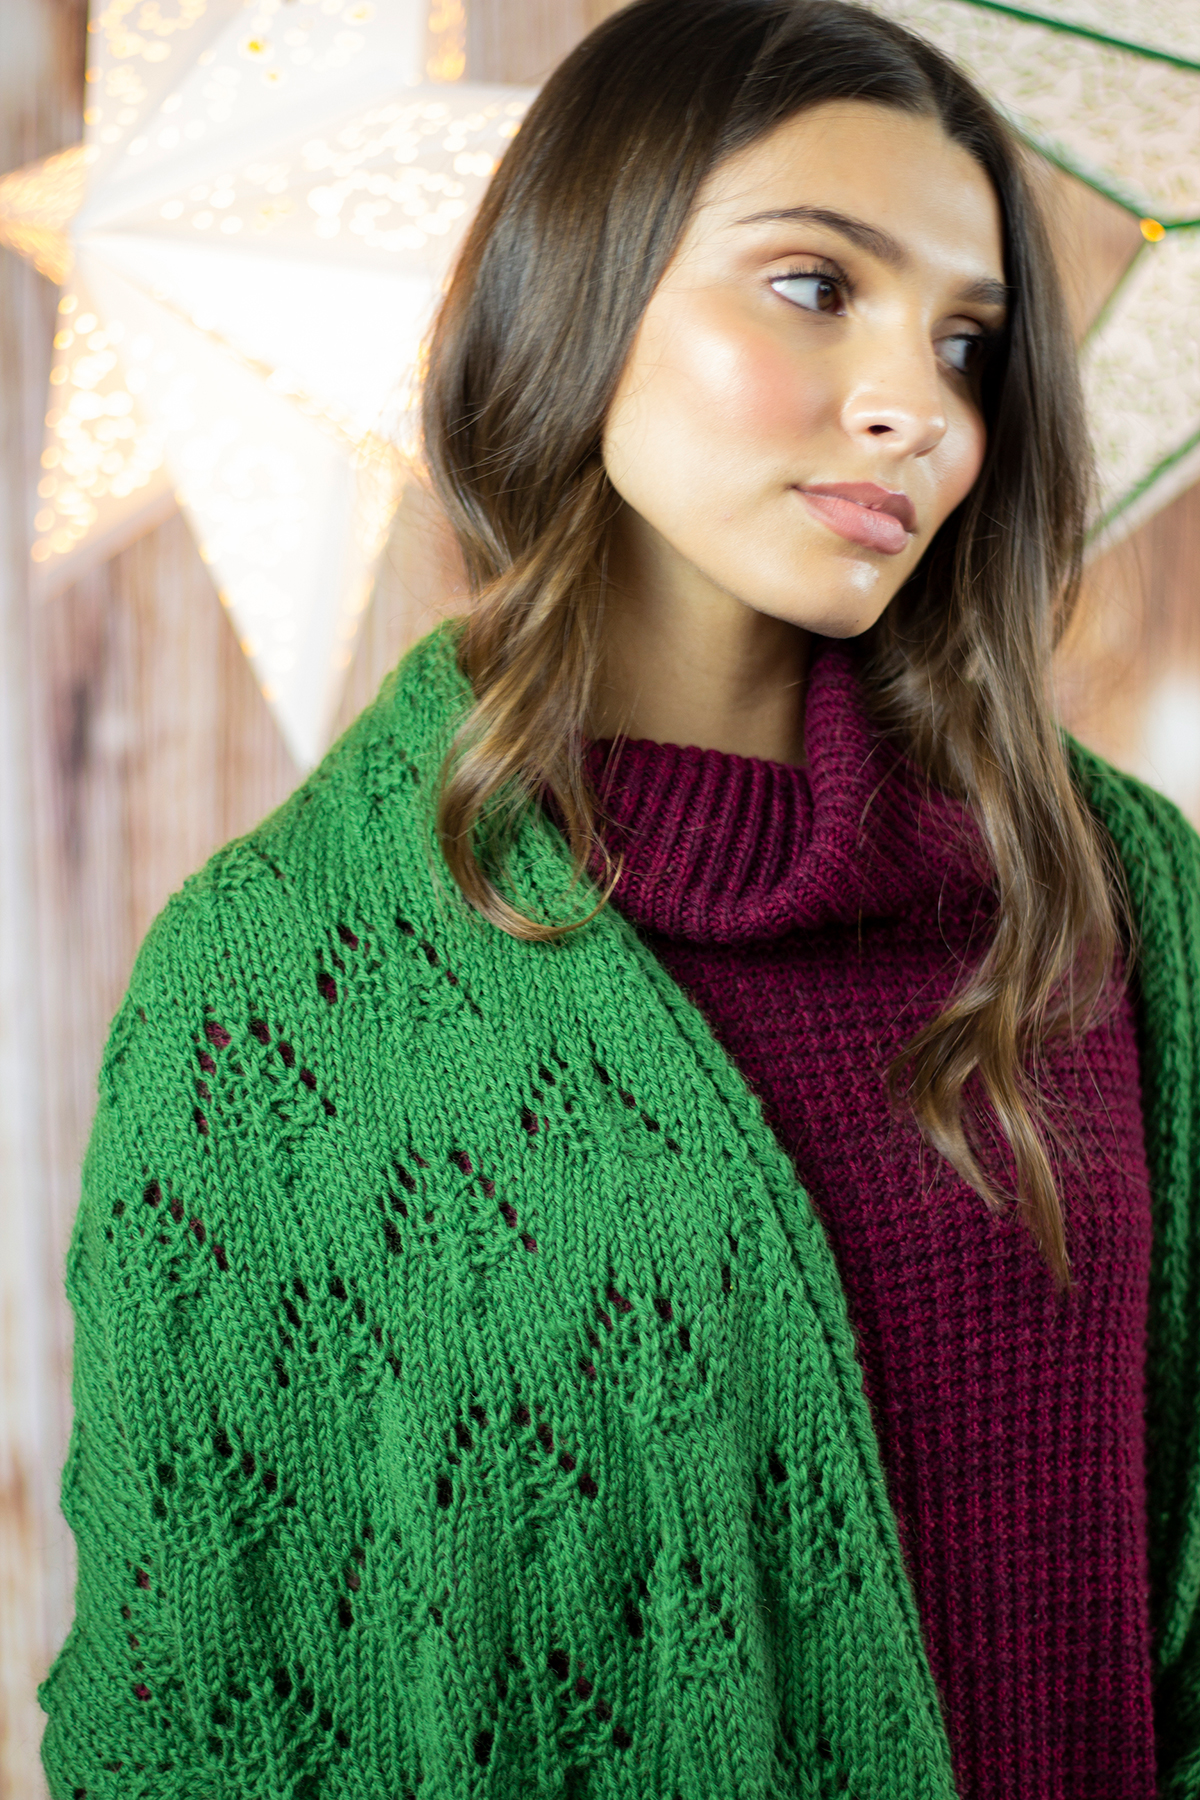
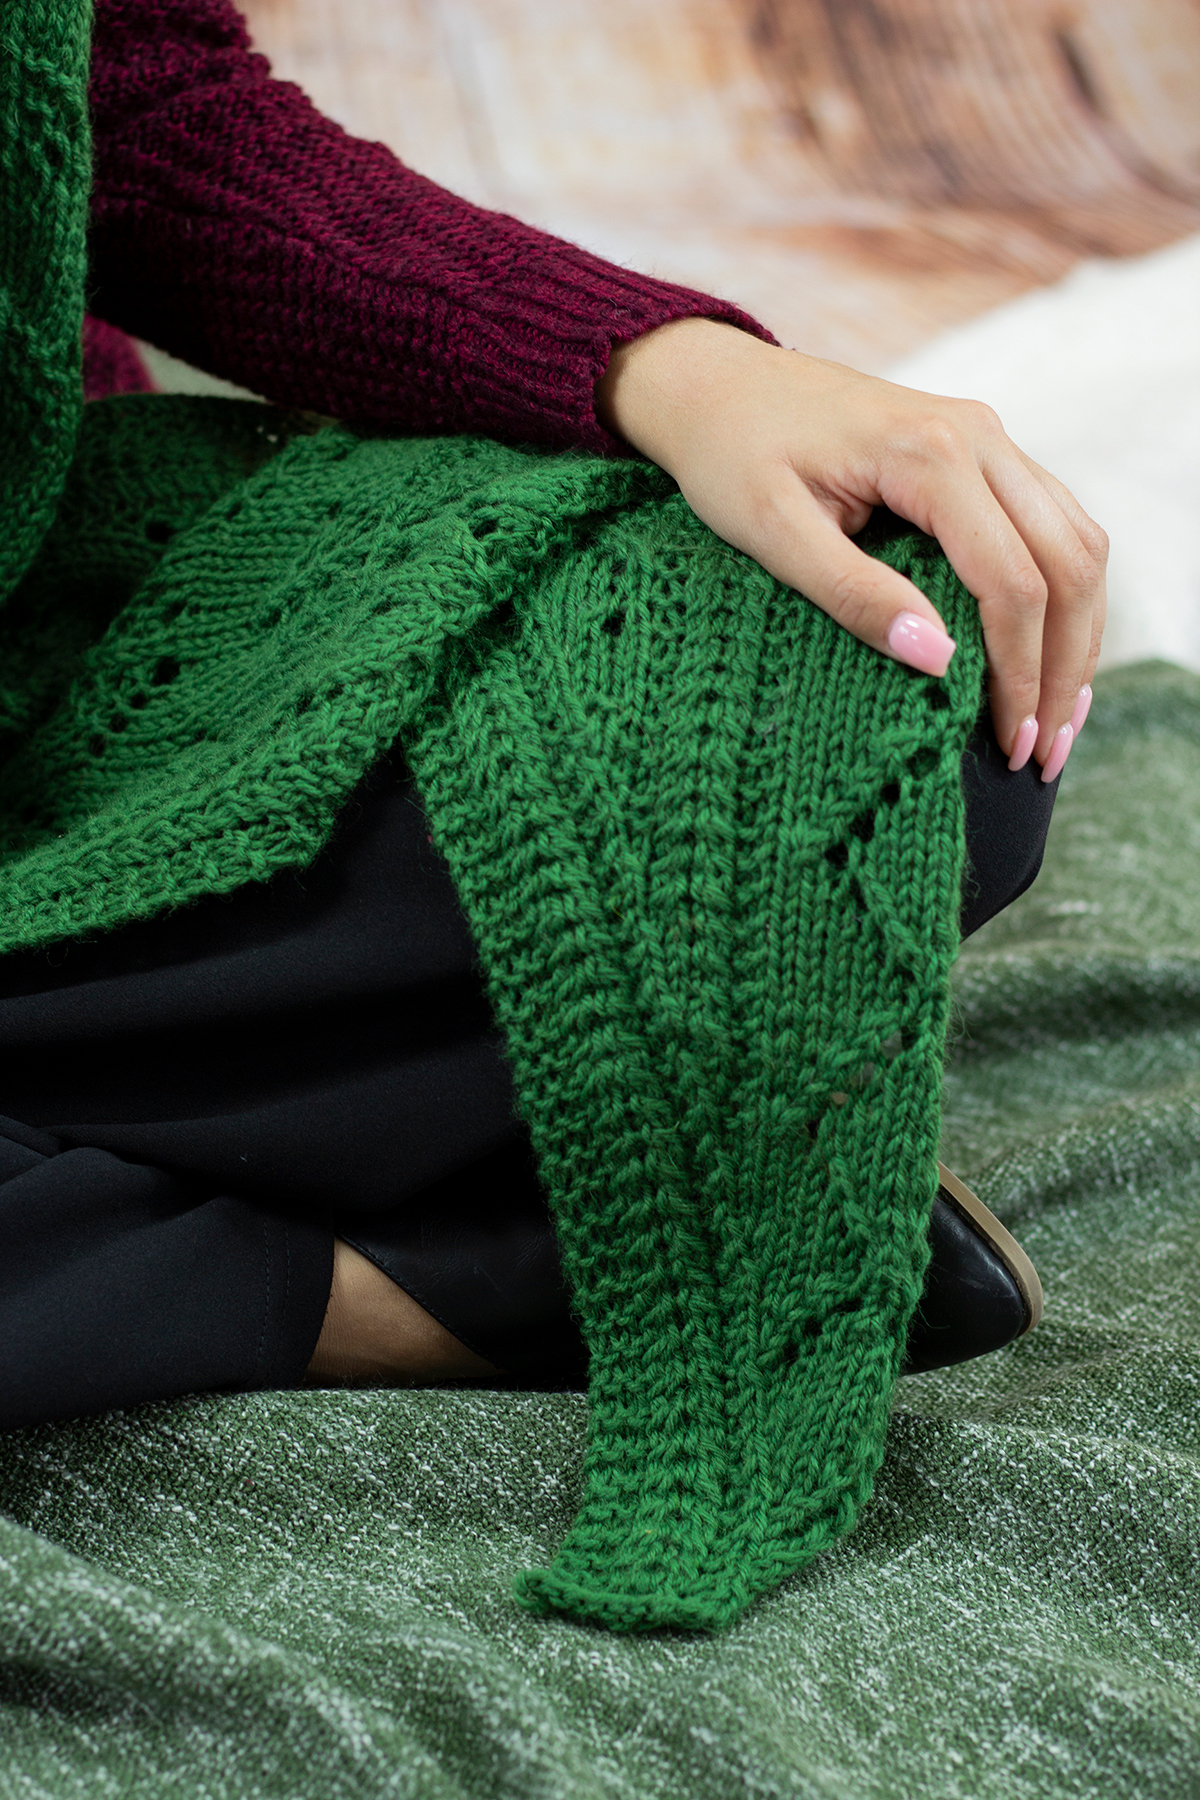
The lacy tree motif makes this shawl perfect for winter. Just imagine yourself in a snowy forest with those pops of green peeking out beneath the piles of snow atop the boughs.
My first tip is to sharpen your chart reading skills. This pattern includes helpful charts and written instructions, but I find that charts are a great way to visualize exactly what you’re doing. Back in our first series of the 12 Days of Winter Kit collection, before we even knew it would be a tradition, I shared some tips for reading charts. You can find that blog post at this link.
My next tip is to use sharp needles. I have so many favorite needles that it’s hard to choose a brand. I’m a bit of a needle nerd and I love everything from Addi Lace Tips to any of the ChiaoGoo lines and have had great experiences with Hiya Hiya Sharps. But in truth, your favorite needle brand probably has an option for sharp tips and that’s what you really want. Why? Simply because it makes working those decreases much easier! In this pattern, usually, you’ll only work two stitches together; however, some lace patterns have you work more than that – three, even four together (as in the Dusk Poncho). And if you must do a purl decrease through the back loop, you’ll thank yourself for the investment, trust me!
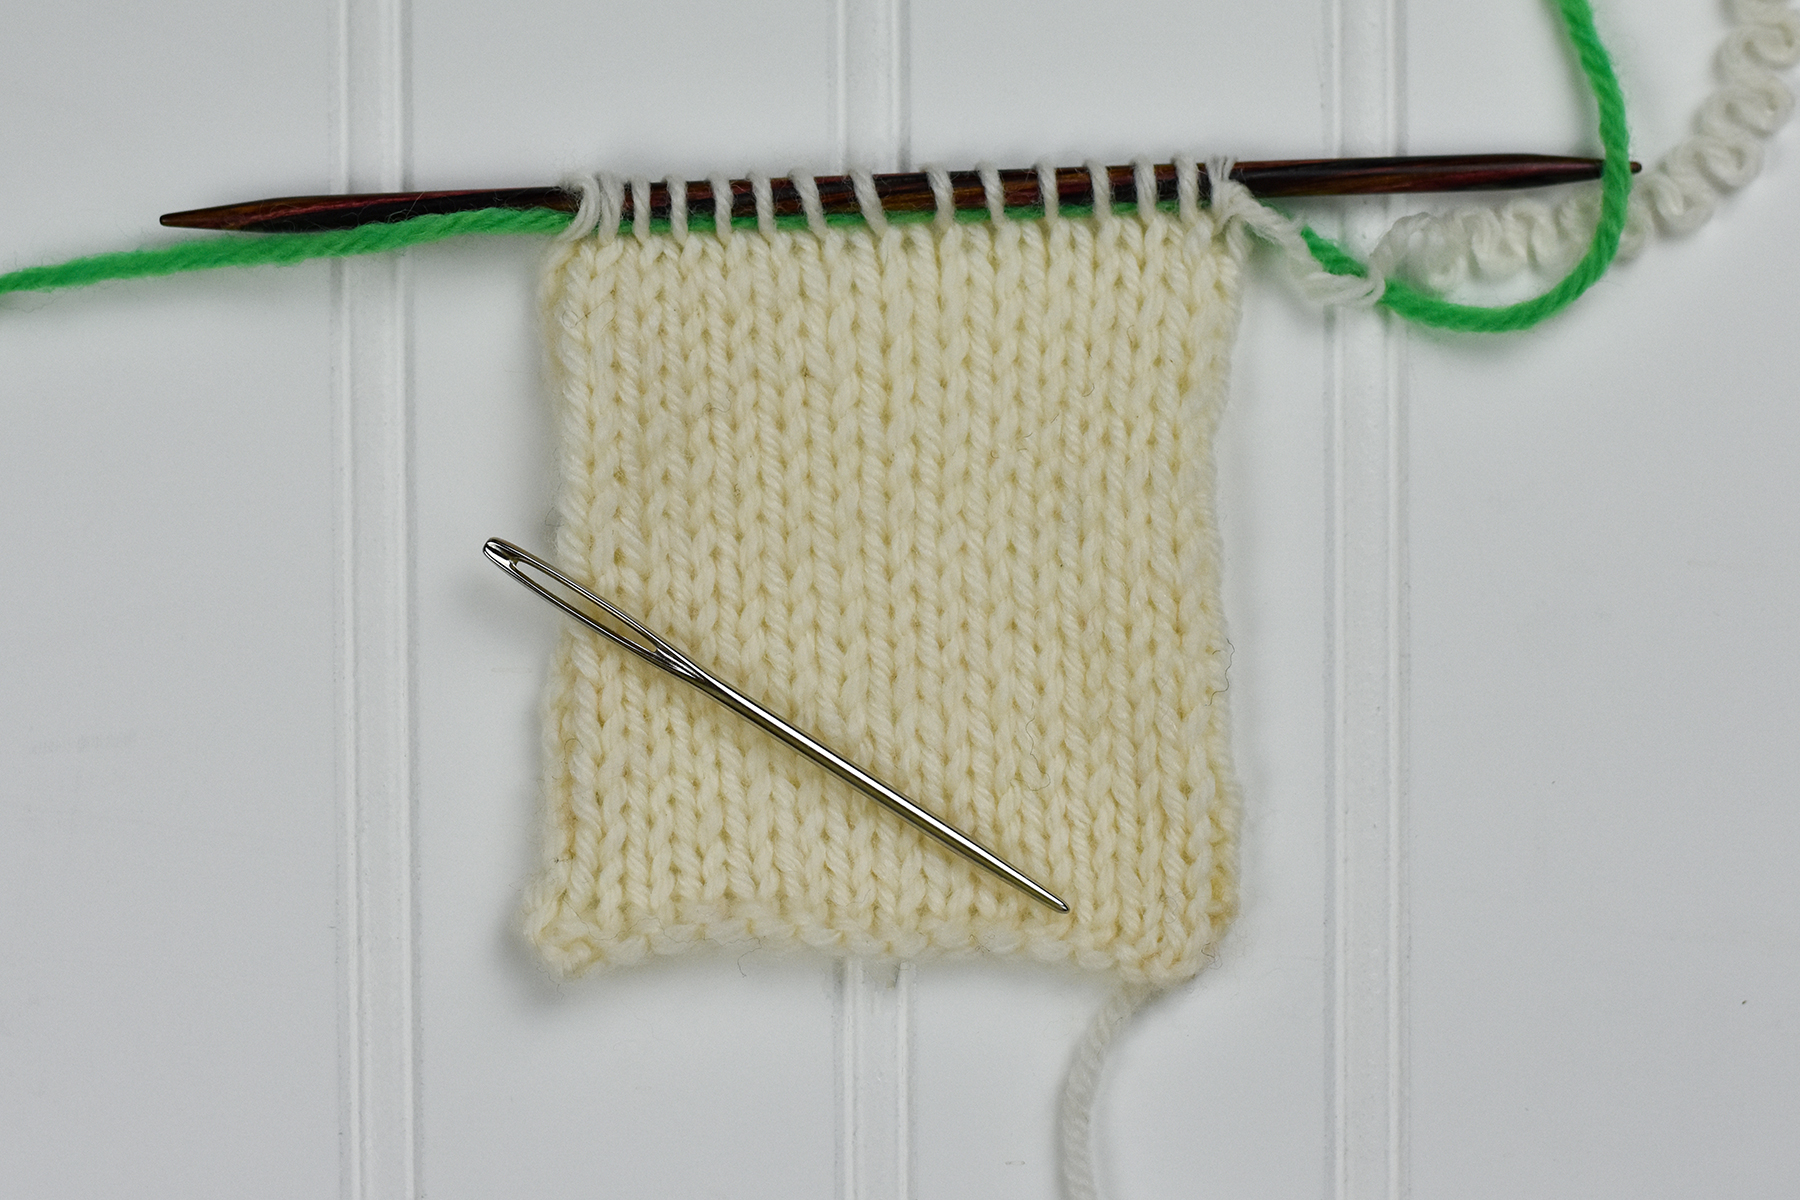
Insert lifelines as you knit to give you a safety zone if you make a mistake and must rip back your work.
My final tip for lace knitting is a lifeline – because it’s a lifesaver! I feel like a pro whenever it comes to correcting mistakes in cable knitting or most textured stitches, however, I always find correcting mistakes in lace to be a bit more tricky. As a result, I often tink back (knit backward – get it?) my work or simply rip back until I get to the row where I made the mistake. When you have lots of decreases and yarnover increases, it’s really easy to lose your place. My suggestion is to insert a lifeline. What’s a lifeline? It’s simply a strand of yarn to place through your stitches as a safe spot to unravel your work if needed because all of those stitches will be secure with a strand of scrap yarn threaded through.
Option 1: This is probably the most preferred method, especially if you’re knitting lace. Before you start knitting your row, thread a piece of scrap yarn that’s about six to eight inches wider than your work and simply glide the tapestry needle through each live stitch without removing the needles. You’ll work just below the knitting needle, as pictured in the example photo above. The ideal place for a lifeline is before a fresh row repeat – this way you know exactly where to start once you unravel your work.
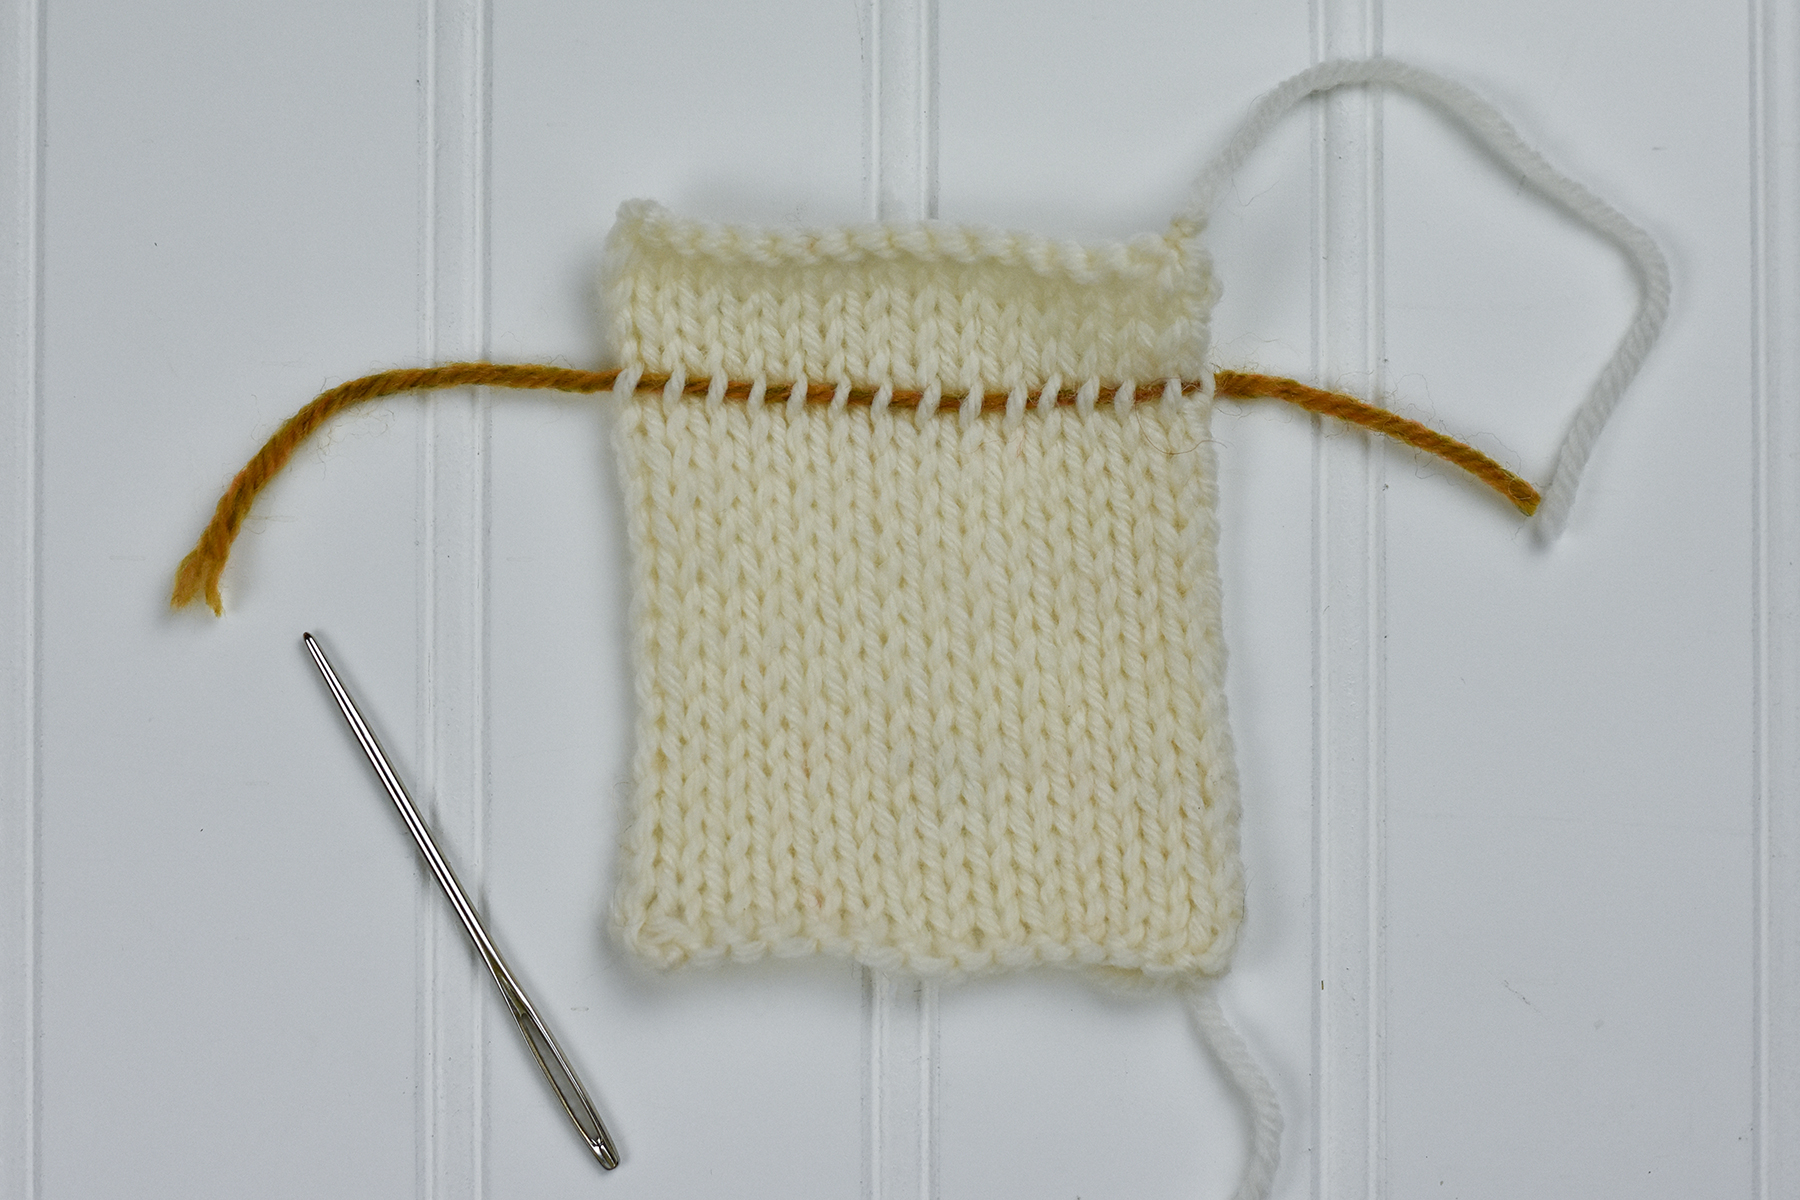
You can always insert a lifeline after you work your rows, too.
The second option is great for moments when you’ve forgotten to insert a lifeline…or if you were overly confident only to find out you made a mistake later. Oops! And I have to say, I’m GUILTY! Have no fear, though, because you can still insert a lifeline any amount of rows below (see above photo). This time, all you’ll do is thread the tapestry needle the same way you did in the first option I described. Then, carefully thread the needle through one leg of each stitch across the row. Picking up each leg of the stitch from below is a bit trickier, but if you take your time you’ll be good to go, I promise. Then you can rip back all the way to the lifeline and your stitches will remain secure.
The tip detail shows how the tree motif transforms into a chevron lace motif, and the final shaping is just so pretty!
That’s it for my lace knitting tips and I hope you find them to be very useful. If you have any questions don’t hesitate to reach out to us because we’re always happy to help. Do you have any lace tips you’d like to share? Let us know in the comments below!
Remember, these exclusive kits can be purchased at local yarn store retailers near you. Each kit comes with the pattern, the yarn required to make it, a mini Universal Yarn project bag, and stitch marker. Use our store locator to find your nearest Universal Yarn retailer!
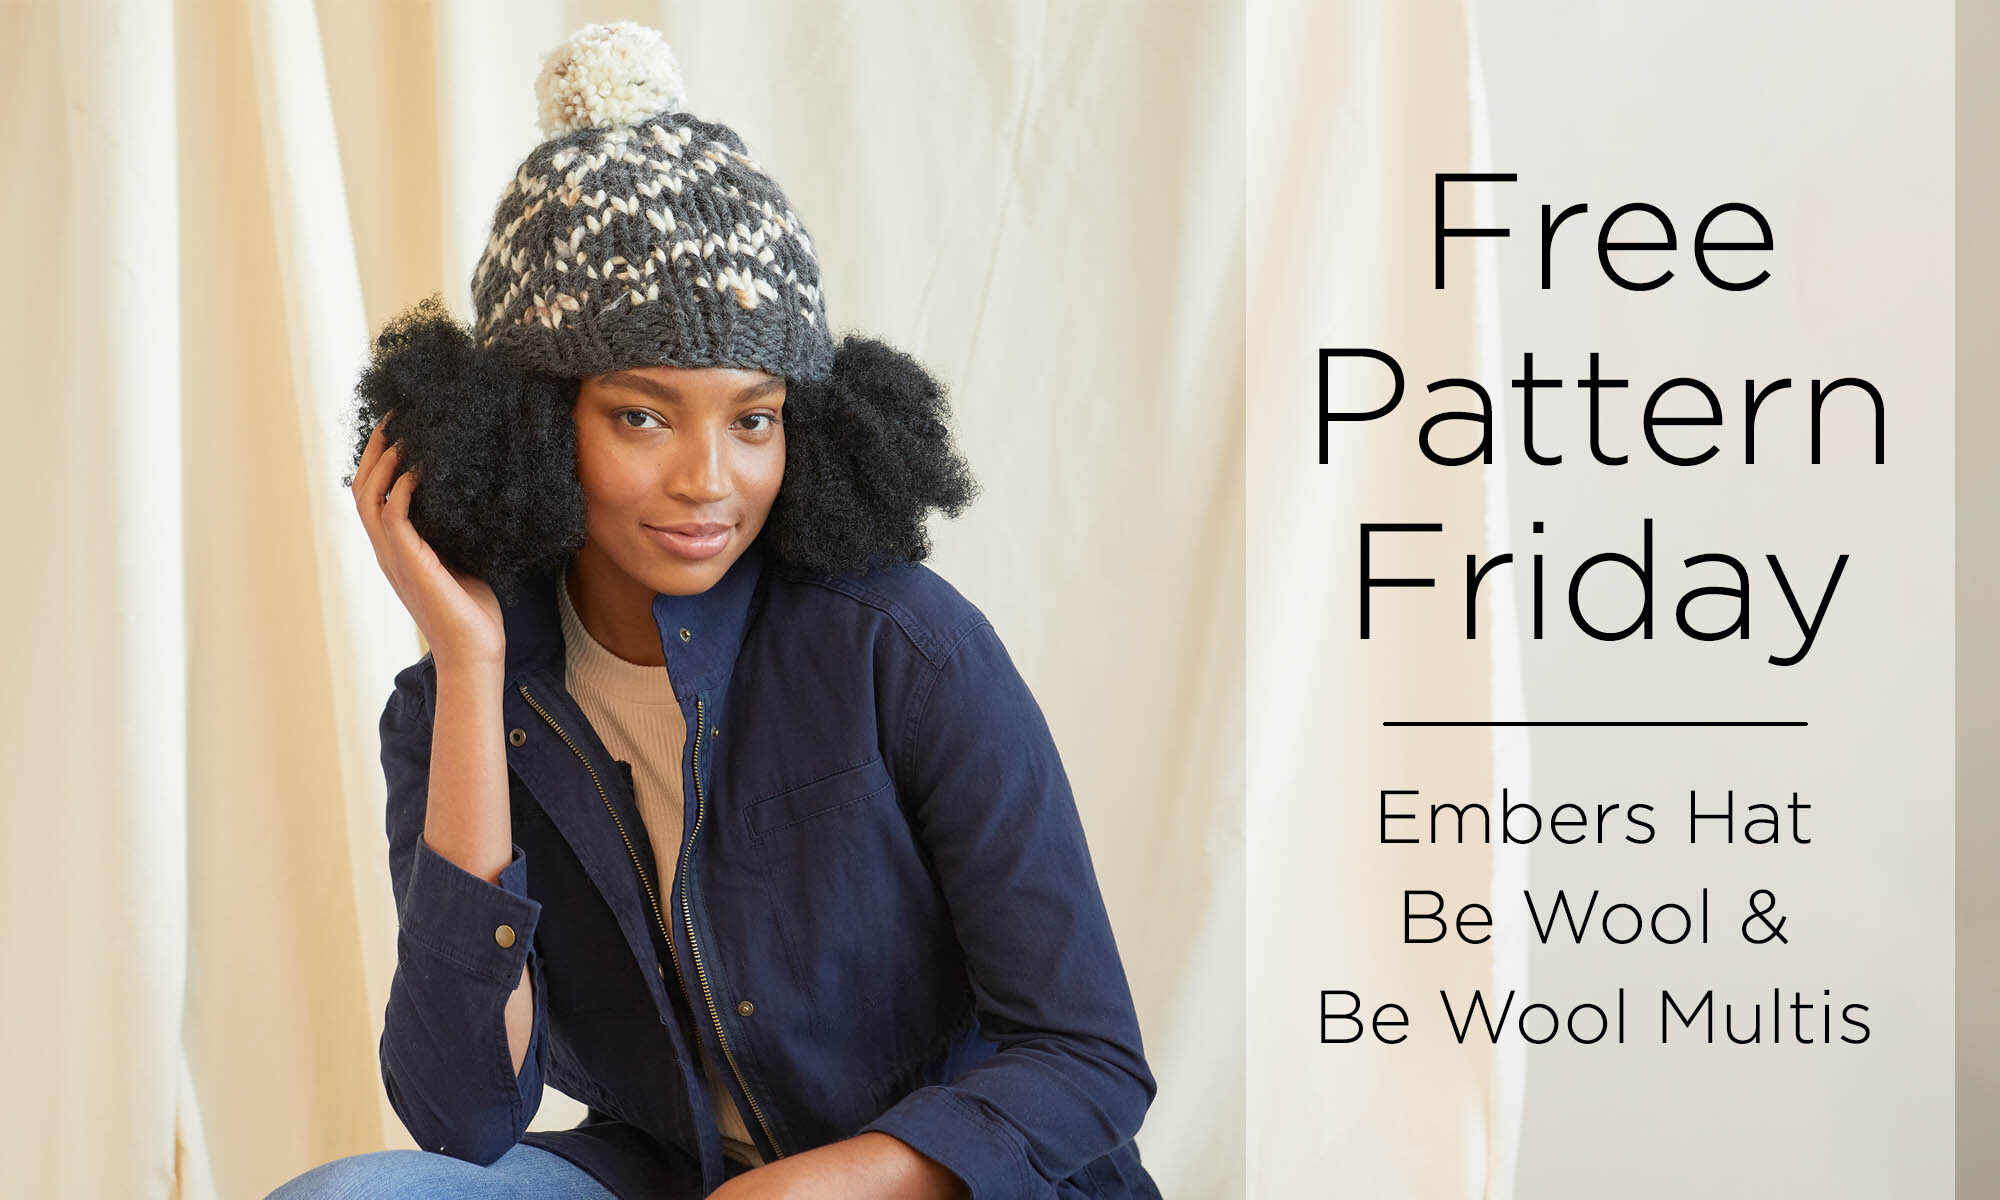
So how about it? Done with all your gift knitting this year? I’m not – I still have a single requested Towanda Sock to go. But there’s still time to squeeze in some quick handmade projects, when you choose those projects carefully!
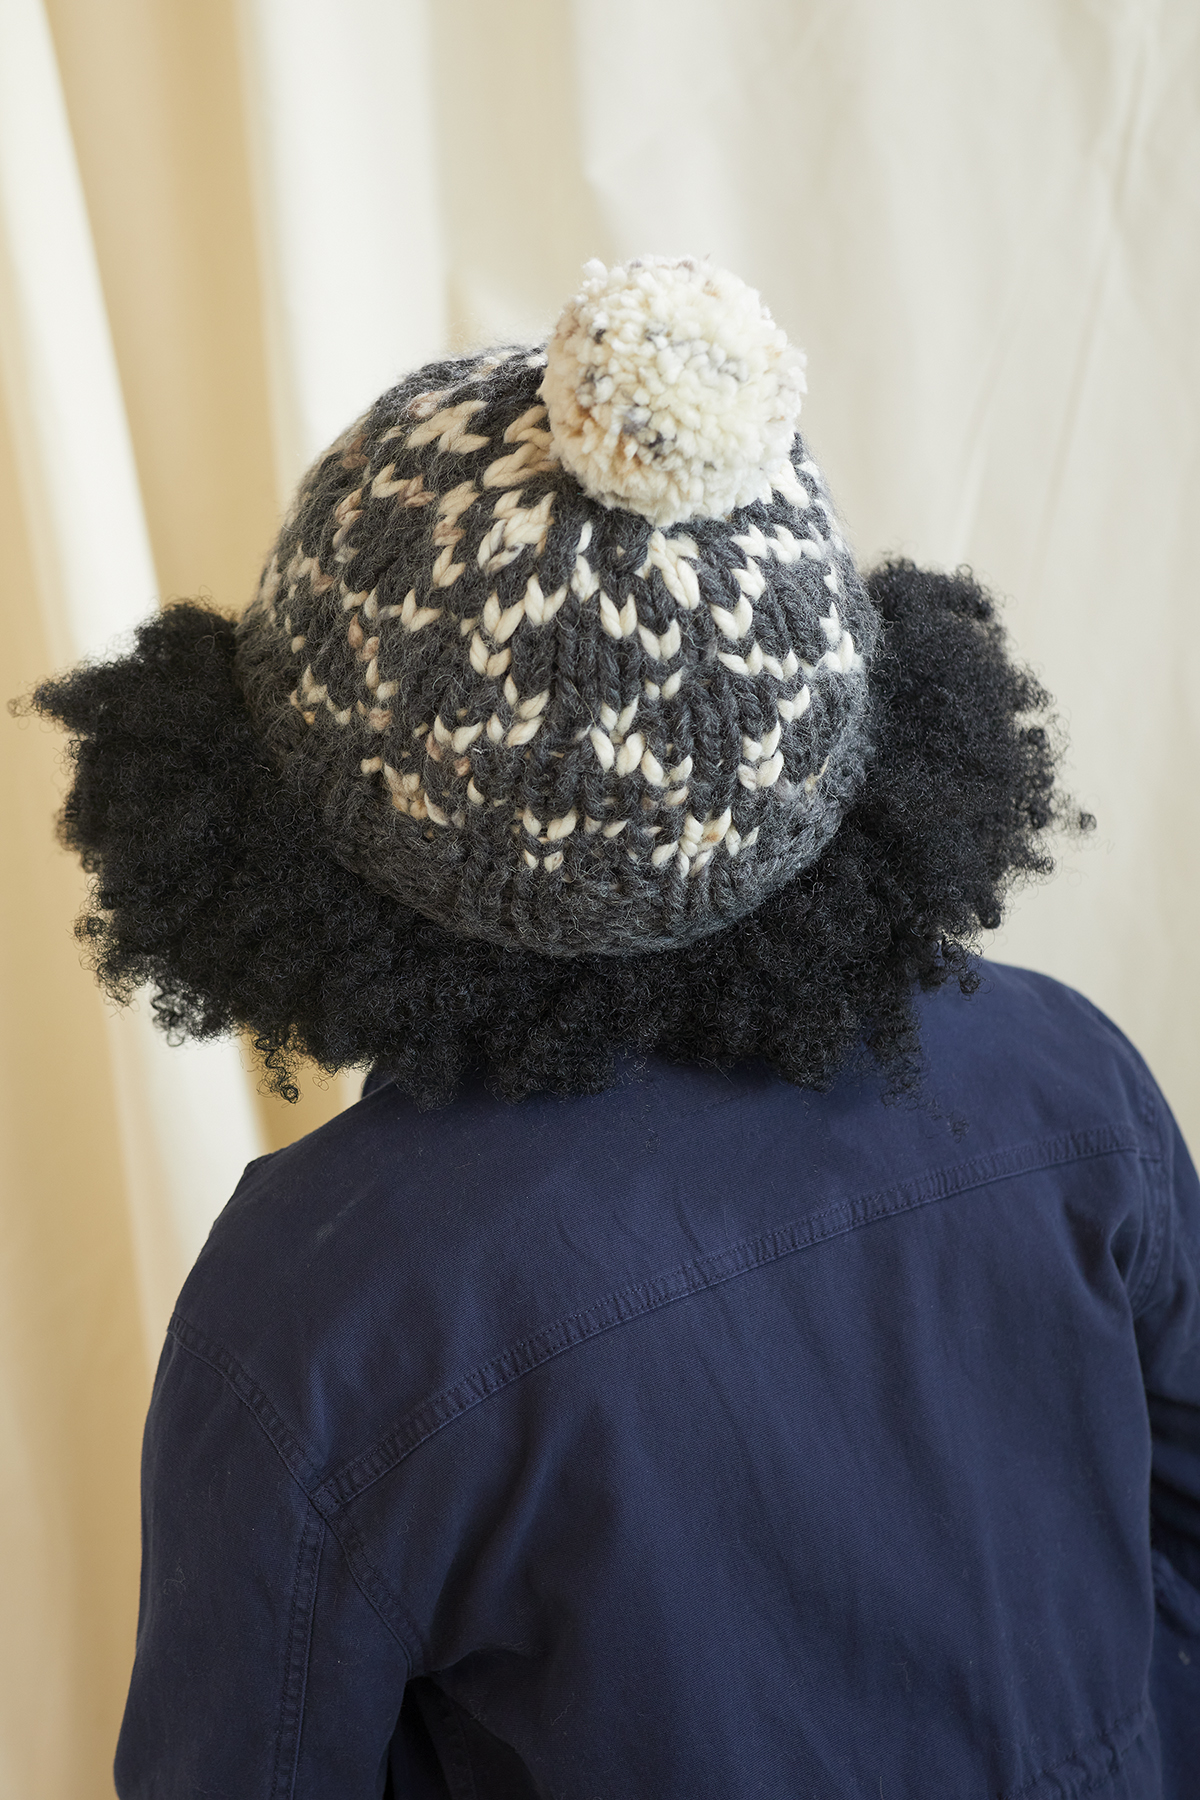
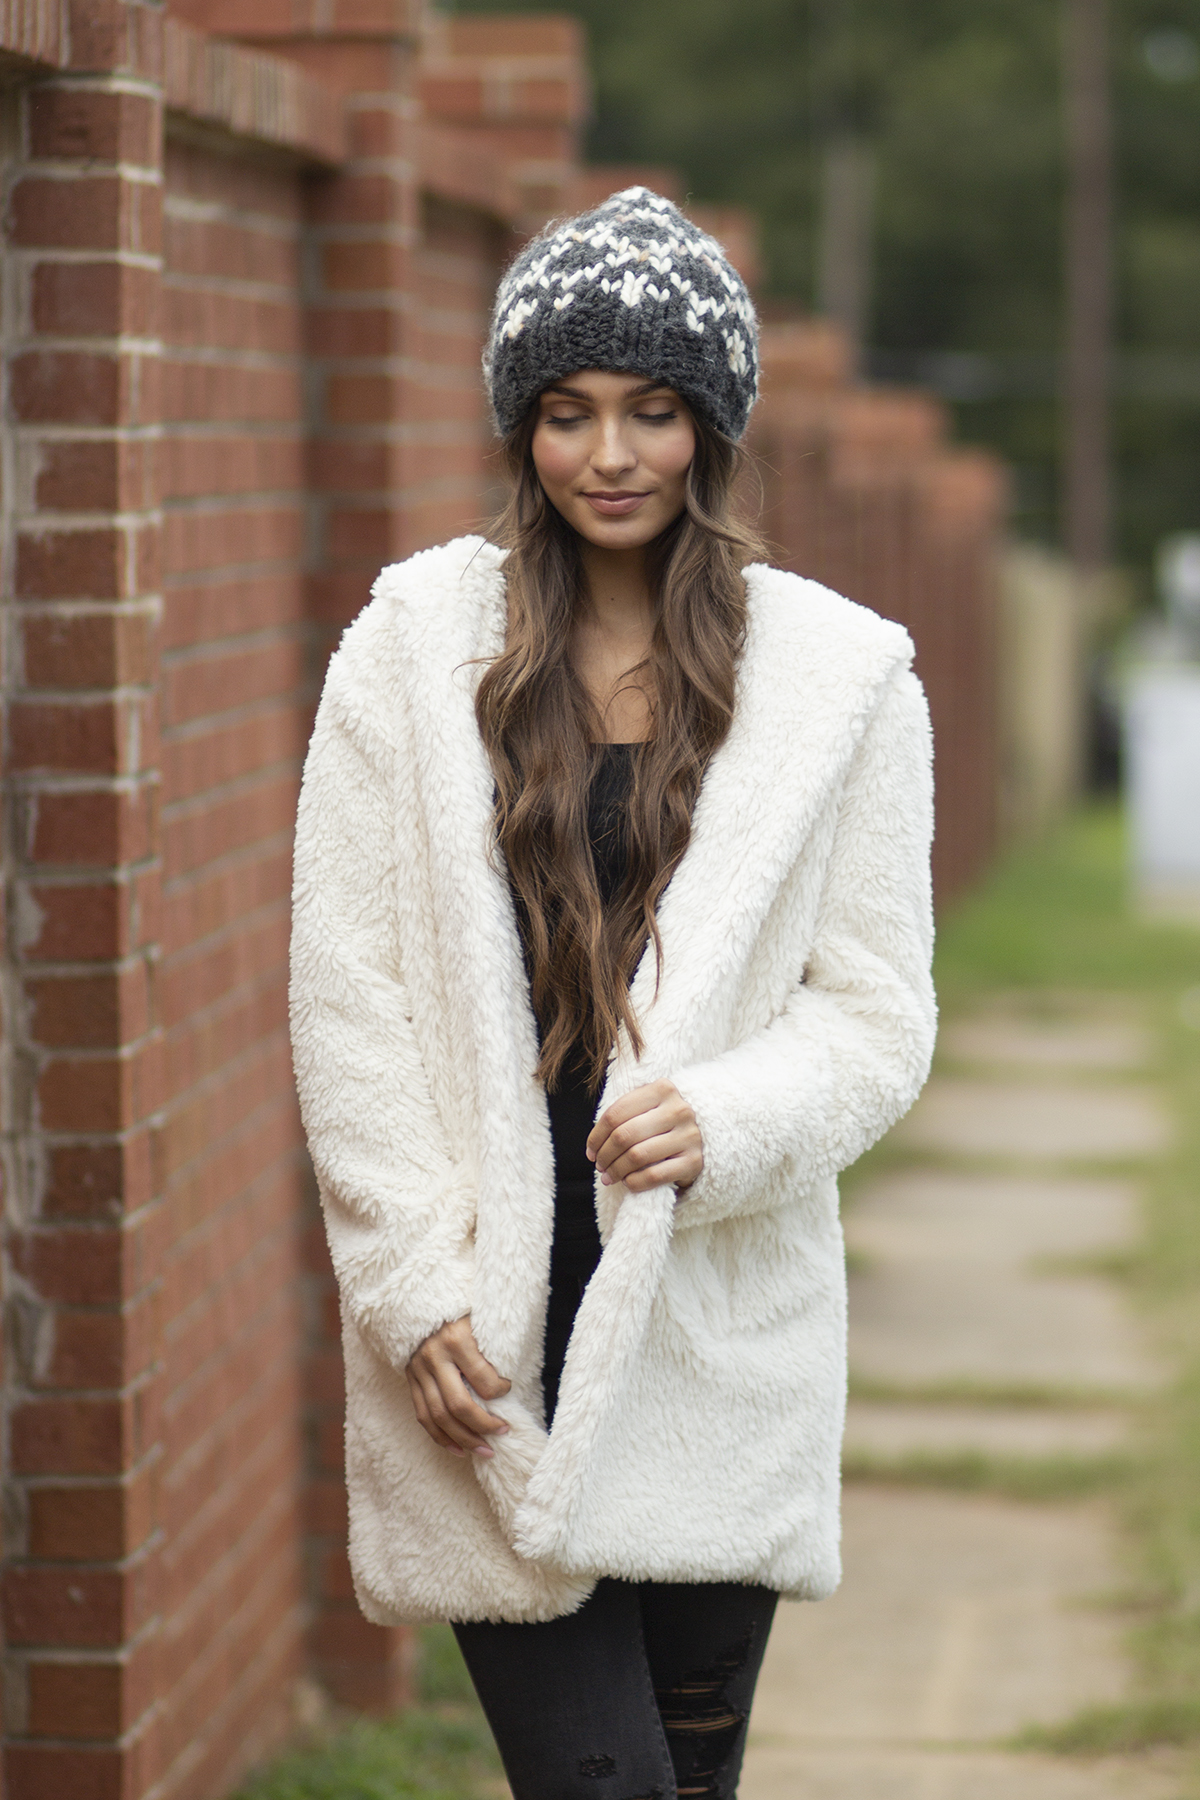
The Embers Hat ticks all my boxes for a quick gift.
Thick yarn
Looks harder than it is (got to impress the recipient!)
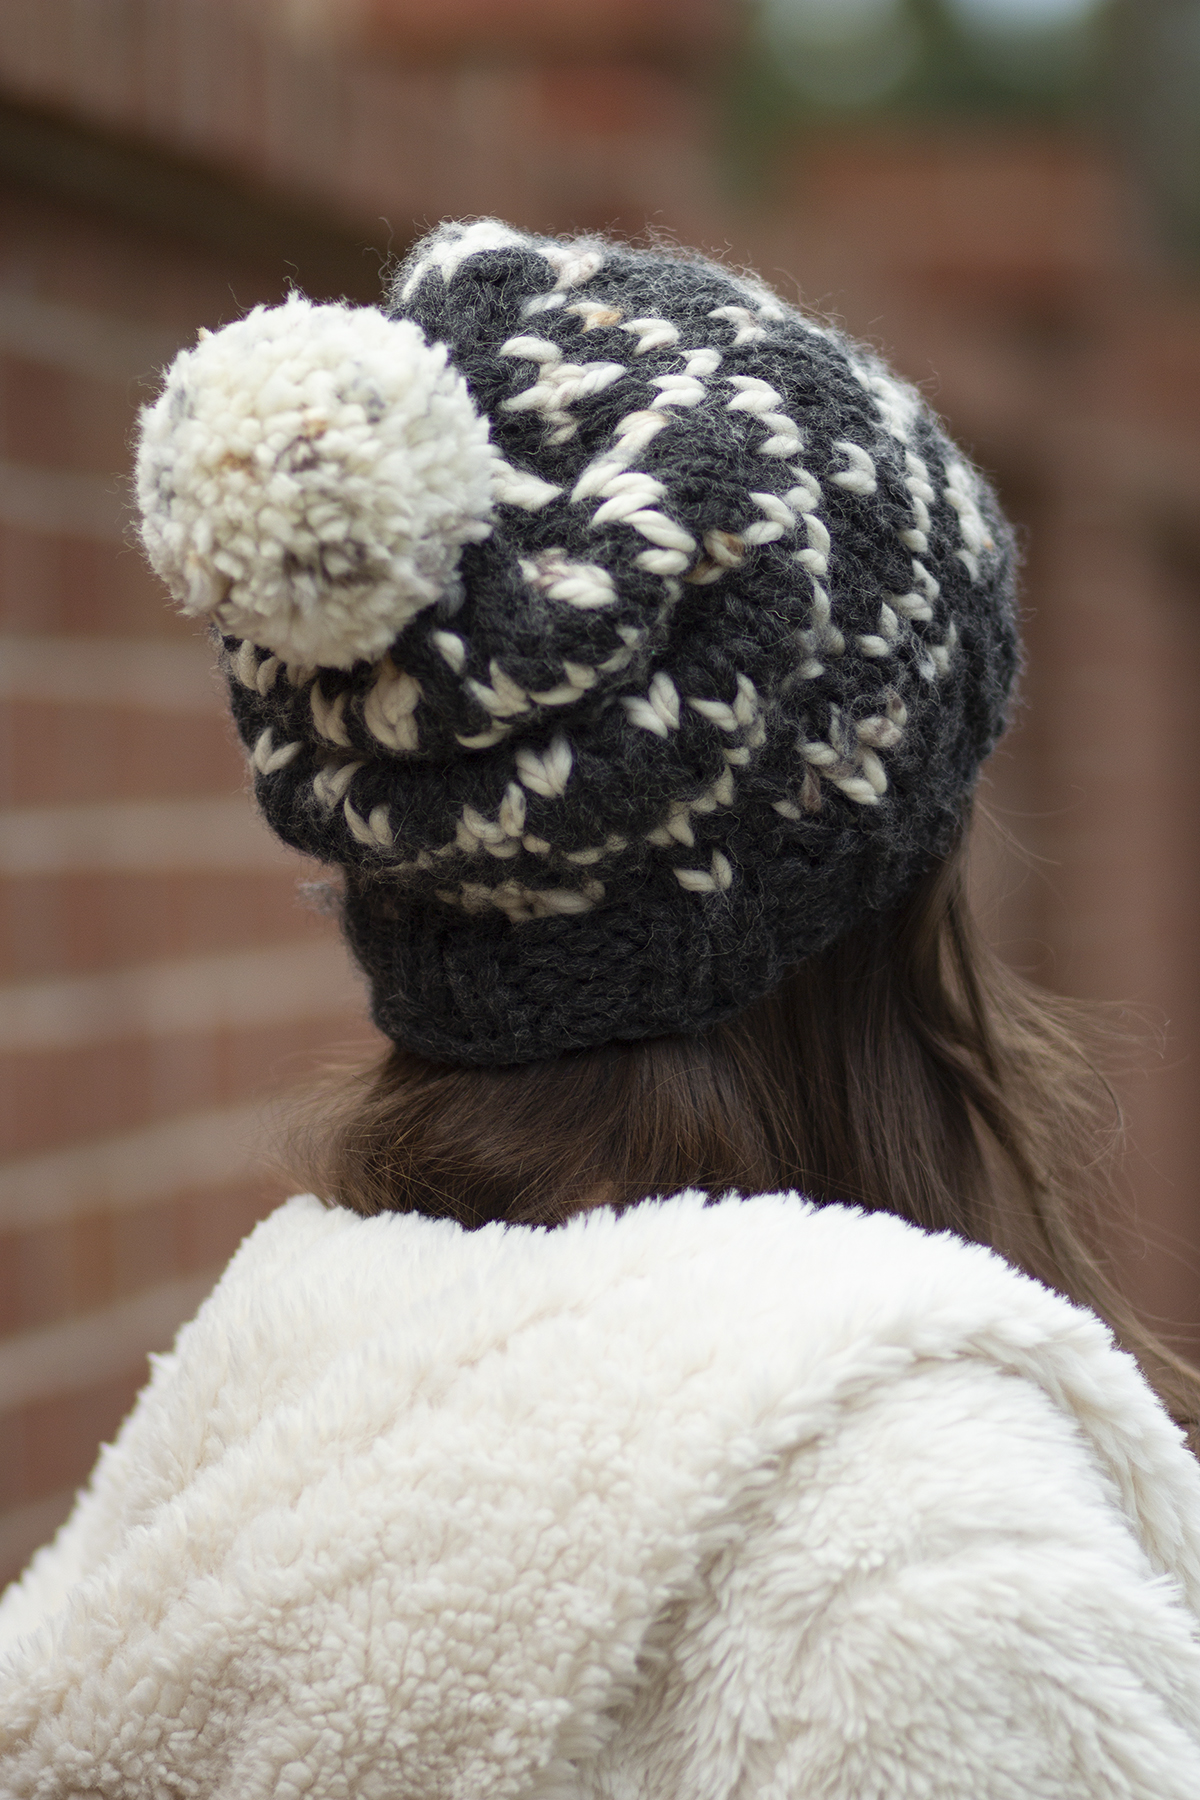
Fun pom pom. I’m a sucker for a pom pom!
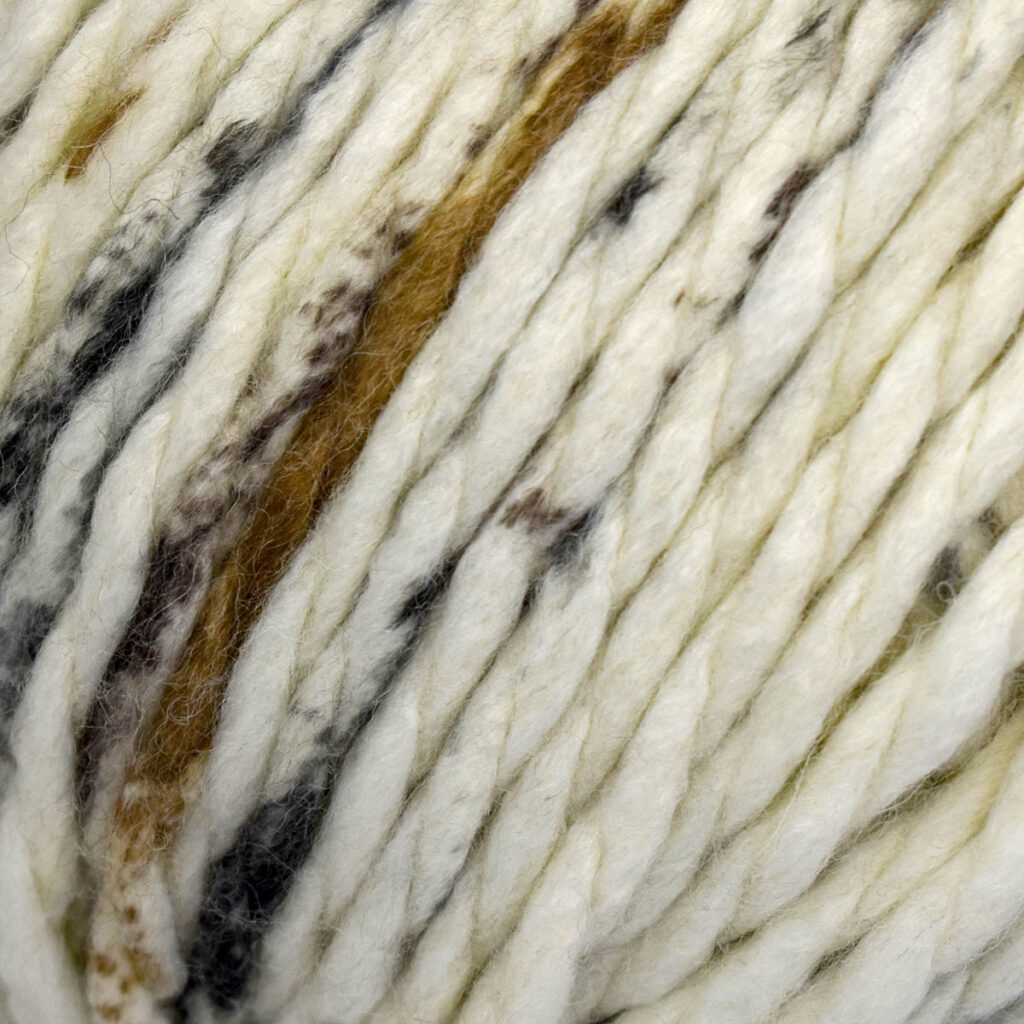
Be Wool Multis 201 Desert
Thick yarn? Check! Solid Be Wool and its color-flecked sibling Be Wool Multis are a perfect matching pair. Each is a thick, soft wool/acrylic blend that works up lightning-fast.
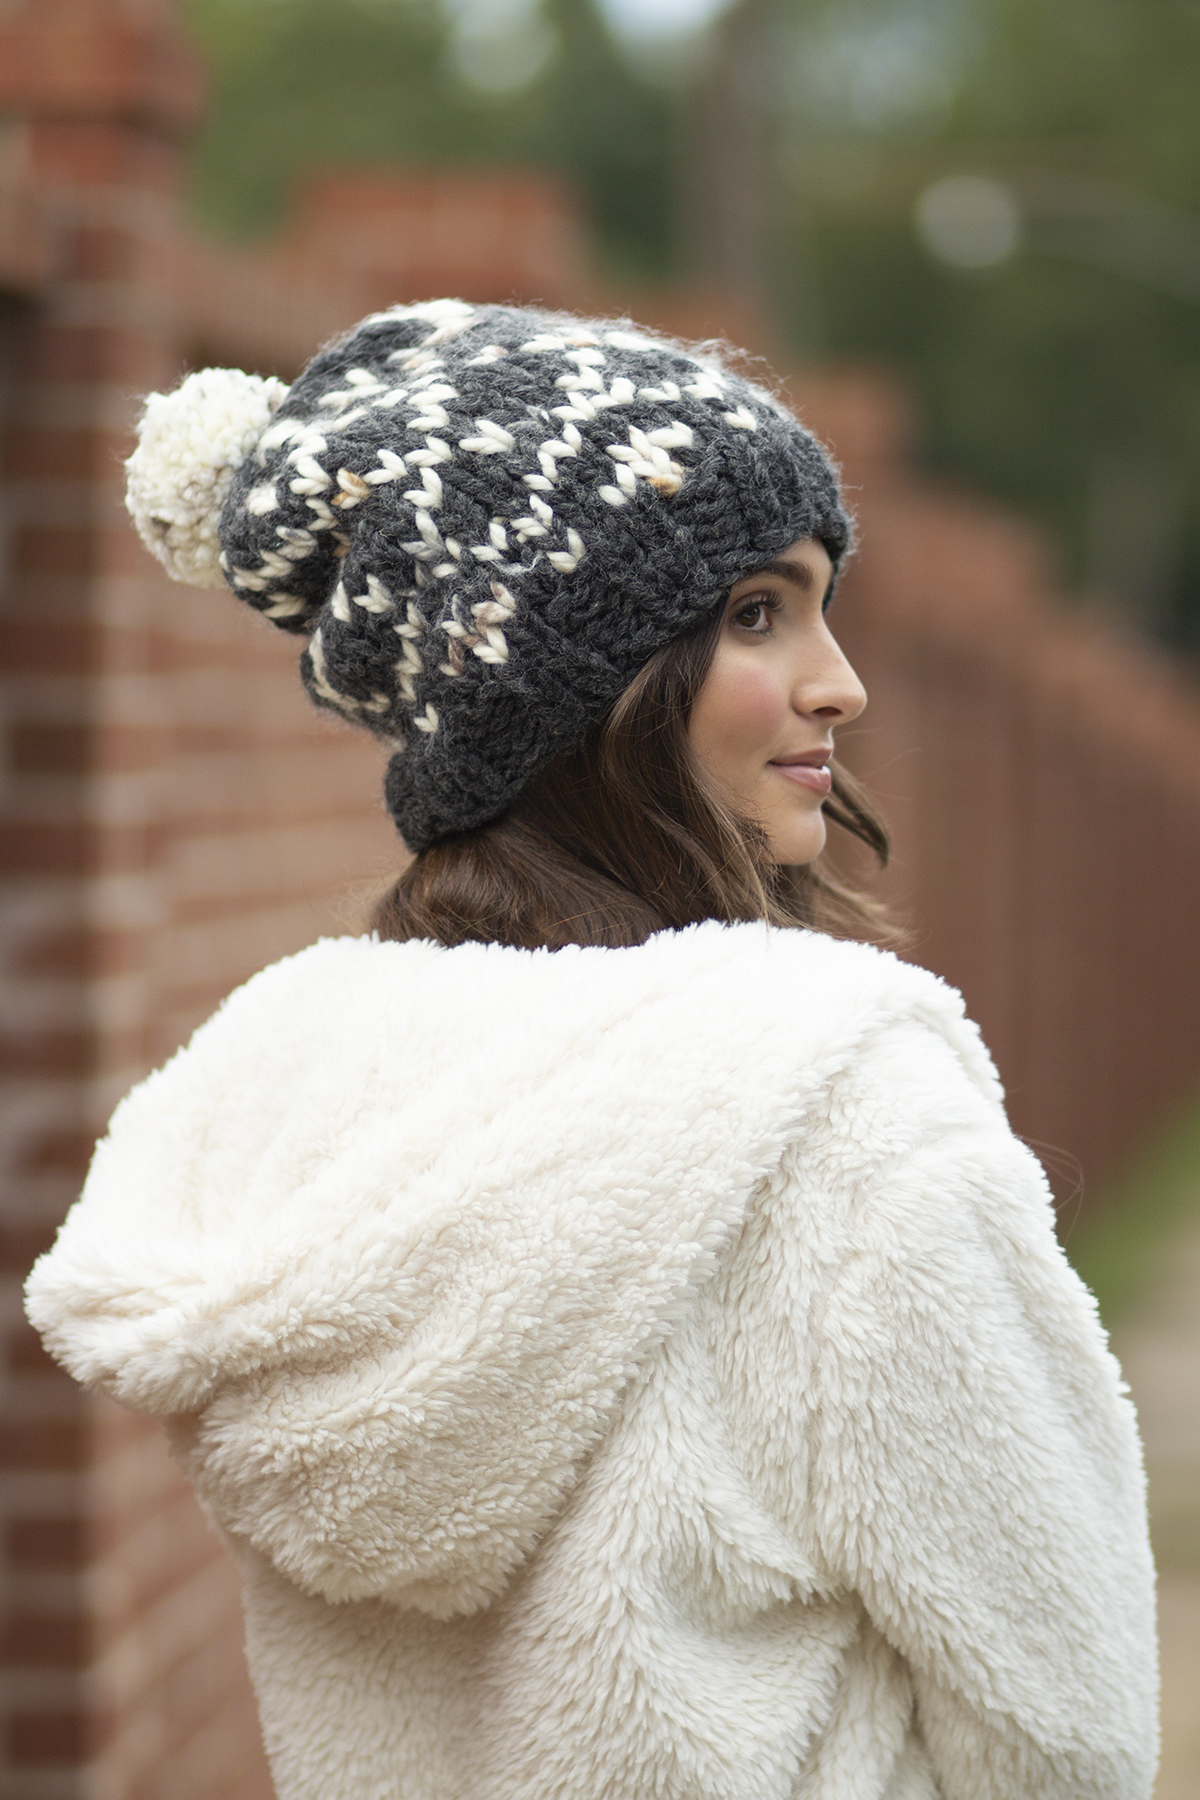
So cozy!
You’ll cast on with US Size 15 (10 mm) 16″ circular for the 2×2 ribbed brim, then move to US Size 17 (12 mm) needles for the body of the hat.
Big and beautiful.
The Fair Isle diamonds pattern is simple enough. The use of multi-colored yarn creates a more syncopated rhythm to the color than straight solid-on-solid, although you could certainly use a coordinating Be Wool color in place of the Multis. I’m wondering how 109 Tango, a rich red, would look!
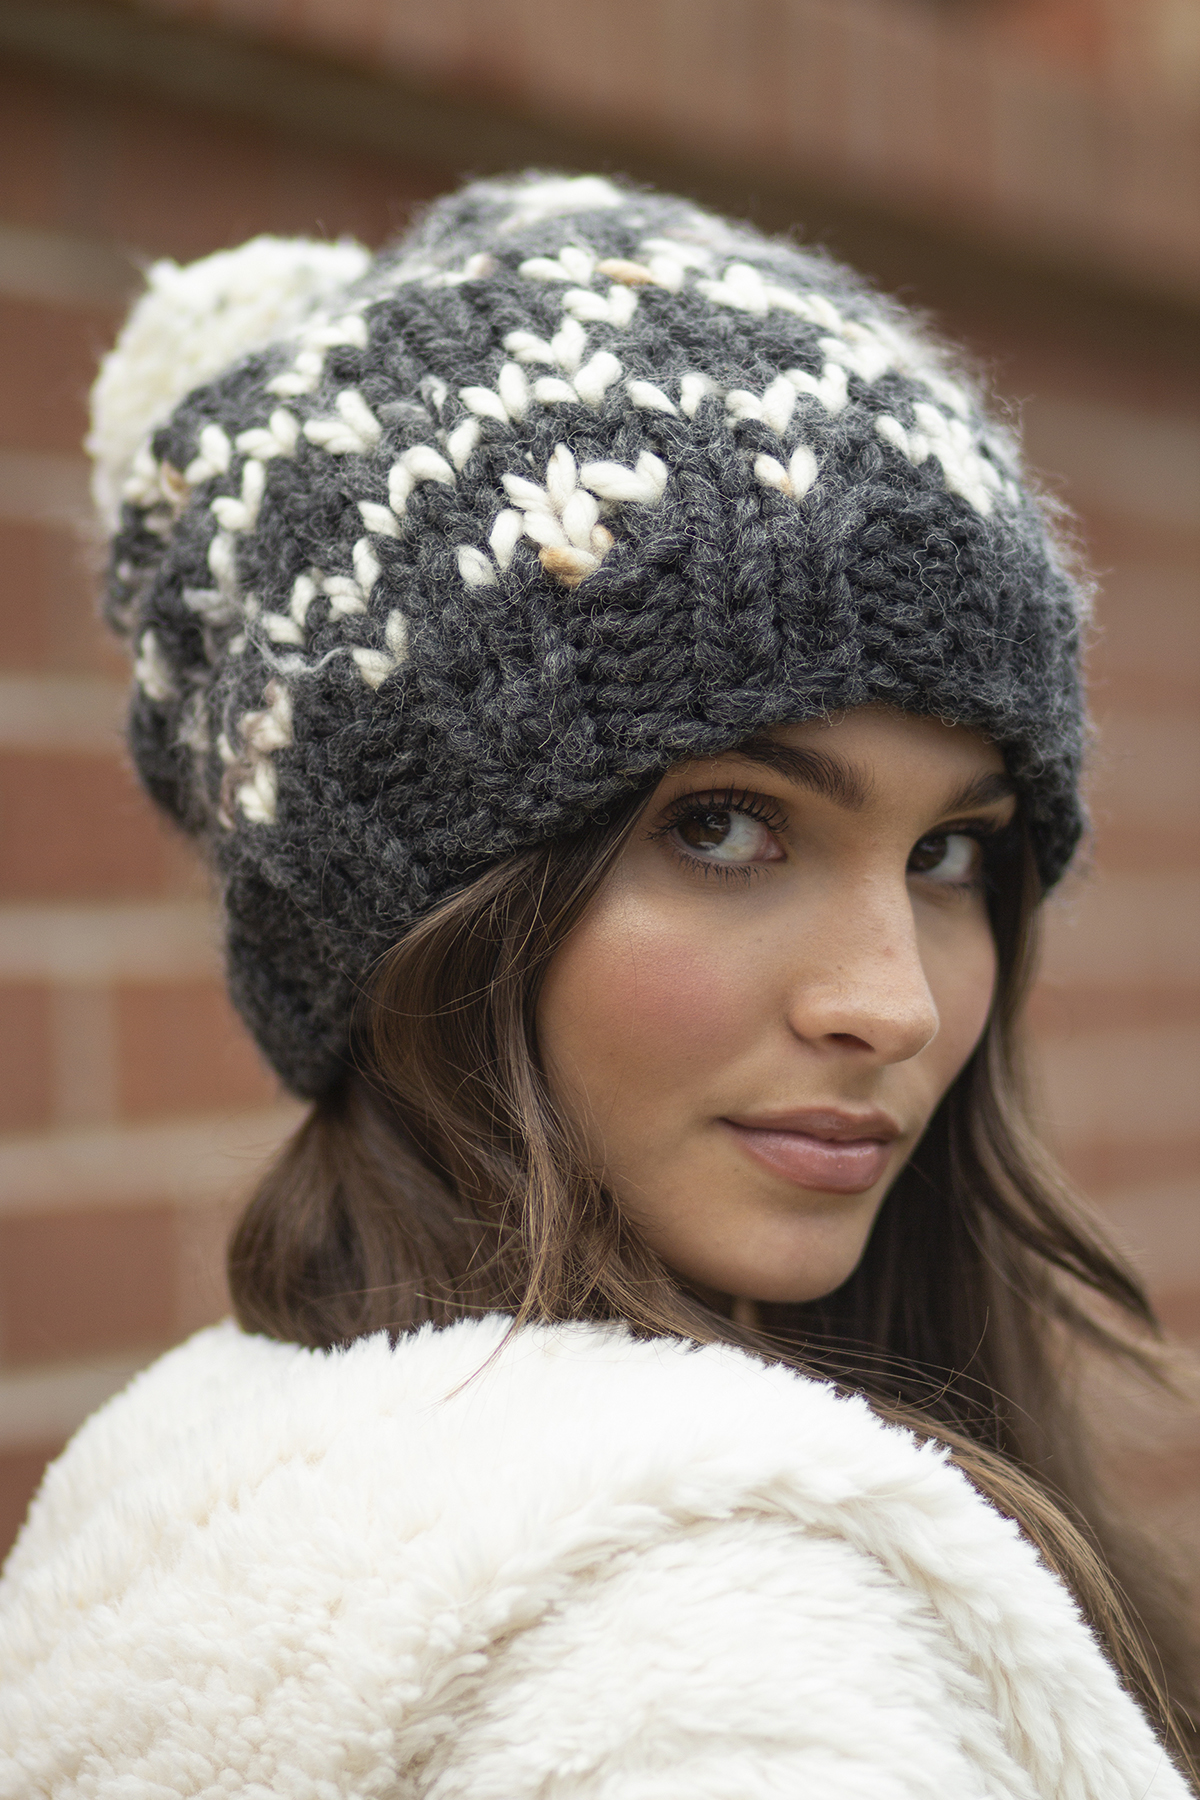
Pom pom-tastic!
Pom pom? Check! And I do love how Be Wool Multis creates a variegated topper without any extra work on the crafter’s part. It’s literally the crowning touch!
Whether you’re looking for a last minute gift, or a fun, fast project for yourself, the Embers Hat has you covered.
We hope you have a stress-free weekend, full of joy.
This is part 9 in a 12 part series highlighting designs from our 12 Days of Winter, series 5 Edition
Hello there! As we inch closer and closer to the end of the Holiday Season, you are likely on the go non-stop with errands like shopping, running to the post office, sprinting for groceries and more. With that in mind, this project is the perfect way to stay creative while staying moving. Winterworld is a crochet table runner (or beautiful accessory!) that is made from many small twinkling snowflake motifs assembled as a statement piece that you’ll cherish for years to come.
Winterworld Table Runner
The snowflakes are made using Bella Cash and Universe held together. I love this combination so much, the Bella Cash is made from Merino, cashmere and nylon making it ultra soft, yet very sturdy to work with. The Universe is made from cotton, linen, polyamide and glitter creating a blend that has depth and a bit of sparkle.
Some techniques you’ll explore working on this project are:
Working with 2 yarns held together
Working in the round
Using a picot to create a motif
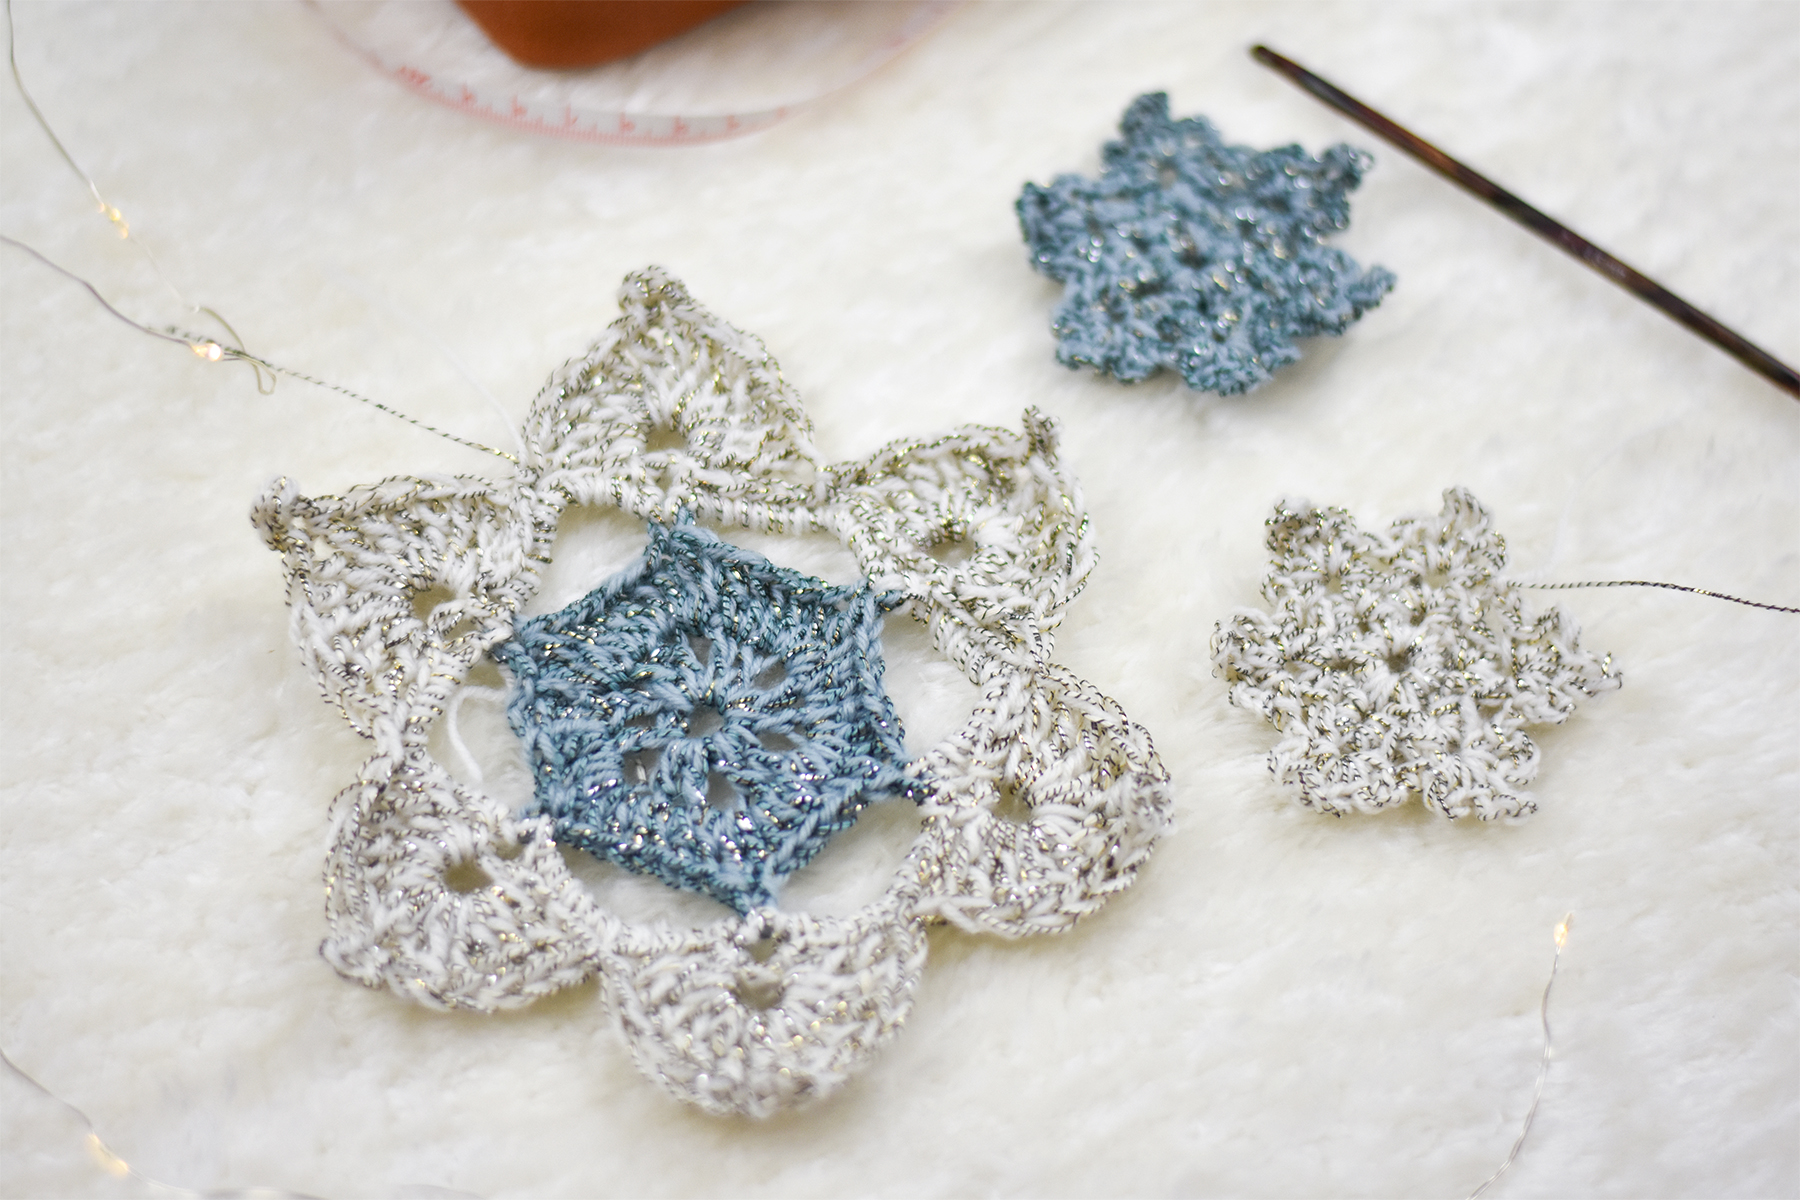
The end result makes beautiful snowflakes with an understated twinkle – perfect for bringing the magic of the season into your home.
Snowflake motif up close with Bella Cash and Universe held together.
The finished piece also makes for a very fun wrap or stole if you’re looking to add some festivity to your look!
Winterworld used as a beautiful and cozy stole.
Winterworld was intentionally designed so that you can work on it anywhere and everywhere! Bella Cash and Universe are each wound into 50 g balls which are the perfect size for stashing into a small project bag with your crochet hook. With each snowflake being made individually, you only have to worry about 1 of each yarn at a time being with you, and making little snowflakes is quick and easy no matter where you are!
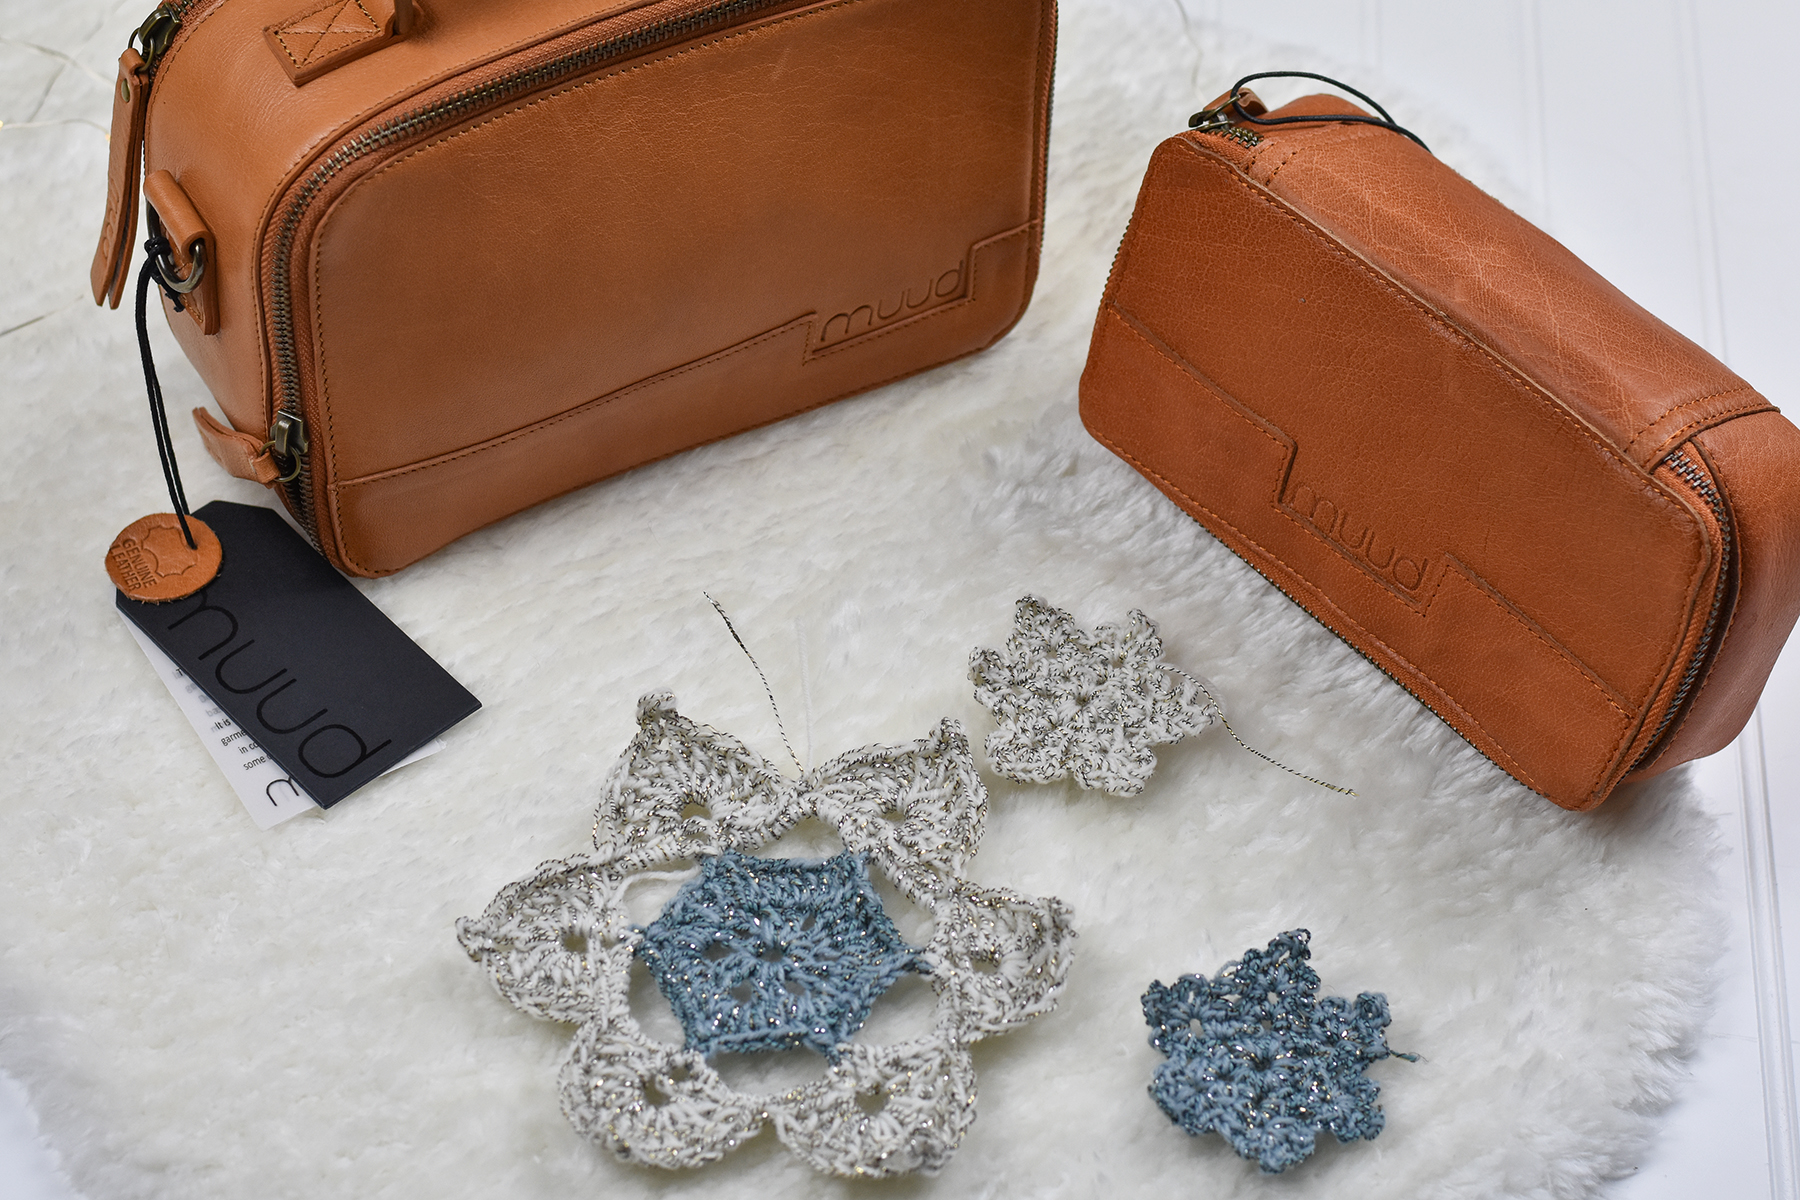
Individual Snowflake Motifs
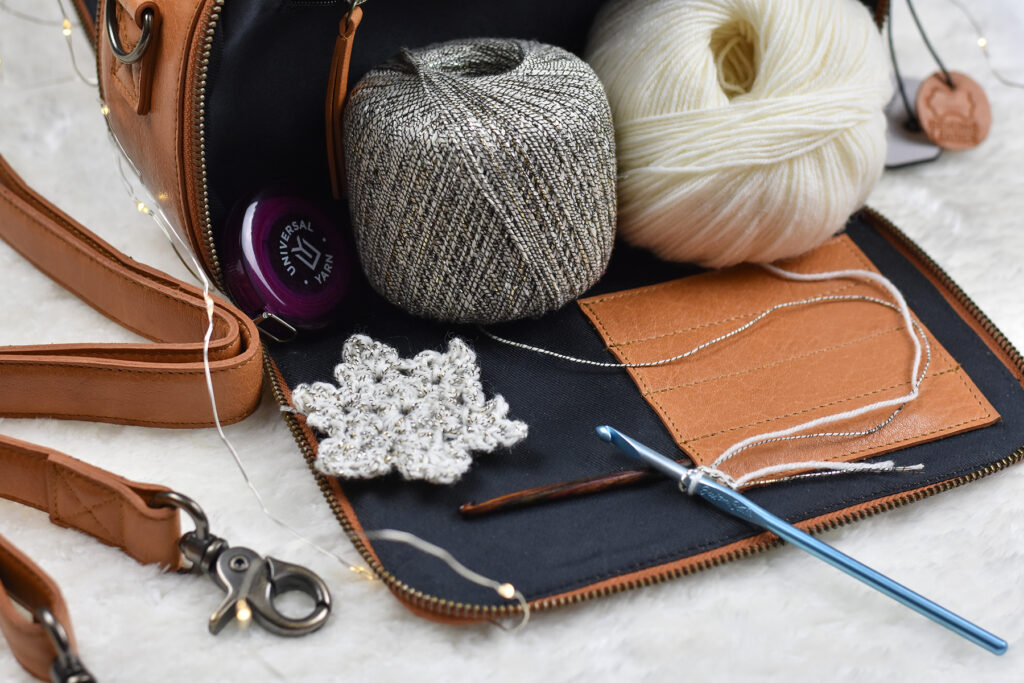
For getting out and about with yarn, I’m obsessed with some of the muud handcrafted leather products that we carry! For this project specifically, I recommend the Hope crochet box or the Heaven bag. Hope is perfect for tucking in to a larger bag as it has a sleek shape, room for the 2 balls of yarn, and an elastic band for up to 6 hooks. It is compact, tidy, and just what you need for bringing a project along to any occasion.
Bella Cash and Universe in the project box, Hope
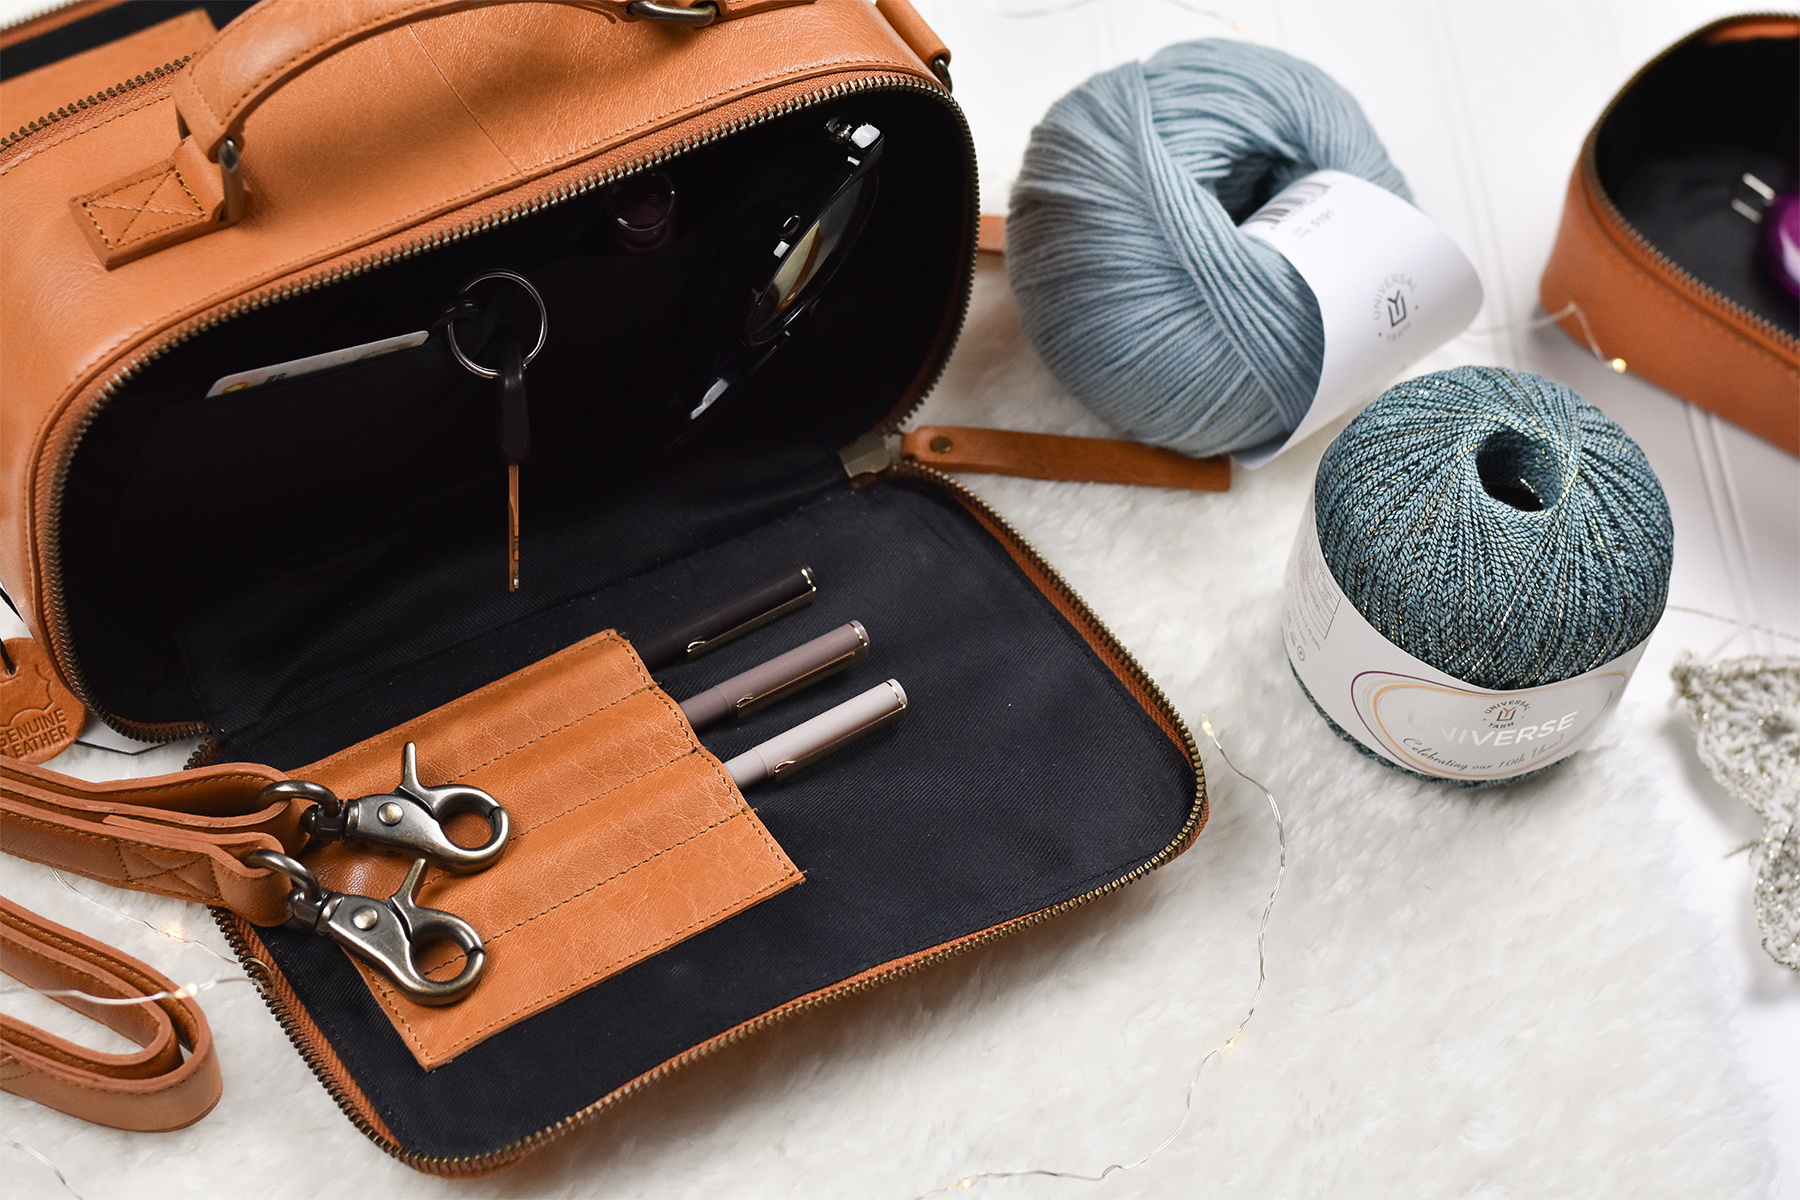
Heaven is my personal favorite. It comes with a strap to turn this project case into its own bag! Don’t worry about tucking and transferring a project bag into a tote, and just make this your all-in-one project purse! The two sides zip fully open to reveal compartments suited for small projects like Winterworld, as well as your daily essentials. With fiber in mind, the bag was designed to have holders for hooks or needles, as well as interior zip compartments and pockets.
One side of the bag, Heaven, used for the Winterworld kitOne side of the bag, Heaven, used for daily essentials
There are plenty of options for having your Winterworld project with you as you navigate holiday parties, shopping and more. Tell us in the comments, what are your favorite places to bring your on-the-go projects!?
Heaven and Hope, size comparison for on-the-go projects
Remember, these exclusive kits can be purchased at local yarn store retailers near you. Not in stock at your local shop? Ask them about drop shipping – order through them, and we ship to you! Each kit comes with the pattern, the yarn required to make it, a mini Universal Yarn project bag, and stitch marker. Use our store locator to find your nearest Universal Yarn retailer!
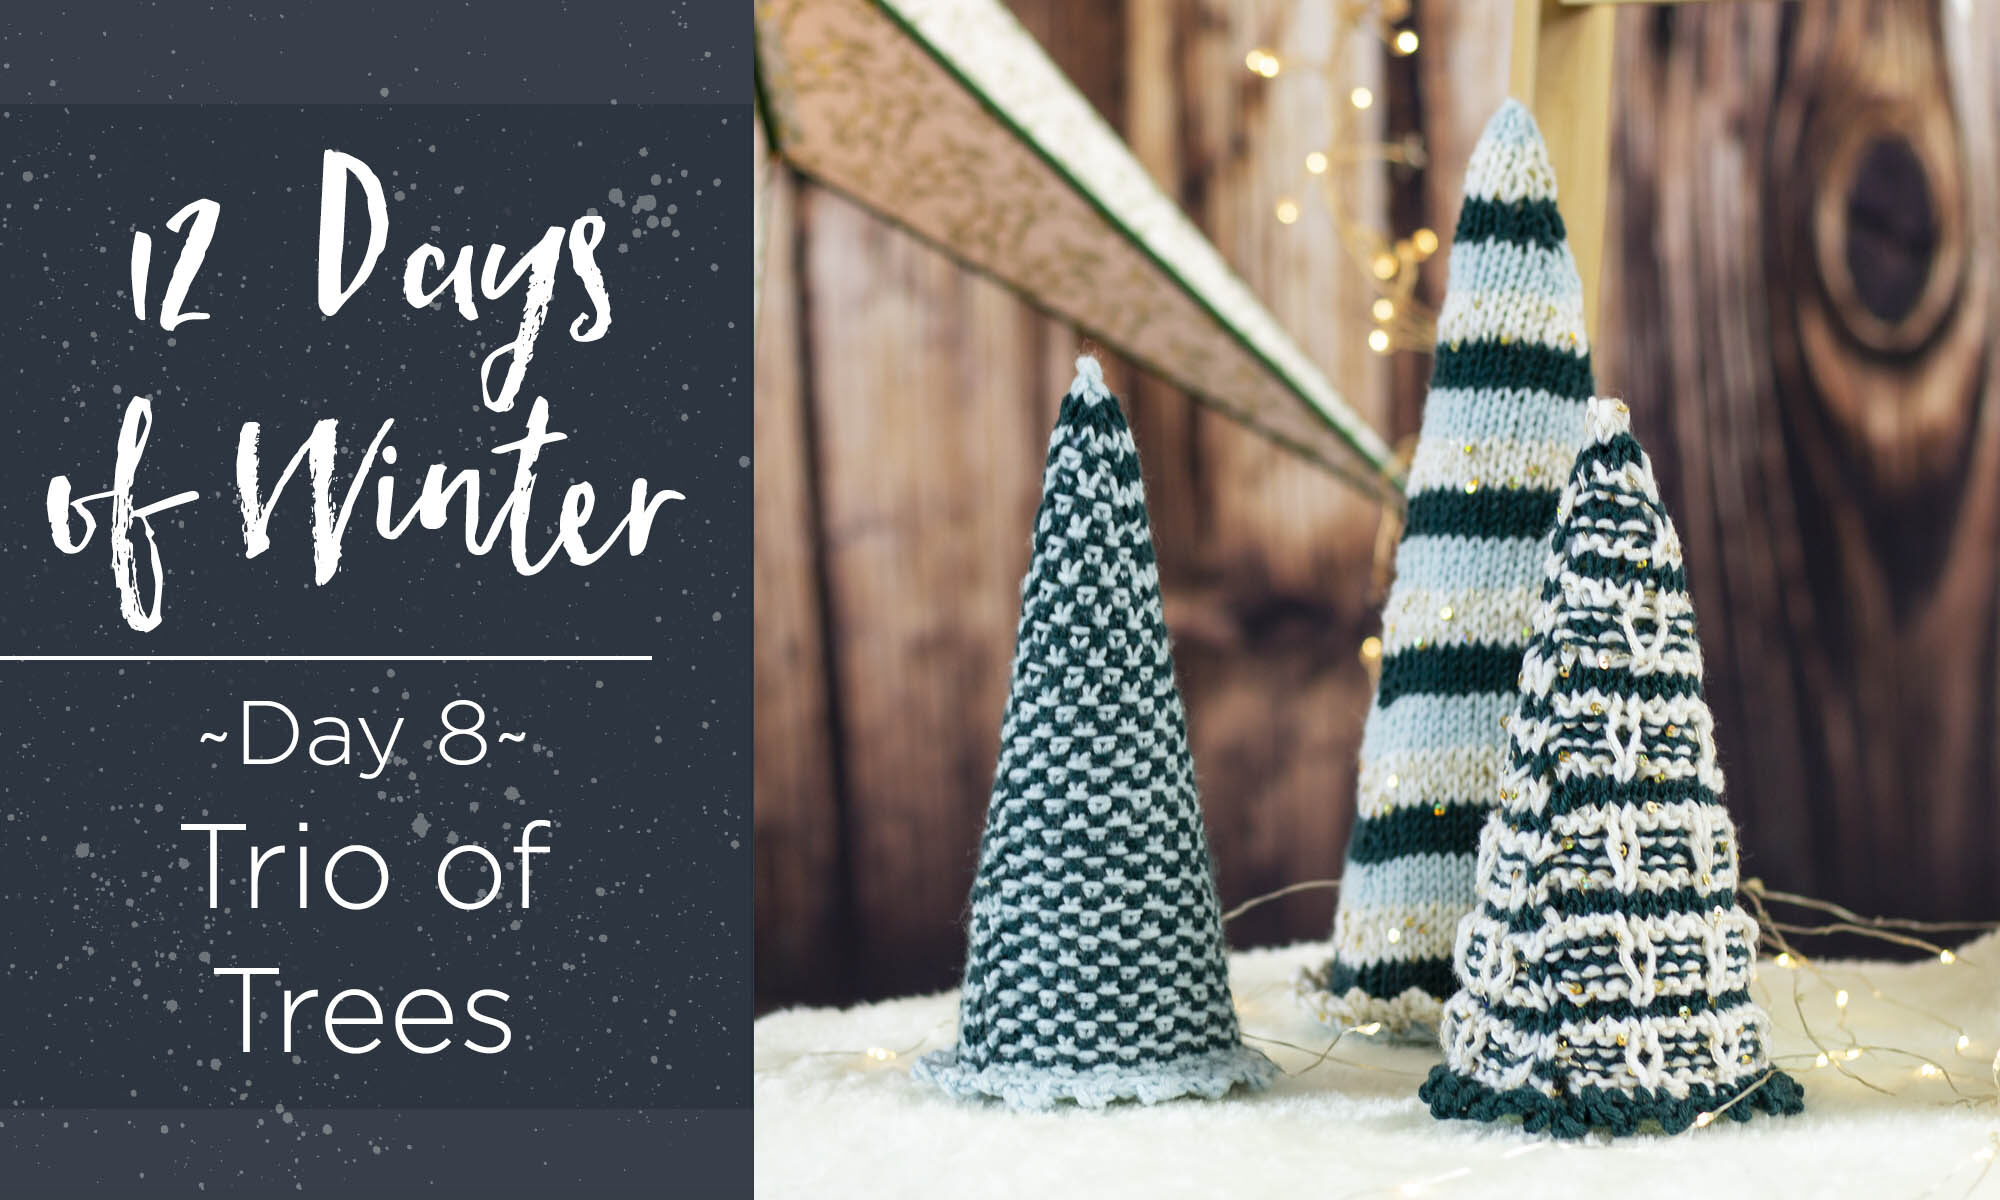
This is part 8 in a 12 part series highlighting designs from our 12 Days of Winter, series 5 Edition.
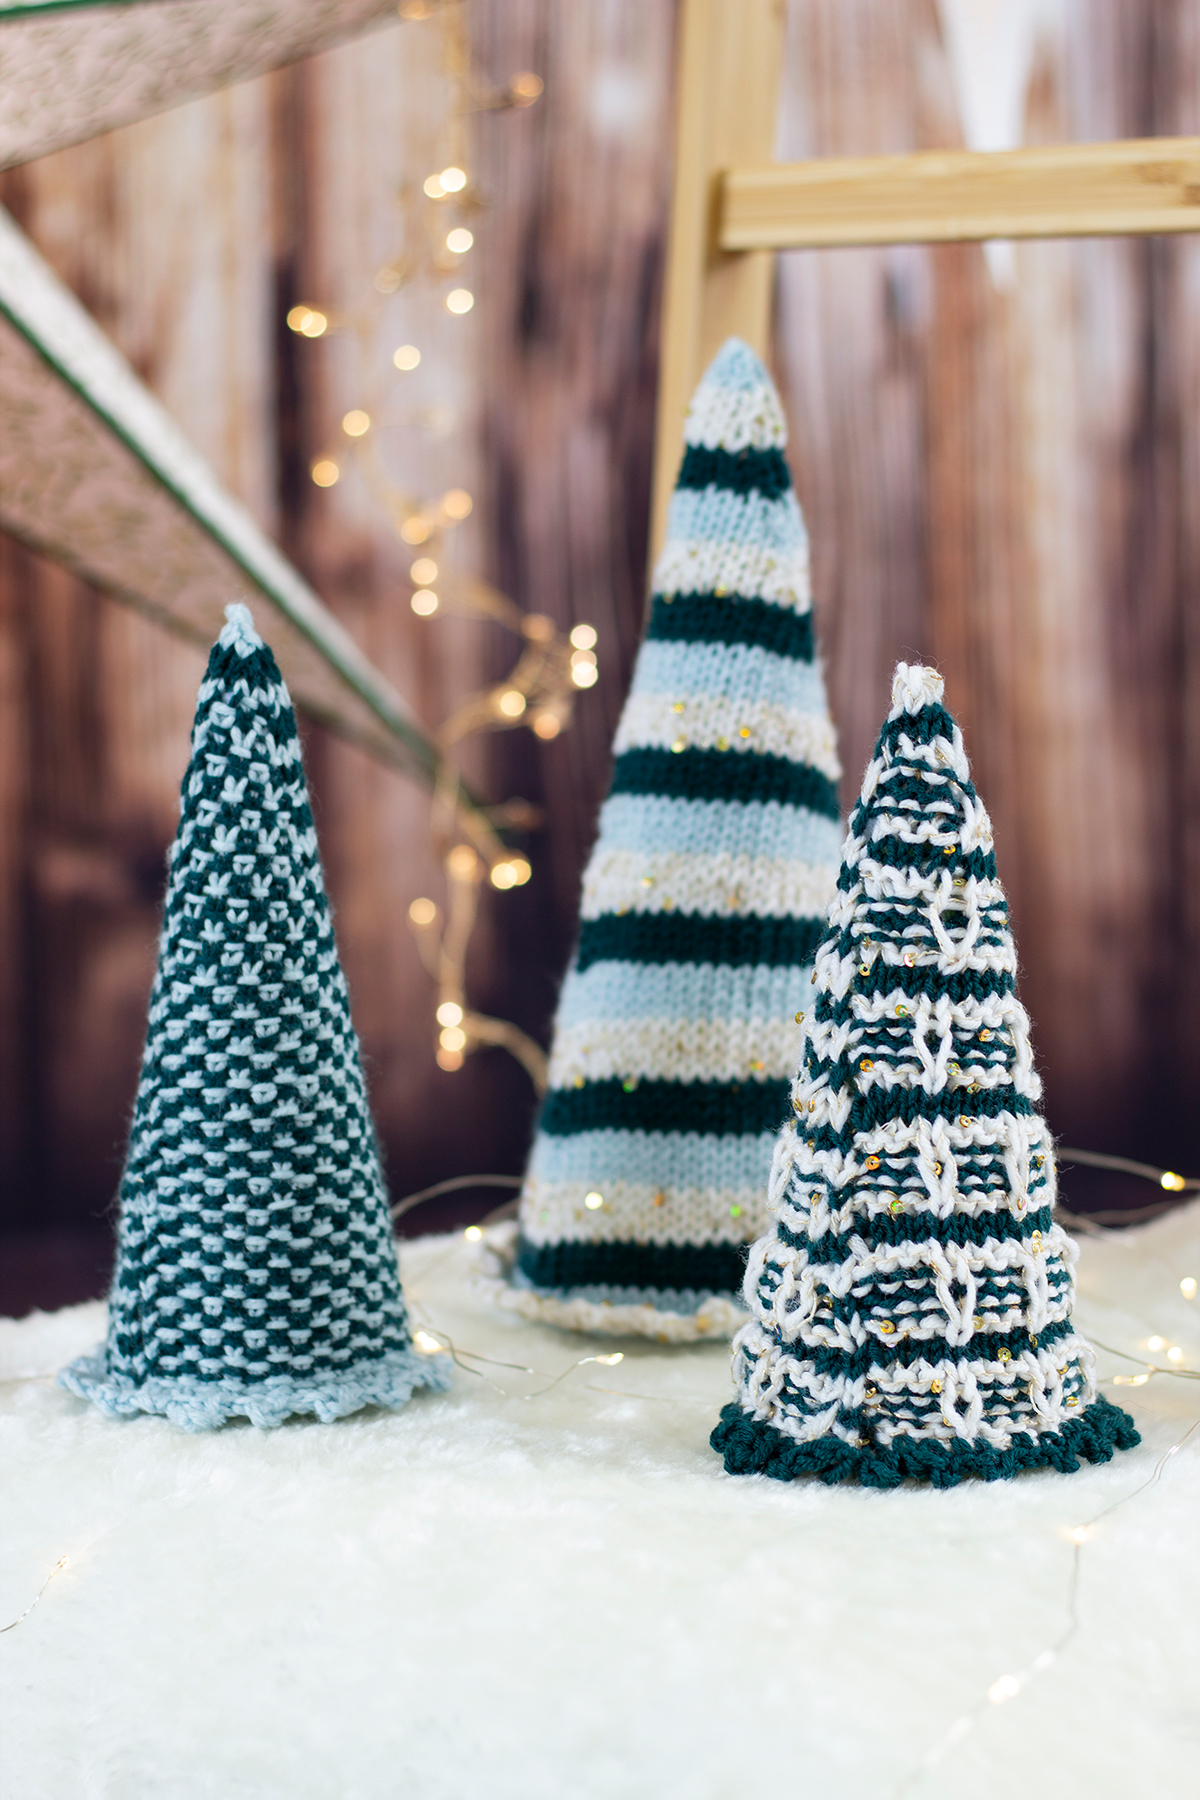
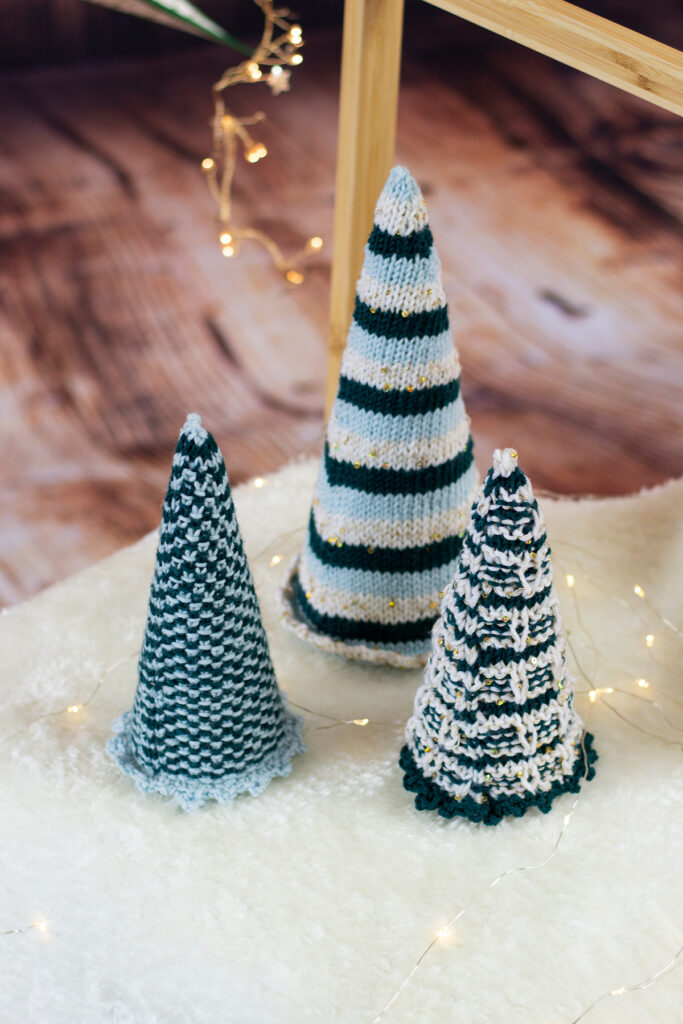
I love the winter season because of many things; seasonal drinks and items come back, joy seems to fill the air, and I always have fun shopping for holiday gifts! Another thing that I look forward to each season is winter-themed decorations! From driving by houses that shine brightly with different lights and figurines, to seeing what special and unique decorations each person sets up or creates, it’s clear to me that you can never go wrong with adding a little bit of spice and flair into your home with decorations for the season. Our Trio of Trees designed by Aubrey Busek is the perfect way to add seasonal décor to your home!
Trio of Trees
Let’s take a closer look: the Trio of Trees are made up of three elegant and timeless patterns that can be recycled year after year (which is such a huge plus!). The trio features a Linen Stitch Tree, a Striped Tree, and a Slipped Ornaments Tree. Each tree brings its own unique character to the table and can easily become a staple decoration in your home for the season. Featuring our Cotton Gold yarn as well as our Dona yarn, these two yarns held together and worked up create some magic to get you ready to jump into the winter season!
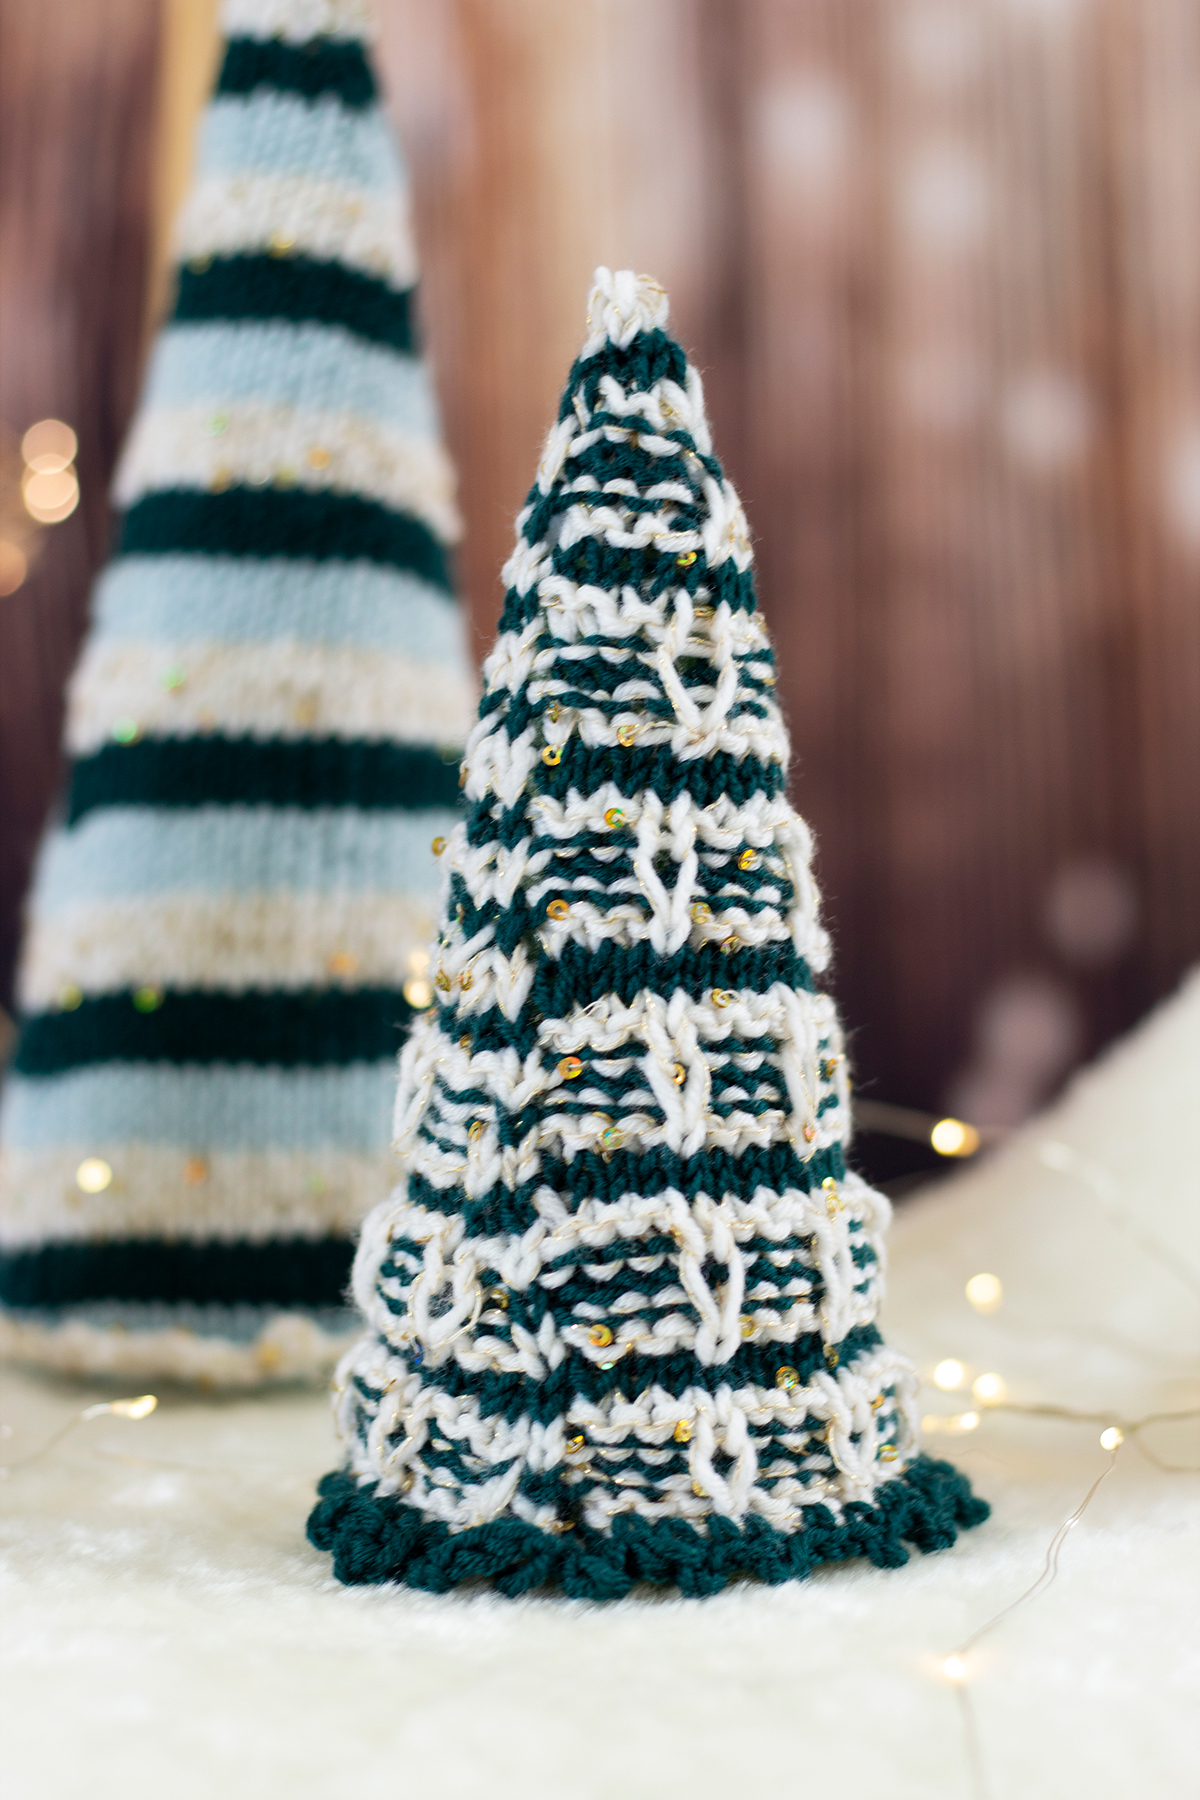
Slipped Ornament Tree
Each tree uses a different stitch pattern, which is fun because you are getting a “stitch sampler” with each tree you make! The Slipped Ornament Tree is my personal favorite, because it reminds me so much of a classic winter tree that we so often see during this time of the year. In this pattern, a special stitch called a Long Stitch is used. The yarn is wrapped twice around the needle, giving a “draped” effect throughout the tree. The delicate sequins strung through our Cotton Gold yarn creates a gorgeous shimmer that, when incorporated with the saturated colors of Dona, will have your guests do a double take and stop to admire this miniature forest in your home!
Linen Stitch Tree
You know those winter decorations that your family brings out year after year, no matter how “old” it gets? That is exactly what I think about when I see the Linen Stitch Tree. This specific tree instantly sends me back to sweet memories in the winter seasons spent with my family, decorating our home and getting ready for the upcoming events. The minimalist Linen Stitch tree offers a mix and match vibe to your holiday décor. You simply work knit stitches and slip stitches with yarn held in front to create a woven effect and provide texture to the tree.
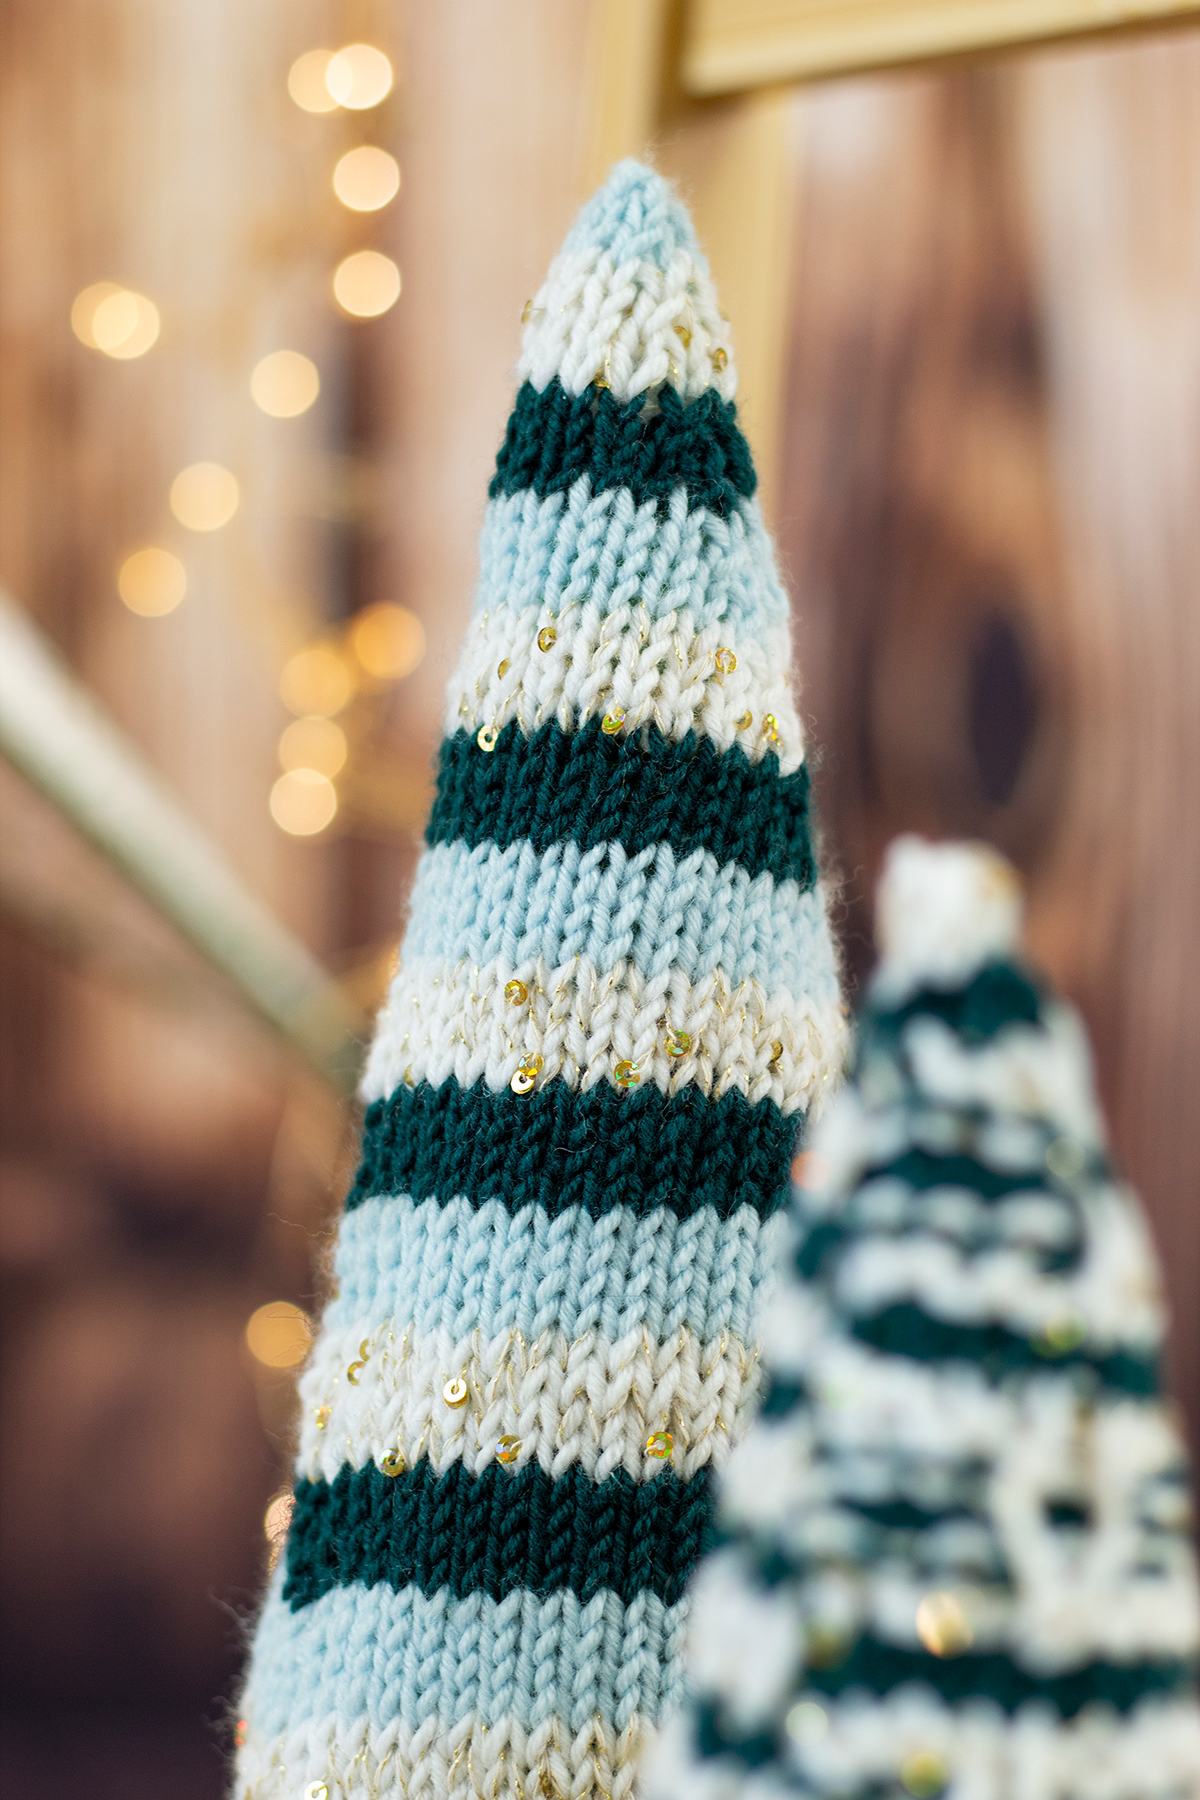
Striped Tree
Look at how it subtly glistens! The Striped Tree features a stockinette stitch pattern worked all the way up the body. A strand of each Dona and Cotton Gold are held together throughout the tree, and the Dona colors (Blue Hint, Balsam, Alabaster) are changed every four rows. The glimmer from Cotton Gold creates a dream-like aura of snow falling from the sky, which is fitting for the season! Although they are all effortless to make, the Striped Tree is the most minimalist pattern in my opinion because it is just stockinette stitch the whole way up! It is the perfect final addition to the Trio, because it adds the right amount of sophistication while still looking simple.
These trees are each knit in the round from the bottom up. A picot edge is picked up and worked after finishing to create ‘skirts’ on the bottom of each tree edge, and the tree tops are stuffed with poly-fill before finally placing around the Styrofoam bases. Remember to check your gauge! It is so important for accuracy and so it fits in the styrofoam cones properly. They are the perfect addition to your home for this winter season, and will be for years to come! These trees will make your friends, family, and guests feel welcomed in your home, in the holiday spirit.
Remember, these exclusive kits can be purchased at local yarn store retailers near you. Not in stock at your local shop? Ask them about drop shipping – order through them, and we ship to you! Each kit comes with the pattern, the yarn required to make it, a mini Universal Yarn project bag, and stitch marker. Use our store locator to find your nearest Universal Yarn retailer!
This is part 7 in a 12 part series highlighting designs from our 12 Days of Winter, series 5 Edition.
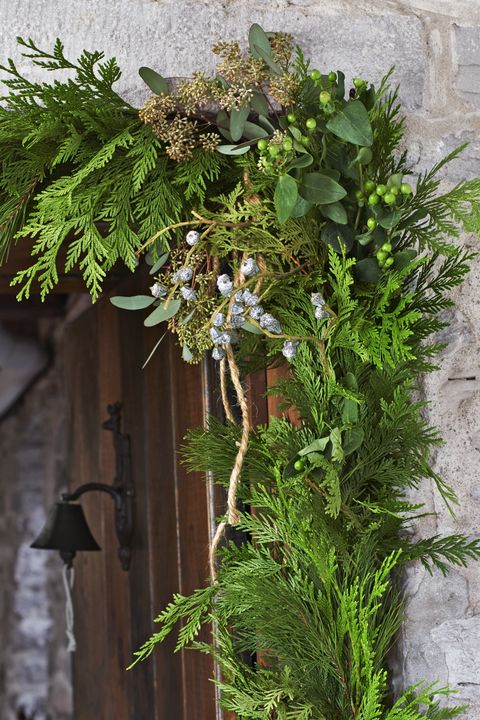
Glittering lights on trees and front porches, activities like ice skating, and delicious comfort foods are all special things about the winter season. Some might even call this time of year *enchanting*. I love driving around during December evenings and looking at holiday displays. Sipping hot cocoa and listening to holiday music while I look at decorations and ornamental garlands always makes me feel warm and fuzzy inside.
Image sourced from Country Living
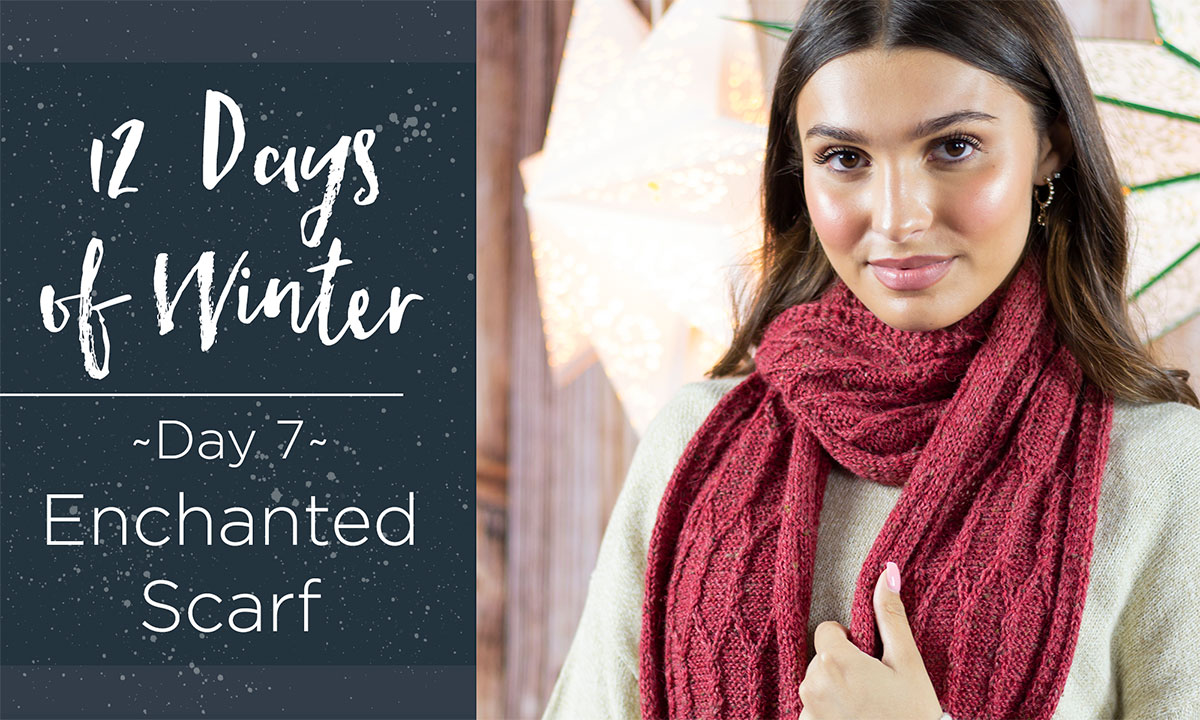
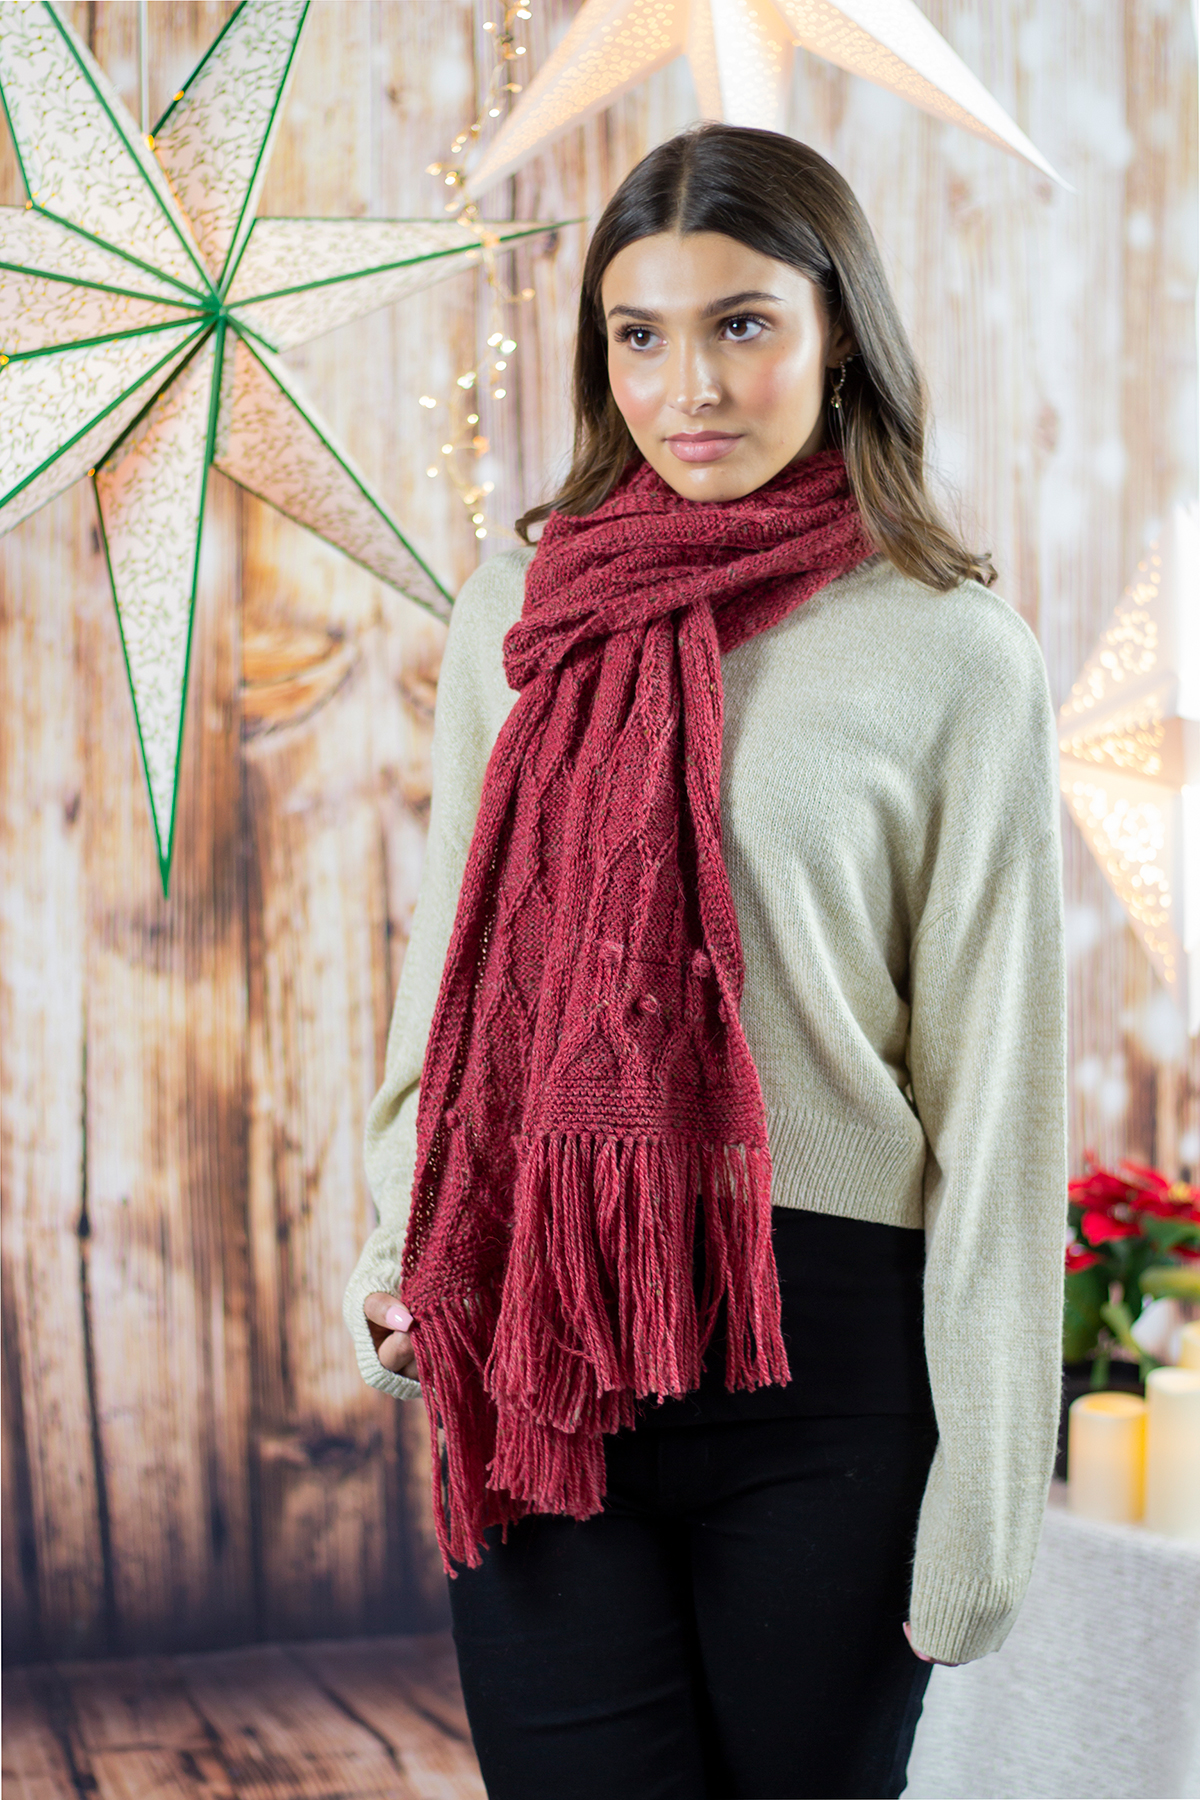
Garlands on banisters and front porches have always been some of my favorite decorations for the season. I have fond childhood memories of helping my Dad put ours up on the stairs and outside every year. Decorations like those served as my inspiration for the Enchanted Scarf, knit using Kingston Tweed.
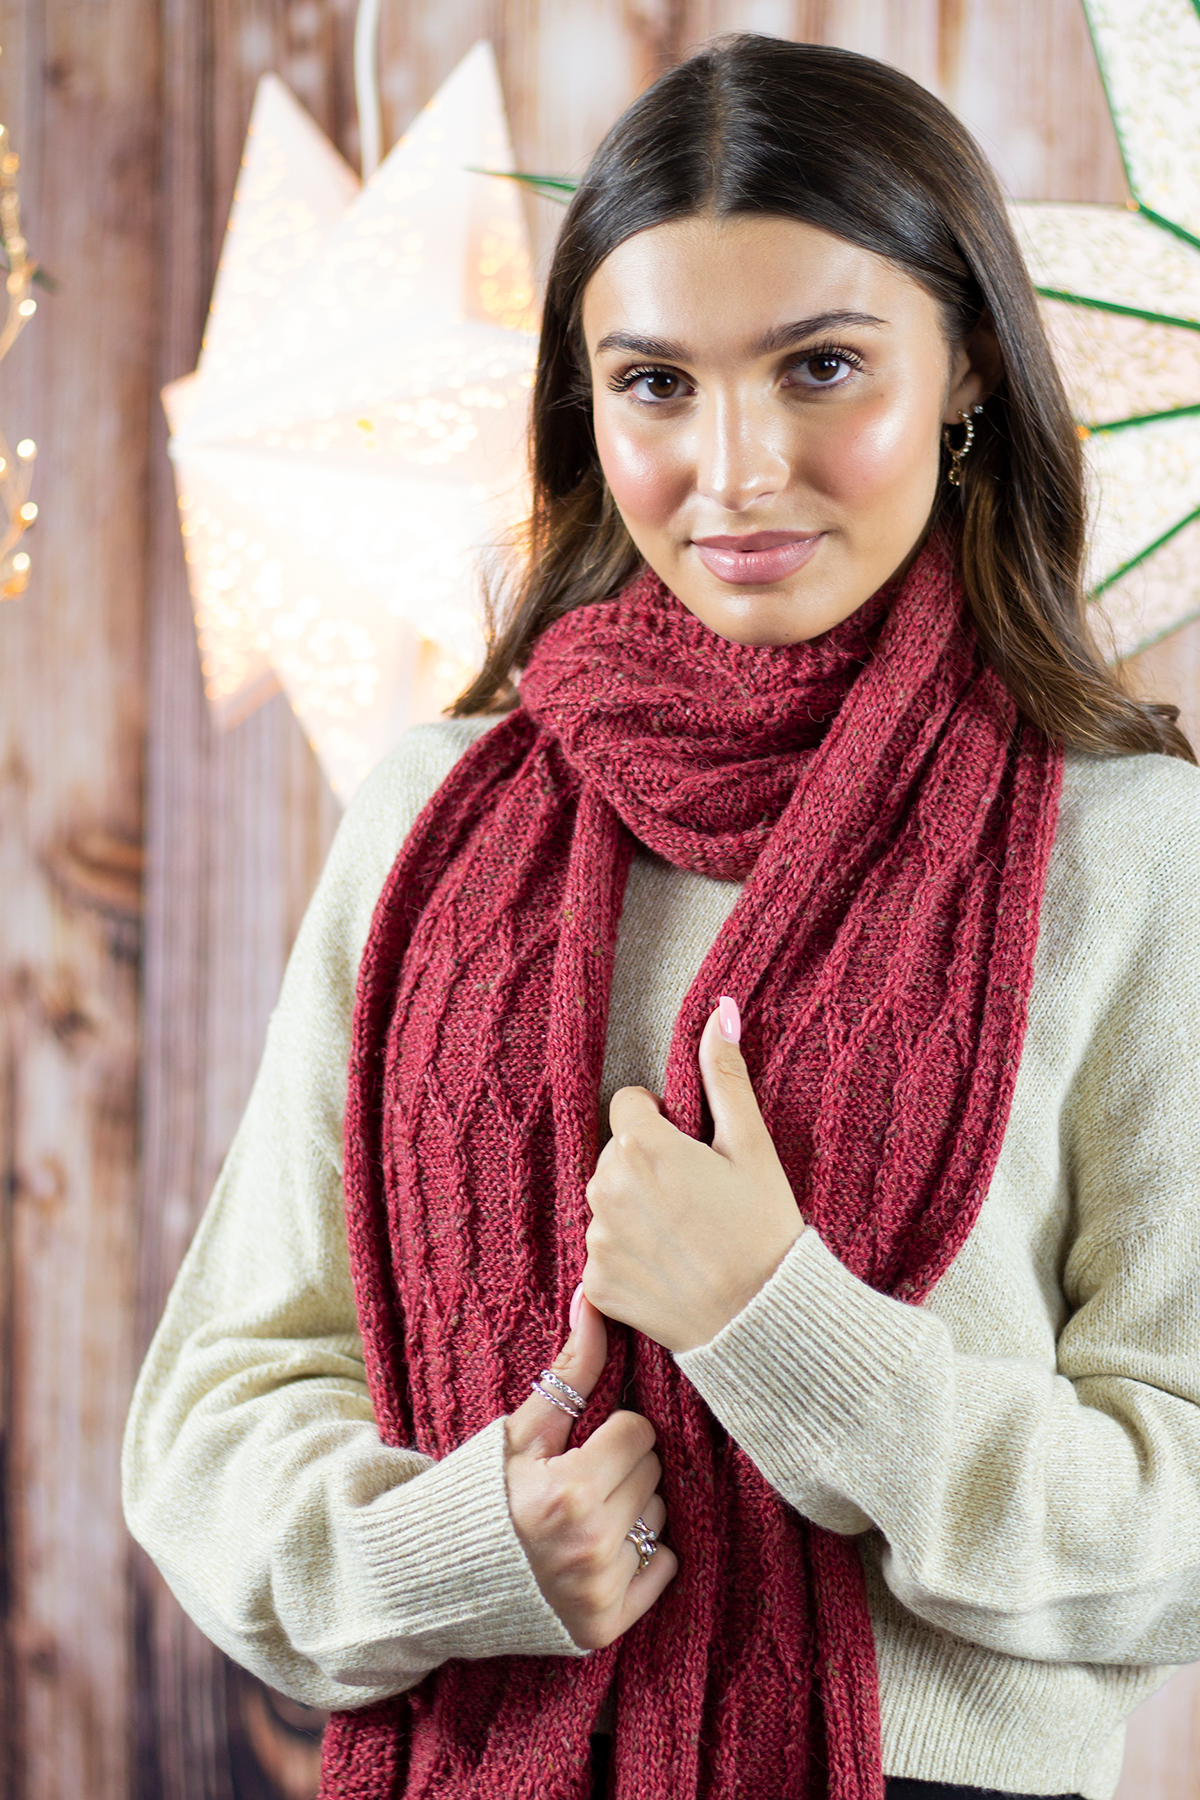
Enchanted Scarf – knit using Kingston Tweed in color 115 Garnet
Techniques you’ll explore in this pattern are:
Knitting flat
Following multiple charts and stitch guides
Cables
Twisted stitches
Adding fringe
Kingston Tweed is a light weight (#3) weight blend of alpaca, wool, and viscose, which adds the tweedy nubs. This beautiful yarn makes a great choice for garments and accessories that you want to have an elegant, yet rustic look and feel. The color 115 Garnet is a lovely warm red shade that we released last year, and I knew was a perfect choice for the Enchanted Scarf.
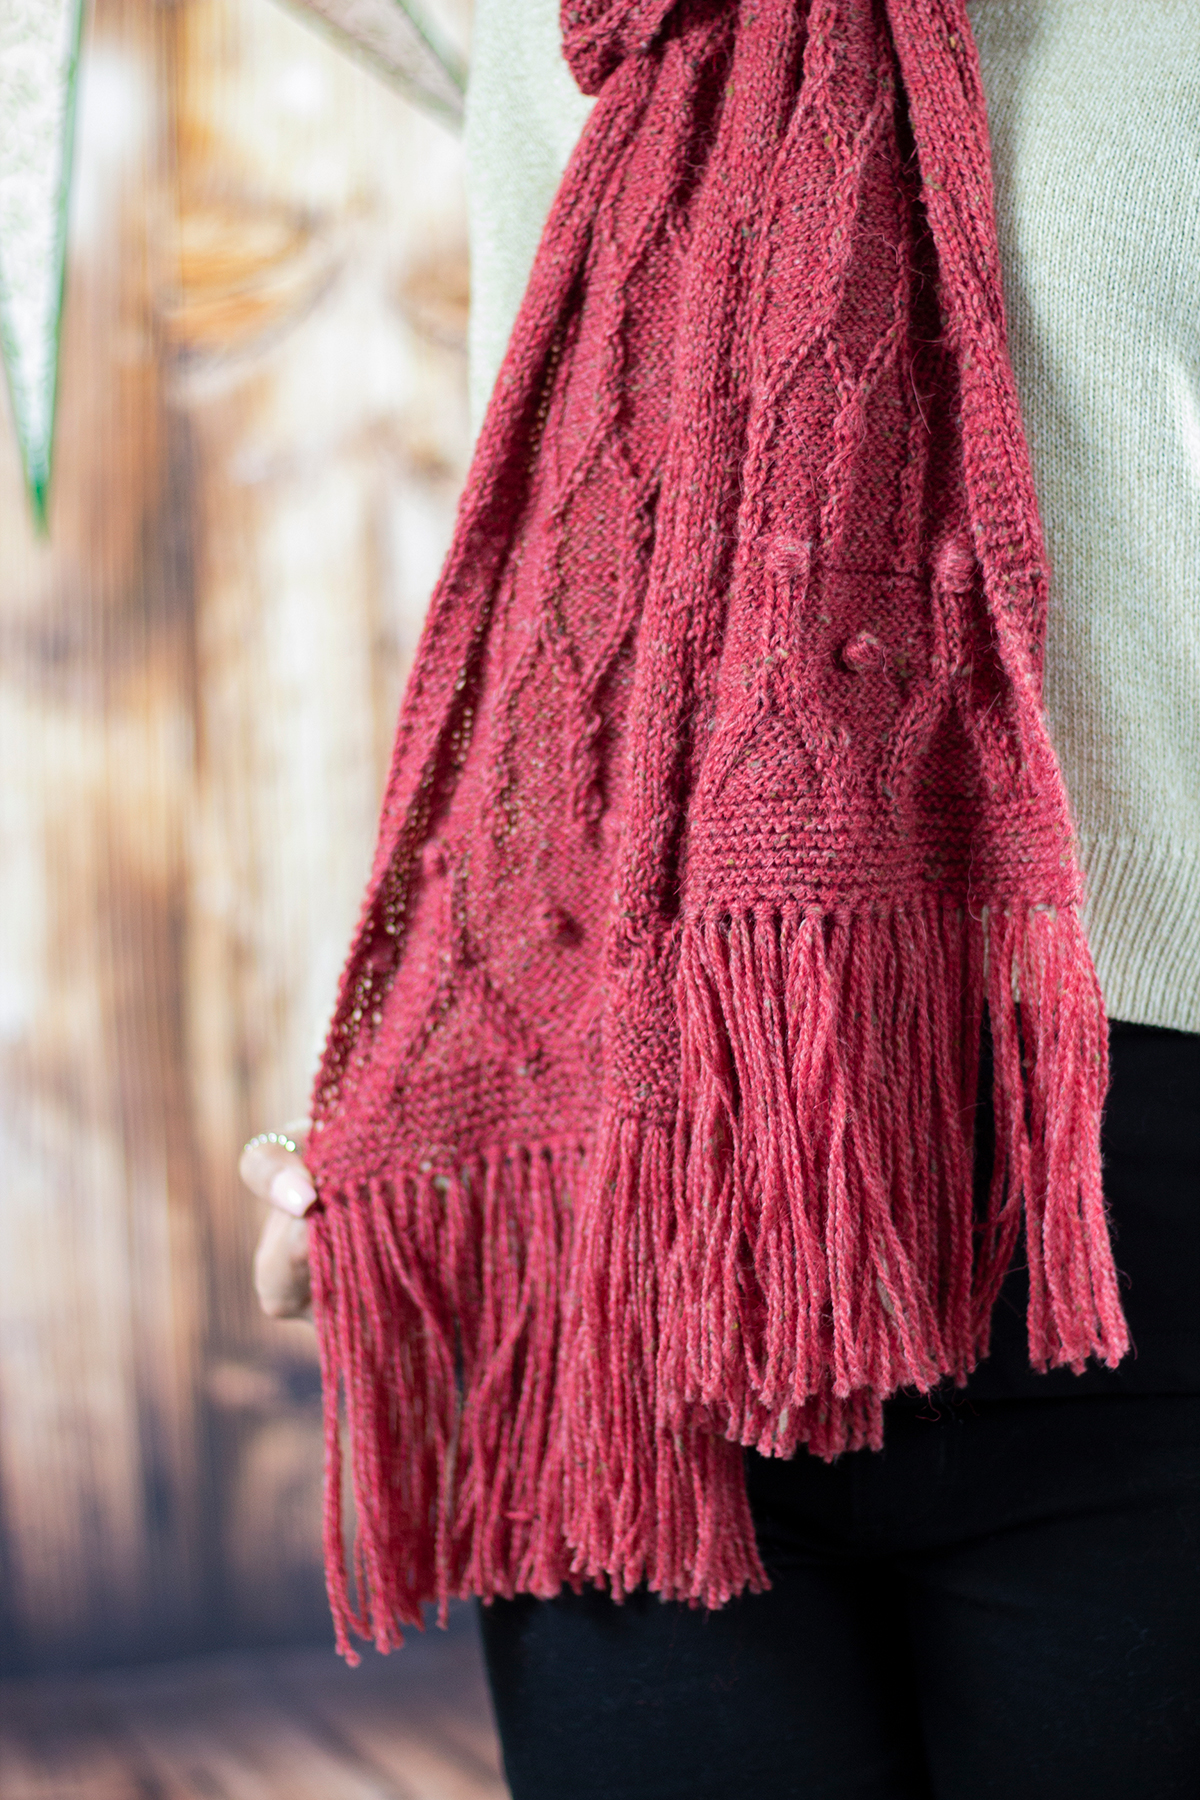
First, a border of garter stitch provides a base for the scarf, then a cable and bobble pattern is worked, creating a texture that reminds me of garlands decorating a mantle or porch. This stitch pattern is reversed on the opposite end of the scarf to create a mirrored appearance. The ‘main body’ of the scarf is worked in a twisted lattice style stitch pattern. I absolutely love twisted stitches. They are delicate miniature cables, and add a sophistication to any stitch pattern. The lattice style pattern reminds me of strings of lights or popcorn on a tree, or lights decorating a house. You’ll work a matching garter border on the other end of the scarf before binding off.
Finally, fringe is added to both ends of the scarf. It reminds me of icicles, and honestly, I think all scarves are better with a bit of fringe. In addition to adding a little ‘Je ne sais quois’ to the scarf, it also shows off the yarn in it’s simple beauty. Kingston Tweed is a yarn with so much texture of its own, that something like fringe shows off all the little details in each strand.
Another textural knit element I love are bobbles! In addition to choosing them as part of this design, there are other patterns in our 12 Days of Winter collection that feature bobbles. They are a whimsical element that adds dimension to add to any pattern. Throughout the 12 Days of Winter blog posts, we like to offer tutorials, as well as tips and tricks for yarns and techniques featured in the kits. Today, I’d love to share with you all my tutorial for working bobbles in stockinette stitch. You can view the video here at this link, and watch below.
Bobble Tutorial by me
As I mention in the video, bobbles can be worked in a variety of different ways, so please refer to your pattern for the specific method used. Although the Enchanted Scarf is knit using Kingston Tweed, I opted to use Uptown DK for the tutorial. It is a smooth 100% anti-pilling acrylic yarn, and provided great visibility for the tutorial. I hope this video is helpful and enjoyable to you. Tell us in the comments: what is a knitting technique you’d like a tutorial made for?
Our exclusive 12 Days of Winter kits can be purchased at local yarn store retailers near you. Each kit comes with the pattern, the yarn required to make it, a mini Universal Yarn project bag, and stitch marker. Use our store locator to find your nearest Universal Yarn retailer! Kits not in stock at your local yarn store? Ask about drop shipping – order through them, and we ship to you!
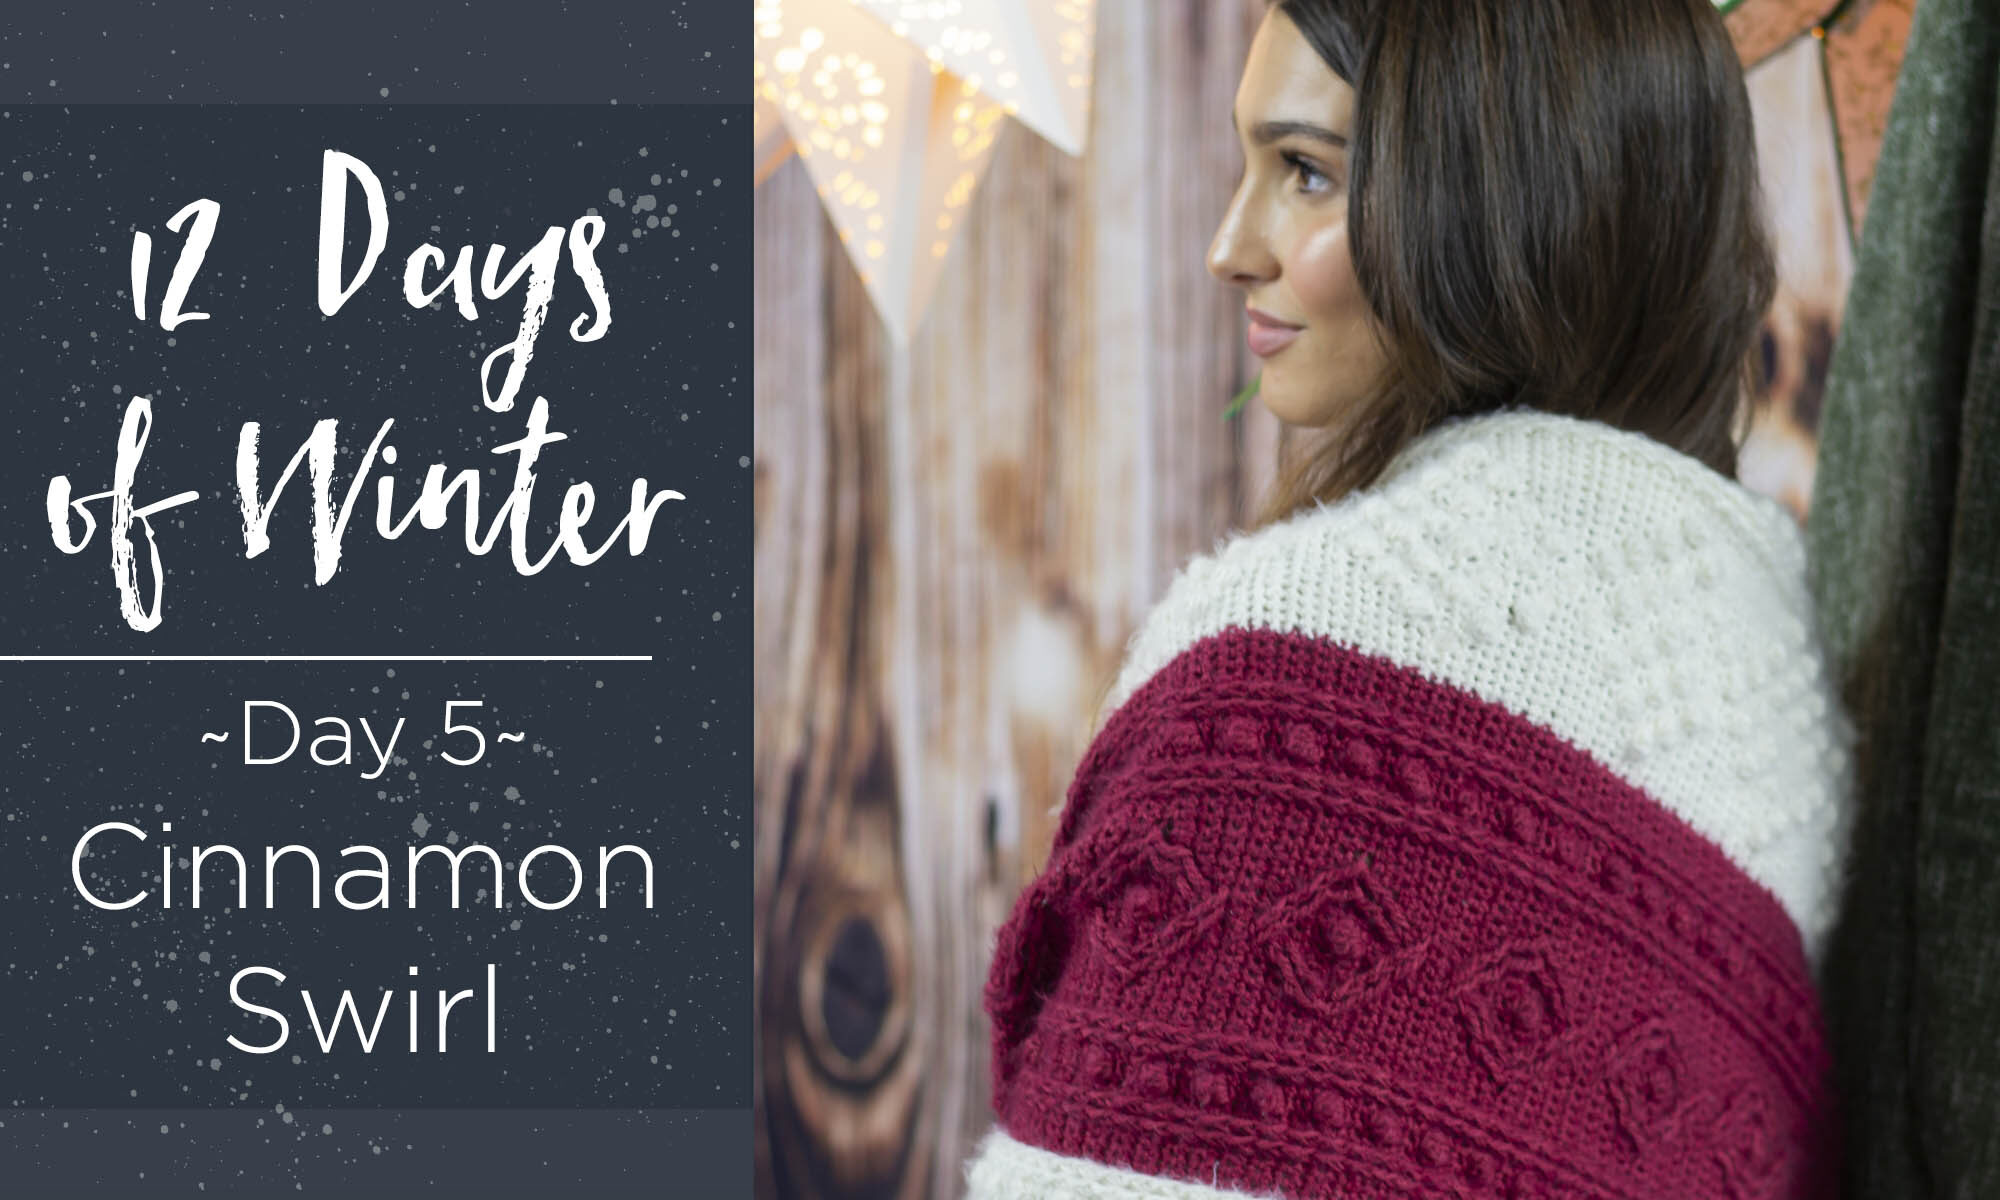
This is part 5 in a 12 part series highlighting designs from our 12 Days of Winter, series 5 Edition
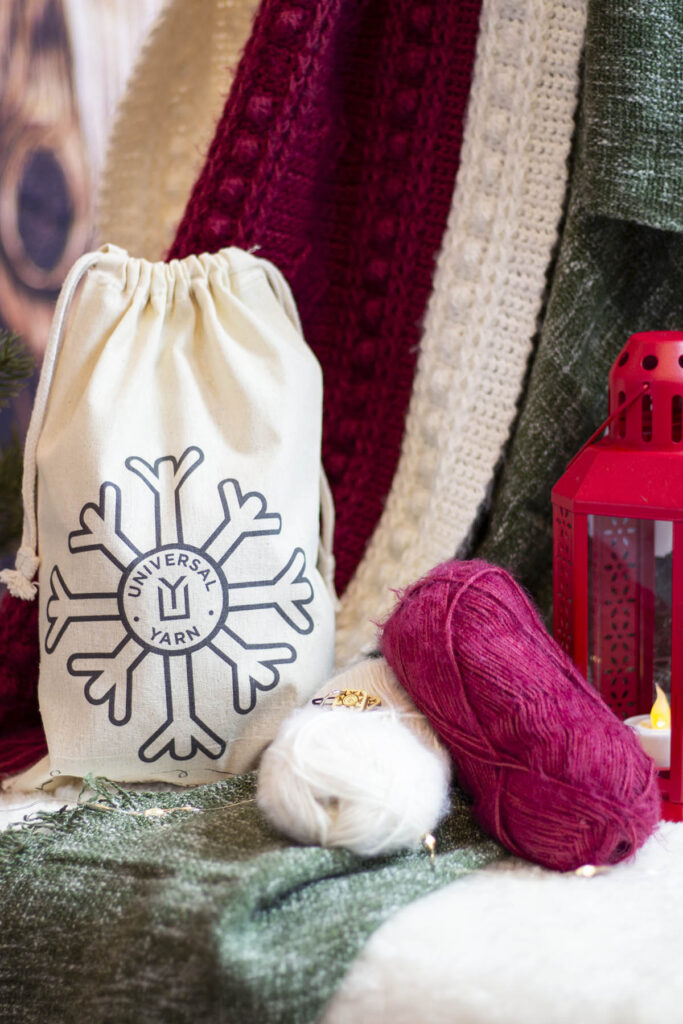
Hello there! I’m so thrilled to bring you our 5th day piece, the Cinnamon Swirl Stole. It’s made with ultra-soft Nymph, and is available in both a crochet version and a knit version , so it feels extra special. Nymph is a blend of Cotton and Polyamide and is genuinely one of the softest yarns I have worked with in a long time! The finished project feels cozy and luxurious – the perfect item to treat yourself. As an extra bonus each of these kits comes with a bonus project bag and stitch marker!
Nymph with bonus kit items – a project bag and stitch marker!
I had the opportunity to design this as a crochet piece first, serving as the inspiration for the knit kit. We will spend some time in this post talking about a special technique involved for crochet – how to join panels as you work.
Cinnamon Swirl, Crochet Version
Before we do that though, can we just take a moment to “Ooh!” and “Ahh!” over the knit companion to this piece!? It’s stunning! this knit version is all worked in one panel using an Intarsia technique for the colorwork, while the crochet version makes one panel at a time, but they attach as you go.
Cinnamon Swirl, Knit Version
To accomplish the crochet join technique, you’ll execute what the pattern calls a “Slip Stitch Sequence” at the end of every other row. This will connect the new panel to the existing one with a practically invisible effect. It lets you achieve the same look as intarsia, while being able to focus on one set of pattern repeats at a time.
Cinnamon Swirl, Crochet Version
The pattern works from the bottom up, and you add new panels on the right hand side of existing ones. To do this, you join the new yarn at the bottom right corner of an existing panel, with the right side facing you, then chain the amount needed for the new one. you’ll turn the row like normal and work back towards the existing panel, then slip stitch to it to finish the row, and slip stitch one row up before turning to start the next row.
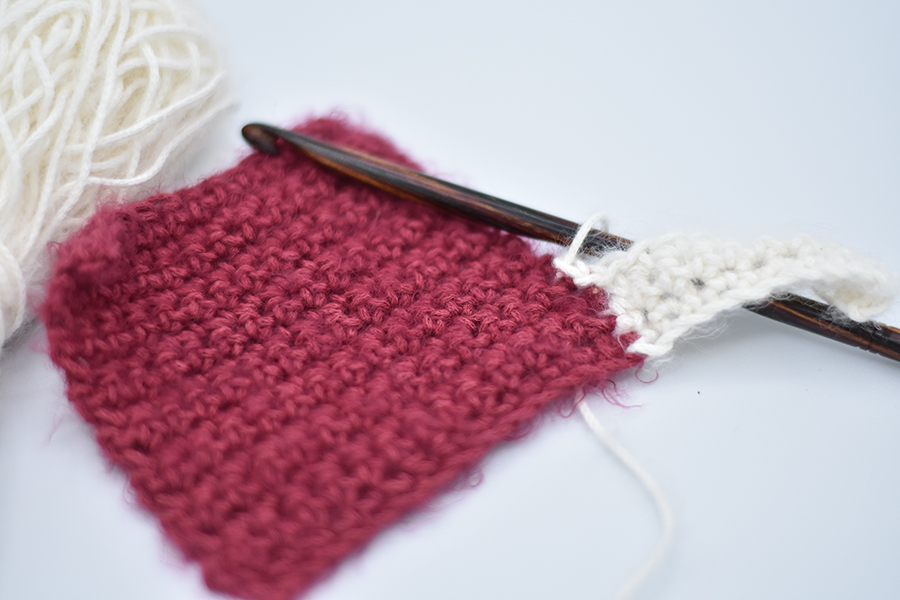
Swatch of the Panel Join from our tutorial
To make sure we don’t leave anybody hangin’ on this technique, we have recorded a tutorial for you! To follow along you’ll want to start out with a swatch of 15 sc sts x 16 rows, using an H/8 (5.0 mm) hook and the yarn Nymph. Have the second color handy along with your hook and press play. This will be a wonderful opportunity to try out this sequence before diving into the pattern.
Tutorial of the Panel Join “Slip Stitch Sequence”
I hope that this tutorial has been helpful to you, and I can’t wait to see how your beautiful Cinnamon Swirl Stoles turn out! Remember, these exclusive kits can be purchased at local yarn store retailers near you. Not in stock at your local shop? Ask them about drop shipping – order through them, and we ship to you! Each kit comes with the pattern, the yarn required to make it, a mini Universal Yarn project bag, and stitch marker. Use our store locator to find your nearest Universal Yarn retailer! Warmly, Ashley Jane McIntyre
This is part 4 in a 12 part series highlighting designs from our 12 Days of Winter, series 5 Edition.
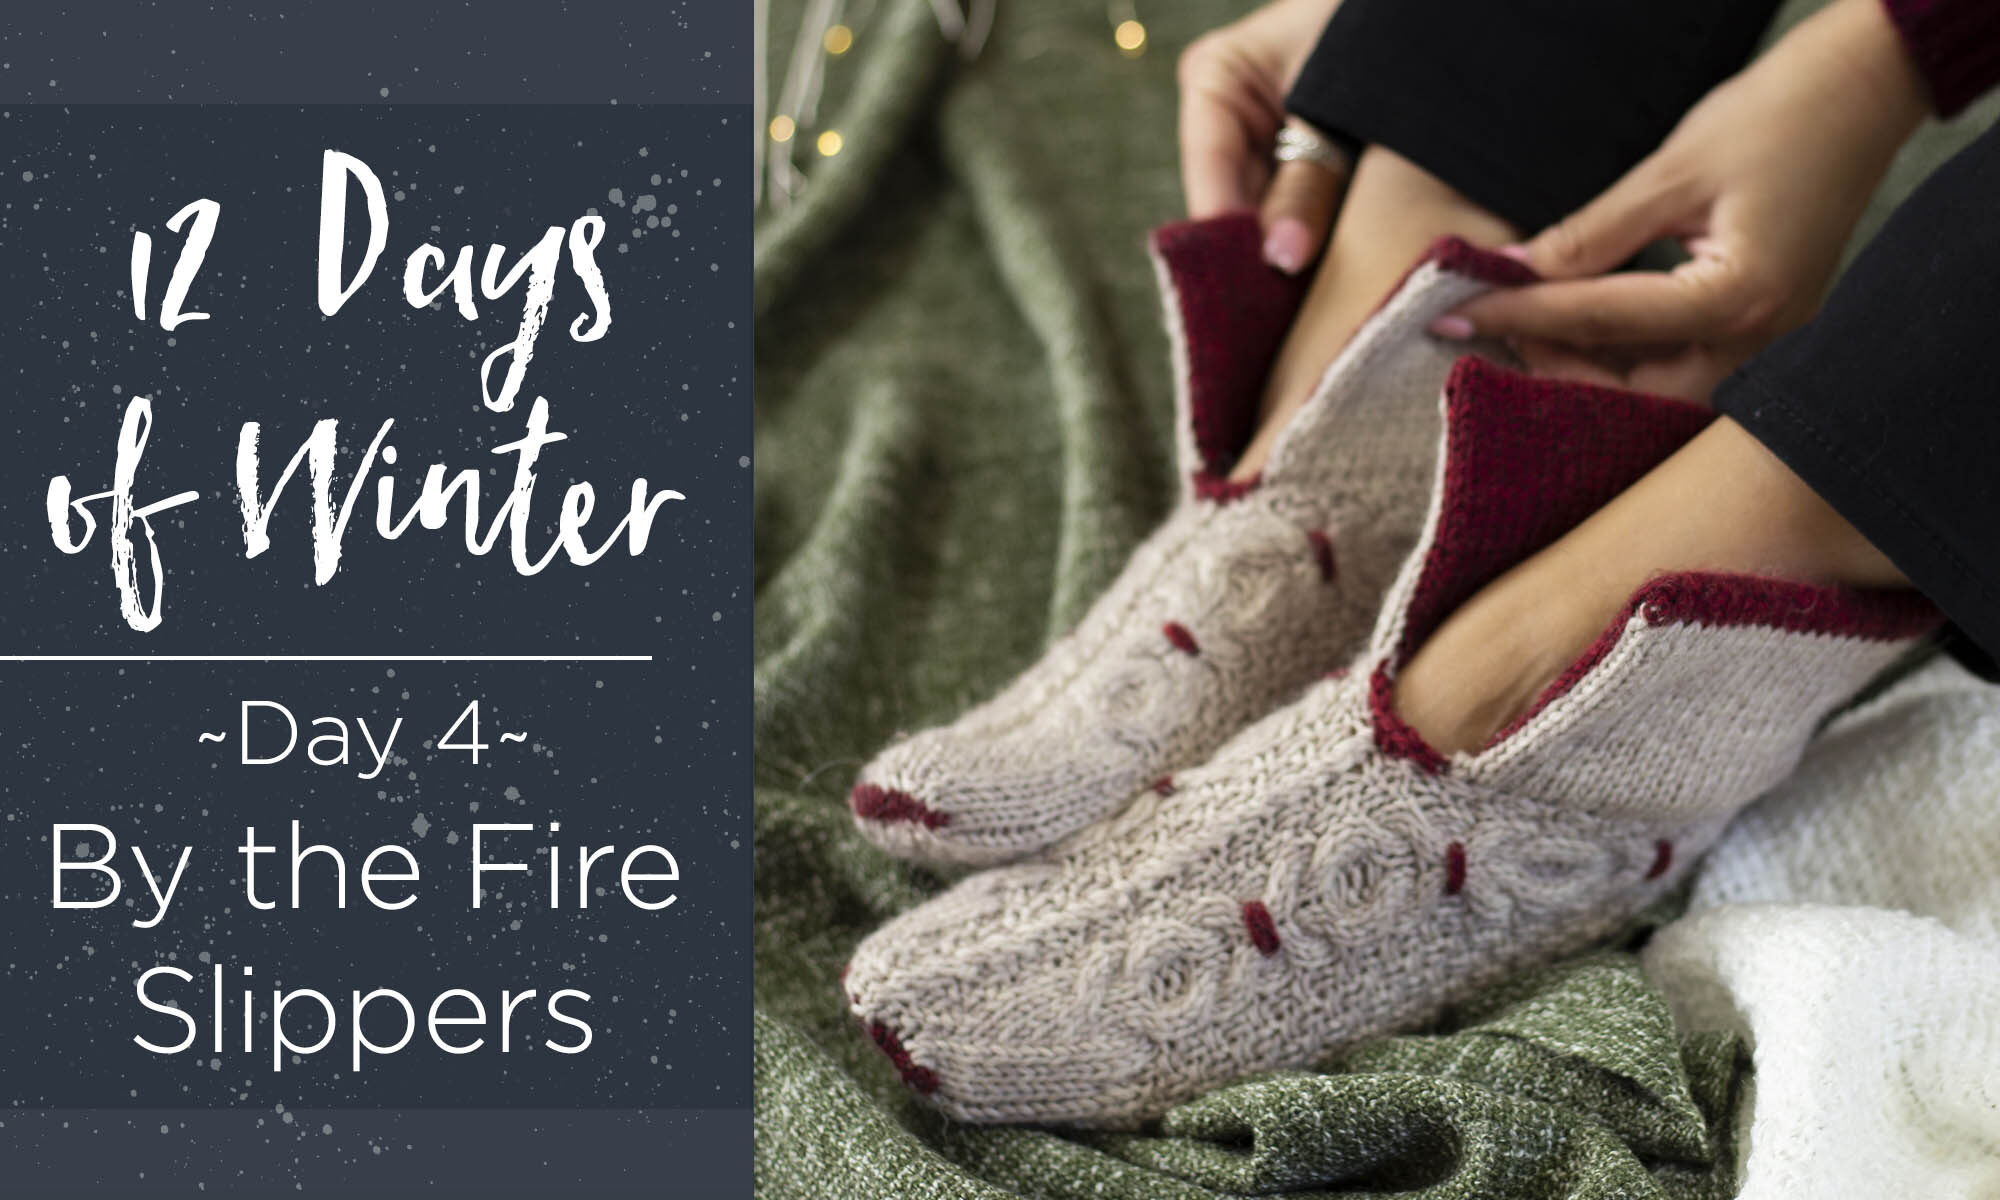
Happy Saturday! I hope your weekend is off to a great start, with a slow morning, warm cup of coffee, and of course, a yarny project! The 12 Days of Winter Kit Collection is one of my favorite design projects each year. We started it during my first year here at Universal Yarn, and I cannot believe we’re already in its fifth rendition! So far, we’ve created more than sixty wintry, giftable projects that are perfect for the holidays. Color me impressed! Each year, these collections are full of accessories, and some of my favorite contributions have been cozy socks. This year it’s no different – I’m simply smitten by my slipper sock design, the By the Fire Slippers.
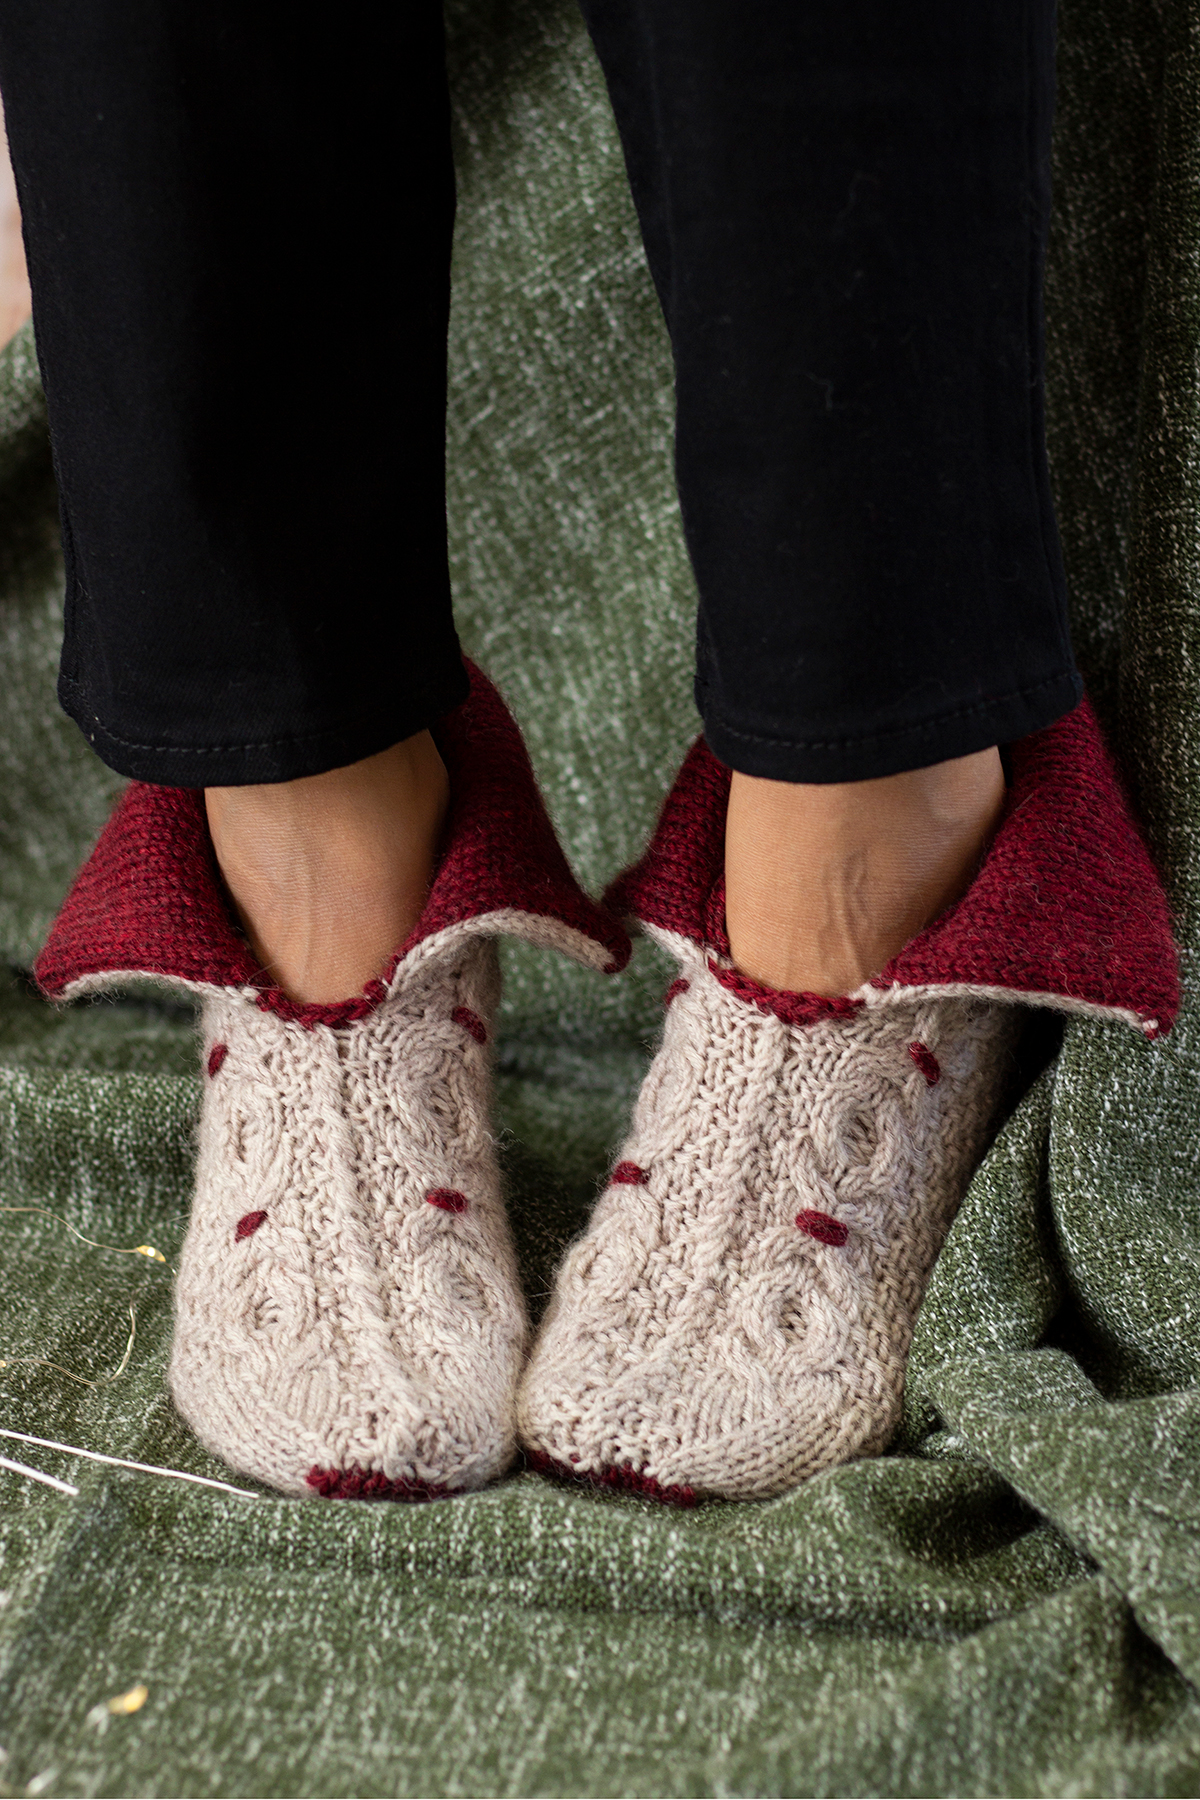
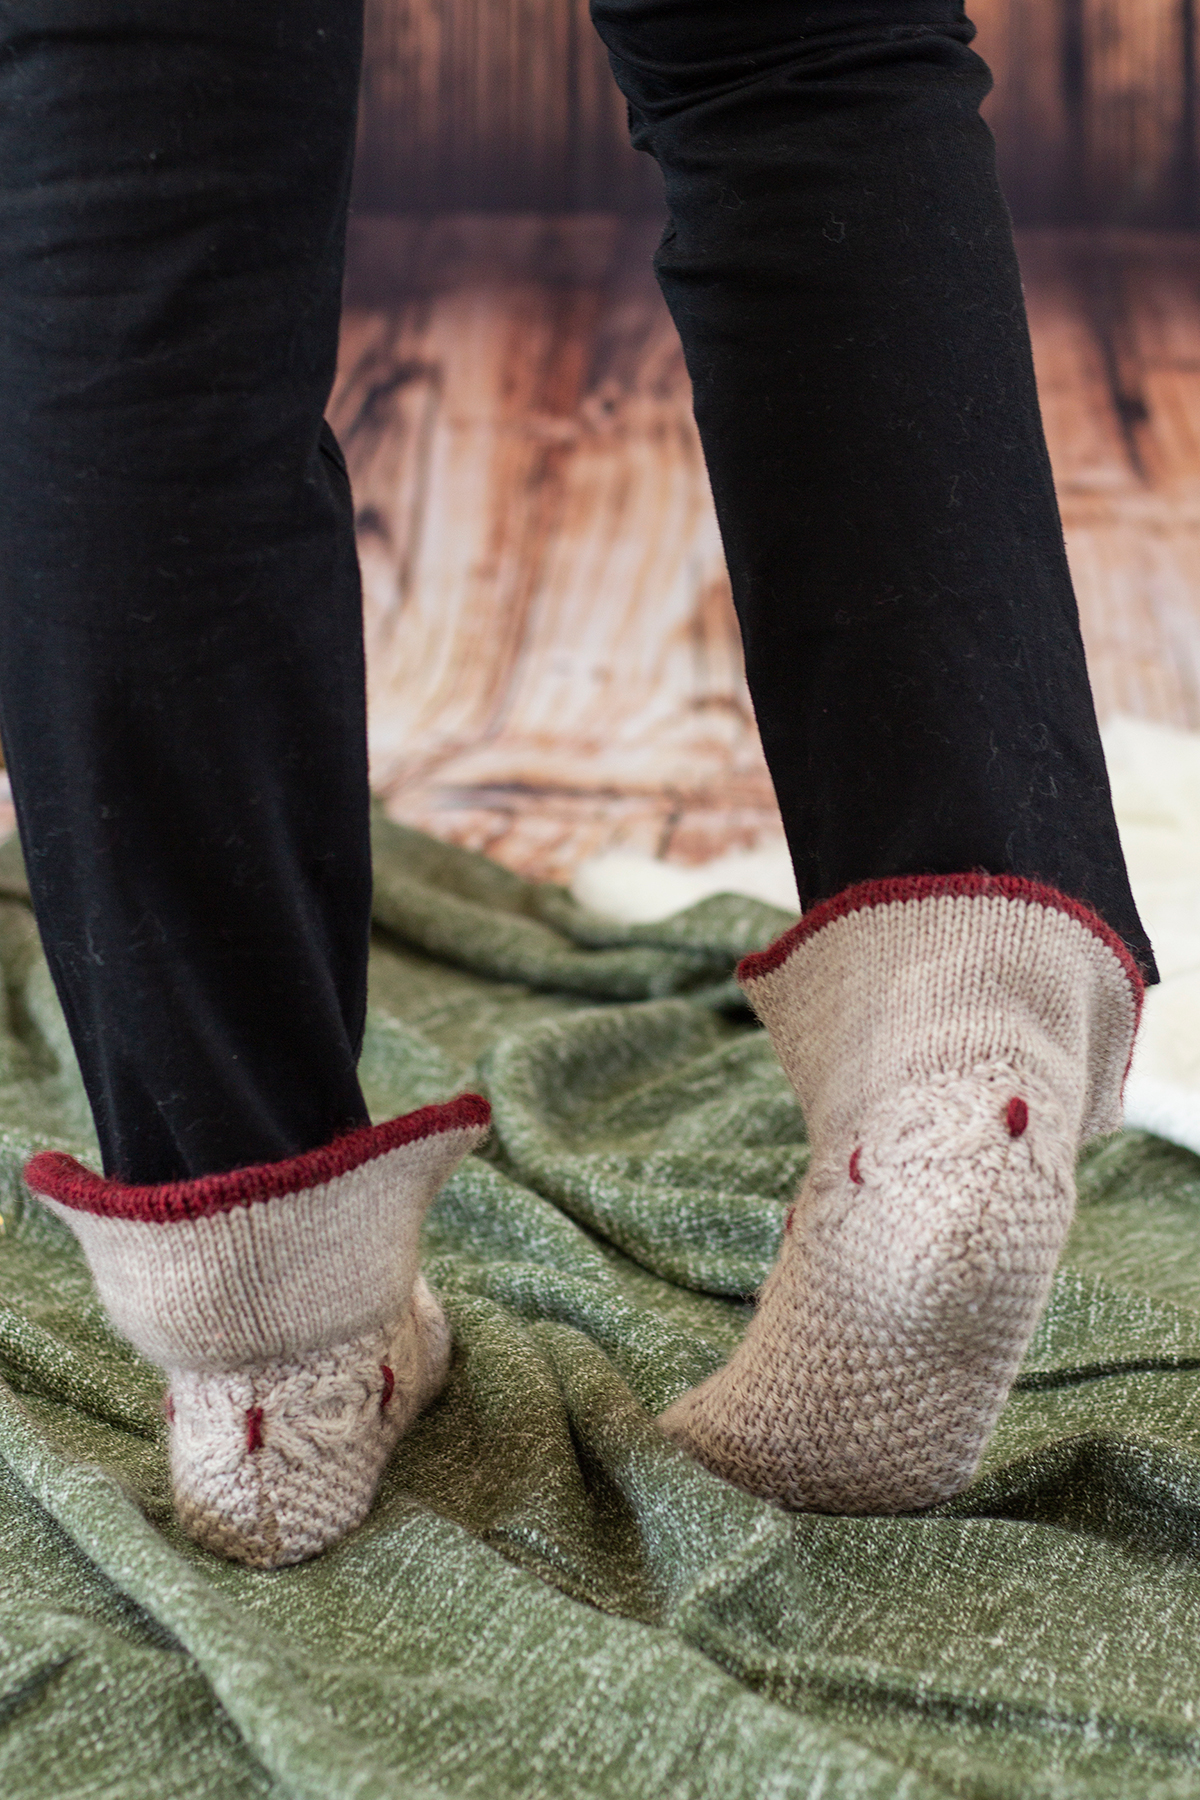
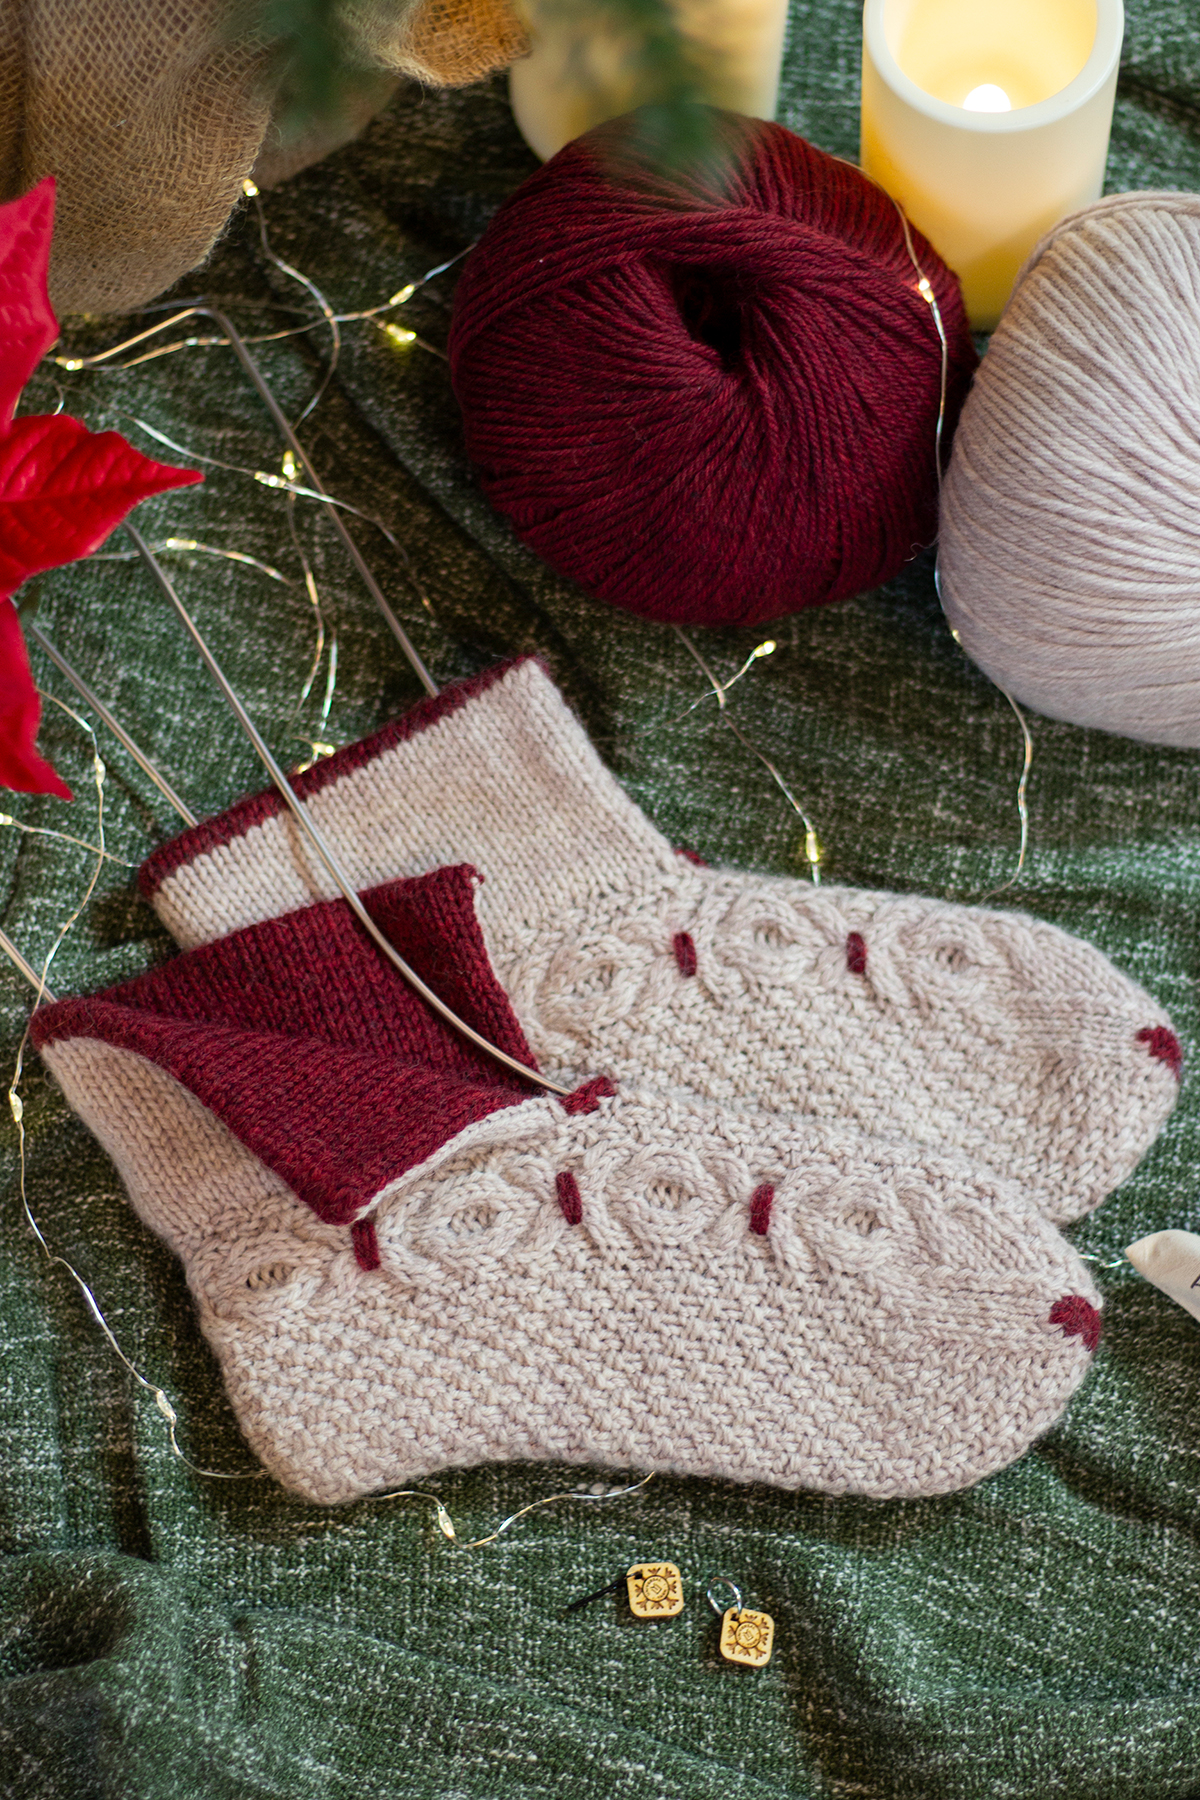
These slippers are a cozy dream! They feature rich textures in the form of cables, twisted stitches, moss stitch, and smocking. A contrast color is used to add thoughtful details including the graft at the toes, the smocking, and – my favorite part – the split, double-thick cuff.
The By the Fire Slippers are knit using Deluxe Worsted Superwash – a superb choice for thick and quick socks! This durable wool yarn will stand the test of time while keeping you warm and comfortable. Plus, because it’s a 100% superwash wool yarn, the slippers are a cinch to care for. And if we’re being honest, easy-care knits make the best gifts because sometimes those we love don’t always remember to handwash!
For this project, I chose the lovely neutral #748 Oatmeal Heather as the main color and paired it with beautiful, velvety red #751 Pomegranate Heather for the contrast color.
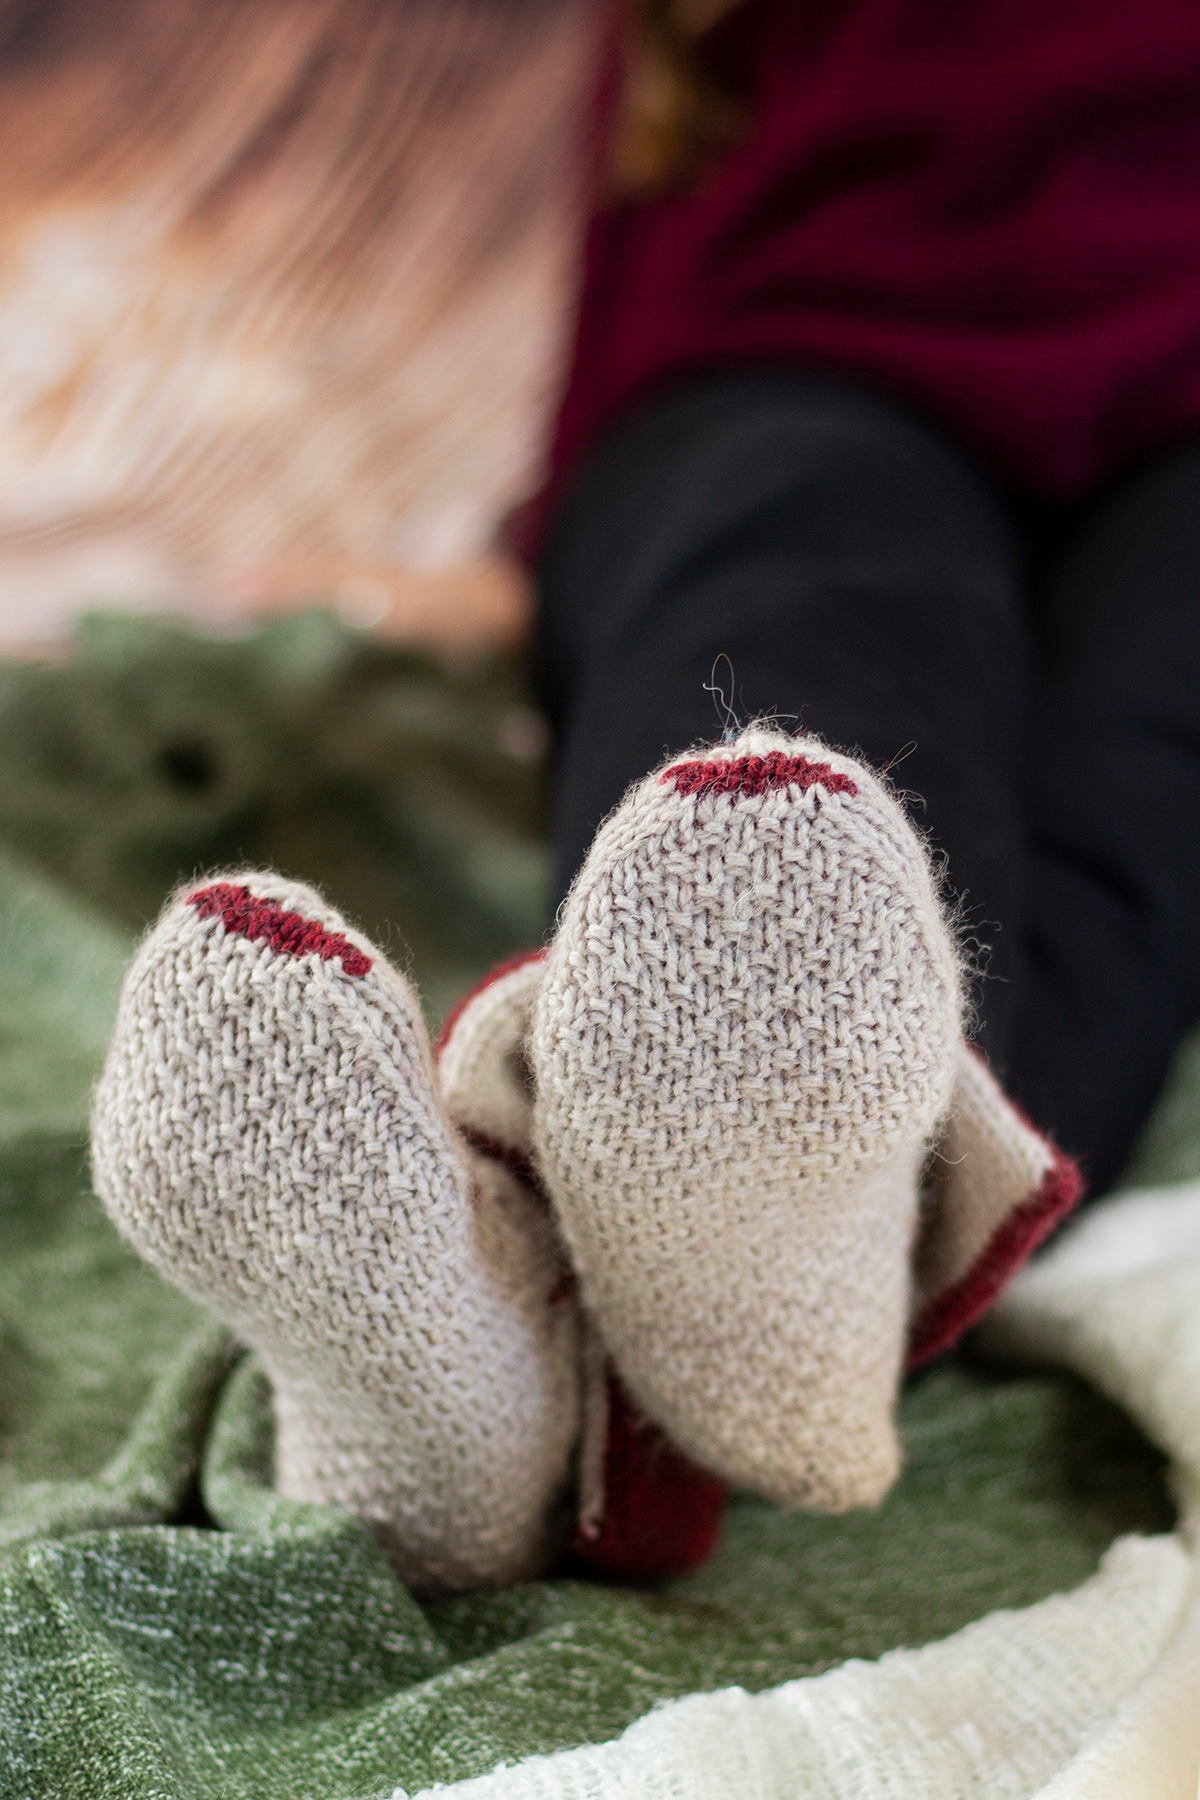
A sweet detail of the contrast color toe graft and the moss stitch across the bottom of the feet.
You’ll get to explore the following techniques while making these slippers:
knitting flat
knitting small circumferences in the round
cables
right and left twists
three-needle bind-off
picking up stitches
Kitchener Stitch
smocking
mattress stitch
The By the Fire Slippers have an engaging, but deceptively simple construction. They begin by casting on what will become the heel, and that piece is worked flat for the width of the ankle, then the piece is joined in the round for the foot. Decreases are worked for the toe, and then the live stitches are grafted together using Kitchener Stitch and the contrast color. The back of the heel is sewn closed, and then it’s time to work the cuff. To create the cuff, stitches are picked up around the opening for the foot and worked flat using the main color. At a certain length, the contrast color is joined and continued flat. Loops are picked up with a spare needle from the picked-up edge of the cuff, and then the piece is folded inward and closed with a three-needle bind-off. The mattress stitch is used to close the front edges of the cuff. Finally, you add the special contrast color smocking and a slip stitch crochet edging to the front for a perfectly polished pair of slippers! As a helpful treat, we’ve created a video on how to work mattress stitch, so you’ll be ready to conquer this wonderful pattern!
I hope you enjoyed the video and feel prepared to finish your own By the Fire Slippers! They’ll make such a great gift for yourself or a loved one. My husband has already requested a pair, so I’m sure I’ll be making them again. Do you plan to knit these slippers for a loved one? Tell us for whom in the comments!
Remember, these exclusive kits can be purchased at local yarn store retailers near you. Not in stock at your local shop? Ask them about drop shipping – order through them, and we ship to you! Each kit comes with the pattern, the yarn required to make it, a mini Universal Yarn project bag, and stitch marker. Use our store locator to find your nearest Universal Yarn retailer!