rocked knitalong – two at a time

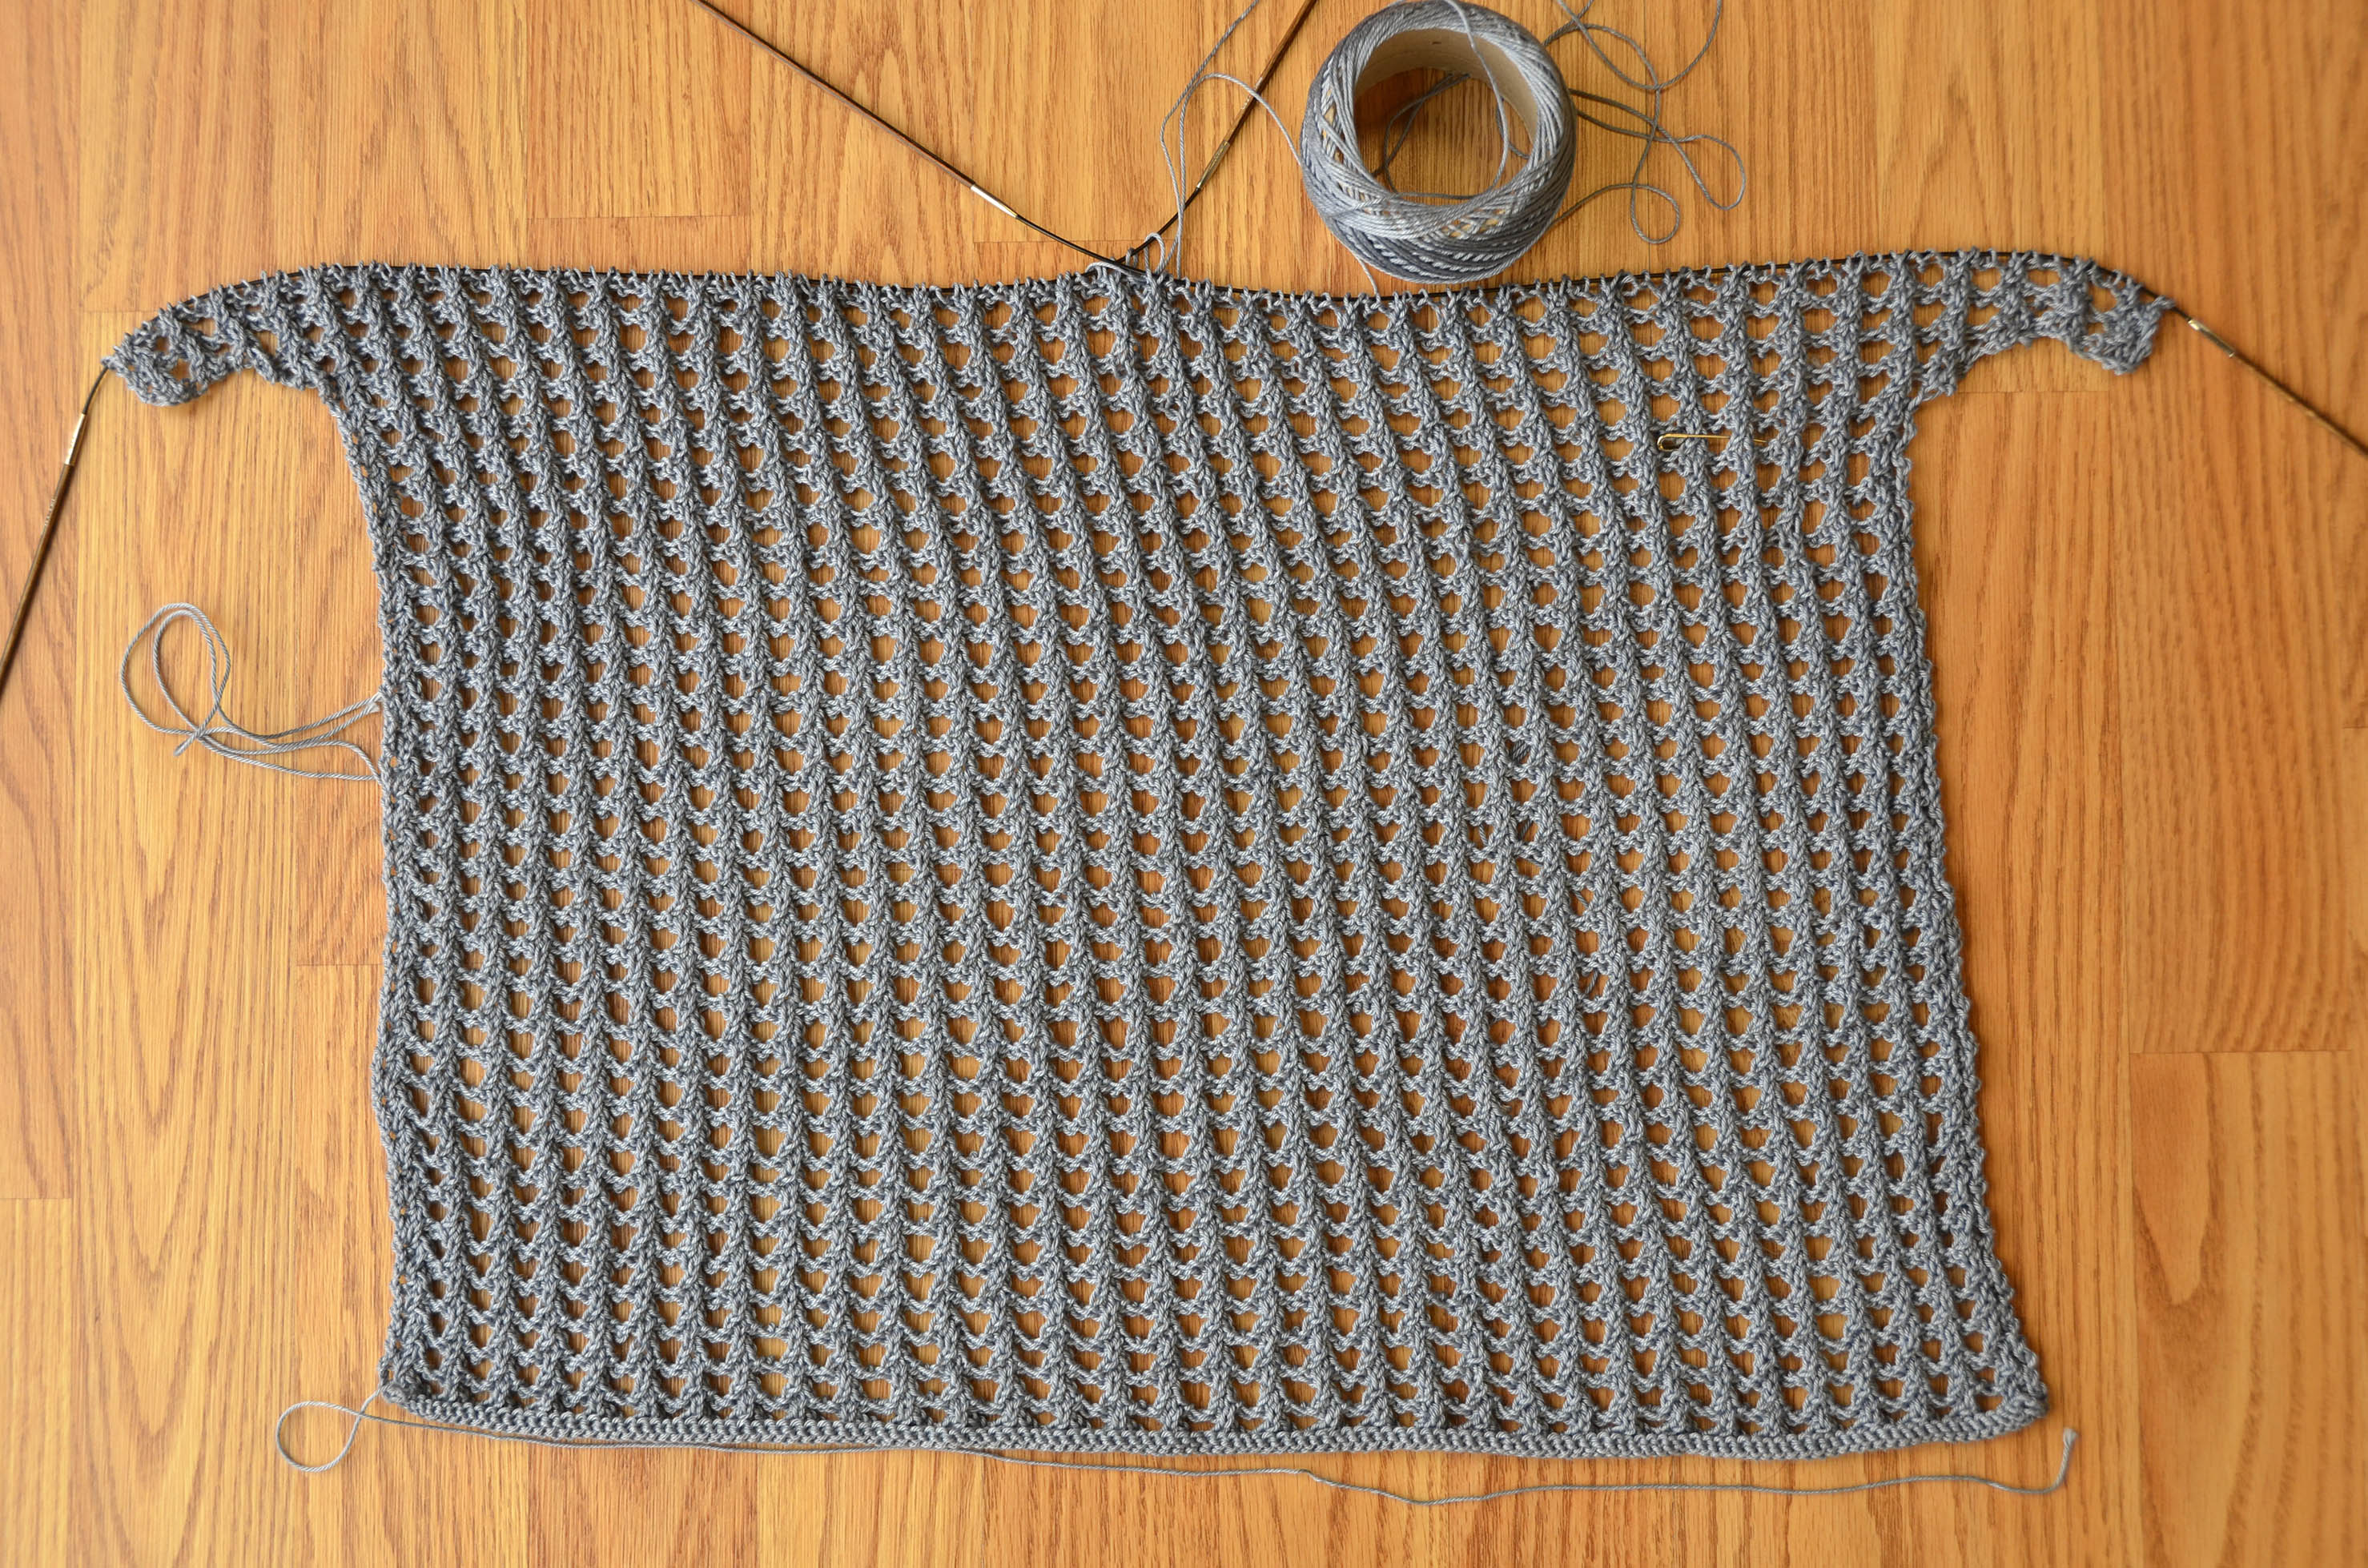
We have a couple of knitters here in the office working both front and back pieces at the same time. Here is Jen’s piece in progress:

Jen'sRocked

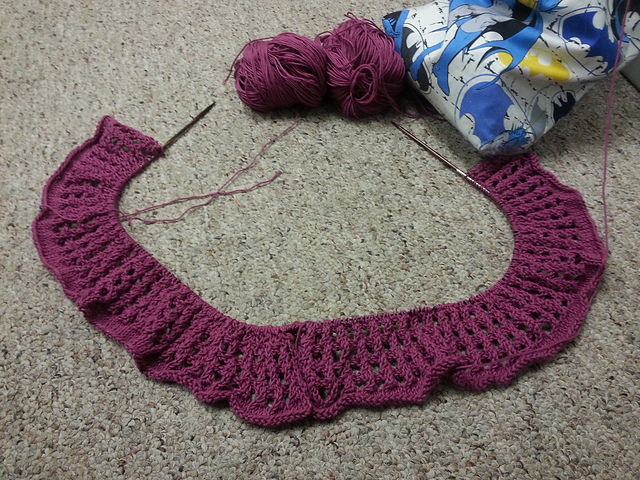
If you look closely, you can see that she has two balls of yarn attached, and two distinct pieces of knitting. If you’ve cast on for your Rocked already, it’s too late to go this route. But it’s an interesting concept for other projects that have identical pieces, such as sleeves. To get started, cast on for the first piece onto your needle. Drop the current yarn. With a new ball of yarn, cast on for the second piece right behind the first set of cast on stitches. Simply work back and forth across both pieces using the appropriate ball of yarn for each piece.

I will sometimes knit both of my sleeves on the  same needle. I find it is easier to keep track of increases, decreases, and other patterning this way.  Other times, I find it a hassle to have multiple strands of yarn hanging from my knitting. But like many things in knitting, it’s nice to have options, right?

One problem I’ve run into before with working two pieces on the same needle is that I might accidentally turn and work the wrong side without first working the right side of the second piece. To solve this problem, I simply tie a piece of yarn between the two pieces so I don’t accidentally turn at the wrong place.

If you’ve read ahead in the pattern (or are maybe already to this point), you’ll see that during the neck shaping you are instructed to work both sides at the same time. This is a similar process to working two at a time sleeves, or two at a time anything else.

Rocked_twoatatimesleeves


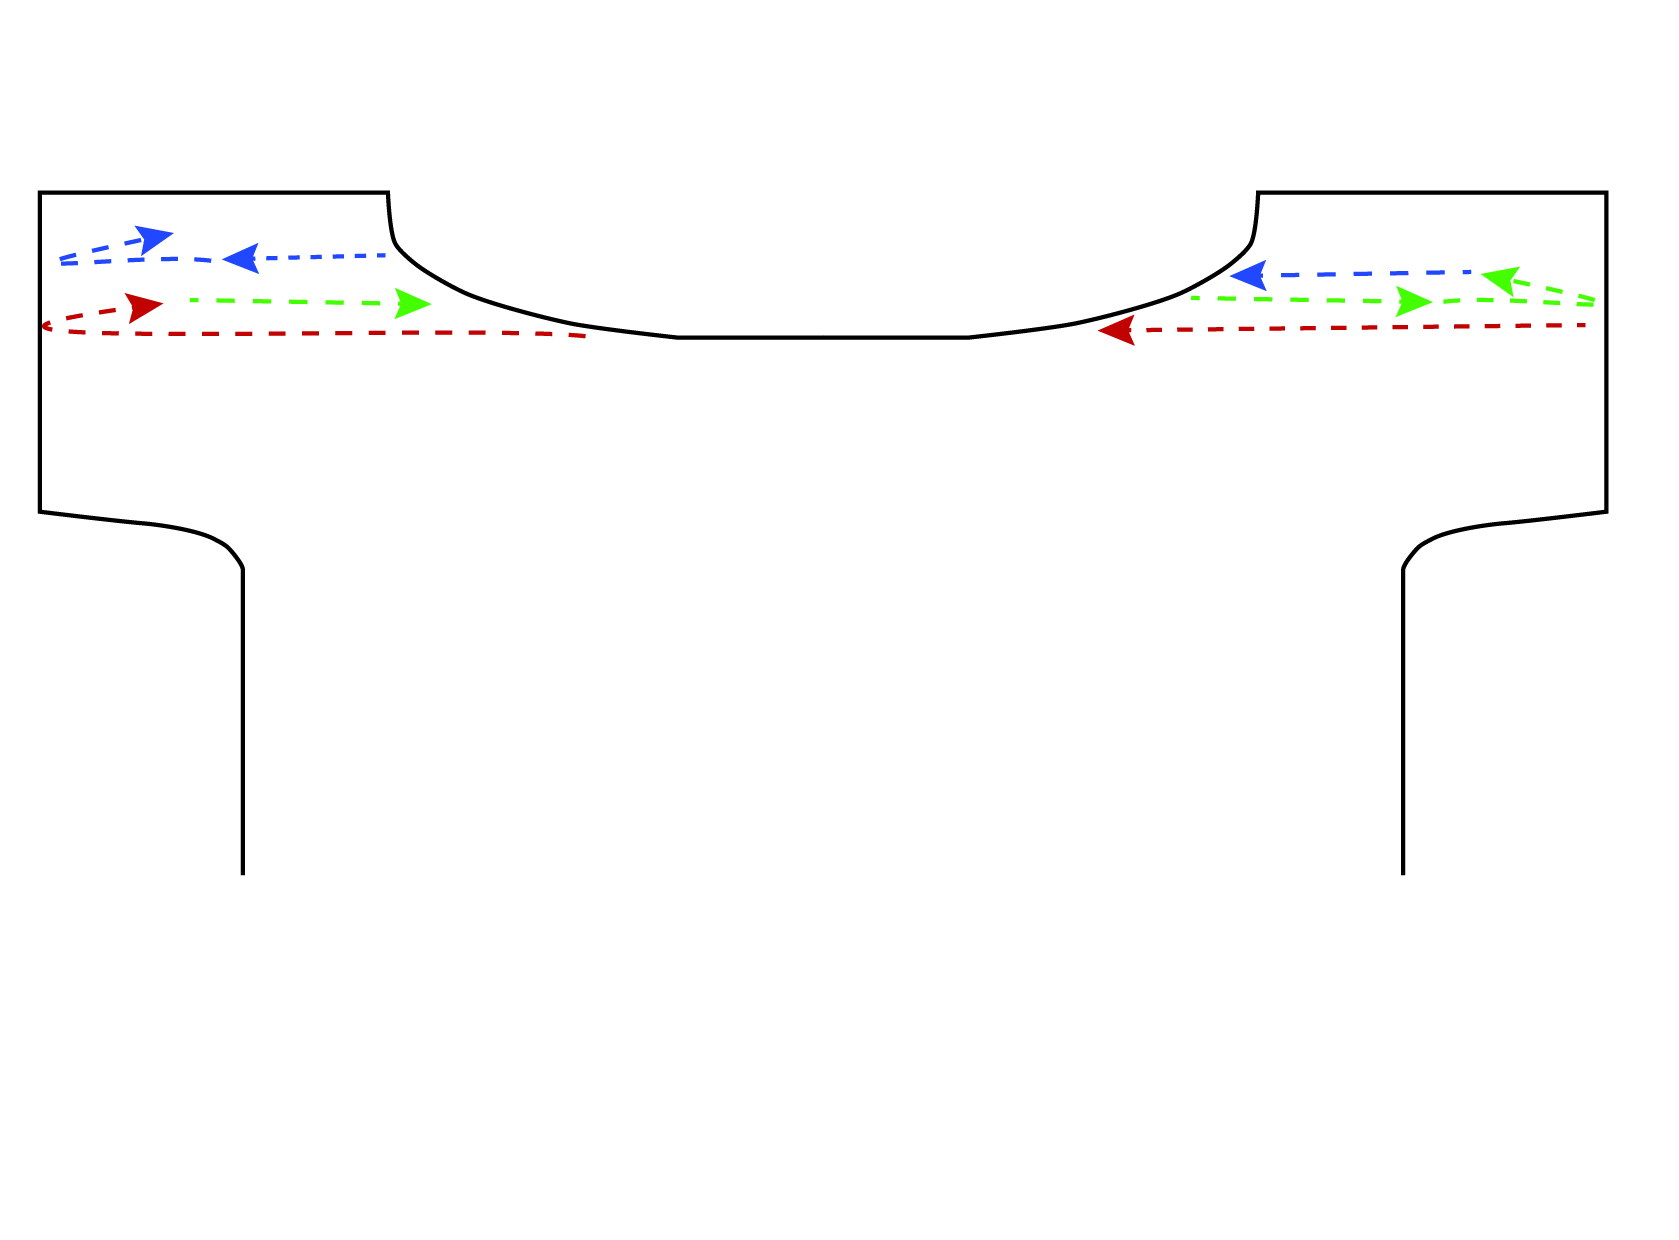
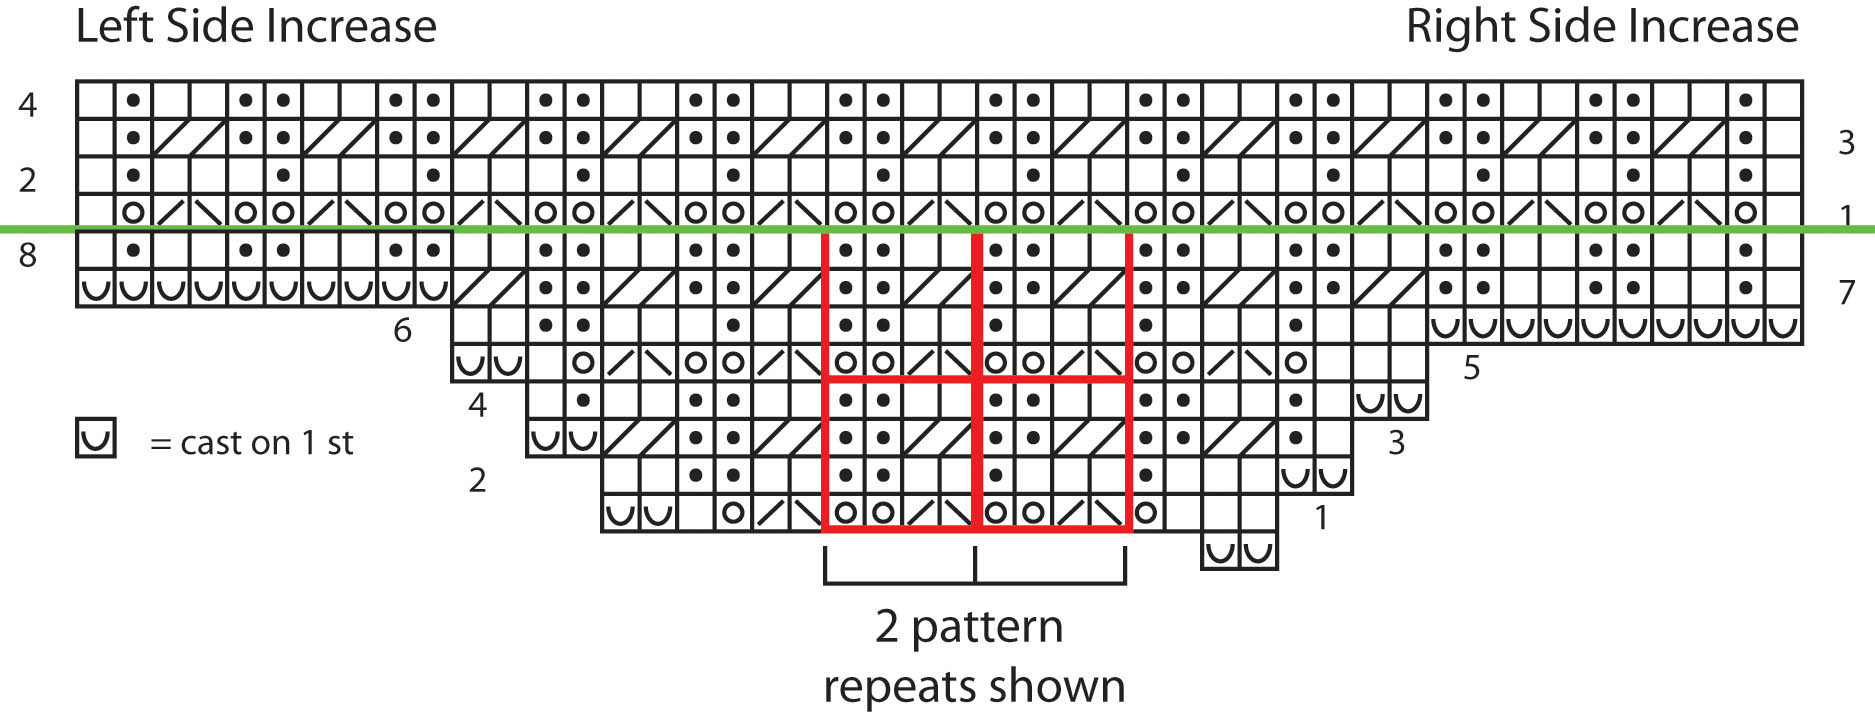
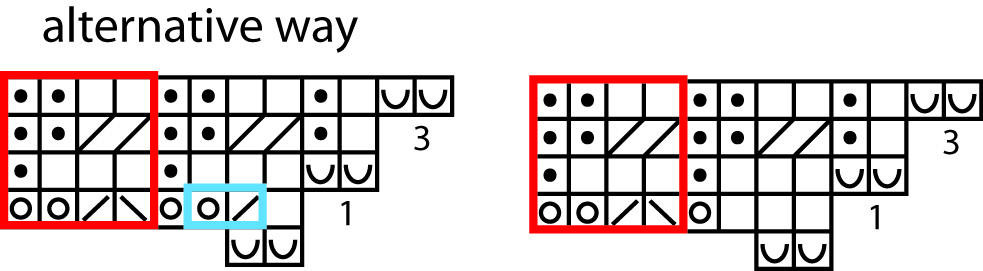
The above image demonstrates how the neck shaping works. Consider the red line row 1. This row reads like this:

Next row (RS): Work in patt over next 55 (61, 65, 71, 75) sts, attach new ball of yarn and bind off center 28 sts, work in patt over rem 55 (61, 65, 71, 75) sts.

The green line above would be row 2. Though not expressly written out, it would read like this:

Row 2 (WS): Work in patt over Right Shoulder sts to end. Bind off 6 sts at beg of Left Shoulder, work in patt to end.

And the blue line would be row 3, and would read like this:

Row 3: Work in patt over Left Shoulder sts to end. Bind off 6 sts at beg of Right Shoulder, work in patt to end.

Make sense? Though I don’t always like to work large pieces at the same time, when working neck shaping I do find it helpful to employ the two-at-a-time method. But you know what, if you prefer to work one side at a time, you’re more than welcome to do so!

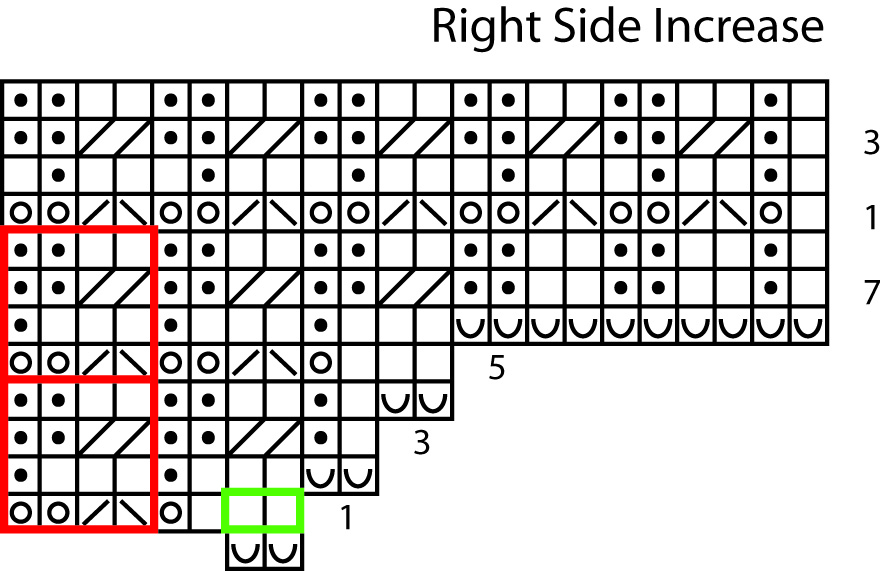
Here’s a graphic to represent how working each side separately would look:

Rocked_oneatatimesleeves

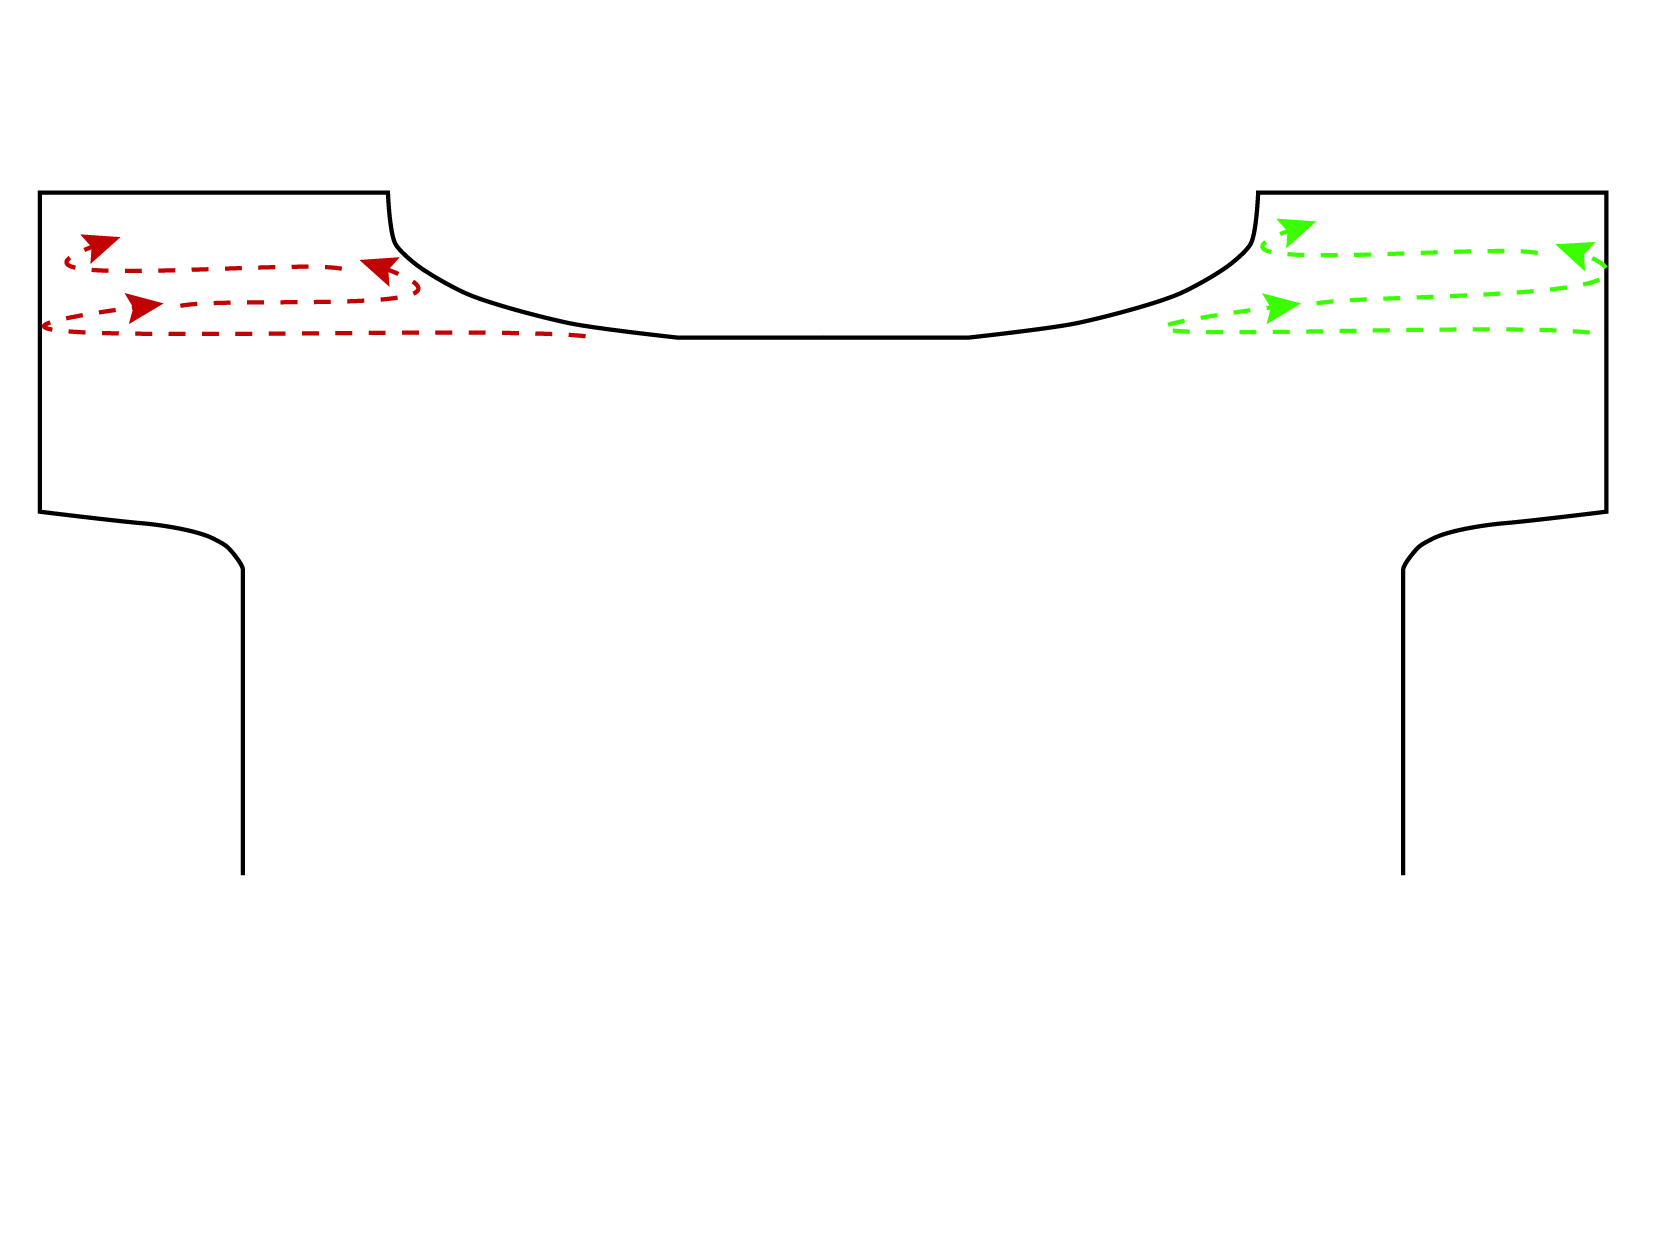
The green line represents the Left Shoulder. Here is how that section would start off it were written out in rows:

Row 1 (RS): Work in patt over next 55 (61, 65, 71, 75) sts, turn. Place rem sts on holder.

Row 2 (WS): Bind off 6 sts, work in patt to end.

Row 3: Work in patt to end.

Row 4: Bind off 5 sts, work in patt to end.

And so forth. After the Left Shoulder is finished, the Right Shoulder would begin like this:

Bind off center 28 sts, work in patt to end.

If you’re not at the neck shaping section yet, that’s okay! Just remember Sandi’s wise sentiment from the other day: it’s not a race!


Rocked Knitalong – If this was a race, I’d be losing.

Once again, I hand the blog over to Sandi Rosner for an update on her Rocked:

It’s been two weeks since our official cast-on date for the Rocked Knit A Long, and my progress has been dismal.

Rocked progress_Sandi

Now, I’m not a slow knitter, and I’ve not run into any issues with this pattern. But like most recreational pursuits, knitting for myself is quickly put aside when work demands get heavy. In addition to being Creative Director for Premier Yarns, I’m working on finishing a book. My knitting and crochet time has been pretty scarce, and when I do sit down with my needles or my hook, it is usually to make something that is needed for a photo shoot or for the book.

I know Amy has written about casting on for the sleeves, but I’m not even close to that point, and to tell the truth, I was feeling pretty bad about it. The internal browbeating went something like this: “Why did I even sign up for this KAL? I should have known I had too much work to do and wouldn’t be able to keep up. I should be setting an example, and here I am looking like a slacker. I’ll never have time to finish this piece.” Sound familiar?

Well, I’ve decided to let go of expectations. The truth is, this is not a race. There is no prize for finishing fast, and no punishment for being a slowpoke. I really do want to wear this top, and I’ll finish it when I finish it – if not in time for this summer, then for next.

I’ve also developed a strategy to turn my Rocked from a burden that induces shame every time I look at it to a pleasure that I look forward to knitting. With the warmer weather of late Spring, some of us here in the office have been getting together after work on Fridays. We choose a place with outdoor seating and have a glass of wine to cap off the week. My Rocked will be the project I take along to knit on those occasions. Nothing like pleasant associations to make a project go faster, right?

So, how is everybody else doing? Are you zipping right along, have you stalled along the way, or are you somewhere in between?

IRL – Jen’s Bamboo Pop cardigan

Today I’m delighted to share a Bamboo Pop FO from Jen who works in our accounting department.

IRL Jen Bamboo Pop

Jen always has multiple projects going on, as she is an avid knitter, crocheter, and spinner. This versatile summery cardigan was a free pattern Jen found on Ravelry. Crocheted using Bamboo Pop in color 210 Orchid Smash, it does look smashing on her – am I right?

Here is Jen in her own words on her fabulous project:

It took 3 balls with a 4mm hook.  The original pattern called for a worsted weight cotton and a 5mm hook I think,  but I knew it would be too heavy and cumbersome for everyday wear.  Since it was top down changing the gauge was easy peasy, I’d like to talk about all the swatching I did and the math I used,  but I really just crocheted until I liked where it was and then transitioned to the shell stitch.  Its ended up being one of my favorite FO’s.  The fabric is very drapey so it feels really nice and fancy to wear.  It looks great over the single black dress I own if I ever decide to go somewhere swanky and it also looks good with a t-shirt and jeans.  It’s very lightweight and breathable so I can wear it over a long sleeve top in the winter or a tank-top when it gets warmer and it isn’t hot or anything.  I knew the bamboo/cotton would grow a lot so I only crocheted until the bottom hit just below my navel, as I suspected, after washing/blocking and wearing it grew to the perfect length for me.  The pattern also called for buttons but I hate sewing buttons on so I just ignored them and use it to showcase my growing collection of shawl pins and brooches.

Thanks for sharing, Jen!

Free Pattern Friday – Picket Cardigan

It’s Free Pattern Friday!

Little Bird Picket Cardigan 1 blogToday, the Picket Cardigan in Little Bird.

More than one person walked by my desk this week and picked this up to fondle it.  Little Bird (100g/344 yds) gives it a lovely sheen, and the smoothness of the fiber really makes those cables and ribs stand out.  It’s not stiff or bulky at all, but very soft and comfy.  The machine washability makes it a home run for baby knits.

This cardigan is knit in pieces and seamed. The back and sleeves are worked in plain stockinette stitch, while the fronts are cabled.  The pattern is written and charted and contains a schematic.

This would look great on a little girl or a little boy. The buttonholes can be placed on either side – although truthfully I always forget which is which.  Eh, the baby won’t care.

Happy knitting!


Rocked Knitalong – casting on for sleeves

Last blog post, I talked about how to maintain stitches in pattern during the sleeve shaping section. But what I didn’t cover was how to cast on at the beginning of rows. Raveler skcfoto asked over in our Rocked knitalong Ravelry group if we could post a video of casting on. I’m glad she asked – we’re happy to do so!

Below is a video showing the knitted cast on. This is a cast on that can be used to begin a project or to cast on at the beginning of a row on an existing piece of knitting, such as Rocked. Instead of the knitted cast on, the backward loop method could also be used. But I find working into the knitted cast on to be much easier to do than backward loop, plus, it provides a more stable edge.

Lluxurious Llamalini

For me, there are more than a few yarns here in the office that inspire daydreams of beautiful projects.  One of those is Llamalini, a decadent blend of linen, royal llama, and silk bourette.  I’m not the only one – designers are picking up on this gem too.  May we show you what our own Amy Gunderson has done recently?

Dichotomy_Llamalini_1_cropped

Dichotomy looks great with the very in-style color blocks that meander up the body and across the arm.  Worked flat in pieces from the bottom up, it uses a circular needle strictly to accommodate the large number of stitches required for a pullover with up to 10″ of positive ease.  Sleeve cuffs are worked by picking up stitches off the sides of the body piece and knitting downward.

Dichotomy_Llamalini_2_blogColor changes are achieved with the intarsia method.  The contrasting “line” is formed by working increases and decreases in the blocks of color – no cabling required.

You can purchase this pattern on Craftsy or Ravelry.  (Puppy not included)

In the Spring/Summer 2015 knit.purl, the Swingback Hoodie is turning heads.  Amy wrote an in-depth guest blog post about her design process for this piece.

Gunderson_Swingback_Hoodie_1  knitpurl Summer 2015 Gunderson_Swingback_Hoodie_5

A dramatic feather-and-fan panel makes a pointed back hem. The hood, fronts, and back are worked from the top down, while sleeves are worked from the bottom up.

As part of the knit.purl blog post, Lisa Shroyer asked for Amy’s suggestions for personal styles that would work well with this cardi.  We got a little happy in the studio with Amy modeling.  We couldn’t resist giving you all a little taste of the fun we had.

Happy knitting!

Swingback-Loop-GIF

Rocked Knitalong, increasing in pattern

I have seen the terror in the eyes of knitter when they read these words, “increase in pattern.” Or “decrease in pattern”, or “maintain stitches in pattern”, or any other number of similar phrases. What does this mean, “in pattern”???

I hope to demystify this for you, at least as far as you need to know for the Rocked top. And the main body pattern in Rocked is actually a really good pattern to learn this concept on. The stitch repeat is only 4 stitches wide x 4 rows high, so it’s reasonably easy to “read” your work.

Here is how the text for the “Increase for Sleeves” section reads:

Cast on 2 sts at beg of next 6 rows, cast on 10 sts at beg of next 2 rows. While it doesn’t expressly say so, the pattern is telling you to also maintain stitches in pattern when casting on.

I’ll try to go about this a couple of ways. For anyone who understands what it means to “maintain in pattern” or just wants to jump right in, I have made a chart for the sleeve increases:


Rows 1-8 of the chart show the increases. After that point, because we have increased a multiple of 4 stitches on each side, the number of stitches for a full pattern repeat, we will simply continue to follow Rows 1-4 of the Mesh pattern.

To try and break it down, let’s look at just the right side portion of the increase chart.

SleeveIncreaseChart_2


For our first 2-stitch cast on, we will then have to work back across those stitches on RS row 1. Although after having cast-on 2 stitches we could fit in part of a pattern repeat, it’s not usually a good idea to do so directly onto cast on stitches. K2tog and ssk are tough to do over cast on stitches, and it’s just not worth it to do it here. Plus, we will be seaming this area later and we want it to be stable.

On the following WS row, take a look at those last stitches that were cast on. Try to visualize them as part of a full pattern repeat. If you shift your eyes 4 stitches to the left on the chart, you can see that you will do the same thing over the new 2 stitches as you would have done on the previous repeat.

SleeveIncreaseChart3


Now, just for the sake of further trying to understand increasing in pattern, here is a different way I could have worked the chart:

SleeveIncreaseChart4


The chart on the right is the way I’ve done it above. The chart on the left shows how we could work the stitches if we really wanted to start incorporating the pattern in as soon as possible. Sometimes we do want to do this in the case of, say, a delicate lace shawl where every stitch shows and counts. It’s also important to remember that if you’re doing lace like we are here, only work a decrease if there are enough stitches for a corresponding increase, and vice versa.

Another simpler way of incorporating new stitches into your pattern without having to follow charts or use your intuition is to place markers. Try placing a marker between every pattern repeat where those vertical red lines of the pattern repeat box sit. Or, at least add markers to the couple of pattern repeats each side of your piece. If you have enough stitches on the sides of your markers for a pattern repeat, do it! If not, just work the stitches in stockinette stitch.

Here’s my Rocked after working a couple of pattern repeats past the sleeve cast on:

Rocked sleeve 2 beginning blog

Rocked piece with sleeve beginning blog


IRL – Colorblock Tank

My contribution to the Spring 2013 of knit.wear was the Colorblock Tank knit up in Flax. This is one of those pieces I have just as much fun wearing as I did designing and knitting it.

colorblock-tank

(image courtesy Interweave/Joe Hancock)

But more awesome than that are the other versions I’ve seen out there in the world. Of the projects listed on Ravelry, maybe half use the color combination of the original which incorporates 6 different shades of Flax.

Katie decided to go her own way with her version of the tank.


This turned out so great, I love it! Katie used 15 black, 08 purple, 07 lilac, 104 wild lime, and 105 natural; so just 5 shades instead of 6. And it worked out fine! I love the colors Katie chose to go with her red hair. She is obviously a purple lover, and shades of purple are so in right now, too.

Free Pattern Friday – Color Block Scarves

It’s Free Pattern Friday!

Three Color Scarf B 1 blogToday, the Three Color Scarves in Cotton Supreme DK Seaspray.

Three Color Scarf B 2 blog
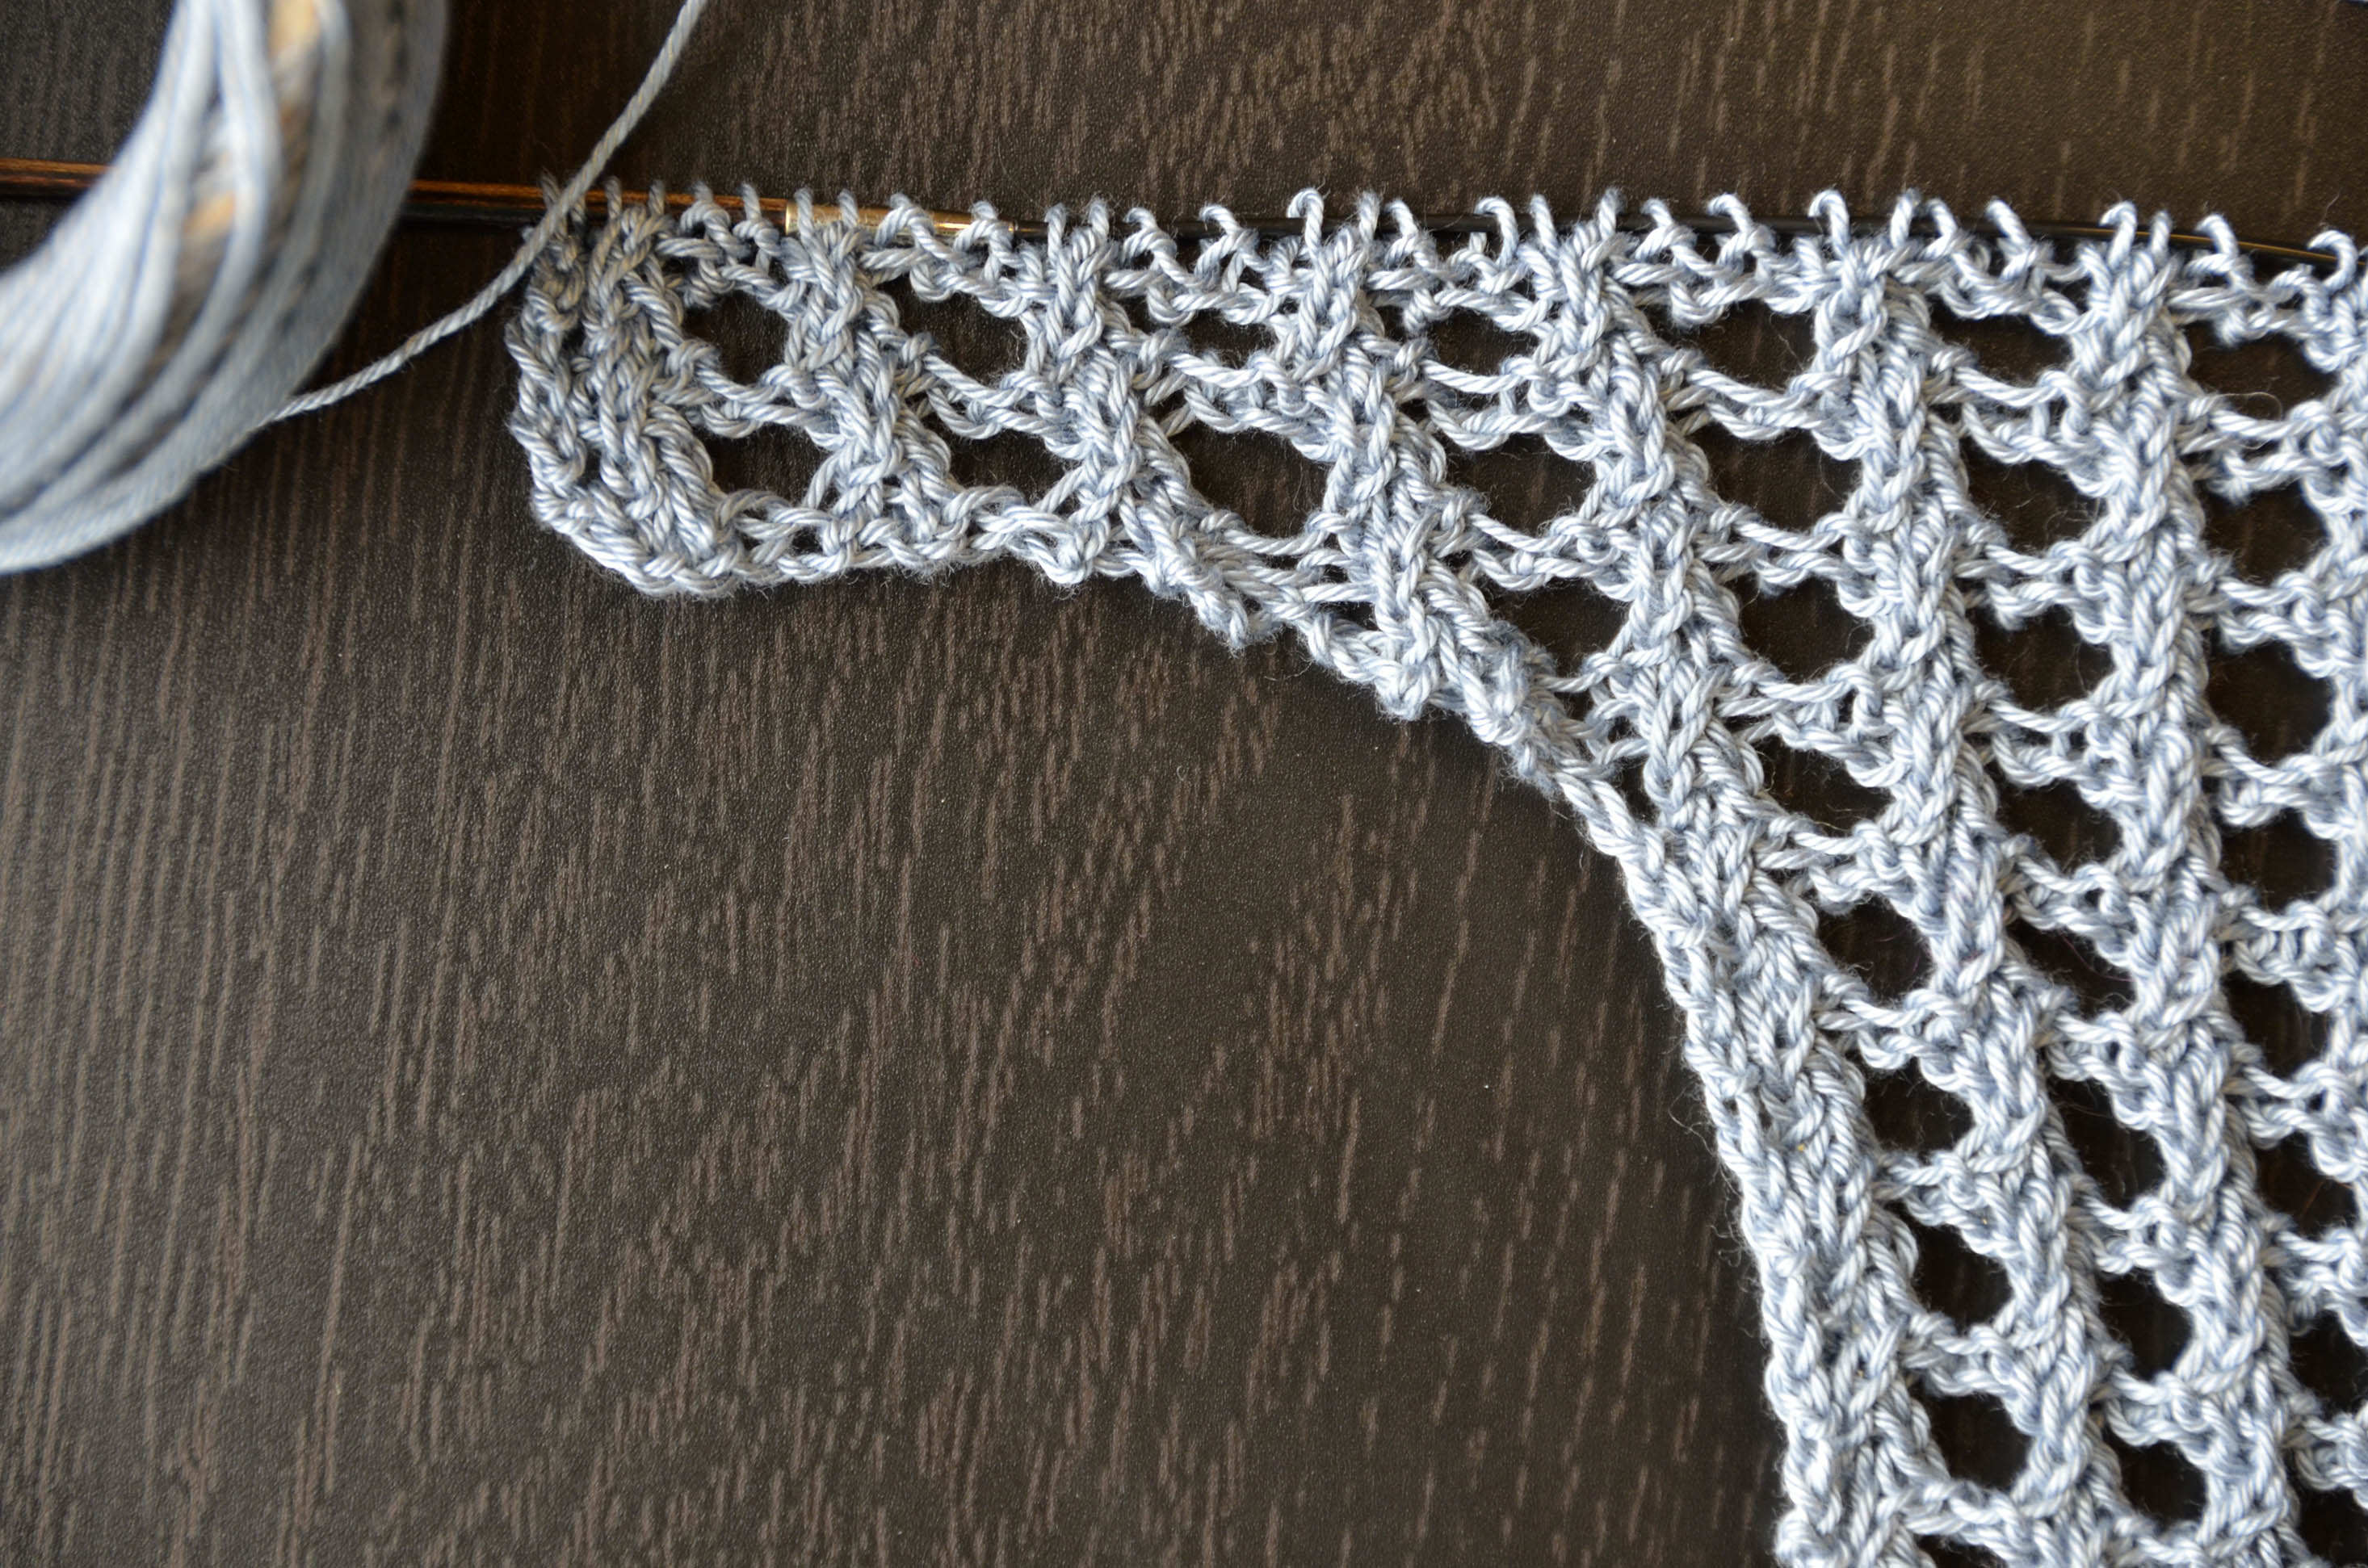
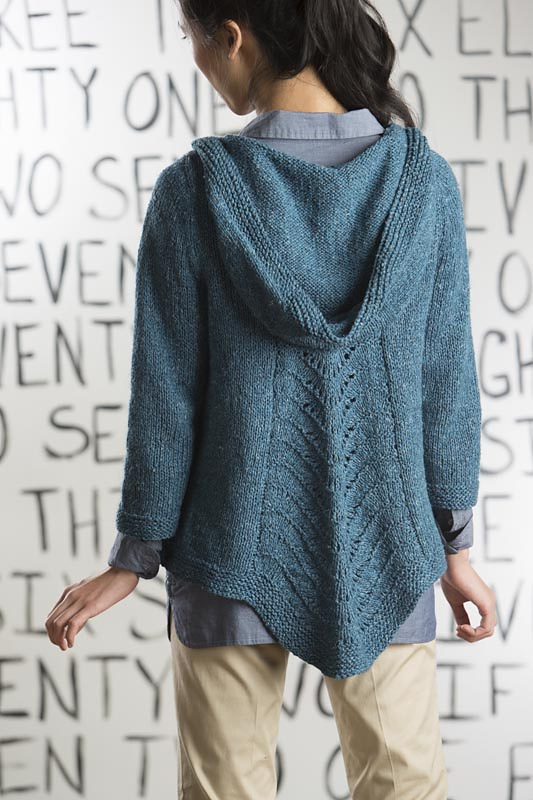
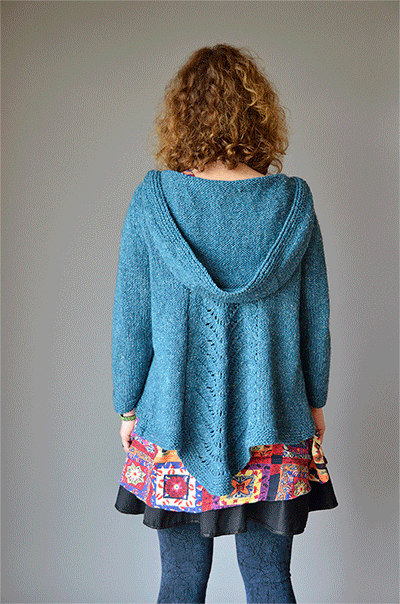
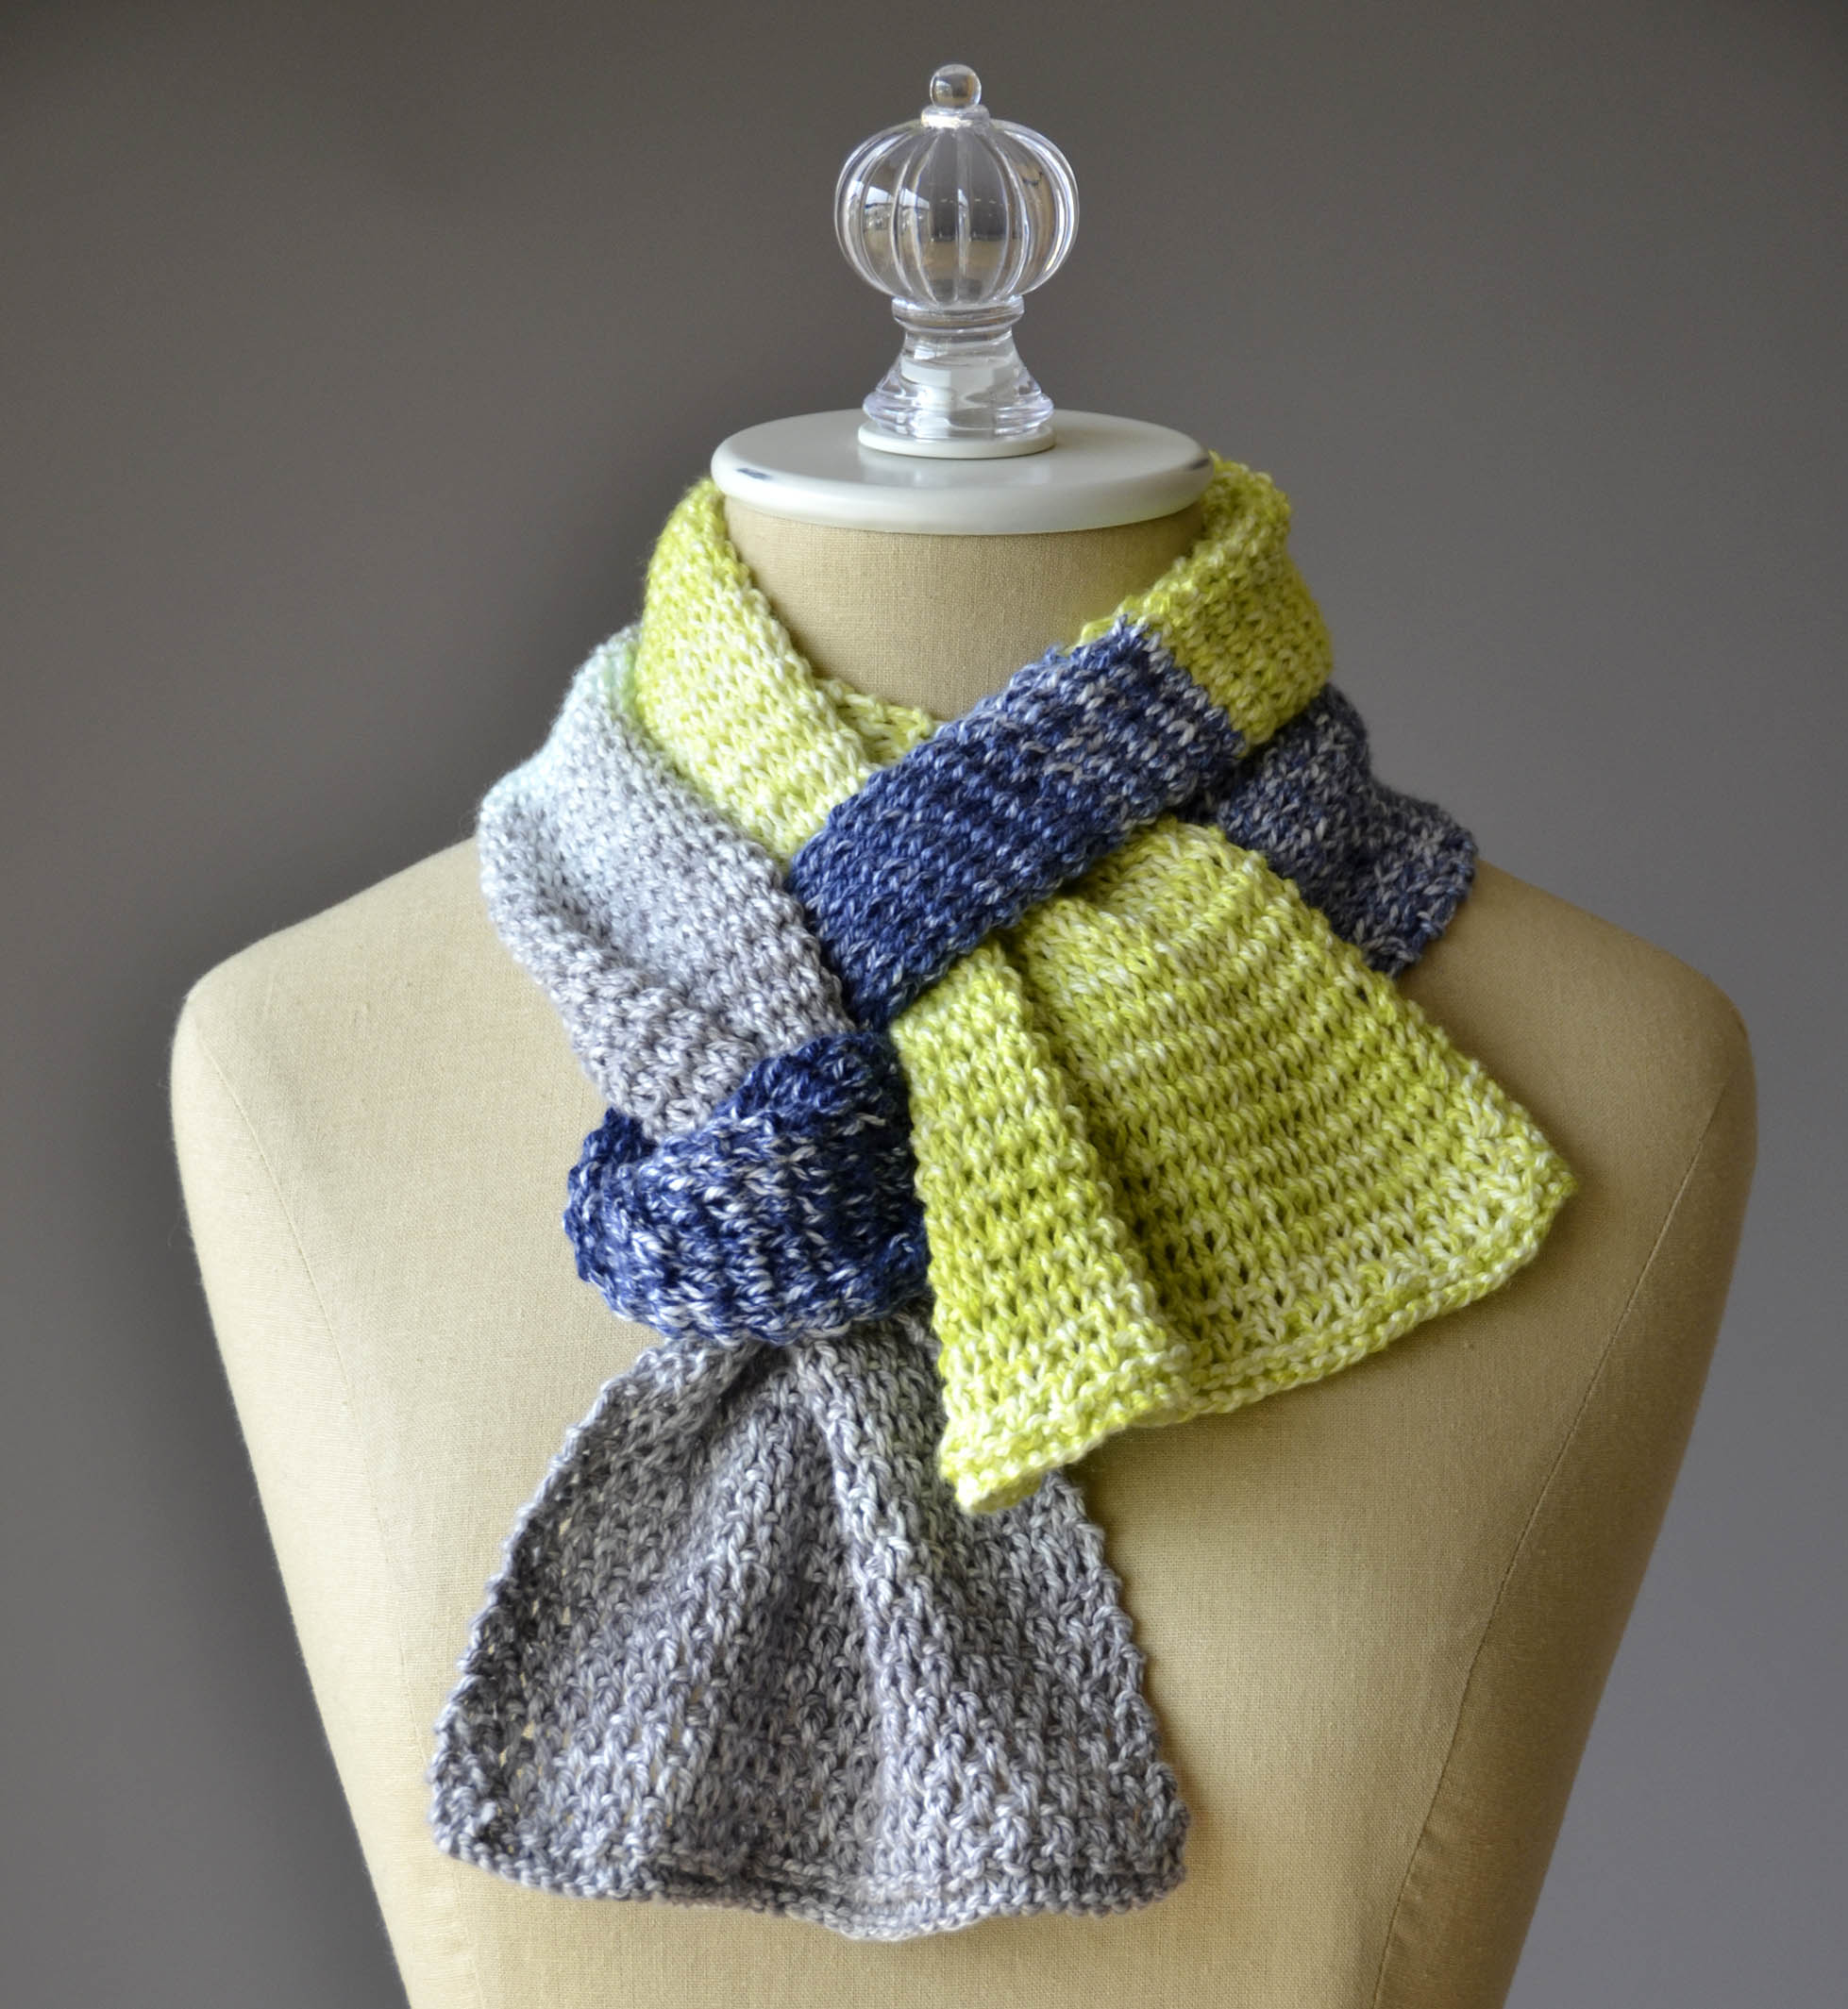
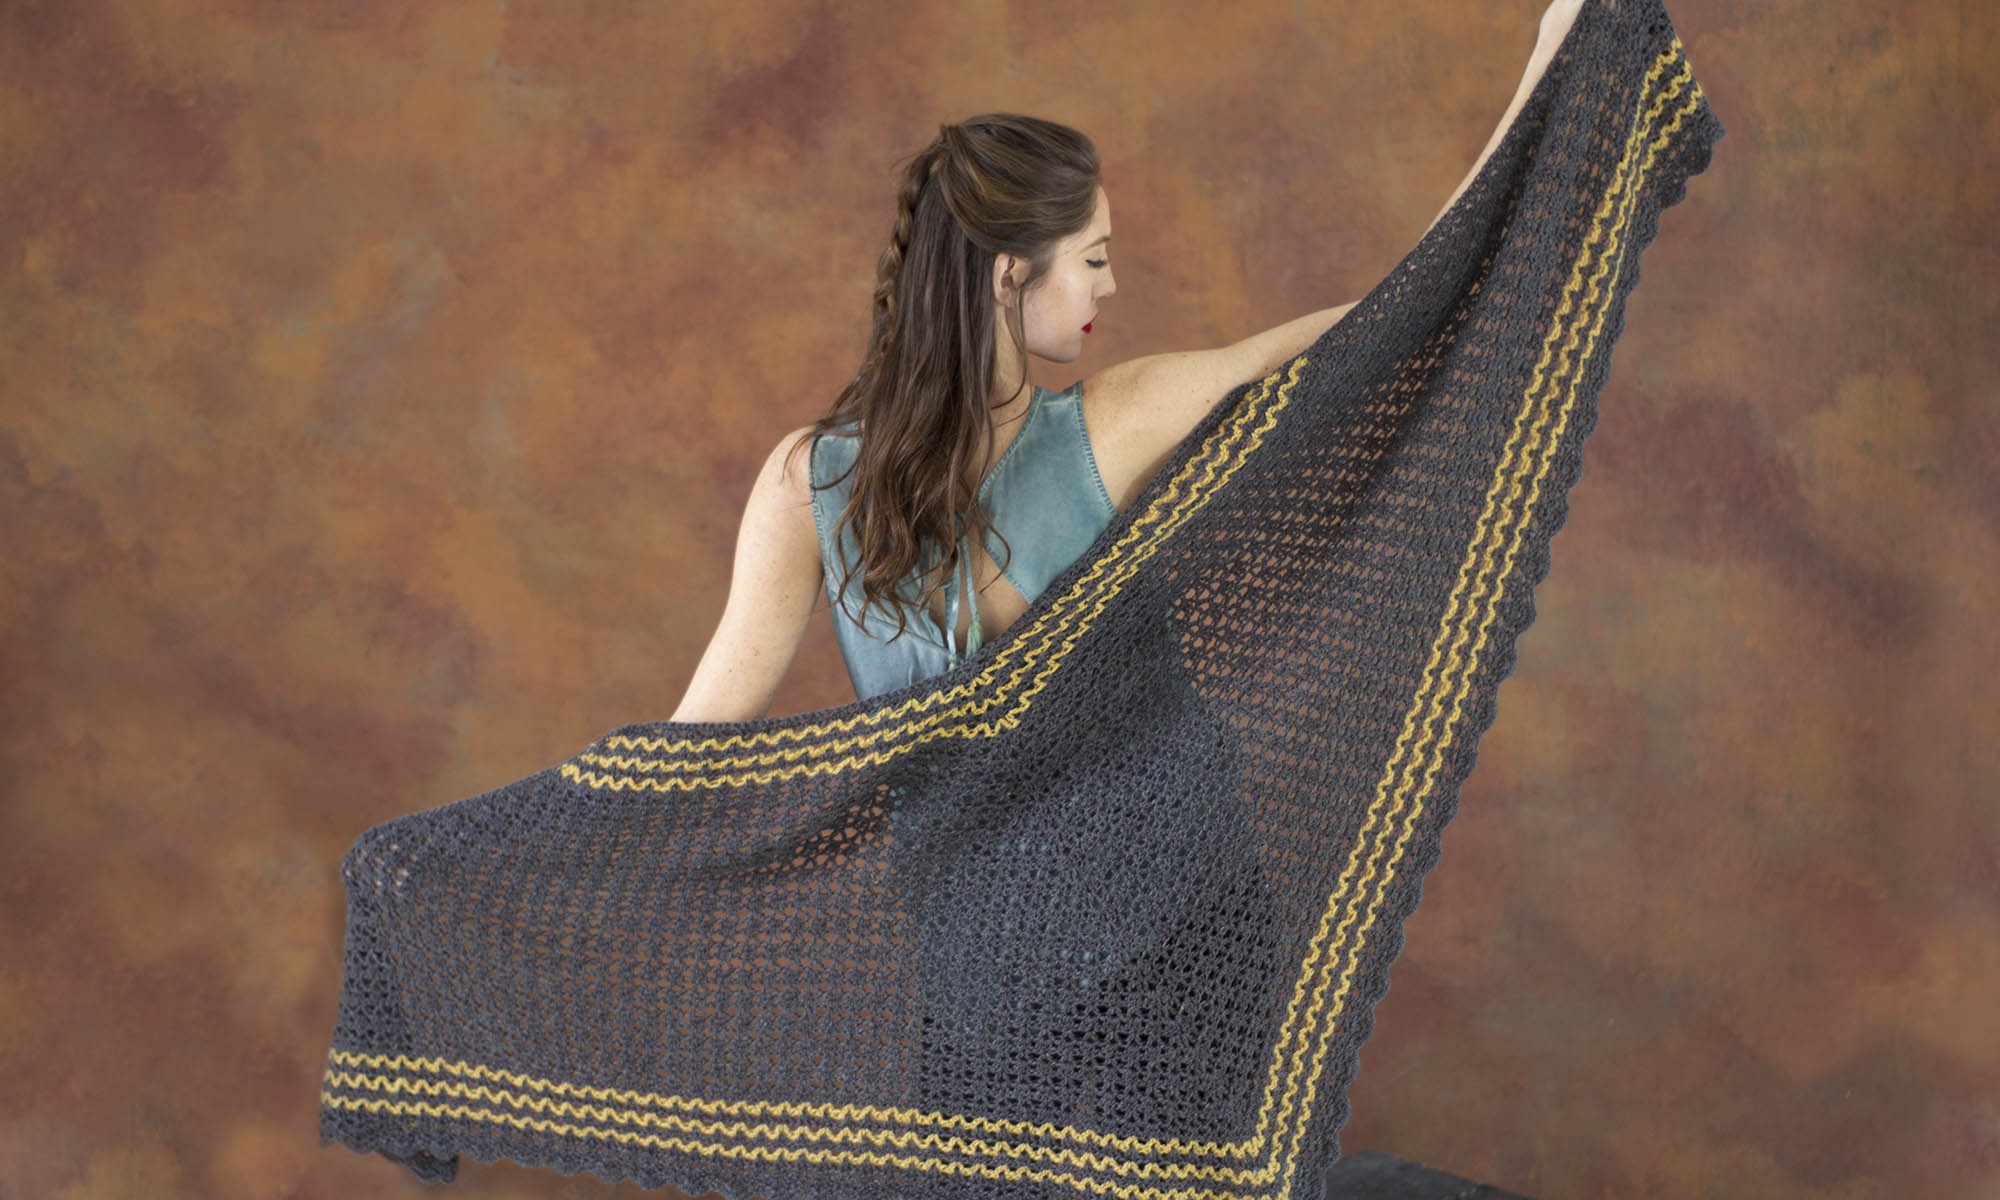
It’s hard to believe that something so simple can look so stunning.  We use the phrase “let the yarn do the work” a lot, but it’s very applicable here.
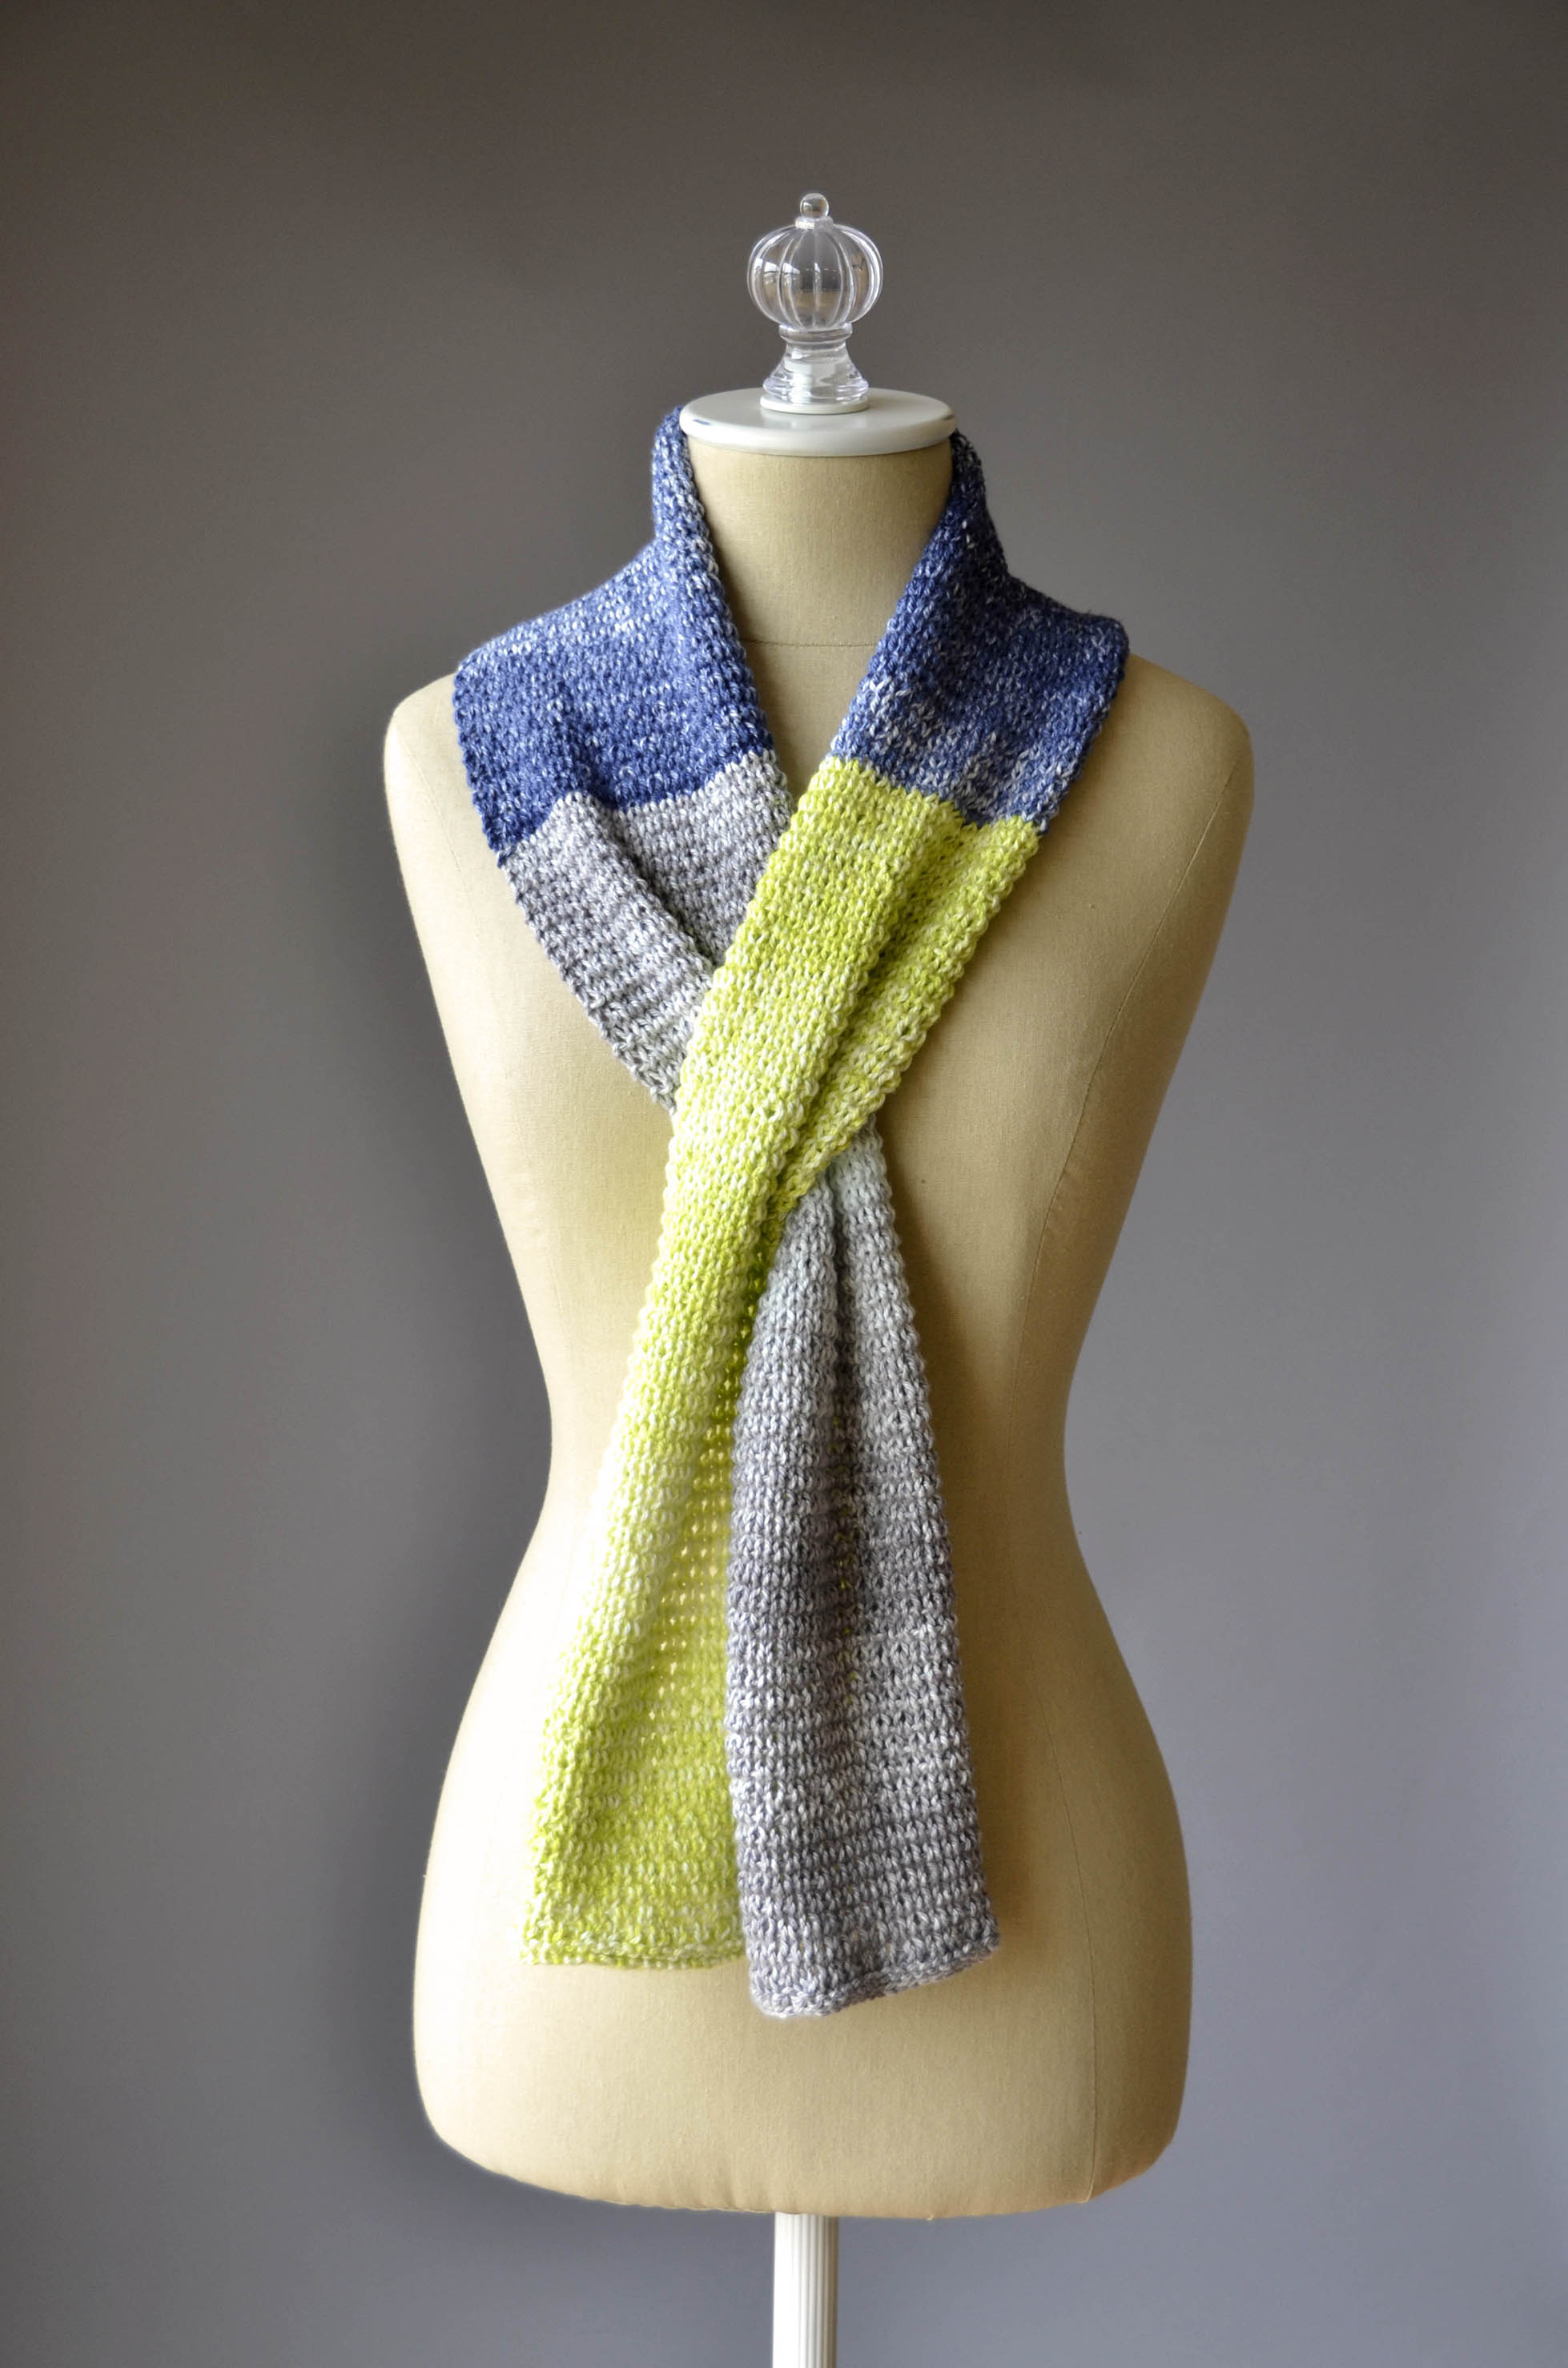
This is a very basic four row pattern consisting solely of knits, purls, and slipped stitches.  It creates a pebbled texture – not quite a stockinette, not quite a garter stitch.  A subtle pattern to match a subtly variegated yarn, Cotton Supreme DK Seaspray (230yds/100g).

Three Color Scarf B 3 blogThis 100% cotton drapes beautifully.  The DK weight means it’s light enough to work for warmer weather, and to wrap around with adding a lot of bulk.

This scarf was a delight to style on our mannequin (we call her Molly), to the point that I had to stop myself from finding more ways to wear this.  Three coordinating colors brighten up any outfit – mix and match to suit your style.

Three Color Scarf A 1 blog

Happily, each scarf only takes about 40 grams of each color – less than half a hank.  So you could easily get two scarves out of your color choice.  Above, we use  306 Storm,  305 Ink Blue,  and302 Sun Lime.  Below we use, 301 Carmine, 304 Blue Skies, and 302 Sun Lime.

Not only is this going into my queue, I’ll also be recommending this to the newer knitters I know.  There’s nothing like an easy project that looks smashing to build confidence.

Happy knitting!

Three Color Scarf A 2 closeup blog


rocked knitalong – working into a double yo

Rocked Knitalong Graphic

As I was knitting along on my Rocked, I was working a lace pattern row with its double yarnovers. When I reached the next (WS) row and was working the [k1, p1] into each double yarnover (yo), it occurred to me that this could make for a good video.

When there is a double yo on your needle, it can be confusing just how to knit or purl into it. If this is your first time dealing with double yarnovers, give this video a try. I hope it helps!