Traverse Scarf – the Basics

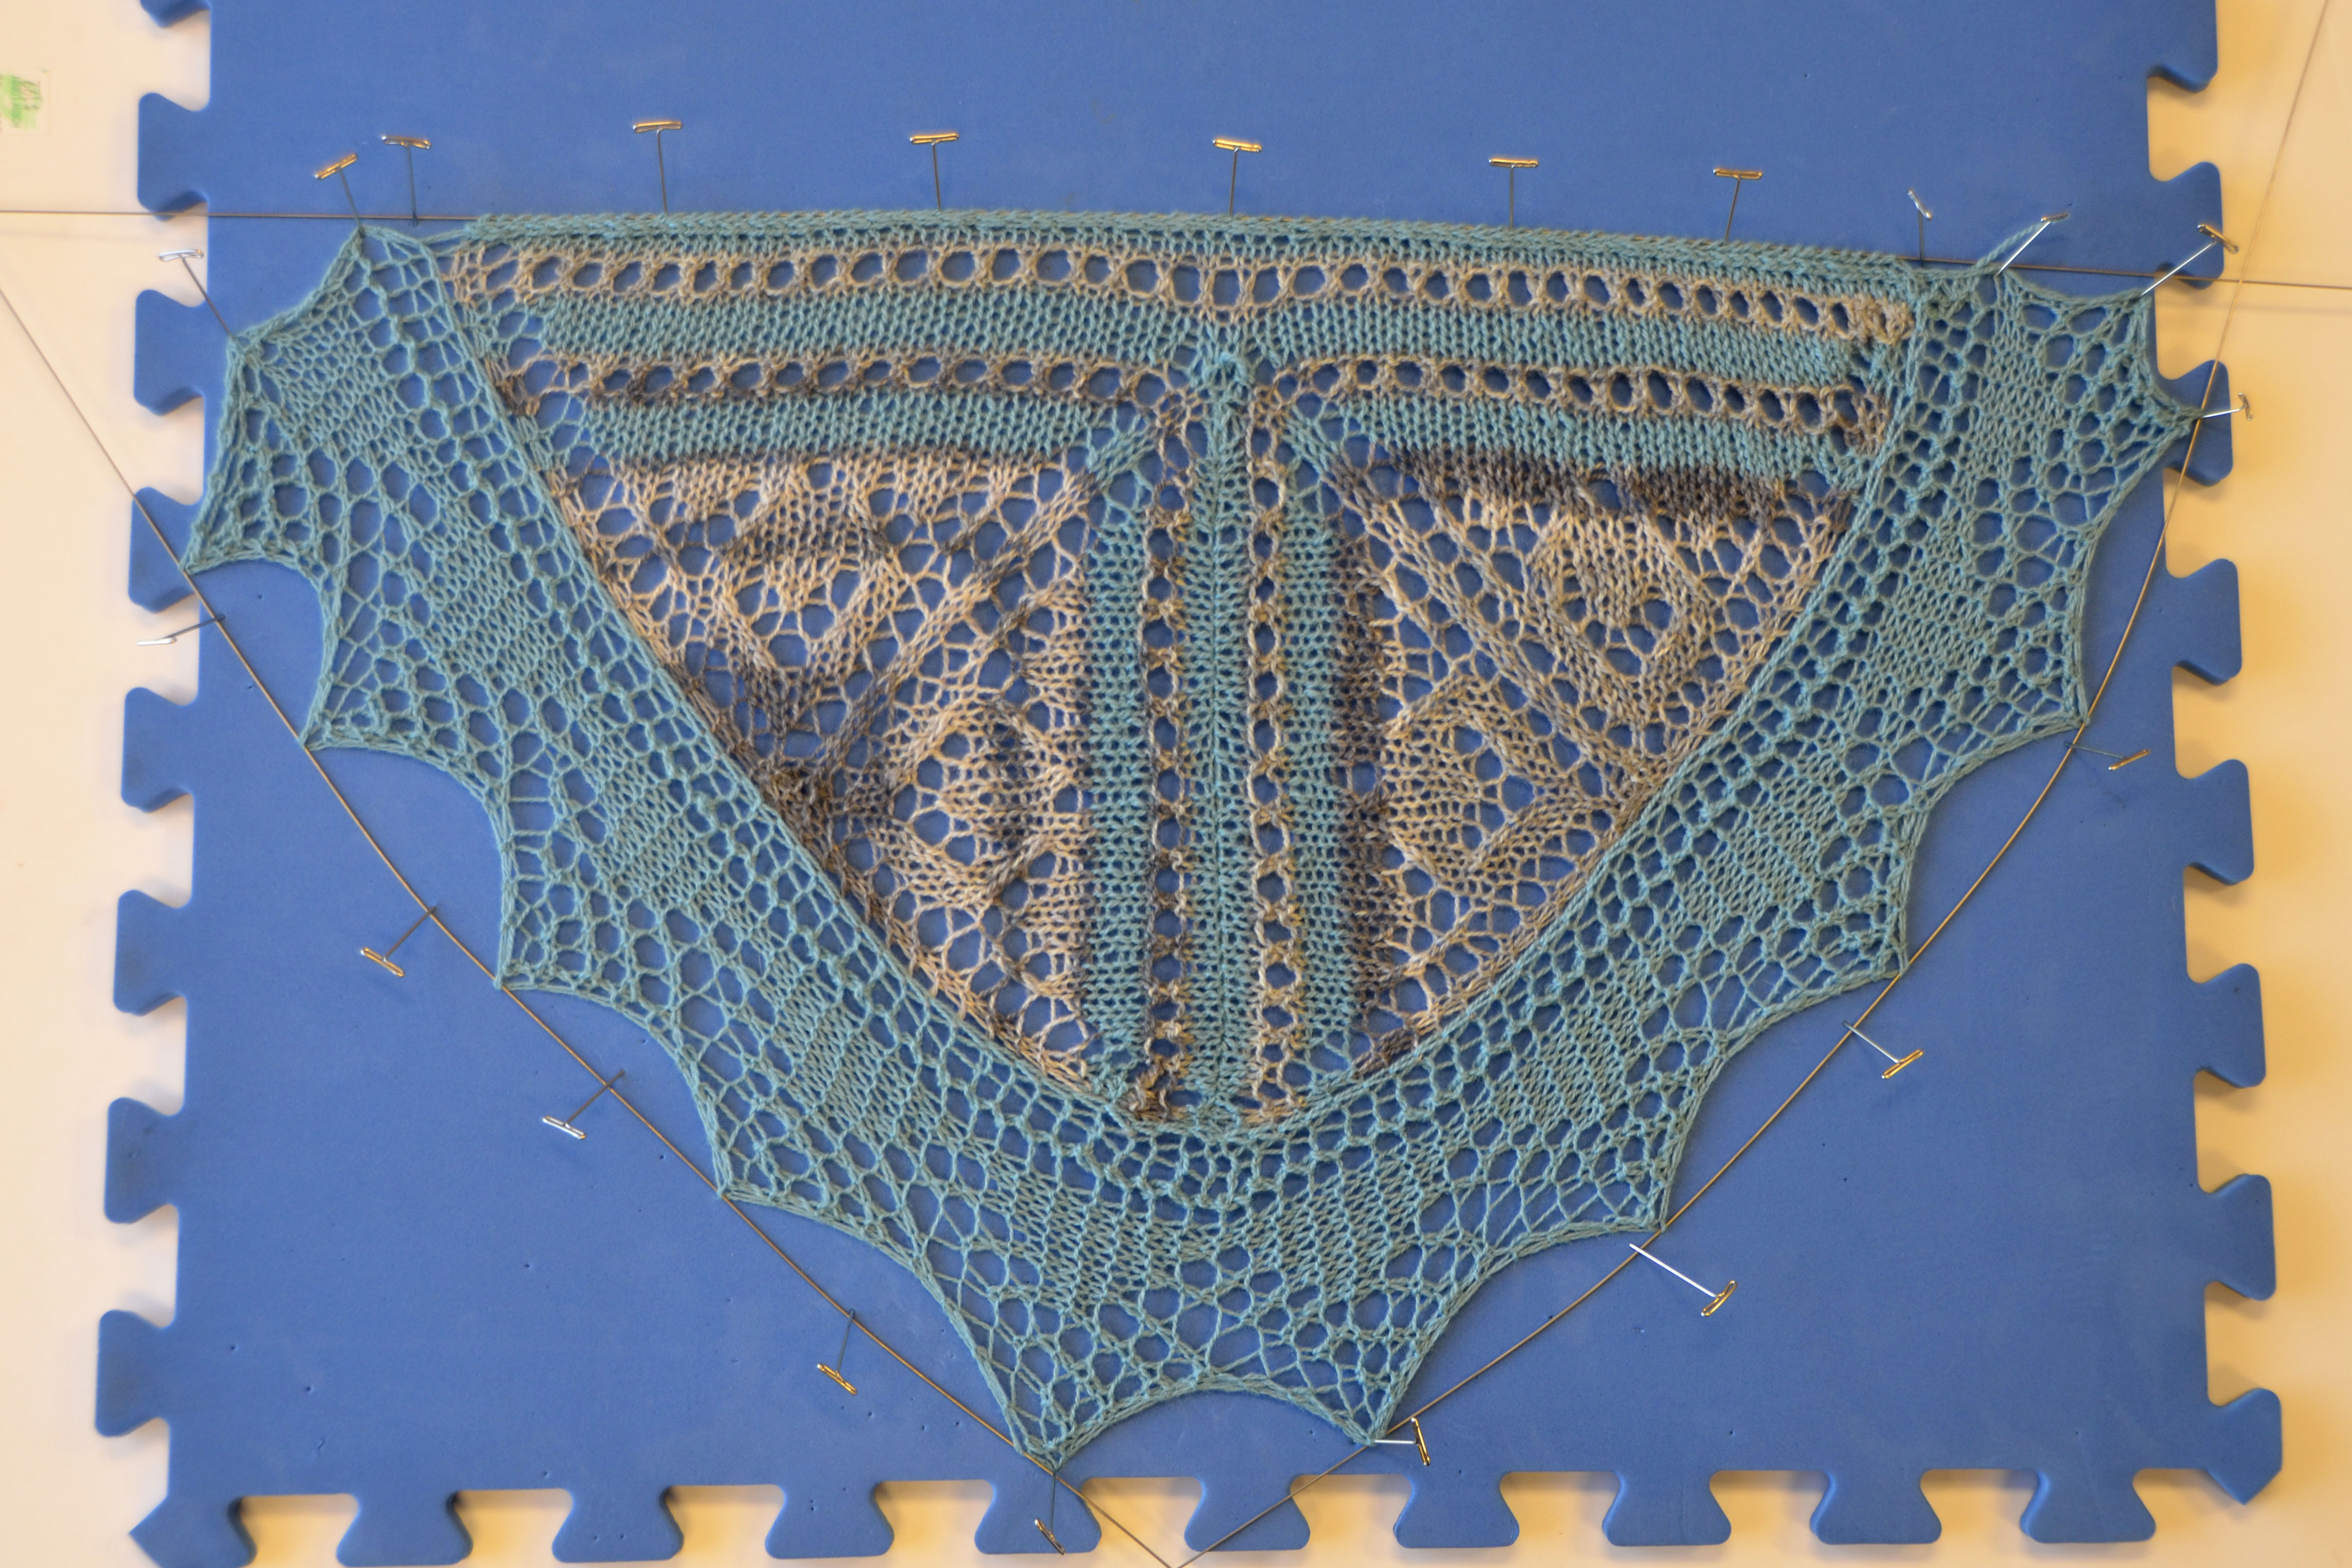
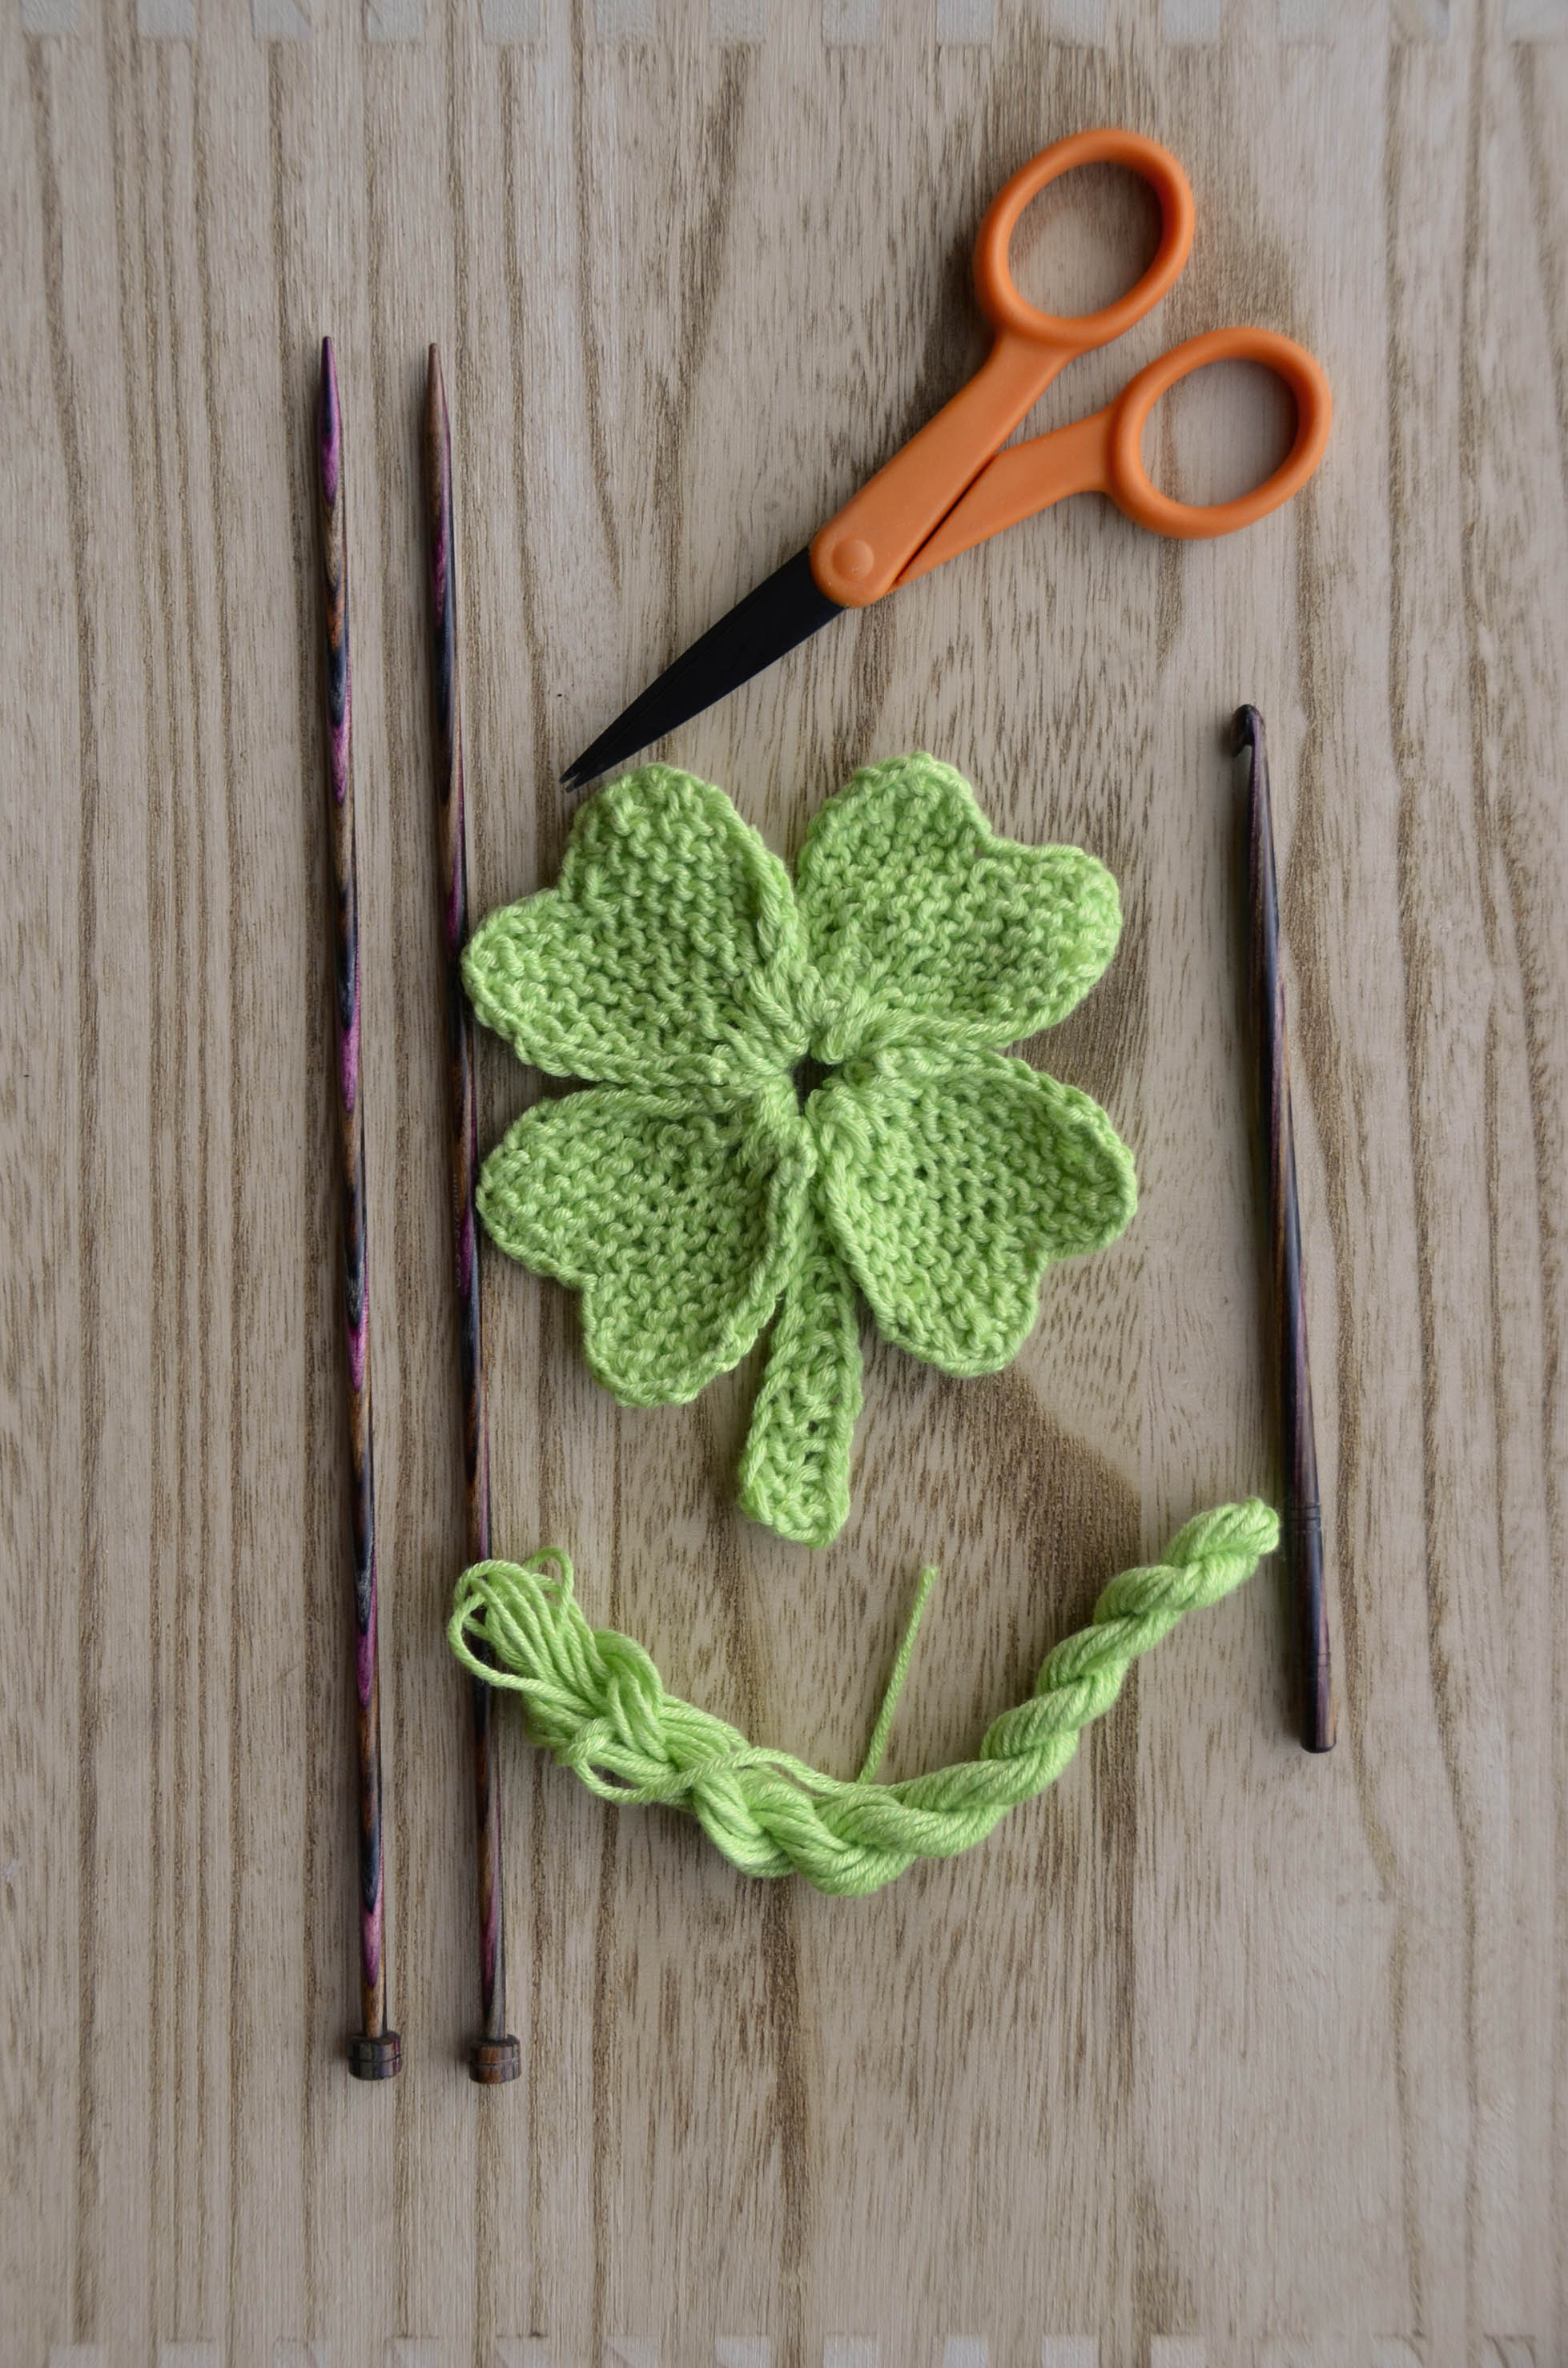
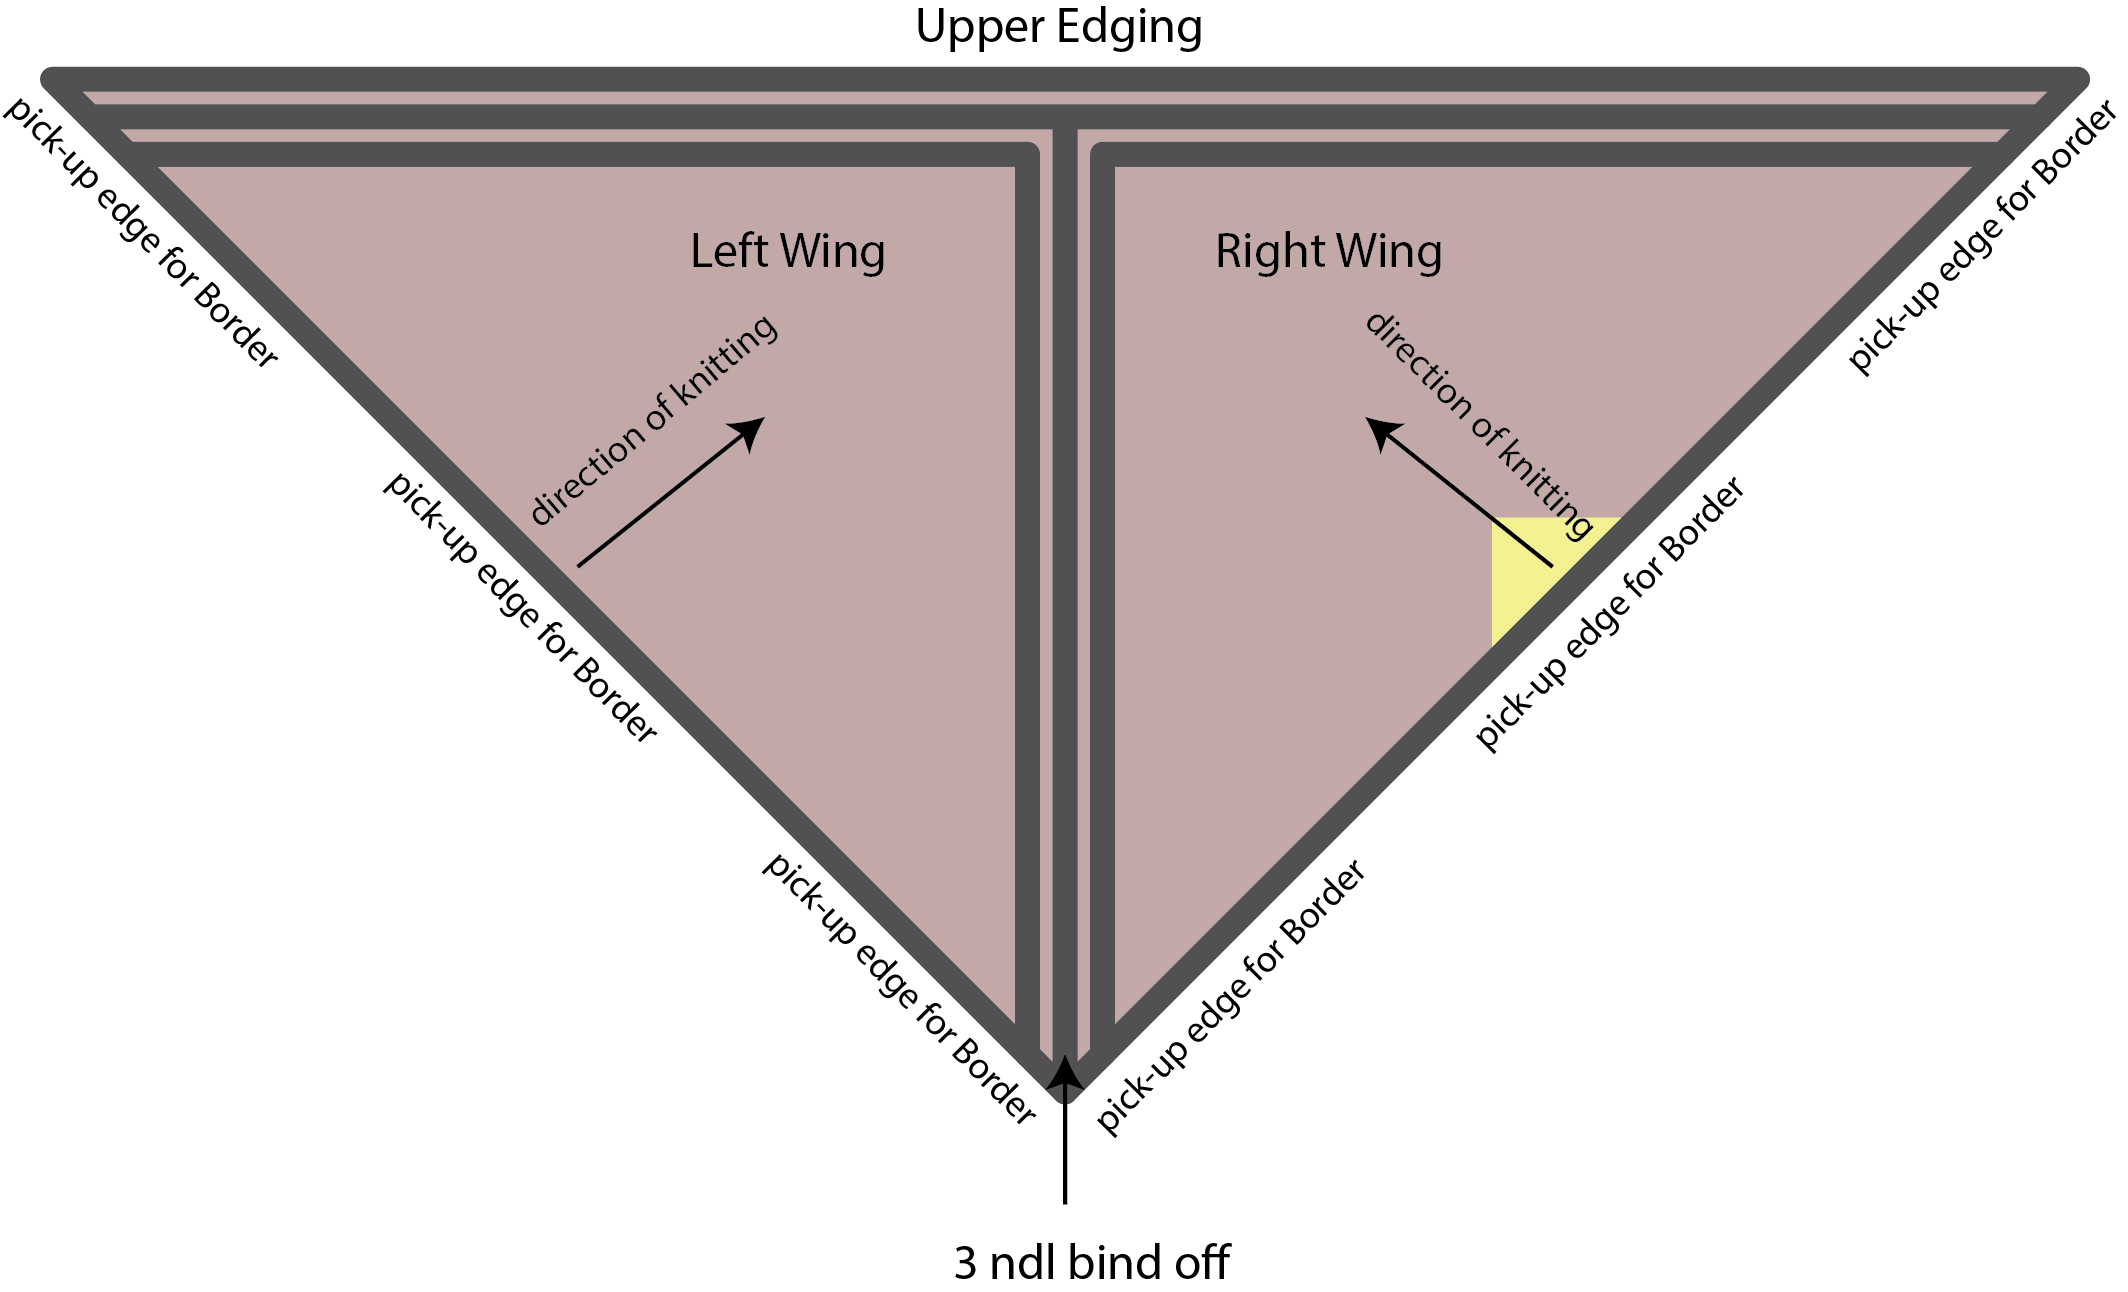
For the last several weeks, I’ve been touching on various elements of some of the projects from our new ebook, Contrarian Shawls 2. The past 3 weeks were spent on techinques from the Bisected Shawl, and the 2 weeks before that I covered how to do filet crochet with the Delphi Stole.

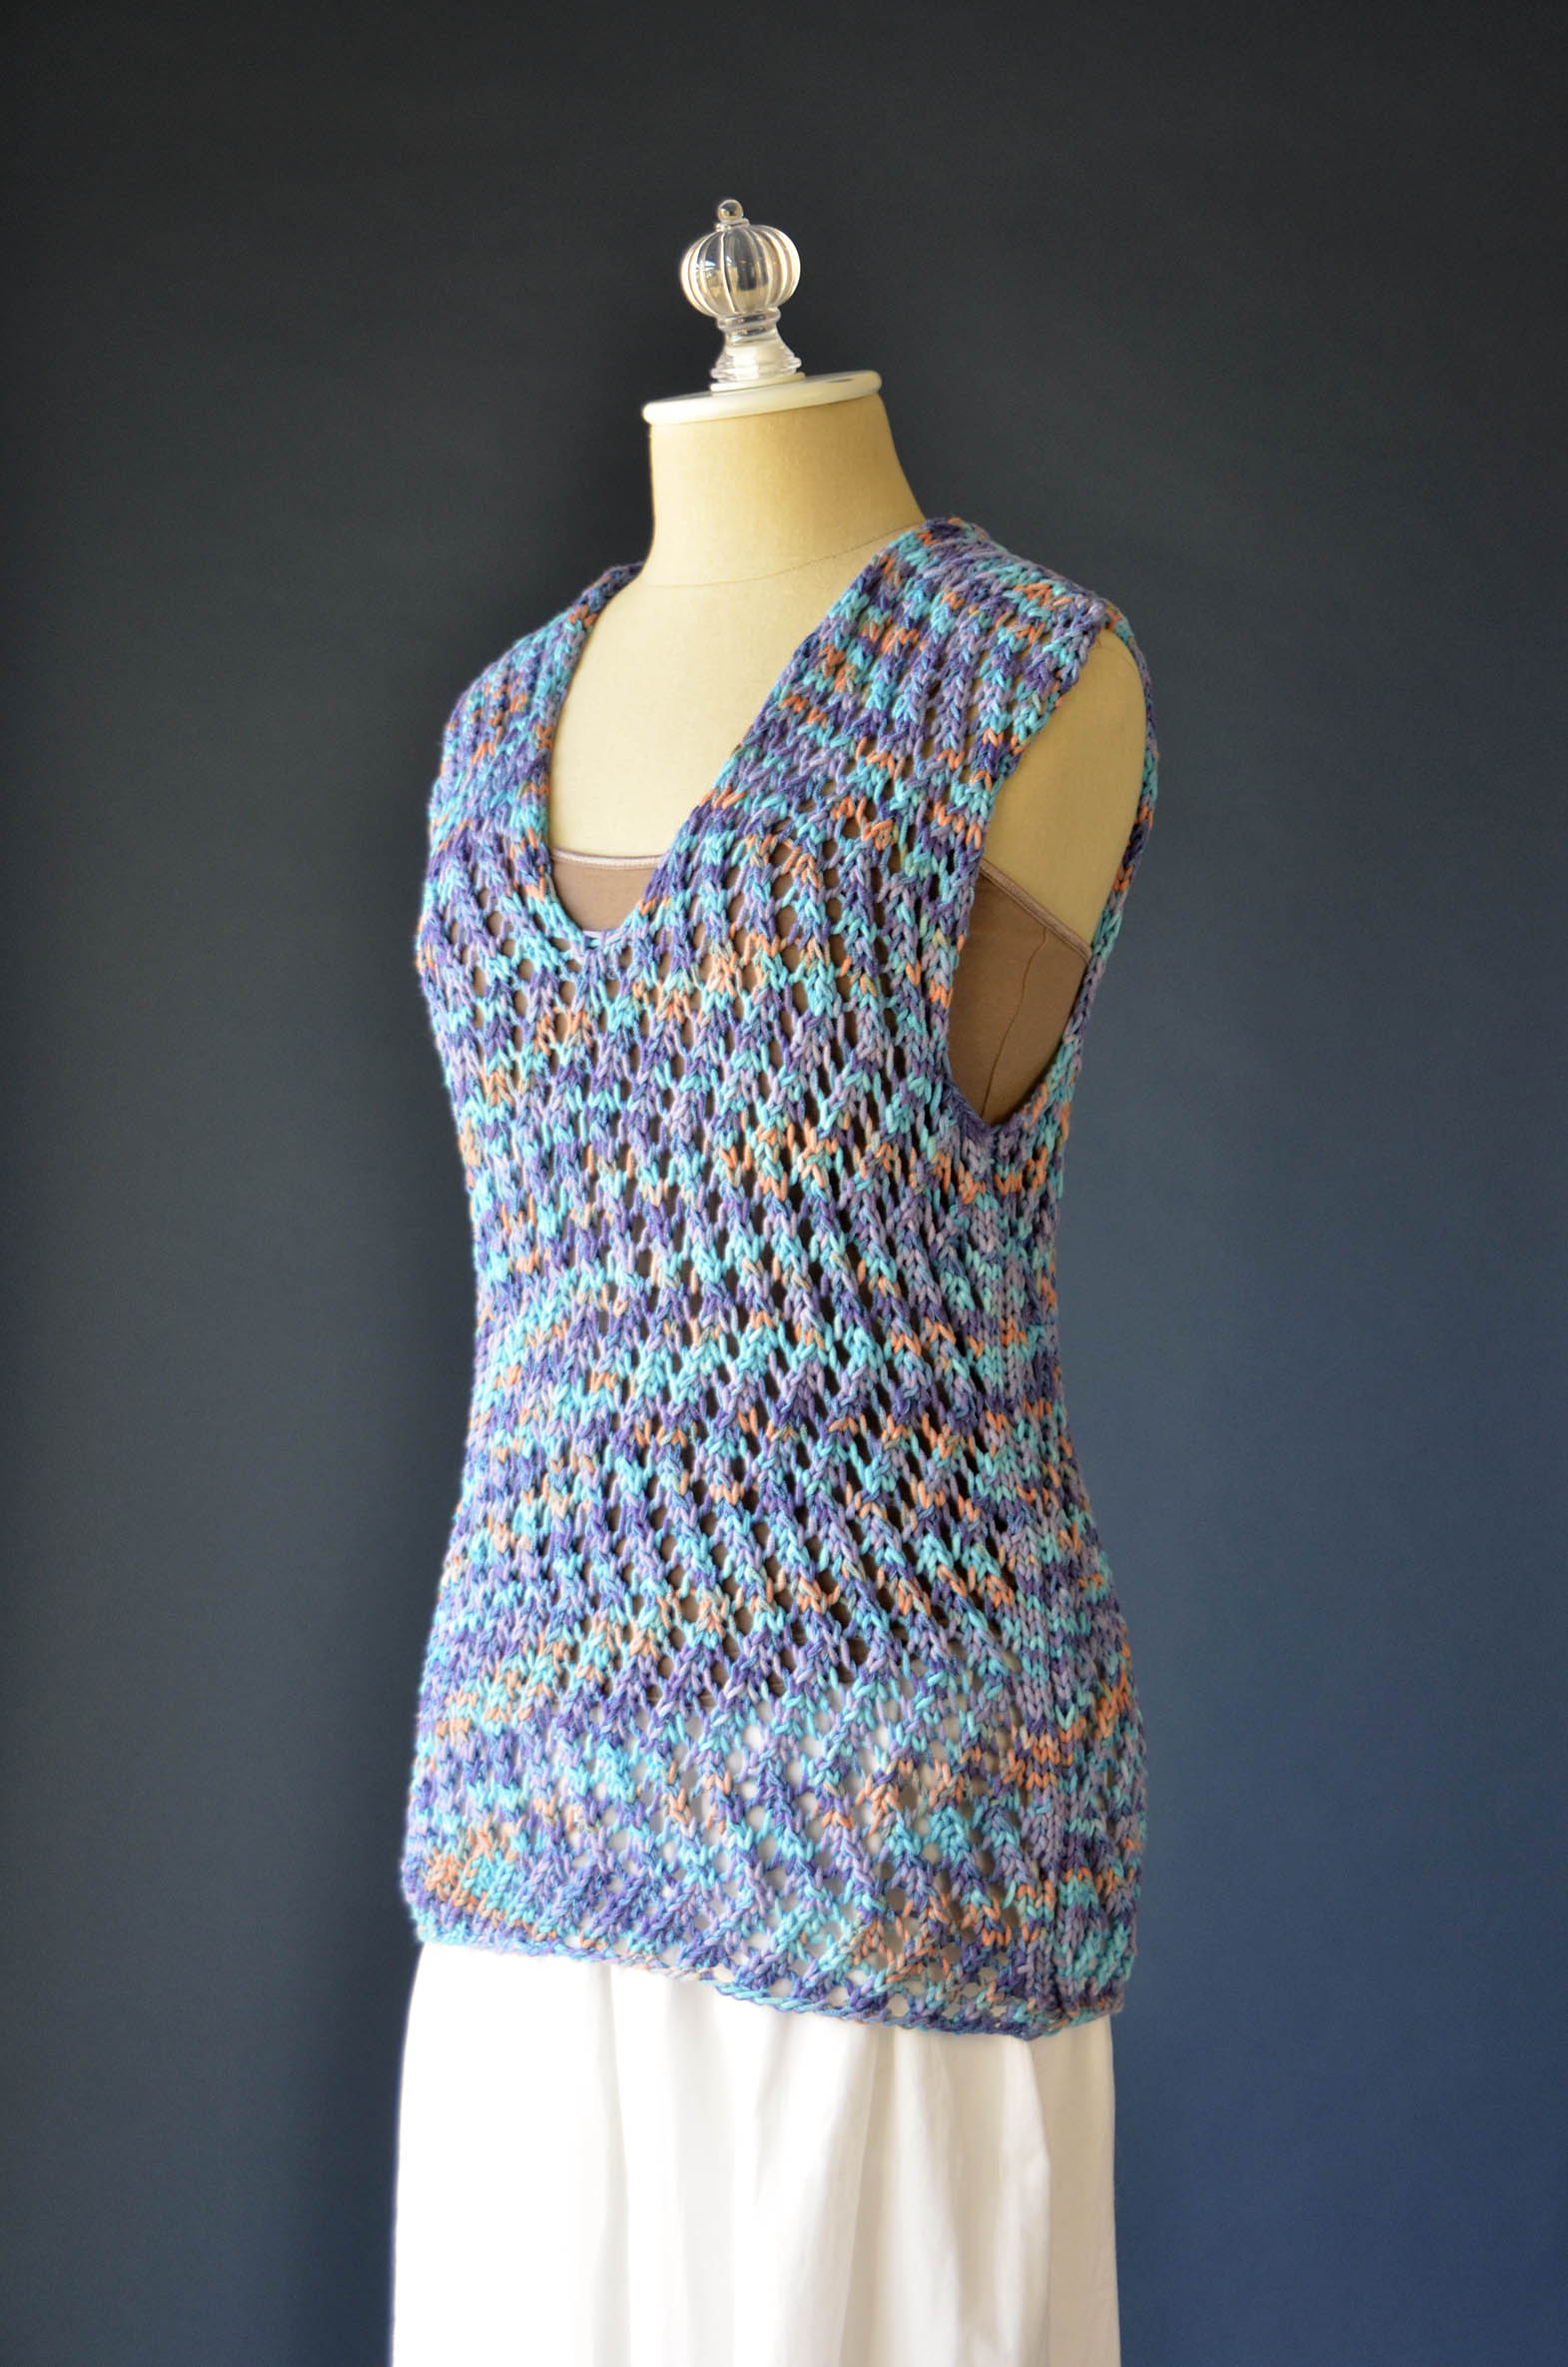
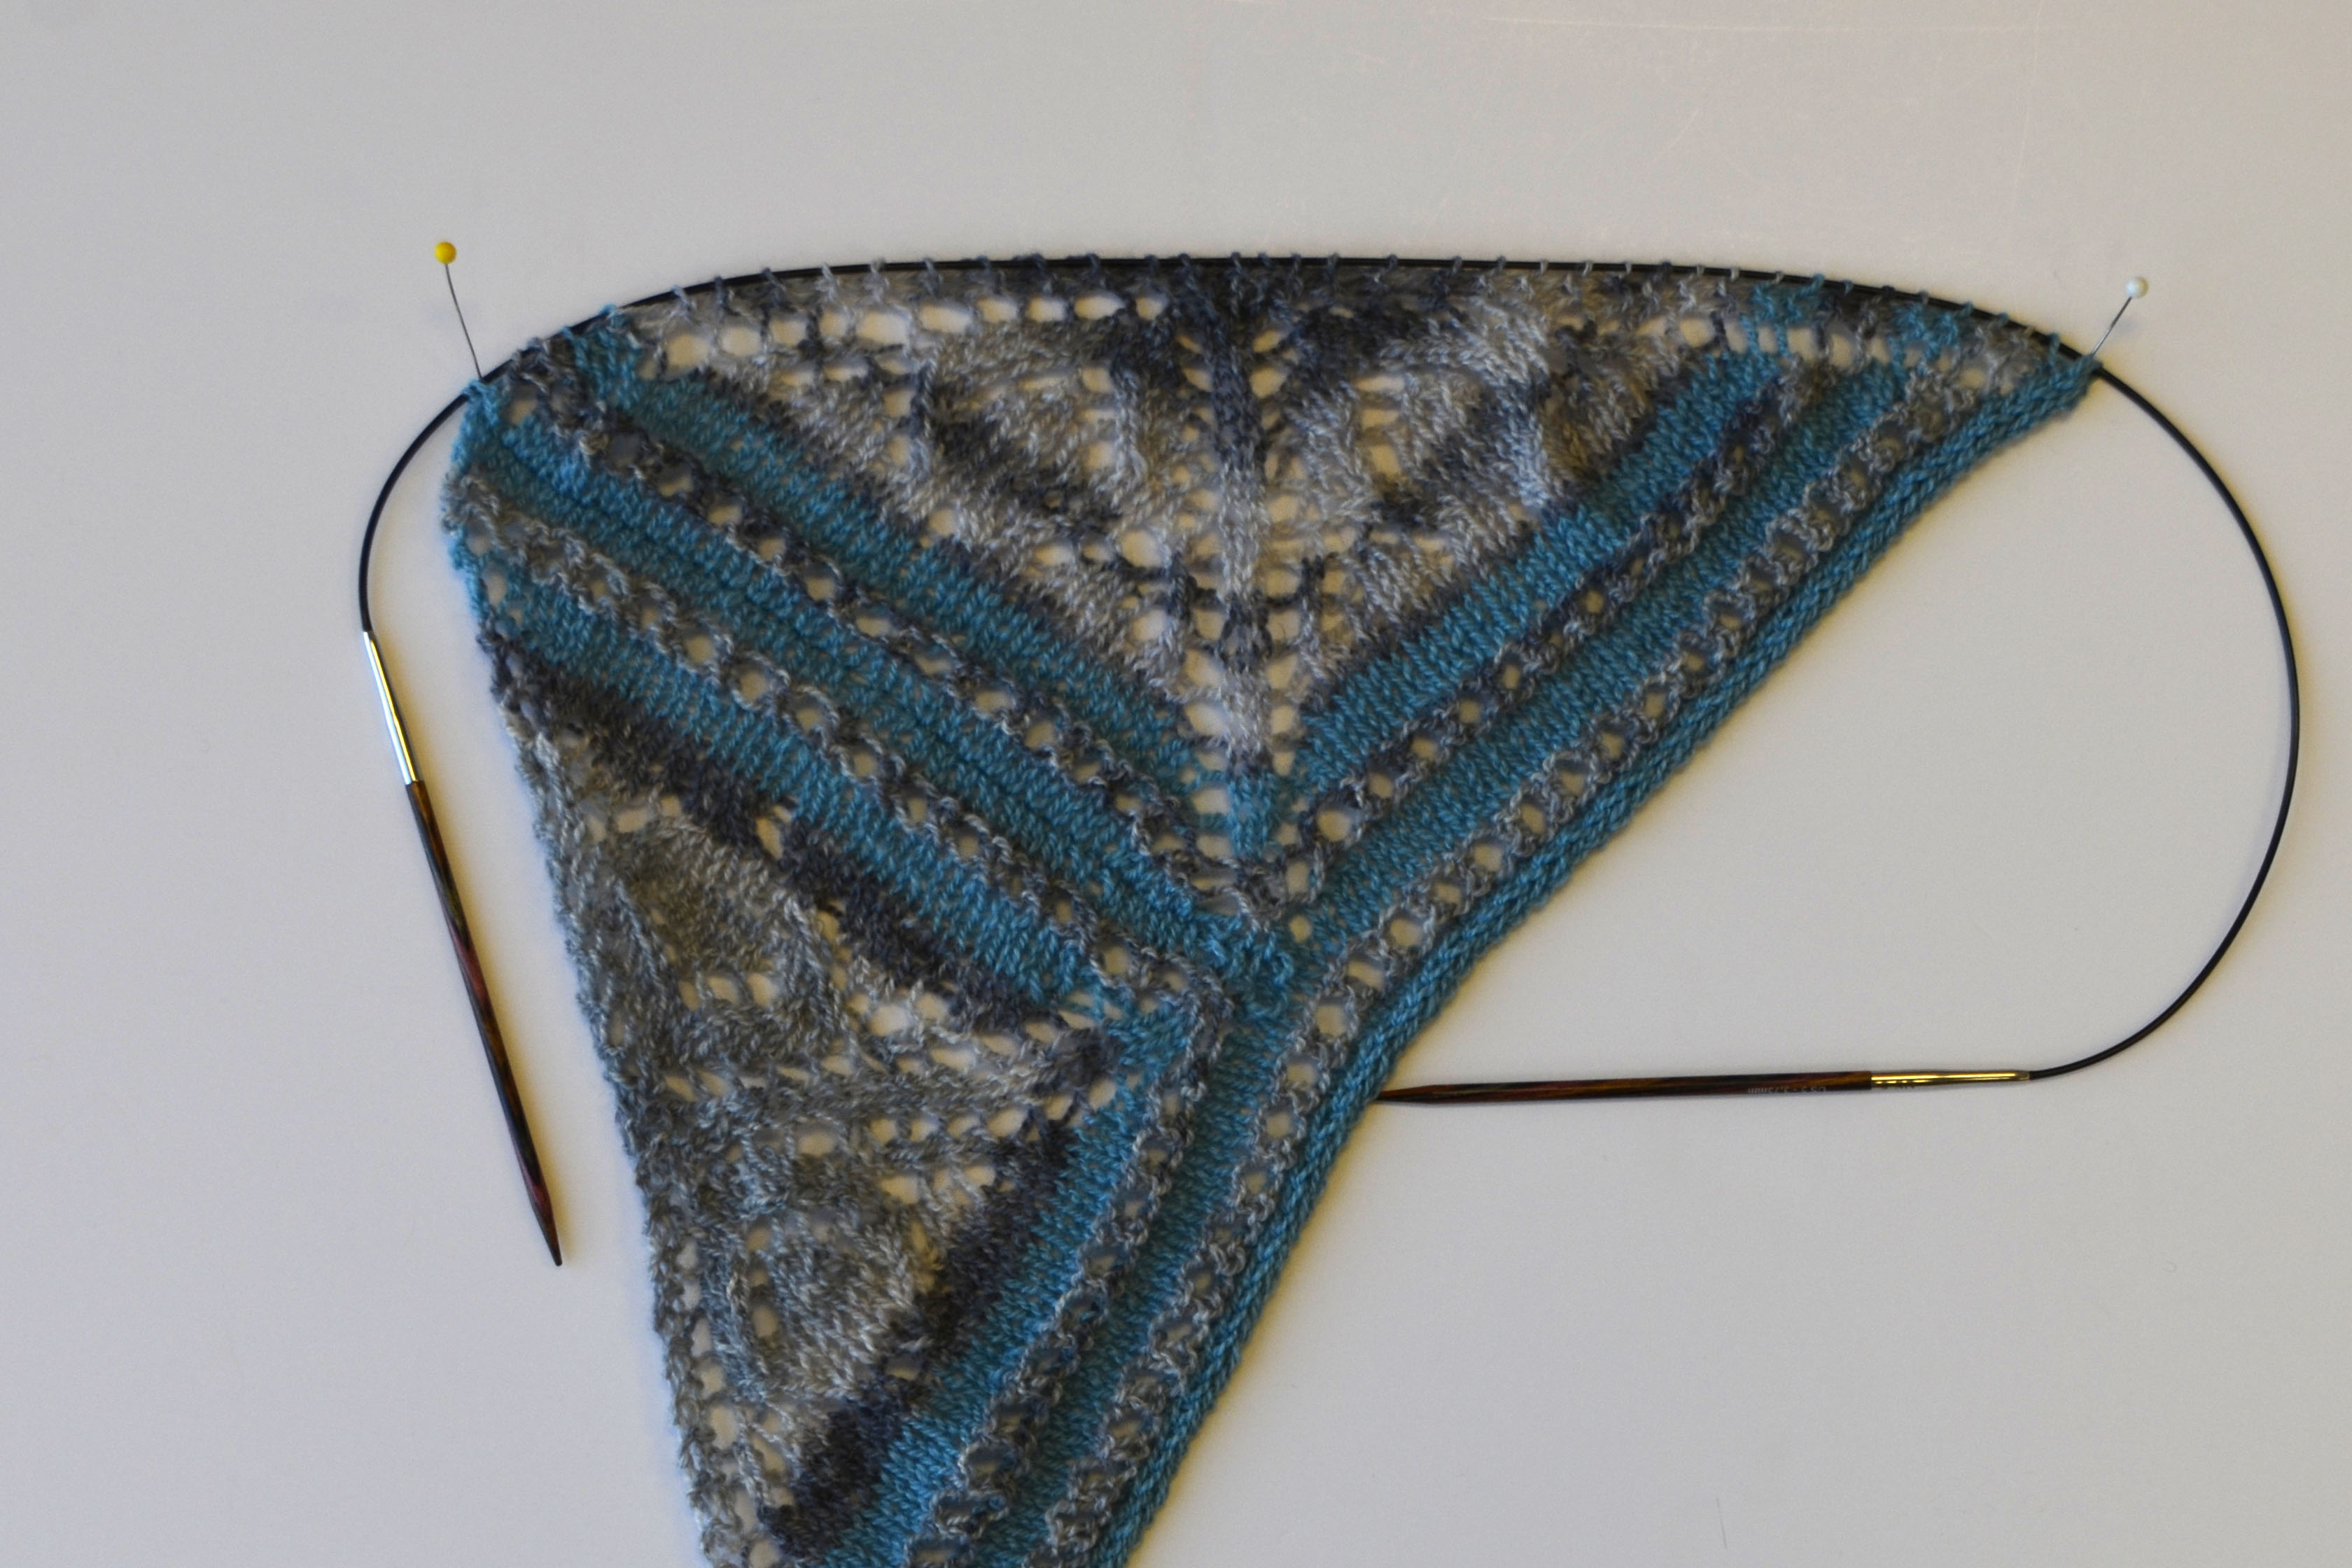
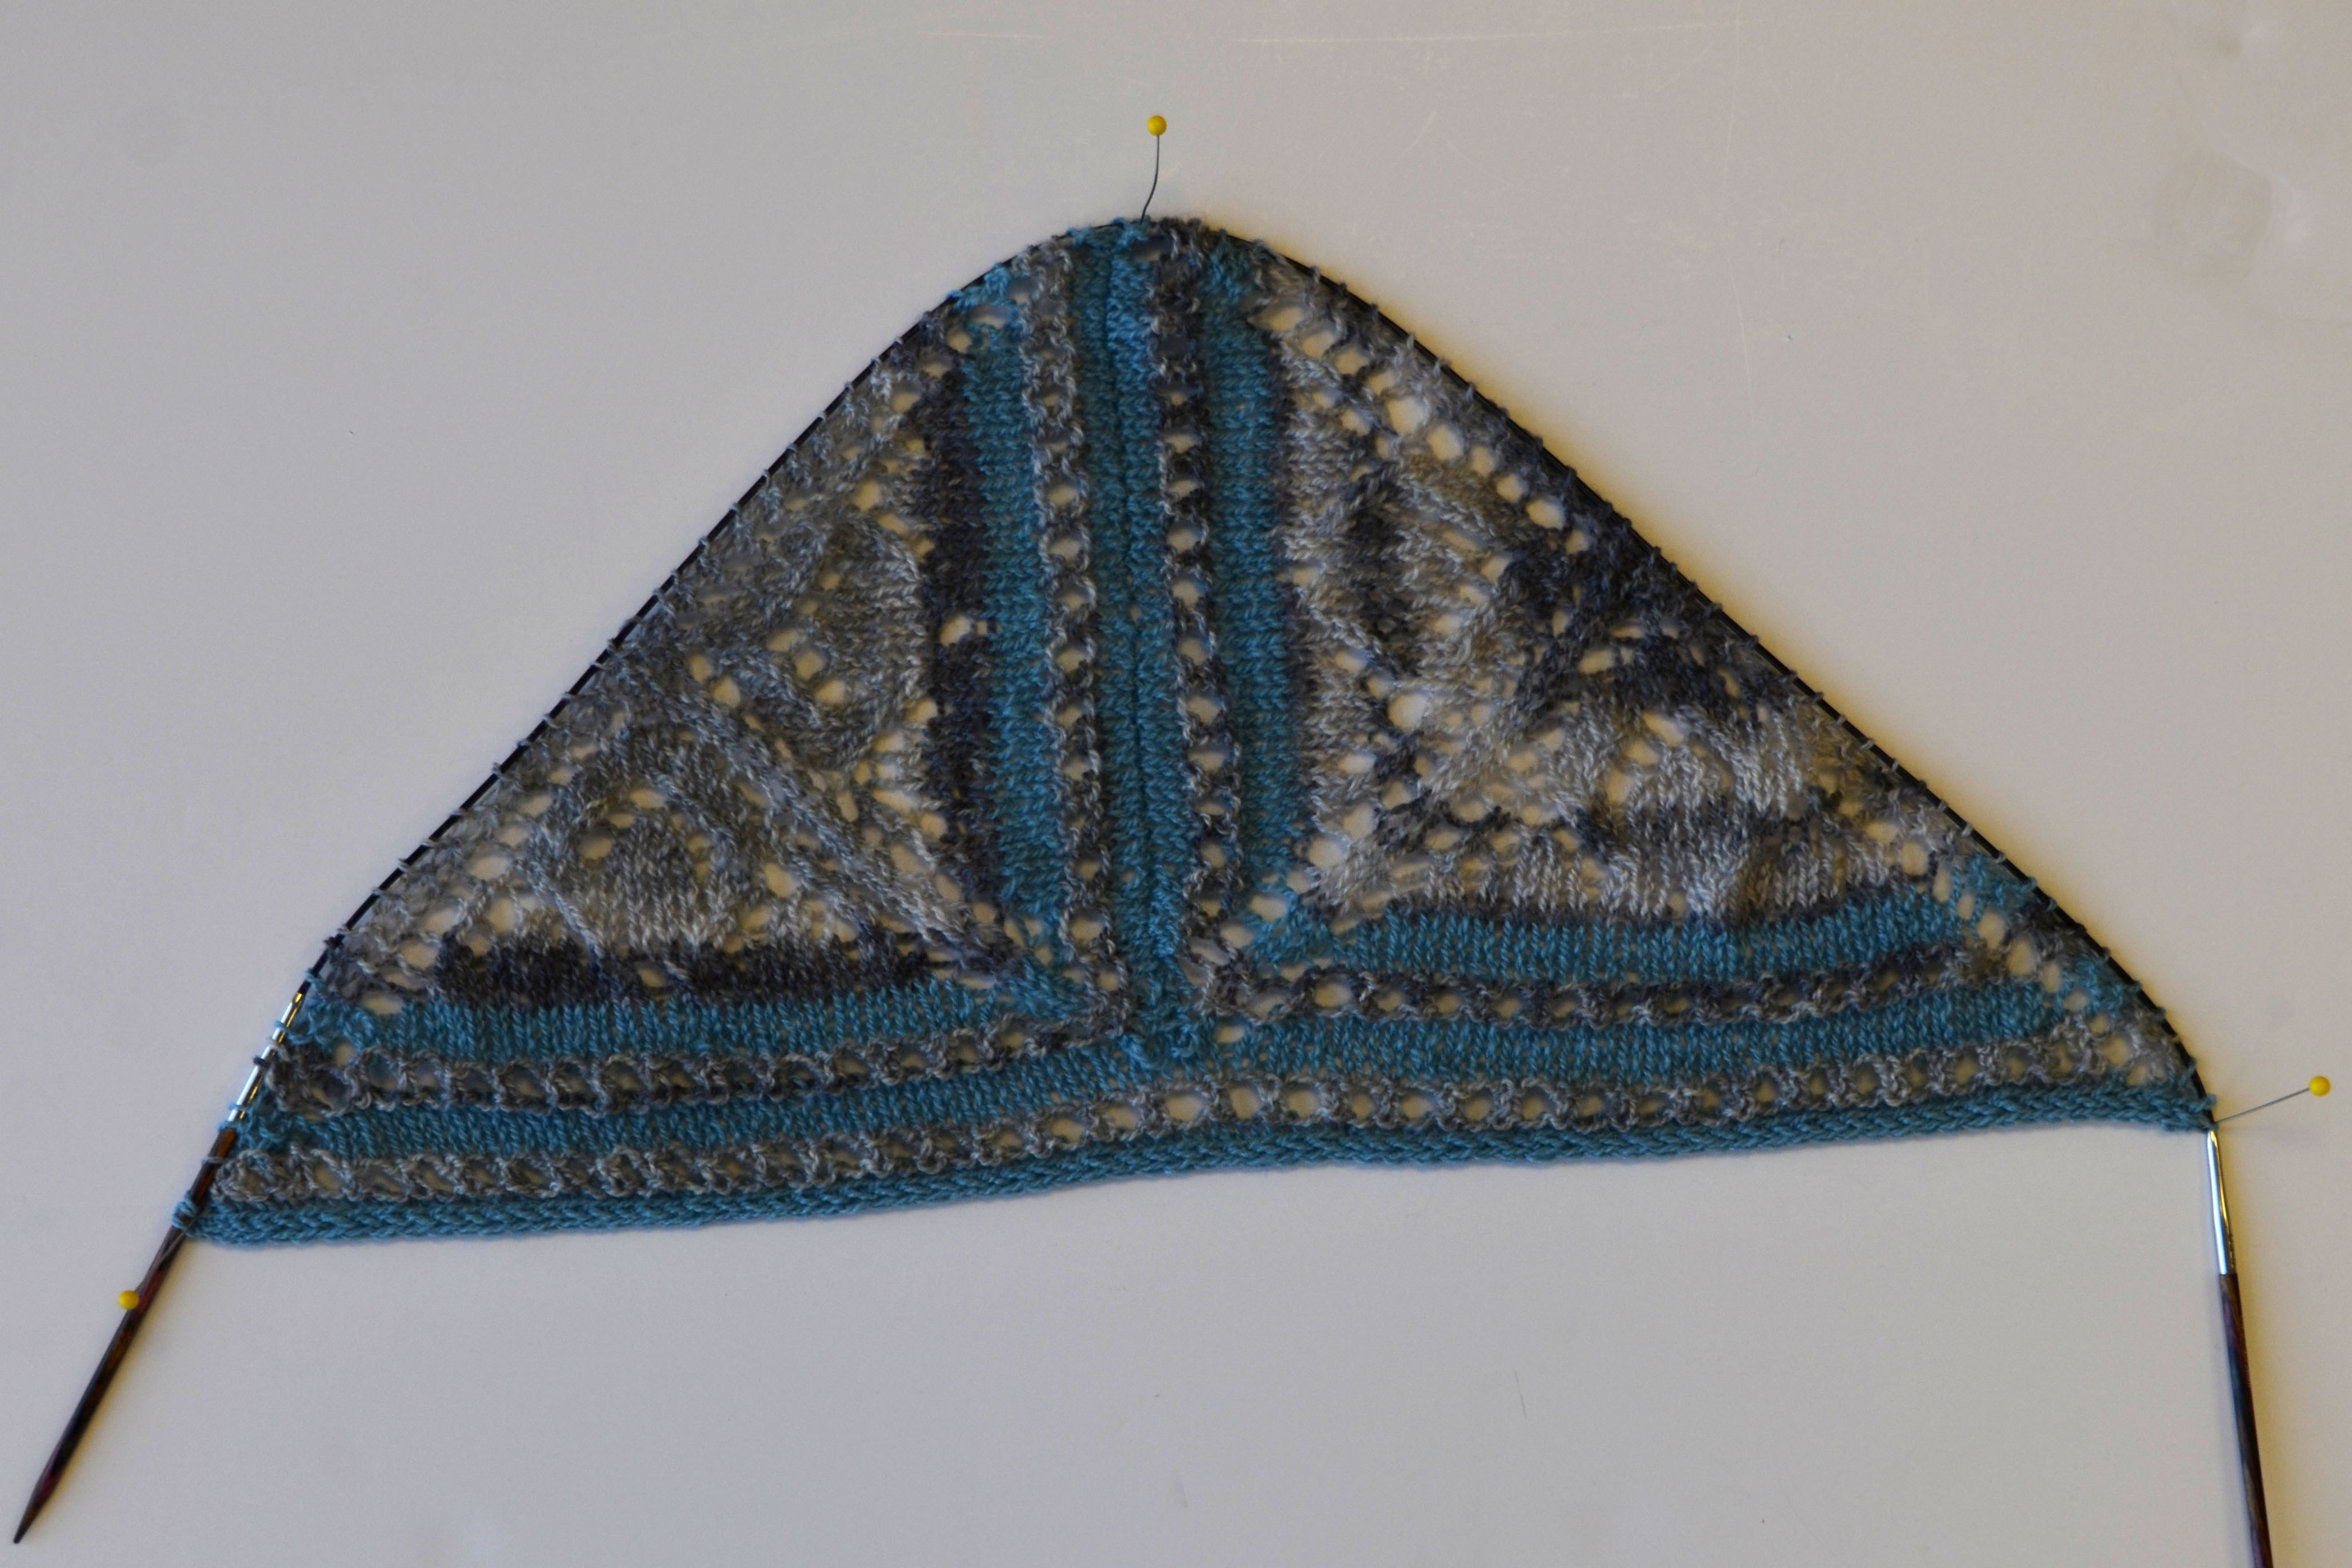
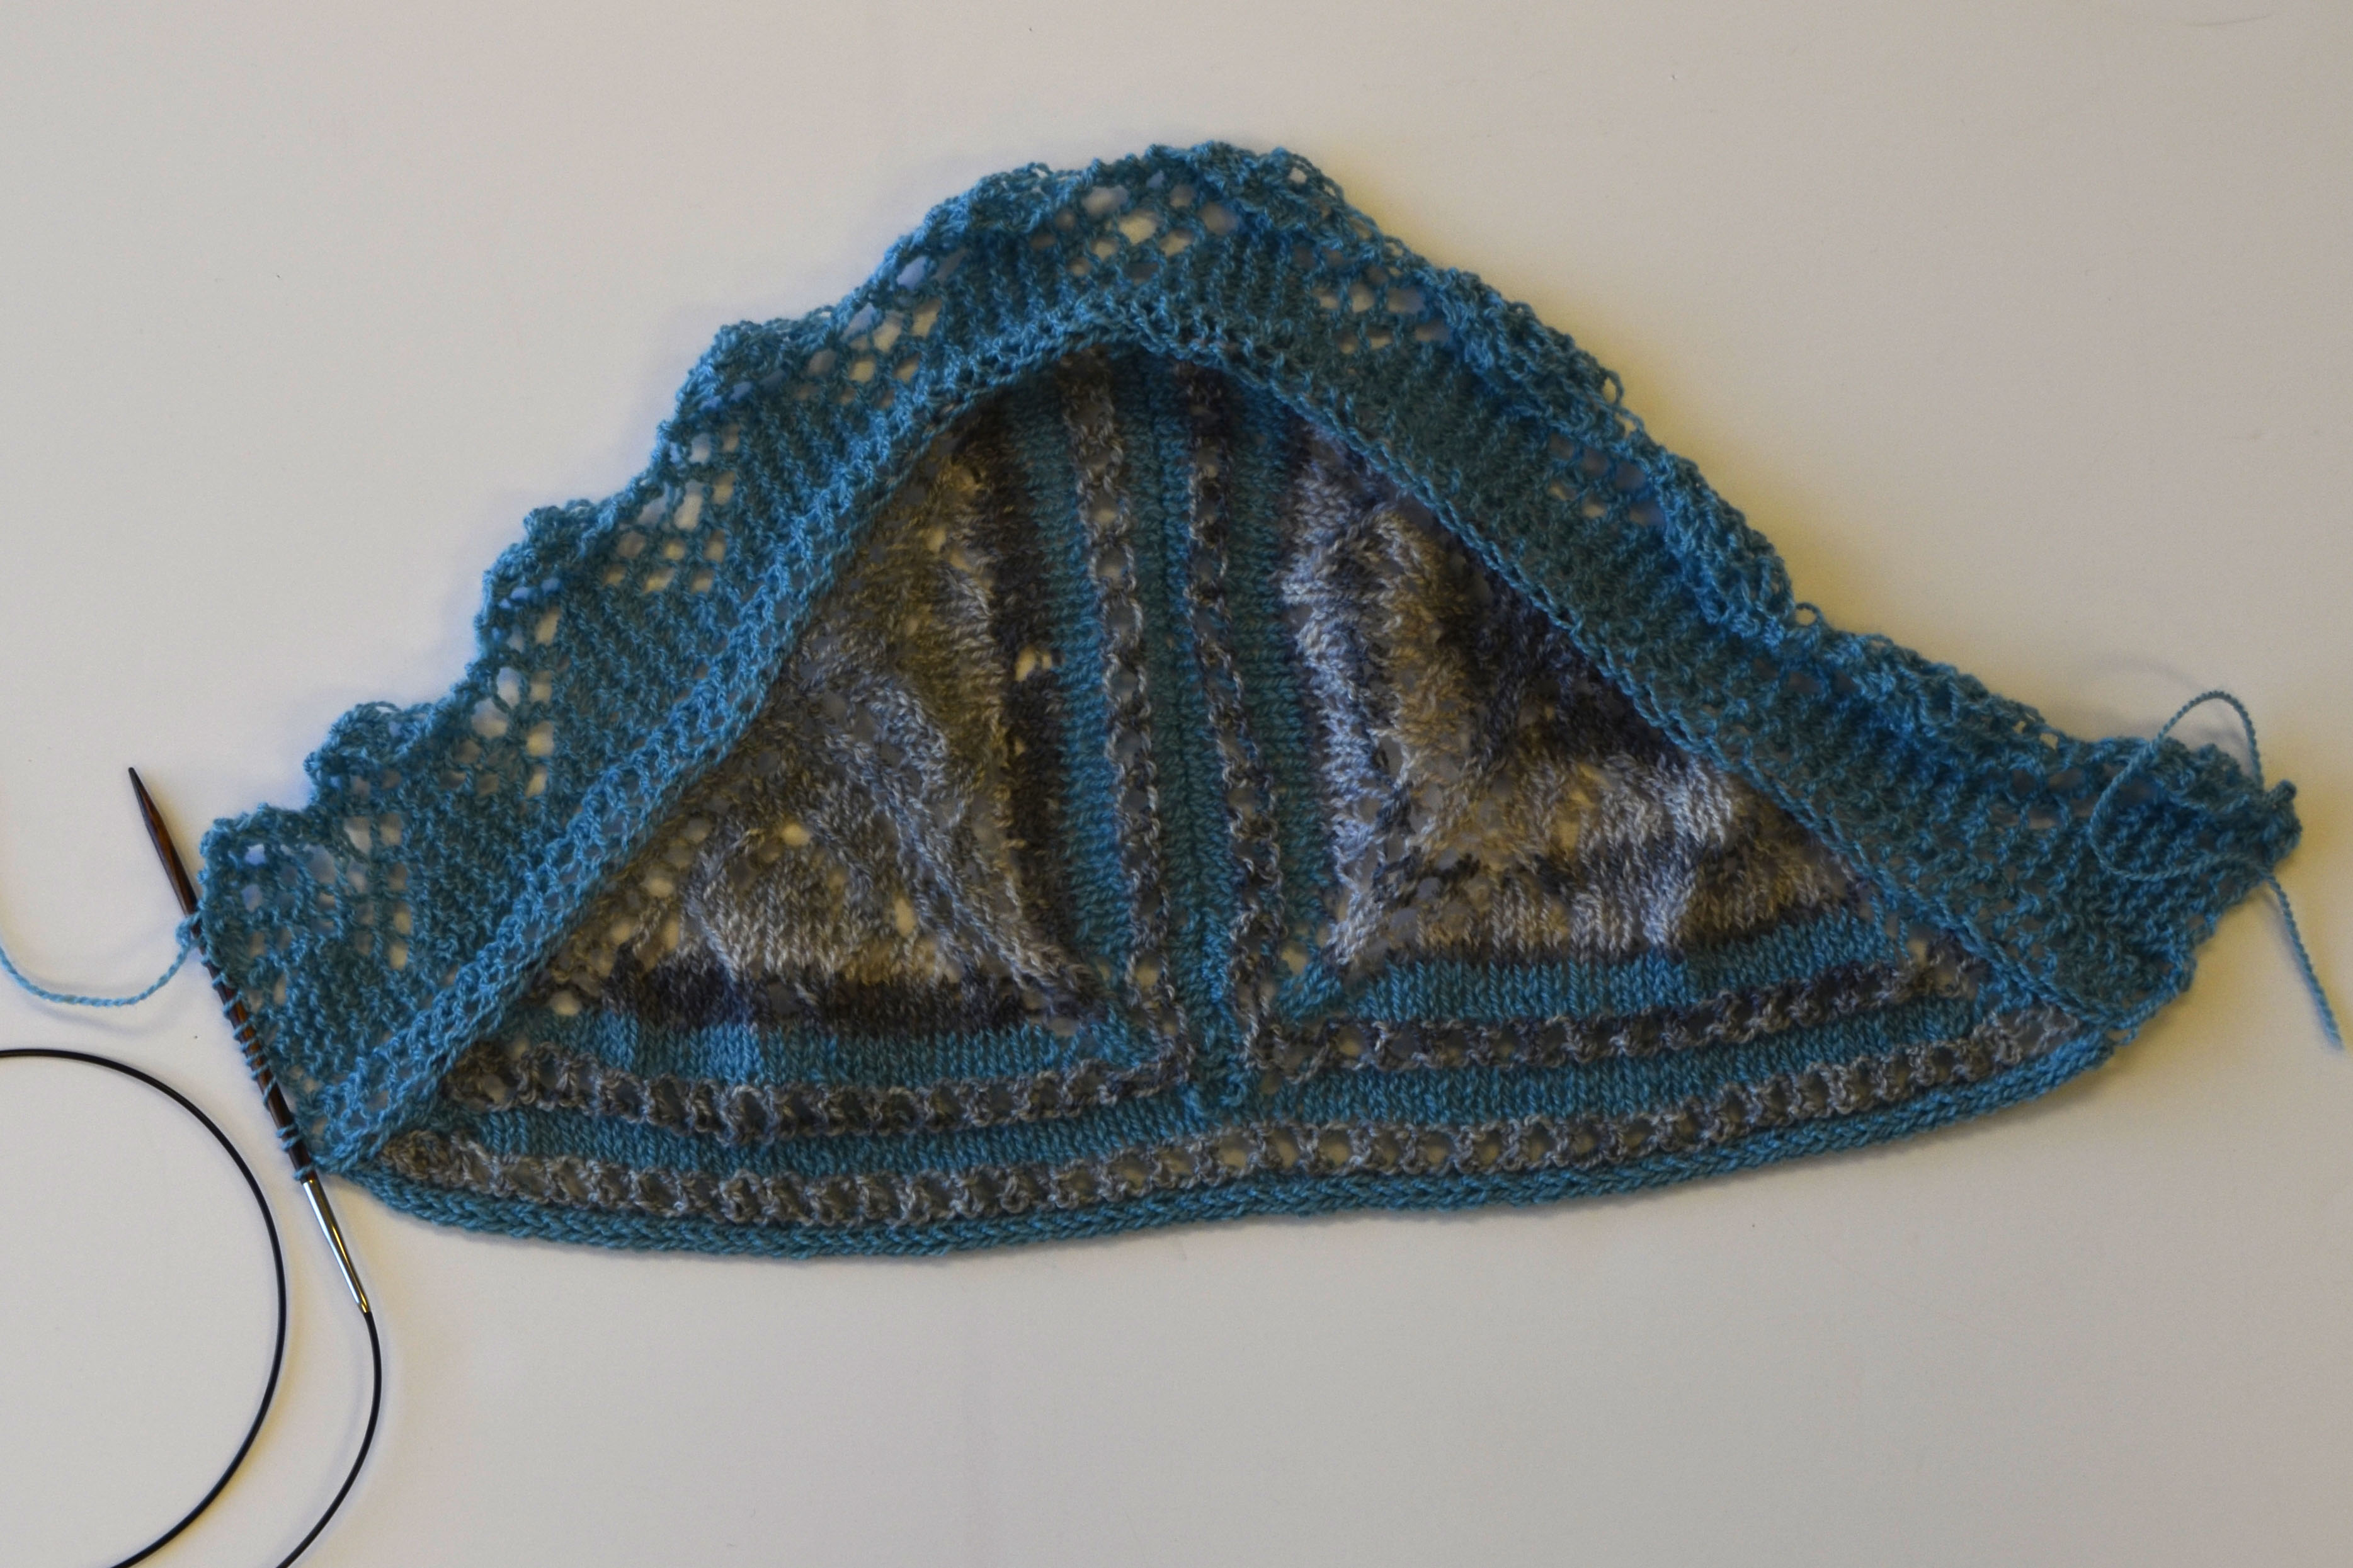
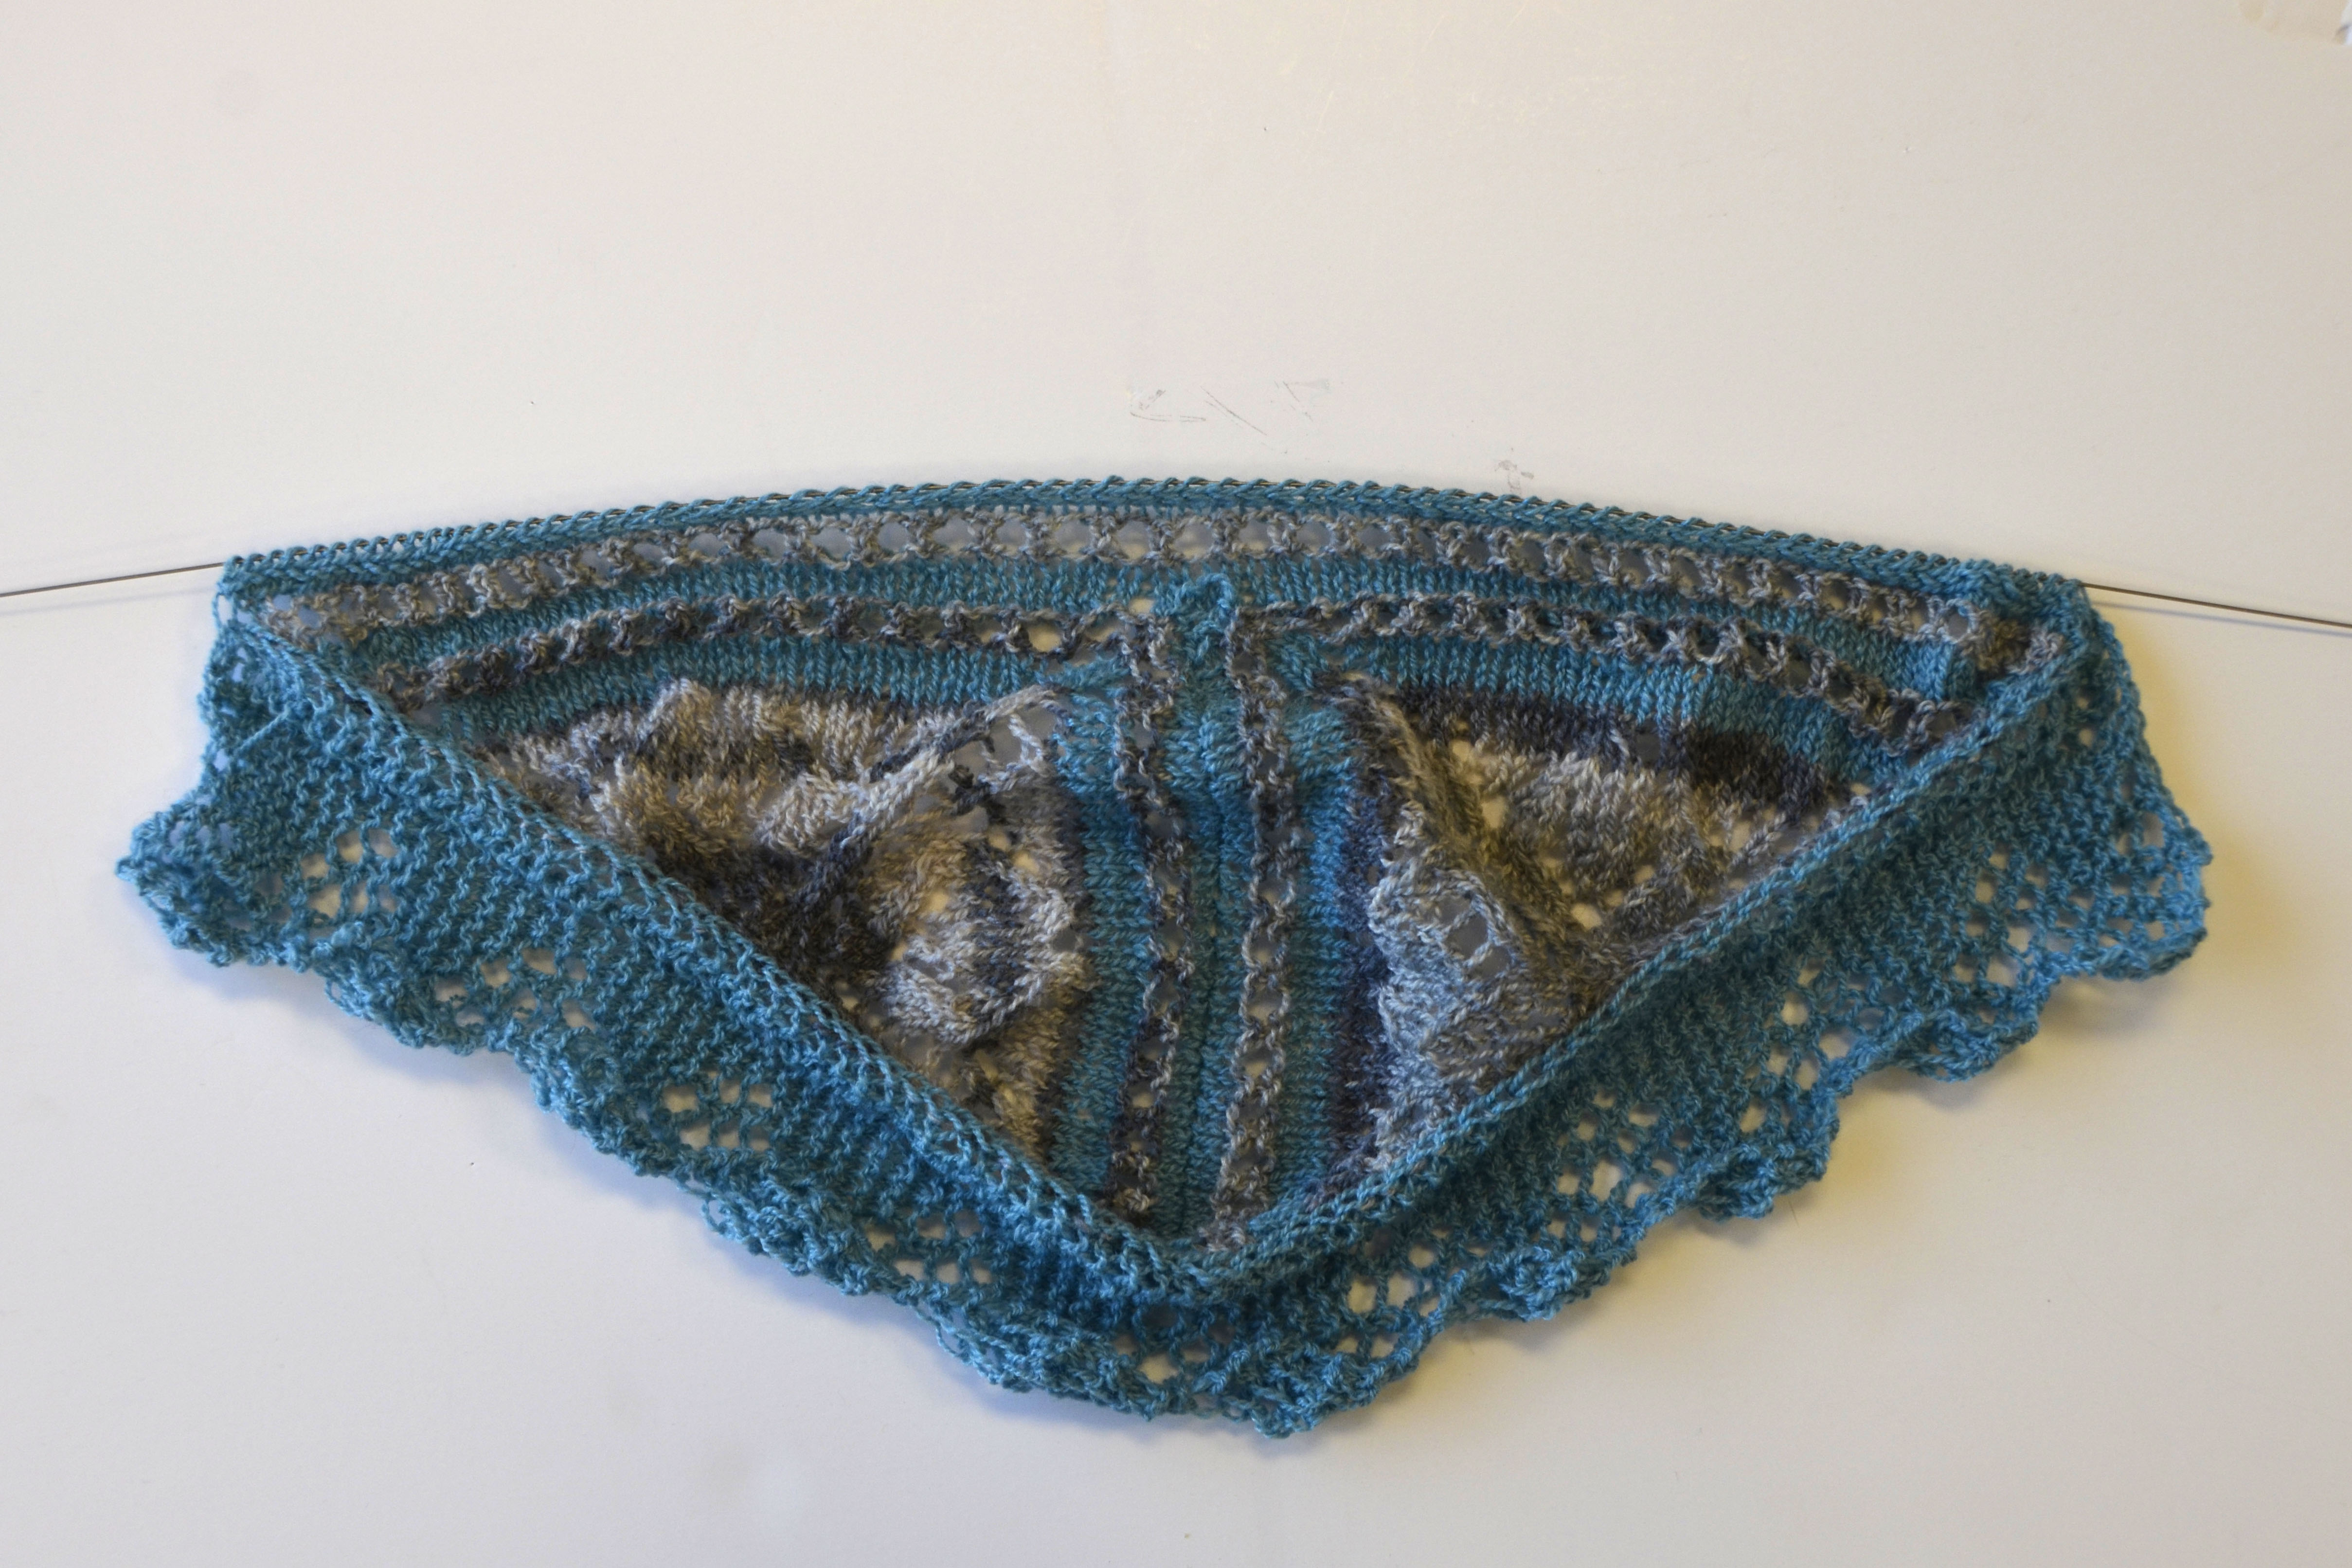
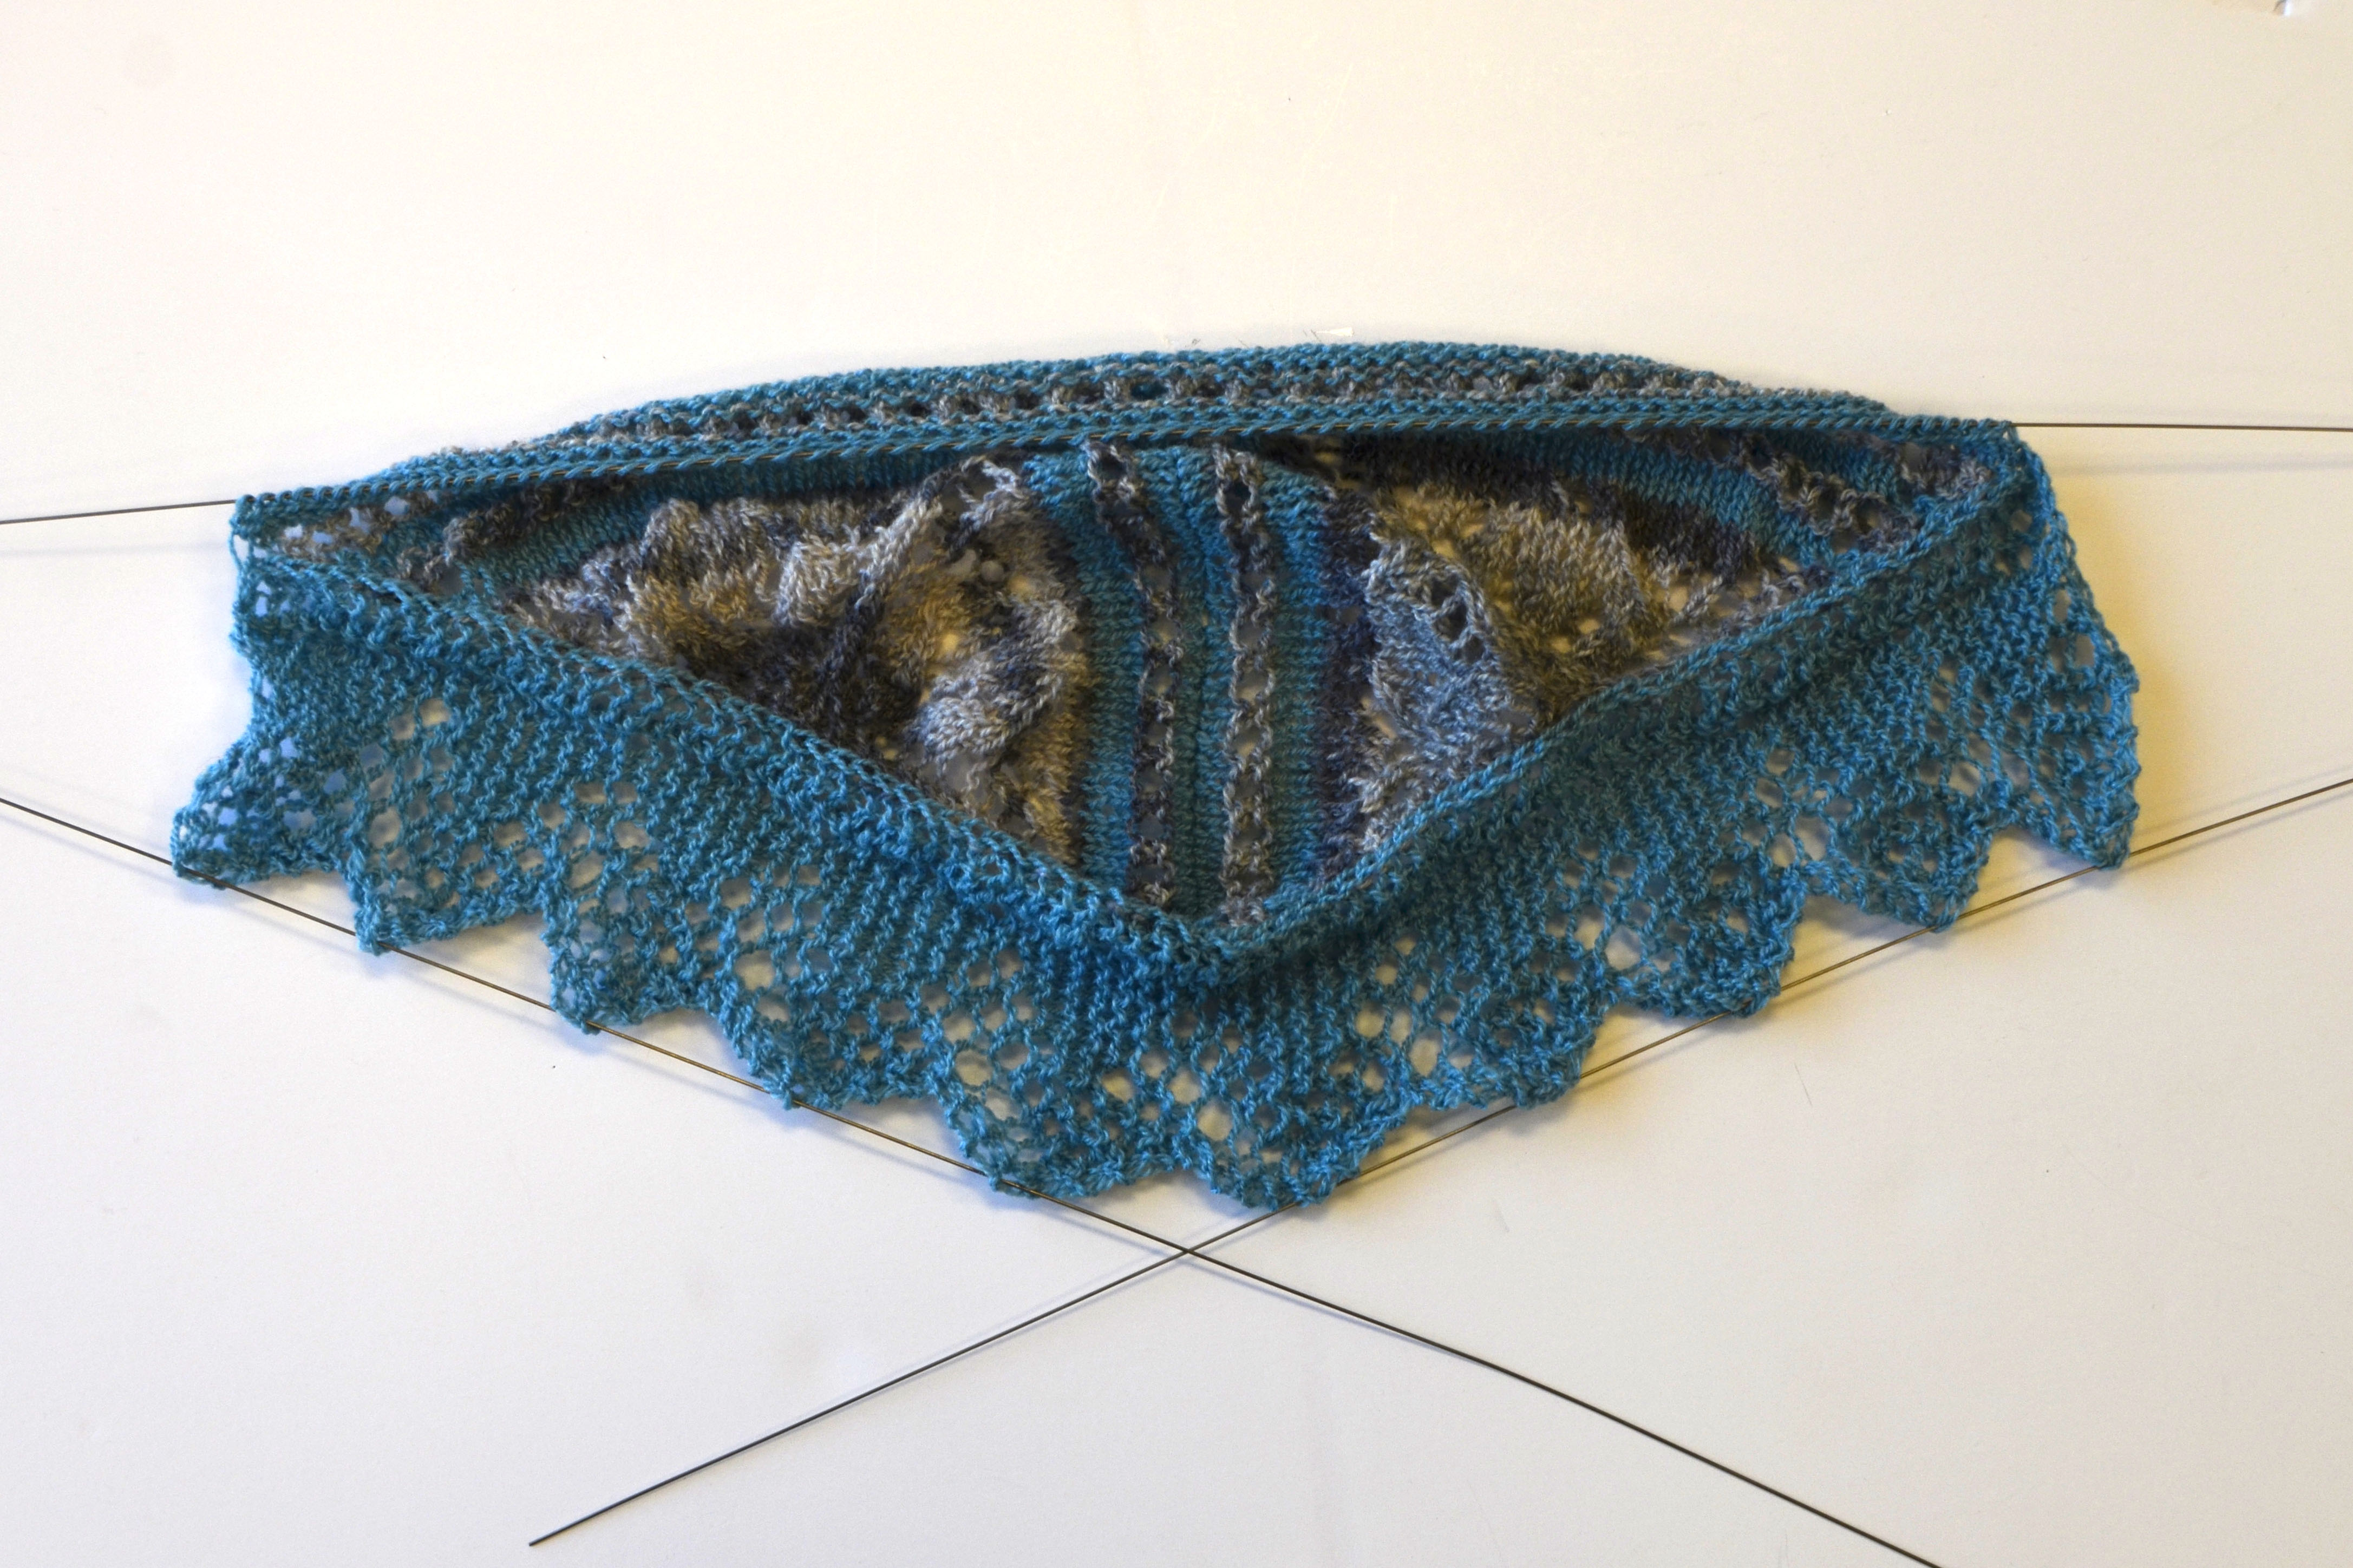
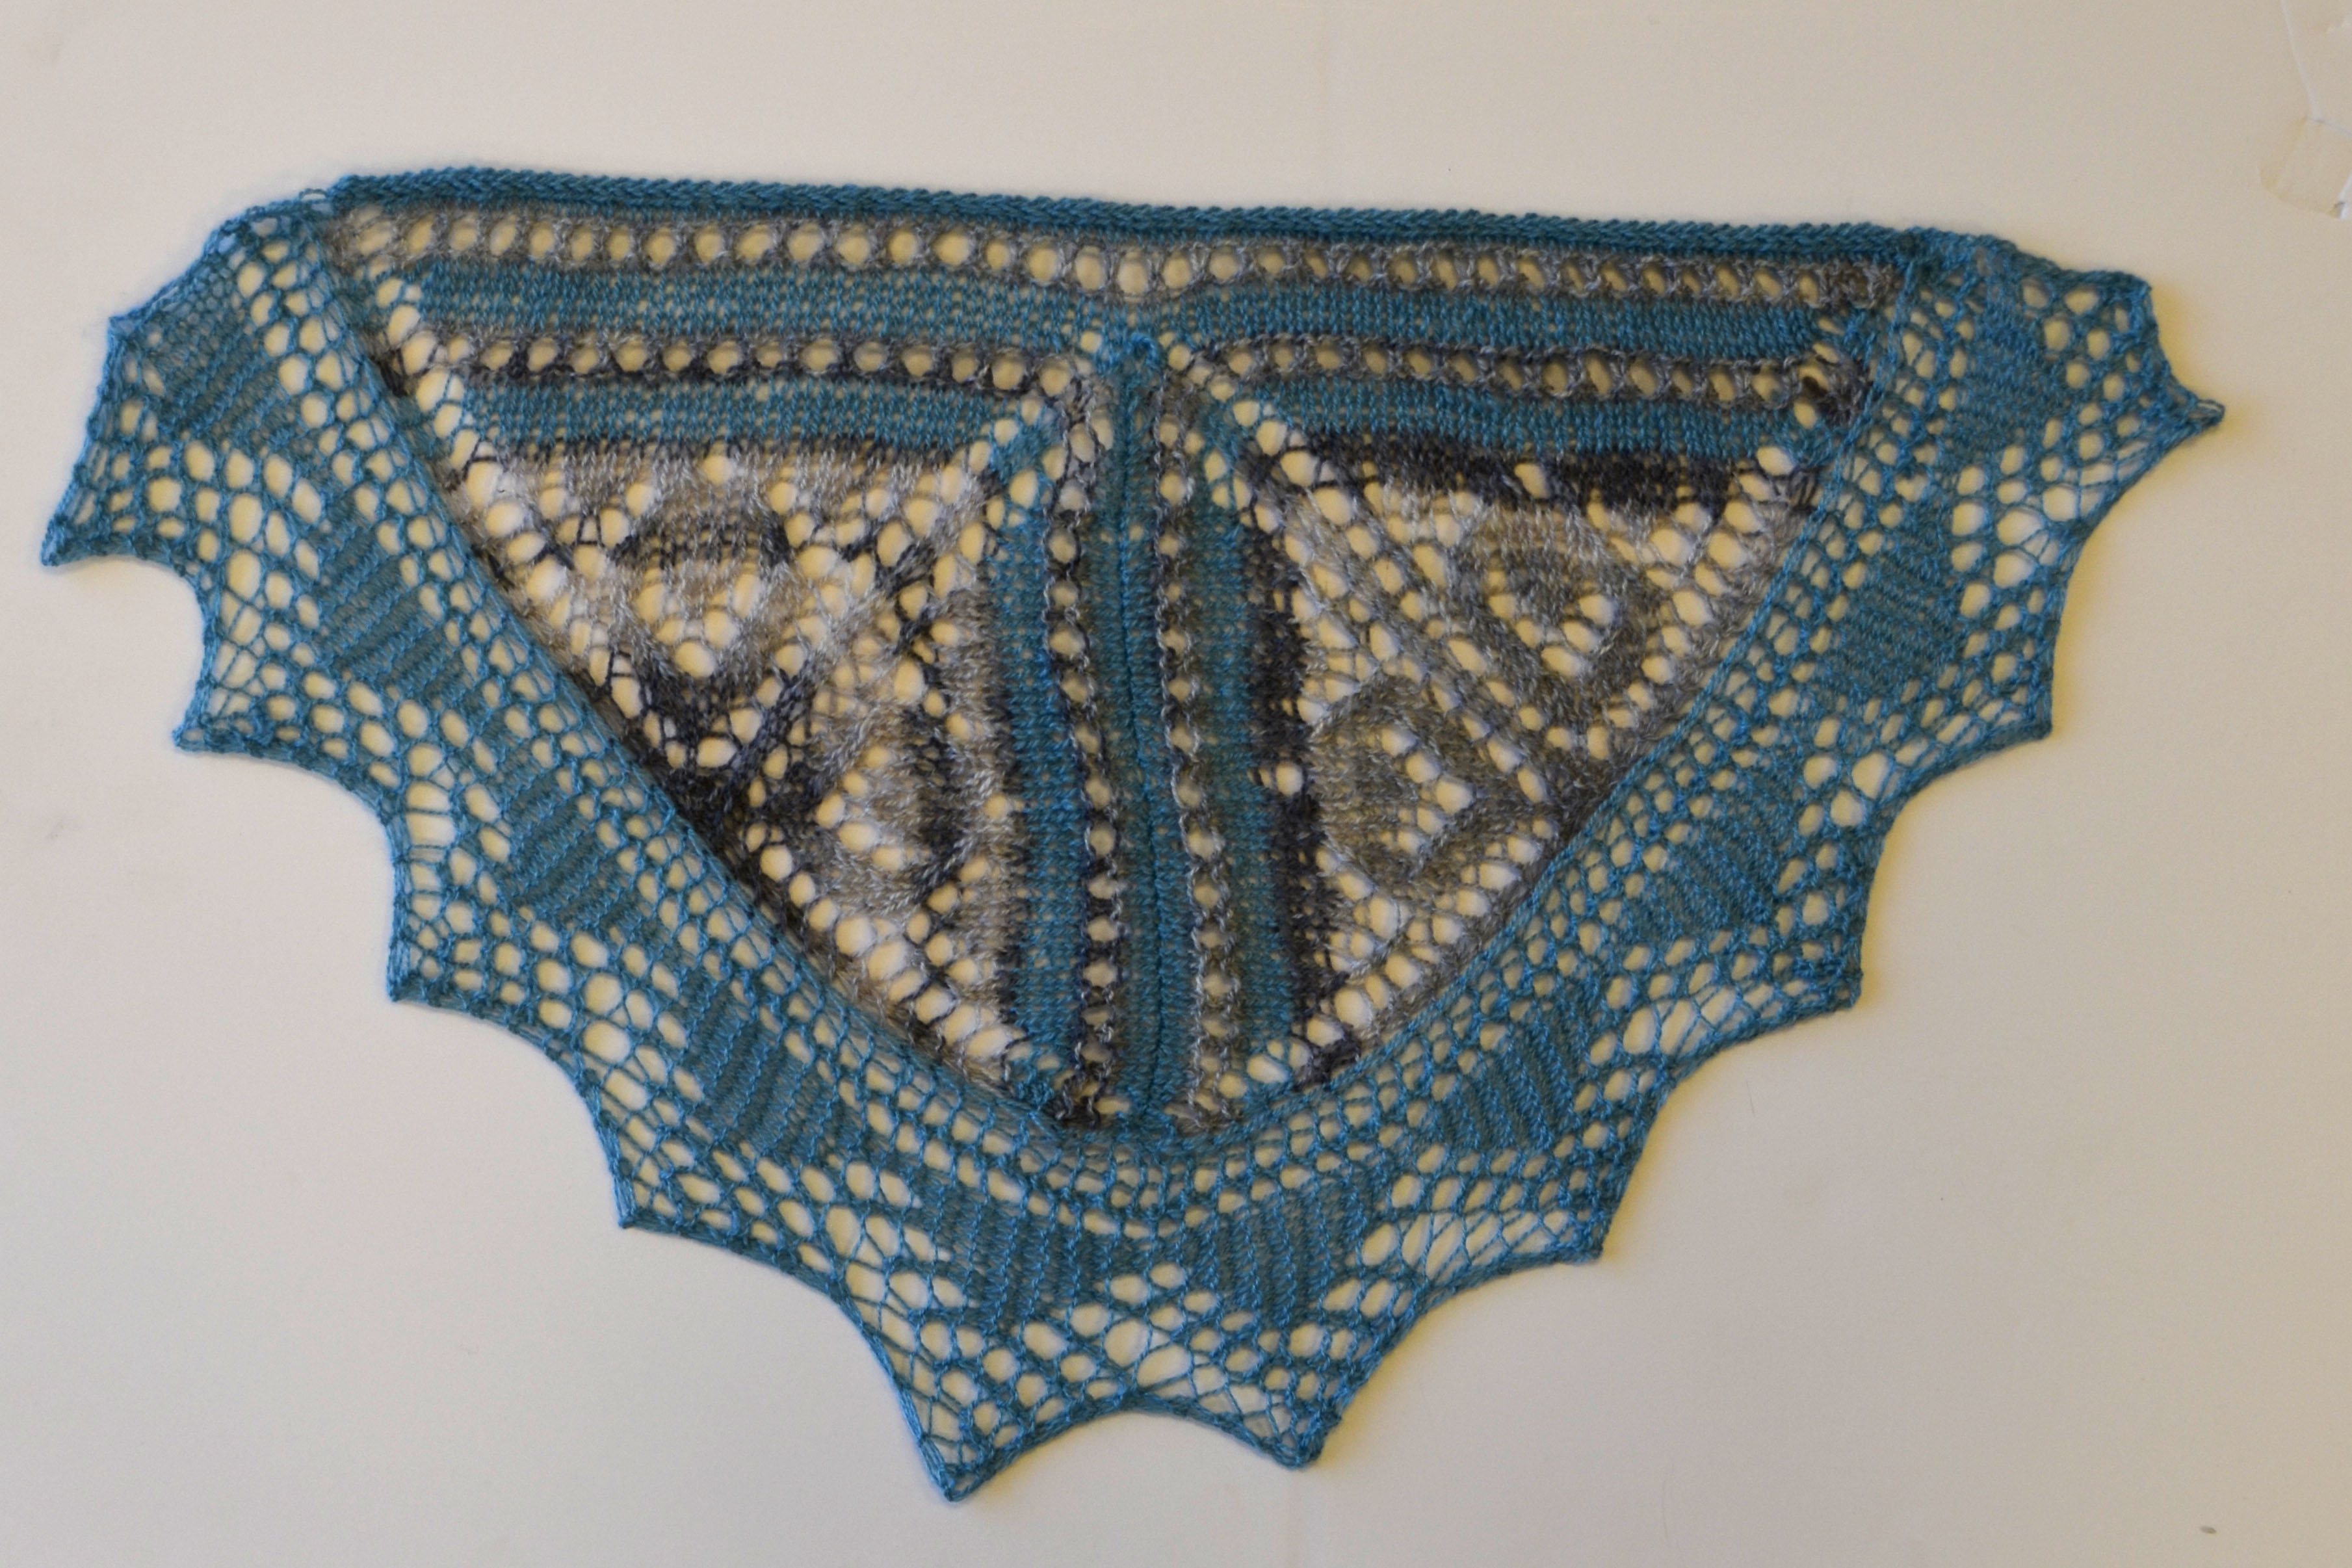
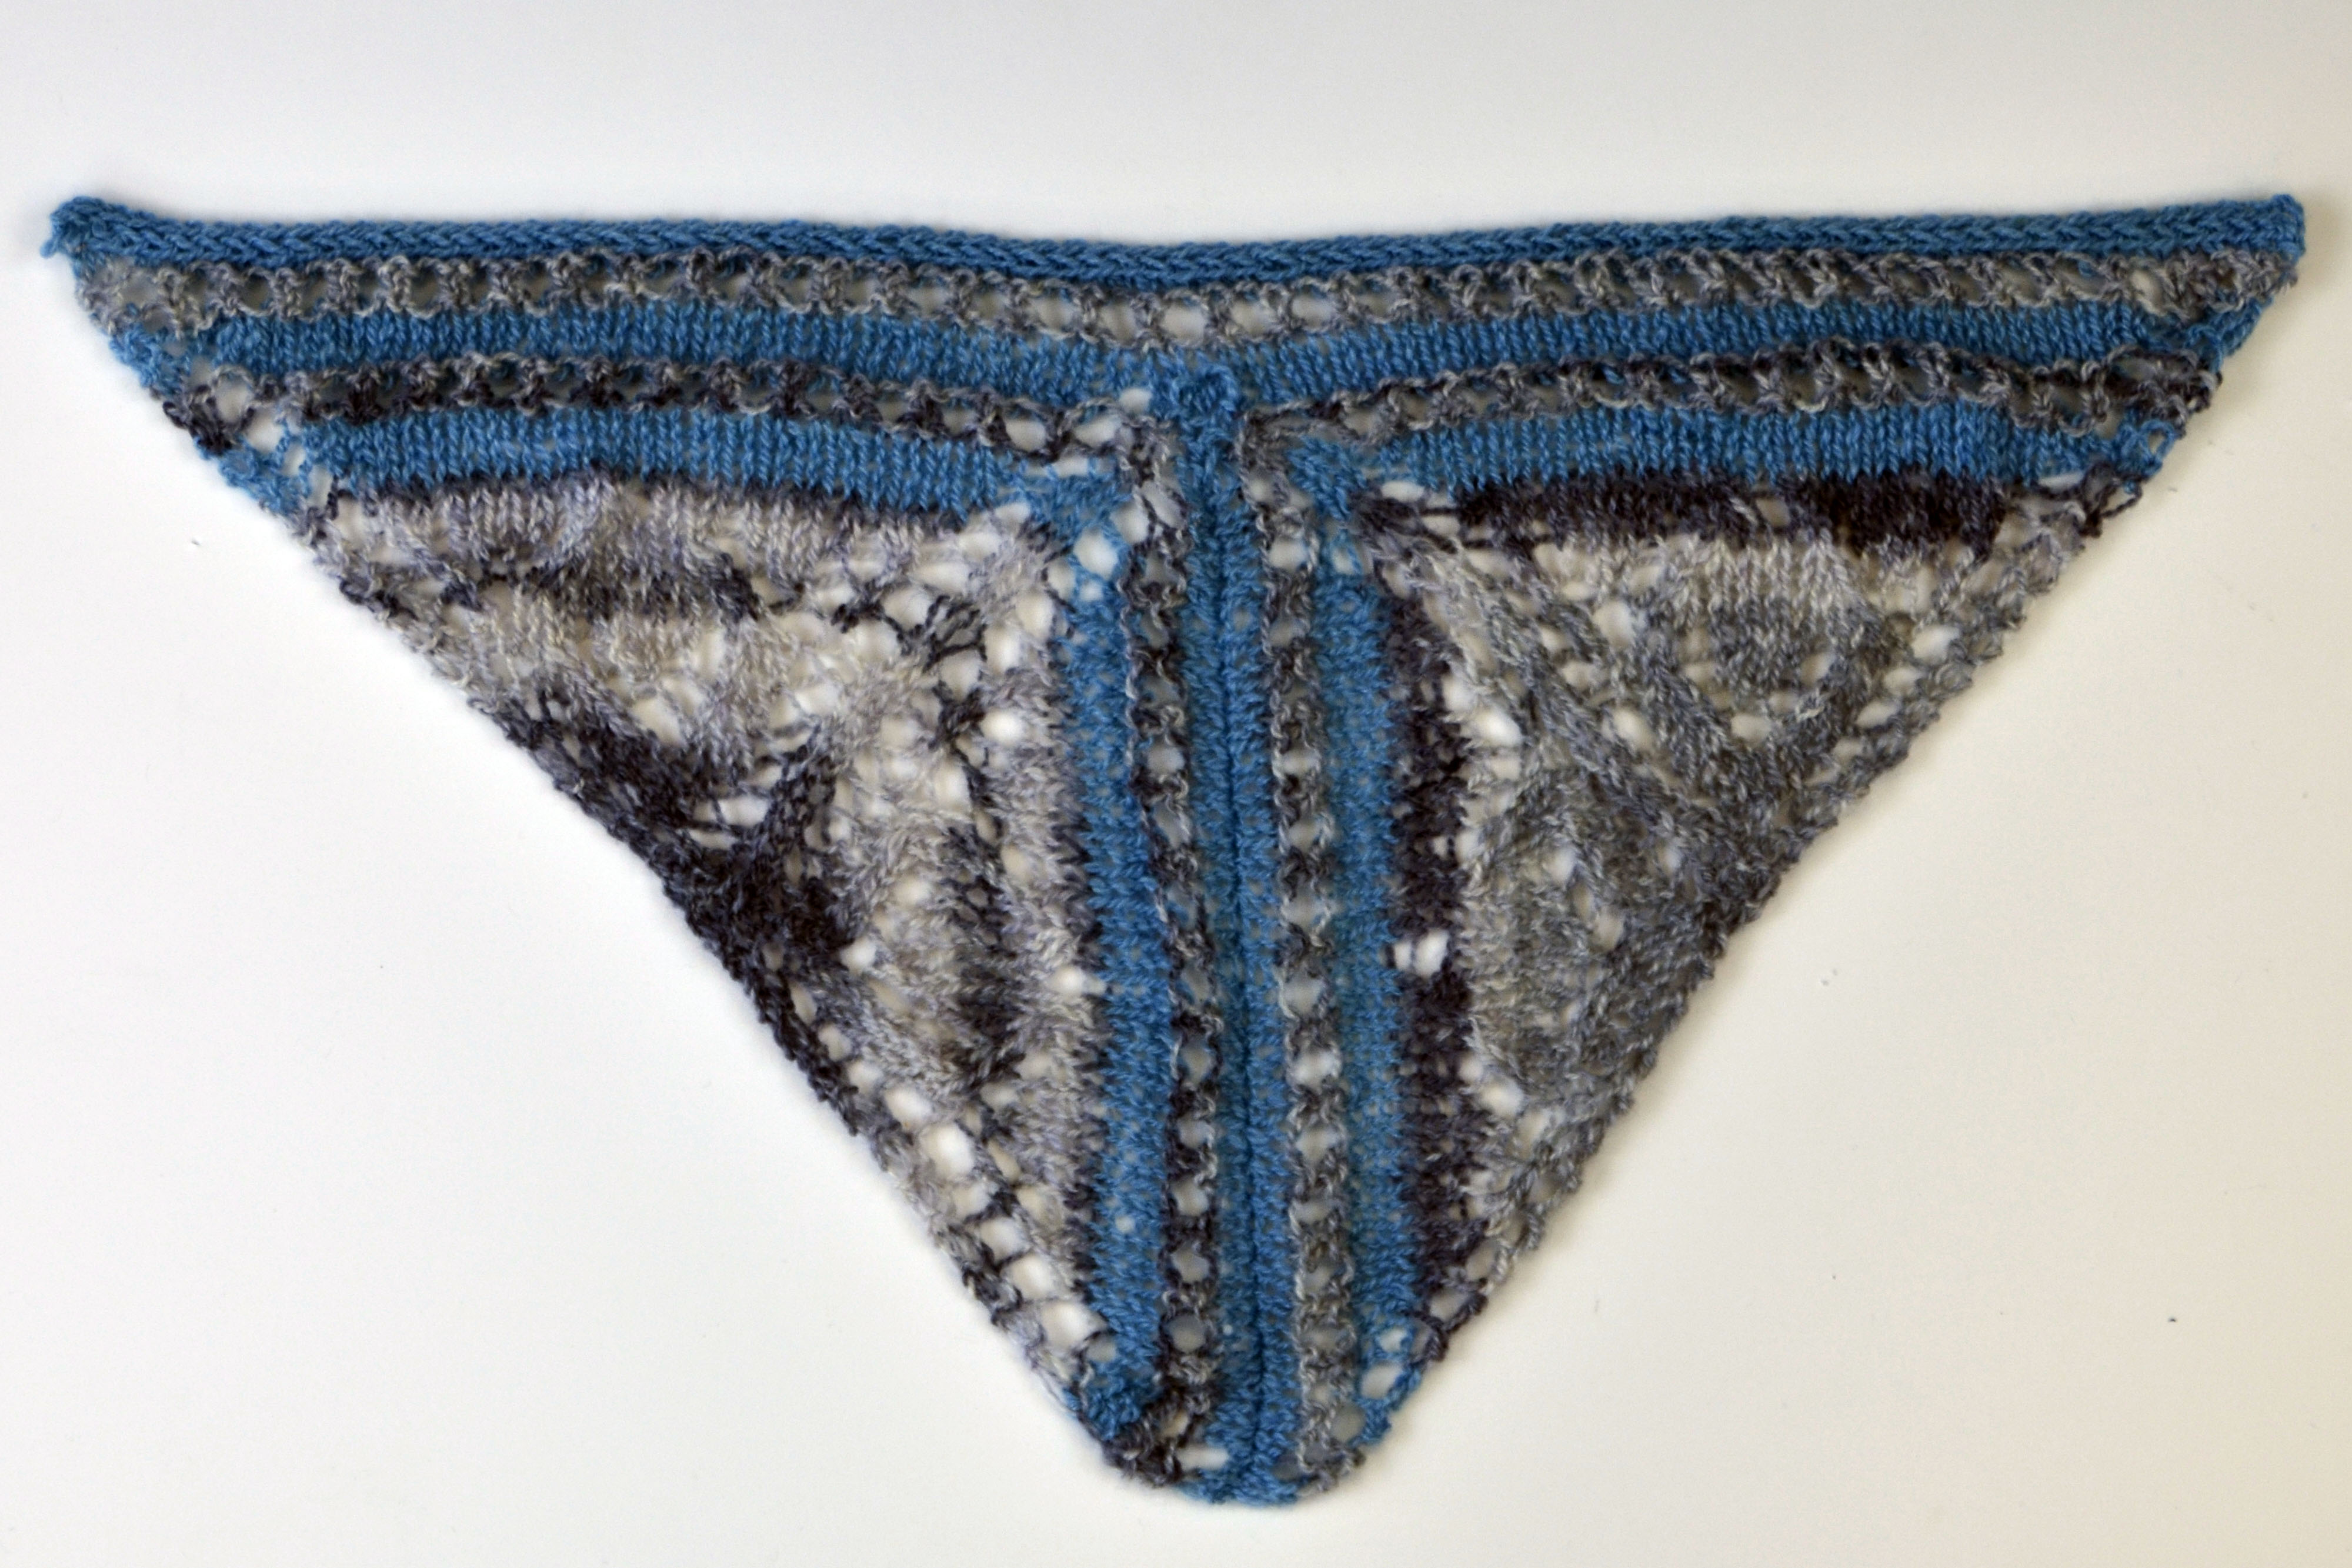
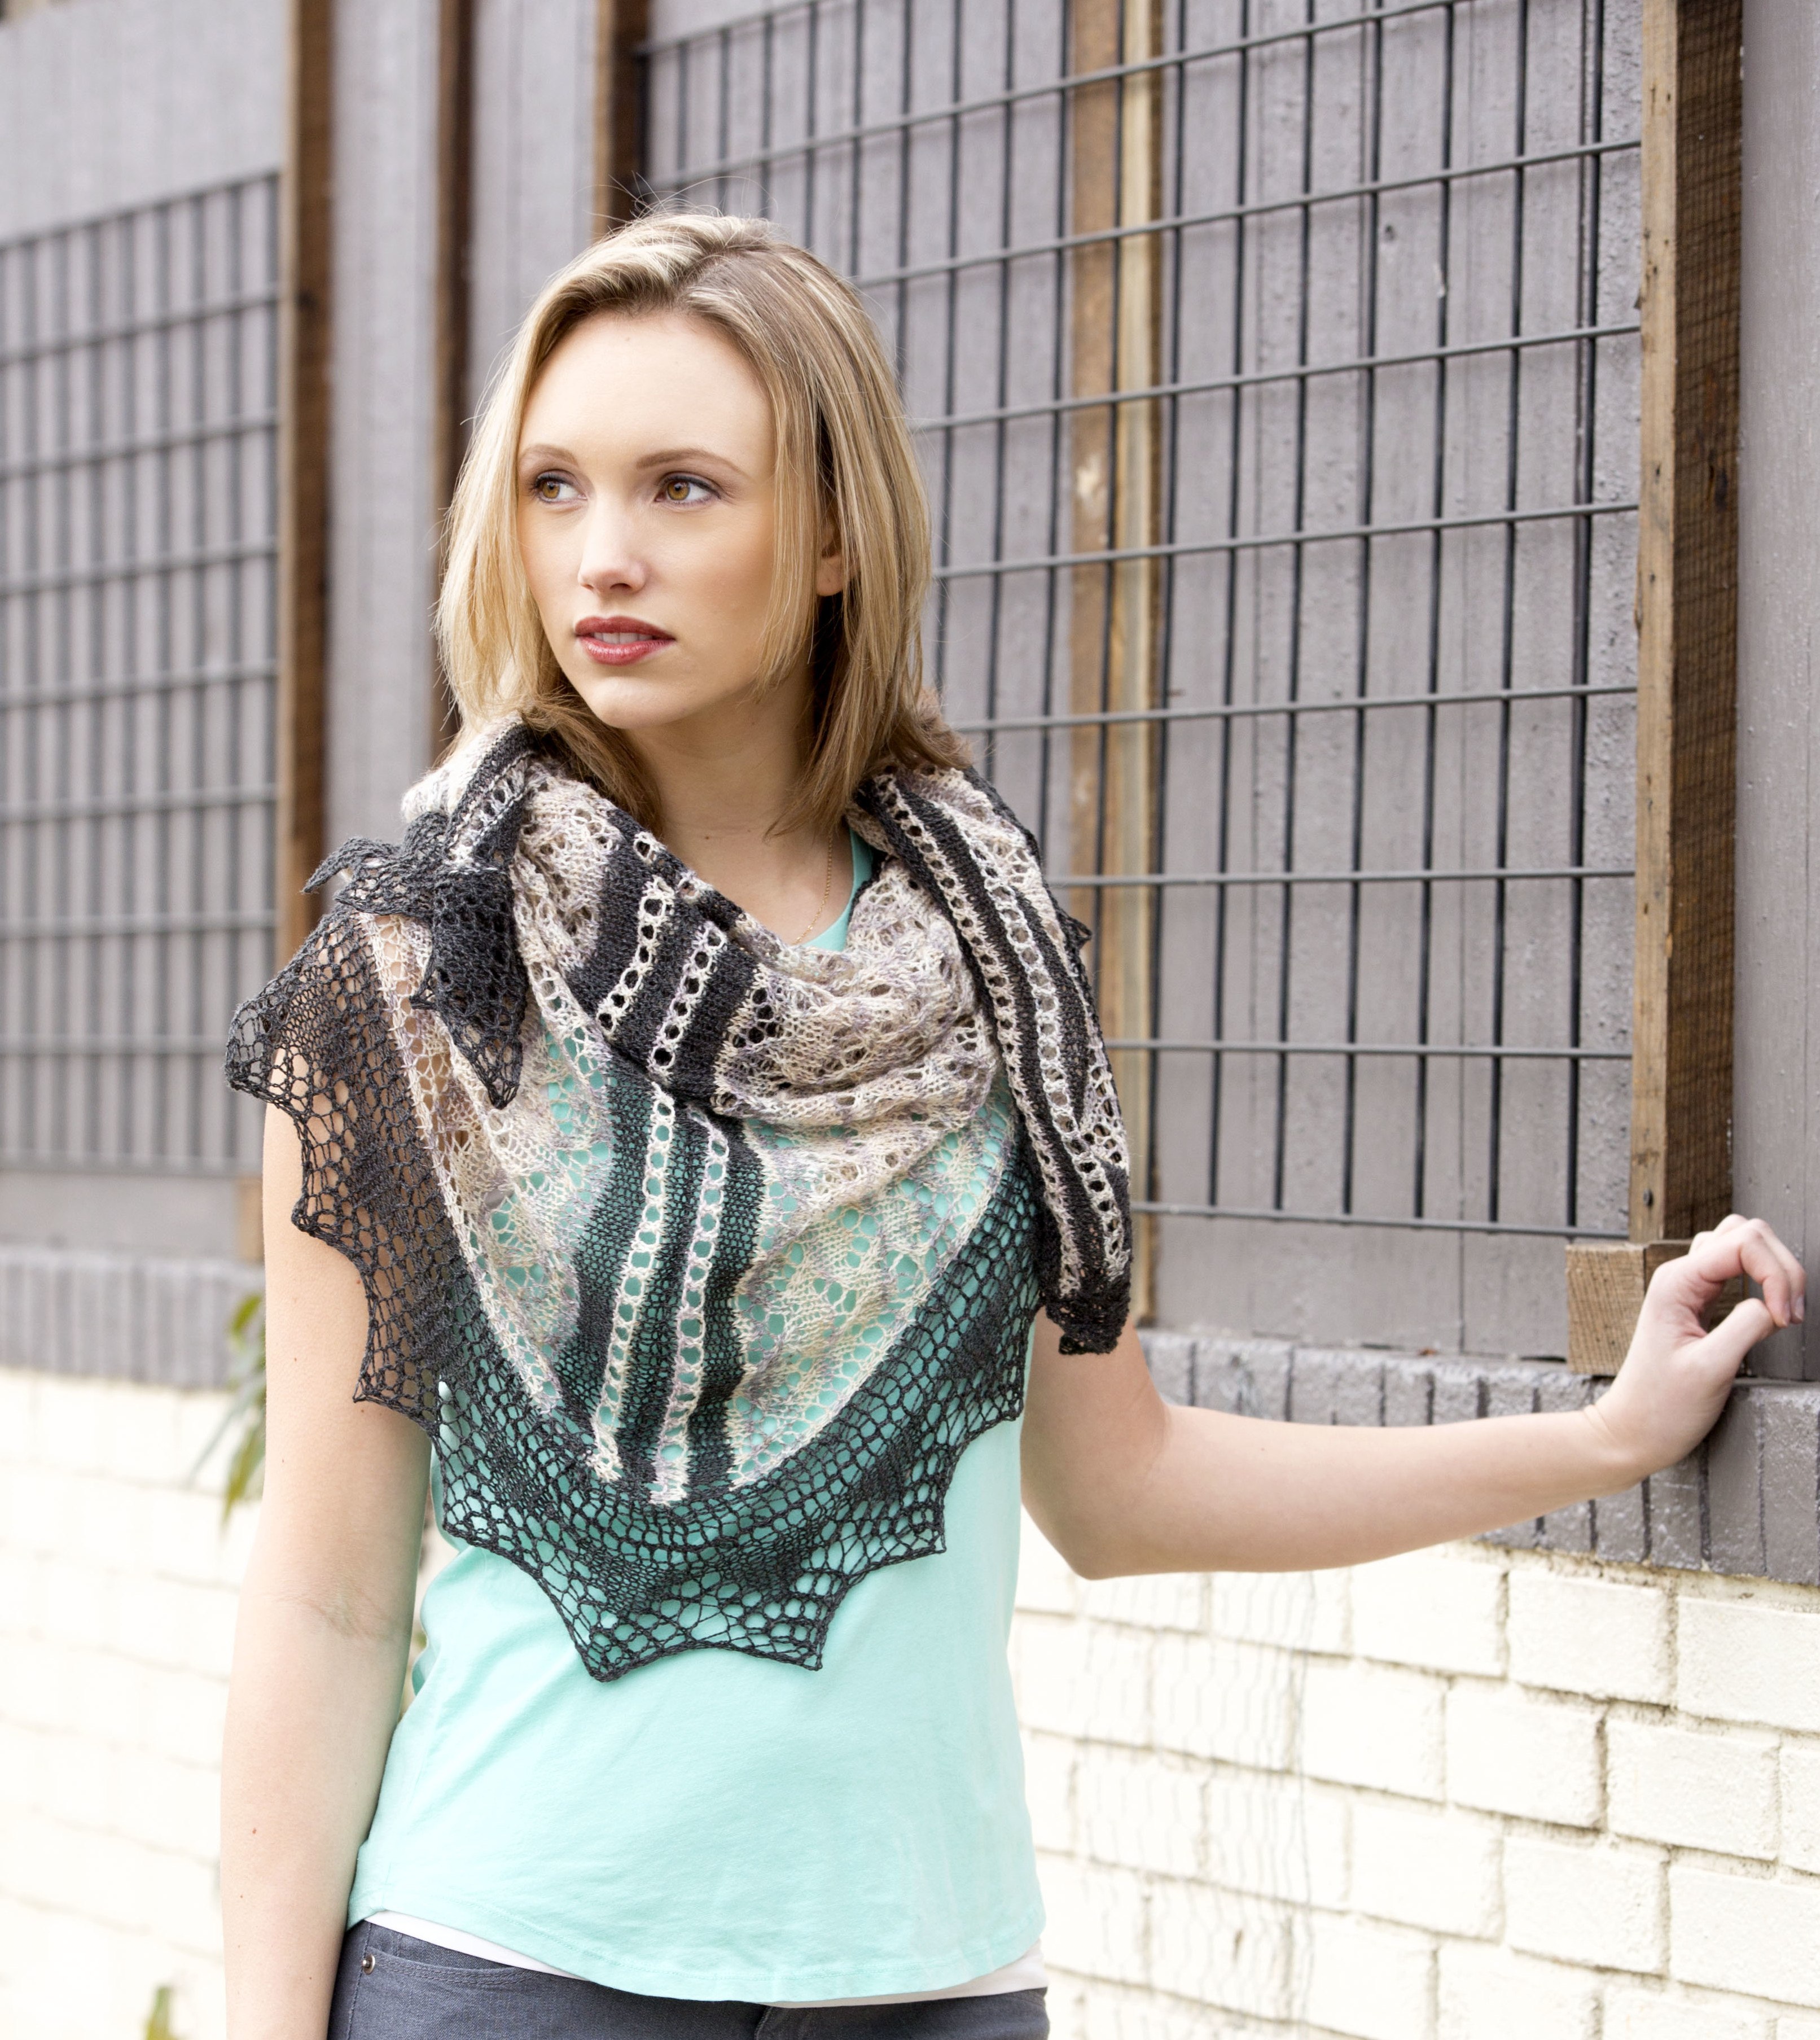
I want to turn this week to the Traverse Scarf, which I think is the most wearable and functional piece in the whole collection.

Traverse_1_hires_crop Traverse_2_hires_crop

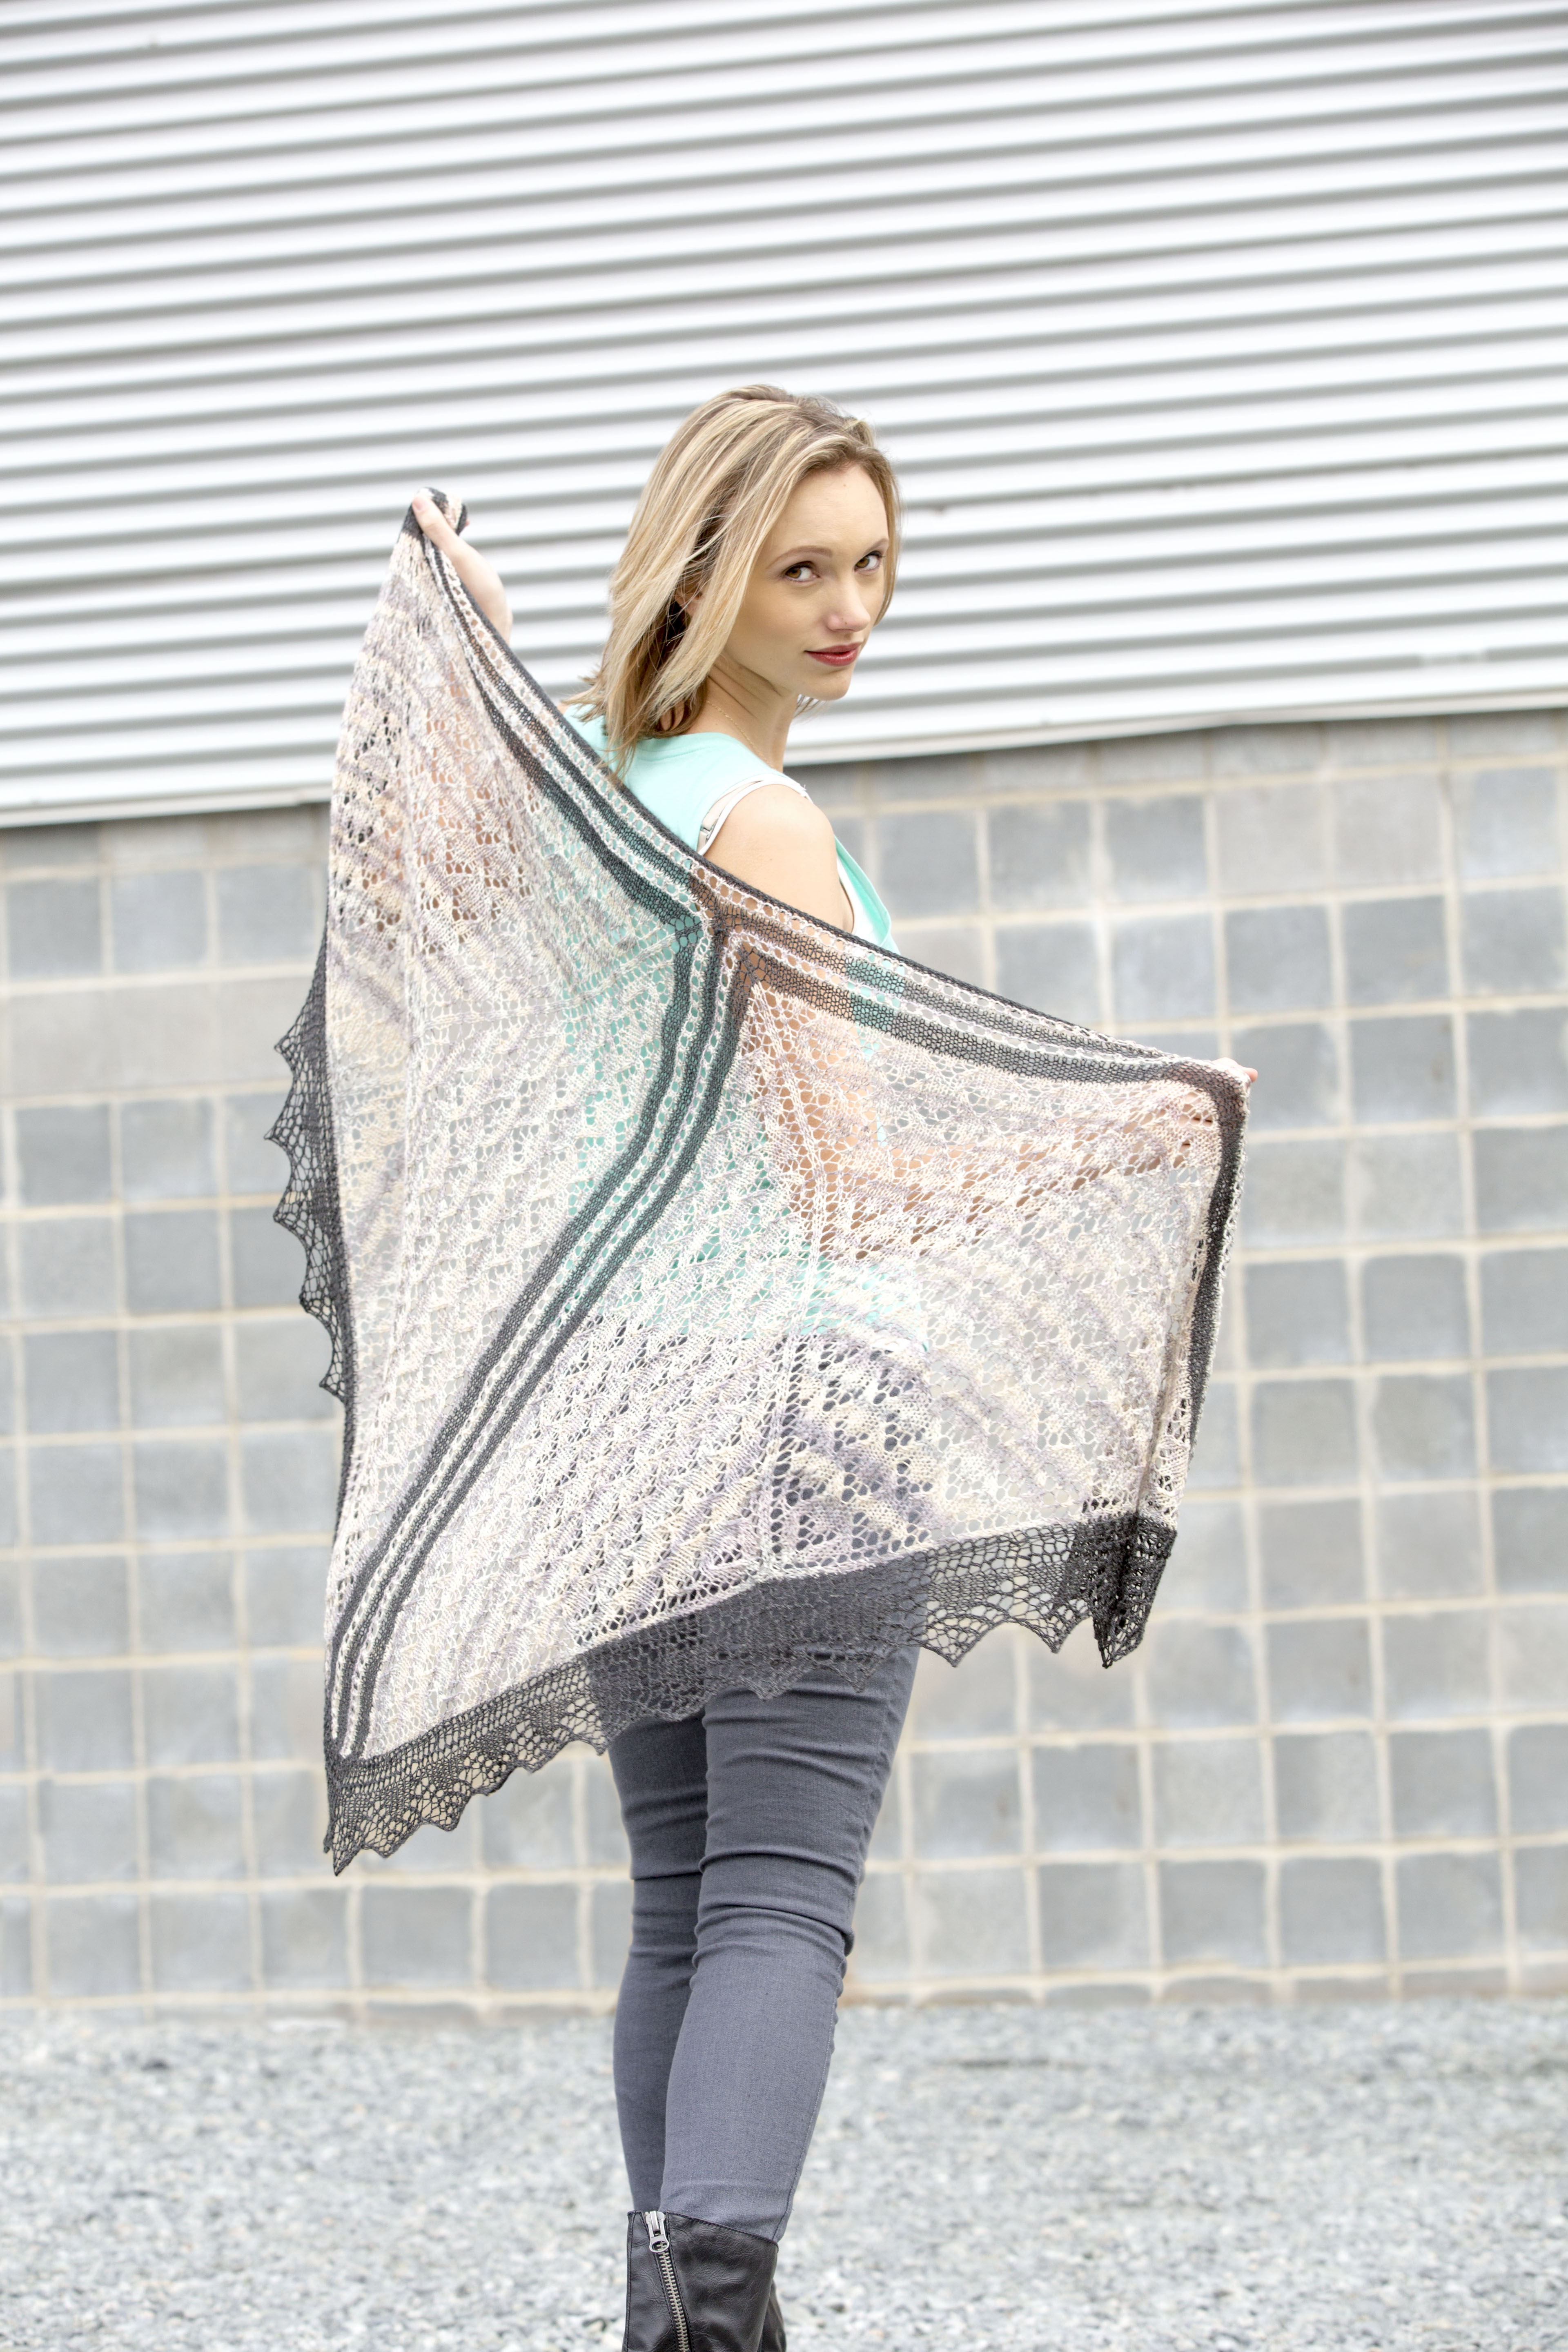
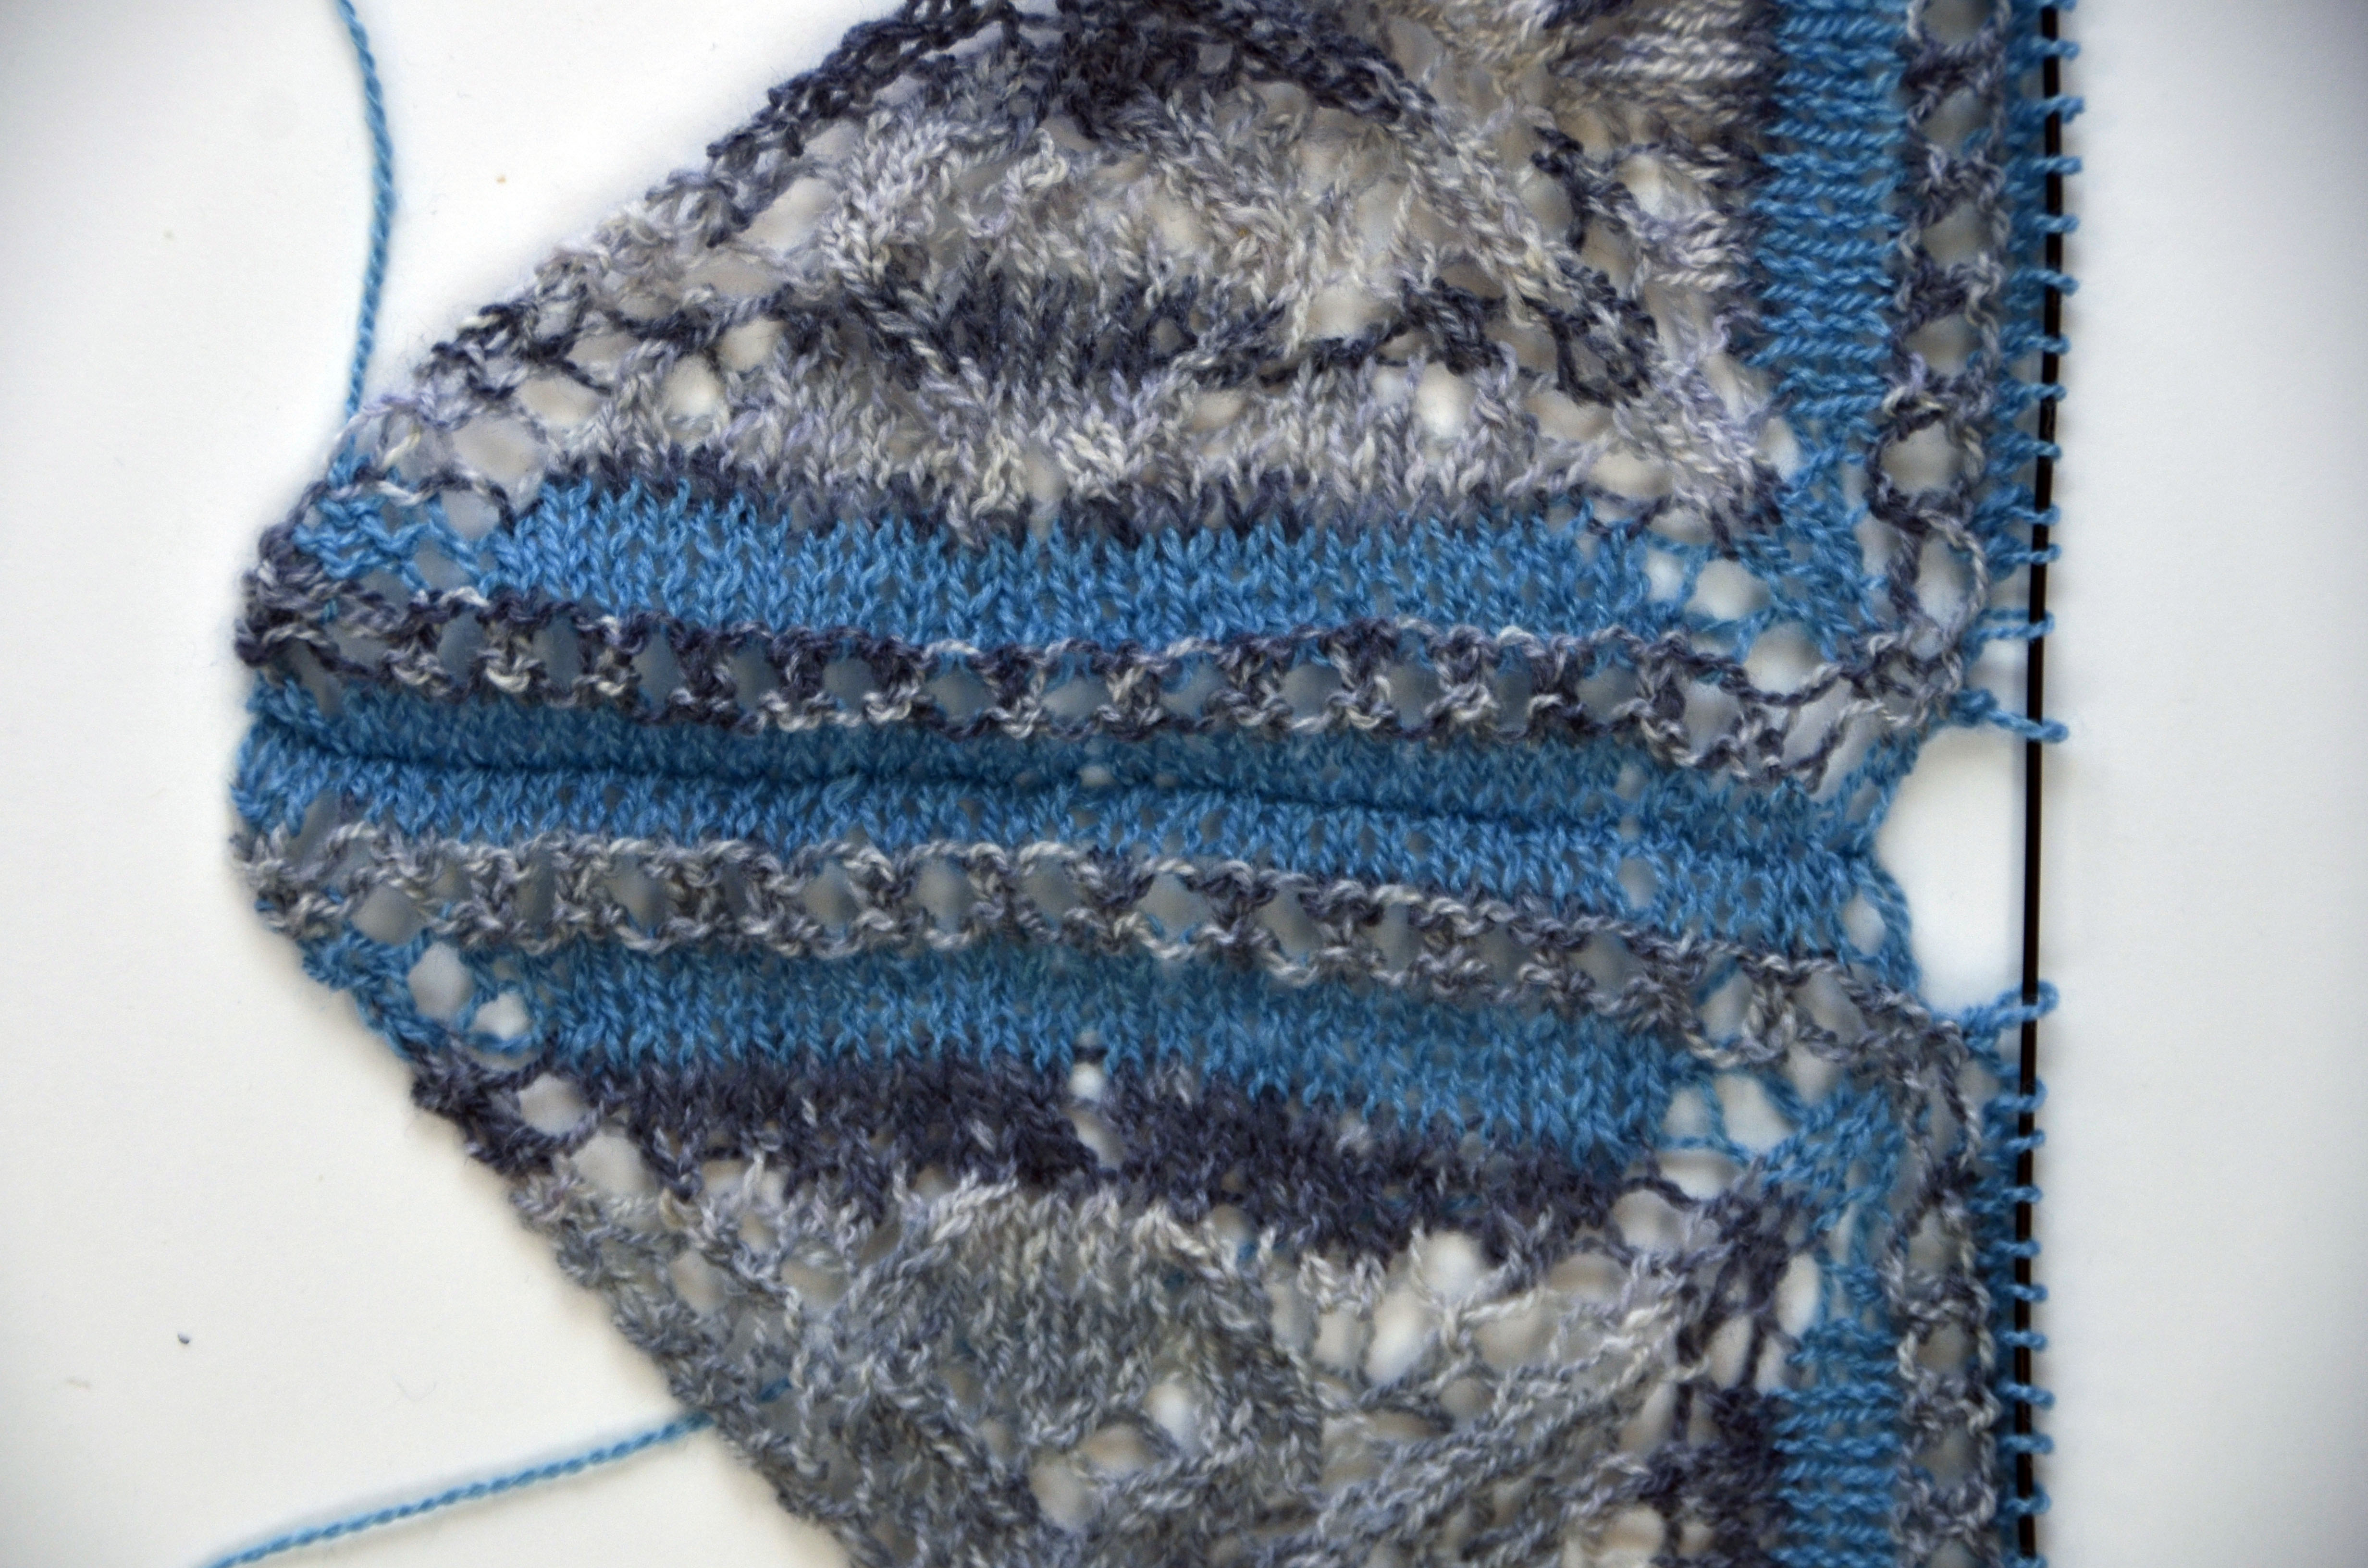
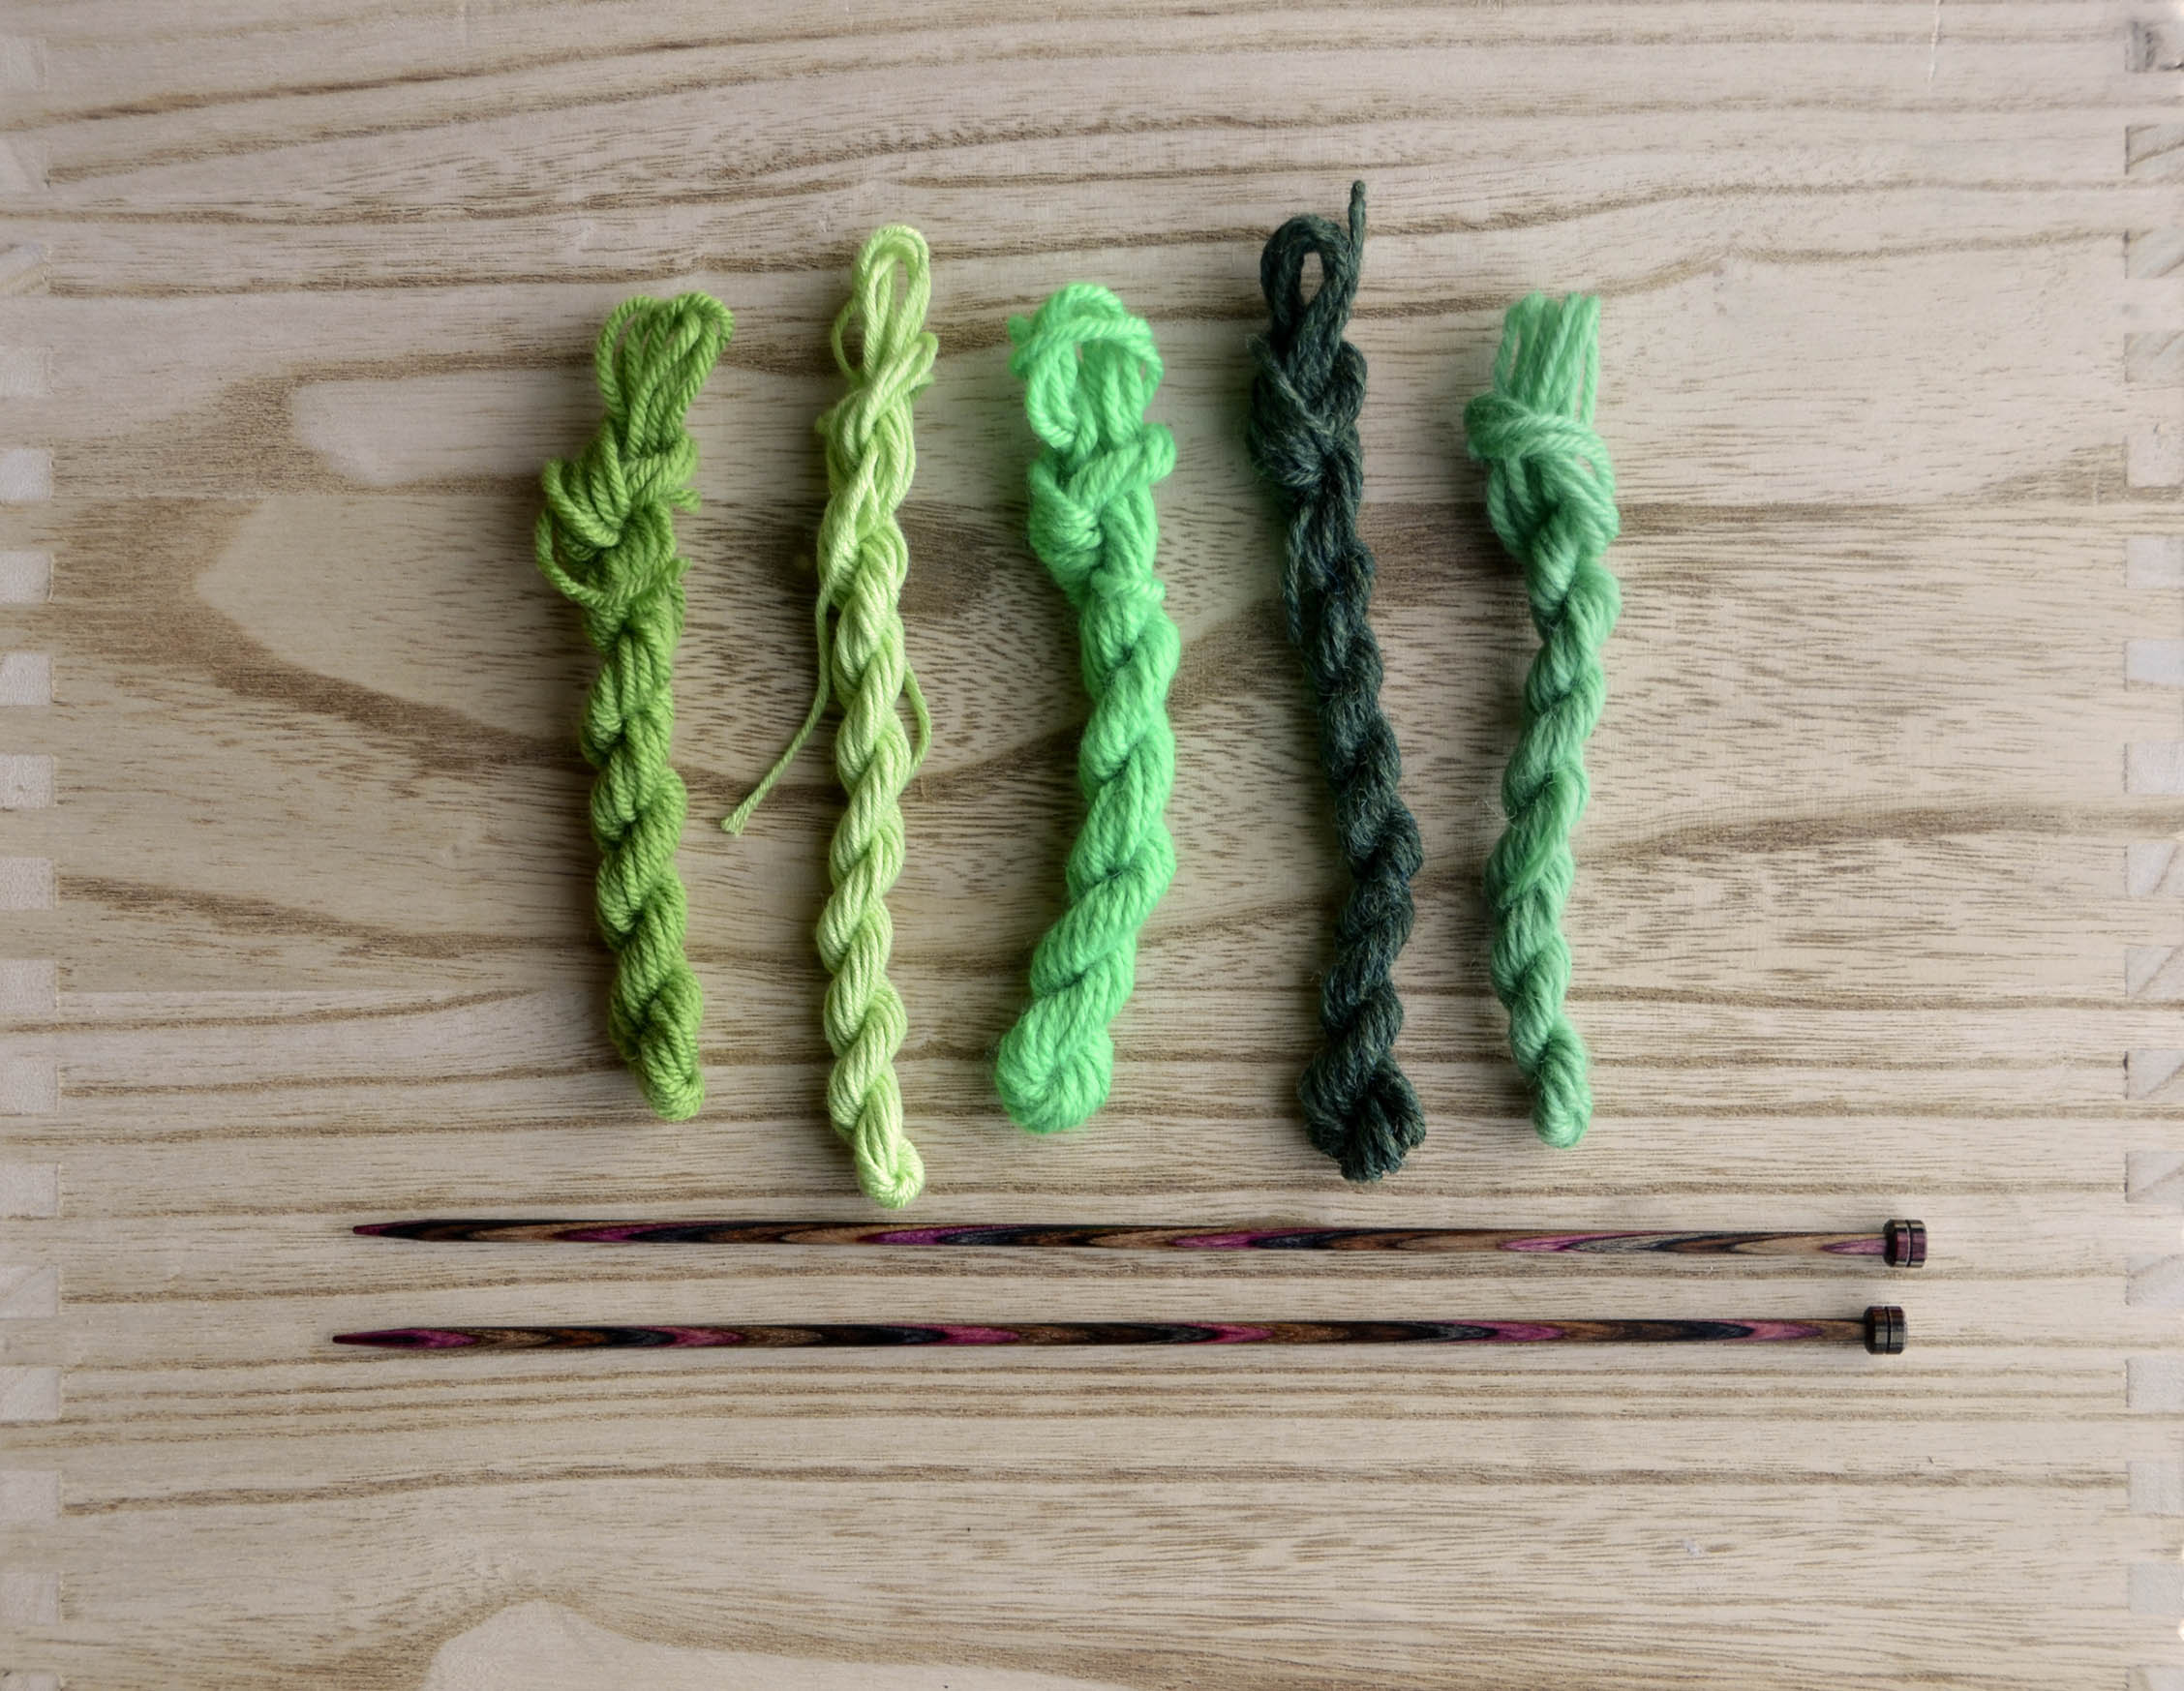
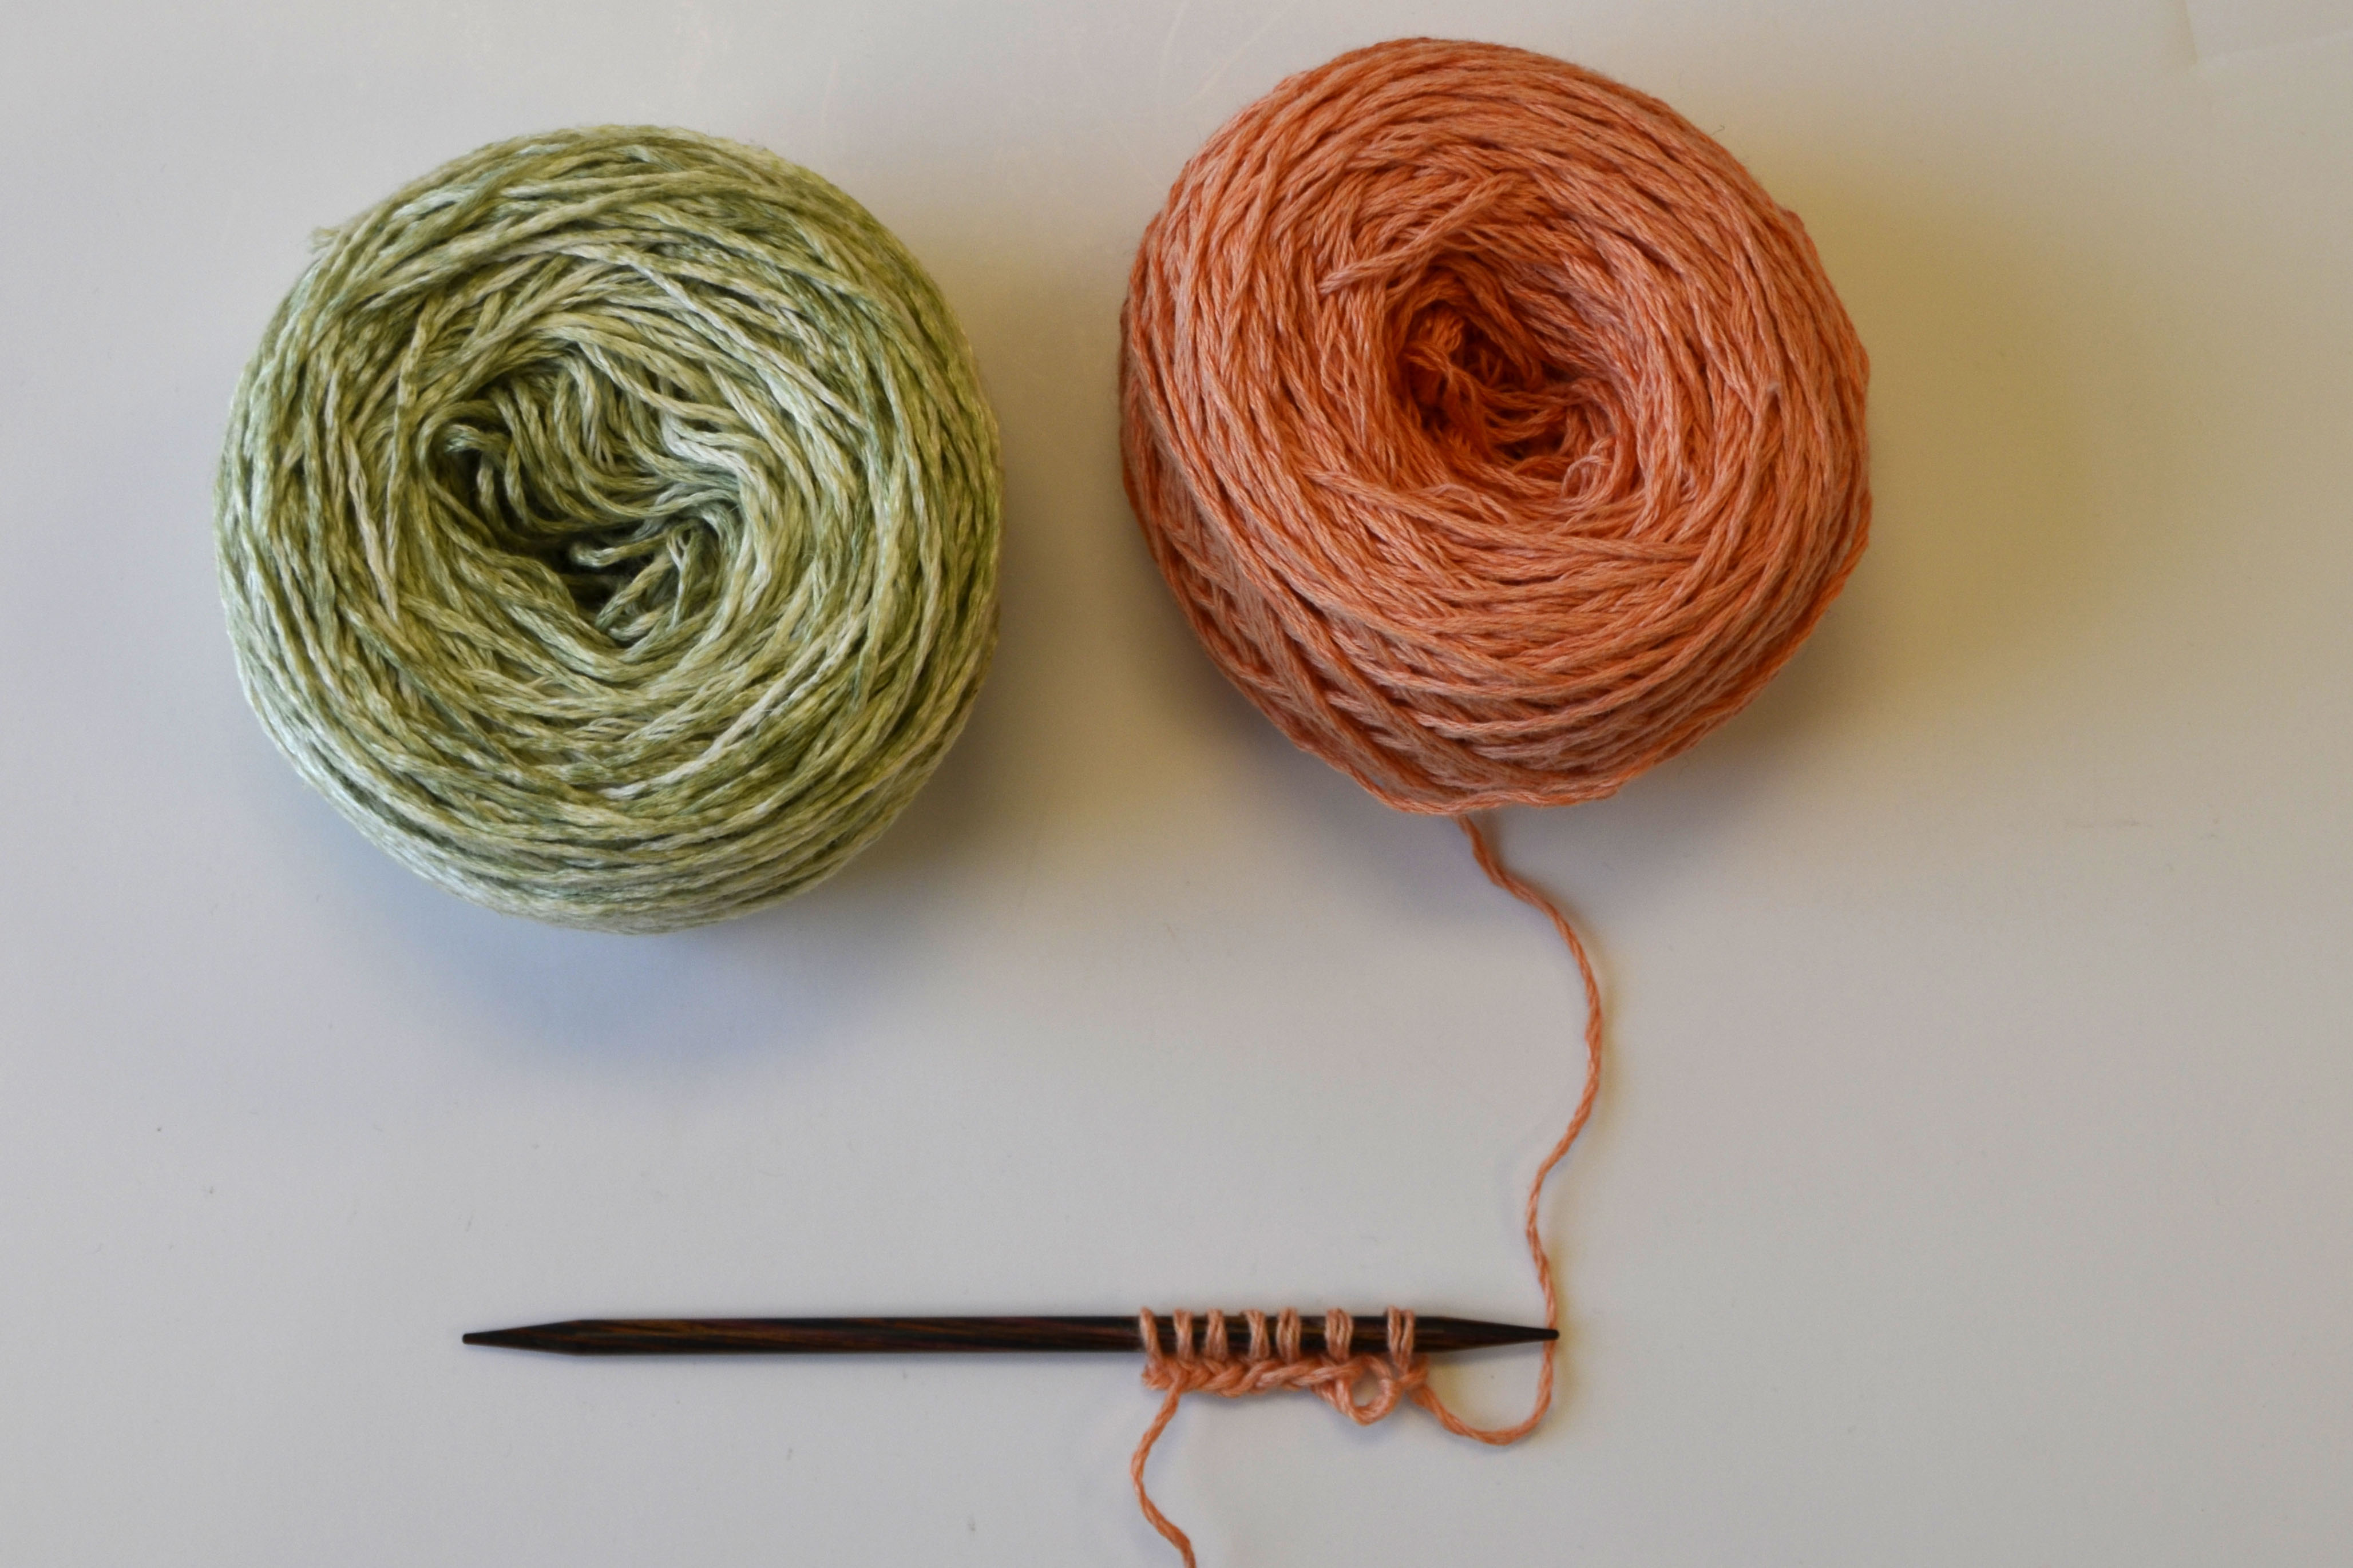
It’s definitely more scarf than shawl, and I think of it as a visually stimulating little trifle. Traverse Scarf uses 2 shades of Good Earth Solids and 2 shades of Good Earth Adorn (spray print). More later in this post on color choices. Good Earth is a linen-cotton blend, making this a great item for warmer months.

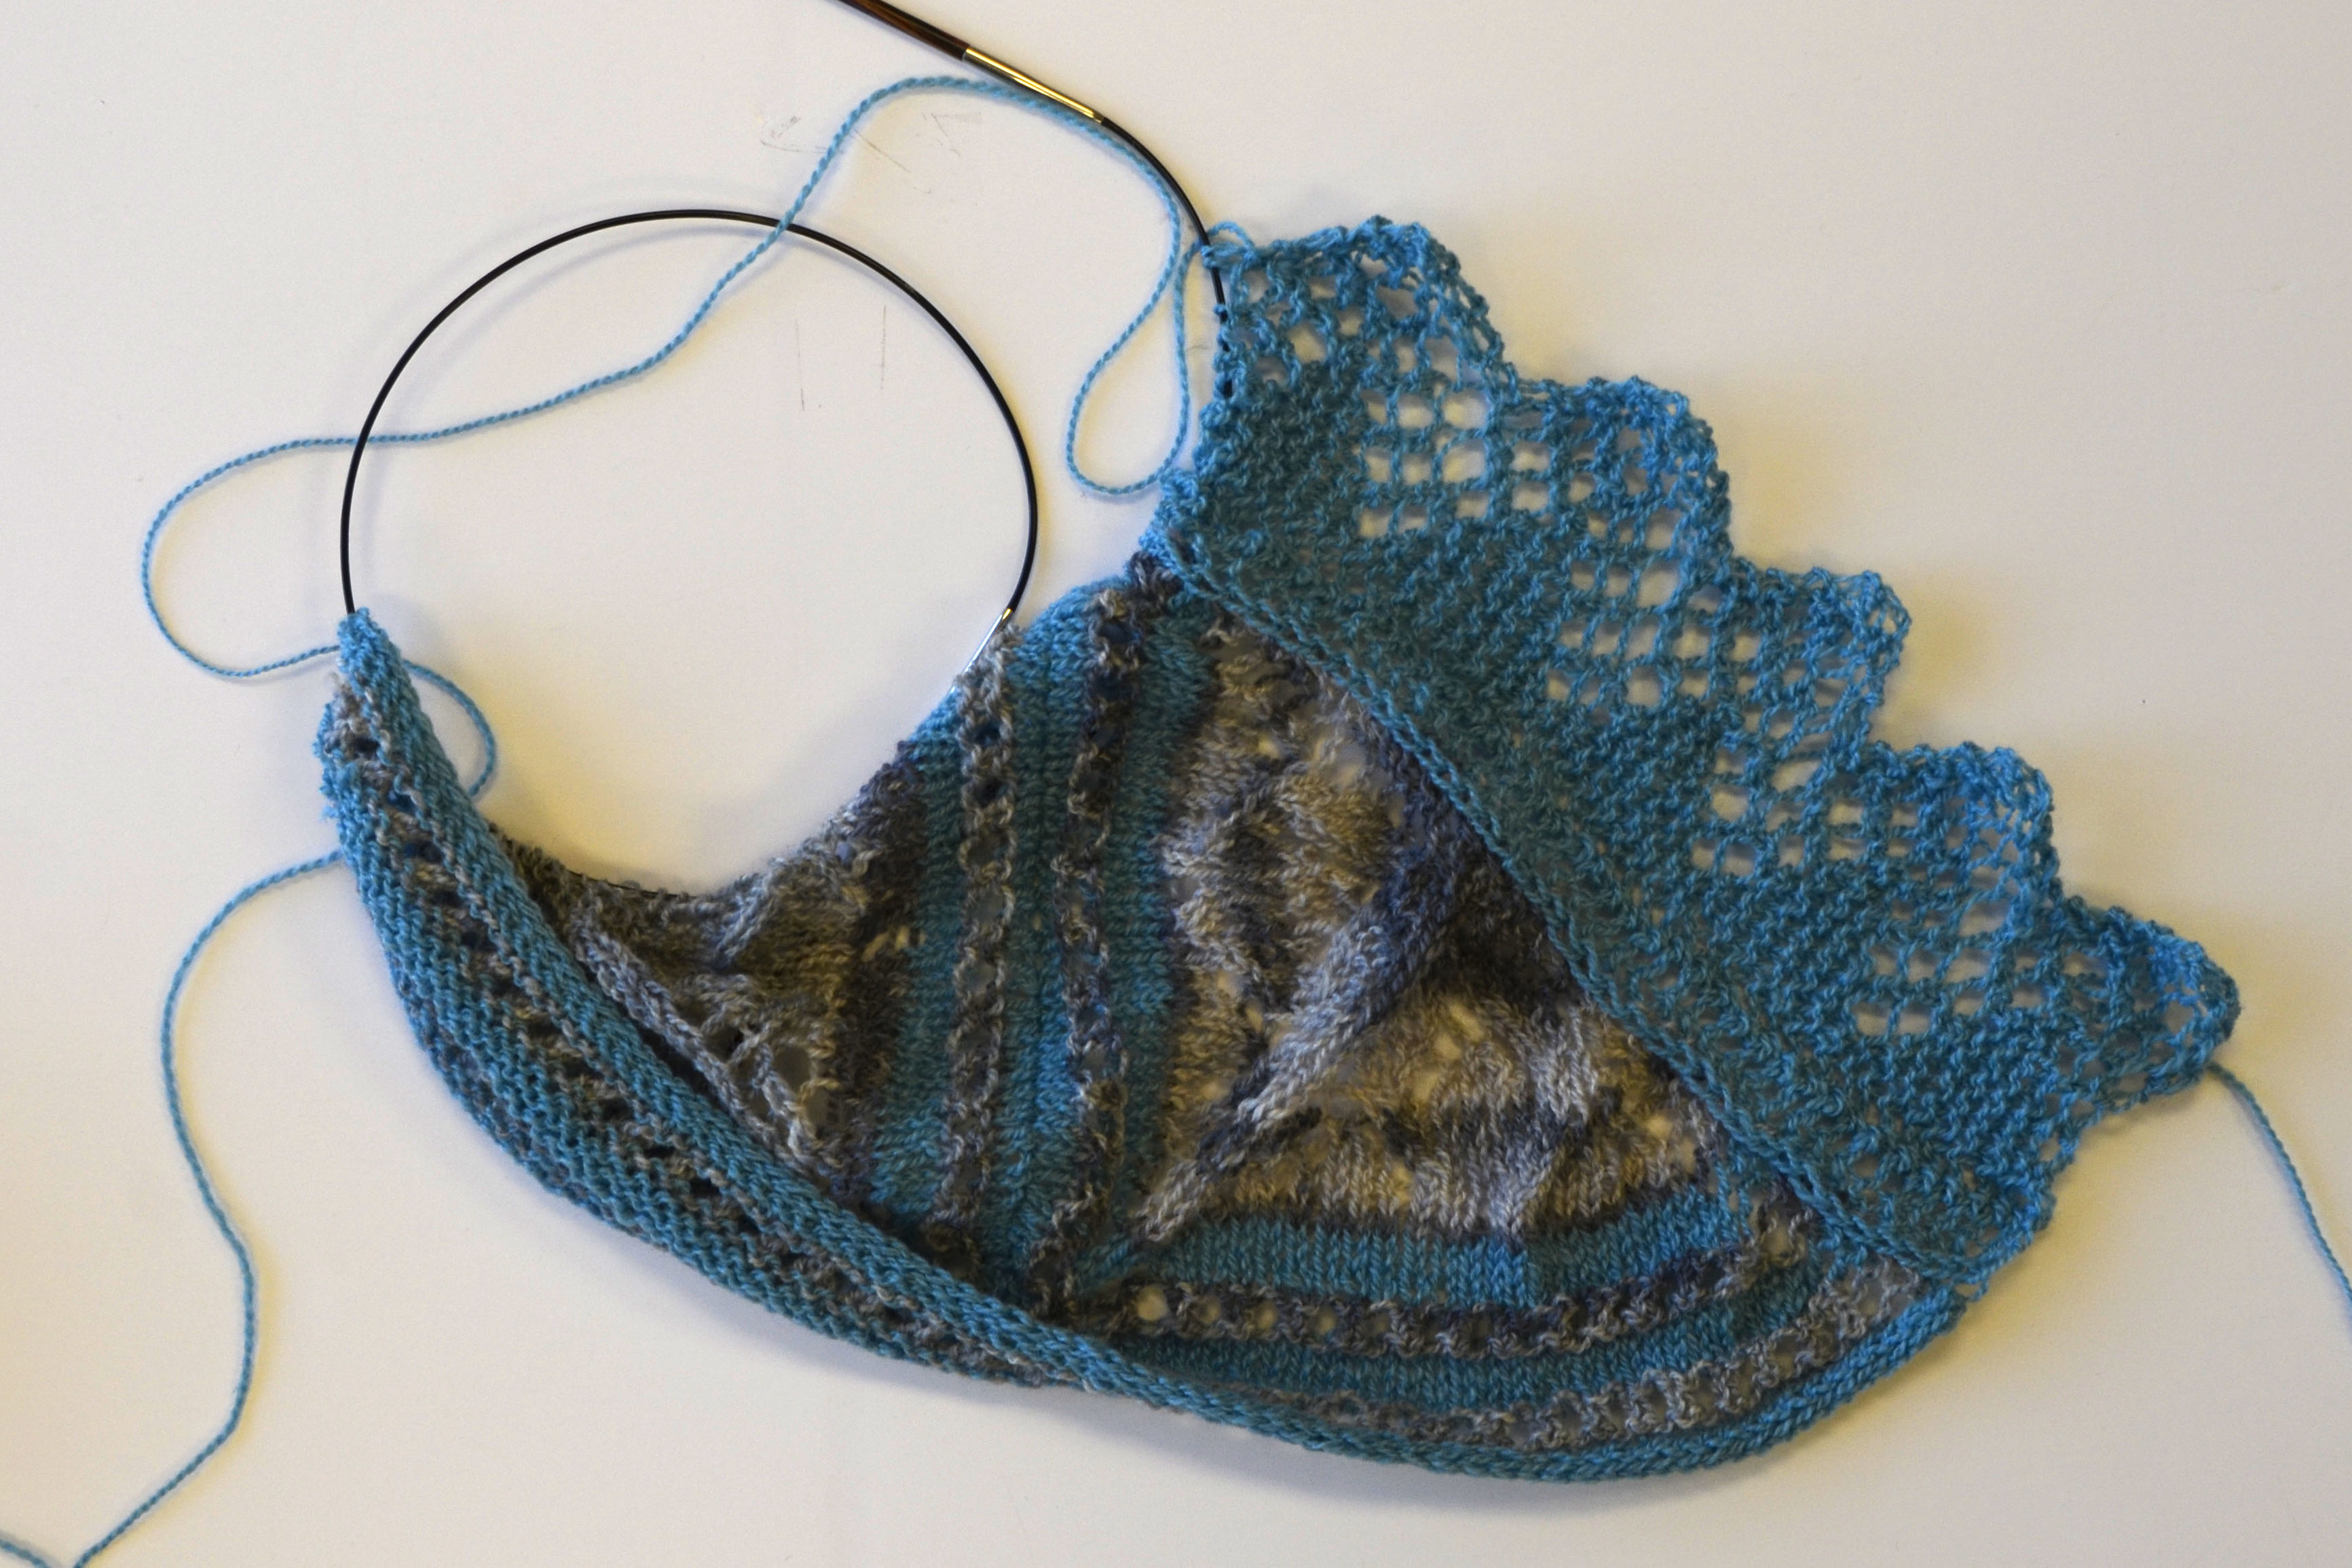
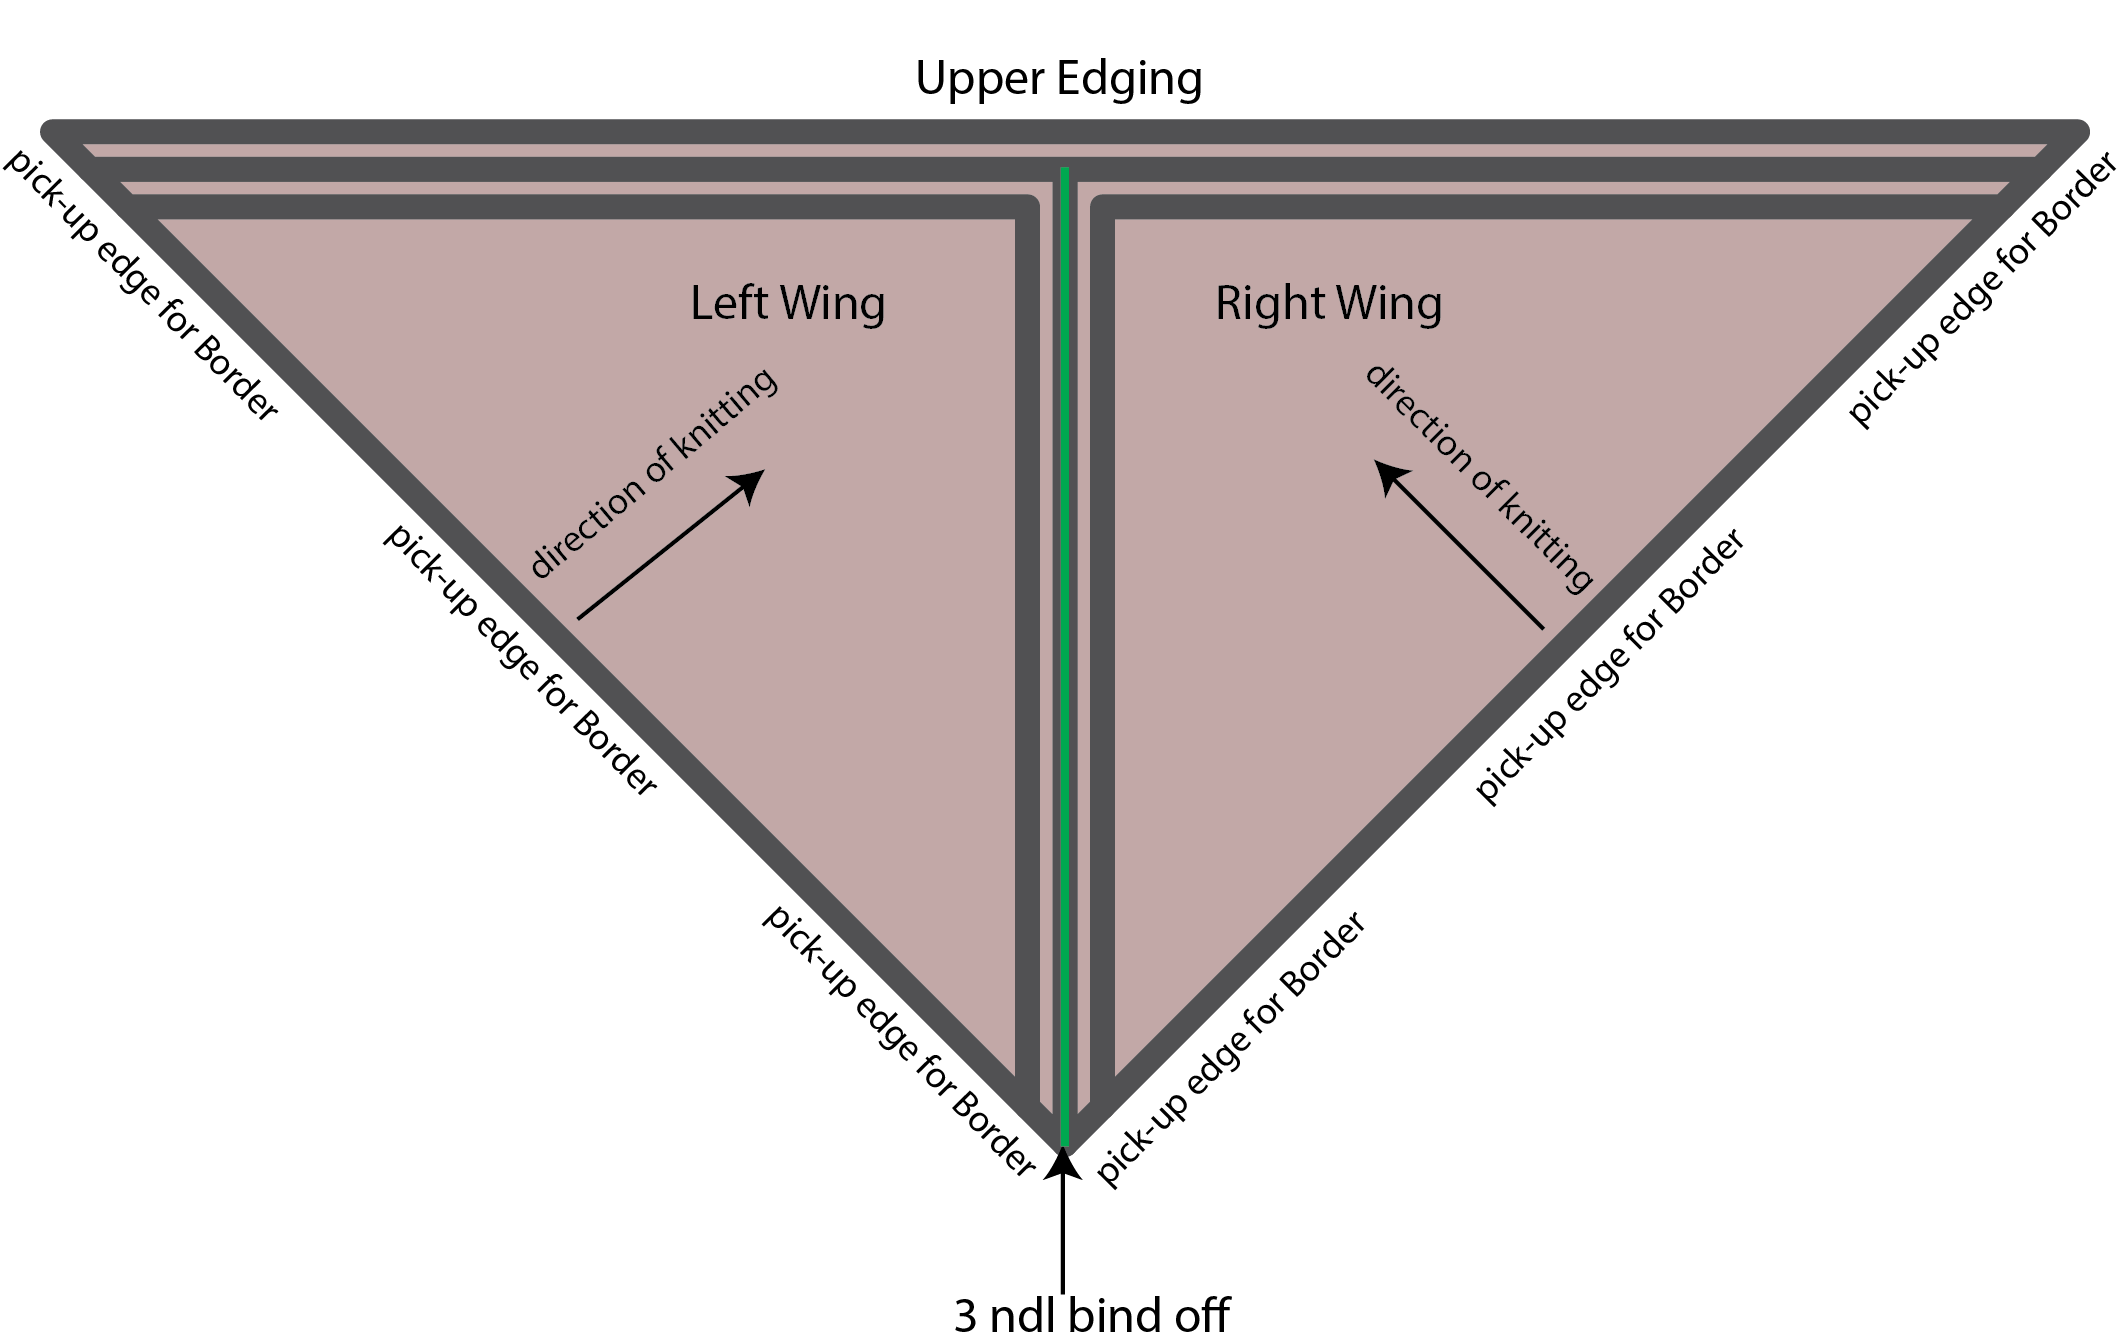
Traverse Scarf is knit from one end to the other. It is a symmetric scarf, so any increases made in the first half have symmetric and mirrored decreases in the second half. Those lines of color in the scarf are Good Earth Solid, and they are created via slip stitches. There is only one color used in each row of this scarf, with the exception of the small section in the center back of the piece.

Today I want to talk about starting out this scarf and establishing the rhythm of increases and getting a feel for the pattern.

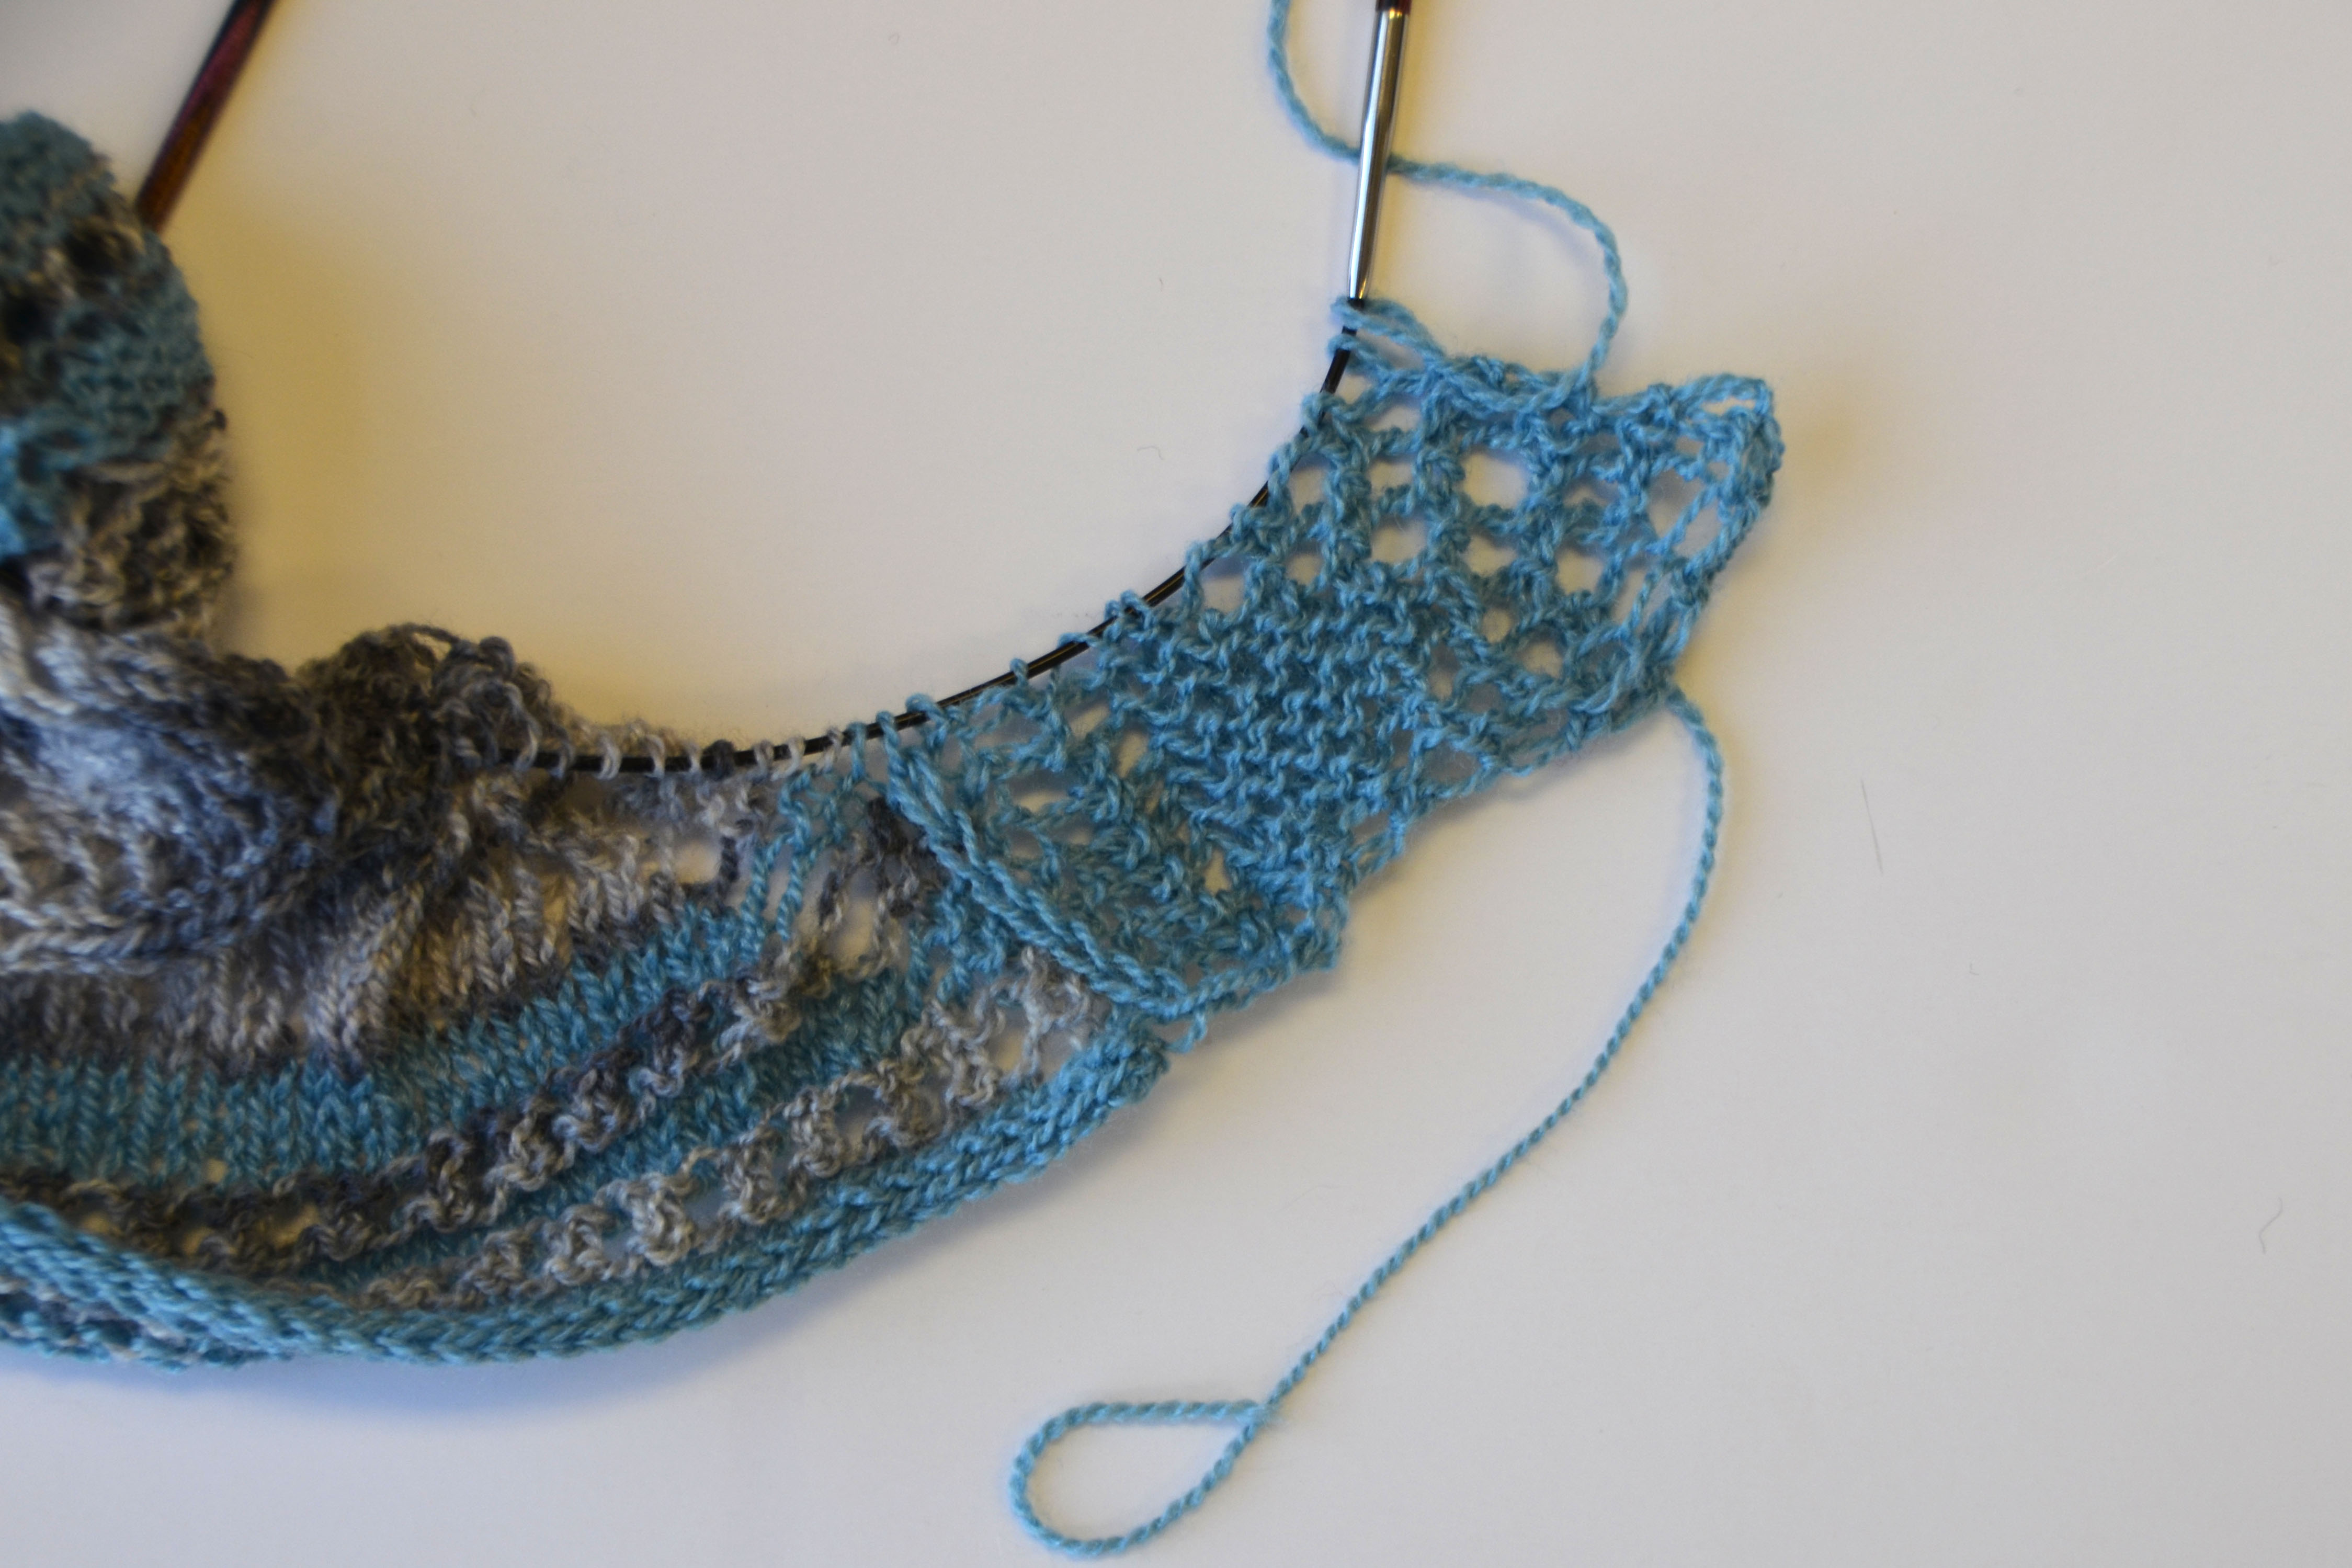
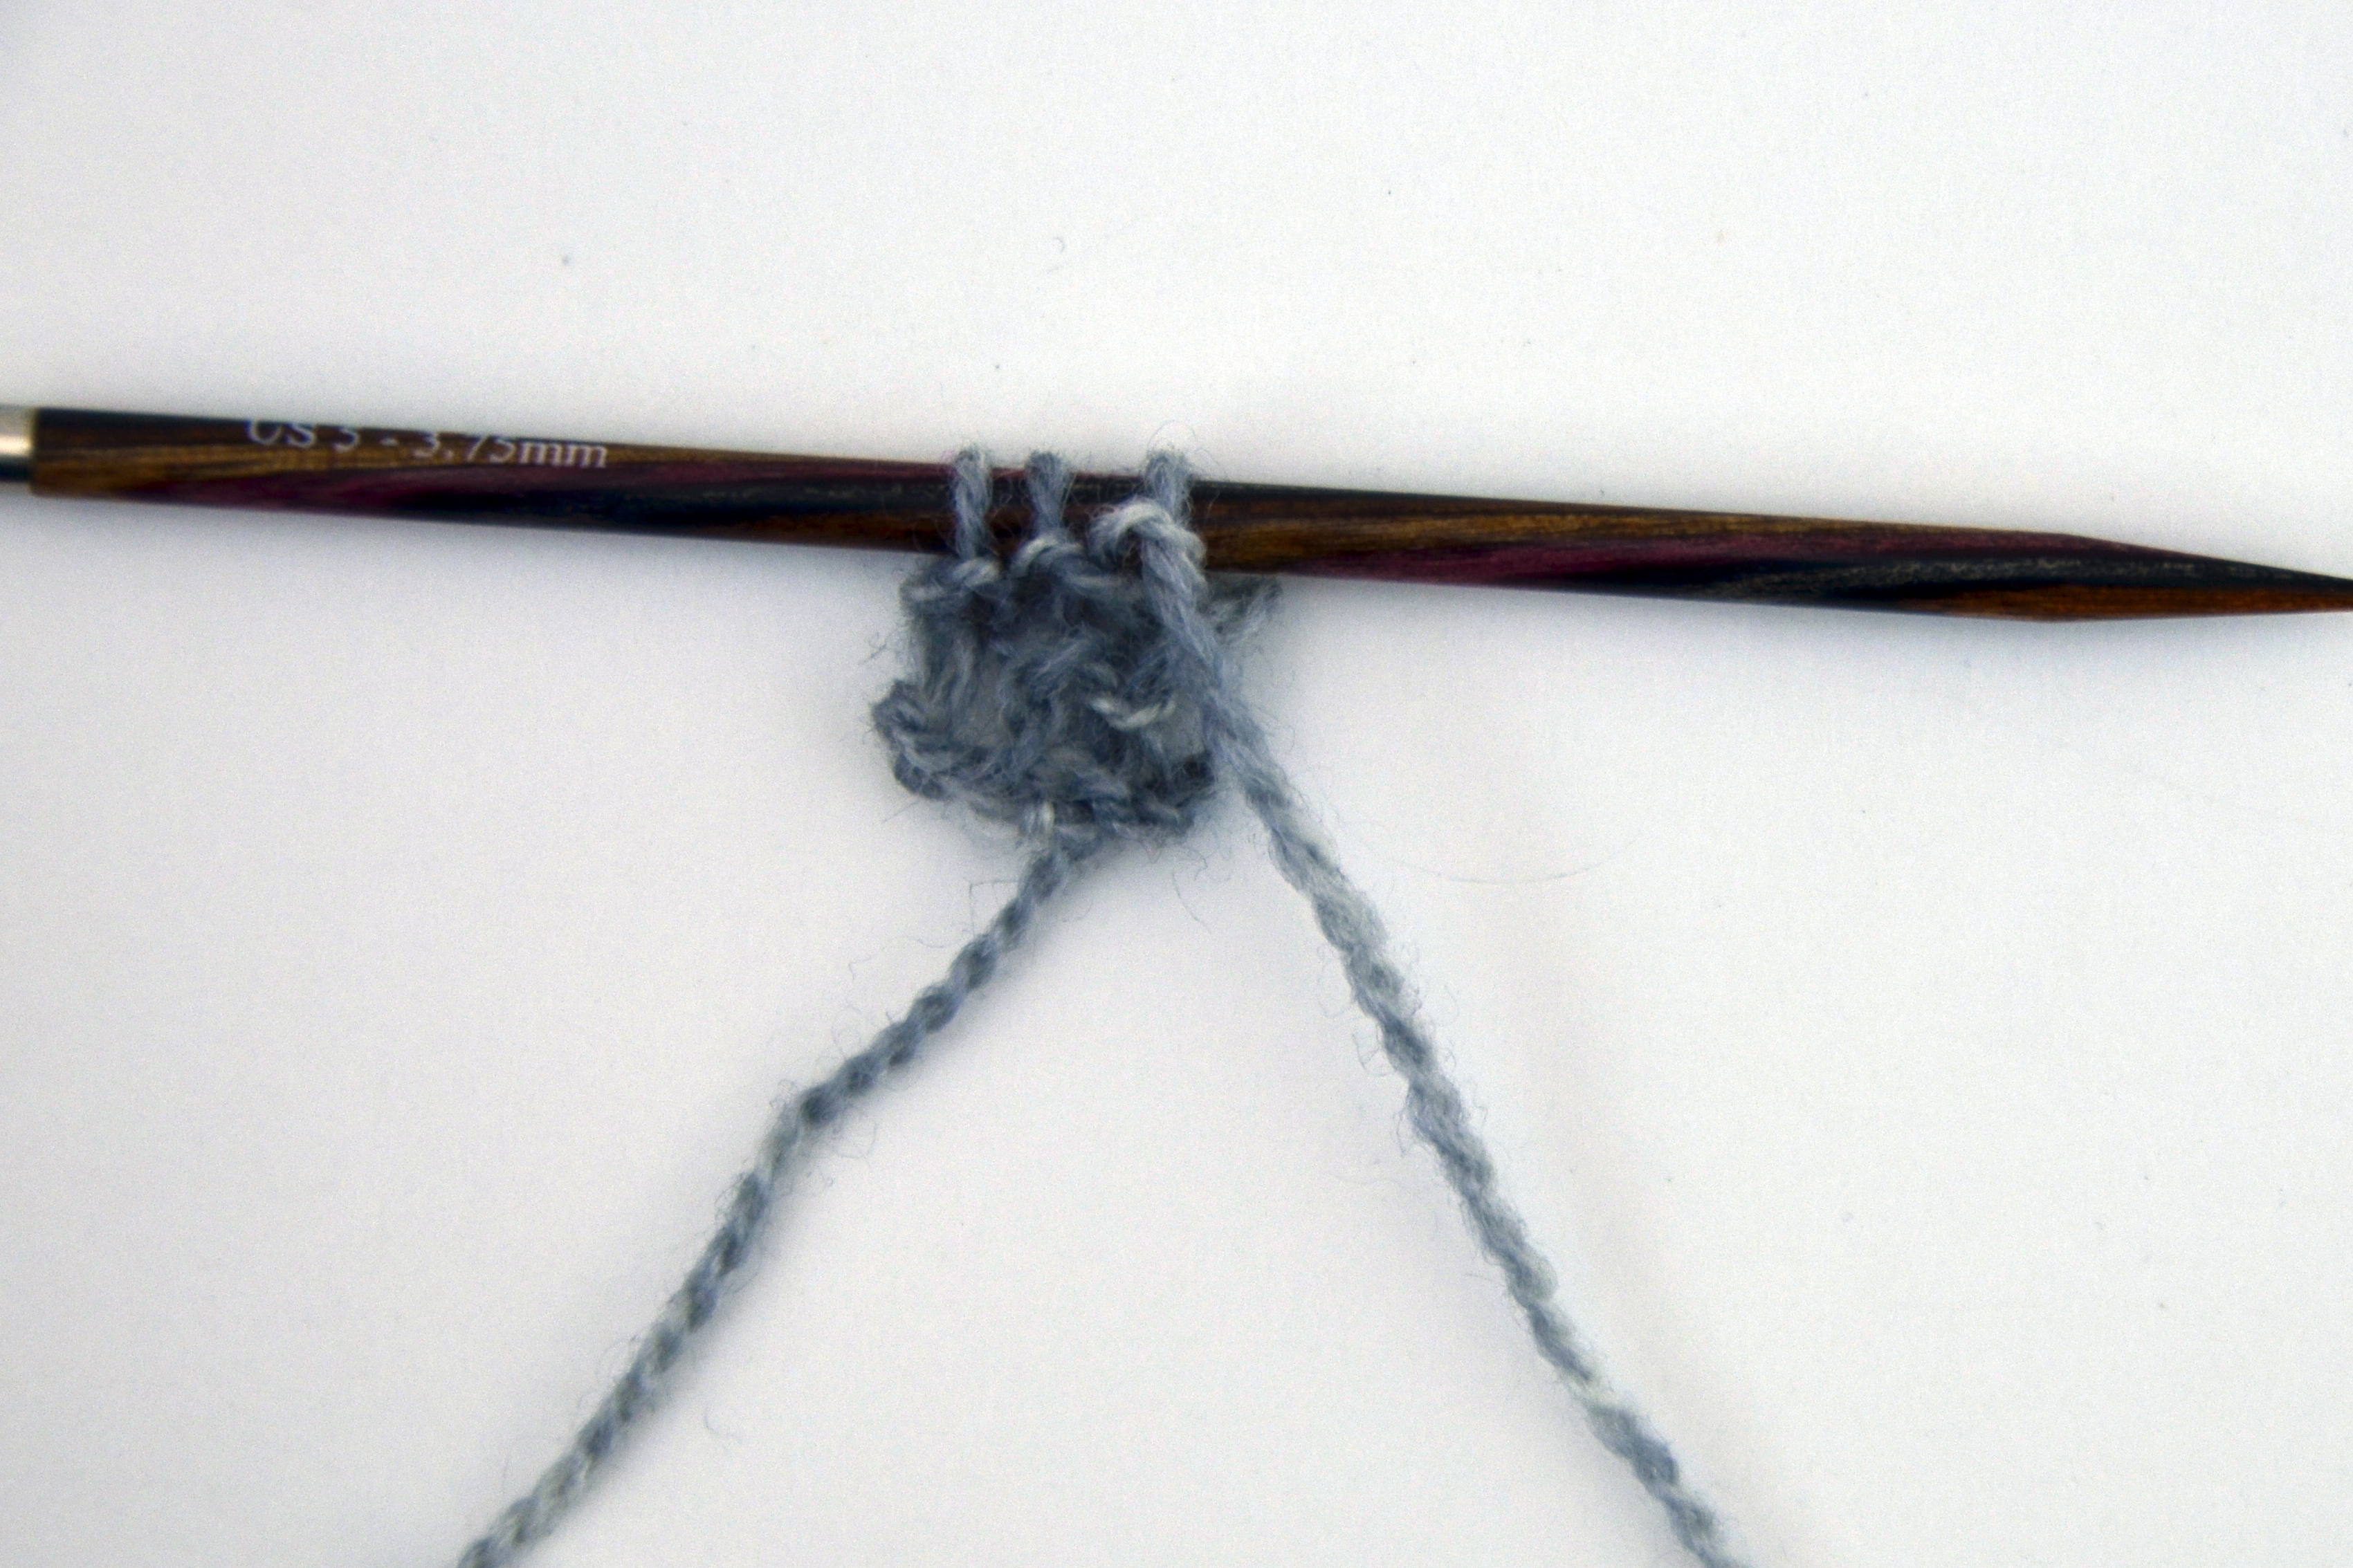
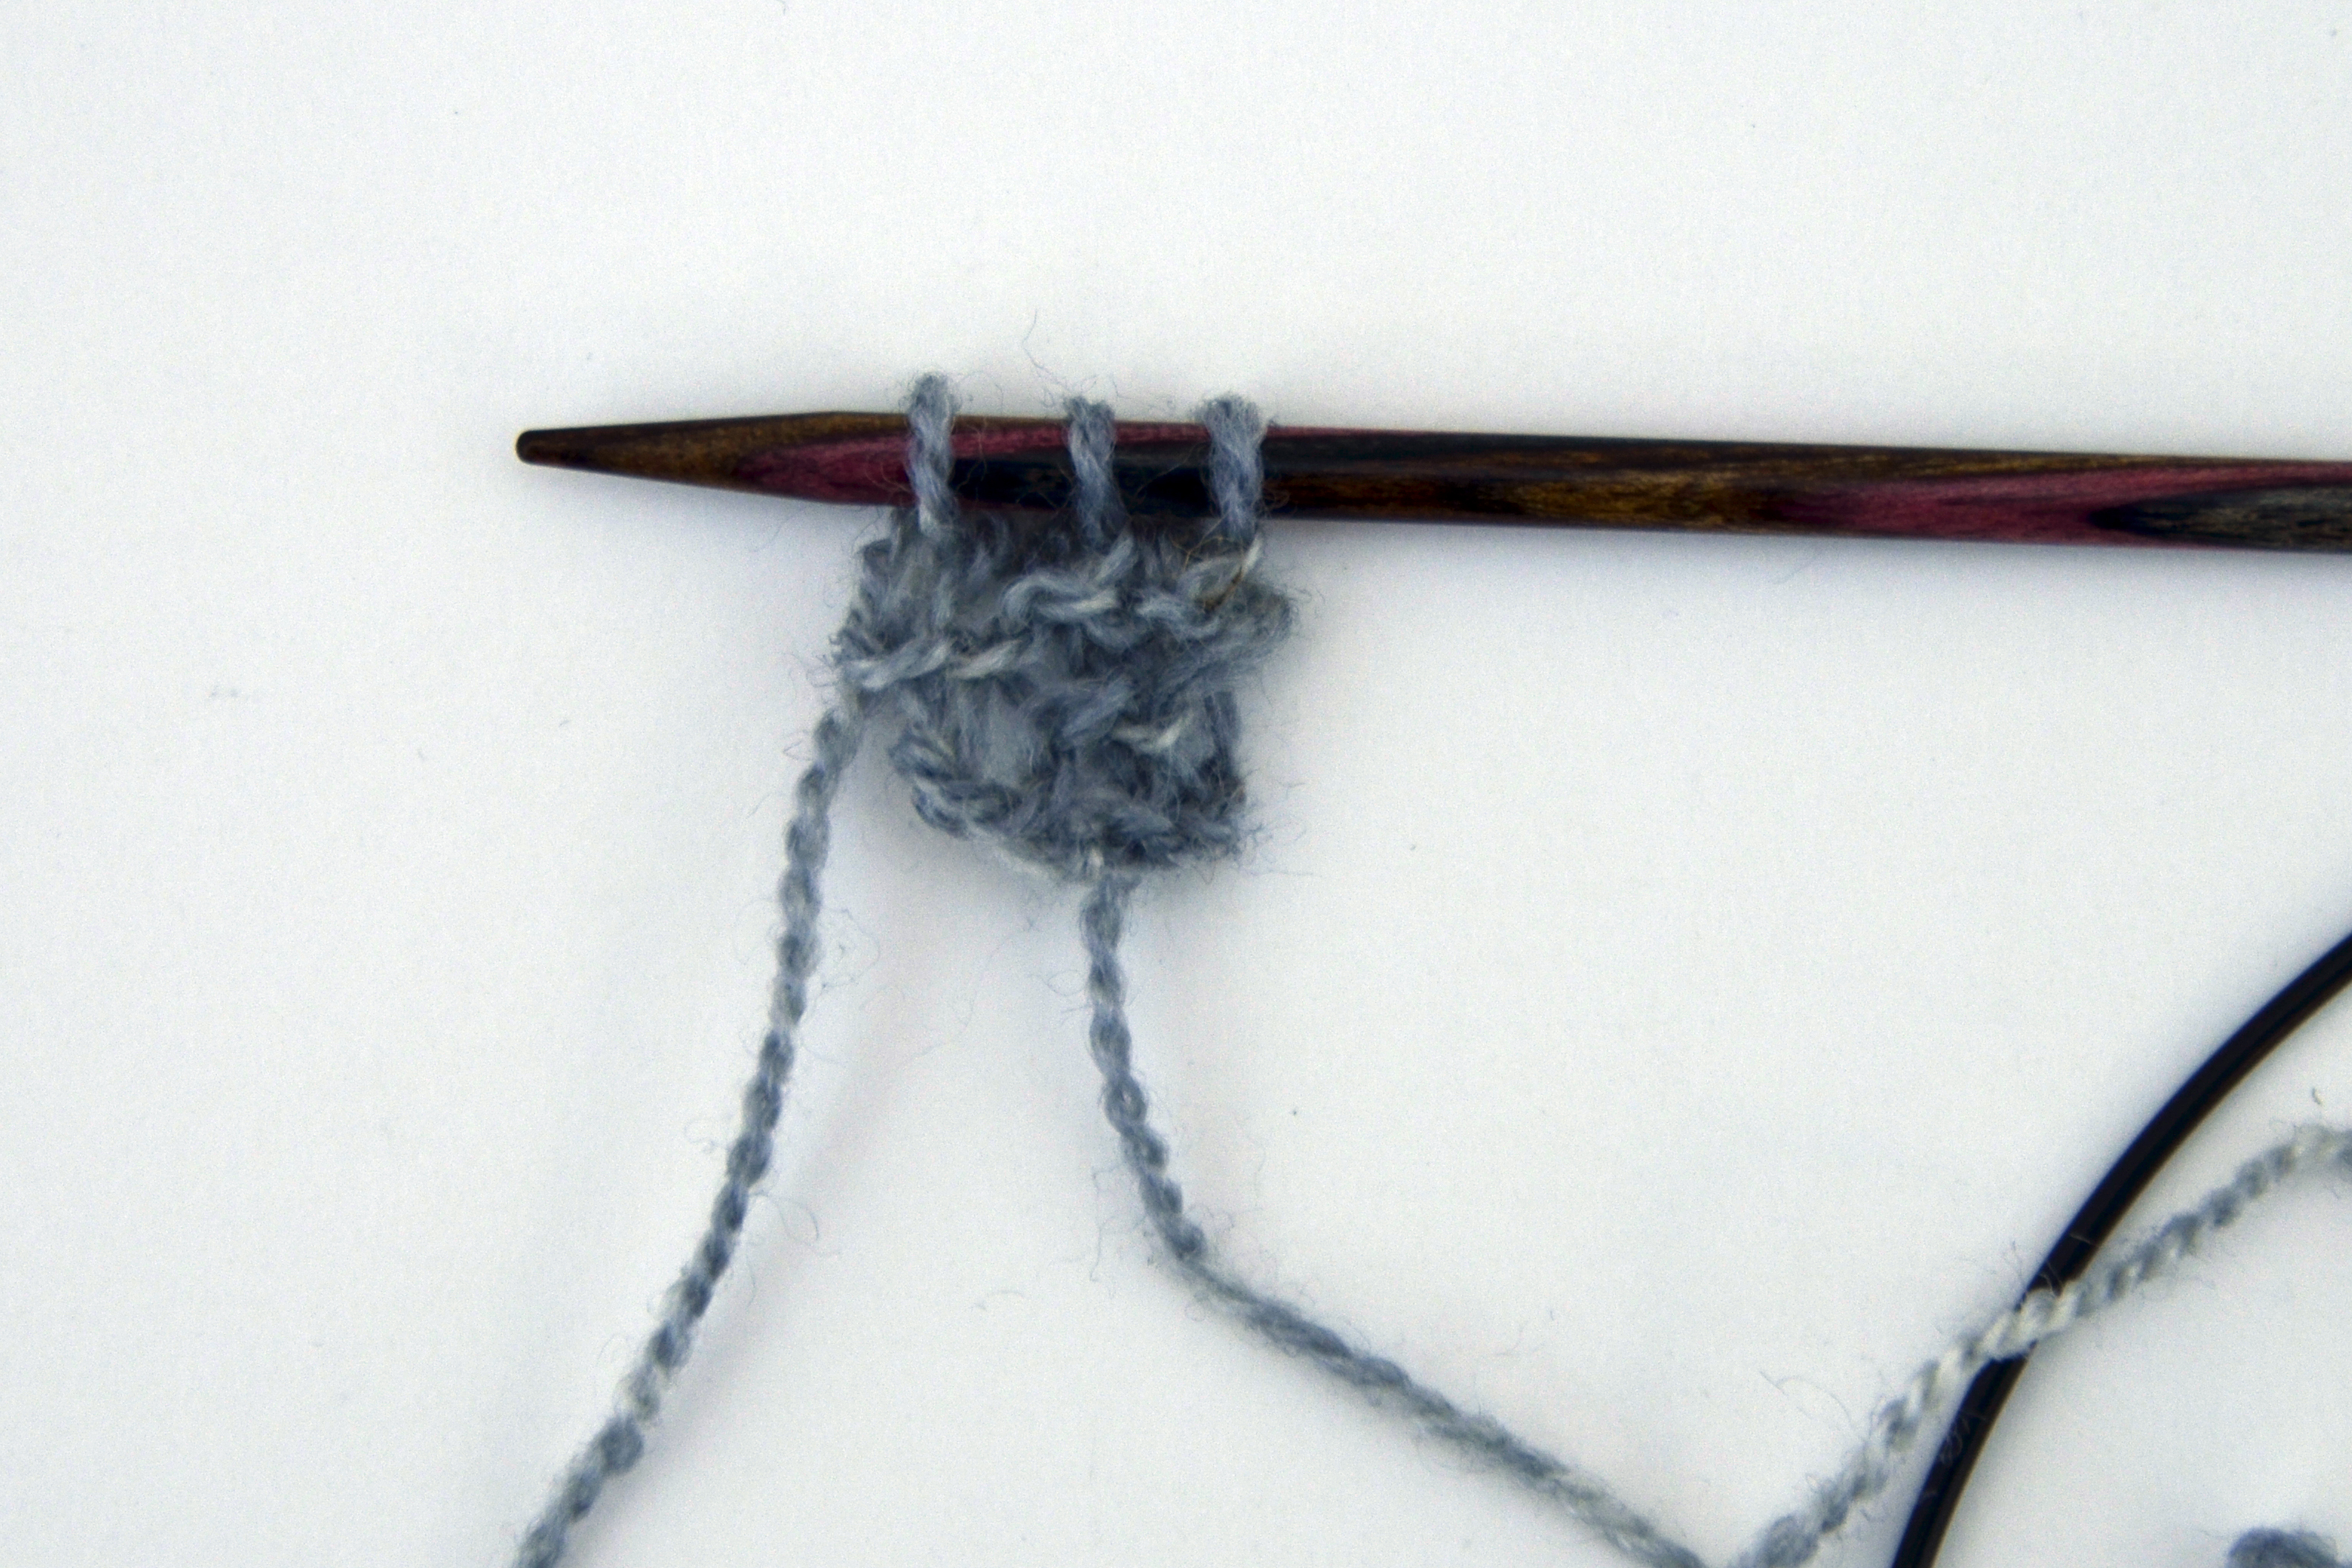
The first step is to cast on 7 stitches with the CC (Good Earth Solids) and then to purl  1 row.

Traverse_1

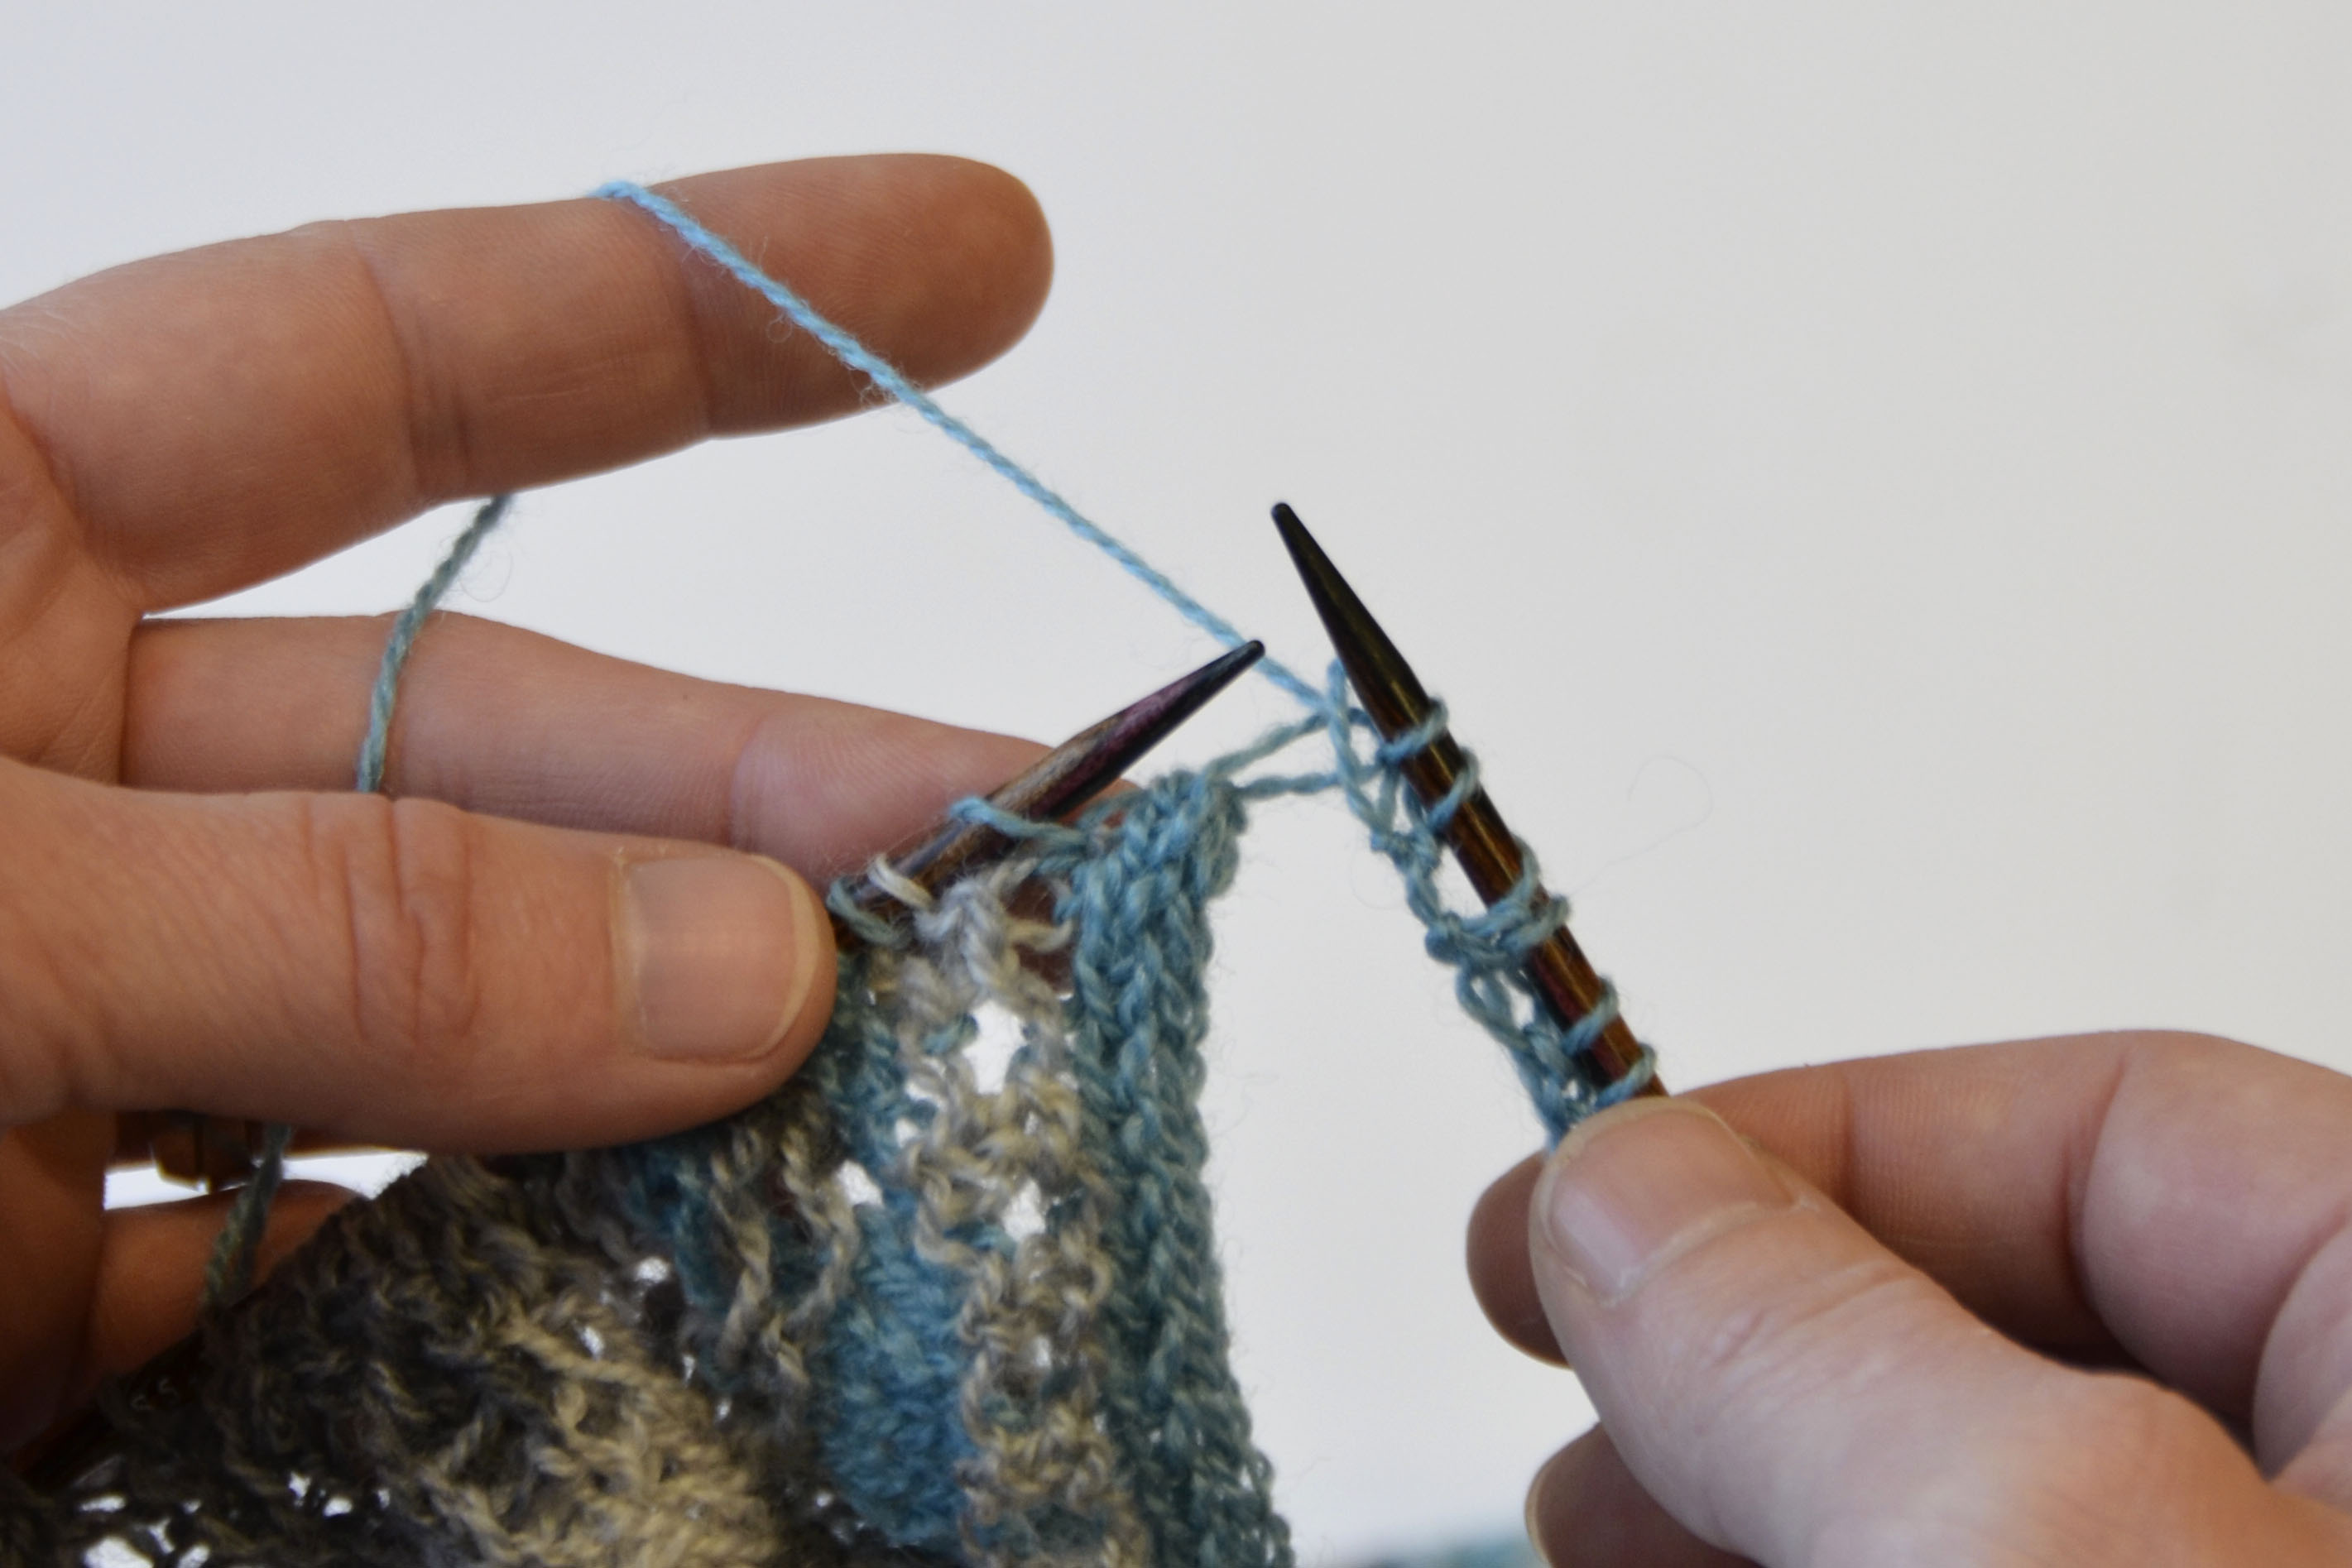
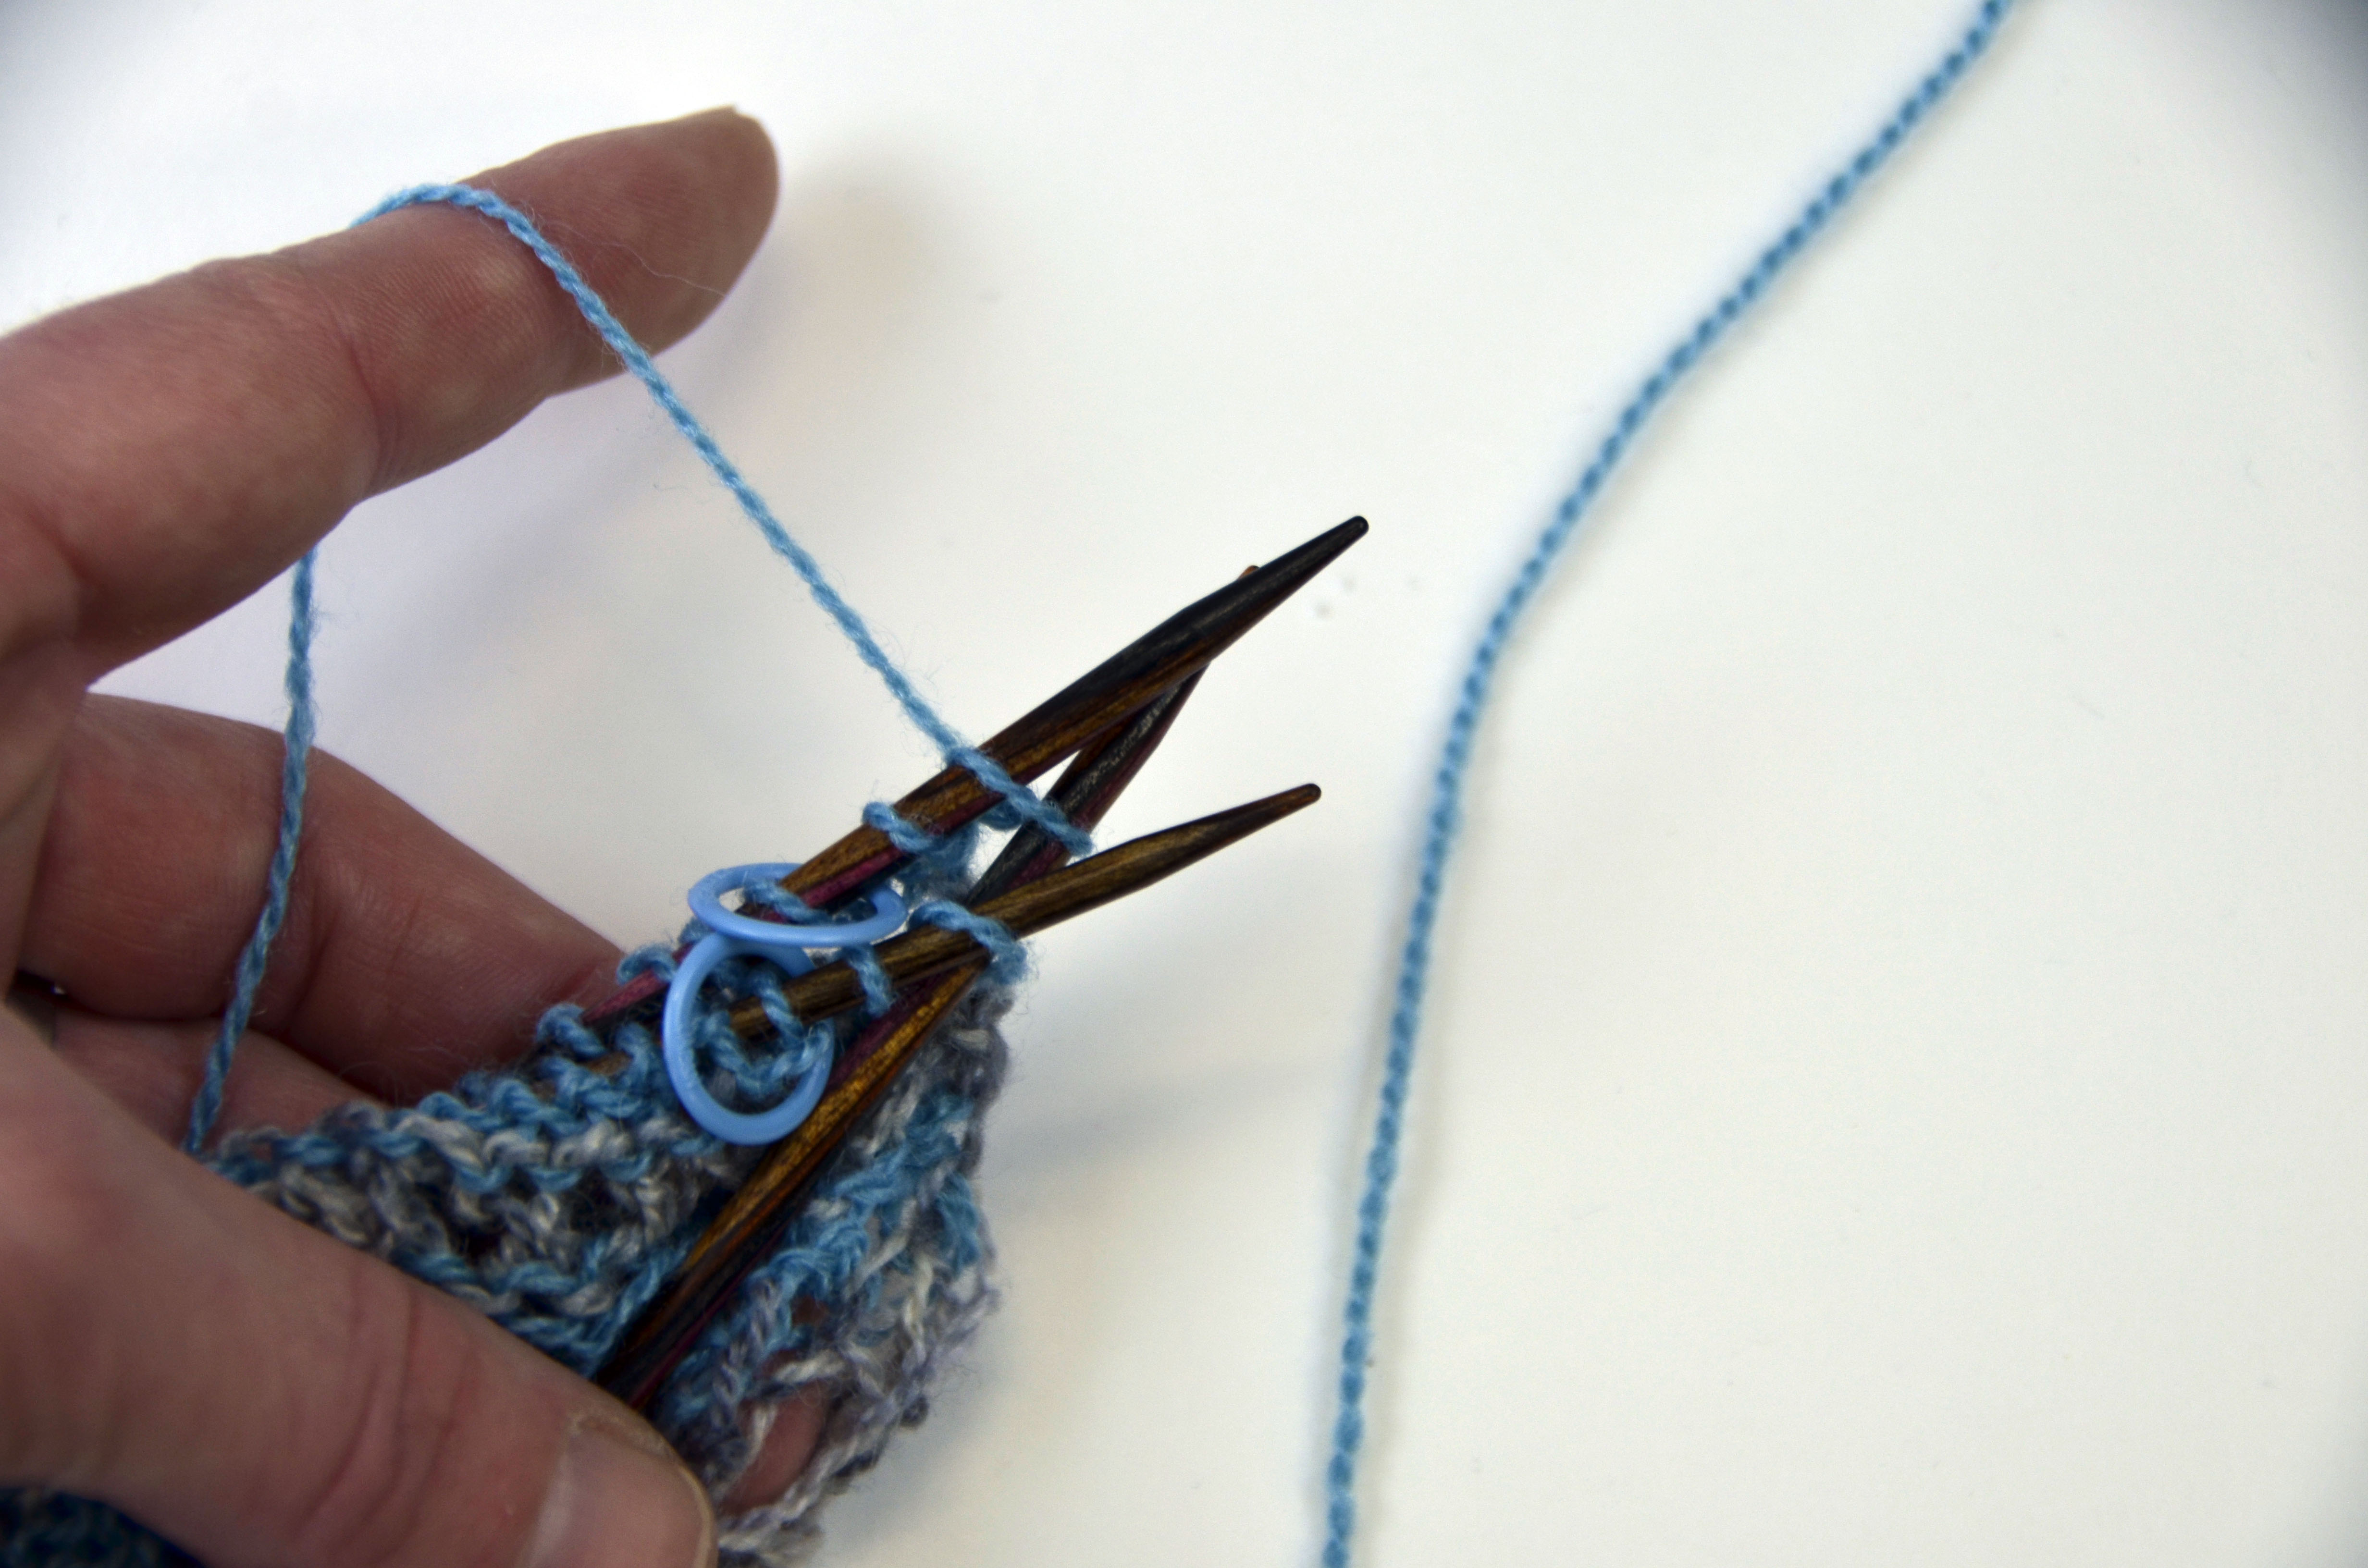
Next, we will establish our first two Slip Stitch Columns (abbreviated SSC in the pattern). The next 2 rows will be worked in MC (Good Earth Adorn). On right side rows, the SSC is worked as: slip 1, p1, slip 1. Stitches are always slipped purlwise (inserting the right needle into the stitch on the left needle as though to purl) with the yarn held in back, or to the wrong side of the work.

Here I am slipping the first stitch. Slipping a stitch simply means to transfer it from one needle to the other. In this case, we’re transferring the stitch from the left needle to the right needle.

Traverse_2

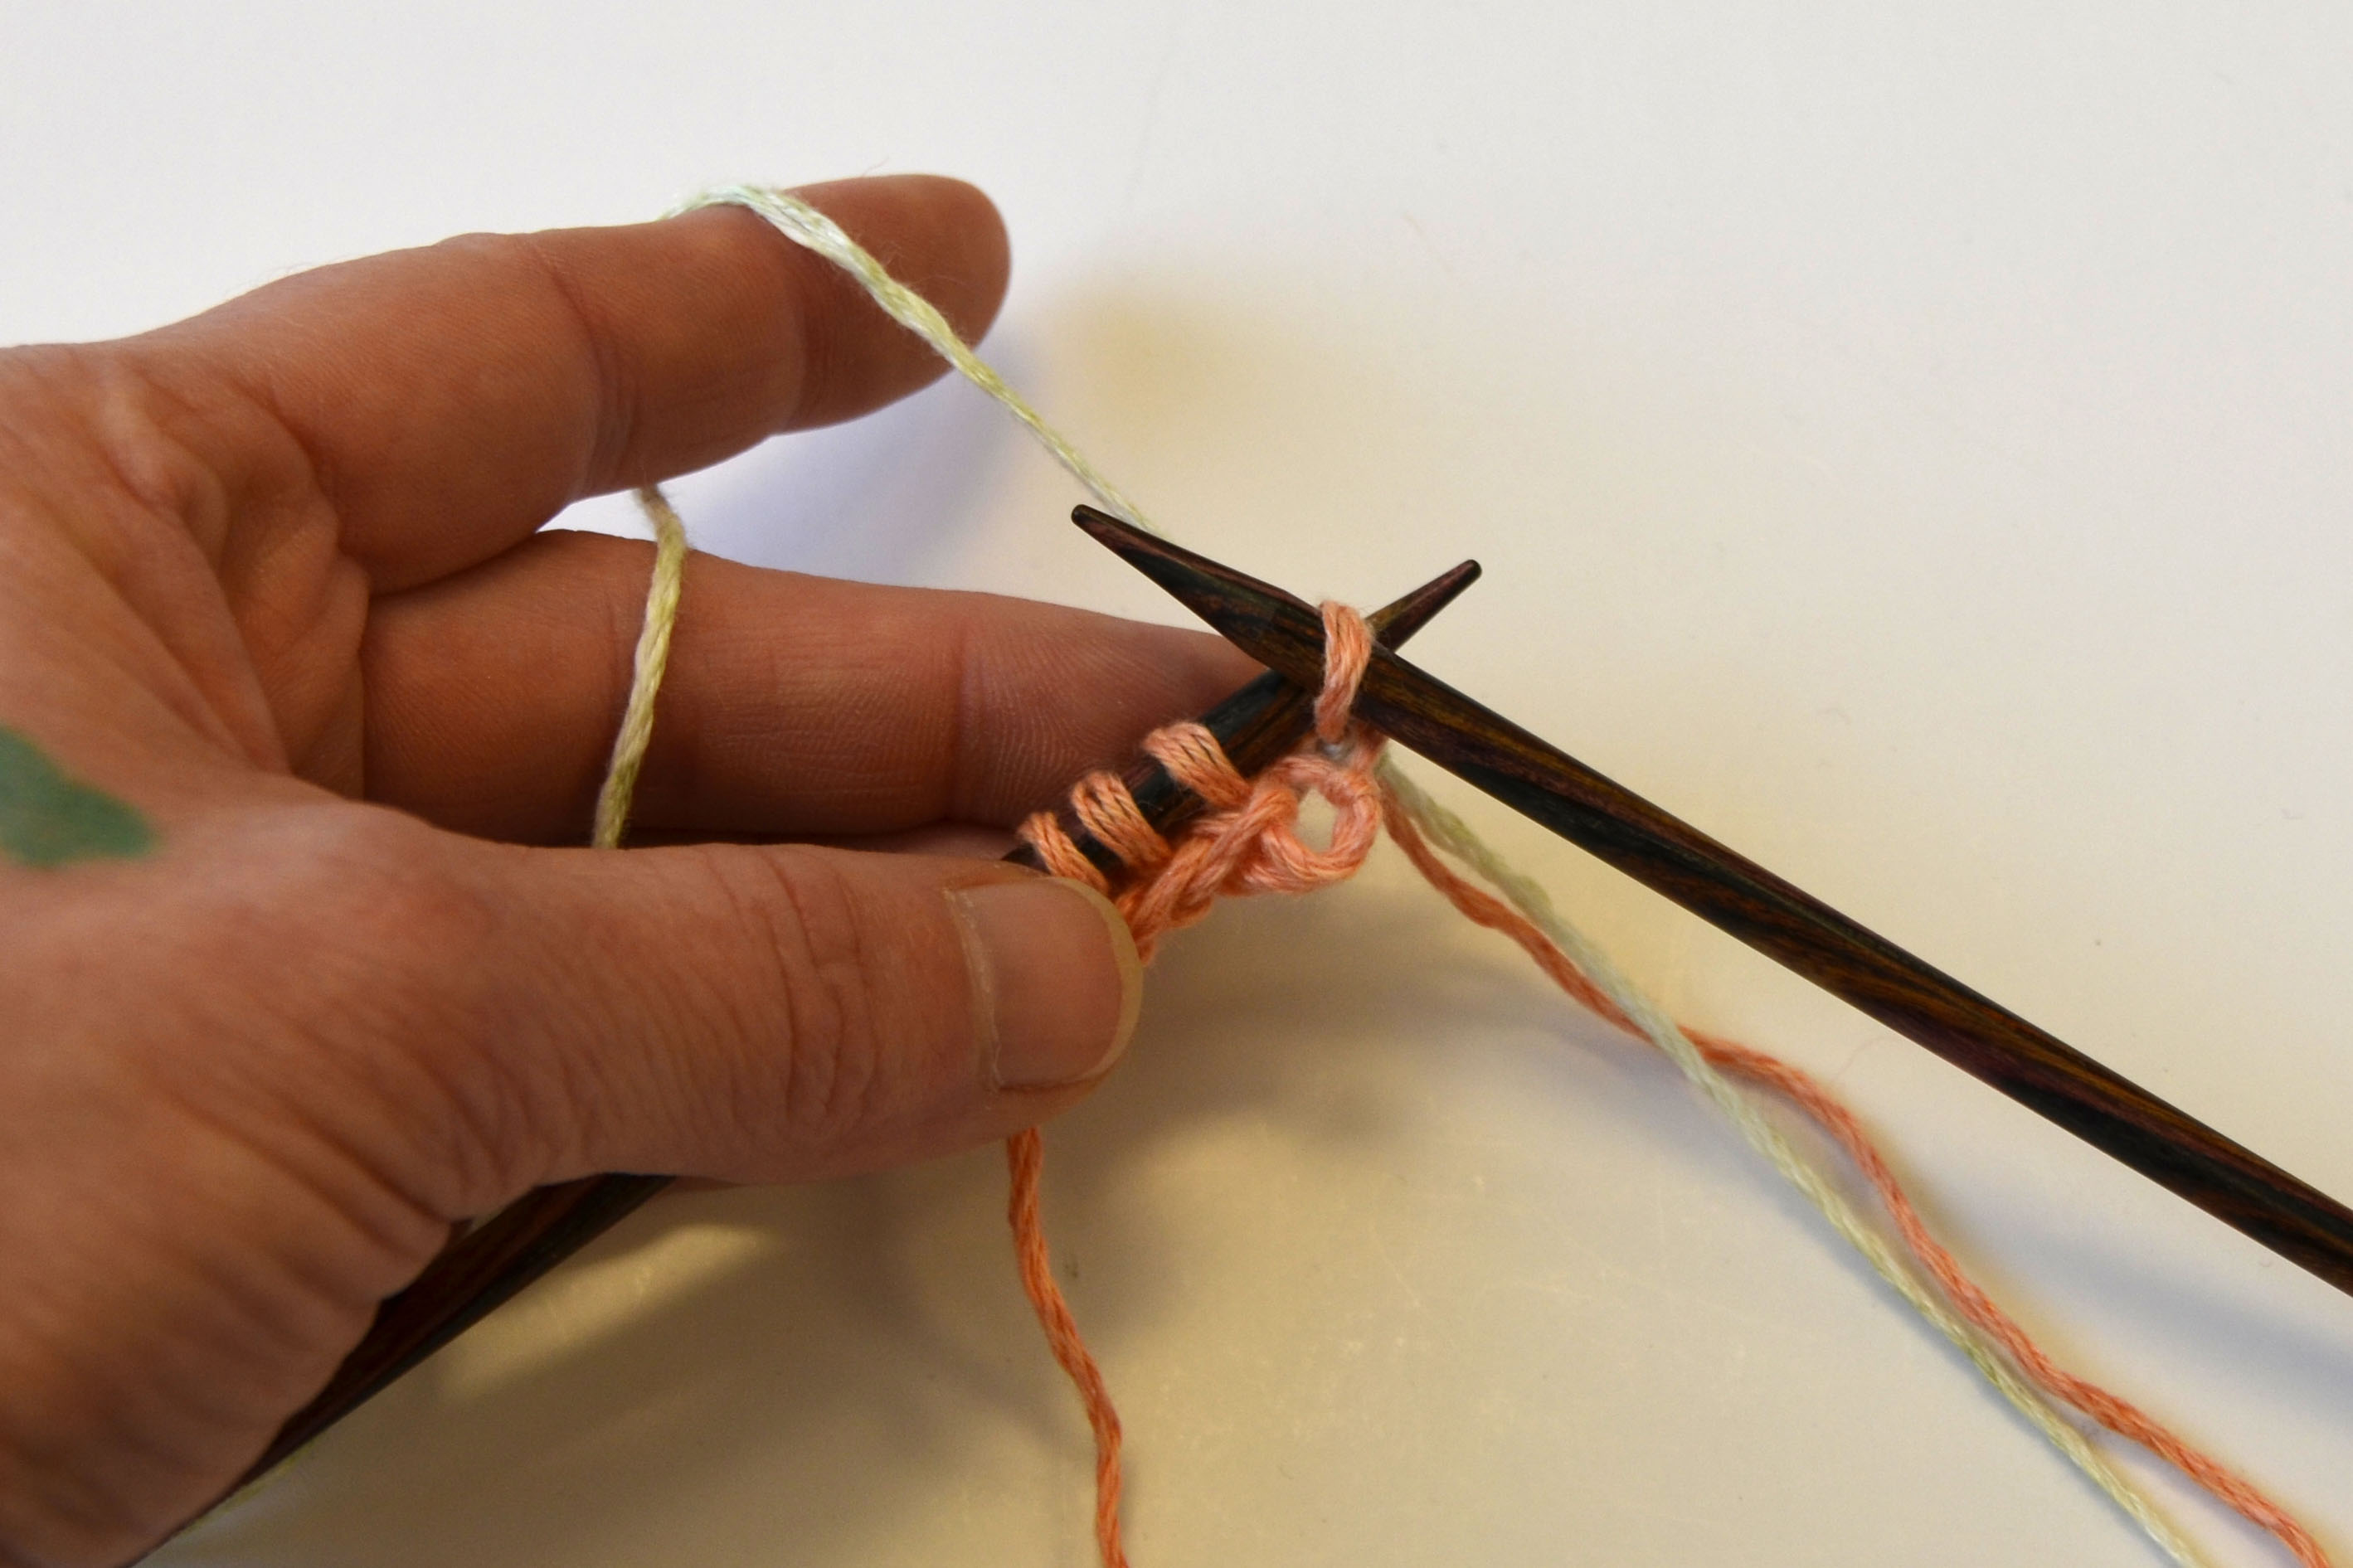
So I slipped 1, purled 1, and now I’m slipping the next stitch, the last of the 3-stitch SSC.

Traverse_3

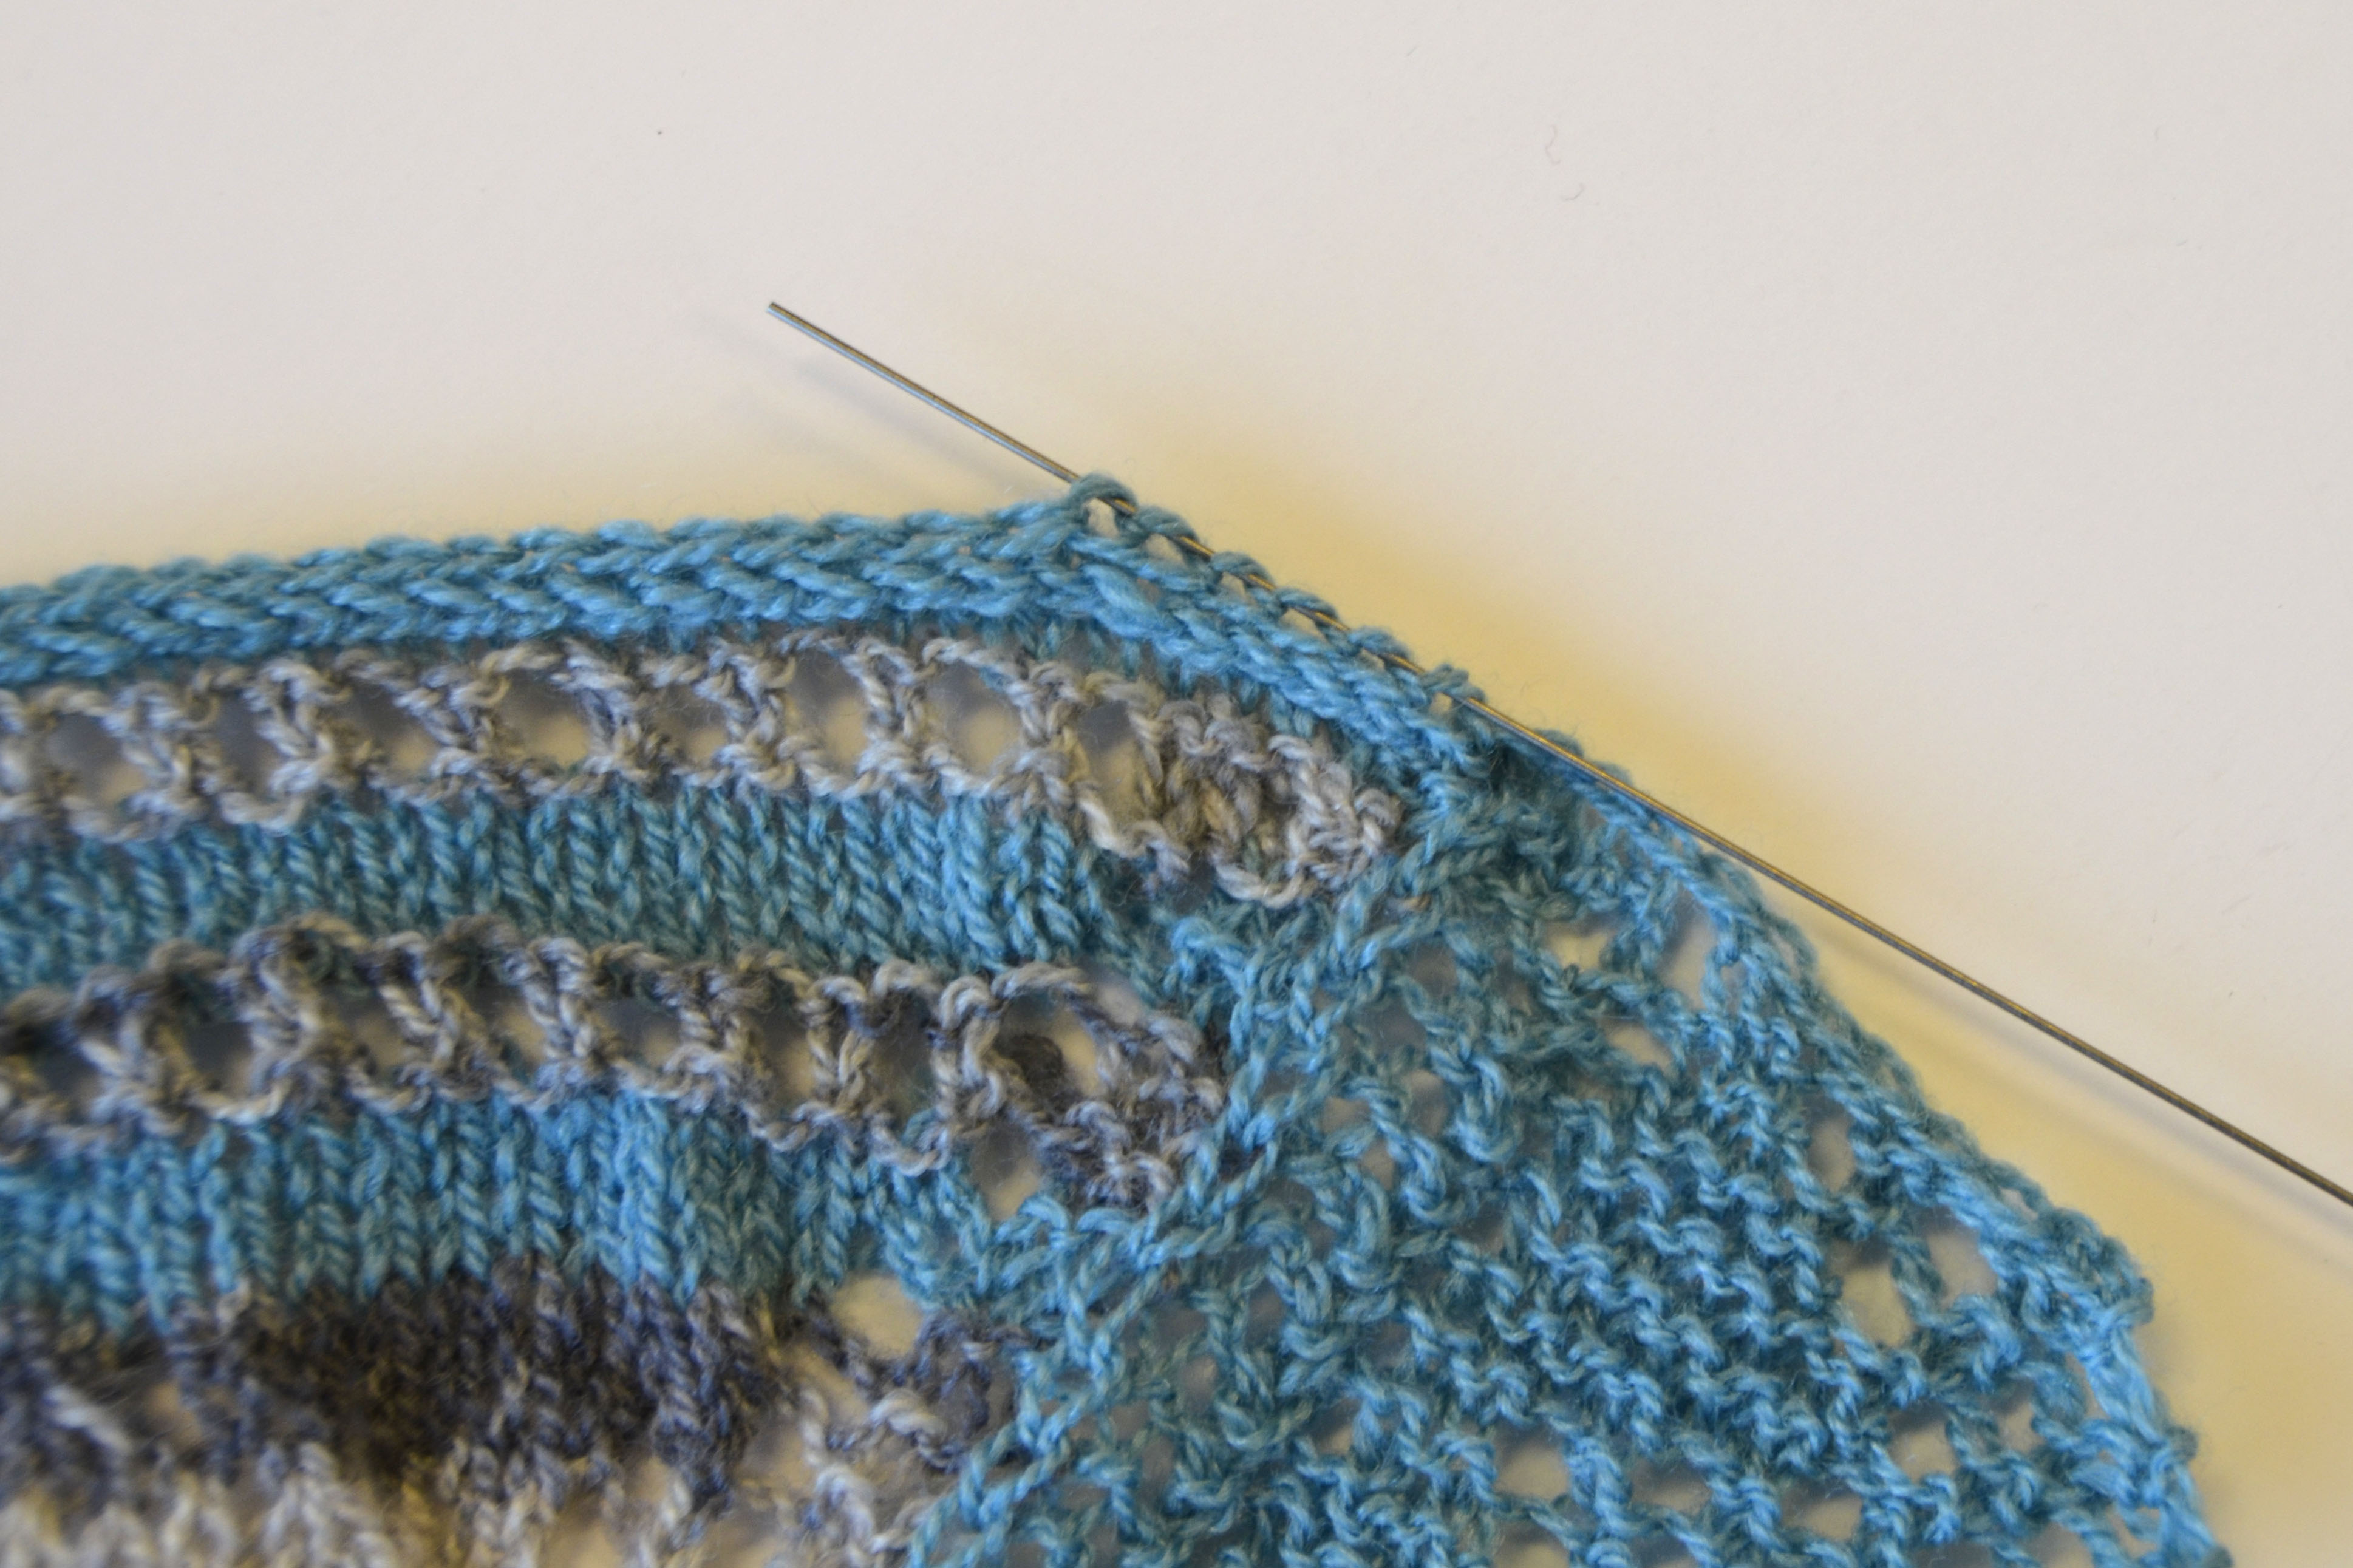
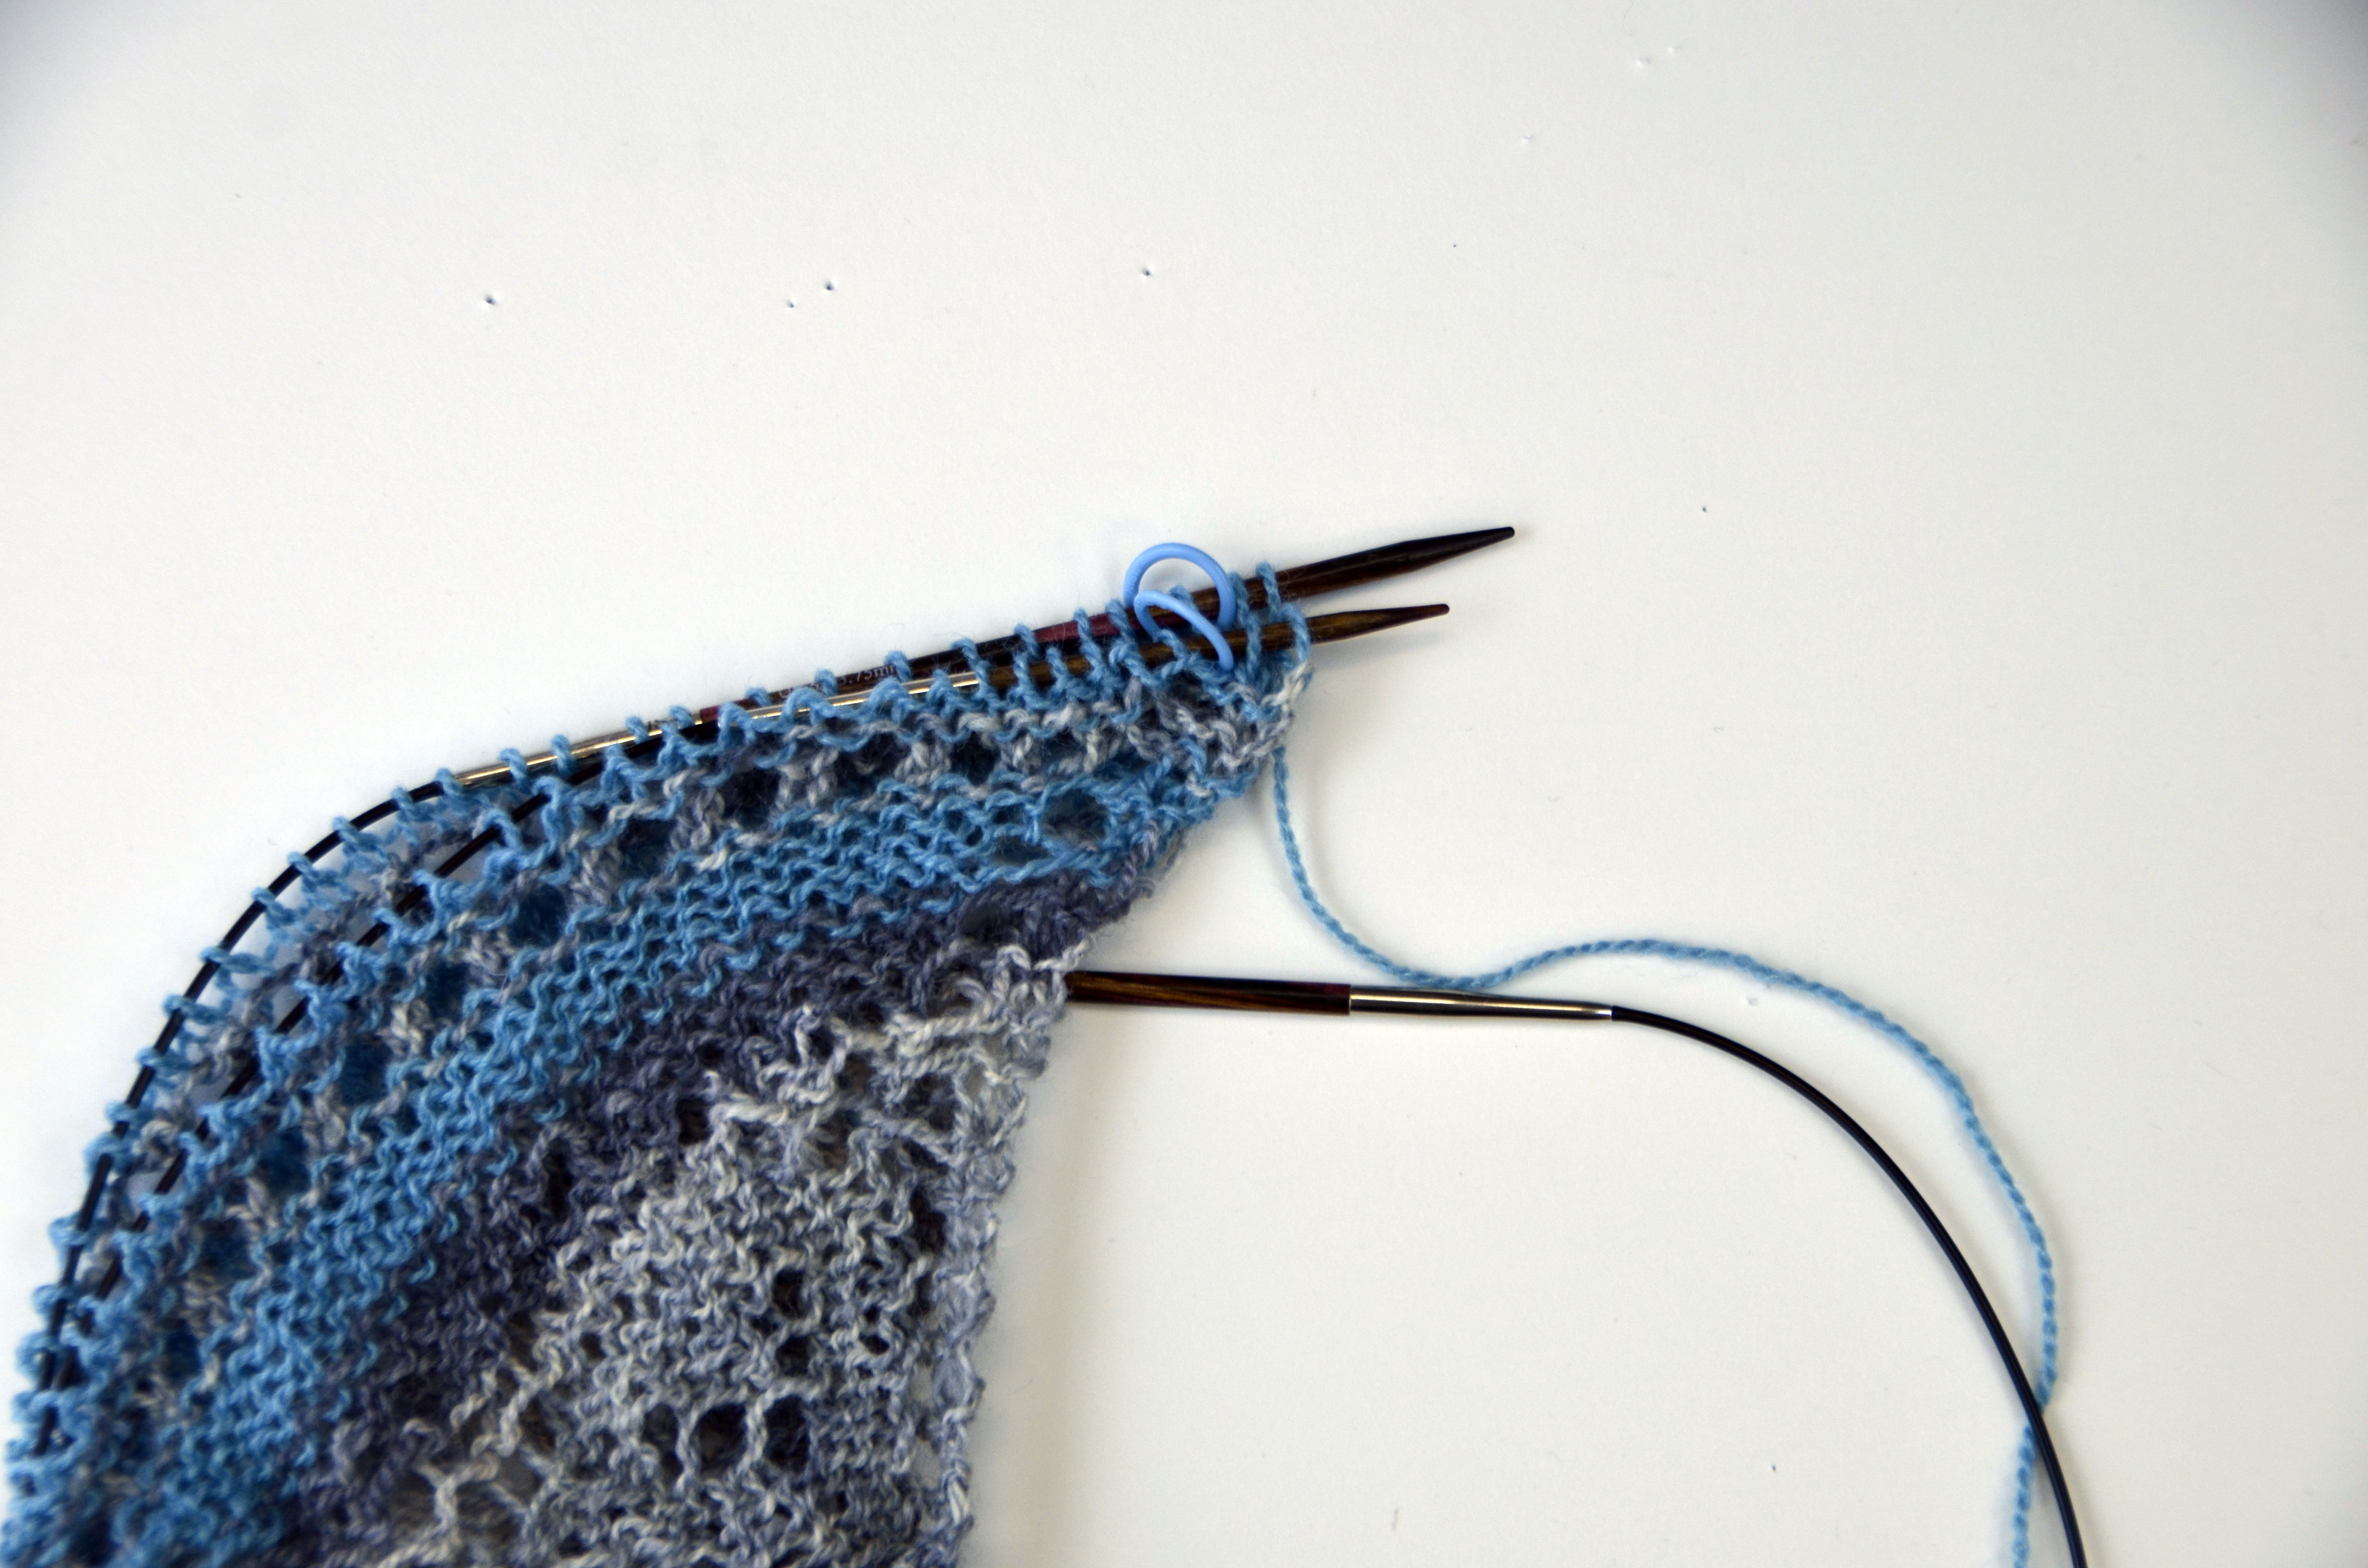
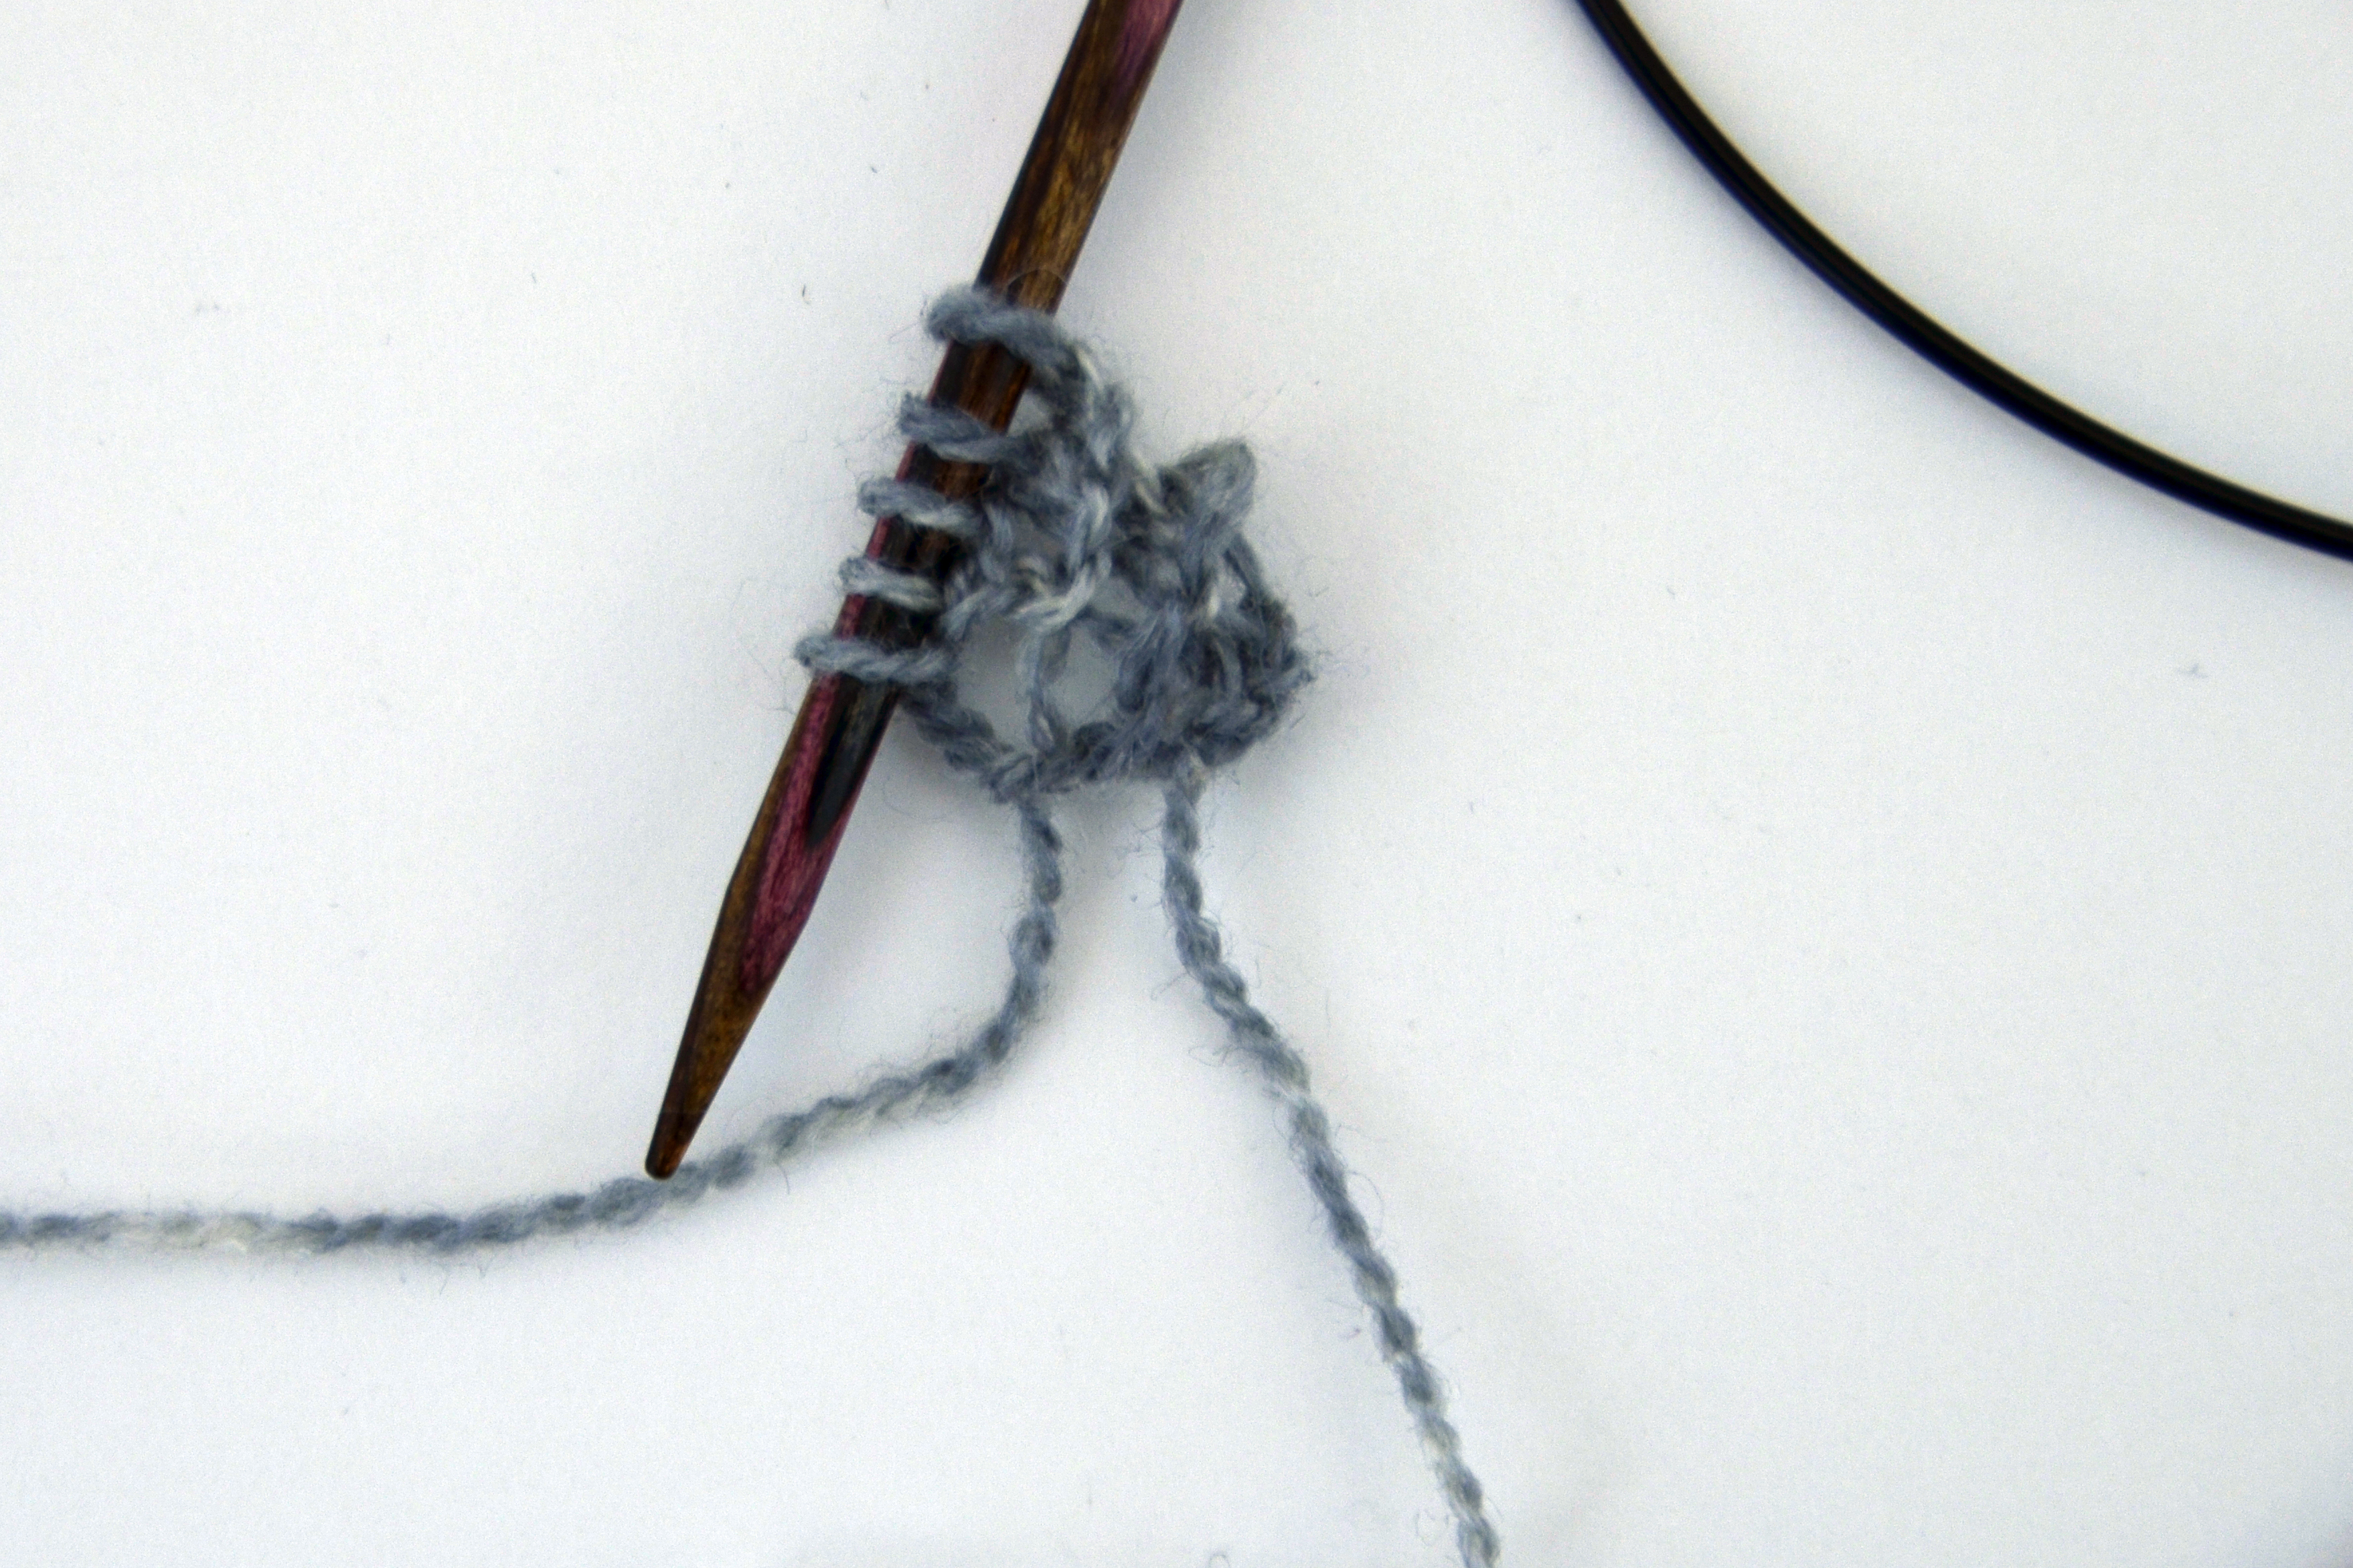
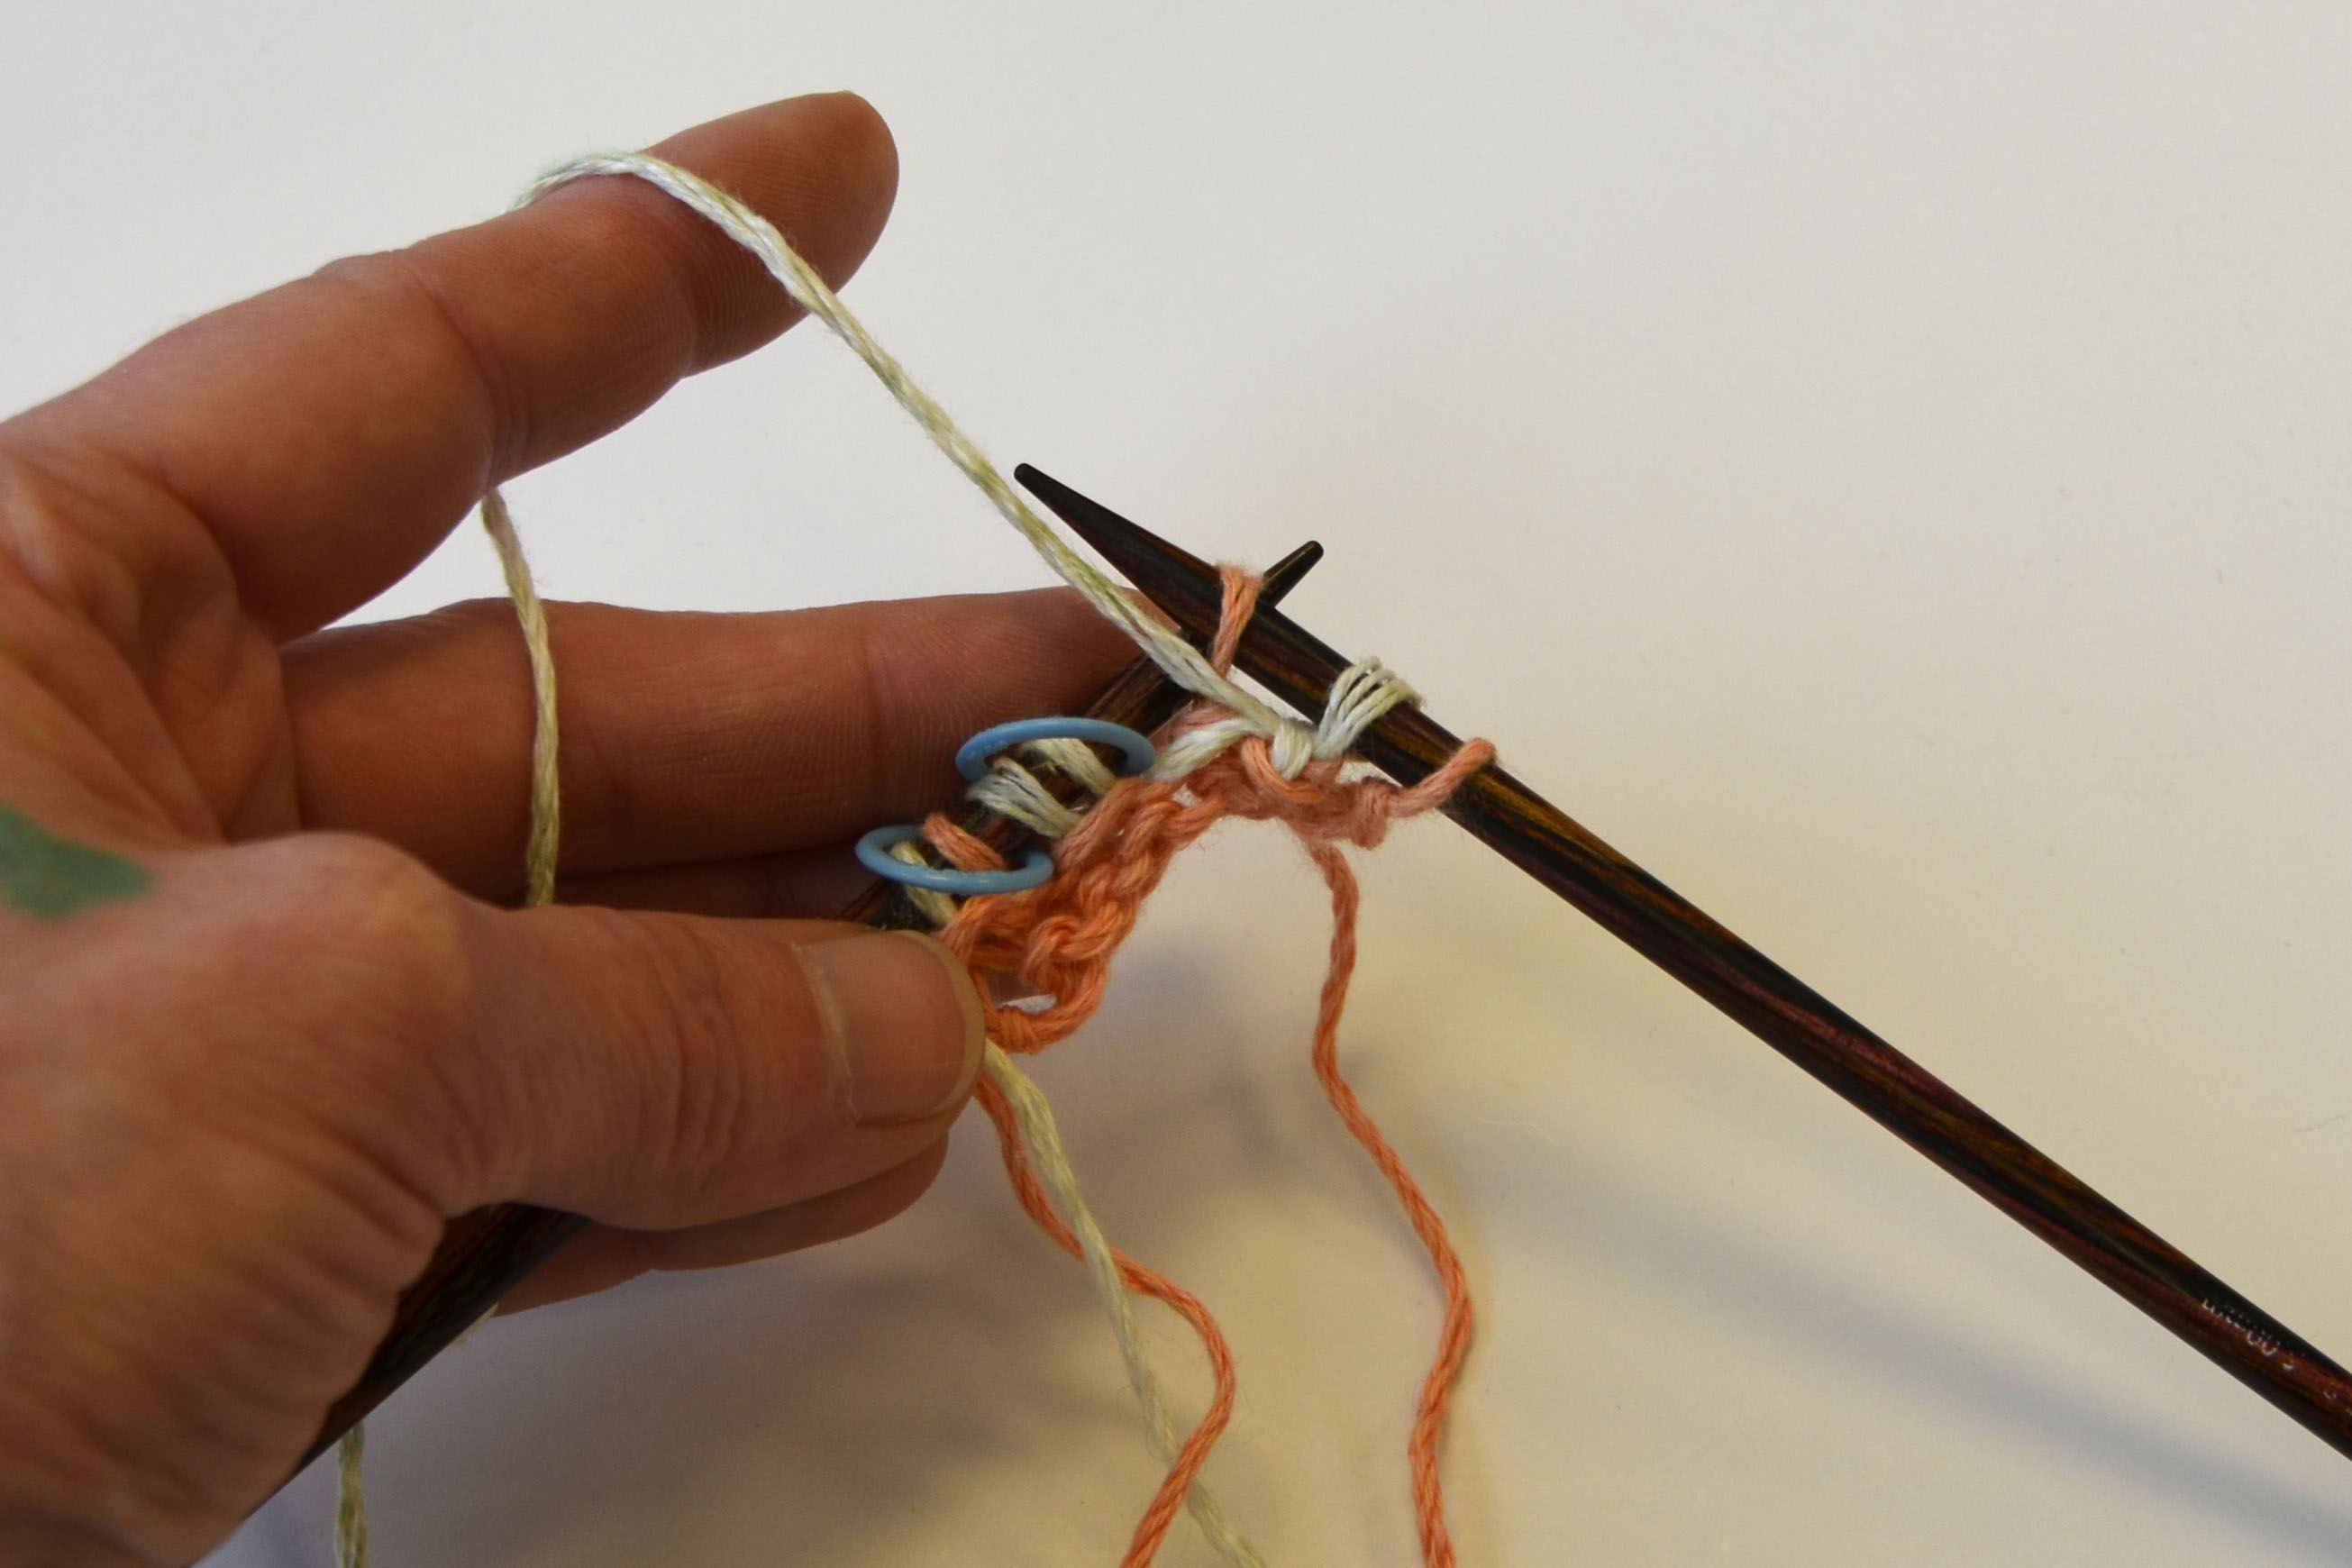
Next I place a stitch marker on my needle. I will always slip this marker when I encounter it. The purpose of stitch markers is generally to remind you of something. In this case, it is to separate the SSC from the increase section.

Traverse_4

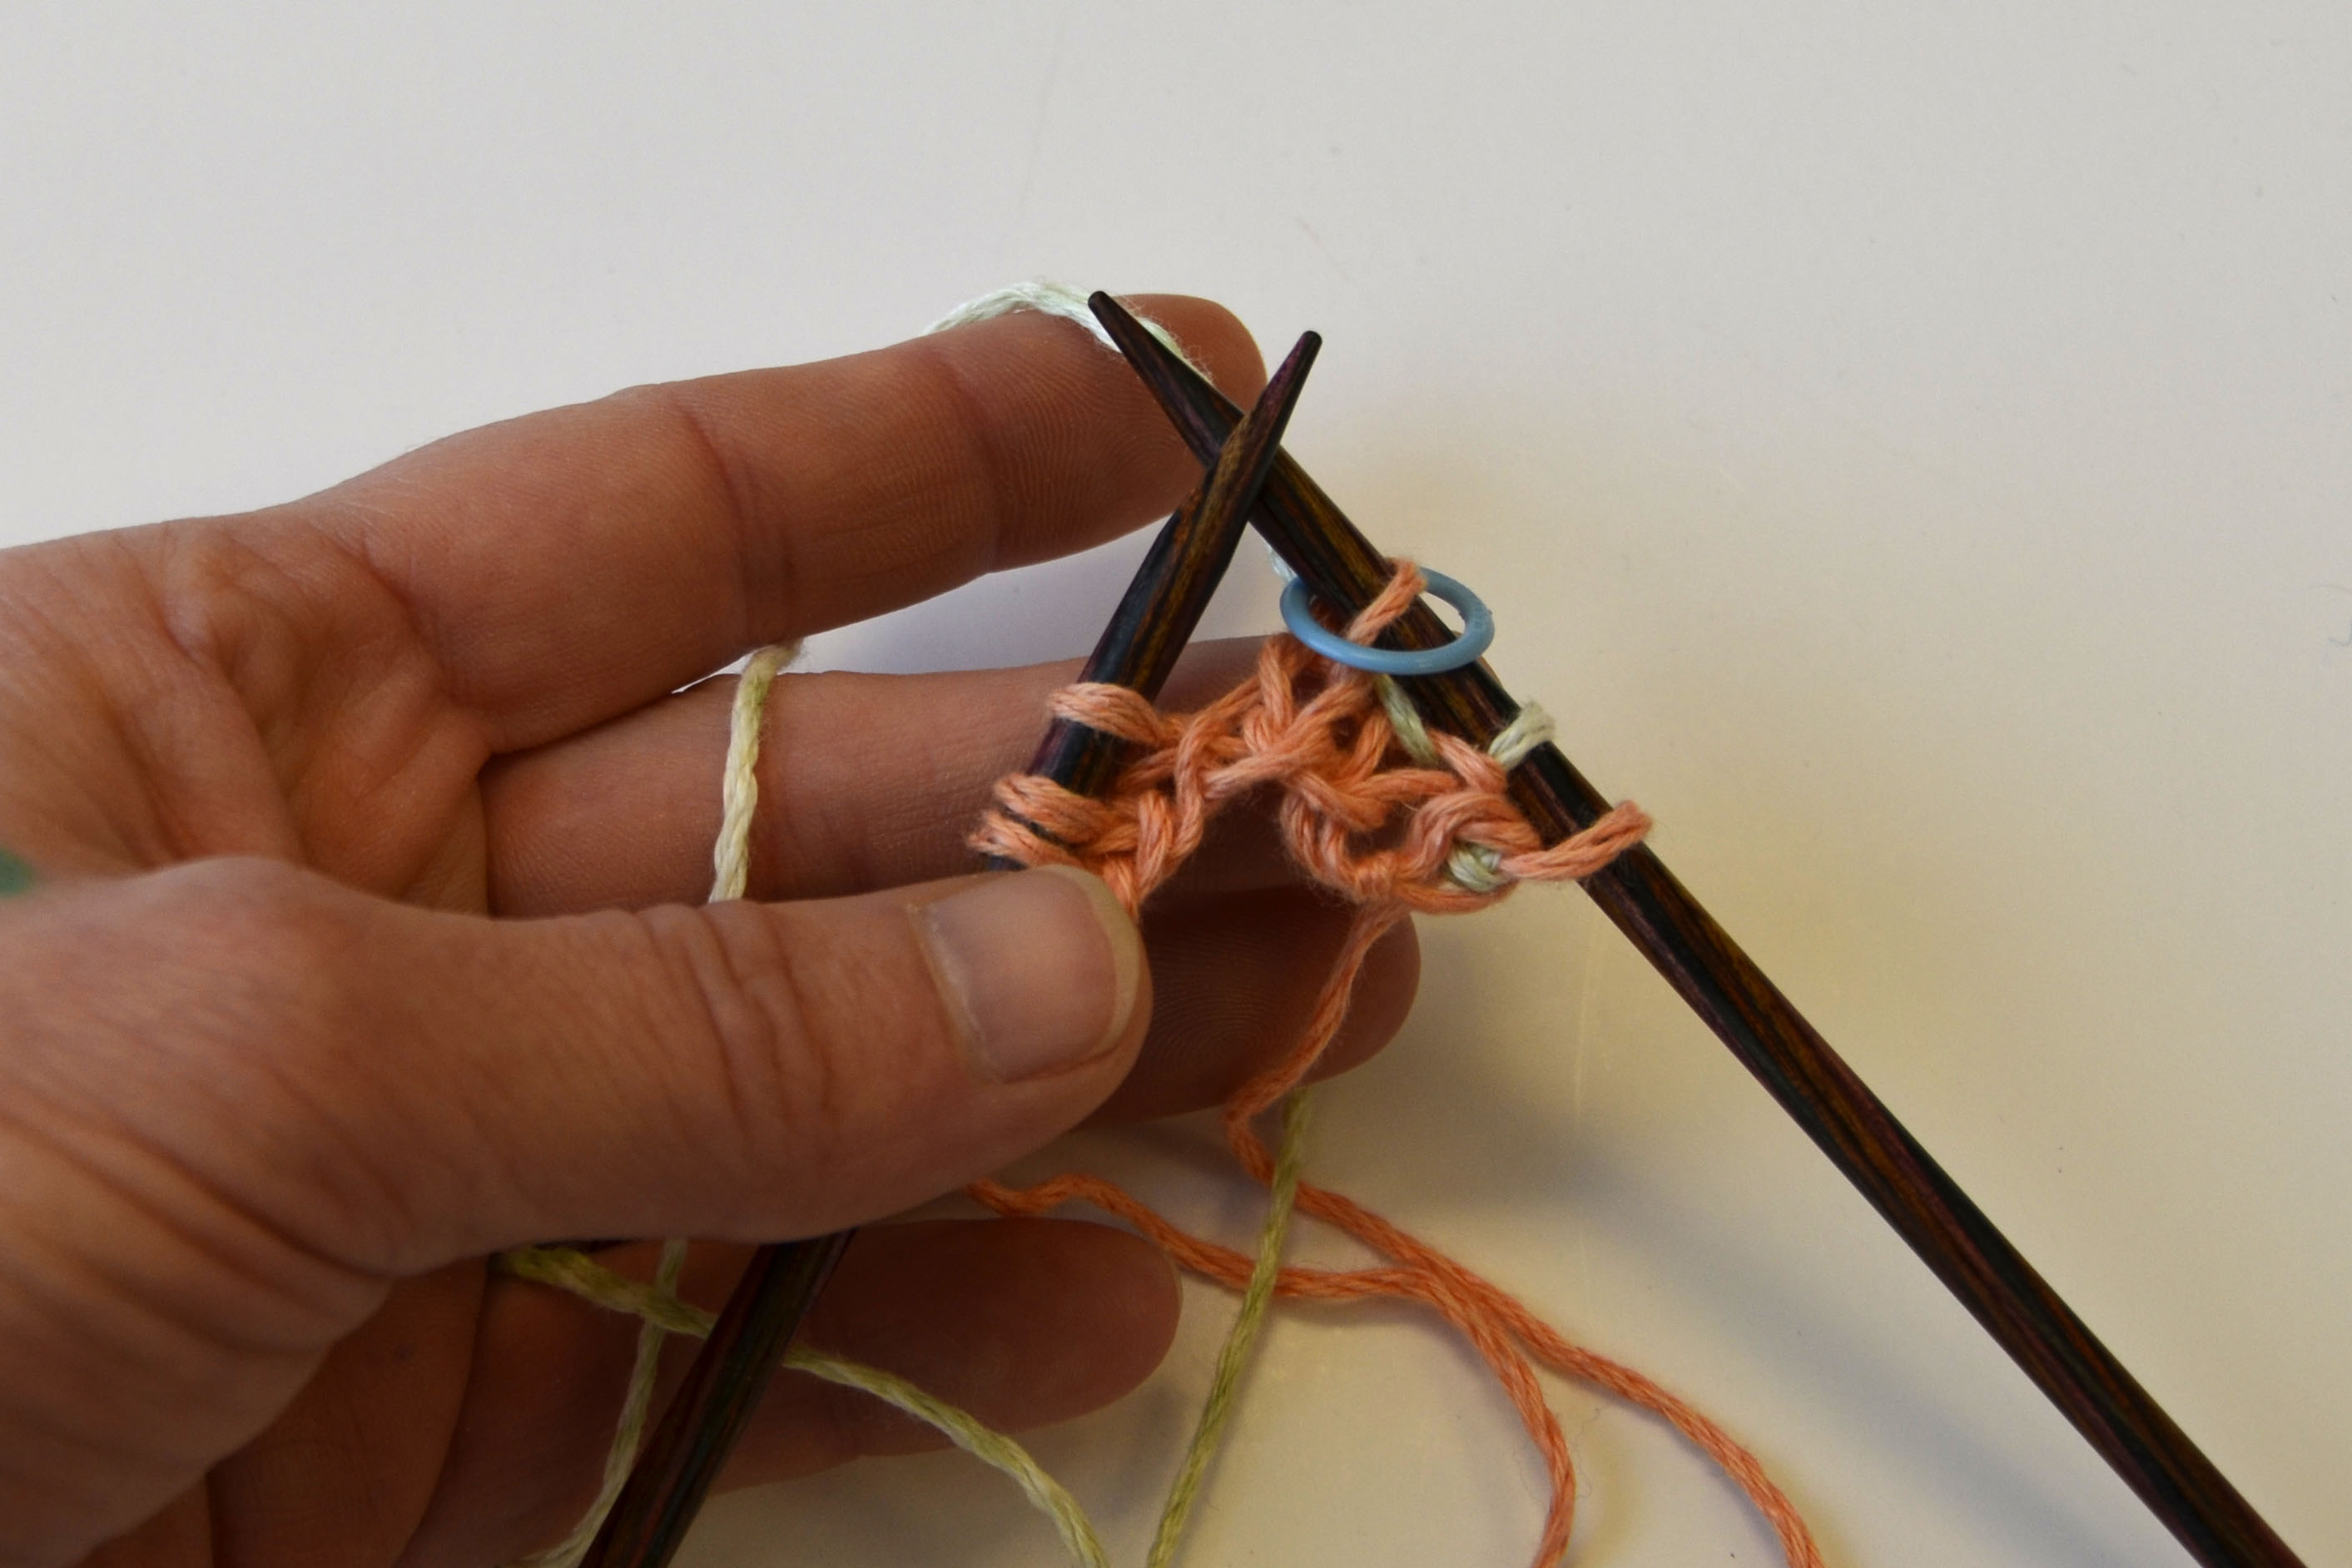
Now I’m going to make my first increase by purling into the front loop, then the back loop of the next stitch (abbreviated pfb). Then I place another stitch marker to indicate the other edge of my increase section. Since I’ve worked my pfb, my increase section now consists of 2 stitches.

Traverse_5

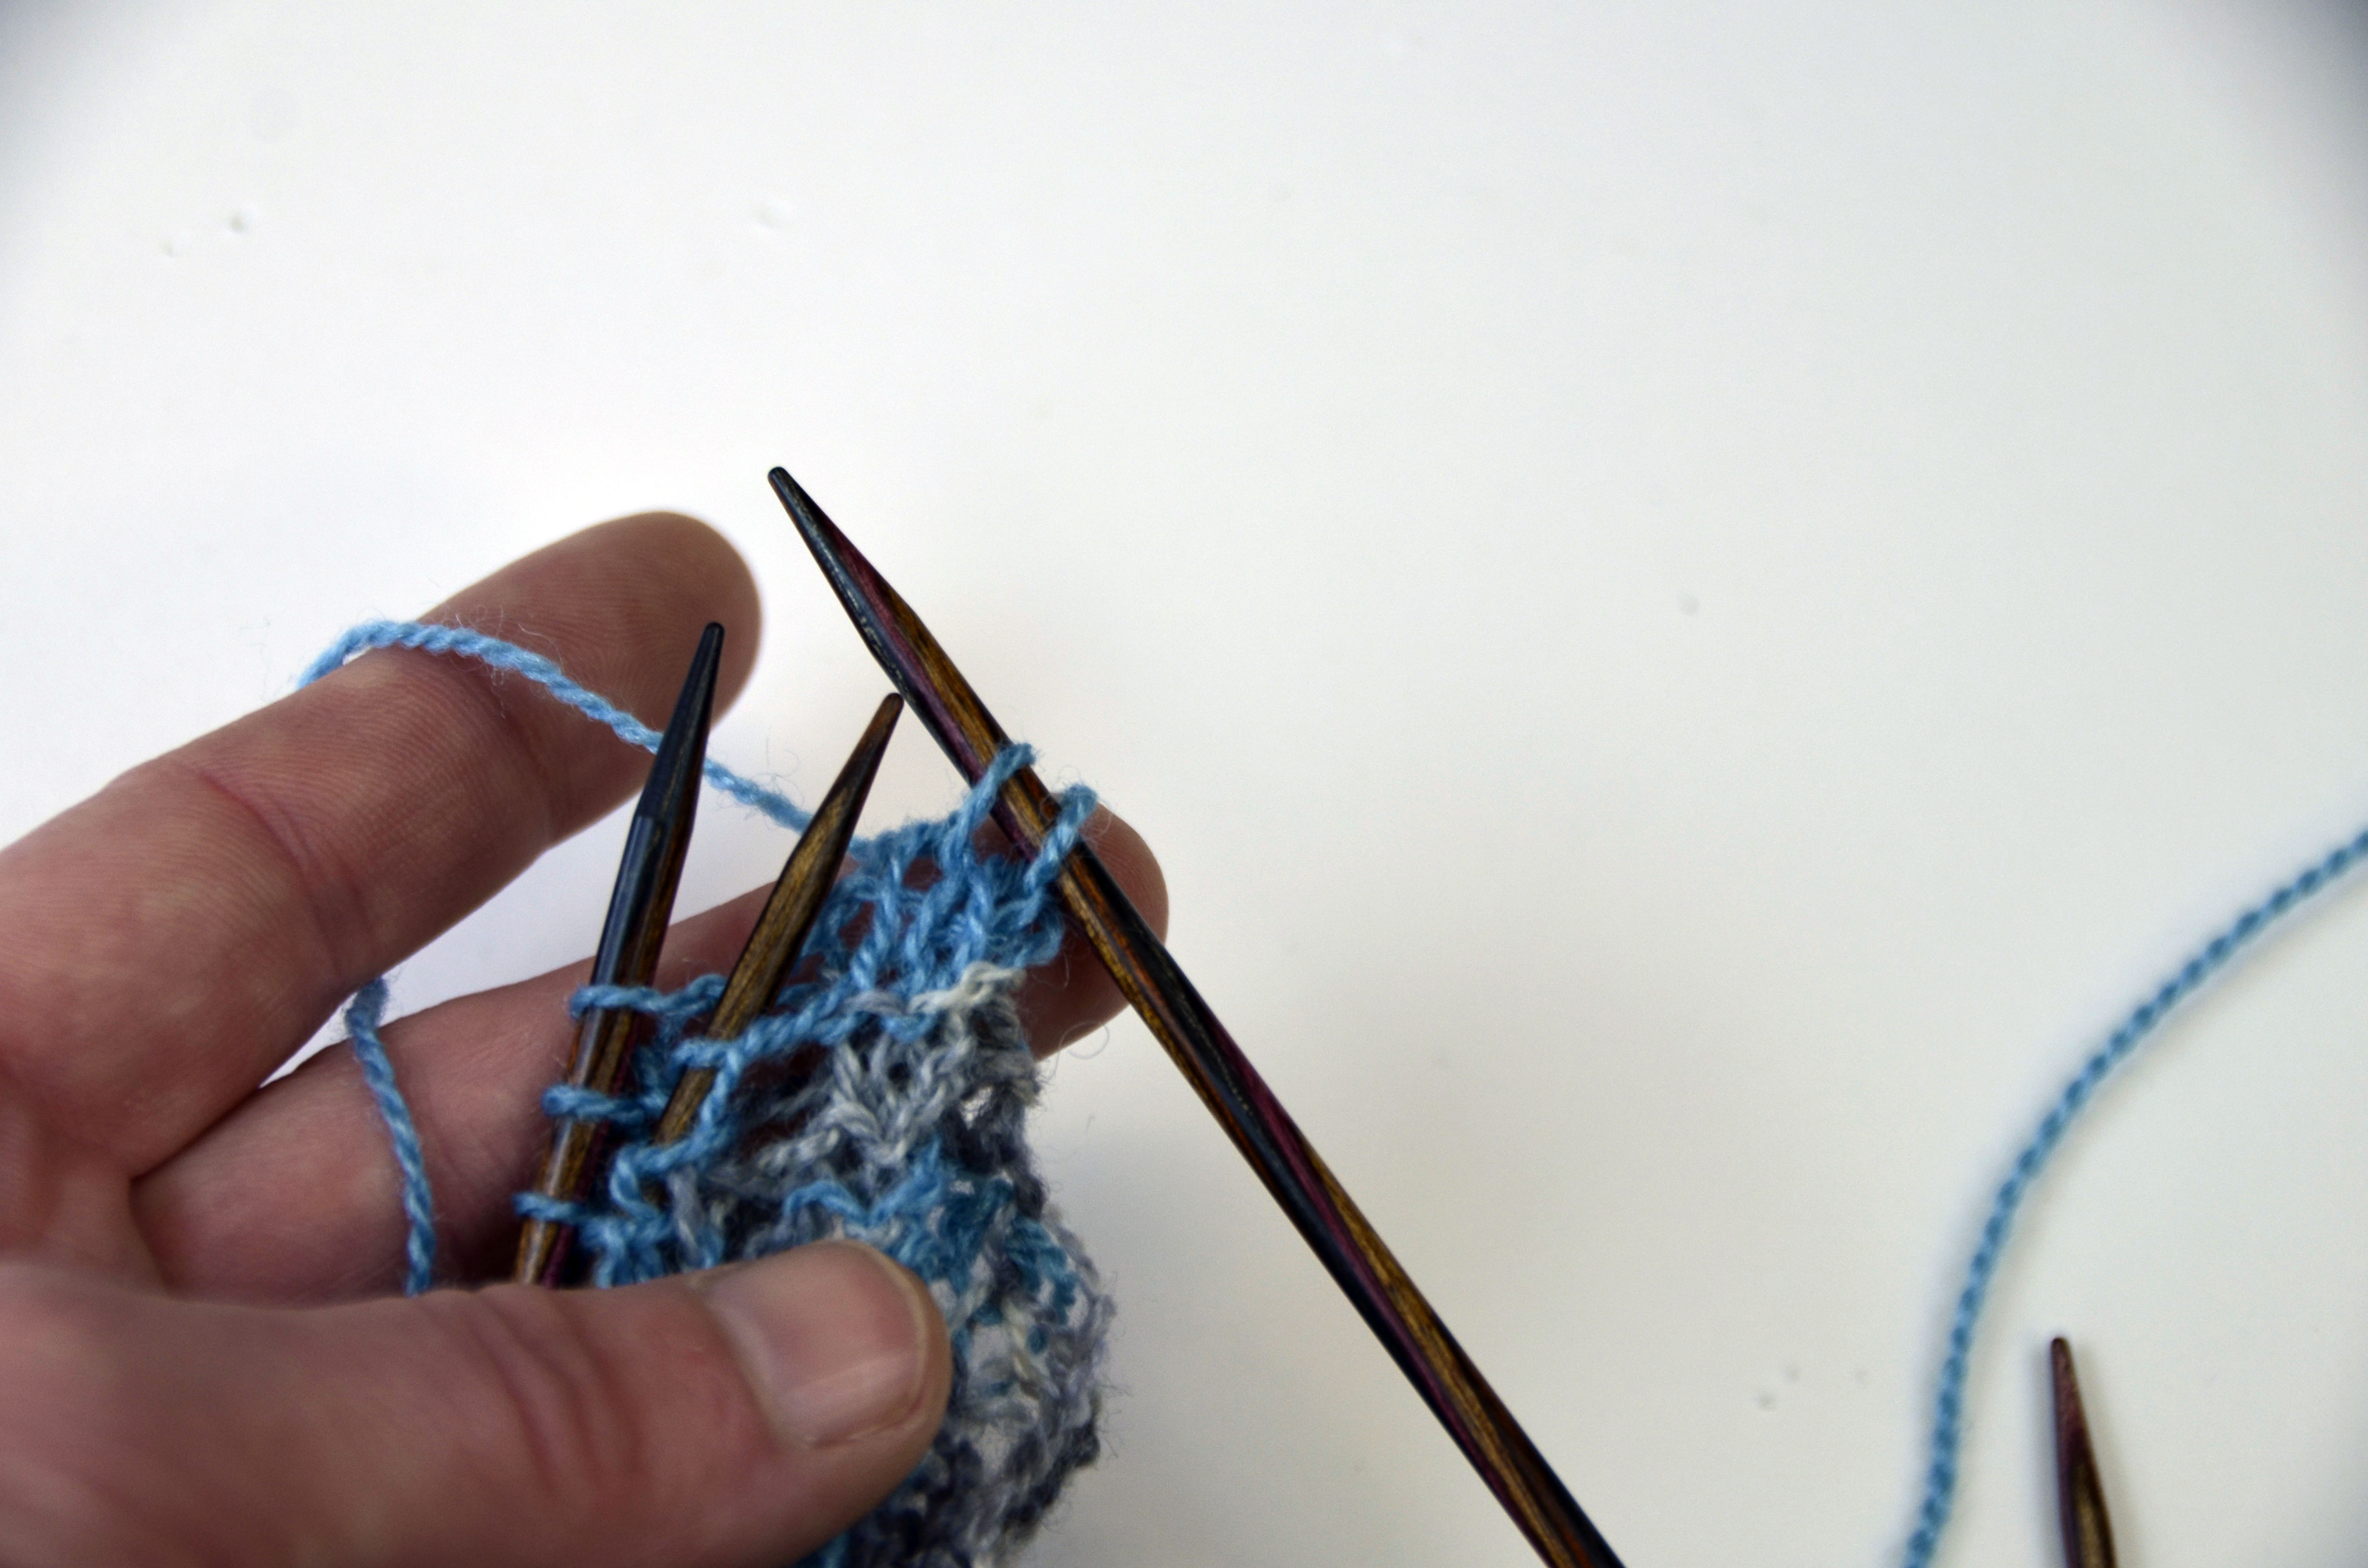
Then I finish off my row by working another SSC over the last 3 stitches.

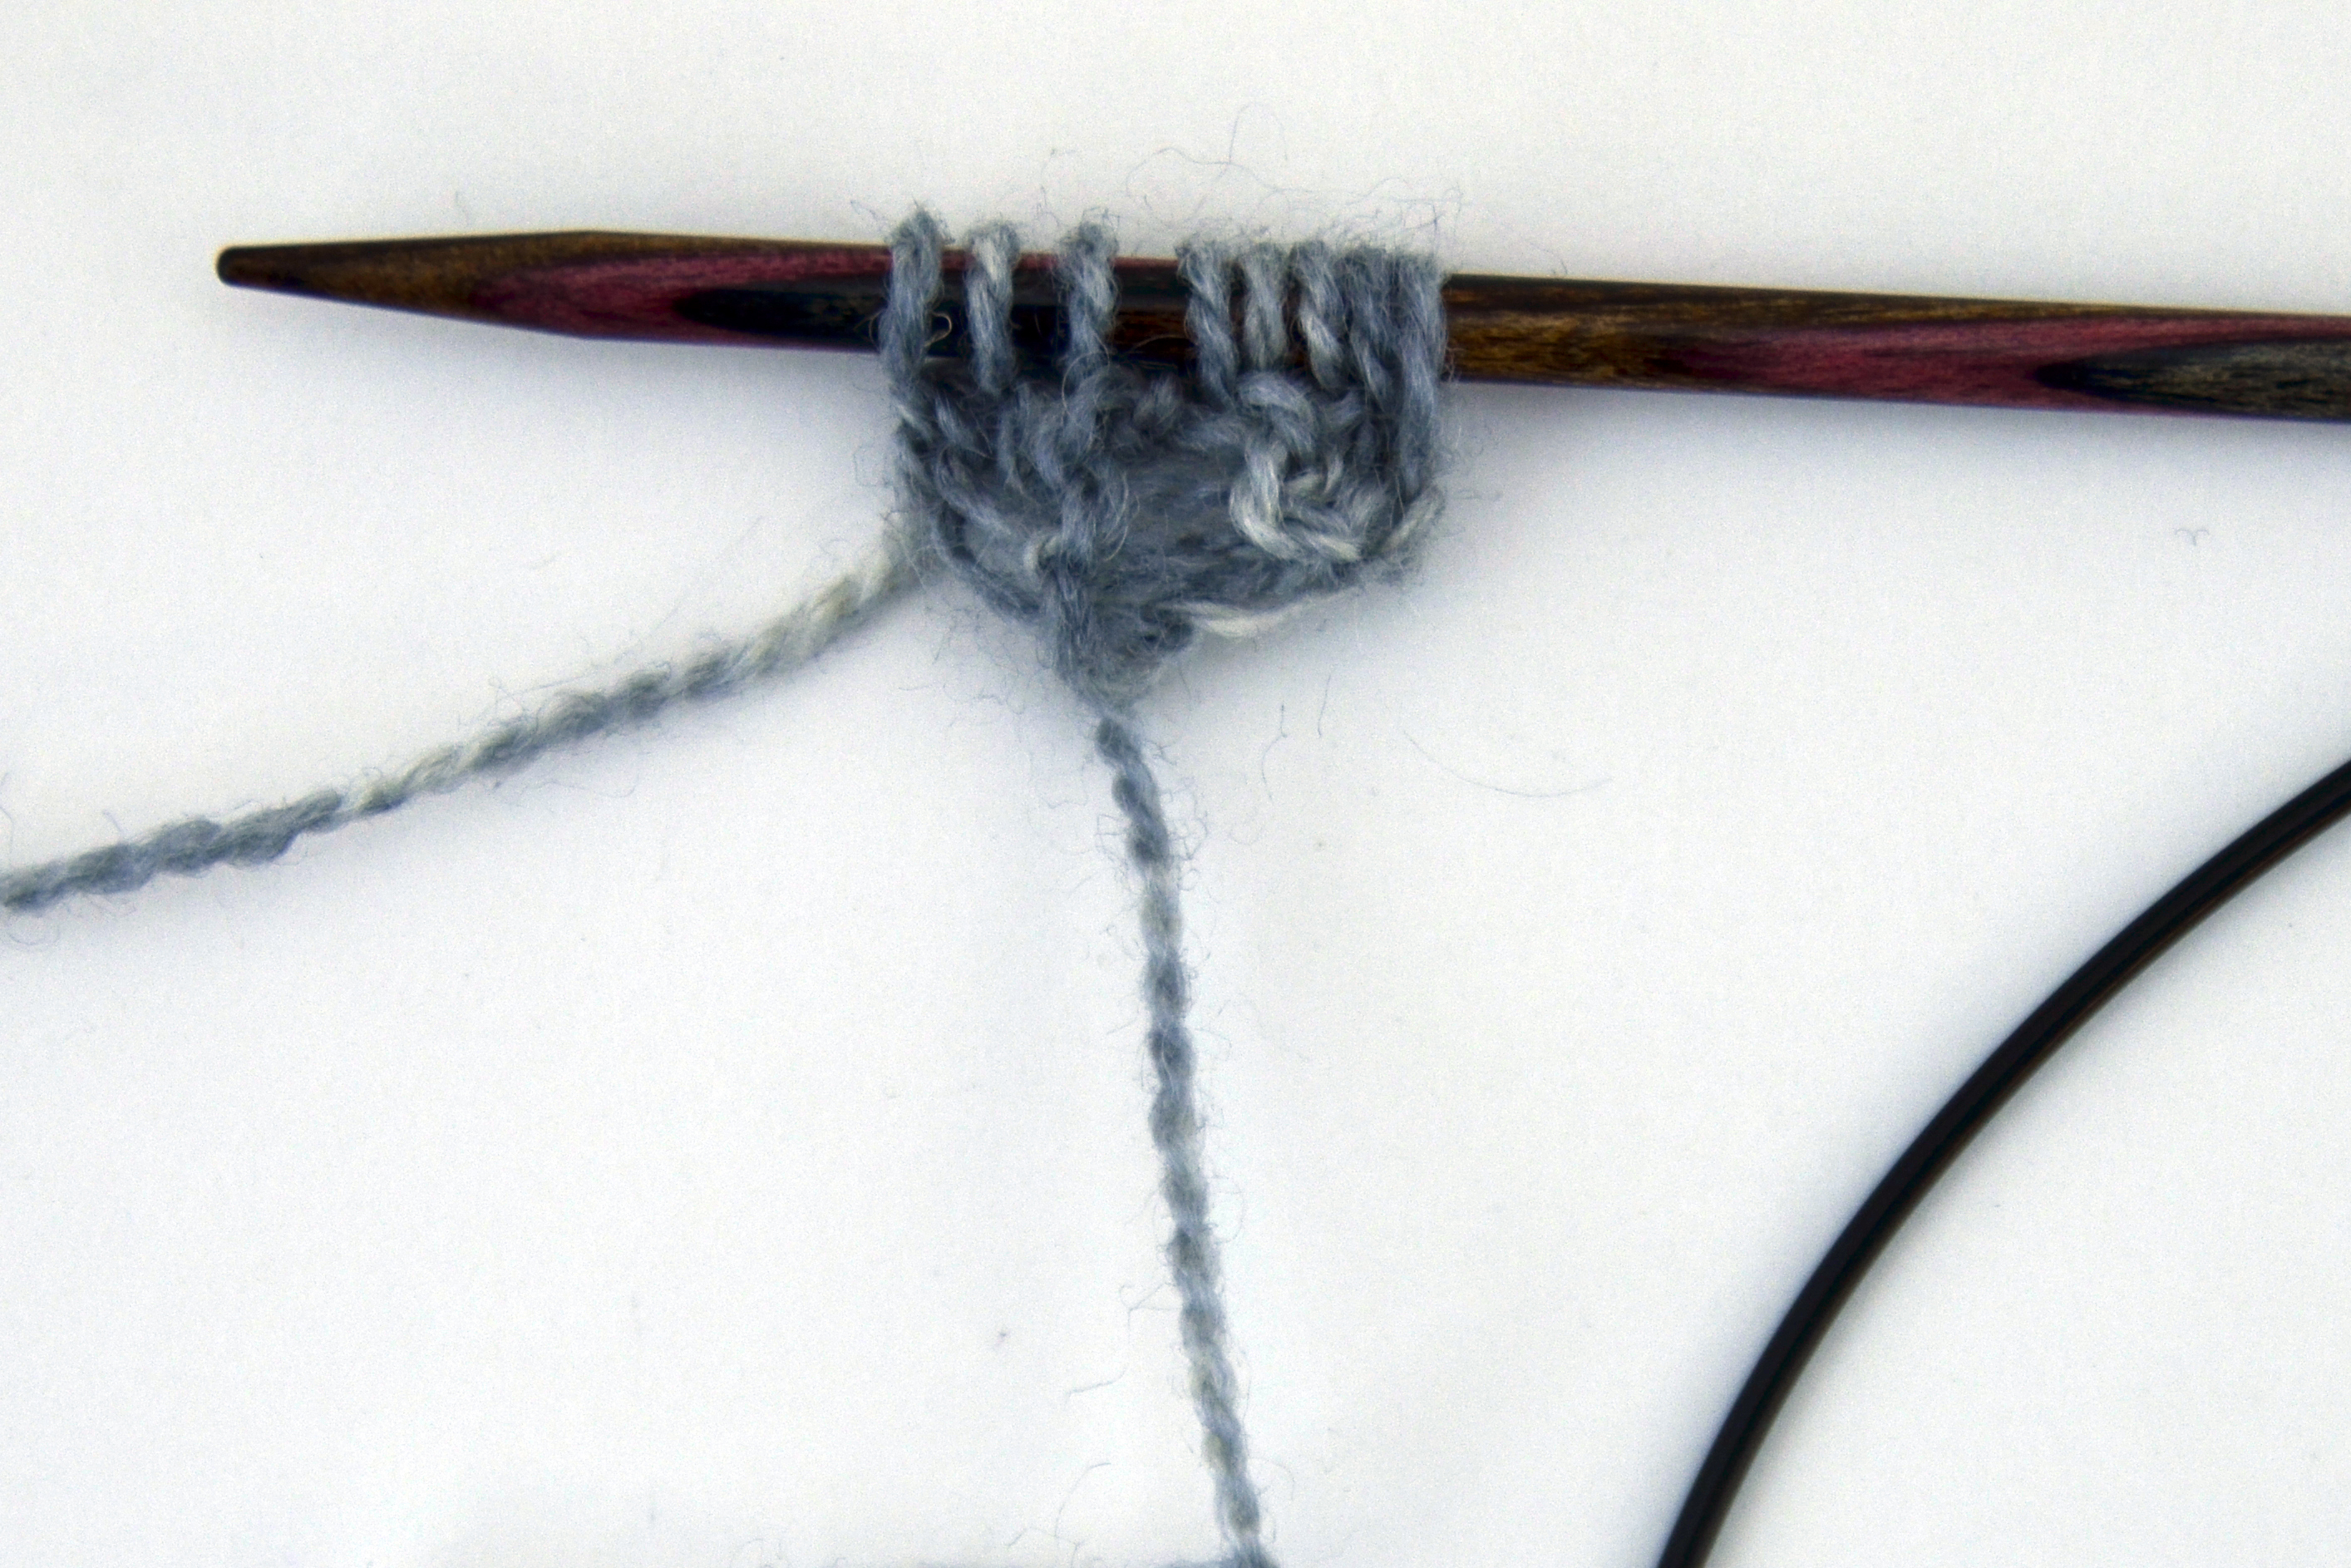
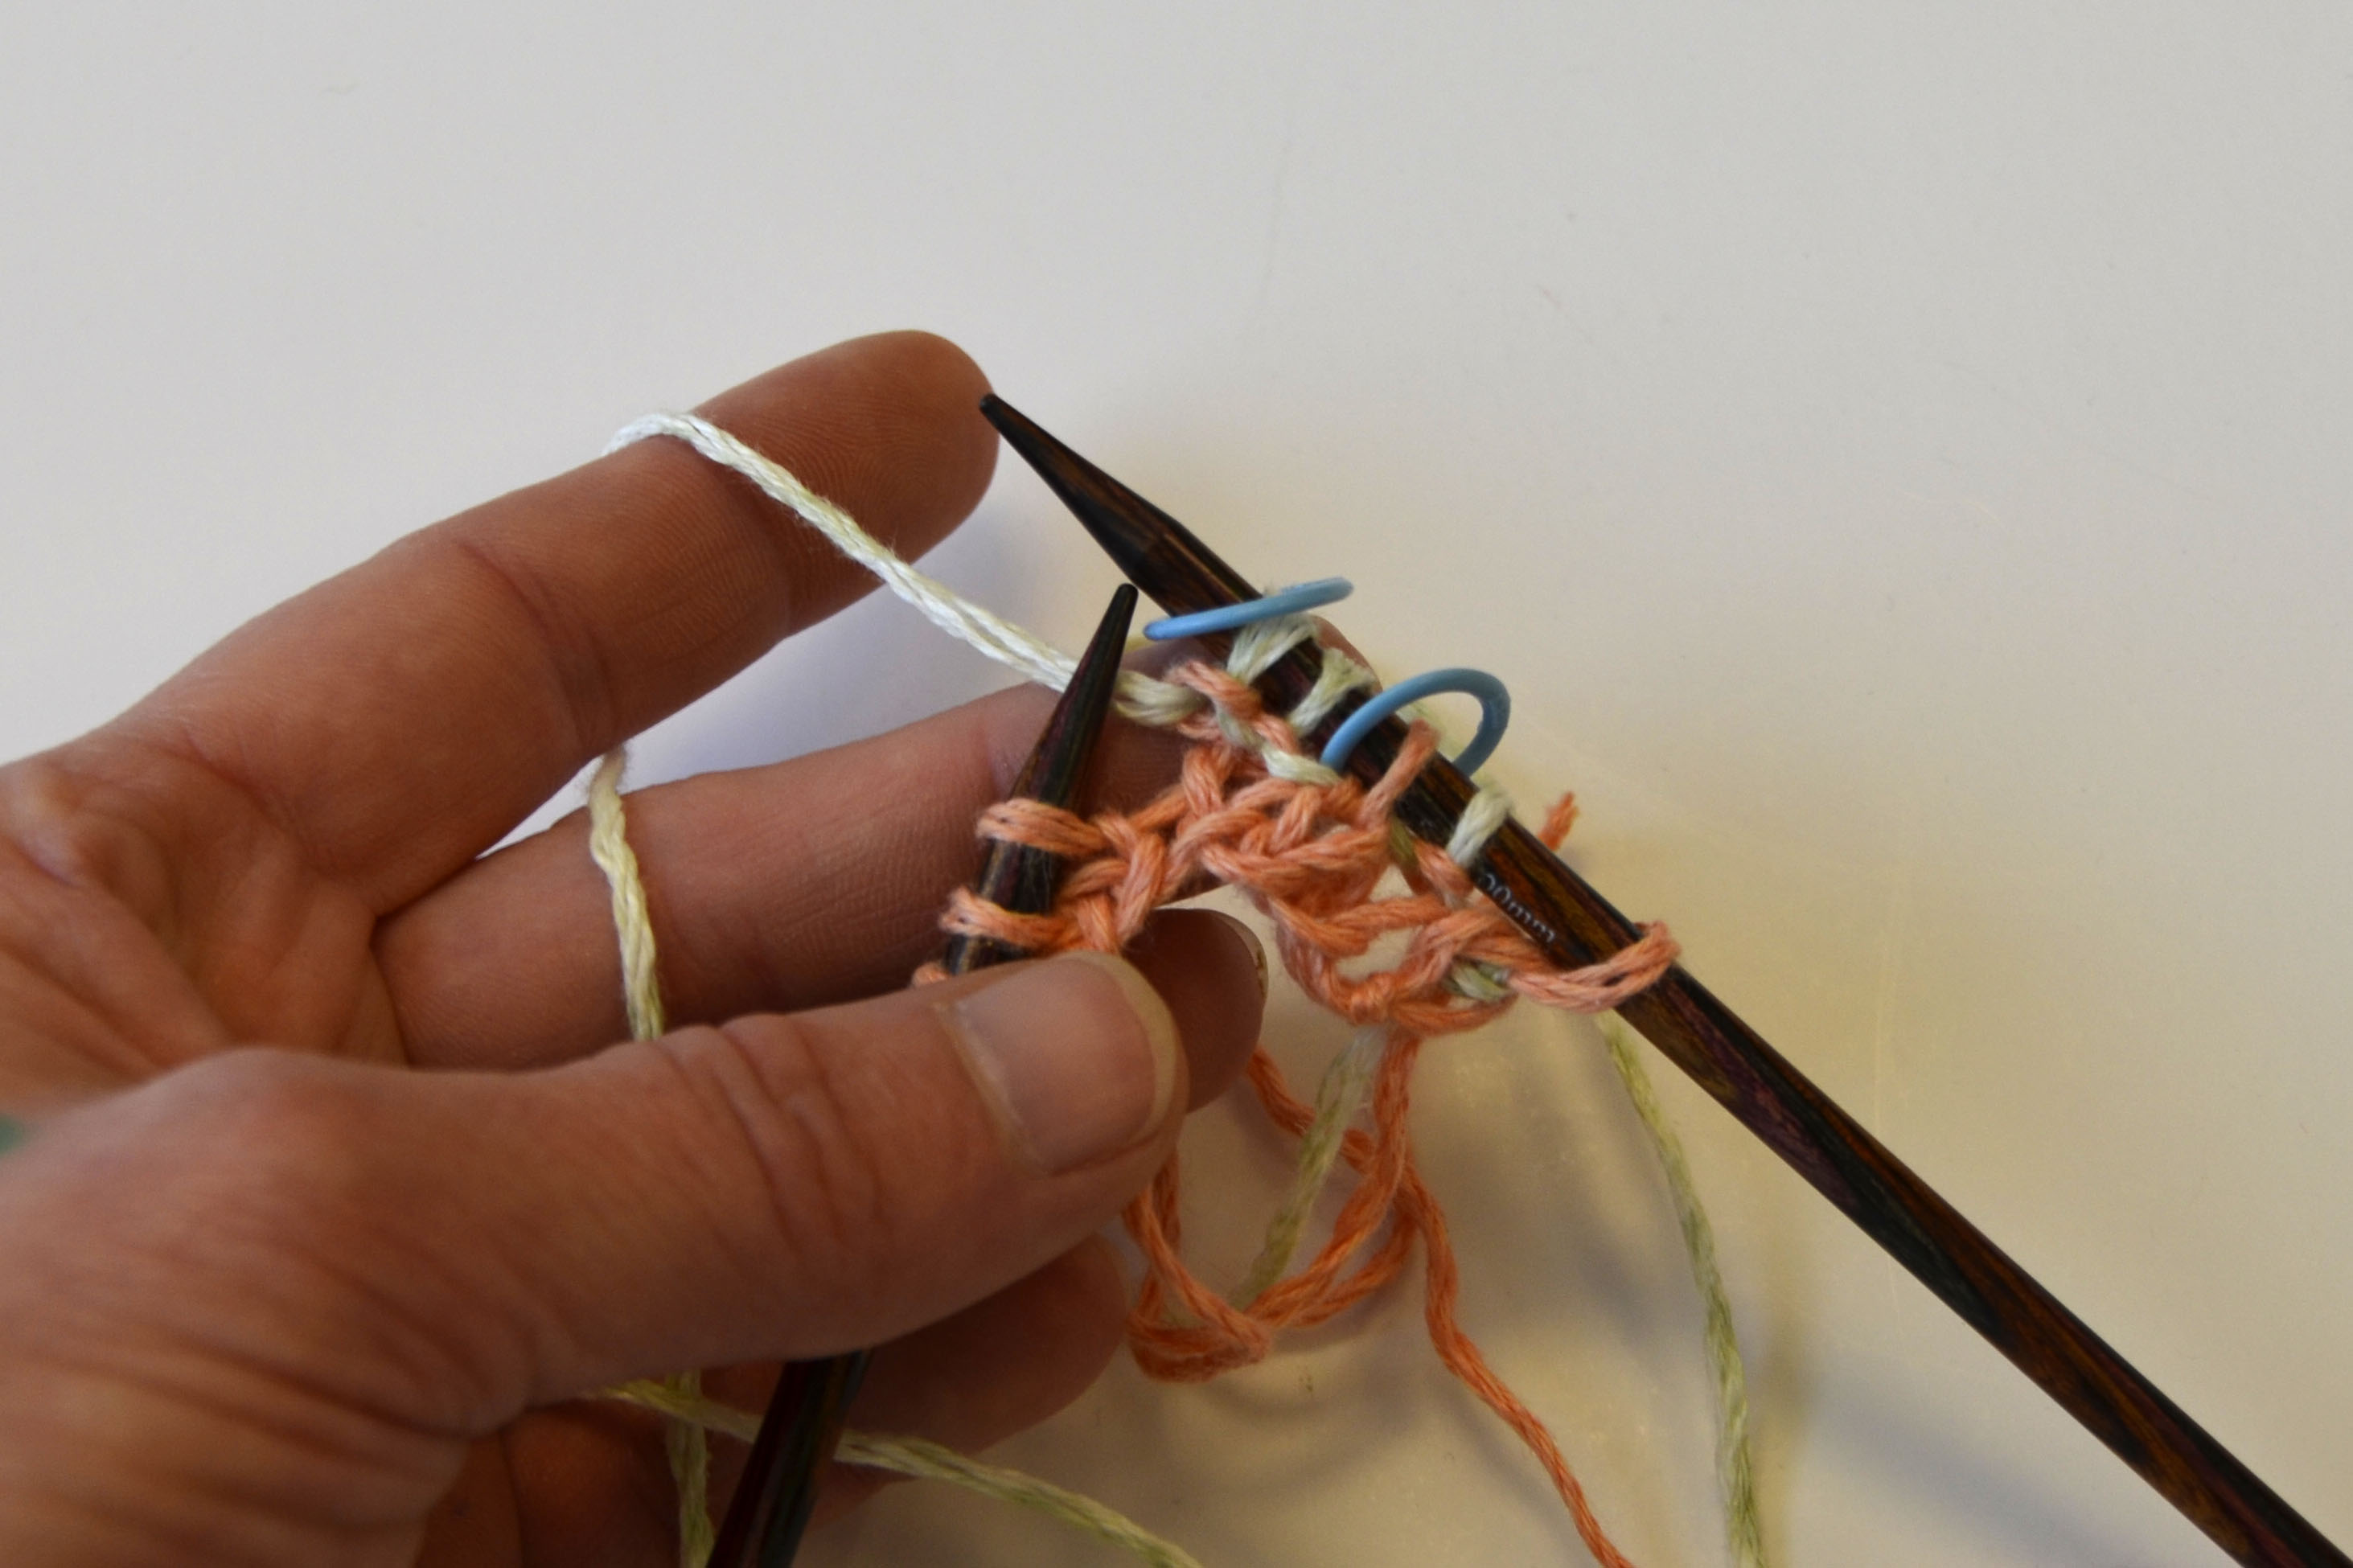
On the following (WS) row, I will work my SSC as: slip 1, k1, slip 1. Because stitches are always slipped with the yarn held on the wrong  side of the work, my yarn is in front as I’m slipping the stitch.

Traverse_6

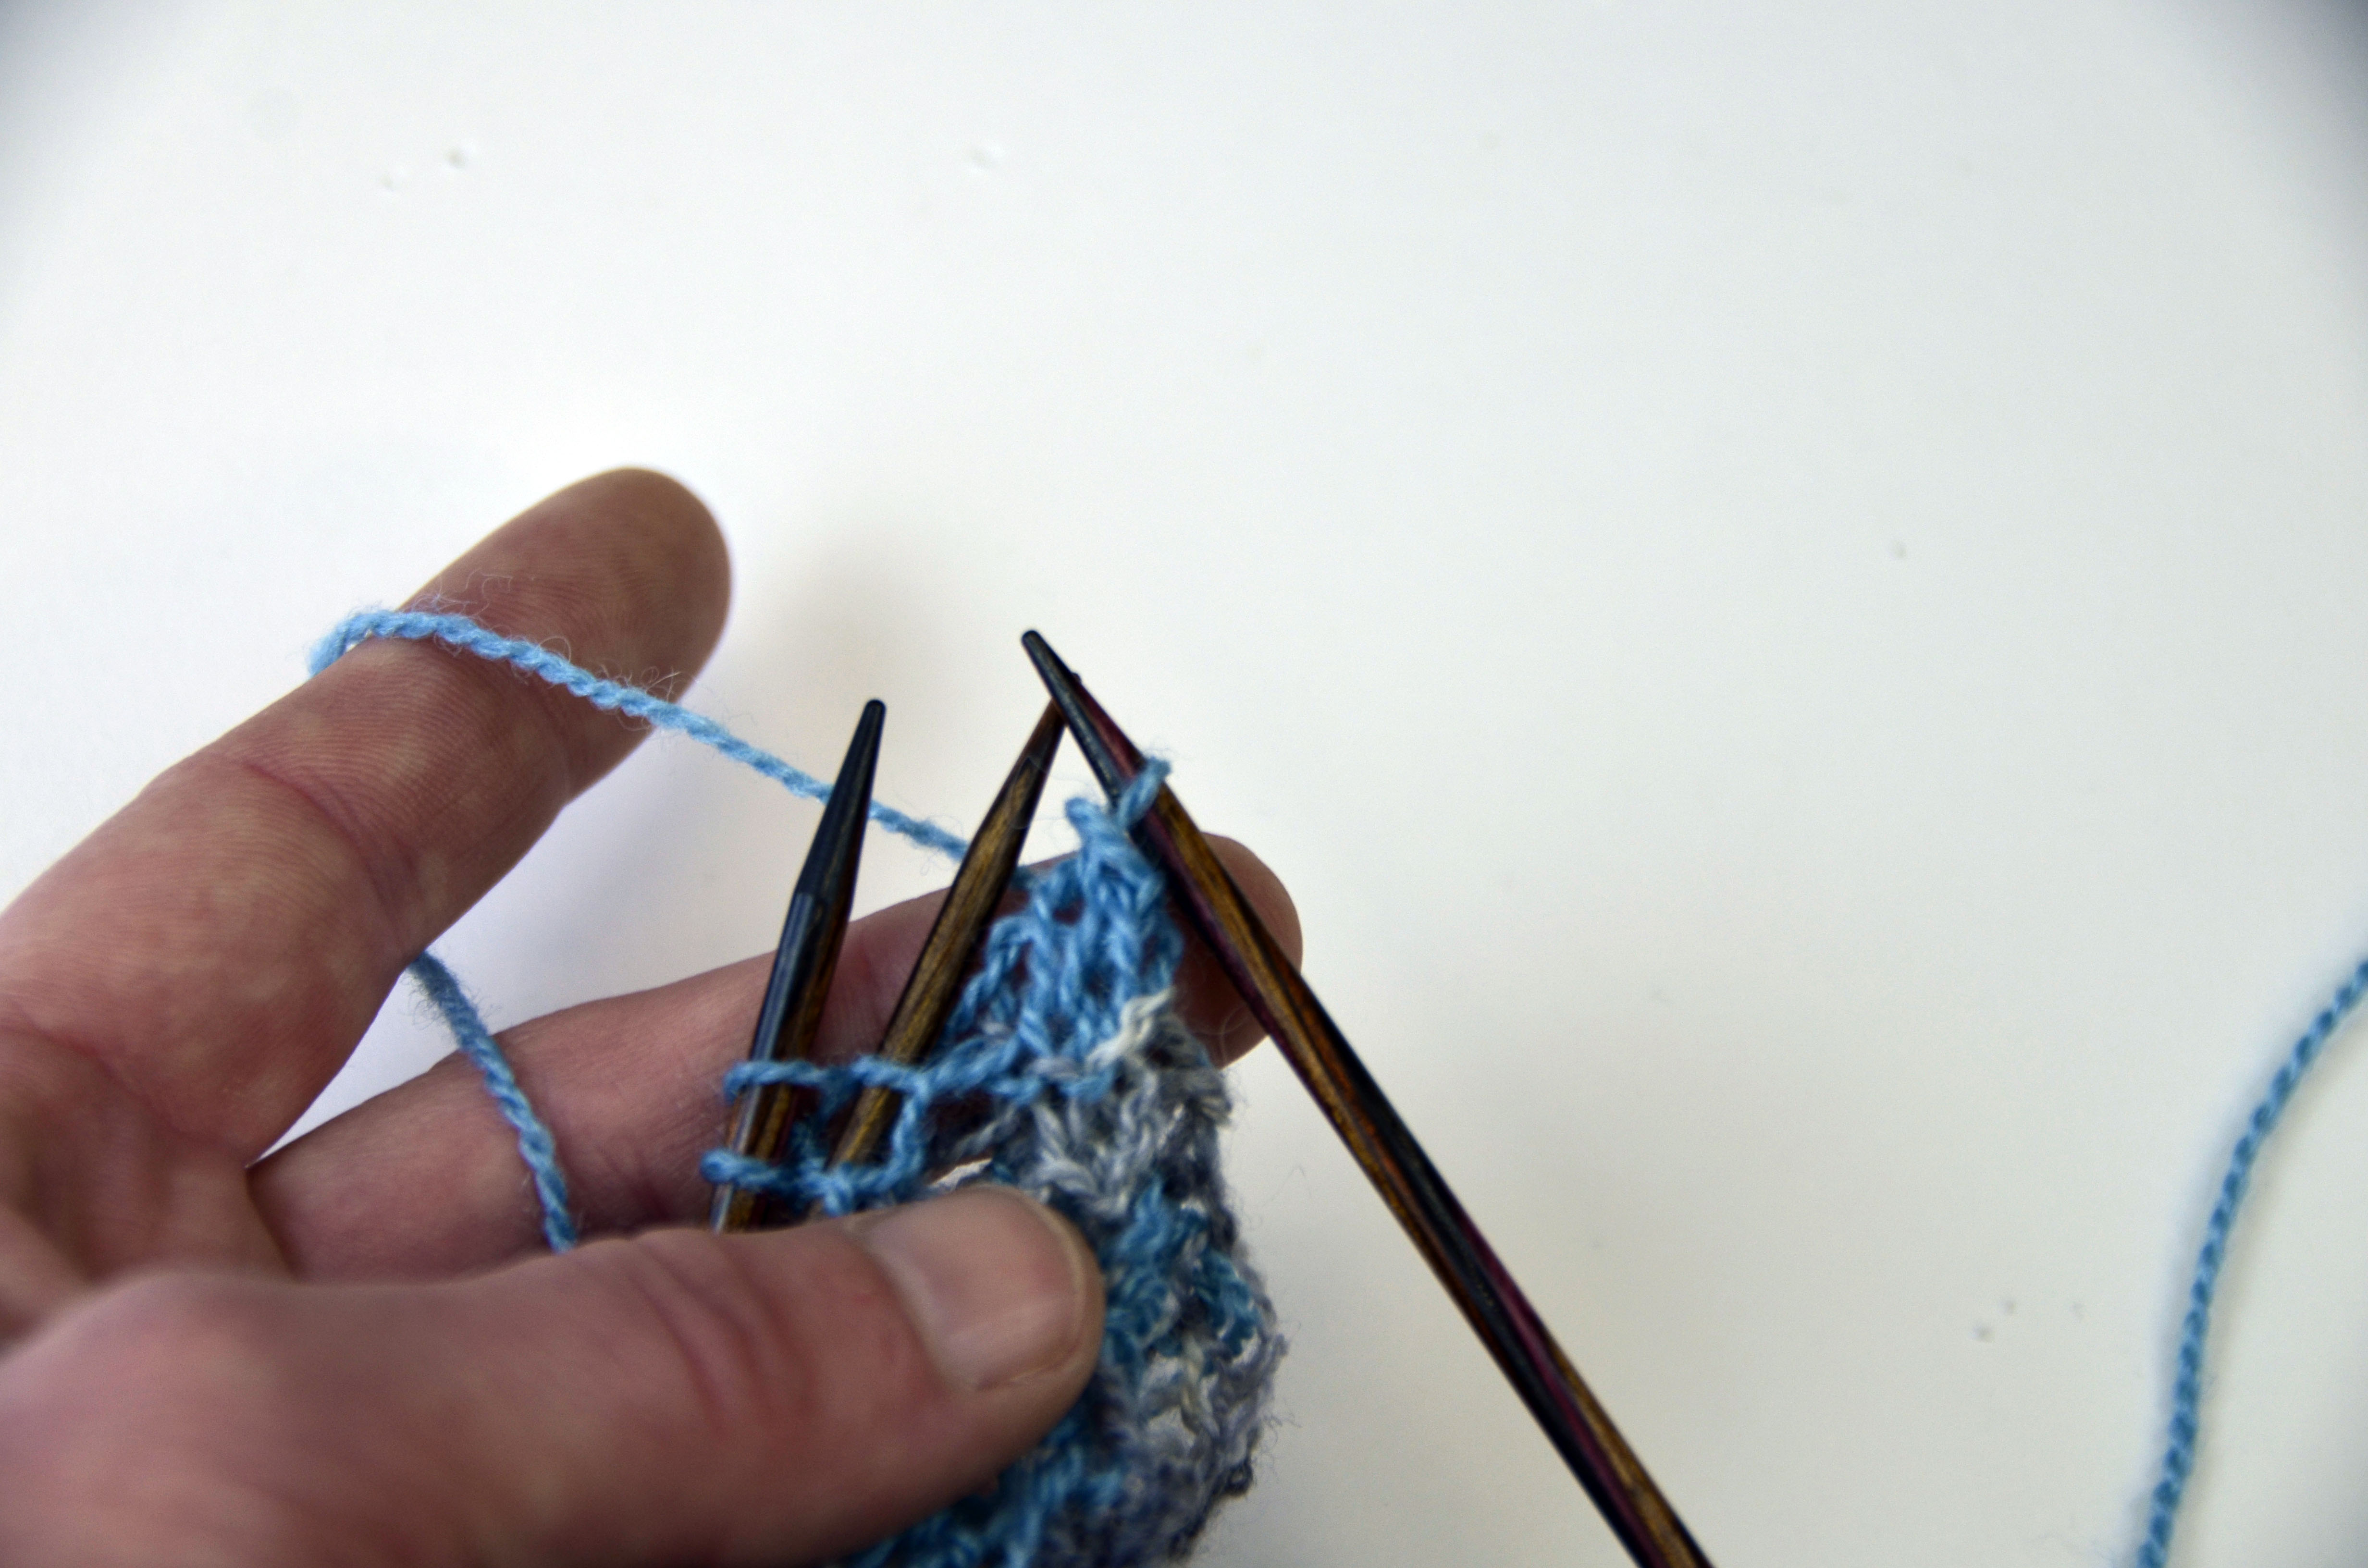
And here’s what it looks like after the cast-on and the first 3 rows. It’s a start!

Traverse_7

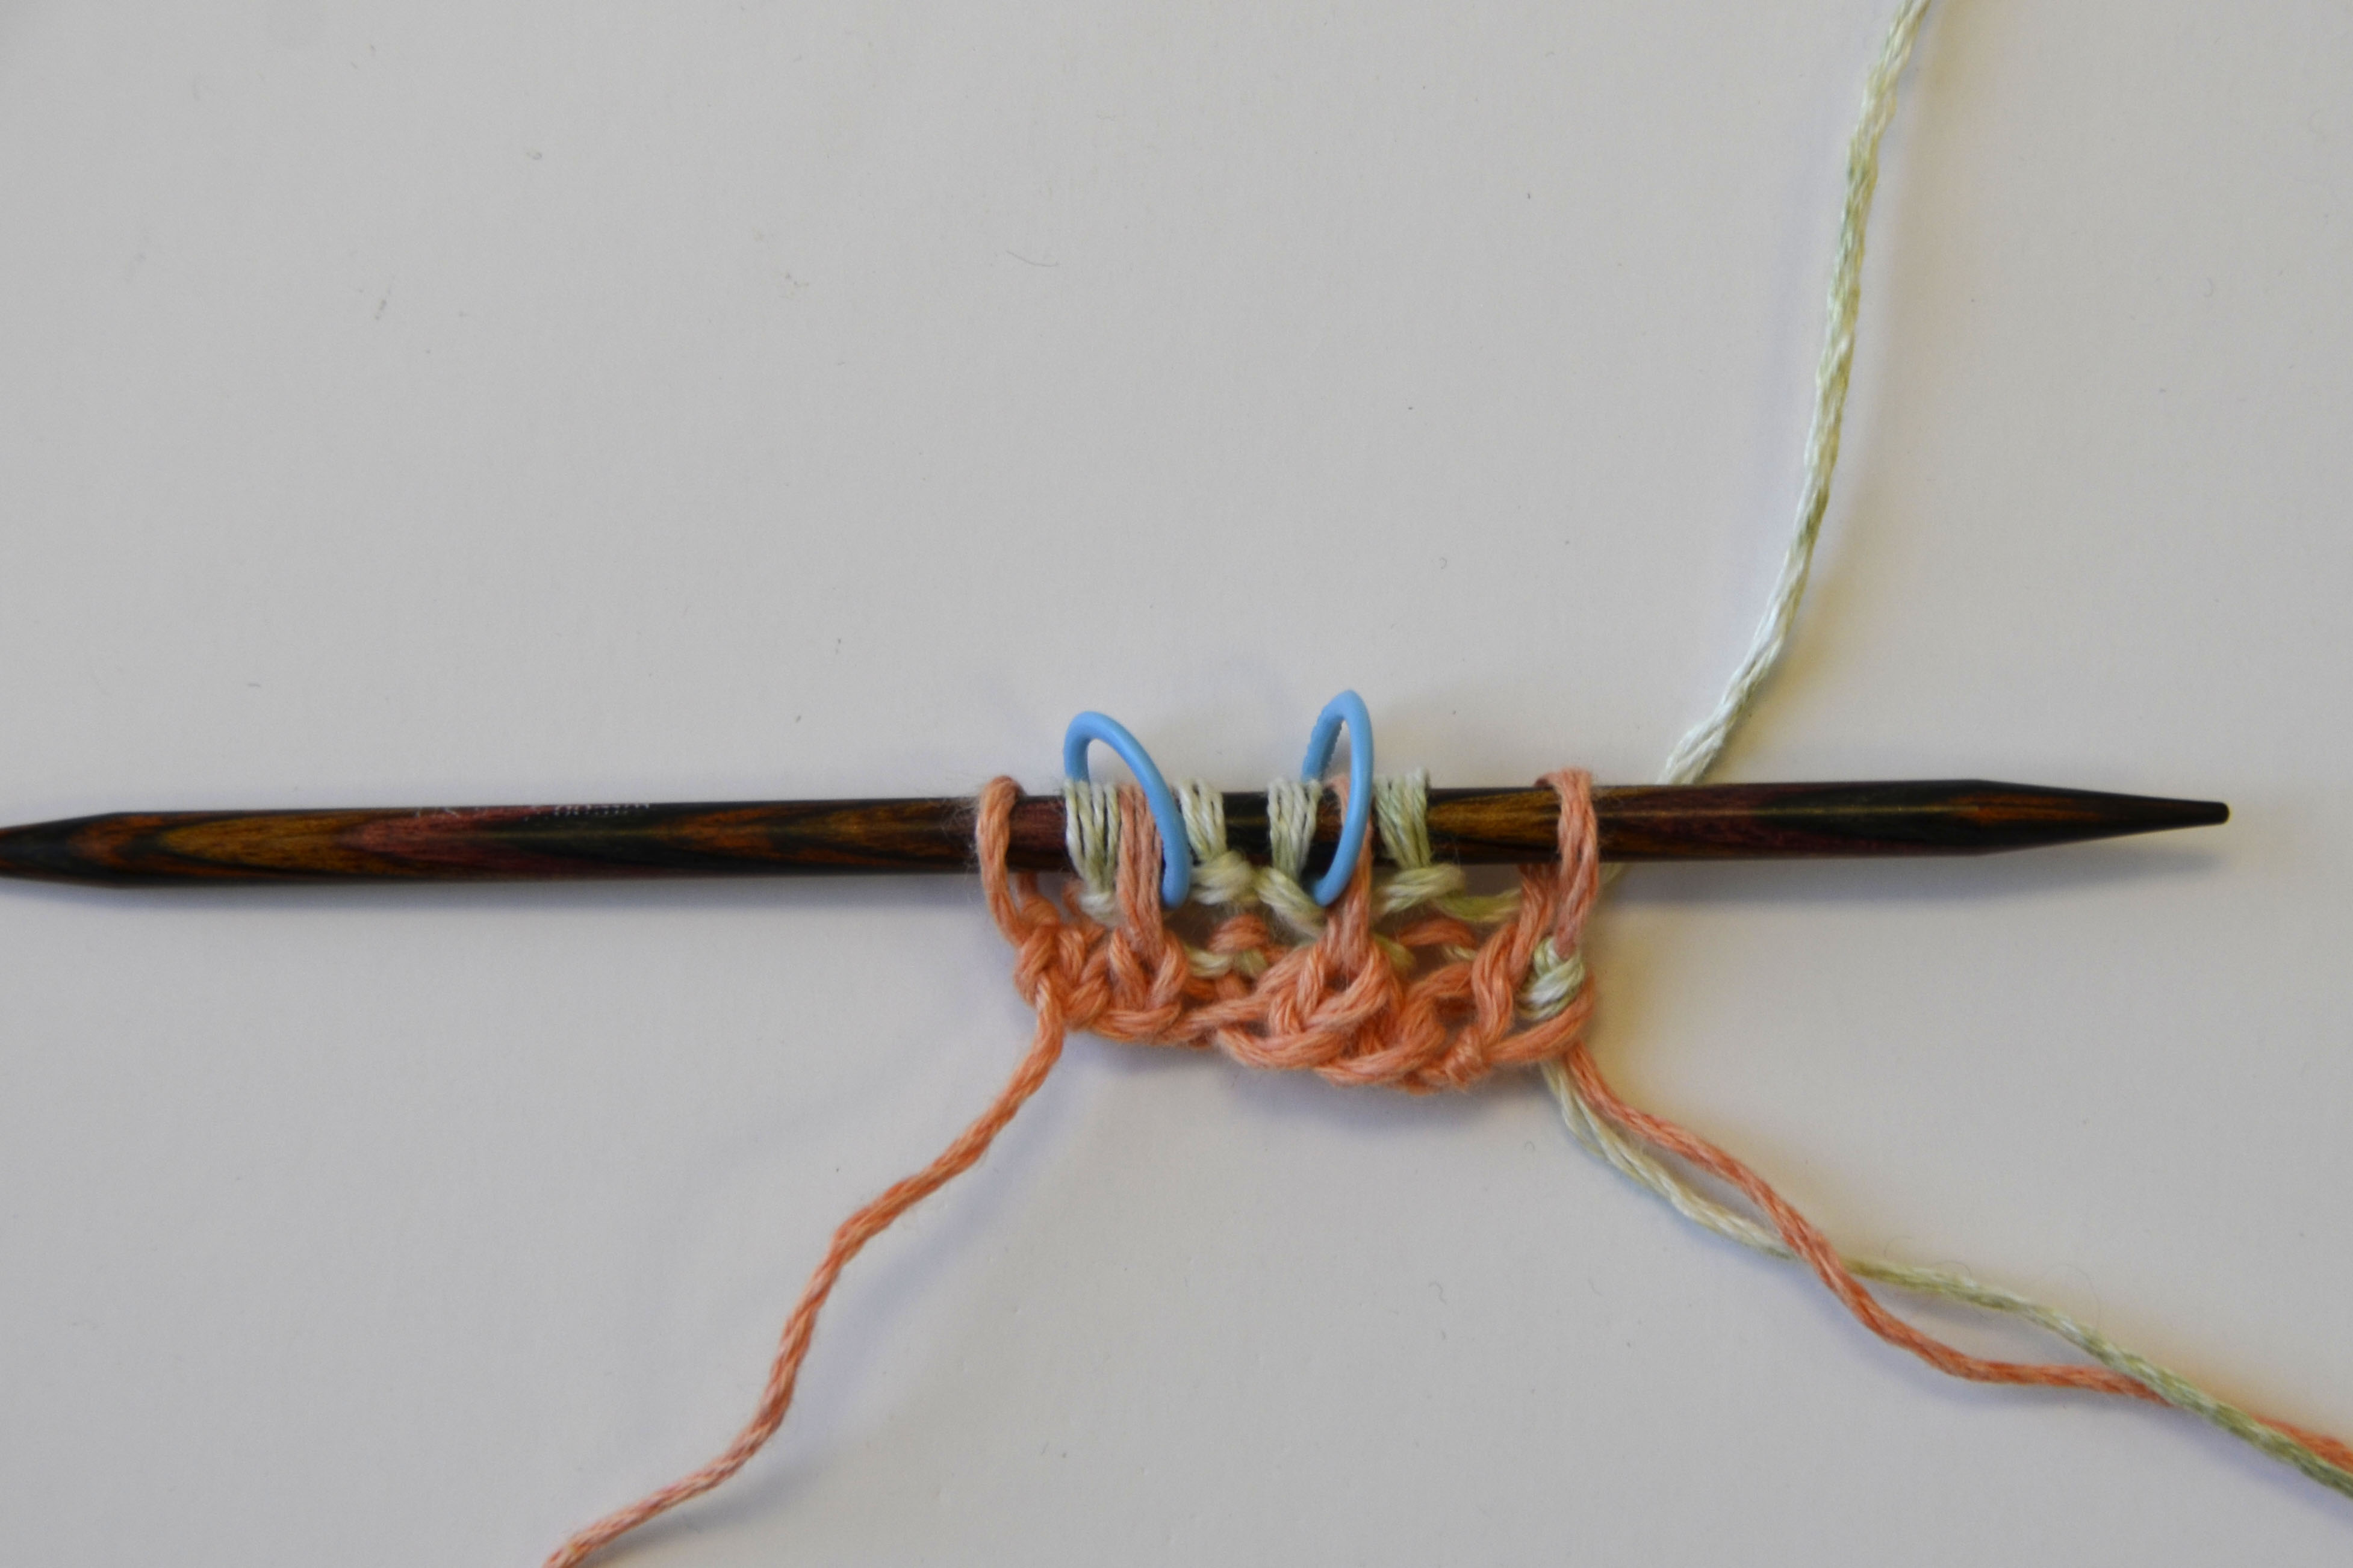
Here’s how things look after the first increase section. My markers are still separating the slip stitch columns from the center section which has grown from 1 stitch to 10.

Traverse_8

Increases always occur every 4 rows, on right side MC rows, by purling into the front and back of the stitch just after that first marker.

Traverse_8_withtext

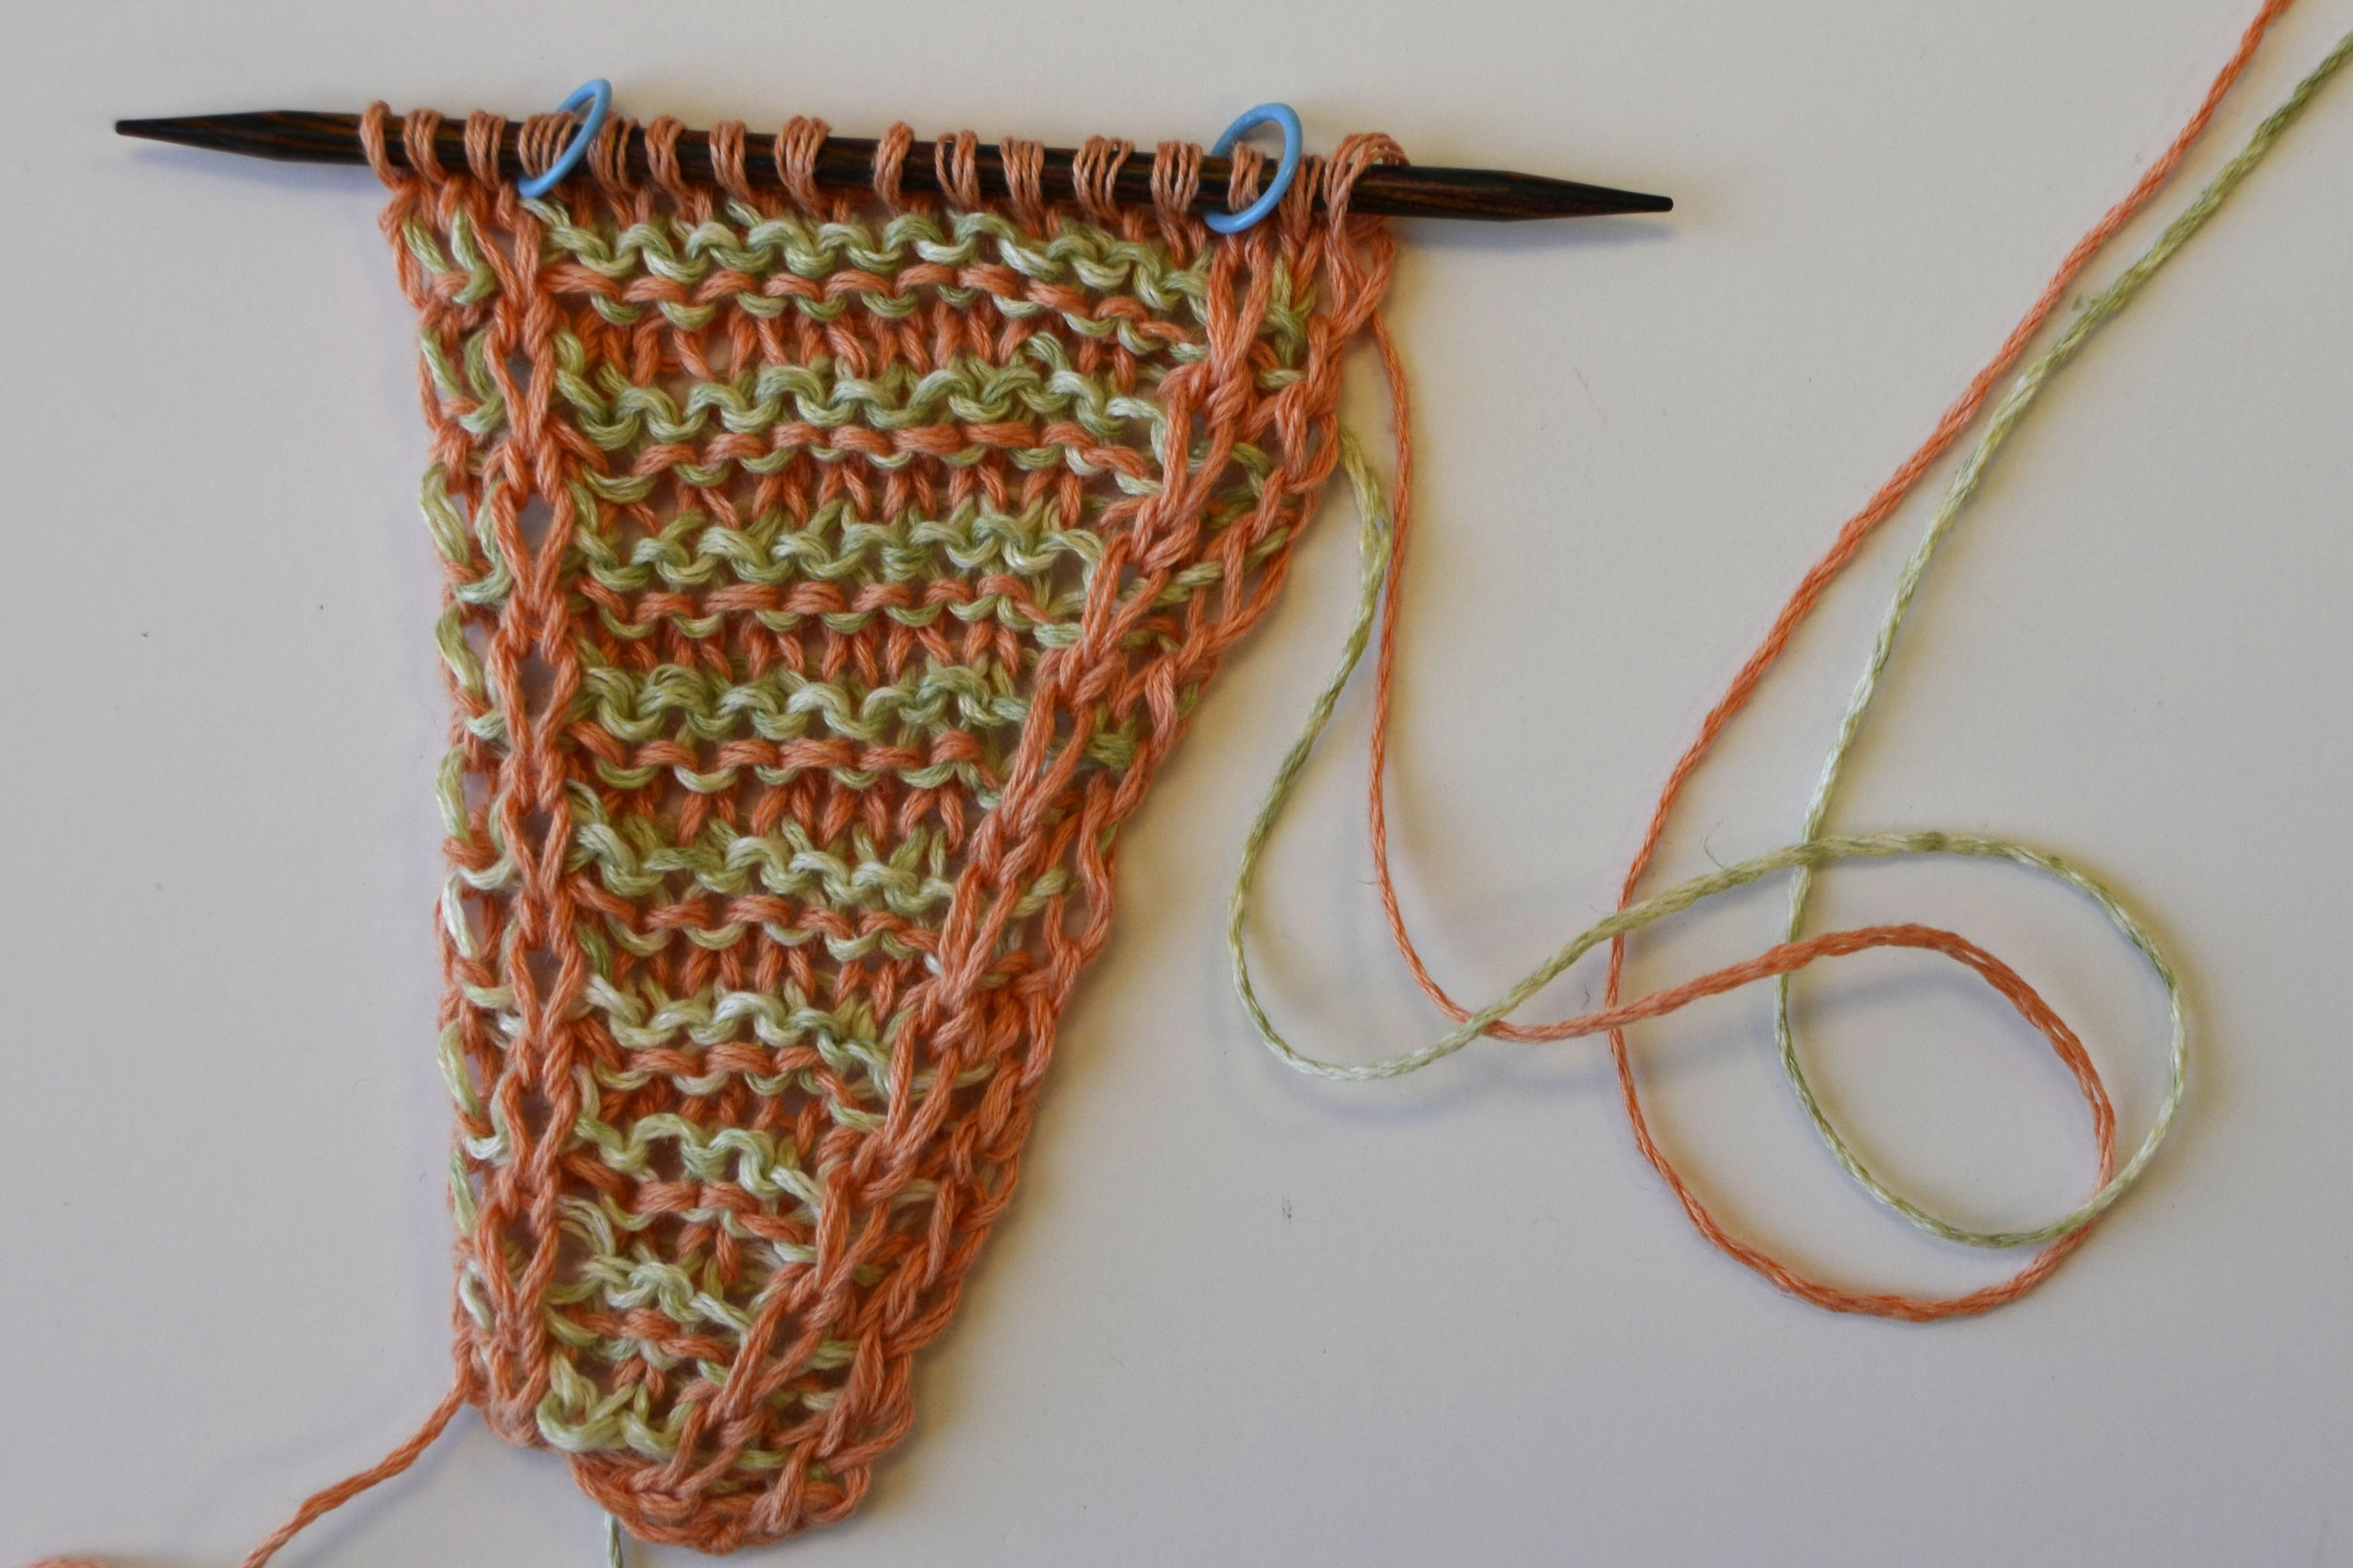
Next, we will introduce the next SSC. Here’s how things look after the first row of this new section. There is the SSC at the right hand side, then 5 stitches, then our new SSC, then our new increase section, and finally the last SSC at the left hand edge.

Traverse_9

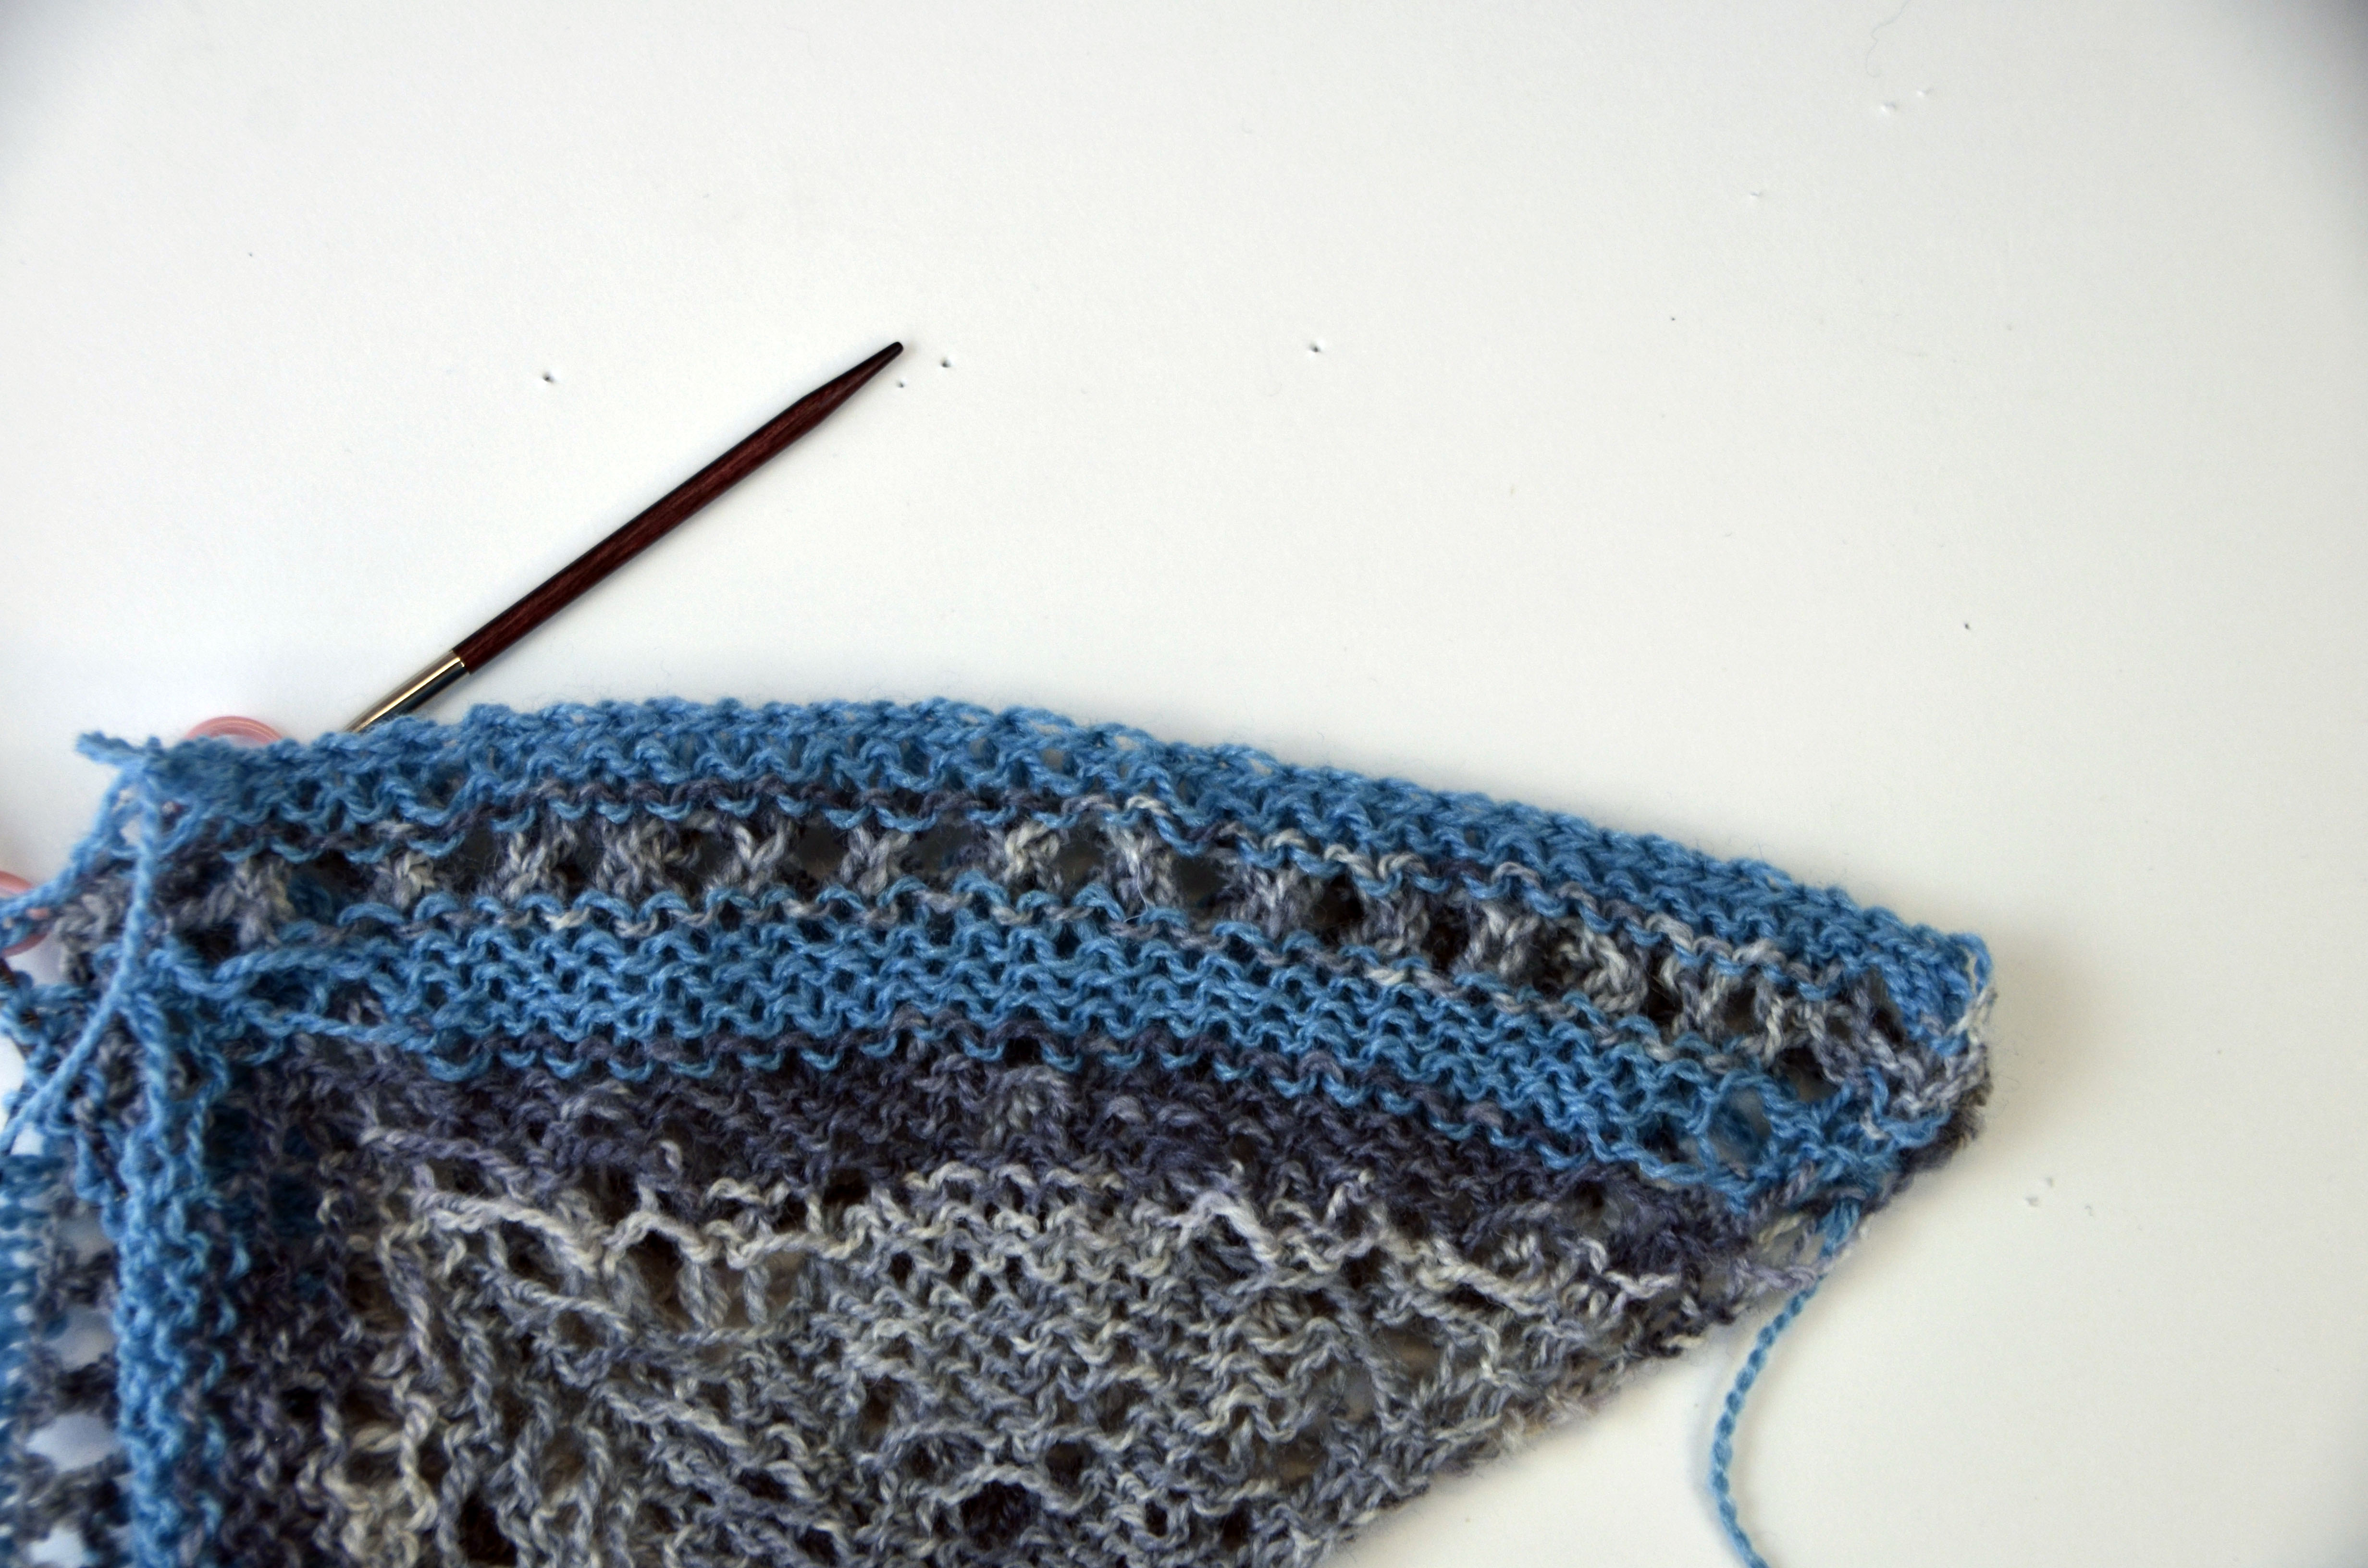
And here’s how we’re looking after a few more rows after introducing our new SSC. By slipping CC stitches on MC rows, we are carrying up that solid color and making what look like colorful outlines.

Traverse_10

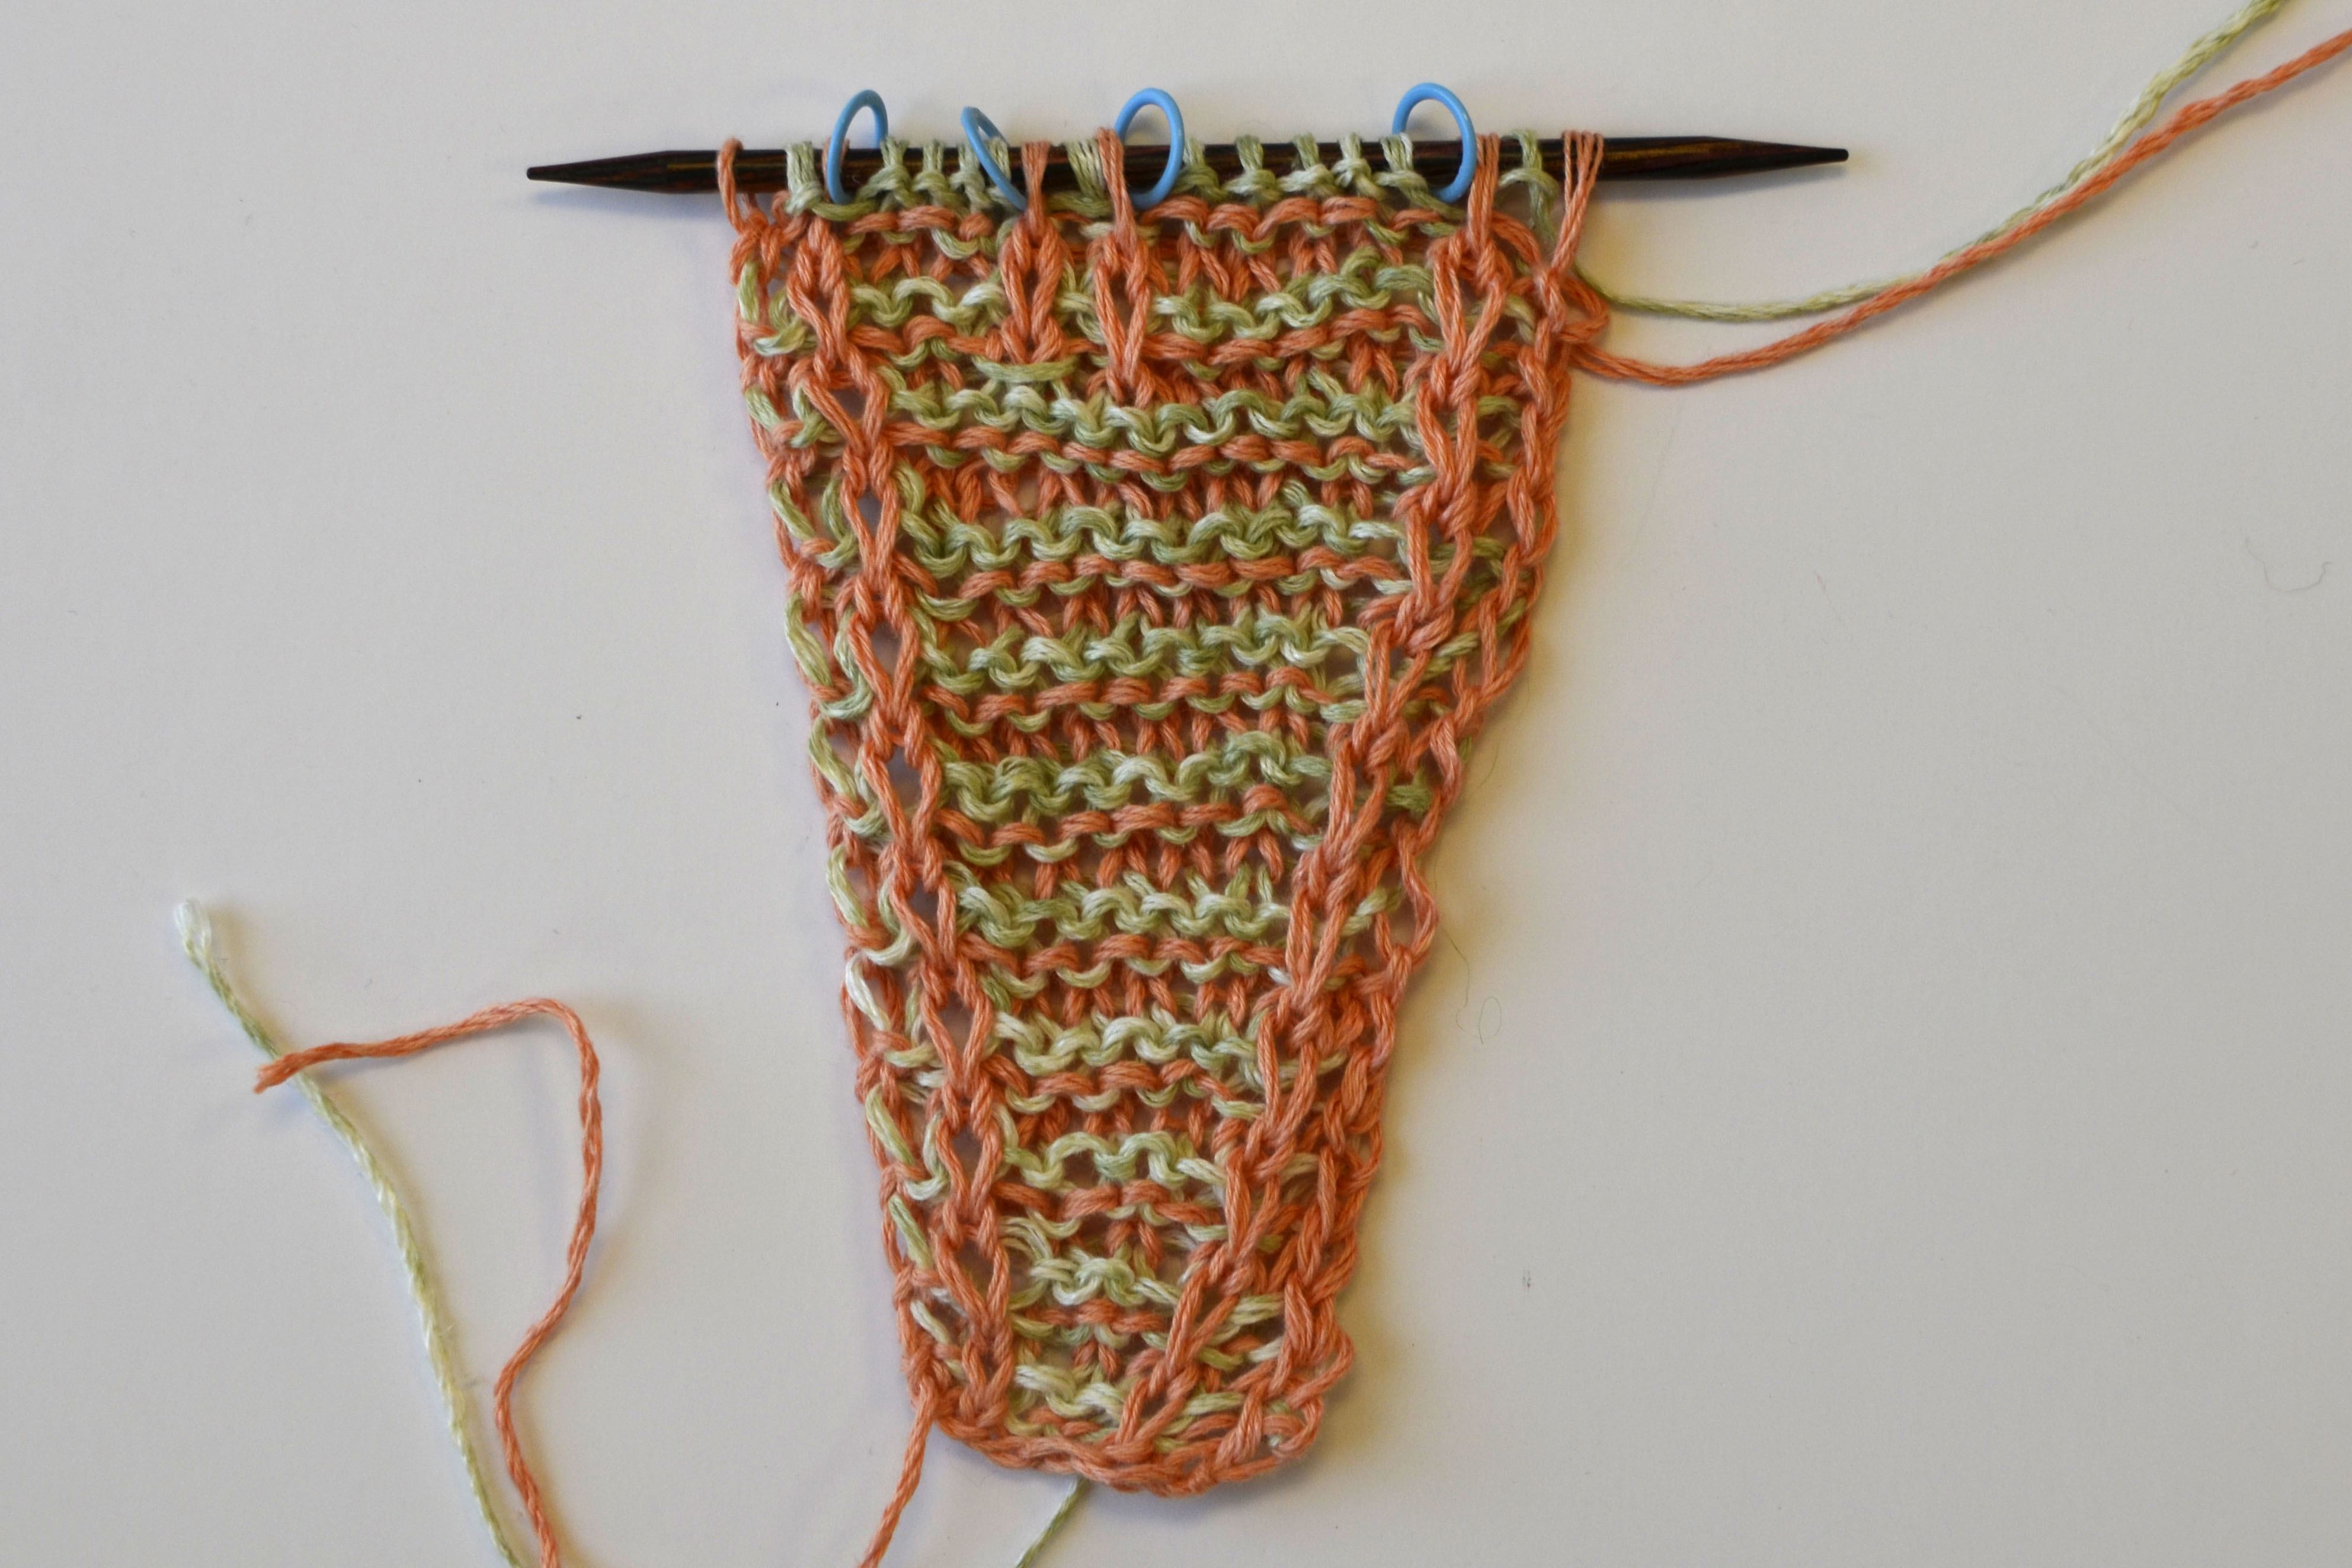
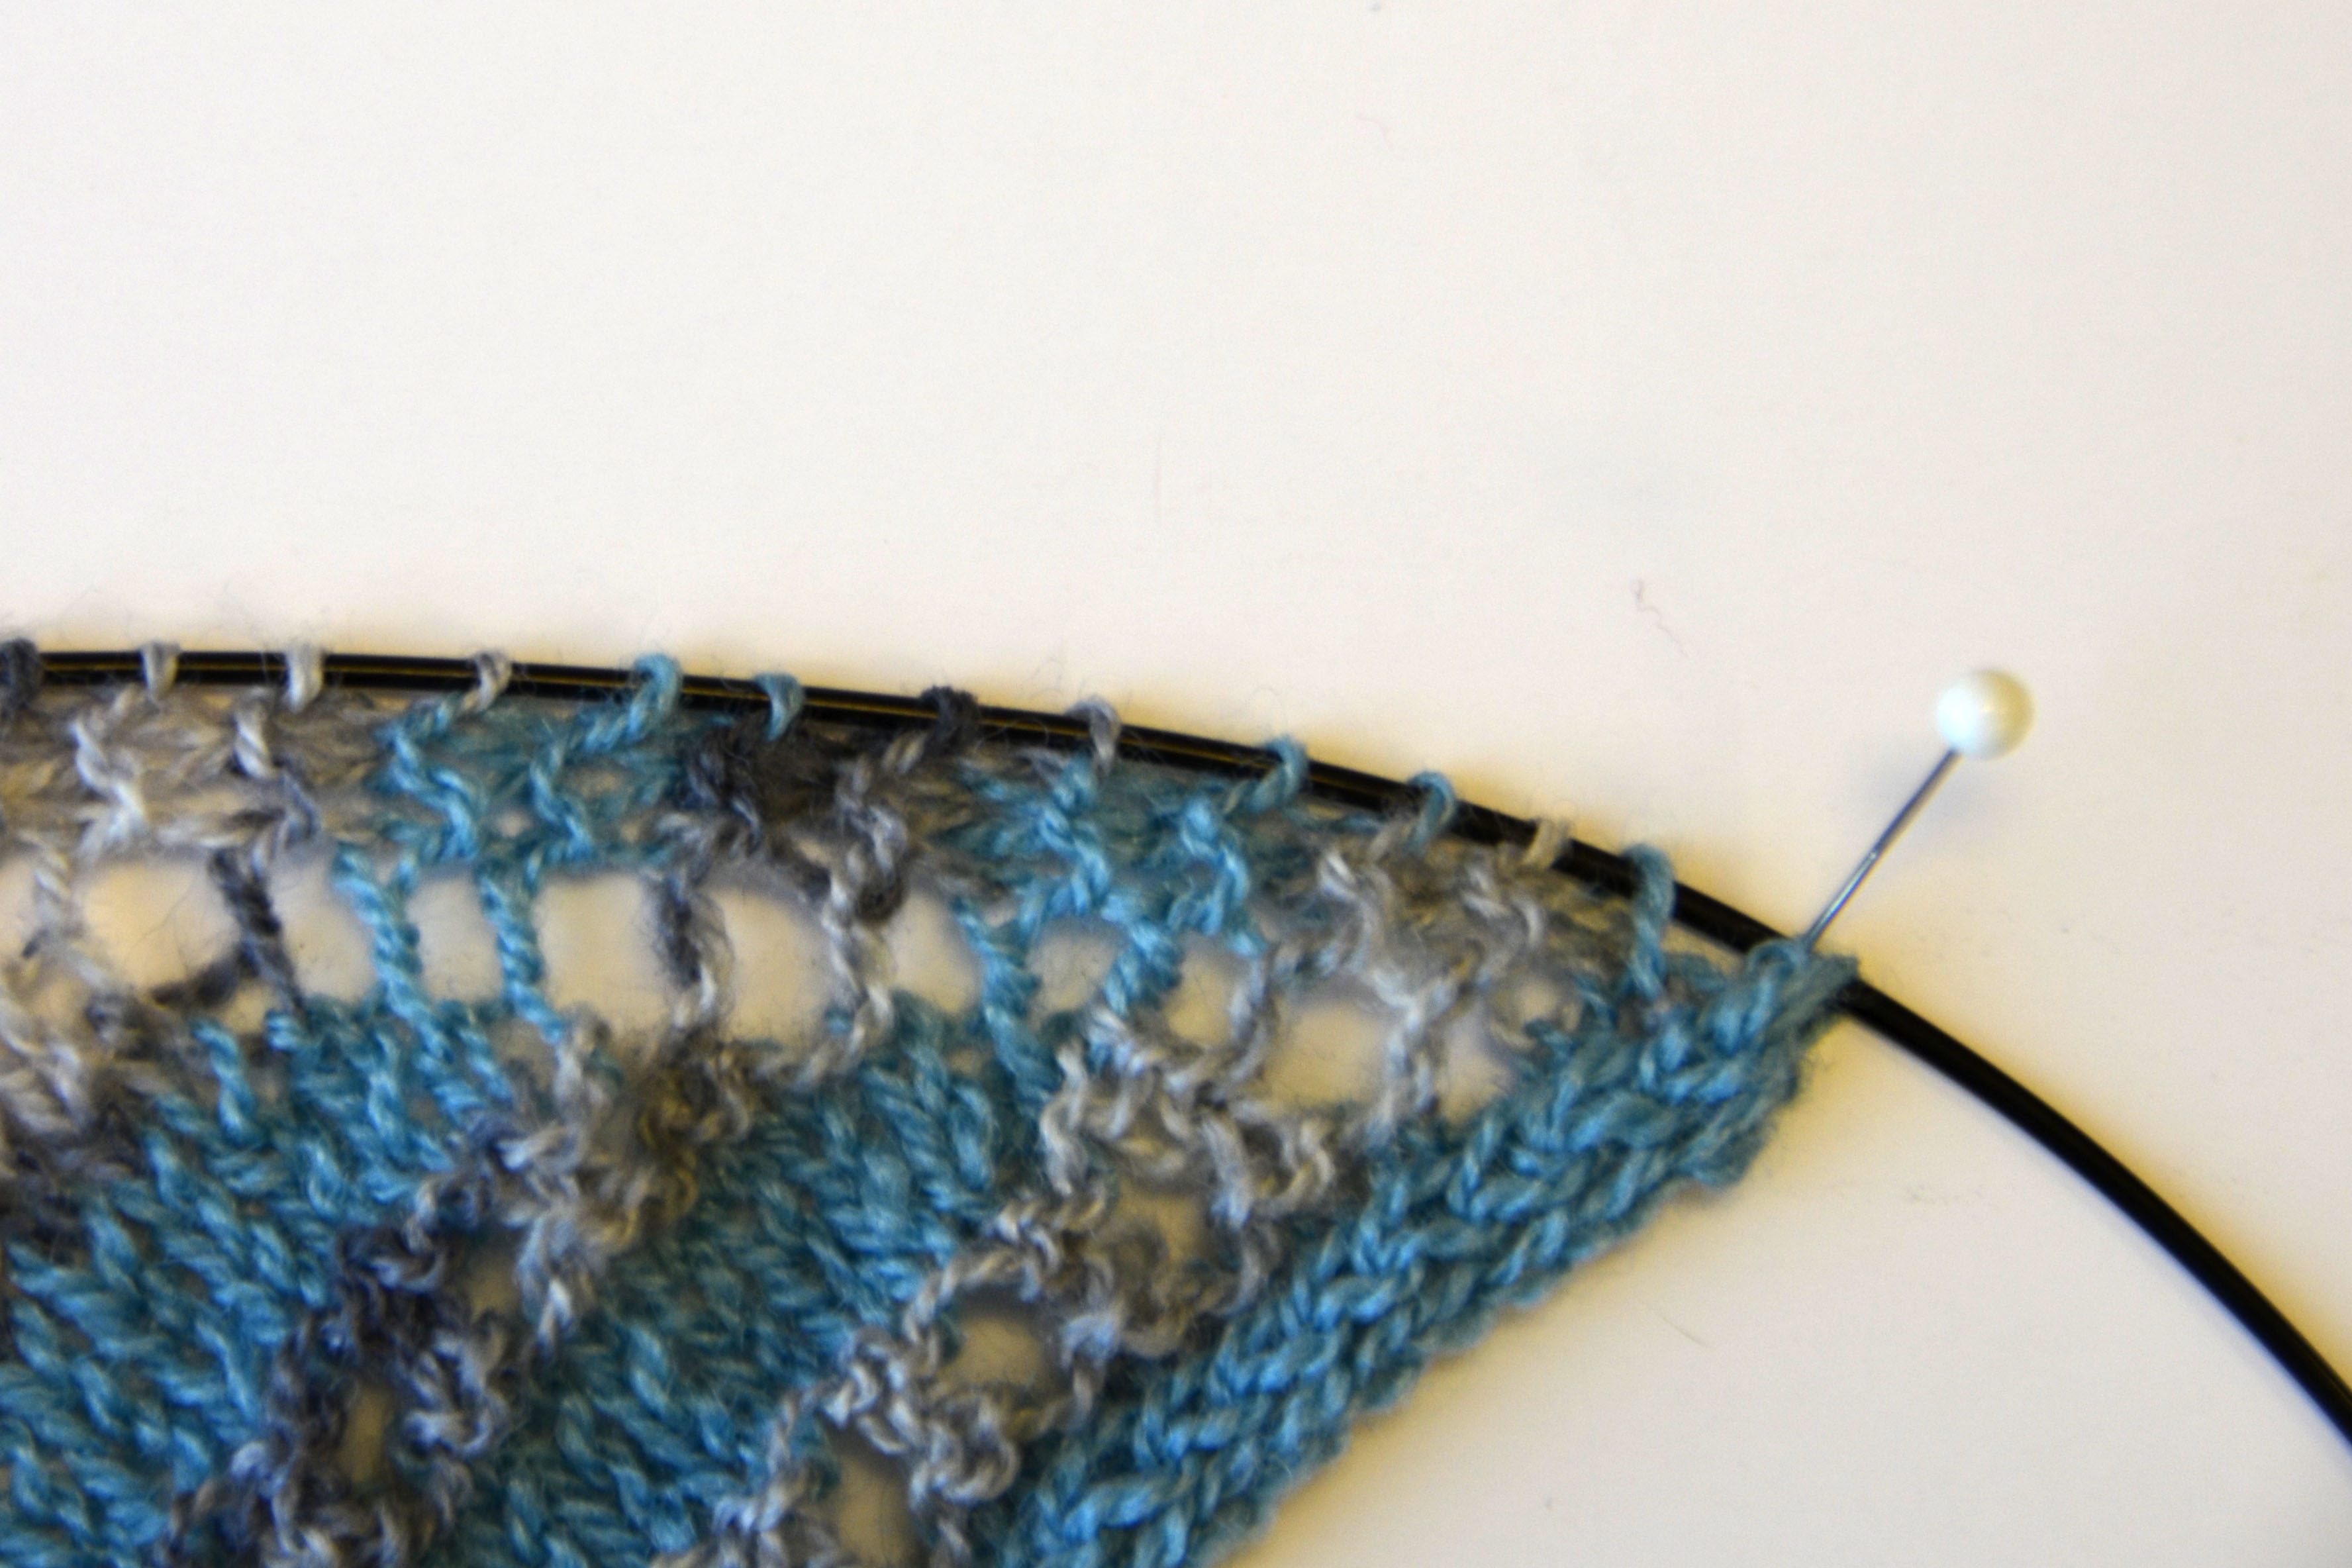
The new point of increase is indicated by the white line below.

Traverse_10_text

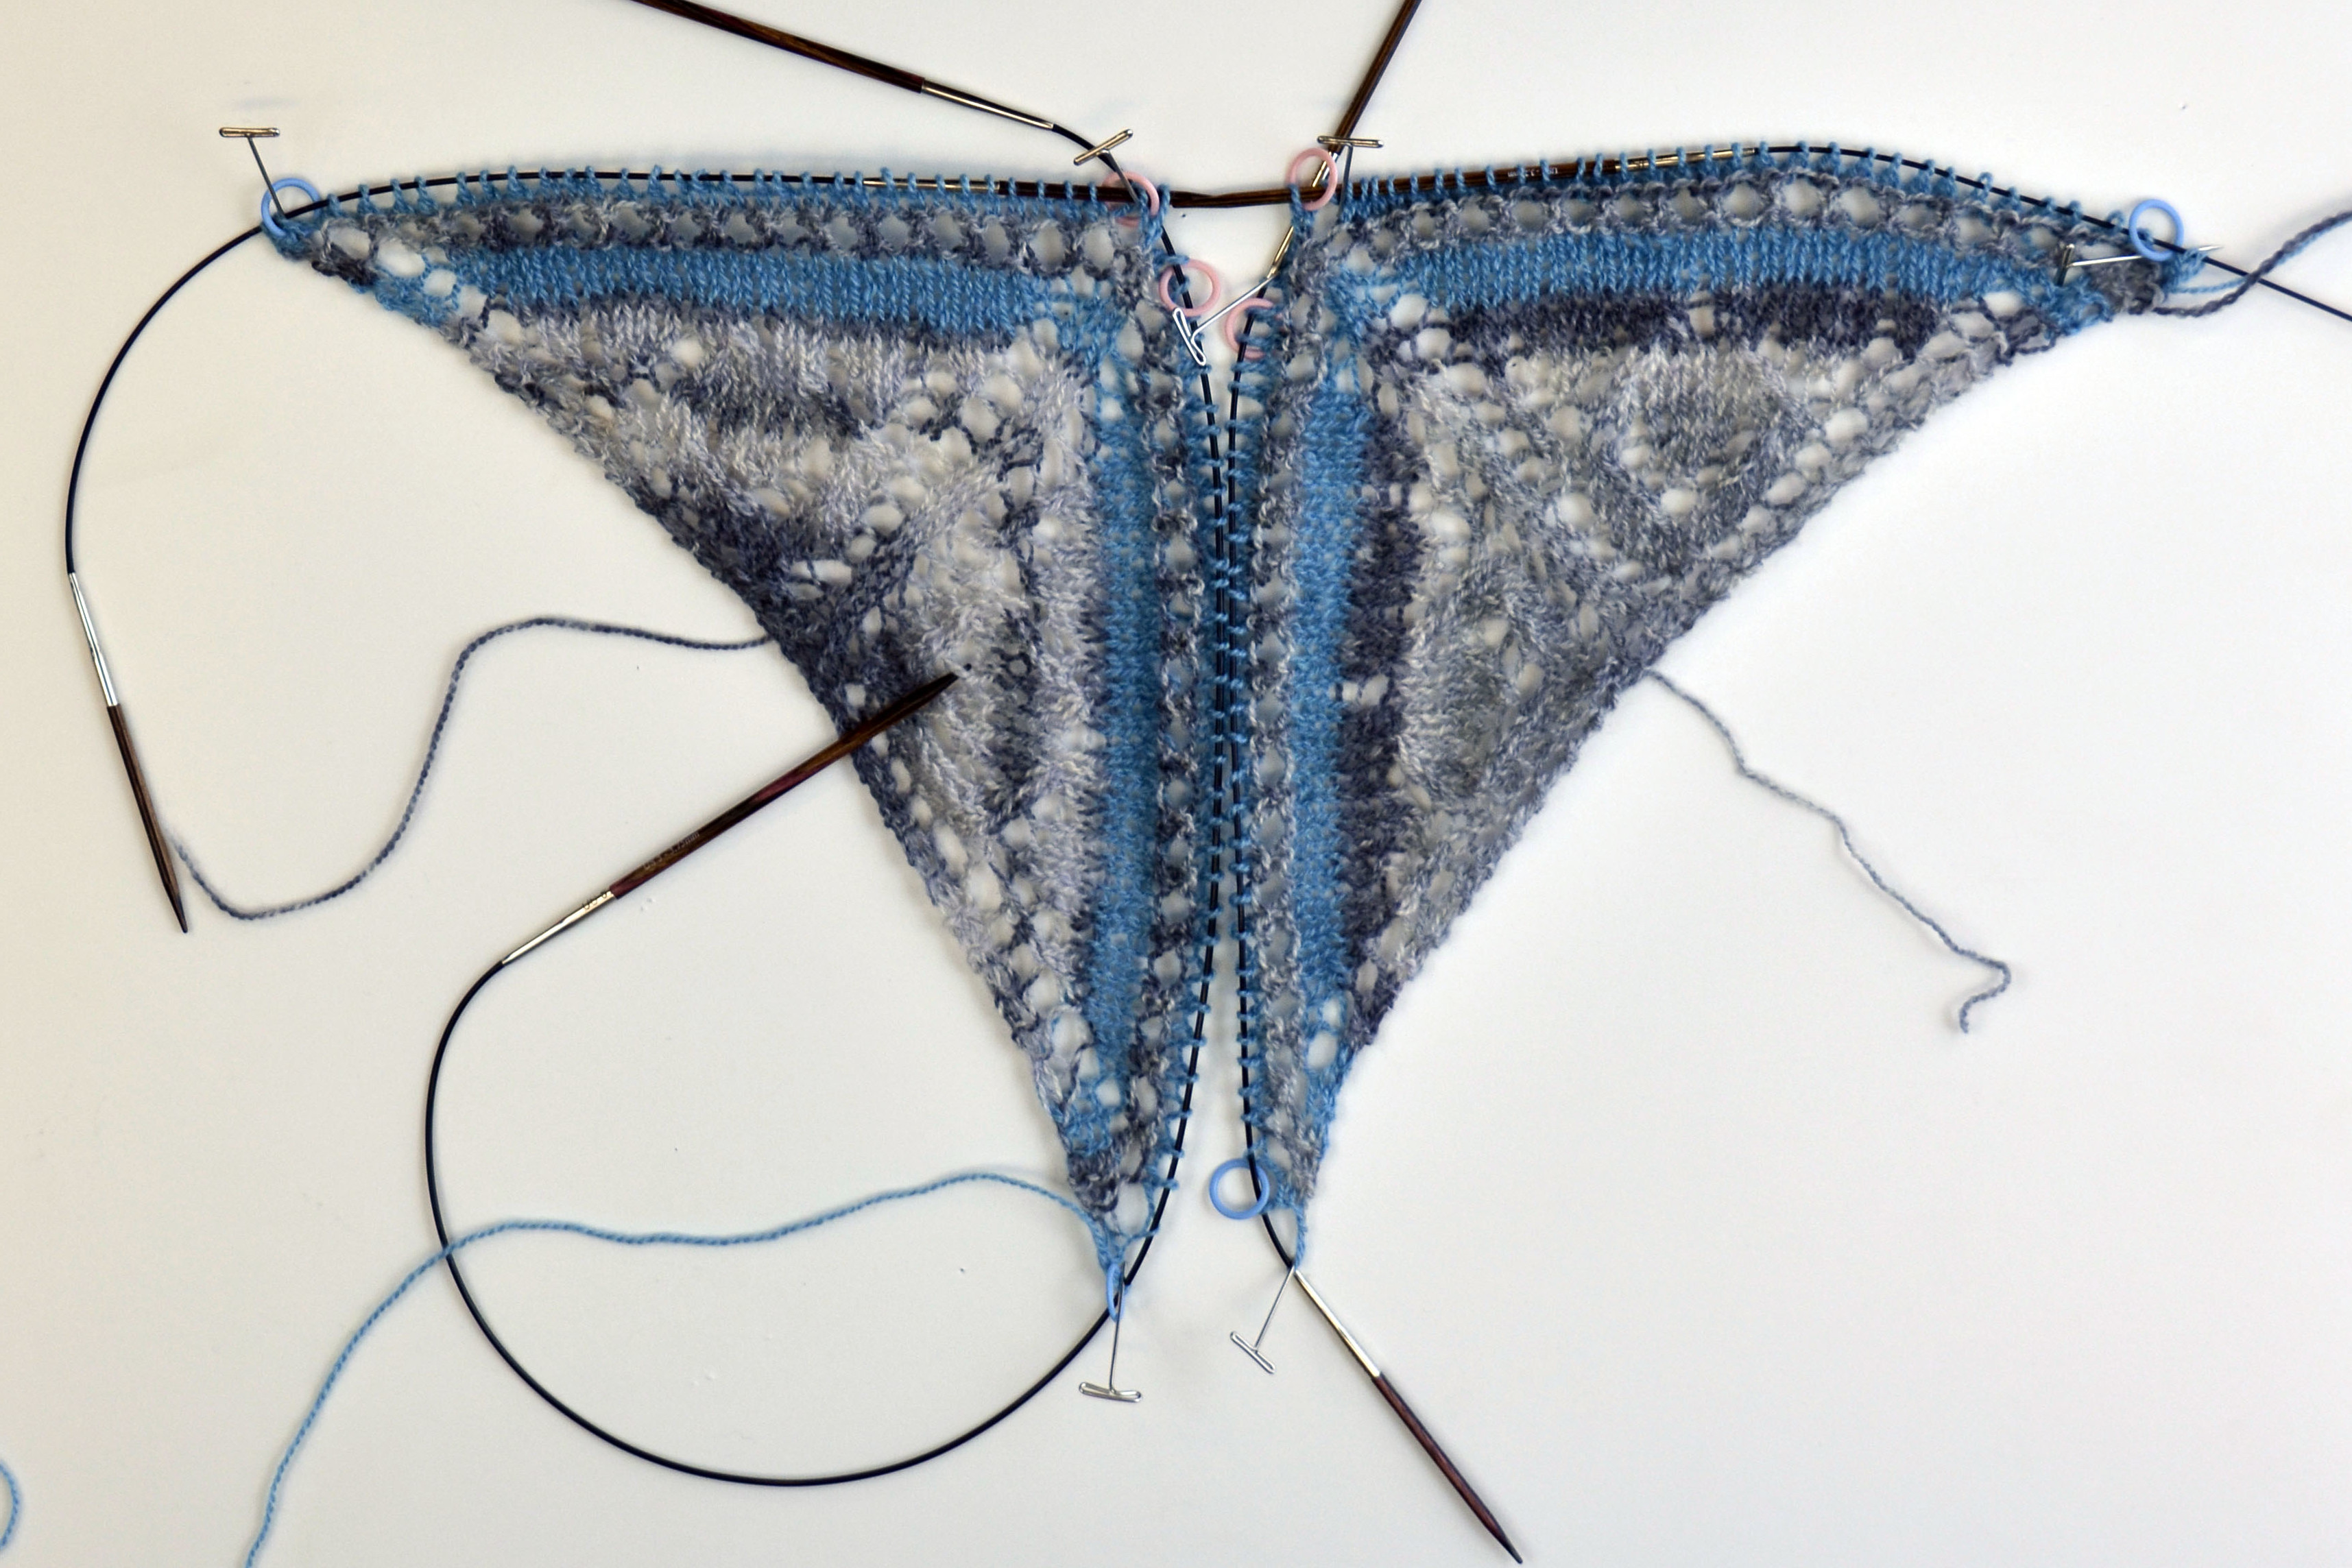
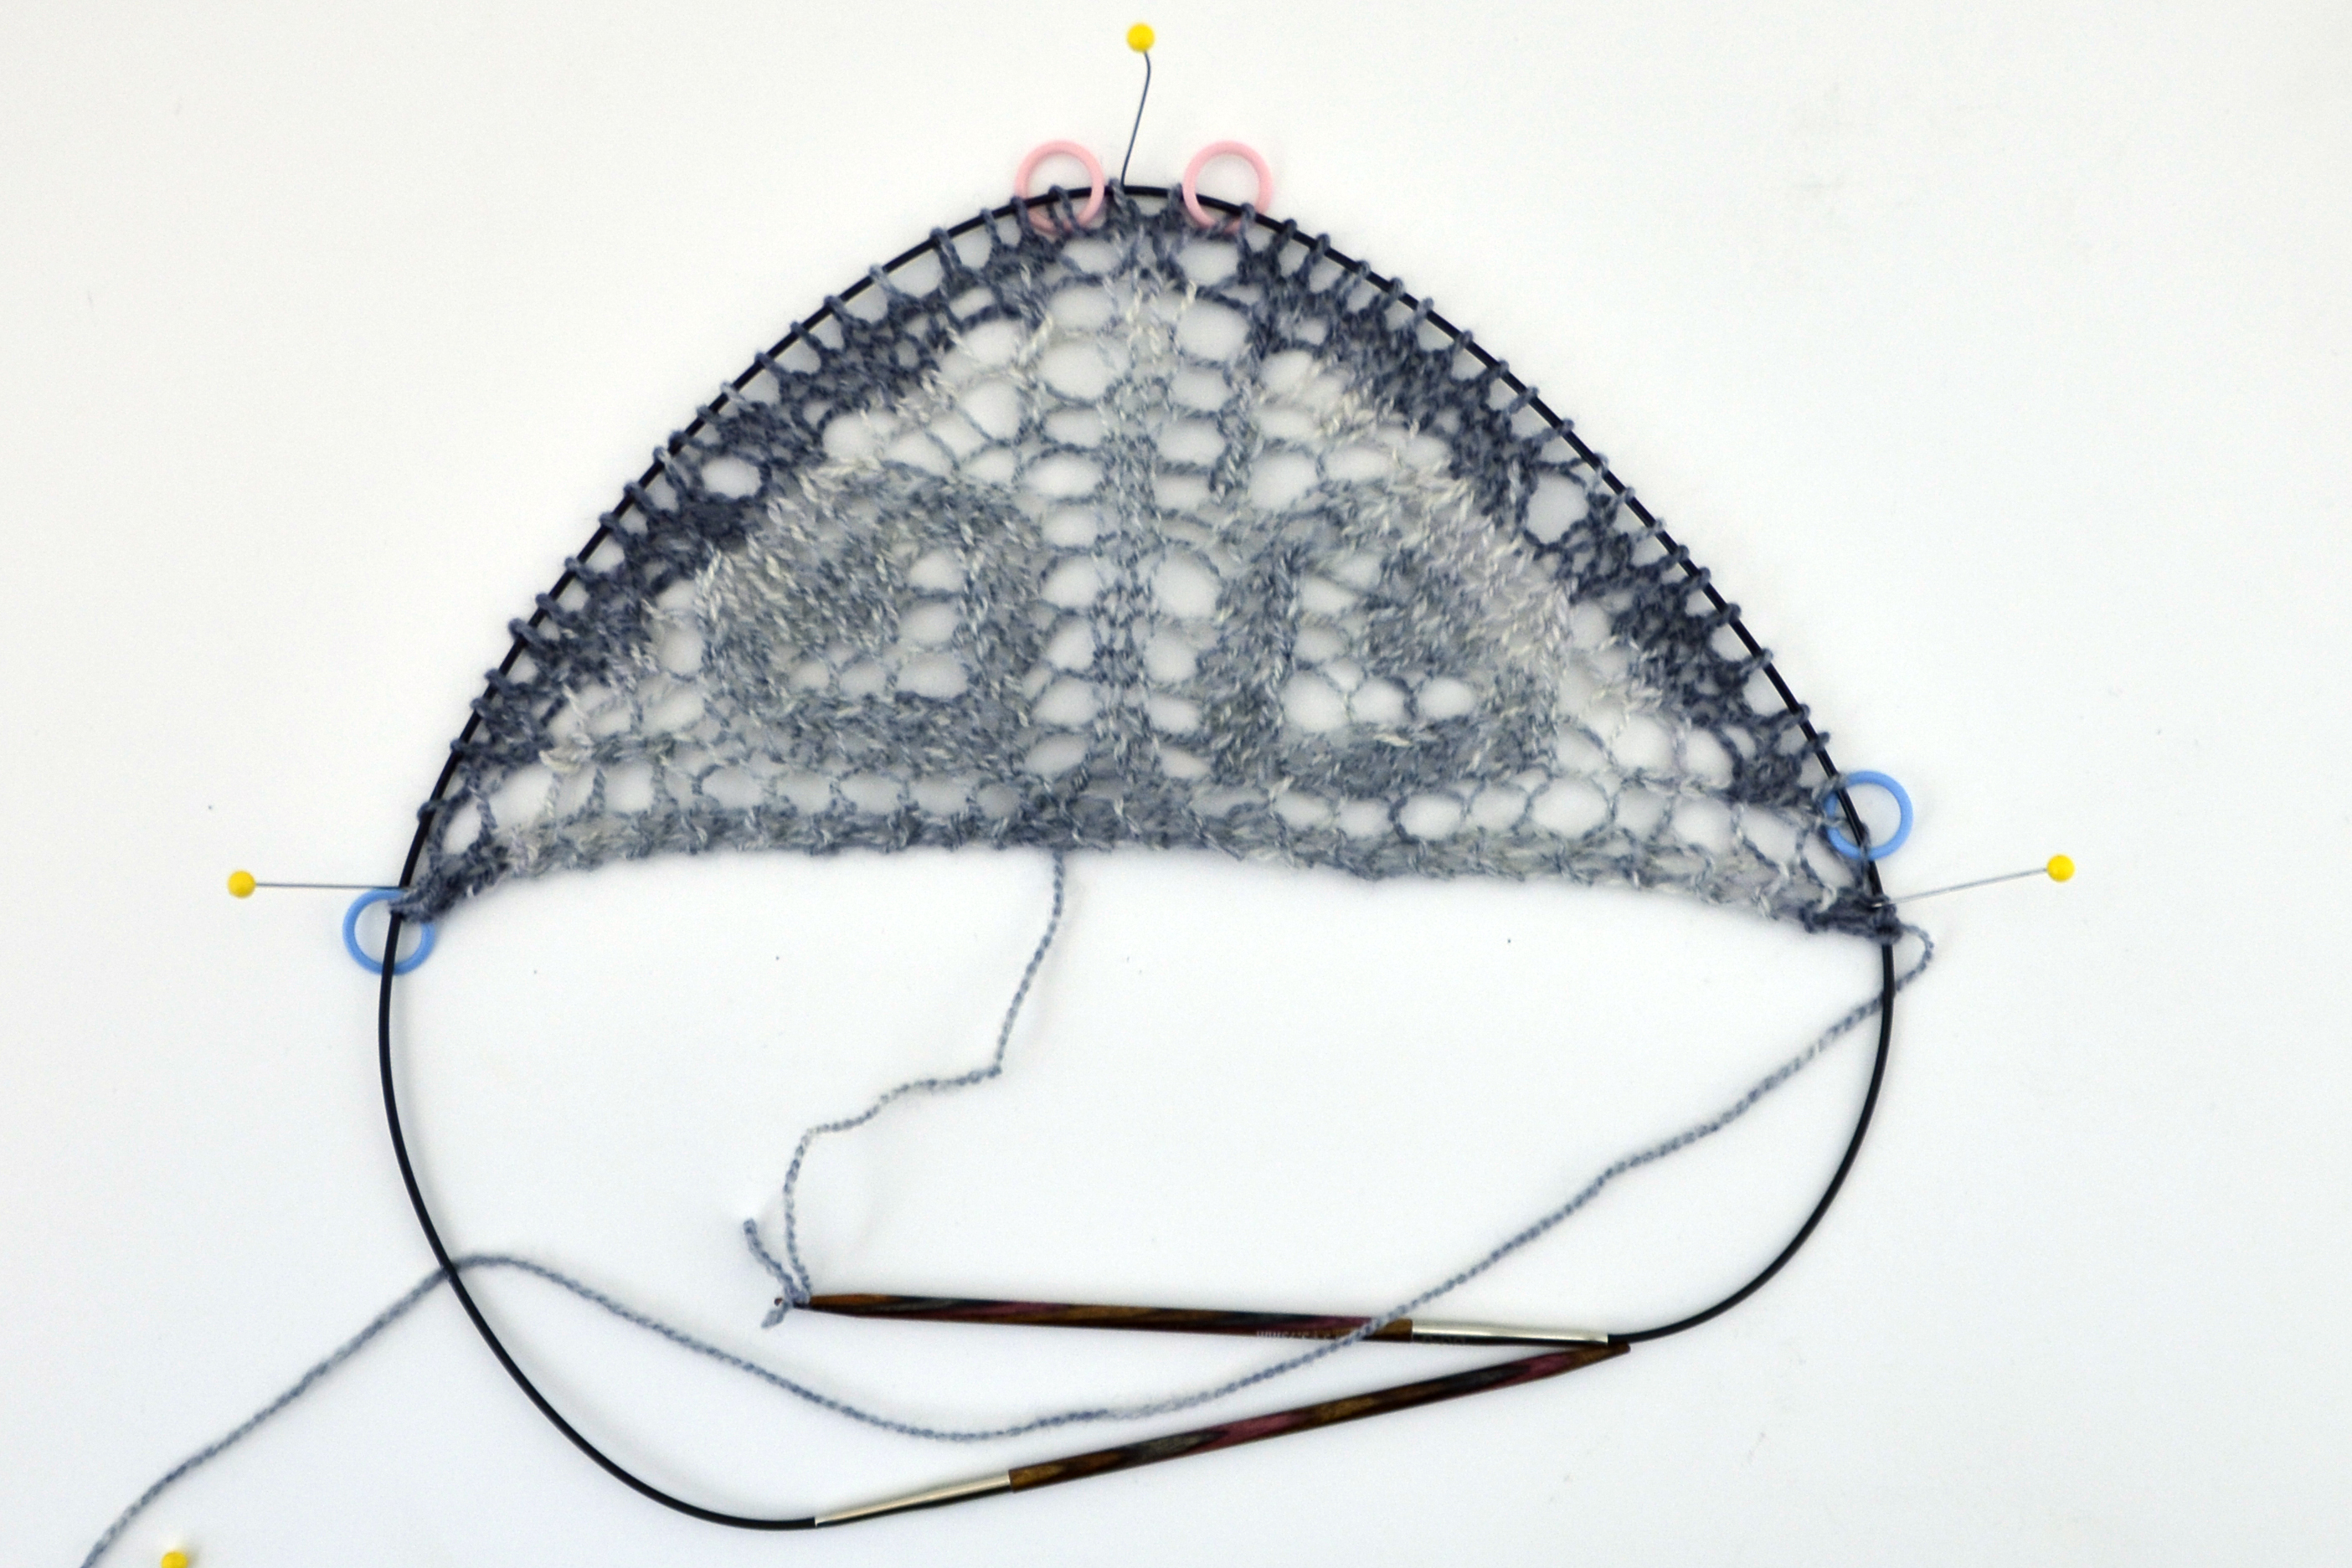
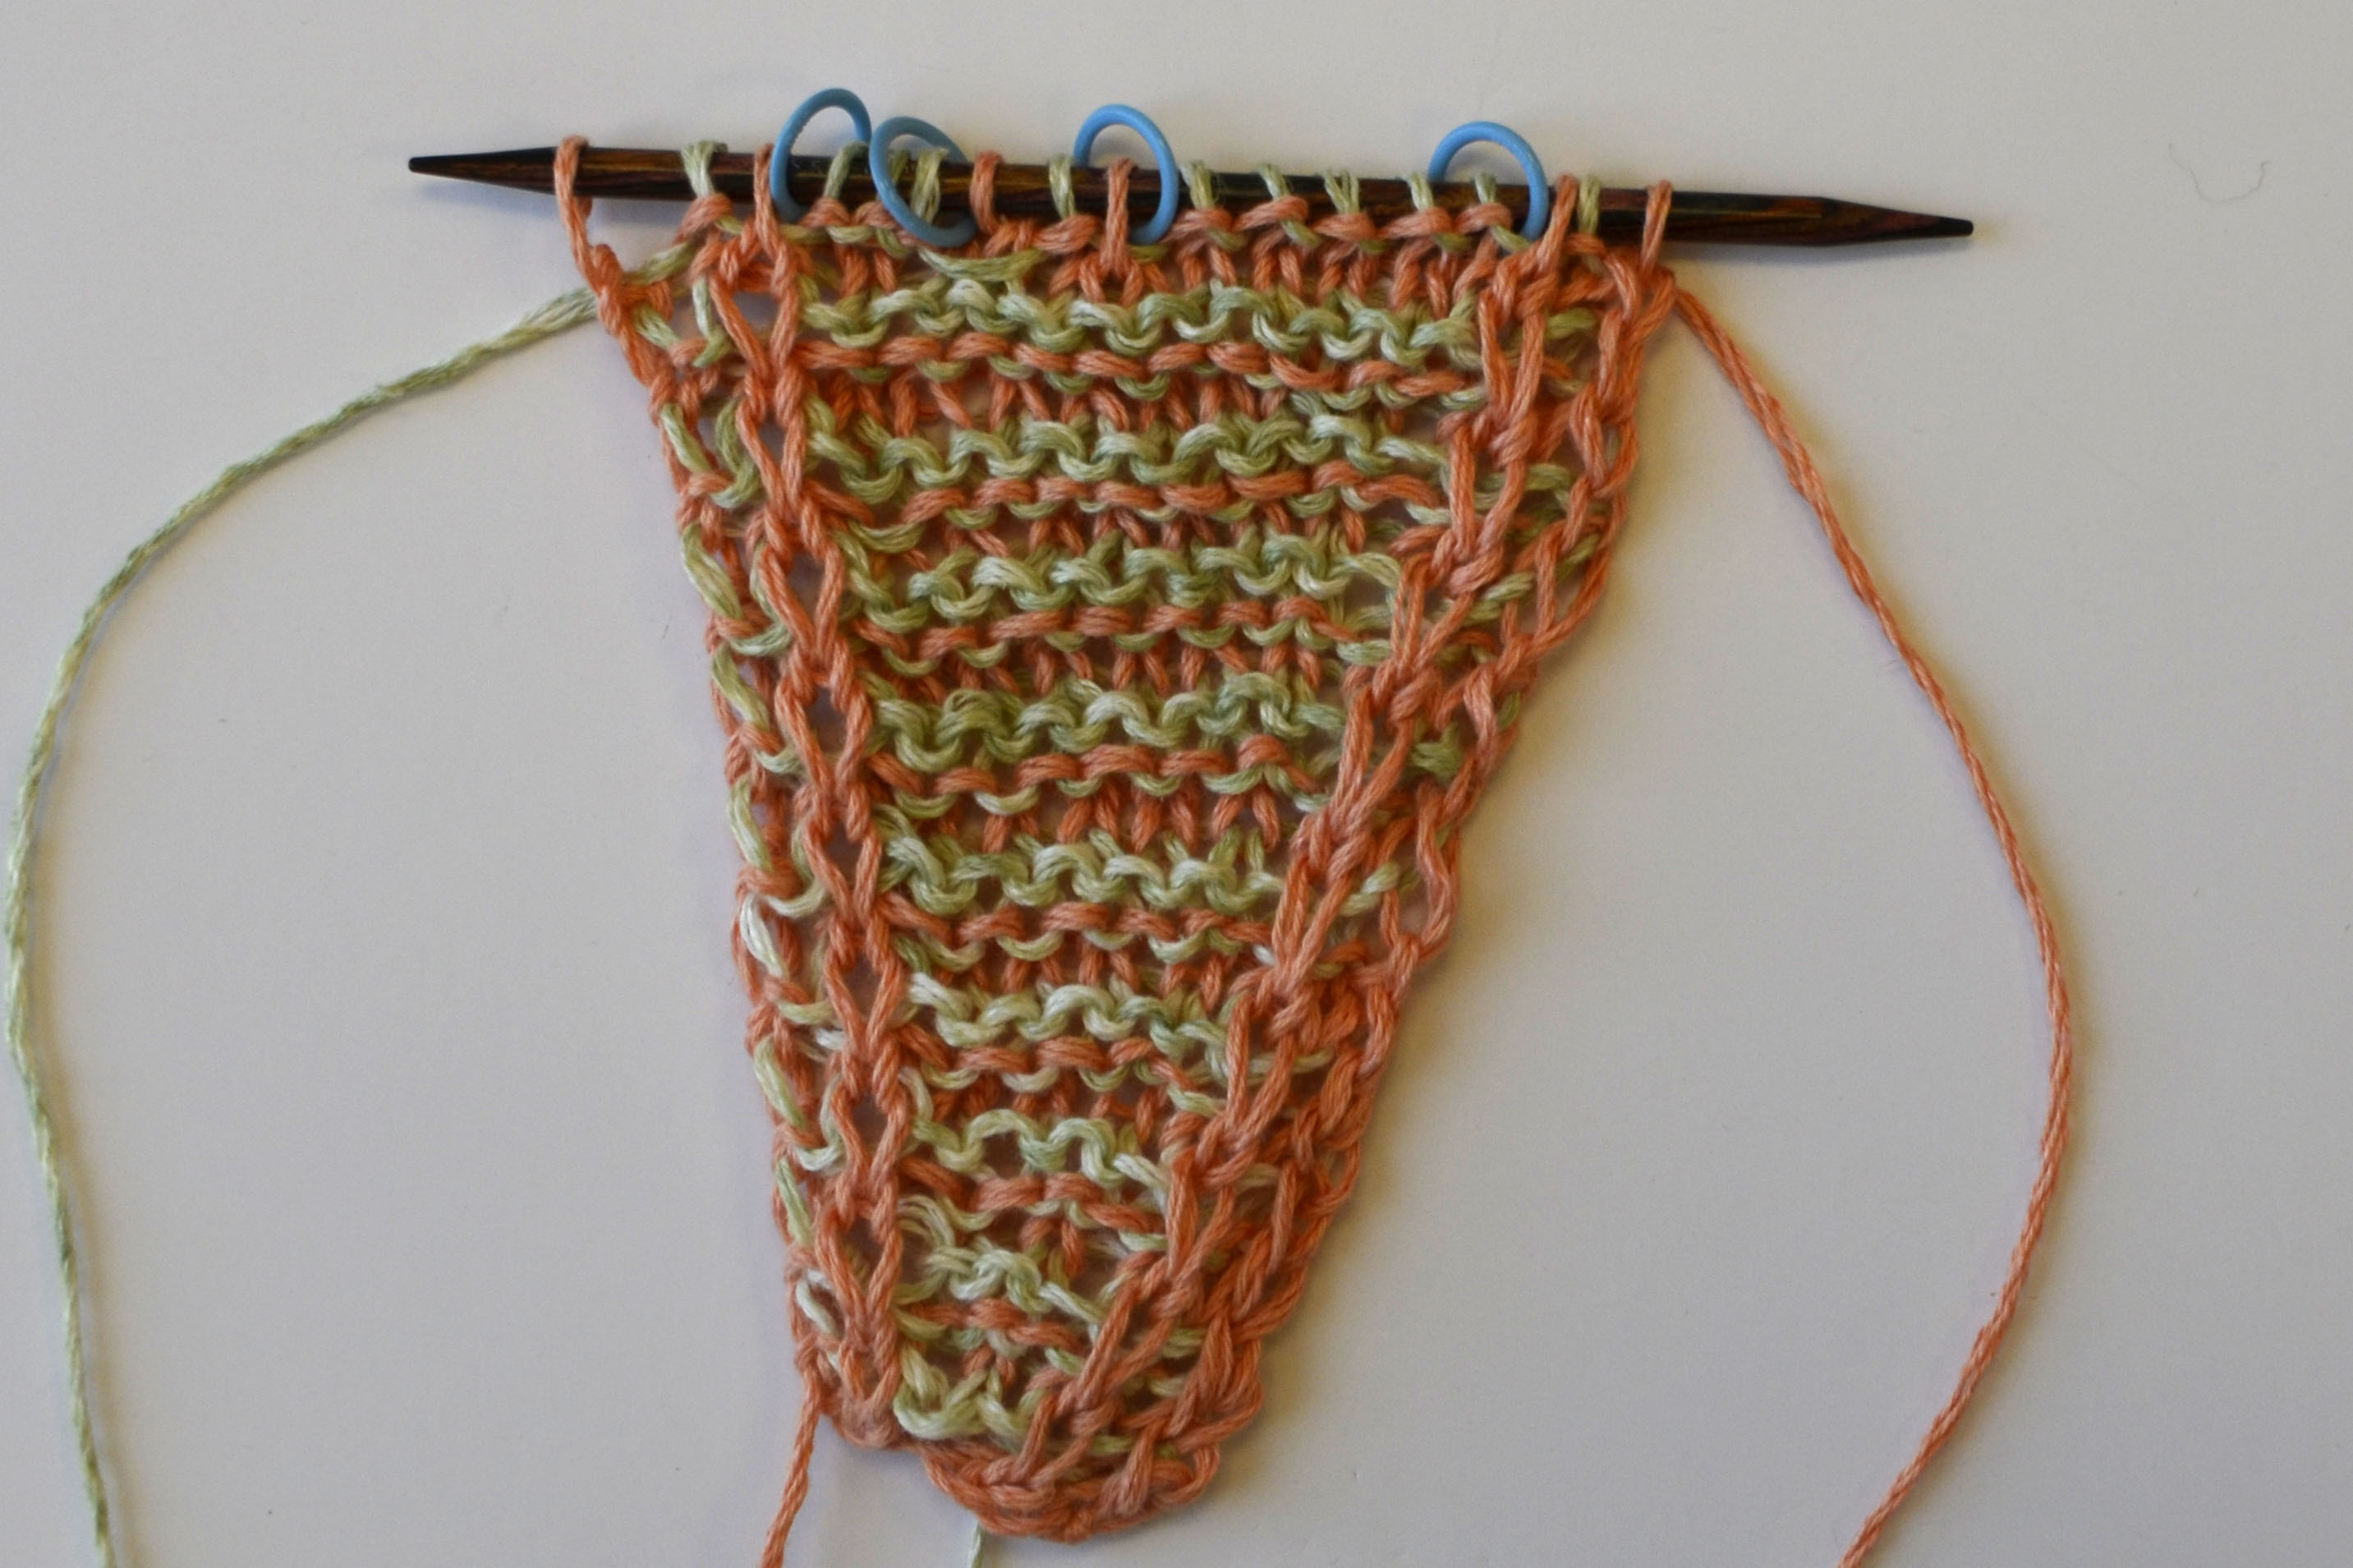
The rest of the first half of the scarf continues to have you work increases and introduce more slip stitch columns regularly. For me, this is one of those nice projects that doesn’t involve any kind of tough knitting acrobatics –  the stitches are simple, but it’s still interesting with enough going on to hold my attention.

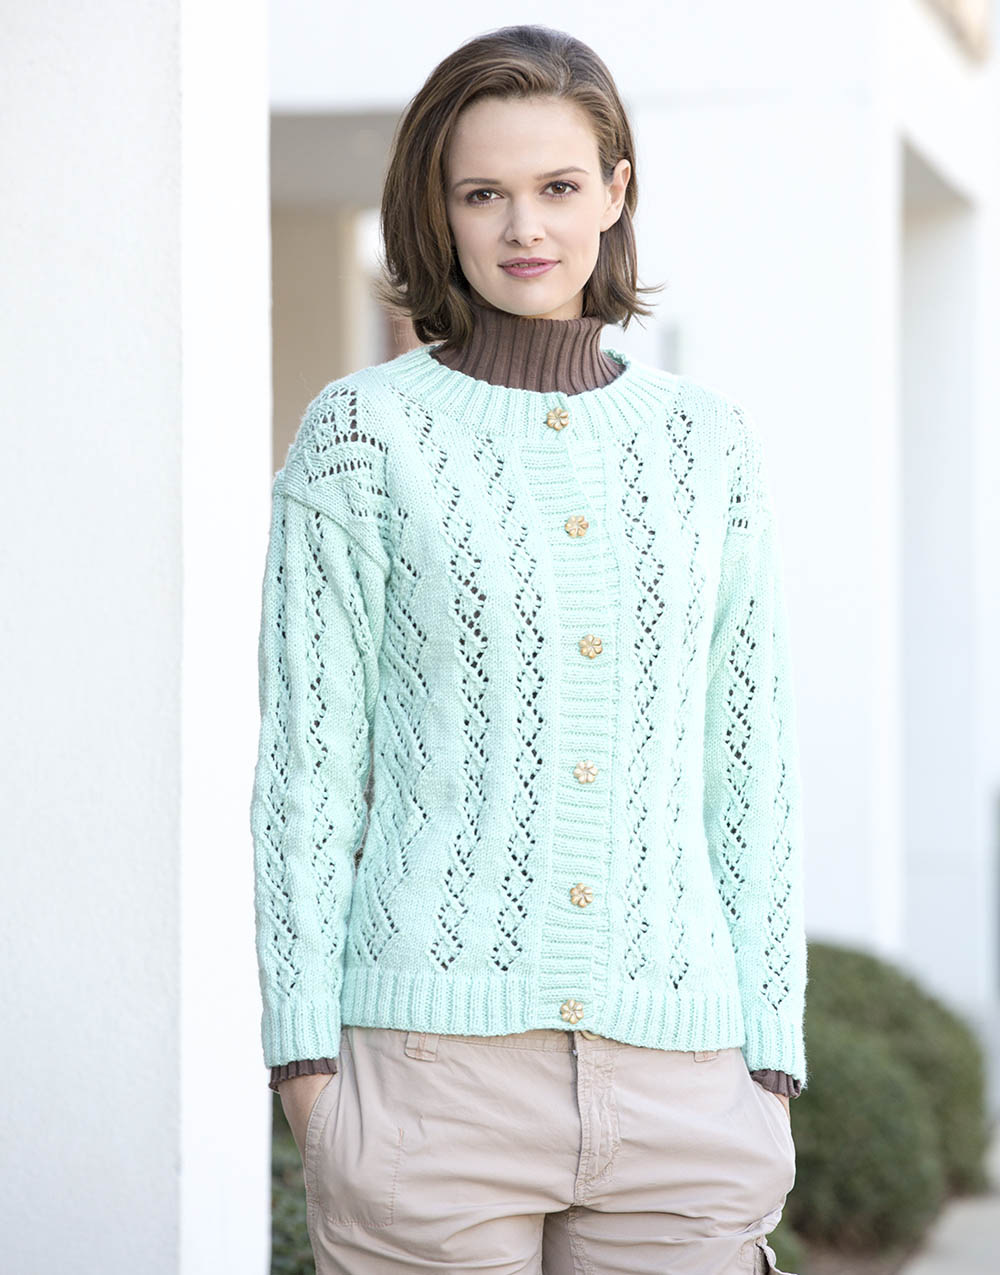
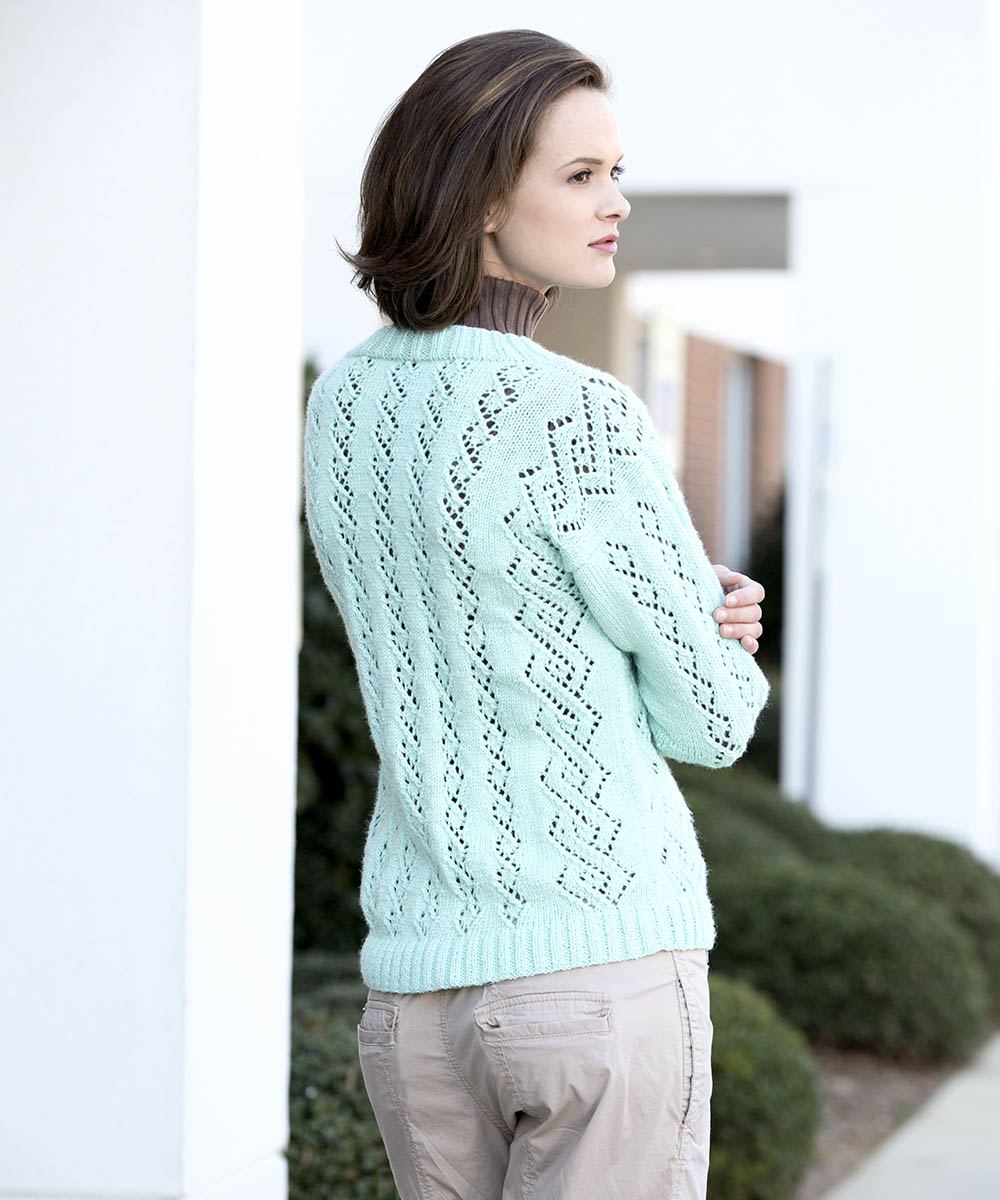
Like the project but not the colors? There are plenty of other options!

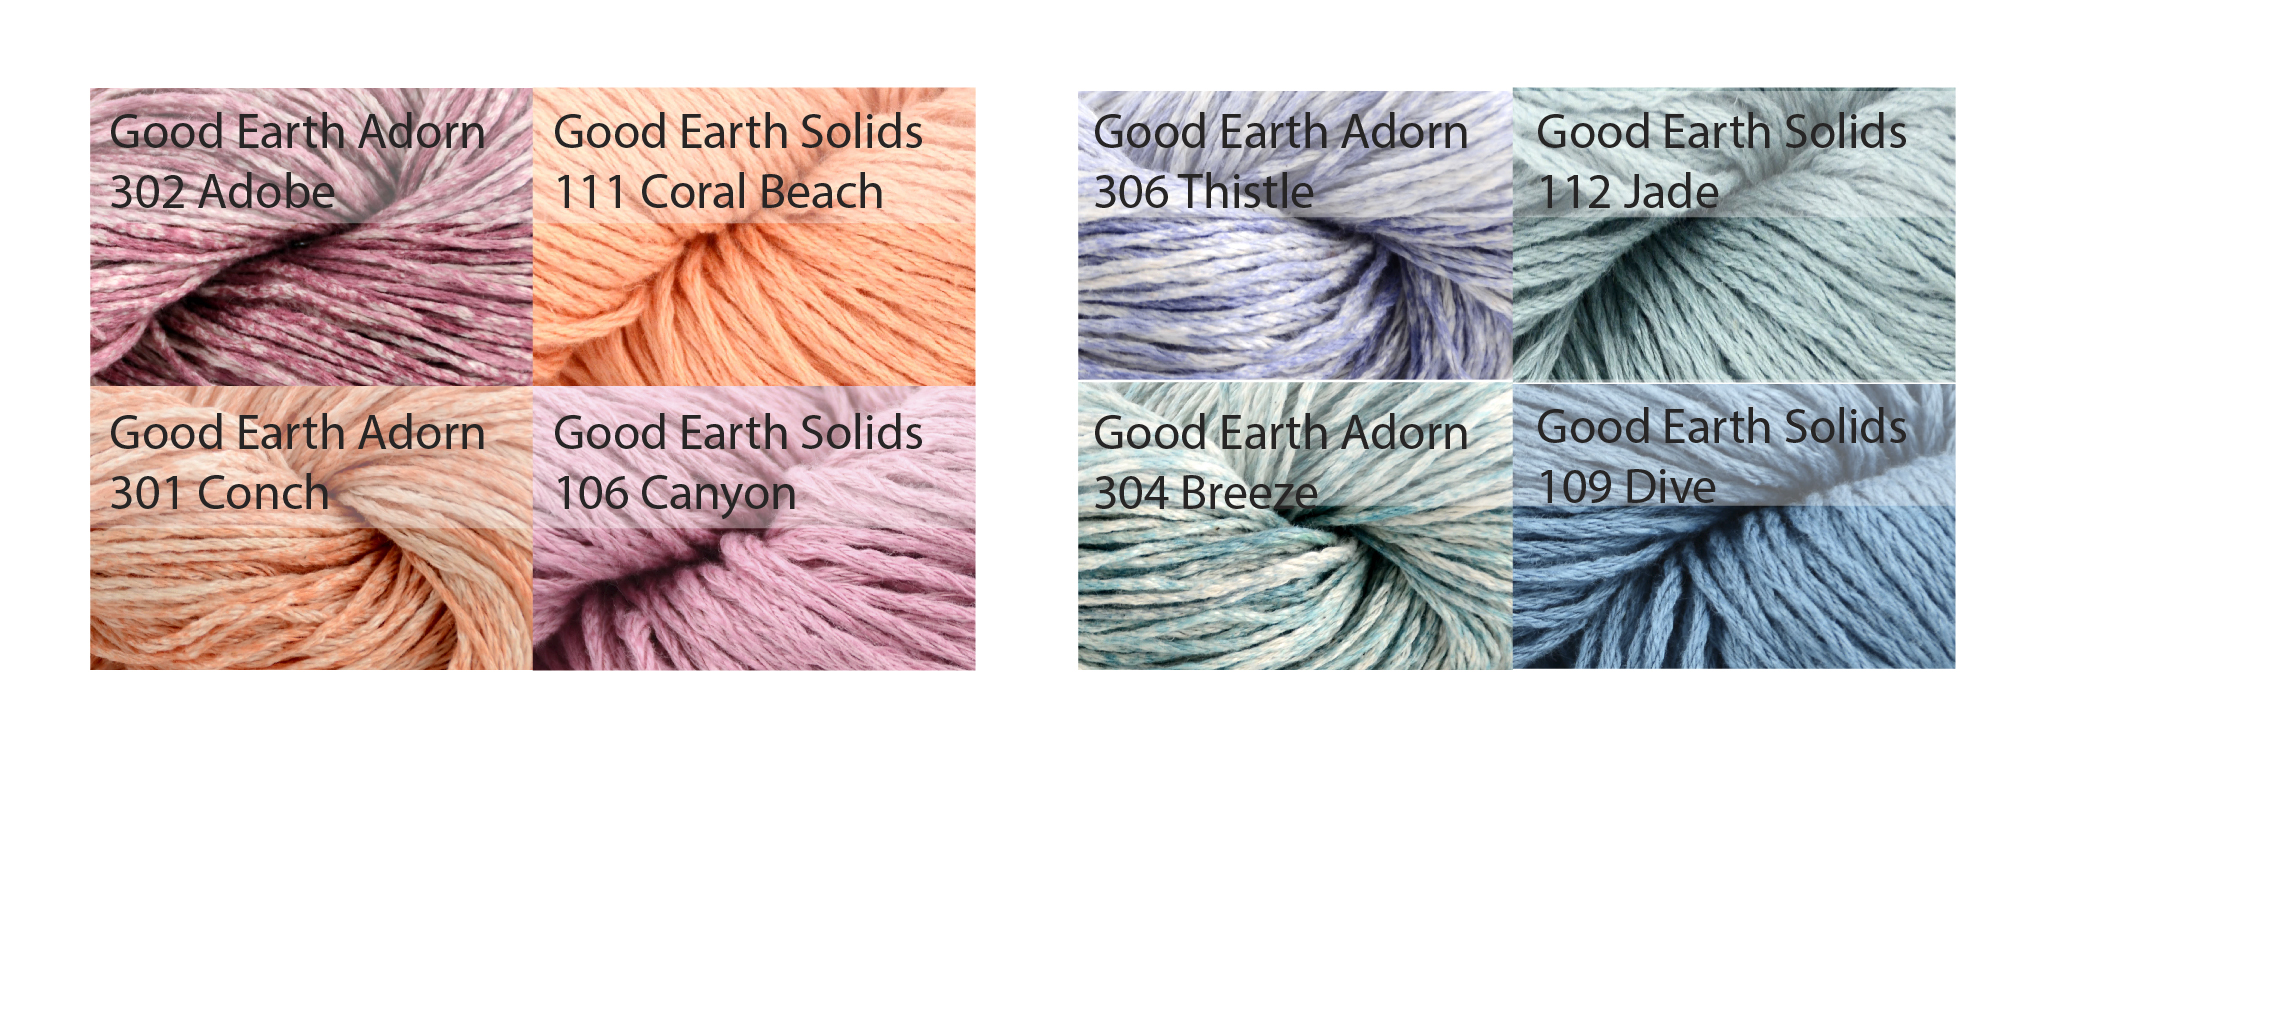
Traverse Scarf takes 1 hank each of 4 different colors. Here is a warm colorway option, and another cool option:

AlternateColorways_)

This project would also look nice with two colors of Adorn and one solid, or vice versa:

AlternateColorways_2

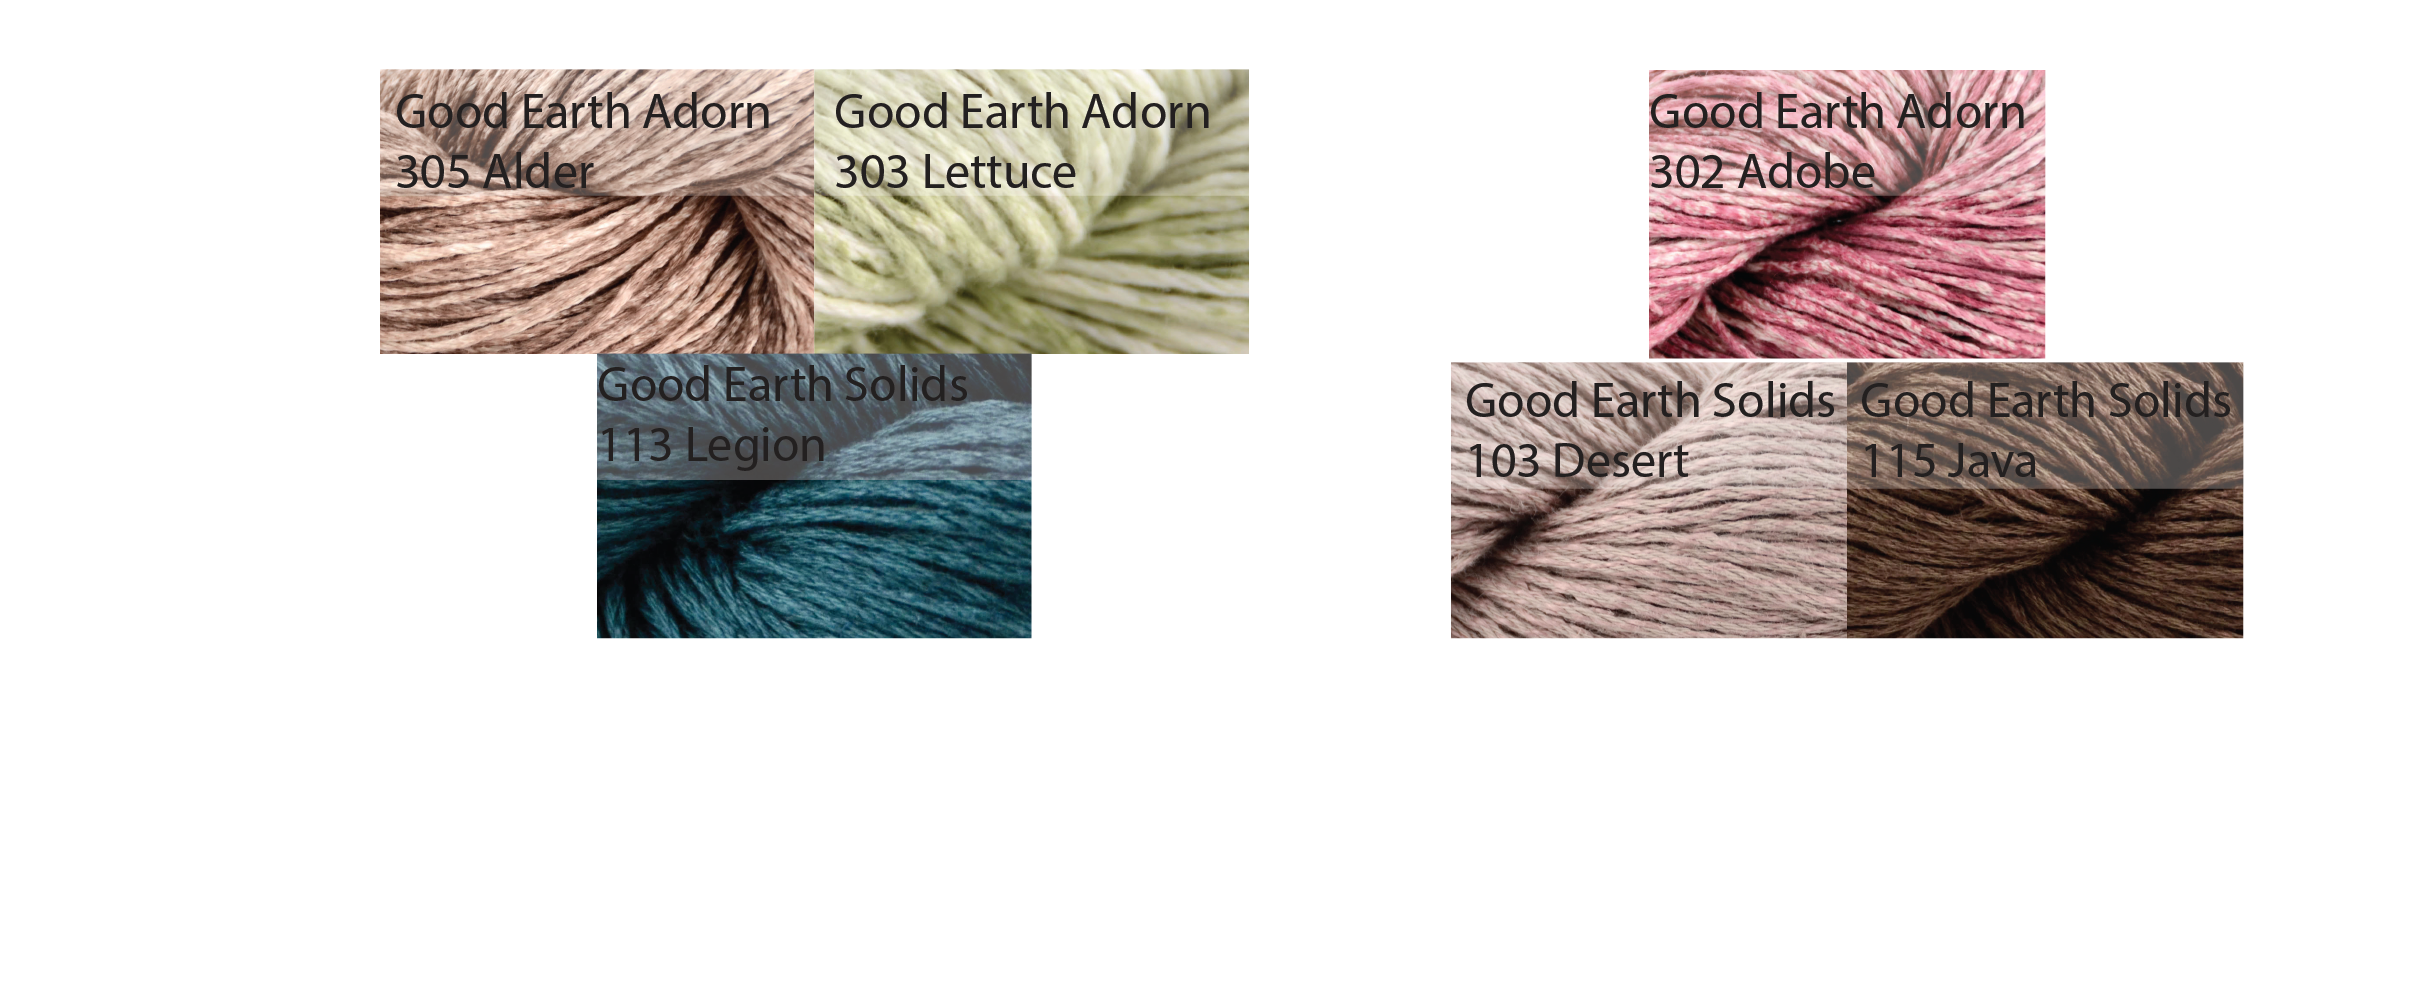
Or you could use just one color each of Adorn and a solid – the sky’s the limit! You can browse all the colors of Good Earth and Good Earth Adorn on our website.

I’ll be back next week with some more how-to goodies from Contrarian Shawls 2.

Free Pattern Friday – Spring Rain

It’s Free Pattern Friday!

Alana Spring Rain blogToday, the Spring Rain Tank in Alana.

This summery tank is knit in one piece from the bottom up. Work the lower body in the round, then separate at the armholes to work front and back.

See that V-neck?  Believe it or not, there is no neck shaping involved. The stretchy lace stitch pattern combined with the drape of viscose blend Alana (158yds/100g) causes the shoulders to naturally fall into place.

Amy Gunderson calls for a Twisted German Cast-On in this pattern, due to its greater flexibility.  She says, “The lace pattern is fairly open and stretchy, and I didn’t want it to be constrained by a too-tight cast-on.”

It’s not a hard technique.  If you can do a long-tail cast-on, you can do this.  I used this recently for a pair of top-down socks and loved it.  It’s a Goldilocks cast-on.  Not too tight, not too loose, just right.  The Knit Witch has a good how-to video on this technique.

We hope you enjoy this free pattern.  Happy knitting!


Spotlight on Yashi

With Spring coming, we want to highlight a great yarn for warm weather.

Yashi and Yashi Iro 2 balls blog

Yashi is 100% raffia.  It has a papery but soft feel and works great for accessories and home decor.  Yashi Iro is its multi-colored companion, dyed in shades that coordinate with the solids.  Our Sales Director Yonca has made a video to tell us all about it.

In the video, she mentions Rick Mondragon’s Japanese Knot bag, which is now available as a free pattern on our website.

Yashi Bag Rick Mondragon_hi-res

This was originally available for STITCHESWest attendees, and we’re very grateful to Knitting Universe for sharing it with us. By the way, if you haven’t been to a STITCHES show yet, put it on your to-do list.  They’re a blast.

You can find the Japanese Knot Bag pattern at this link.

We hope you enjoy this fun free crochet pattern.  Happy crafting!

Bisected Shawl – Knit-on Edging

We’re at the end of the road on our 3-part journey to learning the ins and outs of the Bisected Shawl. Two weeks ago we learned how to do a top-down triangle and complete the first part of the shawl. Last week we tackled putting the two halves together. Today, we’re going to finish off our swatch with a knit-on edging.

A knit-on edging is literally an edging that is knit onto an existing piece of knitting. Many top-down shawls incorporate a knit-on edging along the bottom part of the shawl. One reason a knit-on edging can be a good choice, is that because it is worked sideways, it is stretchy enough to be blocked. It can be difficult to produce a nice bind-off for the lower part of a shawl such that it can accommodate the stretch needed to block. Another reason knit-on edgings are nice, is that there are a multitude of ways to make a decorative pattern that wouldn’t always be possible otherwise.

To begin, we first need to pick up stitches along our the two angles of our triangle.

Edging_1

You’ll be picking up roughly 1 stitch for every other row, or every ridge along your garter stitch edge. Picking up stitches along a garter stitch edge is easy! Just slide your needle through the outermost loop of the stitch, and that’s it. Picking up stitches is different than picking up and knitting. In picking up and knitting, there is a strand of yarn involved. Here, we are simply placing loops on a needle.

Here’s the first half picked up.

Edging_2

And here we are with all stitches picked up and ready to add our edging. For my small swatch, I ended up picking up 80 stitches. It’s important in this pattern that the stitches picked up is a multiple of 8. We’ll see why a little later on.

Edging3

Next, we cast on our first edging stitches. Cast on 12 stitches to your needle.

Edging_4

Next, work Row 1 of the Edging pattern over the first 11 stitches.

Edging_5

That very last Edging stitch is how we connect to the picked-up set of stitches. At the end of every right side row of the Edging, knit the last Edging stitch together with a stitch from the shawl body (picked-up stitches).

Edging_6 Edging_7

Then turn, and work row 2 across the Edging stitches. Continue by repeating Rows 1-16 of the Edging, continuing to knit 2 together at the end of every right side row, attaching the Edging to the shawl as you go.

Here we are after 1 repeat of the Edging:

Edging_8

The reason it was important for us to pick up a multiple of 8 stitches in the beginning is based on the number of rows in every Edging repeat. There are 16 Edging rows, and we are consuming an Edging stitch on every other row, which is why we need multiples of 8. But along the way if you find that you’re off by a stitch or two, don’t sweat it. You can even yourself out by knitting 3 stitches together instead of 2 (an Edging stitch together with  picked up stitches). Or you can knit the same picked up stitch twice if you need an extra stitch.

Here we are with half the Edging added, and then all the Edging.

Edging_9

Edging_10

Those last 12 Edging stitches left on the needle – you can just bind those off.

Now, perhaps the most important step of all: blocking. You may see this instruction in the finishing section of a pattern and wonder what the heck it means. Well, it can mean different things depending on the type of stitches in the project, the fiber content of the yarn, and the desired outcome. But in a general way, blocking means to even out your stitches either by making wet or steaming and then allowing to dry.

Lace is something that almost always benefits greatly from blocking. I tend to do a “hard block” on lace, which means I stretch it to its limits. If at all possible, I utilize blocking wires rather than using a million little pins. I’m so fond of blocking wires, that I typically keep this in mind when designing shawls. The Bisected Shawl is no different.

First I’m going to take a look at the top edge which we bound-off using the I-Cord method. I’m going to slide my blocking wire through the I-Cord bind-off, 1 stitch at a time.

Edging_11

I am simply inserting my wire from front to back along each individual stitch. You could also go back to front, or perhaps find a spot along the back side of the I-Cord to get your stitches onto the wire. The most important thing is to be consistent with your method.

Edging_12

Next I’m ready to do the Edging. I could use individual pins at each of the points of the Edging, but I prefer to use another blocking wire.

Edging_12.5

Now the wires need to be stretched. For this, I have a set of interlocking foam mats that are sold as play mats for kids. For my swatch, I only need one mat. If I were blocking a large project, I could assemble as many as needed to accommodate the size of my project.

Edging_13

I pin into the foam mat, adjusting pins as I go, pulling as taut as I dare without skewing the shape of my knitting too much. After adjusting and making sure everything is symmetric, then I steam. After the piece is fully dry, I like to let it remain pinned overnight. This really lets the blocking “set”, so that the block stays for a long period of time.

Edging_14

And here is my swatch, no longer a crumpled mess!

Join me next week when I talk about slip stitch knitting and the Traverse Scarf.

Free Pattern Friday – Starry Road Scarf

It’s Free Pattern Friday!

Universe Starry Road Shawl loose blog

Today, the Starry Road Scarf in Universe.

Breathtaking, isn’t it? Universe (246yds/50g) is the yarn we created specifically for our tenth anniversary, and it’s unlike anything else out there.  A cotton/linen blend held with a metallic strand, wrapped in polyamide for greater strength, it’s perfect for lacy shawls and scarves like the Starry Road Scarf.

Continue reading “Free Pattern Friday – Starry Road Scarf”

Bisected Shawl – Putting the Pieces Together

Last week we covered the basics of a top-down triangle and the starting garter tab. Now we’re going to start putting it all together!

As a refresher, we’re talking about the Bisected Shawl, one of the projects from ebook Contrarian Shawls 2.

BisectedShawl_2_hires

Since last time, I finished up both miniature versions of right and left wings and added the edging. Here they are sitting next to each other, all ready to be joined. As per the pattern, I have divided each wing in half and placed the stitches on separate needles.

Here is a diagram of the shawl. That green line in the center represents the 3 needle bind off we’re about to do.

Bisected Shawl_3ndlbindoff

A three needle bind off is a way of joining two sets of live stitches. In this case, we’re joining half each of the right and left wings of the shawl. It’s called the three needle bind off because it require three needles. Though because I’m using circular needles, I only need to use the other end of one of the circulars as the third needle.

To begin, place the right sides of the pieces together:

3ndl_2

Next, knit 2 stitches together. That is, knit one stitch from the front needle and one stitch from the back needle together.

3ndl_3

Then knit two stitches together again (1 from each needle) so there are now 2 stitches on the right needle.

3ndl_4

Now is where the “bind off” part of this comes into play. Pass the first stitch on the right needle over the second stitch.

3ndl_5

3ndl_6

Next, k2tog, bind off 1 stitch, and keep doing this for the remainder of stitches to be joined. Here is the finished three needle bind off:

3ndl_7

And here’s what it looks like from the front:

3ndl_8

After I block the piece, that seam will flatten out and look virtually seamless. You can see that I’ve put the remaining stitches from both wings onto a single needle. I worked the top edging across these stitches and here’s what it looks like after weaving in ends and giving a light steaming:

3ndl_9

I’m using Whisper Lace in brand new colors 115 Mineral (solid) and 212 Stonework (multi). I’d love to see this color combination in a full-sized Bisected Shawl!

Join us next time when we tackle the final step of this shawl, the attach-as-you-go garter lace edging.

Free Pattern Friday – Swirling River Cardigan

It’s Free Pattern Friday!

Swirling RiverCardigan_front_blog

Today, the Swirling River Cardigan in Uptown DK.

This is a great light sweater for Spring in a lovely lightweight yarn.  Uptown DK (273yds/100g) is 100% anti-pilling machine washable acrylic.  Even if you’re a fiber snob, as I confess I sometimes am, you’ll be surprised by just how pleasant it is to work with, and just how nicely it knits up.

SwirlingRiverCardgan_back_blogThis cardi is traditionally constructed, knit in pieces from the bottom up.  The collar and button band are picked up and knitted after finishing the garment.  The Little Swirl and Big Swirl lace repeats are both written and charted.

We love this sweet piece, perfect for the cusp of the changing seasons.  We hope you do too.

Happy knitting!


Knit a Clover Family

What is it about the four leaf clover that intrigues us? It’s said that only 1 in every 10,000 clovers has four leaves (as opposed to the more common three-leaved clover). So finding a four leaf clover is considered lucky. The clover has also become a symbol of all things Irish, and upcoming holiday, St Patrick’s day. St Patrick himself is said to have explained the holy trinity of Christianity to the Irish (at that time, Irish pagans) using the three leaf clover as illustration.

Green mini-hanks blog

Holidays can be a nice way to pass the year, regardless of what our beliefs are. Traditions can be soothing and familiar and fun. And in any case, I happen to love the color green, all shades. And I enjoy any excuse to knit cute little frivolous things and entertain the math-geek part of my brain.

Finished clovers 2 blog square

The Clover Family is shown knit in 3 different yarns – Bamboo Pop (small), Uptown Worsted (Medium), and Deluxe Worsted held double (Large).

The 4 identical petals are knit separately. Then the stem is knit, turning into I-Cord at the end.

Dark Green Clover in progress blog

Then the I-Cord is threaded through eyelets along the lower edge of the petals. I used a crochet hook along with my long tail to bring the I-Cord through the eyelets, but you could use a tapestry needle or even your fingers.

Uptown Clover in progress blog

Draw the I-Cord taut, weave in the end, and voila – your very own four leaf clover.

Bamboo Pop Clover with tools blog

You could just as easily make a three leaf clover by leaving off one of the petals, or turn it into the super rare five leaf clover by adding an extra petal.

These clovers are pure whimsy. But I could see these pinned to a bag or a headband, giving them a little functionality. At the very least, we all need something green to wear next week on St Patrick’s day to avoid getting pinched.

Finished clovers 1 blog

Bisected Shawl – Starting Out

The last 2 weeks we talked about how to do filet crochet and the Delphi Stole from ebook Contrarian Shawls 2.  Now we’re ready to move onto some knitting with the Bisected Shawl from the same collection.

BisectedShawl_2_hires

BisectedShawl_1_hires

The Bisected Shawl is a really fun knit. It’s worked in several sections, and it’s fun to see the progress as you move along. The bulk of the shawl is worked in a multi color of Whisper Lace, while accents are worked in a solid. The lace pattern on both the shawl body and the border are not too tough. If you’ve done just a little bit of lace before (or even a lot), this would be a great project for you. Over the next few weeks, we’re going to be covering all you need to know about wrapping your head around this shawl project.

Below is the diagram of the shawl construction:

BisectedShawl_diagram

There are 4 main steps to the shawl:

  1. knit the Right Wing
  2. knit the Left Wing
  3. join the Right and Left Wings with a 3 needle bind off & work the Upper Edging
  4. Border

Today, we’re going to talk about steps 1 & 2, which are really the same step, but done twice! The wings are just top-down triangles, which may or may not be a familiar concept for you. Top-down triangles are a common way of knitting triangular shawls, or any triangular-anything, for that matter.

If you take a look at that diagram and the little “direction of knitting” arrow, that is where our Wing begins. And like many top-down triangles, this one begins with a garter tab.

A garter tab is just a small “tab” of knitting that makes for a continuous looking and seamless start. To begin the garter tab for the Right and Left Wings, we cast on 3 stitches and then knit 4 rows. Our tab looks like this:

GarterTab1

Doesn’t look like much, does it?

After this portion is complete, it’s time to pick up stitches for the beginning of the shawl.

First, we knit 3 (simply knit across the live stitches on the needle):

GarterTab2

Next, we rotate the tab 90 degrees clockwise and pick up and knit 2 stitches from the side of the tab (1 stitch in each garter bump):

GarterTab3

And finally, we pick up and knit 3 stitches along the cast-on edge:

GarterTab4

It just looks like a scrunched up mess, right? For an even more seamless start, you can try casting on the 3 stitches for the tab using a provisional method. So instead of having to pick up 3 stitches along the cast-on edge, you can just place live loops on your needle and knit them.

Next step is our set up row which will get us ready to begin the lace patterning. Markers are placed after the first 2 stitches and before the last 2 stitches of the row. Markers are also placed on either side of the 2 center-most stitches.

GarterTab5

As with most top-down triangles, 4 increases are worked on every right side row – 1 after the first 2 stitches, 1 on either side of the center 2 stitches, and 1 before the last 2 stitches. Geometry – it’s like magic!

Here’s how our wing looks after the first  20 rows of the pattern. You can see that I started in the bottom center of the swatch where my cast-on tail is hanging. Yarnovers are increasing the triangle shape in the center and on the sides. I love how the garter stitch tab transitions seamlessly into the garter stitch edge stitches of the piece.

GarterTab6

For reference, this small portion of the shawl is where the highlighted area would be in the diagram:

BisectedShawl_firsttriangle

And on the shawl itself:

BisectedShawl_2_beginningtriangle

Next time we’ll talk about joining the wings together and working our top edging.