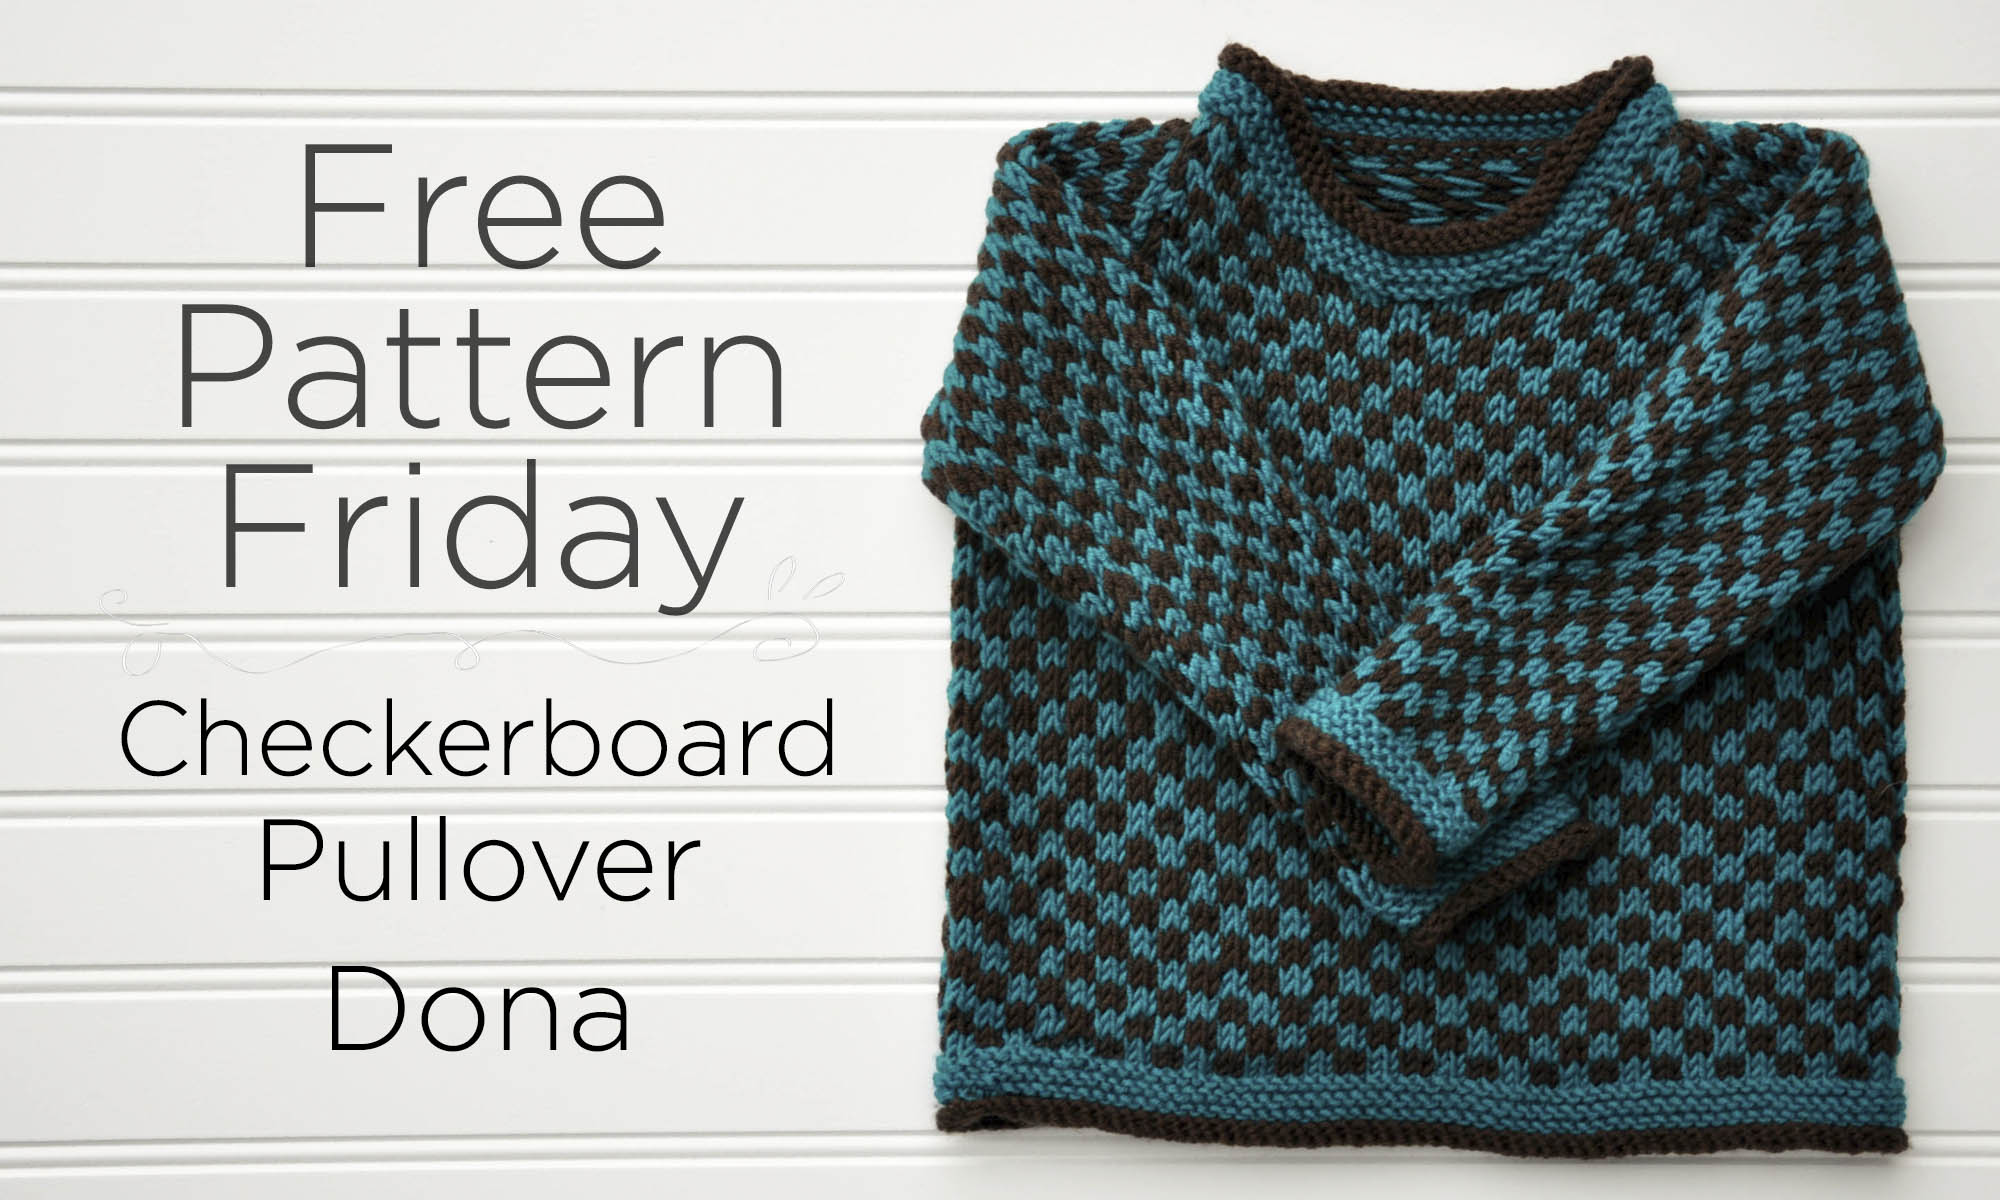
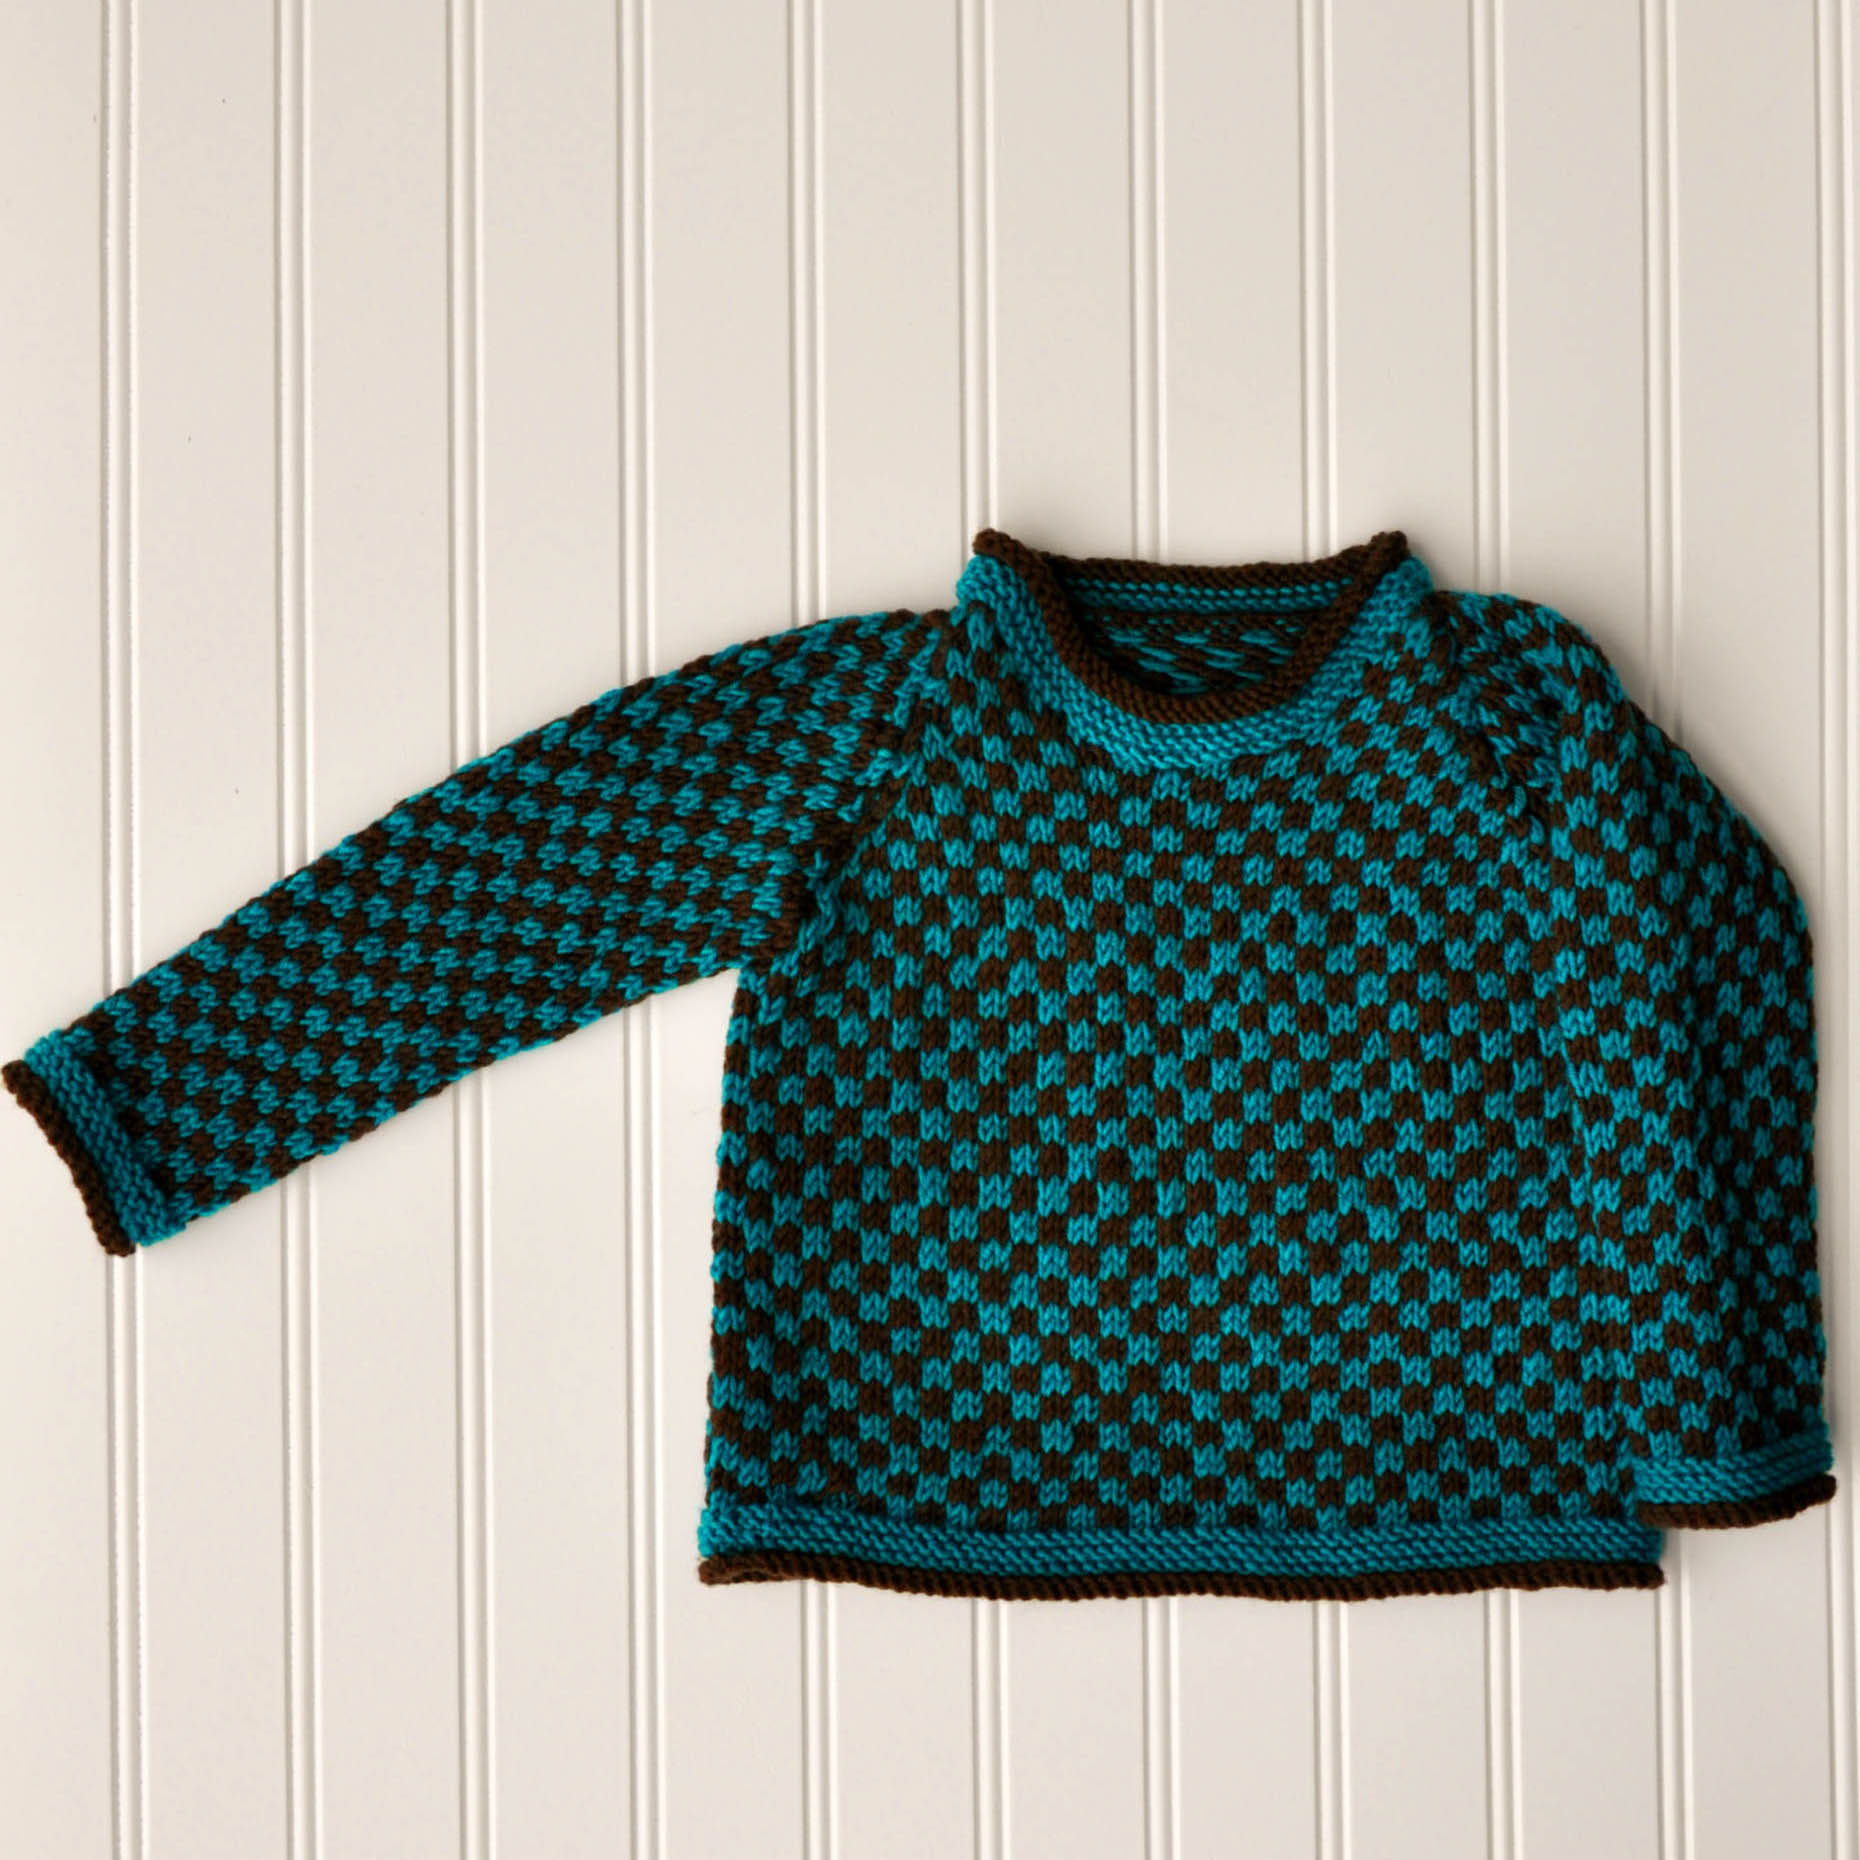
It’s sized from 3-6 months all the way up to 10 years. Whether your little one is “ooh, look at the tiny toes!” or “I can’t believe they’re growing up so fast!” you can still make them a fun sweater.
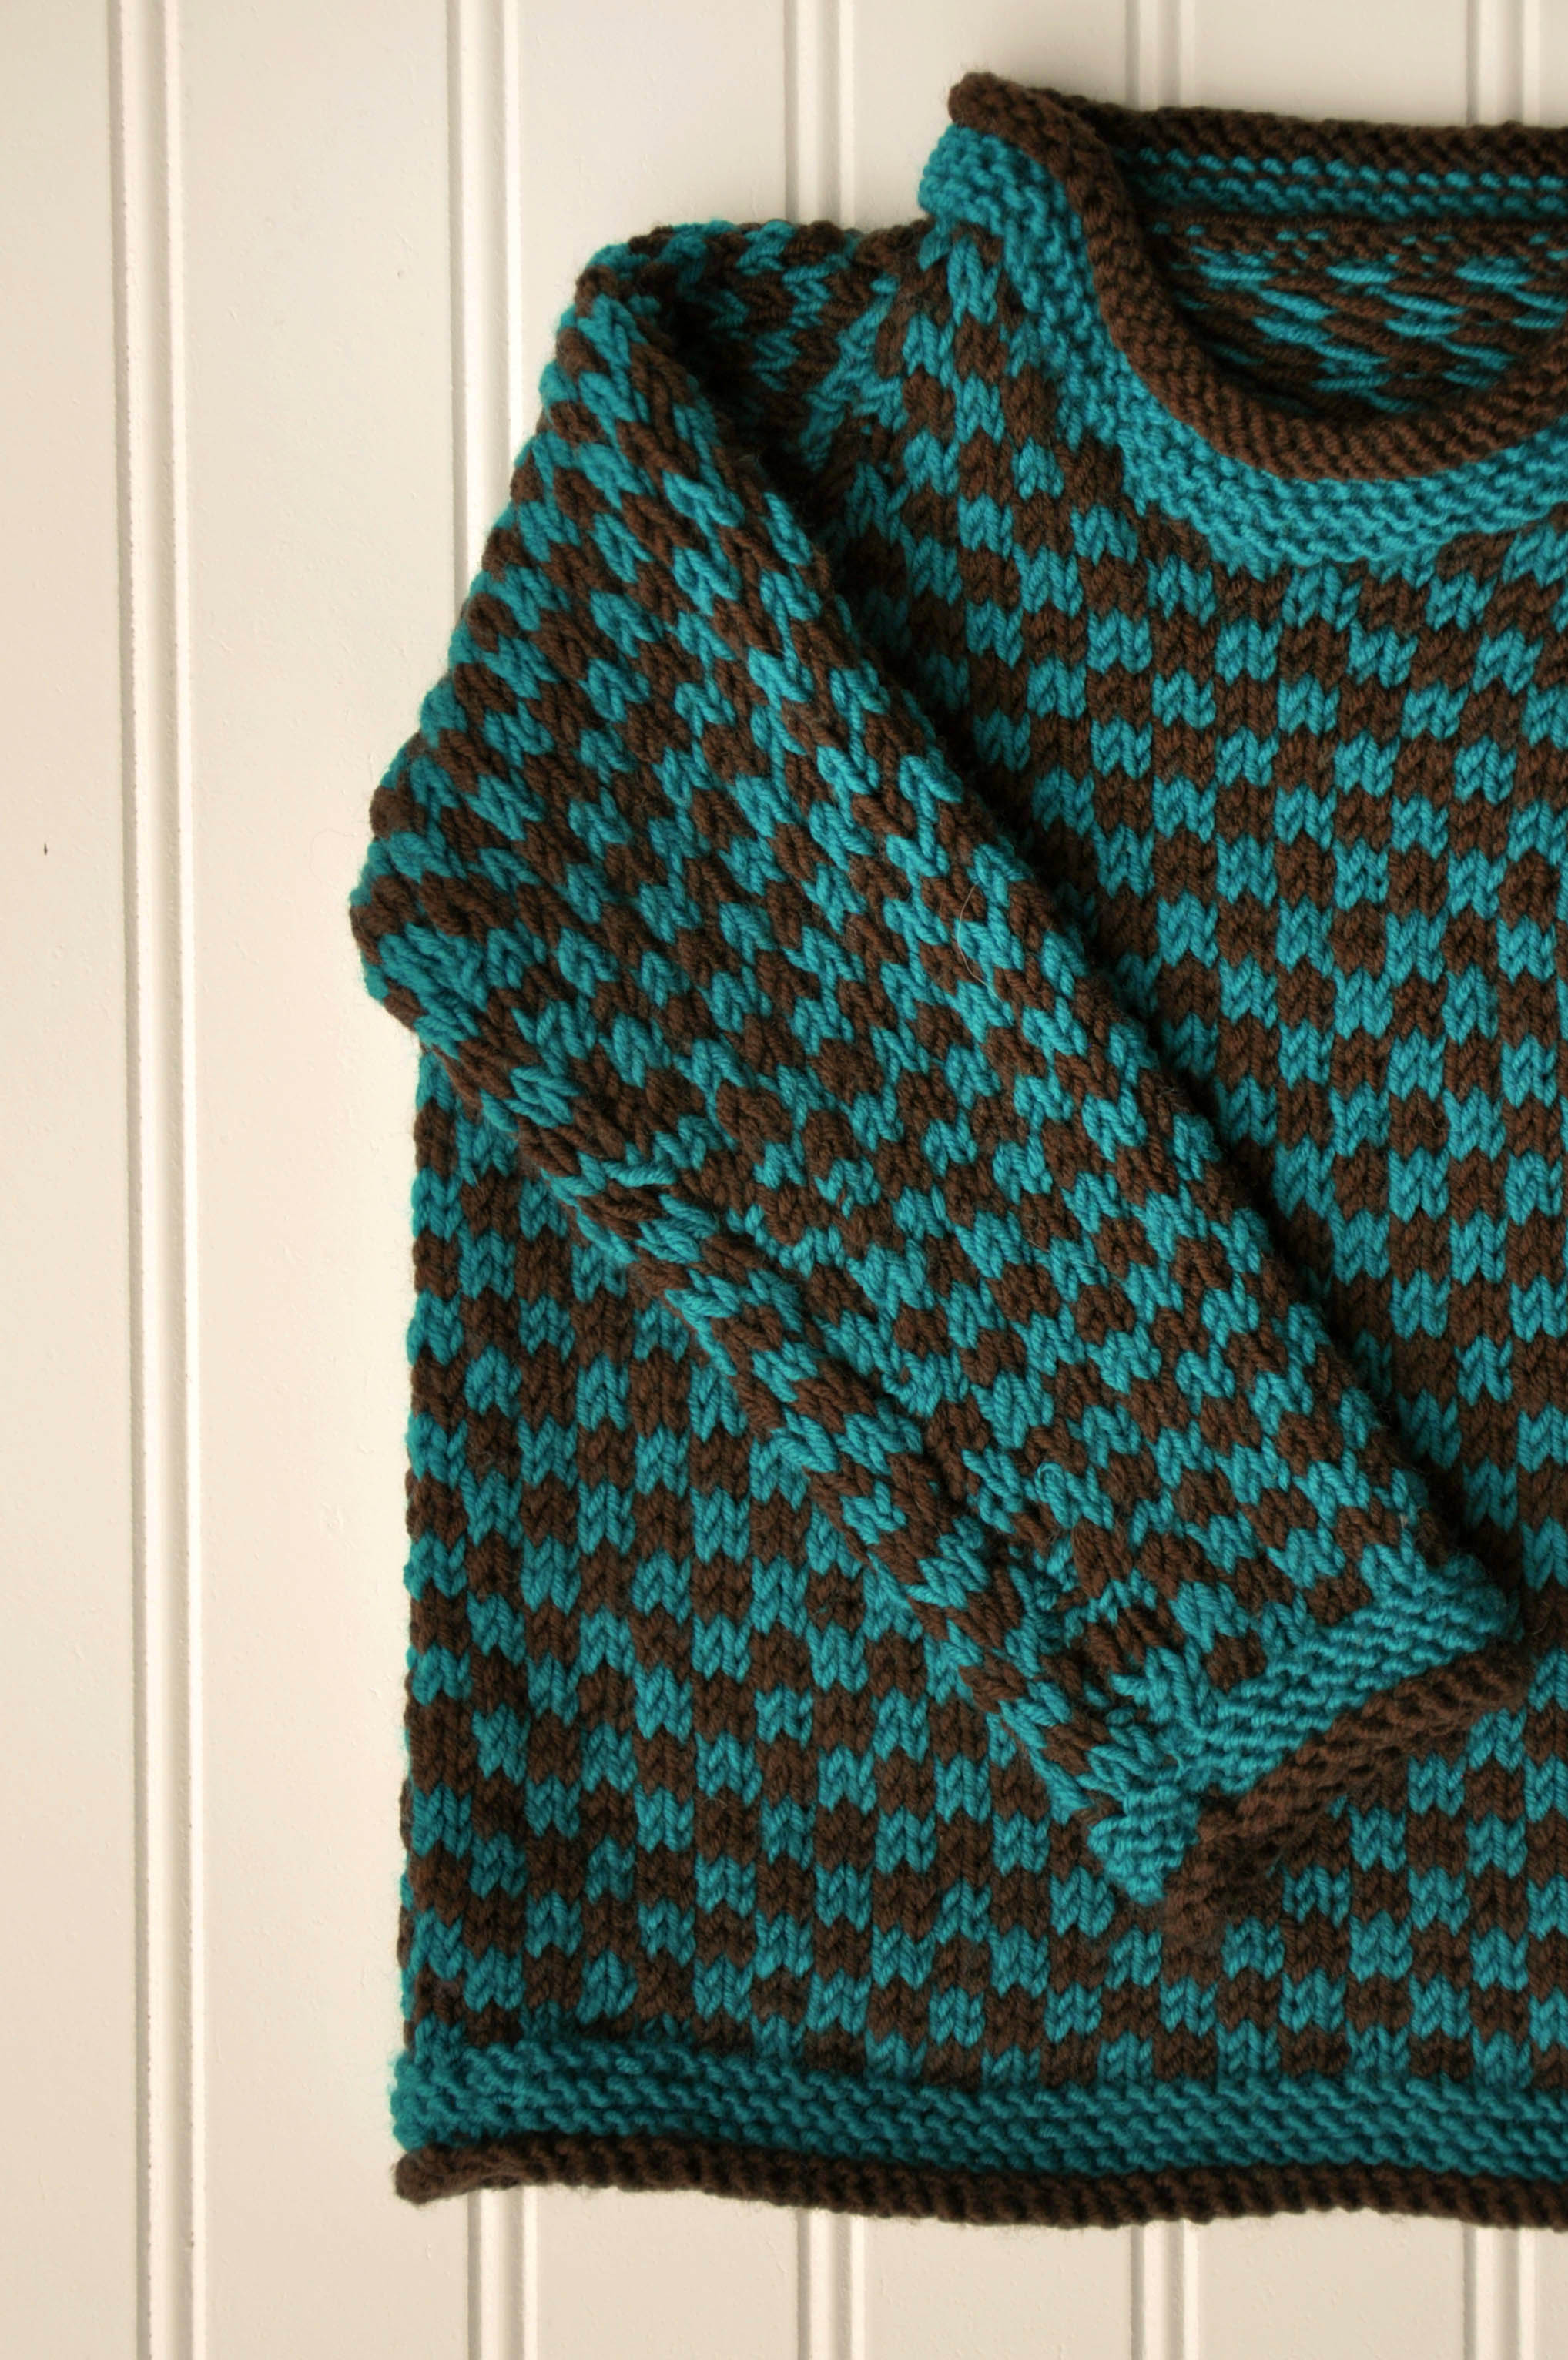
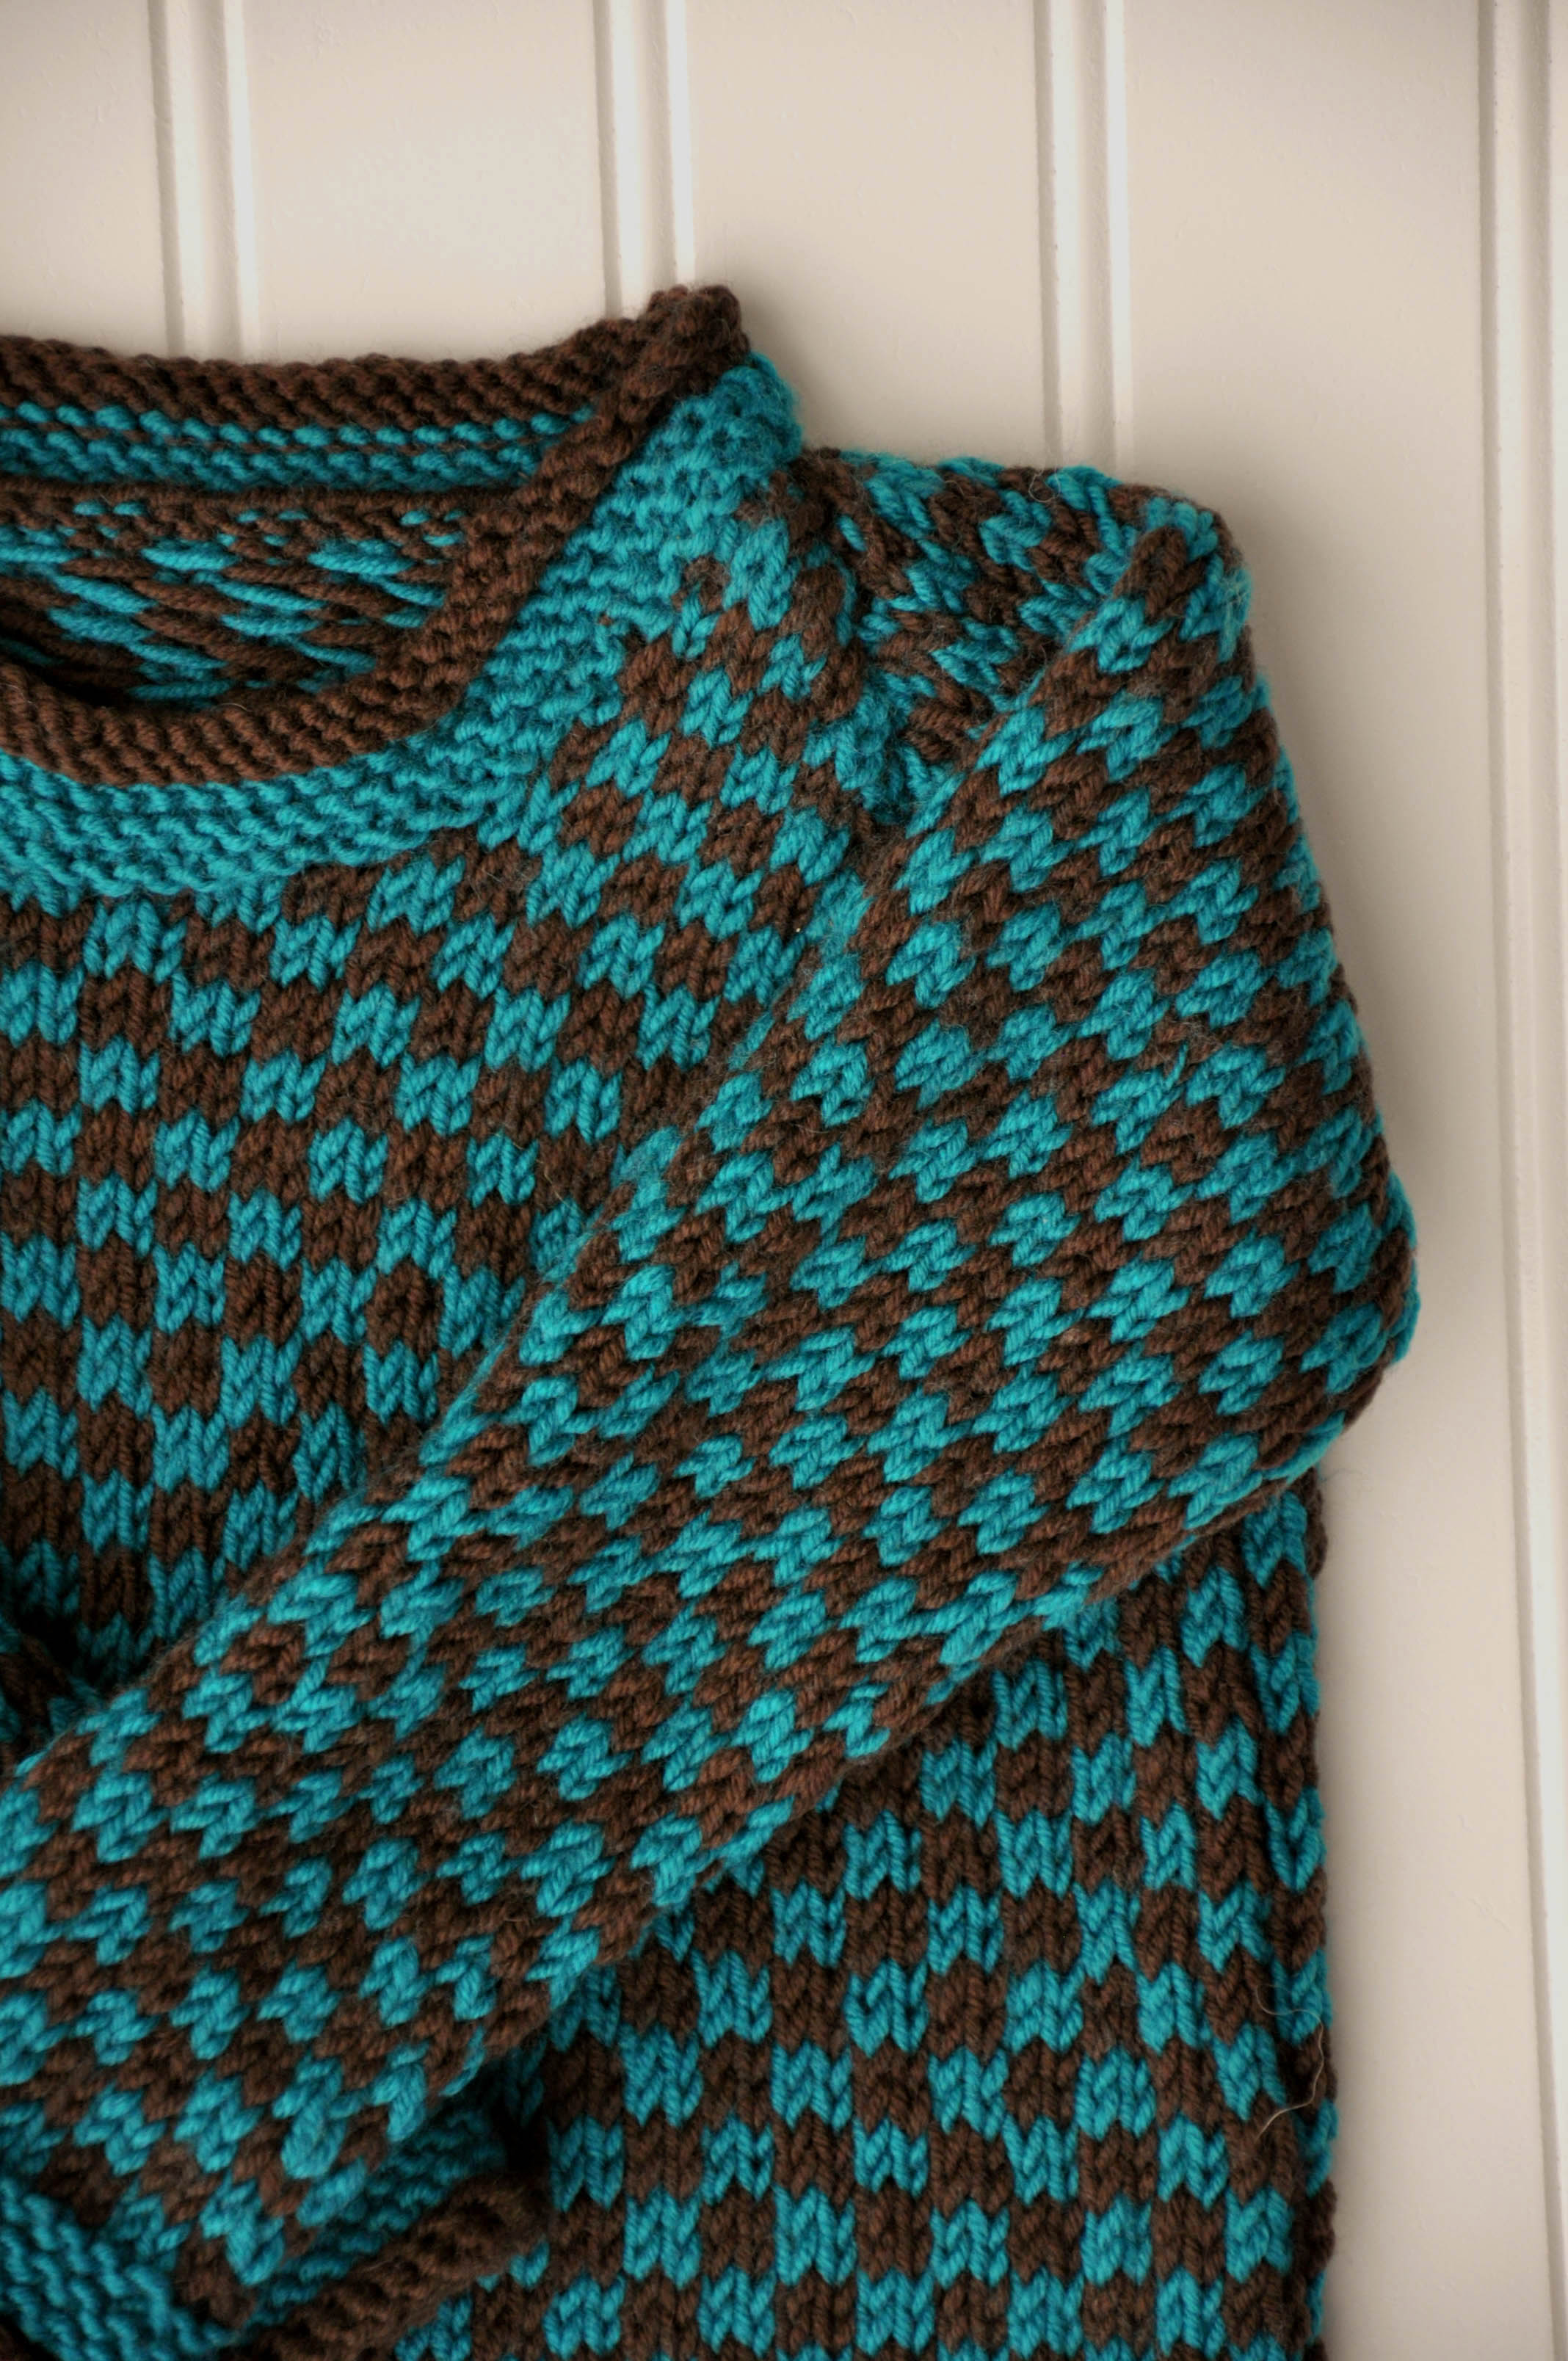
The stranding is very predictable. If you like to do Fair Isle without having to constantly refer back to the pattern, you’re set. Put on an episode of This Is Us and knit away without missing the juicy bits.
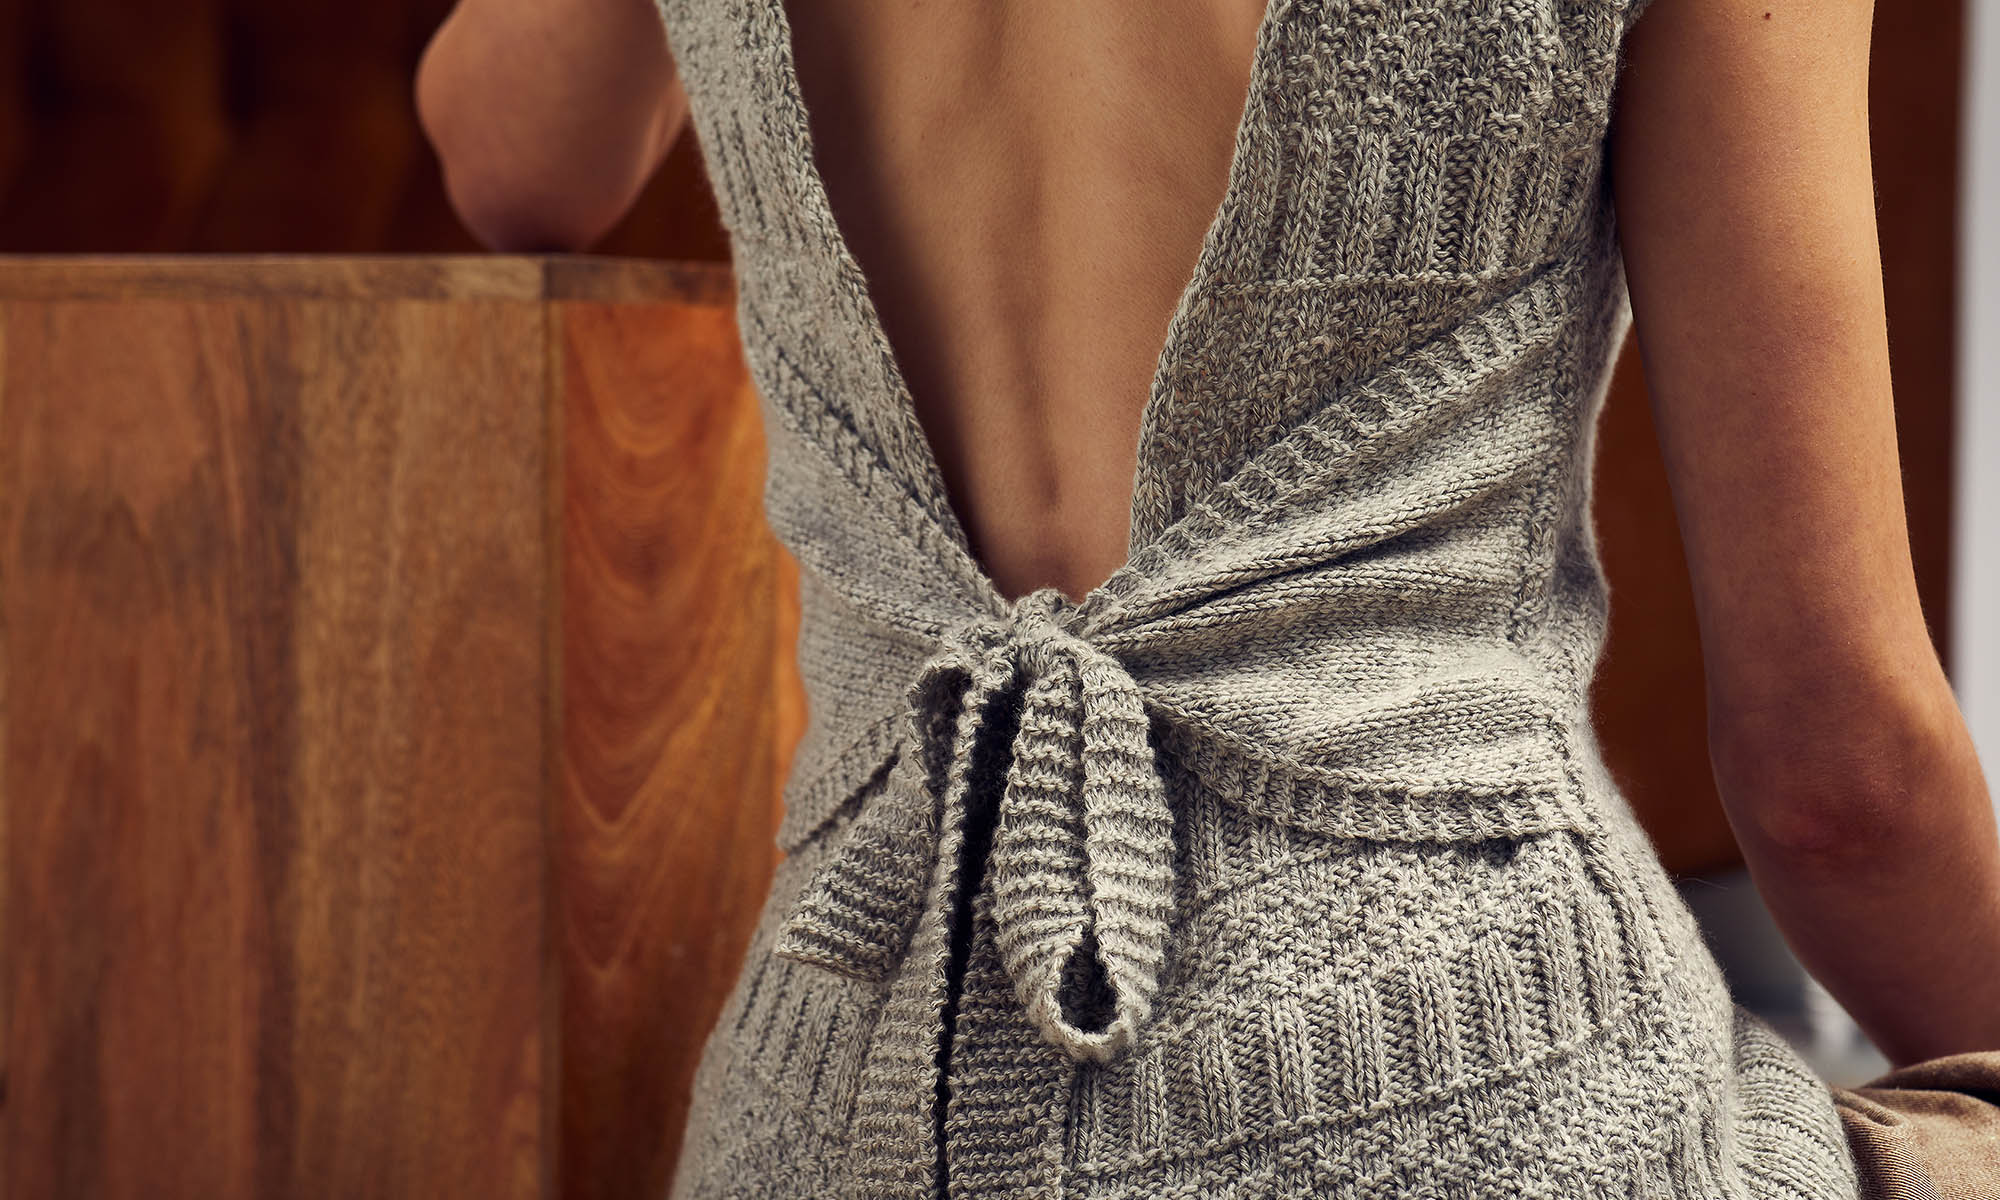
It would be really easy to customize. Fibra Natura Dona has a range of bold colors, both dark and light. Blue and white for a gingham look? Red and black for a classic checkerboard? Team colors for the little fan? There are a lot of possibilities!
Giving back: it’s something everyone seems to think more about this time of year, and something we could all probably think about a bit more. That’s why we have created the new pattern, Thy Neighbor (pattern link).
Thy Neighbor – A pattern to benefit the Refugee Support Services center in Charlotte.
We recently began donating some of our time and resources to the RSS: Refugee Support Services here in Charlotte, the city Universal Yarn calls home. This organization is doing amazing things, and we want to support them in every way we can.
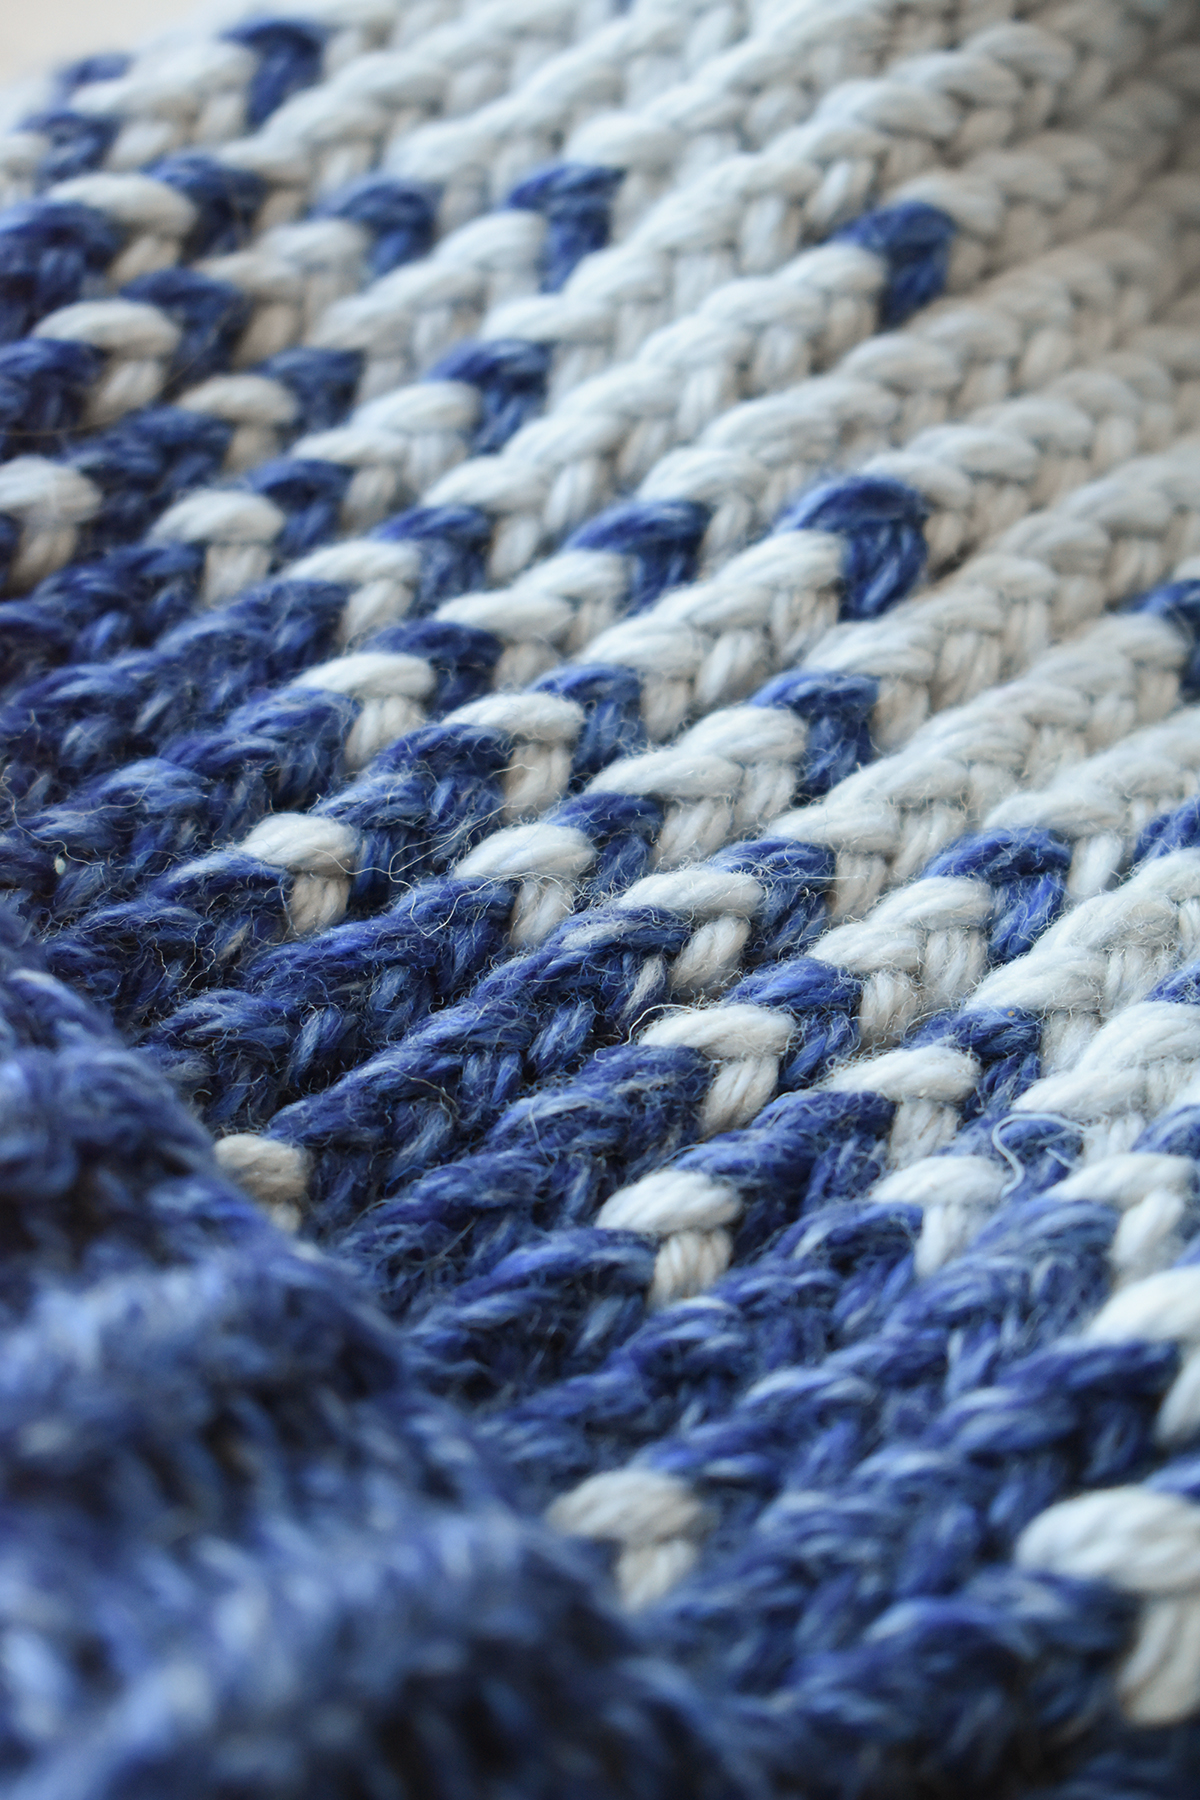
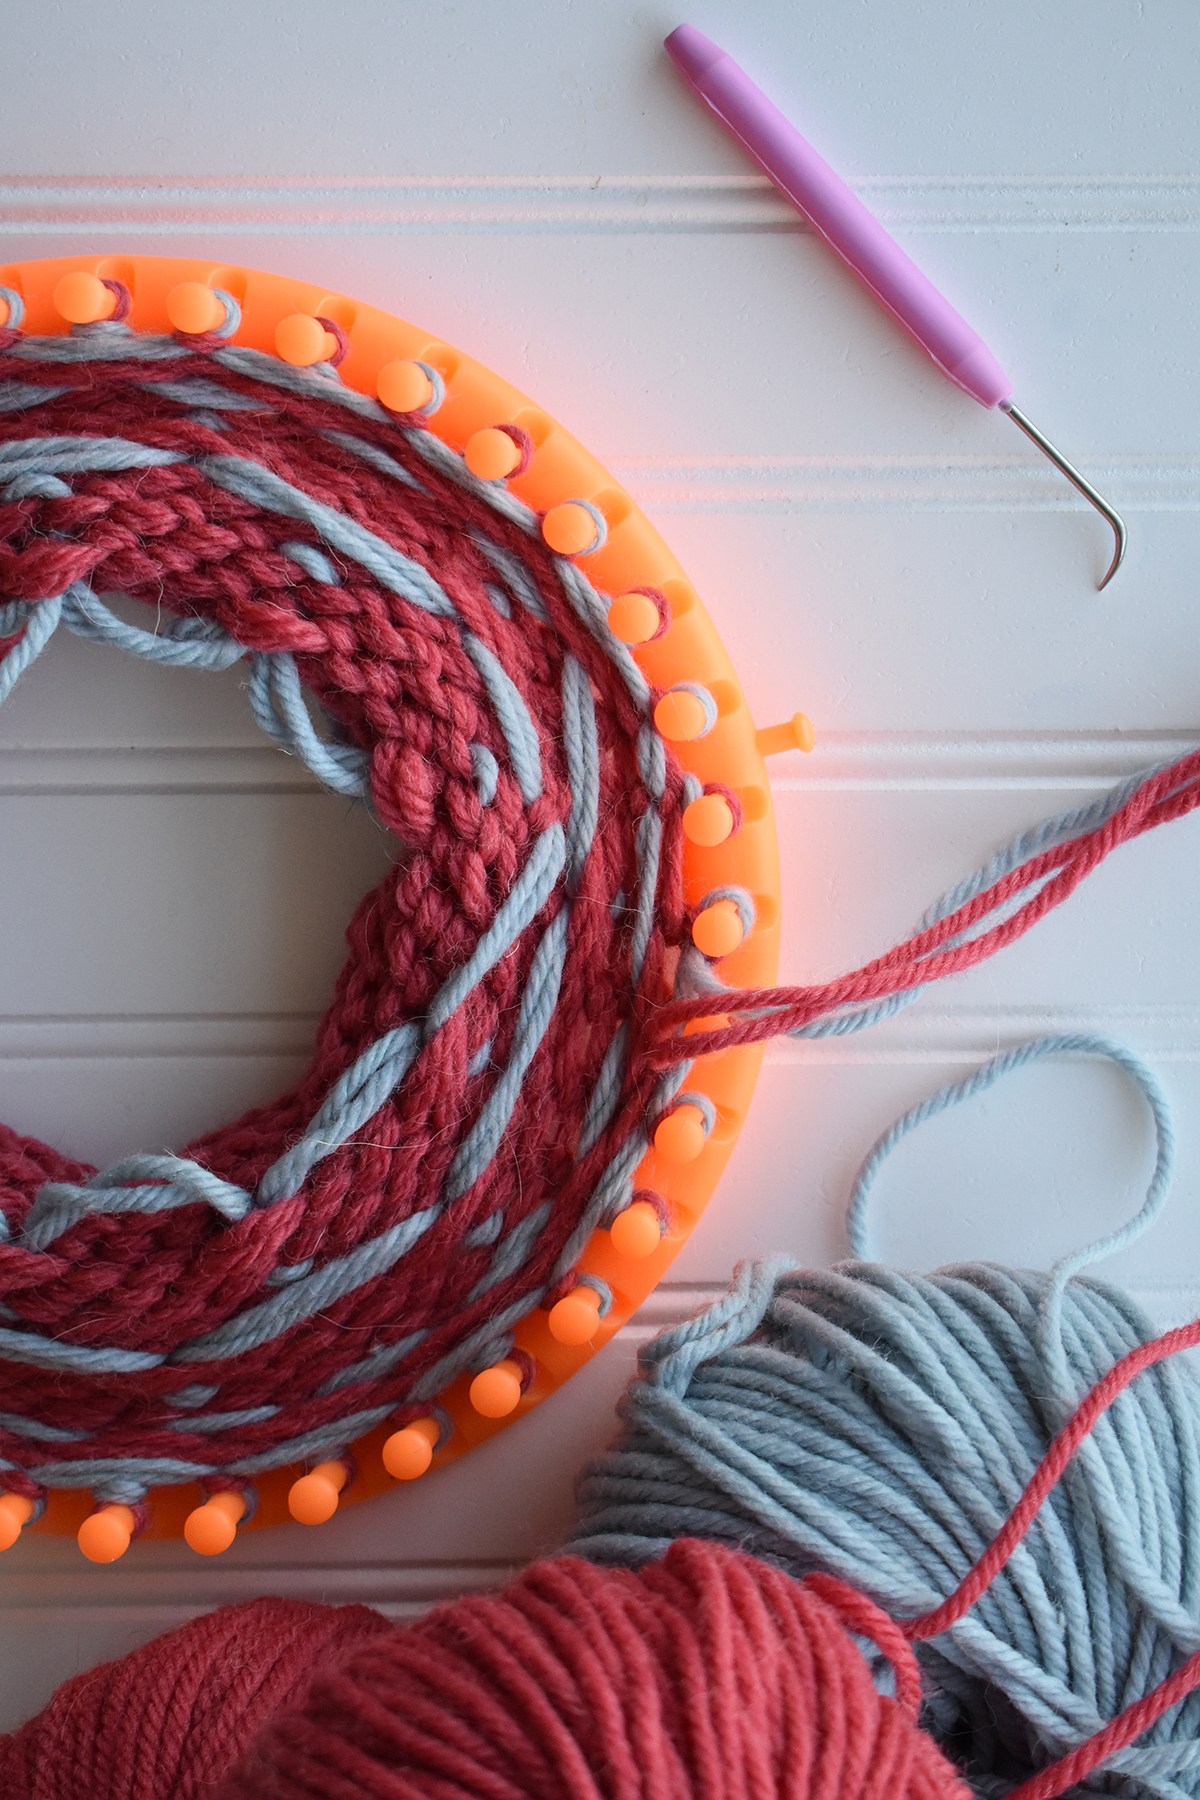
Stranded colorwork has an interesting effect when worked with a loom because of the twisted stitches.
Each Thursday, a group of wonderful women and volunteers meet at the center for English lessons, knitting, community-building, and to take advantage of the many resources the facility has to offer.
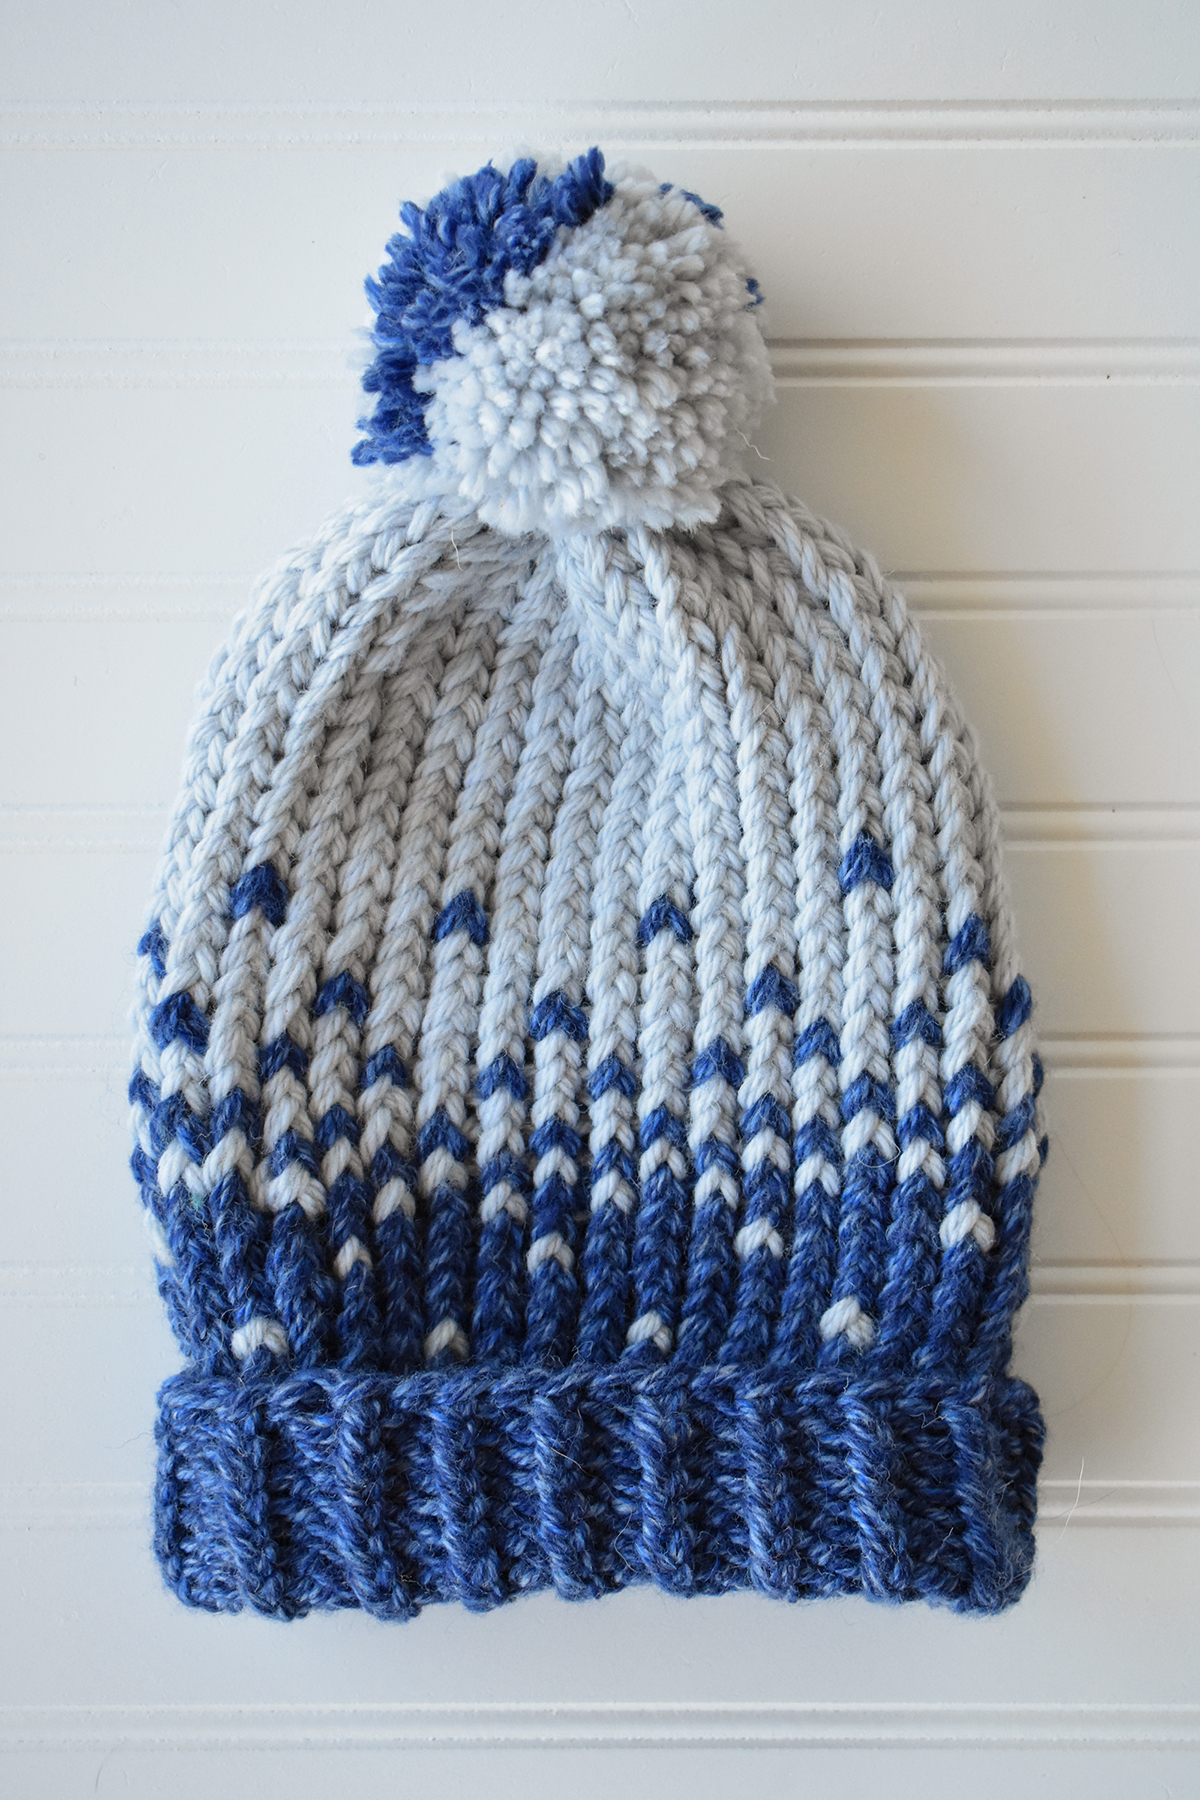
My in-progress Thy Neighbor hat, worked on a loom with Deluxe Bulky Superwash. Colors shown are 901 Rosy Mauve & 932 Icy Grey.
Many of the women make hats on round knitting looms. Loom knitting is really accessible. Anyone can pick it up in just a few minutes, which might be why it’s a popular knitting method at the center. Although we had never knit using looms before, we wanted to meet participants where they are. So we got some looms to practice and will now contribute our own knowledge of knitting. Volunteers at the center help the women distribute their handcrafted goods to earn extra income and develop financial literacy. As a way to give back and support their efforts, we designed this Fair Isle hat. We’ll be teaching the participants this technique to spice up their loom-knitting activities. All proceeds from the sale of this pattern will be donated back to RSS.
As I said before, we want to do as much as we can for this organization. It brought us so much joy to sit in a room filled with the chatter of people from all over the world, offering a helping hand, and exchanging kindness with one another. It’s truly special. When you purchase Thy Neighbor, 100% of the proceeds will be donated to RSS. Financial contributions to the organization help make their peer support, educational, legal, and social programs possible. We sincerely hope you’ll join us in helping, and encourage you to explore the RSS website (link) to deepen your understanding of their work.
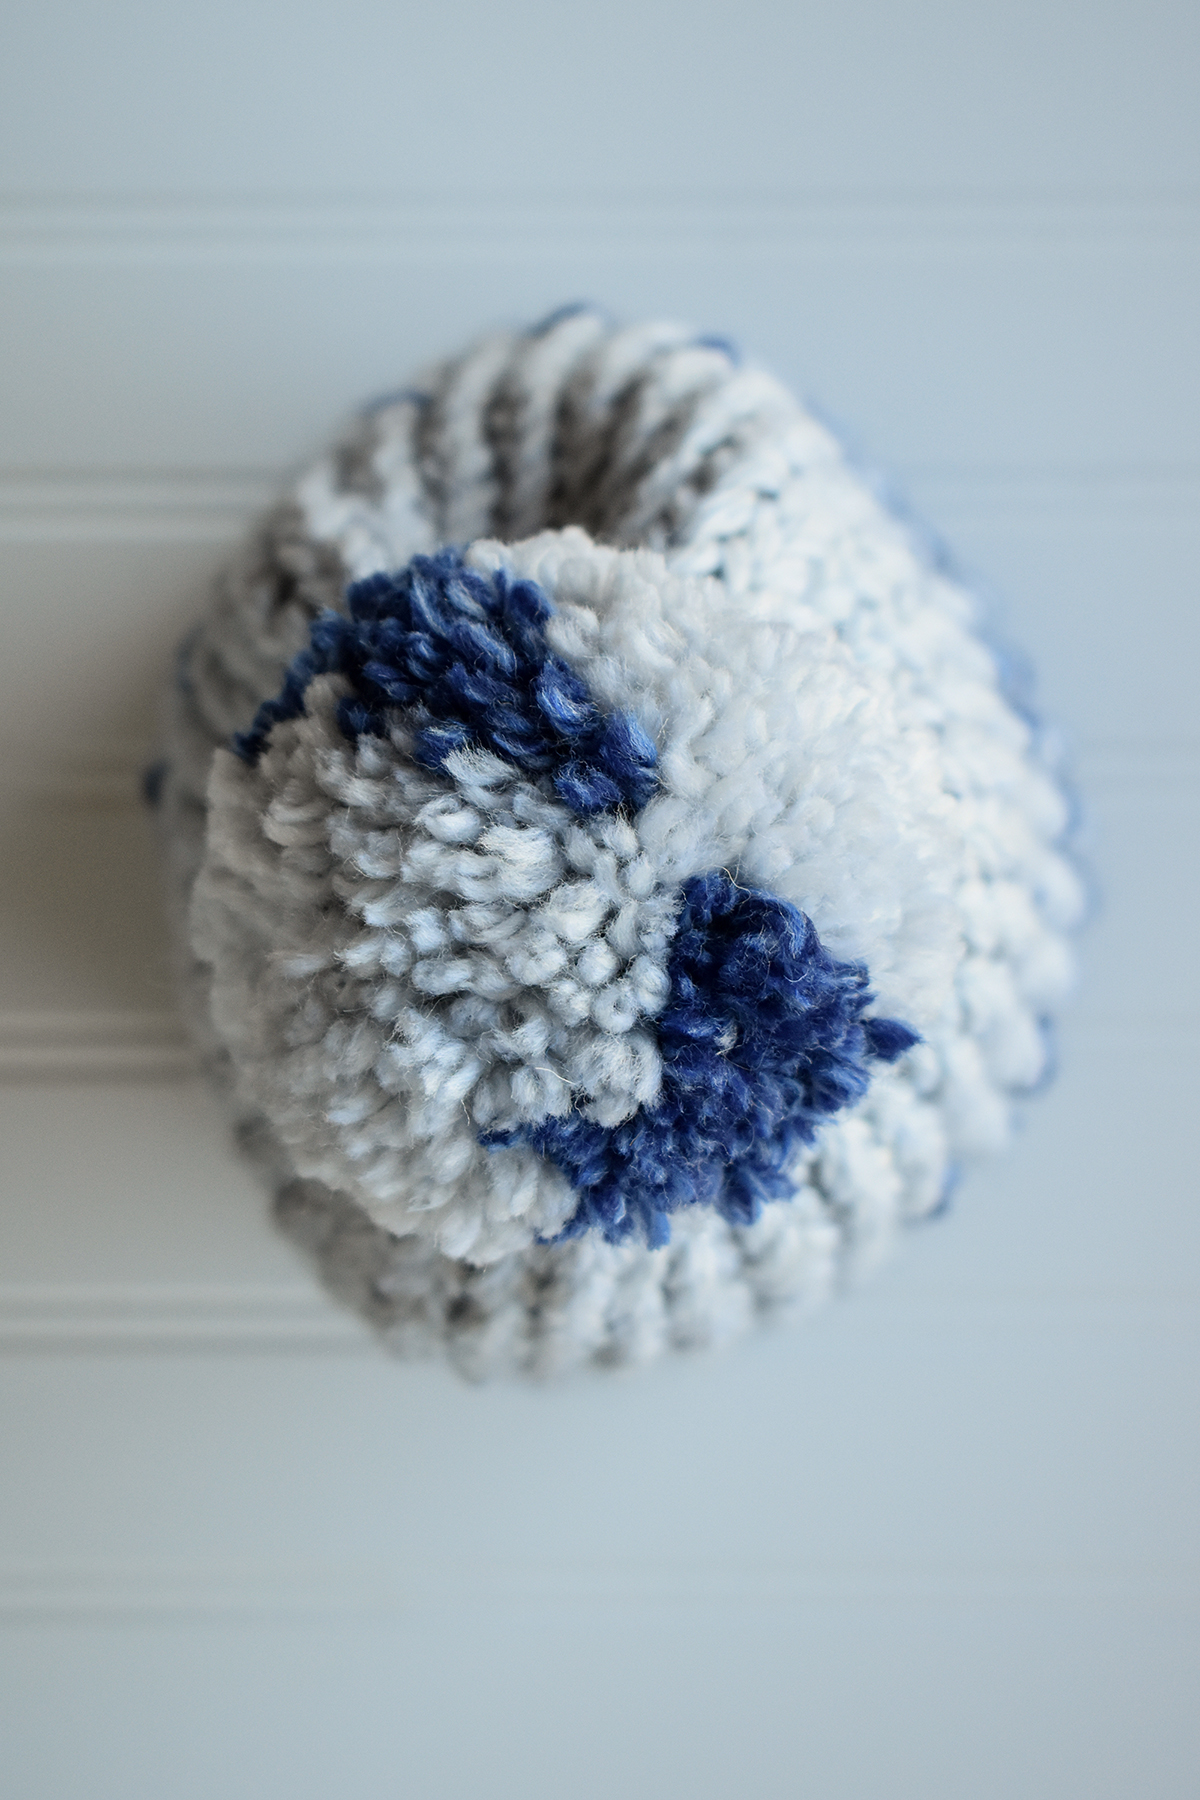
Topped with a multi-color pom-pom! This pattern really is so much fun!
Thank you so much for joining us in our support of RSS! We hope you have a wonderful week!
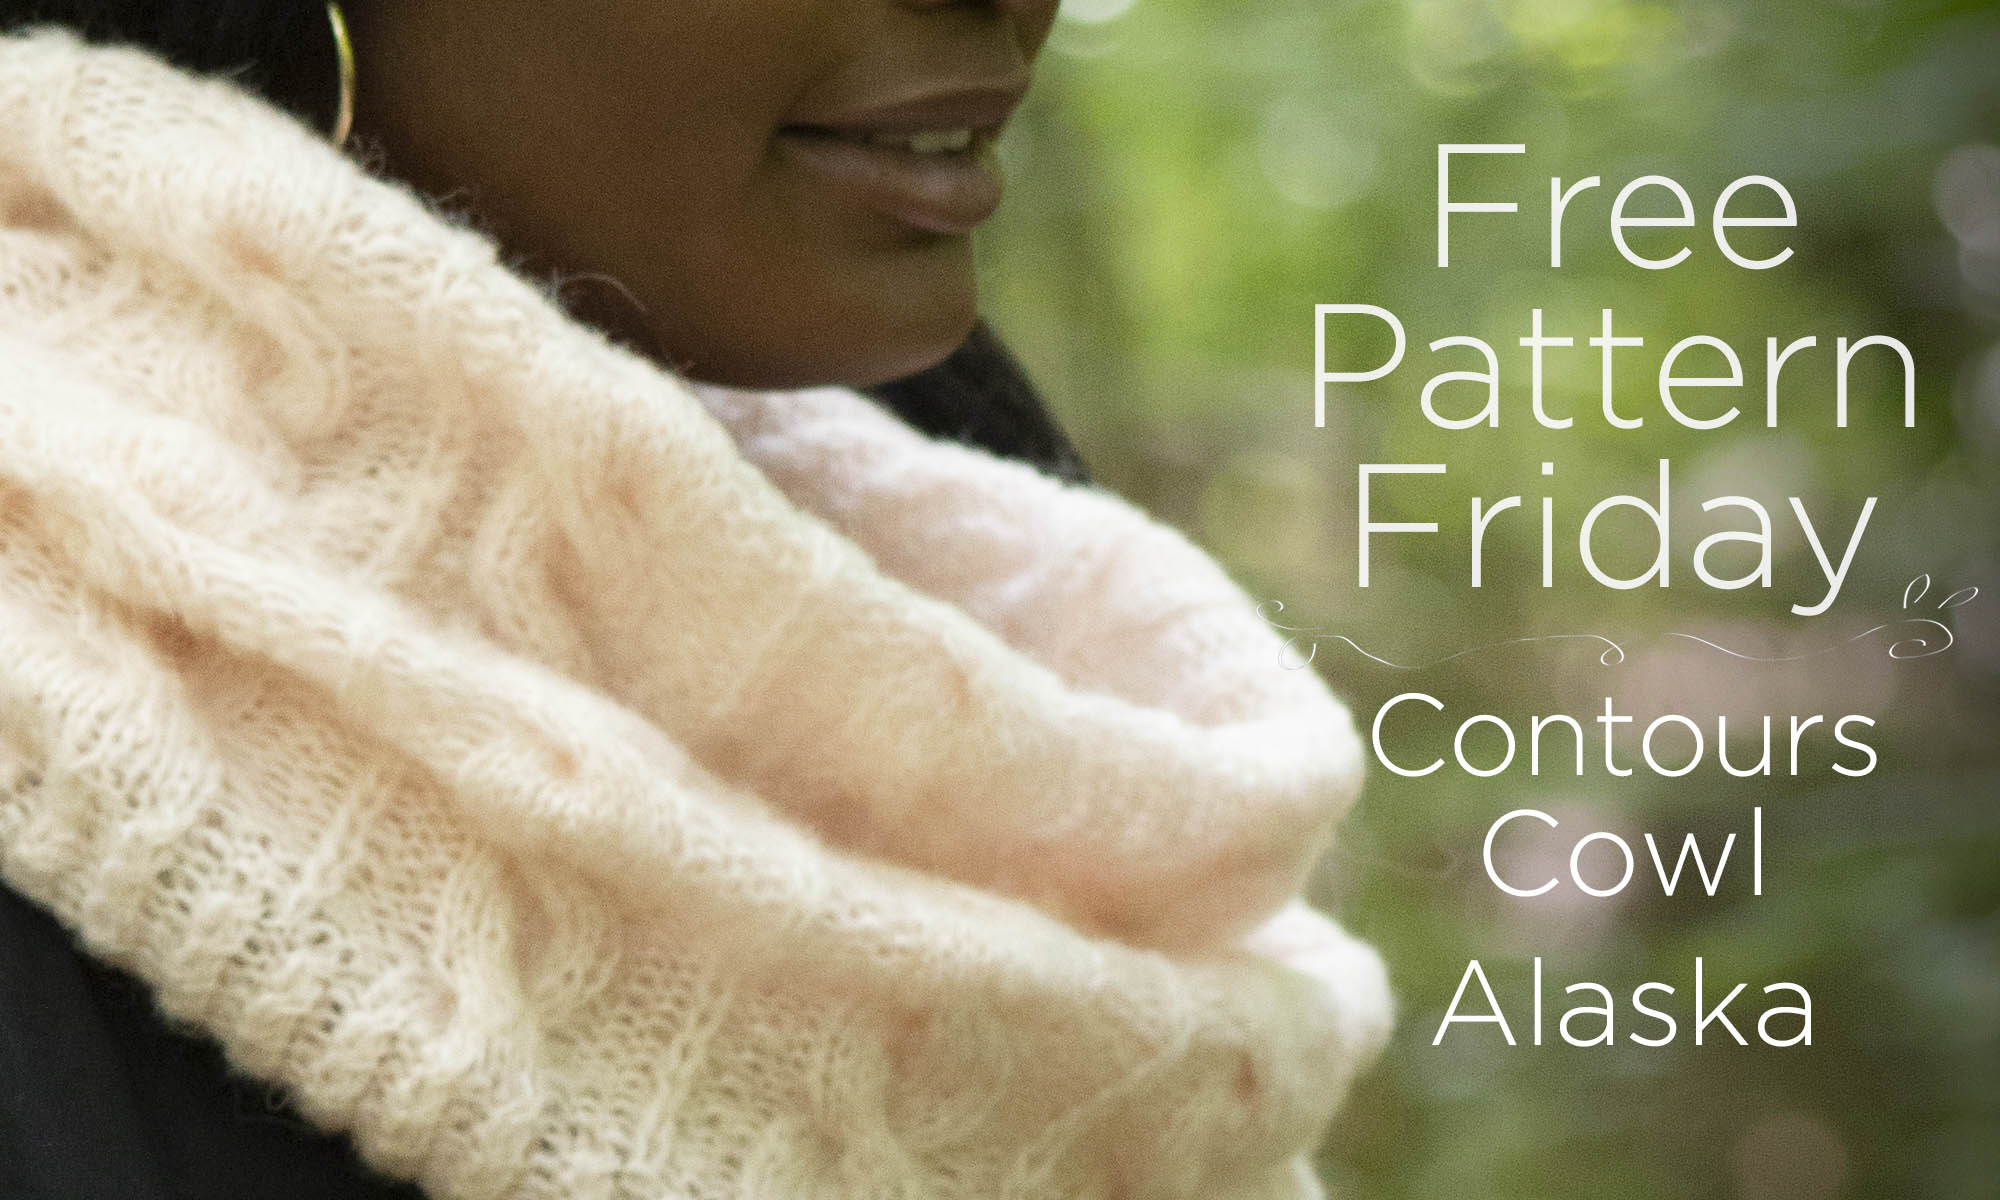
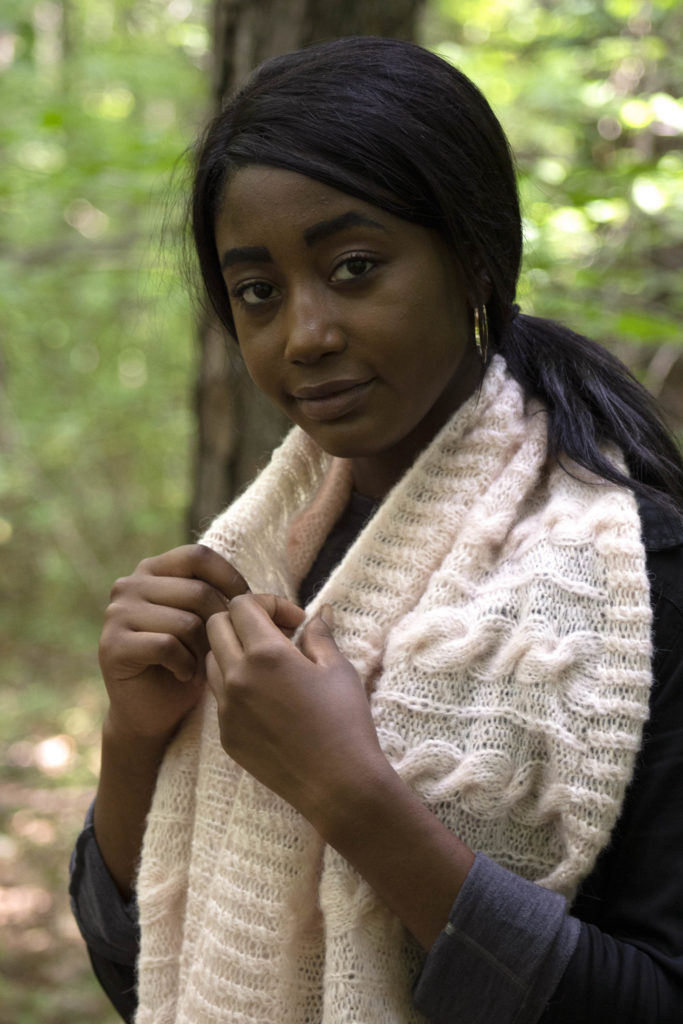
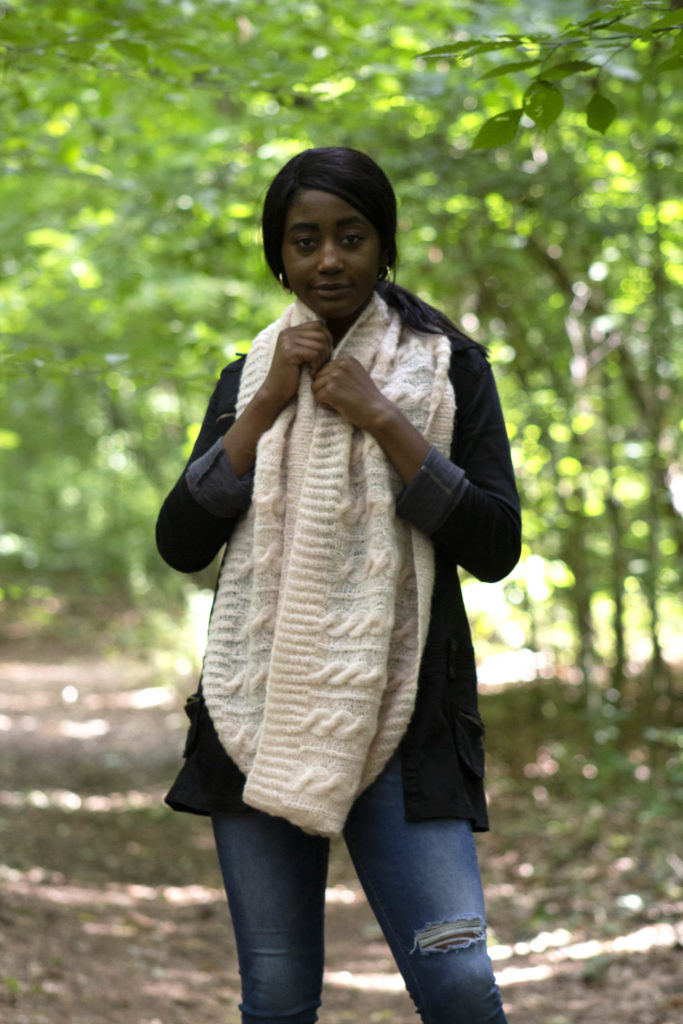
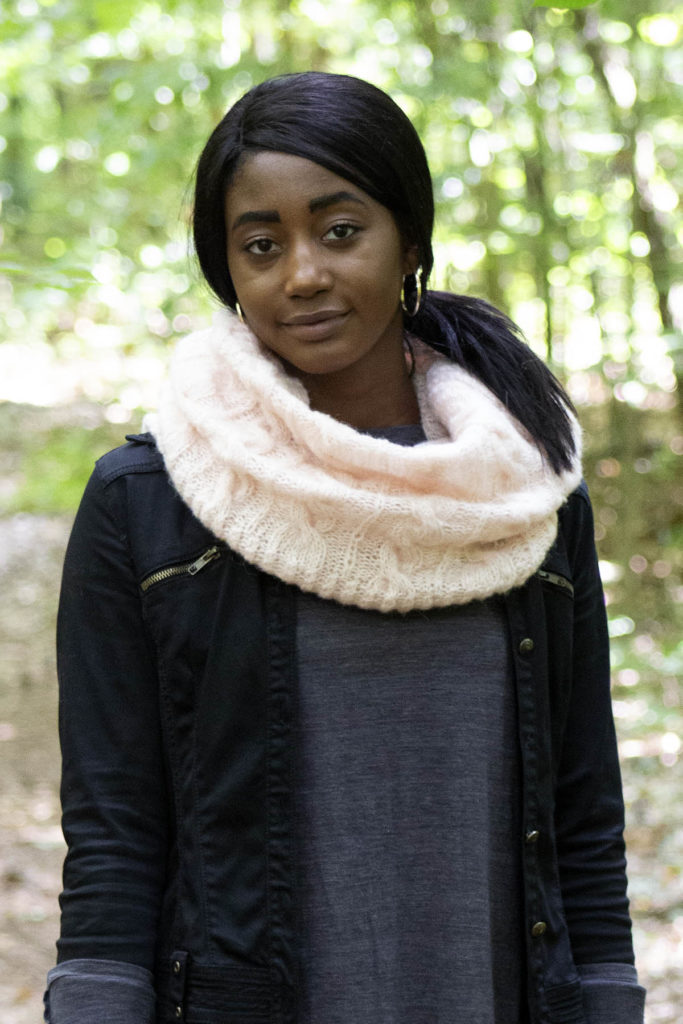
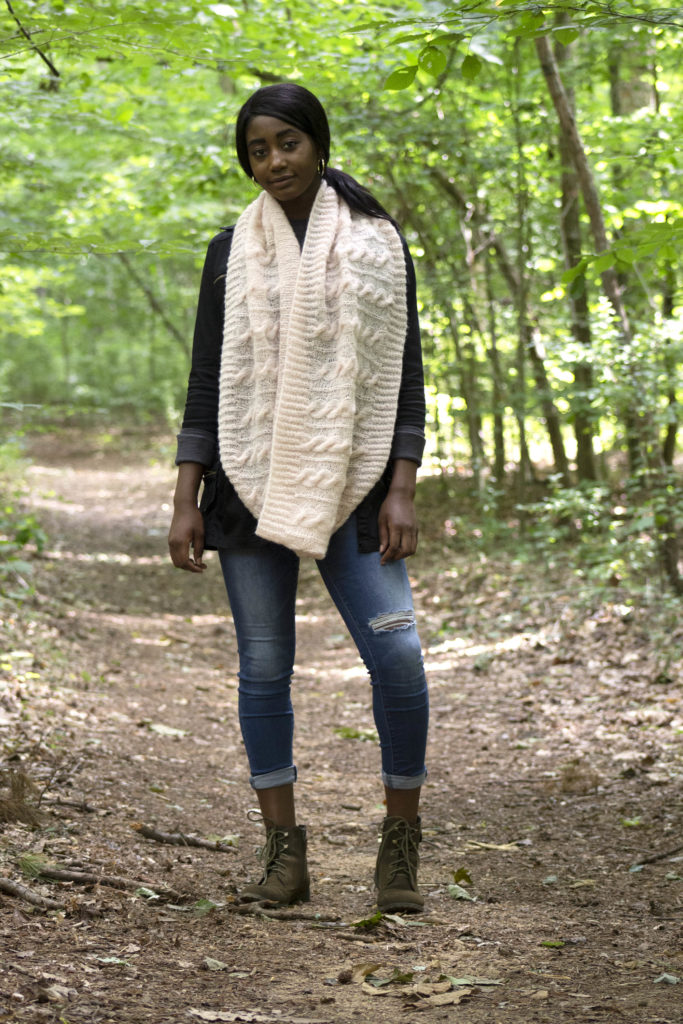
The Contours Cowl features lofty, all-over cables. If you thought cables make for a dense fabric, think again – Alaska is featherweight and soft as down, countering the density you might expect from the usual cabled cowl. It’s perfect to loop around your neck once or twice – and each styling option will keep you warm and cozy.
Knit seamlessly from the bottom-up, this cowl features an easily memorizable cable and slip stitch pattern on a background of reverse stockinette.
We hope you enjoy this week’s free pattern! Have a wonderful, craft-filled weekend!
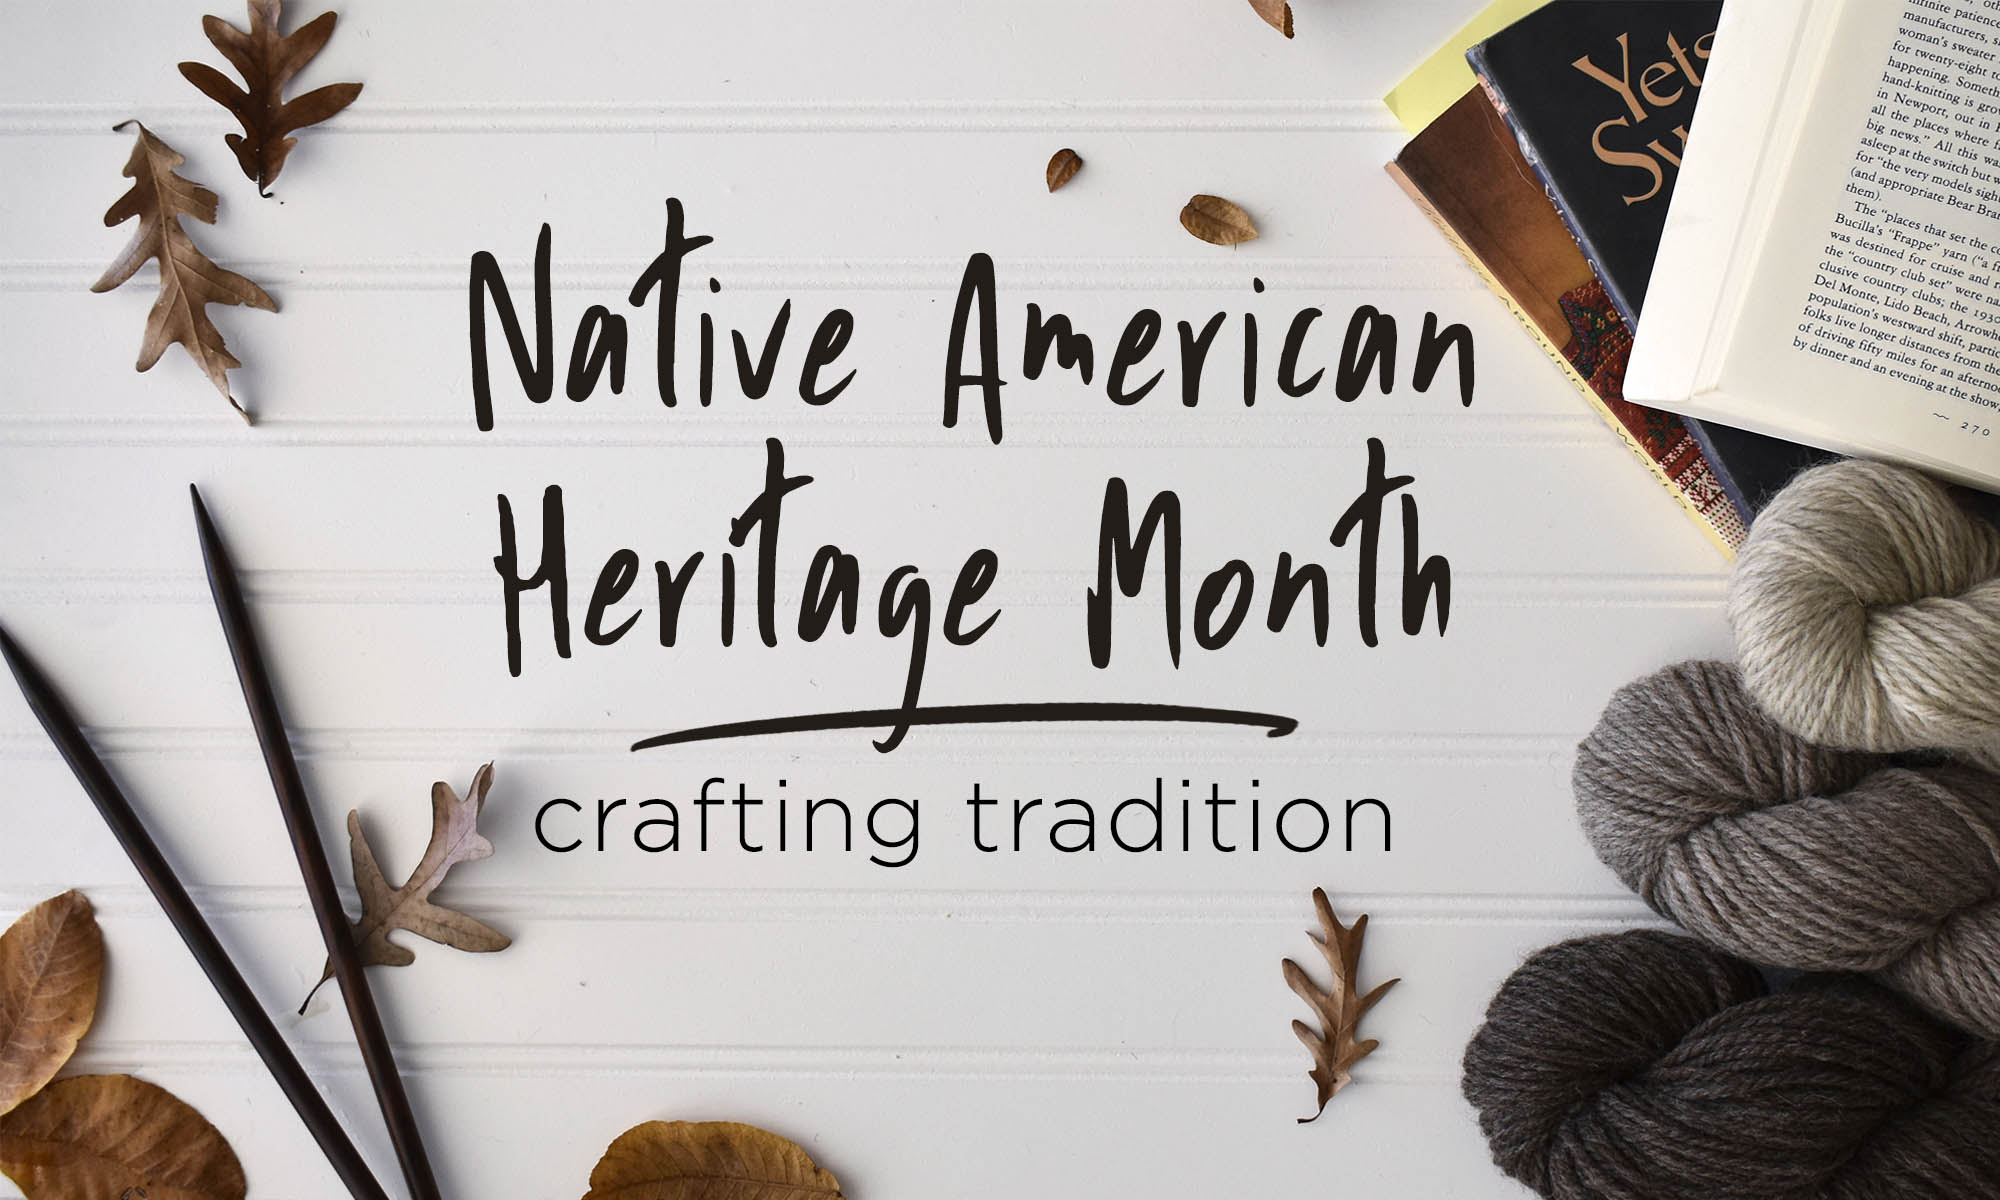
Today is Thanksgiving – since it is a national holiday in the United States, many of us will be spending the day with friends and family. Not only is today Thanksgiving, but November is also Native American Heritage Month. As such, I’m taking some time to talk about the incredible textile work of indigenous Americans.
Disclaimer: this is in no way a comprehensive overview. I am touching on only a few things. I could go on for much longer than I will, and I’ll happily include some information for further reading.
When I initially decided to use today’s post as a platform to touch on Native American Heritage Month, my brain went to knitting – it always does. I wanted to look into traditional Cowichan sweater knitting. Okay – I know we’re based in the US, and that today is a US holiday, but the first tradition I’d like to talk about originates in Canada. Anyway – these iconic sweaters originate from the Coast Salish people of British Columbia.
Indian Sweater Making By The Charlie Family, ca 1946. Image from: Royal BC Museum Archives
During the mid-nineteenth century, European settlers introduced domestic sheep and the craft of hand-knitting to the region. In an excellent overview of the history of Cowichan Knitting (pdf link), Margaret Meikle explains that native women skilled in handcrafts likely taught themselves to knit, working from samples available to them from the European settlers. Although the first Cowichan sweaters were solid-colored, Fair Isle sweaters influenced the colorwork these sweaters are known for early in the twentieth century.
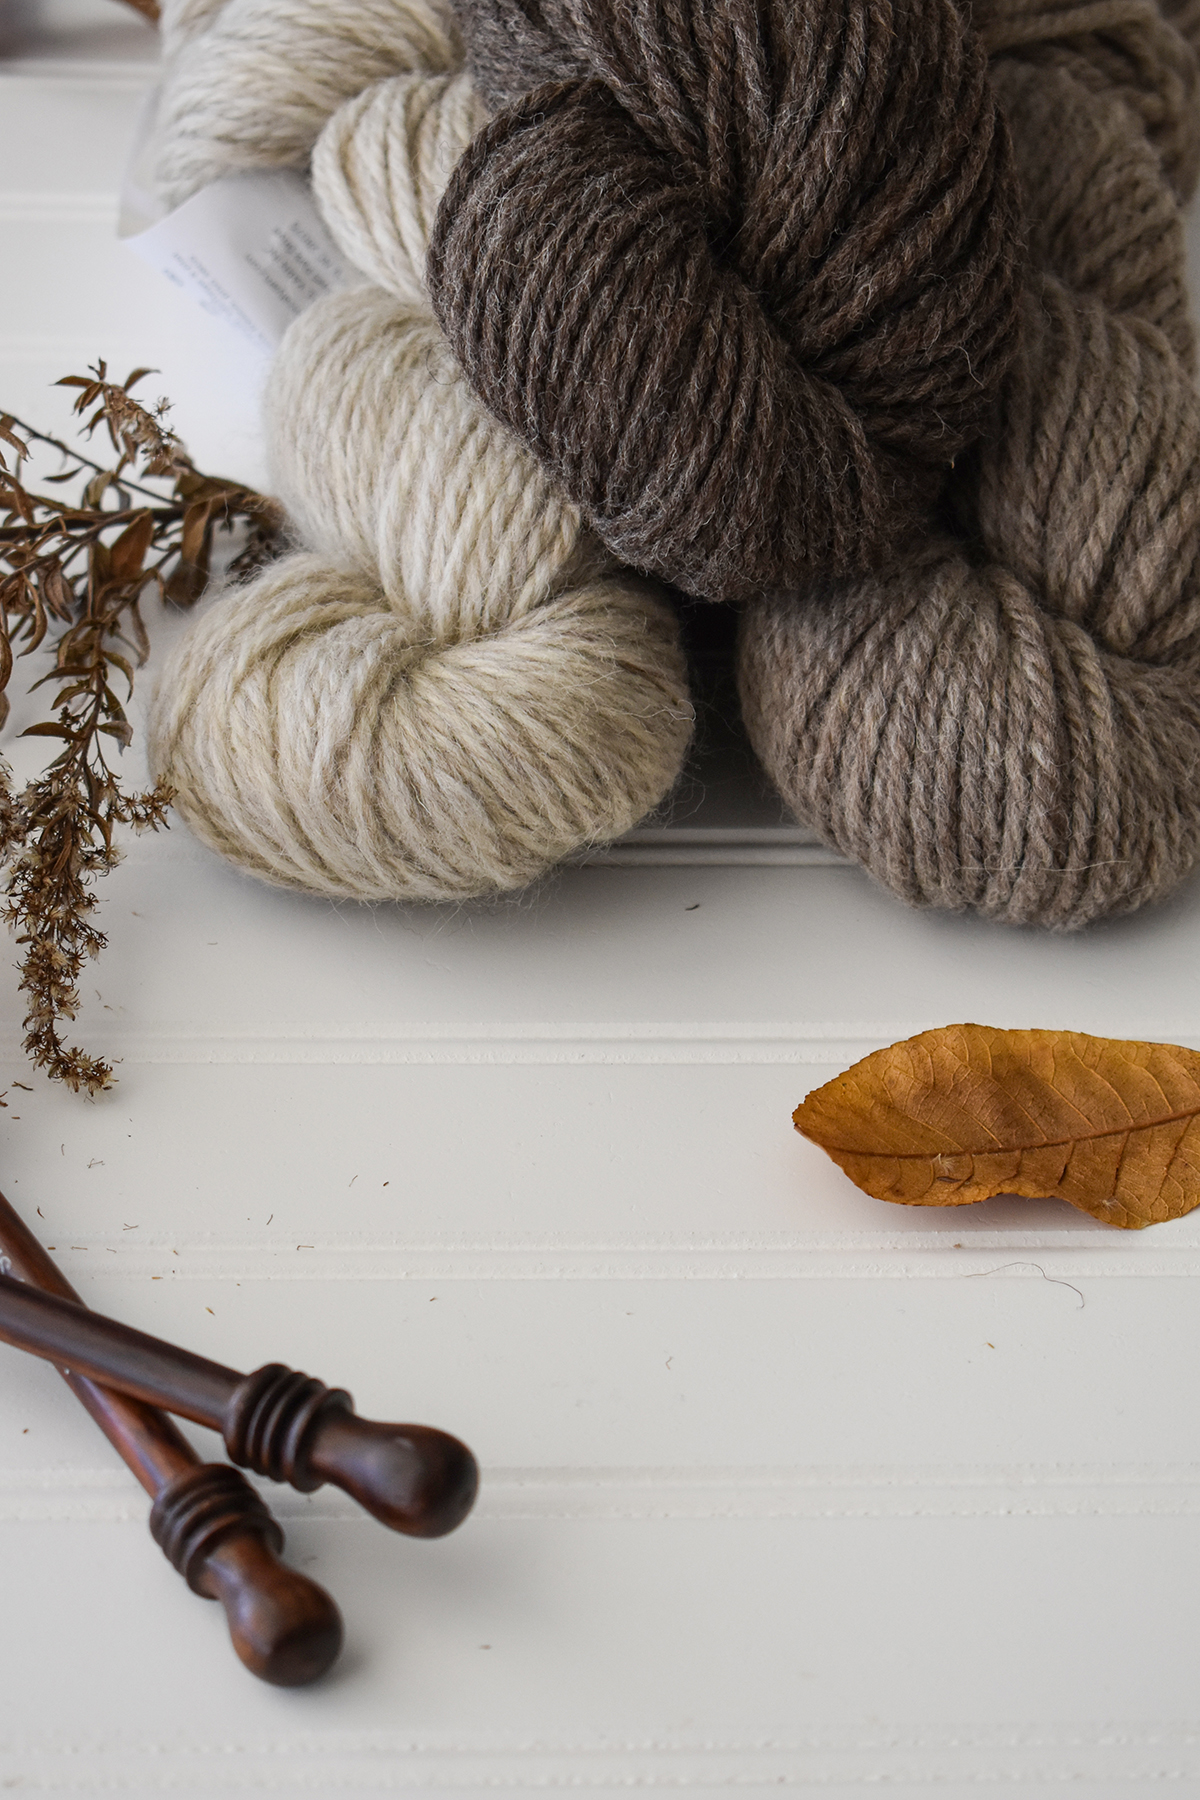
In her book Knitting Around the World, Lela Nargi explains that the yarn used to create these sweaters as thick, handspun, single-ply, and naturally colored. These sweaters are as utilitarian as they are attractive. They are hardy and perfect to withstand cold, wet climates. They also feature beautiful patterning – each symbol with a story behind it.
Yetsa’s Sweater
In the children’s book, Yetsa’s Sweater(pictured above), author Sylvia Olsen demonstrates how the sweaters are personal. In the book, Yetsa’s grandma explains that the sweaters tell a story about family. I’d recommend checking out this book if you’re looking to share your love of knitting with young people in your life, but there is no shame in reading it as an adult!
Yetsa’s Bolero; pattern by Sylvia Olsen
If you now find yourself dreaming of a Cowichan-style sweater, I also discovered that Sylvia Olsen also wrote Knitting Stories, a book featuring Salish-inspired designs including Yesta’s Bolero – a perfect match for Deluxe Worsted Naturals (Pewter and Millet, anyone?). There are many interpretations of Cowichan sweaters on Ravelry. One in particular I like is Jane Richmond’s West Coast Cardigan – which she describes as being “inspired, in respectful admiration, by the Cowichan Sweaters that are abundant on Vancouver Island and are a tradition of the Coast Salish people” and clarifies that the design is not a real Cowichan sweater, only inspired by this traditional style. For her design, I’d recommend holding two strands of Deluxe Chunky Naturals together as one to obtain gauge.
In Alaska, the Tinglits Chilkat people created beautiful Chilkat blankets. Made for movement, these blankets feature long-fringed borders that swayed beautifully with the dancers who wore them during ceremonies. The designs displayed on the blankets are the crests of the family or groups for whom they were woven. These weavings were made from mountain goat hair that was handspun and dyed naturally. The art of Chilkat blanket weaving was a dying craft, but Jennie Thlunaut (pictured above) is single-handedly credited for keeping the tradition alive.
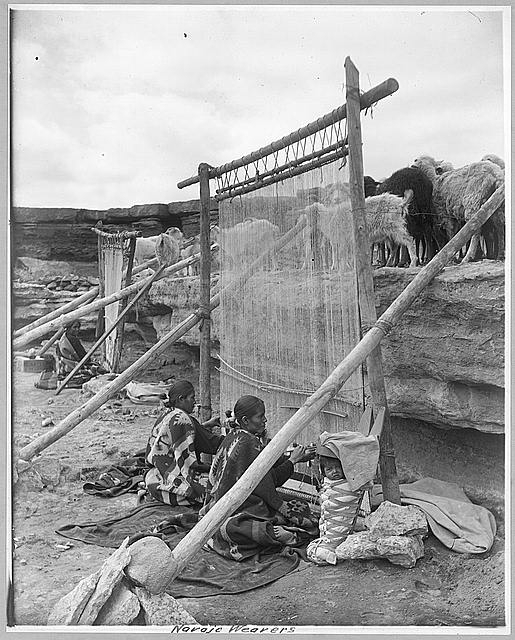
Navajo Weavers, ca 1914 from Library of Congress
Based on my reading, it seems well understood that the Pueblo people were weaving centuries before the European invasion of North America. Their weavings were made from plant fibers, such as cotton and yucca, but it was not uncommon for human, dog, and wild animal hair to be incorporated, too. When Spanish settlers introduced Churro sheep to the region, wool began to replace cotton in textiles. When the Pueblo and Navajo people encountered one another during the seventeenth century, the Pueblo shared their knowledge of weaving with the Navajo.
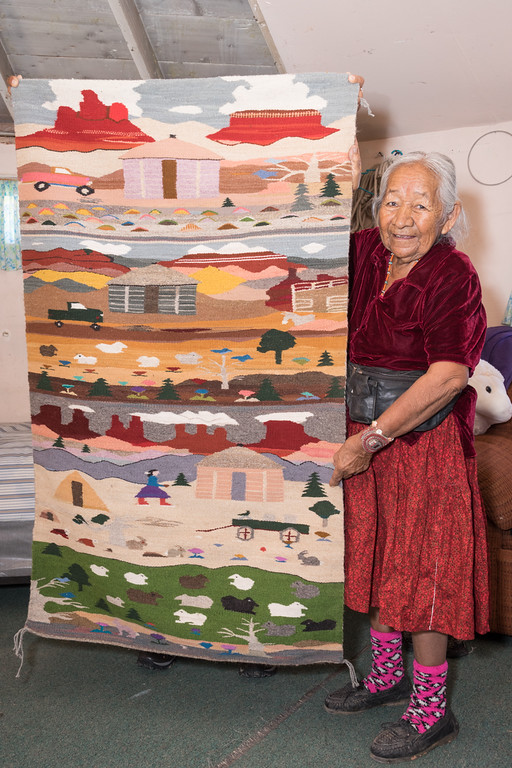
Navajo weaving master Clara Sherman
Because the Navajo were largely nomadic, working with sheep and wool was well-suited to their lifestyle. The Navajo primarily created garments and blankets; however, in the late nineteenth century the political climate was harmful to the people and changed the purpose of their craft. This is when Navajo rugs became popular, and they remain that way today.
Danielle Hena, a curatorial intern at the Wheelwright Museum, explains that “stories, curiosities, and beauty are carried within each textile: stories from history, curiosities that will continue to be curiosities, and beauty that was transferred from a weaver’s vision to the viewers.” She perfectly sums up what makes the rich textile heritage of indigenous people so unique.
Feeling inspired? I know I am! I’d like to share an inspirational resource I uncovered while writing this post: the organization Adopt-a-Native Elder’s Rug Program. This organization facilitates a market for Navajo elders to sell their beautiful handwoven rugs. I thought this was pretty neat and I couldn’t resist sharing.
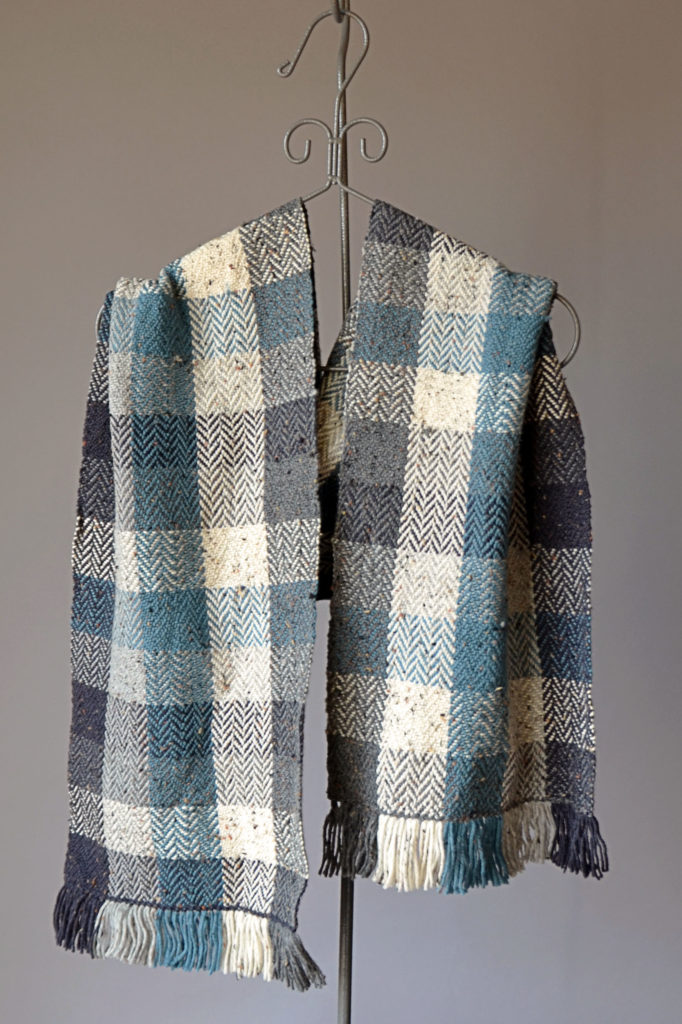
Still, if you want to make things with your own hands, there are plenty of resources out there! For example, Amy is an avid weaver and occasionally posts about the topic on our blog. You can find her weaving posts here (link). You may also be interested in a pattern – if so, check out the Sparkle Windows Scarf. This thing is gorgeous! Finally – check your local yarn shop for weaving classes. Our customers have shared projects woven using many of our yarns, and it’s such a lovely way to see it transformed.
Herringbone scarf using Deluxe DK Tweed, designed by Amy Gunderson
I hope you’ve enjoyed this post, have learned something from it, and feel inspired!
If you’re interested in reading more, here are the resources I’ve used for this post:
On Cowichan Knitting
Cowichan Indian Knitting by Margaret Meikle (link)
Knitting Around the World: A Multistranded History of a Time-Honored Tradition by Lela Nargi; (pp. 217-225)
Yetsa’s Sweater by Sylvia Olsen
On Weaving
For more information about Jennie Thunaut and Chilkat Blankets, I recommend exploring Masters of Traditional Arts, an ongoing interdisciplinary project produced by Documentary Arts focusing on the recipients of the National Heritage Fellowship (link here).
Unpacking a phrase: The Chilkat Blanket by Christy Christodoulides (link)
Three Southwest Weaving Cultures; adapted from Beyond the Loom: Southwestern Weaving Traditions exhibit, Colorado University Museum (link)
Wheelwright Museum Blog – Archives of Navajo Textiles (link)
This is part 12 in a 12 part series highlighting designs from our 12 Days of Winter, Series 2 Edition.
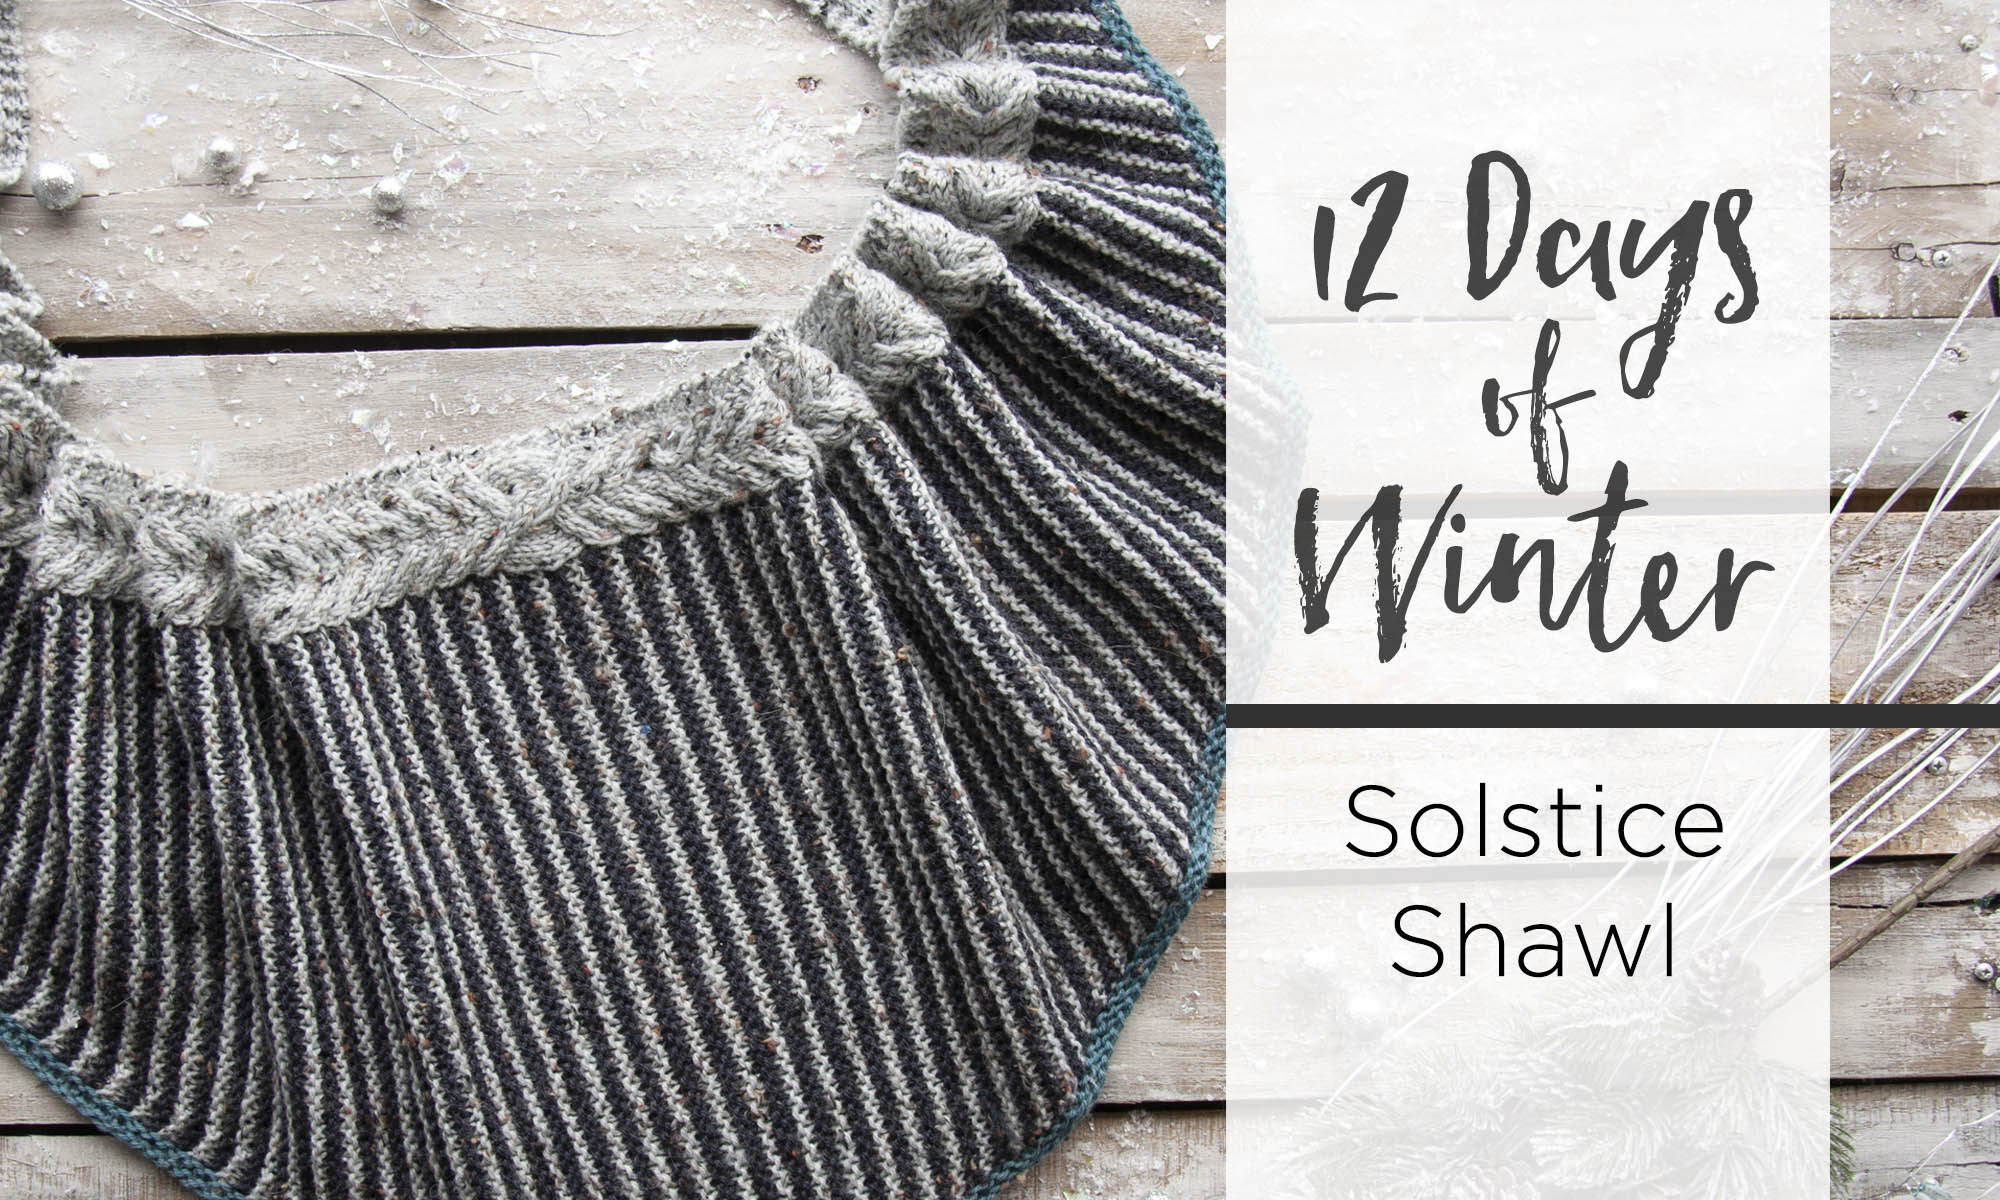
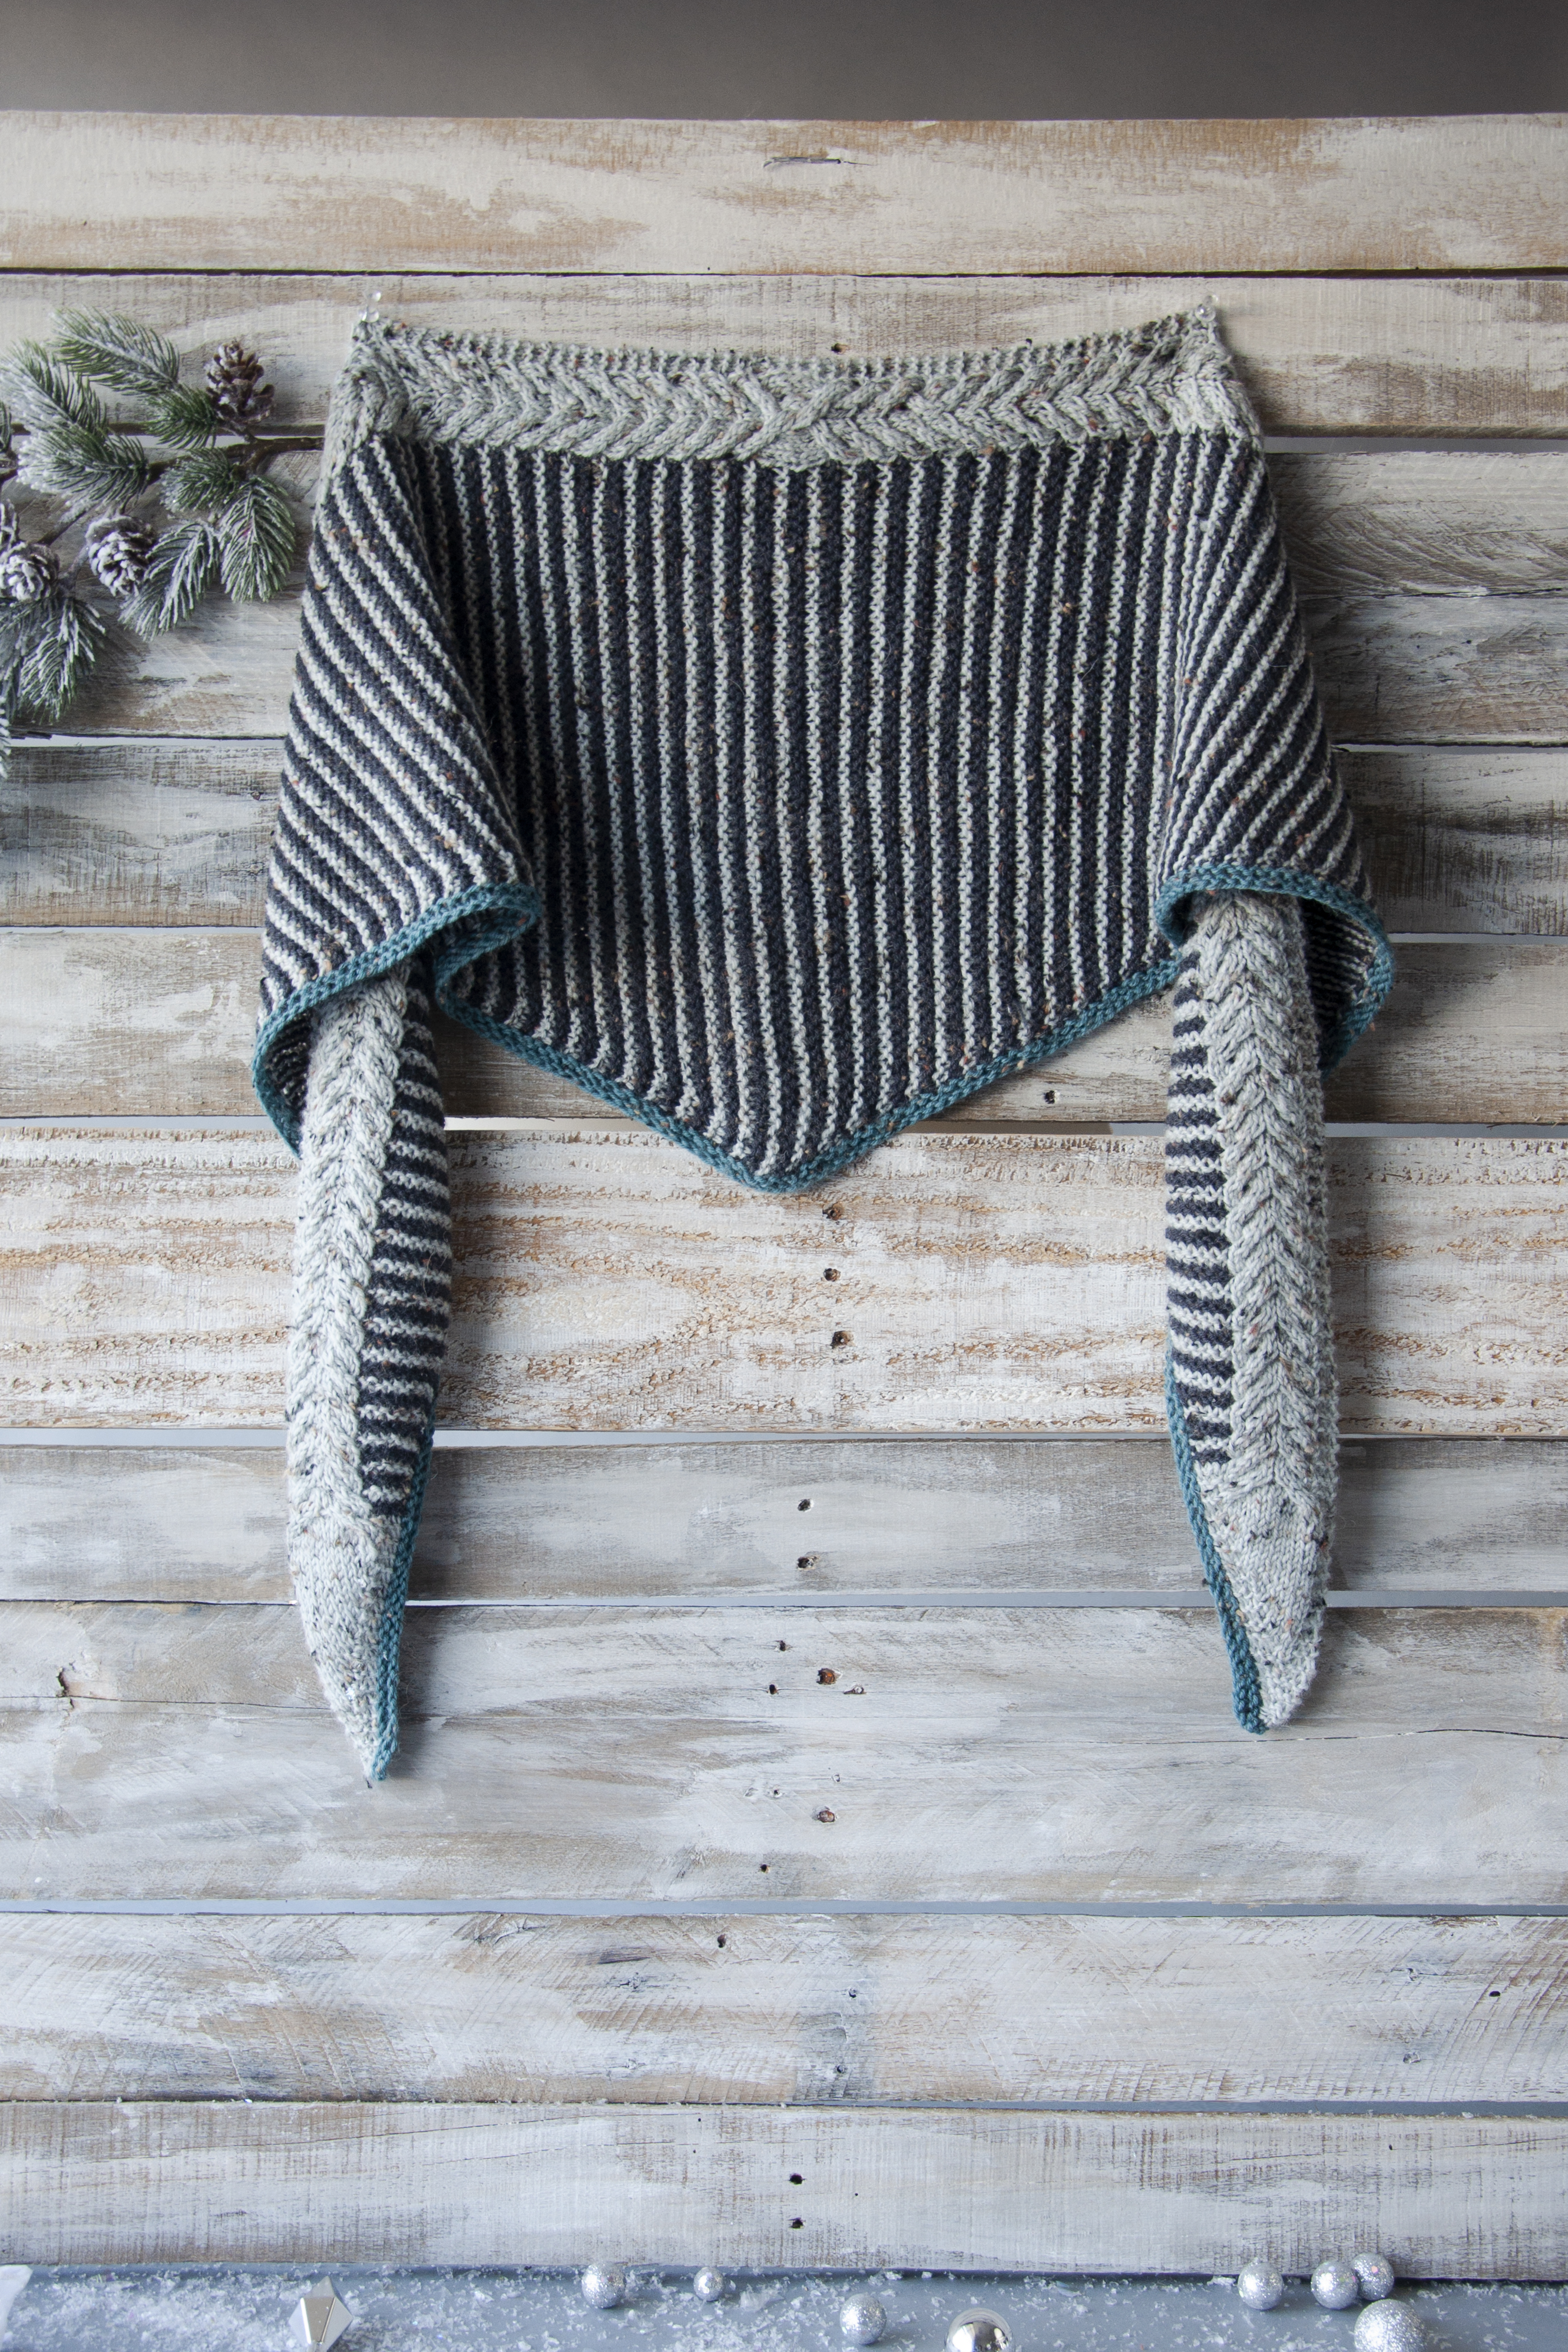
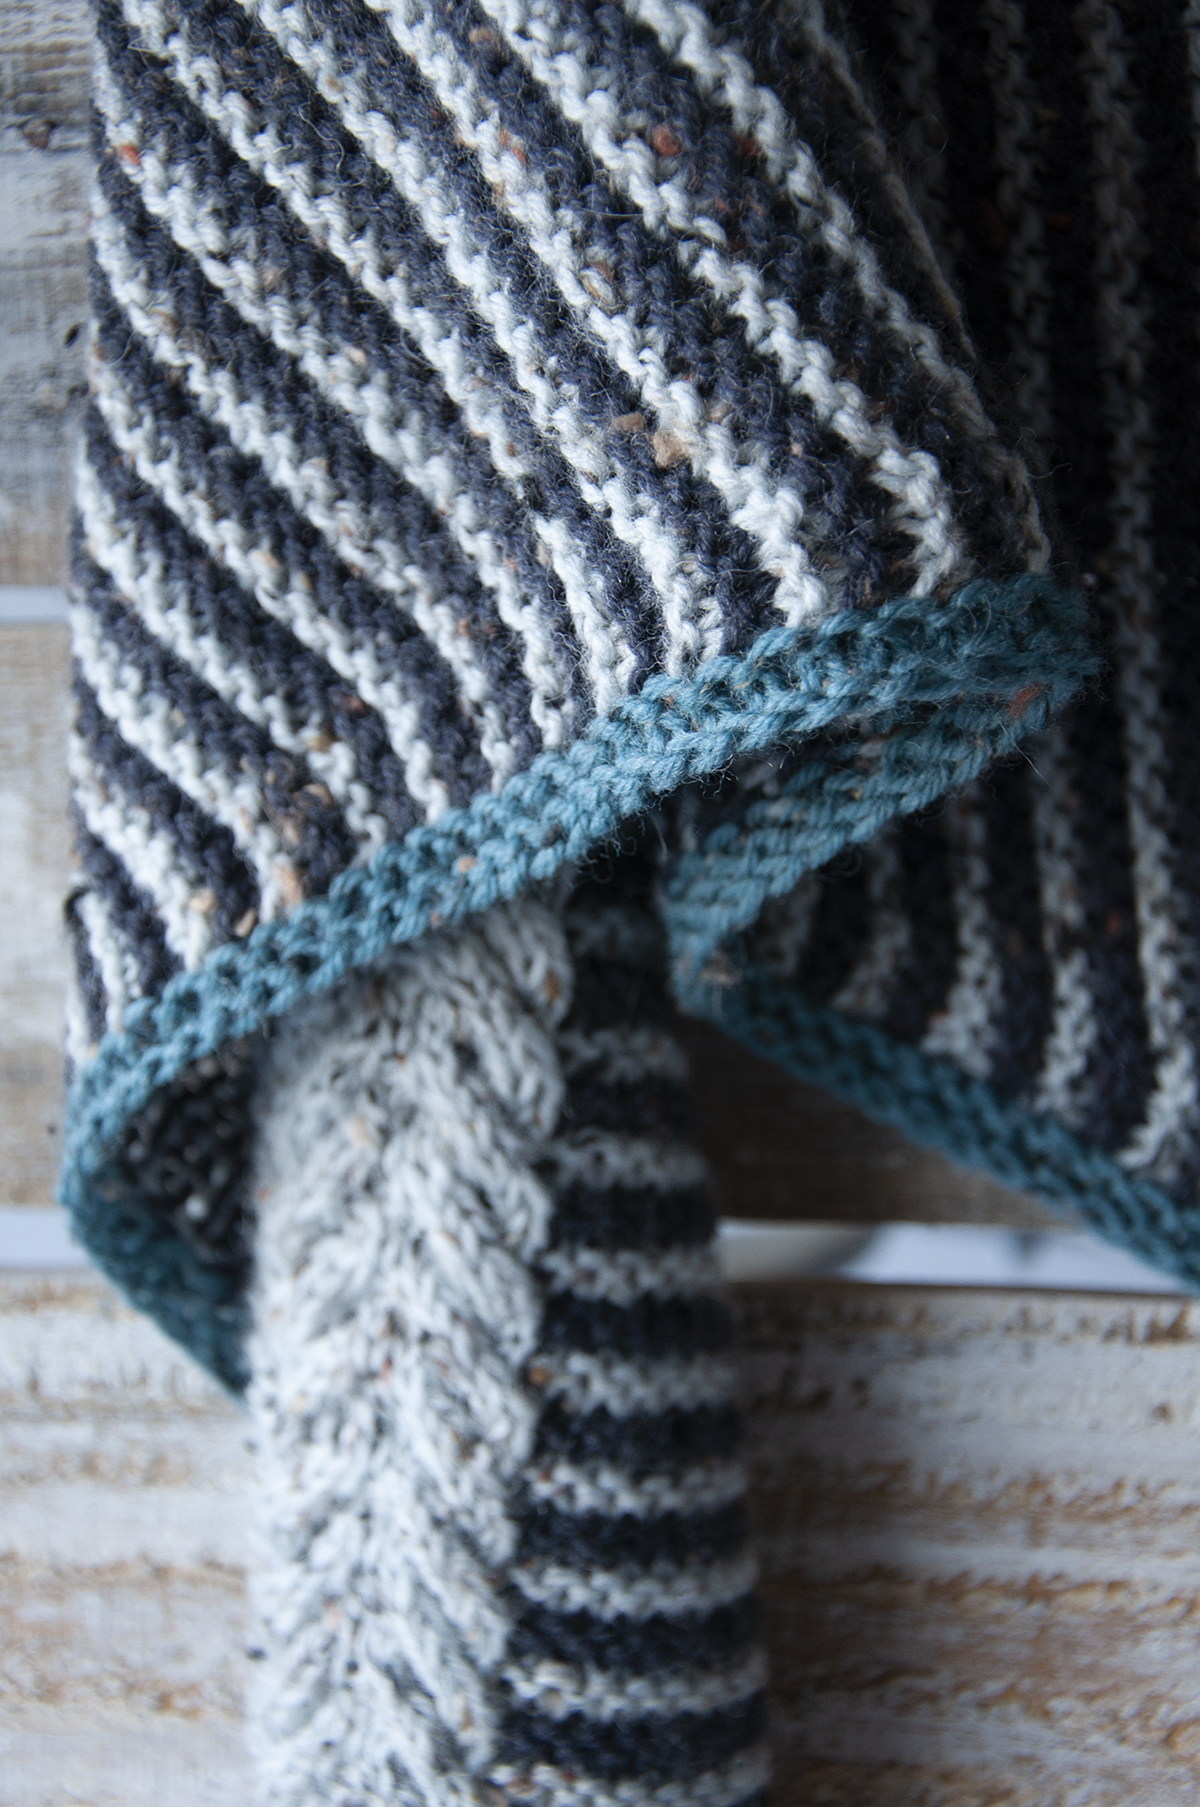
Day 12 – can you believe it? Today we reveal the final installment of the Universal Yarn 12 Days of Winter Kit Collections – Series 2! Say hello to the Solstice Shawl.
Can I be honest? I am really proud of this design – in my opinion, it’s one of my best designs and I sincerely hope you love it.
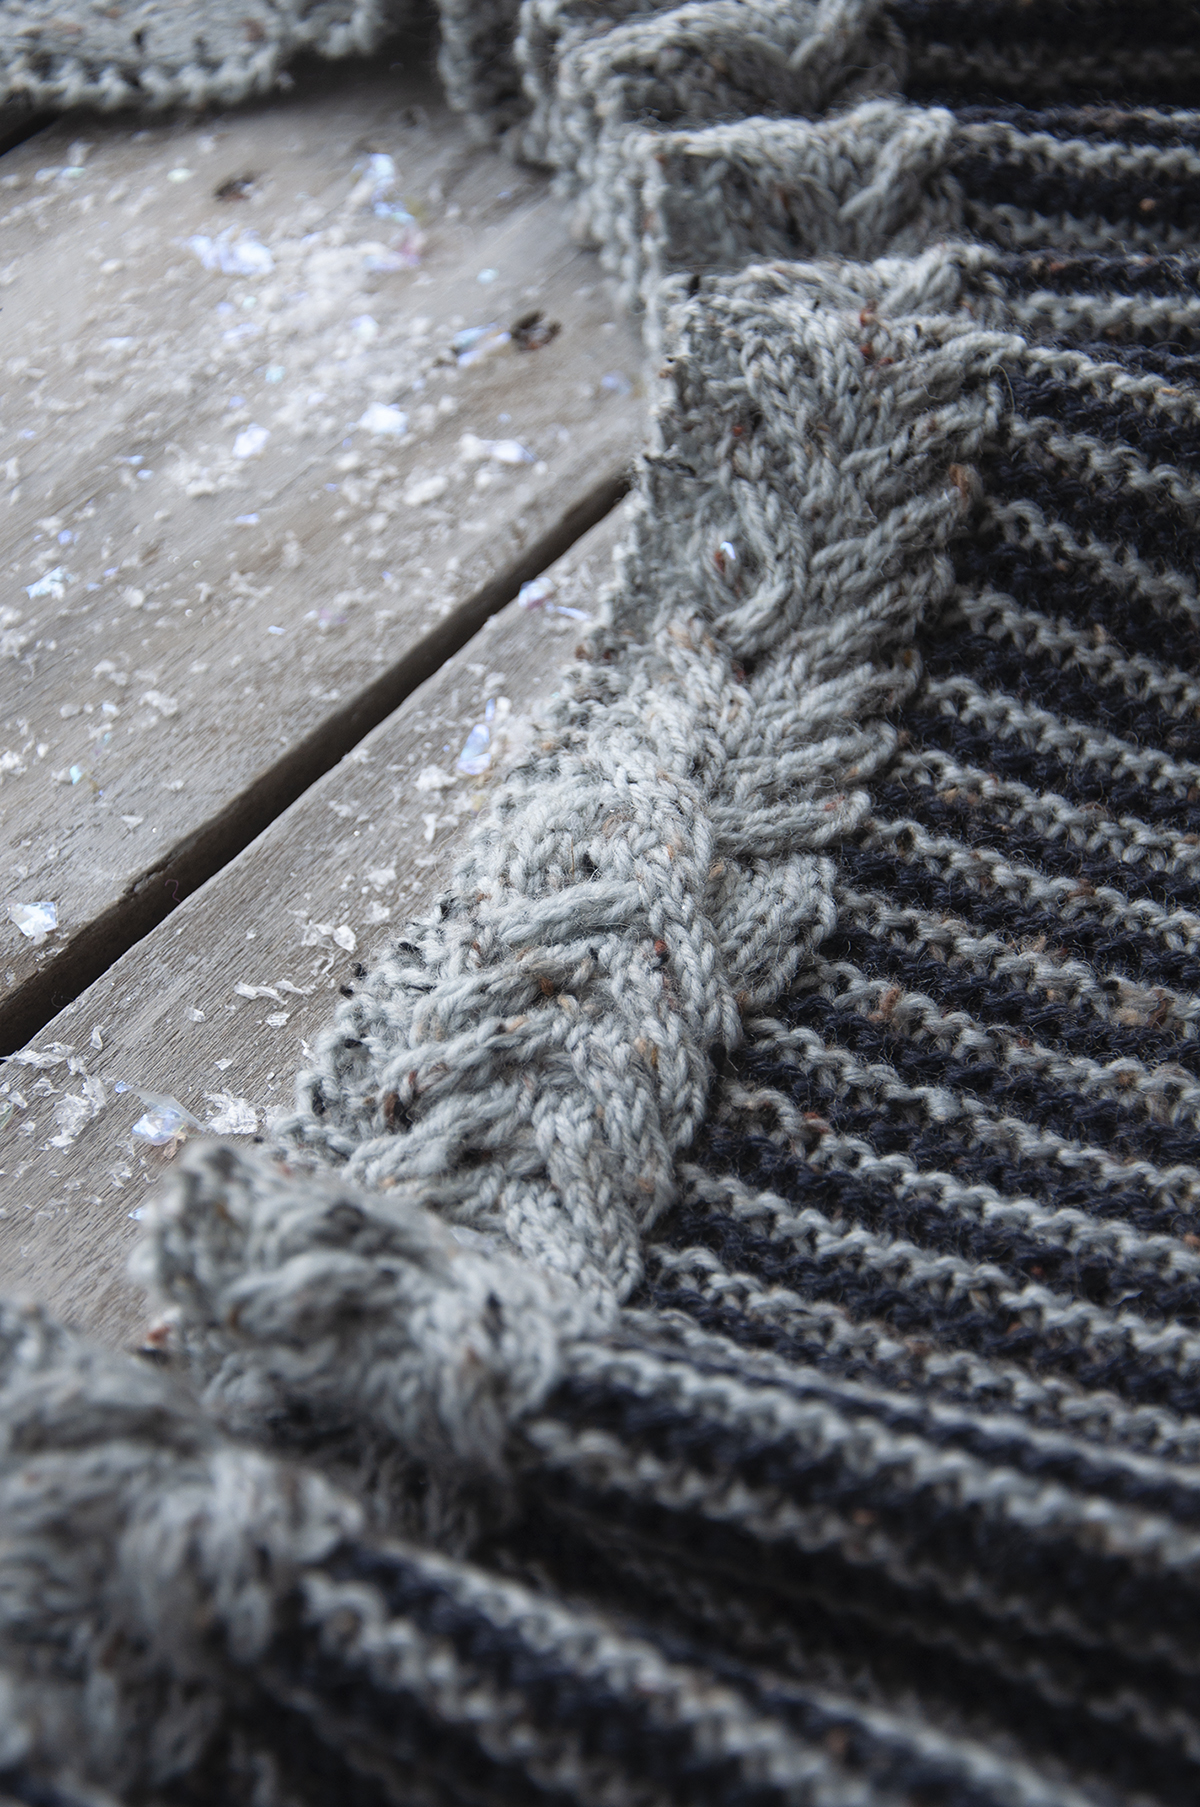
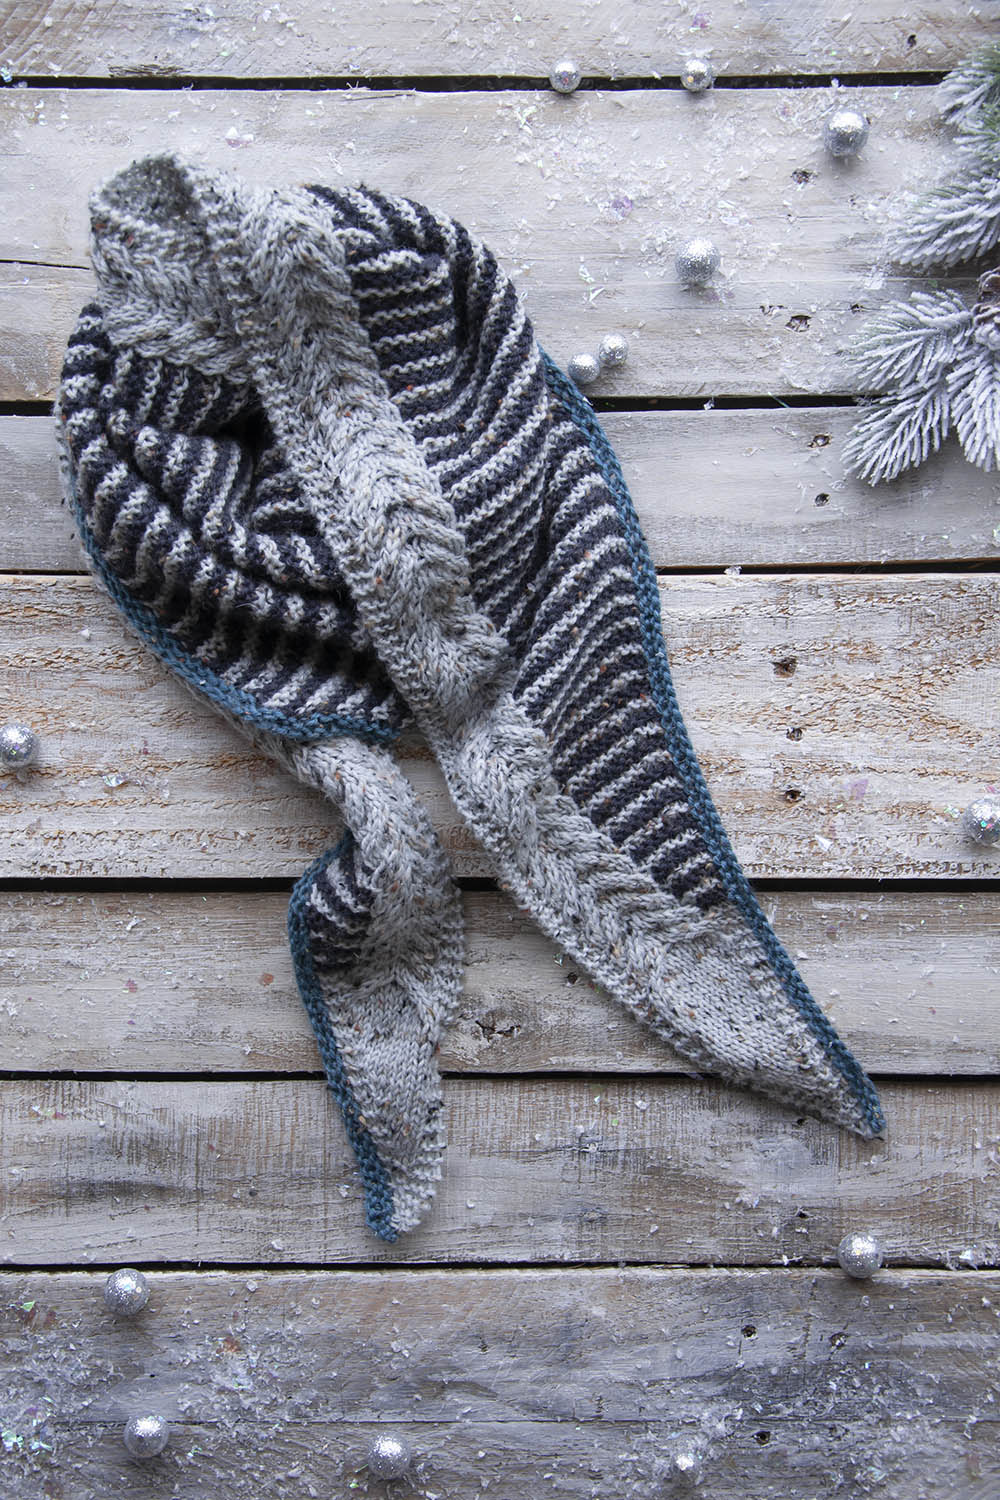
This isn’t a very complicated design, but what I feel proud of is the balance of simplicity and intricacy in the piece. This shawl combines cables, stripes, and intarsia. It is worked from tip to tip, starting and finishing with the same number of stitches (just two!). Finally, it’s finished with a very simple contrast color border.
Part of what makes this project special is the yarn used: Deluxe DK Tweed Superwash. I love this yarn. It’s rustic and the tweedy nubs add interest to every type of pattern – from simple garter to cables, lace, and stranded colorwork. (If you need convincing, just take a look at the recent collection in this yarn, Rustic & Refined).
I’m keeping this post short and sweet, but before I sign off, thank you’s are in order! Like last year we had a really wonderful time putting this collection together. It is a team effort, for sure. So thanks to everyone on our team for putting in so much hard work! And thank you so much for supporting our company, your local yarn shops, and for following our posts for this collection. We appreciate it so much!
Remember, you can find the 12 Days of Winter Kit patterns on Ravelry.
Ah, knitting. I love everything about it. However, some techniques sing to me more than others. Cables are one of those techniques. I can never get enough. If I can squeeze them in, I do. They don’t have to be complicated – but they can be. Either way, I love them. I want to knit cables as often as I want to eat Kit Kats or Reeses’ Peanut Butter Cups – all the time!
I actually really like using cable needles, but I occasionally lose them. The crevices on my sofa are likely home to several. So what do you do when you don’t have a cable needle or spare DPN handy? Do you find another project? NO! Of course not! You simply cable without a cable needle. I’m going to show you how with a quick tutorial!
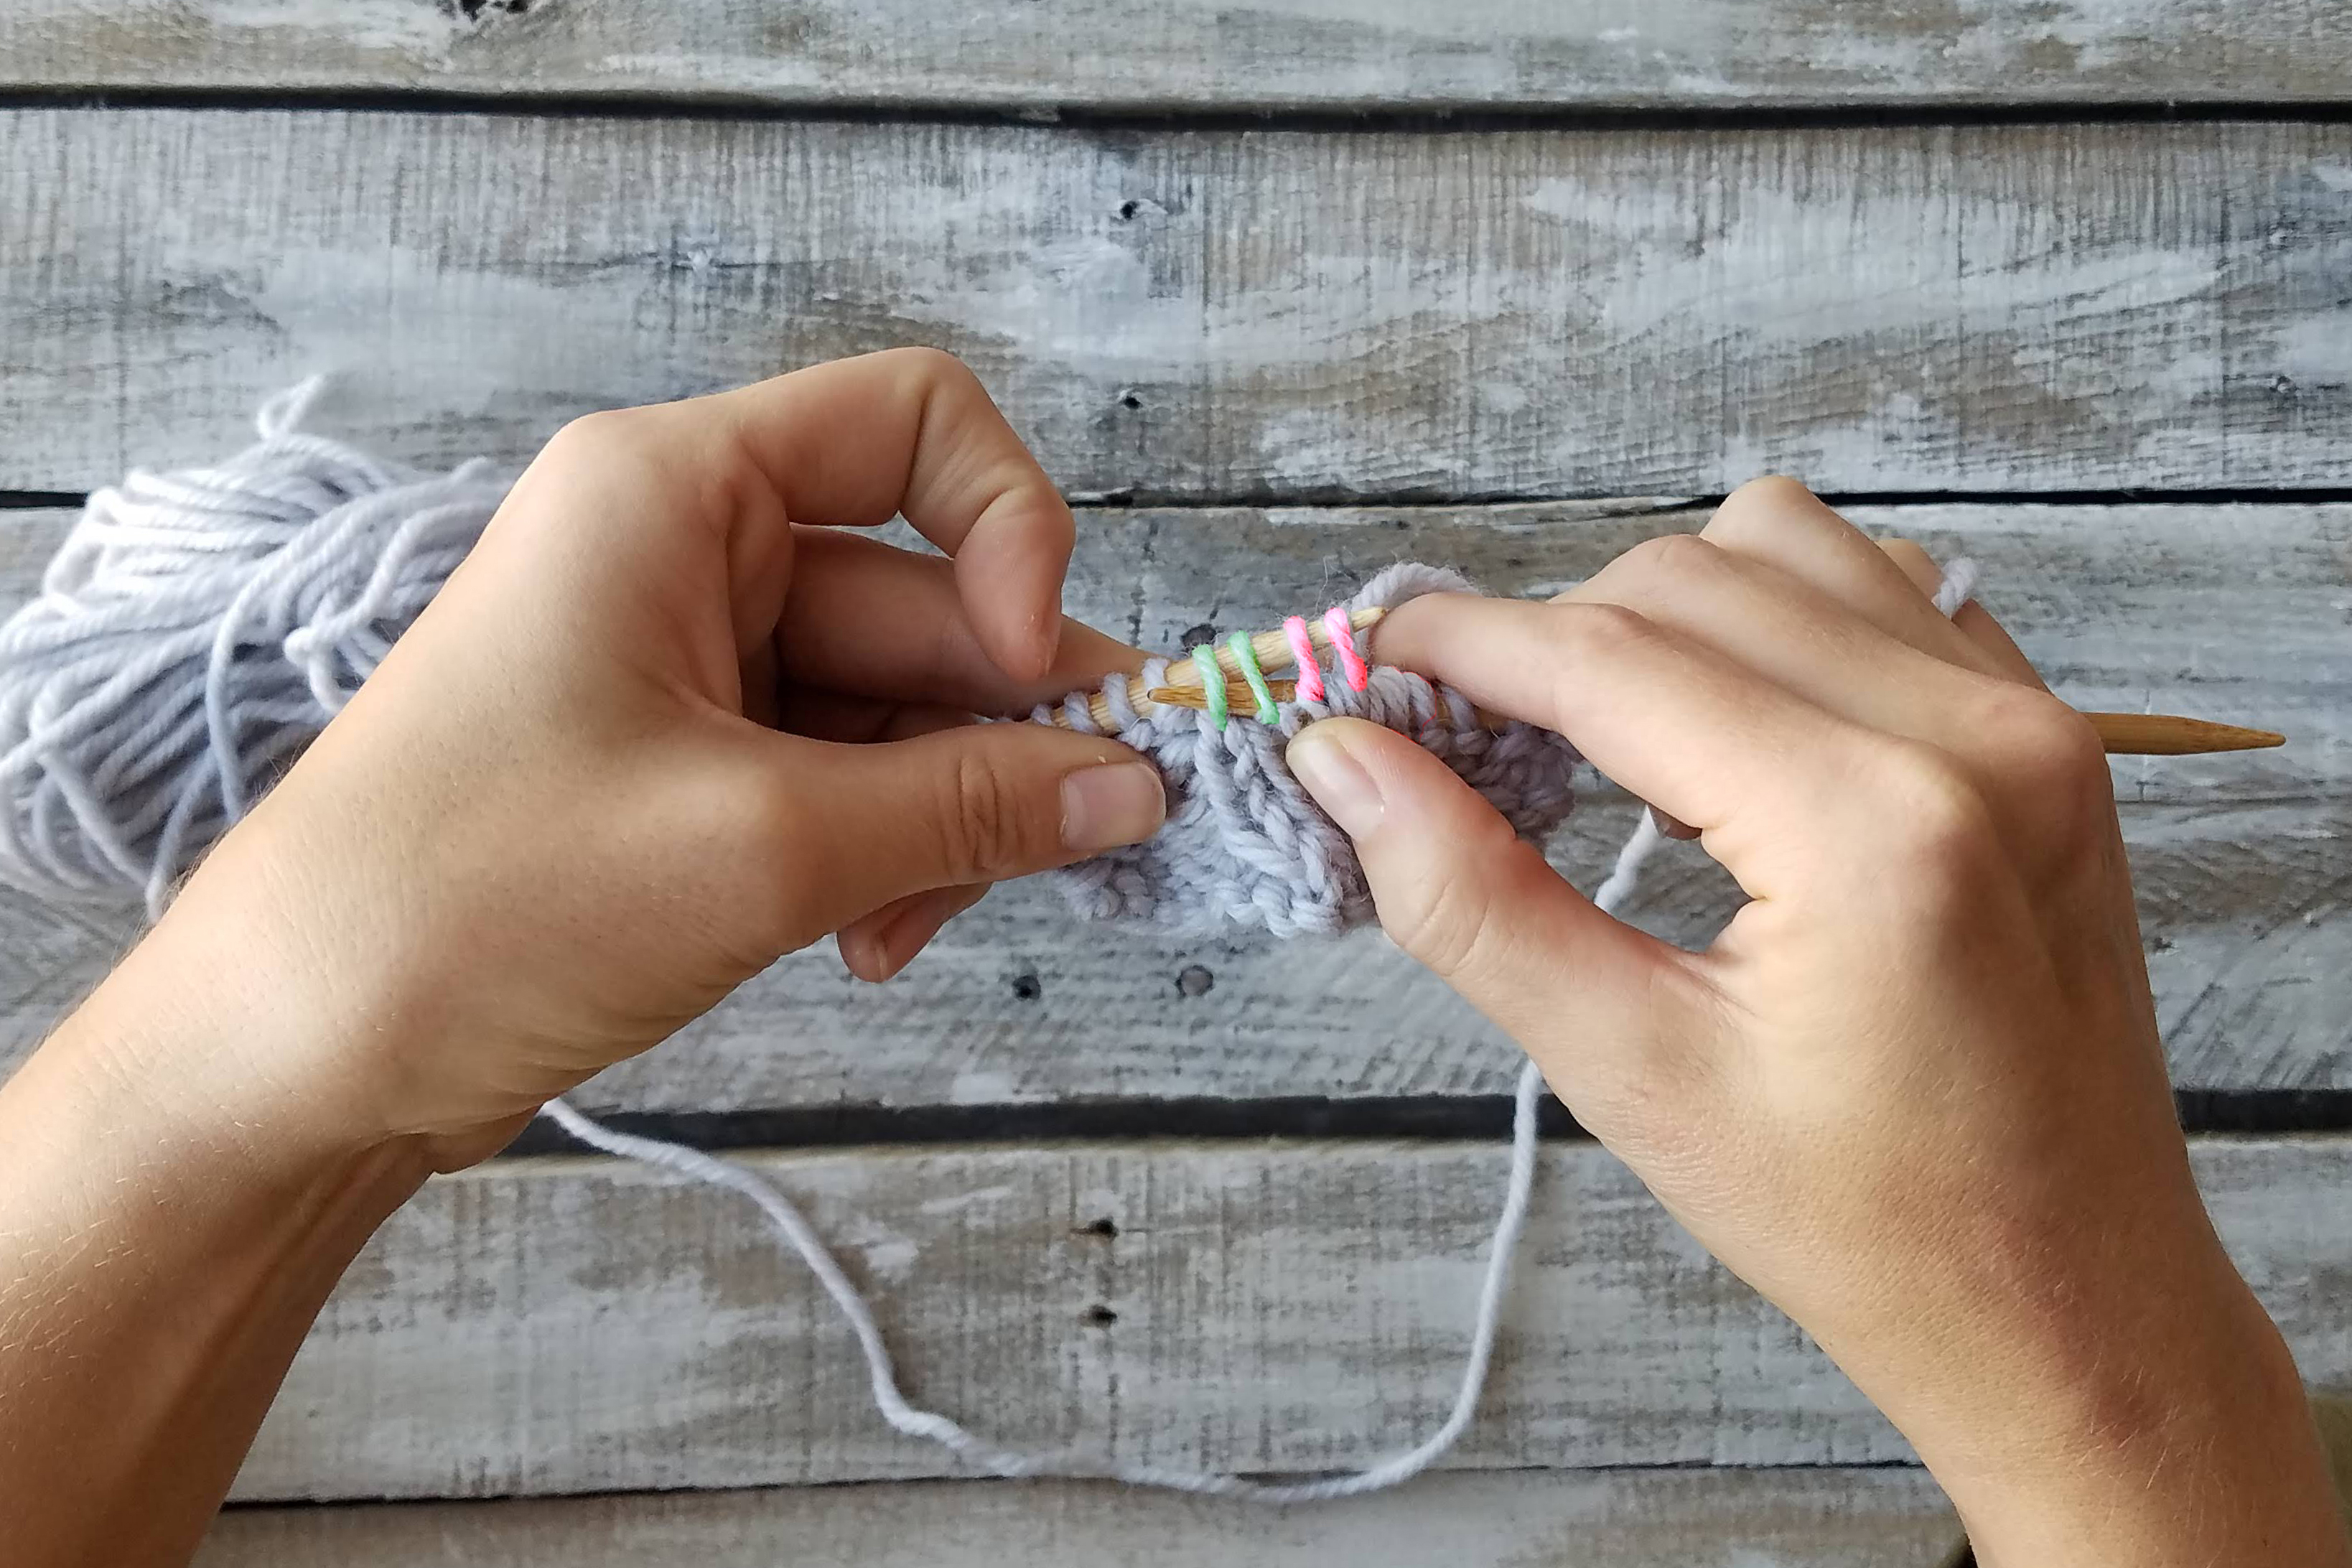
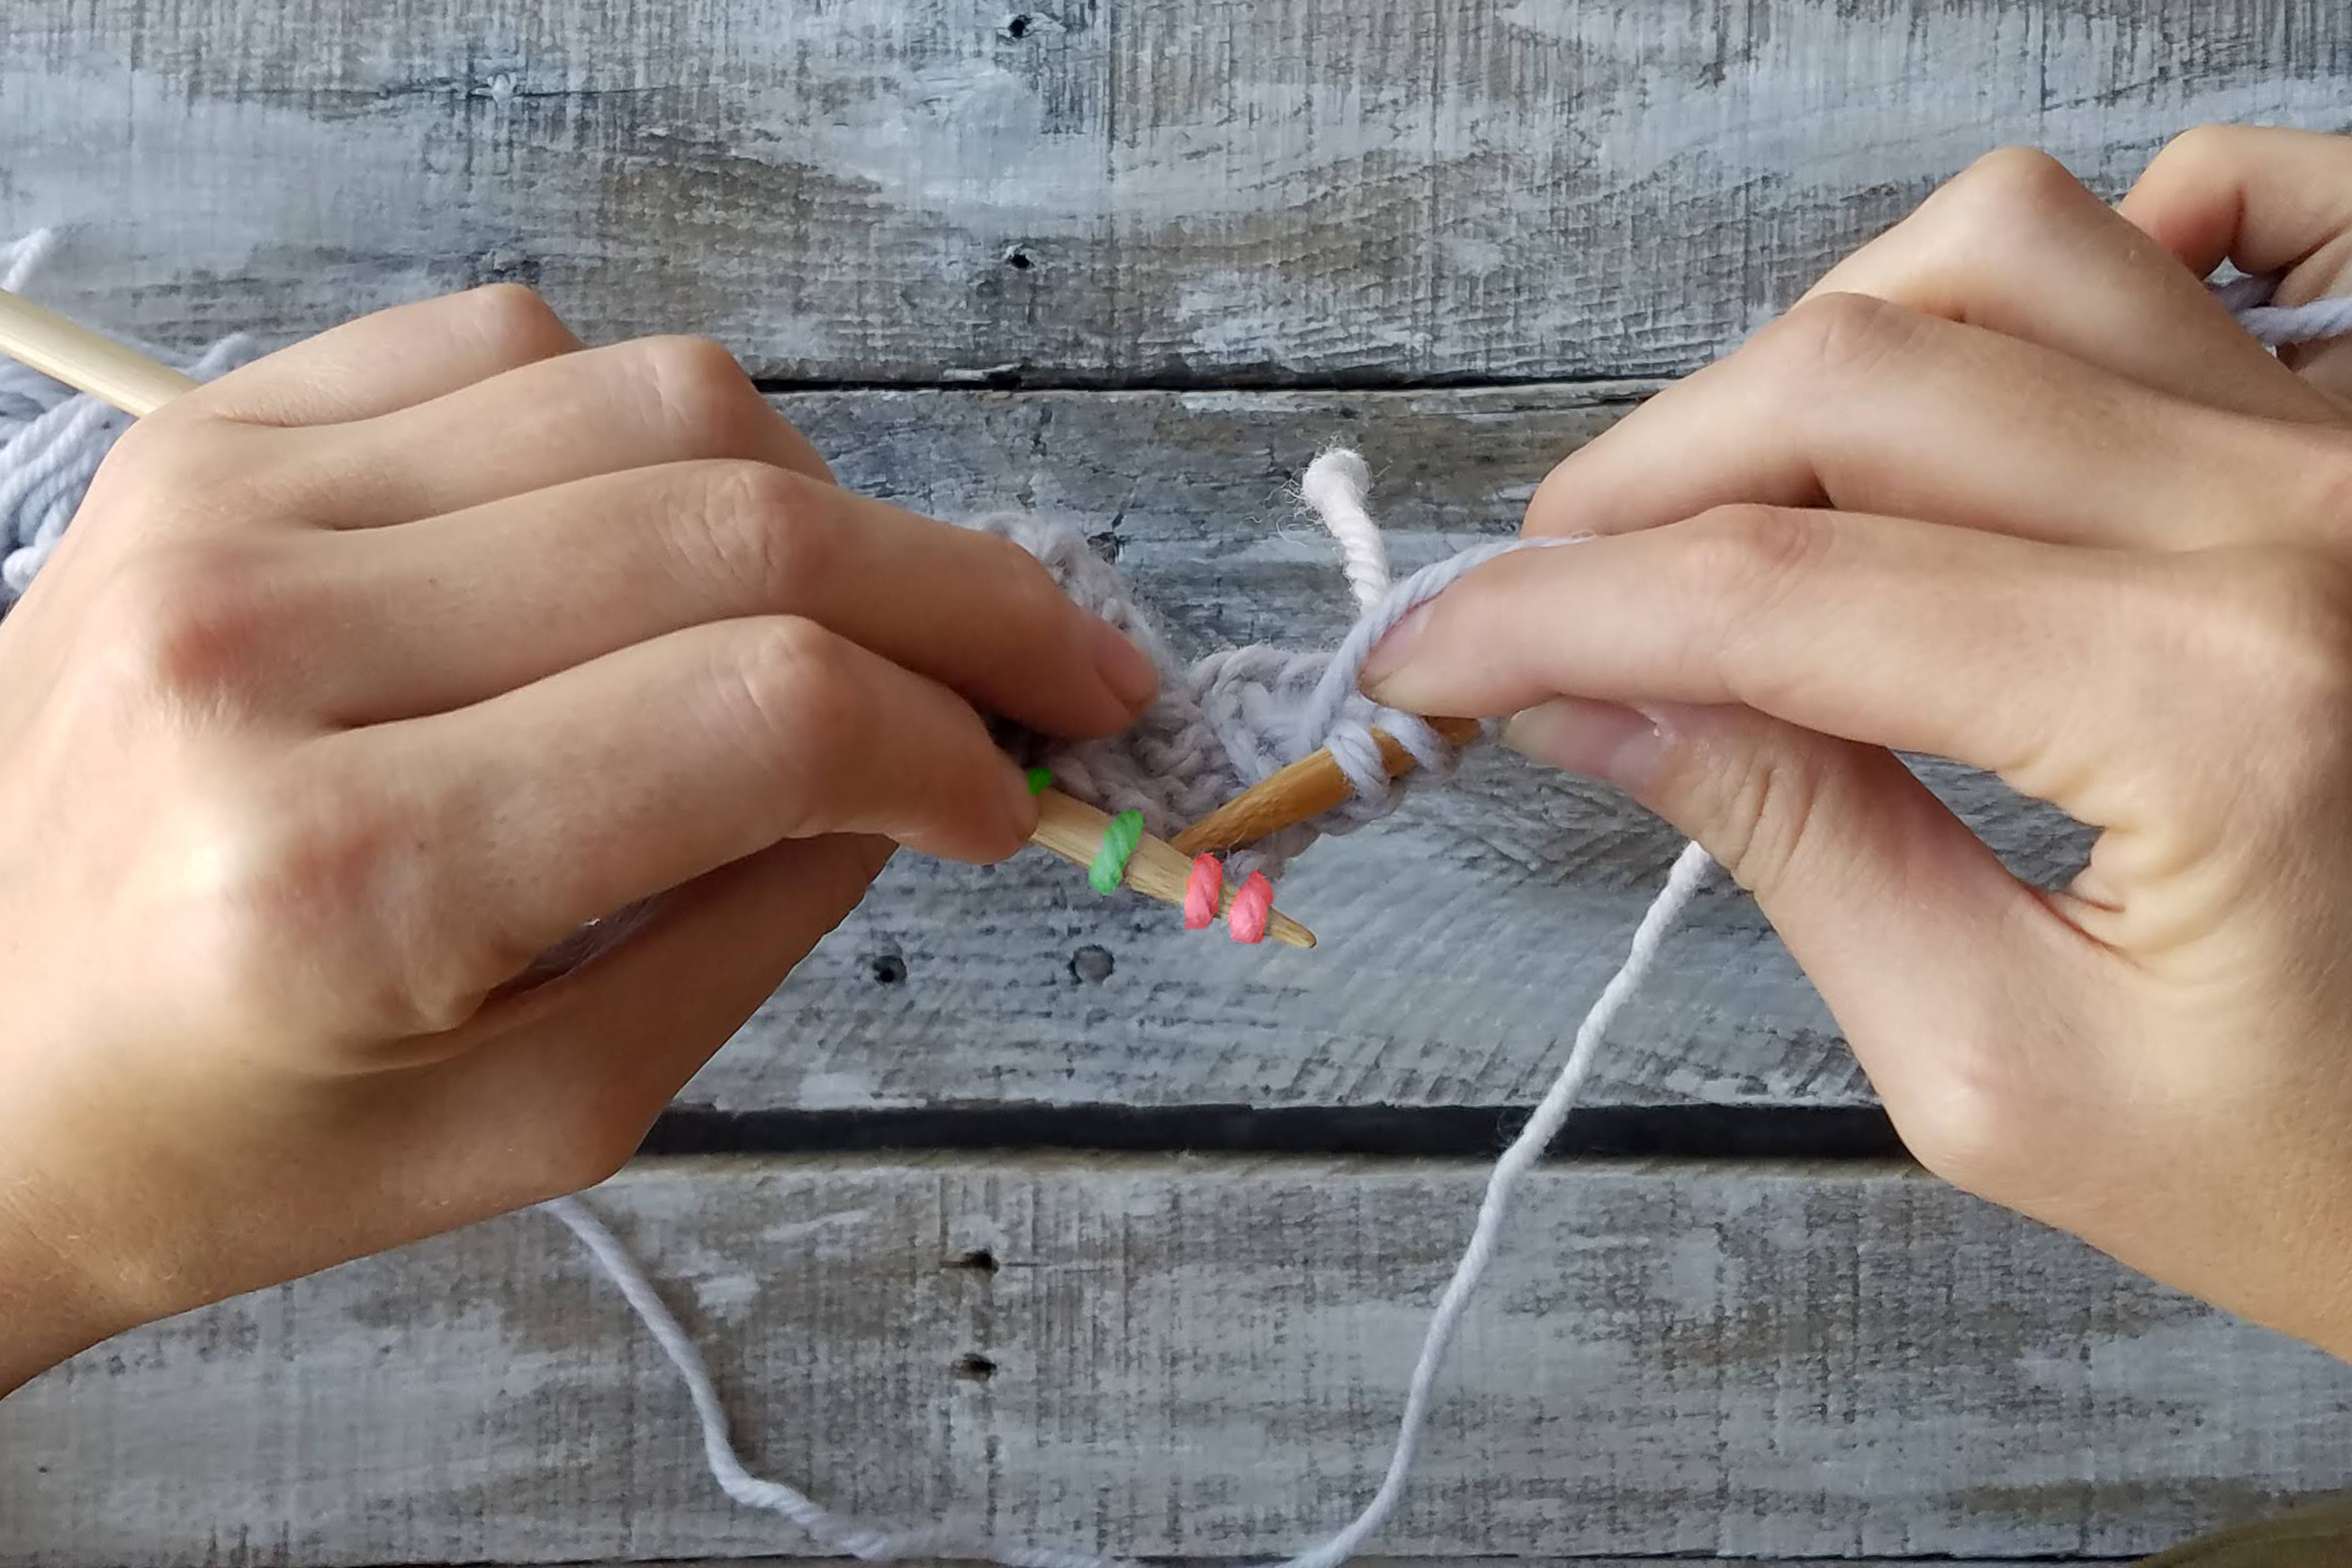
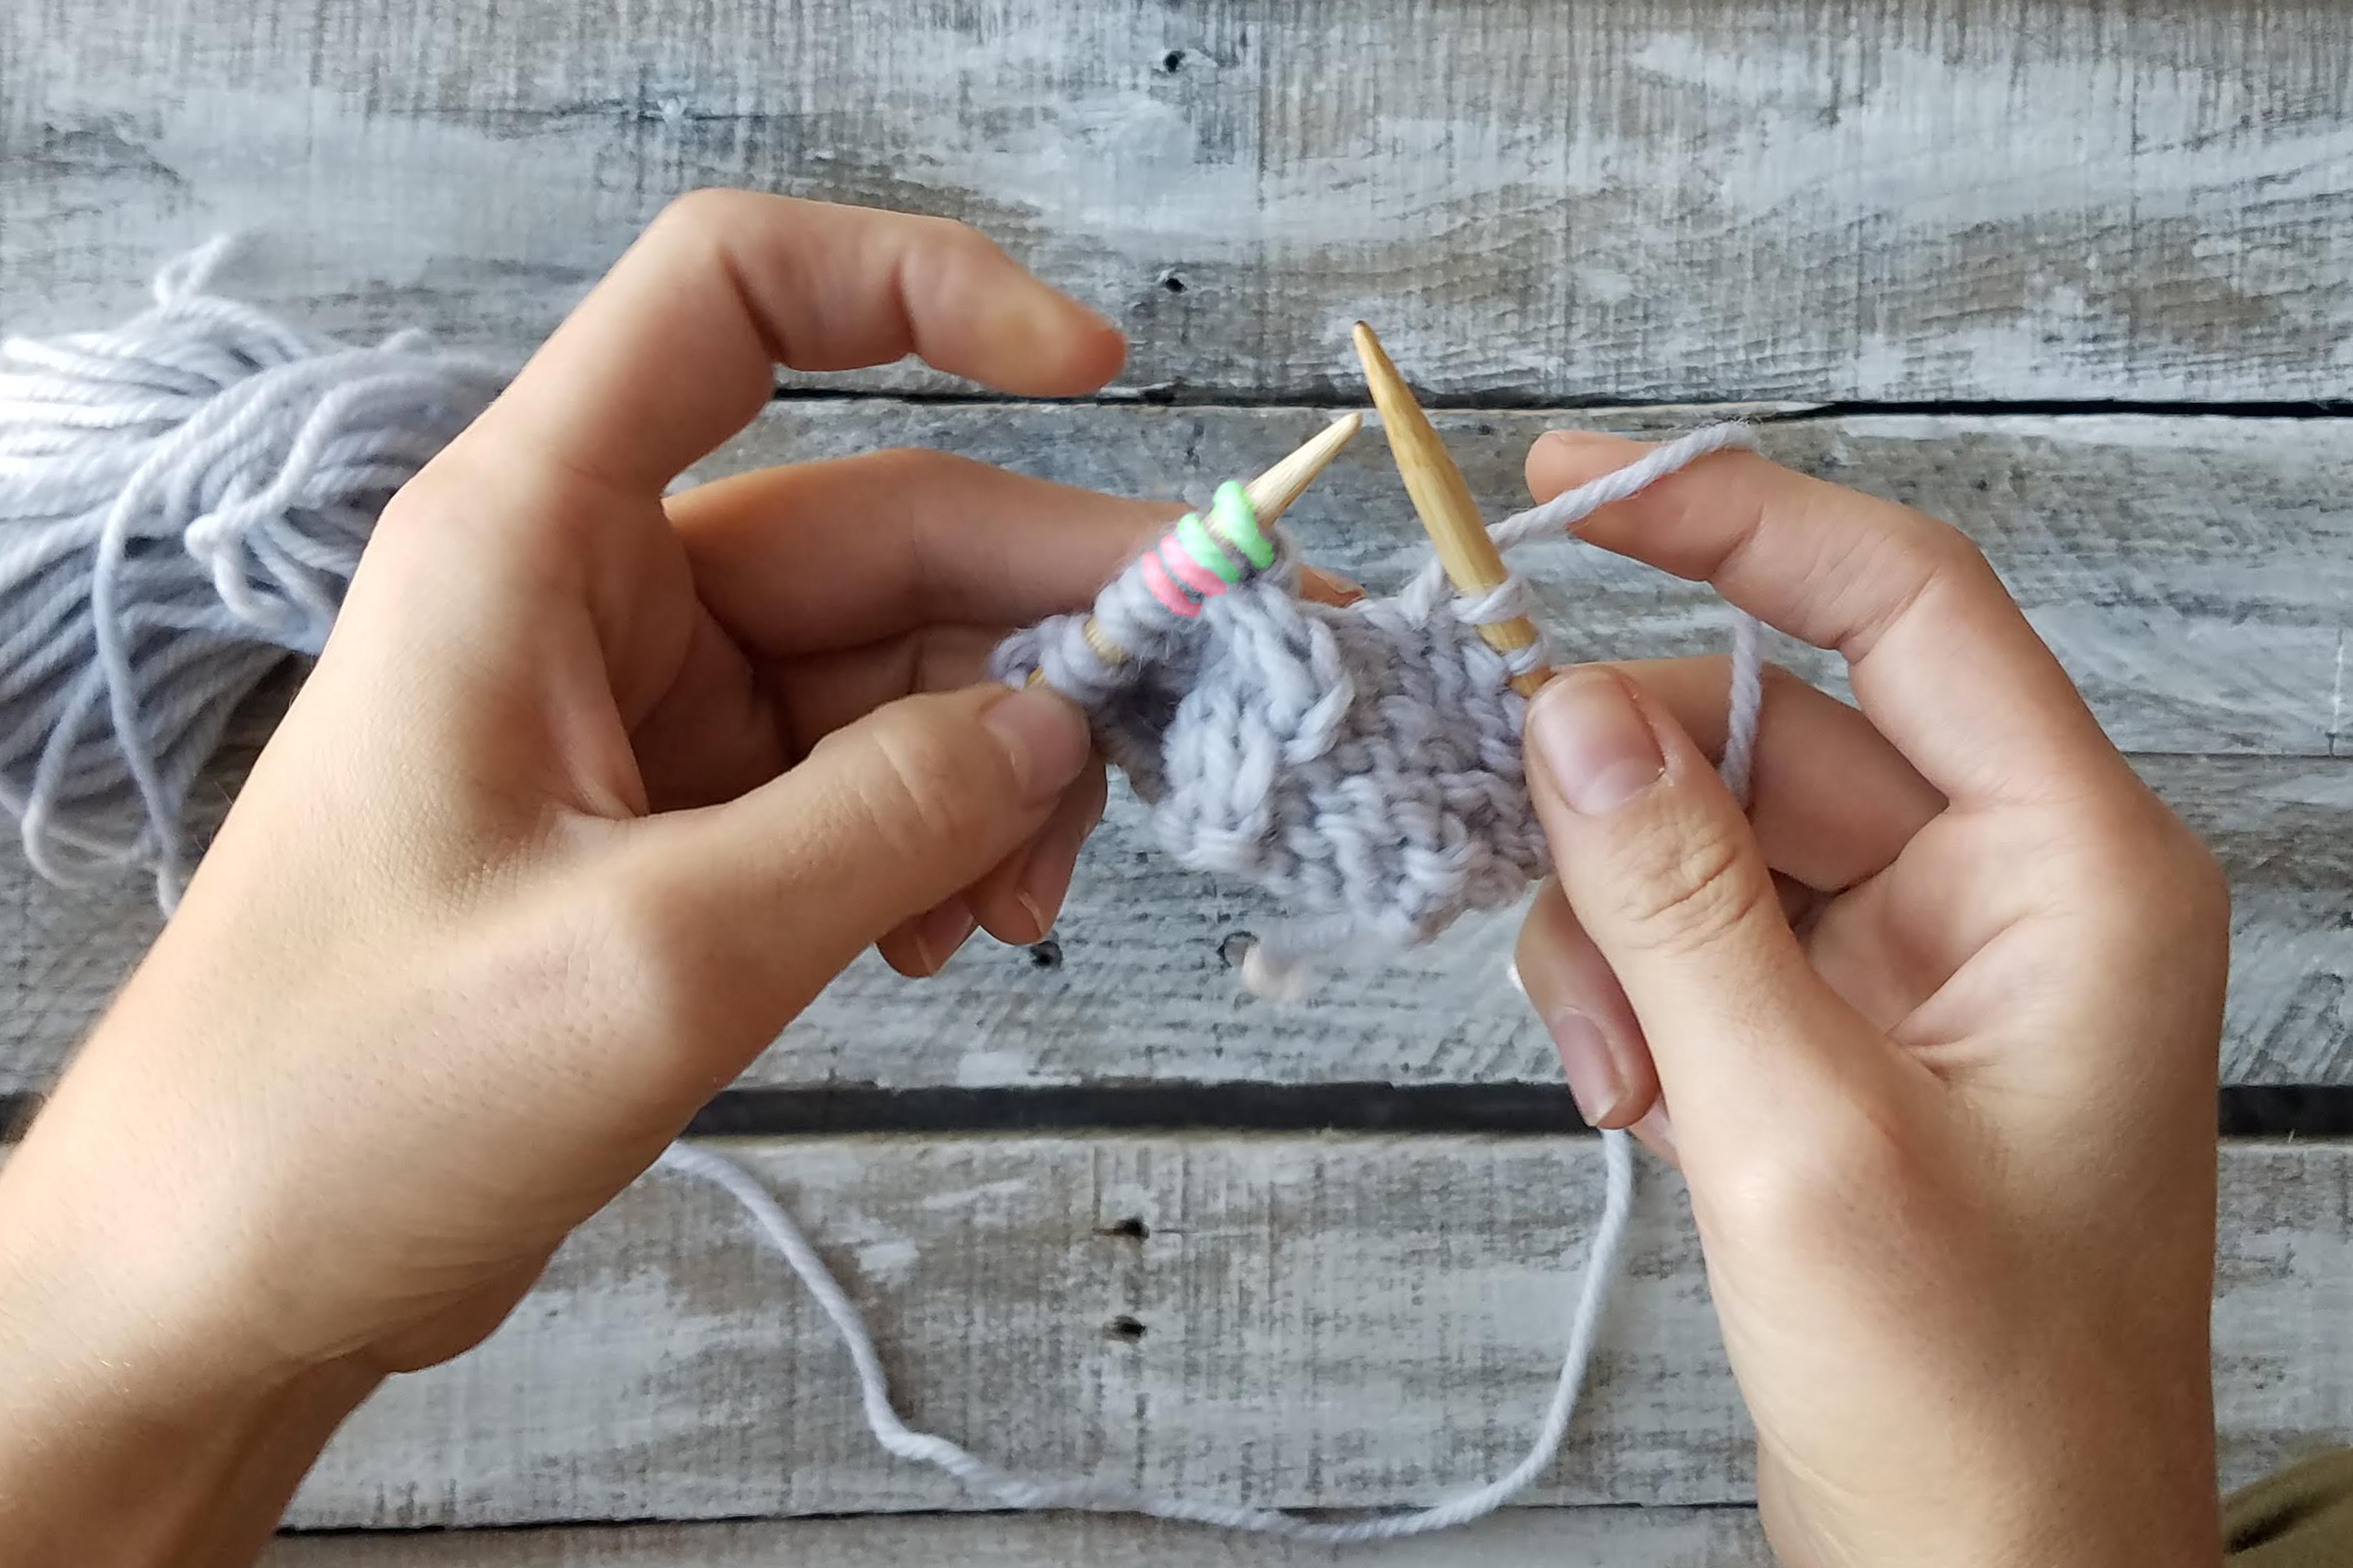
Stitches ready for their next twist.Cabling without a cable needle is just a matter of rearranging your stitches. I’ve highlighted the stitches we’ll be working with using red and green. In this instance, I am going to cross my stitches to the left.
Going behind the first two stitches (red) on the left-hand needle, slip the third and fourth (green) stitches to the right-hand needle. The first two stitches will be in FRONT of the work. If you were working this as a right cross, the red stitches would be in the BACK of your work, and you would slip the green stitches purlwise from the front.
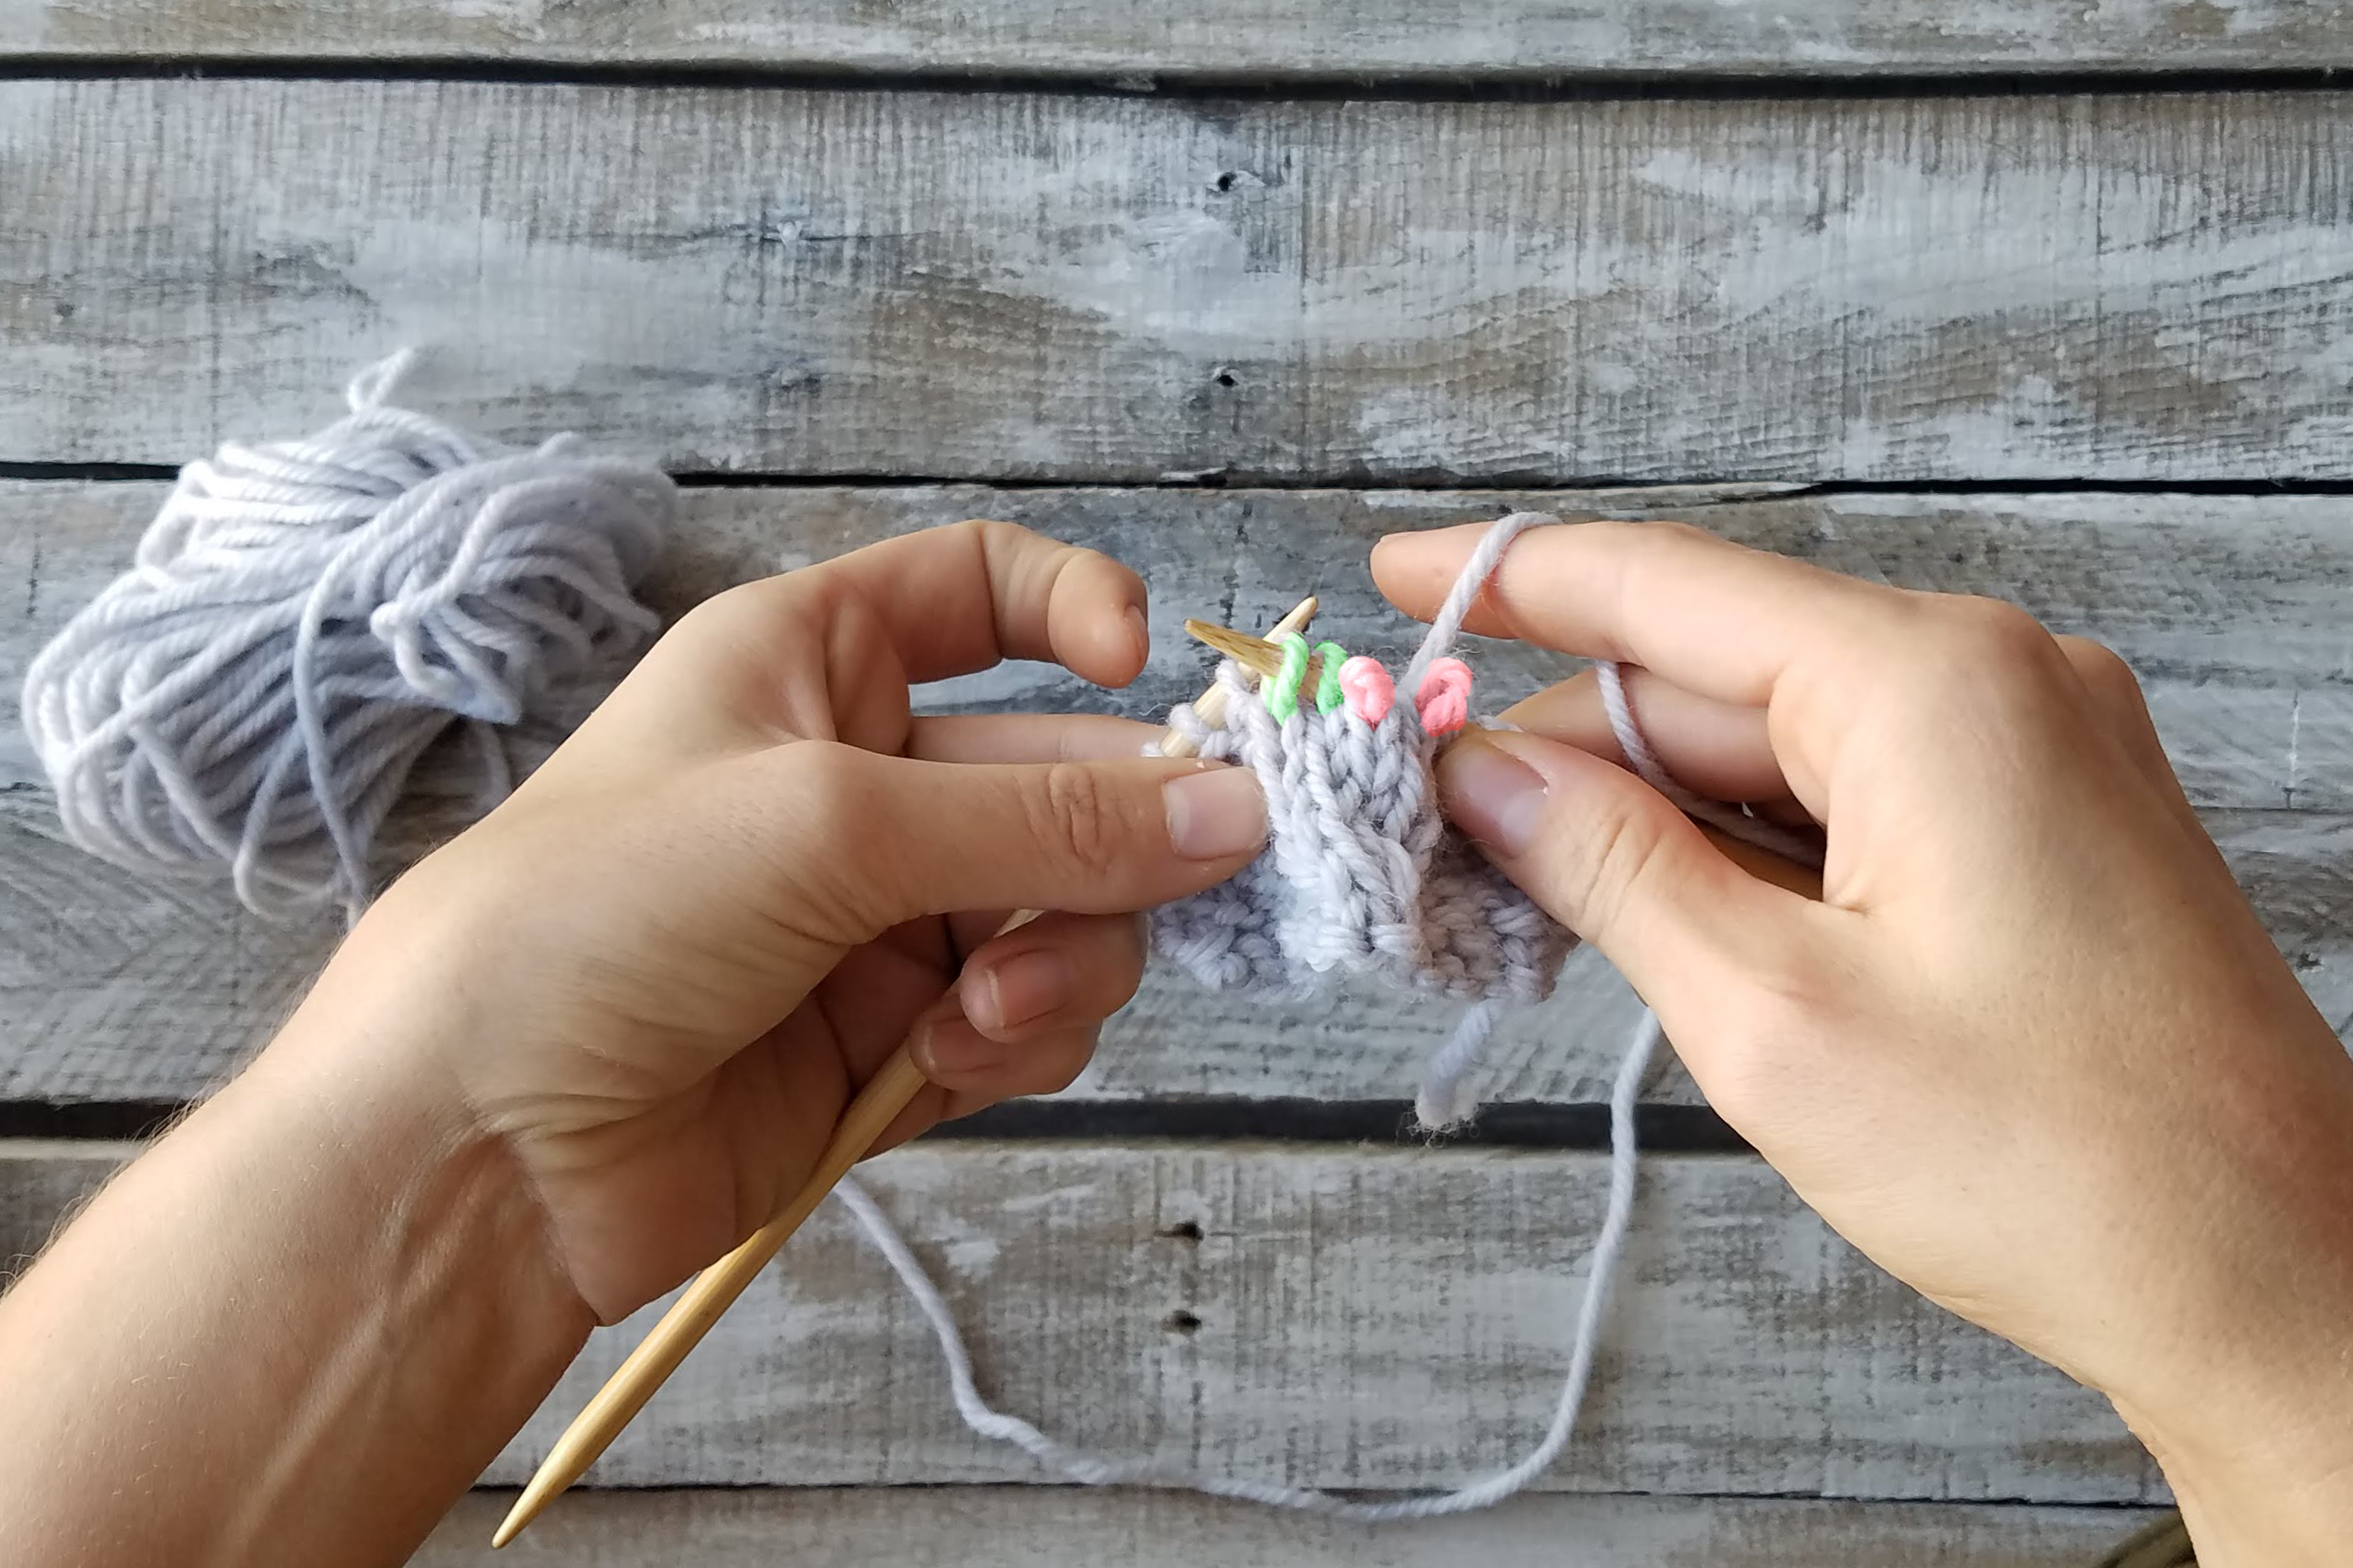
Alternate view – slipping the green stitches purlwise to the right-hand needle.Don’t be afraid!
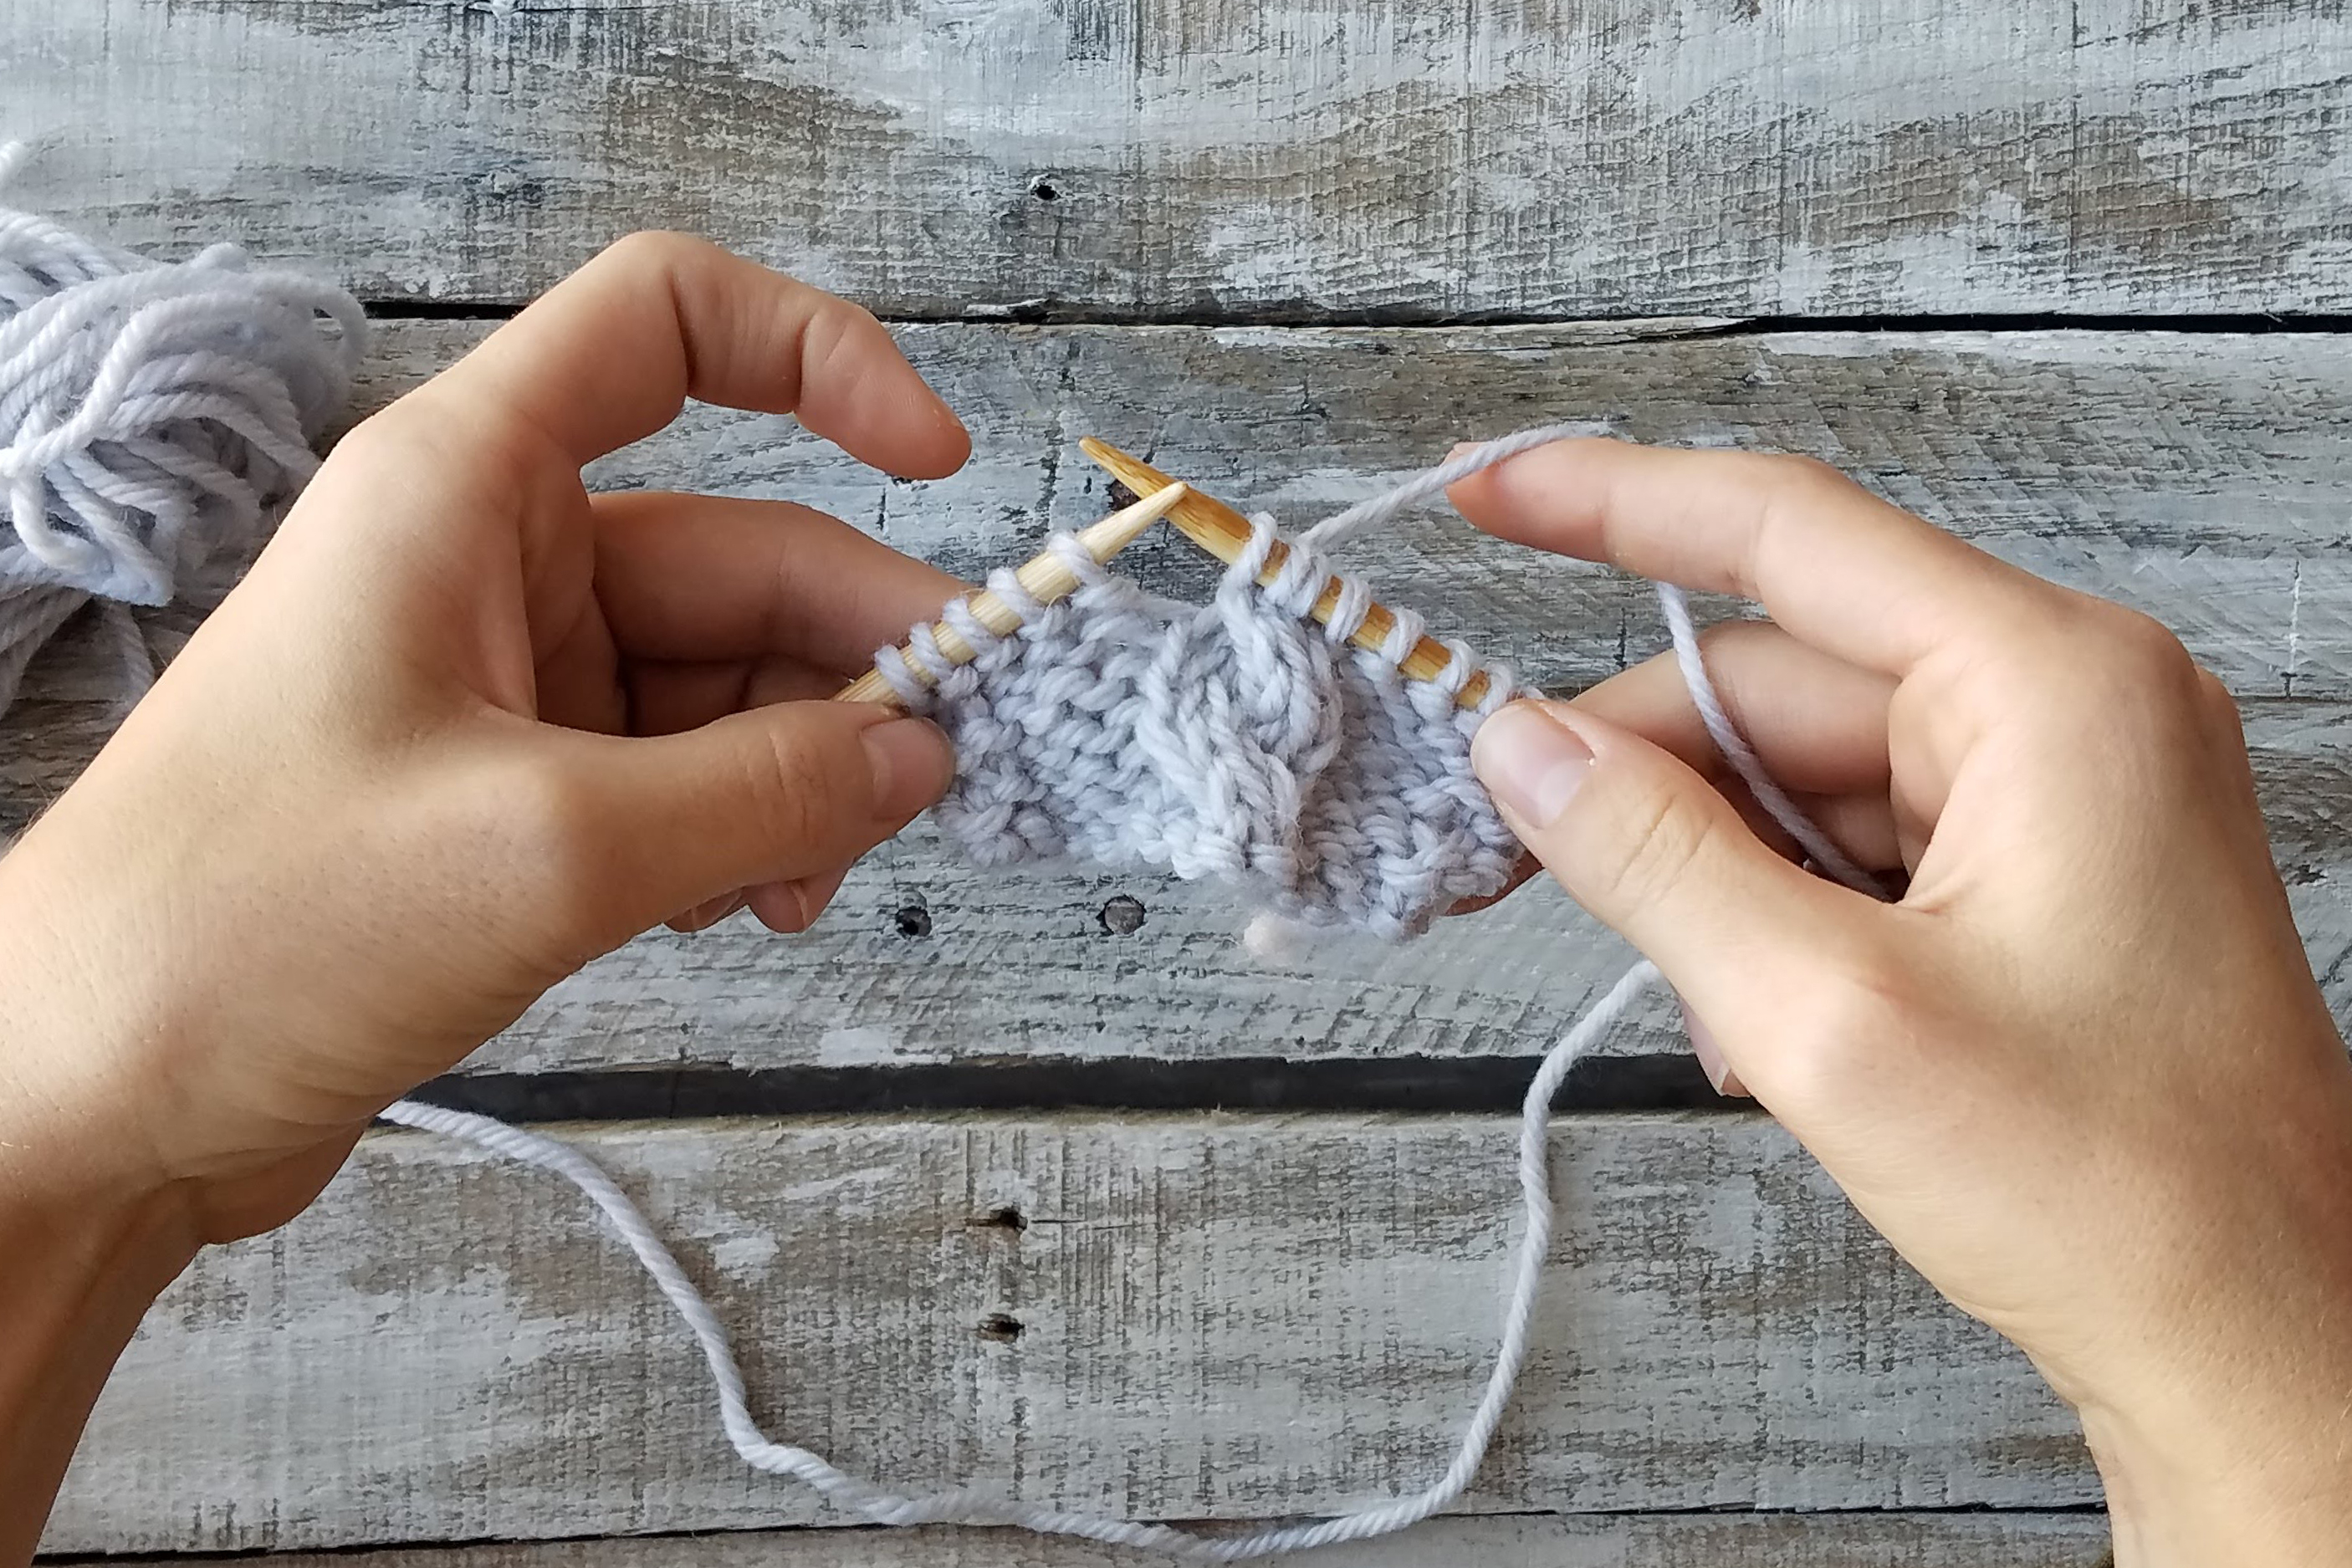
If the above photo scares you, just take a deep breath. It’s really not that scary! When you slip the green stitches, the red stitches will fall off your needle. That is okay – that’s what you want!
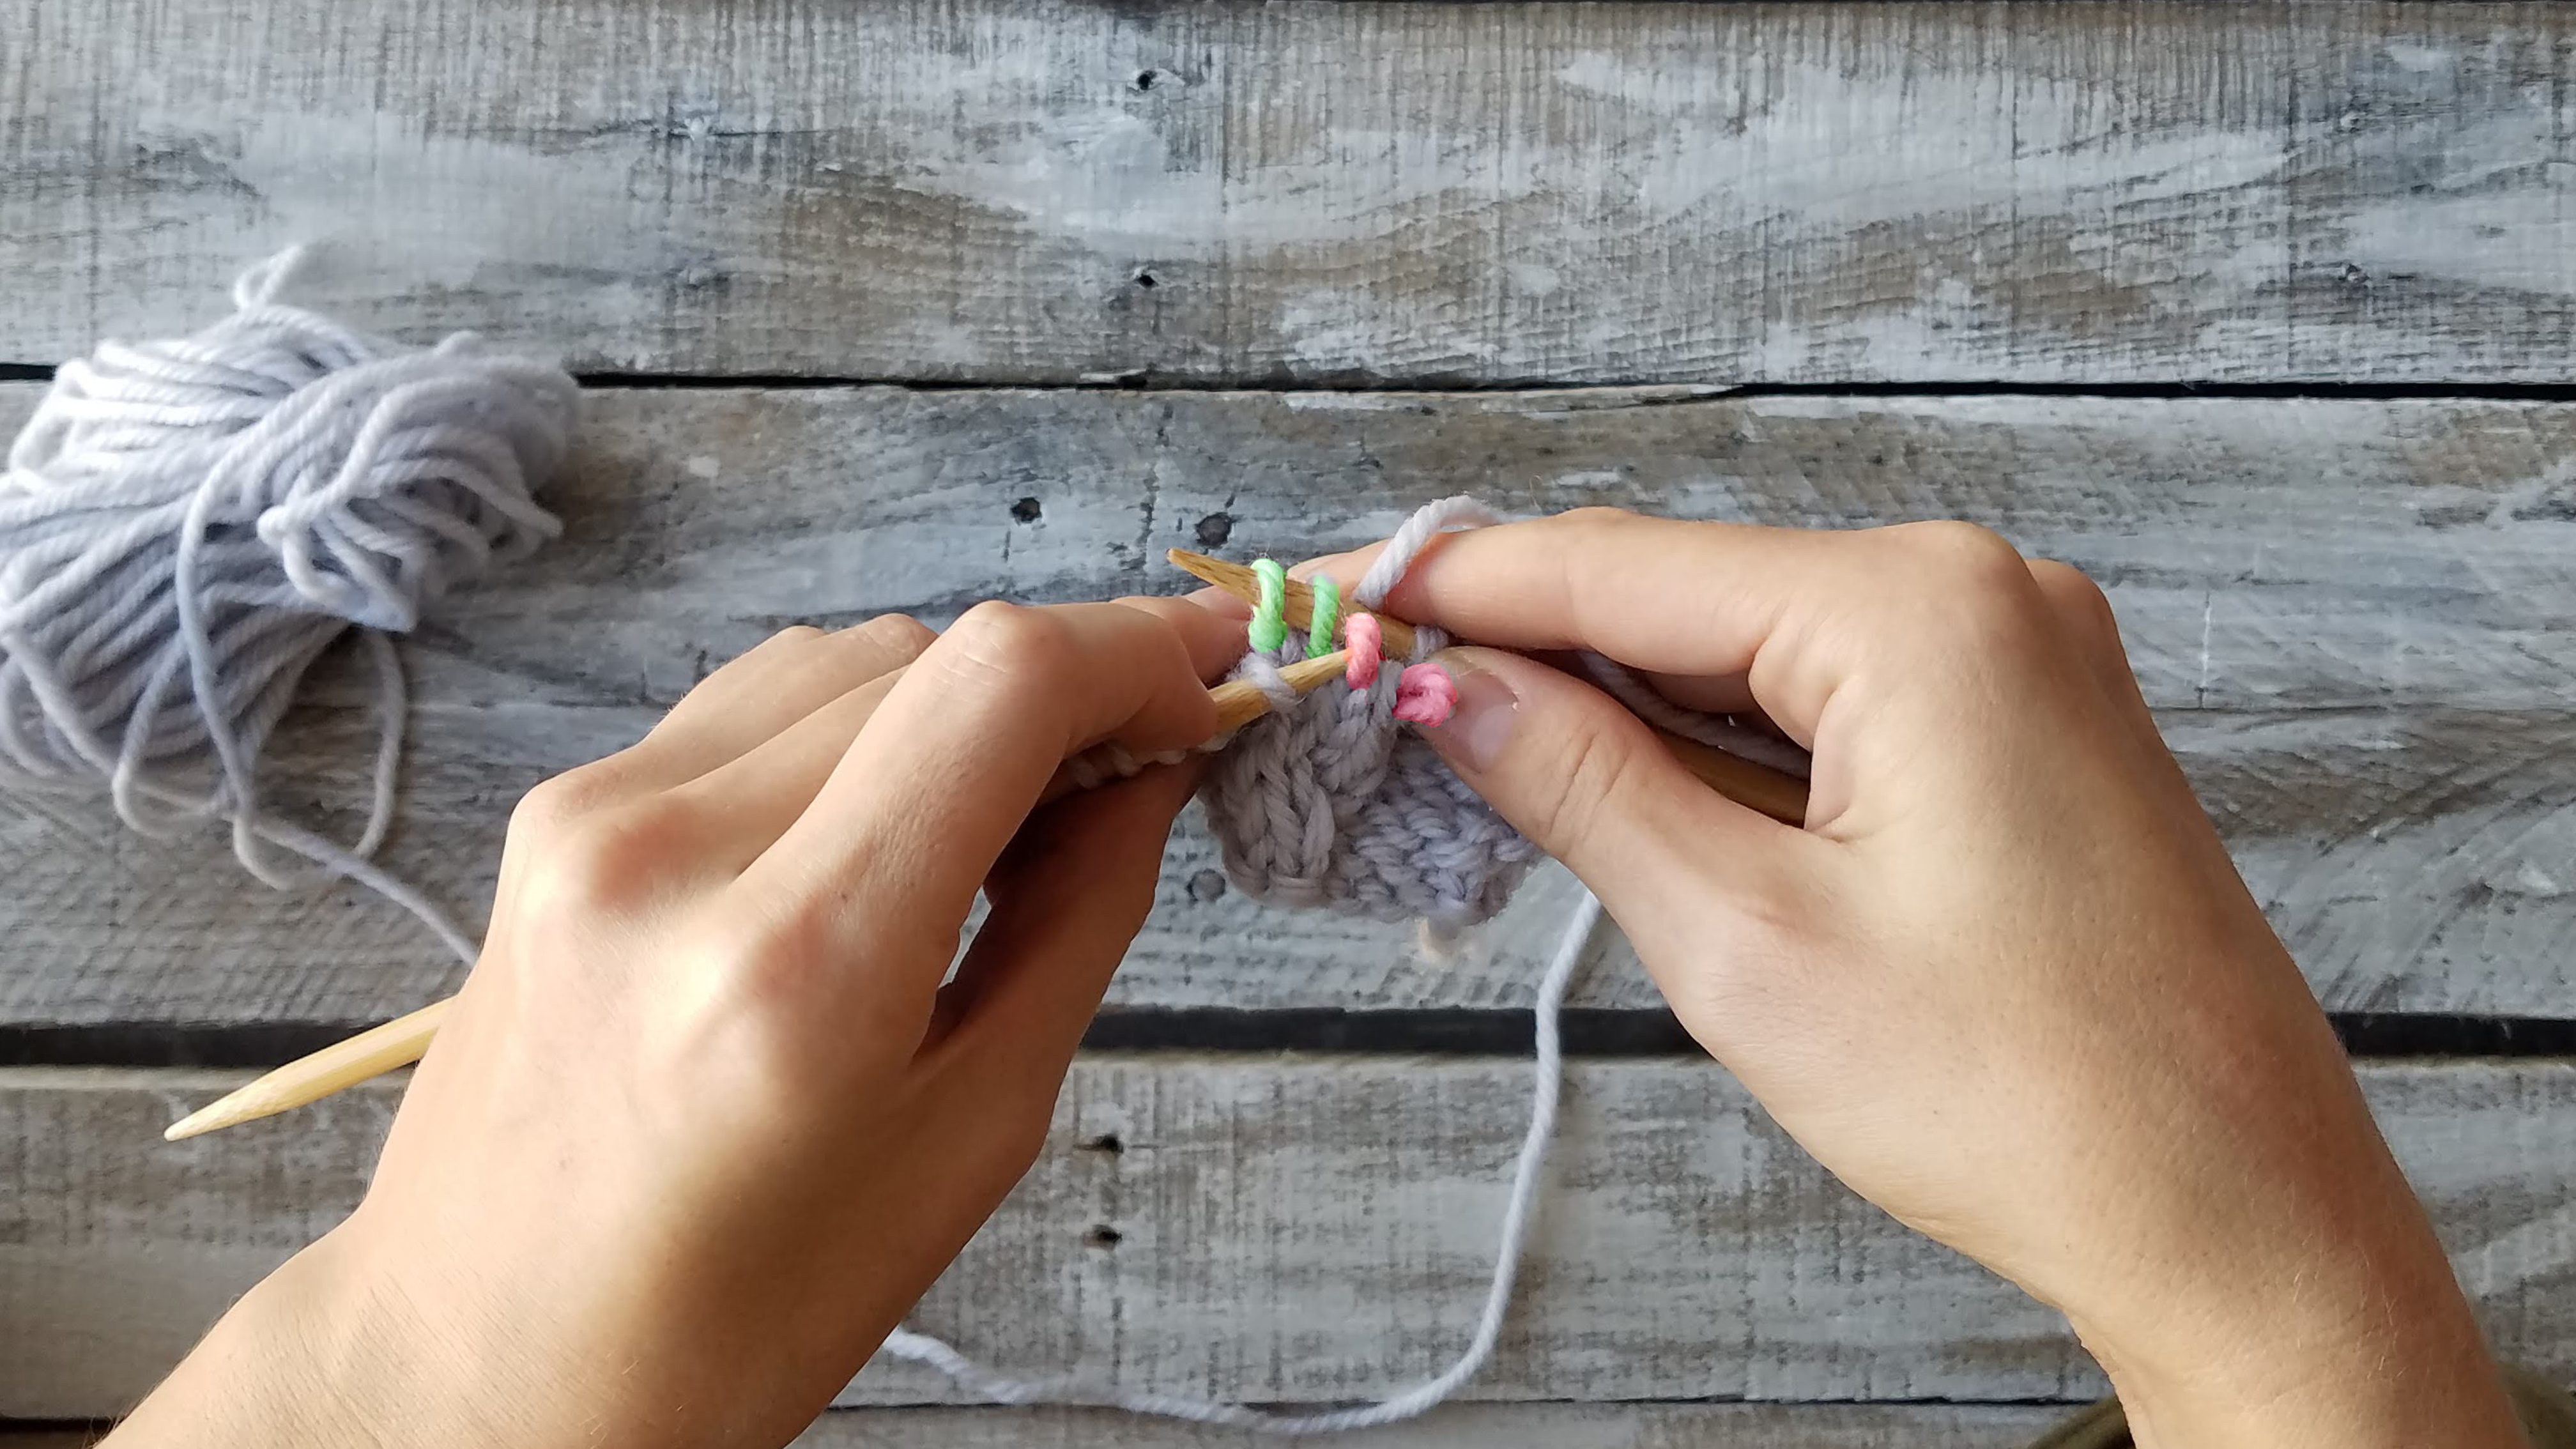
Scoop the stitches back up with the left-hand needle.
Carefully scoop the red stitches up with your left-hand needle. Breathe a sigh of relief – your stitches are safe again. Notice, we are simply re-arranging the stitches. * If you were working this as a RIGHT cross, the red stitches would be in the back of your work.
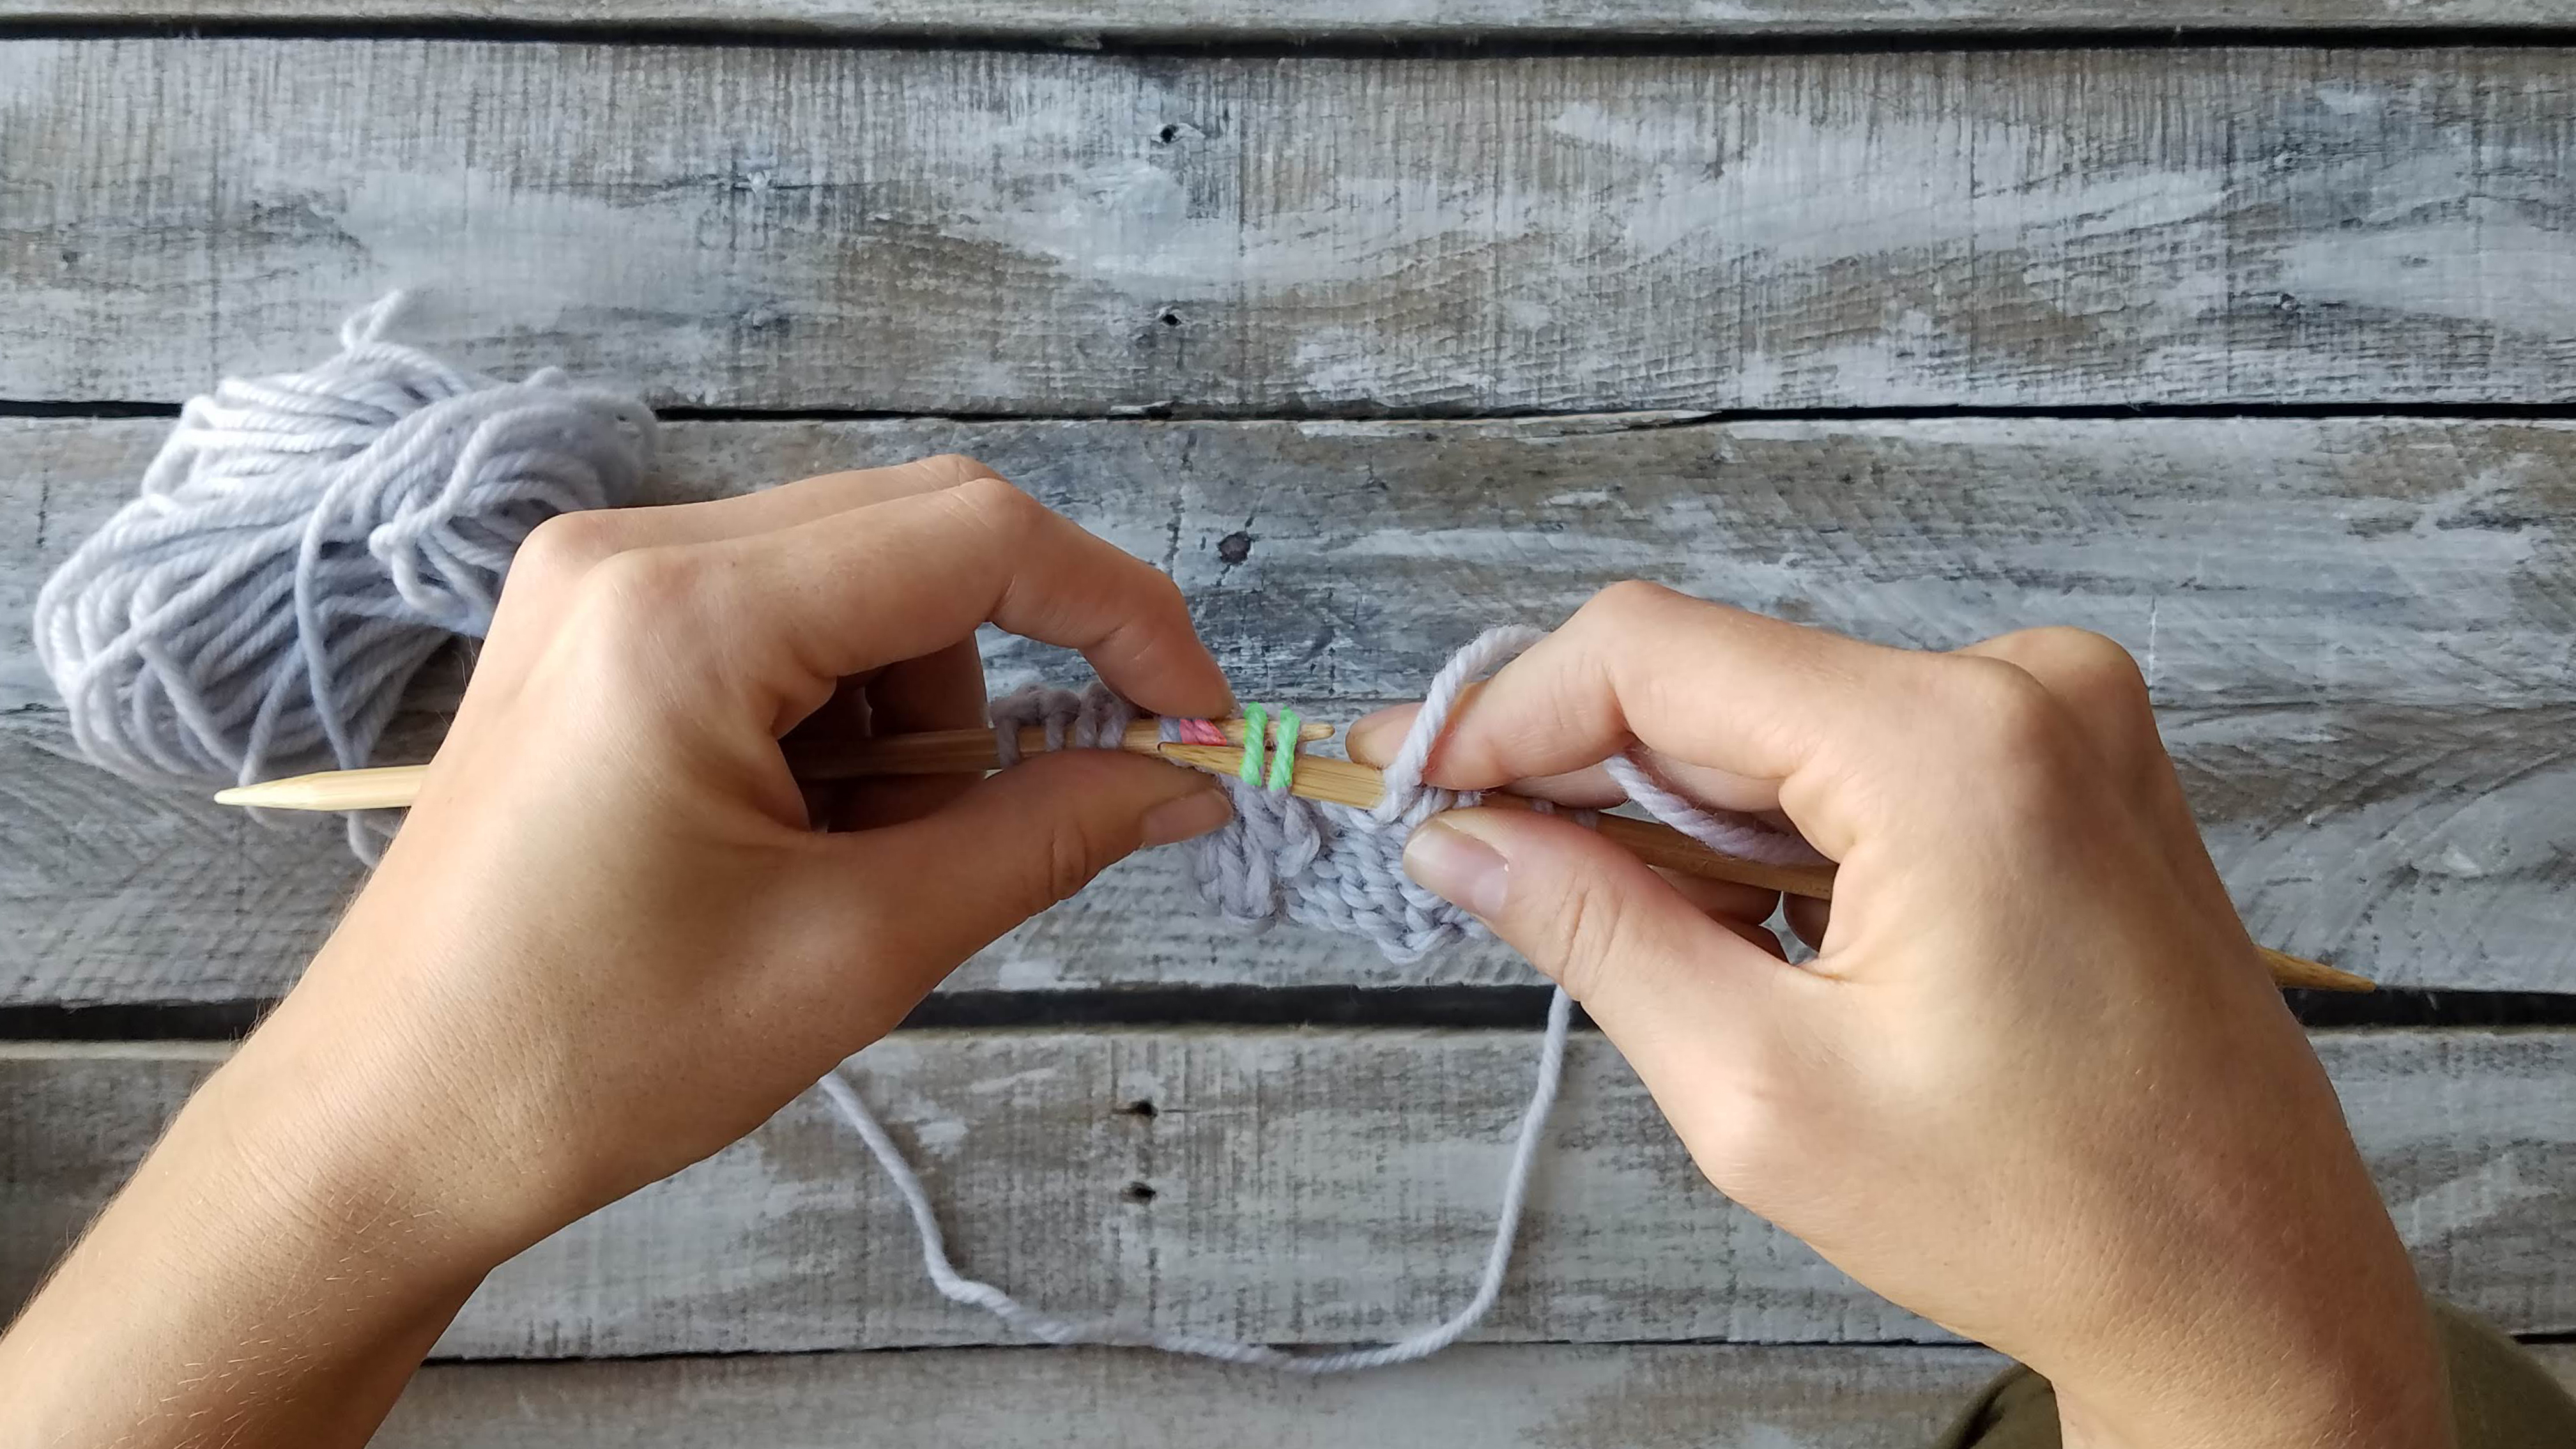
Continue to re-arrange your stitches by slipping the green stitches from the right-hand needle back to the left-hand needle.You’ve rearranged your stitches. Perfect! Now you’re ready to carry on and knit.
After the stitches are all back on the left-hand needle you may continue knitting as usual. You can already see the twist in your work.
TA-DA!
That’s it! You’ve created a beautiful cable without a cable needle.
I realize that I’ve only included instructions for a 2×2 Left Cross here, but my hope is mainly to give you the courage to go forth without a cable needle. In fact, the pattern features left and right crosses; so if you choose to skip the cable needle you’ll have plenty of time to practice both.
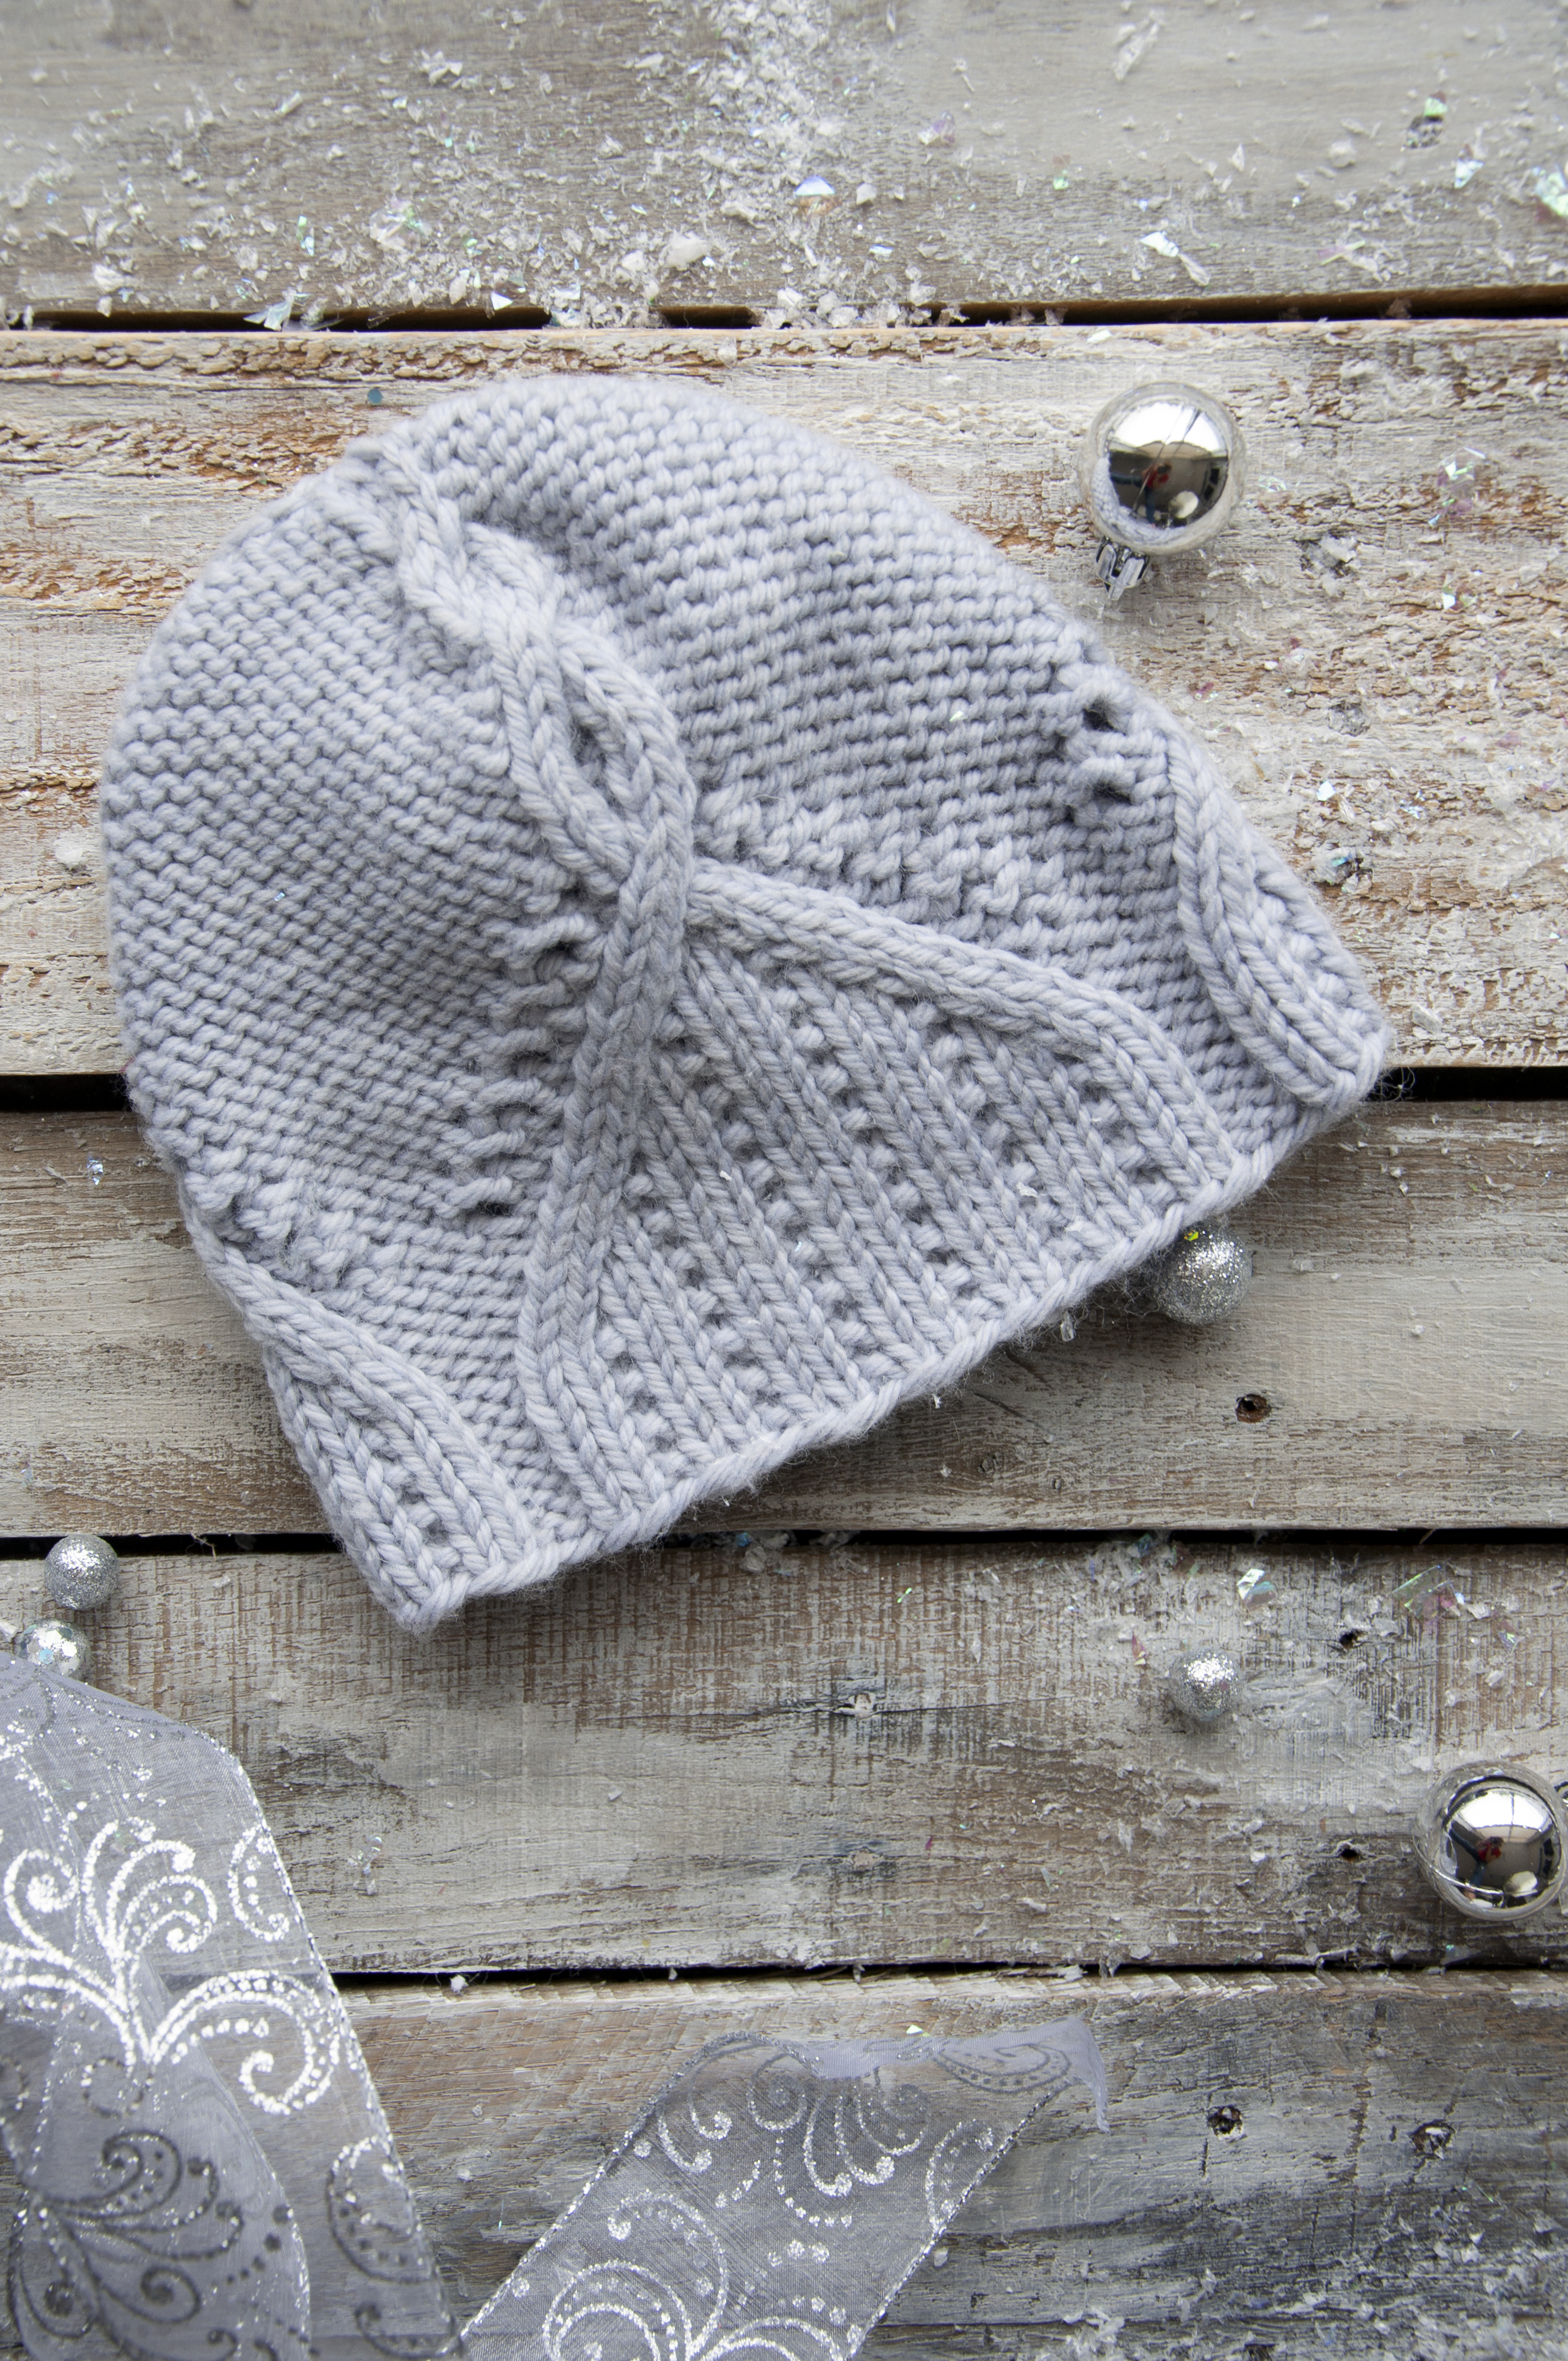
Left and right cable crosses are used to create the traveling cables in the hat. The cables in the crown use right crosses.
You can do this on any number of stitches, but I wouldn’t recommend working cables without a needle on anything more than 3×3 crosses. Any bigger than that and things can start to look sloppy and feel fiddly. Cable needles are great and help to maintain an even tension, but the same results can occur without them. Some find that skipping the cable needle feels faster, too. In personal projects, I go both ways. It depends on my mood and whether I can find my cable needle!
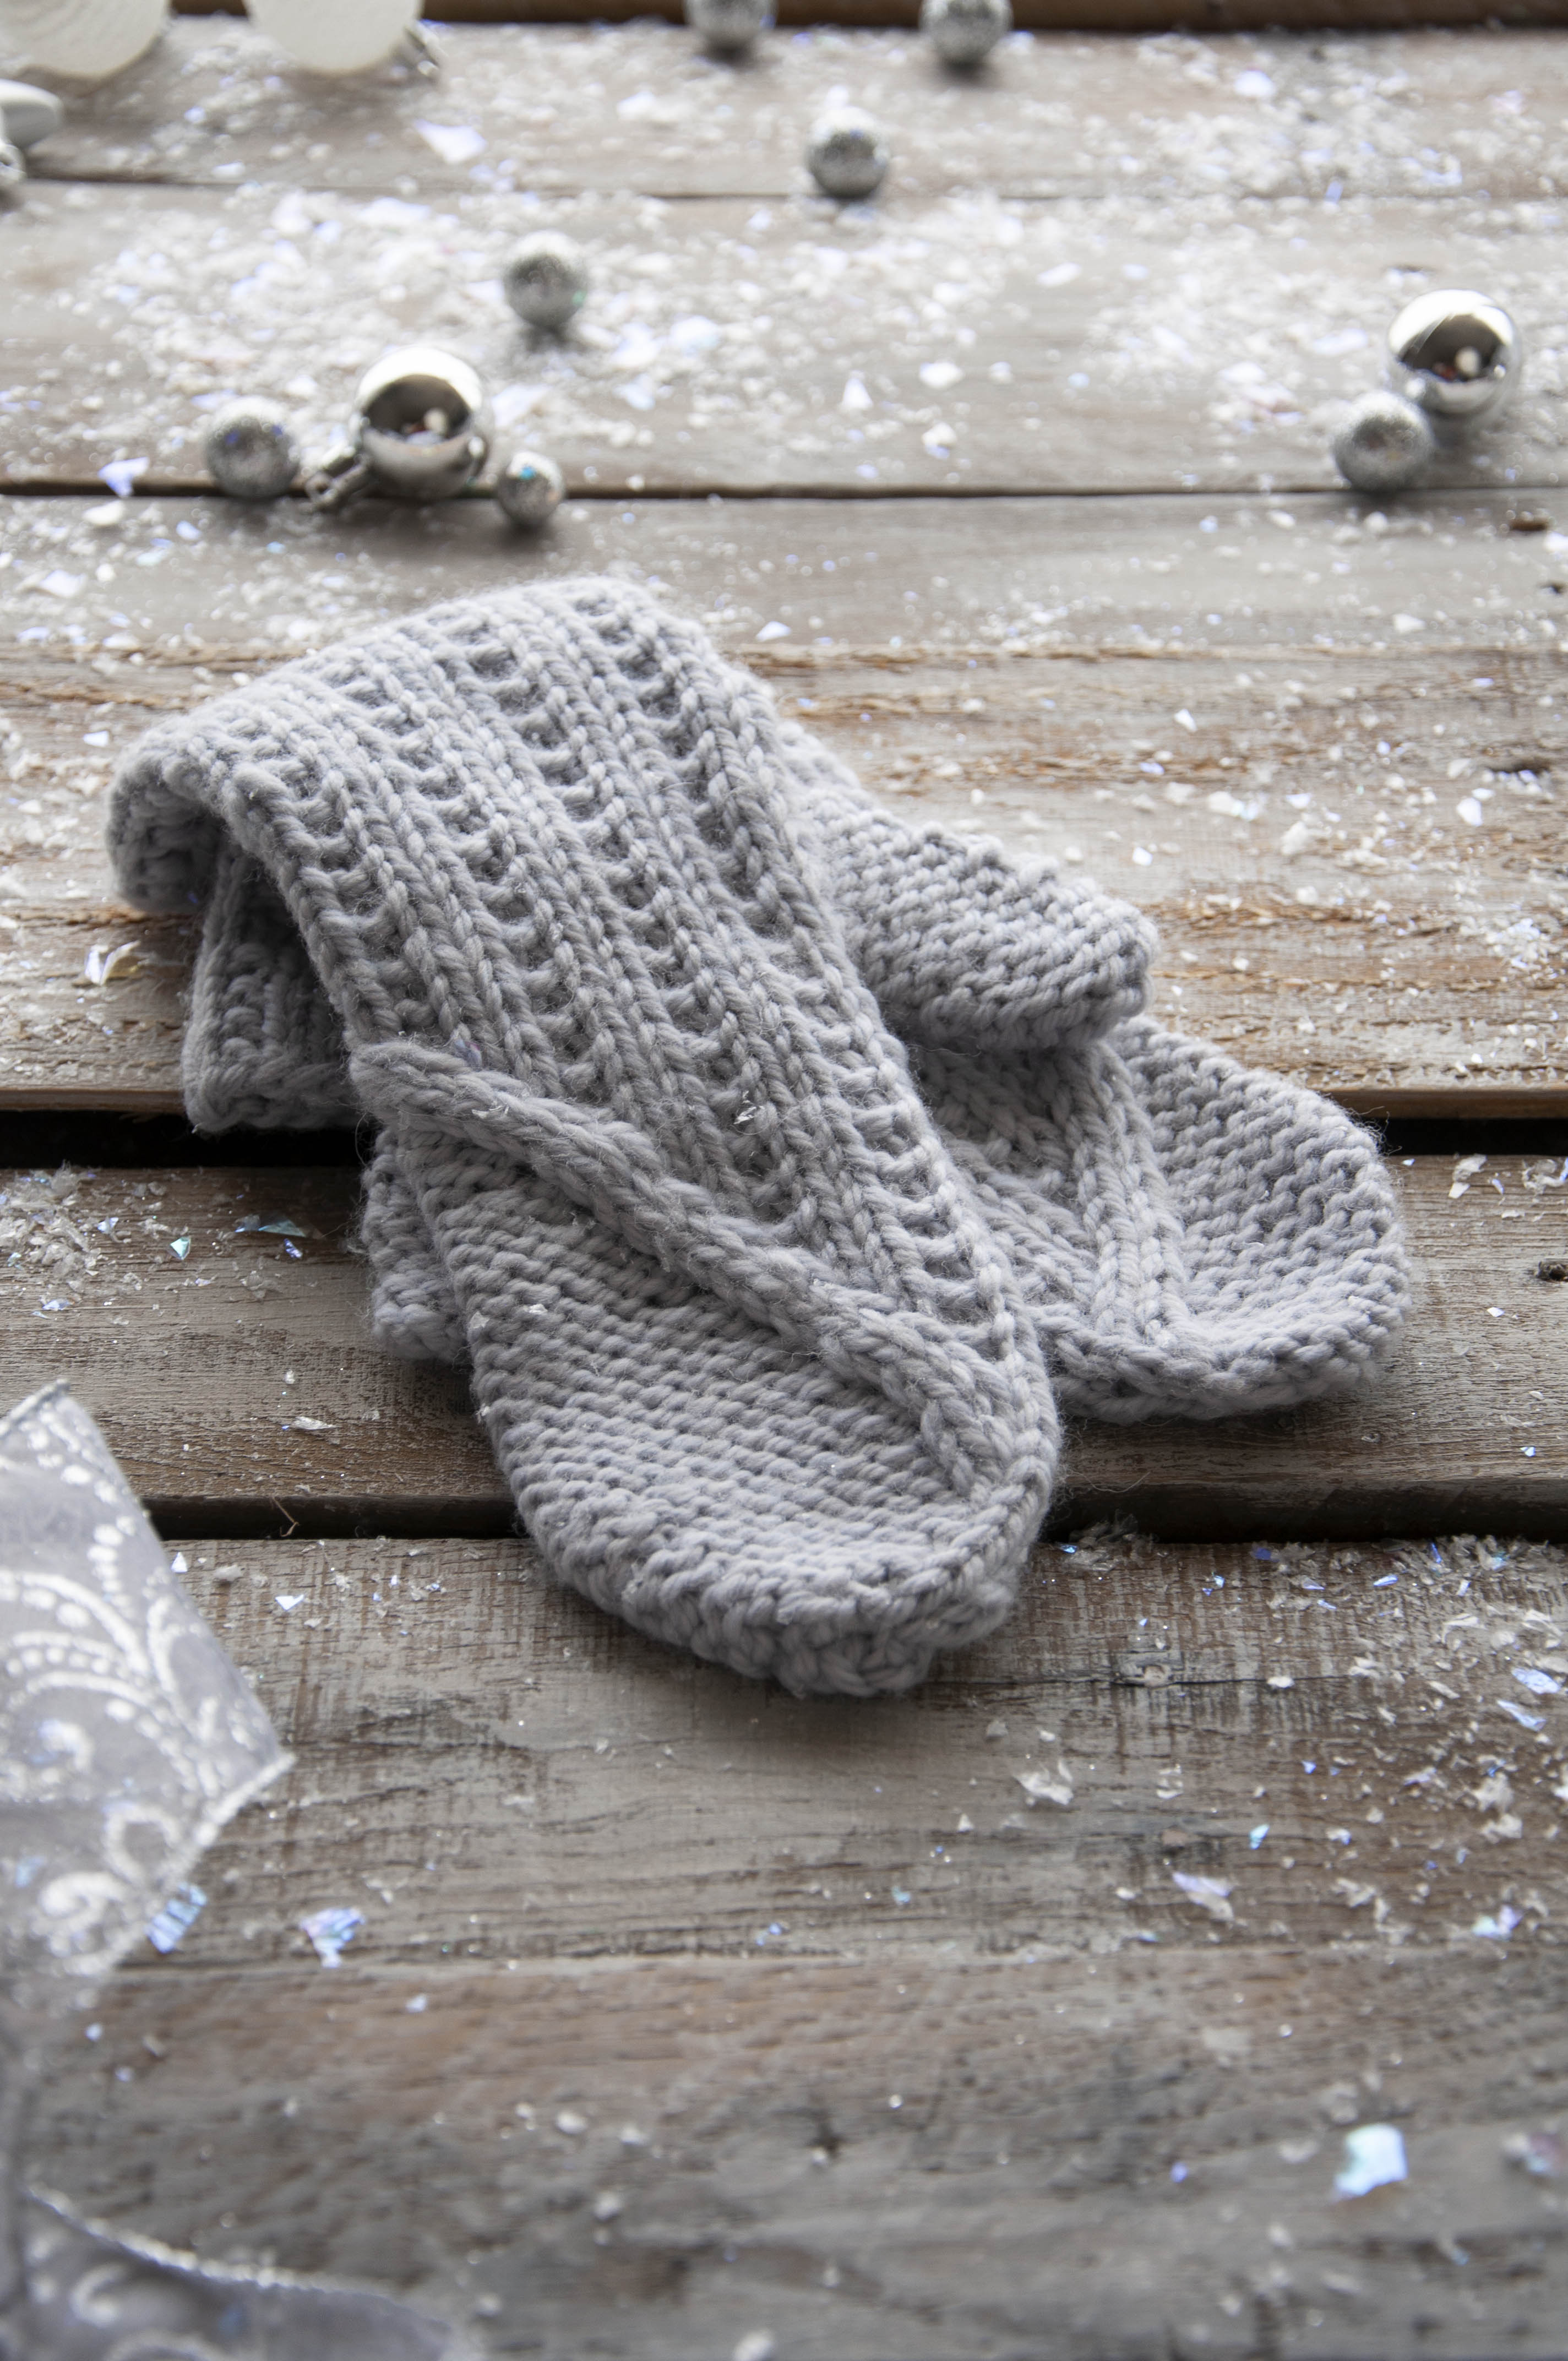
Cable stitches are also used in the mittens.
Remember, you can find the 12 Days of Winter Kit patterns on Ravelry.
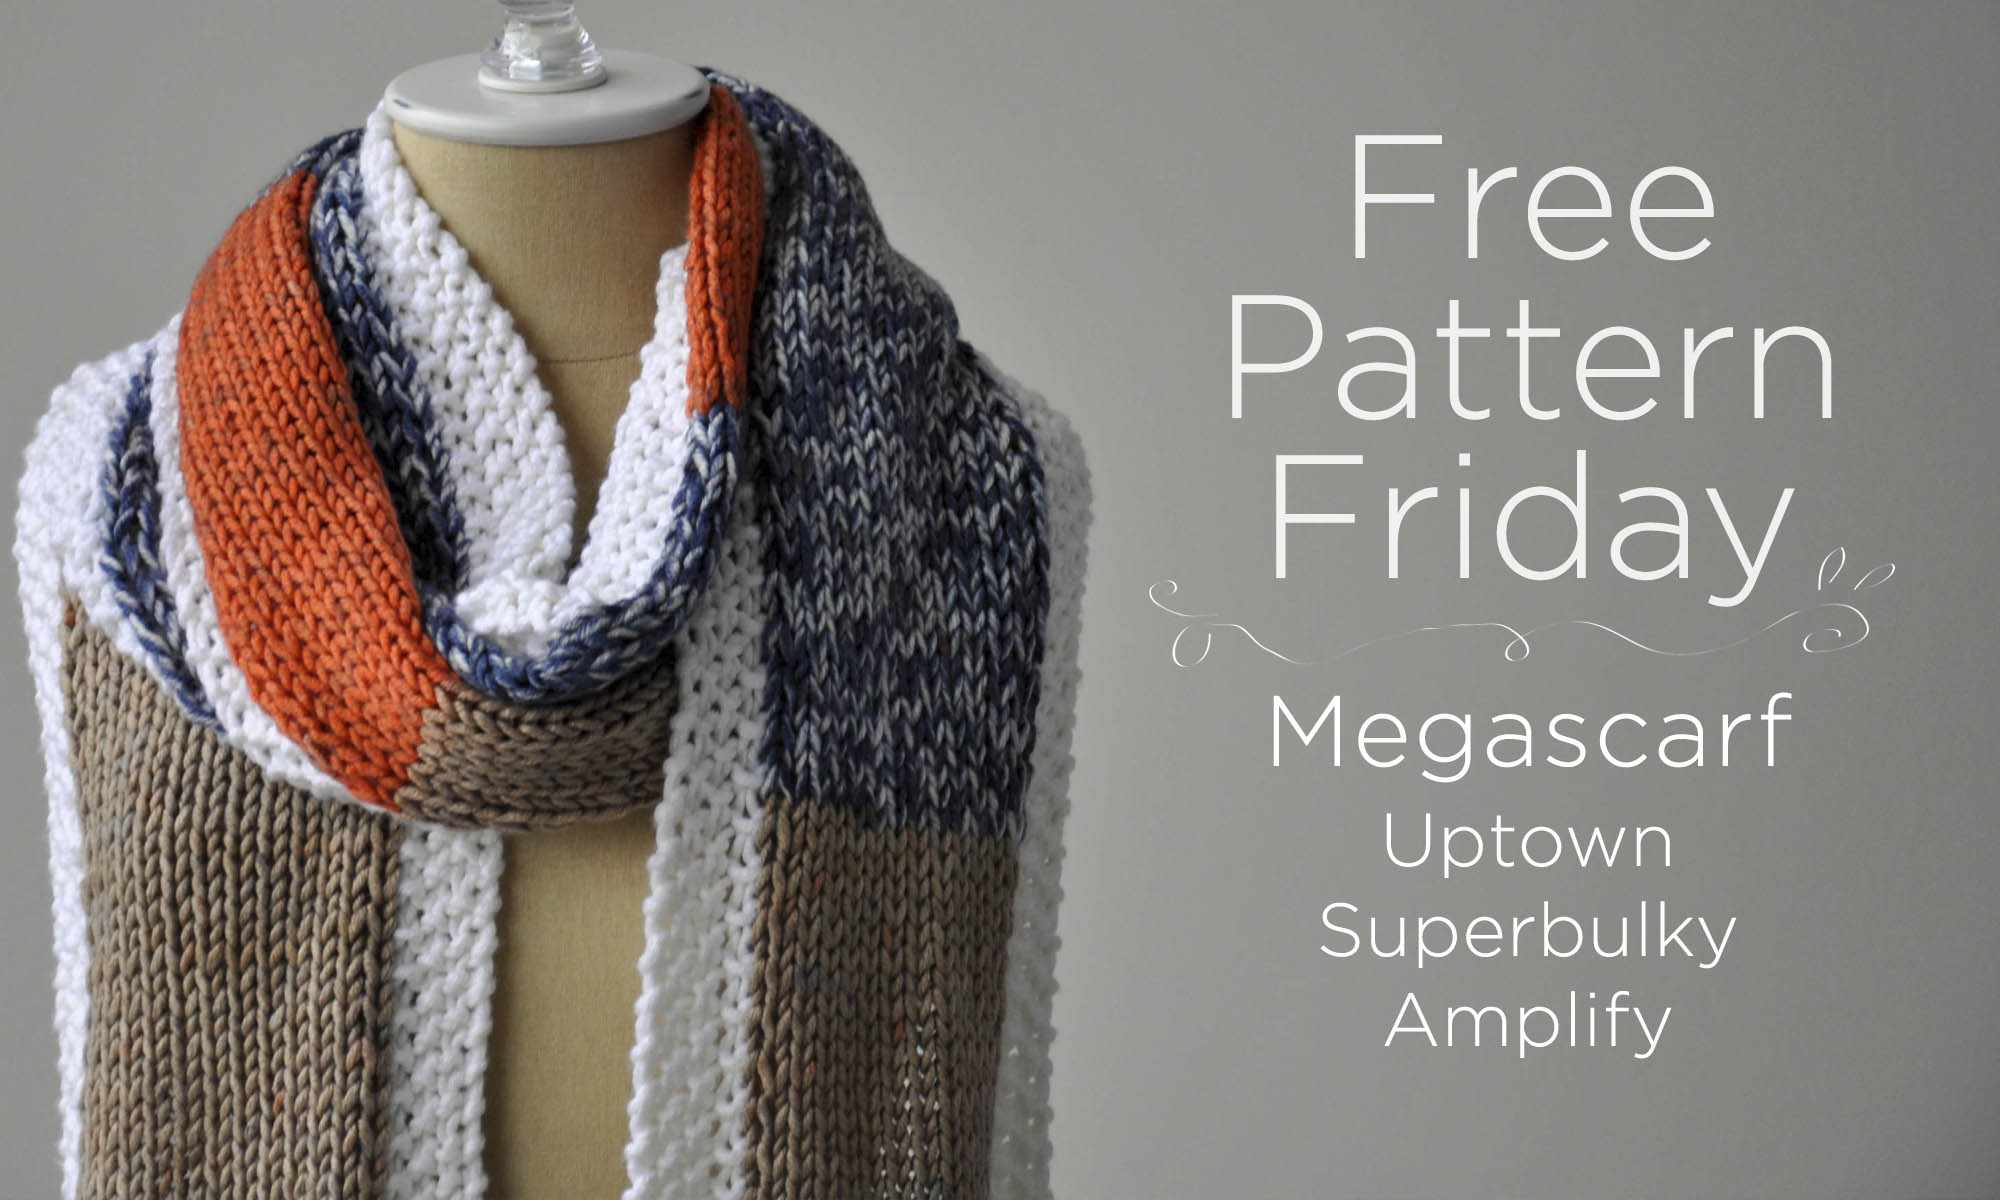
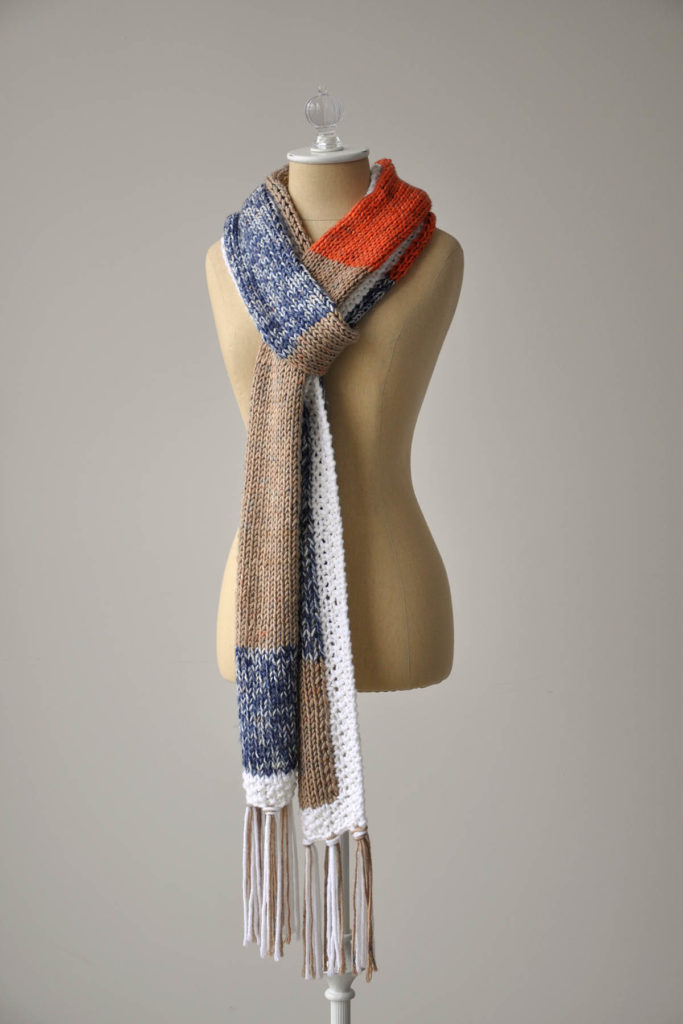
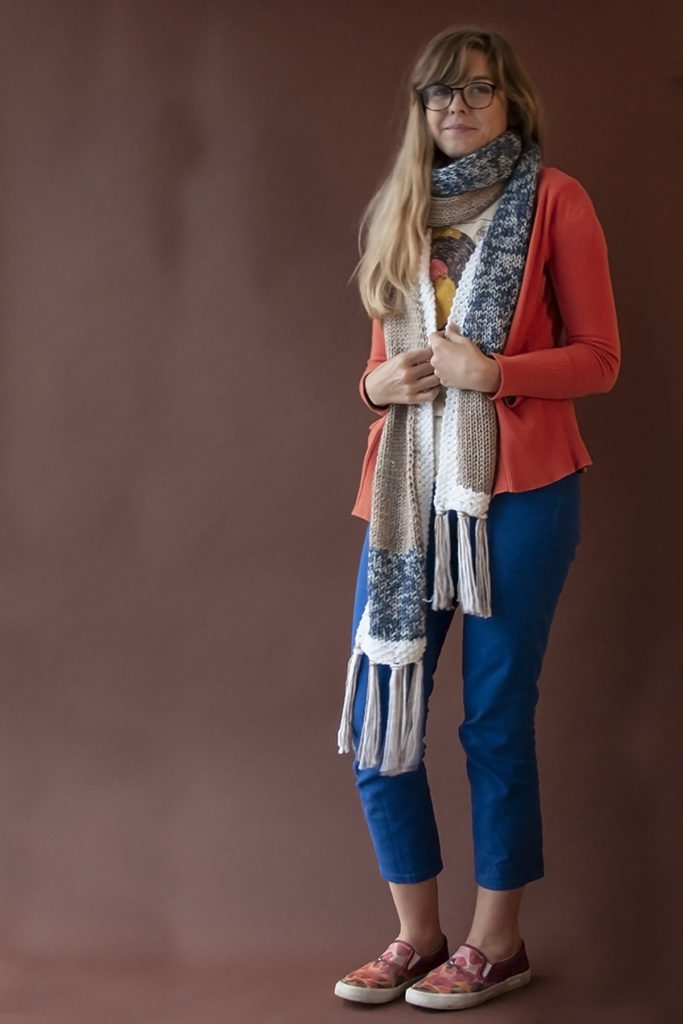
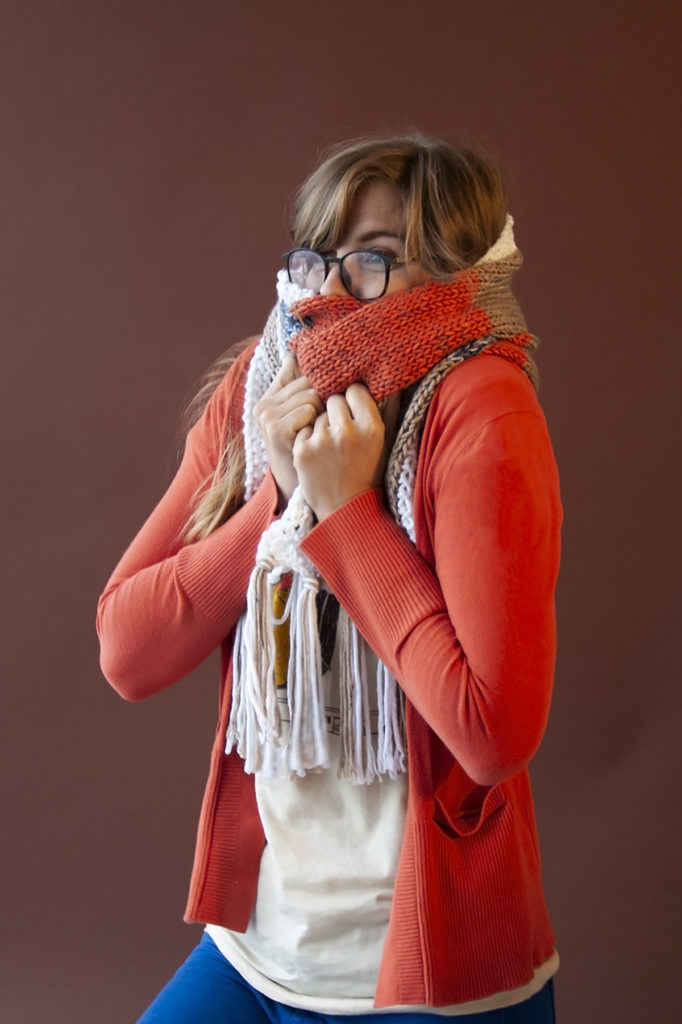
The scarf gets its name from the plump yarn and extra-long length. Despite the length, this scarf knits up so quickly! Can you believe you only need to cast on 20 stitches?
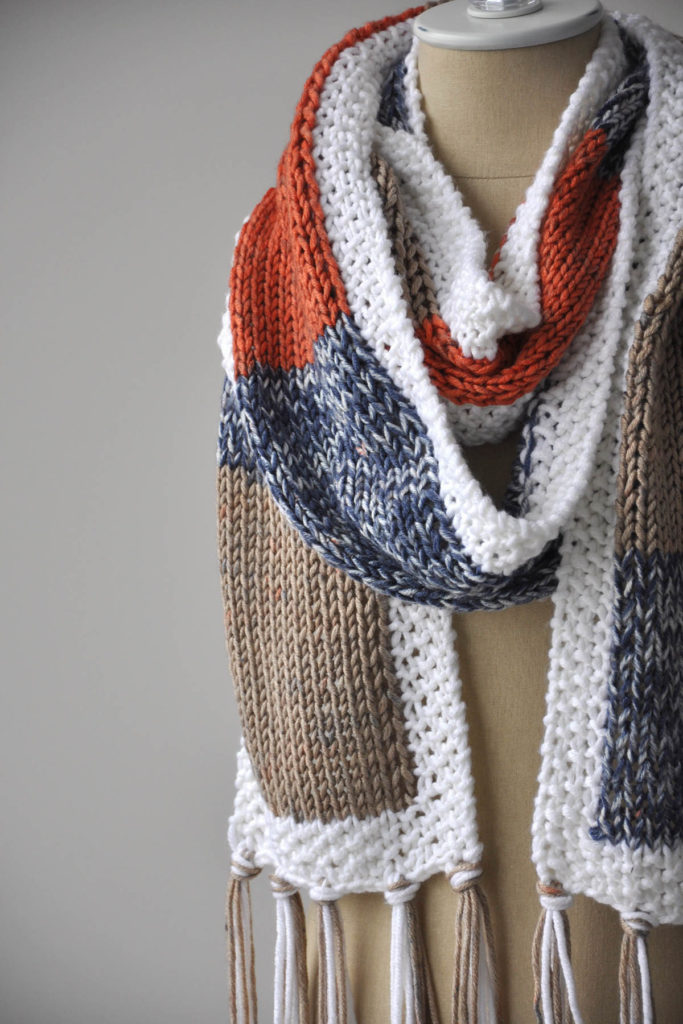
This scarf mixes intarsia and self-striping Uptown Super Bulky Amplify for exciting results. We think this pattern is great for beginners looking to learn a new skill. Intarsia is easy, we promise!
Complimentary colors forever!
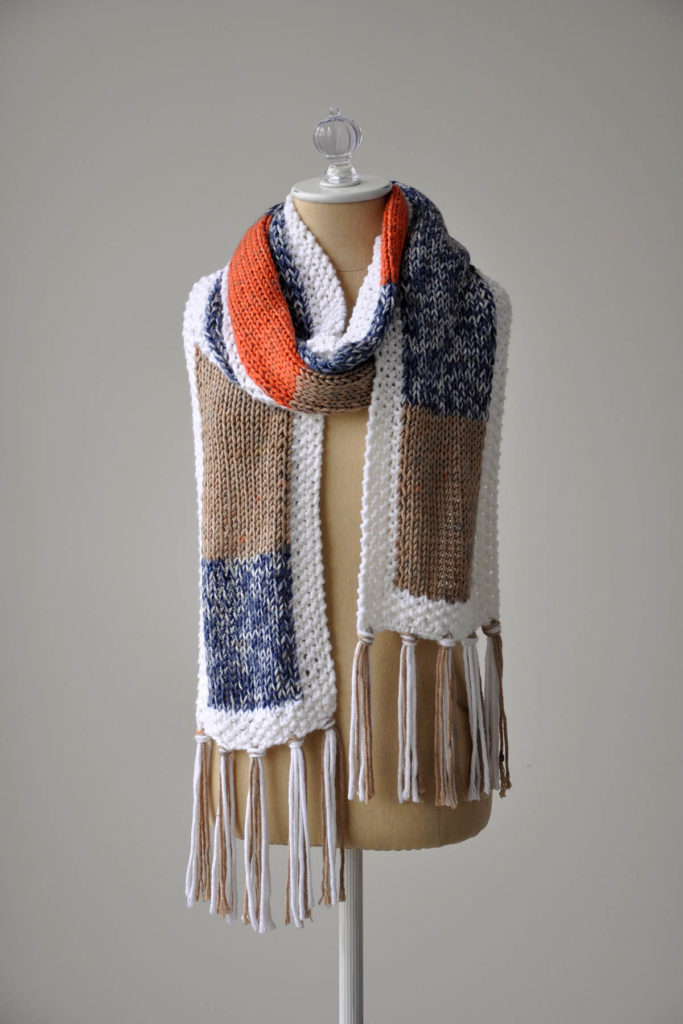
Be careful – if your outfit matches a free pattern too closely, your colleagues may insist that you model it!
It’s okay, though! I’m totally up for wrapping myself in knitwear all day, every day! Plus, I’m almost always cold! We wrapped this scarf around my neck many times. Perfect for the snowy weather the north has been experiencing this week!
We hope you enjoy this week’s free pattern! Have a fabulous weekend!
This is part 10 in a 12 part series highlighting designs from our 12 Days of Winter, Series 2 Edition.
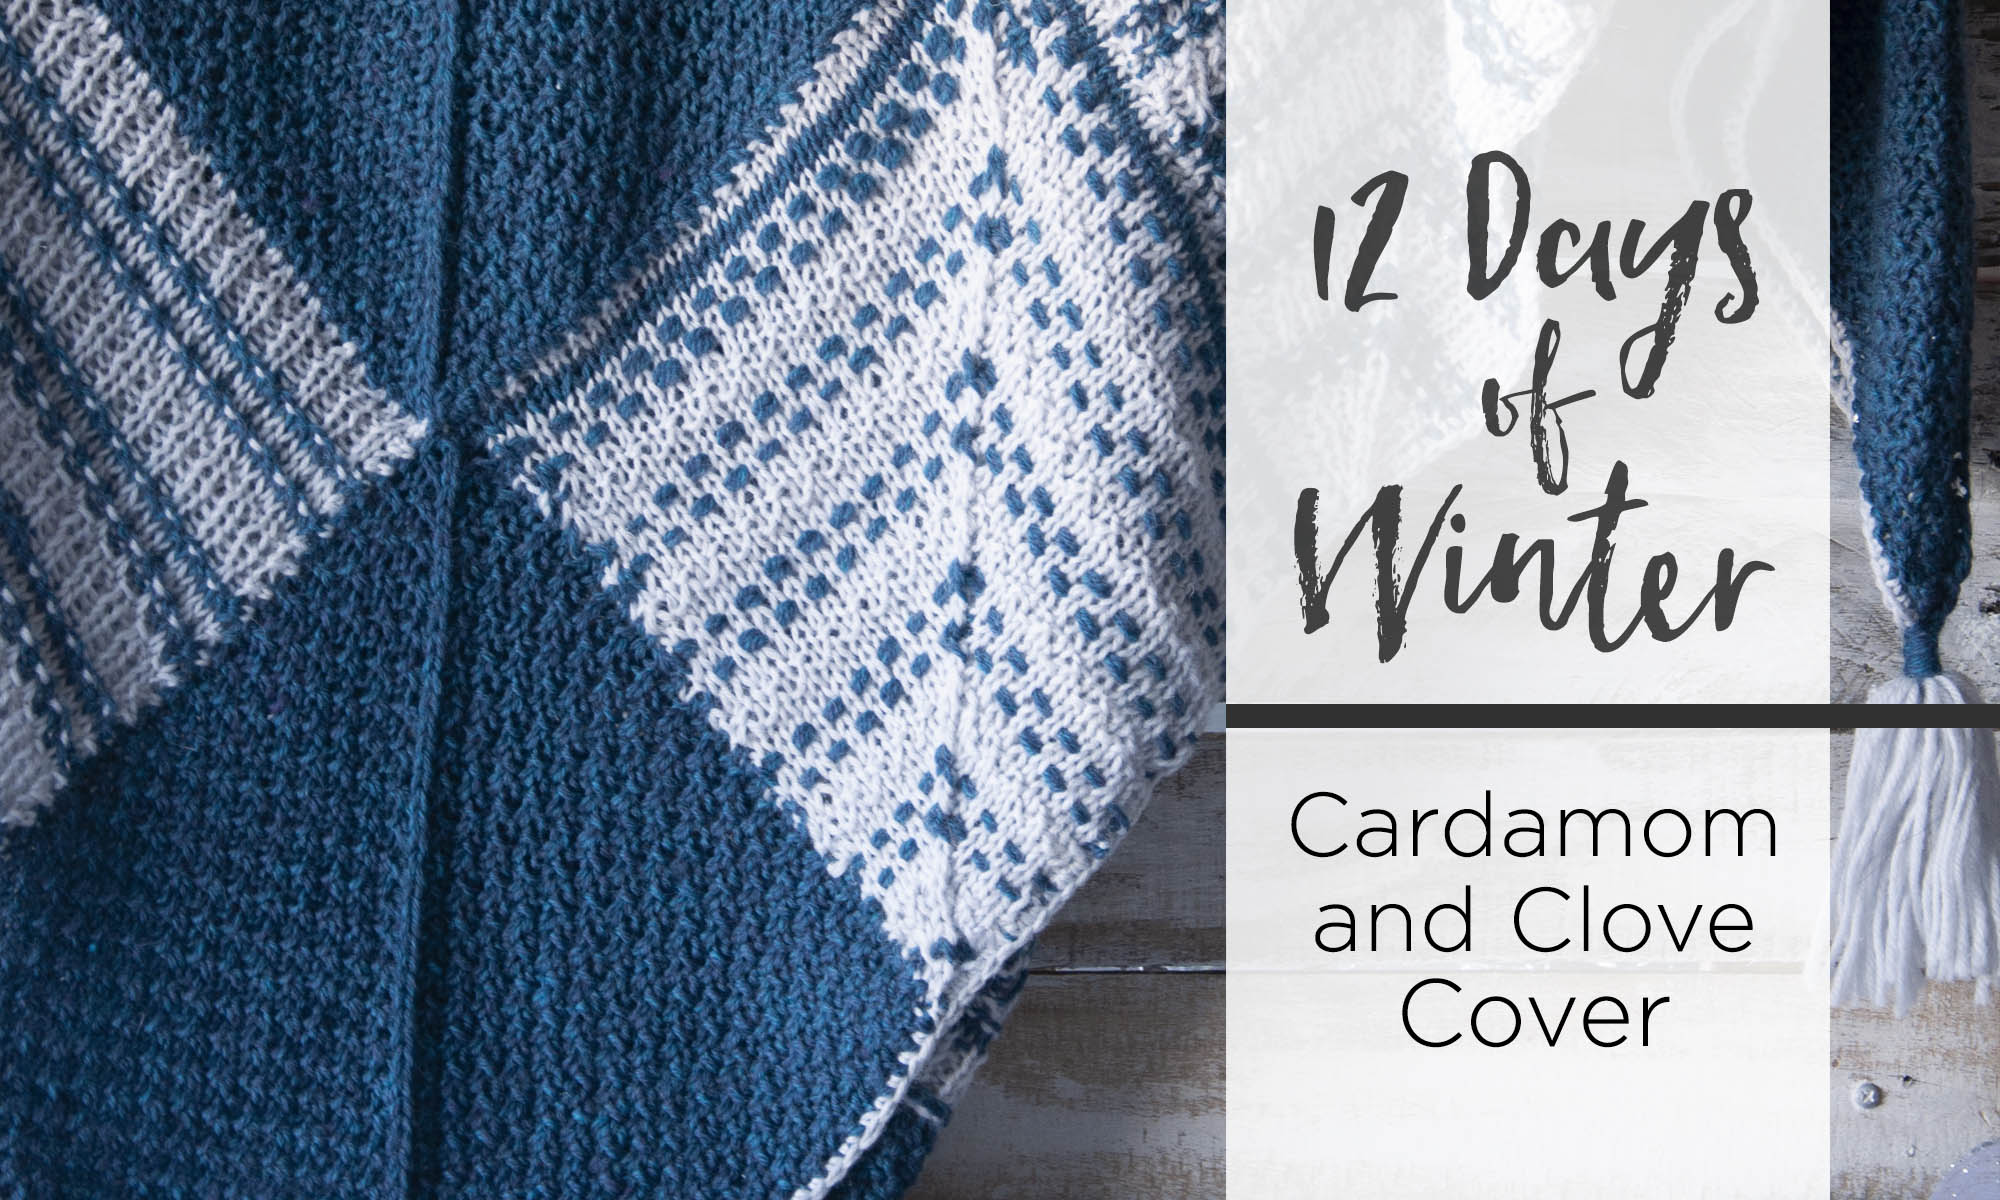
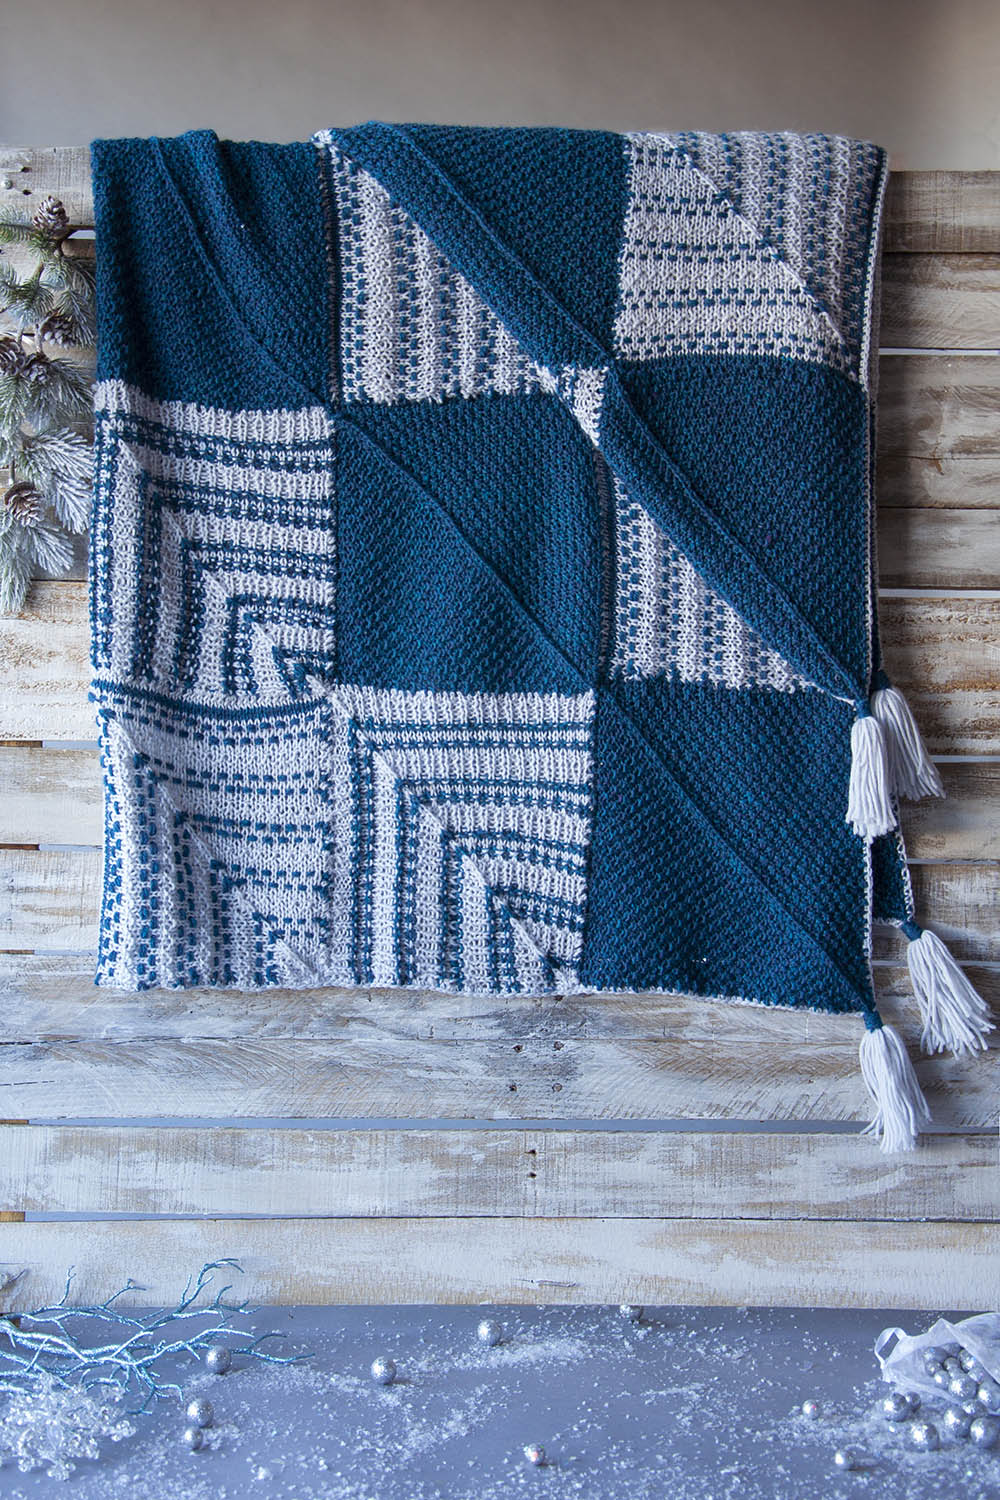
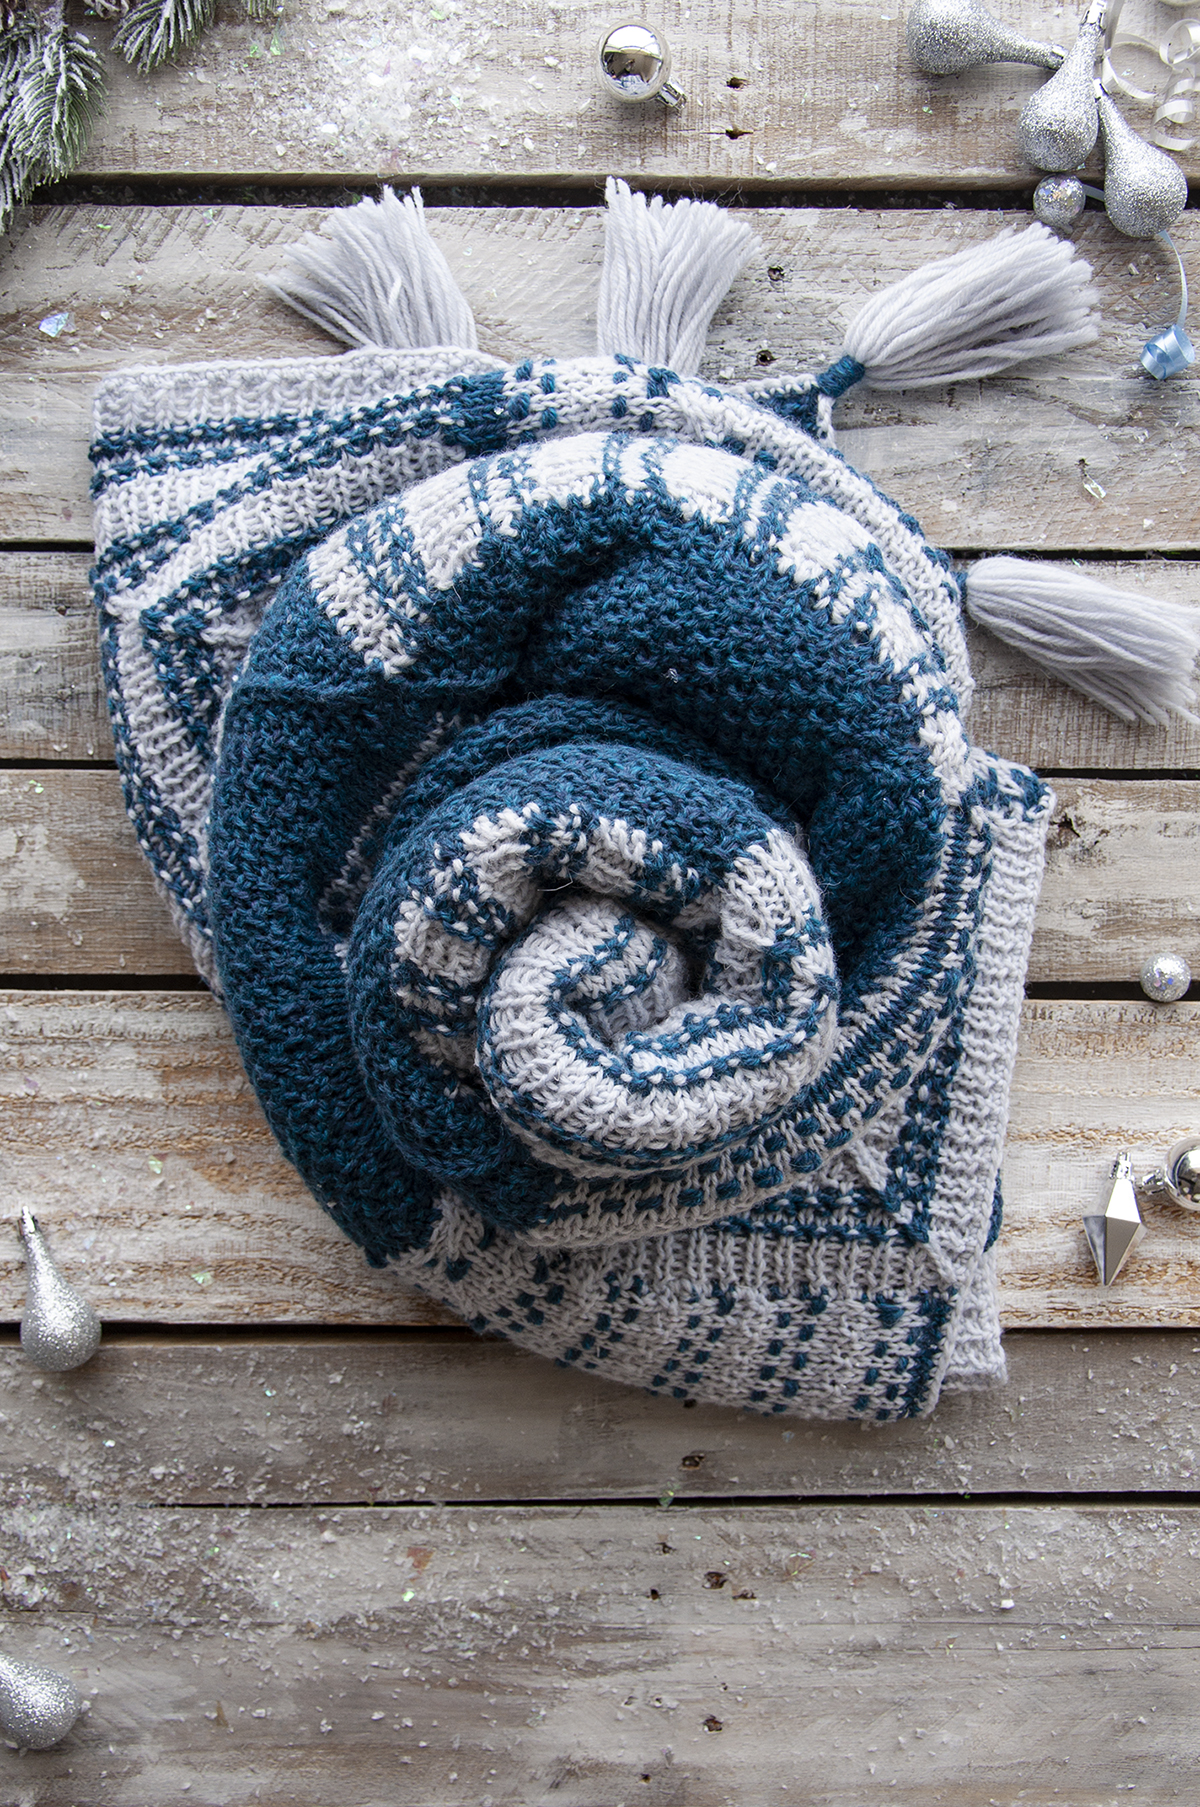
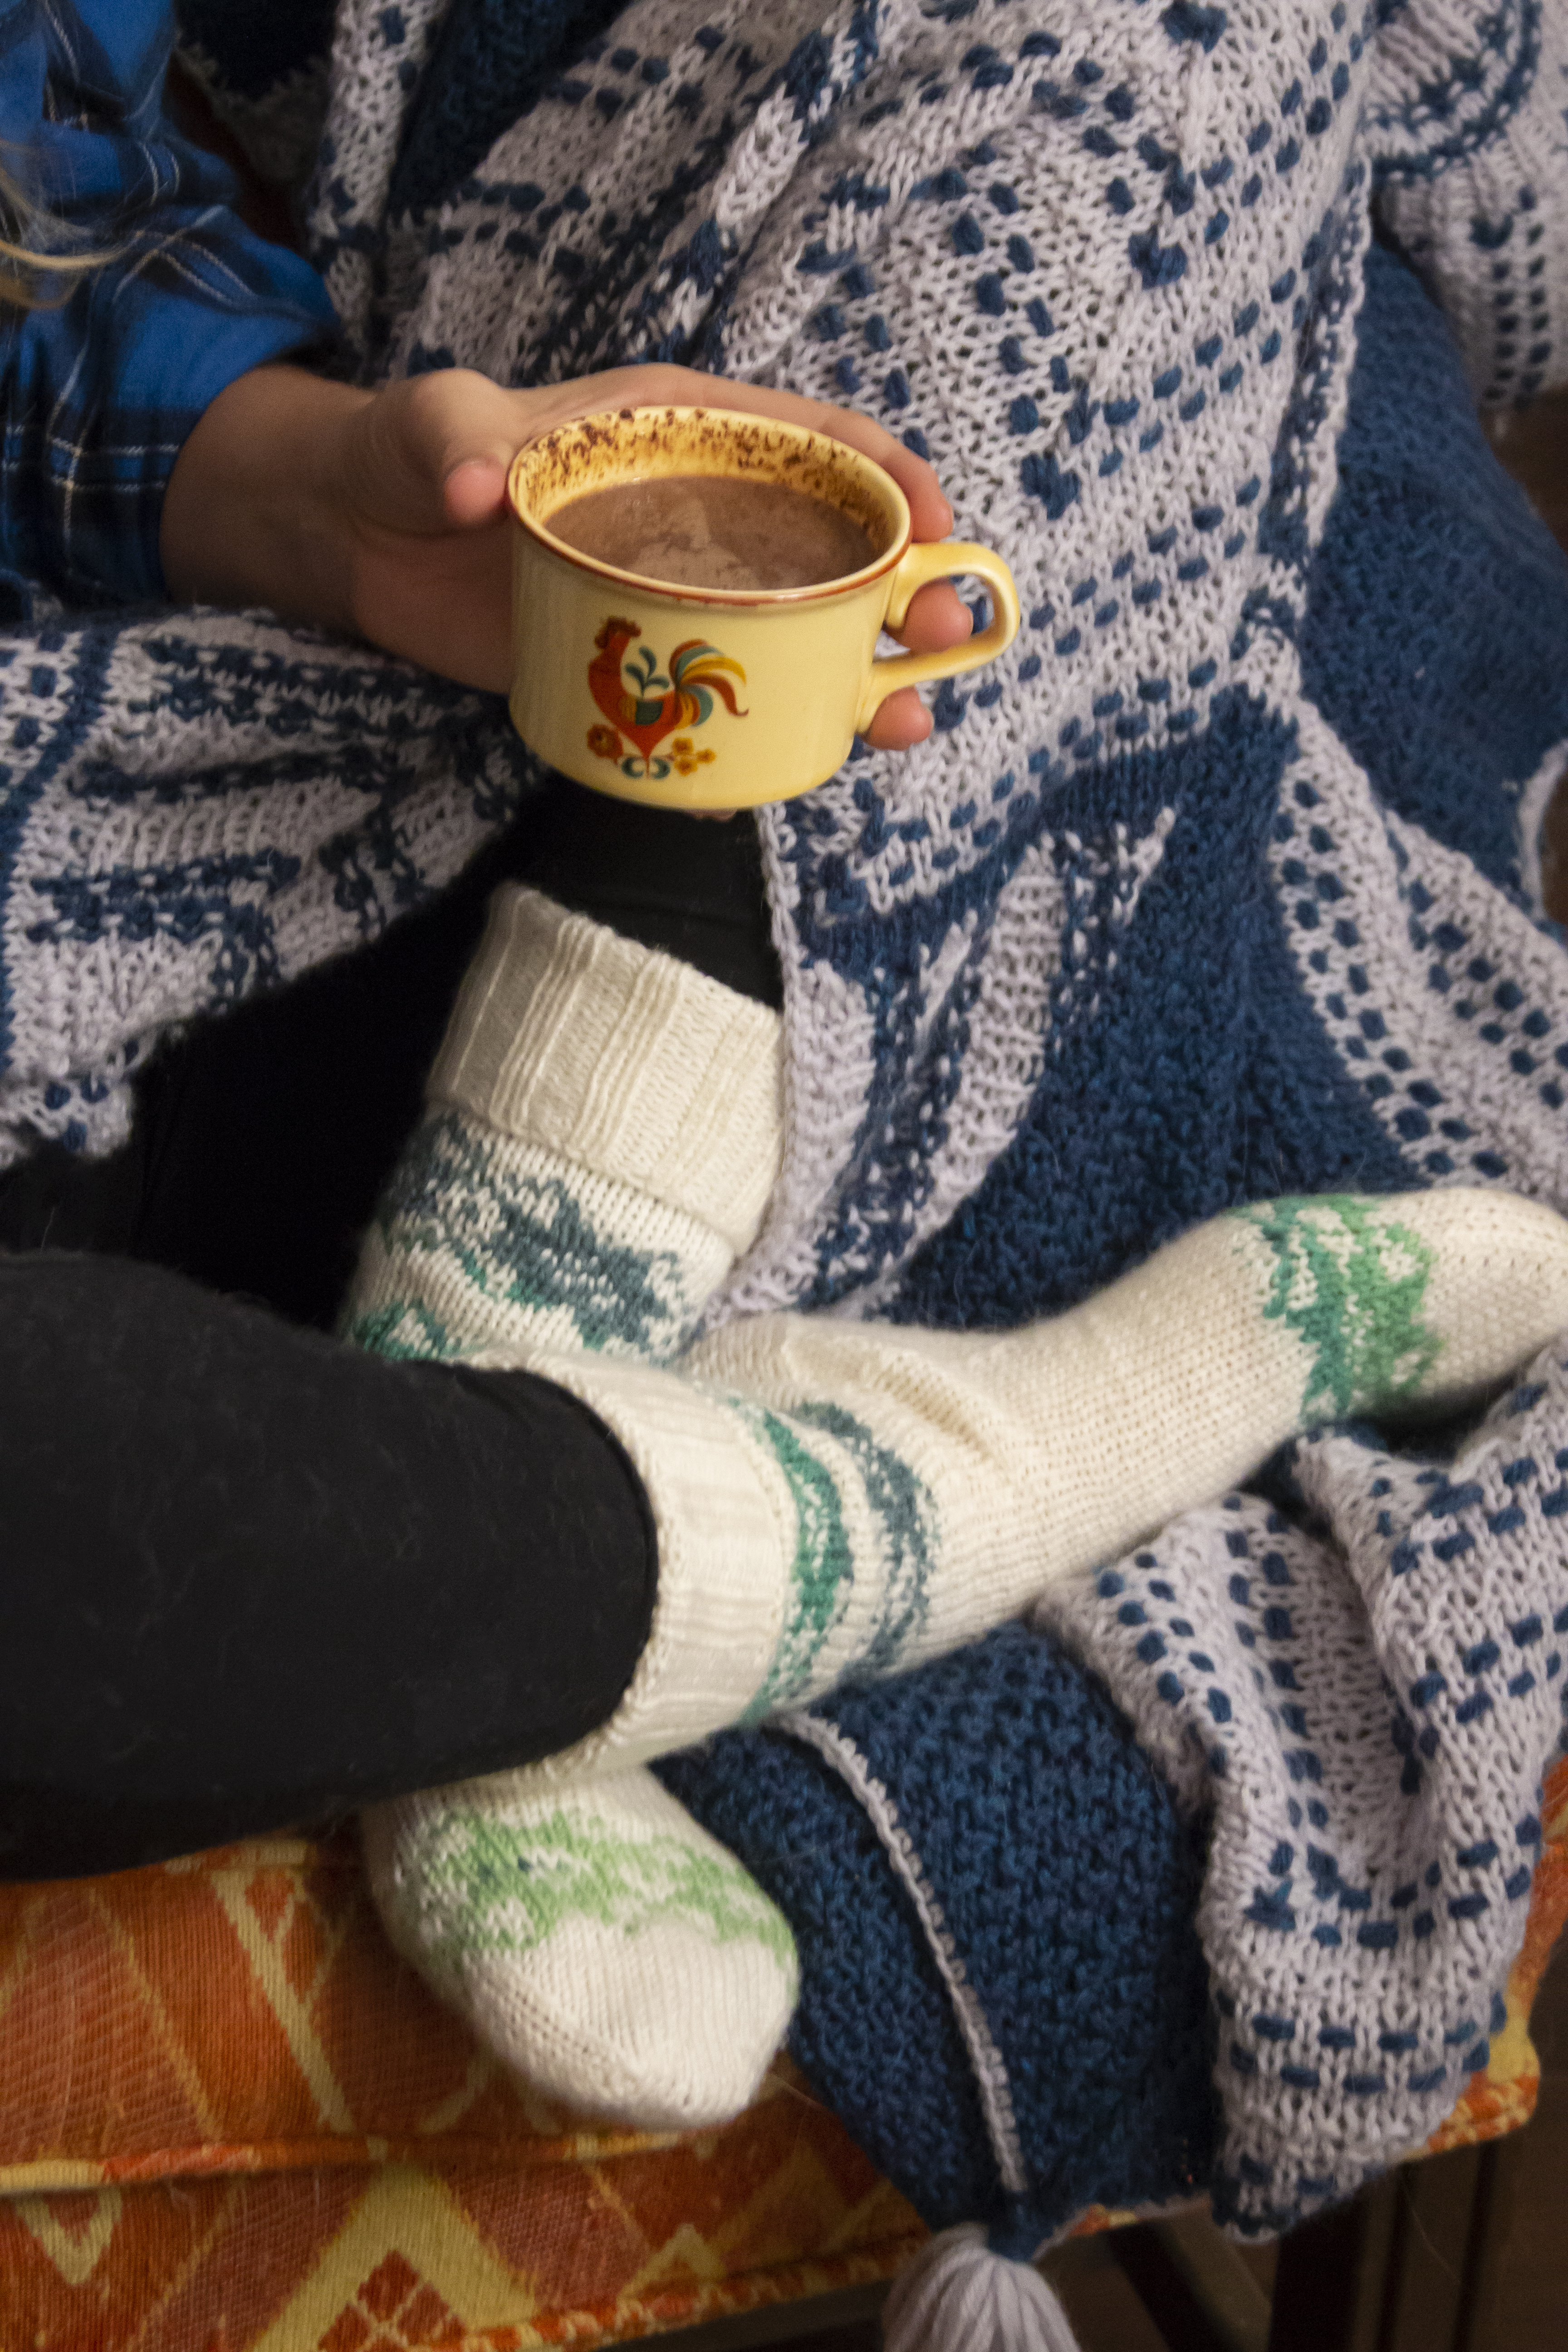
Today I’m happy to introduce the Cardamom and Clove Cover – an ultra-cozy wool blanket that’s perfect to wrap around your shoulders while drinking a warm and wintry beverage!
I grew up in a place where it actually snows (when I say “actually” I mean unlike the meager, quick-to-melt amounts that we receive here in Charlotte, NC). To this day I find there is a lot of magic to snow days, and that was especially true when I was a child.
Living in a rural area, just by the border of a state park, snow days first meant shoveling the driveway followed by playing in the snow-covered woods for hours and hours. I rarely came inside until the tips of my hair were completely frozen and my feet couldn’t hand the cold anymore. Then, I’d make my way back home. While my siblings and I pulled off the six million layers we wore to stay warm, my mom prepared hot cocoa.
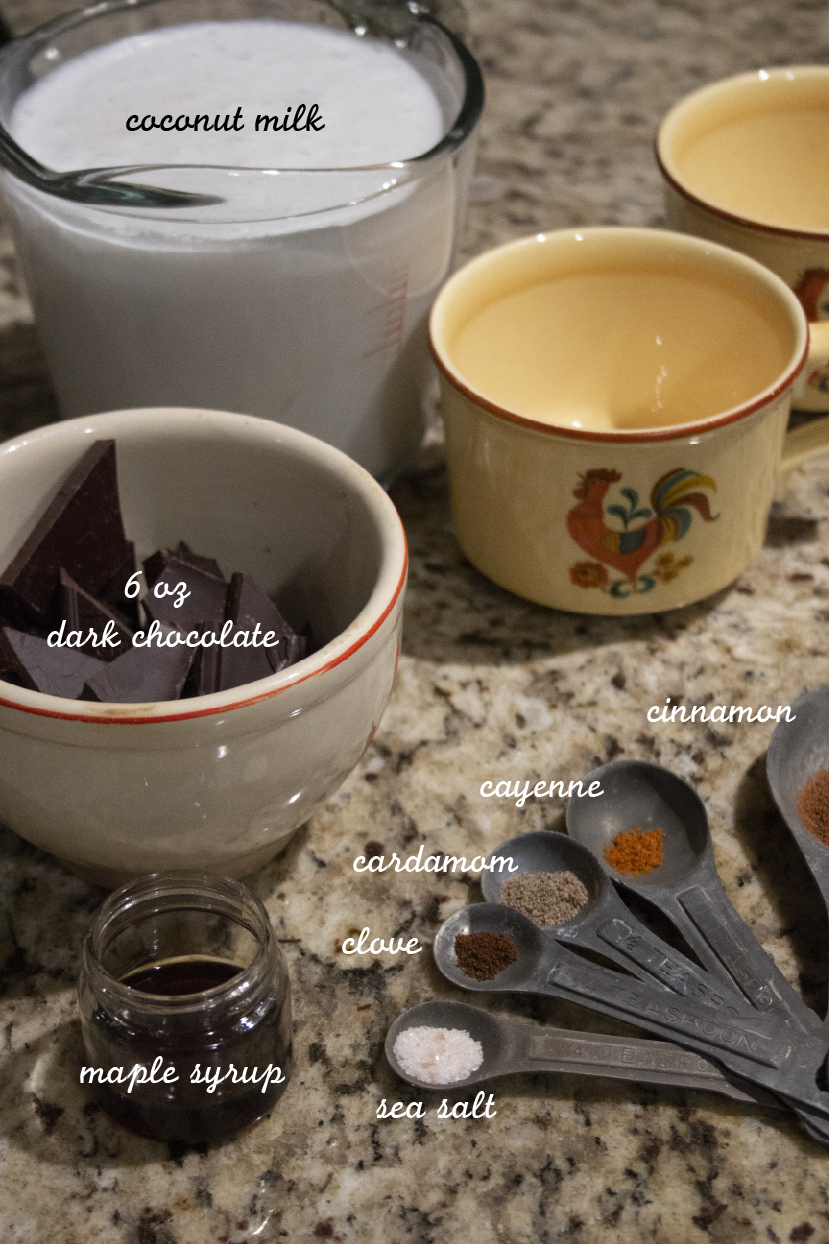
What’s nicer than enjoying a warm beverage with a cozy blanket on your lap after spending hours in the cold? So, to accompany this design reveal I thought it would be fitting to share a perfectly spiced hot cocoa with a touch of cardamom and clove. This recipe isn’t overly sweet, but it is very rich.
Ingredients – serves four
12 Days of Winter Kit Collection – Cardamom and Clove Cover Kit
6 oz very dark chocolate (I used 90% cocao)
4 cups of coconut milk (or your milk of choice)
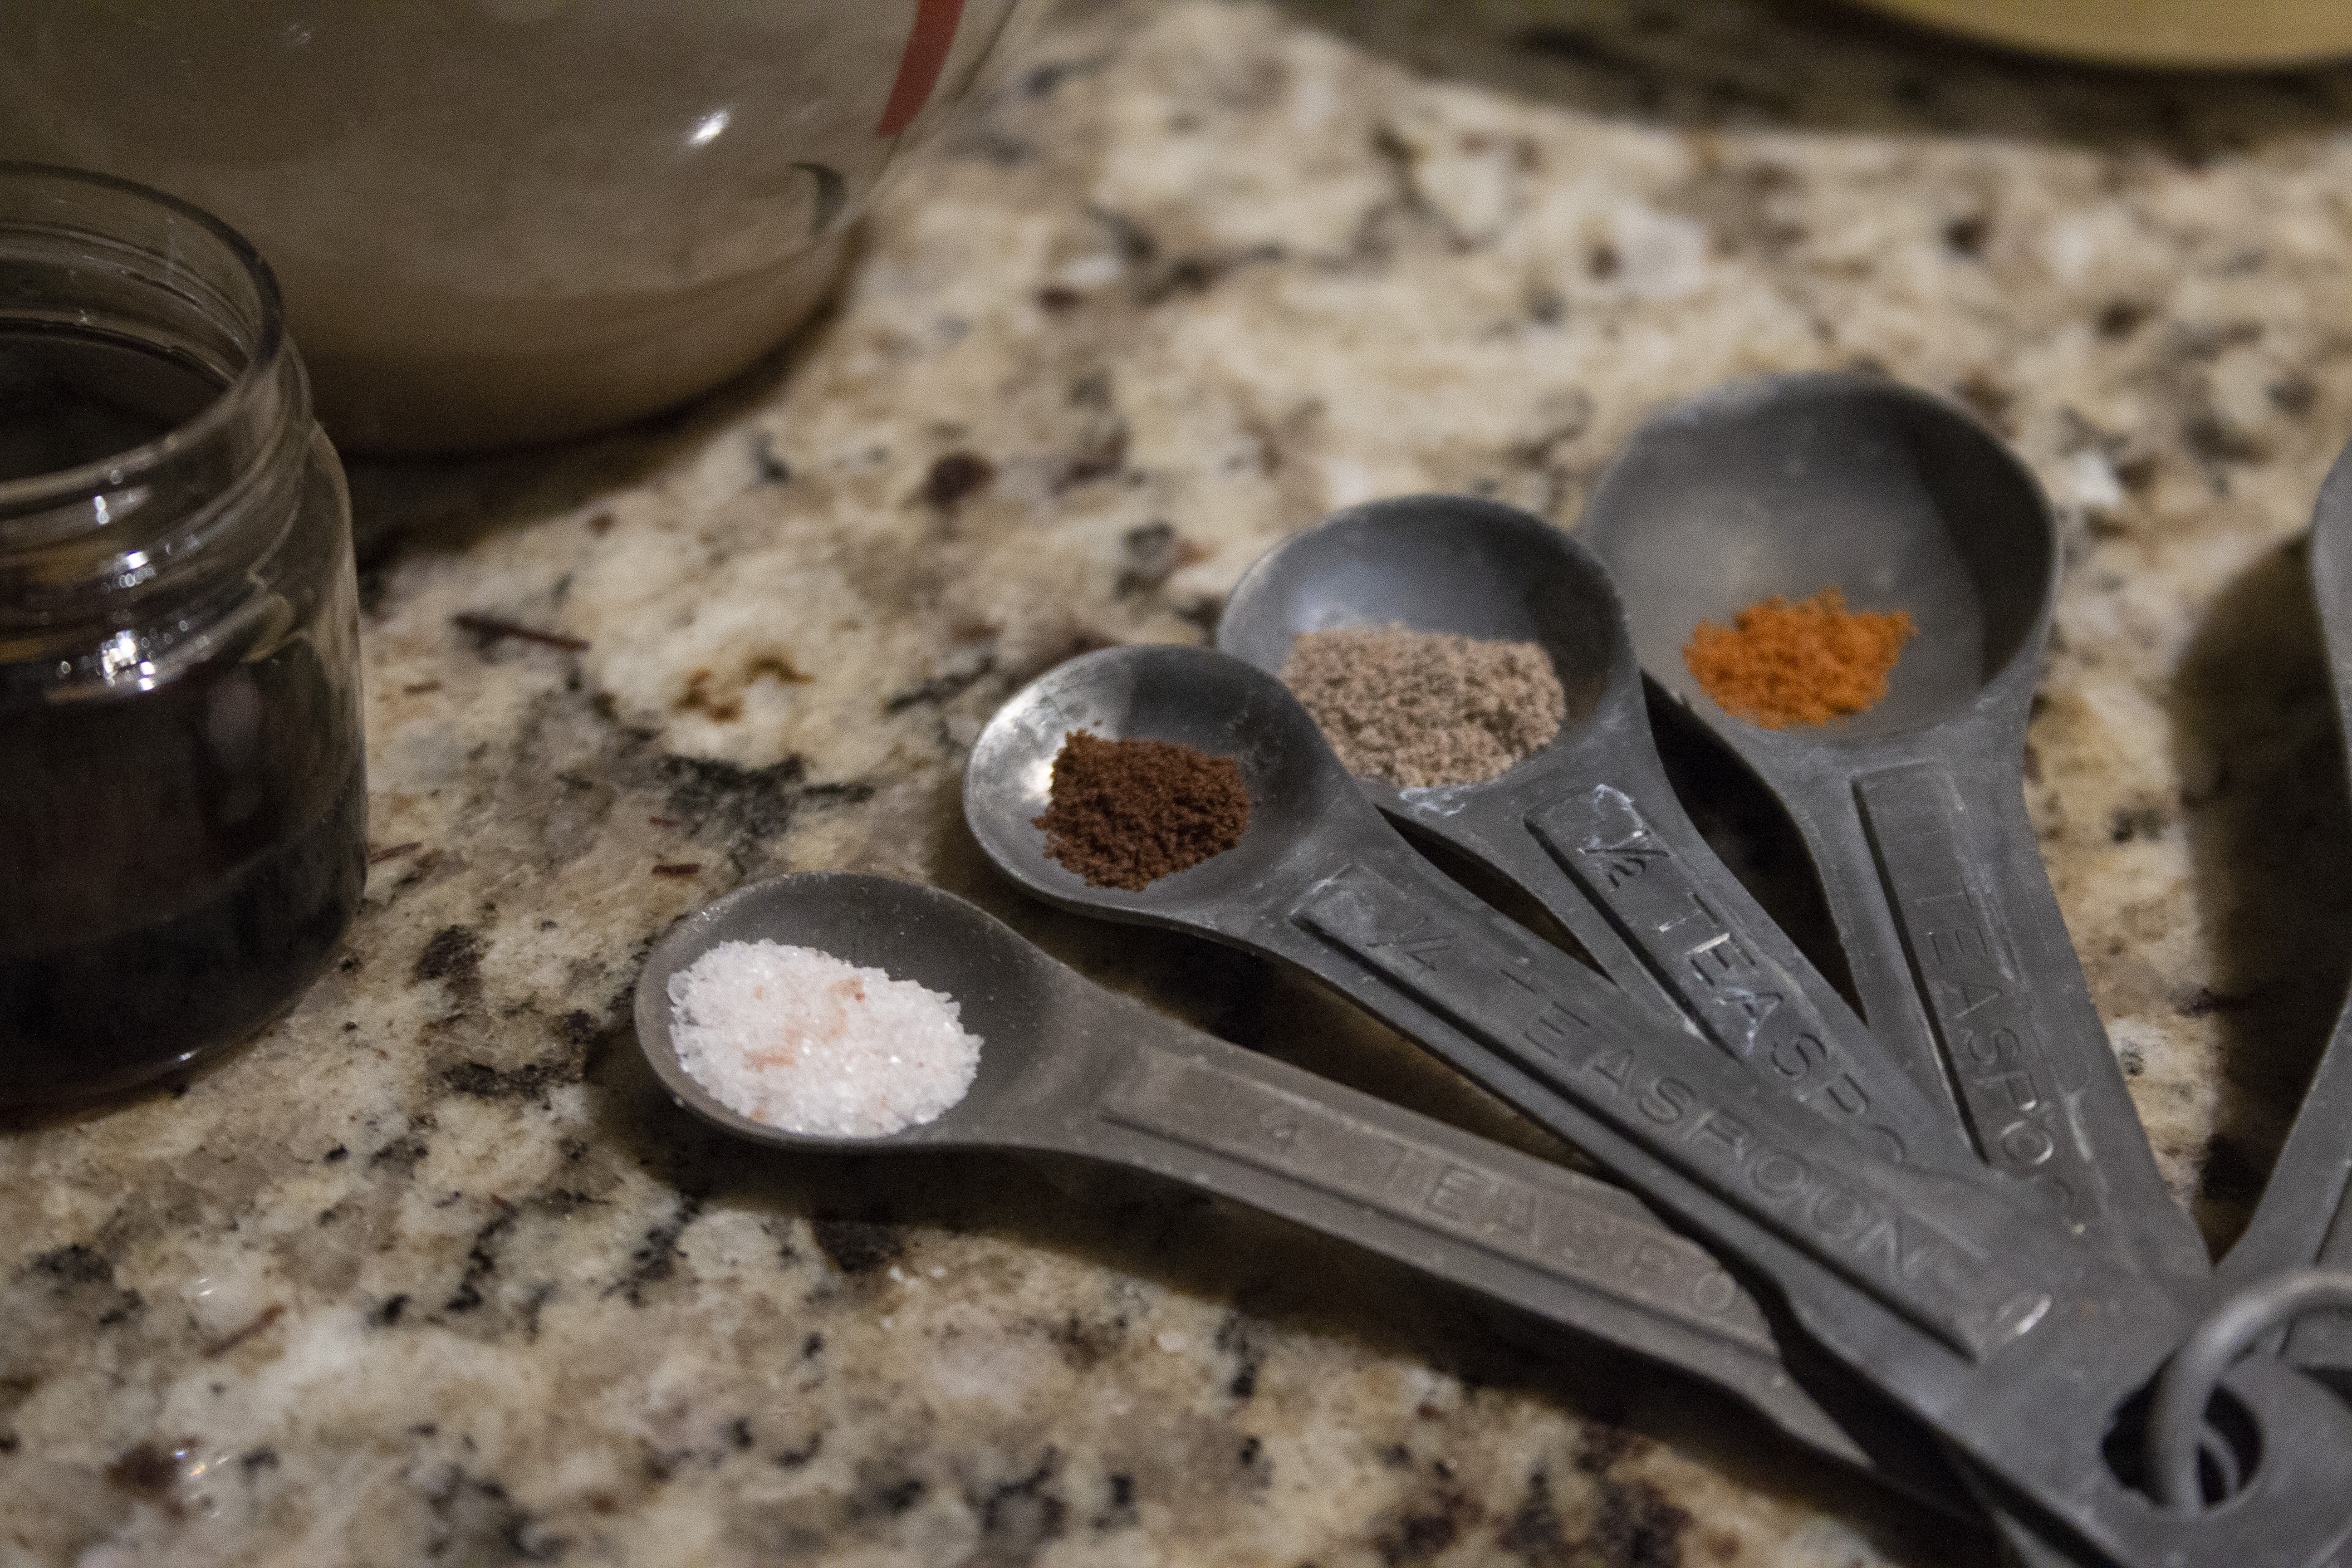
1 pinch cayenne
1 pinch ground cloves
1/4 tsp cardamom
1/2 tsp cinnamon
1/4 tsp freshly ground sea salt
1 Tbsp maple syrup
First – knit, knit, knit! How are you going to cuddle up and drink hot chocolate under your blanket if you haven’t knit it?! Okay – I admit, hot chocolate is just as good for knitting this kit, so you don’t need to complete this step first!
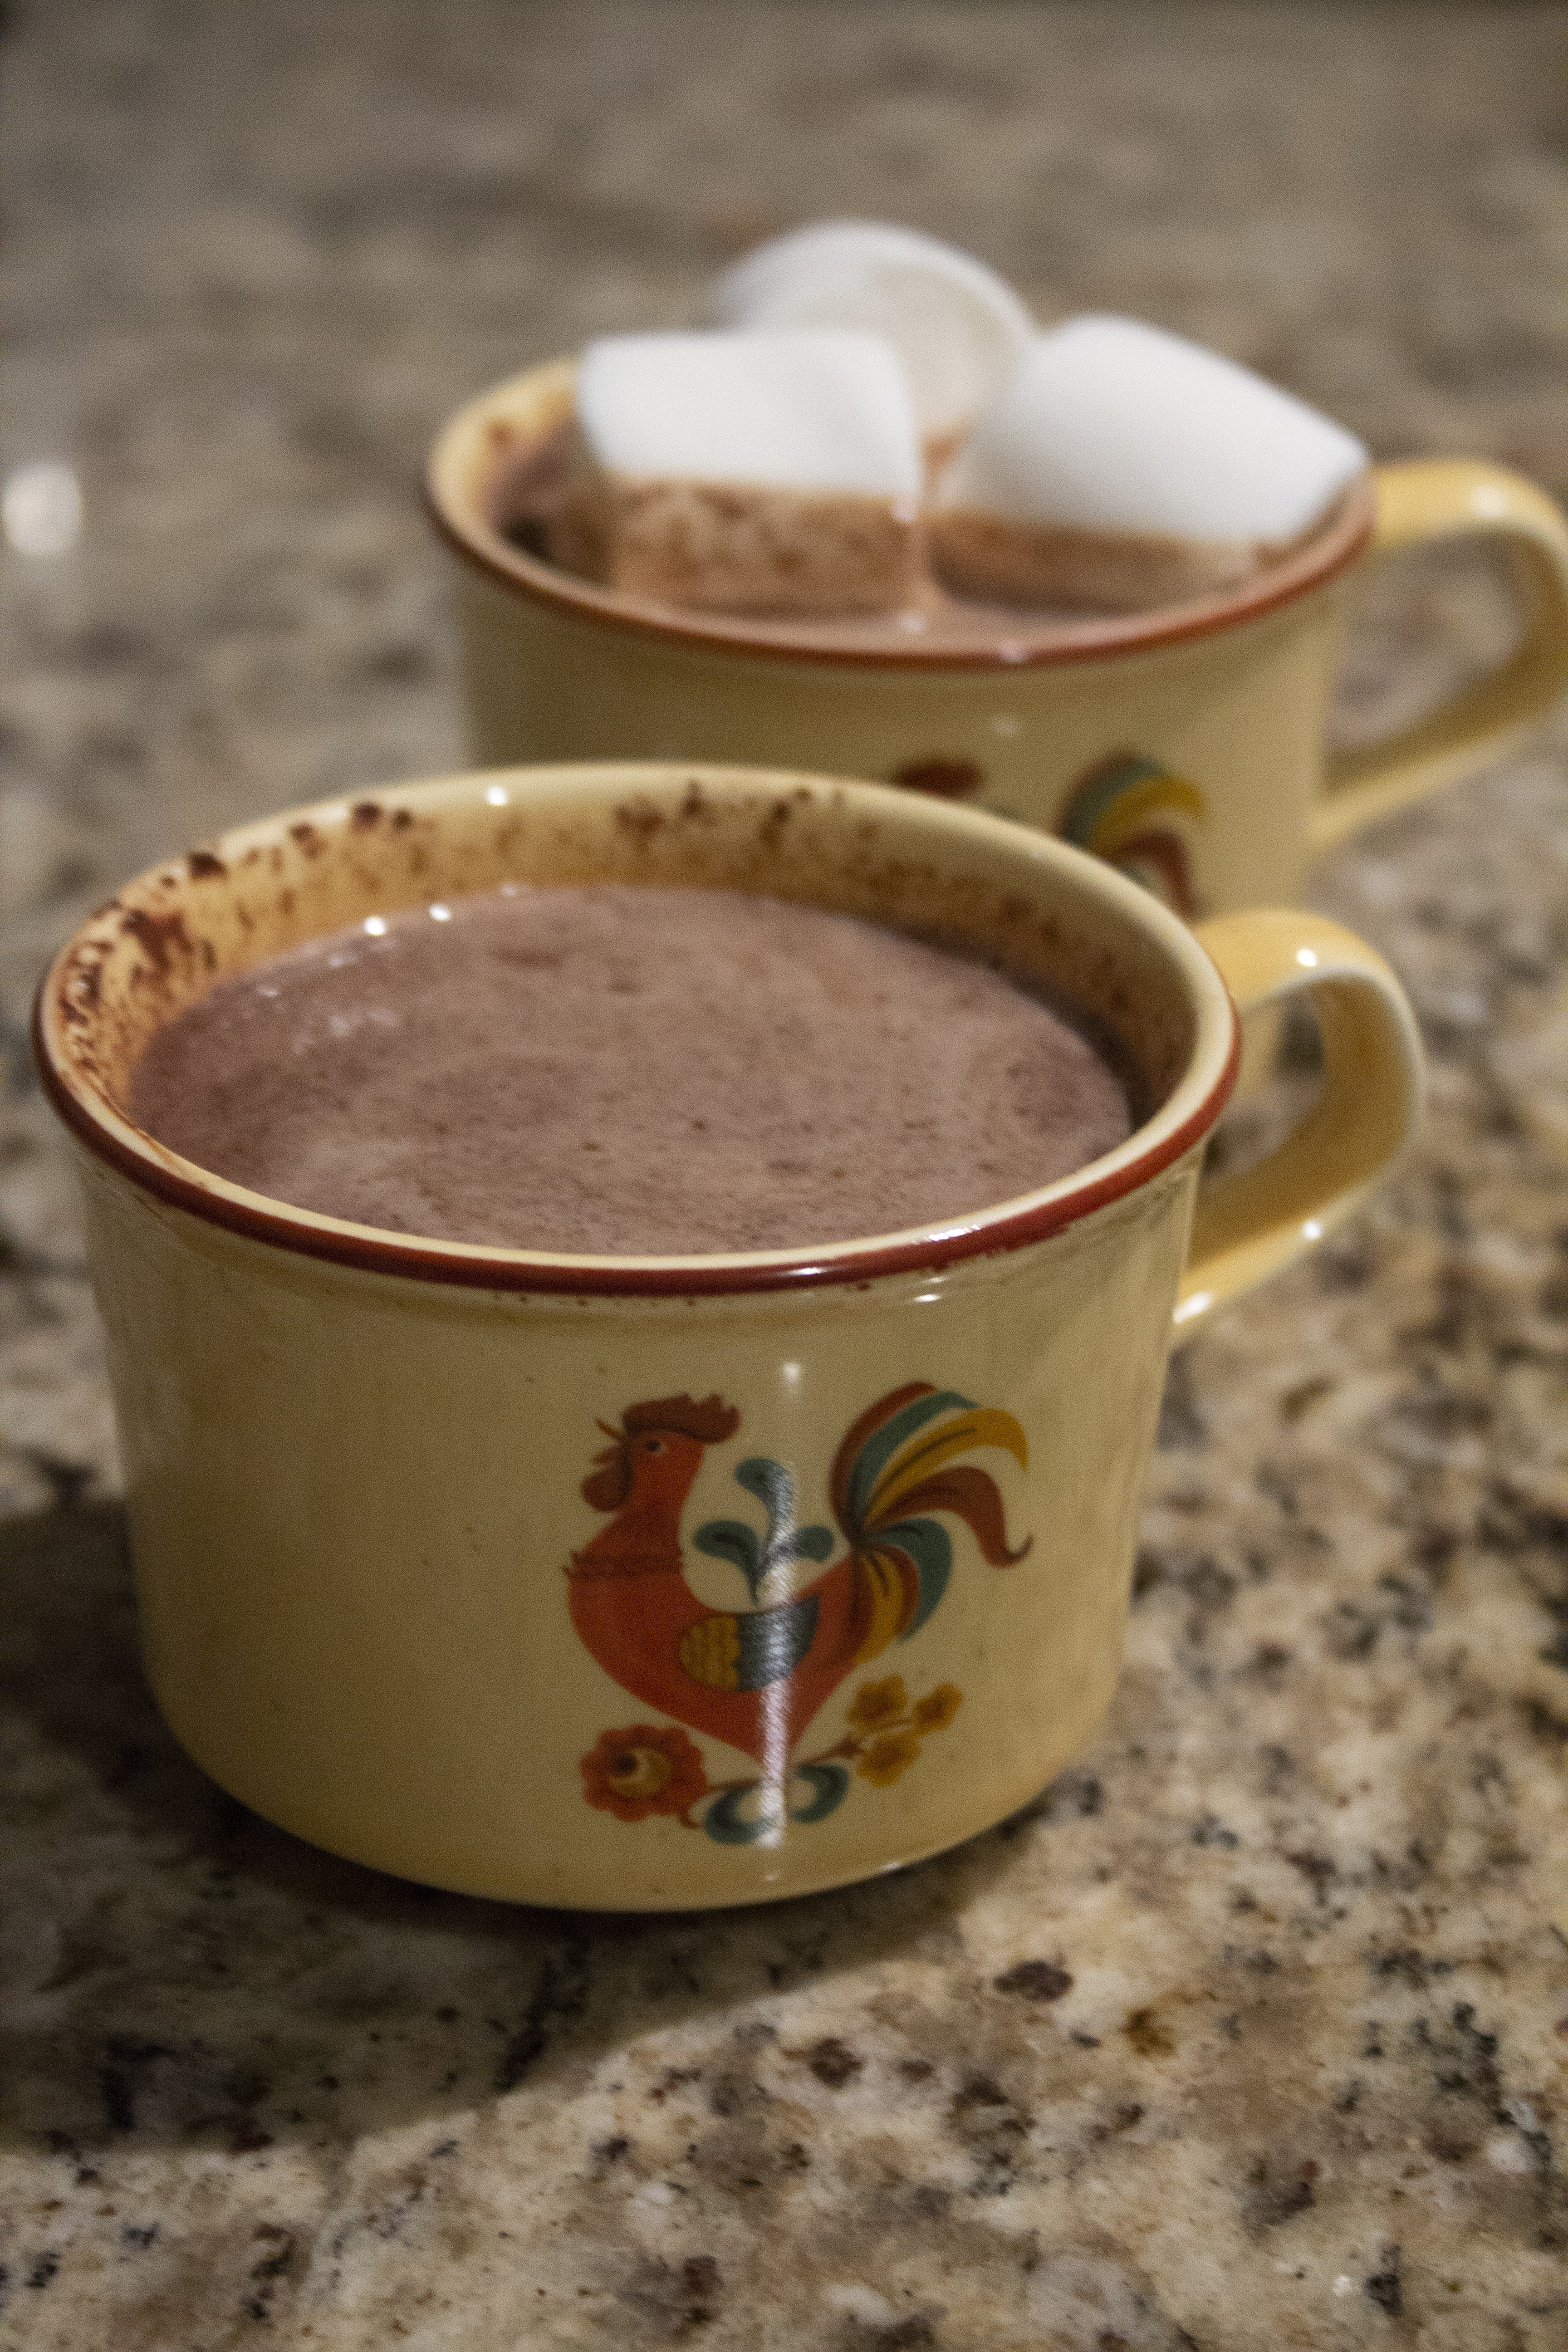
Pour the milk into a saucepan. Set the stove to low heat. Add the chopped chocolate and stir, slowly bringing the temperature to medium. When the chocolate is melted add the cayenne, cloves, cardamom, cinnamon, sea salt, and maple syrup. Stir, sip, and adjust spices and sweetener to taste.
Add marshmallows – or don’t, it’s up to you! It’s a pretty basic recipe that can be adapted however you’d like. I encourage you to have fun. Heck – add some nutmeg in there if you’re feeling really crazy!
Never enough knits – the Mistletoes and Cardamom and Clove Cover are perfect companions for hot chocolate.
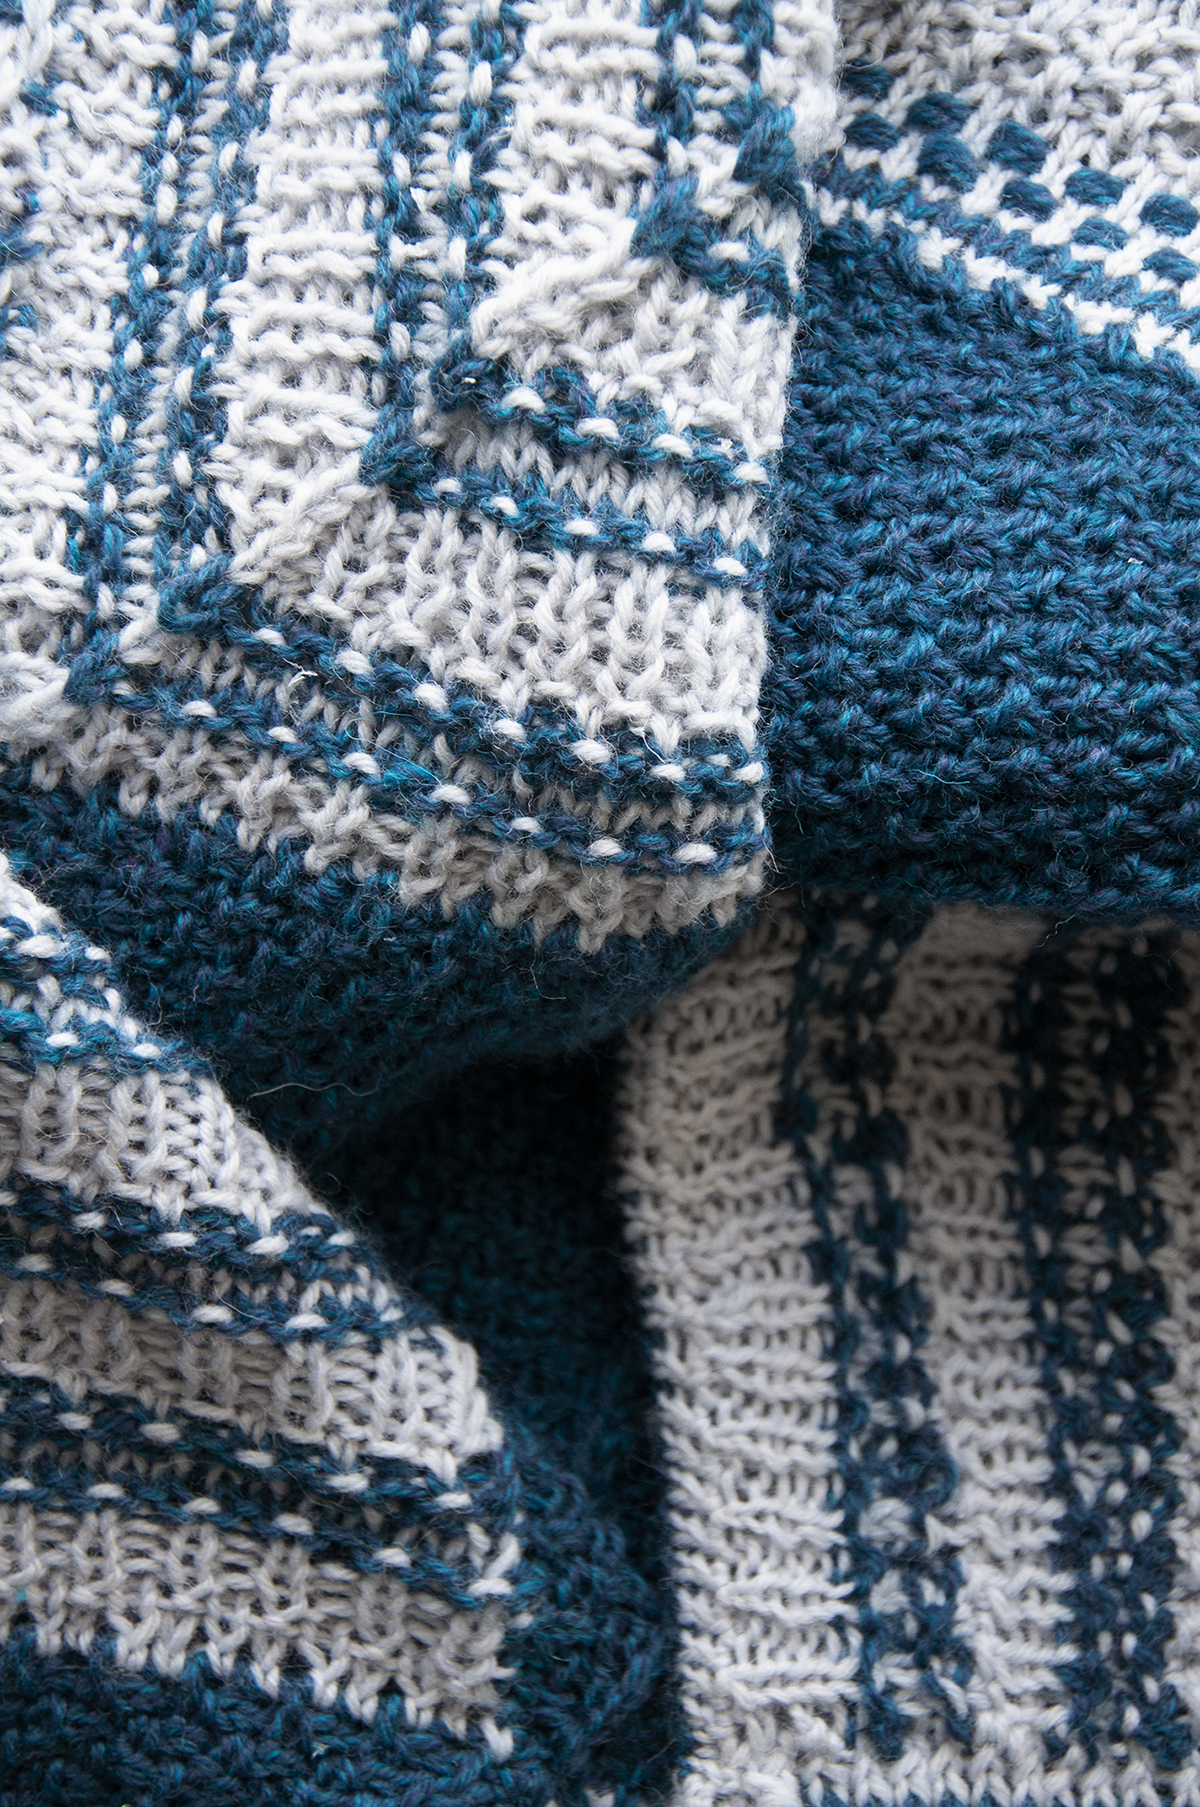
Worried about spilling your cocoa on your beautiful blanket? Don’t! The Cardamom and Clove Cover Kit uses Deluxe Worsted Superwash, so it’s incredibly easy to care for.
Remember, you can find the 12 Days of Winter Series 2 patterns on Ravelry.
This is part 9 in a 12 part series highlighting designs from our 12 Days of Winter, Series 2 Edition.
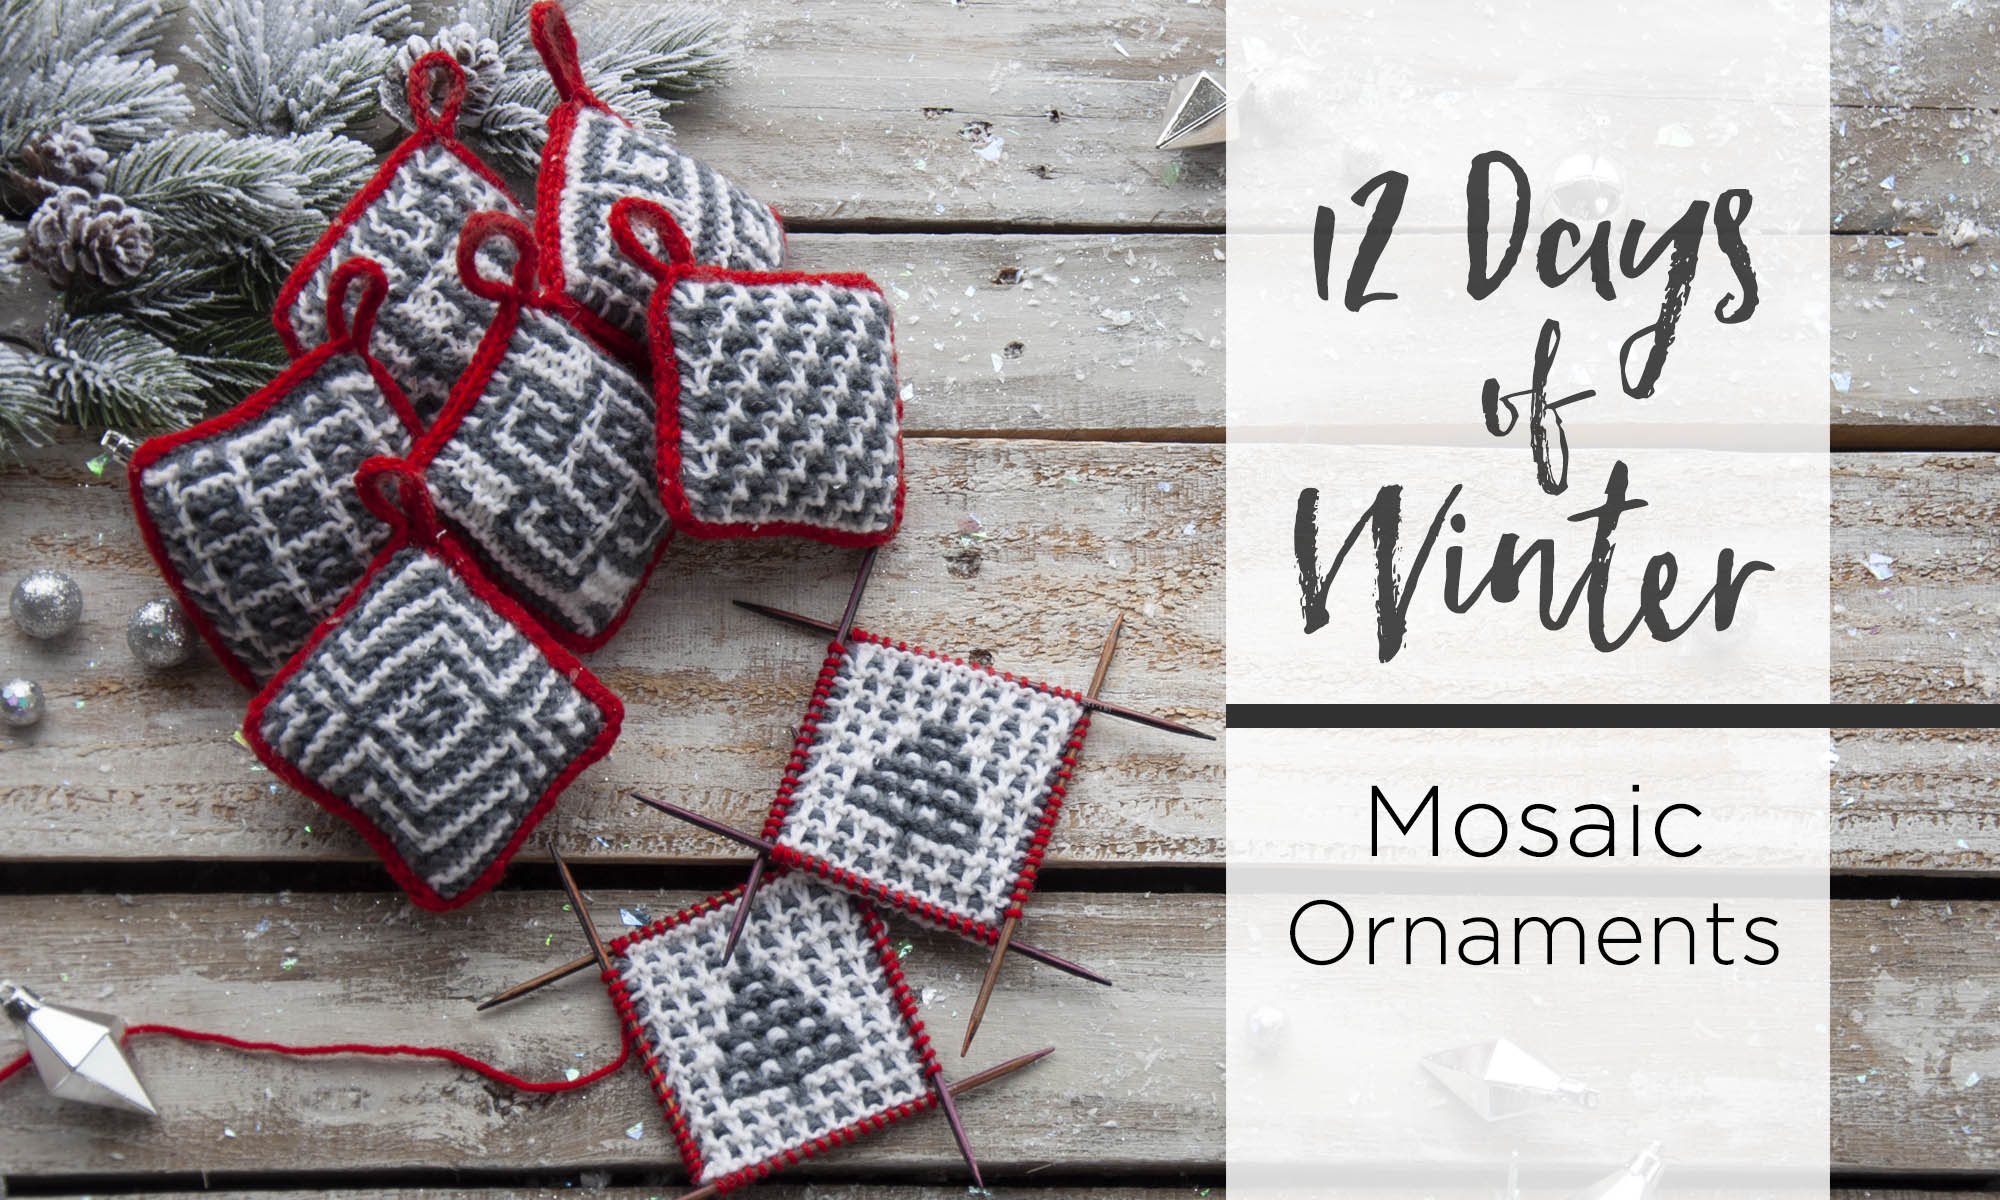
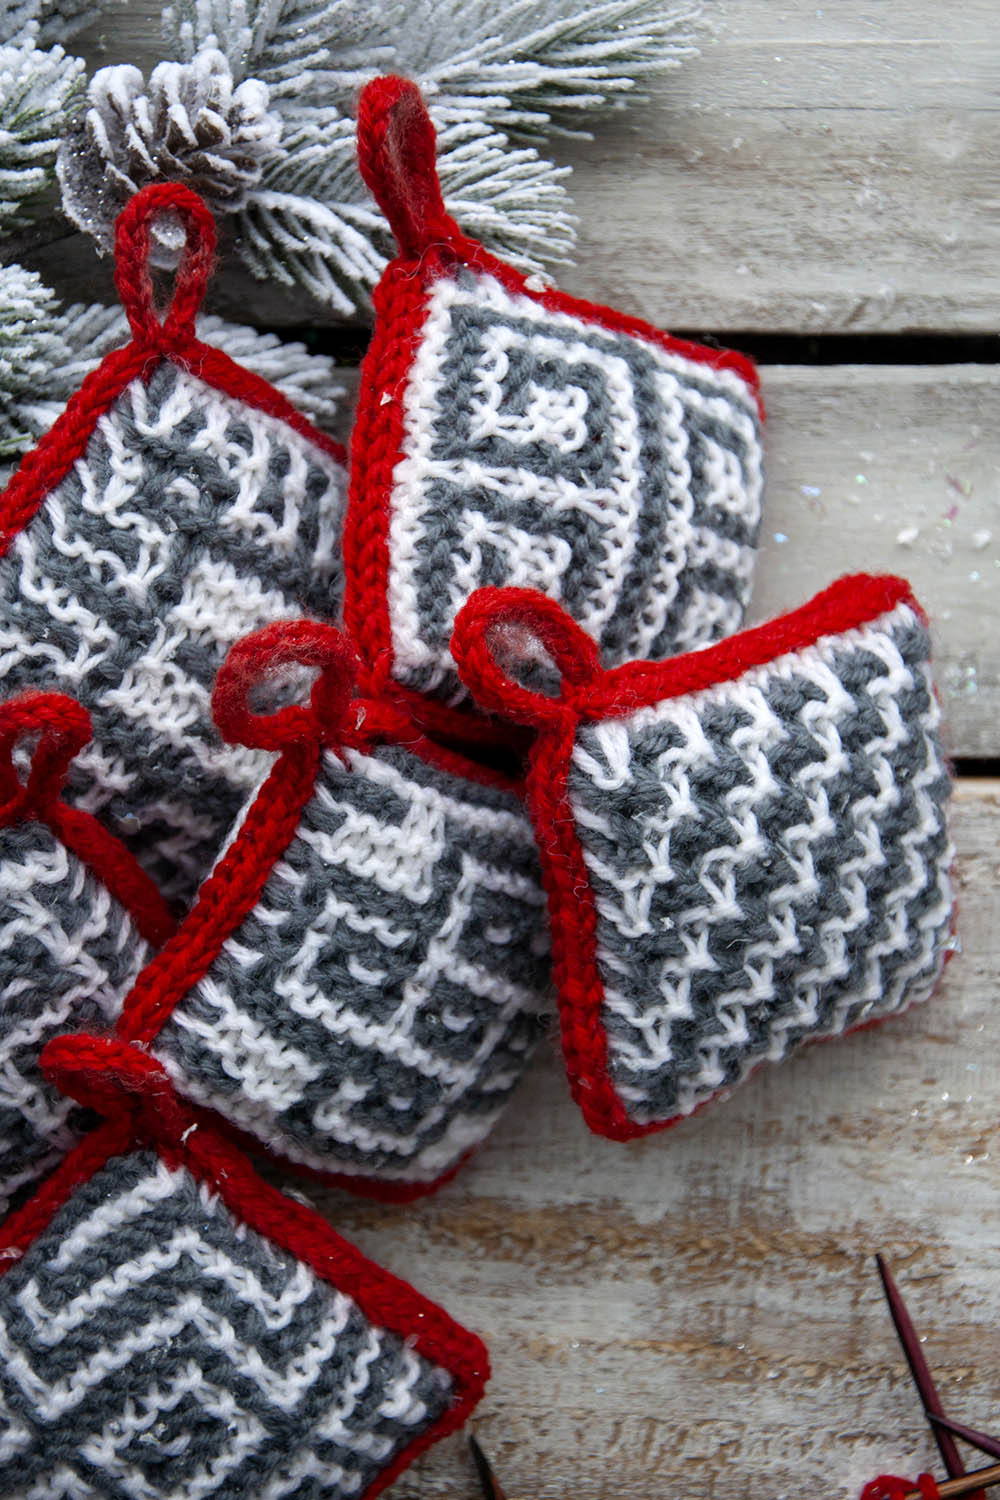
Ornaments are meant to be special. Often they are passed down to us. Perhaps they’ve been collected from some treasured place, or maybe they are handmade. After all, what is more charming than lovingly made handmade items?
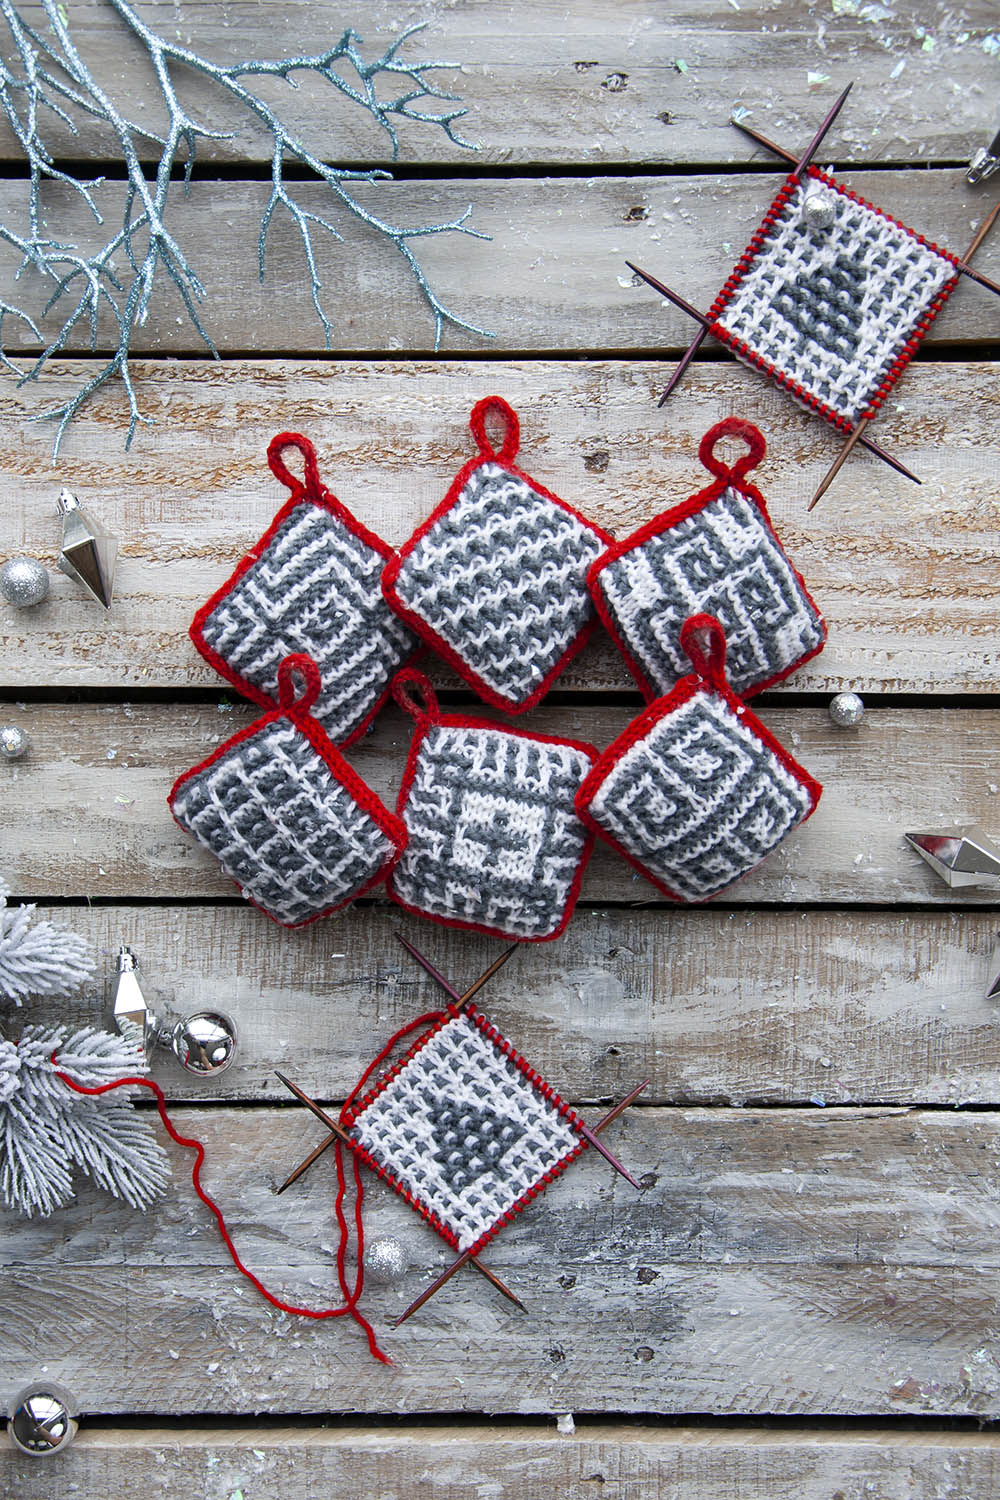
The Mosaic Ornaments pattern calls for 3 balls (1 of each color) of Deluxe DK Superwash. Though there are seven different mosaic designs included in the pattern, the yarn amounts are enough to make at least 40 ornaments. Quite a bargain, eh?
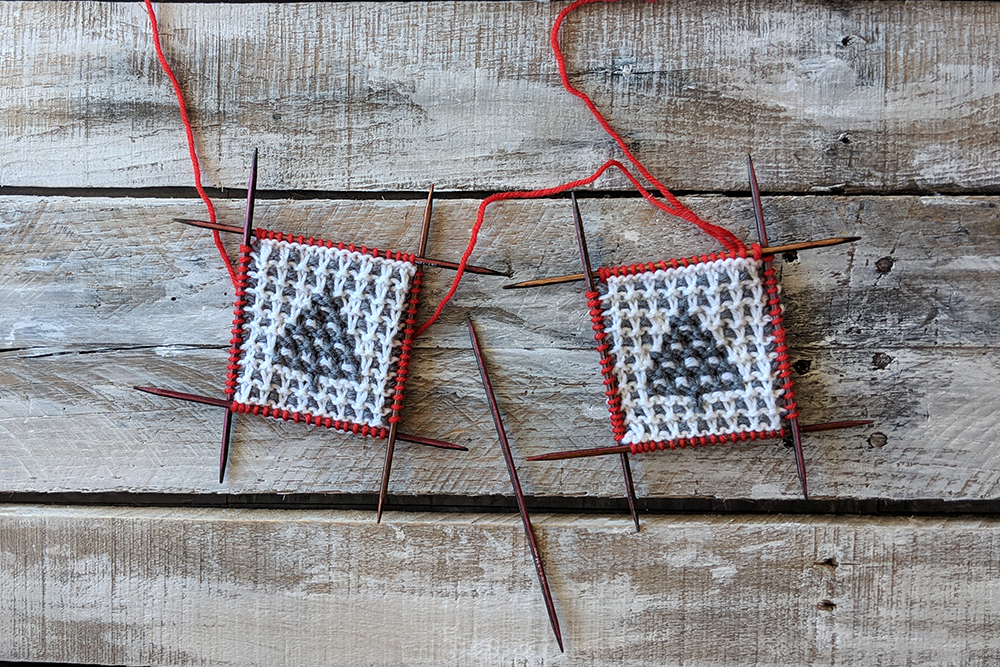
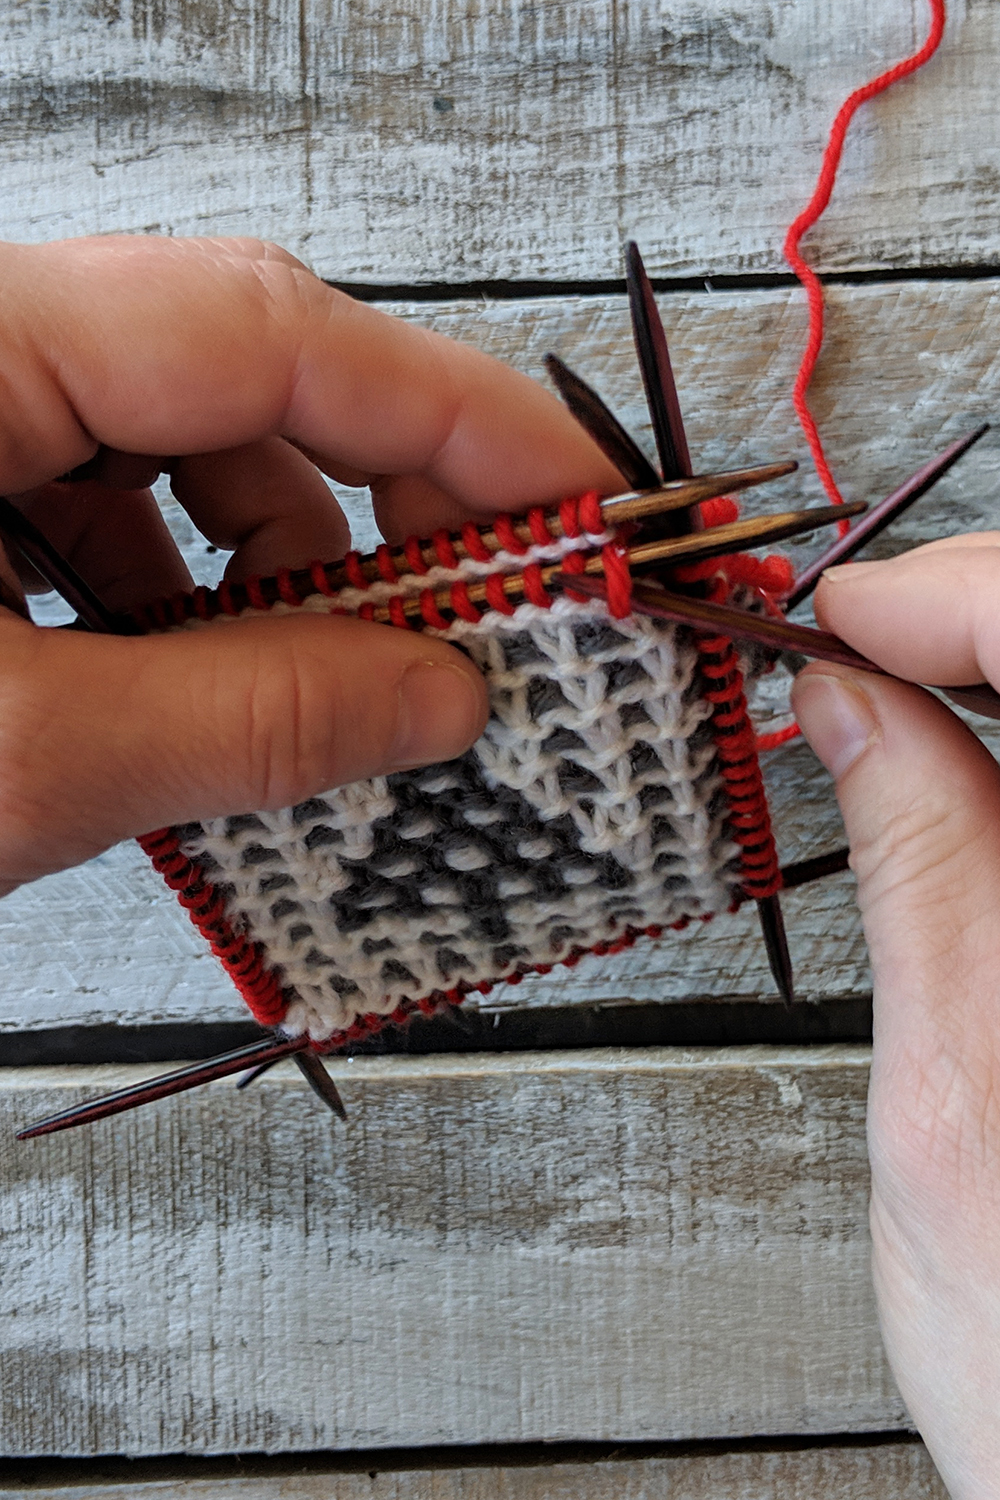
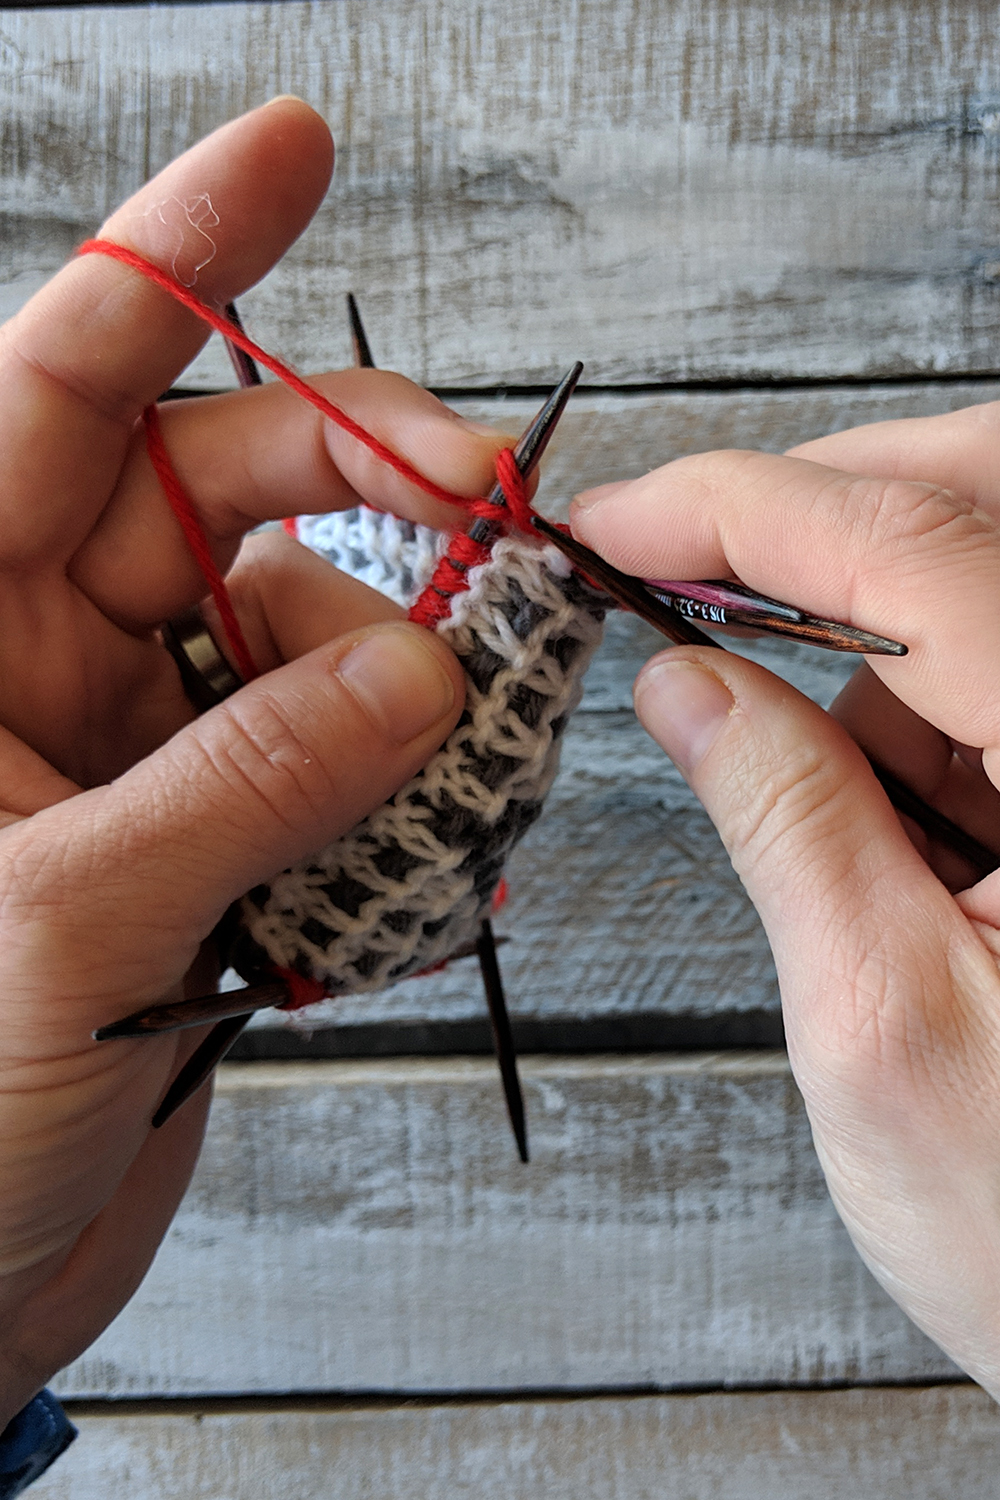
Each ornament begins by knitting the two sides separately. They are then joined with a three-needle I-Cord bind-off. Sound tough? It’s not, because I’m adding a step that takes this from a three-needle bind-off to just (the usual) two needles. Keep on reading to see how I like to do it!
Here you can see that I have two sides of the Trees ornament, all ready to be joined.
What I haven’t shown in these images is that the first step is to pick up and knit stitches all the way around each square with the contrasting red color. So that’s where we are at now – stitches have been picked up around each square.
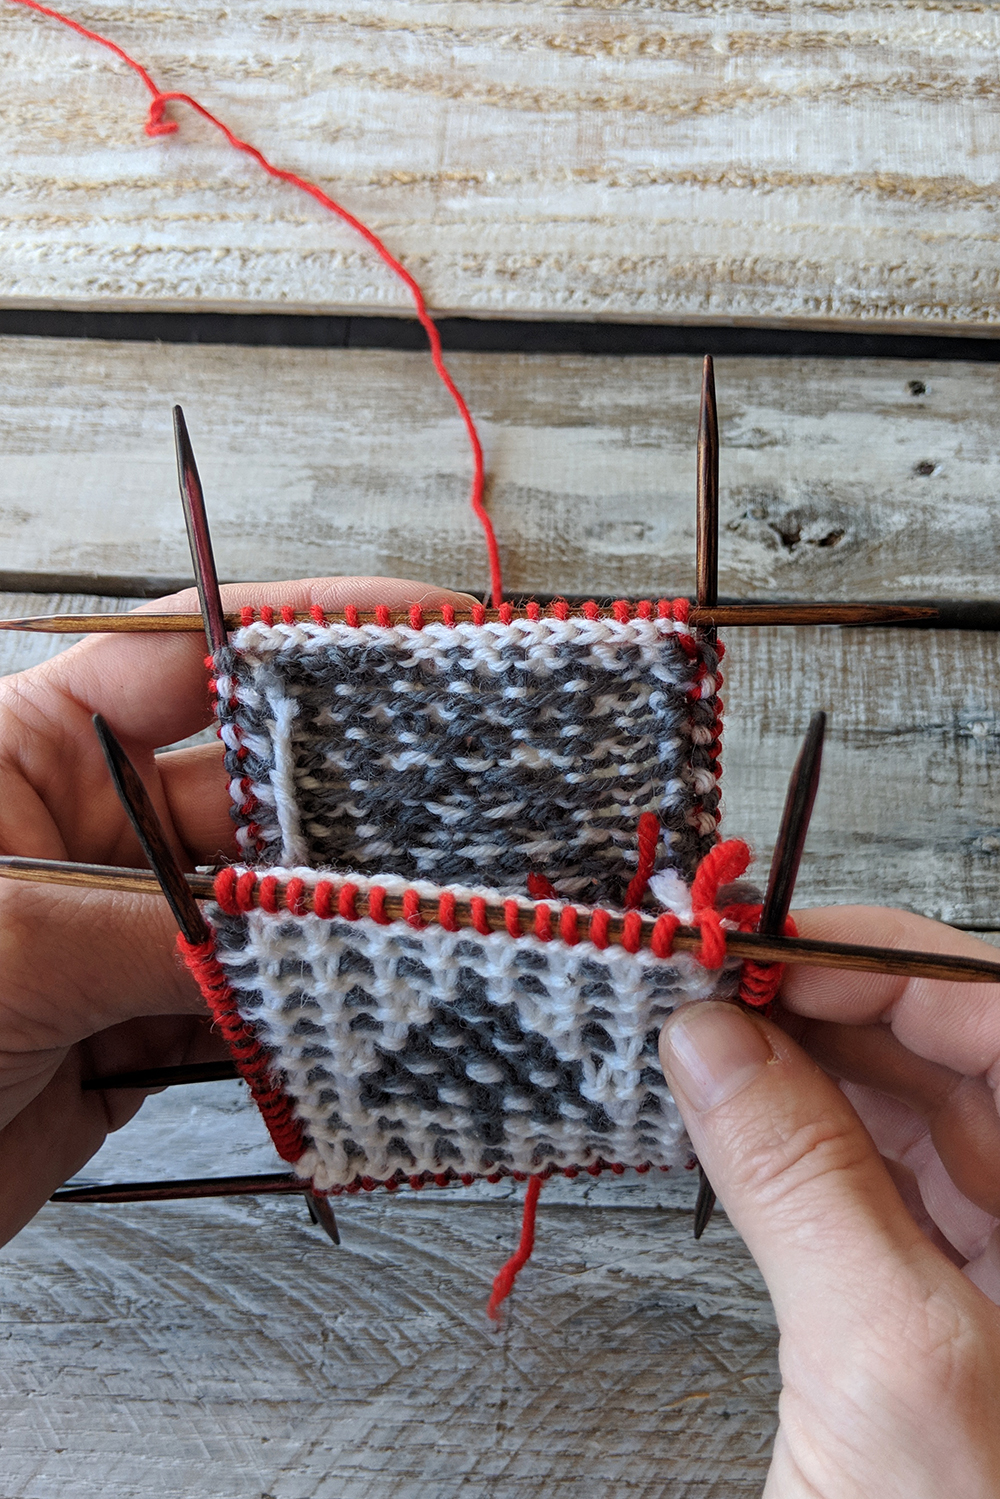
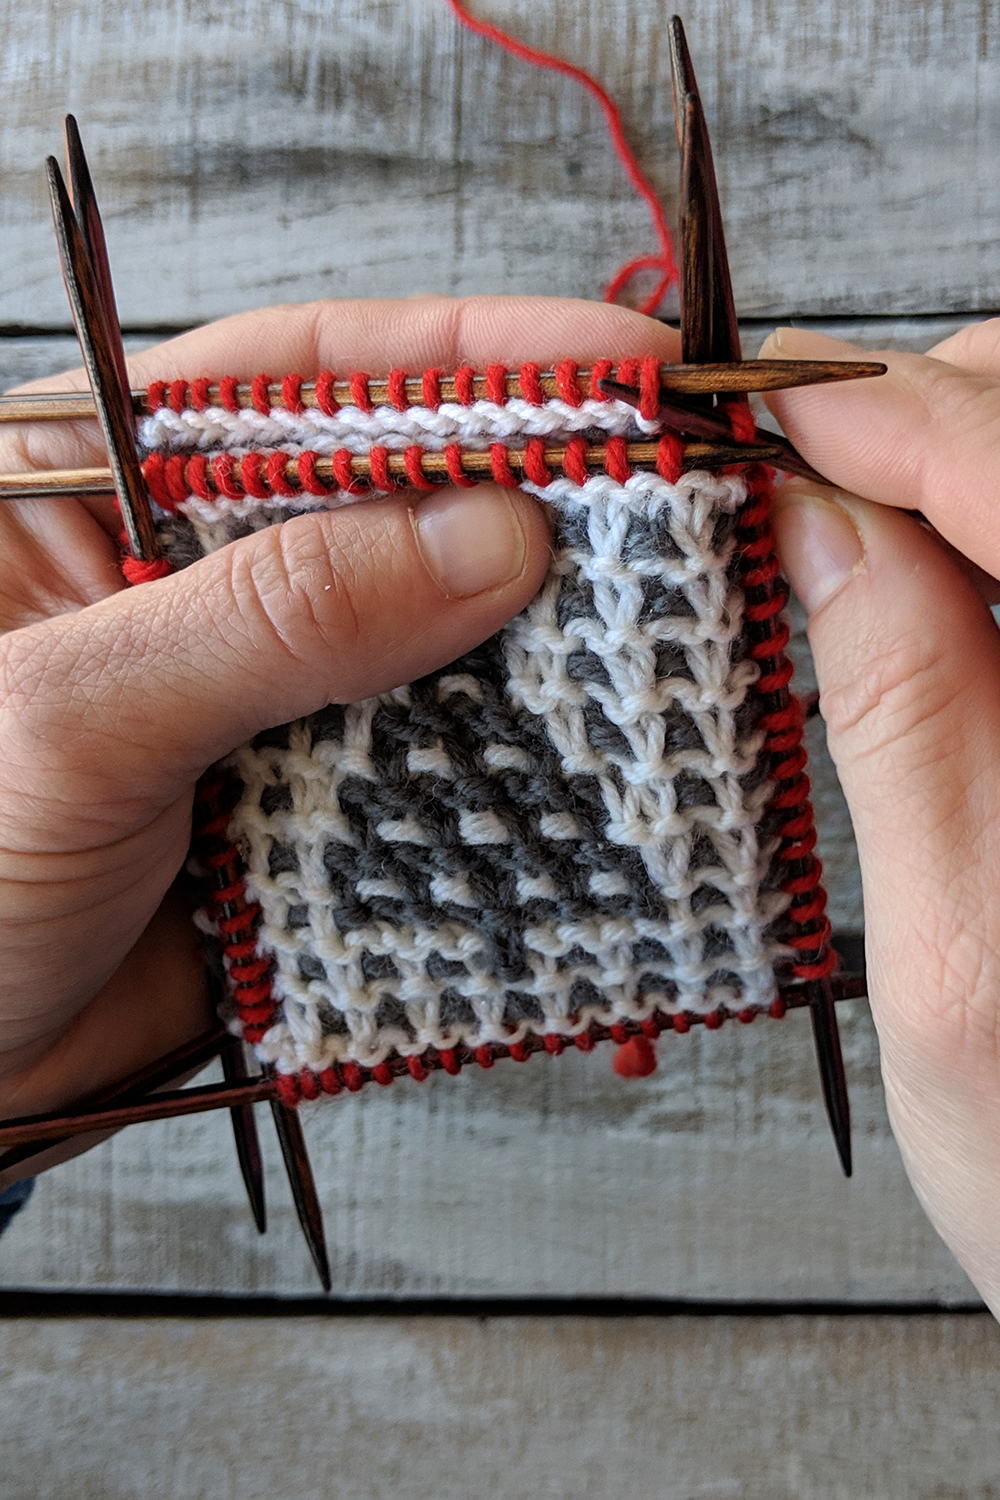
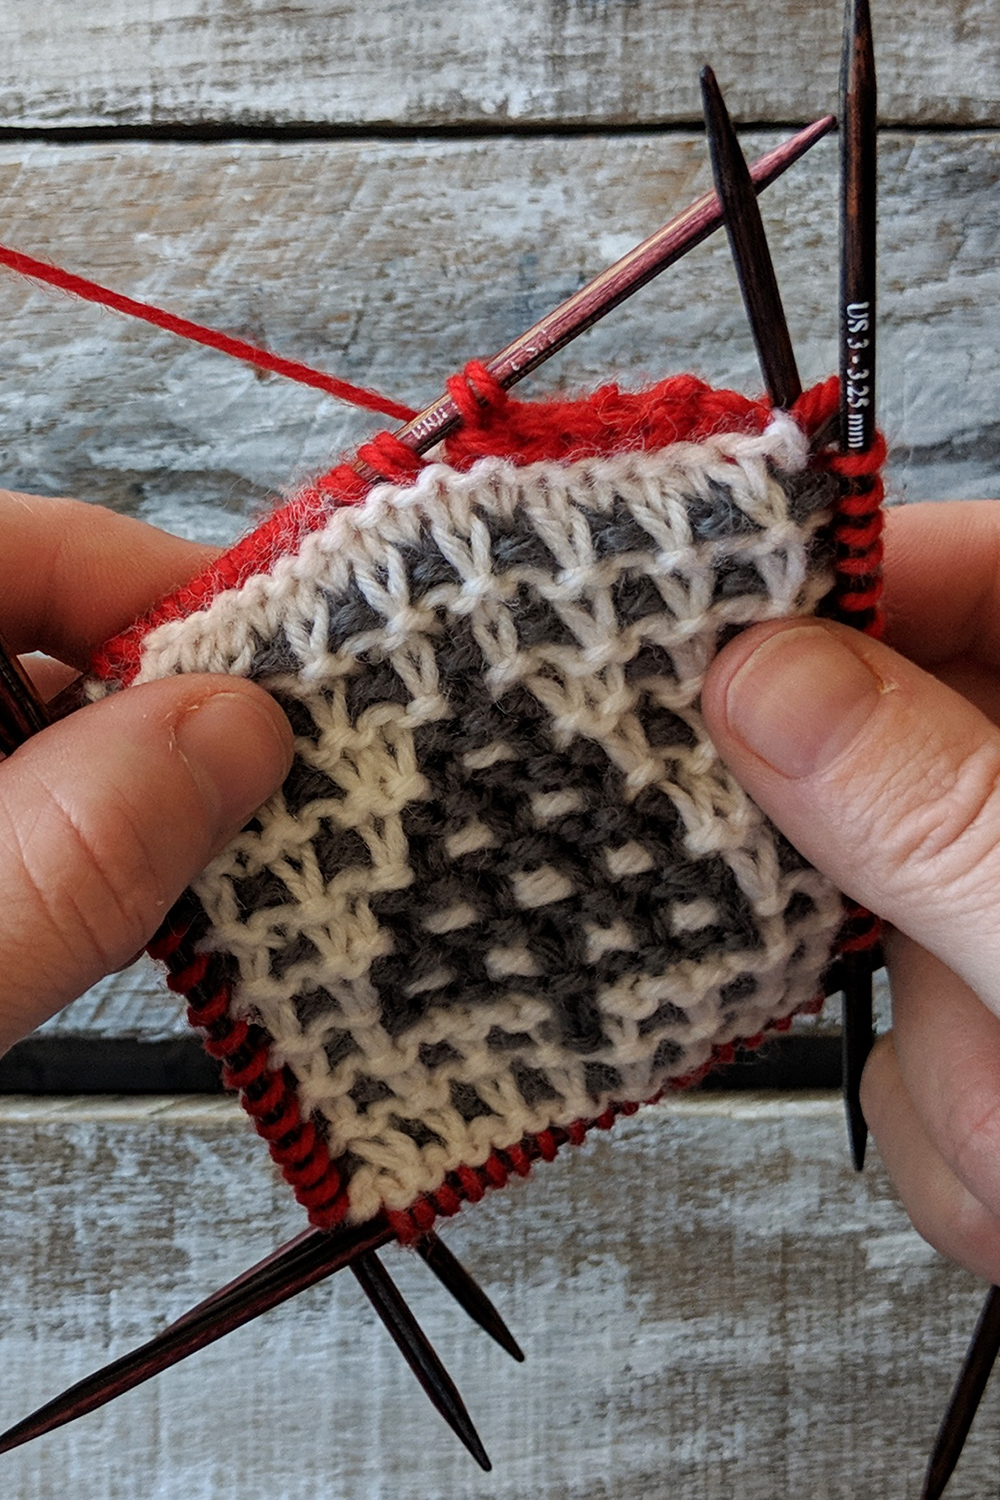
Next, place both pieces with their wrong sides facing together.
This is similar to the prep for a tubular bind-off.
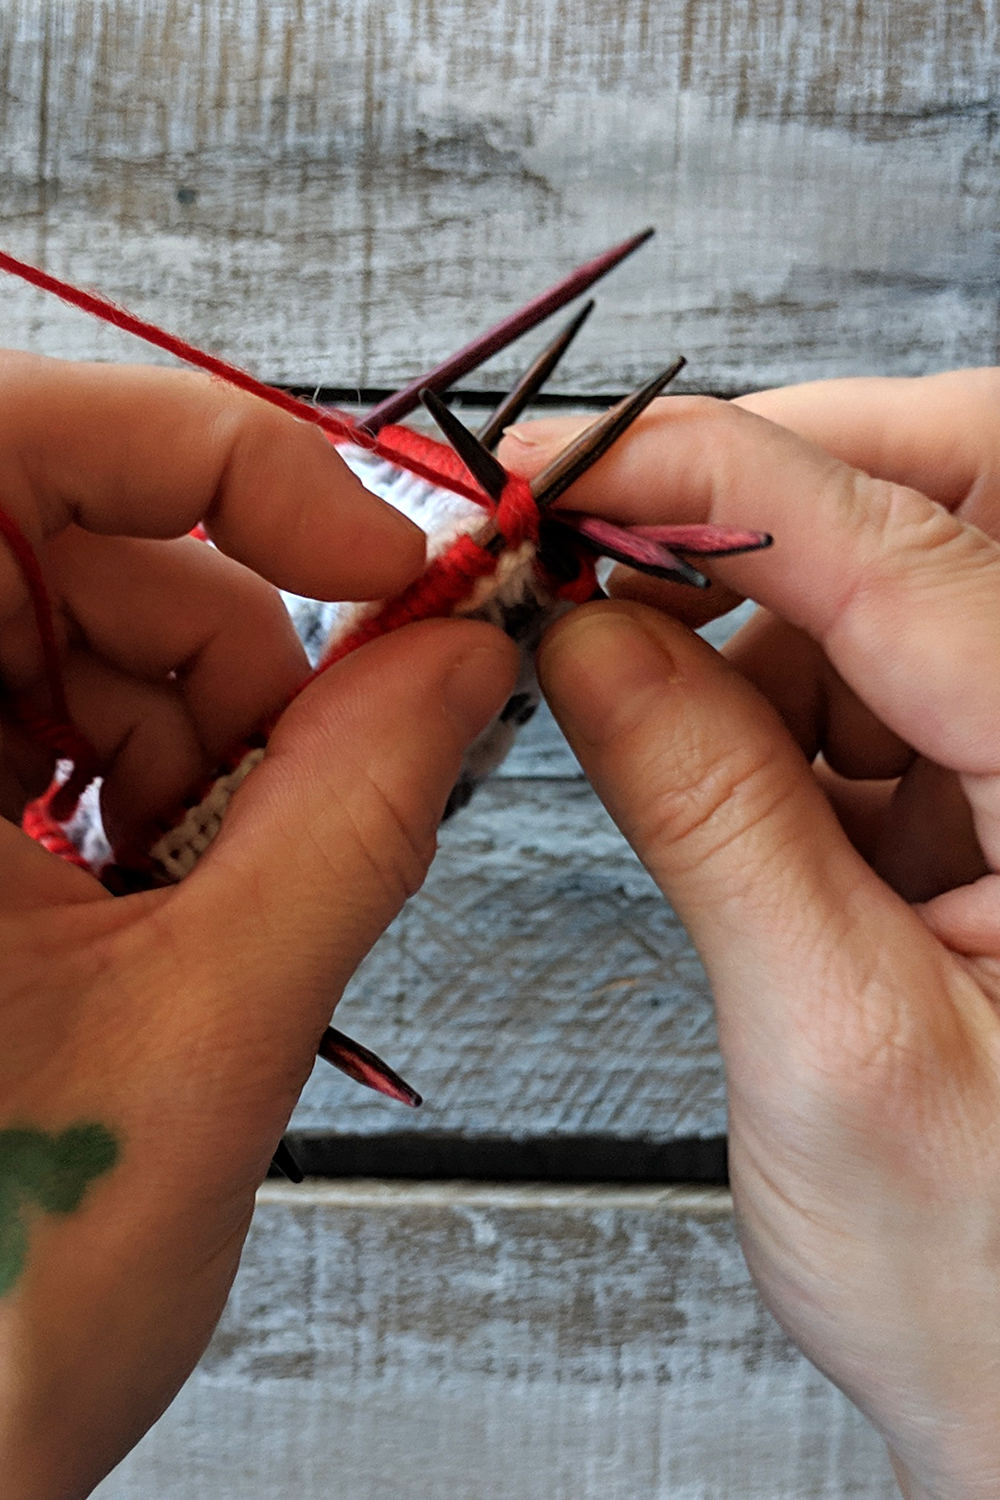
What I’m doing now is certainly not absolutely necessary, but I find it makes the process so much easier. With a separate double pointed needle (dpn), first I slide a stitch from the front needle onto the spare dpn.
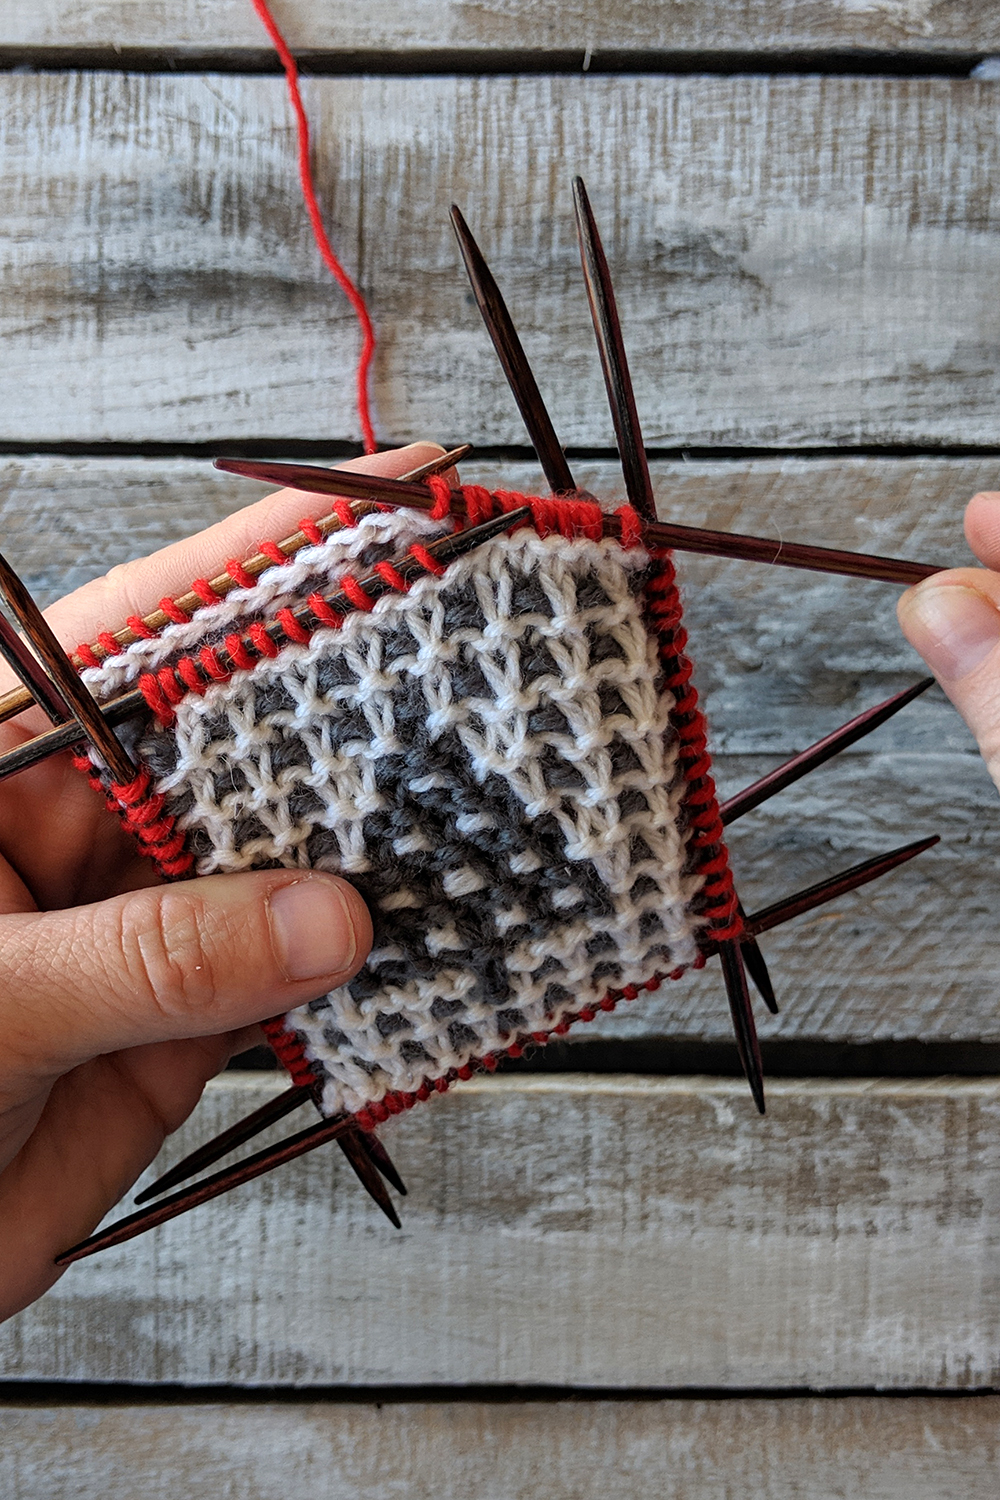
Next, I slide a stitch from the back needle onto this same dpn.
Keep going, alternating front and back needles/stitches until all stitches from one front and back needle have been transferred to the spare.
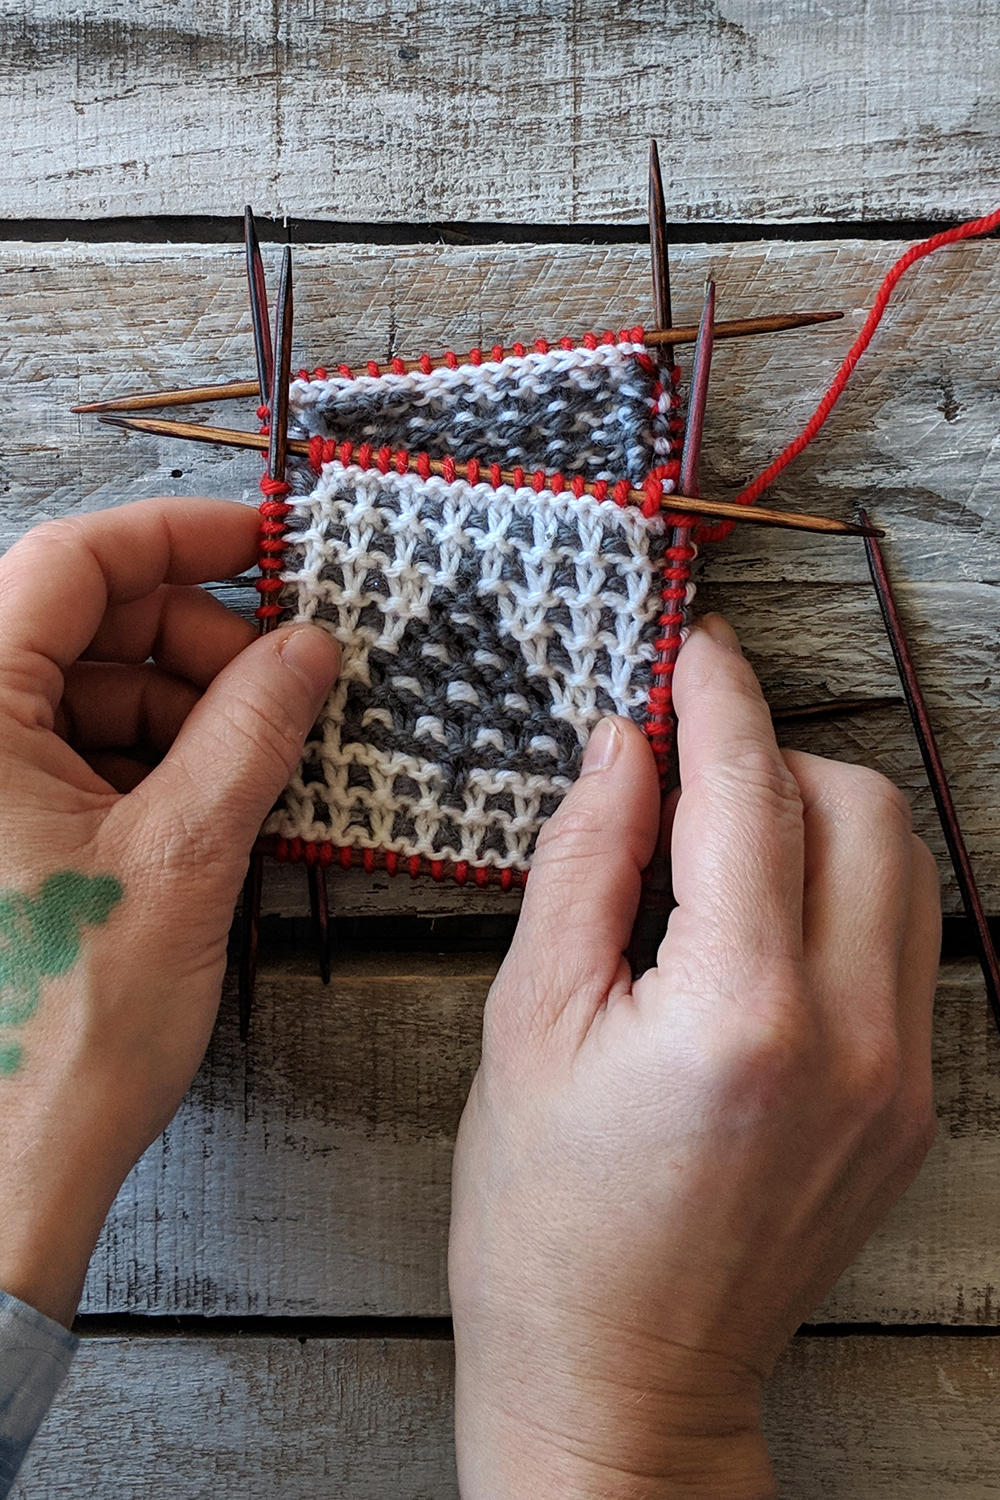
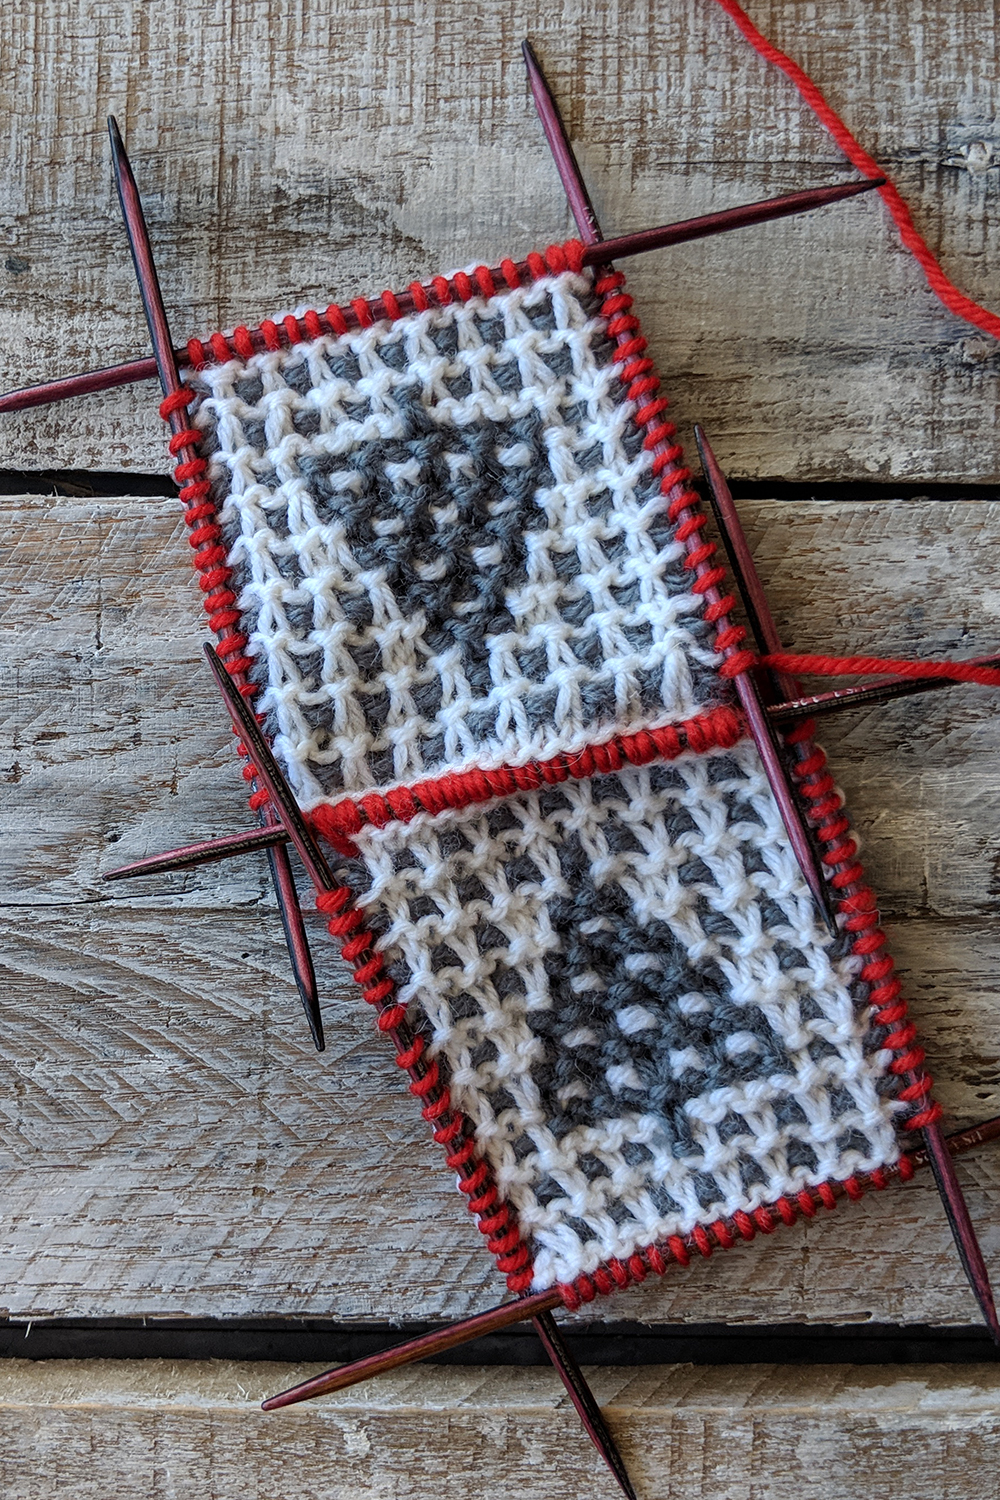
All the stitches from each needle are transferred. We’re ready to bind off!
Now that the stitches from both needles have been combined onto one needle, all we’re really doing is an I-Cord bind-off, but with one extra step.
To start, cast on two stitches using the knitted method. These are our I-Cord stitches.
Next, knit 1 (the first cast-on stitch), then k3tog tbl (knit three stitches together through the back loops). These three stitches are: the second cast-on stitch, a stitch from the prior front needle, and a stitch from the prior back needle. Slip the resulting 2 stitches back to the working left needle. Then: * K1, k3tog tbl, slip these 2 sts back to the left needle; rep from *
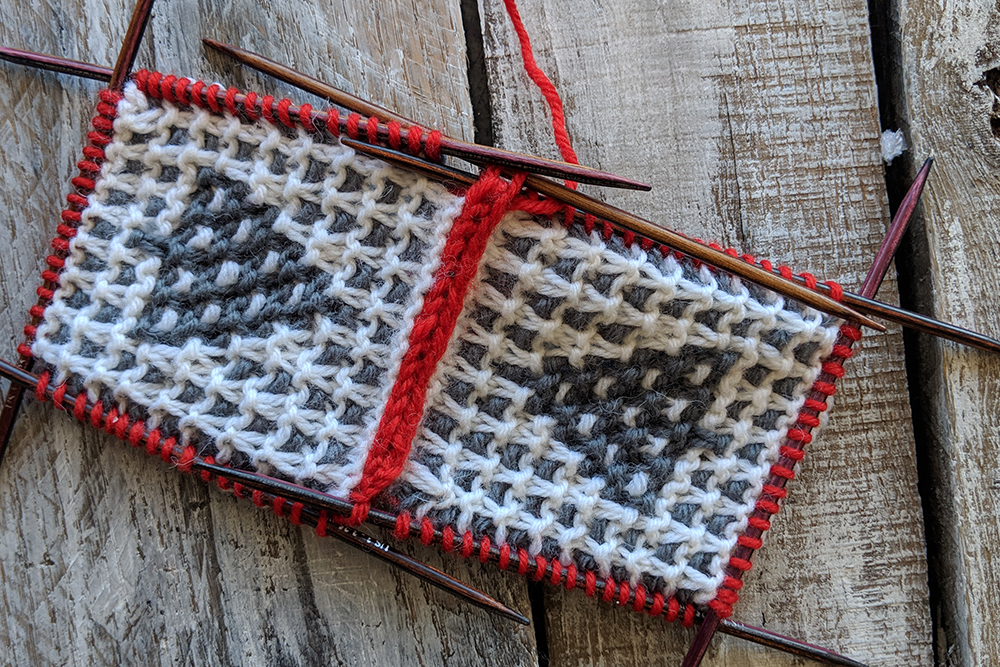
This baby 2-stitch I-Cord is works well to join the sides of the ornament and gives a nice finished look to the project, as well.
Here’s what it looks like after the side is partly joined.All done!
Remember, you can find the Series 2 12 Days of Winter patterns on Ravelry!
This is part 8 in a 12 part series highlighting designs from our 12 Days of Winter, Series 2 Edition.
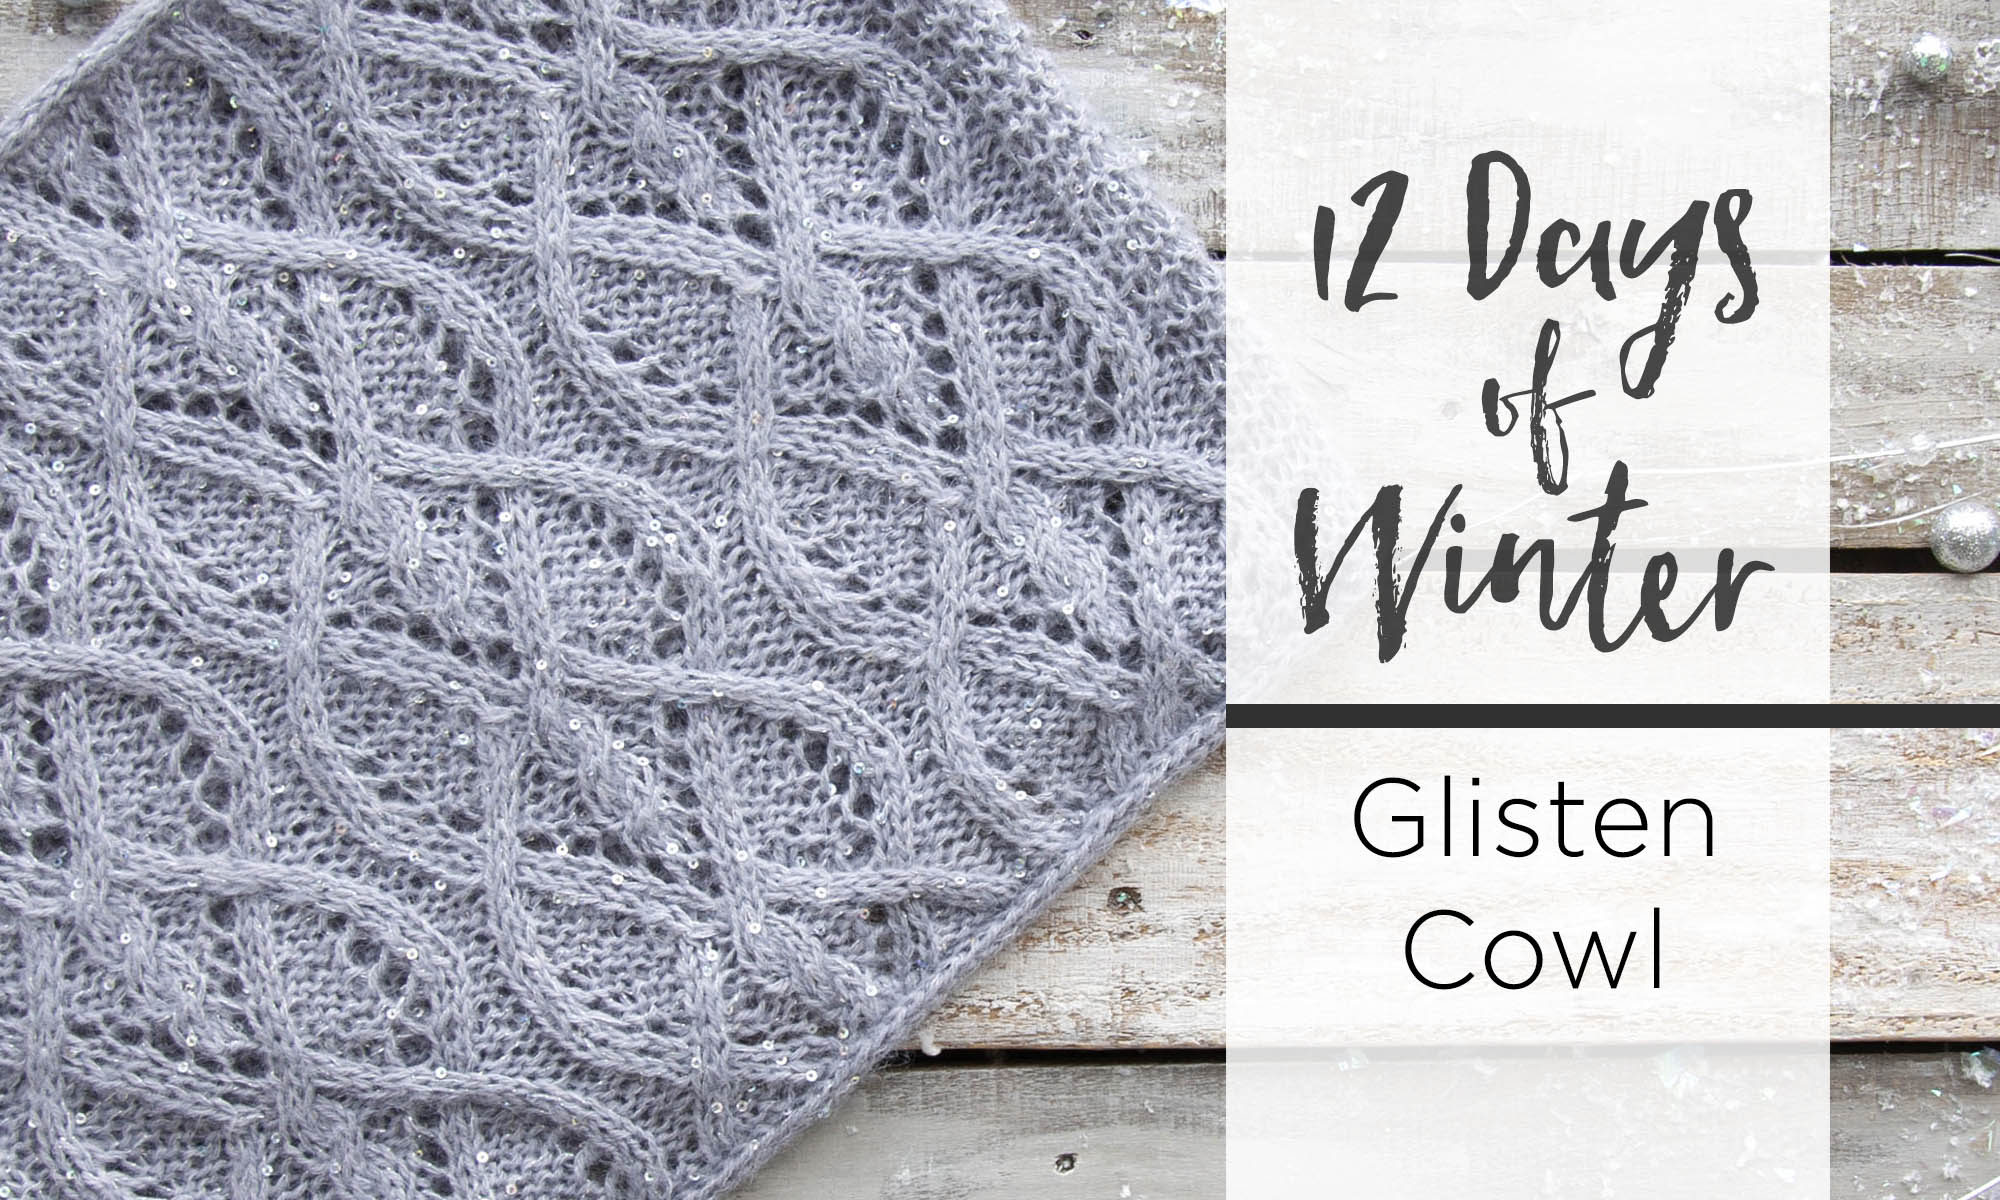
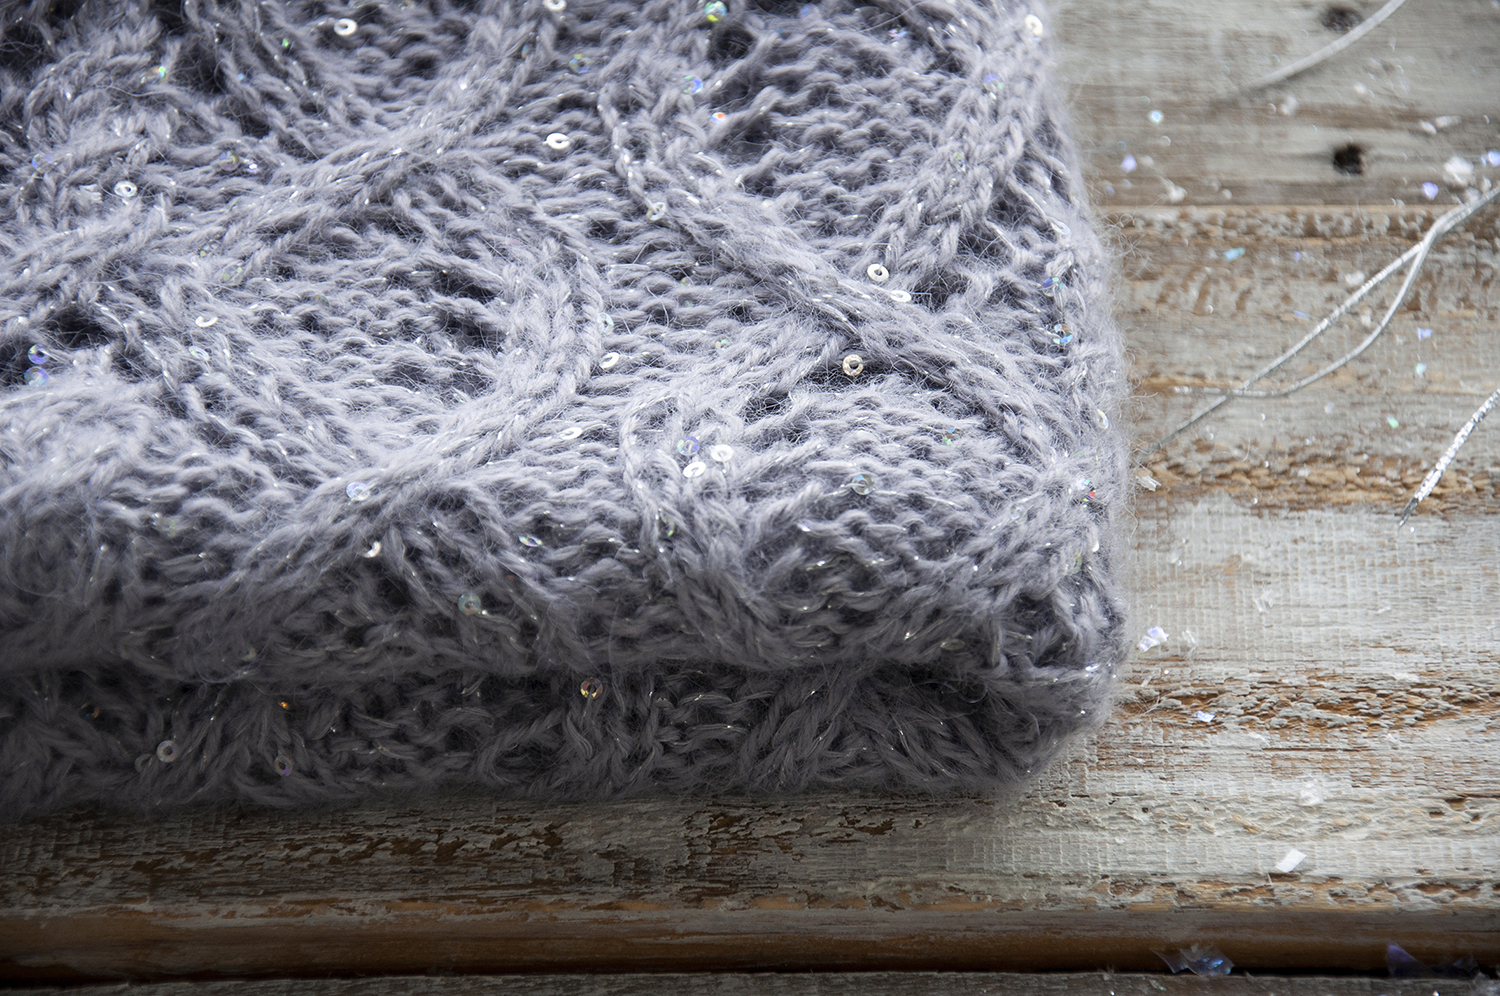
Say hello to the Glisten Cowl (link here). Winter, more than most seasons, elicits a desire to adorn ourselves with something sparkly. It’s probably because of all the bright lights, the glow of snow, and – as my dear friend Yukon Cornelius puts it: “gold; and silver!” So if you’re in the mood for sparkly seasonal splendor, I invite you to treat yourself to the Glisten Cowl.
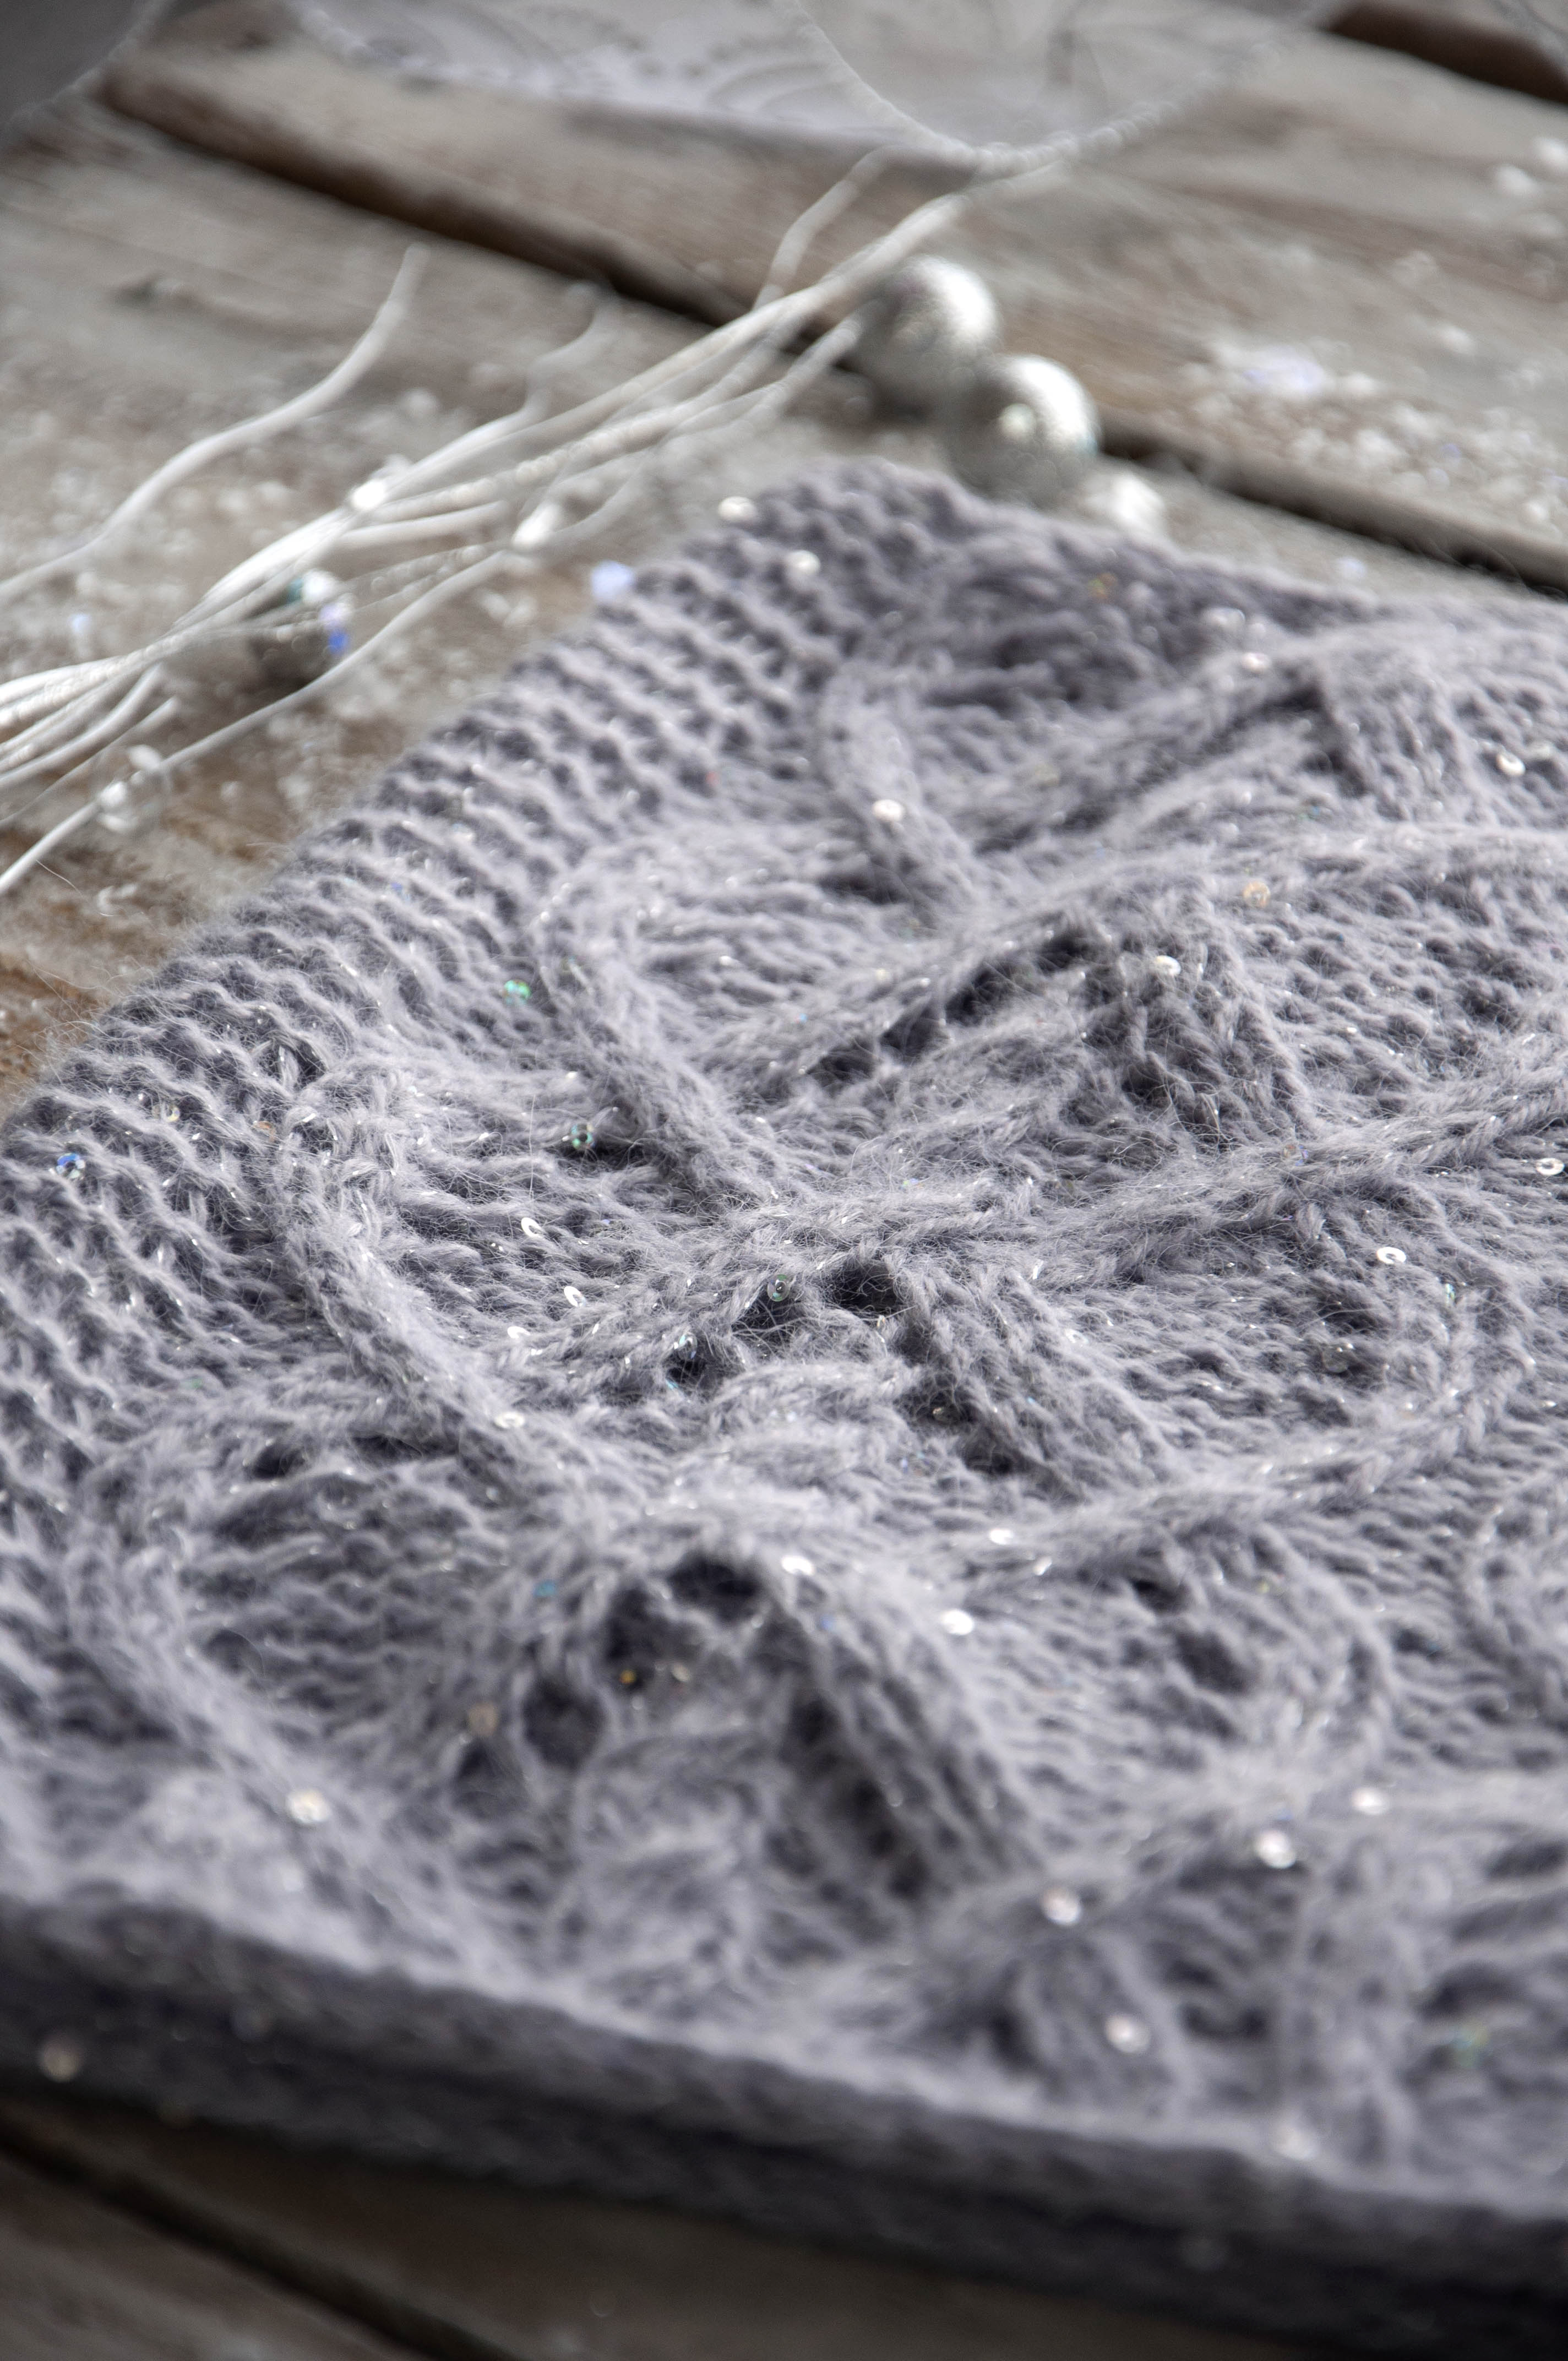
Cables, lace, and sparkles – what more can you ask for?
The yarn is what truly makes this design special. Amphora and Cotton Gold are held together to create a fabric with a soft halo and radiant sparkle. It’s perfect for every special holiday event you attend.
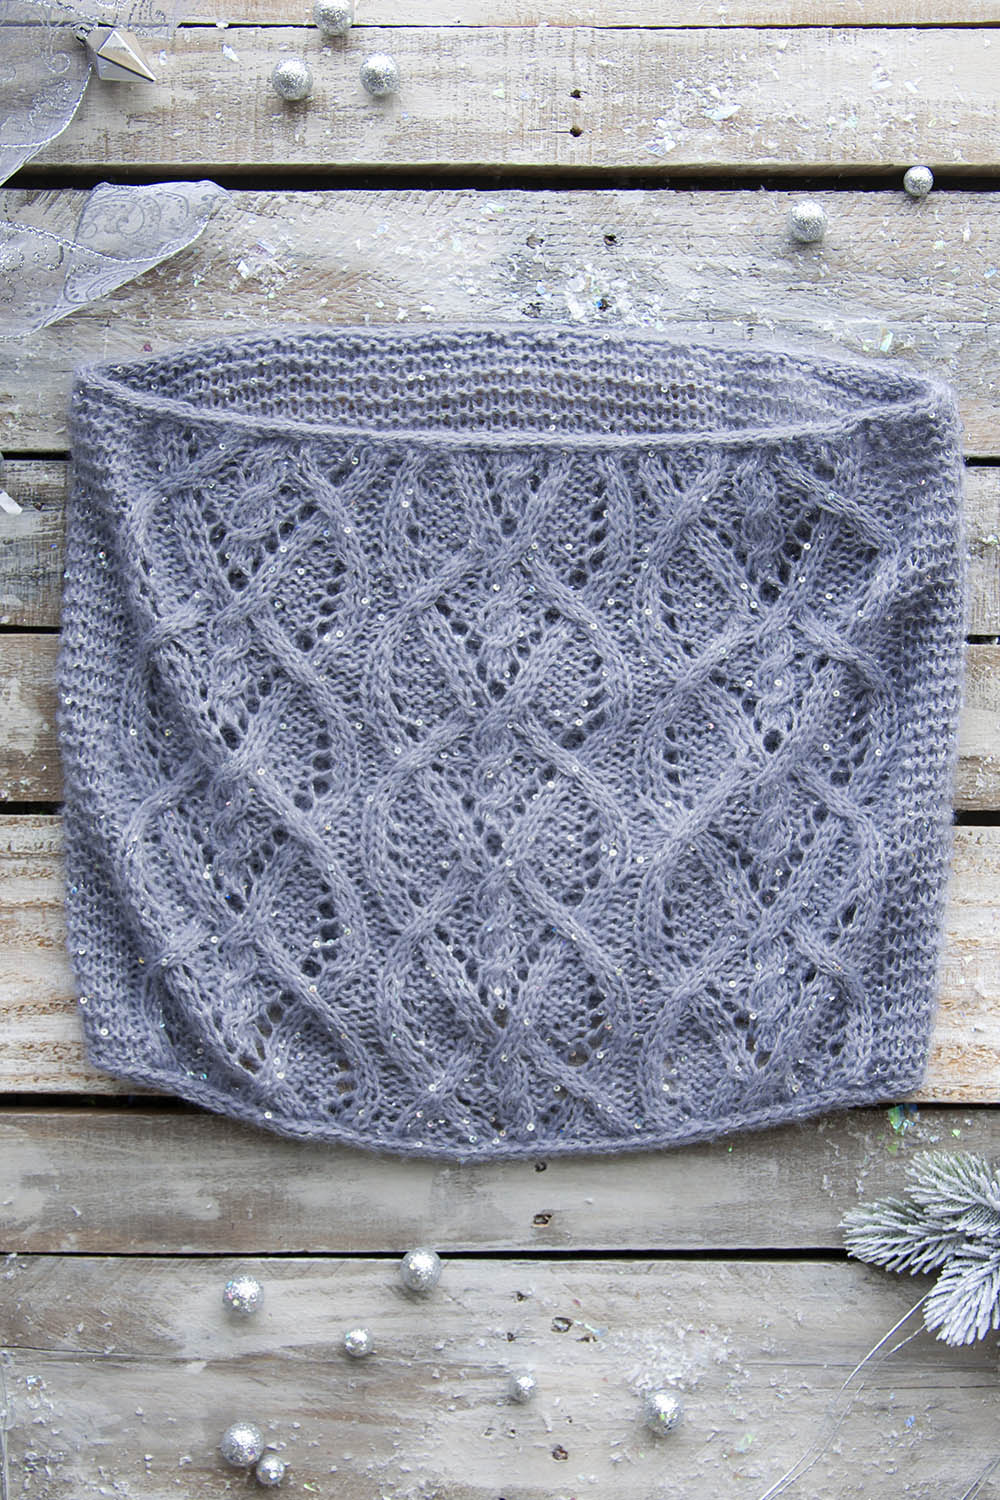
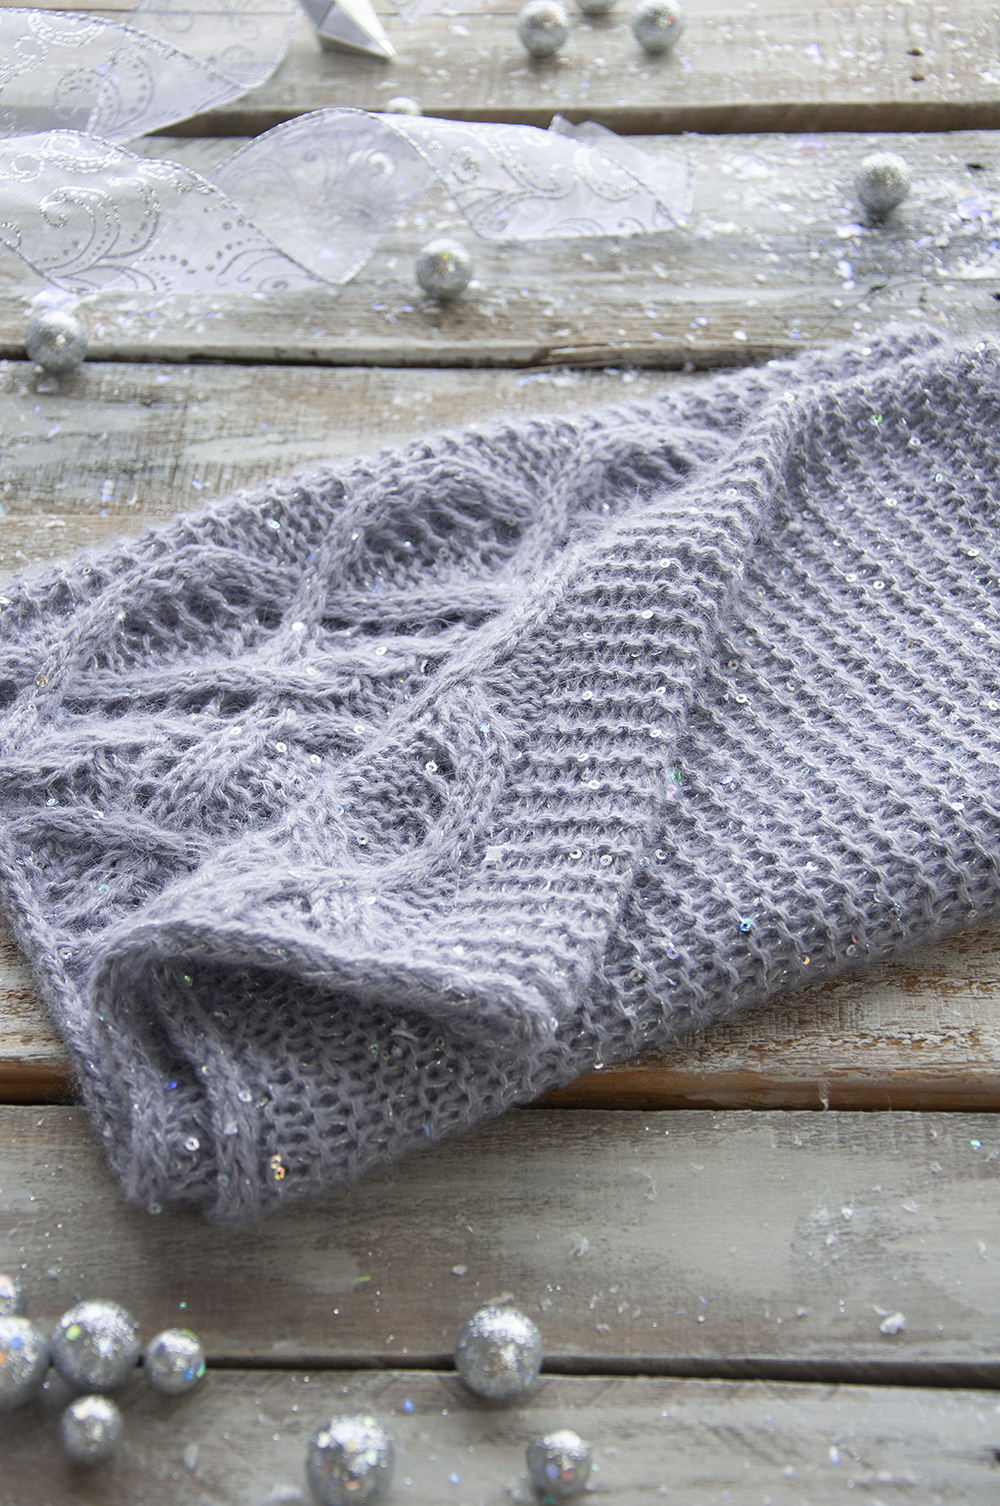
The front part of the cowl is an intriguing cable and lace pattern, while the back is simple garter stitch. The garter section allows your mind to rest before diving back into the patterned section. The difference between the two sections is also visually pleasing allowing the intricate cables to shine more brightly.
The popular winter carol – Winter Wonderland – inspired the name of this cowl, so it’s only fitting that a knitters’ version of the song exists. I struggled a bit and recruited Heather’s talent for words. Get ready because it’s pretty amazing. I’m only sorry that we don’t have a recorded version of her singing it – I learned today that she has a lovely singing voice!
Would you look at those stitches? Magnificent – I tell ya!
Winter Wonderland – Knitters Edition
Needles click, are you listening You can see this cowl glistening A beautiful sight We’re happy tonight Knitting in a winter wonderland
We make sure, to do swatching So our gauge, we’re not botching Our tension’s not wrong As we finally cast on Knitting in a winter wonderland
In the meadow, we can knit a snowfolk Then pretend she runs our LYS. She’ll say, “did you mean to drop that stitch, dear? Don’t you fret a bit, I’ll fix your mess!”
Later on, we’ll admire As we knit by the fire The cowl that we’ve made In just the right shade Knitting in a winter wonderland.
Three cheers for Heather – she’s an invaluable part of our team!
Remember, you can find the Series 2 12 Days of Winter Kit Patterns on Ravelry.