Day 10 of Winter – Series 5 Edition

This is part 10 in a 12 part series highlighting designs from our 12 Days of Winter, series 5 Edition.

Are you new to lace knitting, or are you already a fan? Either way, you’re in for a treat today as we take a closer look at the oversized, extra cozy Evergreen Shawl!

Beautiful and oversized, you’ll be so cozy in the blanket-y shawl.

First, though, let’s chat about this lovely design and all the special details. When I wear shawls, I love an oversized one, especially in the winter. You can wrap them around your neck and shoulders a couple of times – and you can’t have too many layers, wouldn’t you agree? 😉 I chose Deluxe Worsted, our classic, 100% non-superwash wool yarn, in the color 12296 Green Leaf for this piece. Since the shawl is covered in lacy fir trees, the color seemed like the perfect fit.

Just take a look at how large, yet still elegant, this Everygreen Shawl is!

In this pattern, you’ll get to indulge in the following techniques:

  • yarnovers
  • basic increases and decreases
  • right and left twists
  • knitting flat

This shawl does indeed have perhaps the simplest of shapes: a right triangle with decreases along one edge. The straight edge of the shawl has a gorgeous lace diamond motif, which although beautiful, does cause stitch counts to fluctuate throughout the pattern. So, as you’re decreasing along one edge to shape the shawl, you’ll also need to ensure that you maintain the stitch patterns as established. It’s a nice balance of rhythm and engagement, perfect for someone who wants to stay focused through a knitting pattern.

Although I’d consider this pattern Intermediate level, don’t fret if you’re a beginner who’s craving a challenge.  I’m the very last person to discourage someone from trying something new. So, if you have little or no lace experience, or even if you have a bunch, I have a few handy tips for knitting lace that will get you started on the right foot.

The lacy tree motif makes this shawl perfect for winter. Just imagine yourself in a snowy forest with those pops of green peeking out beneath the piles of snow atop the boughs.

My first tip is to sharpen your chart reading skills. This pattern includes helpful charts and written instructions, but I find that charts are a great way to visualize exactly what you’re doing. Back in our first series of the 12 Days of Winter Kit collection, before we even knew it would be a tradition, I shared some tips for reading charts. You can find that blog post at this link.

My next tip is to use sharp needles. I have so many favorite needles that it’s hard to choose a brand. I’m a bit of a needle nerd and I love everything from Addi Lace Tips to any of the ChiaoGoo lines and have had great experiences with Hiya Hiya Sharps. But in truth, your favorite needle brand probably has an option for sharp tips and that’s what you really want. Why? Simply because it makes working those decreases much easier! In this pattern, usually, you’ll only work two stitches together; however, some lace patterns have you work more than that – three, even four together (as in the Dusk Poncho). And if you must do a purl decrease through the back loop, you’ll thank yourself for the investment, trust me!

Insert lifelines as you knit to give you a safety zone if you make a mistake and must rip back your work.

My final tip for lace knitting is a lifeline – because it’s a lifesaver! I feel like a pro whenever it comes to correcting mistakes in cable knitting or most textured stitches, however, I always find correcting mistakes in lace to be a bit more tricky. As a result, I often tink back (knit backward – get it?) my work or simply rip back until I get to the row where I made the mistake. When you have lots of decreases and yarnover increases, it’s really easy to lose your place. My suggestion is to insert a lifeline. What’s a lifeline? It’s simply a strand of yarn to place through your stitches as a safe spot to unravel your work if needed because all of those stitches will be secure with a strand of scrap yarn threaded through.

Option 1: This is probably the most preferred method, especially if you’re knitting lace. Before you start knitting your row, thread a piece of scrap yarn that’s about six to eight inches wider than your work and simply glide the tapestry needle through each live stitch without removing the needles. You’ll work just below the knitting needle, as pictured in the example photo above. The ideal place for a lifeline is before a fresh row repeat – this way you know exactly where to start once you unravel your work.

You can always insert a lifeline after you work your rows, too.

The second option is great for moments when you’ve forgotten to insert a lifeline…or if you were overly confident only to find out you made a mistake later. Oops! And I have to say, I’m GUILTY! Have no fear, though, because you can still insert a lifeline any amount of rows below (see above photo). This time, all you’ll do is thread the tapestry needle the same way you did in the first option I described. Then, carefully thread the needle through one leg of each stitch across the row. Picking up each leg of the stitch from below is a bit trickier, but if you take your time you’ll be good to go, I promise. Then you can rip back all the way to the lifeline and your stitches will remain secure.

The tip detail shows how the tree motif transforms into a chevron lace motif, and the final shaping is just so pretty!

That’s it for my lace knitting tips and I hope you find them to be very useful. If you have any questions don’t hesitate to reach out to us because we’re always happy to help. Do you have any lace tips you’d like to share? Let us know in the comments below!

Remember, these exclusive kits can be purchased at local yarn store retailers near you. Each kit comes with the pattern, the yarn required to make it, a mini Universal Yarn project bag, and stitch marker. Use our store locator to find your nearest Universal Yarn retailer!

Happy crafting!


Day 4 of Winter – Series 5 Edition

This is part 4 in a 12 part series highlighting designs from our 12 Days of Winter, series 5 Edition.

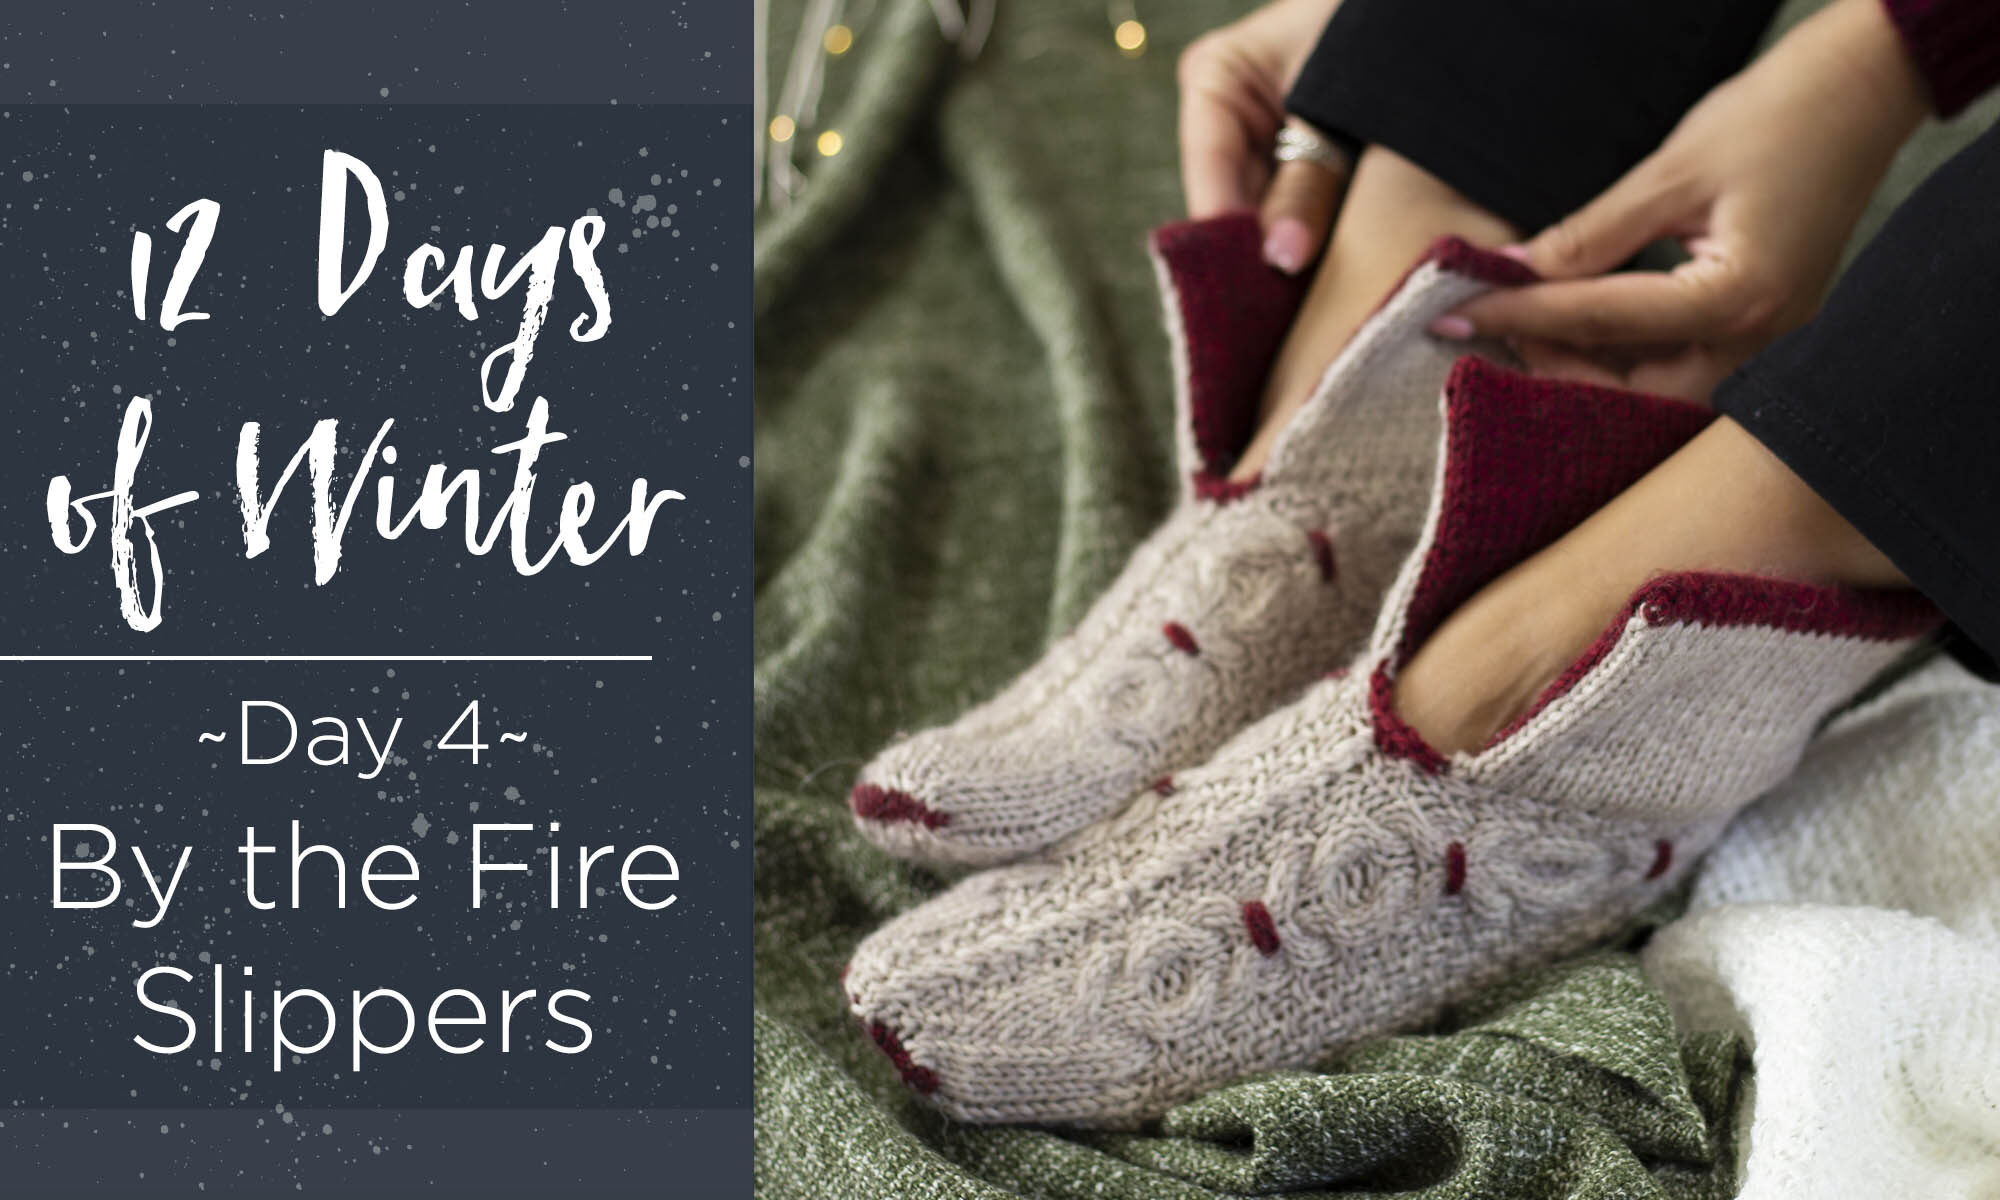
Happy Saturday! I hope your weekend is off to a great start, with a slow morning, warm cup of coffee, and of course, a yarny project! The 12 Days of Winter Kit Collection is one of my favorite design projects each year. We started it during my first year here at Universal Yarn, and I cannot believe we’re already in its fifth rendition! So far, we’ve created more than sixty wintry, giftable projects that are perfect for the holidays. Color me impressed! Each year, these collections are full of accessories, and some of my favorite contributions have been cozy socks. This year it’s no different – I’m simply smitten by my slipper sock design, the By the Fire Slippers.

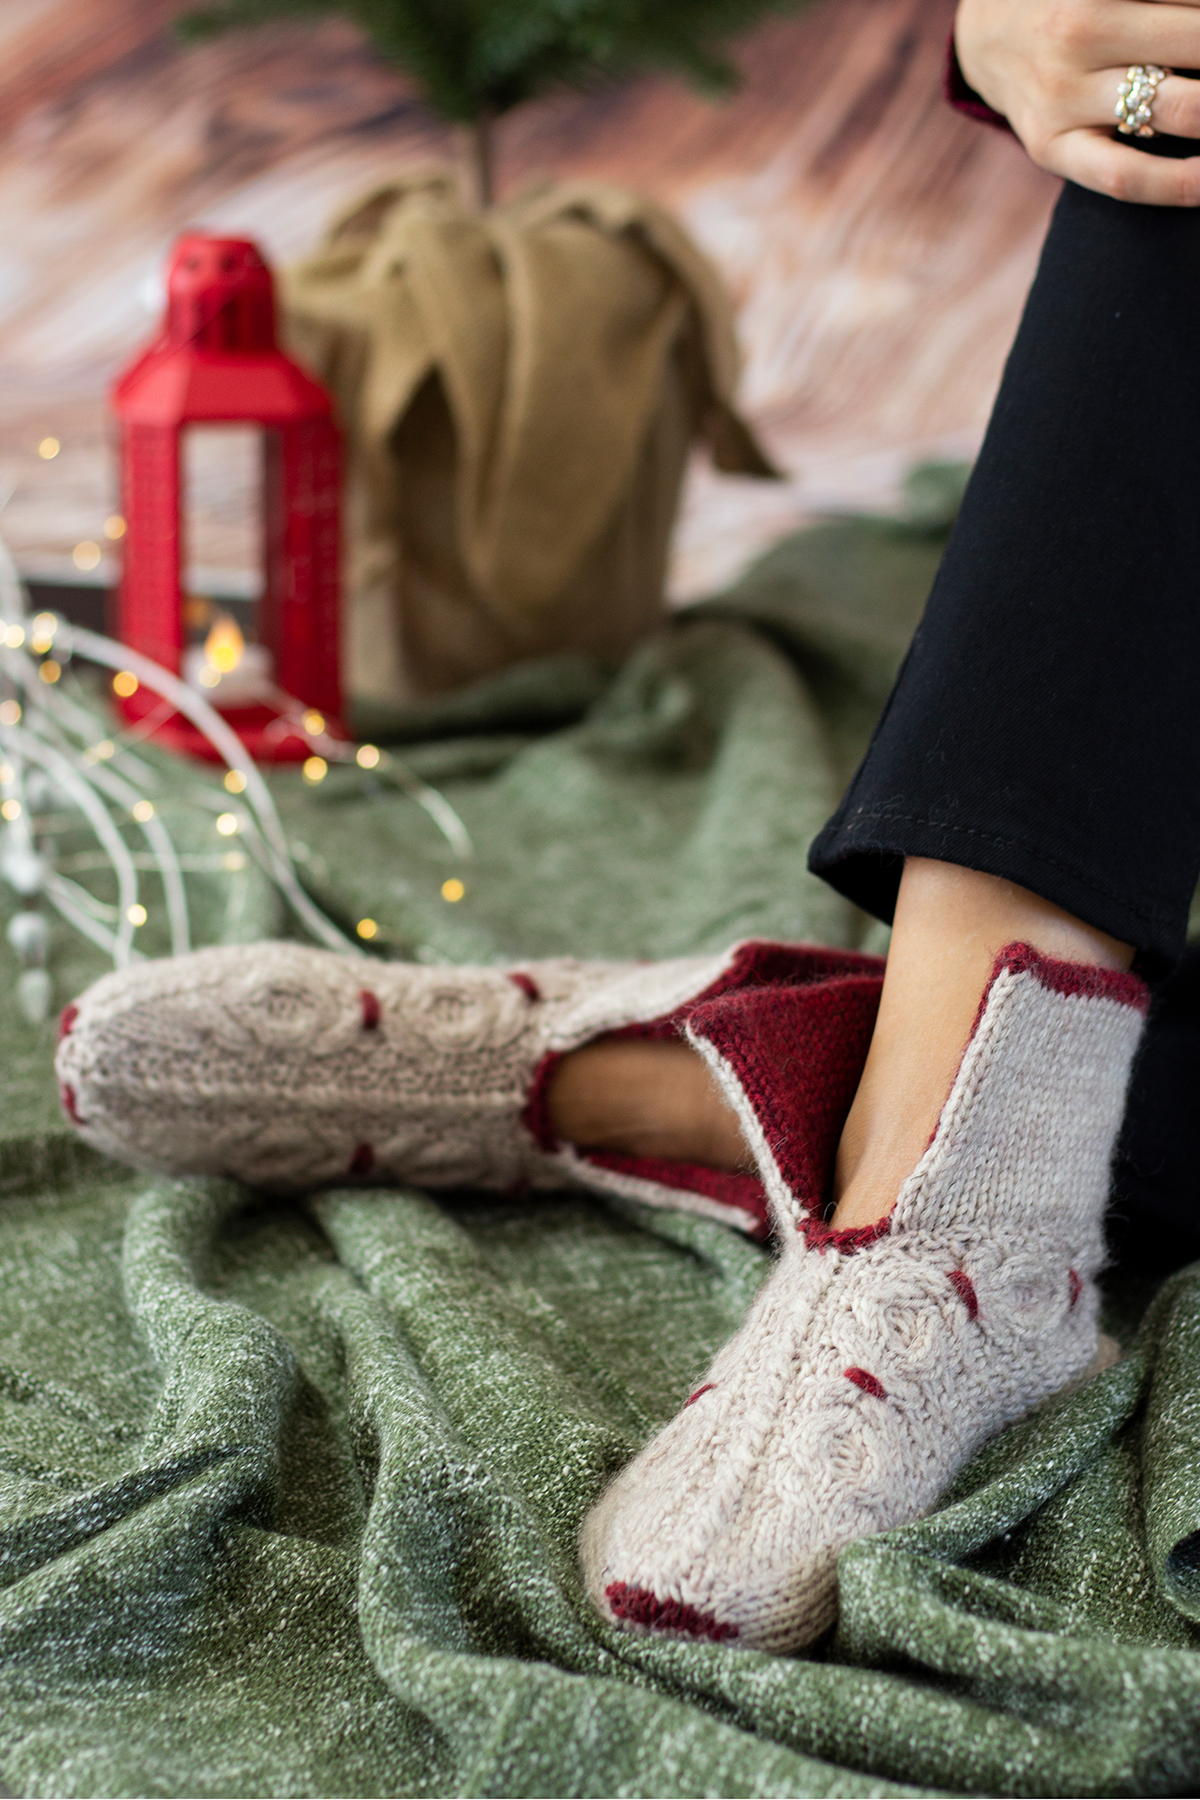
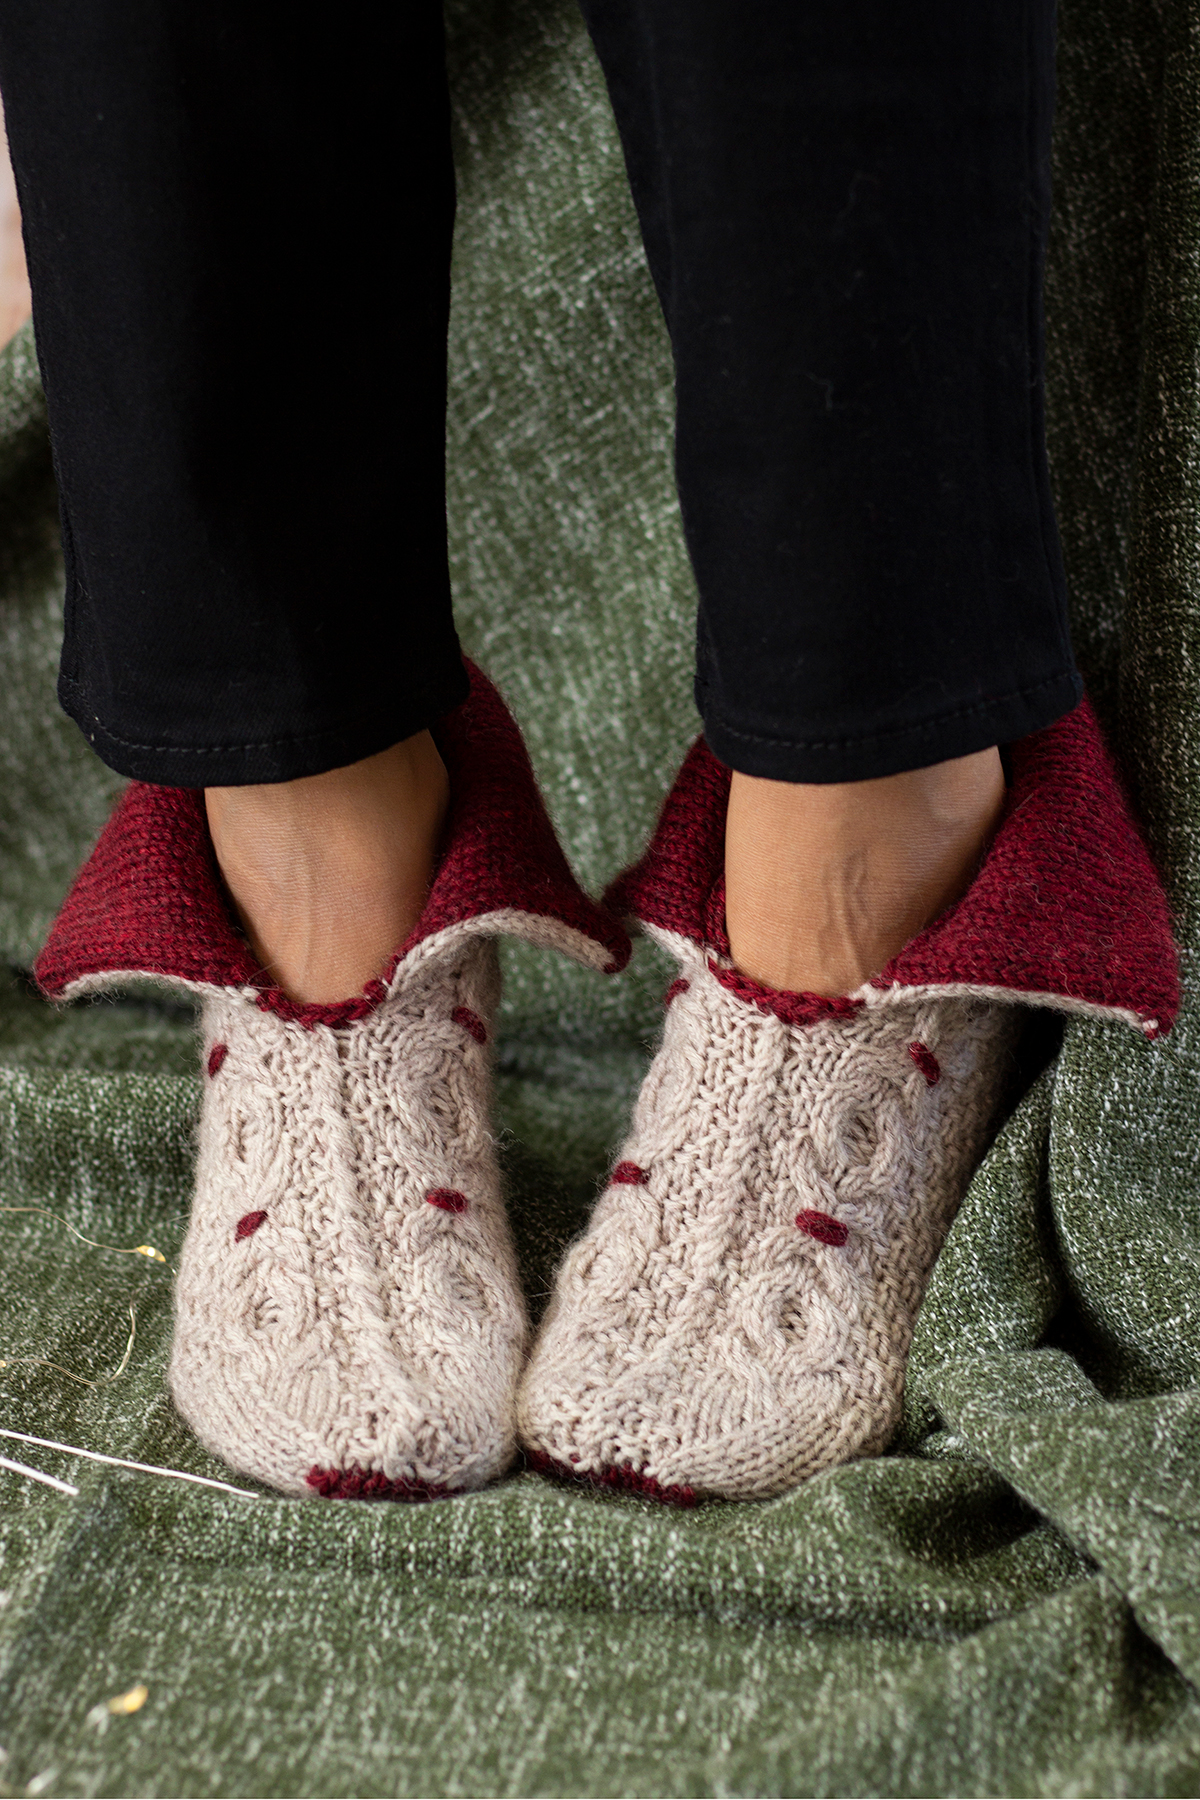
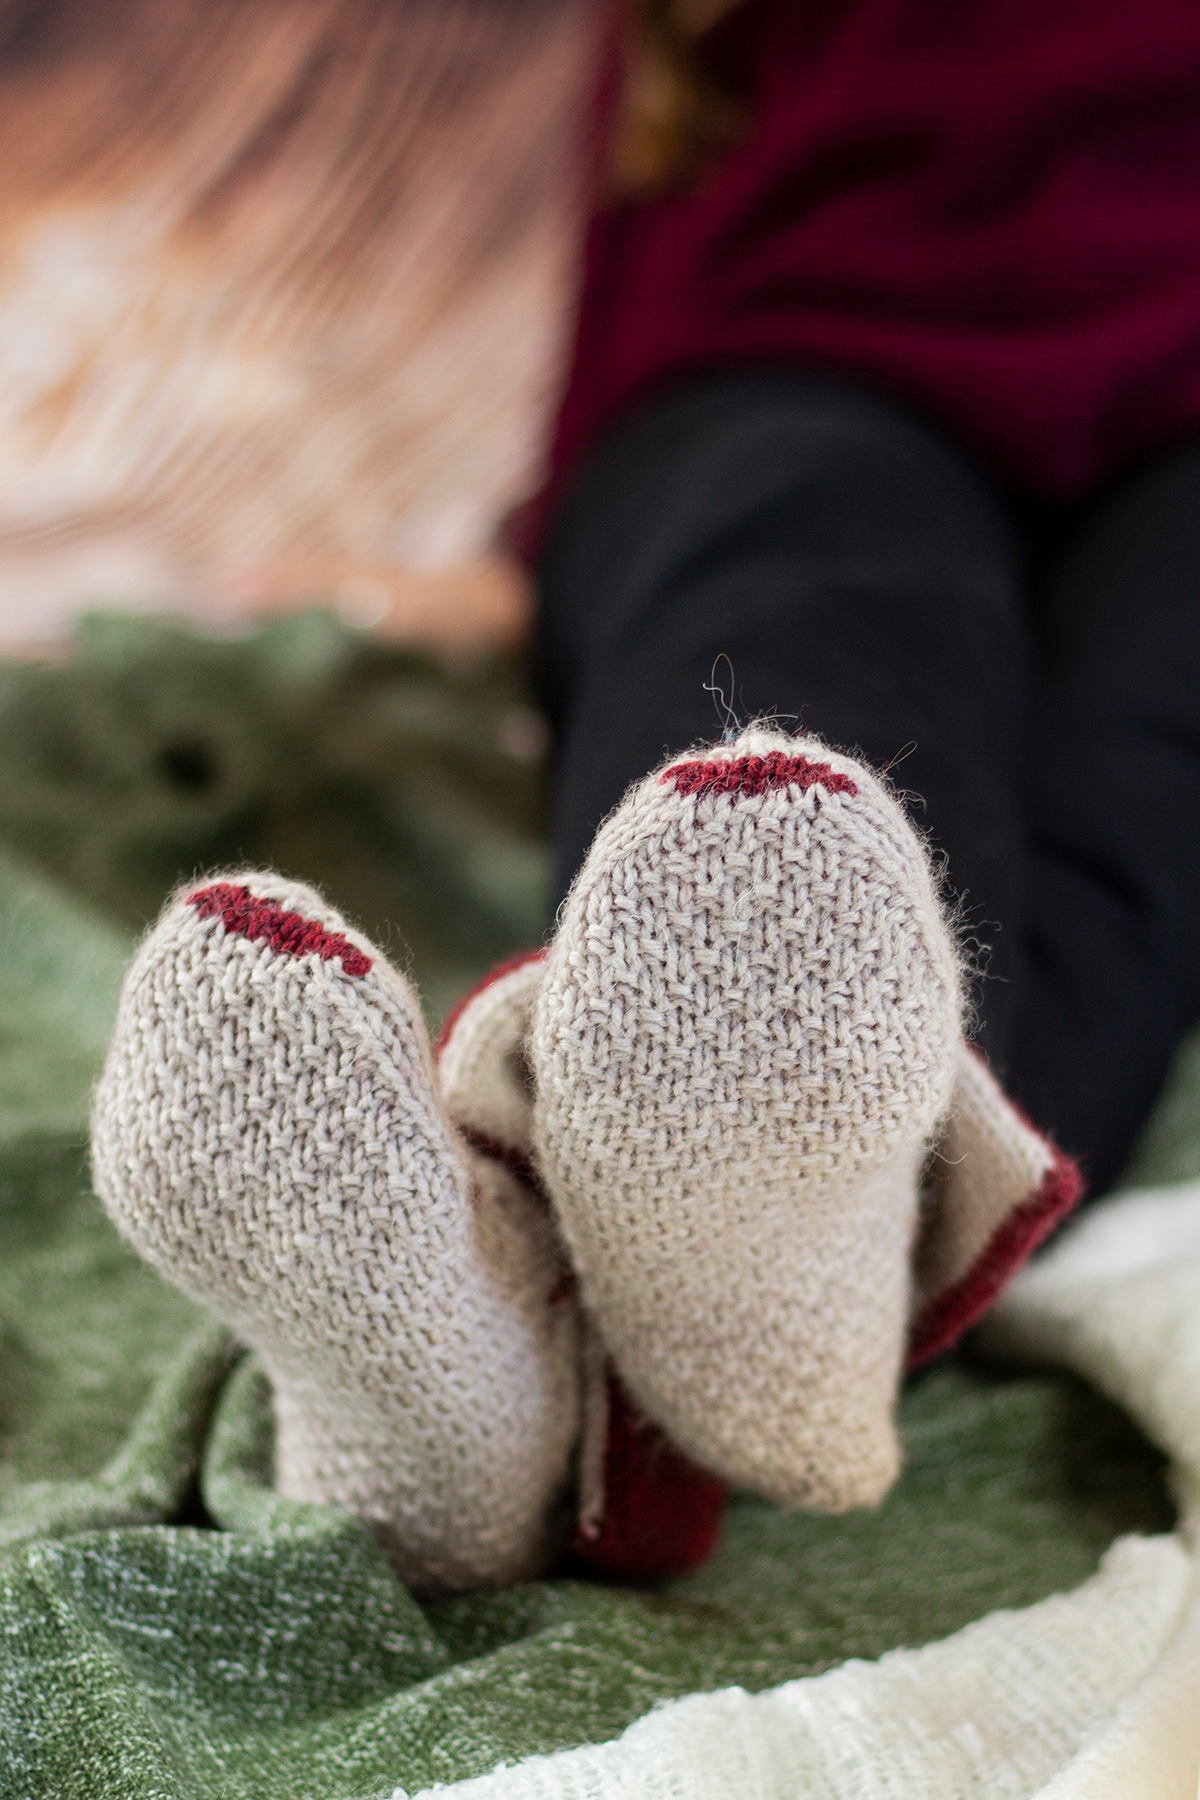
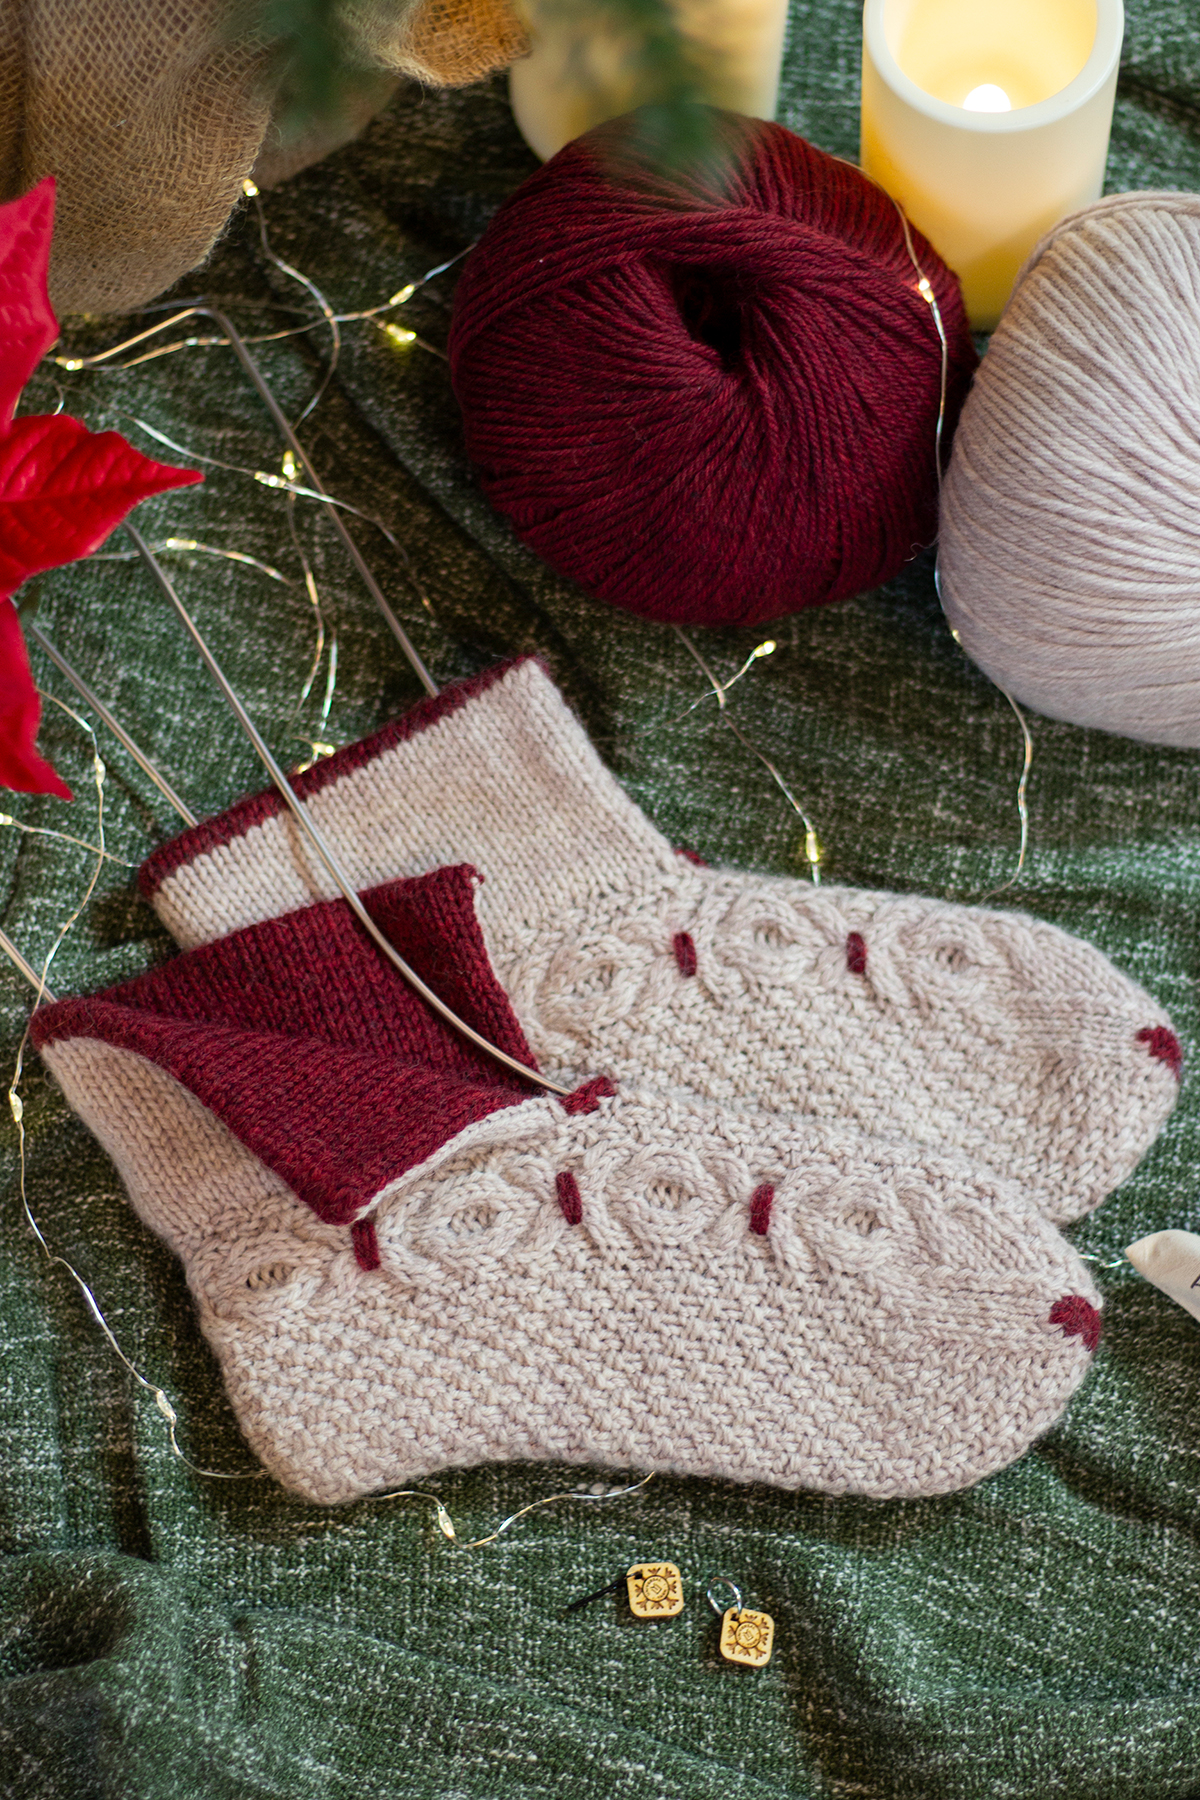
These slippers are a cozy dream! They feature rich textures in the form of cables, twisted stitches, moss stitch, and smocking. A contrast color is used to add thoughtful details including the graft at the toes, the smocking, and – my favorite part – the split, double-thick cuff.

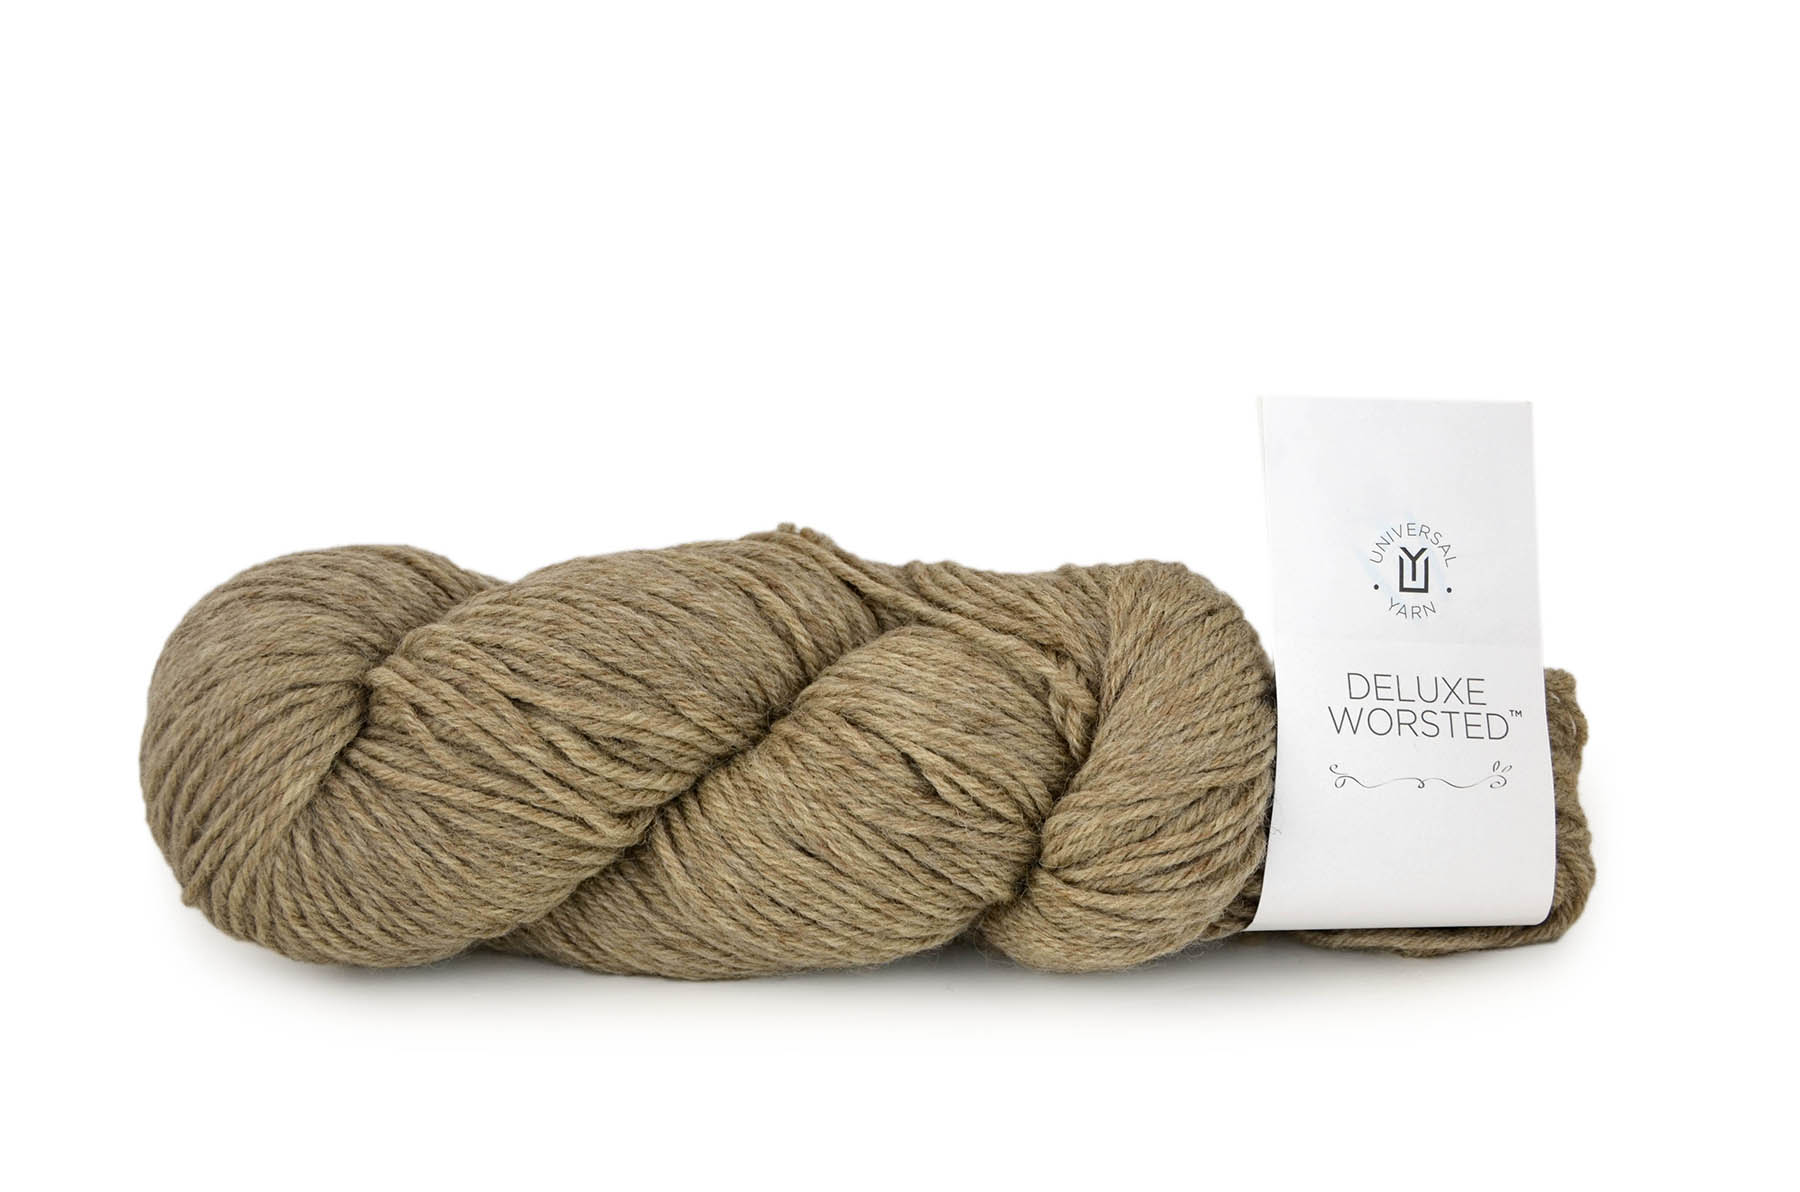
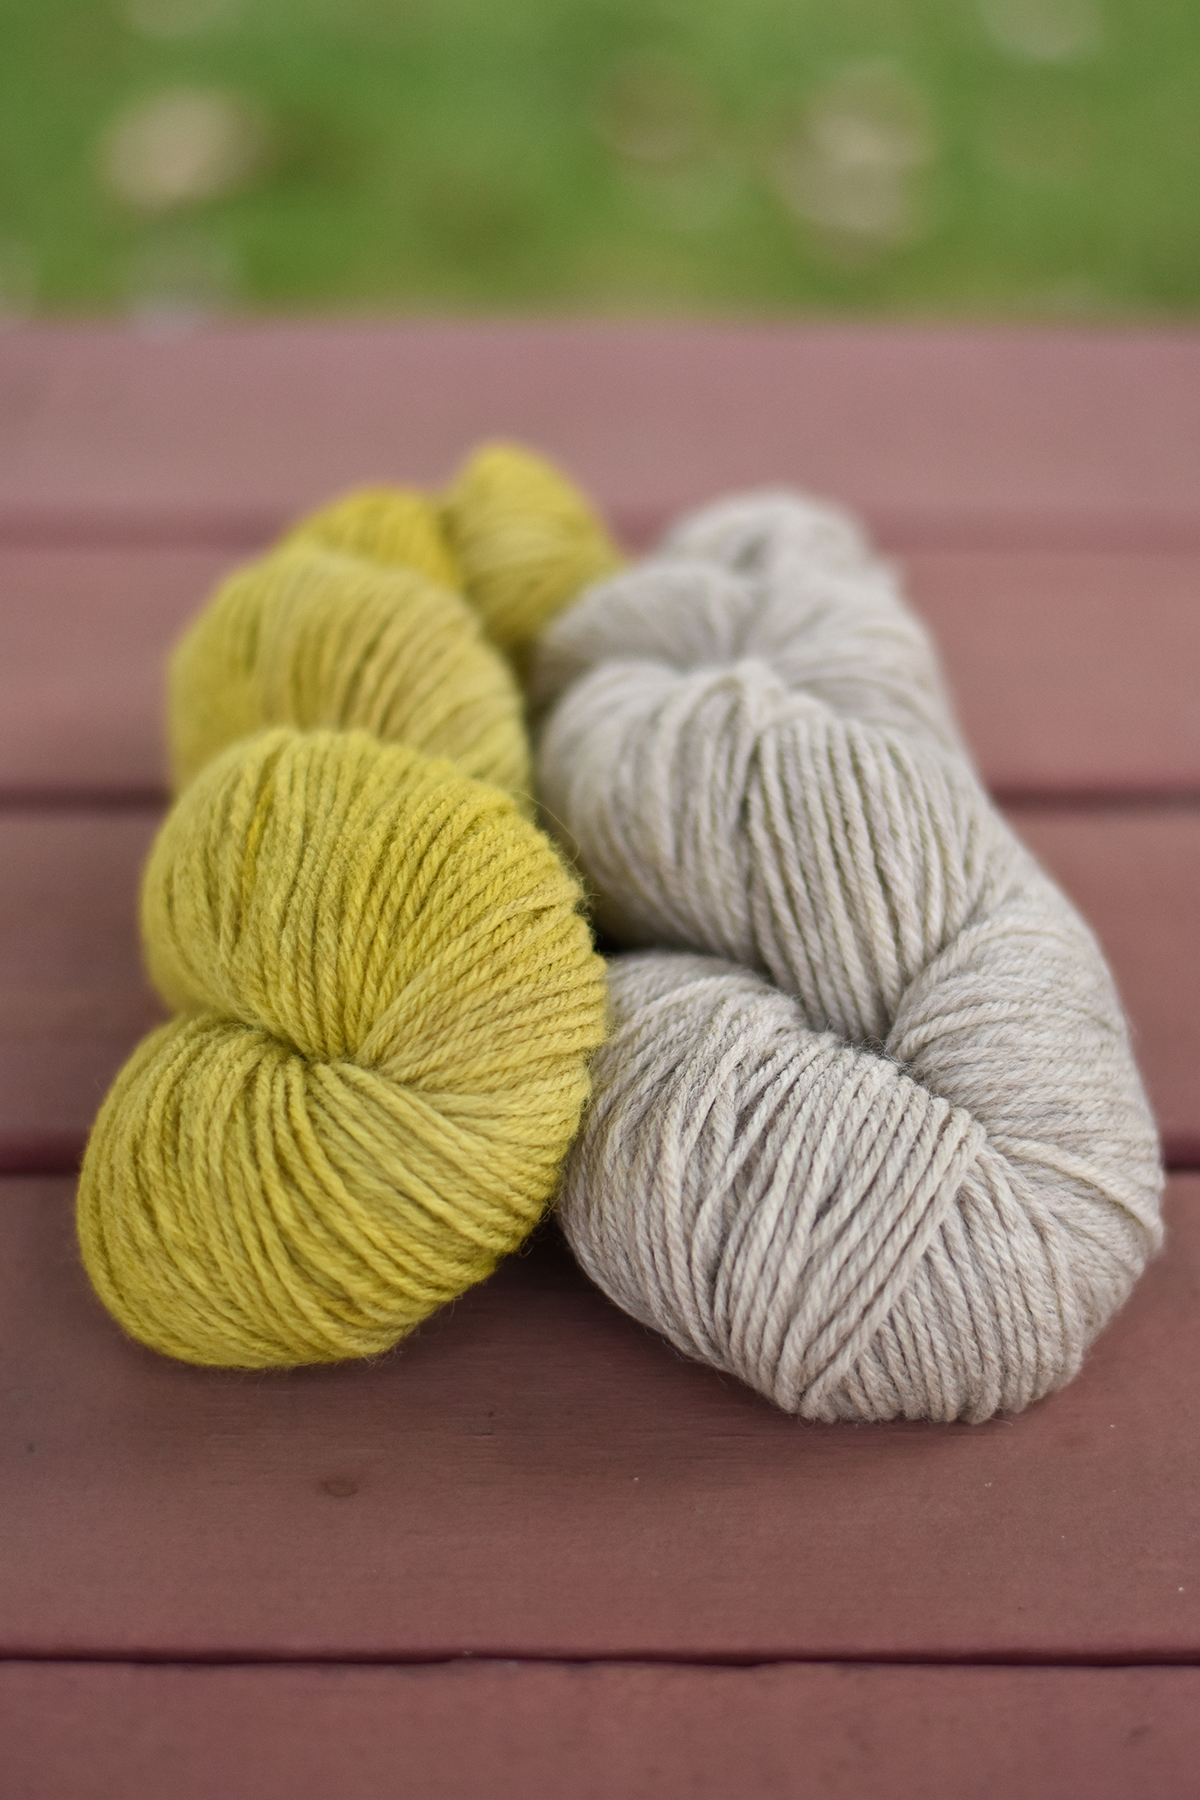
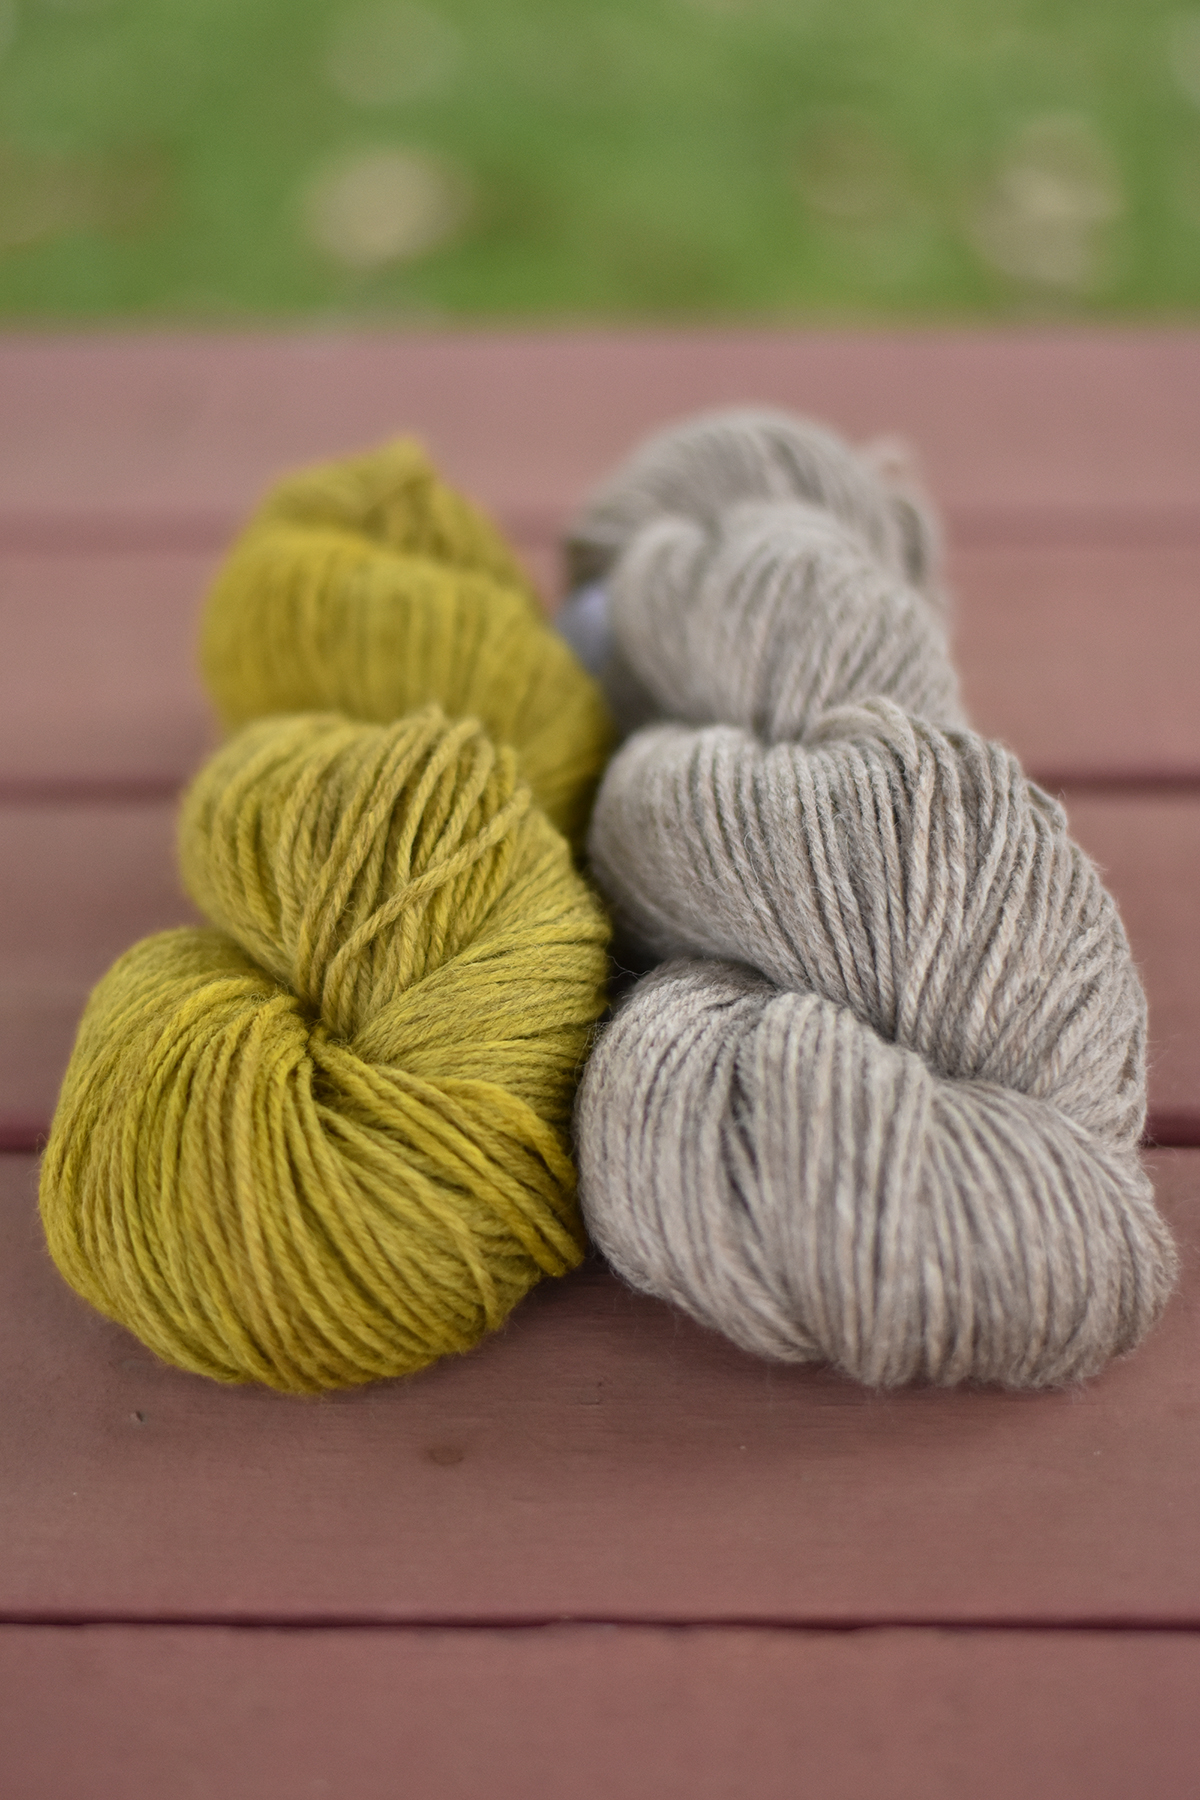
The By the Fire Slippers are knit using Deluxe Worsted Superwash – a superb choice for thick and quick socks! This durable wool yarn will stand the test of time while keeping you warm and comfortable. Plus, because it’s a 100% superwash wool yarn, the slippers are a cinch to care for. And if we’re being honest, easy-care knits make the best gifts because sometimes those we love don’t always remember to handwash!

For this project, I chose the lovely neutral #748 Oatmeal Heather as the main color and paired it with beautiful, velvety red #751 Pomegranate Heather for the contrast color.

A sweet detail of the contrast color toe graft and the moss stitch across the bottom of the feet.

You’ll get to explore the following techniques while making these slippers:

  • knitting flat
  • knitting small circumferences in the round
  • cables
  • right and left twists
  • three-needle bind-off
  • picking up stitches
  • Kitchener Stitch
  • smocking
  • mattress stitch

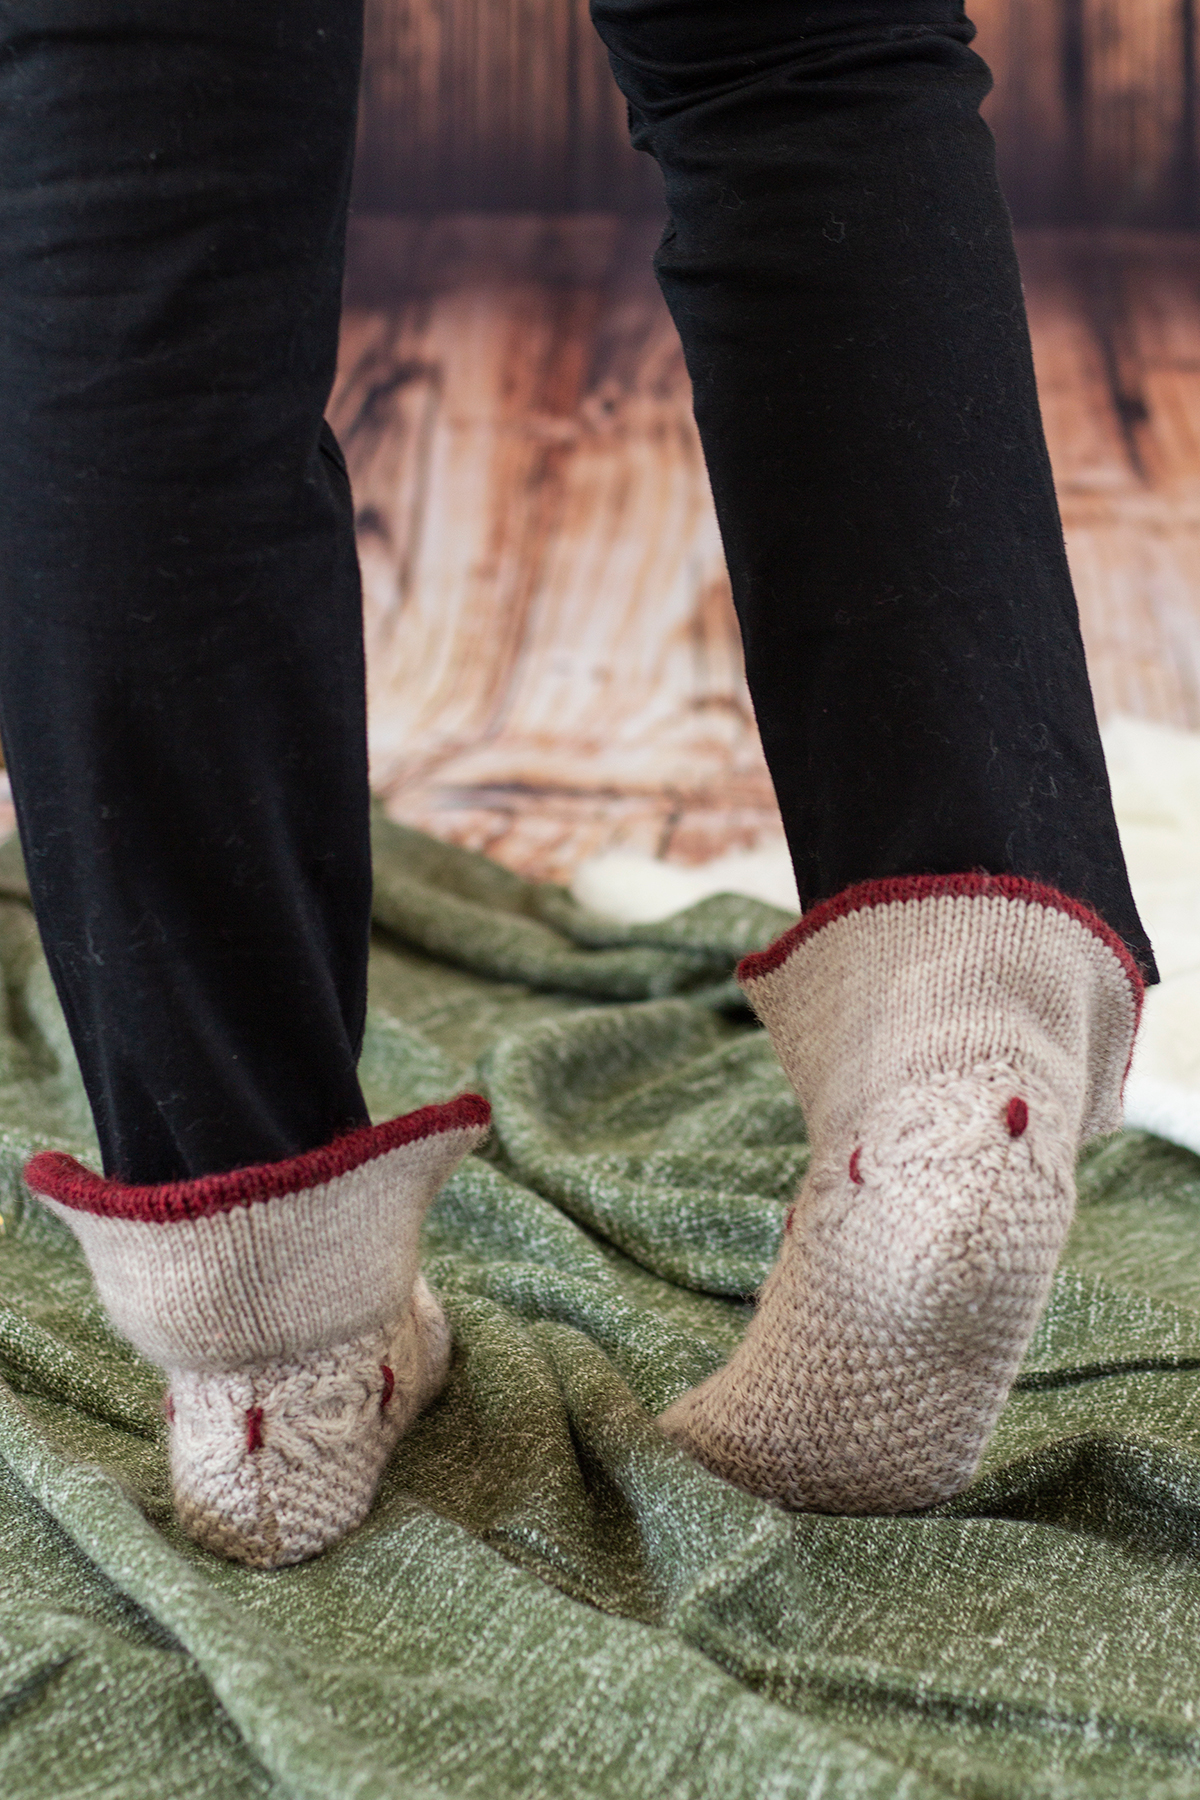
The By the Fire Slippers have an engaging, but deceptively simple construction. They begin by casting on what will become the heel, and that piece is worked flat for the width of the ankle, then the piece is joined in the round for the foot. Decreases are worked for the toe, and then the live stitches are grafted together using Kitchener Stitch and the contrast color. The back of the heel is sewn closed, and then it’s time to work the cuff. To create the cuff, stitches are picked up around the opening for the foot and worked flat using the main color. At a certain length, the contrast color is joined and continued flat. Loops are picked up with a spare needle from the picked-up edge of the cuff, and then the piece is folded inward and closed with a three-needle bind-off. The mattress stitch is used to close the front edges of the cuff. Finally, you add the special contrast color smocking and a slip stitch crochet edging to the front for a perfectly polished pair of slippers! As a helpful treat, we’ve created a video on how to work mattress stitch, so you’ll be ready to conquer this wonderful pattern!

I hope you enjoyed the video and feel prepared to finish your own By the Fire Slippers! They’ll make such a great gift for yourself or a loved one. My husband has already requested a pair, so I’m sure I’ll be making them again. Do you plan to knit these slippers for a loved one? Tell us for whom in the comments!


Remember, these exclusive kits can be purchased at local yarn store retailers near you. Not in stock at your local shop? Ask them about drop shipping – order through them, and we ship to you! Each kit comes with the pattern, the yarn required to make it, a mini Universal Yarn project bag, and stitch marker. Use our store locator to find your nearest Universal Yarn retailer!

Happy crafting!


Day 3 of Winter – Series 5 Edition

This is part 3 in a 12 part series highlighting designs from our 12 Days of Winter, series 5 Edition.

Do the evenings of winter inspire you to knit more? It’s certainly the case for me. I’ve always loved the magic of a starry night. I know the shorter days can cause some to feel weary, but I find a special type of comfort in the longer, colder nights. I love how early you’re able to see the glittering stars decorate the winter night sky. It’s so fun to point out beautiful constellations and cross your fingers in hopes of catching sight of a shooting star in the cool, crisp air.

The wintry skies of the north were my inspiration for the third installment of this year’s 12 Days of Winter Kit Collection, the Polar Nights Cowl, which I’m thrilled to share with you today!

In this kit, you’ll get to explore the following techniques:

  • knitting in the round
  • stranded colorwork
  • slipped stitches

As I mentioned earlier, I have always loved the starry skies of the winter. But more than that, I’ve also had a lifelong fascination with the polar regions of the world. Yep – it’s a dream of mine to visit both the Arctic and Antarctica and this year I came so very close. So close, in fact, that I’ve been able to tick the Northern Lights off my lifetime bucket list when I visited Alaska in September.

The experience of seeing the Aurora Borealis, or the Northern Lights, is one I’ll treasure forever. The trip, in general, was so impactful and special to me for so many reasons, and I was inspired to design something to remind me of it. Our 12 Days of Winter Kit Collection was the perfect fit for this design!

The Polar Nights Cowl uses three gorgeous yarns: Fibra Natura Donnina and Rico Design Essentials Super Kid Mohair Loves Silk held together as one and Rico Design Ricorumi Lamé DK held on its own. Donnina and Loves Silk held together in a deep, dark navy serve as the background. On their own, each yarn is incredibly soft, but when combined it truly creates a world of magic – Donnina’s plump, soft extrafine merino is pillowy soft, and the feathery mohair and silk blend of Super Kid Mohair Loves Silk adds an ethereal halo. The Ricorumi Lamé DK in a glistening gold is used to create the stranded colorwork motif that’s inspired by beautiful Norweigian Marius sweaters – yet another nod to the polar regions of our world.

I love the contrast between the gold and blue in this cowl. As the light hits the stitches, the shimmering effect is simply stunning. Dare I say this cowl is almost as breathtaking as a starry sky? It’s up for debate, but what certainly isn’t is how much you’ll love knitting this kit!

Here is what our lovely 12 Days of Winter Kits look like – perfect for scooping up as a gift for another knitter, or for yourself!

Remember, these exclusive kits can be purchased at local yarn store retailers near you. Not in stock at your local shop? Ask them about drop shipping – order through them, and we ship to you! Each kit comes with the pattern, the yarn required to make it, a mini Universal Yarn project bag, and stitch marker. Use our store locator to find your nearest Universal Yarn retailer!

Happy crafting!


Day 2 of Winter – Series 5 Edition

This is part 2 in a 12 part series highlighting designs from our 12 Days of Winter, series 5 Edition.

Have you ever been on a classic sleigh ride on a cold winter night? Maybe you’ve gone on a lovely horse-drawn carriage ride on a chilly day. If not, perhaps it’s on your wintertime bucket list? Whether you have or haven’t, one thing you surely need while gliding gently through the snowy woods is a set of woolly accessories to keep you cozy and warm, and the Sleigh Ride Set is a perfect choice!

The Sleigh Ride Set is knit using my favorite stash staple, Deluxe Worsted, which is a 100% non-superwash wool yarn. I choose colors 12282 Hunter Green and 40002 Millet for the design – the green provides excellent, earthy contrast, and the lightness of the undyed yarn is the perfect choice for showing off plump cables. In this set, you’ll get to explore the following techniques:

  • Knitting Small Circumferences in the Round
  • Cable Knitting
  • Ribbing
  • Making a Pom Pom
The hat is topped with a fluffy pom pom in the contrast color.

It’s no secret that I love the outdoors, so it always serves as great inspiration. My entire life, my favorite trees have been evergreen trees. I love that they provide a bit of color during the leafless time of year, are visually stunning with their variety of needle lengths (I mean, they have needles – and I’m a knitter, what’s not to love?), feature everything from adorable and small to impressively large pine cones, provide tasty pine nuts (yum!), and…my favorite thing about them…the amazing fragrance! So I can’t help myself – I look to them often for design inspiration and the ideas keep coming. In this case, they are the inspiration for the cable motif that decorates the hat and mitts. Ribbing that features a rope of cables serves as the trunk in the contrast color ribbing and cuffs, then the boughs begin during the main portion of both accessories.

Each mitt in the set mirrors the other one.

Doesn’t this set make you immediately cross your fingers for snow (especially if you live in a place that lacks snow, like me!)? I know snow is unlikely, but the mornings here have still been chilly. And now that it’s December, I’m finally in the mood for some holiday tunes and I’d love to share my favorites with you! Now I’m daydreaming about that sleigh ride – but with the extra magic of festive tunes in the background, all while wearing my delightful knit set!

My first pick is just plain fun. It reminds me of my childhood because it’s my mom’s favorite holiday song: Winter Wonderland by Bing Crosby. It’s also the perfect song for this accessory duo, after all, it starts:

“Sleigh bells ring, are you listening?
In the lane, snow is glistening
A beautiful sight
We’re happy tonight
Walking in a winter wonderland”.

I can’t help but smile when I hear this song. It literally makes me warm with joy and instantly in the mood for all things holiday – from decorating to gift-giving, to frolicking in the woods with my two pups, it truly captures the joy of the season.

Next up, another traditional choice for the season! I’ll be honest, I’m not the biggest fan of lyrical holiday music, with a few exceptions like the one listed above. Most of the time I prefer instrumental music to spark those festive feelings. And what better instrumental, classical music than the Nutcracker Suite by Tchaikovsky? I was never a ballerina, but I’ve always enjoyed ballet, and seeing The Nutcracker brings me much joy. I may not need to wear a hat and mitts during the event, but they’ll surely be a benefit while walking to the theater on a chilly night!

Looking for music to soothe your ears while knitting this gorgeous kit? My last recommendation is a go-to for me, but it’s definitely not quite traditional. Whether I am at work, relaxing at home, or even doing my everyday chores, I really enjoy listening to lo-fi music. The beats are so calming and help me focus. Lucky for us, there are some great options available on YouTube, like the perfect Lofi Christmas Radio by Lofi Geek. This is hands-down what I’ll most likely be listening to while I work on my gift-knitting this year. And, tying this all back to the Sleigh Ride Set – this would truly be a fabulous gift, as a kit or as the actual hand-knit items!

Are you a fan of seasonal music? What do you love to listen to while knitting gifts? Let me know in the comments!

Remember, these exclusive kits can be purchased at local yarn store retailers near you. Each kit comes with the pattern, the yarn required to make it, a mini Universal Yarn project bag, and stitch marker. Use our store locator to find your nearest Universal Yarn retailer!

Happy crafting!


Natural Dye Series: Goldenrod & Deluxe Worsted Naturals

Hi everyone! It has been a while, and by that, I mean literal years since I’ve shared some of my adventures in natural dyeing. In the past, I’ve shared posts about dyeing with lichen, marigold, and even azaleas (link to other posts in our Natural Dye Series), but today we’re going to take a look at one of my favorite sources for natural dye: goldenrod!

I recently learned that goldenrod is often mistaken for ragweed, a plant guilty of causing brutal allergies. It’s interesting because the two look dramatically different in my opinion, but apparently the confusion exists! I’ve heard this from our own AJ, and just over the weekend, a friend of mine told me the same thing. That’s too bad because goldenrod is a beautiful plant that attracts pollinators, and it deserves all of the love. The sight of these yellow flowers along the roadside always brings me joy and gives me the itch to dye yarn. Our office happens to be extremely close to some fields of goldenrod that bloom in late October, so I couldn’t resist the opportunity to cut some flowers and play!

Unlike my previous posts about natural dyeing, this time I wanted to try something different, so I opted for our 100% non-superwash wool, undyed Deluxe Worsted Naturals. A woolly classic, this yarn comes in five gorgeous natural shades – from light cream to deep brown. Their heathered appearance got me wondering how neat would it be to see how they compare when dyed together. I certainly wasn’t disappointed!

Although 40001 Cream would make a great base for dyeing, it’s pretty similar in color to our Ready to Dye selection and I really wanted to try something different. So for this experiment, I chose 40002 Millet, 40003 Musket, and 40004 Pewter. I figured these shades would yield the most interesting results thanks to their heathered appearances. They work well together as a gradient undyed, and the natural dye made that gradient all the more magical!

I’m not going to get into a tutorial today, because I followed the same steps I used for marigold dyeing. You can see that post for instructions here (link). I will say the primary difference is that I left some of the greenery on the plants, created the dyebath, and strained it before adding the yarn. Since I dyed three skeins or 300 grams, I needed at least 300 grams of goldenrod to ensure the dye would be saturated enough to have an effect.

Honestly, I’m so smitten with the results. I can’t believe how beautifully they turned our – er, I can, but I’m still awestruck! I want to drop everything and knit a beautiful scarf, cowl, or shawl that takes advantage of the gradient. They make such a beautiful trio. Let’s take a look at how each skein compares to its undyed counterpart.

40002 Millet

Starting with the lightest we have 40002 Millet. This will always be one of my favorite shades of Deluxe Worsted. It took the dye like I expected. It is the brightest of the bunch and most closely resembles the goldenrod blossoms.

40003 Musket

Next, we have 40003 Musket. I think I prefer this result over the Millet – it just has a bit more depth to it that I find very interesting. The gold reminds me of whole grain dijon mustard (yum!) and I’d love to see this knit up into some plump cables.

40004 Pewter

Finally, we have what must be my favorite: 40004 Pewter. I mean, wow! This was the hue I was most unsure about. I wondered whether the dye would really show up at all. To my pleasant surprise, it certainly took and created a color that reminds me of antique brass.

Top to Bottom: 40002 Millet, 40003 Musket, 40004 Pewter

And there you have it – the results of my exploration in dyeing with goldenrod and Deluxe Worsted Naturals! Which color is your favorite? How would you knit or crochet them? Let me know in the comments!


Knitflix: Halloween Edition

Happy Halloween, folks! We have a few days left of what is the official spooky season. No October would be complete without movie marathons. Whether you’re into feel-good Halloween flicks from your childhood or classic horror, I’m sure you have plans to watch something festive this weekend. I know those of us at Universal Yarn certainly are! So, today we wanted to share what we’re watching and some yarns and projects inspired by those flicks. Our design team – Aubrey, AJ, Heather, and I – are ready to share some of our favorites with you!

Aubrey

“Although I can happily admit I don’t love horror movies, I DO love film and television that has a dark or spooky undertone to it. Combine it with comedy, and I am sold. The Addams are a satirical take on the idealized 20th-century American family, and arguably the best part about them is that they are very much unconcerned with the fact that people find them bizarre or scary. Growing up, I would watch the television show with my parents, and Morticia Addams quickly became an icon of mine for various reasons. She’s stylish, passionate about her family, independent, and confident in herself, which are all qualities I admire. Also, this femme fatale was a knitter! Remember the 3 legged romper?


The 1993 film Addams Family Values is one of my favorites to watch around Halloween, and so I thought I’d share a couple of knitting patterns that I think will help anyone channel their inner Morticia. A dramatic silhouette I could see Morticia loving would be a cape. For our Elevated Essentials collection, I designed the Moria Cape, knit using 100% non-superwash wool Deluxe Worsted.

This cape was a lot of fun to design, and the black and gray color-blocked panels give it a very modern touch. It has a trapeze shape, with an open front and armholes that make it easy to wear out and about. I believe everyone deserves some statement outerwear pieces in their wardrobe, and this cape is meant to be exactly that! Pair this with a billowing blouse or dress and you have a very Morticia-esque silhouette. This pattern combines cable work and shaping, so it is on a more intermediate level. It is worked in pieces and seamed to ensure it lasts for years to come.

Though we might not design our patterns with characters in mind, it is so much fun to think about a character you love and what they might enjoy making and wearing. Morticia Addams certainly seems like the type of woman who would love to make herself some FABULOUS knitted sweaters and accessories!”

AJ

“I have watched Hocus Pocus every year for Halloween since I was a kid. Don’t get me wrong, there are plenty of other movies that I love for the season, but this film feels like tradition at this point. My household has watched it enough that my husband and I will spout off goofy quotes like “Dead Man’s Toe!” to each other year-round for absolutely no reason.  I know – I’m weird. So anyway, that’s why I love this adorable Witch Legs Scarf pattern by Chelsea Roberts! It has an iconic style spotted in movies like The Wizard of Oz and in Hocus Pocus that just screams “Witch!”

A great yarn to use is our Uptown Worsted, which comes in plenty of vibrant colors and is made in an Anti-Pilling Acrylic that is ultra-soft and super easy to care for.  Because of the price-point and variety of color options, this makes for a great gift to thank hosts of Halloween parties, or simply a fun quick project to whip up and wear while passing out candy year after year.  I myself received this scarf as a gift during my Craft Guild Fall Gift Exchange, and I wear it for our October Guild Meeting for a bit of quirky costume fun!”

Heather

“I tend to spook easily, so I’m not a big fan of scary movies. However, I have to tip my hat to a classic B-grade horror flick from 1962 called The Brain That Wouldn’t Die. I stayed up watching the late-night creature feature at a friend’s slumber party after everyone else went to bed. A mad scientist keeps his fiancee’s head – and just her head – alive after a car wreck.

You’d better believe this blew my tiny mind.  Even now, when I see people in thermal hoods, I think of it.  However, this movie did kindle a love of truly awful movies in me, so I thank it for that. For the Brain that Wouldn’t Die, I keep wanting to make a balaclava, for obvious reasons! But to keep it from creeping me out, I think I’d turn the idea on its head (pun intended!) and go with Picklehead by Suzen Statz, designed in Uptown Worsted!”

Rachel

I think I may be the only one here that LOVES horror films. So does my mom, so that’s probably the reason behind it. I’ve been watching horror films since I was probably a bit too young to handle some of them. Even if they were off-limits, I remember sneaking behind the sofa in the living room to take a peek while my mom enjoyed them. I watch scary movies all year on a regular basis – rewatching favorites and savoring the new ones, regardless of whether they’re ridiculous or legitimately good (don’t even get me started, there are too many to name!). My pick for this Halloween is an absolute classic: Stanley Kubrick’s The Shining. Everything about this movie is great – the visuals and cinematography, ominous music, pace, and the psychological and supernatural tension throughout.

Regarding visuals beyond the set, the costume design is chock full of excellent sweaters. I’ve wanted to recreate several of the sweaters donned by Jack and of course, we can’t overlook (oh yes, the Overlook) Danny’s Apollo 11 sweater. (Take a look at this excellent project by Sabrina Magazine).

However, one of the most iconic images in the film is the carpet. It’s eye-catching, graphic, and unforgettable. So thank goodness The Shining blanket by Kraftling exists. This is described as a beginner-friendly pattern which is great because I know my crochet skills aren’t polished yet. The moment I spotted this pattern I knew it had to go on my “to-make” list – perhaps by next Halloween? For the blanket, I’d use Deluxe Worsted Superwash. Although normally I’m a non-superwash gal, I have to say that I like my homewares easy to care for. You can wash and dry this yarn on low heat without the concern of felting. Easy peasy!

So that’s it for our Halloween movie picks this year! Do you indulge in spooky movies each Halloween? What are your favorites? Do you have any projects recommendations to go along with them? Let us know in the comments!

Have a safe, spooky, and fibery Halloween!


Pattern Spotlight: Lipsky

Happy Thursday! Today I’d like to spotlight a pattern I designed that was recently published in the Deep Fall 2021 issue of Knitty. It’s bright, a little quirky, and a ton of fun to knit. Say hello to Lipsky!

I designed the Lipsky (pattern link) vest in late June and knit this baby in less than two weeks. Sure, part of this was due to a fast-approaching deadline, but it’s also because it’s simply a fast project! Amy Singer and Jillian Moreno, the geniuses behind Knitty, asked me to create a vest that’s perfect for layering. While vests have traditionally been worn in more preppy or minimalist fashion, the Lipsky vest is quirky and contemporary. A leading trend this fall is the statement vest and Lipsky celebrates it by incorporating other trends such as color blocking and checkerboard patterning.

I chose DK-weight Fibra Natura Dona for the project. This plump and super soft extra fine superwash merino yarn features a broad palette of deeply saturated colors. I whipped up a quick sketch with colored pencils, but I wasn’t confident in my color selection. I asked Talya, the creator of our videos, TikTok content, and Reels, to give me her opinion. Together we came up with the combination of #102 Daffodil, #119 Clear Day, #127 Real Teal, #114 Camellia, and #135 Buttercup.

This vest incorporates a variety of colorwork techniques. You’ll pretty much get to dip your toes into everything! It includes intarsia worked flat and in the round, stranded knitting, and a touch of stripes. Don’t be intimidated, though! The intarsia is completely uncomplicated and the stranded colorwork is a breeze to memorize.

One concern I had while designing was that the intarsia portions at the top would be jarring with the different colors used in the stranded colorwork portion. My solution to this was simple – pepper the edgings with the teal and vibrant pink, and add stripes of sky blue and yellow to the hem. Incorporating these colors together in this manner helped to create harmony throughout the piece. It’s those details that really make me love this vest.

While I tend to be partial to seams because of the structure and longevity they provide, I know that many knitters prefer seamless, top-down sweaters. I wanted to give the people what they want, so I switched up my norm and designed Lipsky to be top-down and seamless. You start at the shoulders, working the back first and then returning to the shoulders to pick up stitches for the left and right front. After you complete the neck and armhole shaping, you’ll join the fronts and back, then work in the round for the rest of the vest.

And there you have it – a quick rundown of my new pattern! I’ve been so excited to share this project with you and hope you find it to be just as playful and fun as I do!

Do you love statement projects like this one? What colors would you choose? Let me know in the comments!

Happy crafting!


Pattern Spotlight – Pebbled Pathways

Have you seen our recently published free pattern, the extra special Pebbled Pathways in Cobblestone? Well, today we’re going to give it some well-deserved spotlight!

Pebbled Pathways (pattern link) has been in the works since late Spring, and I am so excited to finally be able to reveal this unique, gorgeous pattern! It is designed by Gabi van Tassel, who is known for her stunning pin loom designs. Her work has been published regularly in weaving publications, including Little Looms and Handwoven magazines. We touch base on a semi-regular basis, and she always has wonderful things to say about our yarns and is such an enthusiastic fiber artist. As soon as we received Cobblestone, I knew I wanted to partner with her for a truly special project. I essentially sent her yarn, asked for some kind of wrap, and this colorful stole is the result! But, in addition to asking her to create this design, I asked her to write a guest post for our blog. So enough of what I have to say…let’s hear from Gabi herself!

From Gabi:

“It was a thrill when I received a small package from Universal Yarn a few months ago, with some brand-new Fibra Natura yarn and the question “Would you like to weave something with this?”  I sure would! 

Cobblestone in #102 Precious Jewels

But let me quickly share with you how we got here: Among other crafts, I like to weave hexagons on pin looms. My first design using Universal Yarn was a Grape Table Topper, published in Easy Weaving with Little Looms 2018. I used Universal Yarn Classic Shades [now discontinued, but Colorburst is a great substitute] at the time, which provided the perfect color run to express grapes.  

Other projects have followed since then, including the recent Raffiametry placemats in Easy Weaving with Little Looms Summer, 2021 using Yashi and Yashi Iro, the best raffia yarns that I’ve seen so far.  

Back to the package that I received: The yarn was a sample of the new Cobblestone yarn, which hit me like a rocket with inspiration. The name reminded me of the old streets in Germany, where I grew up. I always loved the calming geometry of those streets, and I often thought about how each of these stones was carefully put in place by skillful crafty hands. I wanted to capture that meditative thought in a shawl with the new yarn.  

In case you are not familiar with pin loom weaving, it is a form of weaving where the crafter uses a small handheld loom to create shaped fabric pieces. Traditionally, pin looms wove 4” squares, but today there are many shapes, including rectangles, triangles, diamonds, and hexagons, in multiple sizes.  

Just because these looms are small, doesn’t mean that you can’t craft serious projects. Pin loom weaving is modular weaving. Join the smaller woven units to make any item that you can imagine … for example, Pebbled Pathways!

Hexagon Pin Loom

The shawl is designed to make the best use of two balls of Cobblestone. The put-up is a generous 200-gram ball boasting 612 yards of 2-ply, 100% merino wool. The project requires one ball each of colors 103 Mardi Gras and 104 Tulip, with about 1 oz of each left over in the end.  You can choose any other two colors of course. I recommend that you pick colors with contrast, to maintain the cobblestone characteristics in the design.   

Weaving is easy. All of the hexagons are plain weave, worked on the Original TURTLE Loom™ in “F-fine sett”. The vivid color changes of the variegated yarn make each hexagon unique. The colors are well-curated and distributed in a way that the hexagons blend in with each other to make a smooth fabric. 

The yarn is a delight to weave.  It is soft and glides well while pin loom weaving. It has just the right amount of elasticity, not stiff and not too stretchy. The light twist is perfect to gently bloom into a nice, soft fabric with a good drape.   

Crafters sometimes hesitate the task of joining pin loom woven shapes. However, hexagons are actually easy to join because they have smooth edgings. The sides are short enough to hold by hand: just match up two hexagons by their sides and sew them together with about 10-12 whip stitches. 

If you would like some help with joining hexagons, check out the video “Joining 101: Sewing Two Hexagons Together” (https://youtu.be/PuD2wv1DdIo). Or, if you are interested in the mattress stitch, see the joining part of “Making an Elf Basket”. 

If you don’t feel like weaving through two whole balls of Cobblestone, let the modular character of pin loom weaving come to the rescue! You can make a slimmer wrap by weaving only four rows instead of six (blue marks). 

You can shorten or extend the length of the shawl by easily adding or subtracting a repeat of three hexagon columns (green marks).  

Or – if you wish to make a small project at first – you can make a cowl, two rows high and nine hexagons in the round (yellow marks). Now, if you decide to make a cowl … and you like it … make another one for a friend … make a few as holiday gifts … Did I mention that there is a rabbit hole here? 

Universal Yarn Universe
Sparkle Windows woven scarf by Amy Gunderson

Many of Universal’s yarns are well-suited for weaving, and the Pebbled Pathways wrap just might be the beginning of more “oh, look what you can make” weaving projects. There is already Amy Gunderson’s beautiful Sparkle Windows shawl in Universe.

Next, Bamboo Pop is a popular yarn in the rigid heddle looms community because of its ease to weave, the lovely drape, and the stunning color effects. Then, there is also Ravello for a project with a touch of luxurious cashmere. Or, you could try the very practical Rico Design Creative Bubble that inspires pin loom woven kitchen and bath accessories. 

Got a loom? Let’s weave! “

Me again (Rachel)! I’m so glad Gabi was able to share not only this beautiful design, but her thoughts on the inspiration, our new Cobblestone yarn, and even more yarns to explore weaving with! We have a small, square pin loom here in the office, and I am pretty tempted to start playing with it. The idea of a fringed scarf or cute cowl is awfully tempting!

I hope you love Pebbled Pathways as much as we do. Have you woven before, or are you now inspired to? Let us know in the comments!


Free Pattern Friday – Autumn Oak

Happy Free Pattern Friday!

Aubrey looking spectacular in the new Autumn Oak Hat!

It’s September, which means the official end of summer is mere weeks away and the season of all things woolly is upon us. For me, that means hats, hats, and more hats! I’m sure I’ve said this before, but hats are one of my favorite things to design and knit. I love everything about the process – they’re an excellent playground for a variety of techniques, quick to work up, and make wonderful gifts. That’s why I’m thrilled to share my latest design with you: the Autumn Oak Hat (pattern link).

The large leaf motif nods to the rounded lobes of White Oak leaves.

Autumn Oak is knit using plush and cozy Posh Alpaca, a blend of wool, superfine alpaca, and acrylic. This single-ply yarn is a super bulky weight but feels surprisingly light and springy. The palette is full of gorgeous neutrals and autumnal hues, and the colorway that simply sings to my heart is #112 Carotene, used in the Autumn Oak Hat. Orange, especially burnt orange, is perhaps my most favorite color, so I knew I needed to design something with it. This autumnal orange immediately conjured images of brilliant fall foliage, especially that of oak trees.

Fiery, red-orange leaves of a White Oak tree.

The Autumn Oak hat features a singular, large leaf motif that simply pops off the background of reverse stockinette stitch. It is complemented by twiggy lace motifs around the rest of the hat. These elements make this an engaging pattern that offers a bit of a challenge in a small package – again, hats are a perfect playground for learning new skills!

The lace motifs flow elegantly into the crown shaping, making this piece look great at every angle. It’s topped with a fluffy pom pom, and let me tell you, Posh Alpaca makes a really plush and fluffy pom pom!

Even though Posh Alpaca only contains 98 yards, it goes a long way. This hat is just a one-ball project, even with the pom pom. It works up fast, so you can knit one for yourself and for your friends and family in no time! It would look gorgeous knit up in any of the other colors, but I’d love to see versions of it using the colors inspired by trees: #101 Birch, #102, Oak, and #111 Hemlock. Whatever color you choose, you simply can’t go wrong!


I hope you love this hat as much as I loved designing it. Let me know which color you’d choose in the comments!

Until next time, happy crafting!


Joyful Stitches in Deluxe Bulky Superwash

Today I’m excited to introduce our latest collection of patterns: Joyful Stitches! The e-book contains six quick-knit projects using Deluxe Bulky Superwash.

At this point, it goes without saying that the past year has been tough on the world with the presence of coronavirus. We have all made big adjustments in our lives, and with social distancing in mind, many of us have been spending more time in the comfort of our homes. The needle arts industry has seen significant growth throughout this time. More and more people are dipping their toes into the world of knitting and crochet, and as a company, we’ve said “hello” to many new customers, even during a time of so much self-isolation. It’s not surprising, either. Longtime crafters know how knitting and crochet can introduce comfort during times of stress, and newbies are figuring that out!

Streetlight in Deluxe Bulky #933 Sweatshirt Grey, #906 Marigold, & #932 Icy Grey

With all of that in mind, Joyful Stitches was born! My plan for this collection was simple: create fun staple items that are a breeze to knit. These patterns feature knit and purl stitches only, but introduces basic shaping and knitting in the round, too.

Why Deluxe Bulky Superwash? Many new knitters enjoy using heavier-weight yarns. It’s very easy to see stitches clearly and the pieces work up at a satisfying speed. Our Deluxe Bulky Superwash is 100% wool that’s machine-washable, making it easy to care for. Whether you’re knitting for the first time or you’re a longtime knitter, you’ll love working with this plump, bouncy wool yarn. Now that you know why we chose this yarn as the foundation of the collection, let’s take a look at the patterns!

Gene in Deluxe Bulky Superwash #939 Burgundy, #917 Summer Sky, & #916 Nitrox Blue

I’m going to introduce these patterns in order of ease and skill level, starting with Gene. Although it’s probably the simplest pattern in the collection, it might just be my favorite. I love the bold colors and graphic stripes, which were inspired by Color Field painter, Gene Davis. All you need to know for this pattern is how to work the knit stitch – that’s really it! Worked sideways, you cast on the length of the scarf. That makes it super easy to modify. I’ve written the pattern for two lengths, but you can easily make the scarf shorter by casting on fewer stitches. After you’ve cast on, all there is to it is knit a few rows, change colors, and repeat. This garter stitch glory will be your go-to winter accessory!

Damson in Deluxe Bulky Superwash #919 Purplish Blue

Next up we have Damson. I’m categorizing this pattern as slightly more difficult than Gene, simply because you’ll need to know how to both knit and purl, plus you’ll get to apply fringe at each end of the scarf. Damson is blanketed with Moss stitch – a personal favorite of mine. This simple texture is created with a four-row repeat that you’ll quickly memorize. It creates a gorgeous, reversible texture, making it easy to style and wear. If you’ve never made fringe before, you’re in for a treat. Fringed scarves have a boho feel, but personally, I also think fringe makes the scarf look more “complete”. Like Gene, Damson is easy to modify. I’ve also written this one to have two lengths, but you can customize the length of your scarf by simply stopping when you reach your desired length or just keep on knitting for a scarf length that will remind you of the Fourth Doctor (minus the amazing stripes, of course).

The Checkmate Mitts in Deluxe Bulky Superwash #935 Ebony and #928 Pulp

Next up, the Checkmate Mitts. The shape and construction of this pattern are incredibly simple: make a rectangle, fold, sew the sides leaving room for the thumb, and repeat to make two mitts! If you enjoyed the easy pattern repeat of Damson, you’ll probably enjoy these mitts, too. Pairing a simple textured pattern with stripes and the effect is simply mesmerizing, creating the illusion of vertical and horizontal stripes. This pattern was inspired by the stitch patterns included in Cecelia Campchiaro’s genius book, Sequence Knitting. Sized for children and adults, the Checkmate Mitts are a perfect gift-knit. One ball of each color will be enough to create more than one pair – make a pair for yourself and for a loved one. Double the fun!

Bruna in Deluxe Bulky Superwash #920 Grape Taffy

Ready to knit in the round for the first time? Look no further than Bruna! I personally love a big, cozy cowl and this one ticks all of my boxes. It fits fairly close to the neck, yet leaves enough space for a bit of drape and breathing room. The depth is perfectly suited for folding inwards to create an additional layer of warmth, too. Bruna is comprised of a broken rib formed by a two-row repeat. This project is perfect for knit nights or catching up on your favorite tv show, as you can seamlessly knit across each round, never stopping to turn your work!

Streetlight in Deluxe Bulky Superwash #933 Sweatshirt Grey, #921 Honeysuckle, & #932 Icy Grey

Once you’ve tackled Bruna, you’ll be ready to start your first hat project! Streetlight is a fun hat that will introduce simple shaping to your knitting toolbox. All of my favorite hats feature a deep, folded brim and Streetlight is no exception. Add a bit of color blocking and a fluffy pom pom and you’ve got a simple hat that still makes a statement! Although these days I’m predominantly a sweater knitter, I love knitting hats. They are fast, addictive, and are honestly the perfect gift. Hats are also great for charity knitting, so be sure to explore your local area for organizations that accept donations for wintry accessories! (If you don’t have a donation site locally, consider donating to the Charlotte Region Arts, Fibers, & Textiles (C.R.A.F.T.) who is currently running a community project and is accepting red hats to support a community blood drive!)

The Checkmate Shawl in Deluxe Bulky Superwash #935 Ebony and #928 Pulp

Rounding out the Joyful Stitches collection is the Checkmate Shawl – a perfect companion for the Checkmate Mitts! This shawl is the largest piece in the collection, and while it is simple, it introduces shaping while maintaining a stitch pattern. If that sounds complicated, don’t stray too far! This shawl begins by casting on at the widest edge and simply repeating the same eight rows until you reach the point. Easy peasy! I opted for tassels on each point for a touch of drama, and it really completes the look.

I hope you’ve enjoyed taking a peek at Joyful Stitches! Each pattern in the collection is available now at 15% off the normal price until Sunday, 9/22/2021, so act fast! Save even more when you purchase the entire e-book on our website, too!

I’d love to know which pattern is your favorite. Do you plan to knit any of these projects for yourself, a loved one, or charity?

Happy crafting!