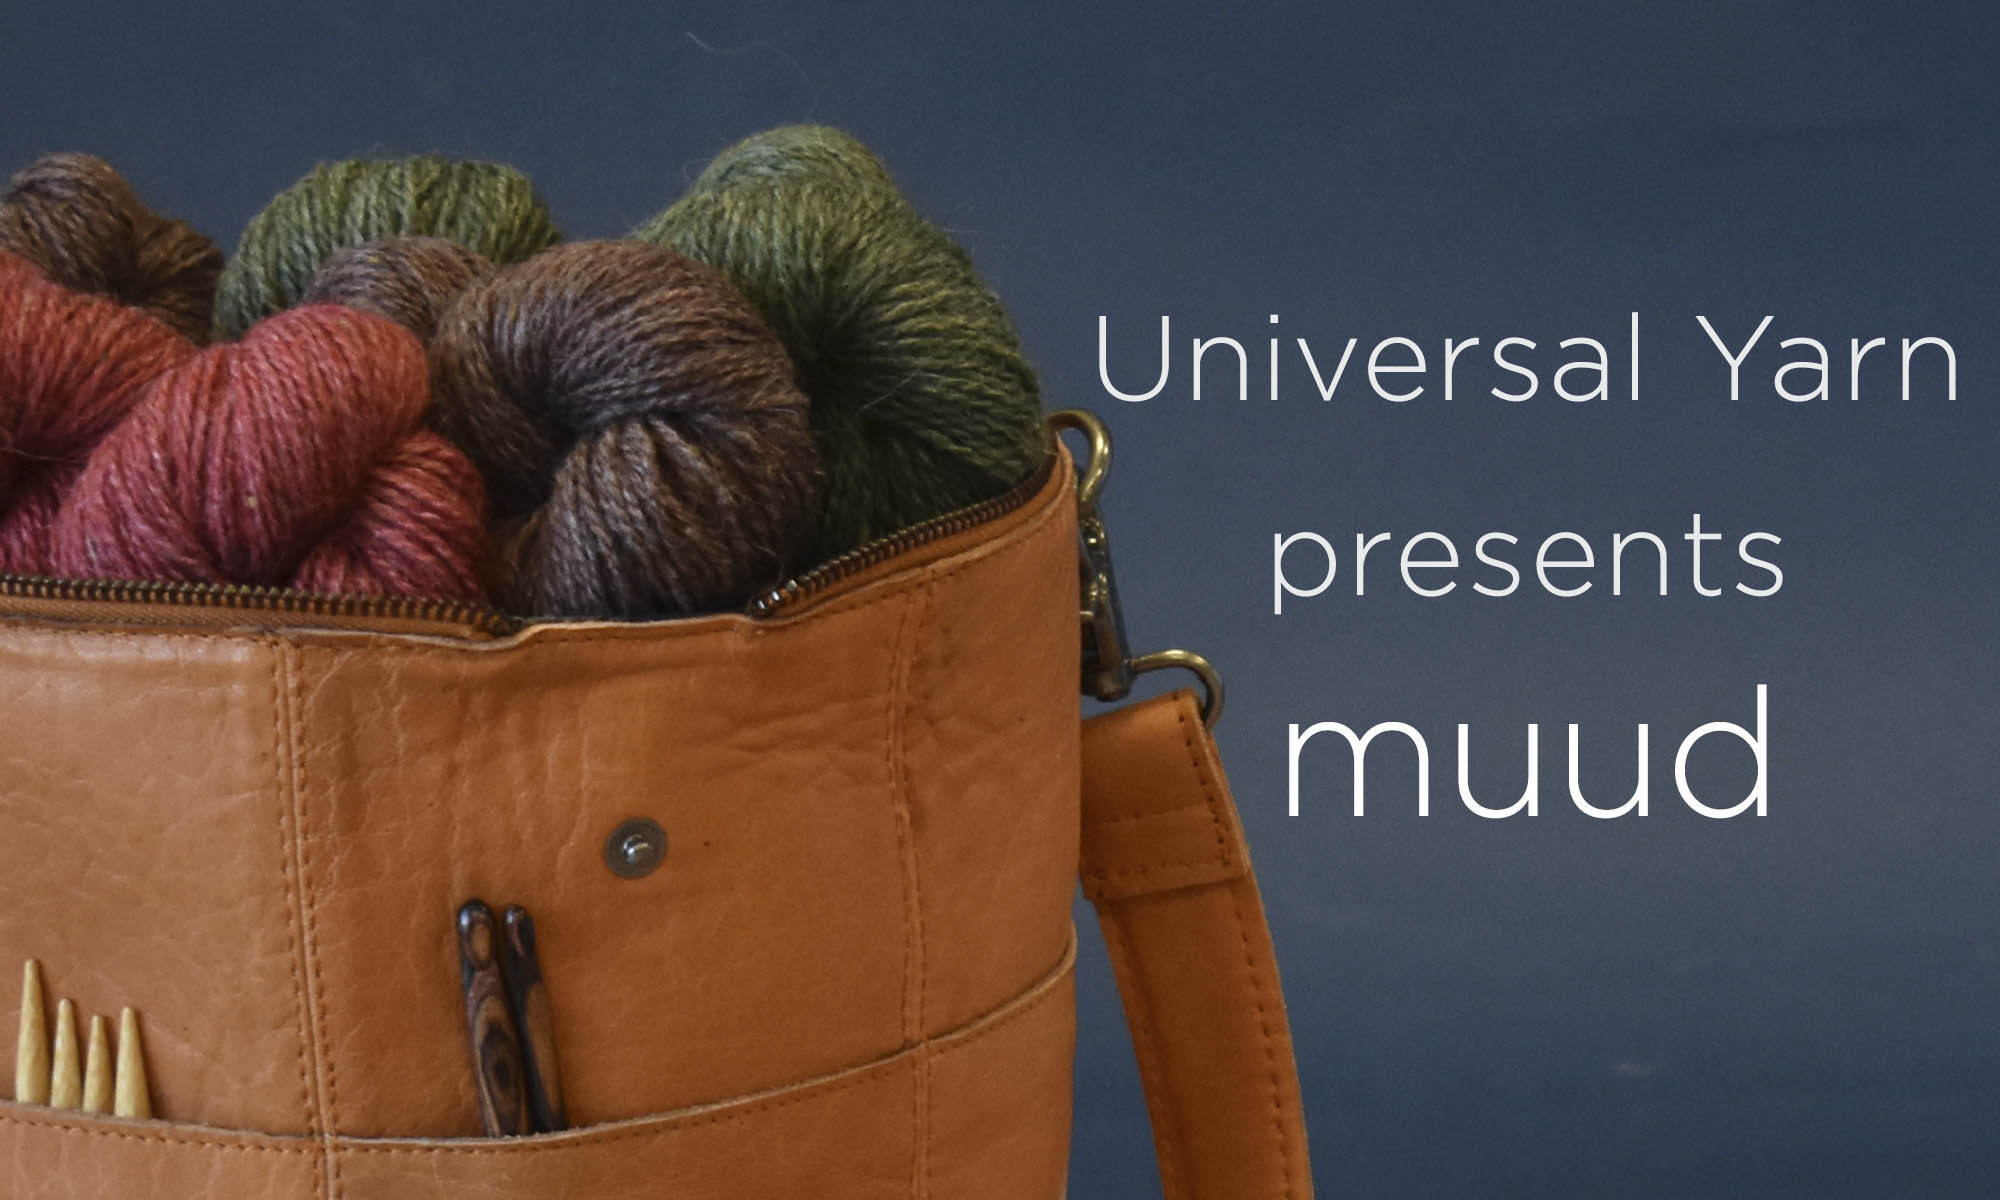
If you have popped by our website in the last week, you might have noticed a new addition. We’ve added an exciting new line of handcrafted leather goods perfect for the crafting lifestyle. Muud is a Danish brand, and we’re so excited to be a retailer for their products in the United States. From project bags to chic storage solutions for your notions, you’re sure to find something you love.
Today, I wanted to share a few of the products that have quickly become essentials for my knitting.
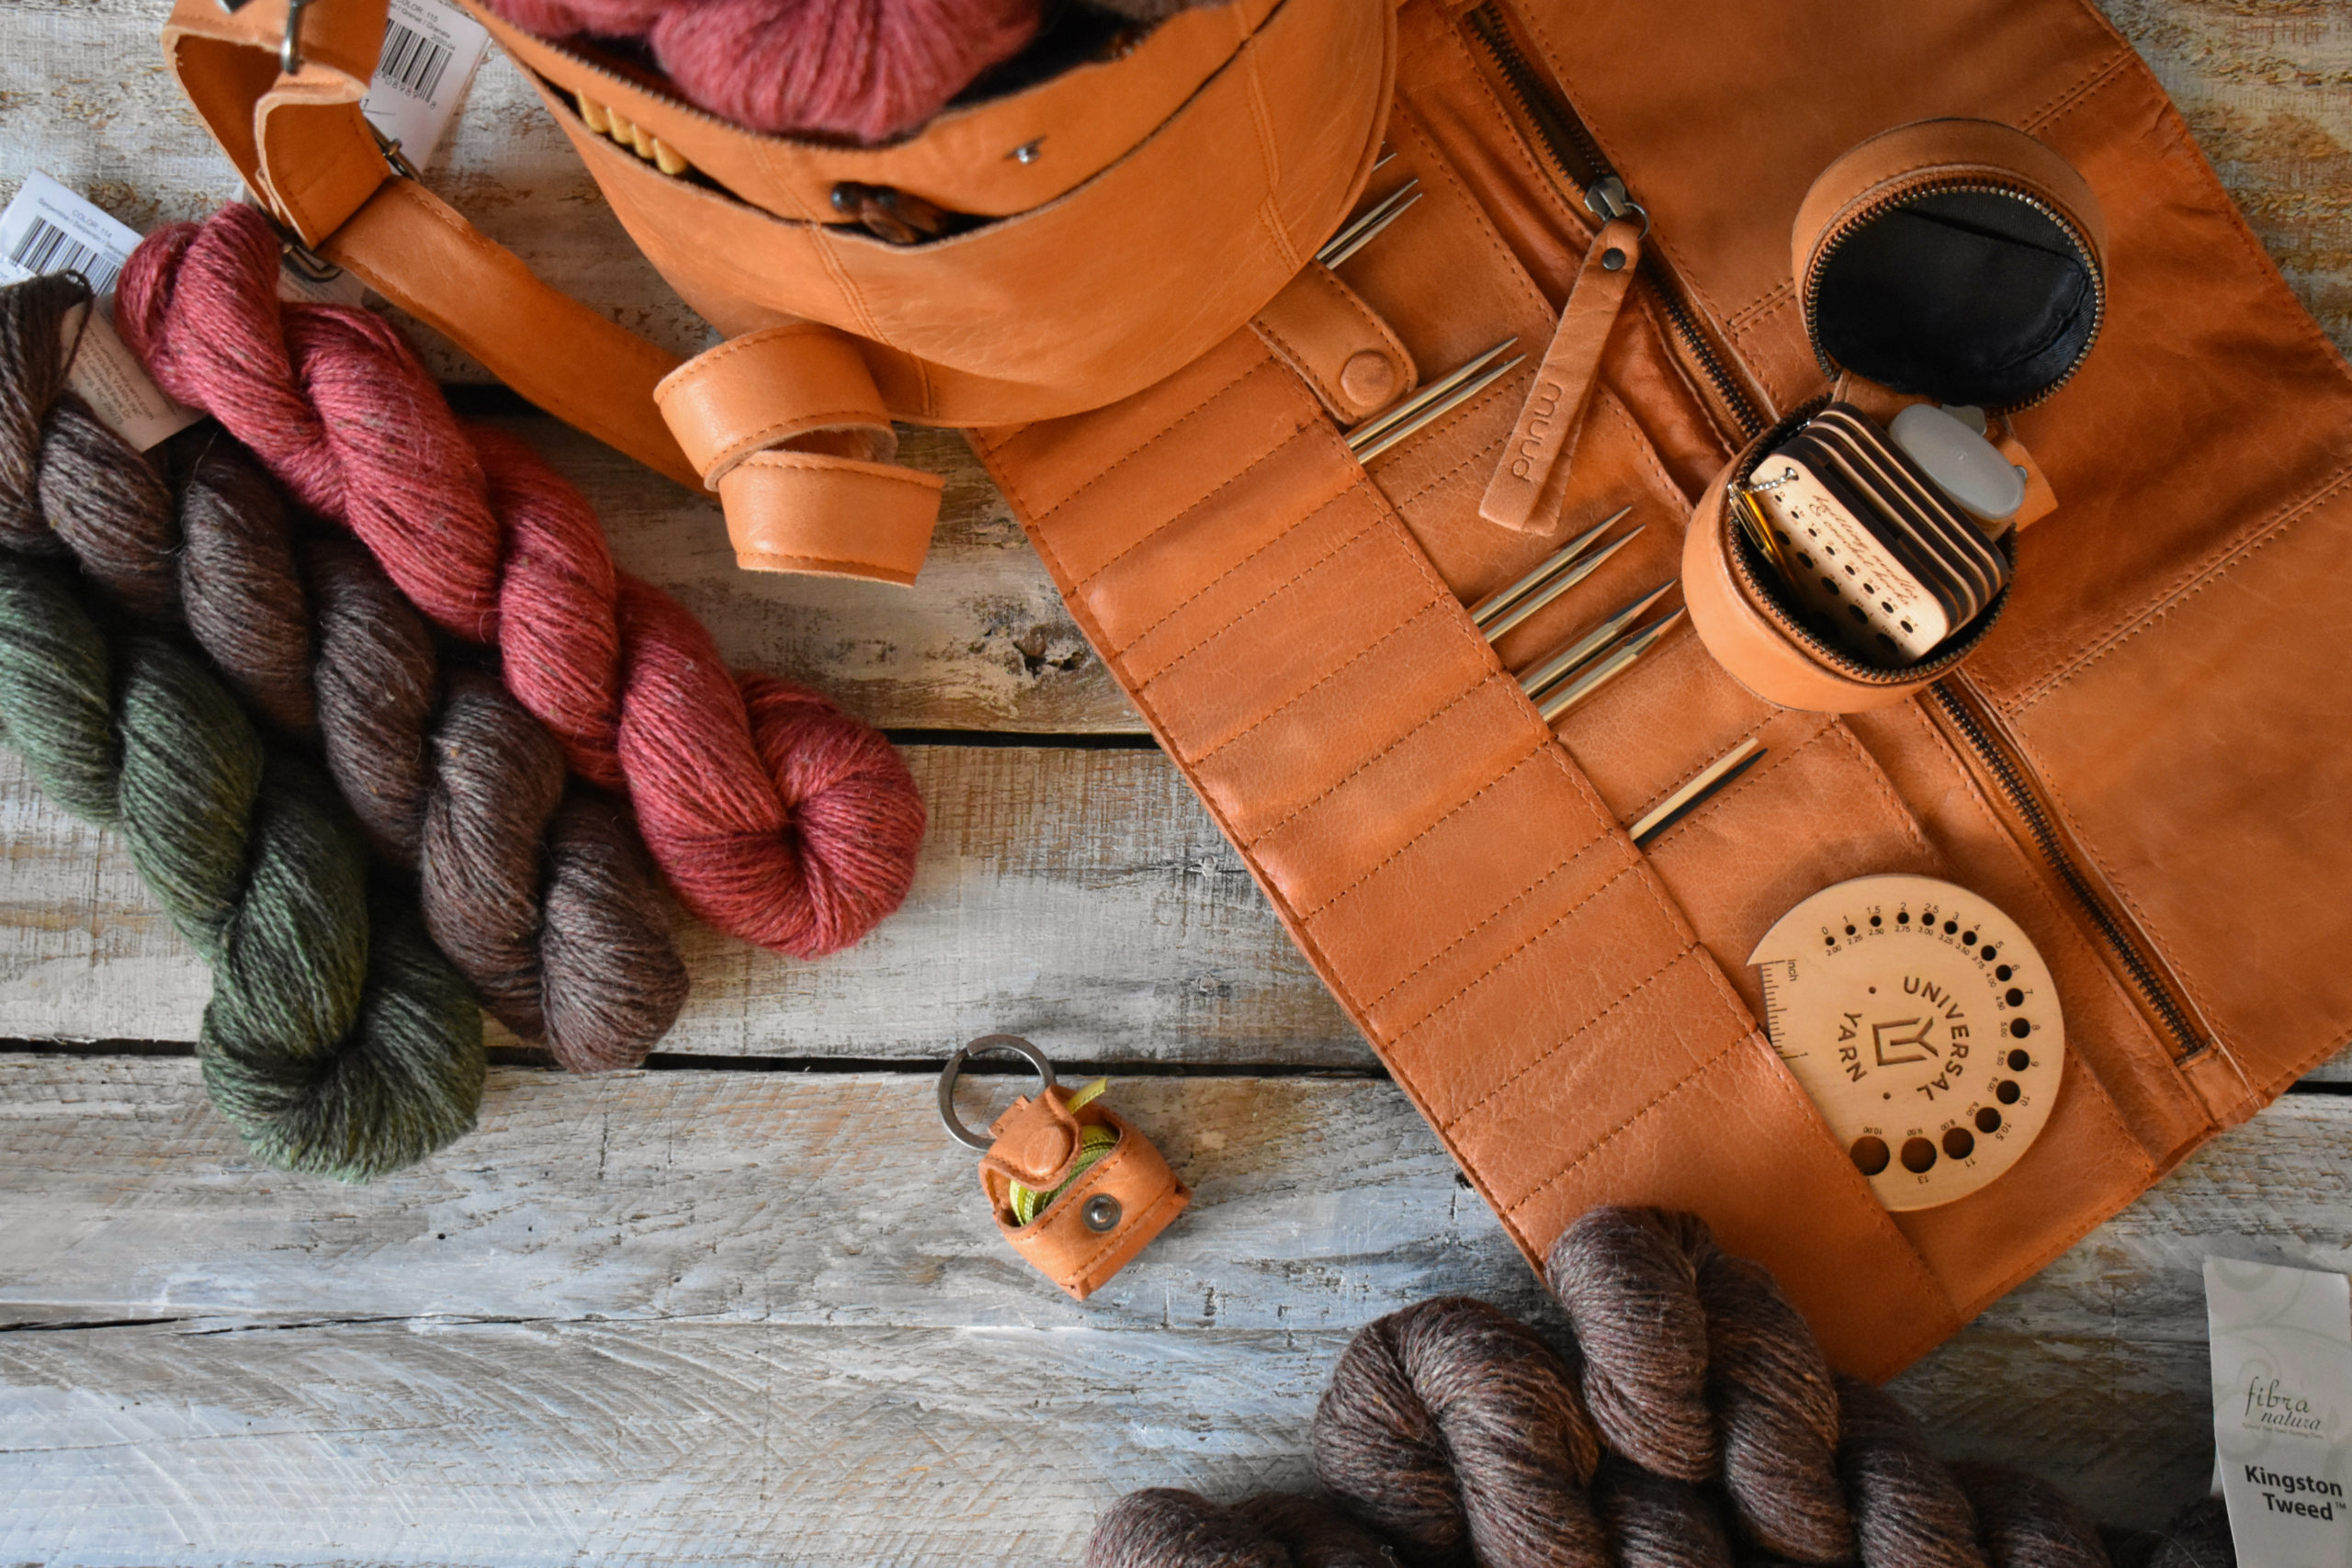
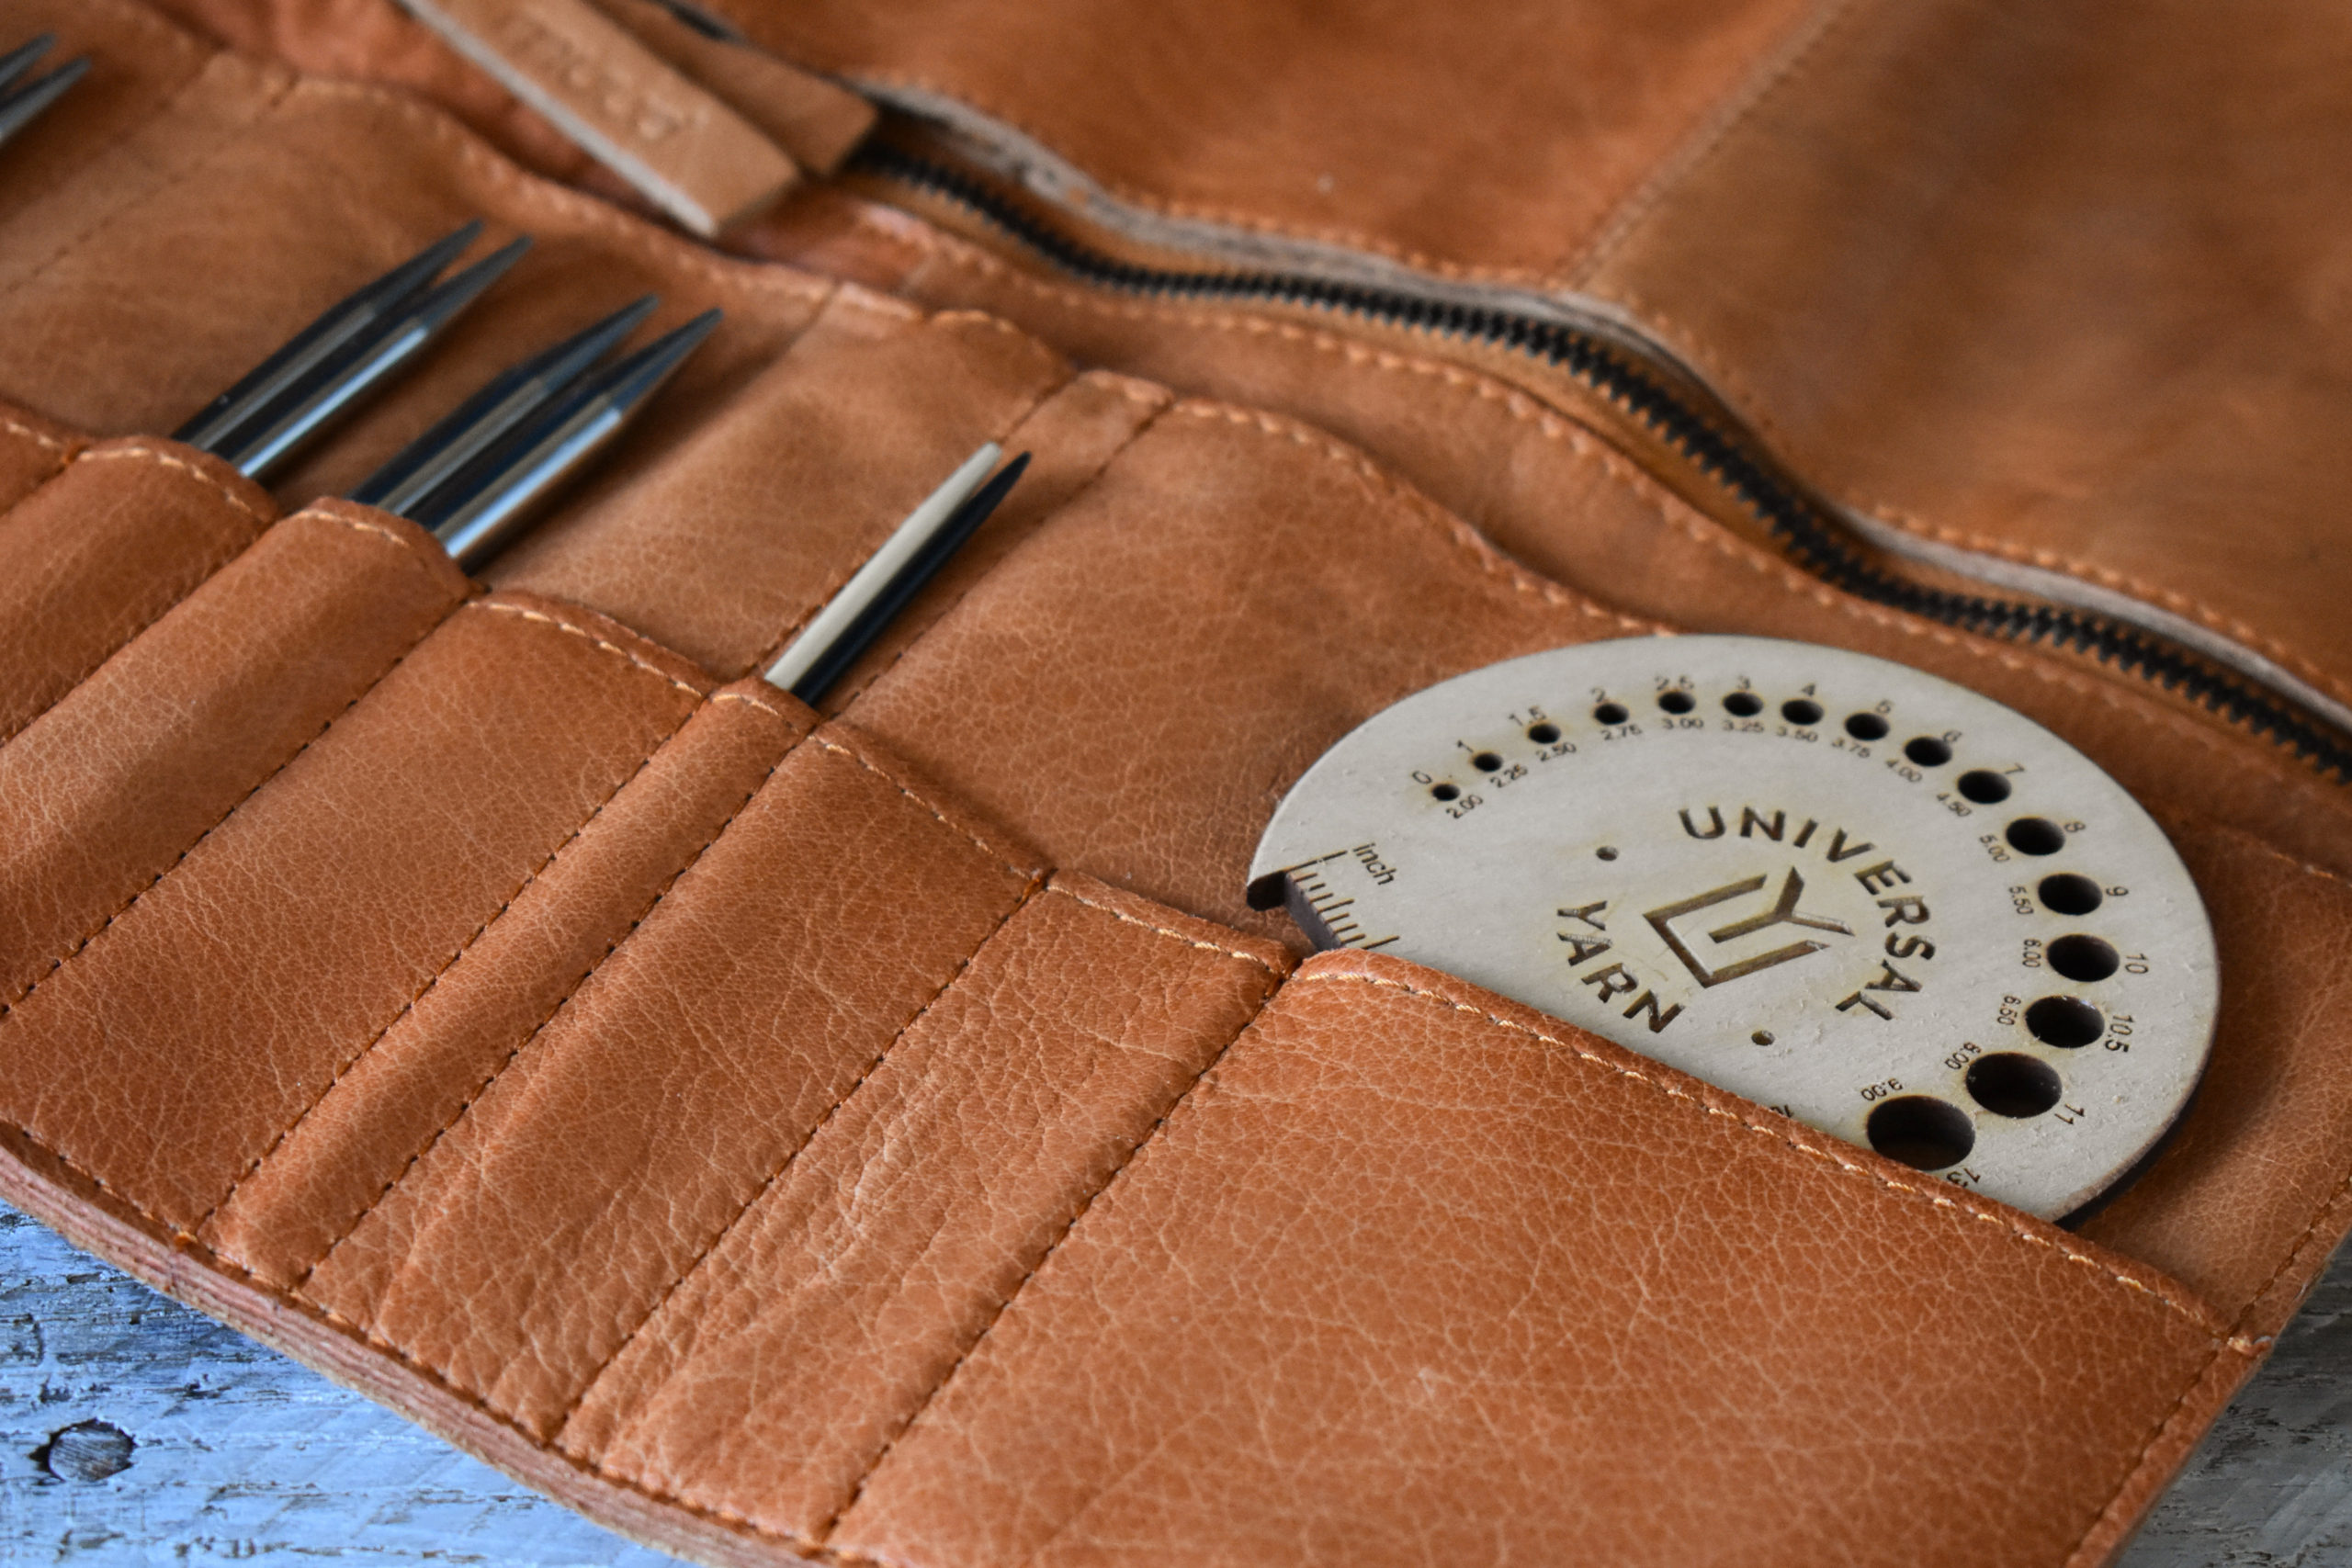
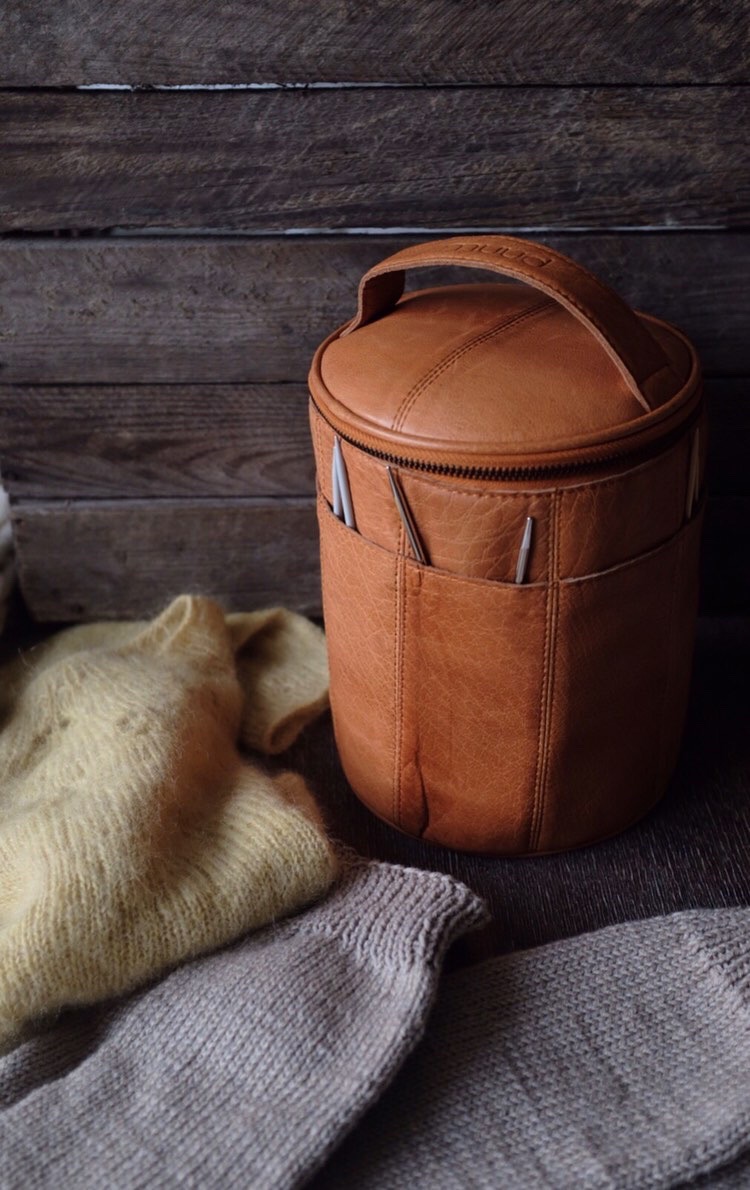
Stockholm has plenty of storage space for your interchangeable needle tips, cords, and notions, like this needle gauge by Katrinkles.
When we first decided to bring on muud, I was immediately drawn to Stockholm. I knew I needed it for my interchangeable needle set. It perfectly stores the needle tips, has a zippered pocket for storing cords, notions, and the perfect pockets for holding my needle gauge. (Stay tuned – the needle gauge shown, created by Katrinkles for Universal Yarn, is coming soon!)
My favorite thing about Stockholm is the size. It is large and roomy, but folds up into the perfect size. It can easily be tossed into a project bag, and doesn’t take up too much space on my living room end table, where my needles usually live.
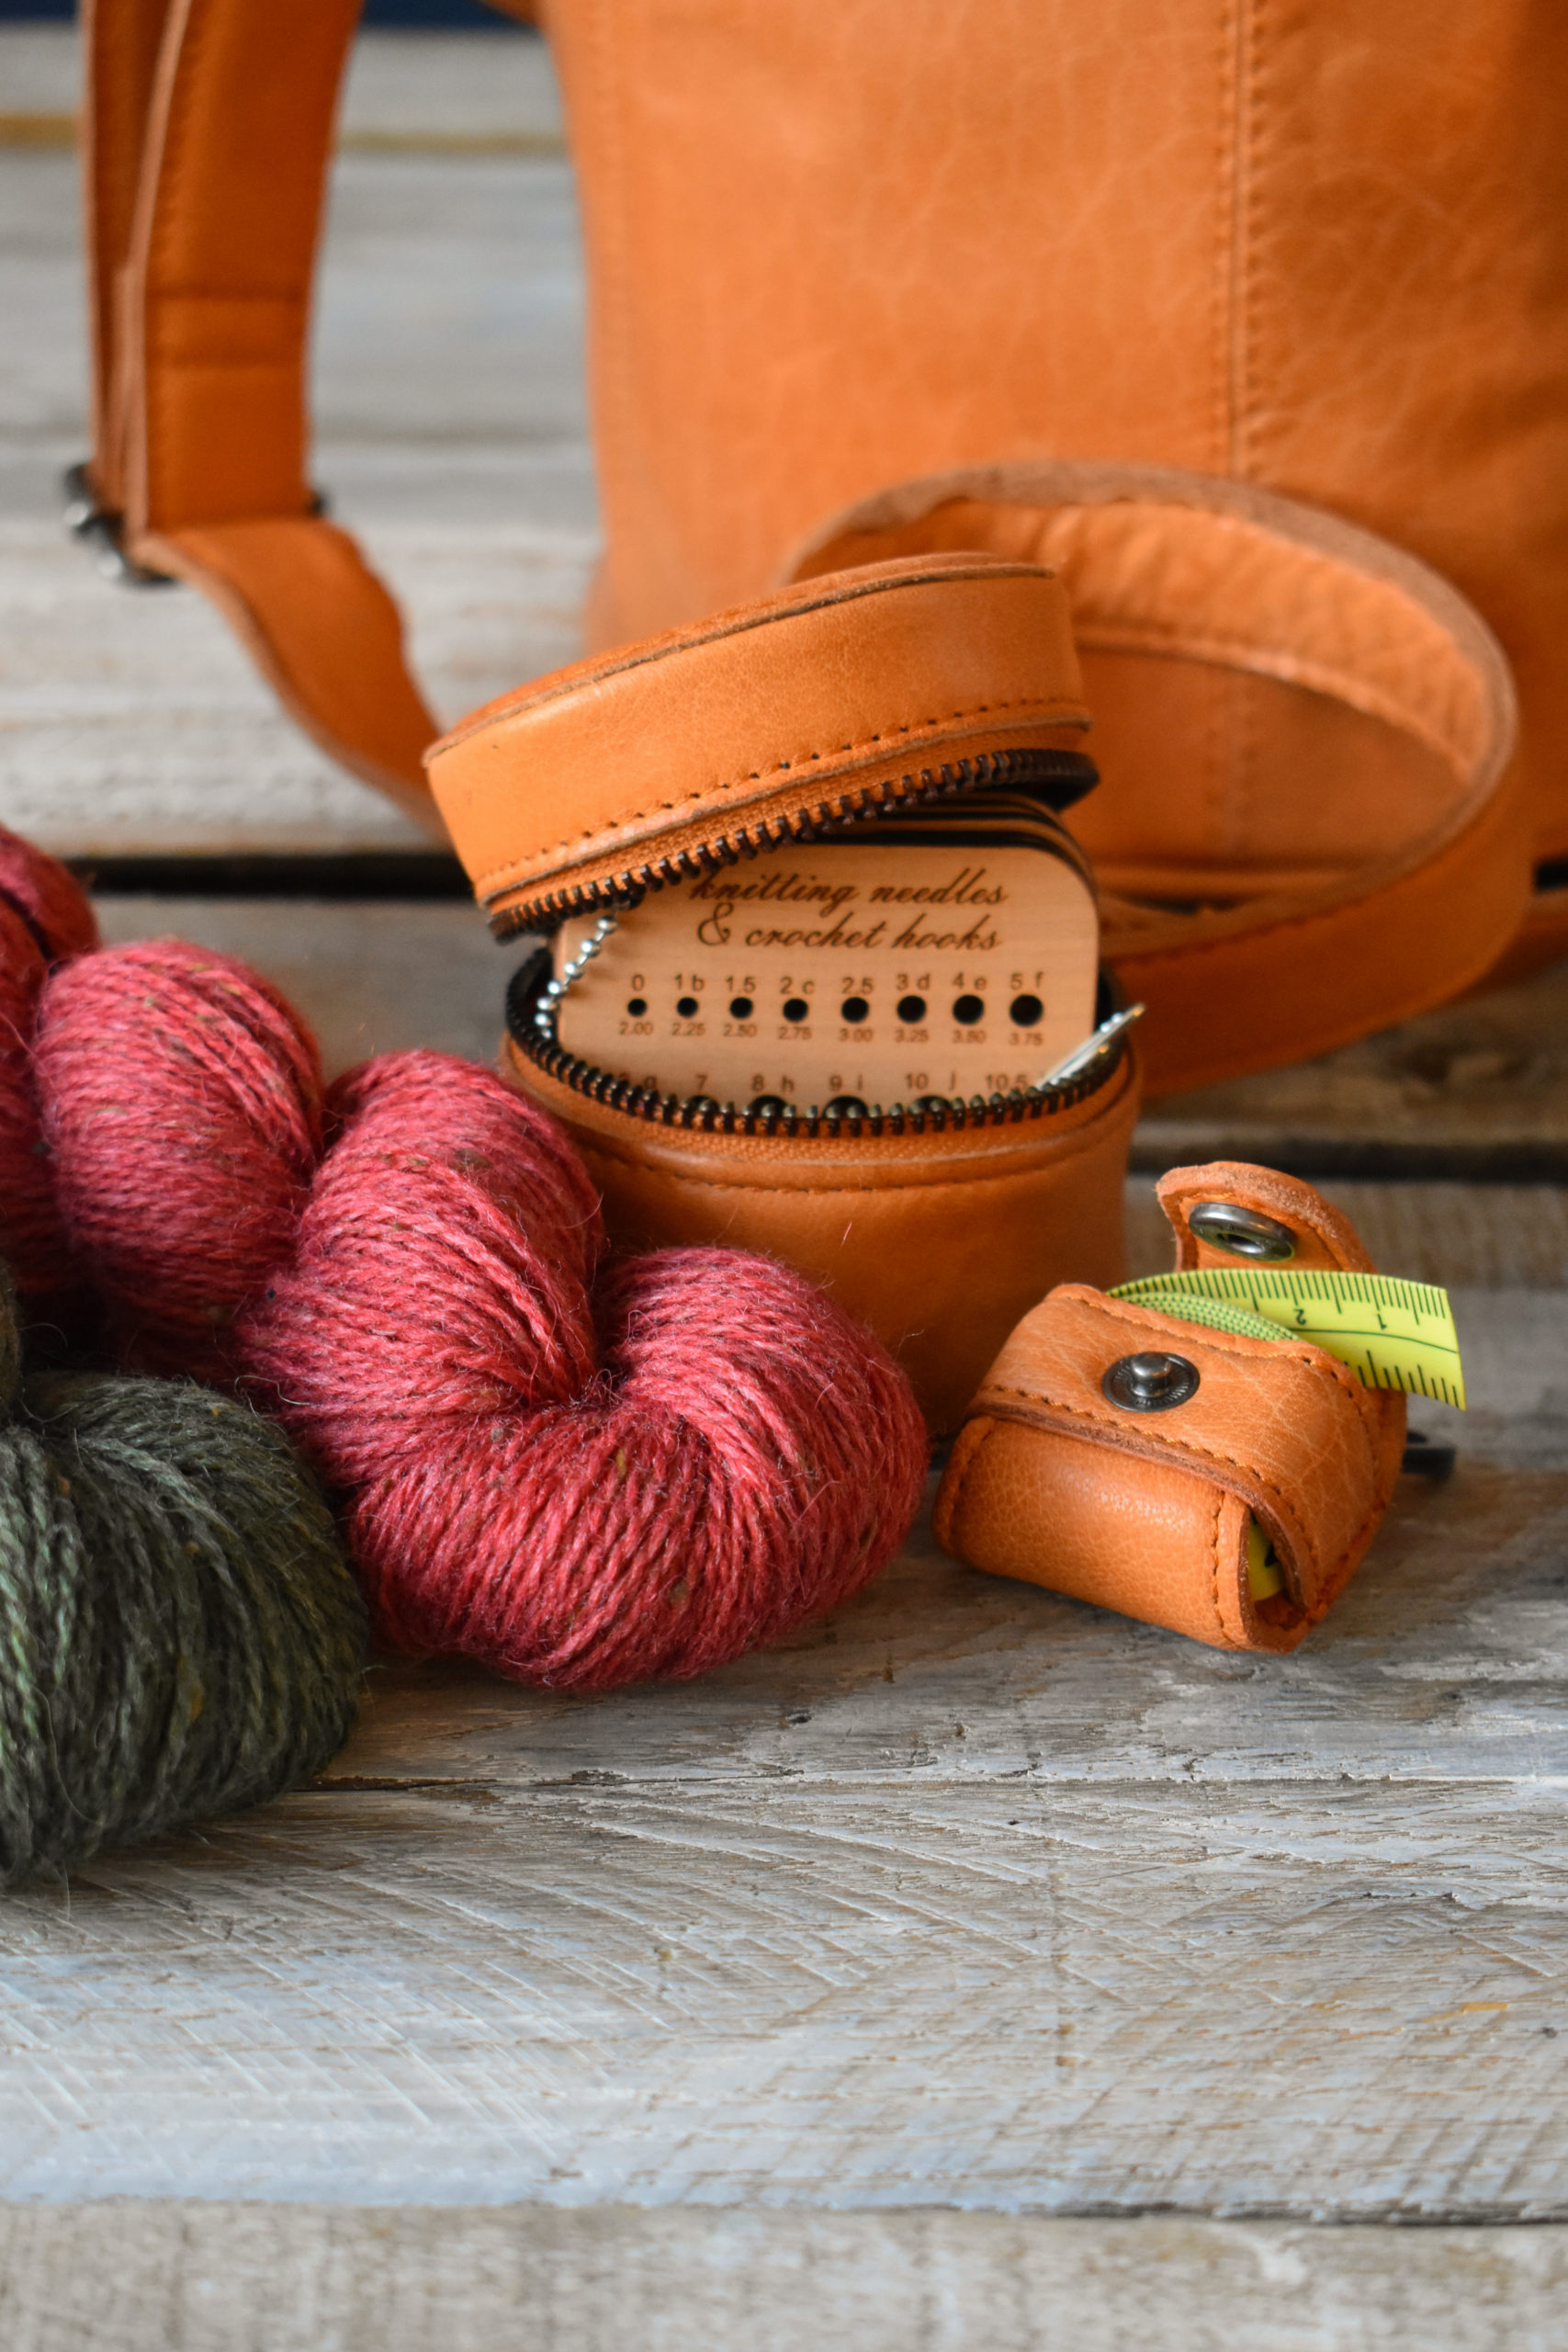
One thing I love about the line is the inclusion of small, adorable accessories that are ideal for storing your notions. Helsinki is a great storage container with a zipper closure. I’ve been using it to store my Katrinkles mini-tools as well as stitch markers, tapestry needles, and more.
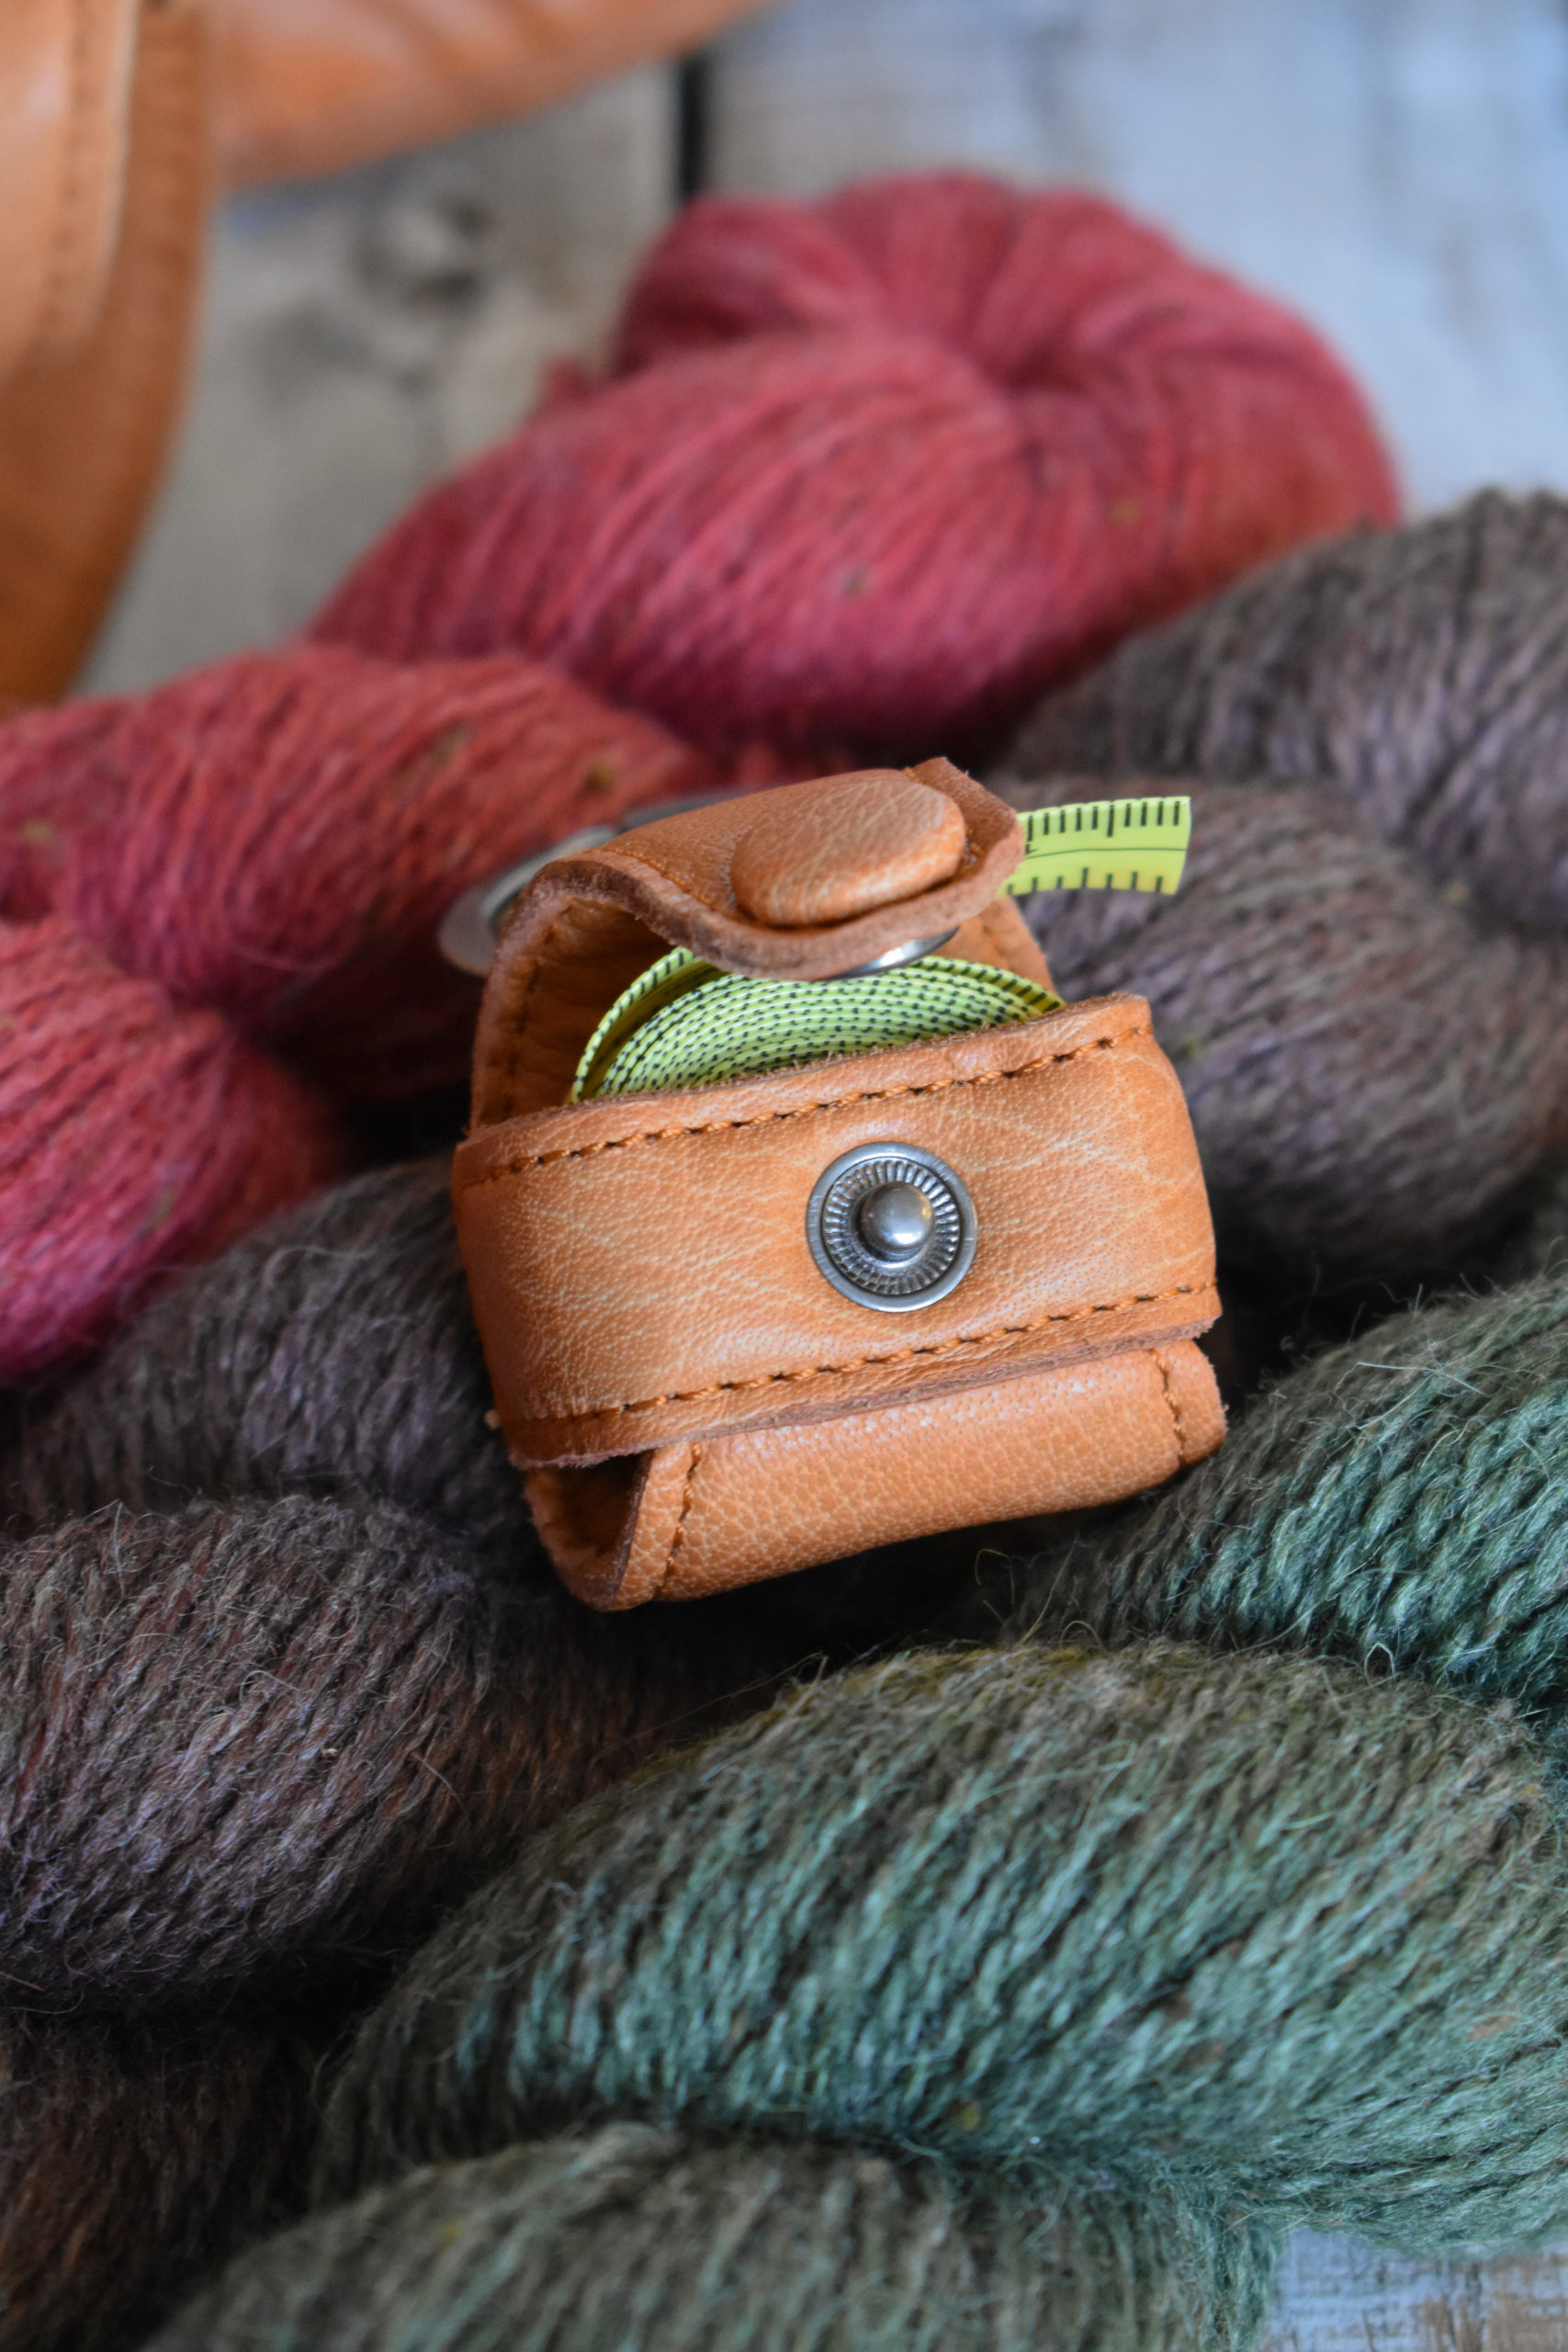
No knitter or crocheter can get by without a tape measure. If I don’t have one nearby, I feel lost! Sure, I have the retractable tape measures, but I also have several of the regular ol’ tape measures. Enter Malmo – possibly the cutest, most useful storage solution for a tape measure I’ve seen. Malmo was designed specifically for them! Just roll it up, place it in the case, and snap it shut until you need it. It has a little keyring, so it’s so easy to attach to your project bag for safe keeping.
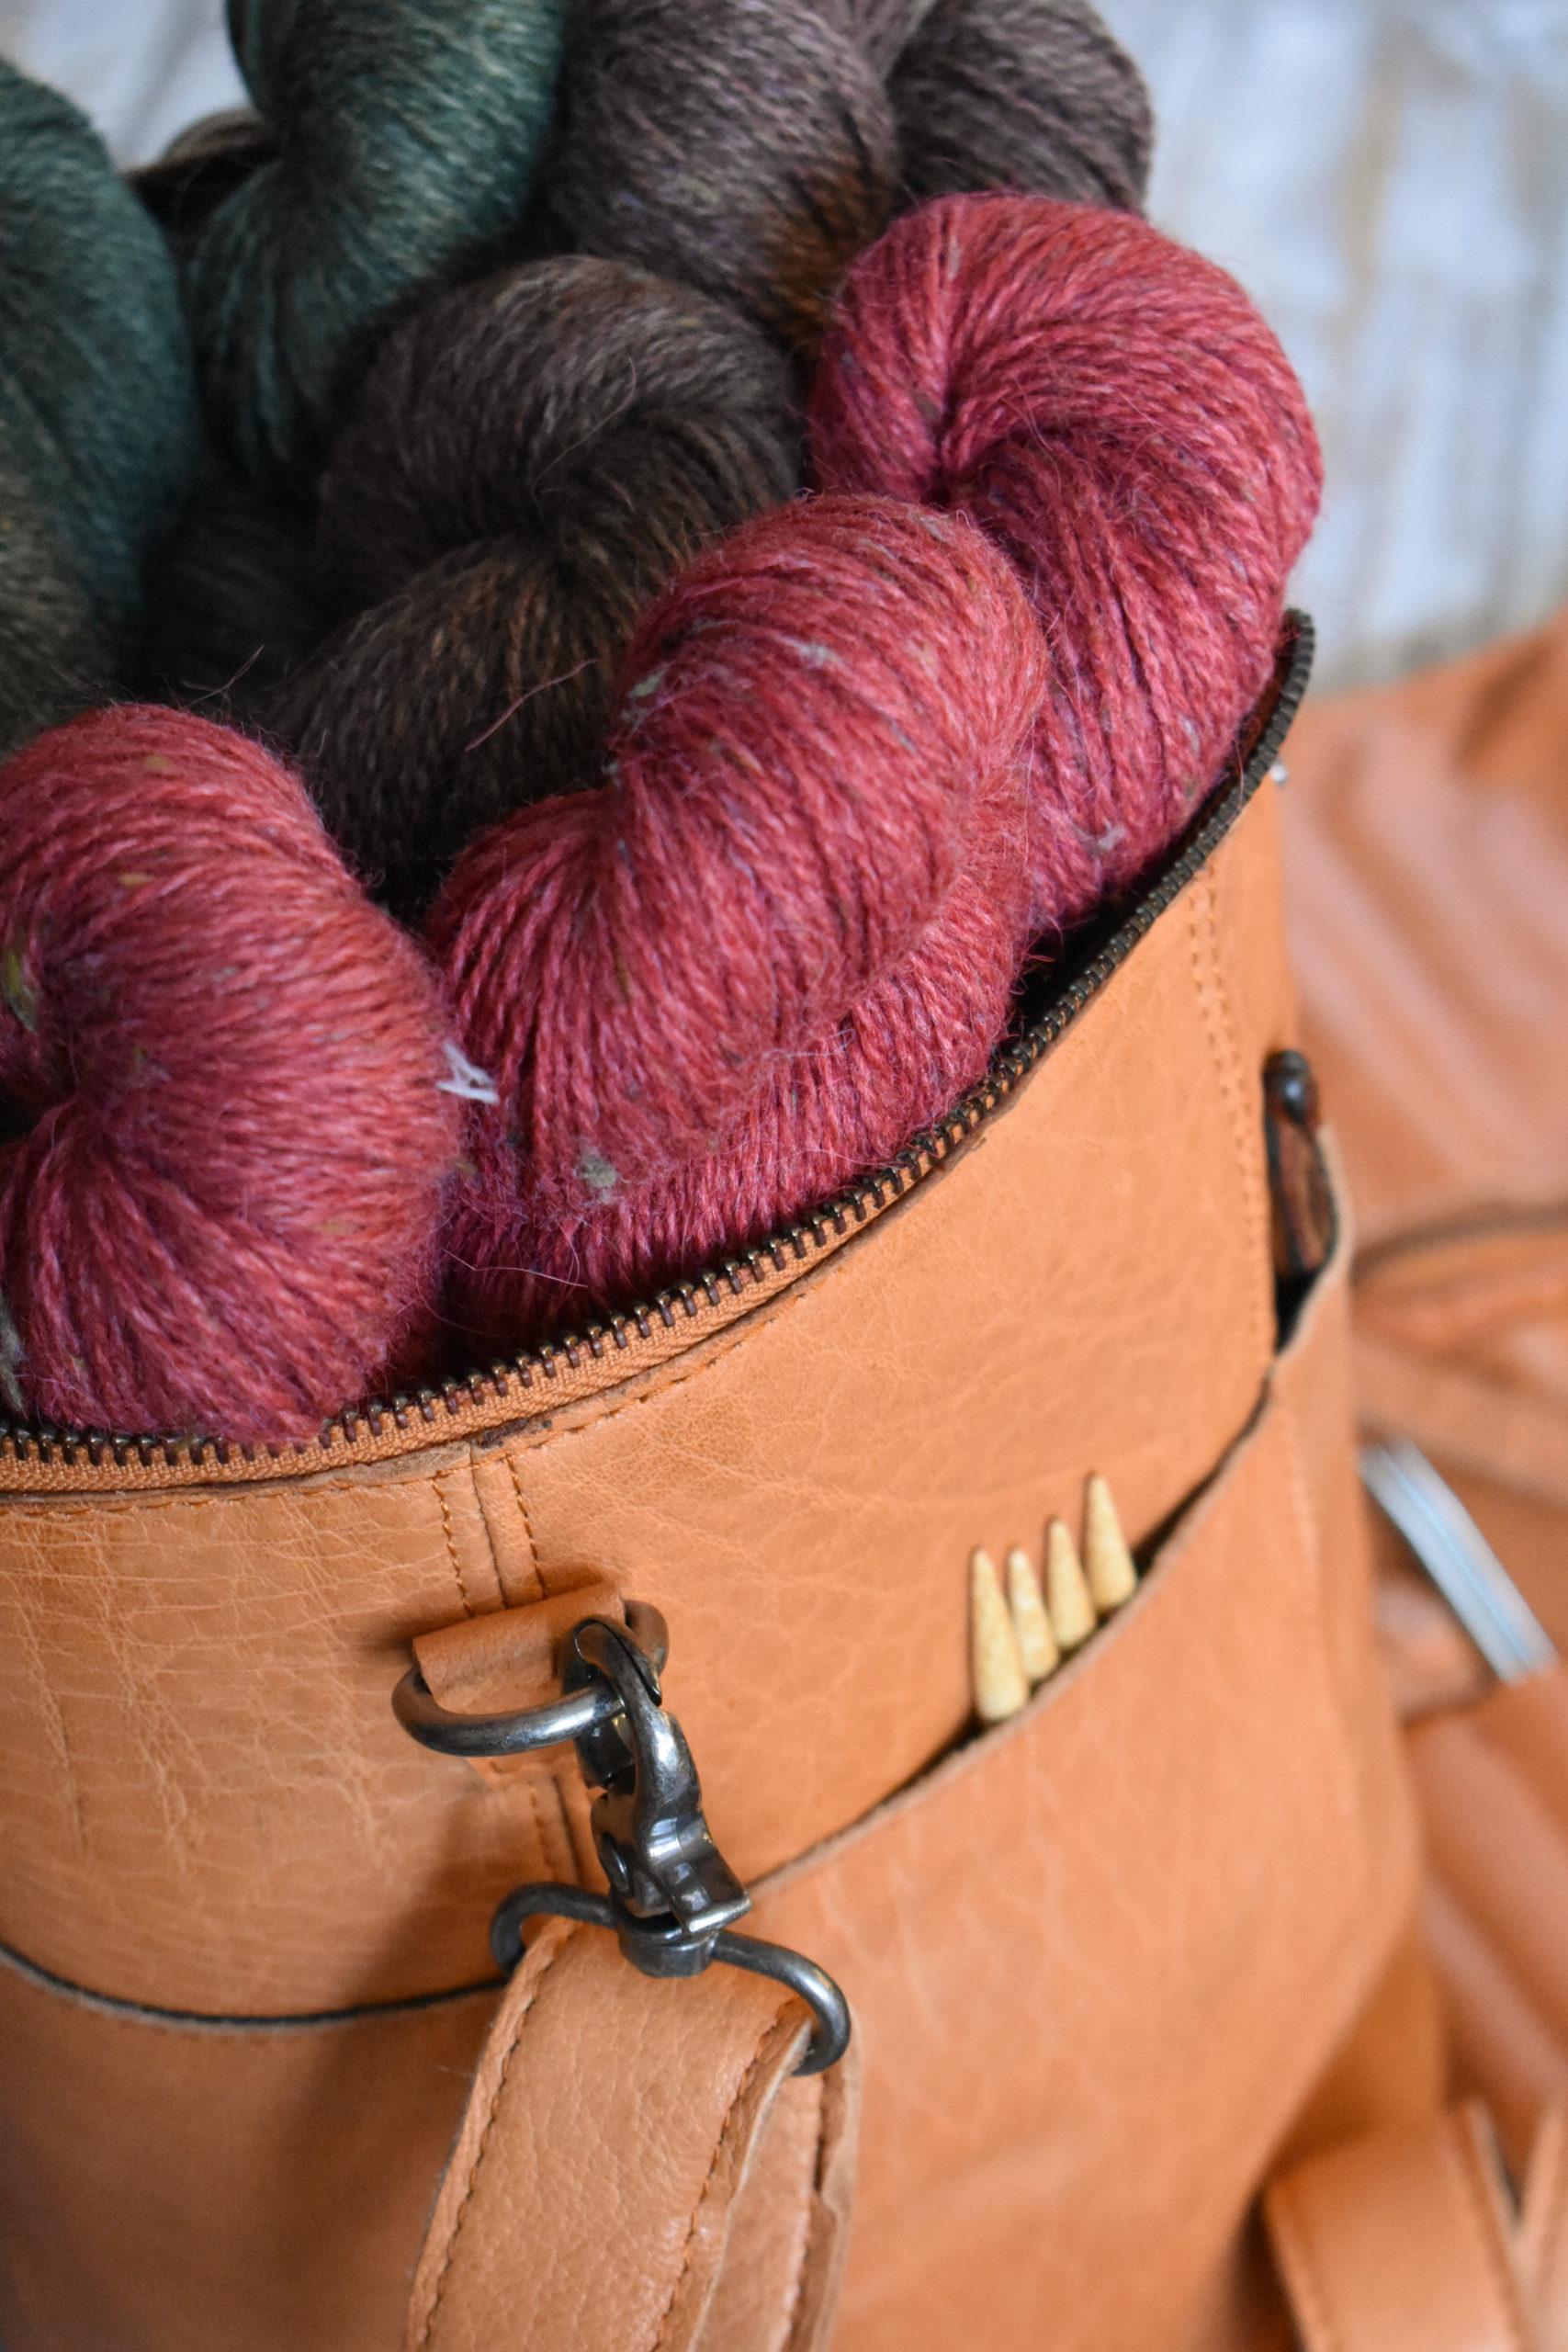
The Saturn XL will fit your project and your yarn – plus your needles and more!
Finally – the Saturn XL. Talk about an excellent project bag! It’s deep, has plenty of pockets both inside and out, and a handy strap to toss over your shoulder and head out the door. This bag will easily store projects of all sizes – including your latest sweater WIP.
Saturn XL
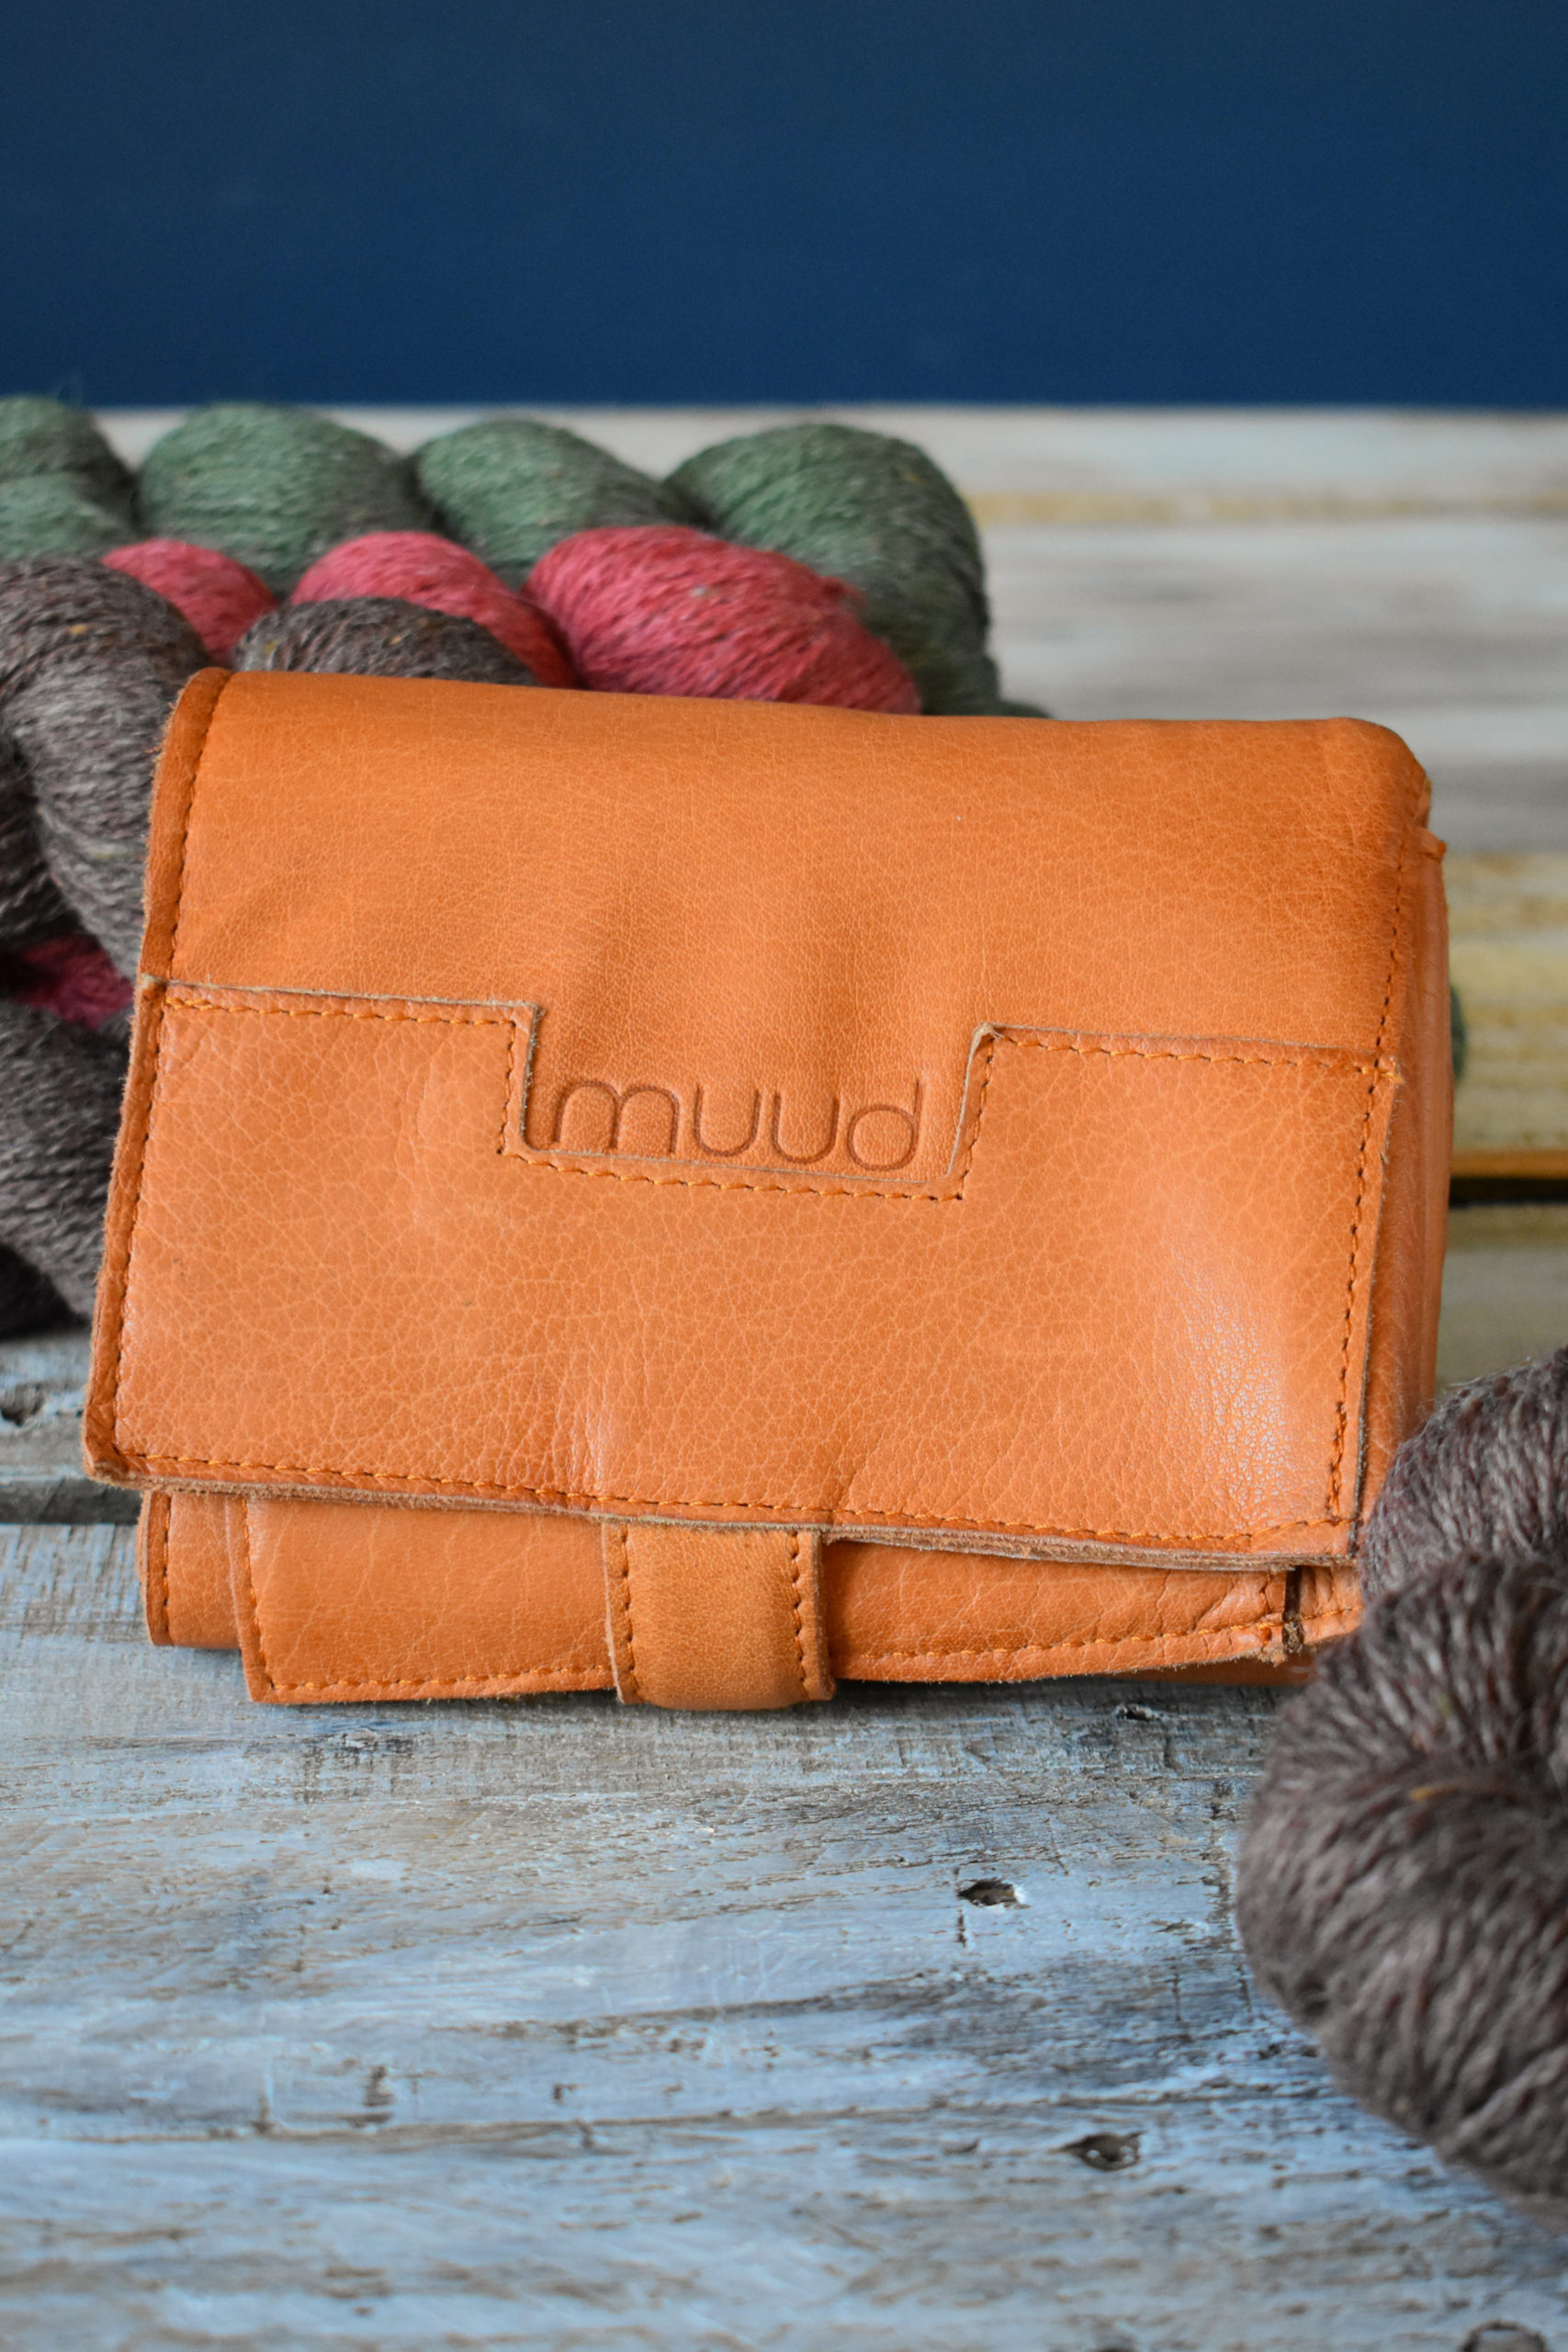
The Whisky colorway is perfect for me, but if brown isn’t your cup of tea, all of the products I mentioned come in black, too. There are also so many different styles and sizes to choose from. If you’re looking for a sophisticated treat for yourself or a luxurious gift for a fellow crafter, check out all of the products in the muud collection here (link).
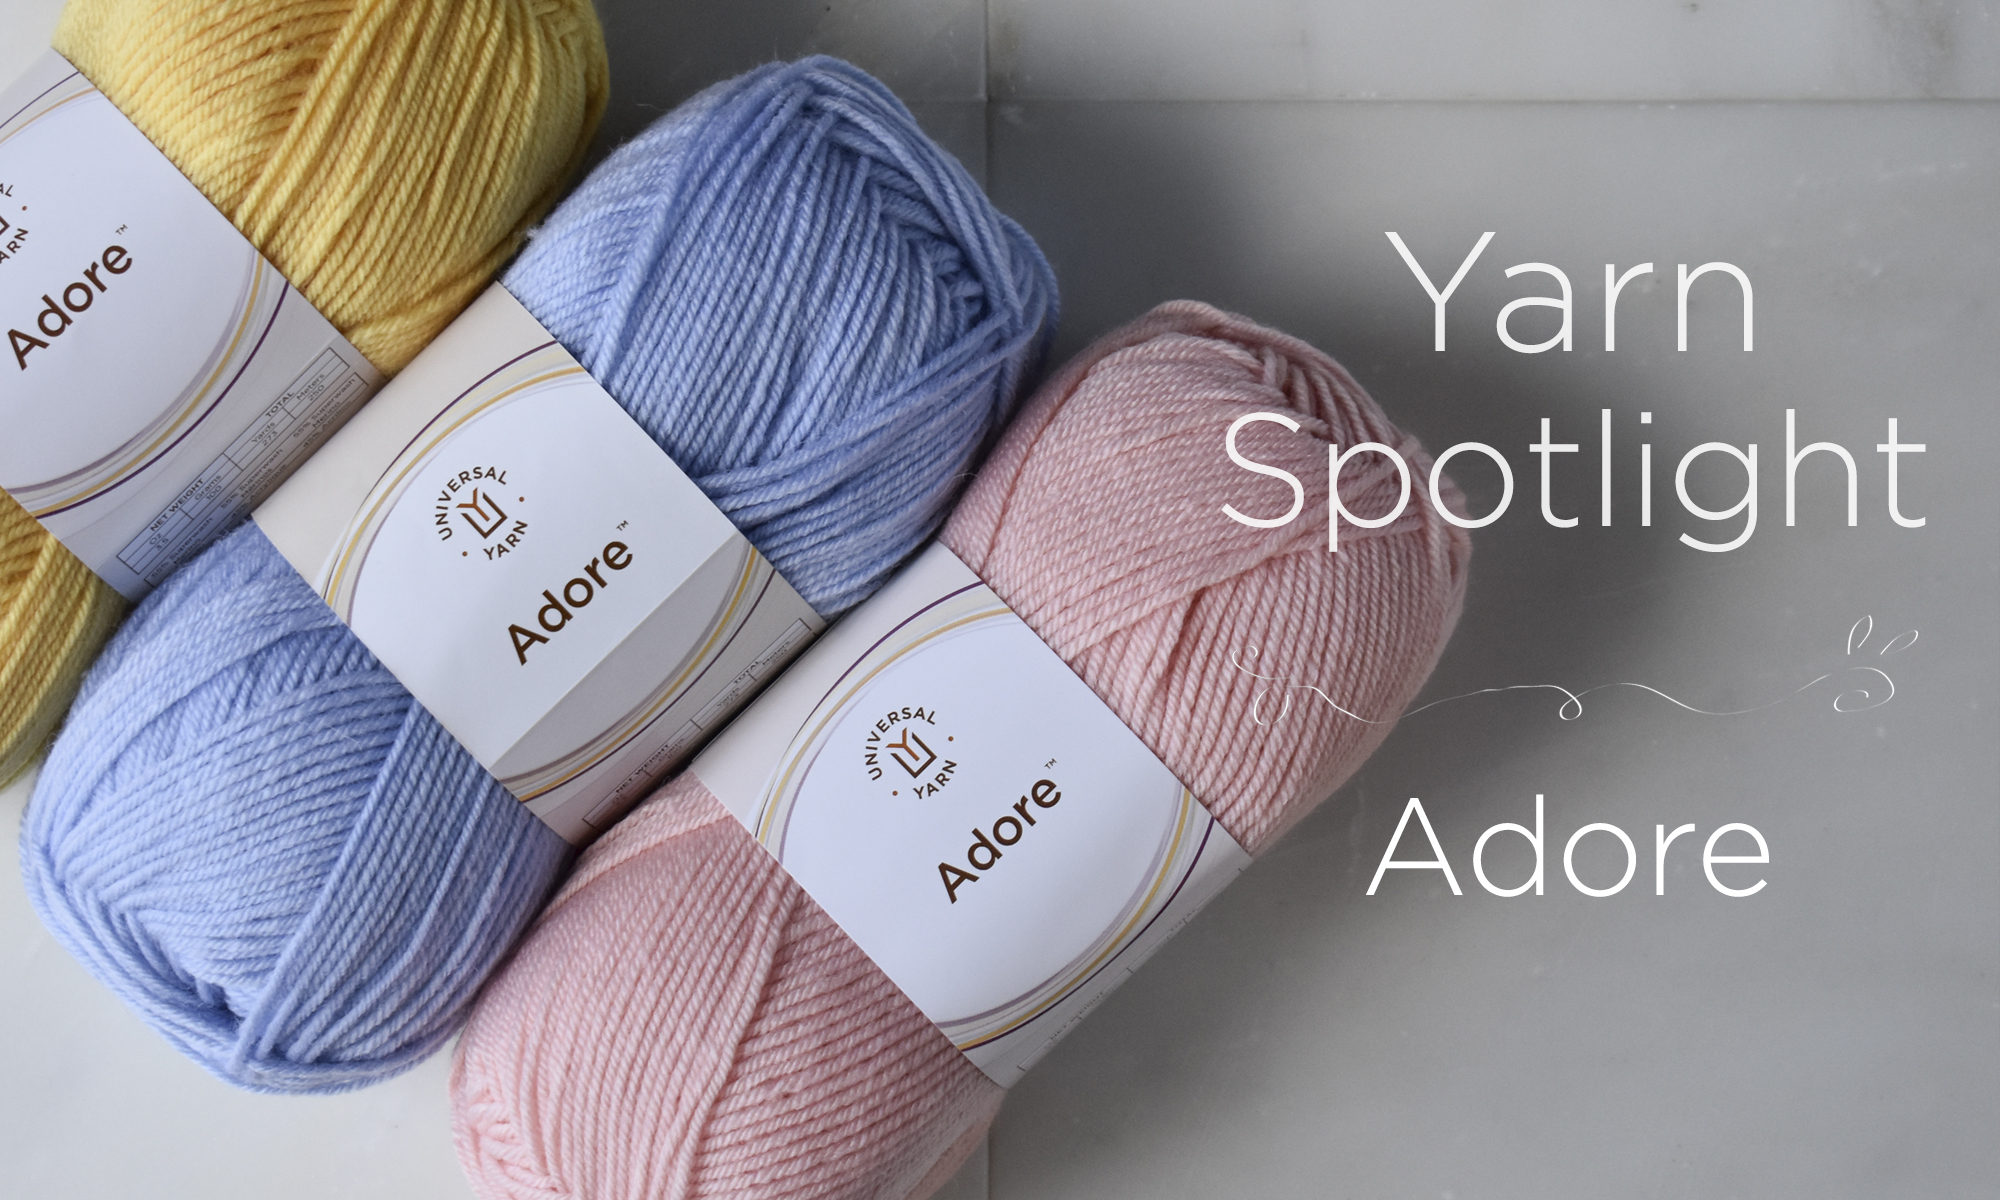
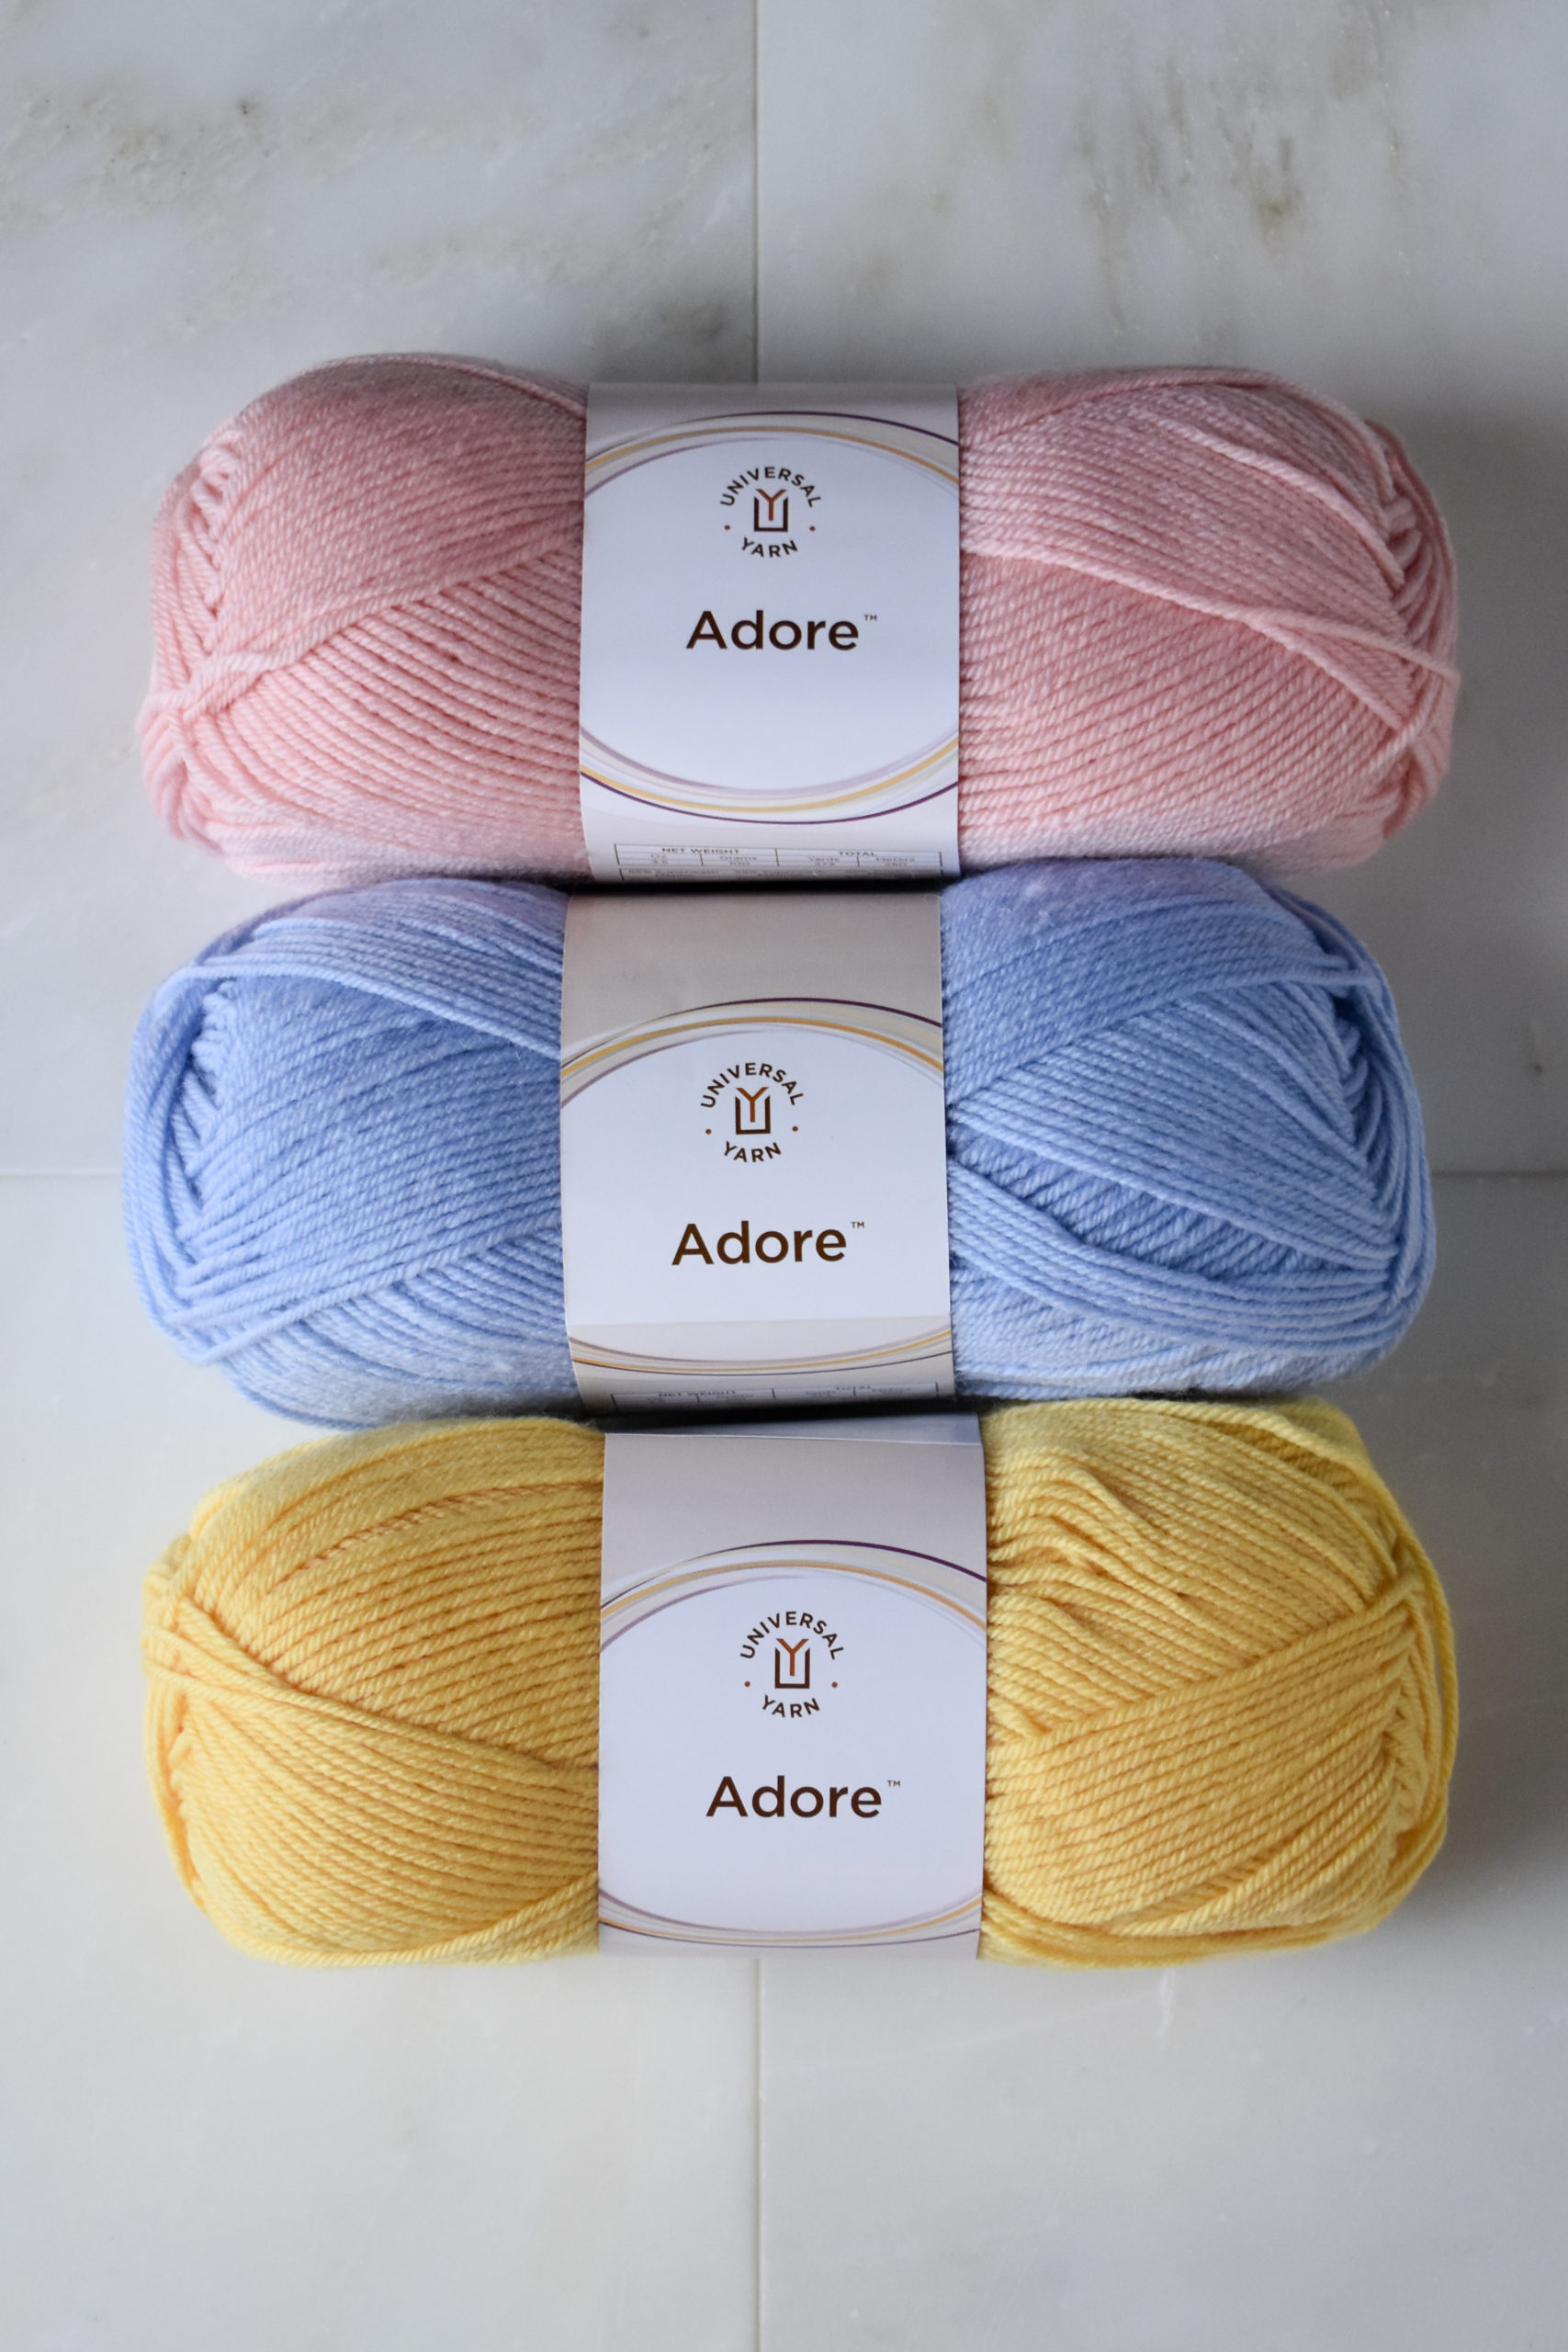
This week I want to chat a little about one of our favorite staple yarns: Adore. Comprised of 55% superwash merino and 45% anti-pilling acrylic, Adore is soft and easy to care for. It is exactly the type of yarn you reach for repeatedly because it ticks all the boxes. It has a broad palette of beautiful colors making it great for multi-color projects. This four-ply yarn is round and springy, giving it excellent stitch definition. It’s there for you whether you want to create a selfish sweater or the perfect gift for that upcoming baby shower.
Speaking of perfect for baby projects – let’s take a look at some of the great baby patterns we have for Adore.
Crosscut (sweater) and Parallelogram (blanket)
I’m pretty sure the quintessential handmade gift for babies is a blanket. Knit or crochet, if you’re a fiber artist, you’ve probably made one for a little one in your life. It’s easy to see why. Baby blankets tend to be fast (certainly faster than an afghan!) and you can be sure the little one won’t grow out of a blanket in a month or two.
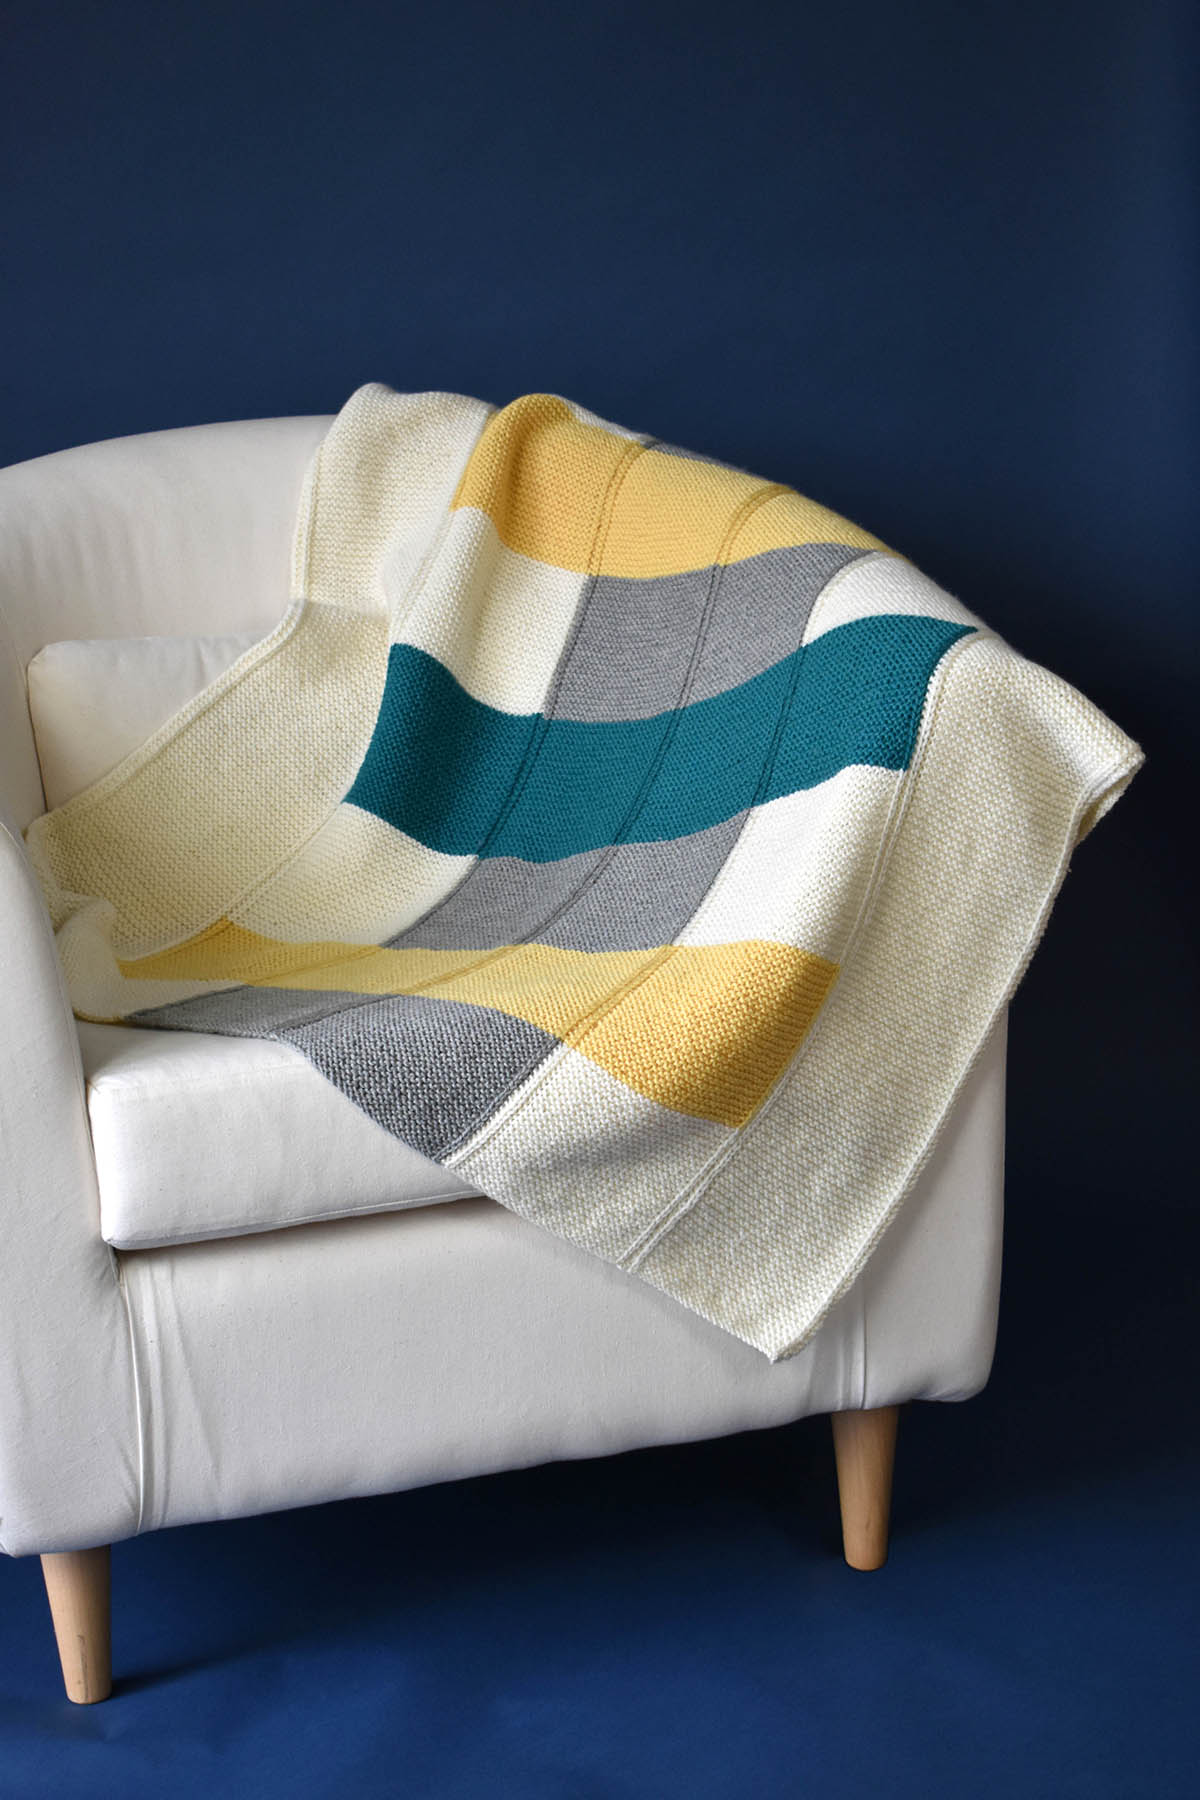
Parallelogram in Adore: #130 Cream, #105 Cloud Grey, #111 Banana, & #110 Turquoise
For the knitters, we have Parallelogram. This is one of my designs, and it was inspired by quilts. It’s modern and graphic but is primarily comprised of garter stitch. It’s an incredibly easy pattern. It is knit in six strips that are sewn together. The way the stripes are arranged in each strip creates the larger blocks of color in the finished piece. If you’re looking for a mindless project with a bit of impact, Parallelogram is right for you.
Oasis Blanket in Adore #105 Cloud Grey, #101 Peony, #110 Turquoise, & #103 Capri
For the crocheters, we have the Oasis Blanket. This one is a personal favorite. Admittedly, I haven’t finished mine (yet!), but it’s so fun! It is created by making granny square motifs, sewing them together, and then working a border around the edges. What I love about this project is how portable it is. You can whip out your yarn and knock out a square any time and in any place.
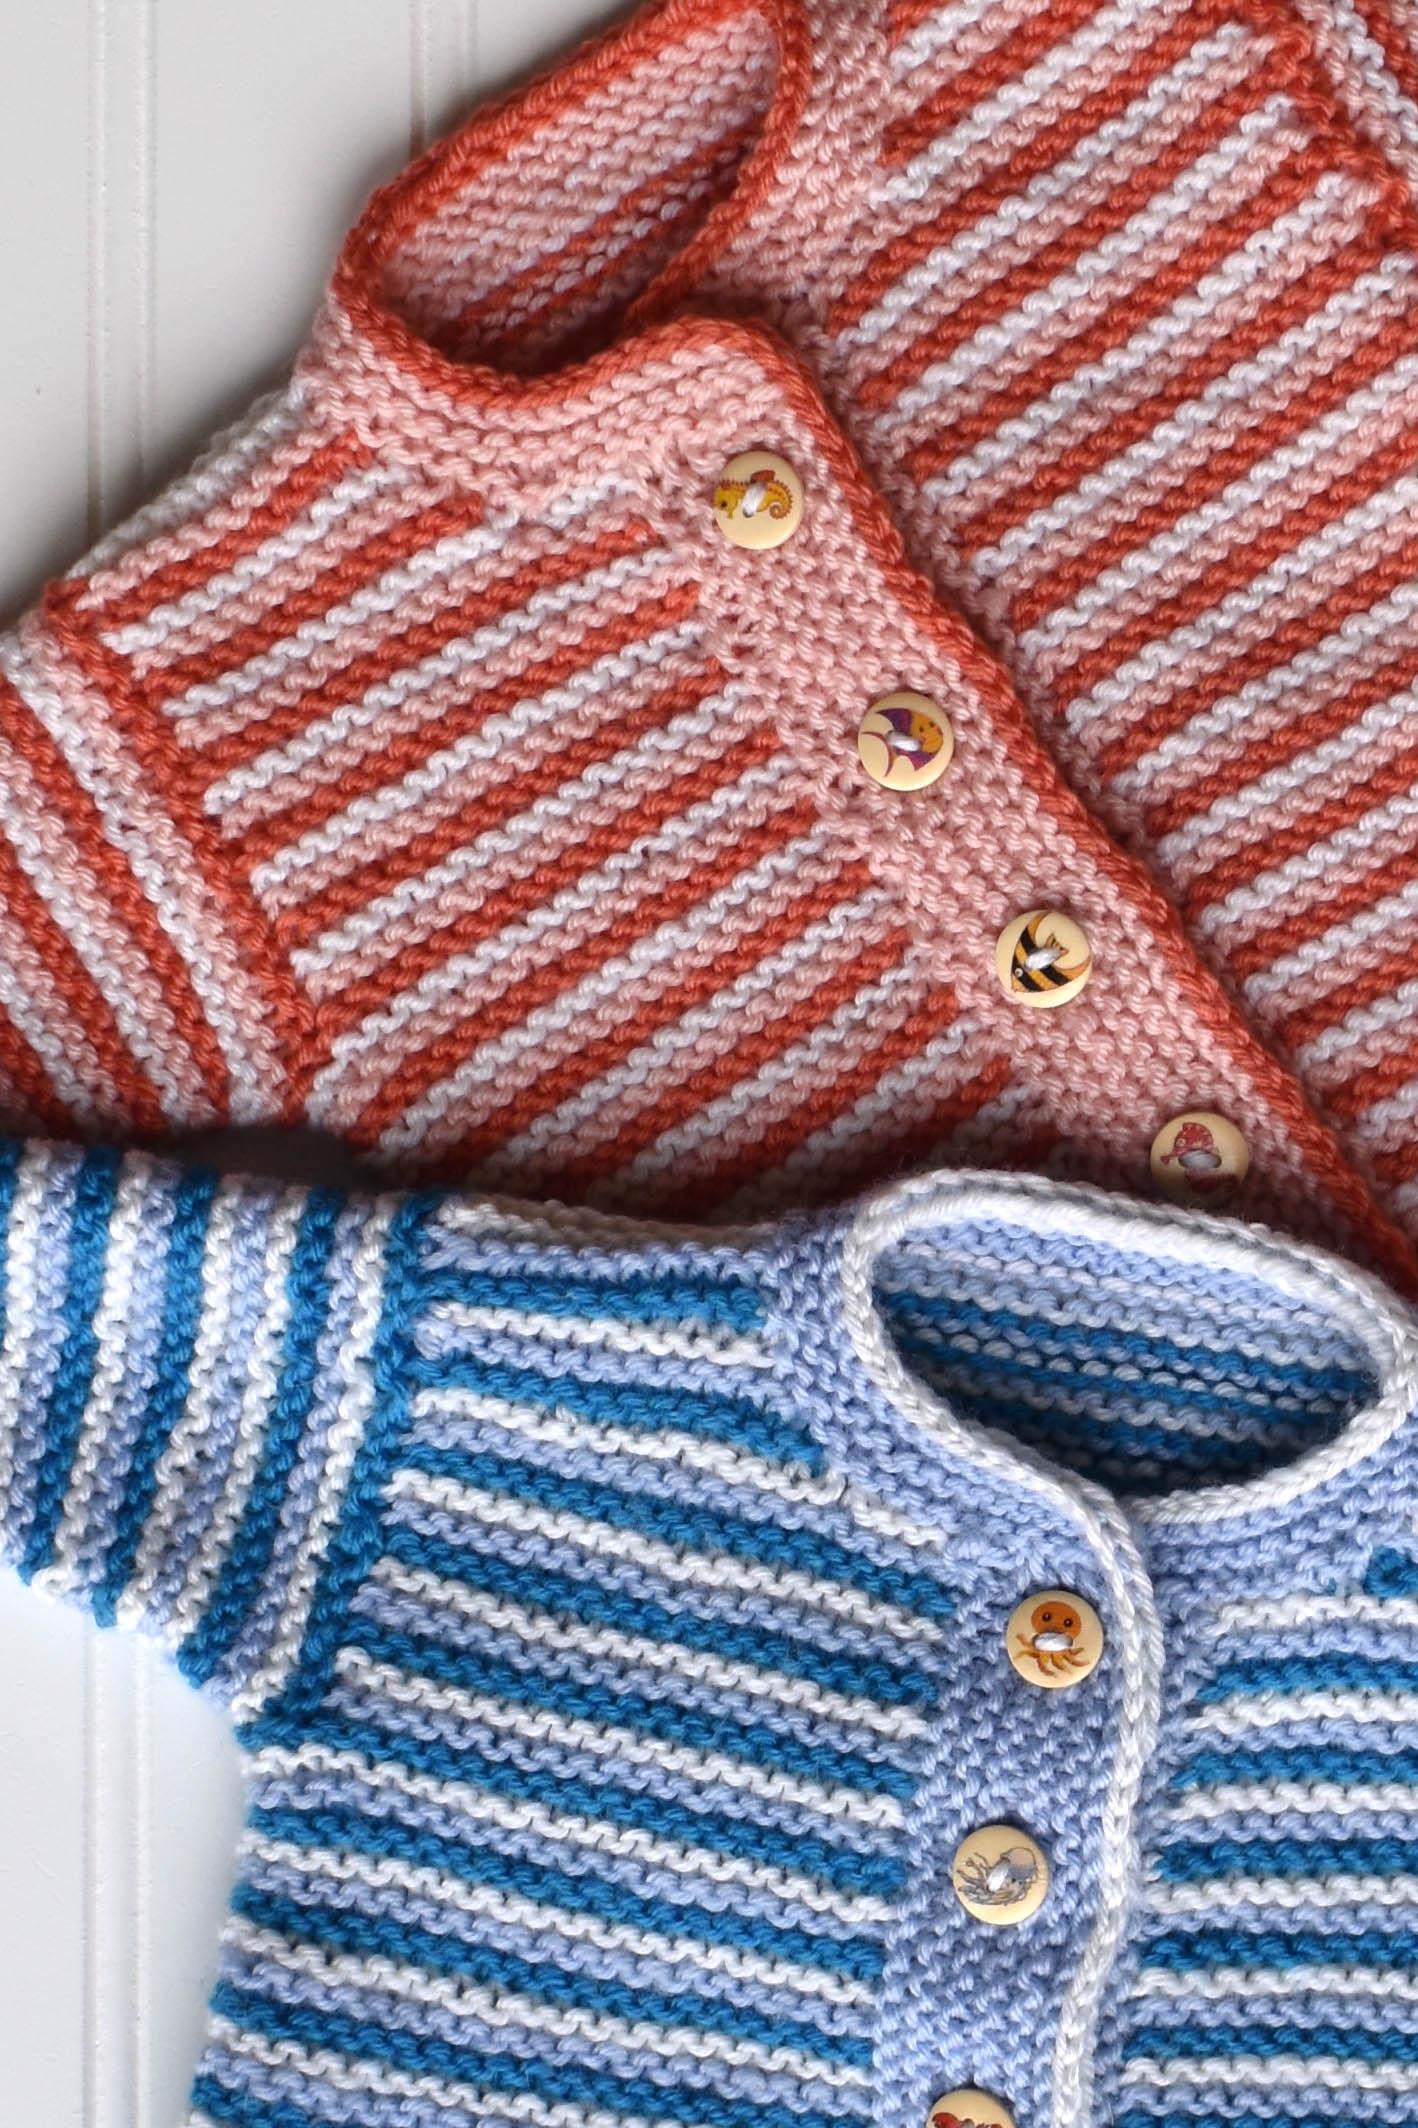
Besties
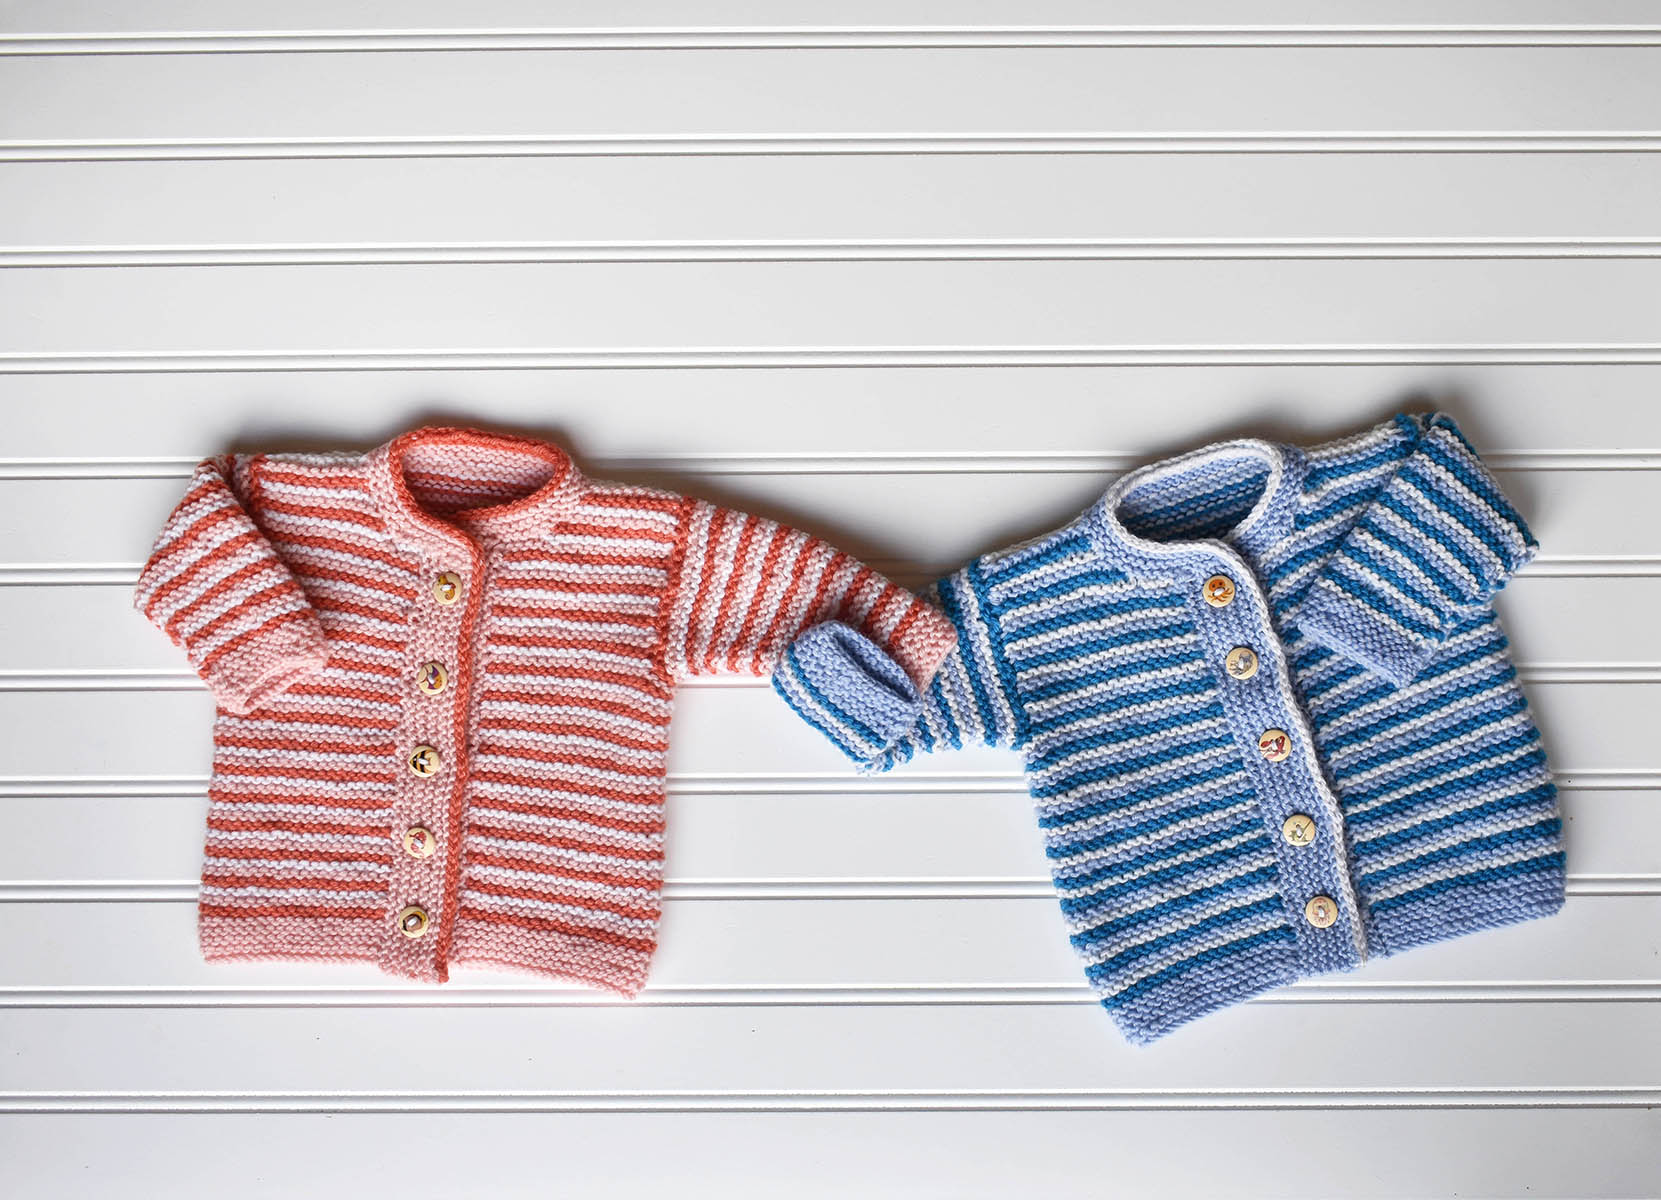
Although blankets may get used for longer than a sweater, you can’t argue with the fact that lil’ babes are ADORE-able (see what I did there?) in sweaters. And baby sweaters are extremely satisfying projects. Raise your hand if you like saying you completed a whole sweater in a few days!
We have no shortage of cute baby sweaters that use Adore. If you enjoy combining garter stitch, stripes, and cute buttons, you’ll love the Besties cardigan. This simple pattern is seamless and quick. With Adore’s broad palette, the color options are endless.
Crosscut in Adore #105 Cloud Grey
If you’re looking for a sweater pattern with interesting construction, why not try Crosscut? This sweater is knit from cuff to cuff and has a striking cable panel along the sleeves and seed stitch along the neck and hem. We love the way Adore makes the cable and texture pop.
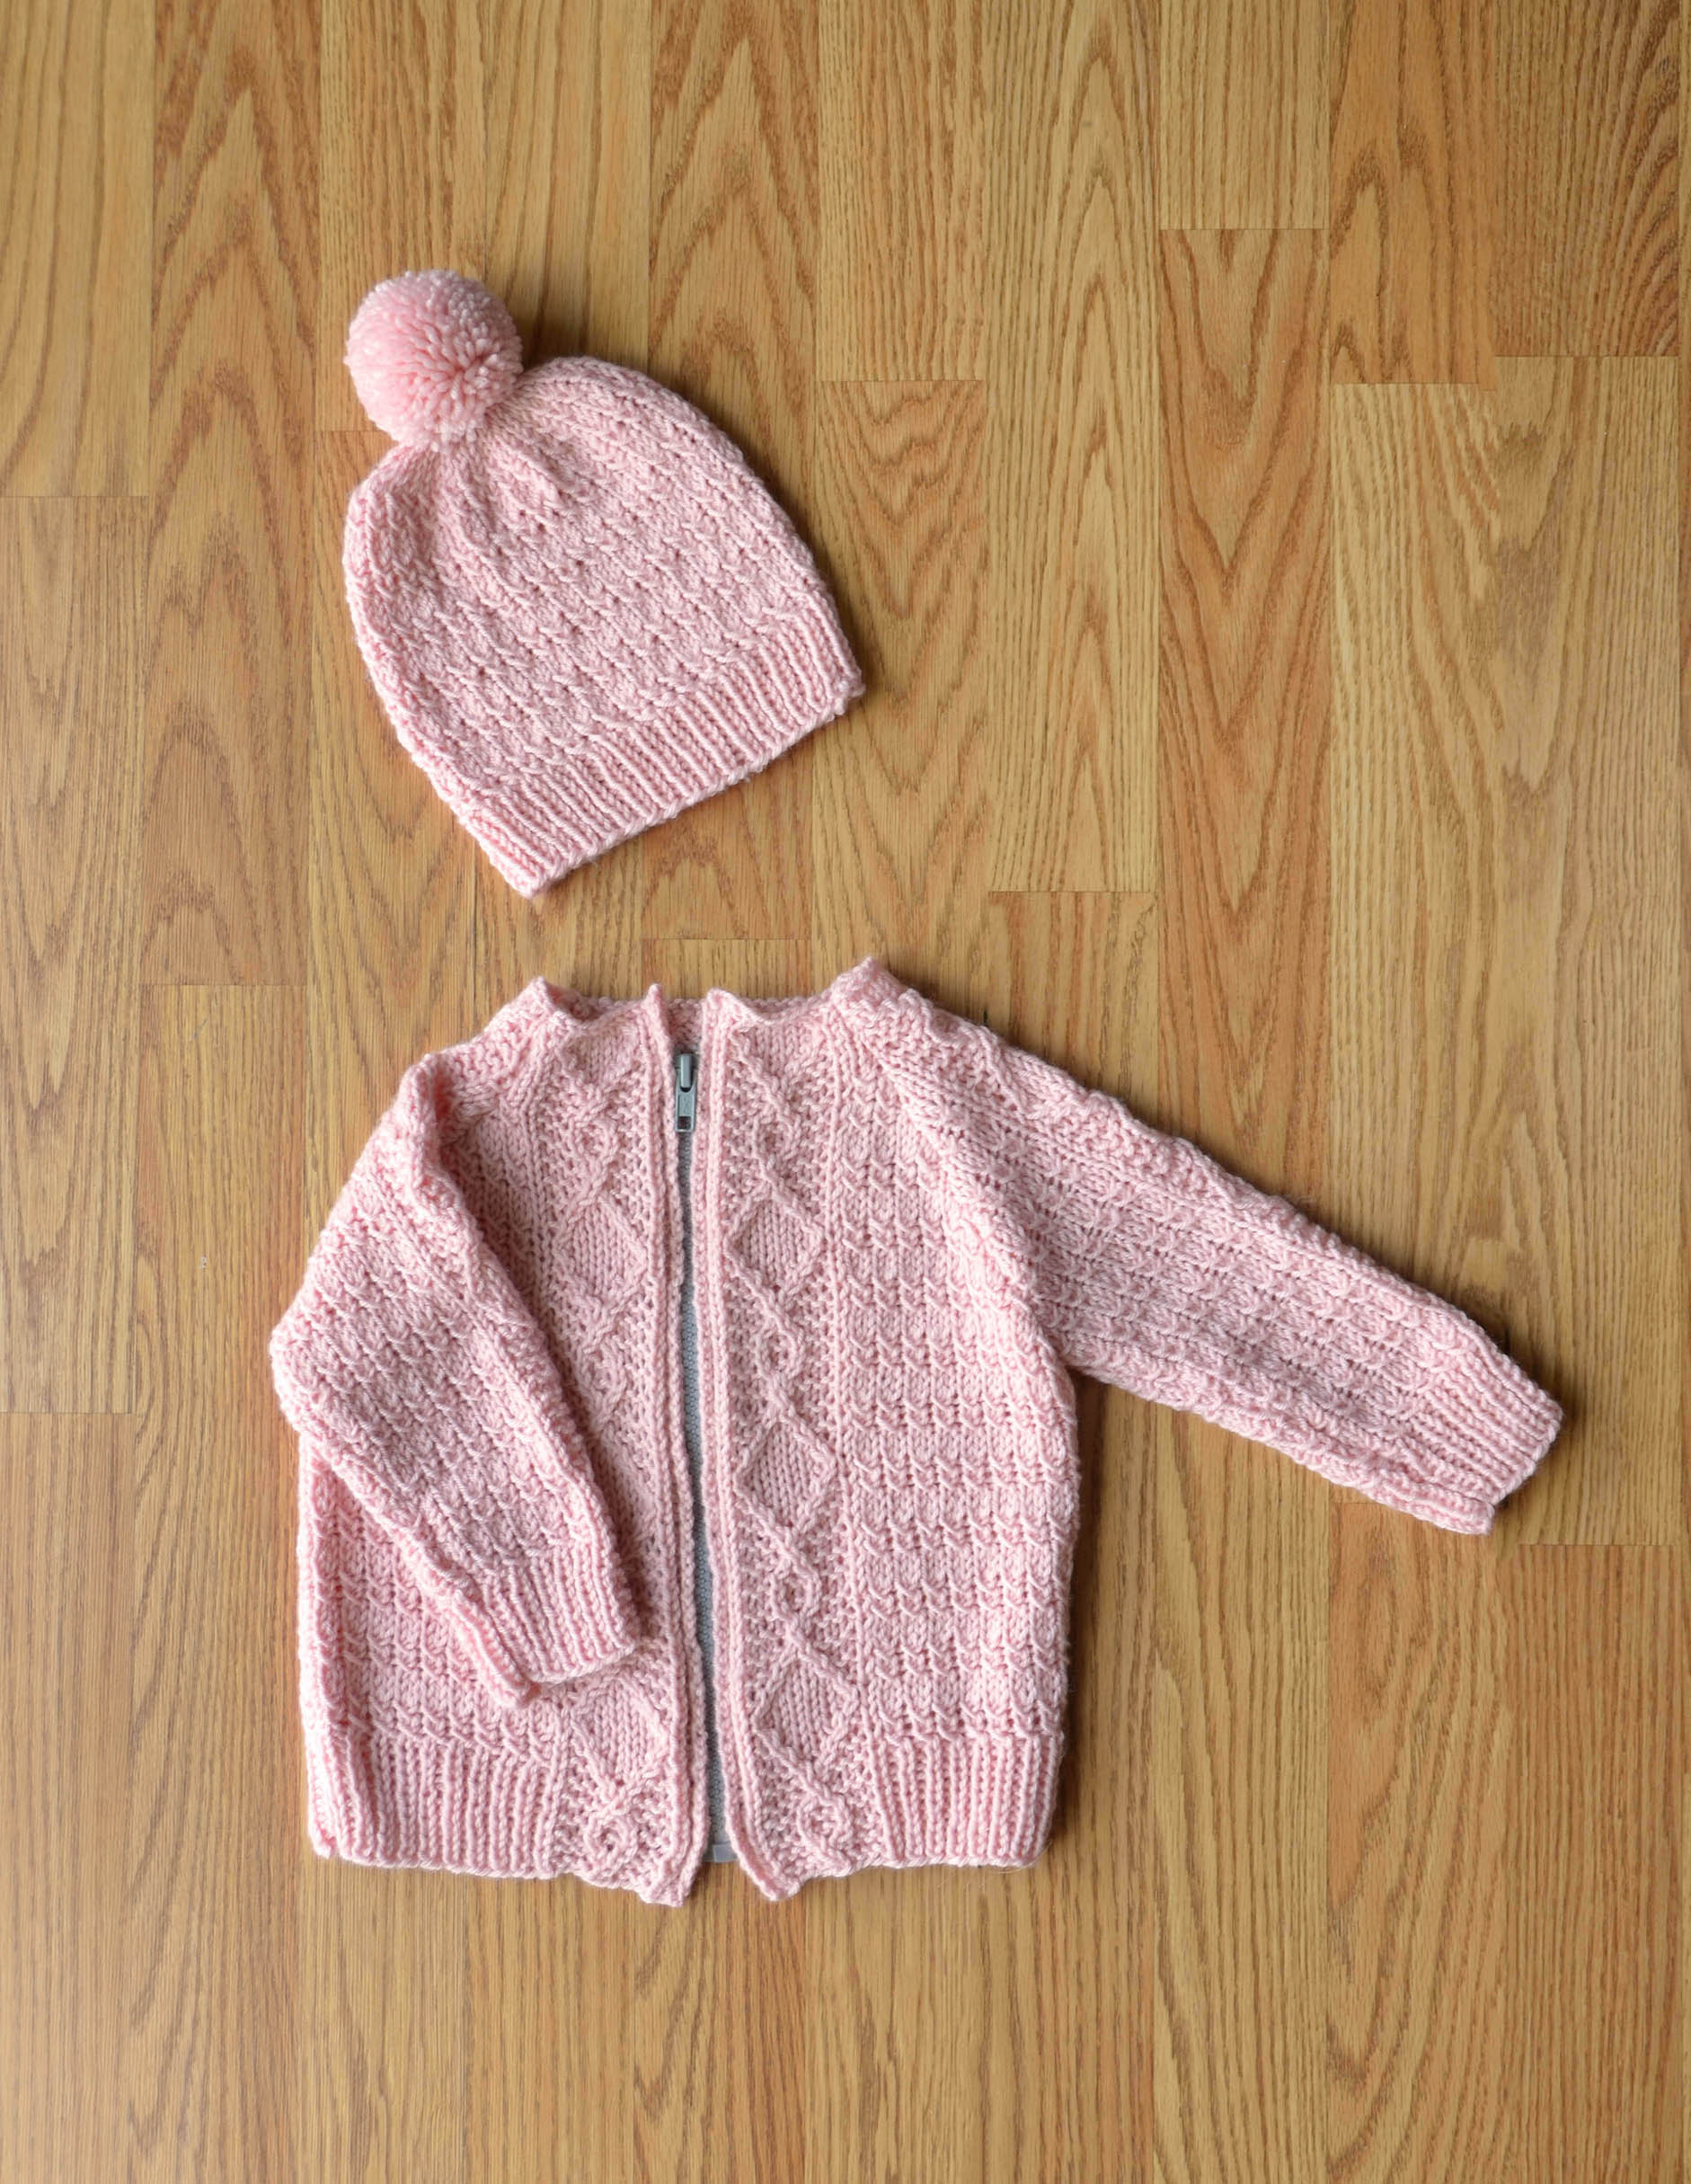
Cozy Kid Set in Adore #102 Pale Pink
Lovers of texture and twisted stitches will find the Cozy Kid Set on their needles in no time. This zippered cardigan is a great layering piece for fall and has a coordinating hat, too!
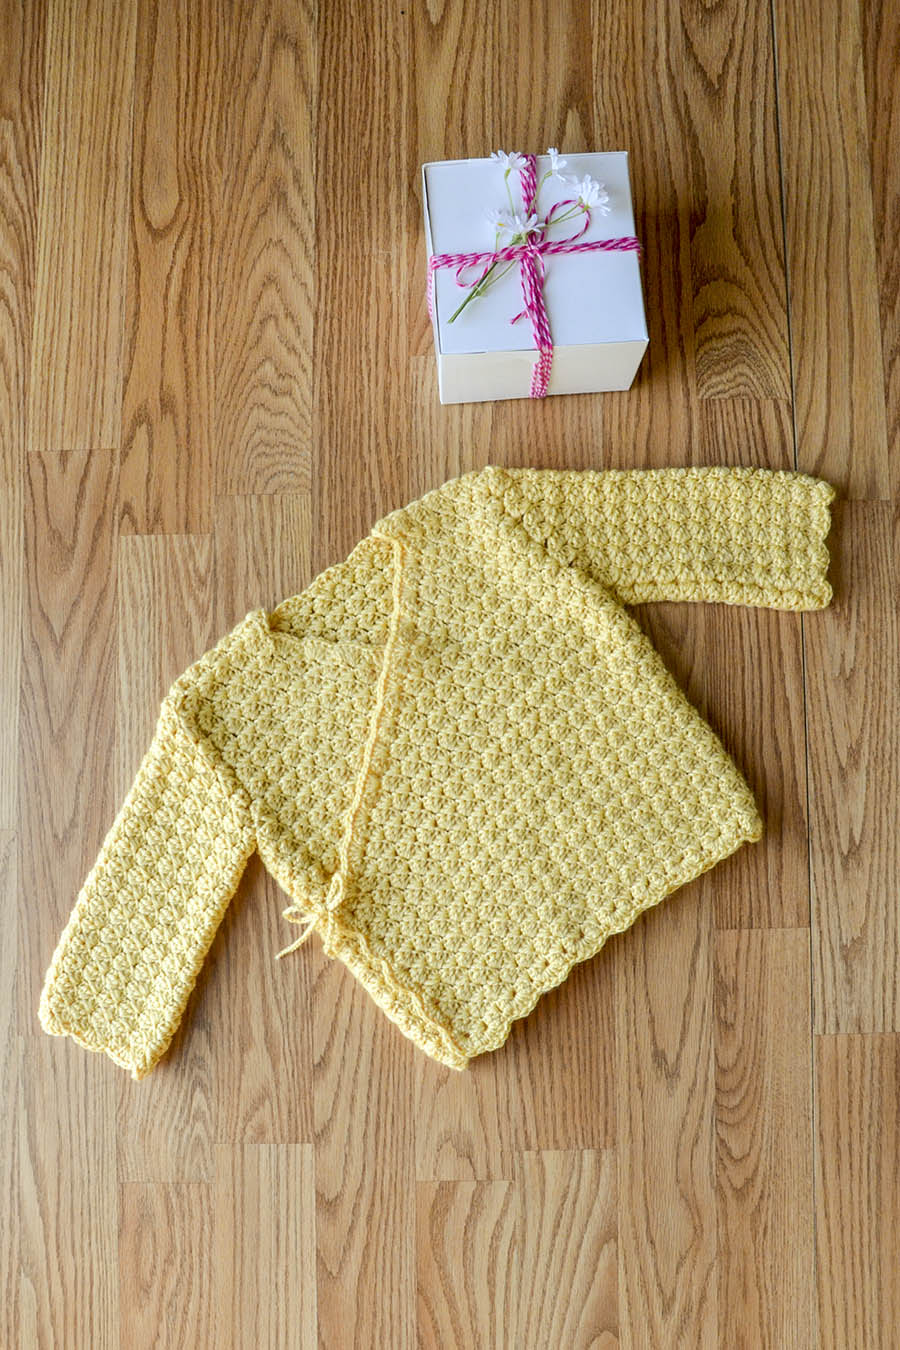
Special Gift Jacket in Adore #111 Banana
The Special Gift Jacket is a precious, crochet wrap cardigan. Scrunch stitches give it a beautiful, all-over texture. The delicate side ties might be my favorite detail!
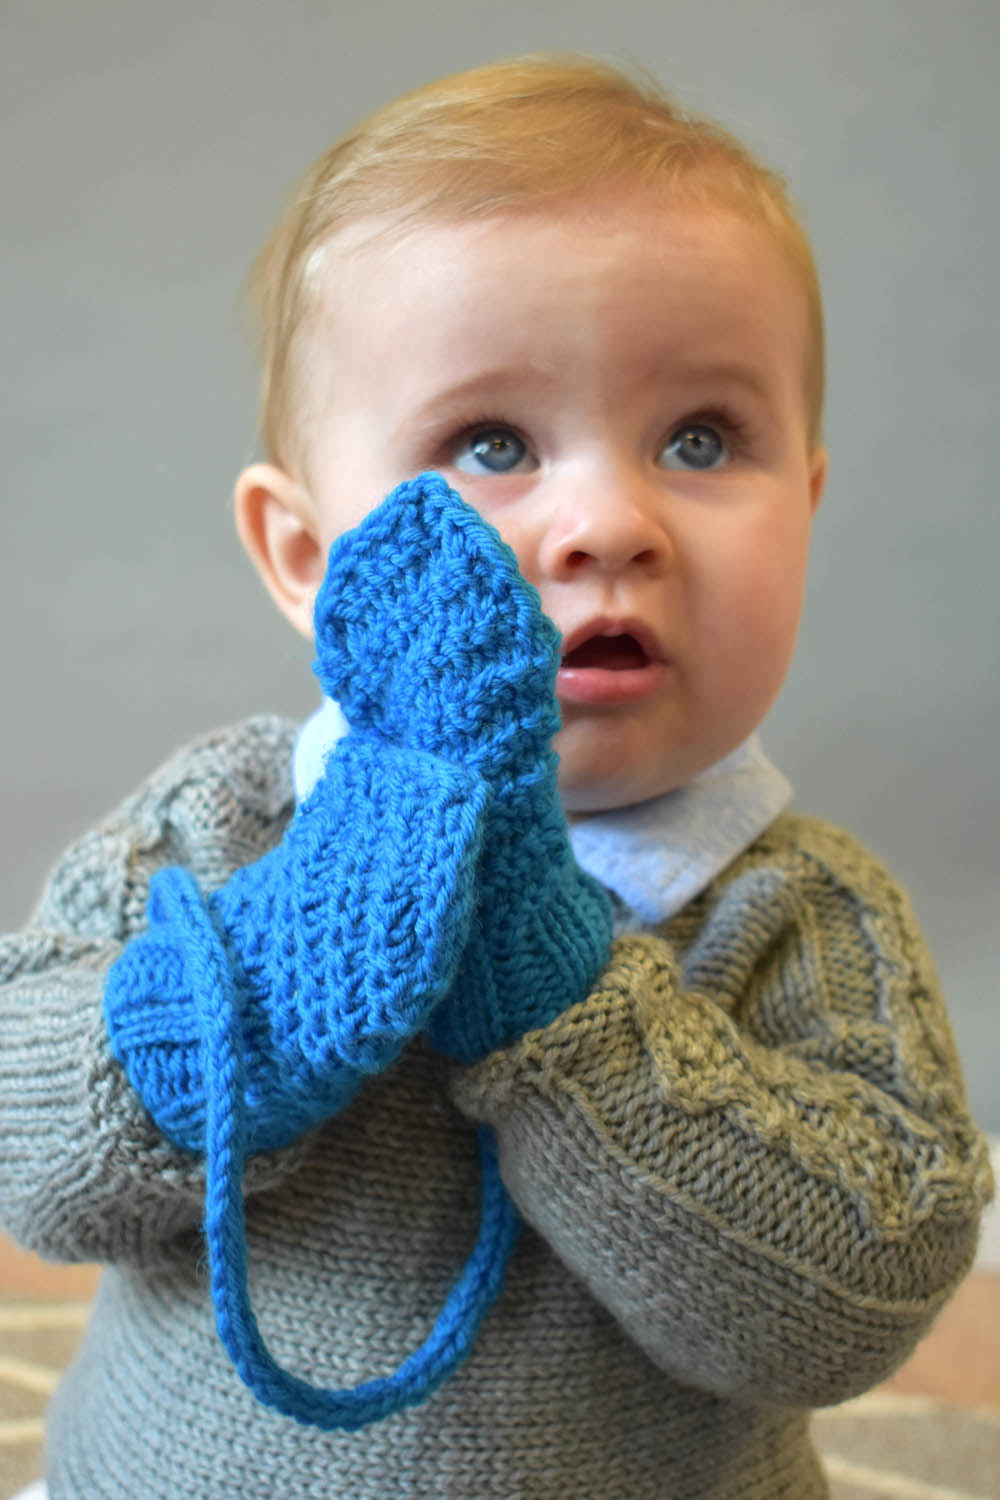
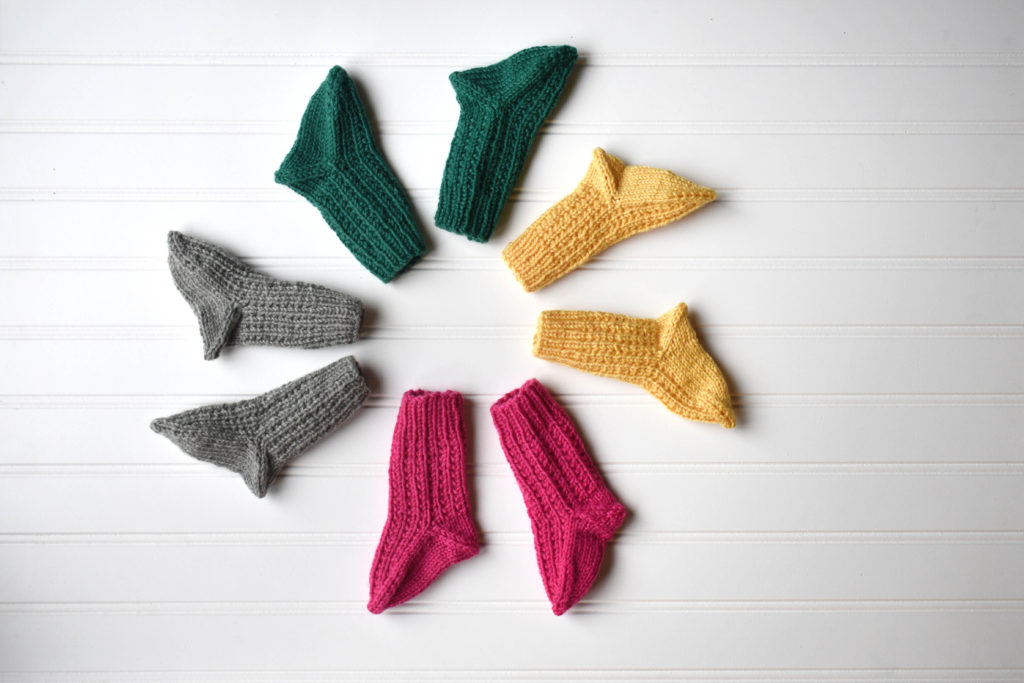
Don’t have time to make a sweater or blanket? No worries! Why not try out the Mini Mittens or Toasty Toes? Better yet, why not make both? These are so fast! You can work them up in a matter of hours and they are sure to be your go-to projects for every baby in your life.
So, those are my picks for baby patterns using Adore. There is more where that came from, too, so be sure to peruse our website for patterns that suit all ages! Happy crafting!
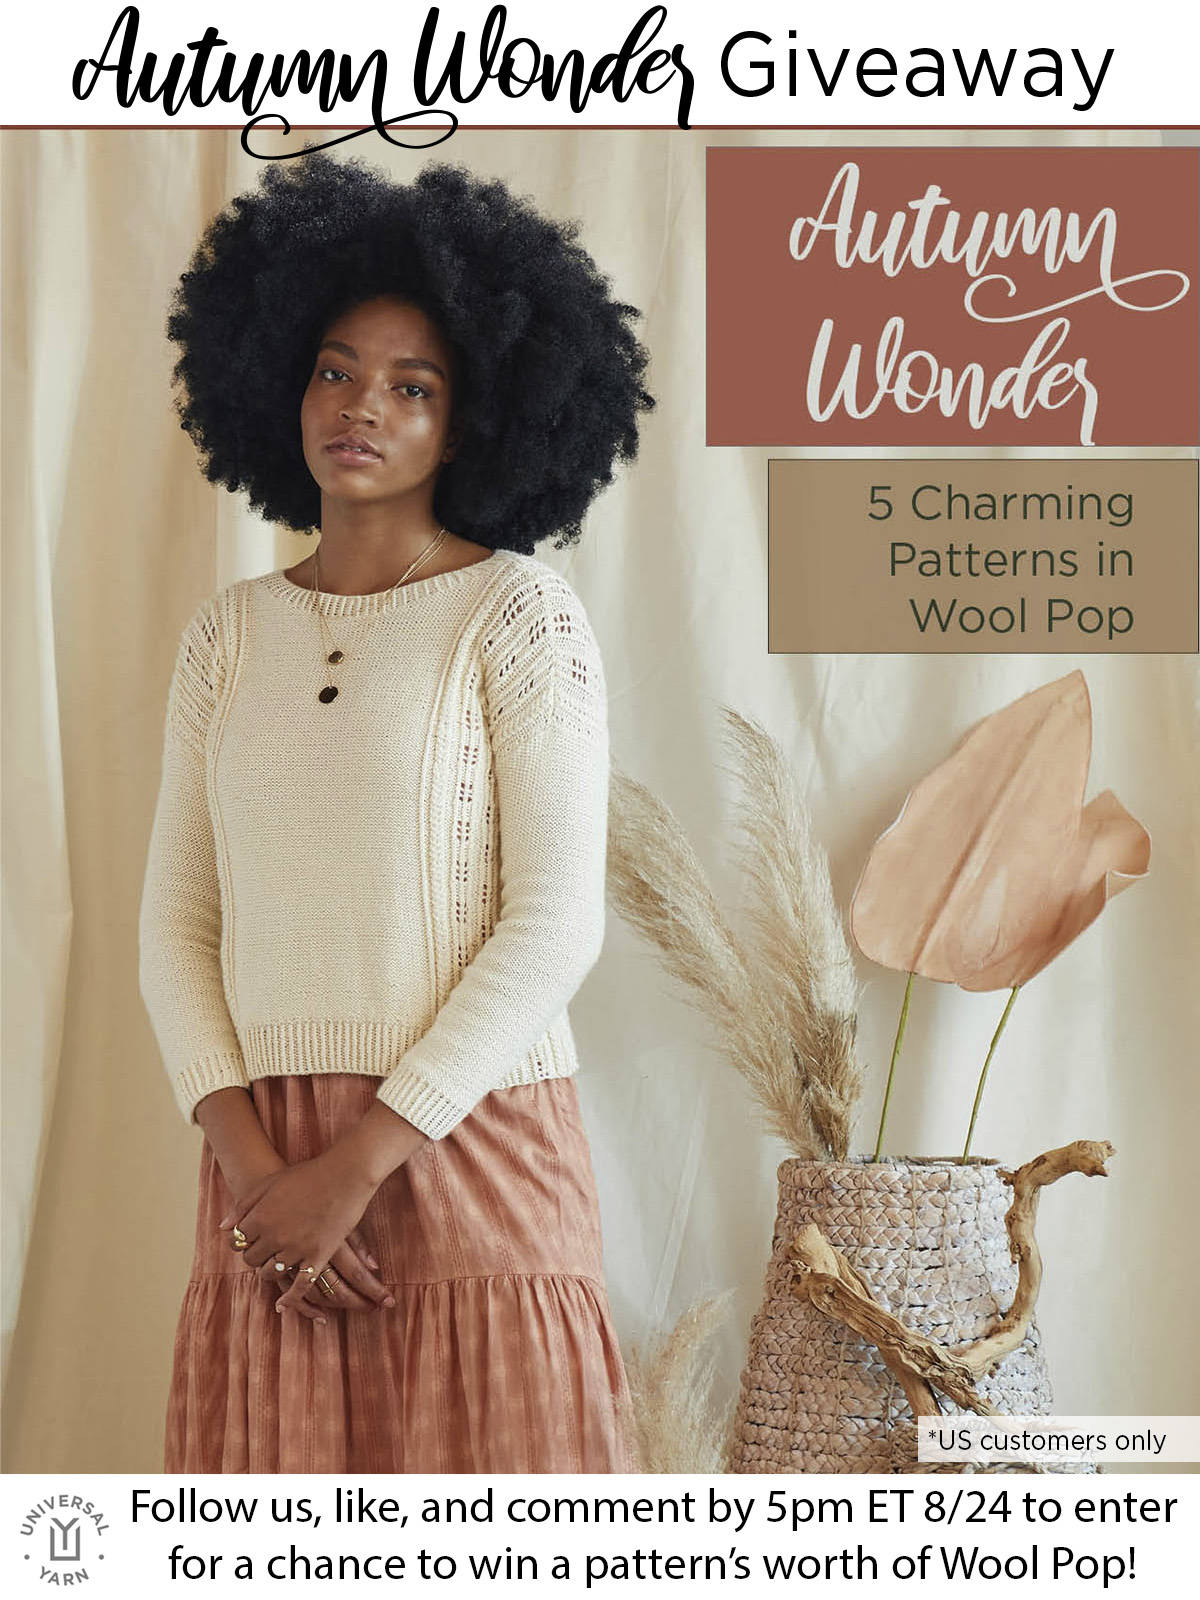
This week we’re celebrating the launch of our latest ebook, Autumn Wonder. This collection is comprised of five charming patterns to knit using Wool Pop. It’s a plump, springy blend of 50% bamboo, 35% superwash wool, and 15% polyamide. Wool Pop is one of our newest yarns, and so far it seems you love it as much as we do! Let’s take a look at the patterns!
Developing pattern collections takes a long time. It starts with a mood board, followed by brainstorming, sketching, and swatching. Then there is the pattern writing, sample knitting, and tech editing. It doesn’t stop there. Outside of the actual pattern work, there is planning and conducting a photoshoot and, of course, putting the whole ebook together! It takes months, and it’s so exciting when we can finally reveal the finished product.
When I started developing the Autumn Wonder collection, I wanted it to include garments and accessories well-suited for the season. You’ll find gorgeous designs suitable for layering as well as rich, textural pullovers with relaxed silhouettes.
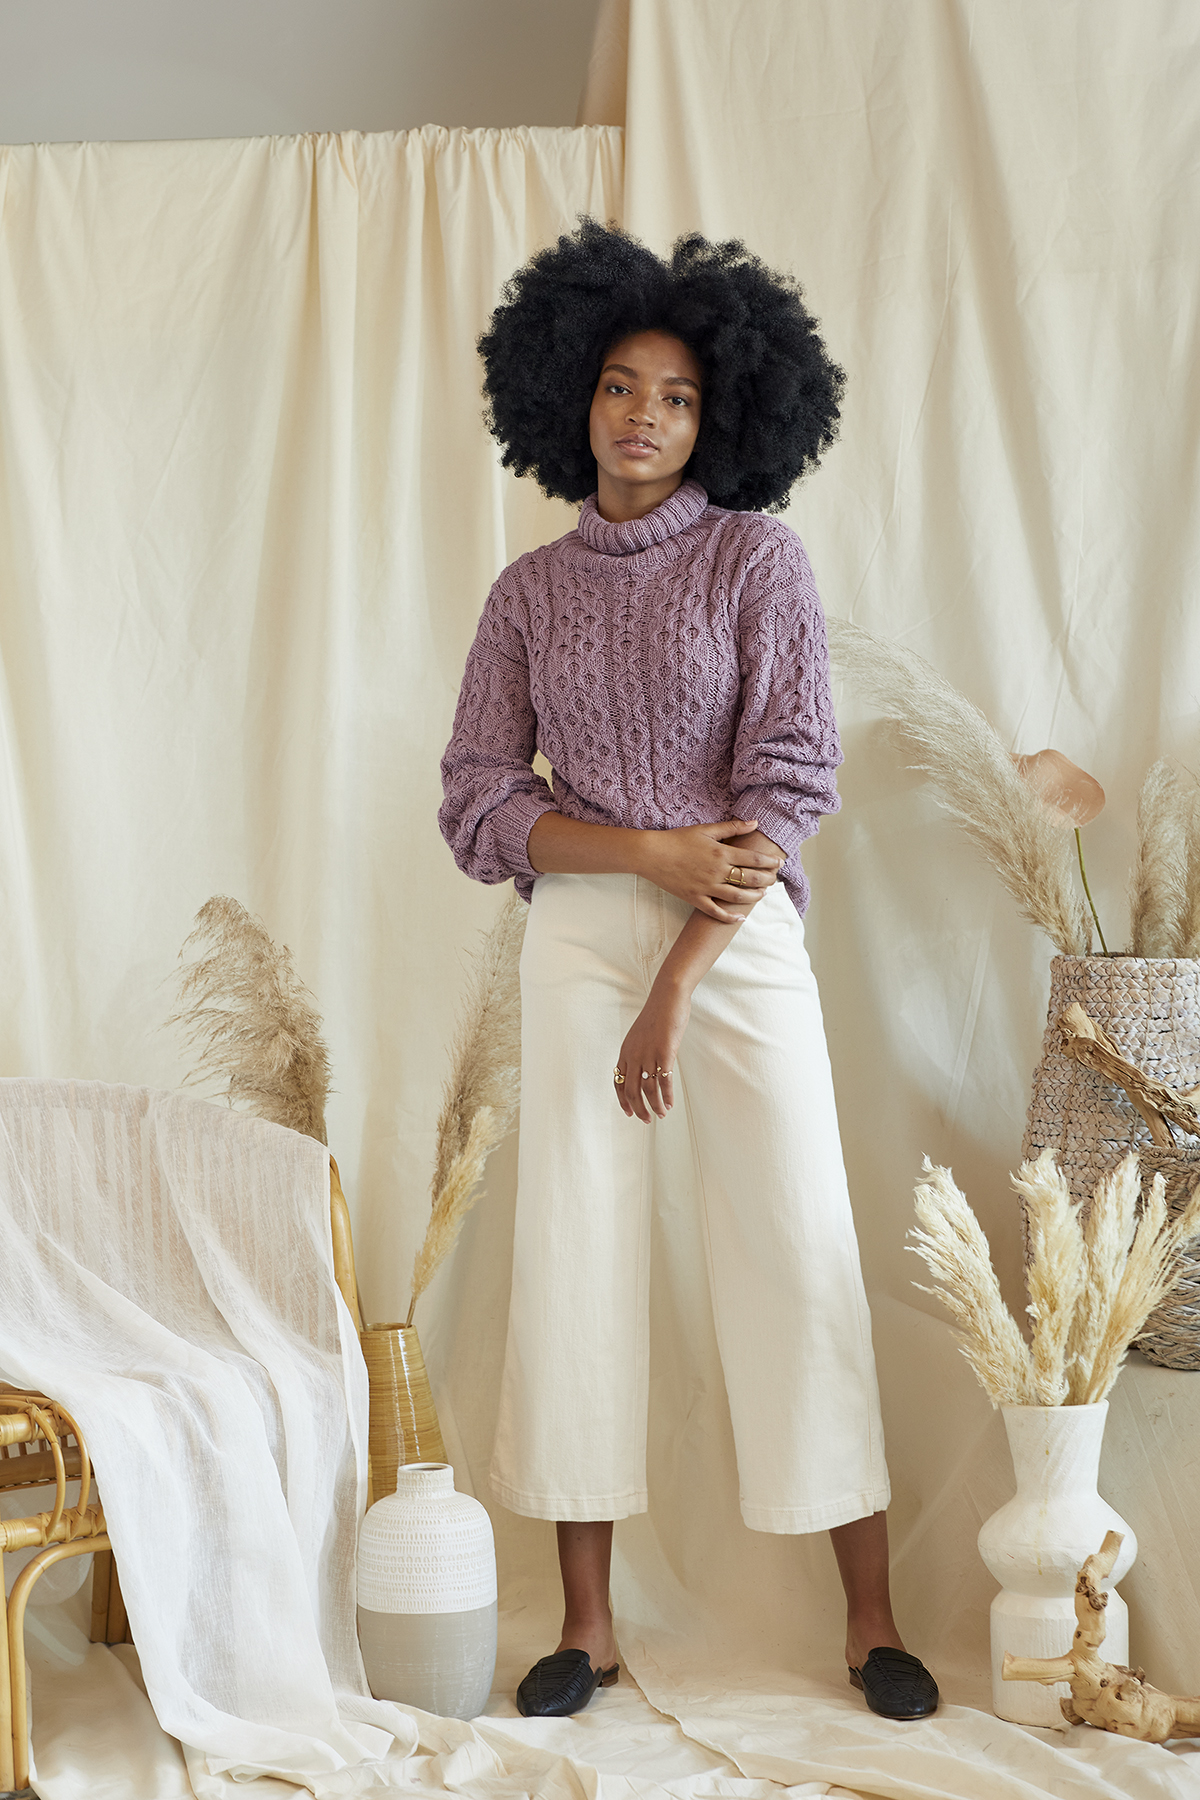
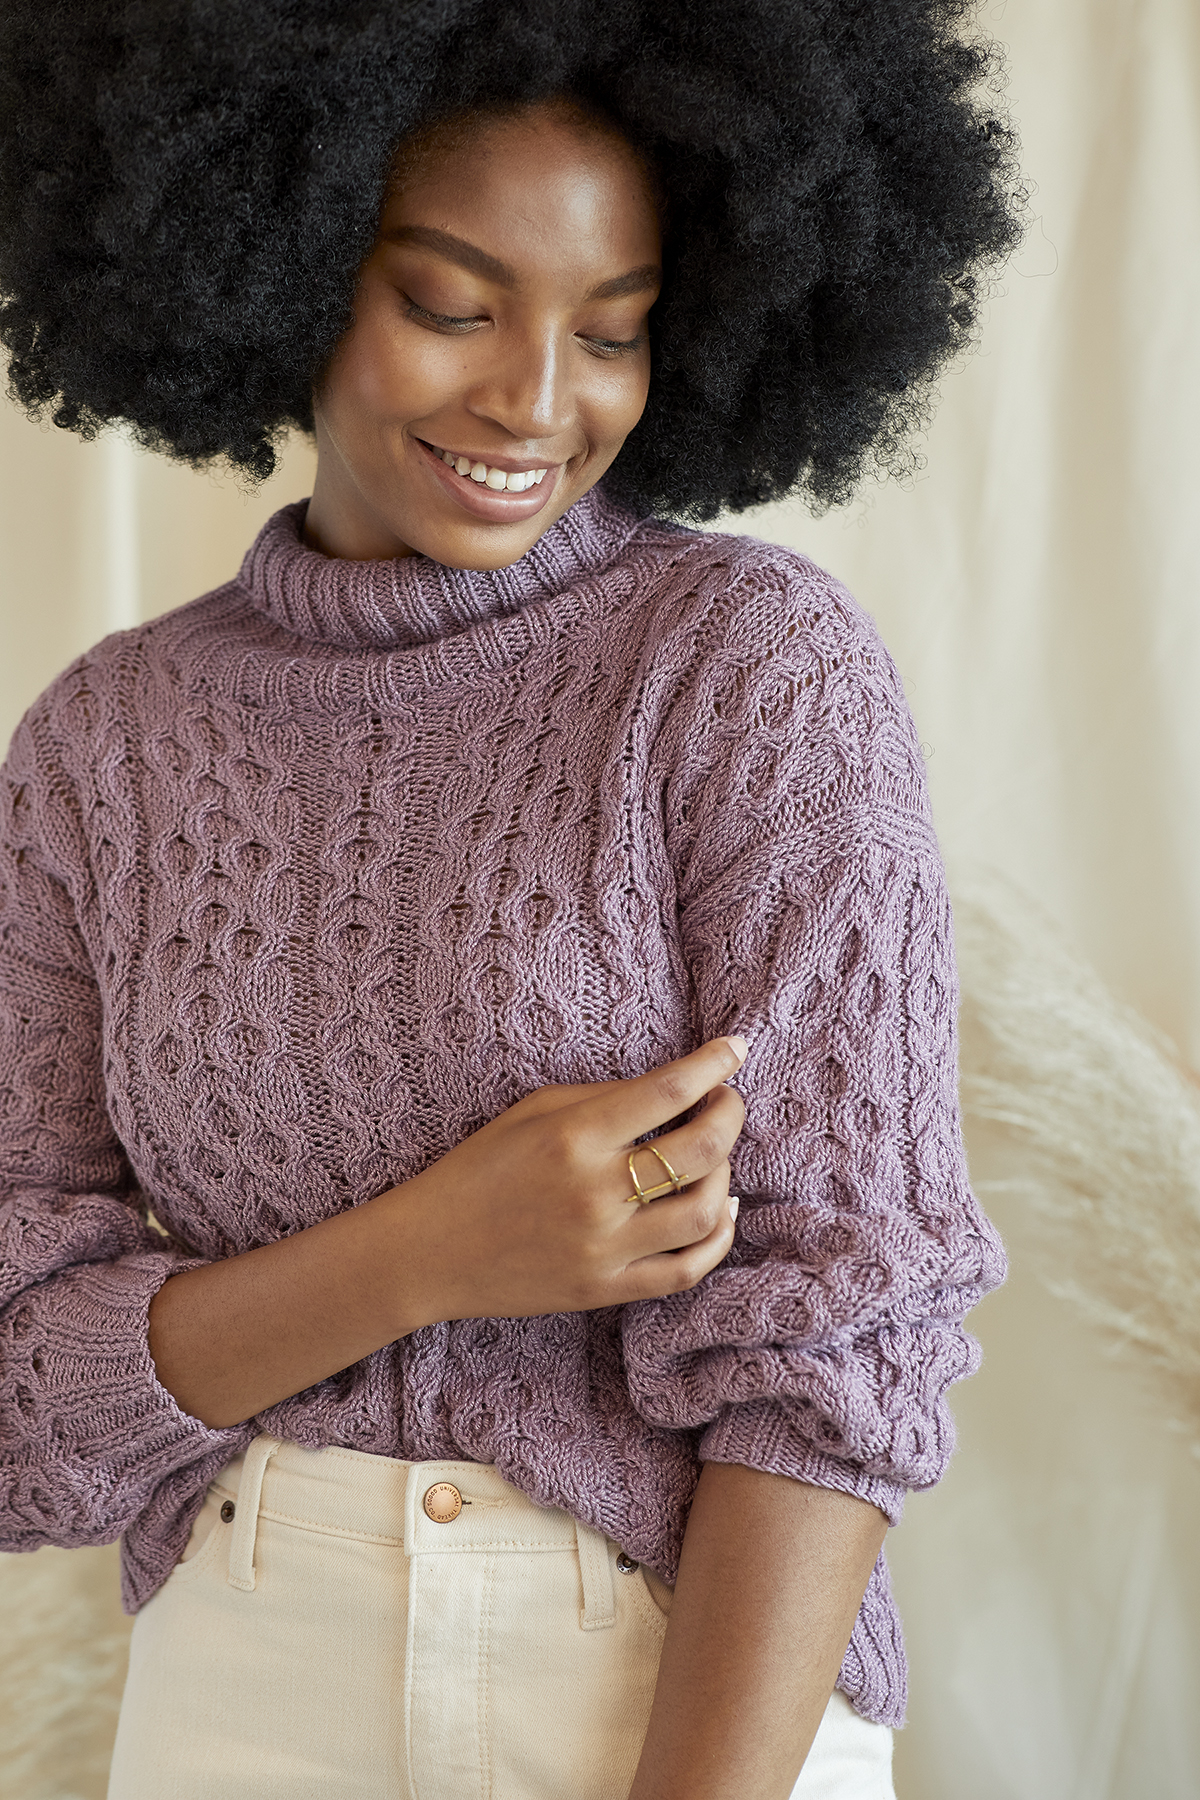
Brezza in Wool Pop #602 Cream
One of my contributions is Brezza. Brezza is a boxy, drop sleeve pullover featuring simple lace and twisted stitches on a background of reverse stockinette stitch. This garment is such a soothing knit. You’ll quickly memorize the stitch pattern, which sweeps from the front along the sides and into the back. The stitchwork in this piece is a testament to the wonderful stitch definition of Wool Pop – I mean, those twisted stitches really pop!
The body of Brezza is knit seamlessly in the round from the bottom up. The front and back are divided at the underarms and worked flat, then are rejoined at the shoulder seam using the three-needle bind-off. The sleeves are knit flat separately and seamed.
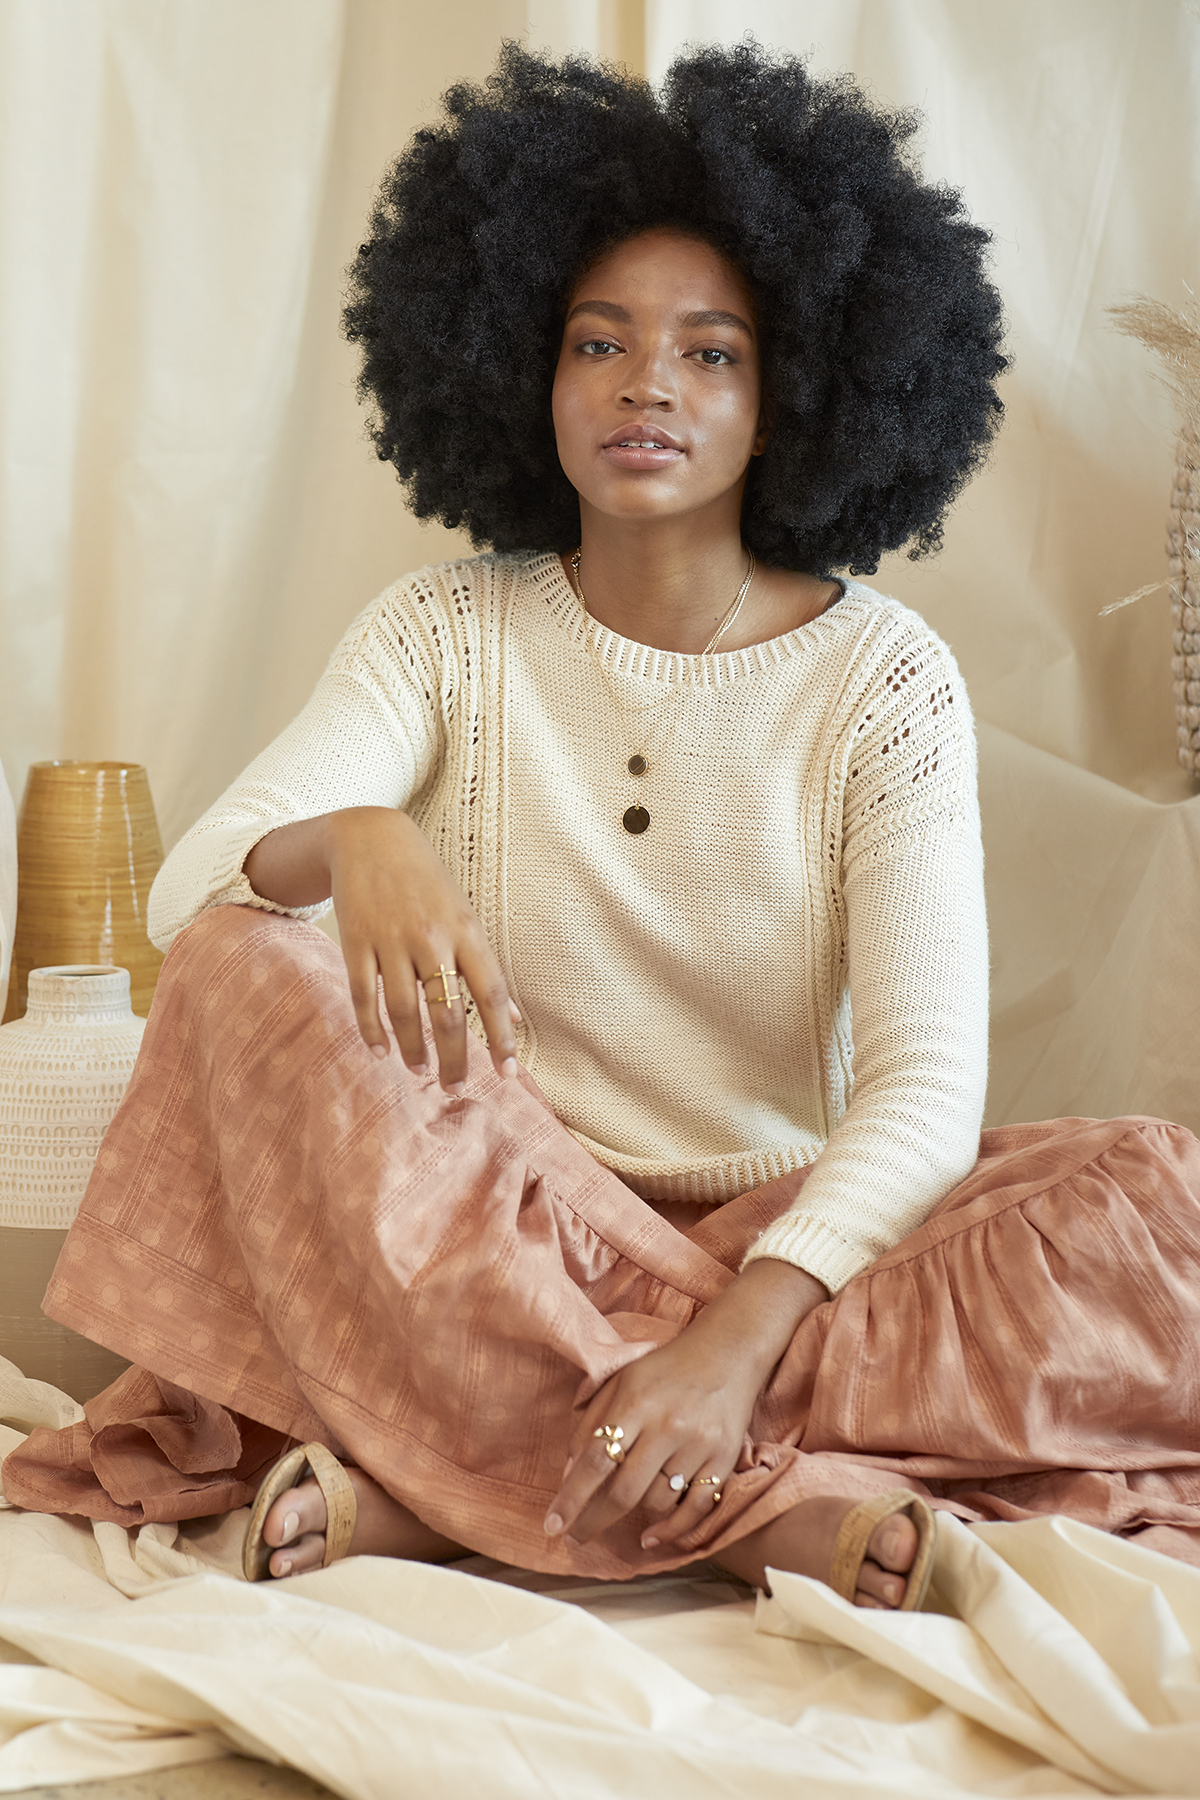
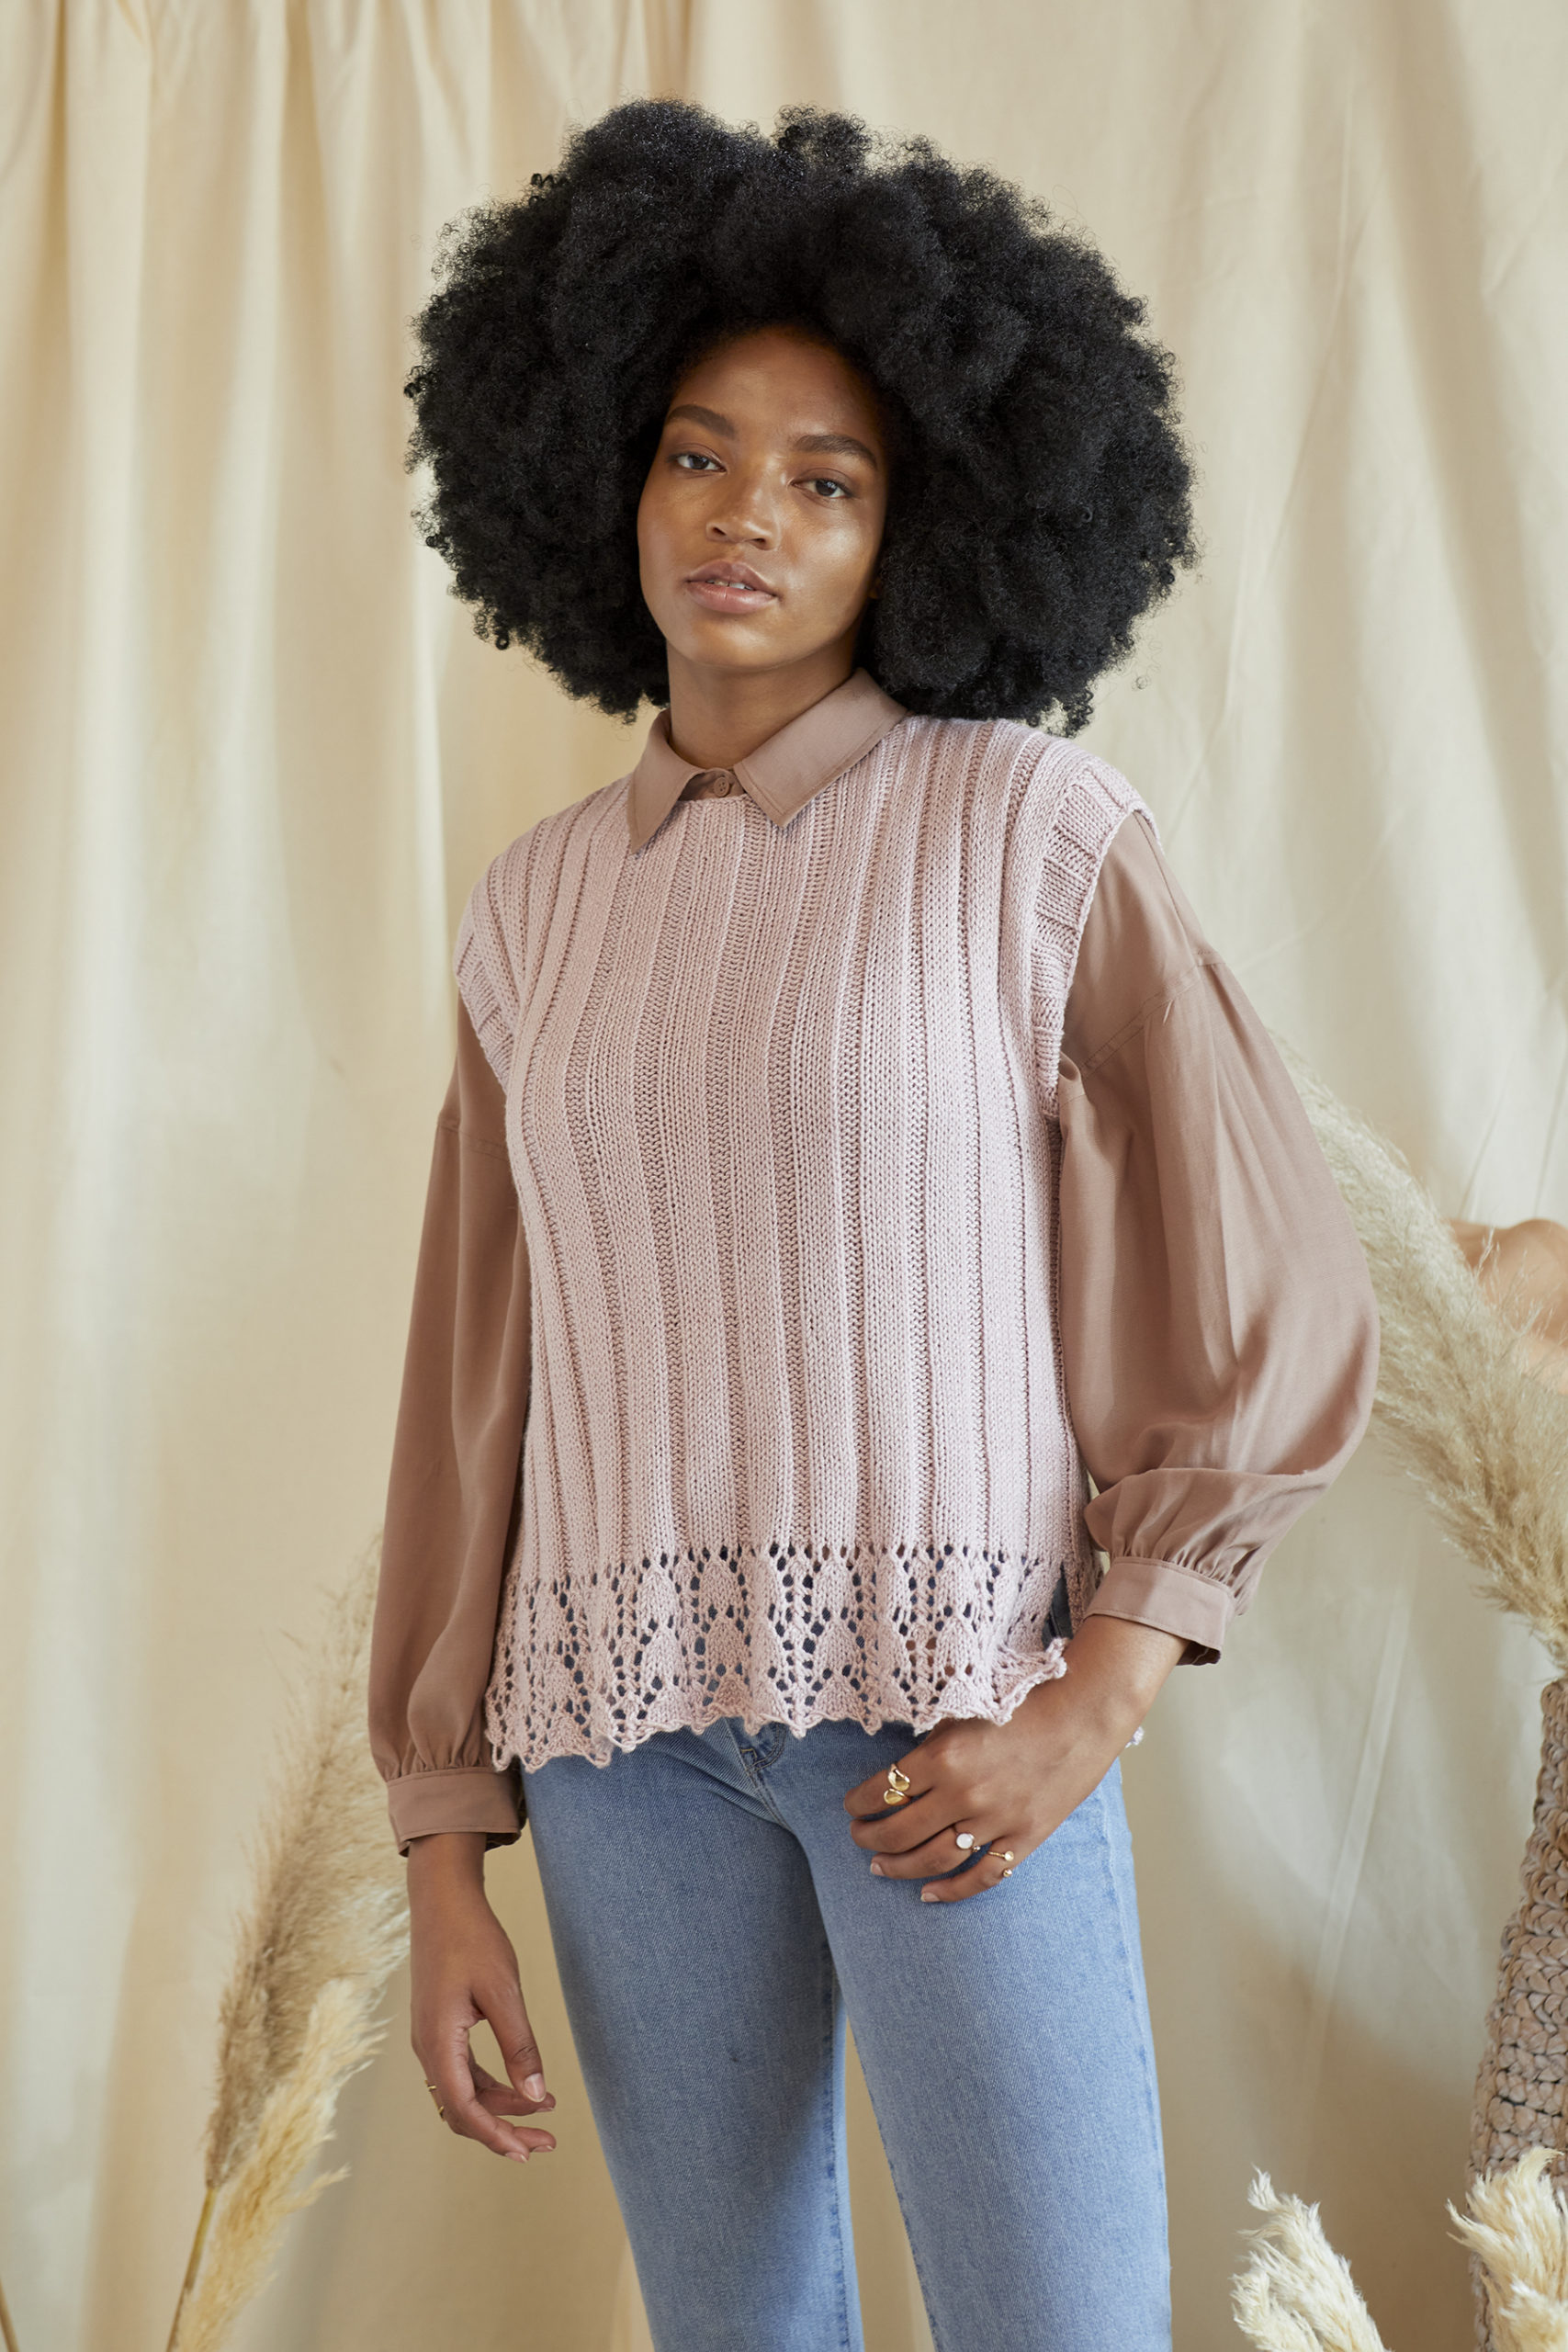
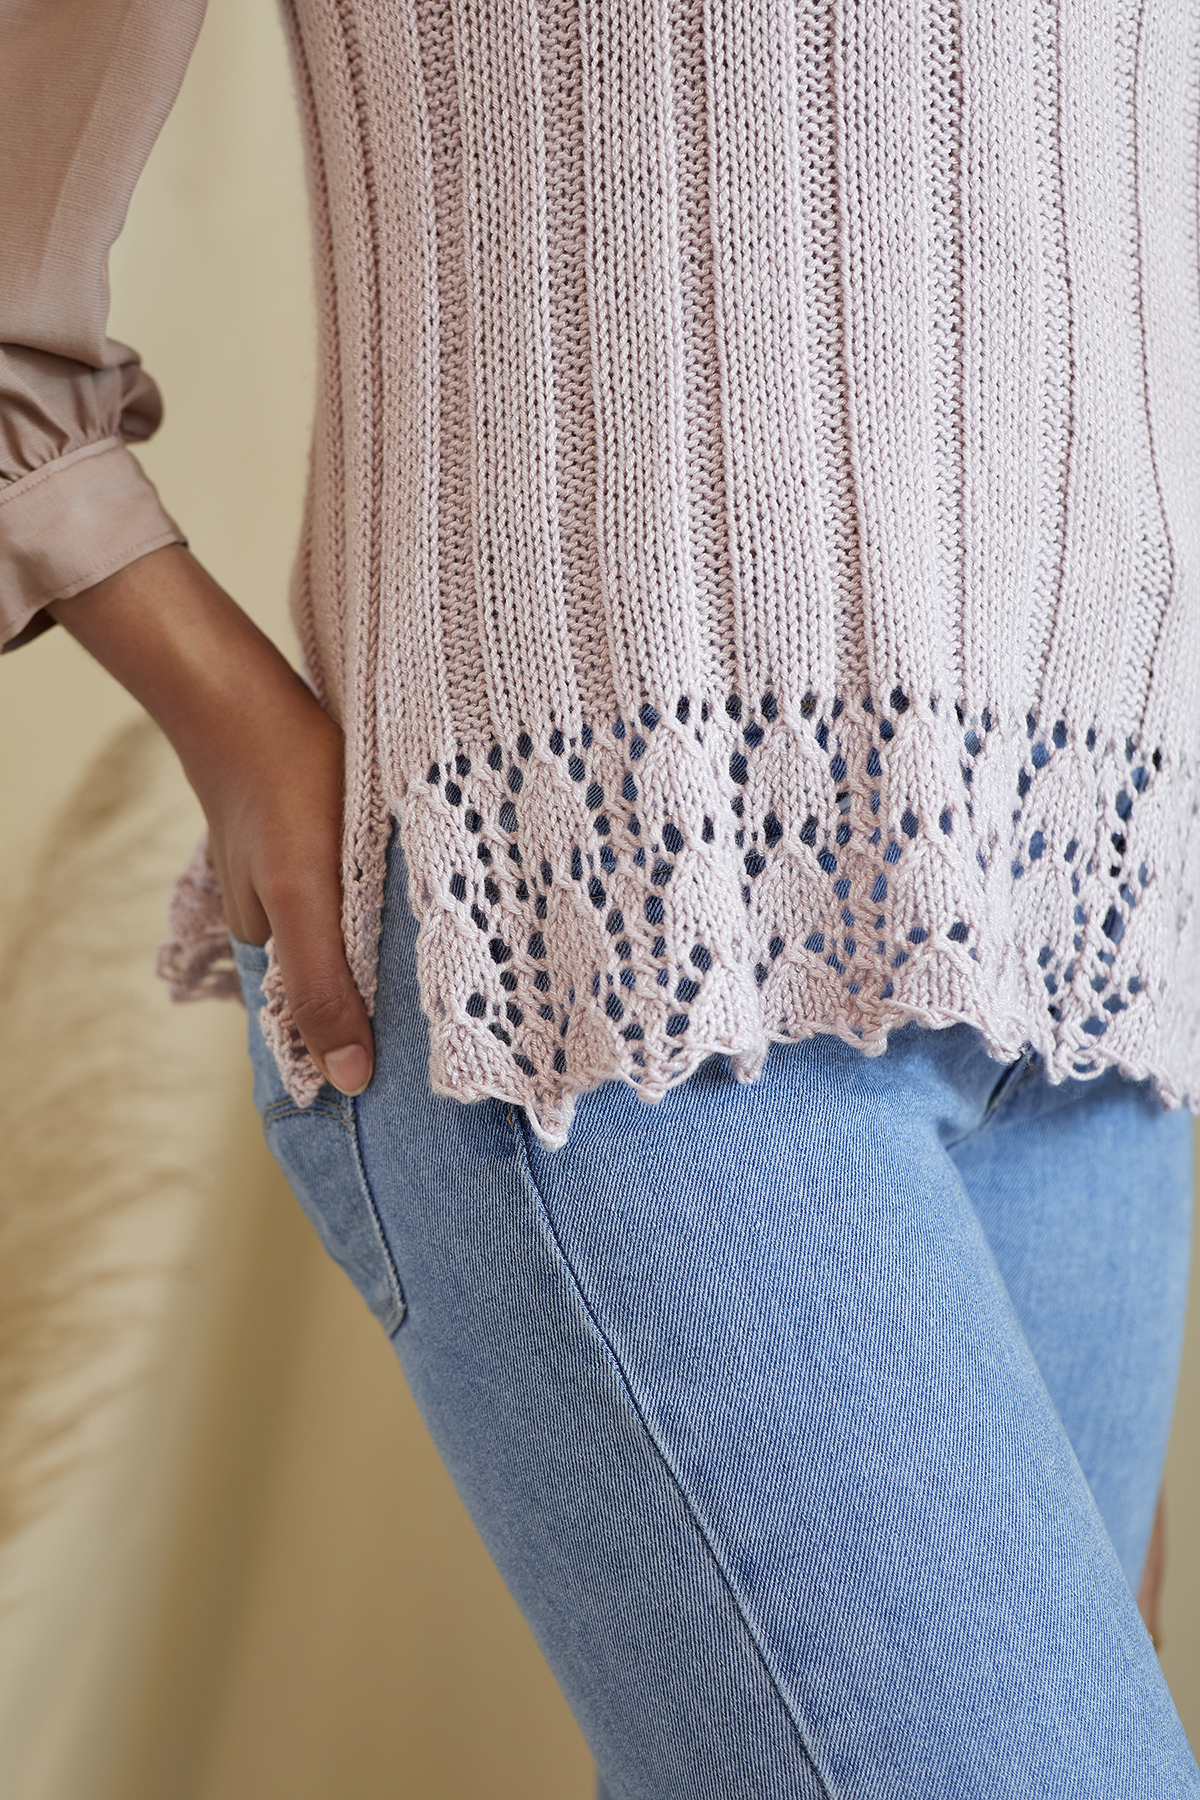
Filigree in Wool Pop #609 Darling Pink
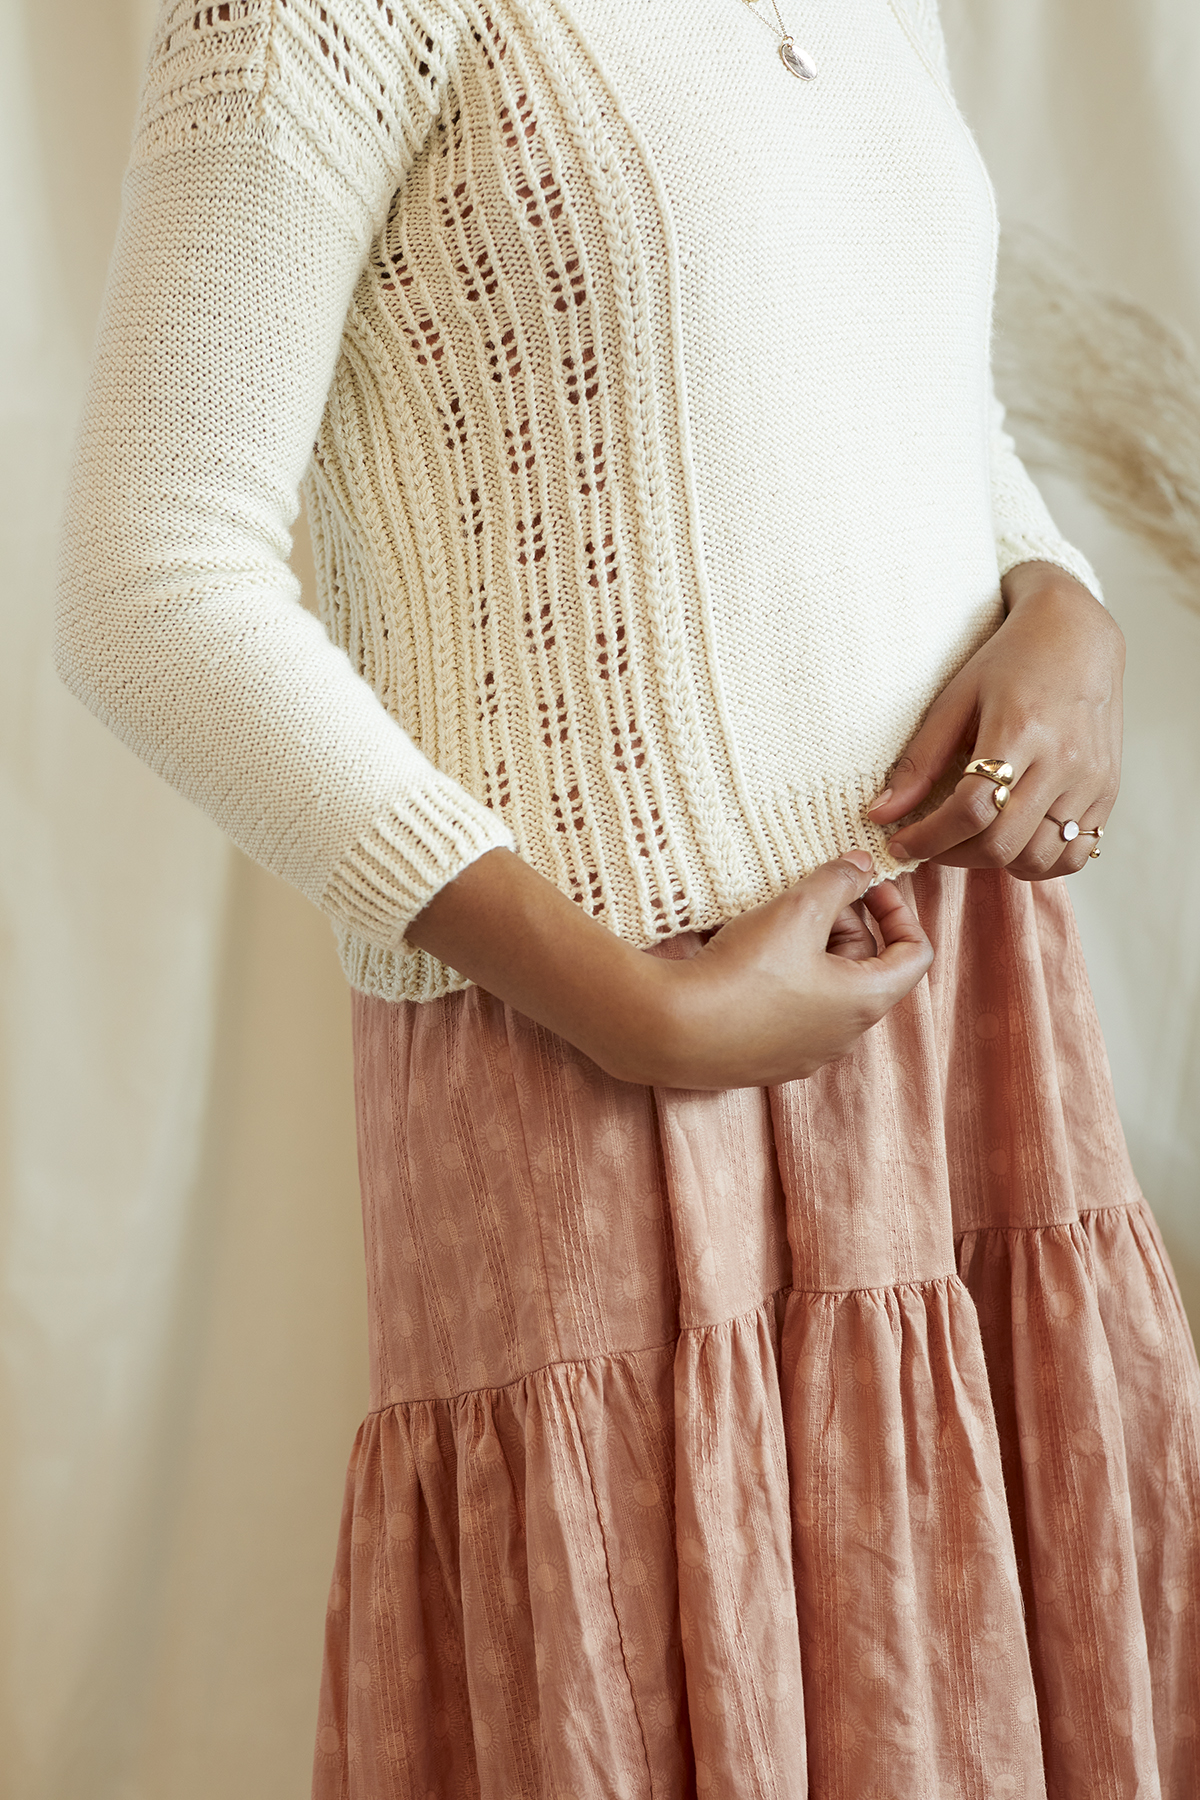
I was given the opportunity to reach out so some designers I admire for this collection. I’ve long admired Lana Jois‘ work, so I was thrilled when she took me up on my invitation to contribute a pattern. Filigree is the result of this collaboration – and it might just be the perfect tee. It’s great for layering (as pictured above), or worn on its own.
I love the split lace hem that decorates this otherwise simple tee. Although I love knitting lace, I don’t always feel like “me” when wearing it. With that said, I fell in love with this top right away – it features just the right amount of lace for me. You can actually see me wearing it in this video. I have my heart set on knitting a version of this top in #616 Denim.
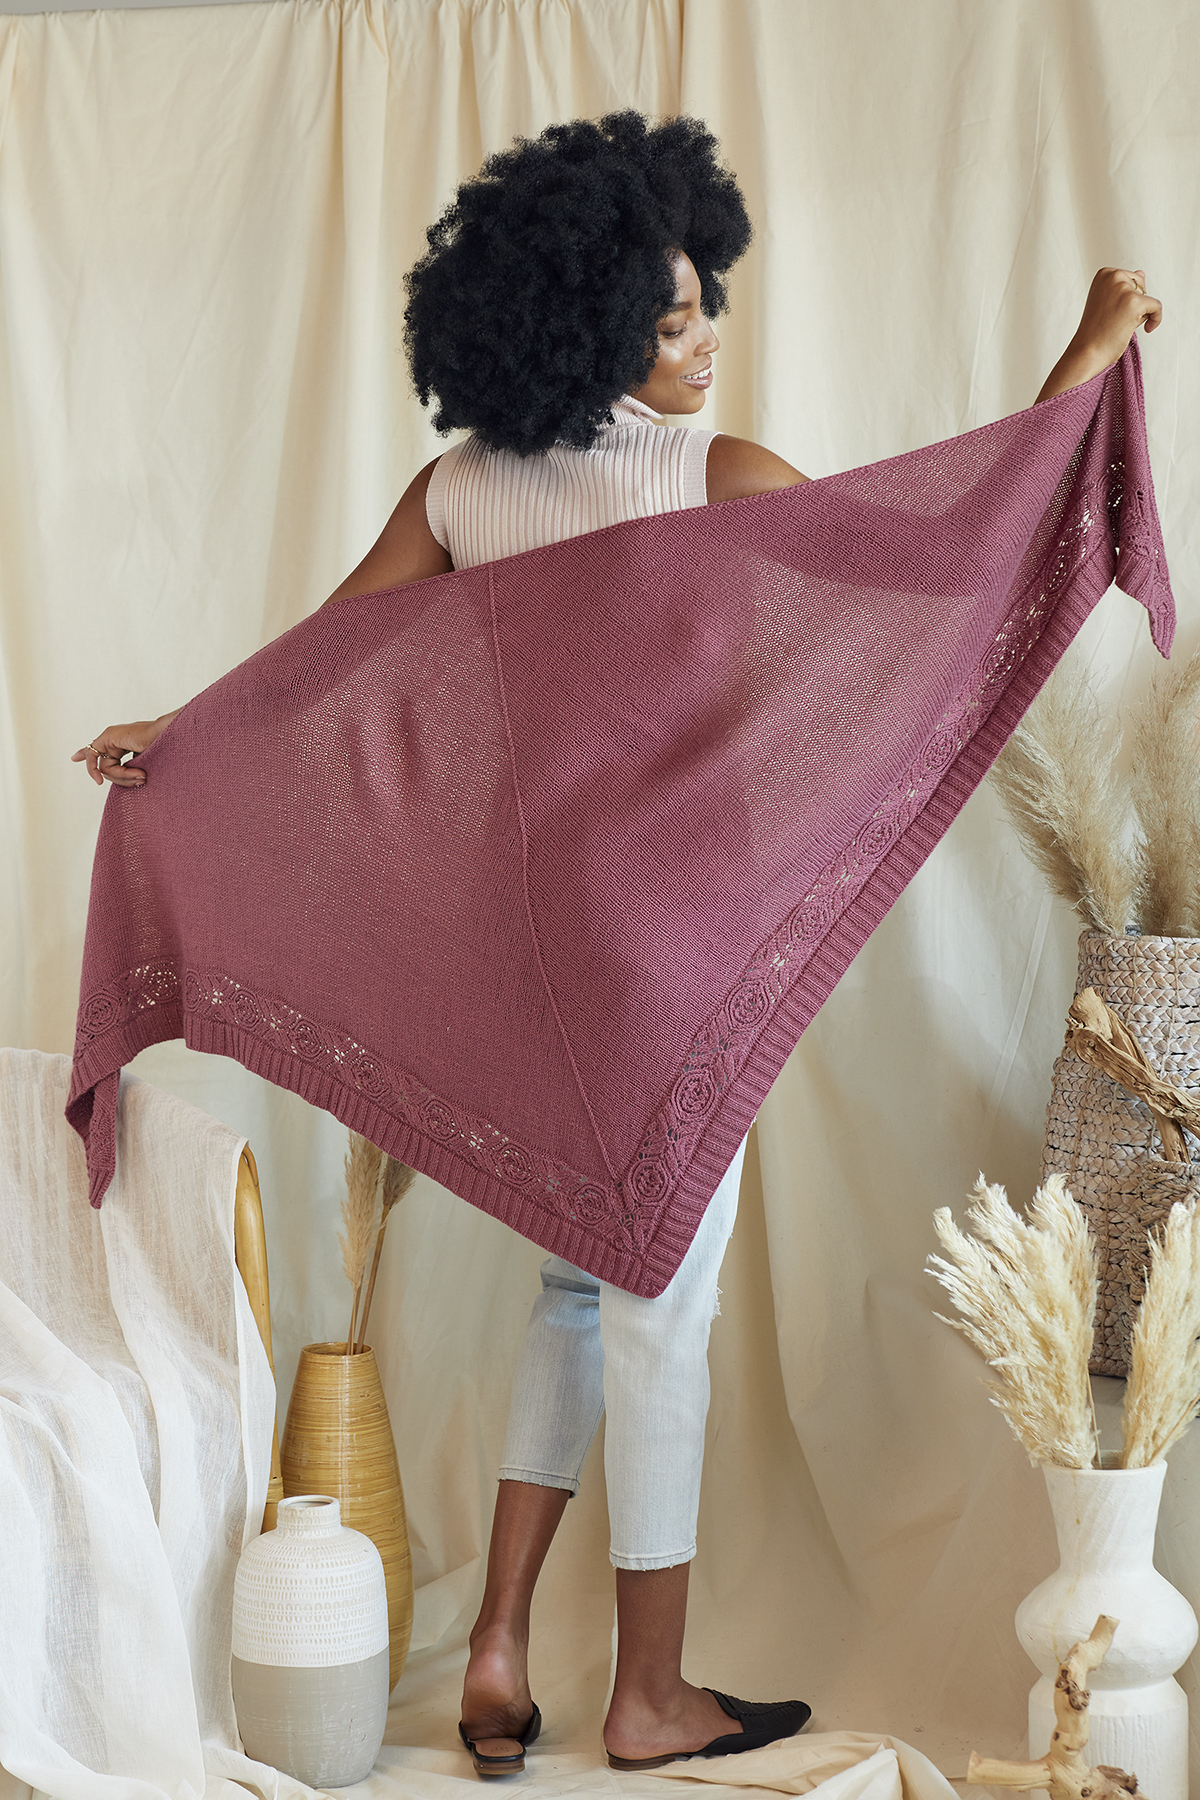
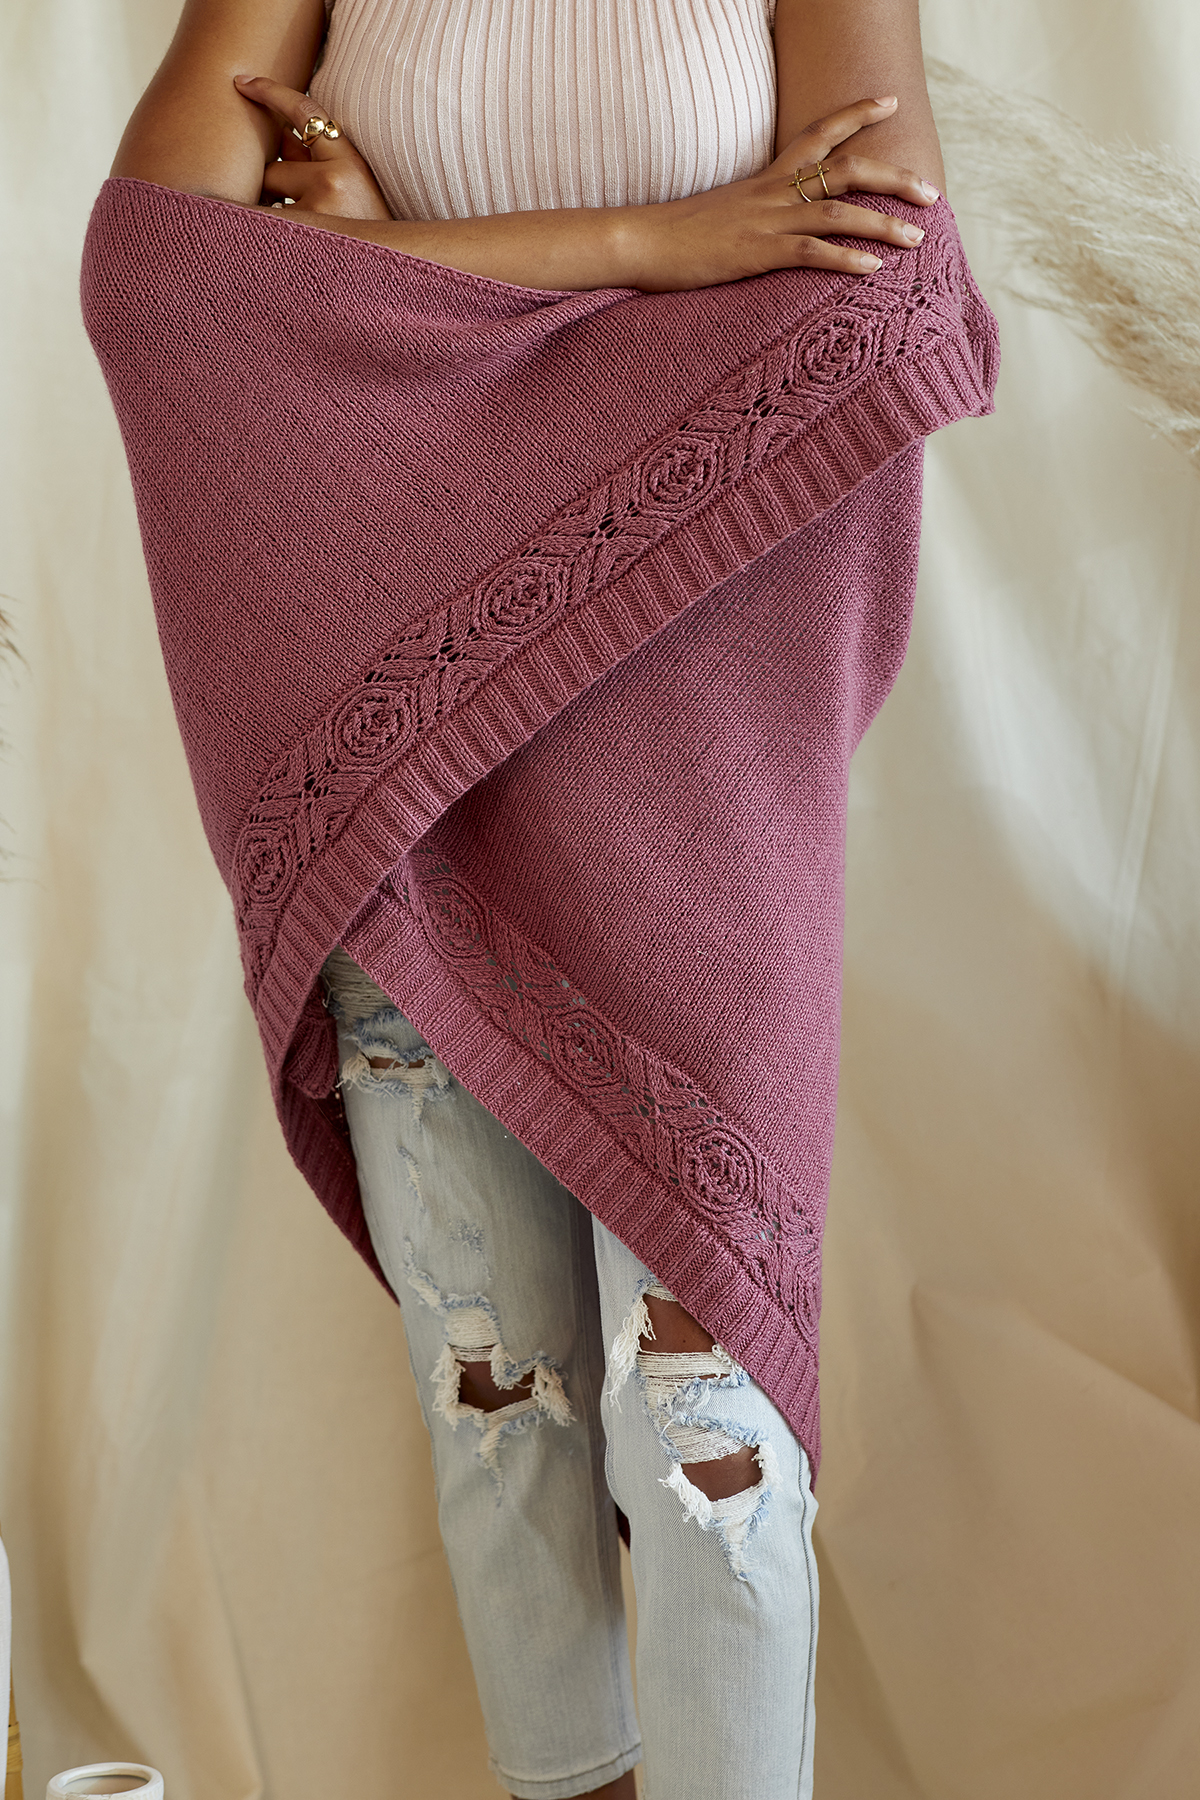
Perennial in Wool Pop #611 Brambles
If garments aren’t your favorite thing to make, look no further than Perennial. Most triangular shawls are knit either from the top down or the bottom up, but designer Adrienne Larsen isn’t one to stick to the status quo. Instead, she chose to use a clever, modular construction.
A beautiful lace panel is framed by simple ribbing and stockinette stitch. The panel is worked first, then stitches are picked up along the bottom edge of the panel to create a ribbed edge that is worked from the top down. Finally, stitches are picked up along the top of the panel for the body, which is worked from the bottom up and a tidy, single crochet border is applied across the top edge. I’m so inspired by this one!
Serra in Wool Pop #617 Raisin
My second contribution to the collection is Serra. This pullover has a relaxed, cozy fit and is covered with cables. Although this is a straightforward design with minimal shaping in this, the cables demand a bit of attention. The results are well worth the effort because you’ll want to live in this piece!
The body of Serra is knit seamlessly in the round from the bottom up. The front and back are divided at the underarms and worked flat, then are rejoined at the shoulder seam using the three-needle bind-off. The sleeves are knit flat separately and seamed.
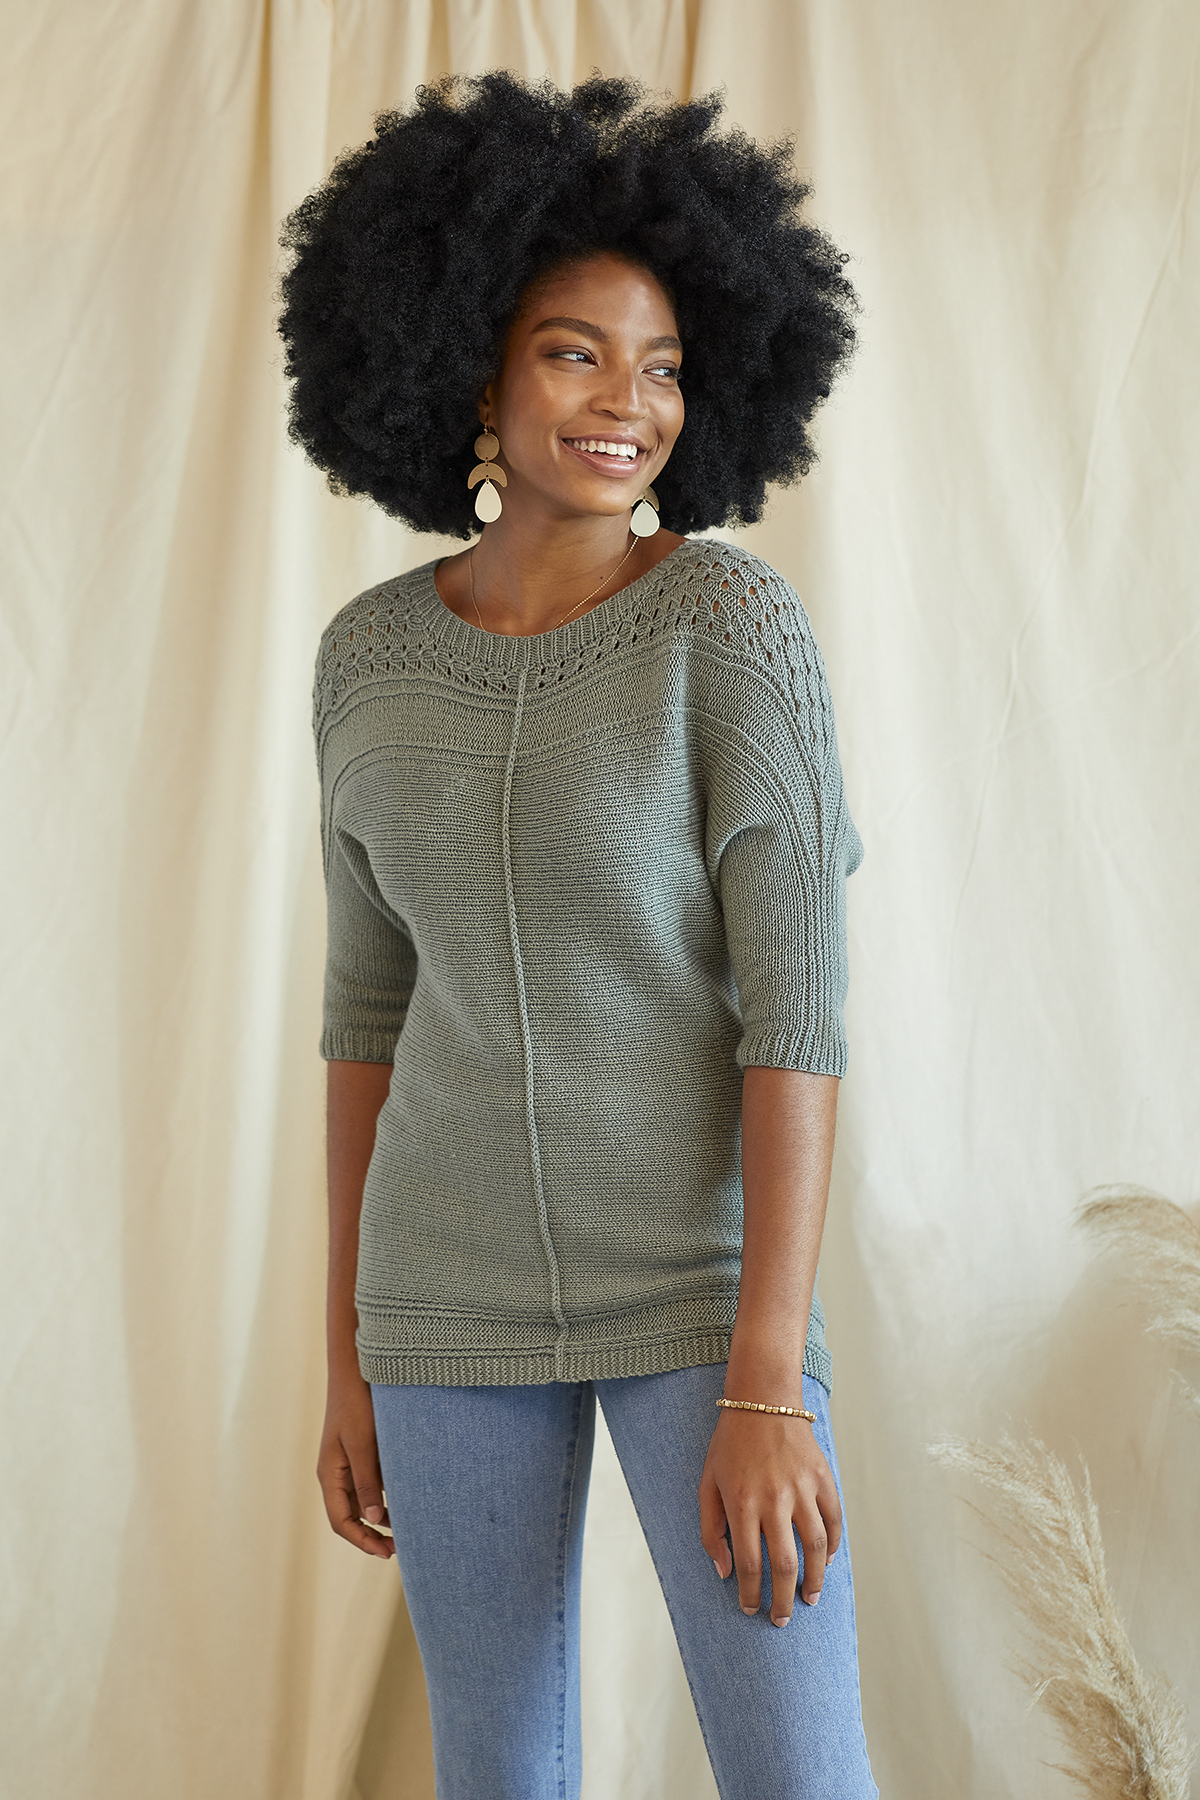
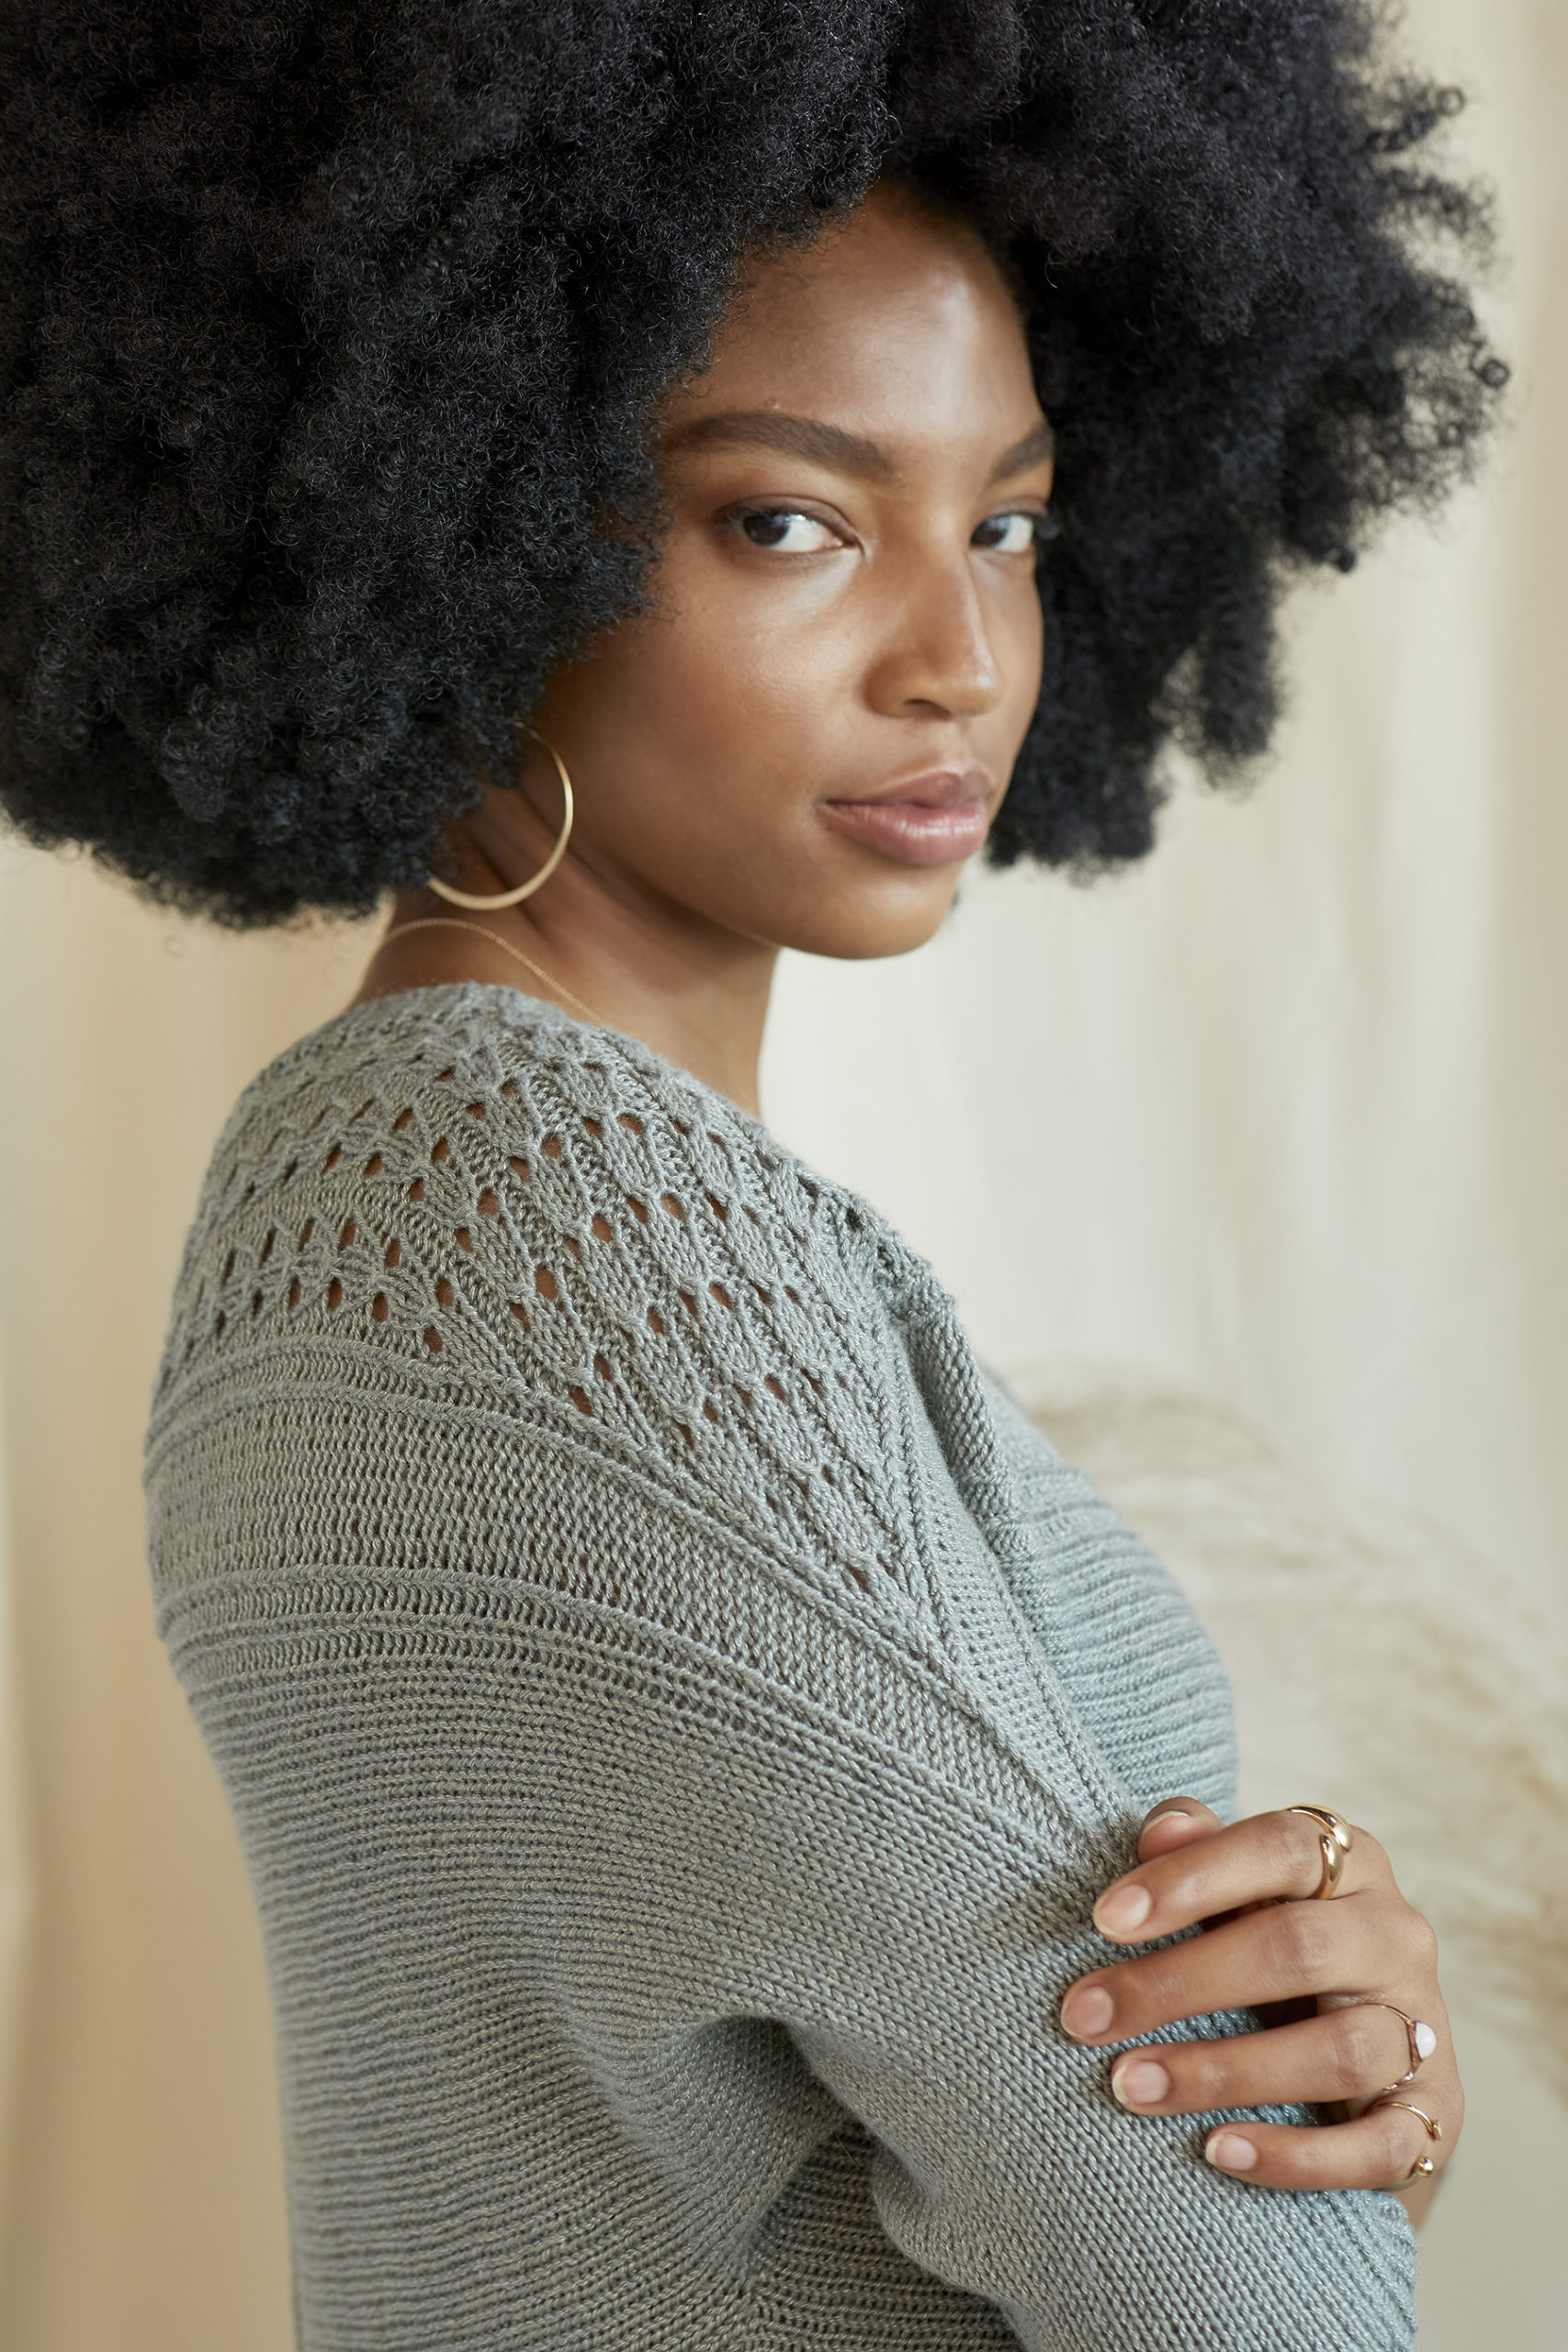
Stagione in Wool Pop #615 Sage
Last, but certainly not least, we have Stagione, designed by Courtney Spainhower. When I invited Courtney to contribute to the collection, she told me that she has made a mission out of “showing shoulders more beautifully than ever before”. I’d call that mission a success! The details in this garment are so thoughtful, from the “rib” along the hem created with garter stitch to the twisted stitches, visible seams, and of course – that drool-worthy shoulder shaping!
This sweater is worked in two mirrored pieces from the center to the cuff. It begins with a provisional cast-on, which is then joined using a stretchy three-needle bind-off to create the visible seams down the center of the front and back. This is another sweater from the collection that I’m dying to knit.
Now that you’ve had a closer look at the designs, I have even more exciting news. To celebrate the launch of this collection we’re hosting a giveaway! Two lucky winners will receive a pattern’s worth of Wool Pop for the project of their choice from the collection, in the color and size of their choice. Does it get any better than that?
To enter, head to our Facebook page (link) and to our Instagram (link). All you need to do is like us, follow us, and comment on our post. We’ll choose a winner next Tuesday, 8/25/20. You can enter on both platforms, but you can only win once.
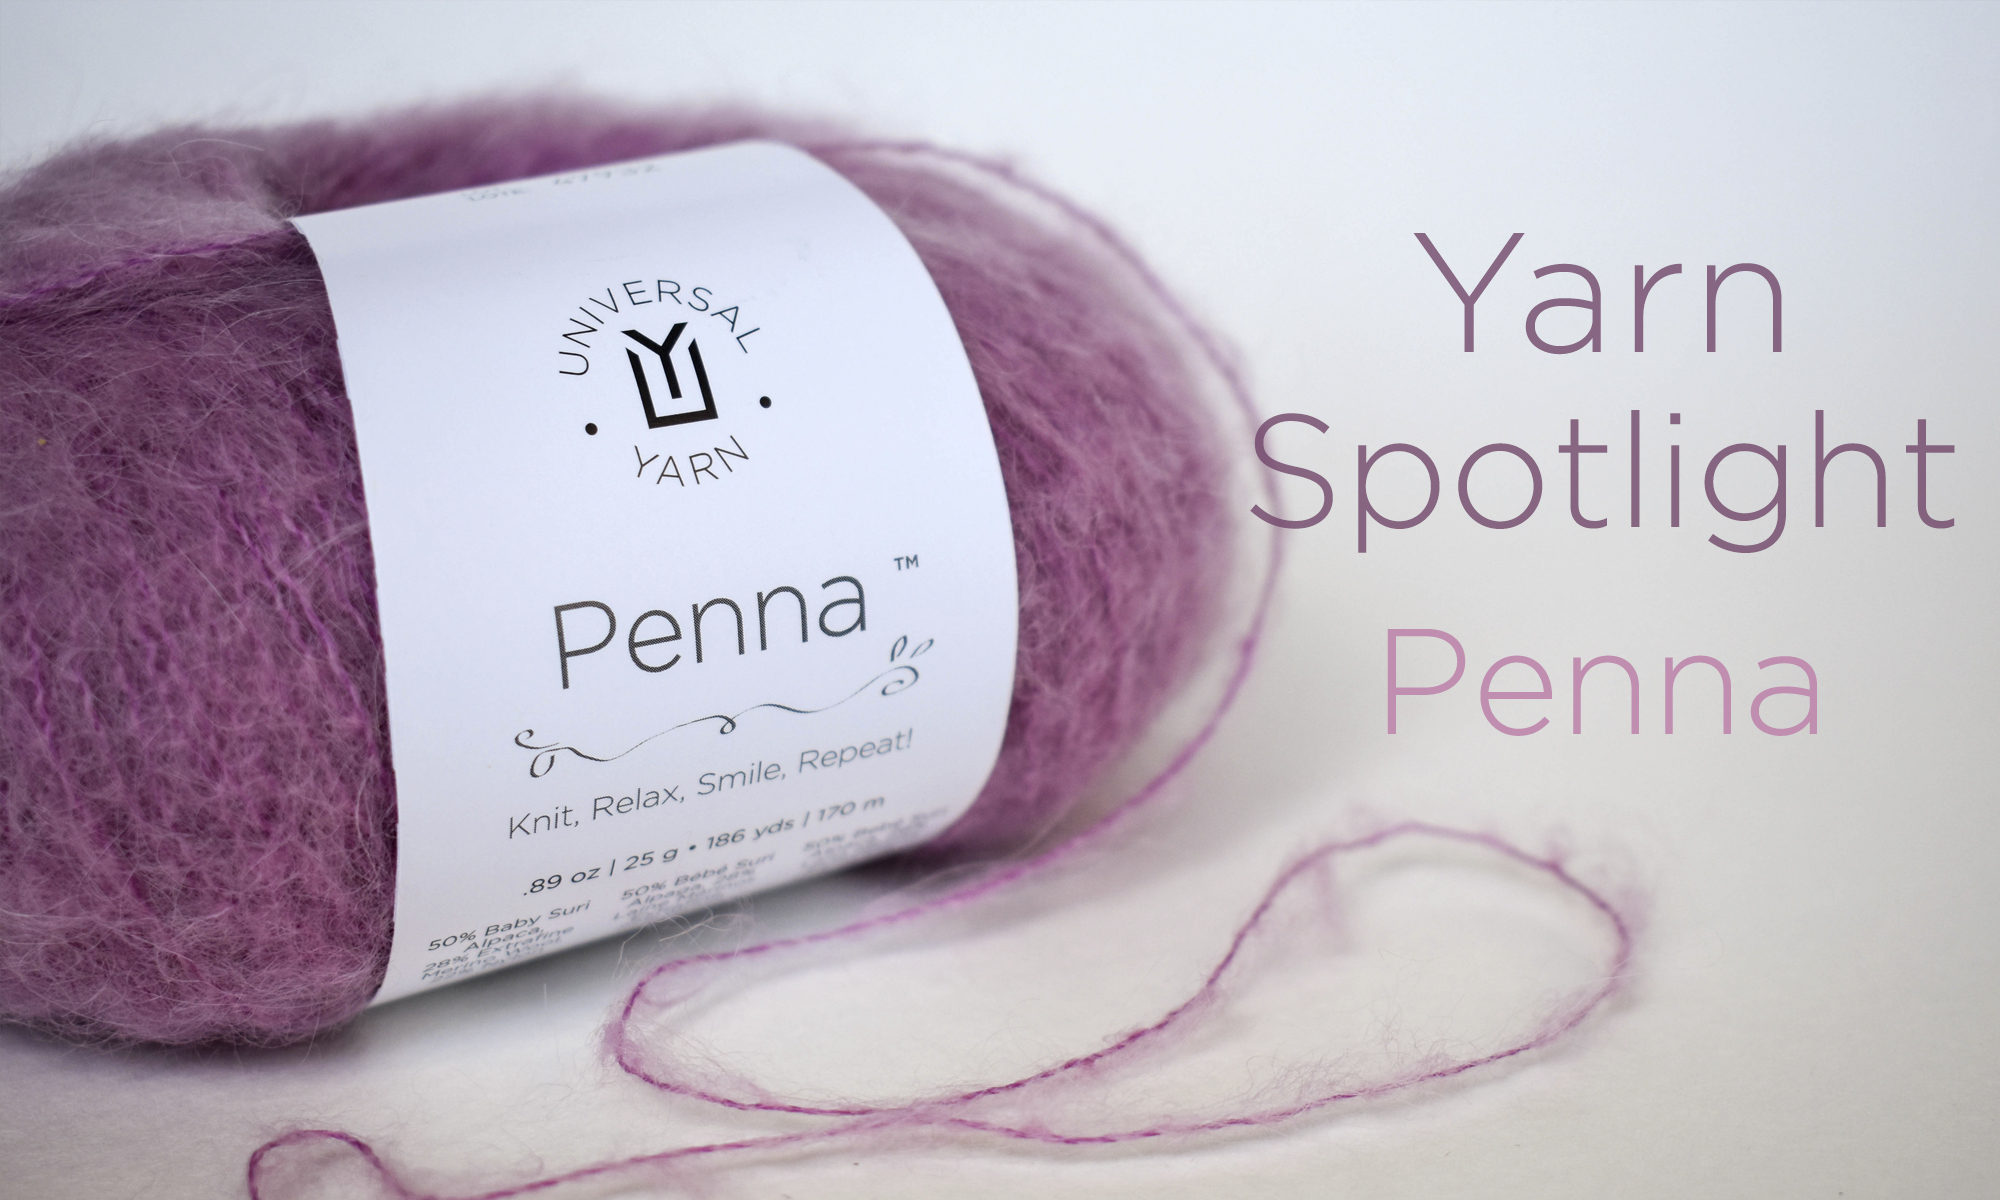
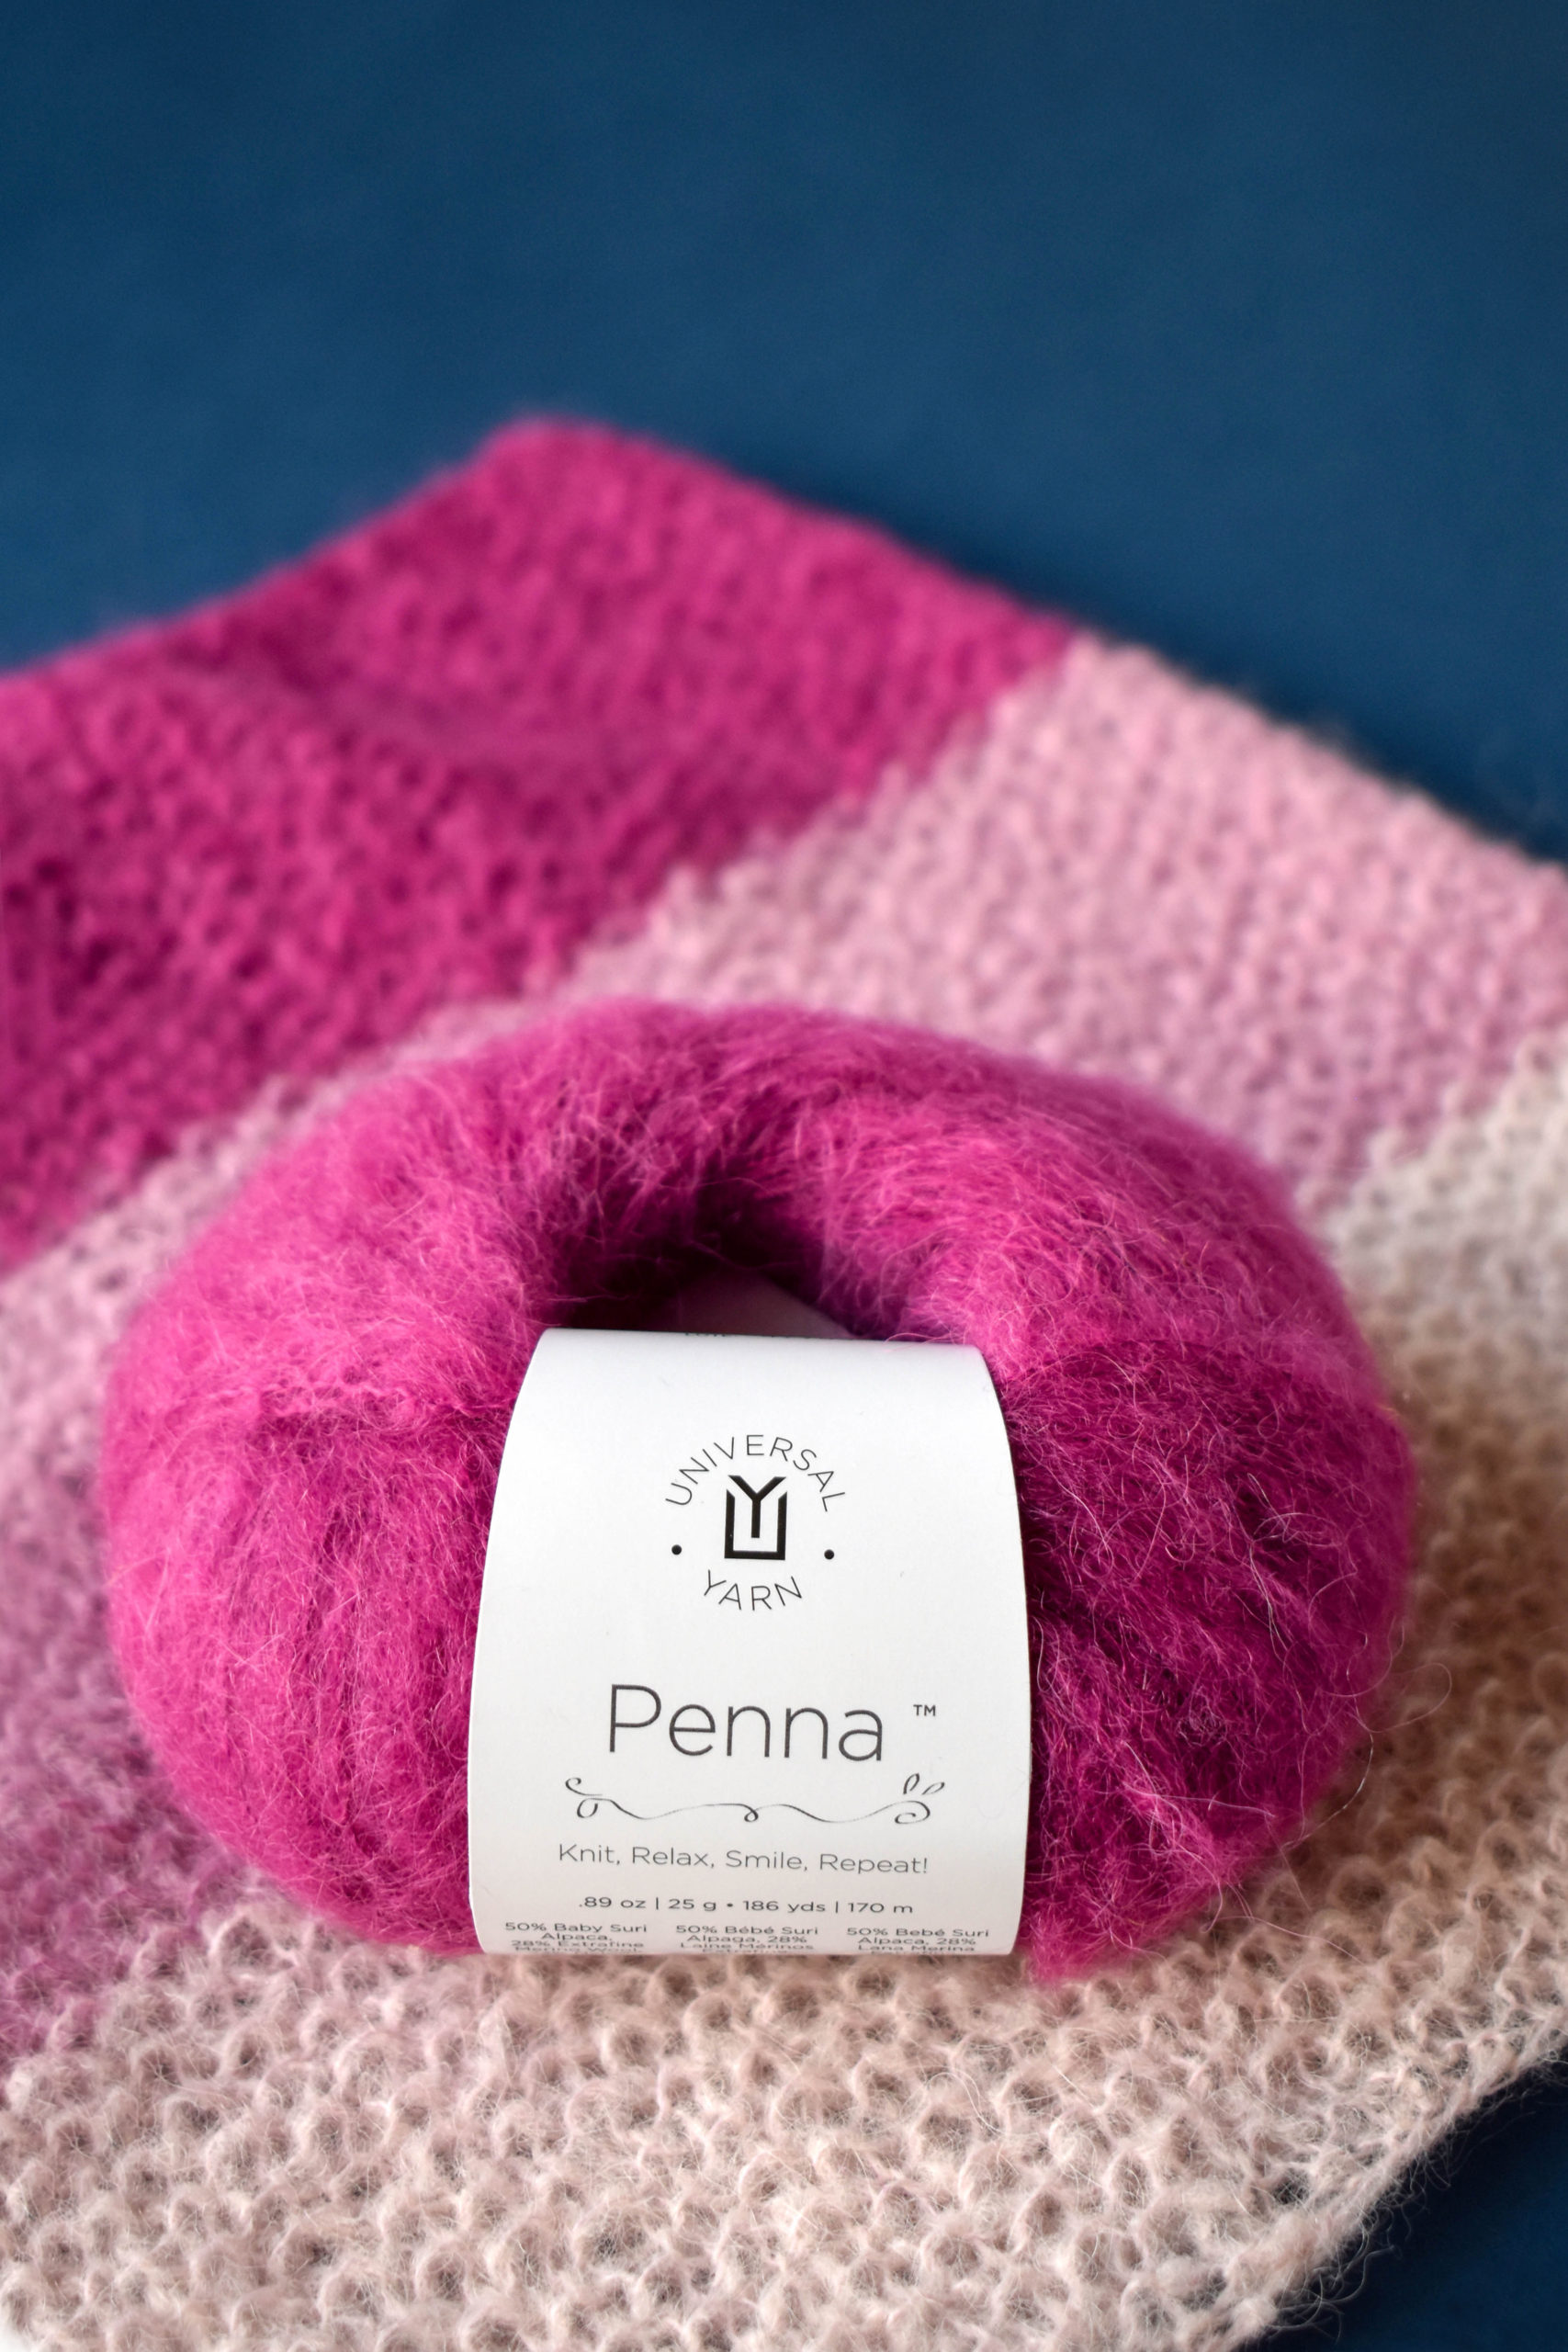
Today, I wanted to give you a sneak peek at an upcoming design and gush about one of our lovely new yarns: Penna.
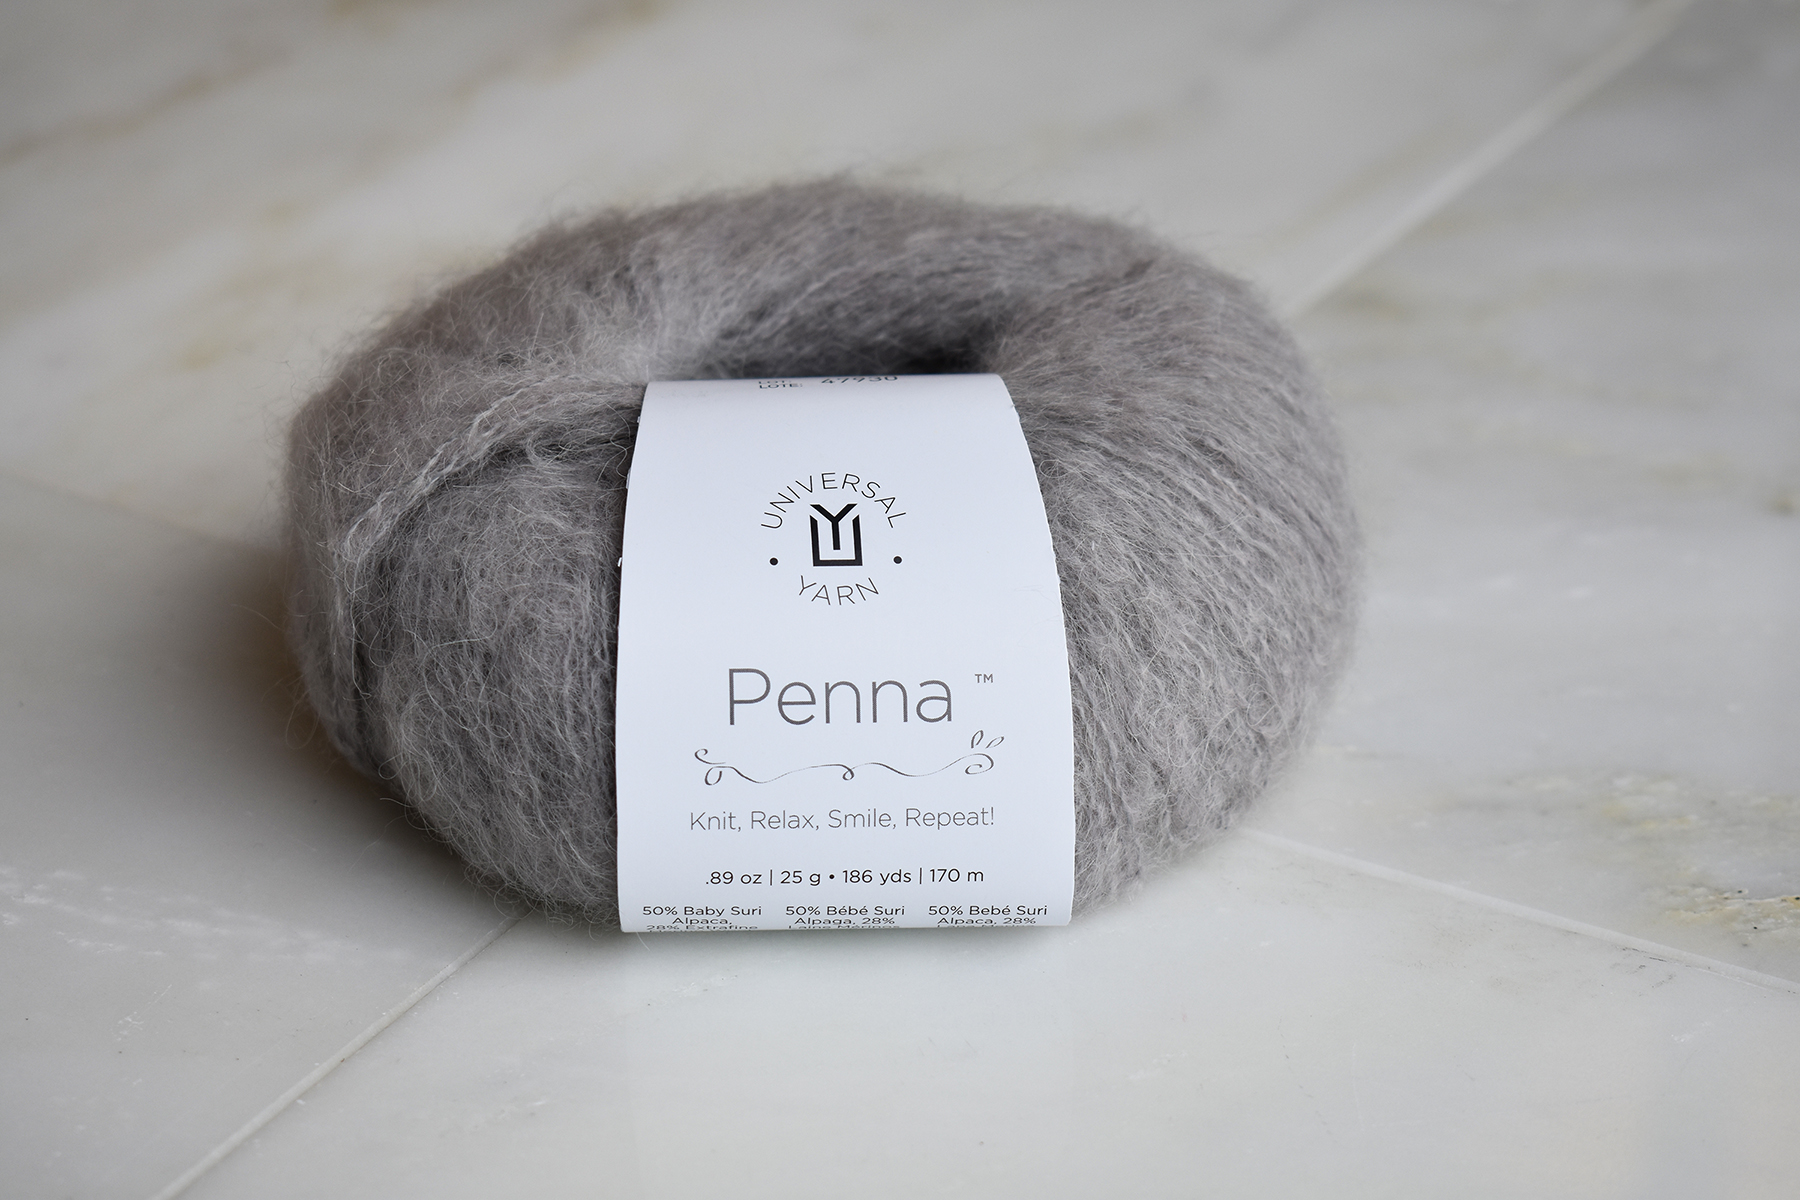
Penna in 110 Dovetail.
You might have noticed Penna pop up in your local yarn store recently. This lace-weight yarn is light as a feather, ridiculously soft, and has a beautiful halo. It is a blend of 50% baby Suri alpaca for a hazy effect, 28% extra fine merino for softness, and 22% nylon for strength. This yarn is a great alternative to laceweight mohair yarns, to which some people are more sensitive. The palette contains sixteen gorgeous colors.
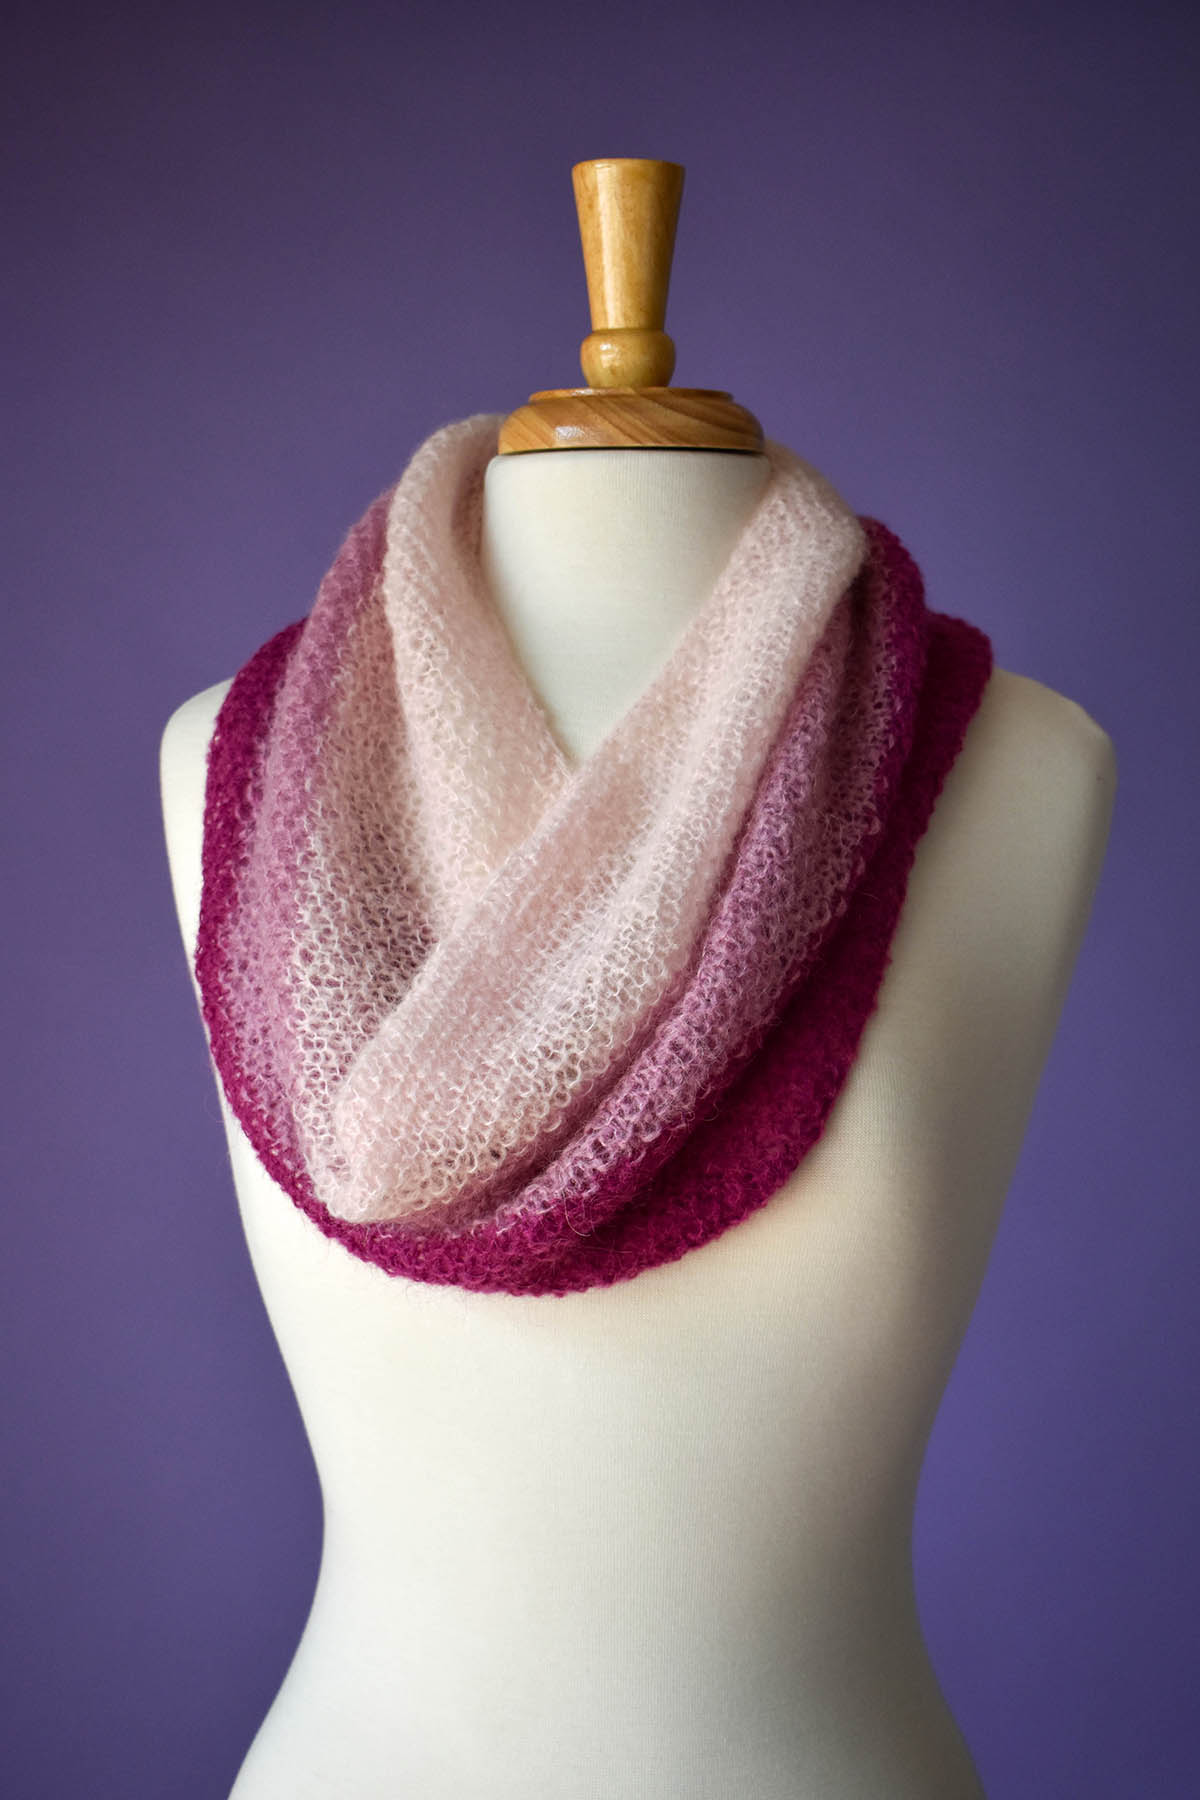
Plume Cowl, shown in 111 Whisper, 112 Rose Kiss, & 113 Raspberry Tart.
One reason we brought this yarn in is because of its versatility. You can hold it as a single strand or as a carry-along with another yarn. If you’re holding it single, we recommend using a large needle for a loose, airy gauge. That’s what really makes this yarn shine. Take the Plume Cowl, for example. Knit at a gauge of 16 stitches over four inches with a suggested needle size of US 8 (5 mm), this accessory is like a cloud for your neck and shoulders. It’s as simple as can be – just seed stitch in the round, with a few color changes to create a nice gradient.
Penna in 113 Raspberry Tart placed on top of the Plume Cowl.
Personally, one thing I love about this yarn is that it pairs well with other yarns. I think it would look beautiful to add a halo to stash staples like Deluxe Worsted, but I wanted to see what Penna was like when held together with a self-shading or self-patterning yarn. We have quite a few of those, but the one that struck me as the most suitable match for Penna is Whisper Lace. Both yarns are so fine, the fabric they create together will still be lightweight. A blend of wool and silk, Whisper Lace is great for warmer weather and the transitional seasons – add the warmth and haze of baby Suri alpaca to that, and you can create perfect projects for autumn and winter.
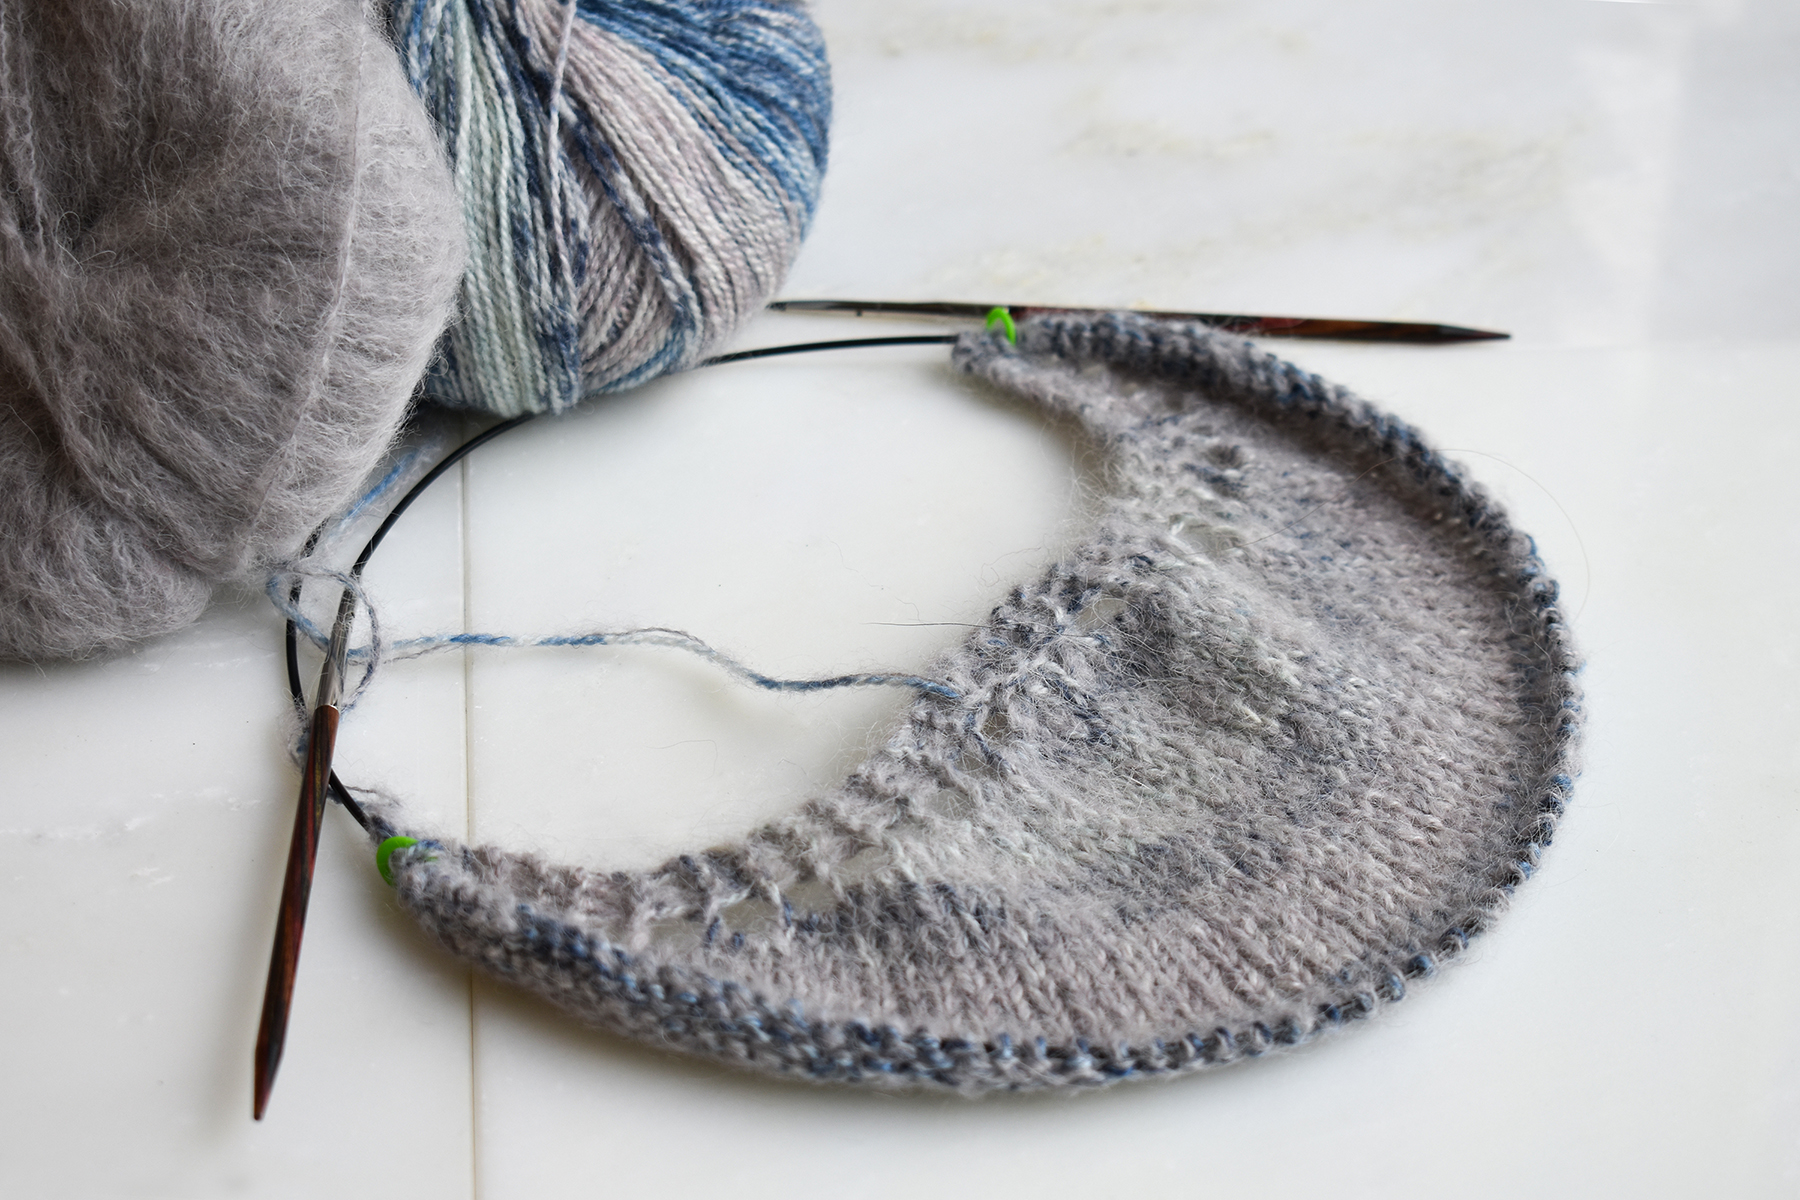
That brings me to the original point of this post. I’m working on a design that pairs Whisper Lace and Penna. I’ve chosen Whisper Lace in 213 Cool Ripples – a blue and grey multi, with Penna in 110 Dovetail – a soft, warm grey. I love the way Penna and Whisper Lace are playing together. Solid-colored Penna softens the transitions from one color to the next in the Whisper Lace.
The beginnings of a crescent-shaped shawl knit in Whisper Lace and Penna.
You can see the humble beginning in the photo above. I decided a shawl would be the perfect project. Lately, I’ve been really into crescent-shaped shawls, so that is the shape I’ve chosen for this design. Four stitches are increased on each edge every right-side row, and two stitches are increased on each edge every wrong-side row. This is what creates the dramatic curve. I’m letting the yarn speak for itself here: nothing more than simple Stockinette stitch for most of the shawl. I plan to finish this project with an applied lace border. I’m undecided on whether I should use a solid, contrasting color for the border, or if I should stitch to stick to the pairing used throughout the rest of the shawl. Only time will tell, but I’d love to hear your thoughts! Let me know in the comments below.
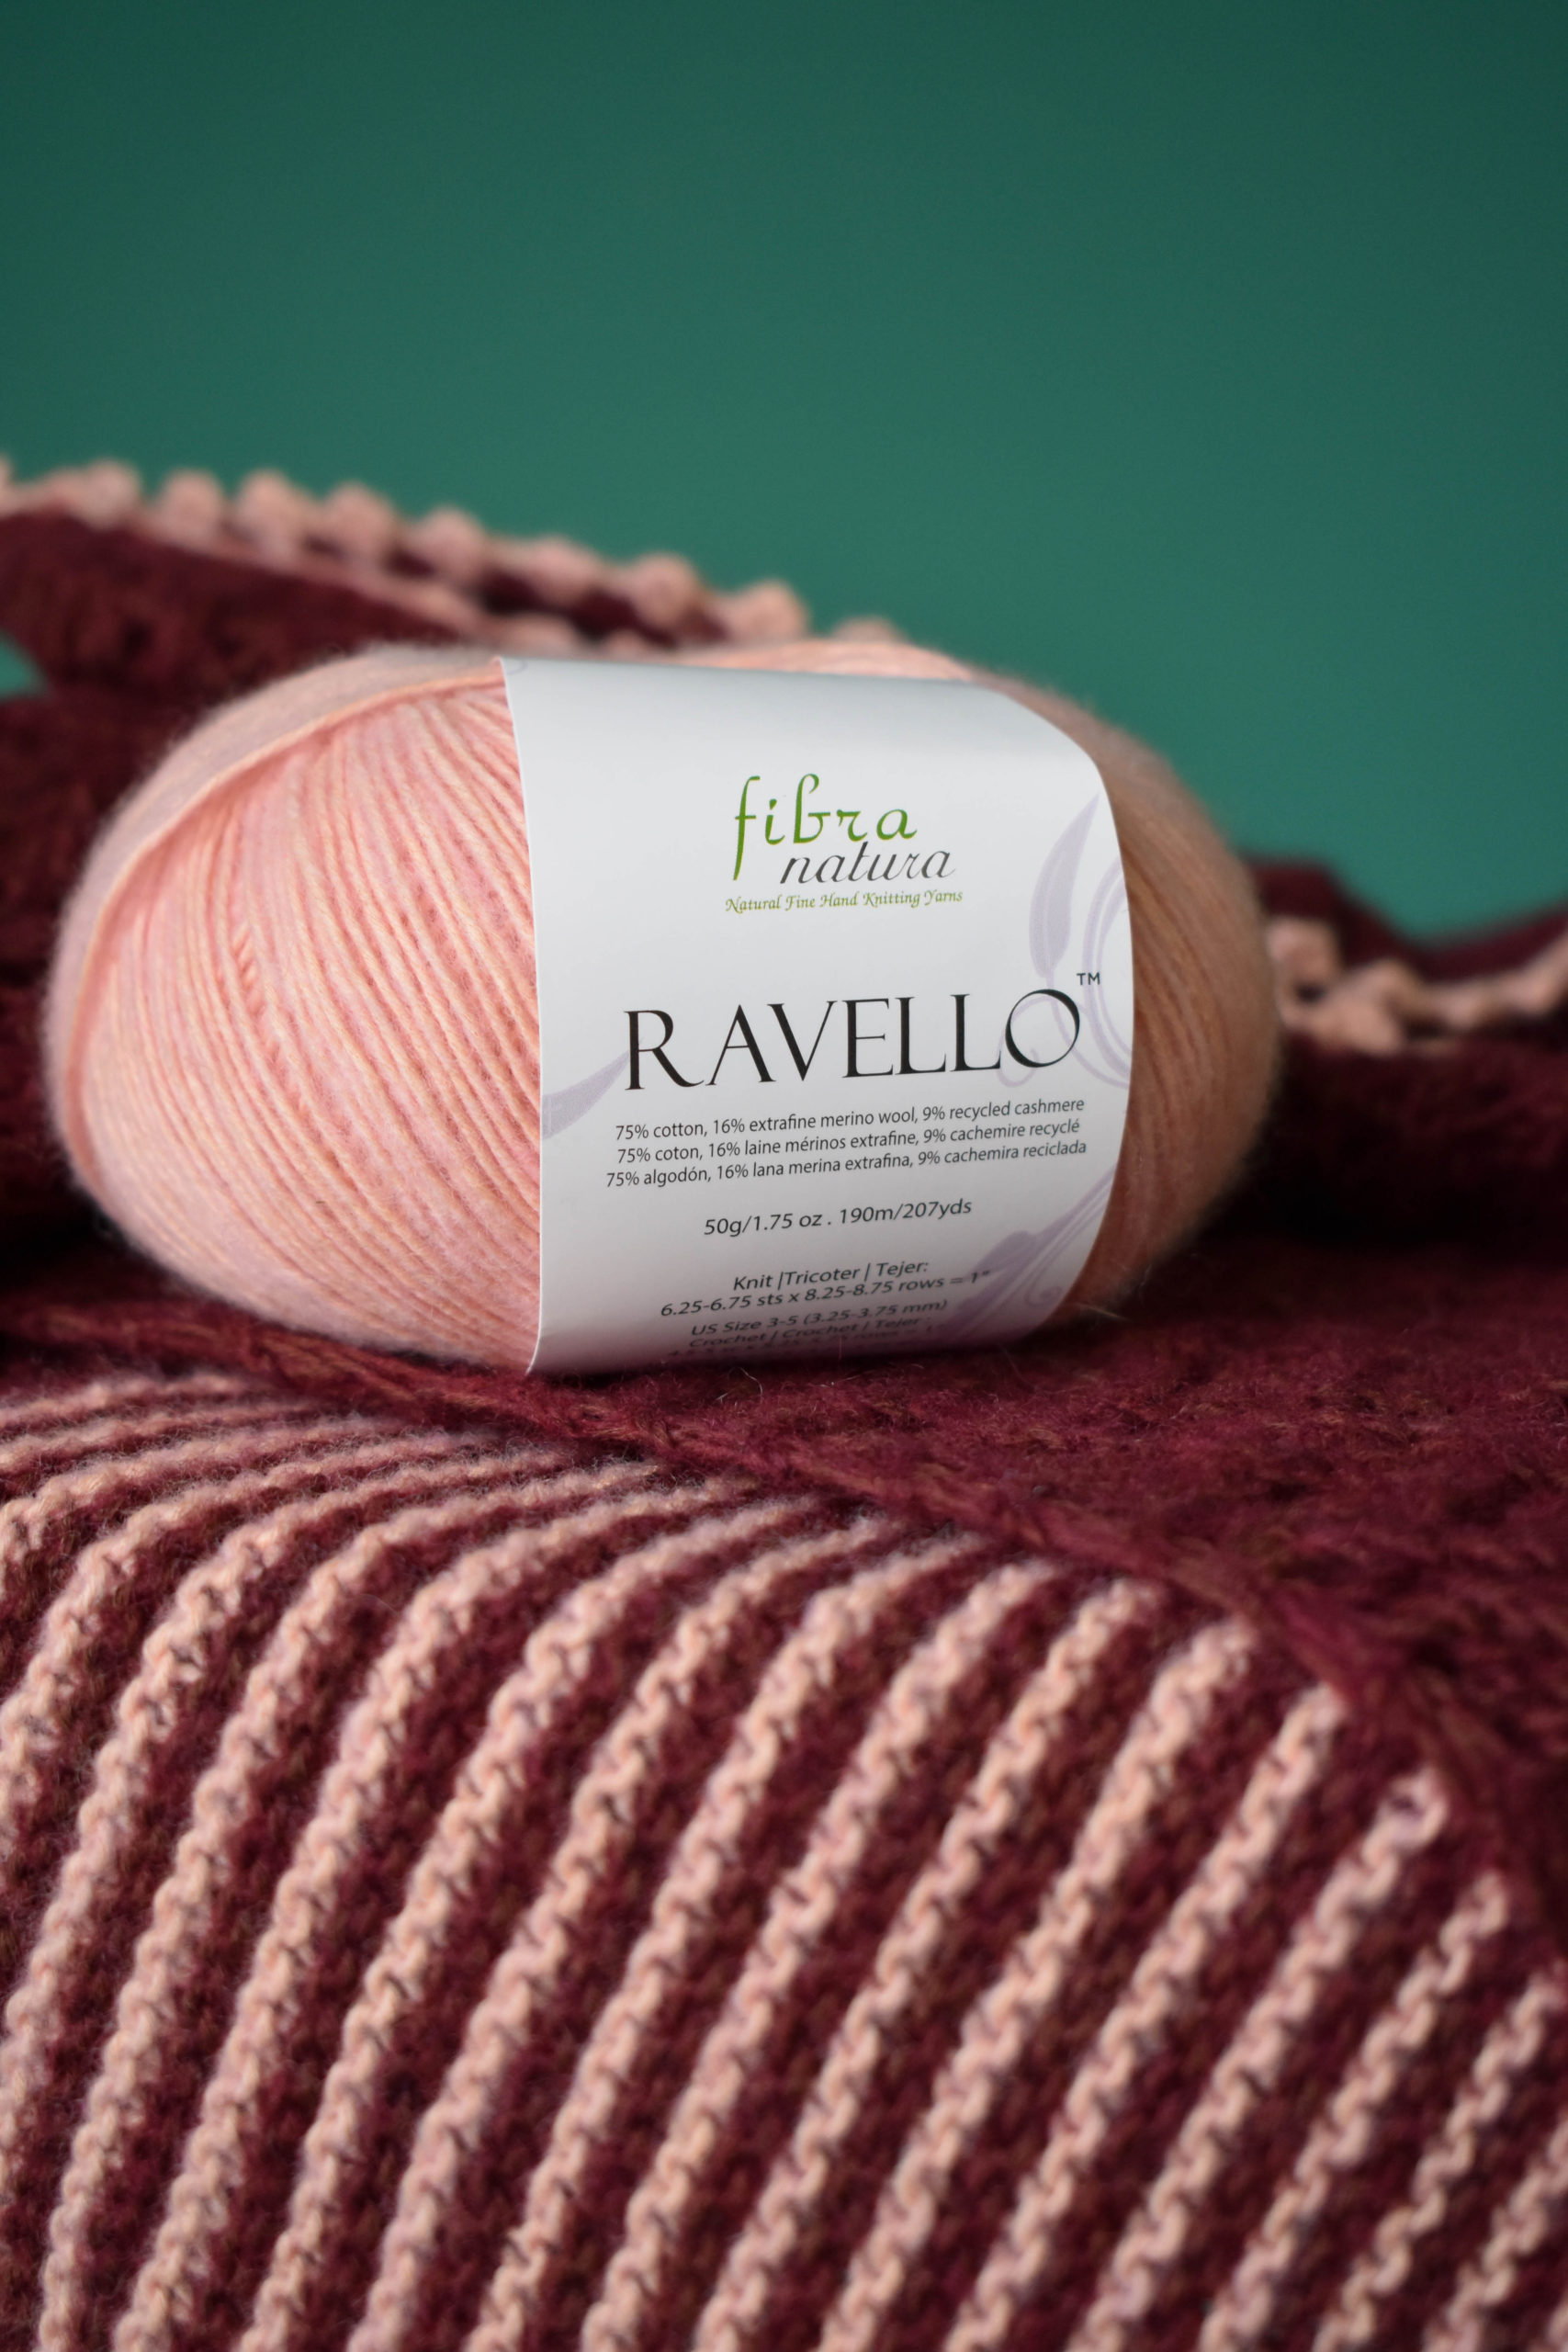
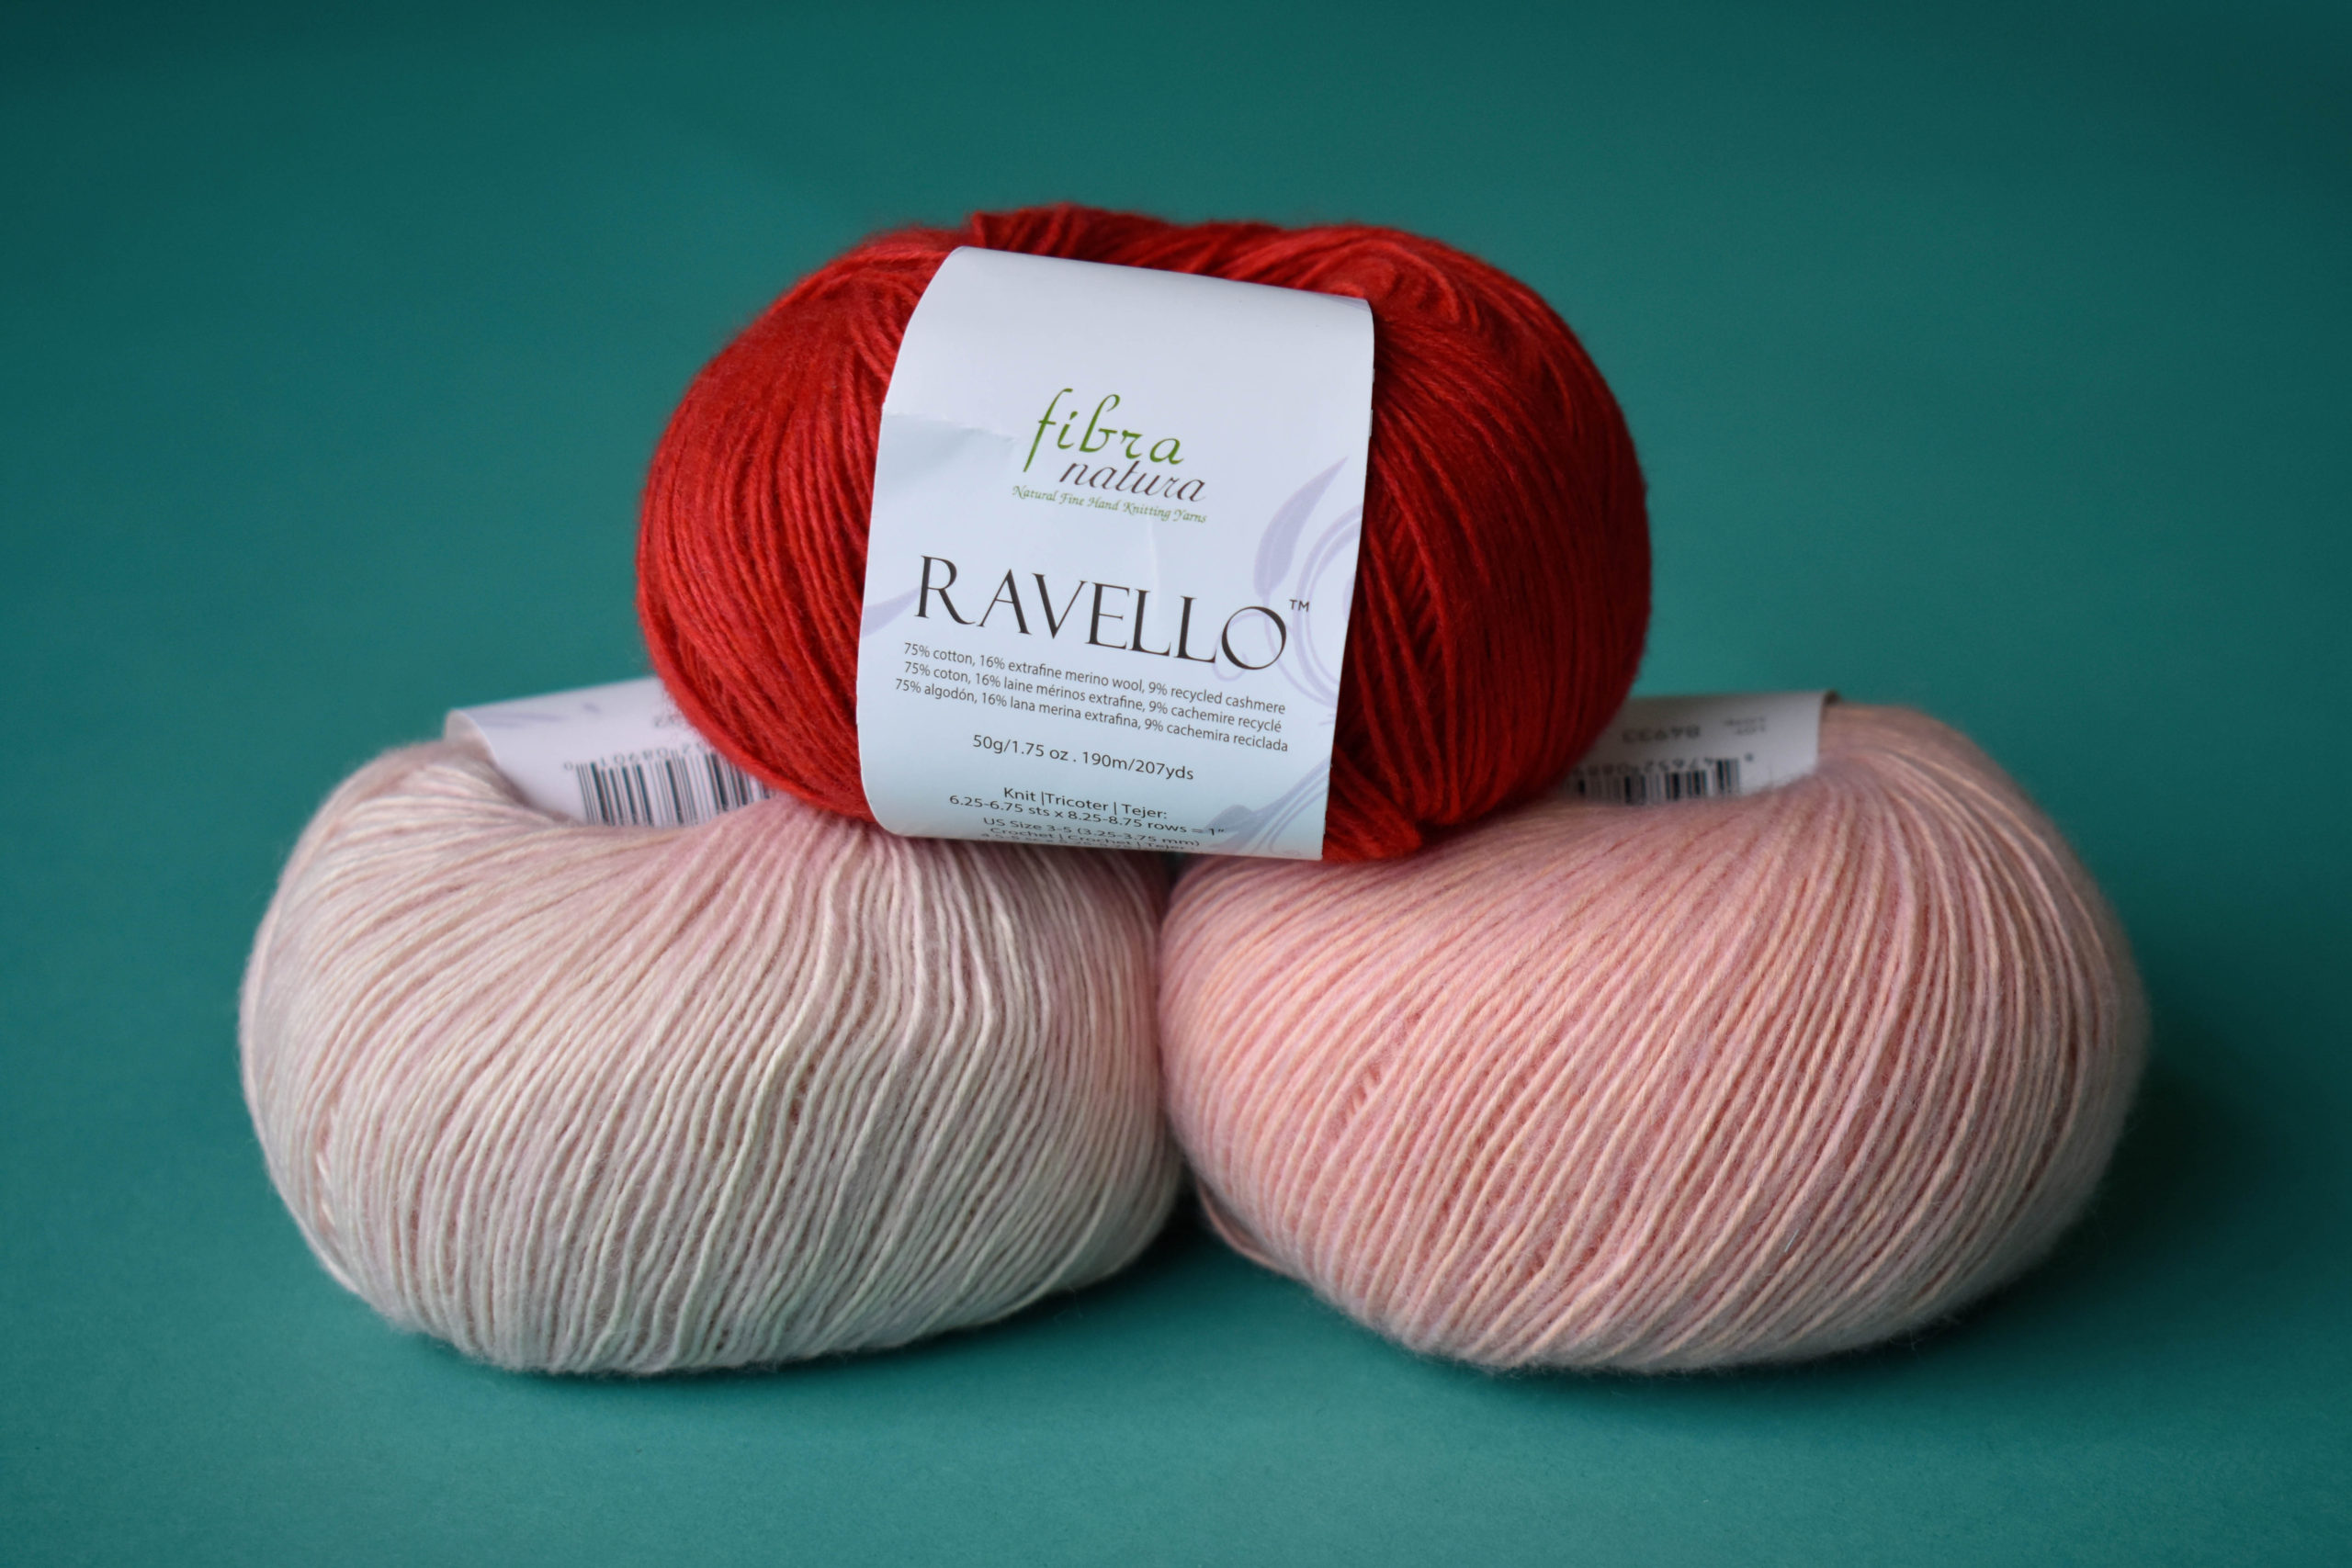
With Valentine’s Day right around the corner, I thought I’d make a confession. I have a new love in my life, and it’s Fibra Natura Ravello. One of our new spring yarns, this is quickly becoming a favorite (I know, I shouldn’t pick favorites!). It’s a blend of cotton, extra-fine merino wool, and recycled cashmere, making it a fabulous yarn for multi-season garments and accessories. Ravello is soft, drapey, and has a subtle halo. These qualities are pretty irresistible!
Ravello in 104 Soft Clay
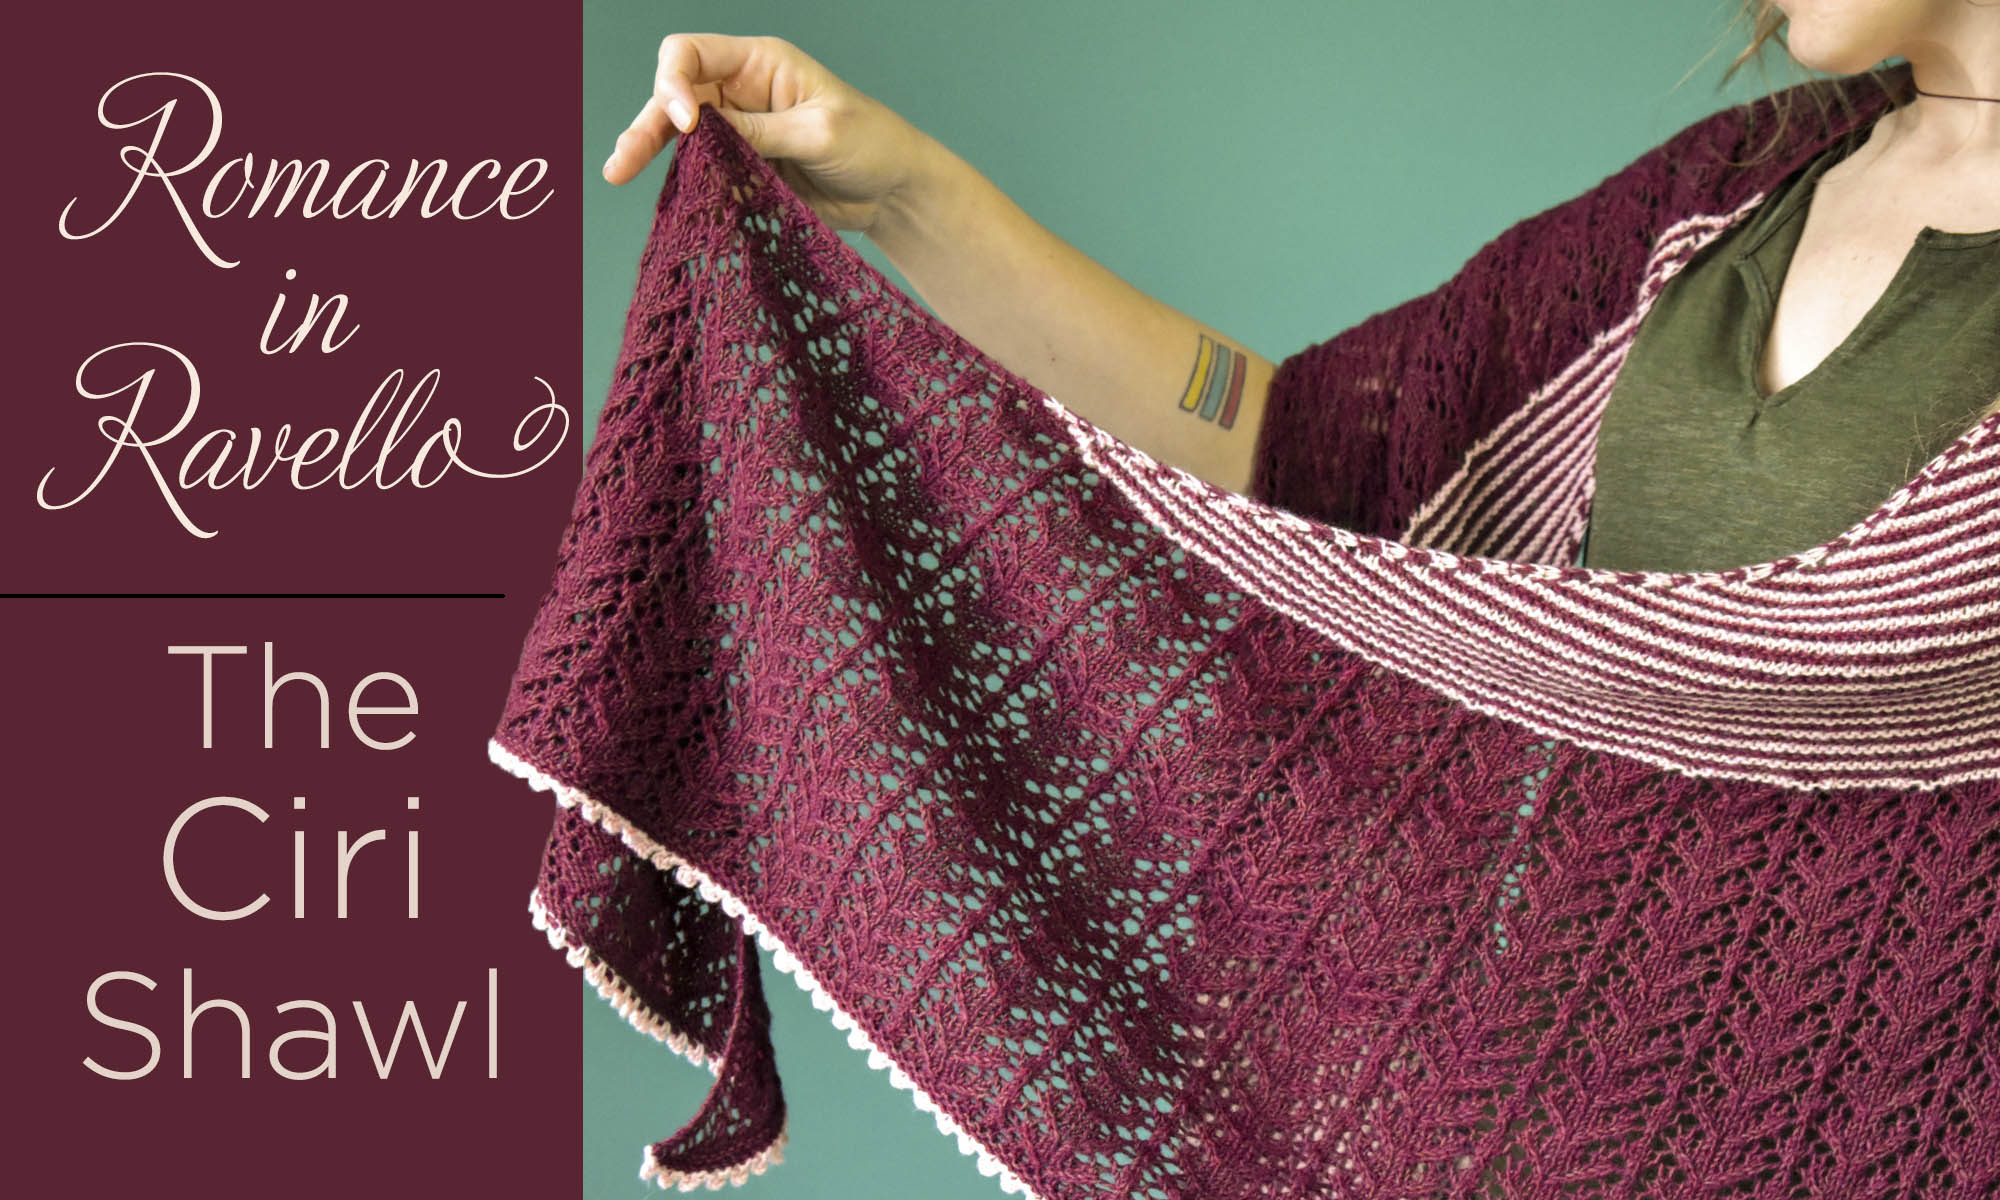
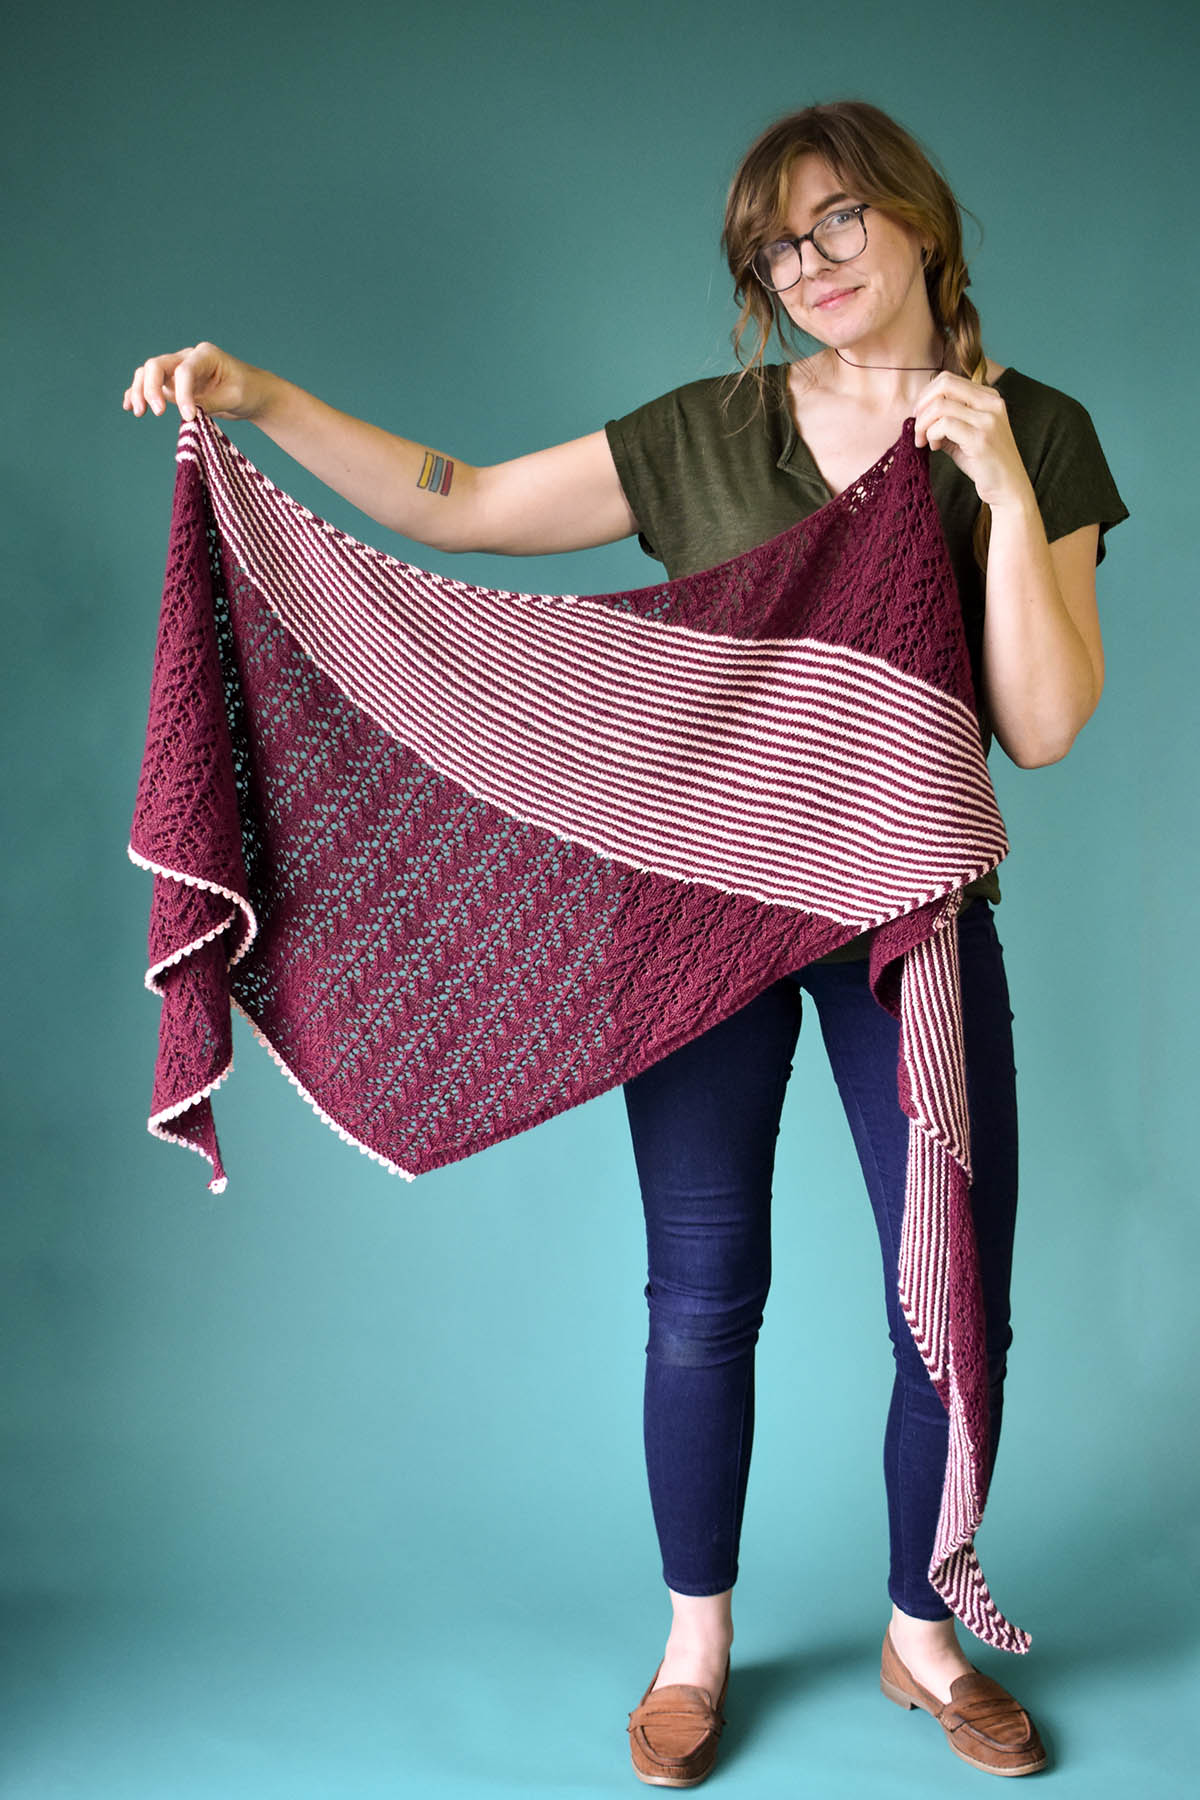
I’ve been having so much fun designing with this yarn. So, just in time for Valentine’s Day, we’re introducing the Ciri shawl. This is a large, asymmetrical shawl knit in two coordinating colors that nod towards Valentine’s Day without being obvious.
The main color is 108 Tuscan Pepper, a rich burgundy that shows off the lace beautifully. It is paired with 104 Soft Clay as the contrast color. After years of resisting pink, I’ve recently become more and more drawn to warm, less saturated shades of pink. Swaths of lace in the main color are interrupted by garter stitch stripes that are worked with the contrast color. It is finished with a crochet picot bind-off that adds a touch of romance. Ciri is knit on the bias, creating an asymmetrical shape. It begins at the tip and slowly increases to the widest edge. The shape and loose gauge make a drapey fabric you’ll love to wear. Each end of the shawl gently spirals downward when you place it over your shoulders.
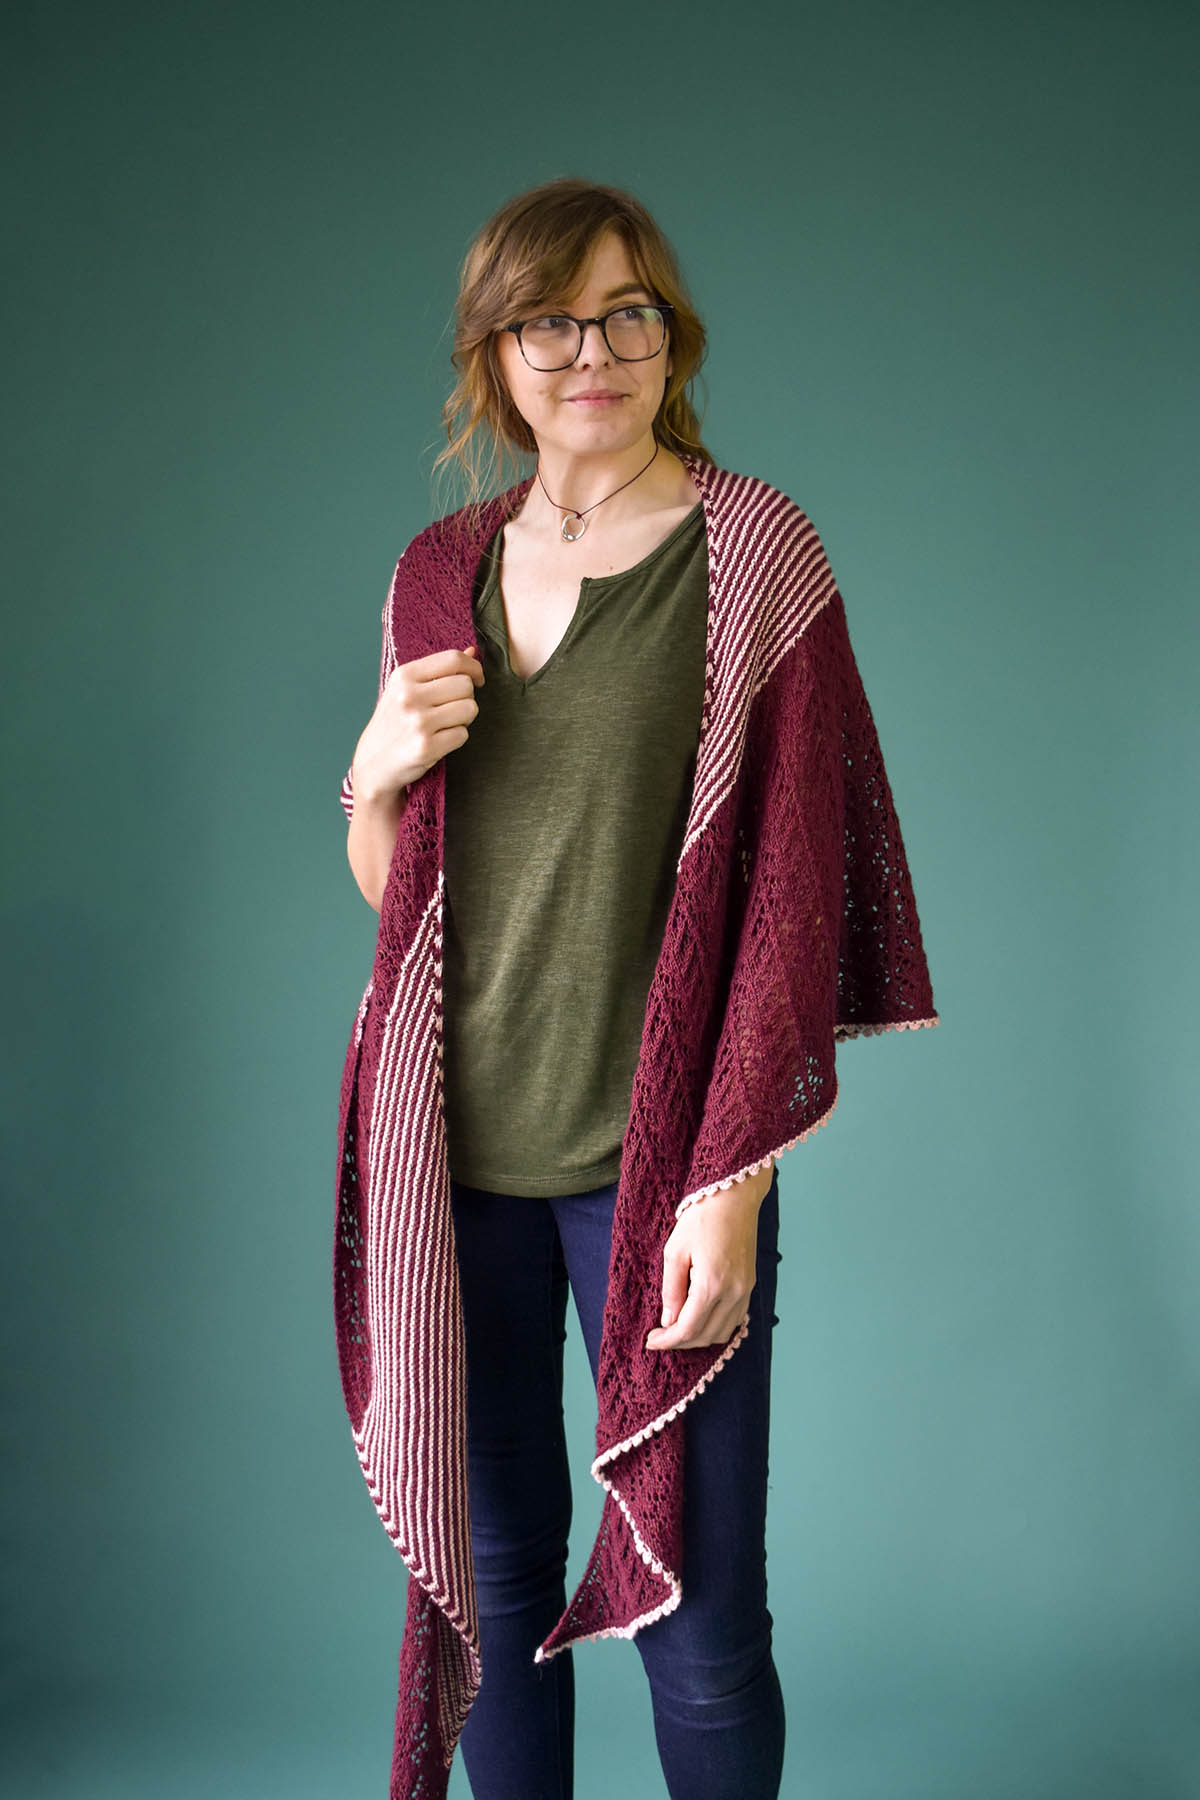
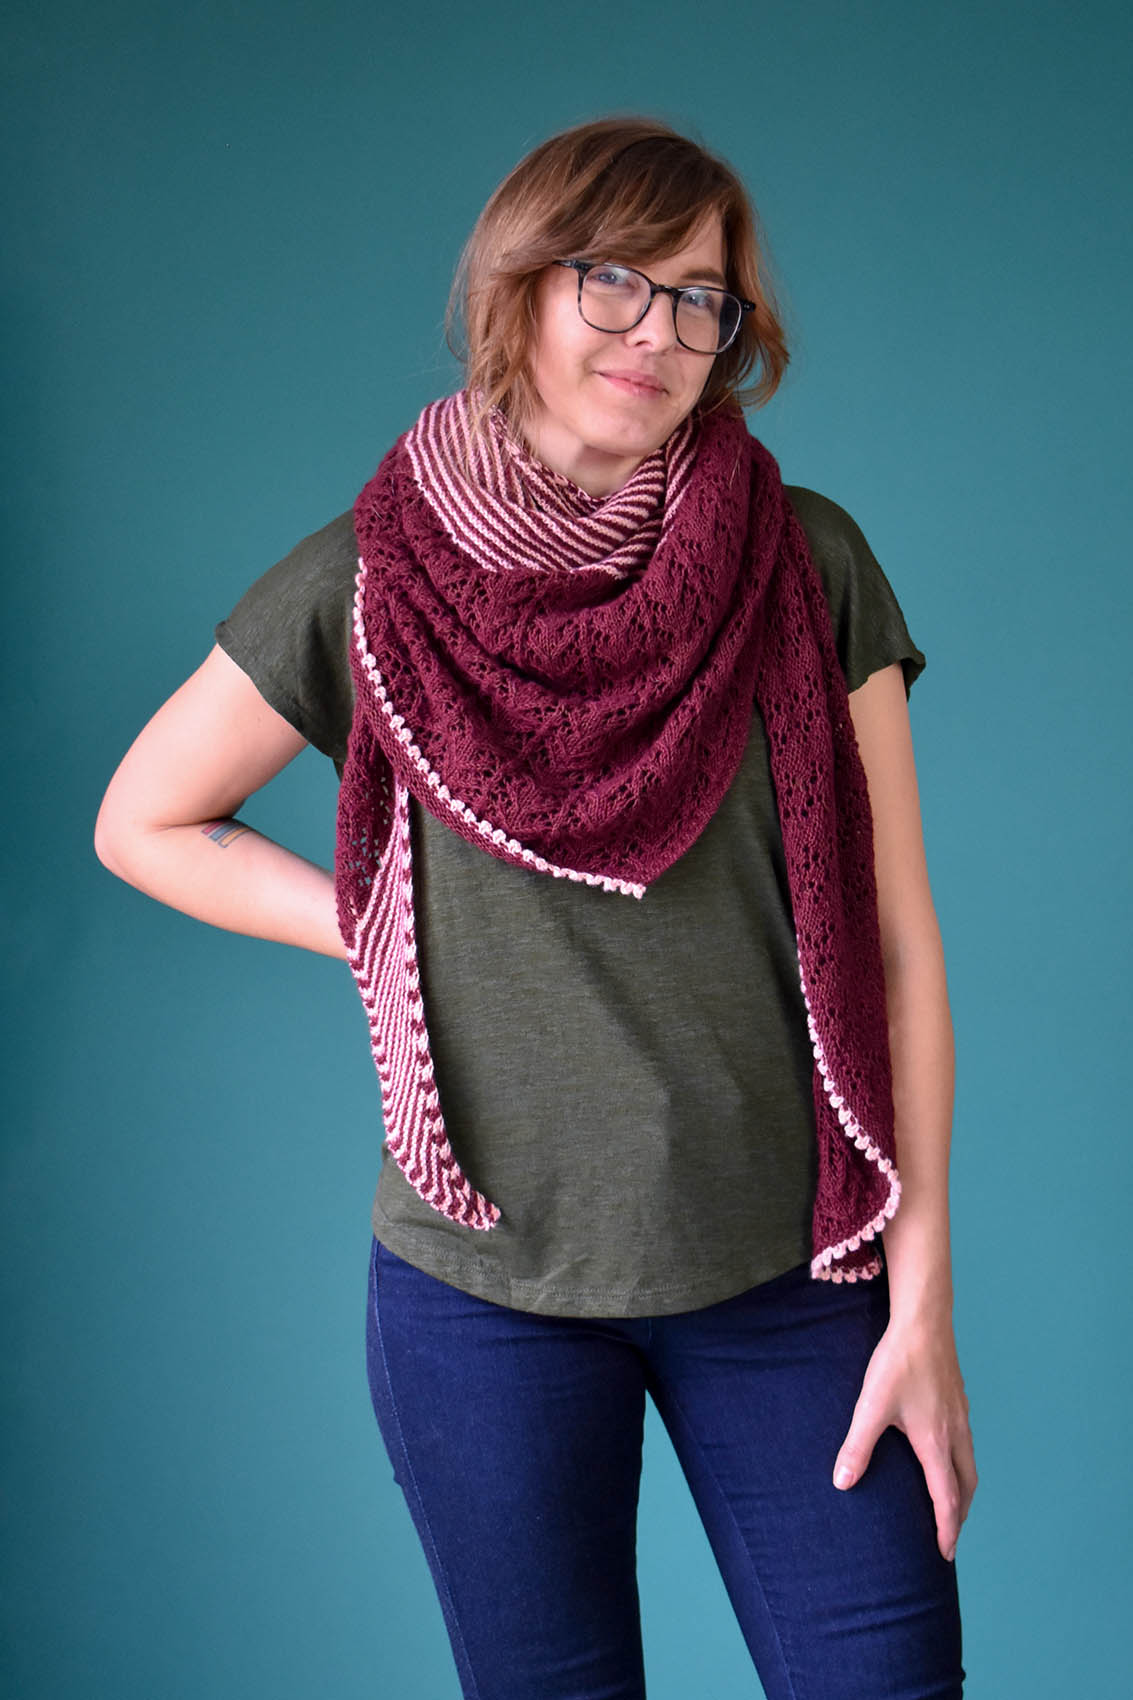
This shawl is quite large. You can wrap it around your neck multiple times for maximum coziness.
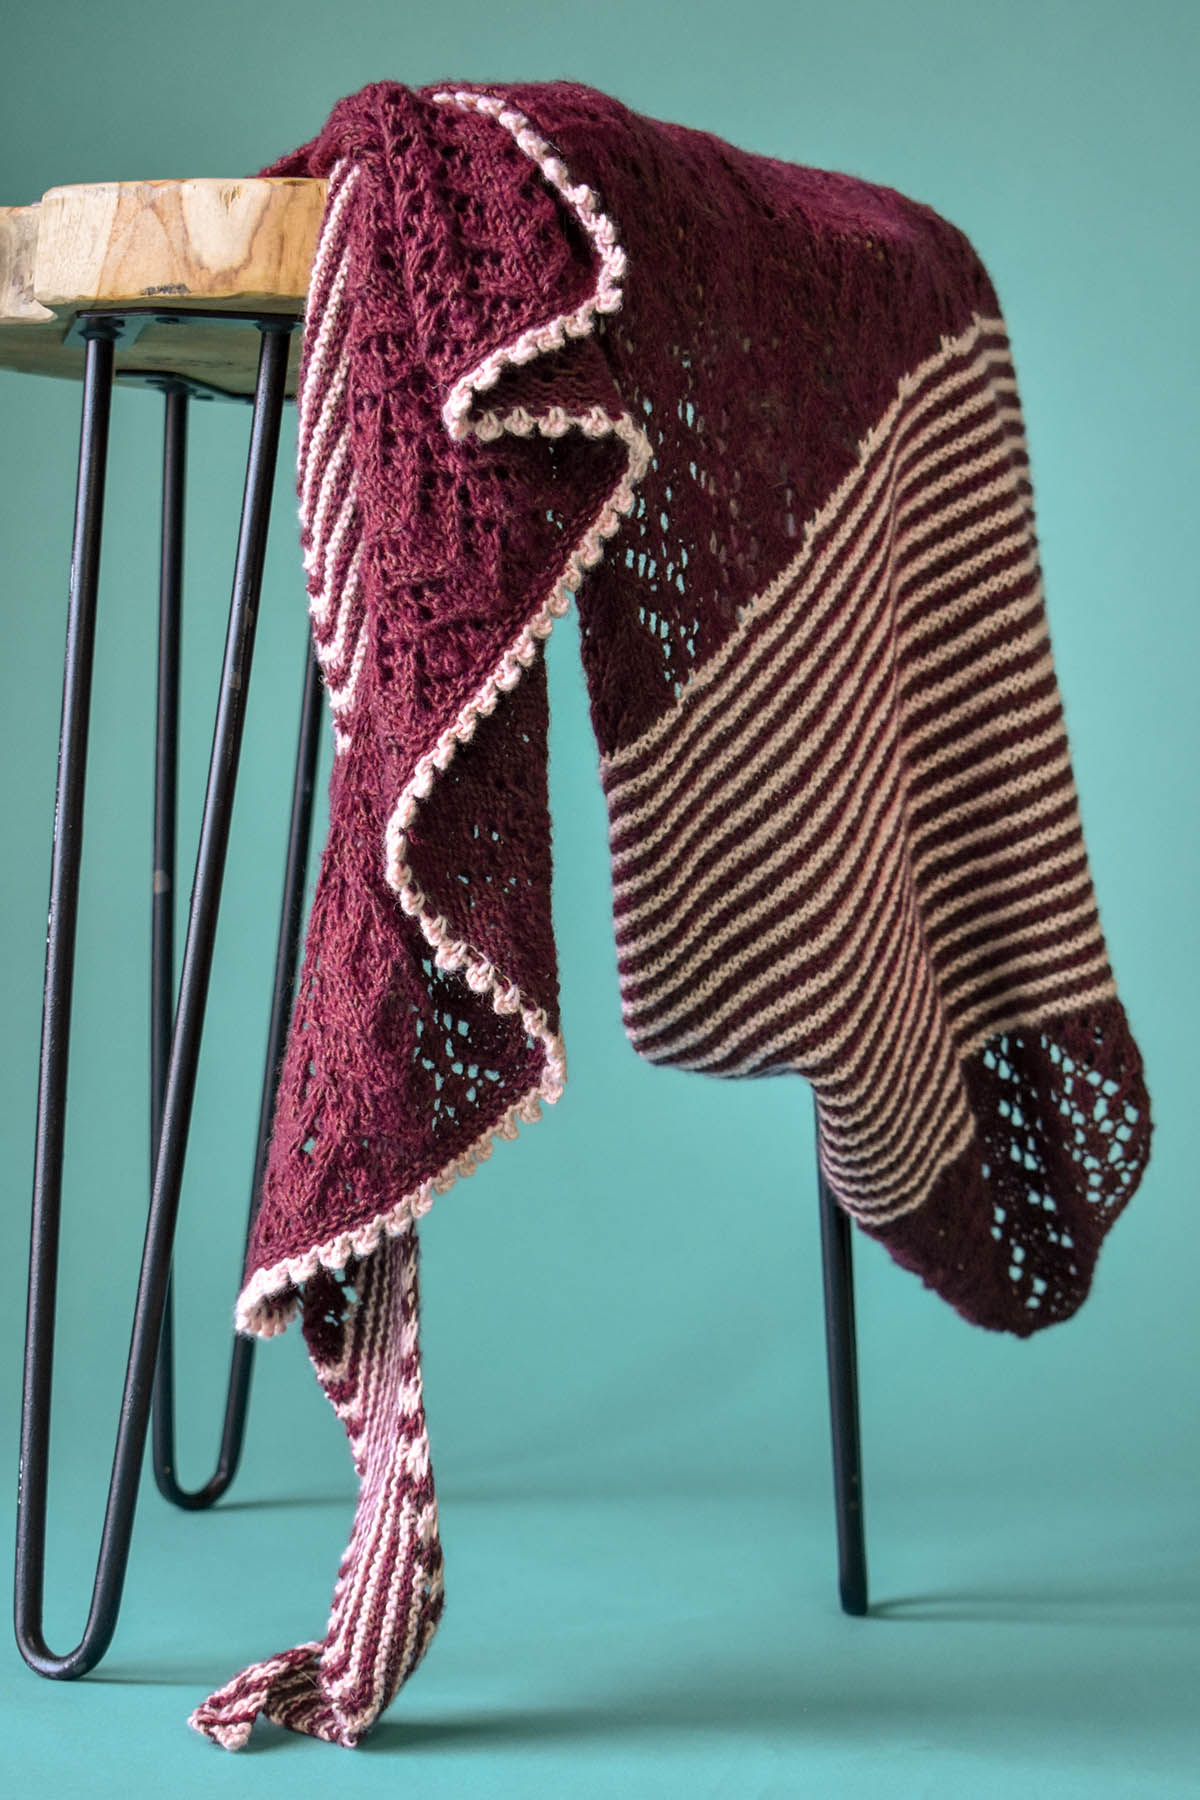
Just look at that picot trim and gorgeous drape – we’re smitten!
Whether you’re knitting this for your Galentine, Valentine, or yourself, the Ciri shawl is the perfect cast-on this week.
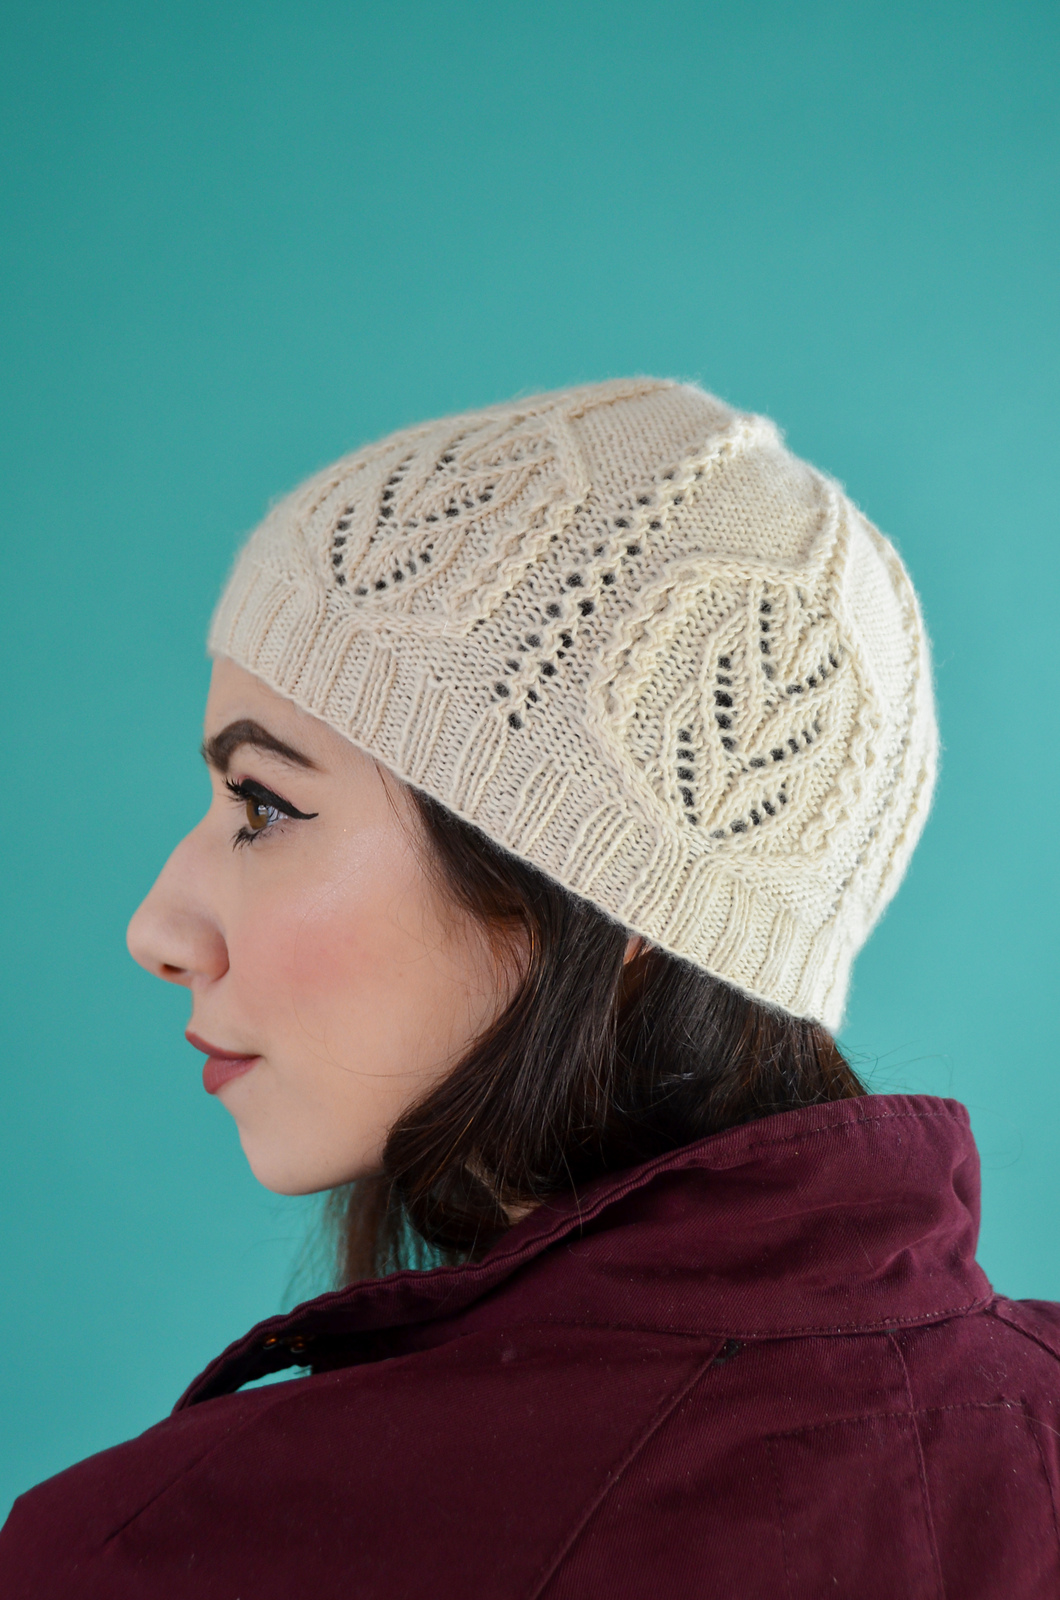
Gardenia is knit is 101 Ocean Fog.
Oh, and just in case you’re looking for a little more Ravello inspiration, don’t forget about Gardenia. Lace and delicate cables would make this sweet little hat another lovely Valentine’s Day project, especially knit up in 106 Malbec or 107 Balet Slipper.
Top: 106 Malbec Bottom, left to right: 107 Balet Slipper and 104 Soft Clay
We hope you have a wonderful holiday – filled with chocolate, yarn, and your favorite people!
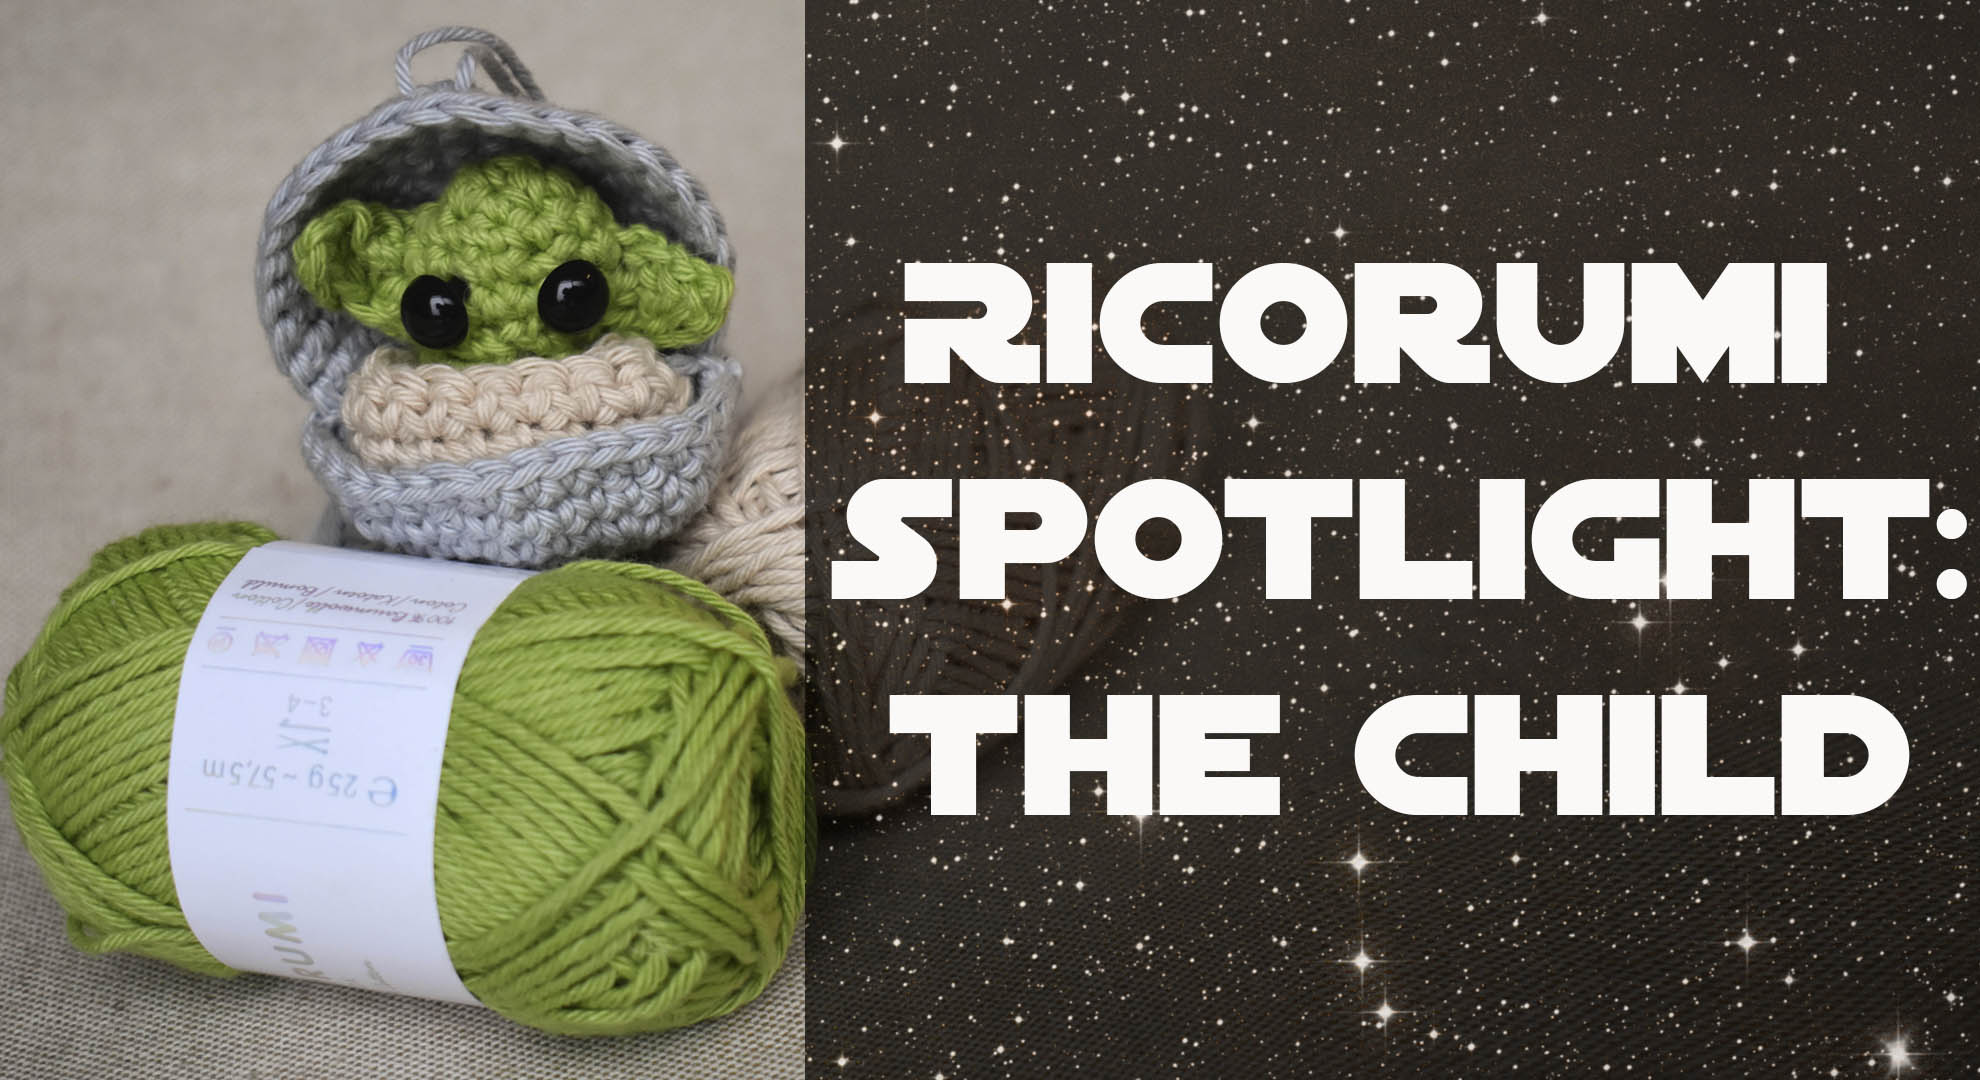
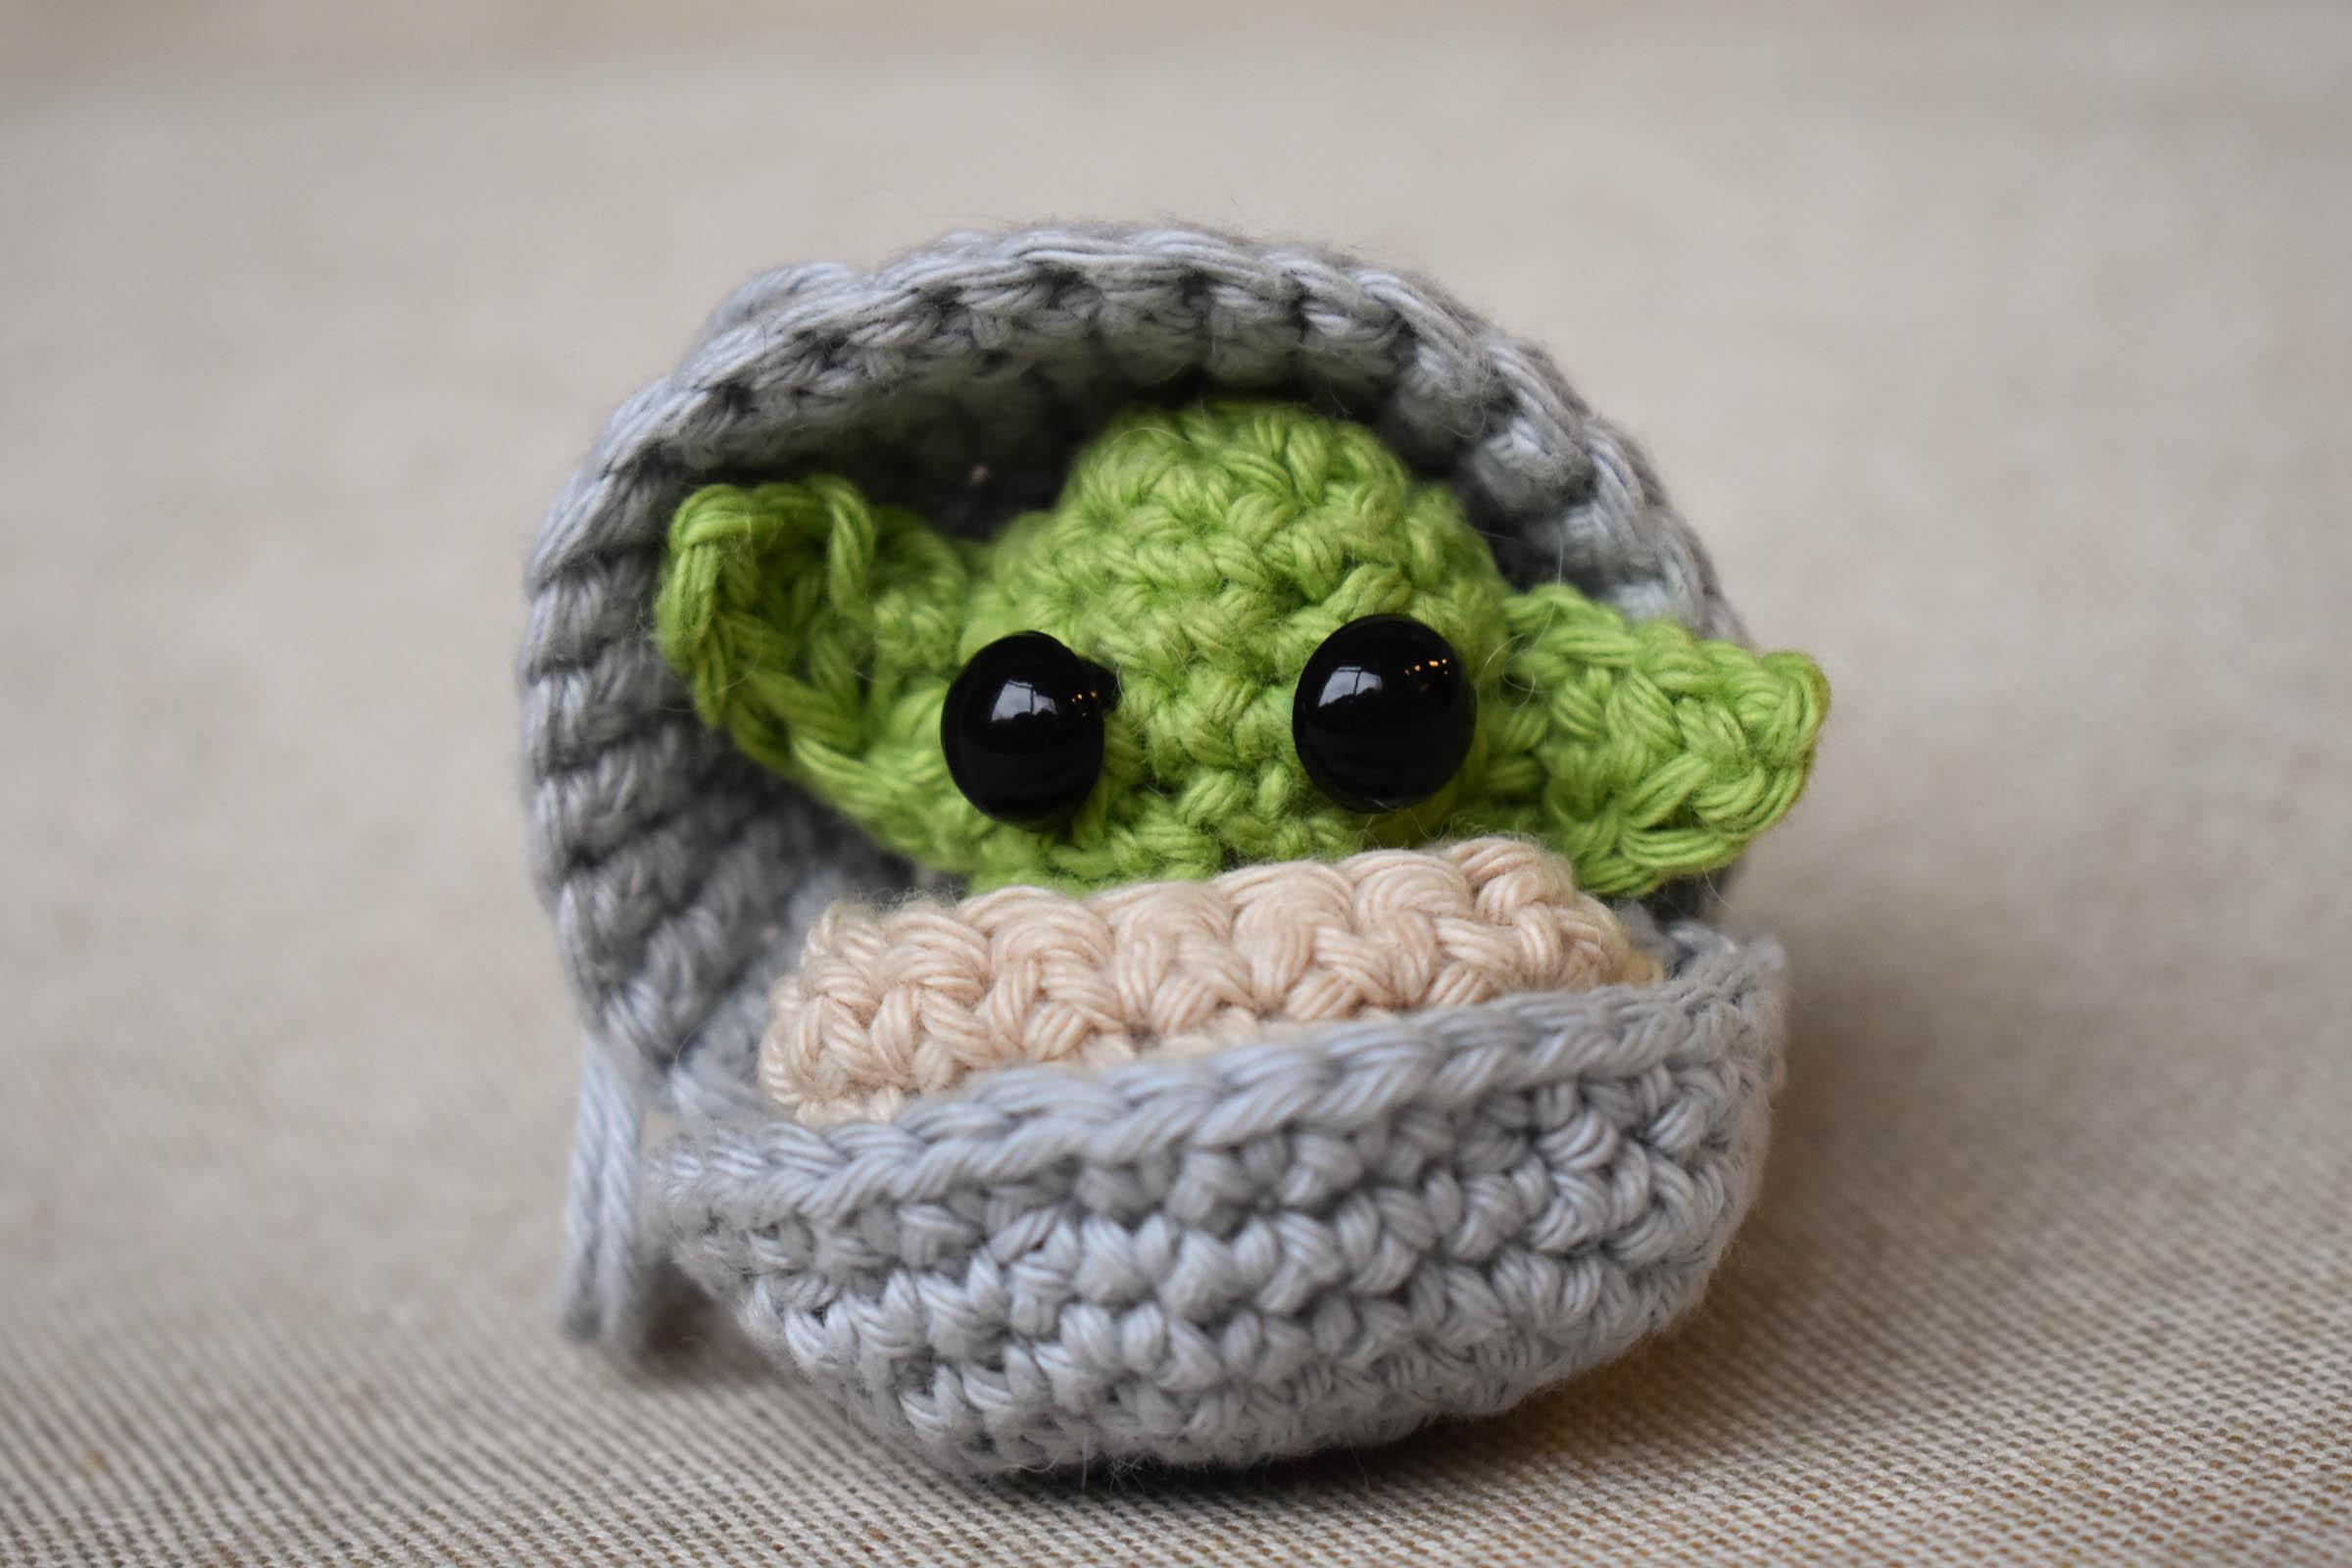
I don’t know about you, but I often pair my crafting time with binge-watching my favorite shows and movies. Lately, like pretty much everyone else I know, I’ve been watching the Mandalorian. Everyone who has been watching this show is pretty much obsessed with the child – and how can you not be? He’s sooo cute! Knitters and crocheters alike have clearly been inspired, and there are already loads of patterns on making a baby alien of your own. When I laid eyes on the Baby Keychain Ornament, designed by Vivianne Russo, I couldn’t resist joining the fun and making one. Luckily we’ve started carrying the perfect yarn for it!
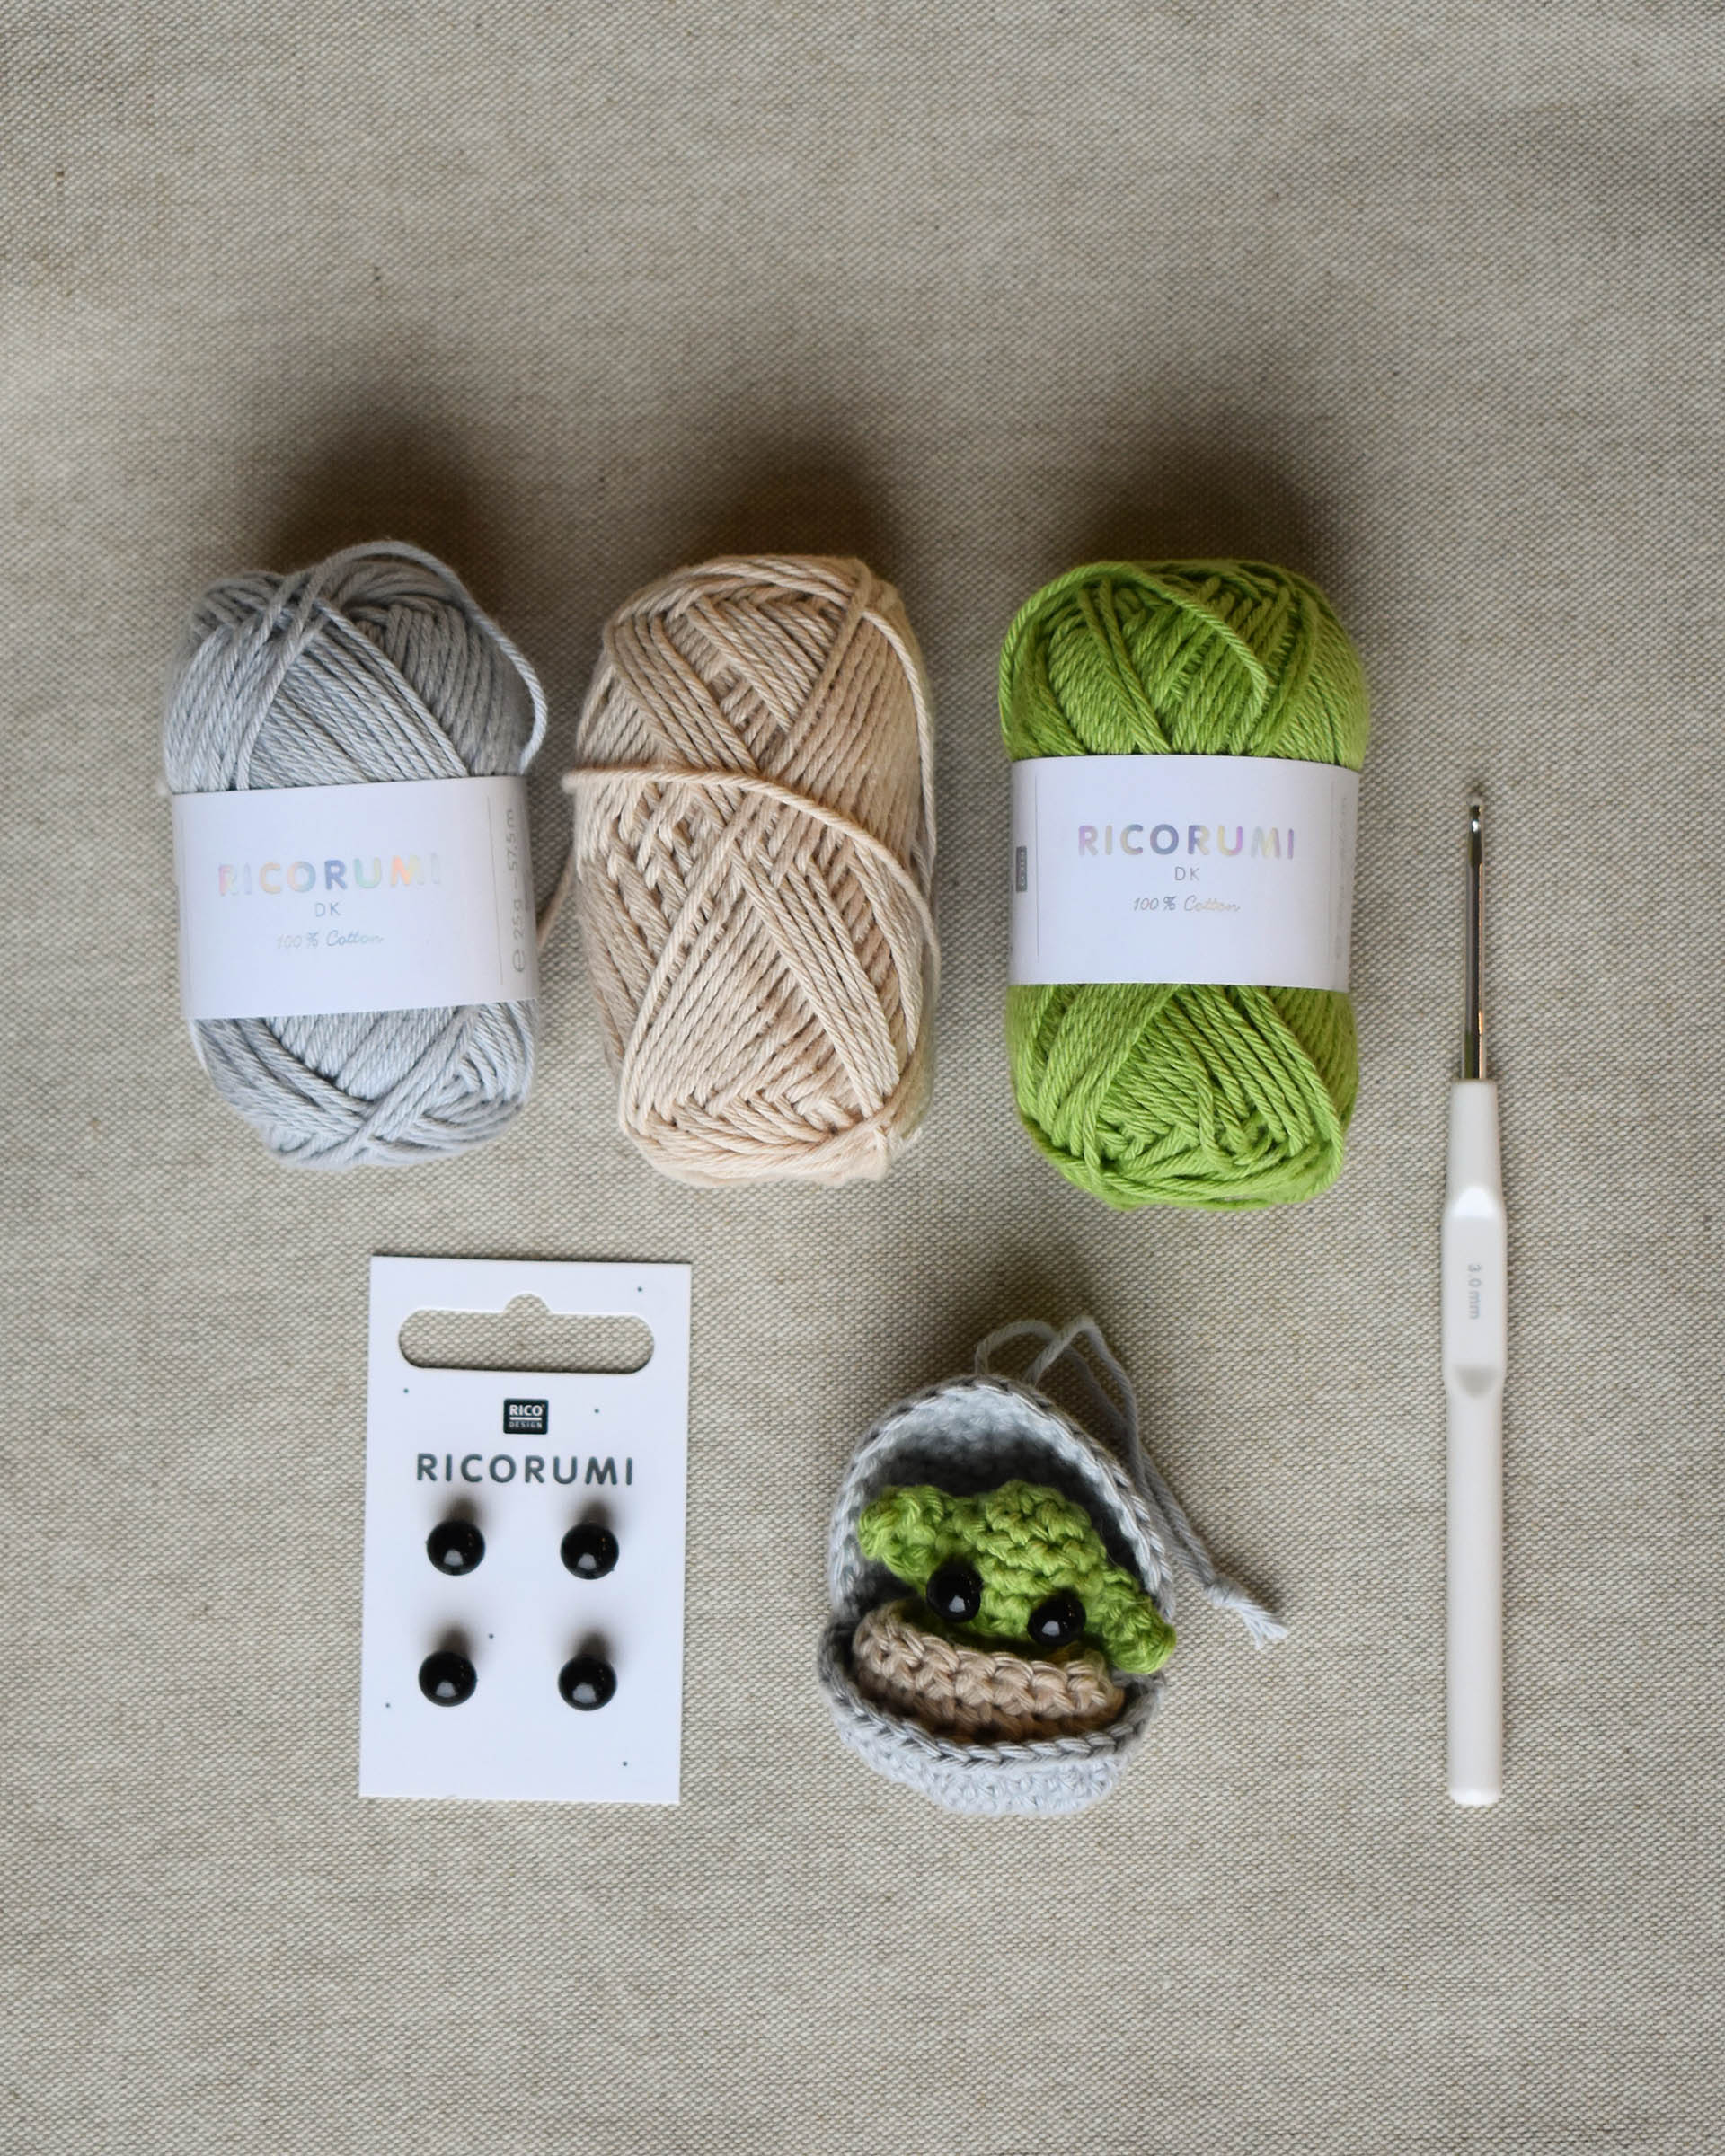
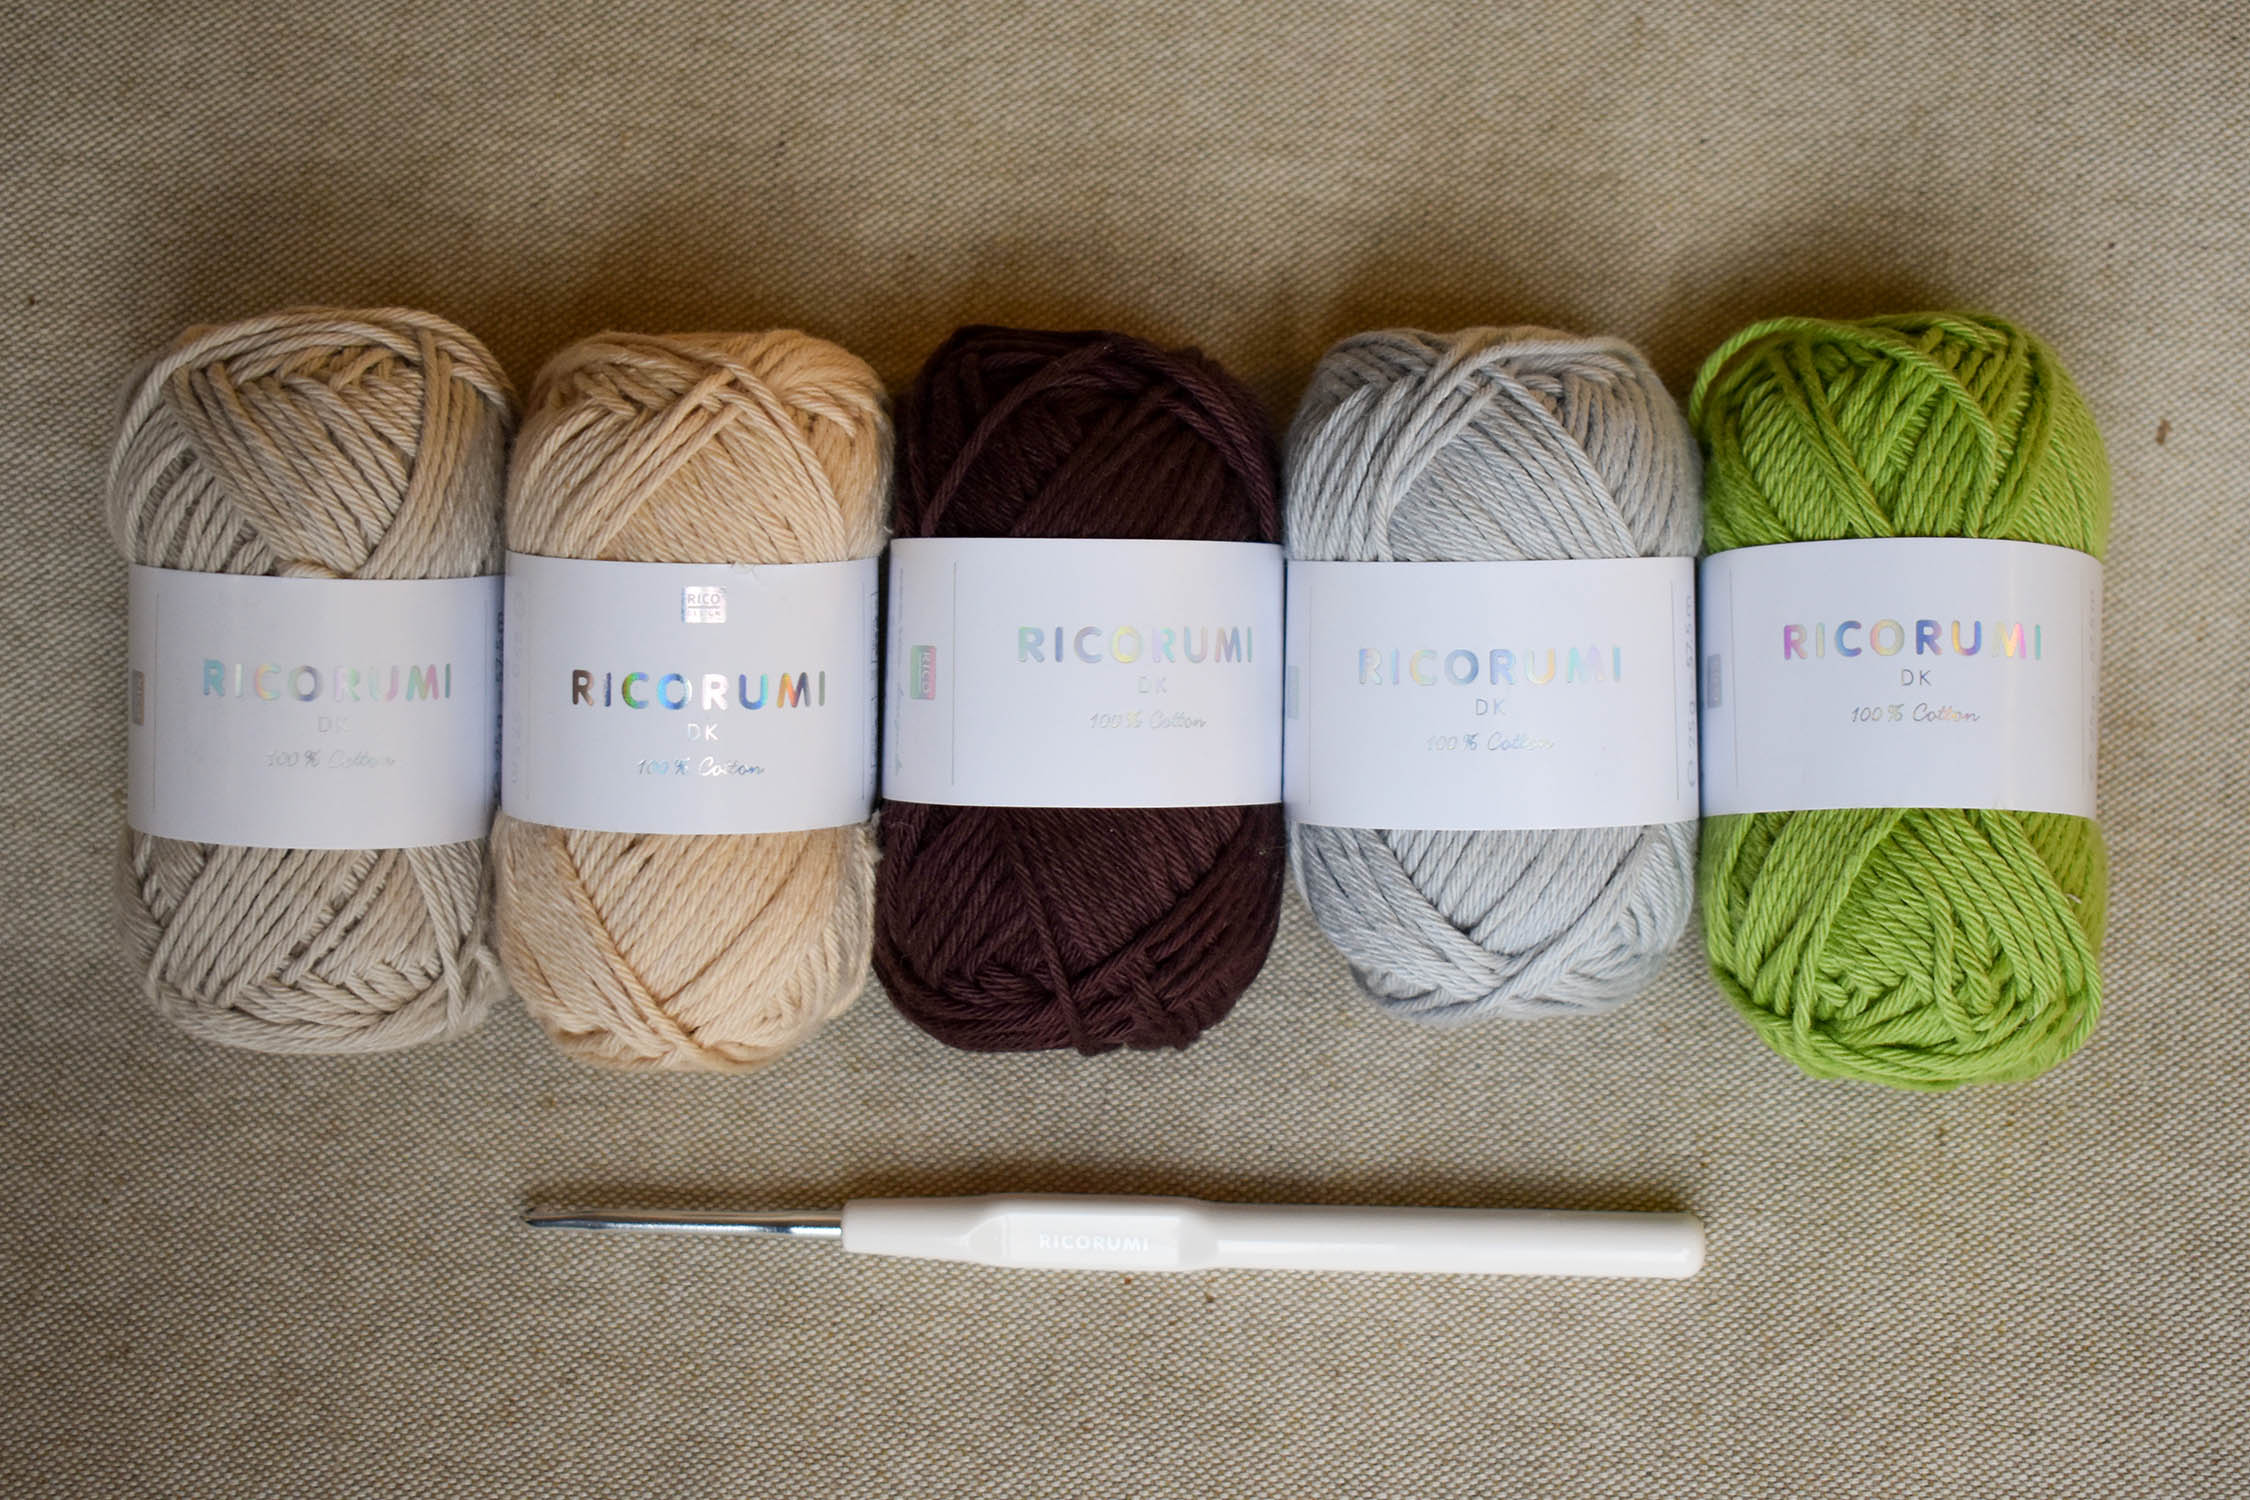
Ricorrumi DK yarn skeins from left to right: 058 Silver Grey, 054 Ecru, & 047 Pistachio. Also pictured: button eyes and 3.00 mm crochet hook, along with the Baby Keychain Ornament.
We recently became a distributor of Rico Design’s adorable Ricorumi line. We’ve all been completely smitten with the adorable kits and mini-skeins. They’re simply irresistible. Plus, notions such as the button eyes and crochet hooks are available, so you can easily grab everything you need.
Are you just melting from the cuteness? I know we are!
When it came to my attention that the little skeins of yarn would be great for making all the green baby patterns around, I immediately grabbed some yarn and notions to get started. I’ve picked out several colors that would be perfect for creating one of your own – and want to share some of the other great patterns to choose from.
For the project I crocheted, I used 058 Silver Grey for the carriage, 047 Pistachio for the body, and 054 Ecru for the collar. Below are some of the other color options that would work equally well. Ricorumi DK yarn skeins from left to right: 051 Mastic, 054 Ecru, 057 Chocolate, 058 Silver Grey, 047 Pistachio.
If you prefer a stand-up figure, Vivianne Russo also designed The Child – Green Baby. We’re also loving Yazmina Nieblas‘ version, which includes the little bowl of bone broth. She created two versions so you can play around a bit more with the colors shown above.
For this version we suggest 051 Mastic for the collar, 054 Ecru for the main garment, 057 Chocolate for the bowl, and 047 Pistachio for the body.
Even if you’re new to crochet (like me), these patterns are really simple. They’re mostly comprised of single crochet and simple increases. Plus, being so small, you can create them in no time at all. If you’re still reluctant to crochet, there are knit versions, too. Plus, Ricorumi DK works equally well with knit projects.
Lucky for us, KnitHacker has already created a comprehensive list of both knit and crochet patterns that are perfect for making a child of your own. Find the crochet list here (link) and the knit list here (link).
Head to your local yarn store to grab your skeins of Ricorumi DK!
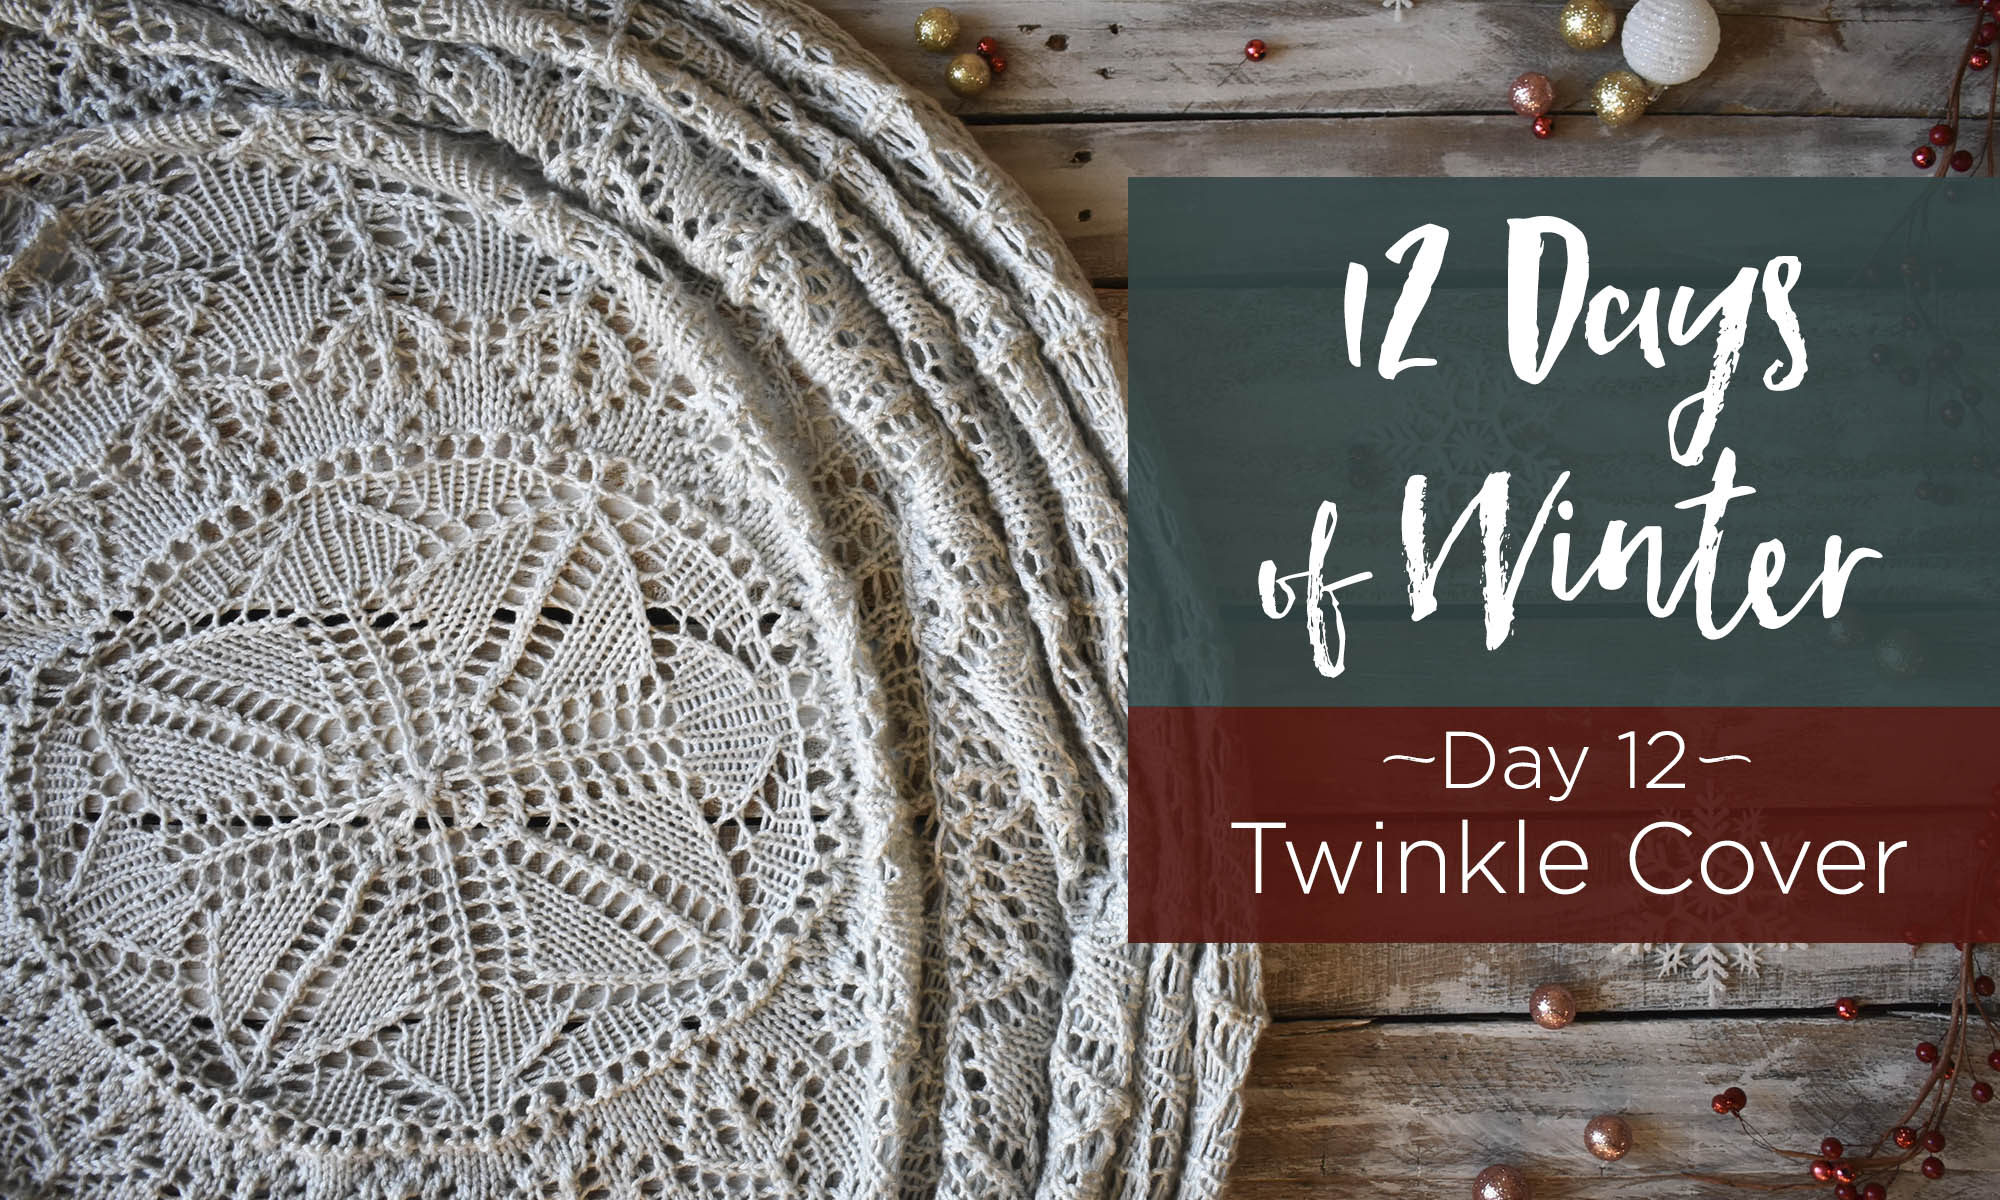
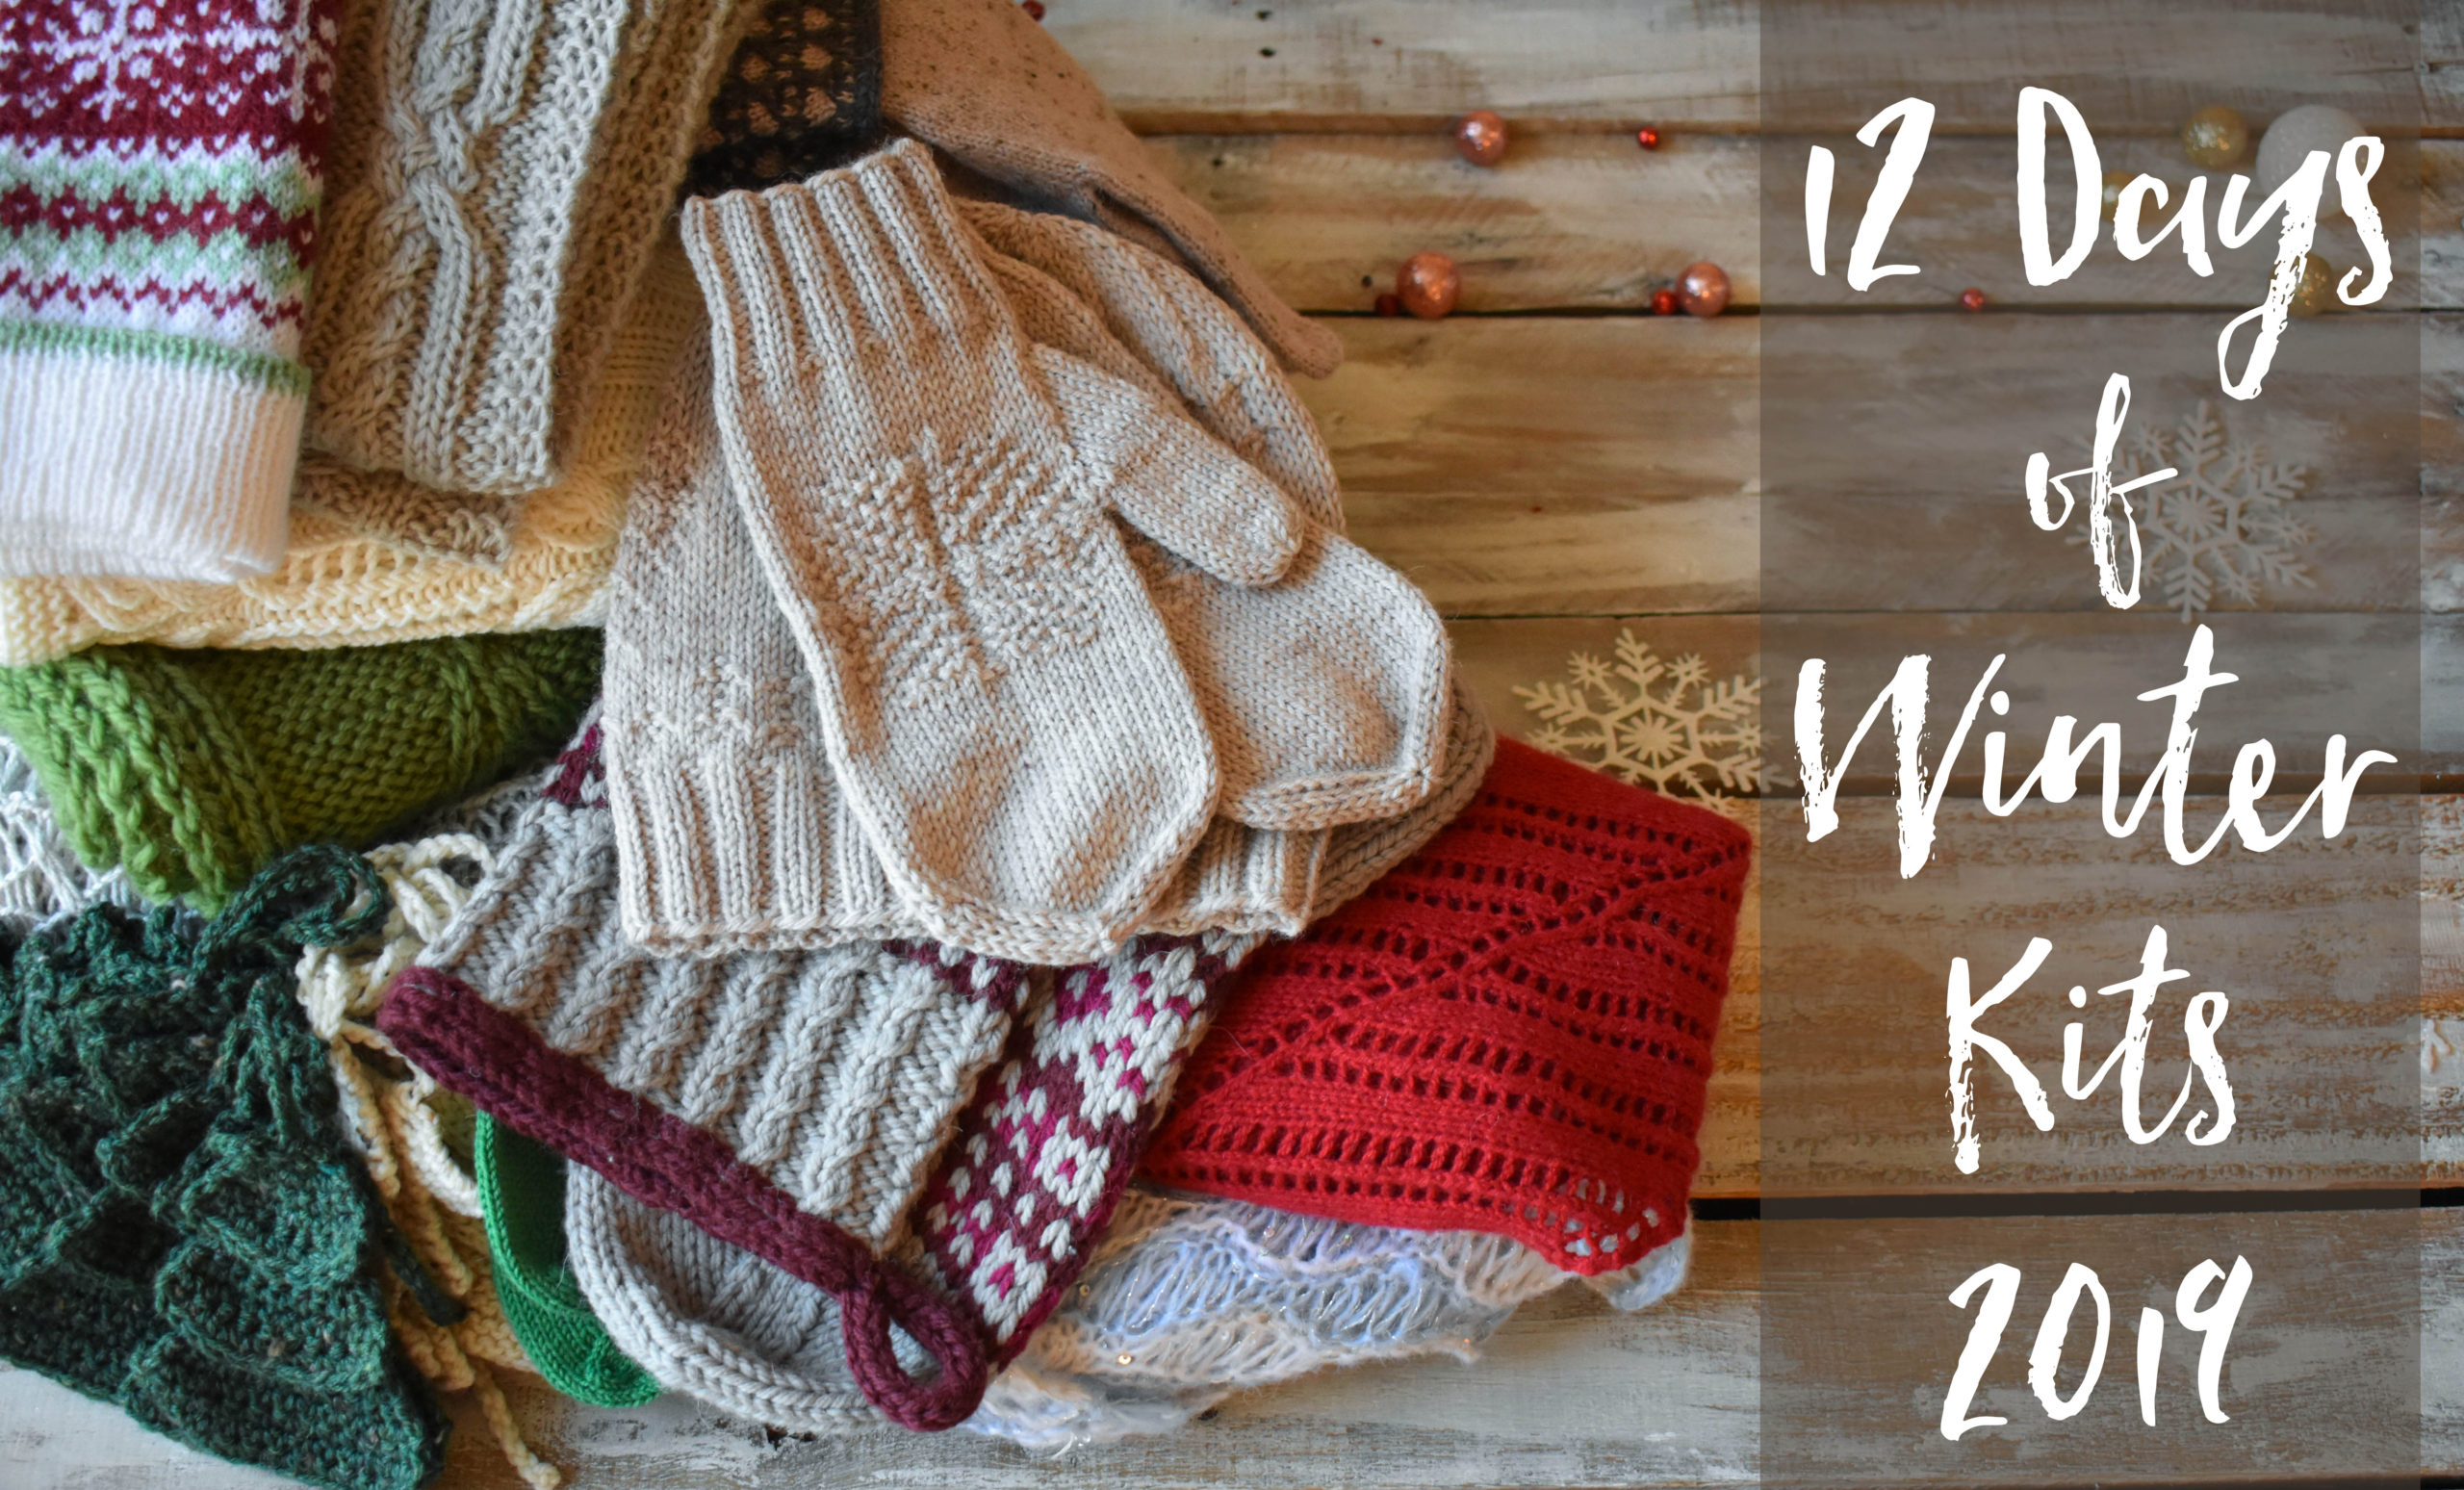
This is part 12 in a 12 part series highlighting designs from our 12 Days of Winter, Series 3 Edition.
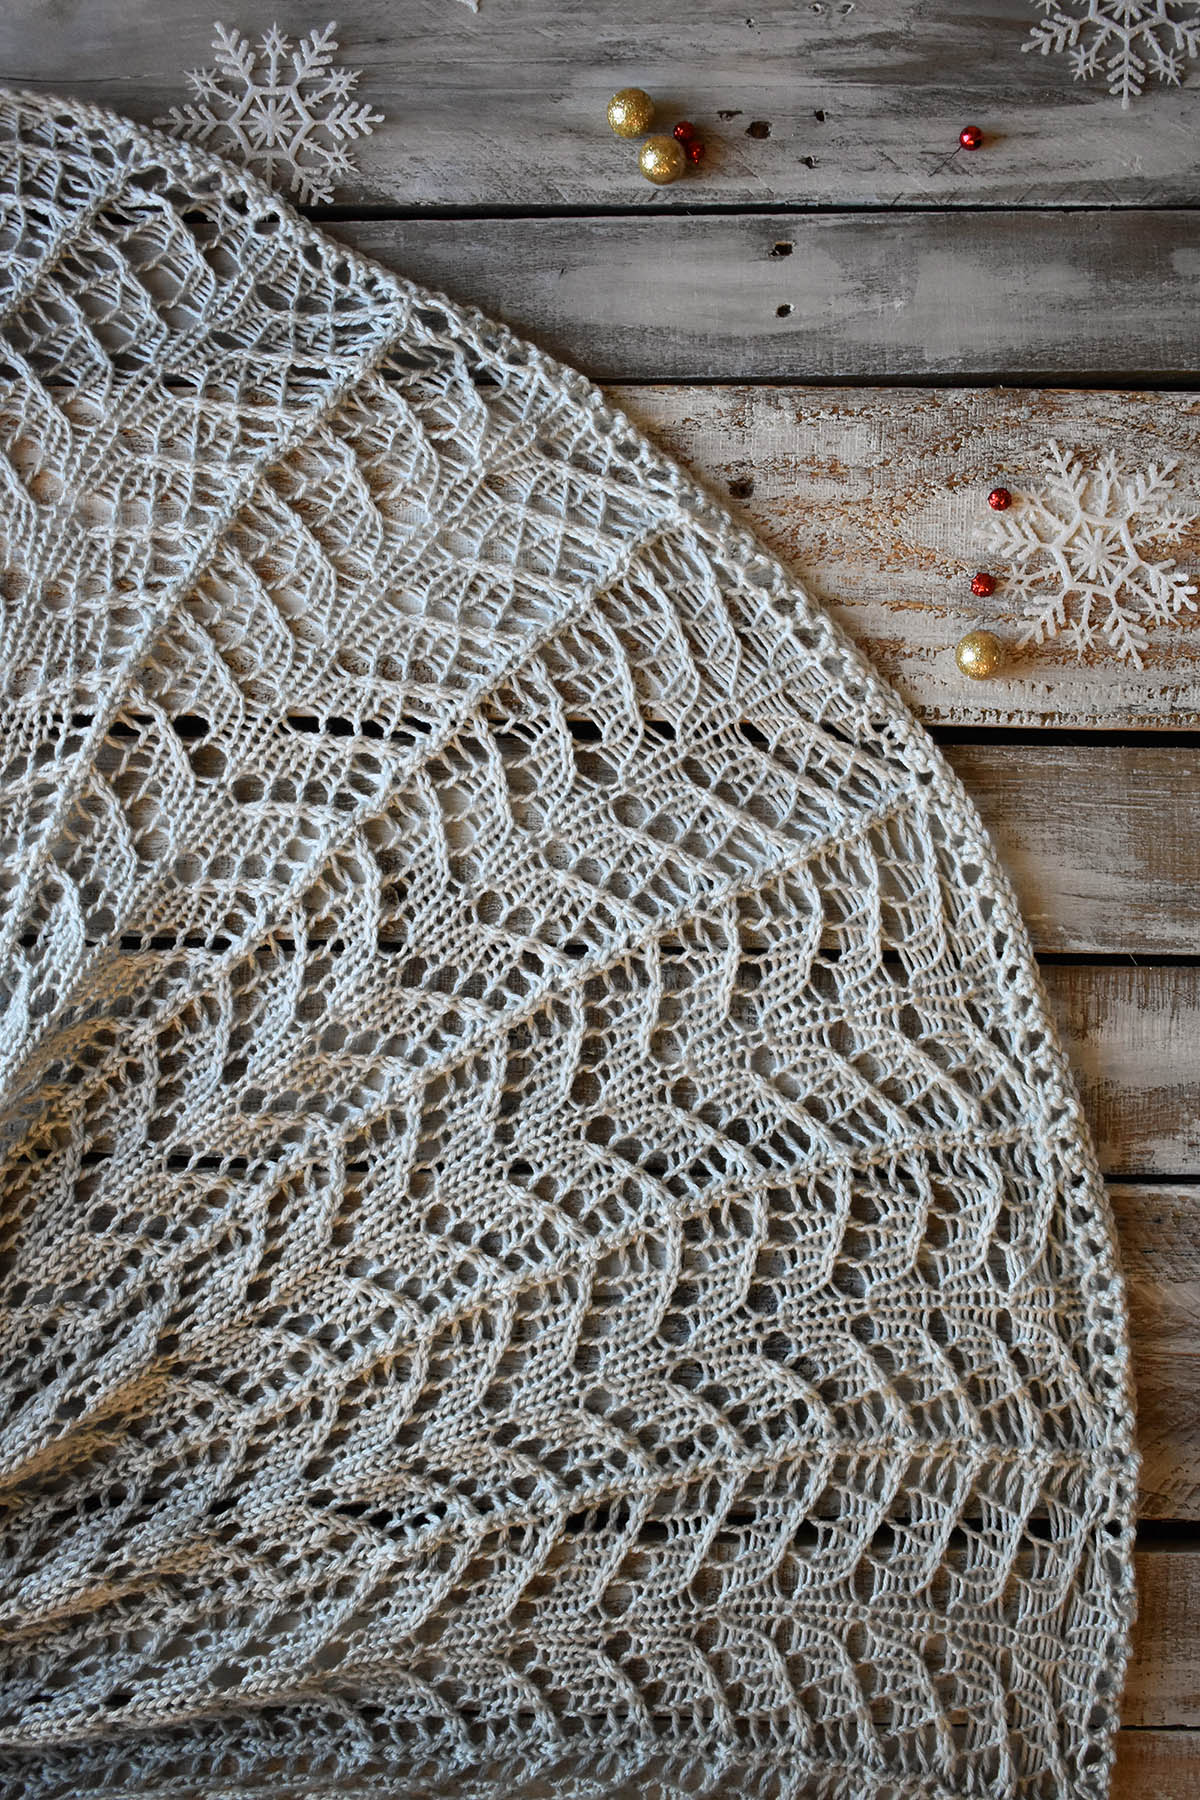
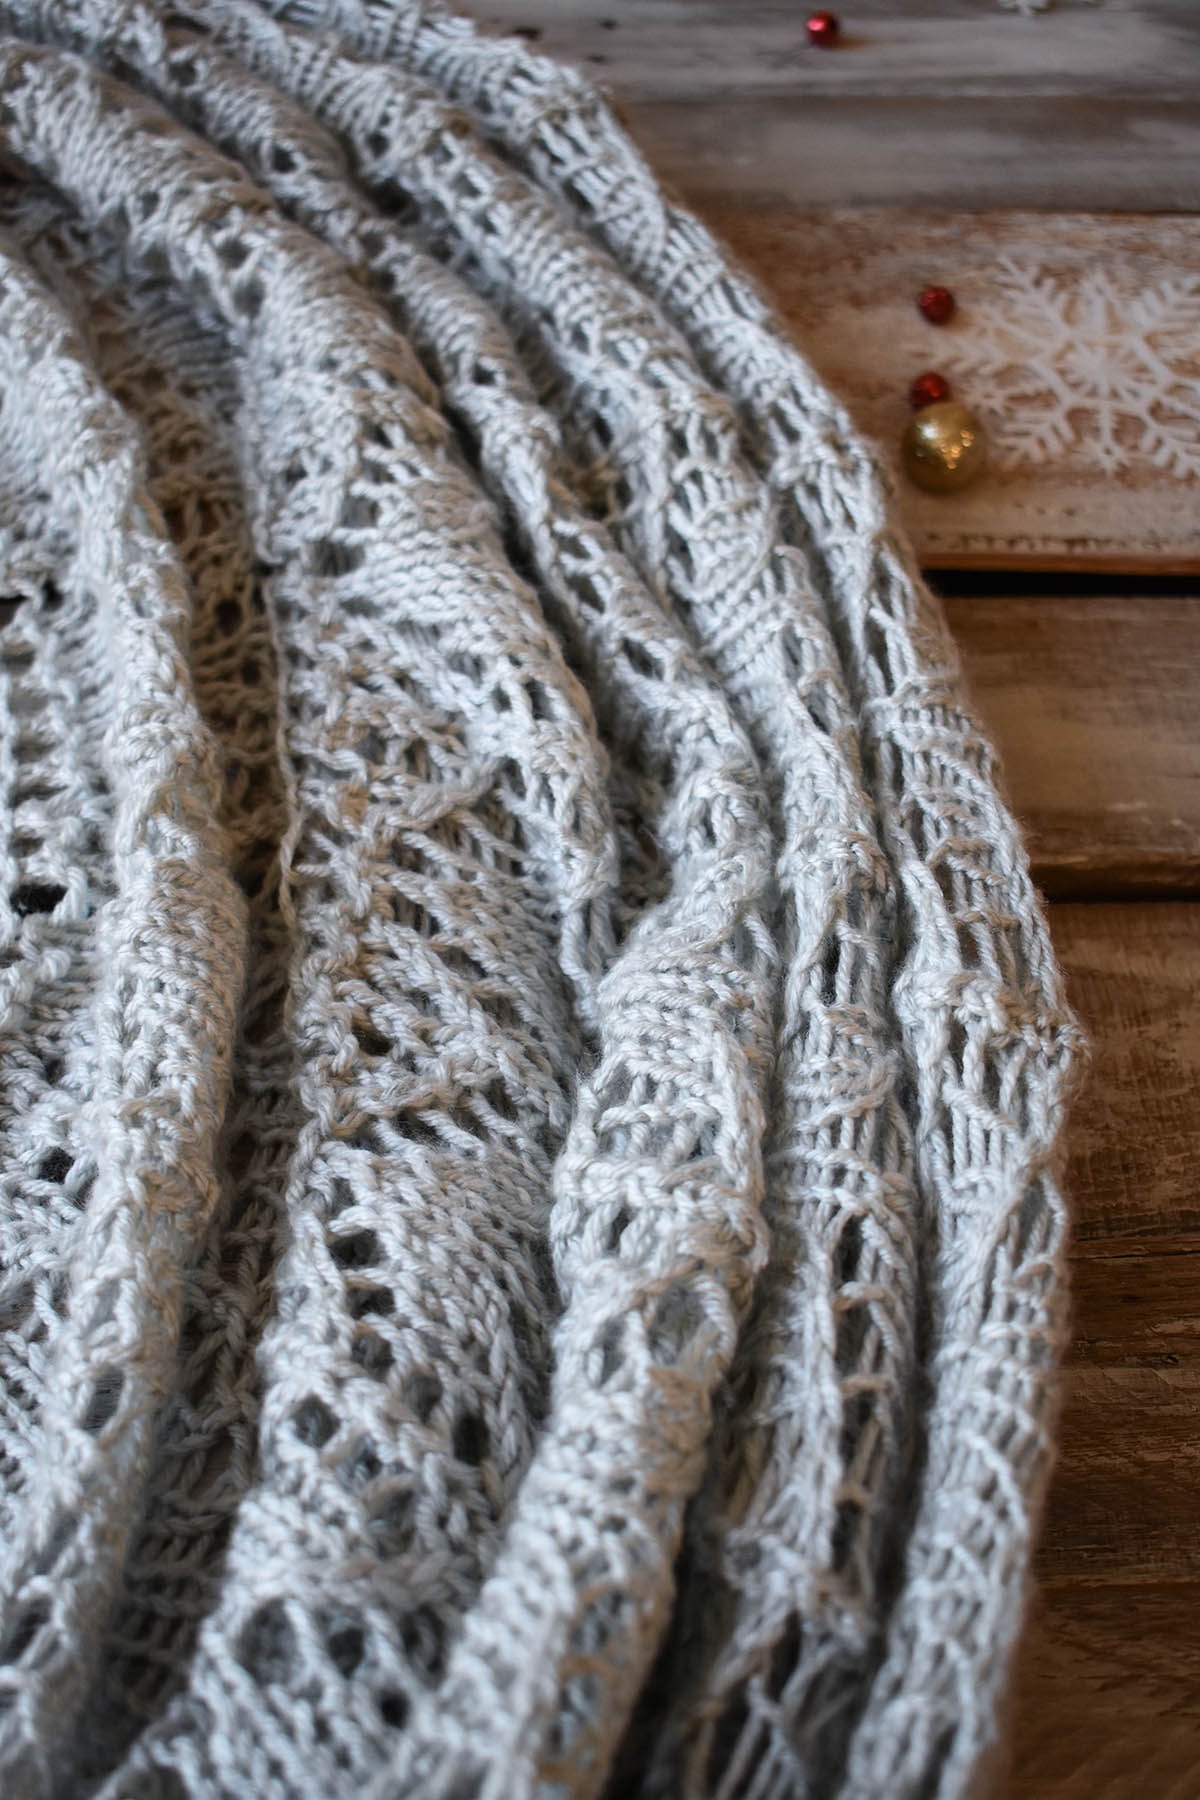
We can hardly believe it, but it’s the final day of the 12 Days of Winter Kit Collection. For Day 12, we’re wrapping things up with the Twinkle Cover, knit using ever-popular Uptown Worsted.
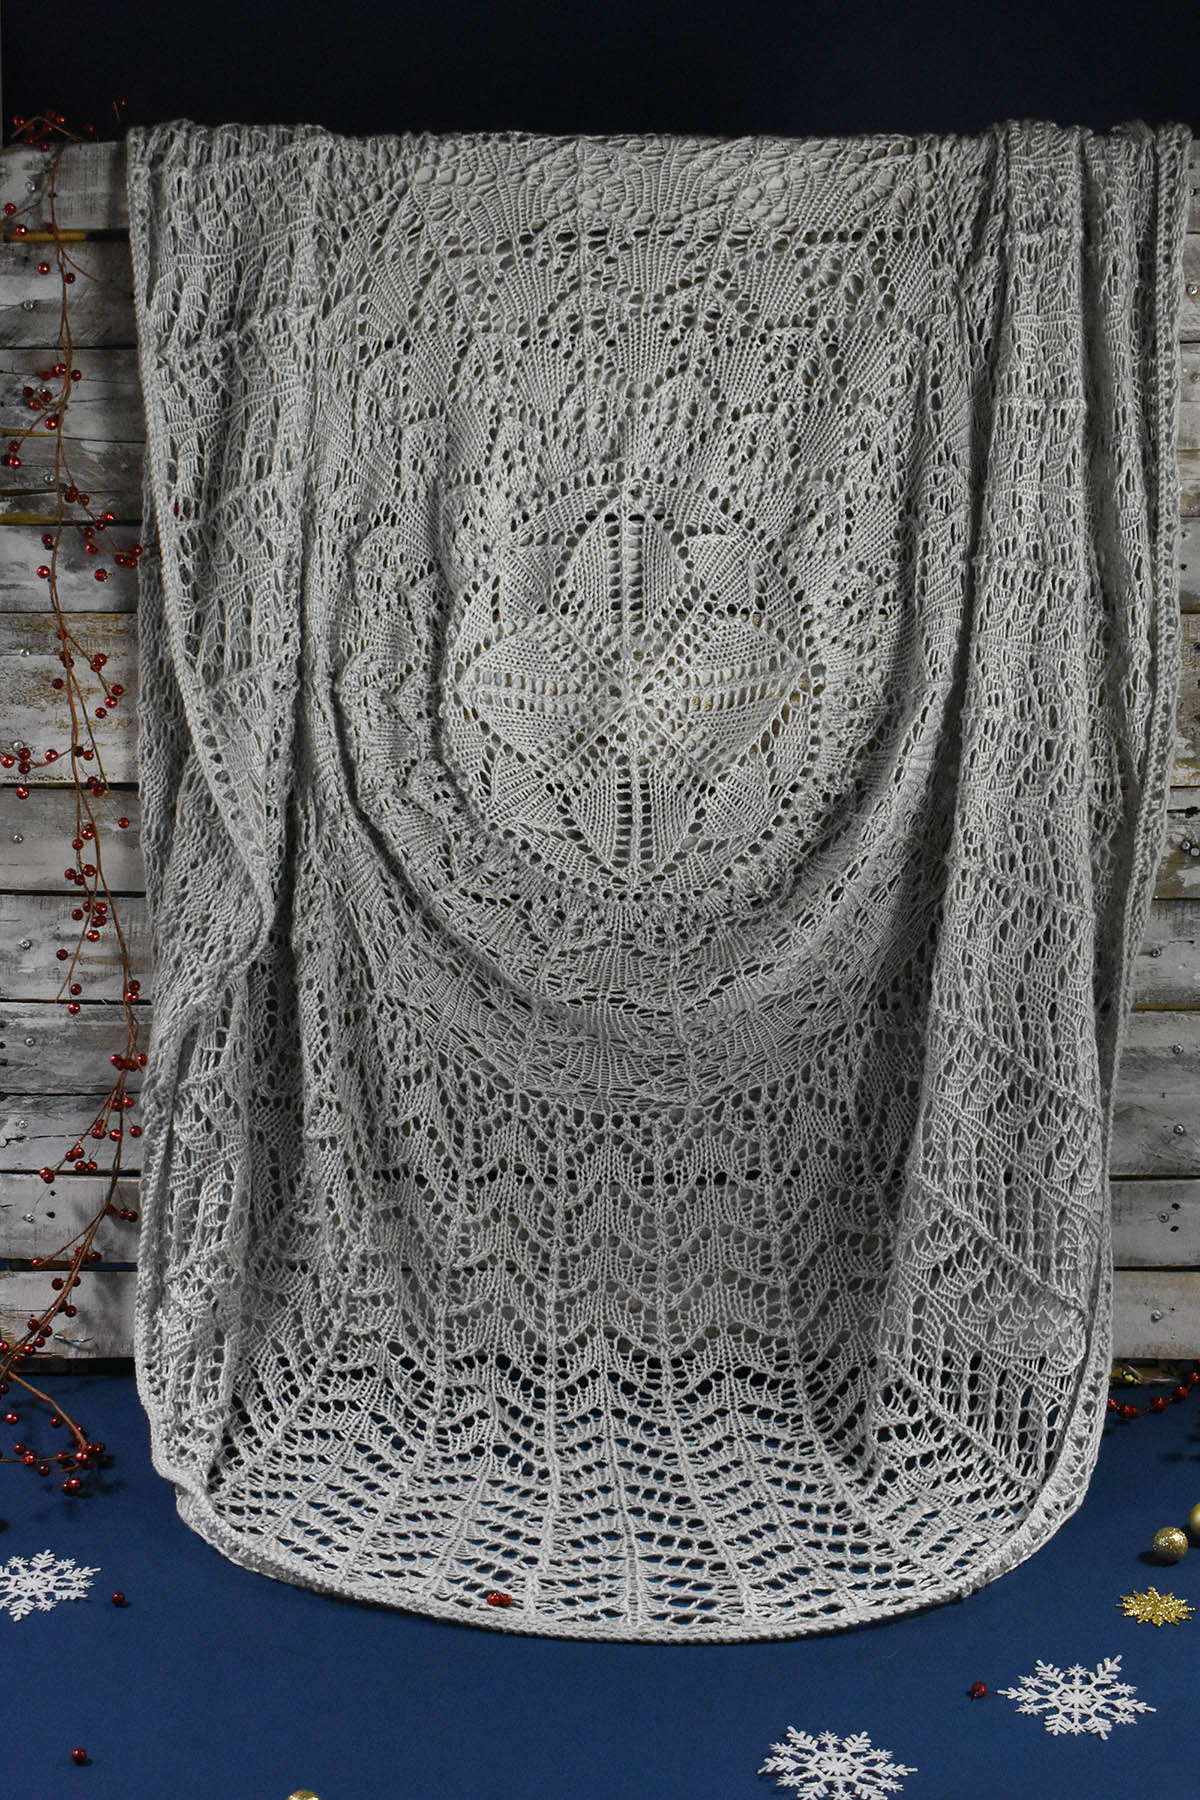
The Twinkle cover features a lovely all-over lace pattern. This circular blanket is created using pi-shawl construction, made popular by the queen of knitting, Elizabeth Zimmermann. Pi-construction begins at the center, then, at regular distances, you simply double the stitch count. The best part? There are just a couple of increase rounds in this whole blanket. The most concentration is required at the beginning of the pattern. After the central increases are complete, the outer rings both feature easy-to-memorize lace motifs.
We have to admit – blocking this blanket will take some effort, but the pattern guides you through the process with some tips and tricks. Steam-blocking is suggested, which might sound risky considering this is an acrylic blanket, but it ensures that you’ll never need to block again. In this case, “killing” the acrylic is a good thing.
Ultimately, this is a project that’s sure to get compliments when you have visitors. It would make a stunning gift, too. We hope you love it.
Thank you so much for joining us for the third 12 Days of Winter Kit Collection. This year we’ve curated a collection of everything from accessories for your head, hands, and heart to beautiful home decor items. There is a mix of projects from beginner to advanced. We so enjoy bringing this collection to life each year and hope you enjoy the kits just as much. Remember, you can find all of the 12 Days of Winter Kit Collection at your local yarn store. Here’s to a crafty, fun-filled winter spent with your loved ones!
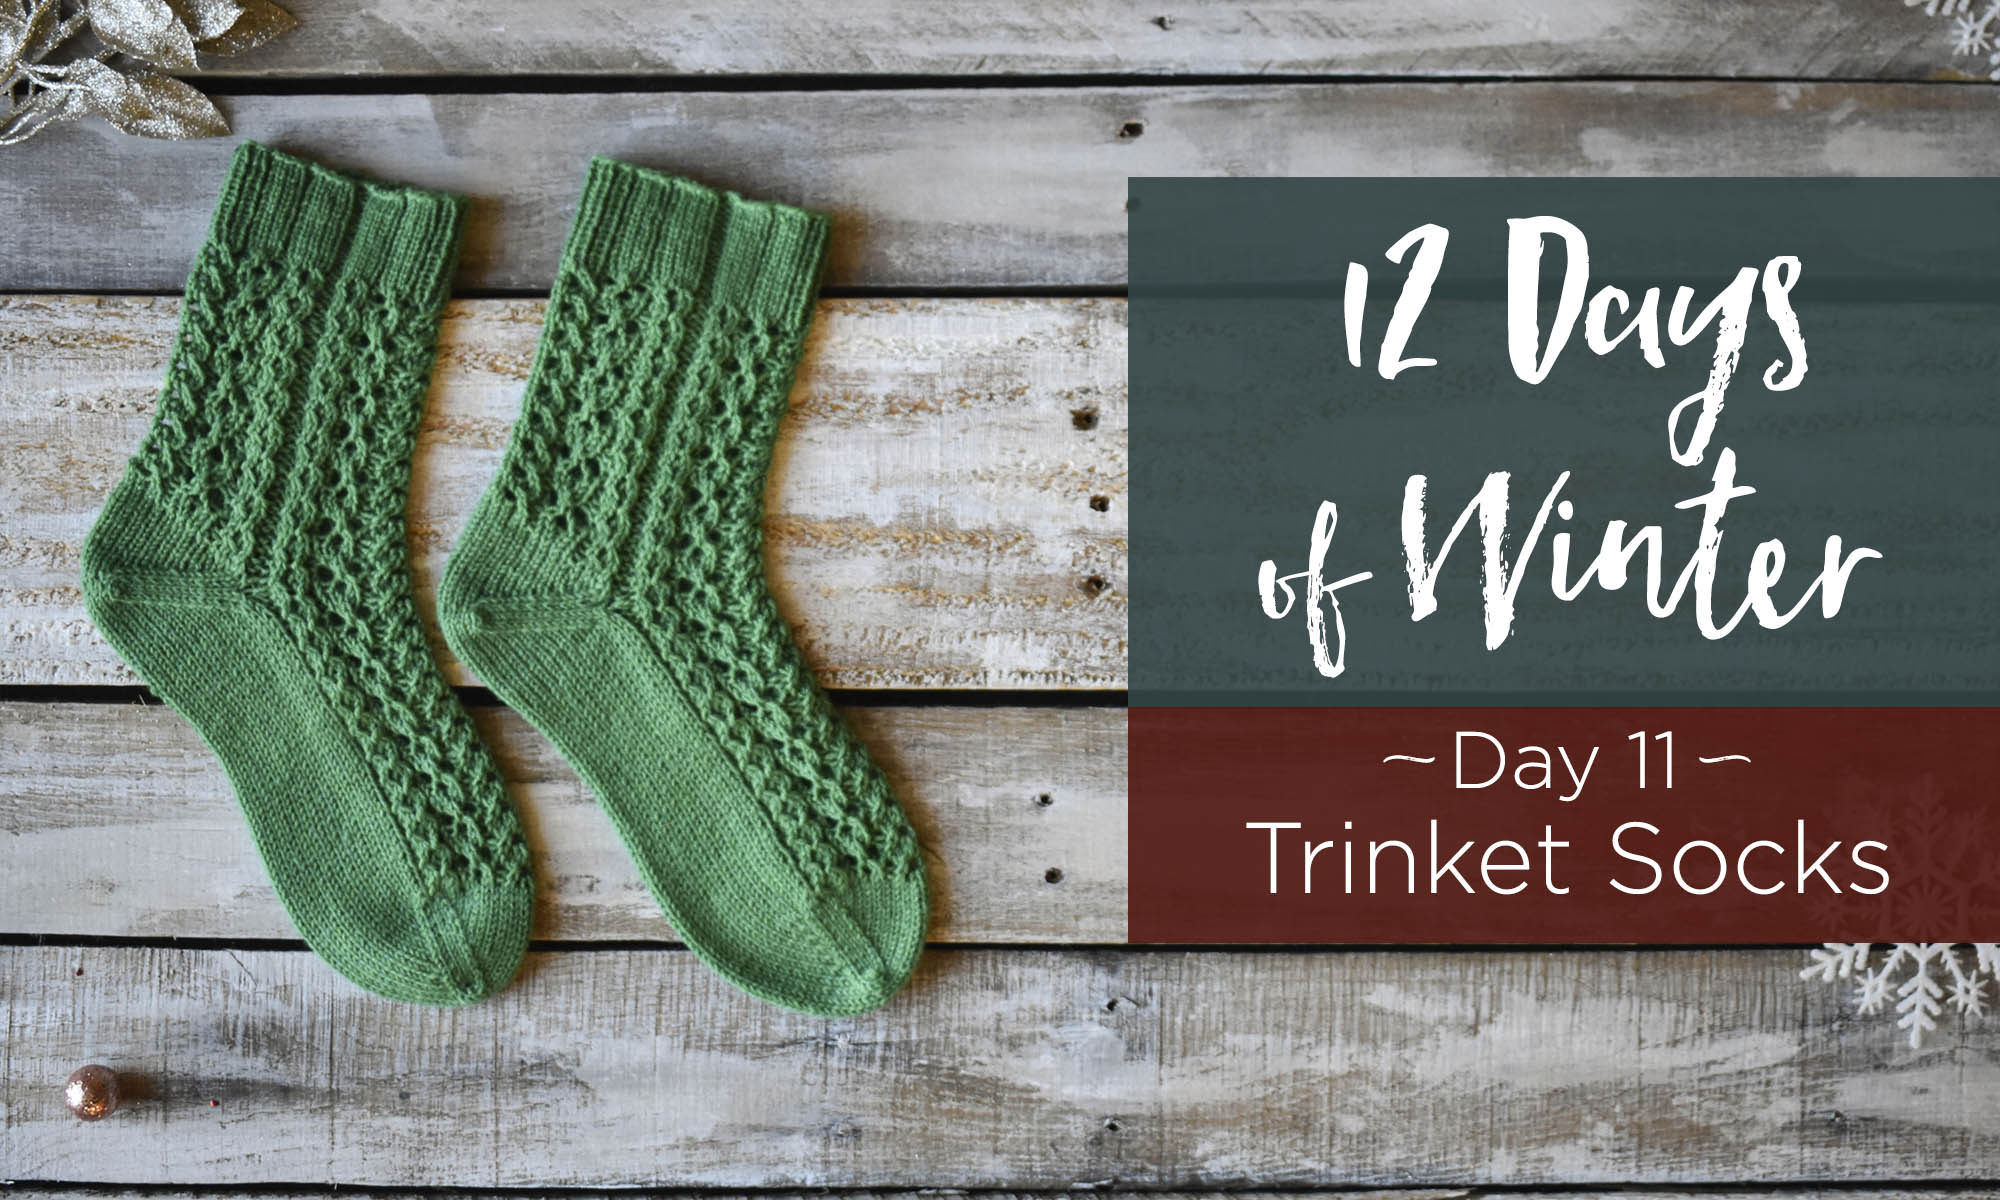
This is part 11 in a 12 part series highlighting designs from our 12 Days of Winter, Series 3 Edition.
It’s Day 11 in the 12 Days of Winter Kit Collection. We can’t believe how quickly time seems to be going. Before we dive into today’s kit and post, I’d like to take a moment to highlight that today is Small Business Saturday. We’re right in the midst of what is arguably the biggest shopping period of the year. As you gear up for the holiday season, don’t forget to support your local small businesses. For those of us who love all things yarny, it’s the perfect day to show some support to your local yarn stores. Without them, we wouldn’t be a business at all! Local yarn stores are front and center of the fiber community – offering a space to learn, socialize, and of course, purchase some yummy yarn.
And now, onto today’s kit (which you can find at your local yarn store).
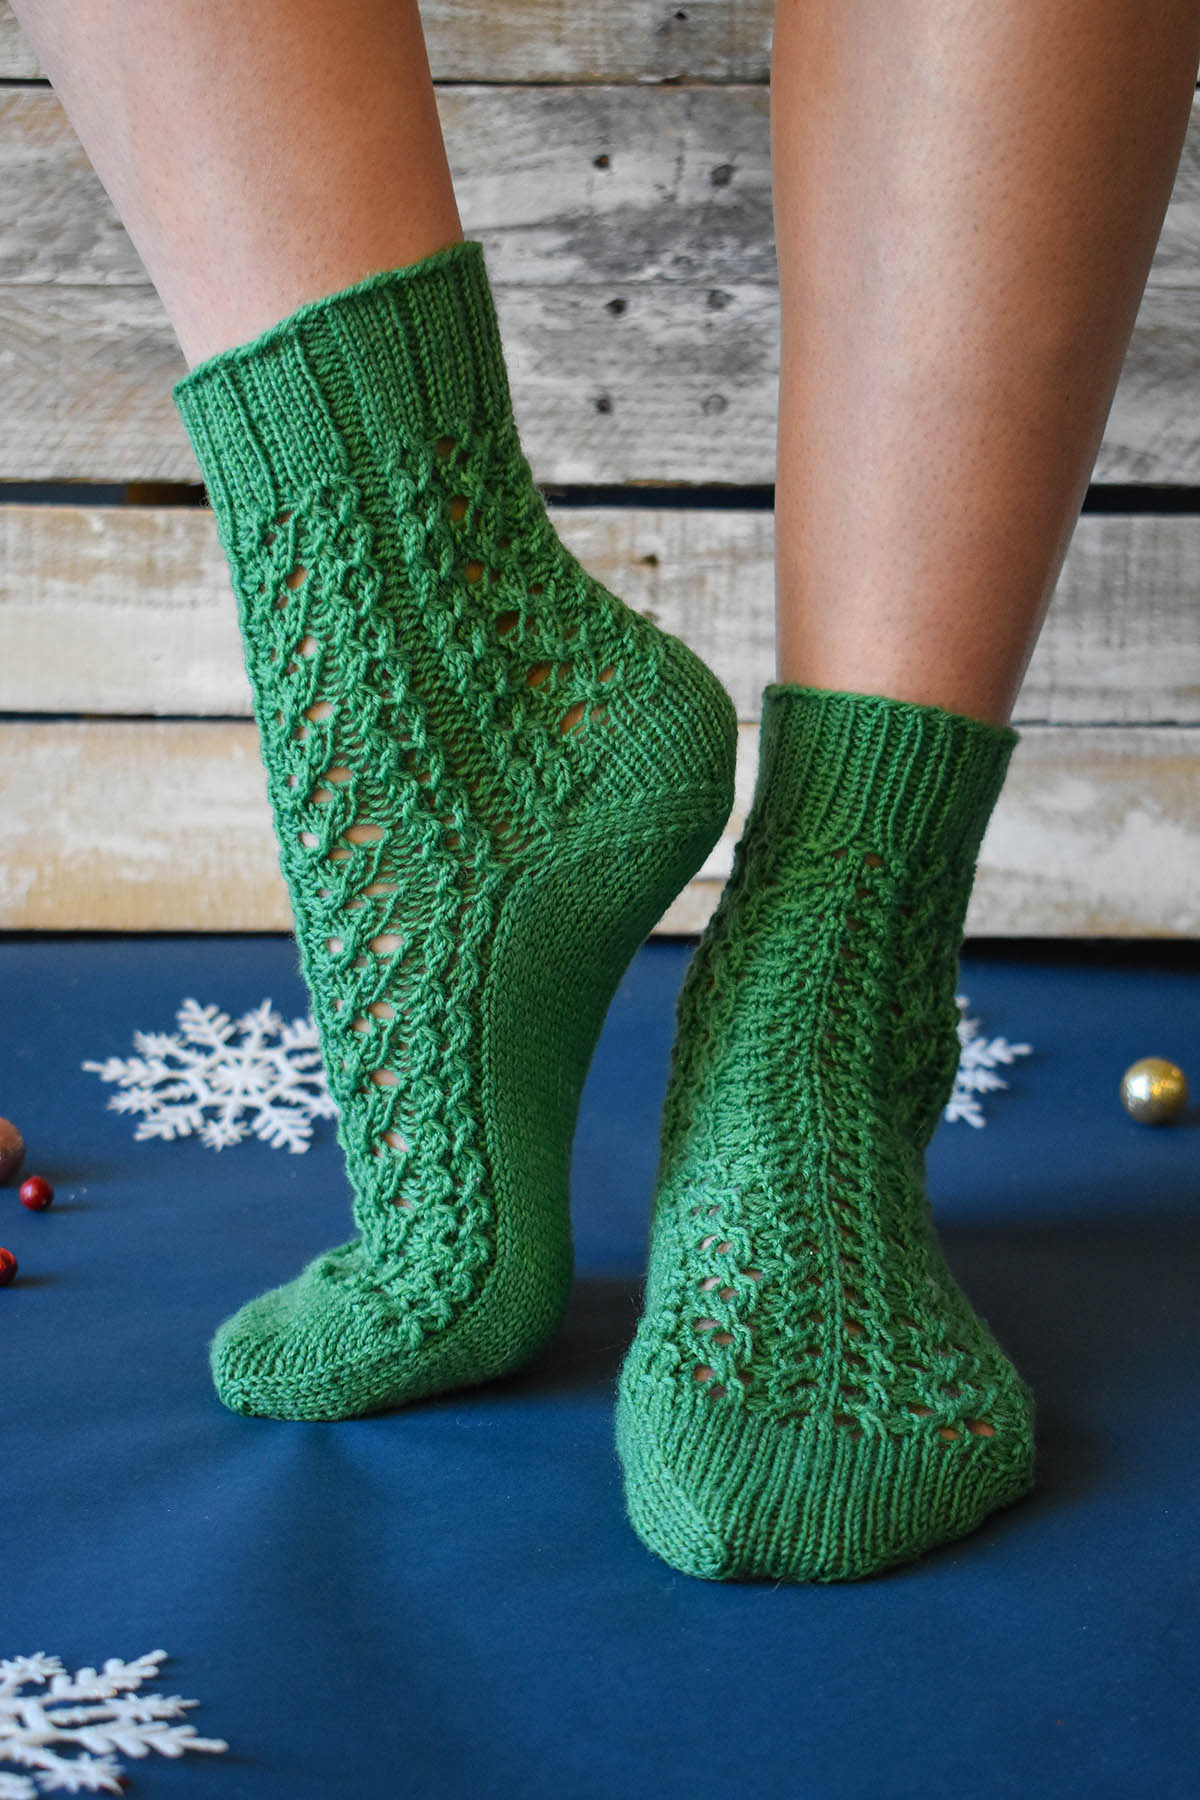
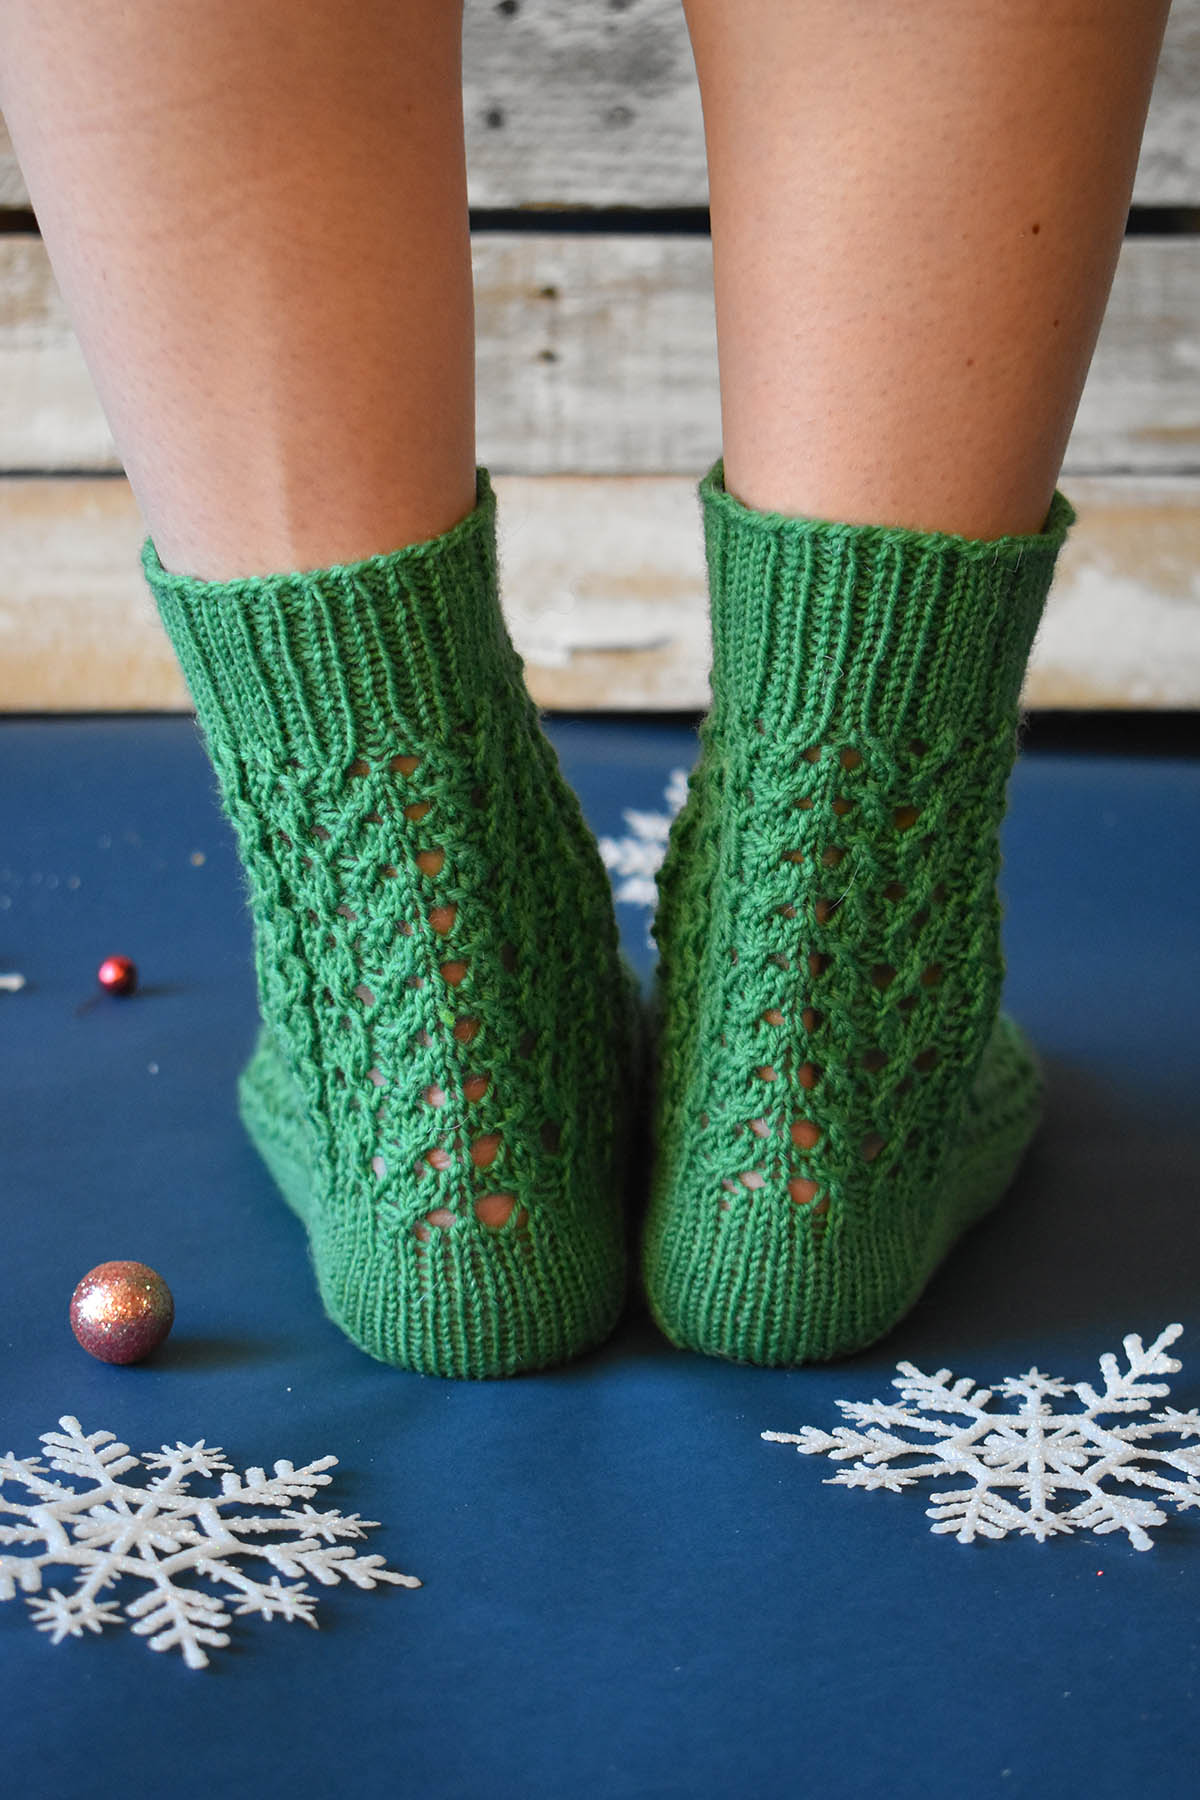
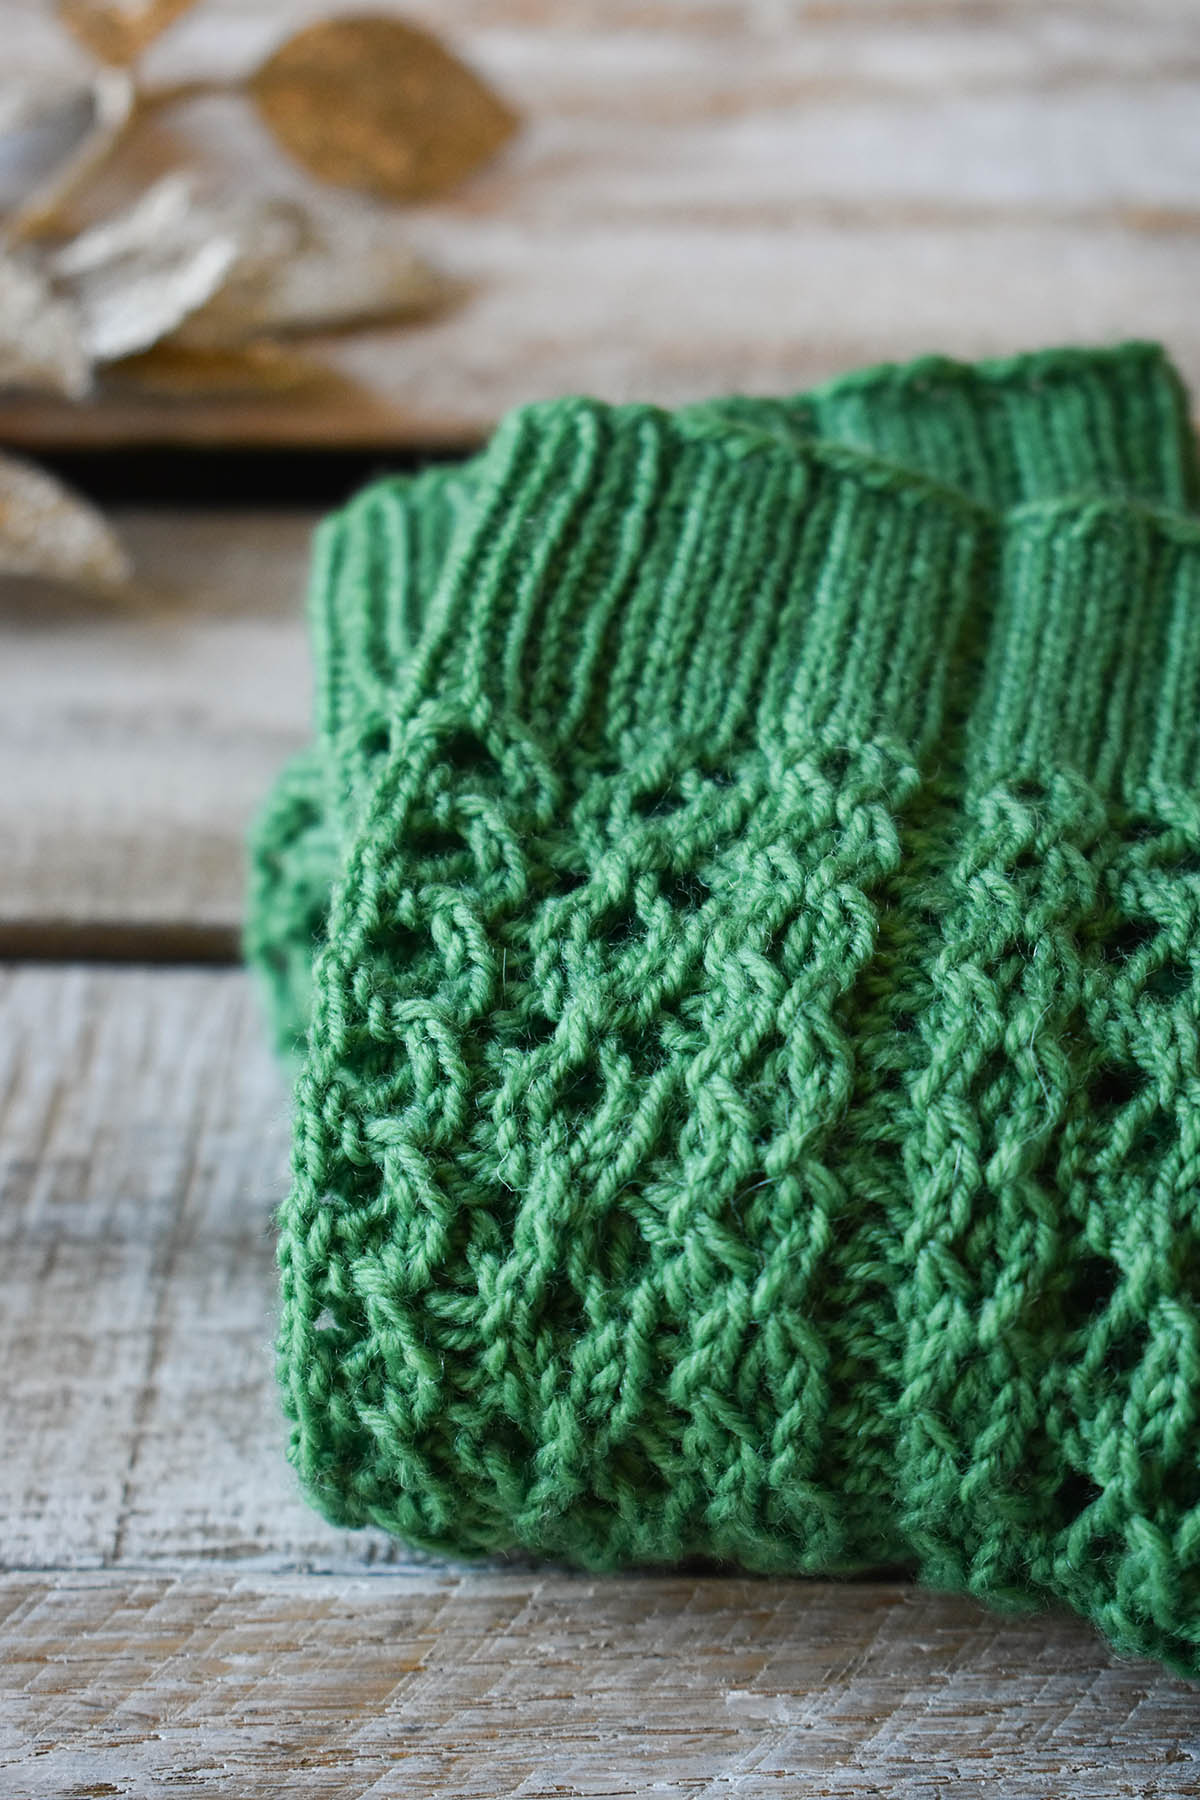
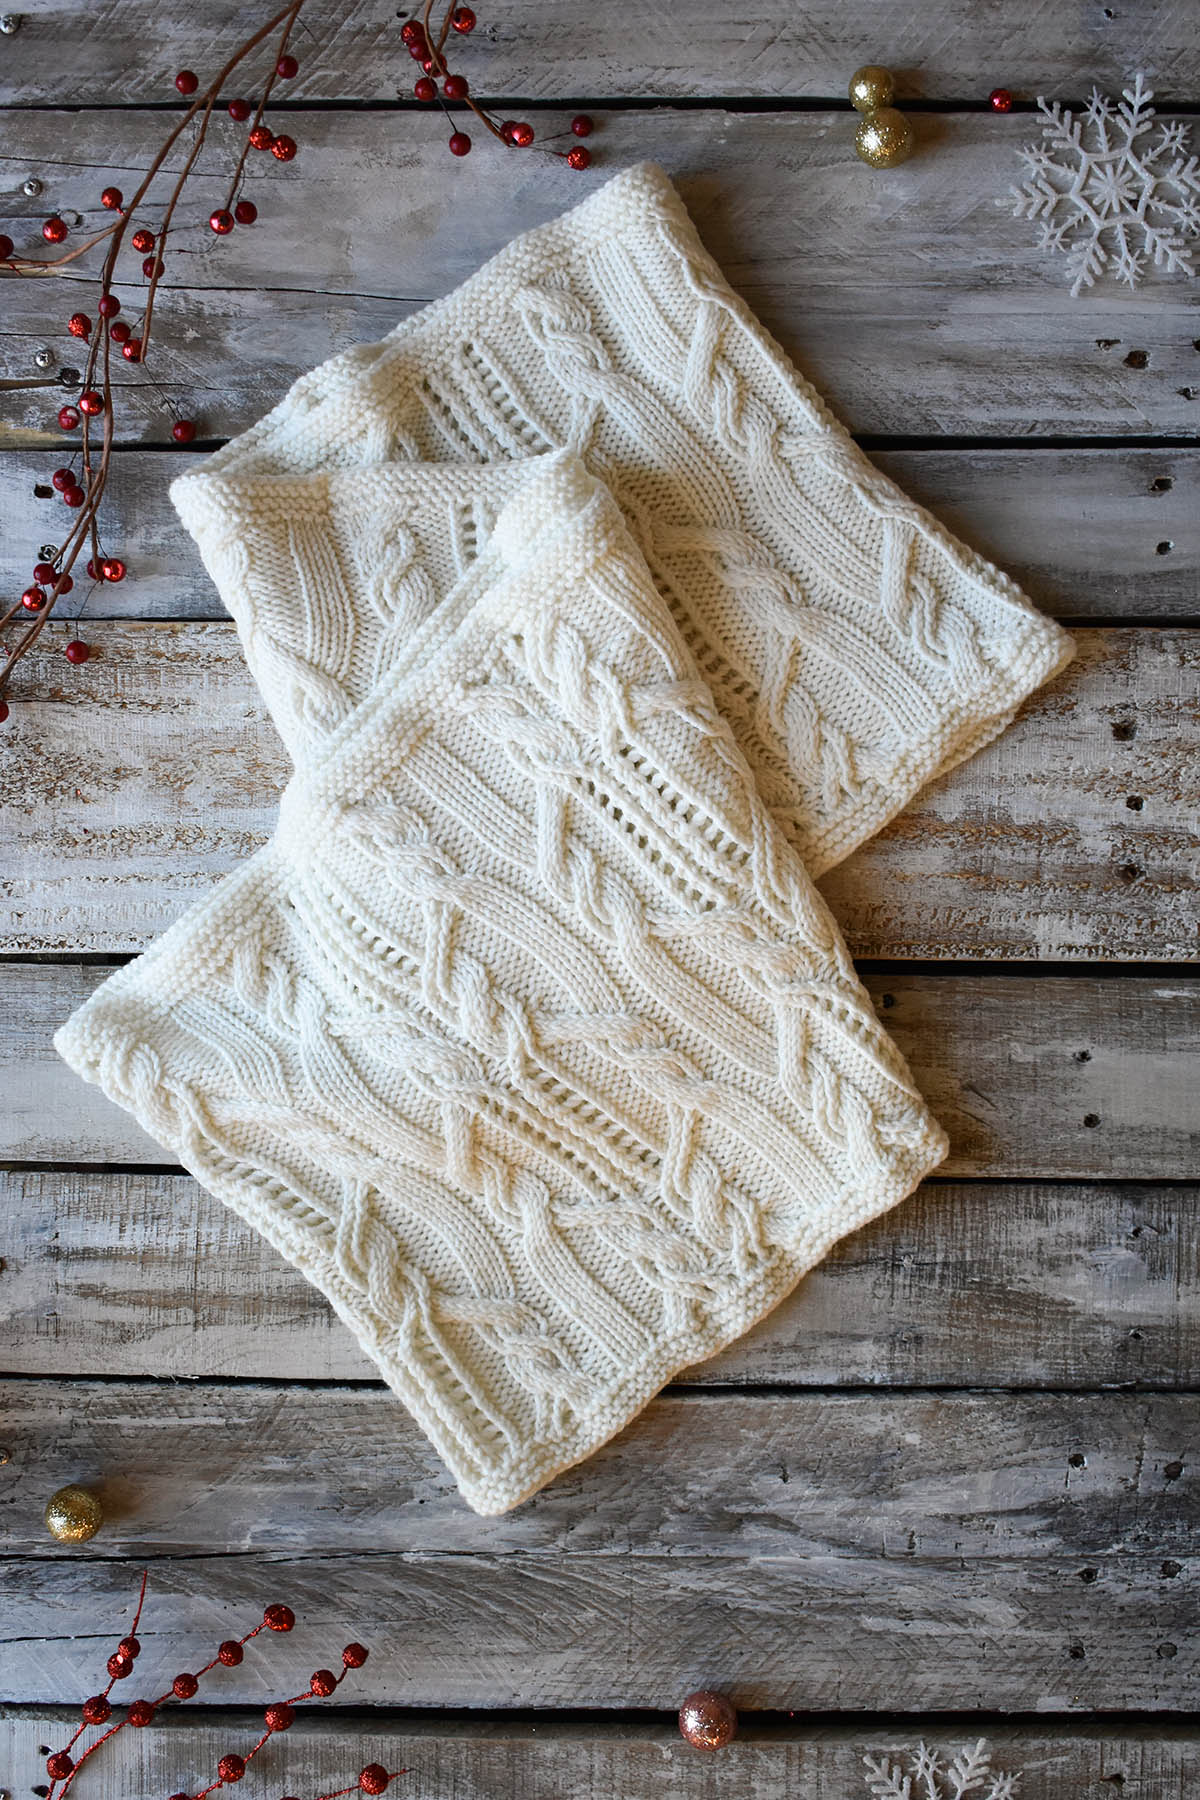
Today we’re excited to introduce the Trinket Socks, knit up in deliciously soft, yet strong, Bella Cash. This is a great all-around yarn, but here in the office, it has become a favorite for knitting socks. Thanks to the superwash merino, they’re machine-washable and easy to care for. Cashmere adds a touch of luxury, and nylon ensures these socks will be strong enough to last for ages. These socks feature a lace and twisted stitch pattern that is addictive to knit, and quick to work up.
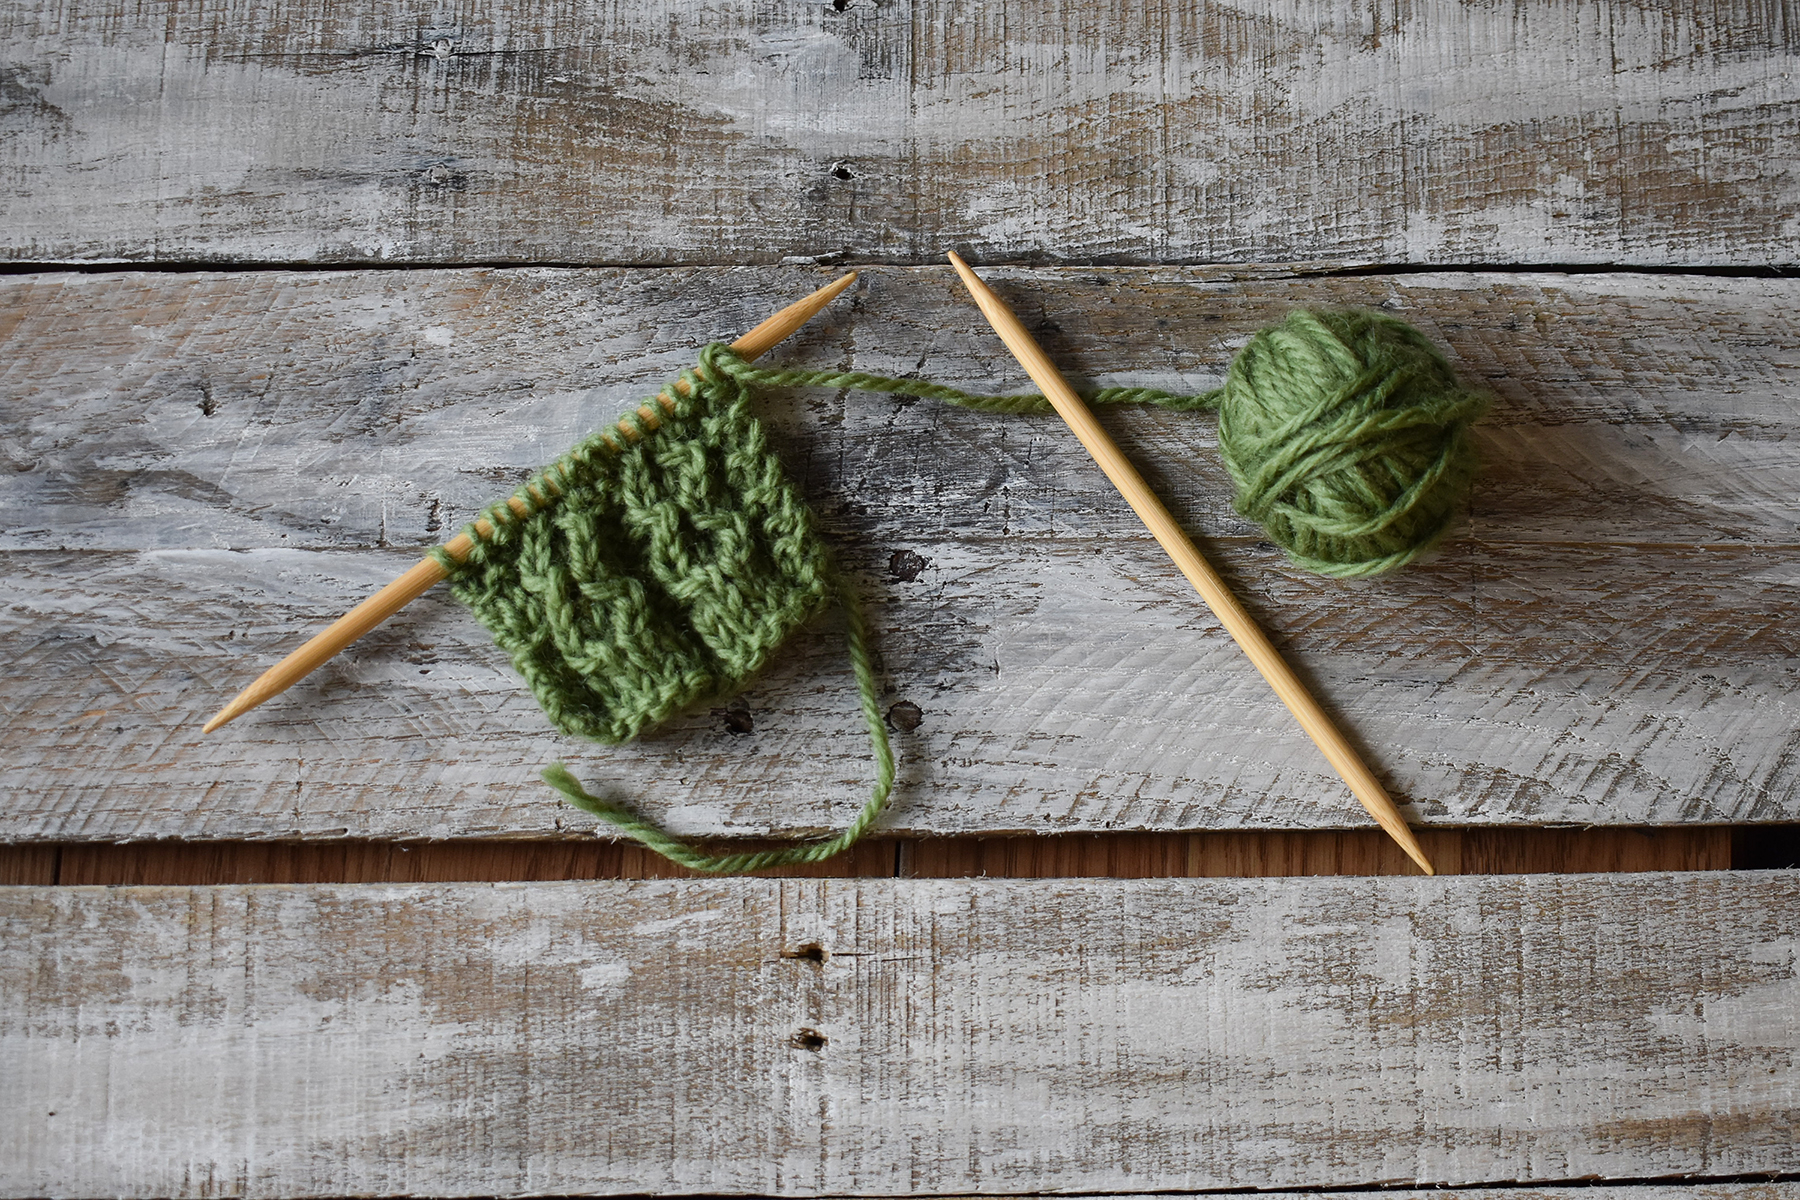
Speaking of twisted stitches – we have a tutorial to share today. If you can recall from Day 7 of Winter (the Mountain Pines Cowl), we shared a tutorial on Right and Left Purl Twists. Today, we’ll be showing you how to knit a regular Right and Left Twist – no purling necessary. Note that for today’s tutorial, we’re using Deluxe Chunky so that it’s easier for you to see.
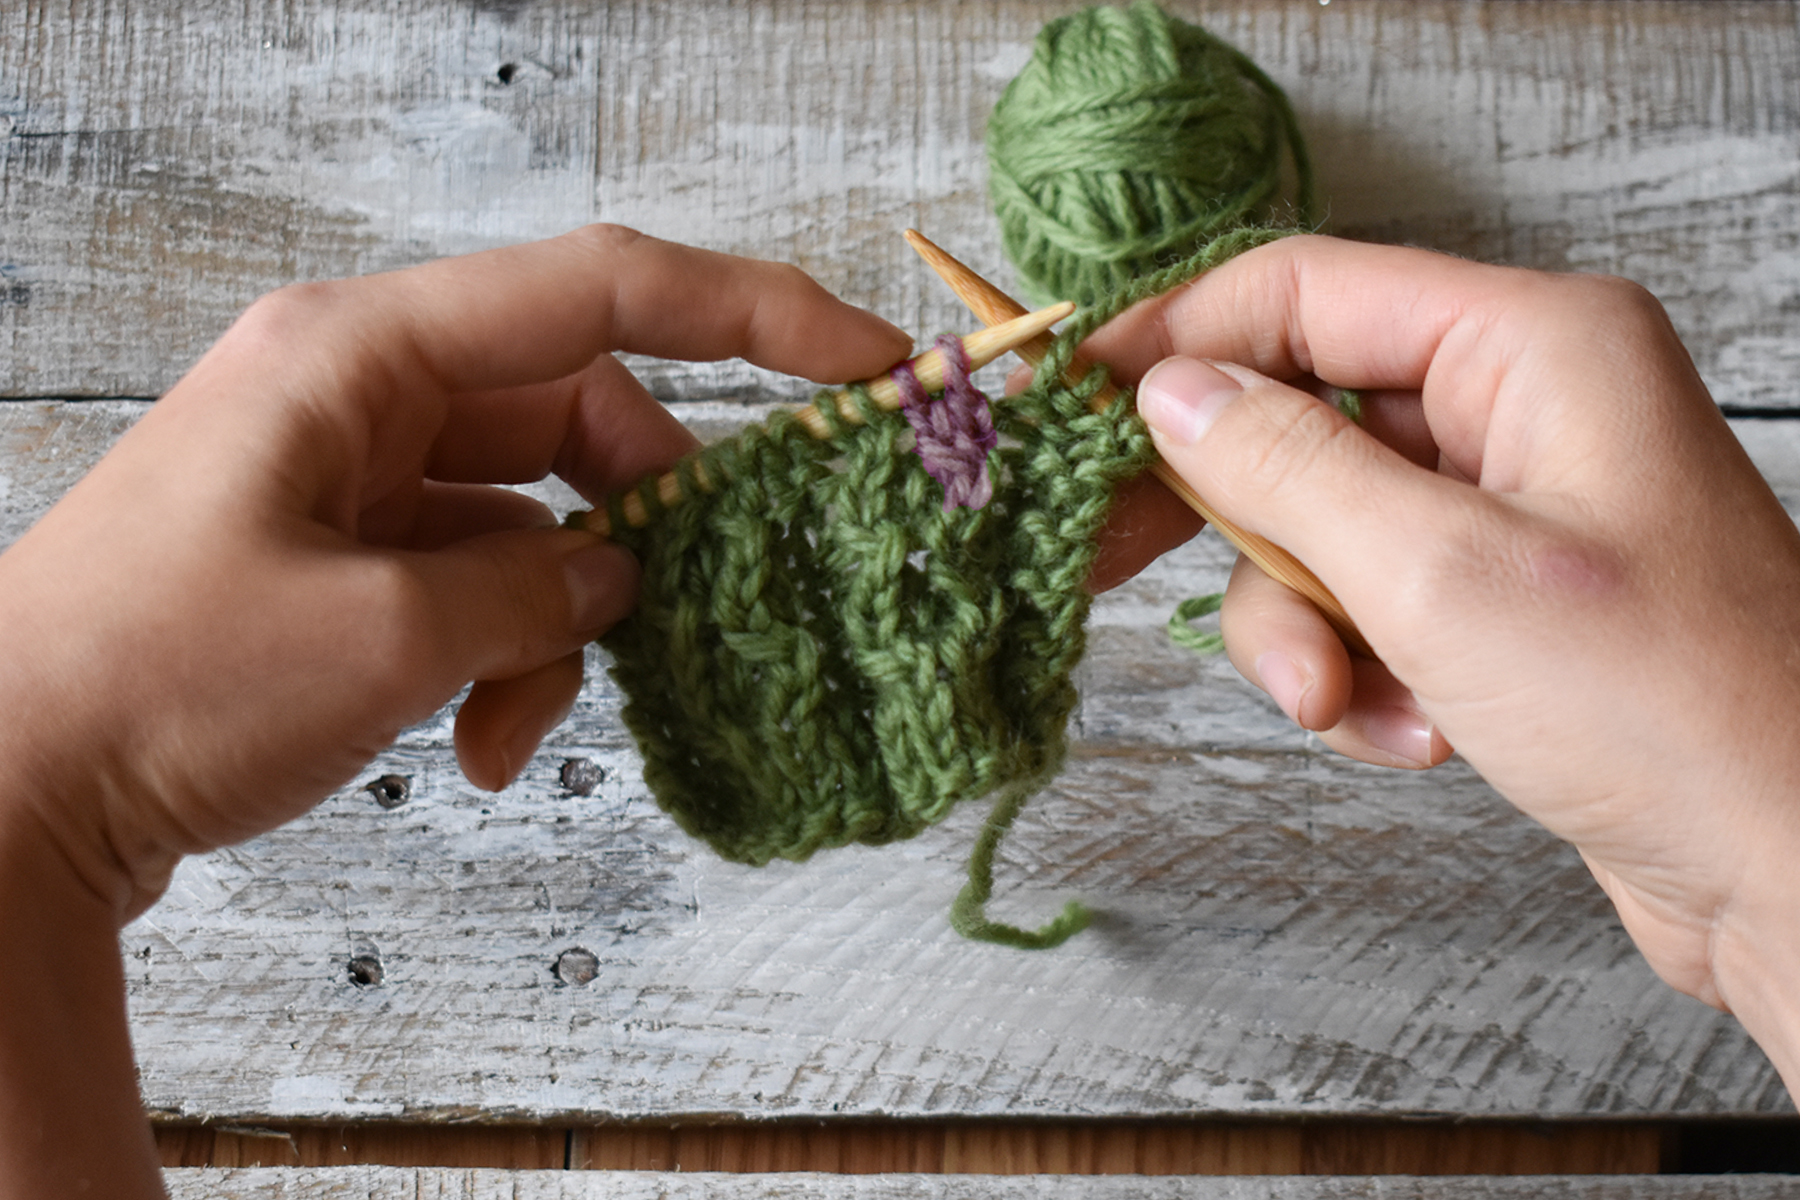
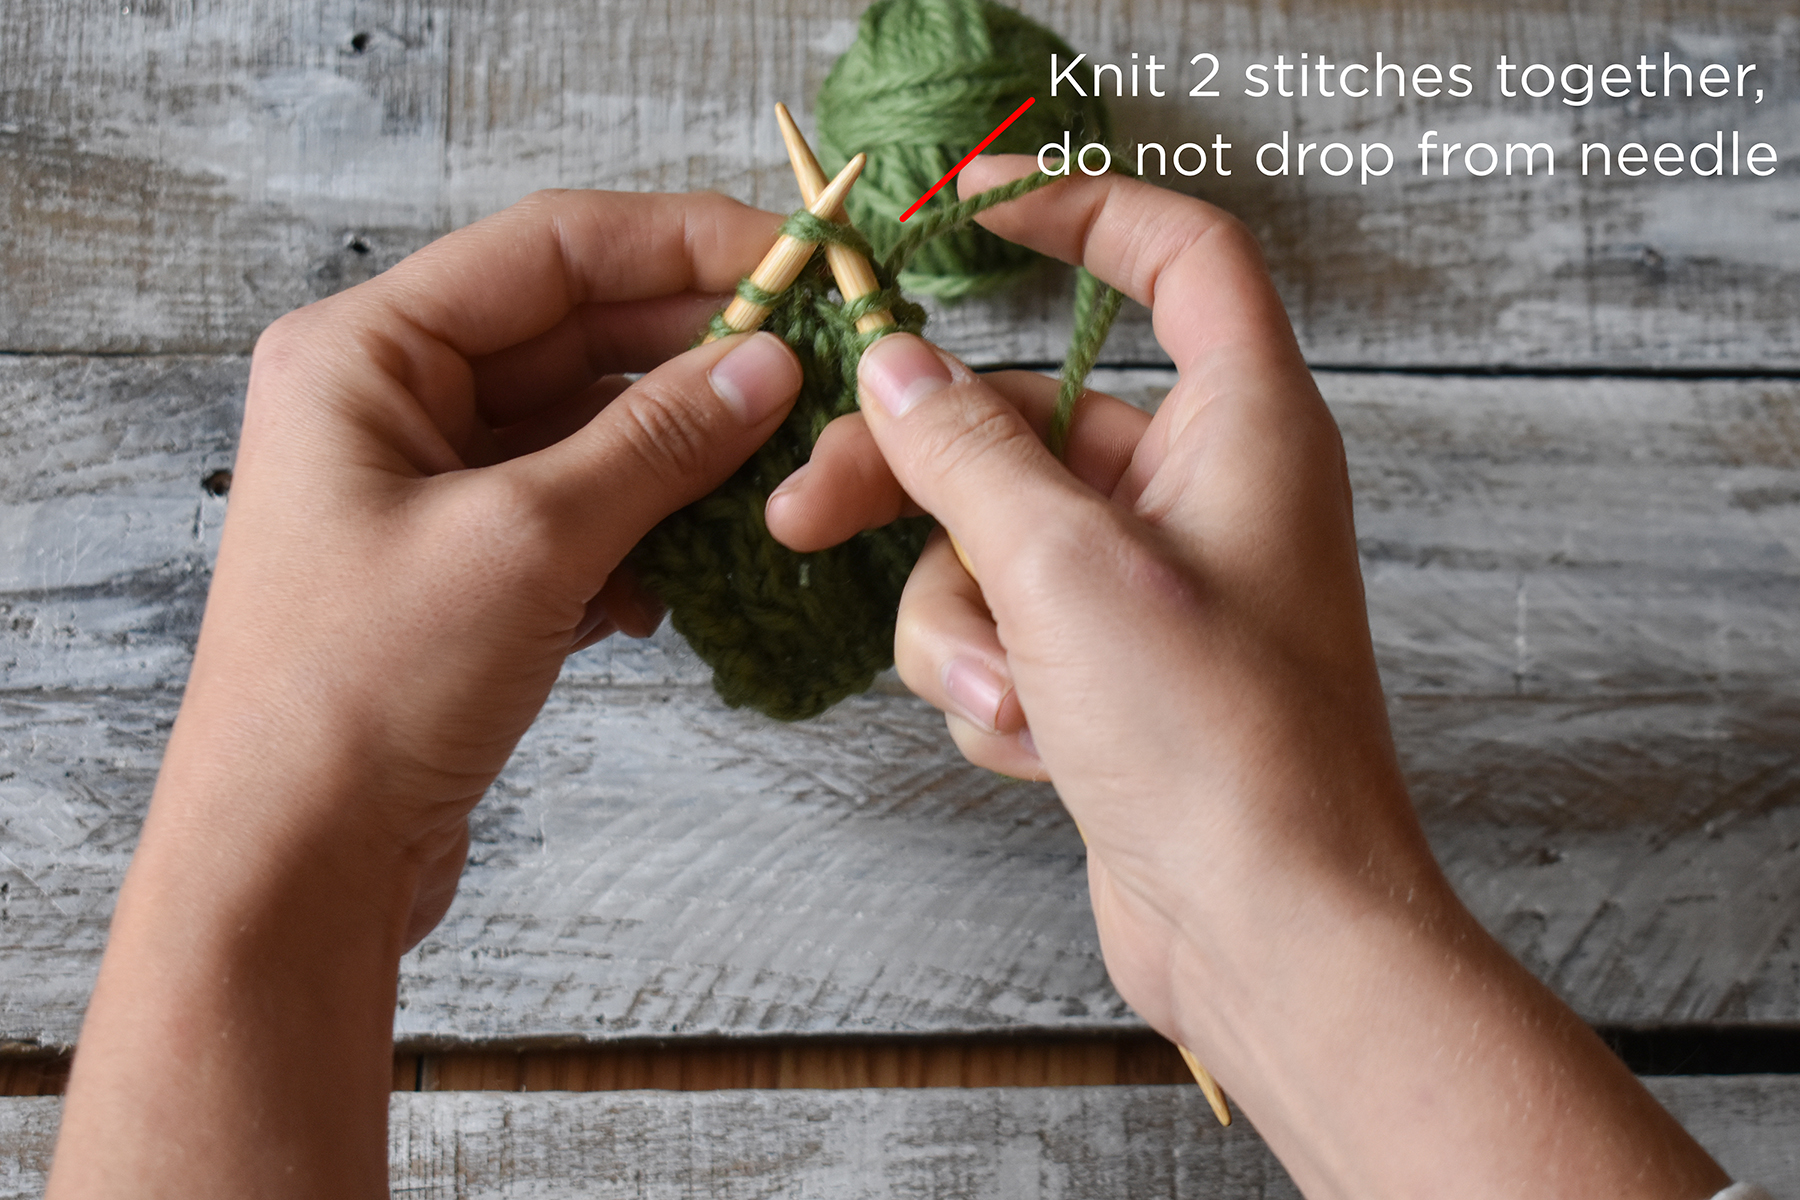
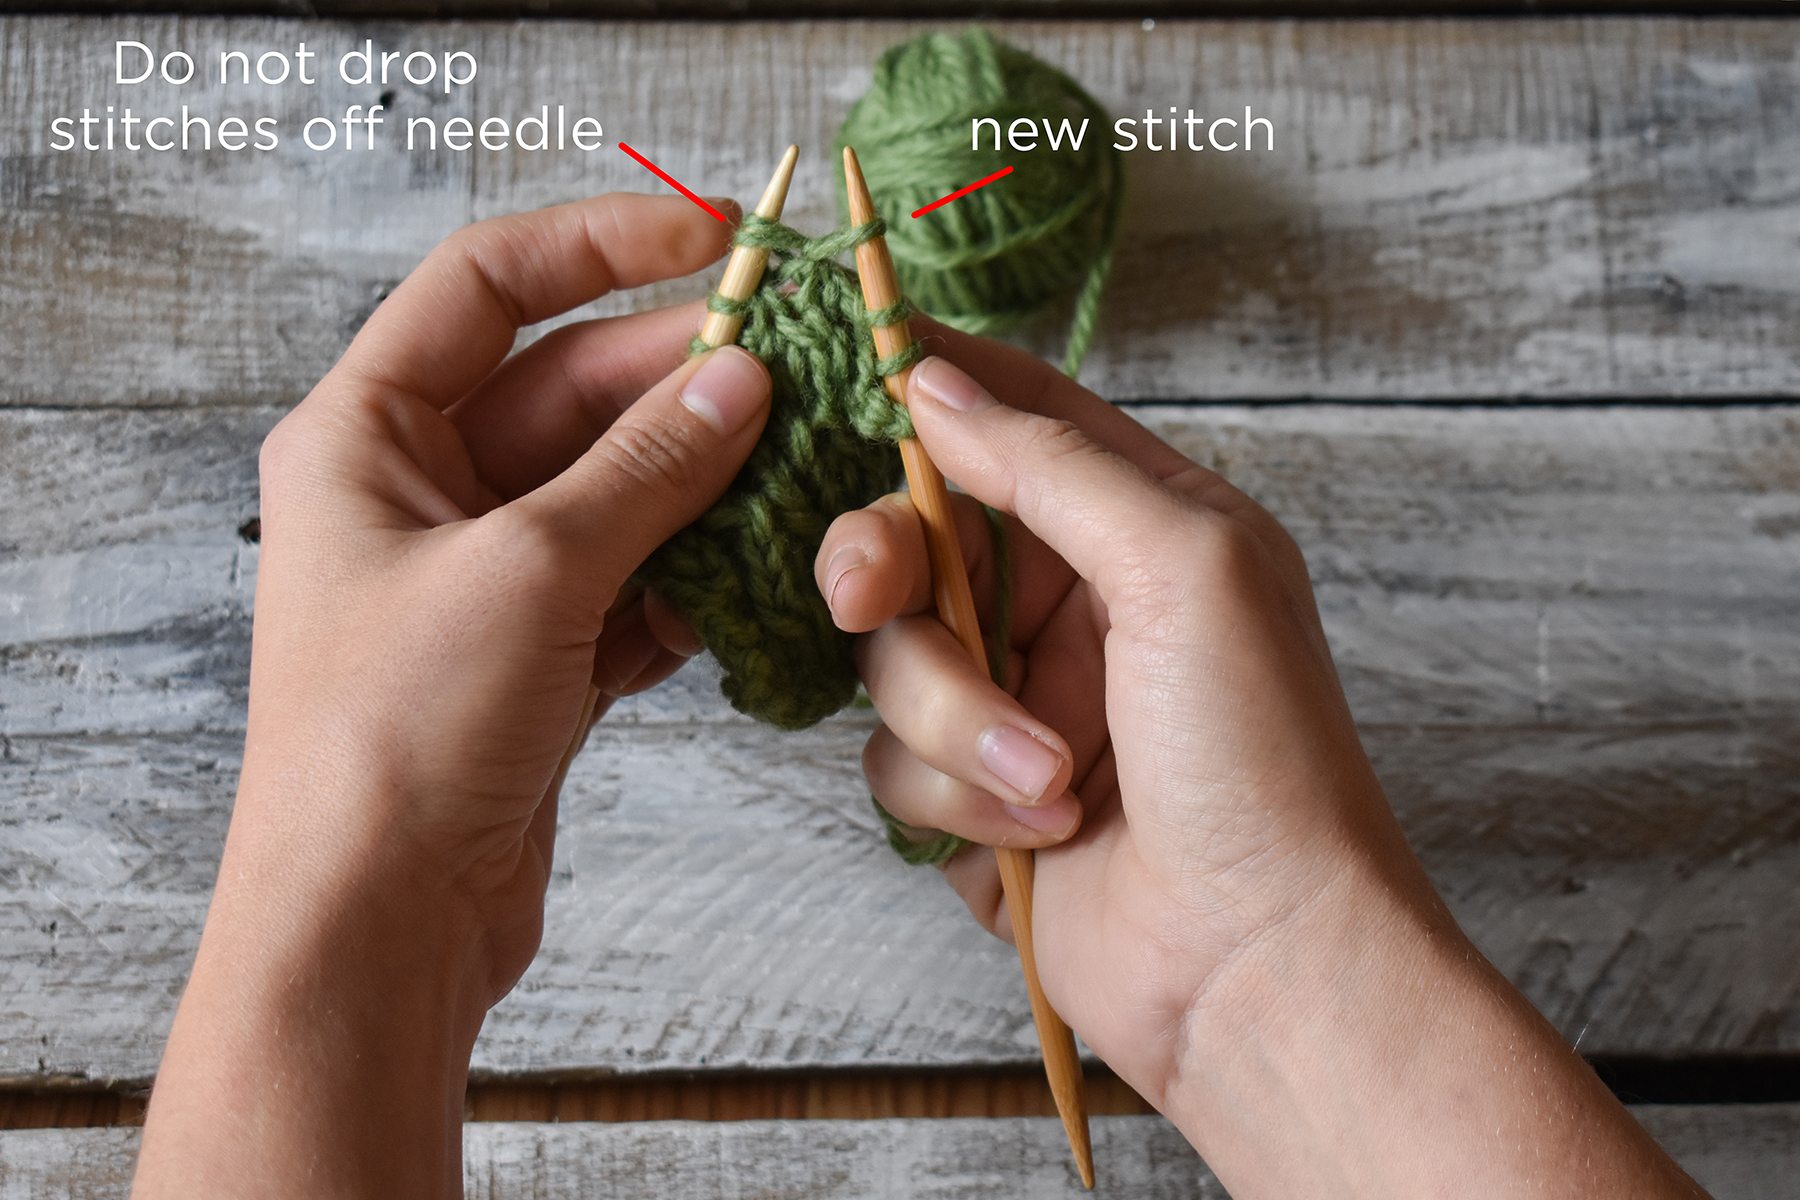
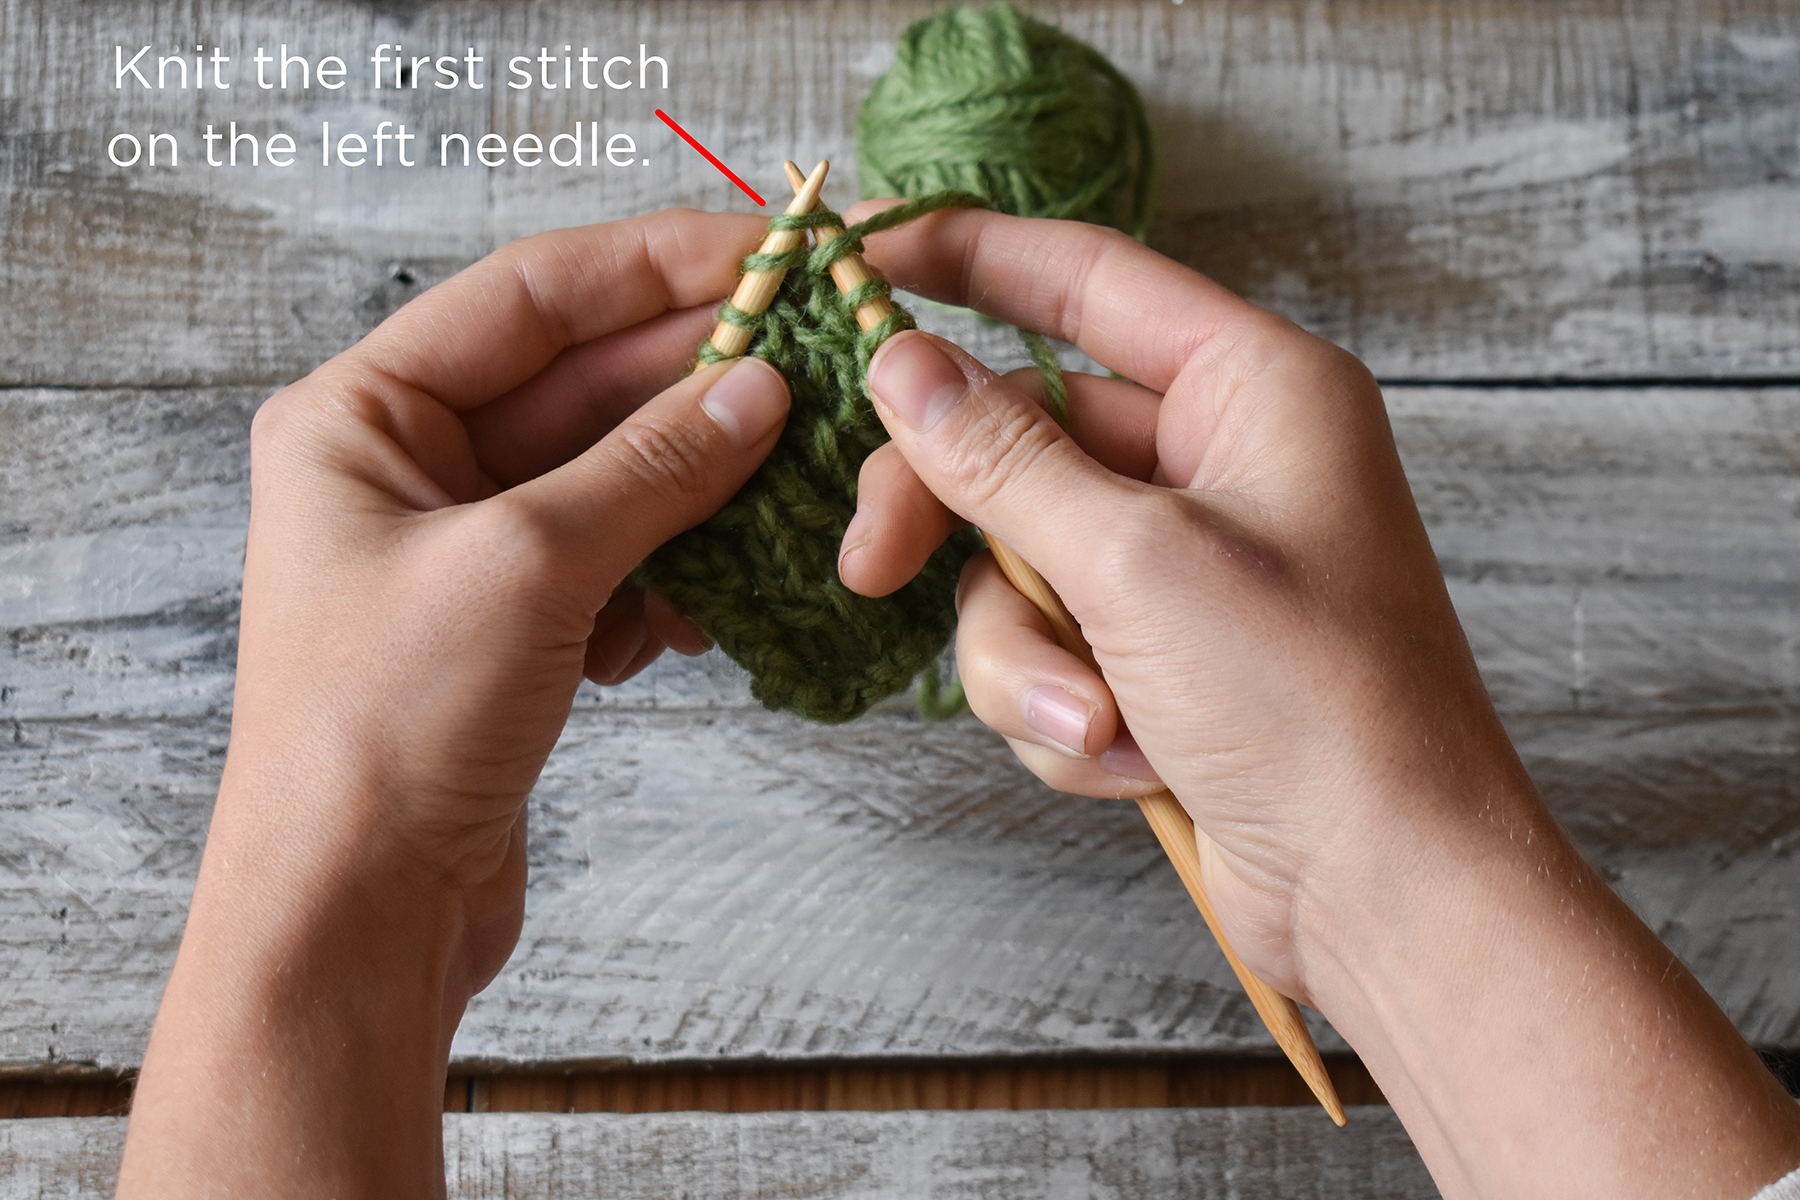
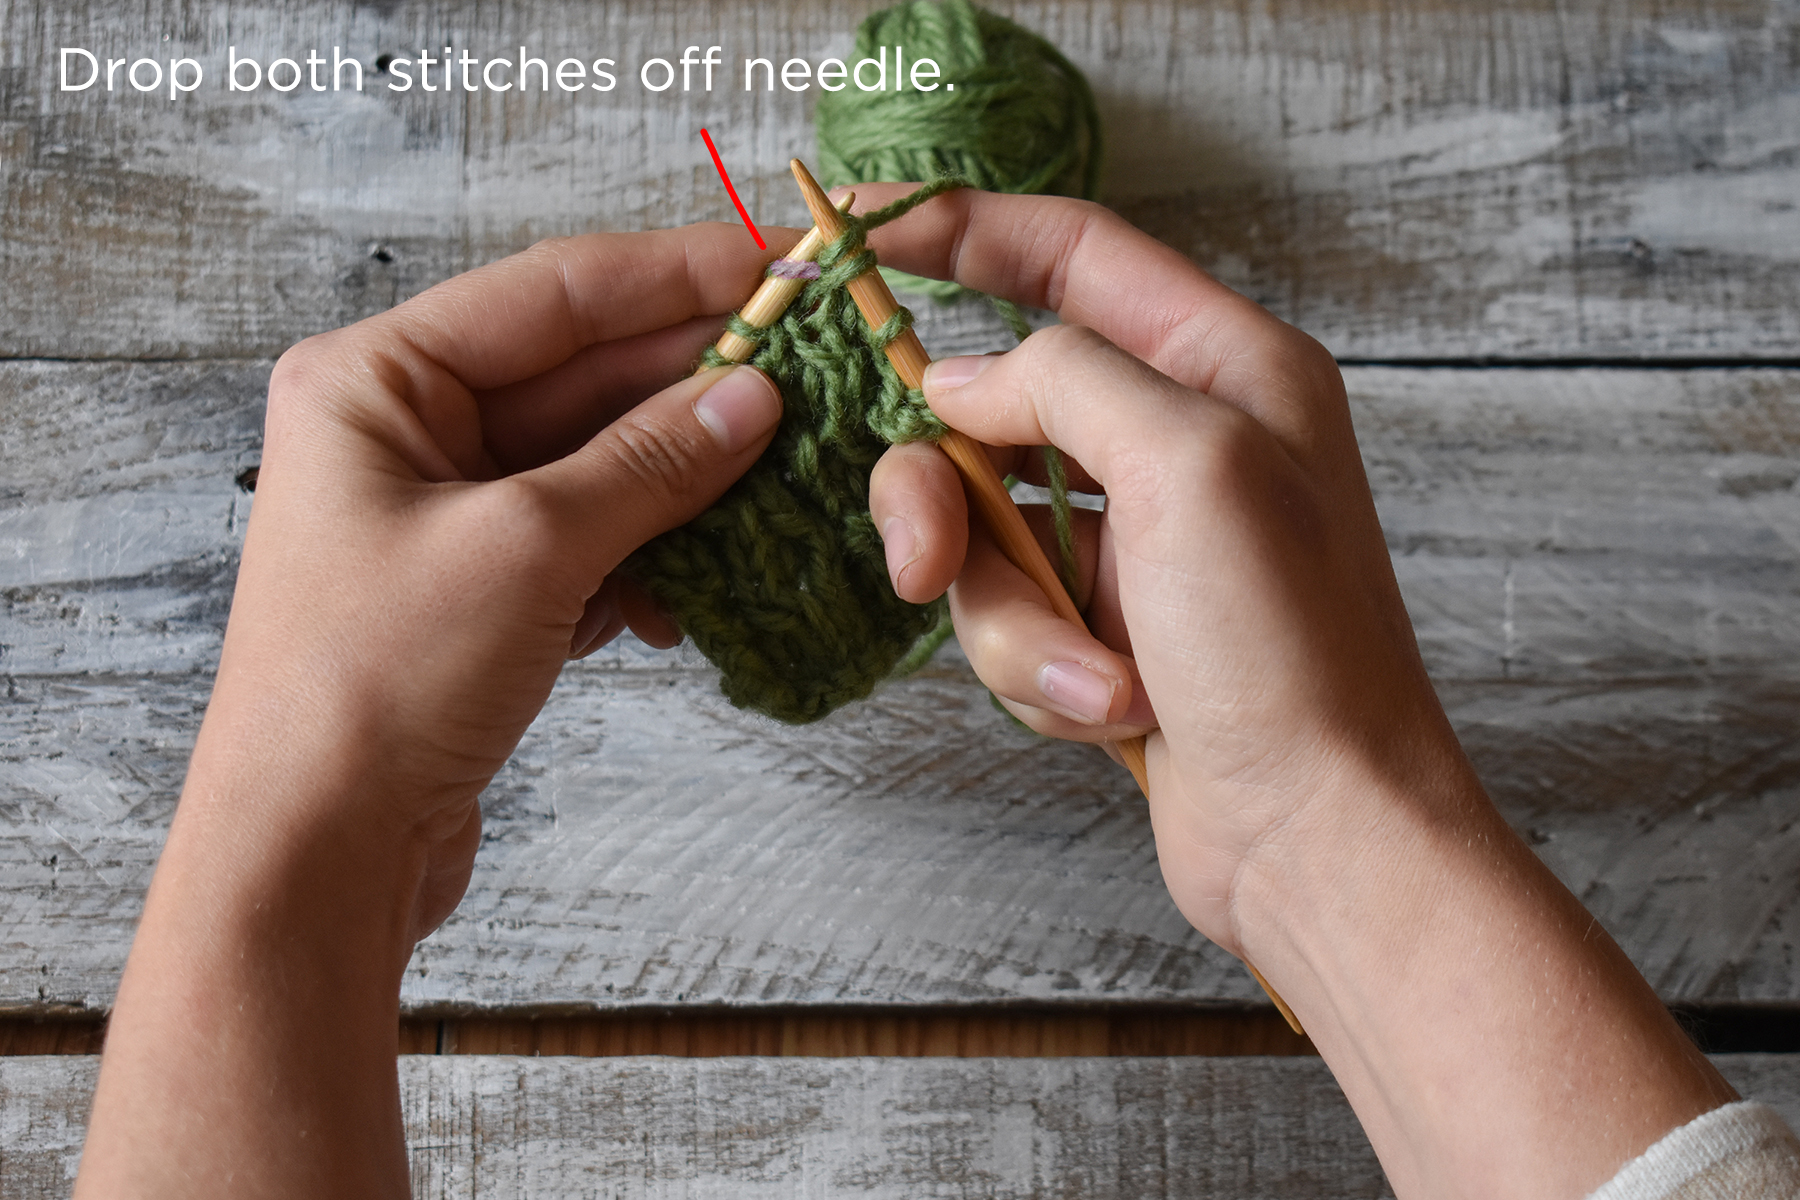
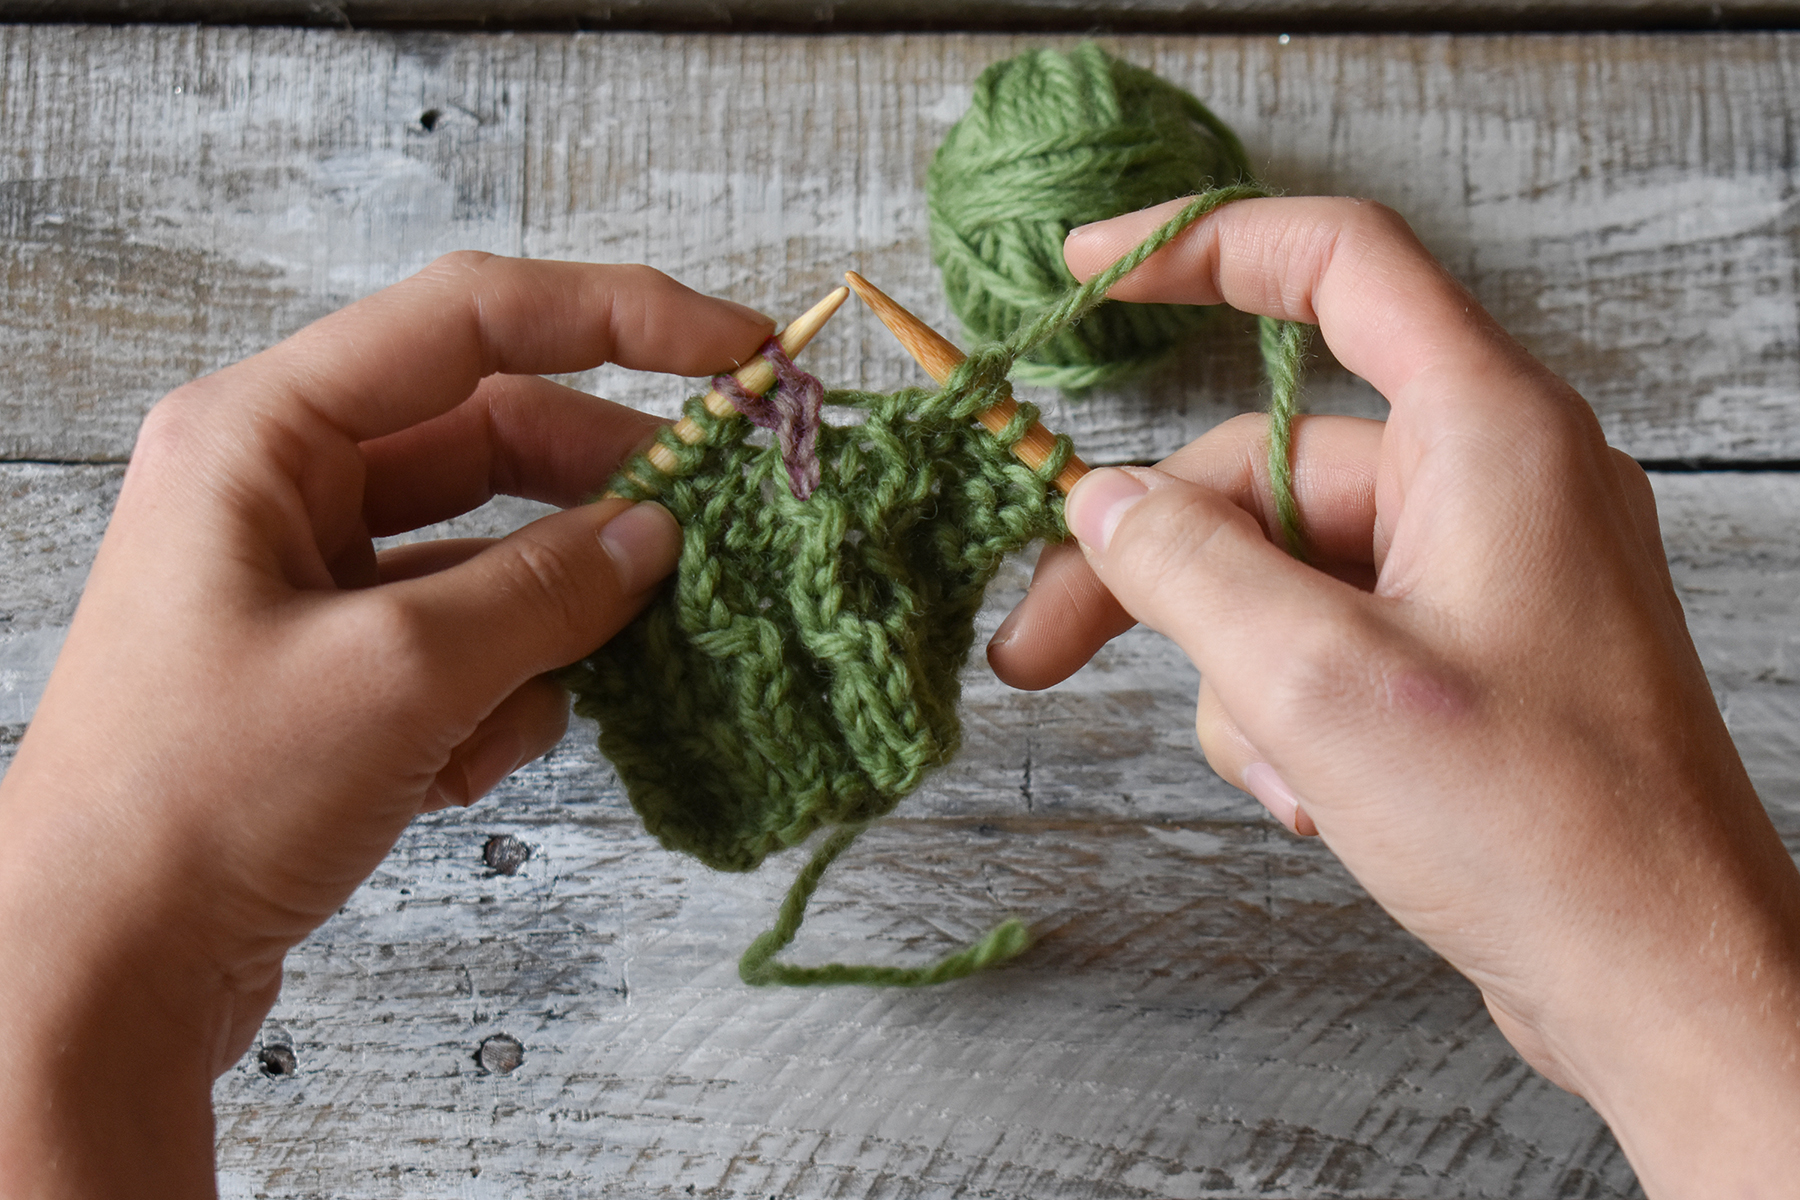
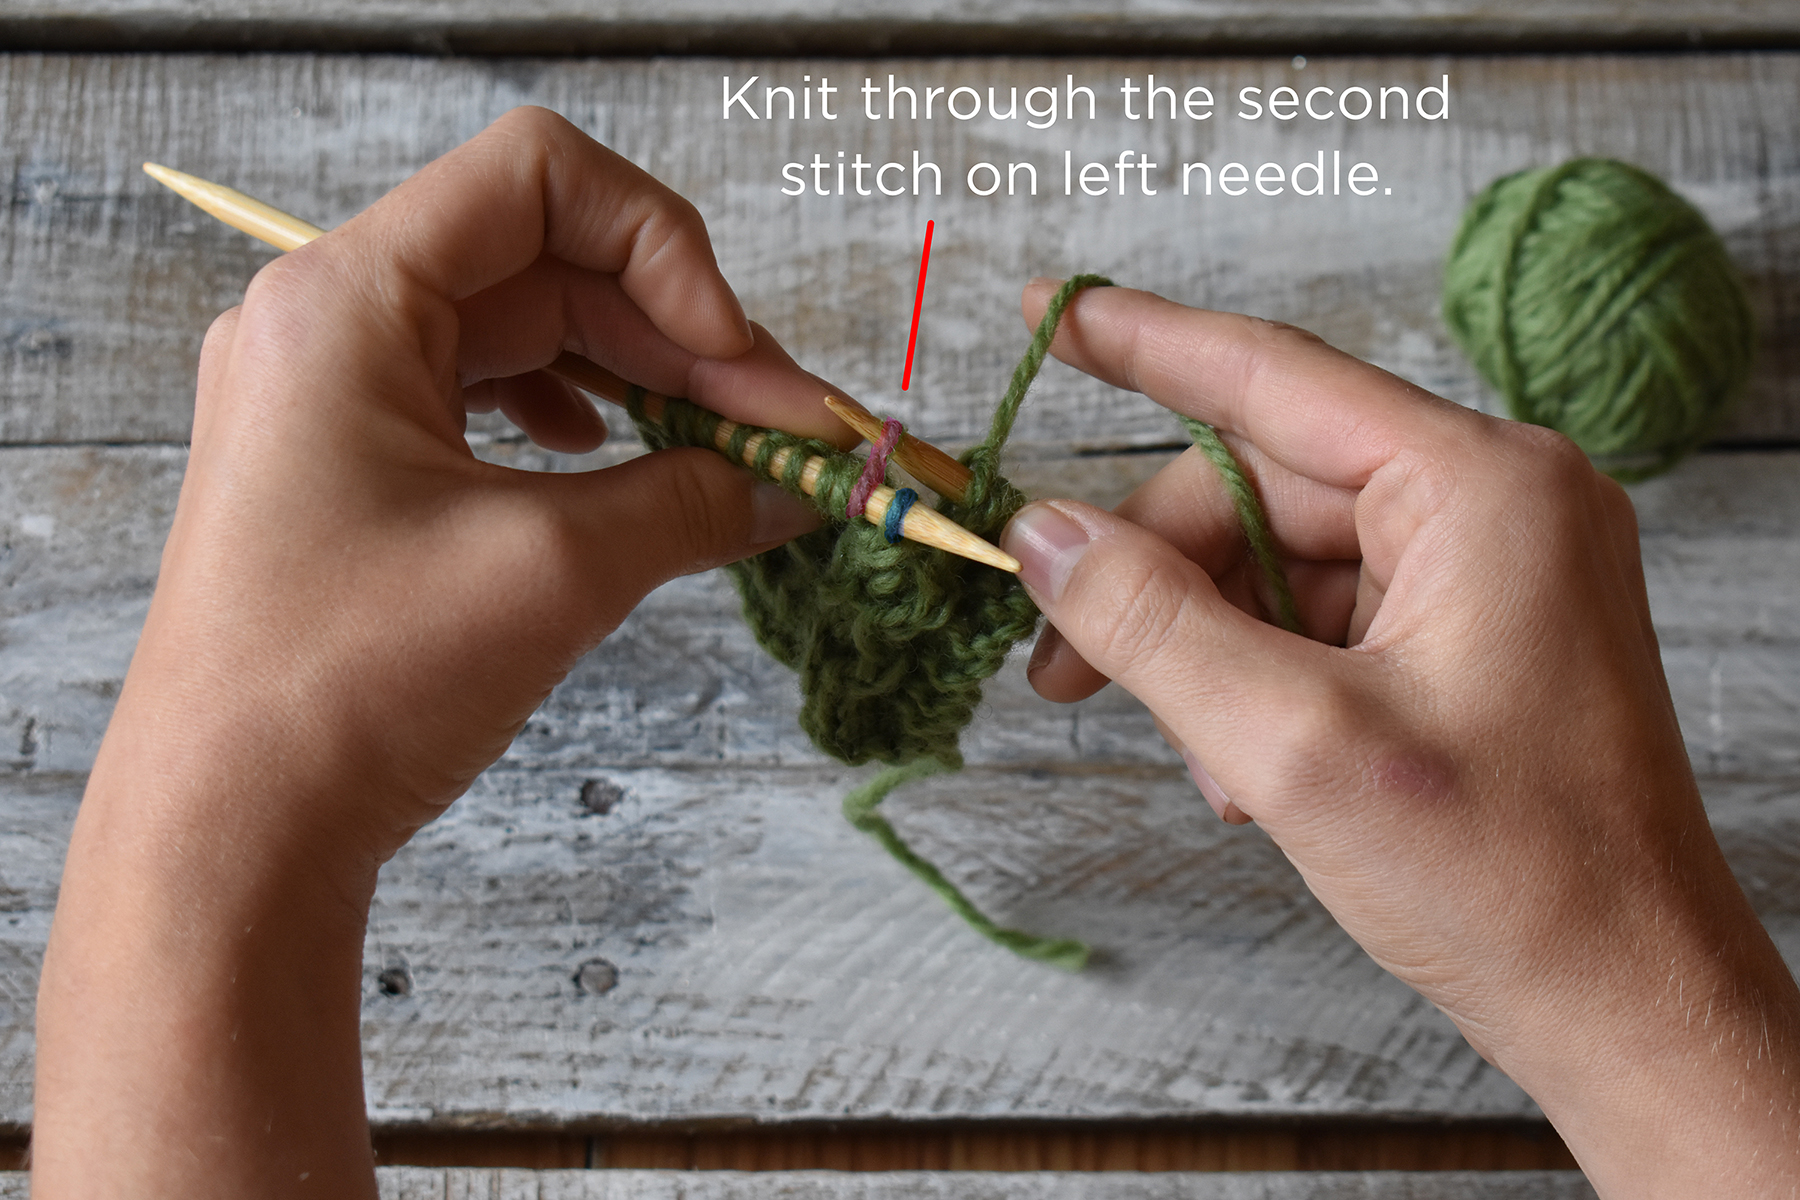
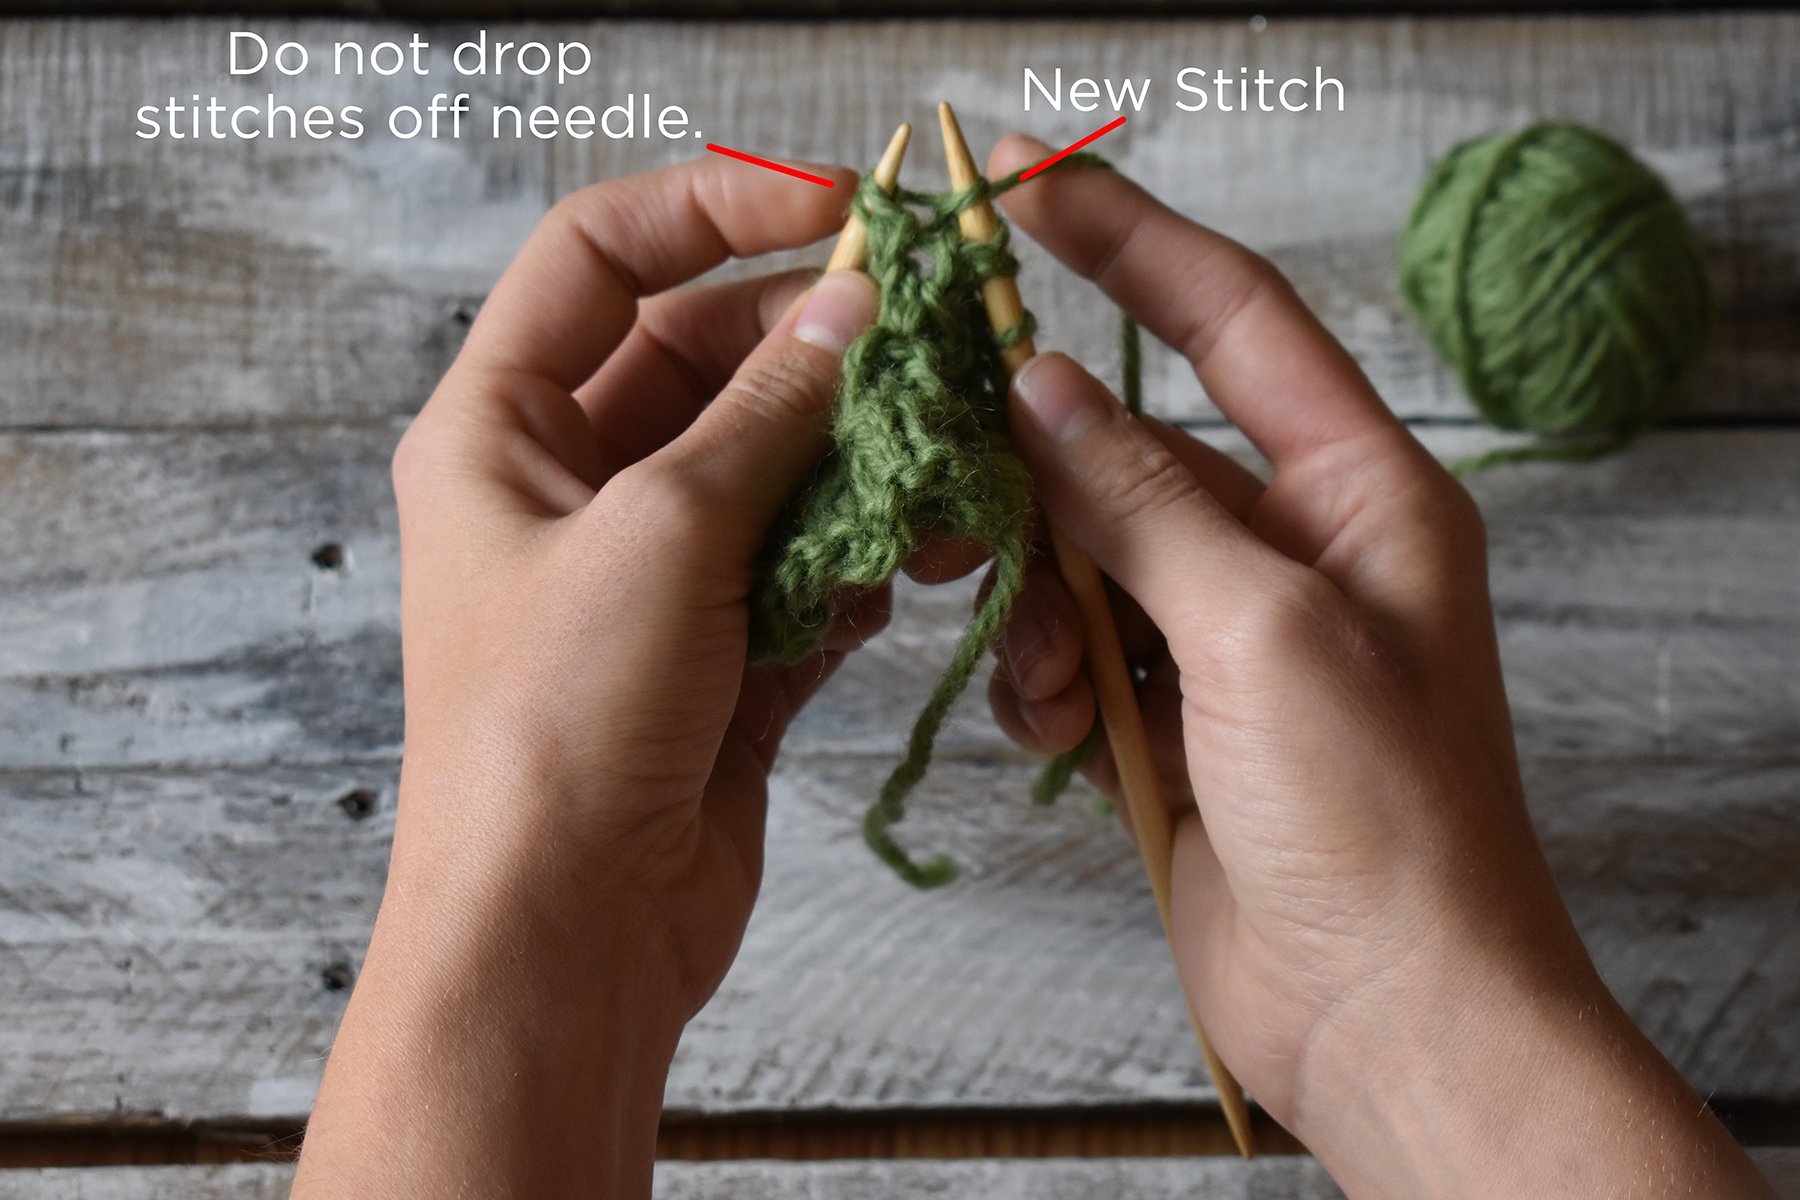
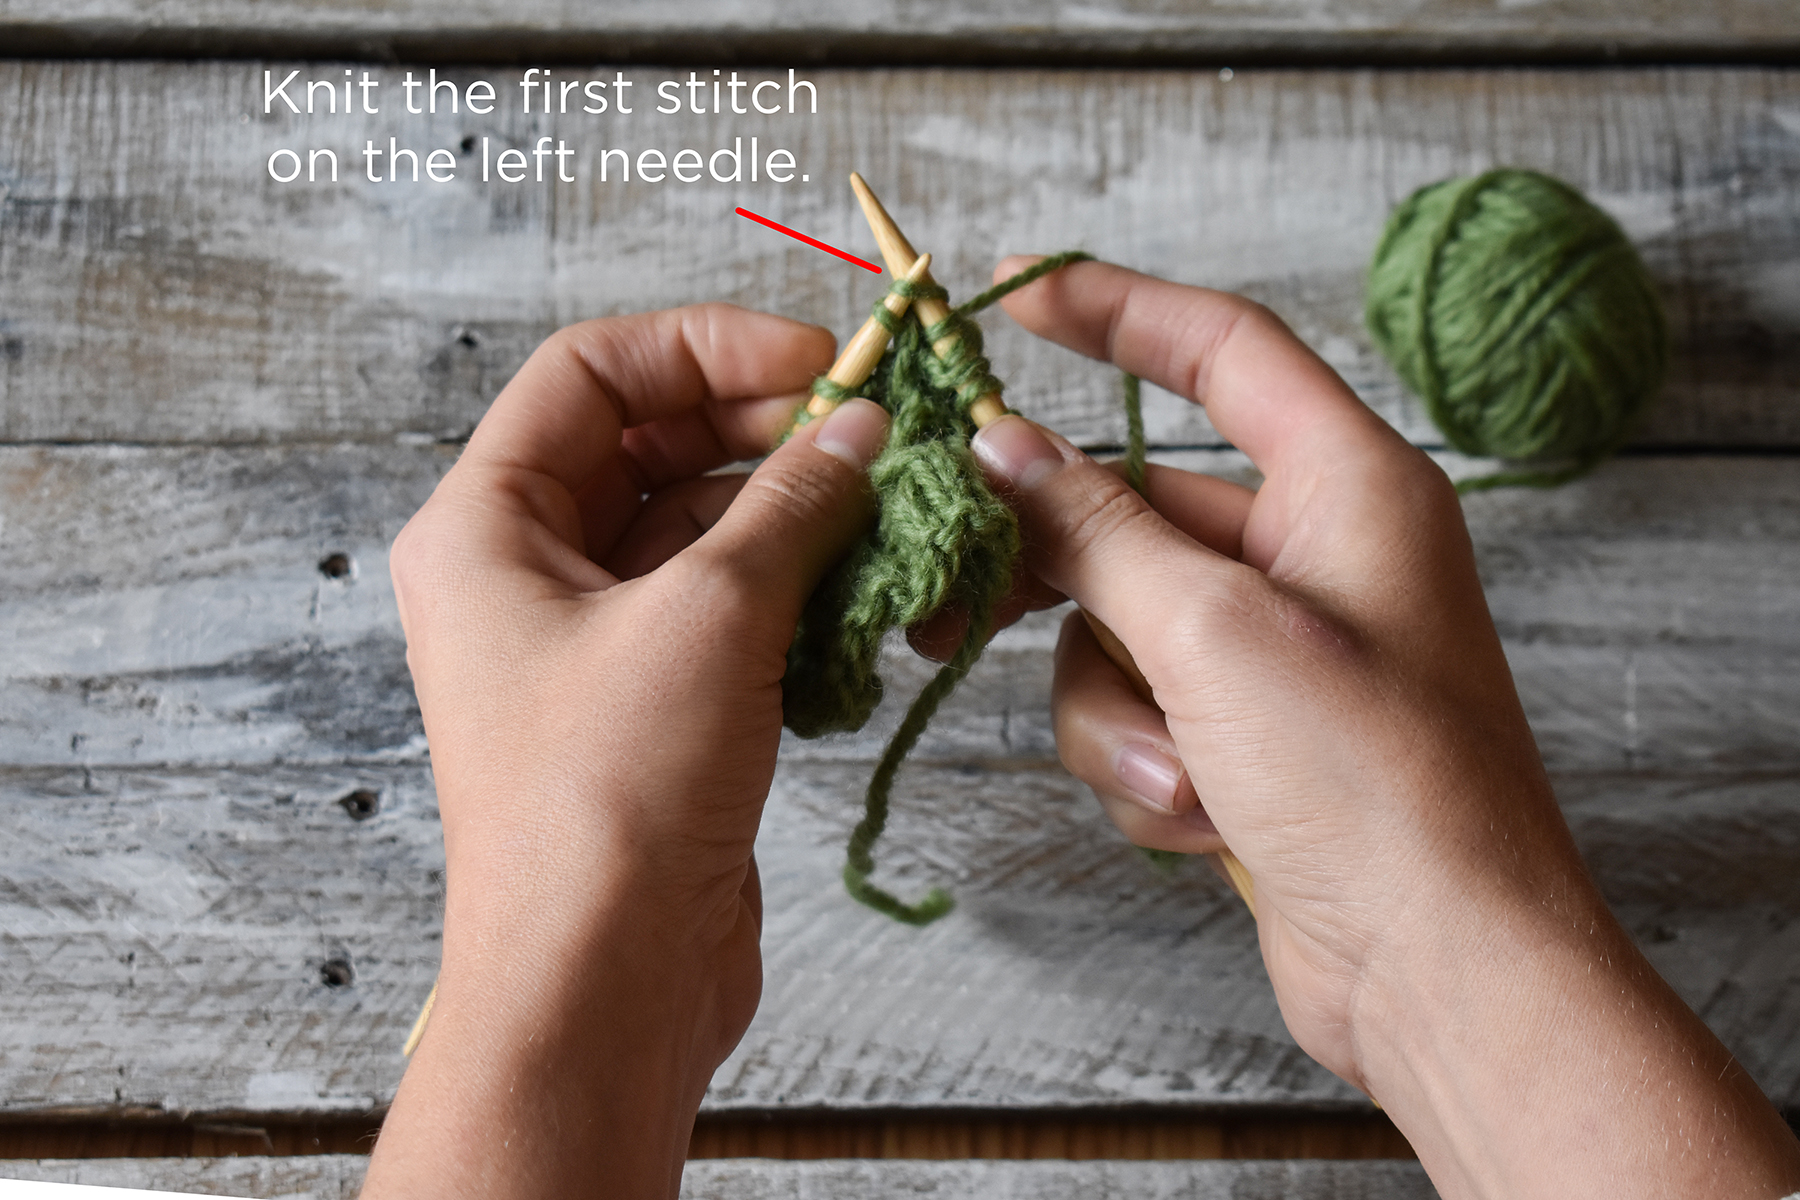
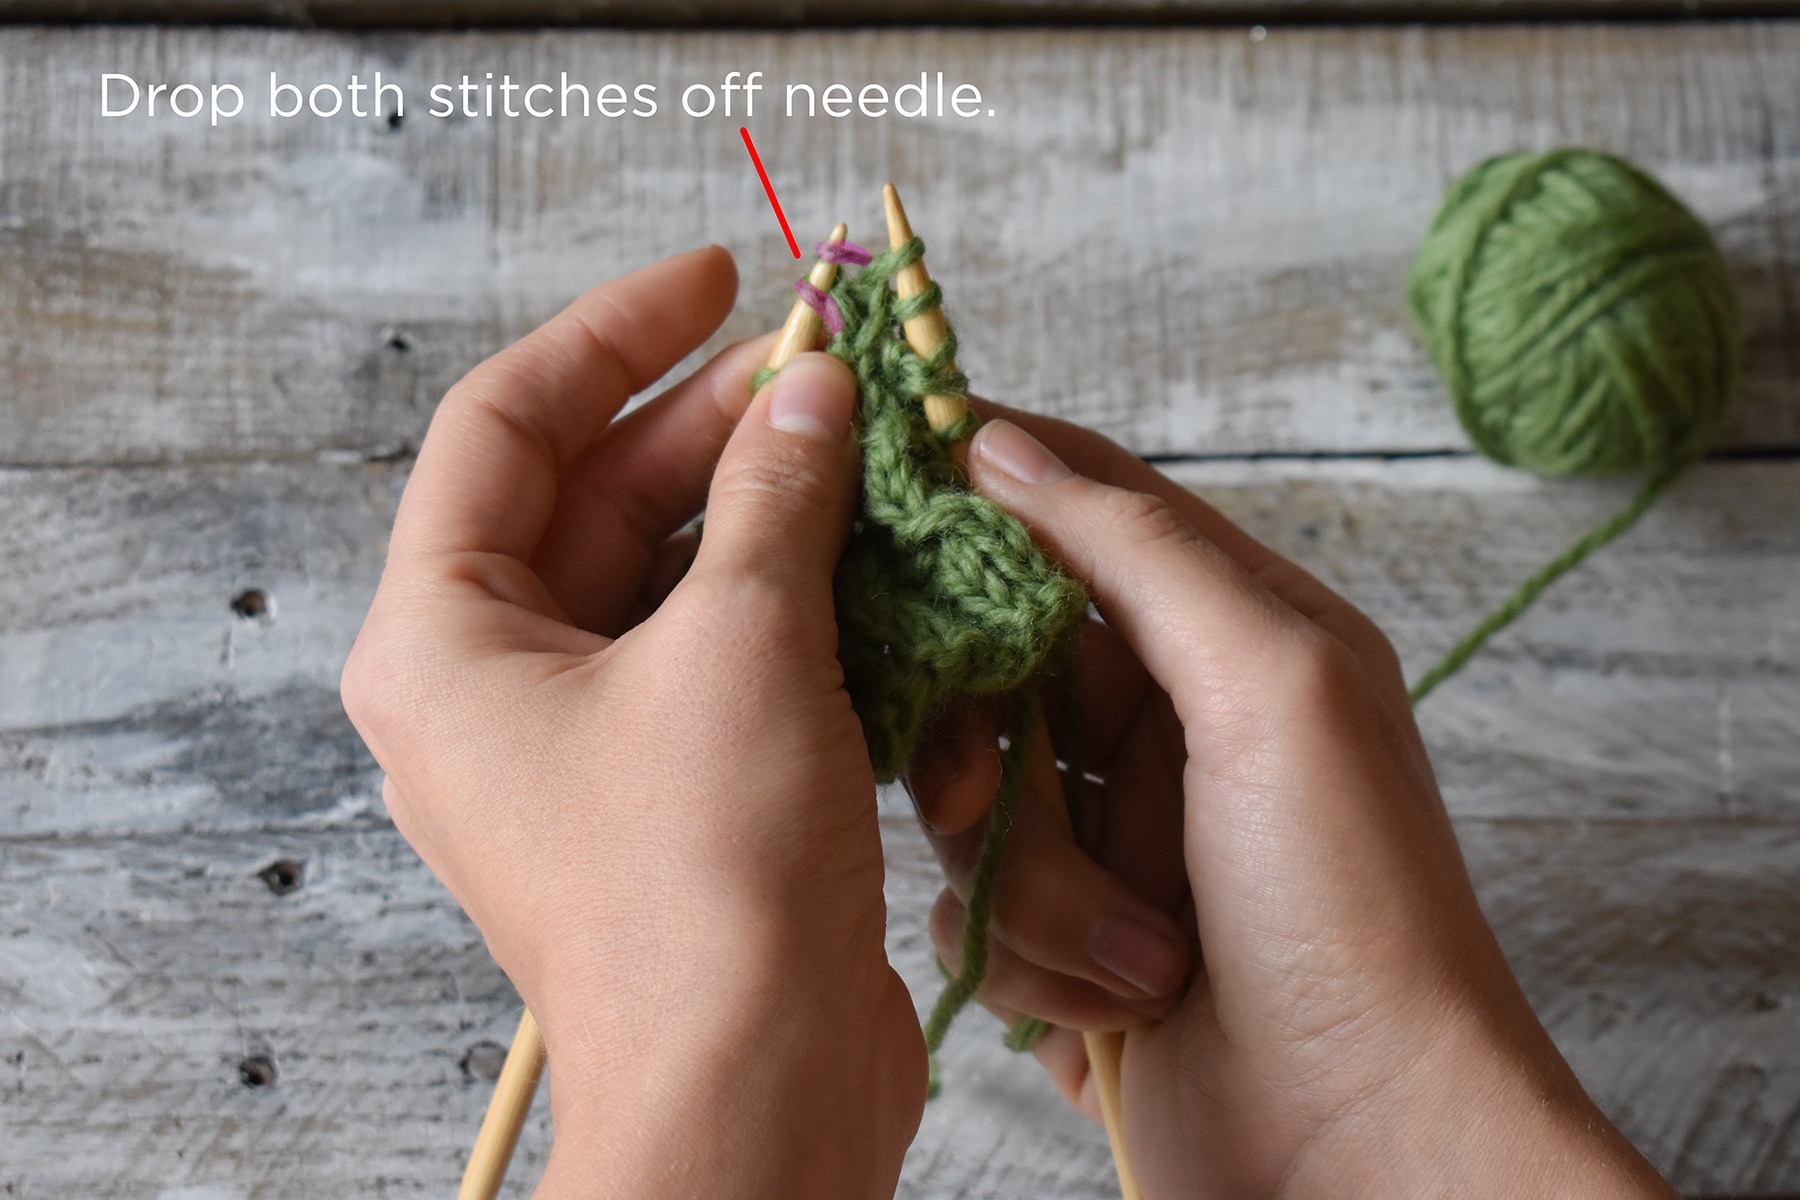
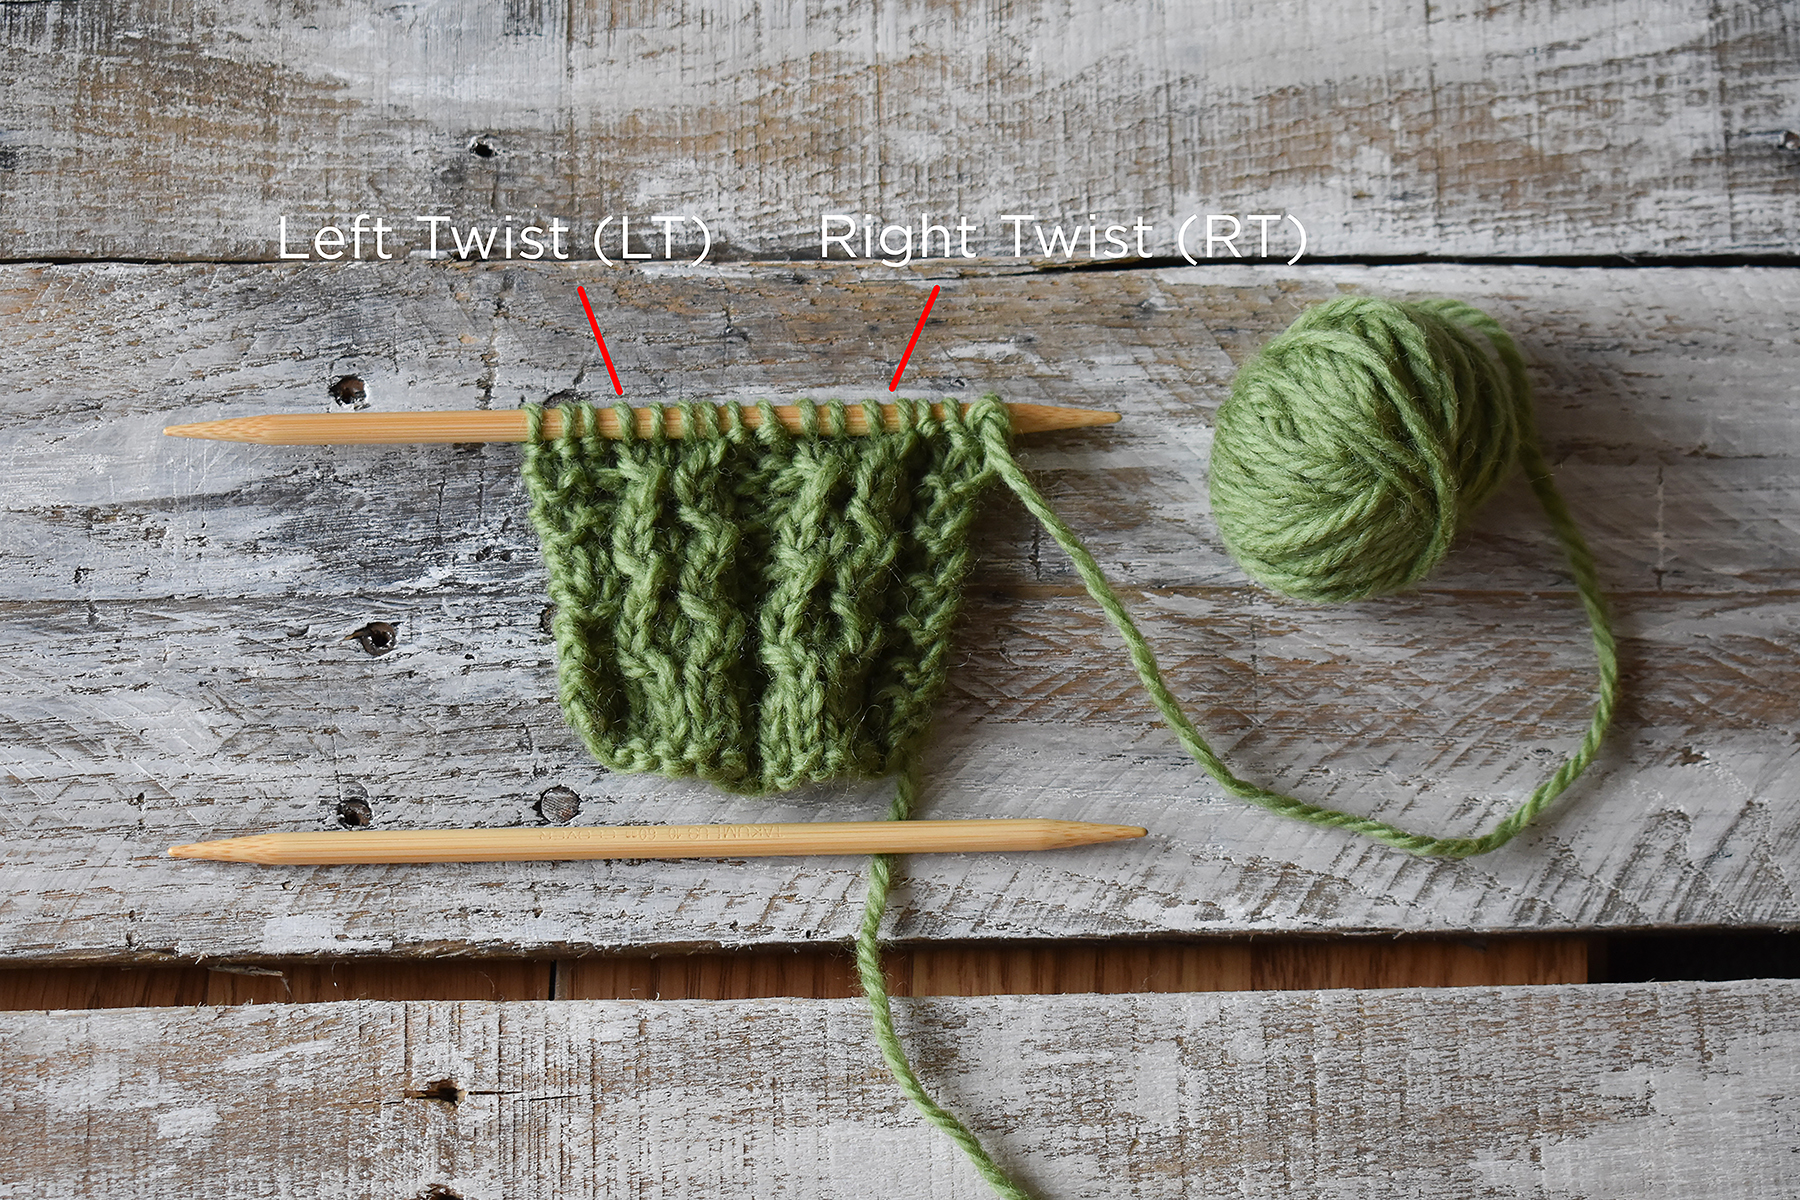
Right TwistStart by making a swatch. Swatches are not only crucial for getting the finished item you want but are also great for practicing new stitches. Work in your pattern until you’ve reached the two stitches you need to twist. I’ve highlighted these stitches in purple so it’s easier to see. We want to change the position of these two stitches by moving the left stitch over the top of the right stitch.Begin by knitting two stitches together, but do not drop the stitches from your needle. As you can see, the two stitches remain on the left needle, but there is now a new stitch on the right needle. Next, knit the first stitch on the left needle. Drop both of the stitches from the left needle. You now have completed the Right Twist, and have two new stitches on the right needle. Easy, right?Left TwistWork in your pattern until you’ve reached the two stitches you need to twist. I’ve highlighted these stitches in purple so it’s easier to see. We want to change the position of these two stitches by moving the right stitch over the top of the left stitch.The first step is to knit only the second stitch on the left needle. This stitch is highlighted in purple. As you can see, the first stitch on the left needle remains in place. After knitting the second stitch, do not drop the stitches off the left needle. Next, knit the first stitch on the left needle. Drop both of the stitches from the left needle. You now have completed the Left Twist, and have two new stitches on the right needle.Here is what each set of twisted stitches will look like. Notice that the Left Twist leans to the left, and the Right Twist leans to the right. In the Trinket Socks, Right Twists and Left Twists are alternated to create an undulating panel.
The Right and Left Twists are a great addition to your knitting toolbox. You’ll find that they’re quite fun to work, and they can really make a stitch pattern interesting. I hope you’ve found this tutorial to be useful.
Notice those panels of twisted stitches – pretty!
Remember, you can find the Trinket Socks kit, as well as the rest of the 12 Days of Winter Kits at your local yarn store. Happy knitting!
This is part 10 in a 12 part series highlighting designs from our 12 Days of Winter, Series 3 Edition.
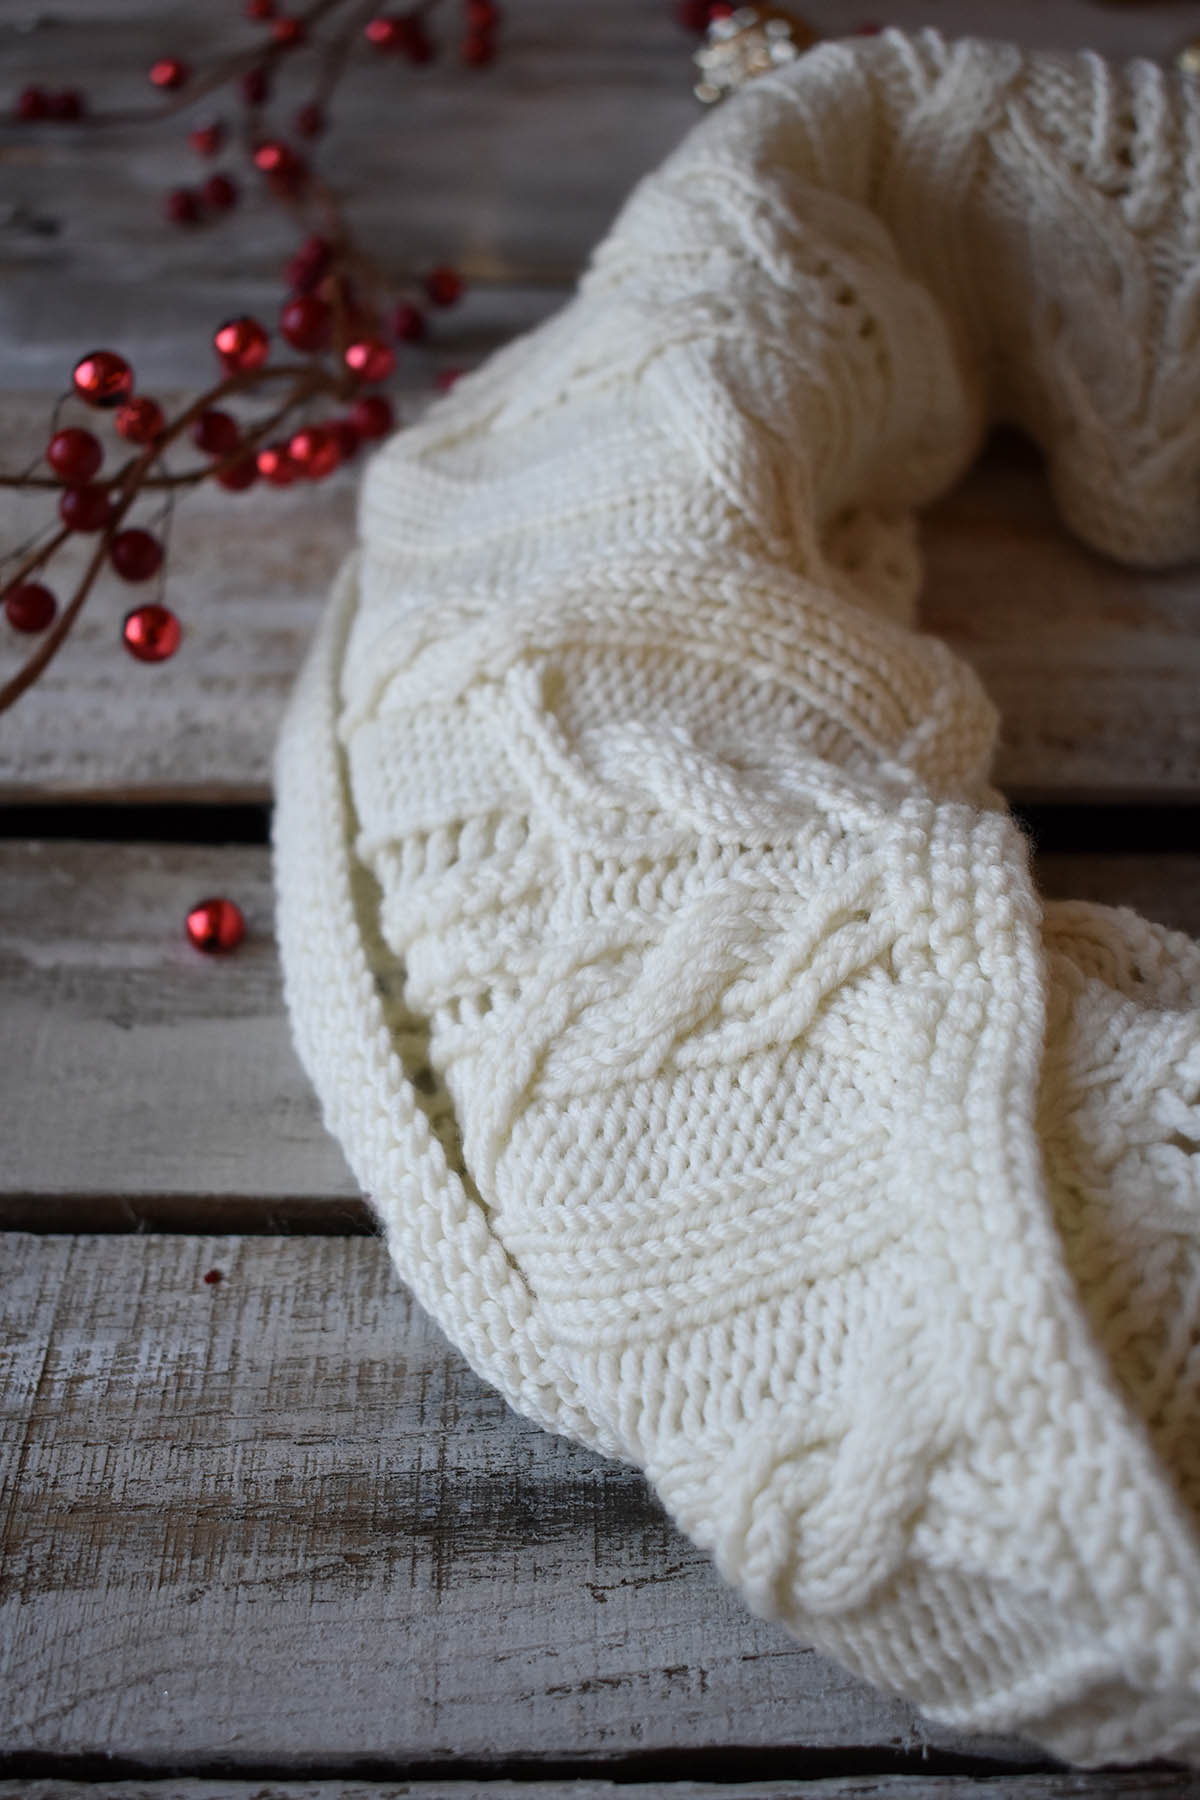
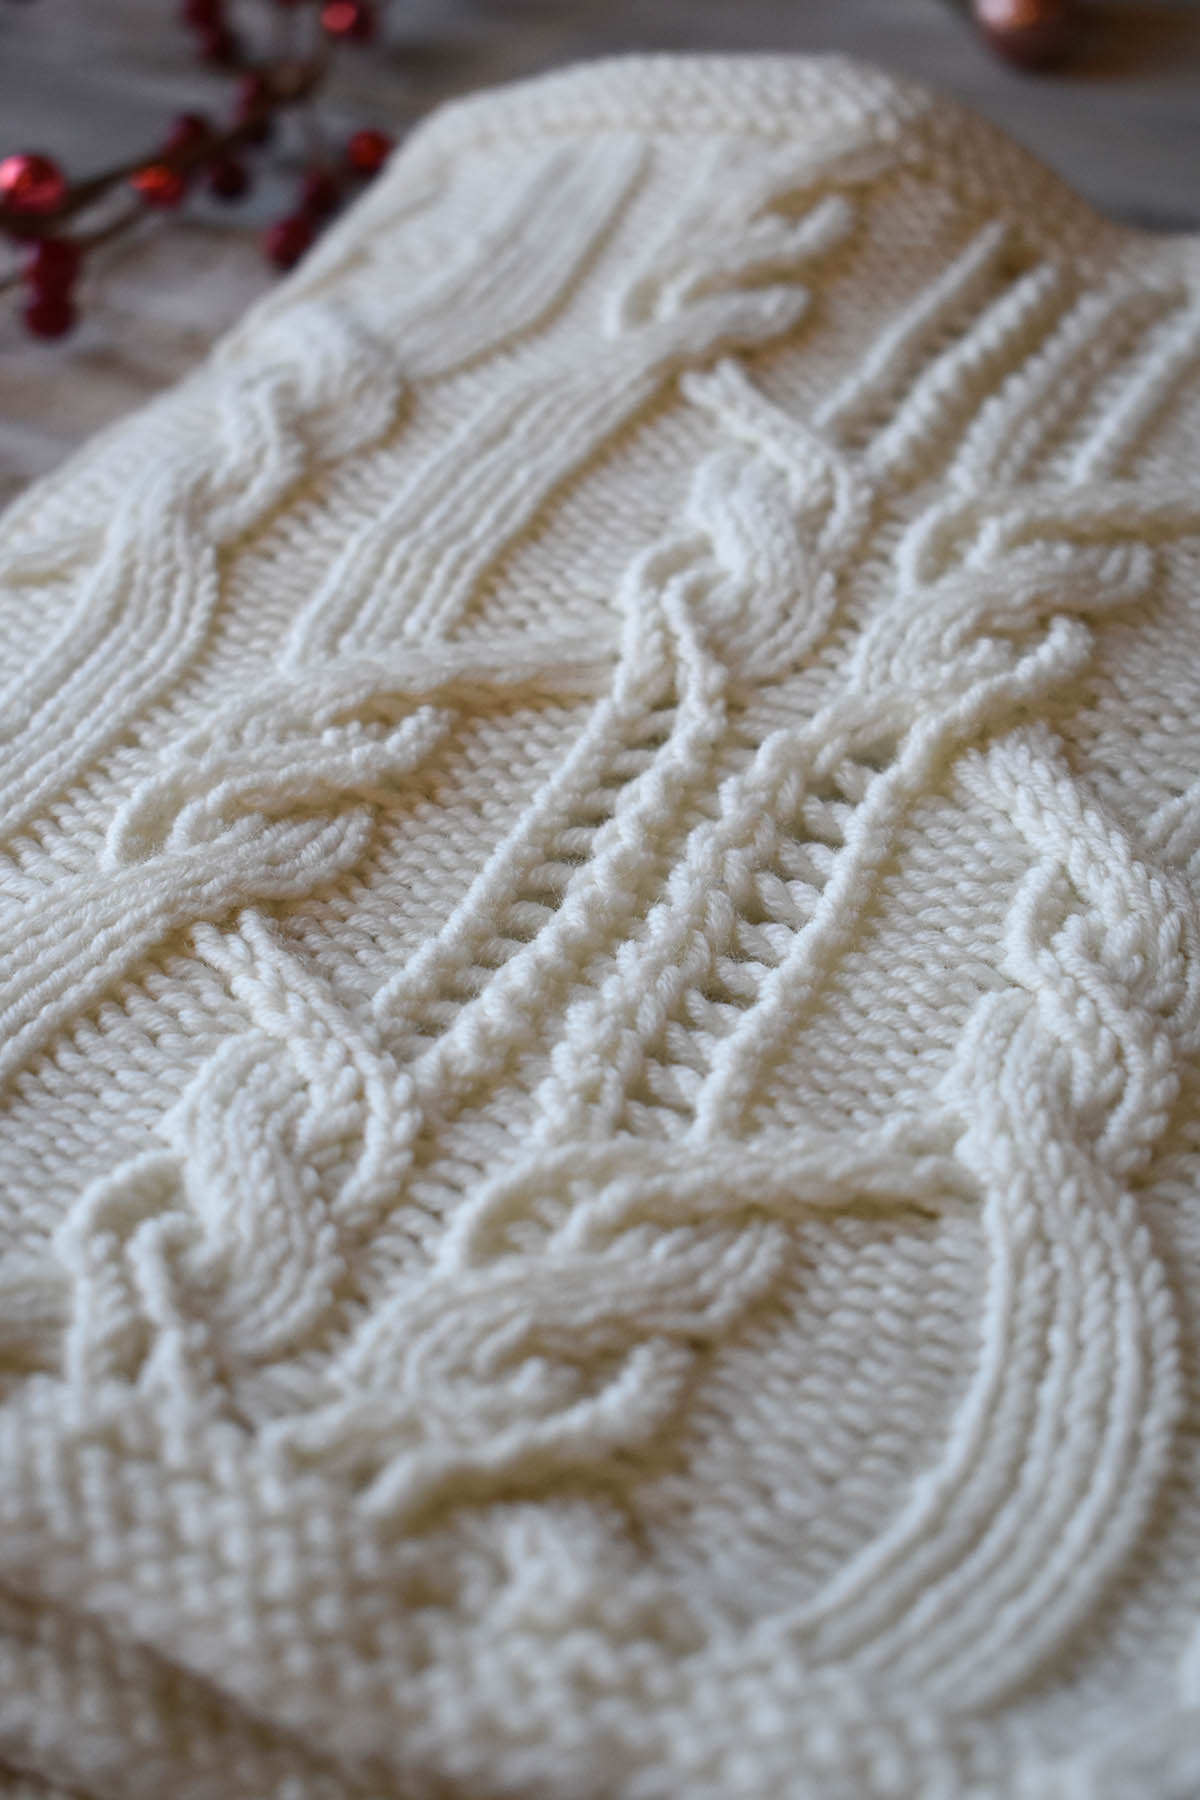
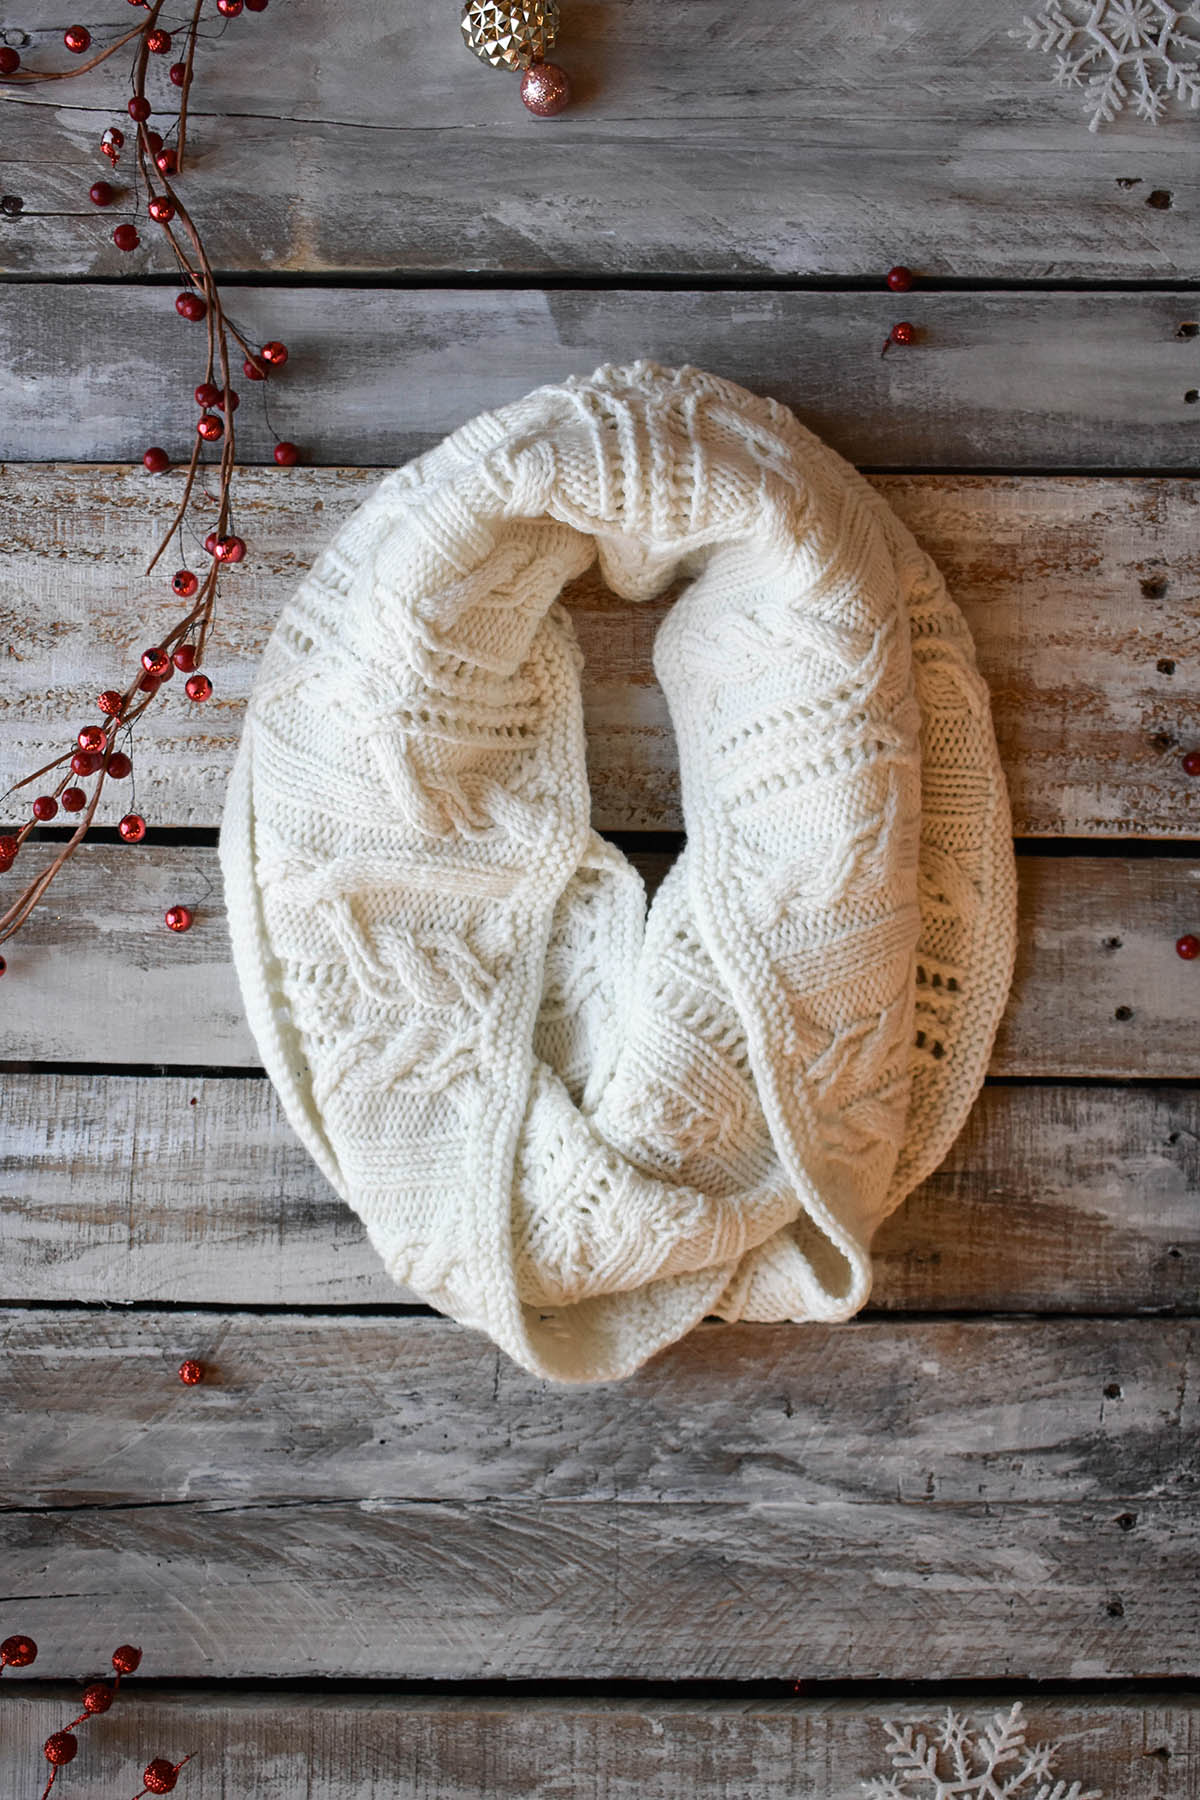
It’s Day 10 of the 12 Days of Winter Kit Collection. Today, the Snowdrift cowl designed by Adrienne Larsen. This design combines cables, twisted stitches, and eyelets to create a show-stopping winter accessory. It’s knit up in Fibra Natura Dona – one of our favorite yarns for knitting cables because of its superior stitch definition. Did we mention that it’s incredibly soft, too? For today’s post, we’ve asked Adrienne to share her passion for cable design with us. Here is what she had to say:
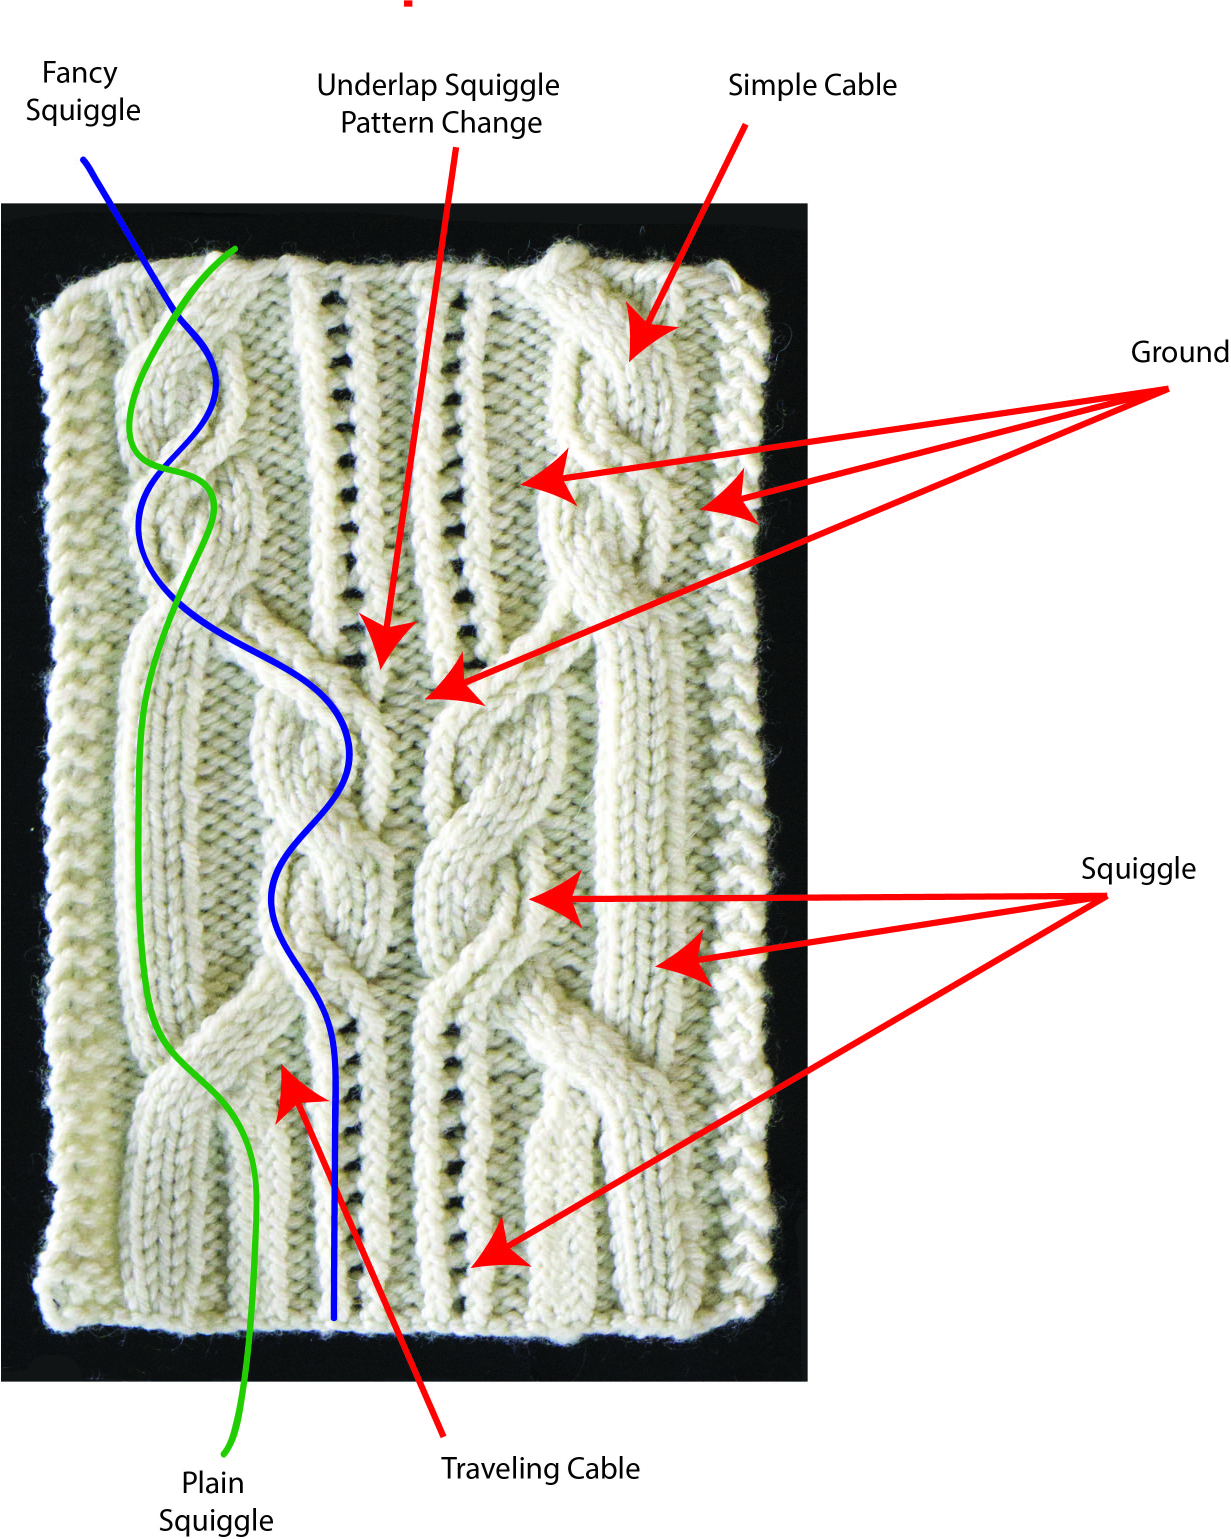
“I love cables. I love how they look and I love thinking about how they work. When creating a new cable pattern, I always break into two main elements: the ground and the squiggle.
The ground is pretty self-explanatory. The ground is what the cable is sitting on: the background. It is usually reverse stockinette stitch because it’s simple and doesn’t pull focus from the main event: the squiggle. If you want to add a little zing, the ground could be seed stitch or garter stitch. If you prefer a really smooth look, it can even be stockinette.
The squiggle is where you can really get creative. You can do a simple cable, which sits in place, and just crosses over itself, like in a 2×2 Right Cross. The squiggle can also move back and forth over the ground as a traveling cable. The stitches in the squiggle usually stay together and move on top of the ground. It can also move under or over other squiggles.
The stitches in a squiggle are classically groups of knit stitches. In this pattern, I decided to change things up by adding some twisted stitches and purls to some of the squiggles. If you look, the twisted stitch squiggles and the plain squiggles always stay that way, even when they move under or over each other.
I also added yarn-overs to some of the stationary squiggles. I didn’t like that you could see the underlapping stitches in the cables in the yarn-over squiggles, so I only placed them when they were stationary. I also only changed from twisted/purl combination squiggles to yarn-over squiggles after during an underlap, when possible where it could be hidden.
That’s just a few things that are considered when cable patterns are designed!”
-Adrienne
We hope you’ve enjoyed learning a bit more about Adrienne’s approach to cable design. We think it’s fascinating and feel so lucky to have her designs in this kit collection. Remember, you can find the Snowdrift kit and the rest of the 12 Days of Winter kits at your local yarn store.
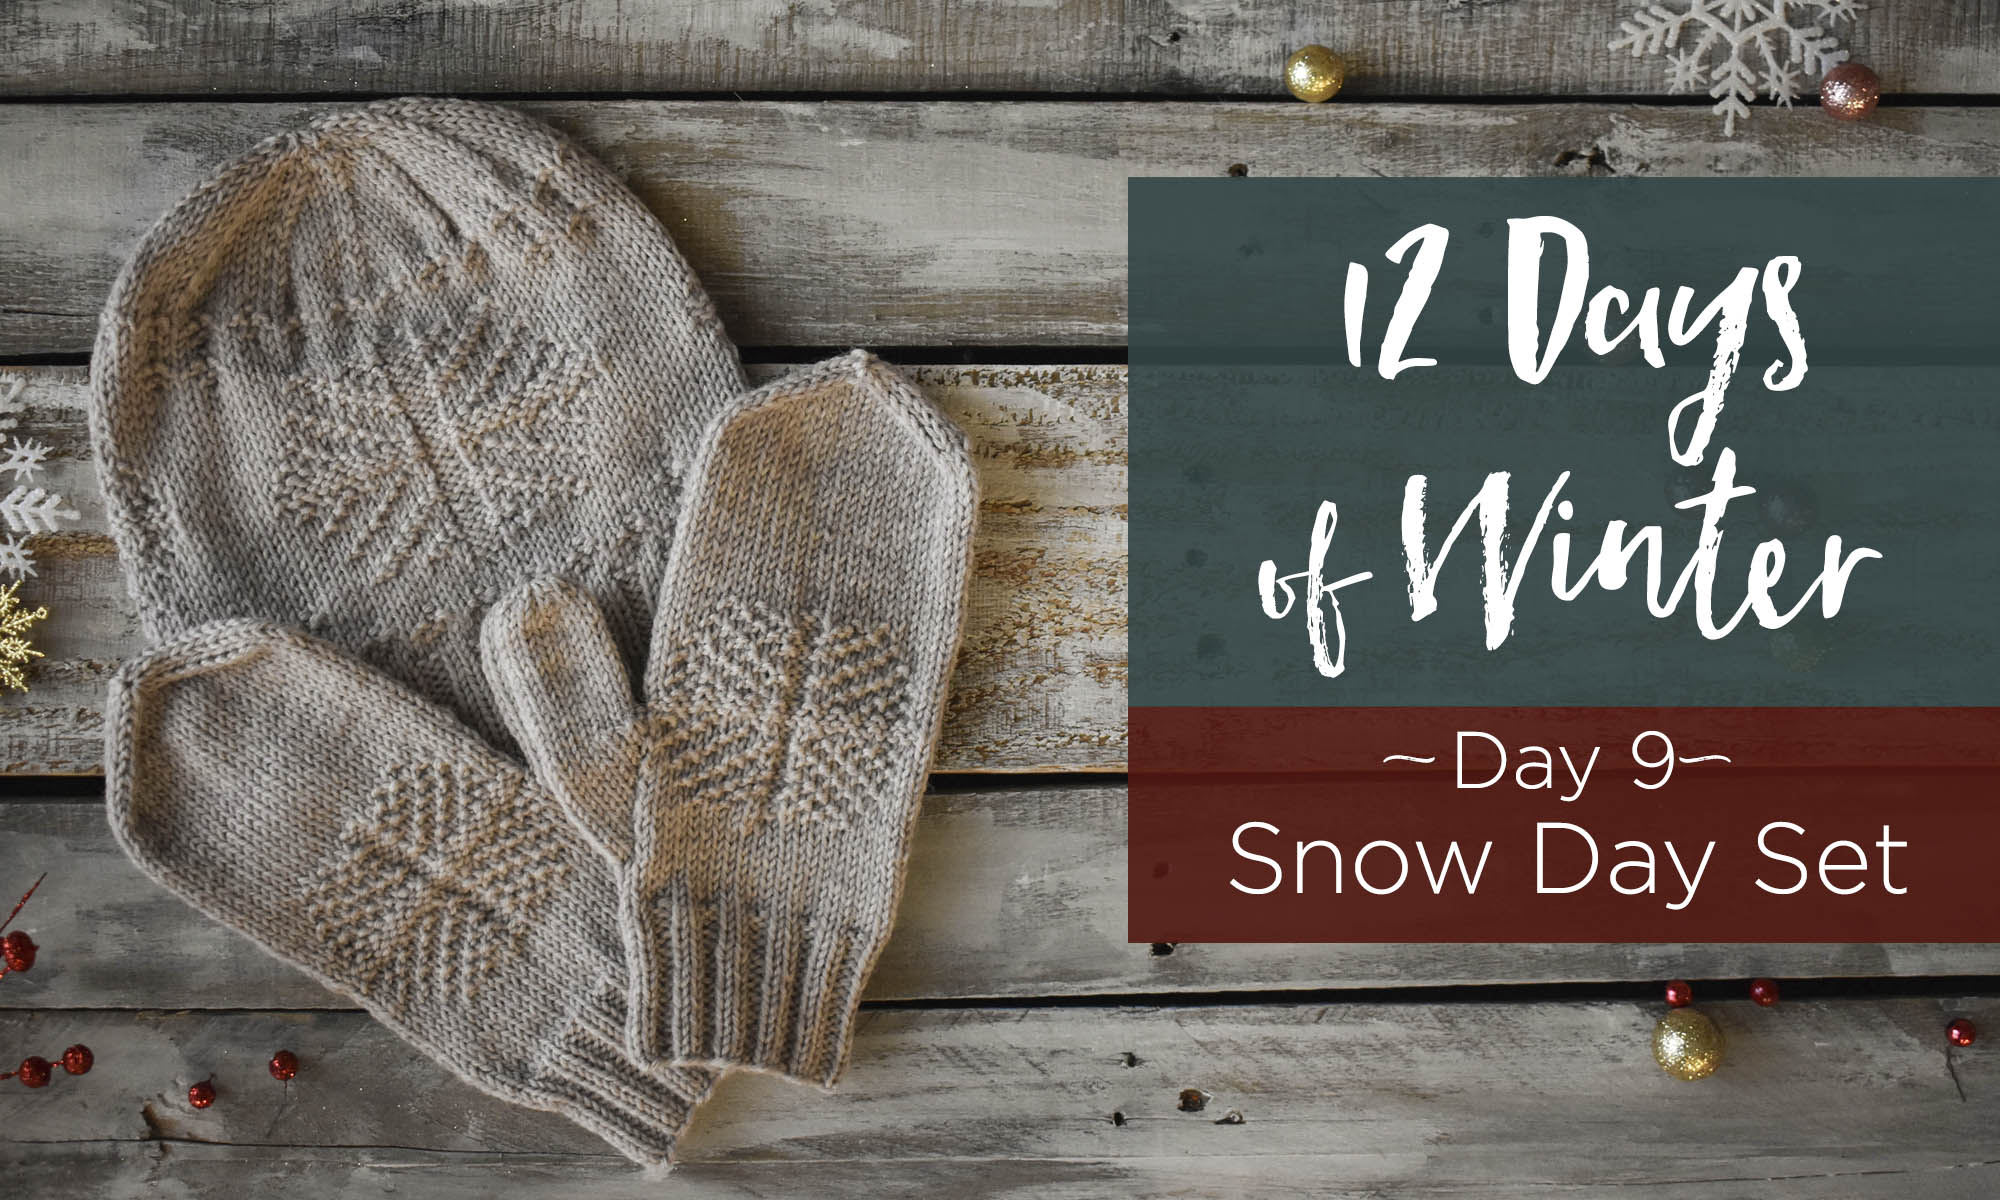
This is part 9 in a 12 part series highlighting designs from our 12 Days of Winter, Series 3 Edition.
It’s Day 9 of Winter in the 12 Days of Winter Kit Collection. In today’s guest post, we welcome the next addition to the kit collection and enjoy a recipe for homemade marshmallows!
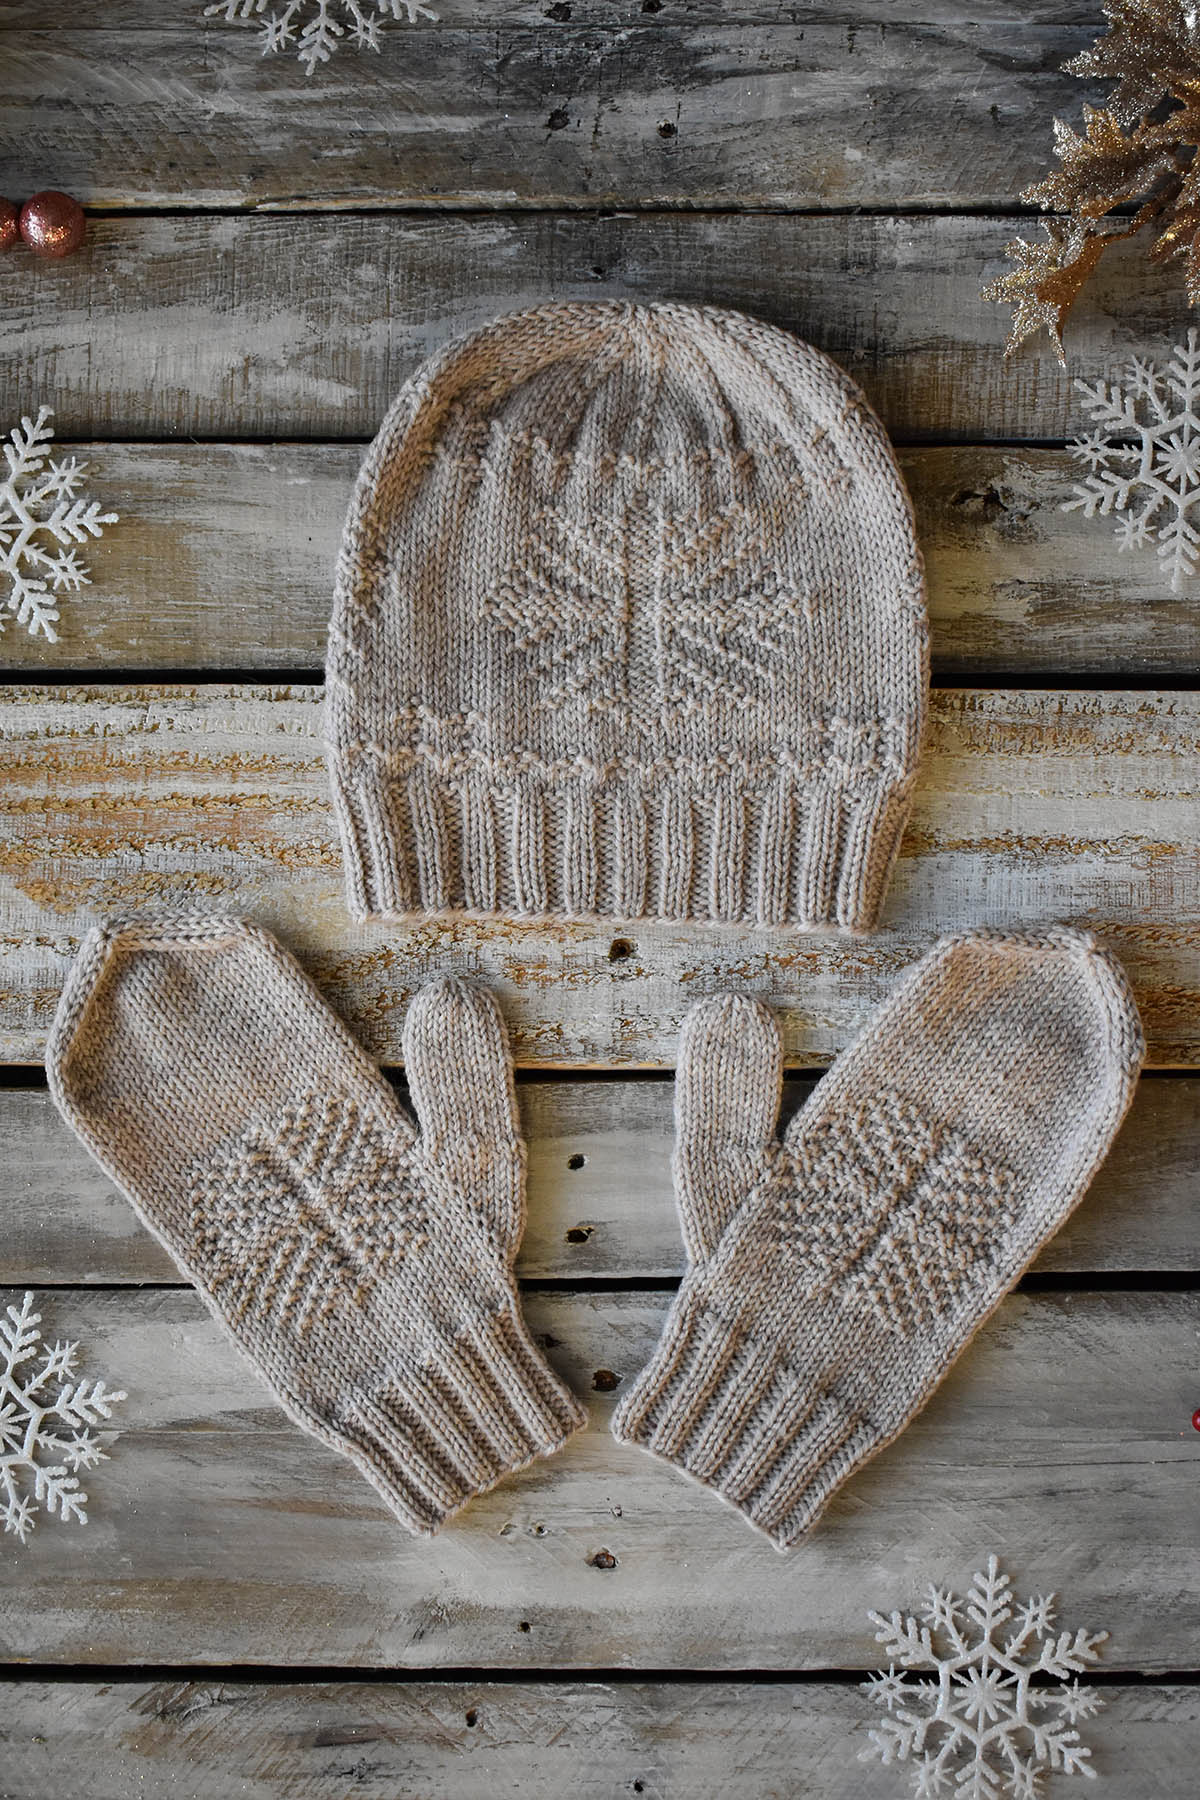
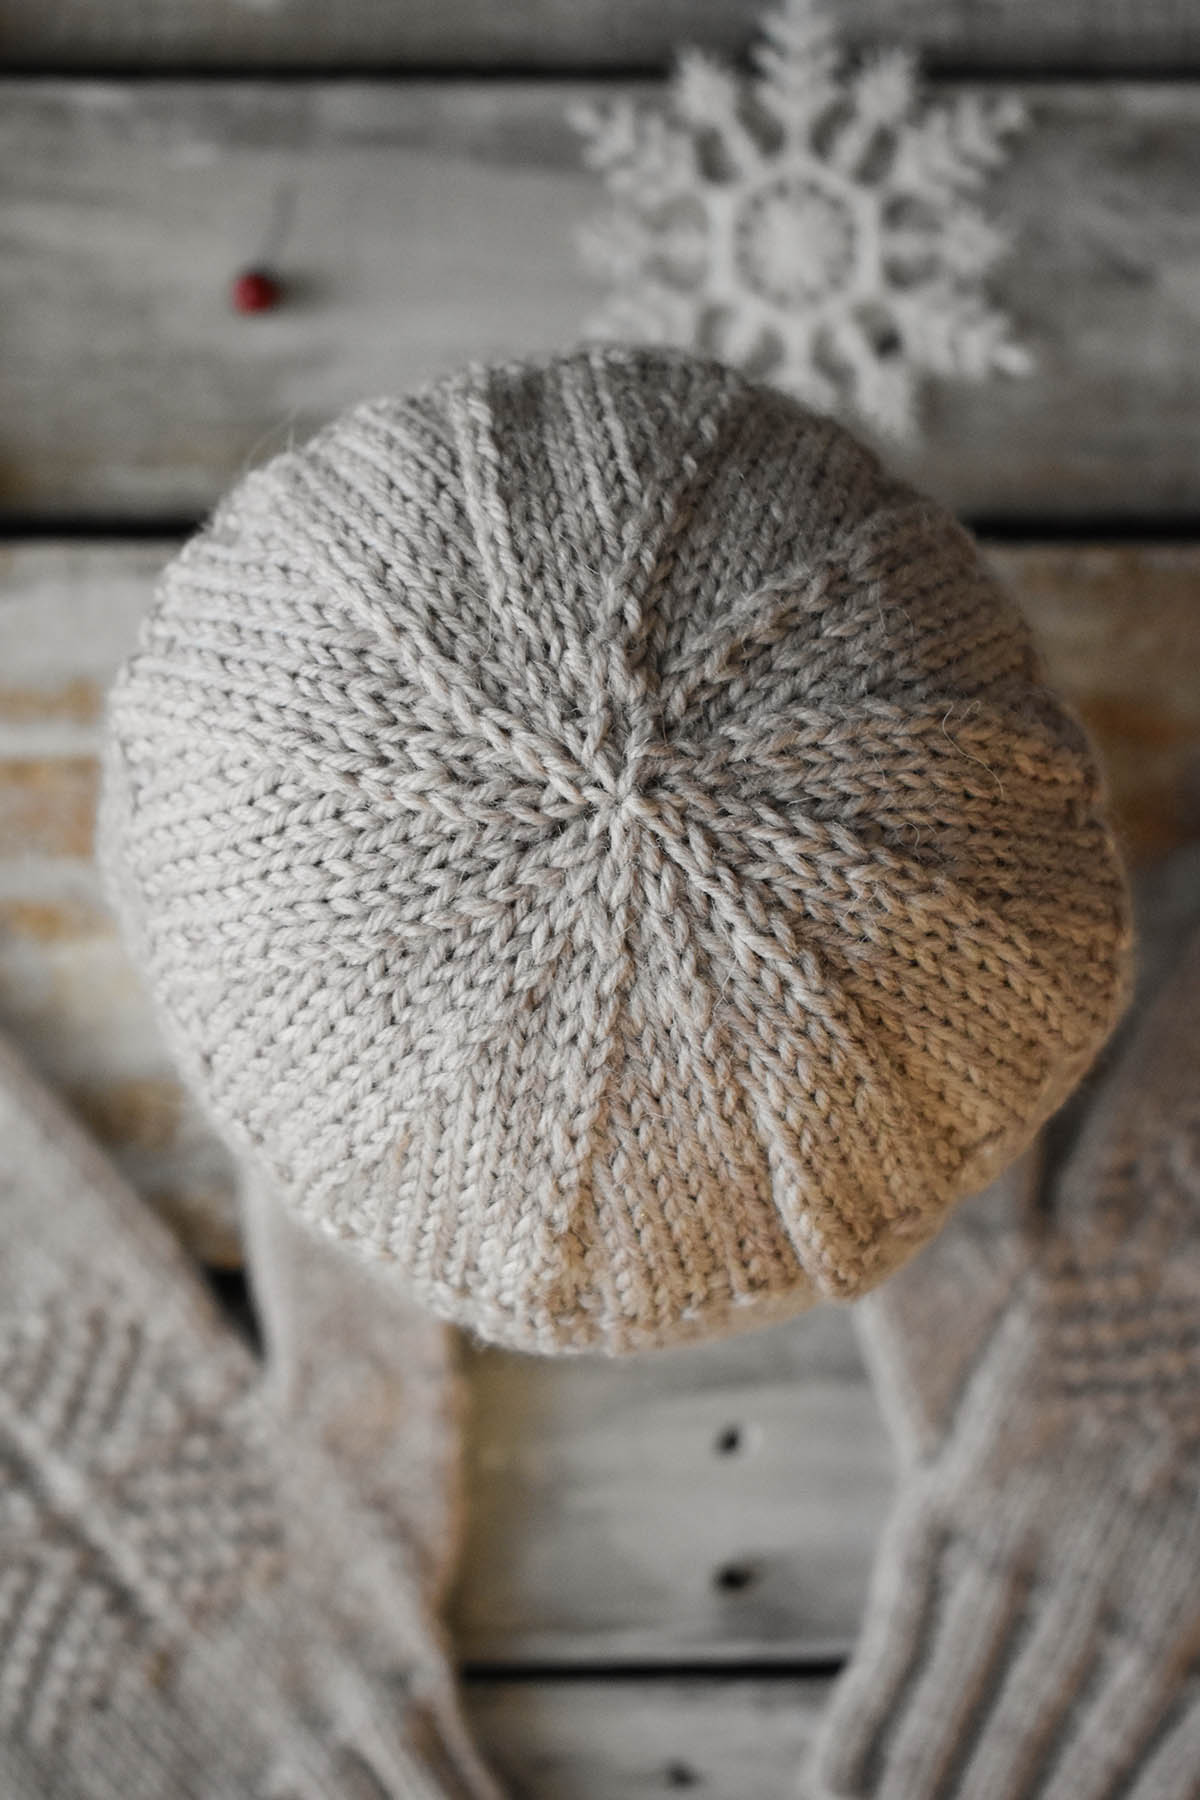
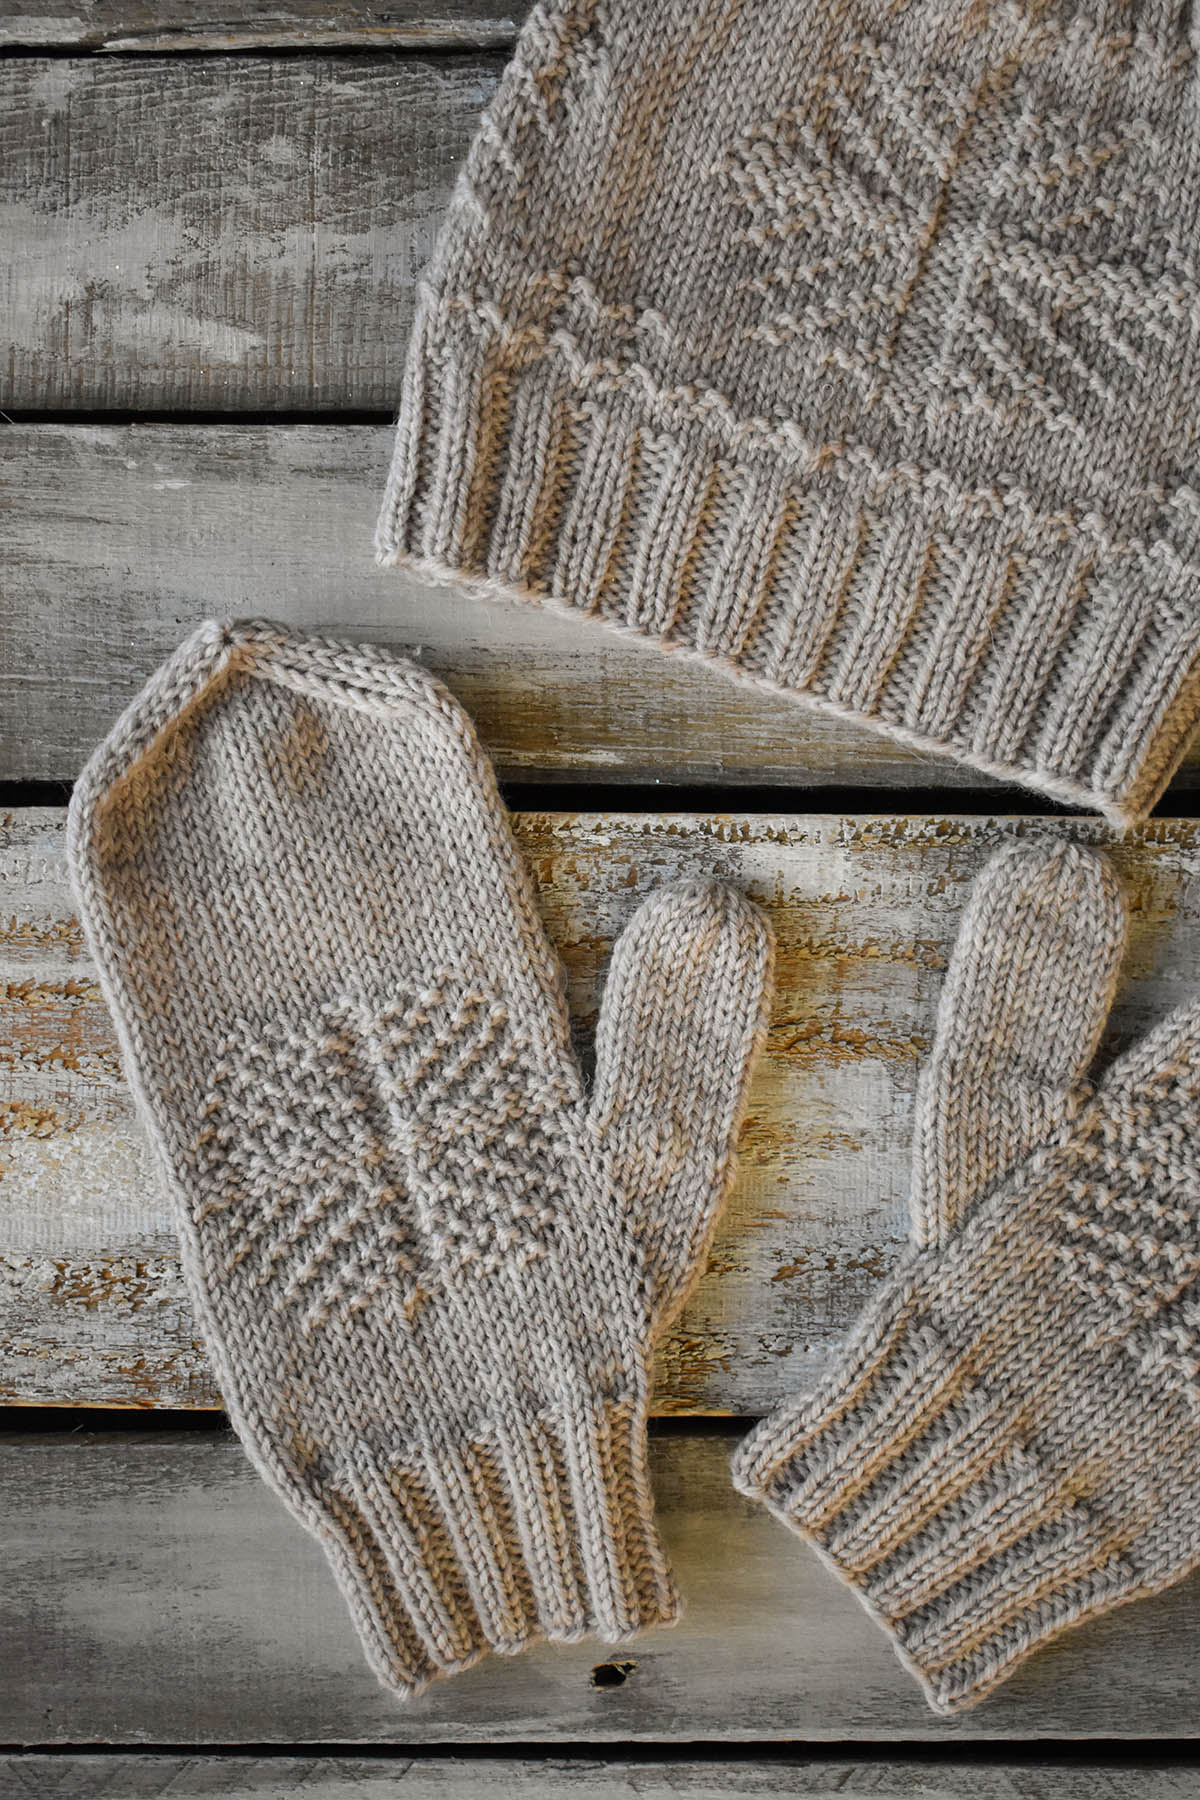
Today, the Snow Day Hat and Mittens, designed by Jennifer Sadler. This cozy accessory set is knit up in warm and woolly Deluxe DK Superwash. This yarn has great stitch definition, making it perfect for the knit-purl snowflake motifs in the hat and mittens. The light, Oatmeal Heather color also helps those stitches to stand out and gives this set a sophisticated feel.
When we asked Jennifer to share her inspiration for the design, she also wanted to include a recipe. Who are we to say no to that offer? Here is what she had to say:
“Snow days are one of my favorite things in the world. Where I live, everything shuts down, and you’re guaranteed a cozy day at home. I designed this hat and mitten set to reflect my love for snow and have a quick project to whip up the moment the snow appears in the forecast. And who wouldn’t love wearing a trio of faux-flakes while playing in real snowflakes?
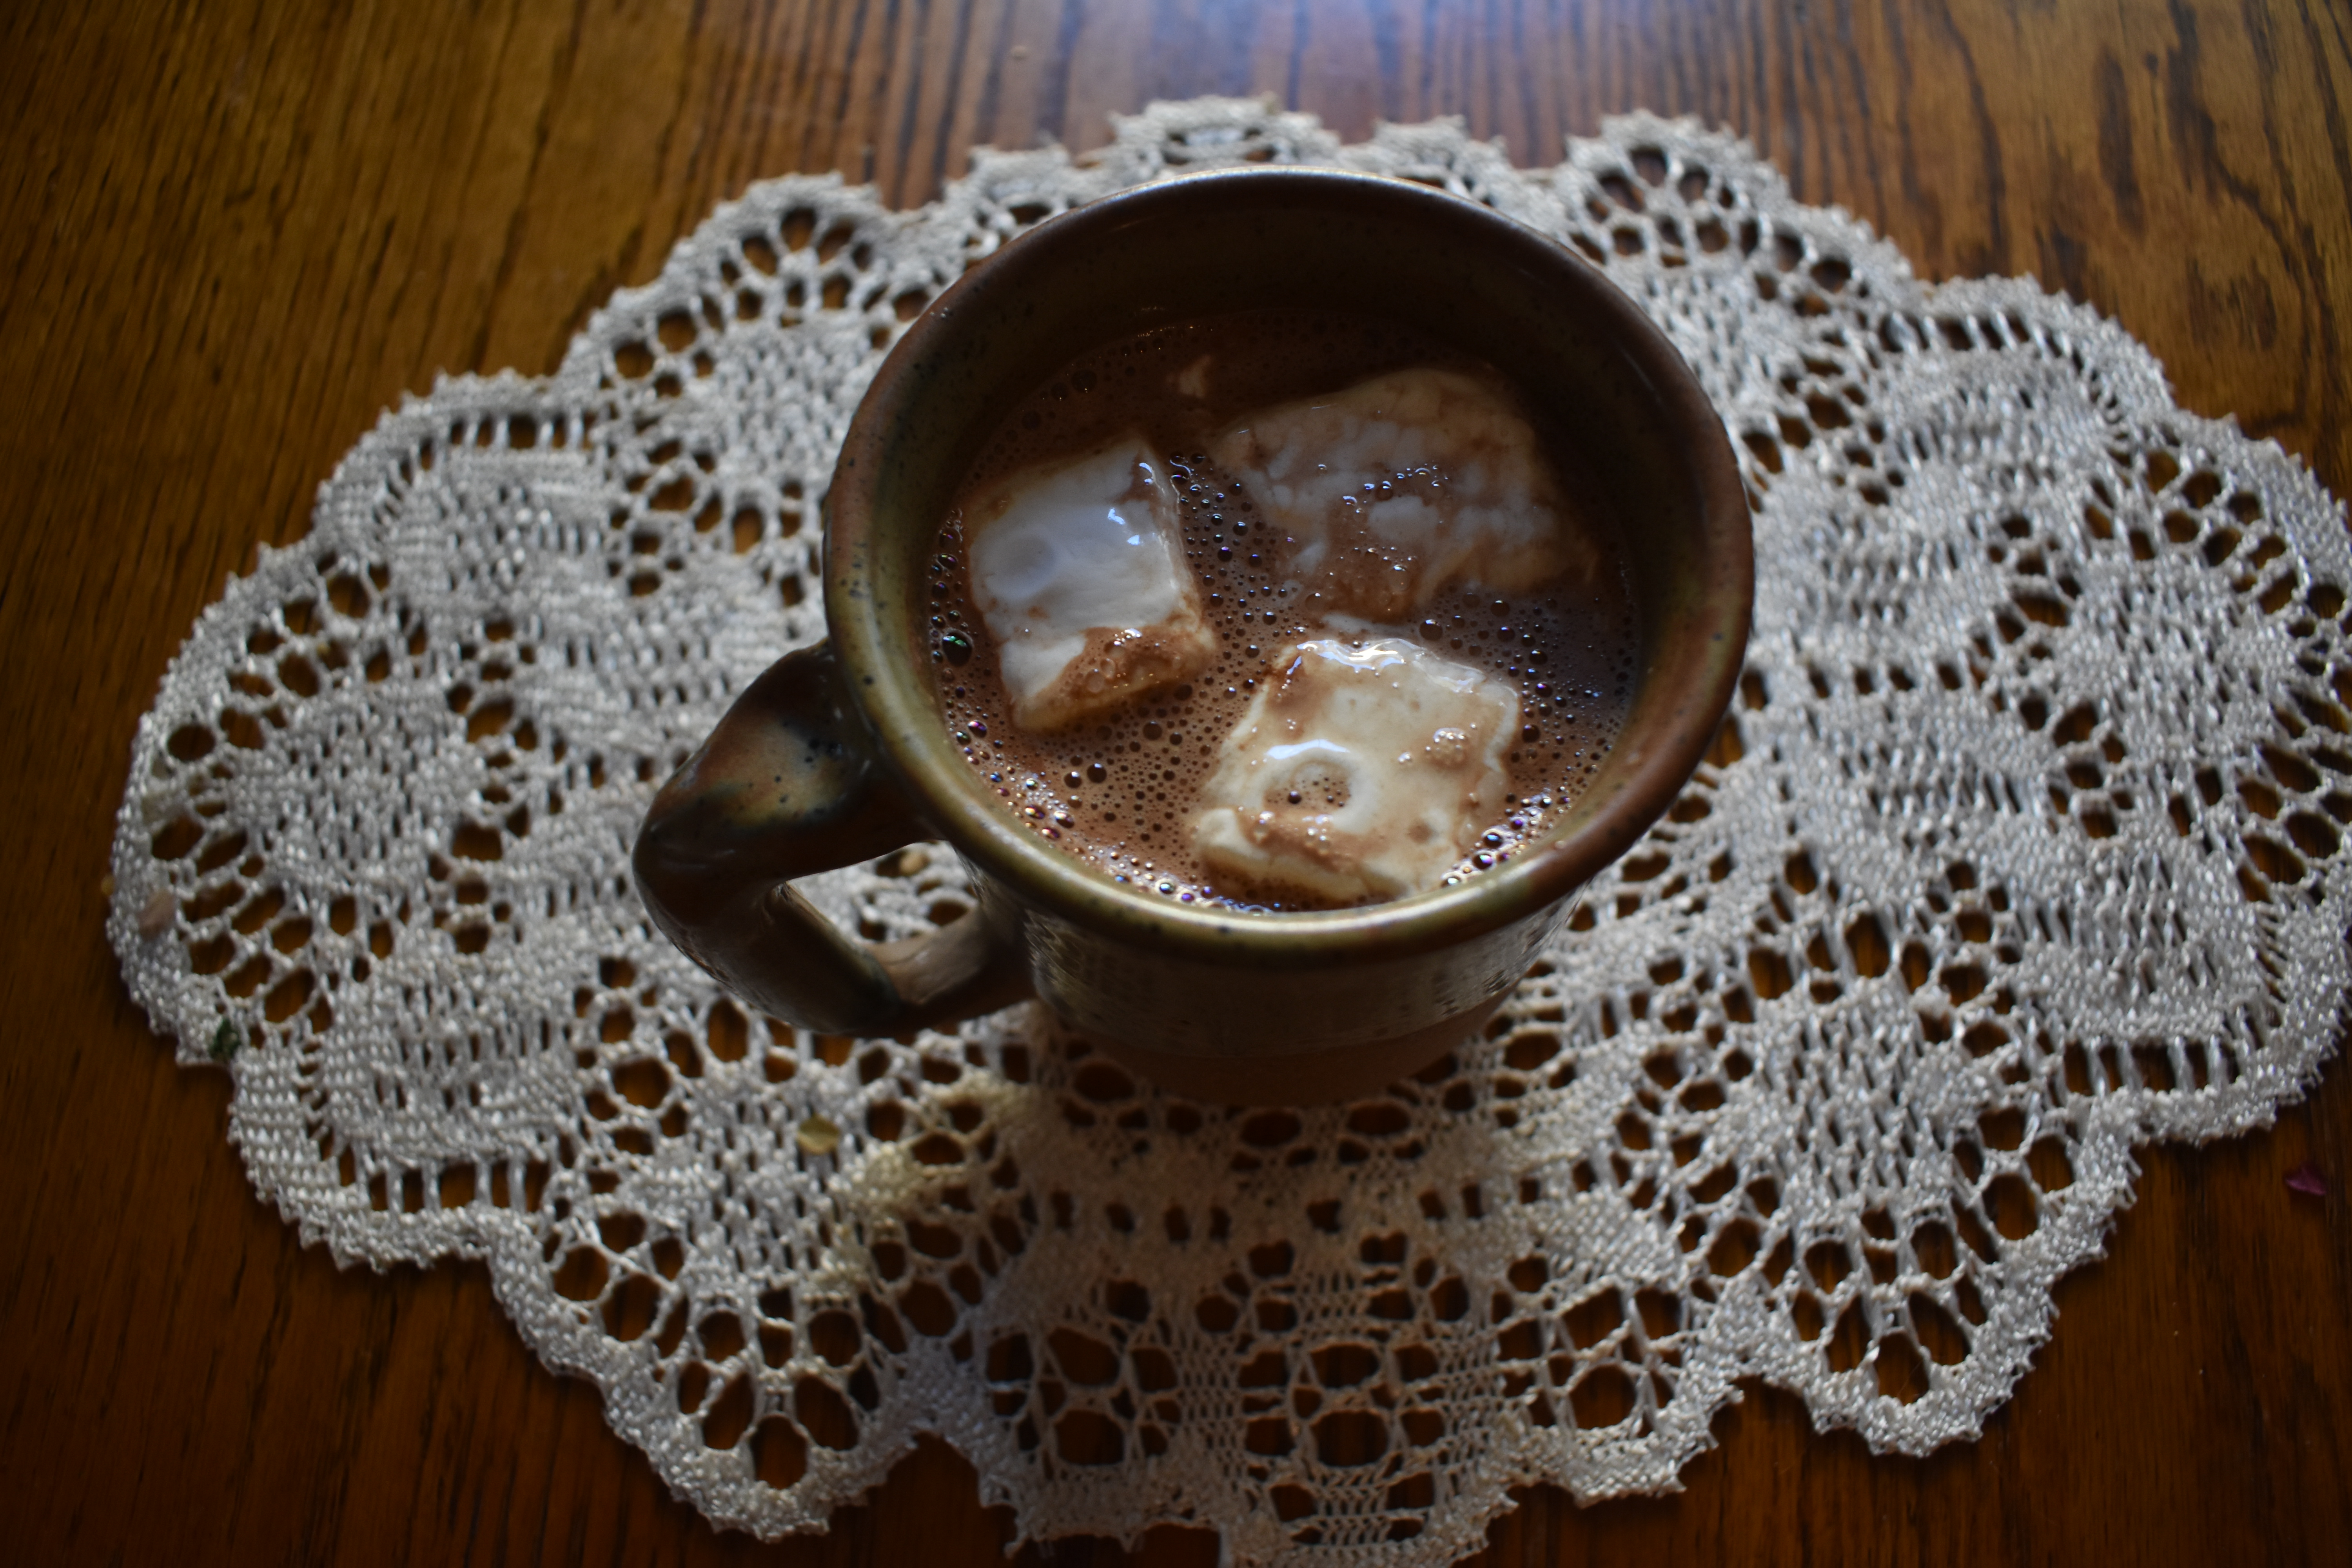
When I’m ready to warm up inside by the fire, I absolutely love having a hot cup of cocoa with homemade marshmallows on top. As intimidating as they may sound, they are pretty simple to make and are infinite times better than their store-bought counterparts. I’m sharing my favorite recipe with you below, so you can whip up some of your own for your next snow day (or just a regular Tuesday, no judgment here!)
Homemade Marshmallows Ingredients: 2 ½ tablespoons unflavored gelatin 1 cup light corn syrup 1 ½ cups granulated sugar 2 tablespoons vanilla extract (peppermint extract is also a yummy option!) ¼ teaspoon salt Confectioners’ sugar, for dusting
Directions:
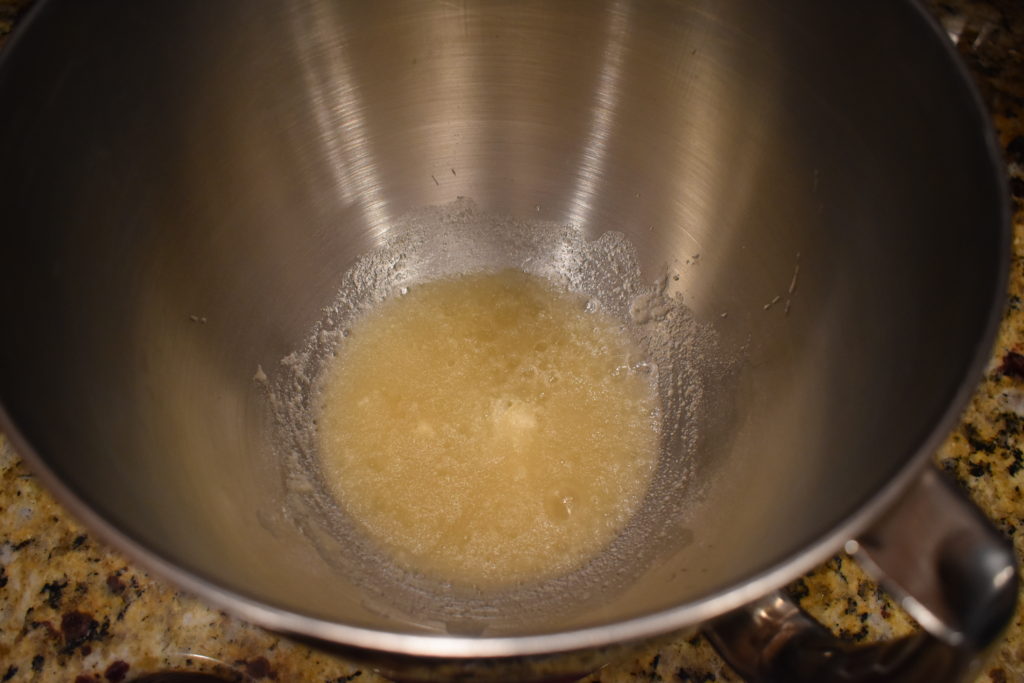
Combine gelatin and ½ cup cold water in the bowl of an electric mixer with whisk attachment. Let stand for 30 minutes.
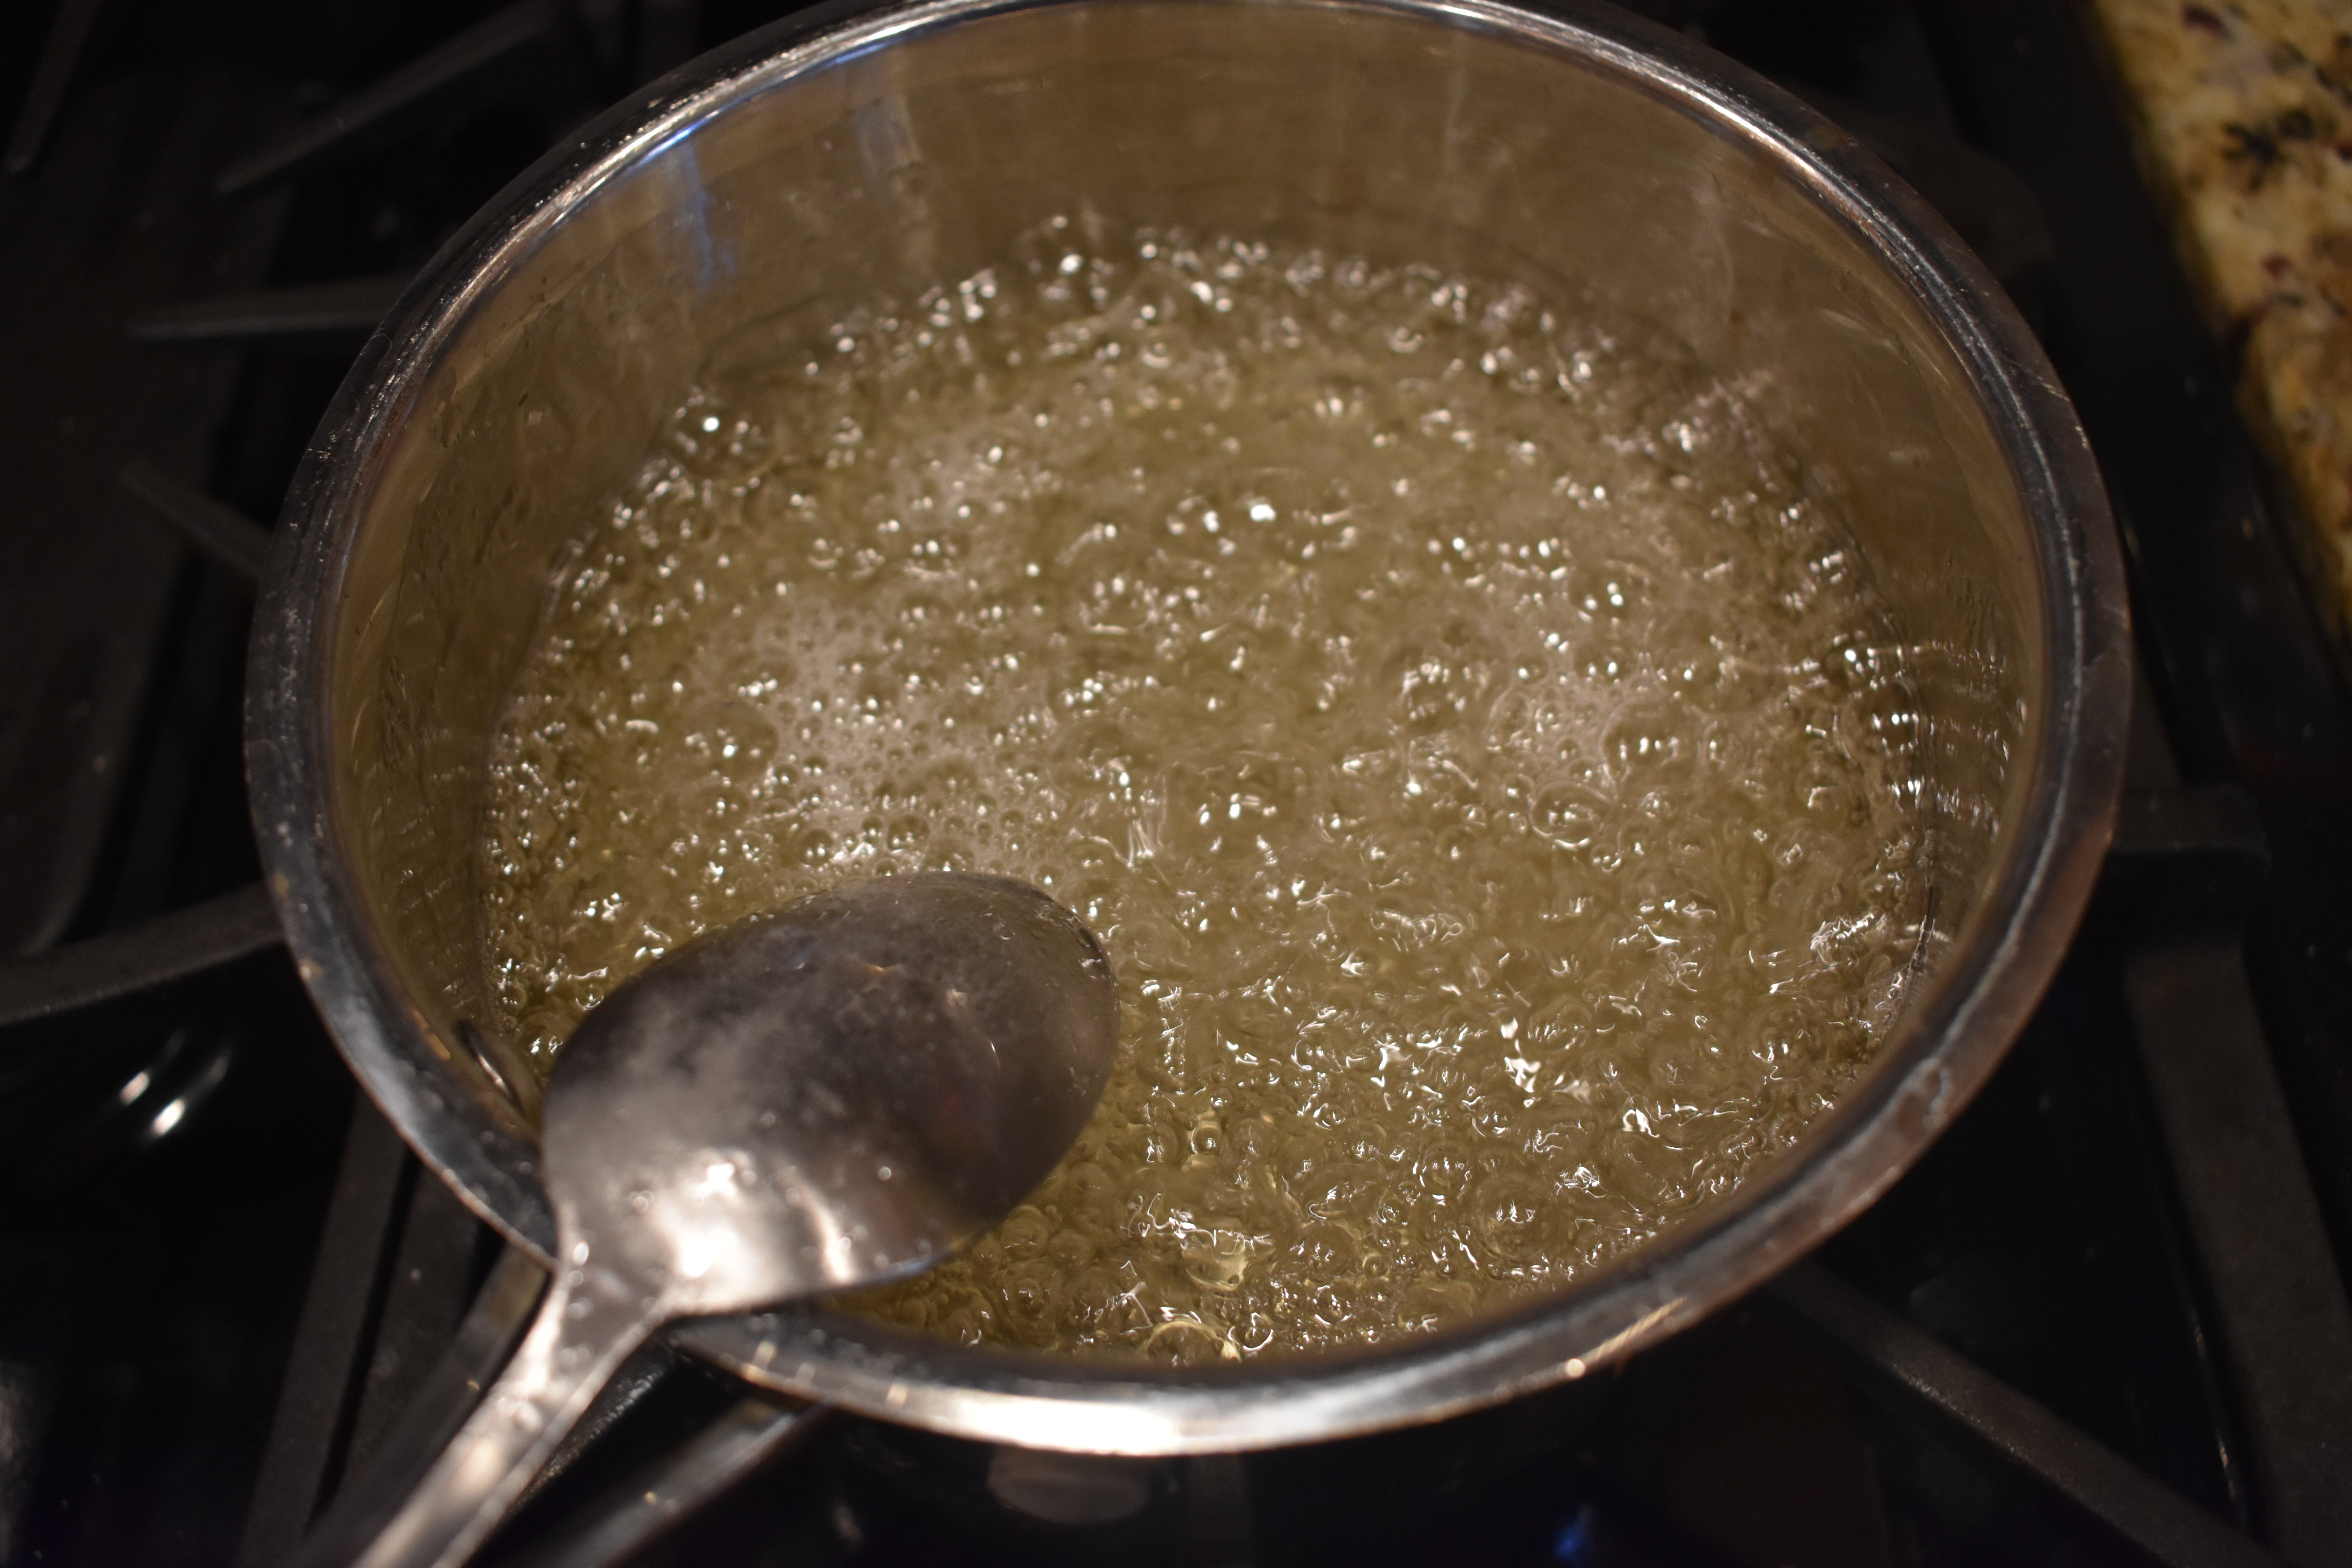
2. Combine granulated sugar, corn syrup, salt, and ½ cup water in a small heavy saucepan; place over low heat and stir until sugar has dissolved.
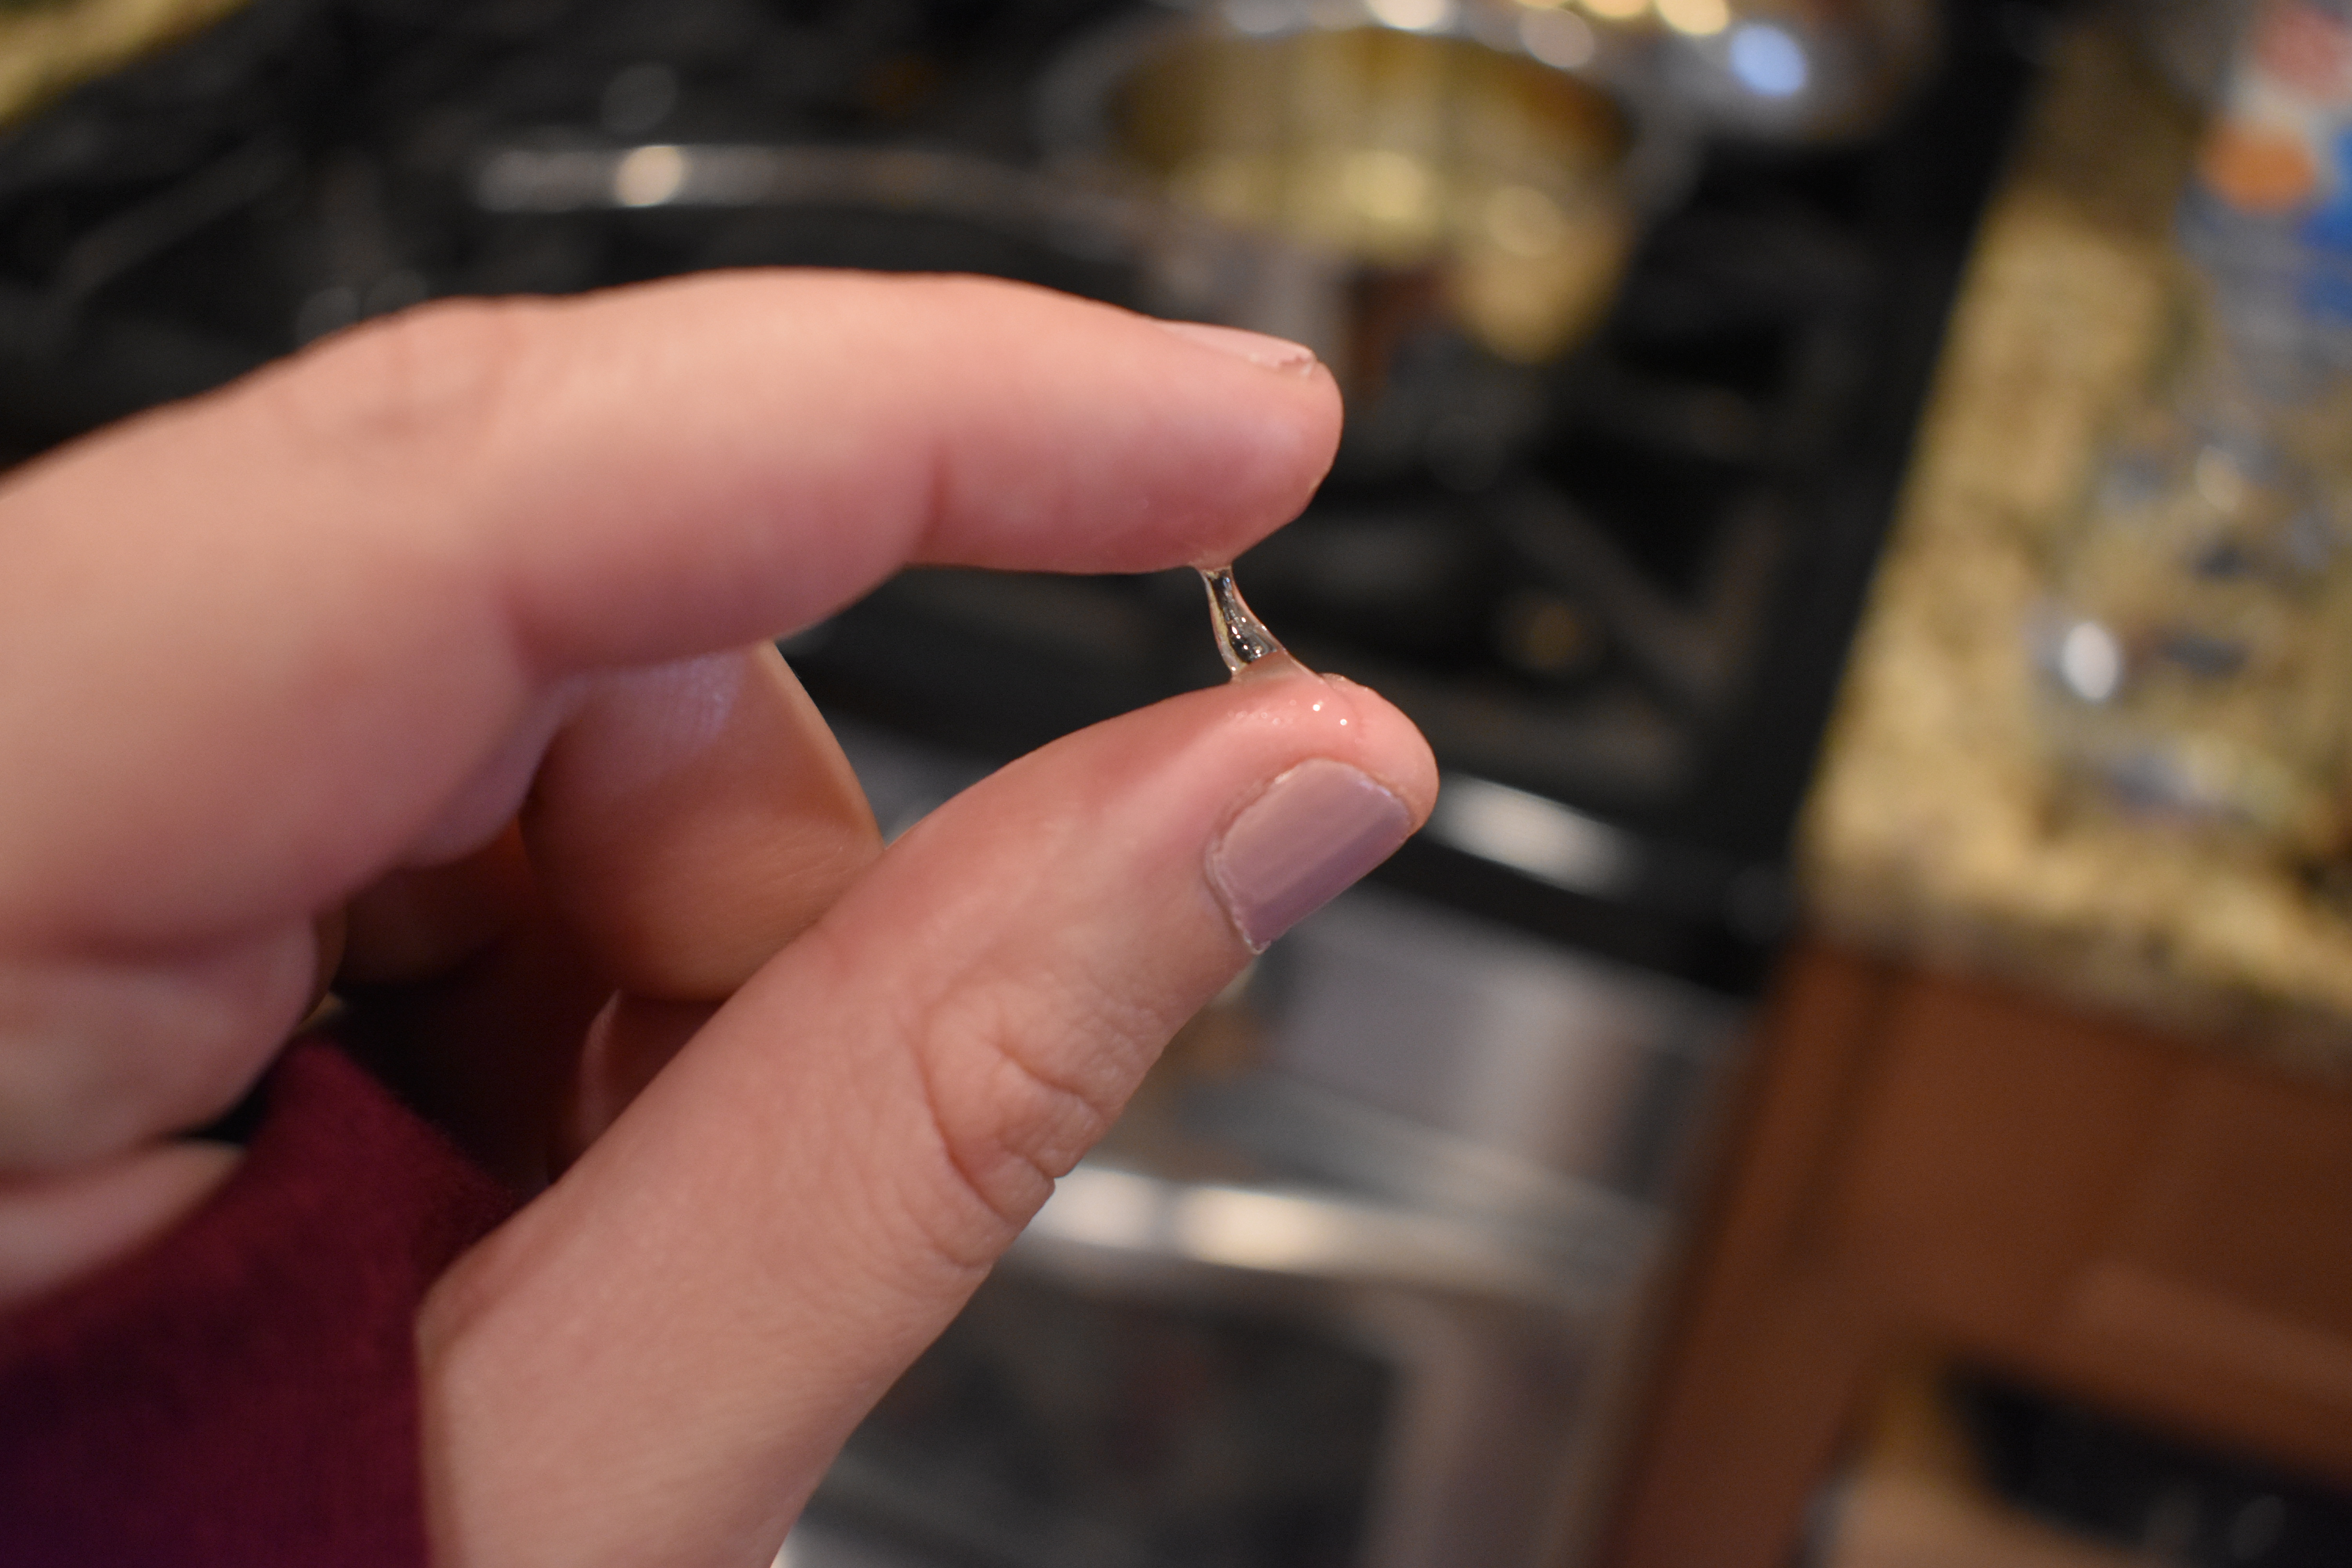
3. Clip on a candy thermometer; raise to high heat. Cook syrup without stirring until it reaches 244 degrees F (firm-ball stage). Immediately remove pan from heat. Tip: if you don’t have a candy thermometer, you can test the syrup by placing a few drops in a glass of cool water. Scoop the drops of syrup out of the water and test with your fingers. The drops should be firm, but pliable. This is firm-ball stage.Testing the syrup by placing a few drops in a glass of cool water and scoop them out with a spoon. Firm, but pliable.
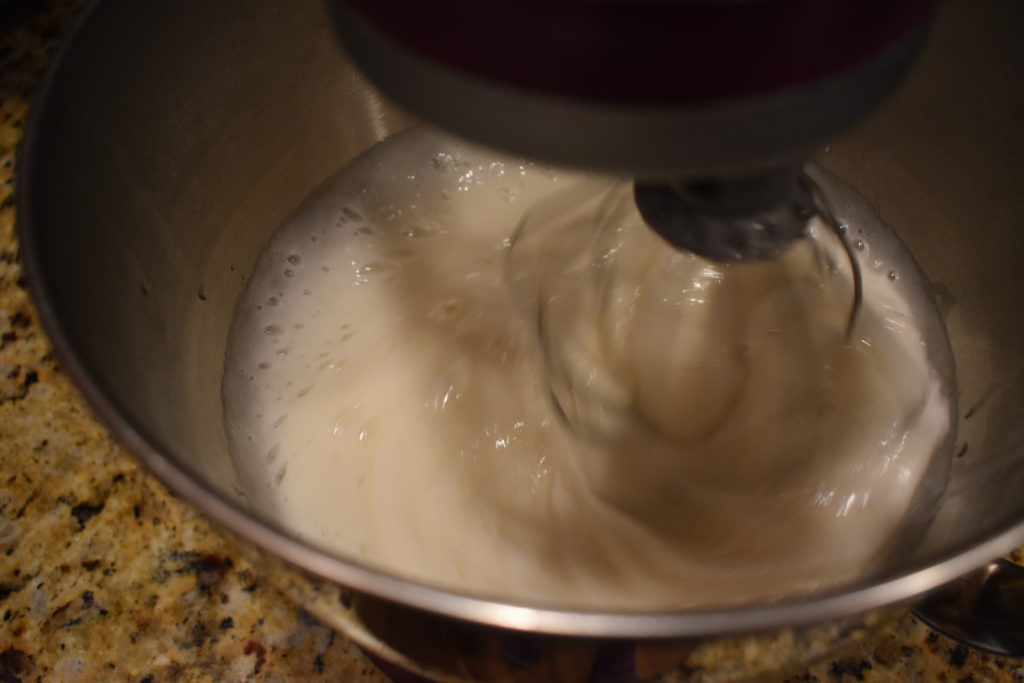
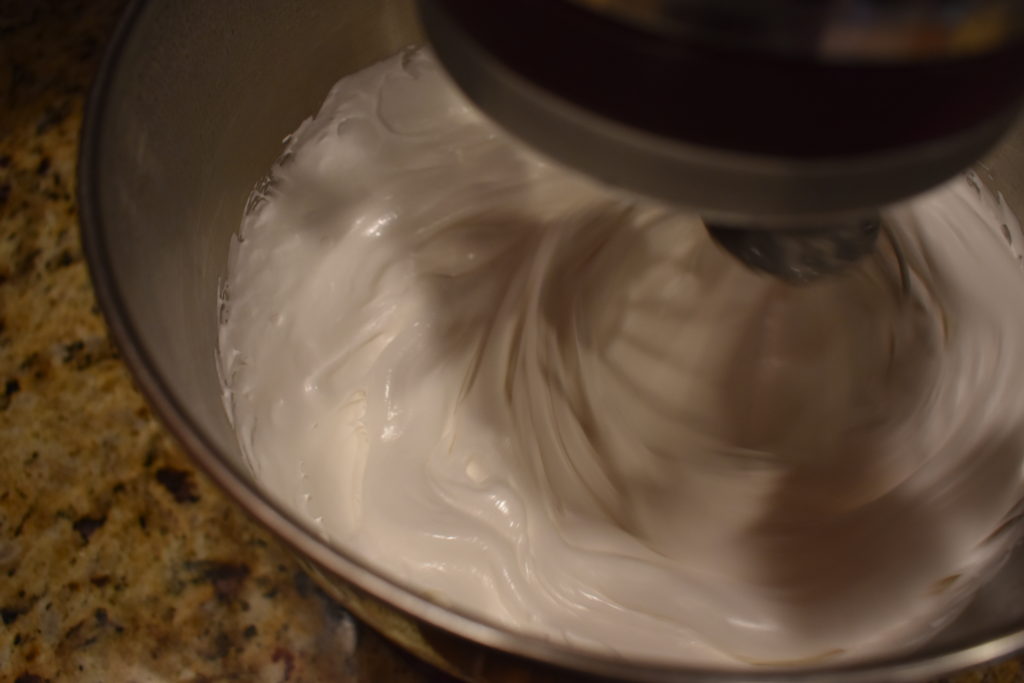
4. With mixer on low speed, slowly and carefully pour the syrup into the softened gelatin. Increase speed to high. Beat until mixture is very thick and white and has almost tripled in volume, about 15 minutes. Add vanilla; beat to incorporate.
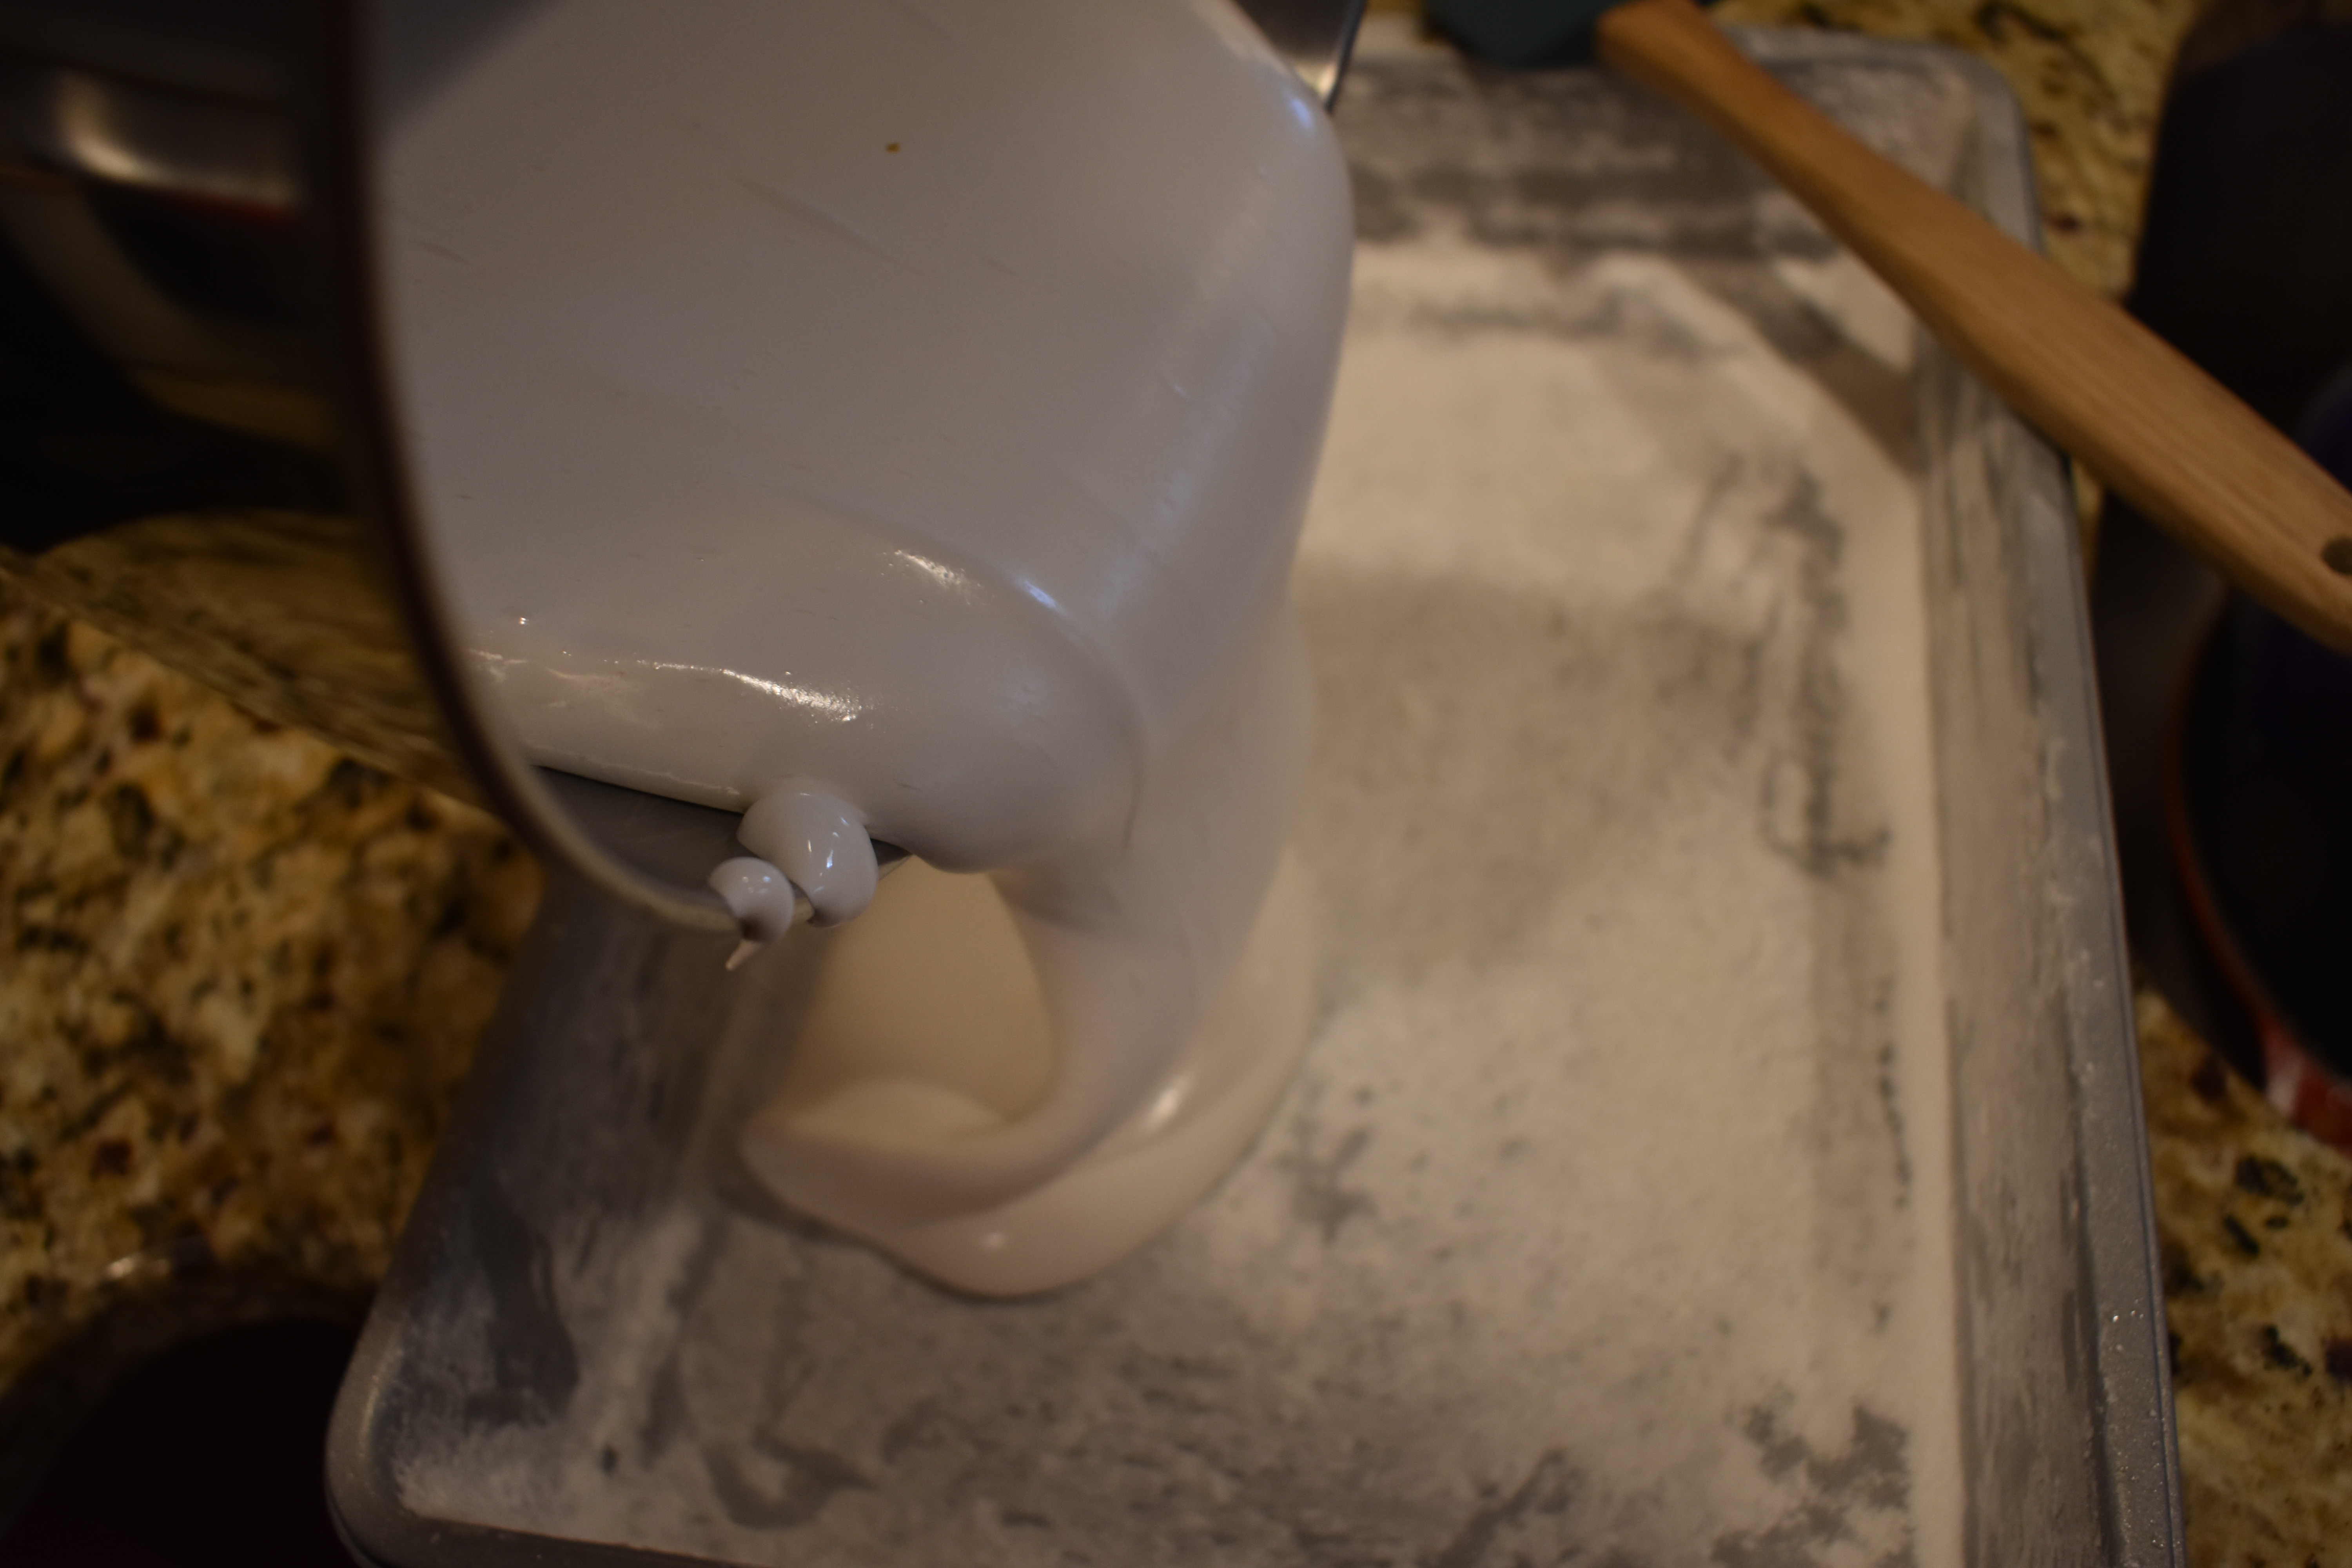
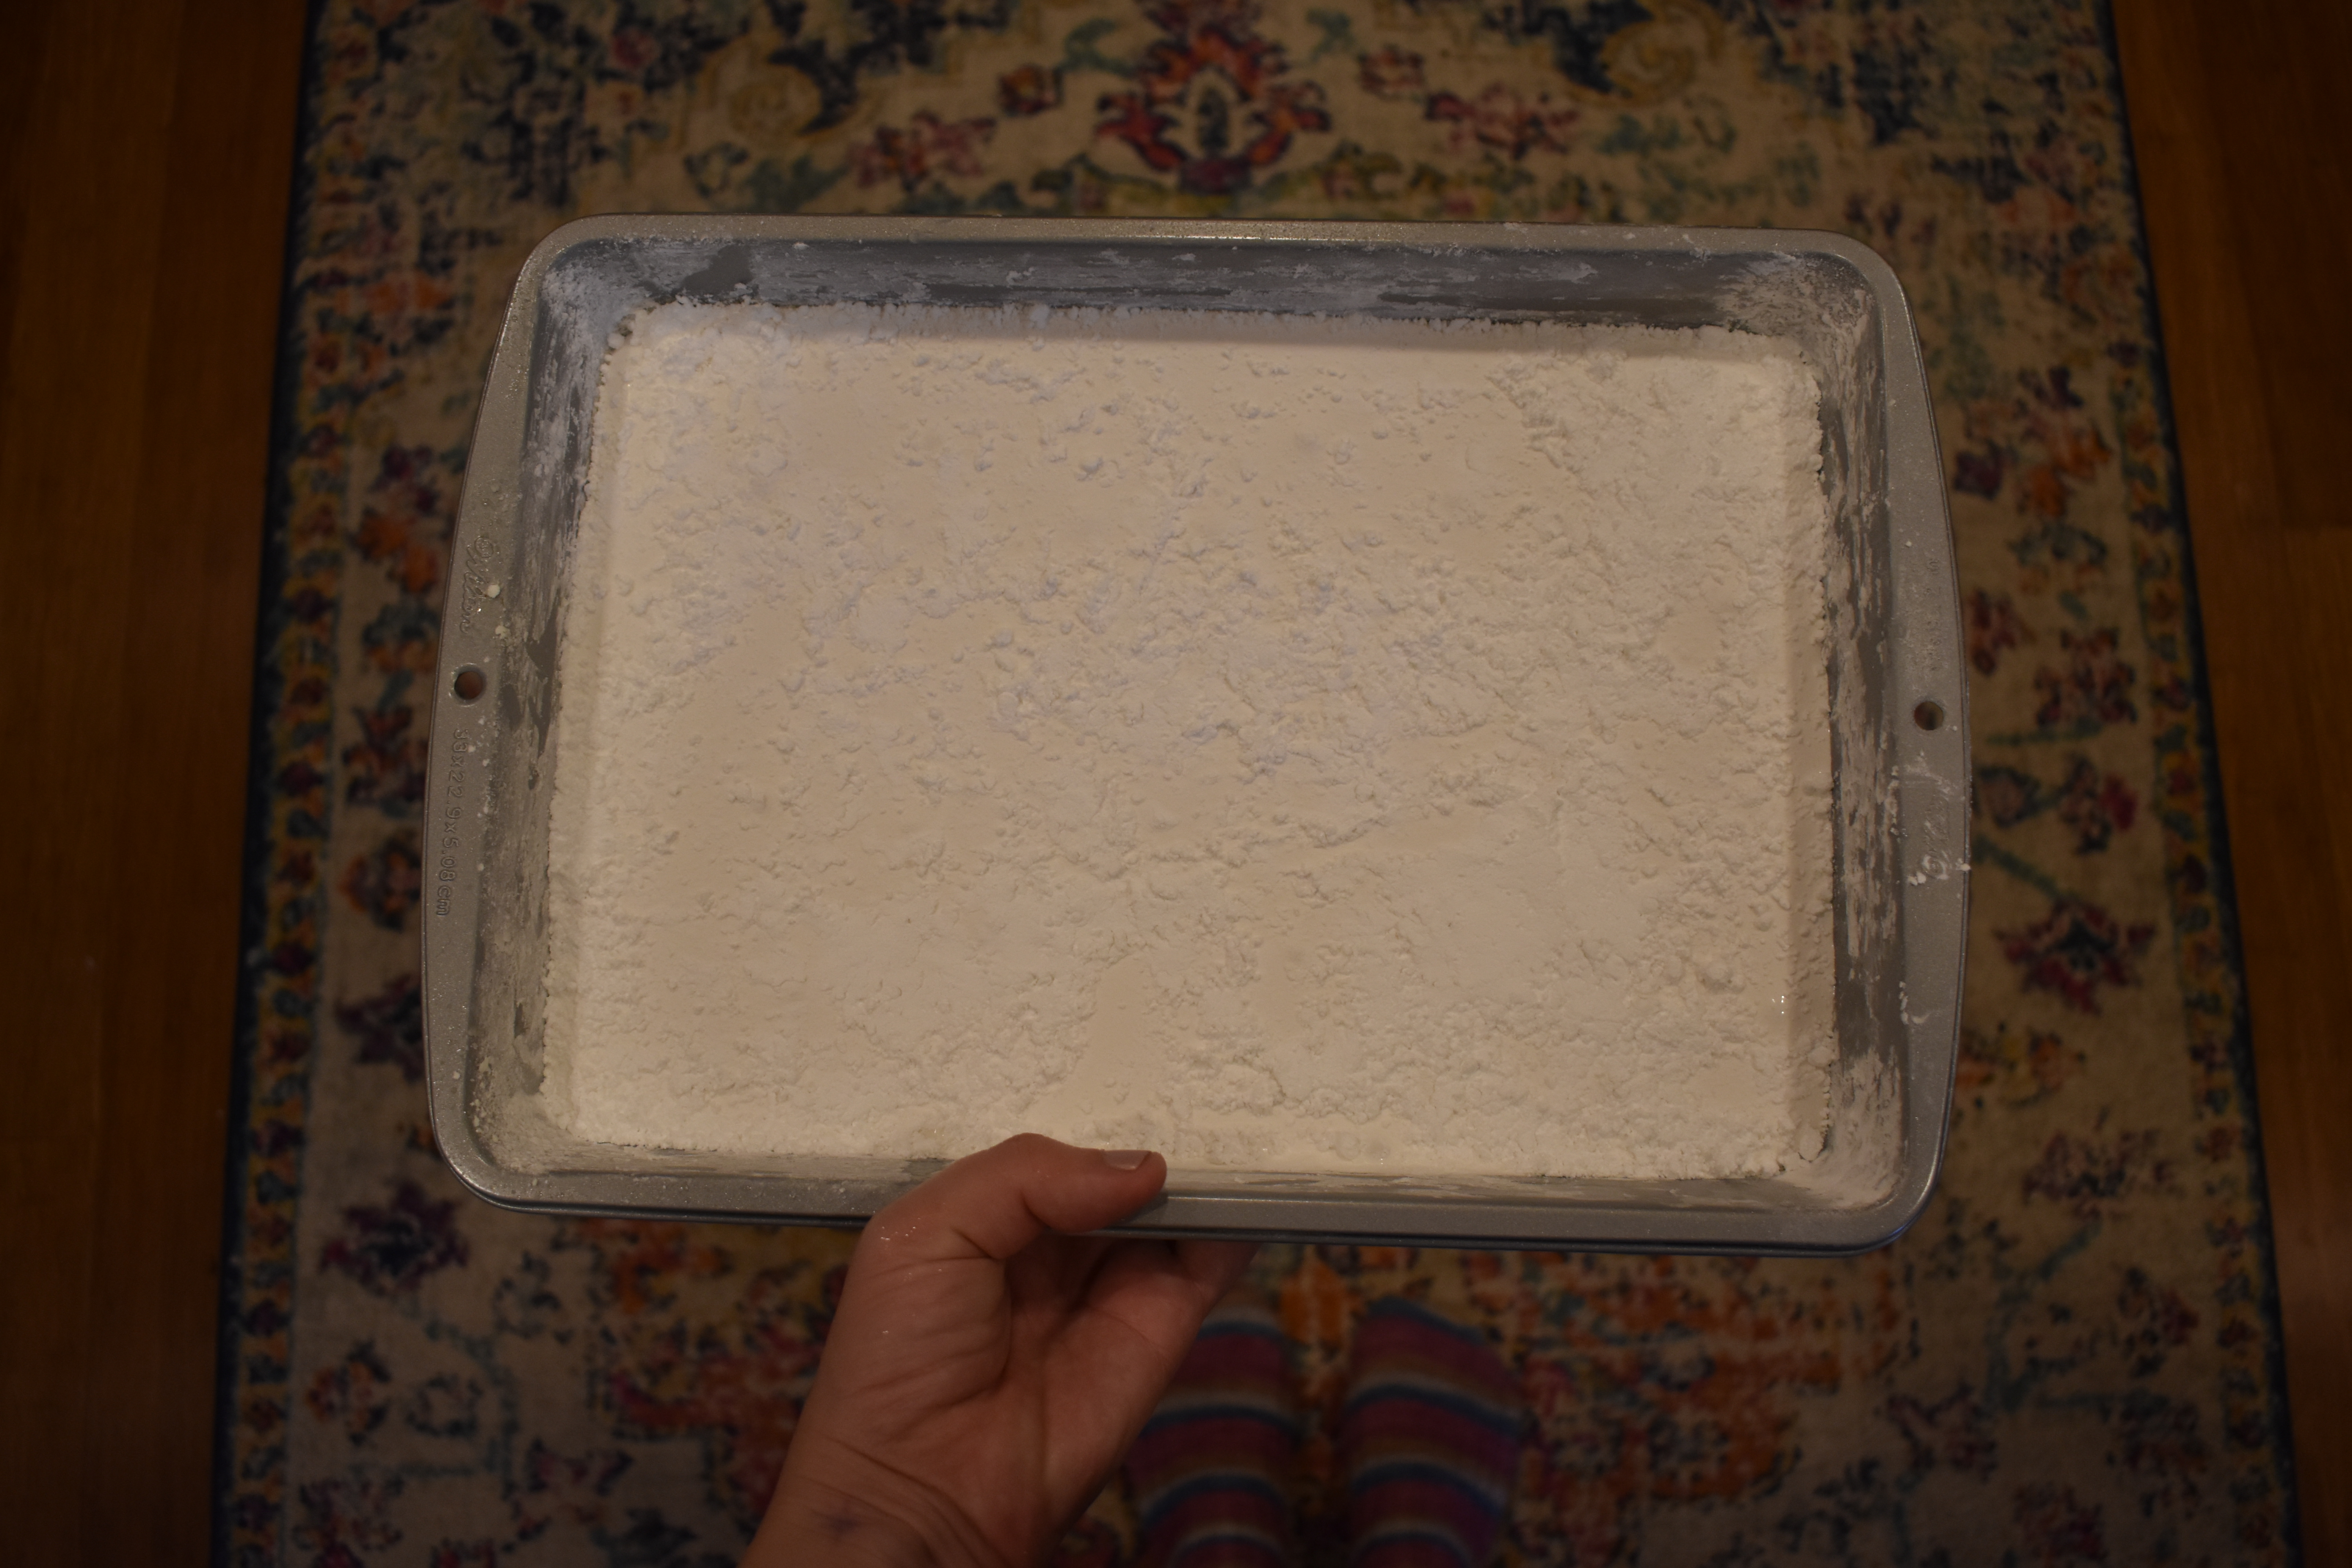
5. Generously dust an 8×12 baking pan with confectioners’ sugar. Pour marshmallow mixture into the pan. Dust top with confectioners’ sugar; wet your hands and pat it to smooth. Dust with more confectioners’ sugar and let stand overnight, uncovered, to dry out.
6. Turn out onto a cutting board. Cut marshmallows with a dry hot knife into 1 ½ inch squares, and dust with more confectioners’ sugar. Alternatively, dust small cookie cutters with confectioners’ sugar, and cut marshmallows with the cutters.
7. Enjoy!”
-Jennifer
We simply cannot wait to try out this delicious recipe. It’s the perfect complement to last year’s recipe for spiced hot cocoa. Remember, you can find the 12 Days of Winter Kits at your local yarn shop.