Tutorial – Magic Circle

Sample Swatches of crochet stitches lay in an arrangement next to three crochet hooks. The heading "AJ's Crochet Corner, Tips and Tricks" is present.

Crocheting into a magic circle makes evenly placing your starting stitches a snap! This technique offers a way to place as many stitches as you need into a perfectly circular shape with the tug of some yarn.

Using a magic circle takes away the guesswork involved with a different method of creating a circular base, where you create a chain, then slip stitch to form a ring. Because this other method with a starting chain has a fixed circumference, it may leave a gap in the center if you make it too big, or be impossible to work into if it’s too small. With the magic circle being adjustable, these sizing problems while starting a project magically disappear!

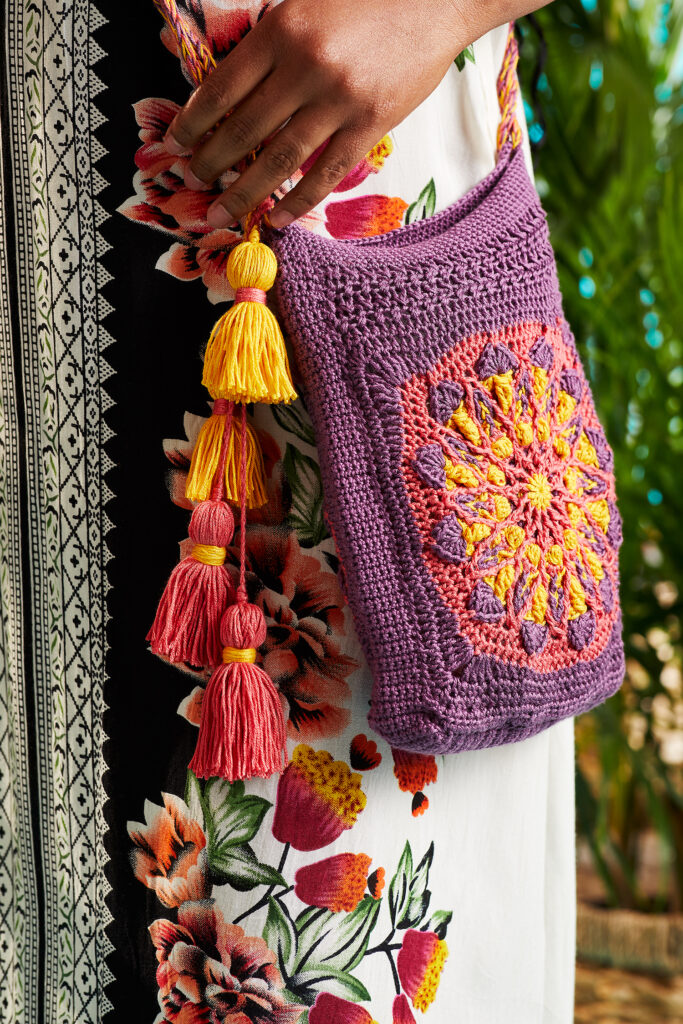
One thing that can be a bit tricky is that not everyone calls this method a “magic circle” as seen in the Paradise Pouch. When getting started with a pattern, you may also read “adjustable ring,” as seen in the Cotton Candy Swirl, or a blend of both called a “magic ring.” It can also be called a loop, as in “magic loop” or “adjustable loop.” Lastly, you may see it represented visually in a chart, denoted by a swirled shape before any stitches start, like in the Spice Market Shawl. Now that you know what to look for, let’s take a look at how to do it! There are just 6 simple steps to do to create a magic circle.

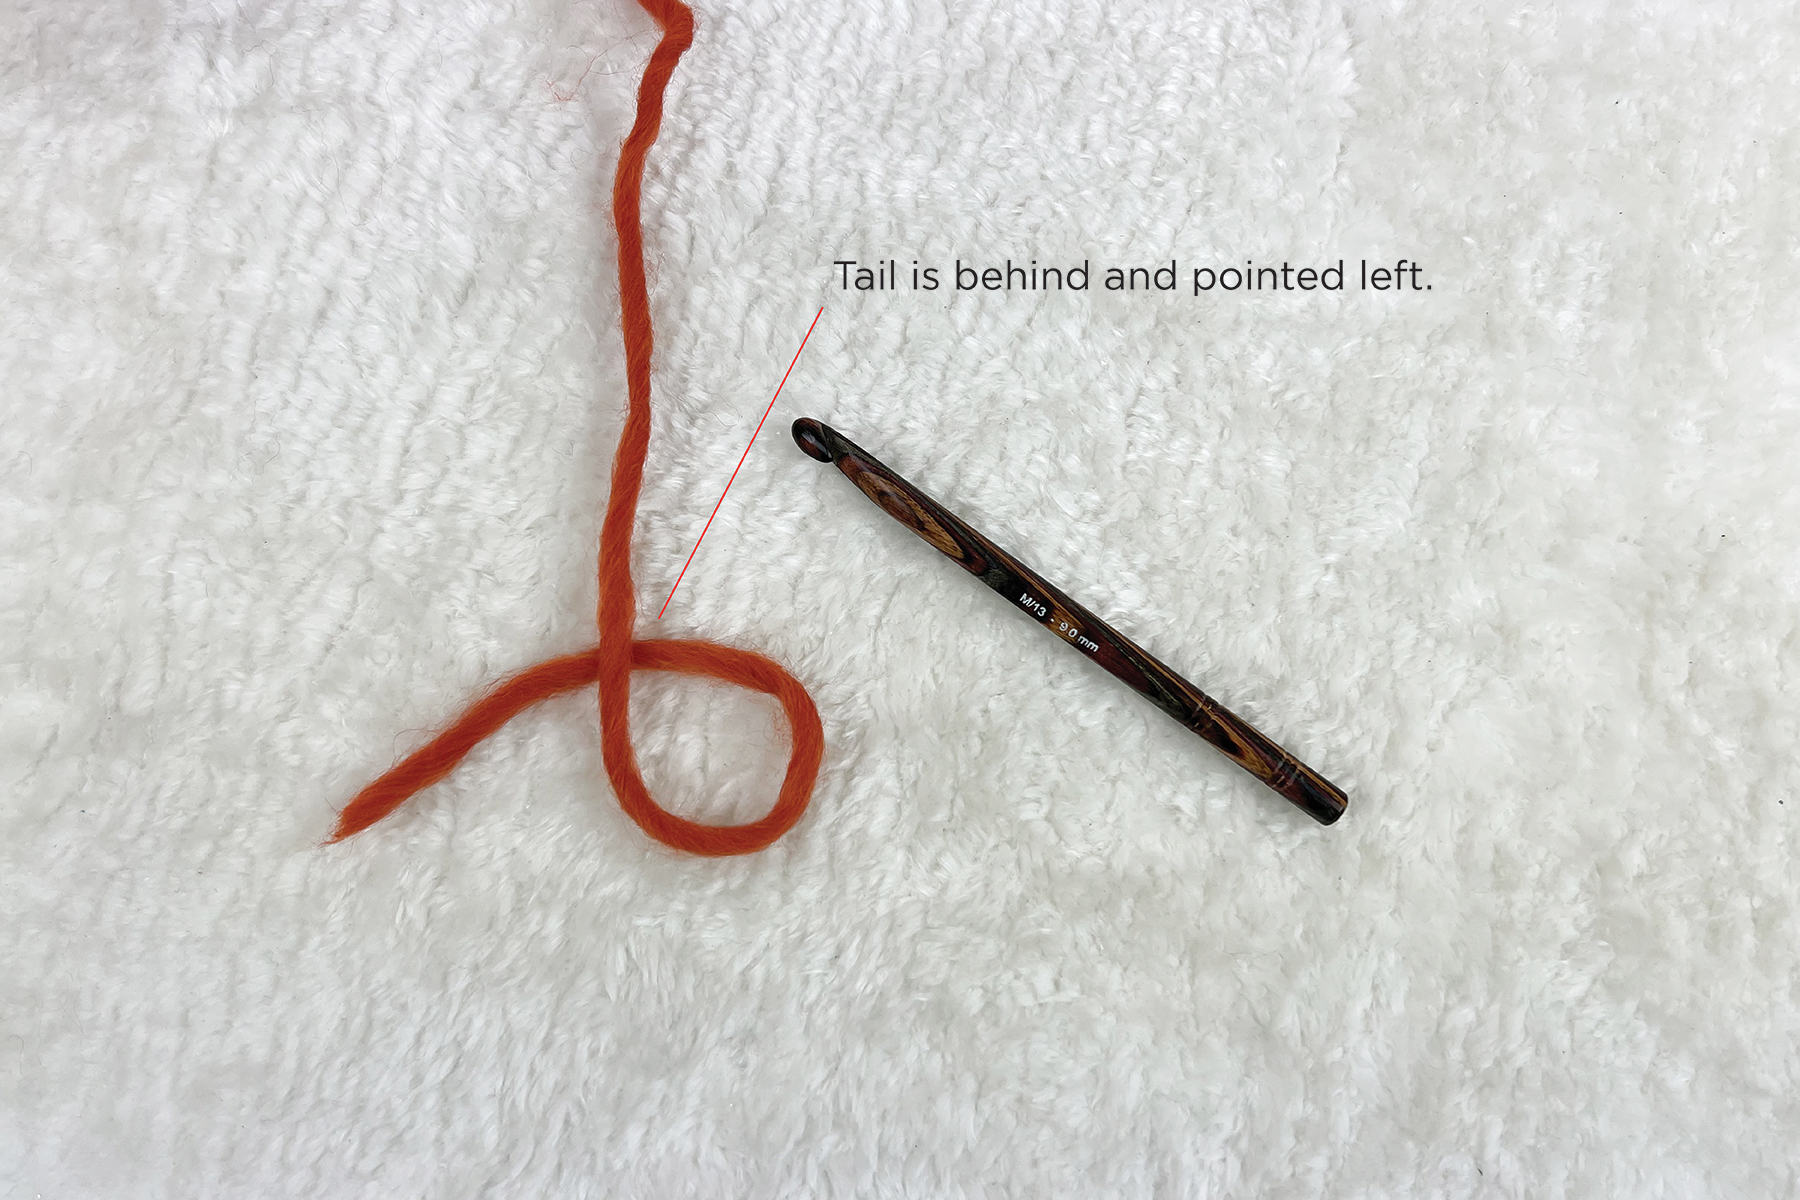
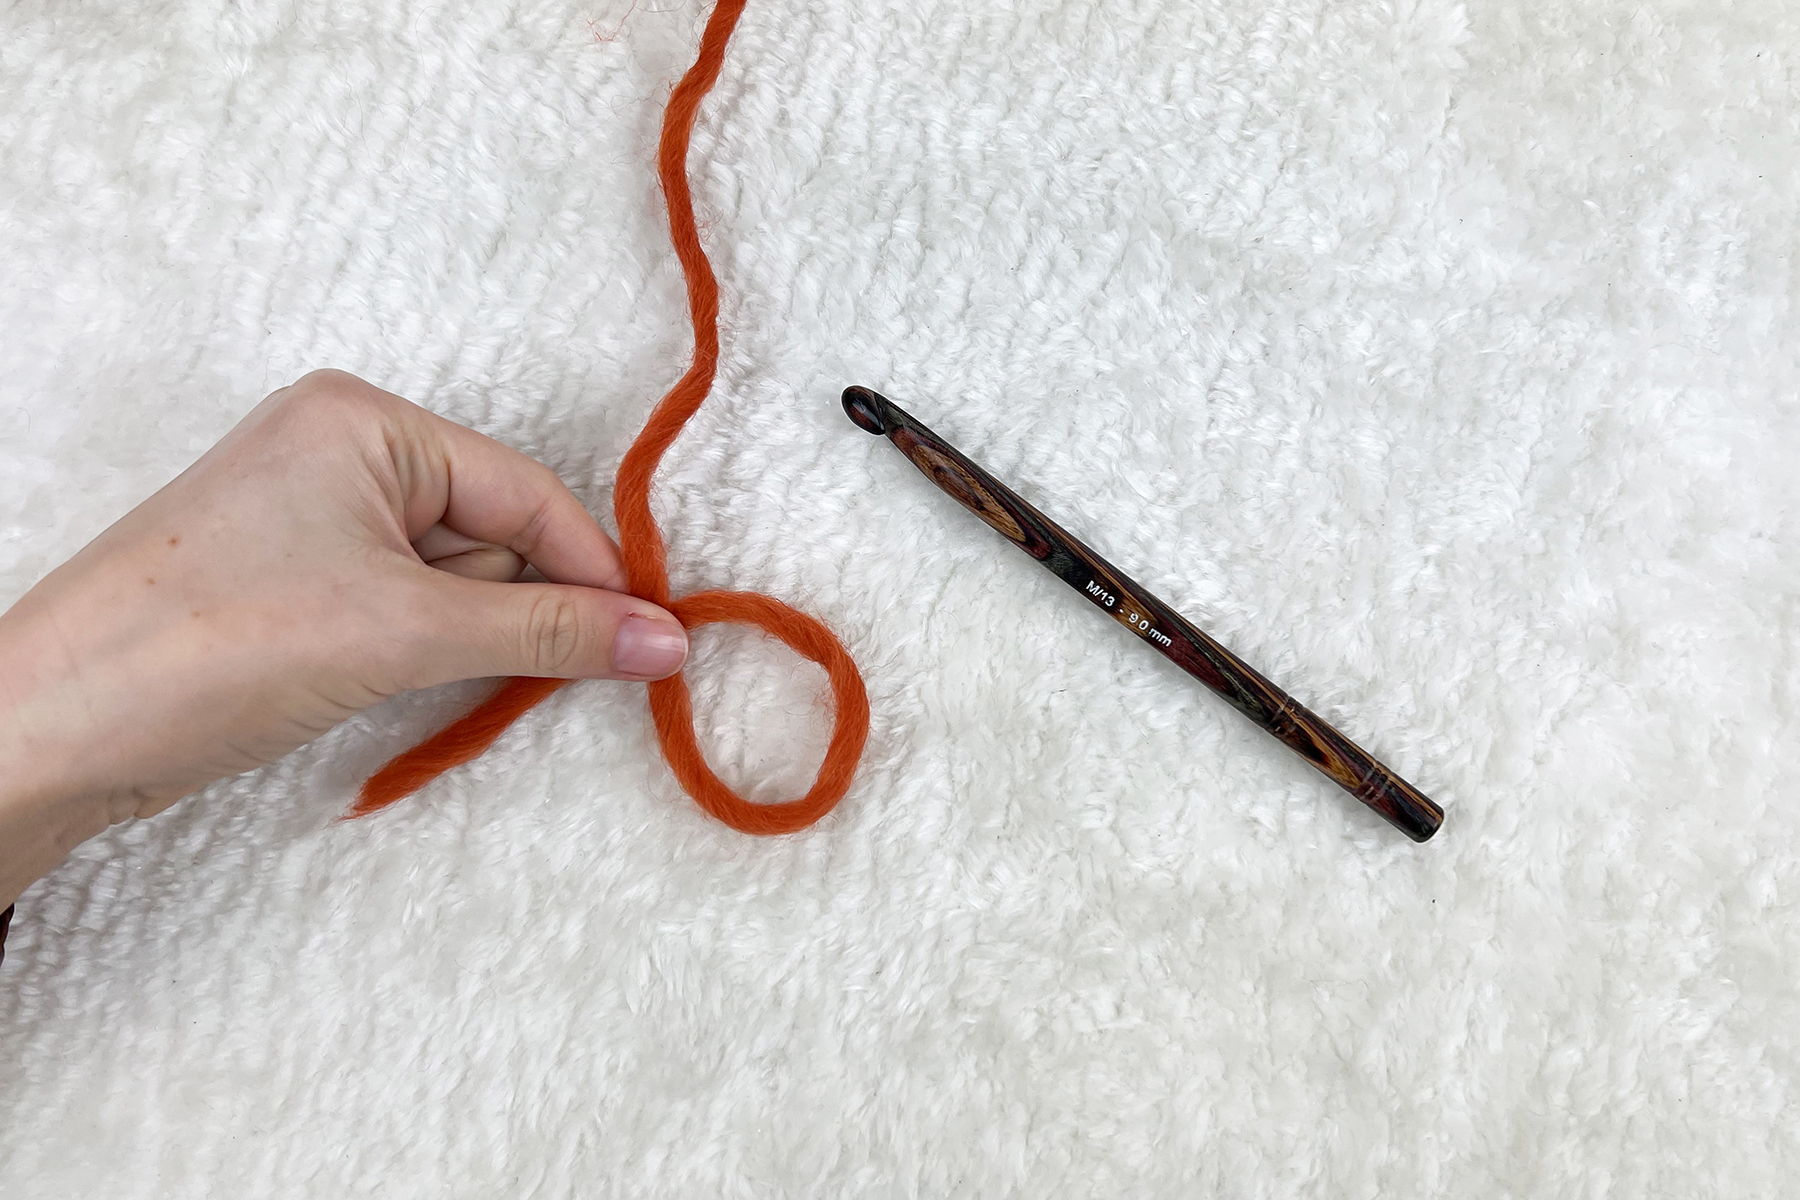
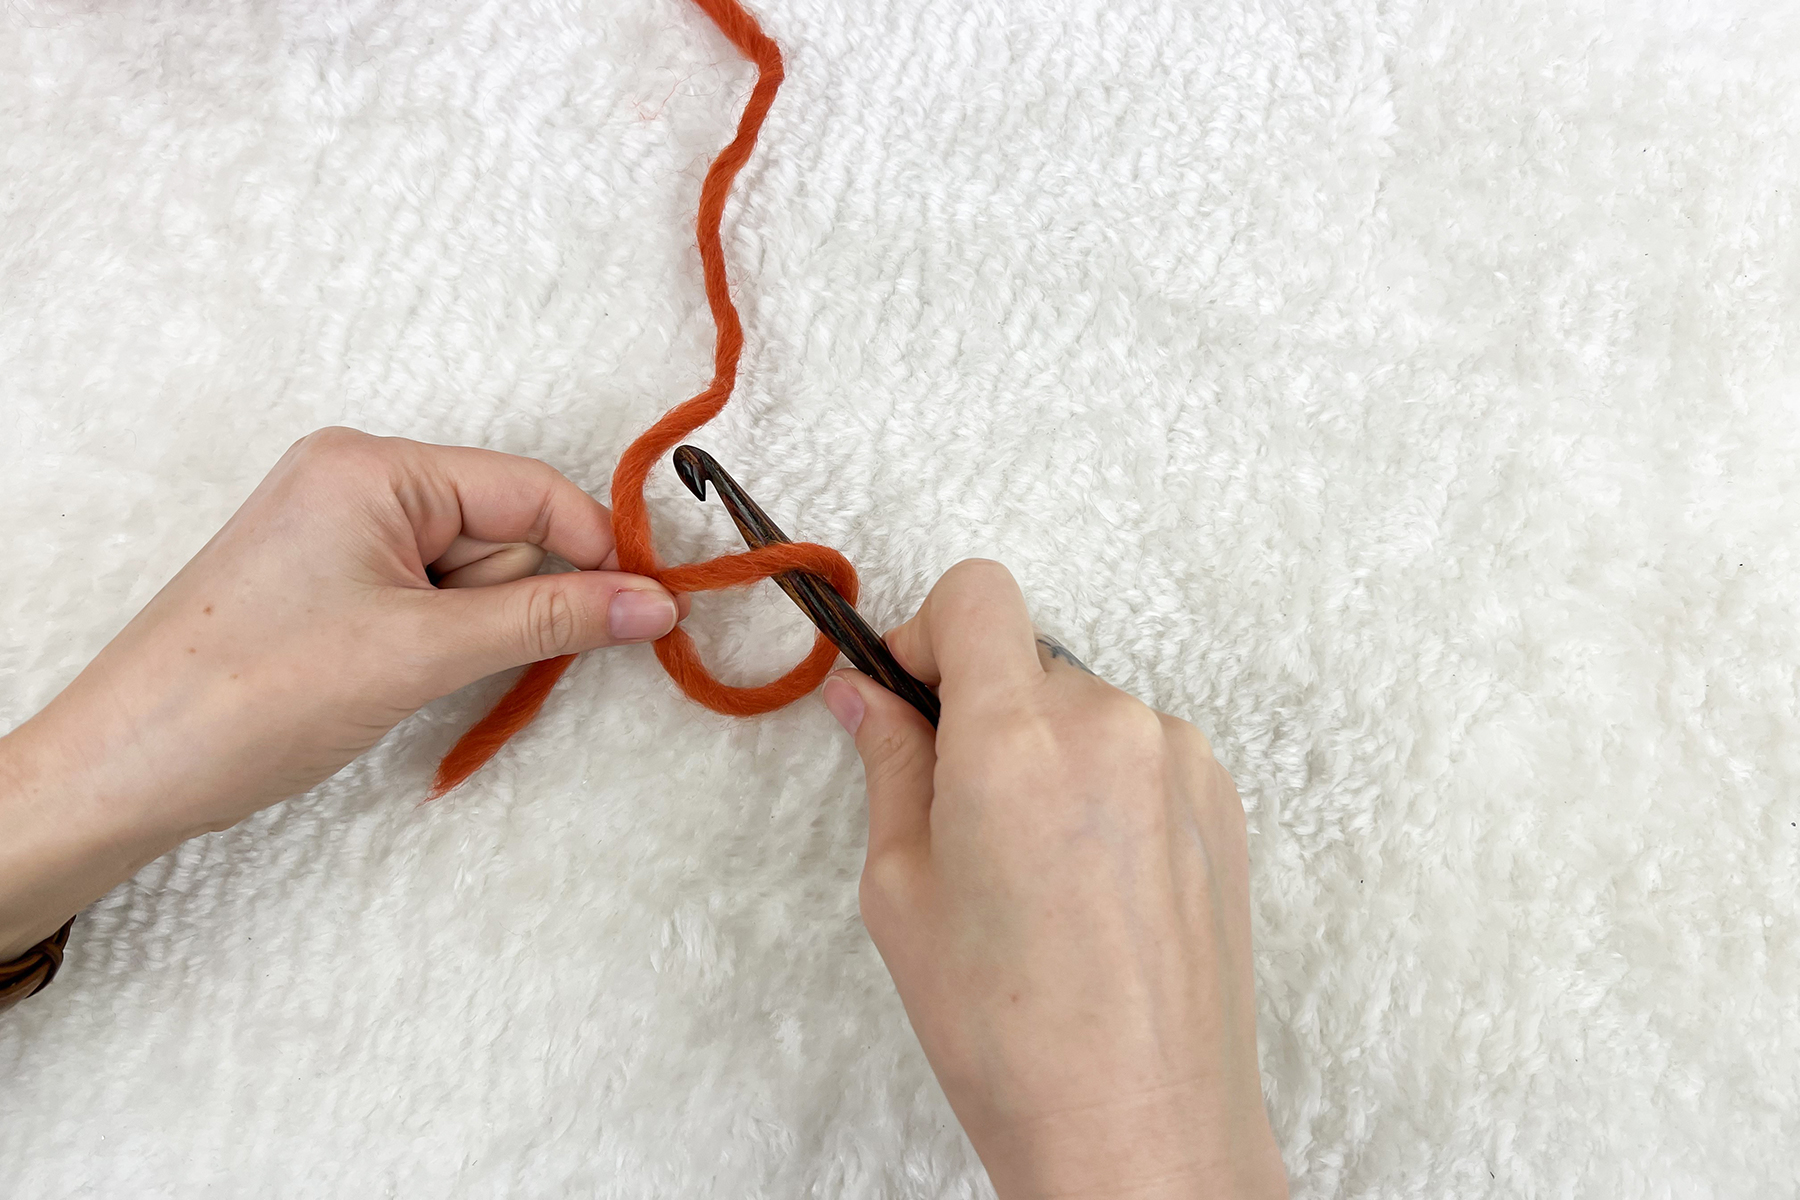
Step 1: Create the circle.

Create an initial loop by laying flat, if it helps, or held in your hand. Place the tail behind the working yarn, and pointed to the left.
Pinch yarn where it overlaps to hold the loop in place while you work.

Step 2: Insert hook.

Reach your crochet hook into the loop.

Step 3: Yarn over.

It may feel strange to tension the yarn while pinching the circle. You may try holding it as seen above or switch to holding the circle with your thumb and middle finger to tension with your pointer finger. I have a habit of starting like this then switching my grip when I begin chaining and stitching as normal (as shown, beginning in step 5).

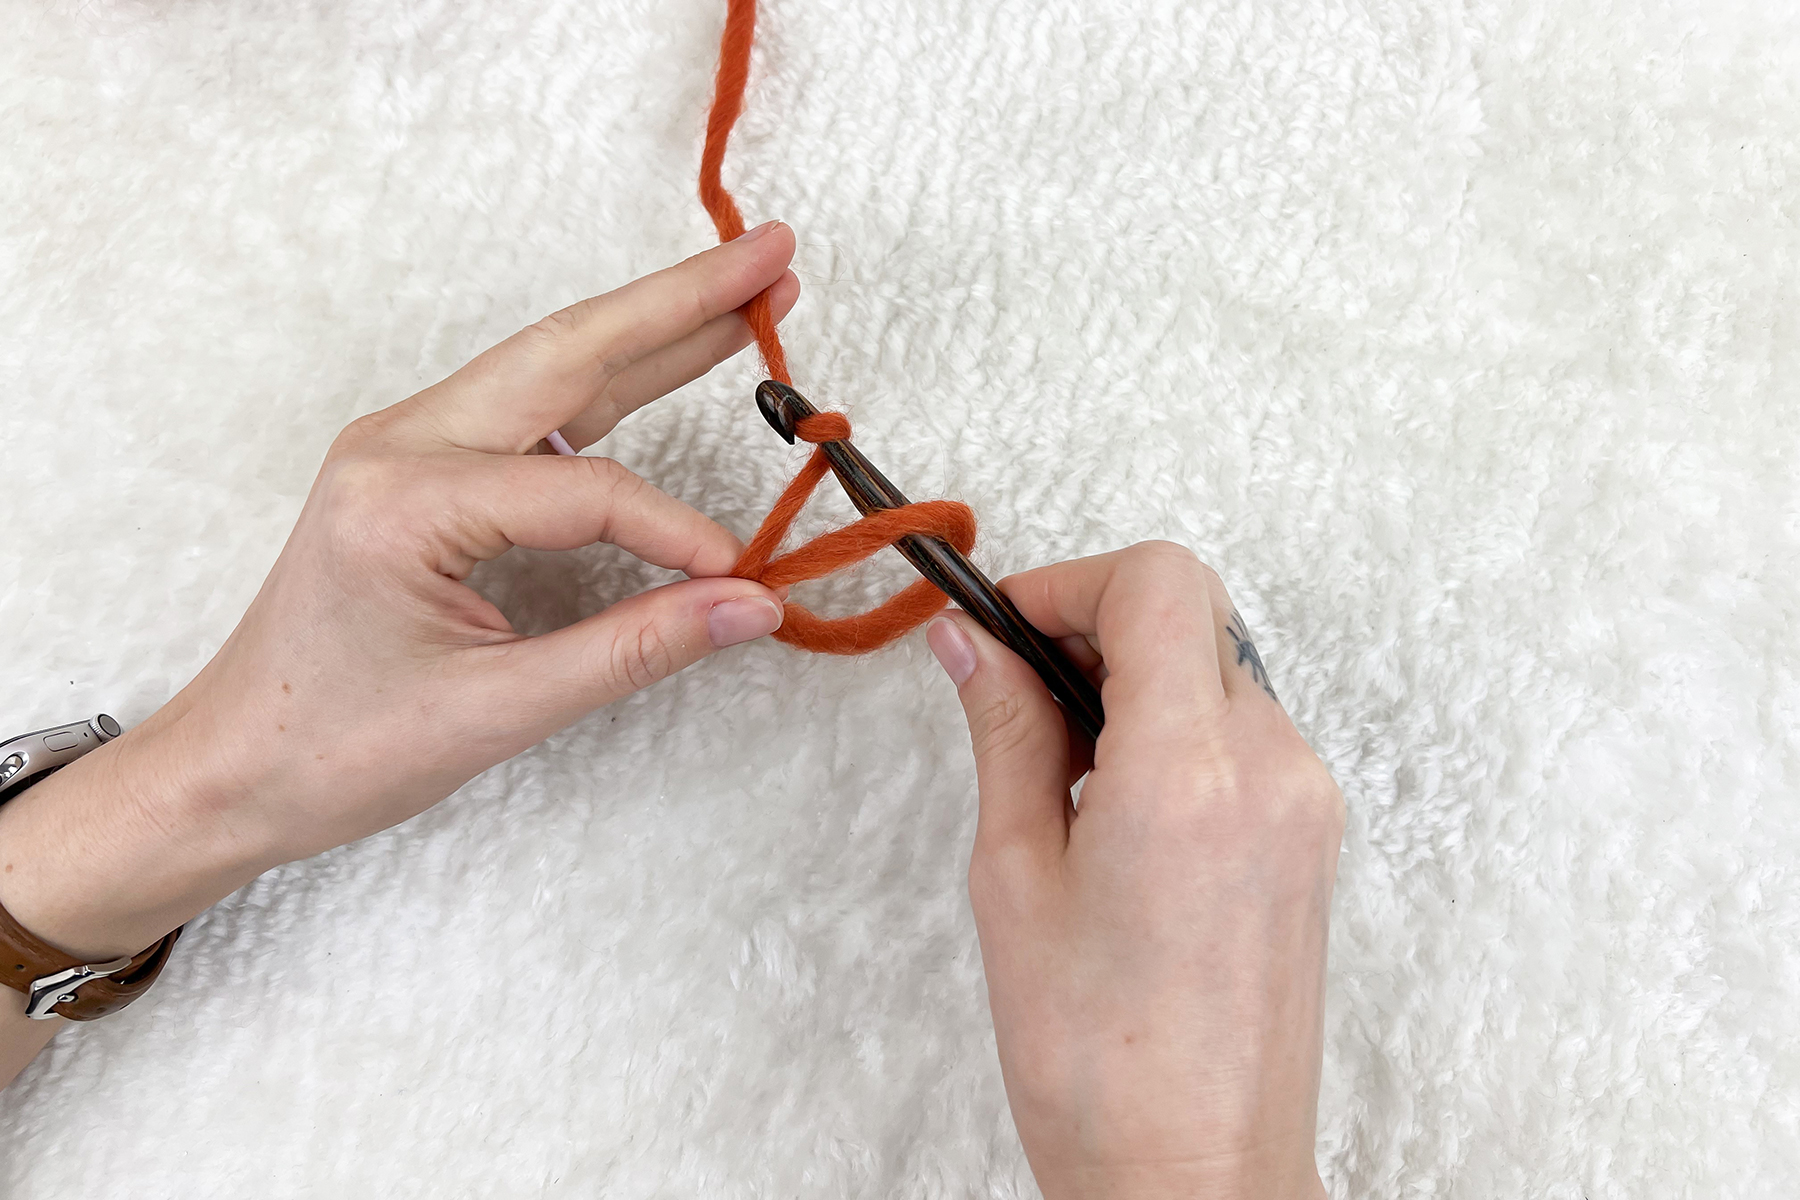
Step 4: Pull through.

Pull the working yarn through the loop with your crochet hook.

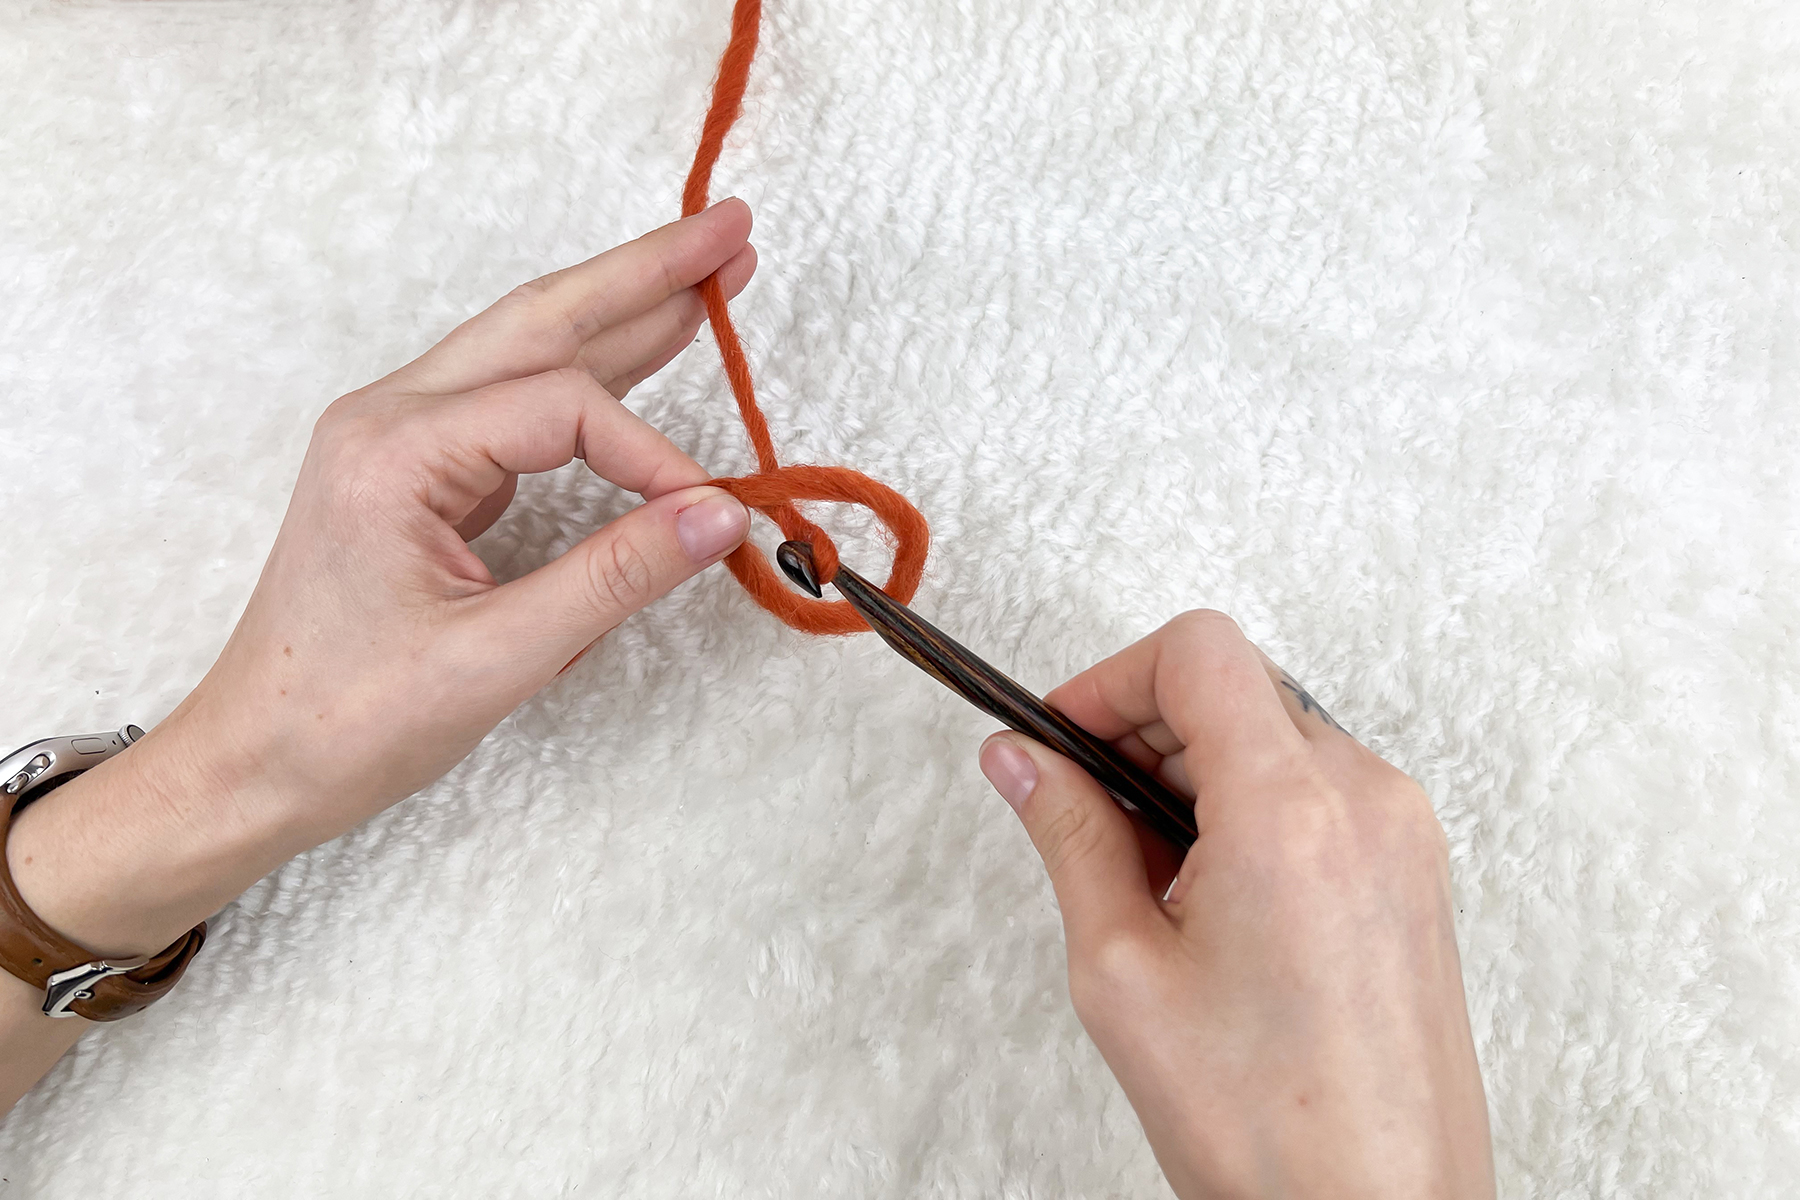
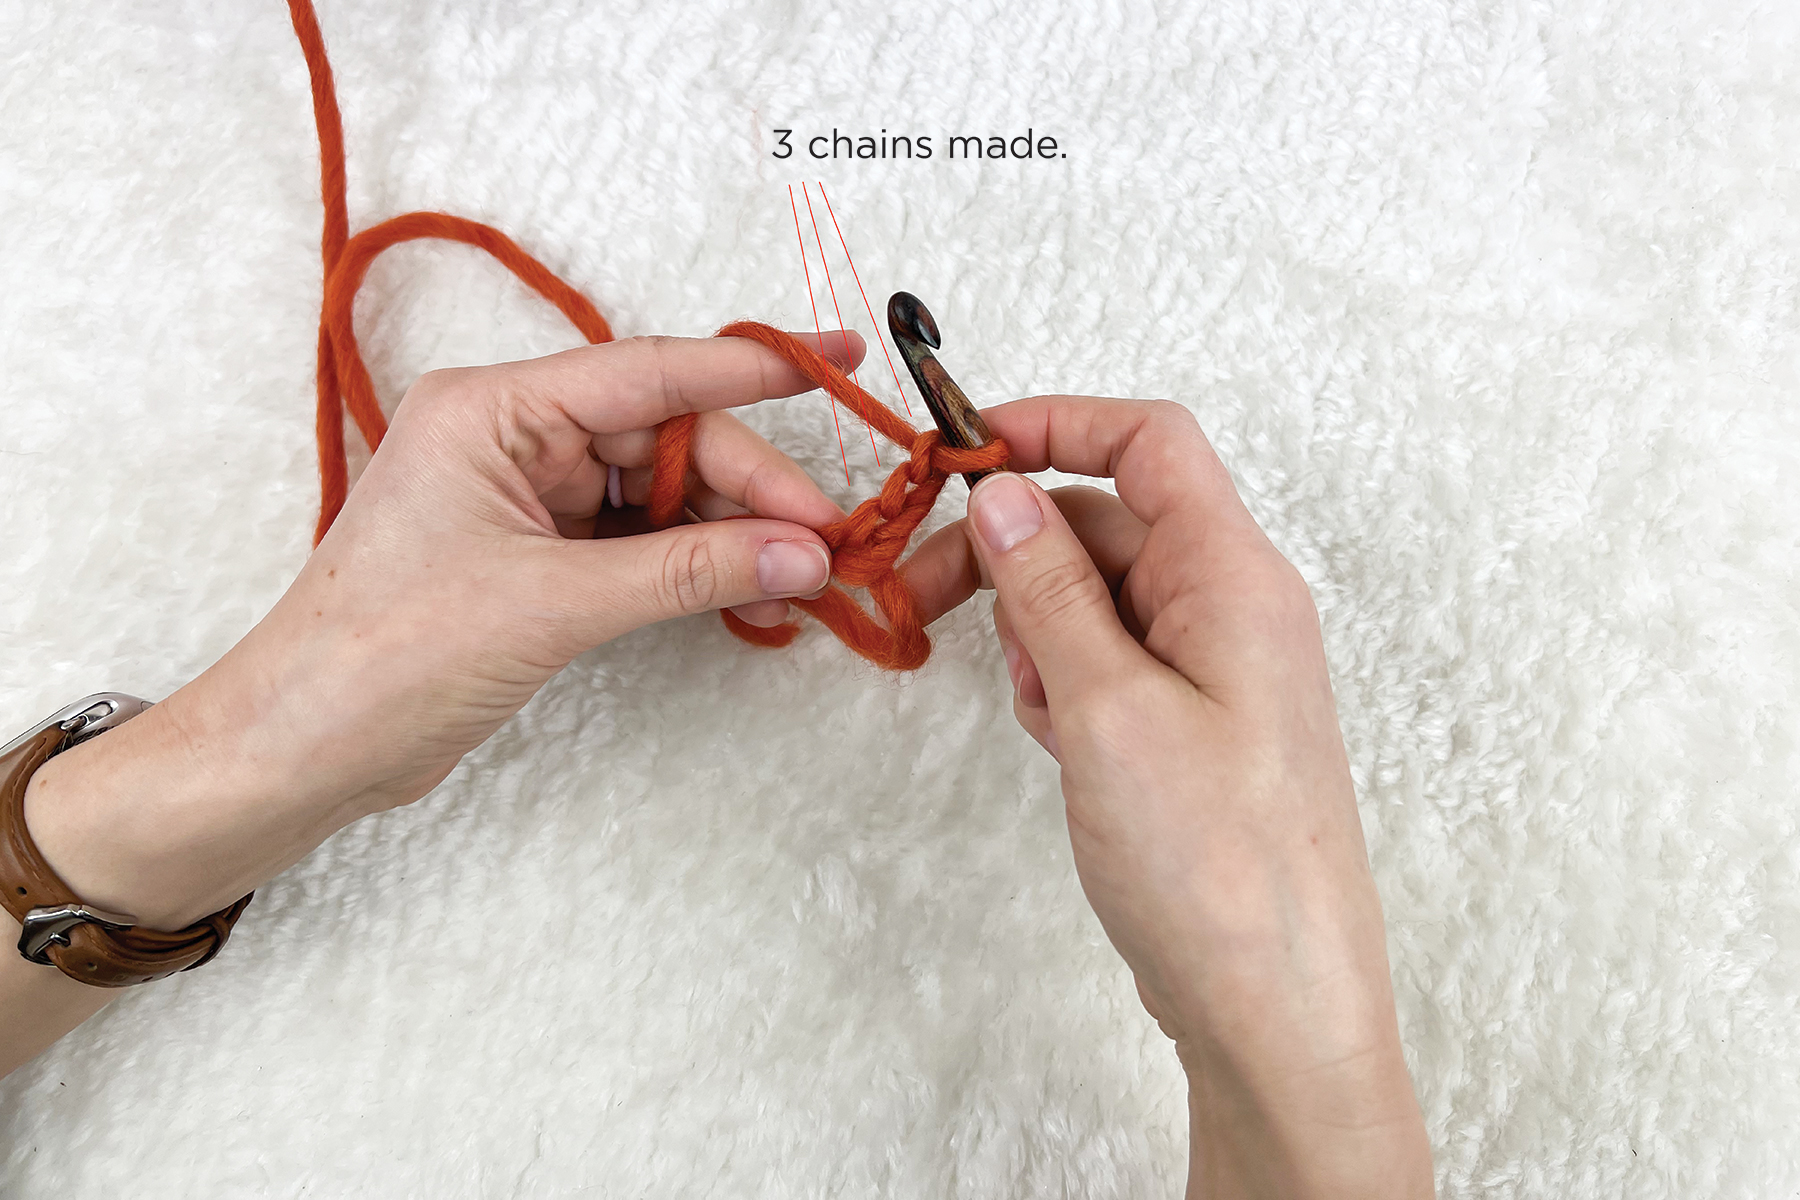
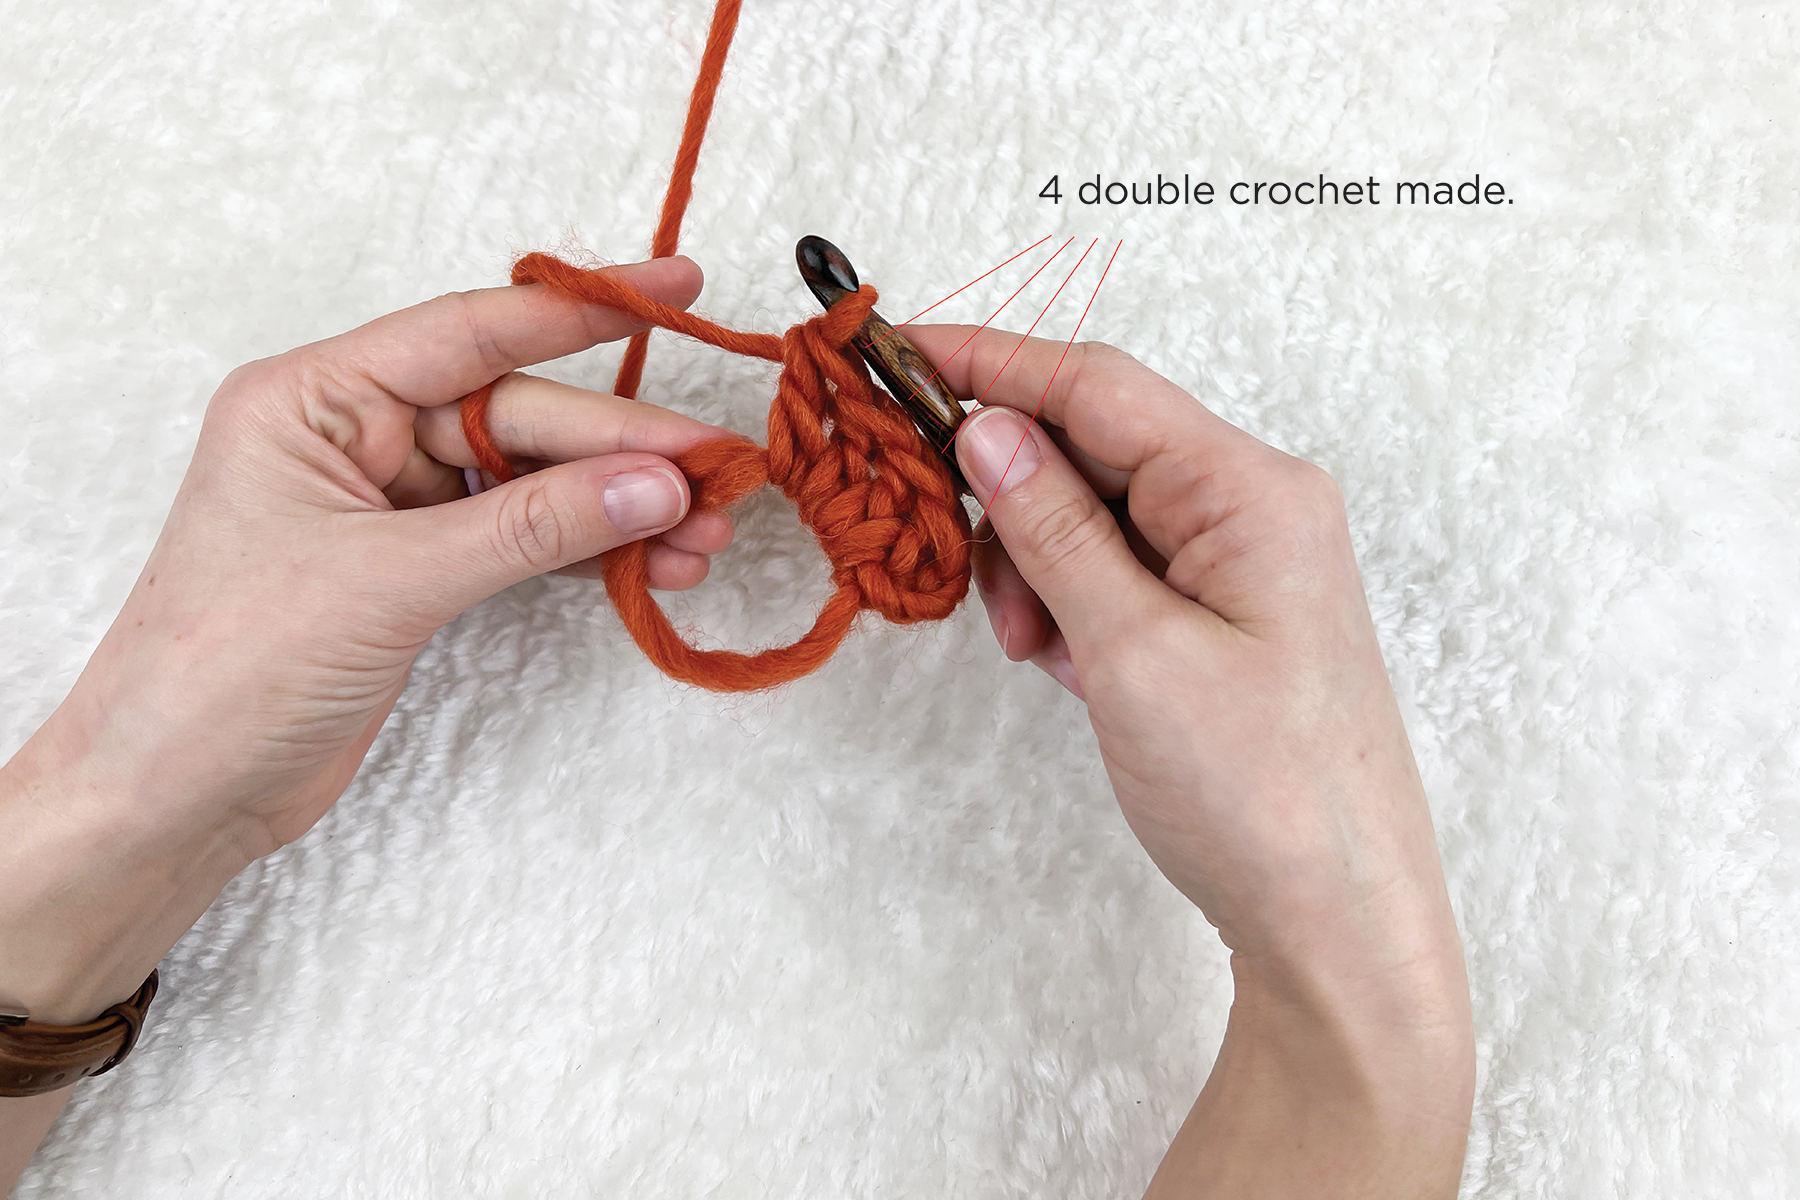
Step 5: Chain, then stitch into the middle of the circle. The pattern you are following will indicate how many chains, then stitches to create.

Here I chain 3, then double crochet 4 times into the loop to demonstrate the technique. But you can do this with any number of, or type of stitches!

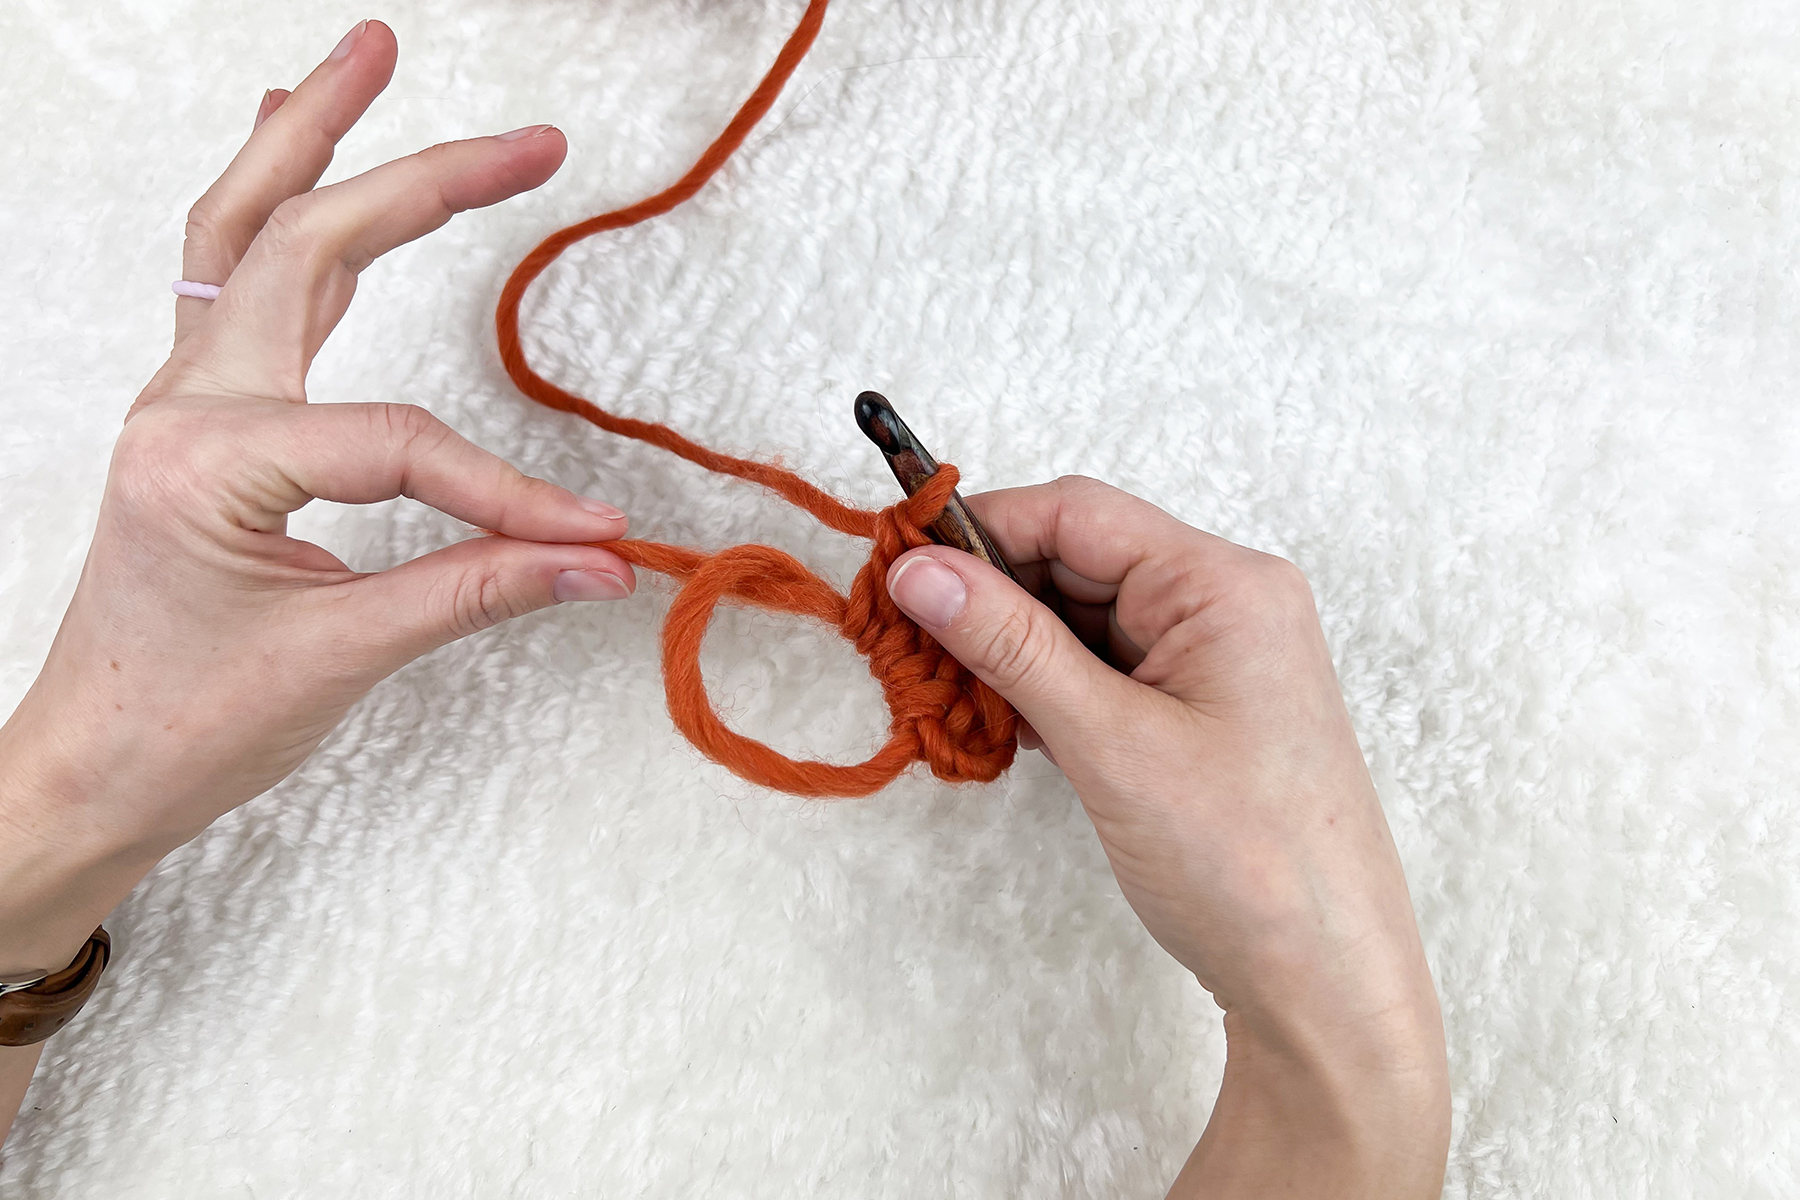
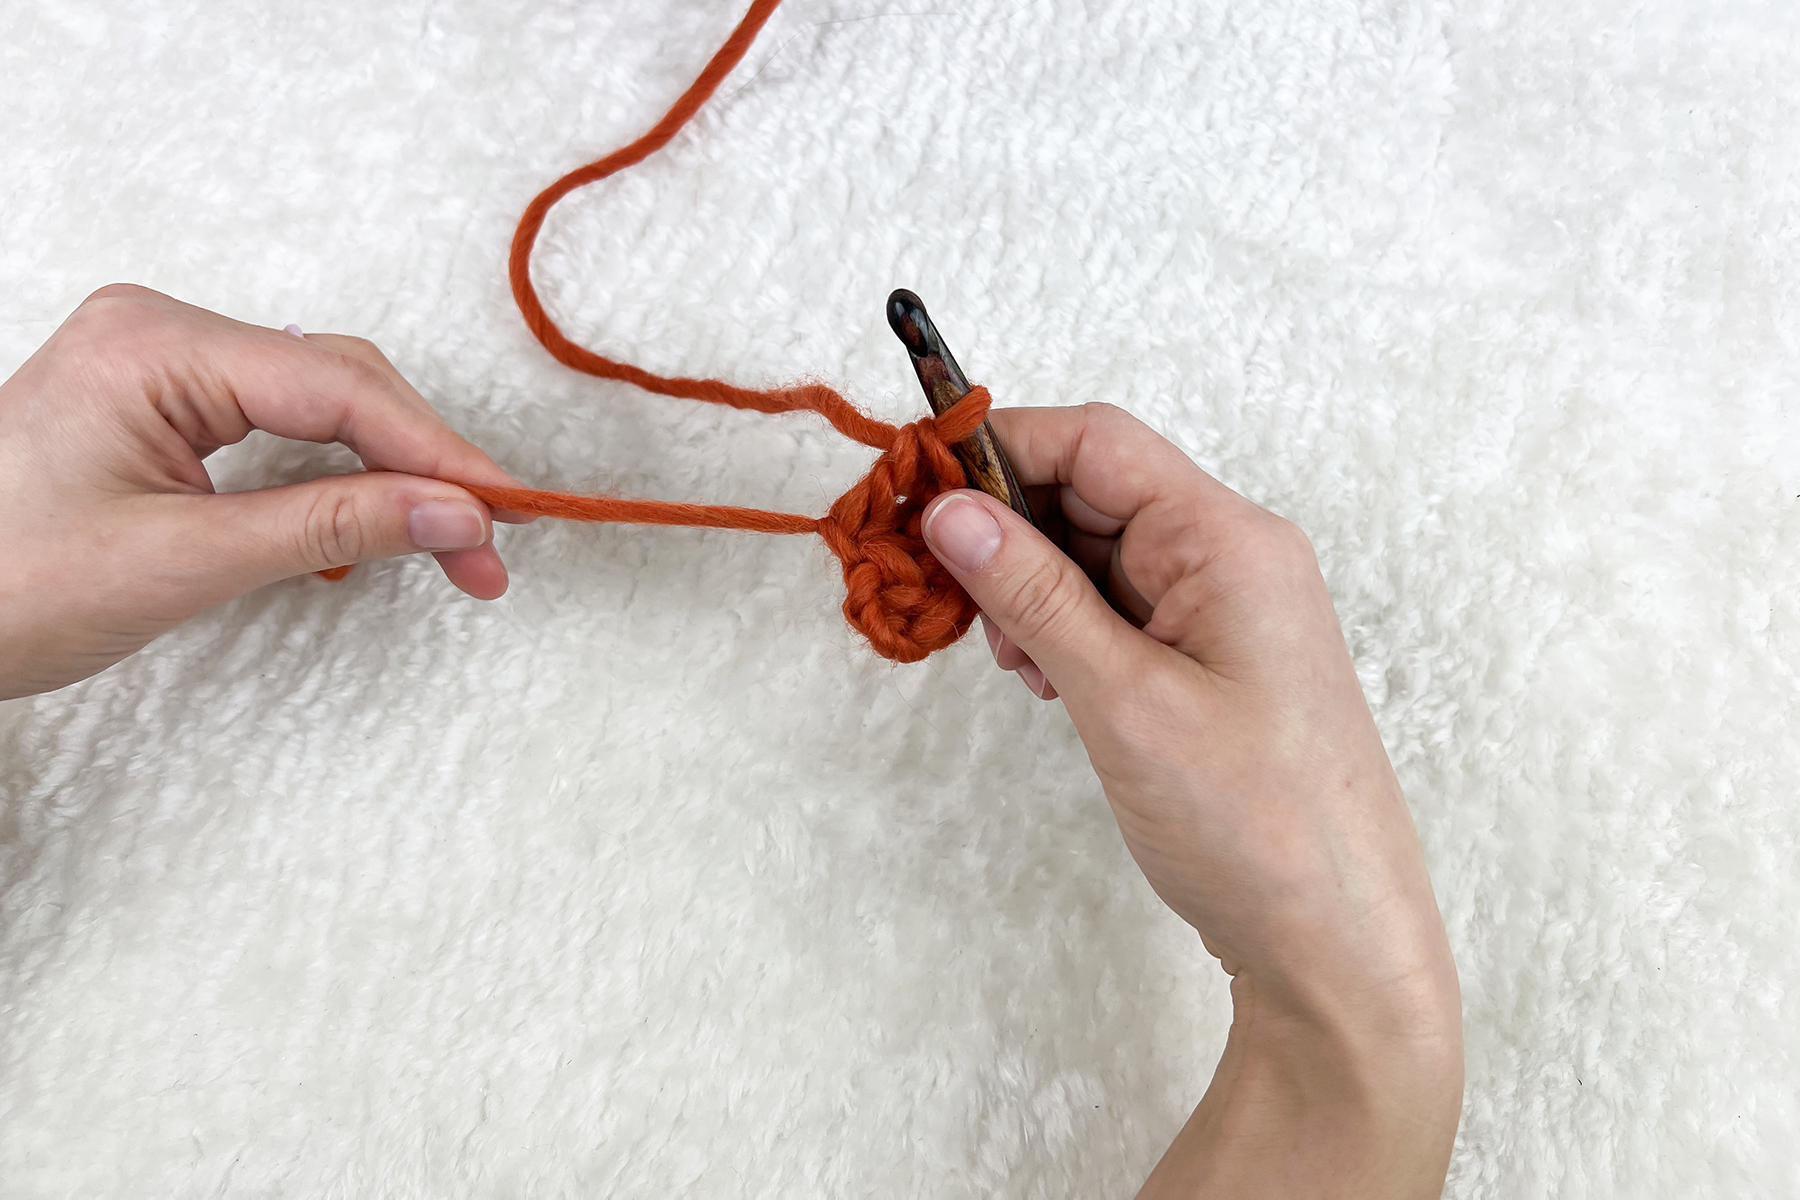
Step 6: Close the circle.

Release your hold on the circle, and pinch the tail of the yarn.
Pull the tail of the yarn until the circle is completely closed.

It’s as easy as that! From here, you continue following the pattern as normal, and will weave in the tail along with any other ends as a finishing step. I hope you find this tutorial helpful, and that you feel inspired to try a new project in the round!

That’s all for now, and Happy Stitching!
Ashley Jane

Rico Spotlight: Fashion Light Luxury in Crochet

Hello there, Welcome back my second installment of “AJ’s Crochet Corner!”

I’m slowly swatching my way through various yarns and infiltrating our knit-heavy office to inspire envy and the desire to switch skills amongst all I meet! Now that you know my evil plans to motivate my coworkers to share my craft, you can help give me feedback on what types of yarn and patterns I should try out and show off next!

Today I tried out Fashion Light Luxury by Rico Design, which is a wonderful brand that we recently started to distribute. Unfortunately, we haven’t had the chance to incorporate their yarns into our pattern collections just yet, but keep an eye out later in the year for new patterns from us featuring Rico Design yarns. This blog post felt extra special, because I was the first one in the office getting to swatch some stitch patterns in Fashion Light Luxury! This particular yarn is made from 74% Alpaca, 22% Wool, and 4% Nylon. It is ultra fluffy so you have a lot of room to play with techniques, gauge and texture.

Rico Design Fashion Light Luxury in Powder 009

For example, our site notes that a recommended hook or needle size is a US 10 or 6mm, to accommodate the fibers as a bulky weight yarn. However, I wanted to get funky and see if I could work up some visible texture, so I scaled down to a US 6 or 4mm hook. It still worked well, as the base yarn housing the fluffy fibers is quite fine.

Rico Design Fashion Light Luxury in Light Blue 018

I worked up a swatch in a Honeycomb stitch, which turned out lovely! The smaller hook wound the fibers into the stitches more and helped to create a unique texture. I would definitely recommend a metal hook for this, as the yarn was a bit grippy when I tried a wooden hook. The overall effect was worth it though! Between the color, the swirls of the pattern, and the bouncy material I’m reminded of sea foam on the shore of a stormy ocean.

I mentioned earlier though how this yarn is meant to be treated as a bulky weight. When you size up your hook, you have more room for the intended airy halo, and get a satisfying drape to boot. Check out the Crochet Cardigan and Shawl designed by the Rico Design Team below!

Rico Design Fashion Light Luxury Cardigan in Pastel Green 024
Rico Design Fashion Light Luxury Shawl in 7 various colors

Here you can see that the fabric made is not as dense as my swatch, and that there is a bit of a cozier quality overall. Ultimately I feel that Fashion Light Luxury is really versatile for the different looks you can manipulate, and for the adaptability of its blend. It’s extremely lightweight, yet very warm, and the nylon gives it enough strength to handle making garments.

I hope you’ve enjoyed this experiment with gauge and a unique yarn! Let me know what you think you’d try to make out of it! Please also drop a comment if there are any specific yarns, or techniques that you’d like to see in crochet.

That’s all for now!

Happy Stitching, Ashley Jane

AJ’s Crochet Corner – Pick Three

3 pretty pennants

Hello there!

My name’s Ashley Jane, also known as AJ here at Universal Yarn. I’m avid crocheter, lover of dogs and all things outdoors, drinker of teas, and the newest member to the design team! My first few weeks here have been a whirlwind of learning our product line, organizing and revamping our Trunk Show Program, and making the cutest ever sample of our Ricorumi Kits!

Ricorumi Kit, Neptune

While settling into my new role, I have had the chance to stitch and swatch a few of our yarns to get to know them. I narrowed down my selection to Bella Cash, Ravello, and Penna. I wanted a chance to play around with some of our softer yarns while seeing what types of texture and feel I could produce with crochet. I loved my results – keep reading on to see my take on these fabulous fibers.

Sample Pennants in Bella Cash 116, Ravello 115 and Penna 106

Bella 123

Bella Cash: Grippy on the hook, and springy to the touch. Using a 3.75 mm hook, I tried out the Lemon Peel stitch to see what type of texture I could get while working with it and wasn’t disappointed. Made from 60% Superwash Merino, 10% Cashmere, and 30% Nylon, this fine-weight yarn has great structure and stitch definition. Plus it feels nice and soft, and the hook size I used created a thick but malleable fabric. Bella Cash is easily one of my favorites to work with so far and would be fantastic in a full sweater with some texture and fine detailing, like the Bellissima Cardi, or the Holiday Lights Shawl.

Bella Cash 116

Ravello 111

Ravello: Smooth to work with, and wonderful for making textures that have a nice light fluff to the finished piece. Using a 3.75mm hook for this fine weight yarn, the fabric has a delightful drape, and a soft airy quality to it. I played around with petal and reverse petal stitches for the pennant below. I loved it so much that I’ve decided to make my first Universal Yarn pattern from it, so be on the lookout for the Petal Shawl, coming soon! With a blend of 75% Cotton, 16% Extra Fine Merino and 9% Recycled Cashmere this yarn is lovely for summery tops like the Riviette Tank or the Lorelei sweater.

Ravello 115

Penna 106

Lastly, Penna: Fluffy and Fun! This lace weight yarn is quite fine with lots of airy soft fibers, made from 50% Suri Baby Aplaca, 28% Extra Fine Merino, and 22% Nylon, so the stitches stand out in almost a ghostly fashion. Each twist and turn of your stitch can be seen through the fluff which I find looks beautiful with basic stitches, so I chose to whip up a simple pennant of Half Double Crochet’s using a 3.75 mm hook. An easy way to incorporate Penna into a piece is to hold it with another yarn like the Ariosa pattern suggests. This adds just the right amount of softness for that cozy, can’t-stop-touching feel. By itself, this is a standout yarn for lacework as seen in the Pluma stole.

Penna 106

All in all, these yarns are unbeatable for their quality and price points. I look forward to experimenting with more yarns and trying them out with crochet and other crafts.

That’s all for now – Happy Stitching!

Ashley Jane