Tutorial – Magic Circle

Sample Swatches of crochet stitches lay in an arrangement next to three crochet hooks. The heading "AJ's Crochet Corner, Tips and Tricks" is present.

Crocheting into a magic circle makes evenly placing your starting stitches a snap! This technique offers a way to place as many stitches as you need into a perfectly circular shape with the tug of some yarn.

Using a magic circle takes away the guesswork involved with a different method of creating a circular base, where you create a chain, then slip stitch to form a ring. Because this other method with a starting chain has a fixed circumference, it may leave a gap in the center if you make it too big, or be impossible to work into if it’s too small. With the magic circle being adjustable, these sizing problems while starting a project magically disappear!

One thing that can be a bit tricky is that not everyone calls this method a “magic circle” as seen in the Paradise Pouch. When getting started with a pattern, you may also read “adjustable ring,” as seen in the Cotton Candy Swirl, or a blend of both called a “magic ring.” It can also be called a loop, as in “magic loop” or “adjustable loop.” Lastly, you may see it represented visually in a chart, denoted by a swirled shape before any stitches start, like in the Spice Market Shawl. Now that you know what to look for, let’s take a look at how to do it! There are just 6 simple steps to do to create a magic circle.

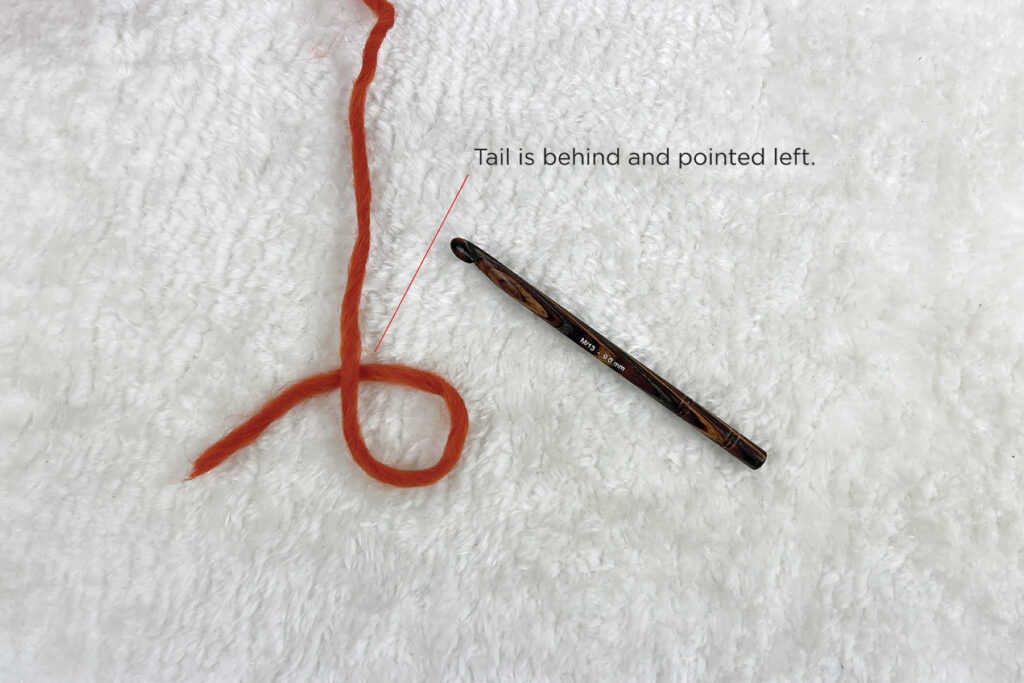
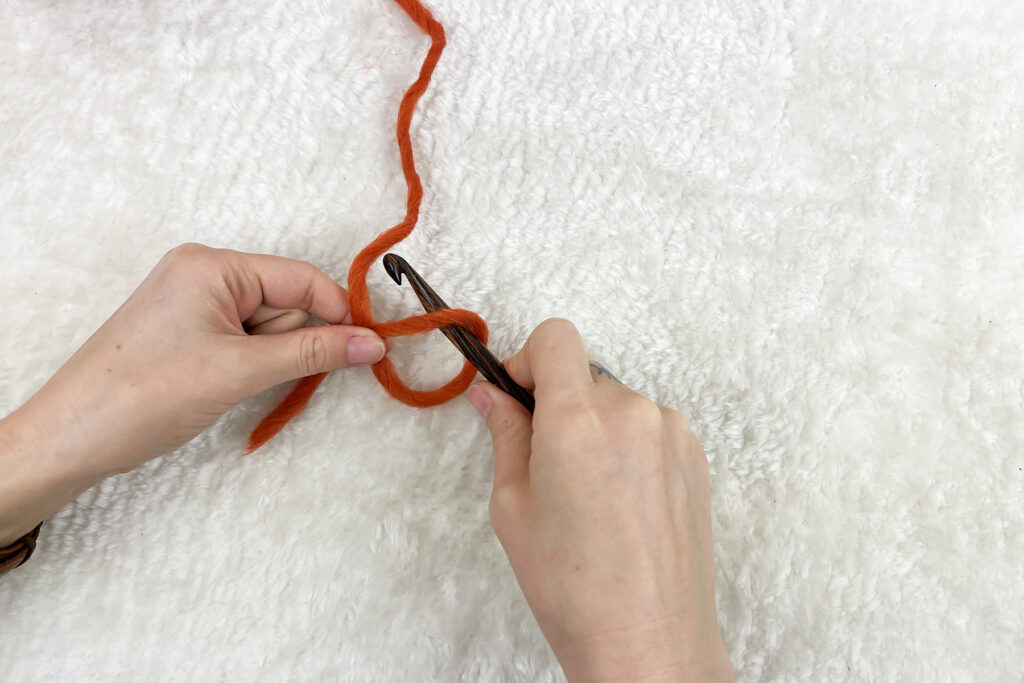
Step 1: Create the circle.

Create an initial loop by laying flat, if it helps, or held in your hand. Place the tail behind the working yarn, and pointed to the left.
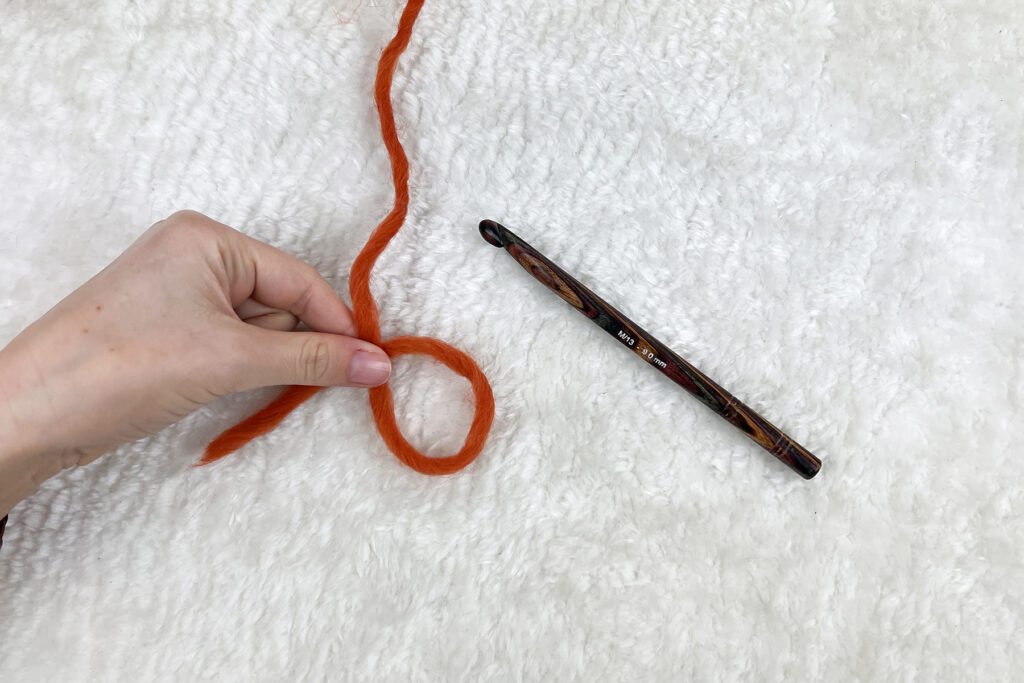
Pinch yarn where it overlaps to hold the loop in place while you work.

Step 2: Insert hook.

Reach your crochet hook into the loop.

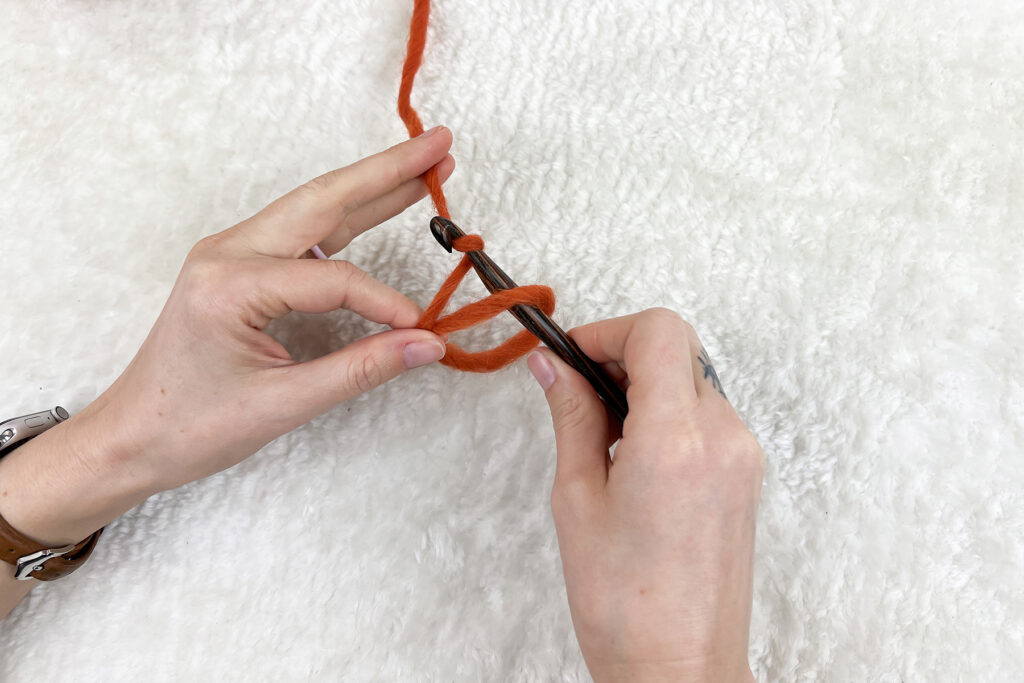
Step 3: Yarn over.

It may feel strange to tension the yarn while pinching the circle. You may try holding it as seen above or switch to holding the circle with your thumb and middle finger to tension with your pointer finger. I have a habit of starting like this then switching my grip when I begin chaining and stitching as normal (as shown, beginning in step 5).

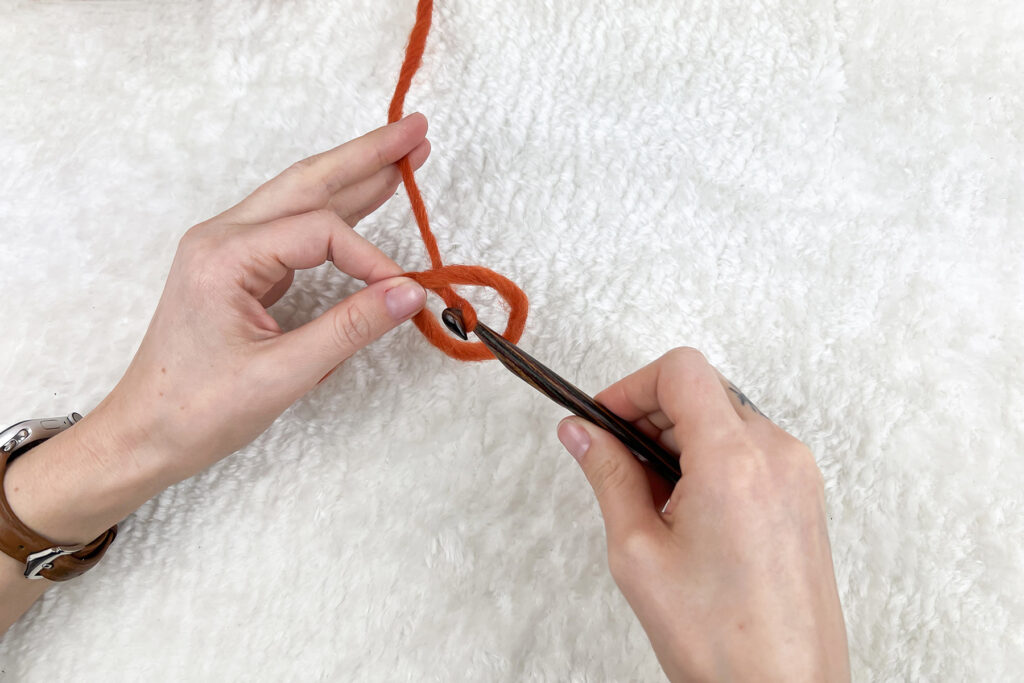
Step 4: Pull through.

Pull the working yarn through the loop with your crochet hook.

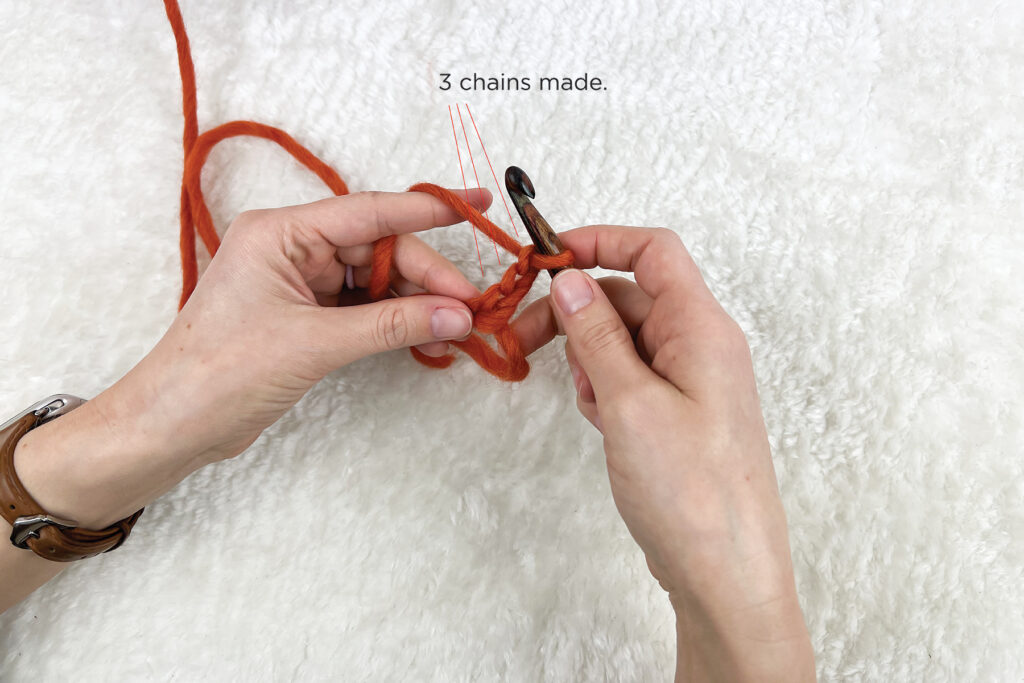
Step 5: Chain, then stitch into the middle of the circle. The pattern you are following will indicate how many chains, then stitches to create.

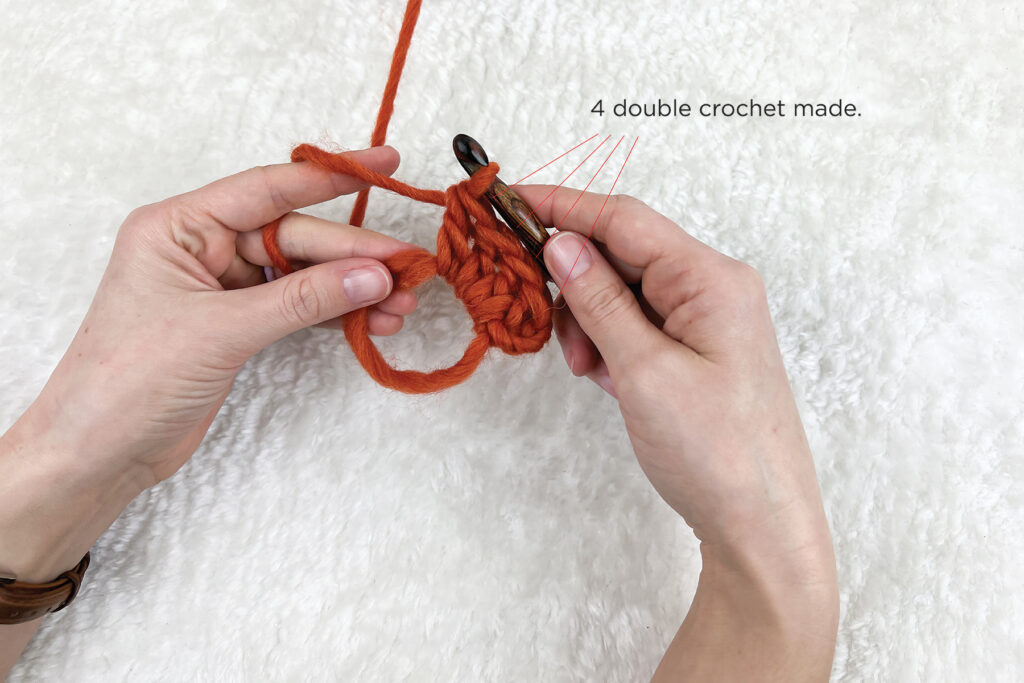
Here I chain 3, then double crochet 4 times into the loop to demonstrate the technique. But you can do this with any number of, or type of stitches!

Step 6: Close the circle.

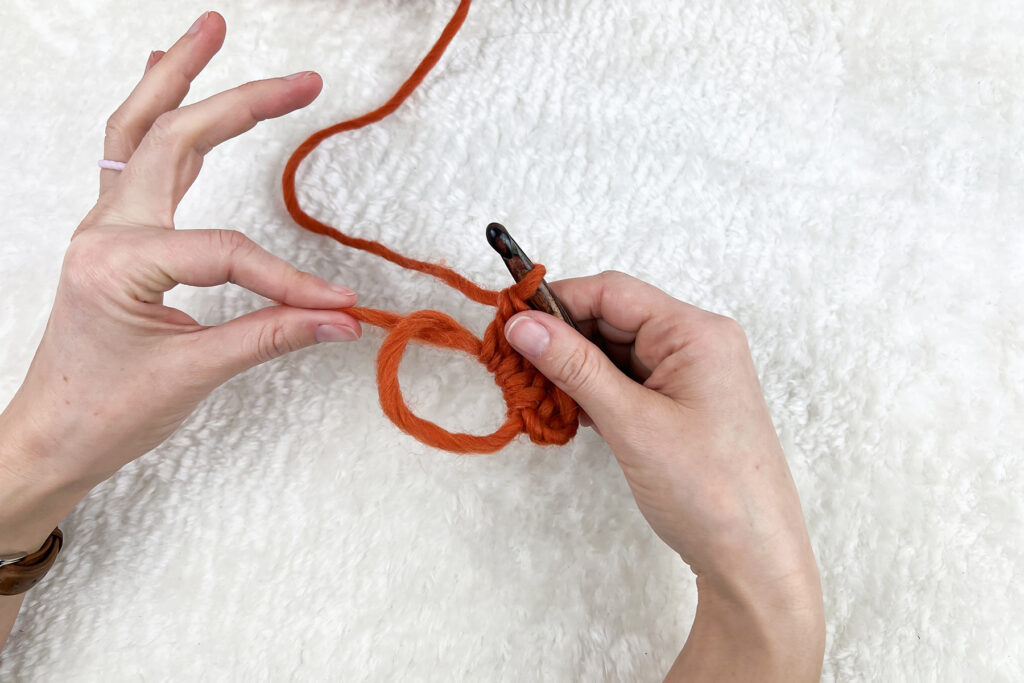
Release your hold on the circle, and pinch the tail of the yarn.
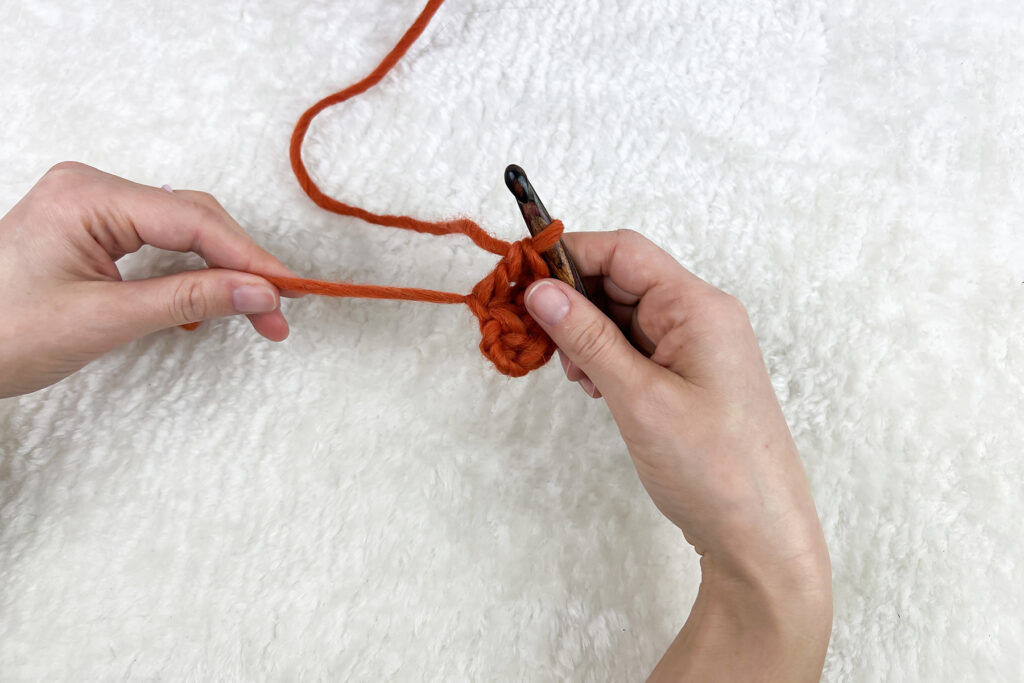
Pull the tail of the yarn until the circle is completely closed.

It’s as easy as that! From here, you continue following the pattern as normal, and will weave in the tail along with any other ends as a finishing step. I hope you find this tutorial helpful, and that you feel inspired to try a new project in the round!

That’s all for now, and Happy Stitching!
Ashley Jane

Collection Spotlight: Soft Simplicity

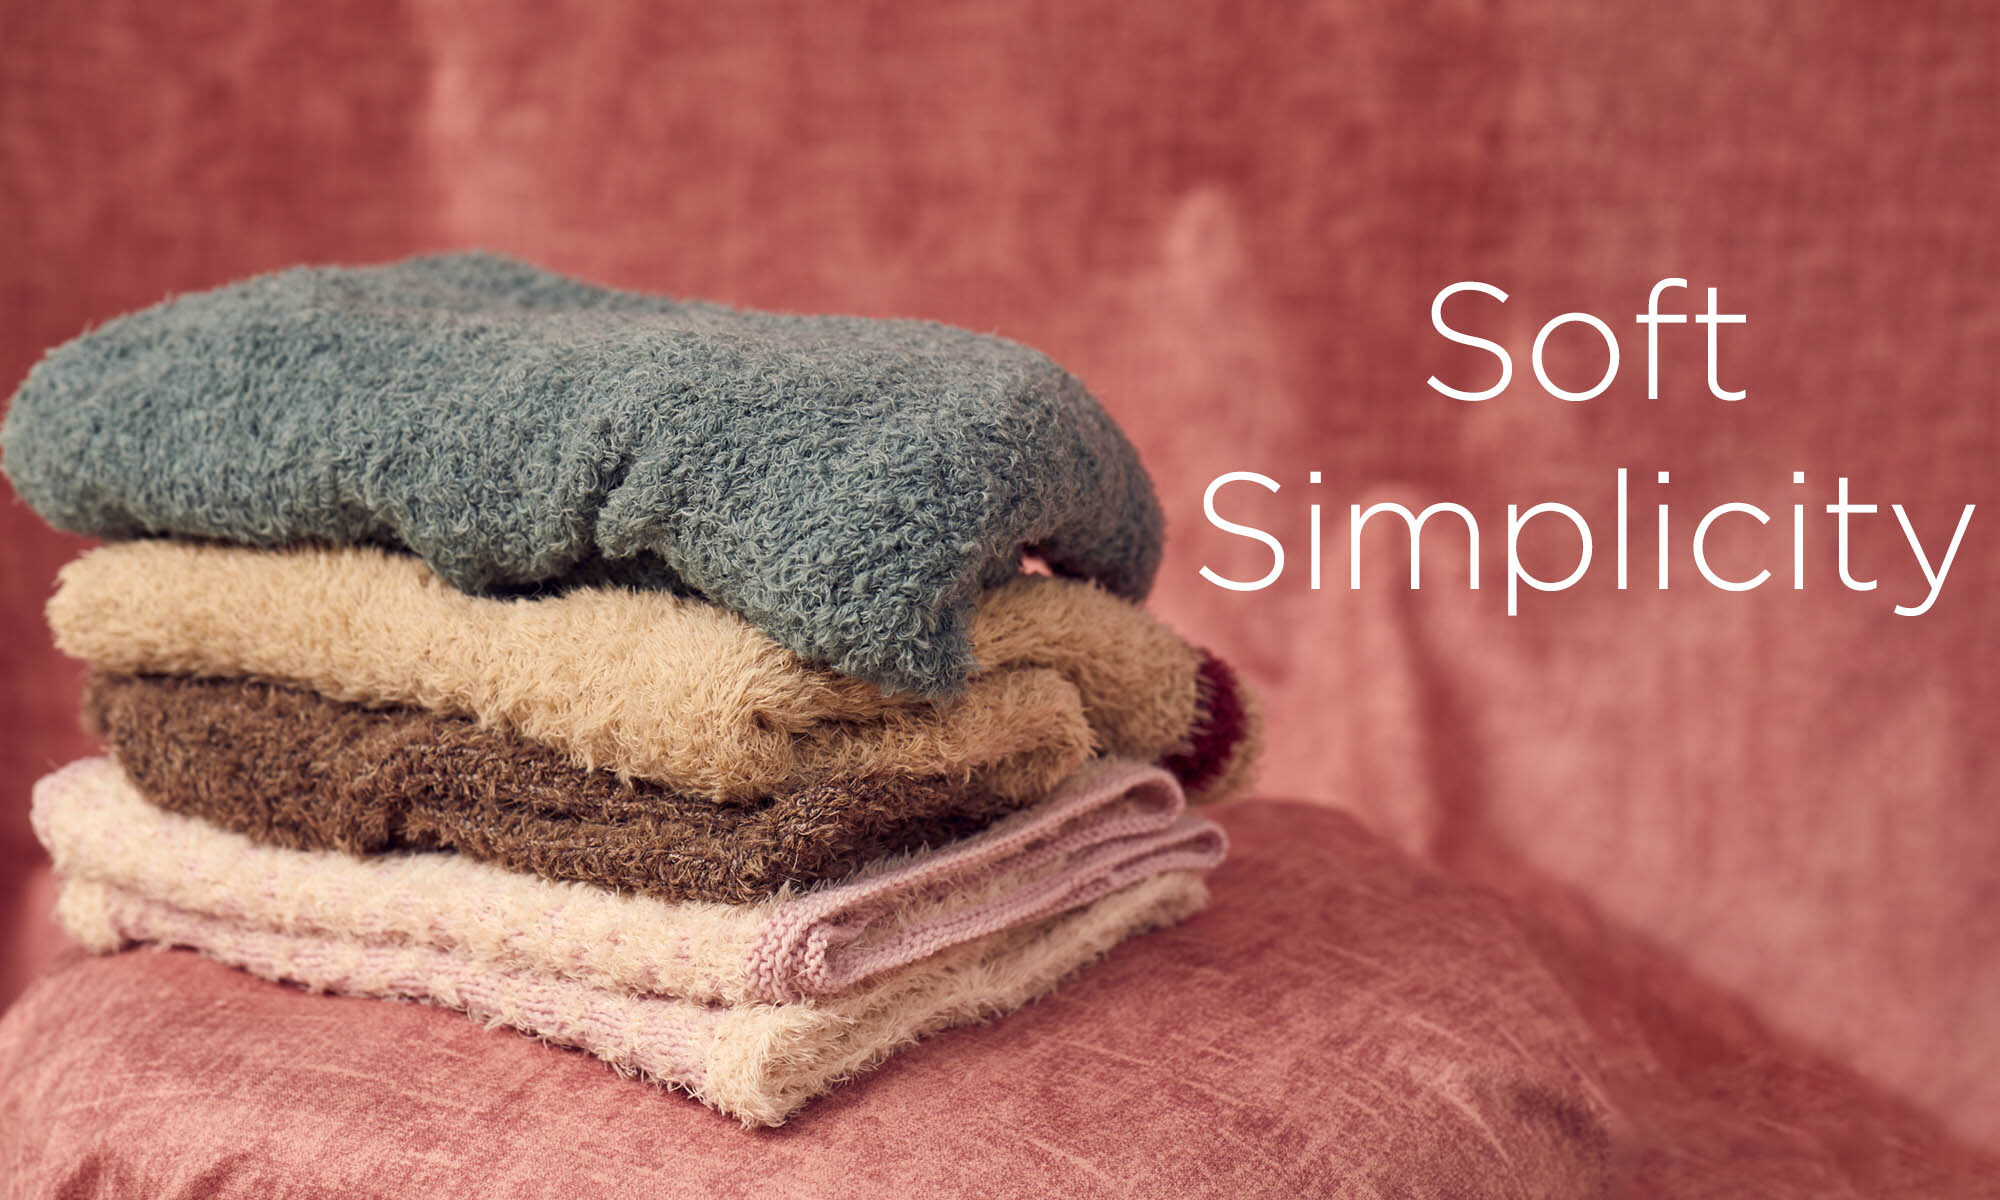
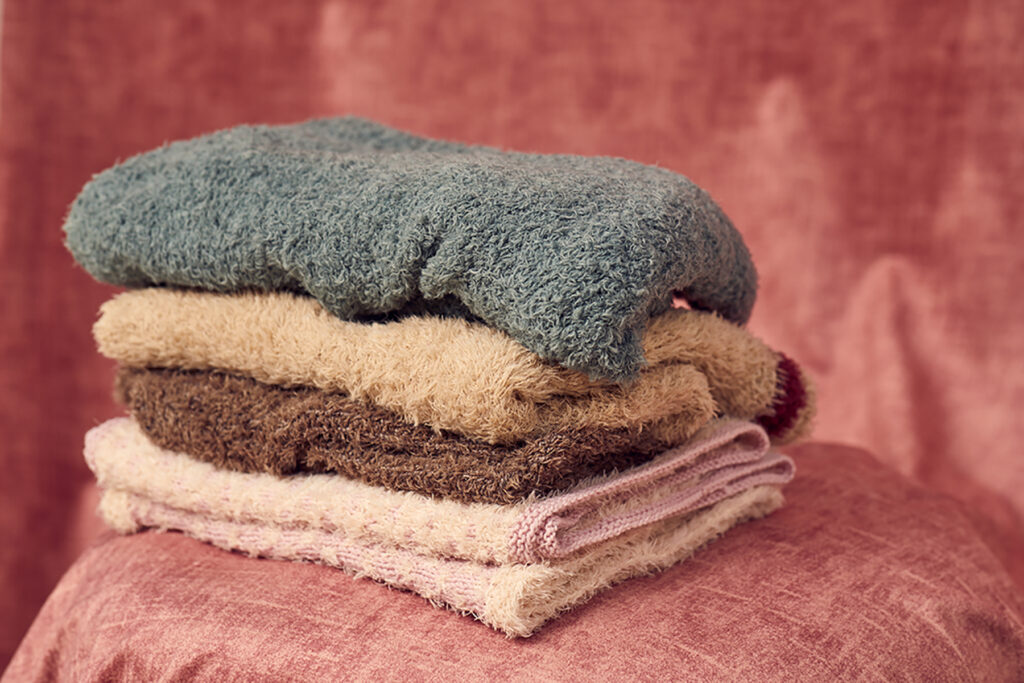
A pile of sweaters and accessories on a red fabric background, with the words "Soft Simplicity".

Happy September! While I’m not one to wish away the summer, I cannot help but feel so excited about the things we’re sharing this autumn season. Even if it’s still hot out, the sun is setting earlier and even a few leaves are beginning to turn. These things signal what may collectively be a knitter’s favorite season: autumn! And what better way to celebrate than with a lovely new pattern collection? Say hello to Soft Simplicity!

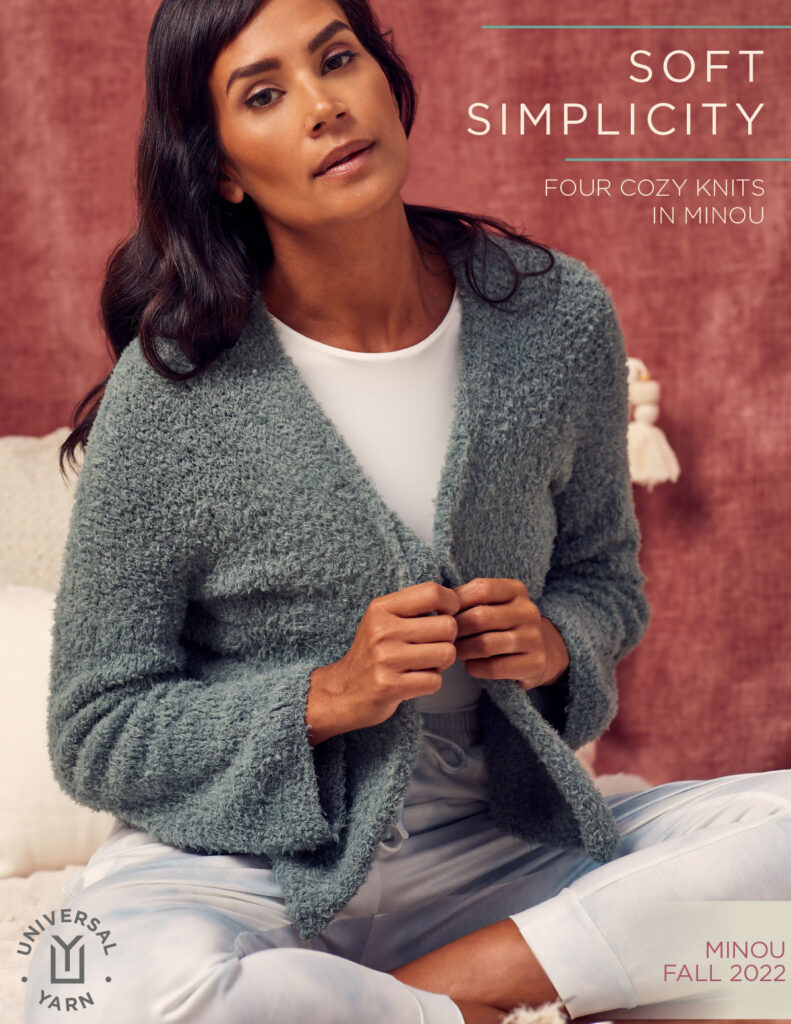
A woman wearing a blue-grey cardigan knit from Universal Yarn Minou. The words "Soft Simplicity" are in the upper right corner. This is the cover of an ebook.
The cover of our latest ebook, Soft Simplicity.

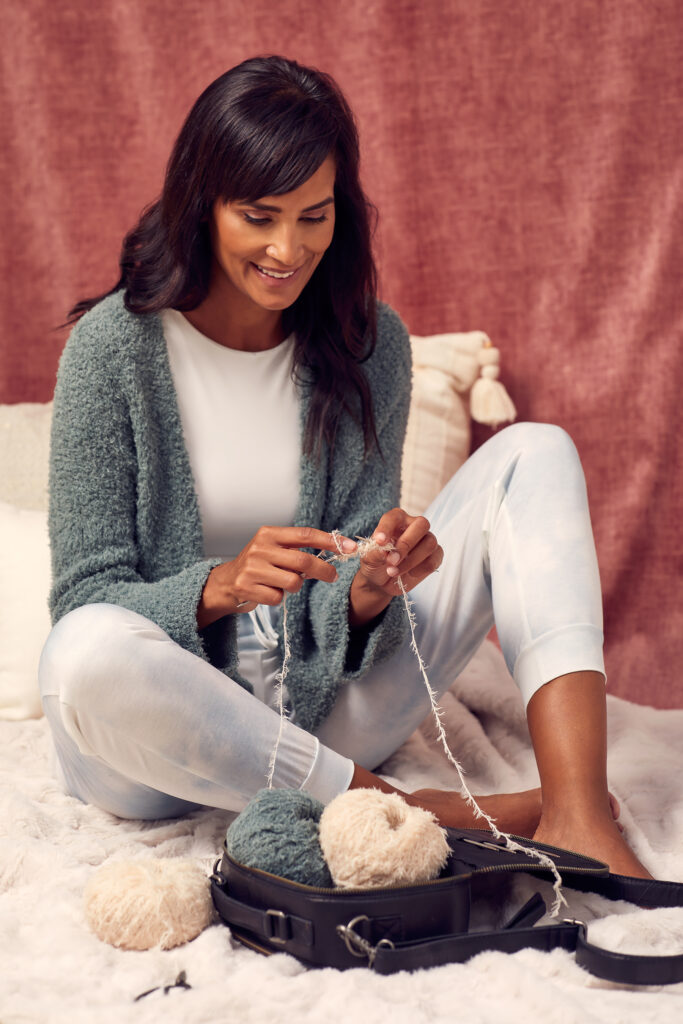
This collection features projects that make our gorgeous yarn, Minou, the star of the show. Minou is our take on eyelash yarns – and there are few yarns out there that can compare! This kitten-soft yarn features fluffy strands of baby alpaca and merino wool that jut gently out of the nylon thread base. The strands are just about 1/4″ long – just enough length to make a statement without being over the top.

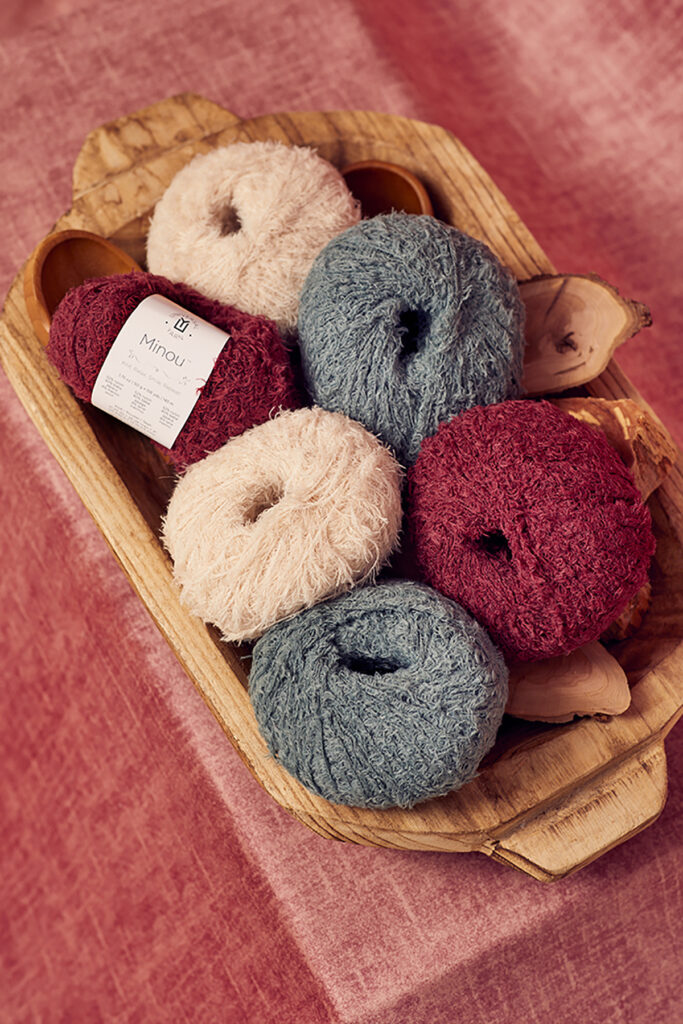
A rectangular, wooden bowl with several balls of Universal Yarn Minou in three colors. It is resting on a red fabric background.
Minou in shades 108 Tanager (red), 107 Heron (grey-blue/green), and 101 Borzoi (cream).

Because Minou is so fluffy and furlike, it’s a great choice for soothing, simple stitches. It’s a match for garter and stockinette stitch on its own, or as a carry-along with your other favorite yarns. You’ll see it featured as a single strand, held together with another yarn, and in stranded colorwork in this collection. Let’s take a closer look.

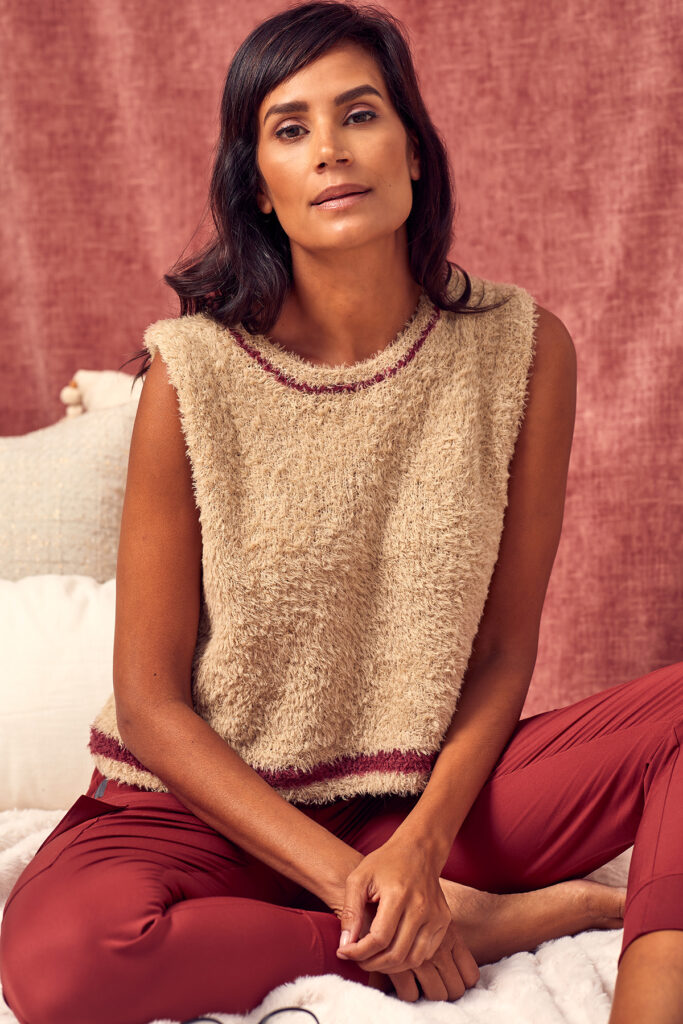
A woman seated on blankets and pillows wearing red pants and a camel-color vest with red details, knit using Universal Yarn Minou.
The Feathered Vest.

First up: the Feathered Vest. This vest is casual and cozy. In the early days of Autumn, wear it as a top that just hints at cooler days ahead. When it’s a bit chilly, it makes a fabulous layering piece. The knitted vest has made quite a resurgence in the past year or two, and we don’t see any reason that should change. I knew this collection wouldn’t feel complete without one. Rather than stick to a solid color, I opted for a pop along the hem and neckband. It’s just enough color to elevate this piece from drab to fab.

This vest is constructed seamlessly from the bottom up in one piece. The front and back are separated at the underarms and worked flat. Then, the shoulders are joined using the three-needle bind-off. Finally, stitches are picked up along the armhole and neckband for a tidy finish.

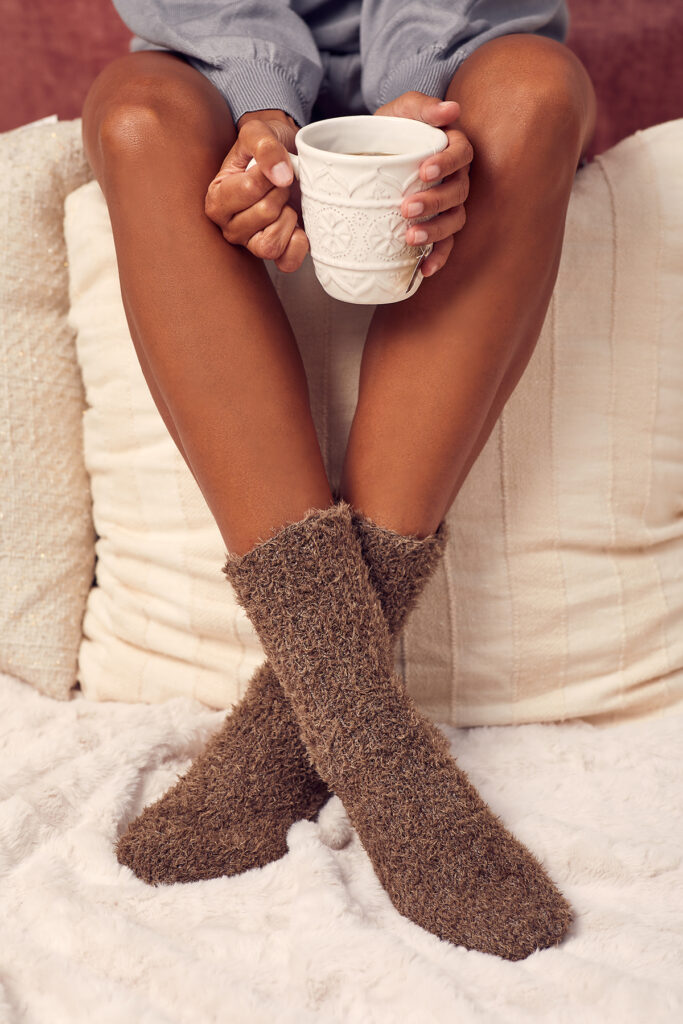
A person wearing a fluffy pair of brown socks knit with Universal Yarn Minou and Bamboo Pop Sock Solids. They are sitting with their feet crossed and holding a cup of coffee or tea.
The Forest Slipper Socks.

The Forest Slipper Socks are a great addition to your sock drawer. Comfy and casual, you’ll love wearing these around the house on a Saturday morning. For this design, I actually did choose a stitch motif, and it’s faintly visible. That’s because its functionality is really what I was after. These slipper socks feature a garter rib that provides a bit of memory and stretch, which is what you want in a pair of socks. In this design, I’ve paired Minou with Bamboo Pop Sock Solids. Bamboo Pop Sock is a customer favorite, and its PBT content adds extra elasticity and helps your socks maintain their shape over time. Because you hold a strand of each yarn together throughout the project, these work up pretty quickly, too!

These socks are knit seamlessly in the round from the cuff down. They feature a heel flap and gusset. Simple shaping forms the toe, then the toe is closed using Kitchener stitch. It’s the most complex pattern in the collection, and it would be helpful if you are already familiar with basic sock techniques before diving in because it can be a little tricky to read your knitting (more on that later!).

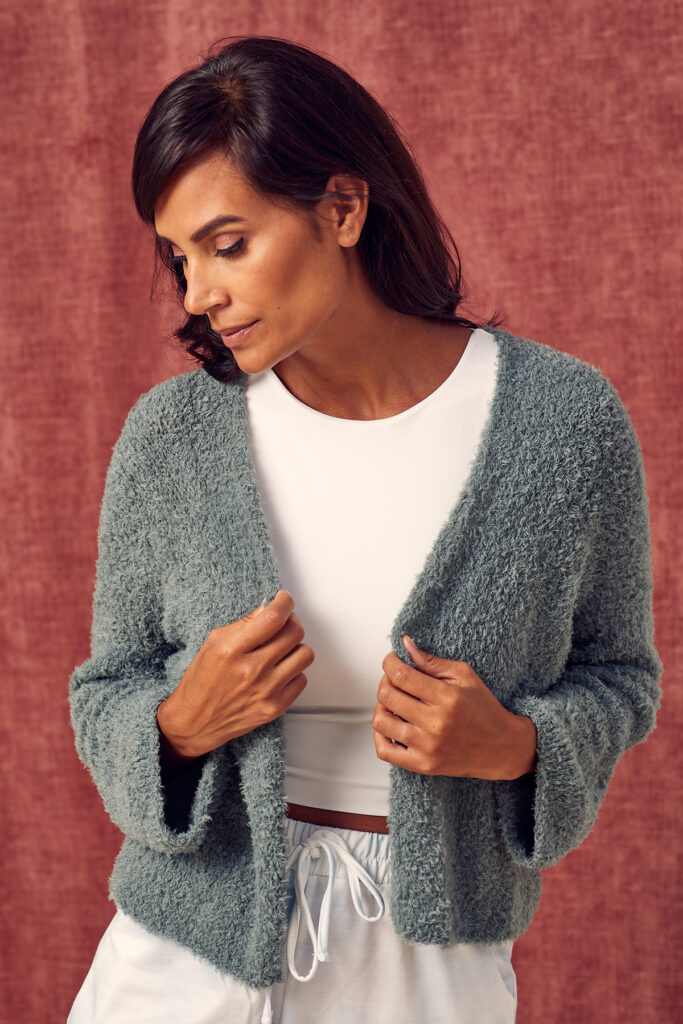
A woman glances downward and to the side while wearing a blue-grey cardigan knit in Minou over a white tank top. She is standing and holding the cardigan edges.
The Pacific Cardigan.

Next up is my favorite piece in the collection: the Pacific Cardigan. This minimalist cardigan is open, features almost no shaping, and is just so easy to wear. I’m perpetually chilly indoors, so cardigans like this are perfect for me year-round. The silhouette is fairly boxy – with sleeves slightly more fitted at the upper arm, but are loose and open at the cuffs. Although it’s simple, Minou’s gorgeous color and texture take this cardi to the next level.

The body of the Pacific Cardigan is worked flat in one piece, beginning with the back hem and working up and over the shoulders. The left and right front are separated at the shoulders and worked separately. After sewing the sides of the body together, the stitches for the sleeves are picked up from around the armholes and worked in the round from the top down.

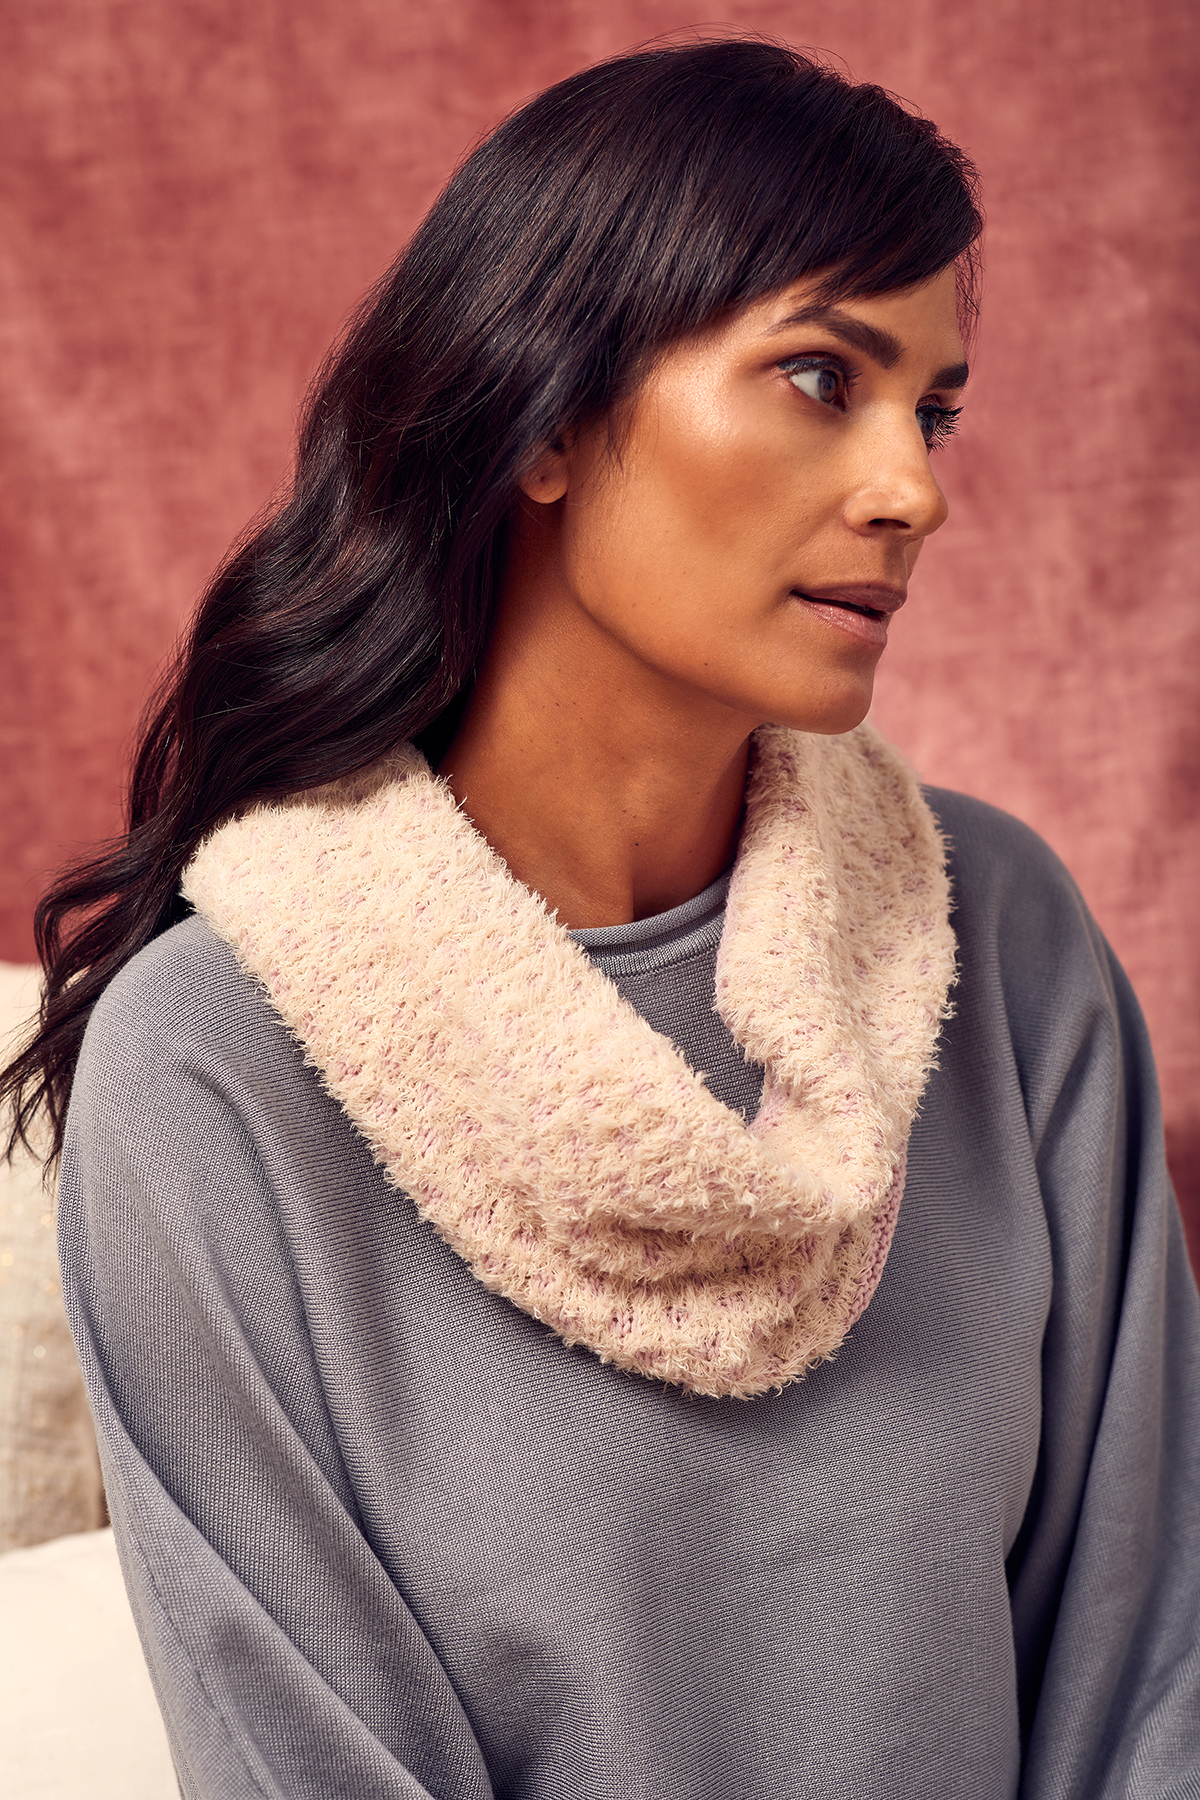
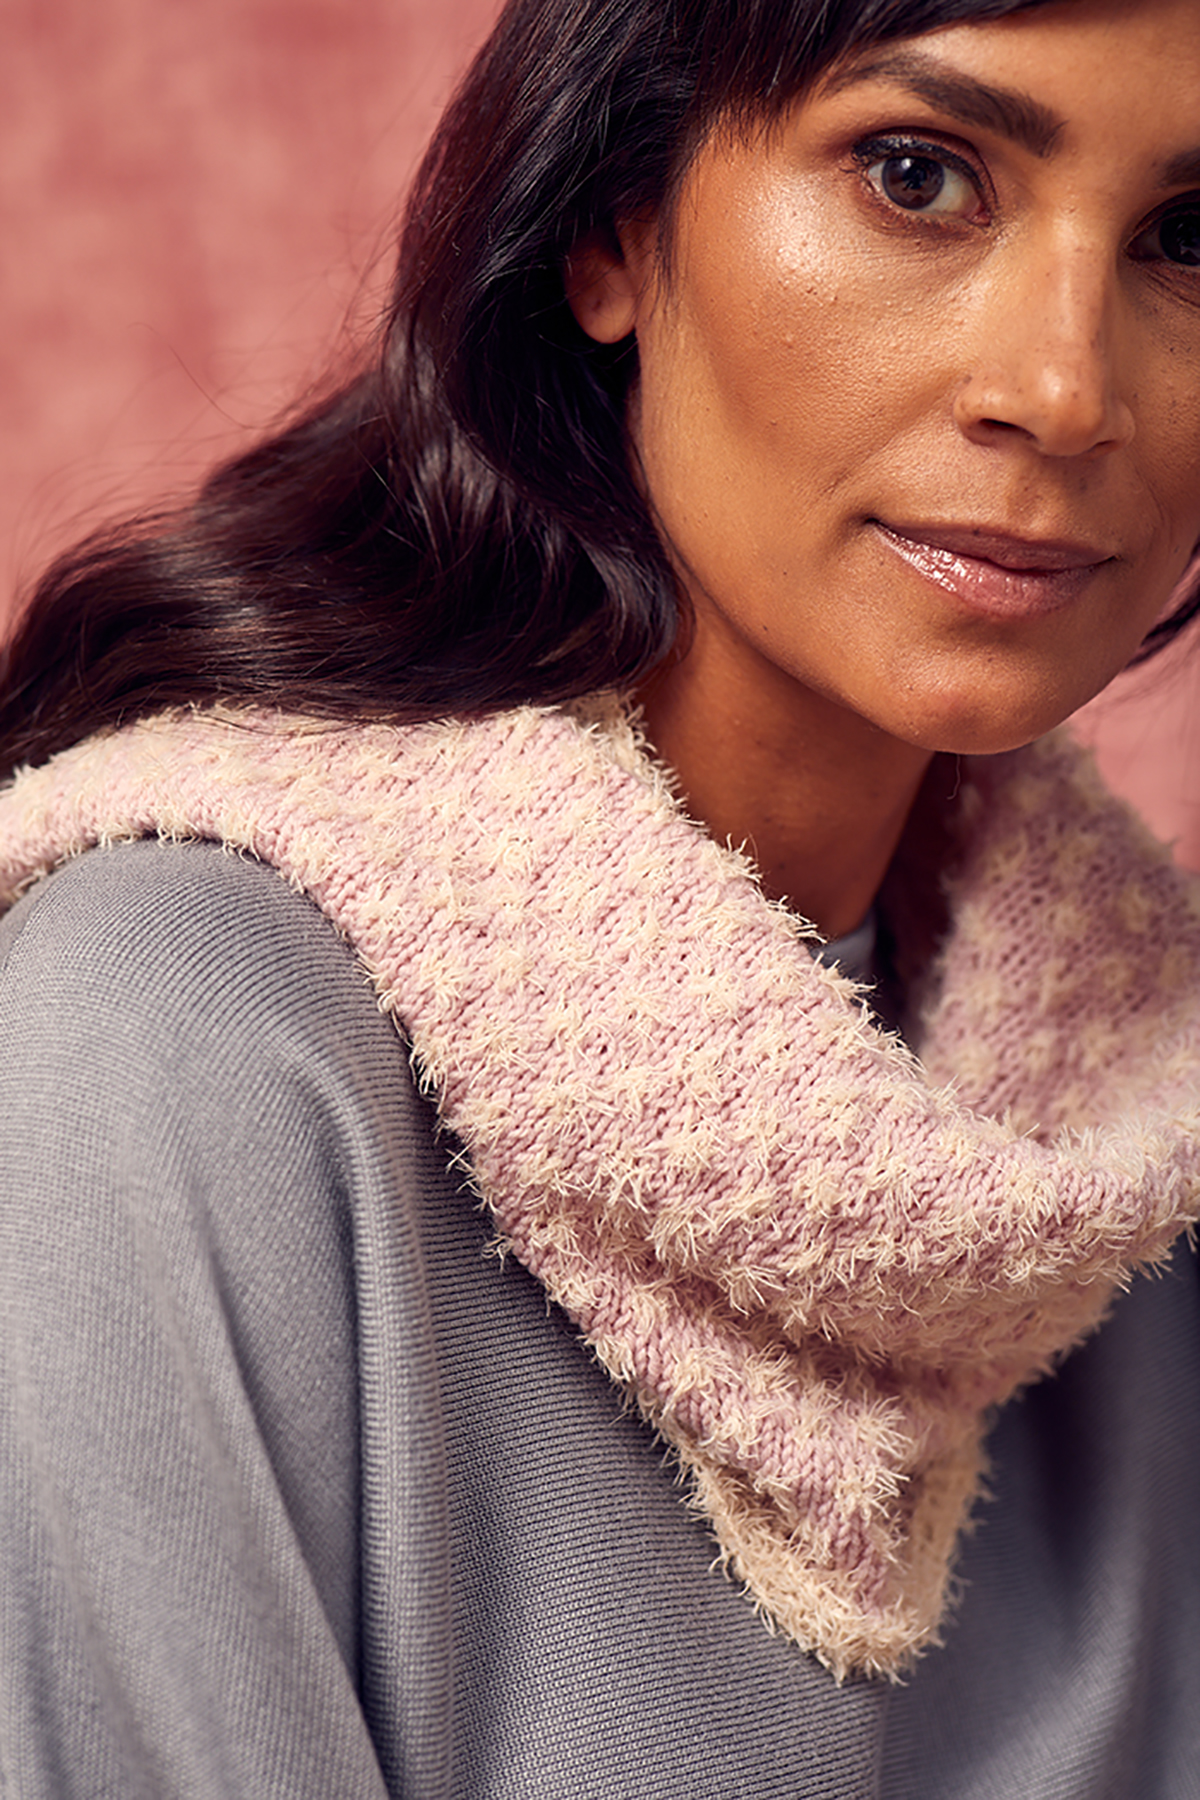
Finally, we have the Speck Cowl. A yarn like Minou simply begs to be worn around your neck – it’s just so lush and cozy! I wanted the design to incorporate low-contrast stranded colorwork, using Minou to make little specks of fluff to decorate the piece. Funny story, though, is that my very trusty sample knitter accidentally swapped the colors in the pattern. I noticed her sneak peek photo was more fluffy than my swatch, but I actually loved it. We chatted a bit and decided it would be great to show both options. So, two versions of this cowl were born! You can see both versions in the photo above – Version B (right) shows Minou as the non-dominant yarn, and the “speck” effect is more apparent. Version A (left) shows Minou as the dominant yarn – notice how much fluffier it is than Version B! I can’t choose a favorite – for the same pattern, the results are strikingly different.

The Speck Cowls are knit in the round from the bottom up. They incorporate a very simple stranded colorwork motif. The top and bottom border feature a few rows of garter stitch. This is probably the perfect “entry-level” Minou pattern. Speaking of “entry-level”, I’ve included some tips and tricks for working with Minou that are helpful whether you’re a newbie or a longtime fiber artist. I hope you find them helpful!

Tips and Tricks for working with Minou
Most of the patterns in this collection are pretty easy, featuring little more than the foundational skills of knits, purls, color changes, and basic decreases. However, being so fluffy, it can be challenging to read your work while knitting with Minou. Counting rows and picking up stitches isn’t as easy as it is with a round, smooth yarn (such as our beloved Deluxe Worsted or Bamboo Pop, for example). Here are a few tips to ensure your project goes smoothly.

  1. Work in bright light. This will make it easier to see your fabric, especially when picking up stitches or seaming.
  2. Swatch! Yes – you need to do it, and not just because your swatch will determine your sweater fit. In the case of Minou and other eyelash yarns, a swatch will help you practice simply by getting a feel for what it’s like to work with the yarn.
  3. When swatching, it can be difficult to count the number of rows and stitches you’ve worked. Take notes regarding the exact number of stitches and rows you knit, and measure the piece you knit rather than counting individual stitches or rows (see next tip!)
  4. Use a row counter, especially when shaping the armholes or neckband. Often, our patterns tell you to work until the piece measures a specific length. We typically include a little buffer of even length to account for any differences with the row gauge. If you use a row counter, you’ll easily be able to track exactly how many rows you worked to achieve the specific length, and thus can ensure the sides and front/back of the piece are perfectly symmetrical.
  5. If the pattern is knit flat, like the body of the Pacific Cardigan, use a removable marker to denote the Right Side and Wrong Side of the work. Because the yarn is fluffy, reverse Stockinette stitch and Stockinette stitch can end up looking very similar, so this tip is especially helpful.
  6. Take your time! We all know knitting isn’t a speedy endeavor, but it’s especially important to slow down when working with eyelash yarns like Minou. This will help you process everything you’re doing more easily, and you’ll be less likely to make mindless mistakes. (Learn from me, I’m the queen of mindless knitting mishaps!)
  7. If you make a mistake, take a deep breath. Although it can be difficult to see your stitches with Minou, the flip side is that it will also hide your mistakes very well. Now, I’m not advocating that we just ignore every knitting mistake we make – it’s good practice to fix your knitting. If you need to frog any part of your work, just take it slow and be careful not to rip back aggressively so as not to damage the yarn. With that said, it is also very much okay to embrace the imperfection and move forward.

Thanks for joining me today as I dished about our new collection, Soft Simplicity. I hope you enjoy each pattern and find the tips and tricks for working with Minou helpful. Be sure to check out all of the ways we’ve been using Minou, too! You can see all of our offerings at this link.

Have a wonderful, fiber-filled day!

-Rachel

Day 7 of Winter – Series 3 Edition

This is part 7 in a 12 part series highlighting designs from our 12 Days of Winter, Series 3 Edition.

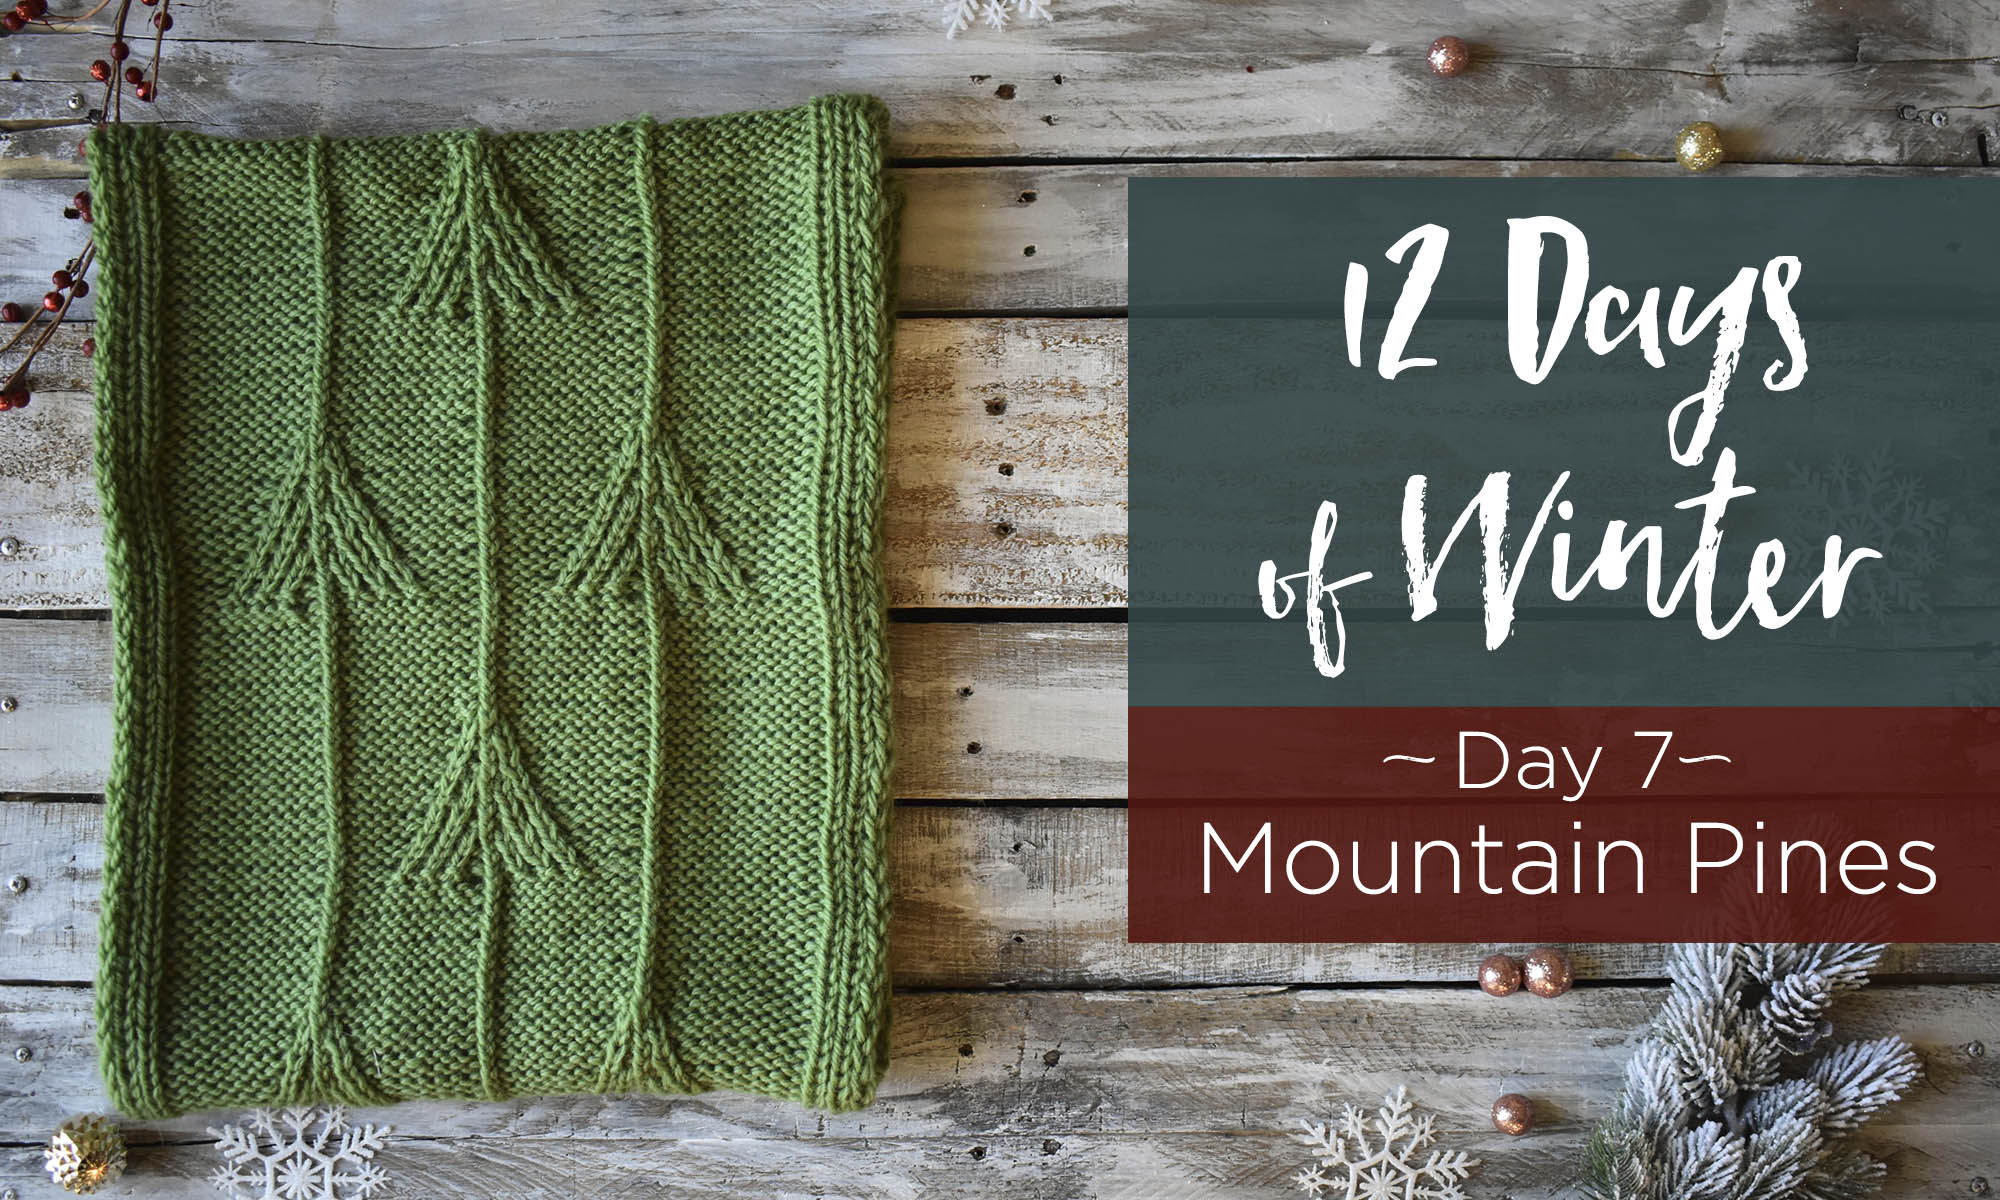
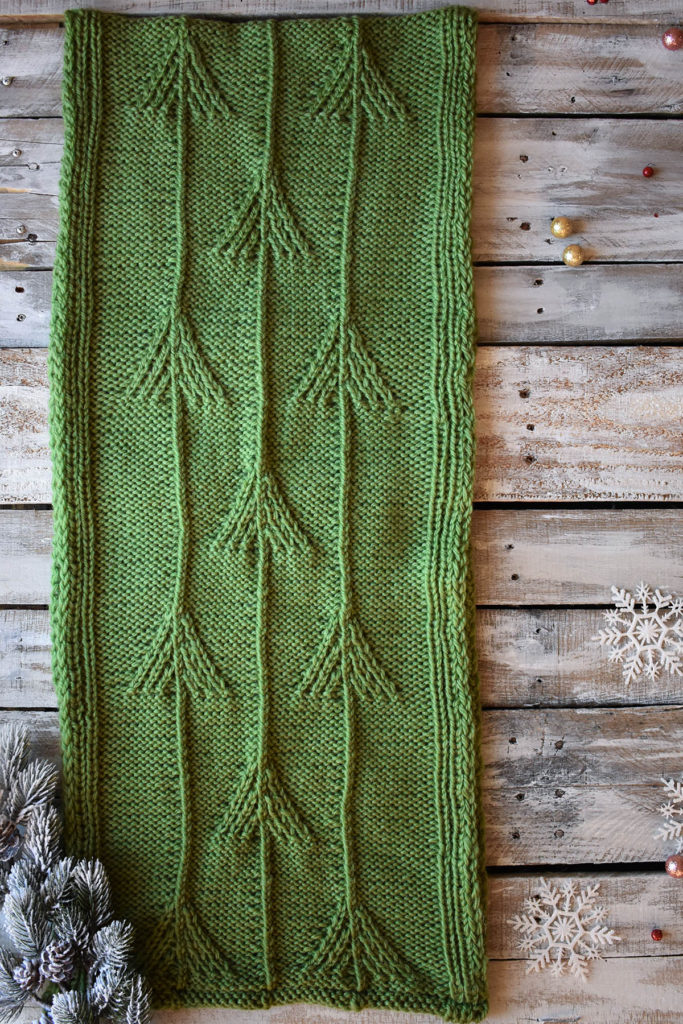
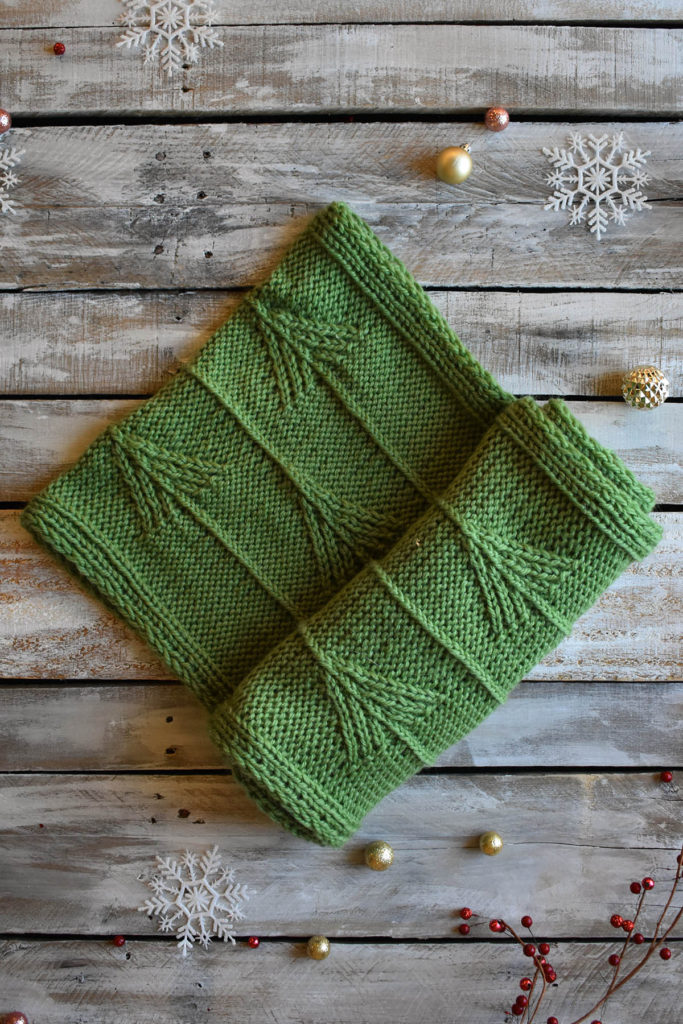
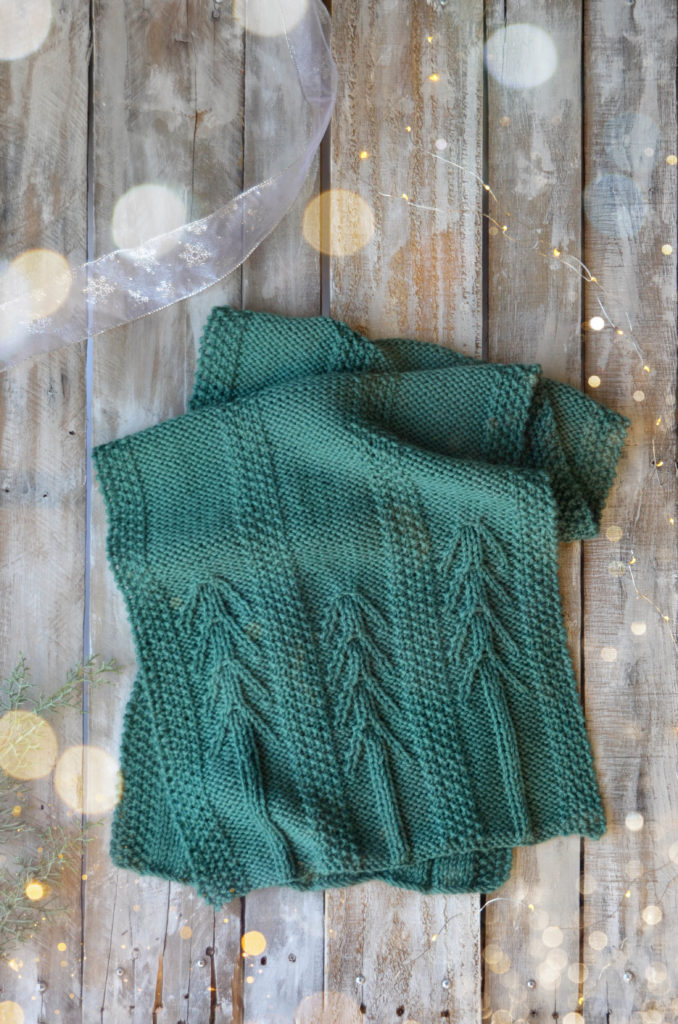
We’re a week into the 12 Days of Winter Kit Collection for 2019, and we hope you’re enjoying everything we’ve shared so far. Today we’re introducing an earthy green cowl that’s sure to hold your interest. Say Hello to the Mountain Pines Cowl, designed by Jennifer Sadler. This deliciously squishy cowl features twisted stitches that form the shapes of evergreen trees. Knit in soft, plump Deluxe Chunky, this is a fairly quick project that will keep you warm all winter long.
A green, twisted stitch cowl knit in Universal Yarn Deluxe Chunky.
Jennifer, who is based in Asheville , North Carolina, got her inspiration from pine trees. Here is what she had to say:


“Here in the North Carolina mountains, pine trees are easily found – there are actually six different kinds of pine trees native to the state. I love how in the winter they stay green, adding a touch of color to an otherwise brown landscape, and when it snows, the branches let the snow pile up, creating a pillow of white on top of the green needles. The Mountain Pines Cowl pays homage to those green monster trees.
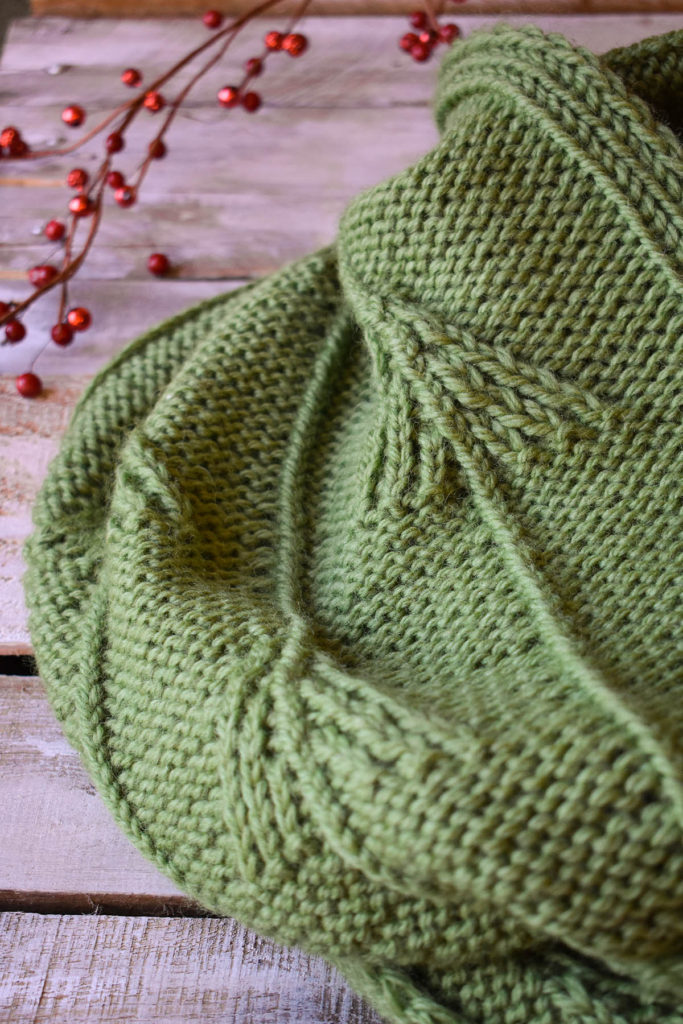
Detail of a green, twisted stitch cowl knit in Universal Yarn Deluxe Chunky.
The pine tree motif is much simpler than it looks to knit. It uses twisted stitches, and no cable needle! Once you’ve experienced the ease of twisted stitches, you’ll want to incorporate them into your knitting as much as possible – they create a wonderful visual texture, with hardly any extra work.” -Jennifer

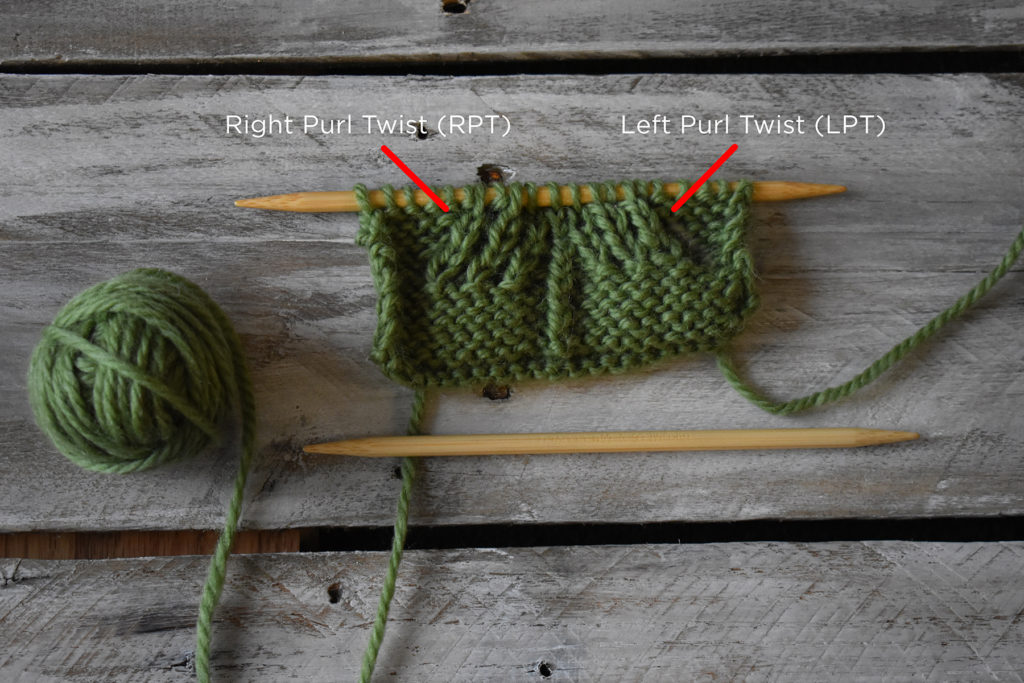
I couldn’t agree more with Jennifer – twisted stitches are a joy to work, especially when you get the hang of them. It eventually feels intuitive and you’ll be glad to have this skill in your toolbox. The Mountain Pines Cowl uses purl twists, so that’s what we’ll focus on in this tutorial. You’ll learn the Left Purl Twist (LPT) and the Right Purl Twist (RPT). The Left Purl Twist (LPT) leans to the left, and the Right Purl Twist (RPT) leans to the right. We’ll cover the LPT first, followed by the RPT.

Left Purl Twist
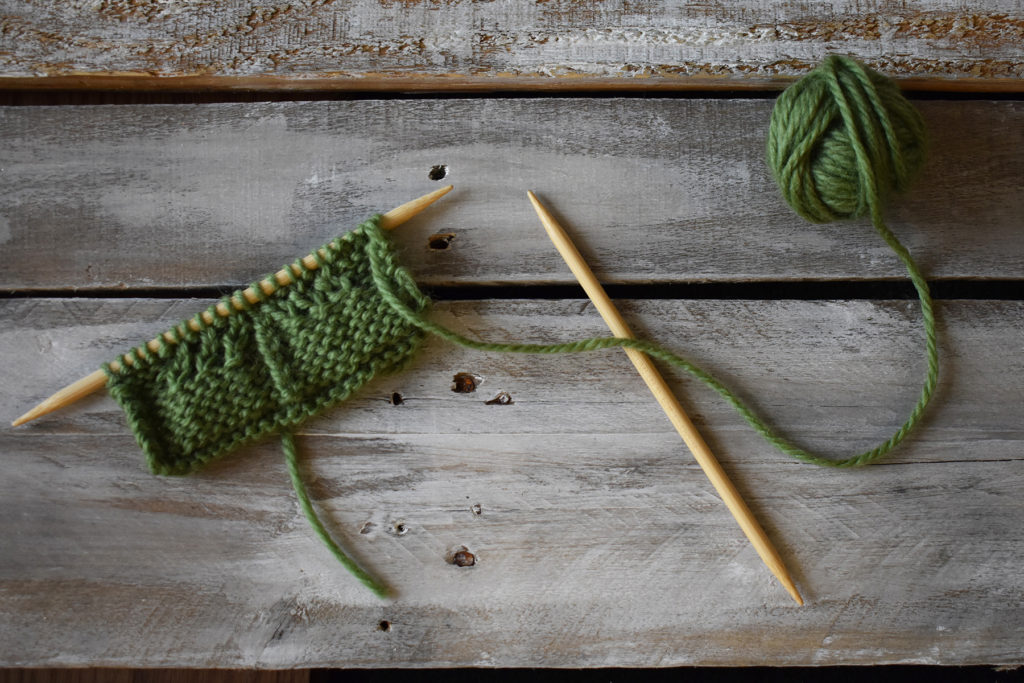
Small swatch on double-pointed needles and a small ball of yarn.
Start by making a swatch. Swatches are not only crucial for getting the finished item you want but are also great for practicing new stitches.
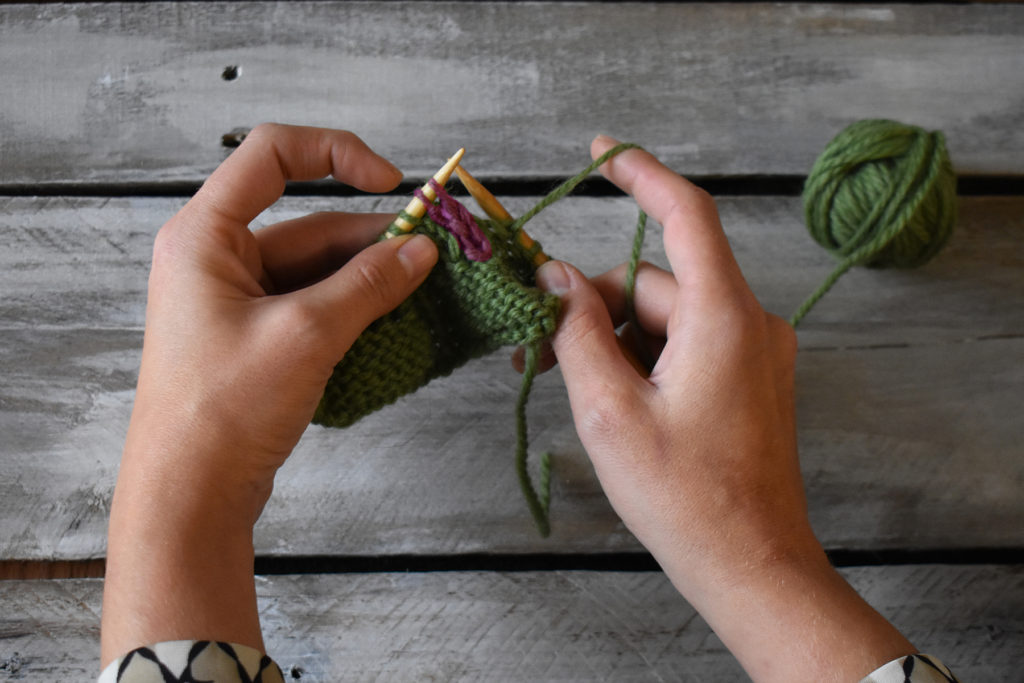
Work in your pattern until you’ve reached the two stitches you need to twist. I’ve highlighted these stitches in purple so it’s easier to see. As you can see we have a knit stitch and a purl stitch on the left-hand needle. We want to change their positioning by moving the knit stitch over the top of the purl stitch.
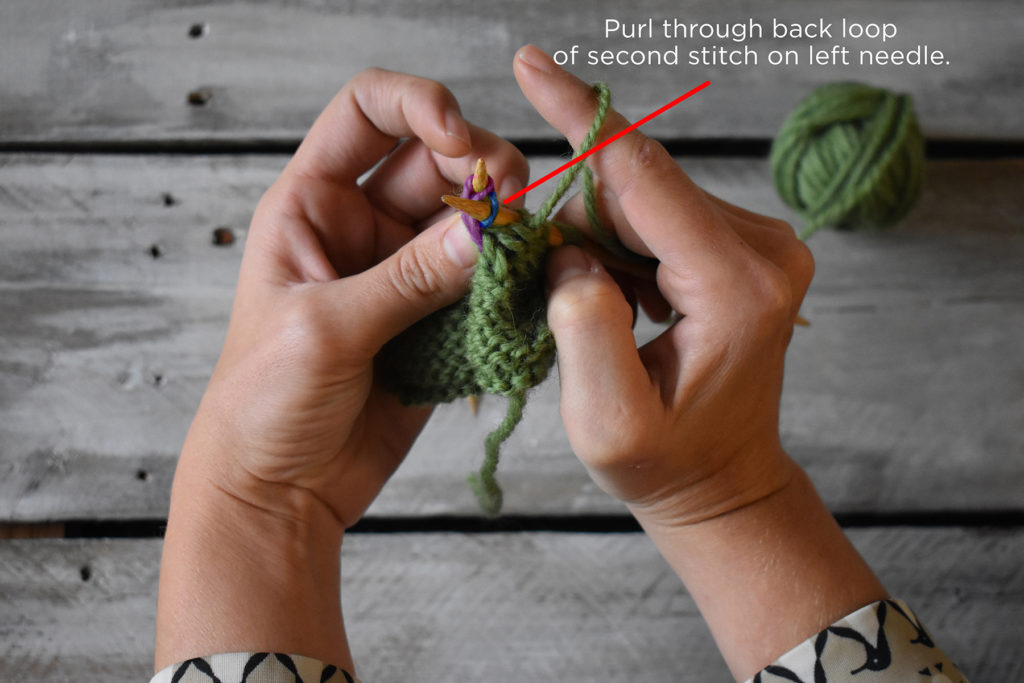
Admittedly, the LPT is just a bit more complex than the RPT. It might feel a little fiddly until you get the hang of it. Remember the order of the stitches from the previous photo? The order of the stitches from right to left was Knit, Purl. For the LPT, the first step is to purl the second stitch on the left needle through the back loop. This stitch is highlighted in blue. As you can see, the first (knit) stitch on the left needle remains in place.
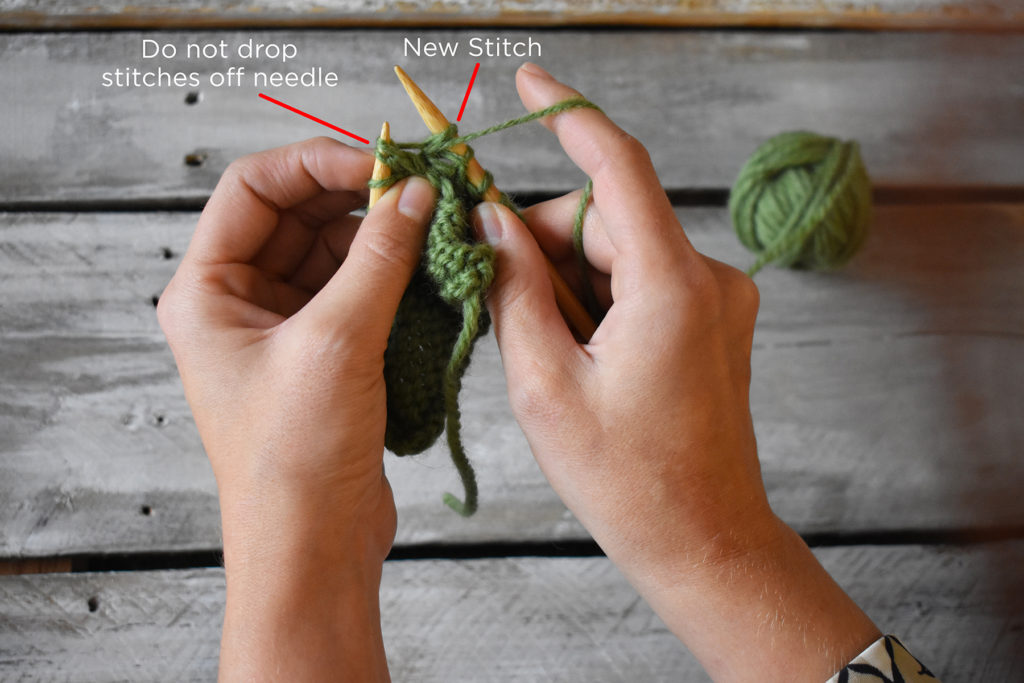
After you purl the second stitch through the back loop, do not drop the first and second stitches off the left needle.
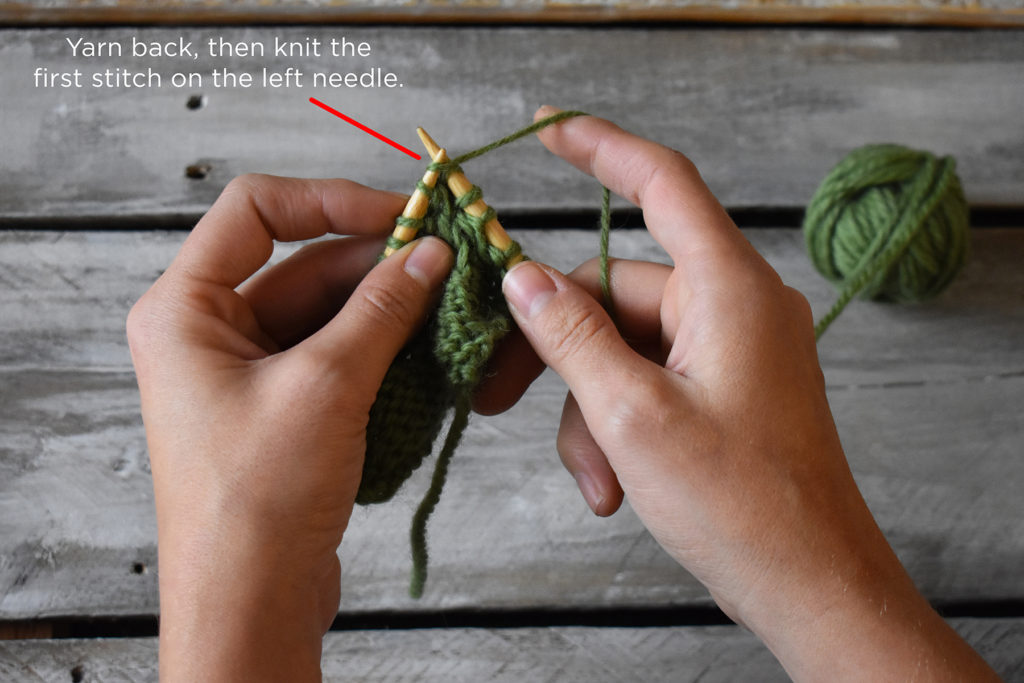
Next, move your yarn to the back of the work and knit the first stitch on the left needle.
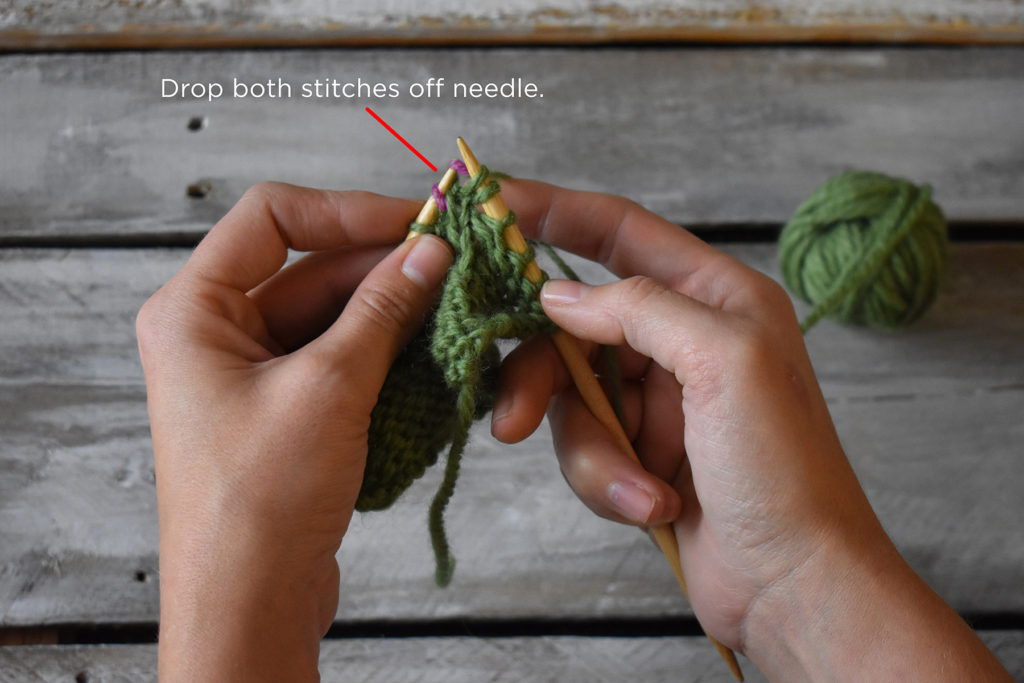
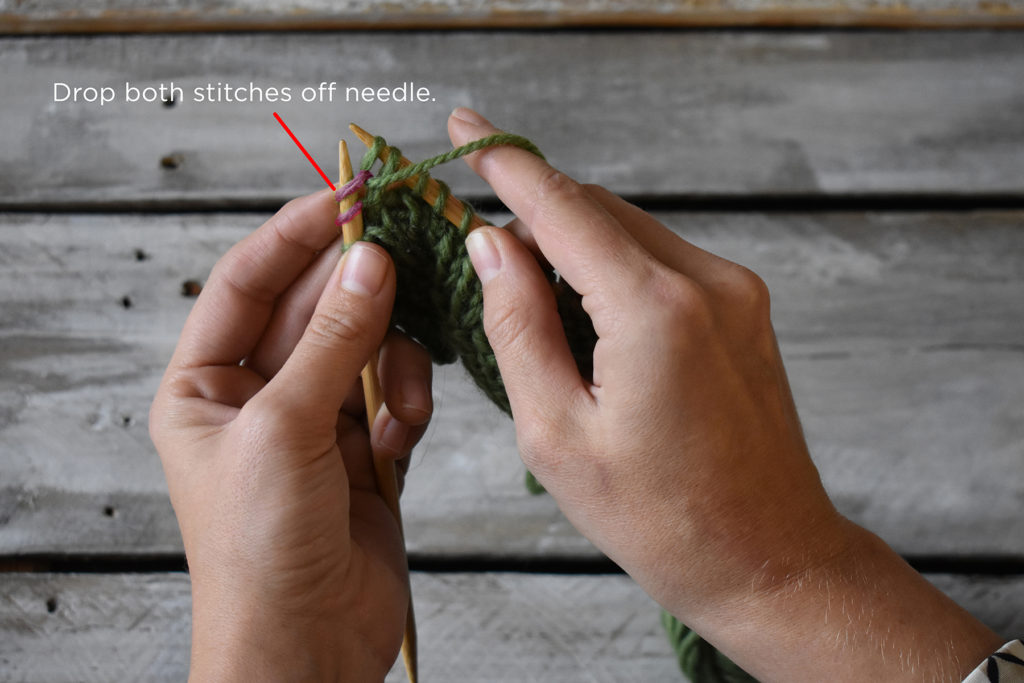
Now you can drop both the first and second stitches on the left needle. These stitches are highlighted in purple. After you drop them, you’ve completed the LPT.
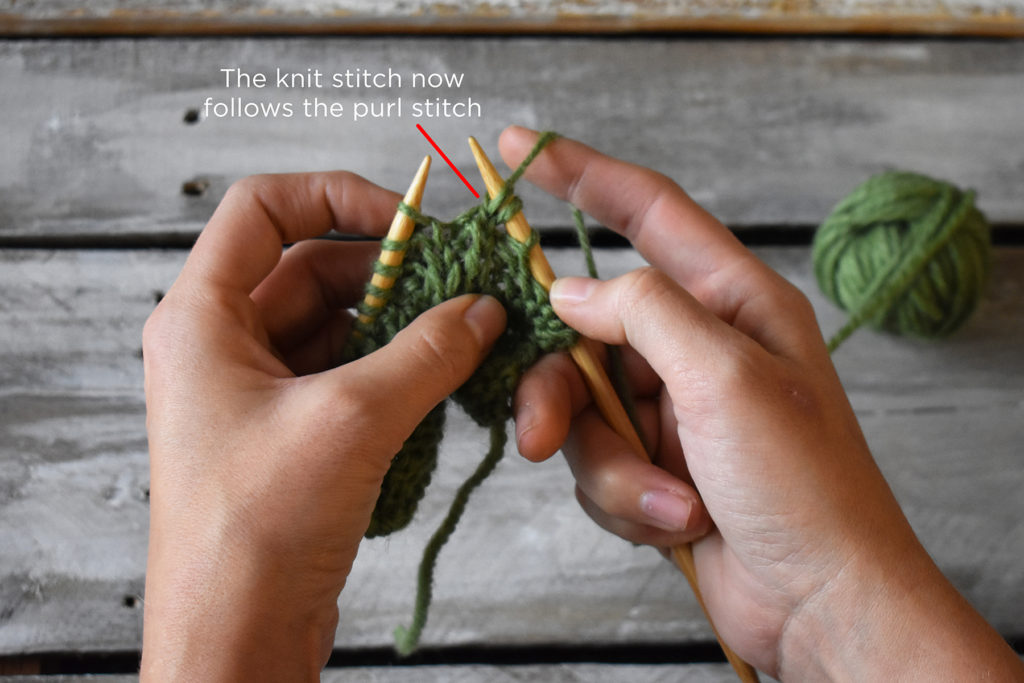
Notice how the stitches have changed position, and the knit stitch now leans to the left, over top of the purl stitch. Well done, now on to the RPT!
Right Purl Twist
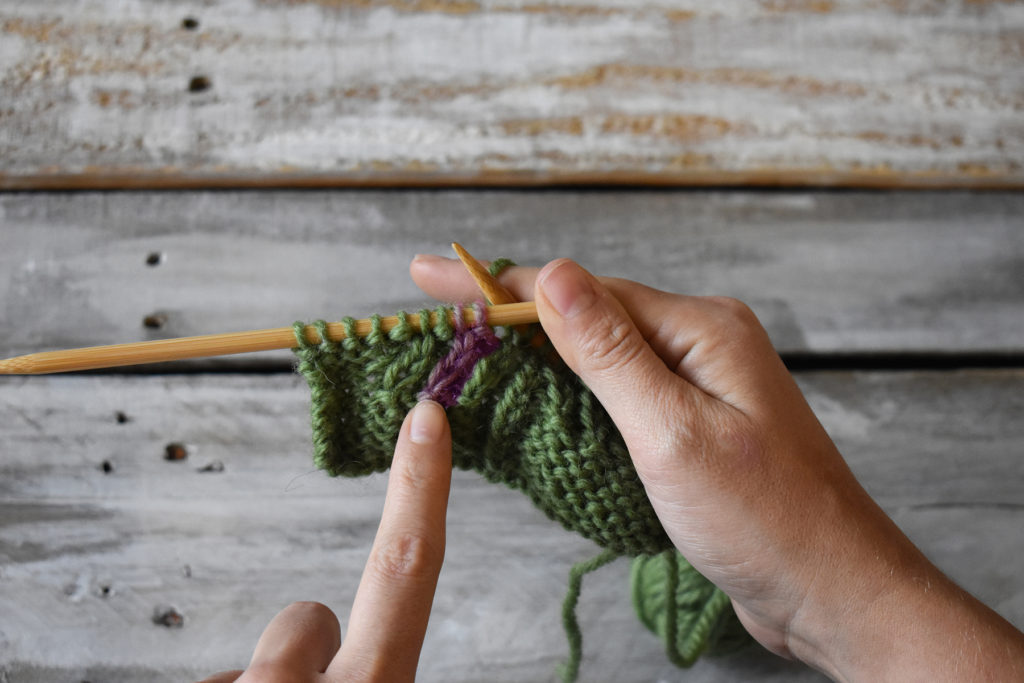
Work in your pattern until you’ve reached the two stitches you need to twist. I’ve highlighted these stitches in purple so it’s easier to see. Here we have a purl stitch that precedes a knit stitch. We want to change the position of these stitches, so that the knit stitch leans to the left, over the purl stitch.
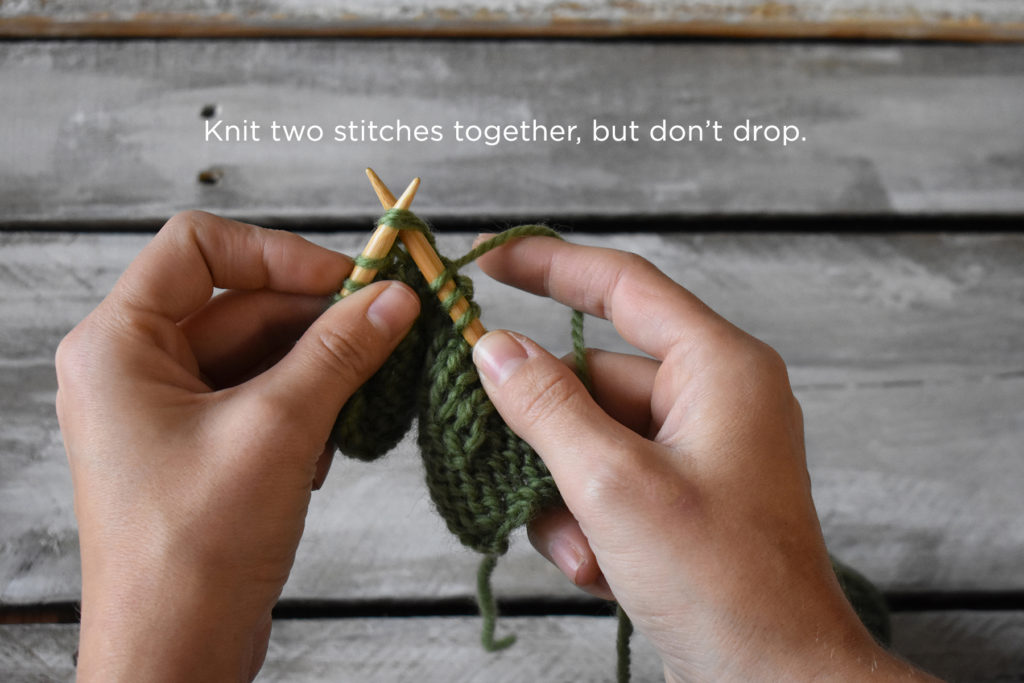
Begin by knitting two stitches together, but do not drop the stitches from your needle.
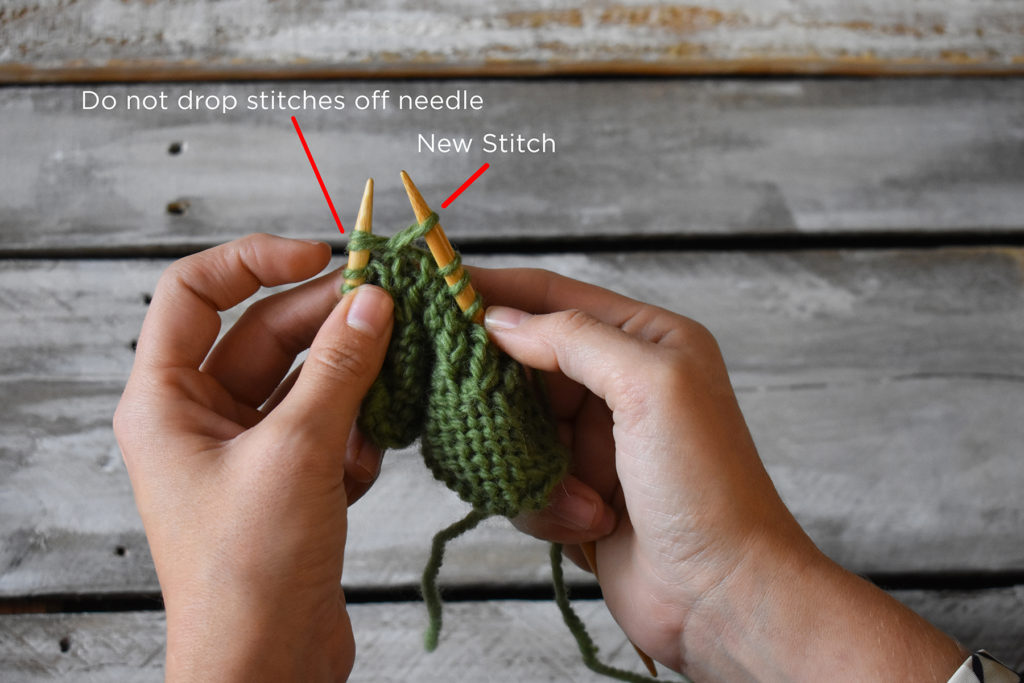
As you can see, the two stitches remain on the left needle, but there is now a new stitch on the right needle.
Bring your yarn to the front, then purl the first stitch on the left needle.
Now you can drop the two stitches on the left needle – I’ve highlighted them in purple so it’s easier for you to see.
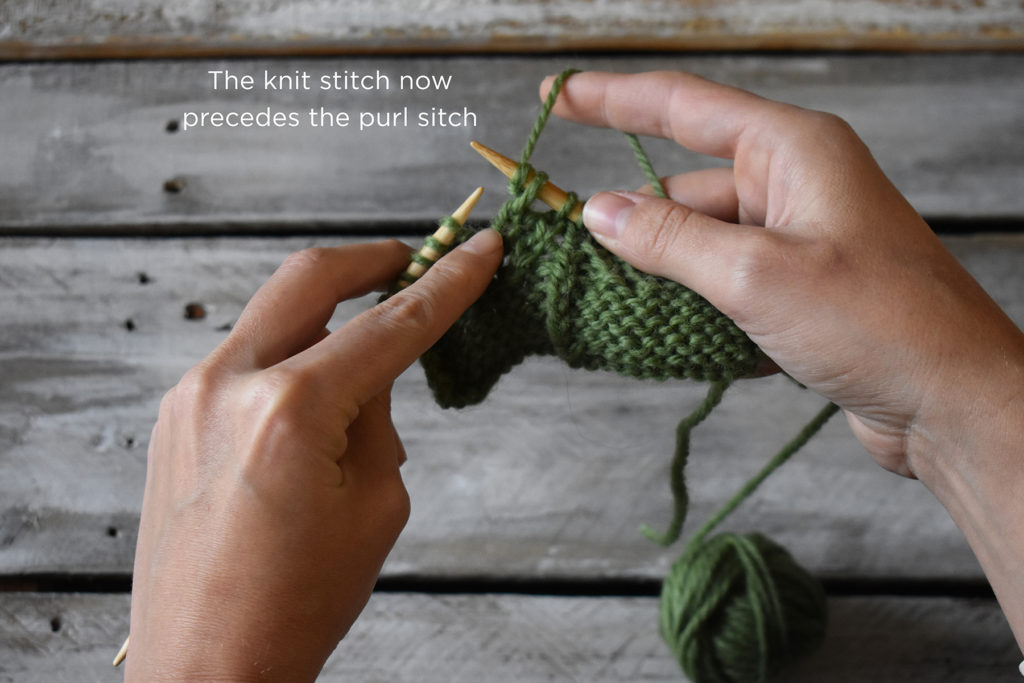
And that’s it – you’ve completed your RPT. Notice how the knit stitch now precedes the purl stitch.
I hope you find this tutorial helpful, and I hope that it drums up excitement for you to start knitting this lovely cowl. Like Jennifer, I’m a big fan of coniferous trees, so this design sings to me!
A green, twisted stitch cowl knit in Universal Yarn Deluxe Chunky.
Remember, you can find the 12 Days of Winter Kits at your local yarn shop. Happy crafting!

Tutorial – Knitting Pleats

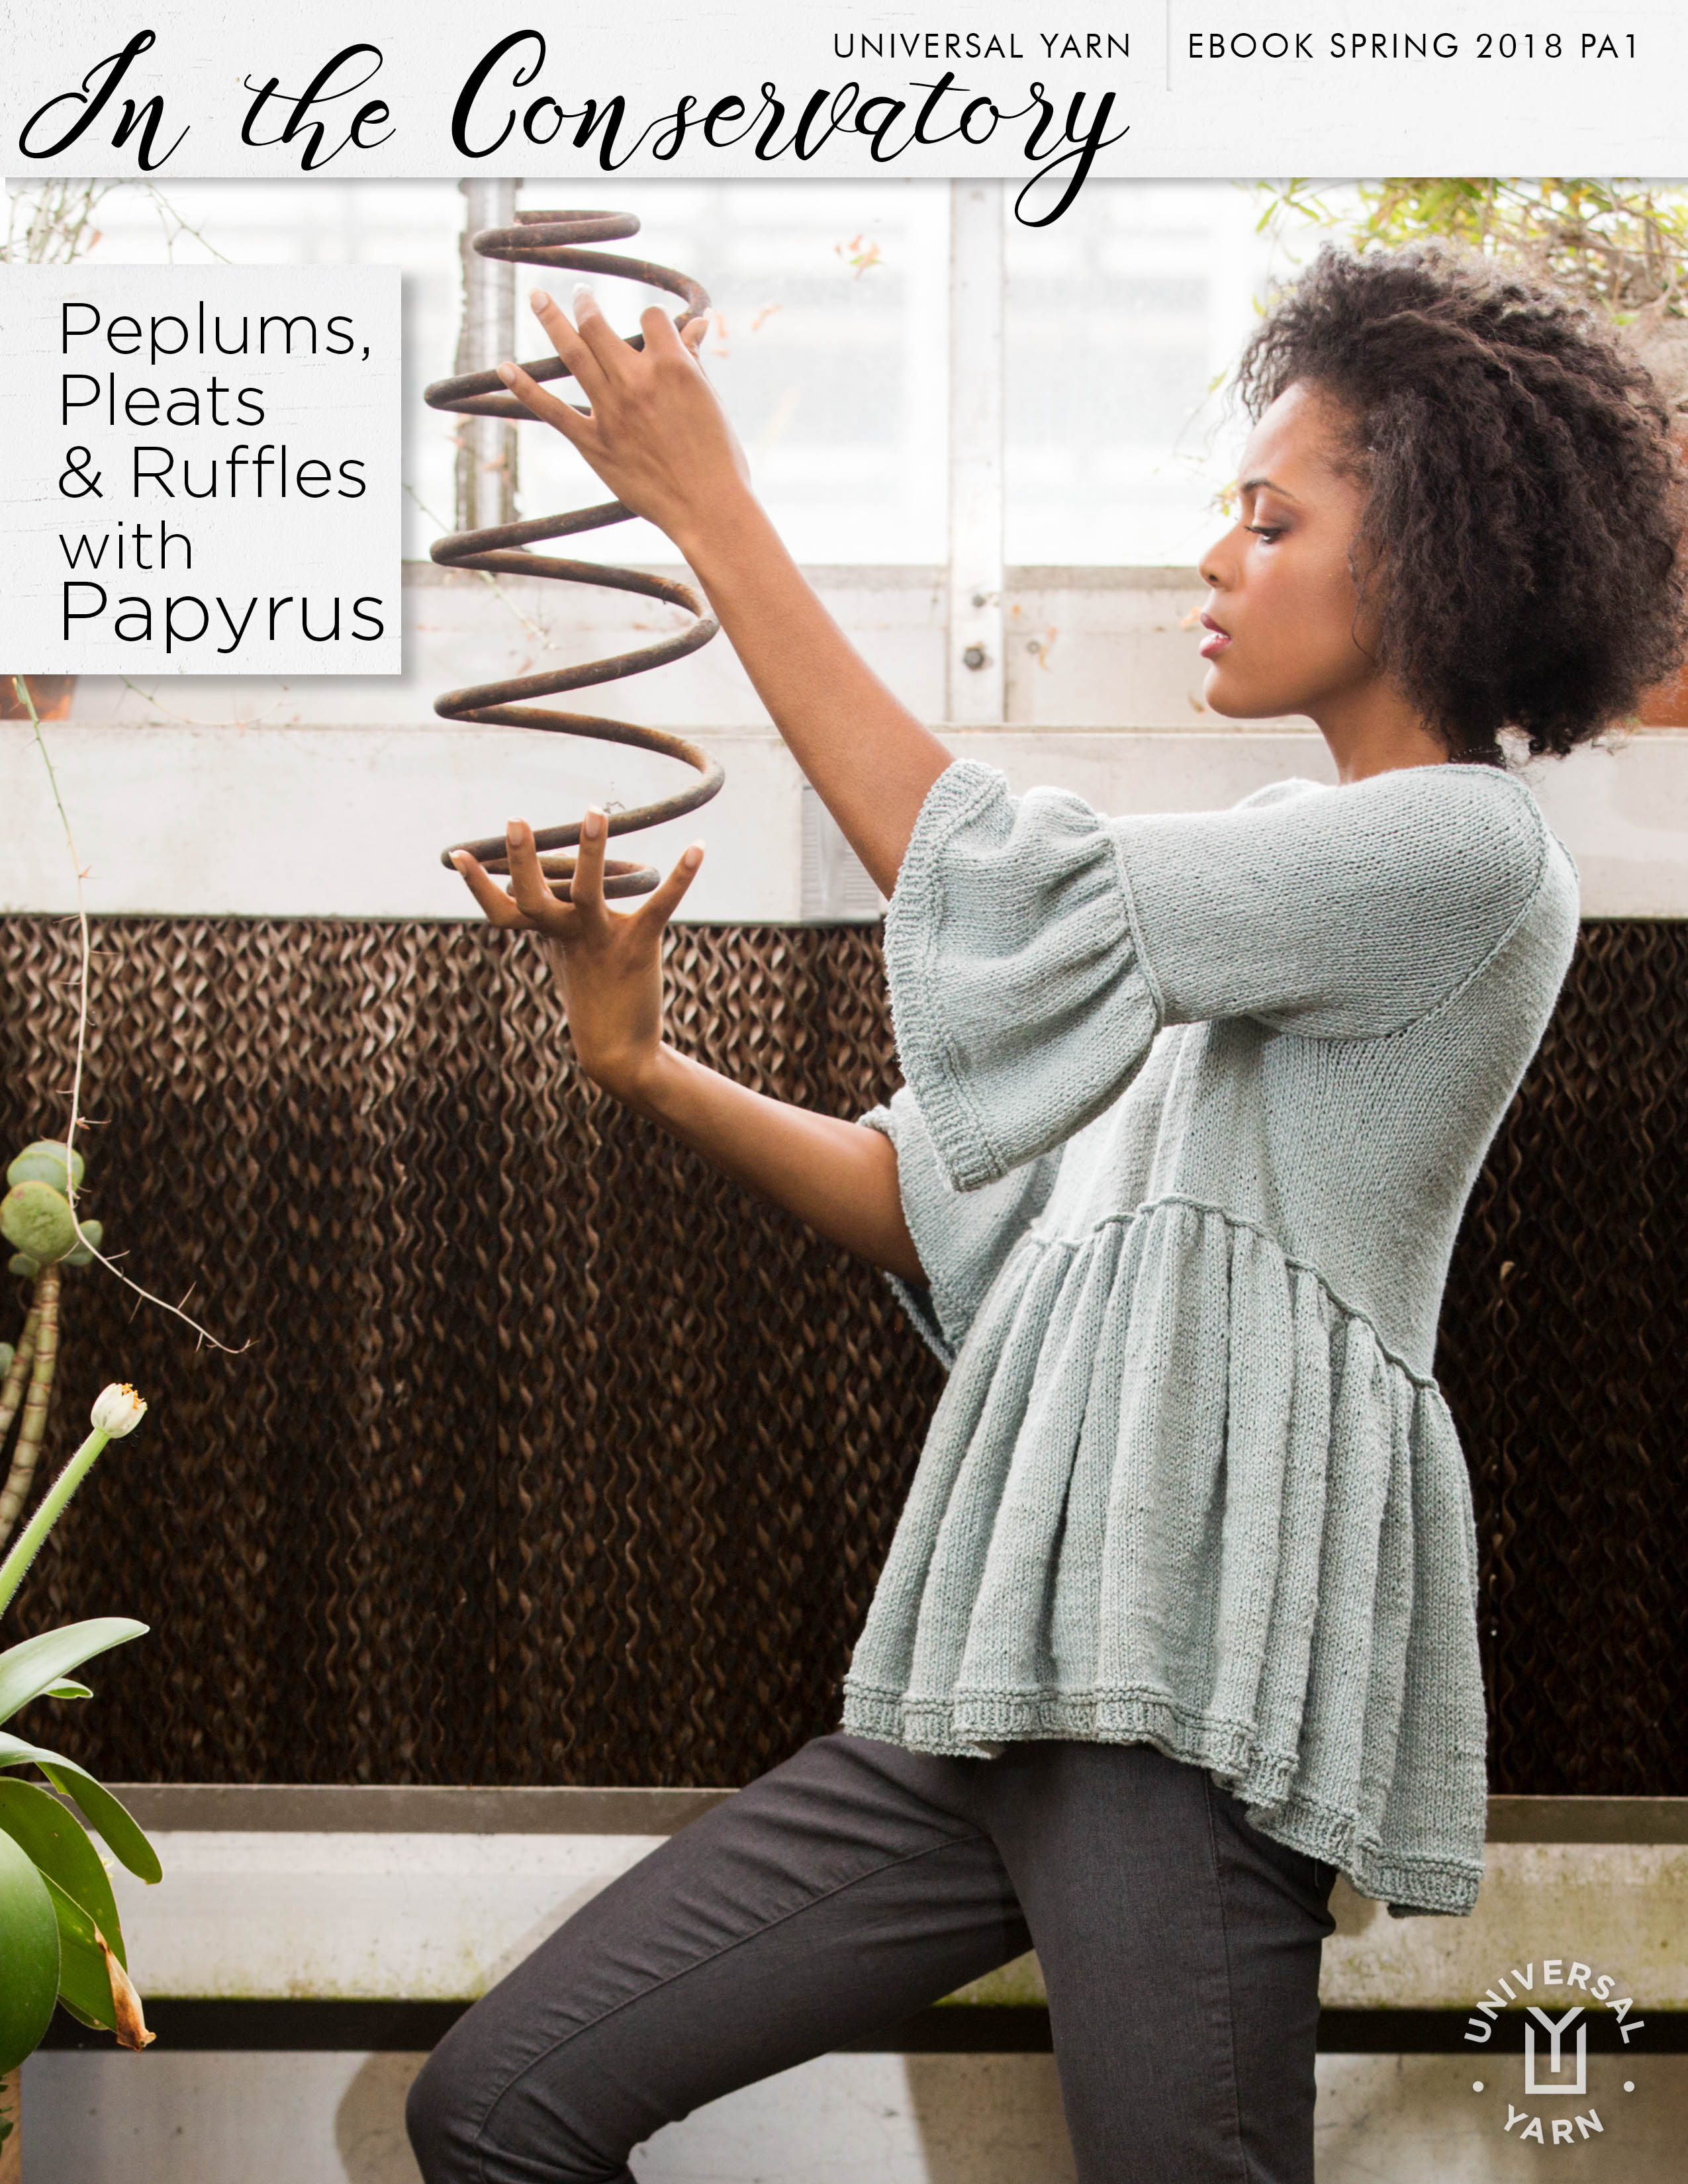
Today we launched the first of our spring pattern collections, Papyrus: In the Conservatory.

Note the giant spring the model is holding. It’s a “spring” collection. :/

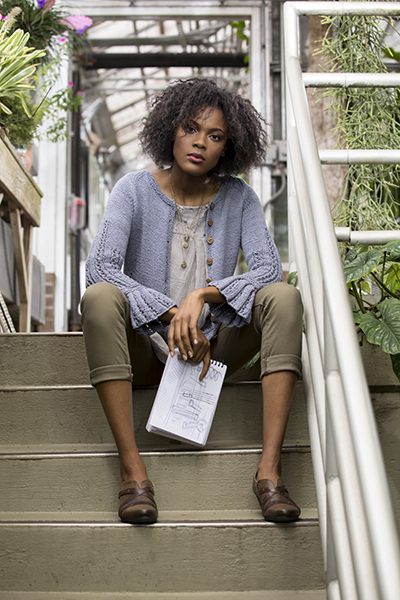
As the cover promises, this collection contains patterns all containing peplums, pleats, and ruffles, all knit in new yarn Papyrus. There is actually just one project that utilizes pleats, and that is the Kaizen cardigan.

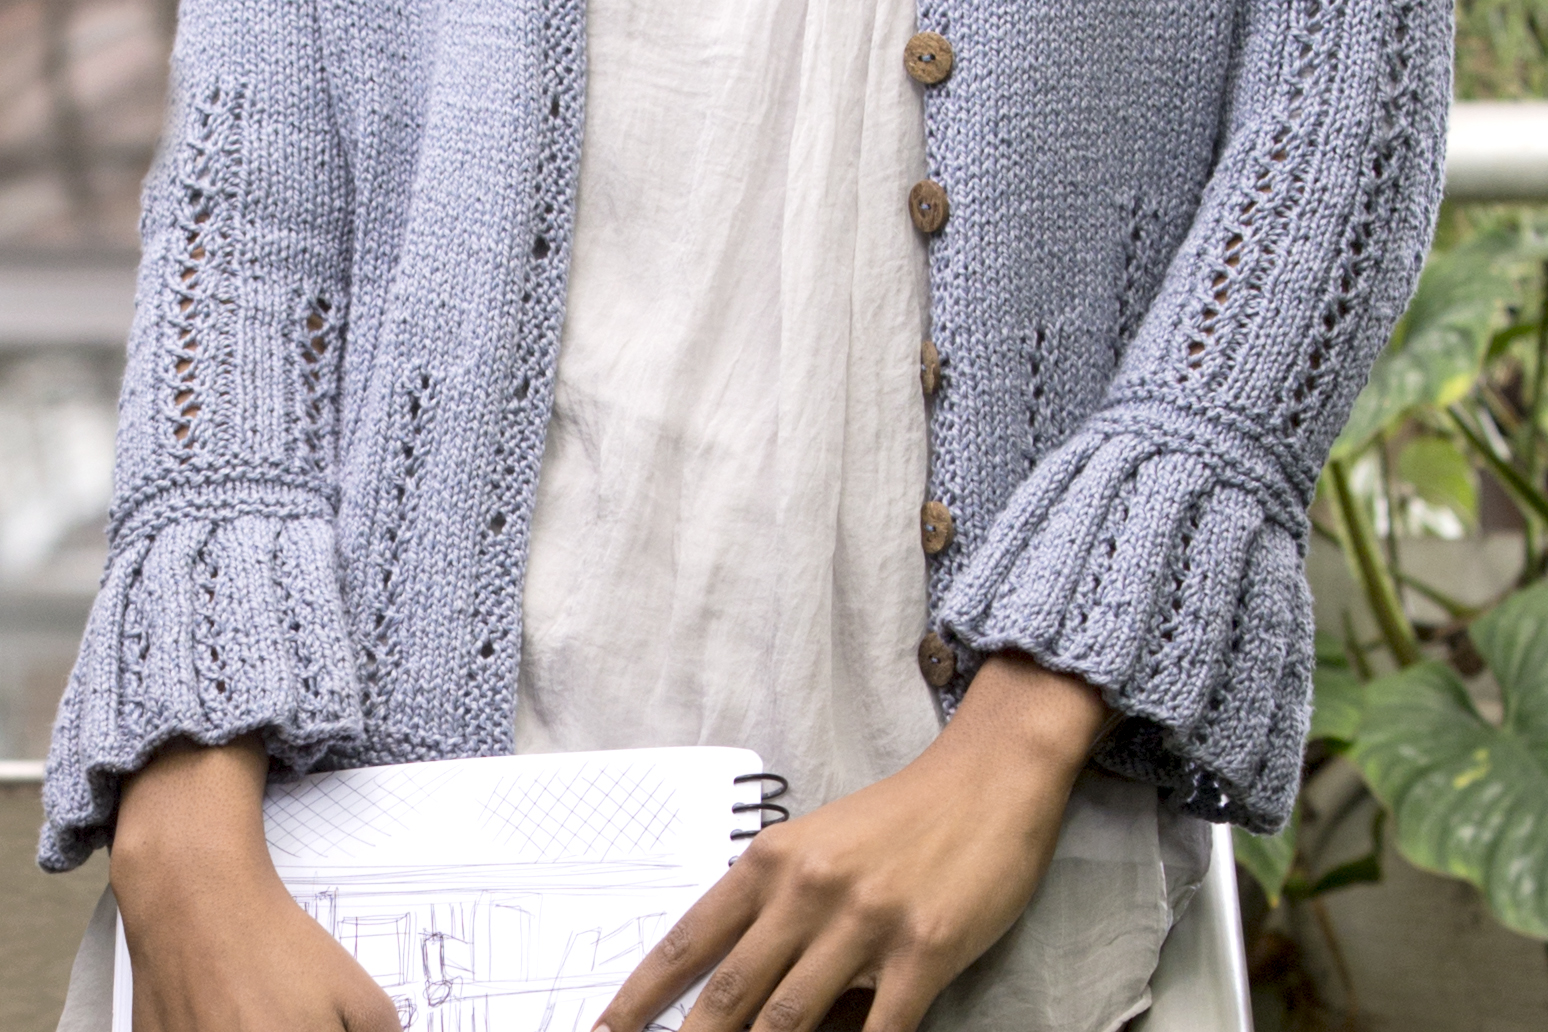
The pleats are added just to the sleeve cuffs here for a touch of feminine playfulness to an otherwise classically shaped cardigan.

Though I did my best to give accurate written instructions of how to make the pleats, this is one of those techniques where pictures really do speak a thousand words. There are a few photos of how to join pleats included in the pattern file, but the following is a much more detailed instruction.

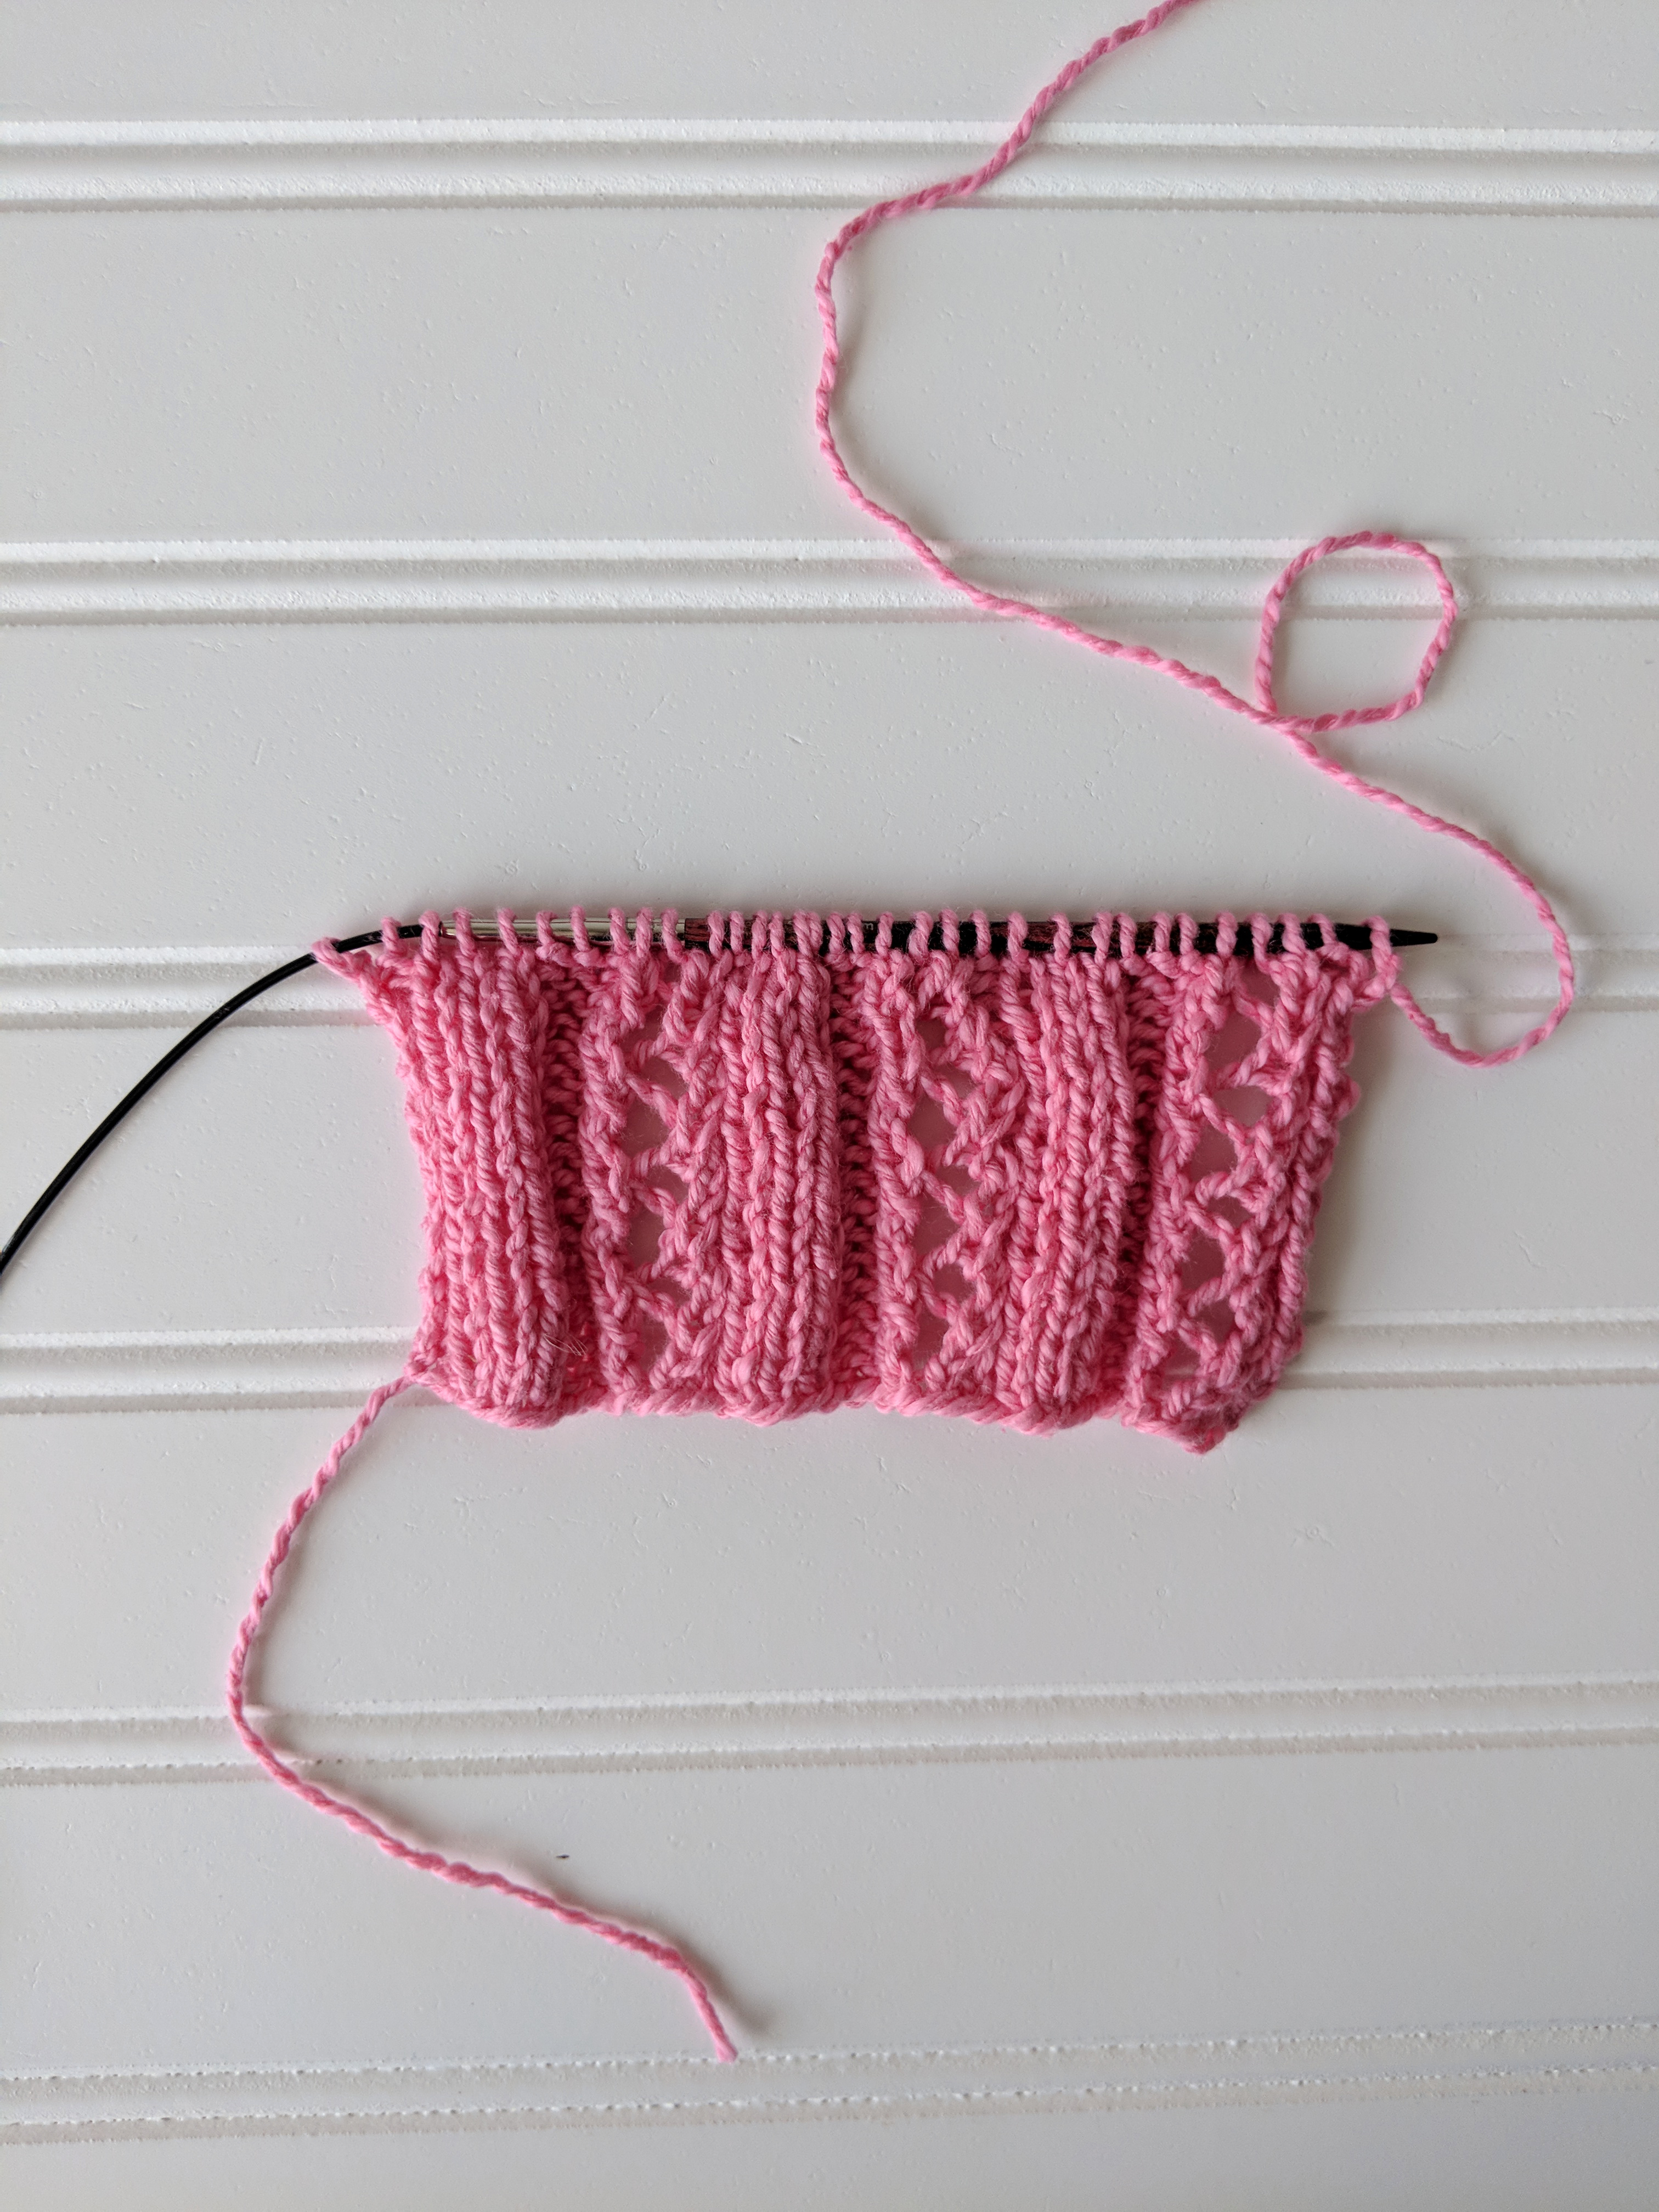
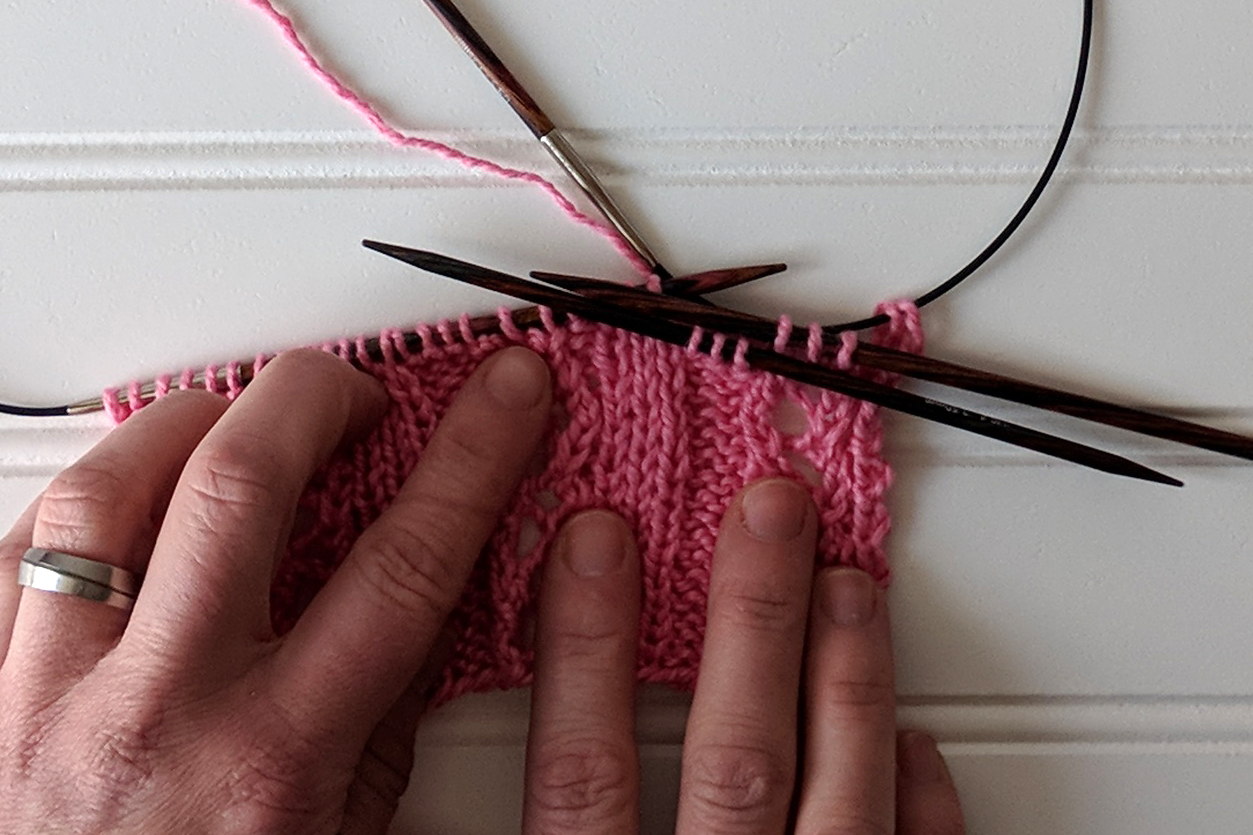
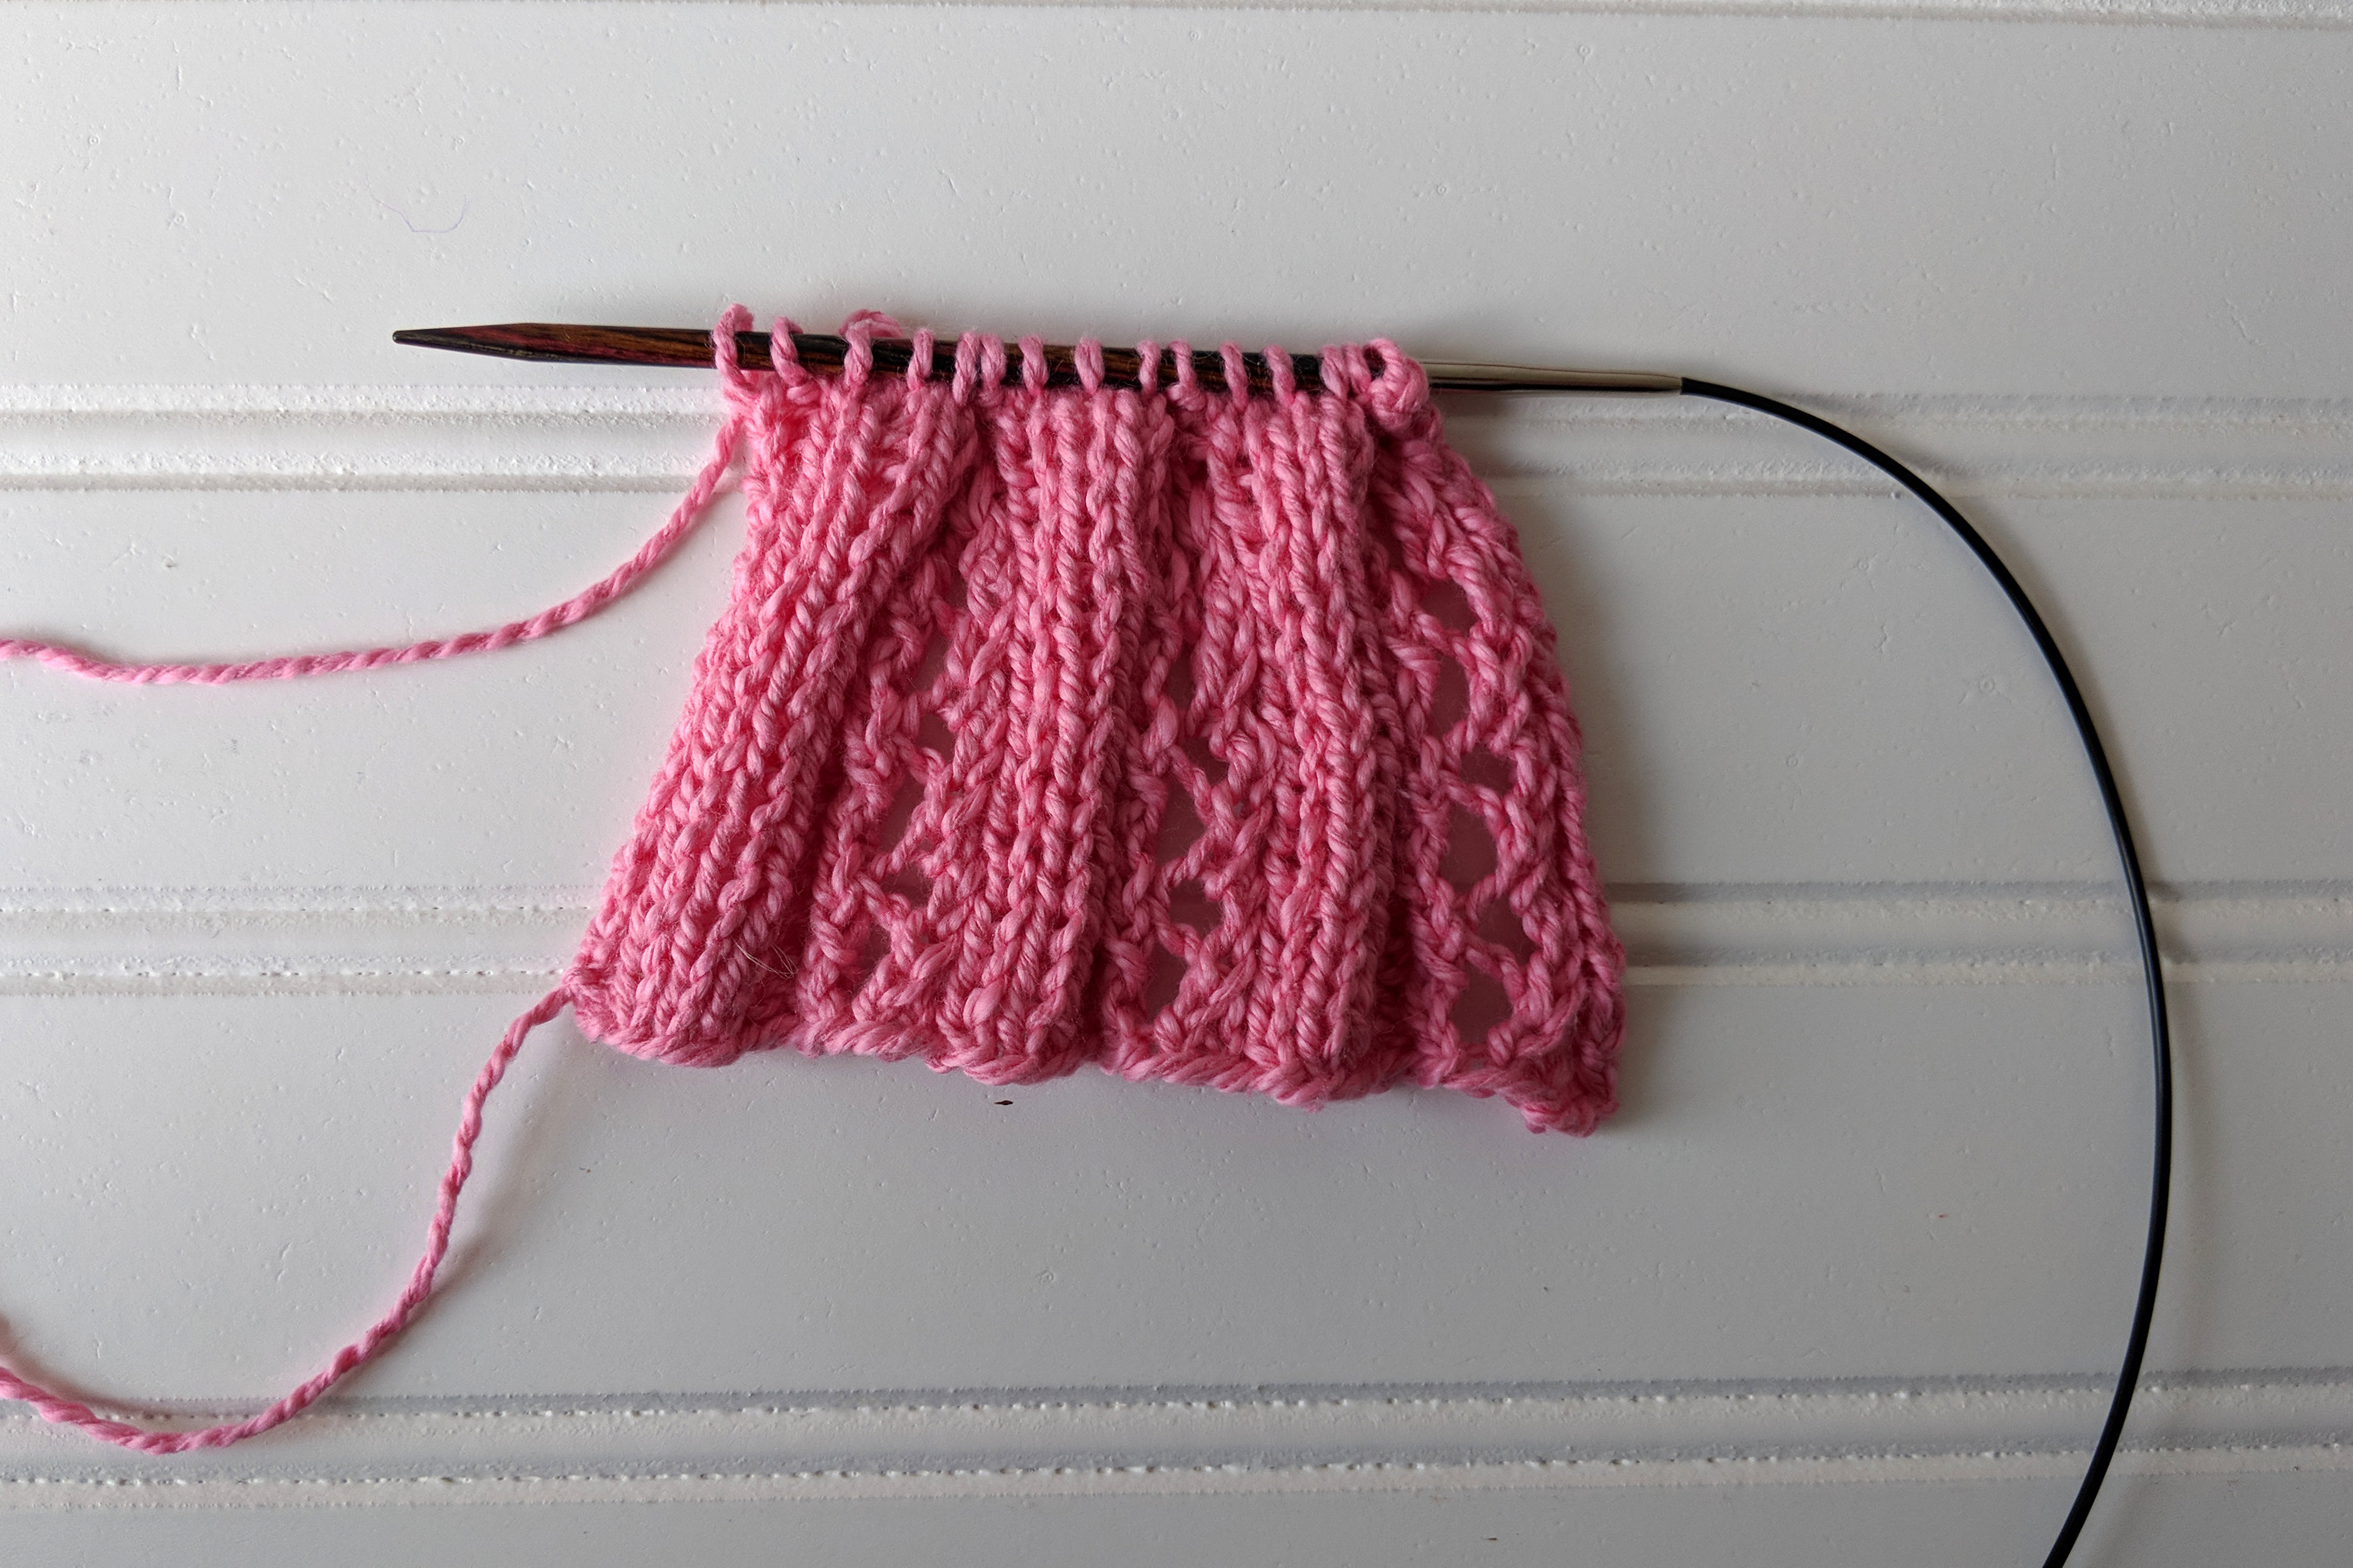
This small swatch shows the cuff prior to the pleat joining. Stitches are reduced by almost two thirds after the pleating process.

First, the edge stitches are worked.

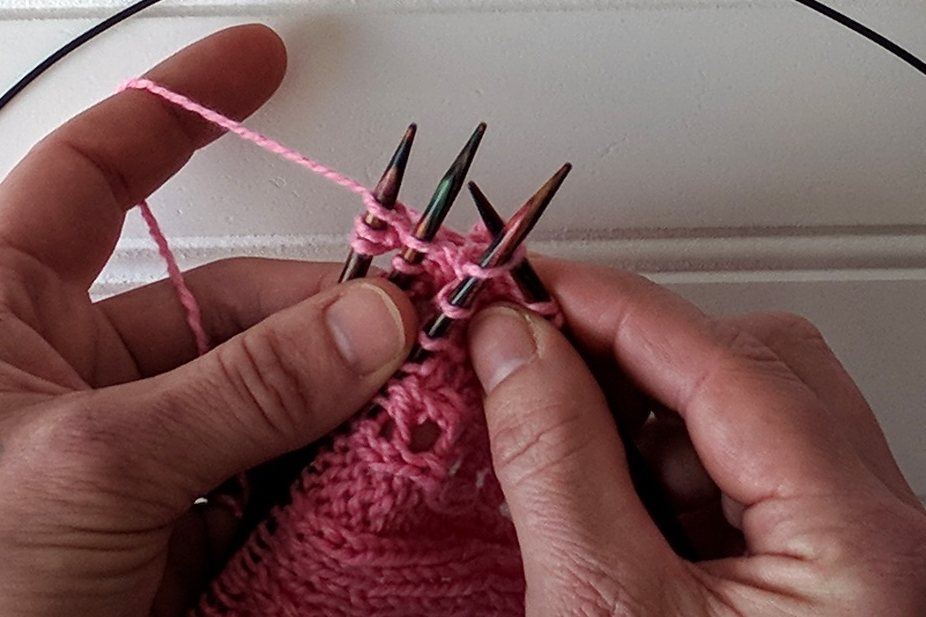
Next, the following 3 stitches (the eyelet column) will be slipped to a double pointed needle.

Eyelet column is now on a spare needle.

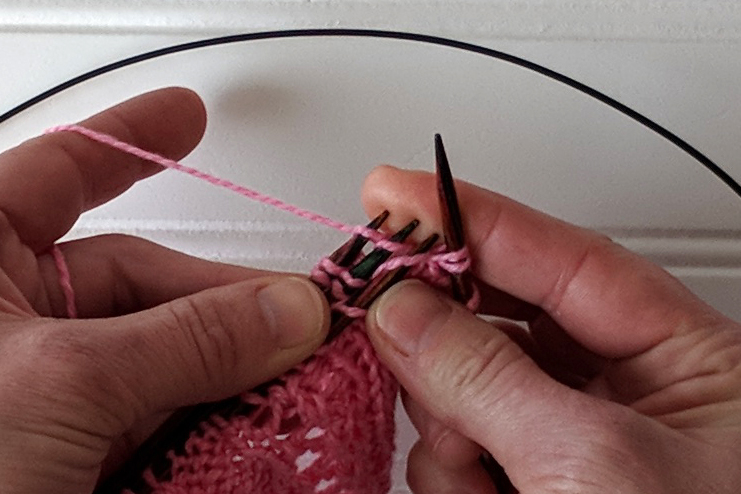
Next, the following 3 reverse stockinette (purl) stitches are slipped to a second spare needle.

Now the first 2 stitches of the row on the right needle. We’re going to be ignoring those stitches. After that, we have dpn 1 with the Eyelet Column sts, dpn 2 with the purl sts, and then the working left needle with all remaining stitches.

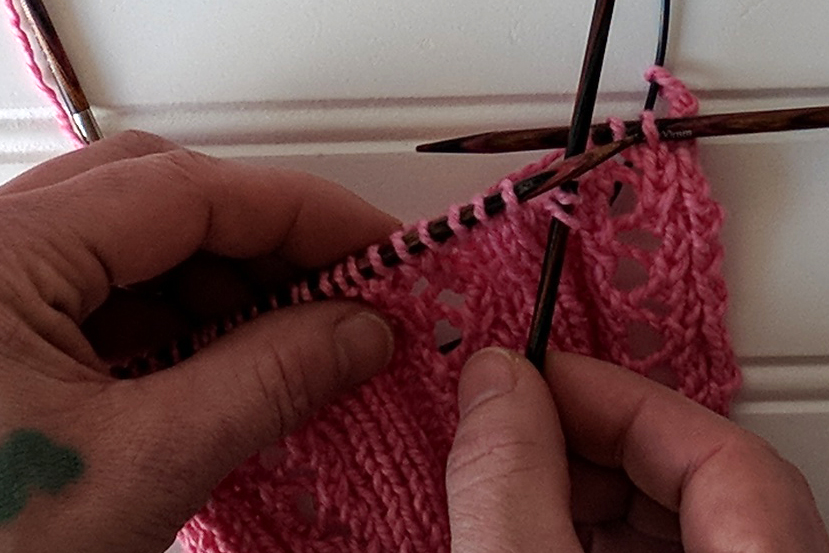
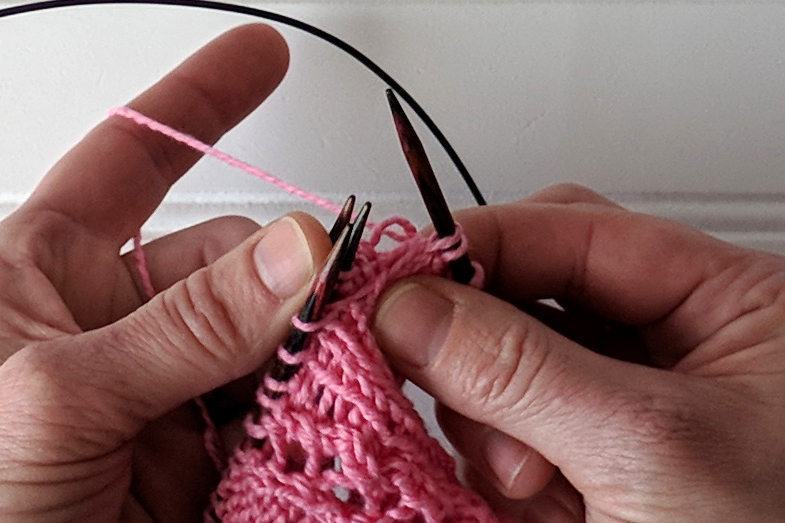
Rotate dpn 2 counter-clockwise, so that the wrong side of these sts is against the wrong side of the 3 sts after it (the 3 sts on the working left needle)

Wrong sides are now together. Slide the sts from this dpn toward the tip.

Place dpn 1 behind dpn 2 without rotating. Align the tips of all 3 needles in preparation for joining.

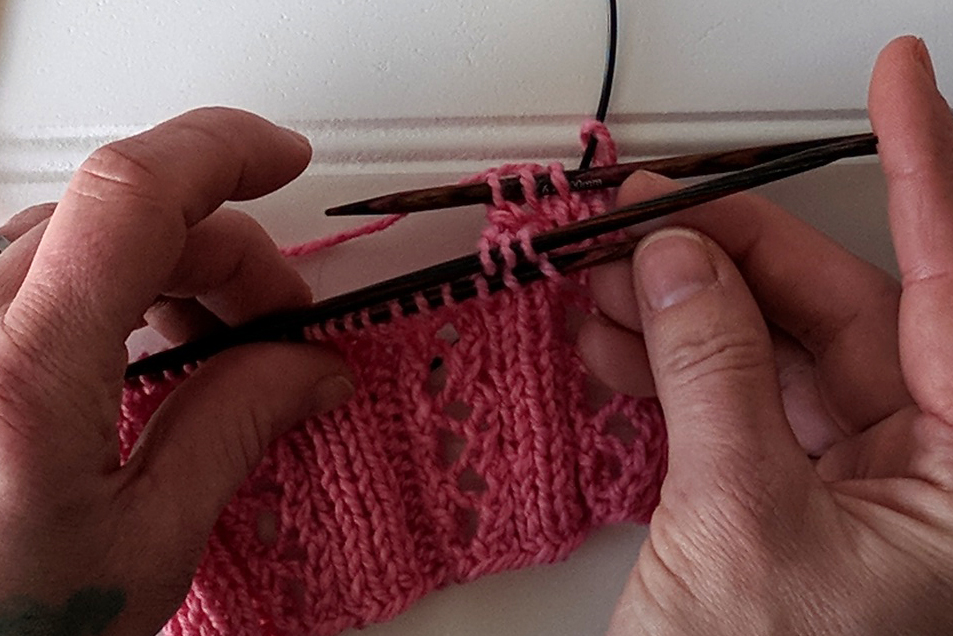
Now we’re going to be working k3tog – 1 st from each needle. Insert the tip of the right needle into the first st on the front needle.

Continue by inserting the tip of the right needle into the first stitch on the middle needle, and then the back needle.

Yarn over and pull through all 3 stitches.

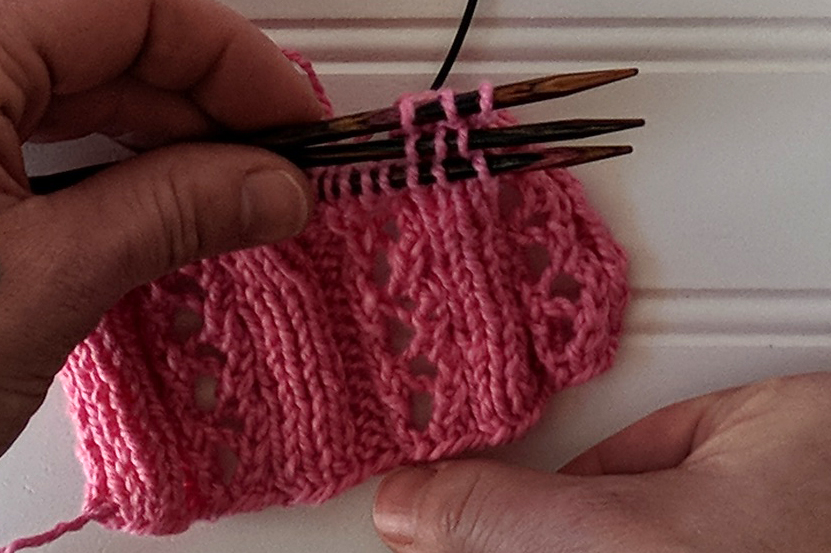
Slip the stitches from the needles – k3tog complete. You will be working k3tog 2 more times to finish this pleat.

All com-pleated. Sorry, I couldn’t resist.

If you thought this looked complicated at the beginning, I hope I’ve changed your mind. It’s just a matter of arranging some stitches and working some k3togs.

Happy knitting!


Day 6 of Winter

The Pine View scarf is a perfect winter accessory. It’s large, warm, and has an excellent amount of squish because it’s knit in our Deluxe Chunky.

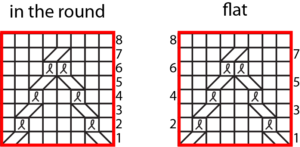
This pattern only uses charts, but don’t let that intimidate you! The stitches are not at all complicated. You’ll get a nice rest at the center of the scarf, too. Personally, I prefer charts over written instructions because I’m a visual person. Charts enable you to see the stitches before you create them.

With that said, some charts can seem overwhelming. You might feel as though you’re getting lost in the grid full of symbols. Fear not, because I’d like to share some helpful tips and tricks for reading charts.

1. Familiarize yourself with symbols.

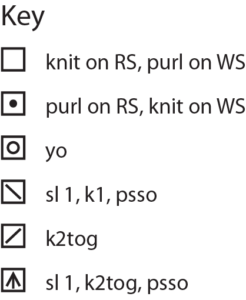
Take time to review the key and ensure you understand what  each symbol means.

2. Flat or in the round?

Is the pattern flat or in the round? When you knit in the round, charts are read from right to left on every row. Pine View is knit flat, meaning that on right side rows you’ll read right to left, and on wrong side rows you’ll read left to right.

Charts that are knit flat have numbers on both the right and left sides. Charts knit in the round only have numbers on the right side.

3. Stay on track!

Highlighters – Don’t cross out rows—you want to be able to go back and read previous rows in case you make a mistake. And, if you’re like me, you will make mistakes! I probably use highlighters most frequently. Simply highlight the rows you’ve completed, and read from the row above.

Washi Tape – For those who prefer not to see previous rows at all, washi tape is a great solution. It can easily be removed from the paper, so you can hide previous rows and simply peel back the tape to see them.

Stitch markers – For charts that have repeats, use stitch markers. It honestly makes a world of difference. A mistake is less likely to offset the entire row if you’re using stitch markers between each repeat.

You can find this pattern, Day 6 of our 12 Days of Winter collection here.

Natural Dye Series: Part II

Happy Halloween! Nothing will make you feel as though you’re creating a witches’ brew like dyeing with lichen. It’s a unique way to get into the holiday spirit.

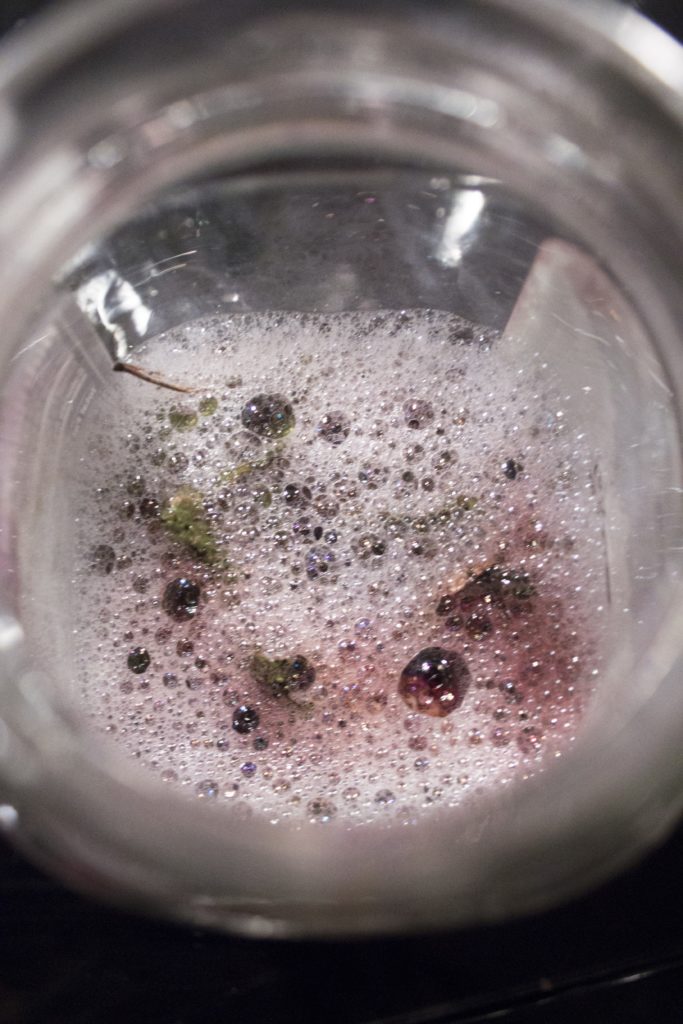
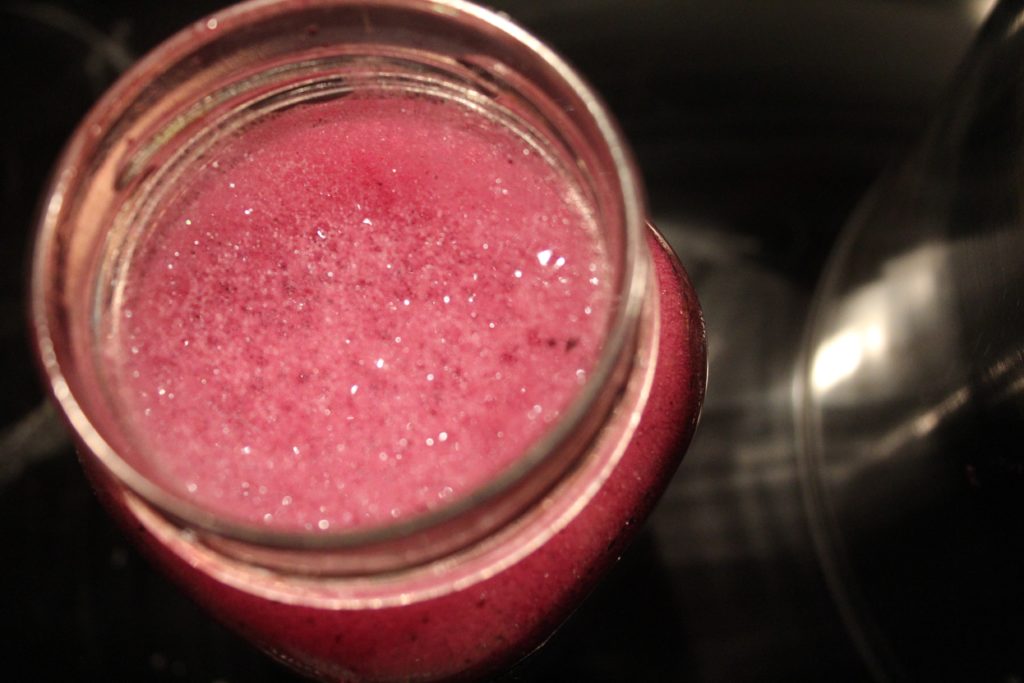
In the second installment of the Natural Dye series, I’m going to show you how to use lichens as a natural dye. If you thought the marigold dye from Part I was fun, you will love this installment. Remember the foamy, magenta liquid in the jar from Part I? That’s the lichen dye.

This dye takes about a month to prepare, but it is well worth the wait. Something about it is magical because you’d never expect such a vibrant color to come from a leathery, grey-brown lichen.

For today’s tutorial you’ll need:

  • A glass jar – canning jars or recycled sauce jars are perfect
  • Measuring cups
  • Ammonia
  • Water
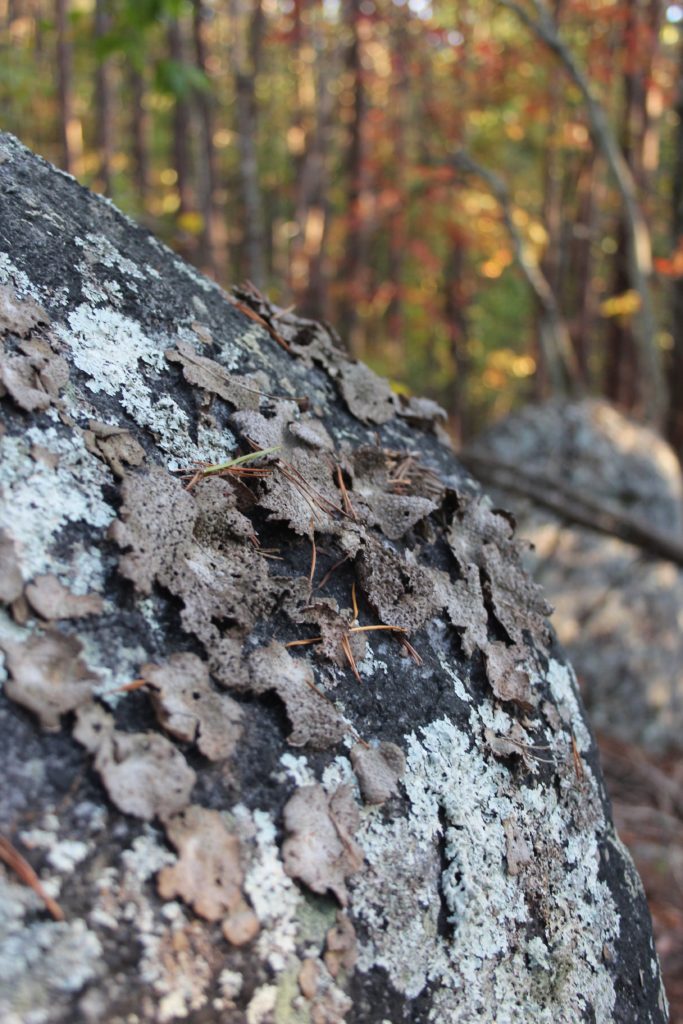
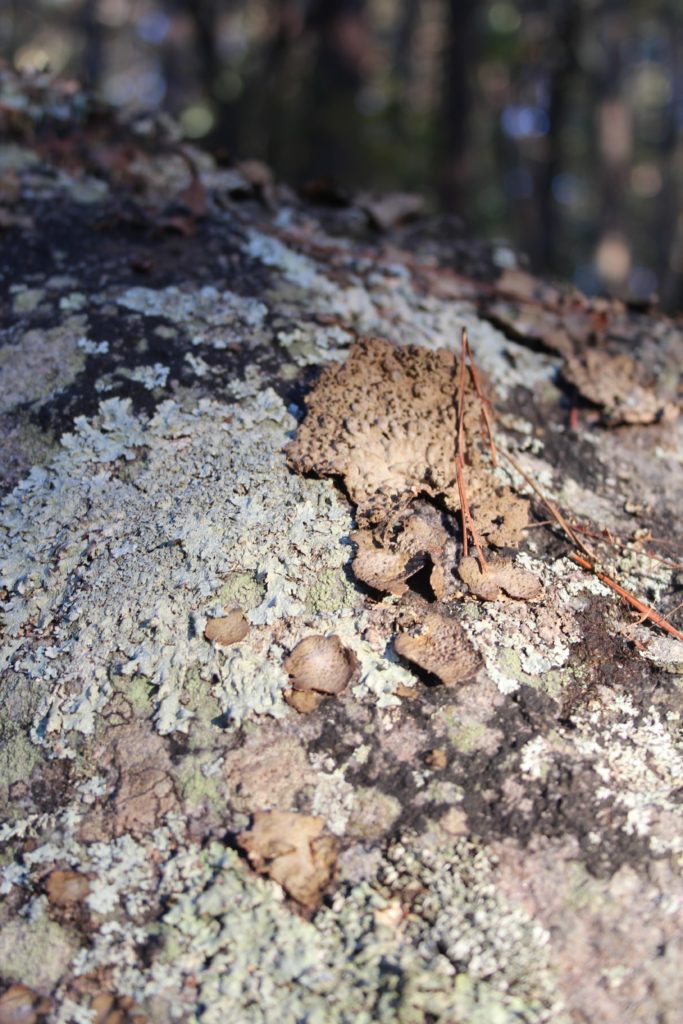
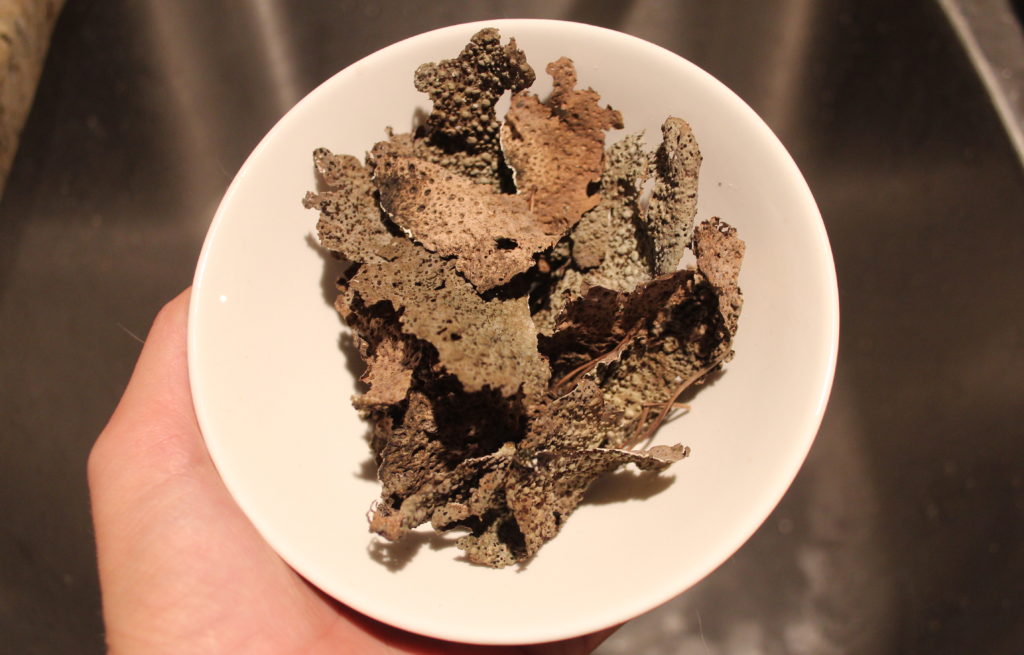
  • A handful of umbilicaria pepulosa (pictured below) – this type of lichen is abundant on boulders, and there are several variations. For results closest to mine, try to find this lichen. You may achieve different results with another variation, but that is part of the fun of natural dyeing!

Before you get started, I want to include a note on ethics and lichen dyes. Unlike our marigold tutorial, in which I grew and harvested my own plants, lichen dyeing requires you to search public and/or forested land. Be considerate and mindful of your impact on the land and how you may be disturbing the ecosystem. Do not collect more than you’ll need – a little goes a long way. Avoid scraping lichen from stones as much as possible as lichen is slow-growing and may not regenerate. I went out on a windy day over the weekend and found more than enough on the ground surrounding the boulders.

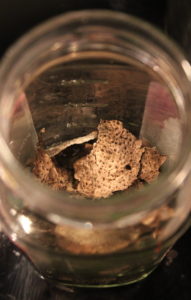
Once you have your lichen, you’re ready to go. To achieve a magenta dye from umbilicaria, an ammonia extraction is required. After you’ve collected your lichen, place your handful into a jar.

Next, create a 50/50 solution of water and ammonia. I’ve measured out 1 cup each. Pour the solution over the lichen, leaving about an inch of air at the top of the jar. You should notice the solution briefly change to a brilliant shade of red or purple that will fade to brown.

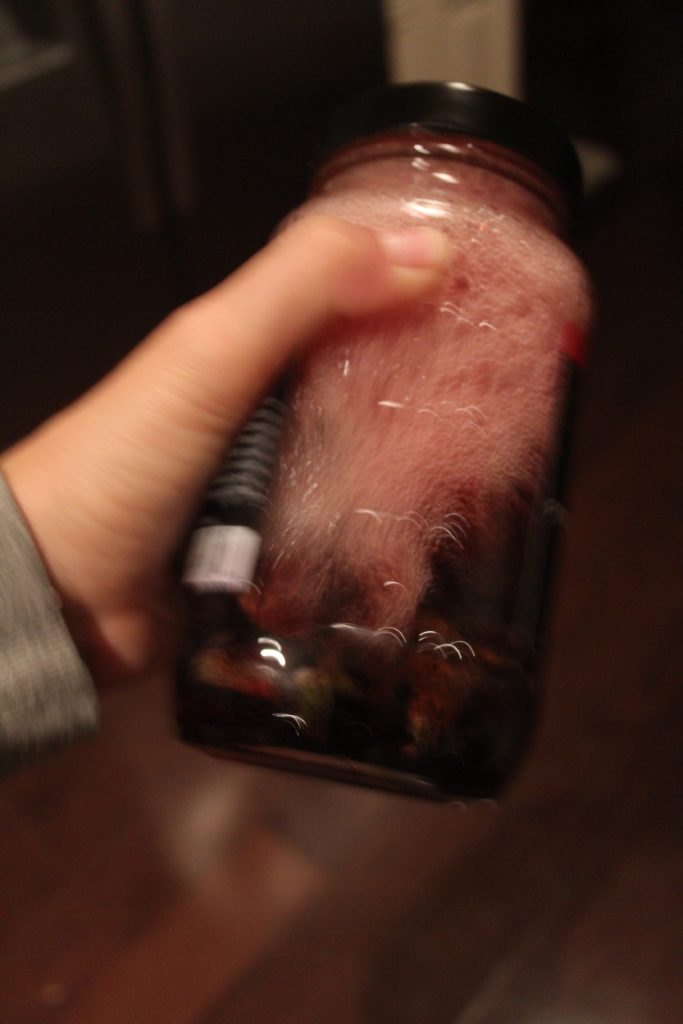
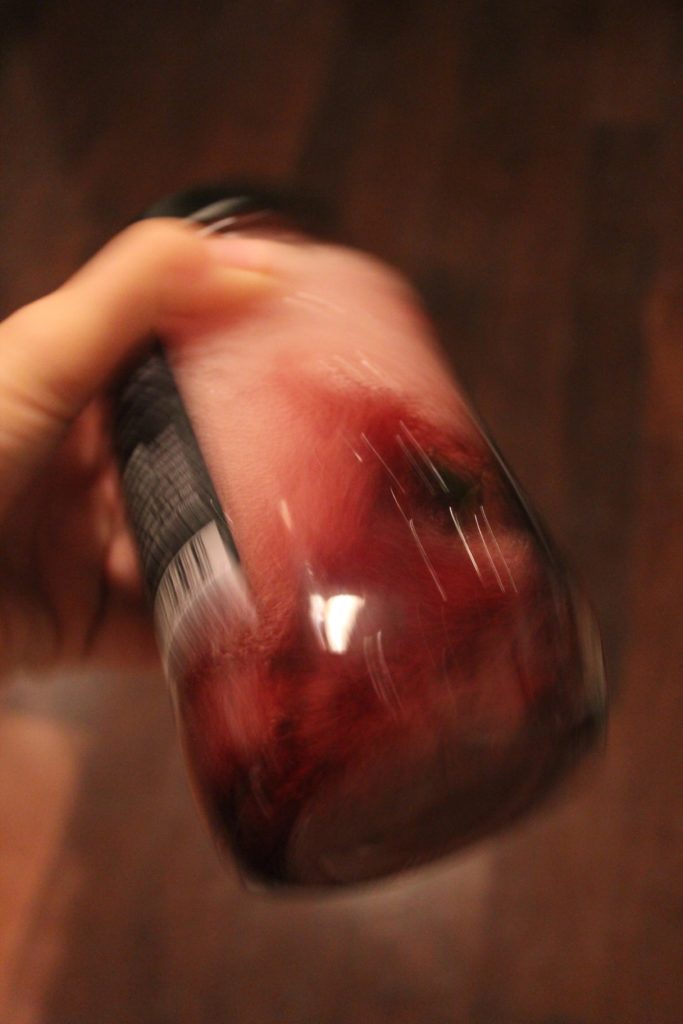
Close the lid tightly and shake to your heart’s content. Give the jar a few shakes each day for about three weeks. Once a week, take the jar outside and carefully remove the lid and swirl the contents of the jar to allow oxygenation. Repeat the process over the next few weeks until the liquid is purple or magenta. This process can take more than three weeks. Do not rush it– it is a practice in patience. I’ve dyed this way many times and have found that I can achieve a gorgeous dye after about a month.

Since I already have another jar of concentration ready to go, I’m going to dive into dyeing.

For this part of the tutorial you’ll need:

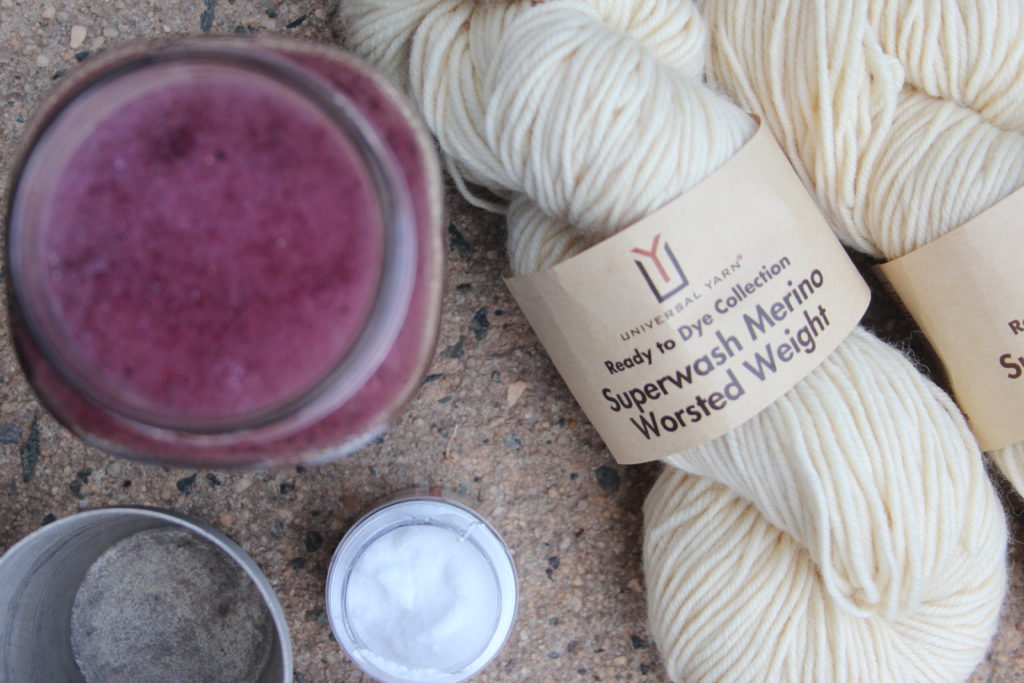
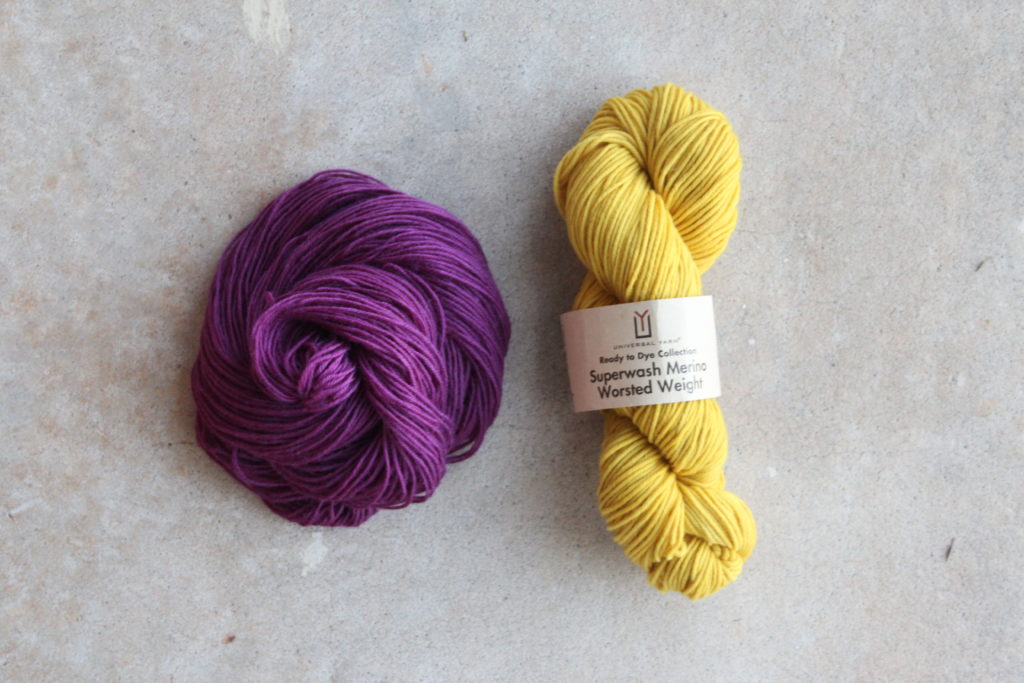
  • 1 skein of Universal Yarn Ready to Dye Superwash Merino Worsted Weight yarn.
  • Jar of concentrated dye
  • One stainless-steel pot that you don’t plan to use for cooking – I purchased mine for a few dollars at a thrift store.
  • Tongs – they don’t need to be stainless steel but choose some that you won’t use for cooking.
  • Measuring cups
  • Water

In Part I, you used a mordant to help fix the marigold dye to the fiber. That step isn’t necessary for this lichen. In fact, it can actually dull the color.

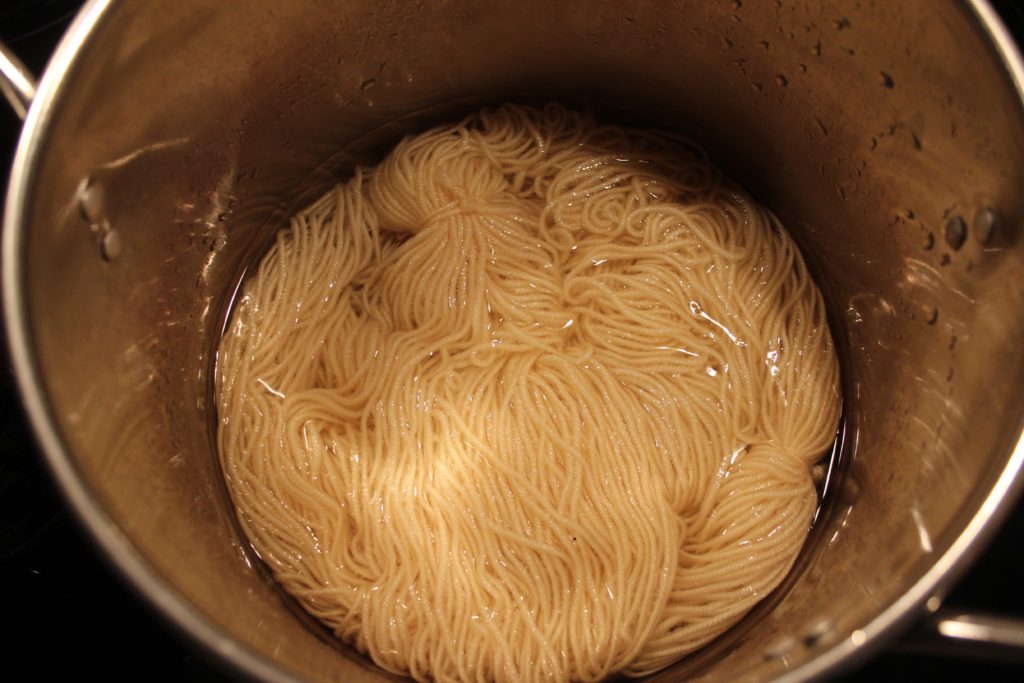
Fill a stainless-steel pot with 4-5 cups of water and place your yarn inside. Set aside for approximately 30 minutes.

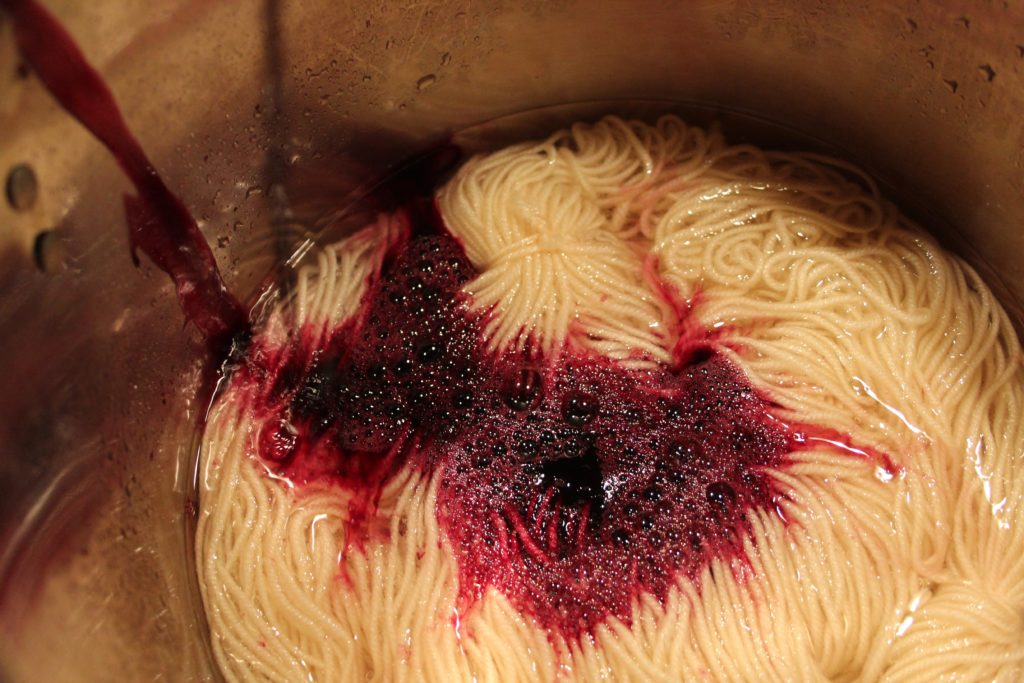
Pour off approximately 1 cup of the concentration into the pot. Gently stir and turn the yarn to incorporate the dye into the water. I suggest you open your windows for ventilation as you’ll be warming an ammonia solution over the stove-top.

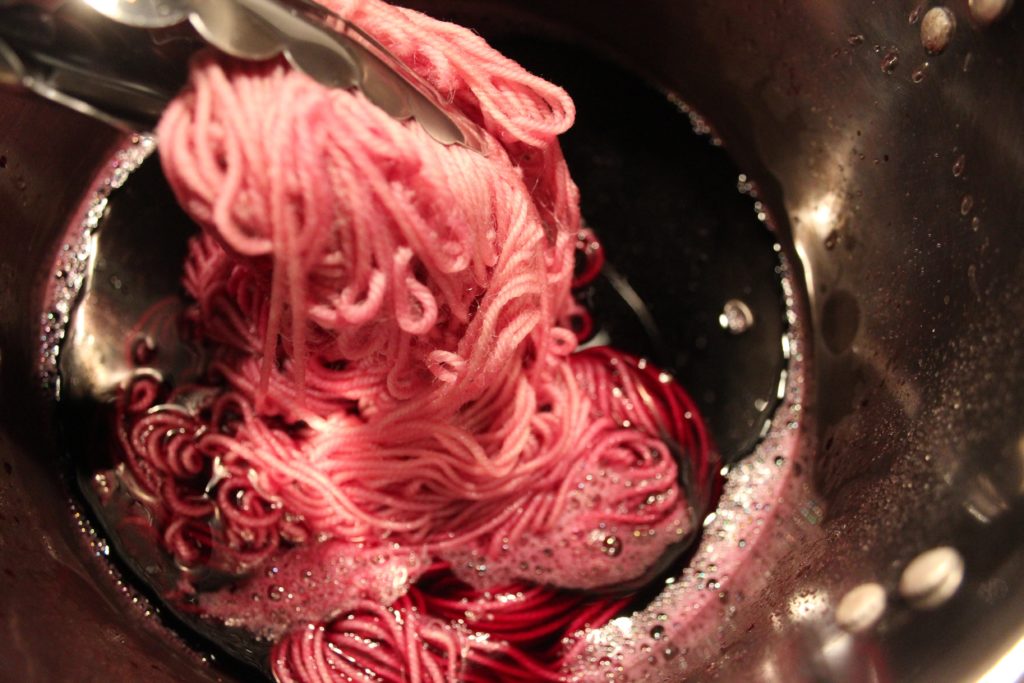
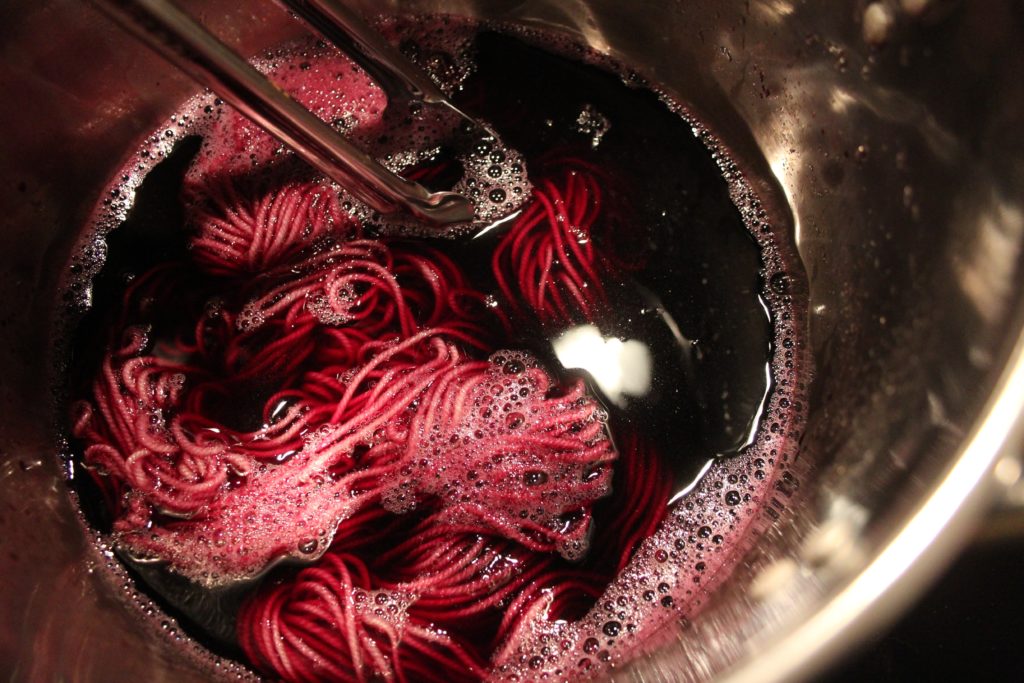
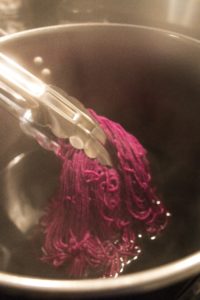
Bring water to just under a simmer. If you have a thermometer it should be about 190 F. Allow the yarn to soak in the dyebath for approximately one hour, occasionally turning the yarn gently with your tongs. Notice how brilliantly saturated the color becomes.

\

Remove from the heat and allow the yarn to cool in the dyebath overnight.

Remove the yarn from the dyebath and thoroughly rinse. I do recommend a gentle detergent or wool wash as the ammonia can be quite pungent. Hang and allow to dry completely. Then, pat yourself on the back for your patience. I told you it was worth the wait!

I’m working on a pattern that uses the yarn from Parts I and II of the Natural Dye series. In the future, I’ll show you how to use natural dyes on some of our other Ready to Dye yarns.

Summit Scarf – Triple Knotted Fringe

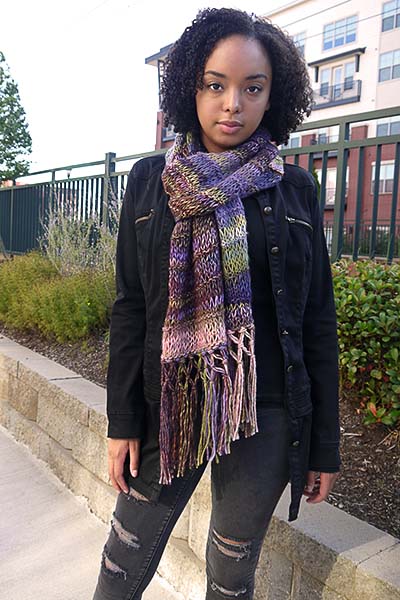
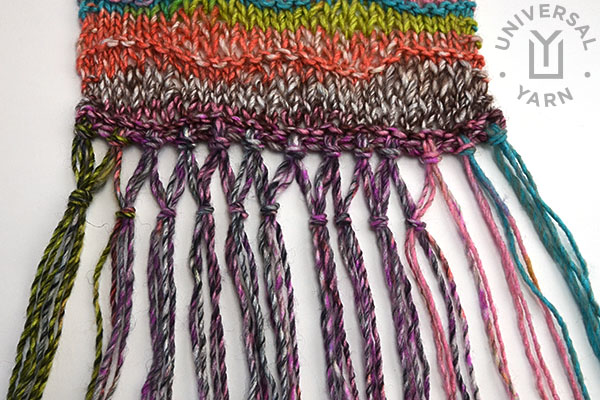
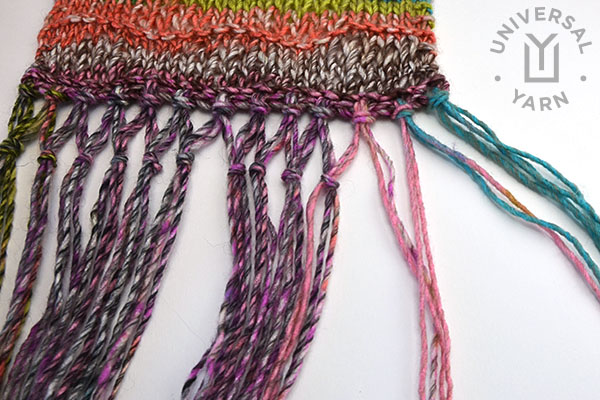
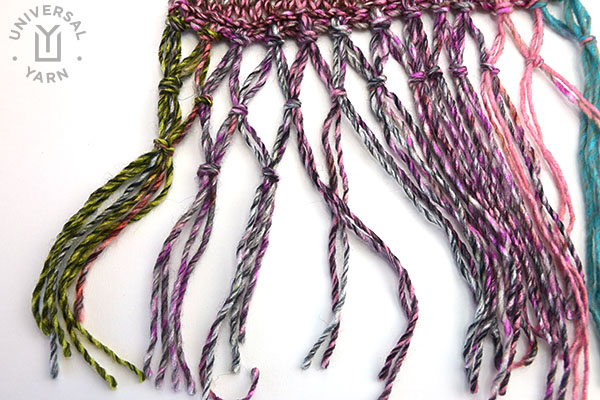
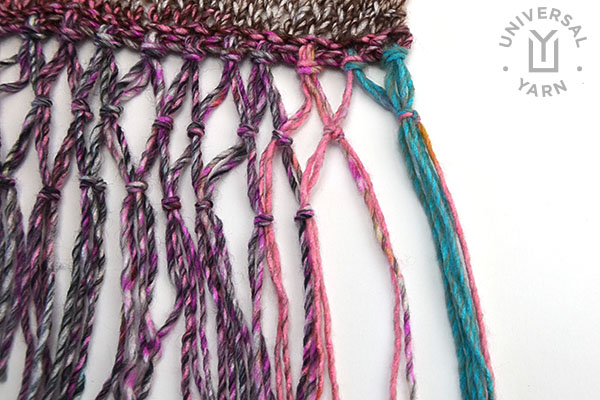
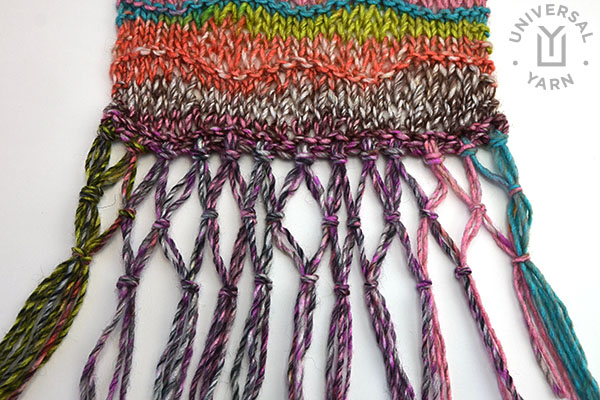
The Summit Scarf from our Colorful Commute e-book features triple knotted fringe. It is an easy way to add a lot of visual interest to your project. It may look complicated, but it’s really quite simple and doesn’t take much more time or effort than plain fringe. Today I’ll show you how to do it!

summitscarf4_classicshadesfrenzy_web

Step 1: Begin as you normally would when adding fringe to a project, for this scarf I cut 21” strands of yarn. Then, holding two strands together as one, I attached groups of fringe to the edge of the scarf, about one group every other stitch.

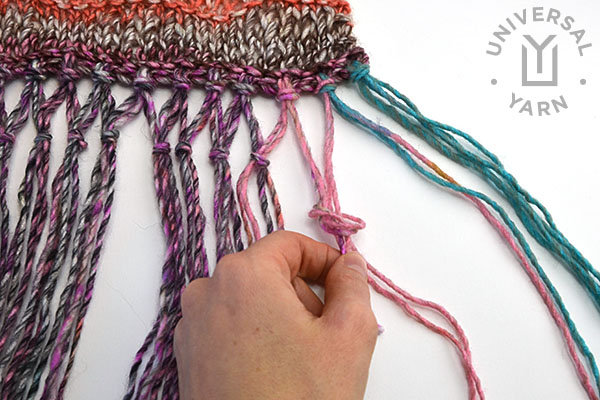
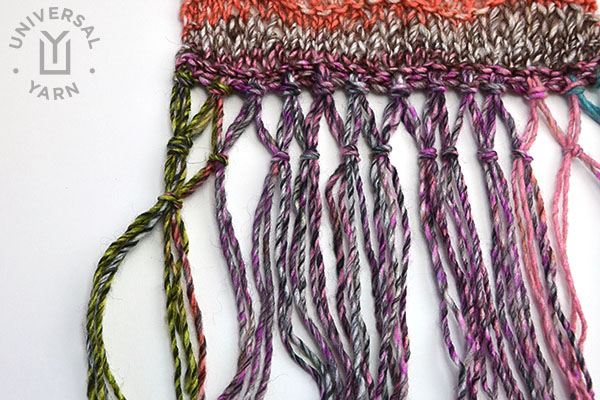
Step 2: Take half of one group of fringe knot together with half of next group of fringe 1” below first row of knots. I did not split the first and last groups of fringe.

fringe1

fringe2

fringe3

fringe4

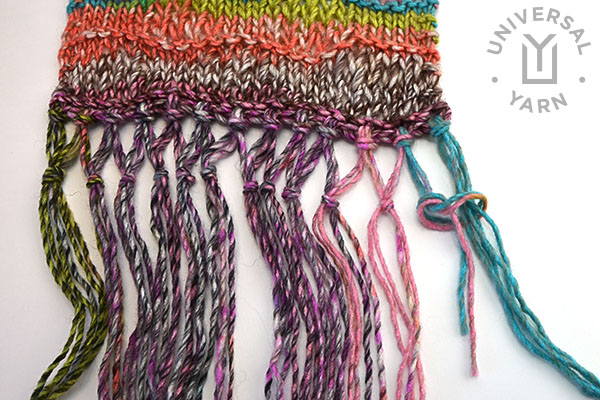
Step 3: Repeat for another row of knots. To finish, trim fringe evenly.

fringe5

fringe6

fringe7

fringe8

That’s all there is to it! You can keep adding more rows of knots to create some really amazing  and intricate looking fringe, use longer strands of yarn when increasing the number of knotted rows. Beads can be placed above the knots (or even in place of the knots) to add some sparkle – there are so many possibilities.


Trade Street Cowls and Hat – Applied Crochet Lines

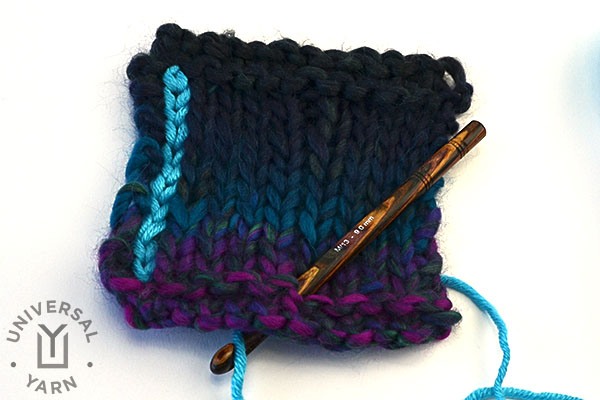
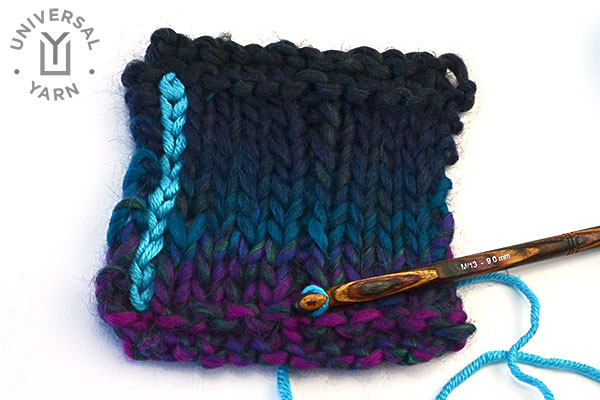
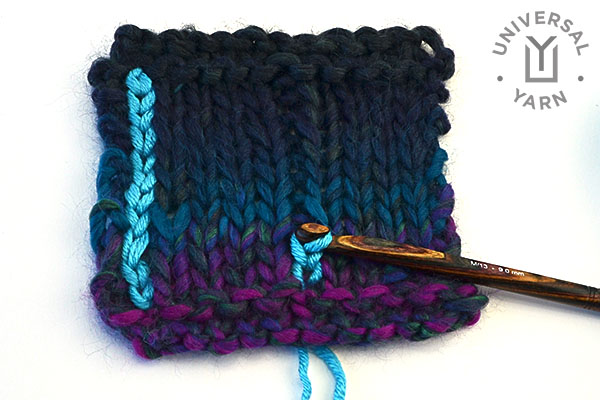
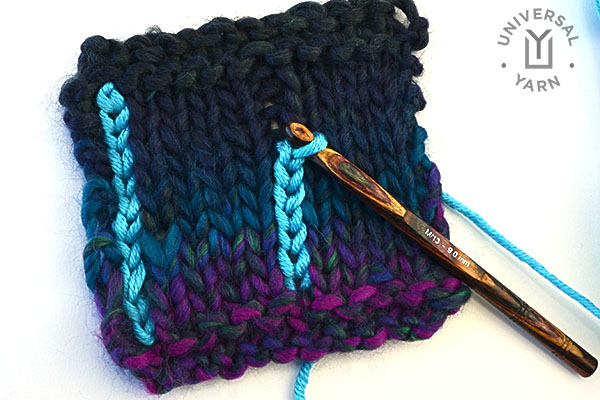
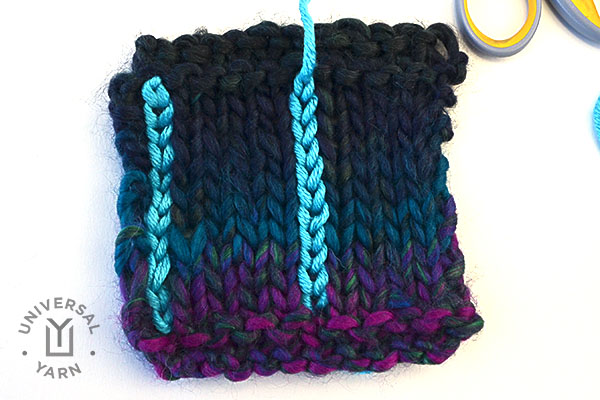
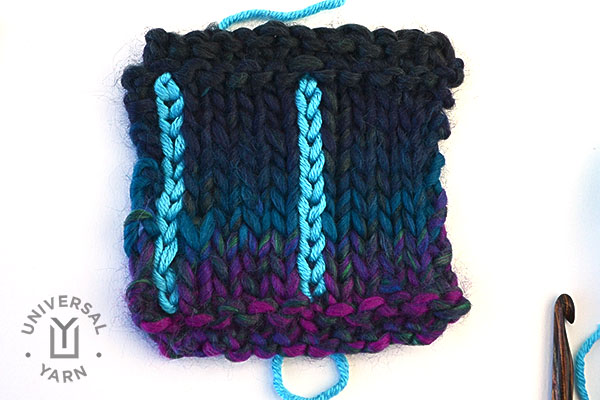
Today, I have another tutorial involving a crochet hook  to go along with our In Transit e-book.  The Trade Street Cowls and Hat pattern uses contrasting applied crochet lines to create vertical stripes. The  lines are added to the purl columns in the finished pieces.

The Trade Street Hat and Cowls feature an applied crochet stripe. No carrying colors on the back side! The pattern comes with both long and short versions of the cowl.

It can be a lot of fun choosing the color for the applied crochet lines, and there are a few options, depending on the look you would like to create. Using a solid color in Uptown Bulky that also appears in the Main Color produces a plaid-like effect. With Classic Shades Big Time as the Contrasting Color, there are a ton of options – choose a highly contrasting section of the color repeat to make the stripes pop, use a section that is neutral or similar to the Main Color for more subtle stripes or choose a section with quicker color changes for gradient stripes.

Let’s get started!

Once you have finished and blocked your cowl or hat, you are ready to add the applied crochet lines.

Step 1: Holding yarn beneath work, insert crochet hook through the center of the first purl st in a column.

appliedcrochet_1


Step 2: Pull a loop of yarn through to the front of the work.

appliedcrochet_2


Step 3: Insert hook through the next st up in the same purl column, pull a loop of yarn through to the front of the work (2 loops on hook), pull the second loop through the first loop (1 loop on hook); repeat along entire column.

appliedcrochet_3

appliedcrochet_4

Step 4: When entire column is complete, break yarn, leaving a 3 to 4 inch tail and pull through last loop.

appliedcrochet_5


Step 5: Pull tail to wrong side and weave in ends.

appliedcrochet_6

Keep going until all of the purl columns have applied crochet lines.

Will you go for subtle or bold stripes on your Trade Street Cowls and Hat?


Free Pattern Friday – Sideline Scarves

It’s Free Pattern Friday!
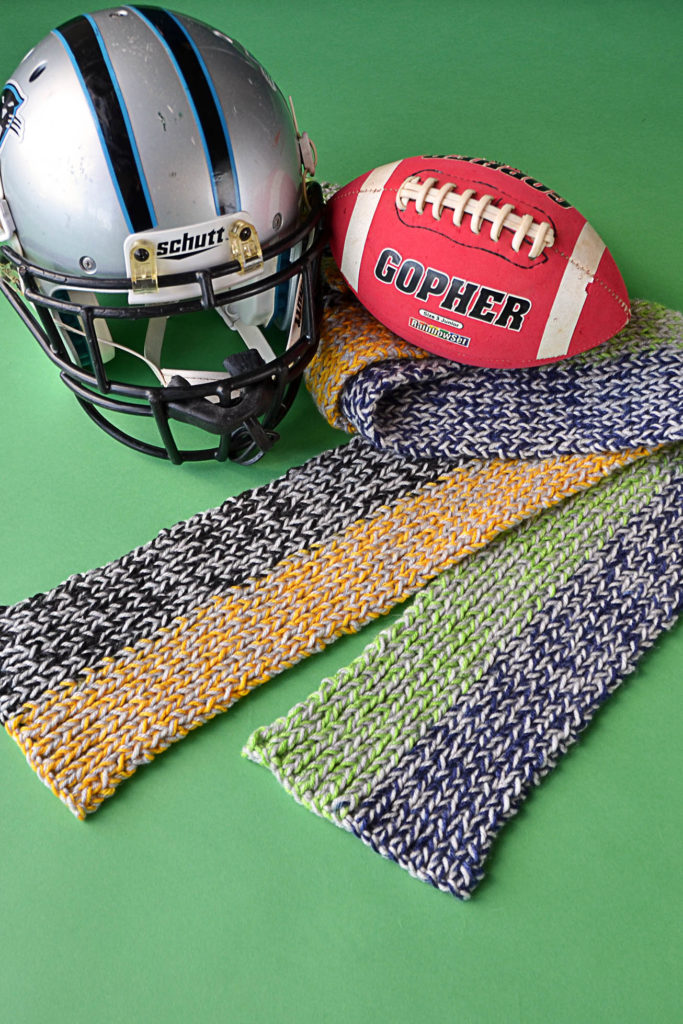
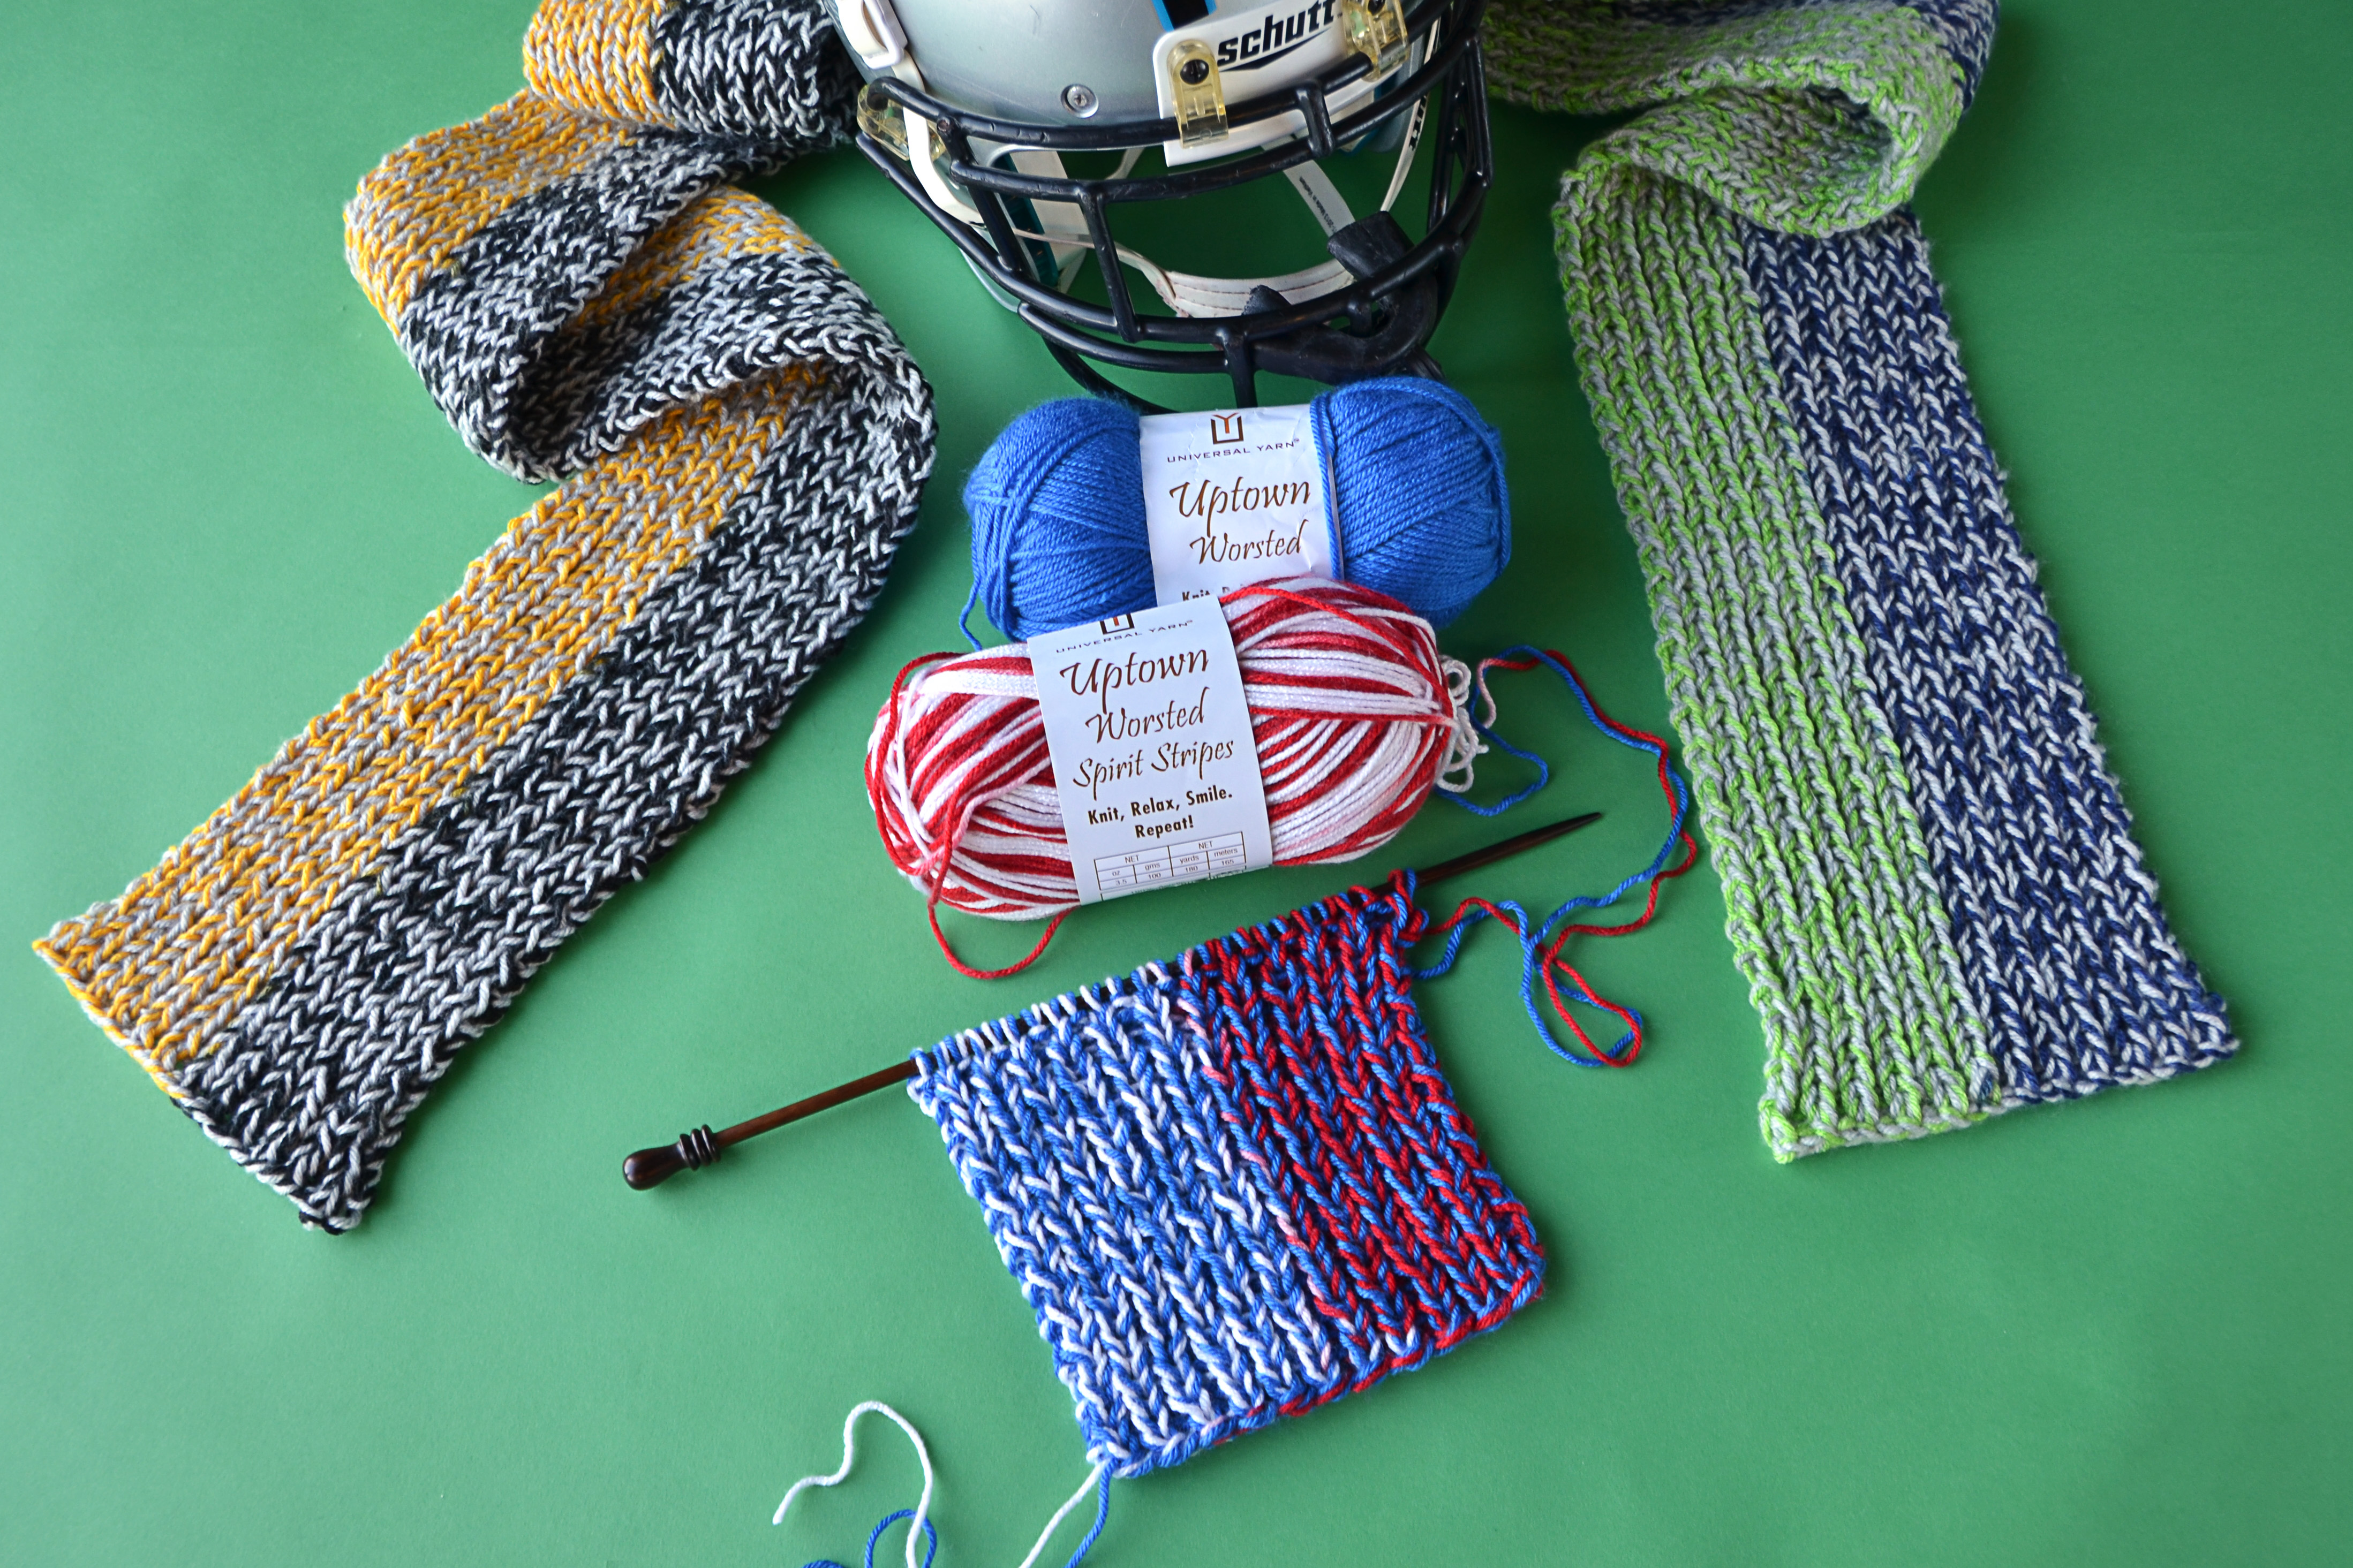
Just in time for football season (and gift knitting season!), we have the Sideline Scarves. And a photo tutorial!

Each scarf requires 1 ball of Uptown Worsted Spirit Stripes and 1 ball of Uptown Worsted. 1 strand of each yarn is held together throughout the scarf.

Though these scarves look like intarsia, I can assure you there is no manual changing of colors in this project. The vertical striping along this piece is inherent in the yarn print. This project takes advantage of the color changes in the yarn, and employs what we call “intentional color pooling.” The reason for the tutorial below rather than a simple pattern is that the color changes in Spirit Stripes can vary just a bit from skein to skein. With the method below, no matter what the lengths of color are in your particular skein, you can achieve intentional color pooling.

With just a little bit of preparation, you’ll be knitting away in no time!

Here’s how to do it!

When choosing yarn colors, it’s best to pick a color in Uptown Worsted solids that contrasts with the Spirit Stripes. In the tutorial below, I’m using Uptown Worsted 324 Black with Spirit Stripes 517 Arena (red and yellow)

Step 1: Holding both yarns together, cast on 30-40 stitches with a US Size 10 1/2 needle. Make sure that the last cast-on stitch ends right at the end of that particular color section in the Spirit Stripes. This is important because we’re going to be calculating just how many stitches are consumed by each section of color.
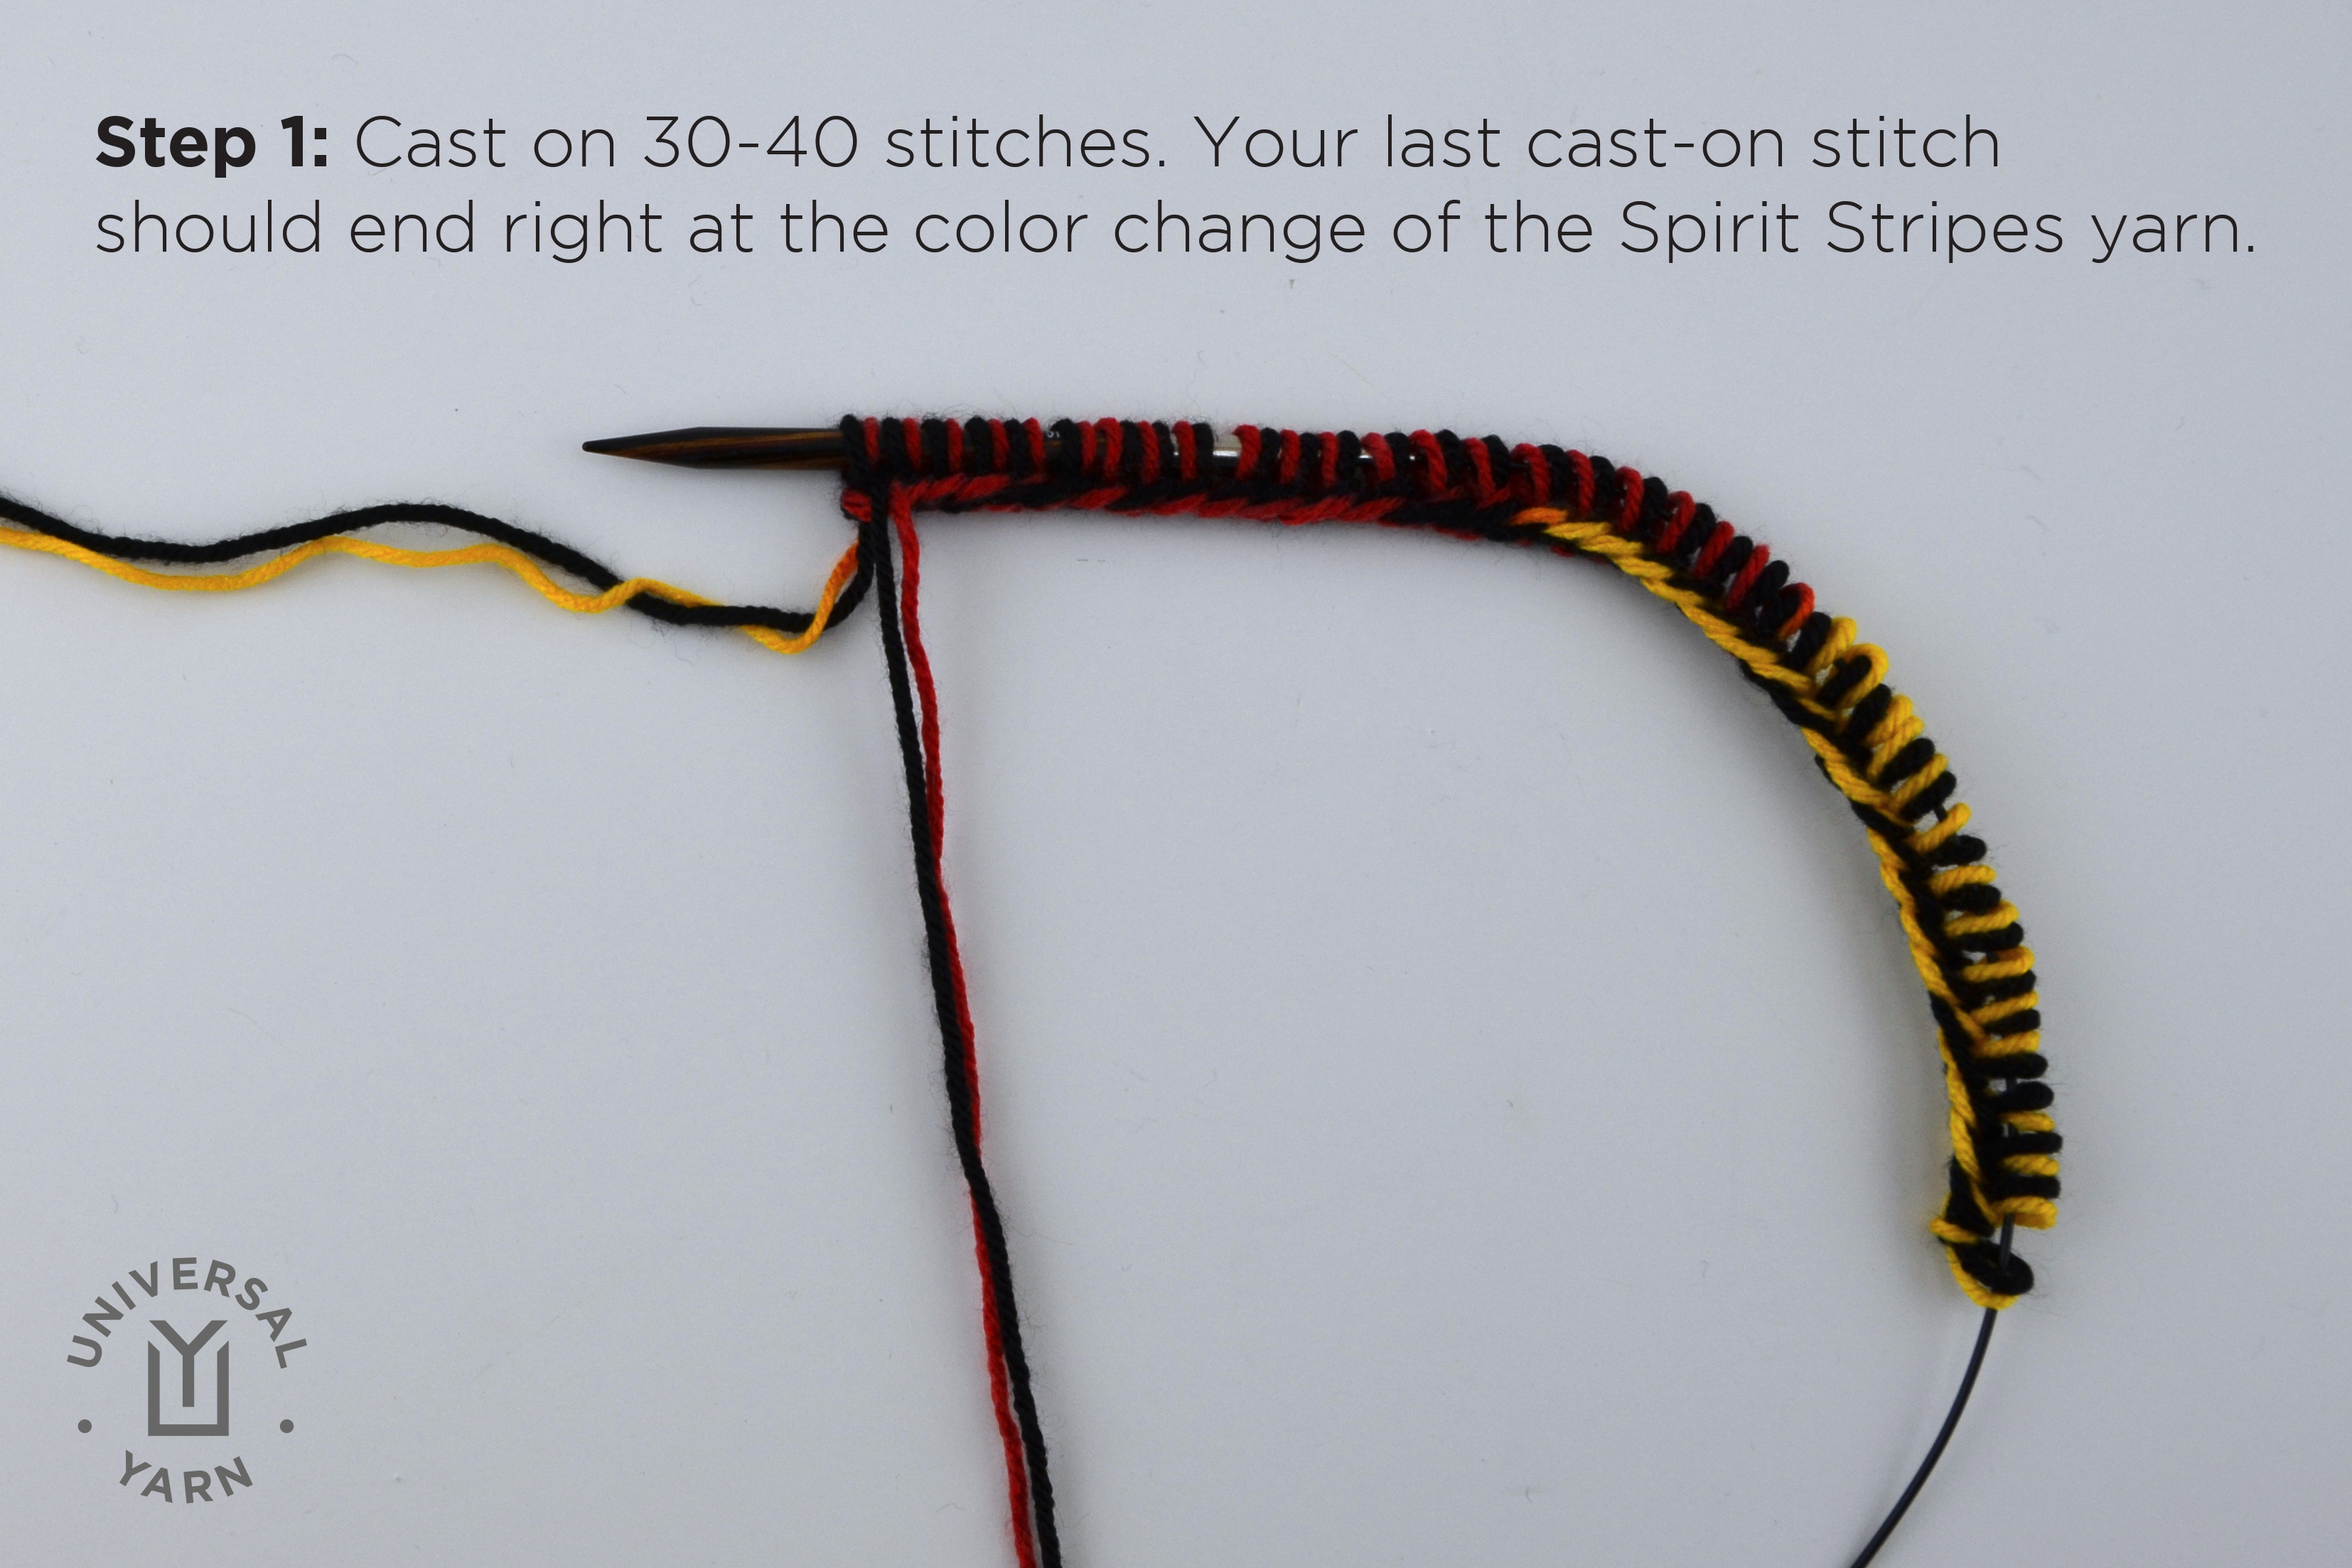
colorpoolscarf1

Step 2: Work in K1, P1 Ribbing through the end of the first section of color. Count how many stitches it took to get through this color, and round to the nearest even number. We will call this number of stitches “X.” If you’re as absent-minded as me, write this number down!
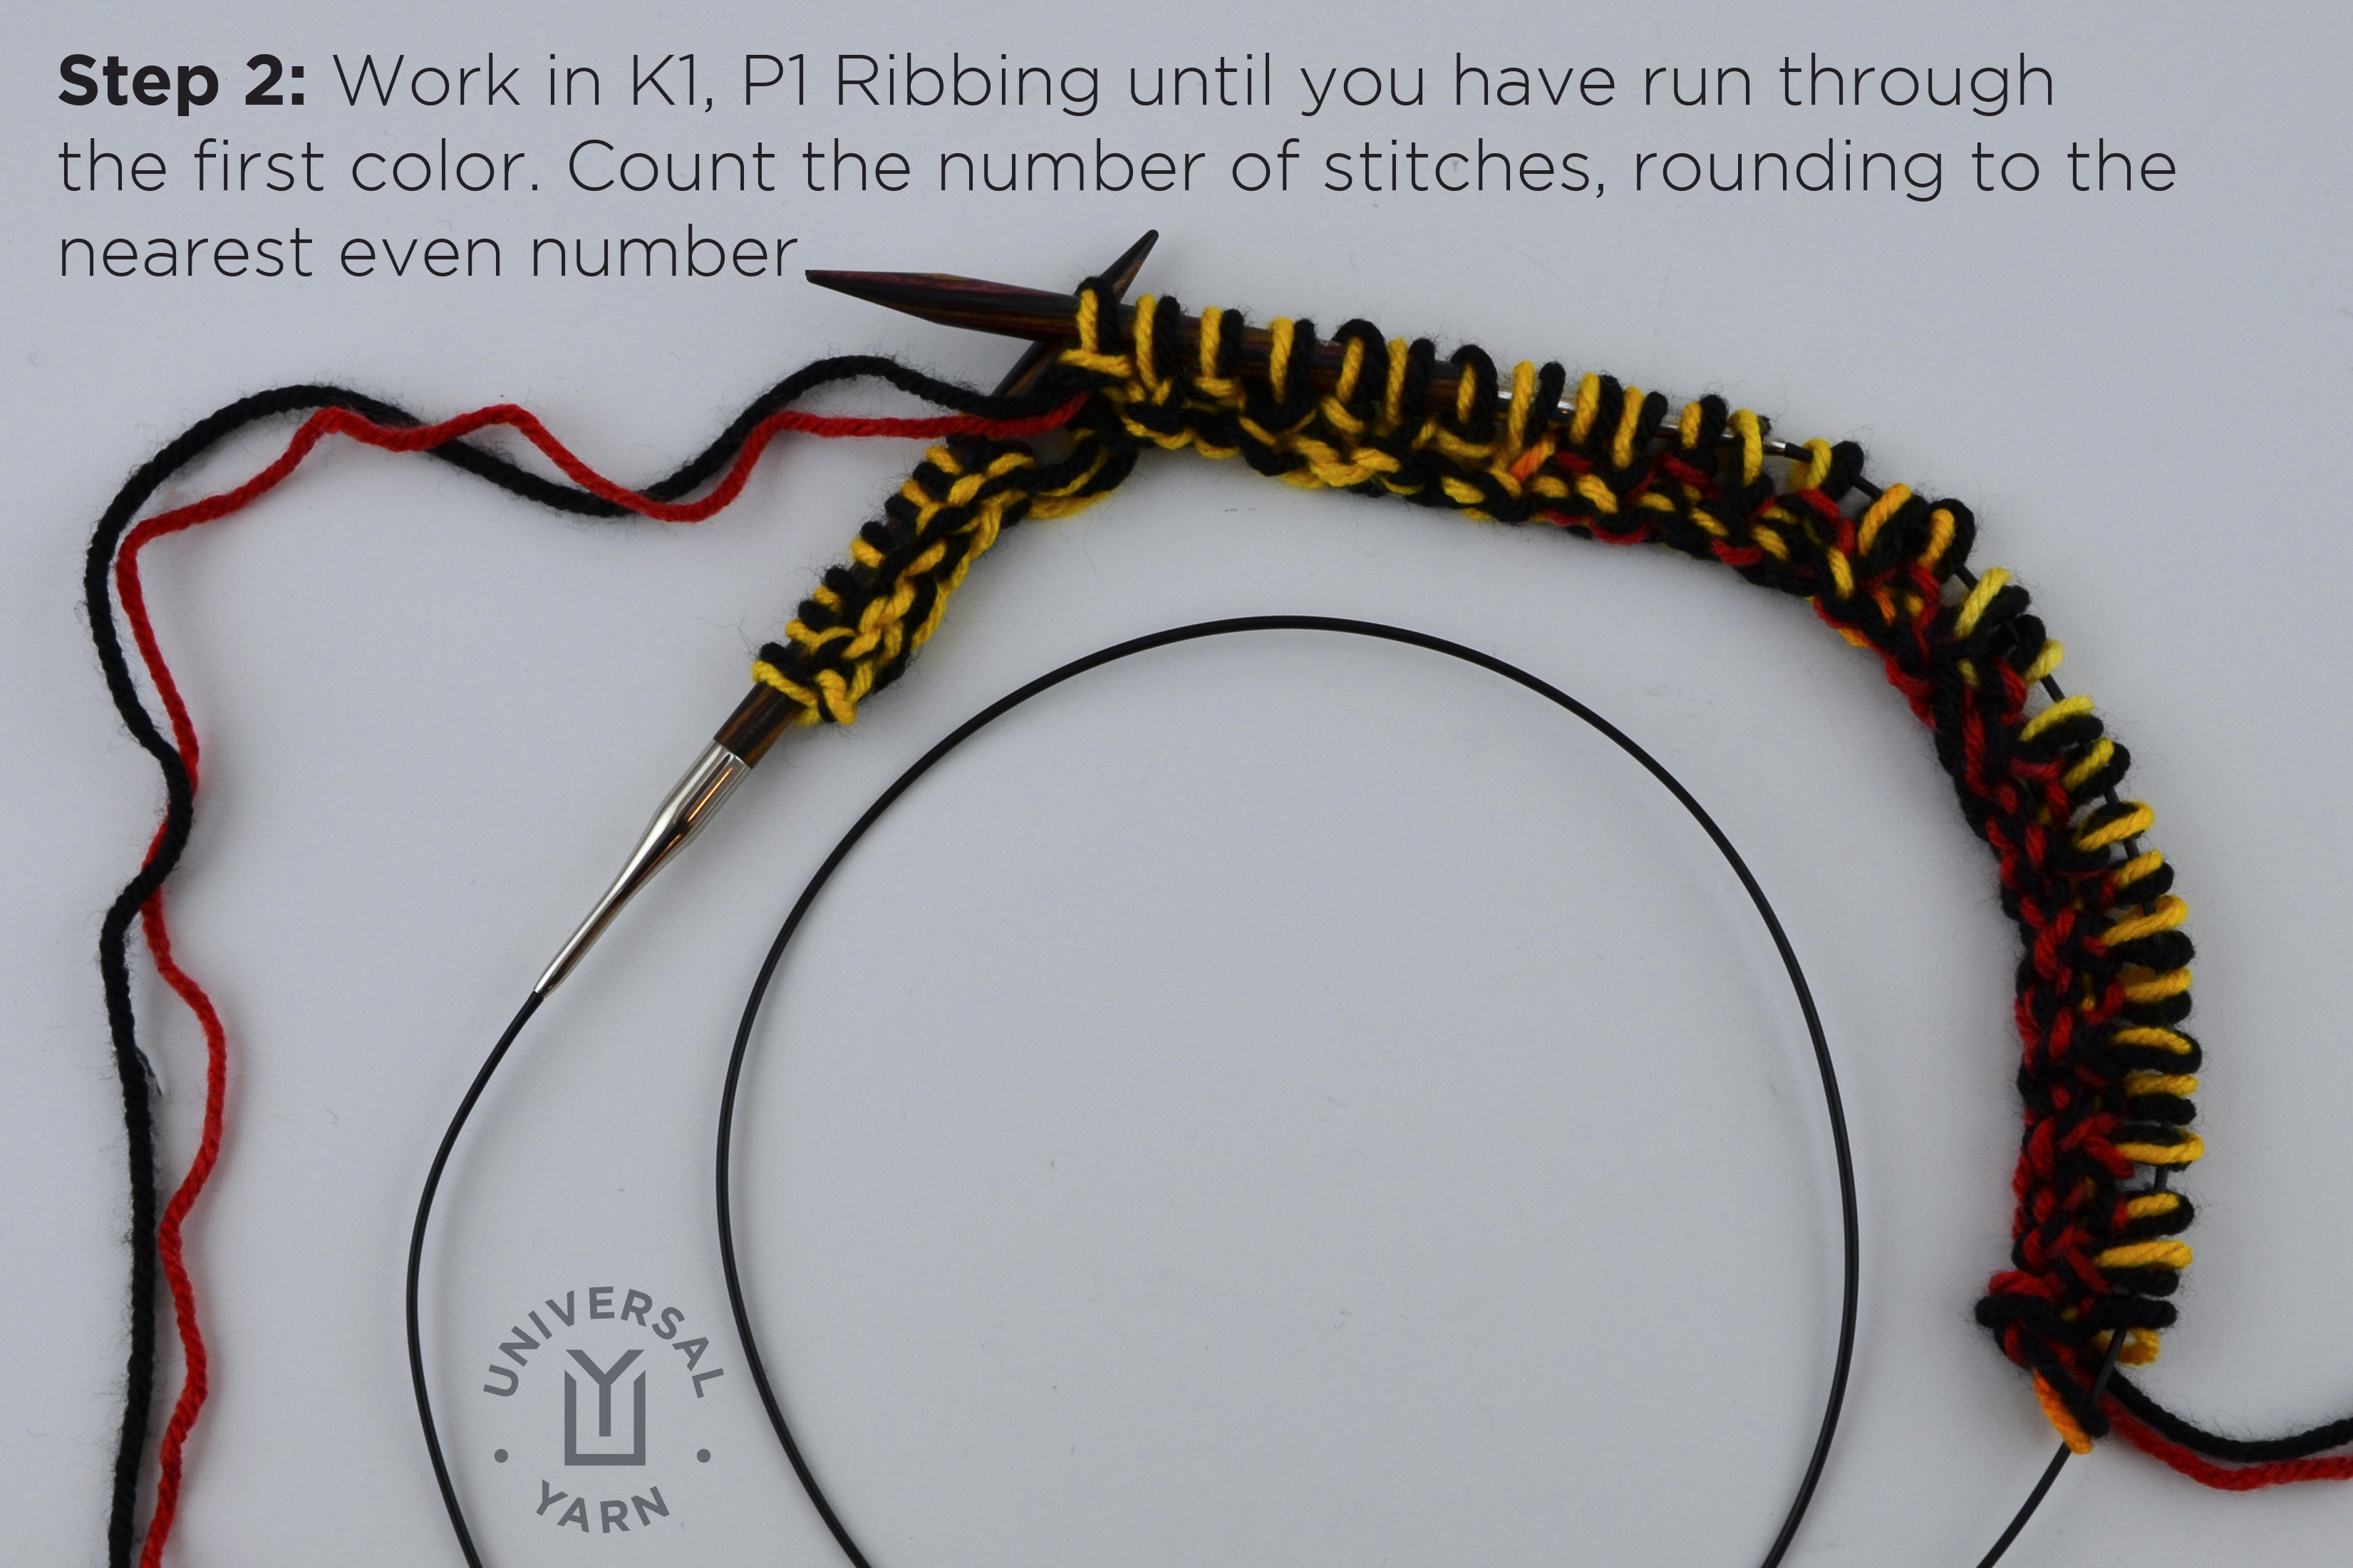
colorpoolscarf2

Step 3: Next, work in K1, P1 Ribbing through the second color and count the stitches. You will most likely have to turn the row before you’ve made it through this color – that’s okay, it’s unimportant now. We will call this color “Y.” Y may not be the same number as X, because the color sections are not always exactly the same length.
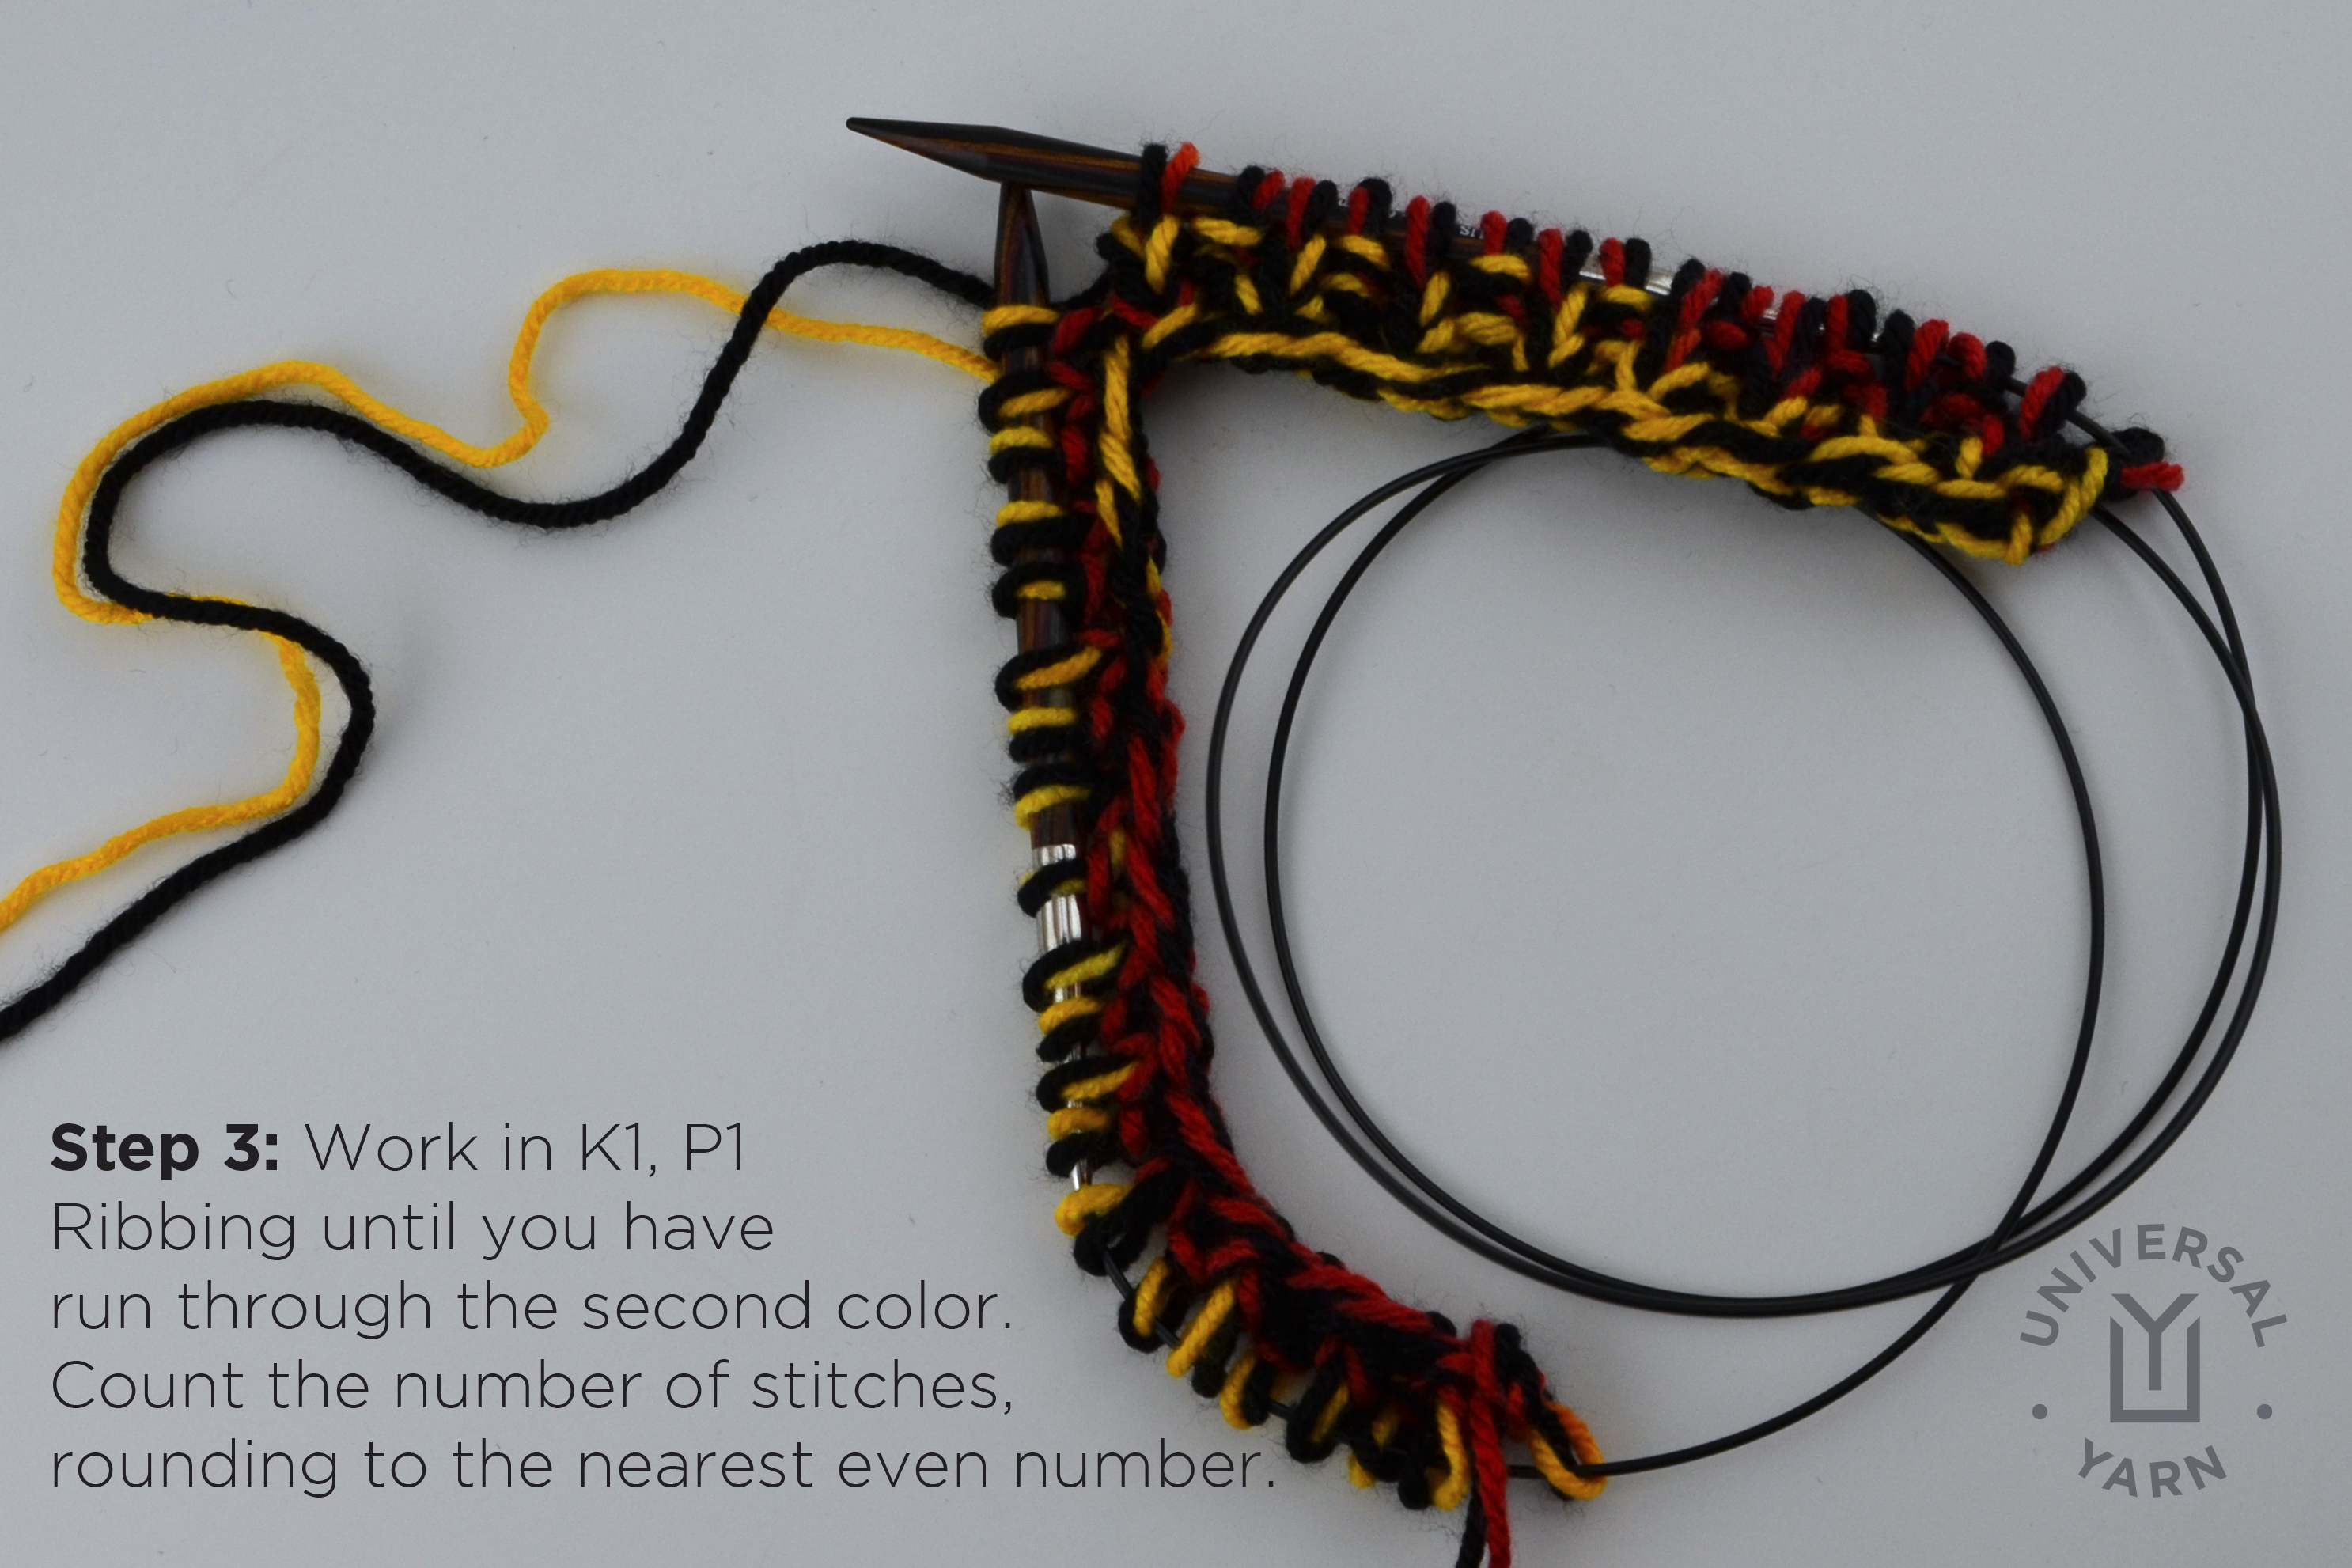
colorpoolscarf3

Step 4: Unravel your knitting from above. Add X + Y, then divide in half. The resulting number will be your cast on. Your cast on number should be roughly 24-30 stitches.

Step 5: With waste yarn, make a crochet chain that is several stitches longer than your cast on number. Now, holding both yarns together, from the tail end of the yarns, find a color section a few colors from the end. Find the halfway point of this section of color. Be sure to leave at least a yard or so of tail for binding off later.
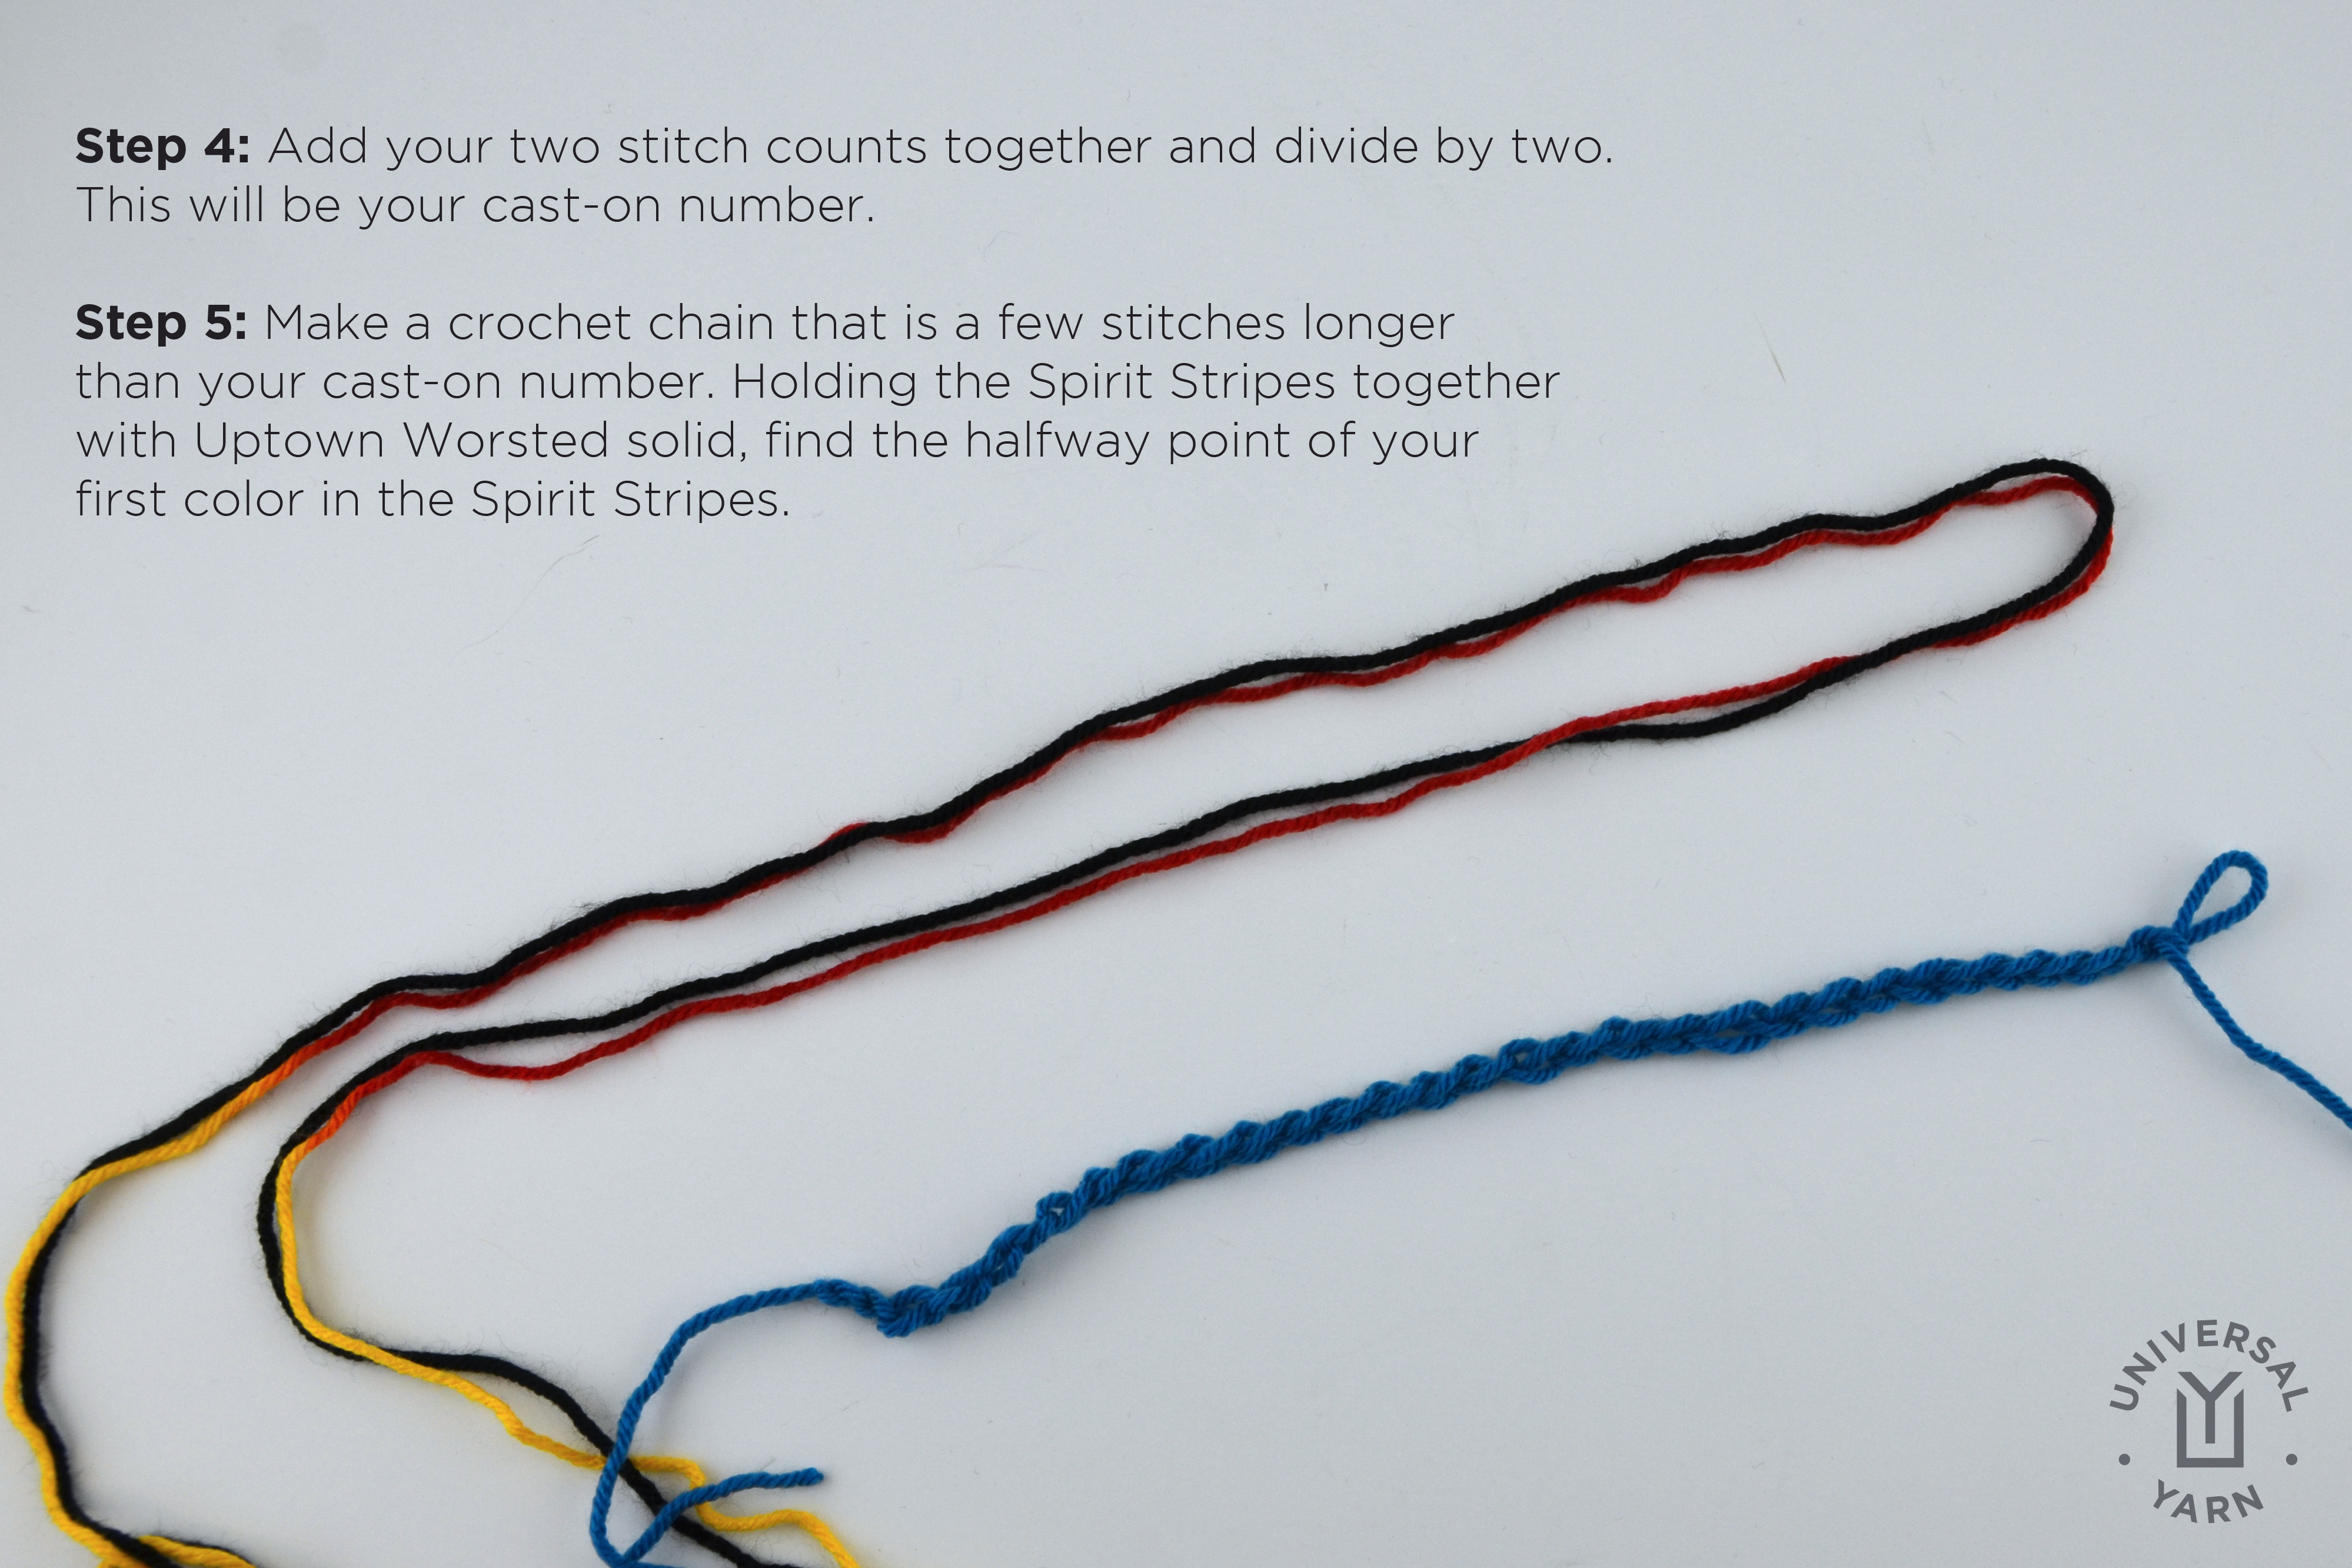
colorpoolscarf4

Step 6: Beginning at that halfway point in the first color section, working through the bottom bump of each crochet chain, [pick up and knit 1 stitch, pick up and purl 1 stitch] until you’ve run to the end of this color. The number of stitches you were able to pick up should be half of X (or Y). If you picked up more or fewer stitches before reaching the end of the color change, take out a few stitches and adjust tension as needed.
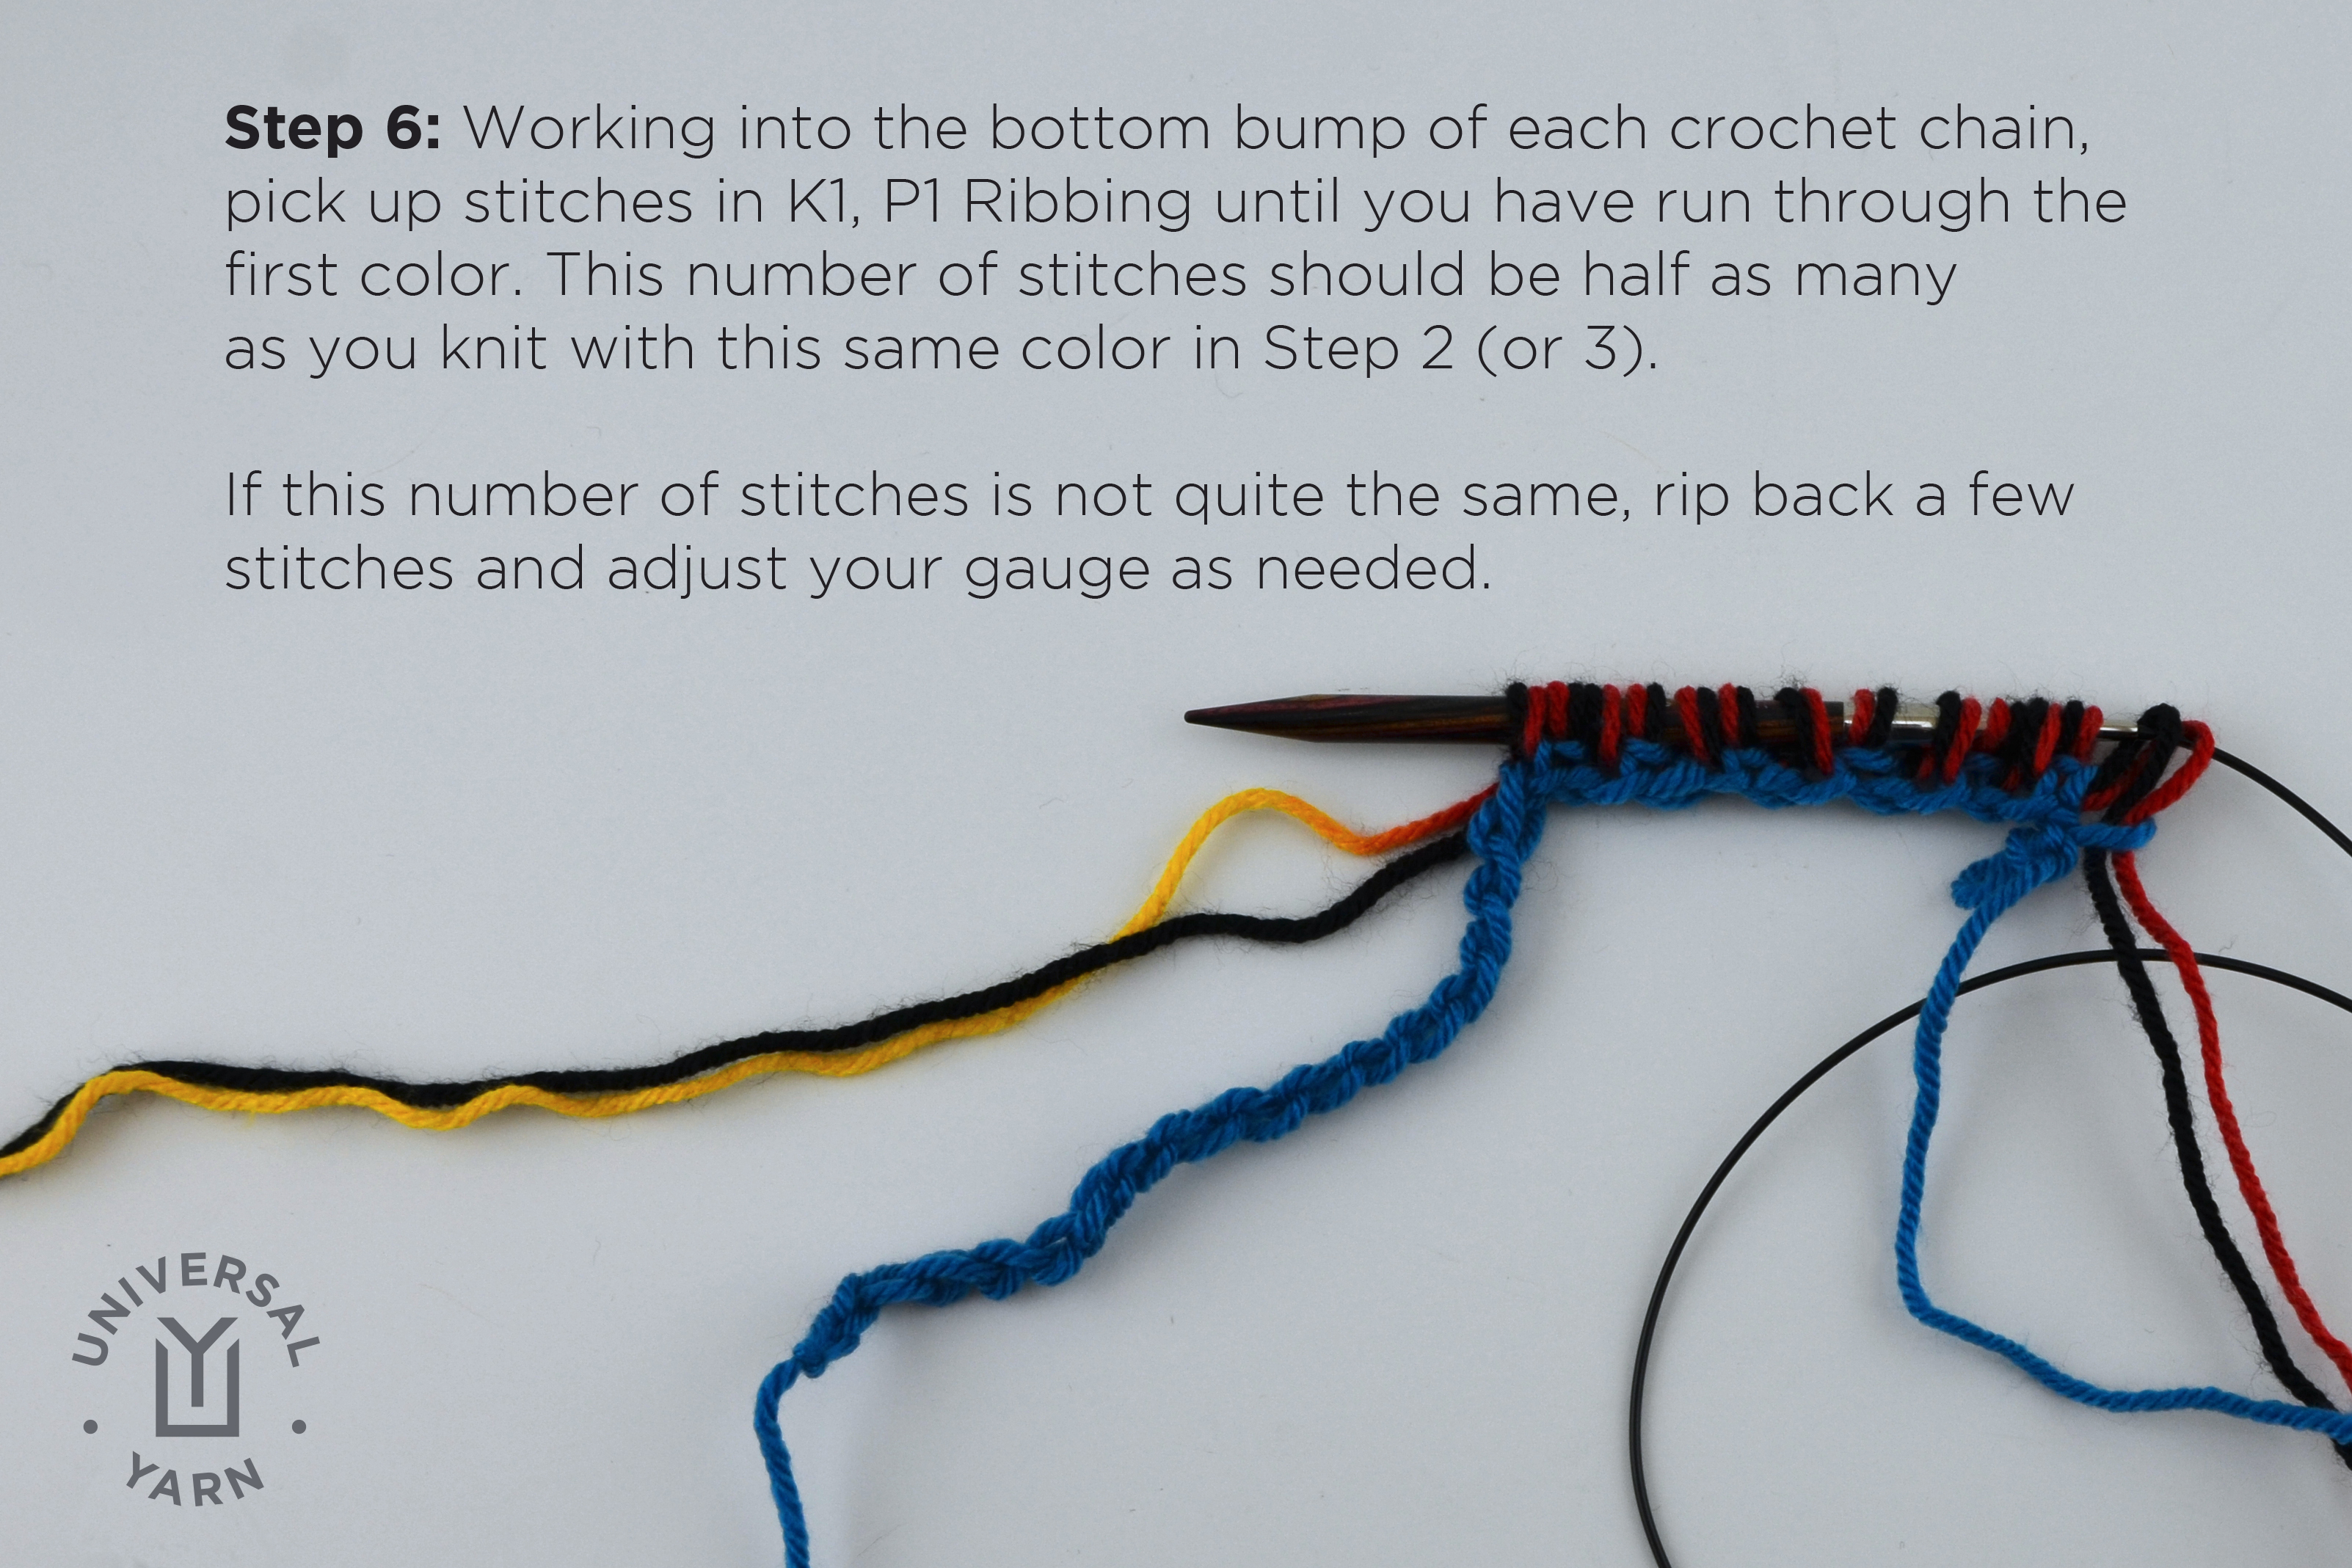
colorpoolscarf5

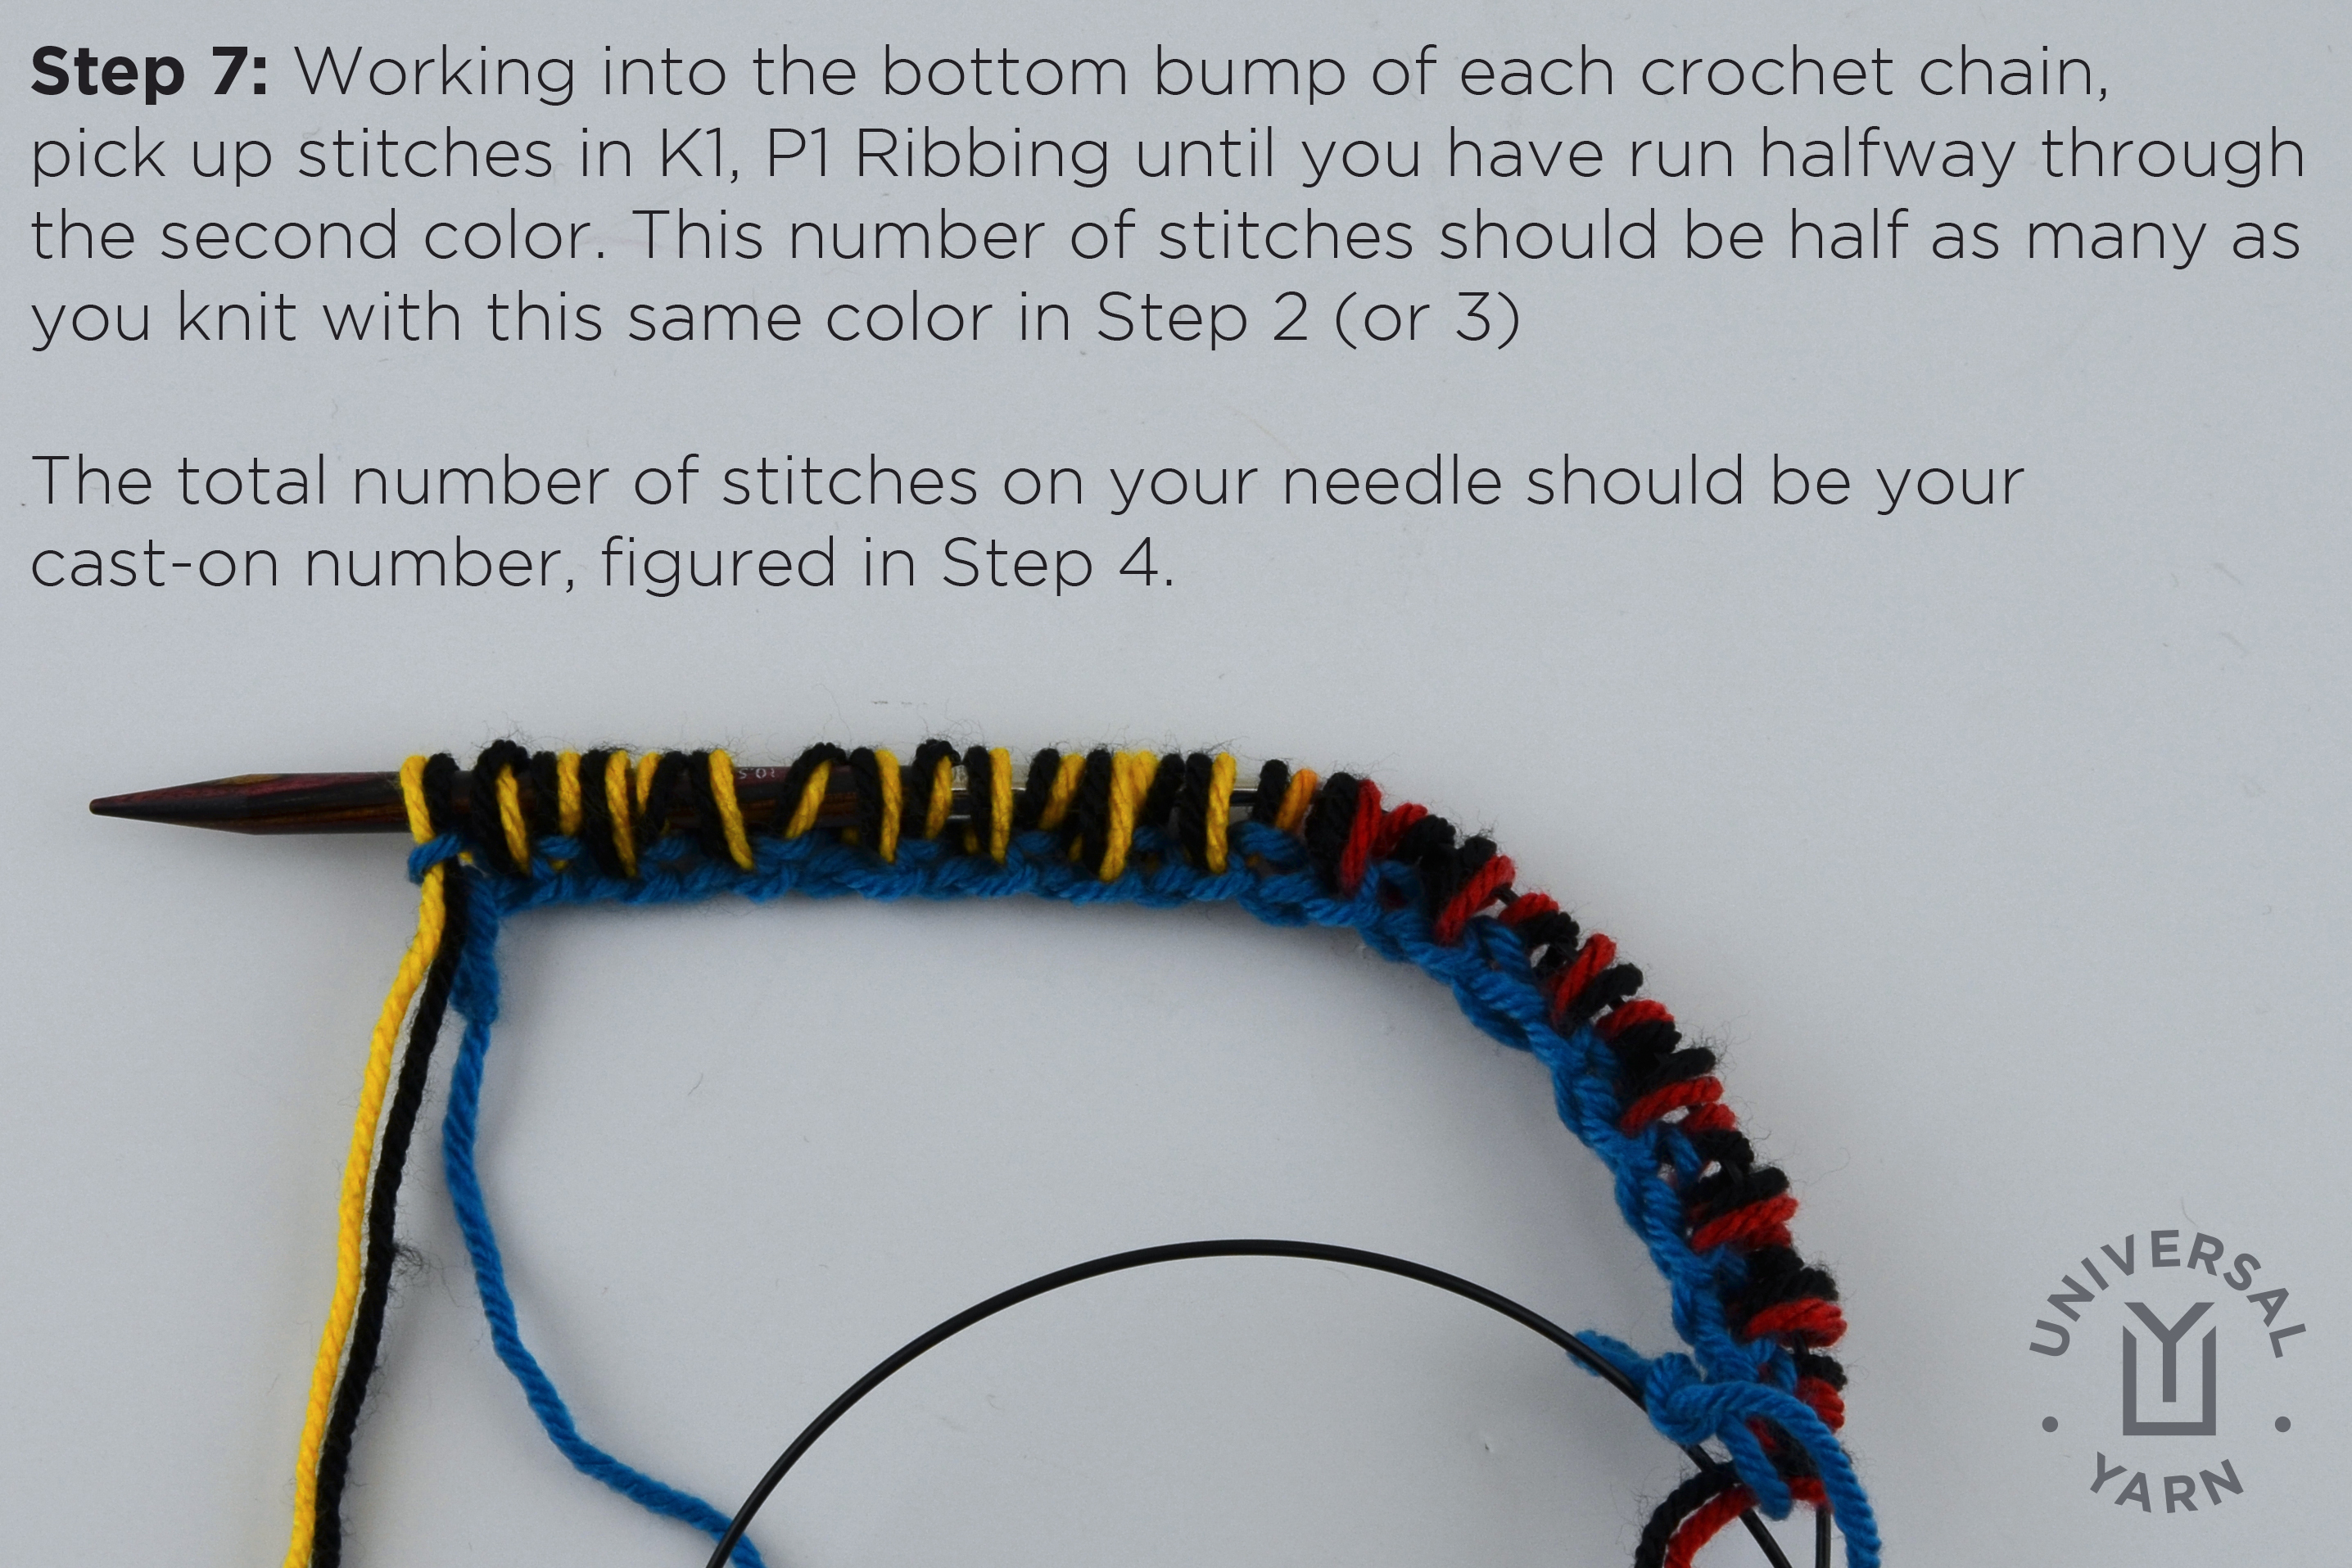
Step 7: Continuing where you left off in the rib sequence (you may have left off with either a pick up and knit or pick up and purl), pick up stitches in K1, P1 Ribbing until you have run halfway through the second color. This number should be half of X (or Y). If it is not, take out a few stitches and adjust your tension.

The total number of stitches on your needle should be the cast-on number figured in Step 4, or X + Y divided by 2.
colorpoolscarf6

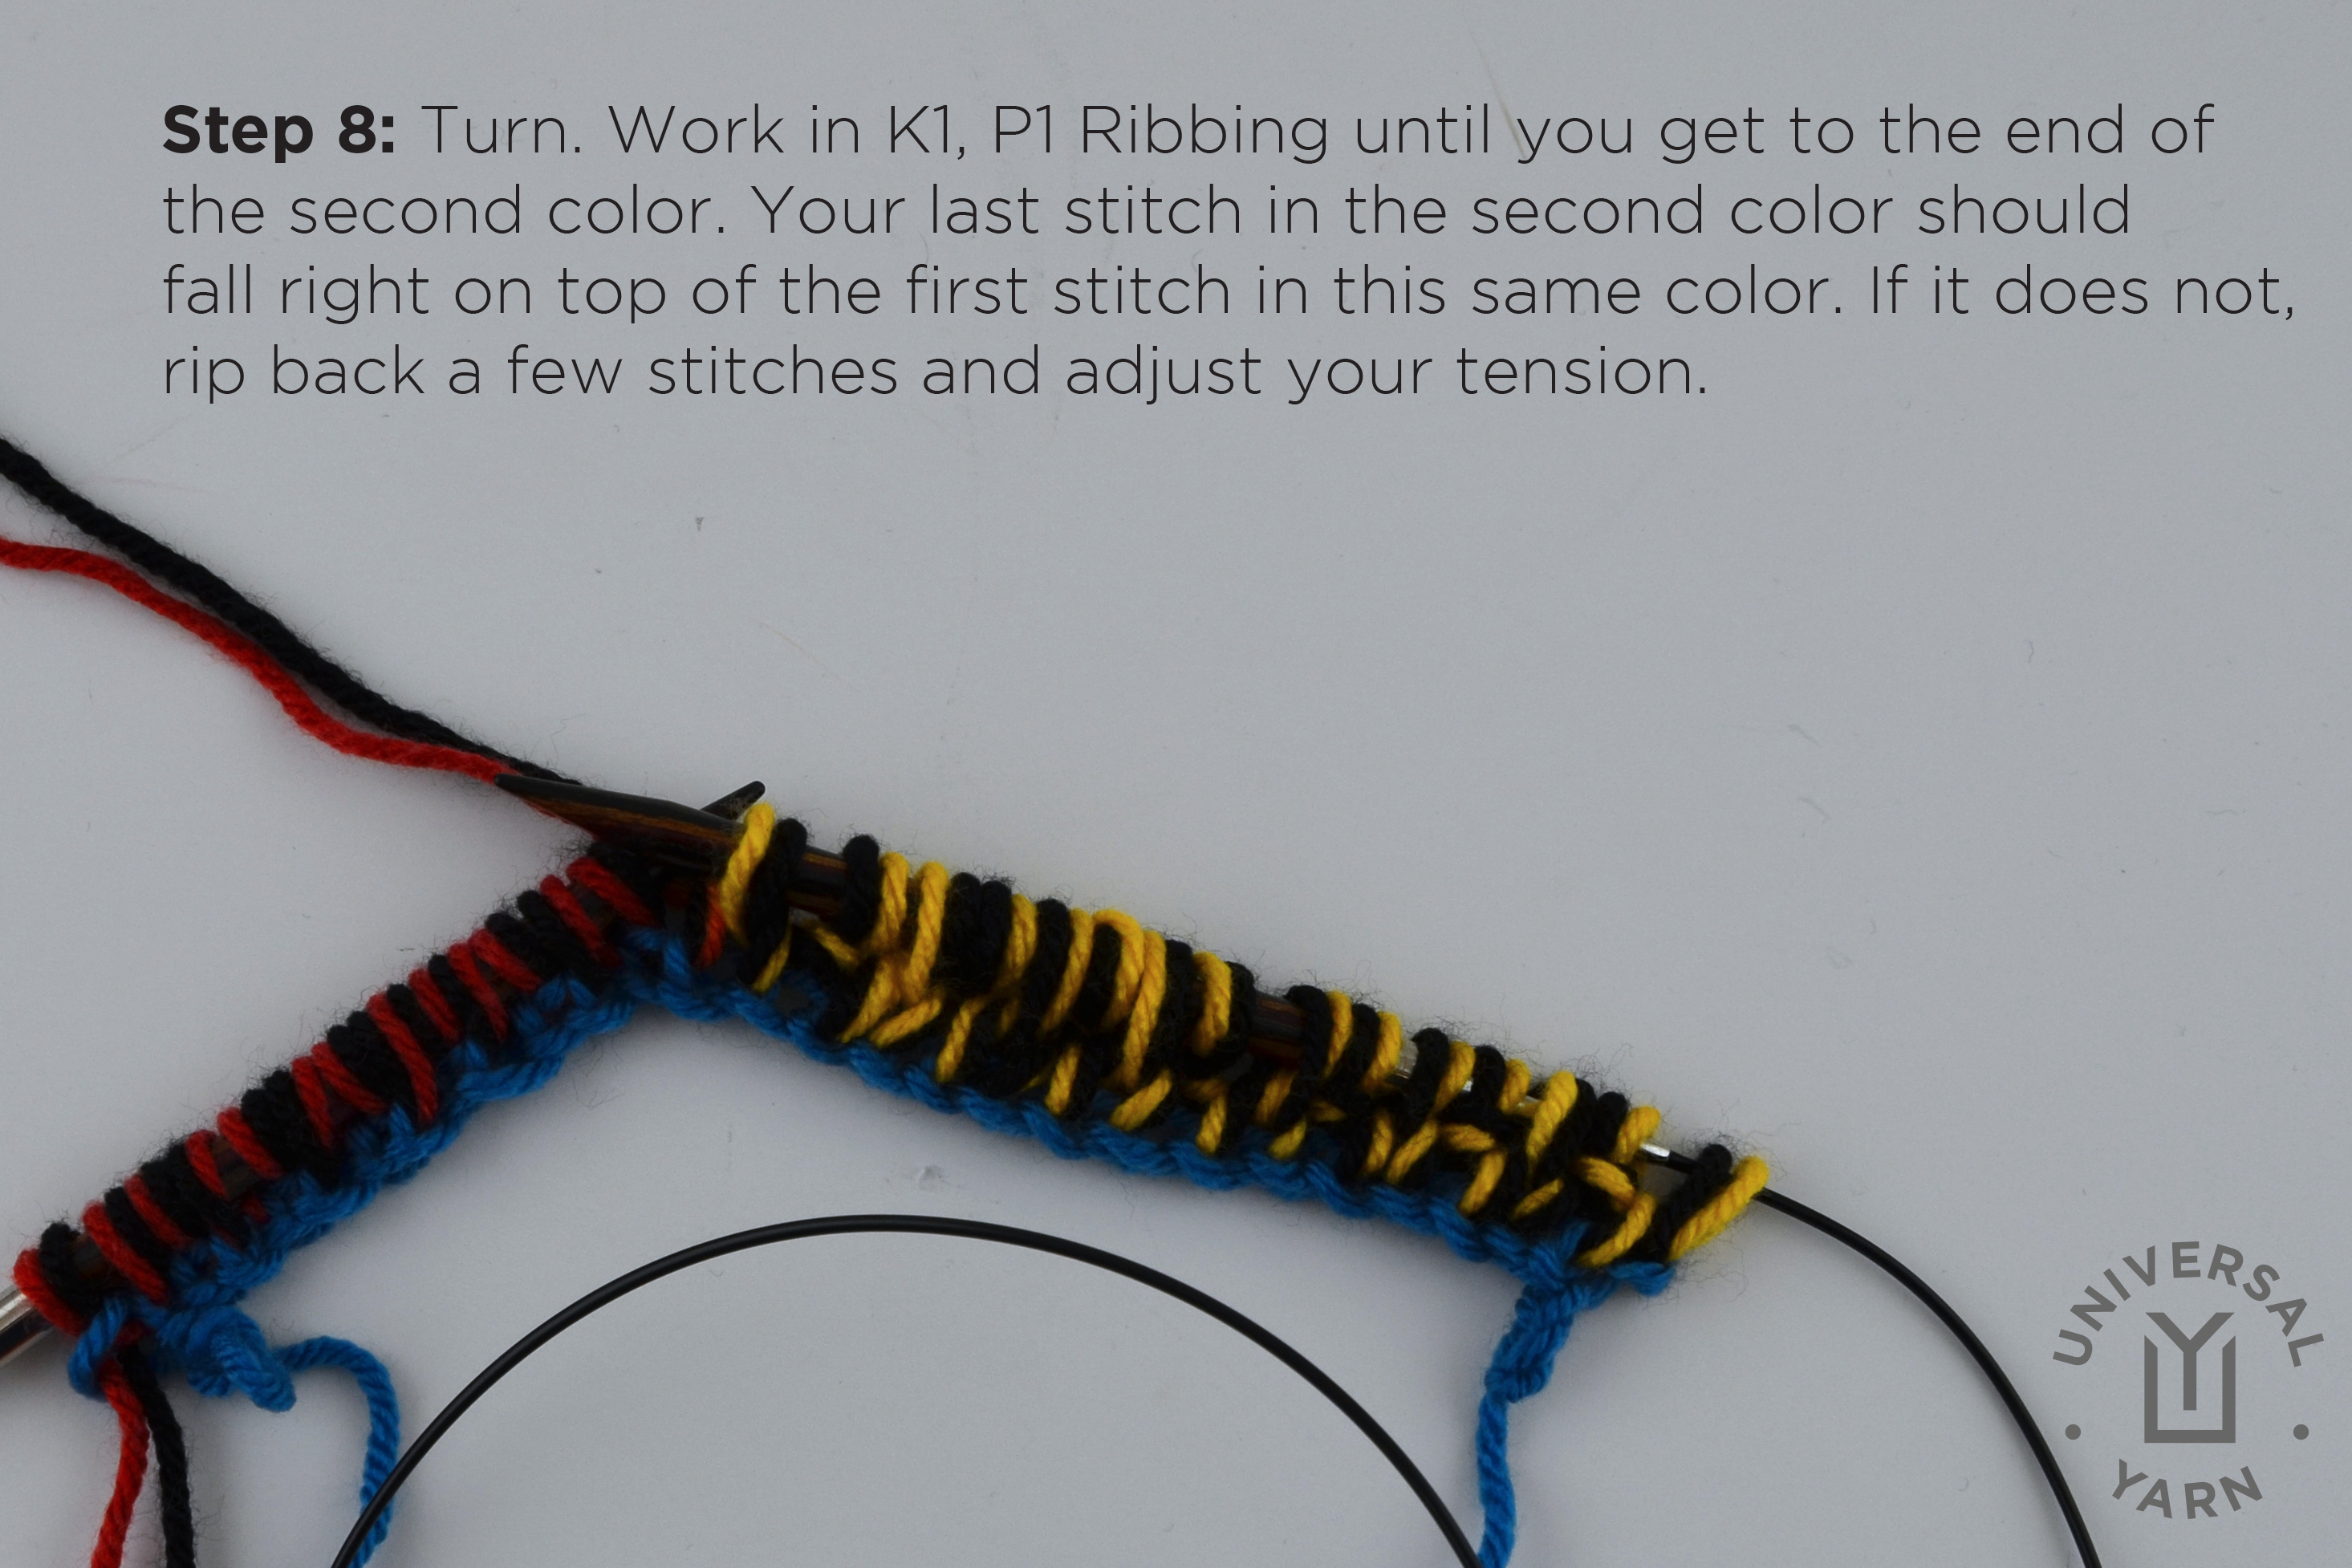
Step 8: Now it’s time for the fun part – the knitting! Turn your work. Work in K1, P1 Ribbing until you reach the end of that color. Your last stitch in this color (shown yellow below) should fall right on top of the first stitch yellow stitch. If it doesn’t, take a few stitches out and adjust your tension.
colorpoolscarf7

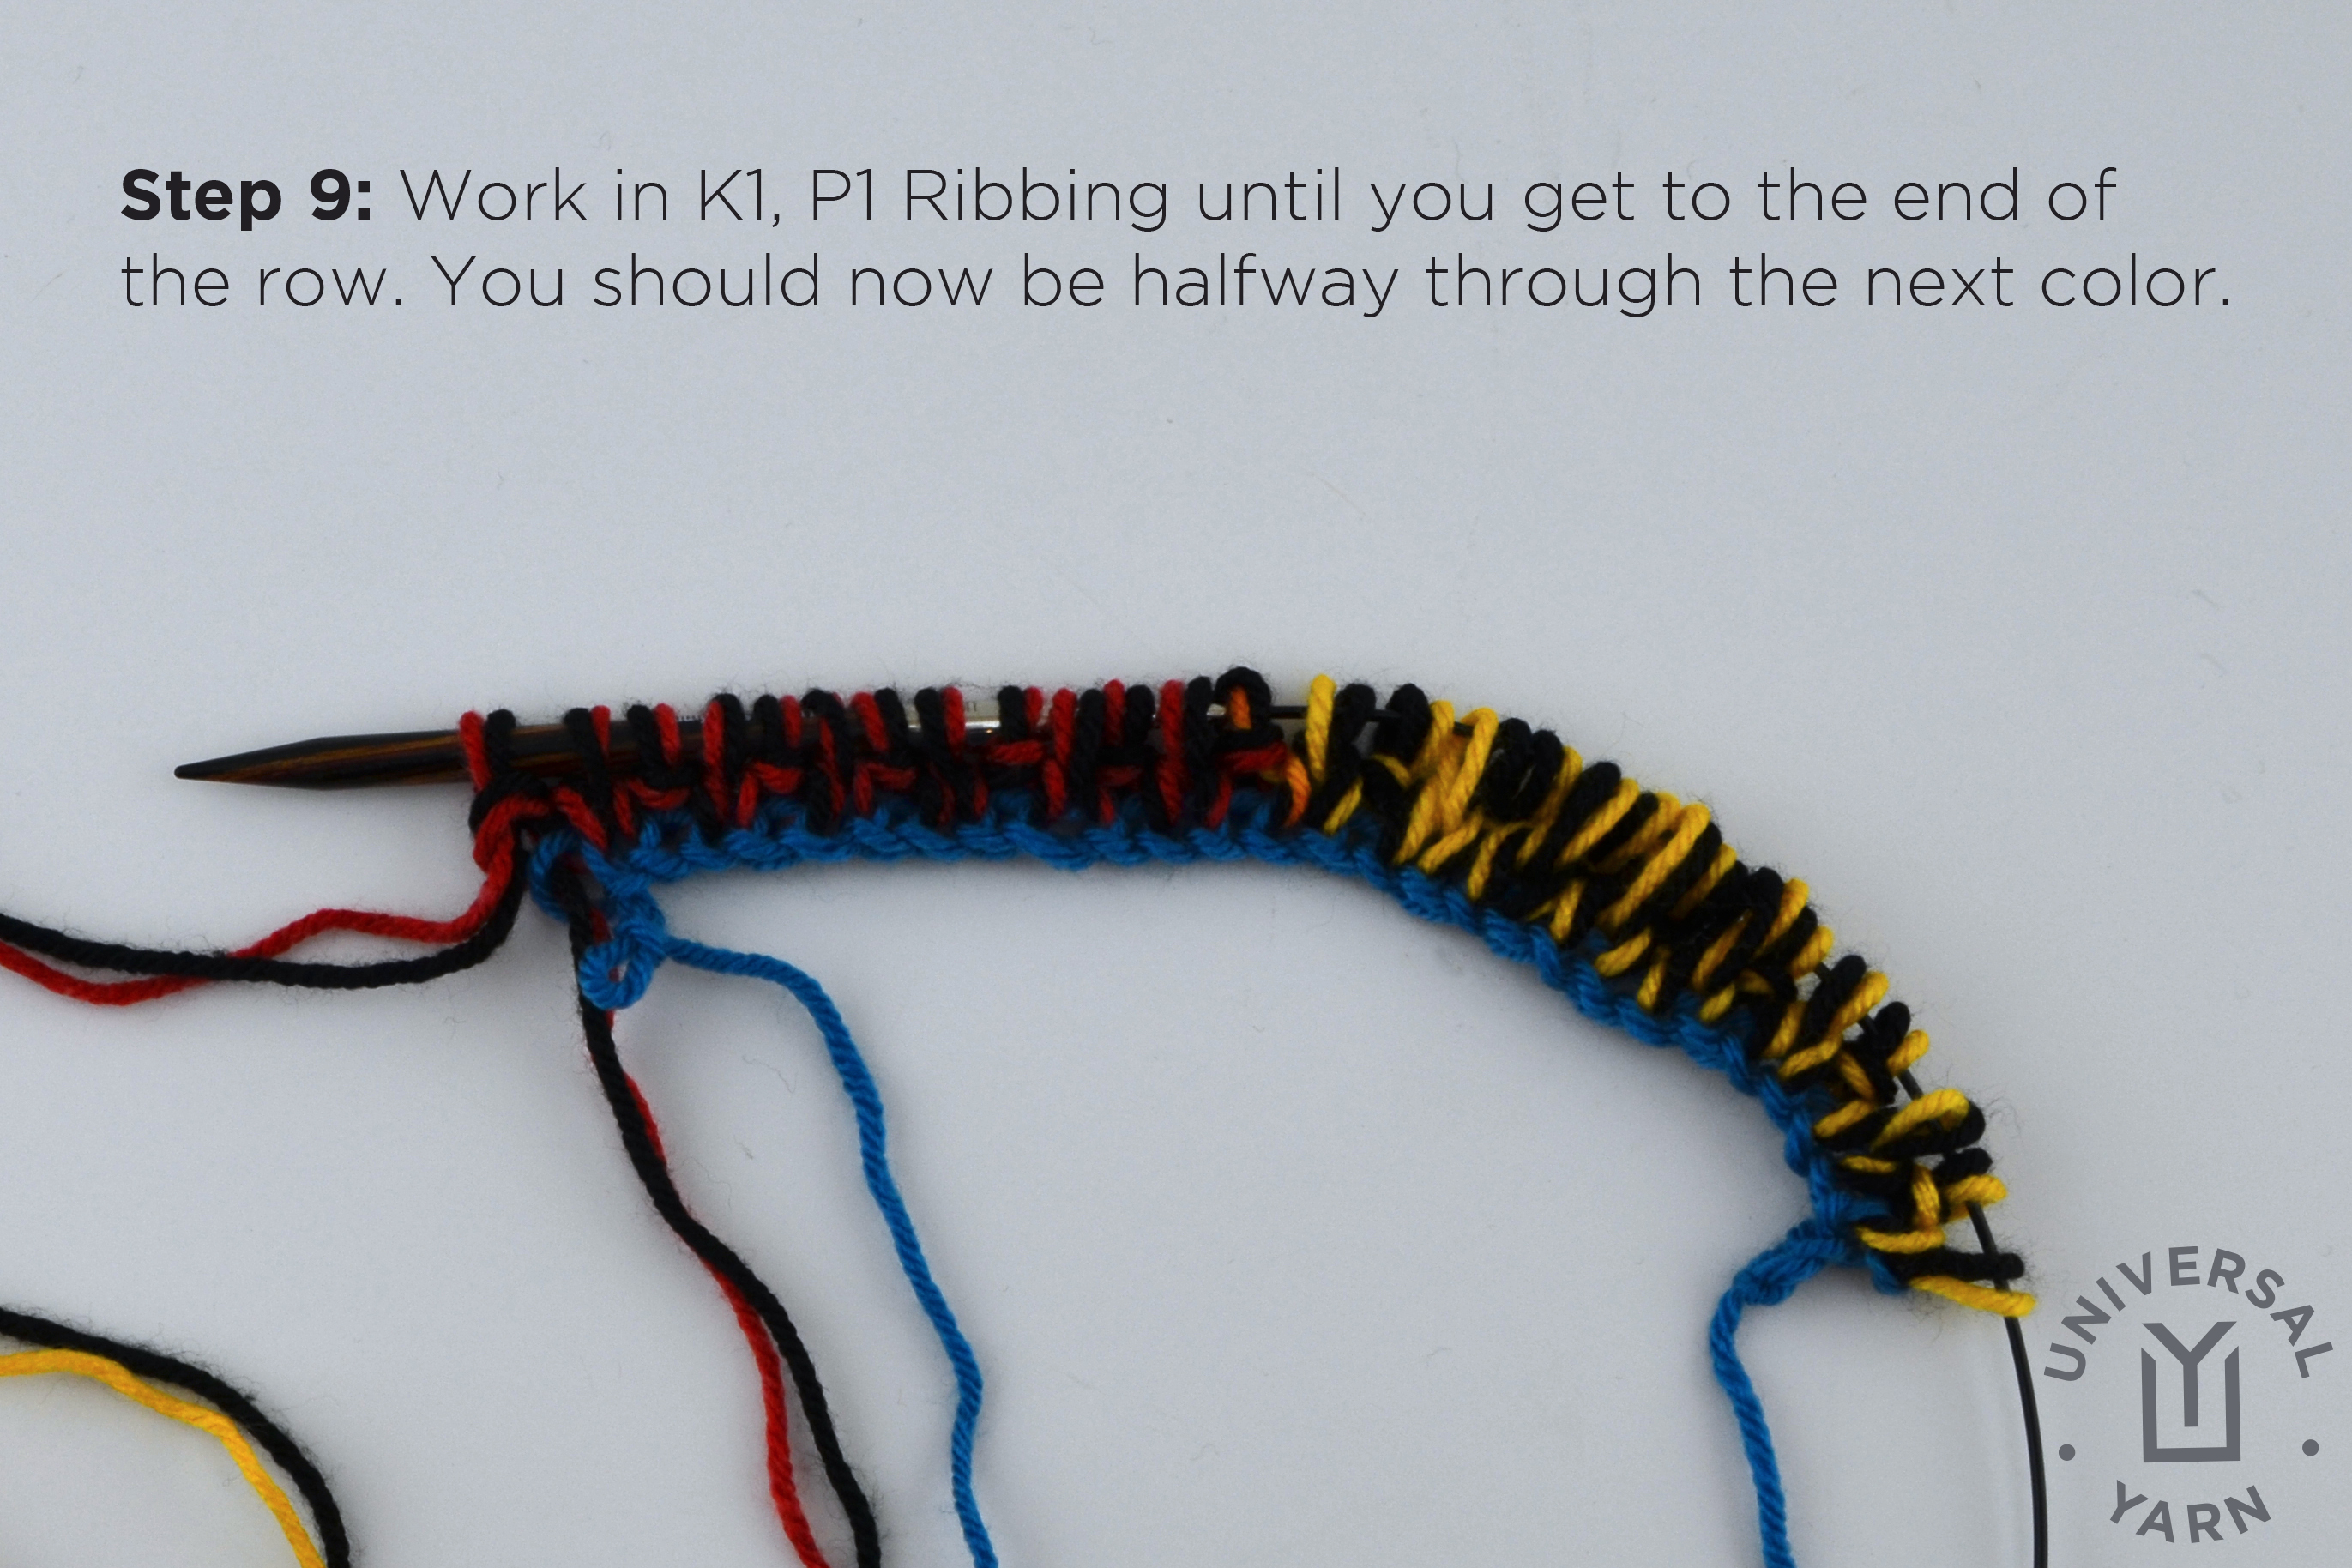
Step 9: Continue in K1, P1 Ribbing to the end of the row. You should now be halfway through the second color (shown red below).
colorpoolscarf8

Repeat Steps 8 & 9 until you have about 1 yard of yarn left, enough to bind off.

Here is another version of the scarf, a little further along:
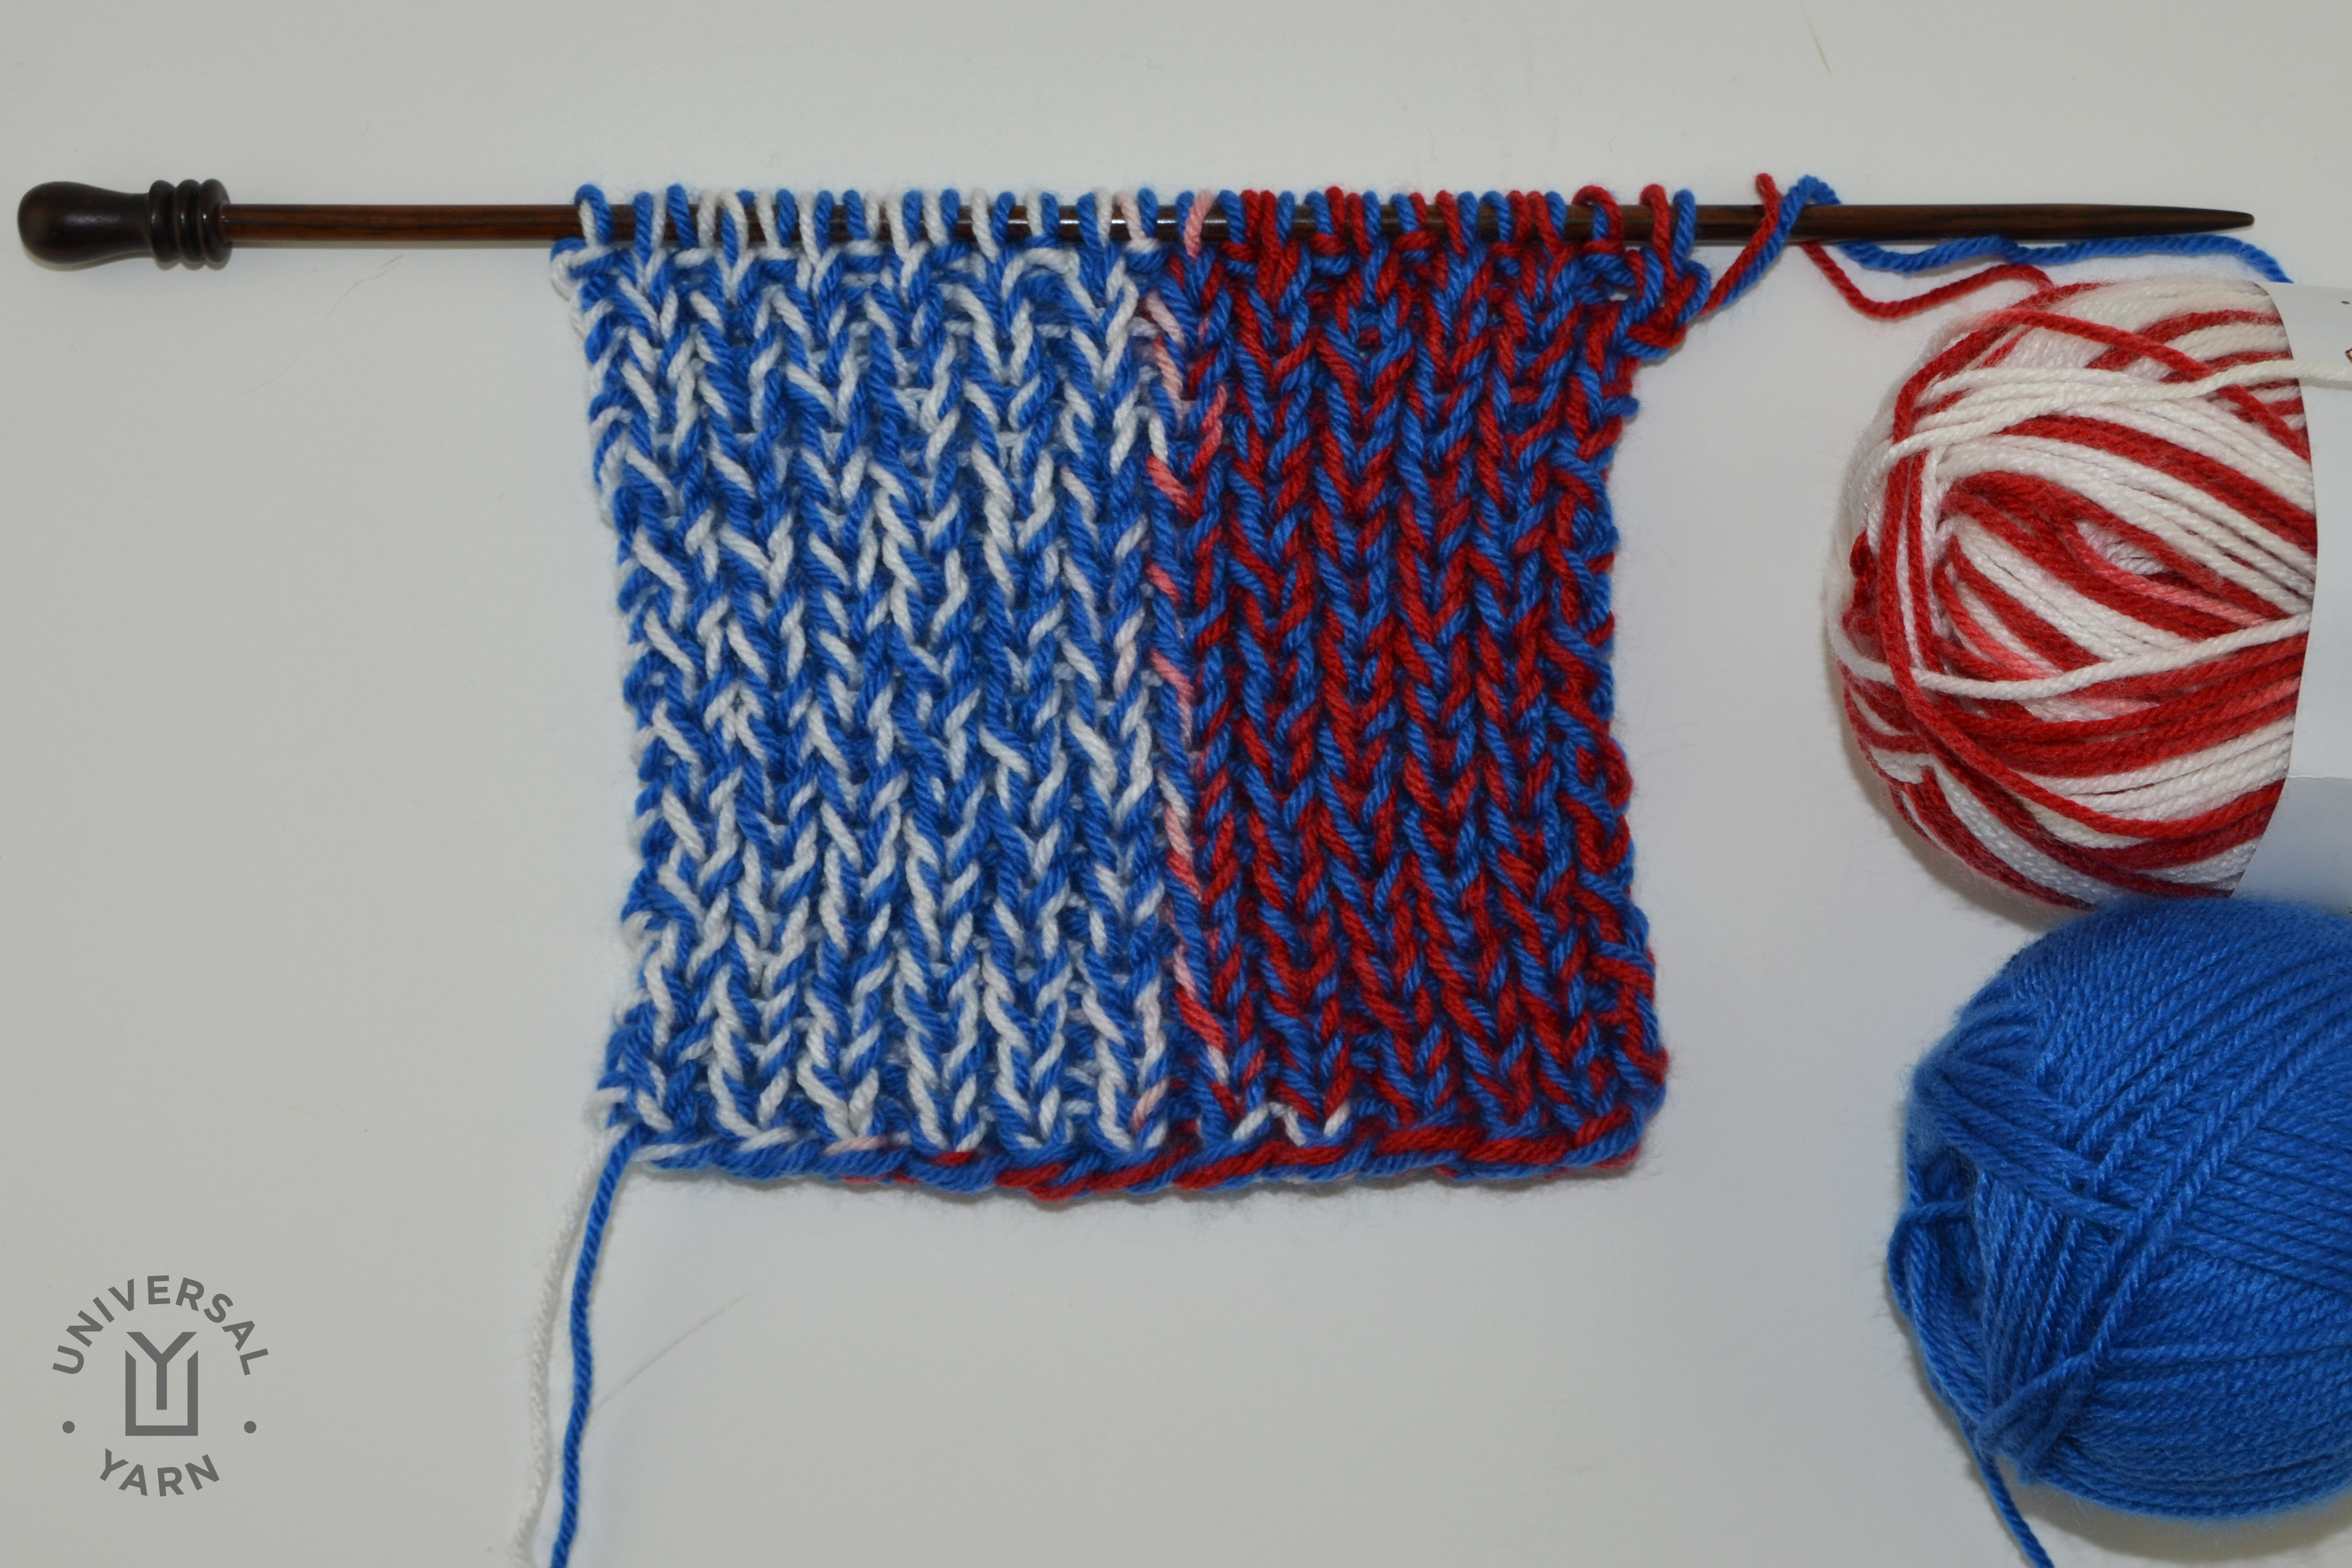
colorpoolscarf9

You can see that the midway point between the colors is not perfect – and that’s okay! Just be sure not to get too far off track with your alignment of the colors, or it will be tougher to correct when you get farther into the scarf.

Pick your team, choose your colors, and get knitting!
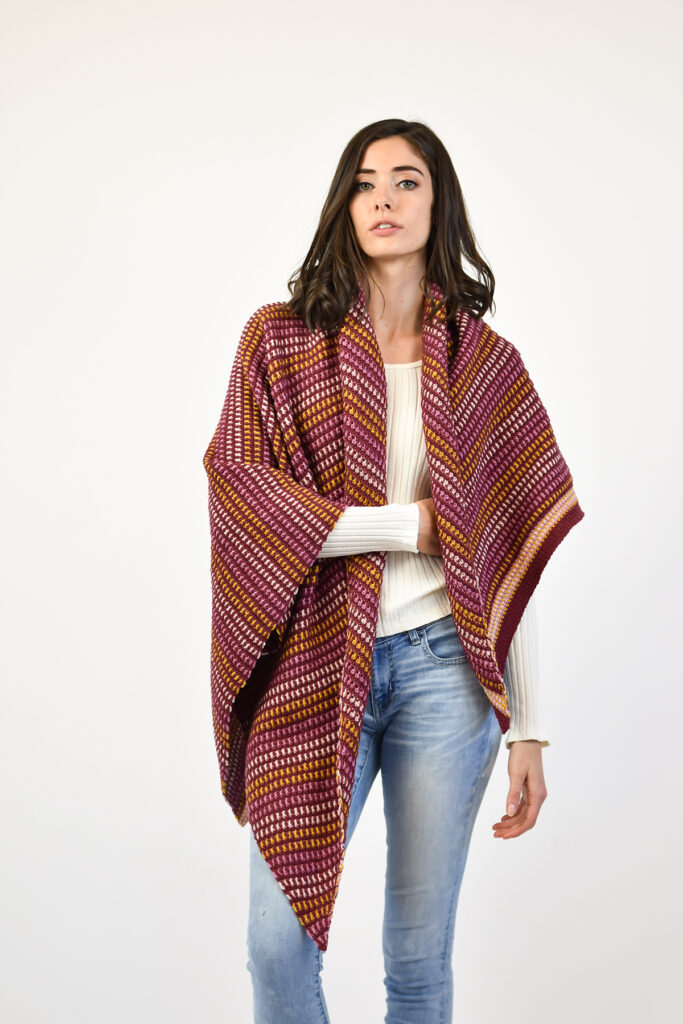
New Bern Cowl – Faux Cable Fundamentals

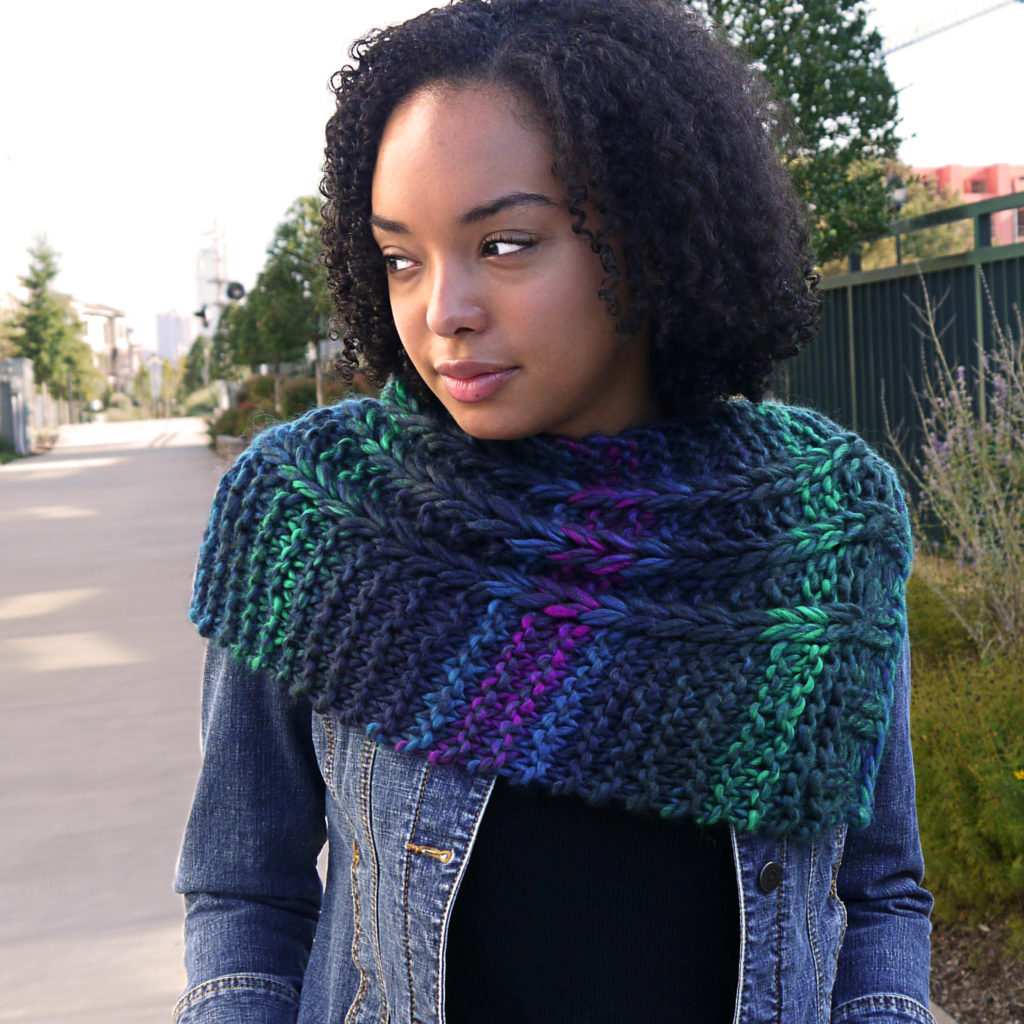
Have you seen the New Bern Cowl and wondered how I created that faux cable look? Today, I’ll show you how, step by step!
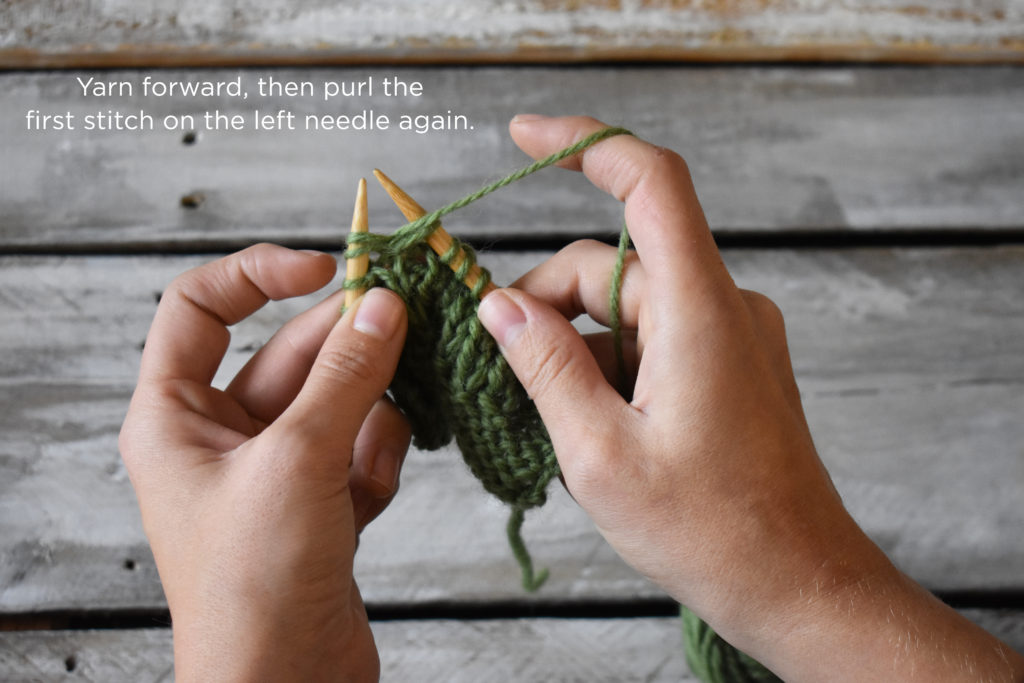
So easy! The New Bern Cowl calls for just two balls of Big Time and a US Size 15 (10mm) needle.

It is a very simple technique, but brace yourself knitters…it does involve a crochet hook! Don’t worry though, if you can do a simple chain, you can do this.

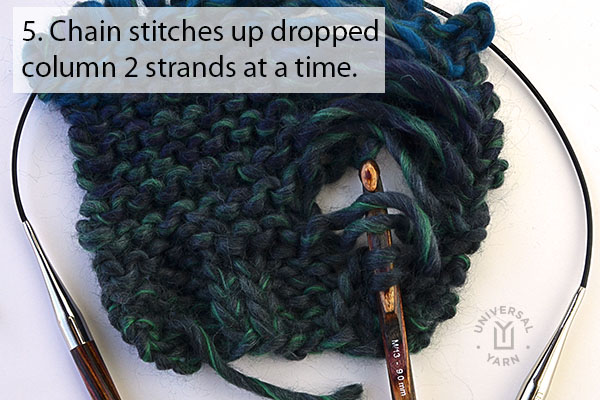
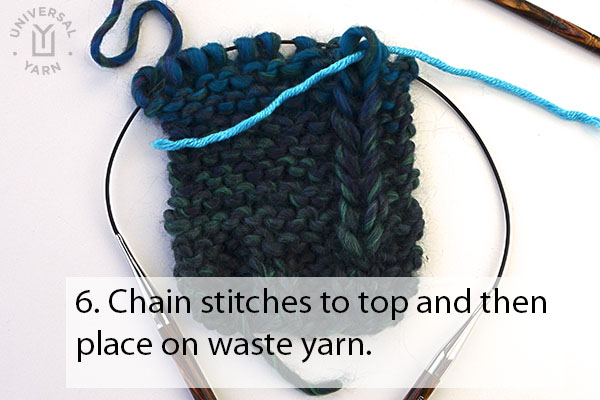
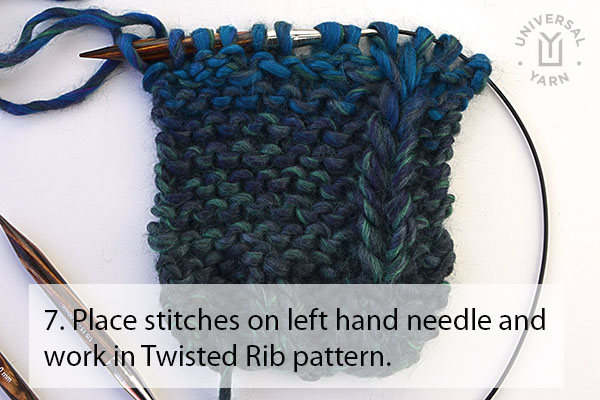
newberncowl_tutorial1_blog4newberncowl_tutorial2_blog newberncowl_tutorial3_blog newberncowl_tutorial4_blog newberncowl_tutorial5_blog3newberncowl_tutorial6_blog2newberncowl_tutorial7_blog2

Pretty easy, right? I can’t wait for you to try it out on your very own New Bern Cowl!