This is part 7 in a 12 part series highlighting designs from our 12 Days of Winter, Series 3 Edition.
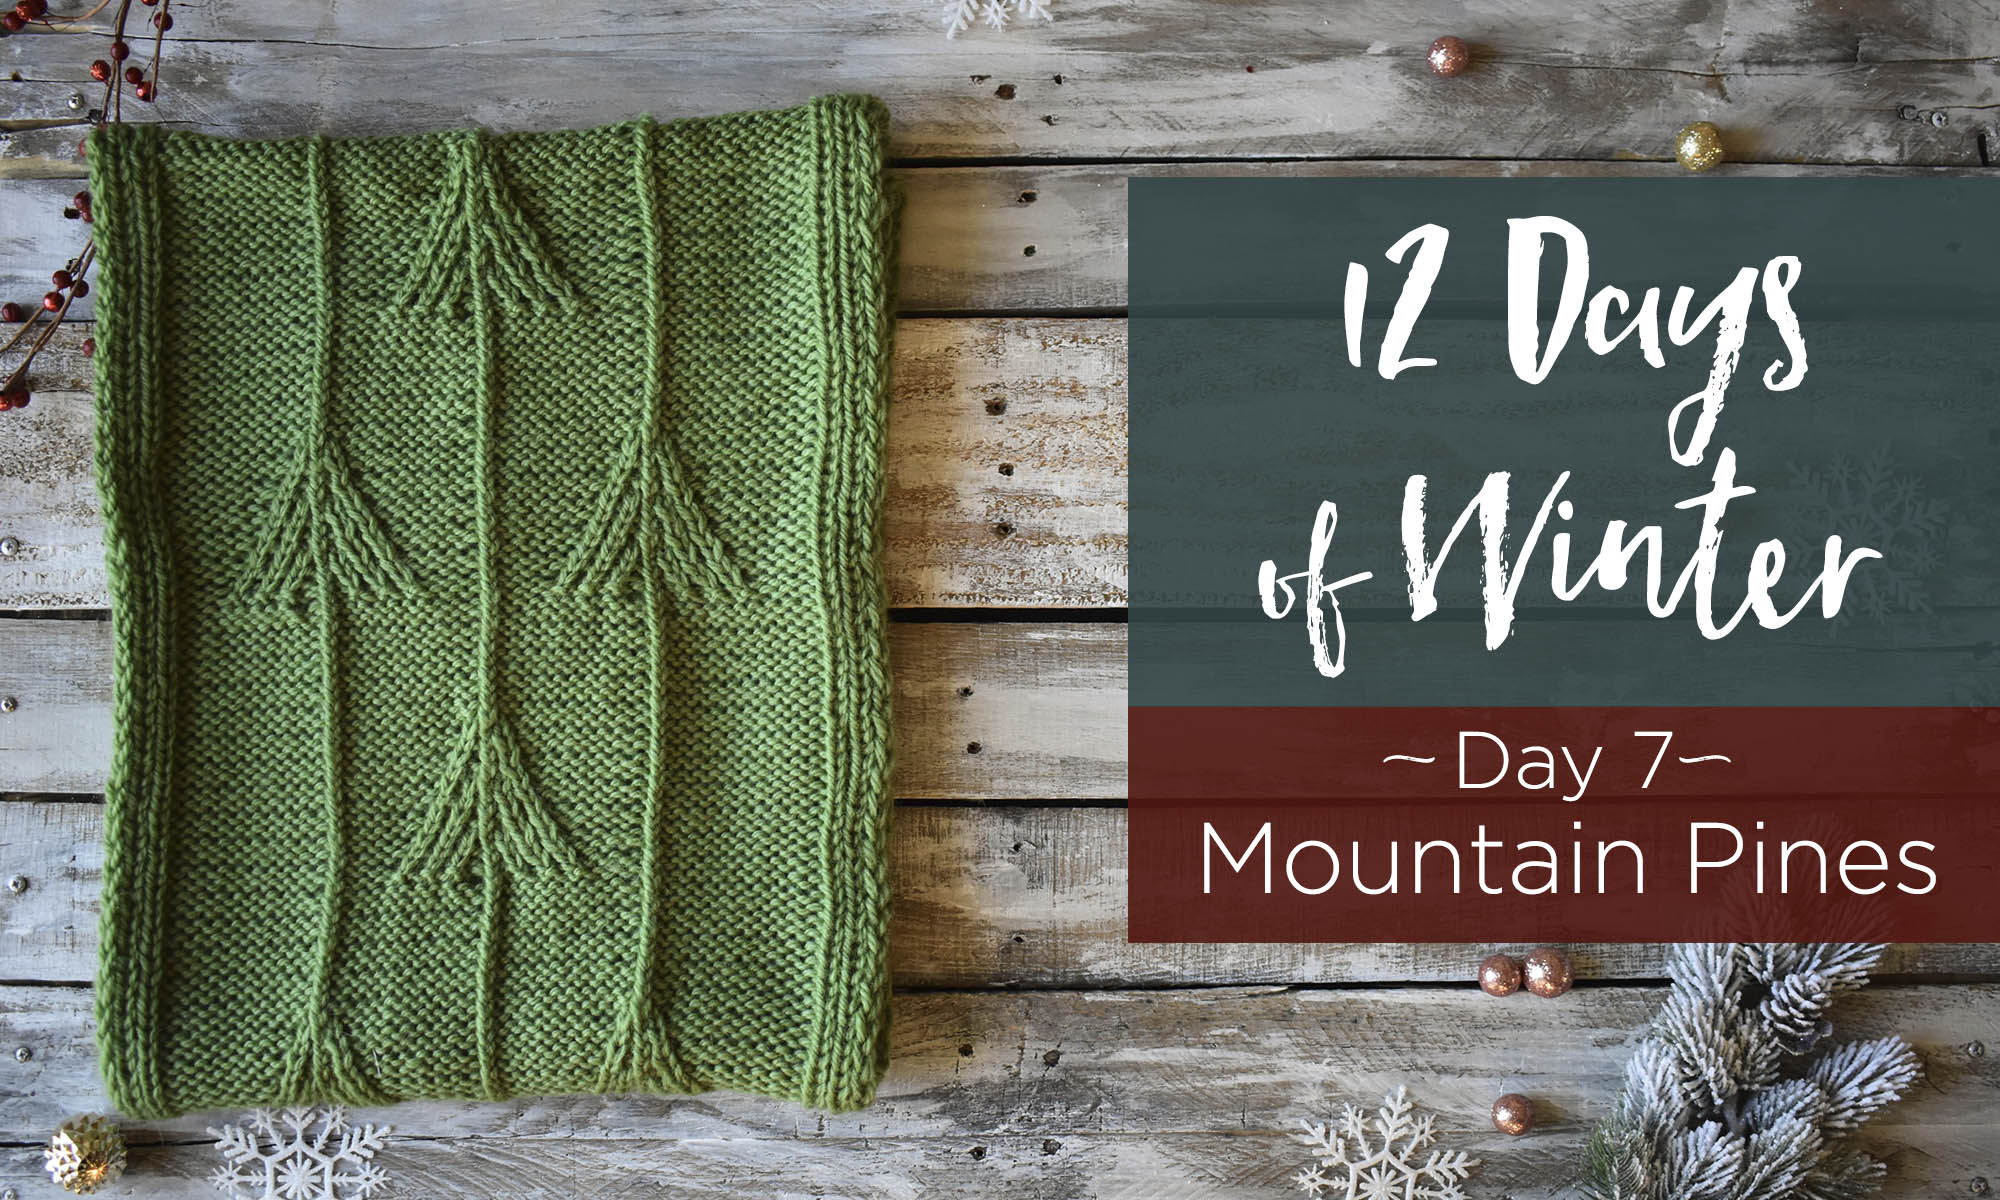
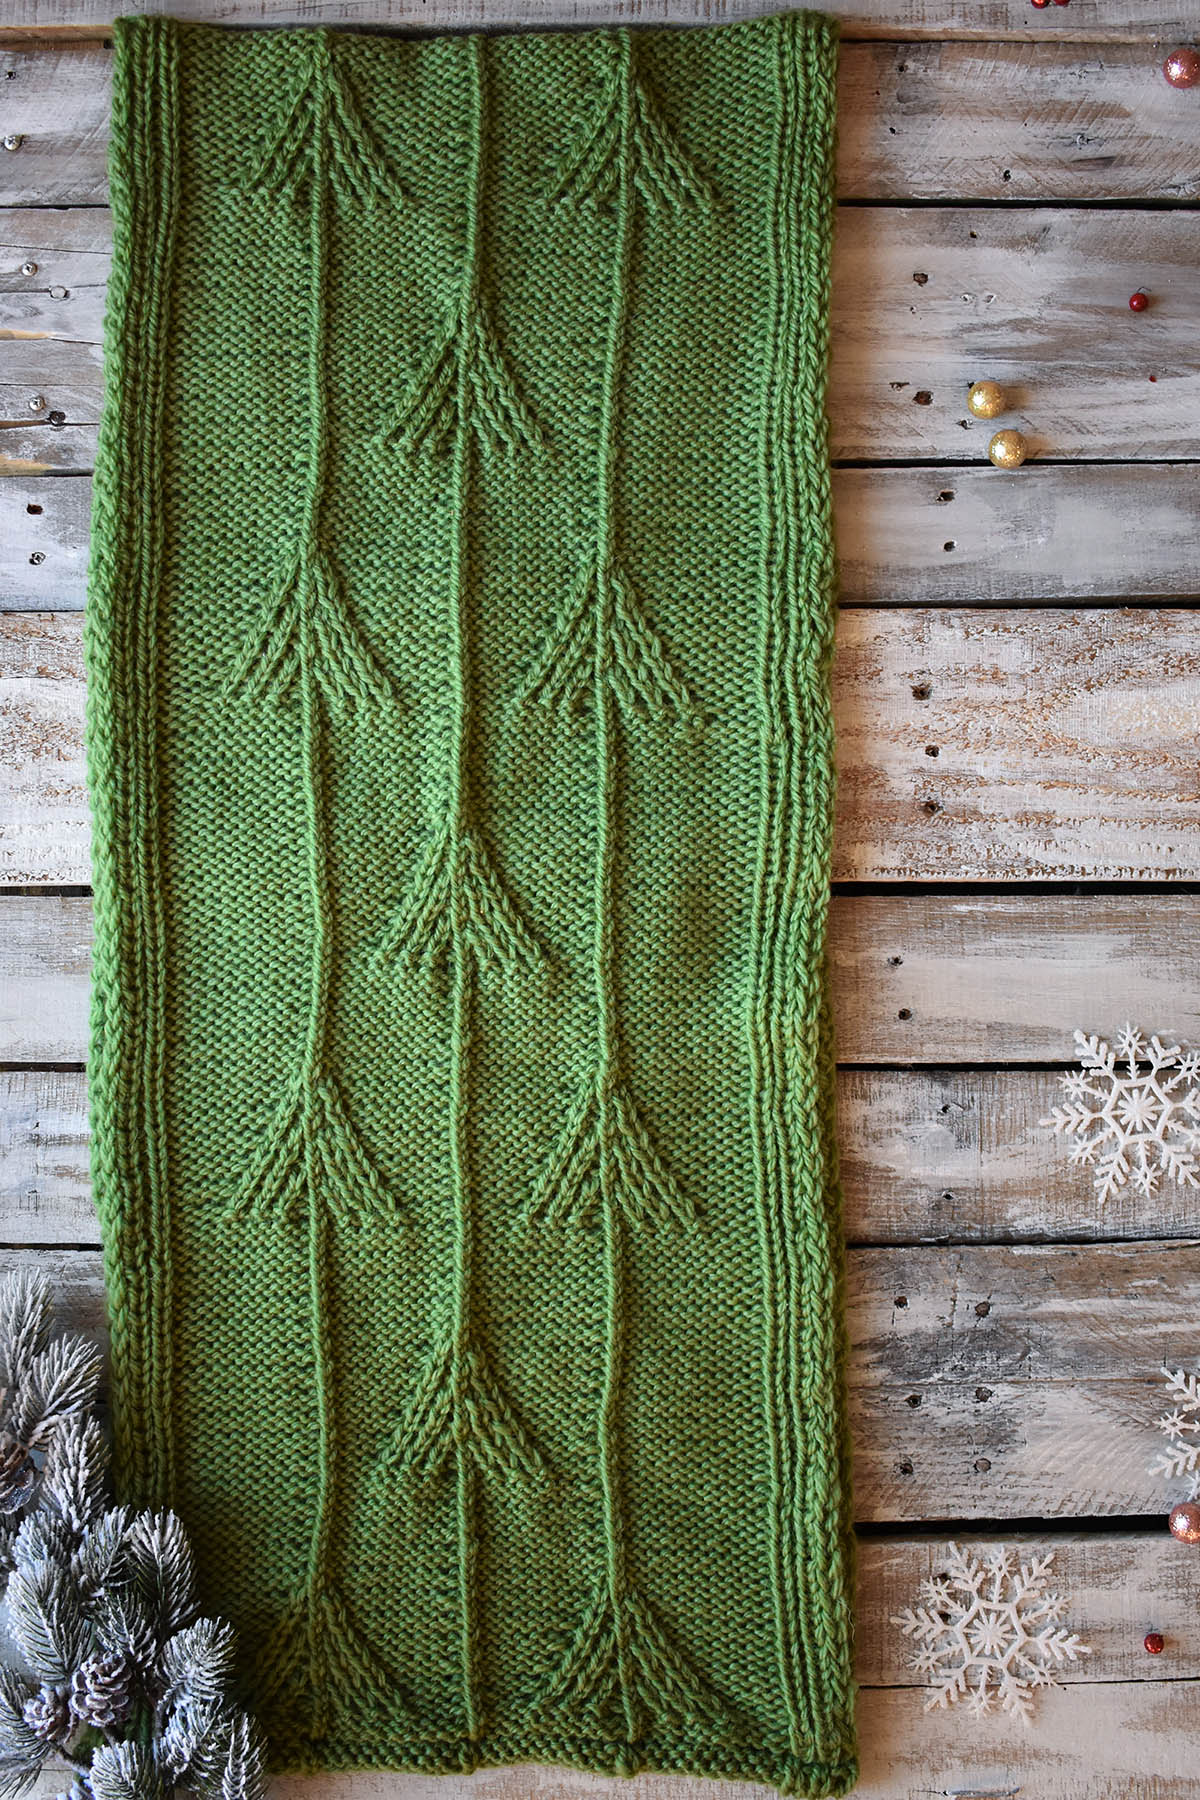
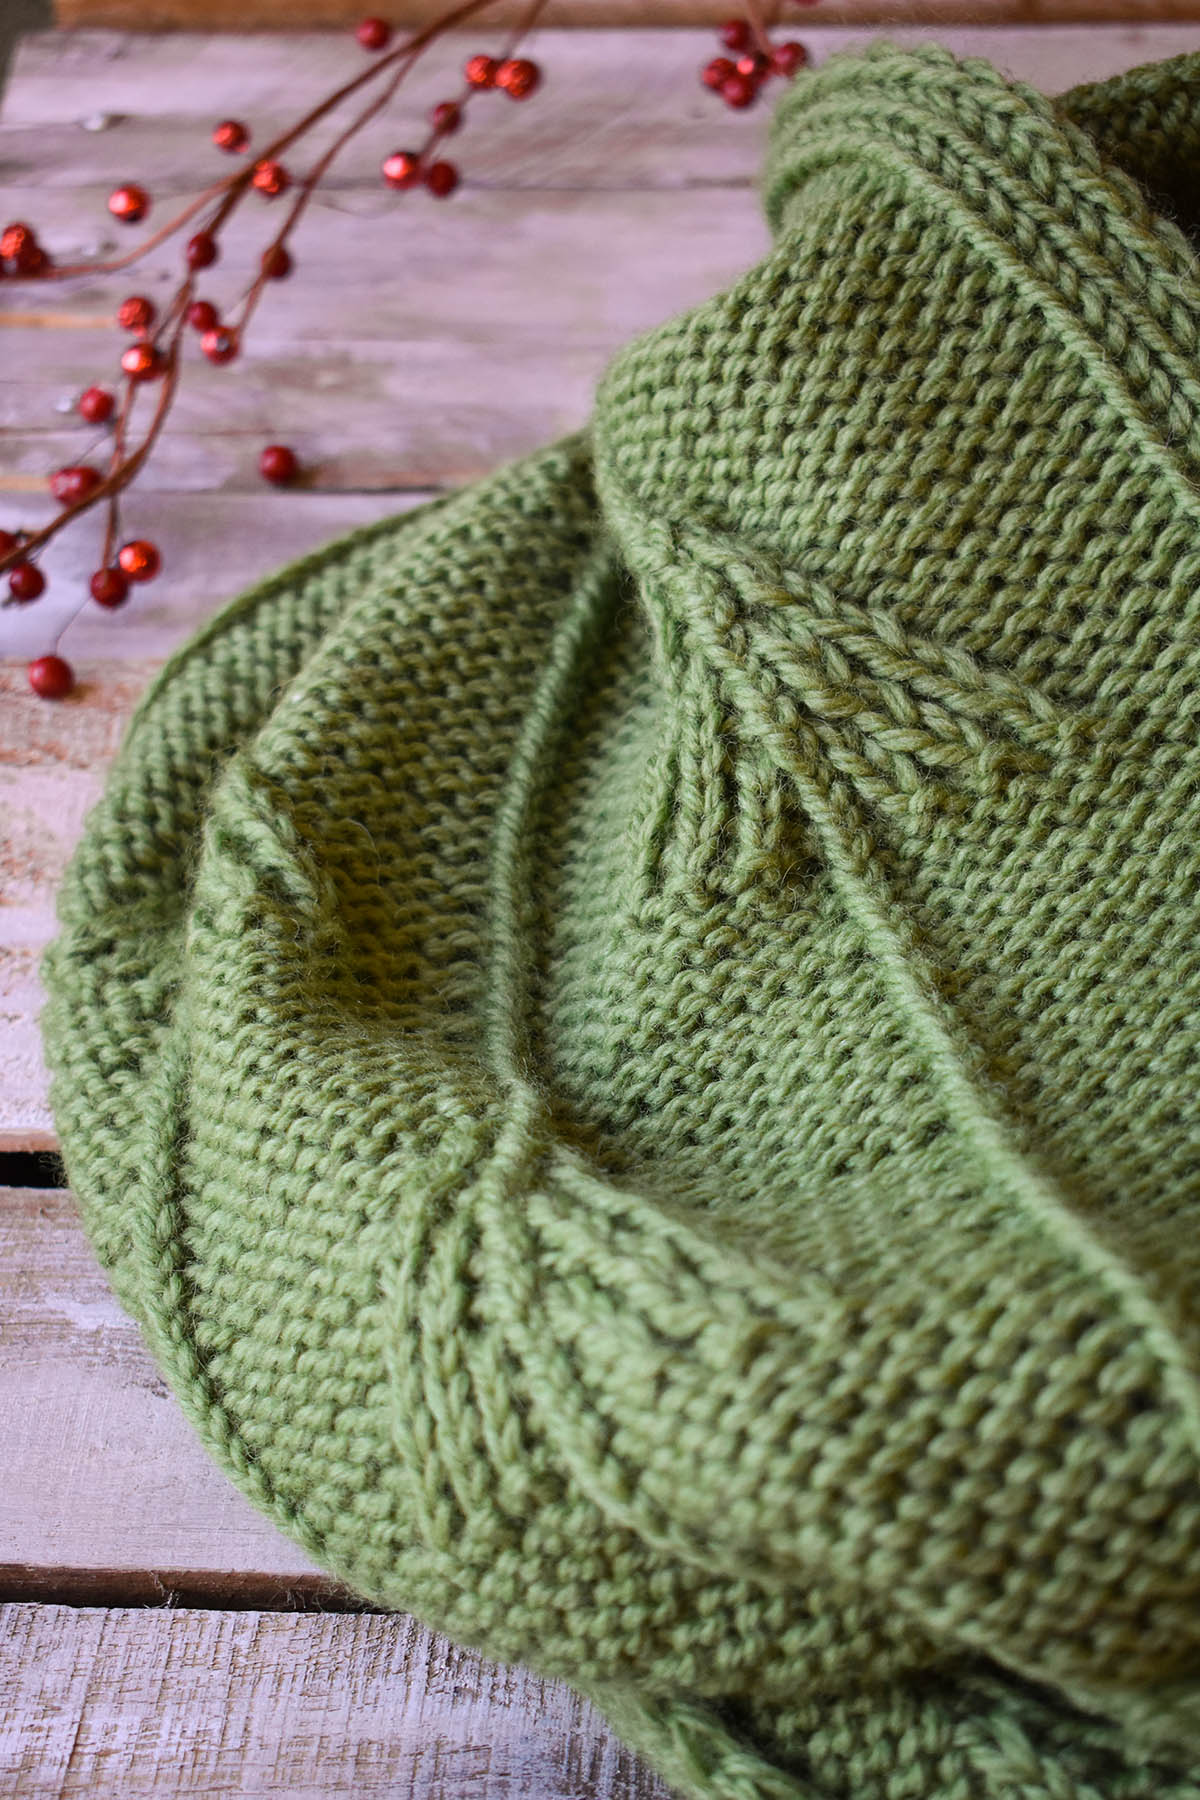
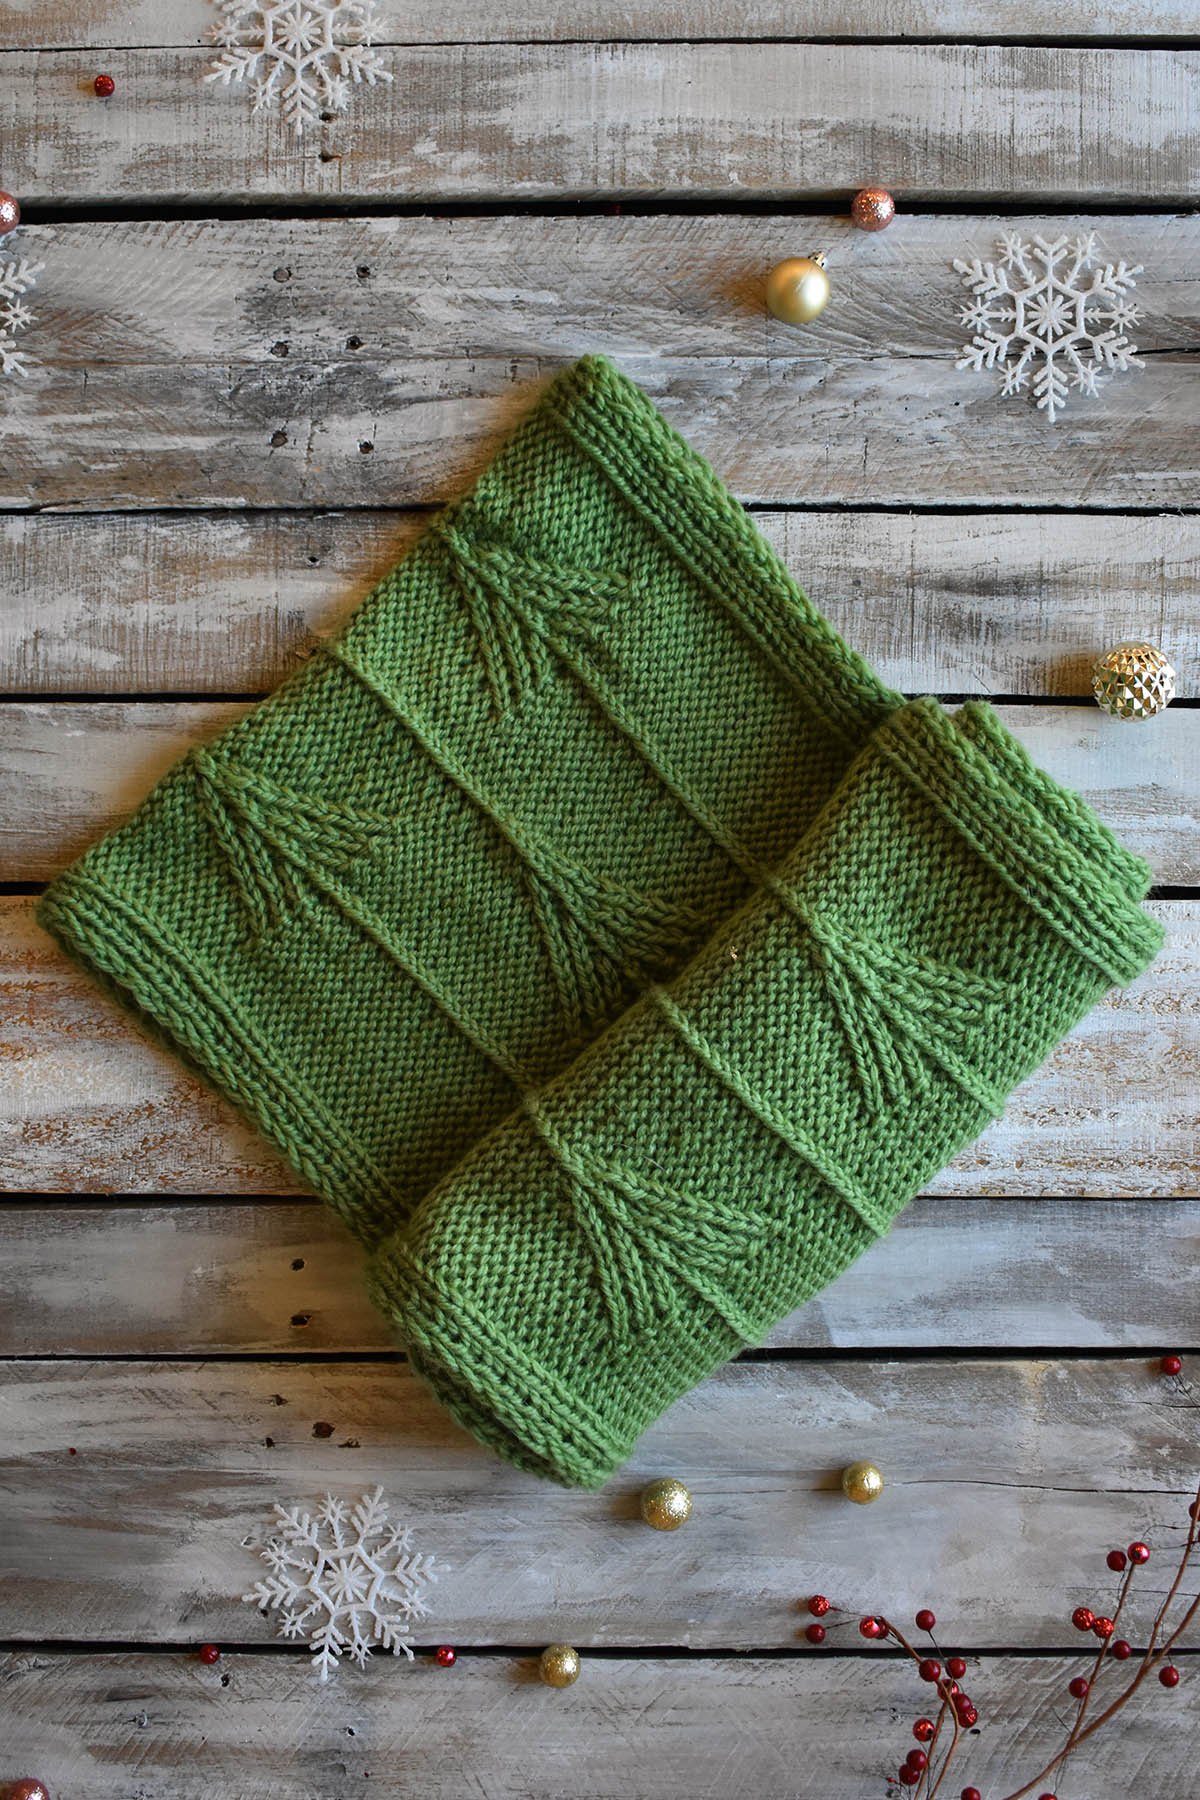
We’re a week into the 12 Days of Winter Kit Collection for 2019, and we hope you’re enjoying everything we’ve shared so far. Today we’re introducing an earthy green cowl that’s sure to hold your interest. Say Hello to the Mountain Pines Cowl, designed by Jennifer Sadler. This deliciously squishy cowl features twisted stitches that form the shapes of evergreen trees. Knit in soft, plump Deluxe Chunky, this is a fairly quick project that will keep you warm all winter long.
Jennifer, who is based in Asheville , North Carolina, got her inspiration from pine trees. Here is what she had to say:
“Here in the North Carolina mountains, pine trees are easily found – there are actually six different kinds of pine trees native to the state. I love how in the winter they stay green, adding a touch of color to an otherwise brown landscape, and when it snows, the branches let the snow pile up, creating a pillow of white on top of the green needles. The Mountain Pines Cowl pays homage to those green monster trees.
The pine tree motif is much simpler than it looks to knit. It uses twisted stitches, and no cable needle! Once you’ve experienced the ease of twisted stitches, you’ll want to incorporate them into your knitting as much as possible – they create a wonderful visual texture, with hardly any extra work.”
-Jennifer
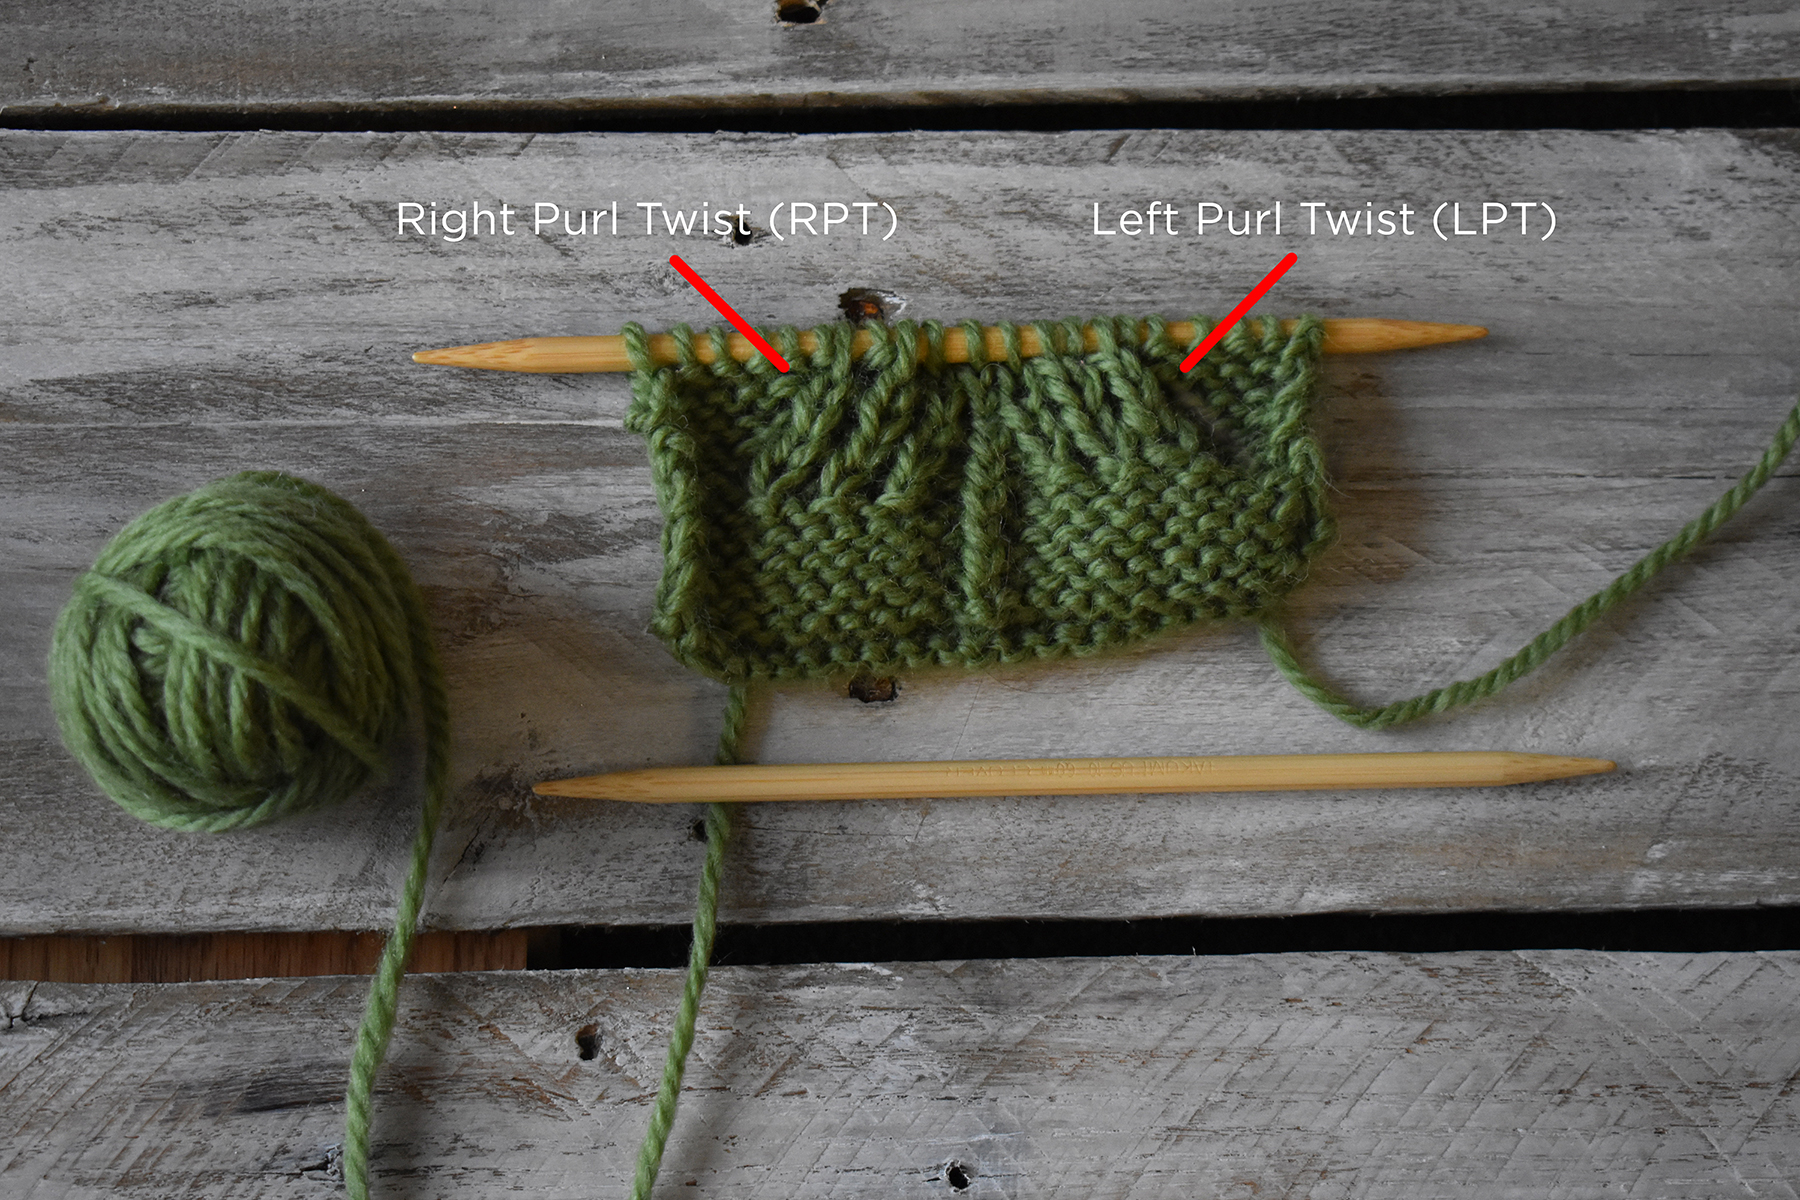
I couldn’t agree more with Jennifer – twisted stitches are a joy to work, especially when you get the hang of them. It eventually feels intuitive and you’ll be glad to have this skill in your toolbox. The Mountain Pines Cowl uses purl twists, so that’s what we’ll focus on in this tutorial. You’ll learn the Left Purl Twist (LPT) and the Right Purl Twist (RPT). The Left Purl Twist (LPT) leans to the left, and the Right Purl Twist (RPT) leans to the right. We’ll cover the LPT first, followed by the RPT.
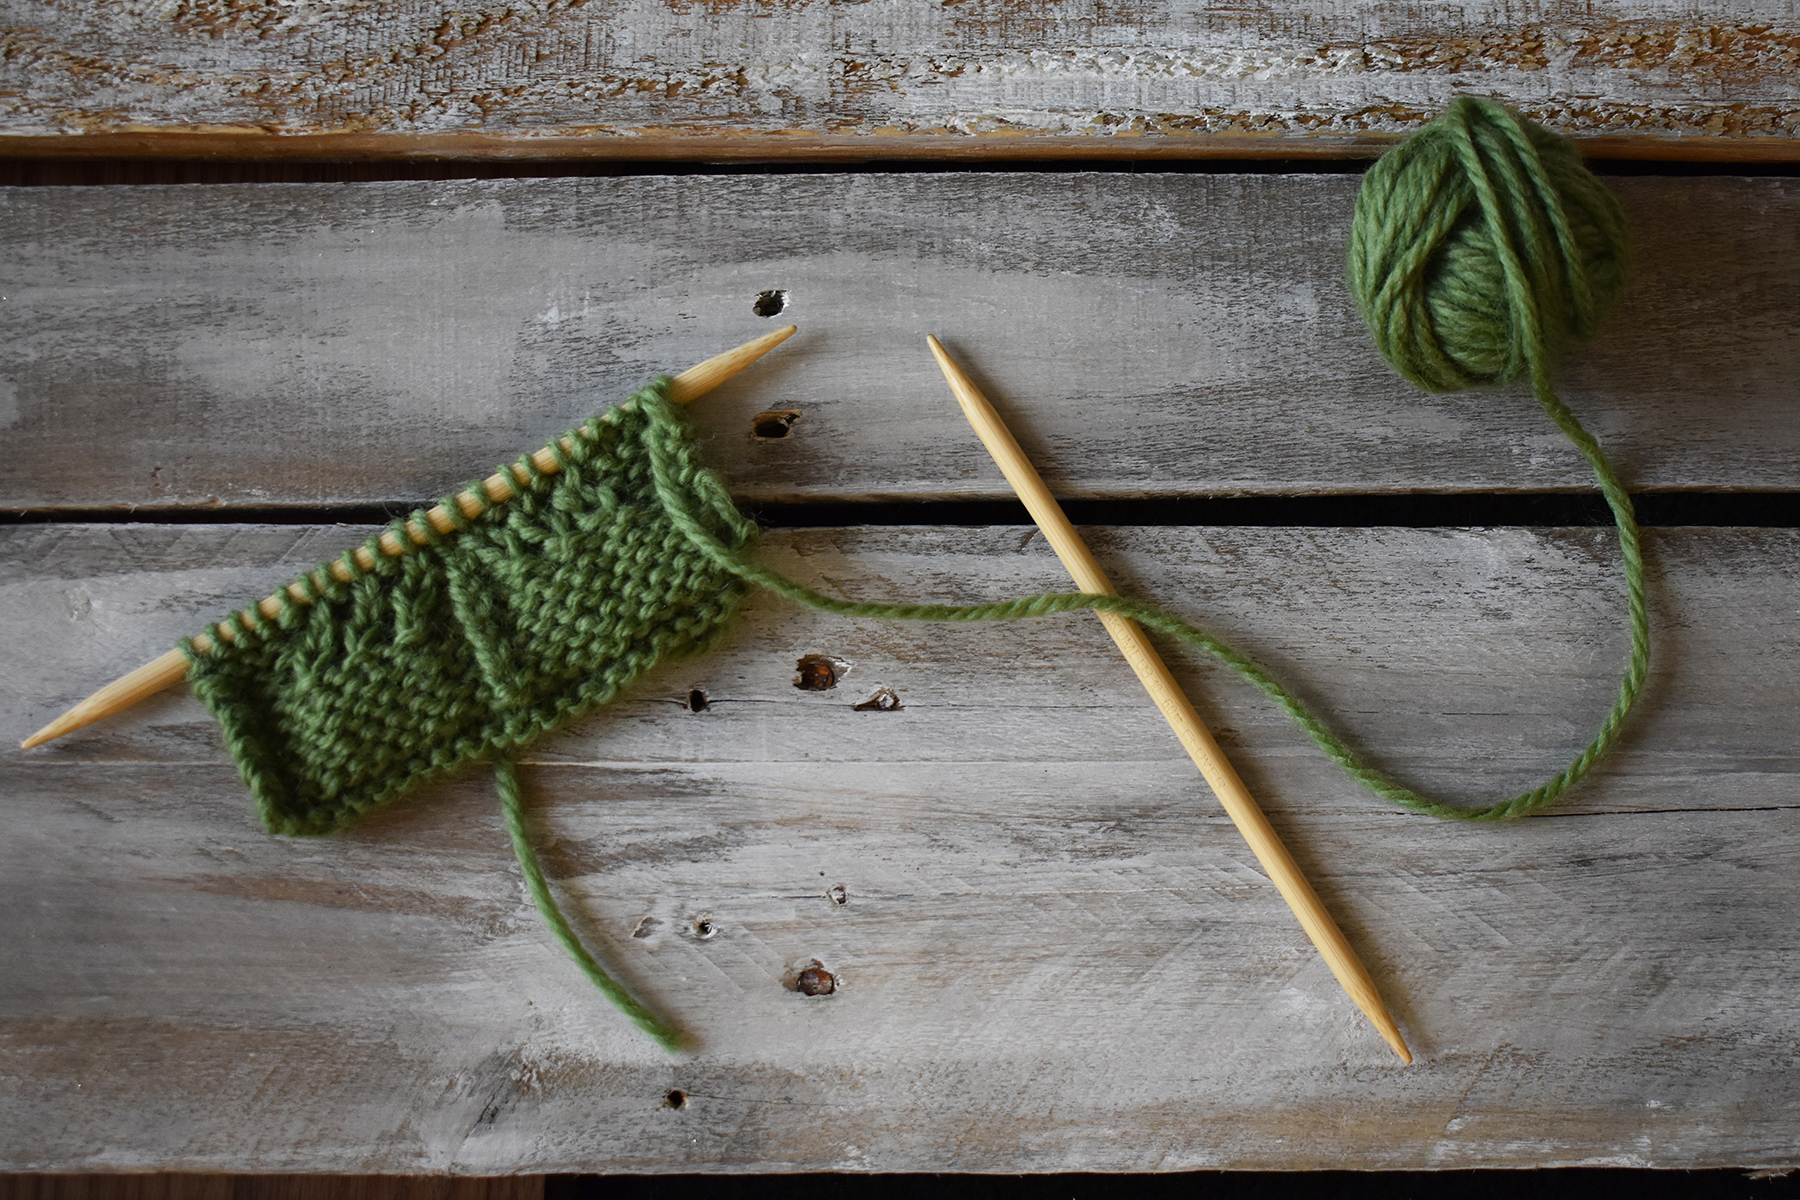
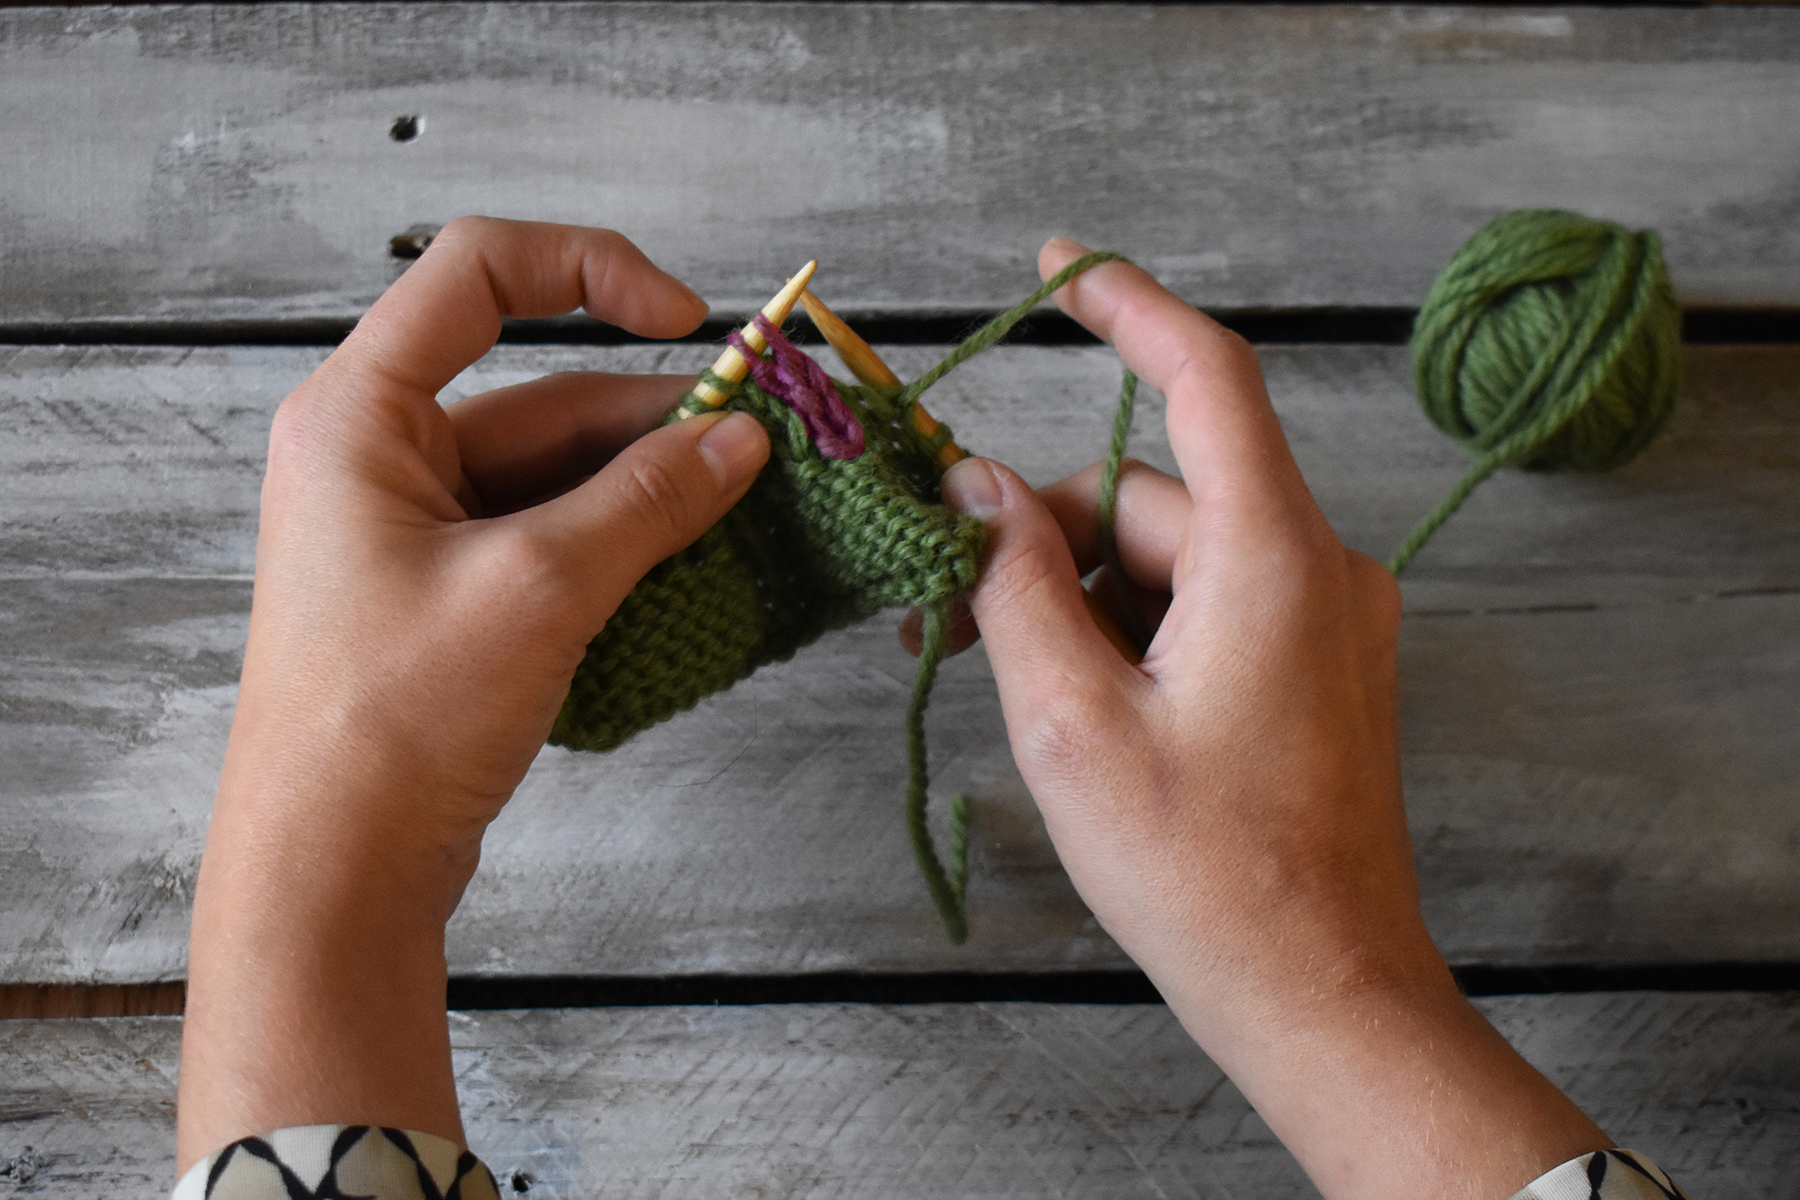
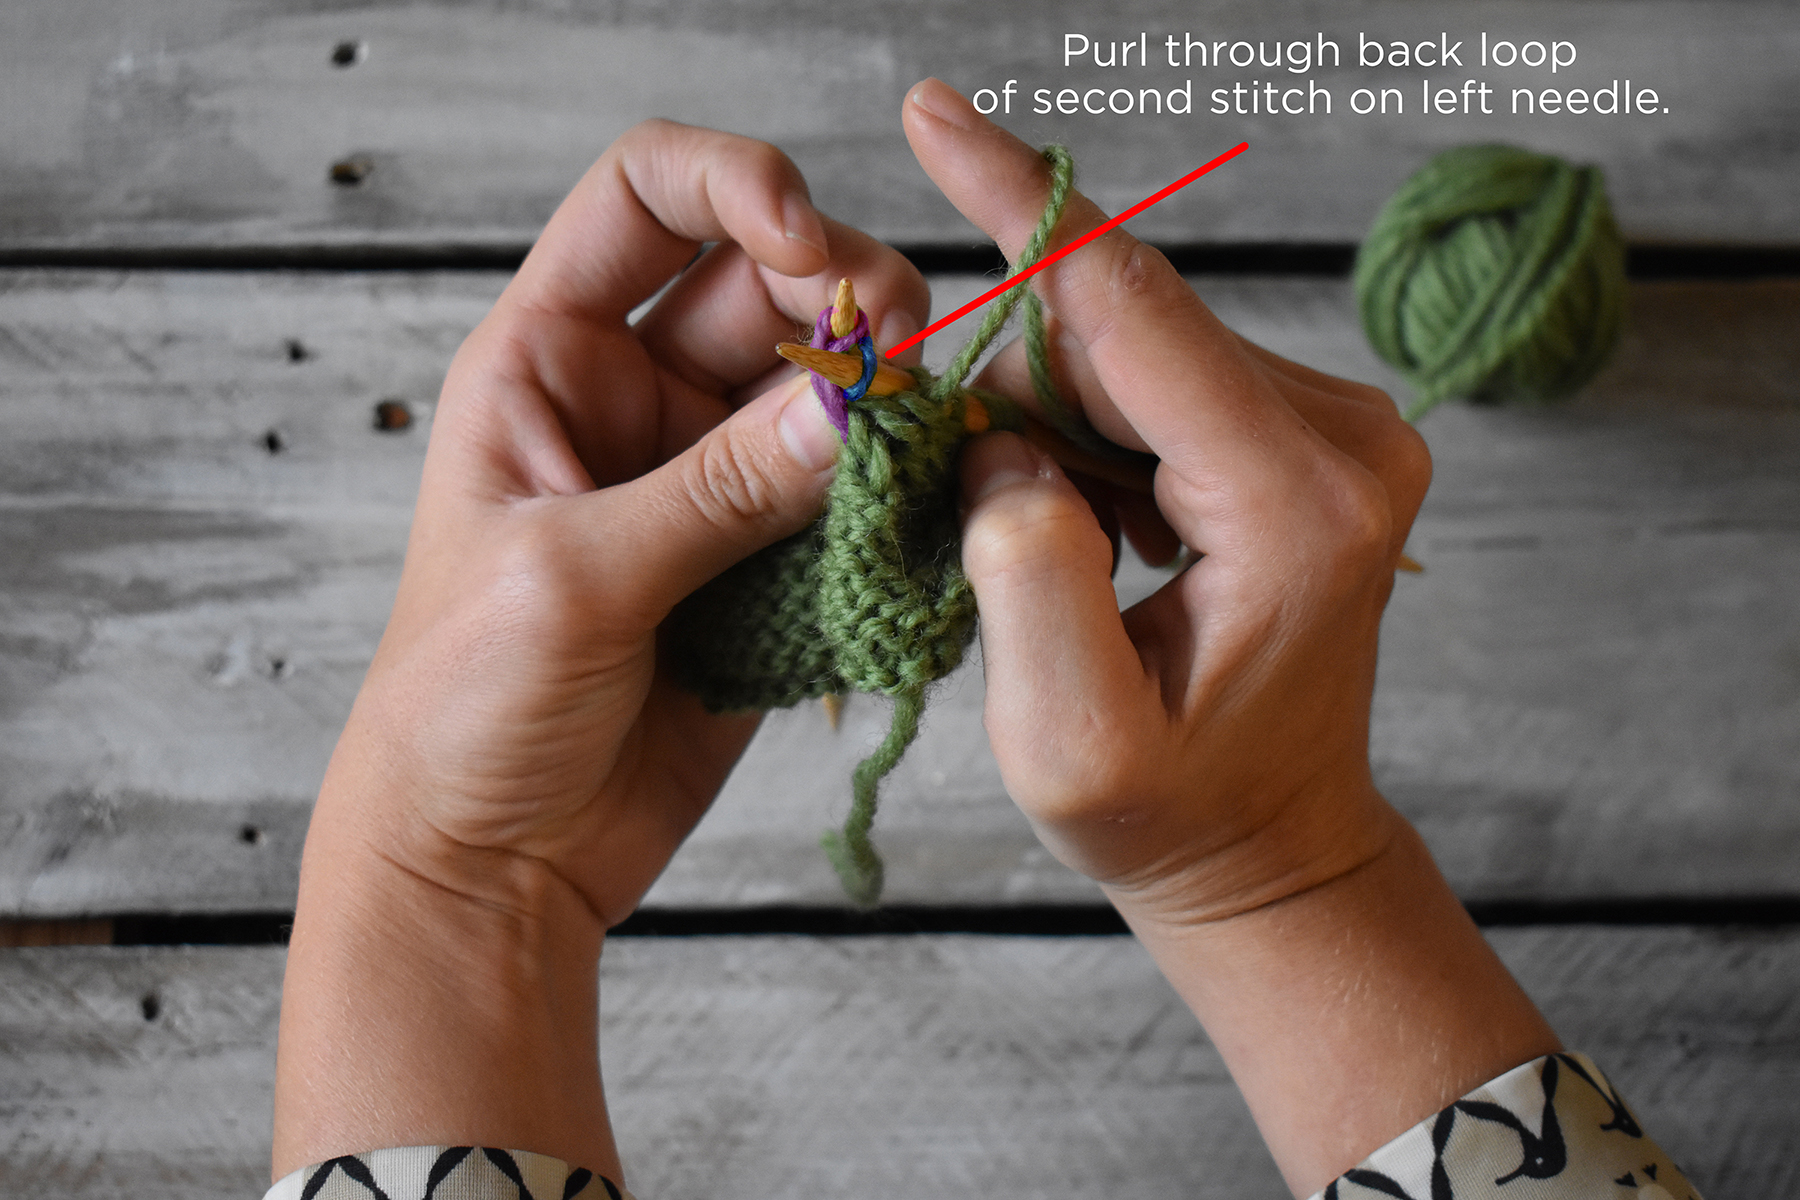
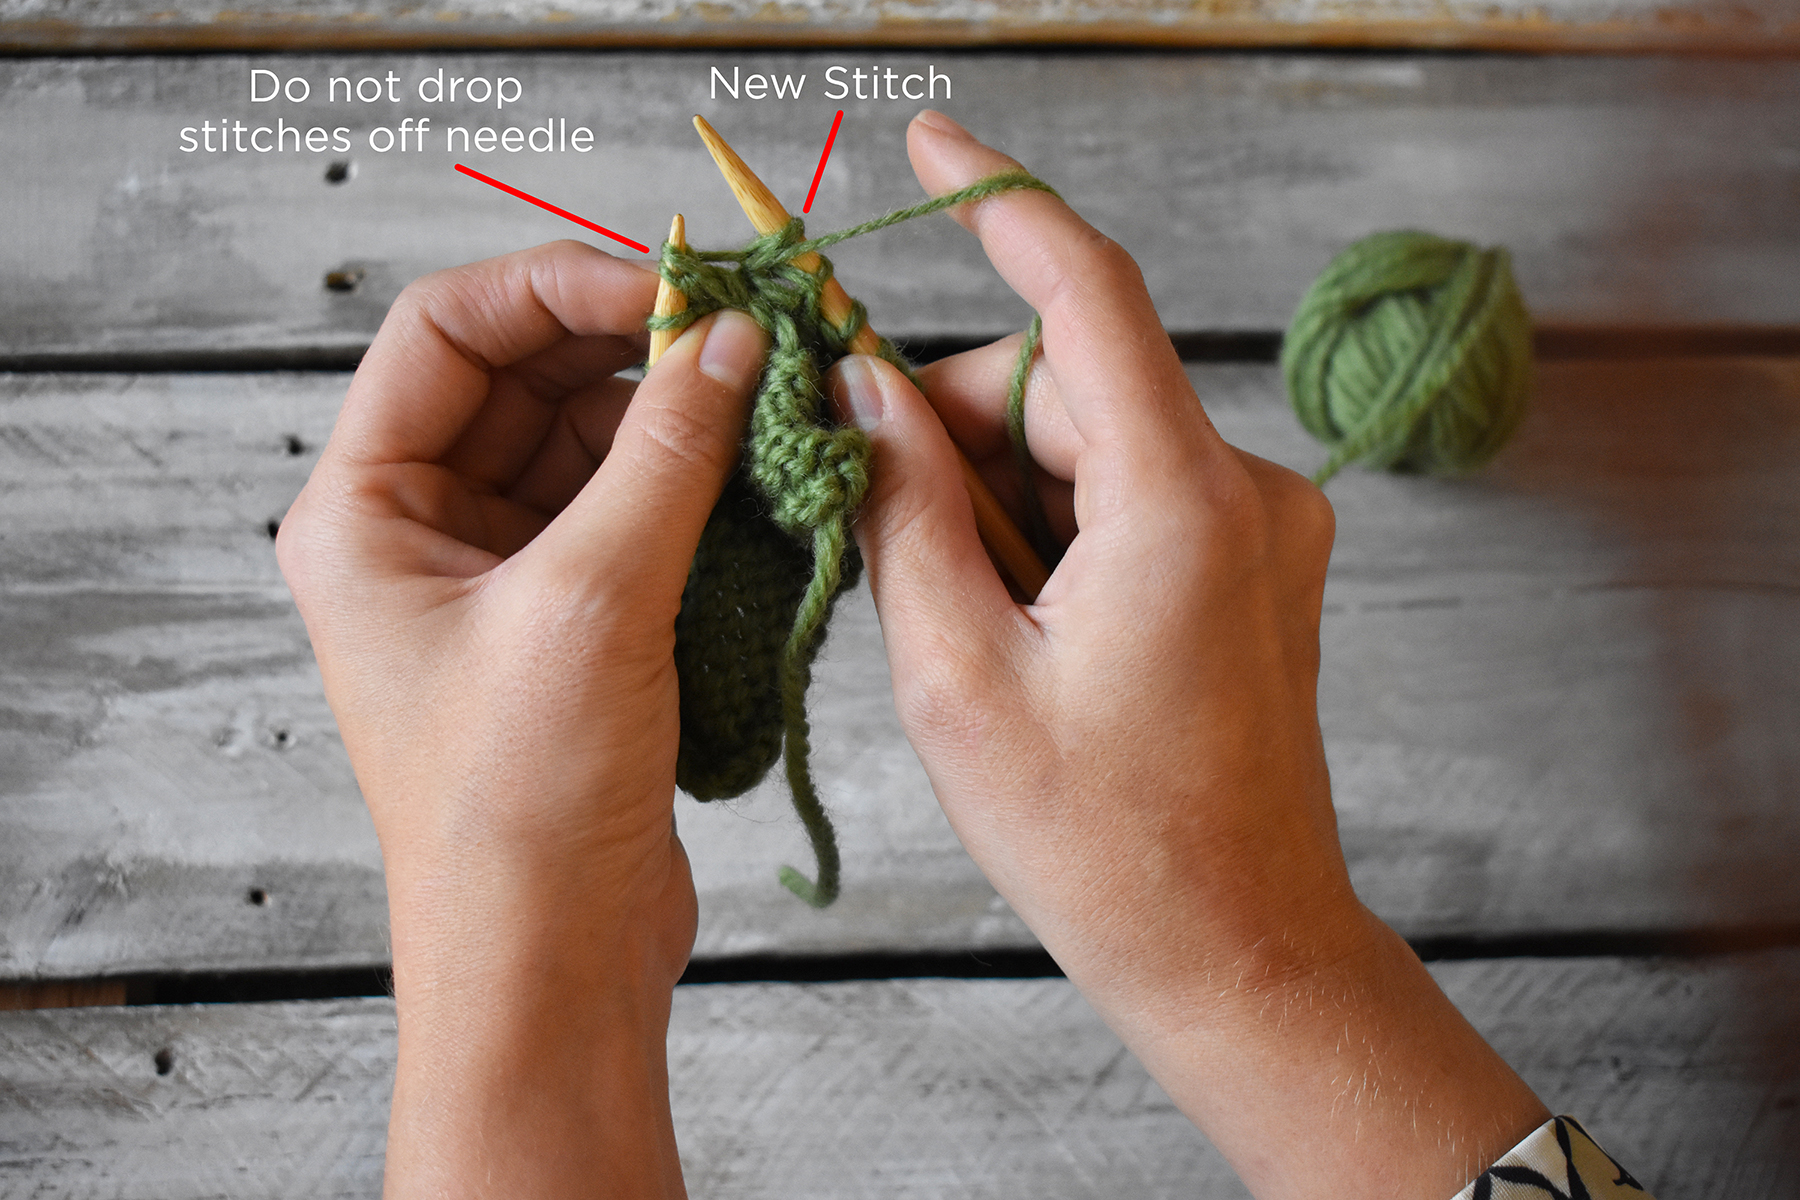
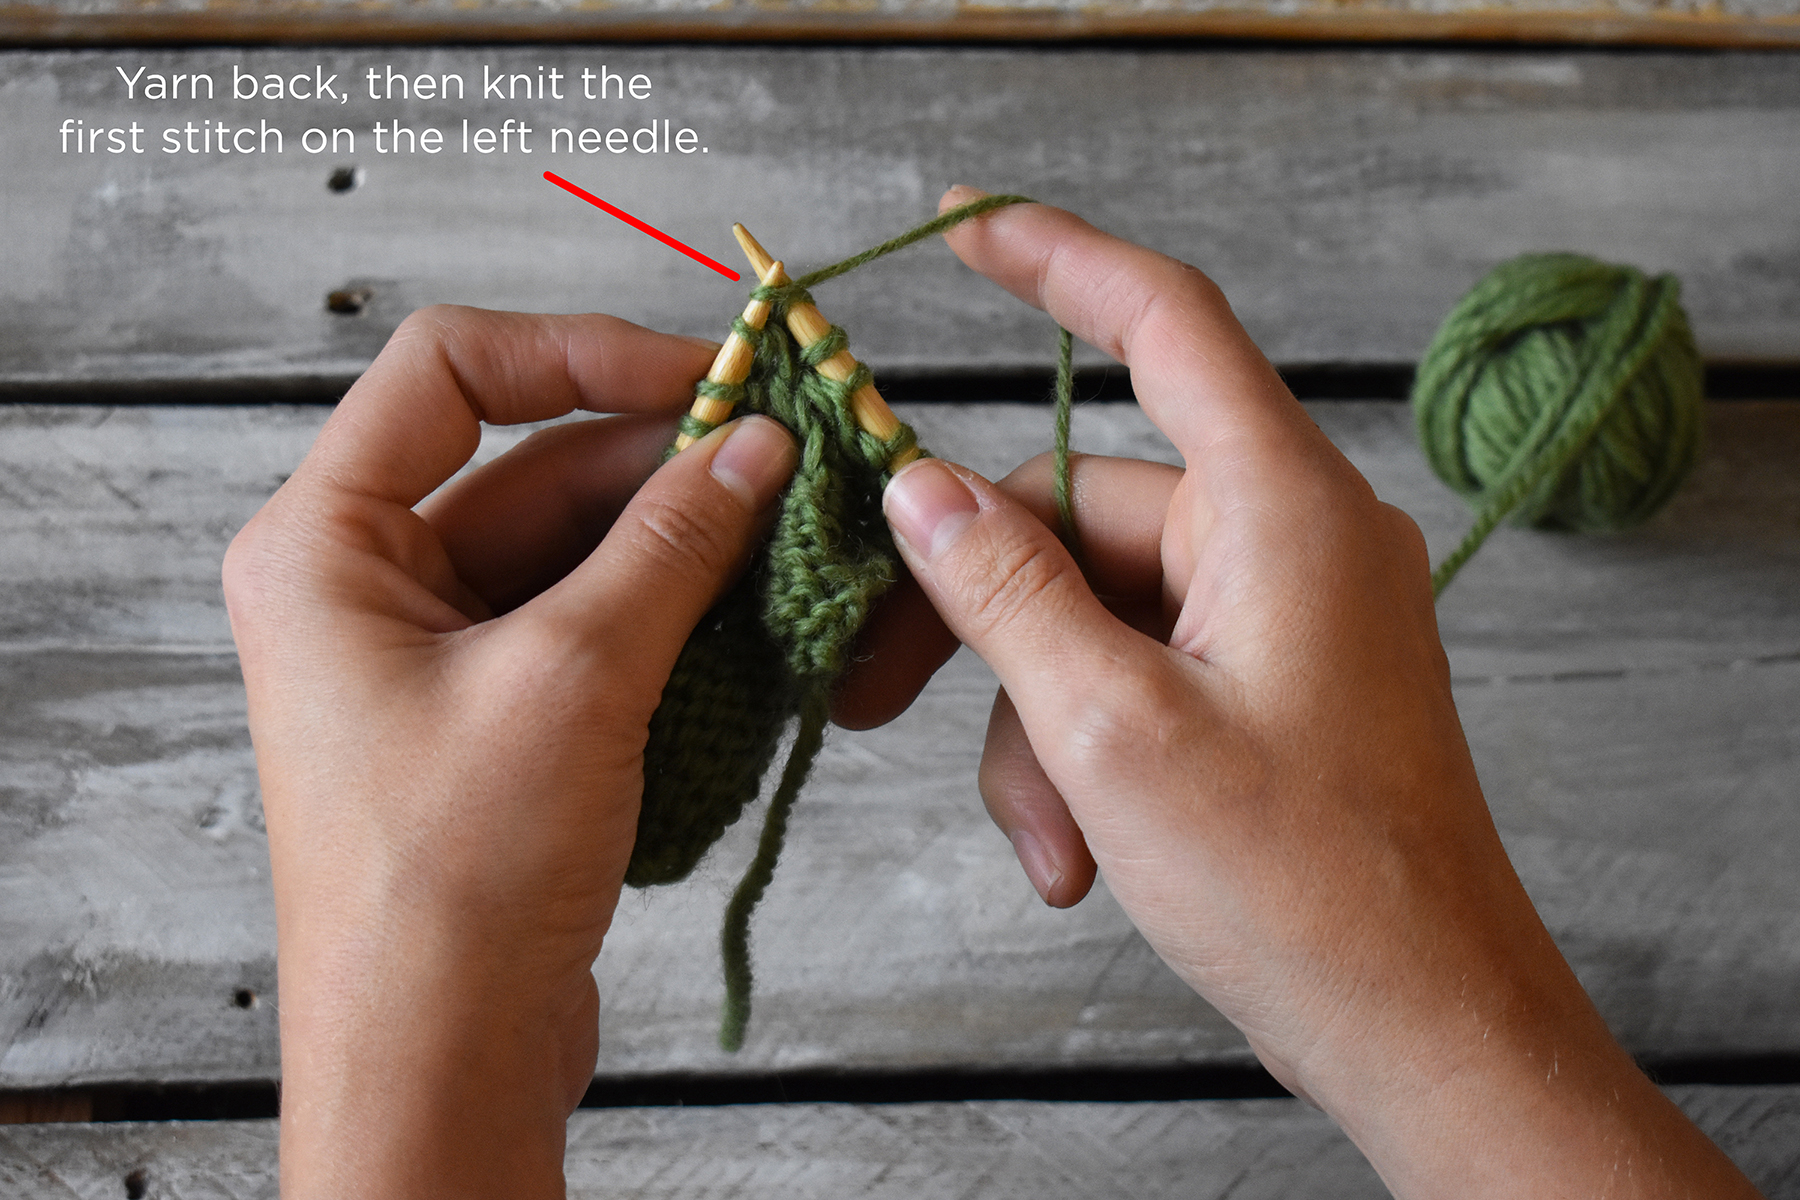
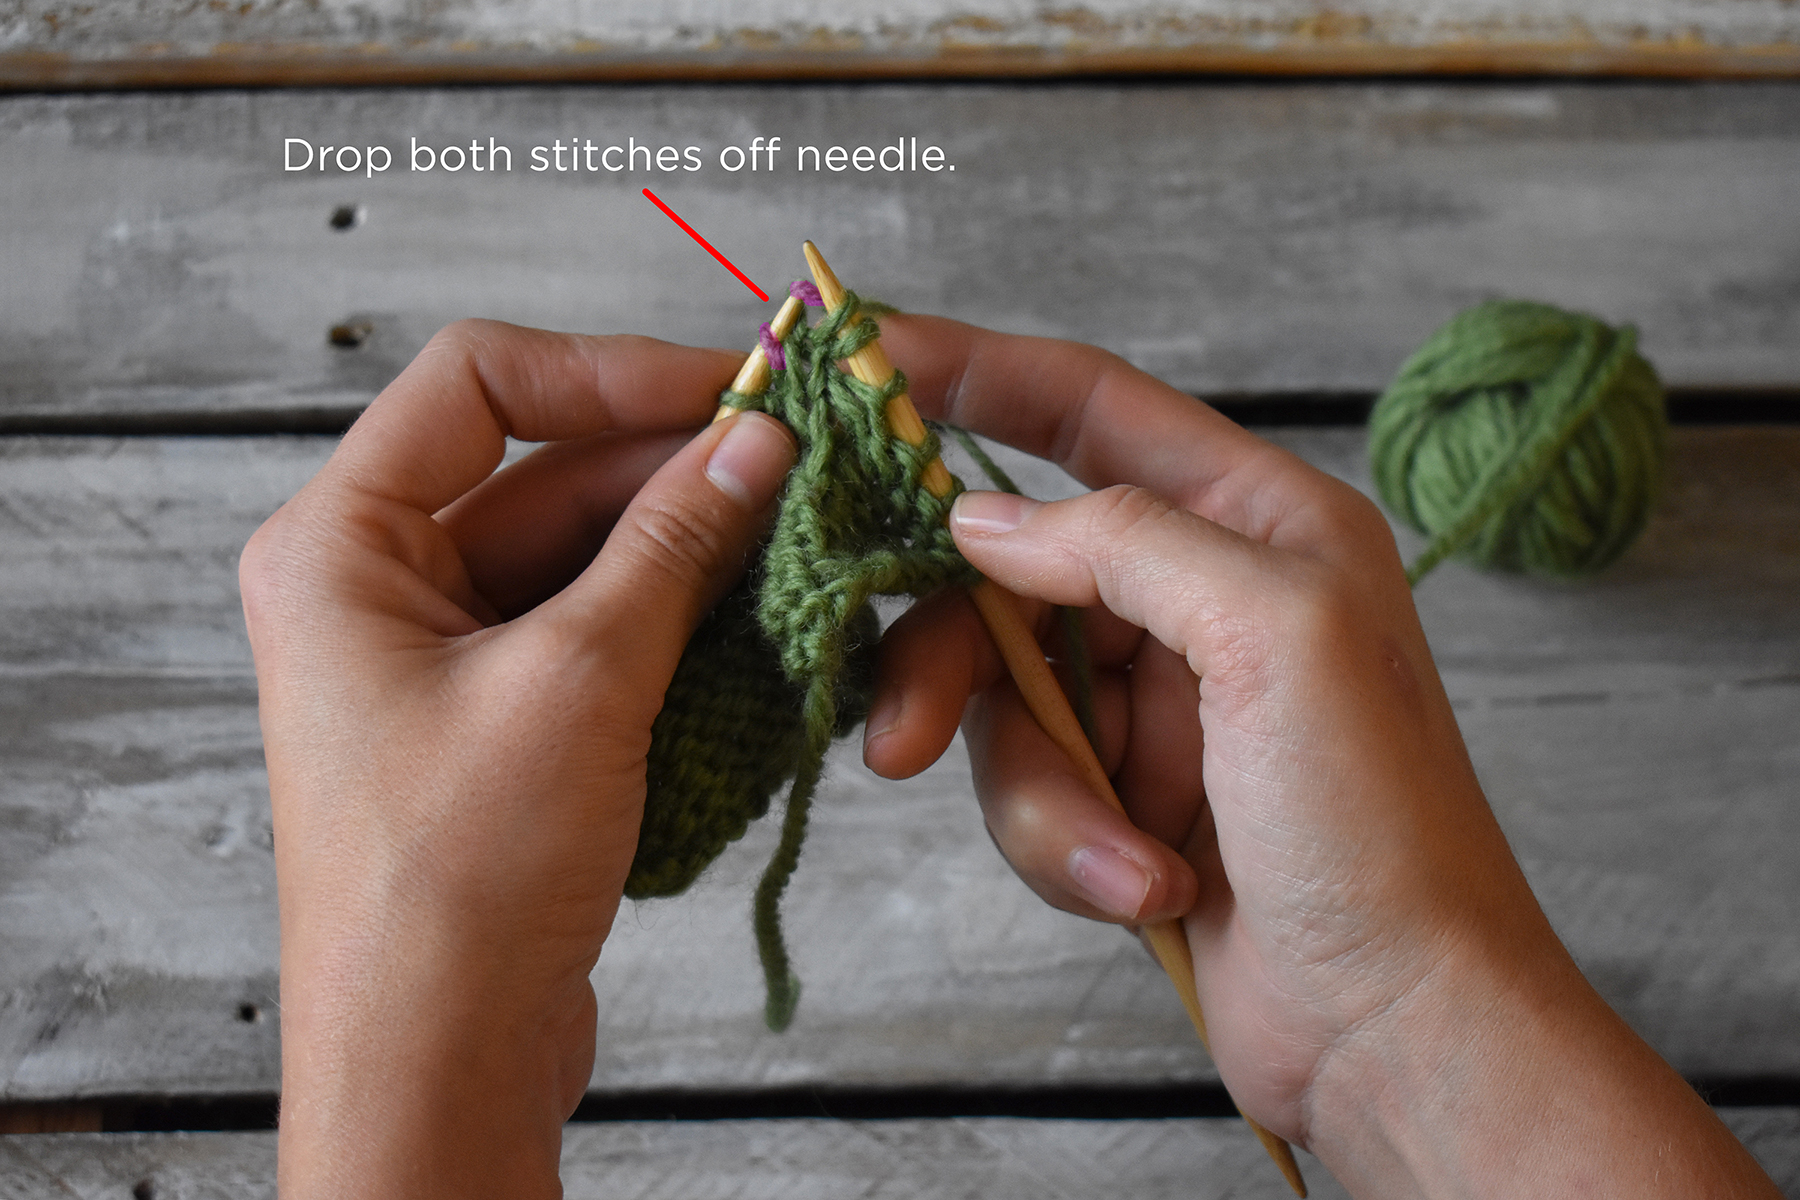
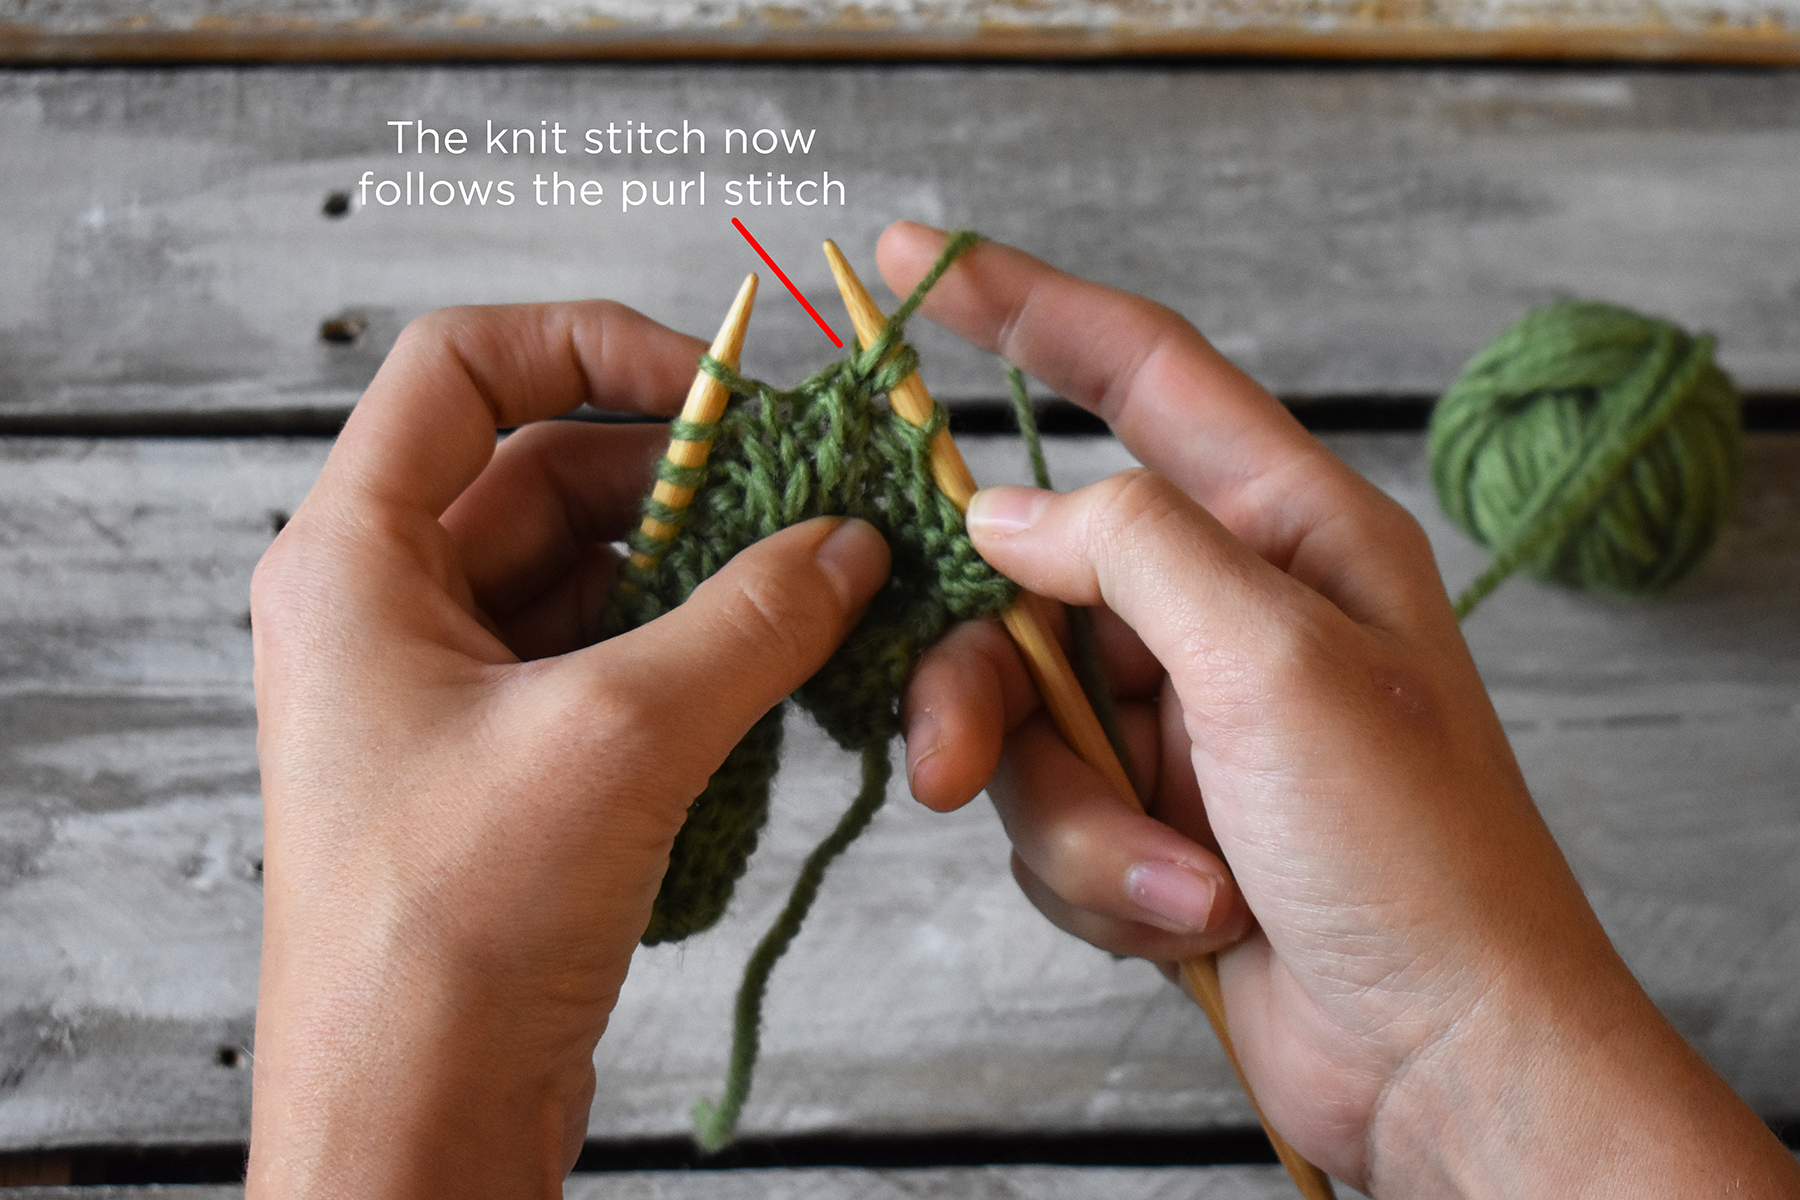
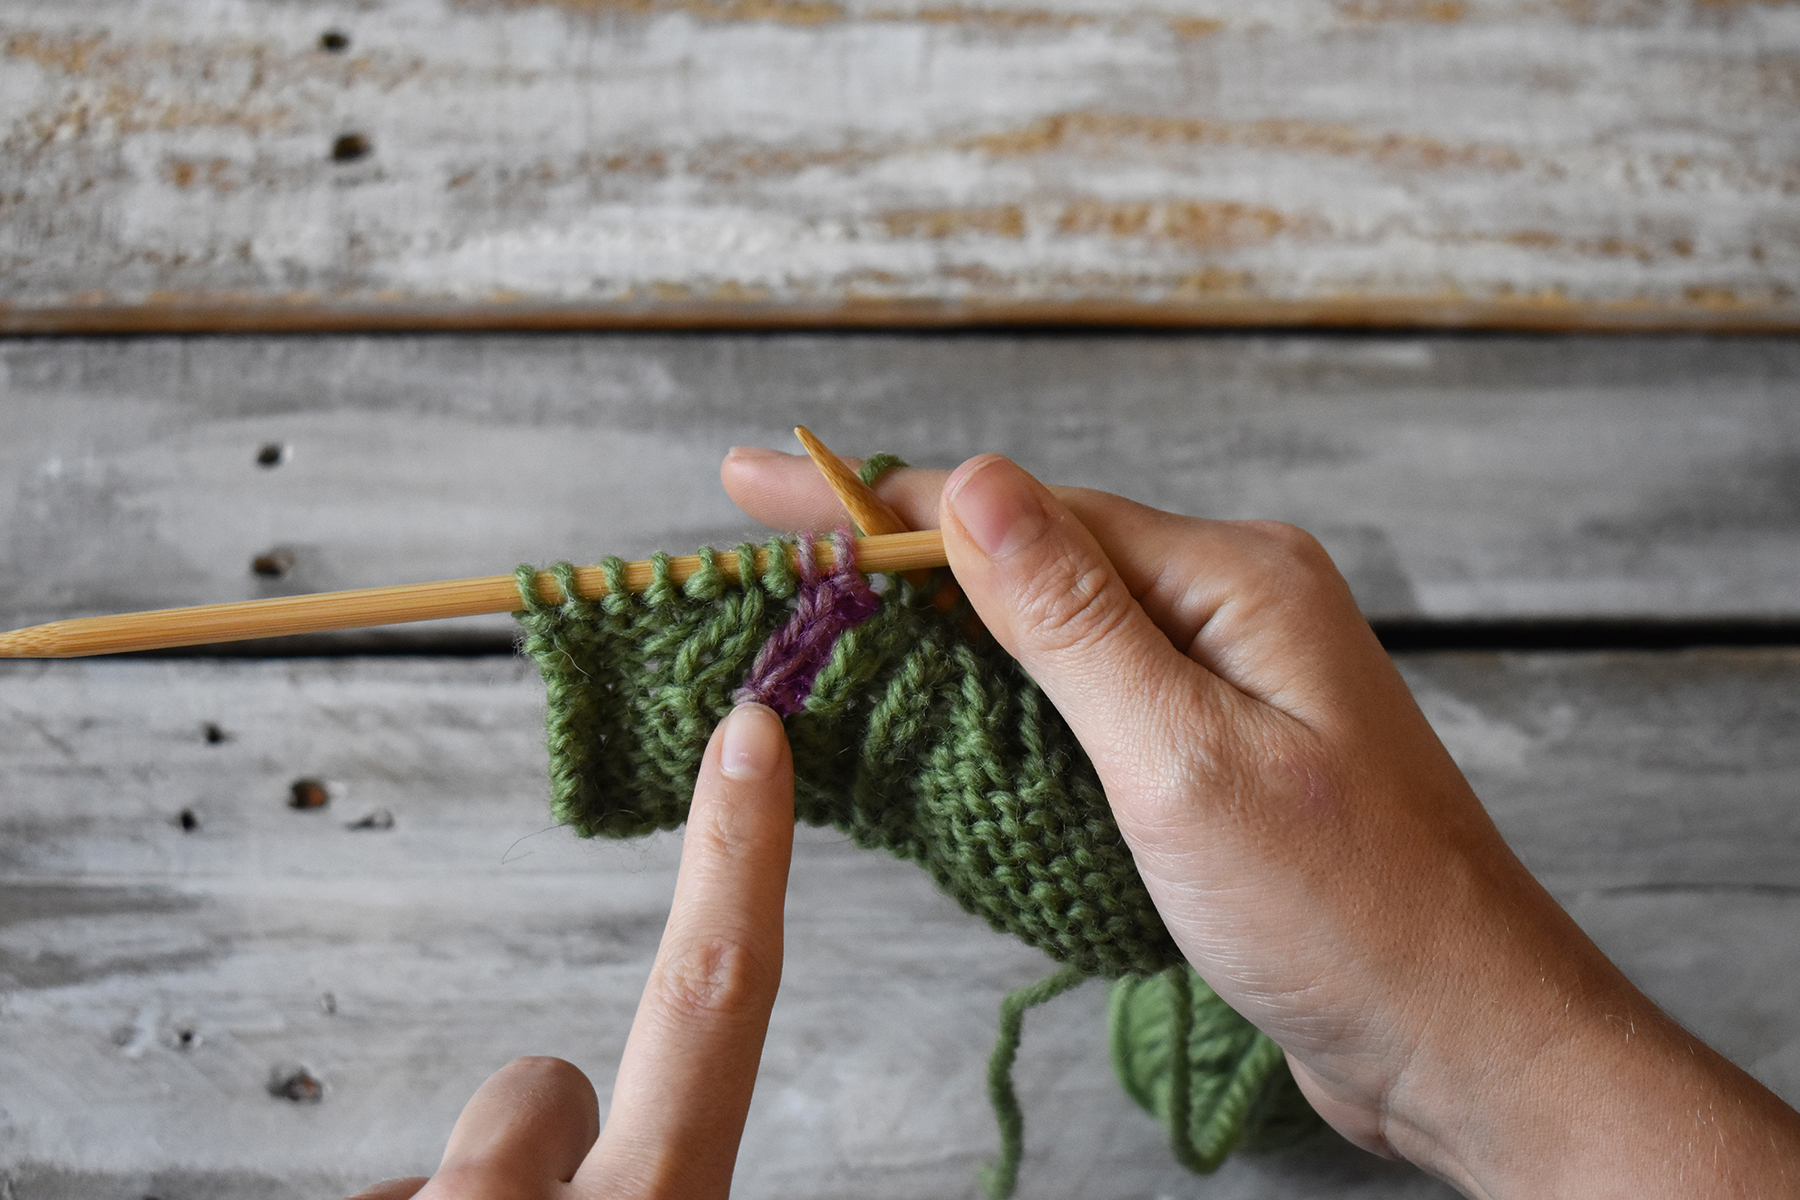
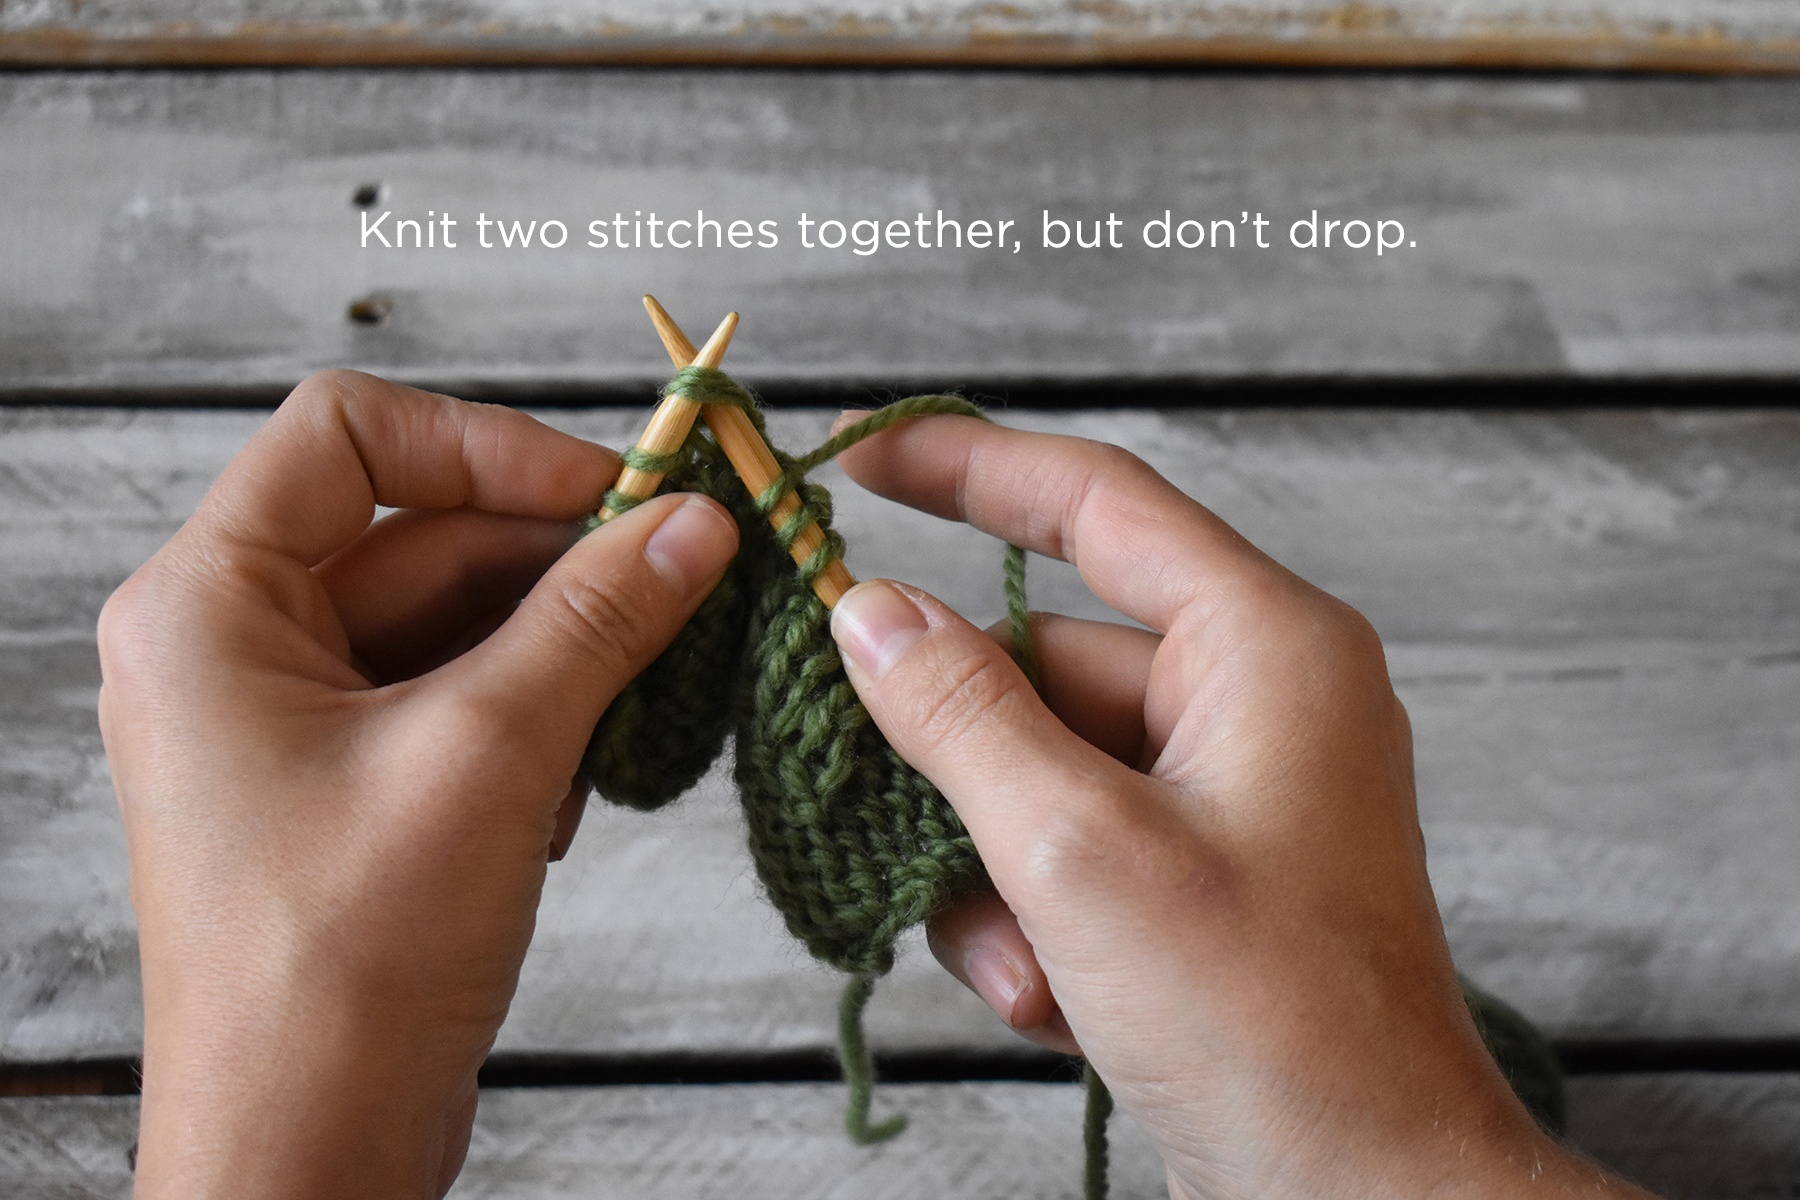
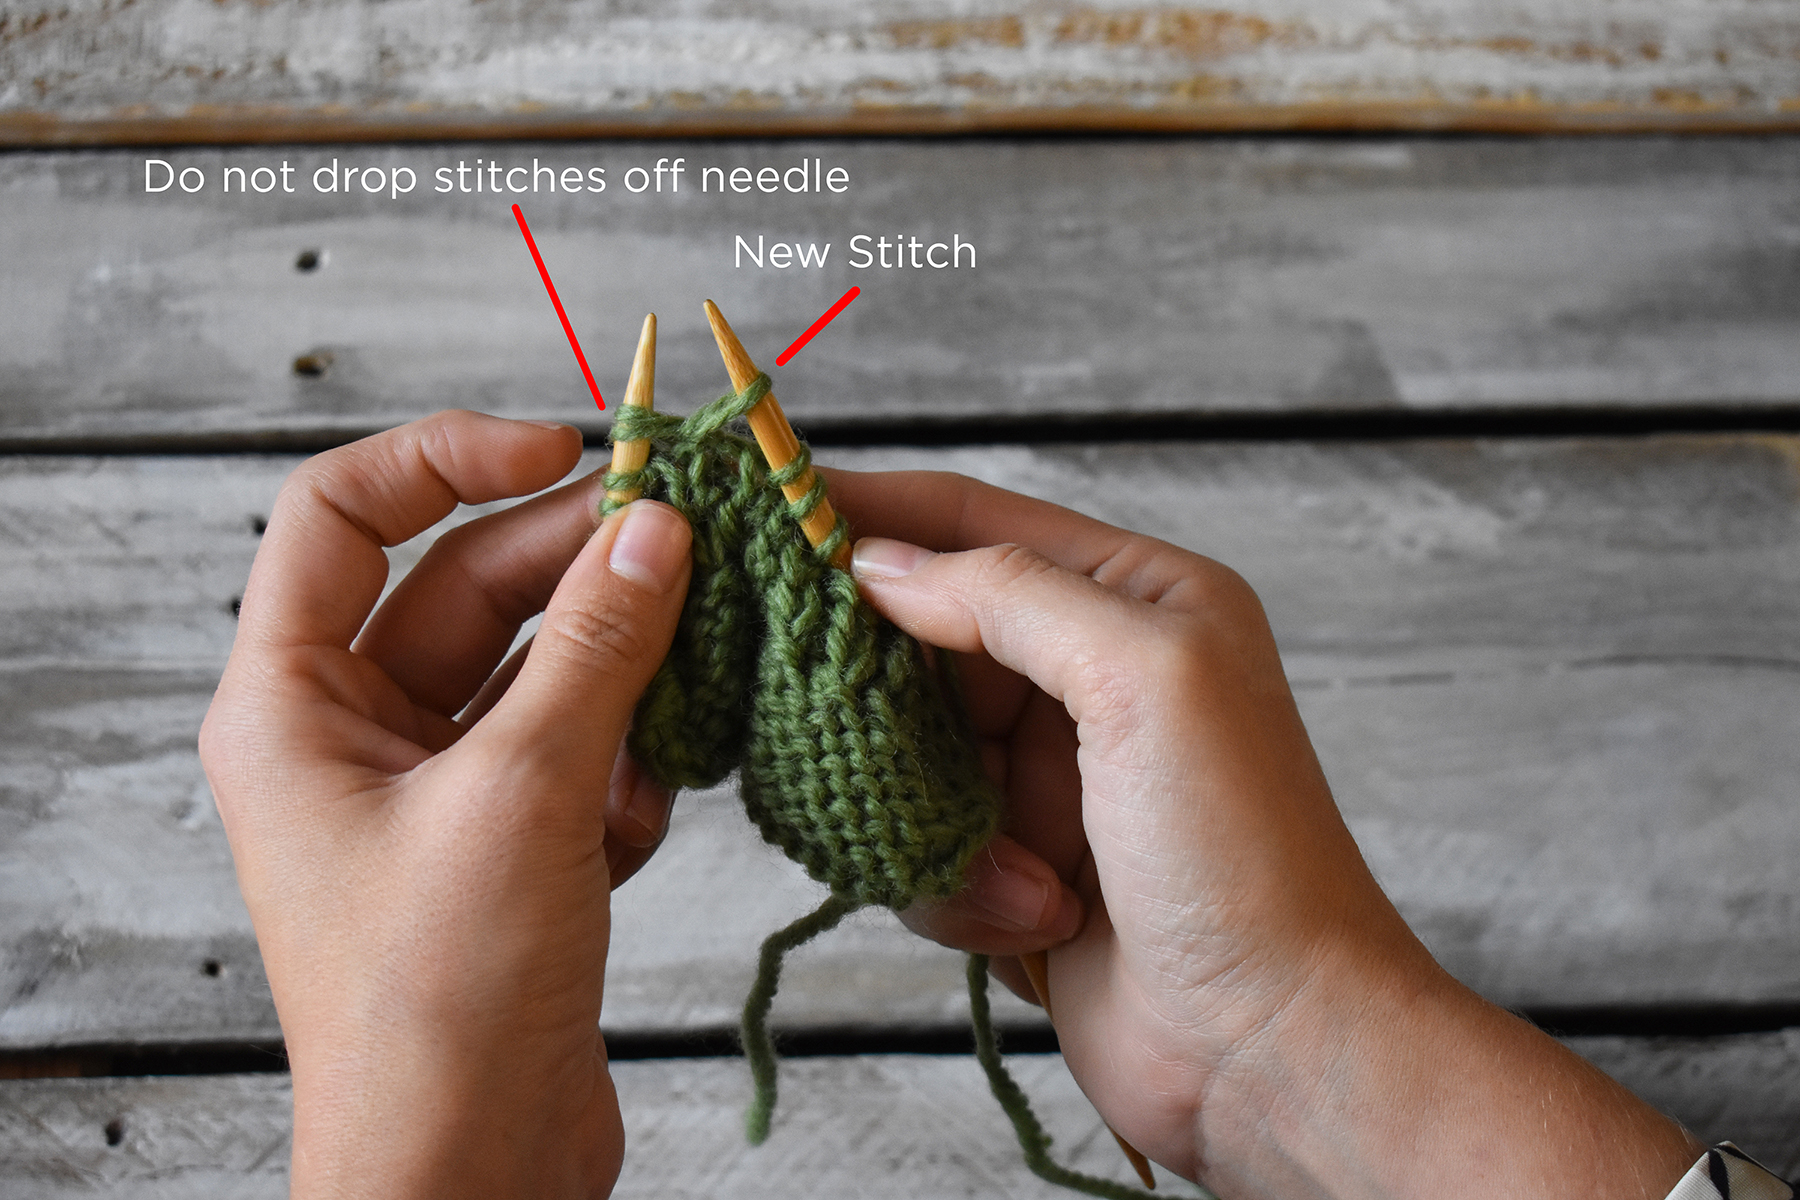
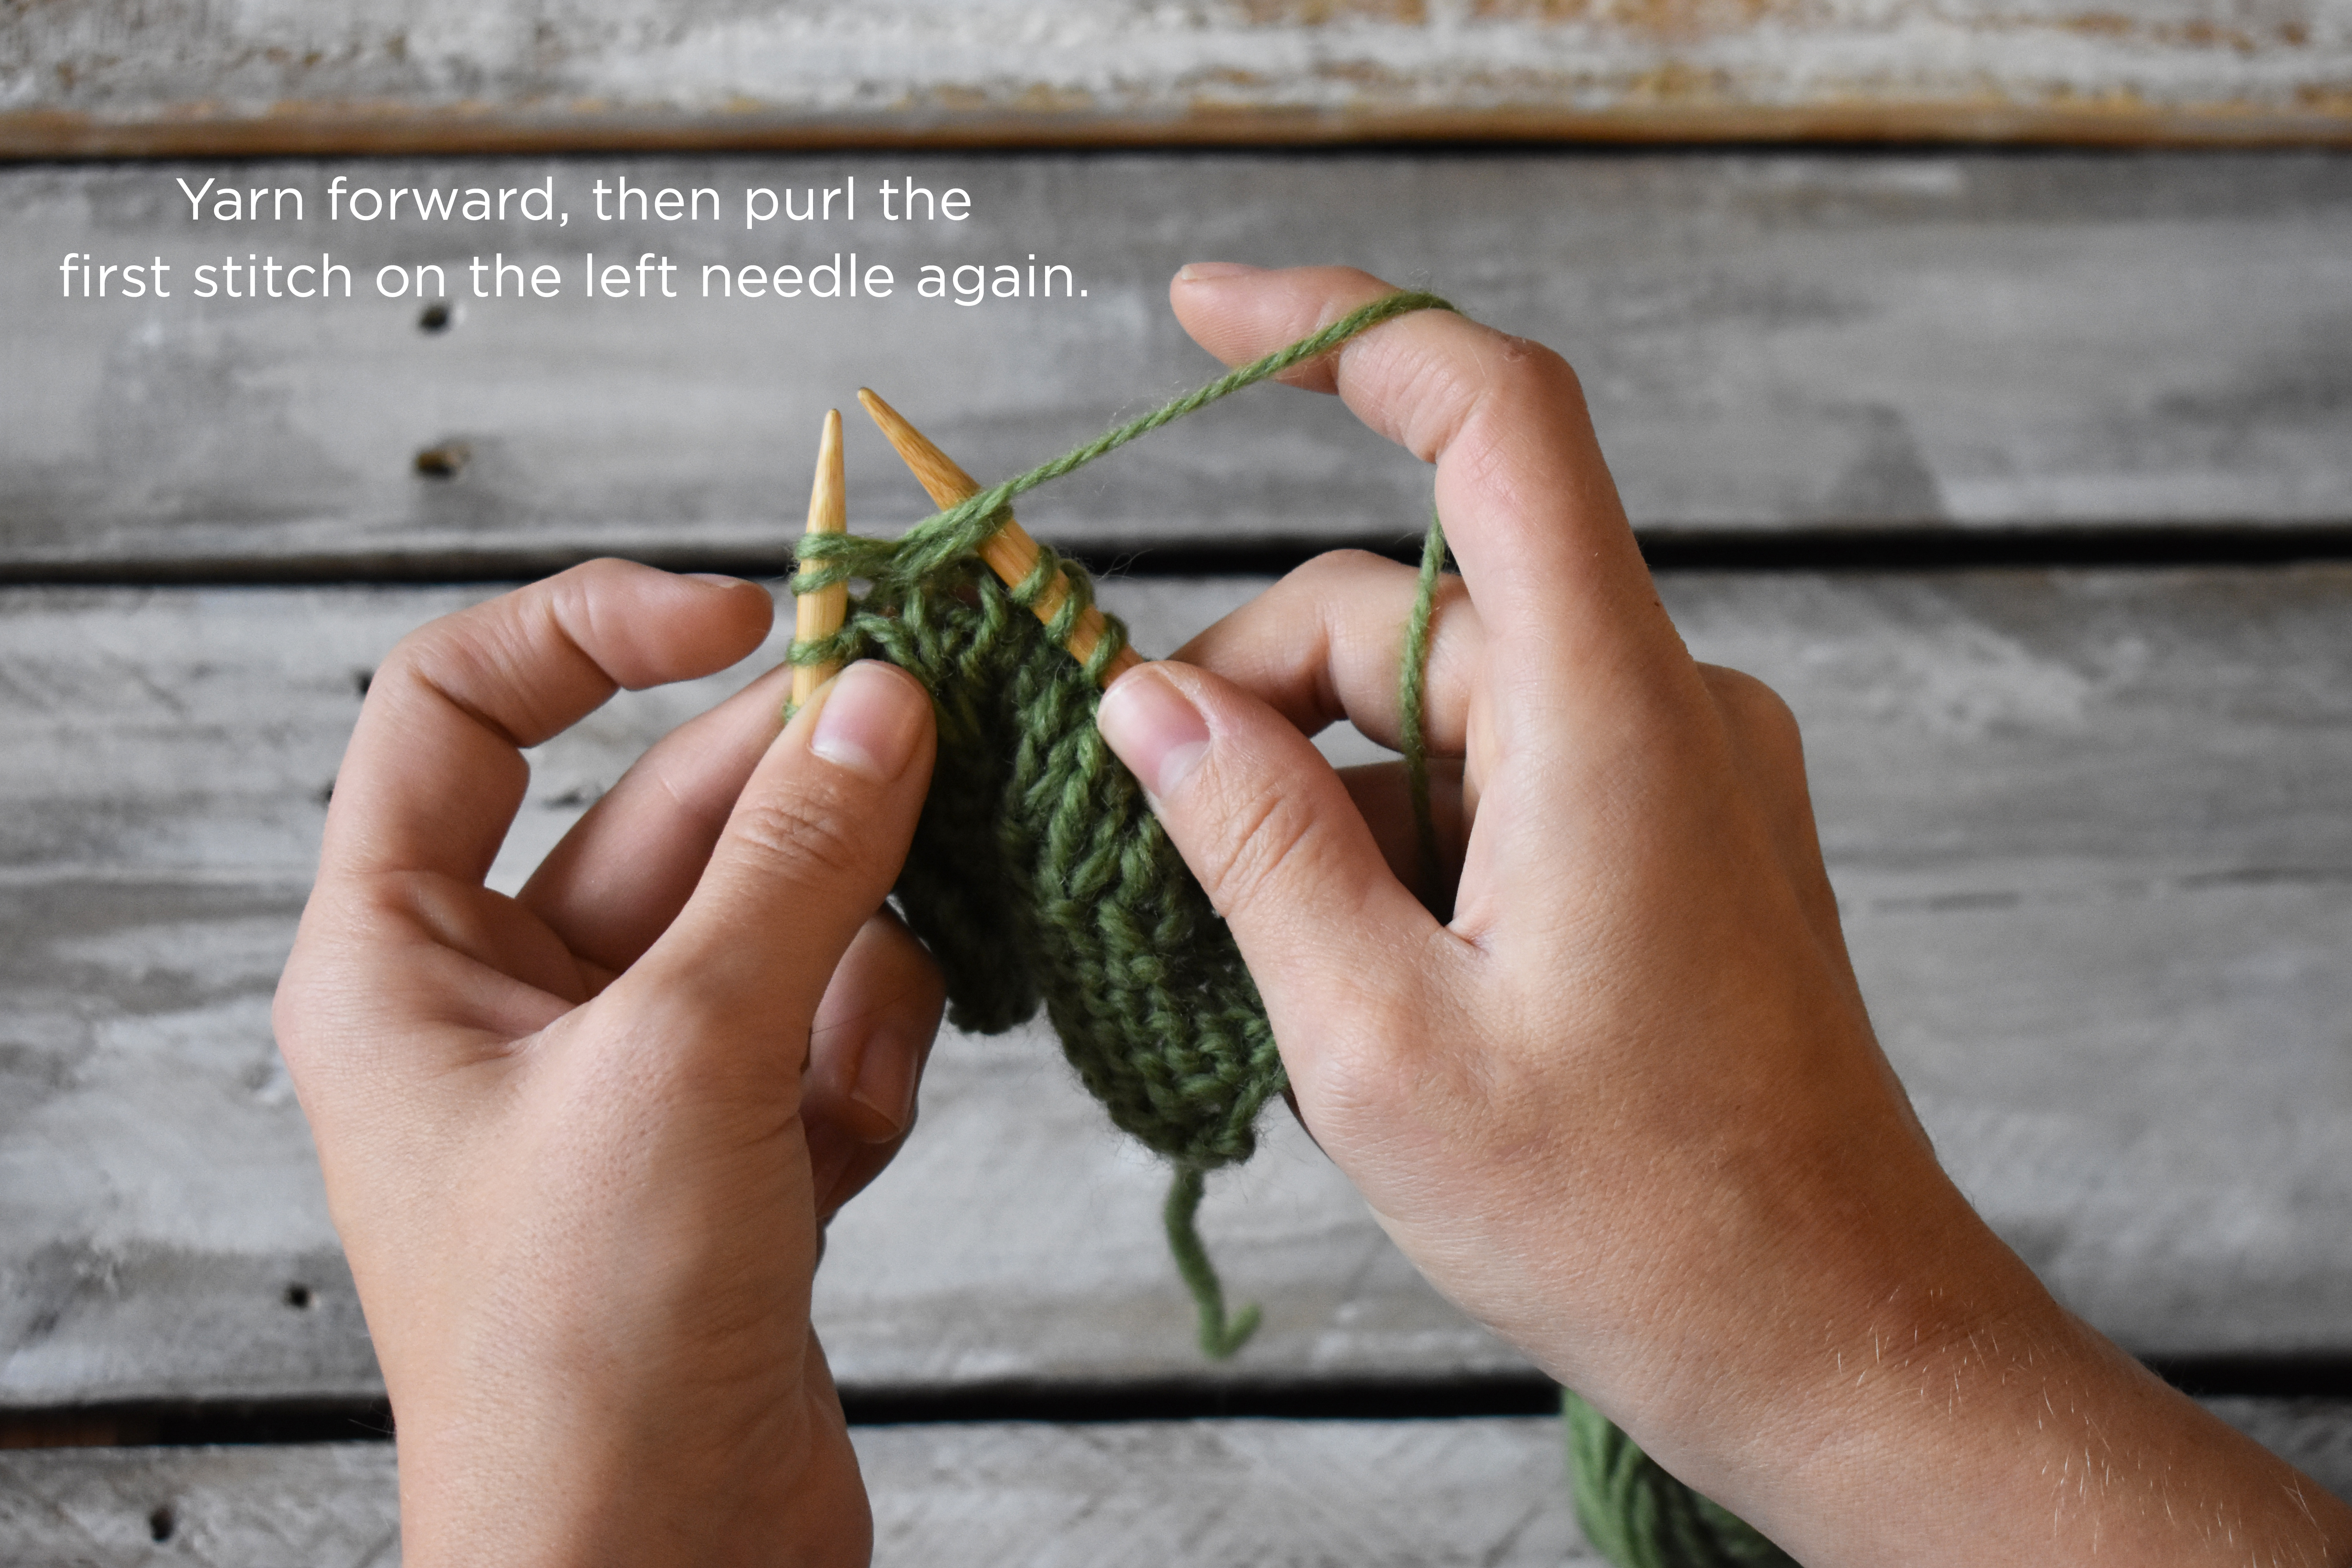
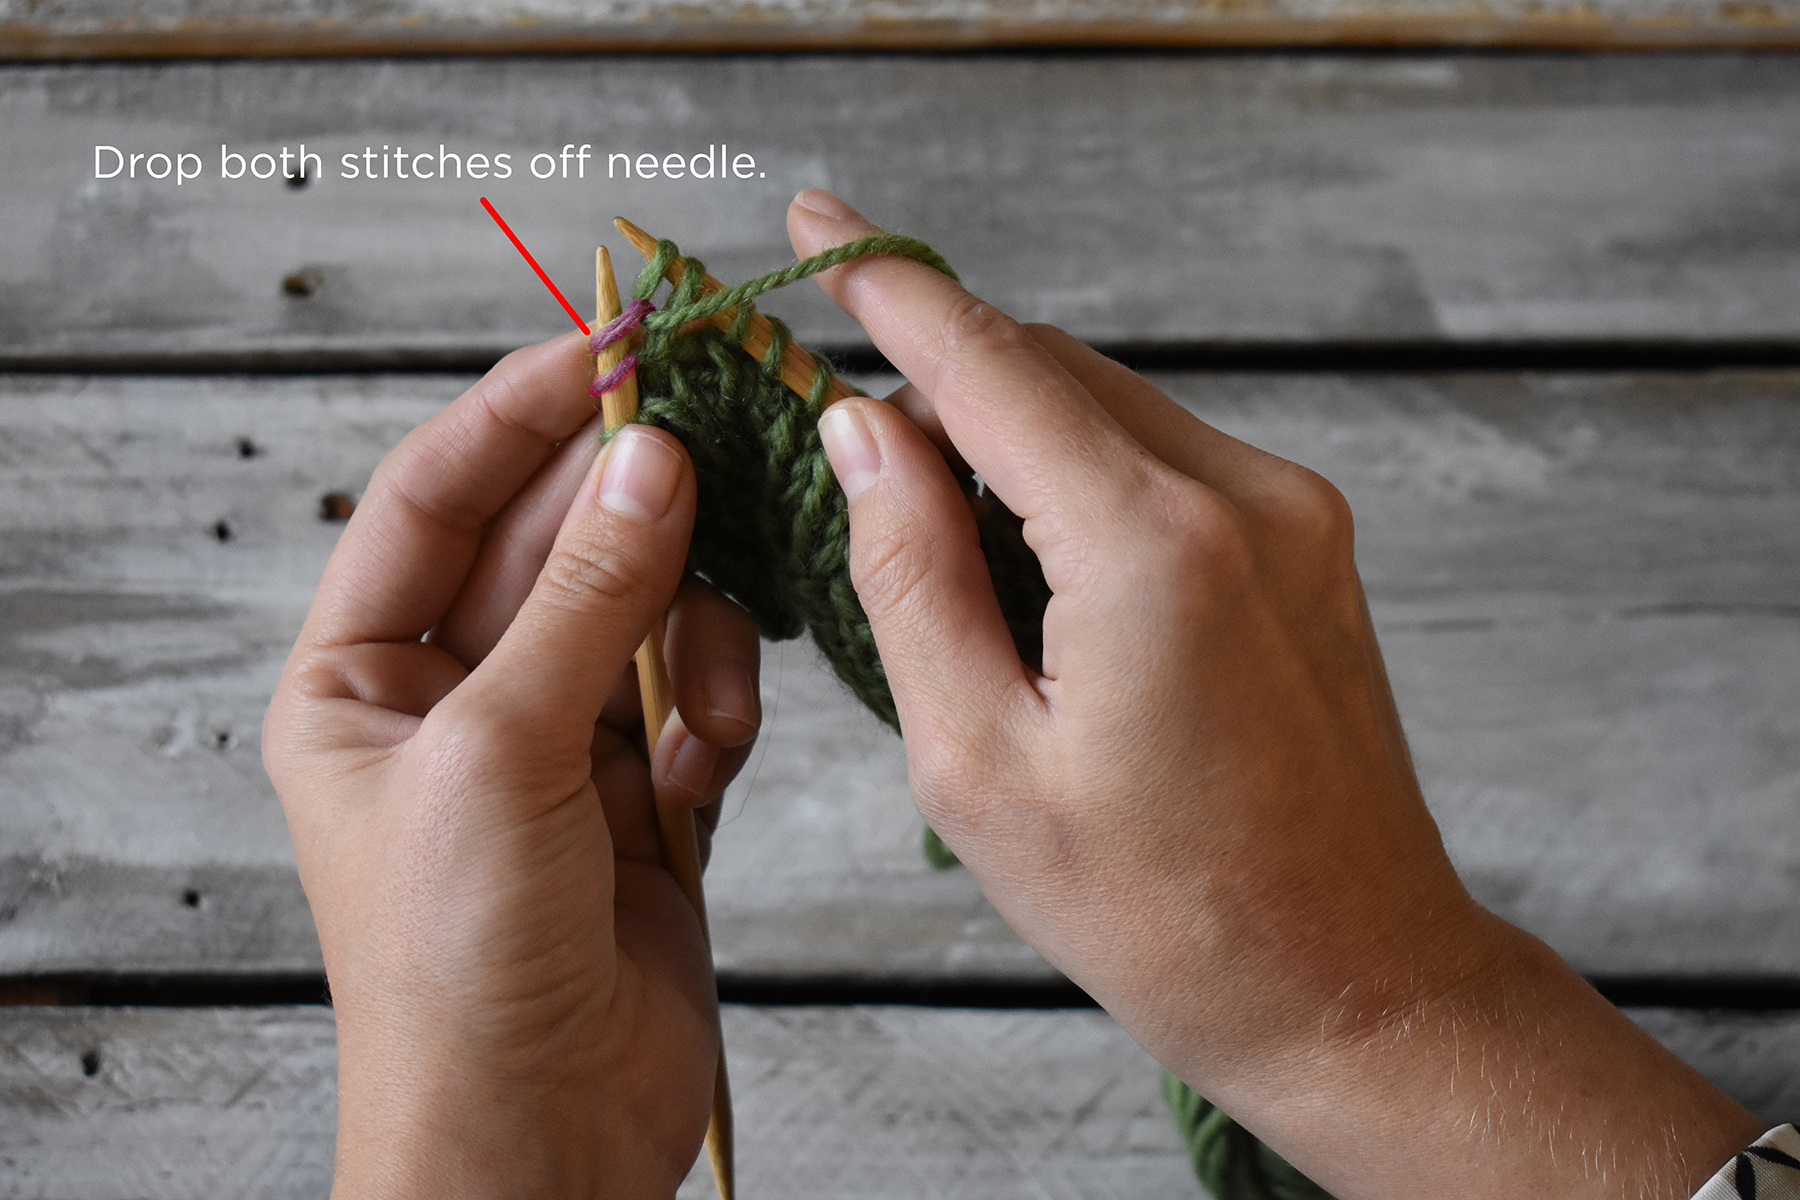
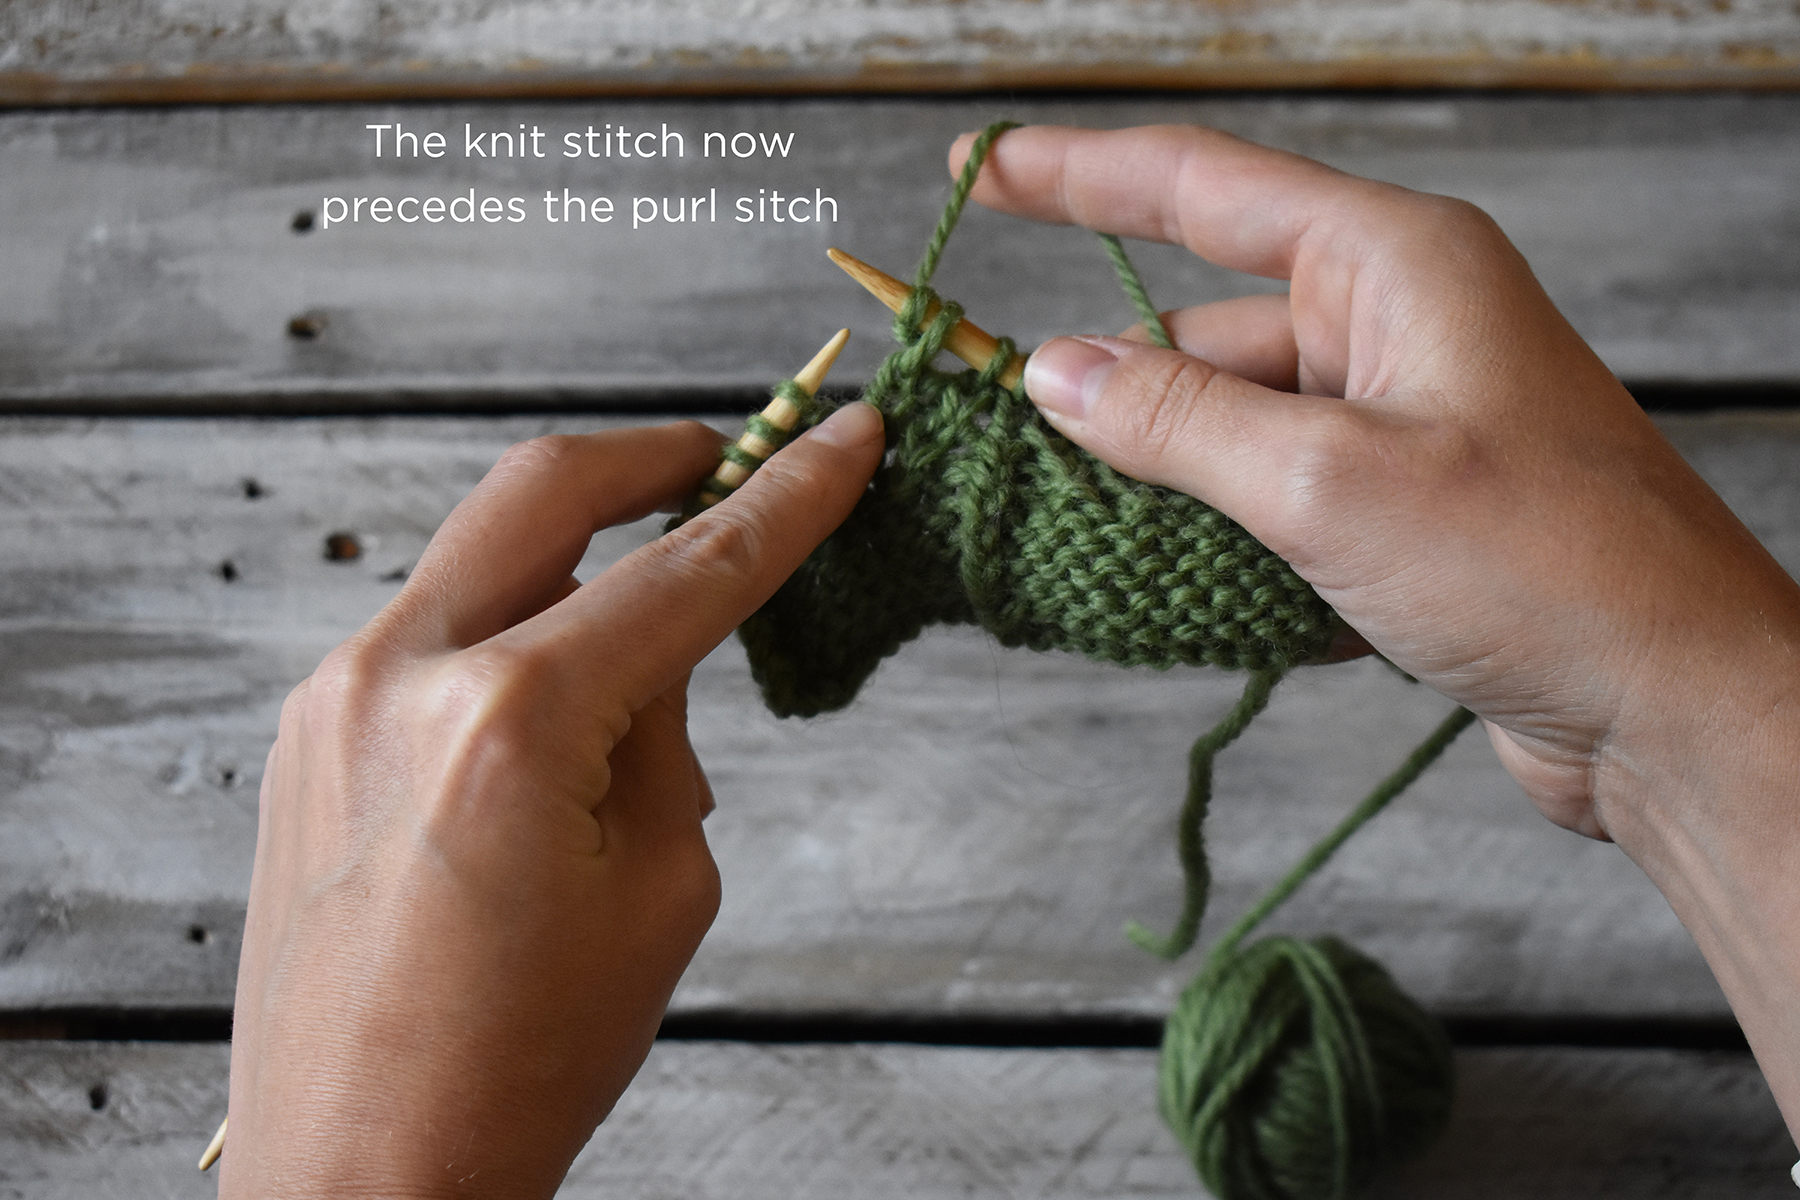
Left Purl Twist Start by making a swatch. Swatches are not only crucial for getting the finished item you want but are also great for practicing new stitches. Work in your pattern until you’ve reached the two stitches you need to twist. I’ve highlighted these stitches in purple so it’s easier to see. As you can see we have a knit stitch and a purl stitch on the left-hand needle. We want to change their positioning by moving the knit stitch over the top of the purl stitch.Admittedly, the LPT is just a bit more complex than the RPT. It might feel a little fiddly until you get the hang of it. Remember the order of the stitches from the previous photo? The order of the stitches from right to left was Knit, Purl. For the LPT, the first step is to purl the second stitch on the left needle through the back loop. This stitch is highlighted in blue. As you can see, the first (knit) stitch on the left needle remains in place. After you purl the second stitch through the back loop, do not drop the first and second stitches off the left needle. Next, move your yarn to the back of the work and knit the first stitch on the left needle. Now you can drop both the first and second stitches on the left needle. These stitches are highlighted in purple. After you drop them, you’ve completed the LPT. Notice how the stitches have changed position, and the knit stitch now leans to the left, over top of the purl stitch. Well done, now on to the RPT!Right Purl TwistWork in your pattern until you’ve reached the two stitches you need to twist. I’ve highlighted these stitches in purple so it’s easier to see. Here we have a purl stitch that precedes a knit stitch. We want to change the position of these stitches, so that the knit stitch leans to the left, over the purl stitch. Begin by knitting two stitches together, but do not drop the stitches from your needle. As you can see, the two stitches remain on the left needle, but there is now a new stitch on the right needle. Bring your yarn to the front, then purl the first stitch on the left needle. Now you can drop the two stitches on the left needle – I’ve highlighted them in purple so it’s easier for you to see. And that’s it – you’ve completed your RPT. Notice how the knit stitch now precedes the purl stitch.
I hope you find this tutorial helpful, and I hope that it drums up excitement for you to start knitting this lovely cowl. Like Jennifer, I’m a big fan of coniferous trees, so this design sings to me!
Remember, you can find the 12 Days of Winter Kits at your local yarn shop. Happy crafting!