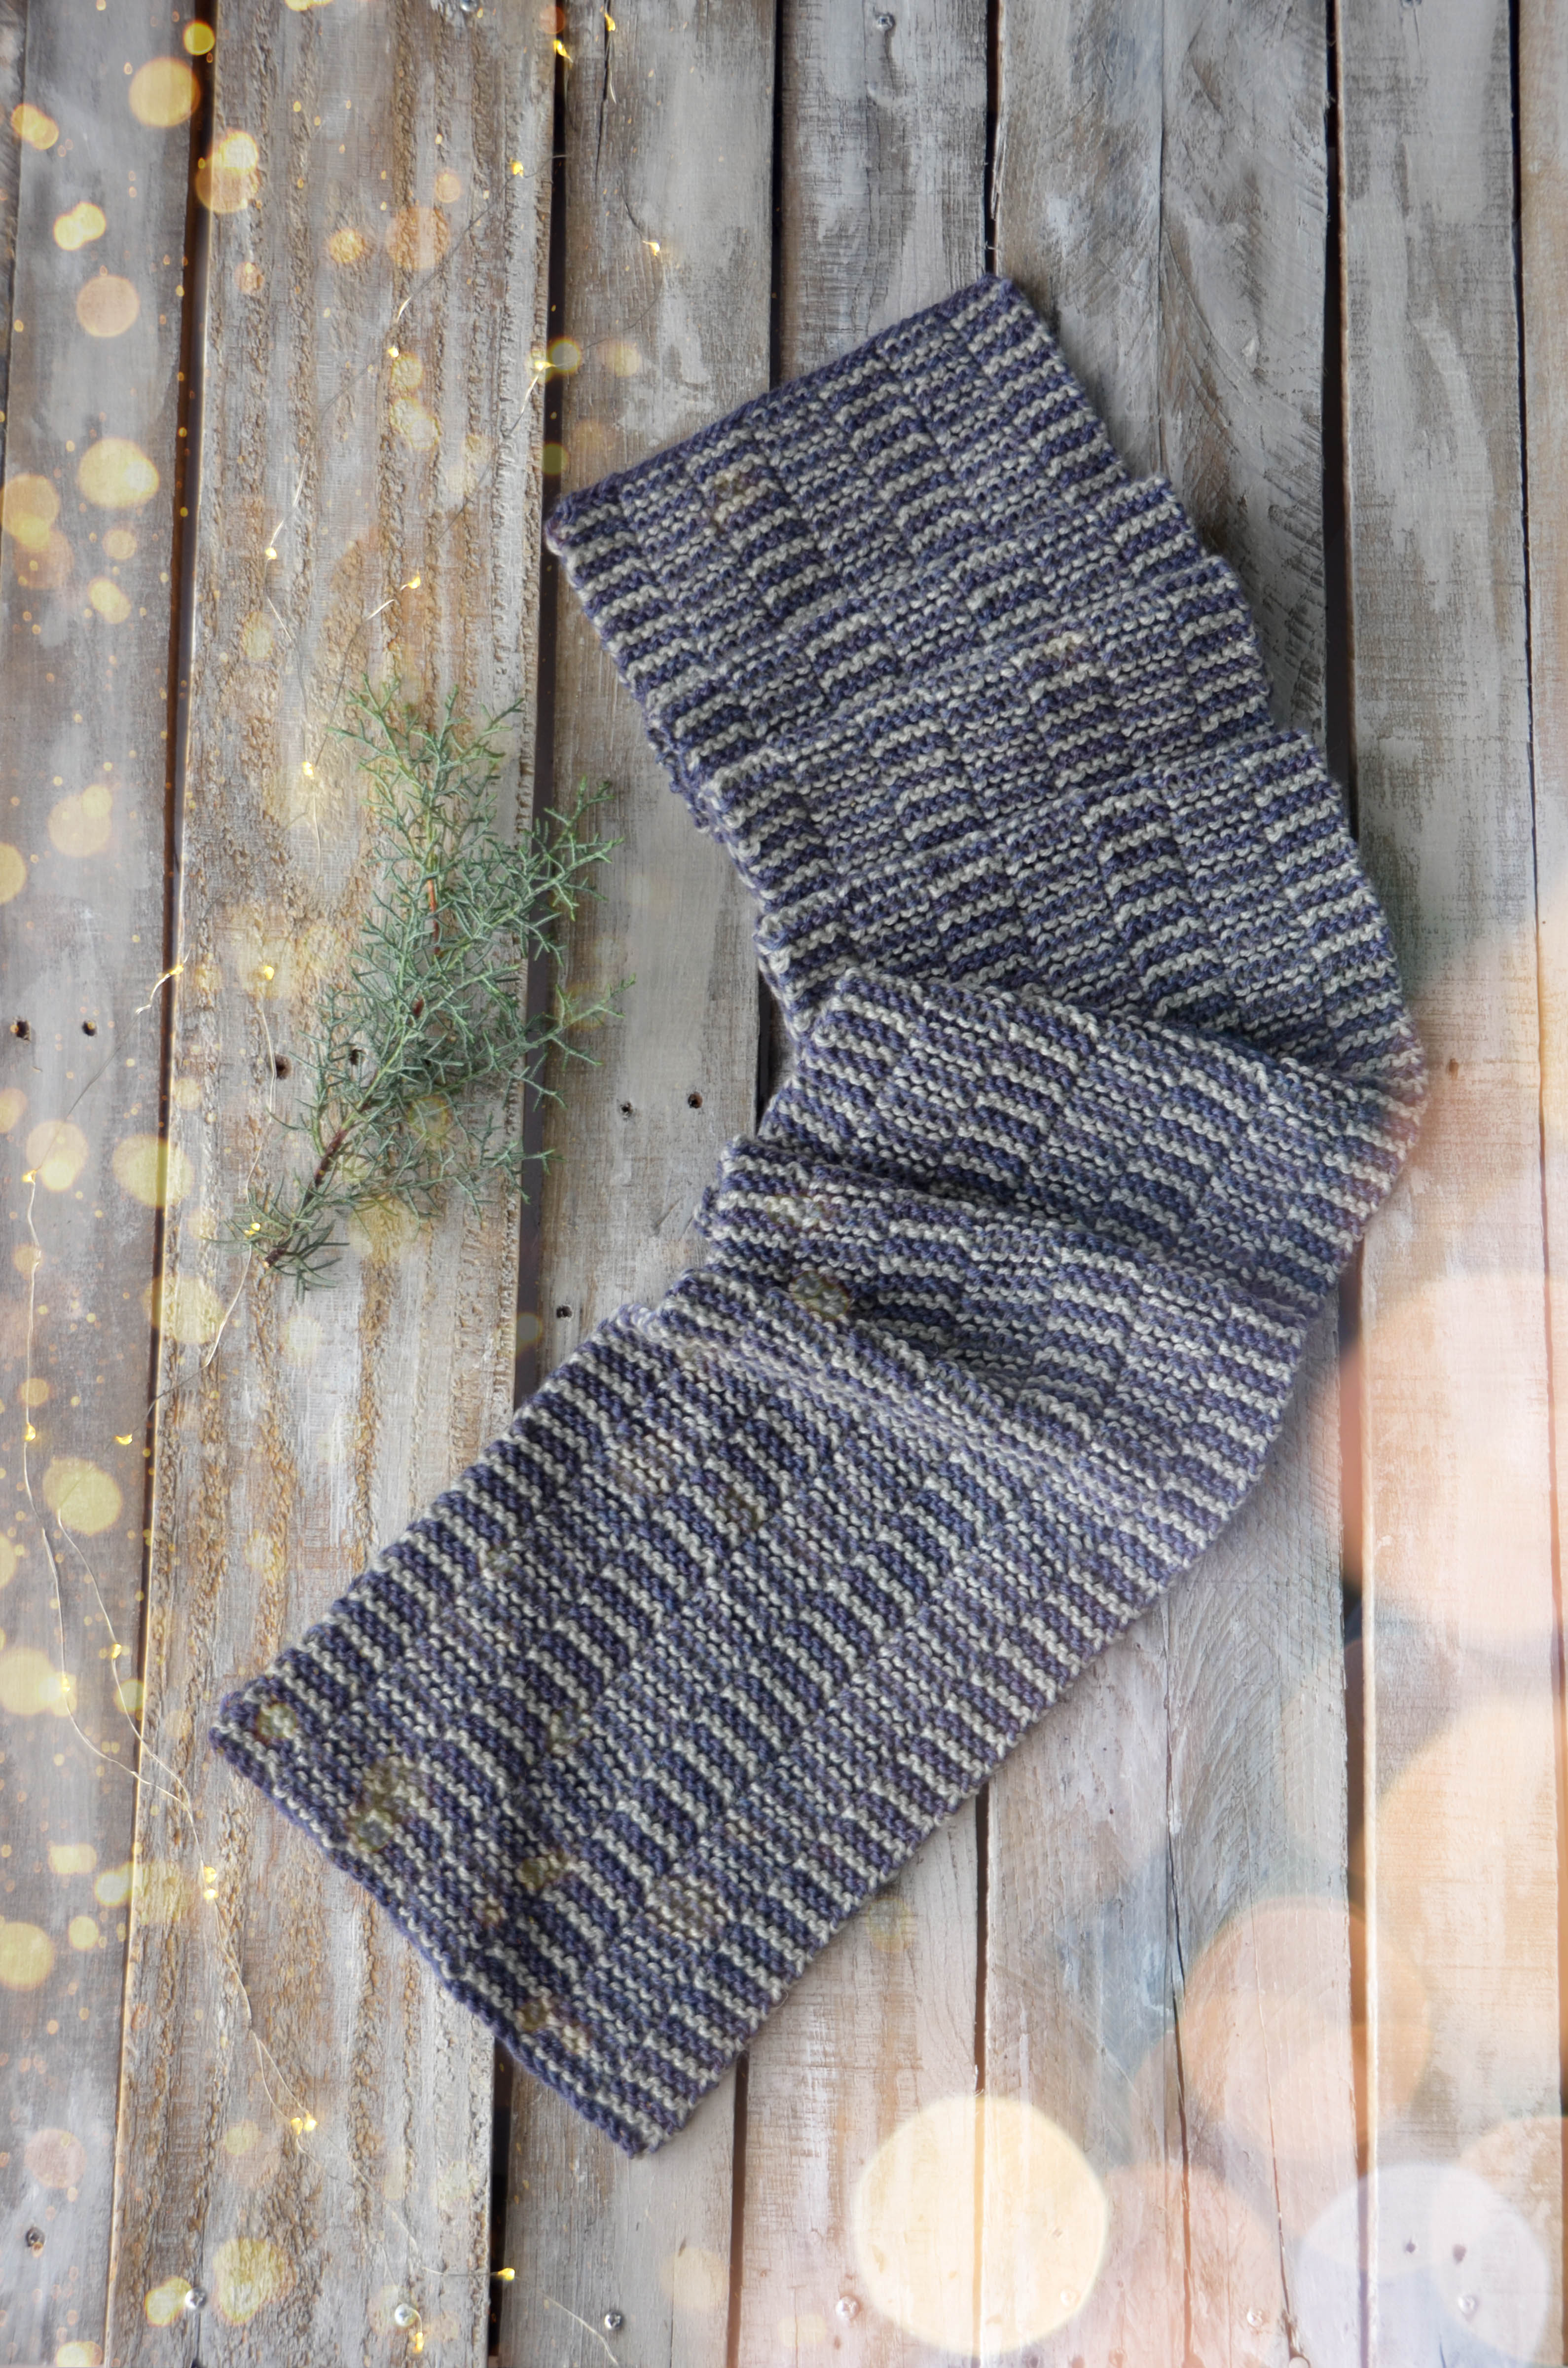
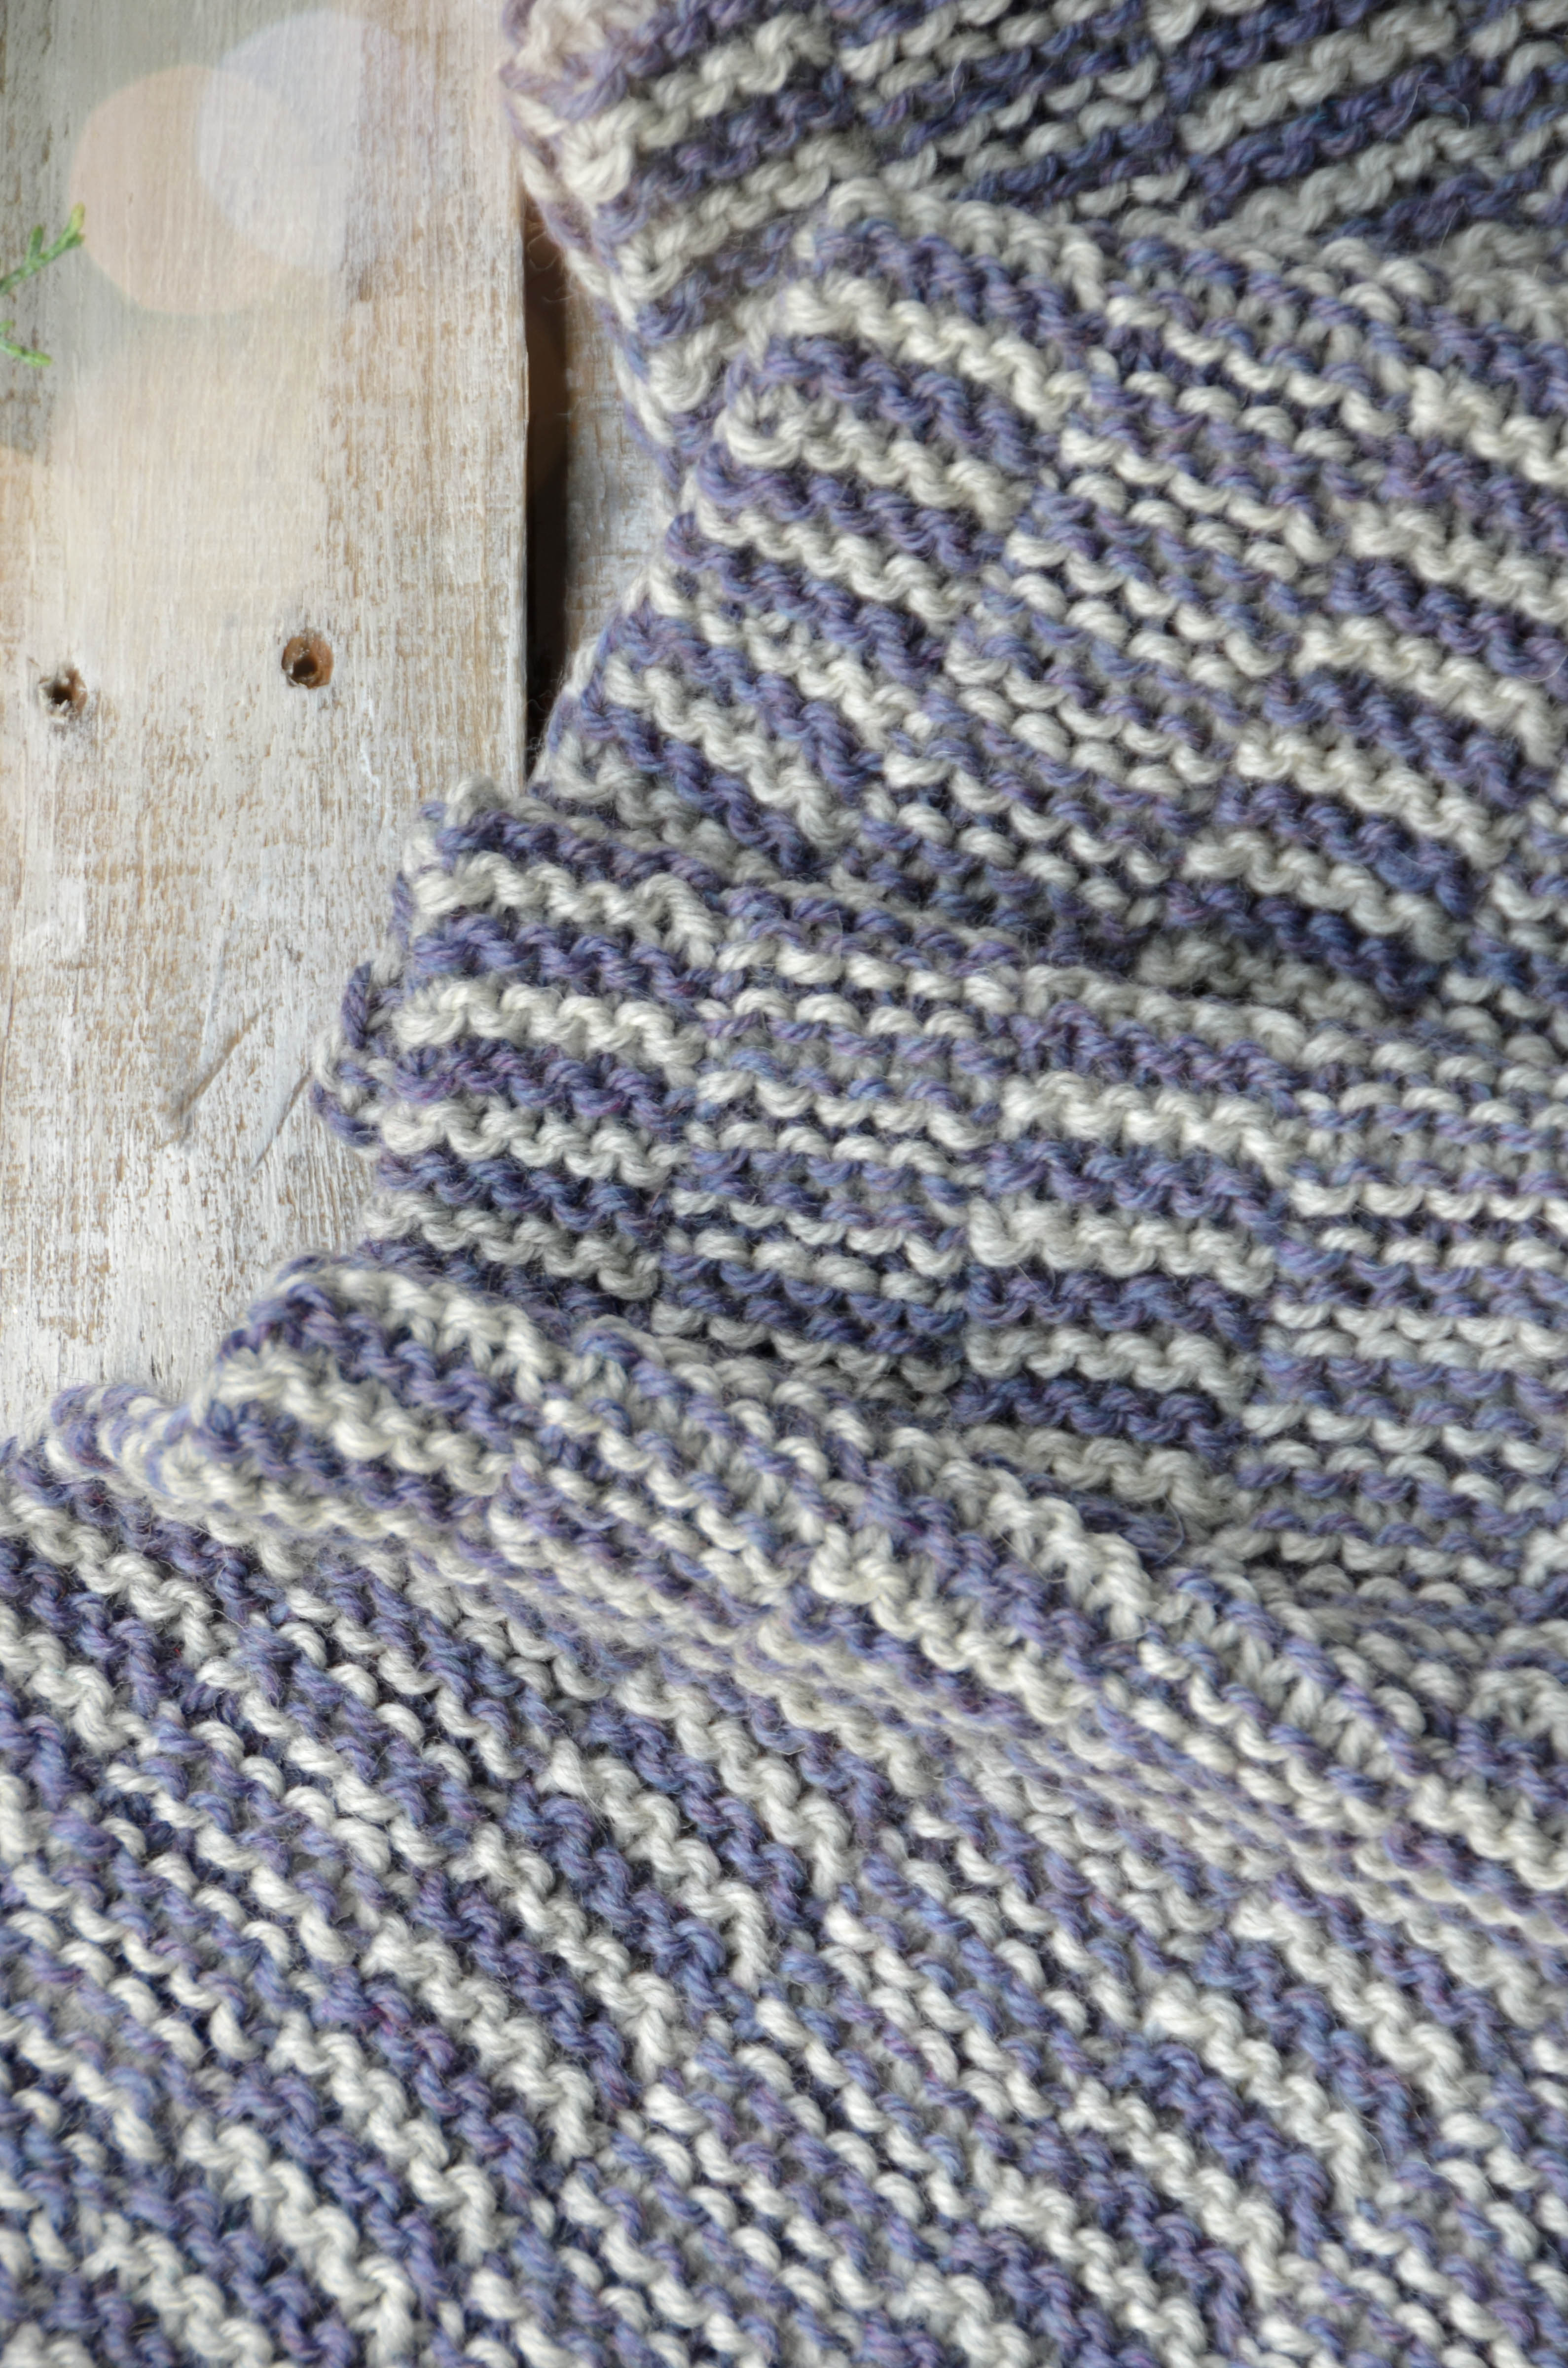
Day 2 of Winter brings us the Broken Garter Scarf. The stitch pattern in this scarf will look familiar to anyone who owns or has read a copy of the brilliant Sequence Knitting book by Cecelia Campochiaro. If you don’t own this book yet, run out and buy it!
This book explores the concept of simple knit-purl texture in a variety of thought-provoking ways. There are many chapters in the book, each expounding on previous ideas. It is fascinating! And it’s easy to read through, fall in love with an idea, and just cast on.
The idea of this particular stitch pattern is a concept in the book that is presented in a variety of ways. I cast on several times with different combinations of knit and purl columns until I finally settled on one that felt right. It’s dead simple – it’s a one row repeat!
That is how the Broken Garter Scarf was born. I wanted to create a project easy to knit that was giftable for women and men alike. Just two balls of Deluxe Worsted Superwash and a few evenings of mindless knitting, and this scarf can be yours.
You can find this pattern, from Series 1, Day 2 of our 12 Days of Winter collection here (link).
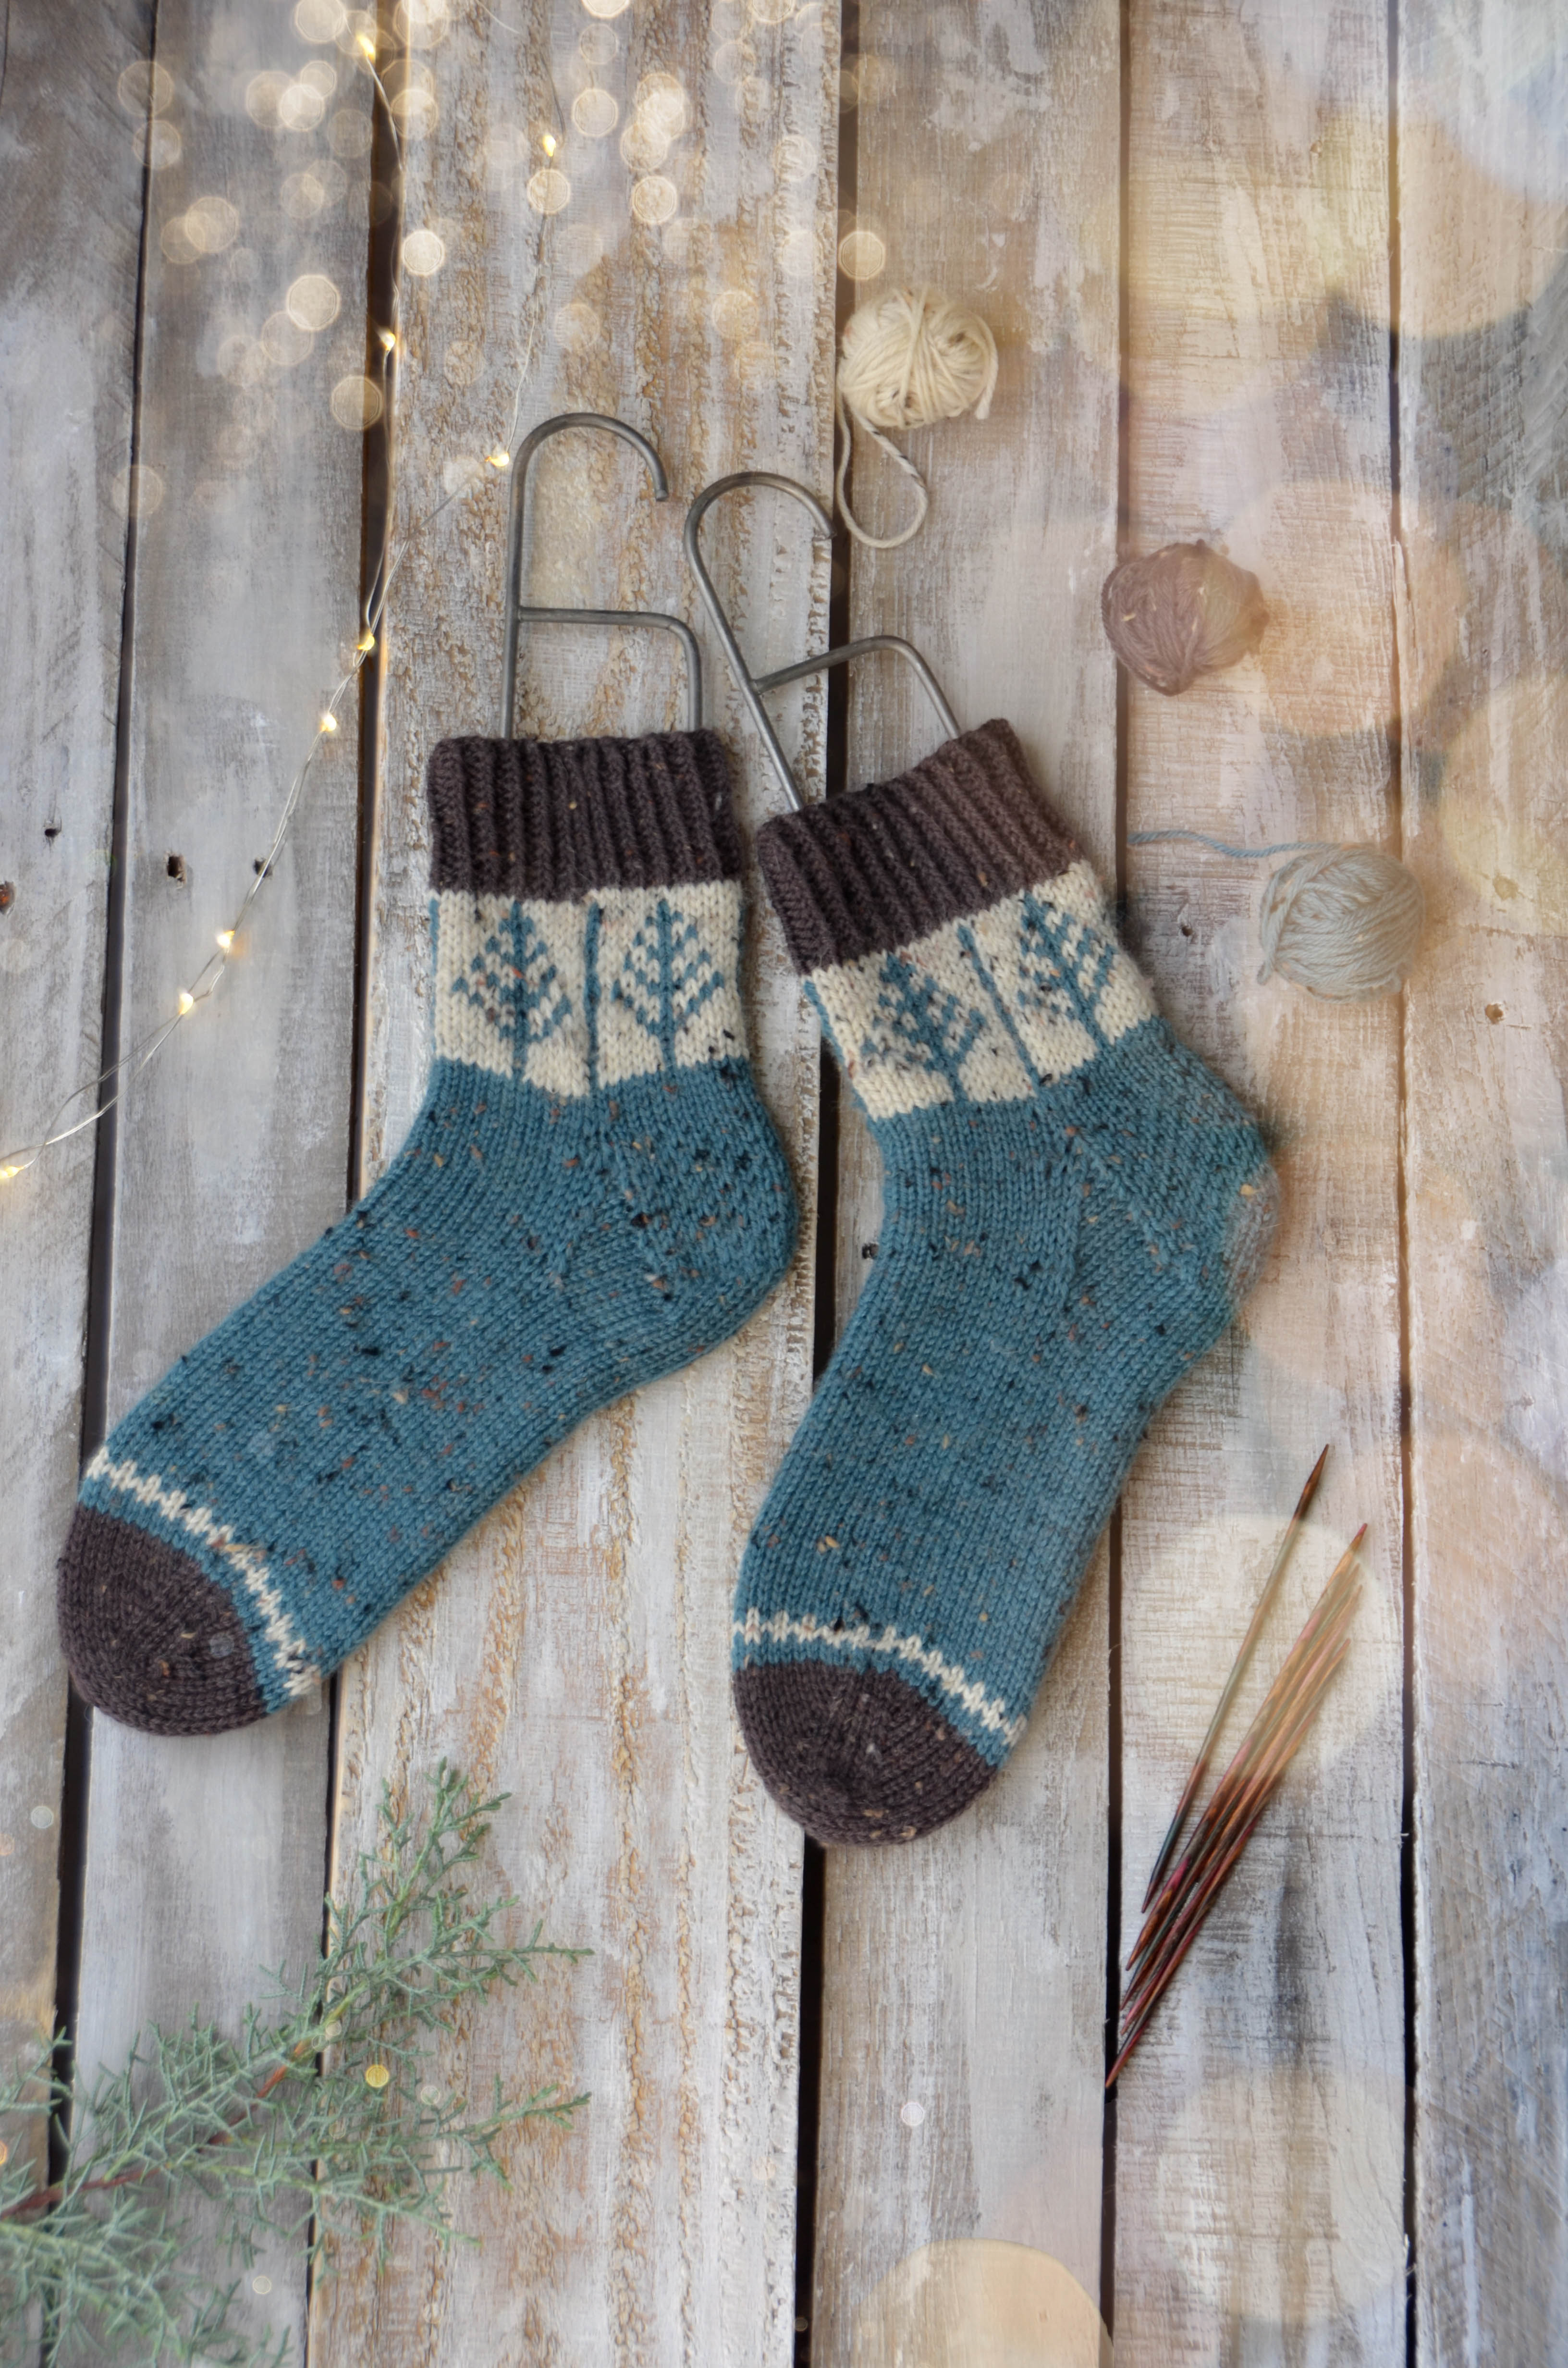
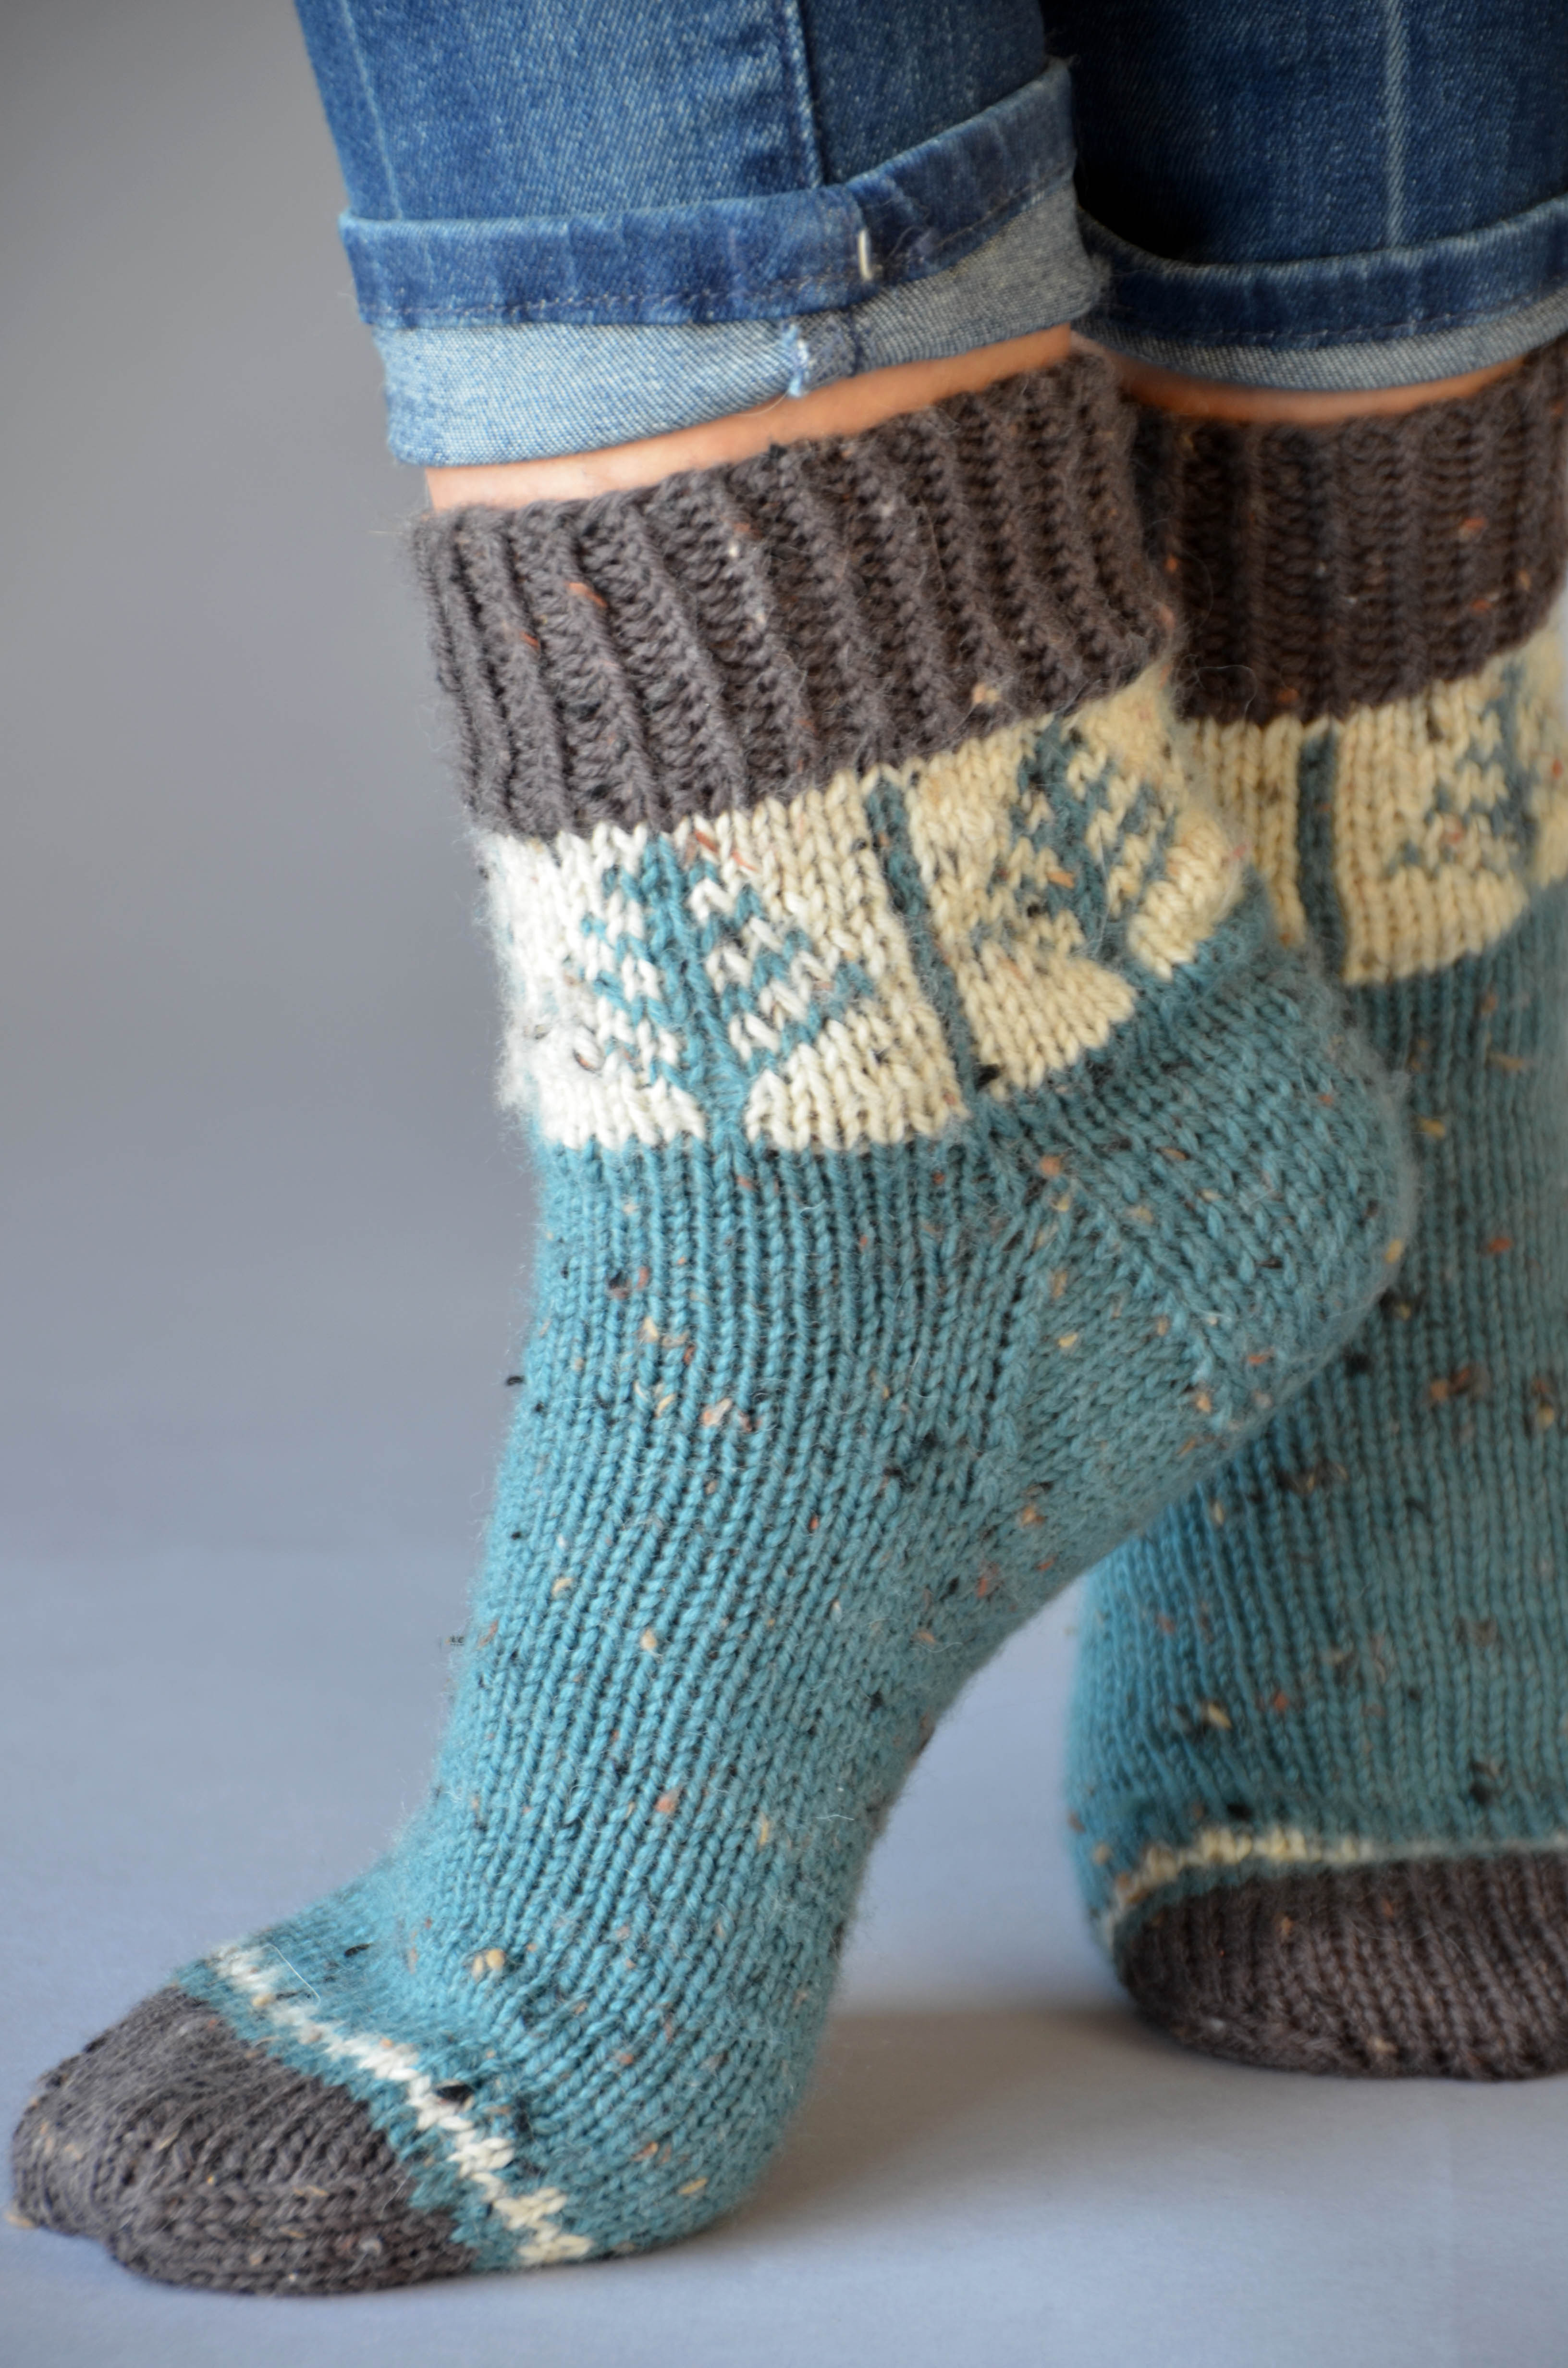
Over the next 12 days, we’re releasing a series of kits designed by the Universal Yarn Design Team. It’s a cozy, wintry collection of accessories that make perfect gifts–for yourself and your loved ones. To accompany the kits, we’d like to share a blog post each day. This series will highlight special aspects of each pattern and include inspiration, tips, tricks, and a few tutorials. For Day 1, we’re introducing the Blue Spruce Socks in Deluxe DK Tweed Superwash.
For as long as I can remember, I’ve loved evergreens and conifers. I’m not sure if it’s because of their fragrant needles and bark, or if it’s because their beautiful colors brought me joy during long and endlessly grey winters. Whatever the reason—I’ve always been drawn to them, so it’s no surprise that I designed the Blue Spruce Socks for our 12 Days of Winter collection.
These socks are warm, cozy, and a joy to knit. If you aren’t a fan of stranded colorwork, don’t fret! The Blue Spruce motif is achieved through slipped stitches. One color is carried at a time and only the stitches requiring the working yarn are knit—the rest are simply slipped purlwise. It requires twice as many rows, but the overall effect is very similar to the appearance of stranded knitting.
In addition to colorwork, the small details make this project ever so special. It features a 1×1 Twisted Rib cuff and an Eye of Partridge heel. My favorite detail is the slip-stitch stripe just before the contrasting-color toes.
You can find this kit, Day 1 of our 12 Days of Winter collection here.
Perhaps my favorite fun challenge in designing knitwear is when I’m working with self-shading or patterning yarns. Much has to be taken into consideration in anticipation of these color changes. Some of my favorite things to do with shading yarn (like Classic Shades) happen in these projects – slipped stitches, intarsia, stripes, motifs, and directional changes.
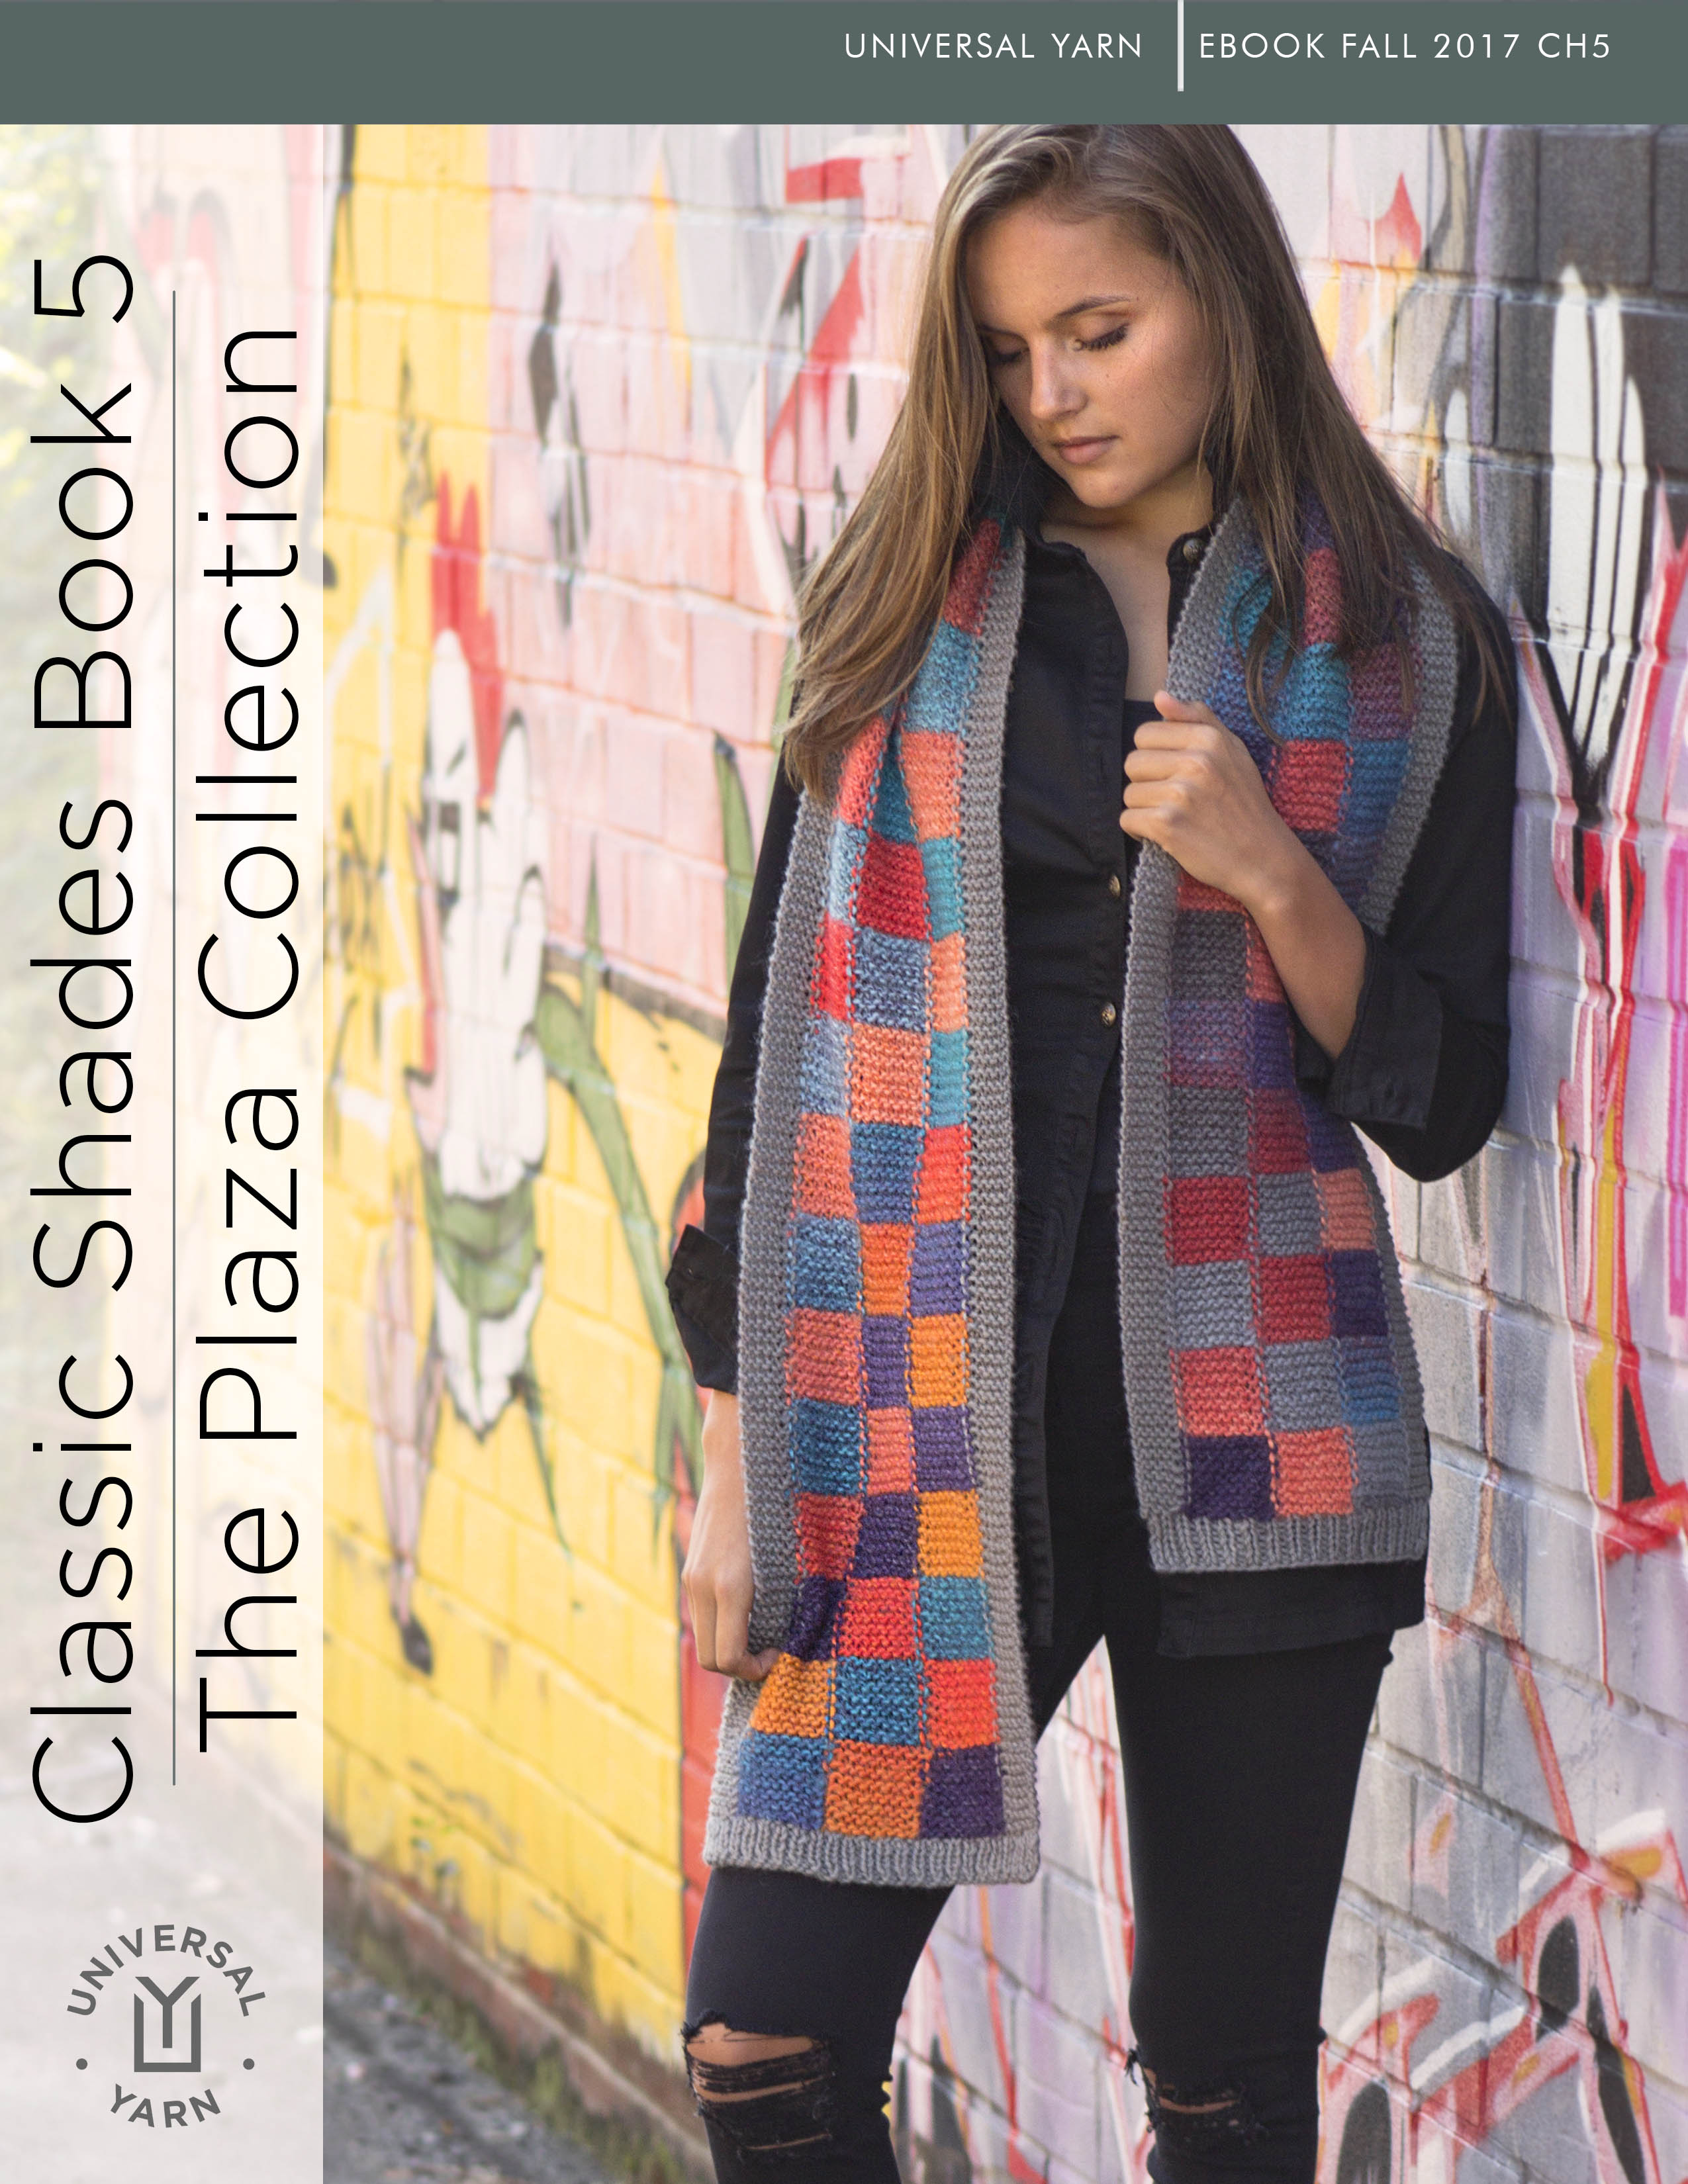
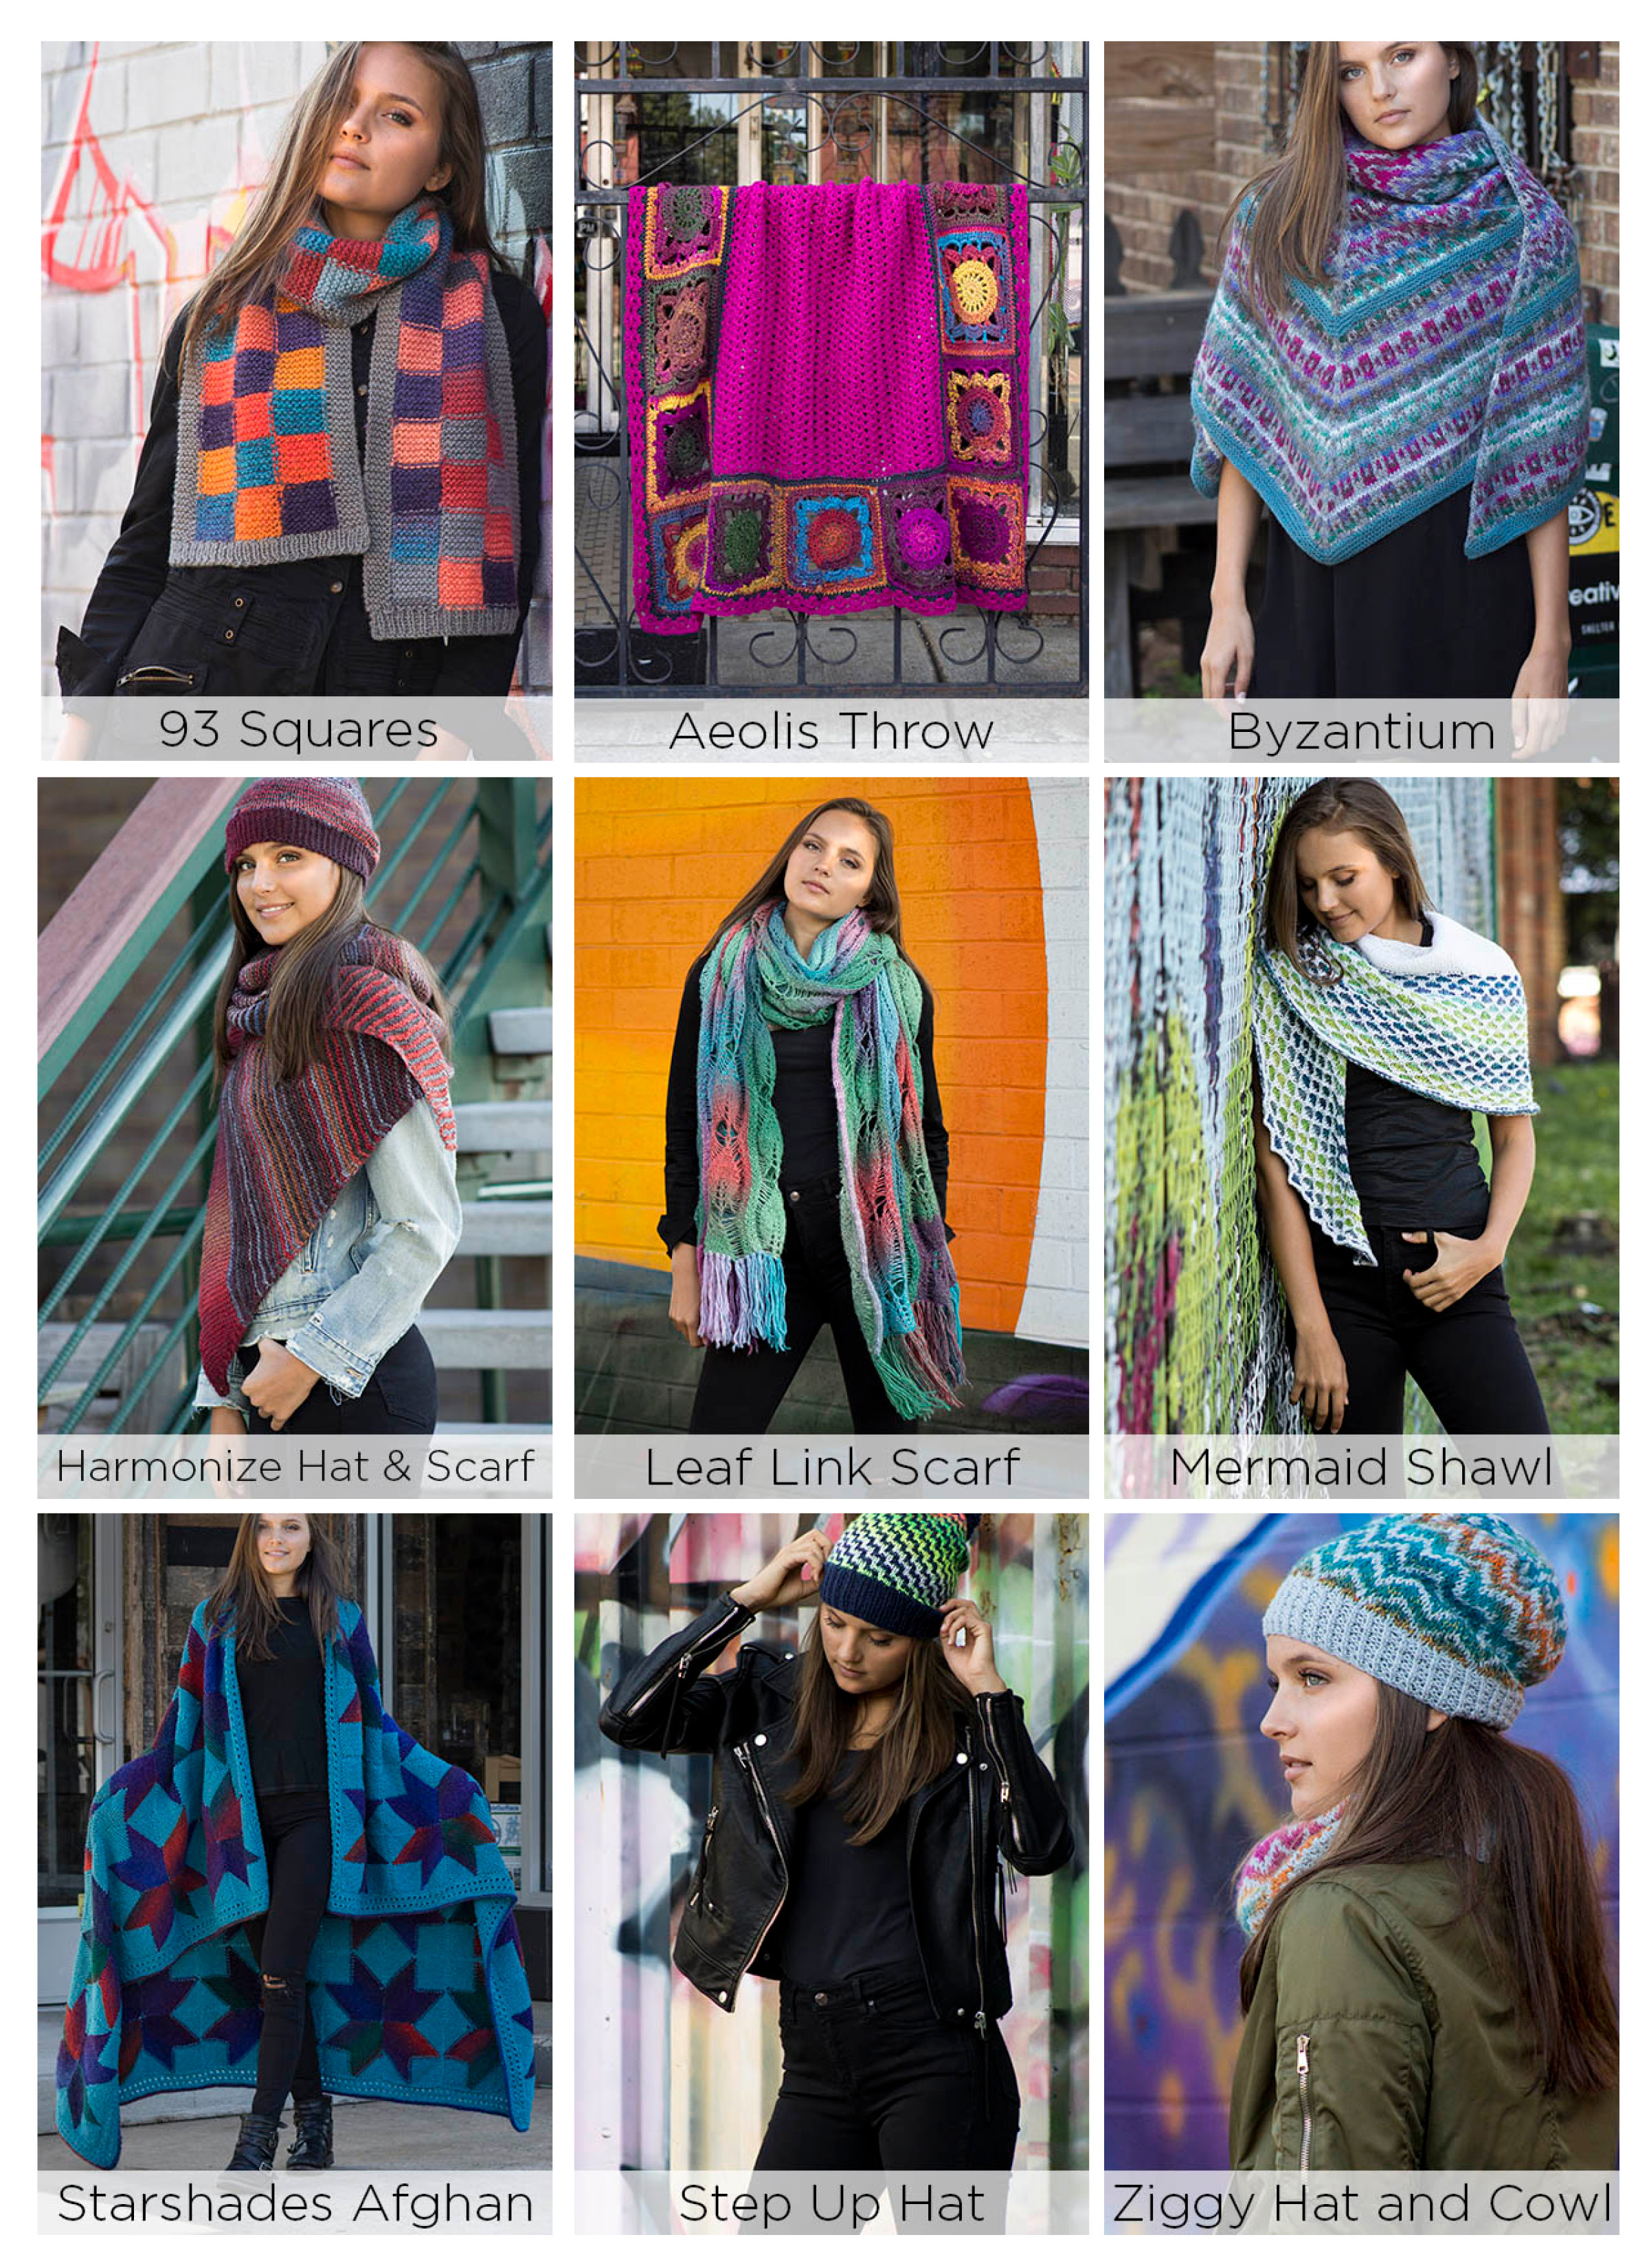
This grouping of 11 knit & crochet accessories and throws was photographed by our own Rachel Brockman in the Plaza Midwood neighborhood here in Charlotte. It’s a hip section of the city that is full of graffiti and character.
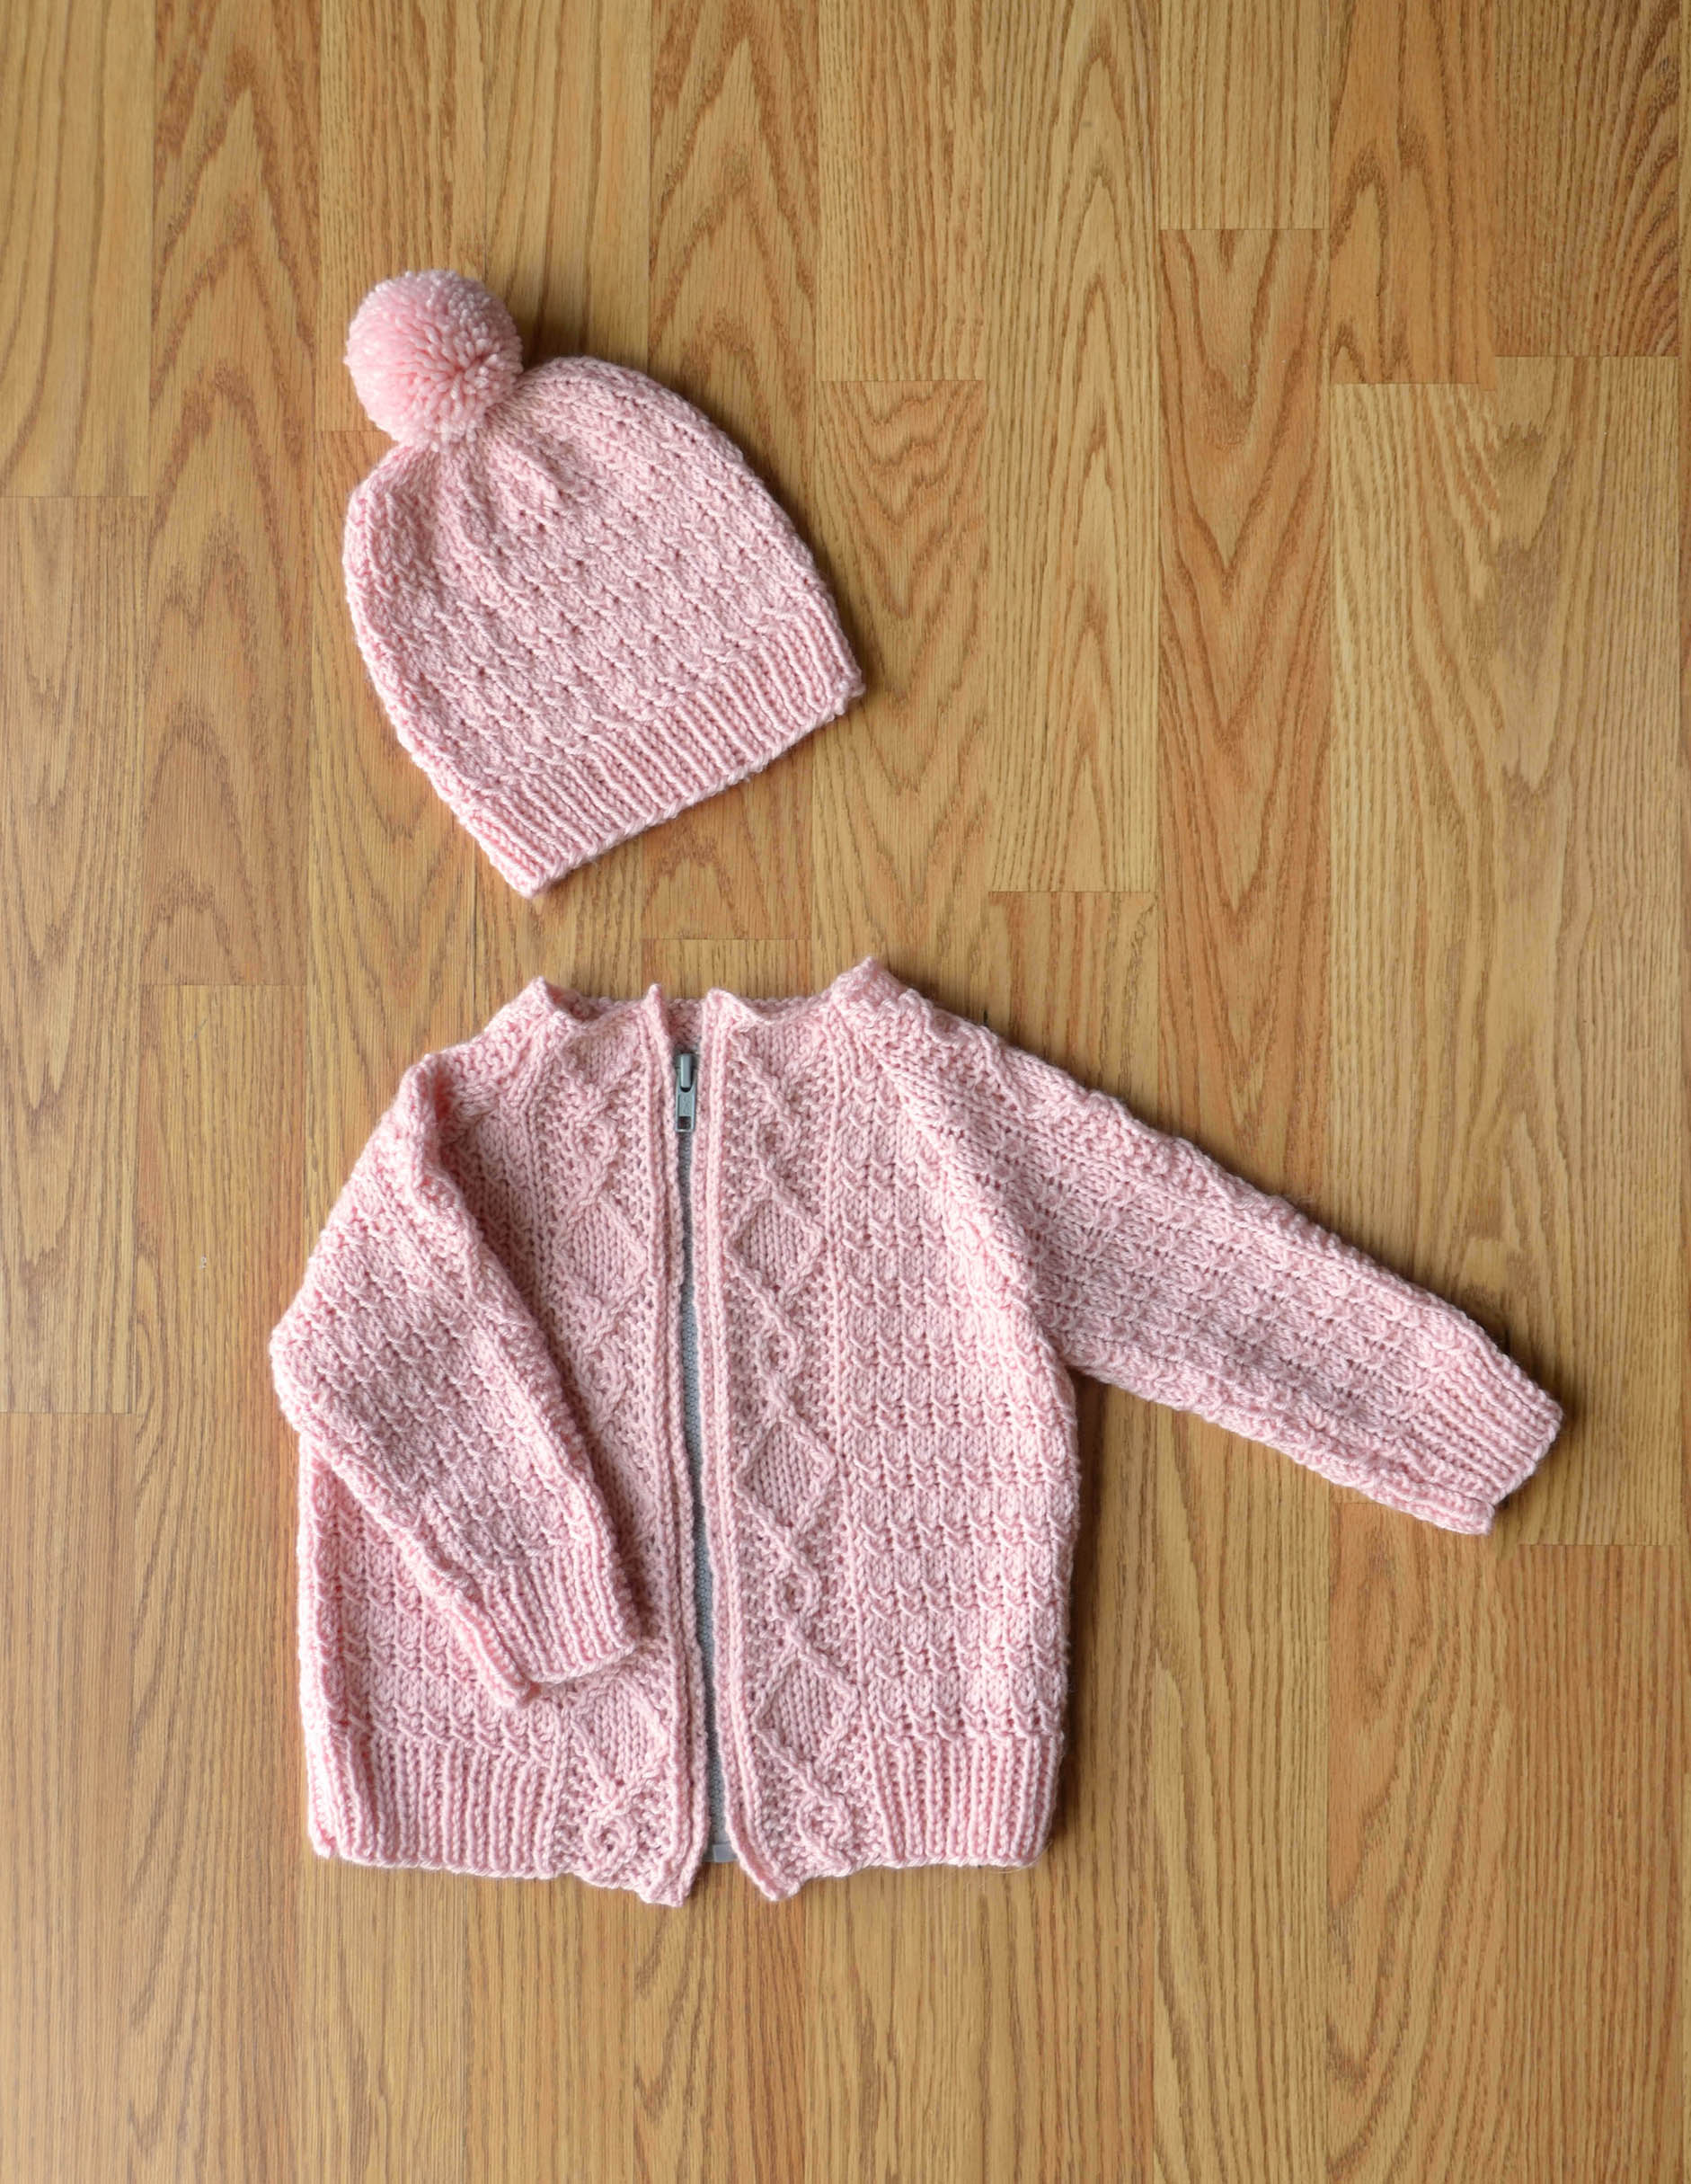
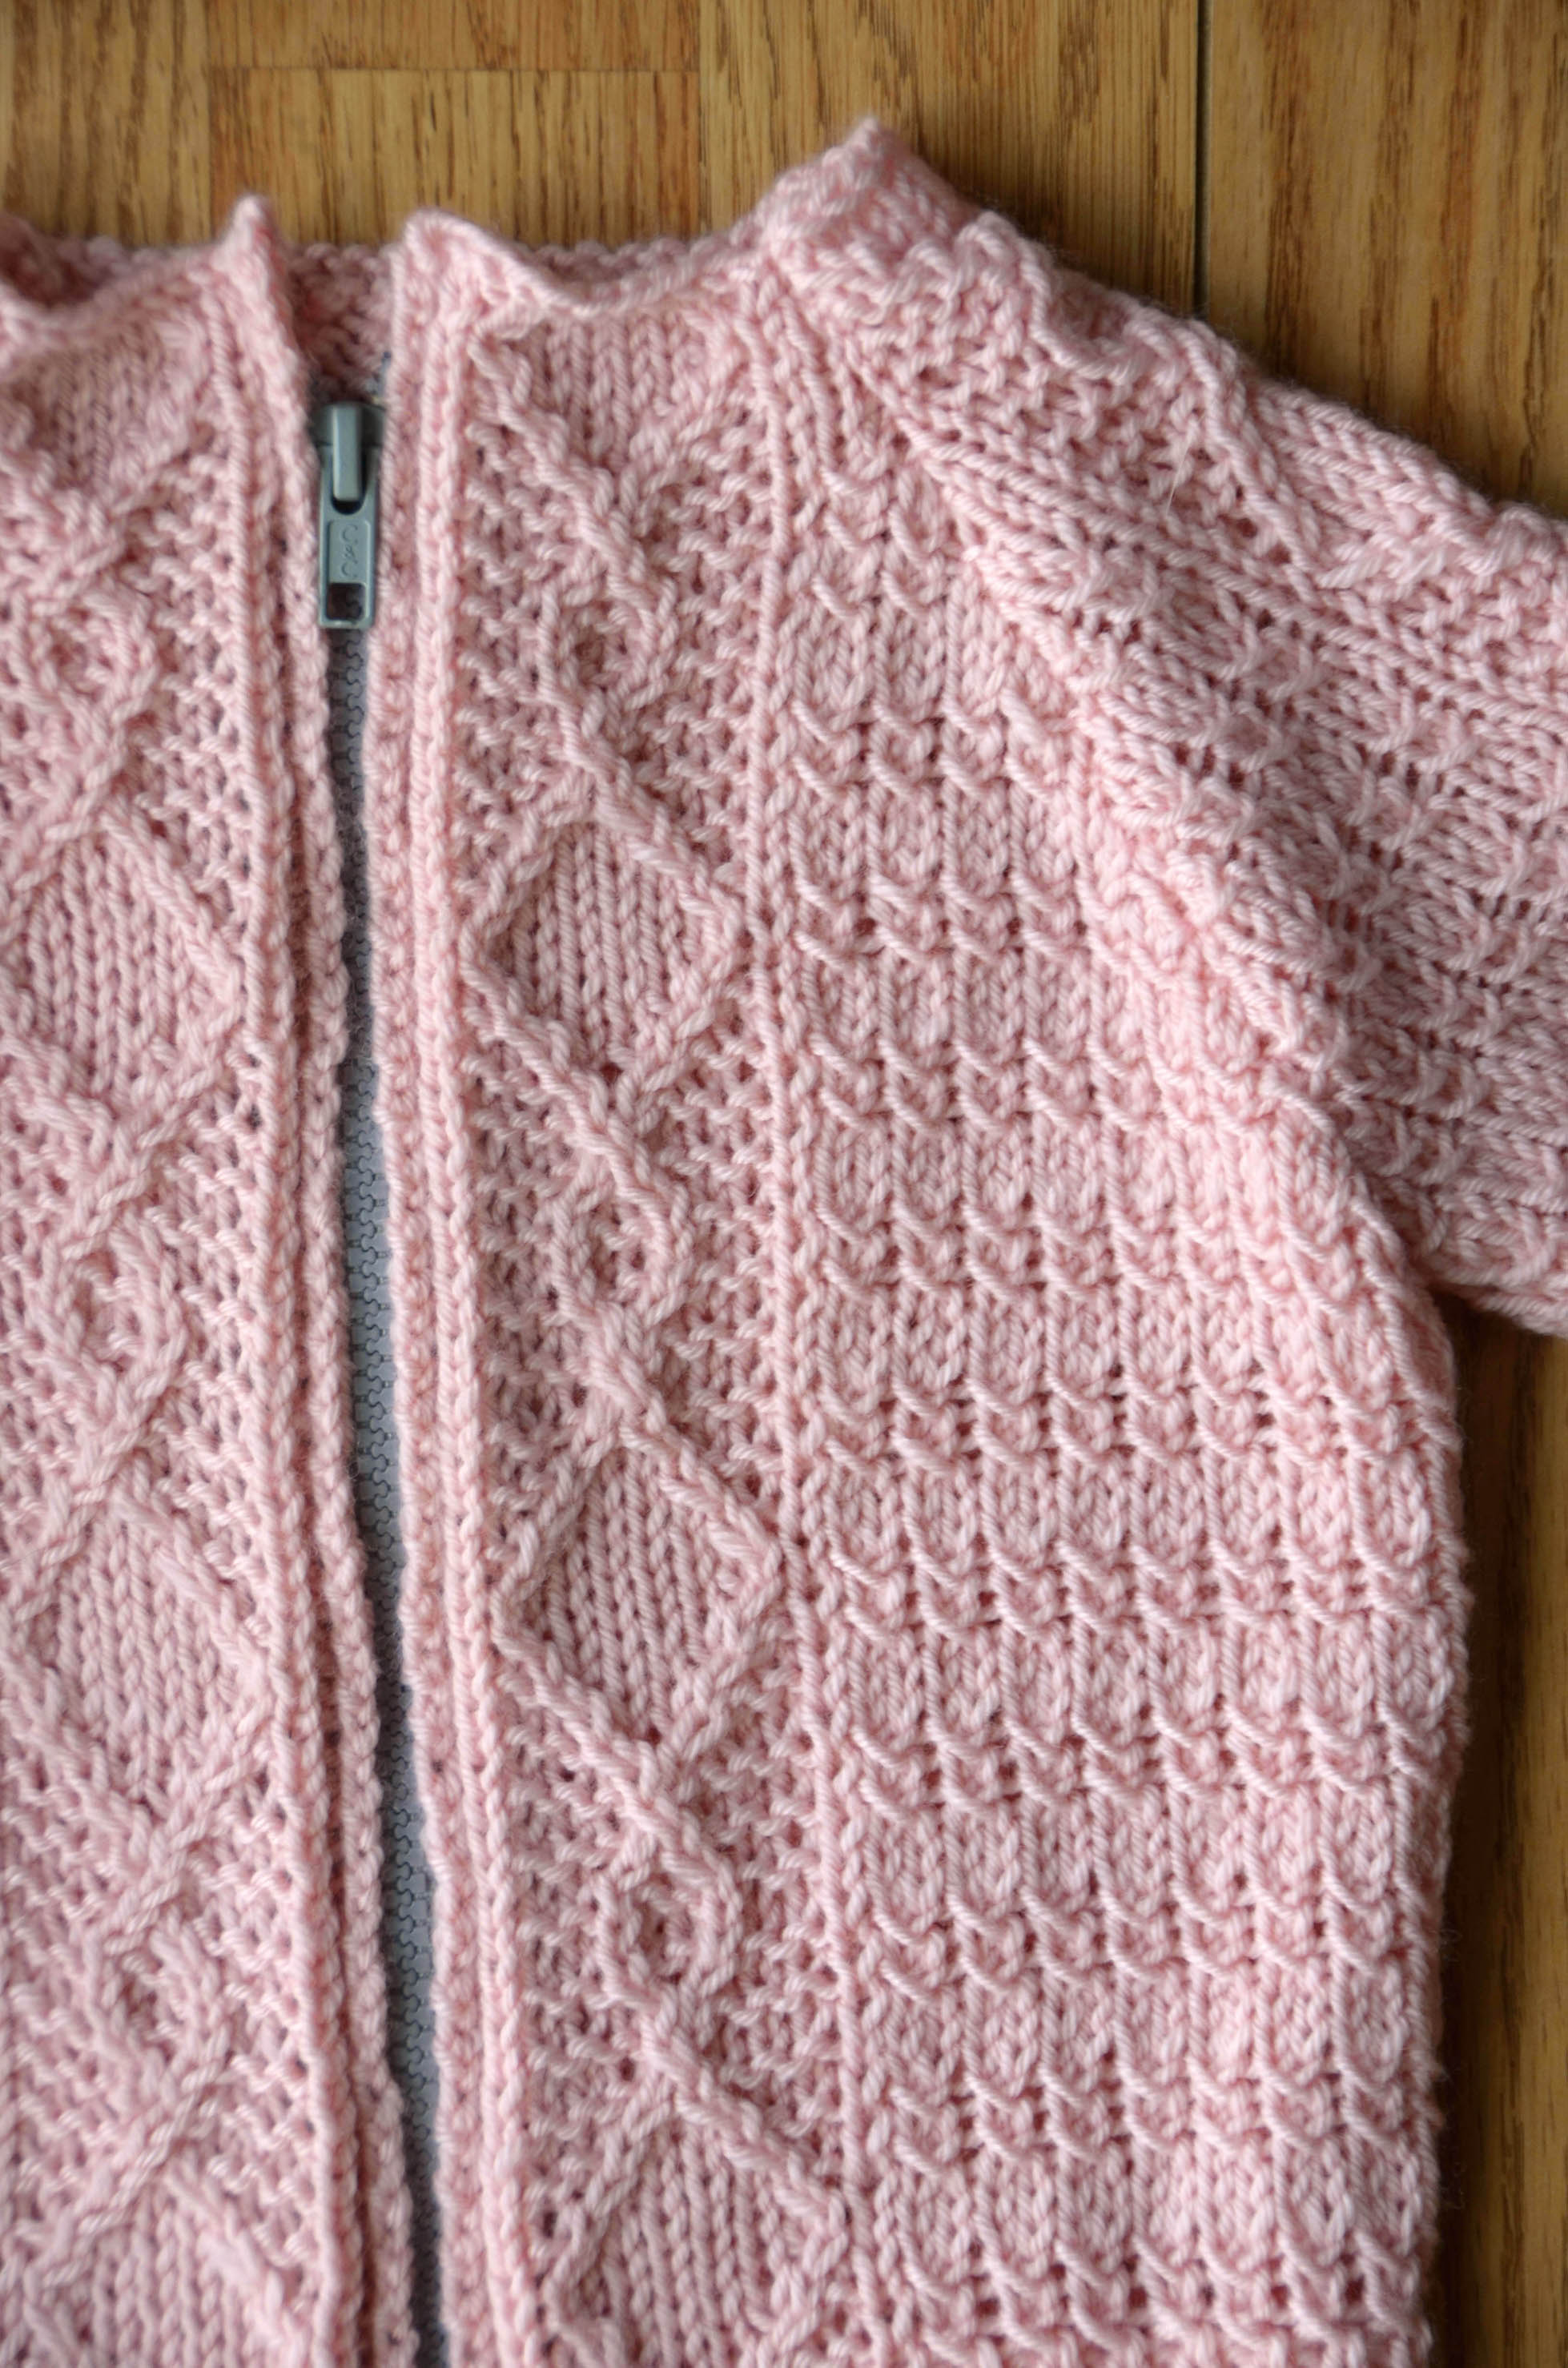
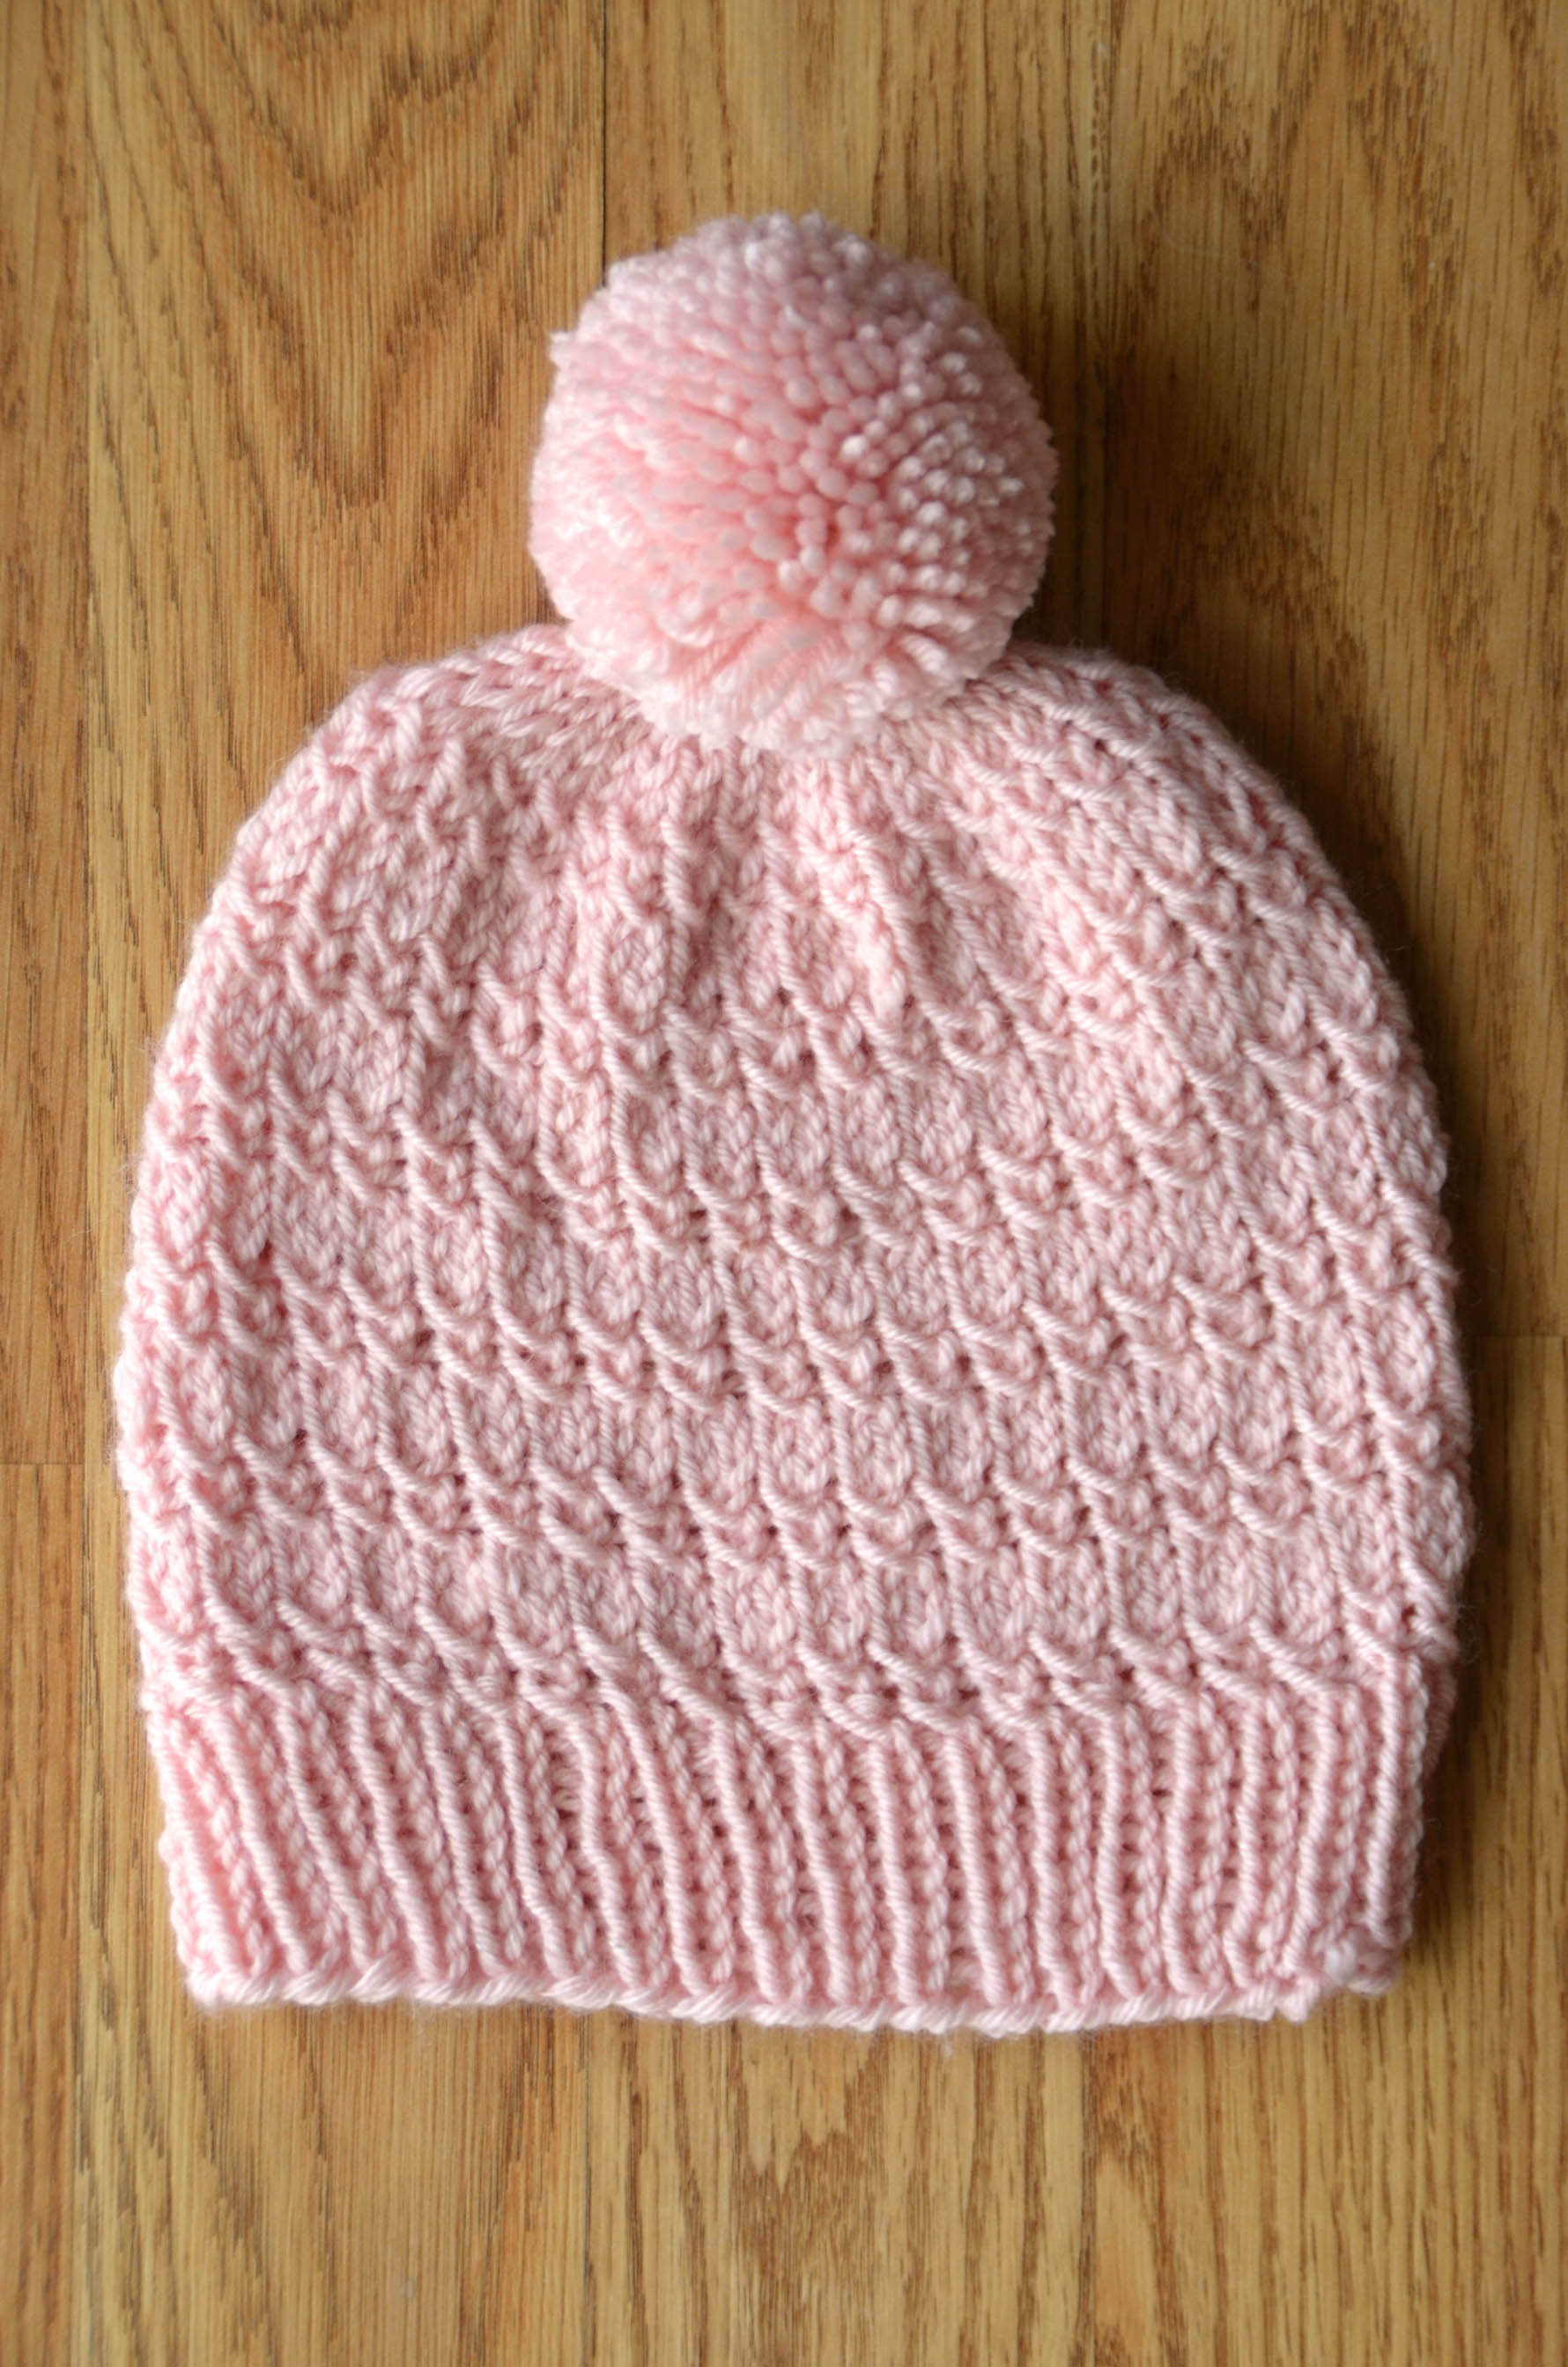
This too-cute set features cables without a cable needle! Left and right twists and mock cables save you the trouble of fiddling with too many notions.
This cute hat and zippered cardi are sized from newborn through 13-years. Machine washable Adore is a good choice here – it’s always nicer to give someone a luxury knit without worrying that all your effort will be lost in the wash.
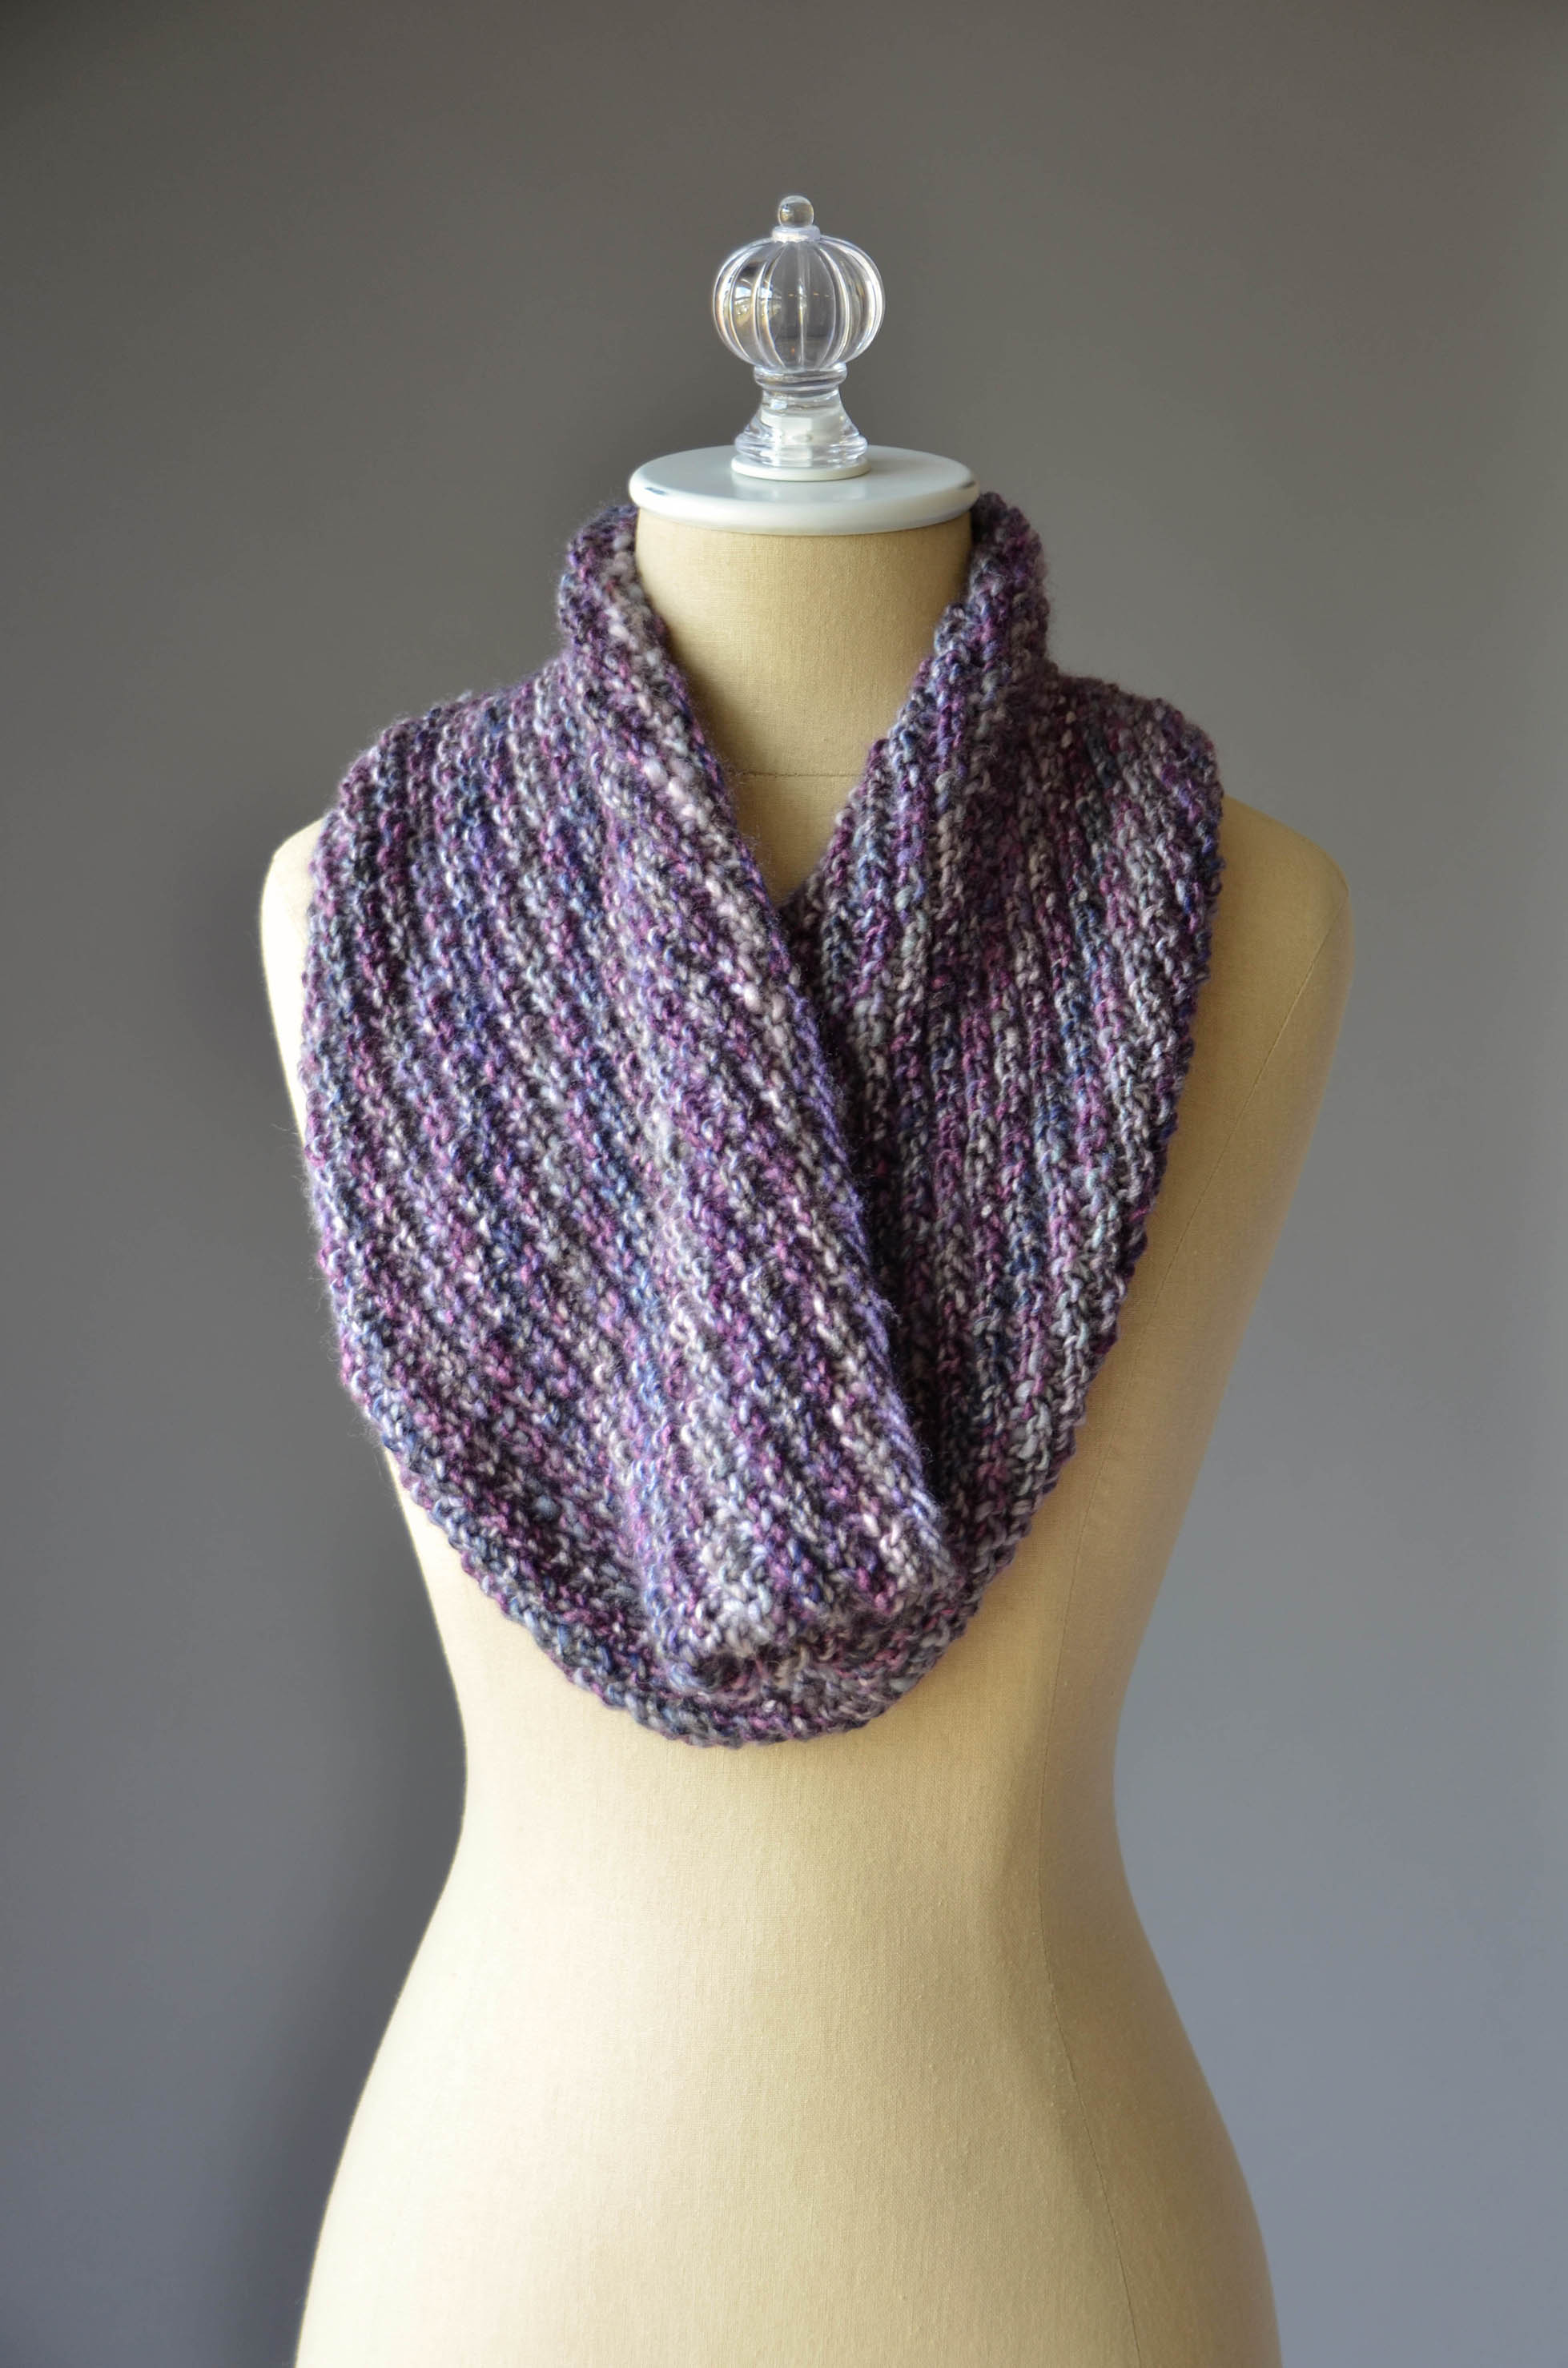
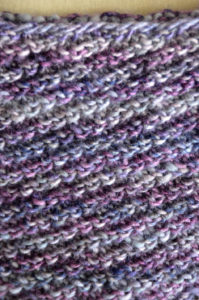
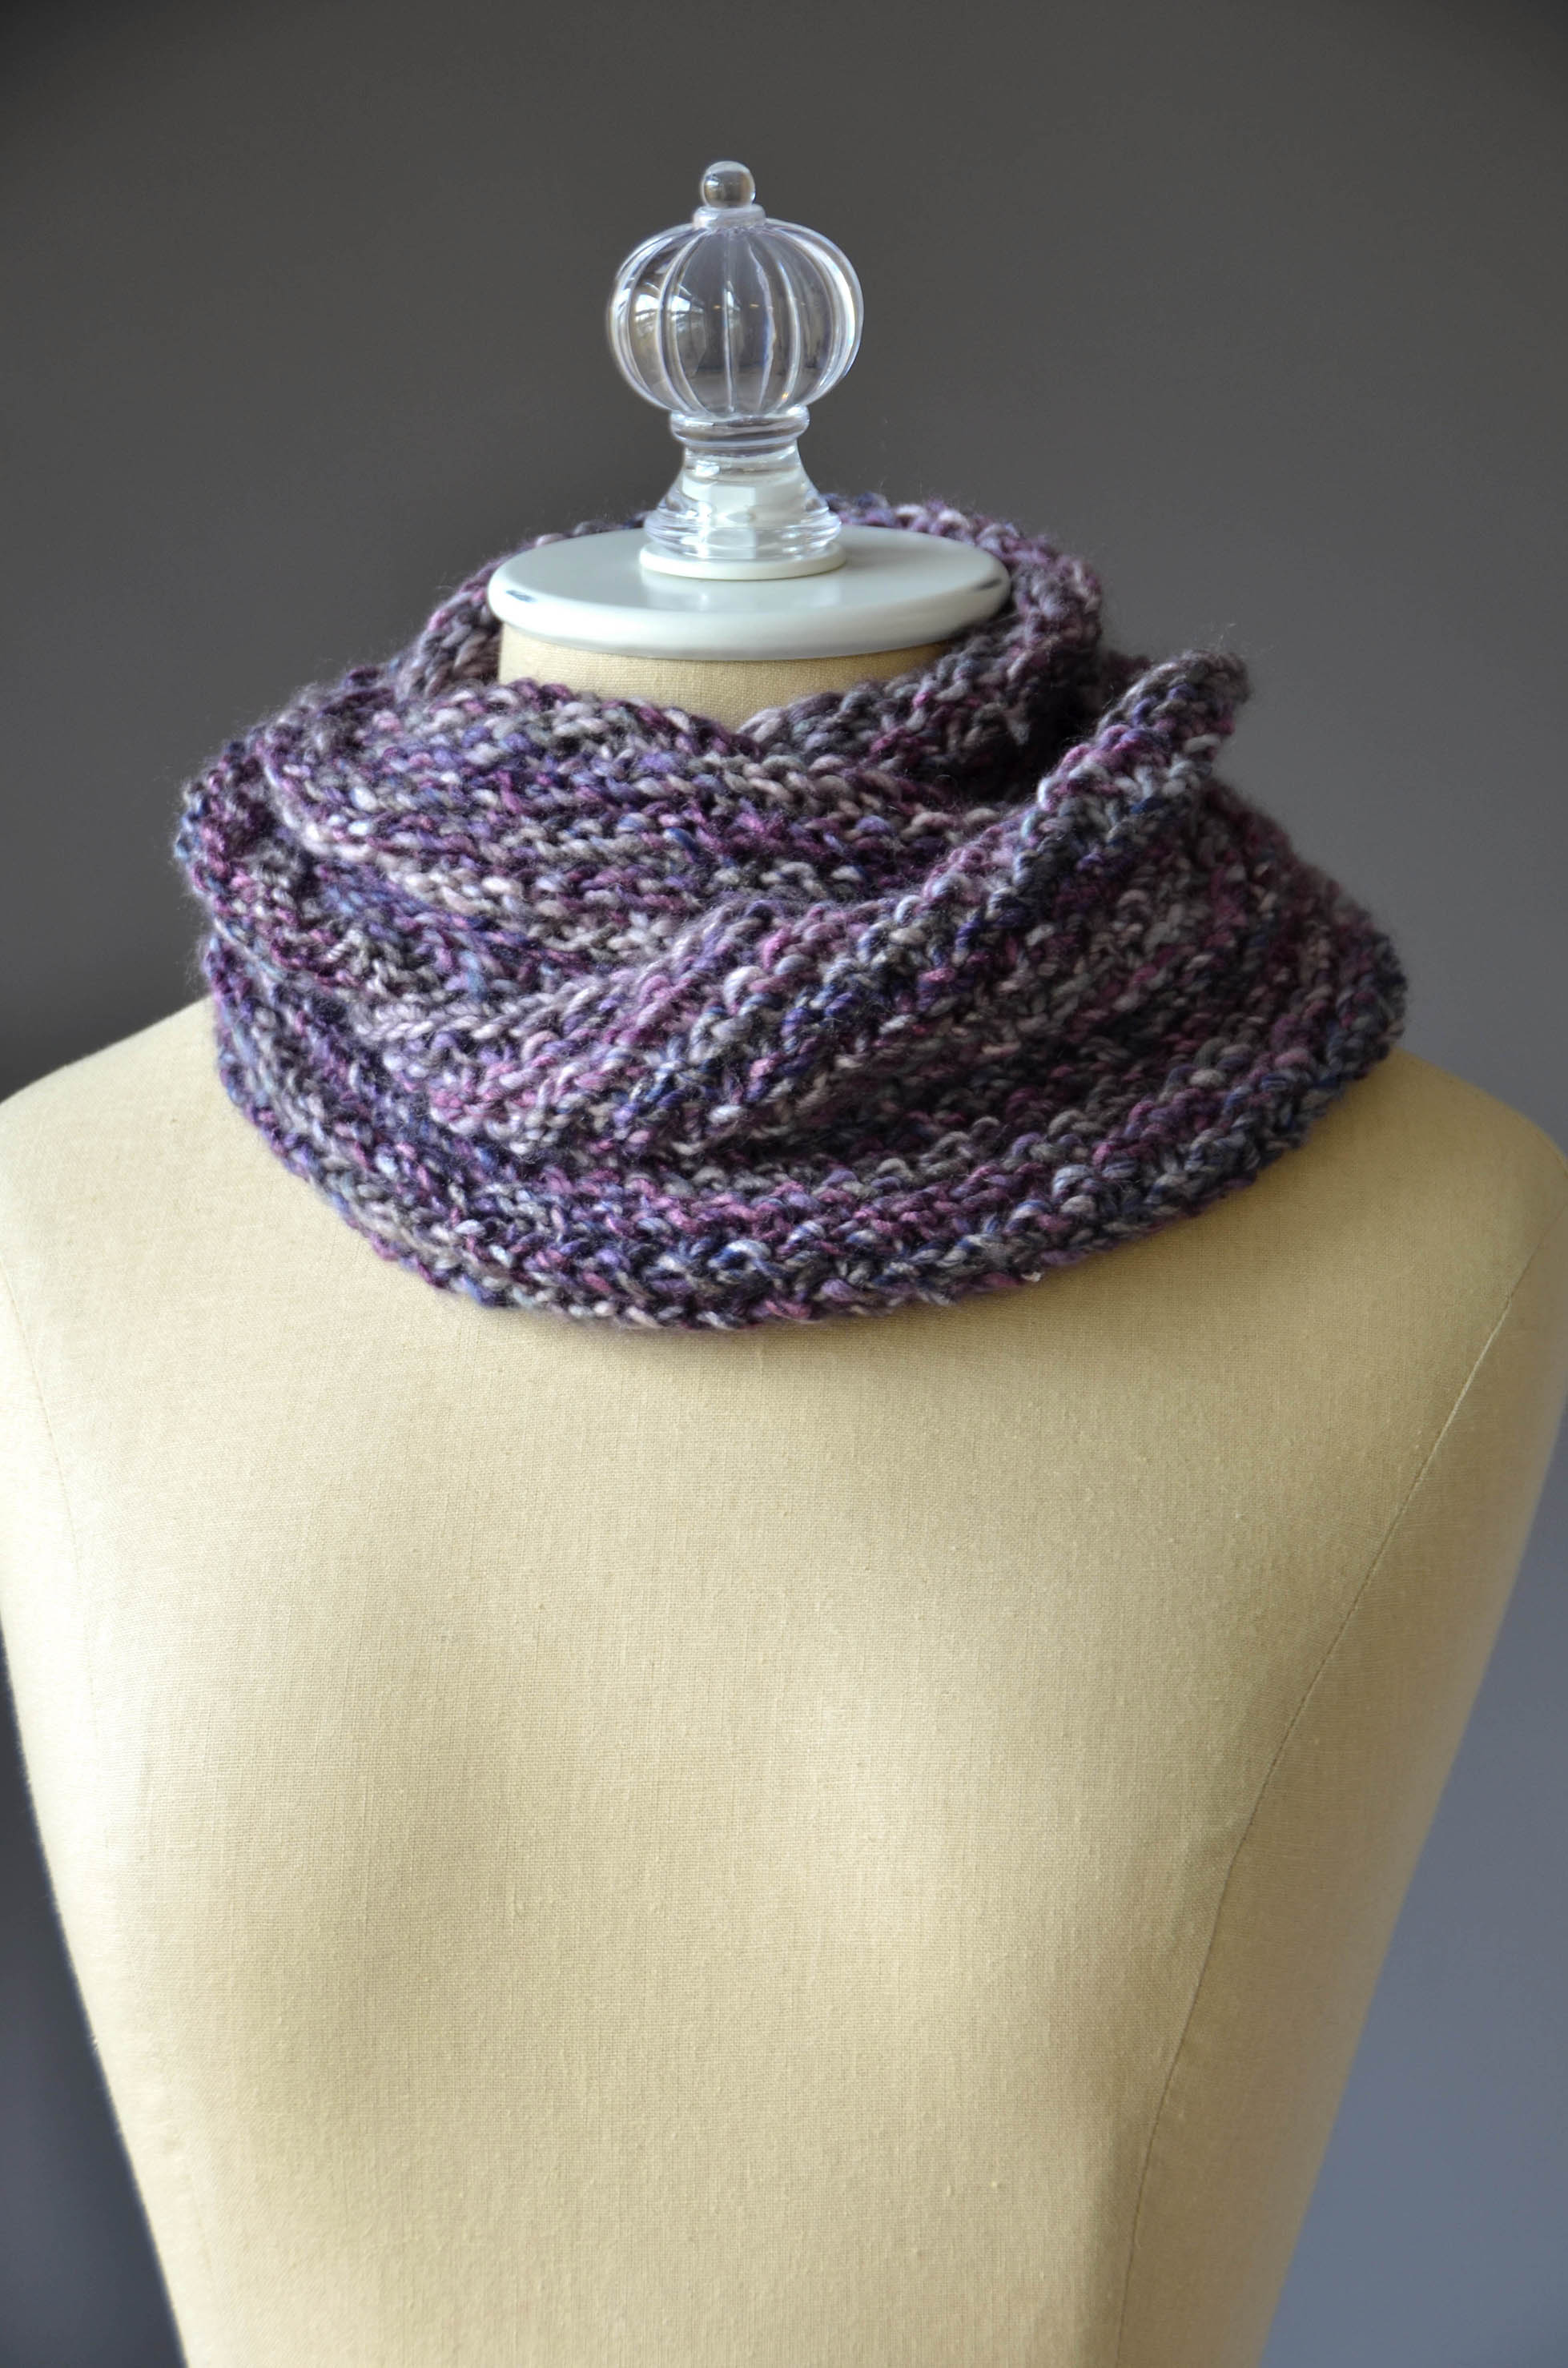
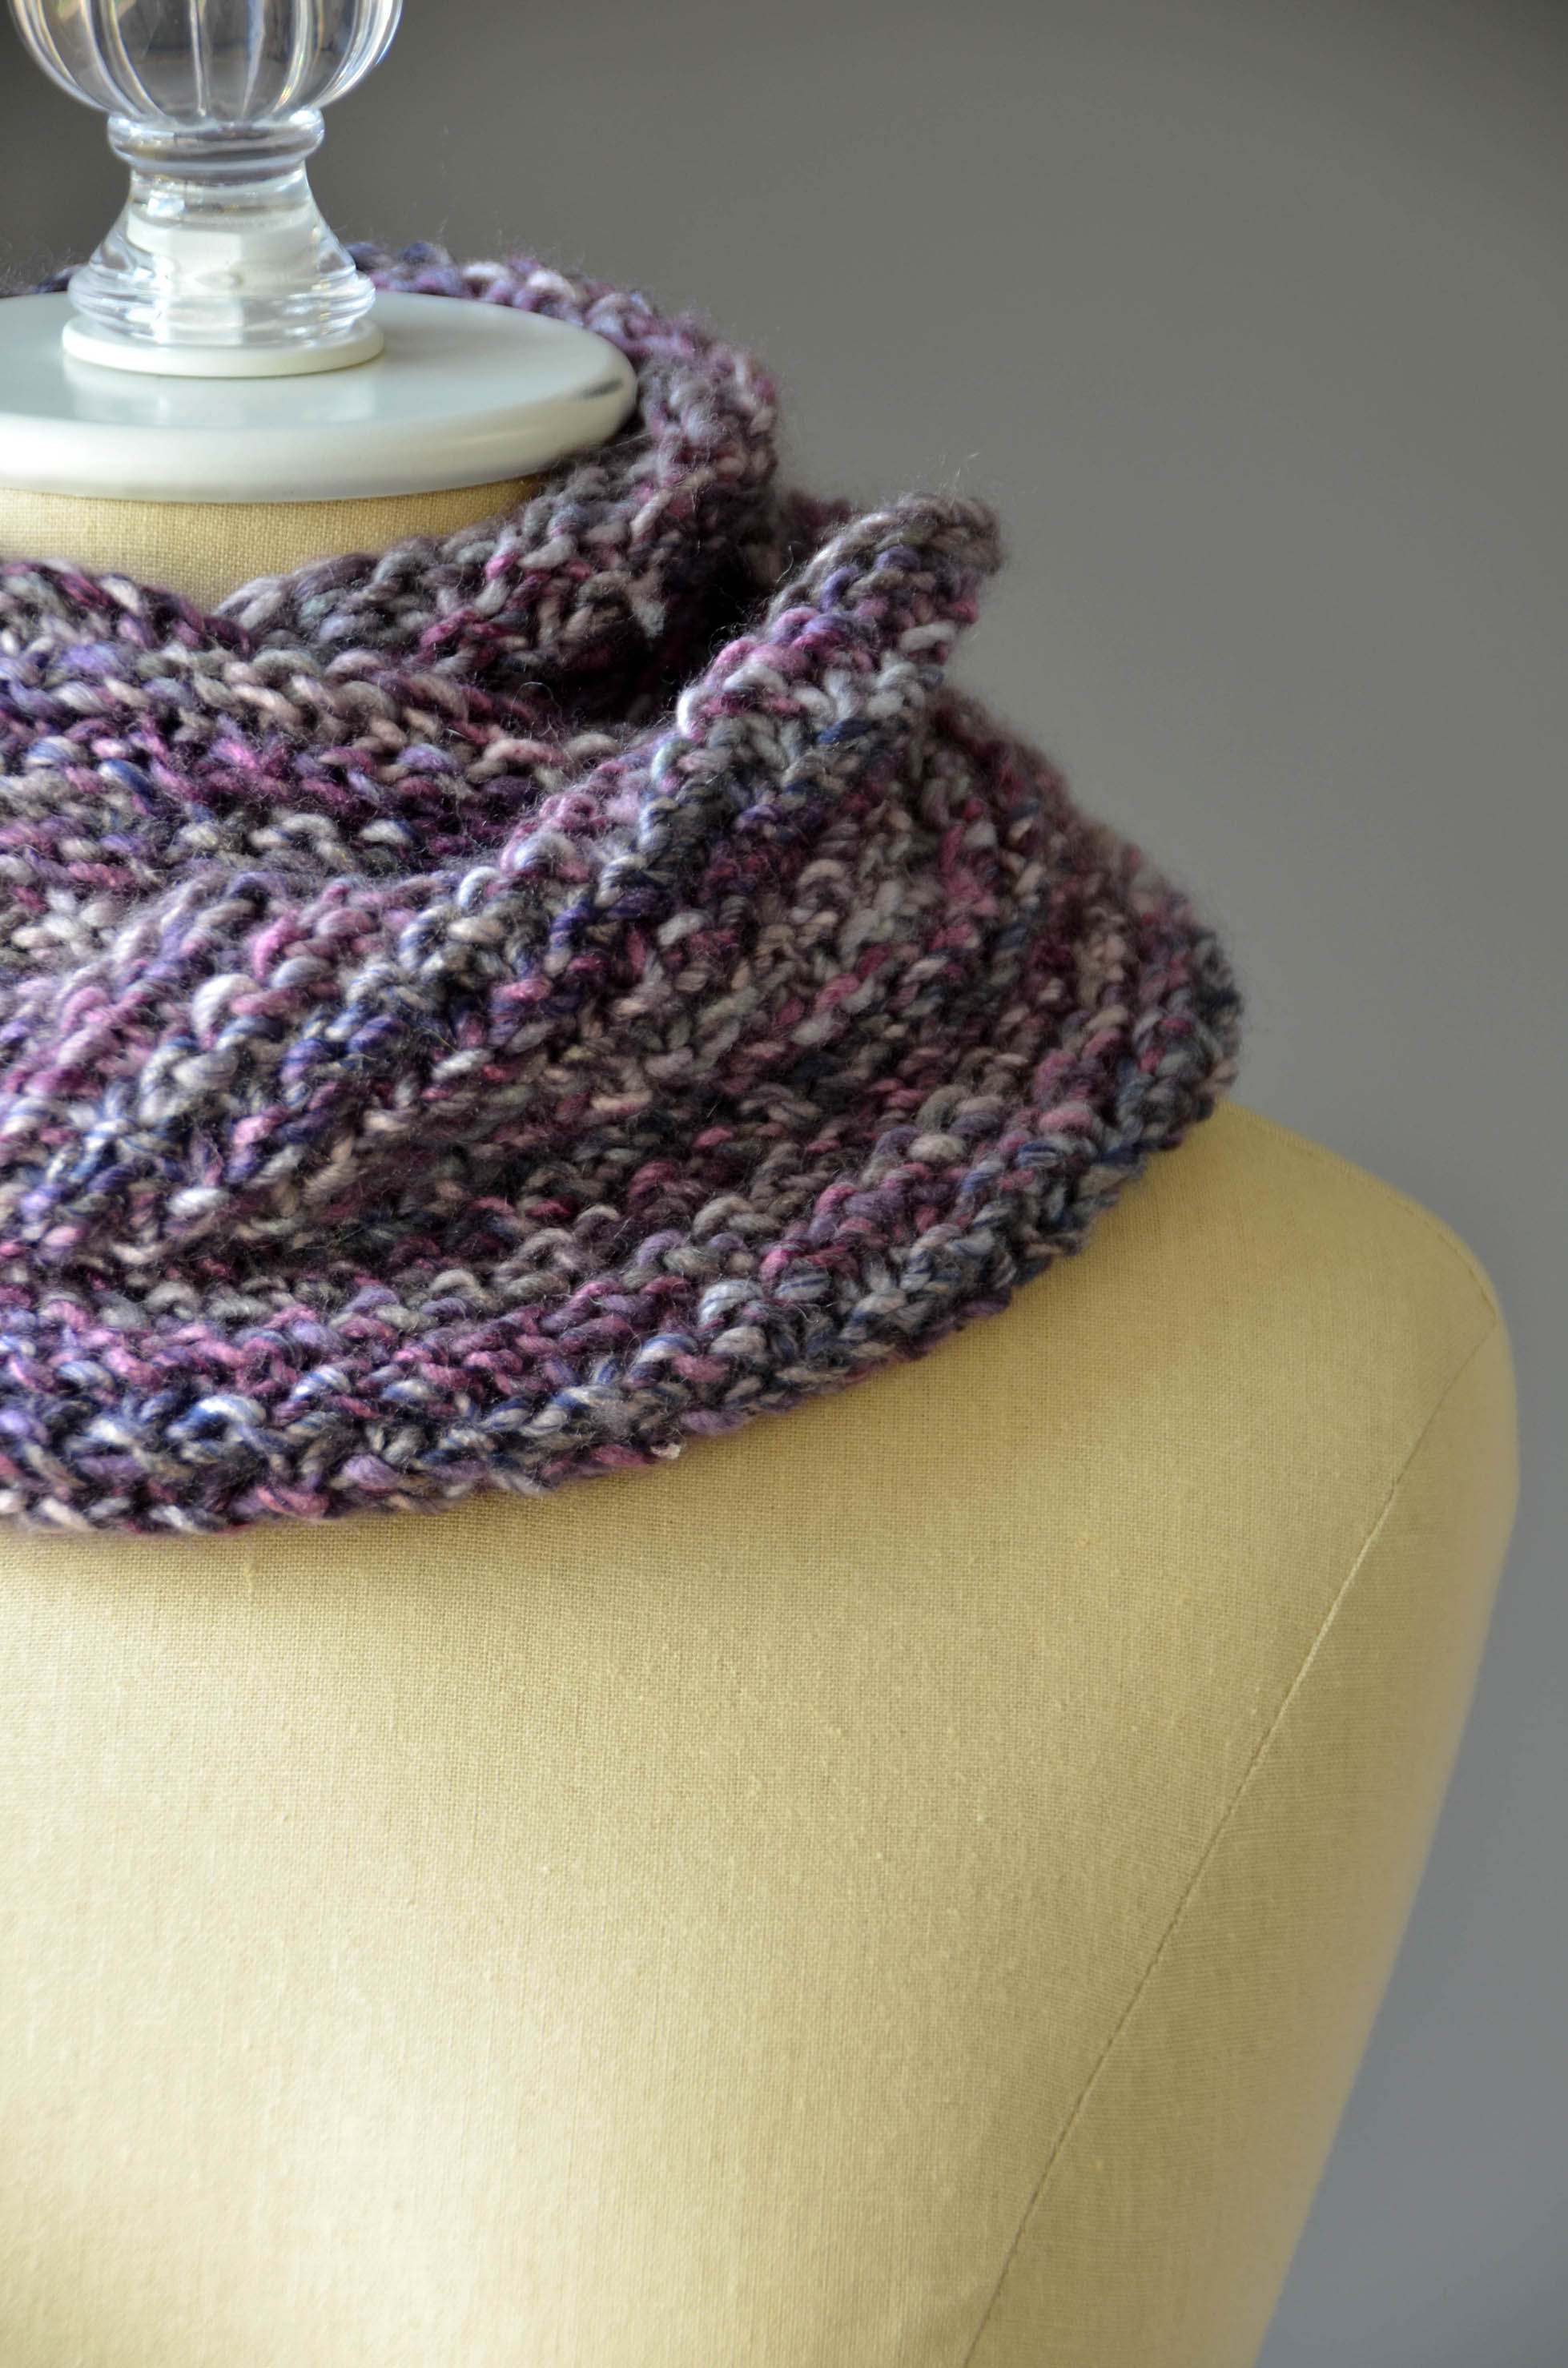
I have to say, as its creator, I’m feeling pretty good about today’s Free Pattern Friday. It was incredibly easy – just knits and purls – but you’d never know it to look at it. For that, credit goes to the yarn, Classic Shades Frenzy.
It’s a thick yarn with enough variation in color to give a simple design additional interest.
This cowl uses a diagonal rib pattern. The beauty of doing this in the round is that if you wish, you can simply cast on the required number and k2p2 all the way around every row until you’ve reached the desired width of your cowl. This took just one ball, and it made a cowl long enough to wear loose or to wrap once for extra warmth.
For mindless knitting, I tend to favor simple designs on big needles that I can work on while chatting or watching TV, and this fits the bill. Now that the weather’s turned, this would be a great knit-night project!
Have a wonderful weekend, and be sure to make time for yourself.
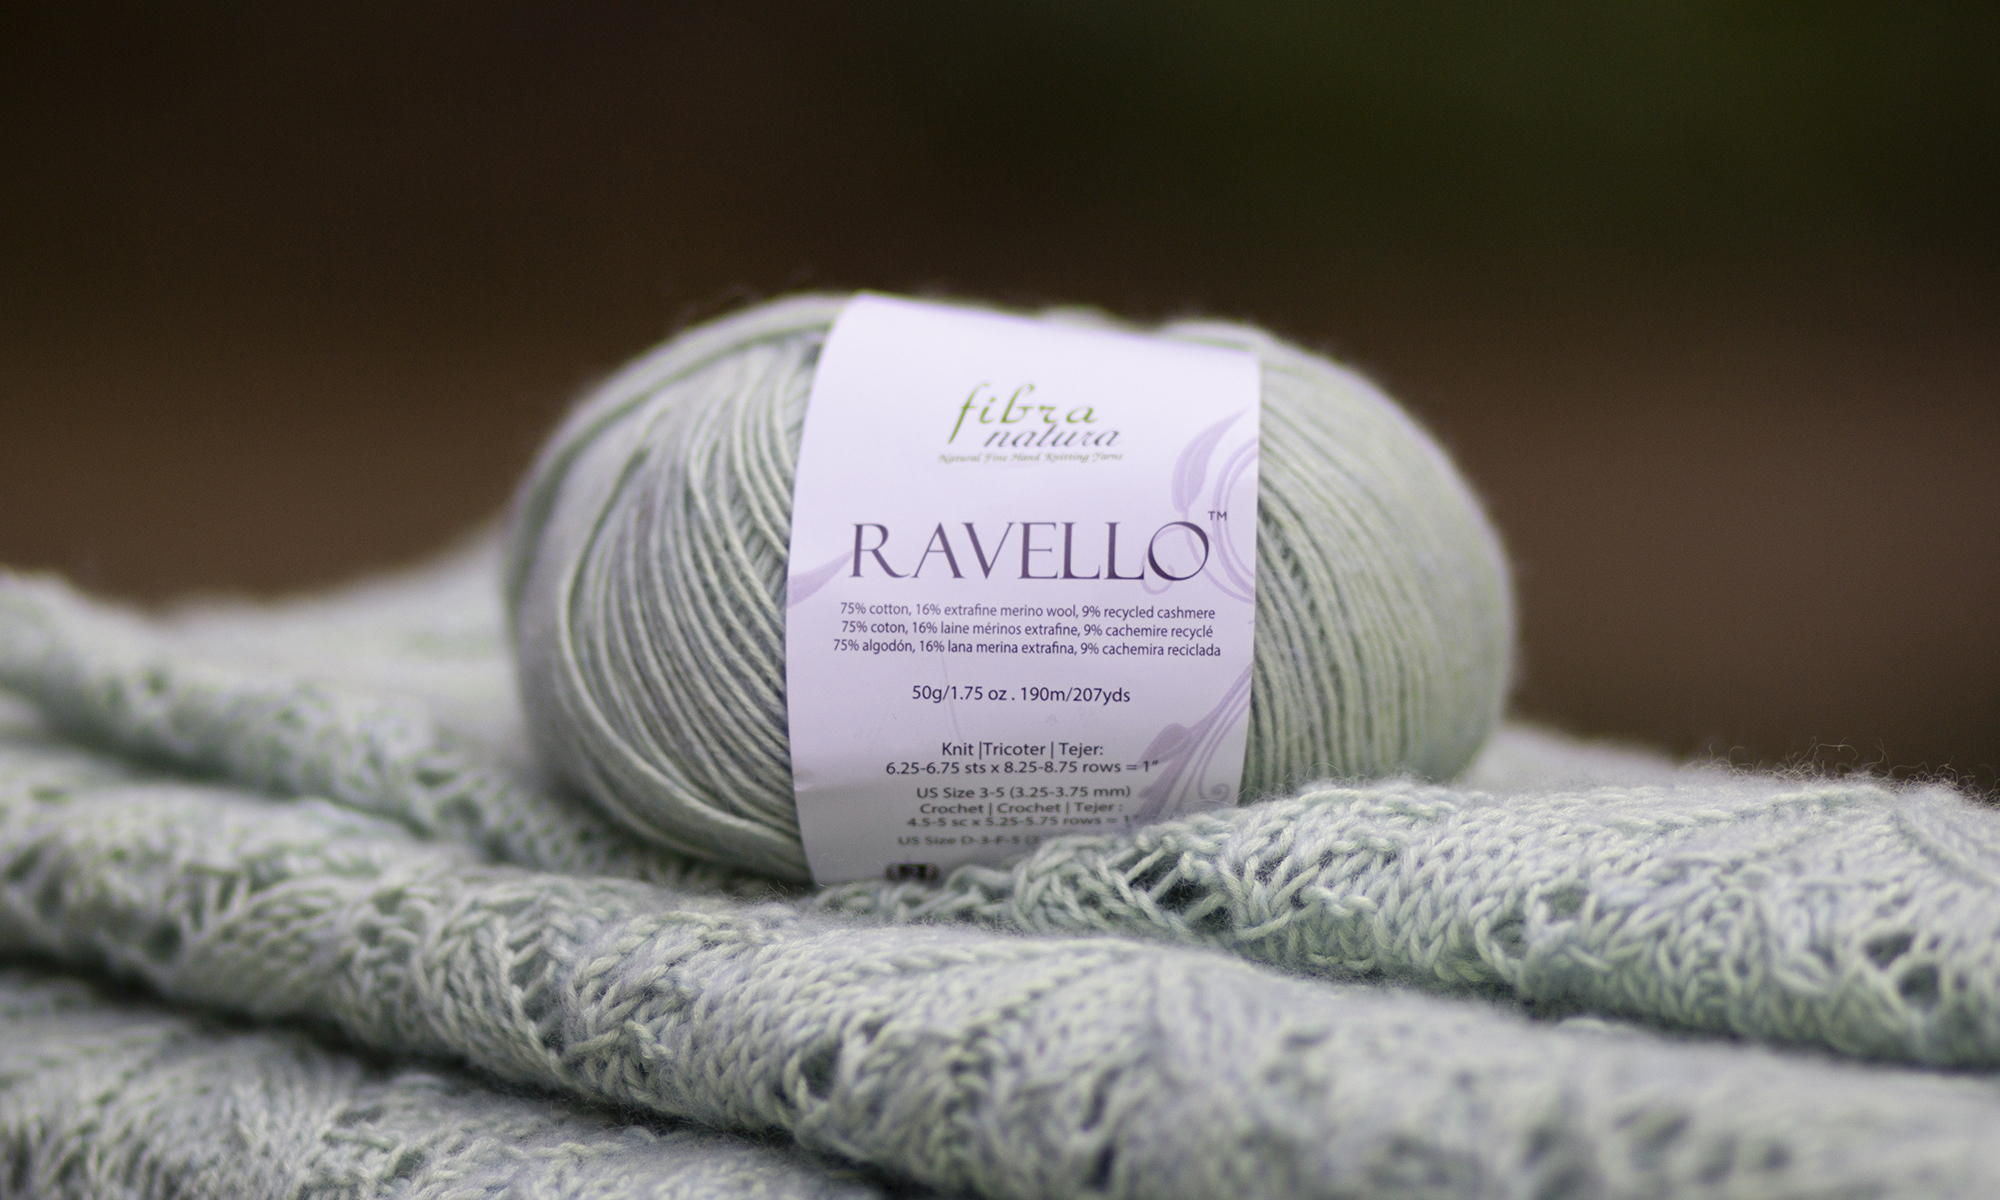
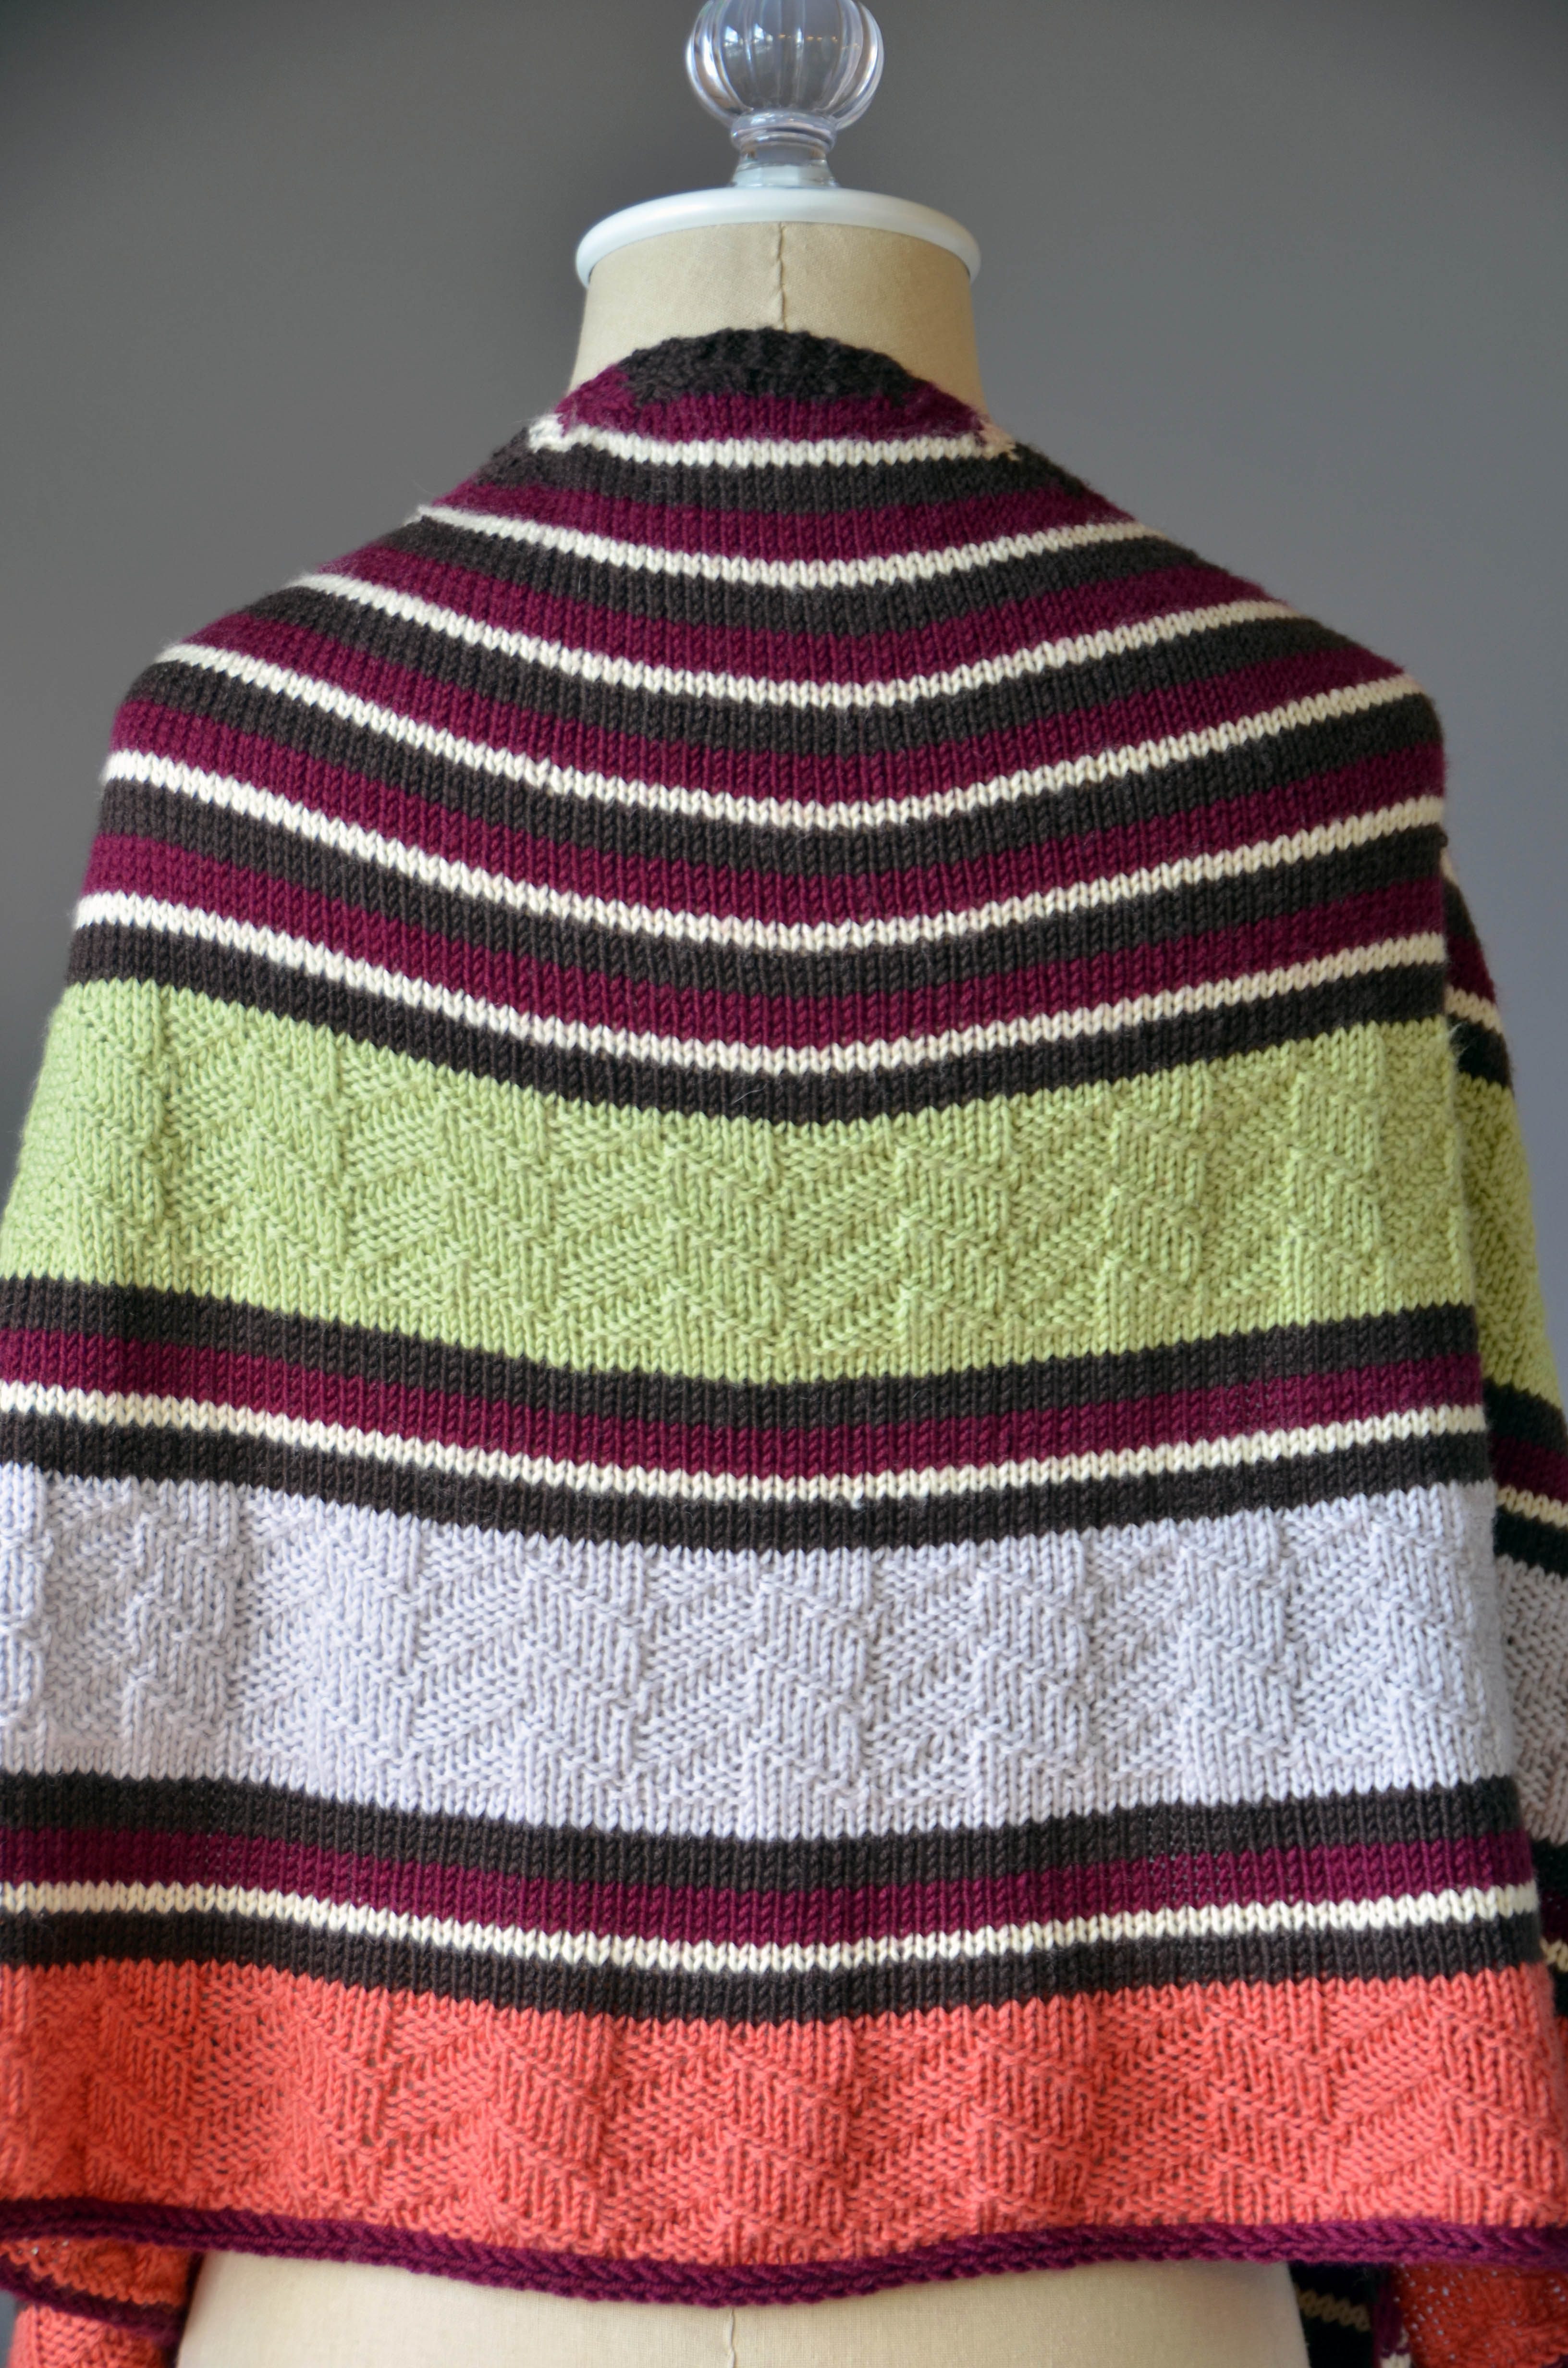
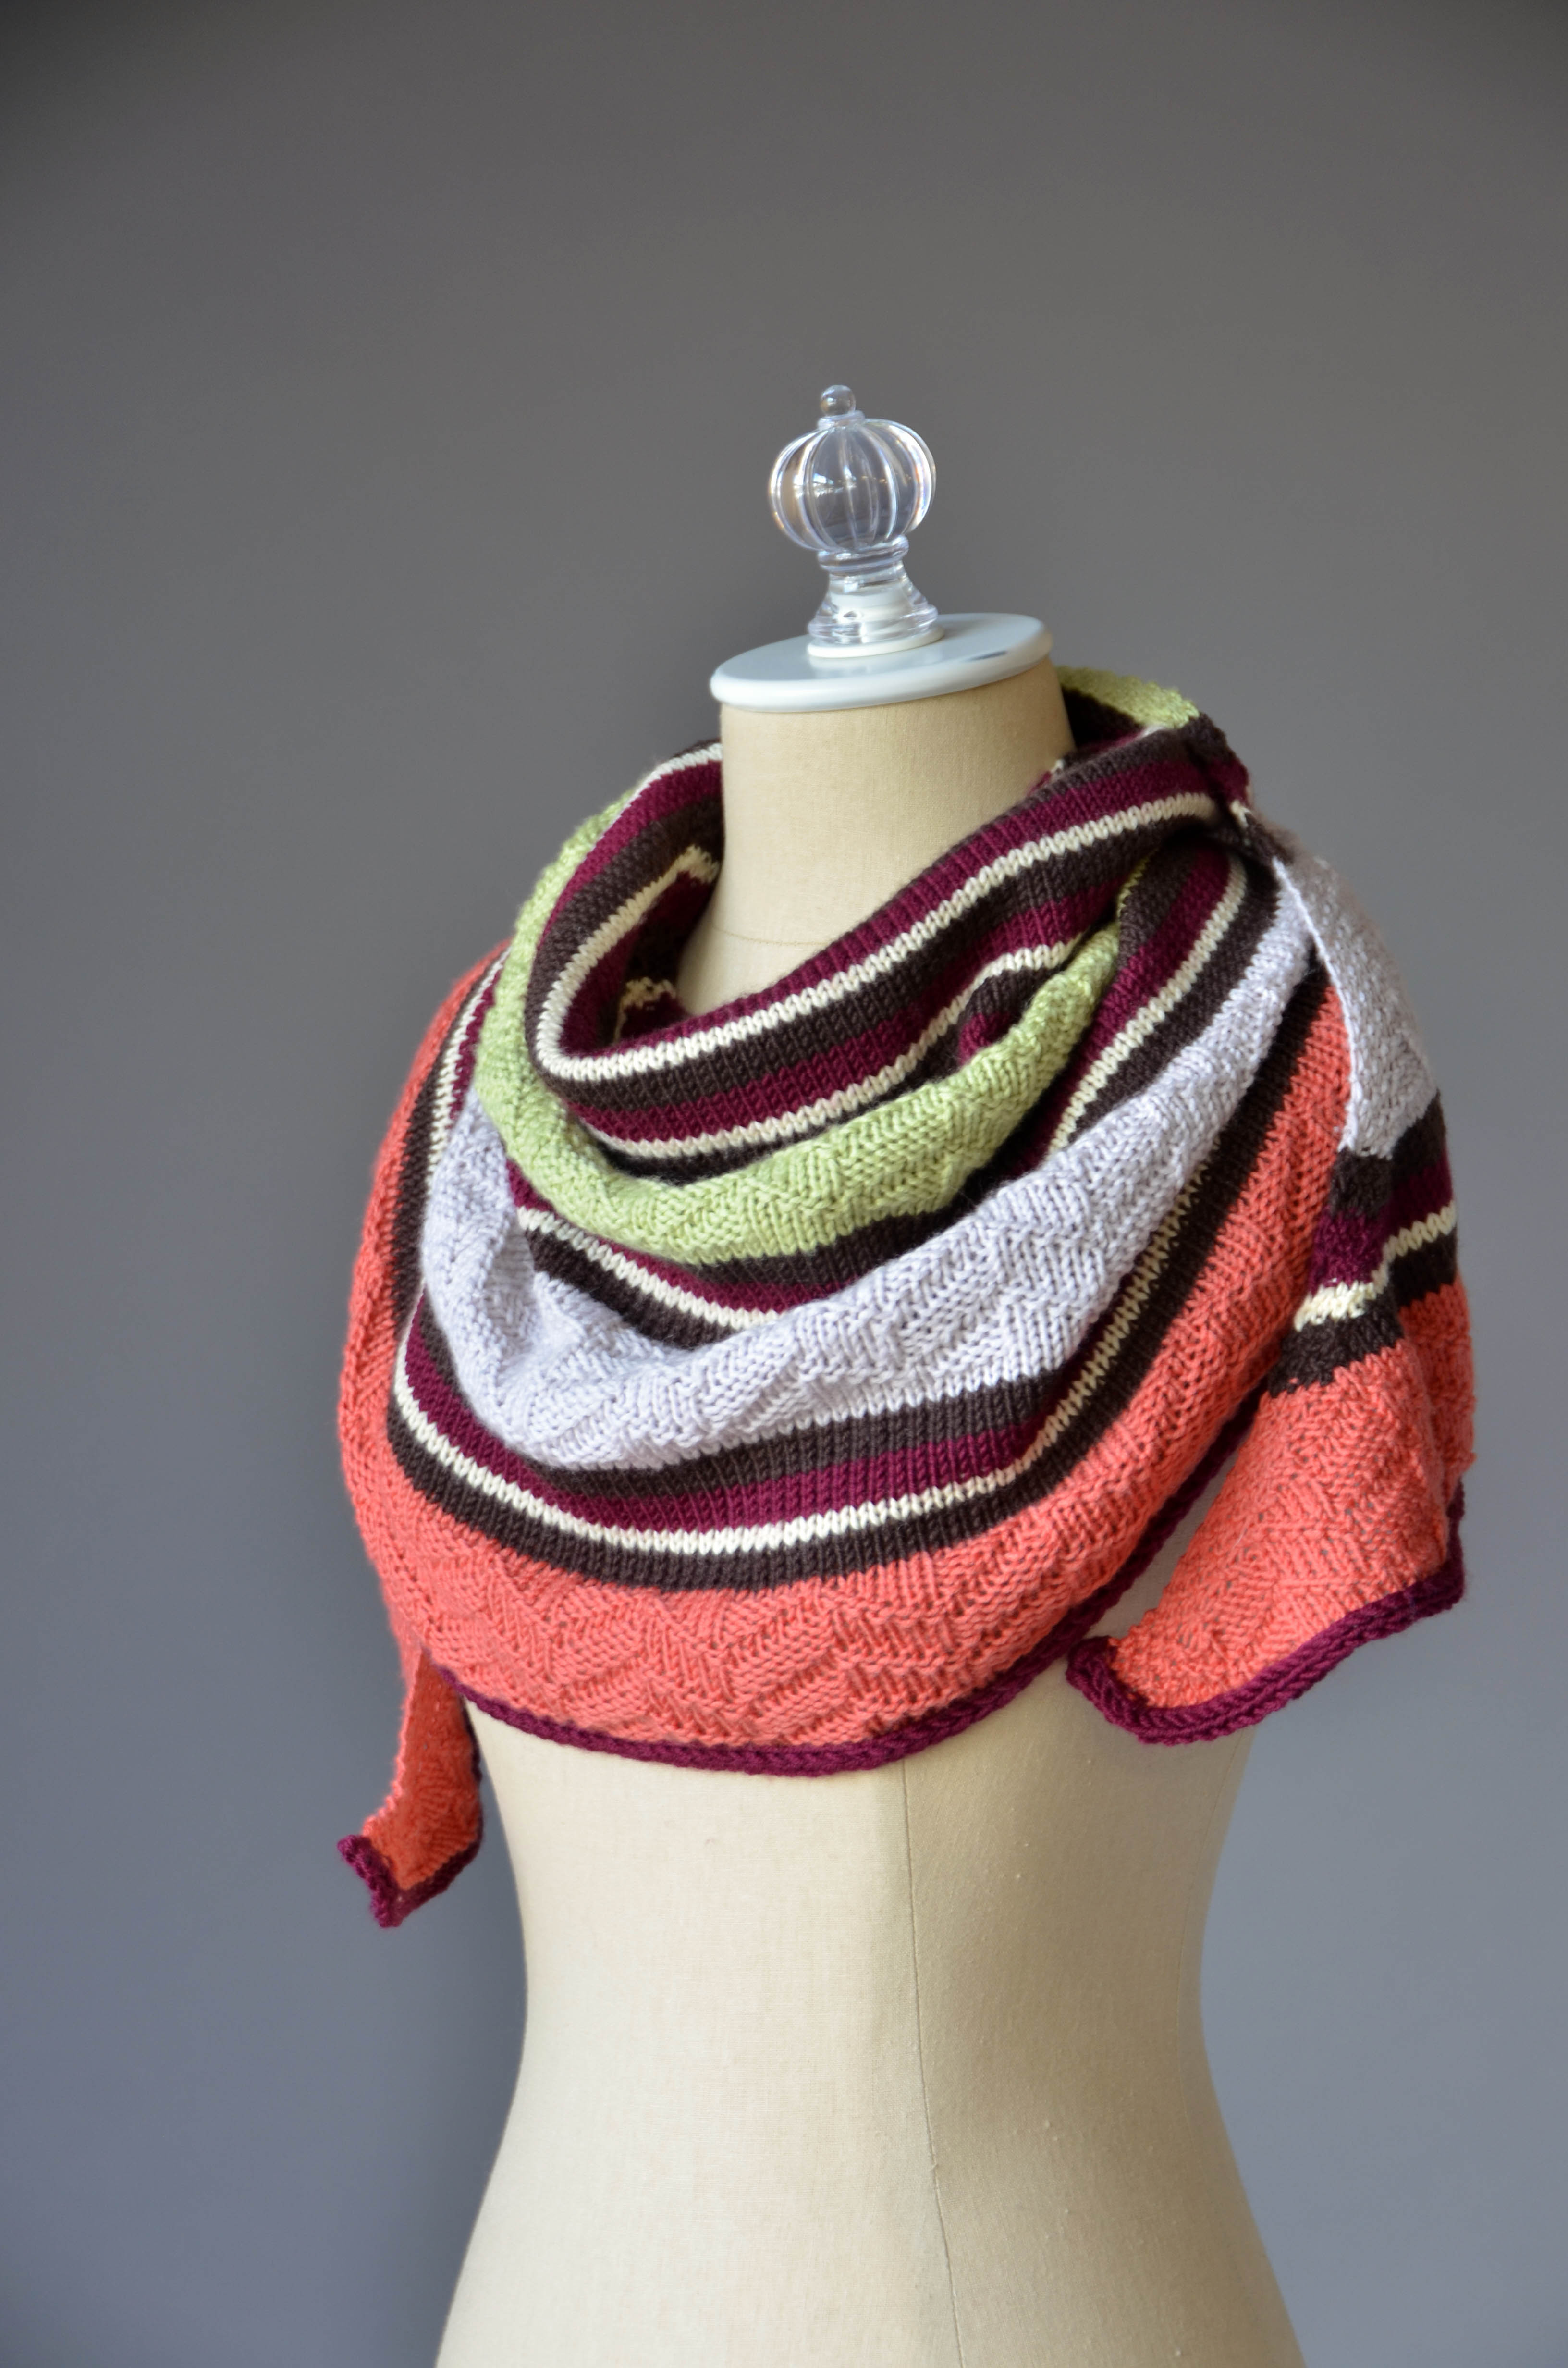
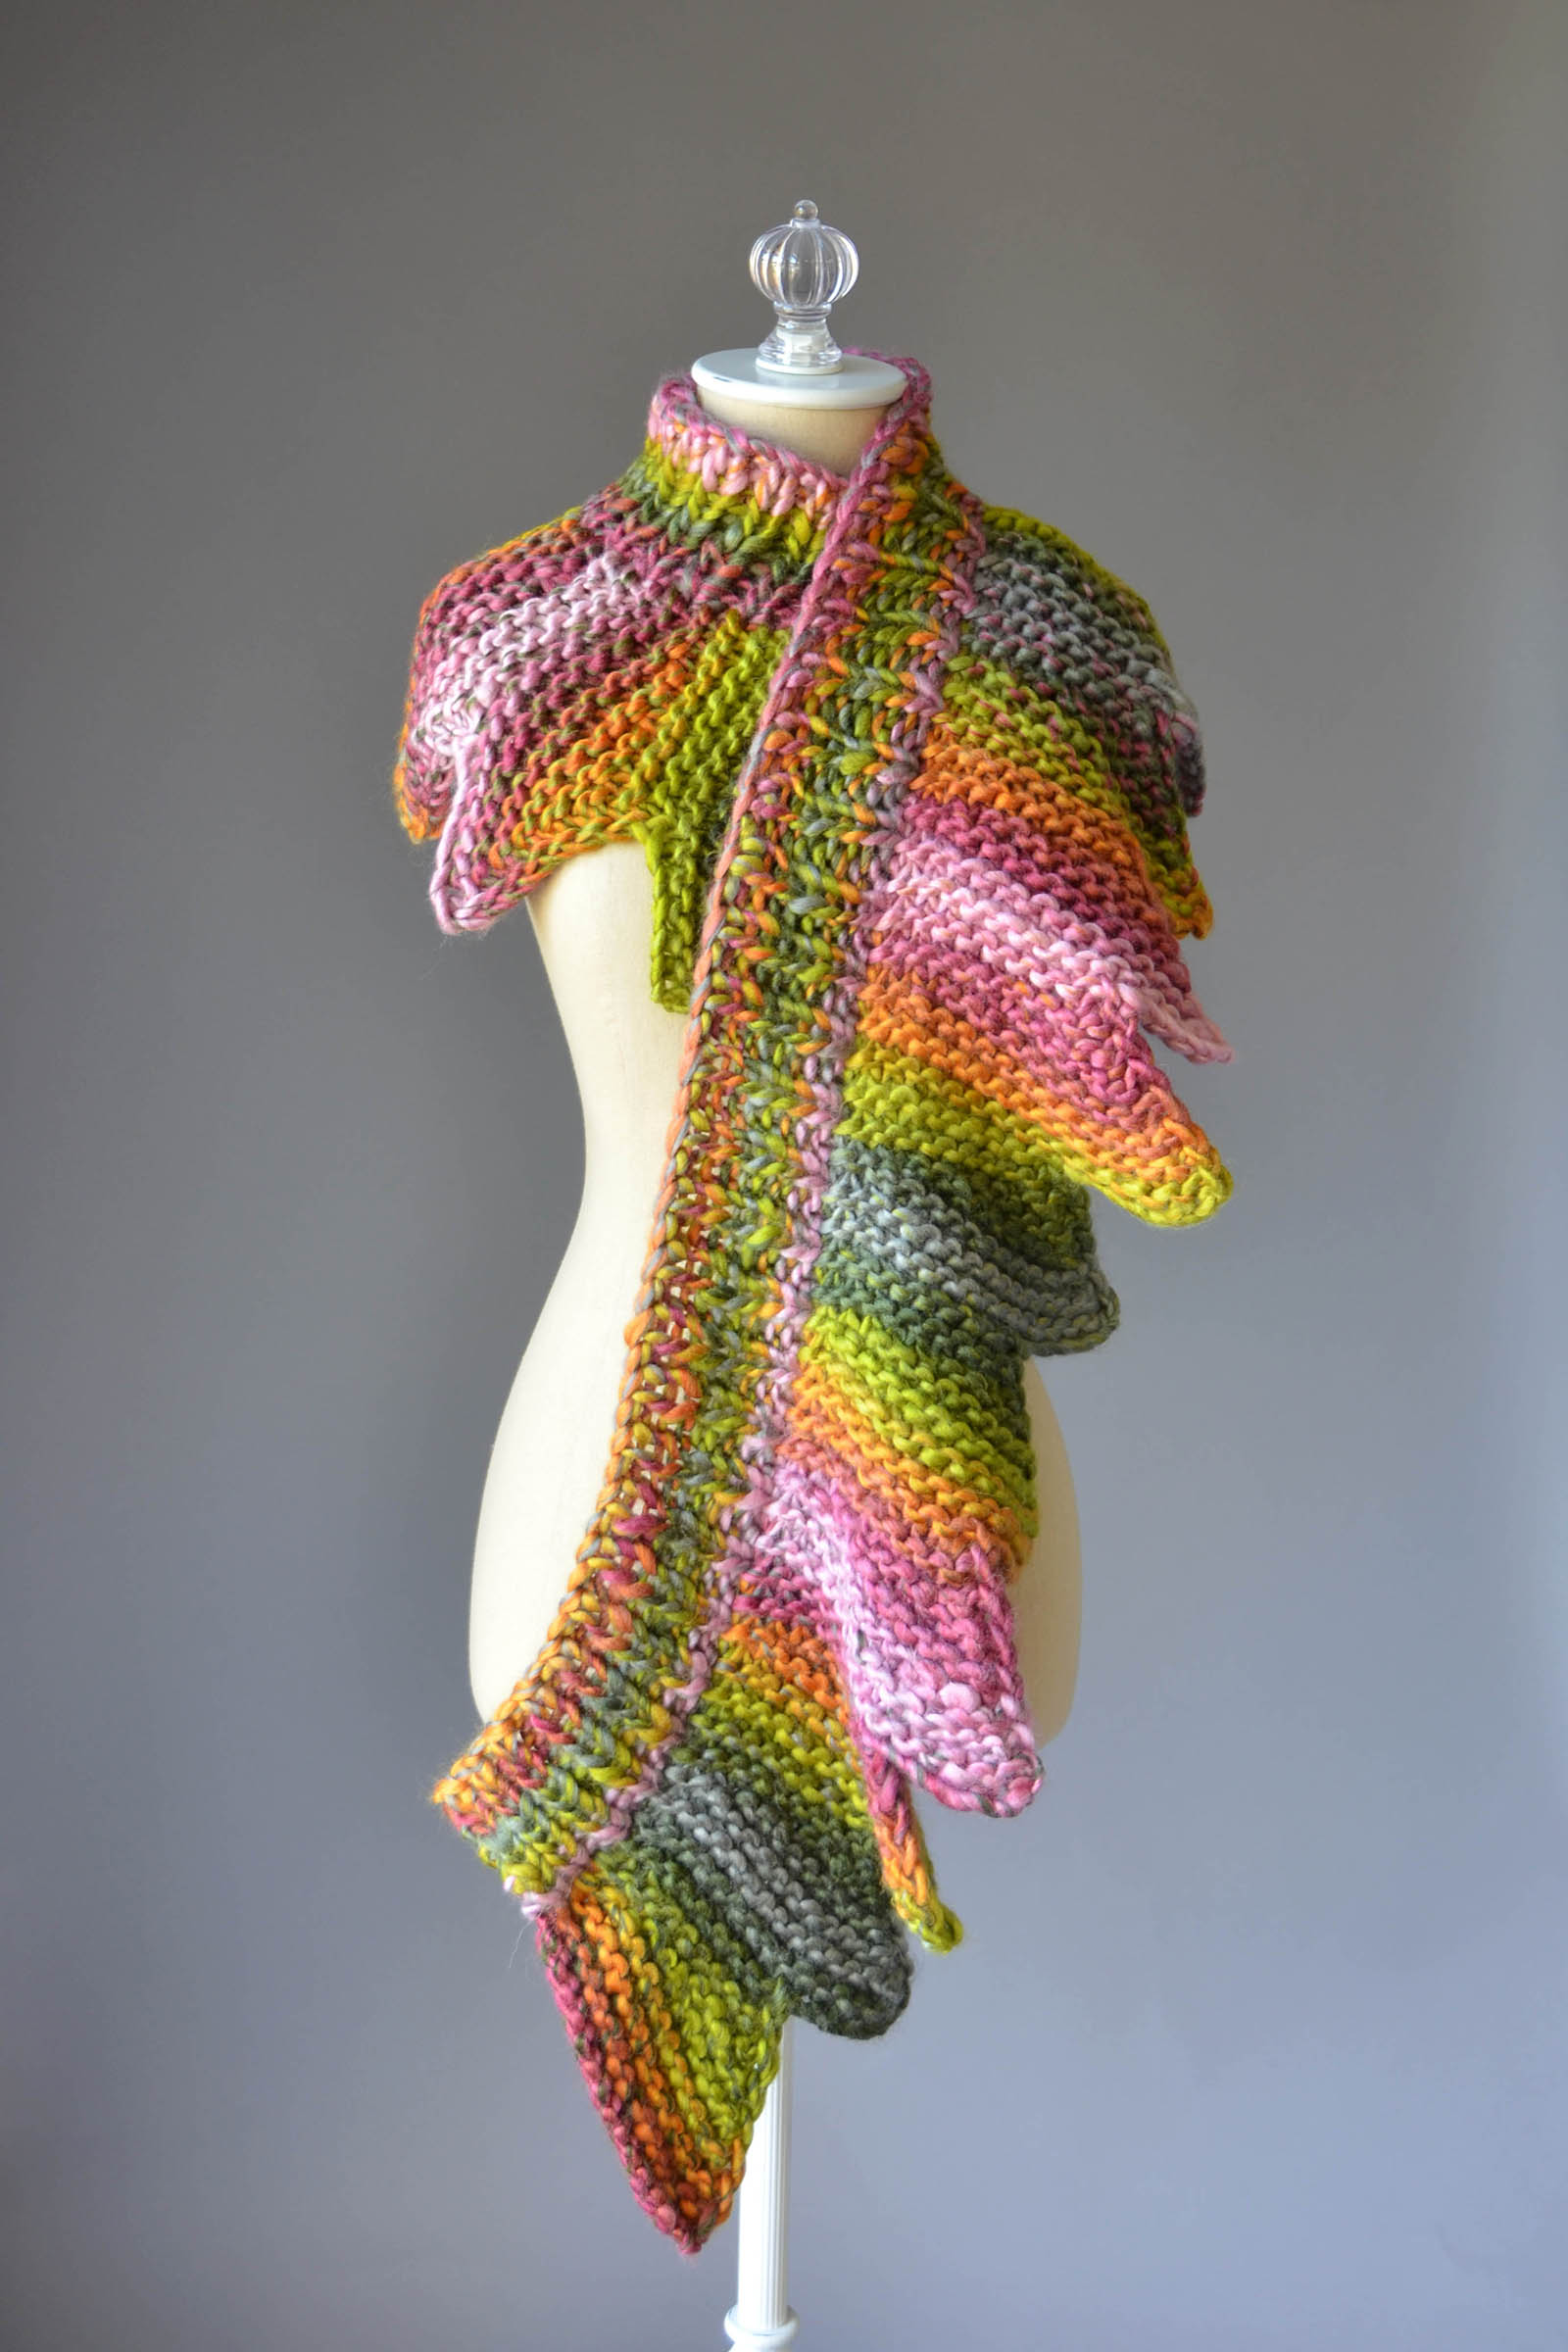
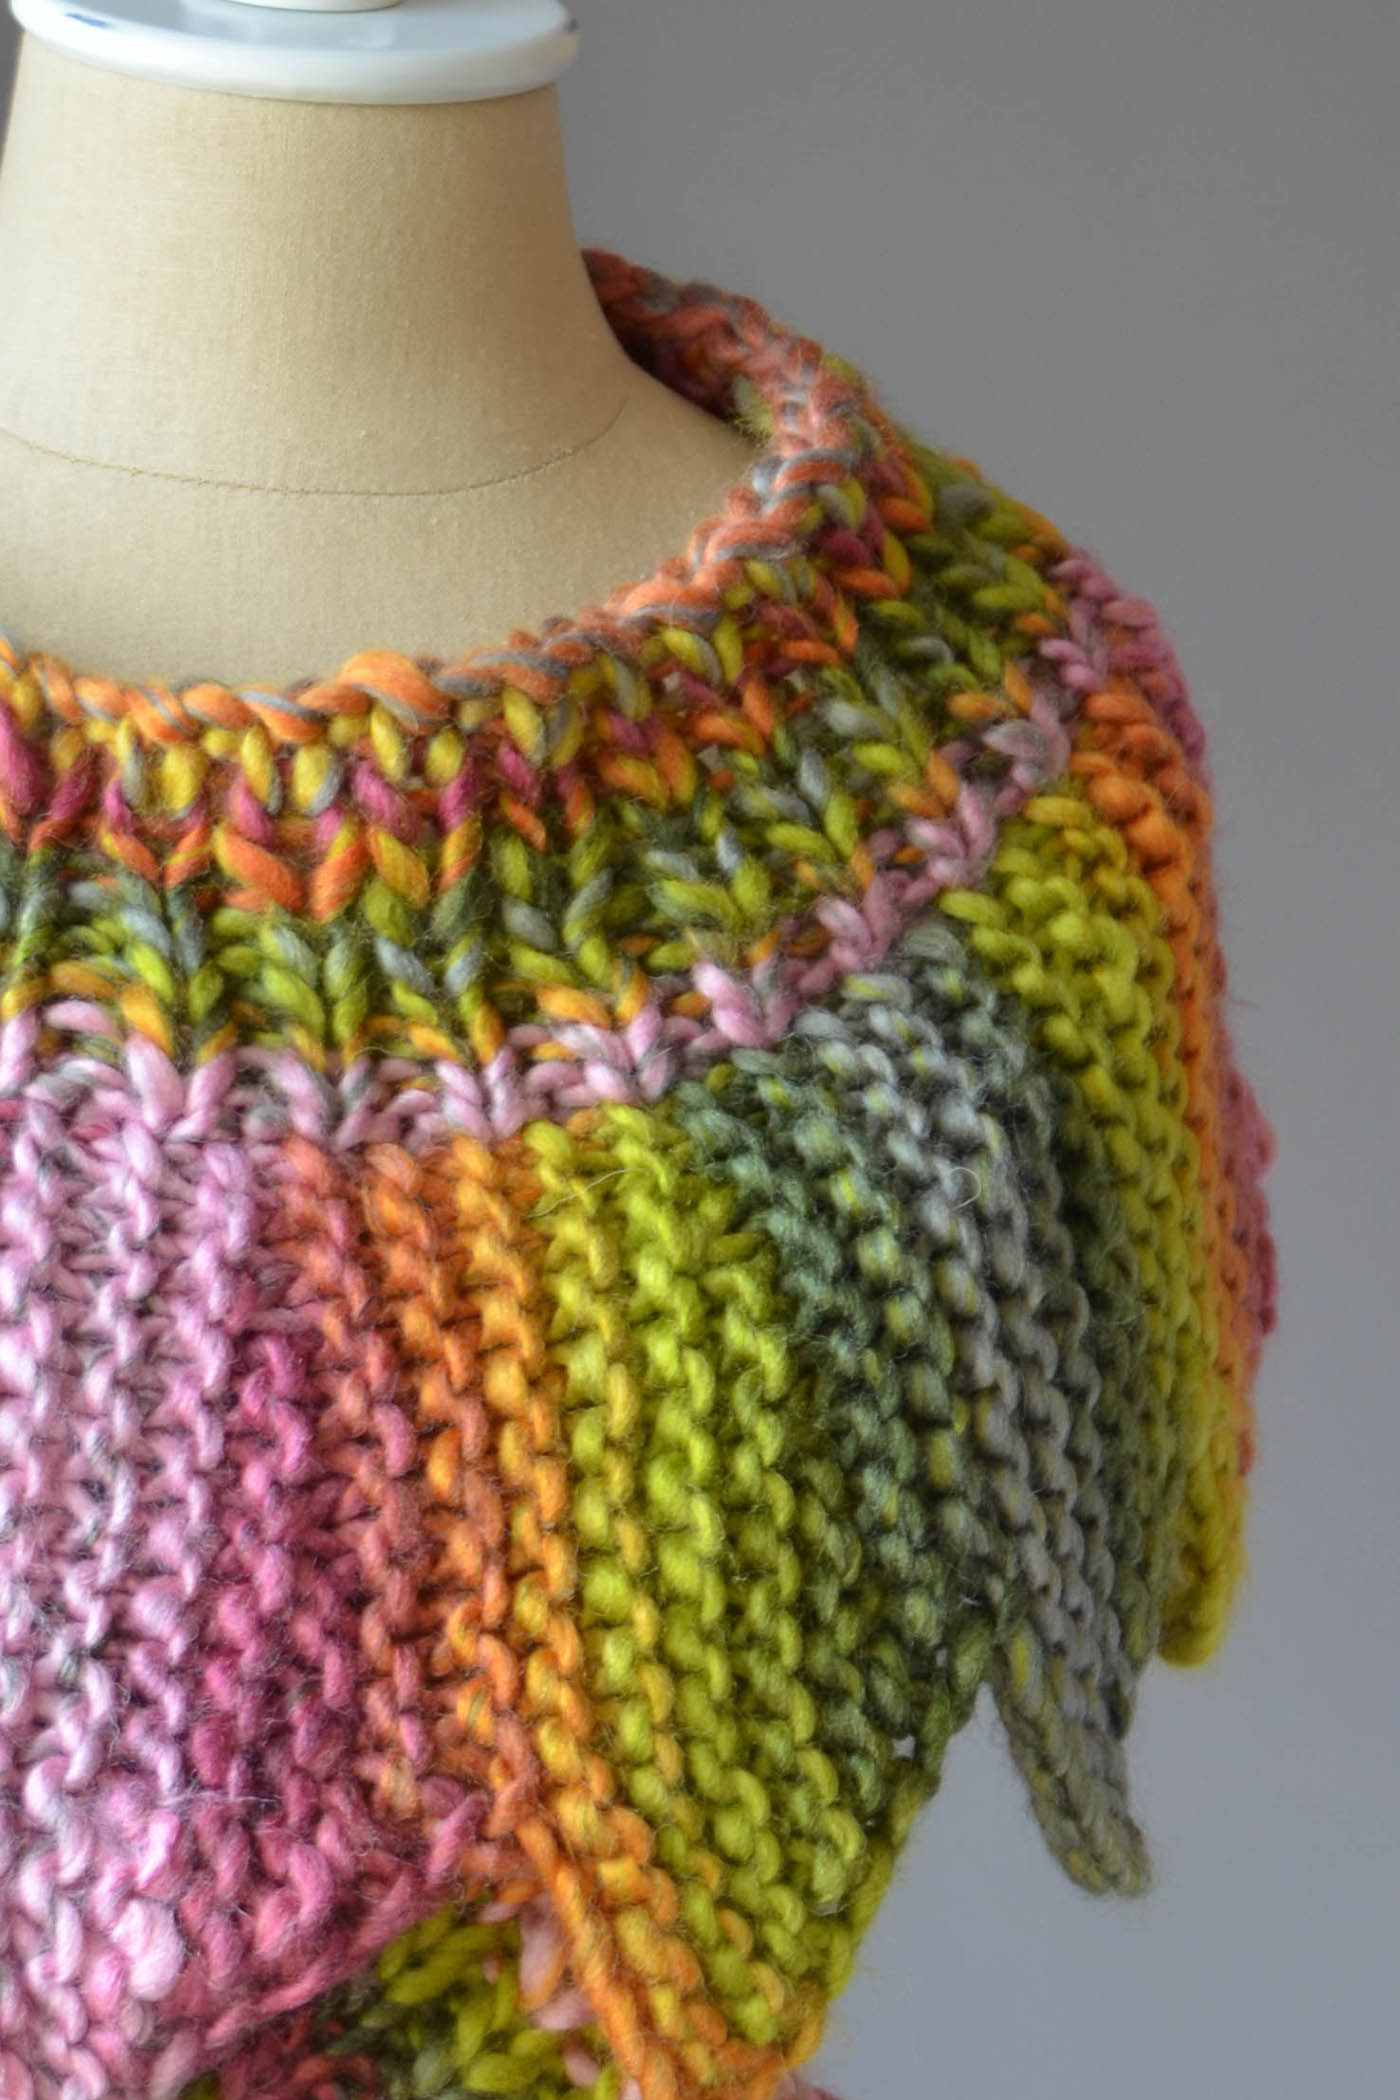
One of the yarns I’ve fallen most in love with since joining the Universal Yarn design team is Fibra Natura Dona. This yarn is simply gorgeous. It is soft, plump, and has excellent stitch definition. We have a variety of great kits that use Dona, but I was excited when Amy asked me to contribute to our Color Kit lineup. My design is the Stratification Shawl.
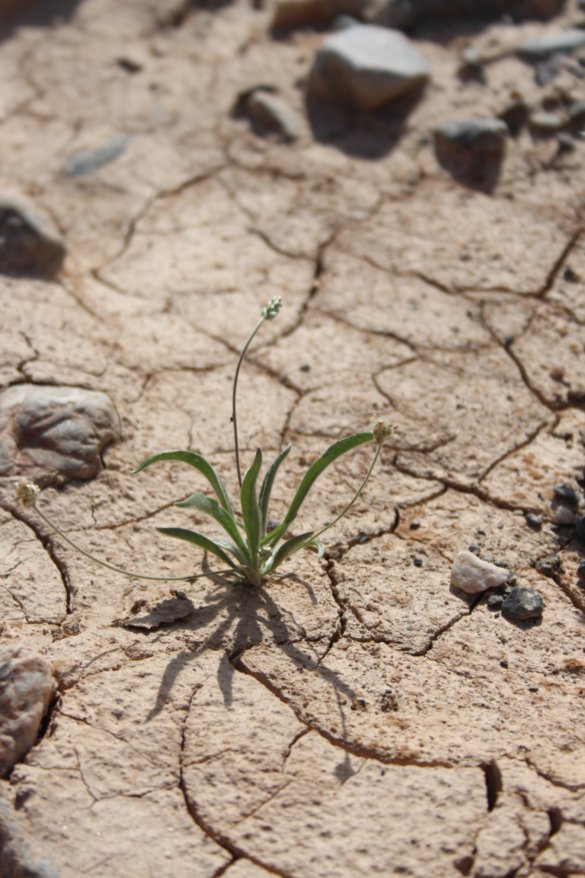
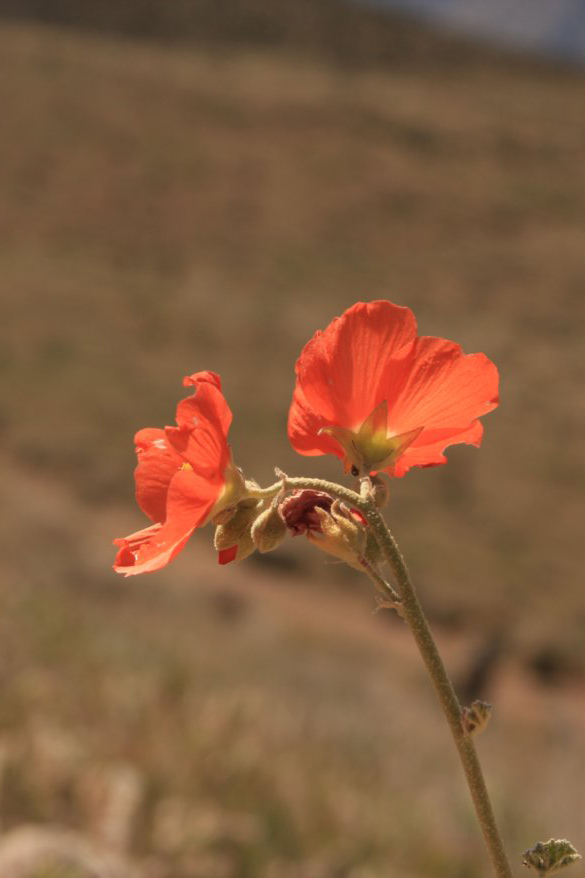
I love the Spice Box palette. These are, without a doubt, my kind of colors. I love warm colors and earth tones. I spend much of my free time outdoors and draw inspiration from the colors and textures of landscapes. I already knew that I wanted to incorporate stripes into the design, so I revisited some photos for further inspiration.
The Spice Box palette made me reminisce about a trip I made to Red Rock Canyon National Conservation Area outside of Las Vegas, Nevada. During my trip, I was mesmerized by the beauty in the strata, or rock layers, in the landscape. Similarly, I loved the way flora sprinkled pops of color into neutral desert landscapes. I’ve included some of the photos that inspired me to include the bold green and coral stripes into the shawl.
This shawl is a pretty straightforward project. It features top-down construction and increases occur along the sides to create a crescent shape. An alternating sequence of simple stripes is elevated with a knit-purl stitch pattern. Dona shows off the stitch pattern perfectly. Finally, the shawl is finished with an I-Cord bind off. It is an excellent project for both beginning and more advanced knitters. I sincerely hope you enjoy this pattern as much as I enjoyed designing it!
Happy Halloween! Nothing will make you feel as though you’re creating a witches’ brew like dyeing with lichen. It’s a unique way to get into the holiday spirit.
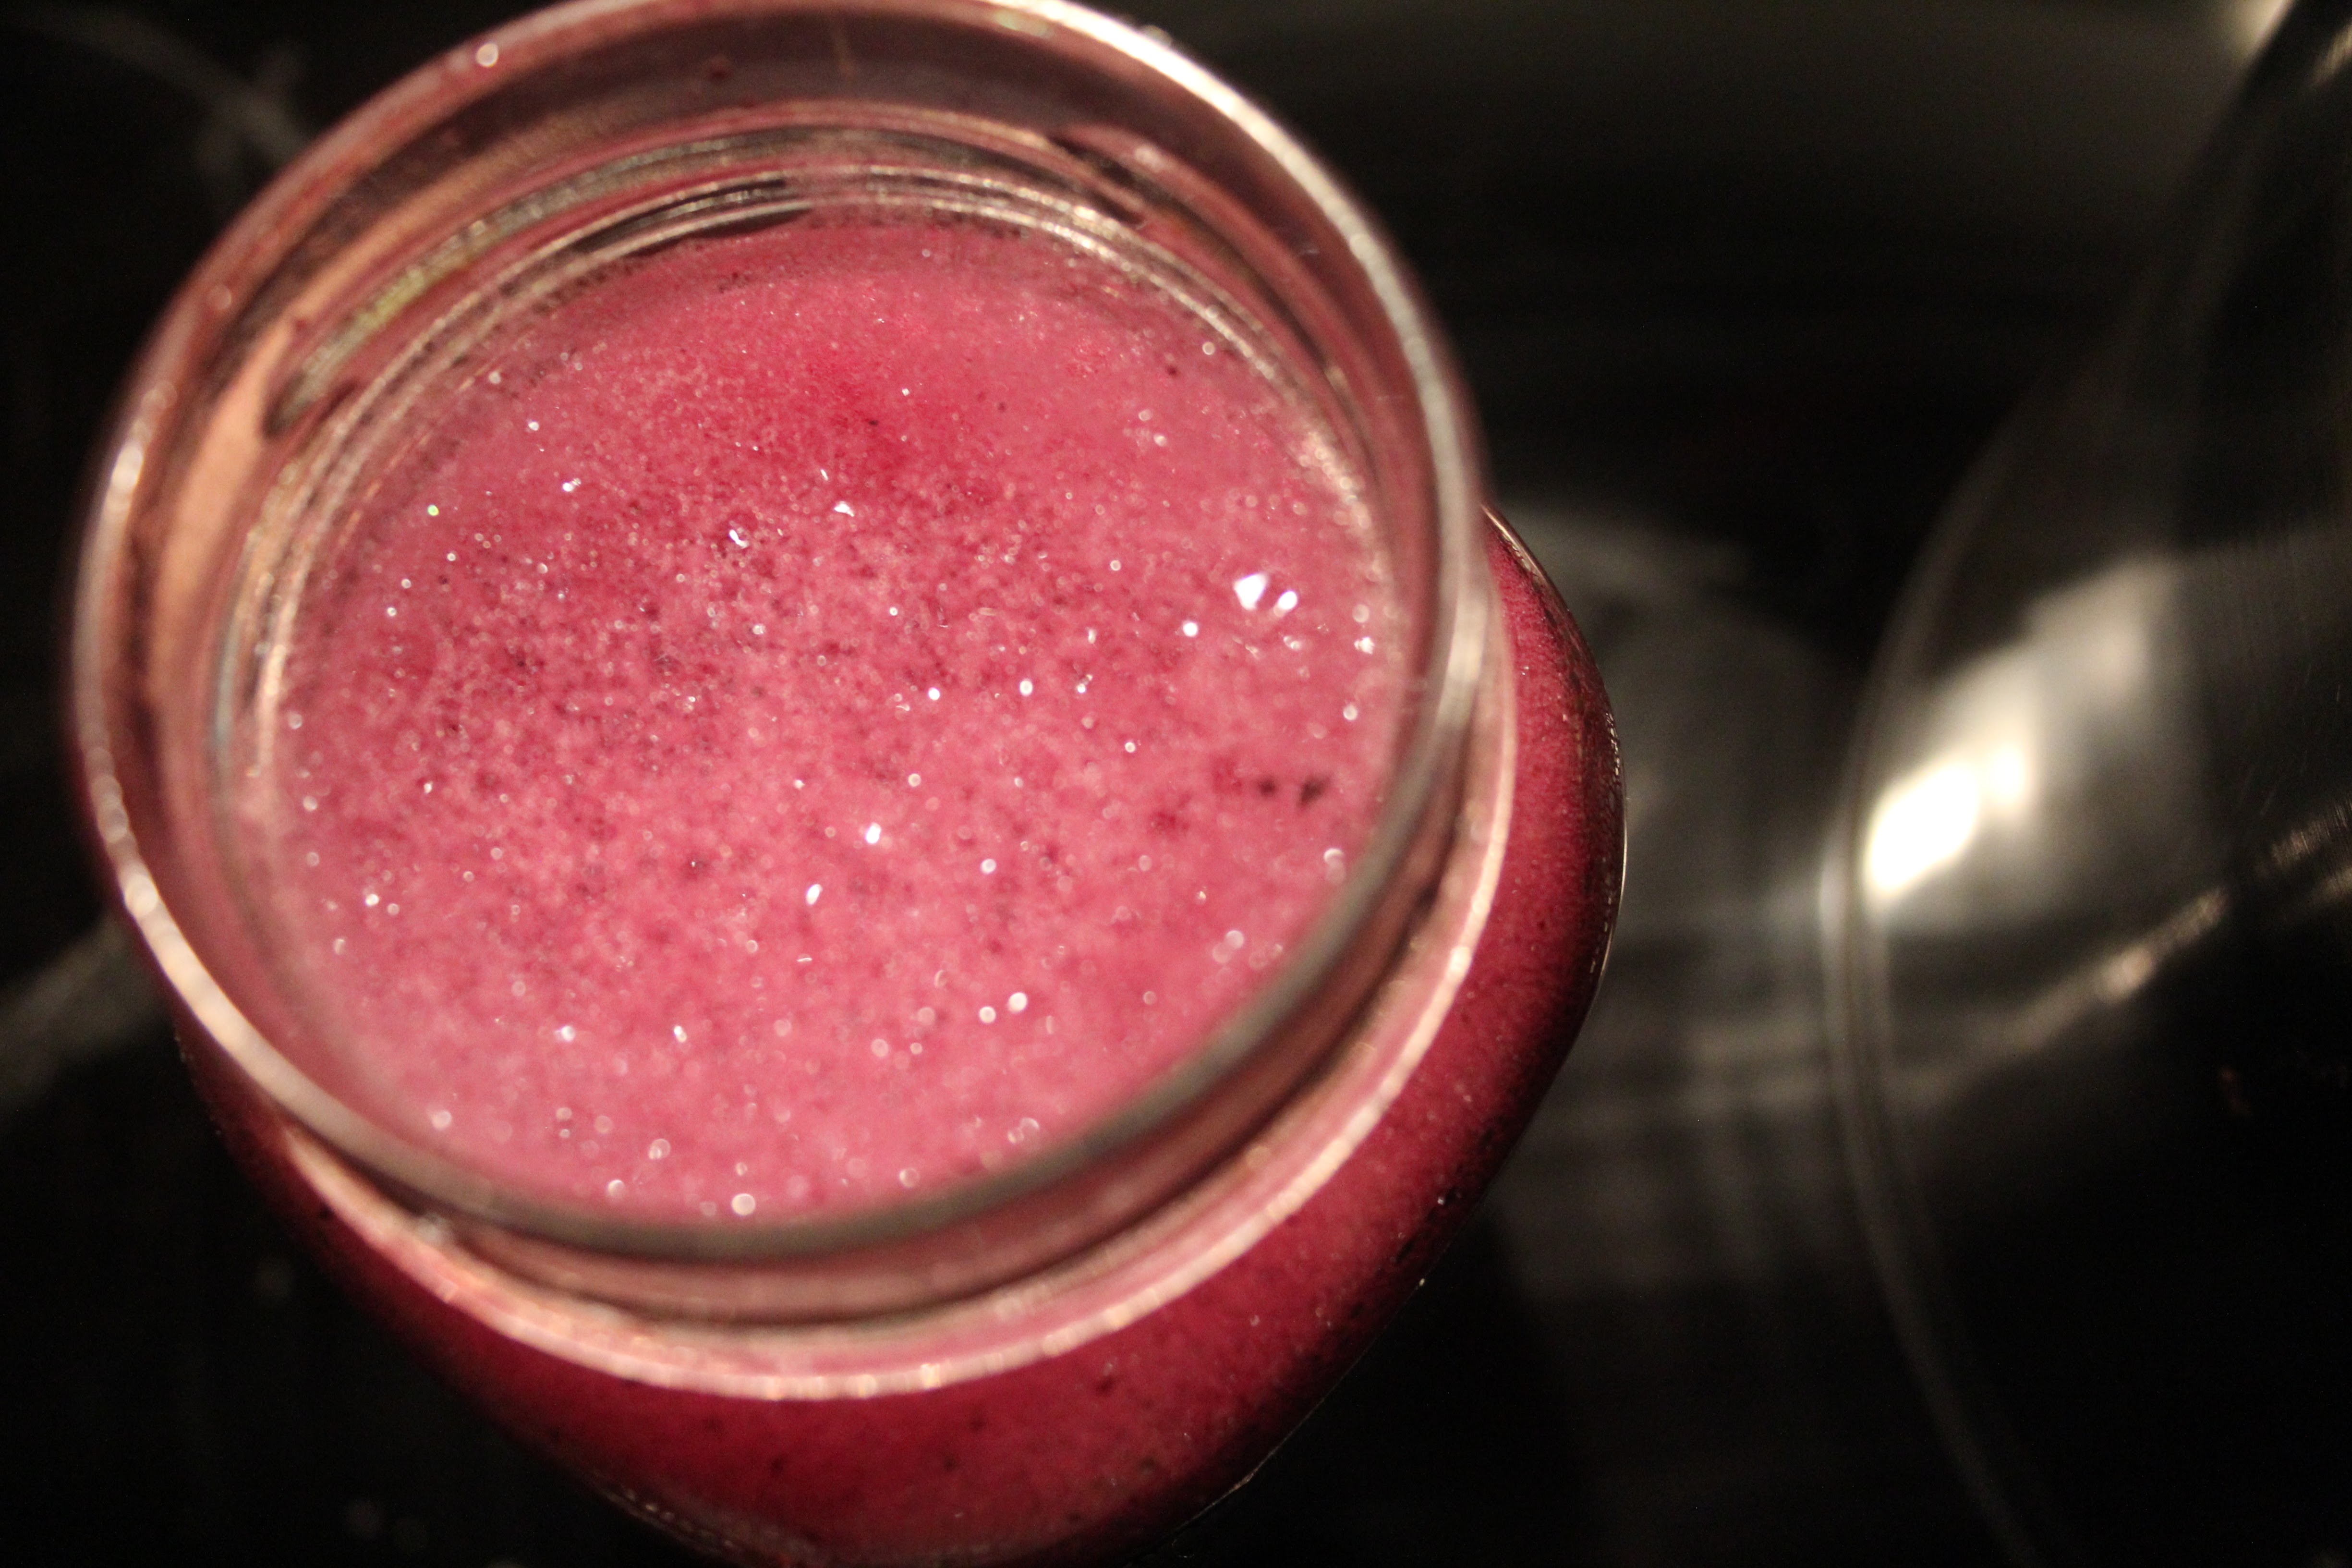
In the second installment of the Natural Dye series, I’m going to show you how to use lichens as a natural dye. If you thought the marigold dye from Part I was fun, you will love this installment. Remember the foamy, magenta liquid in the jar from Part I? That’s the lichen dye.
This dye takes about a month to prepare, but it is well worth the wait. Something about it is magical because you’d never expect such a vibrant color to come from a leathery, grey-brown lichen.
For today’s tutorial you’ll need:
A glass jar – canning jars or recycled sauce jars are perfect
Measuring cups
Ammonia
Water
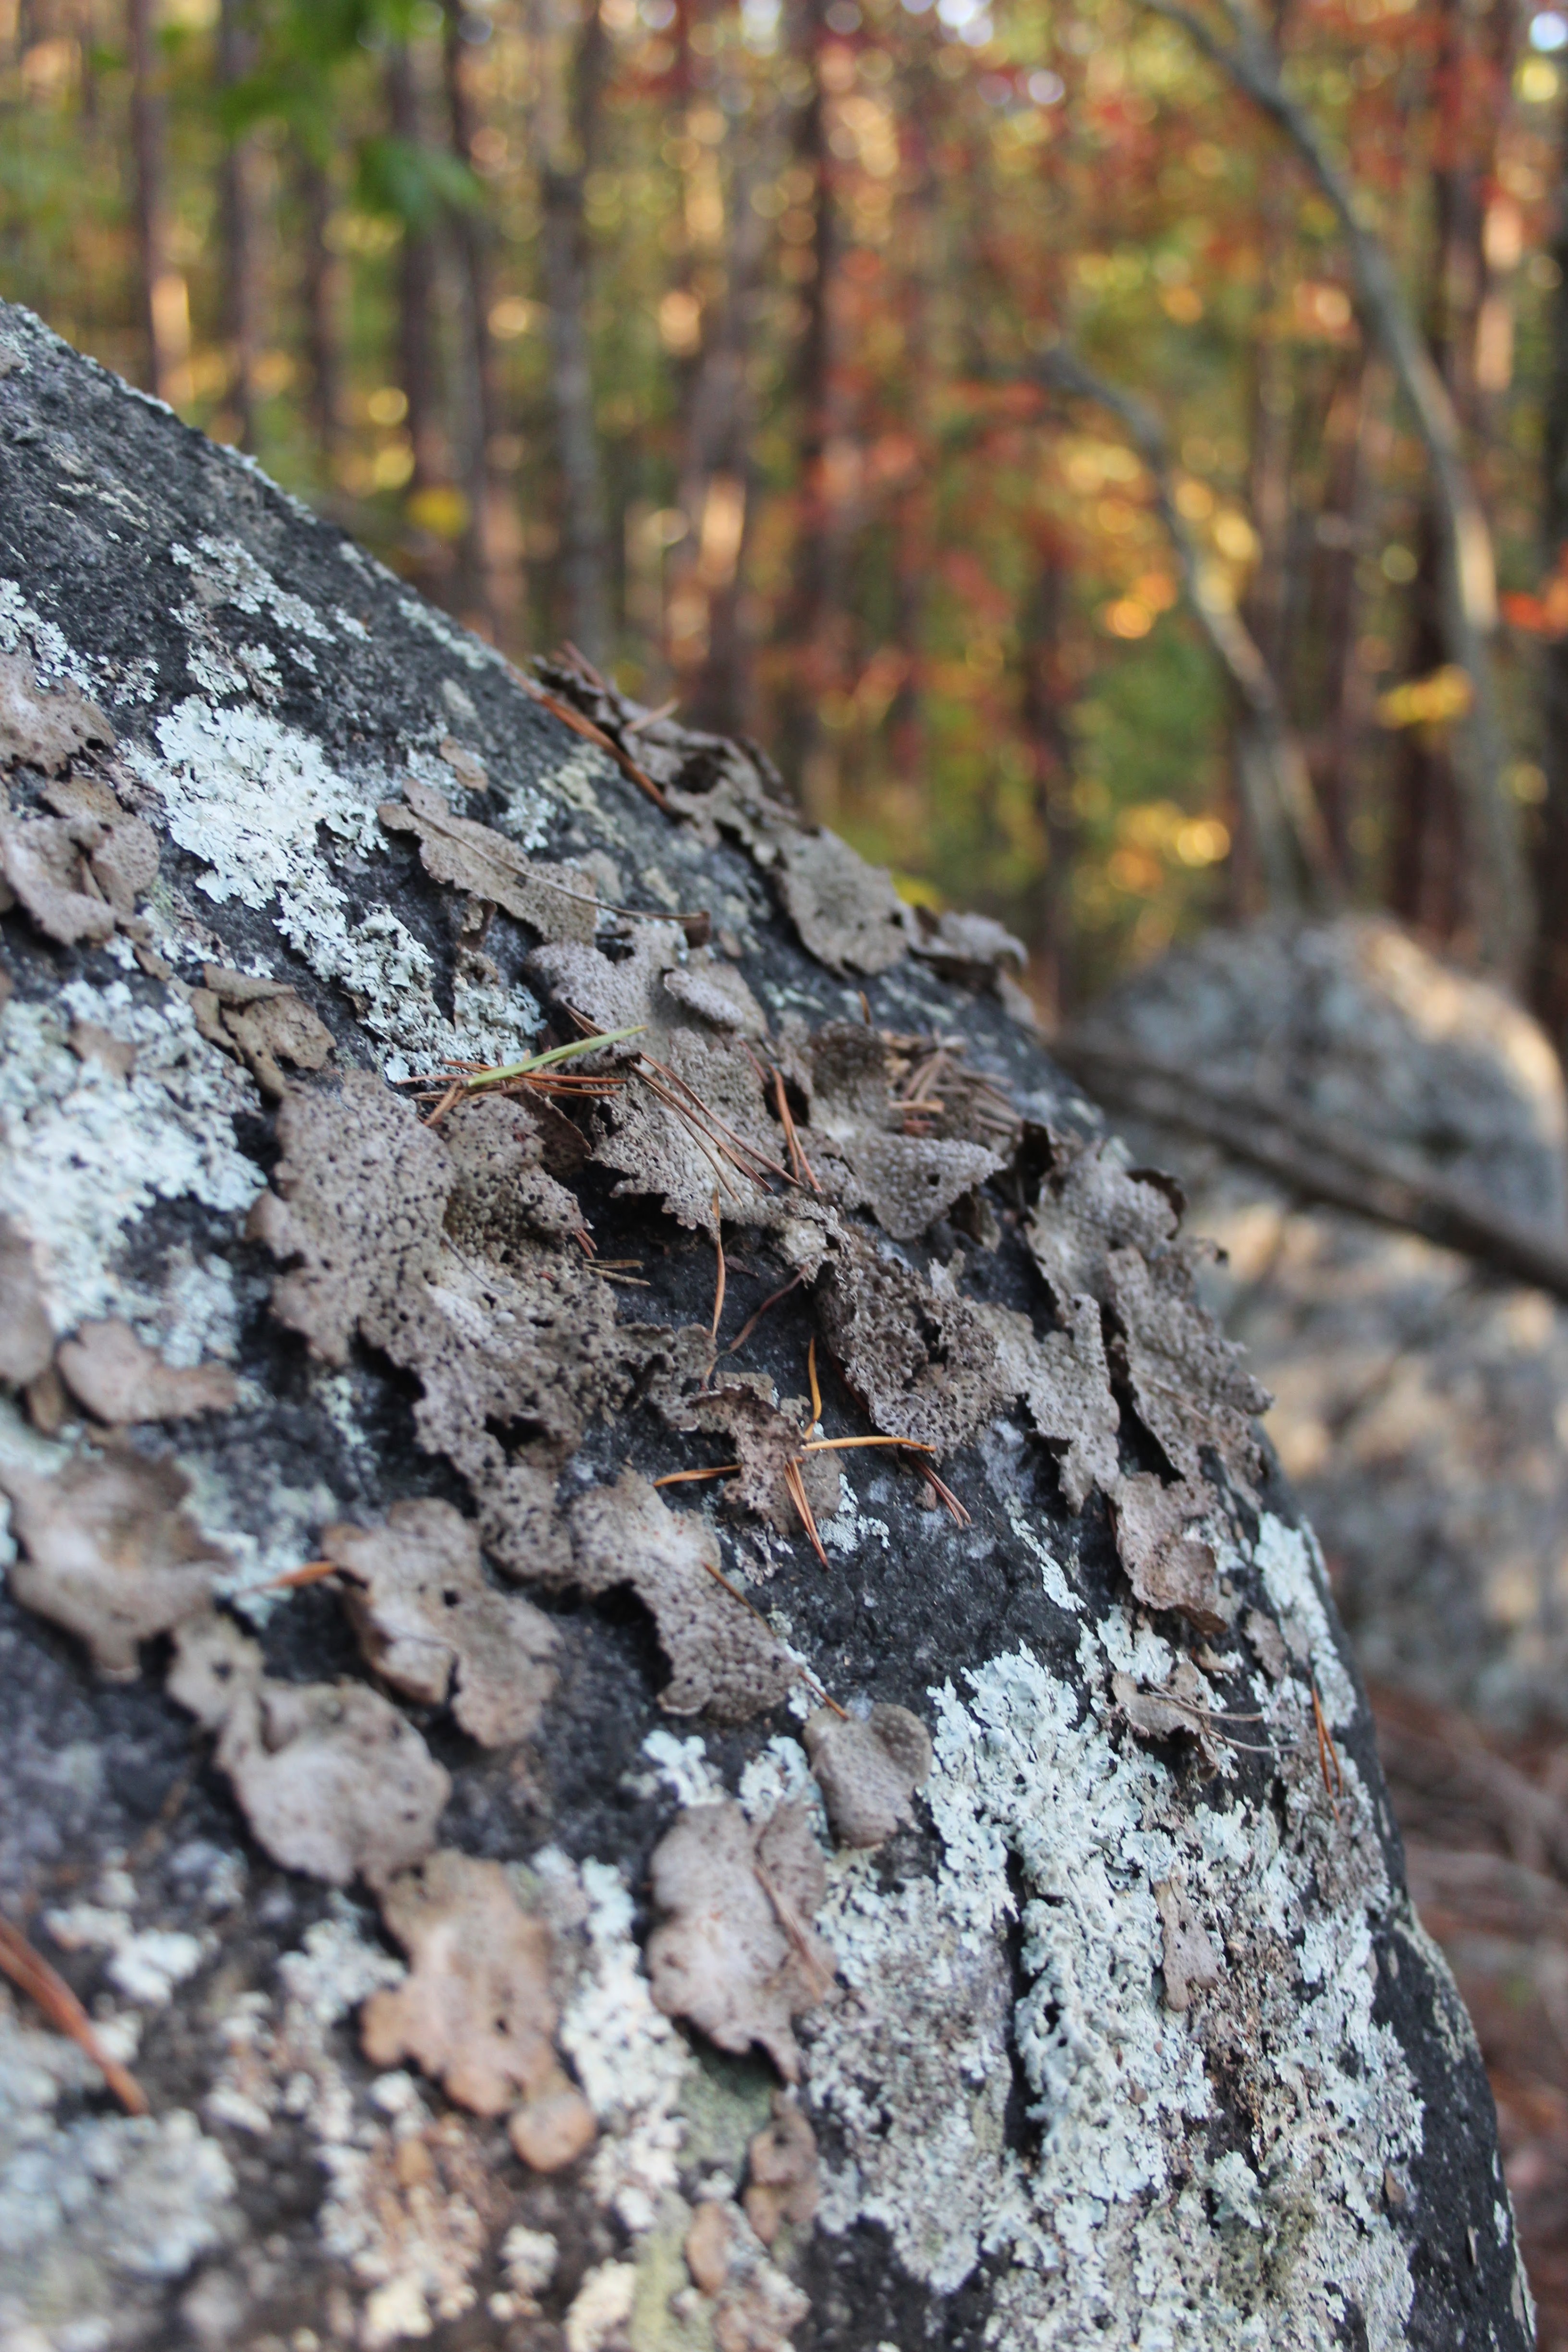
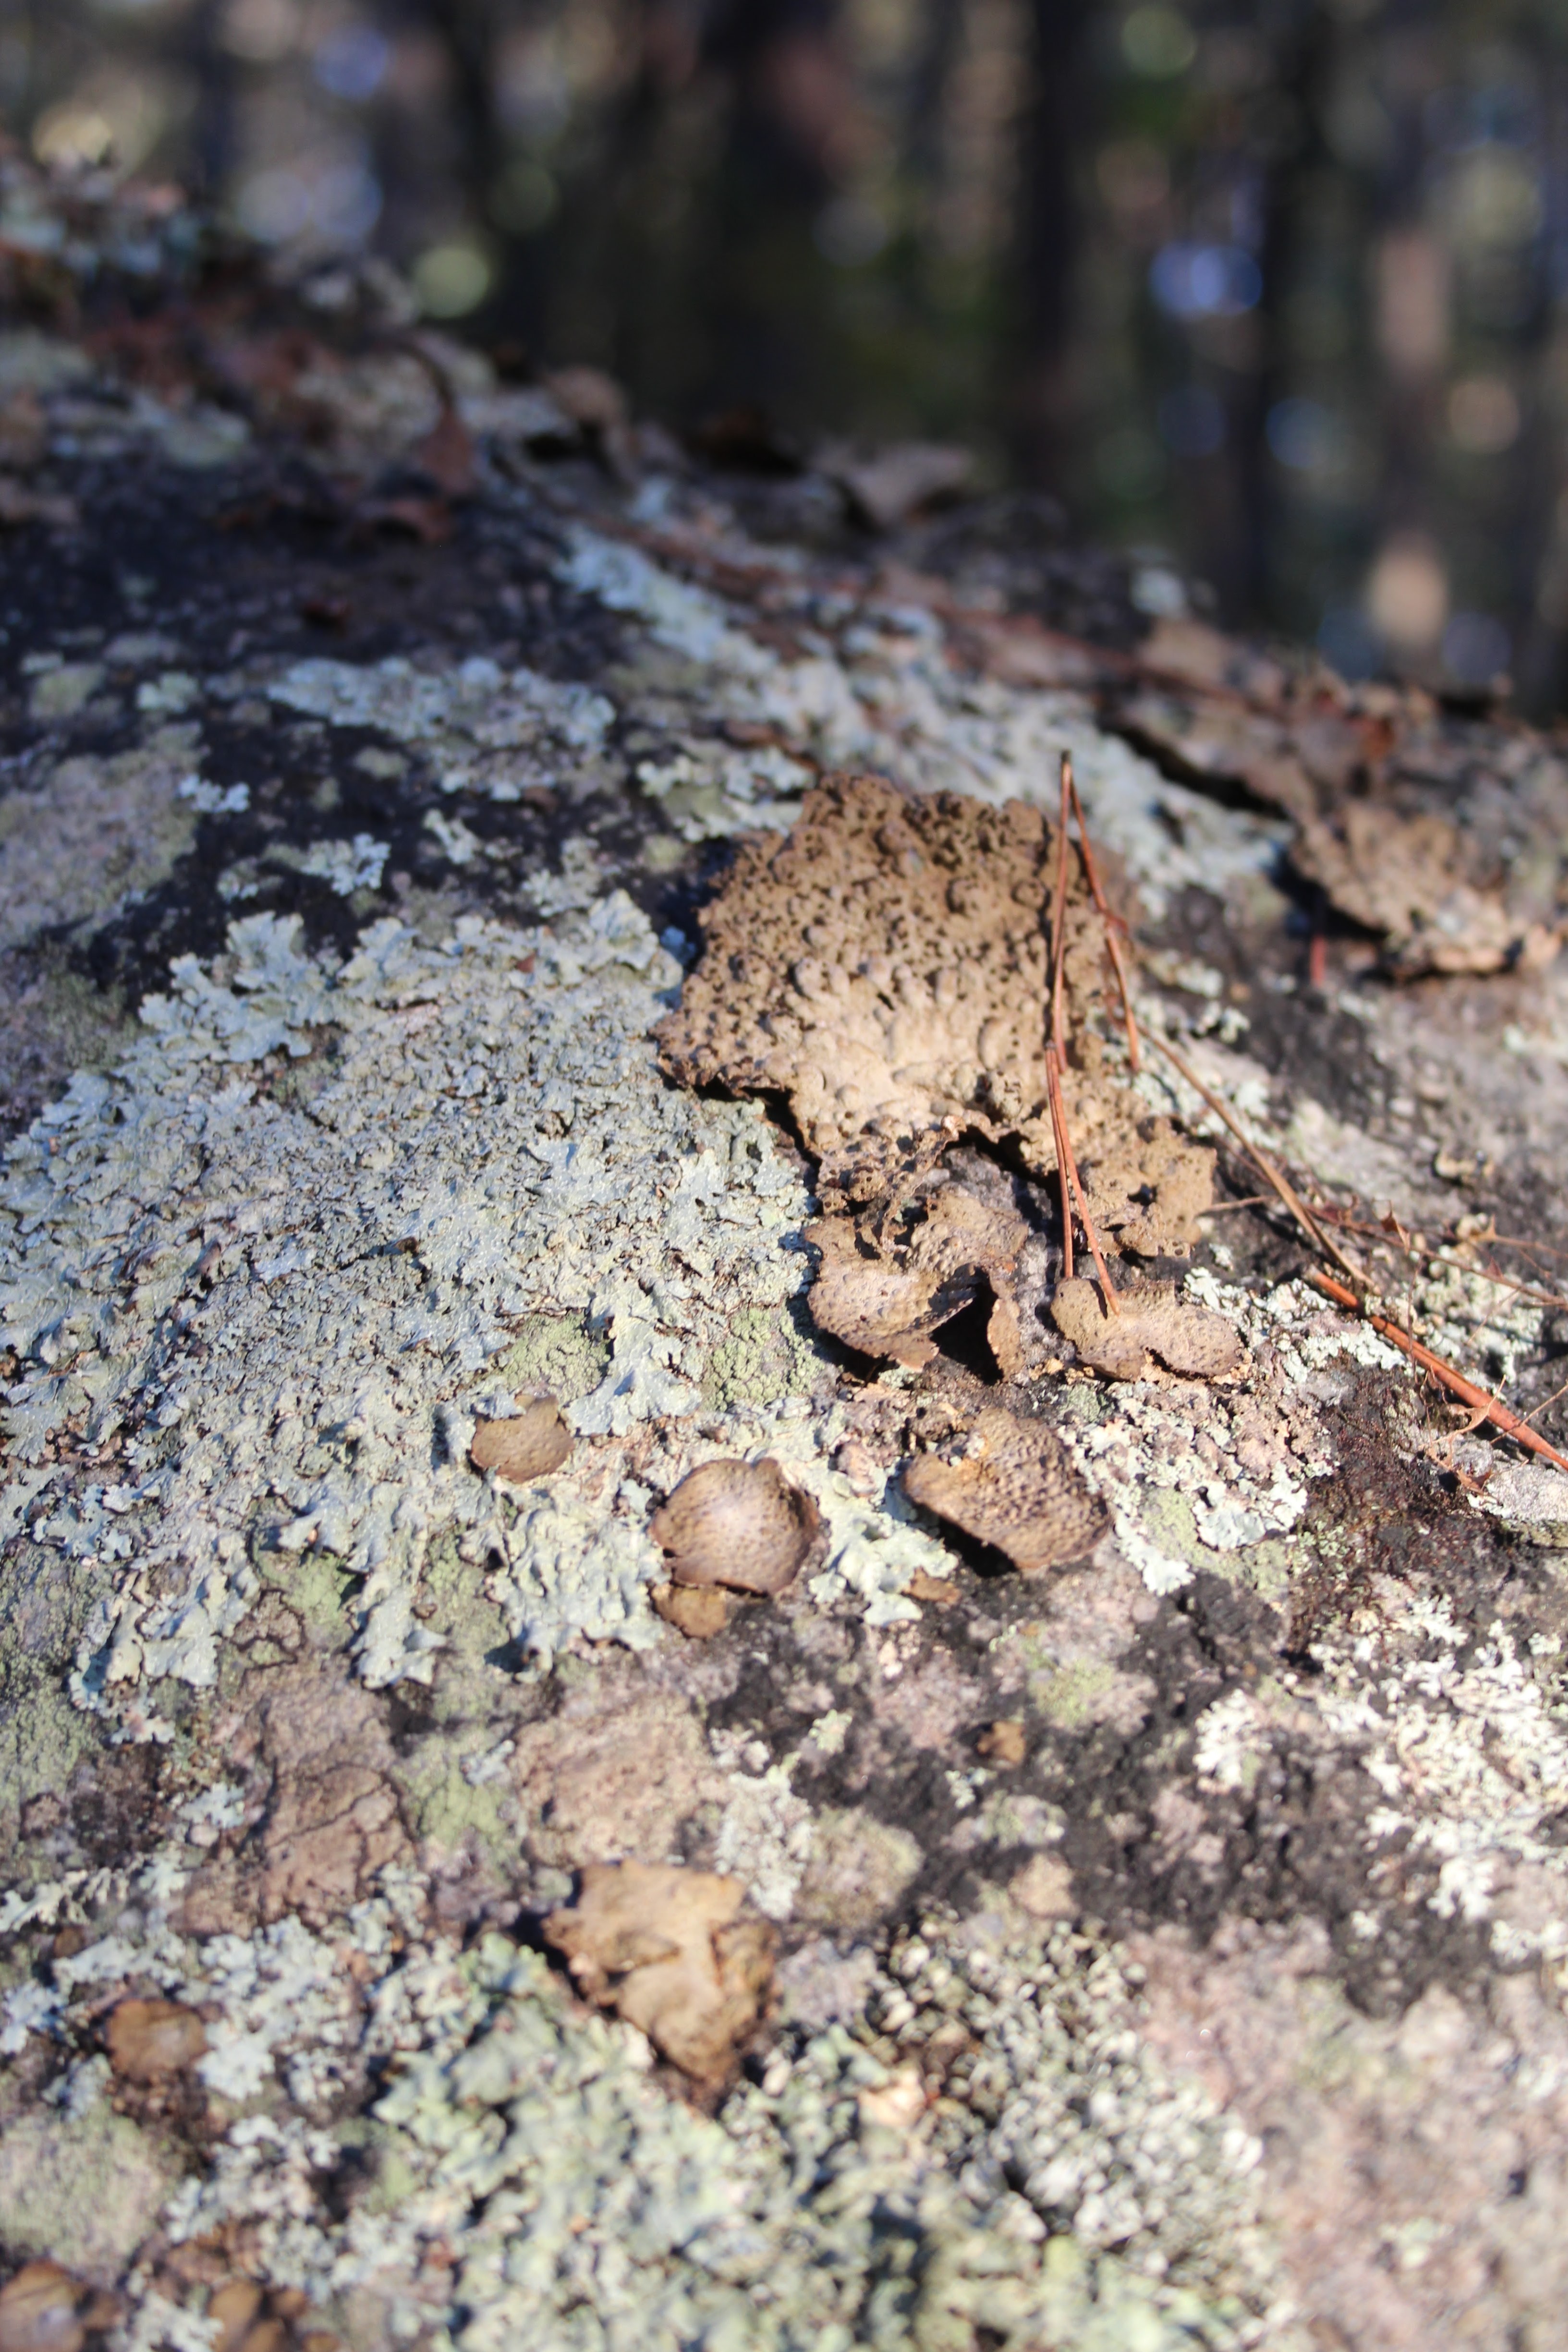
A handful of umbilicaria pepulosa (pictured below) – this type of lichen is abundant on boulders, and there are several variations. For results closest to mine, try to find this lichen. You may achieve different results with another variation, but that is part of the fun of natural dyeing!
Before you get started, I want to include a note on ethics and lichen dyes. Unlike our marigold tutorial, in which I grew and harvested my own plants, lichen dyeing requires you to search public and/or forested land. Be considerate and mindful of your impact on the land and how you may be disturbing the ecosystem. Do not collect more than you’ll need – a little goes a long way. Avoid scraping lichen from stones as much as possible as lichen is slow-growing and may not regenerate. I went out on a windy day over the weekend and found more than enough on the ground surrounding the boulders.
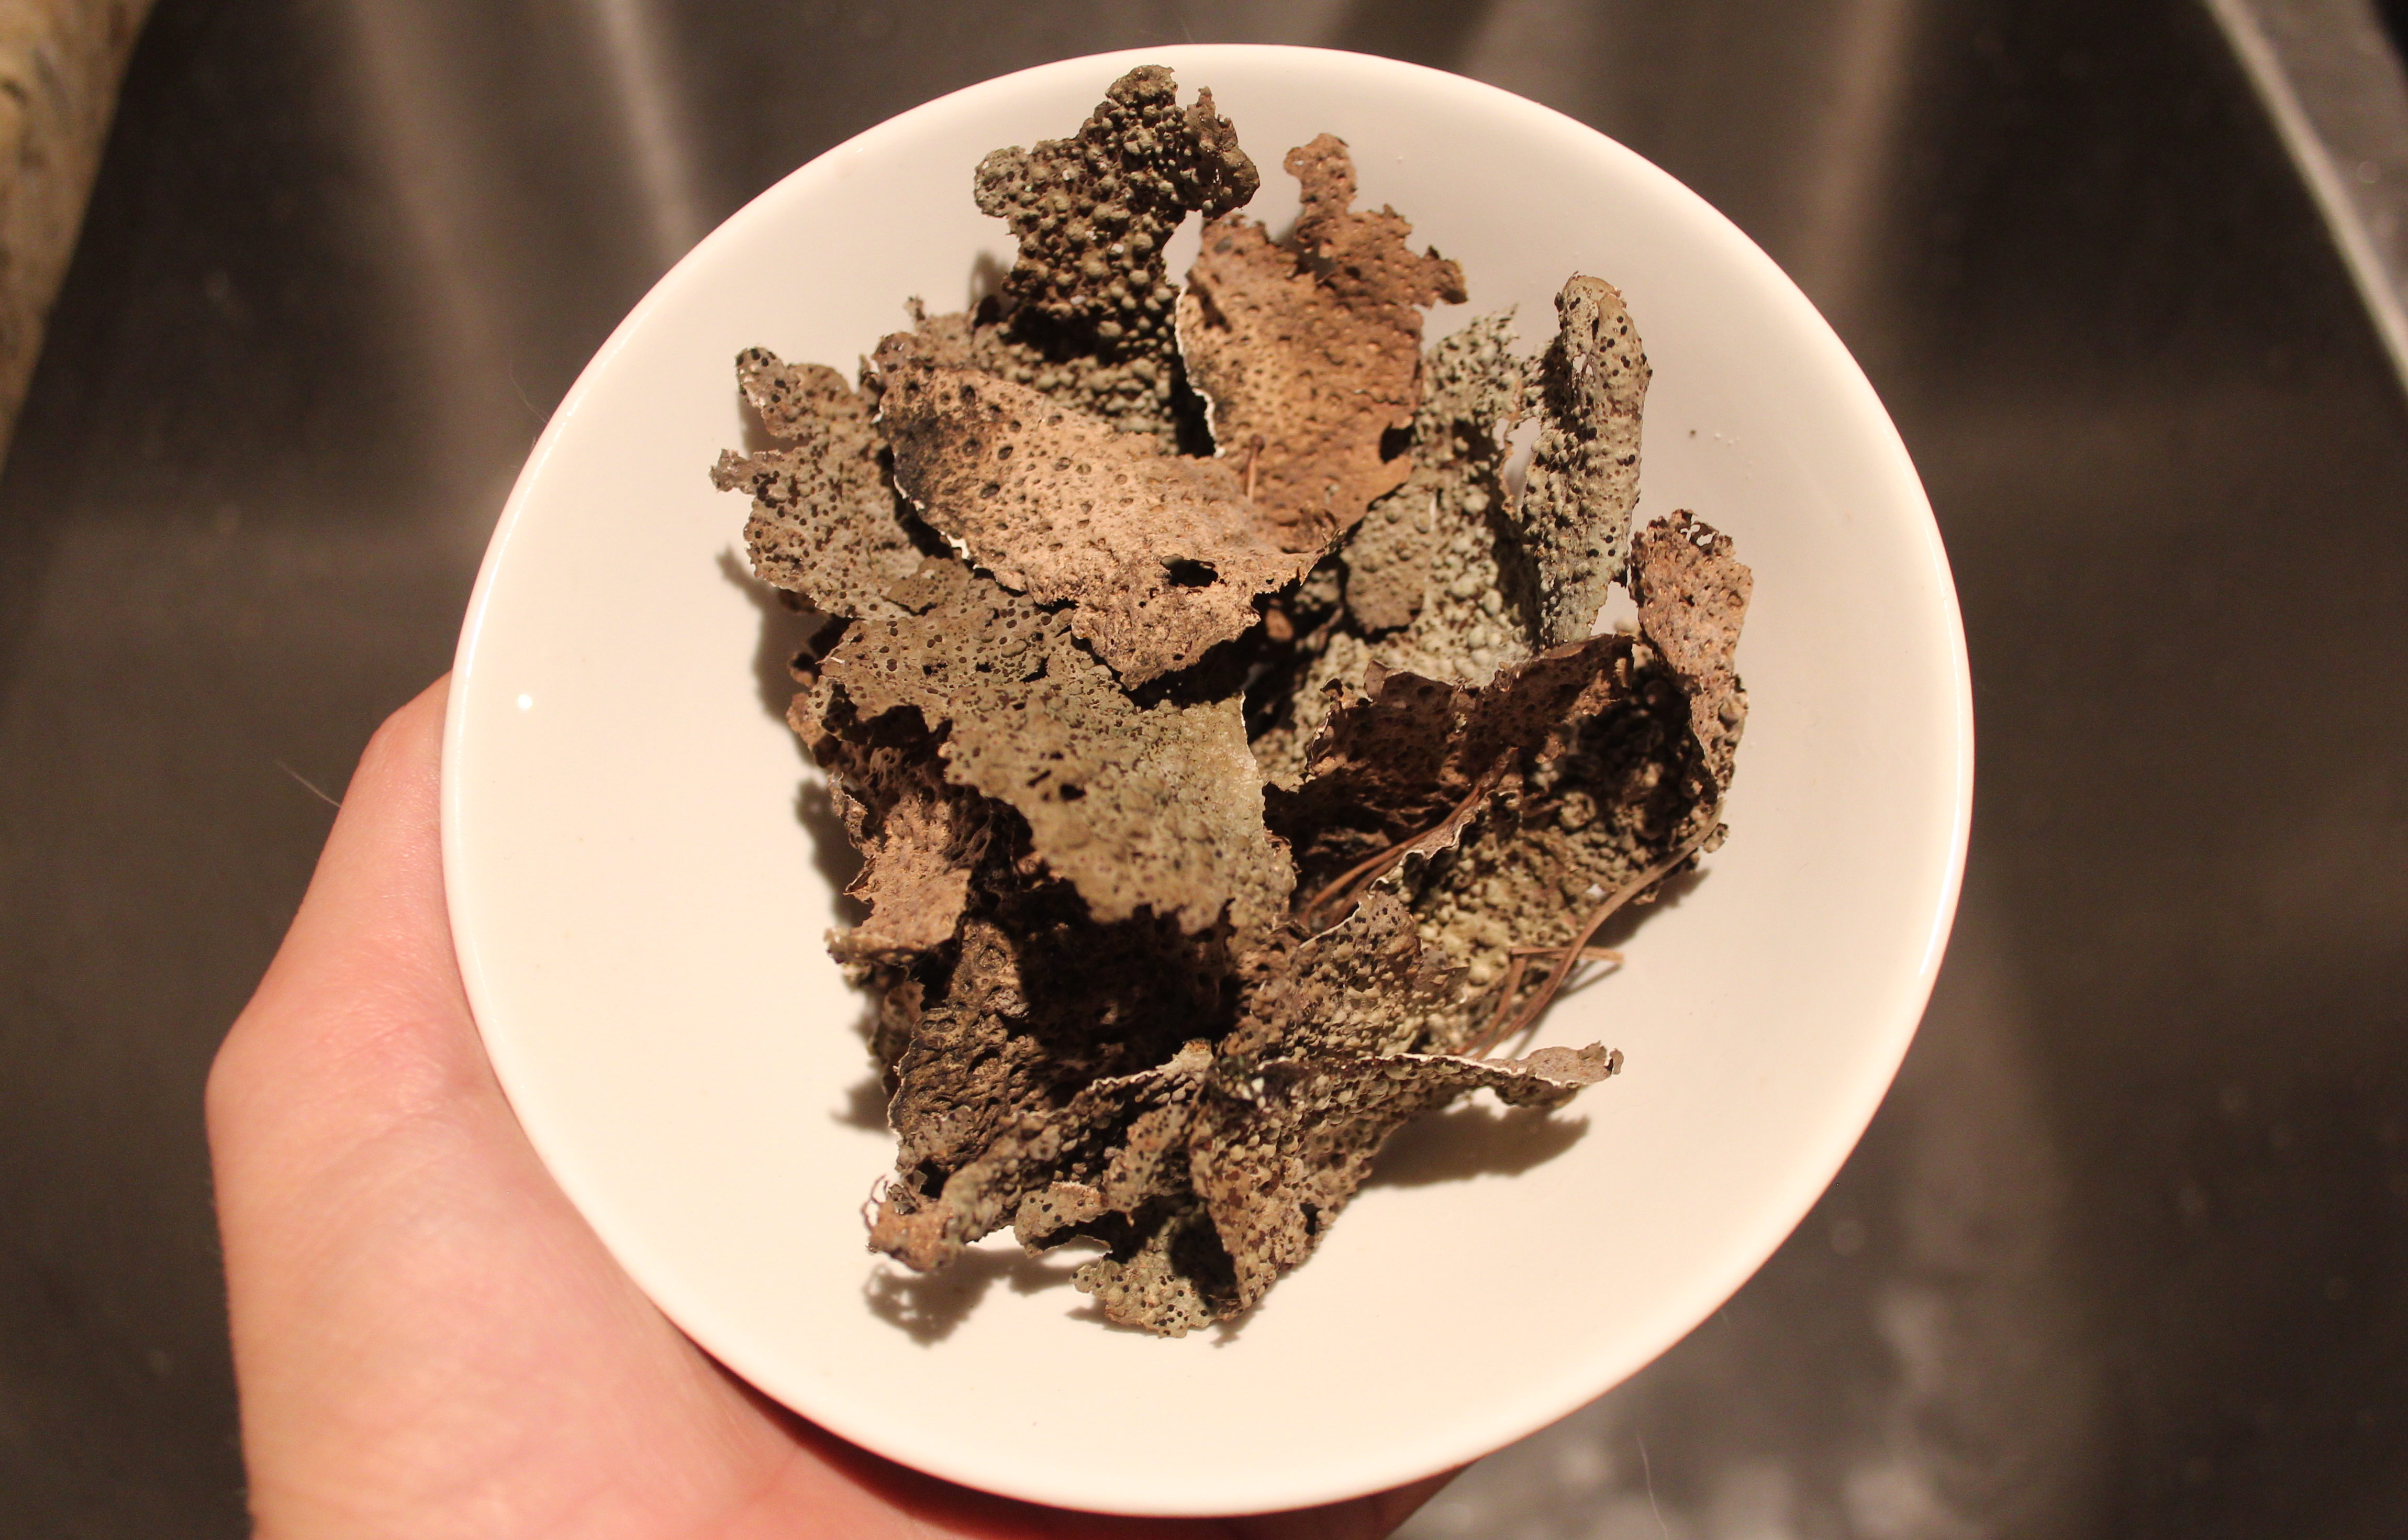
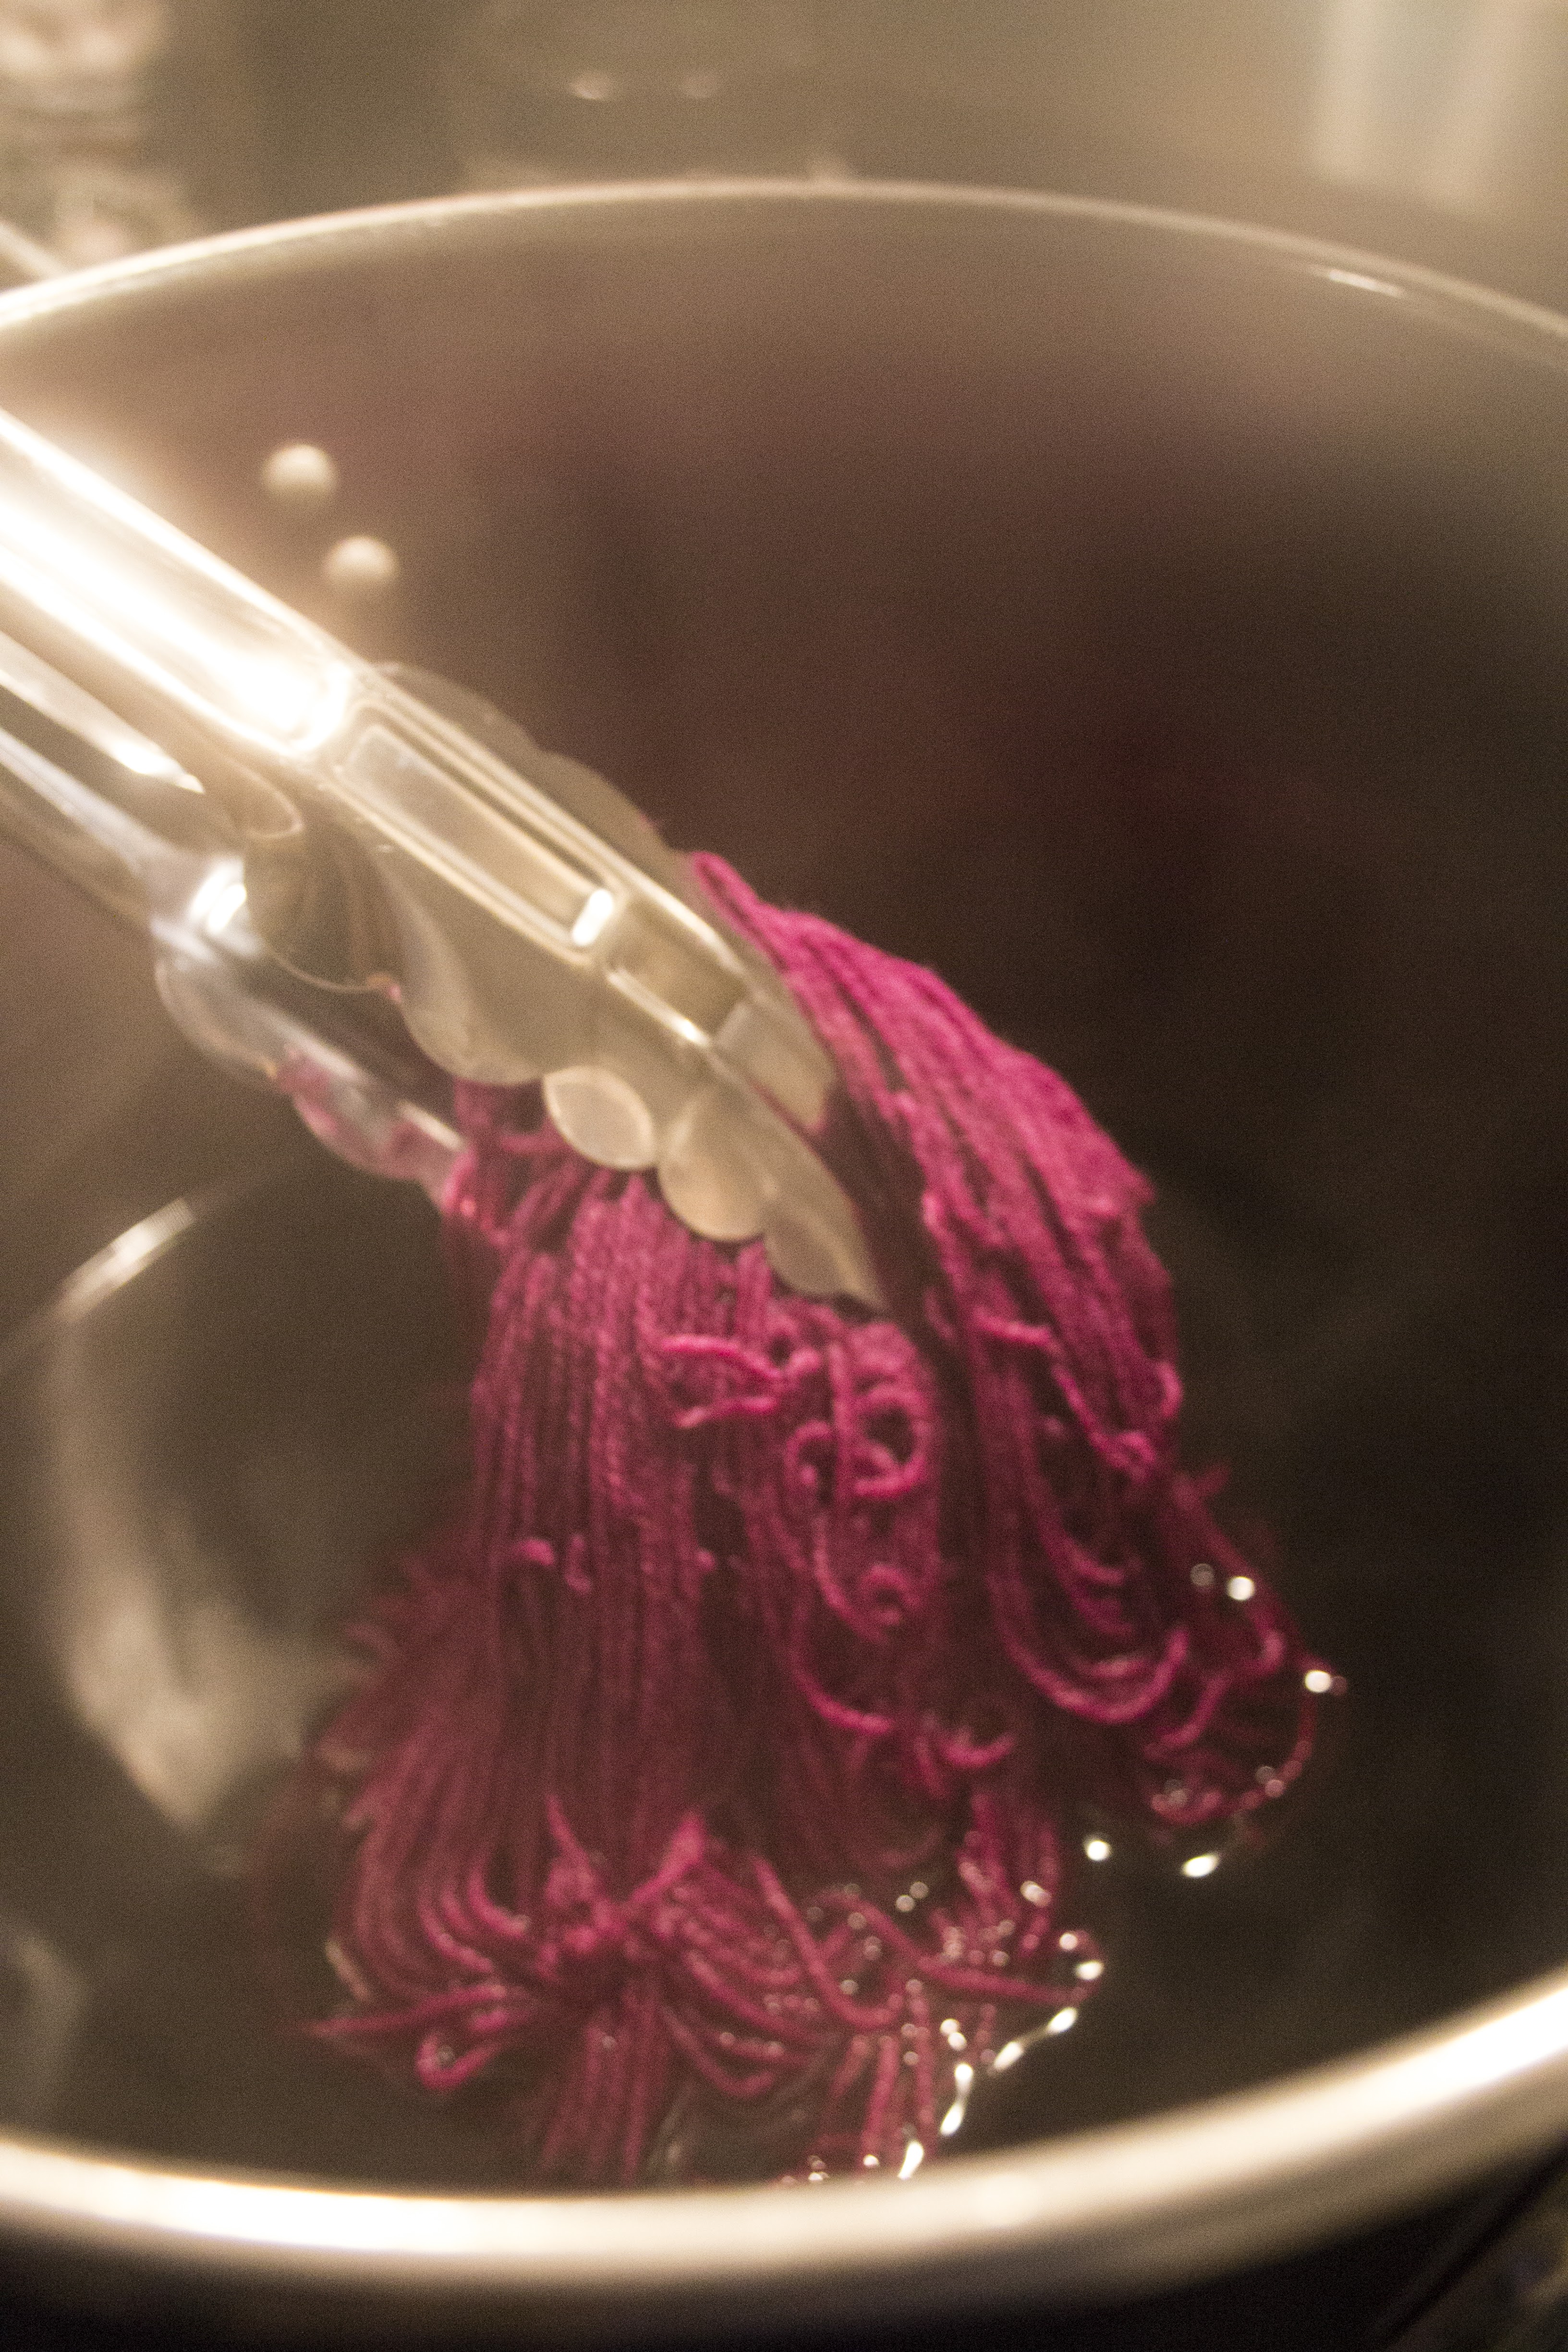
Once you have your lichen, you’re ready to go. To achieve a magenta dye from umbilicaria, an ammonia extraction is required. After you’ve collected your lichen, place your handful into a jar.
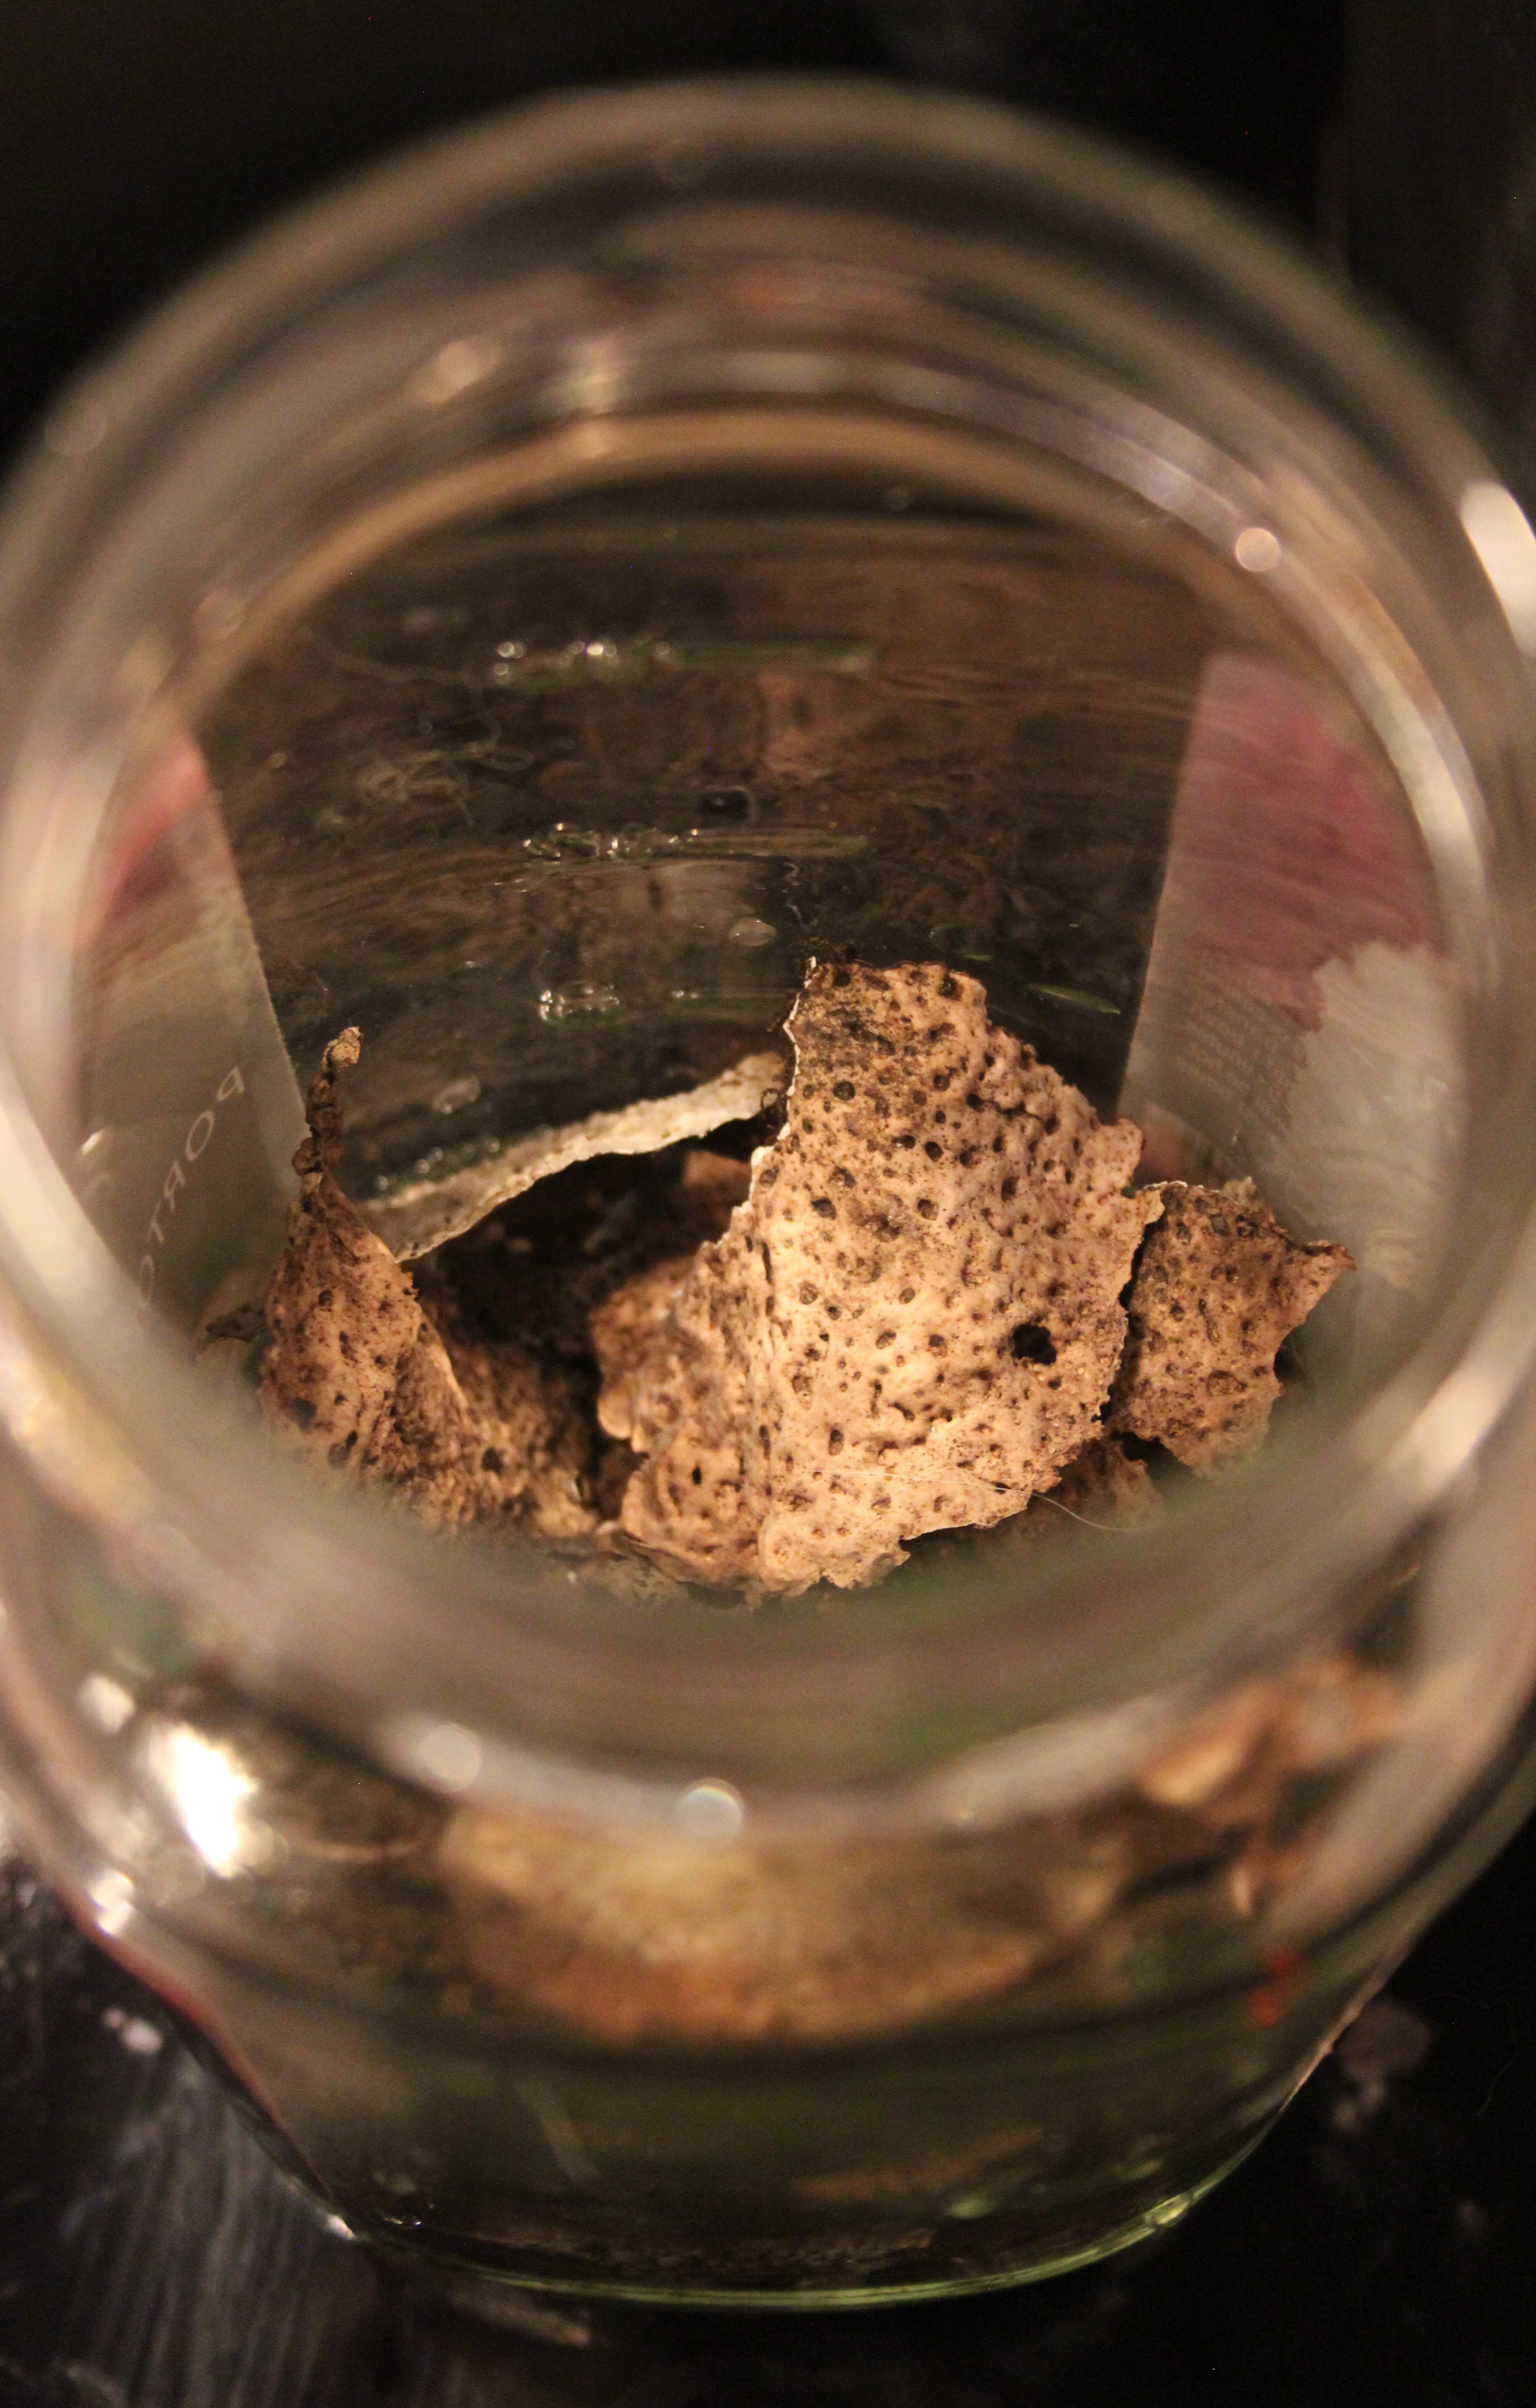
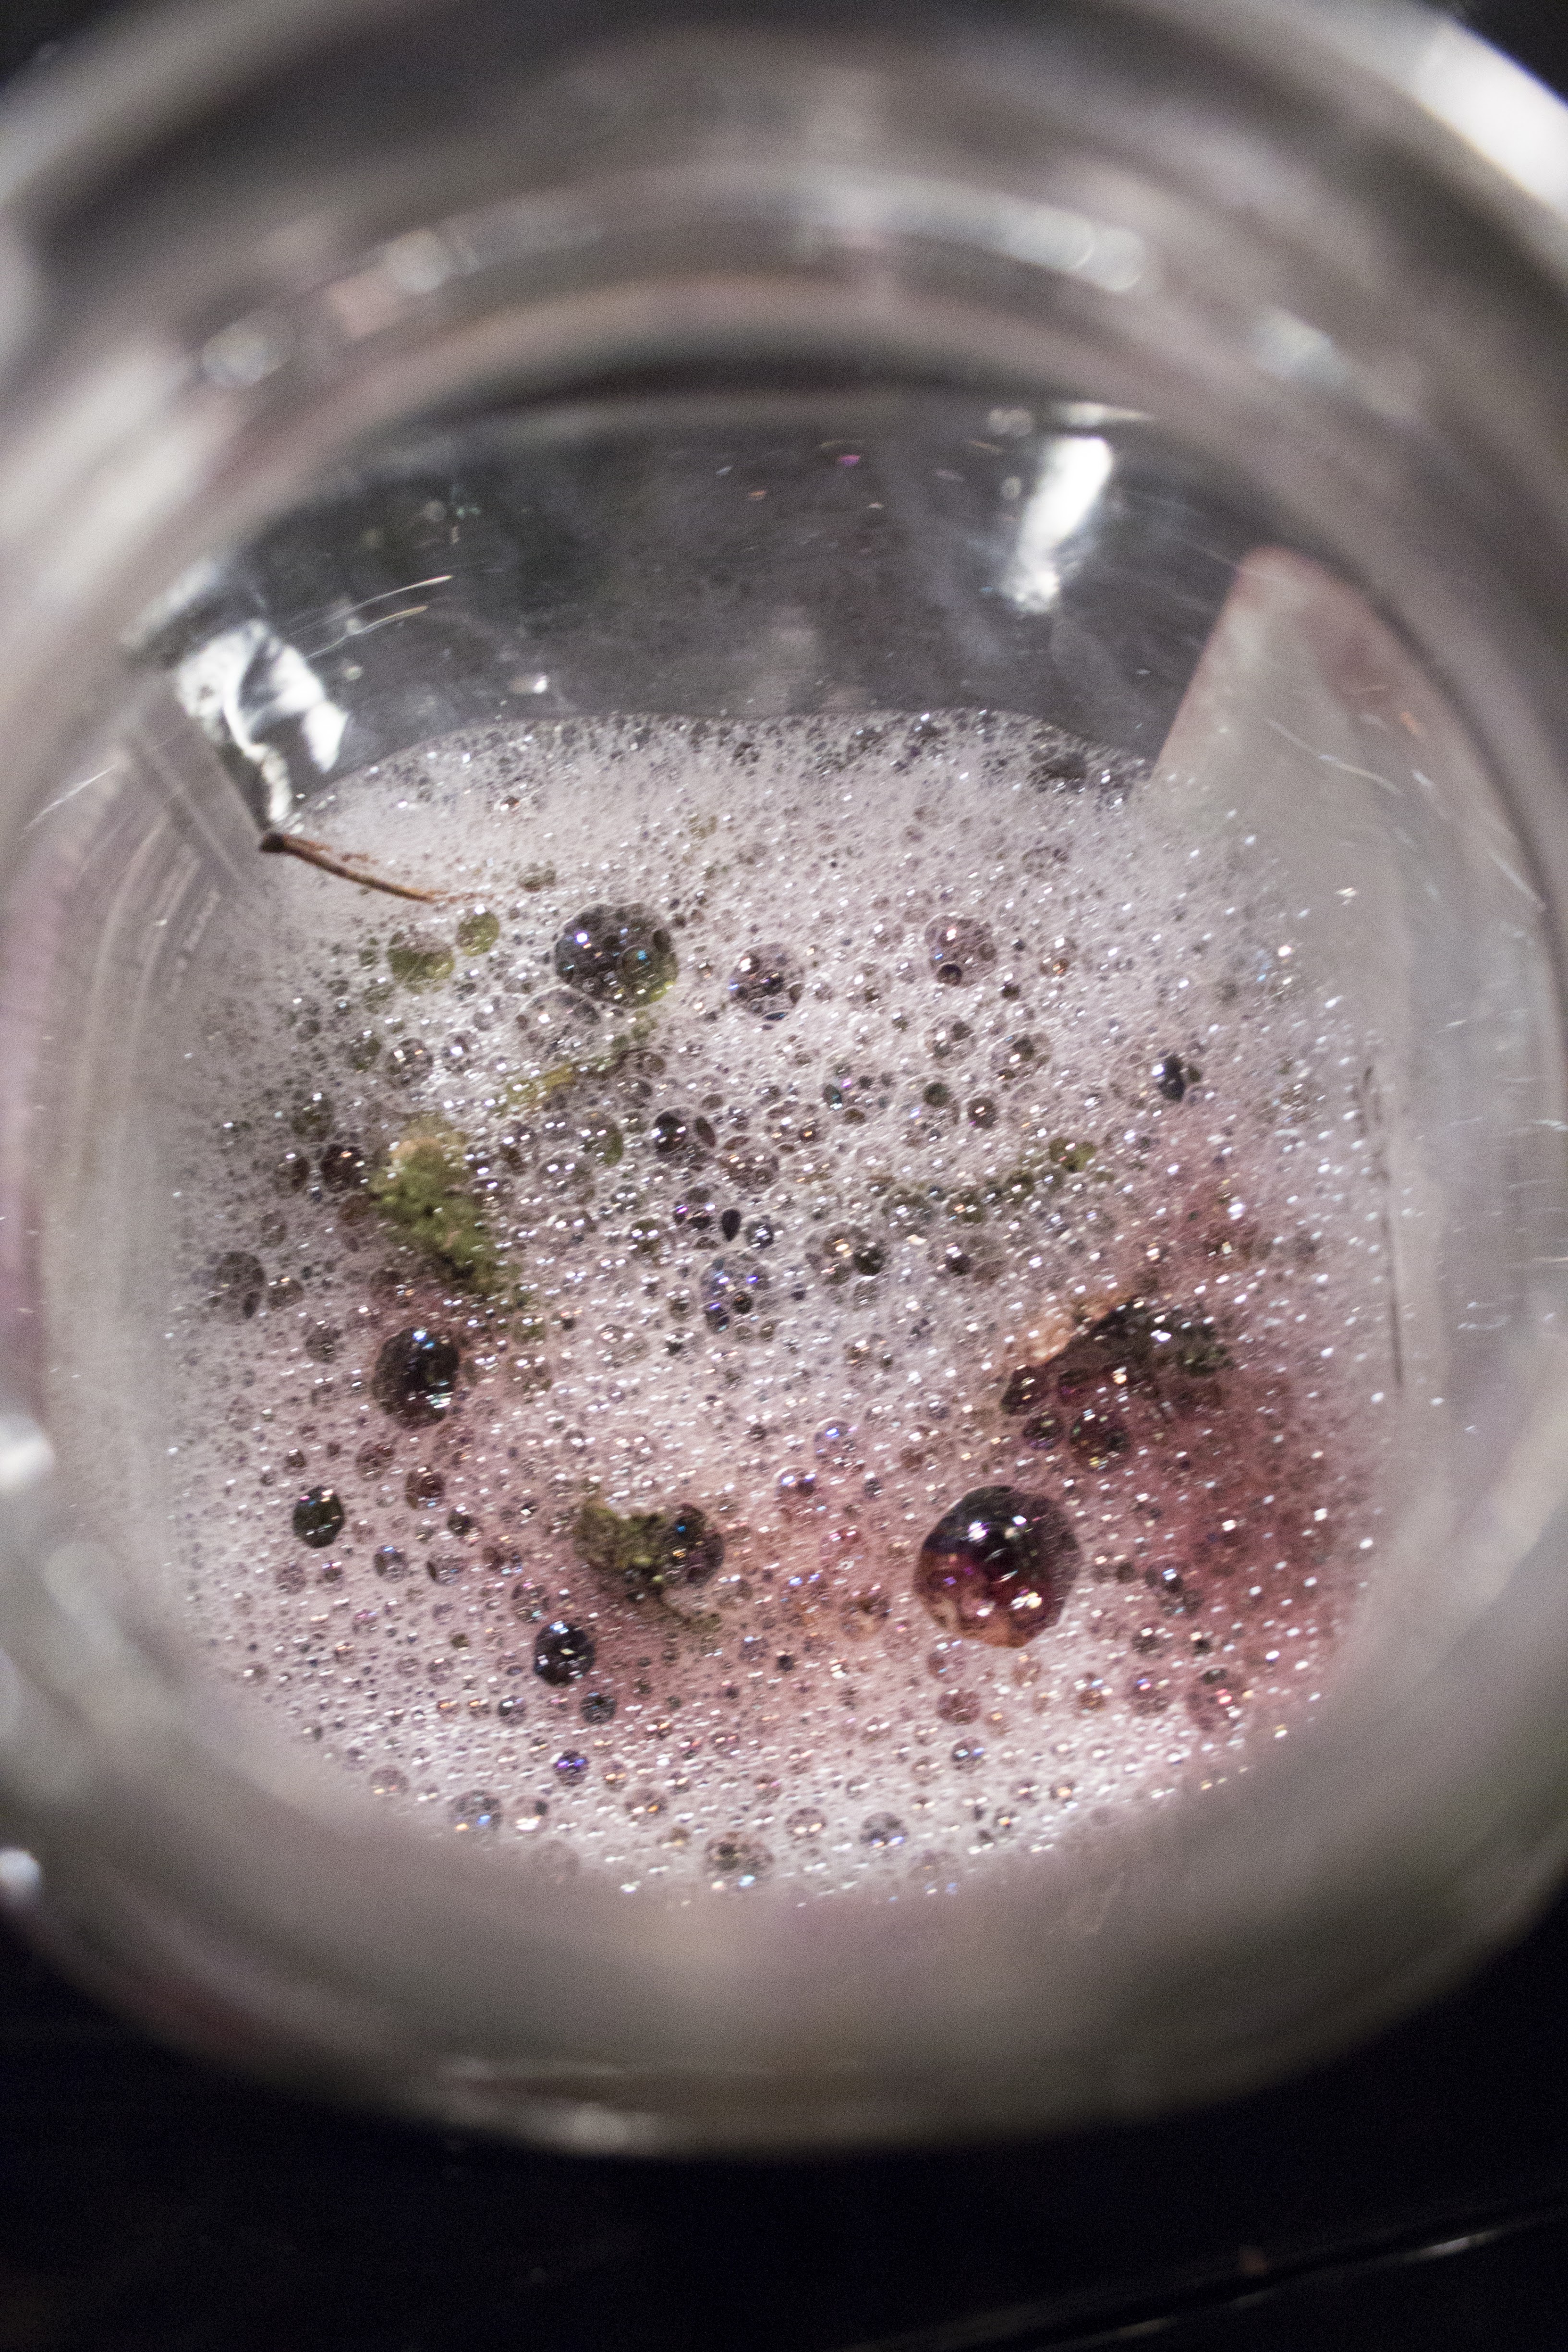
Next, create a 50/50 solution of water and ammonia. I’ve measured out 1 cup each. Pour the solution over the lichen, leaving about an inch of air at the top of the jar. You should notice the solution briefly change to a brilliant shade of red or purple that will fade to brown.
Notice the spot of color in the foam.
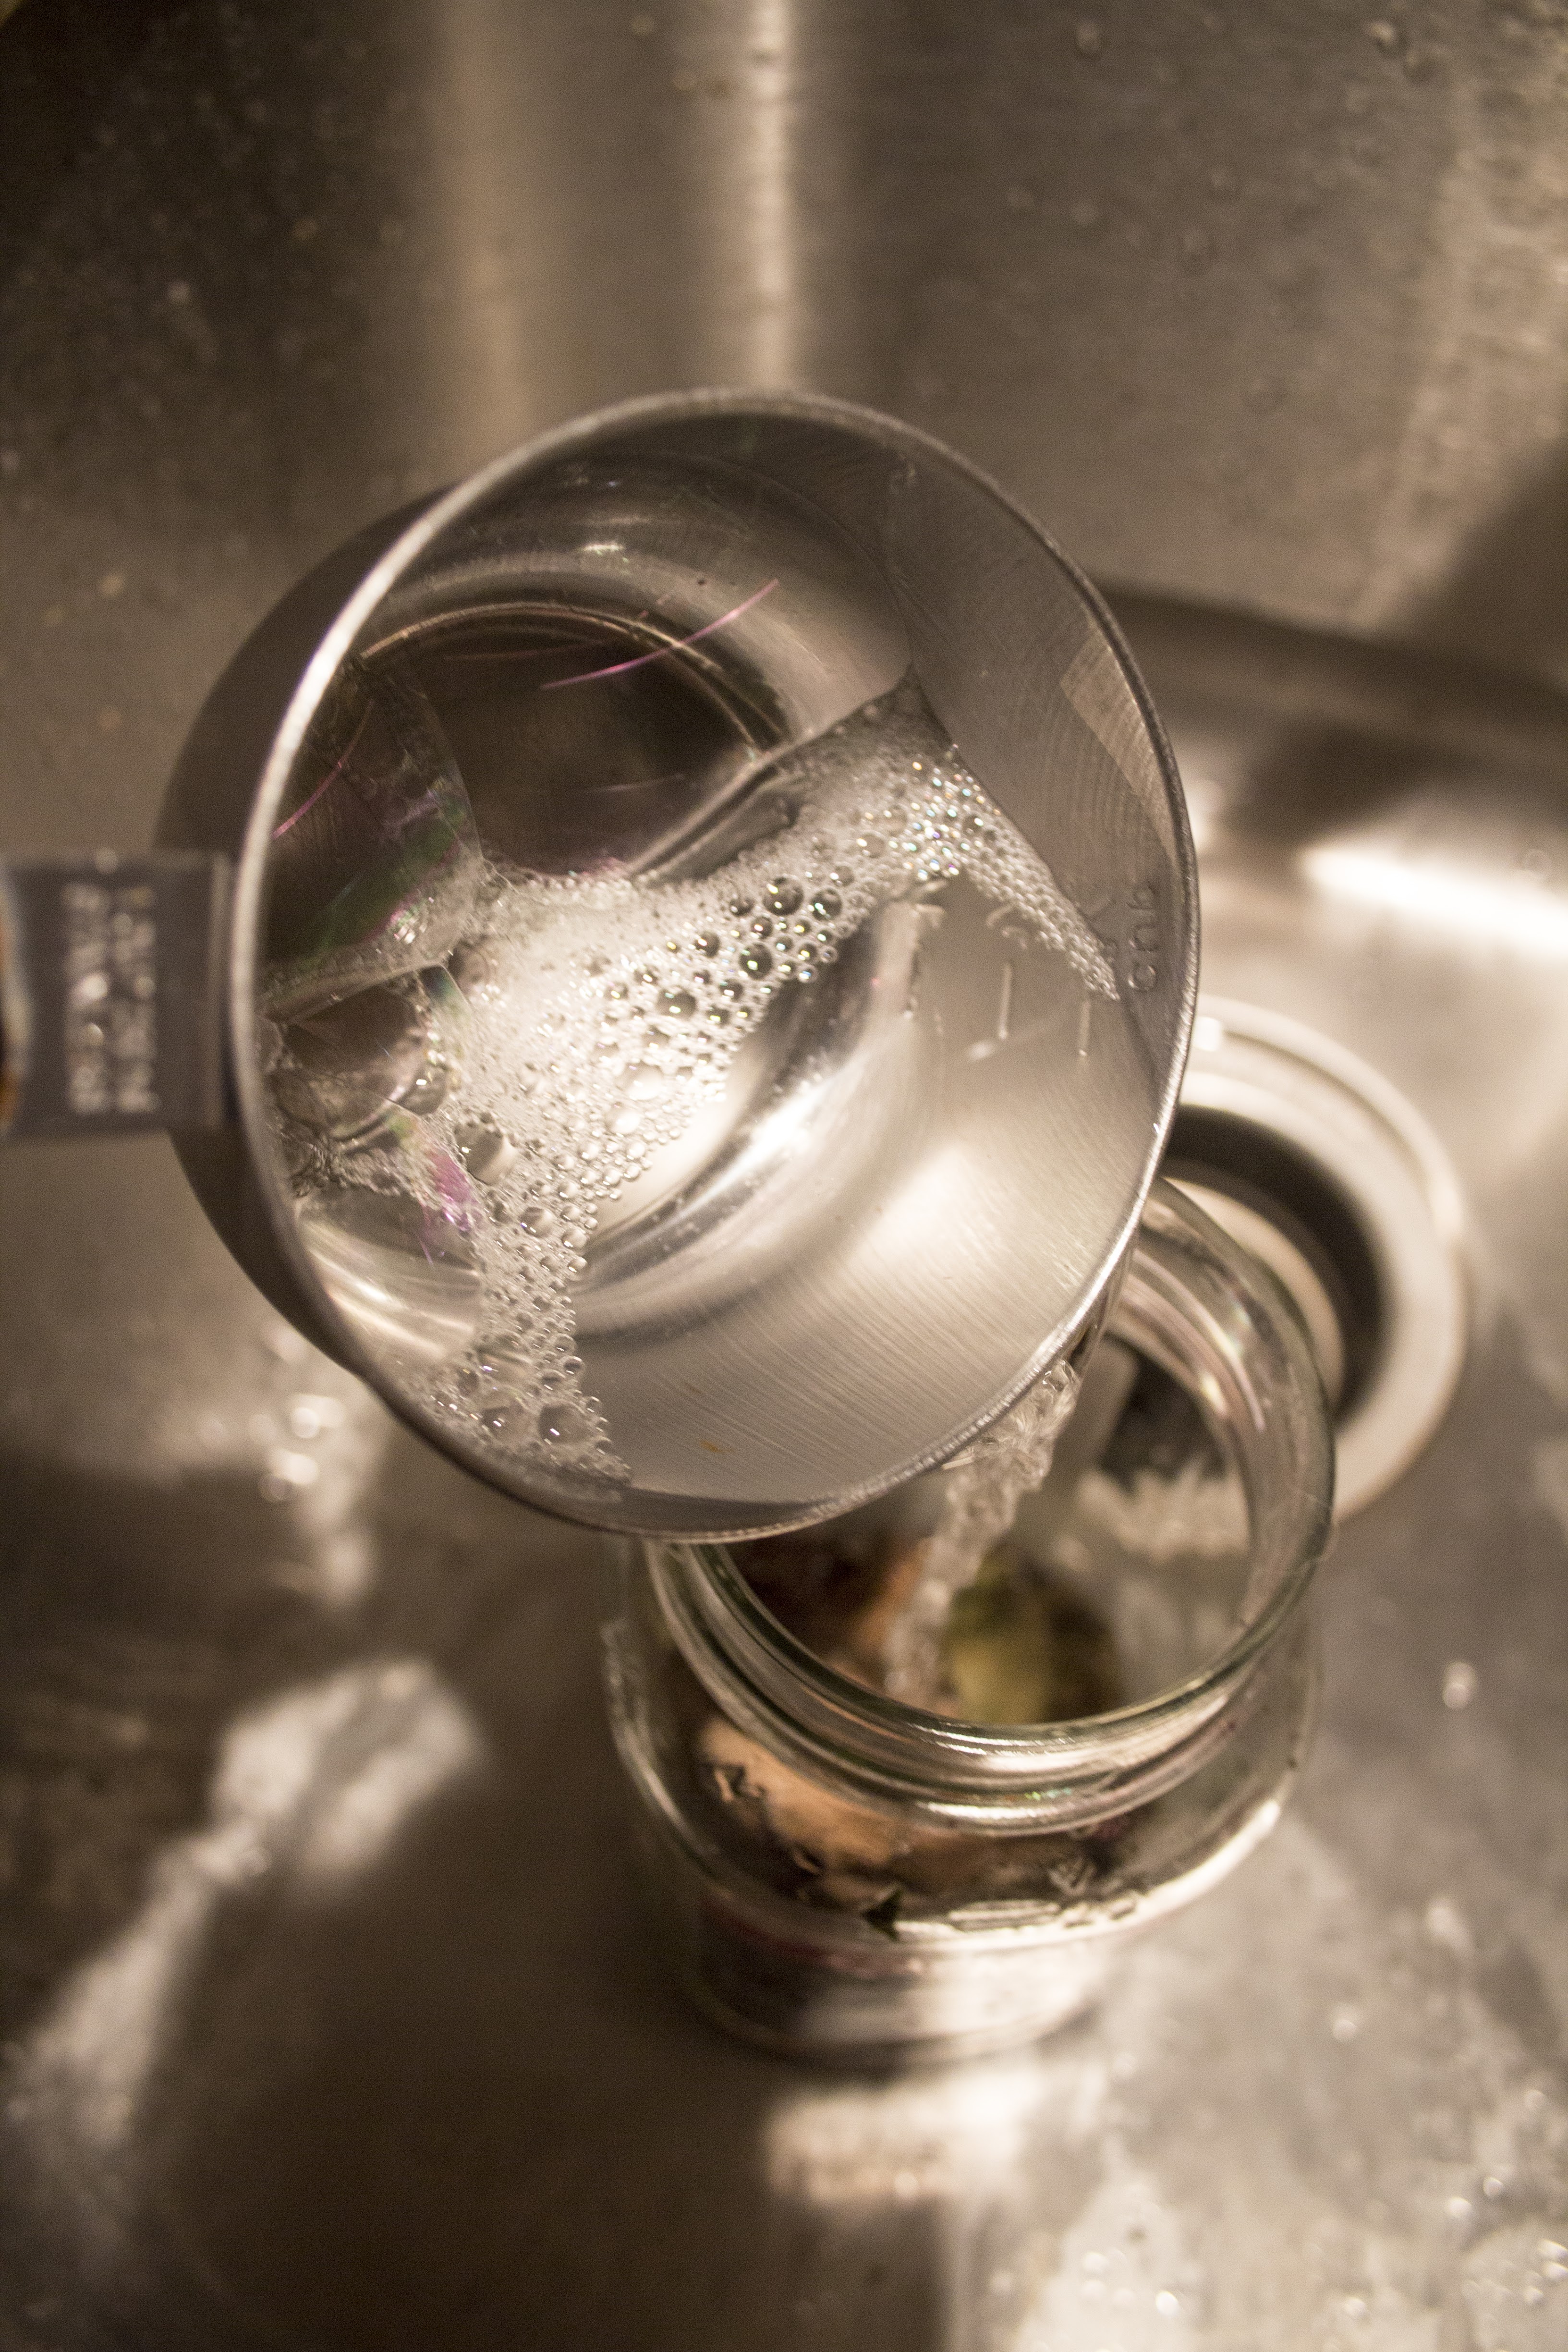
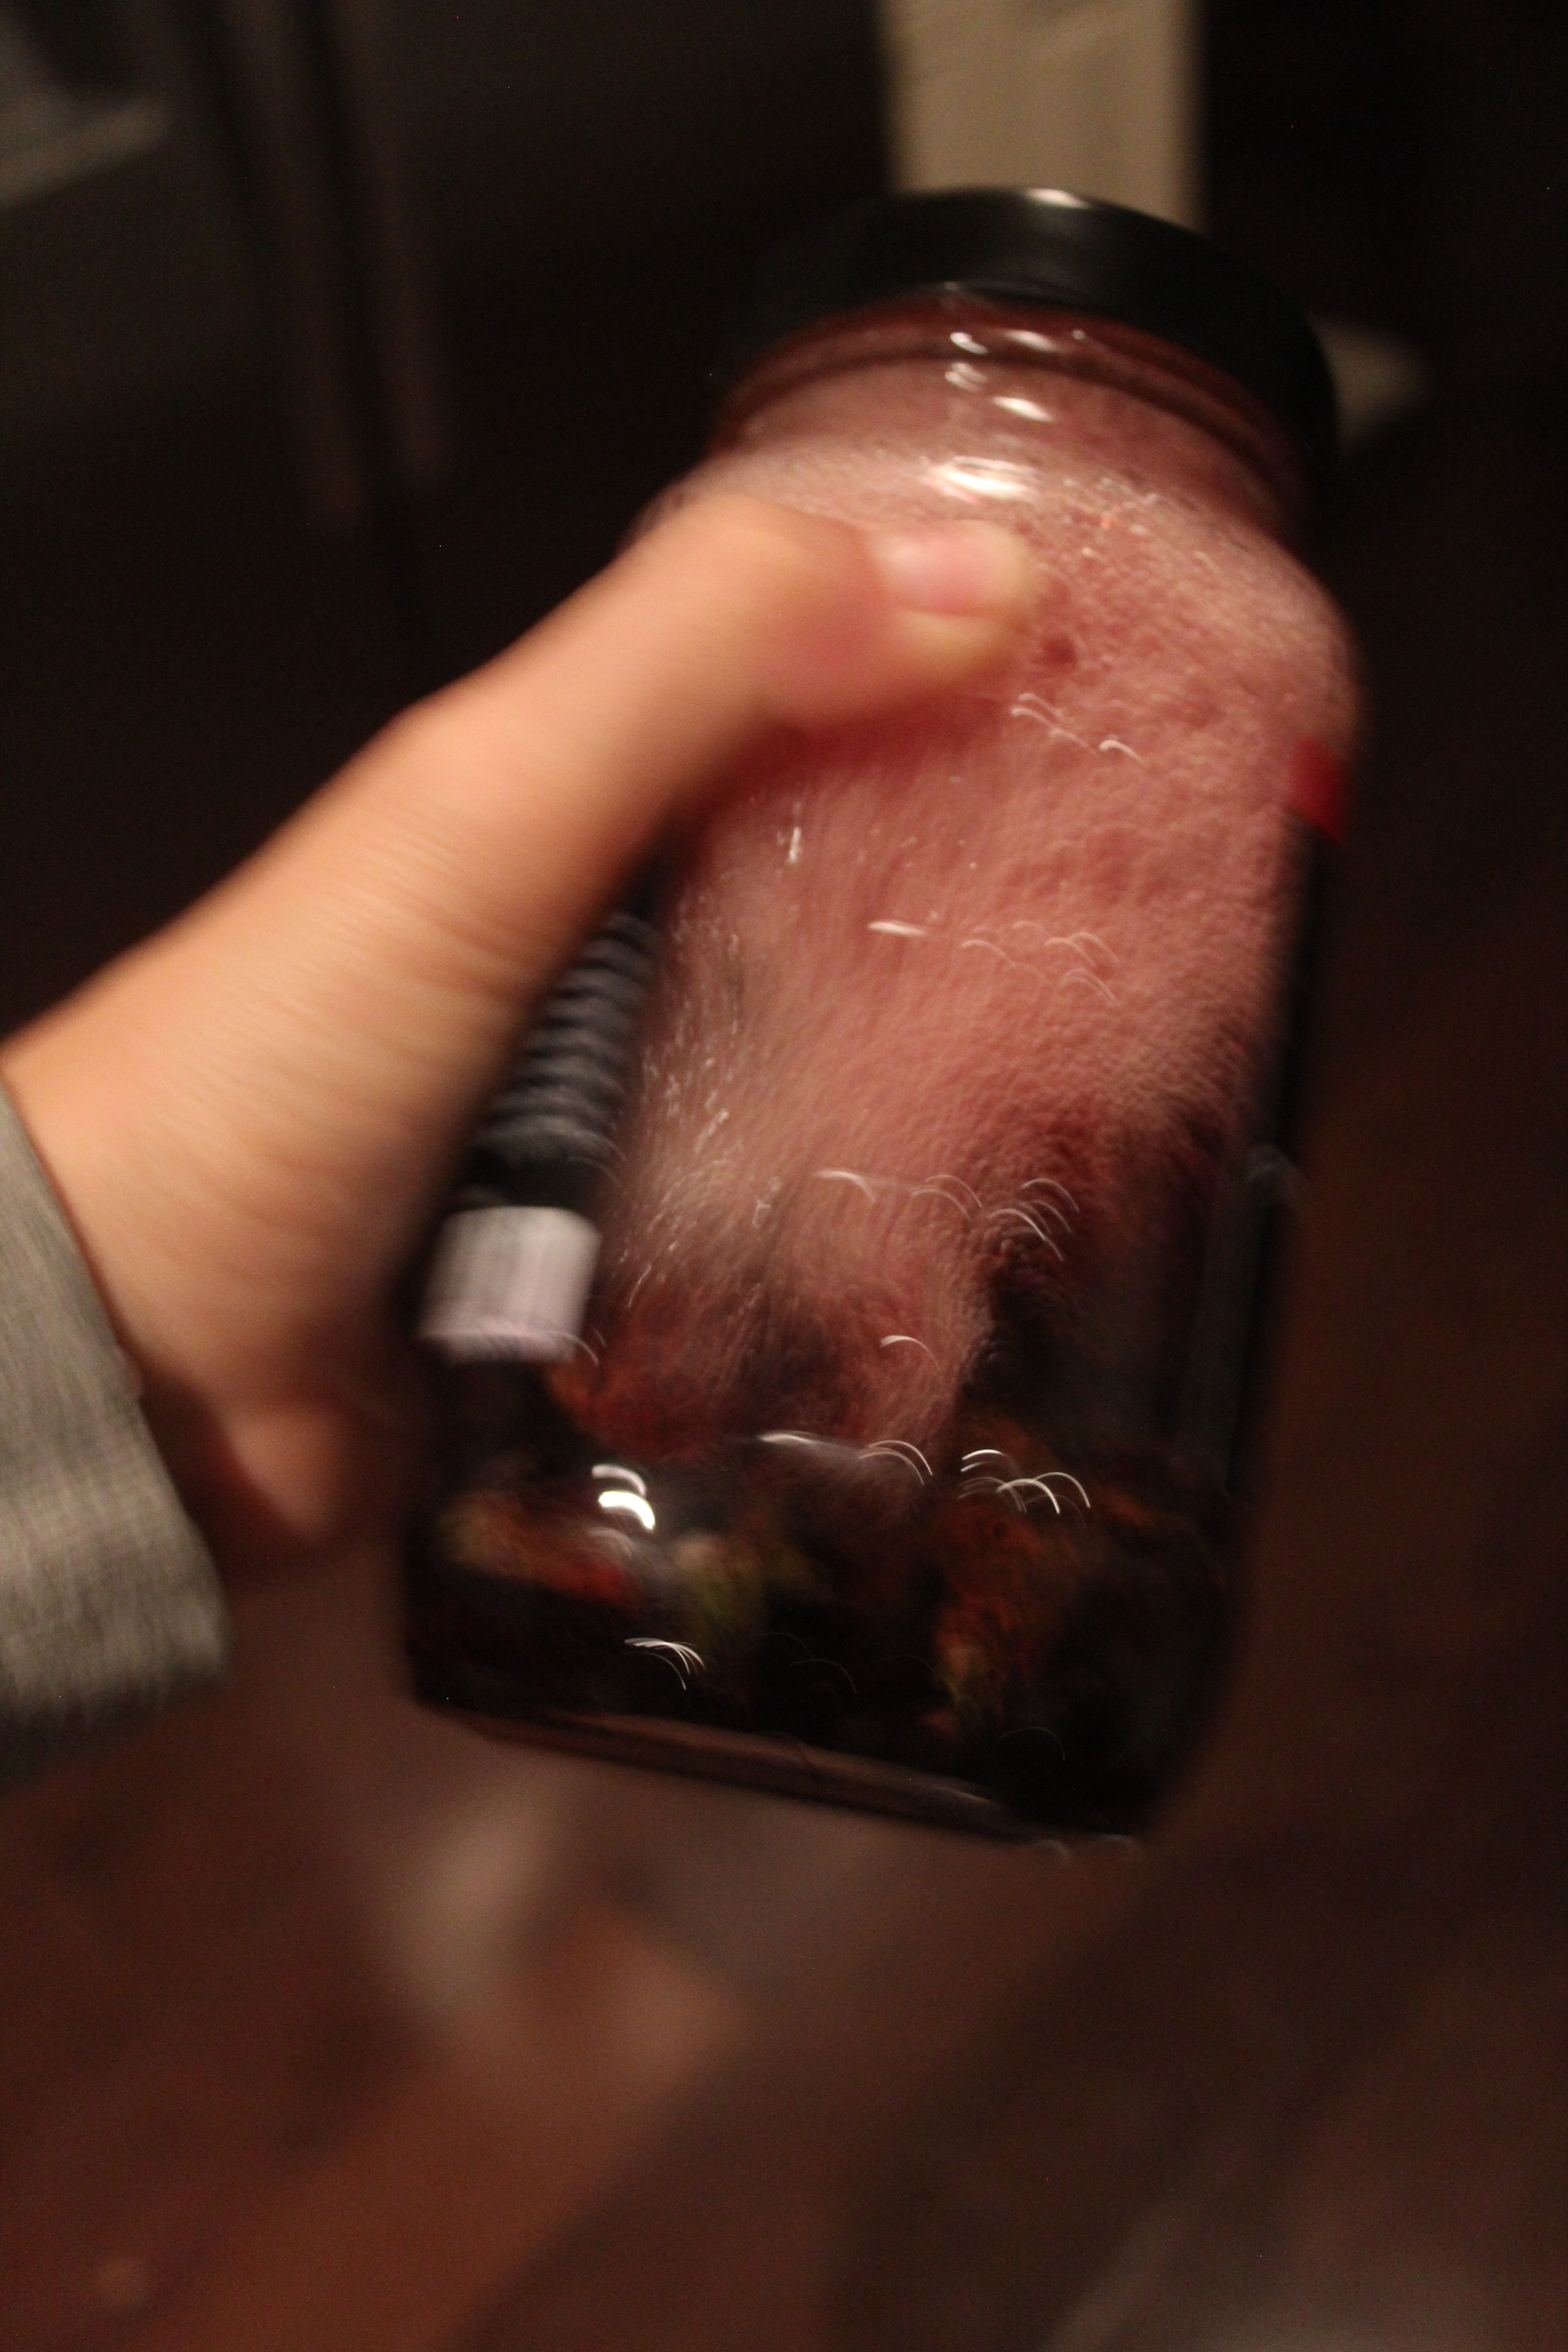
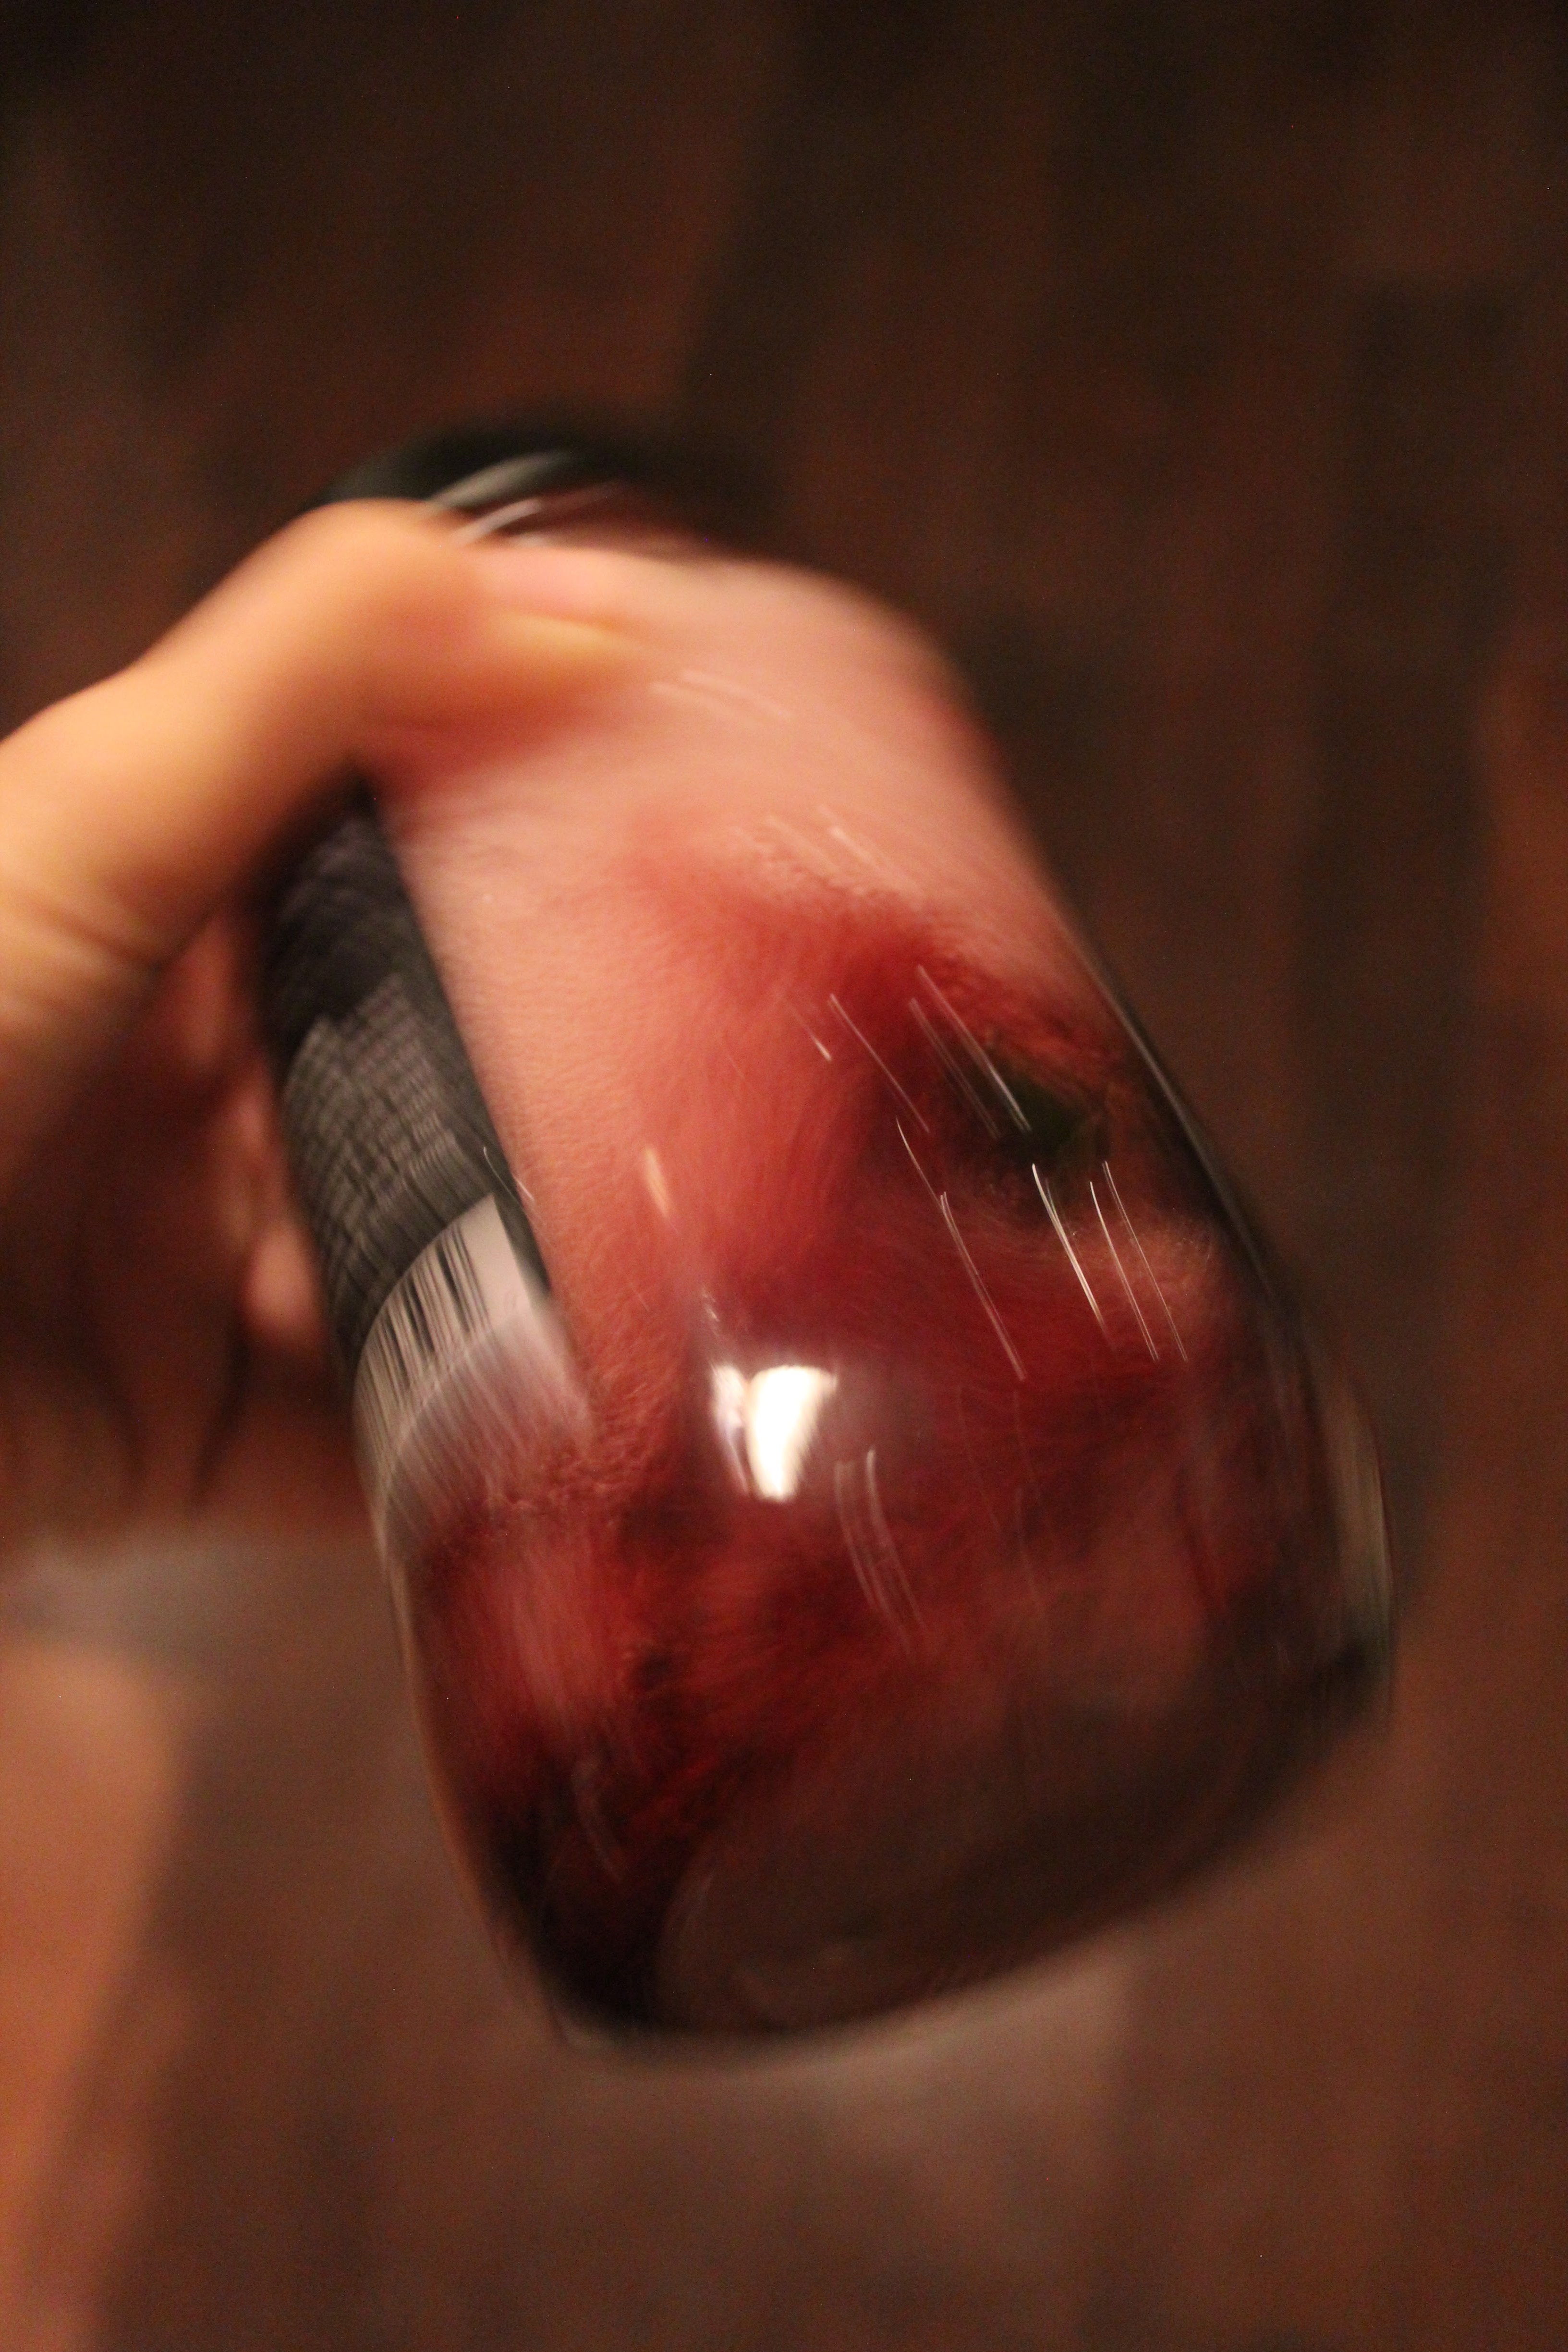
Close the lid tightly and shake to your heart’s content. Give the jar a few shakes each day for about three weeks. Once a week, take the jar outside and carefully remove the lid and swirl the contents of the jar to allow oxygenation. Repeat the process over the next few weeks until the liquid is purple or magenta. This process can take more than three weeks. Do not rush it– it is a practice in patience. I’ve dyed this way many times and have found that I can achieve a gorgeous dye after about a month.
Since I already have another jar of concentration ready to go, I’m going to dive into dyeing.
For this part of the tutorial you’ll need:
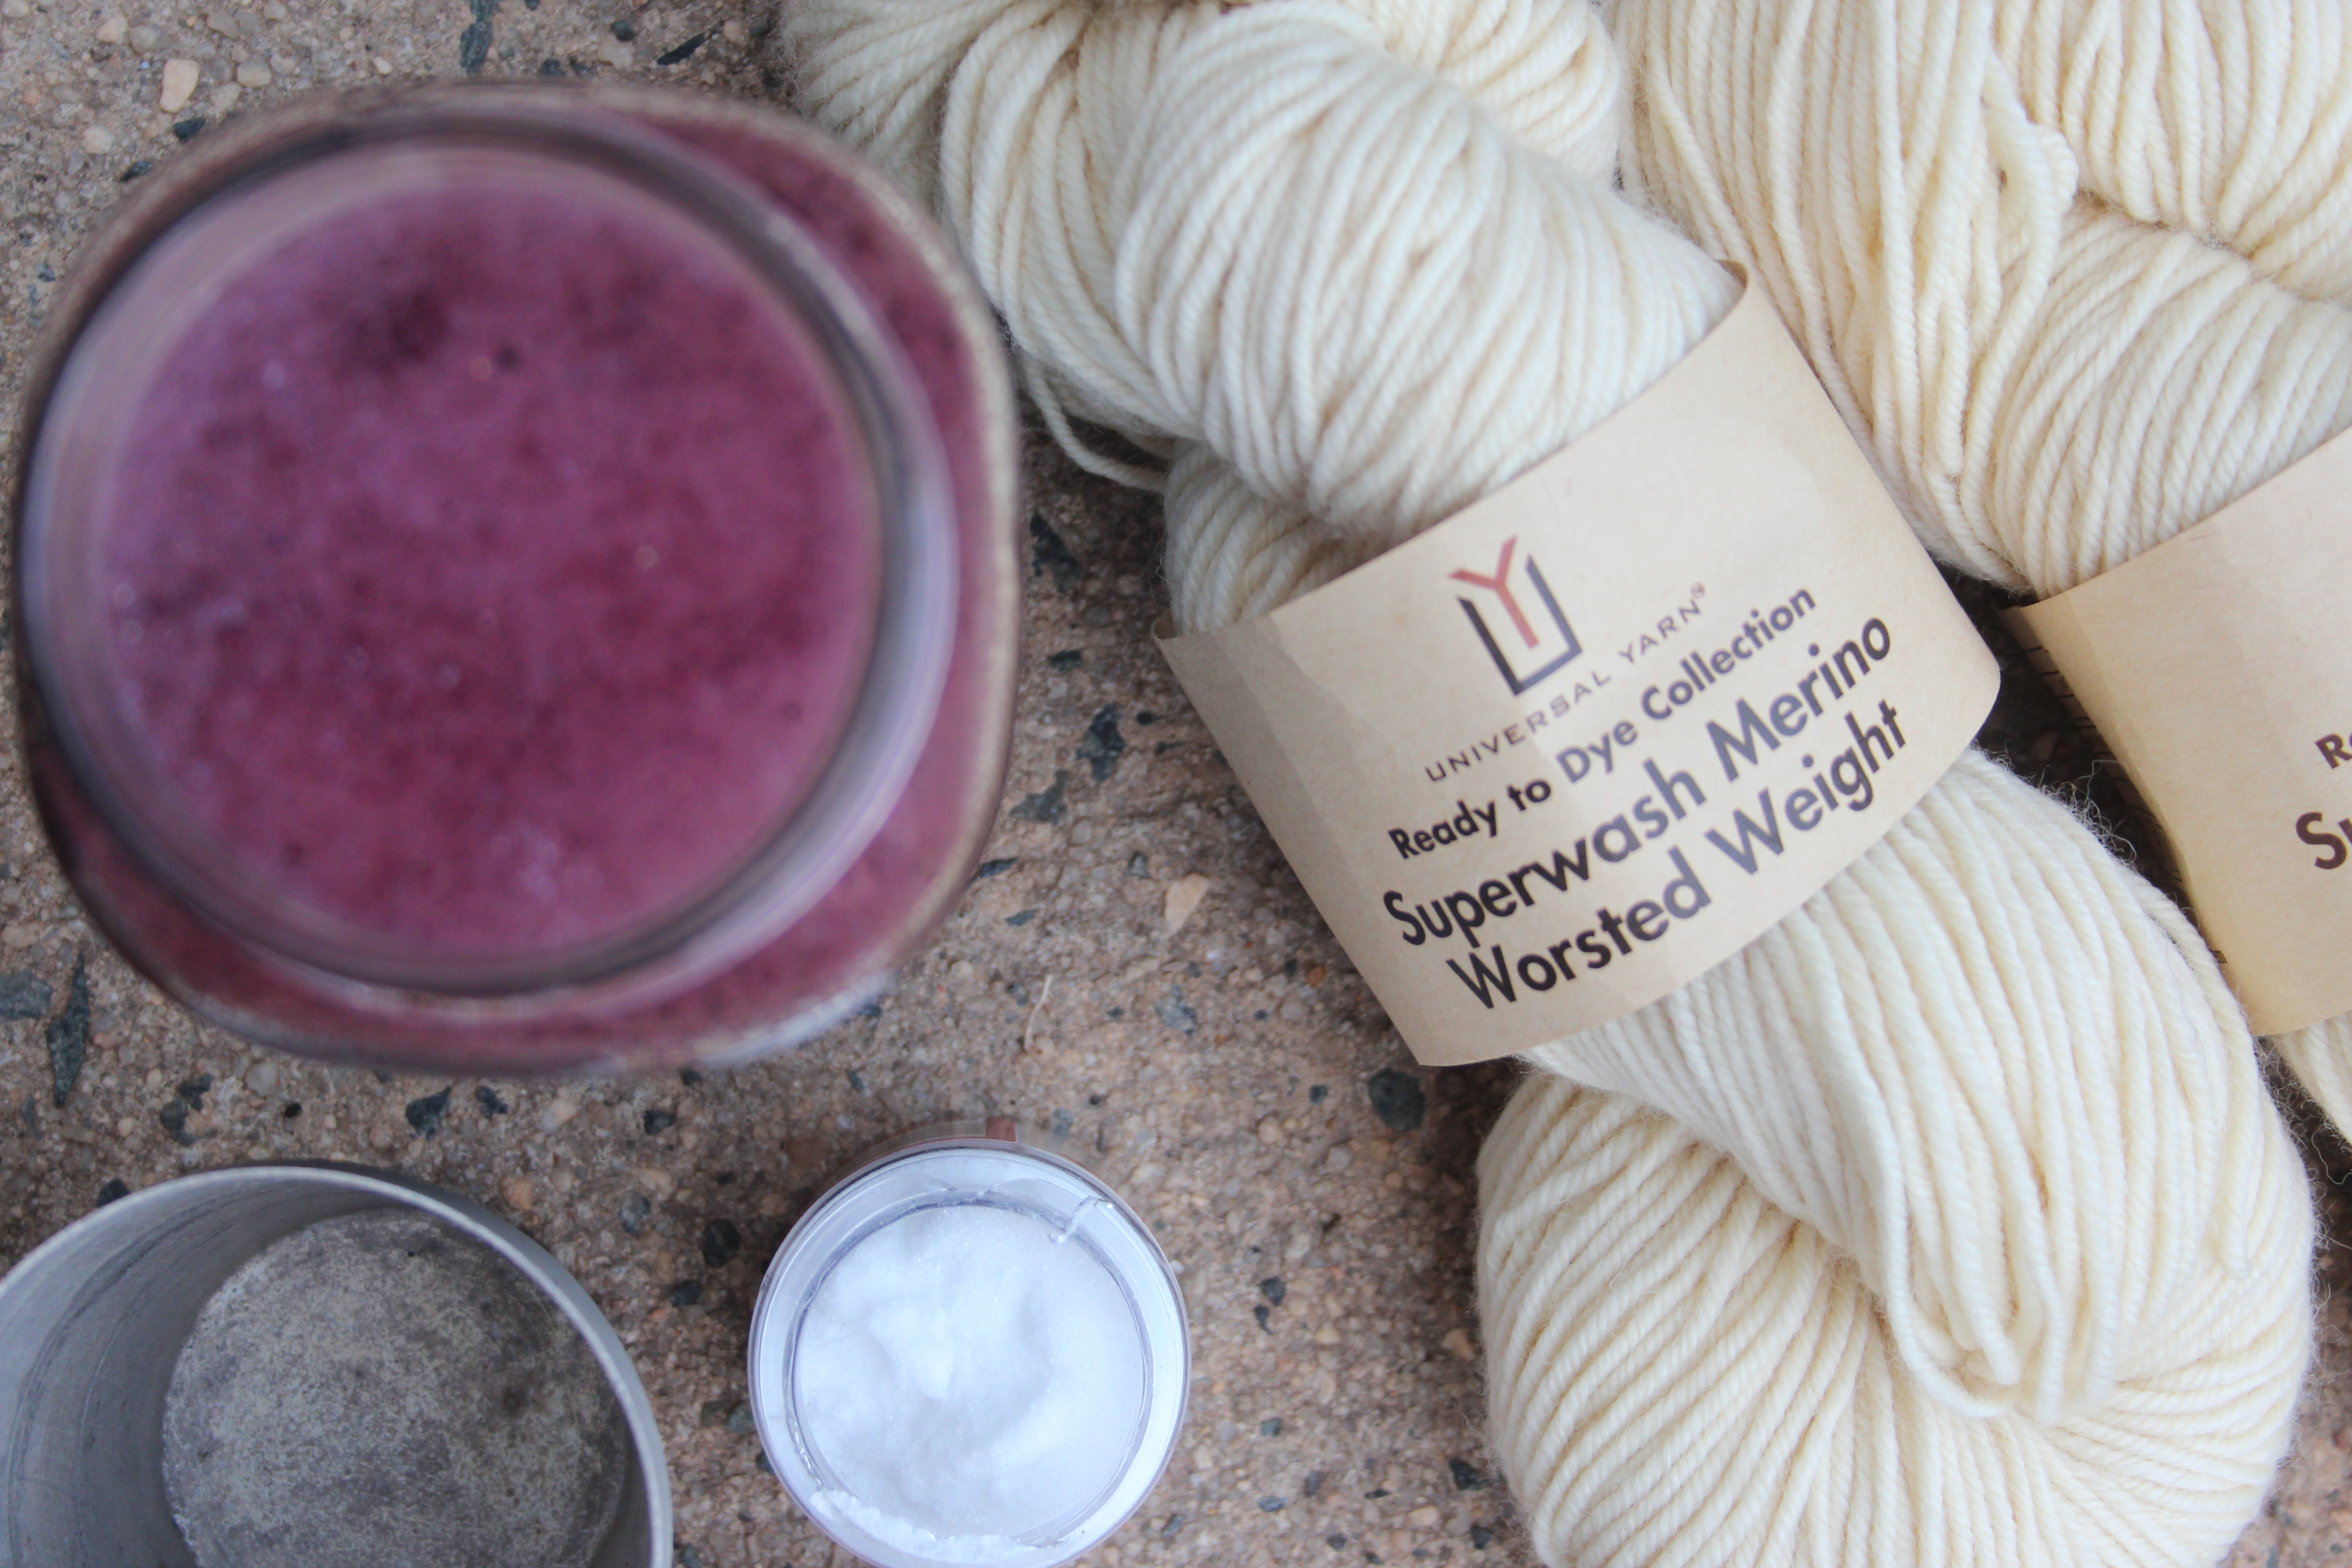
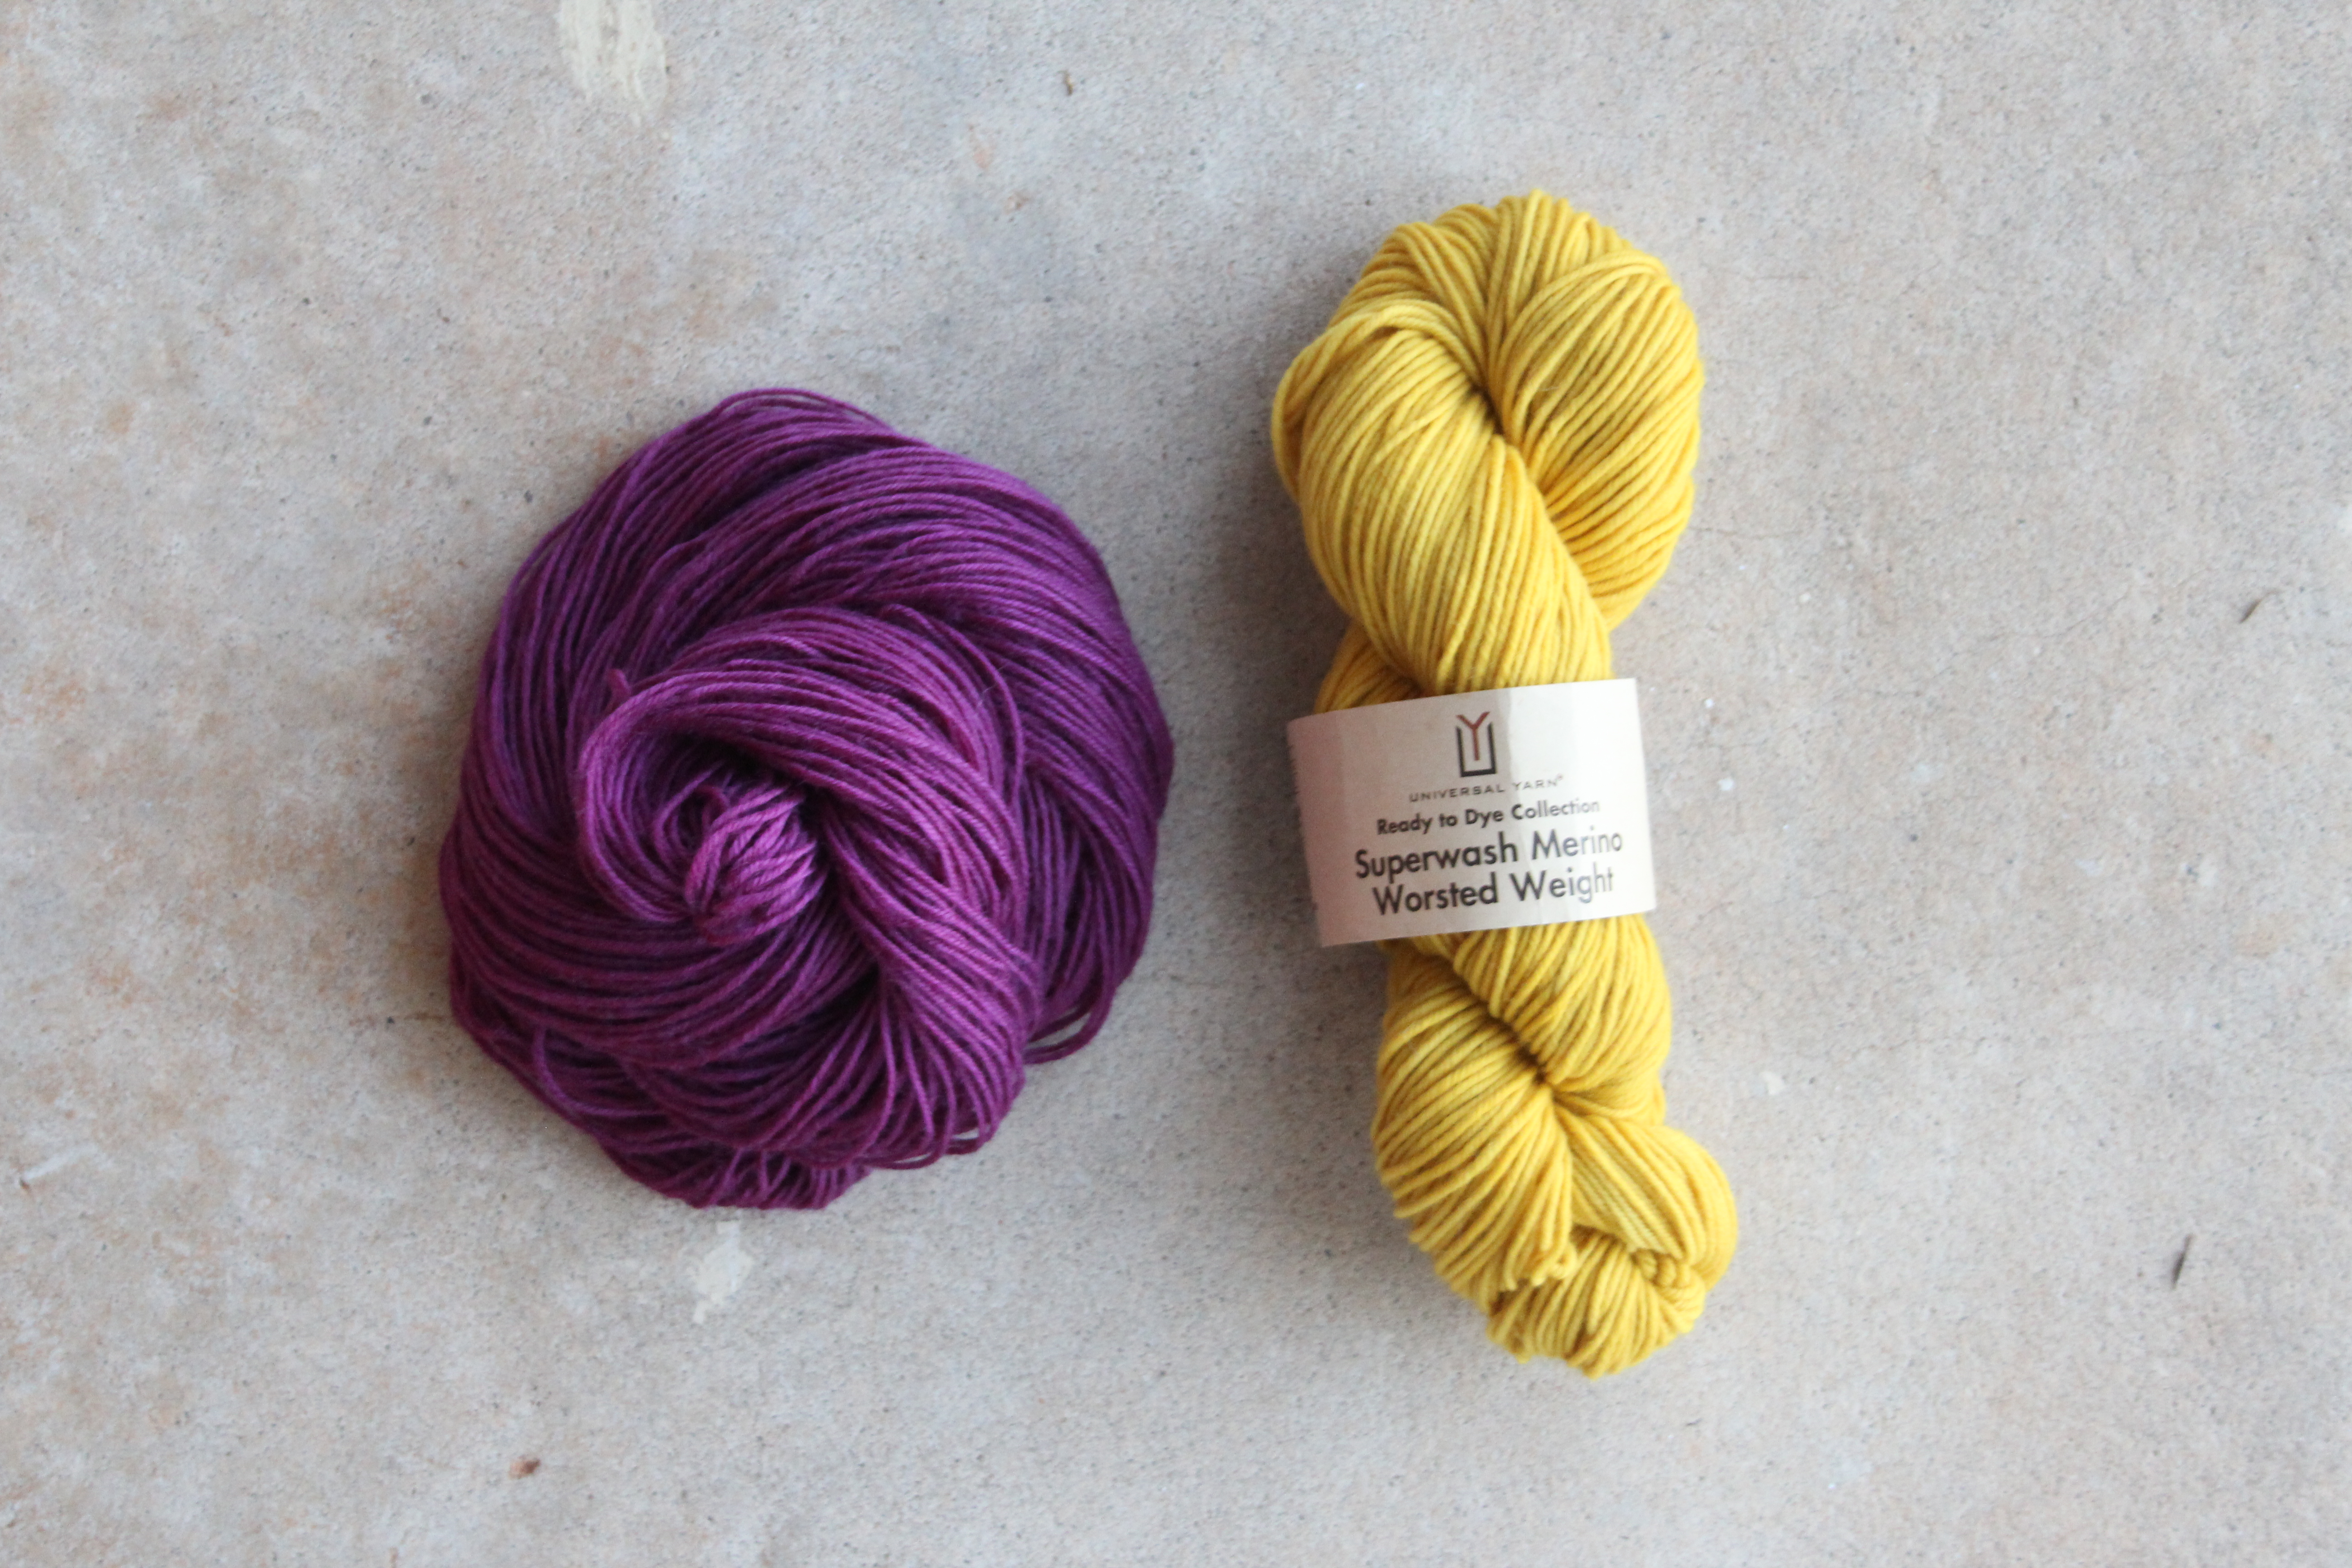
1 skein of Universal Yarn Ready to DyeSuperwash Merino Worsted Weight yarn.
Jar of concentrated dye
One stainless-steel pot that you don’t plan to use for cooking – I purchased mine for a few dollars at a thrift store.
Tongs – they don’t need to be stainless steel but choose some that you won’t use for cooking.
Measuring cups
Water
In Part I, you used a mordant to help fix the marigold dye to the fiber. That step isn’t necessary for this lichen. In fact, it can actually dull the color.
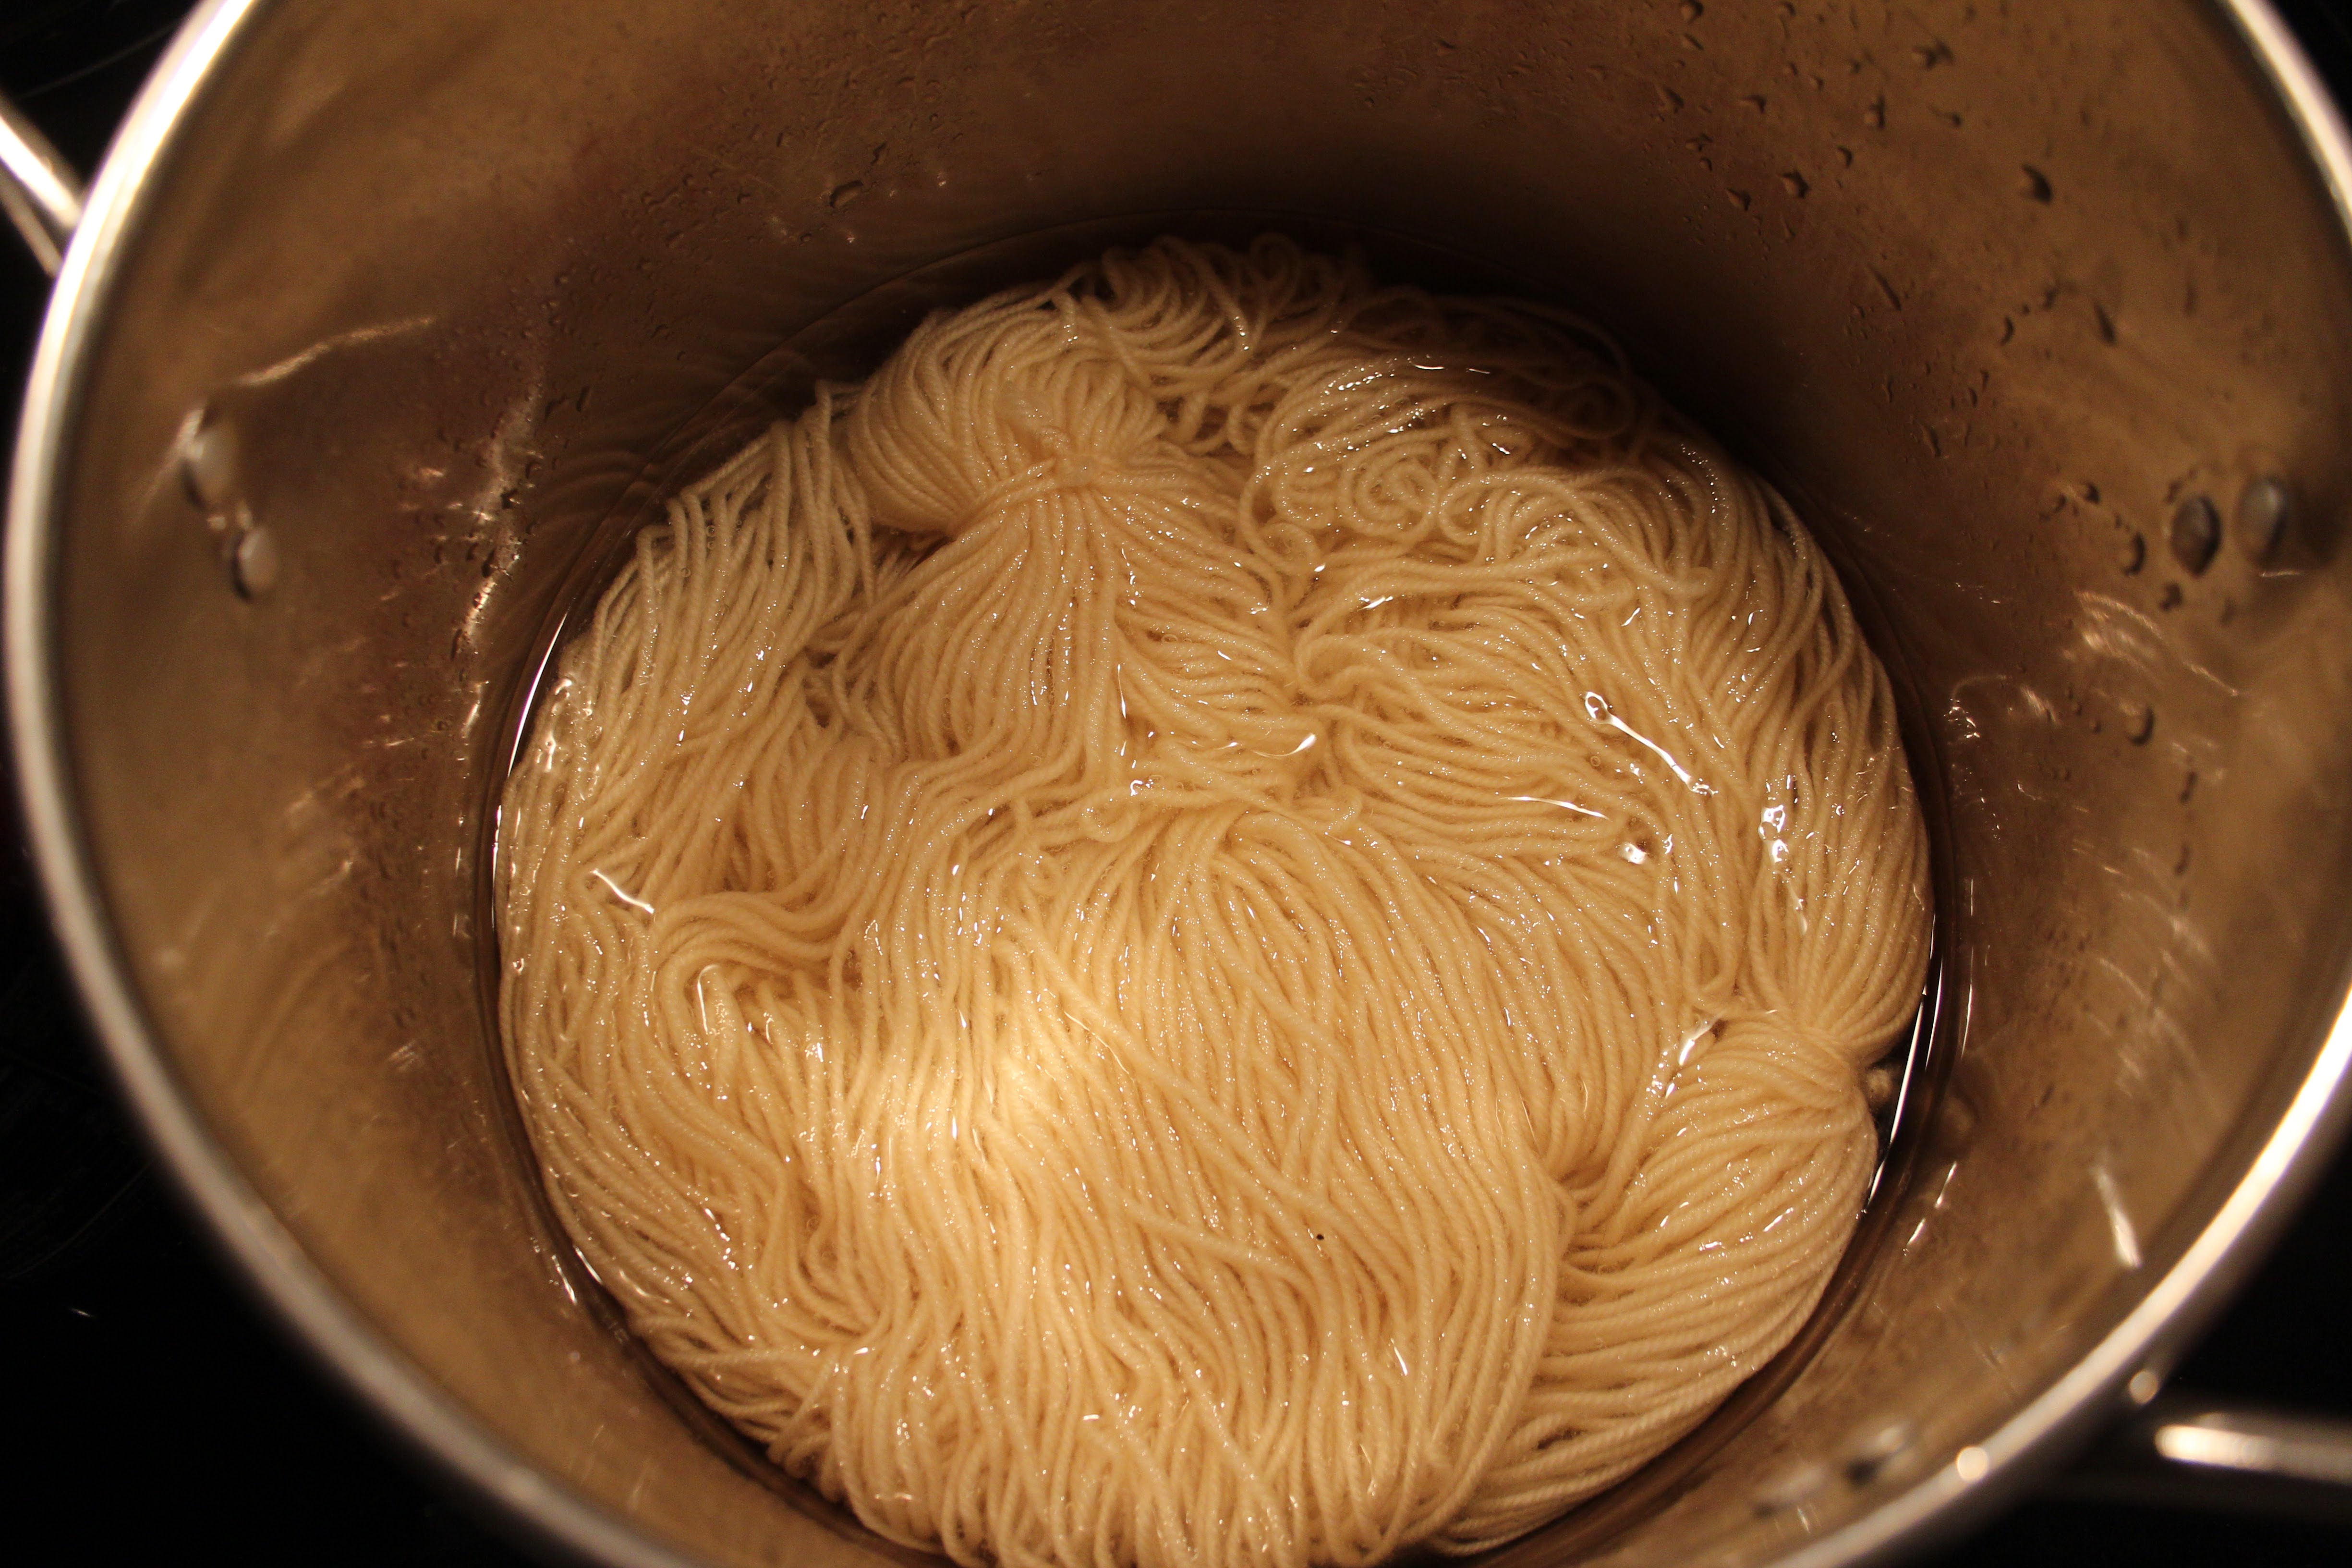
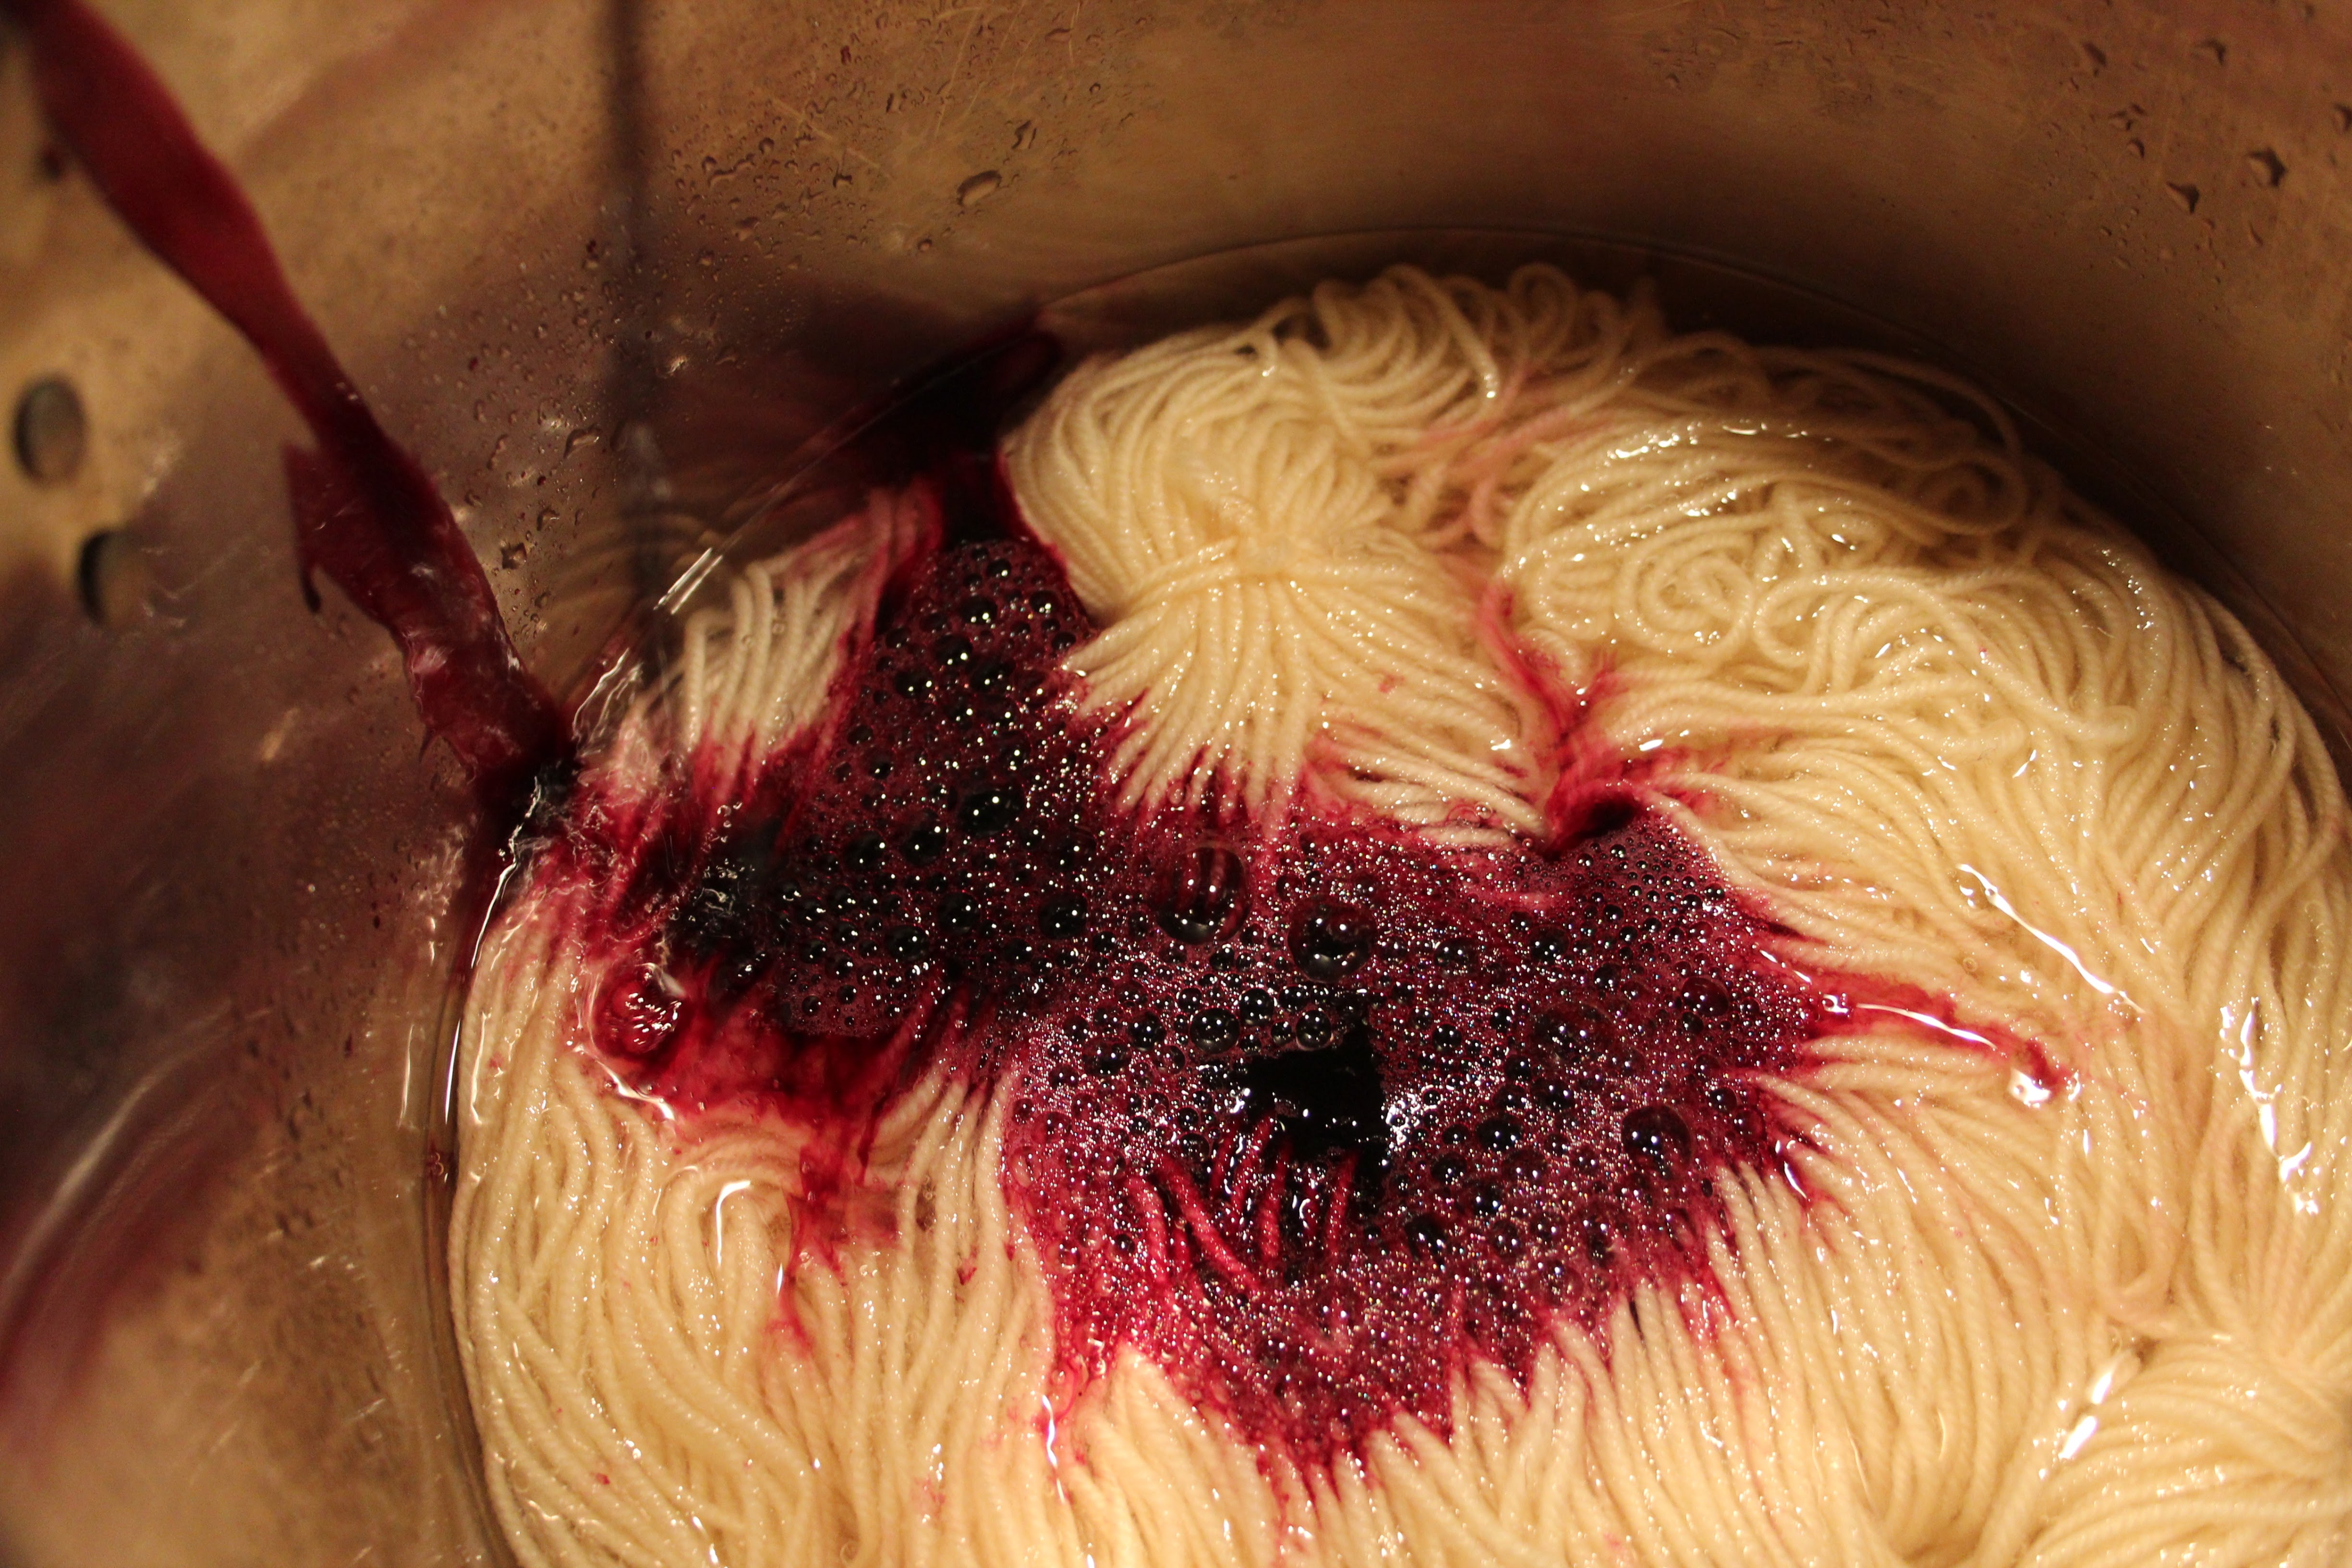
Fill a stainless-steel pot with 4-5 cups of water and place your yarn inside. Set aside for approximately 30 minutes.
Pour off approximately 1 cup of the concentration into the pot. Gently stir and turn the yarn to incorporate the dye into the water. I suggest you open your windows for ventilation as you’ll be warming an ammonia solution over the stove-top.
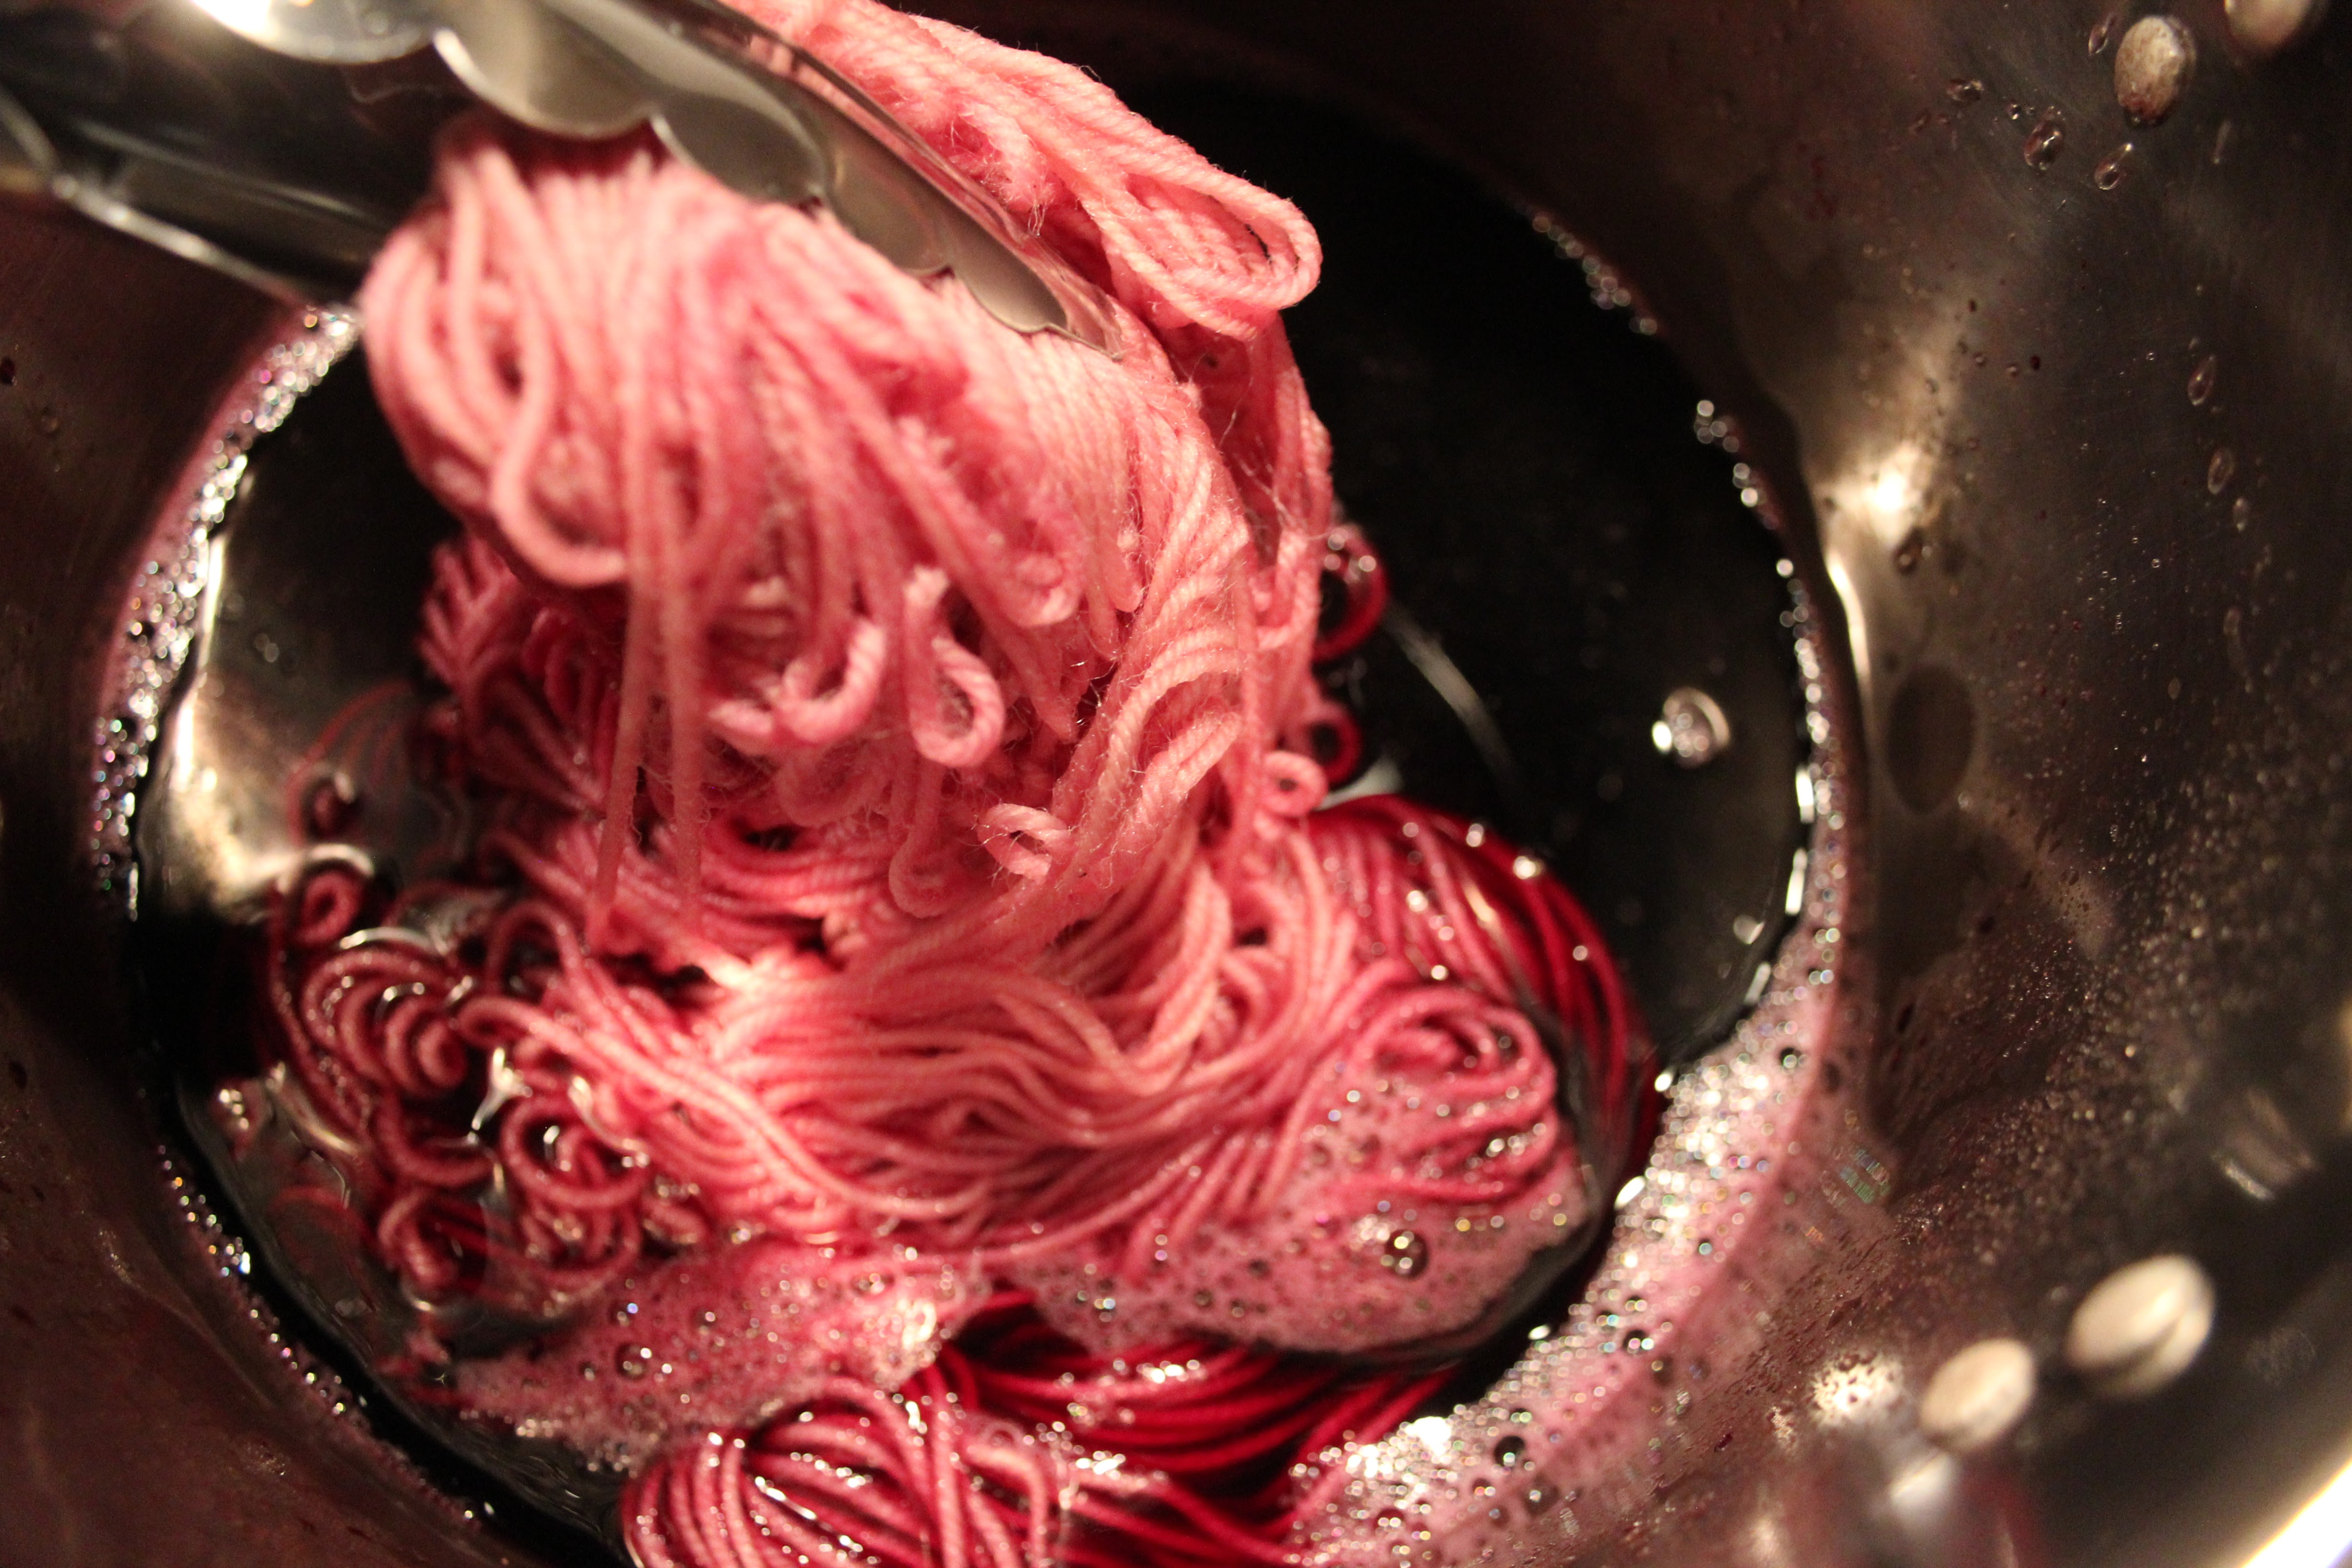
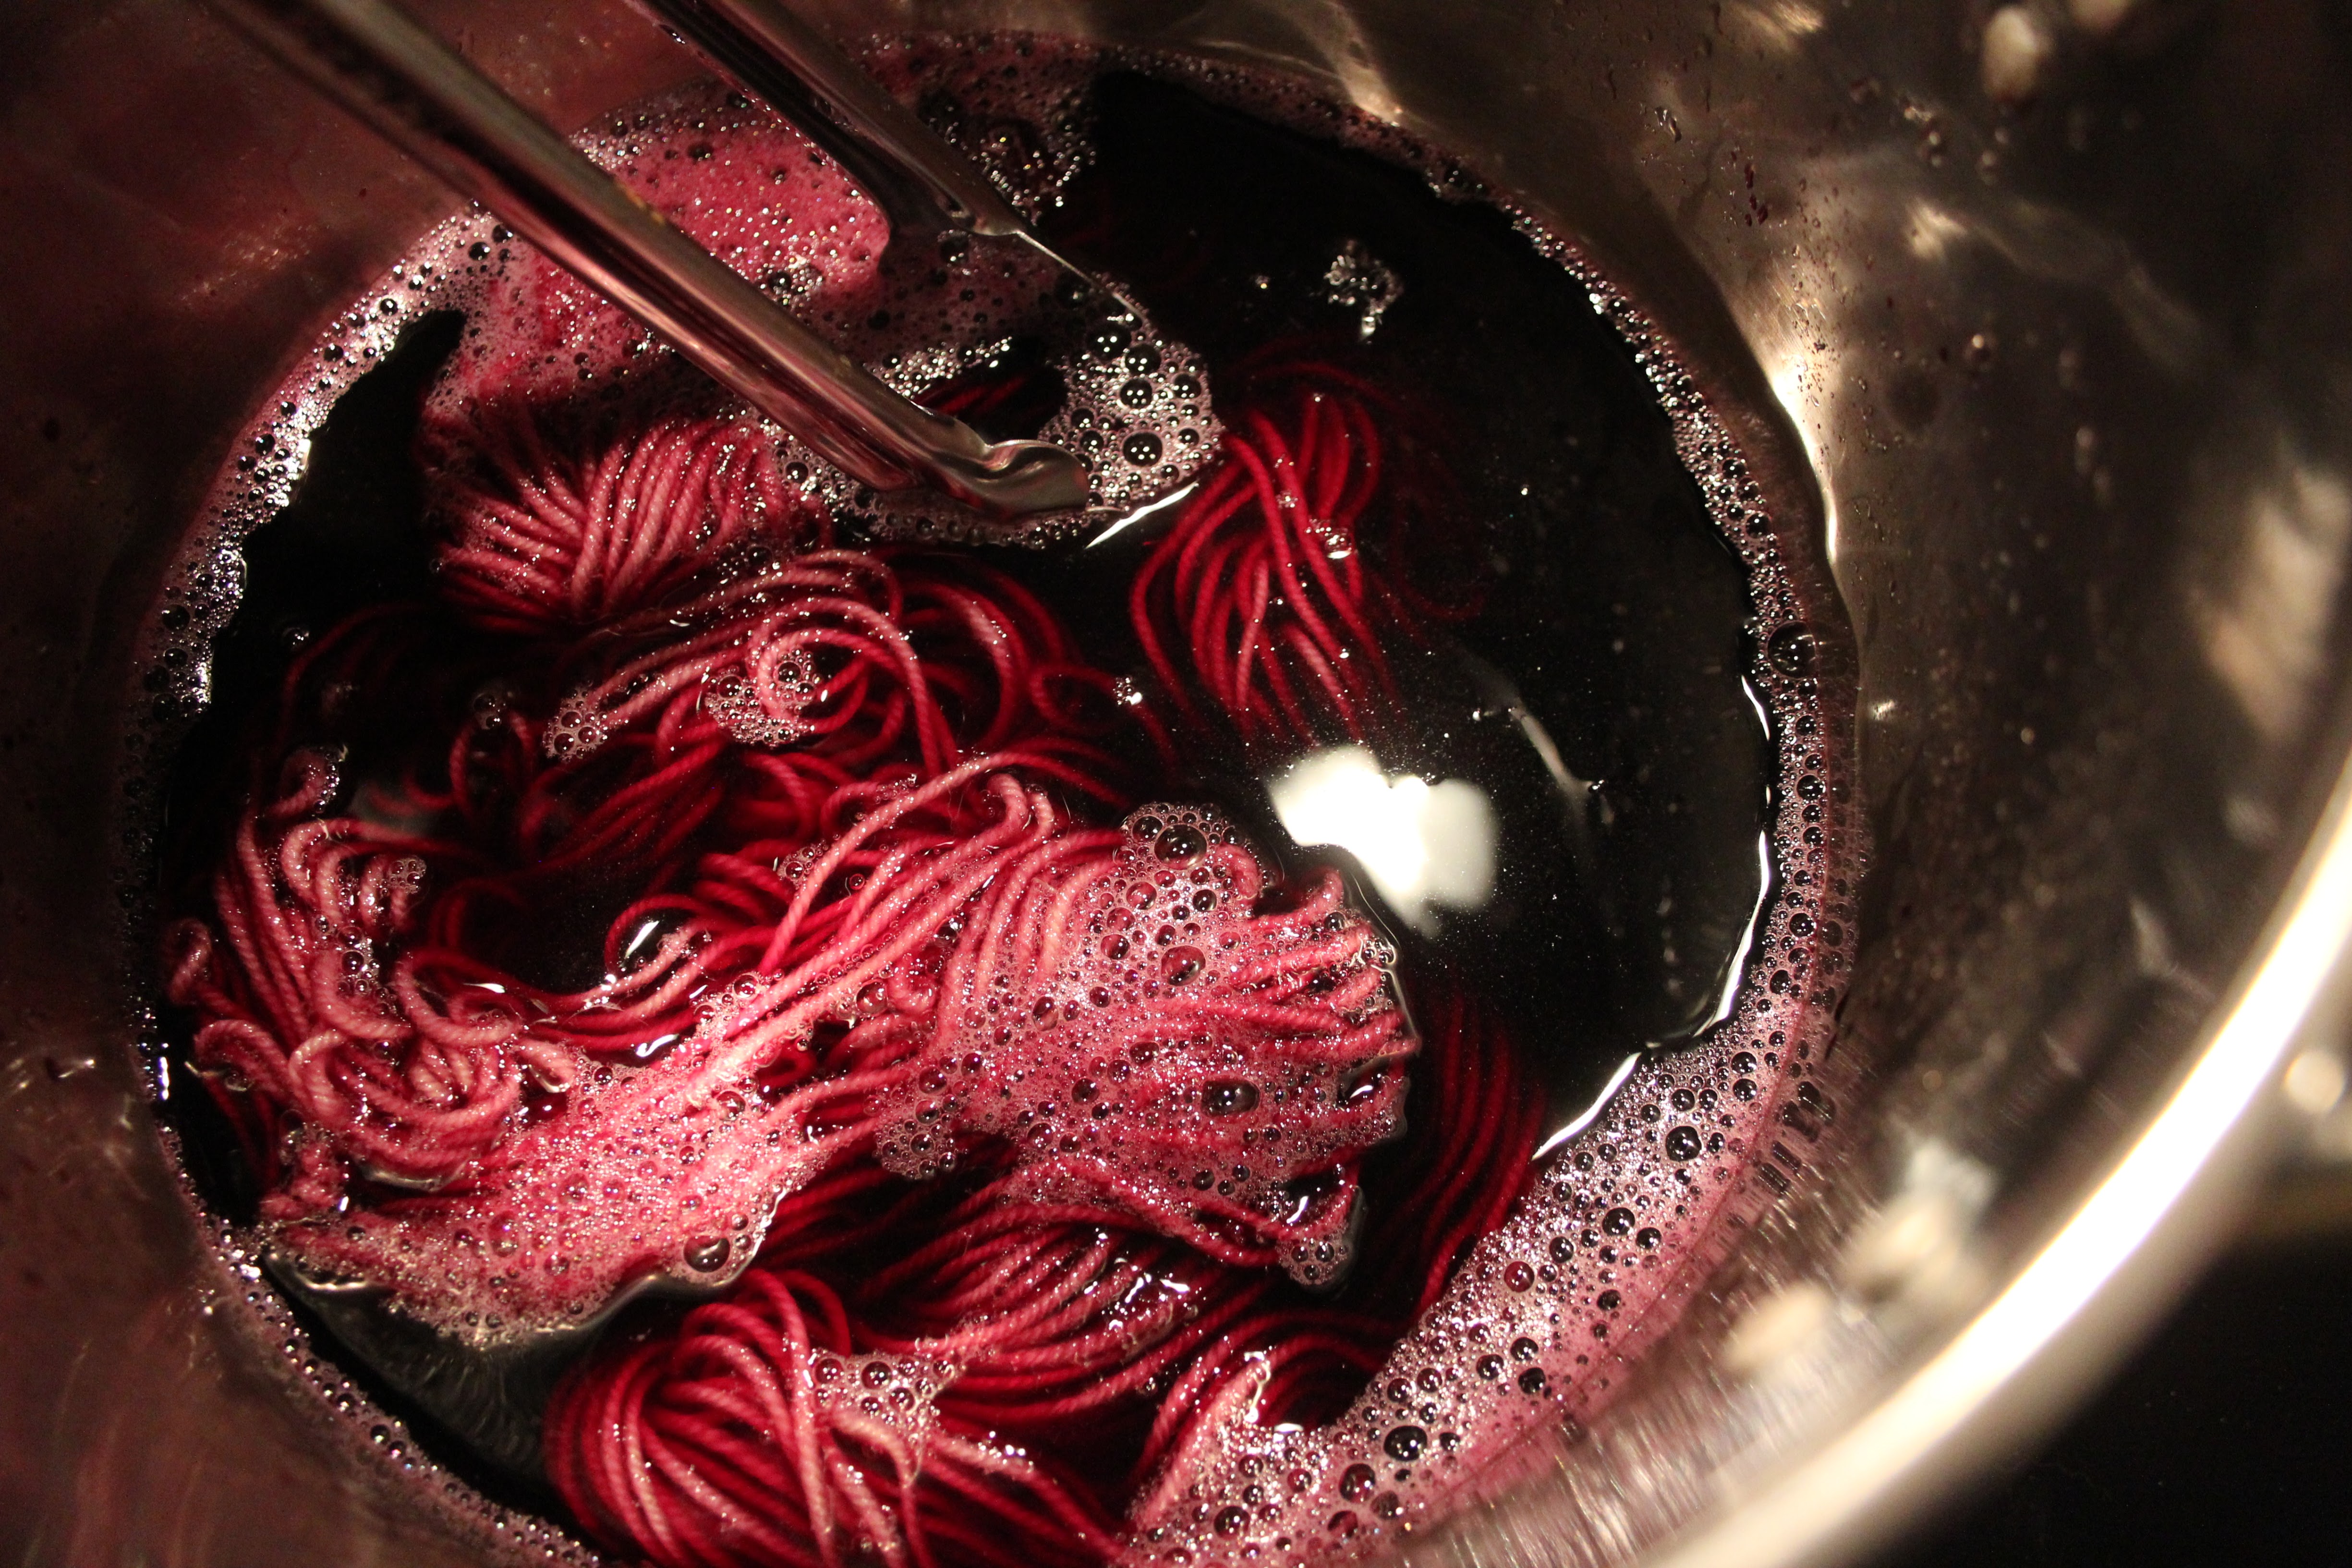
Bring water to just under a simmer. If you have a thermometer it should be about 190 F. Allow the yarn to soak in the dyebath for approximately one hour, occasionally turning the yarn gently with your tongs. Notice how brilliantly saturated the color becomes.
\
Remove from the heat and allow the yarn to cool in the dyebath overnight.
Remove the yarn from the dyebath and thoroughly rinse. I do recommend a gentle detergent or wool wash as the ammonia can be quite pungent. Hang and allow to dry completely. Then, pat yourself on the back for your patience. I told you it was worth the wait!
I’m working on a pattern that uses the yarn from Parts I and II of the Natural Dye series. In the future, I’ll show you how to use natural dyes on some of our other Ready to Dye yarns.
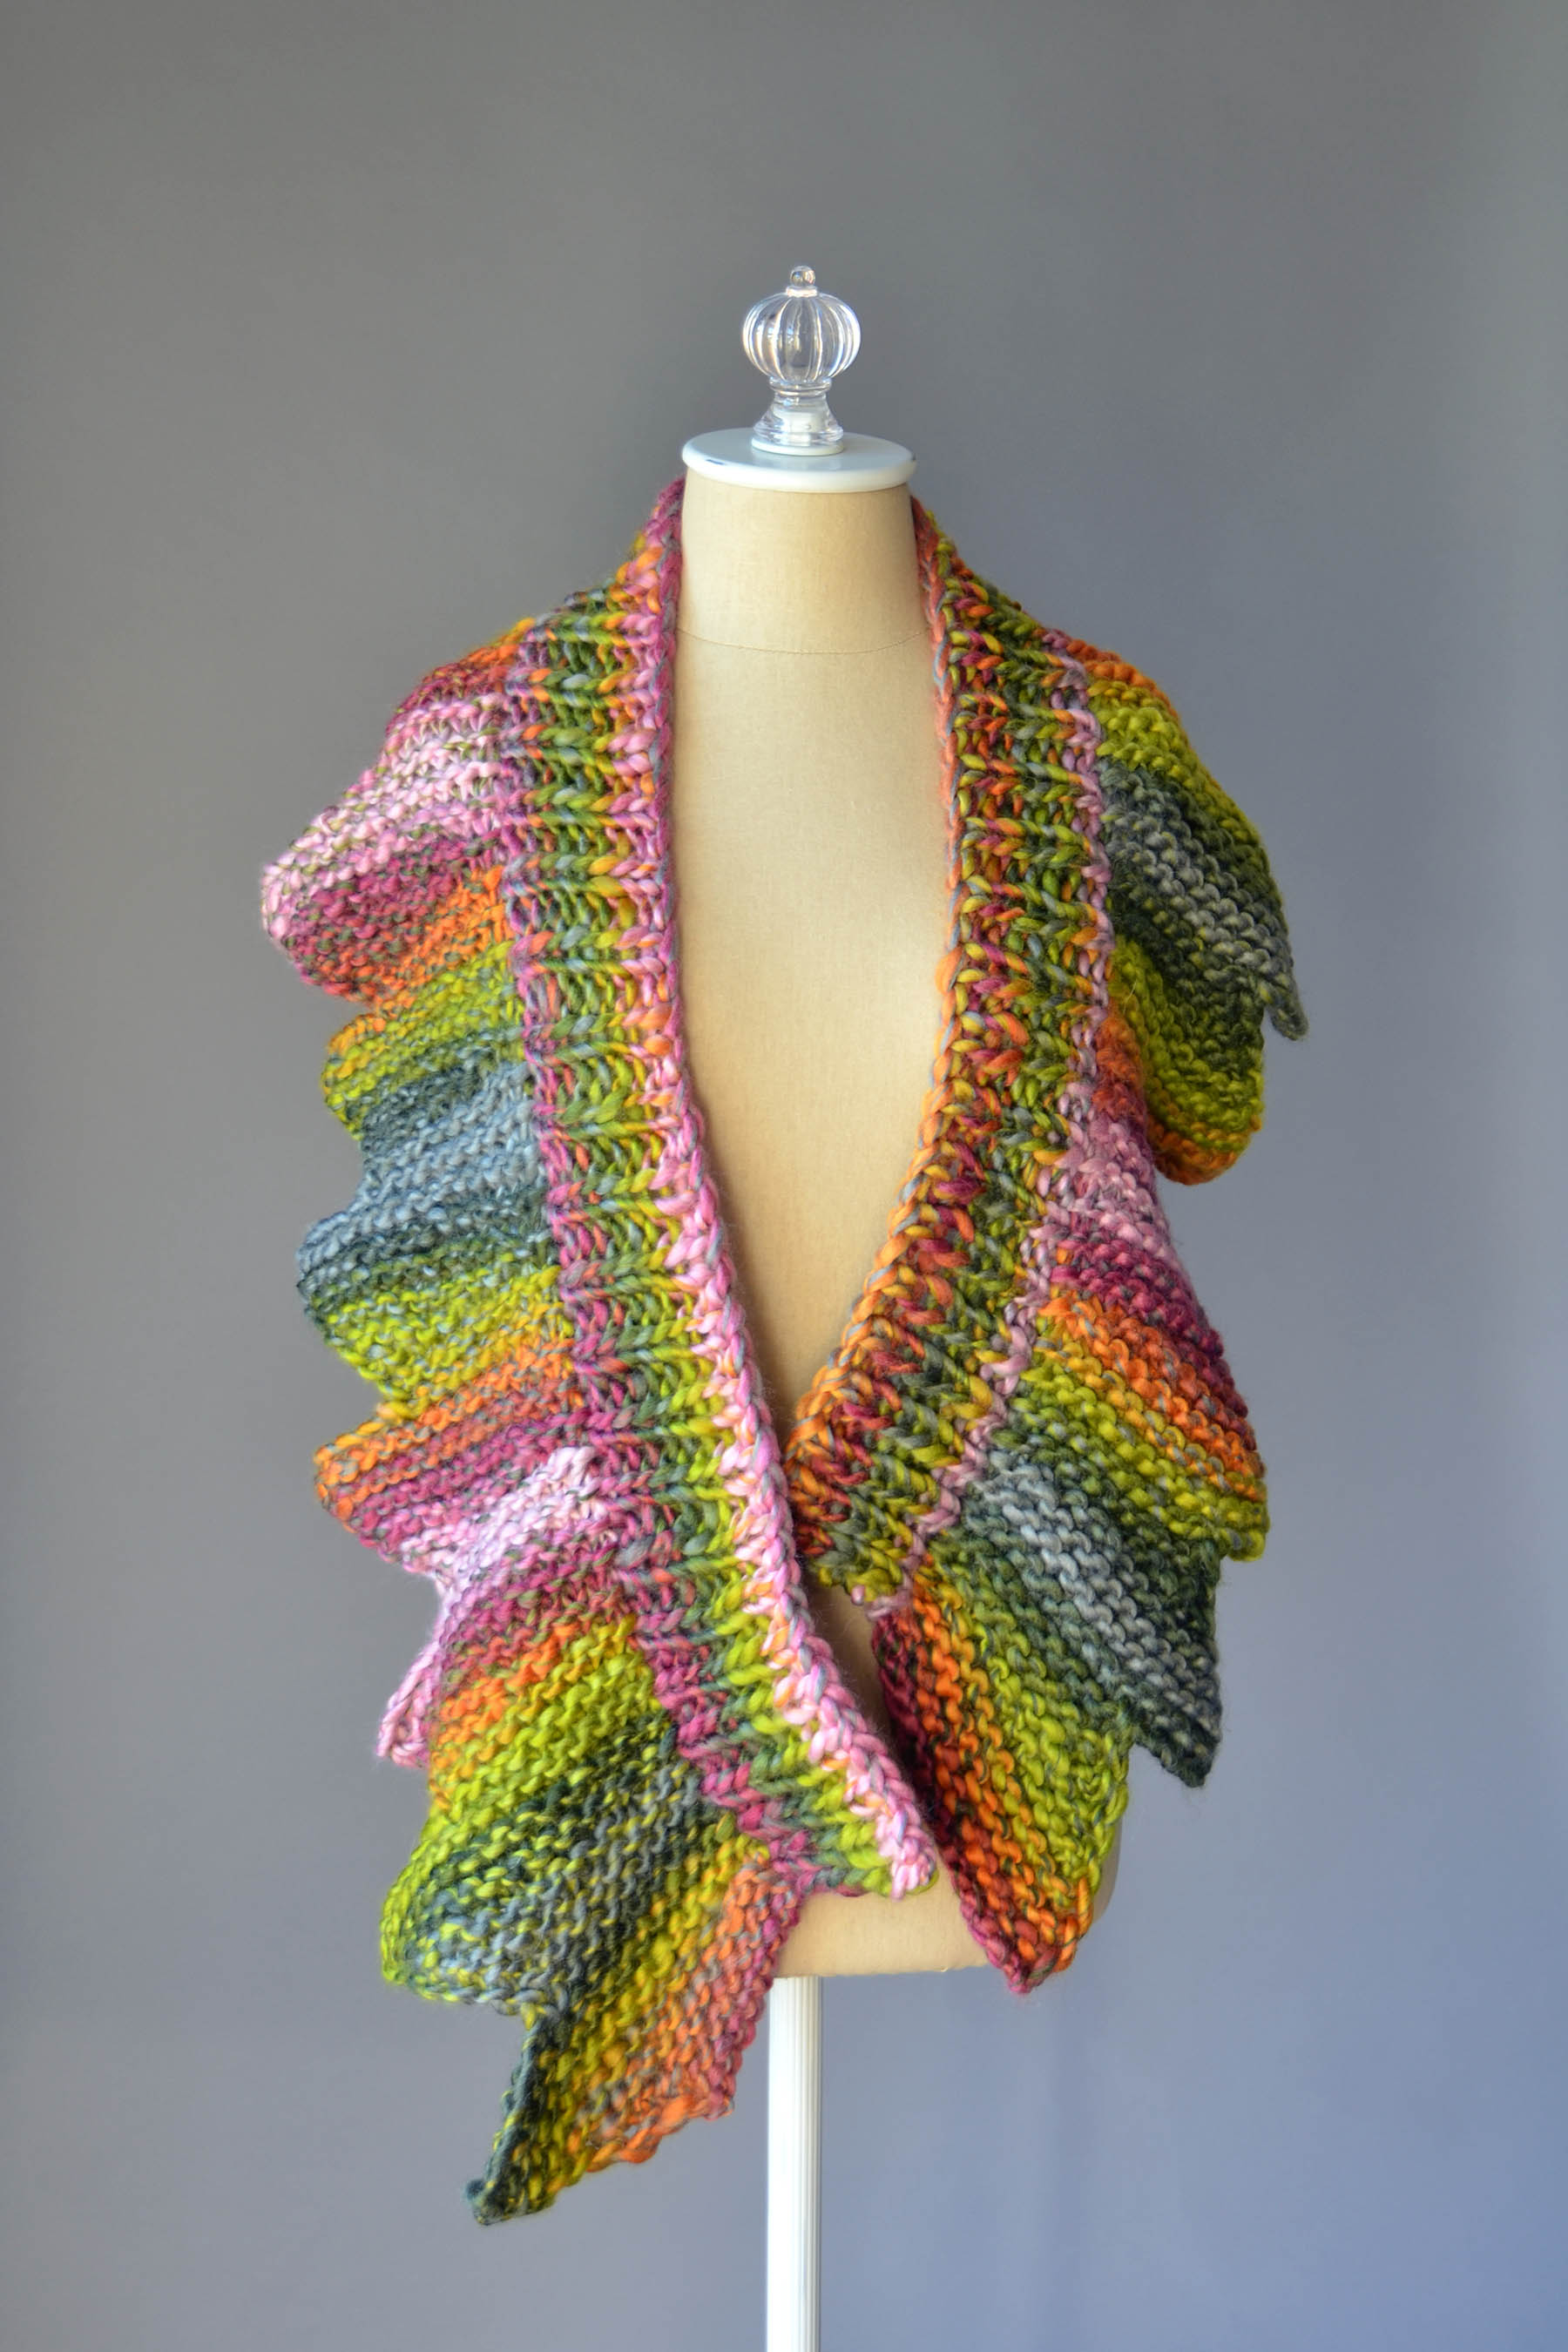
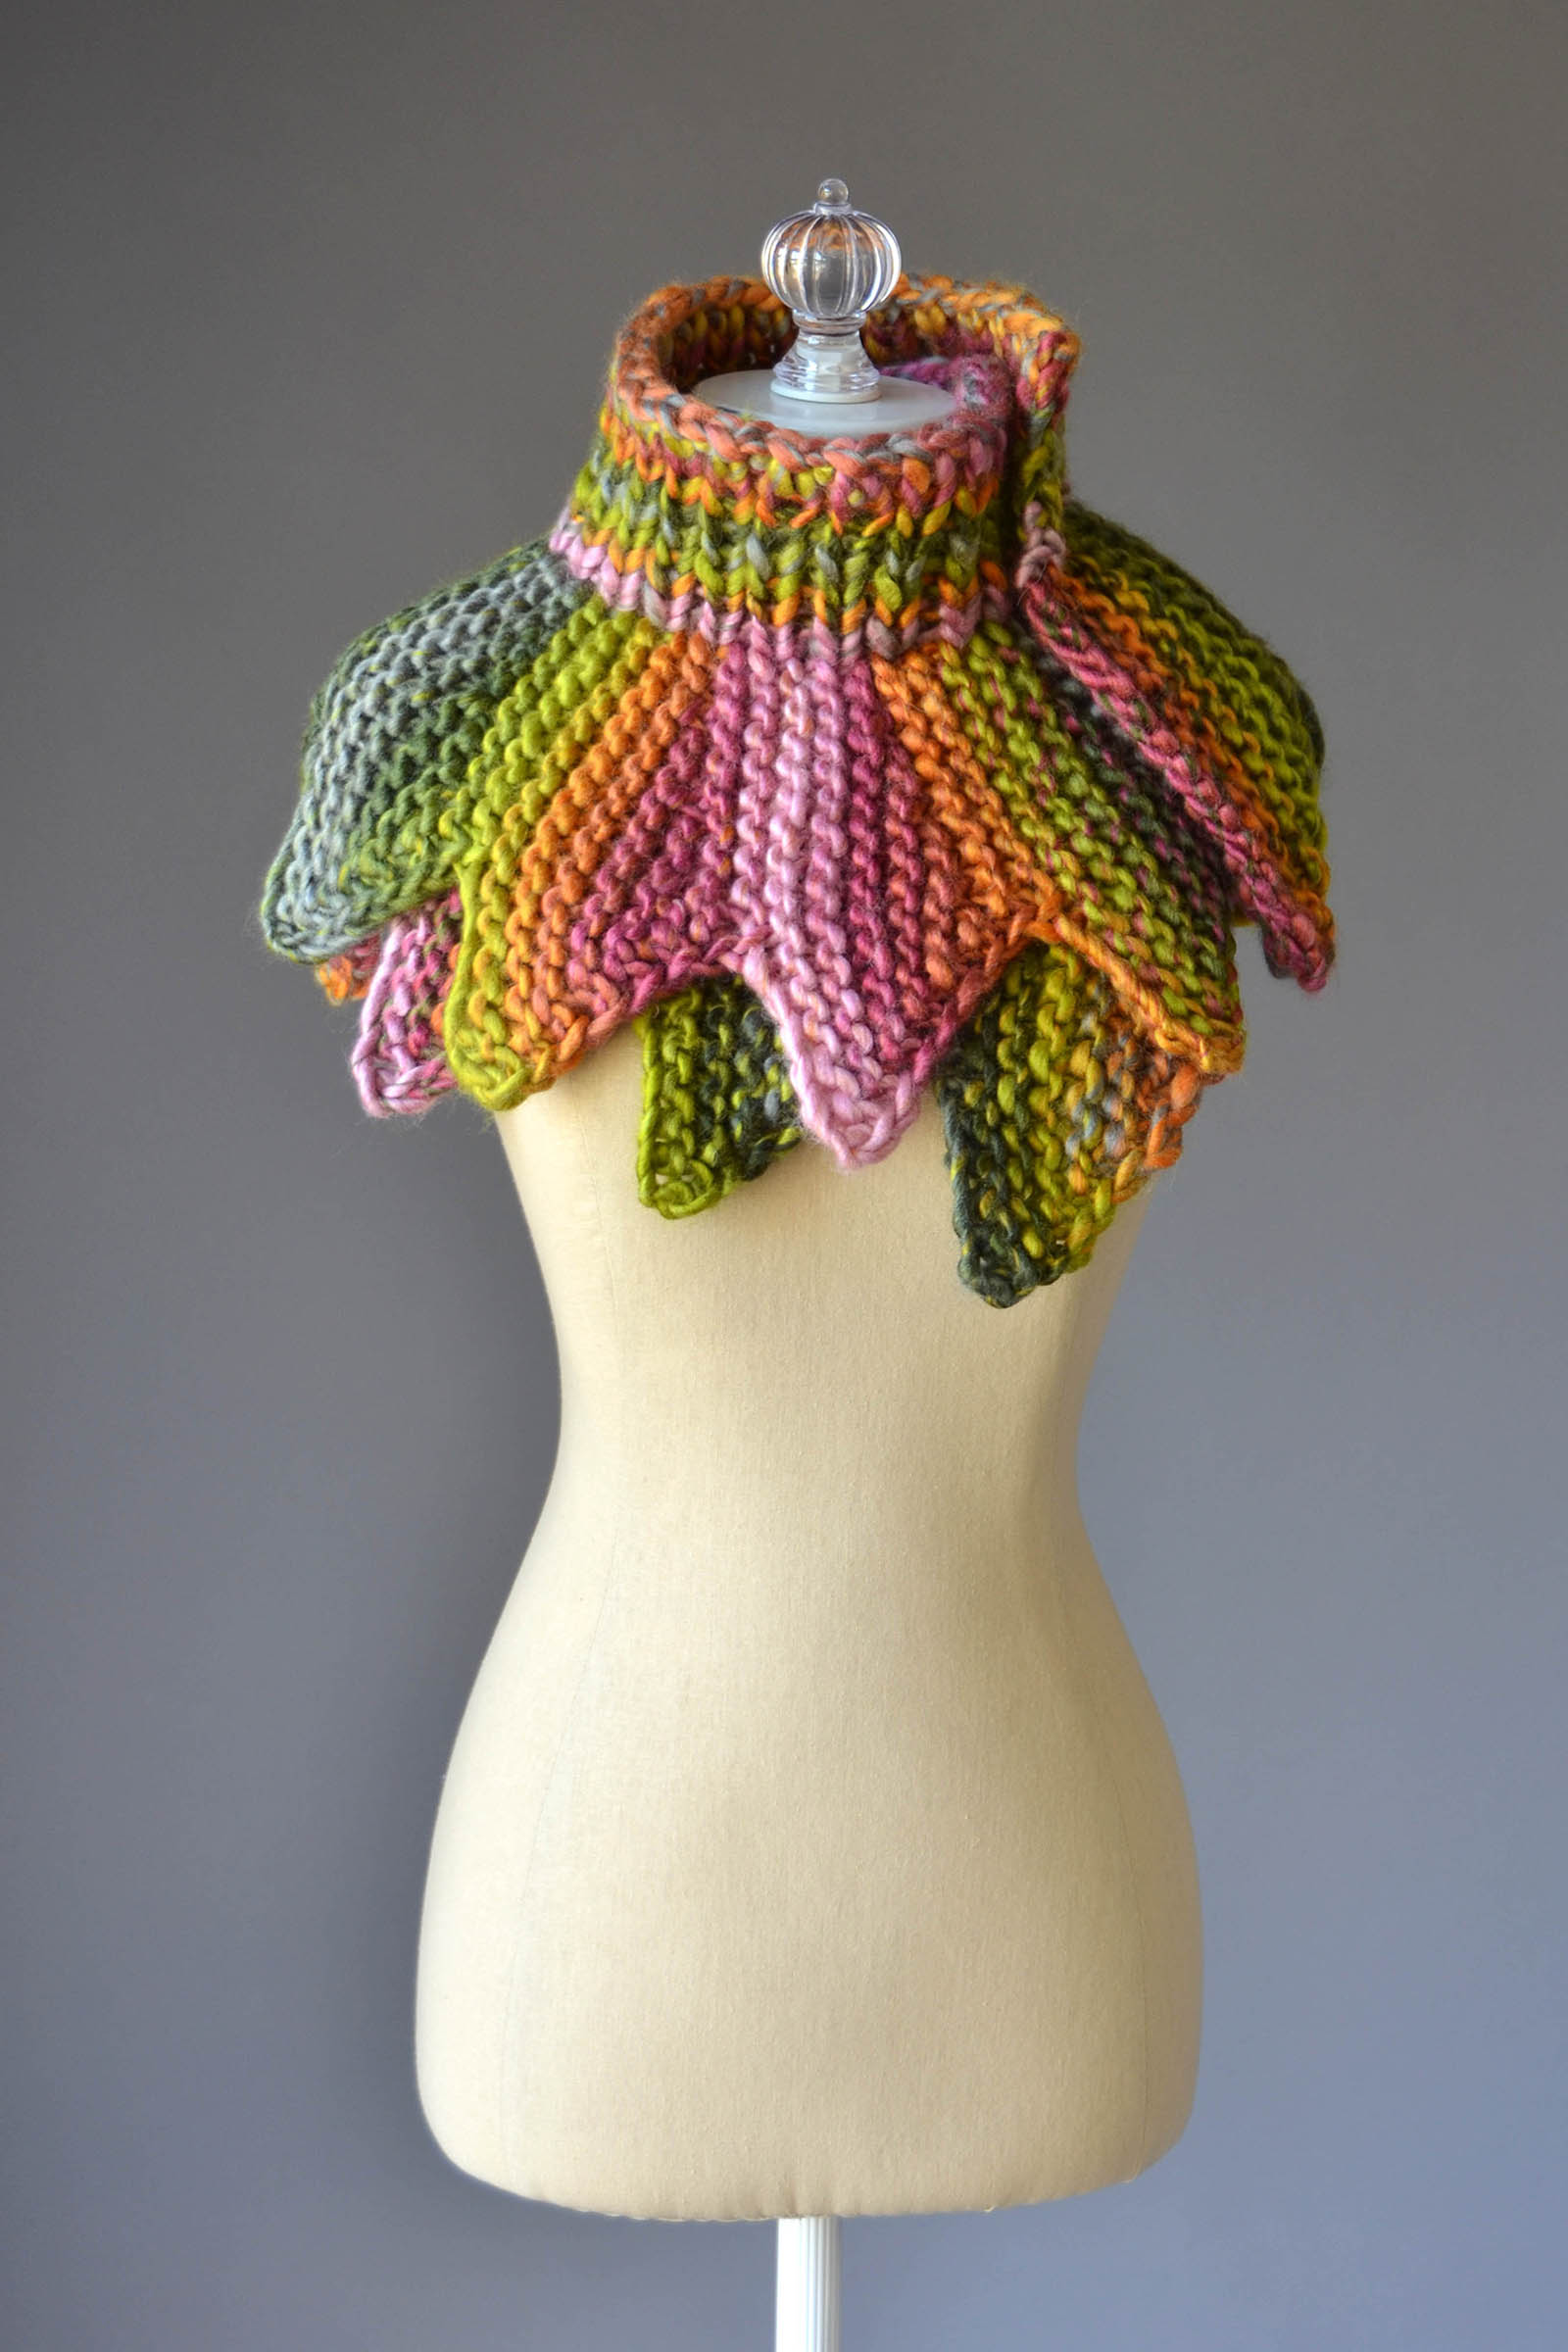
What a neat design! It combines a soft, bulky yarn – Classic Shades Big Time – with a bright Spring colorway, the new 819 Botanica. It’s a healthy dose of color as winter rears its head.
Each of the 18 “petals” is shaped through short-rows and decreases. After the lower petal section is complete, ribbing is worked upward from the straight/unshaped edge. The flexible edge formed by the ribbing’s tendency to gather makes this a fun piece to wrap around however you like.
We hope you have an amazing weekend, and find time to make something fun!
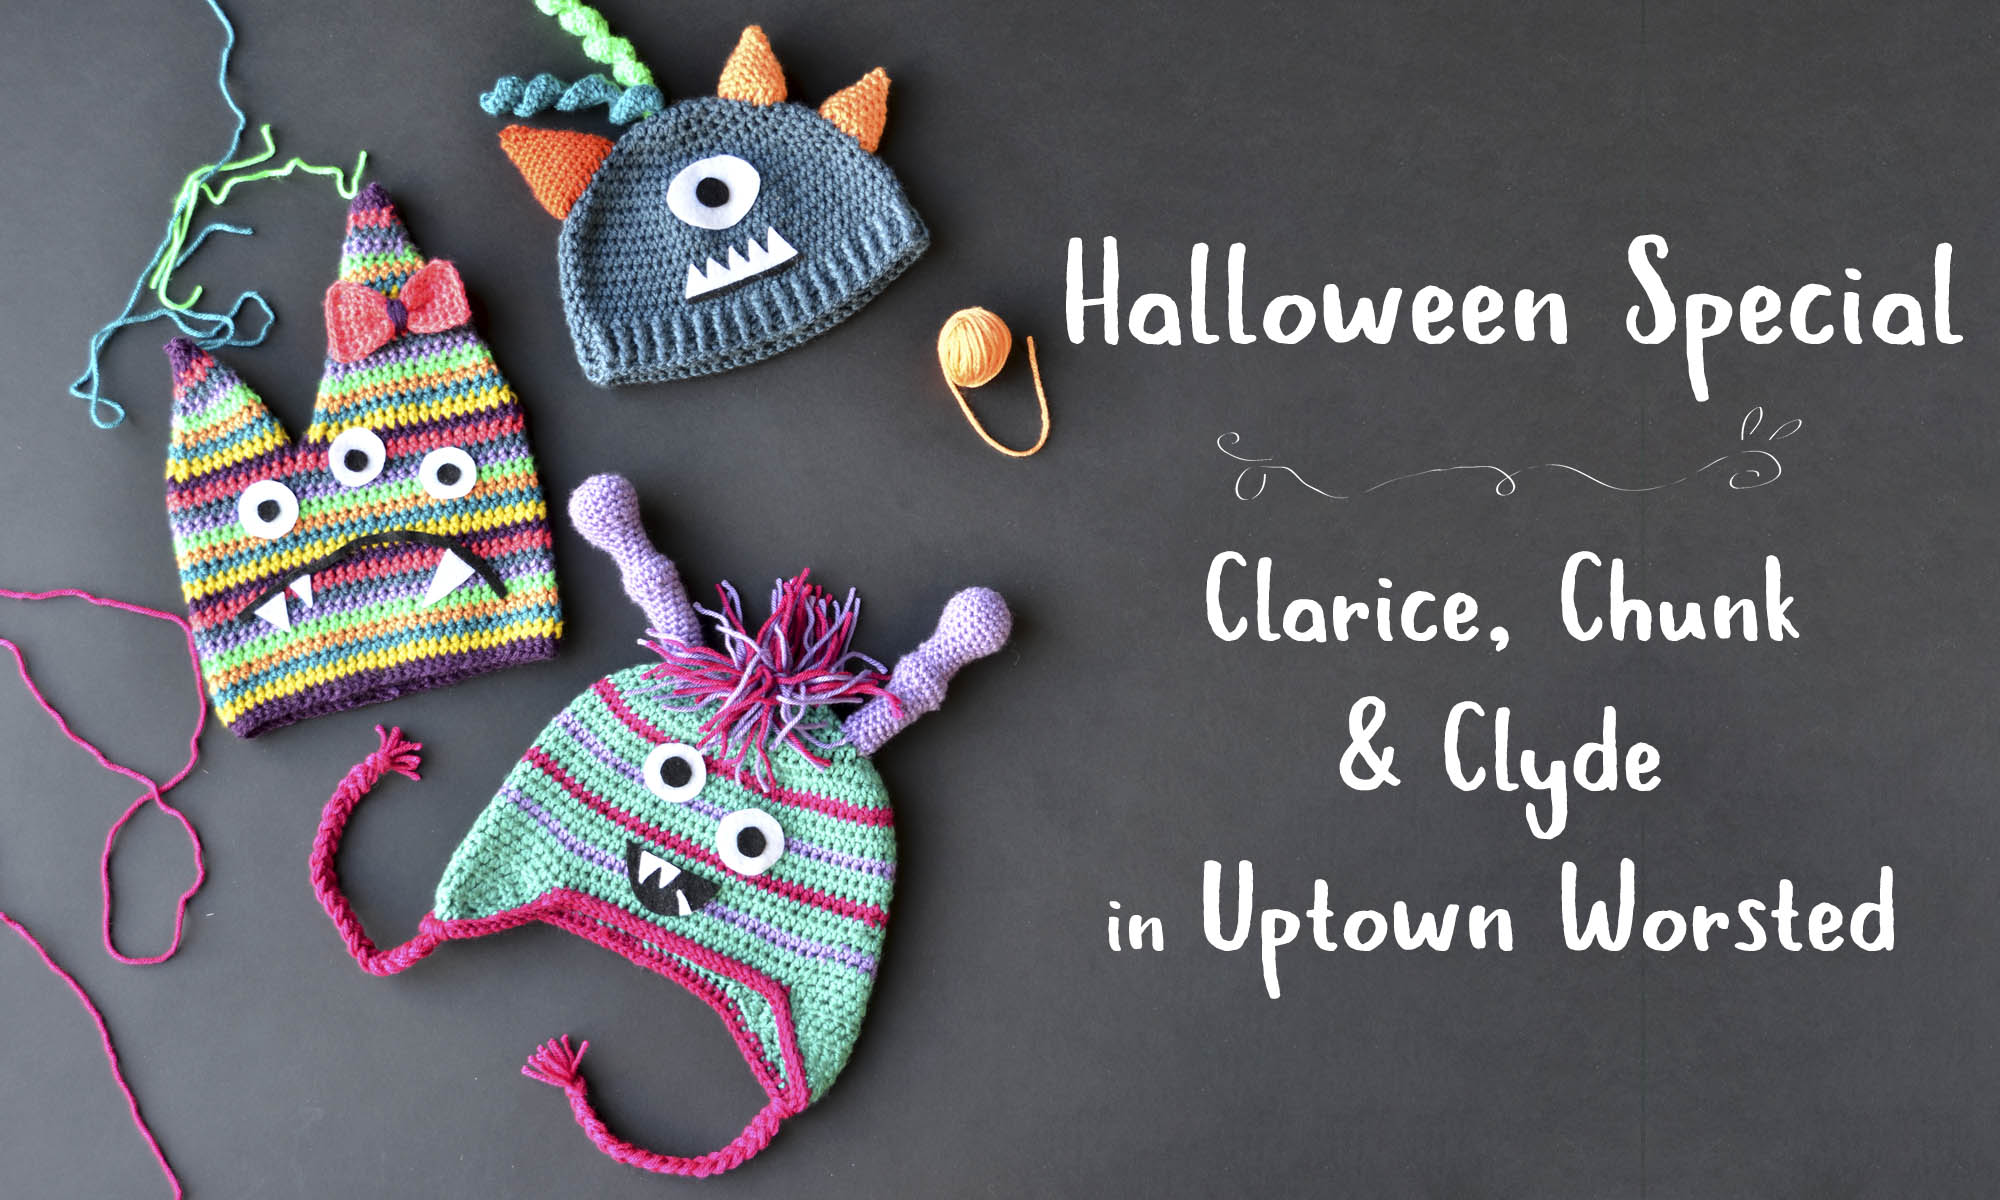
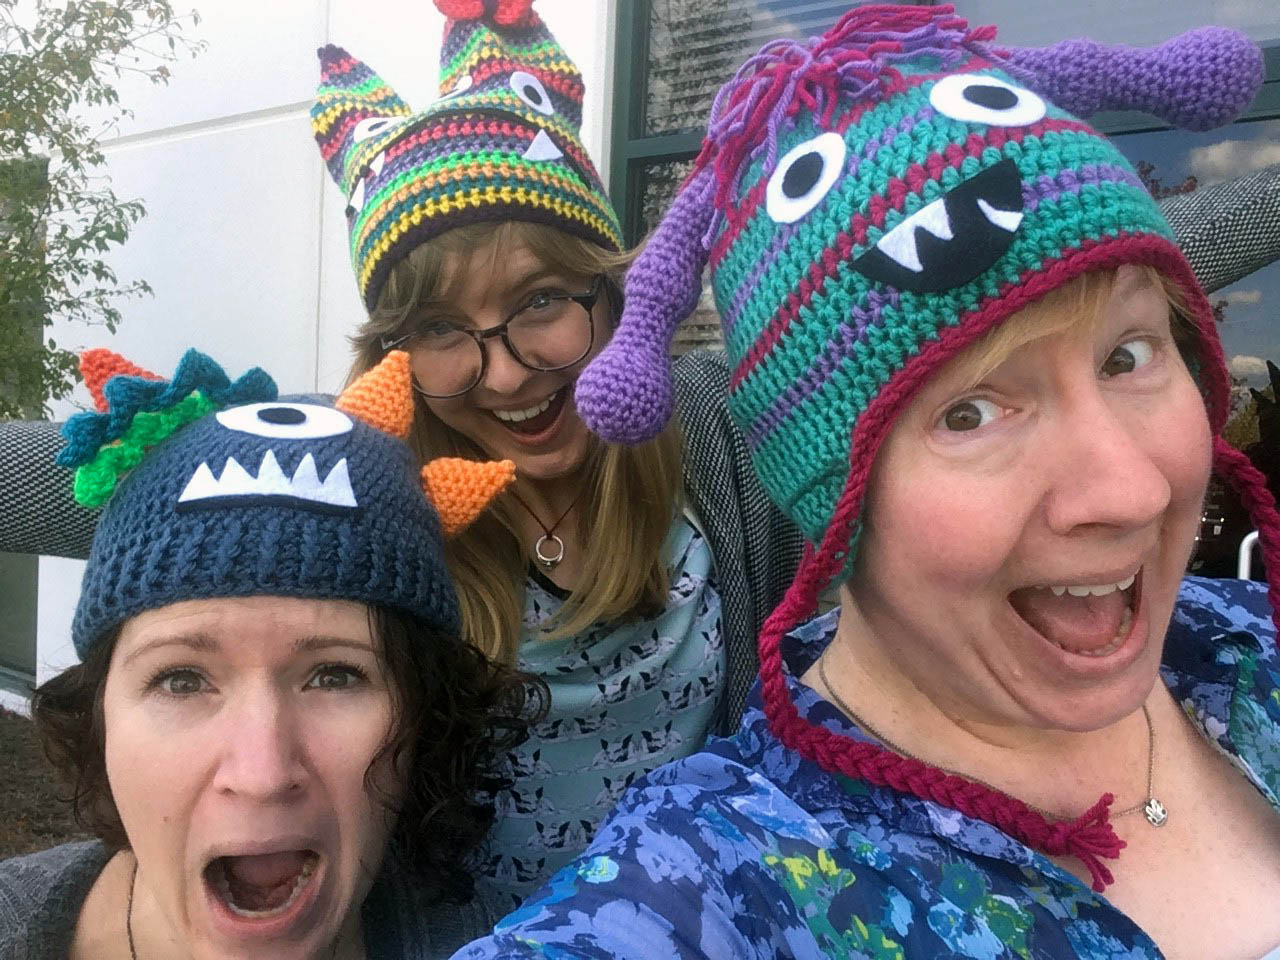
Halloween is hands down my favorite time of year. The air is just starting to get crisp, meaning I can finally break out my handknits. There’s always candy. Everywhere. All the time. Cider, campfires, beautiful changing leaves; I could go on.
Clockwise from the top we have Rachel wearing Clarice, Heather wearing Chunk, and me (Amy) wearing Clyde)
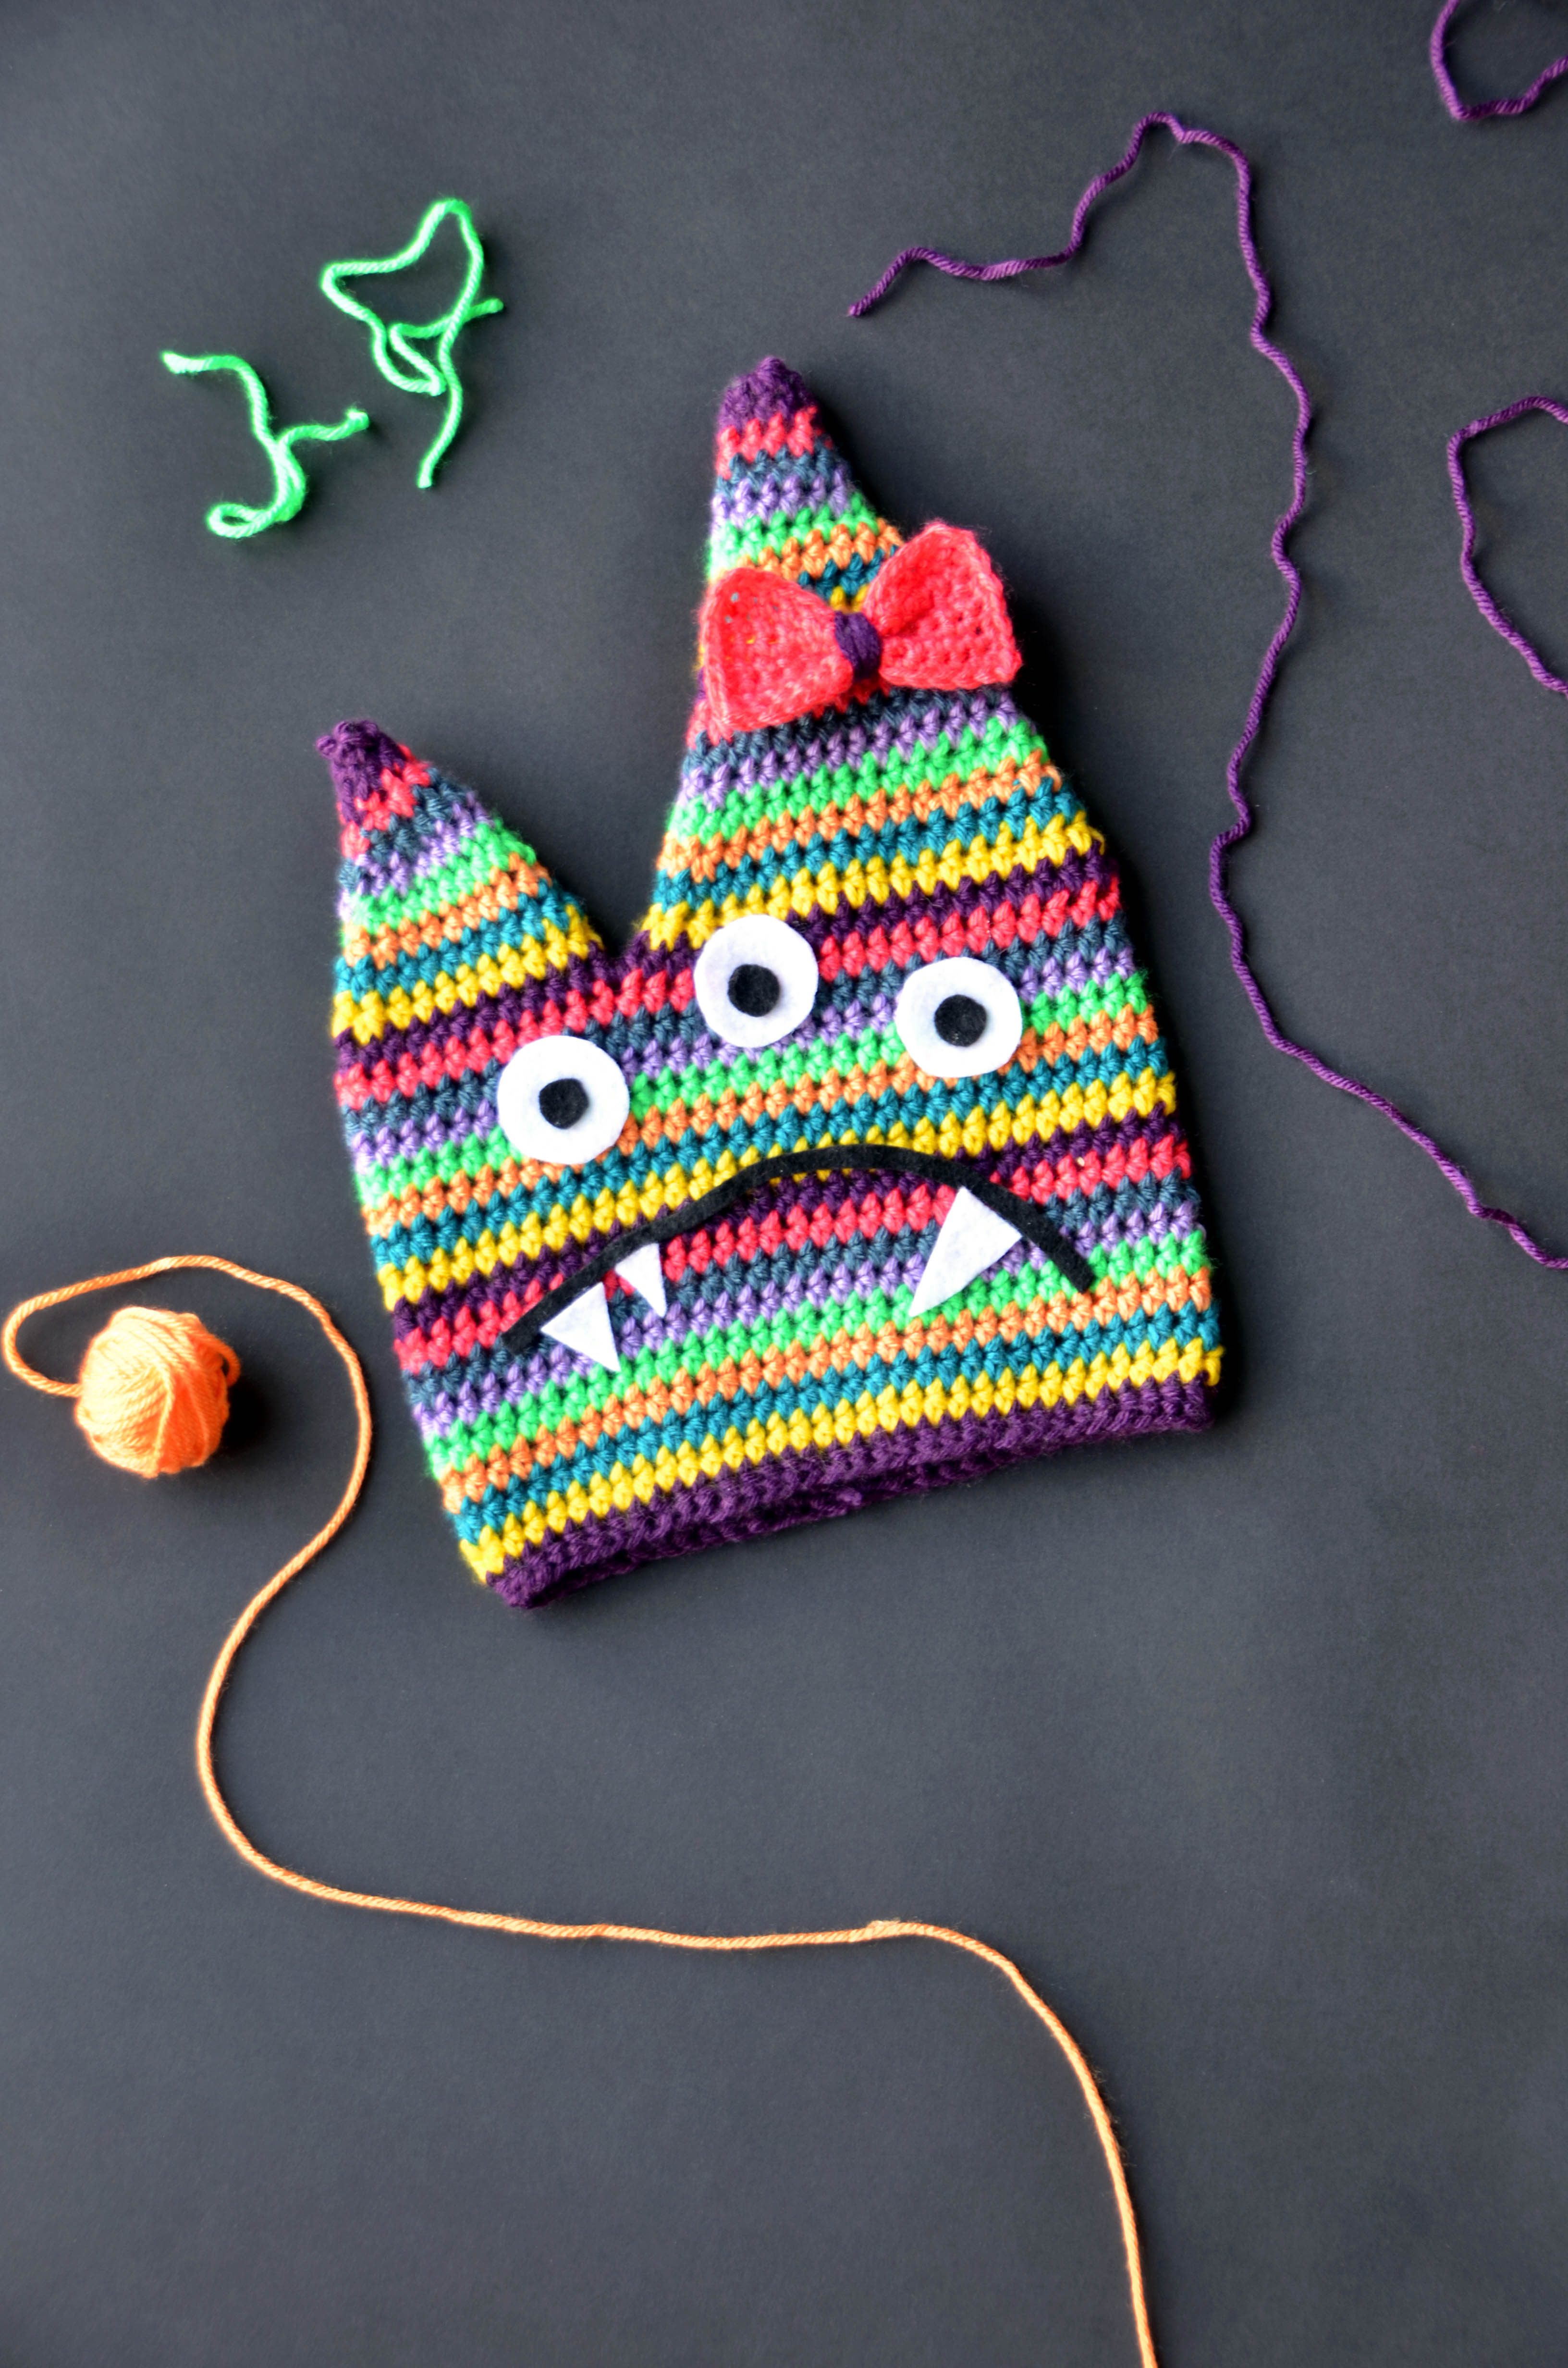
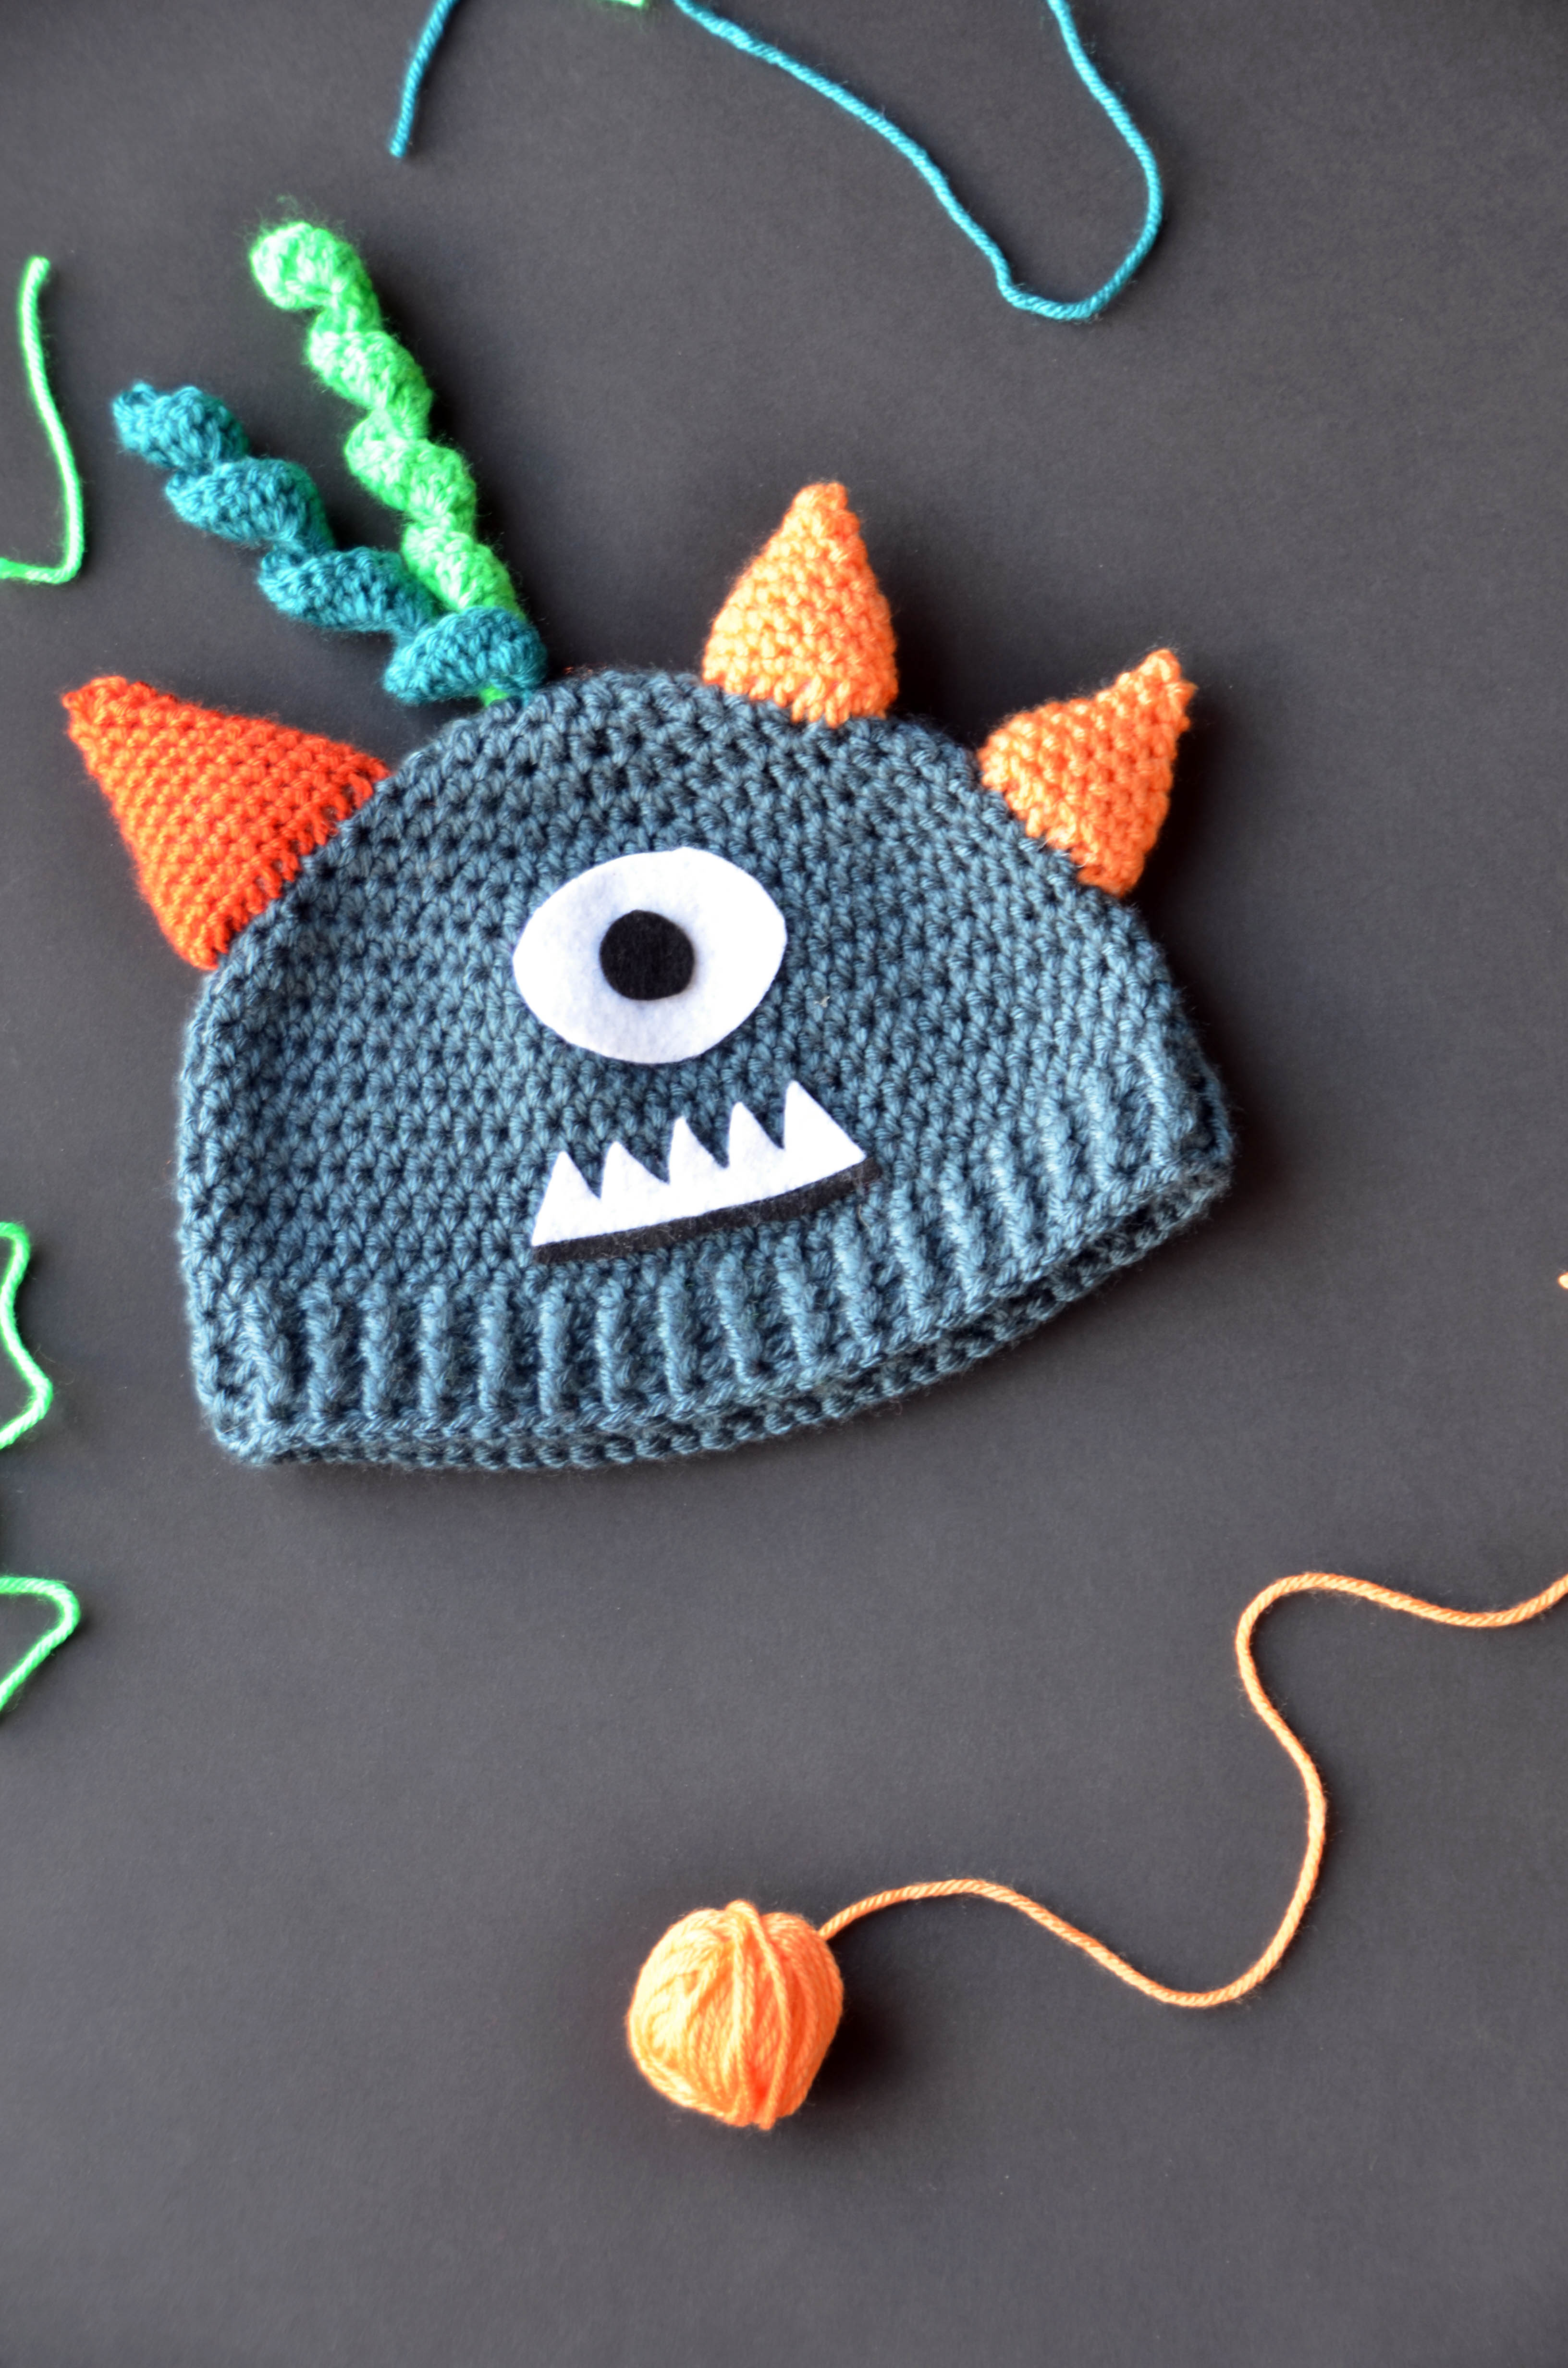
But of course the most fun thing about Halloween are the costumes. I finally settled on my own costume idea for this year a week or two ago. But there was a period of panic where I just couldn’t come up with an idea I was happy with. Enter: monster hats (pattern link).
Hi. I’m Clarice. I know it doesn’t look like it but I’m actually very happy.
Now monster hats are really pretty fun any time of year. They’re really not season-specific. But, in a pinch, they can make an excellent costume.
Hhhii, I’m Chunk. I like you.
All three are crocheted in numerous shades of Uptown Worsted, our super-soft anti-pilling acrylic. This is a great hat yarn because it feels good on the head and is not itchy. It’s also quite affordable and buying several skeins in different colors won’t break the bank.
I believe she was not in her right mind while making me. I mean, one eye? At least it’s a large eye. I am Clyde, by the way.
There lots of different add-on elements going on in each of these hats. The idea is that you can follow the patterns as written if you like. Or you can come up with your own unique monster using different combinations of spikes, horns, different numbers of eyes, etc.
We want candy. More candy. And not the cheap stuff.
So if you’ve found yourself with out a costume and Halloween only a week away, why not be a monster?
You can find the patterns for all three hats on our website here (pattern link). Happy Halloween!
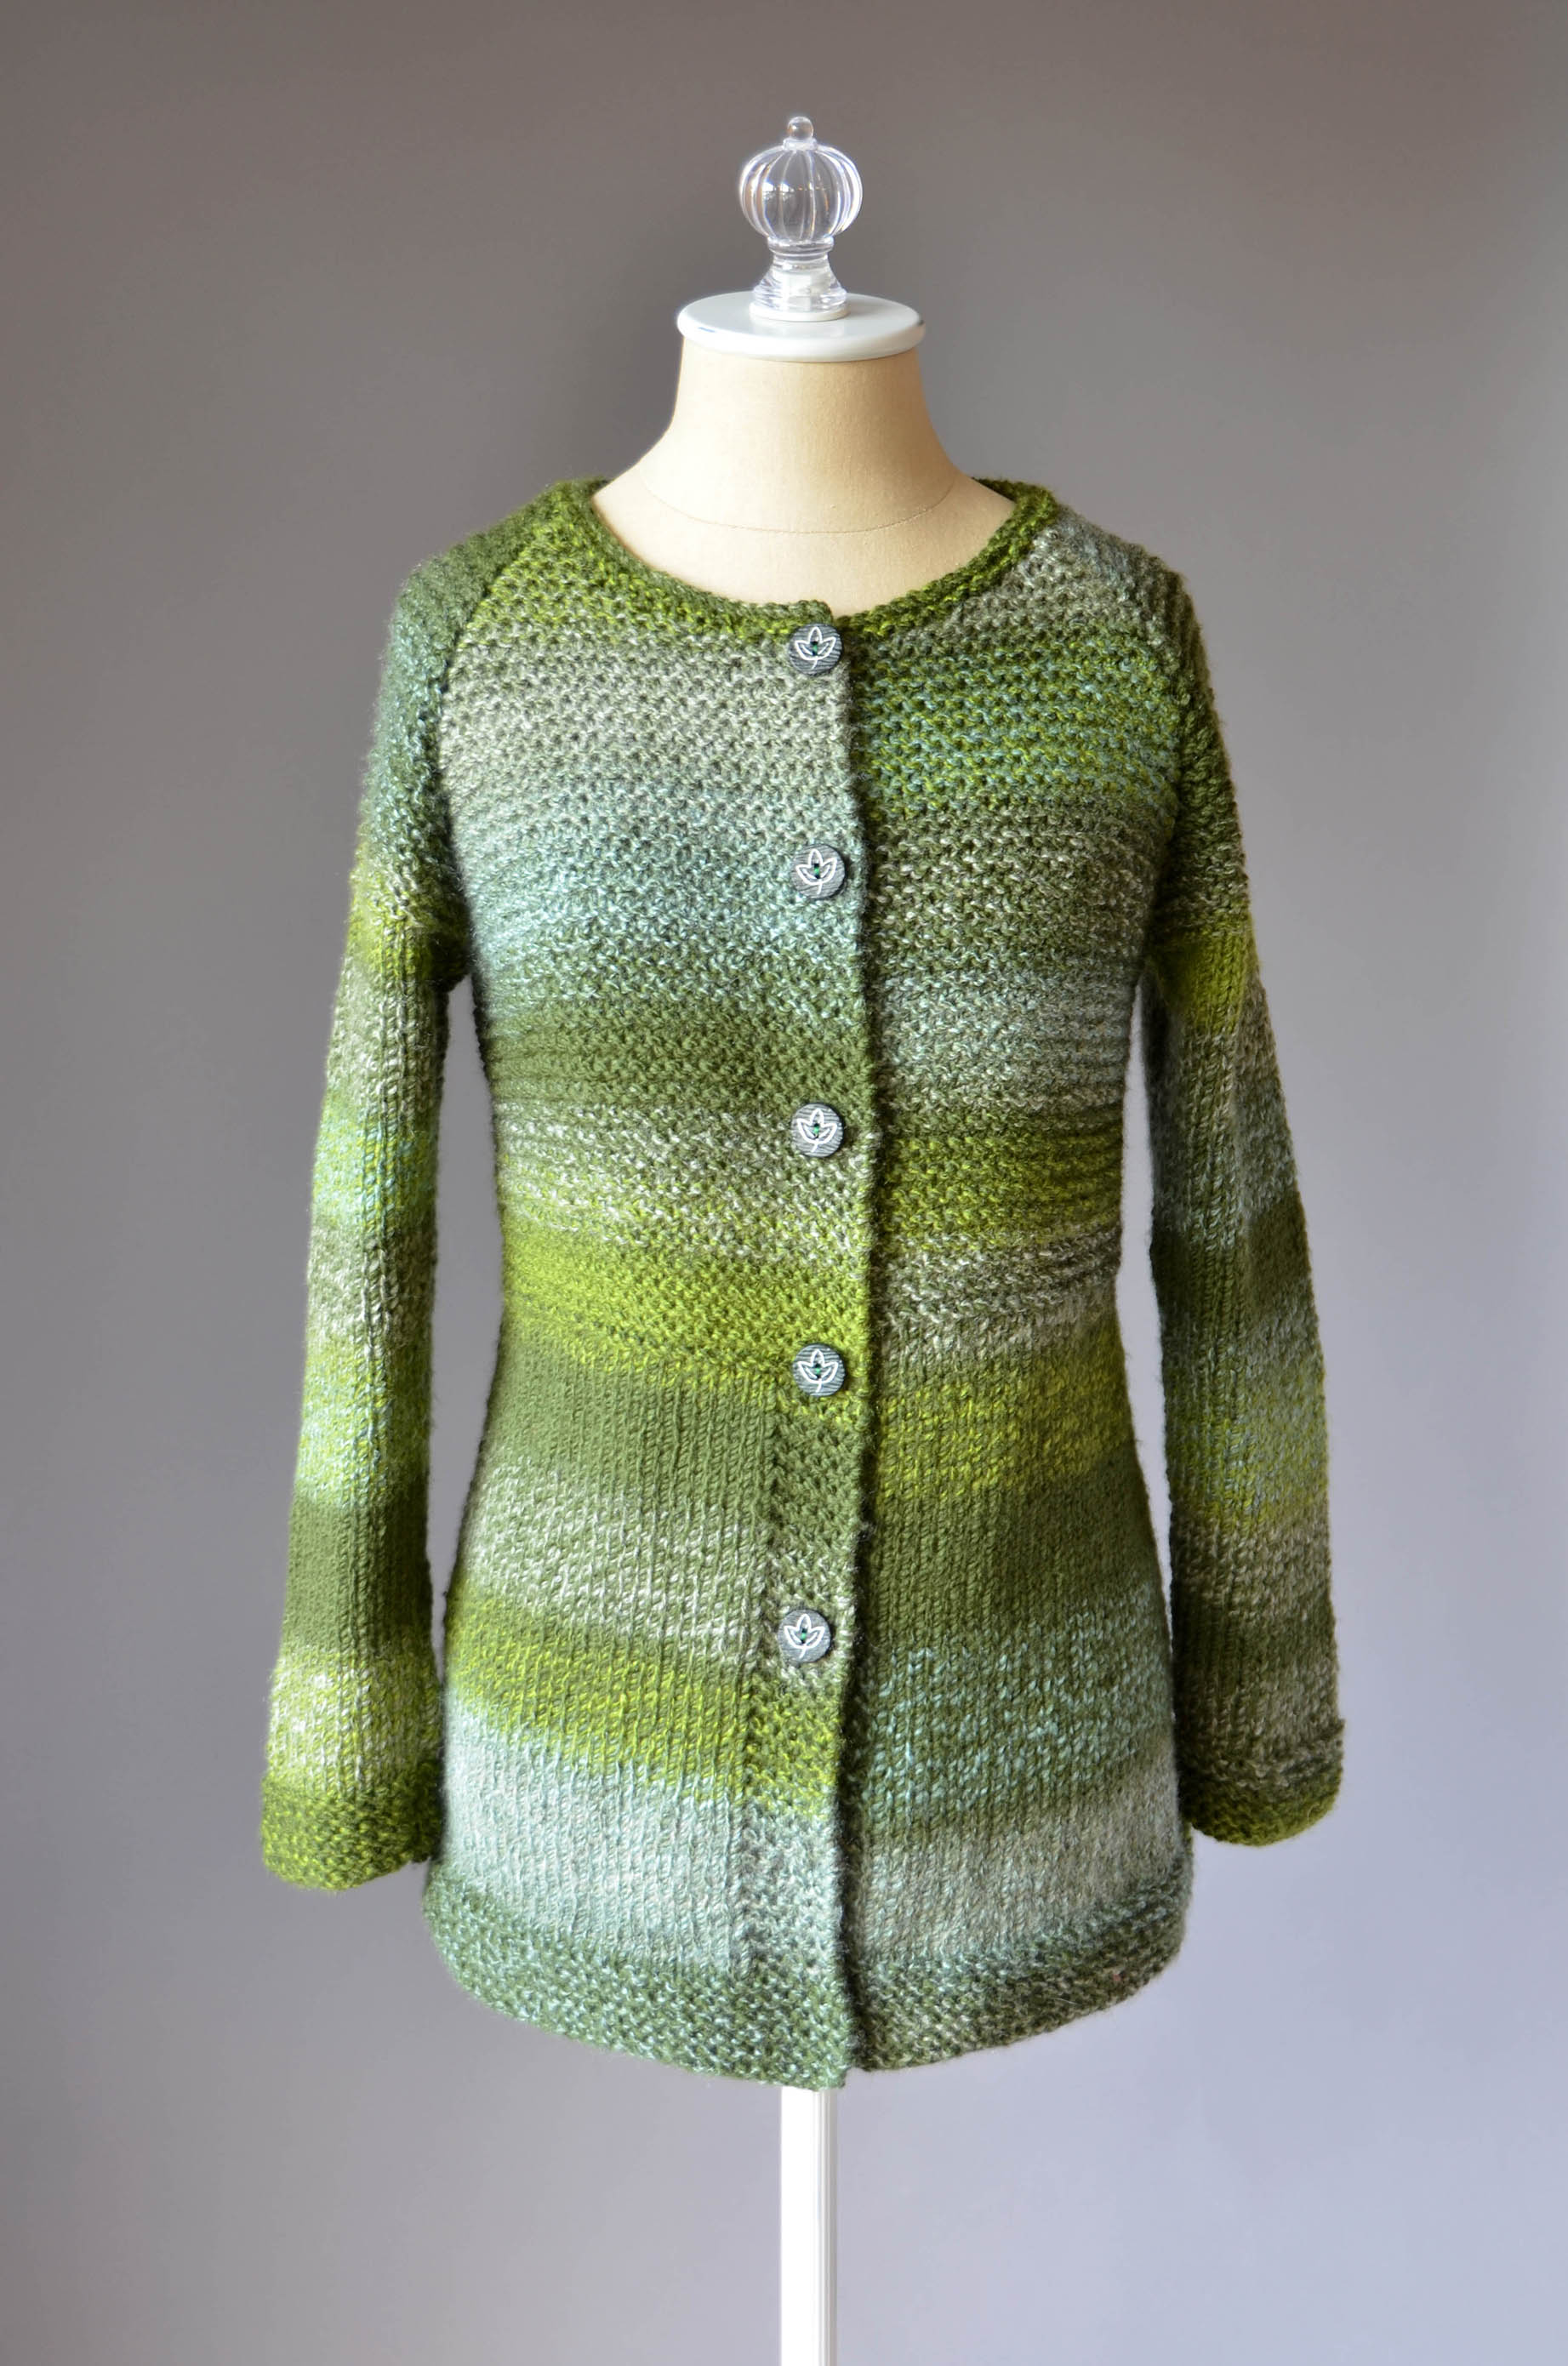
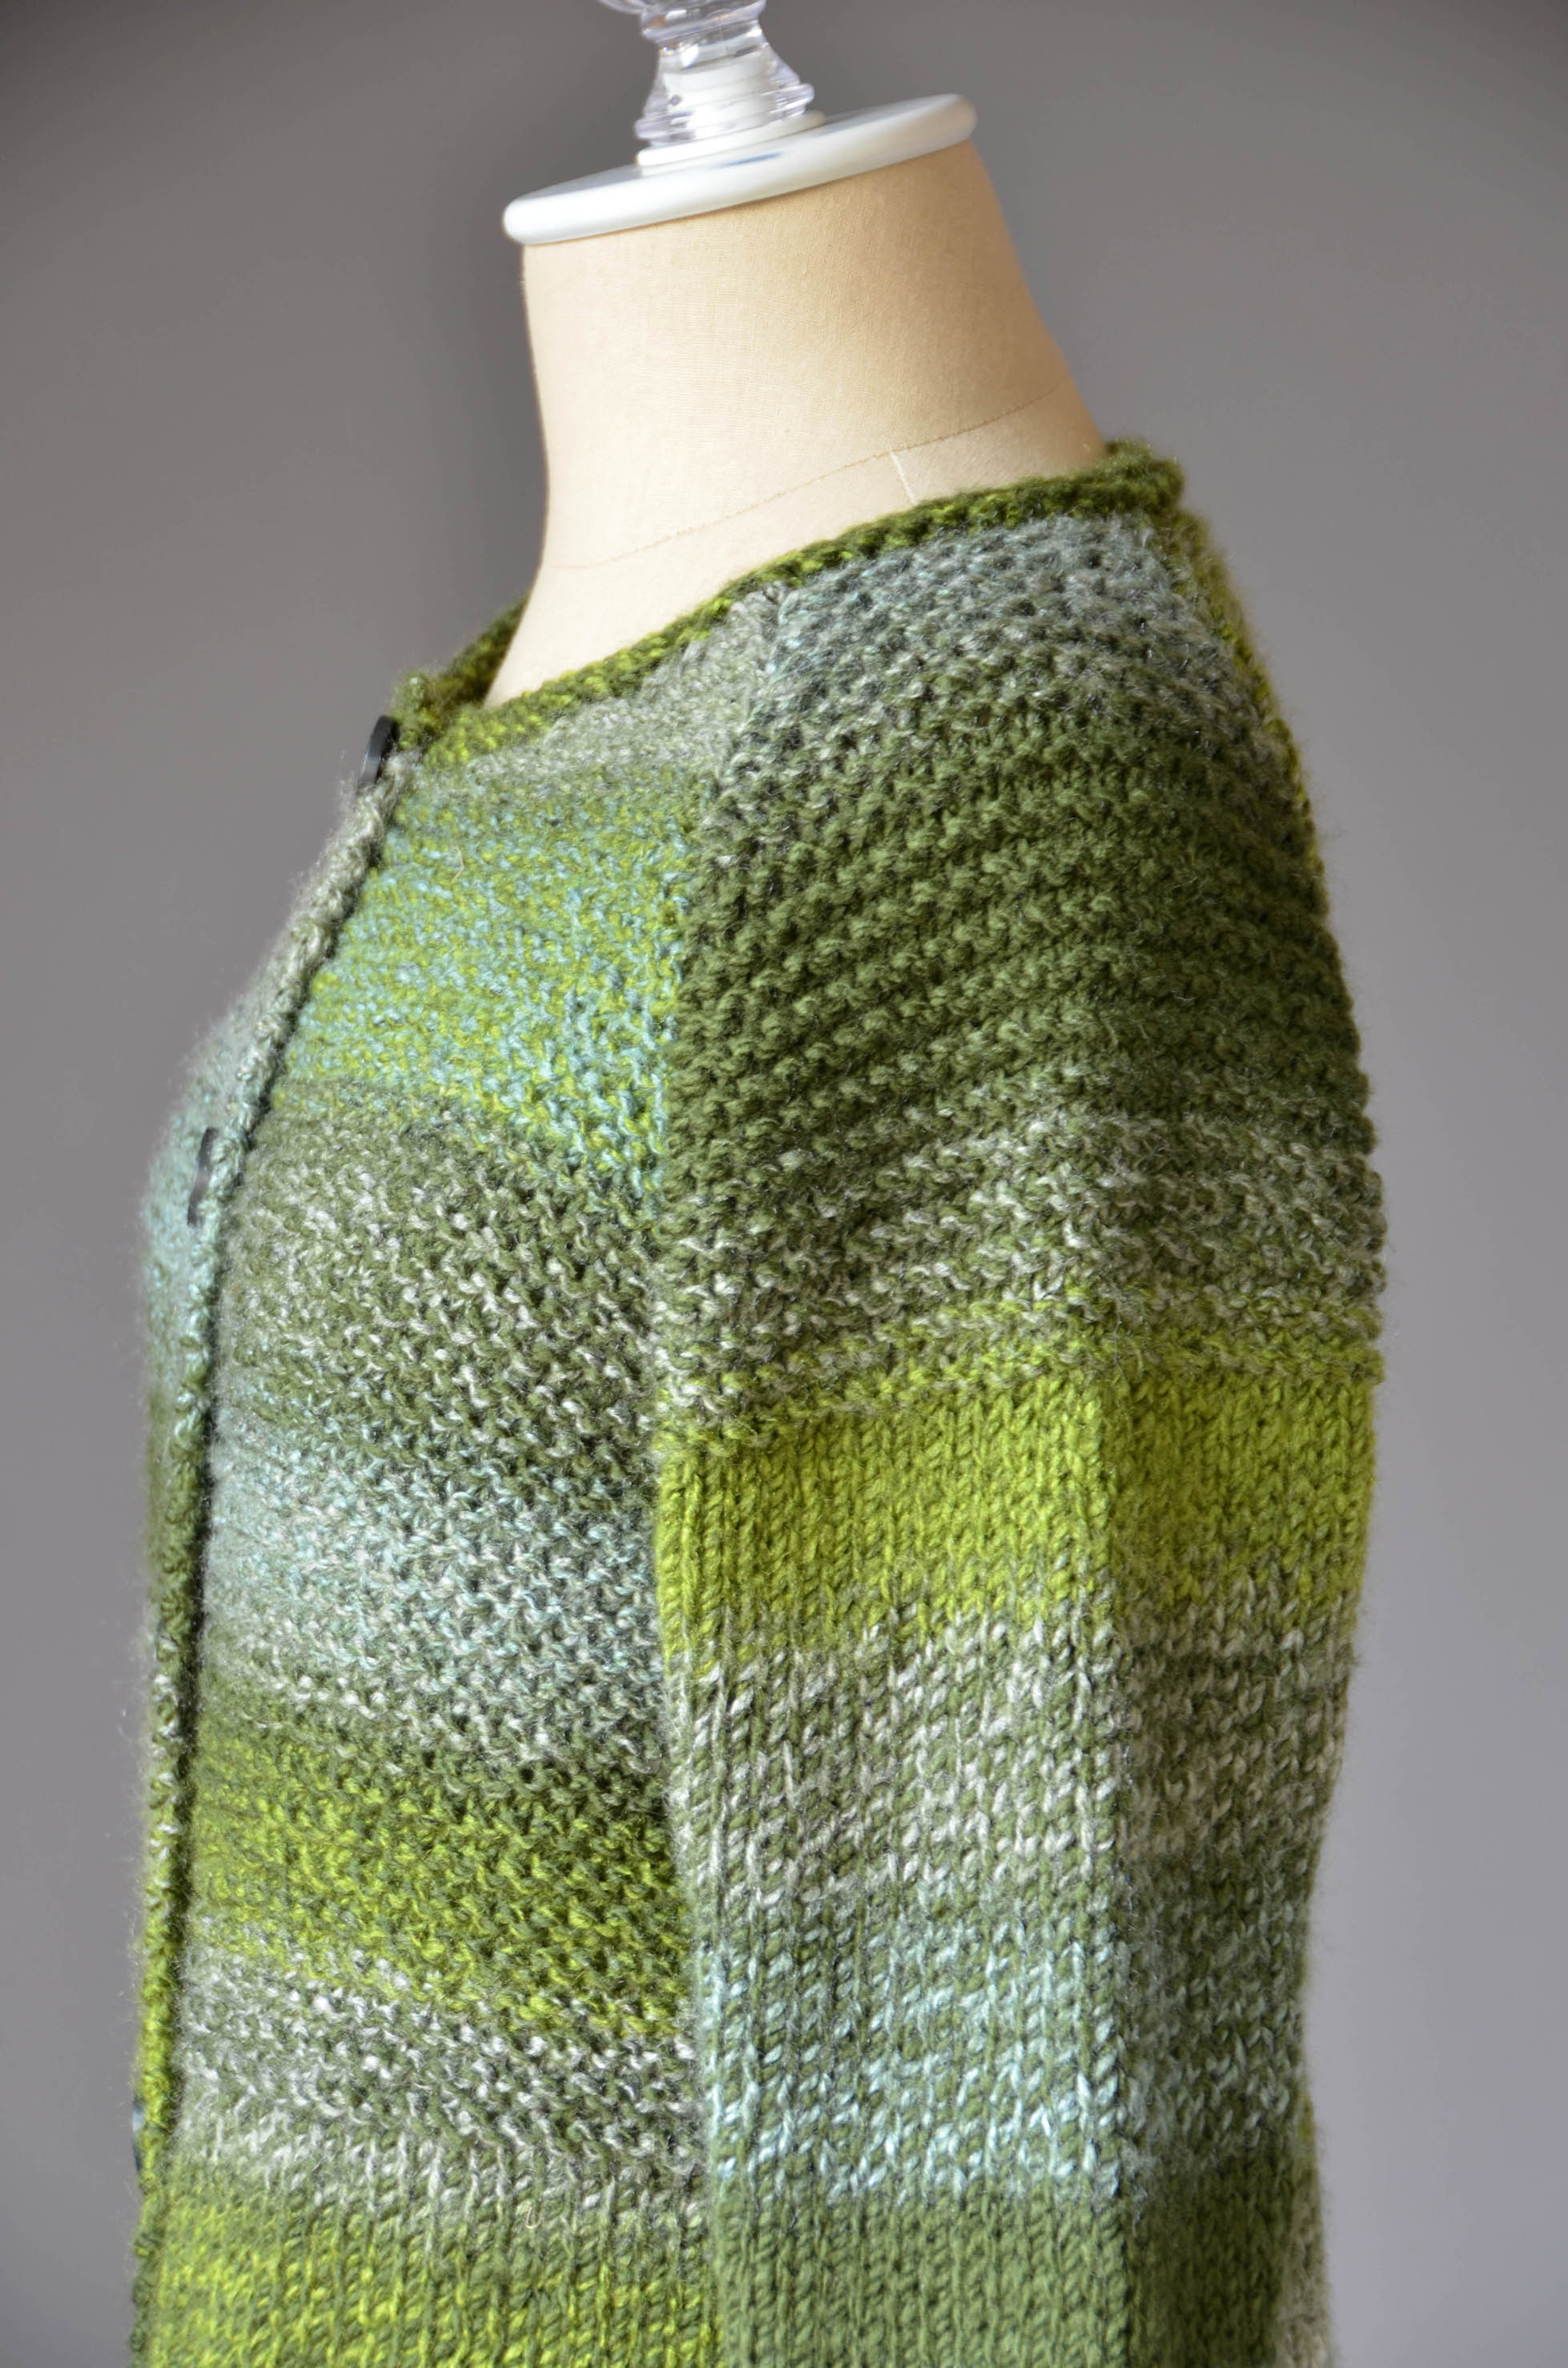
The leaves are falling from the trees, but we want to hold onto all things green just a little bit longer. The Mossbank Cardigan is a lovely A line sweater, knit from the bottom up in pieces and seamed. The buttonbands are worked as one with the front pieces, so no picking up stitches later for this!
Best, self-shading Major does the colorwork for you, gently striping up the length of the body and sleeves.
We hope you have a restorative weekend, and find time to make something beautiful.