This is part 3 in a 12 part series highlighting designs from our 12 Days of Winter, Series 3 Edition.
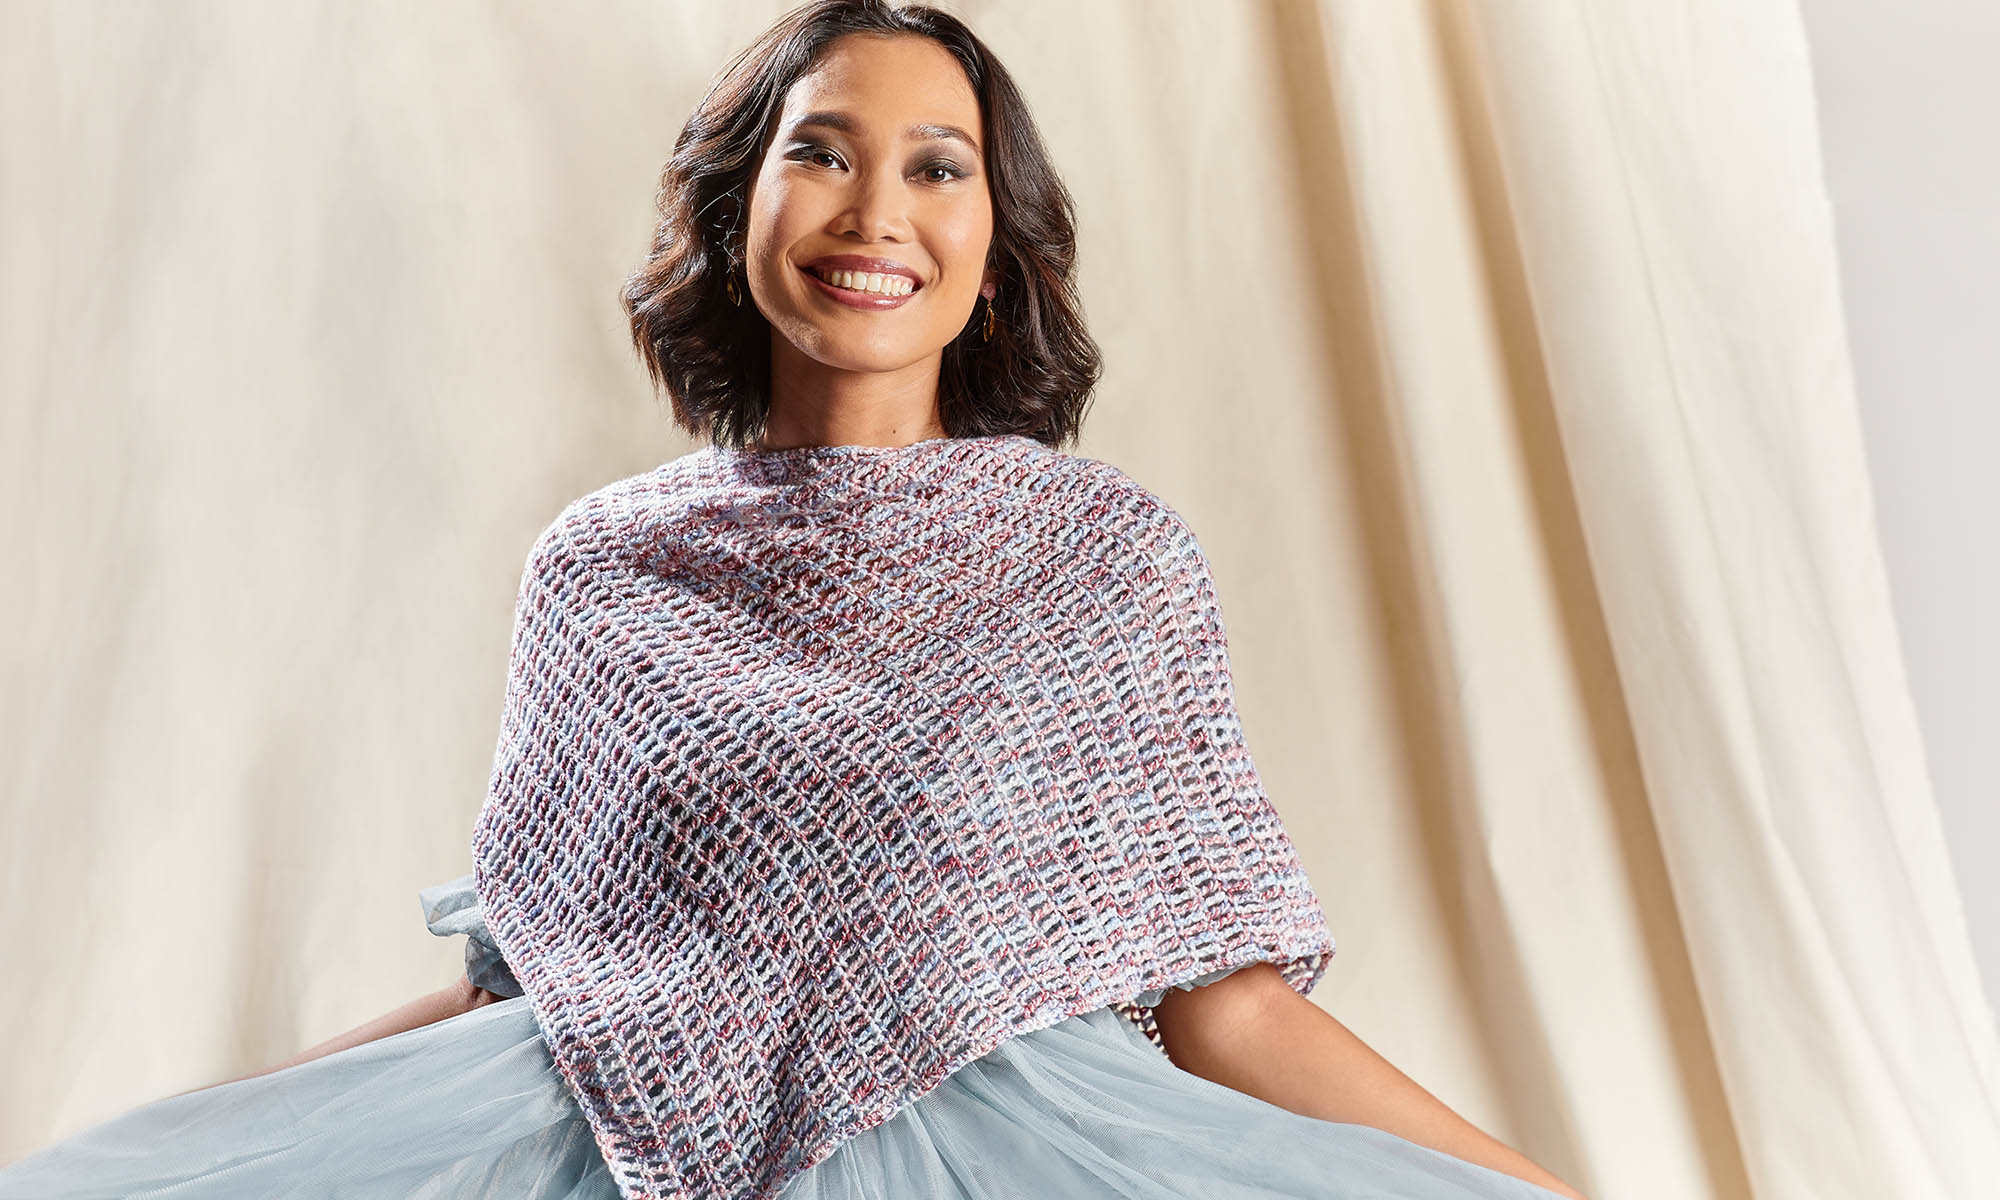
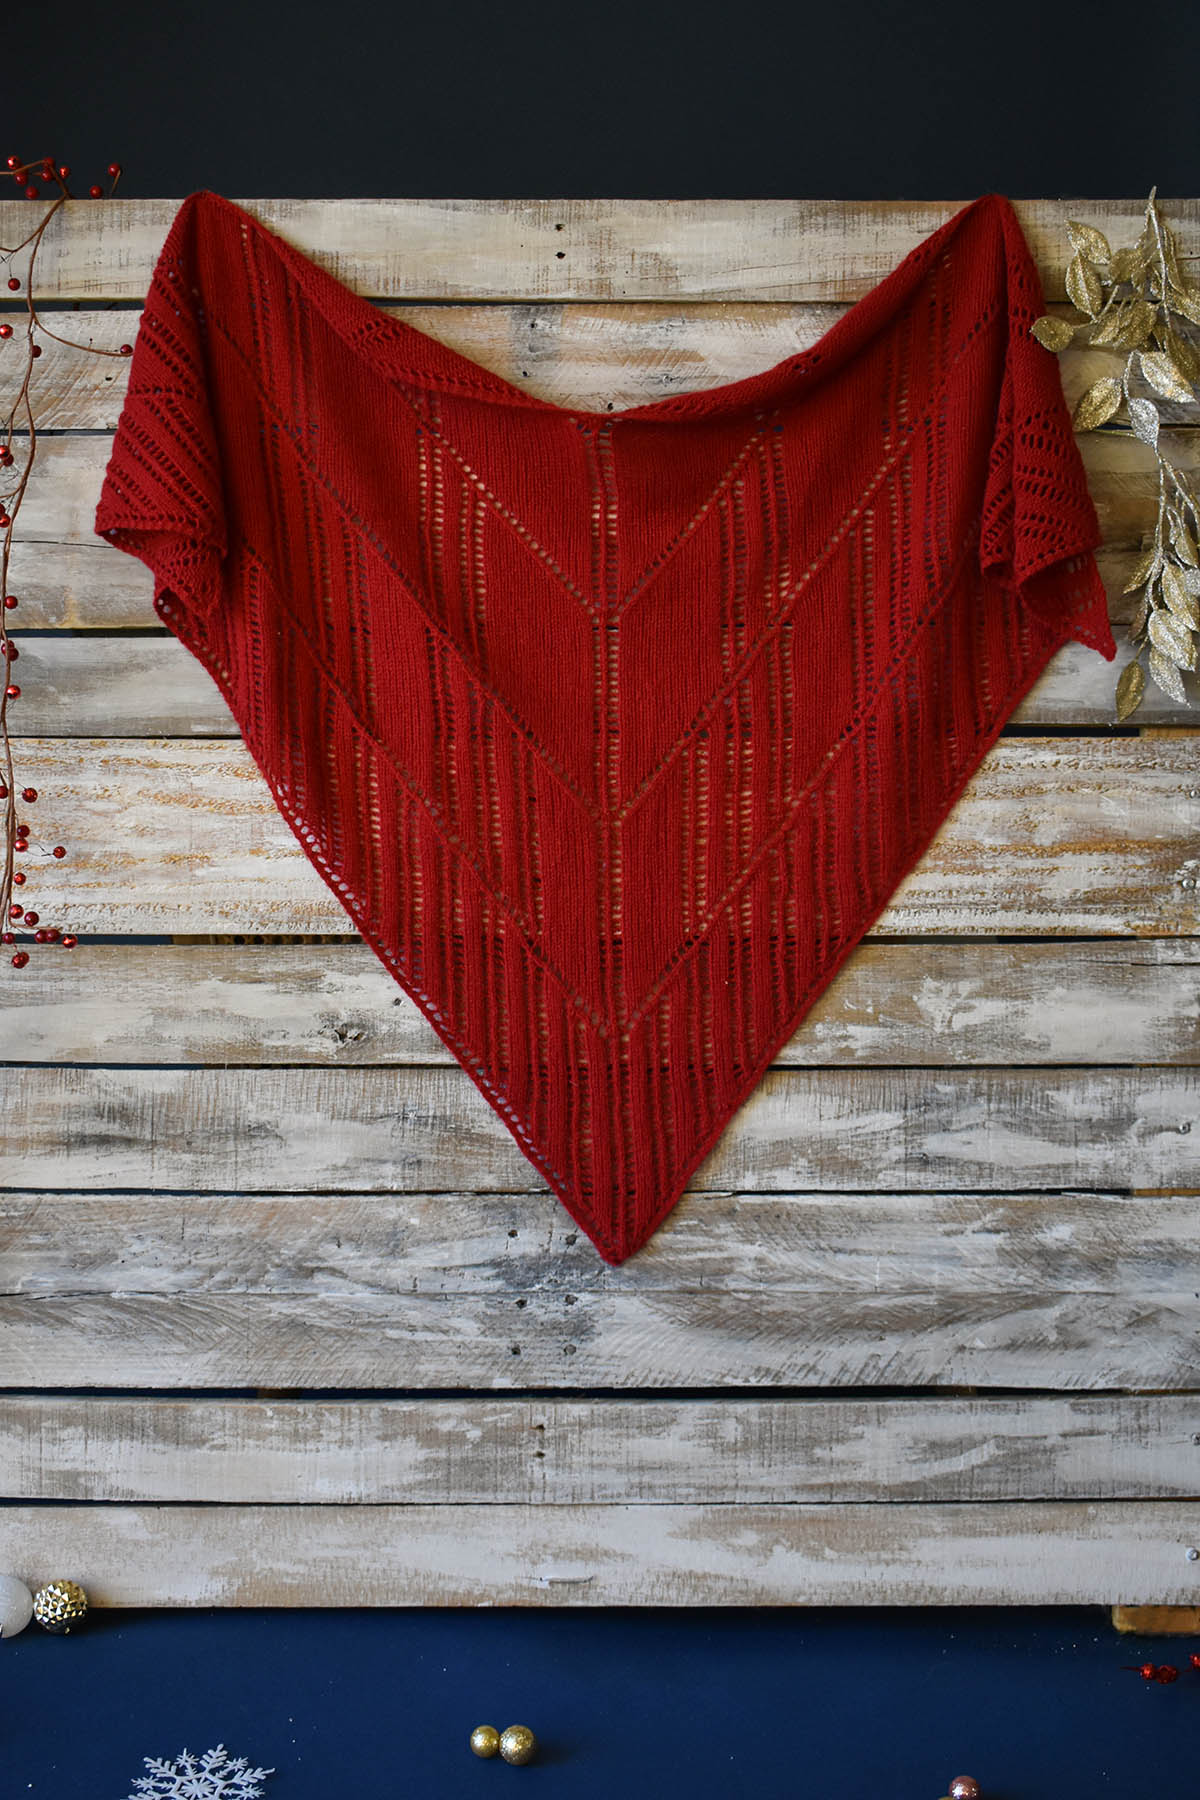
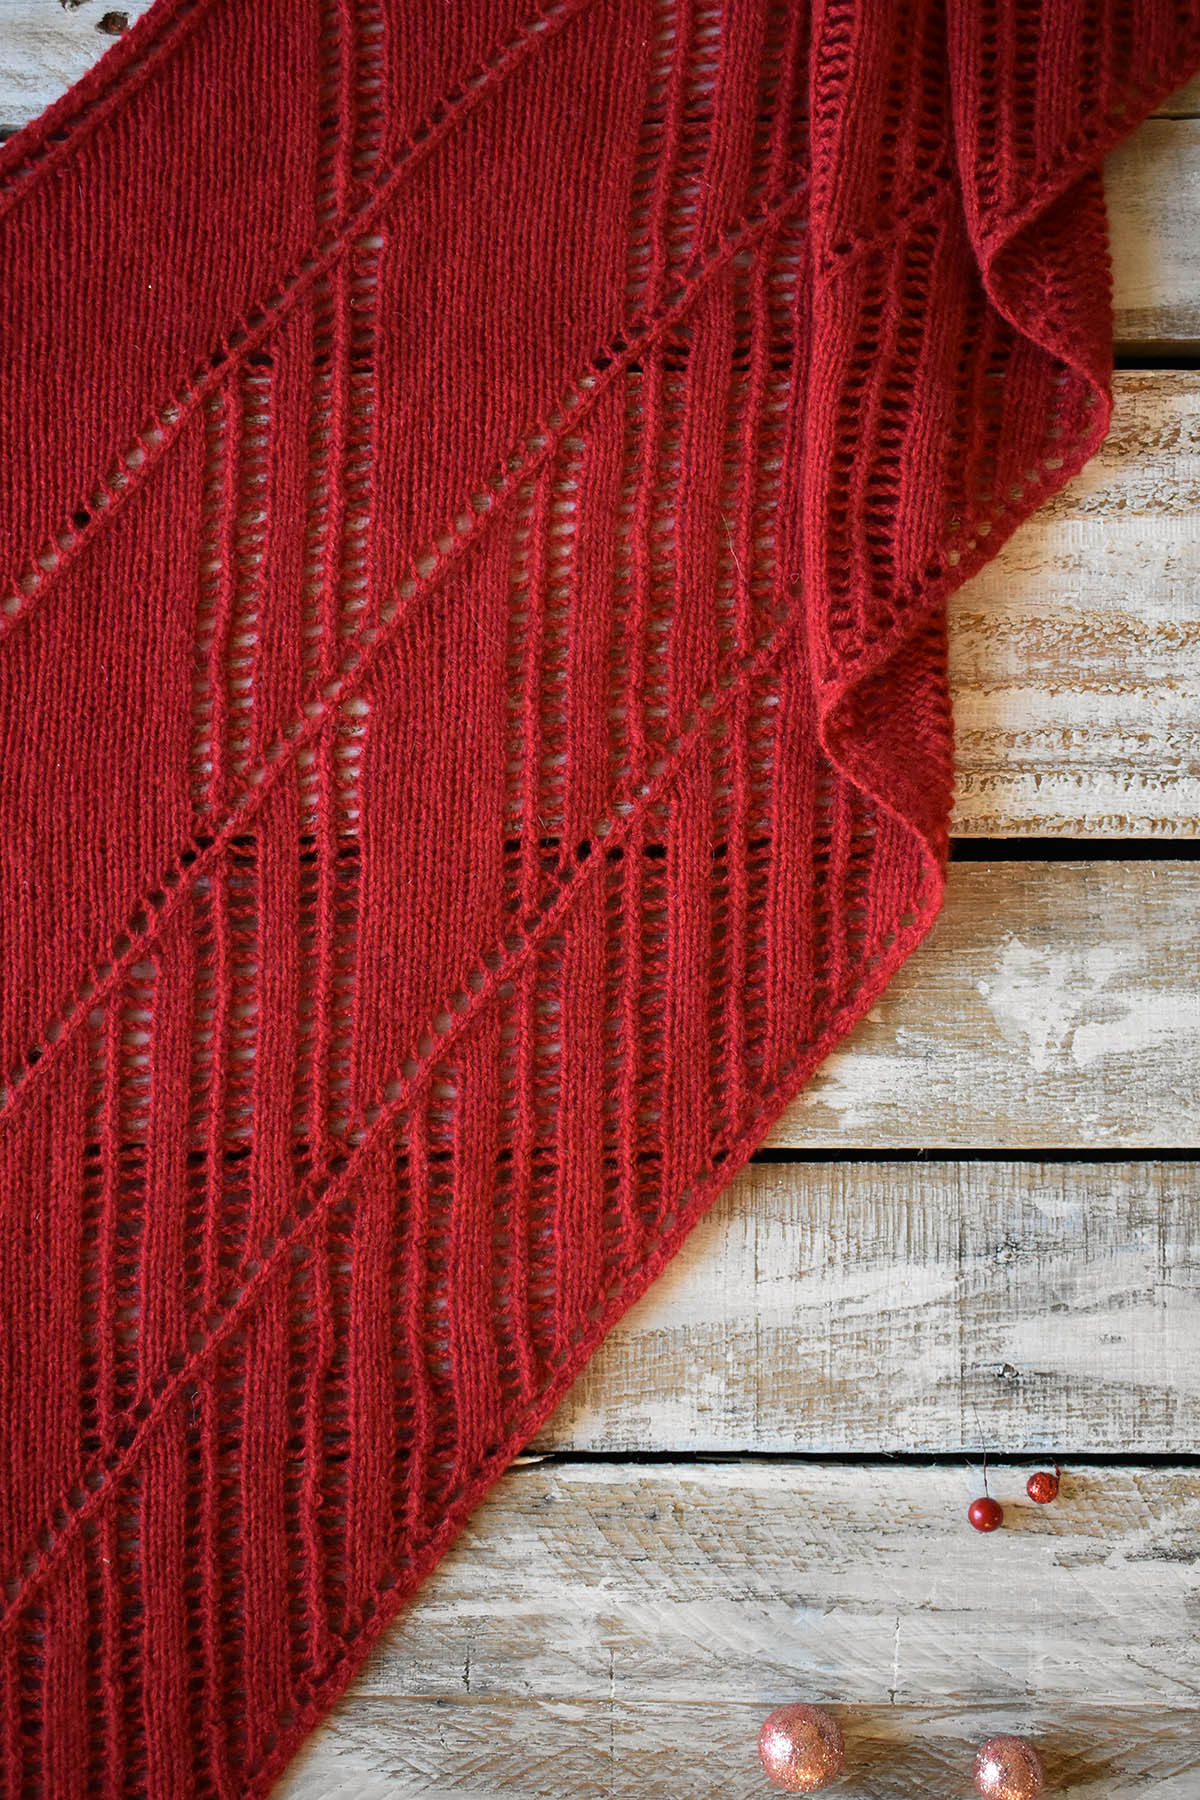
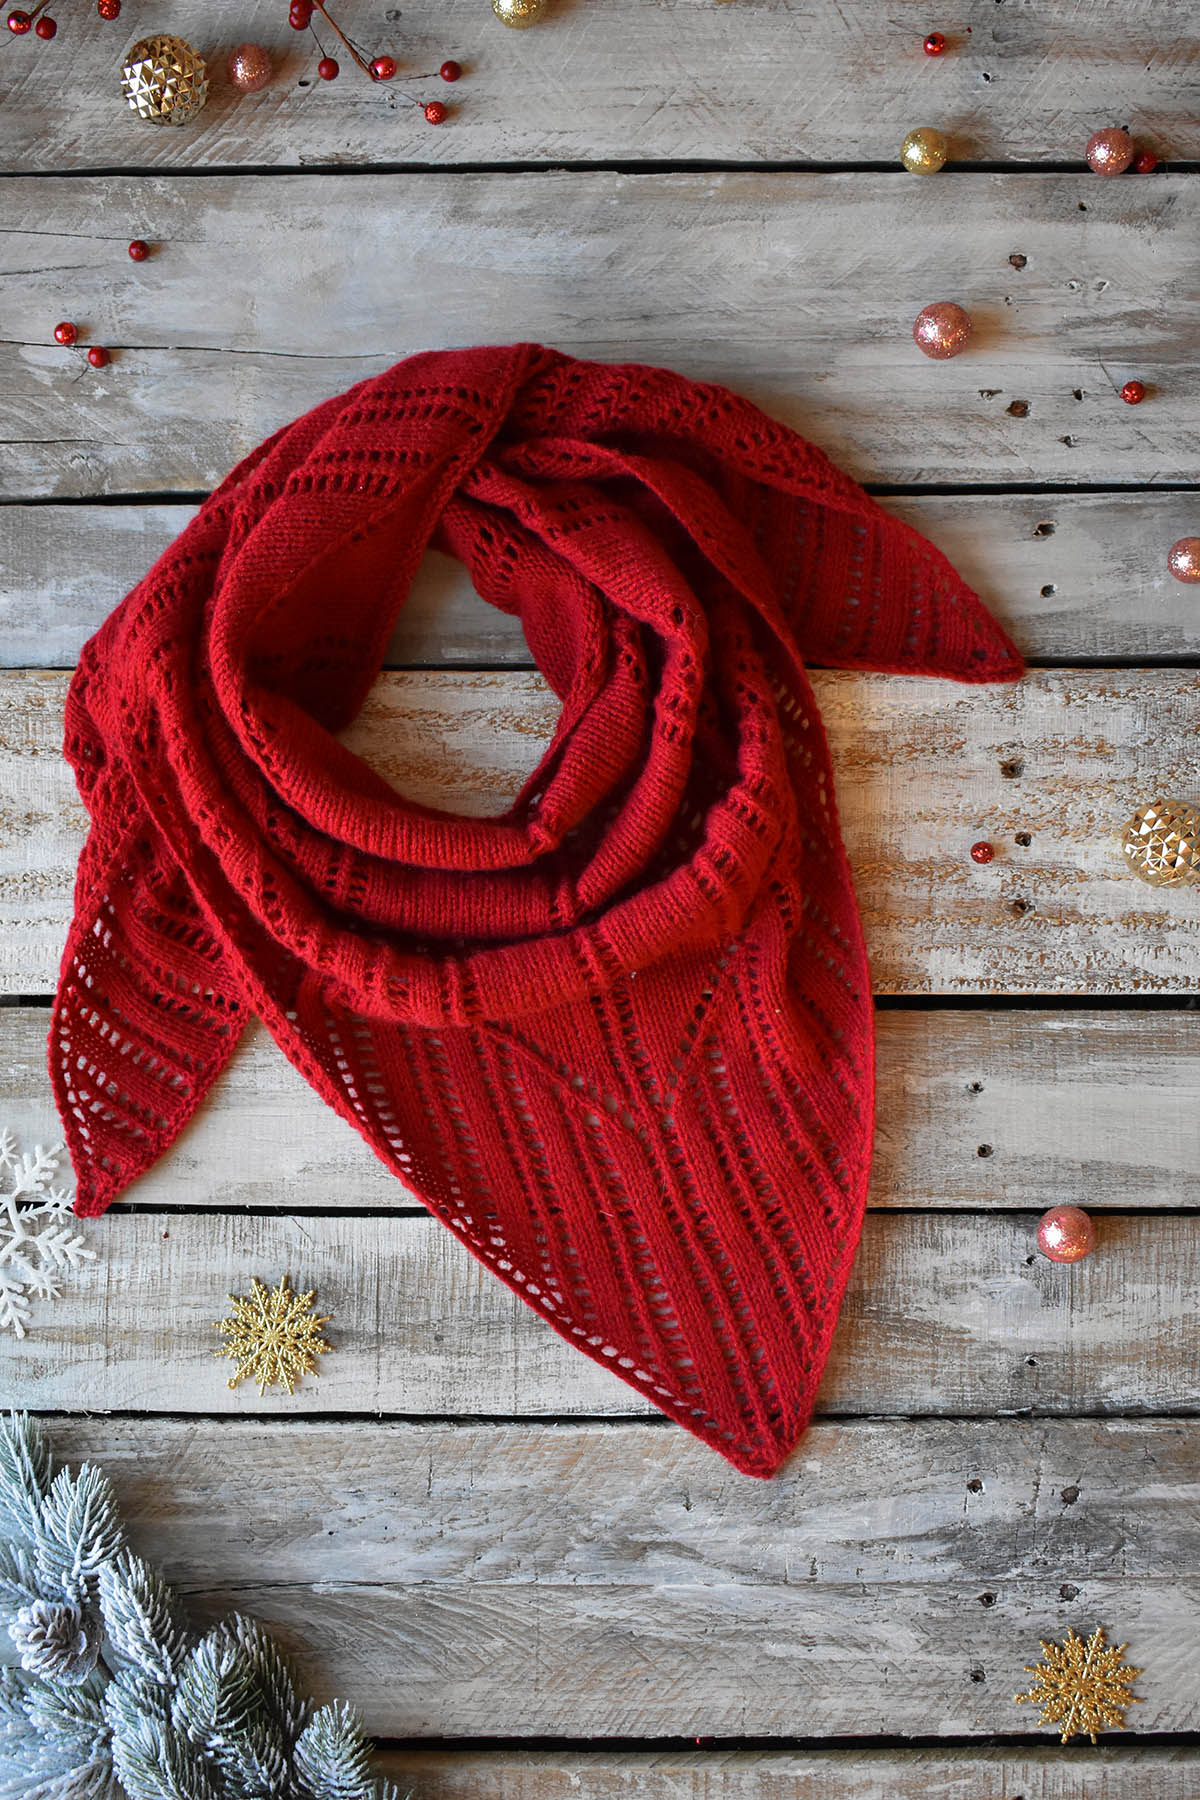
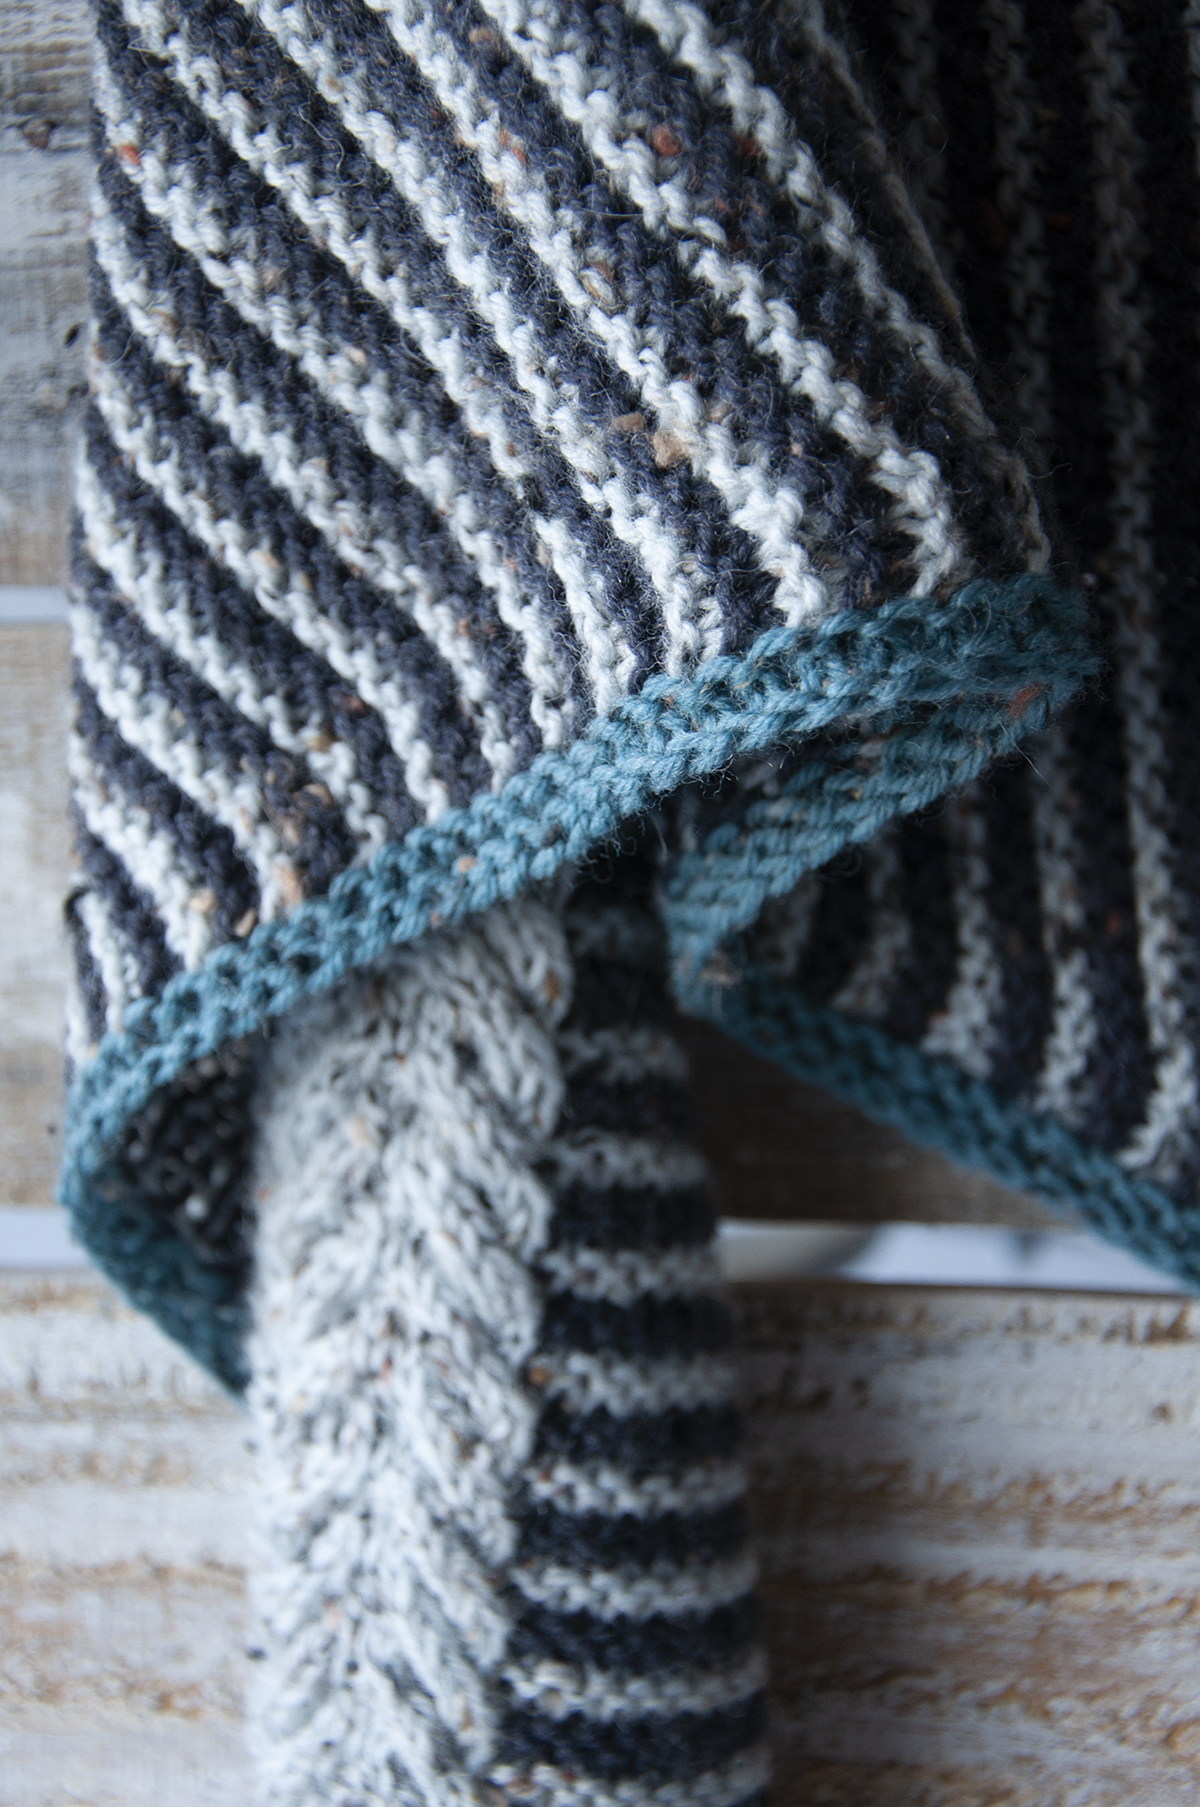
It’s already Day 3 of the 12 Days of Winter Kit Collection, and I couldn’t be more excited to share this lovely shawl with you. Say hello to December in the City – a luxe shawl in dreamy Cashmere Lusso, designed by Adrienne Larsen. We love the lace columns and geometry of this shawl, and we wanted to pick Adrienne’s brain. We asked her to share a bit about her inspiration for this design, so she kindly obliged. Here is what she had to say:
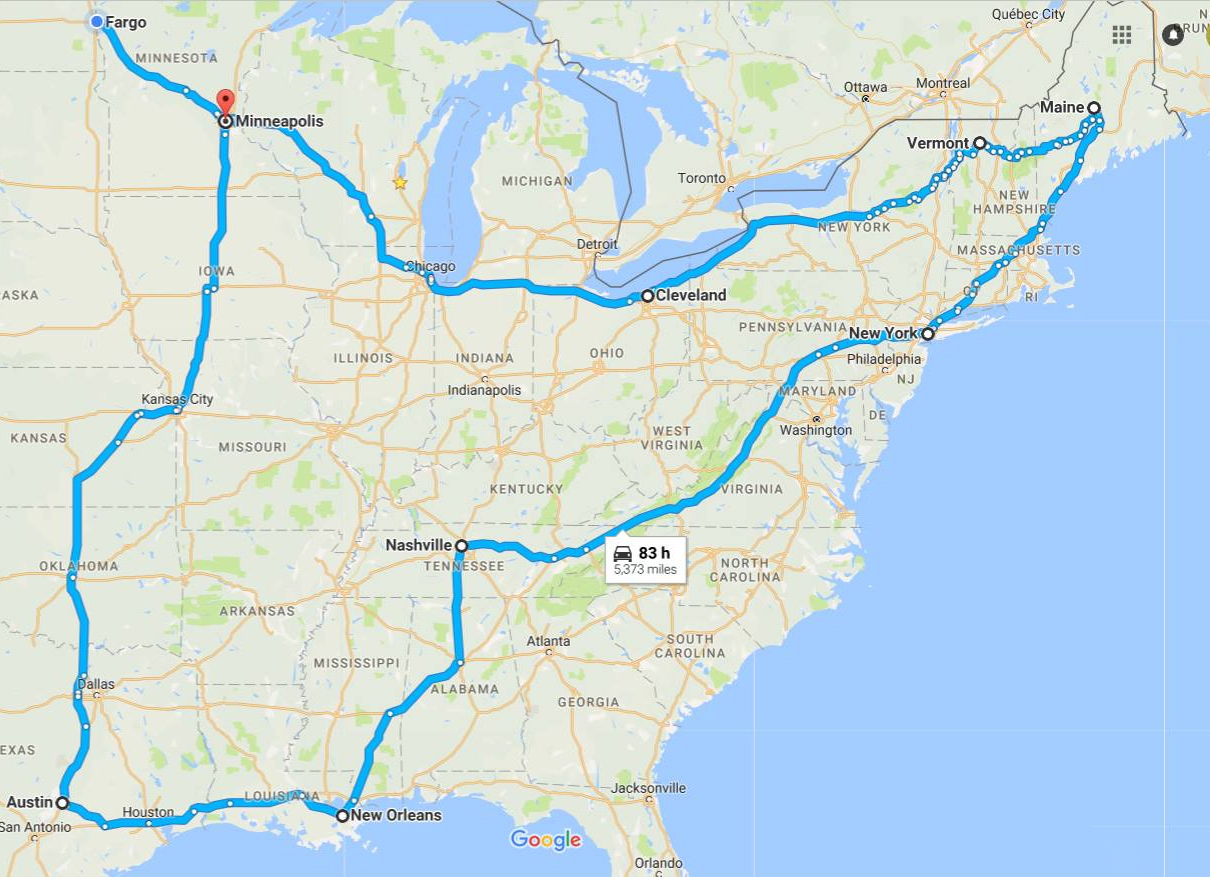
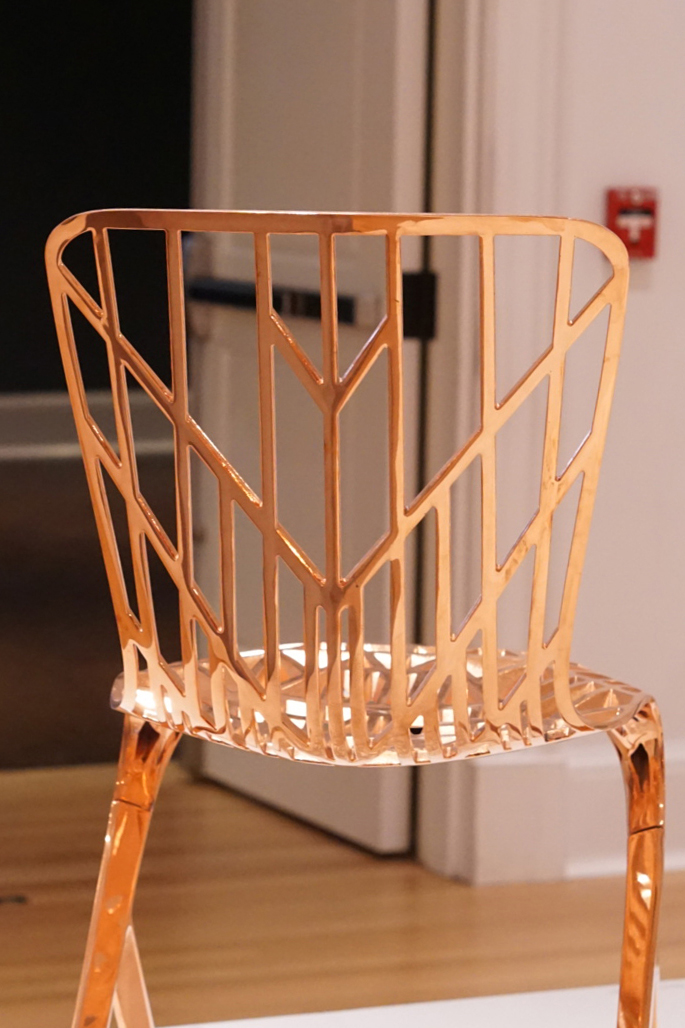
“This design has been a long time in the making. It all starts in May of 2017 when I went on an EPIC road trip with my sister. We covered 25 states in 14 days! We saw so much, and I visited a lot of states I’d never been on before. I ate so much ice cream in so many places (surprisingly, the best was vegan ice cream in Austin)!
It was such a whirlwind that I don’t even remember what state I was in when this chair at a museum struck my fancy. (It’s very Adrienne to remember the ice cream flavors in Austin – Cinnamon Toast Crunch & Horchata – but not this). I loved the combination of the vertical lines and interrupted diagonals.
I wrote a lace pattern with it in mind in my hotel room that night. Since that time, that lace pattern has tried to be both a tank top and a pullover, but it didn’t work out. It wasn’t until two years later that I realized that it was a shawl.
You never know when inspiration will strike, so never give up on a good idea!”
-Adrienne
We loved hearing about Adrienne’s inspiration for this shawl and can absolutely see the resemblance. This shawl is a magical addition to the 12 Days of Winter Kit Collection. As a reminder, you can find the 12 Days of Winter Kits at your local yarn shop.
This is part 2 in a 12 part series highlighting designs from our 12 Days of Winter, Series 3 Edition.
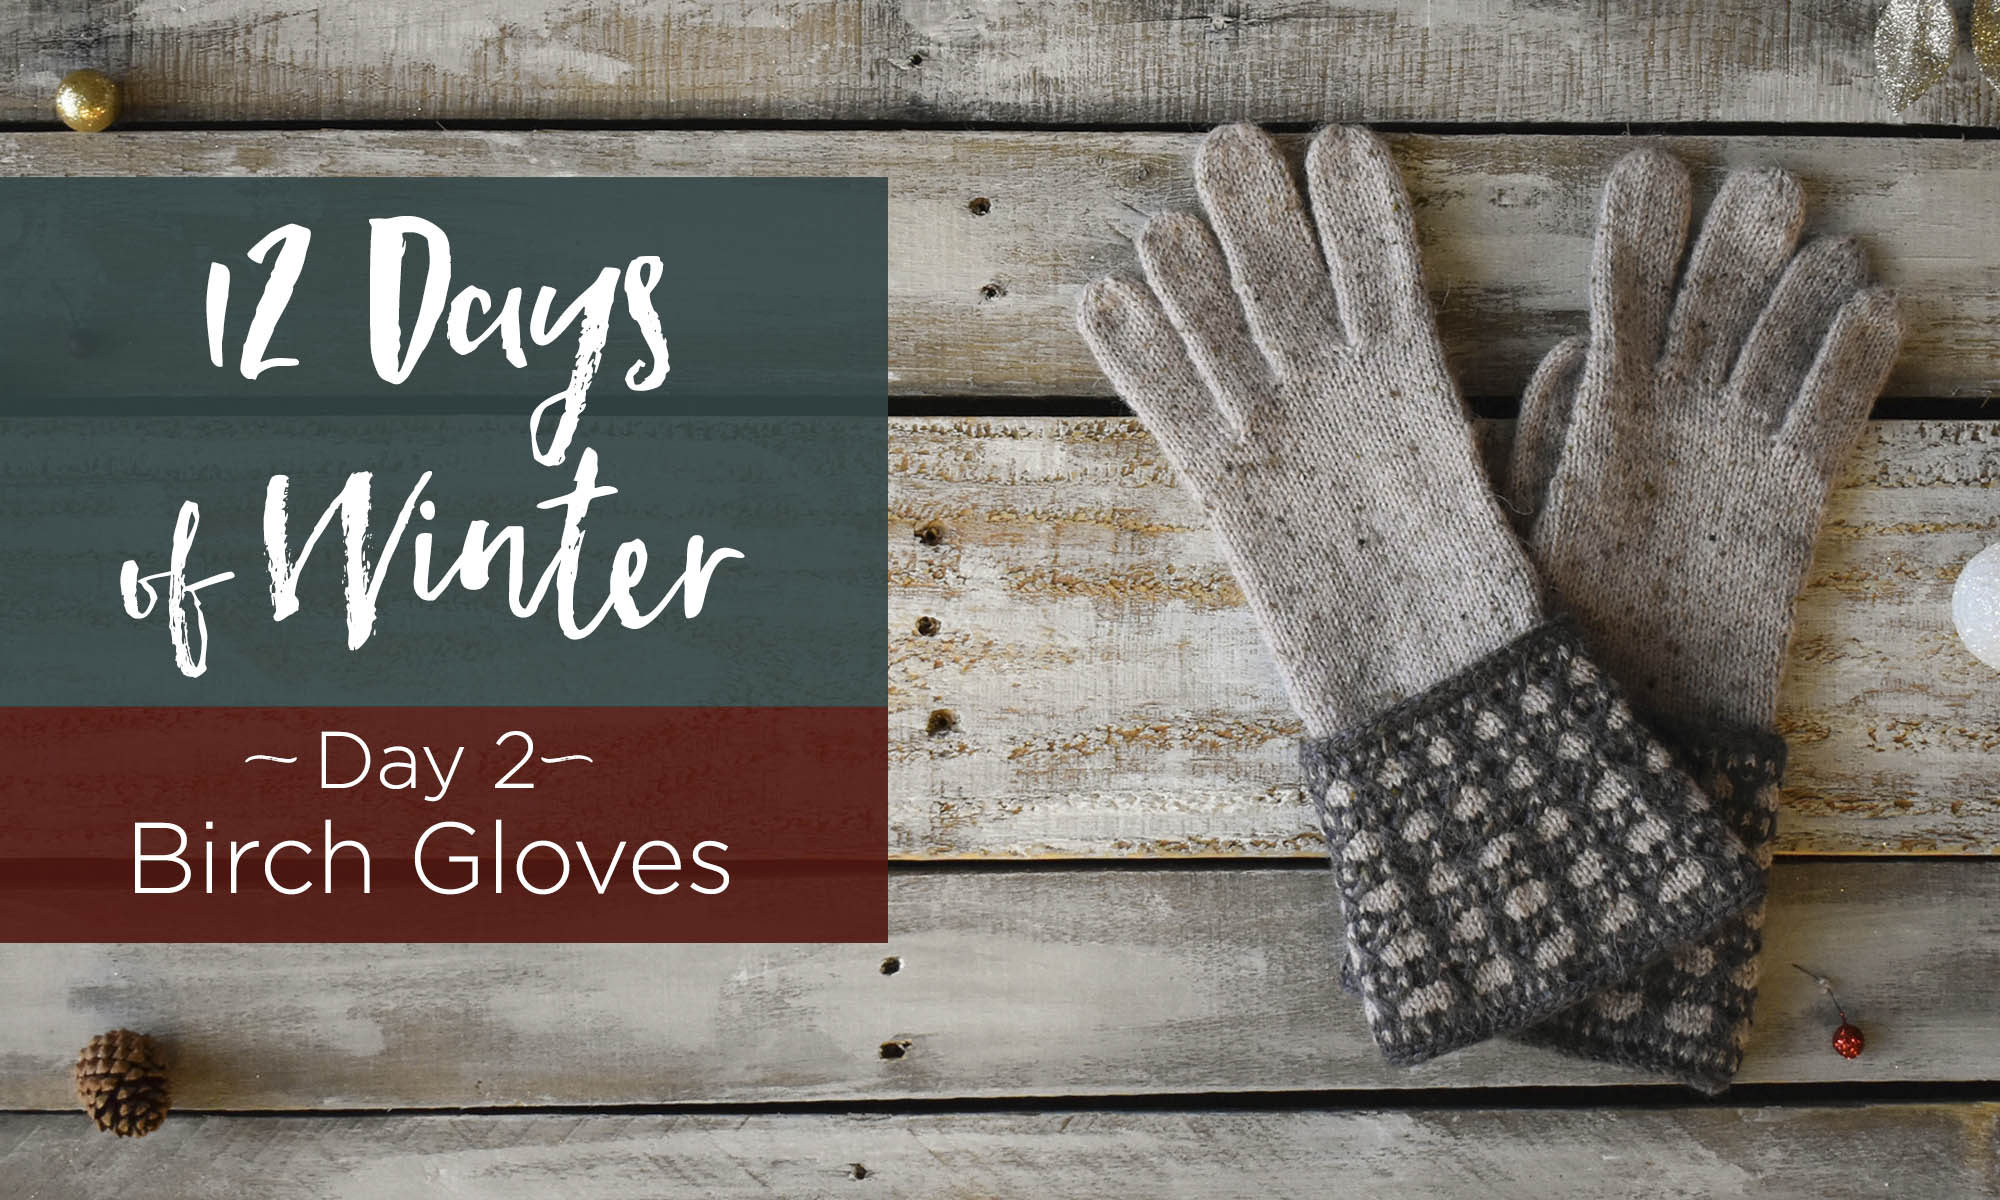
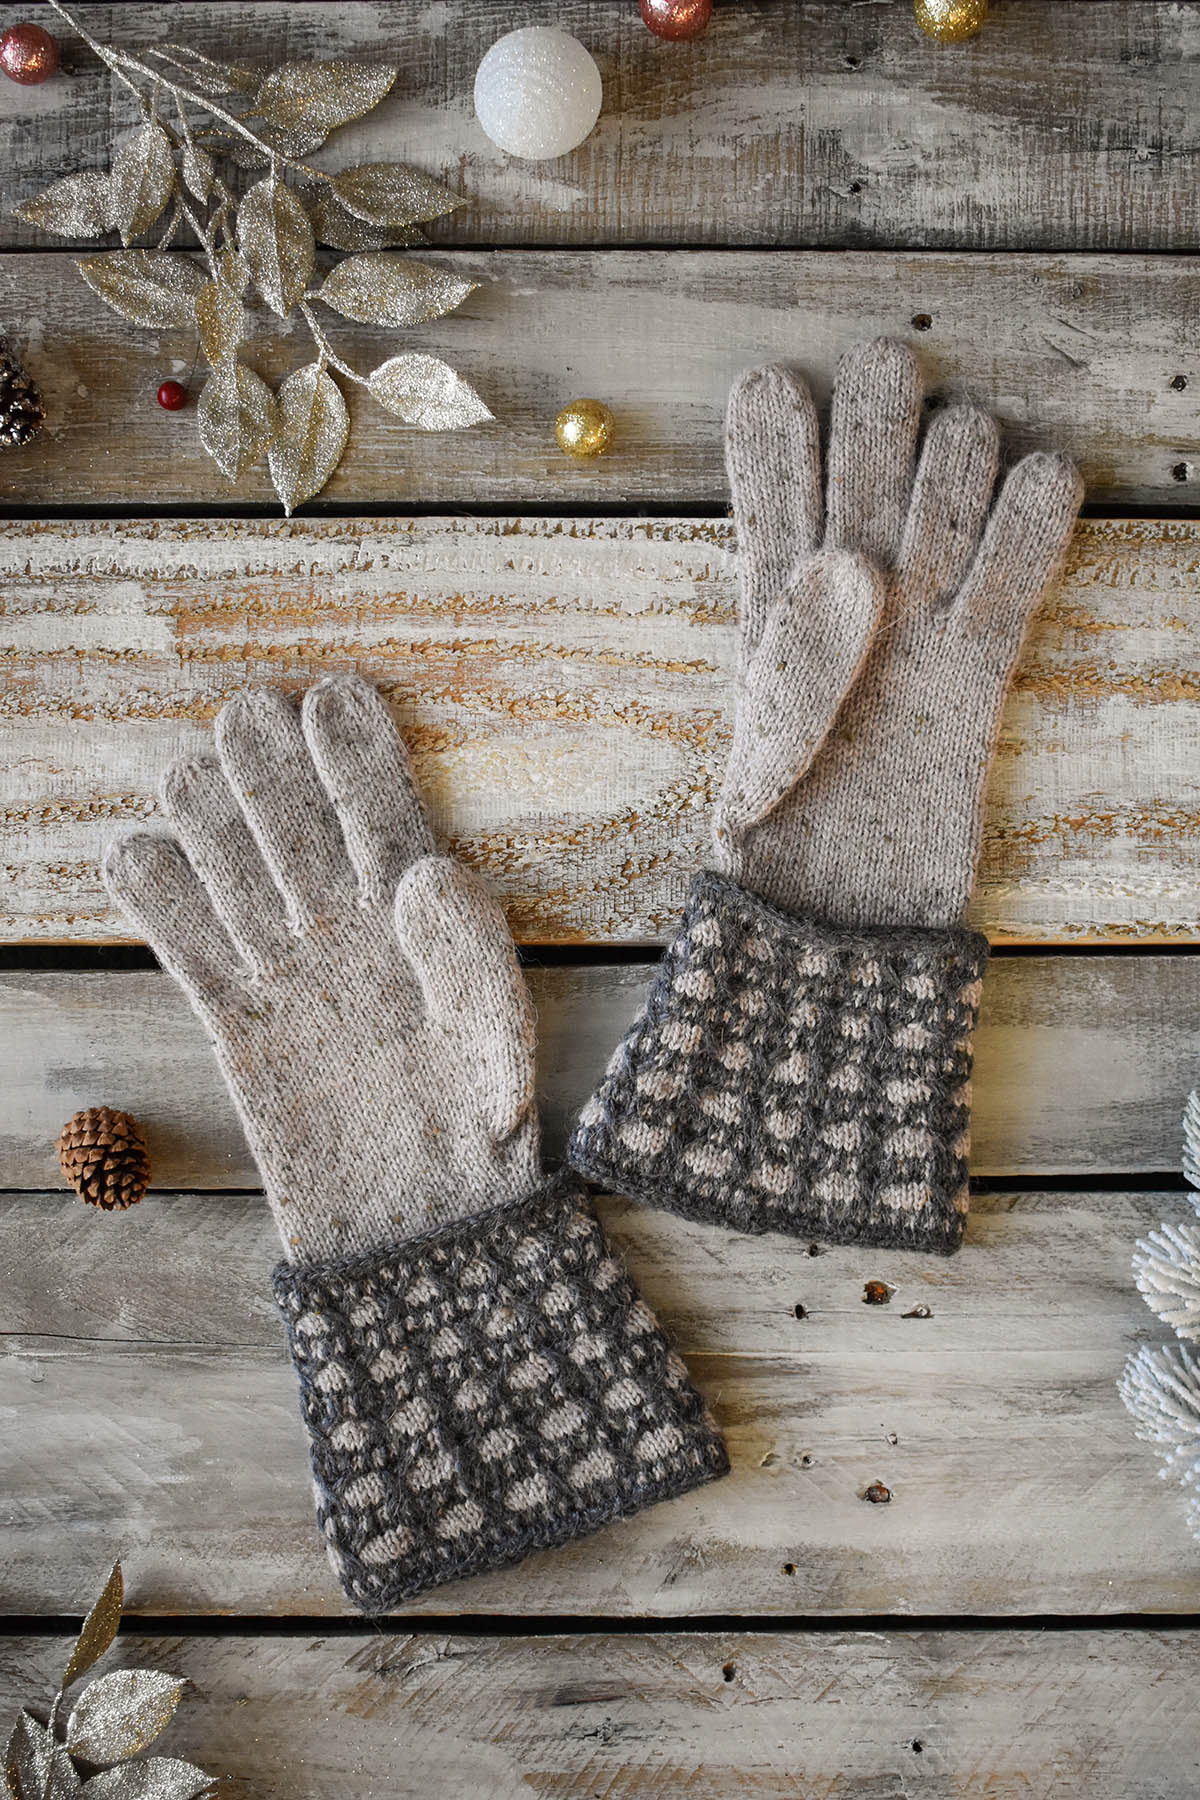
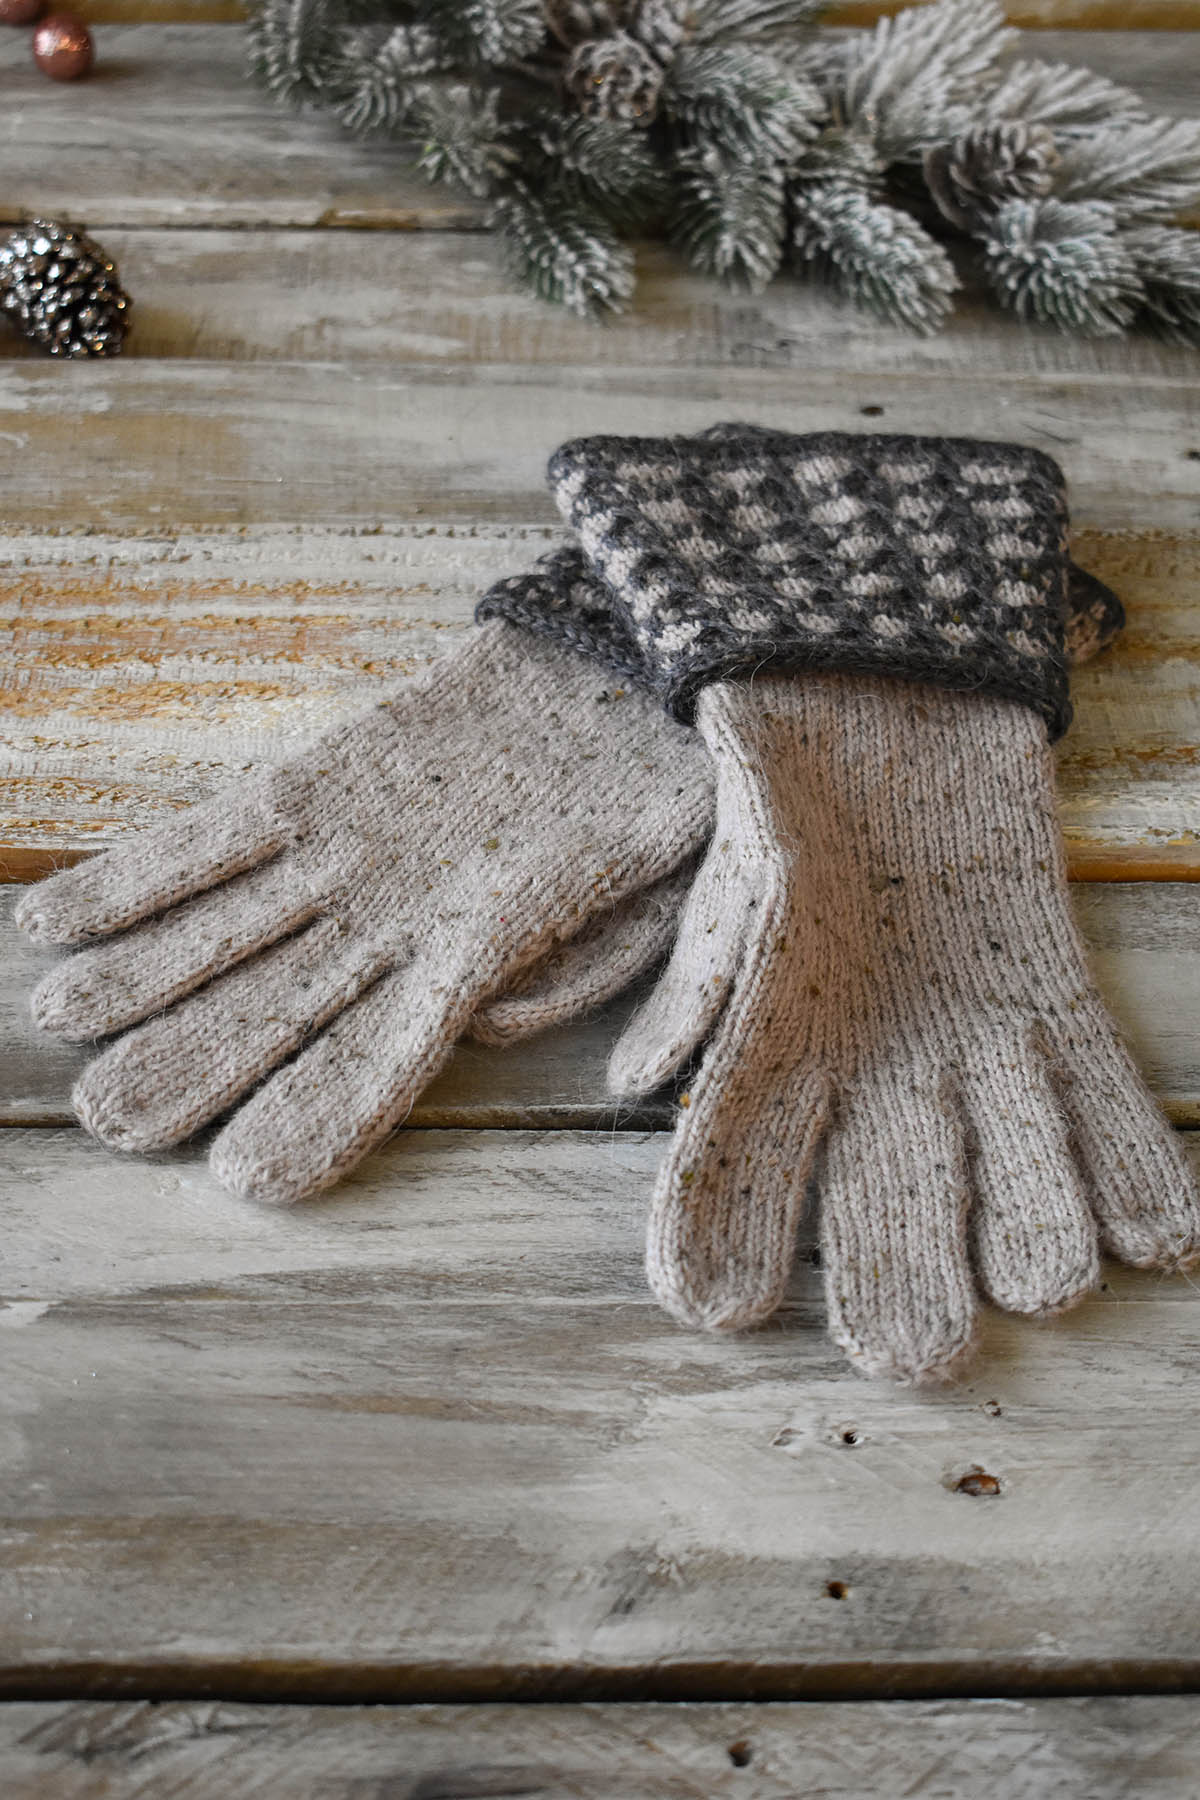
Happy Day 2 of the 12 Days of Winter Kit Collection! We know you are all eager to see what we’ve whipped up for the second day of the series, and we are thrilled to share with you – the Birch Gloves. Everyone needs a pair of elegant long gloves in their wardrobe, and hand-knitting them means these are perfect for yourself or made up as a gift for a loved one. Designed by Adrienne Larsen, the Birch Gloves are guaranteed to be cherished for seasons to come!
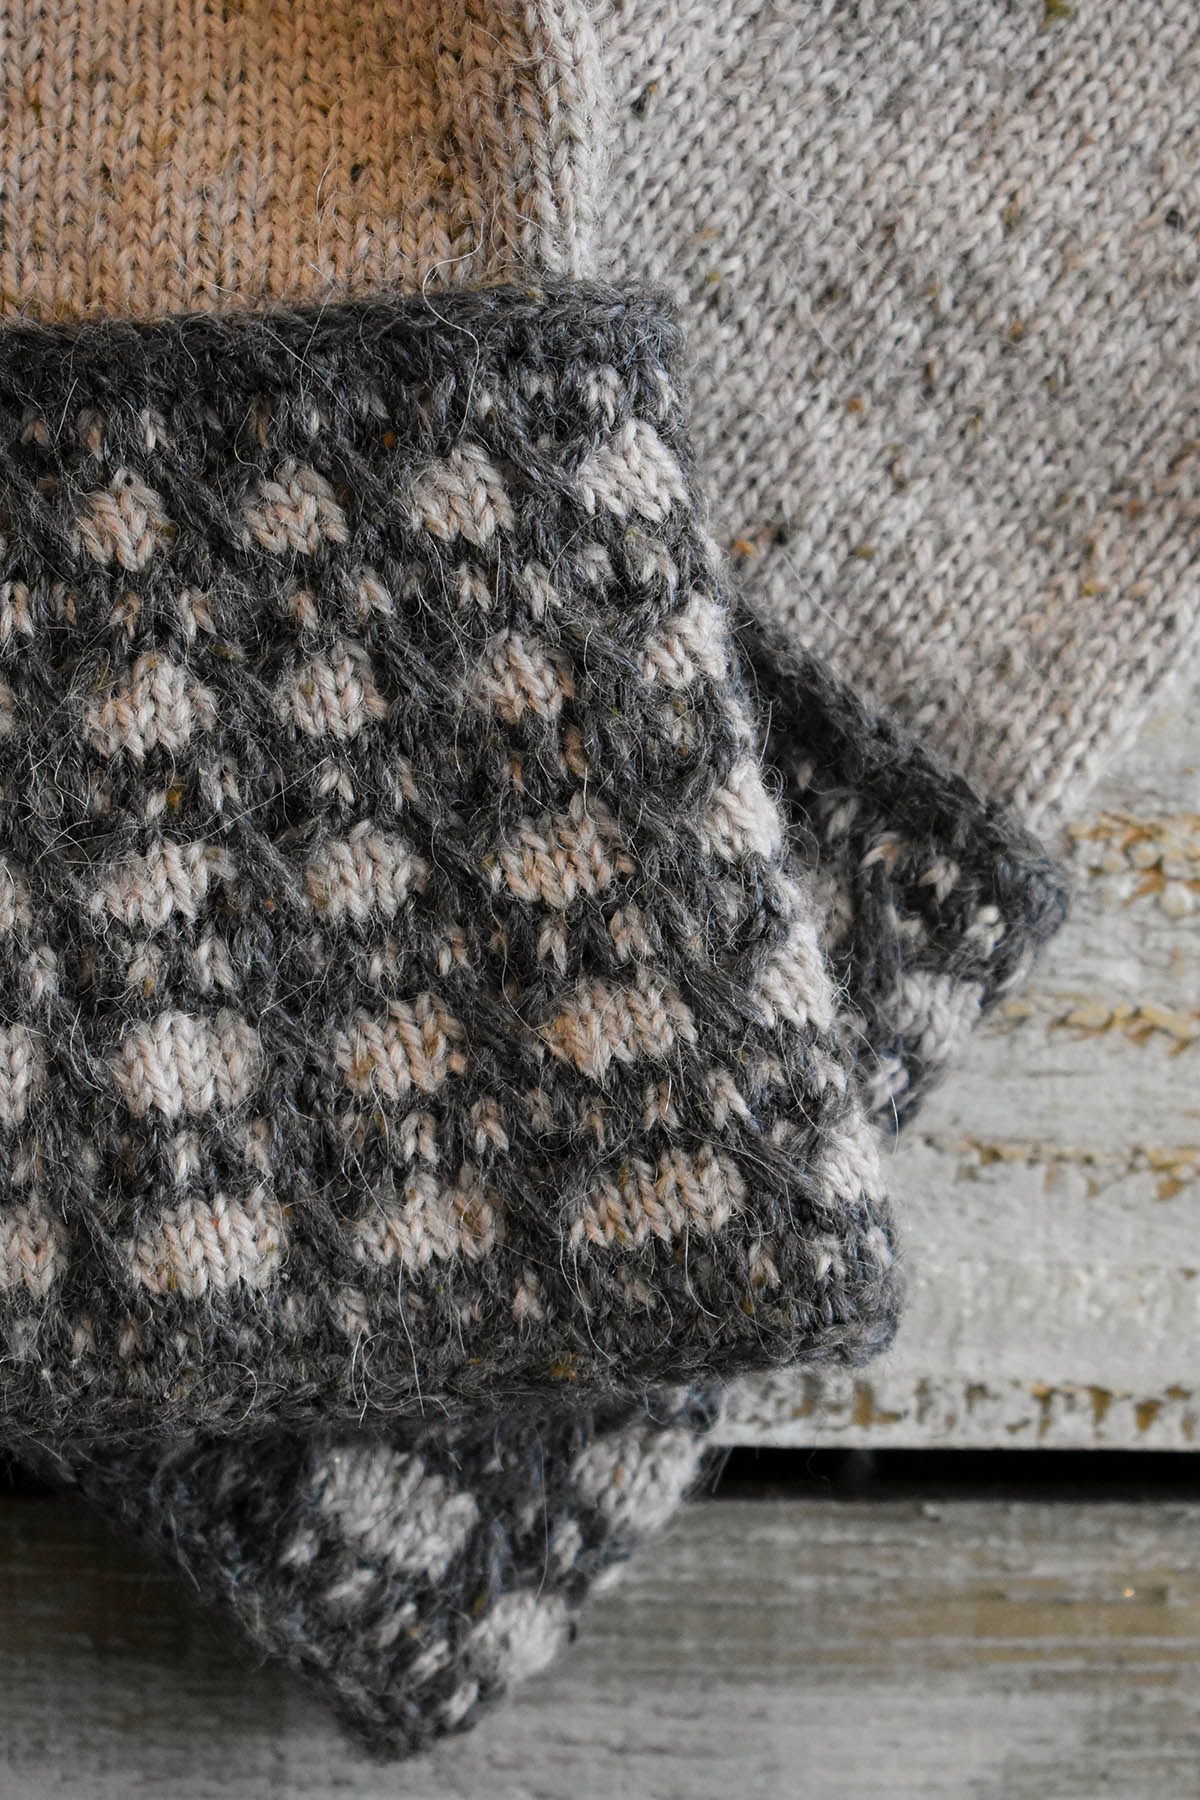
Knit in our Kingston Tweed yarn, this project features two different colors; 102 Calcite and 112 Basalt. These gloves are a gauntlet style with a flared cuff that gives a refined appearance to any outfit. Wool and alpaca fibers are blended into the yarn, meaning the Birch Gloves will also keep your fingers warm and toasty – maybe while out at a holiday market or off to see the Nutcracker ballet! The neutral colors of the yarn for this project are also certain to pair well with any sweater you choose.
The Birch Gloves feature cables and a slip stitch colorwork pattern for the cuffs, and the beautiful Kingston Tweed yarn is on serious display for the hands and fingers in stockinette stitch. Knitting the cuff and glove separately, you seam them together with an I-cord edge that adds a tidy finish. Both the cuffs and glove are knit in the round, working from the bottom up. Construction-wise, this is sure to be a fun project to take on and maybe a new method of knitting gloves to learn!
Whether you choose to knit the Birch Gloves for yourself or as a gift for someone special, these are guaranteed to be loved by everyone around. We hope you are inspired to kick back with a mug of warm Cider or Gløgg , turn on your favorite holiday film, and get to knitting these stunning gloves! You can pick up your 12 Days of Winter Kits including the Birch Gloves Kit at your local yarn shop.
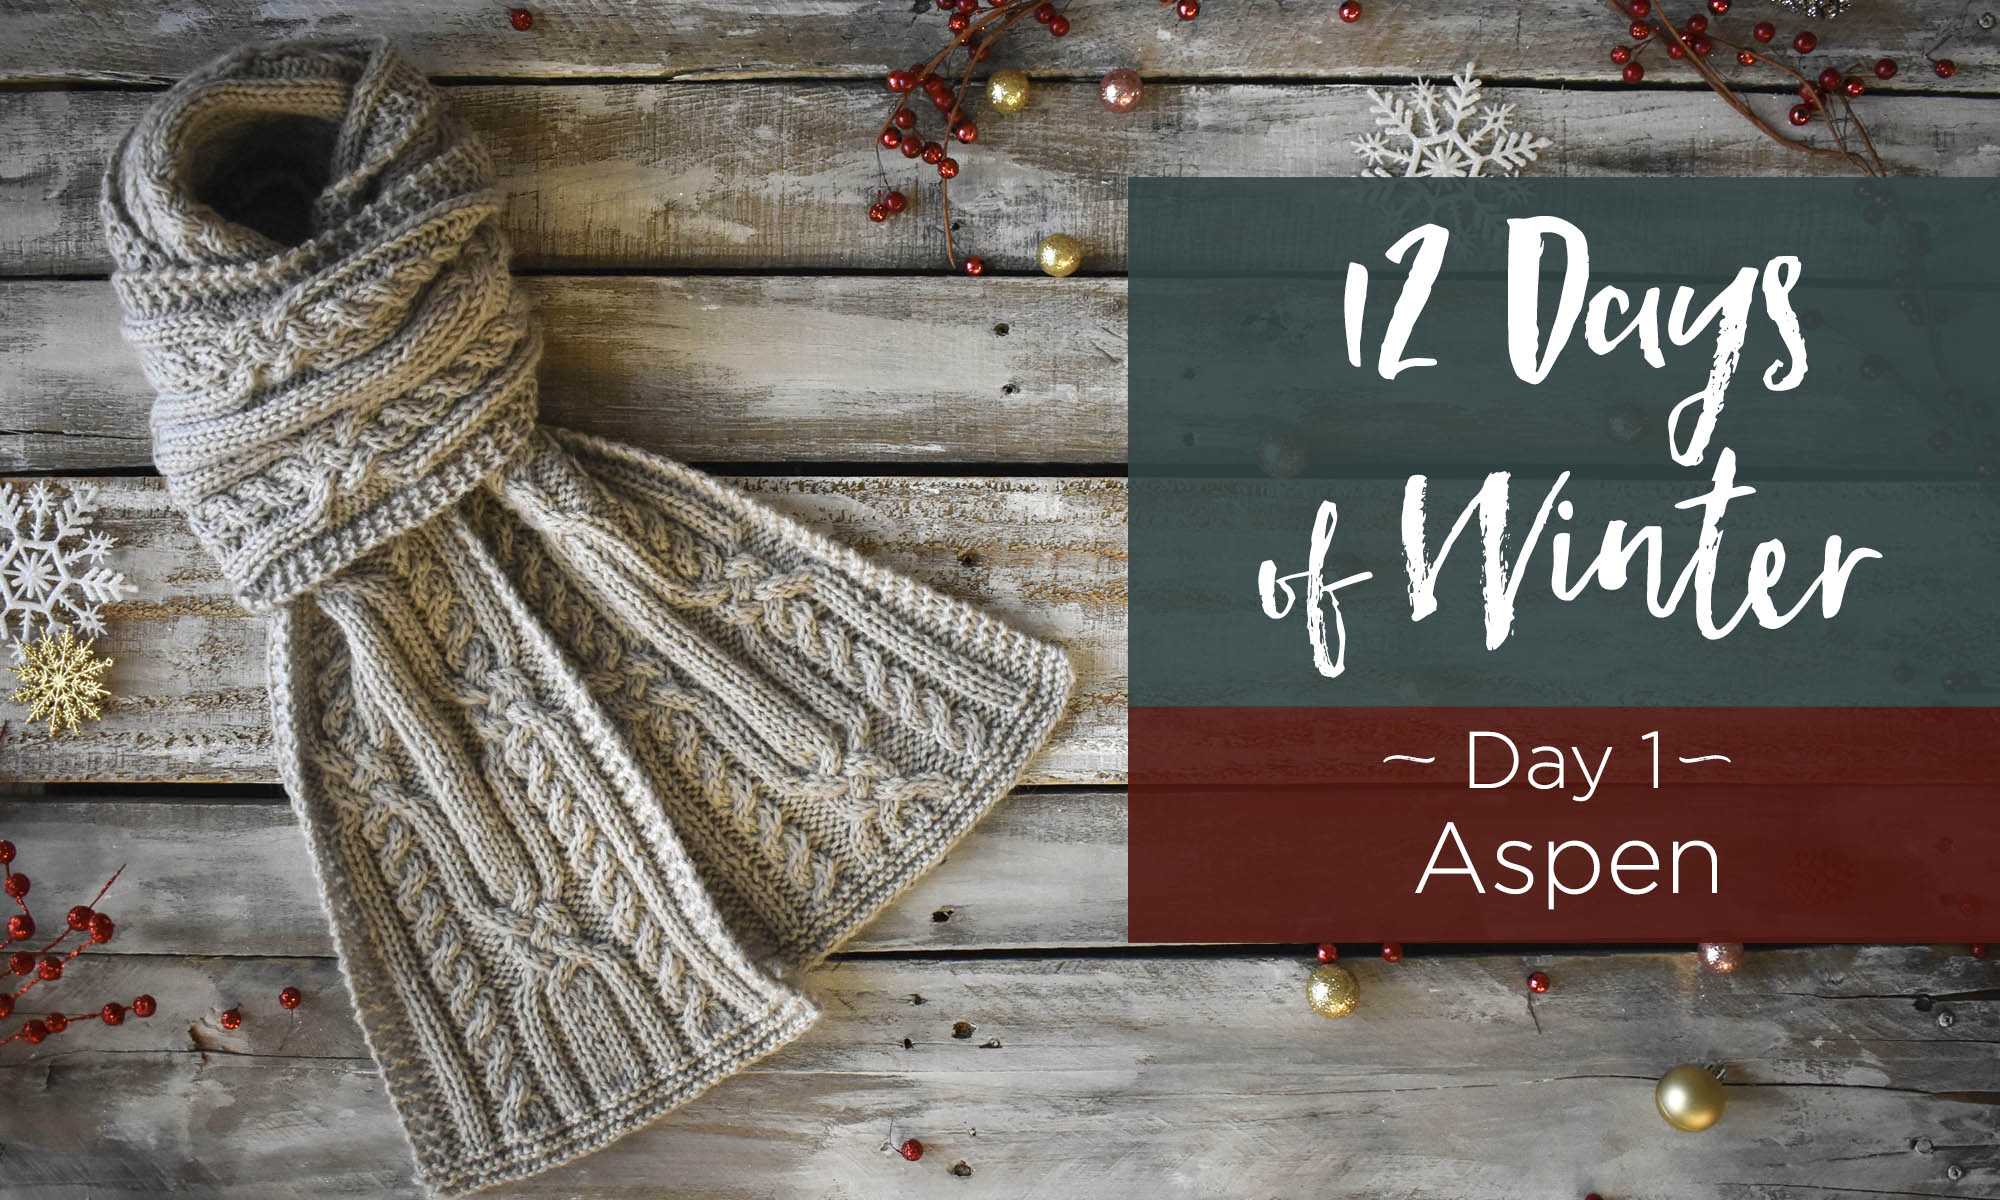
This is part 1 in a 12 part series highlighting designs from our 12 Days of Winter, Series 3 Edition.
It’s that time again – the holidays are just around the corner. Unbelievably, we’re just over halfway through November. For most of us, that means we’re knee-deep in crafty gift-making for loved ones. Here at Universal Yarn headquarters, we’ve been working hard to keep the 12 Days of Winter tradition alive with a beautiful third installment. We’re so excited to share these projects with you. Whether you are looking for a gift for a special yarn-loving person in your life, or for the perfect gift to make, we’ve got you covered.
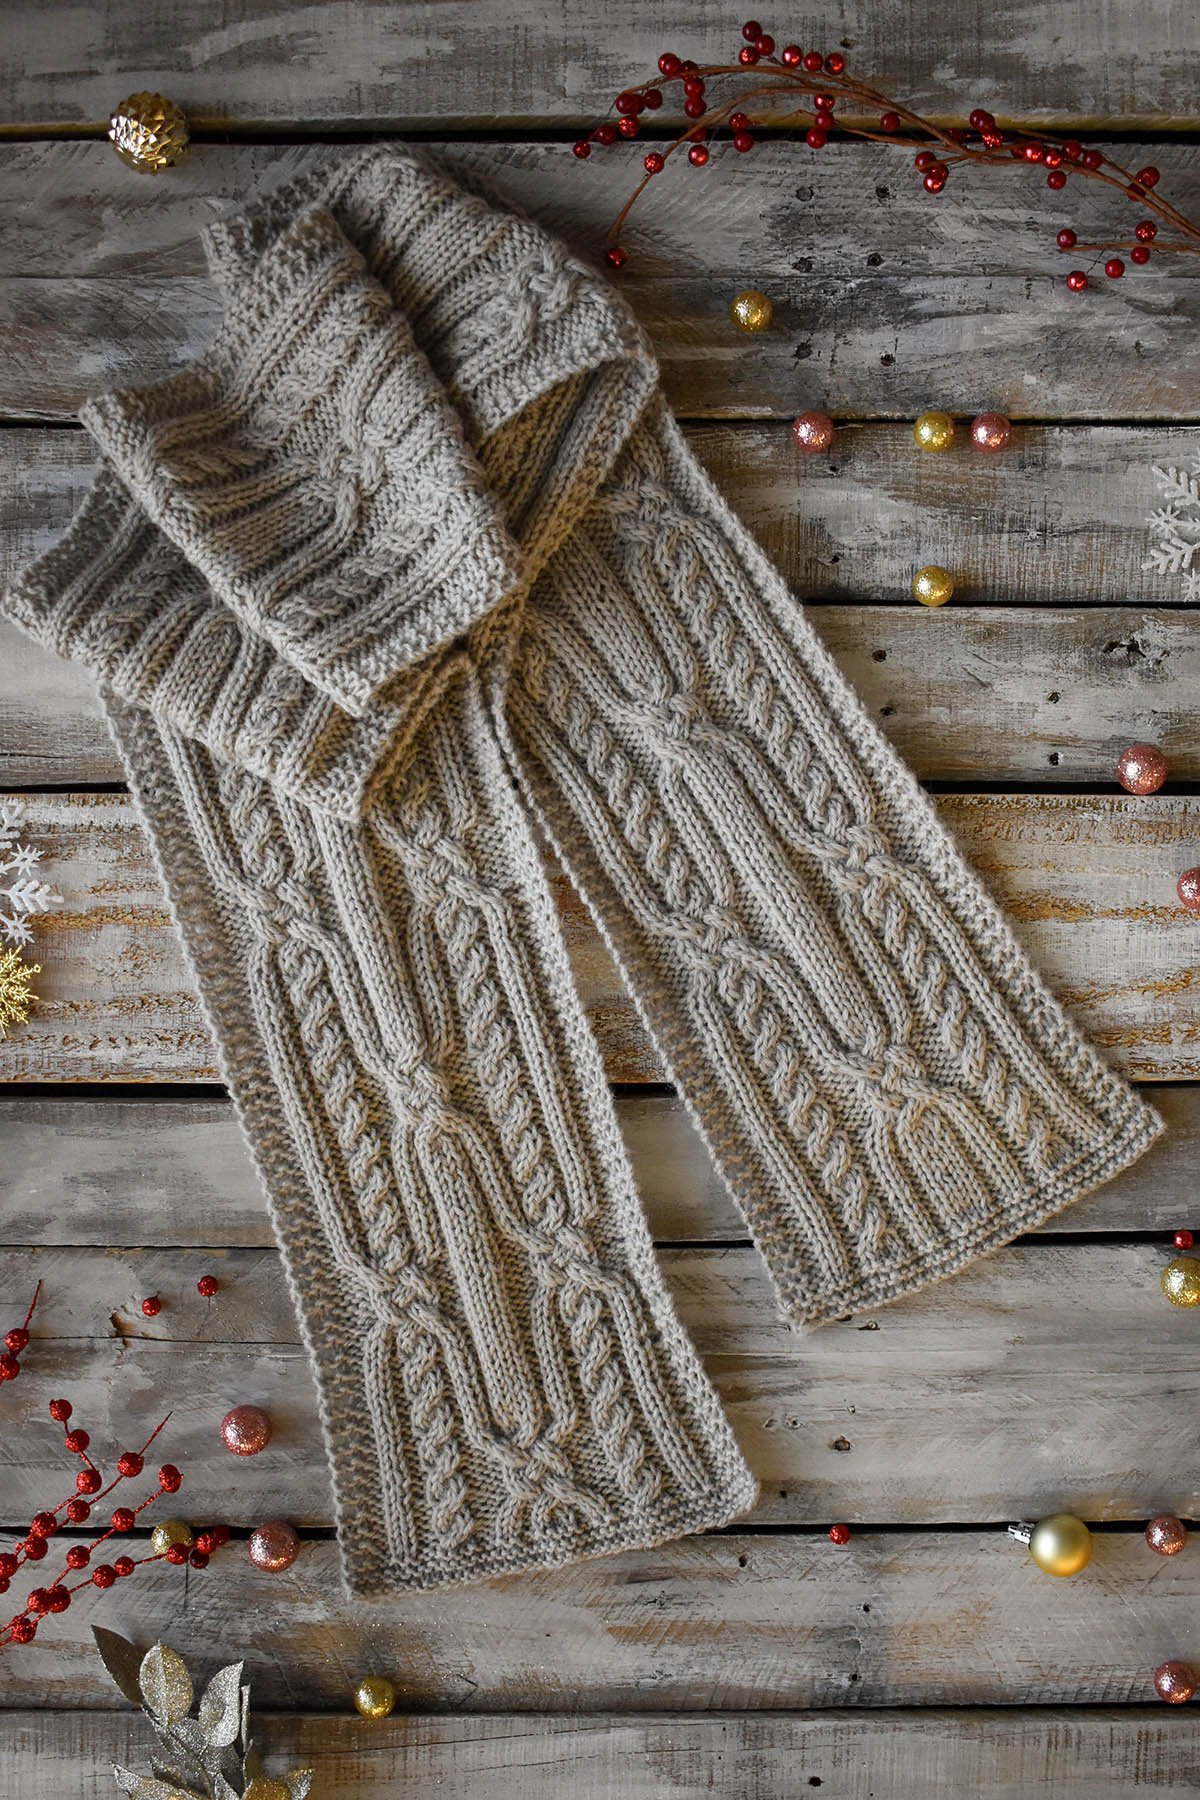
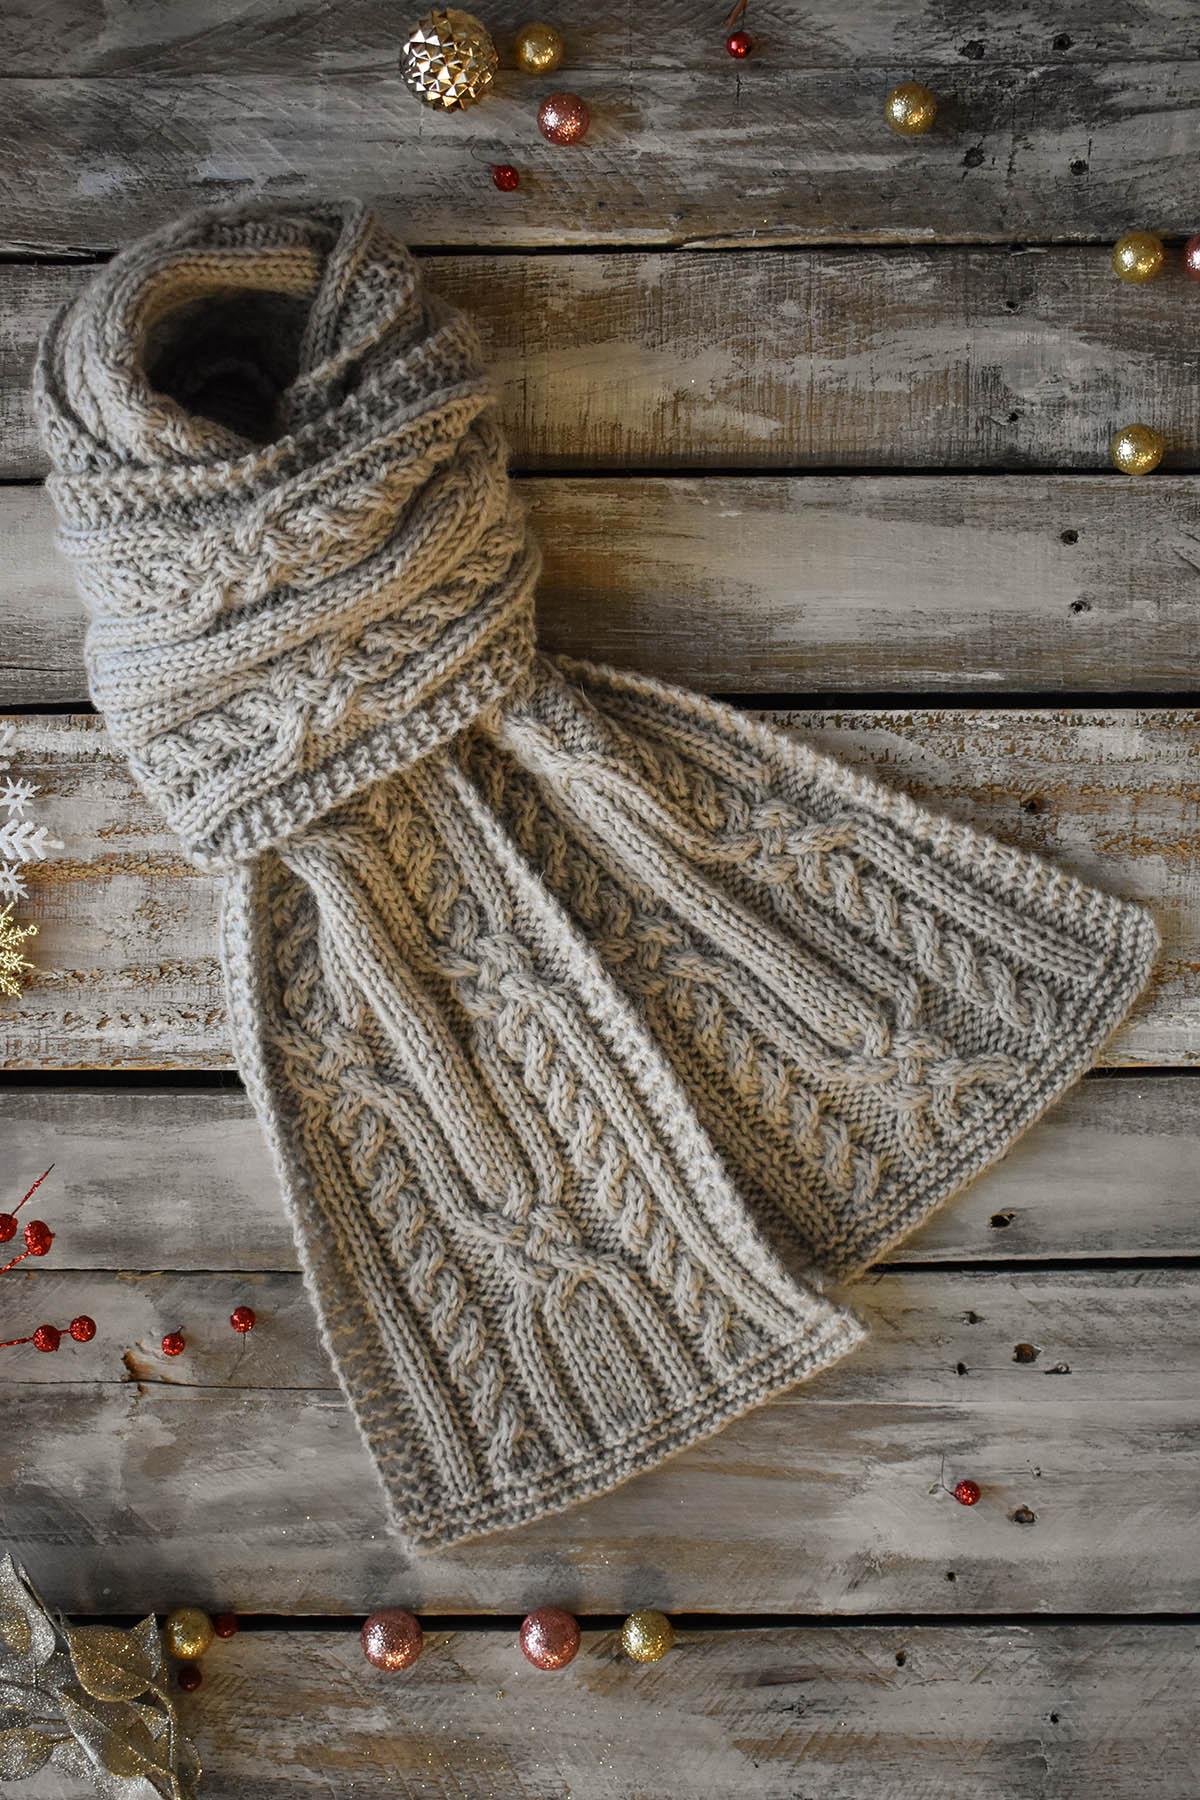
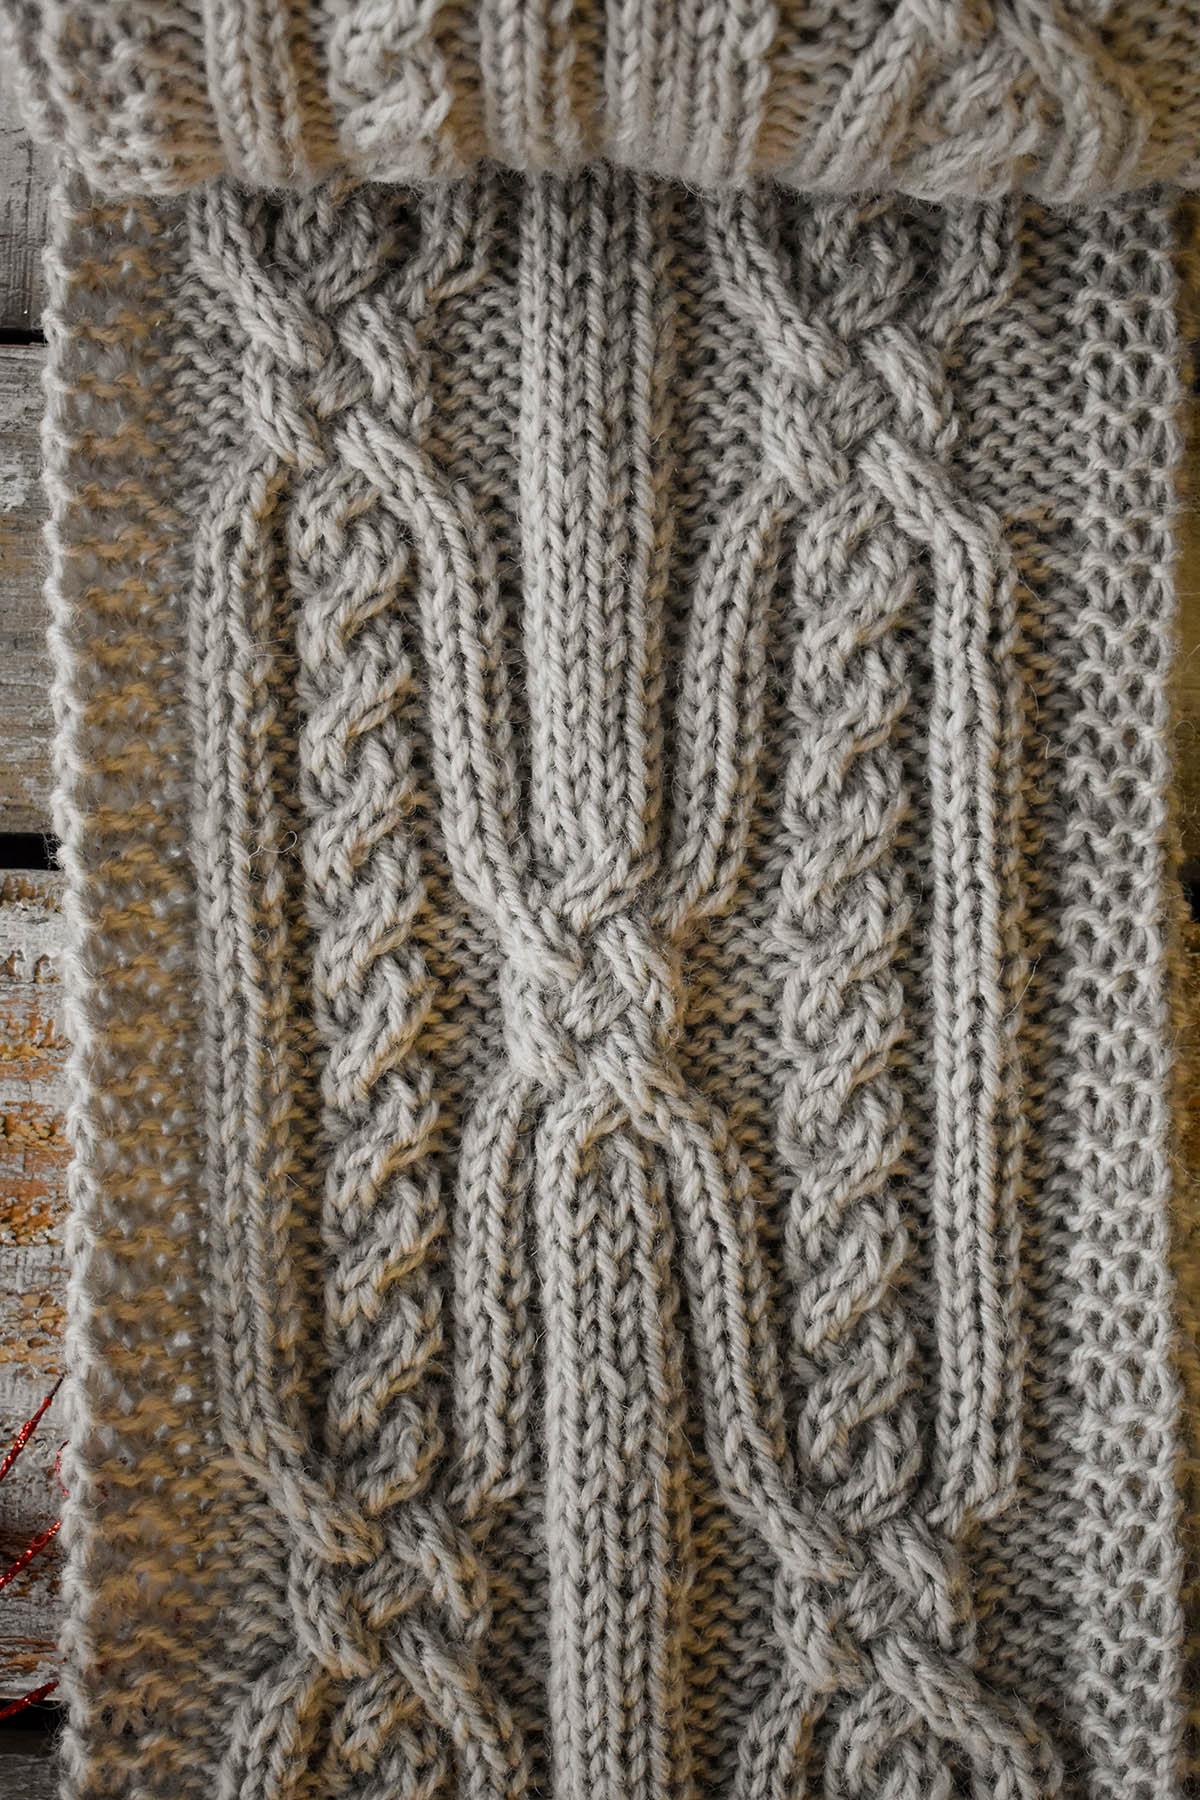
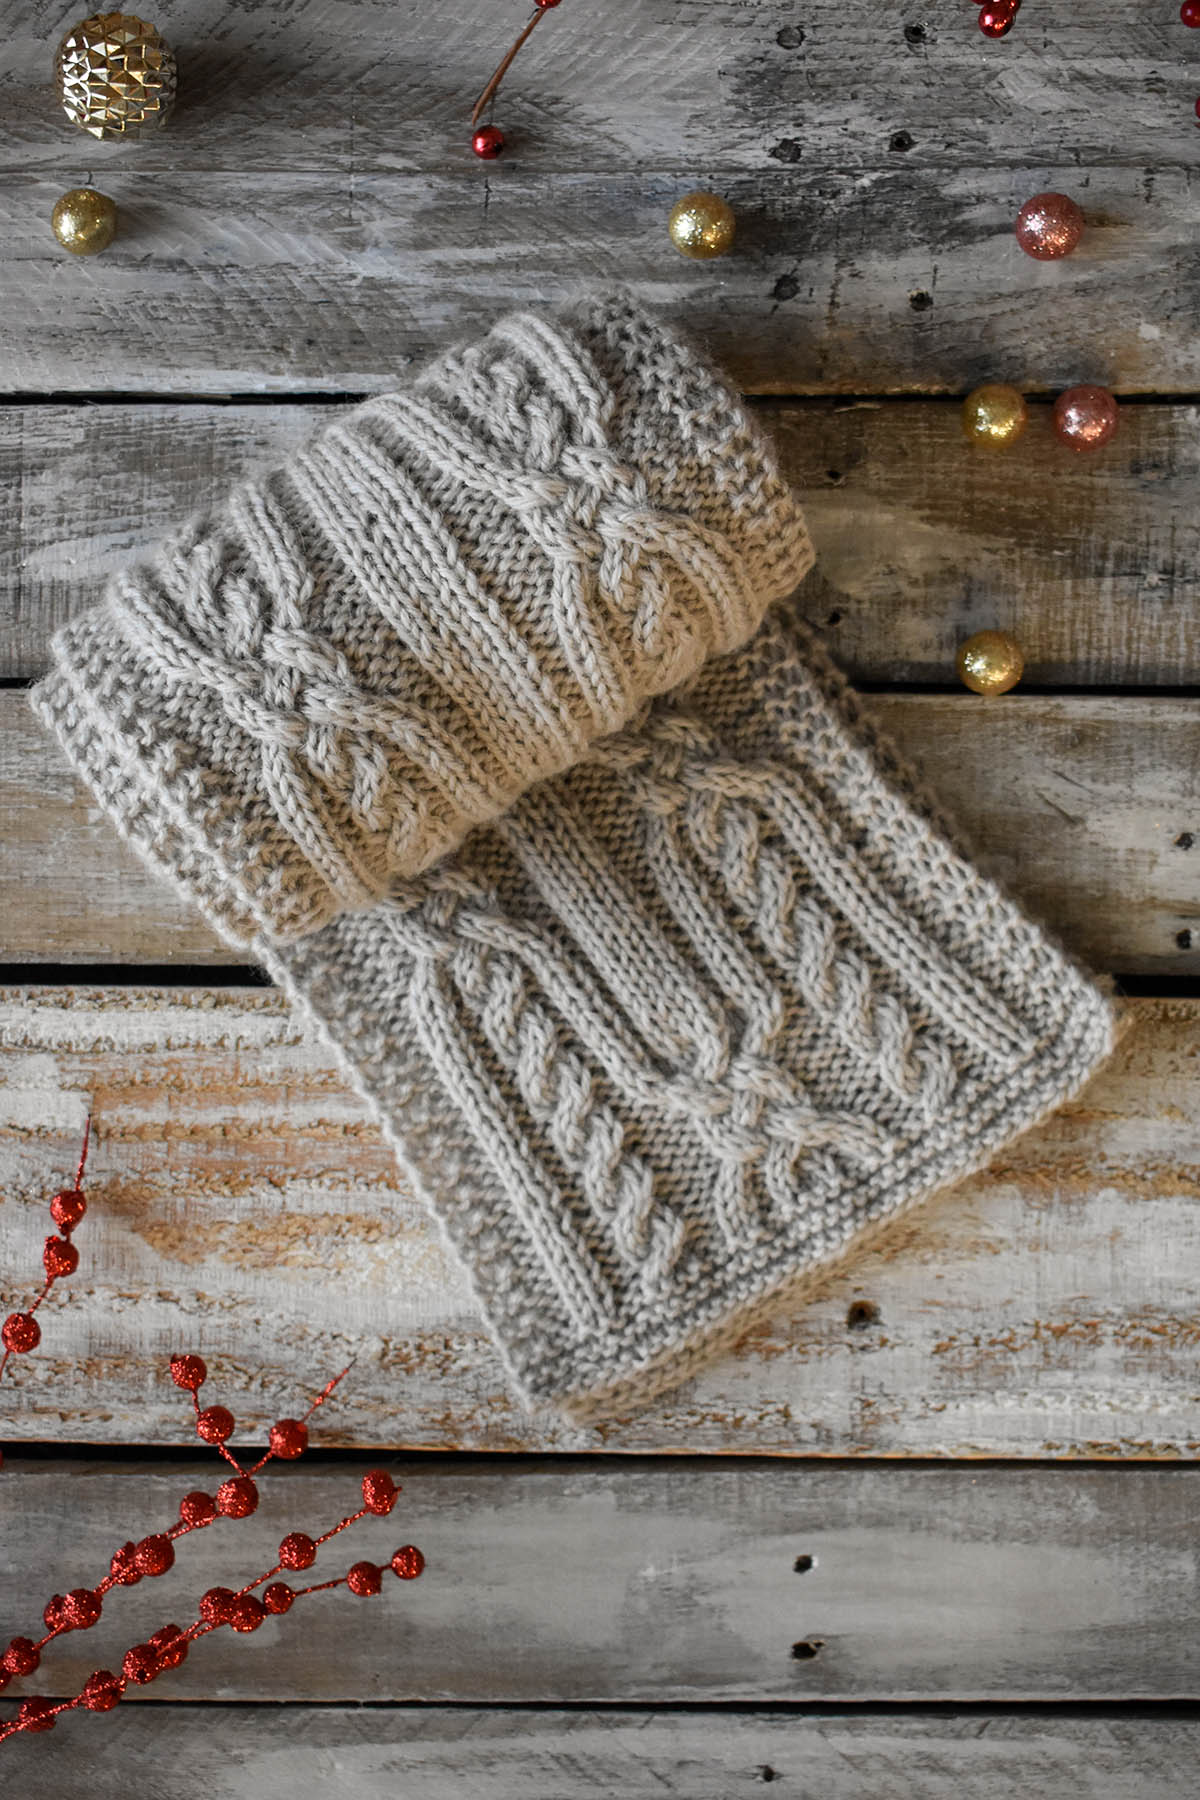
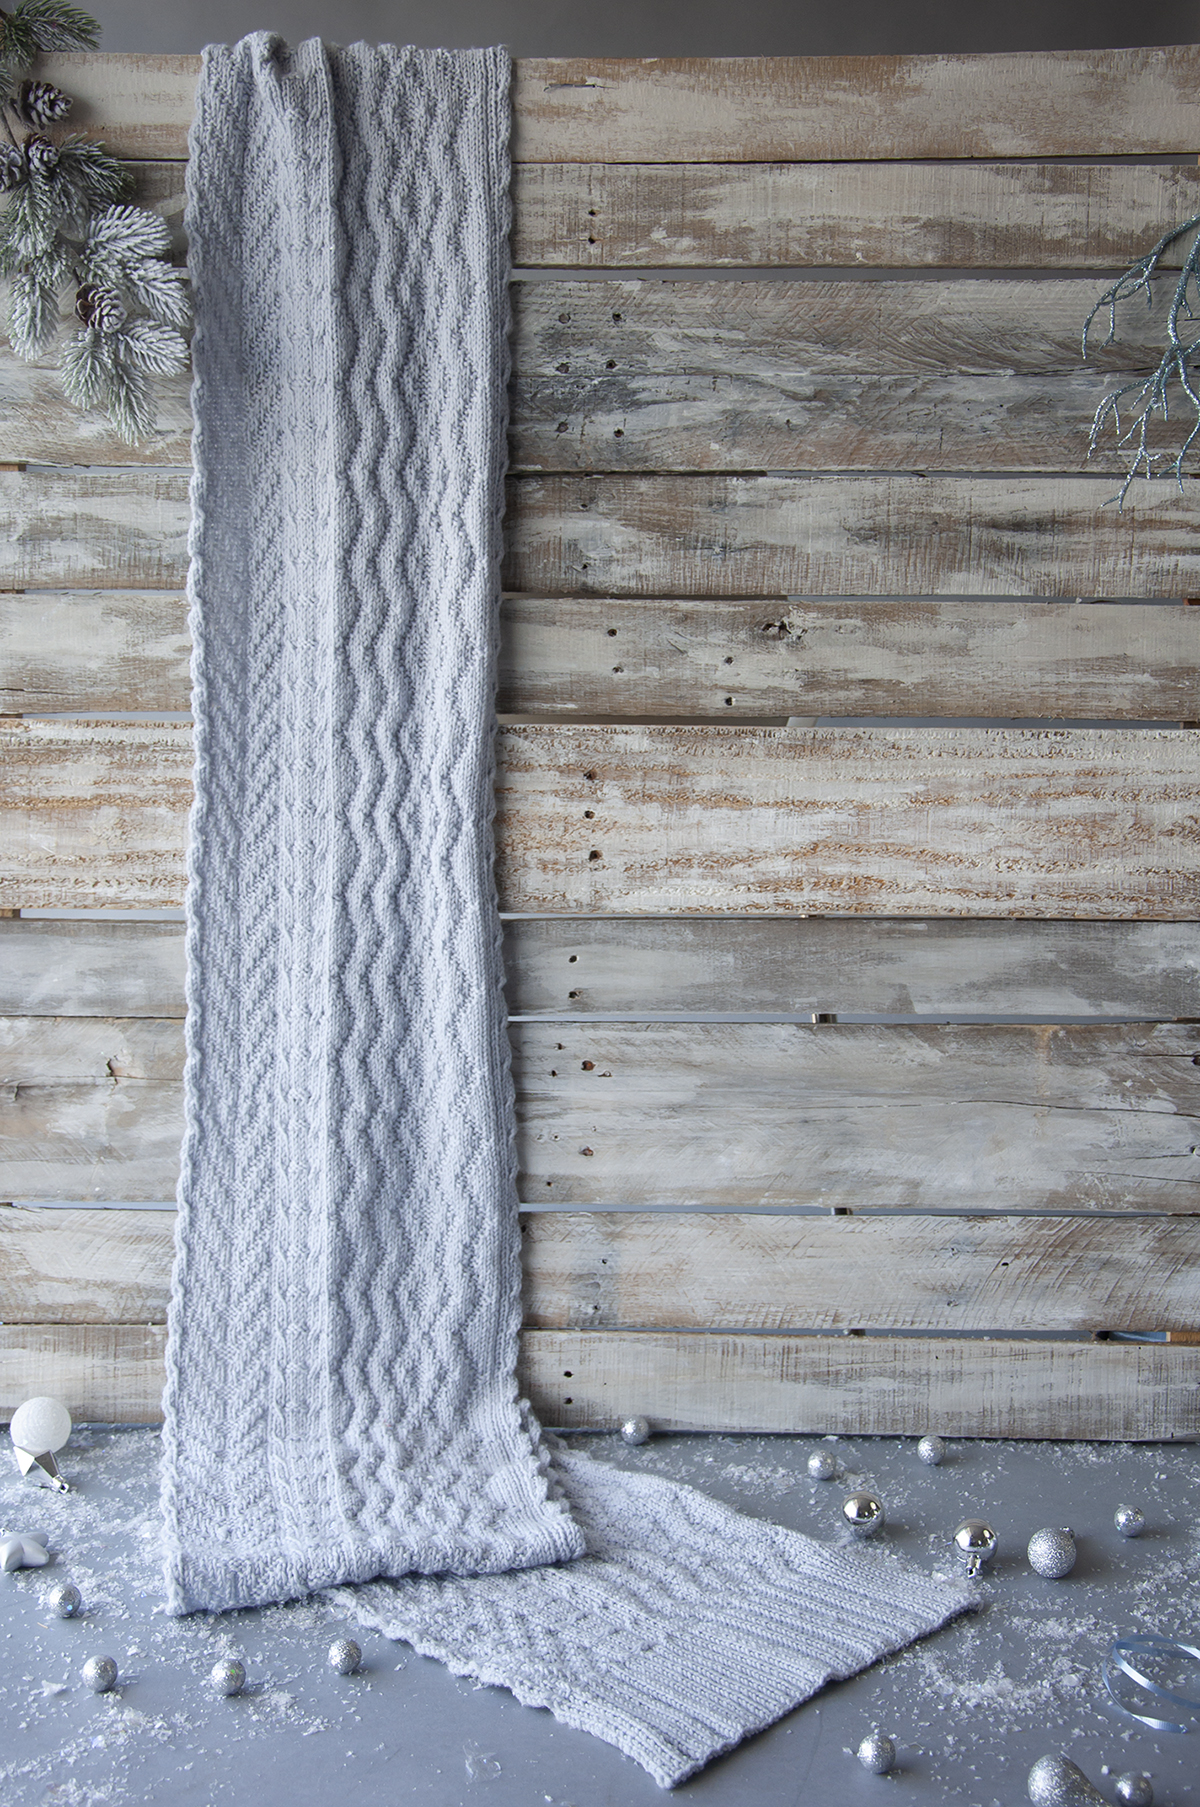
This year we’re kicking off the collection with a scarf designed by the talented Adrienne Larsen. Aspen is one of those perfect, squishy scarves that’s just the right length. It’s beautiful – any worthy recipient would be thrilled to wrap this around their neck.
The elaborate cable motif is simpler to work than one might expect, and by the time the scarf is complete, you’ll likely have it memorized. Inspired by quaking aspen trees, each cable in this scarf grows out of another. The result is an interlocking pattern that is sure to turn heads.
Knit up in Deluxe Worsted, a 100% wool yarn, we’ve selected a neutral color that allows the stitchwork to shine. It’s perfect for men and women alike and is sure to work well with any item in your winter-weather wardrobe. Surprisingly, this pattern takes just two skeins, which are included in the kit along with the pattern. Surely you can finish this one in time for the holidays.
We hope you’ll love the Aspen scarf as much as we do, and that you’re equally excited for the other patterns we have coming. Remember, you can find the 12 Days of Winter Kits at your local yarn shop.
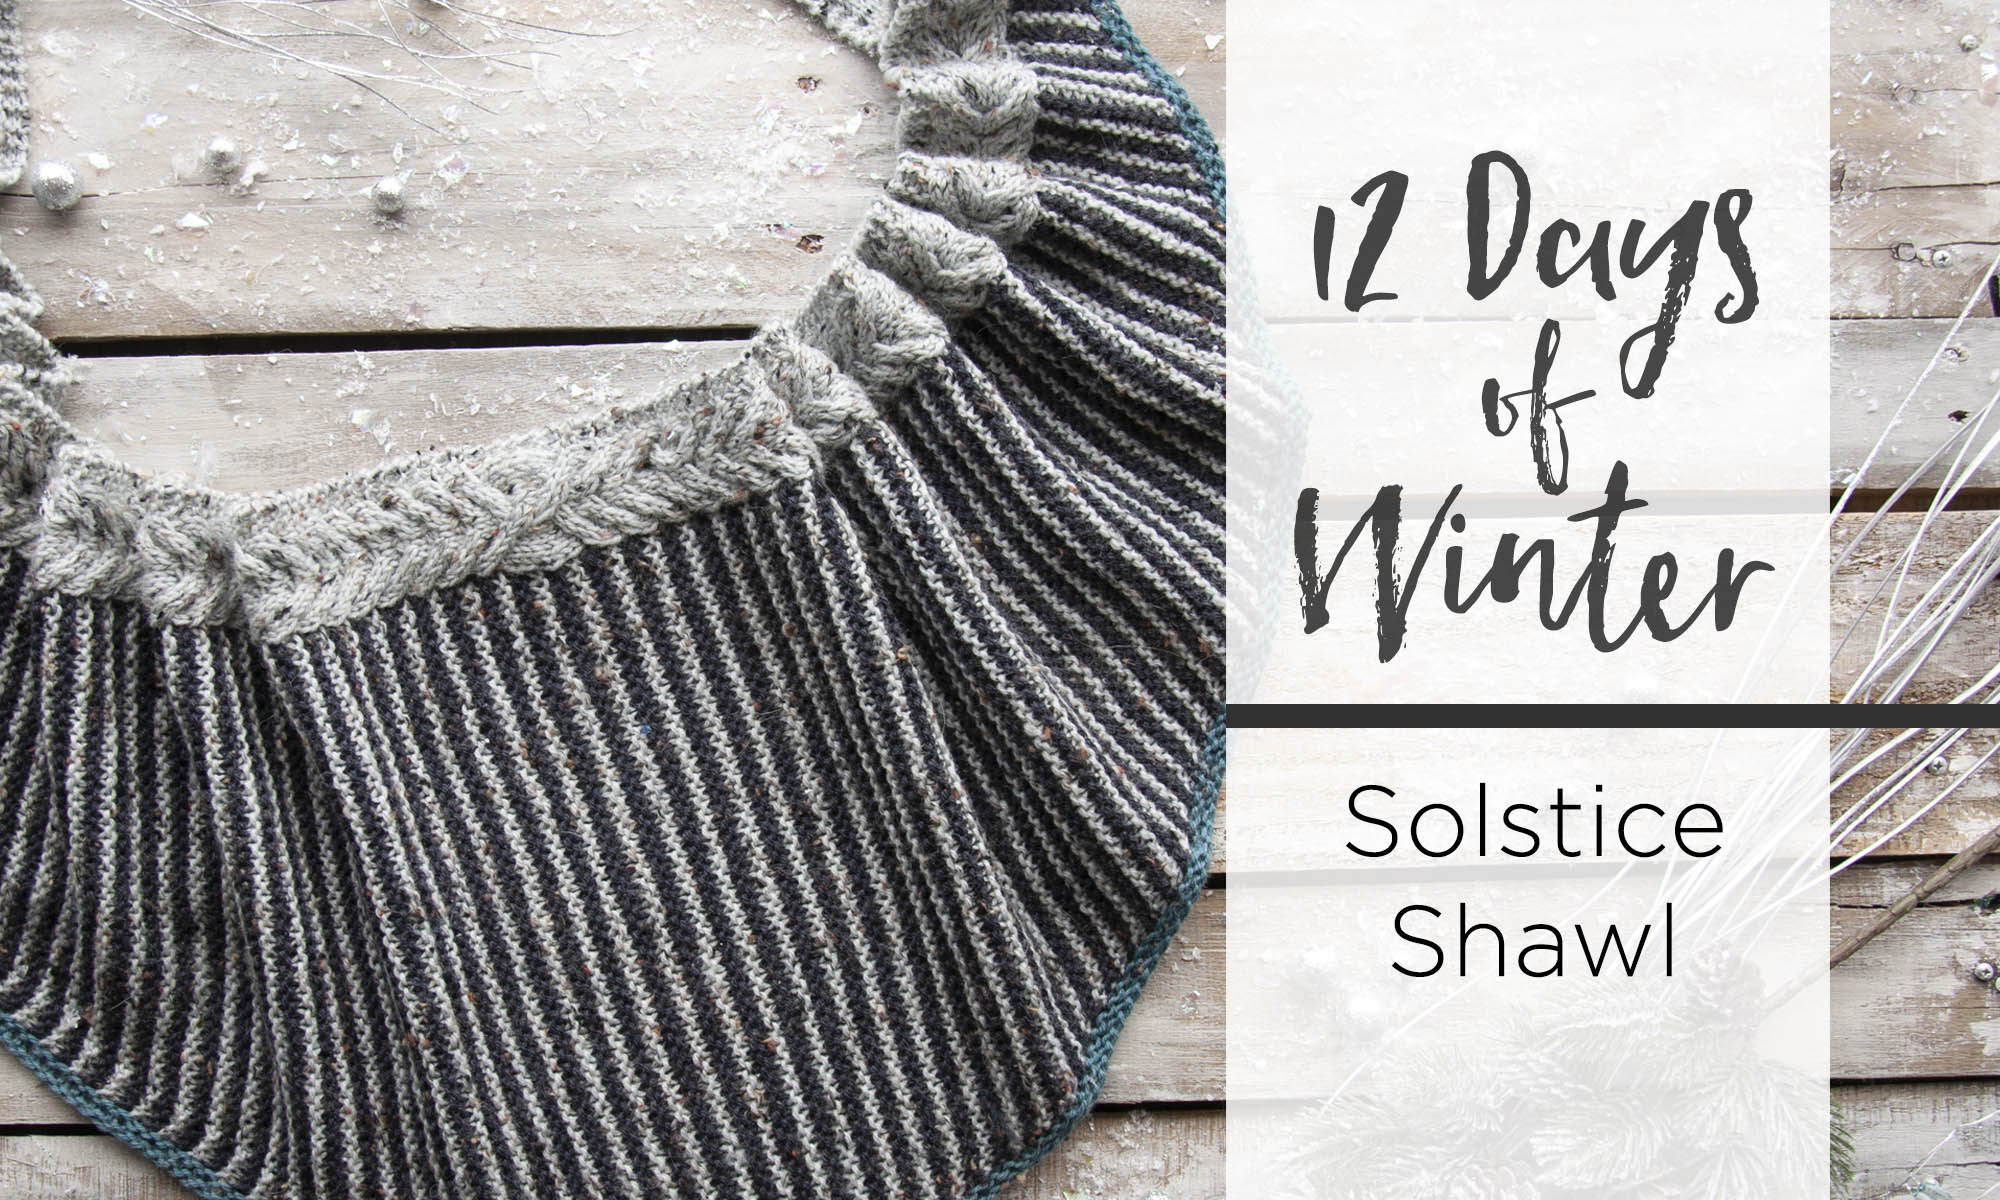
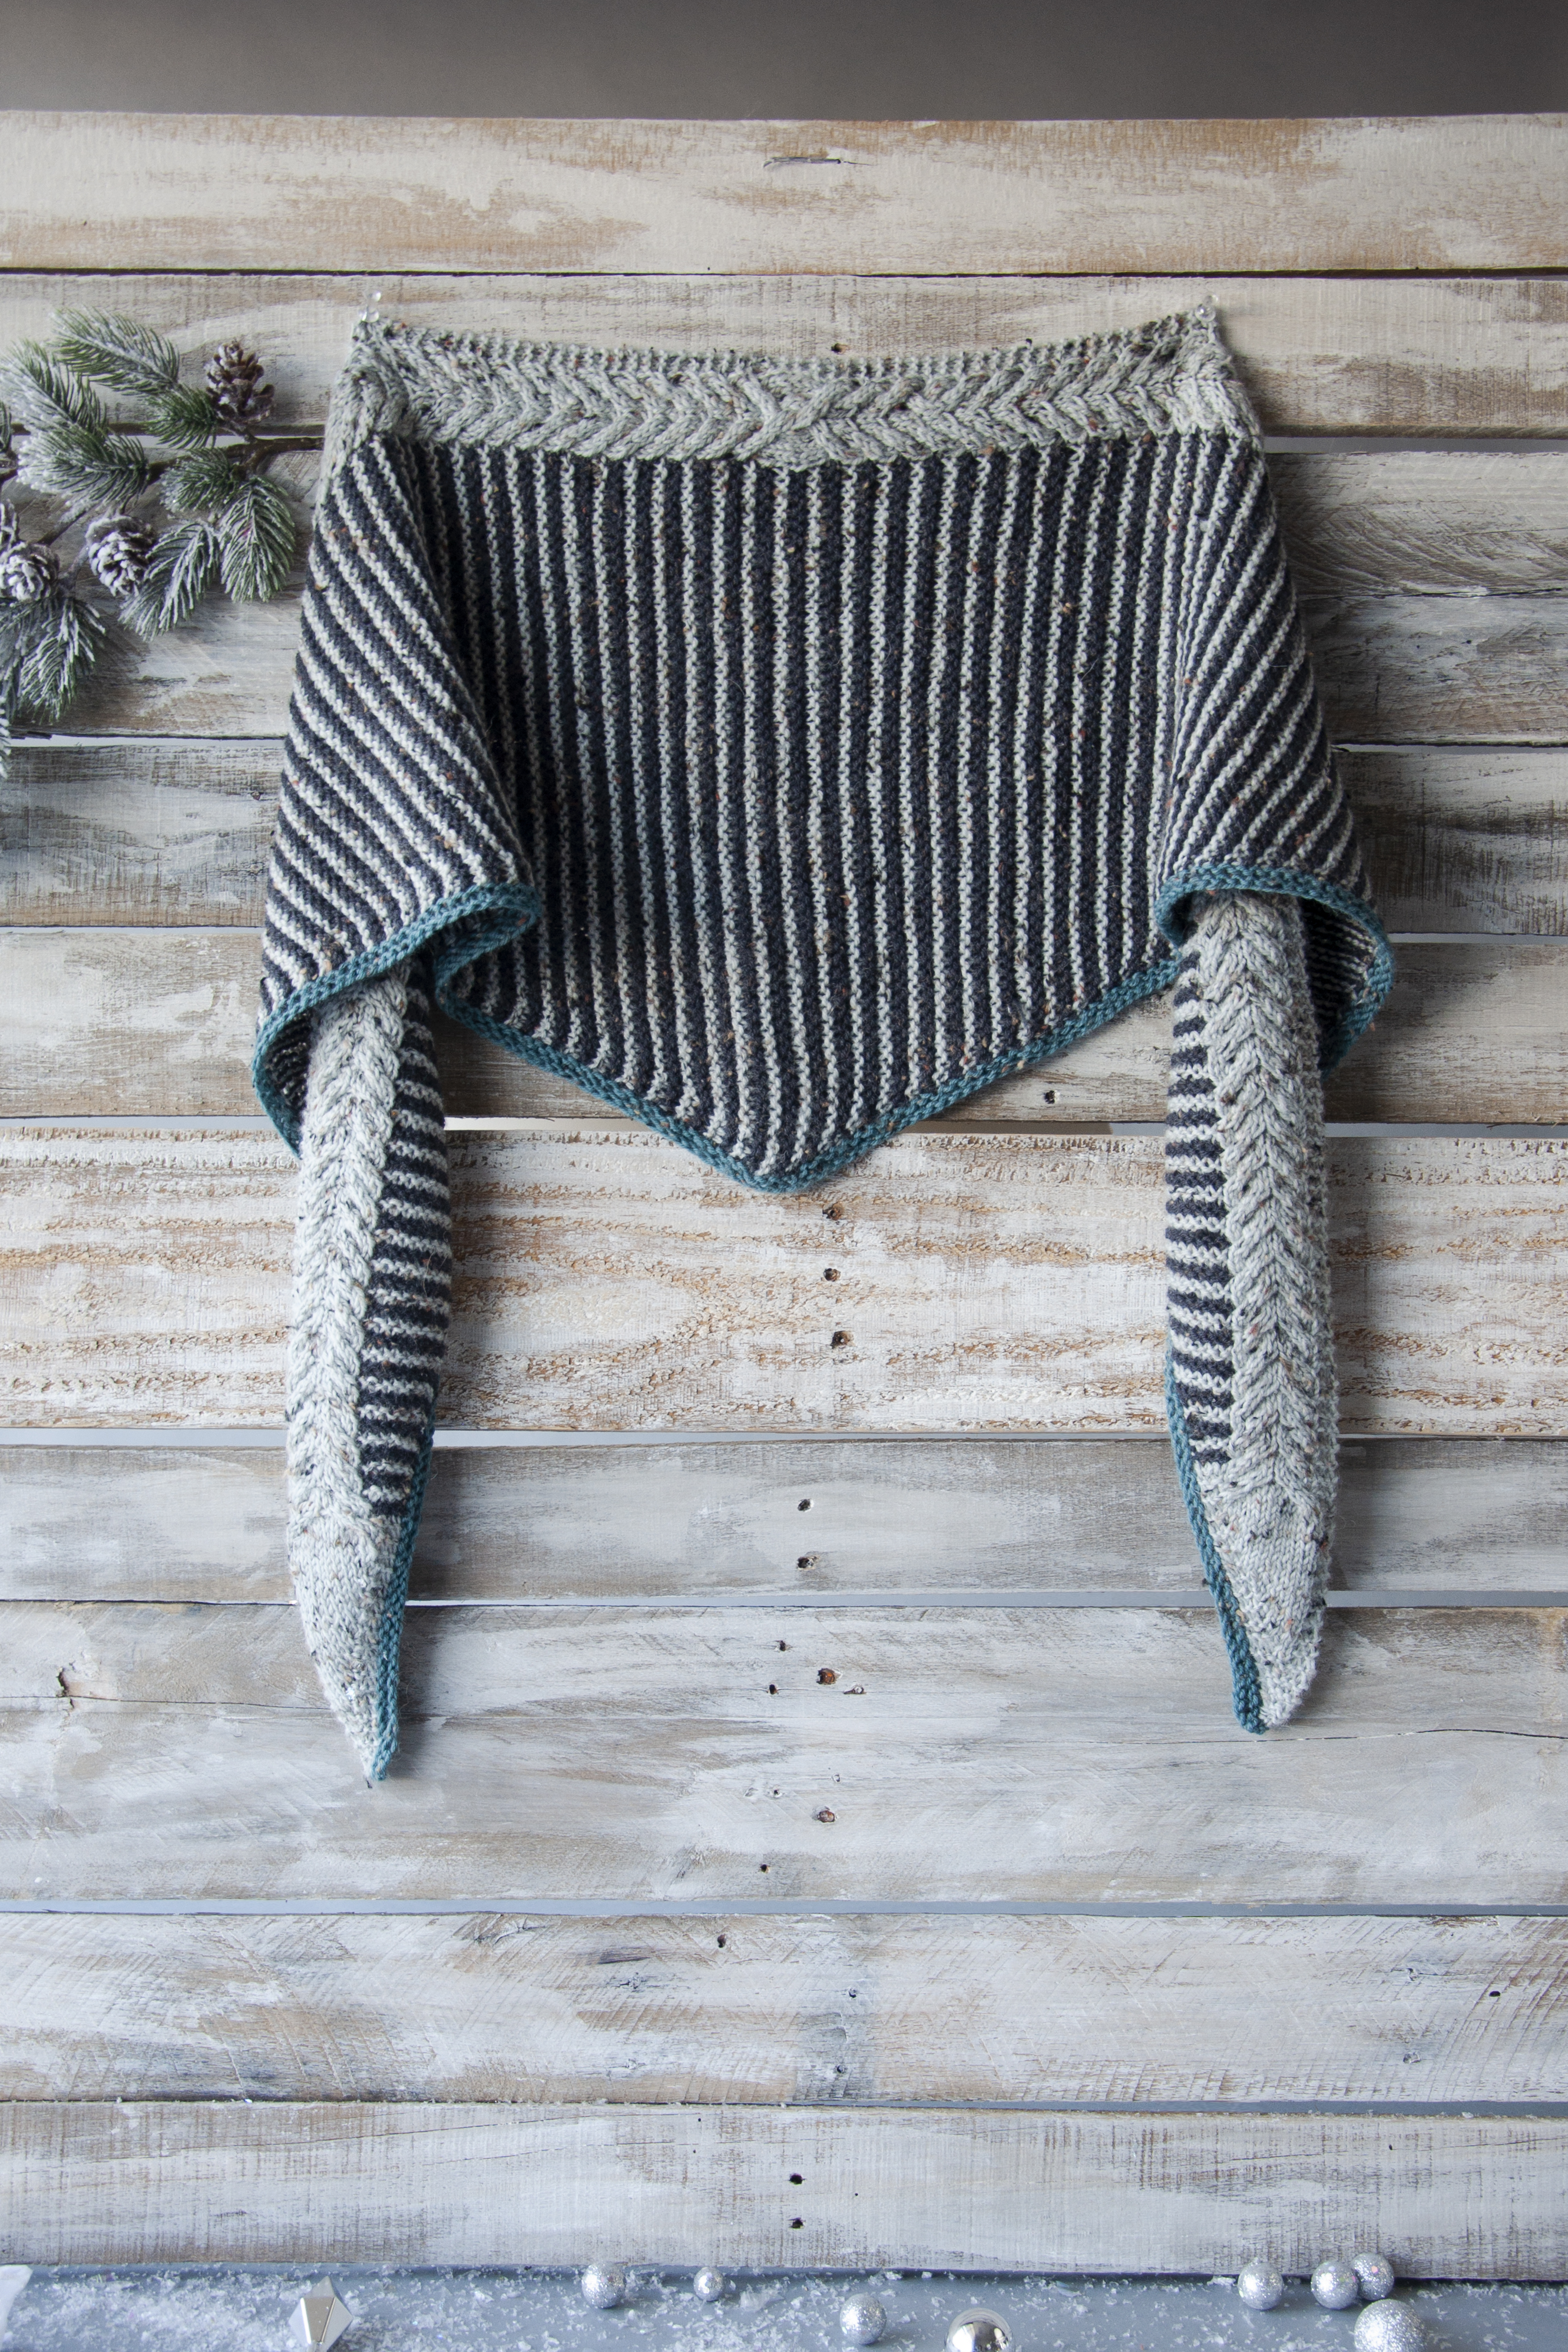
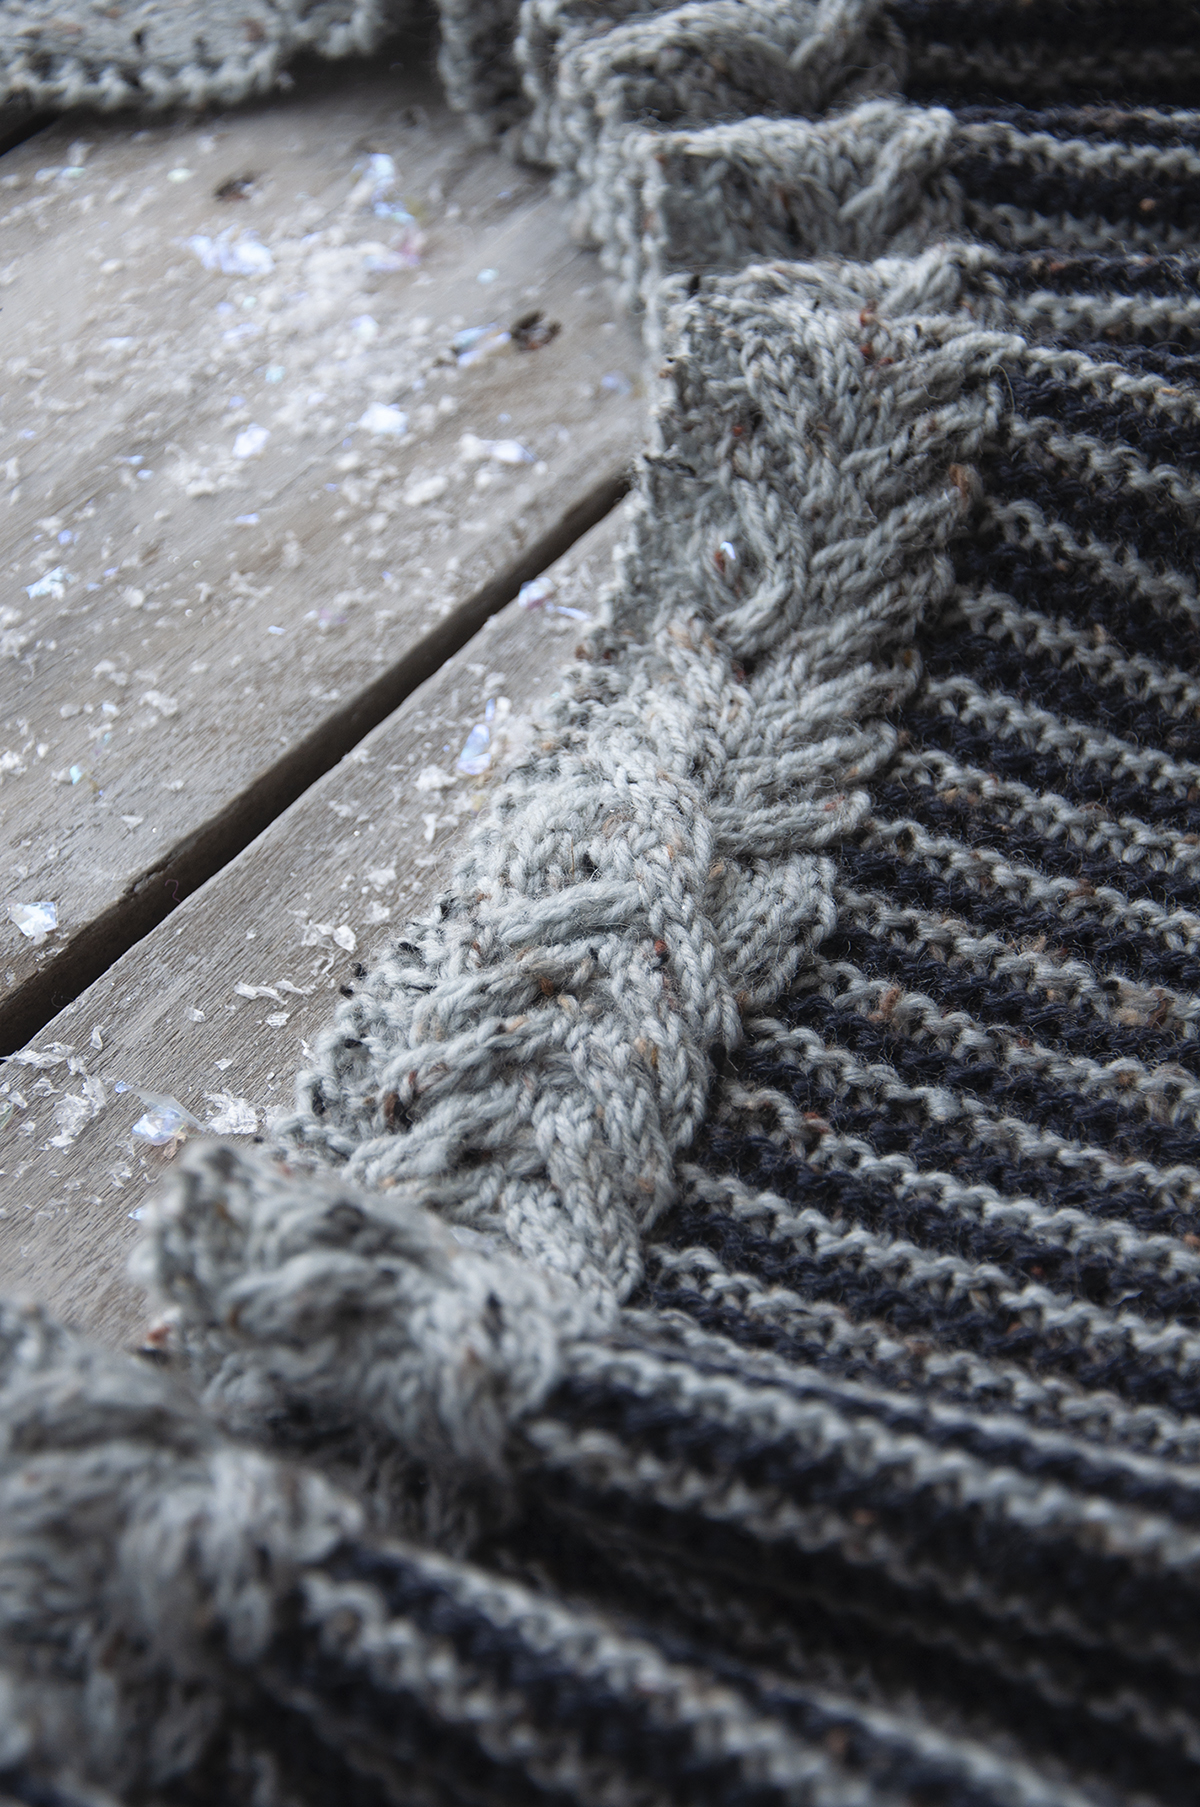
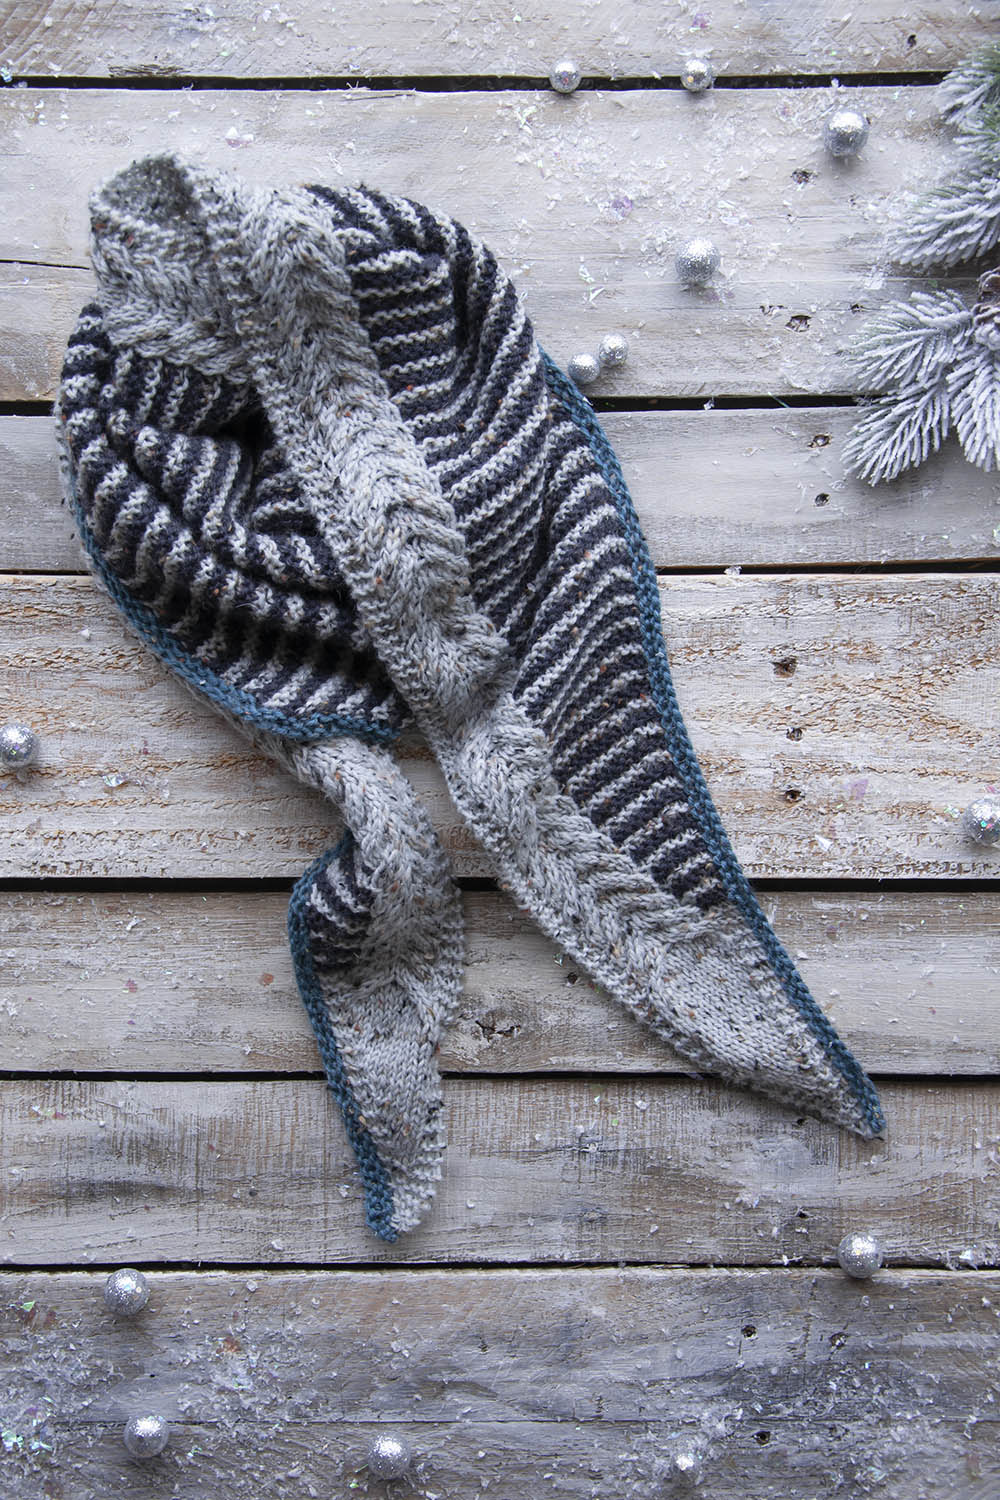
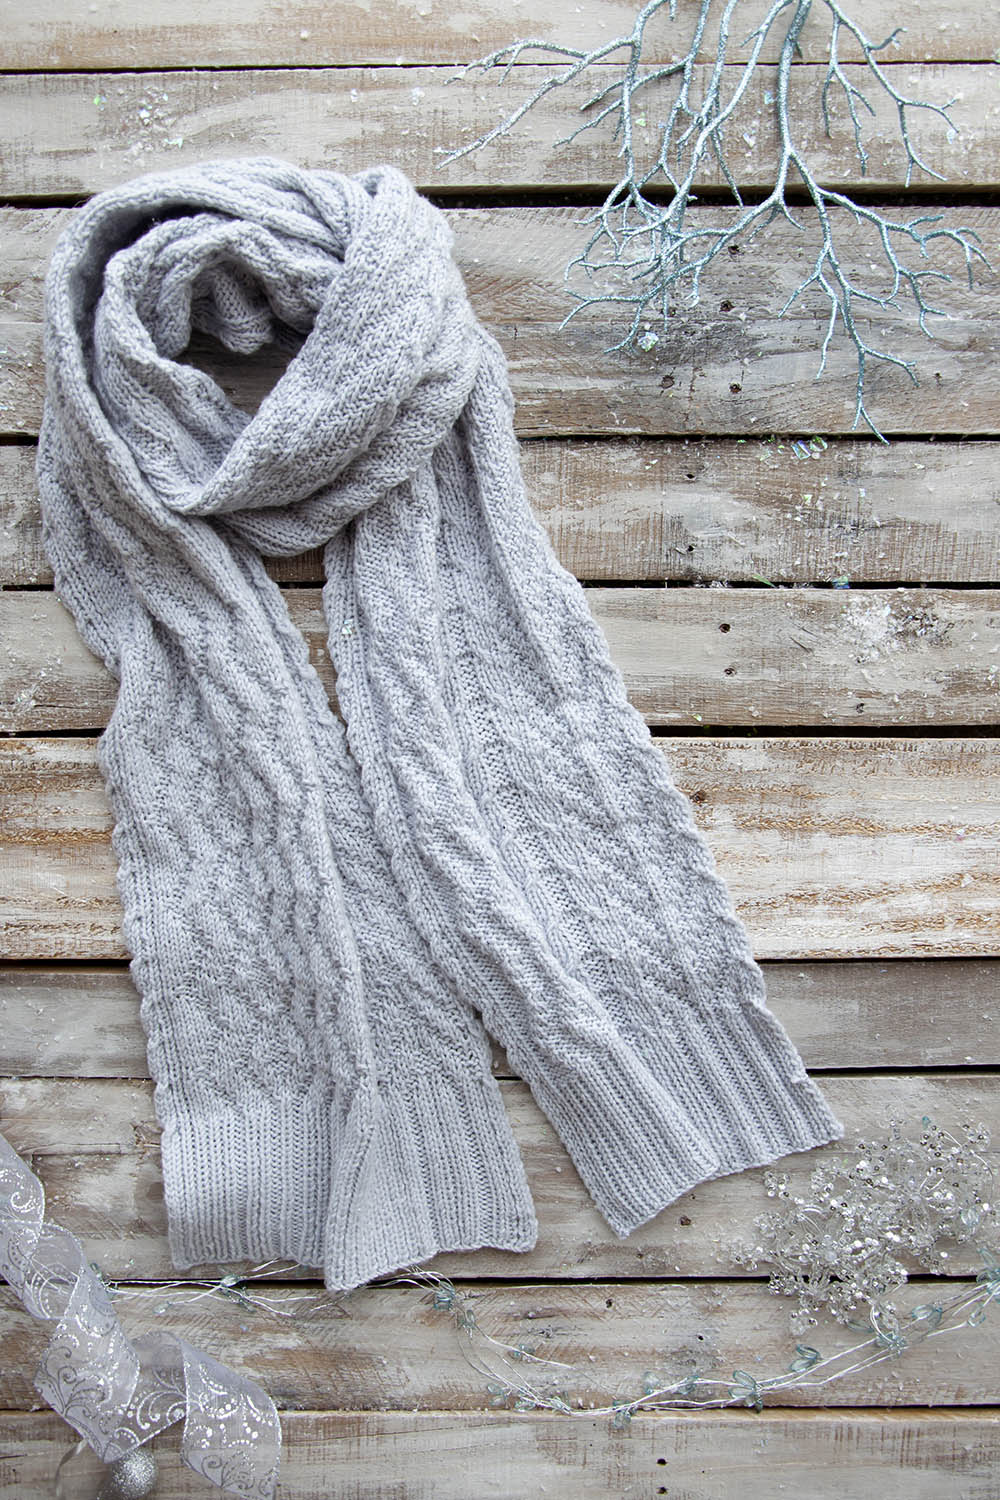
This is part 12 in a 12 part series highlighting designs from our 12 Days of Winter, Series 2 Edition.
Day 12 – can you believe it? Today we reveal the final installment of the Universal Yarn 12 Days of Winter Kit Collections – Series 2! Say hello to the Solstice Shawl.
Can I be honest? I am really proud of this design – in my opinion, it’s one of my best designs and I sincerely hope you love it.
This isn’t a very complicated design, but what I feel proud of is the balance of simplicity and intricacy in the piece. This shawl combines cables, stripes, and intarsia. It is worked from tip to tip, starting and finishing with the same number of stitches (just two!). Finally, it’s finished with a very simple contrast color border.
Part of what makes this project special is the yarn used: Deluxe DK Tweed Superwash. I love this yarn. It’s rustic and the tweedy nubs add interest to every type of pattern – from simple garter to cables, lace, and stranded colorwork. (If you need convincing, just take a look at the recent collection in this yarn, Rustic & Refined).
I’m keeping this post short and sweet, but before I sign off, thank you’s are in order! Like last year we had a really wonderful time putting this collection together. It is a team effort, for sure. So thanks to everyone on our team for putting in so much hard work! And thank you so much for supporting our company, your local yarn shops, and for following our posts for this collection. We appreciate it so much!
Remember, you can find the 12 Days of Winter Kit patterns on Ravelry.
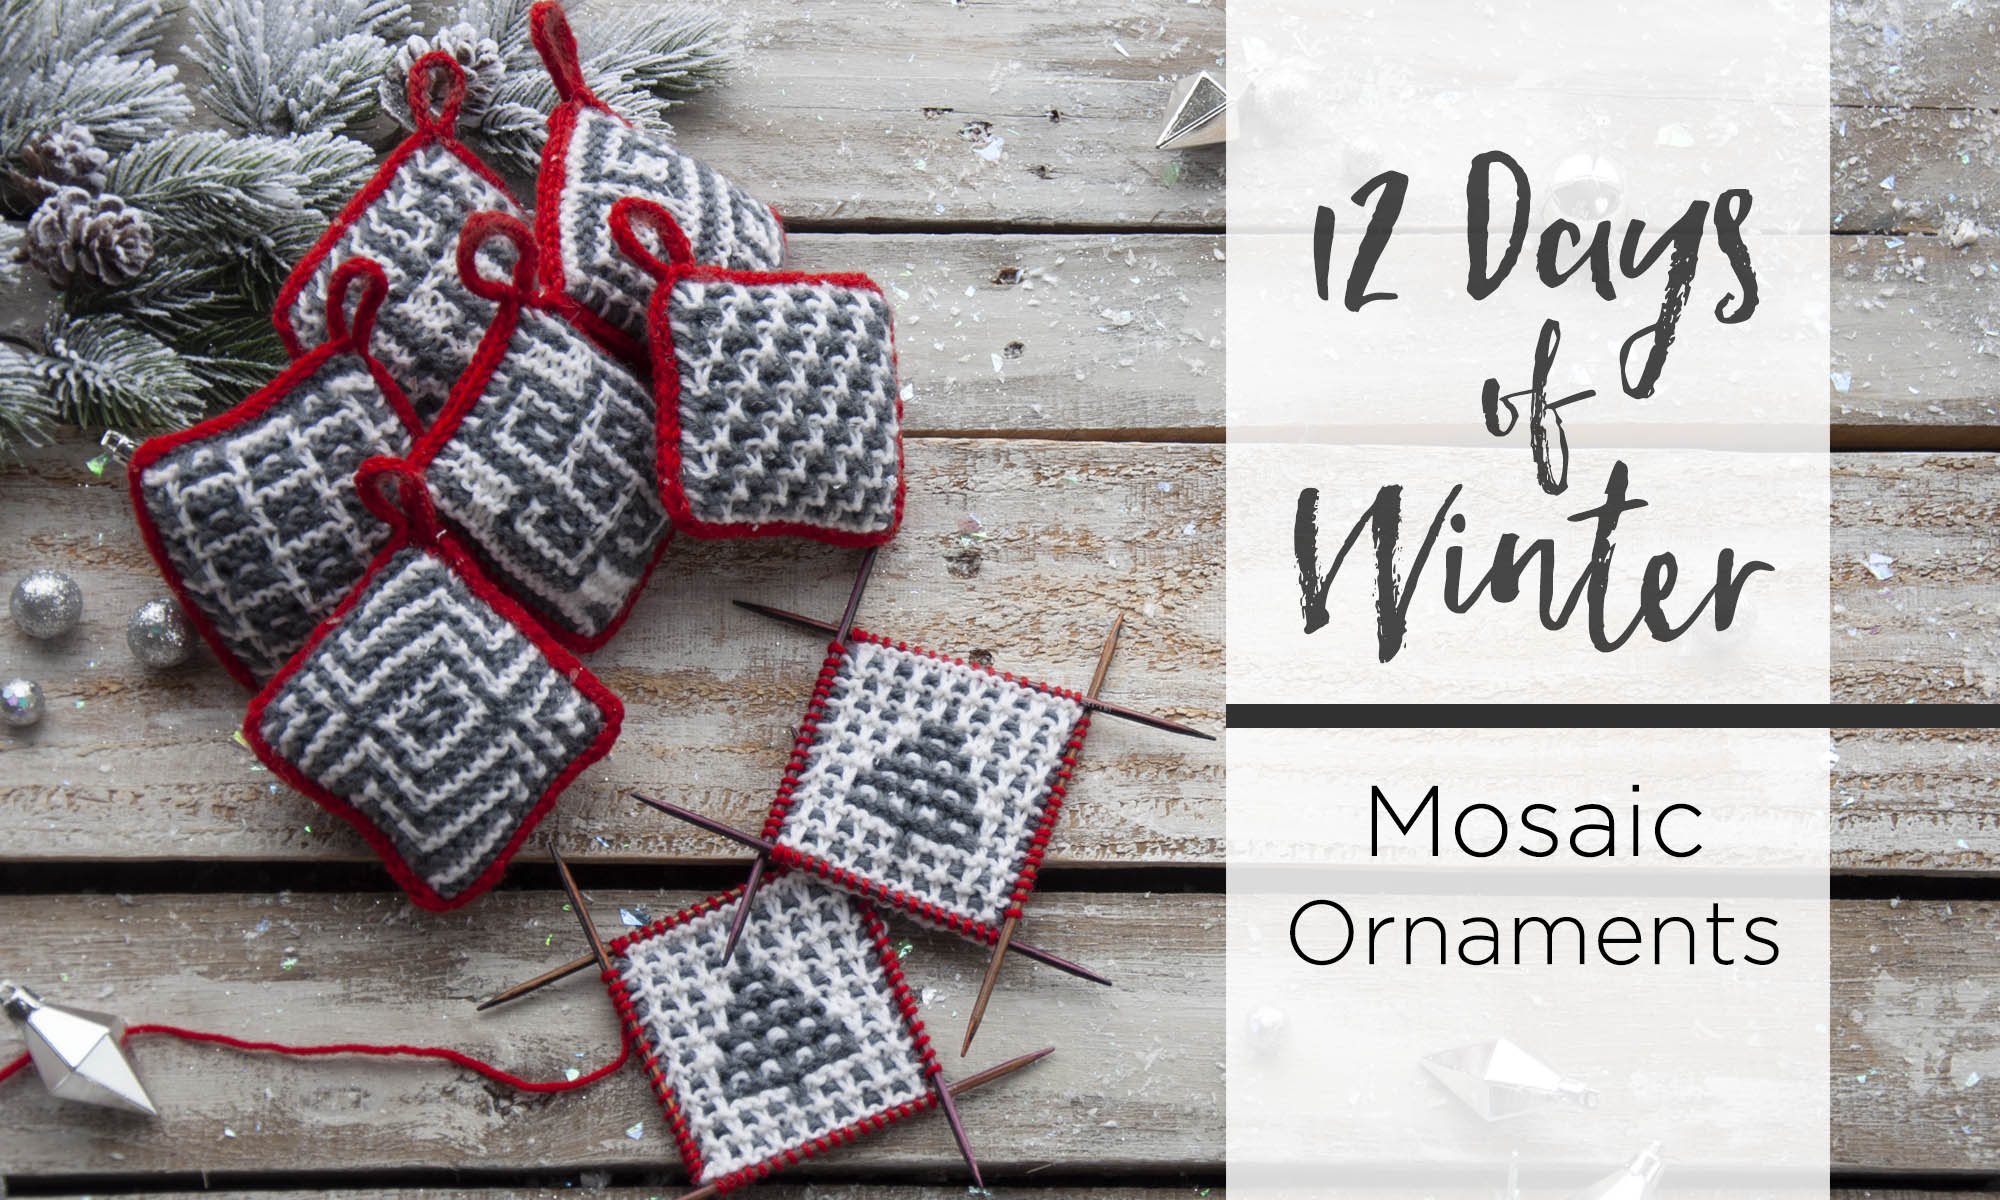
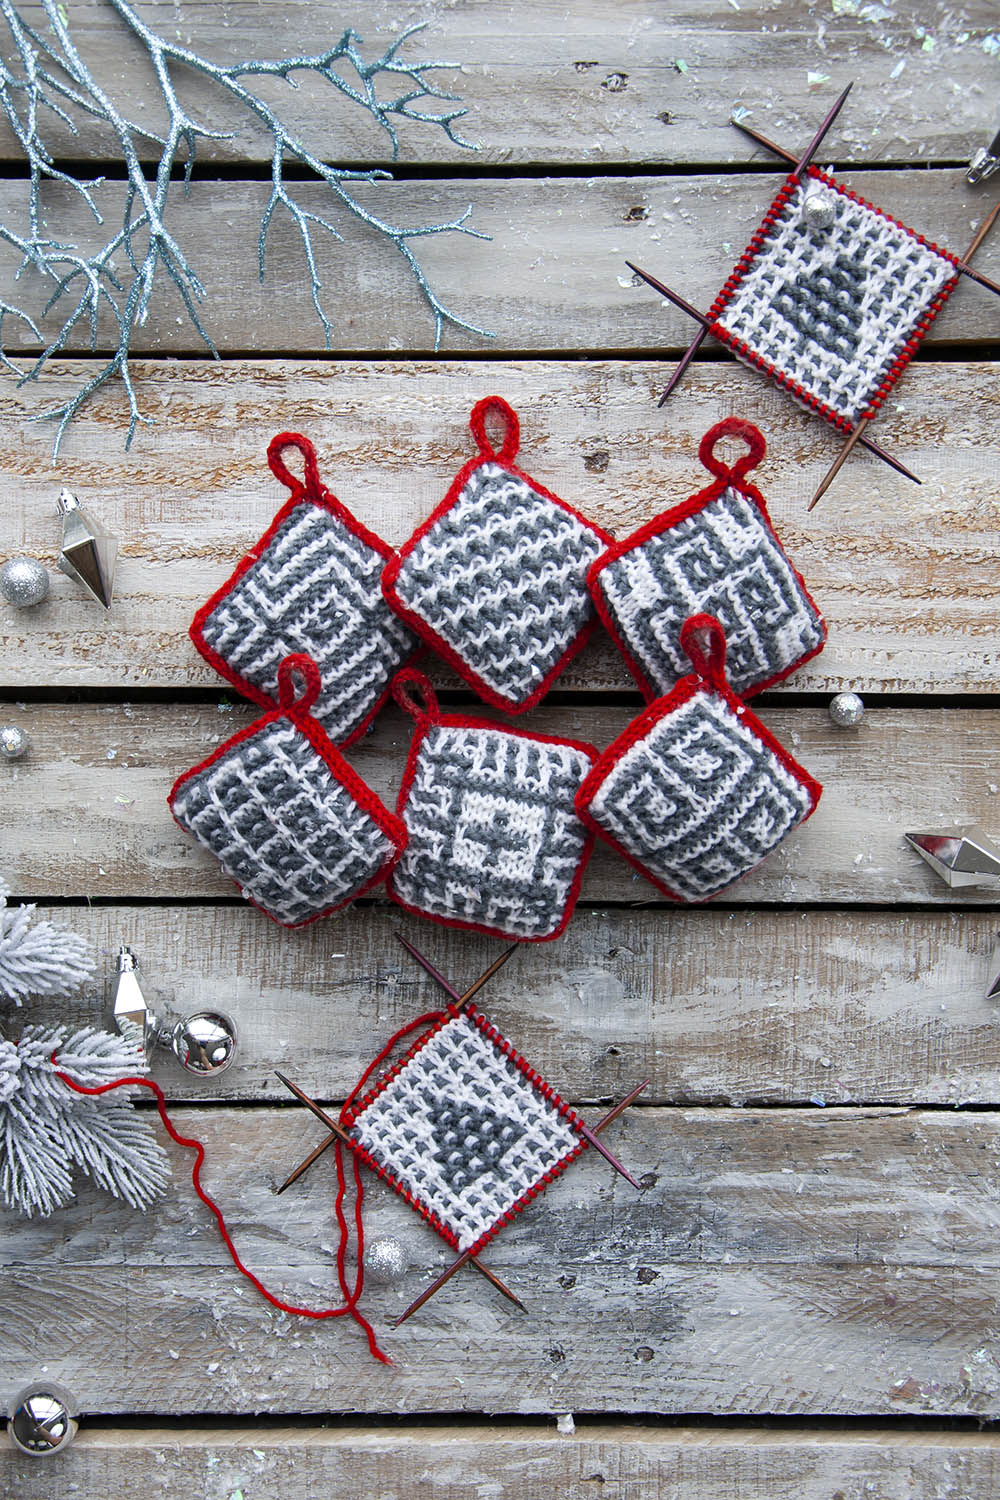
This is part 9 in a 12 part series highlighting designs from our 12 Days of Winter, Series 2 Edition.
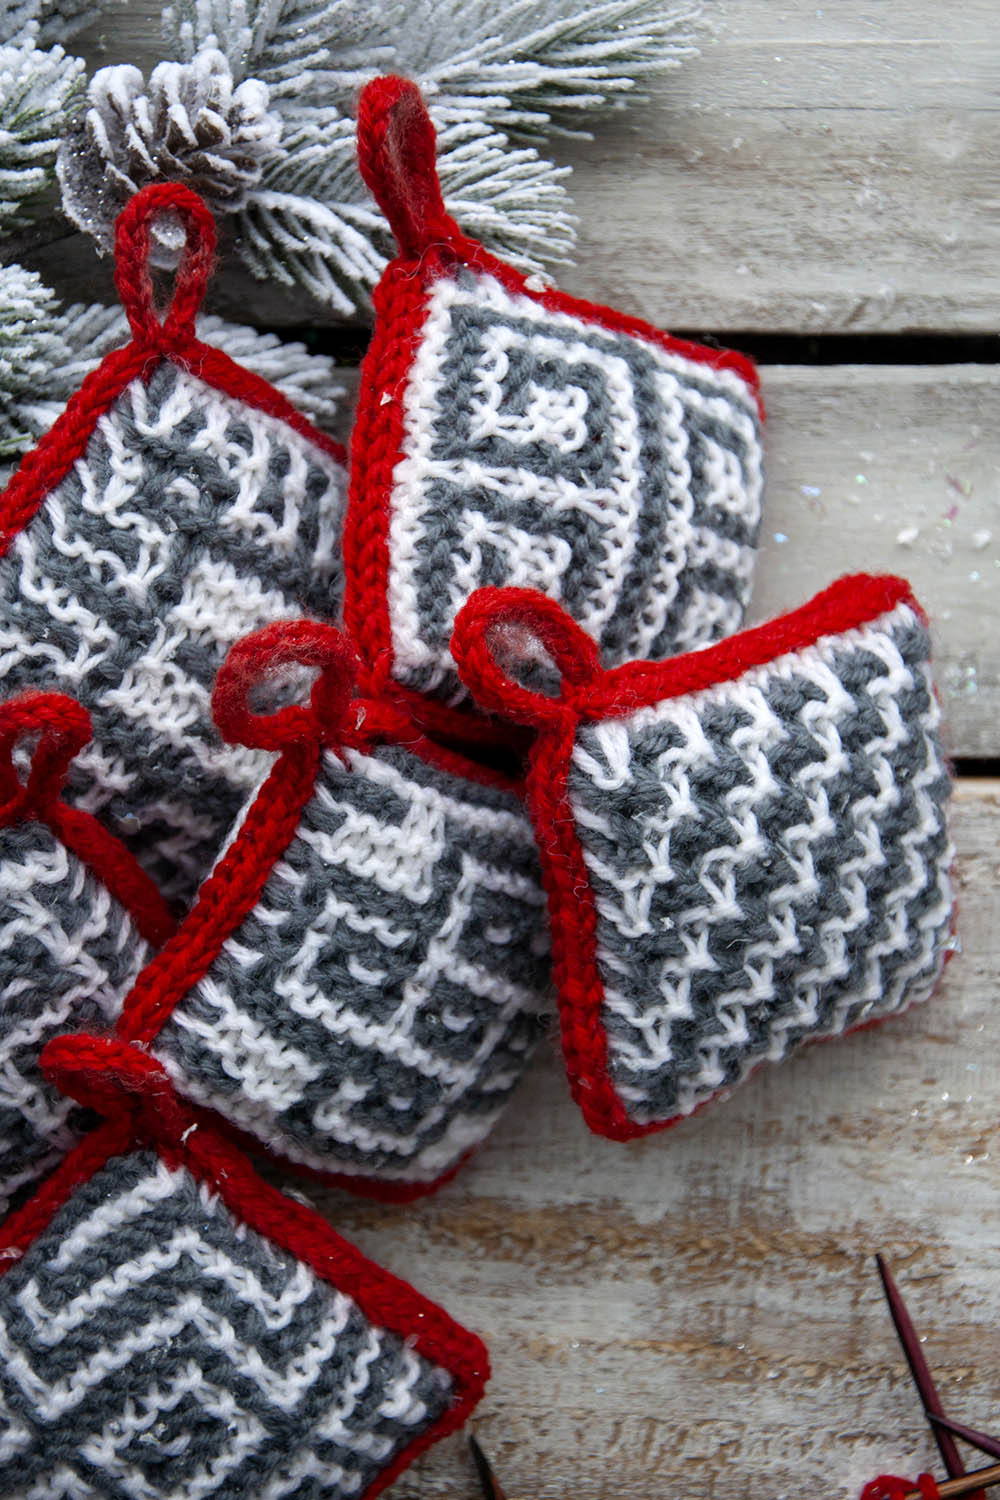
Ornaments are meant to be special. Often they are passed down to us. Perhaps they’ve been collected from some treasured place, or maybe they are handmade. After all, what is more charming than lovingly made handmade items?
The Mosaic Ornaments pattern calls for 3 balls (1 of each color) of Deluxe DK Superwash. Though there are seven different mosaic designs included in the pattern, the yarn amounts are enough to make at least 40 ornaments. Quite a bargain, eh?
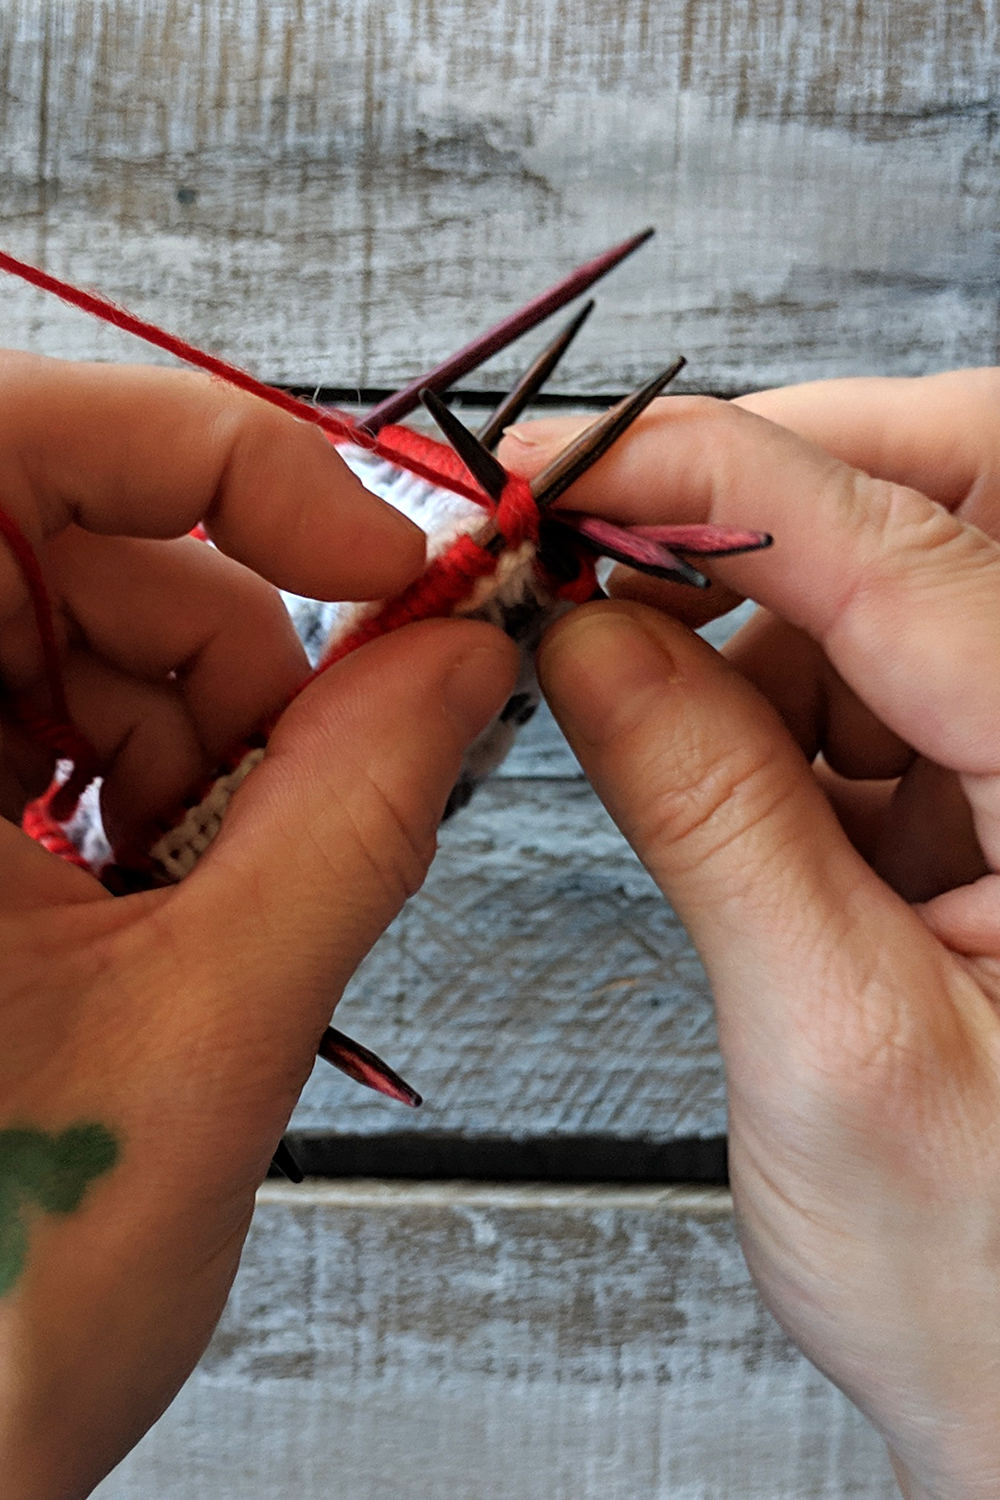
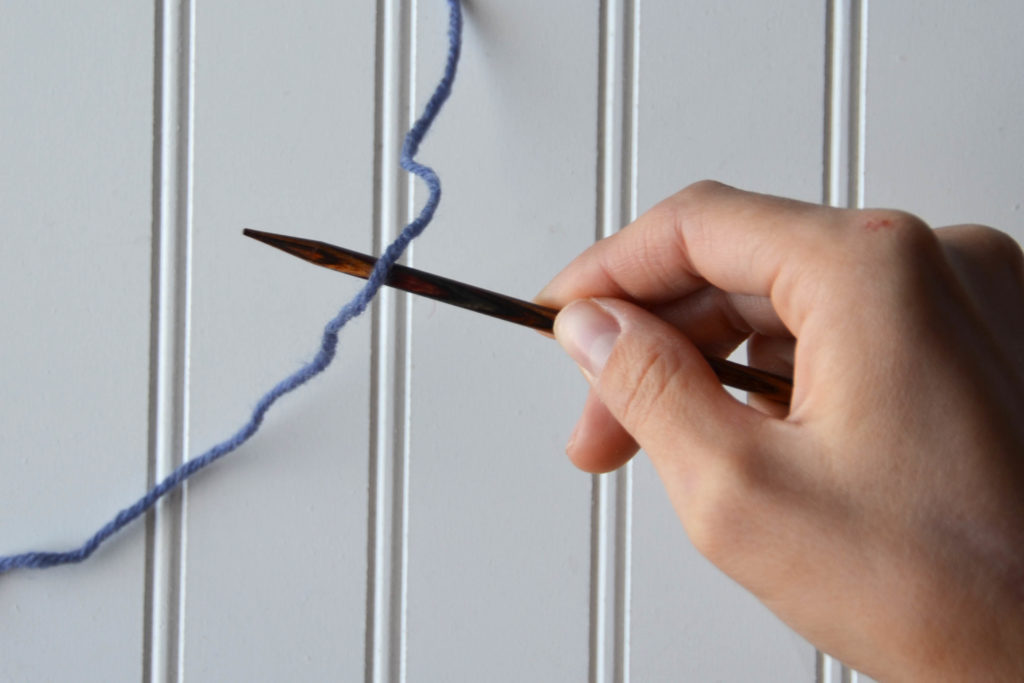
Each ornament begins by knitting the two sides separately. They are then joined with a three-needle I-Cord bind-off. Sound tough? It’s not, because I’m adding a step that takes this from a three-needle bind-off to just (the usual) two needles. Keep on reading to see how I like to do it!
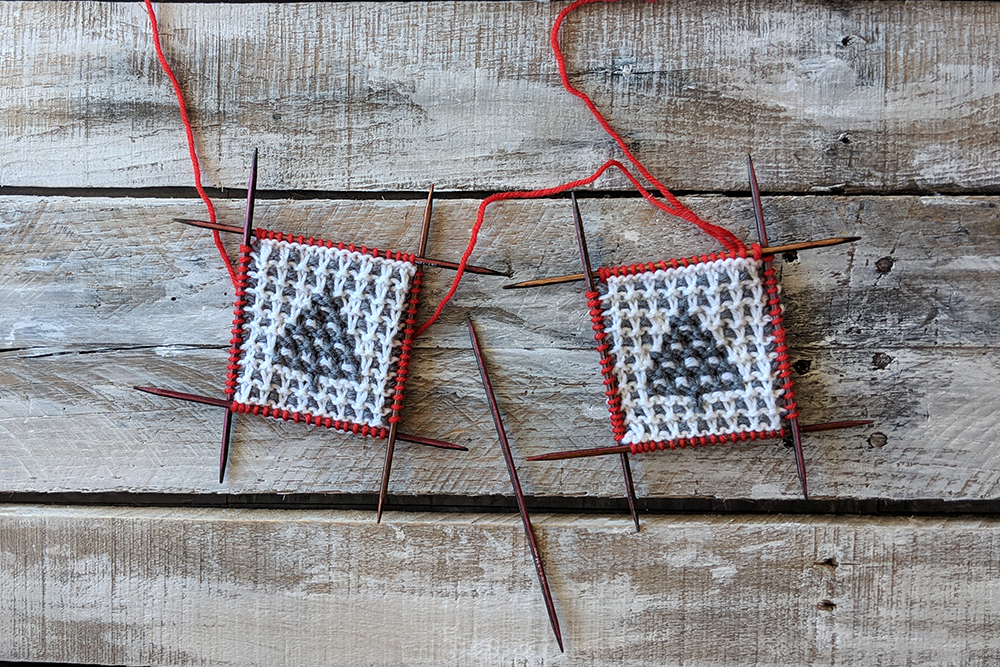
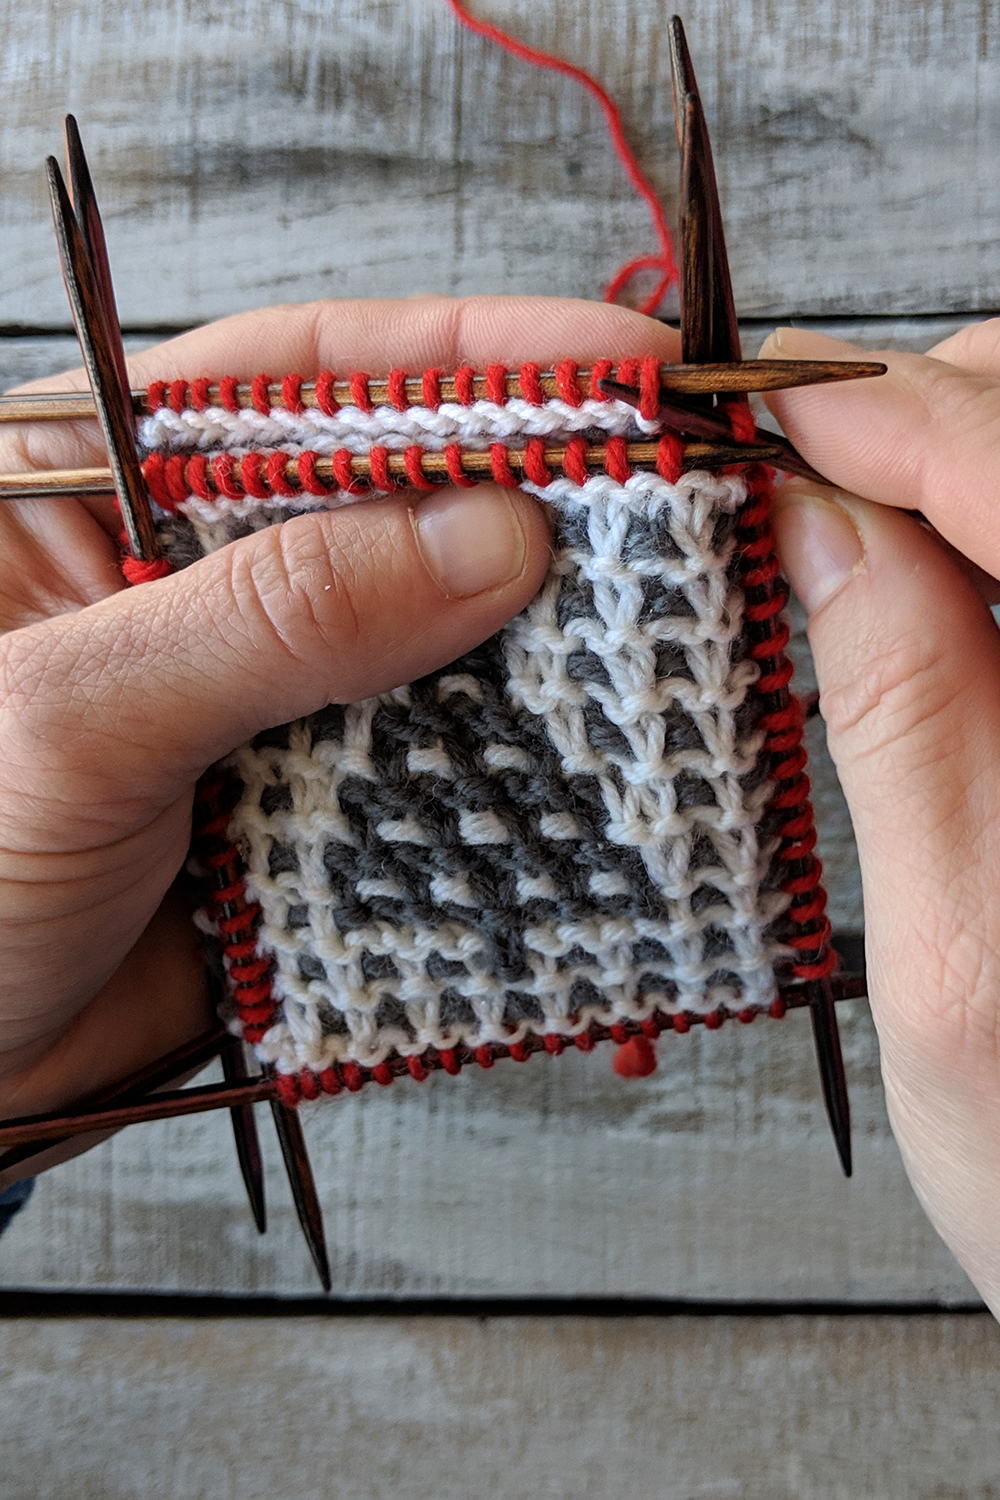
Here you can see that I have two sides of the Trees ornament, all ready to be joined.
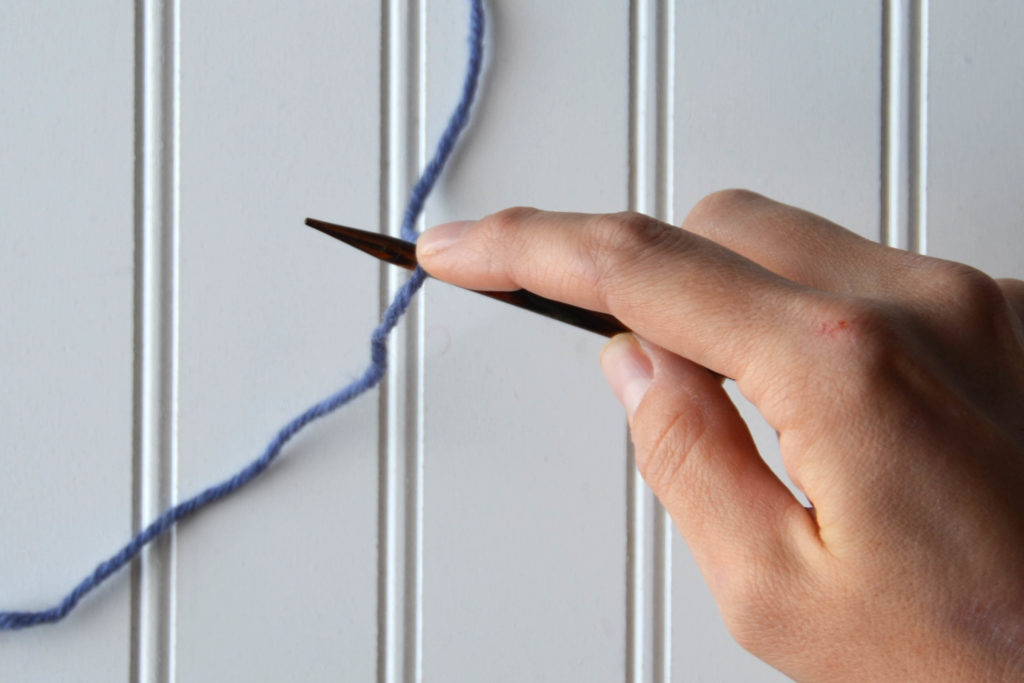
What I haven’t shown in these images is that the first step is to pick up and knit stitches all the way around each square with the contrasting red color. So that’s where we are at now – stitches have been picked up around each square.
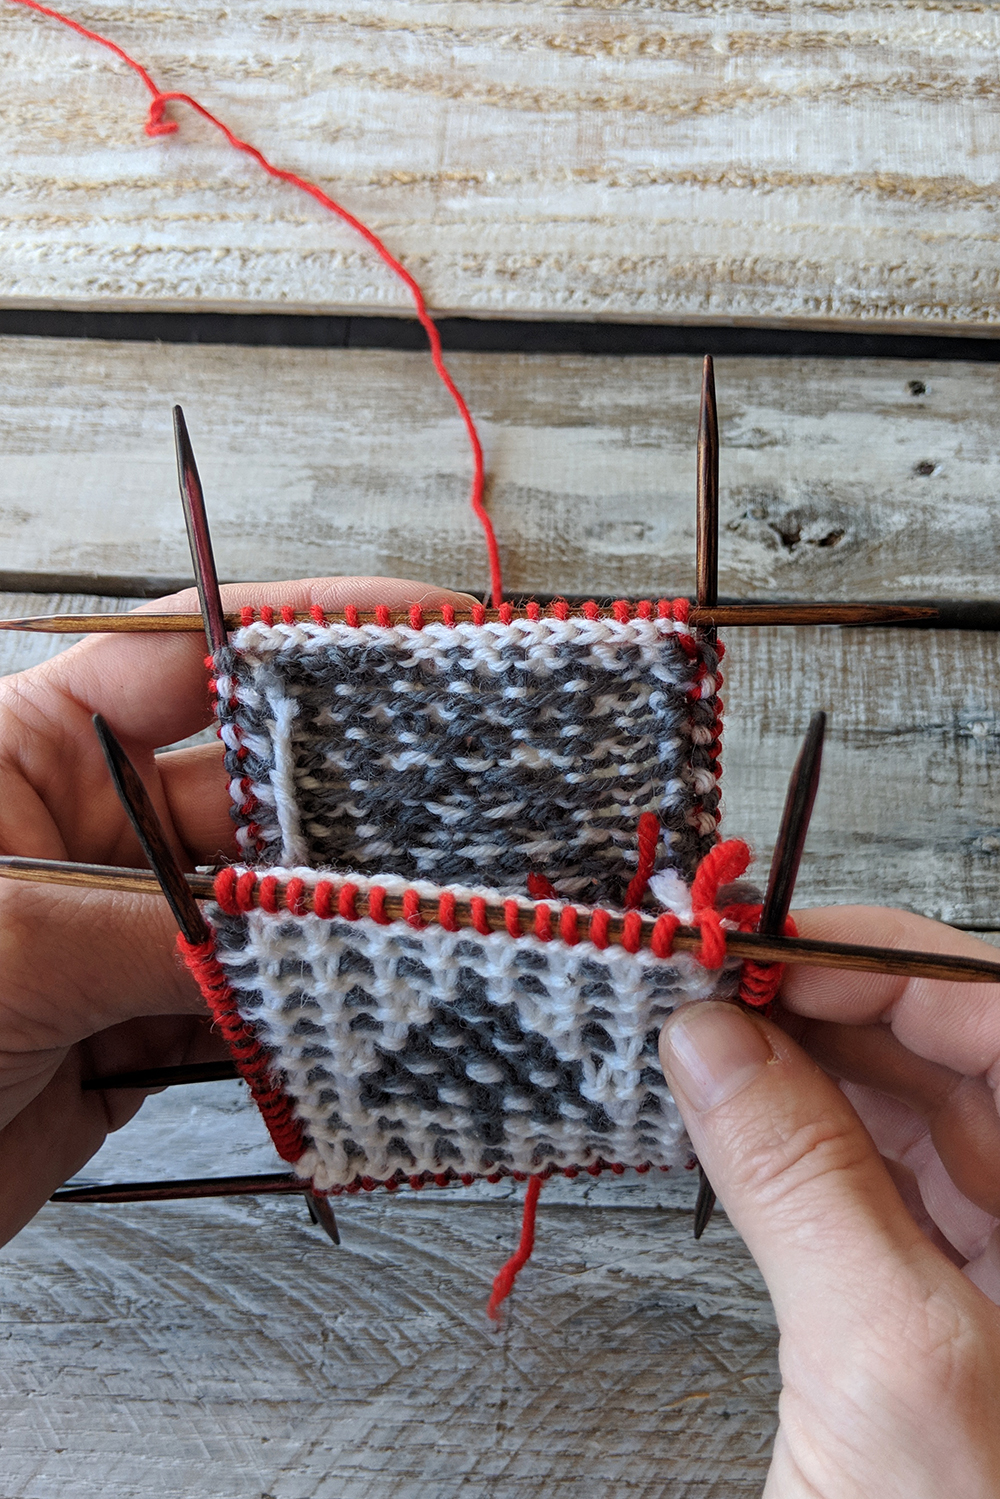
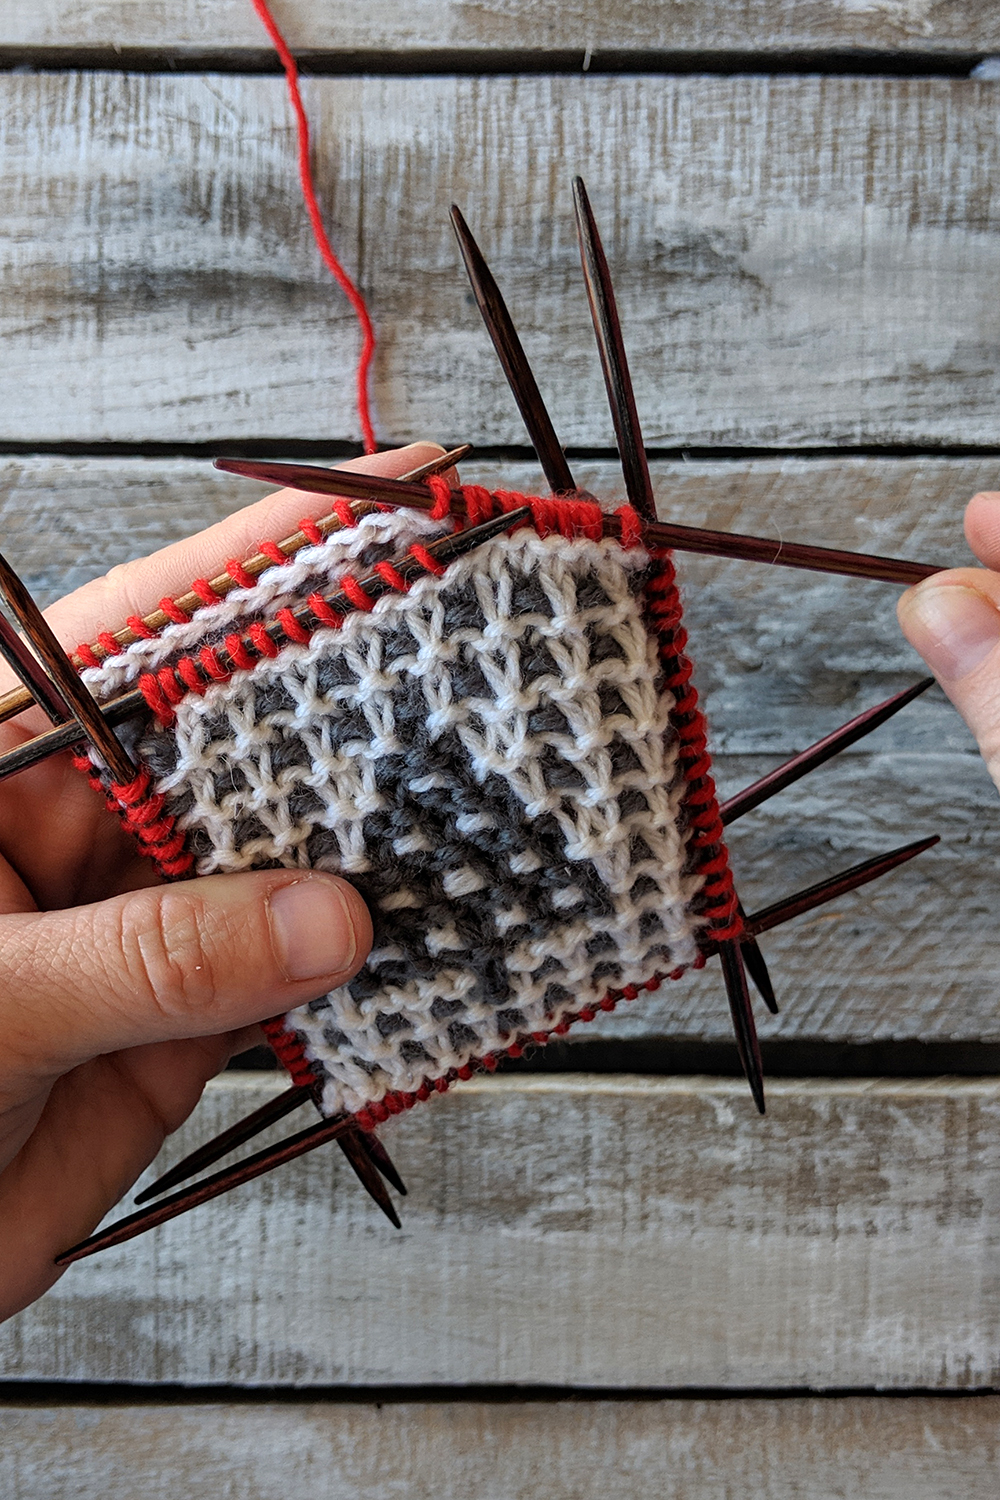
Next, place both pieces with their wrong sides facing together.
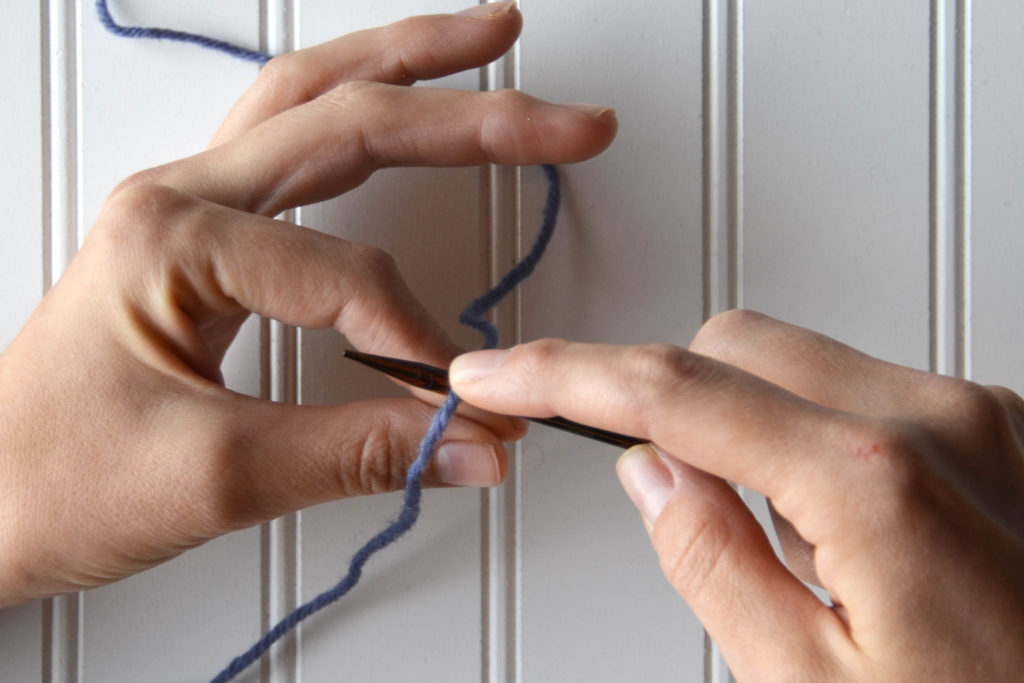
This is similar to the prep for a tubular bind-off.
What I’m doing now is certainly not absolutely necessary, but I find it makes the process so much easier. With a separate double pointed needle (dpn), first I slide a stitch from the front needle onto the spare dpn.
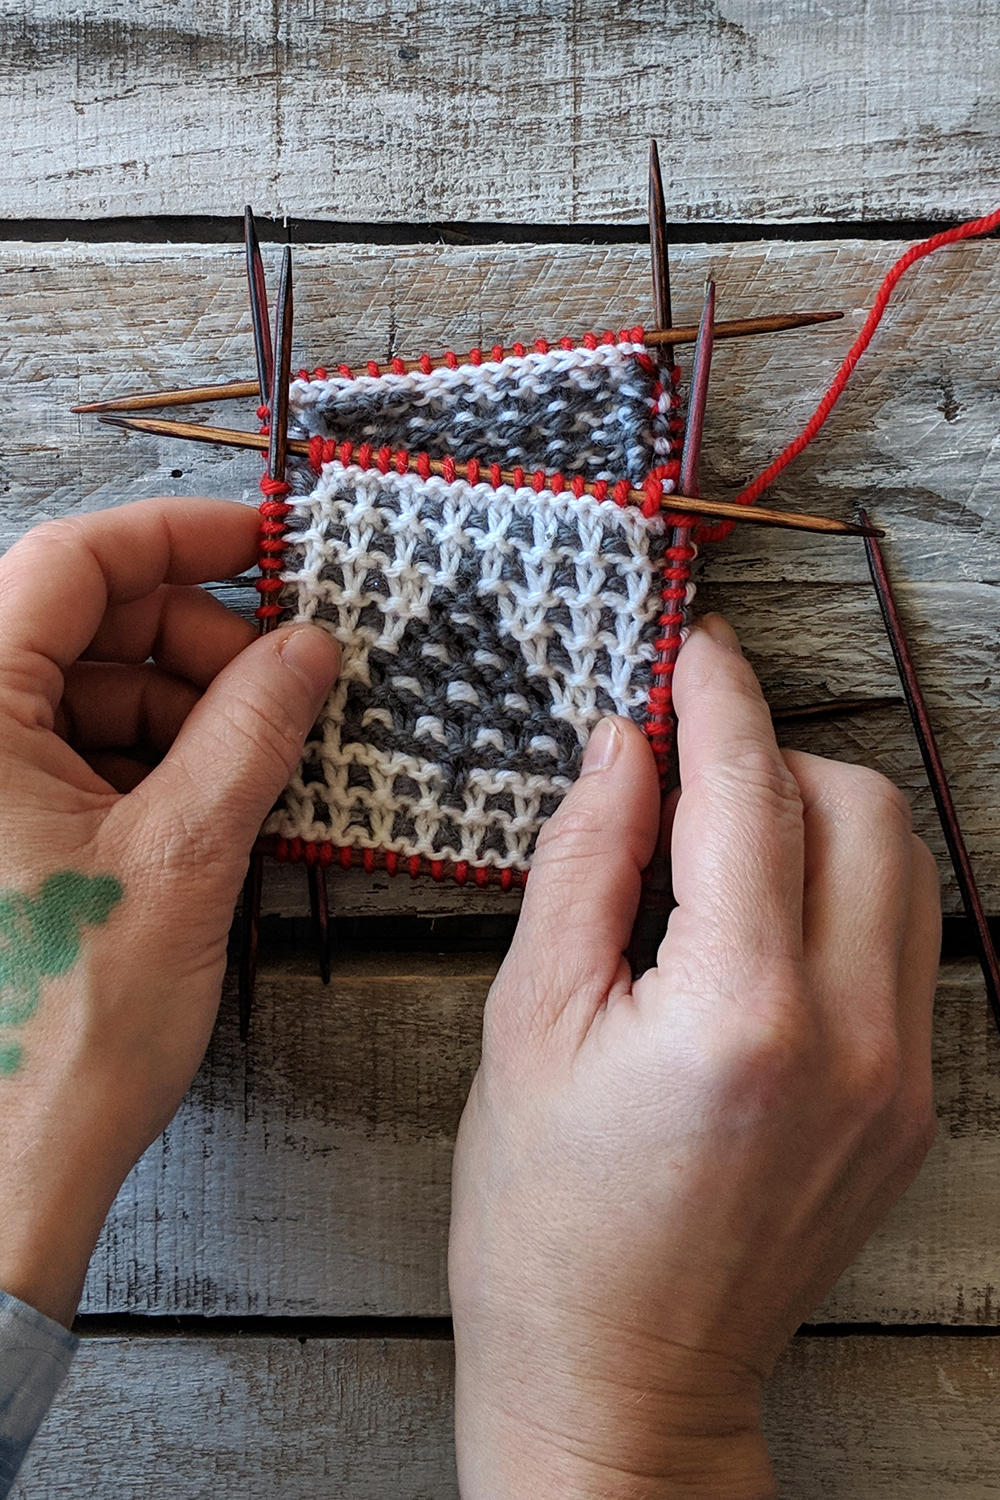
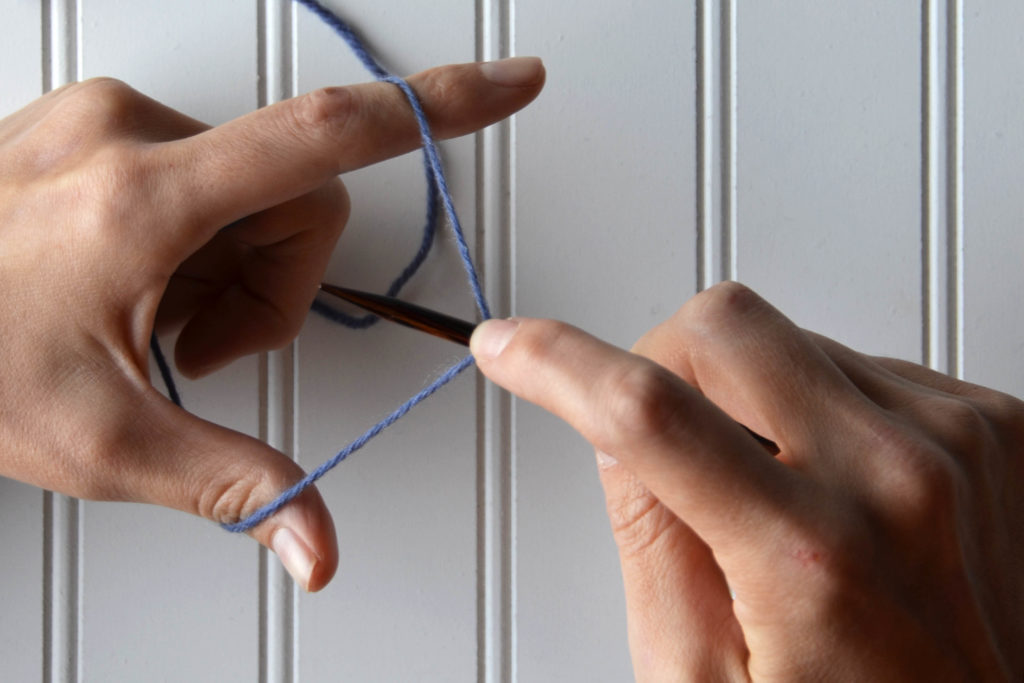
Next, I slide a stitch from the back needle onto this same dpn.
Keep going, alternating front and back needles/stitches until all stitches from one front and back needle have been transferred to the spare.
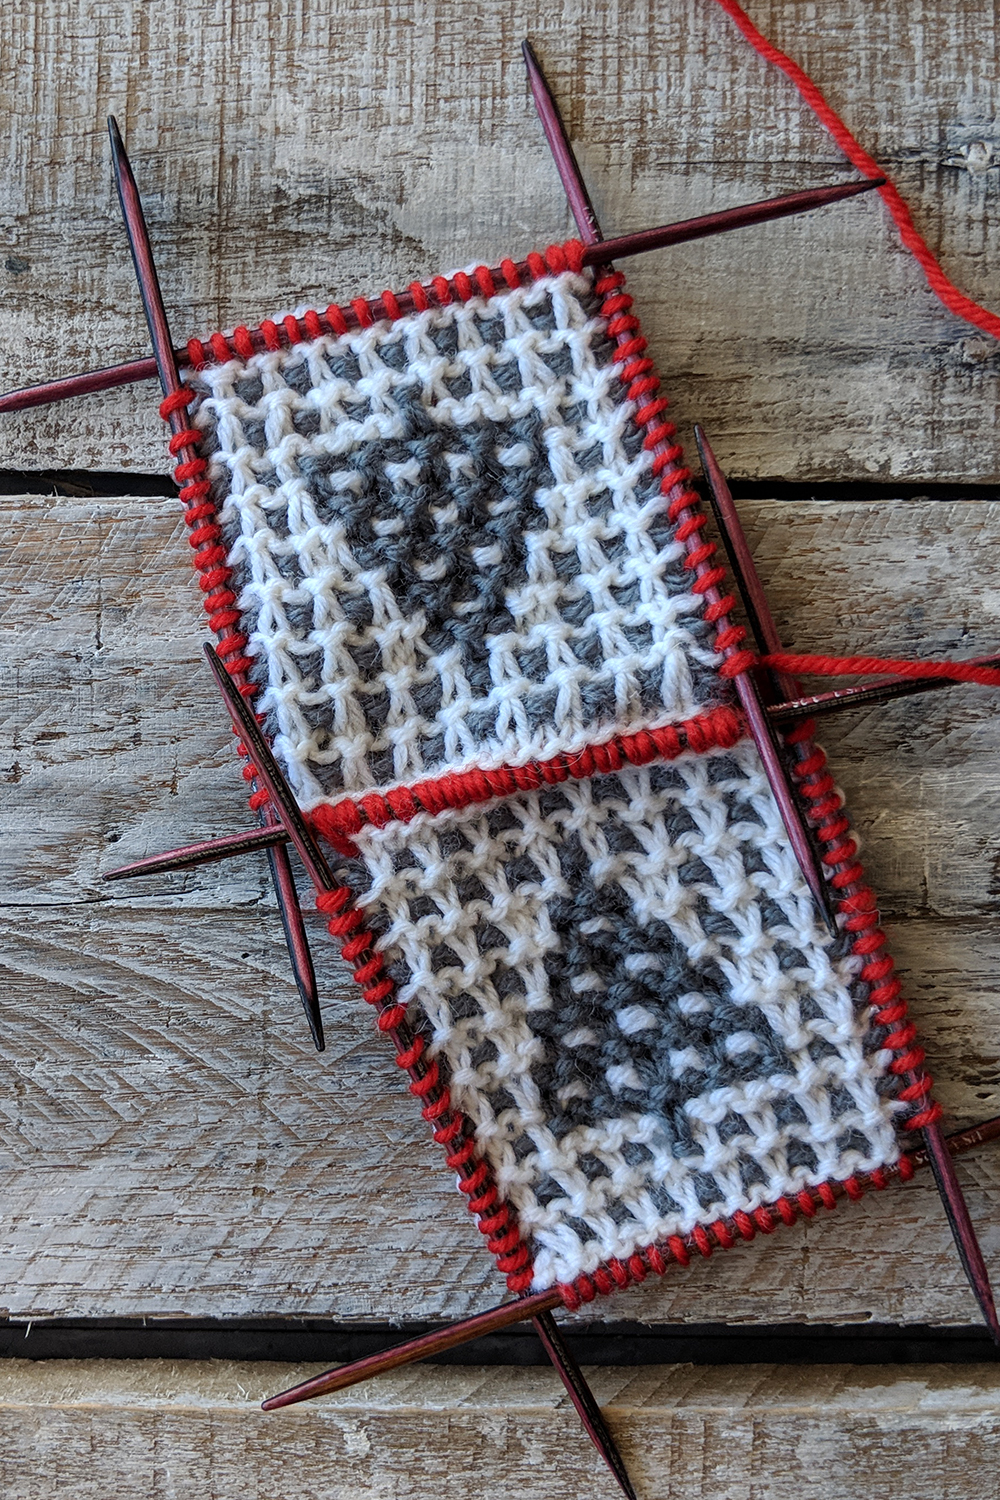
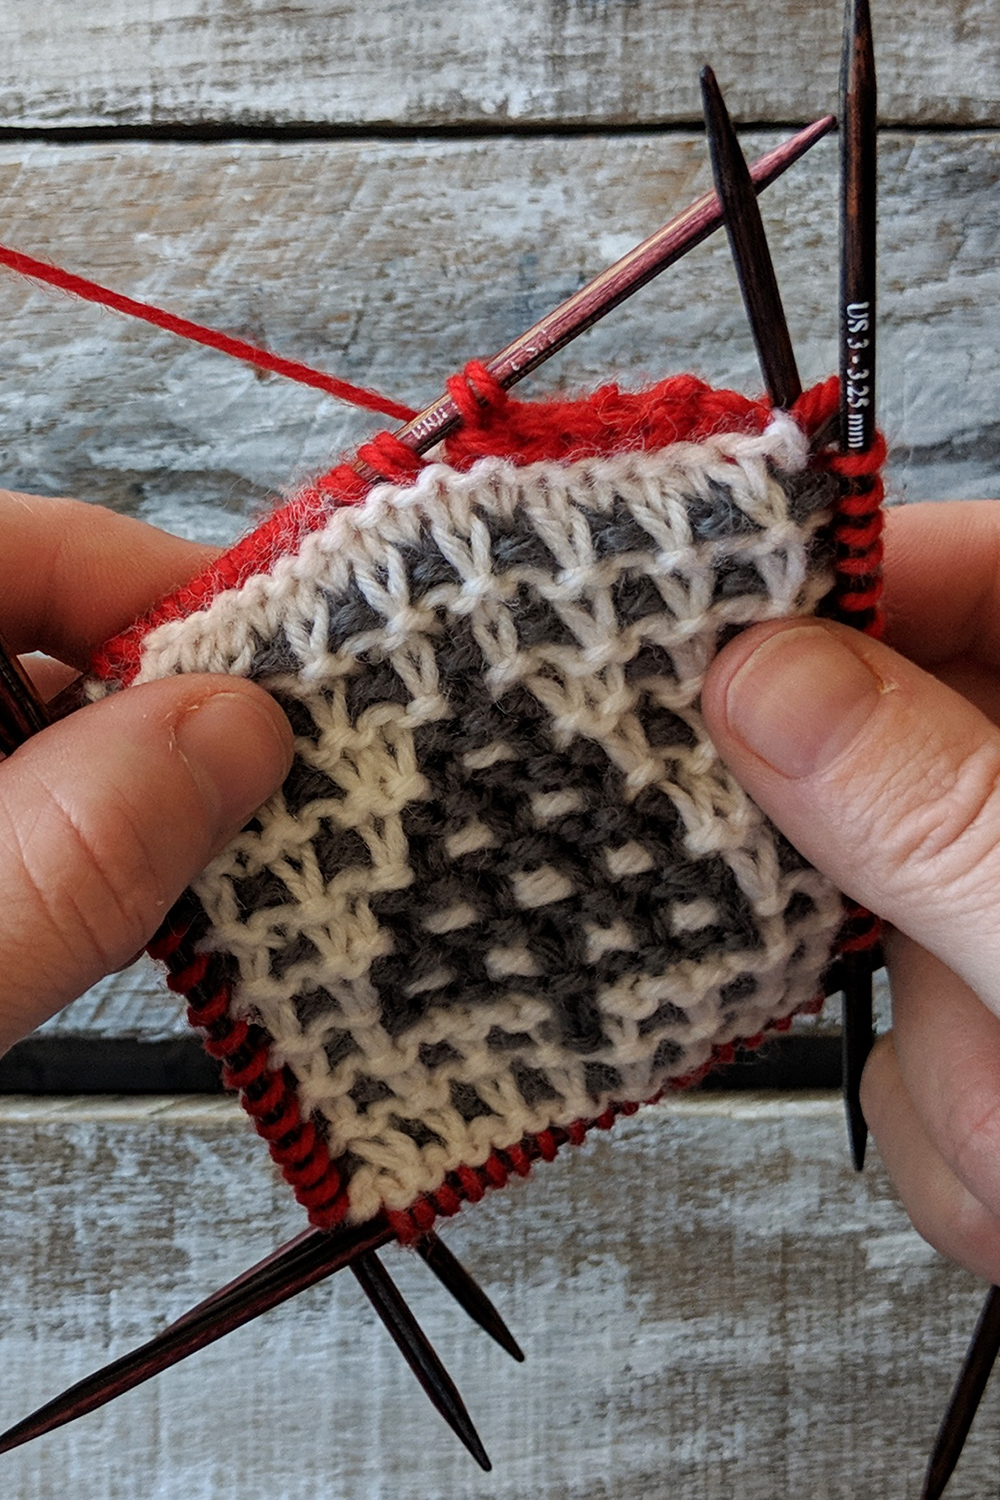
All the stitches from each needle are transferred. We’re ready to bind off!
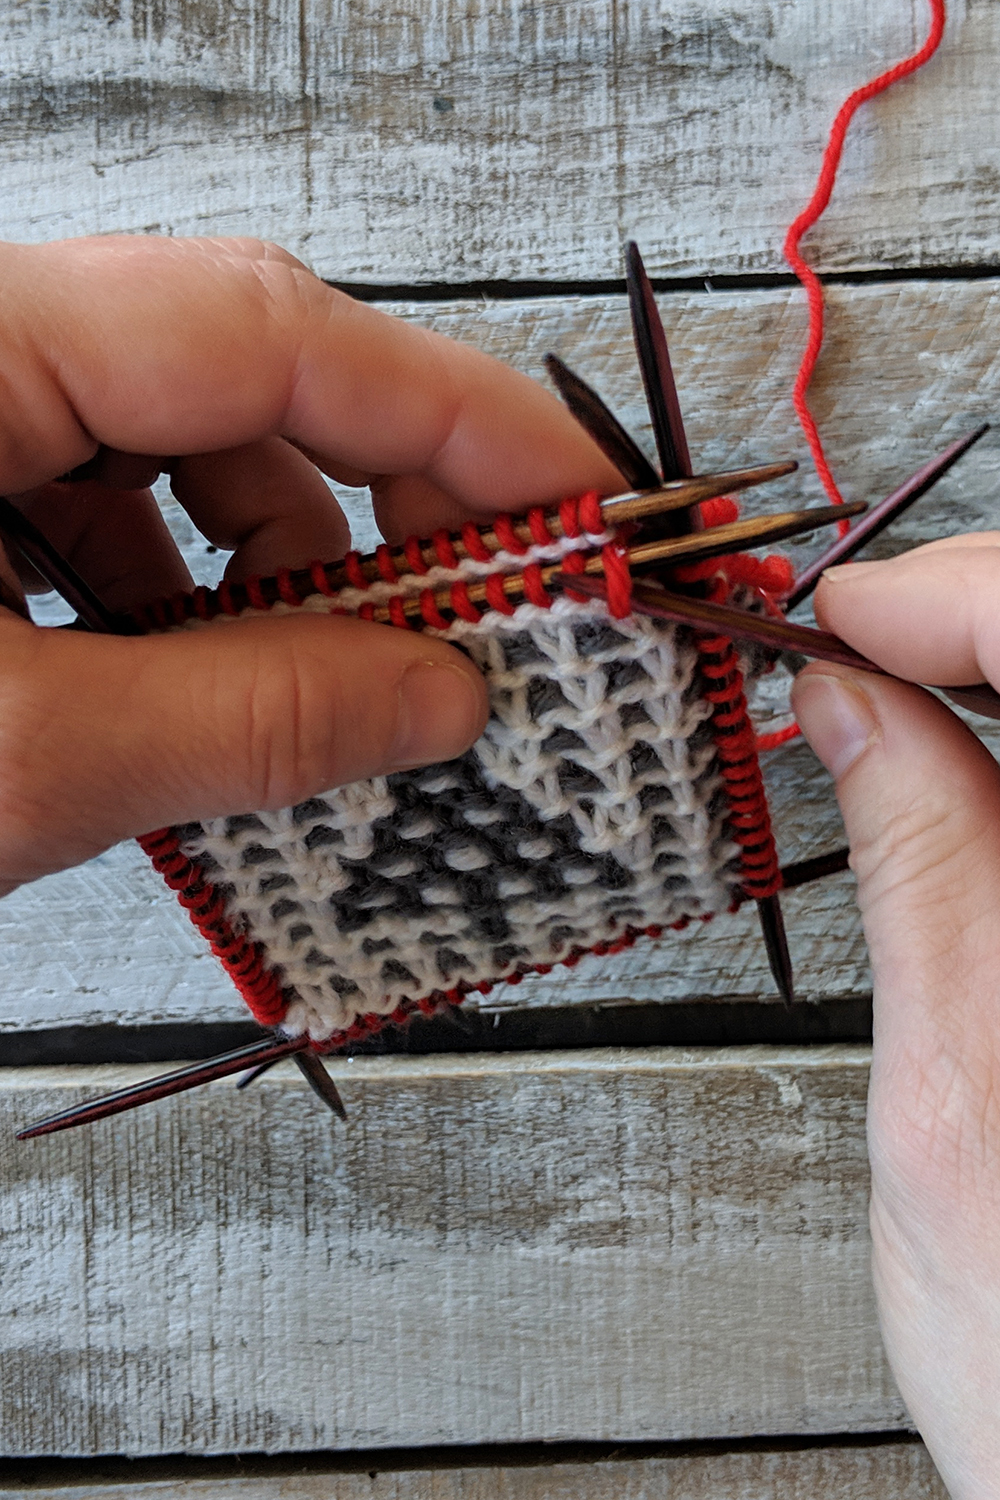
Now that the stitches from both needles have been combined onto one needle, all we’re really doing is an I-Cord bind-off, but with one extra step.
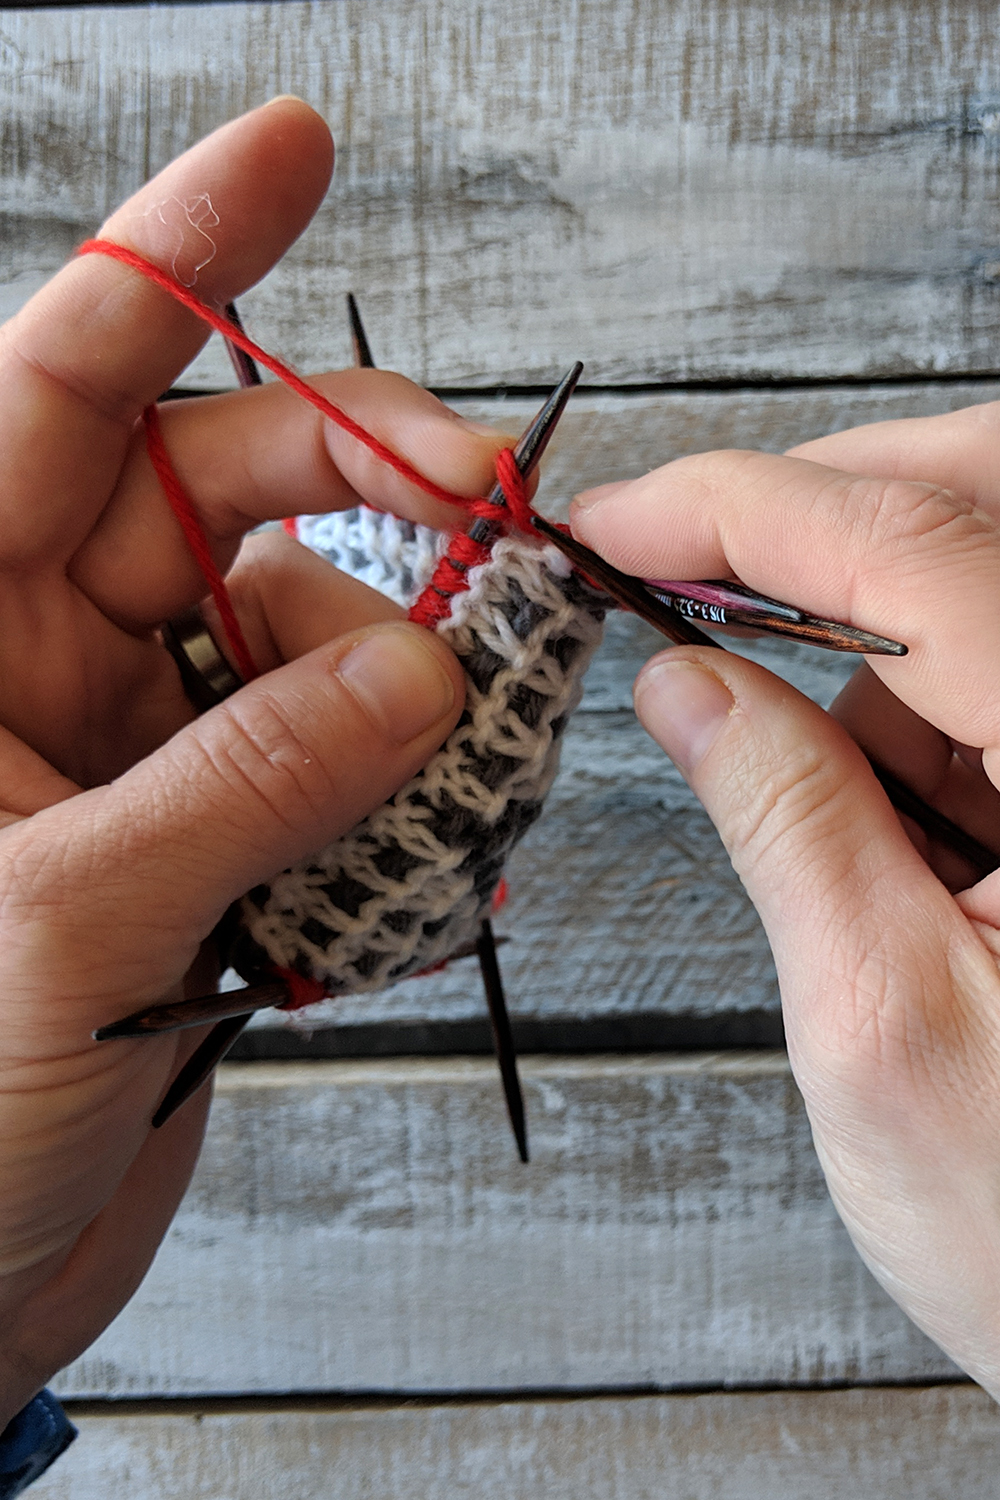
To start, cast on two stitches using the knitted method. These are our I-Cord stitches.
Next, knit 1 (the first cast-on stitch), then k3tog tbl (knit three stitches together through the back loops). These three stitches are: the second cast-on stitch, a stitch from the prior front needle, and a stitch from the prior back needle. Slip the resulting 2 stitches back to the working left needle. Then: * K1, k3tog tbl, slip these 2 sts back to the left needle; rep from *
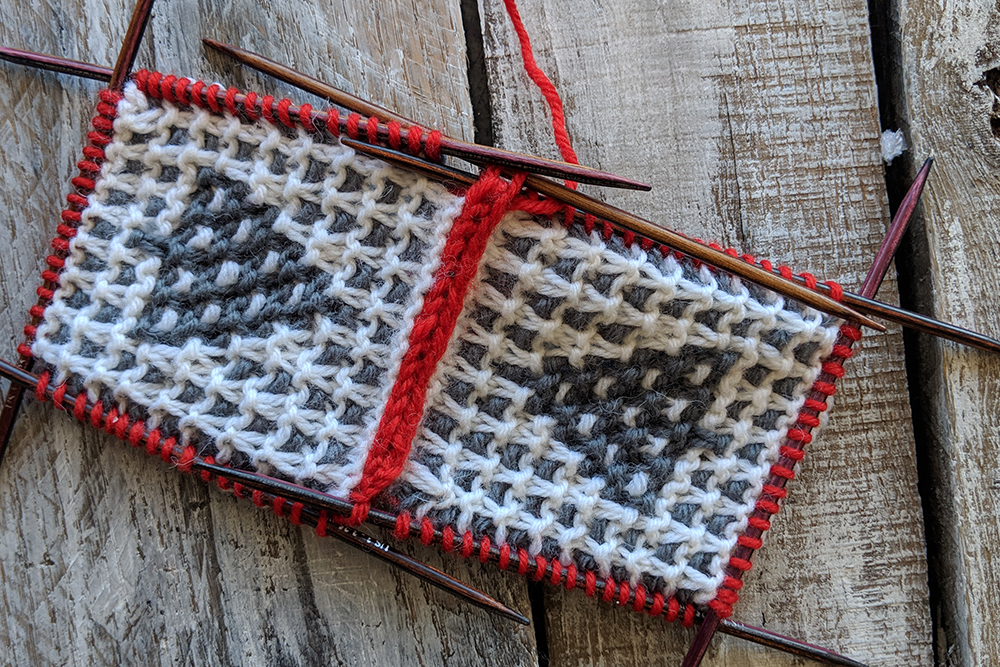
This baby 2-stitch I-Cord is works well to join the sides of the ornament and gives a nice finished look to the project, as well.
Here’s what it looks like after the side is partly joined.
All done!
Remember, you can find the Series 2 12 Days of Winter patterns on Ravelry!
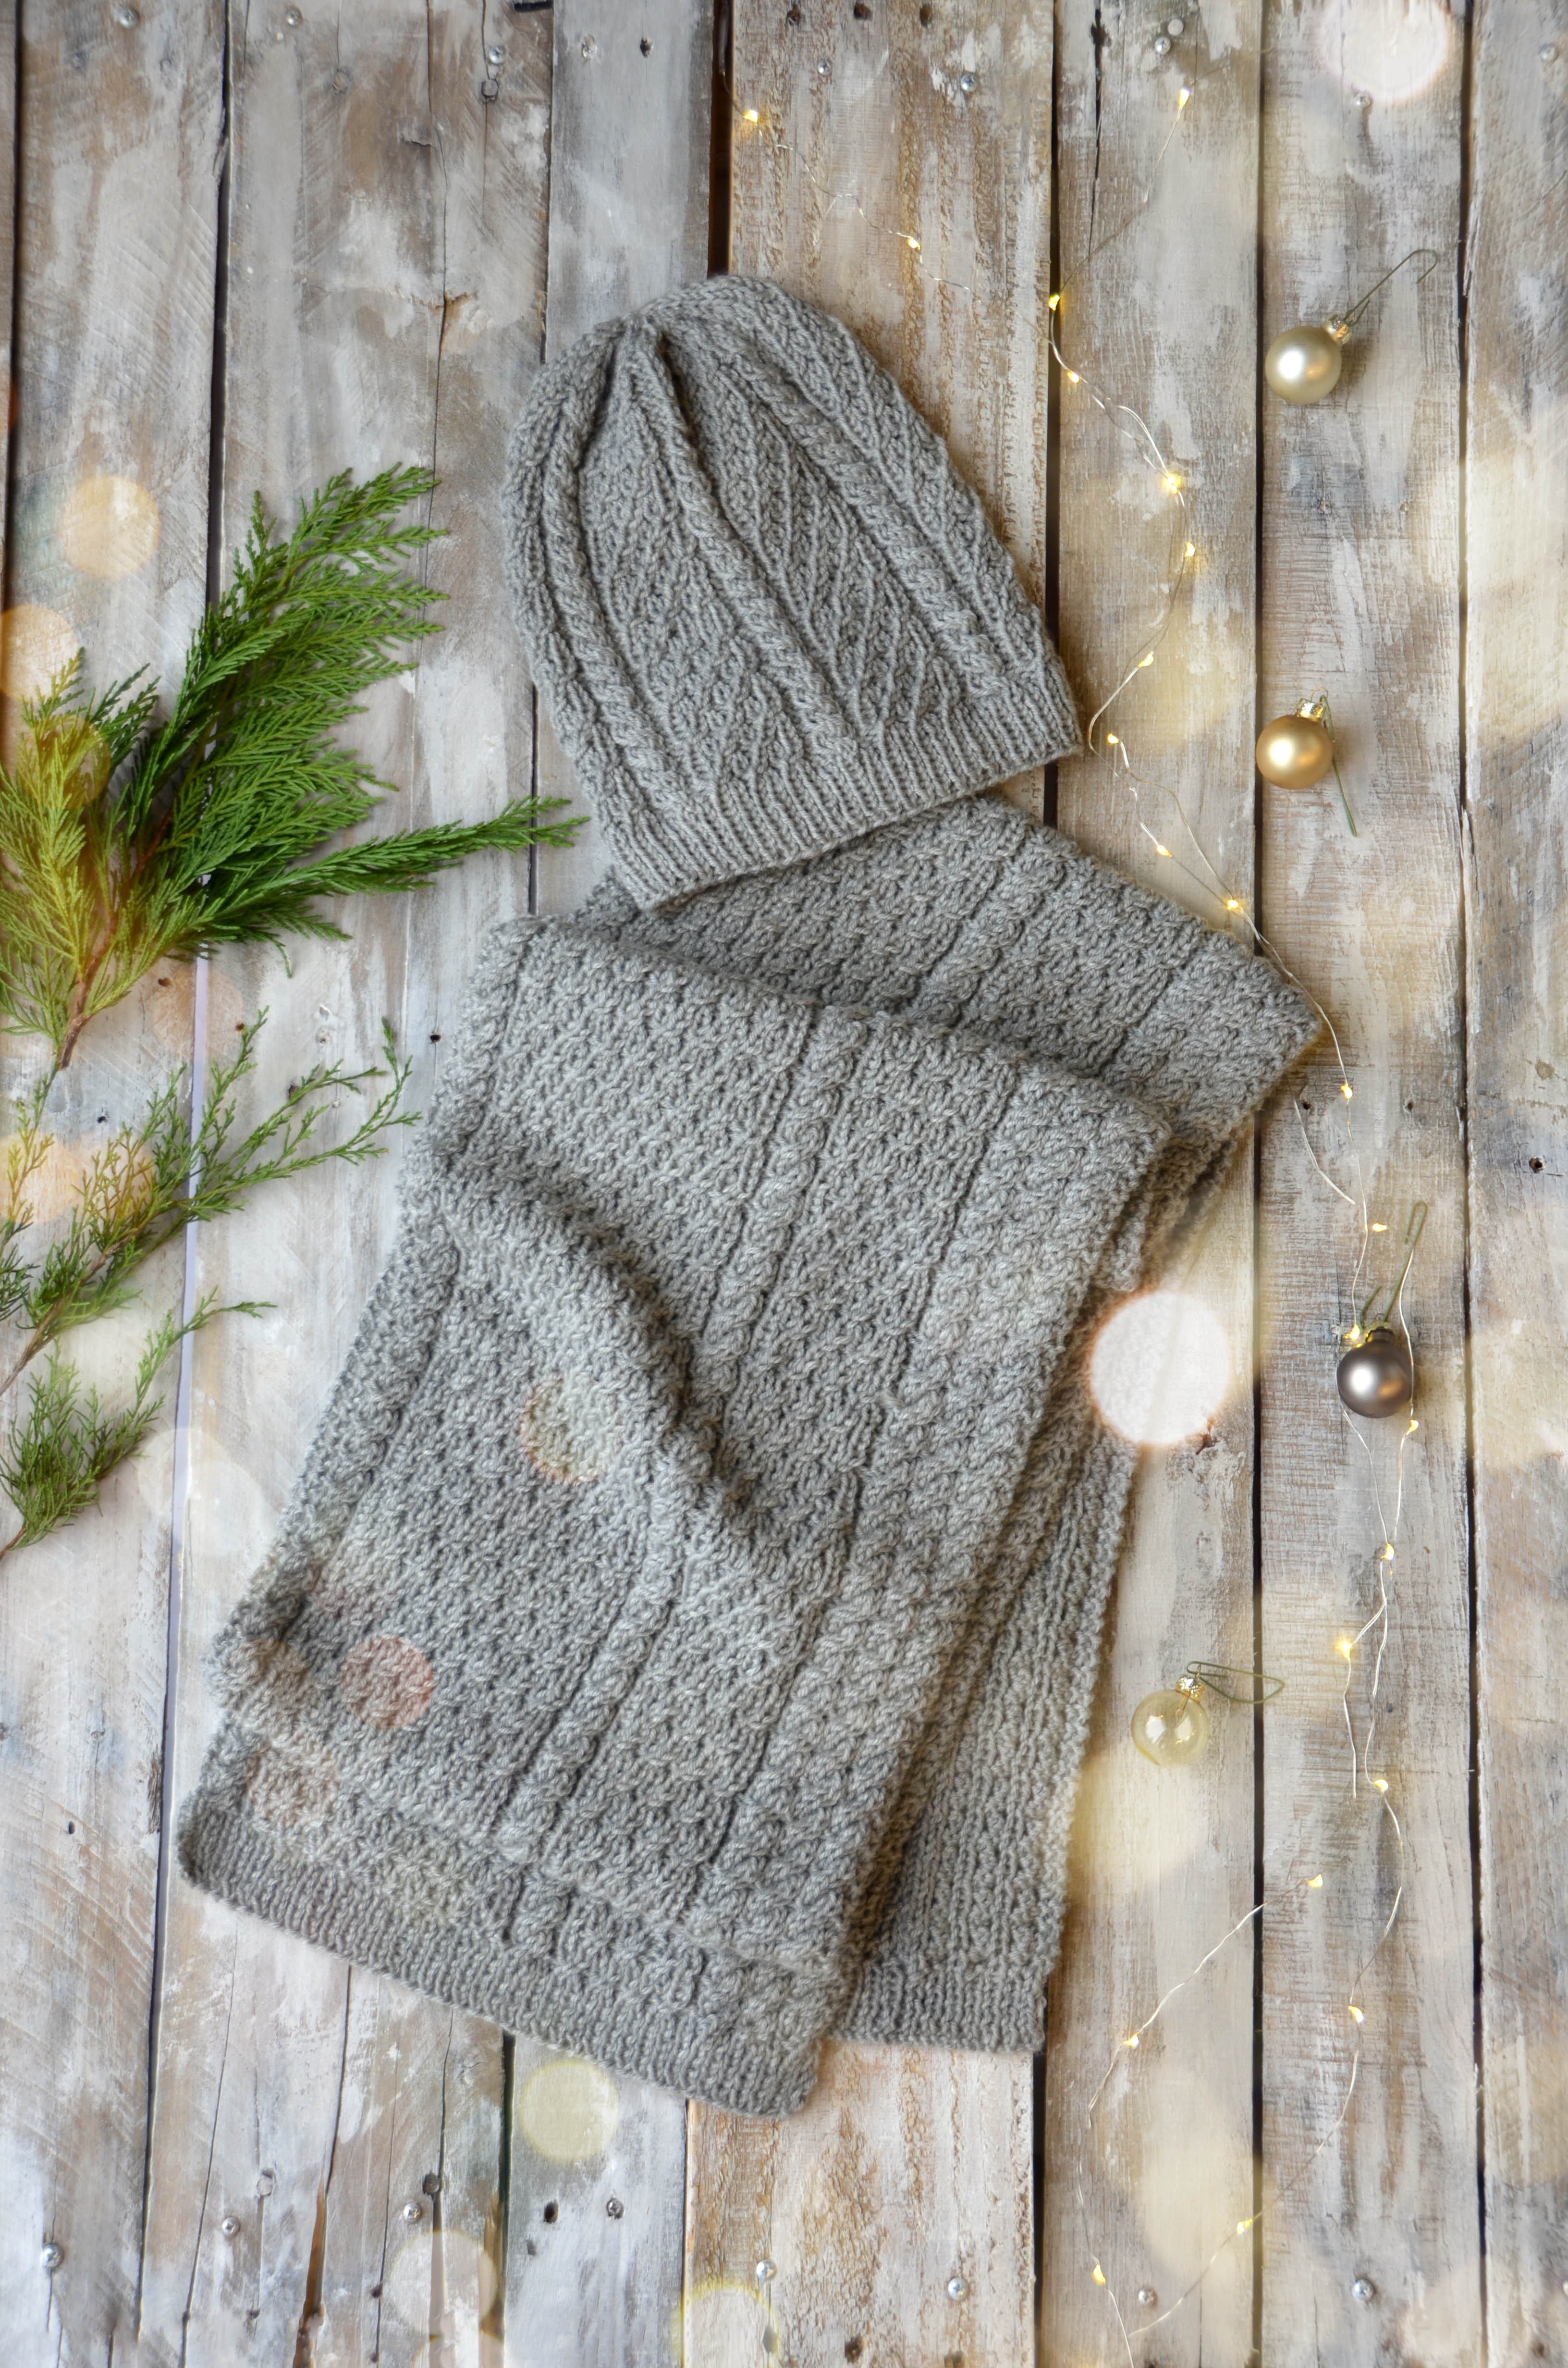
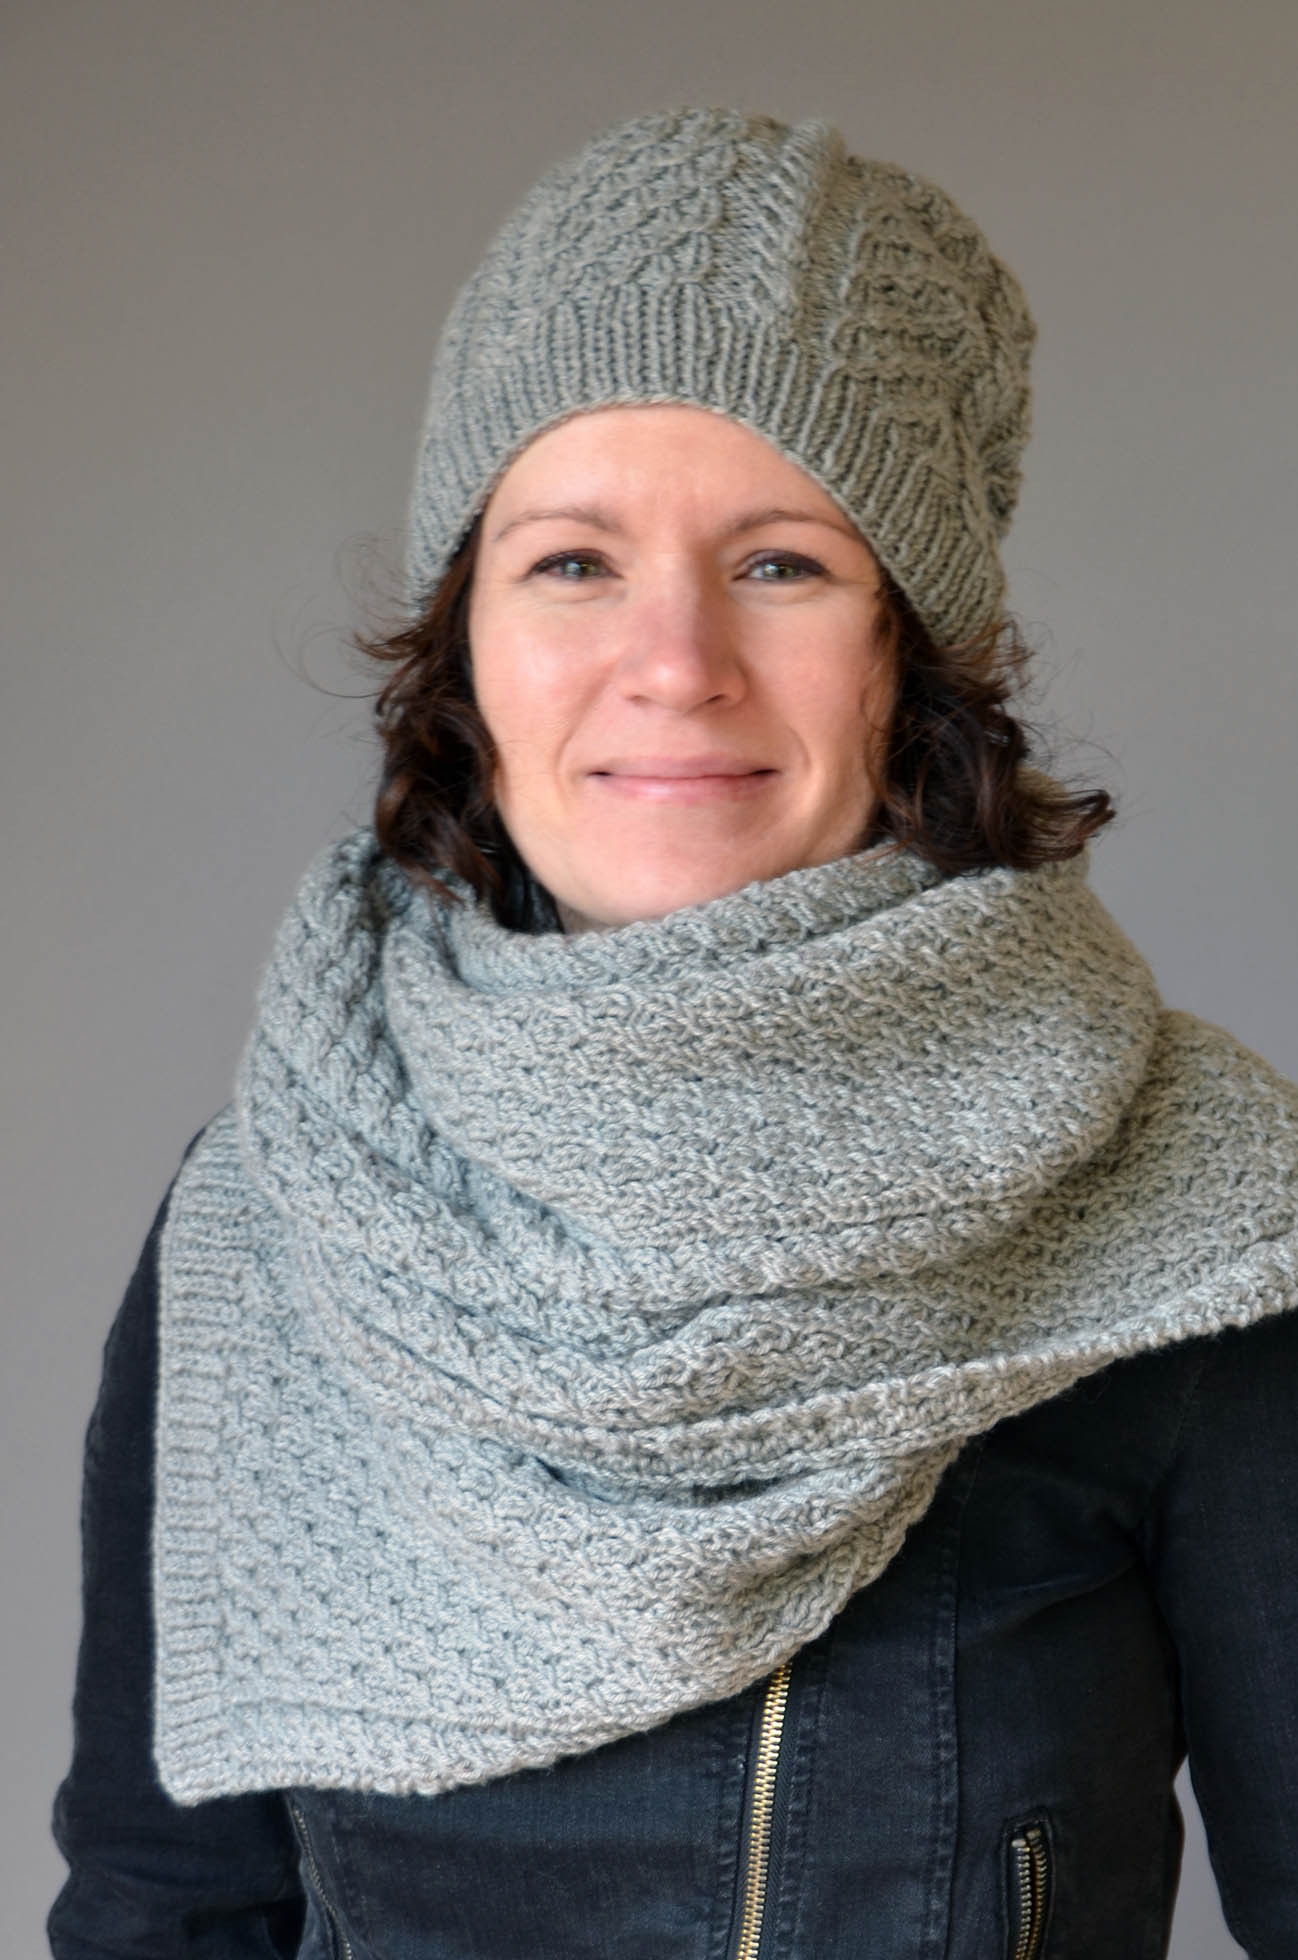
This is part 6 in a 12 part series highlighting designs from our 12 Days of Winter 2018 Collection.
My number one goal when designing a scarf is to make it look good on both sides. This can be quite challenging! Many/most cables have a definite unpleasant look to their wrong sided rows. Fair isle in a scarf is better done in the round because A) curling and B) floats. But simple knit/purl texture can be very nice on a scarf, and easy to work, too.
Oh hey – it’s scarf weather!
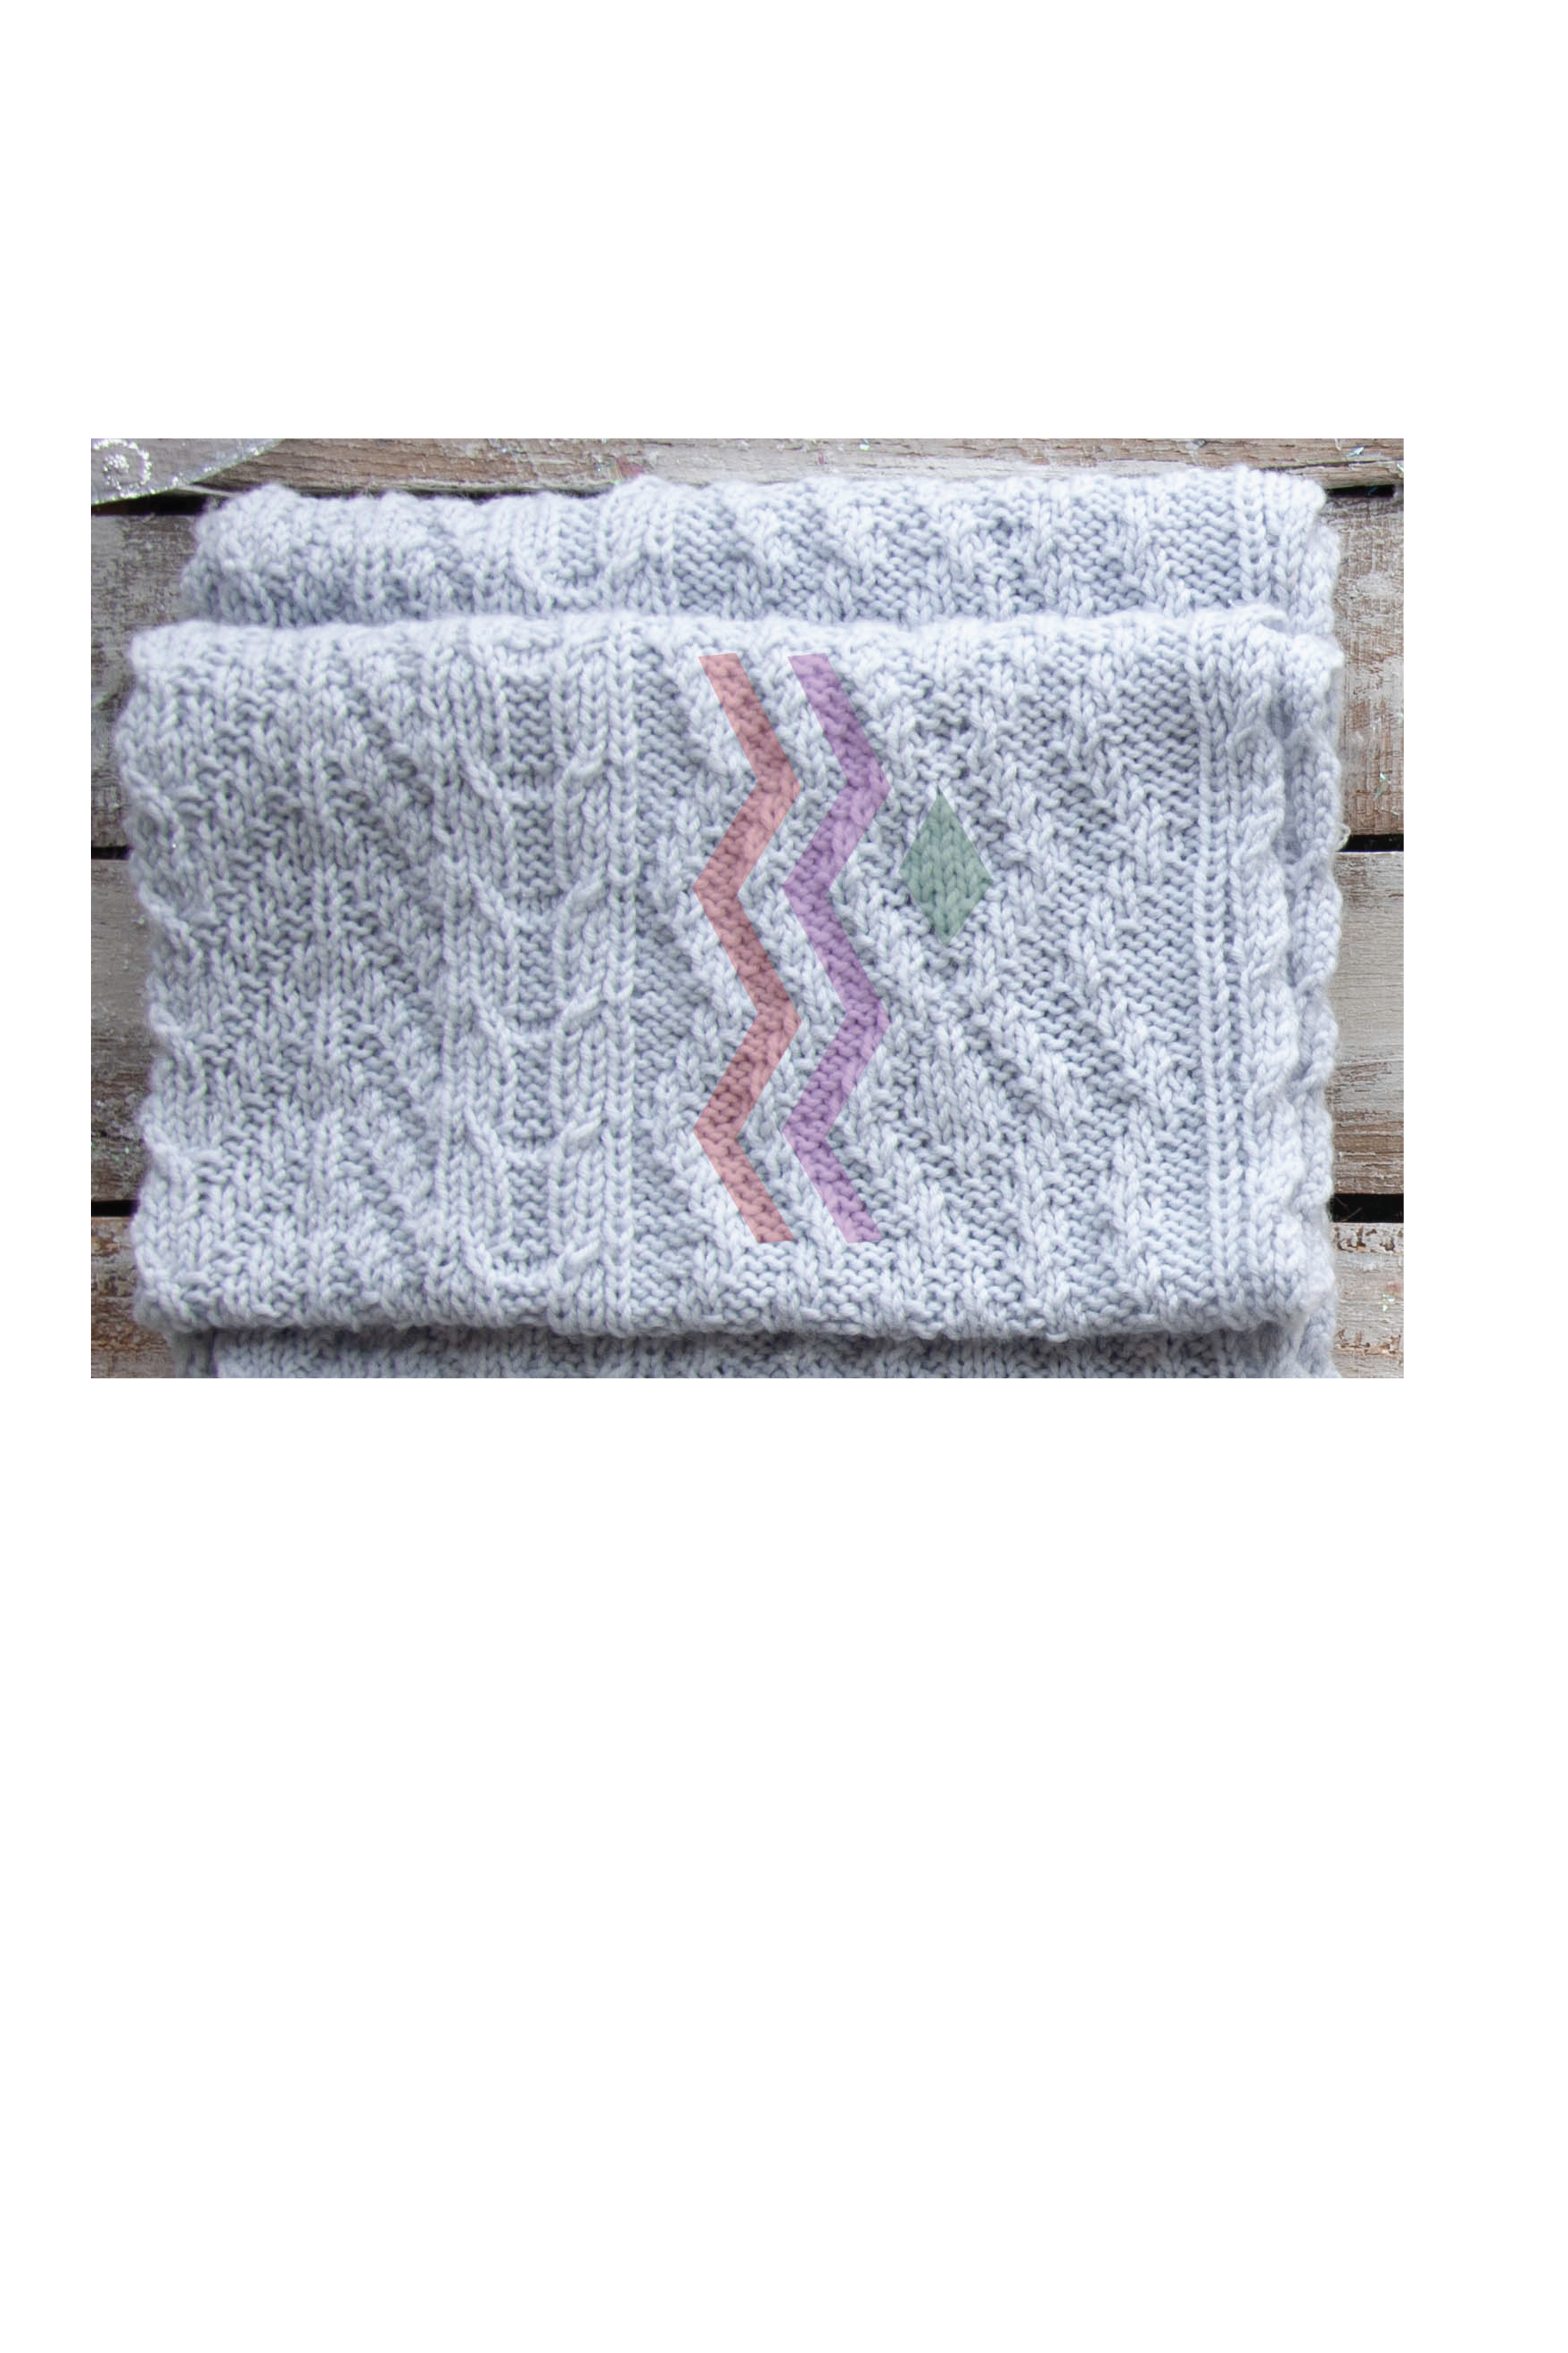
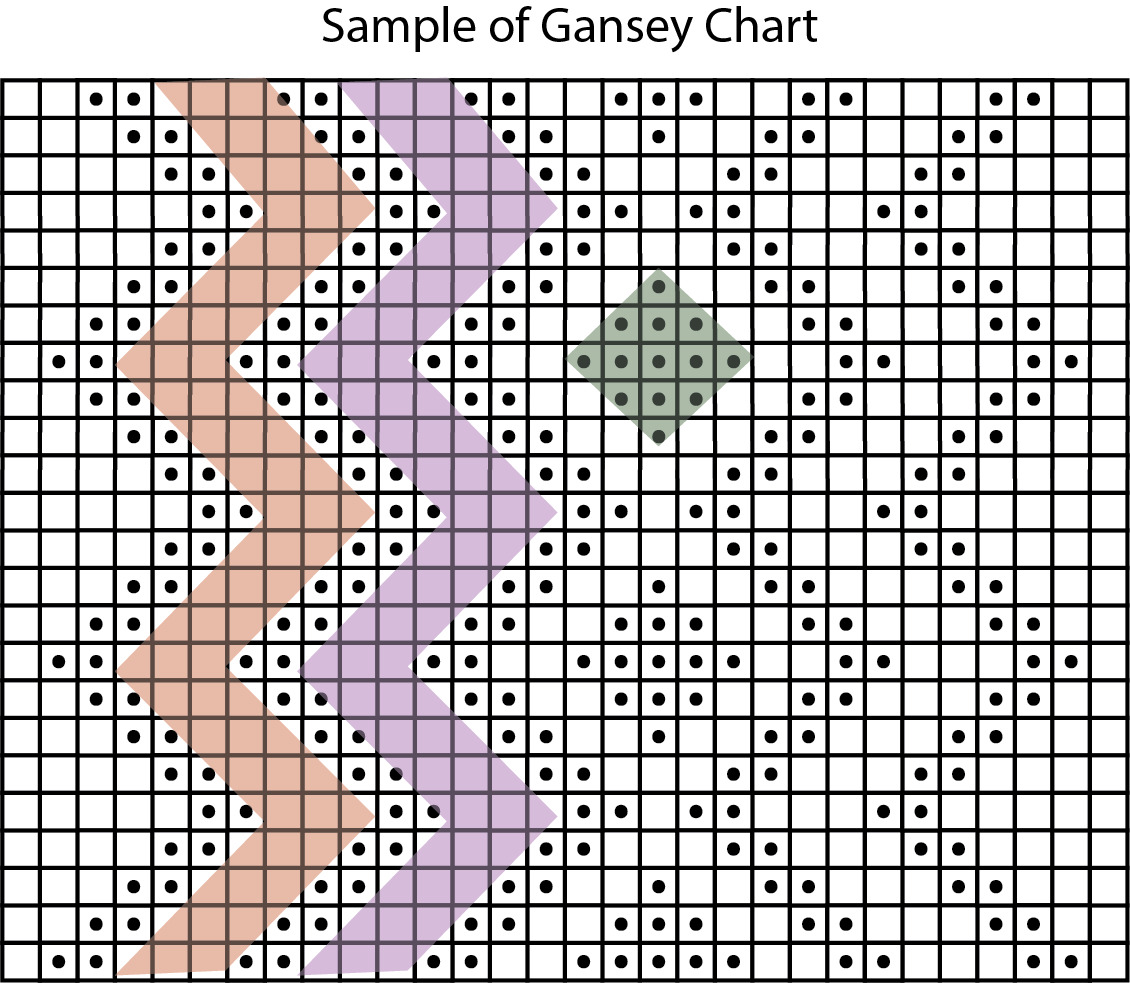
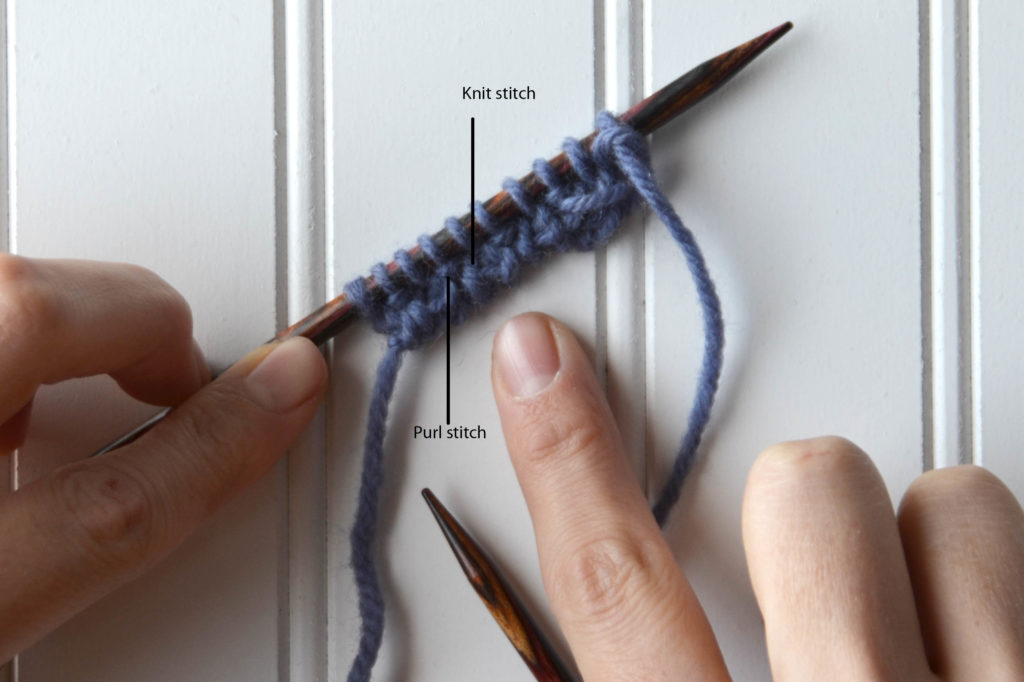
Echo Scarf (pattern link) is knit in Dona. Scrummy, scrumptious, buttery, and soft with amazing stitch definition: Dona. This scarf features a generous amount of ribbing at each end that flows directly into the texture and reversible cable patterning on the body of the scarf.
It may be difficult to tell from the photos, but the main stitch pattern is only an 8 row repeat. The patterning is also shown in the pattern in chart form and also written text. I am 100% a chart person, but I know that some knitters prefer text because their brains don’t always “click” with the way charts are presented. I’ll never pass up an opportunity to talk about chart reading because I believe they are so much easier (once you get the hang of them) to follow at a glance.
To illustrate, I’ve highlighted a few sections of the actual scarf below that correspond to the chart.
A blank square means to knit on the right side and purl on the wrong side, and represents stockinette stitch. A square with a dot inside it means to purl on the right side and knit on the wrong side, and represents reverse stockinette stitch.
The squares are visually conveying what the actual piece of knitting will look like. The blank squares which are stockinette look plain and smooth, just as they do in the finished piece. So the idea is that when you look at the chart and see this arrangement of symbols, you can know what stitches come next just at a glance.
As a reminder, whether you’re a chart or a word person, this pattern still has you covered. Remember, you can find Series 2 of the 12 Days of Winter Kit patterns on Ravelry.
This is part 2 in a 12 part series highlighting designs from our 12 Days of Winter, Series 2 Edition.
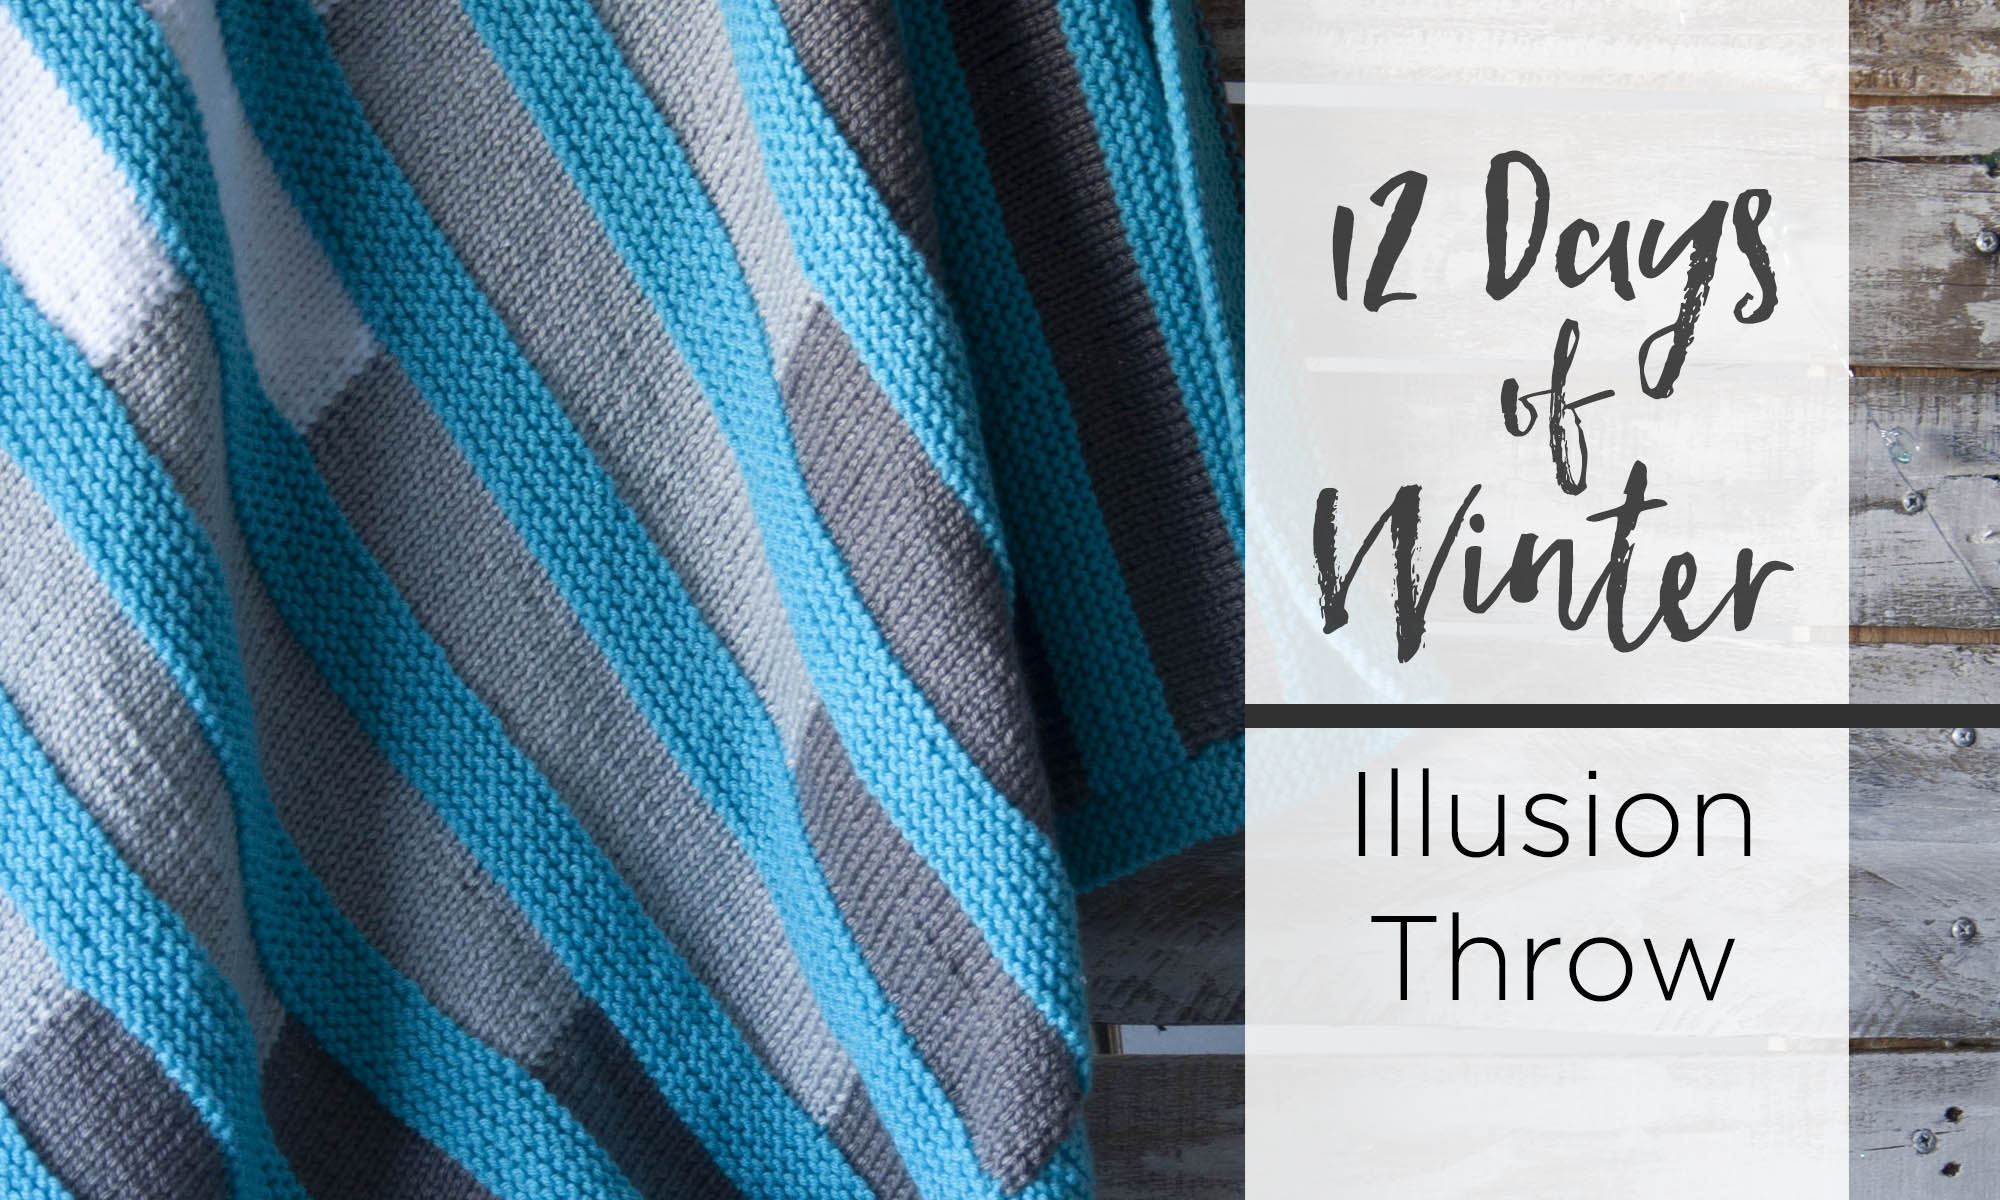
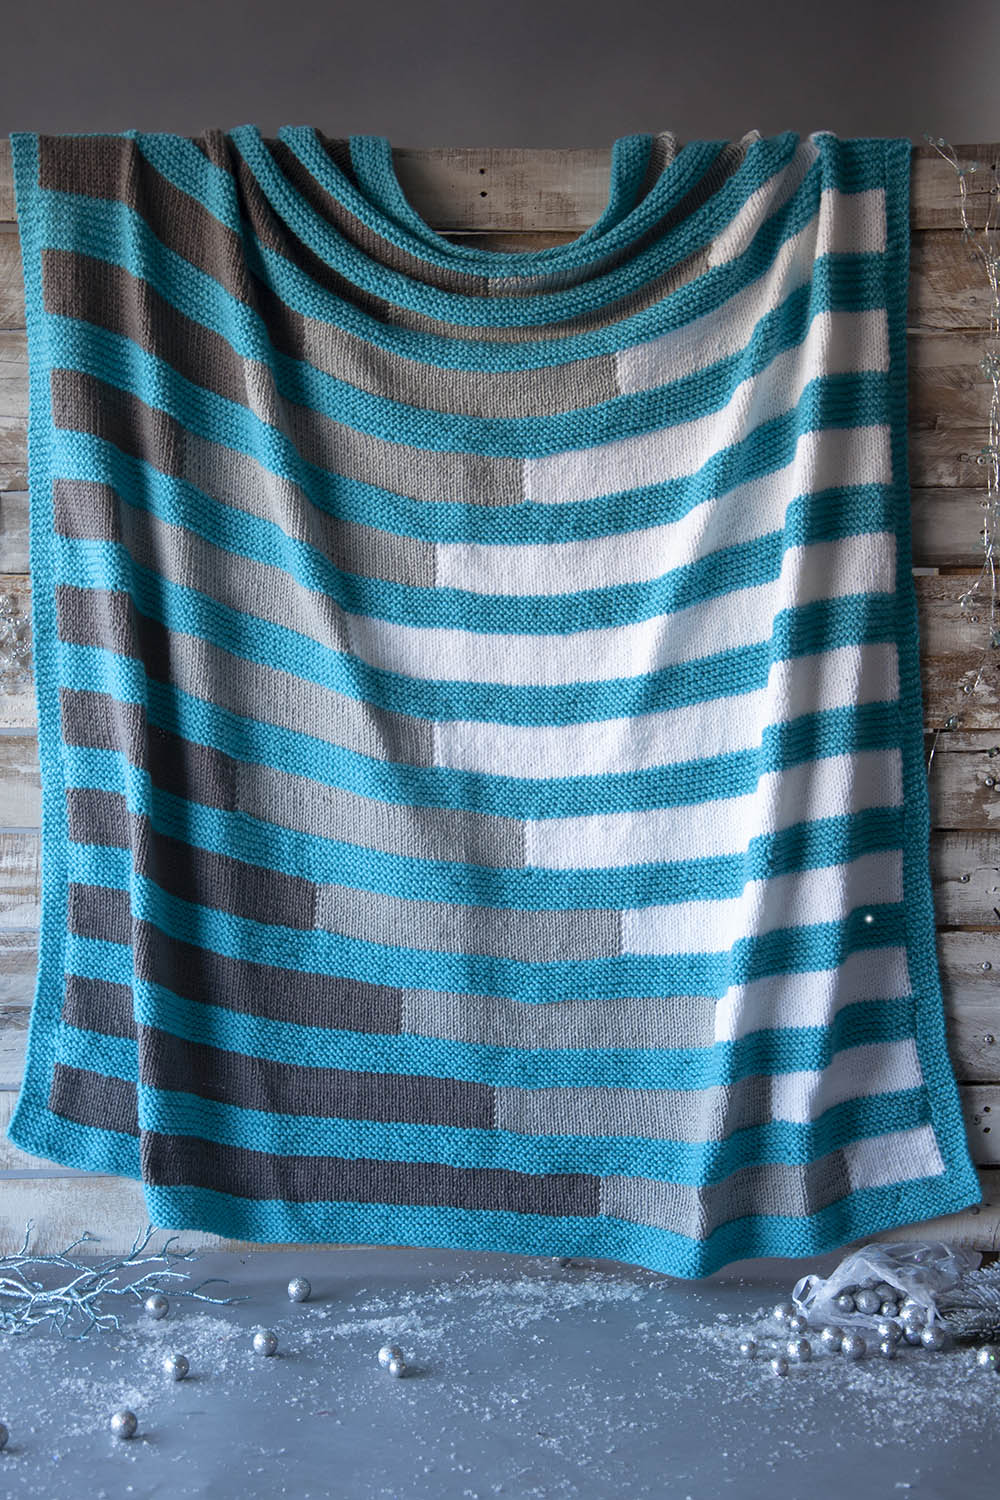
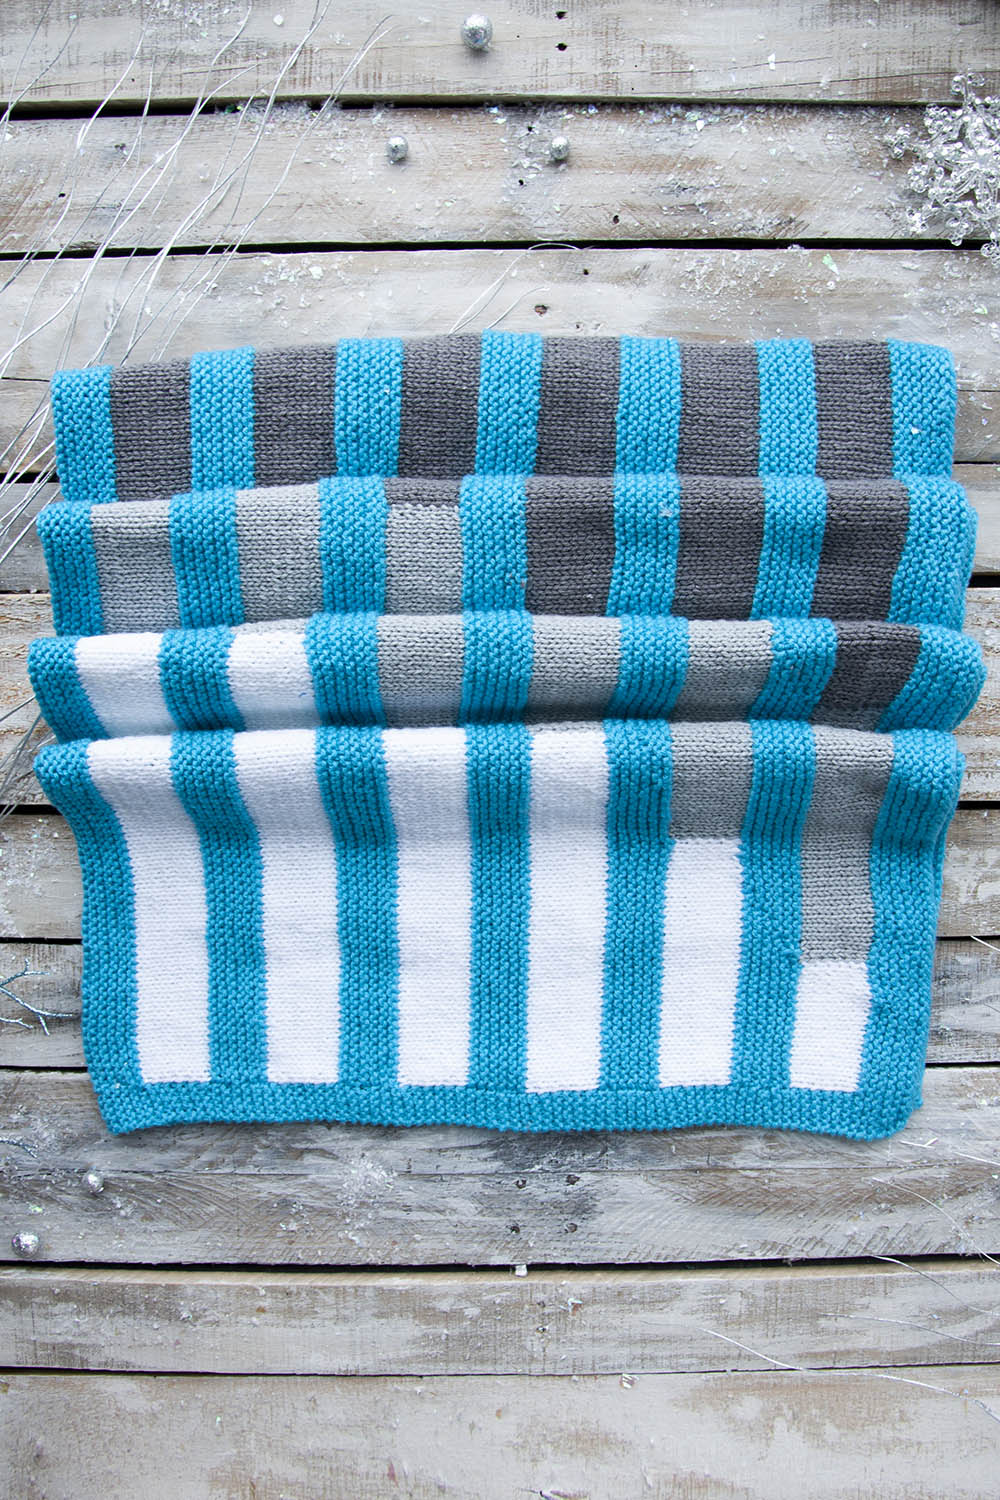
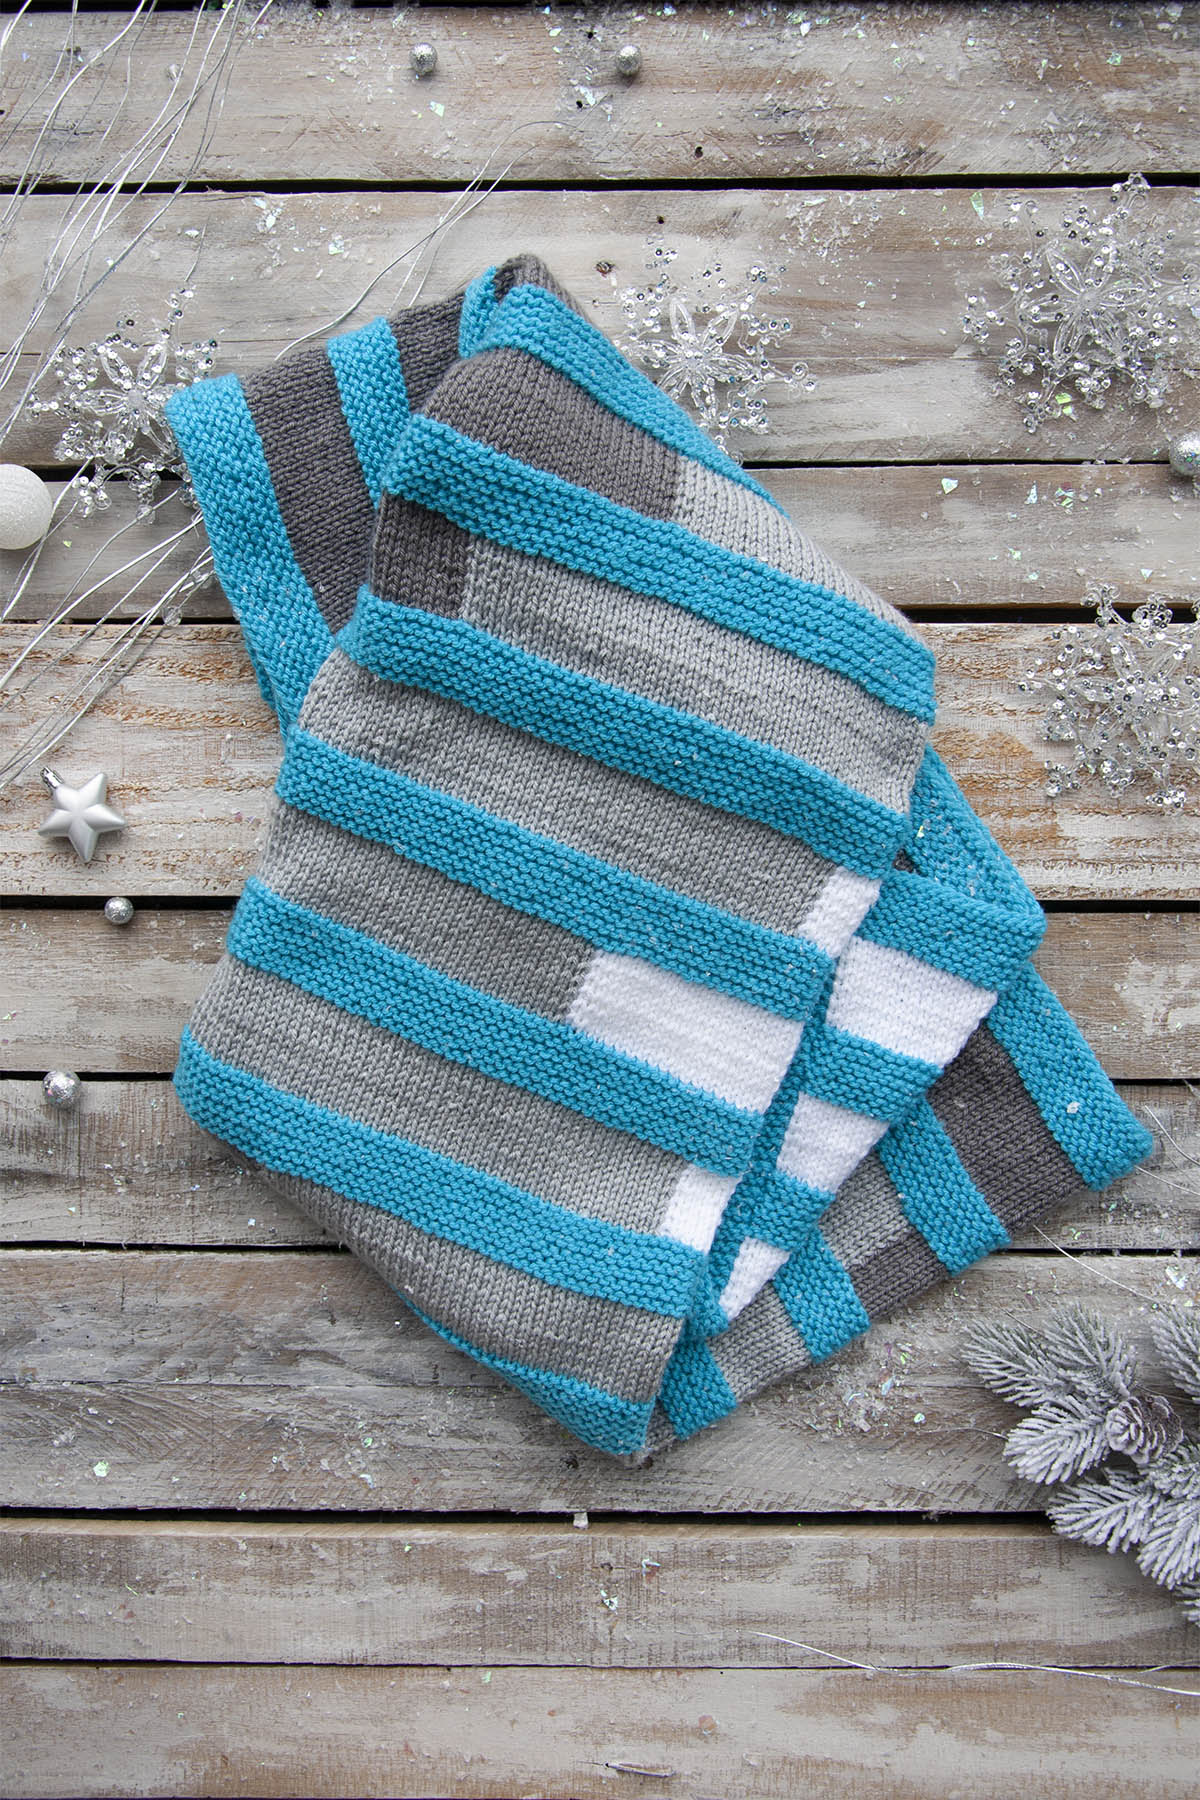
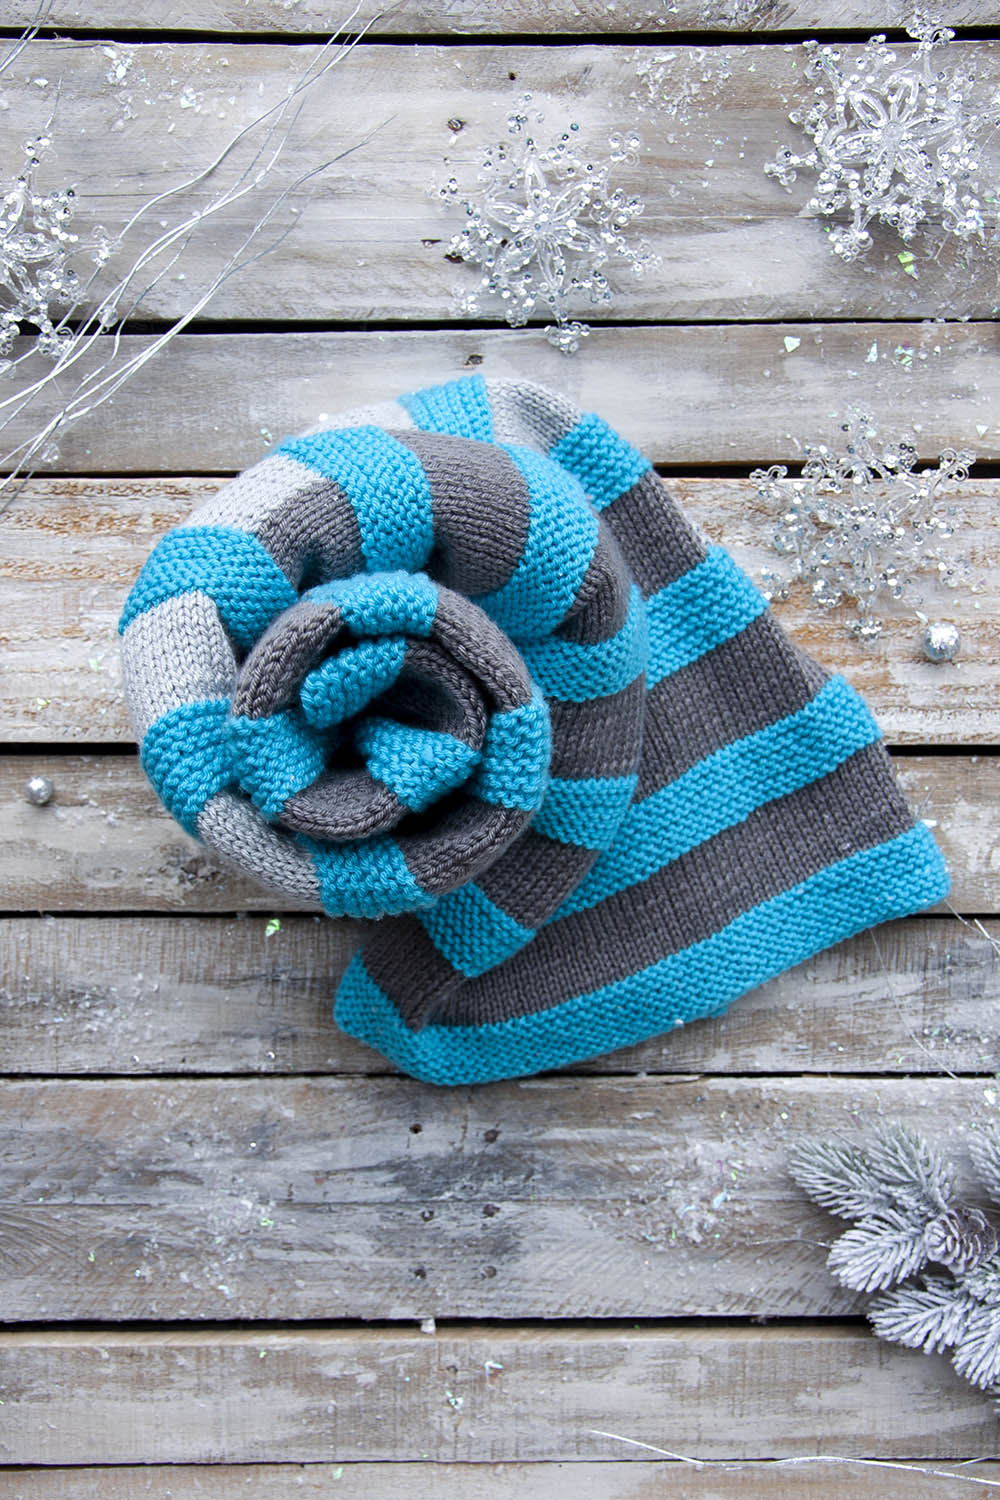
Meet the Illusion Throw (pattern link)! Made using machine washable Uptown Worsted, this throw is squishy, resilient to pilling (perfect for everyday use!), and the perfect size to throw over your couch.
This graphic throw is inspired by one of my other favorite crafty things: quilting. Illusion Throw is definitely not like your grandmother’s quilt. Rather, it is a knitted interpretation of some beautiful modern and graphic quilts I’ve seen out there in the world.
I wanted to create a project easy enough for beginners (so no complicated shapes or shaping) but entertaining for more experienced knitters, too. The stitches themselves are easy – there is nothing more than knit and purl going on here.
The color changes – where white shifts to light gray and then to dark gray – this is achieved using the intarsia technique. I feel like intarsia sometimes has an unpleasant reputation, but it’s actually very simple to do. And there are only a few color changes on each row, so there is no need to have a thousand bobbins hanging off the back of your work.
To change colors with intarsia, all you’re doing is dropping the color you were using, picking up the new color behind the old one (to prevent any gaps or holes in your work) and knitting on. That’s it!
Remember, you can find Series 2 of the 12 Days of Winter Kits patterns on Ravelry.
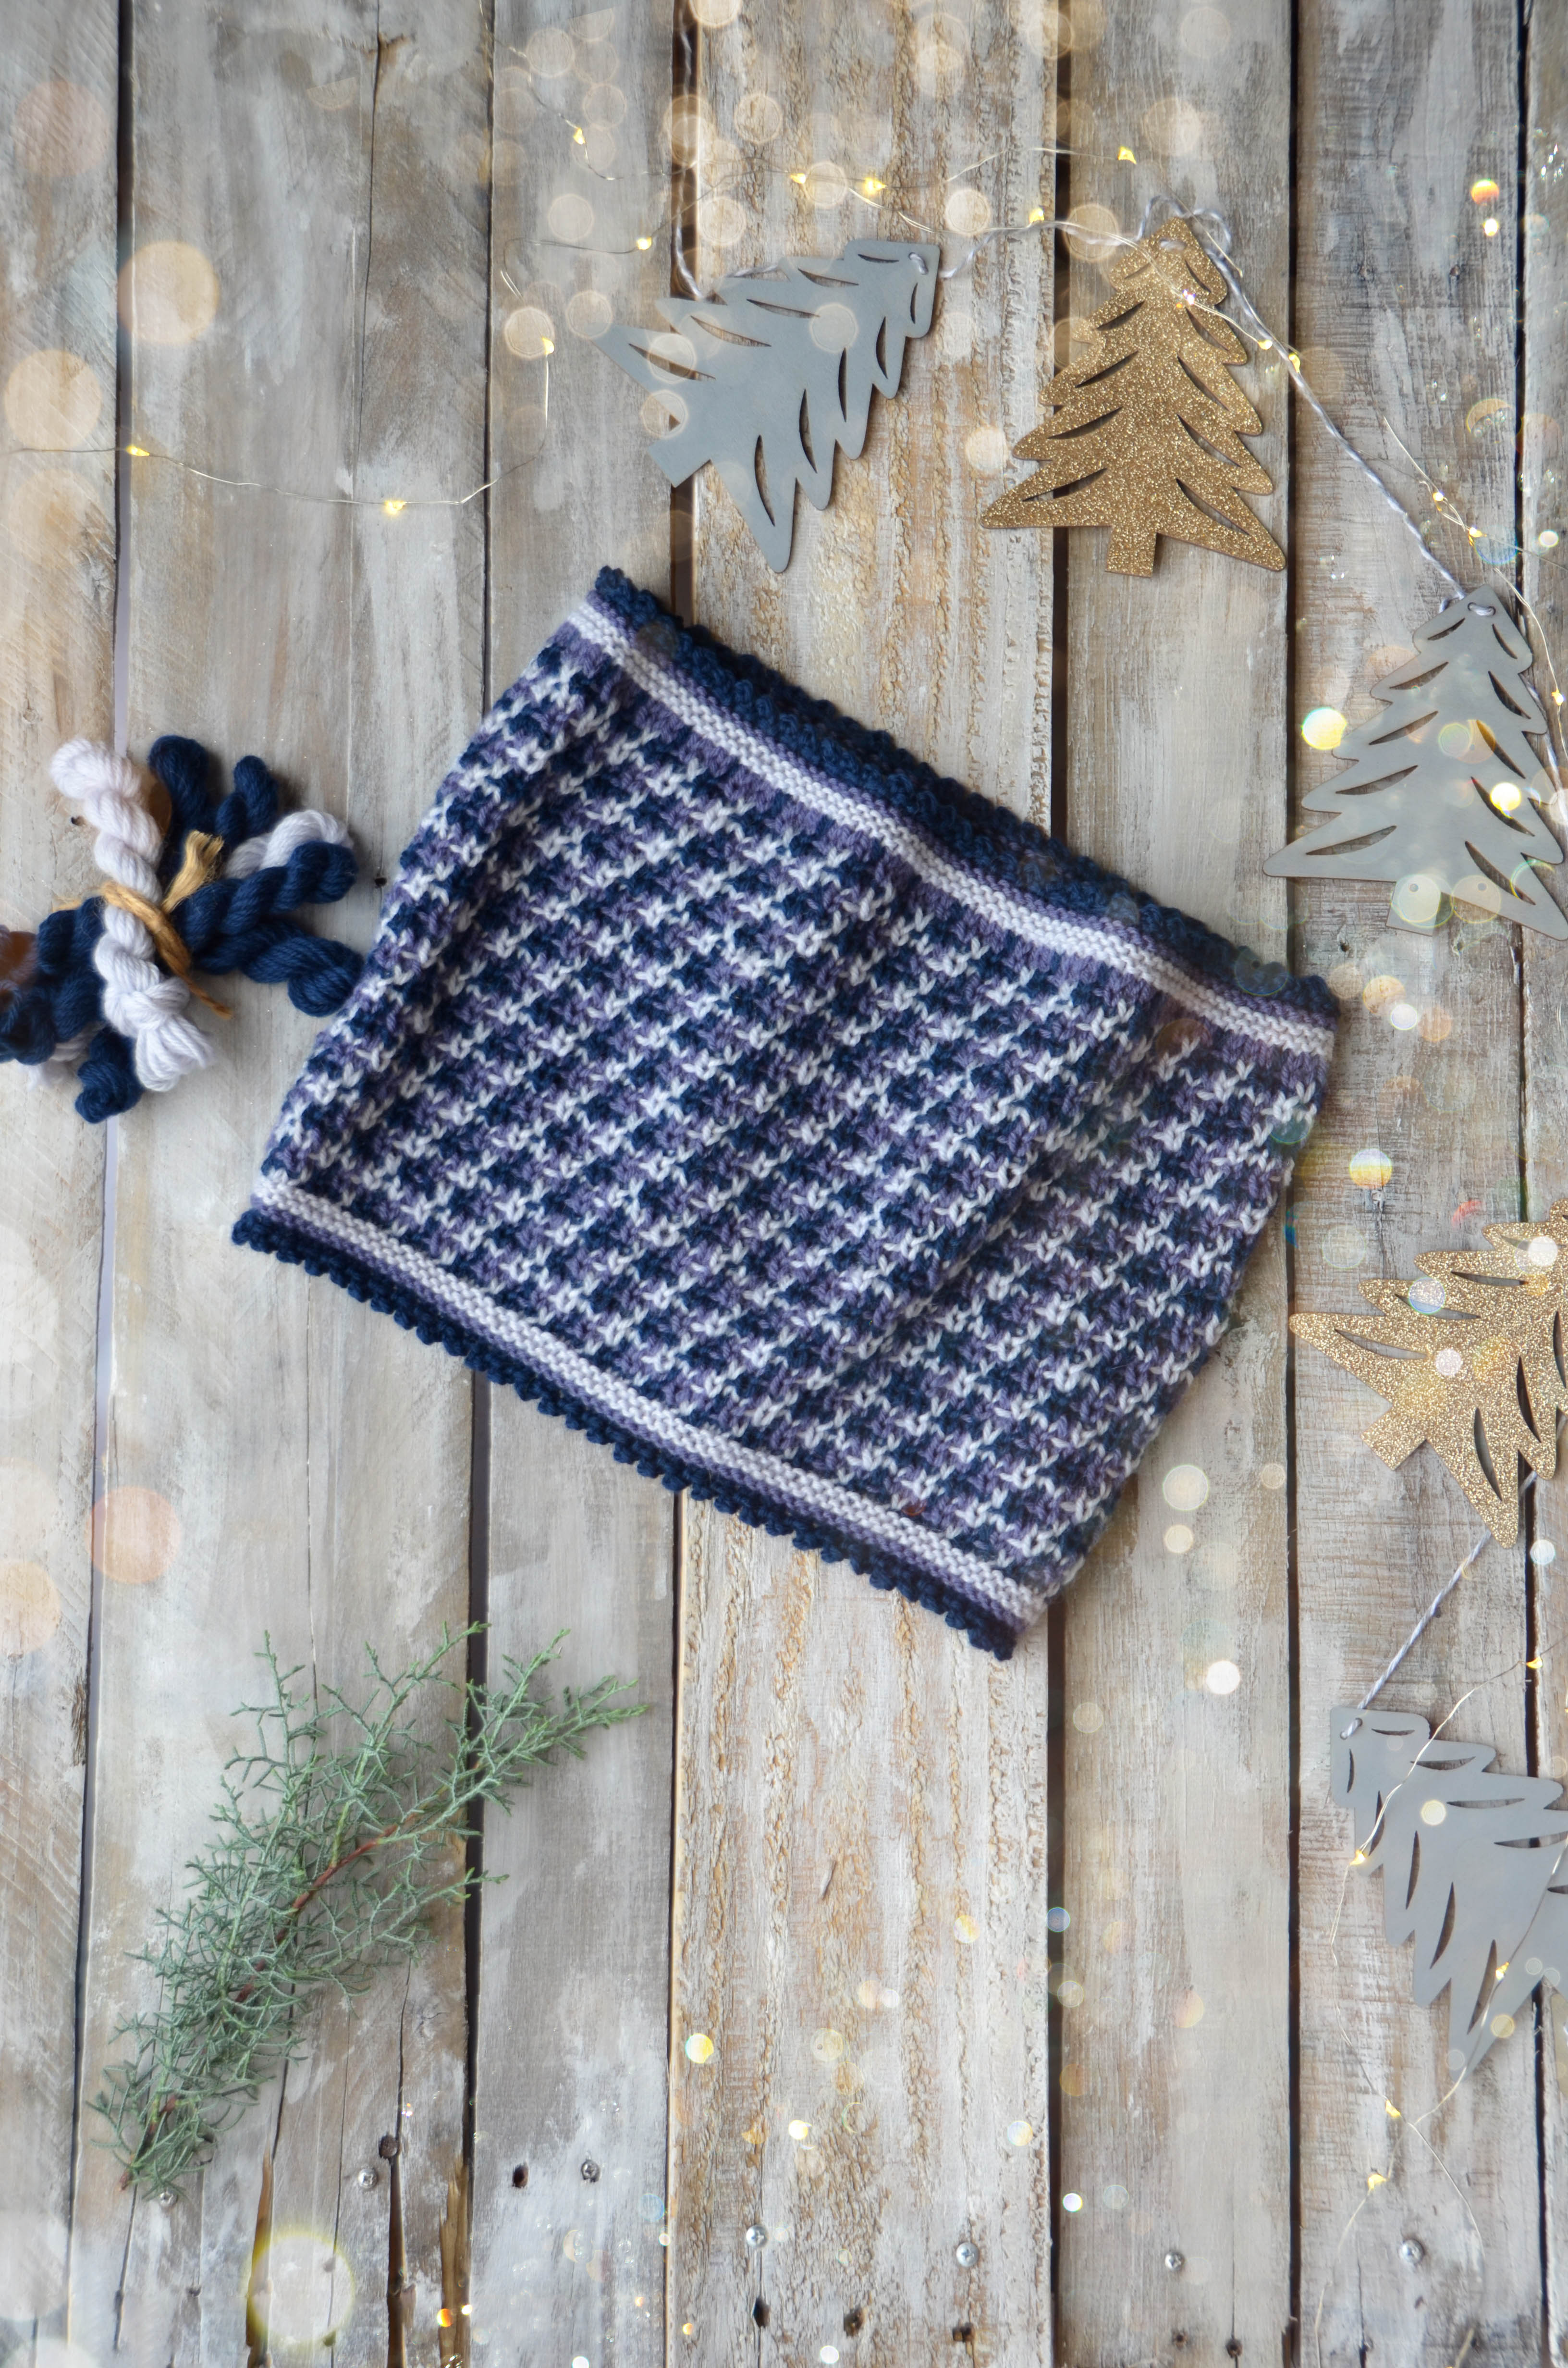
The pattern is written for the smaller size as shown, and also a large size, long enough to wrap around your neck twice. The yarn included in the kit is enough to knit either two small cowls, or one large. So – bonus!
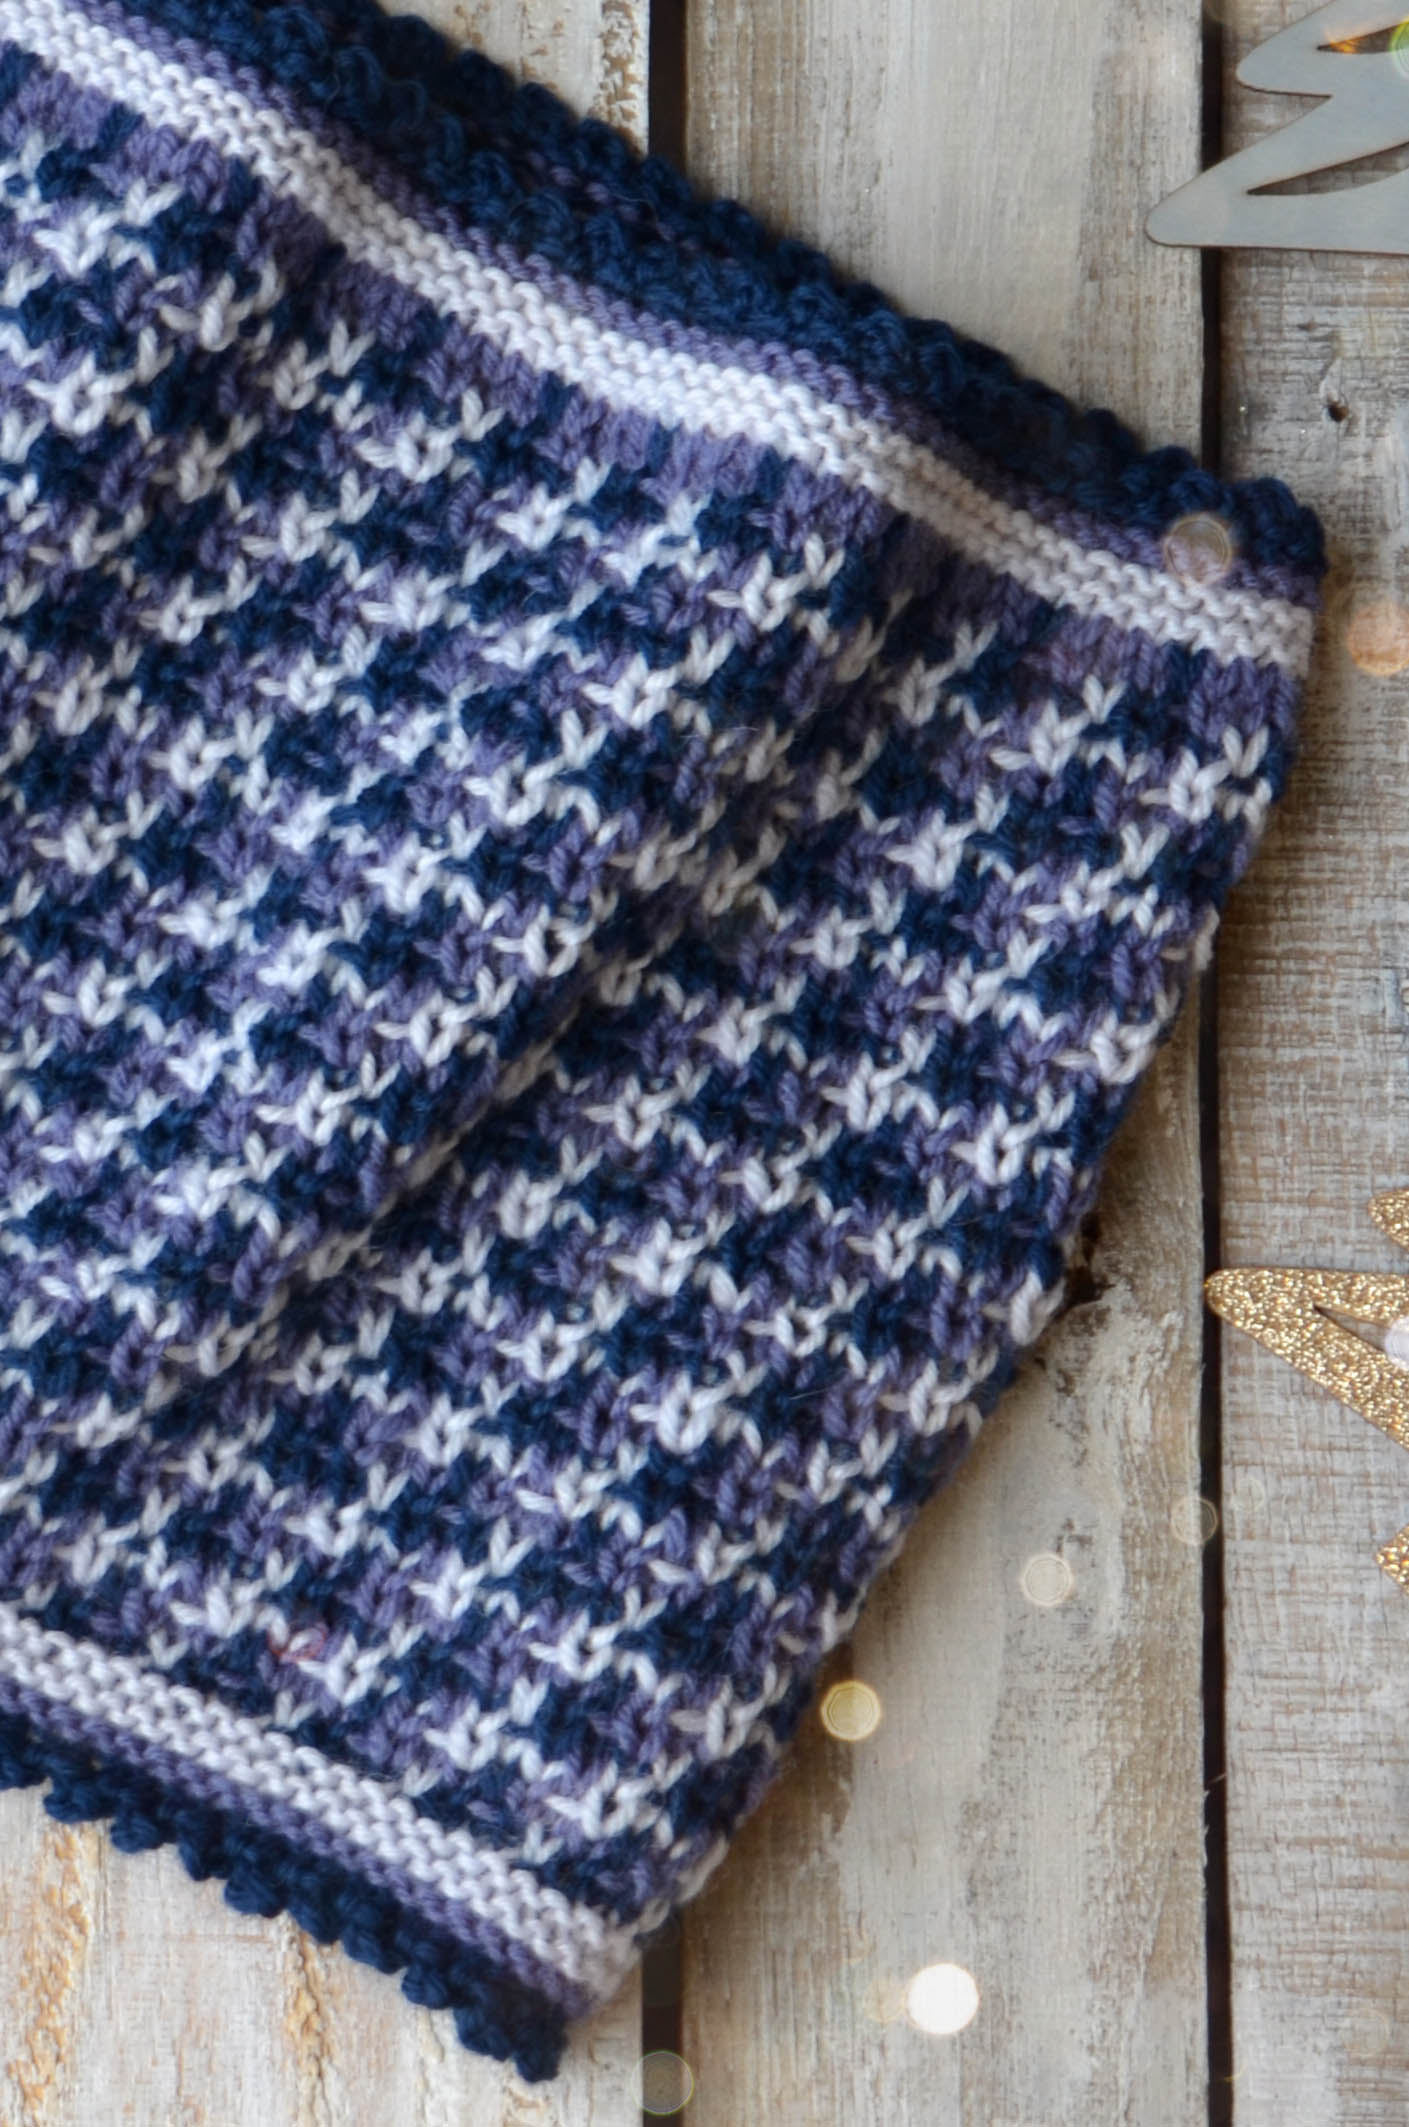
The main body of the cowl is super-duper simple. The complex looking color pattern is just slipped stitches. Colors are changed every two rounds, and only one color is used per round. It hits that sweet spot of knitting where the pattern is just a bit more than stockinette – enough to keep you interested – but easy enough that you can work on it anywhere.
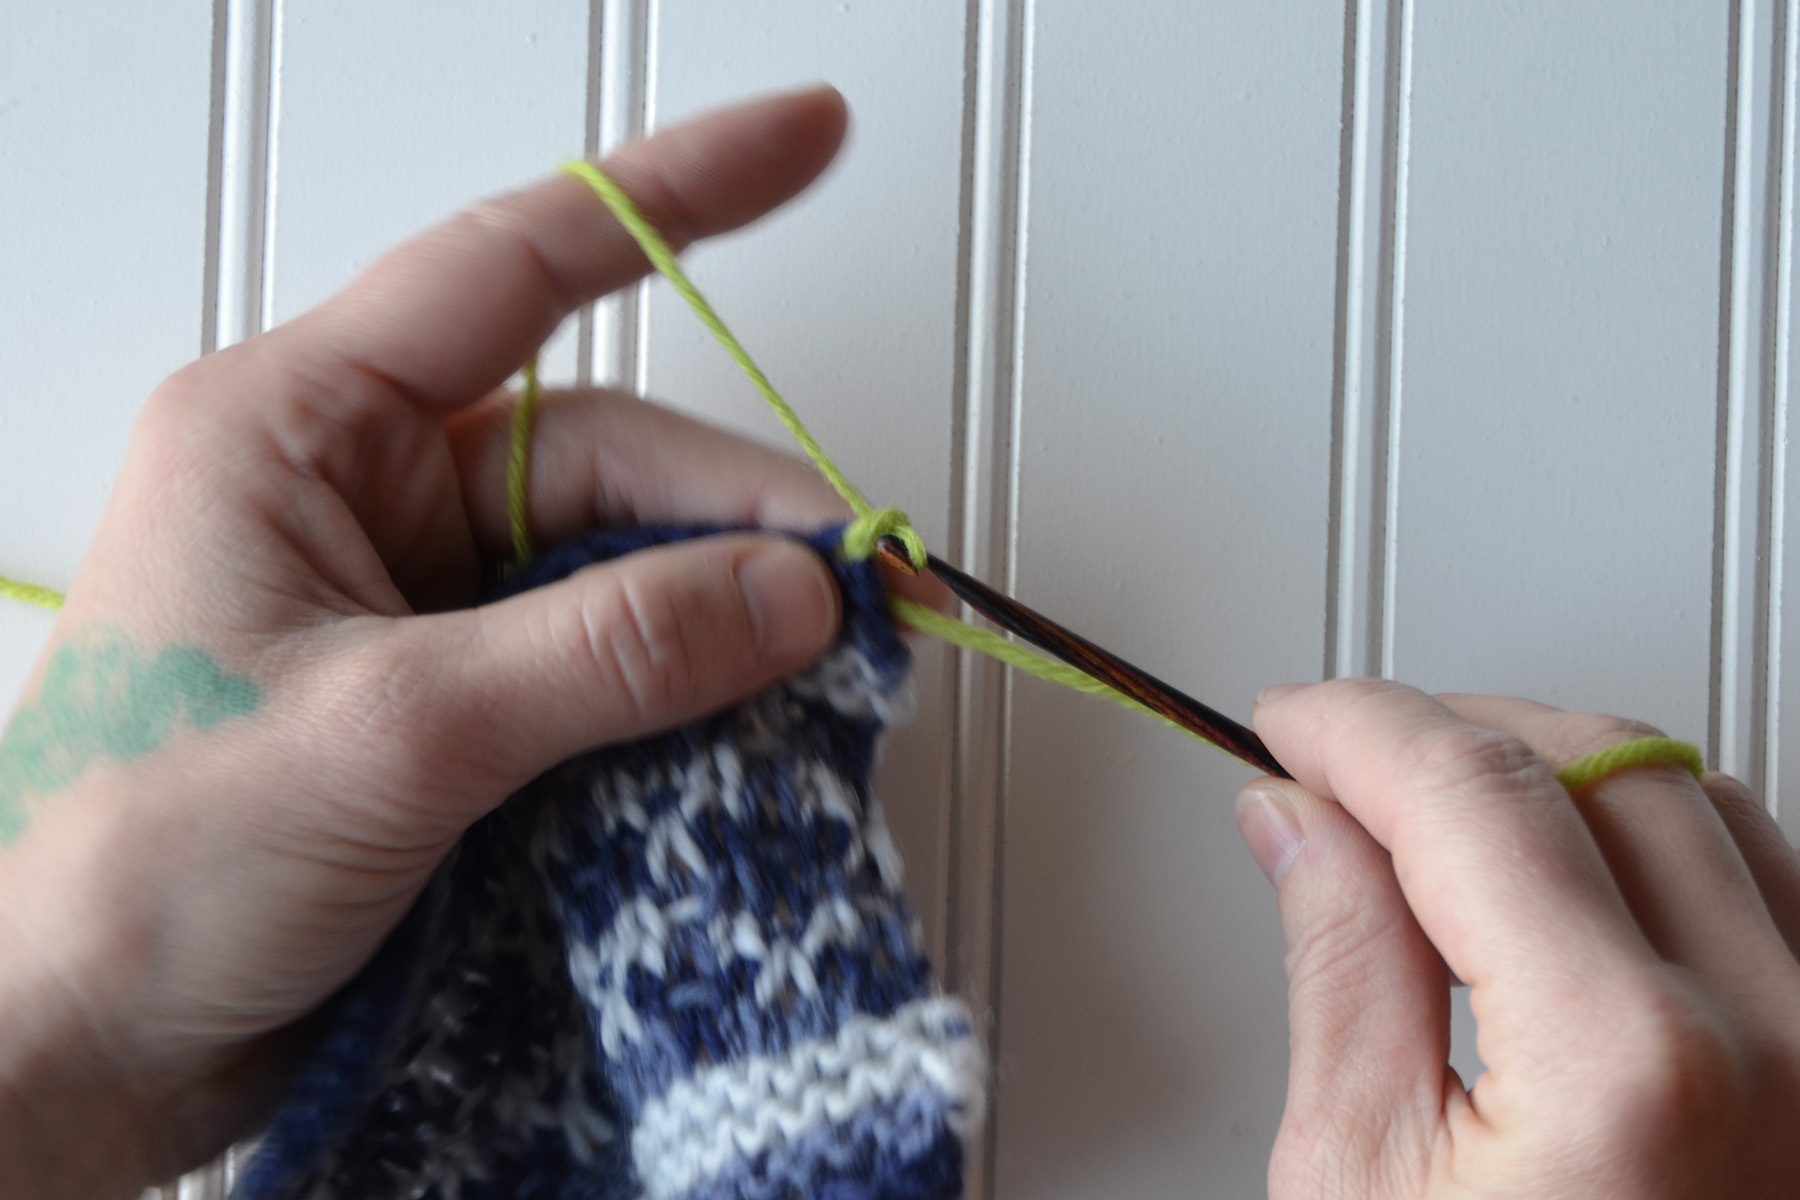
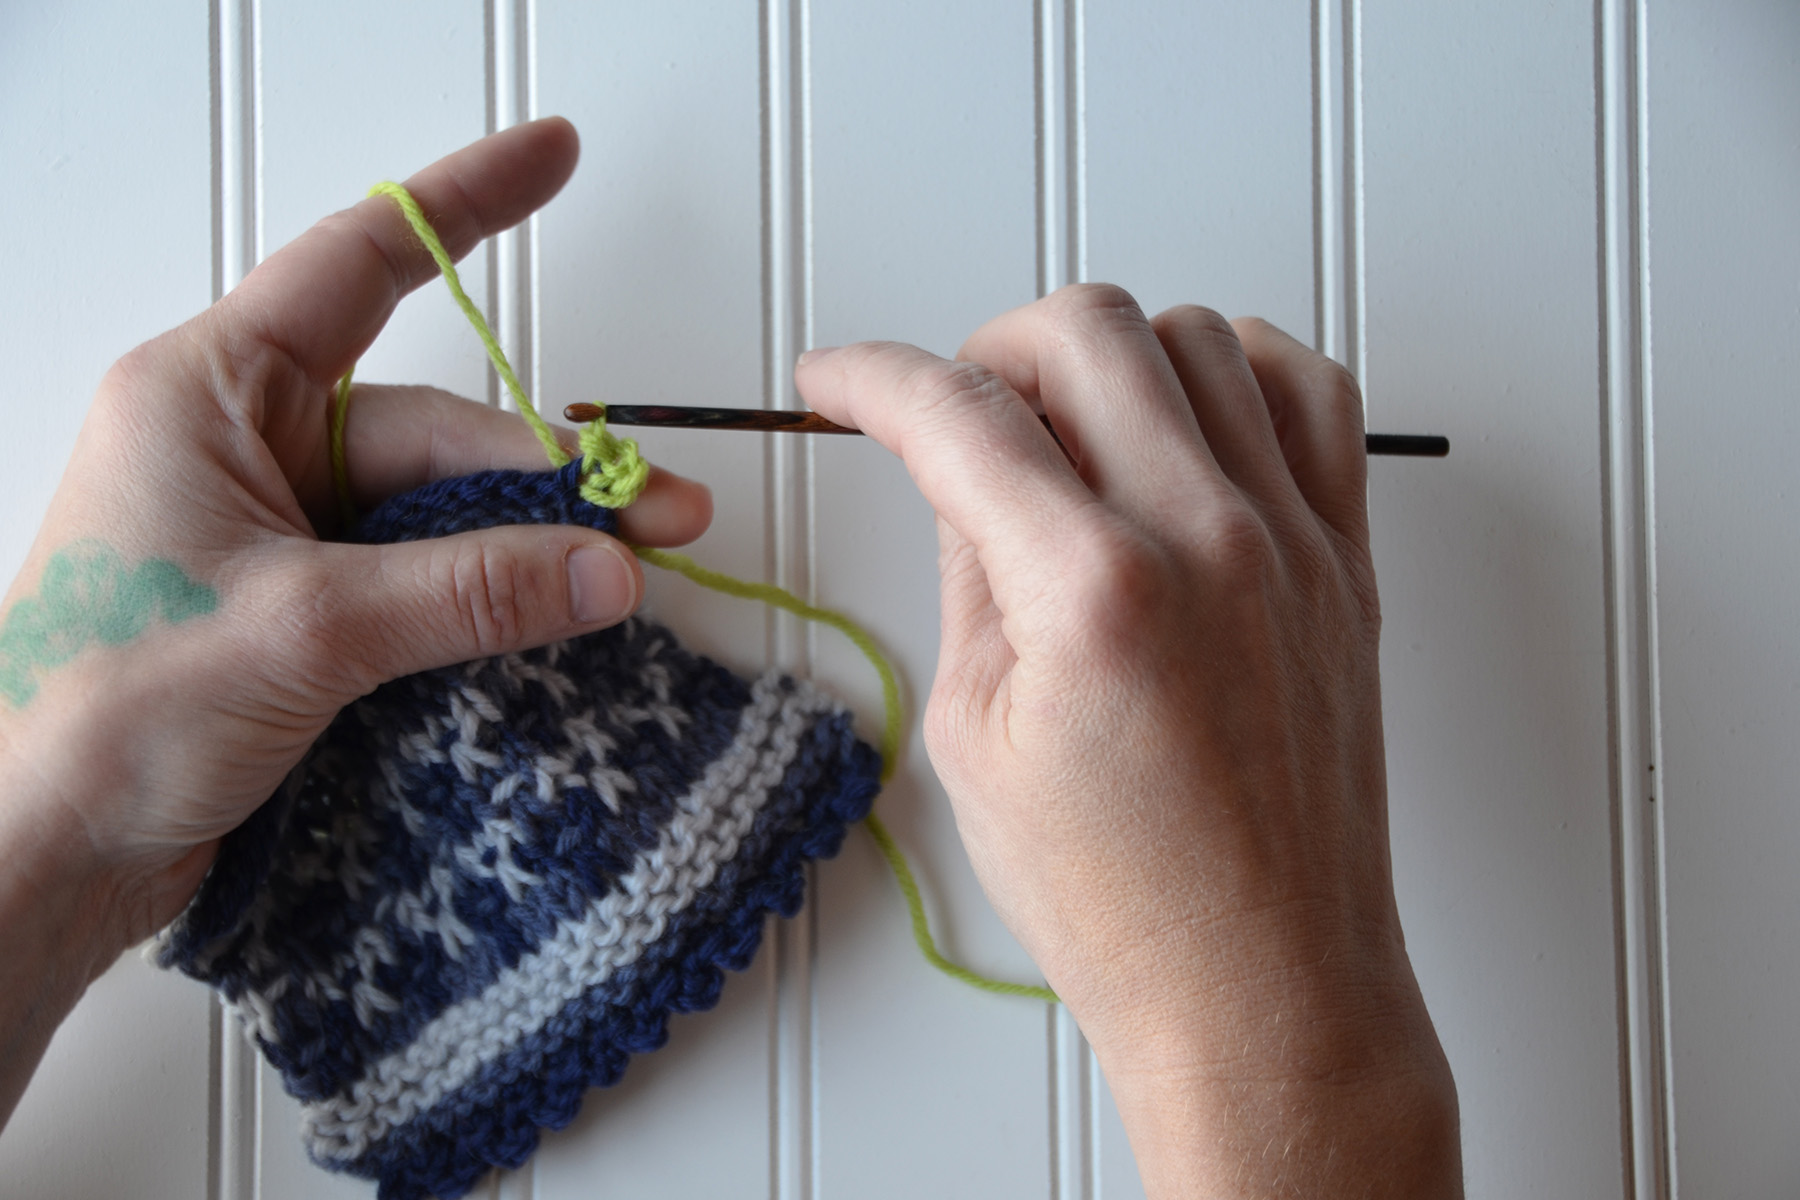
My favorite detail of this cowl is the picot edging along both edges. This could have been done with a knitted picot bind-off, but I chose to use a crochet picot instead. For me, it’s just less fiddly than doing its knit counterpart. Let’s learn how to do it!
If you need a little closer view on any of the following images, just click on it and it will open in a new browser window.
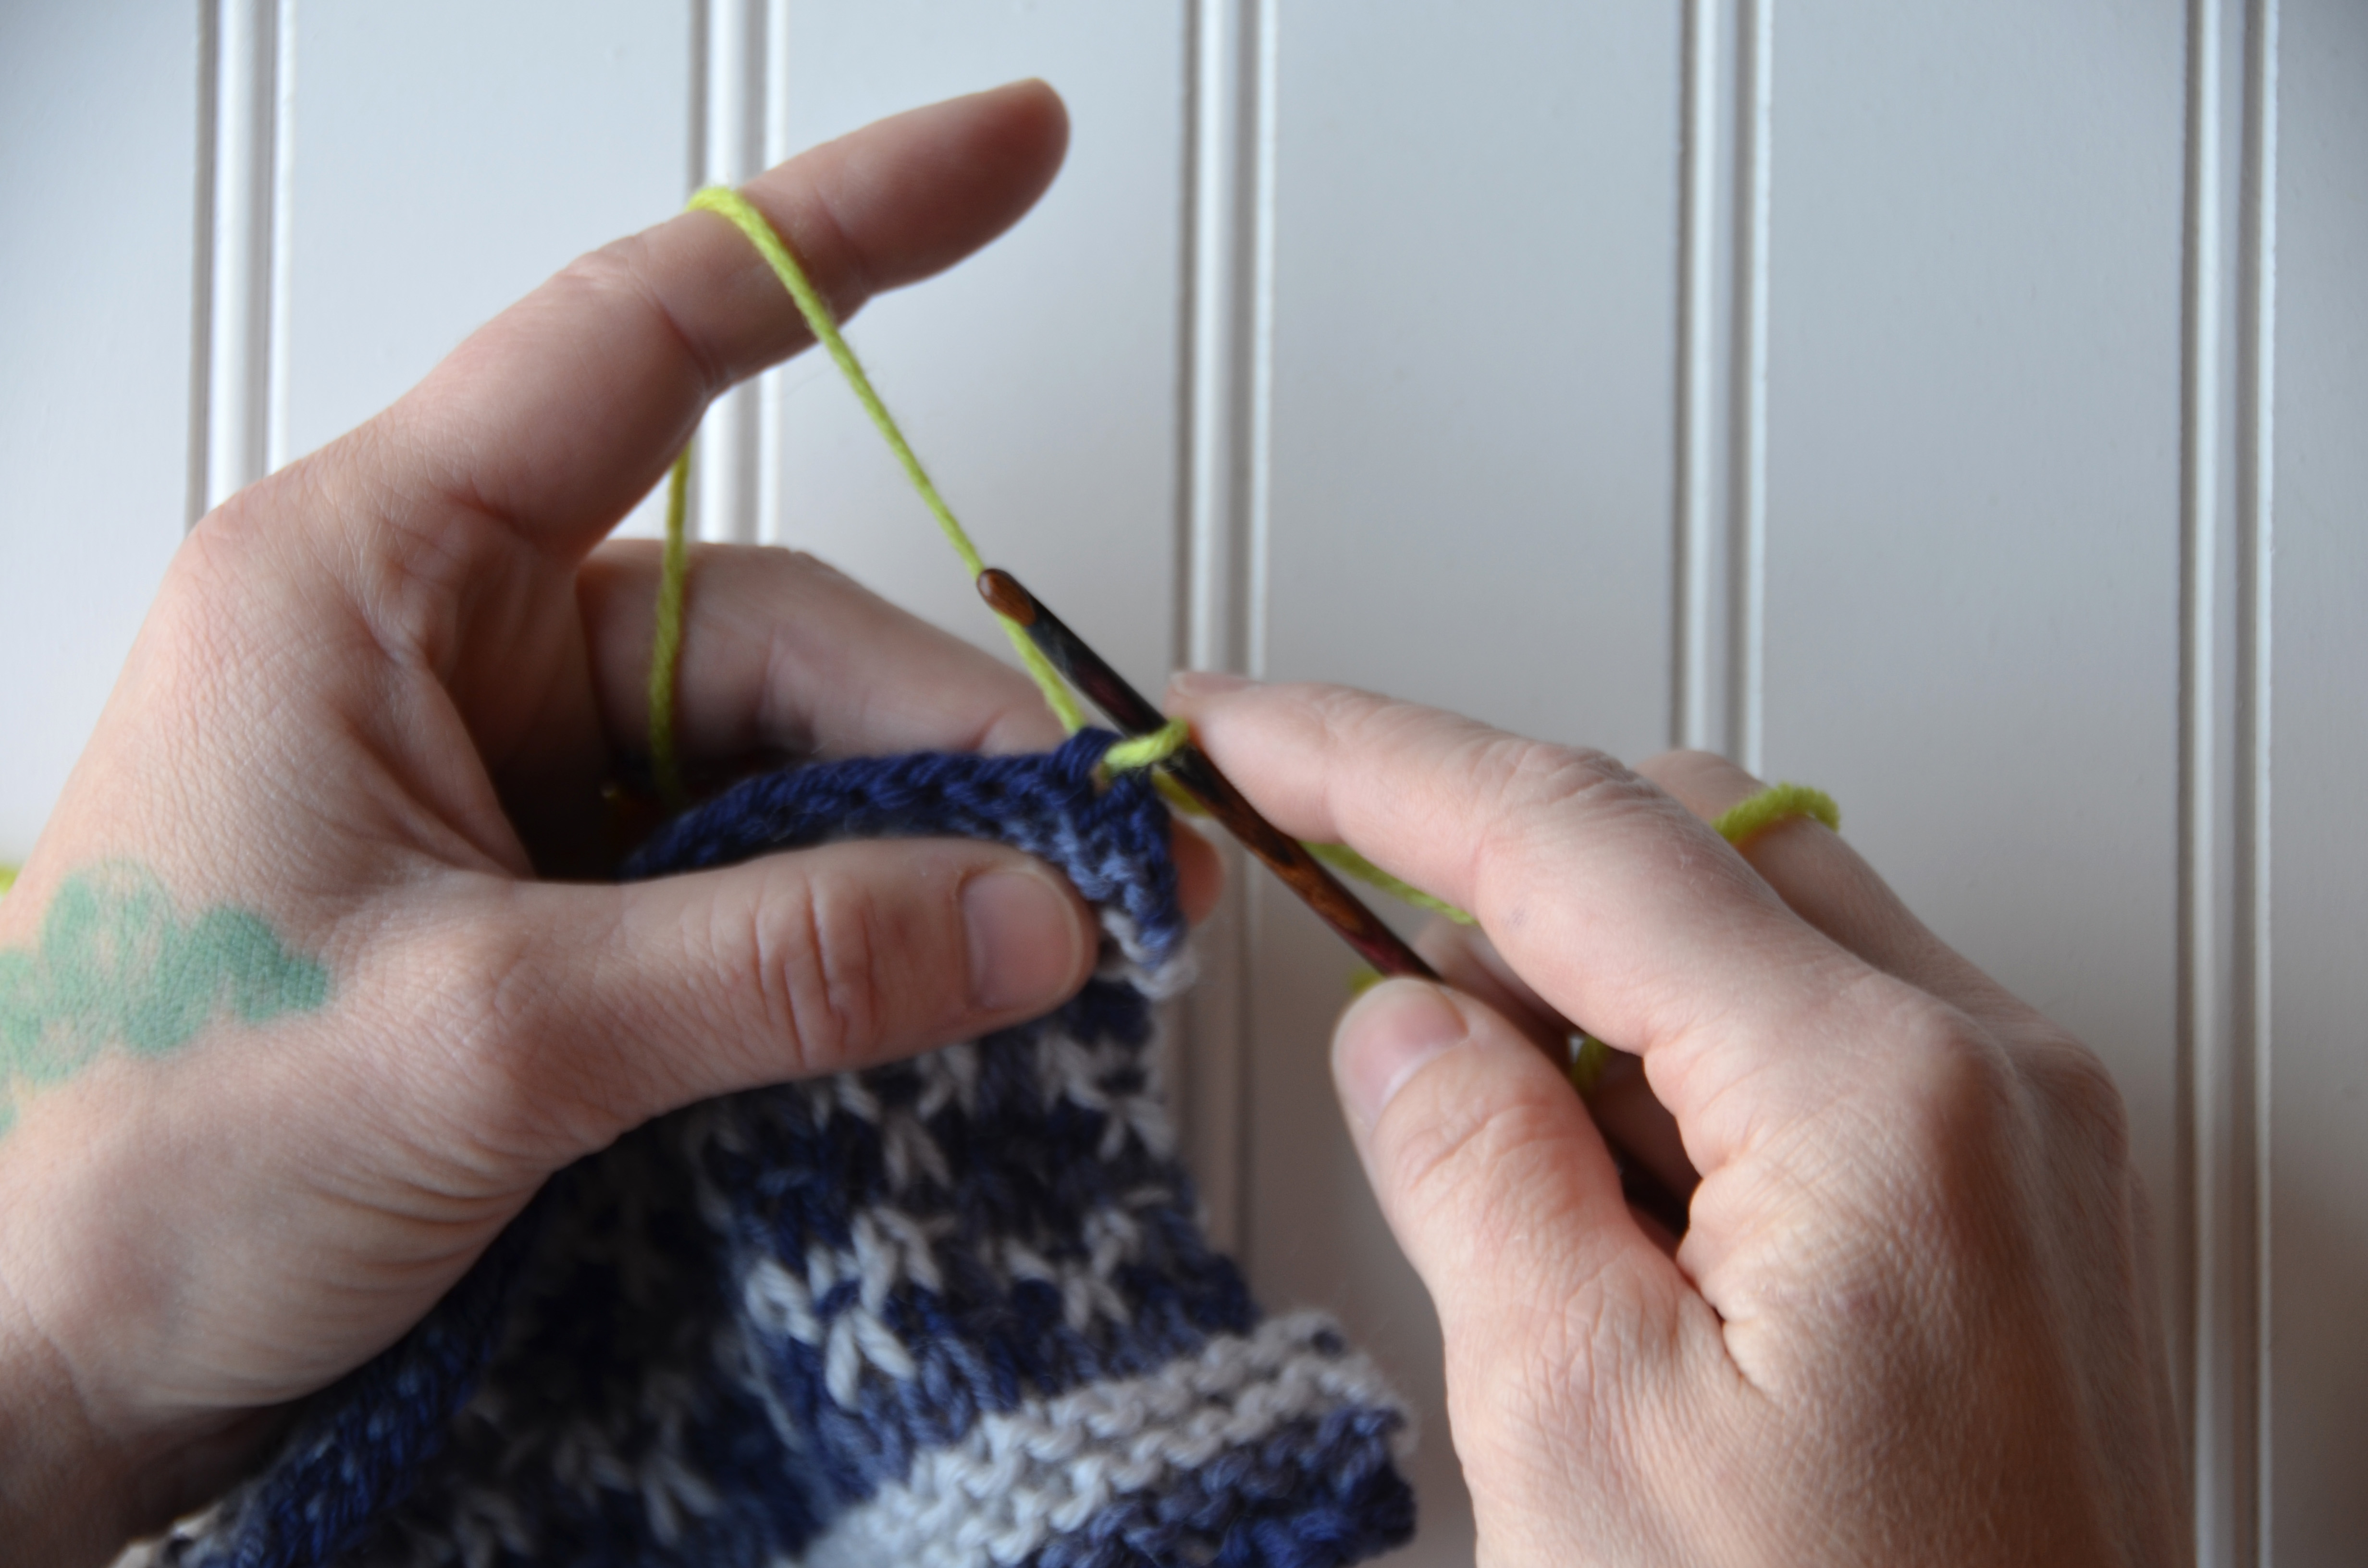
In my swatch, you can see that I’ve already done the picot edging along the lower edge. I’m going to be using a contrast color for the top edge so it’s easier for you to see.
Begin by pulling up a loop onto your hook. Be sure to work through both loops of the knit stitch from the cowl as you do this.
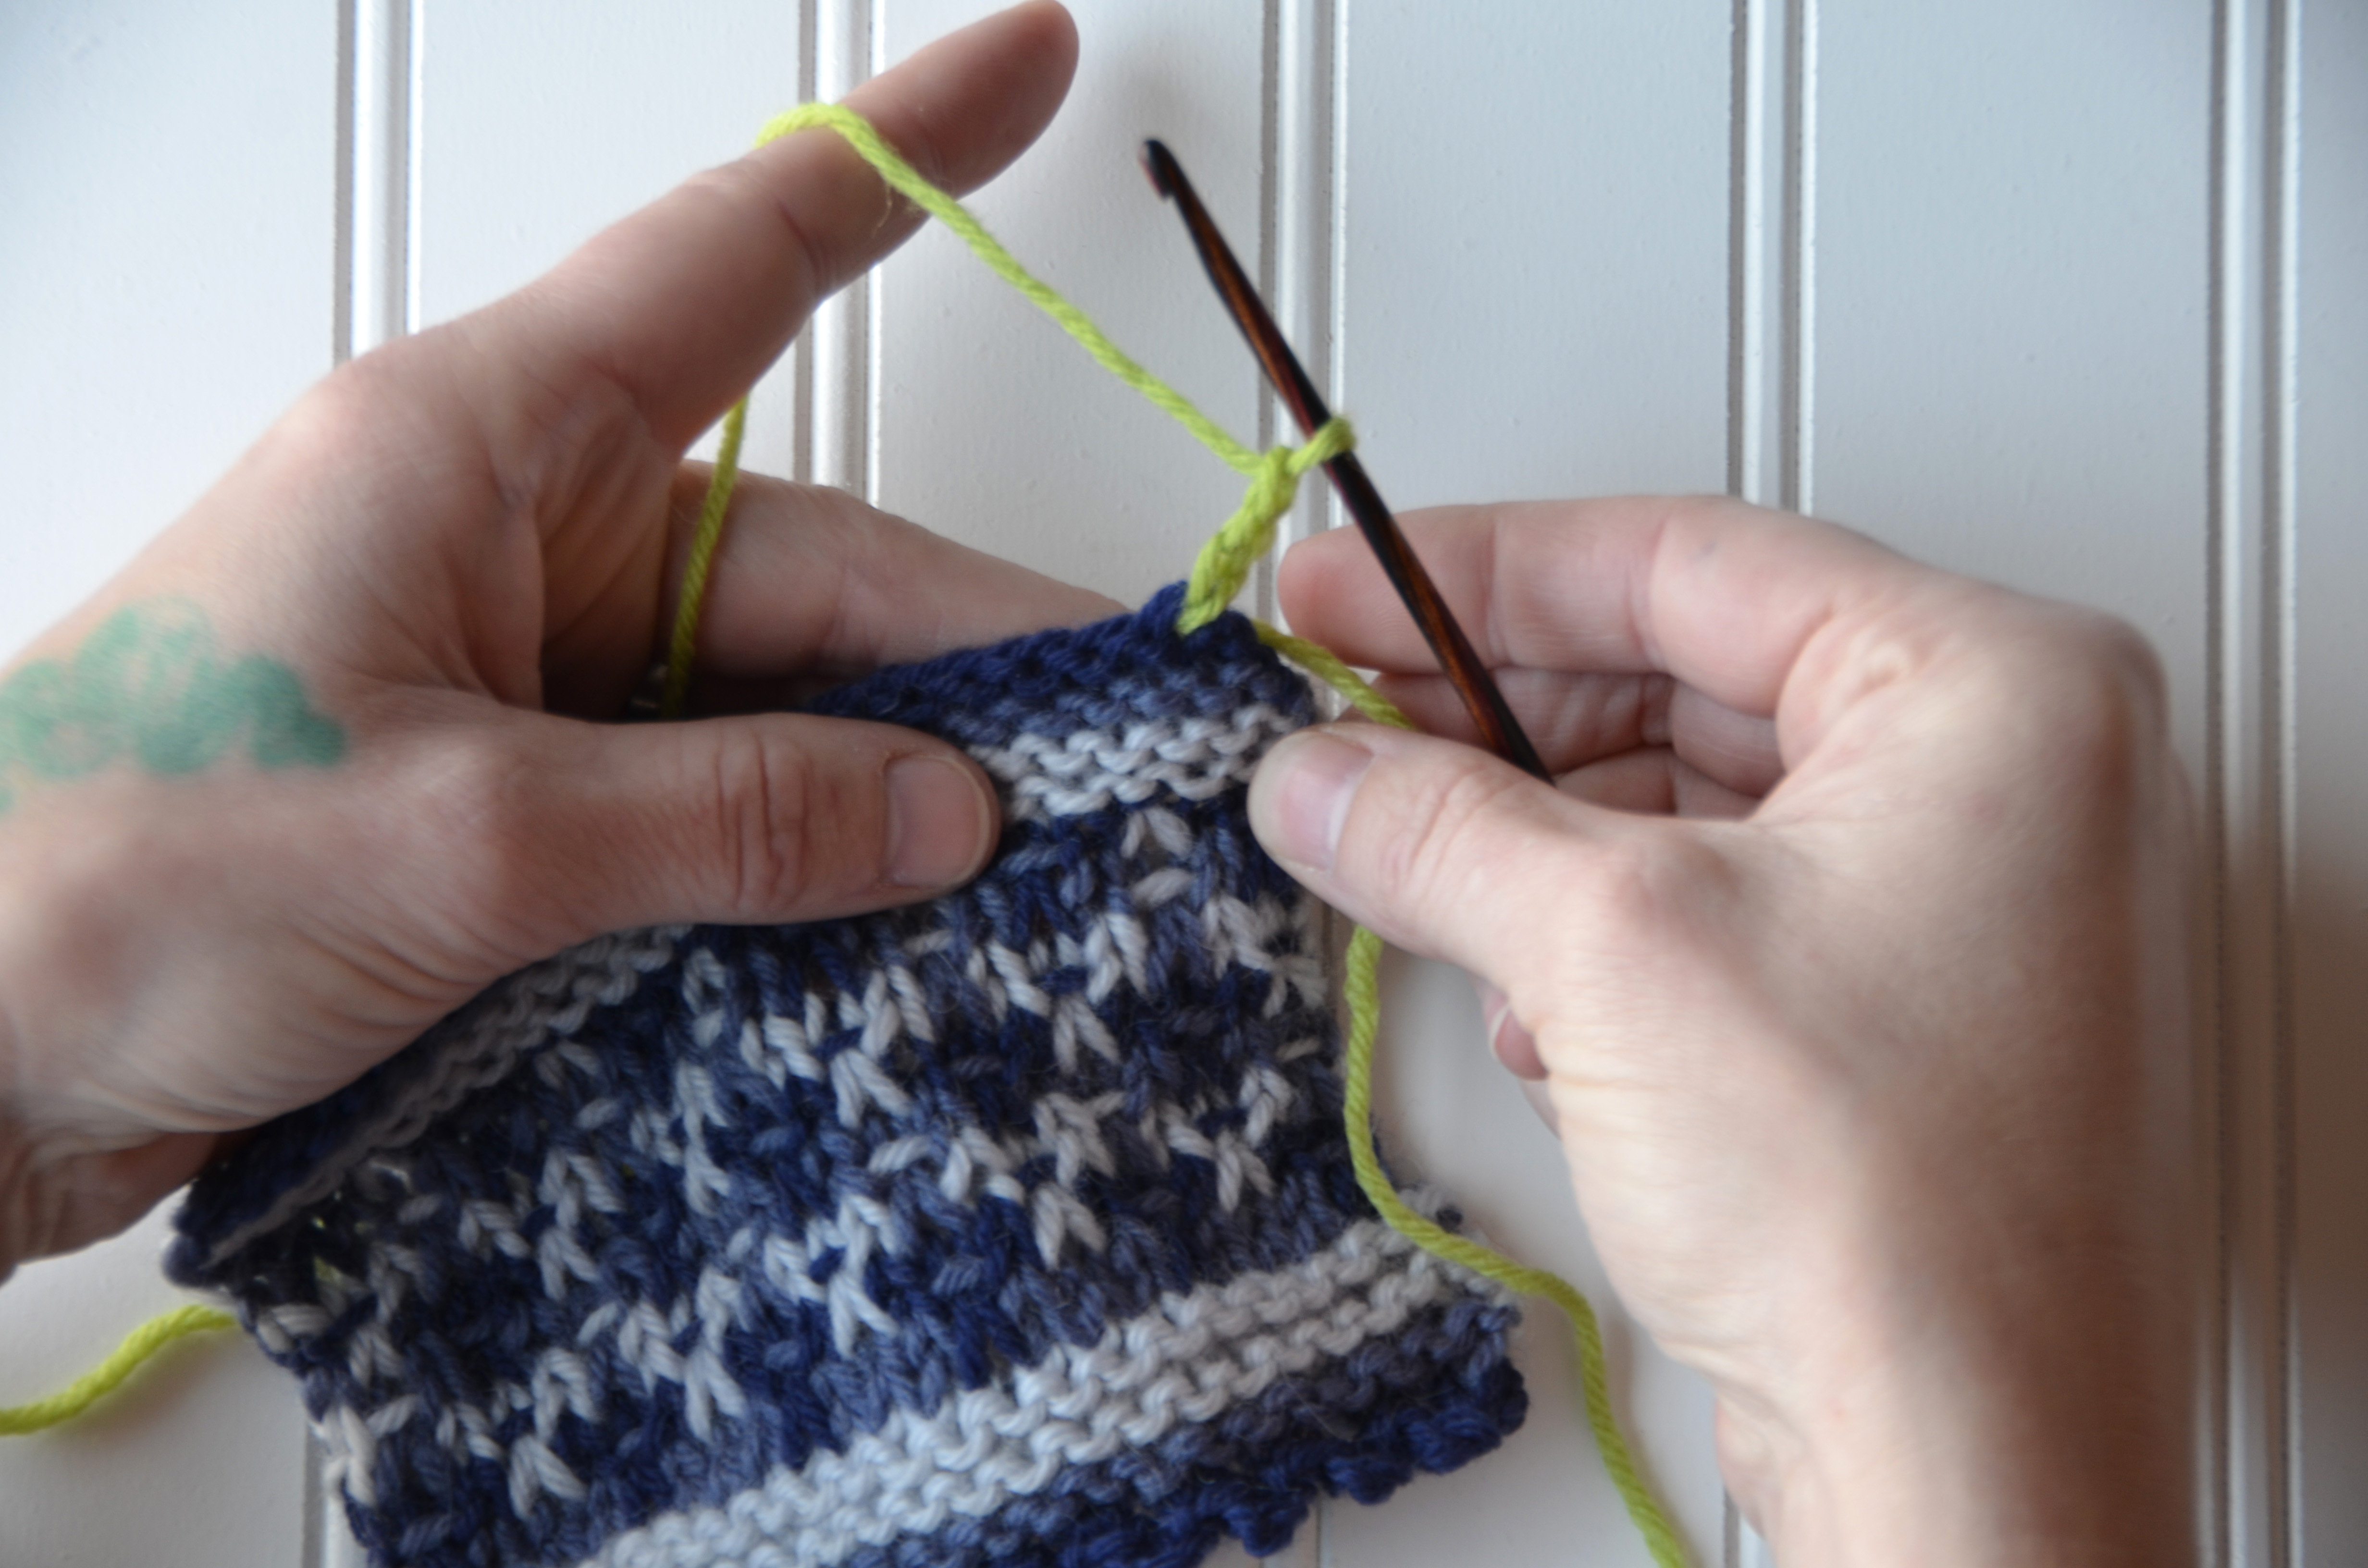
Step 1: Chain 3. To make a chain, first yarn over as shown.
To complete the chain, pull the yarn over through the loop already on your hook.
All 3 chains complete.
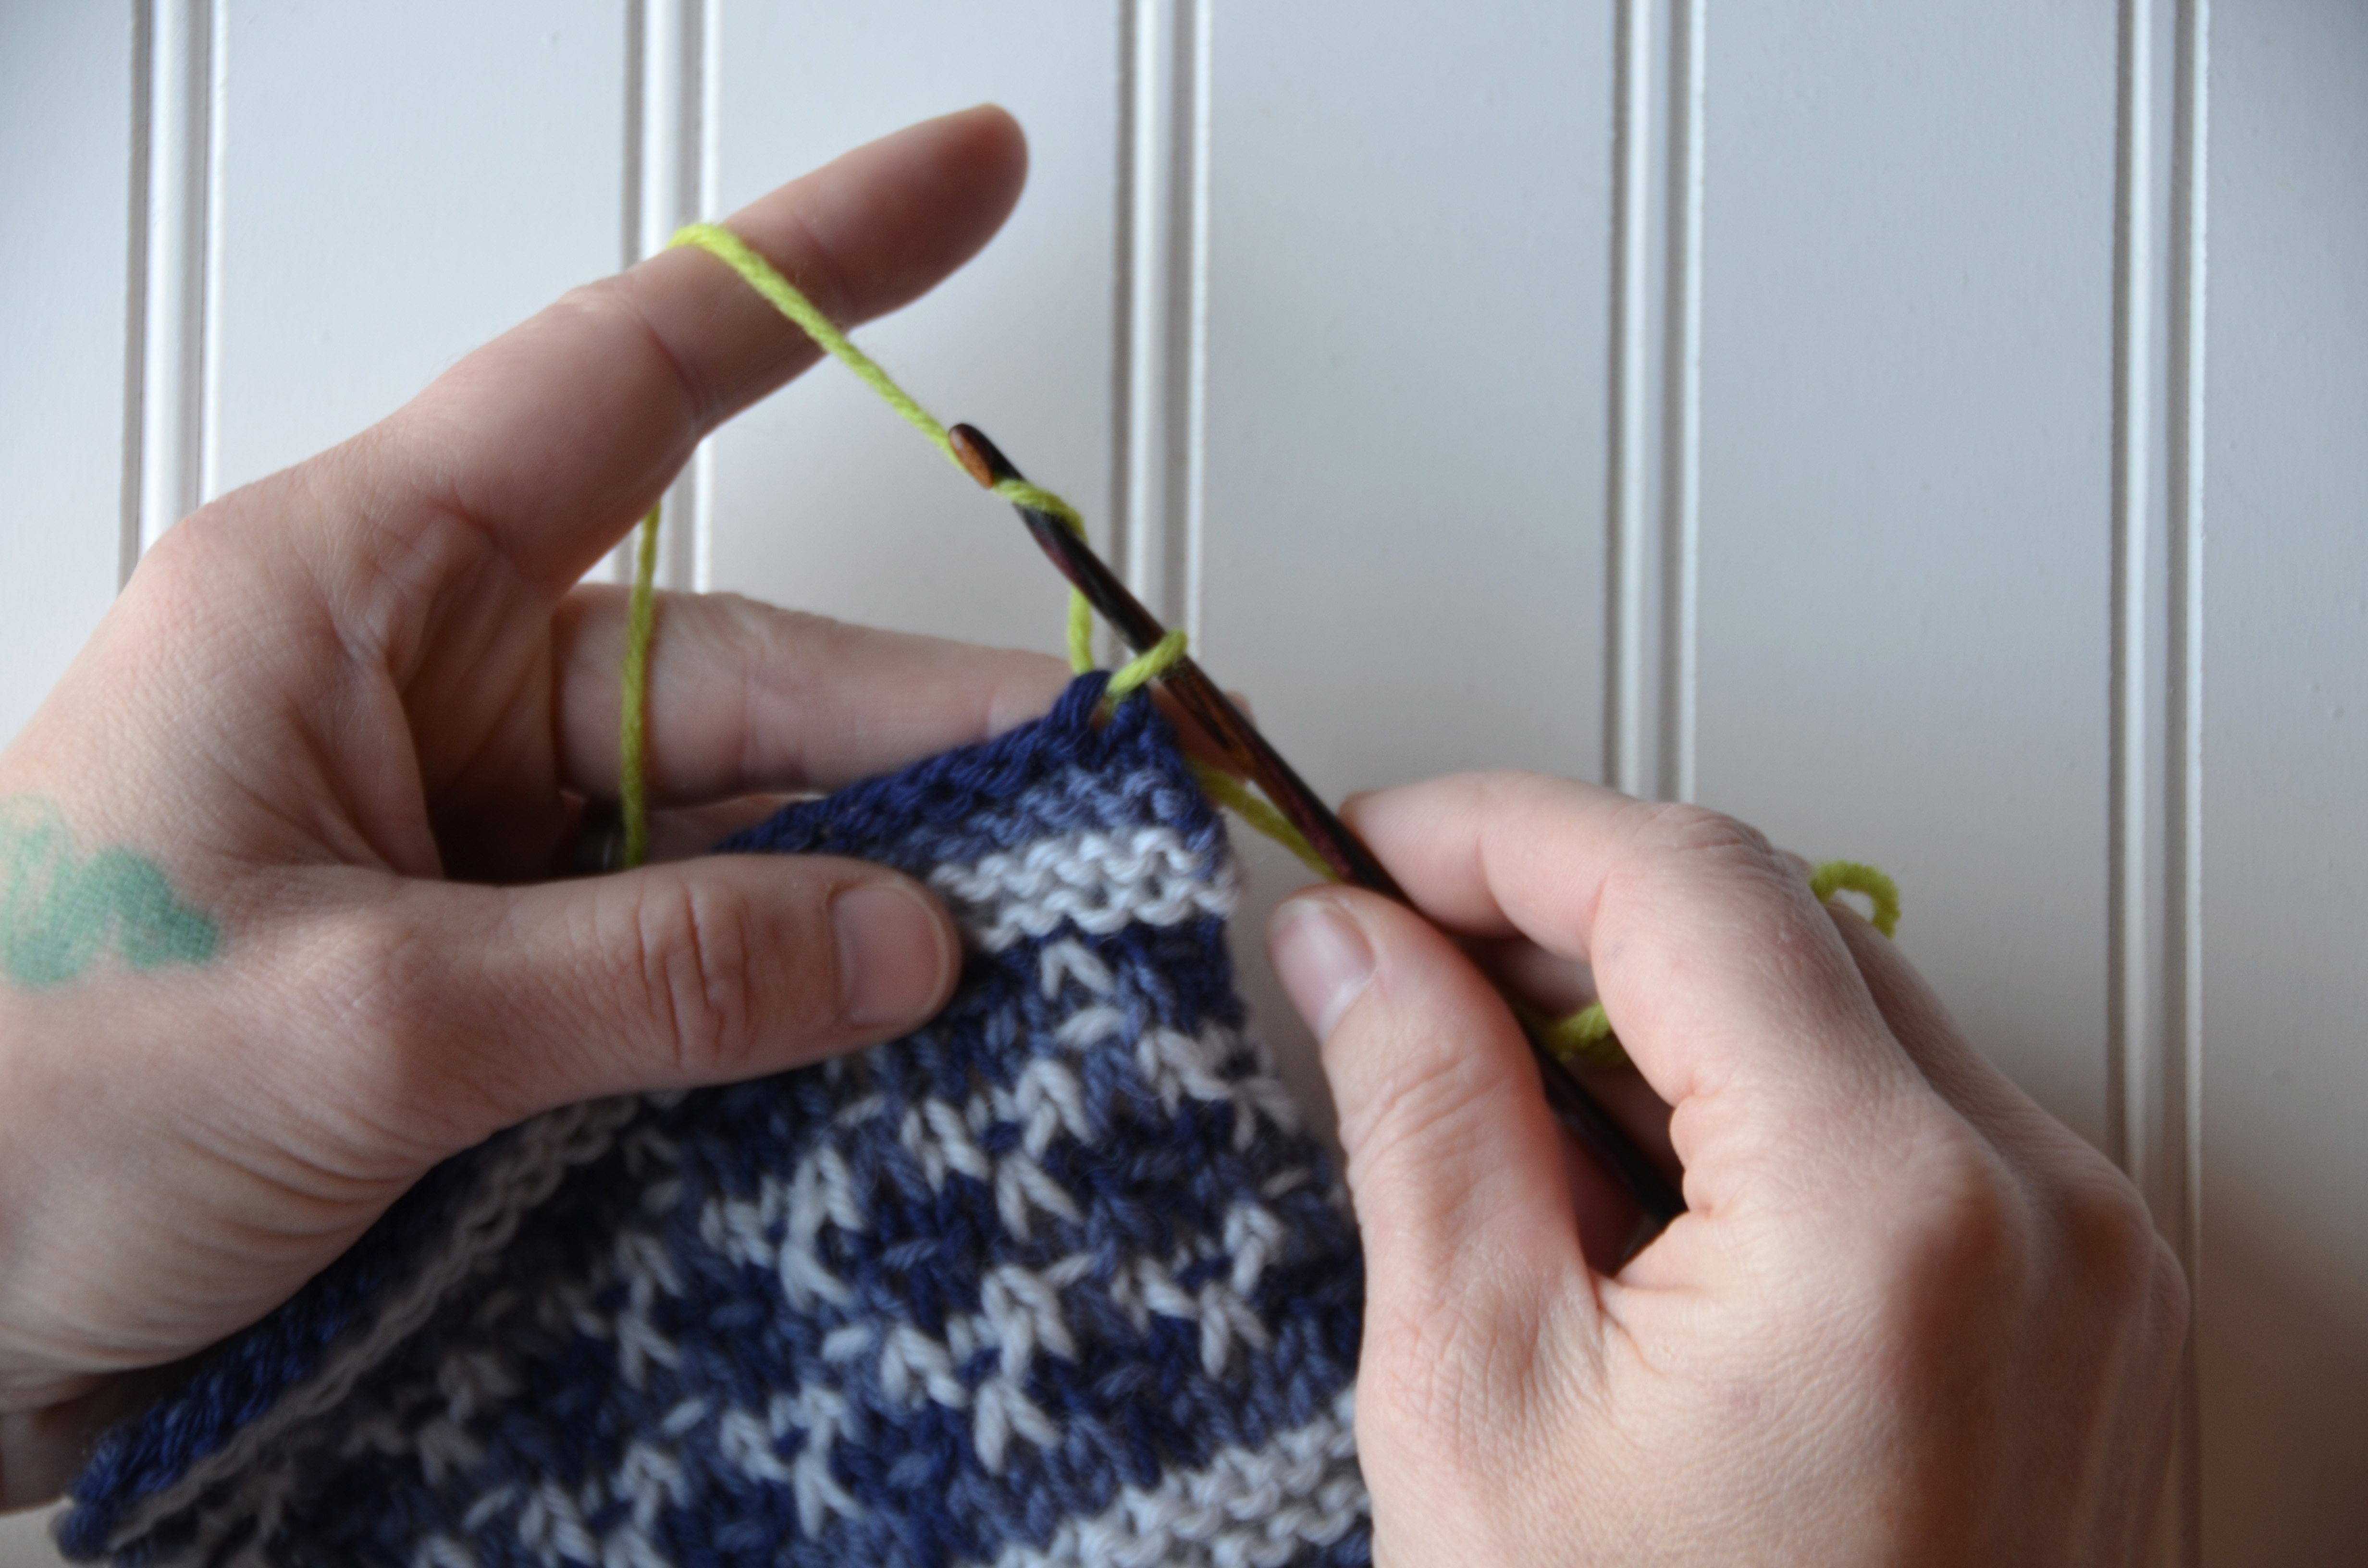
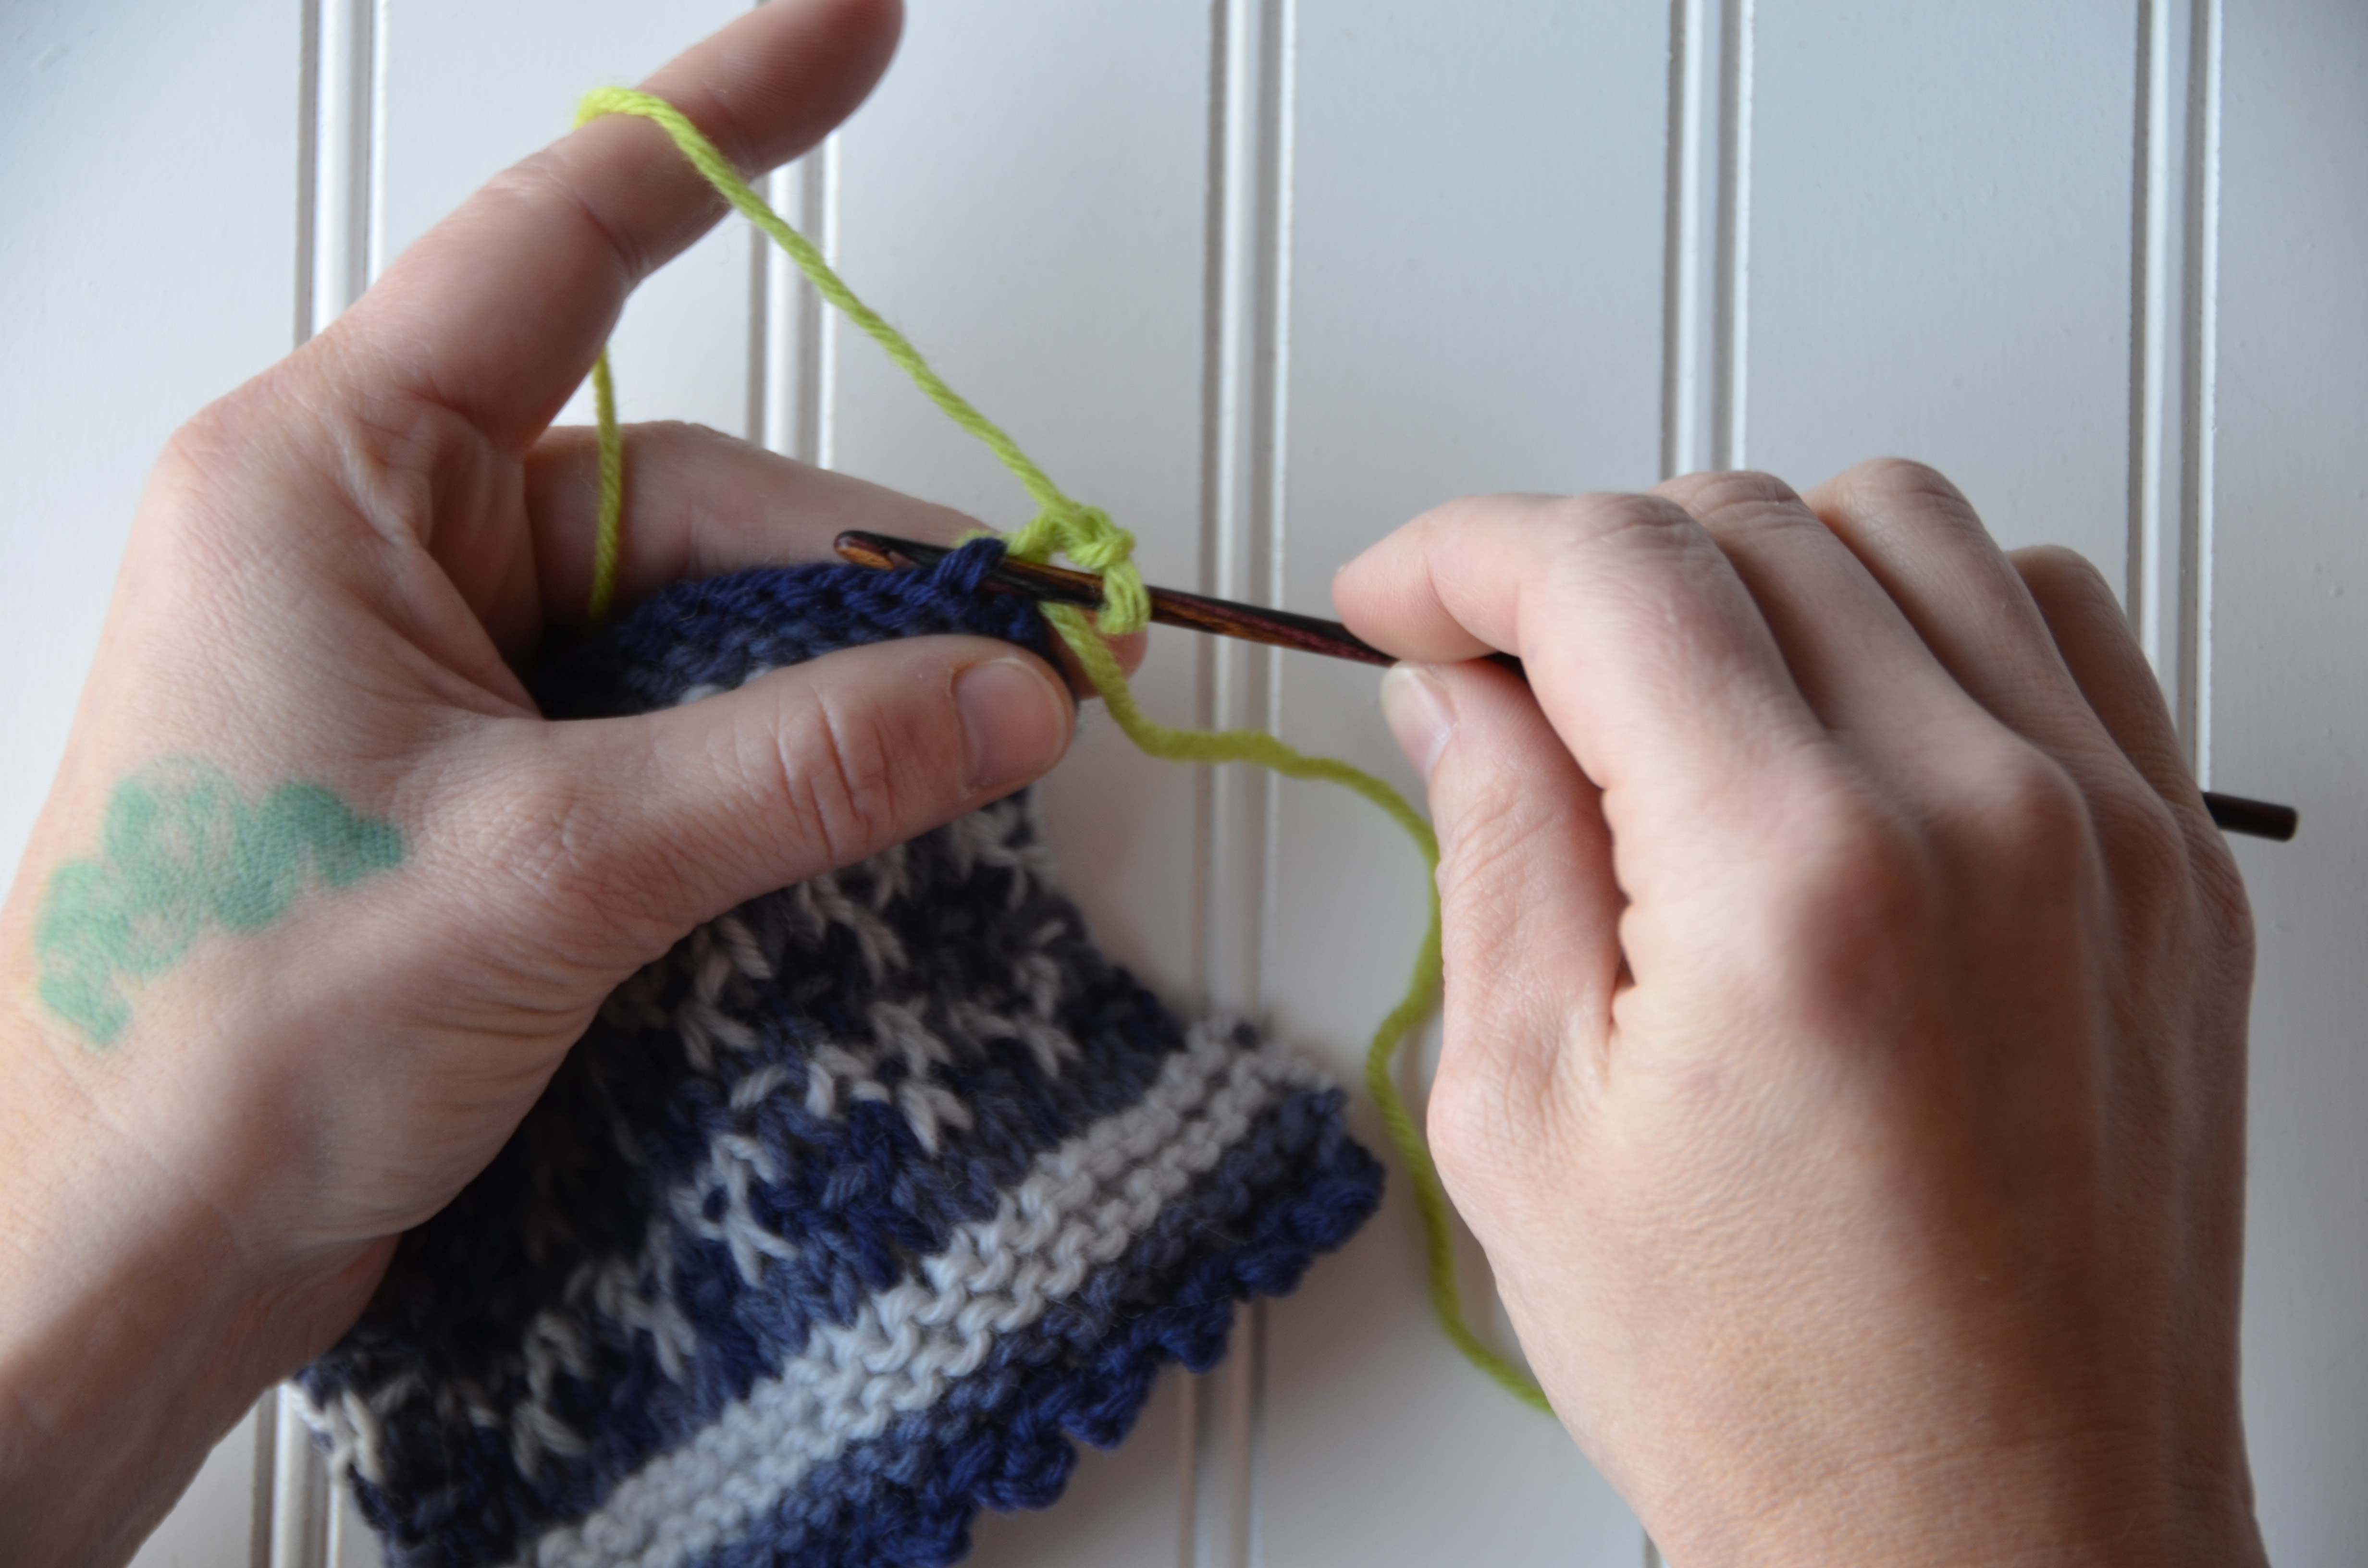
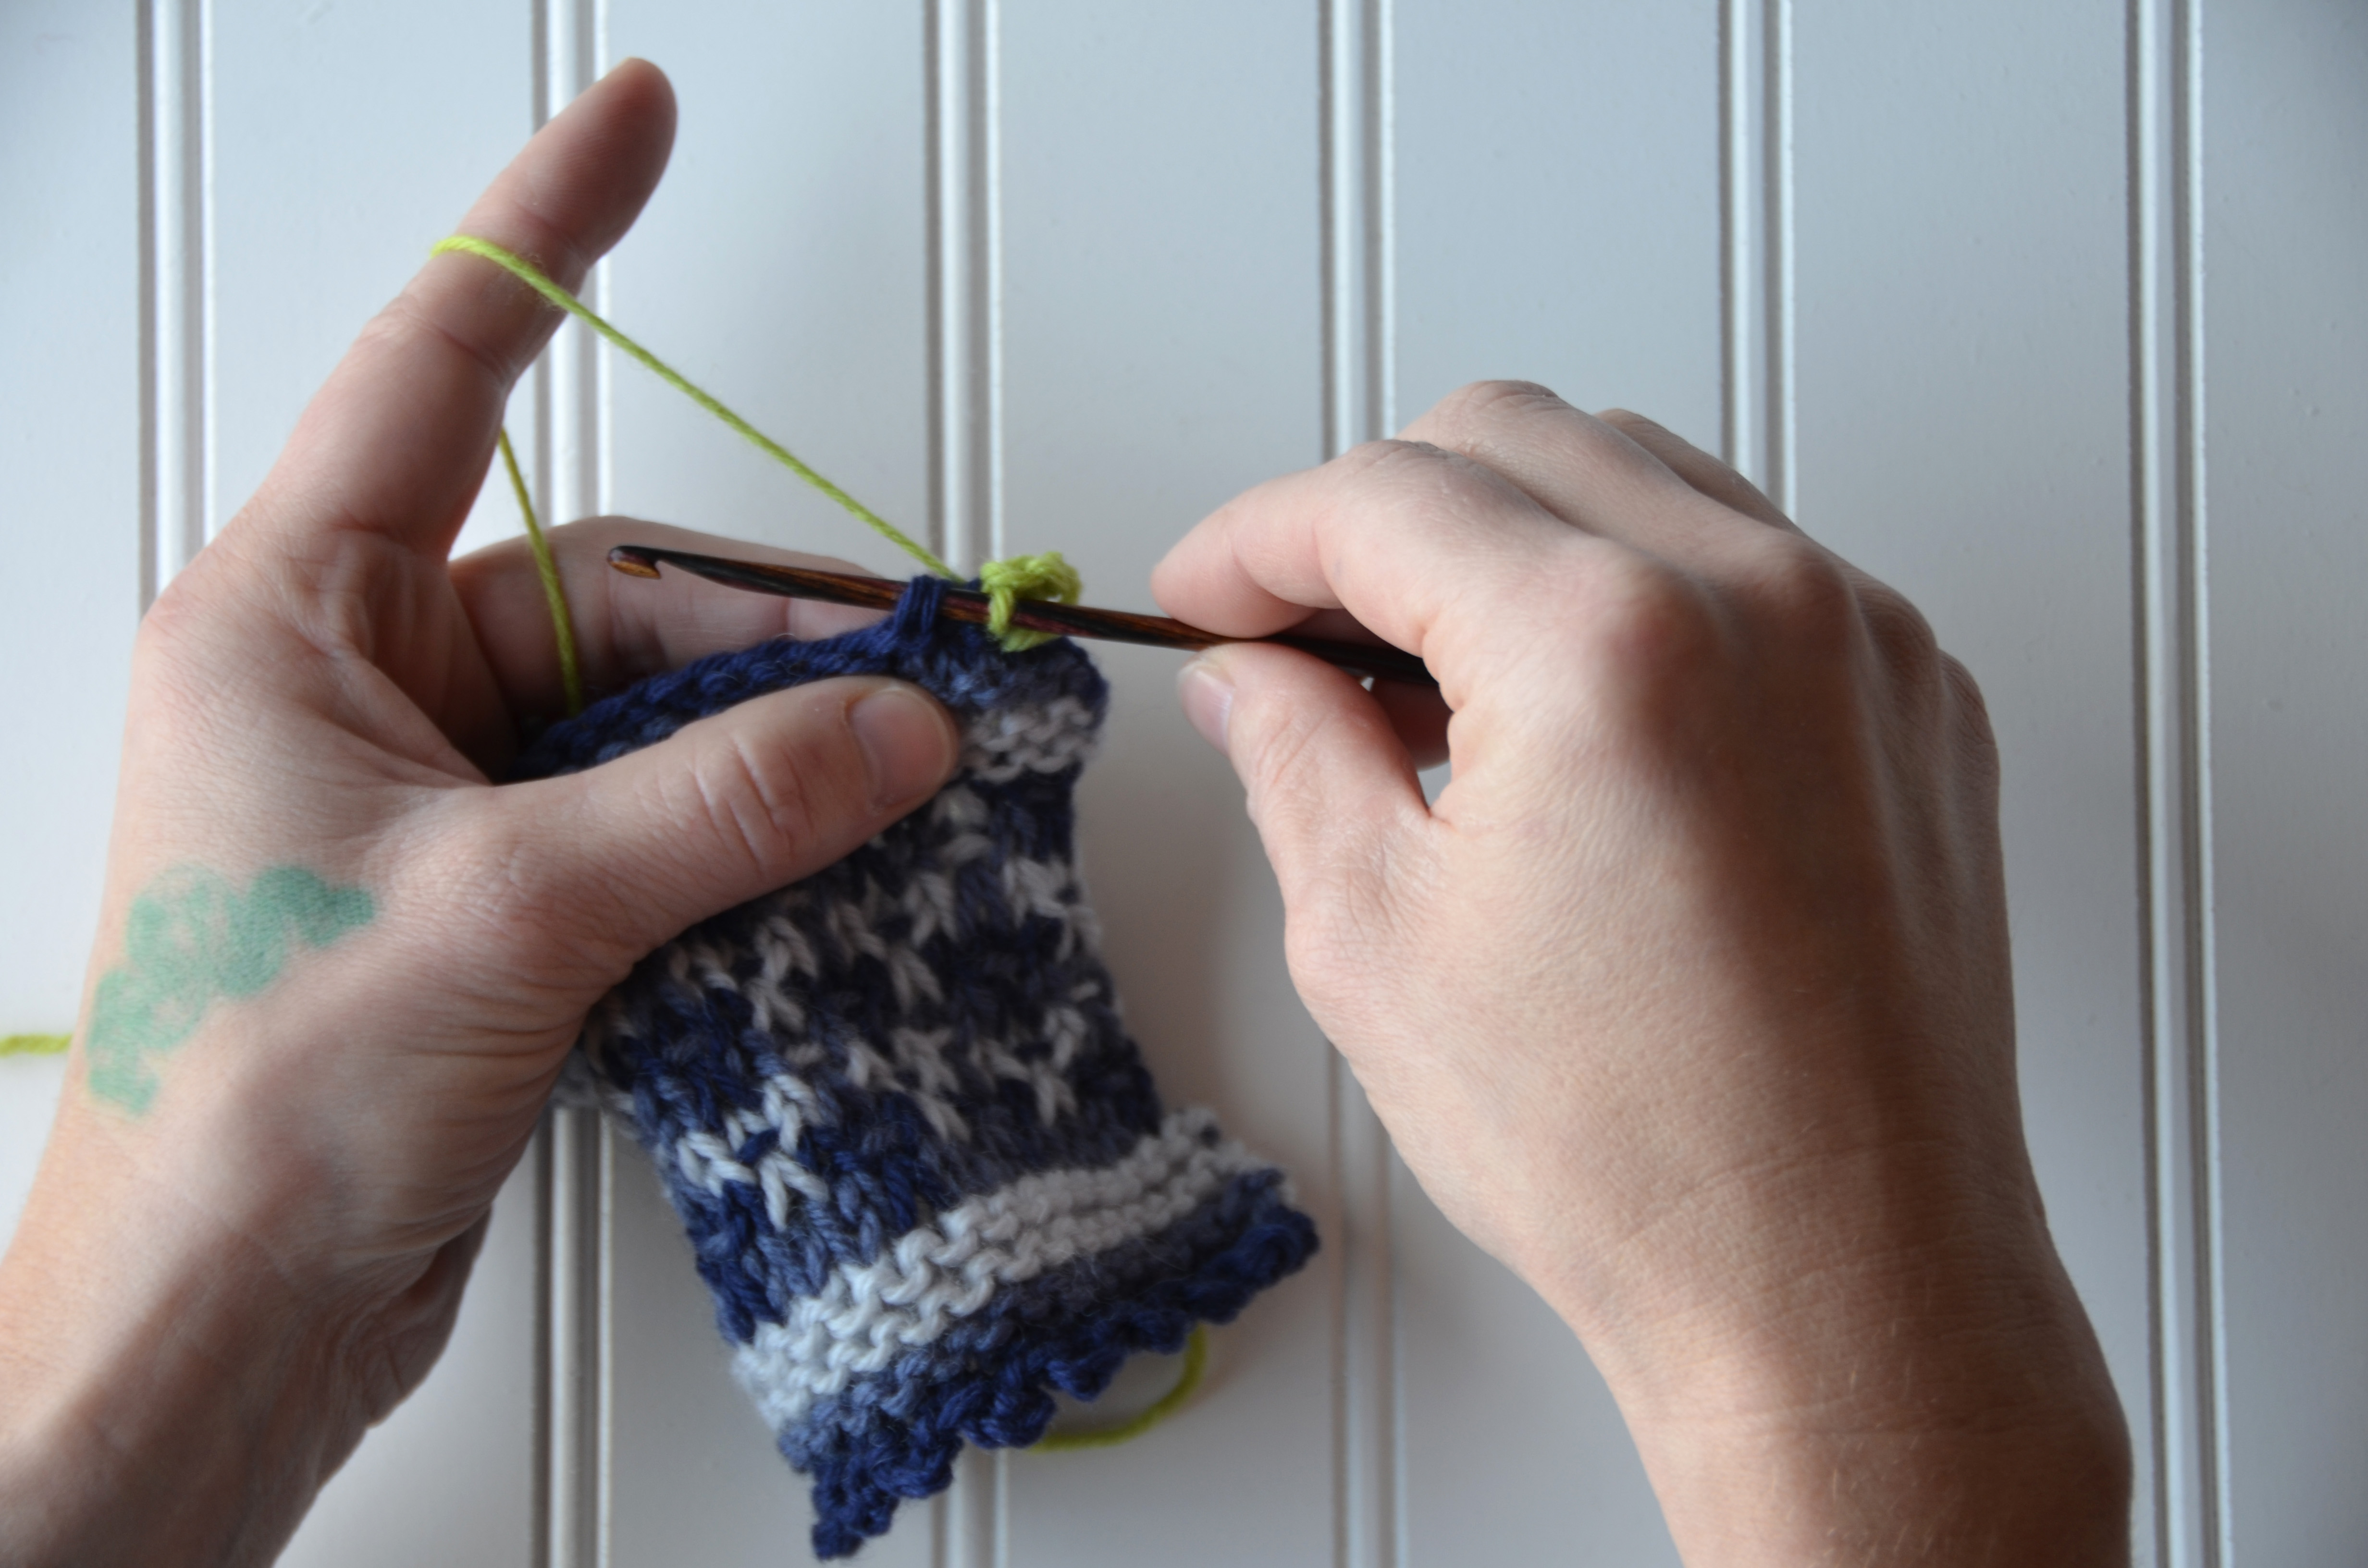
Step 2: Slip stitch into the same knit stitch from the cowl body. To do this, first insert your hook into the stitch, going underneath the same two loops again.
Yarn over and pull through the knit stitch.
Then pull this second loop through the first loop on the hook to complete the slip stitch.
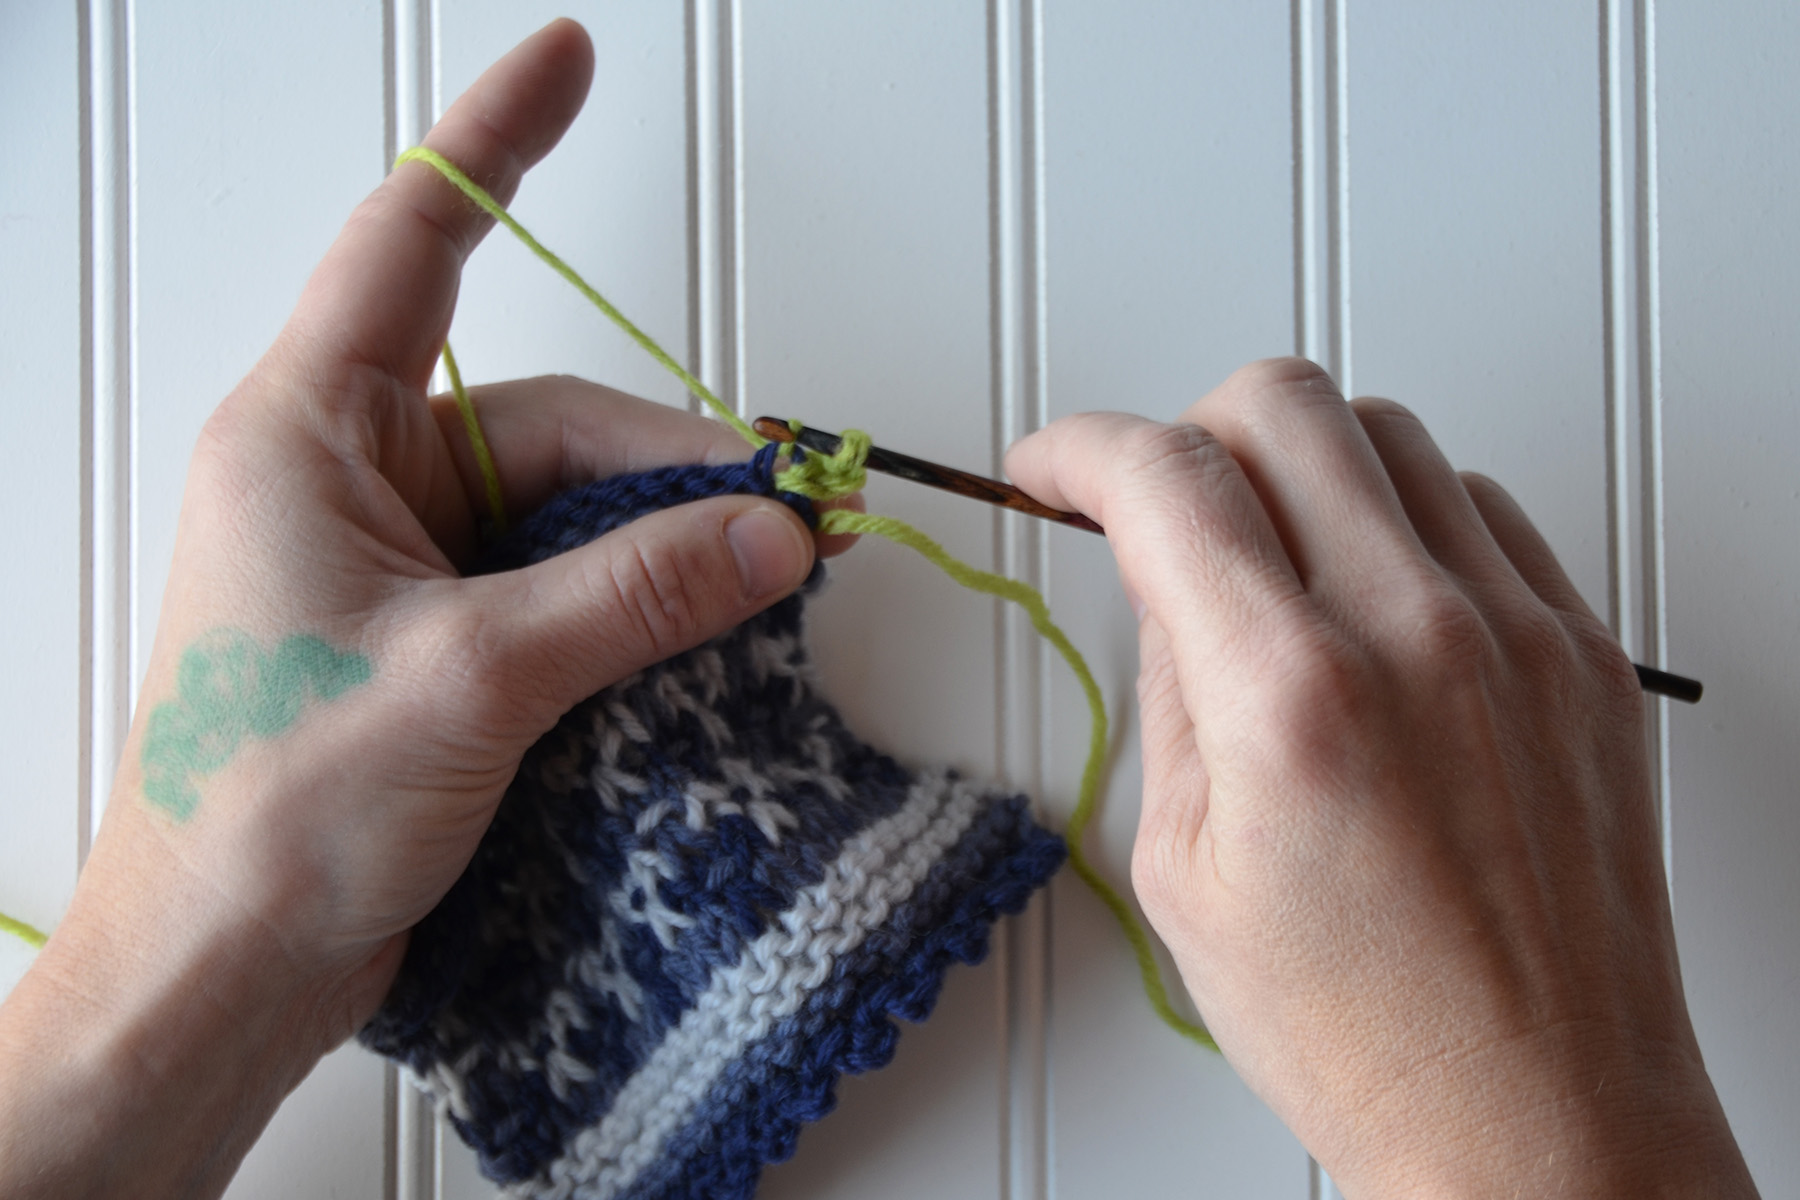
Step 3: Skip the next knit stitch from the cowl body, and slip stitch into the next knit stitch.
Repeat Steps 1-3 for the edging. So you’re going to be working [slip stitch, chain 3, slip stitch] into every other stitch along both edges of the cowl. No big deal, right?
Here’s my swatch after a few more little picots.
Again, you can find the kit for this cowl on our website here (link). Here’s to learning new things!
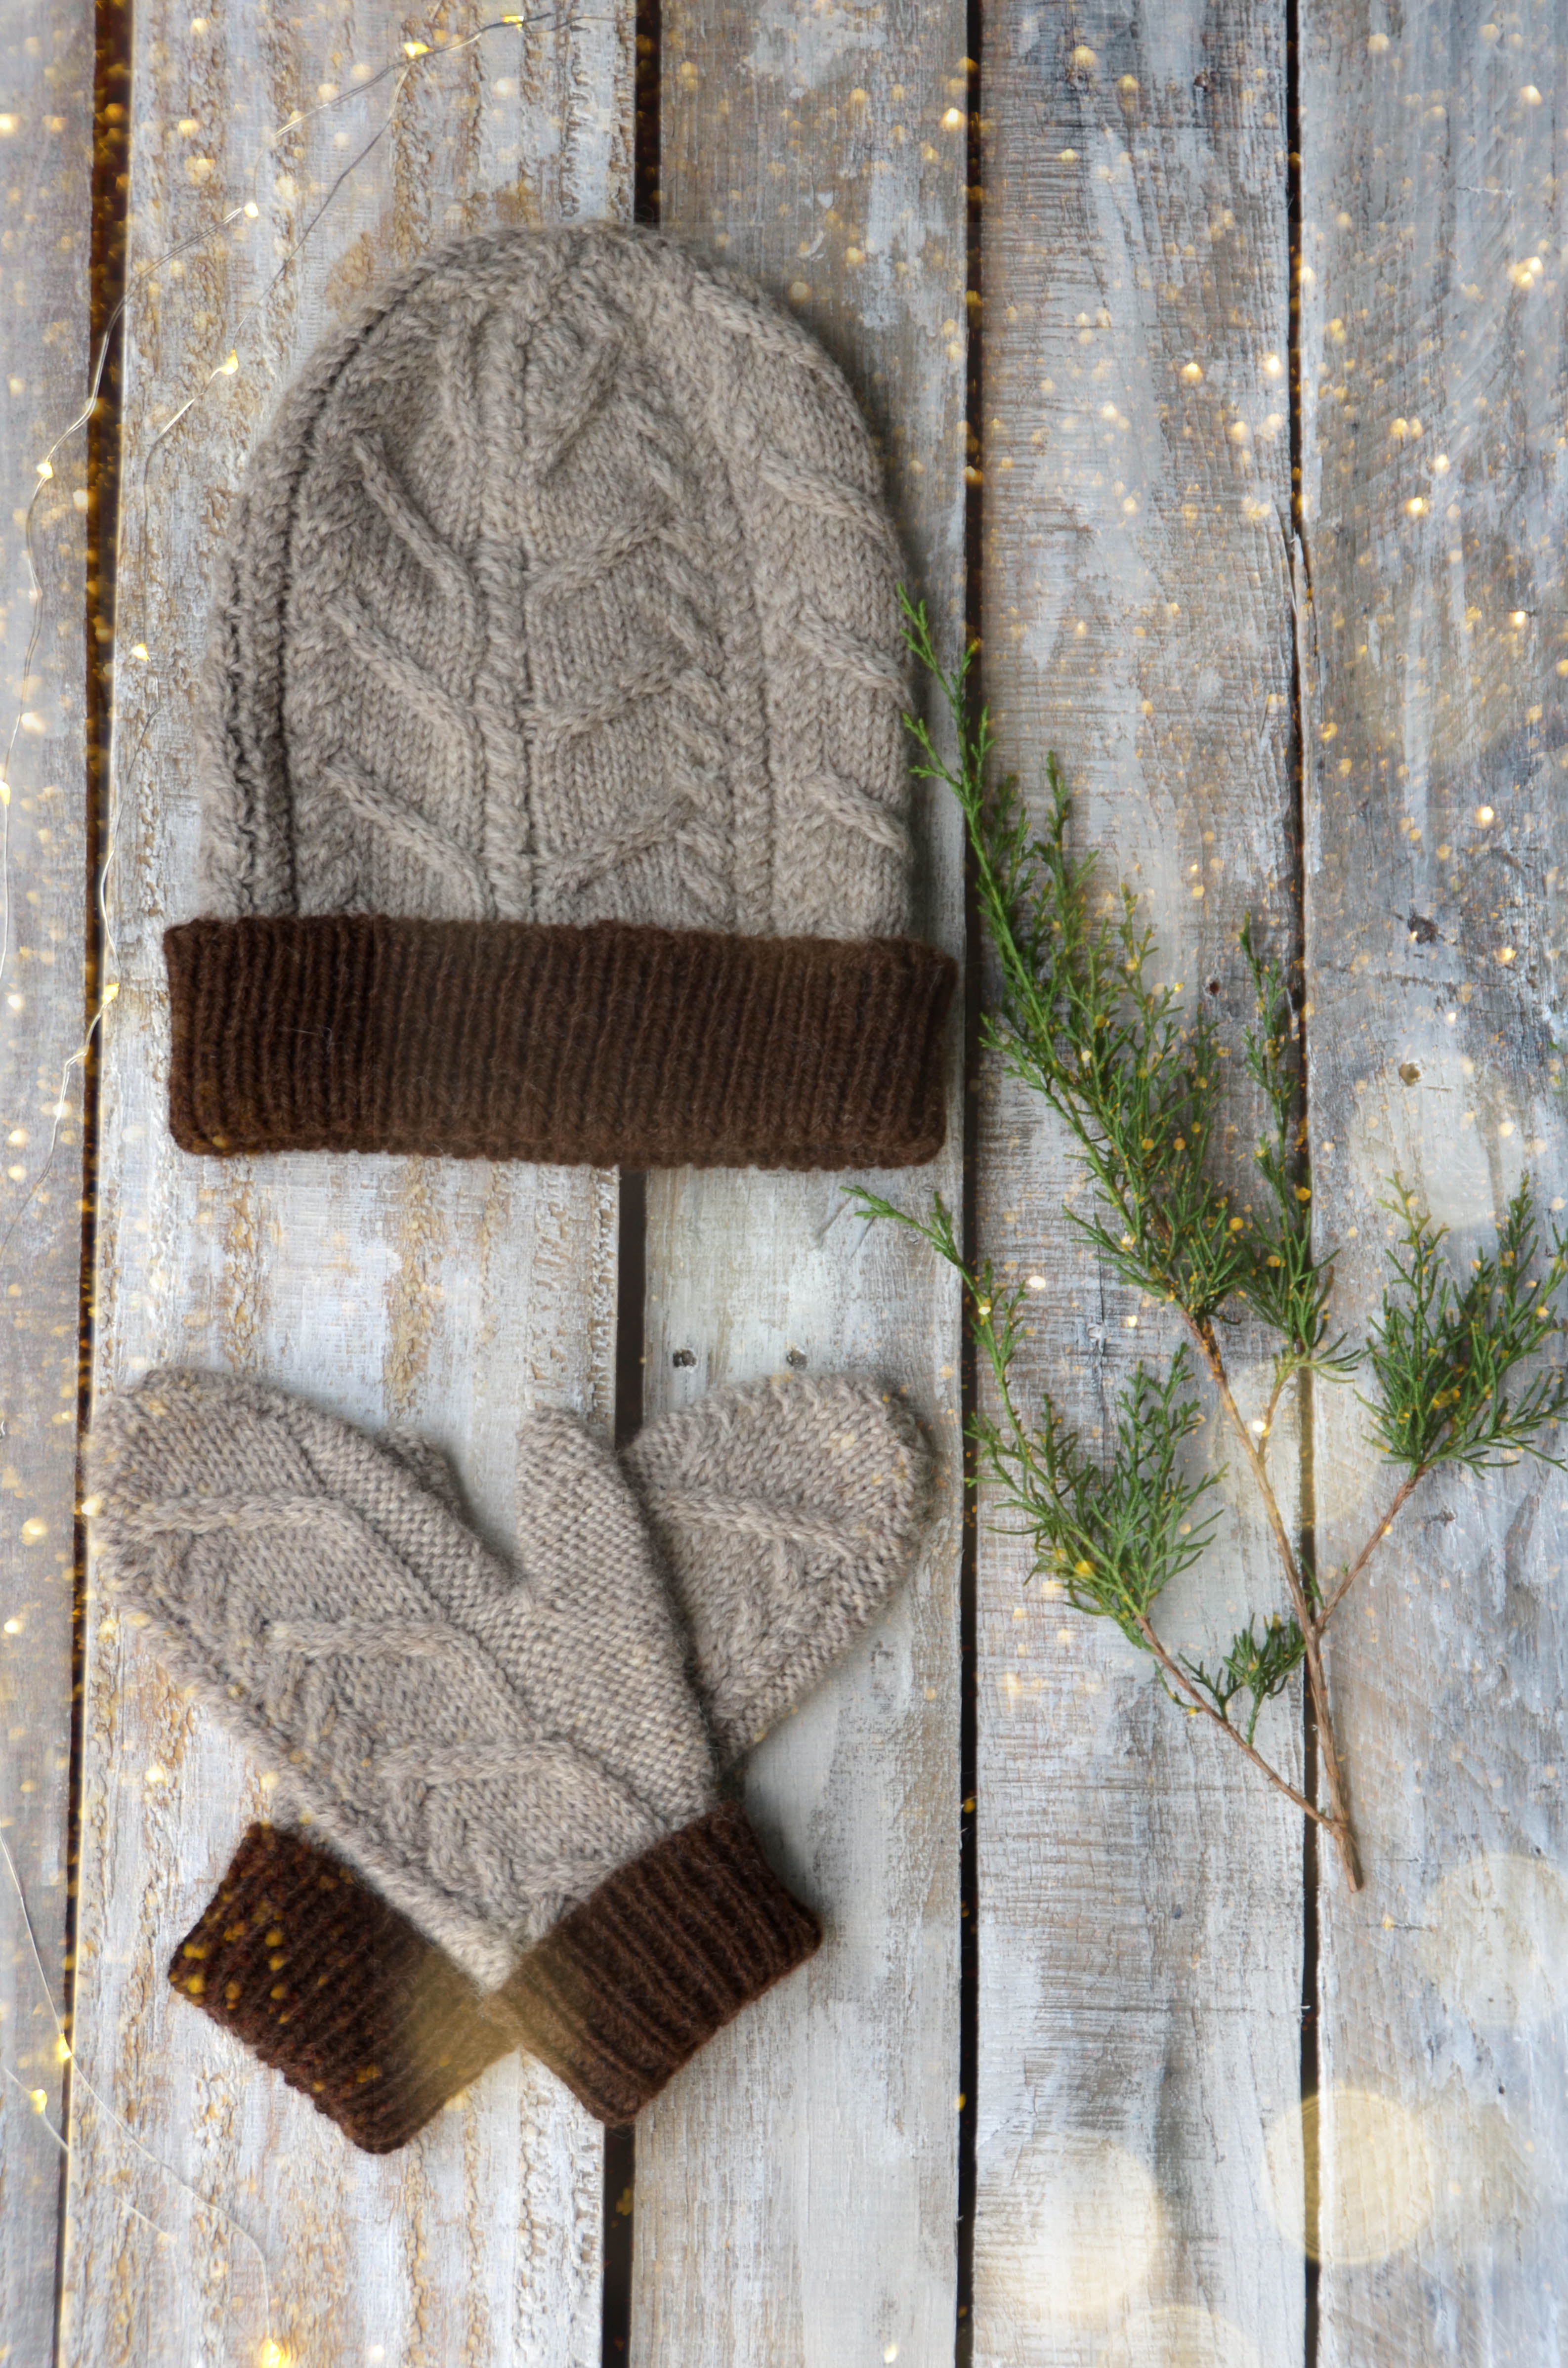
Today we’re introducing the Nutmeg Hat and Mitten Set. The neutral set is incredibly wearable for men and women alike. Personally, I love working with undyed wool. It is rustic in appearance and goes with nearly anything. While I’m a lover of color, I equally adore the natural shades of wool. You can see more of our Deluxe Worsted Naturals collection here.
This set features all over cables and a contrasting cuff. I wanted to give this set a professional finish, so I used the long-tail tubular cast-on method.
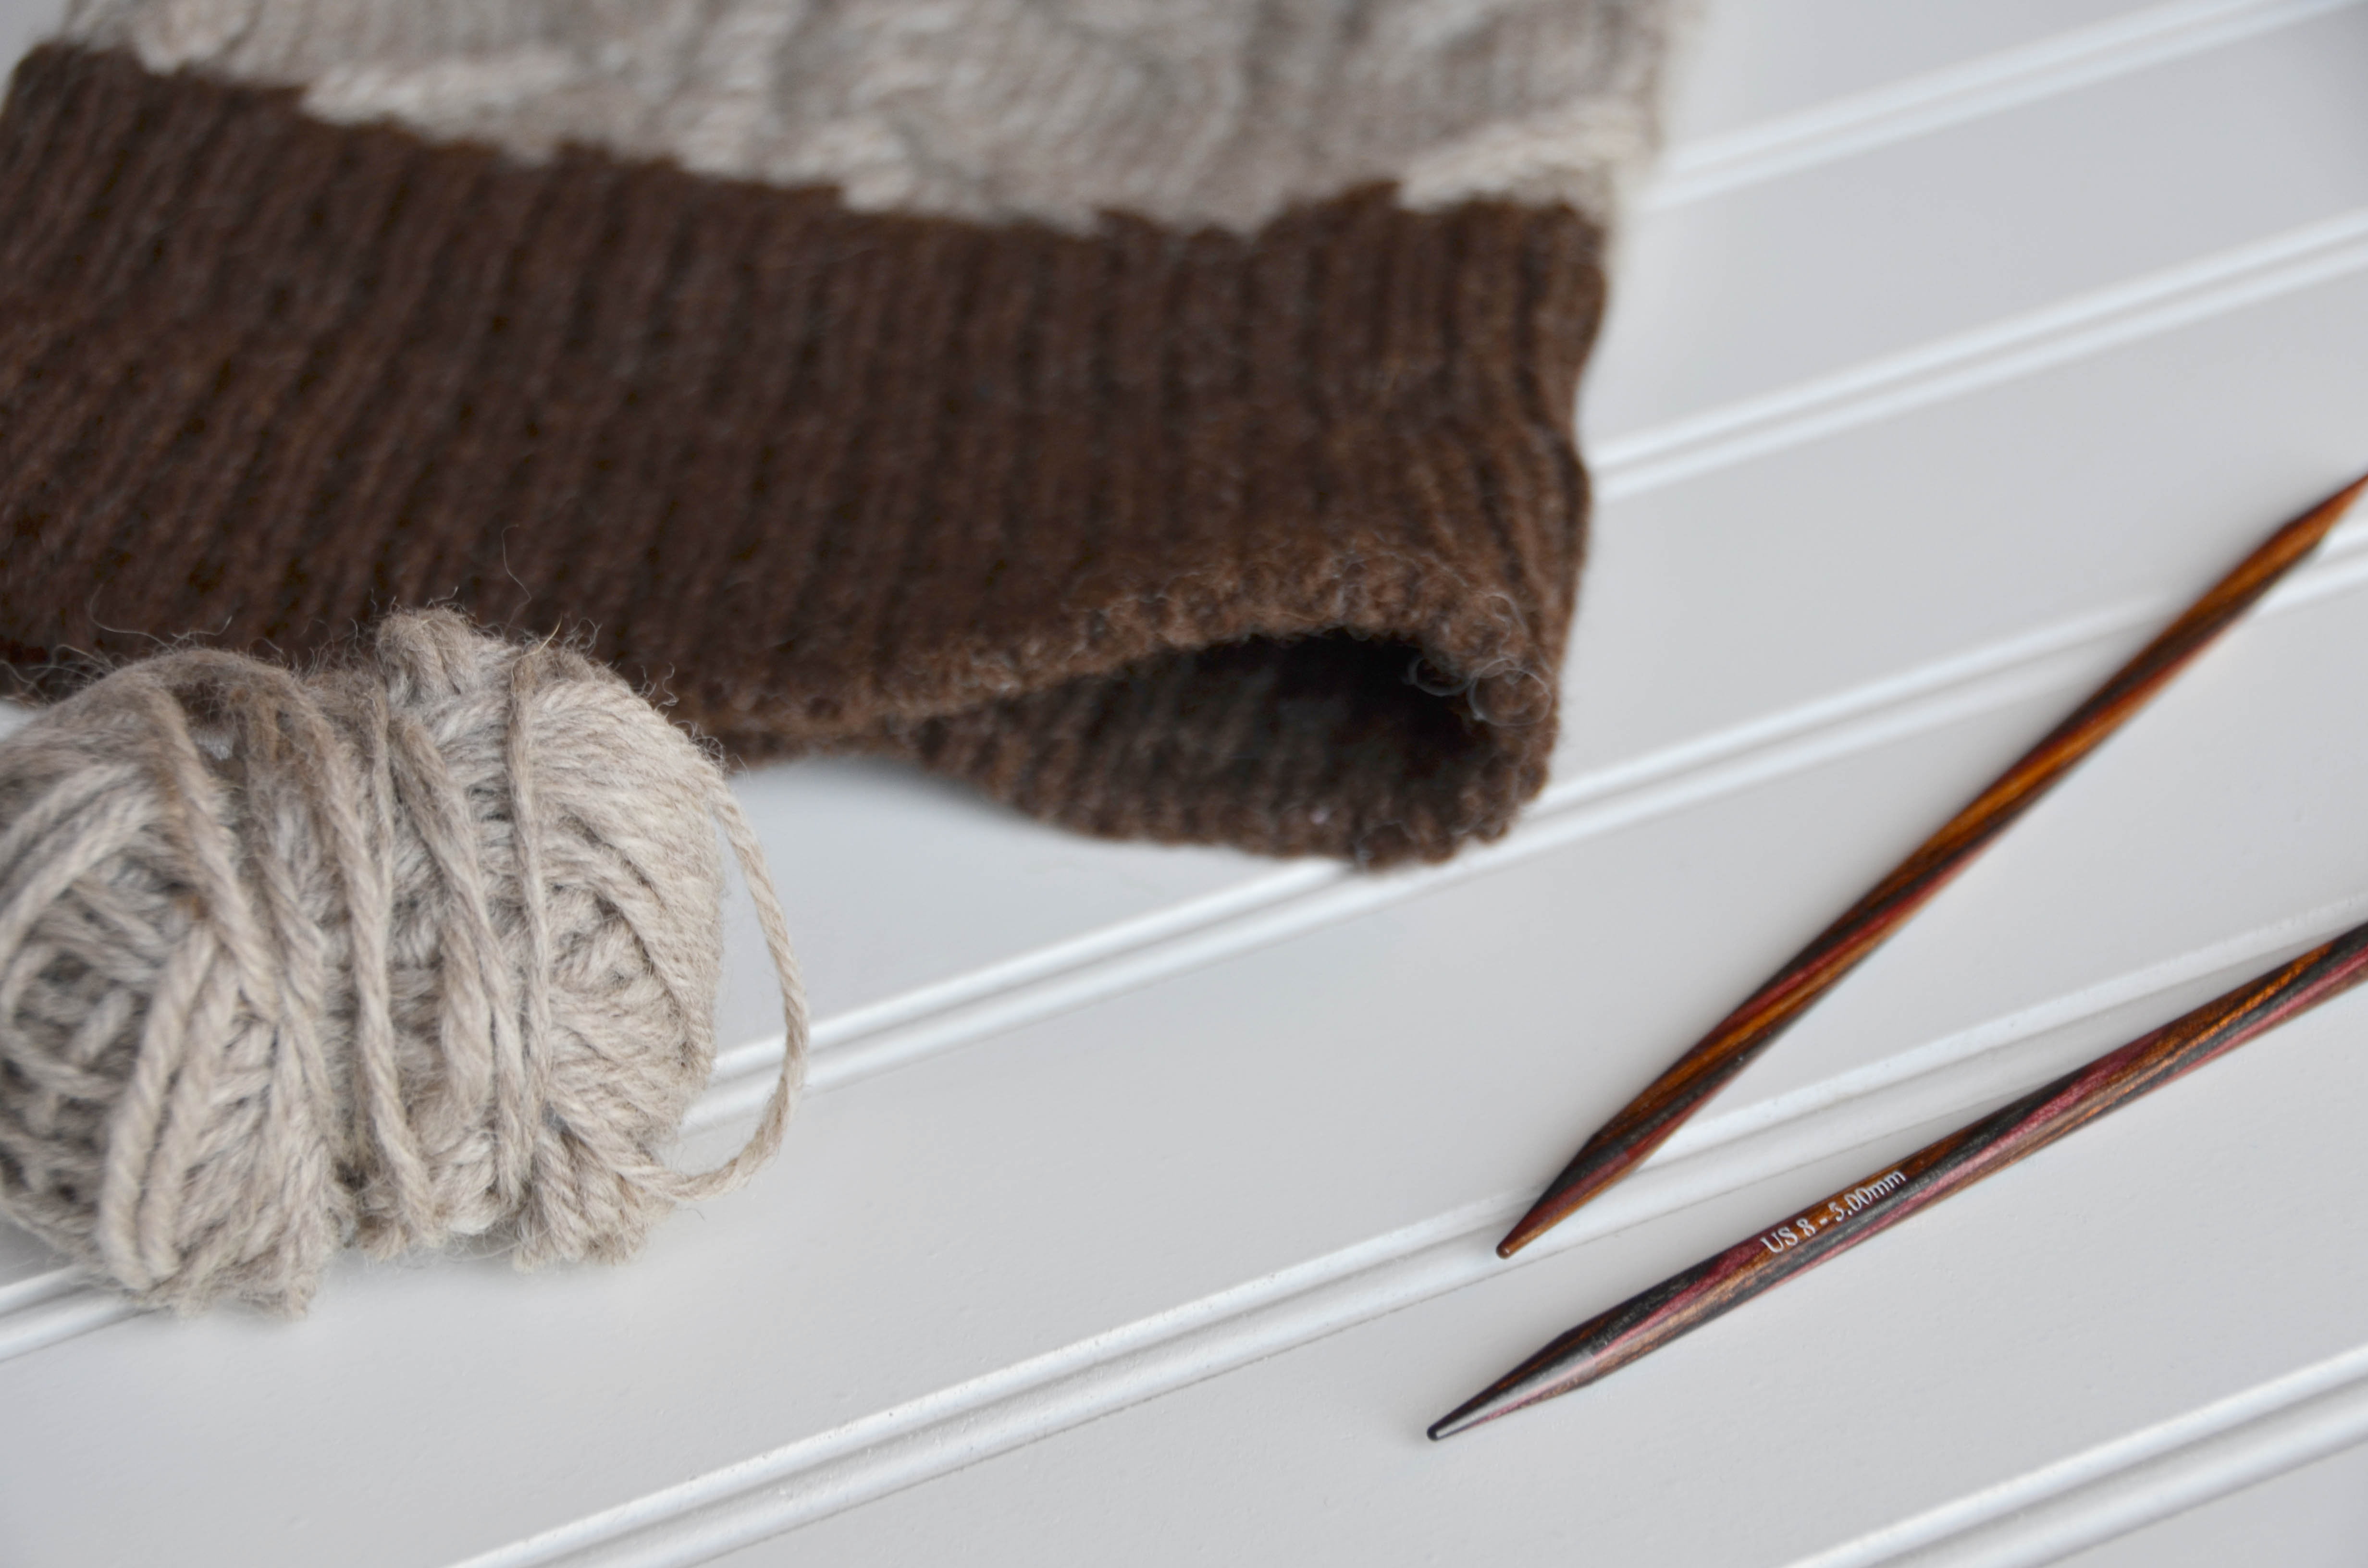
I can easily recall a time when I felt intimidated by the Tubular cast-on method. Like many things in knitting (and in life), we often perceive new things to be more challenging than they really are. This cast-on method is one of those things. If you look at the Nutmeg set, you’ll notice that the 1×1 Ribbing seems to run seamlessly from the right side to the wrong side. Notice the lack of a cast-on edge in the photo below. You can’t tell where it was cast-on. That is the beauty of a tubular cast-on.
It takes more time than most other methods and it feels a bit fiddly at first, but it’s well worth it. It’s by far my favorite method when I’m using 1×1 Rib.
If you’d like a closer look at each photo, simply click it.
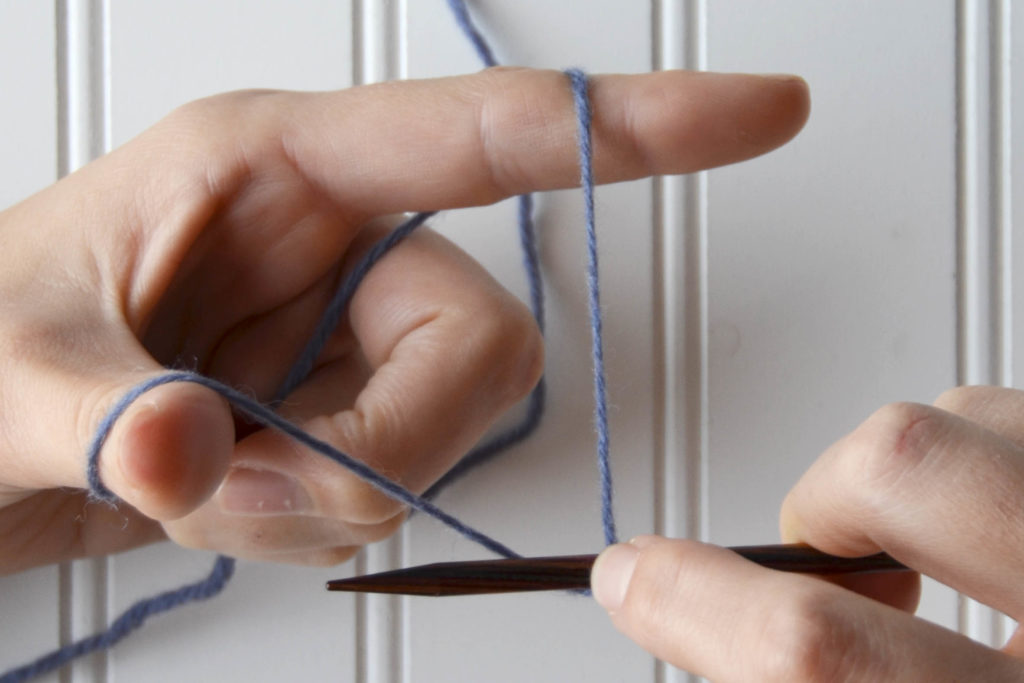
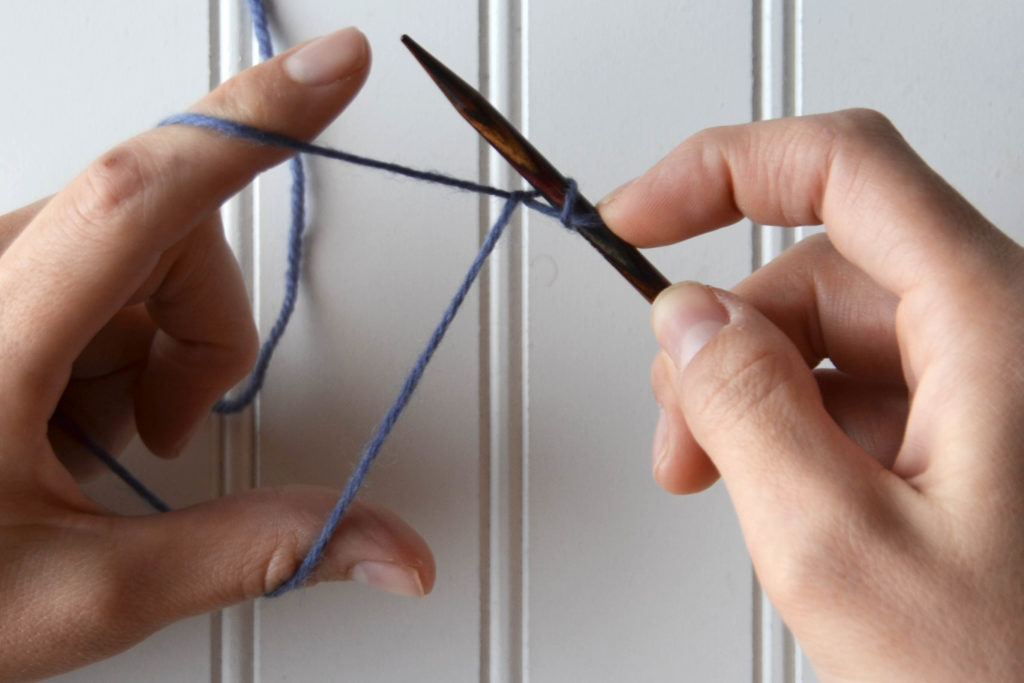
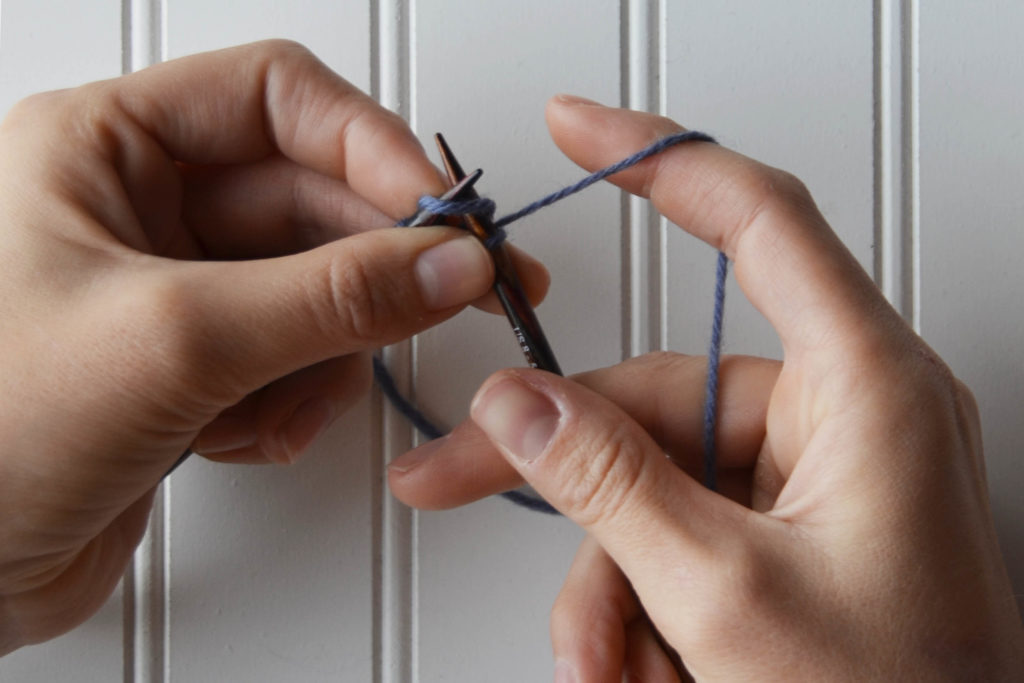
To begin, place your yarn over the needle, leave a long tail as you would with a traditional long-tail cast on. You can use a slip knot, however; I do not so that the cast-on stitches are as invisible as possible.
Hold your yarn in place with your index finger.
Separate your tail and working yarn with your thumb and your index finger. You’ll do the same way you would for a regular long-tail cast-on.
Notice that I’m tensioning my yarn the same way that I would for a regular long-tail cast on.
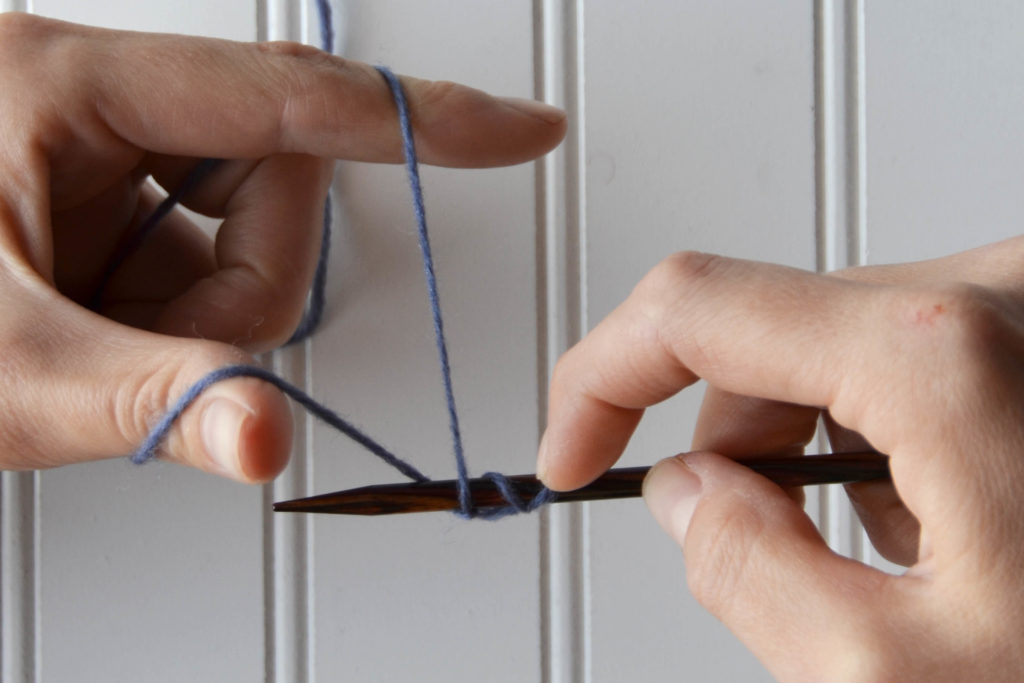
Working from front to back, bring your needle under the yarn around your thumb.
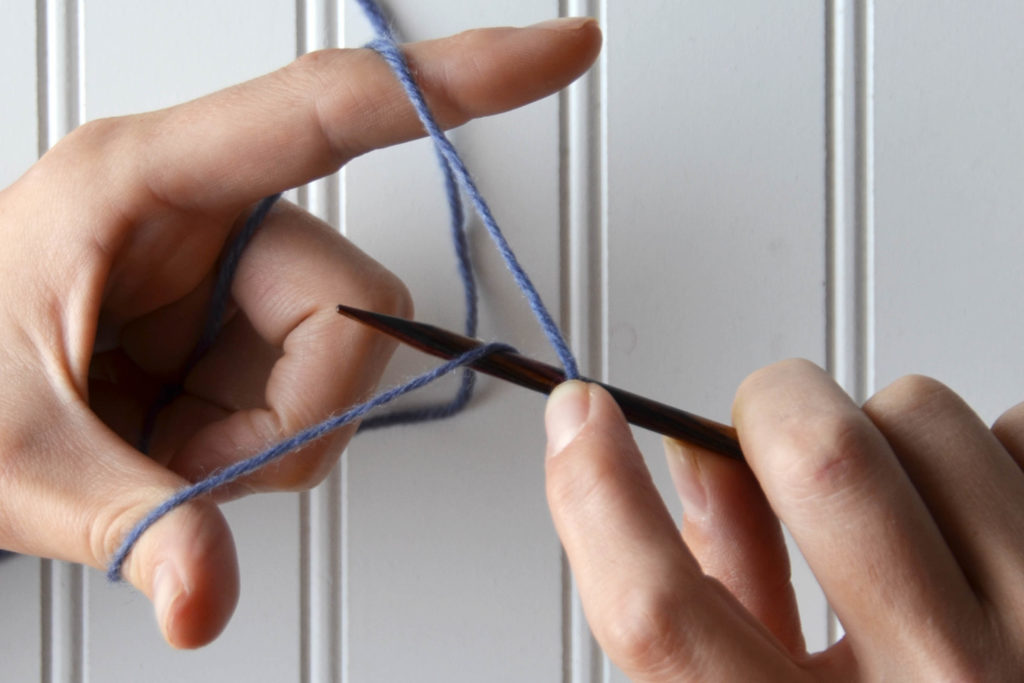
Bring the needle up through the center.
Working from front to back, bring the needle over the yarn around your index finger and dip underneath it, then underneath the yarn around your thumb.
Correct the tension in your yarn. You now have two stitches. Notice how there is not a bump across that stitch? This will be a knit stitch.
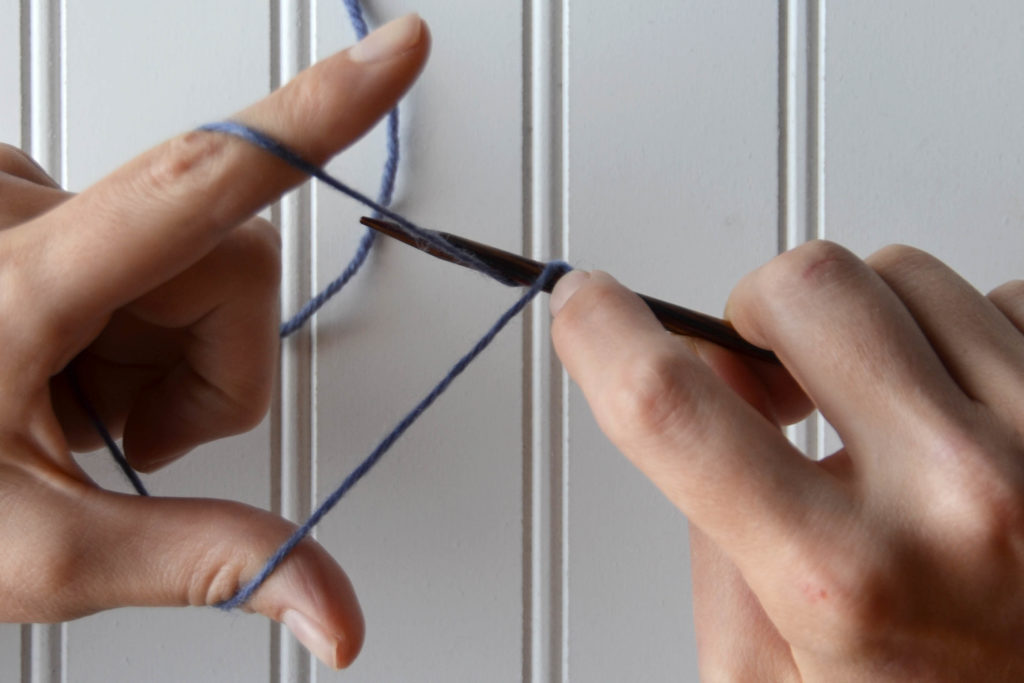
The motion for a purl stitch mirrors the knit stitch.
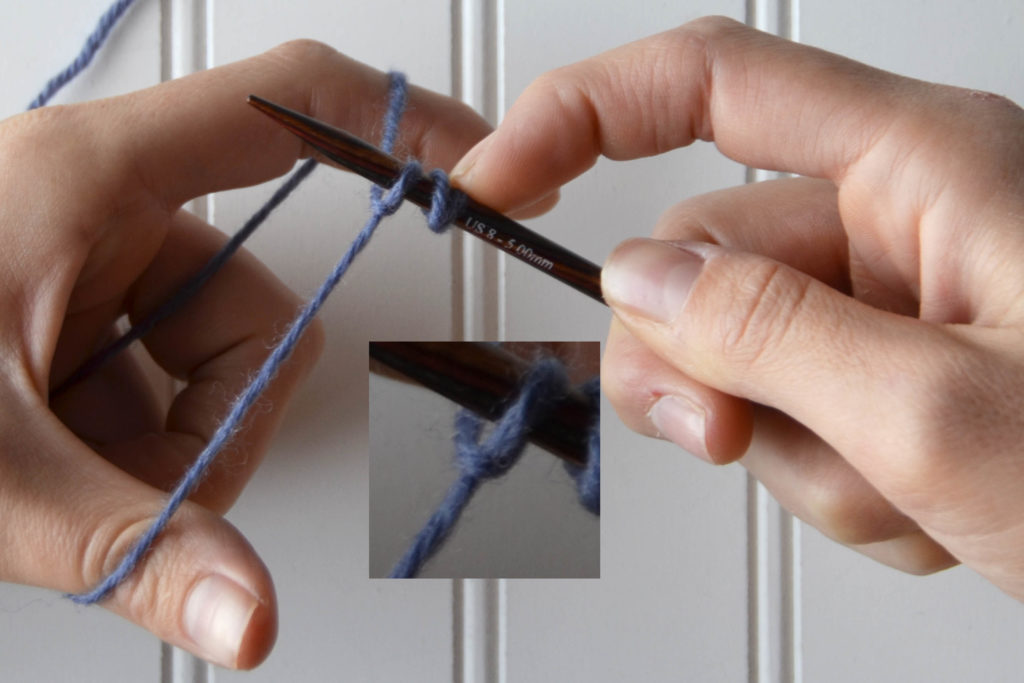
Working from front to back, bring the needle over the yarn around your index finger, dipping below it and bringing the needle back through the center.
Working from back to front, bring the needle over the yarn around your thumb, dipping below it and then below the yarn around your index finger.
Correct your tension. Notice that this stitch has a purl bump. This is a purl stitch.
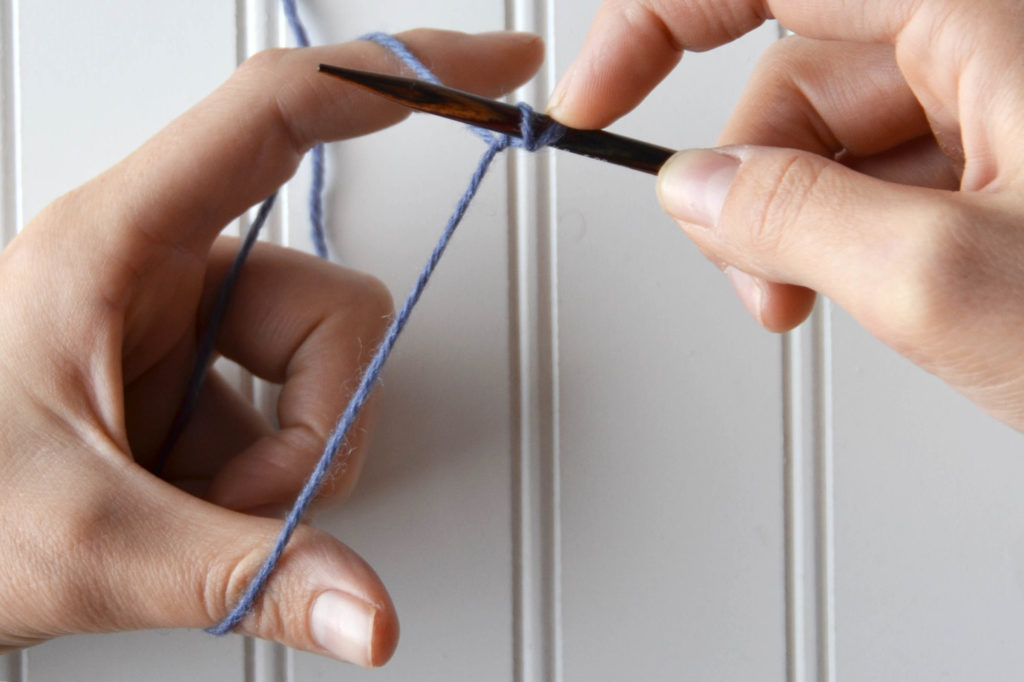
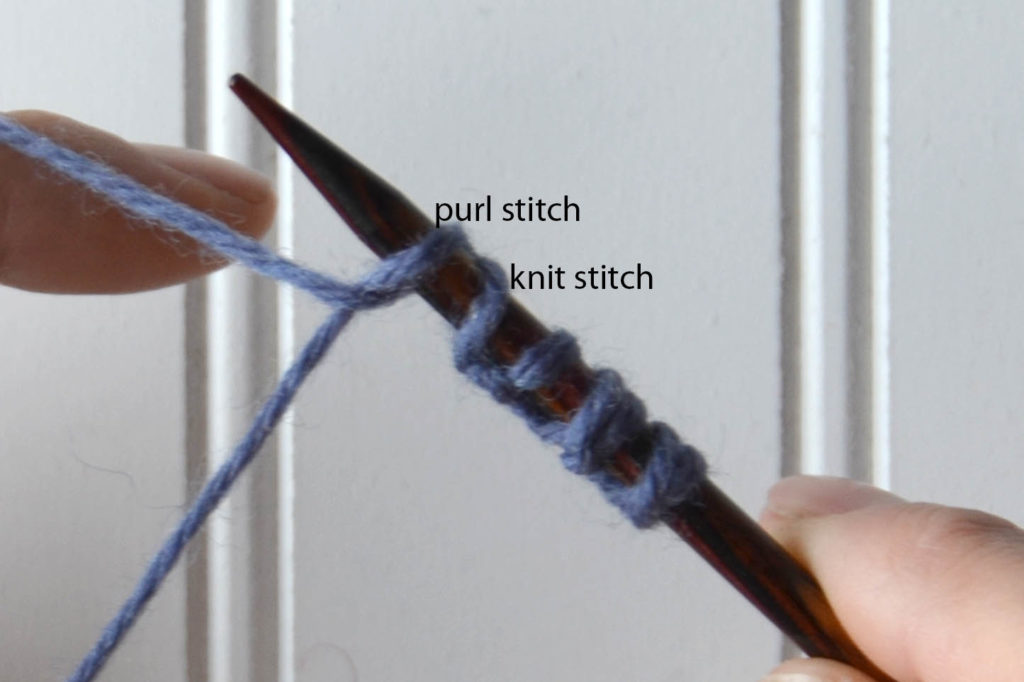
Continue in this manner, alternating between knit and purl stitches until you have the required number of stitches.
Notice the difference between the knit stitches and the purl stitches.
Once you have the correct number of stitches, carefully turn your work. I highly recommend using your index finger to hold the last stitch you cast on in place. Now you’ll begin working the first foundation row.
Once you’ve turned your work, grab your working yarn and slip the first stitch purlwise with your yarn in front.
Bring your yarn to the back.
Knit the next stitch through the back loop. This will untwist the knit stitch.
Continue to slip the purl stitches with your yarn in front and knit the knit stitches through the back loop to the end of your work. Turn your work. Now you’ll begin the second foundation row.
Just as in the previous row, slip the purl stitches purlwise with yarn in front.
Knit the knit stitches normally–there is no need to knit them through the back loop because these stitches should no longer be twisted.
Repeat the last two steps to the end of the row
On the next row, simply work in K1, P1 ribbing by purling the purl stitches and knitting the knit stitches.
This is what your finished cast on should look like.
Once you’ve finished casting on, you can join your work in the round (as would be the case for the Nutmeg Hat and Mitten Set). There will be a small space you’ll want to seam. Typically I do this just before weaving my tail into the project.
This method works for projects that are knit flat or in the round. It gives your projects such a neat finish. It’s also much more stretchy than a traditional long tail cast-on.
You can find the link to the Nutmeg Hat and Mitten set here.
Though there are some traditional 2×2 cable panels in both hat and scarf, most of the crossed stitches are actually twisted stitches. Right and left twist stitches are a way of crossing stitches that doesn’t require a cable needle. And with just a bit of confidence, 2×2 cables can be crossed without a needle, as well.
I love love love twisted stitches and use them frequently in designs. Through the magic of (simple) needle acrobatics, a lovely texture can be made across your knit fabric. These types of stitches were used a few years ago in our Uptown Afghan Knitalong. Here is the video showing how to do right and left twists.
Remember, each of our 12 Days of Winter projects come packaged in a very giftable bag tied with ribbon. So if you’re shopping for one of your knitting buddies, these might just fit the bill.
I have no plans of taking this off any time soon. It’s freezing in our office!