Bamboo Pop Accessories Inspiration

Have you have seen our new Bamboo Pop Accessories eBook?


Part of the idea behind these patterns was to help keep your knitting and crochet mojo going strong through the warmer months…any project from this collection would be perfect for working on poolside. It was such a blast designing this collection. I was inspired in part by all the colorful, tropical knitwear being shown by many designers in their 2017 Resort collections and a recent trip to Hawaii helped provide the names for the designs.

The bright colors and fiber content of Bamboo Pop are perfect for creating knit and crochet items that wear well throughout the spring and summer. Bamboo Pop makes these projects soft and cool against your skin, great for those days of going in and out of overly air conditioned buildings.

Anuenue Sampler: The Hawaiian word for rainbow is a perfect fit for this scarf. As a sporadic crocheter, I love working on projects where I get to try out a bunch of different stitches and techniques, so I knew my first crochet design had to be a sampler. This design also is perfect for anyone, who like me, has difficultly choosing just one color! Different colors, stitches and edging will keep you entertained.

Awapuhi: Named for wild Hawaiian ginger, the plaited stripe pattern mimics the texture of the flowers which start out white and then turn red as they mature. White and Lily Pad blend beautifully in the textured stripes, adding additional dimension, with the bright pops of Lime Green for the ribbing. This scarf will go perfectly with summer outfits, taking you from breezy walks on the beach to dinner and drinks!

Kukui: Hawaiians extracted oil from the kukui nut and burned it in a lamp called kukui hele po, which means “light, darkness goes.” This shawl transitions from light to dark with bands of White, Silken and Black divided with bands worked in a slip stitch pattern using all three colors. To create the asymmetric shape, you’ll begin at the smallest point with just a few stitches increasing gradually to the widest edge. The elongated shape is easy to wear in many different ways.

Lilikoi: Also known as passionfruit – from its gorgeous flower to delicious fruit, I could not get enough lilikoi when I went to Hawaii! This shawlette creates a fun blend of solid and variegated colors with a slip stitch pattern that helps mix the colors between sections. Garter stitch makes for a lovely, squishy fabric and also makes the knitting a breeze. The shape is a shallow triangle, in a size that is perfect for draping around your neck kerchief style.

Philodendron: Fun, bright and just a little quirky. Philodendrons are having a bit of a moment right now – from knit, fabric and print versions to real fronds showing up in home décor. The cowl is worked with a combination of a striped background and instarsia fronds, creating a wonderful statement piece for your warm weather wardrobe.

Plumeria: Plumeria are also known as the “Lei flower,” sure this cowl is a little more substantial than a lei, but you still get flowers draped around your neck! Stranded knitting is usually reserved for winter projects and I thought it would be fun to incorporate that into a warm weather project. A brighter color palette and a combination of floral and wave designs make this stranded project summer ready.

Tiny Bubbles: These tiny bubbles will make you feel fine! This scarf is a fun way to combine a solid and variegated color, or if you like, you could make each row of bubbles a different color. The bubbles are created by stripes and dropped stitches, not stranded knitting, so you are only working with one color at a time. This is another great piece to work on, wear, and add a little Pop to the warm season.

I hope you enjoyed taking a little peek behind the scenes and learning a bit about the collection and the inspiration behind it! What projects are you planning to make with Bamboo Pop?

Color Pooling, Ocean Style

Last year, I wove a scarf utilizing the variegated effects of Bamboo Pop. You can find that post and all of my warping and weaving photos here.

This is the first version of the color pool scarf.

For my second go at this scarf, I decided to try one of our tonal multis in Bamboo Pop. I chose 205 Brilliant Blues + 120 Graphite for the warp. I wove with Whisper Lace 104 Fog as weft. This project takes just one ball of each color for a substantially sized scarf.

So soothing.

This blue-gray version is a more understated look than the original. I was hoping to show that this fun technique can be used to achieve more or less impact – it’s all about contrast.

I love the twisted fringe finish with hemstitching. It’s so tidy!

You can see both scarves in person at Stitches United next month. Stitches United is a new kind of multi-craft stitches. In addition to knit, crochet, and yarn, there will also be sewing, weaving, beading, and a lot more! If you’re in the Hartford, CT area at the end of April, you should definitely check it out.

See you next time here on the blog with more fun weaving!

Check out our knockers!

Greetings from Stitches Texas!  We’re having a blast in booth 517, talking to crafters and, okay, maybe doing a little shopping of our own.

However, we want to share something else with you.  While we’re at Stitches Texas, we’re showing our knockers to the world!

knockers-sign

We speak, of course, of knitted knockers, which we made to support knittedknockers.org.  It’s a great organization dedicated to providing knitted prostheses to women who have lost a breast to cancer.  For this contest, each vote is one dollar, with proceeds benefitting the organization.  It’s a creative way to help people in need.

We entered two pairs in the contest.

knockers-on-sign

First, Sparkle Nation!  Designed by Amy Gunderson, these use our 10th anniversary yarn, Universe.  There’s a “best branding” category, so we made sure to brand these knockers.

Not that kind of branding.

Sparkle Boobs!

Amy put a little “UY” at the base.  We love these fancy sparkly numbers.  Frankly, we’d put our knockers up against anybody else’s any day of the week.

But those aren’t the only pair we’ve got on display!

knockers-in-lingerie-on-sign

Designer Tori Gurbisz is new to our team, but has instantly fit right in with the Universal family.  She designed a pair in Bamboo Pop, complete with frilly Whisper Lace lingerie.

Ooh La La!

Tori used her pair to make the point that every woman deserves to feel beautiful.  The ribboned lace is symbolic of that.

If you’re at Stitches Texas and feel like judging peoples’ knockers, go by the wall and see what’s front and center.  Our knockers could always use support, but however you vote, it’s all for a good cause. There are some truly bodacious entries and more than a handful really stand out and demand attention.

If you’re interested in helping, visit http://www.knittedknockers.org for patterns and more.

Happy knitting!

Color Pooling: Finishing with Twisted Fringe

Last time on Weaving Wednesday, I showed you how I warped for my Bamboo Pop color pool scarf. Over the last couple of weeks, I had a chance to do the actual weaving which went incredibly fast.

Weaving_1

After weaving a few picks with scrap yarn, I did a bit of hemstitching with my weft yarn, Whisper Lace.  I left a good 12″ before beginning this in order to have long enough ends to do my fringe. I did a simple plain weave throughout the entire scarf, beating with a light hand to give my finished scarf nice drape.

Weaving_2

This scarf was a joy to weave. The motions and weaving were simple and the colors a delight to watch. Each time I advance the warp and a new section of color came into view, it gave me a little lift.

Fringe_1

After hemstitching at the end of my scarf, I cut it free, leaving the beginning end still attached to the loom. I then trimmed all the fringe evenly, to about 11″.

Fringe is the easy and obvious way to go when ending a scarf. It eliminates the need for a hem. Fringe also adds a nice little bit of heft, allowing a scarf to hang nicely. An easy way to spruce up your fringe is to make it twisted. I’ve done this by hand before on a few projects, but it’s tedious and I don’t enjoy doing it. This time around, I decided to splurge and bought myself a battery operated fringe twister. Sometimes, you just need the right tool for the job.

See the two little prongs jutting out from the top of my tool? The item actually came with 4 prongs, but I removed 2 of them for this project.

Fringe_2

Each of my stripe sections of the scarf is comprised of 8 strands. I’m making 2 twisted fringes for each stripe, so each fringe is made up of 4 strands. To use my fringe tool, I attached 2 strands to each prong.

Fringe_3

I didn’t get a good photo of this step, but those little metal pieces in the top of the prongs will extend, grabbing onto the yarn, and then retract back down.

Fringe_4

Next, I push the button on my tool into position 1, which twists each strand independently. To get consistent twist on all my fringe, I counted to 30, (sort of in rhythm to the noise of the tool) as the tool was spinning.

Fringe_5

Once the strands are nice and twisty, I push my button down into position 2. This rotates the entire top of my tool in the opposite direction than the prongs rotated, twisting the strands around each other. During this step, I found that counting to 20 made a perfect balance of countertwist.

Fringe_6

Then, release the ends of the yarn from the metal prongs and tie in an overhand knot. The twist stays twisted!

Fringe_7

After I made all the twisted fringe on the final end of my scarf, I cut the beginning end from the loom. To keep this end of my scarf from moving around, I just set a heavy book on top.

Fringe_8

After handwashing and laying flat to dry, I had myself a very colorful scarf!

Pooling-Scarf-Flat-1

My finished scarf, before fringe is 62″, and is about 78 ” with fringe. With one ball of each color of Bamboo Pop and 1 ball of Whisper Lace, I could have gone about 20-30% long if I had wanted.

Pooling-Scarf-2 Pooling-Scarf-3

I’m extremely happy with how this scarf turned out. It’s quite lightweight with amazing drape. It’s so very wearable. I could envision this in many different color combinations of our Bamboo Pop.

Join me next time for a lace weaving adventure with our anniversary namesake yarn, Universe!


Color Pooling: I Meant to Do It!

Have you ever heard of color pooling in the worlds of knitting, crocheting, or weaving? Briefly, color pooling is when a patterned yarn “pools” in particular colors sections. This pooling may or may not be intentional. It is very common to see unintentional pooling in variegated-type yarns, where the color repeats are very short.

An example of unintentional color pooling that looks really cool can be seen on the front our Siren Sweater, knit in Infusion Handpaints.

Infusion Sideways Yoke Pullover_front_blog

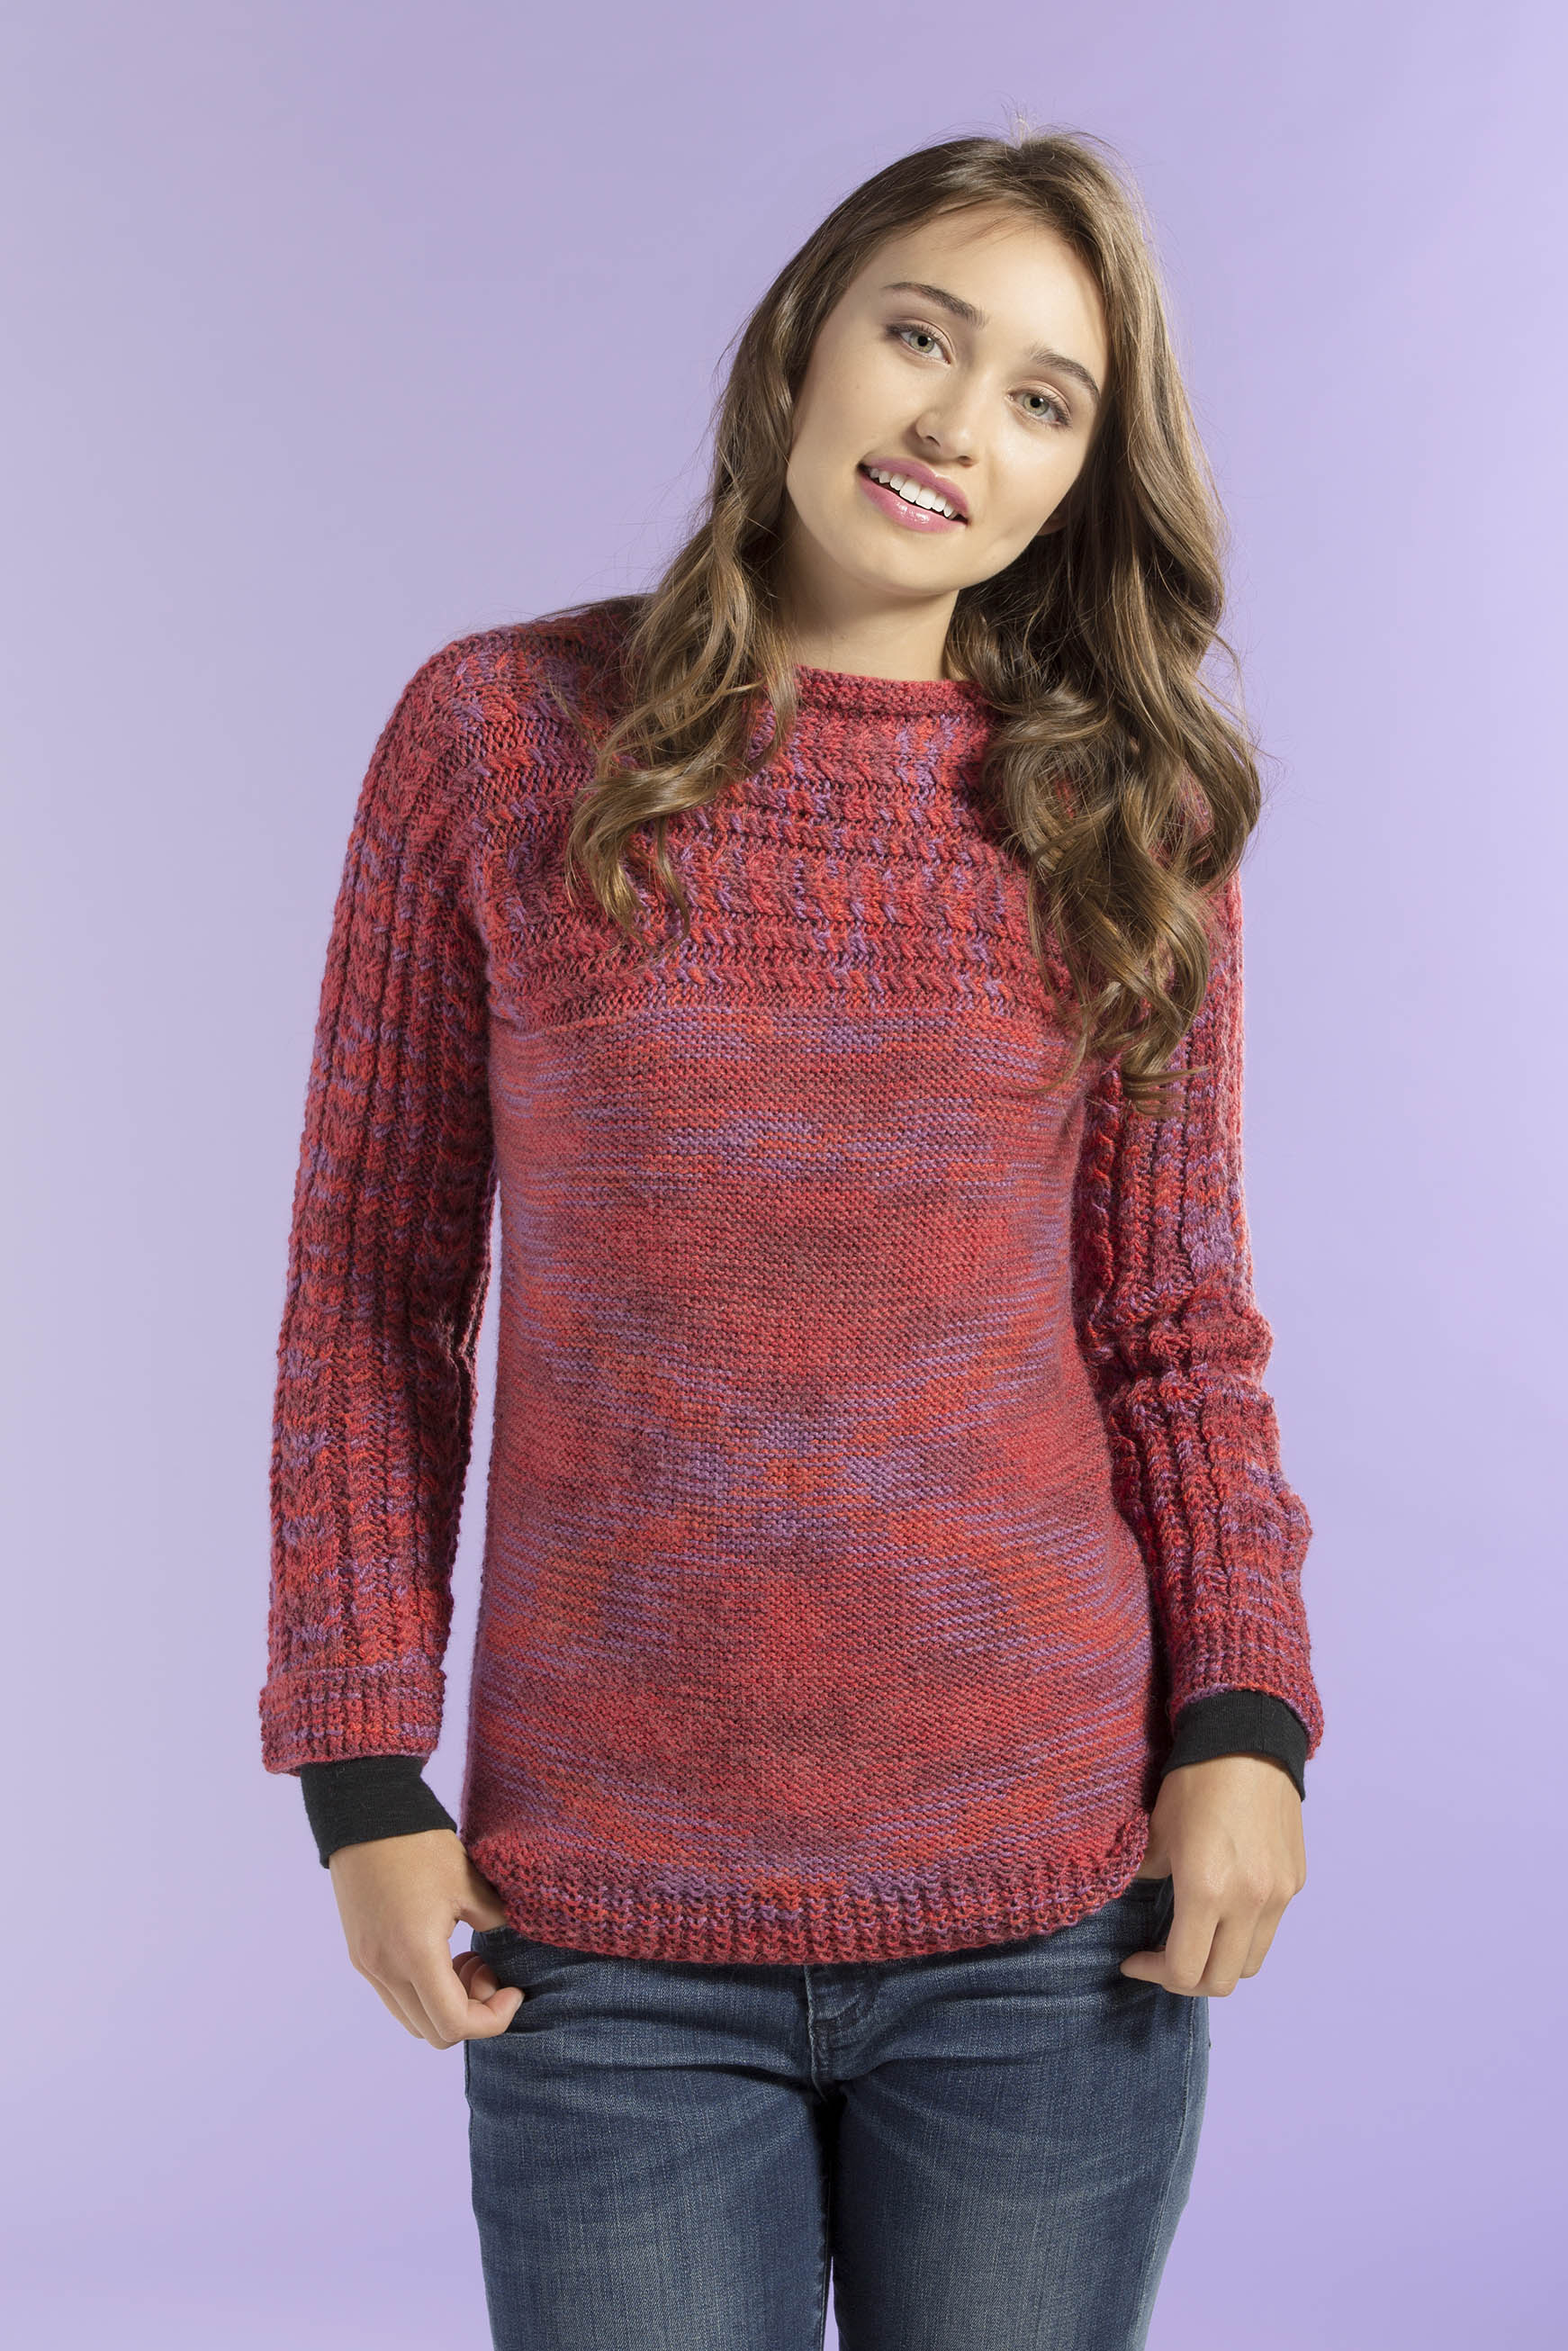
See the argyle thing going on there? Though unintentional in this sweater, it is very possible to intend to make argyle from a yarn like this.

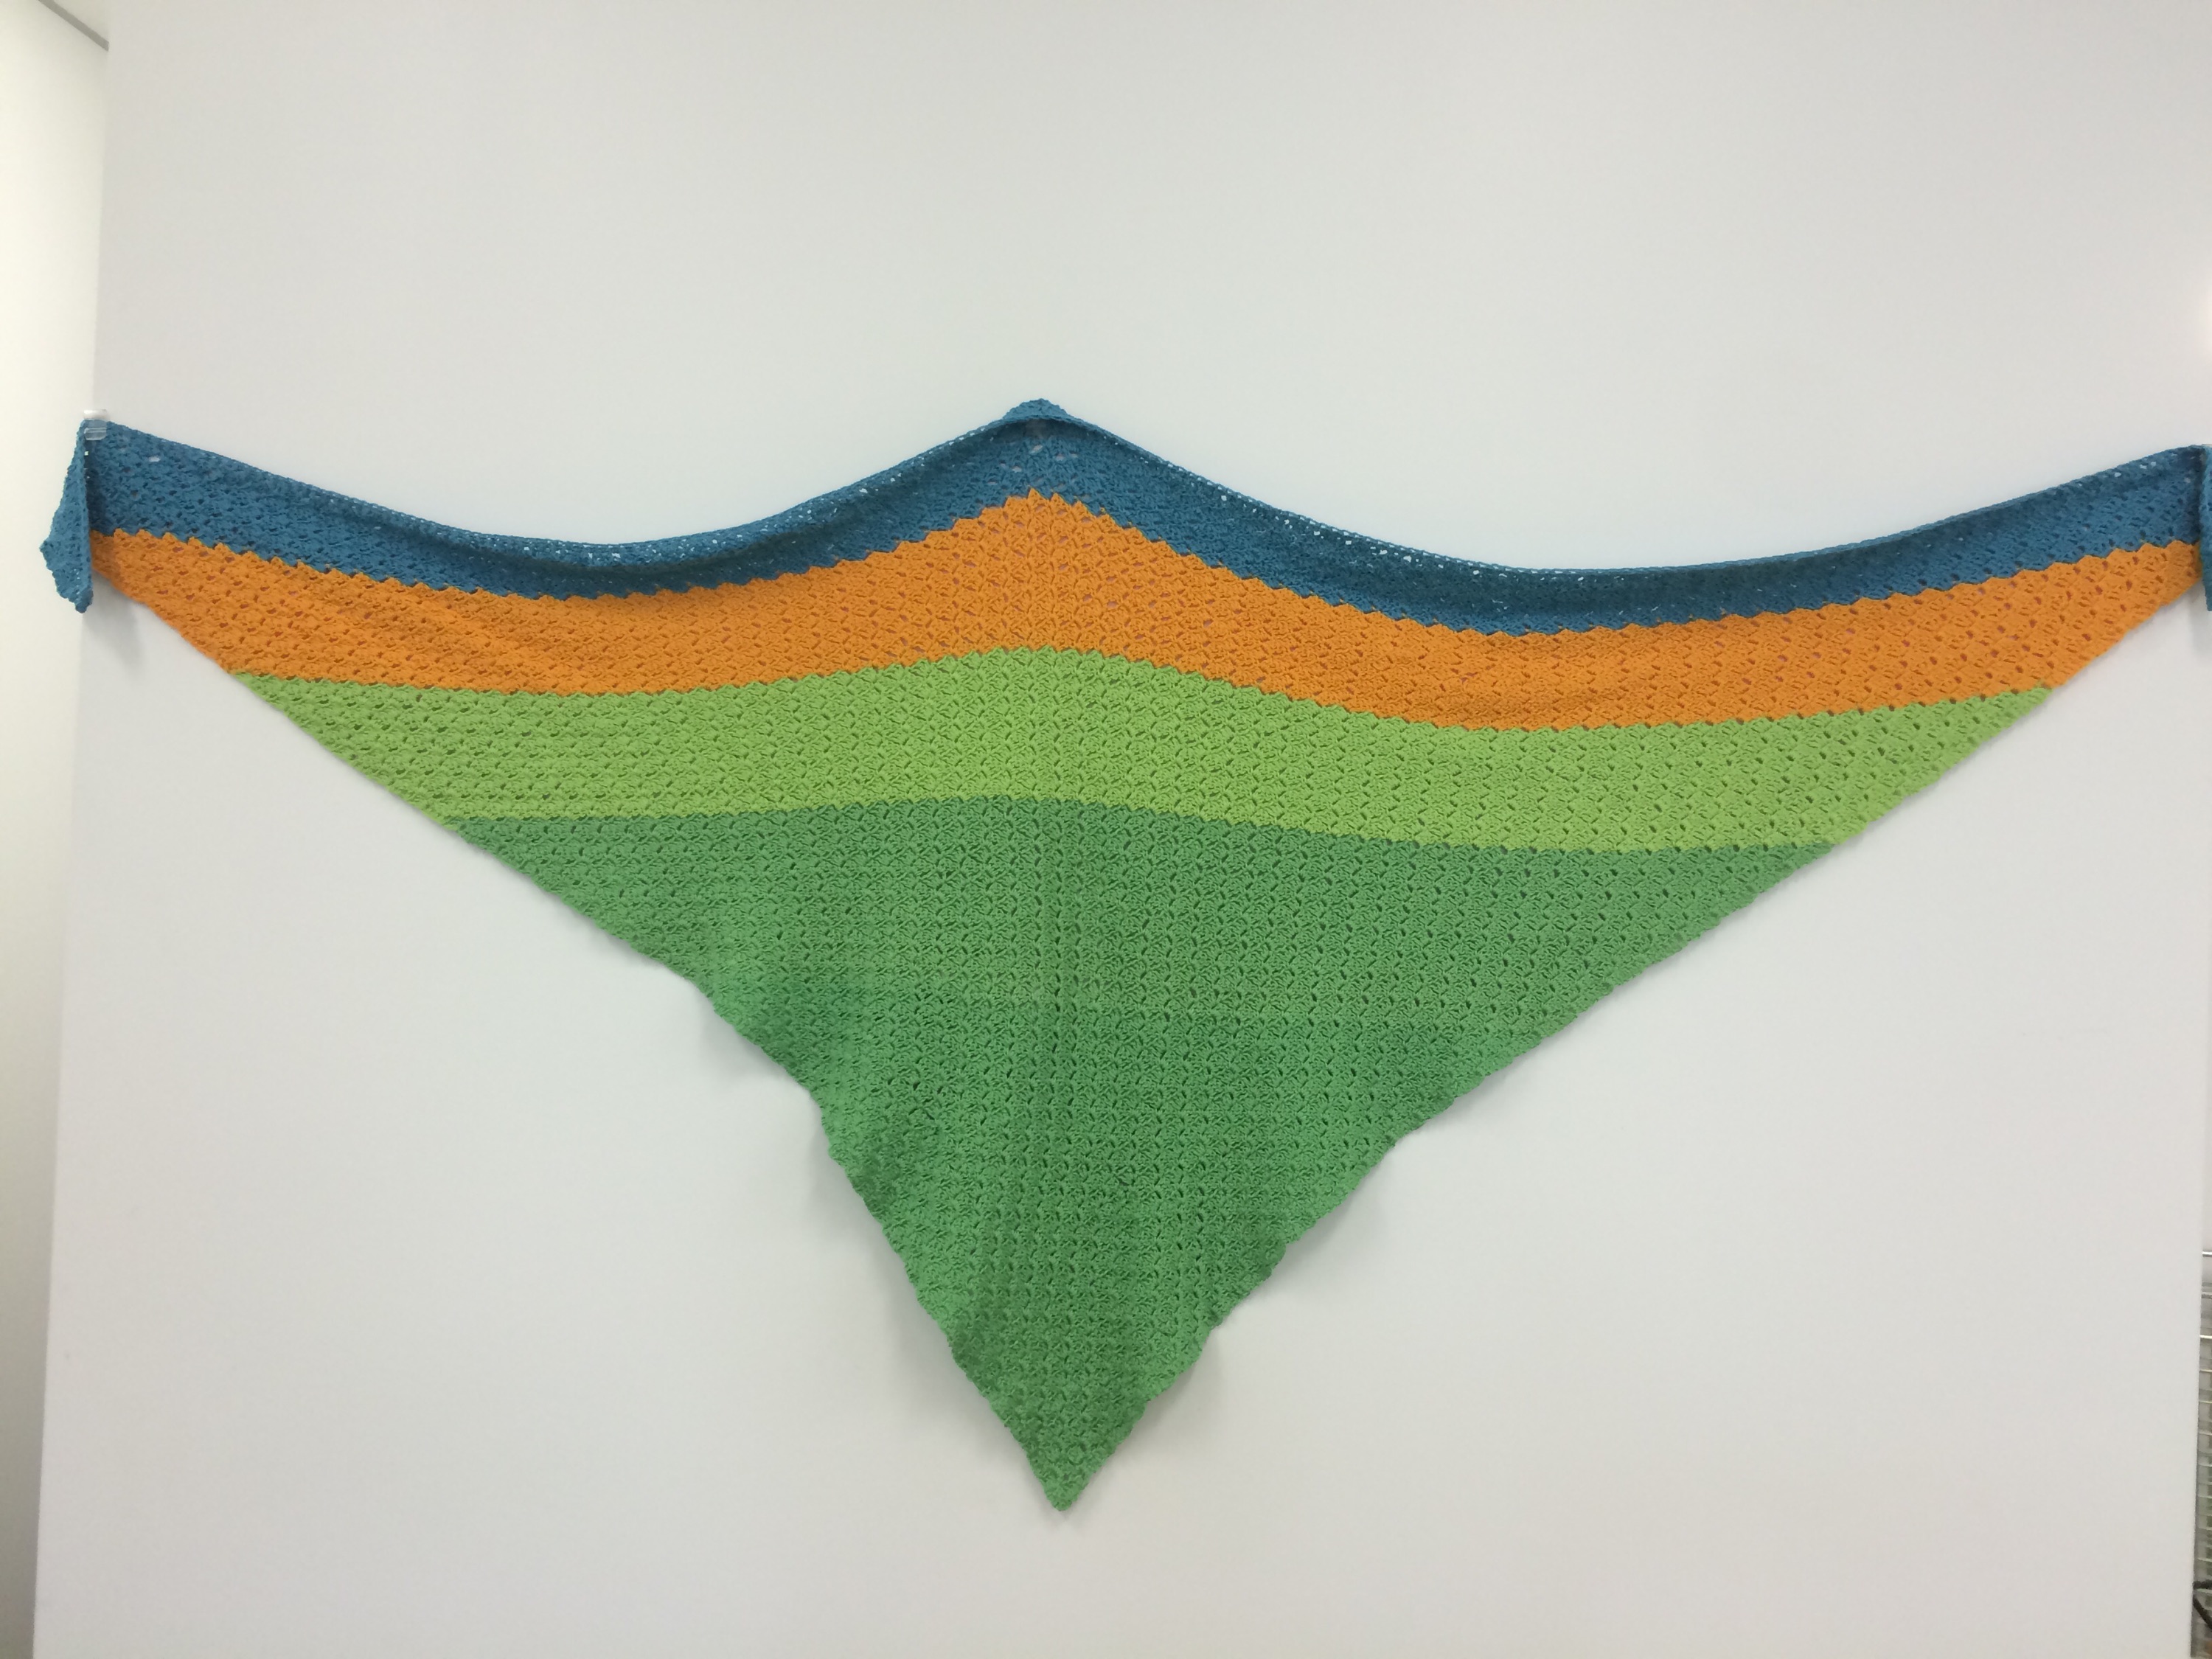
Even printed yarns with longer color repeats can be intentionally pooled. A good example of this is the Pennant Scarf, designed by Erin McKenna Halsey for our Uptown Worsted Spirit Stripes yarn. (You can find a crochet version of this scarf here)

Again, we see an argyle pattern form. The reason for this pattern, my dear friends? Math! By knowing how long each color repeat is and how much yarn a stitch consumes, it is possible to figure out how to make your patterned yarn do amazing things!

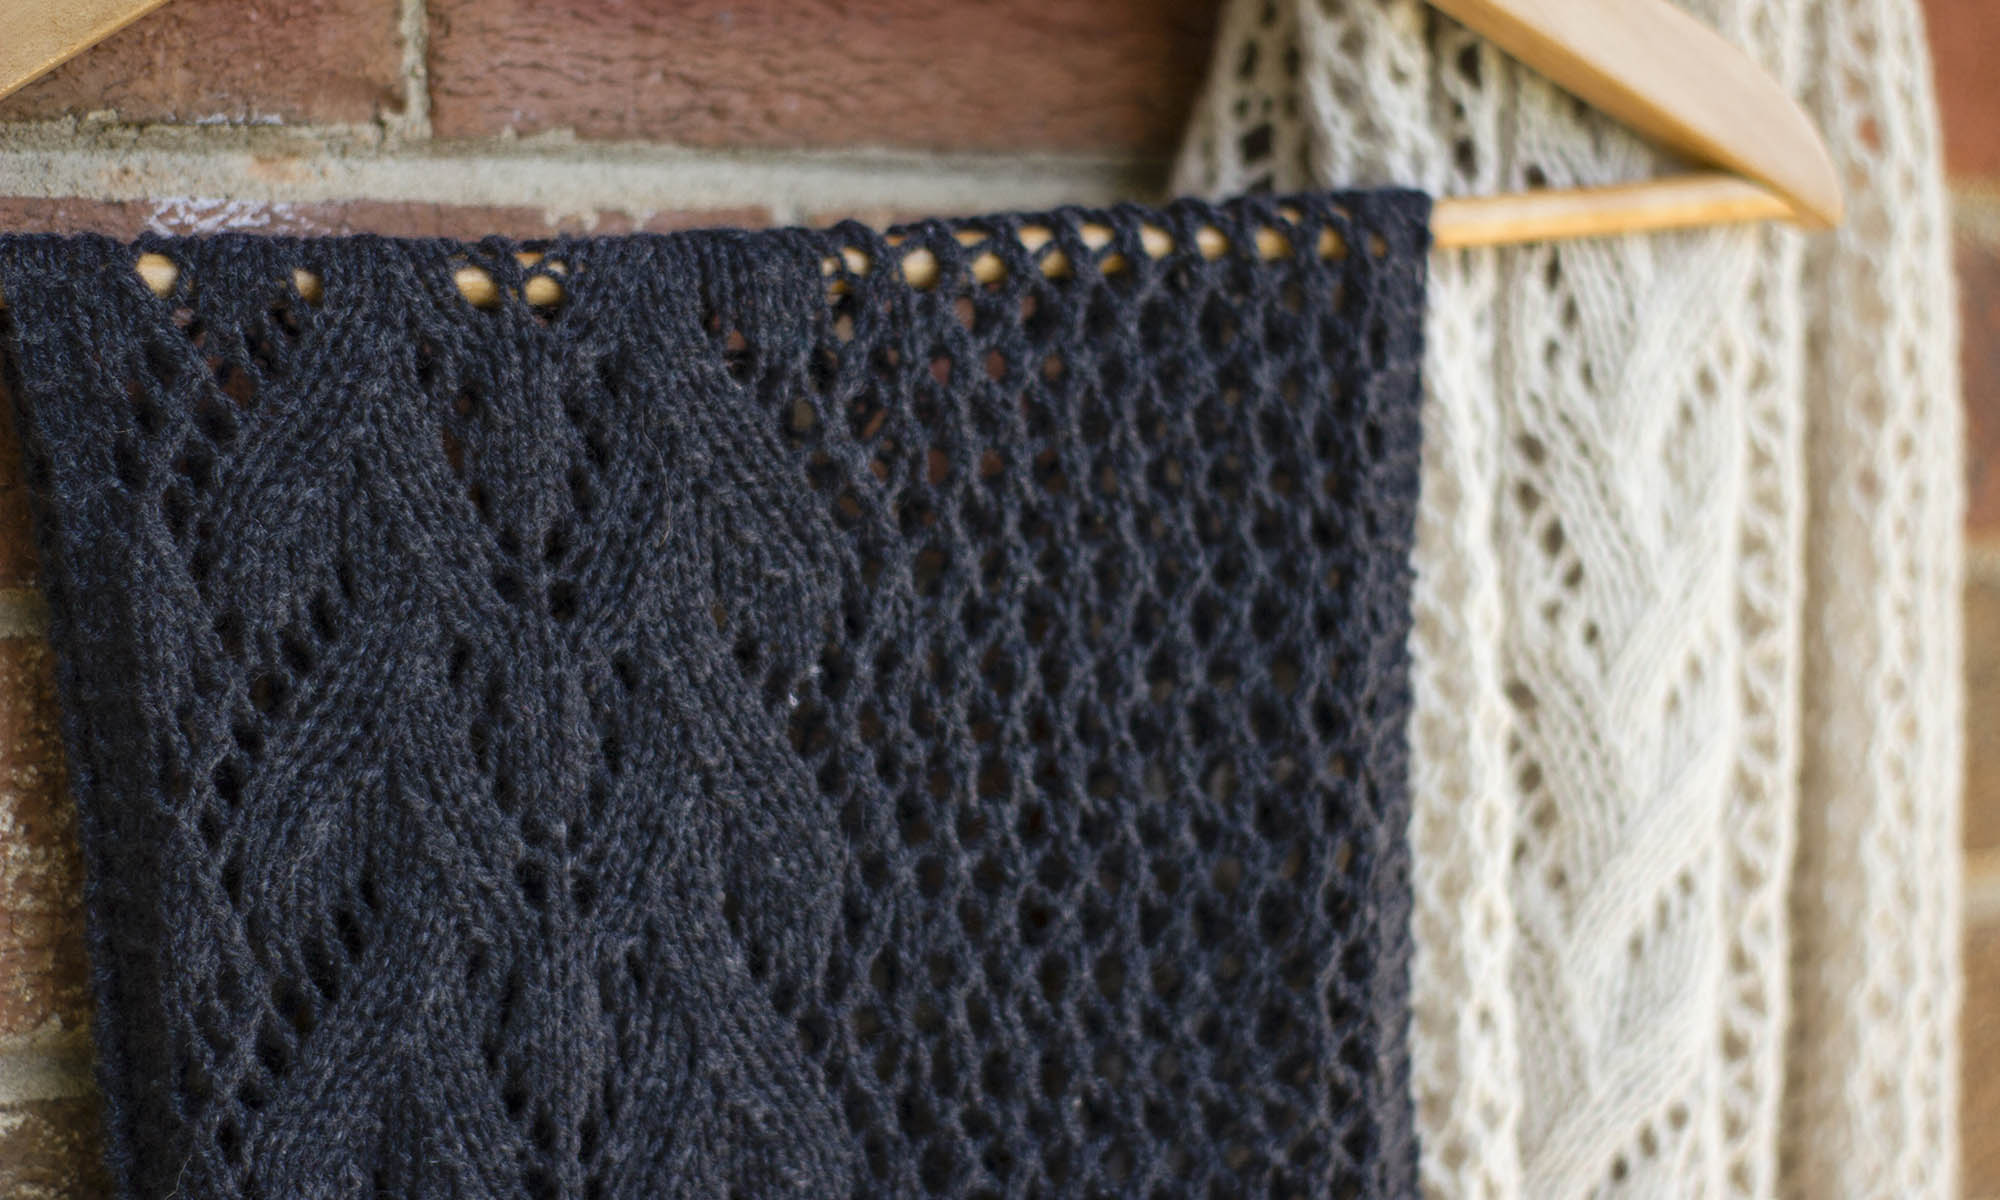
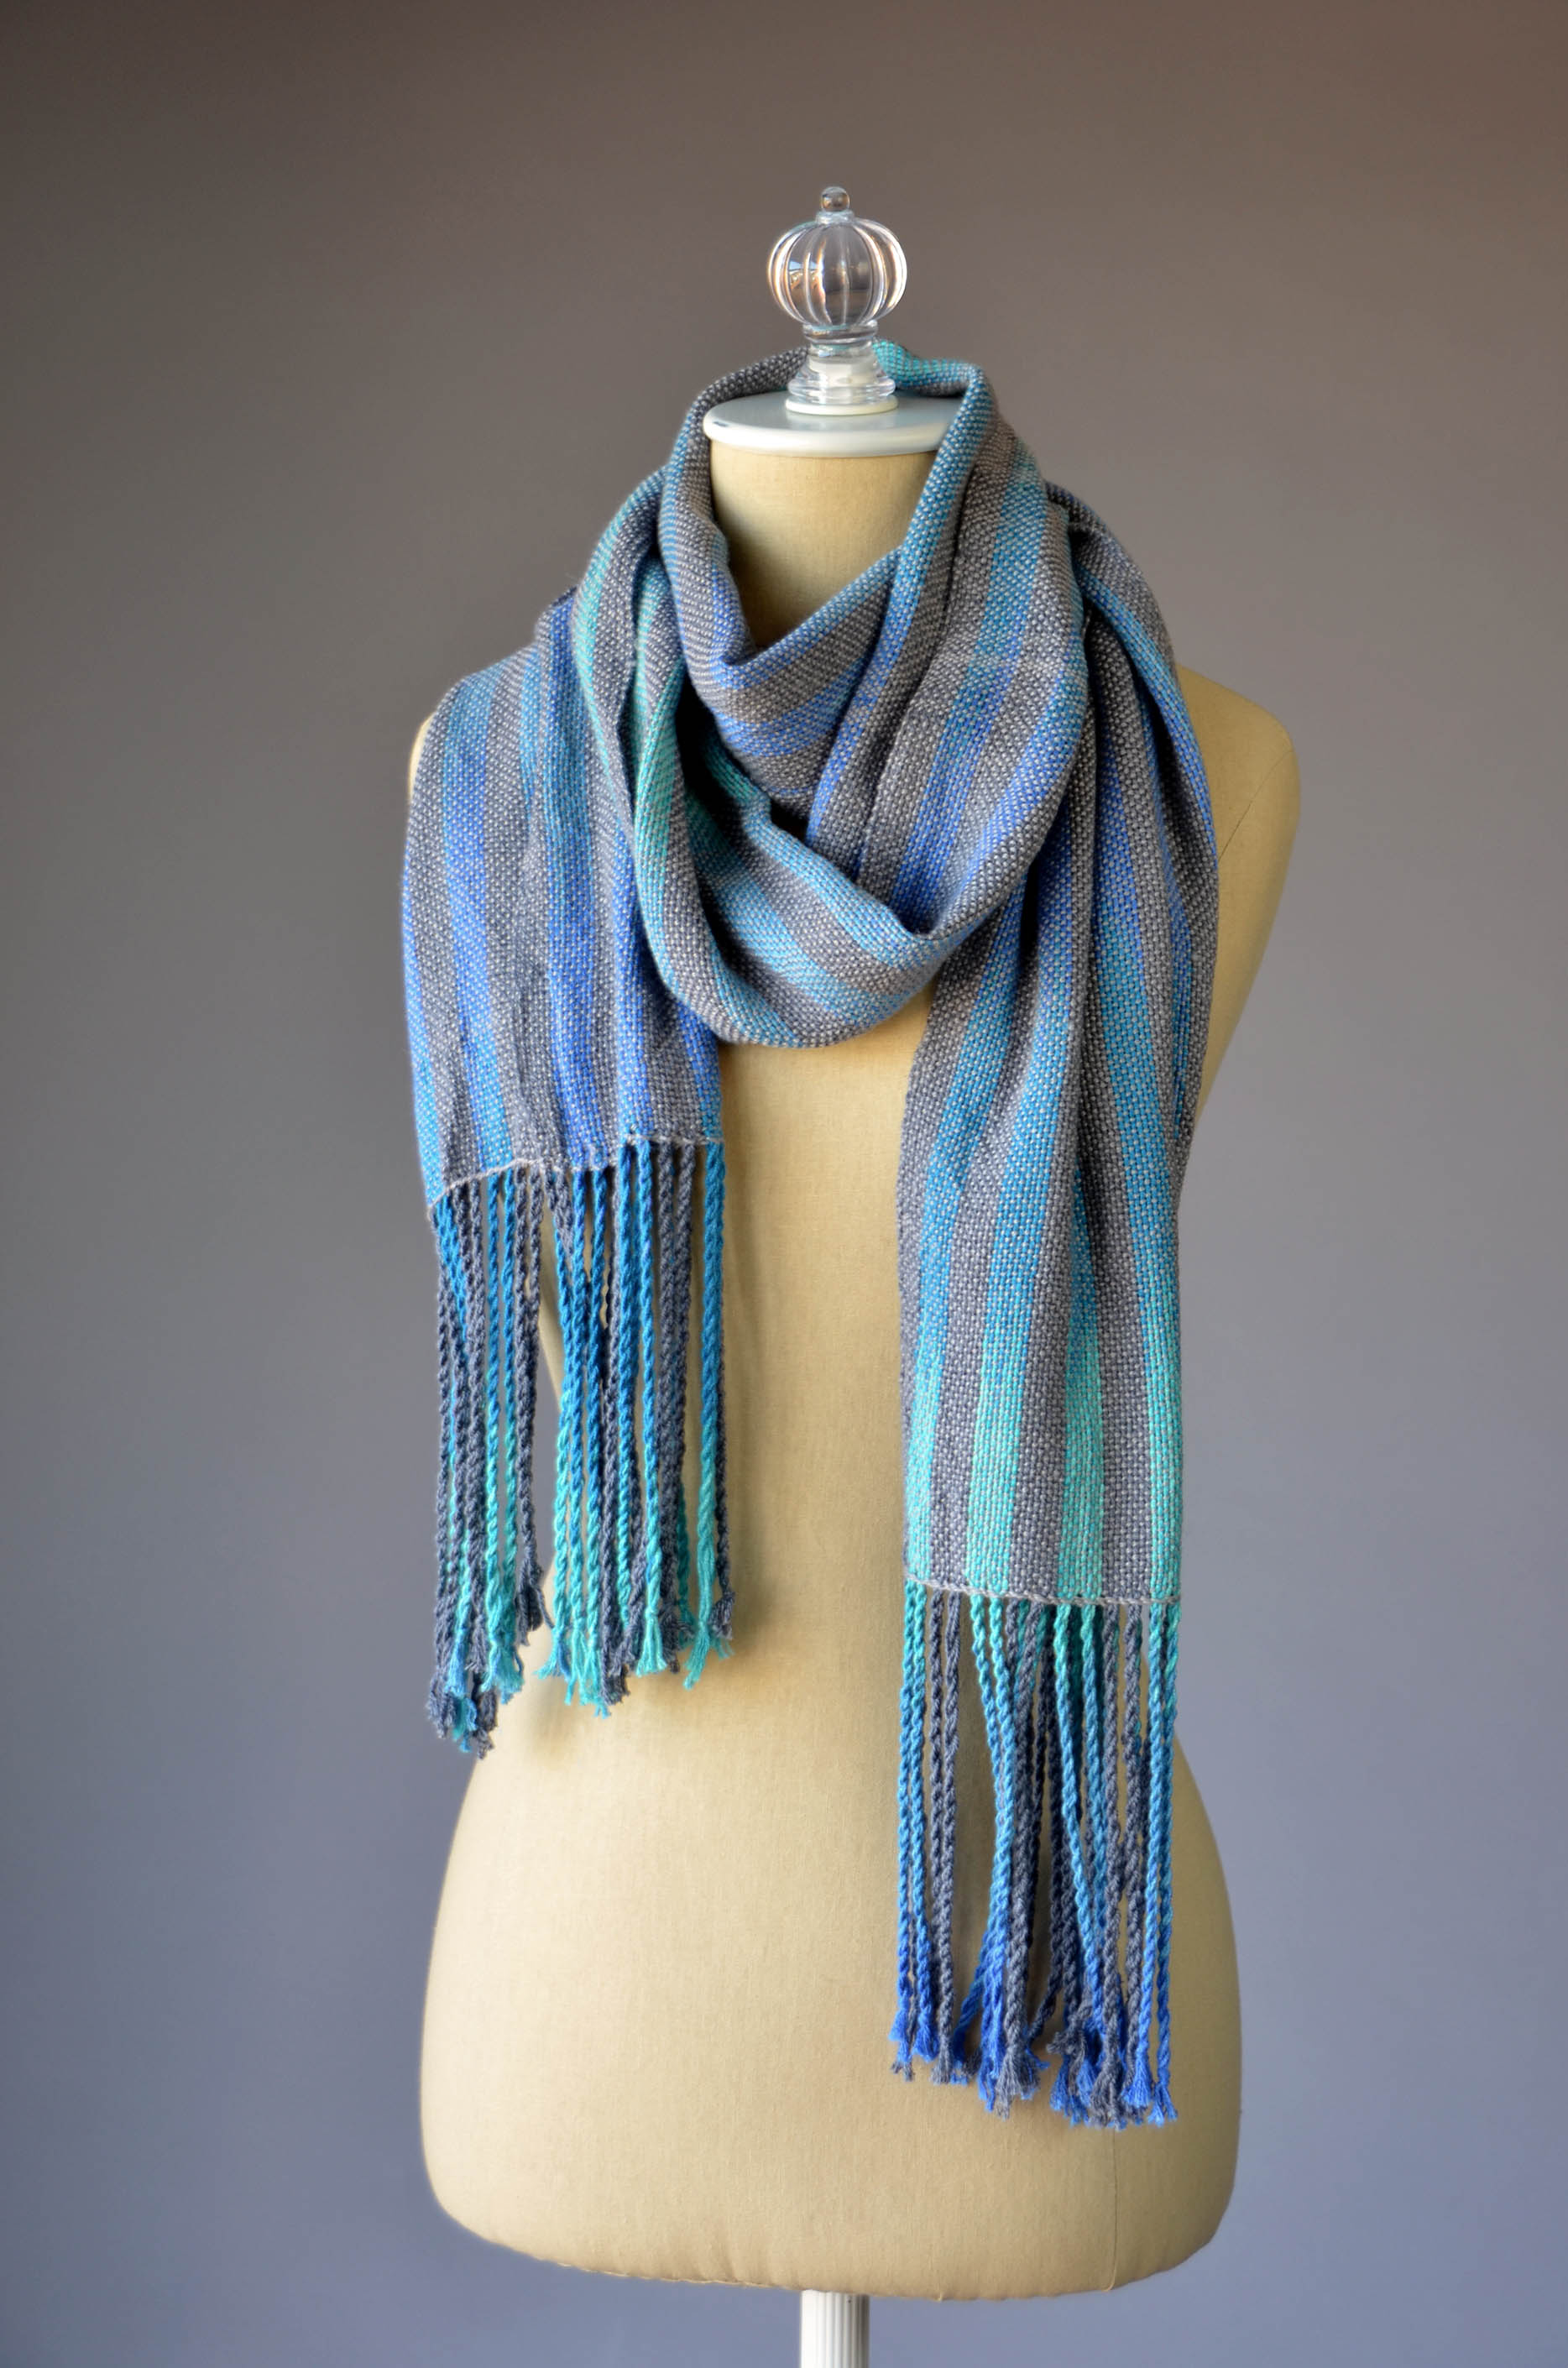
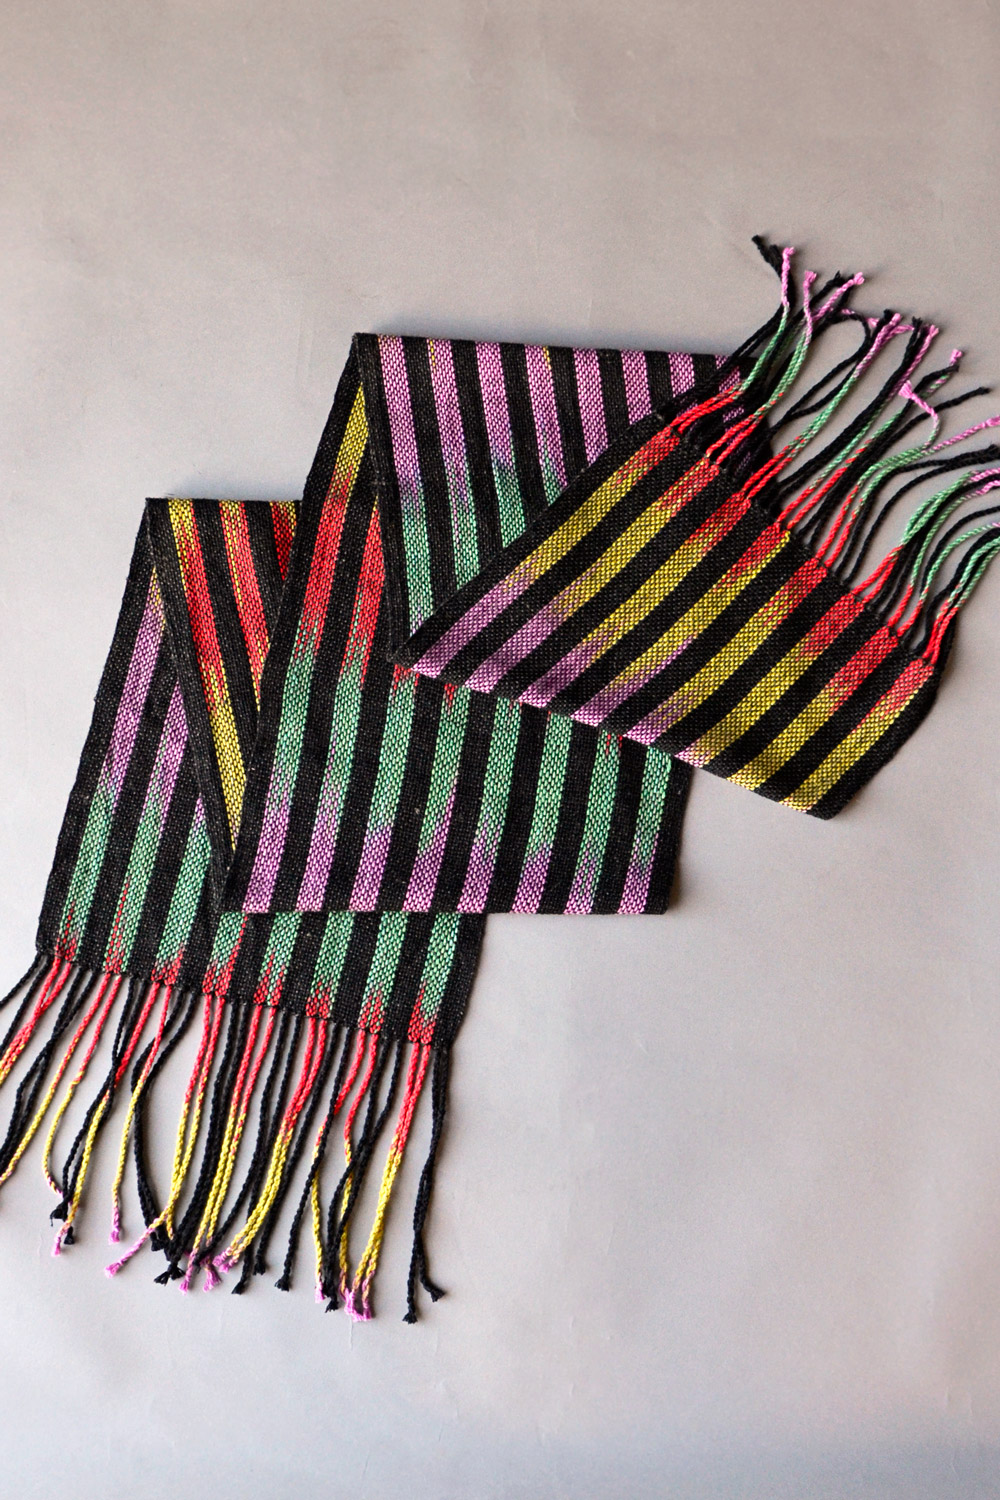
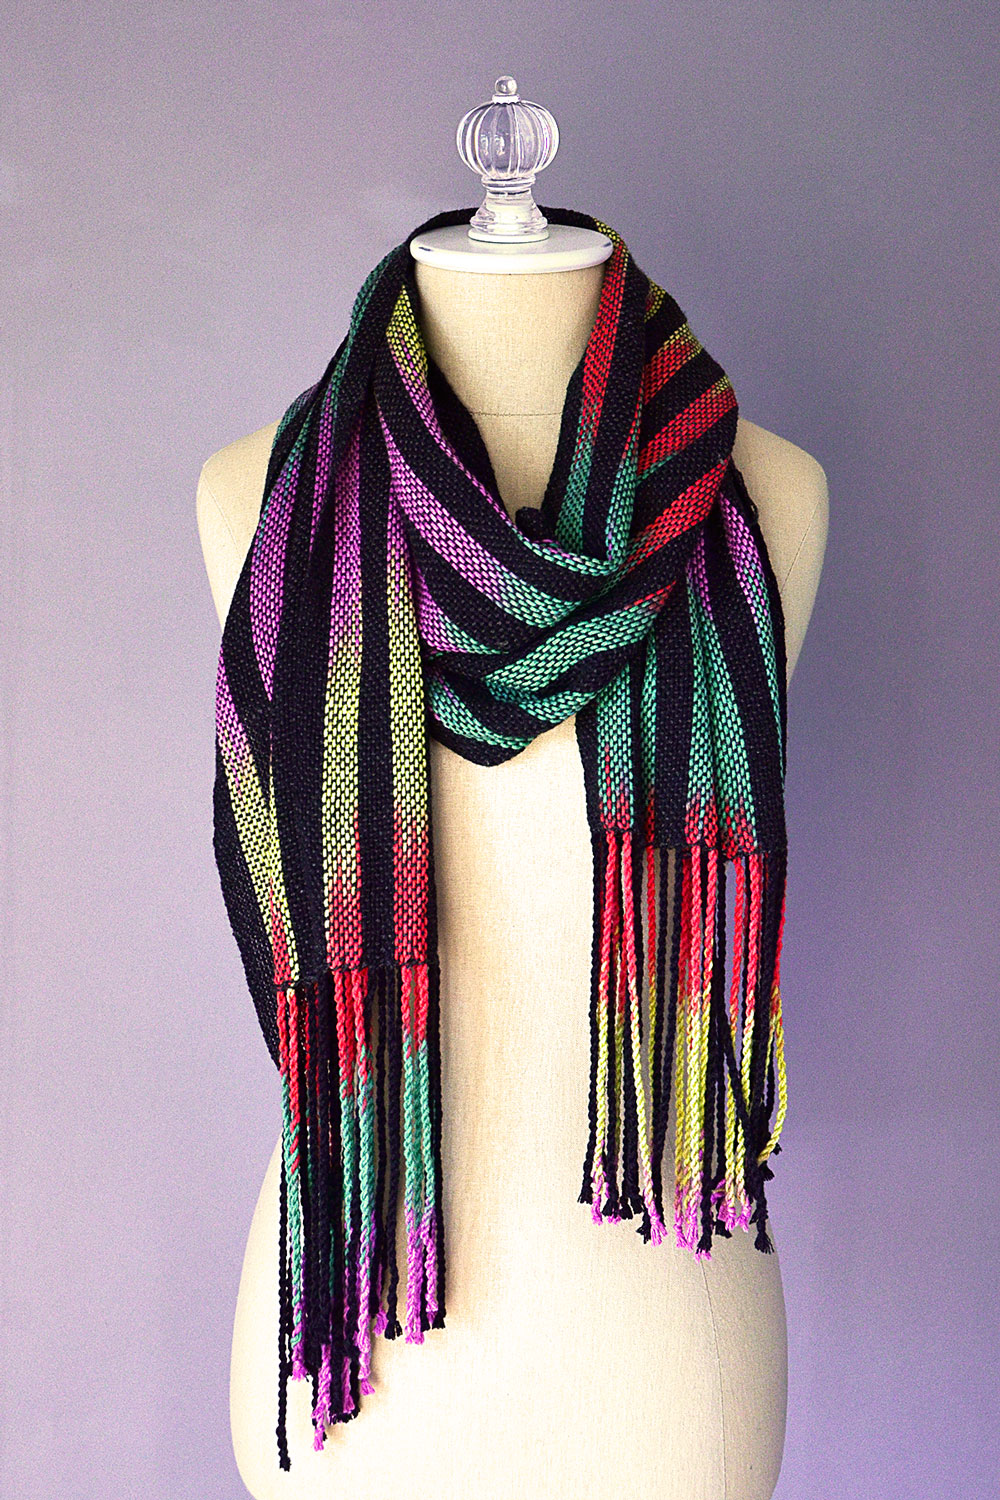
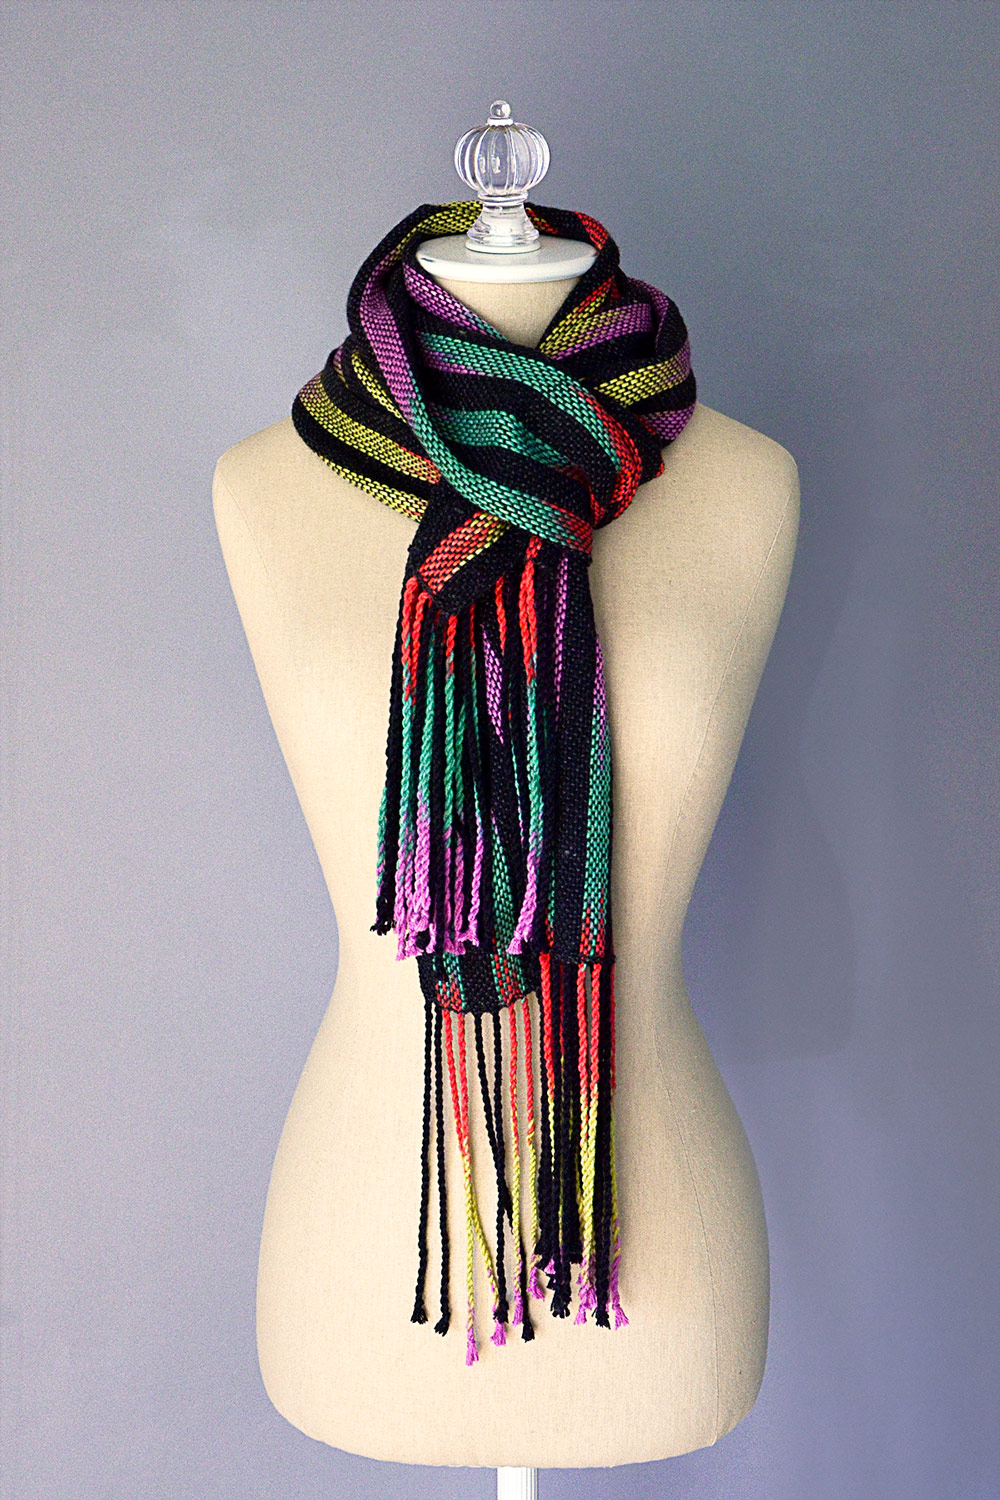
However, the weaving project I’m going to share today is a much simpler way of intentionally pooling color. My project was inspired by recent Little Looms Magazine by Interweave Press.  The image on the cover of the magazine is actually a close-up of the scarf I decided to make.

SPSUM16

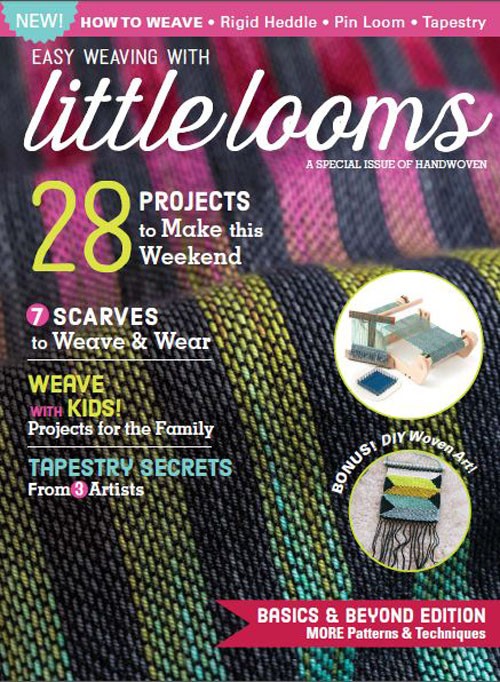
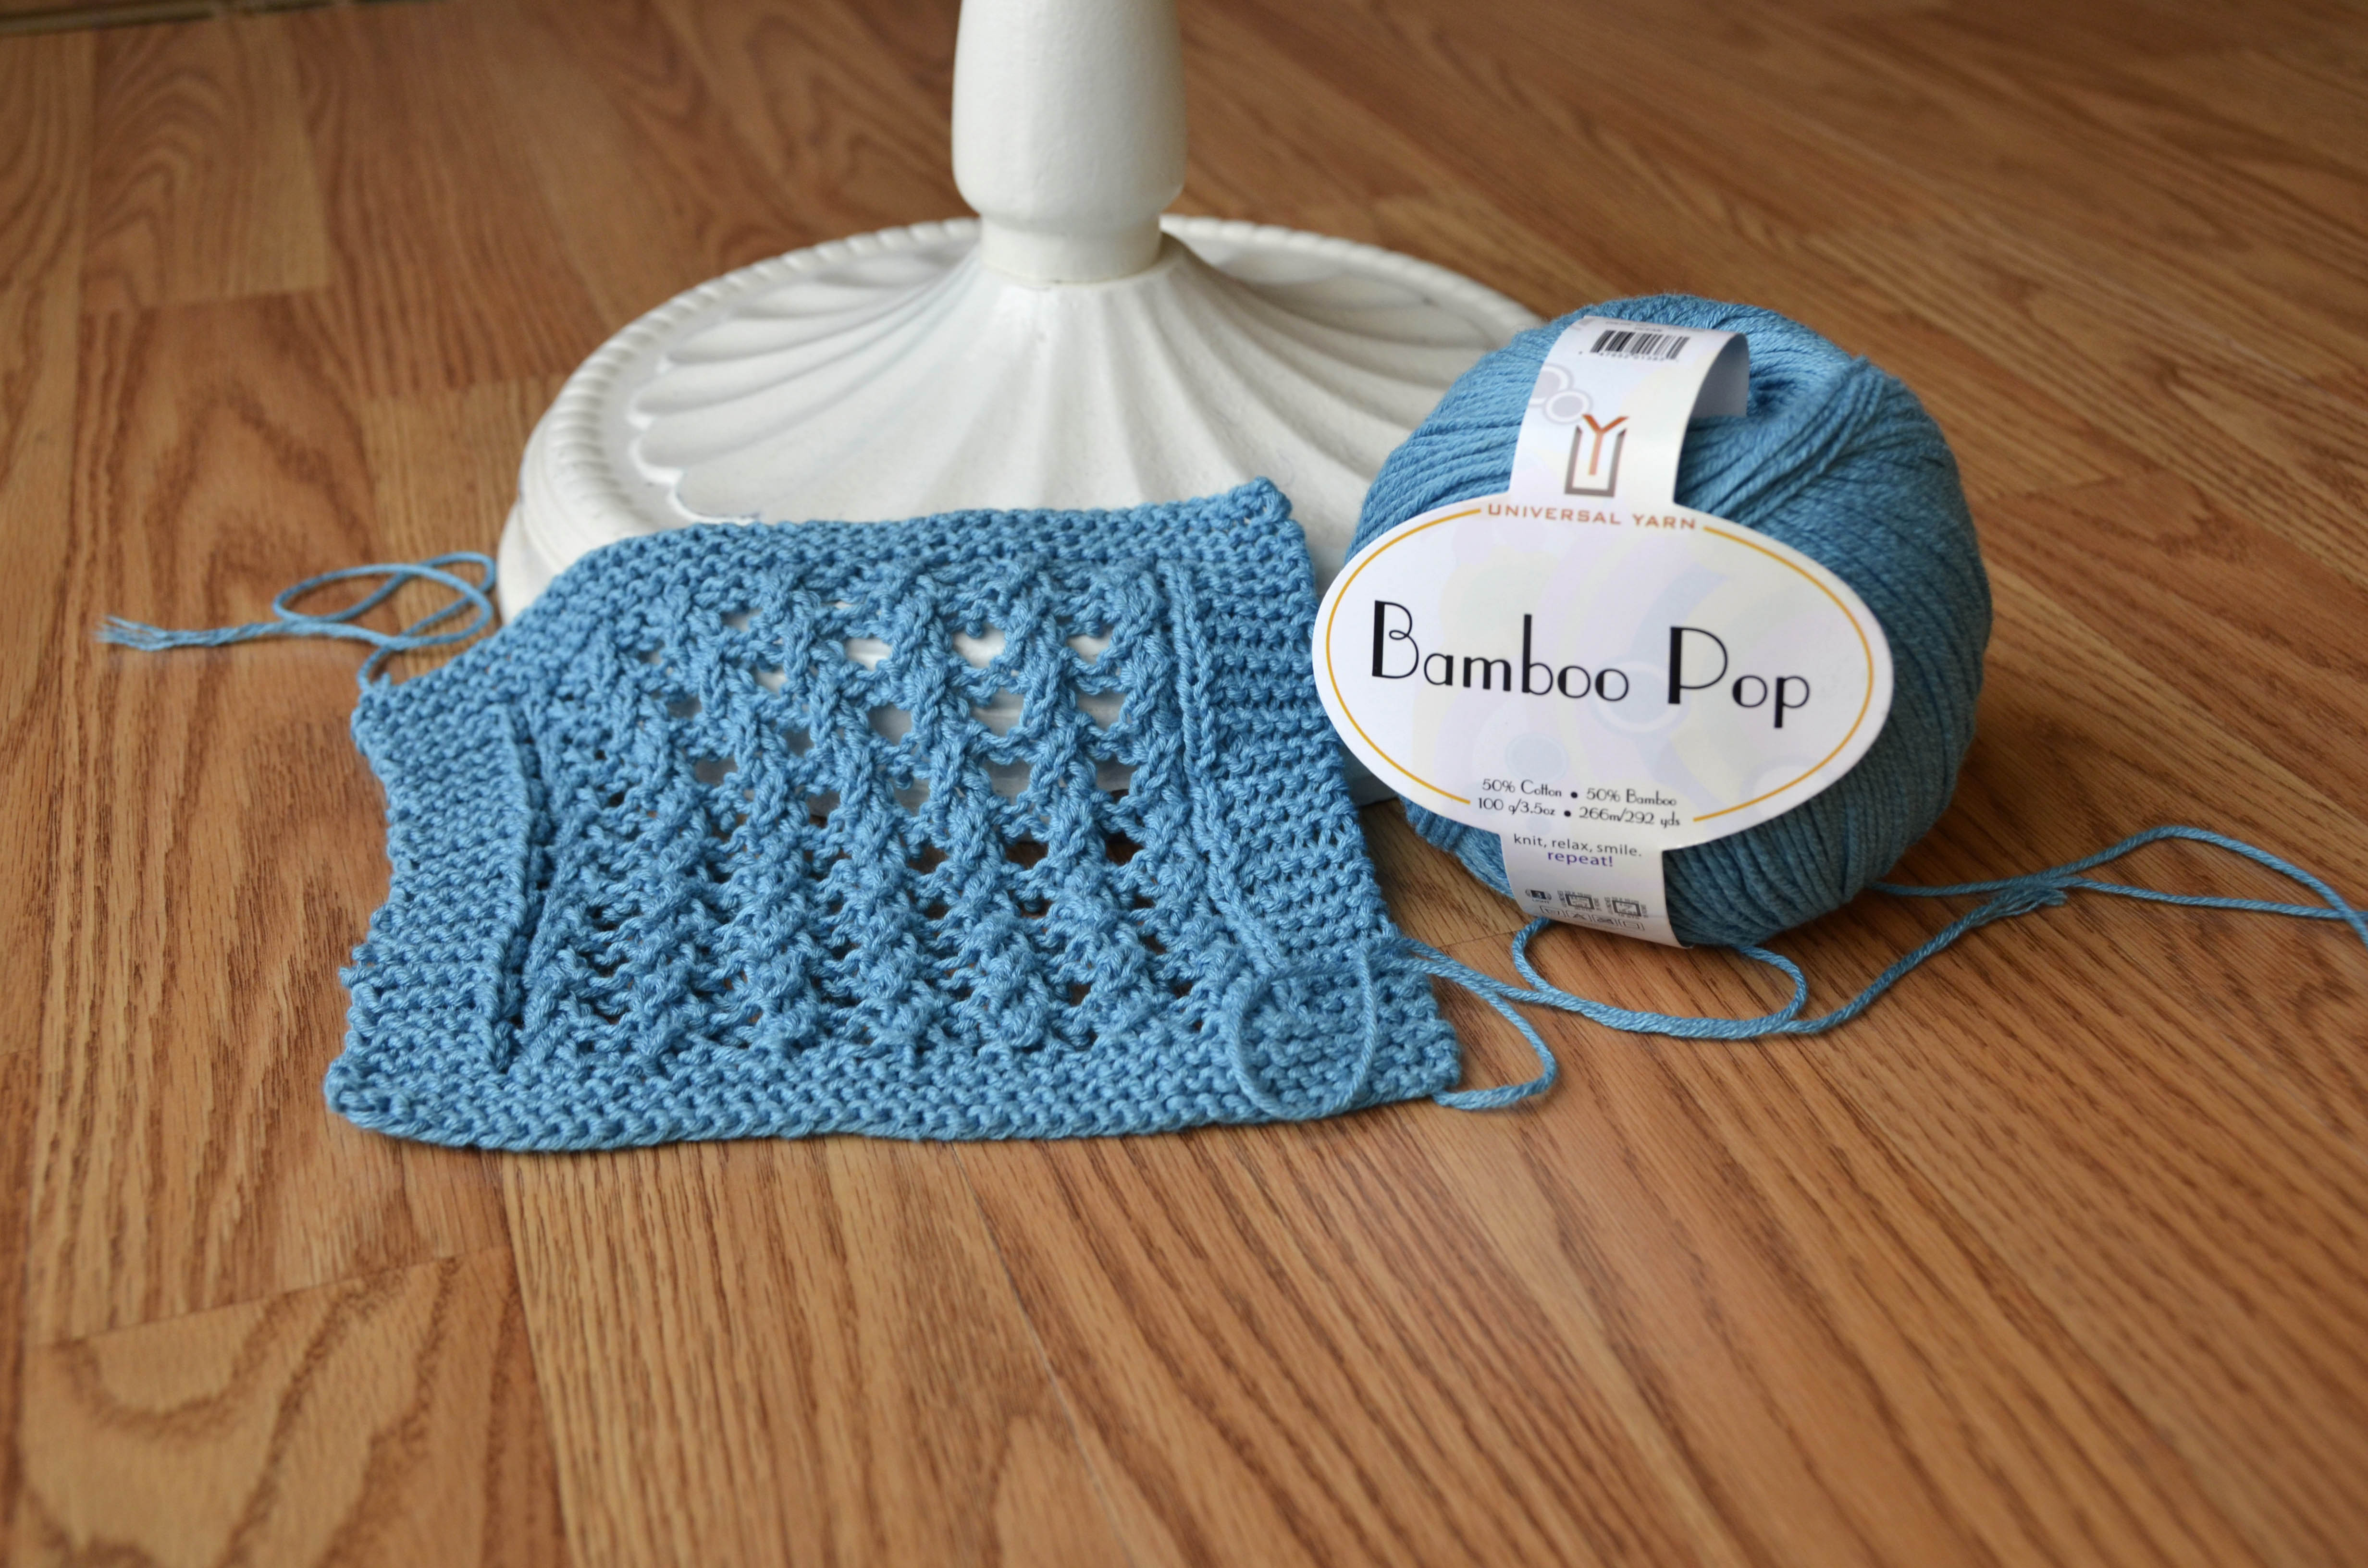
After looking at the other photos of the scarf inside, I realized our Bamboo Pop multi colorways would be perfect for this project.

StackedBalls_smaller

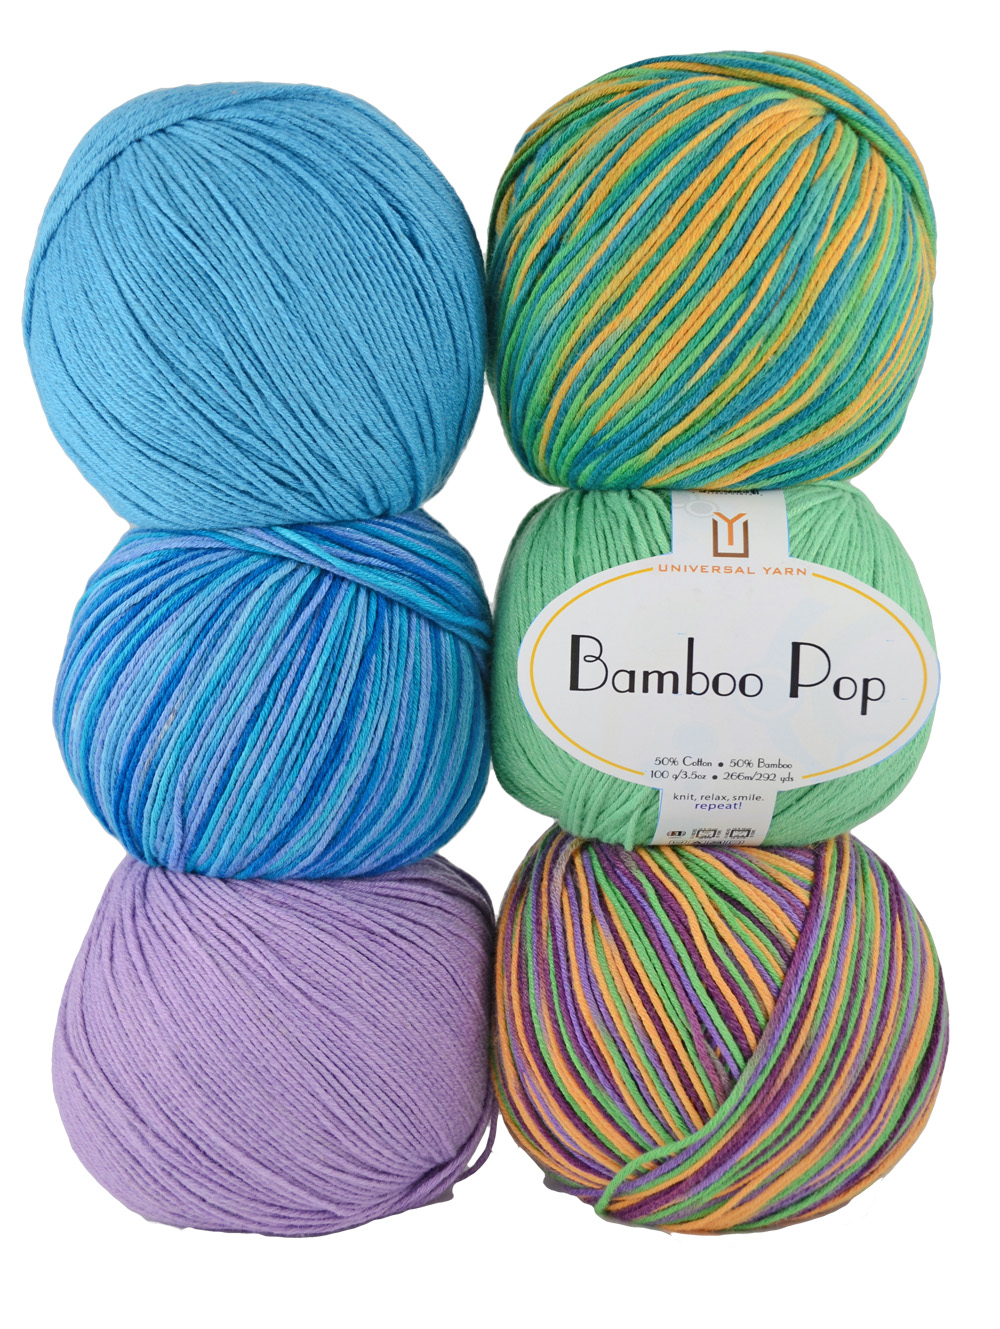
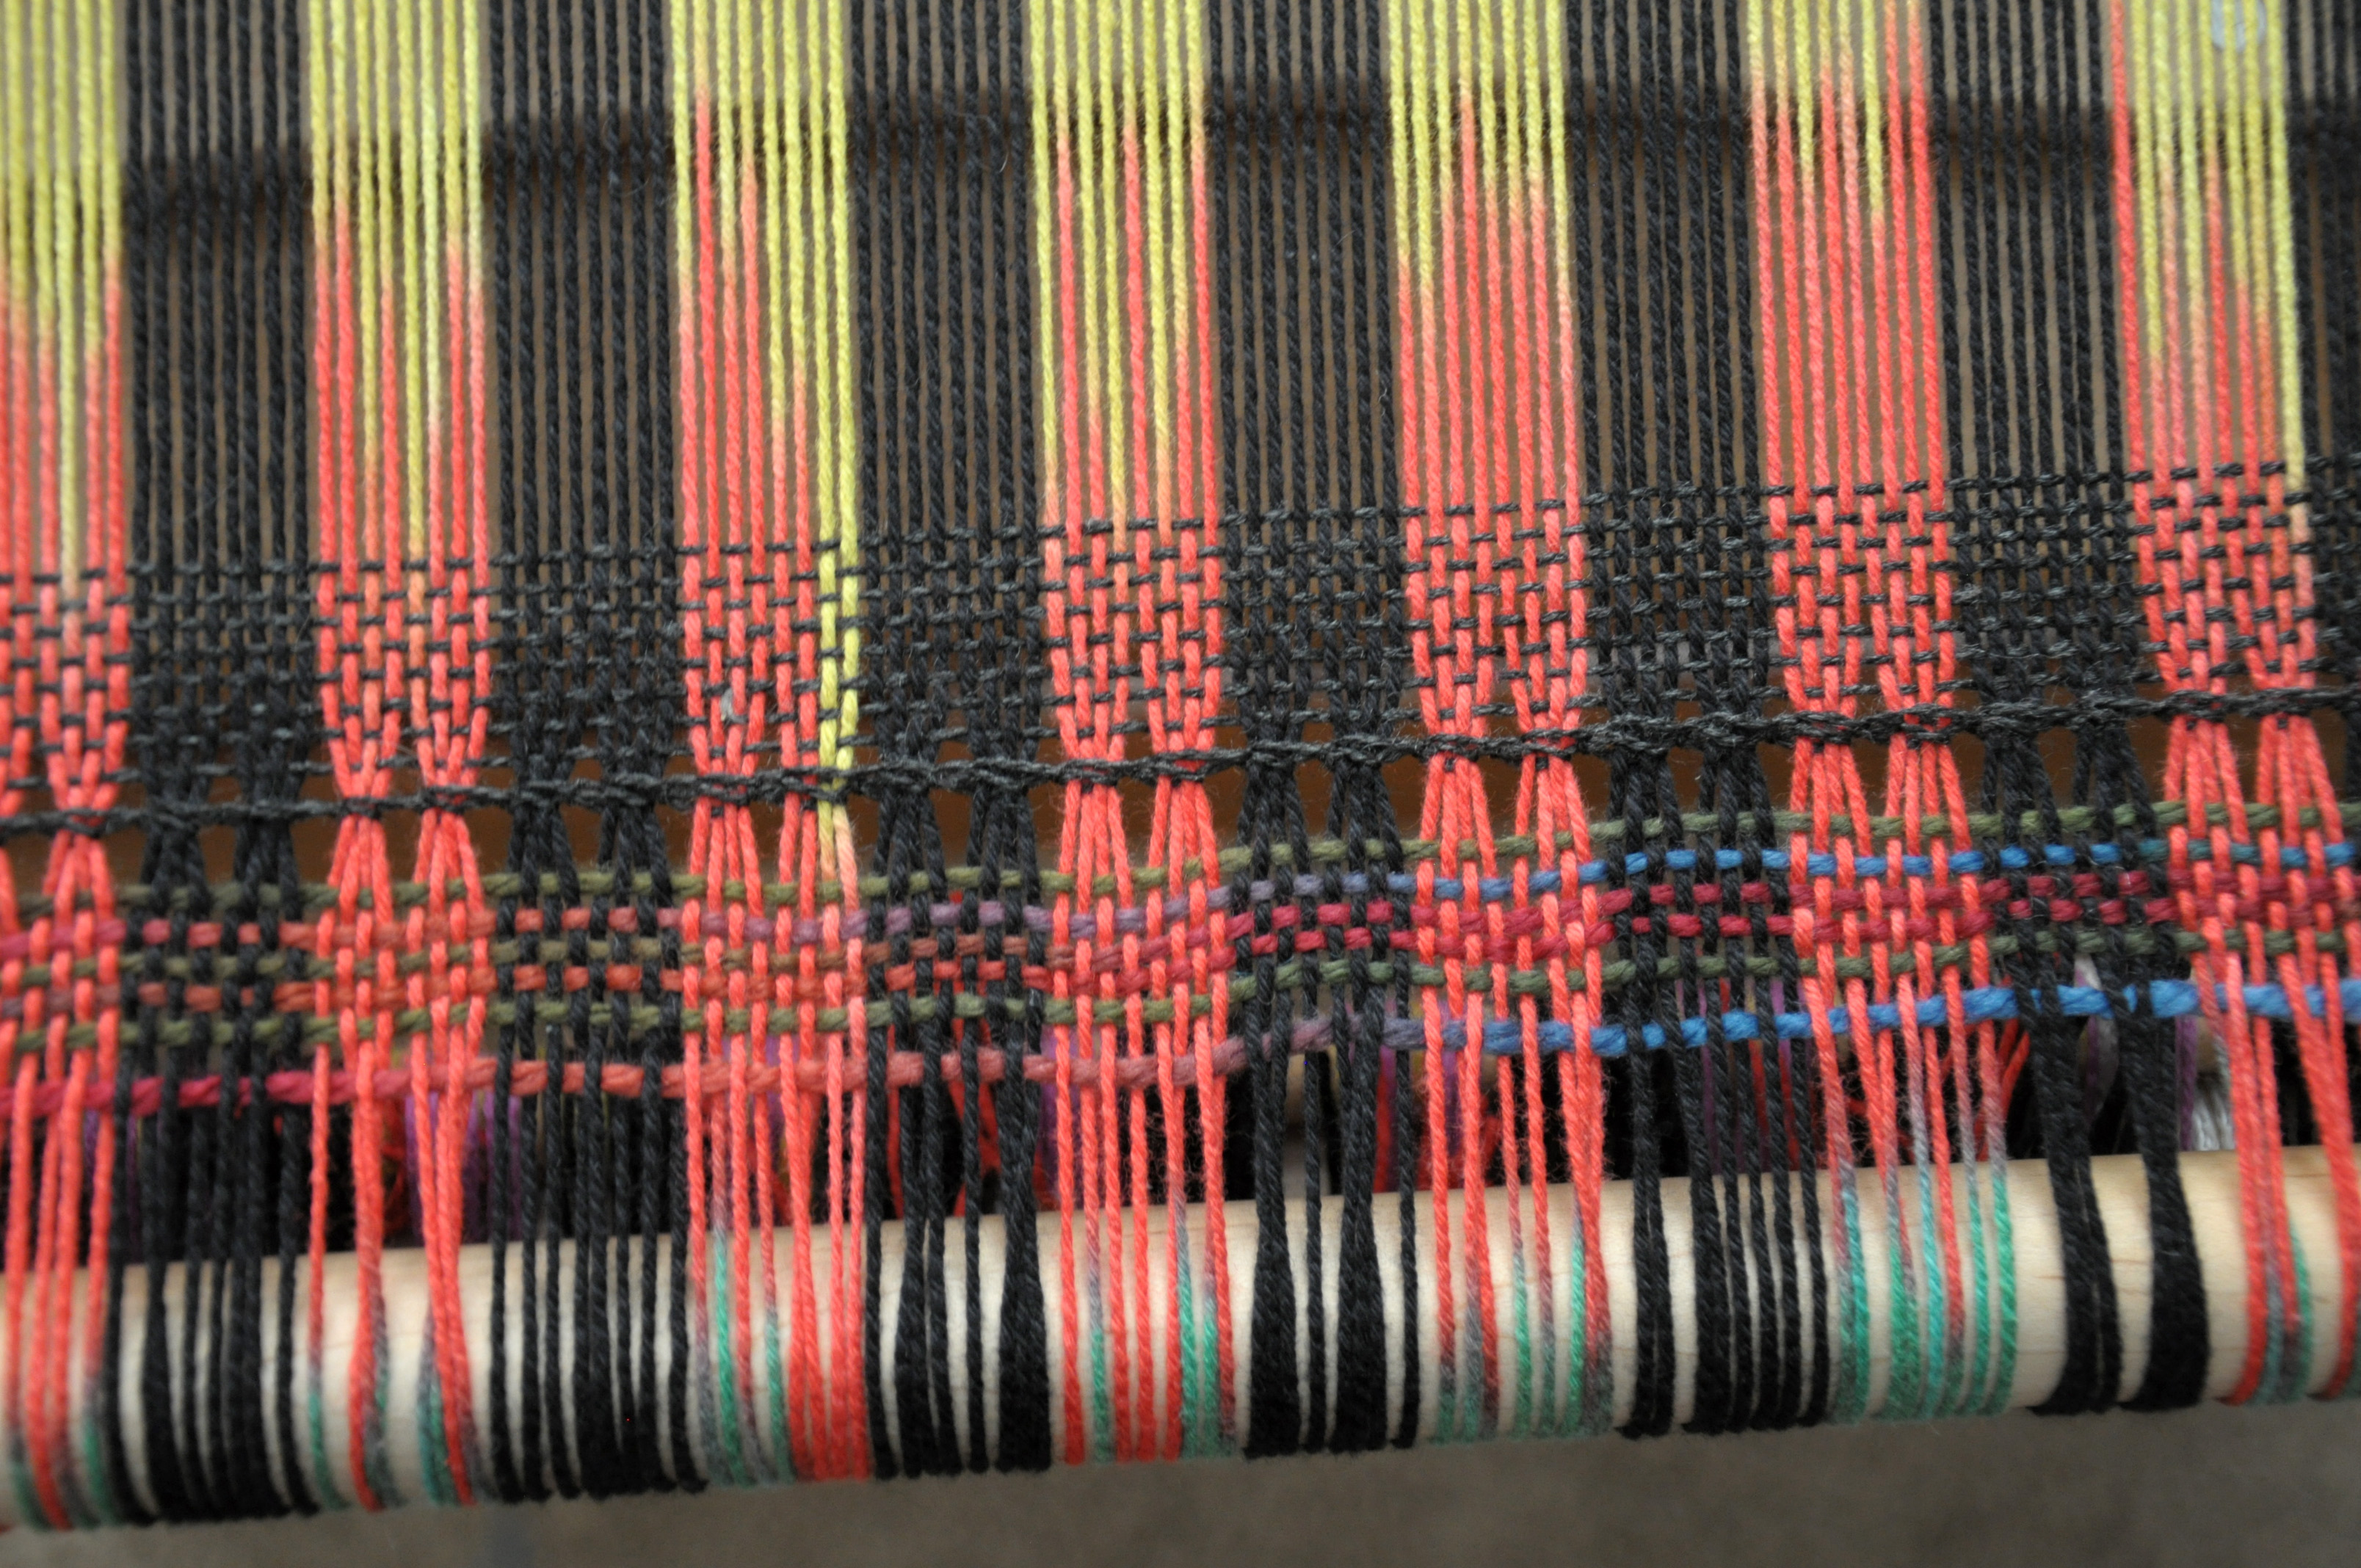
For my scarf, I chose Bamboo Pop #218 Stripe (multi) and #112 Black (solid) for the warp. I’ll be weaving with Whisper Lace #111 Ebony as weft. It’s a lighter weight than Bamboo Pop, and will allow for a warp-faced weave.

To warp, I first tried direct-warping my 16″ Cricket loom with my Bamboo Pop multi sections. The secret to this scarf is all about finding the point at which the color sections in the multi yarn repeat. I discovered that 110″ was my ideal point to wrap around the warping peg. The color repeated back on itself at that length (and also did at shorter lengths, but I like a long scarf and want to plan for fringe). But I found that it was very difficult to keep my color sections lined up with this warping method.

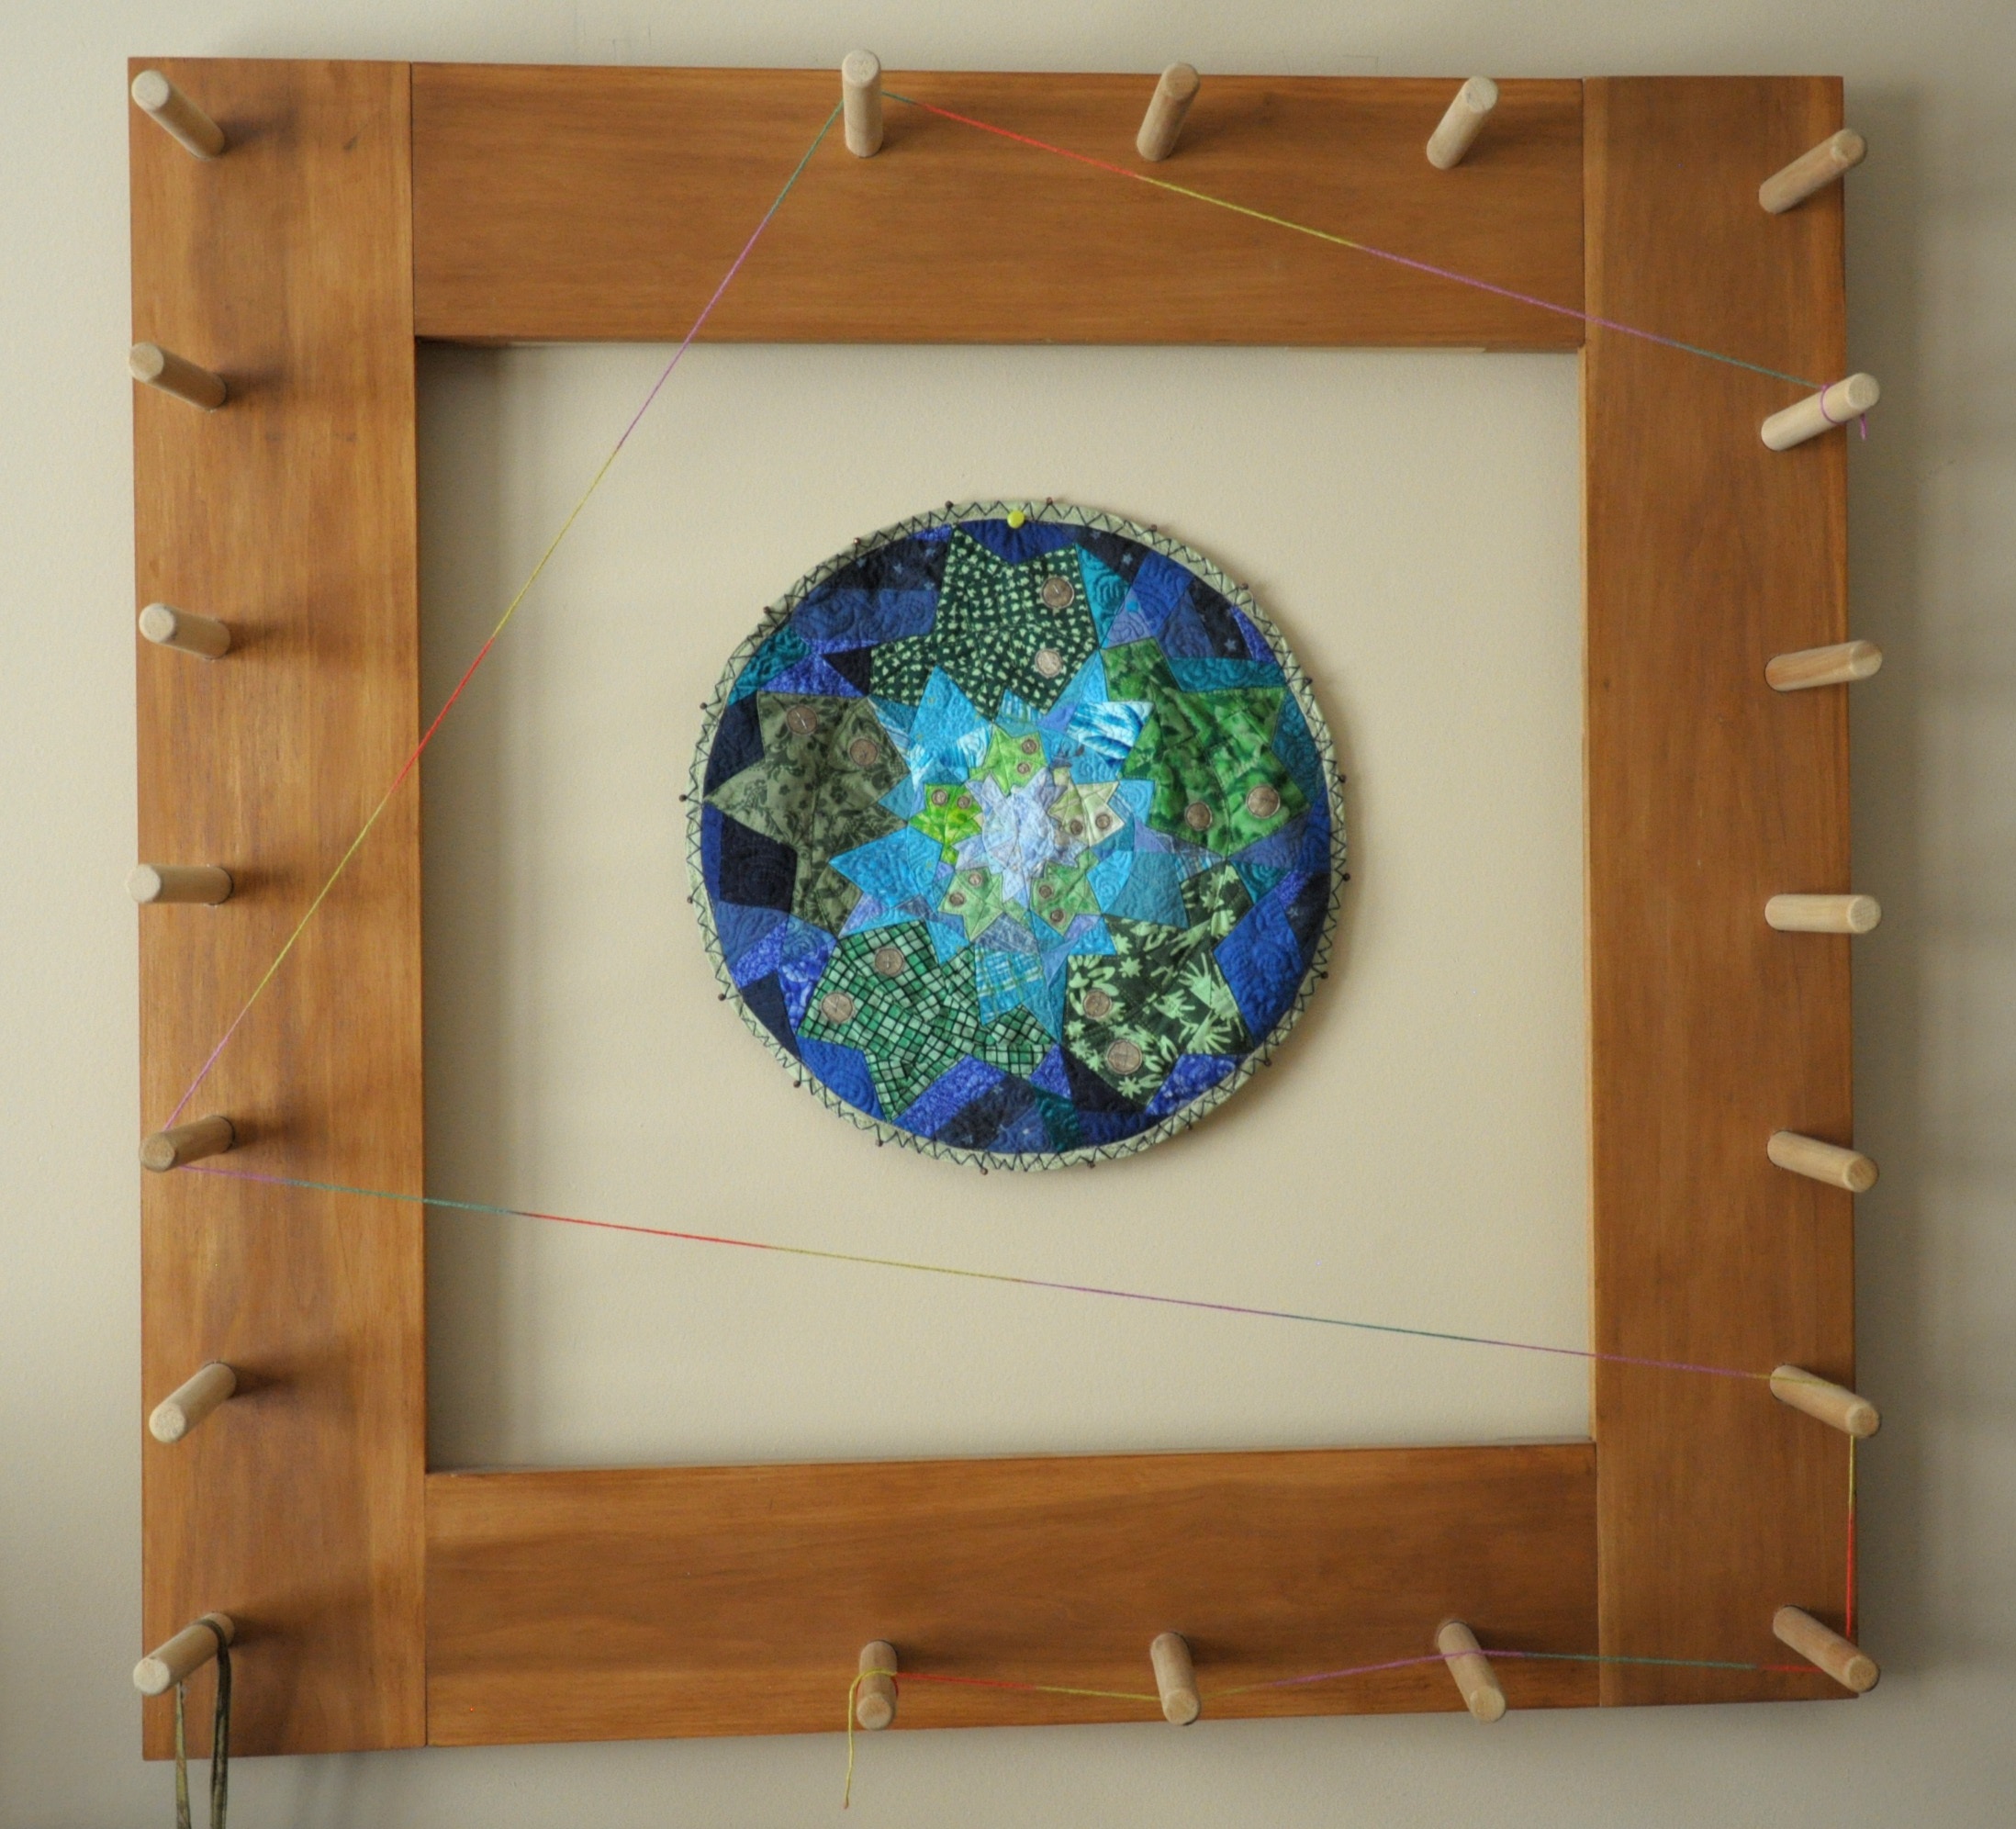
Plan B: use a warping board. I happen to have a warping board that I made several years ago. You can make smaller versions of this, or you can buy them. Or you can simply use two warping pegs clamped a certain distance apart. But the nice thing about a warping board is that it allows you to wind a long warp over a short distance, by wrapping the yarn back and forth between the pegs.

In this particular project, it was super helpful to have all those pegs. It allowed me to find the perfect distance in which my colors repeated. To begin, I first tied a guide string.

ColorPool_2

ColorPool_1

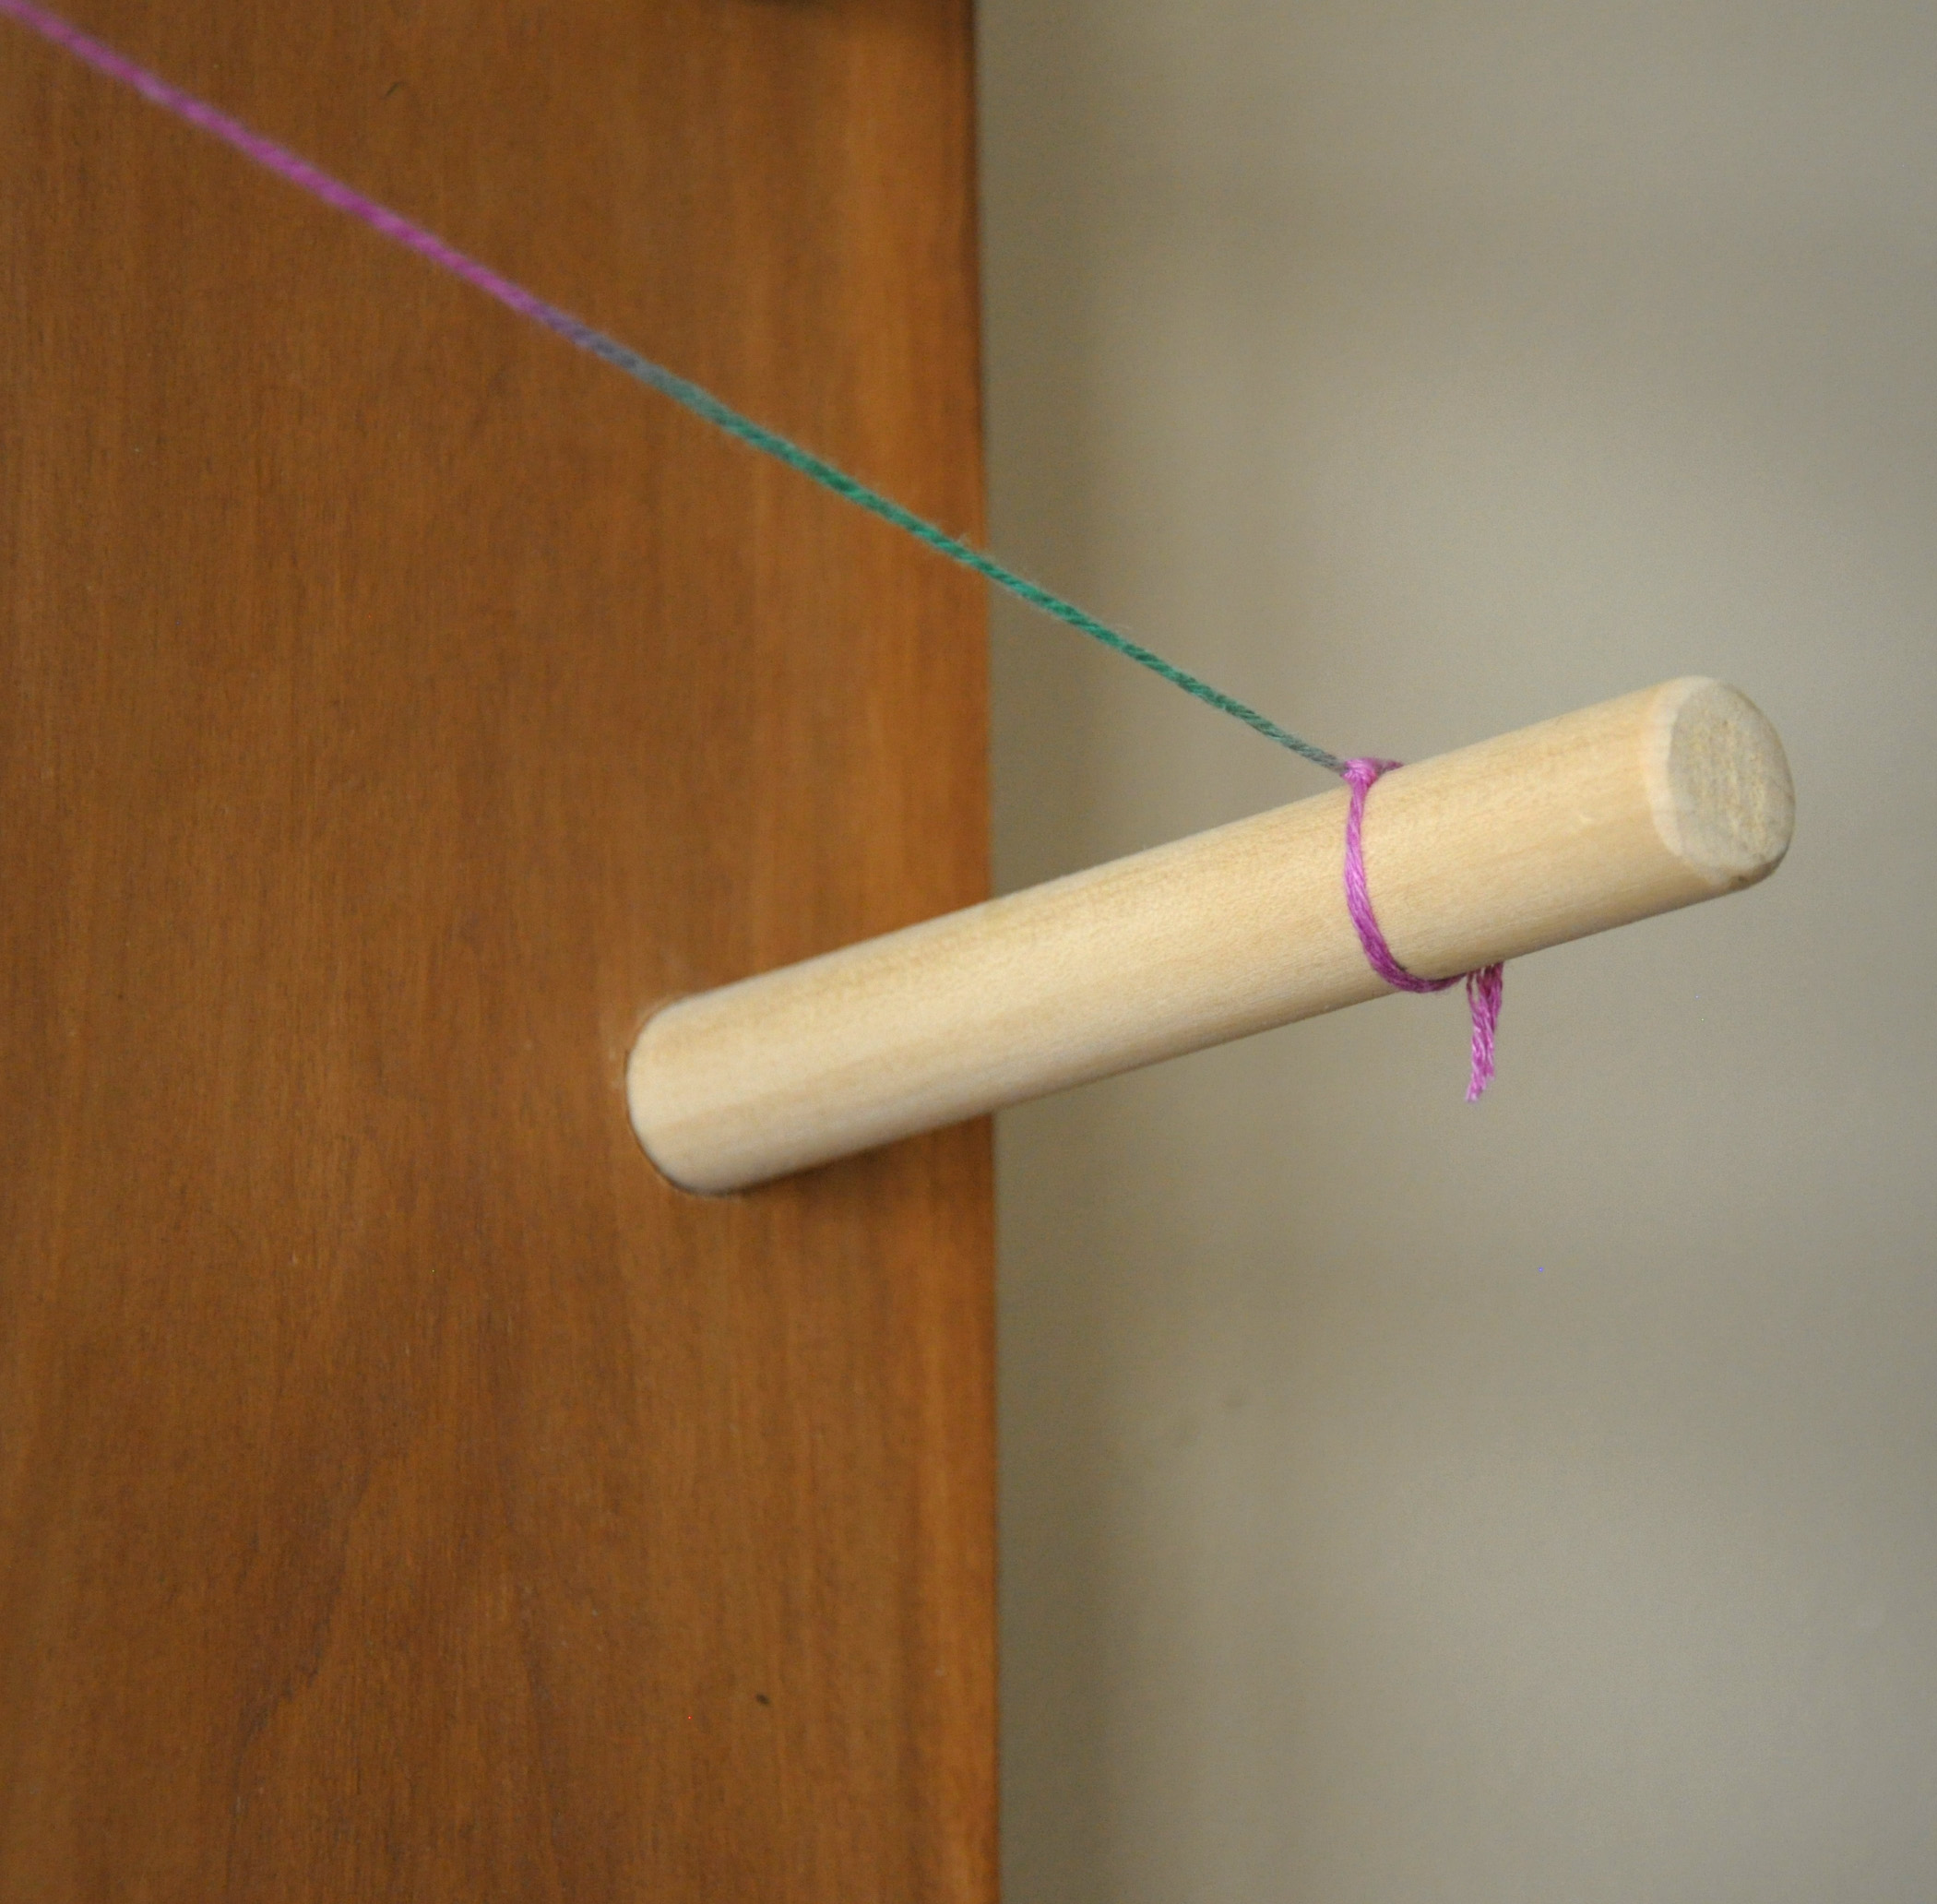
Then I wrapped along and around my pegs until I found my perfect distance. Then I tied the other end to the last peg. A guide string is just that – a guide that the warp will follow as you’re wrapping it around the warping board.

ColorPool_3

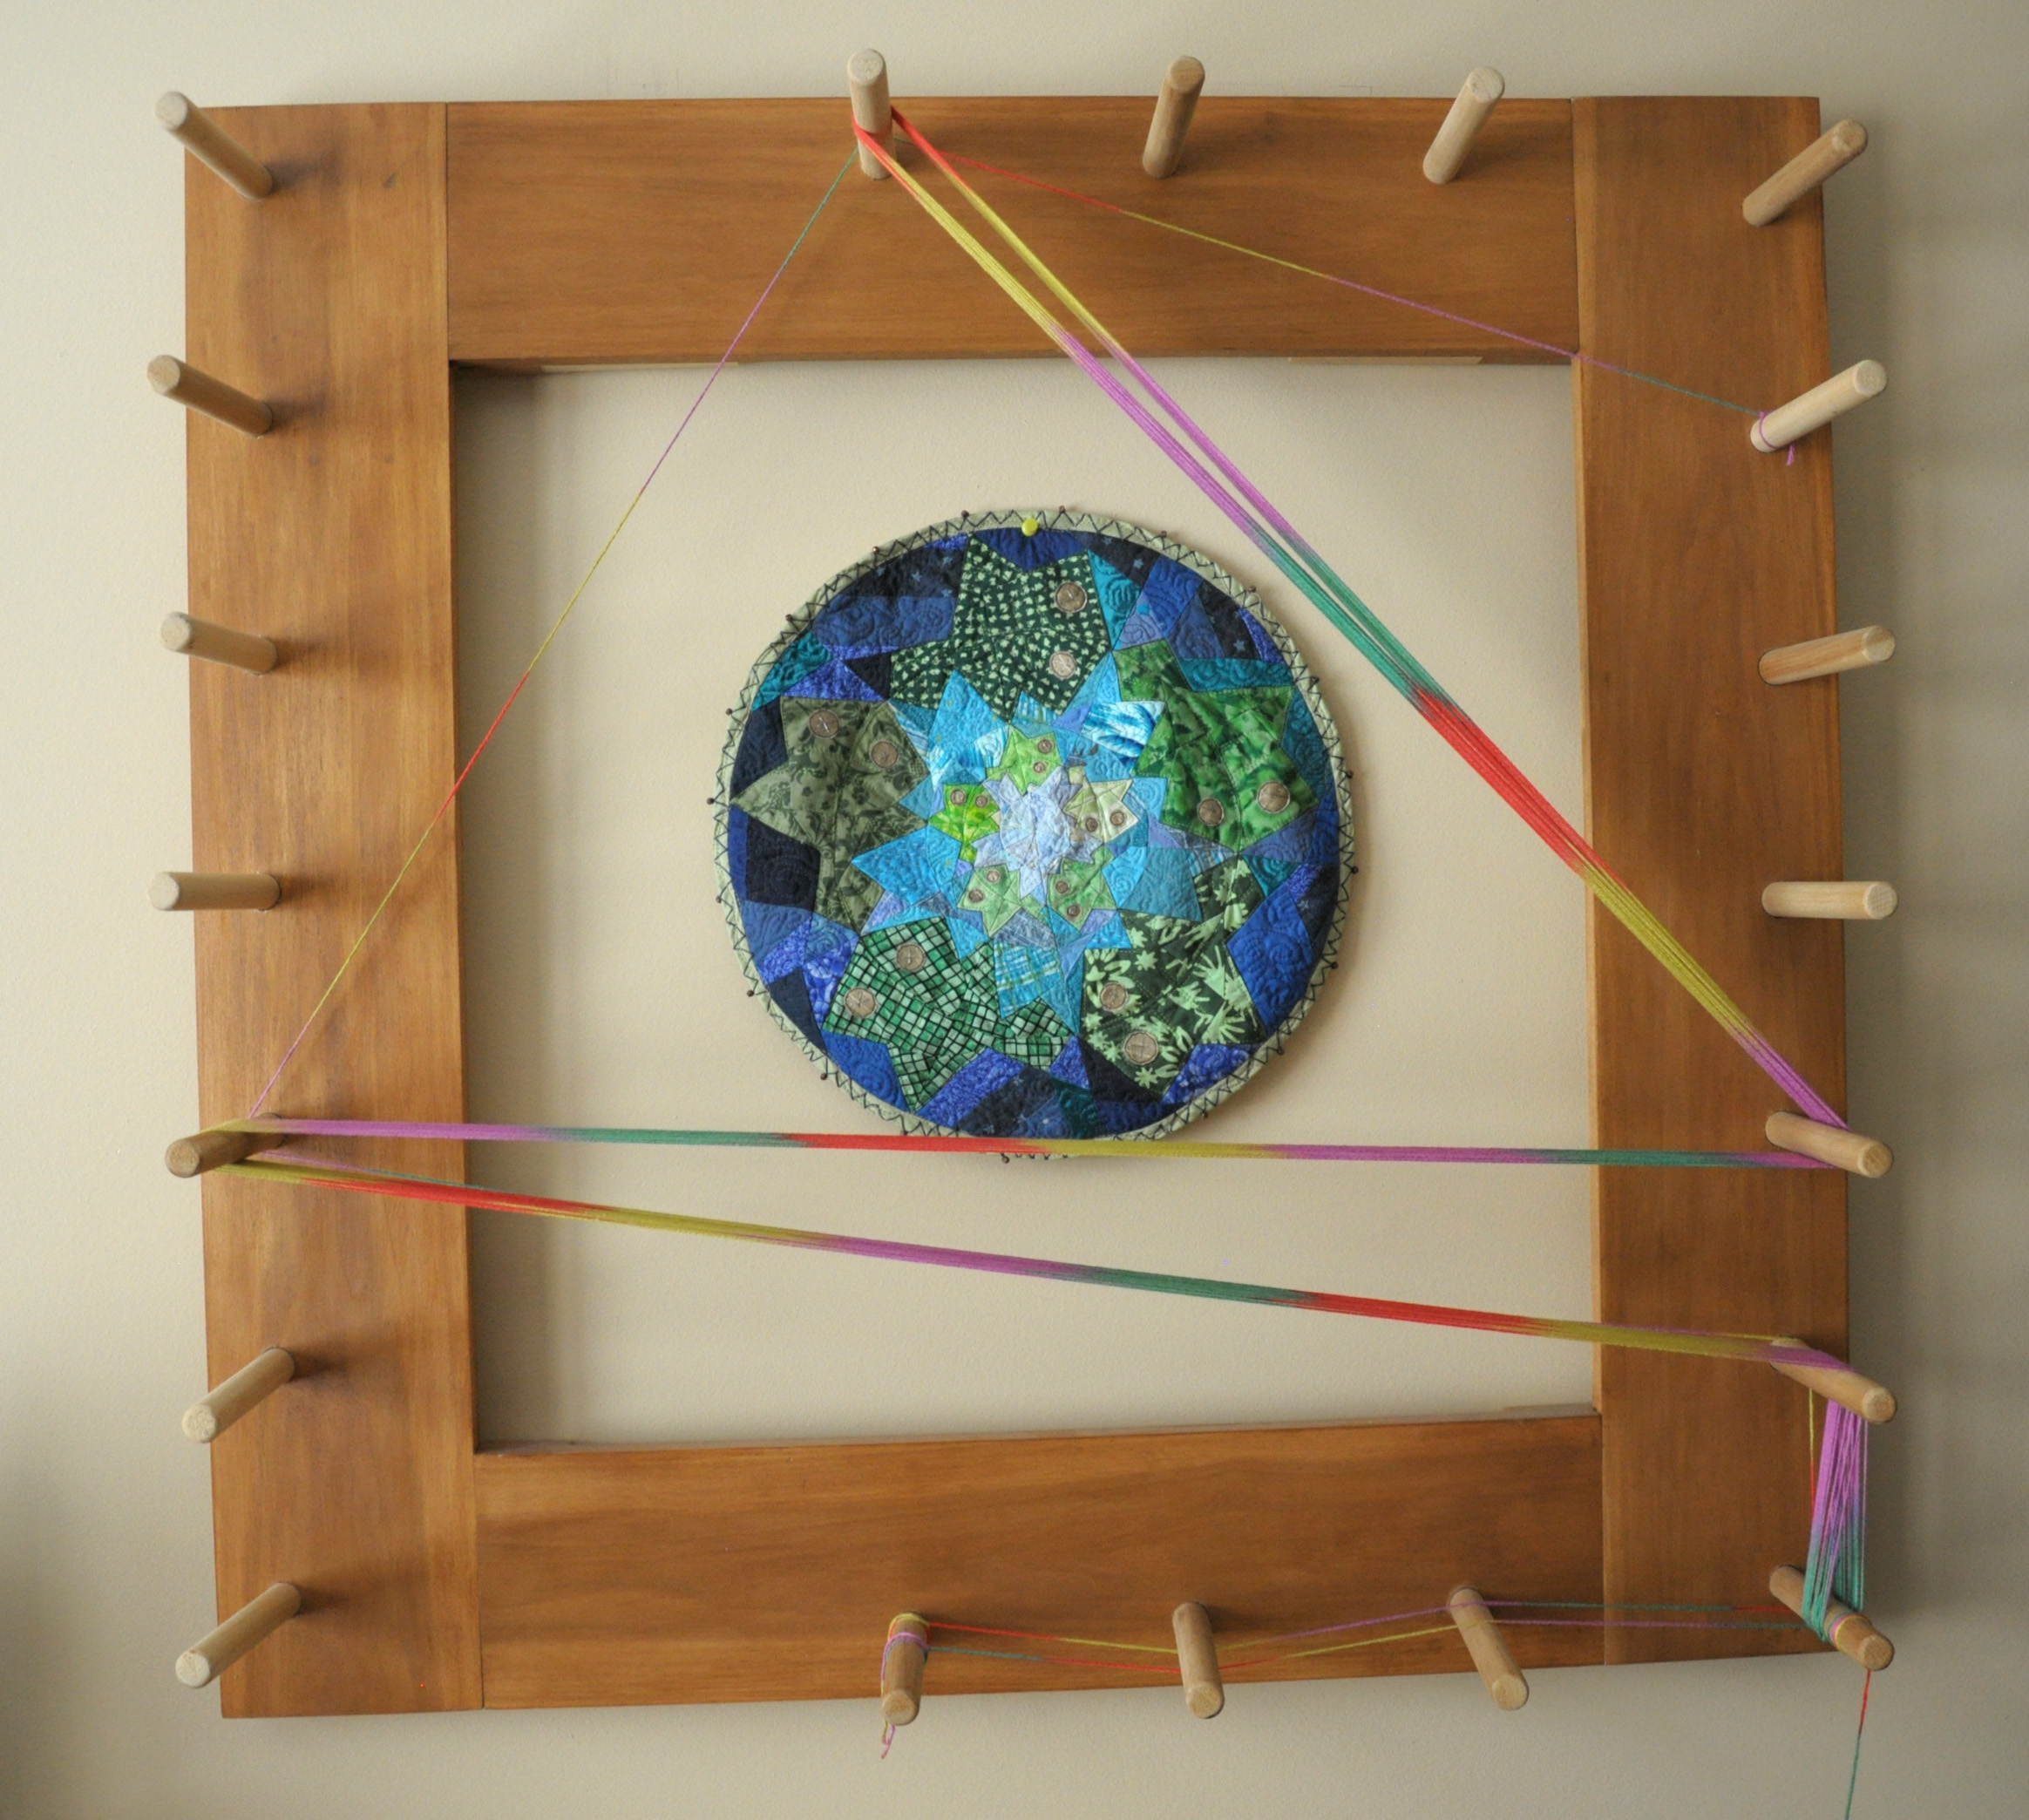
But, as you’ll see, I ended up having to adjust my path because the colors were not quite lining up.

ColorPool_4

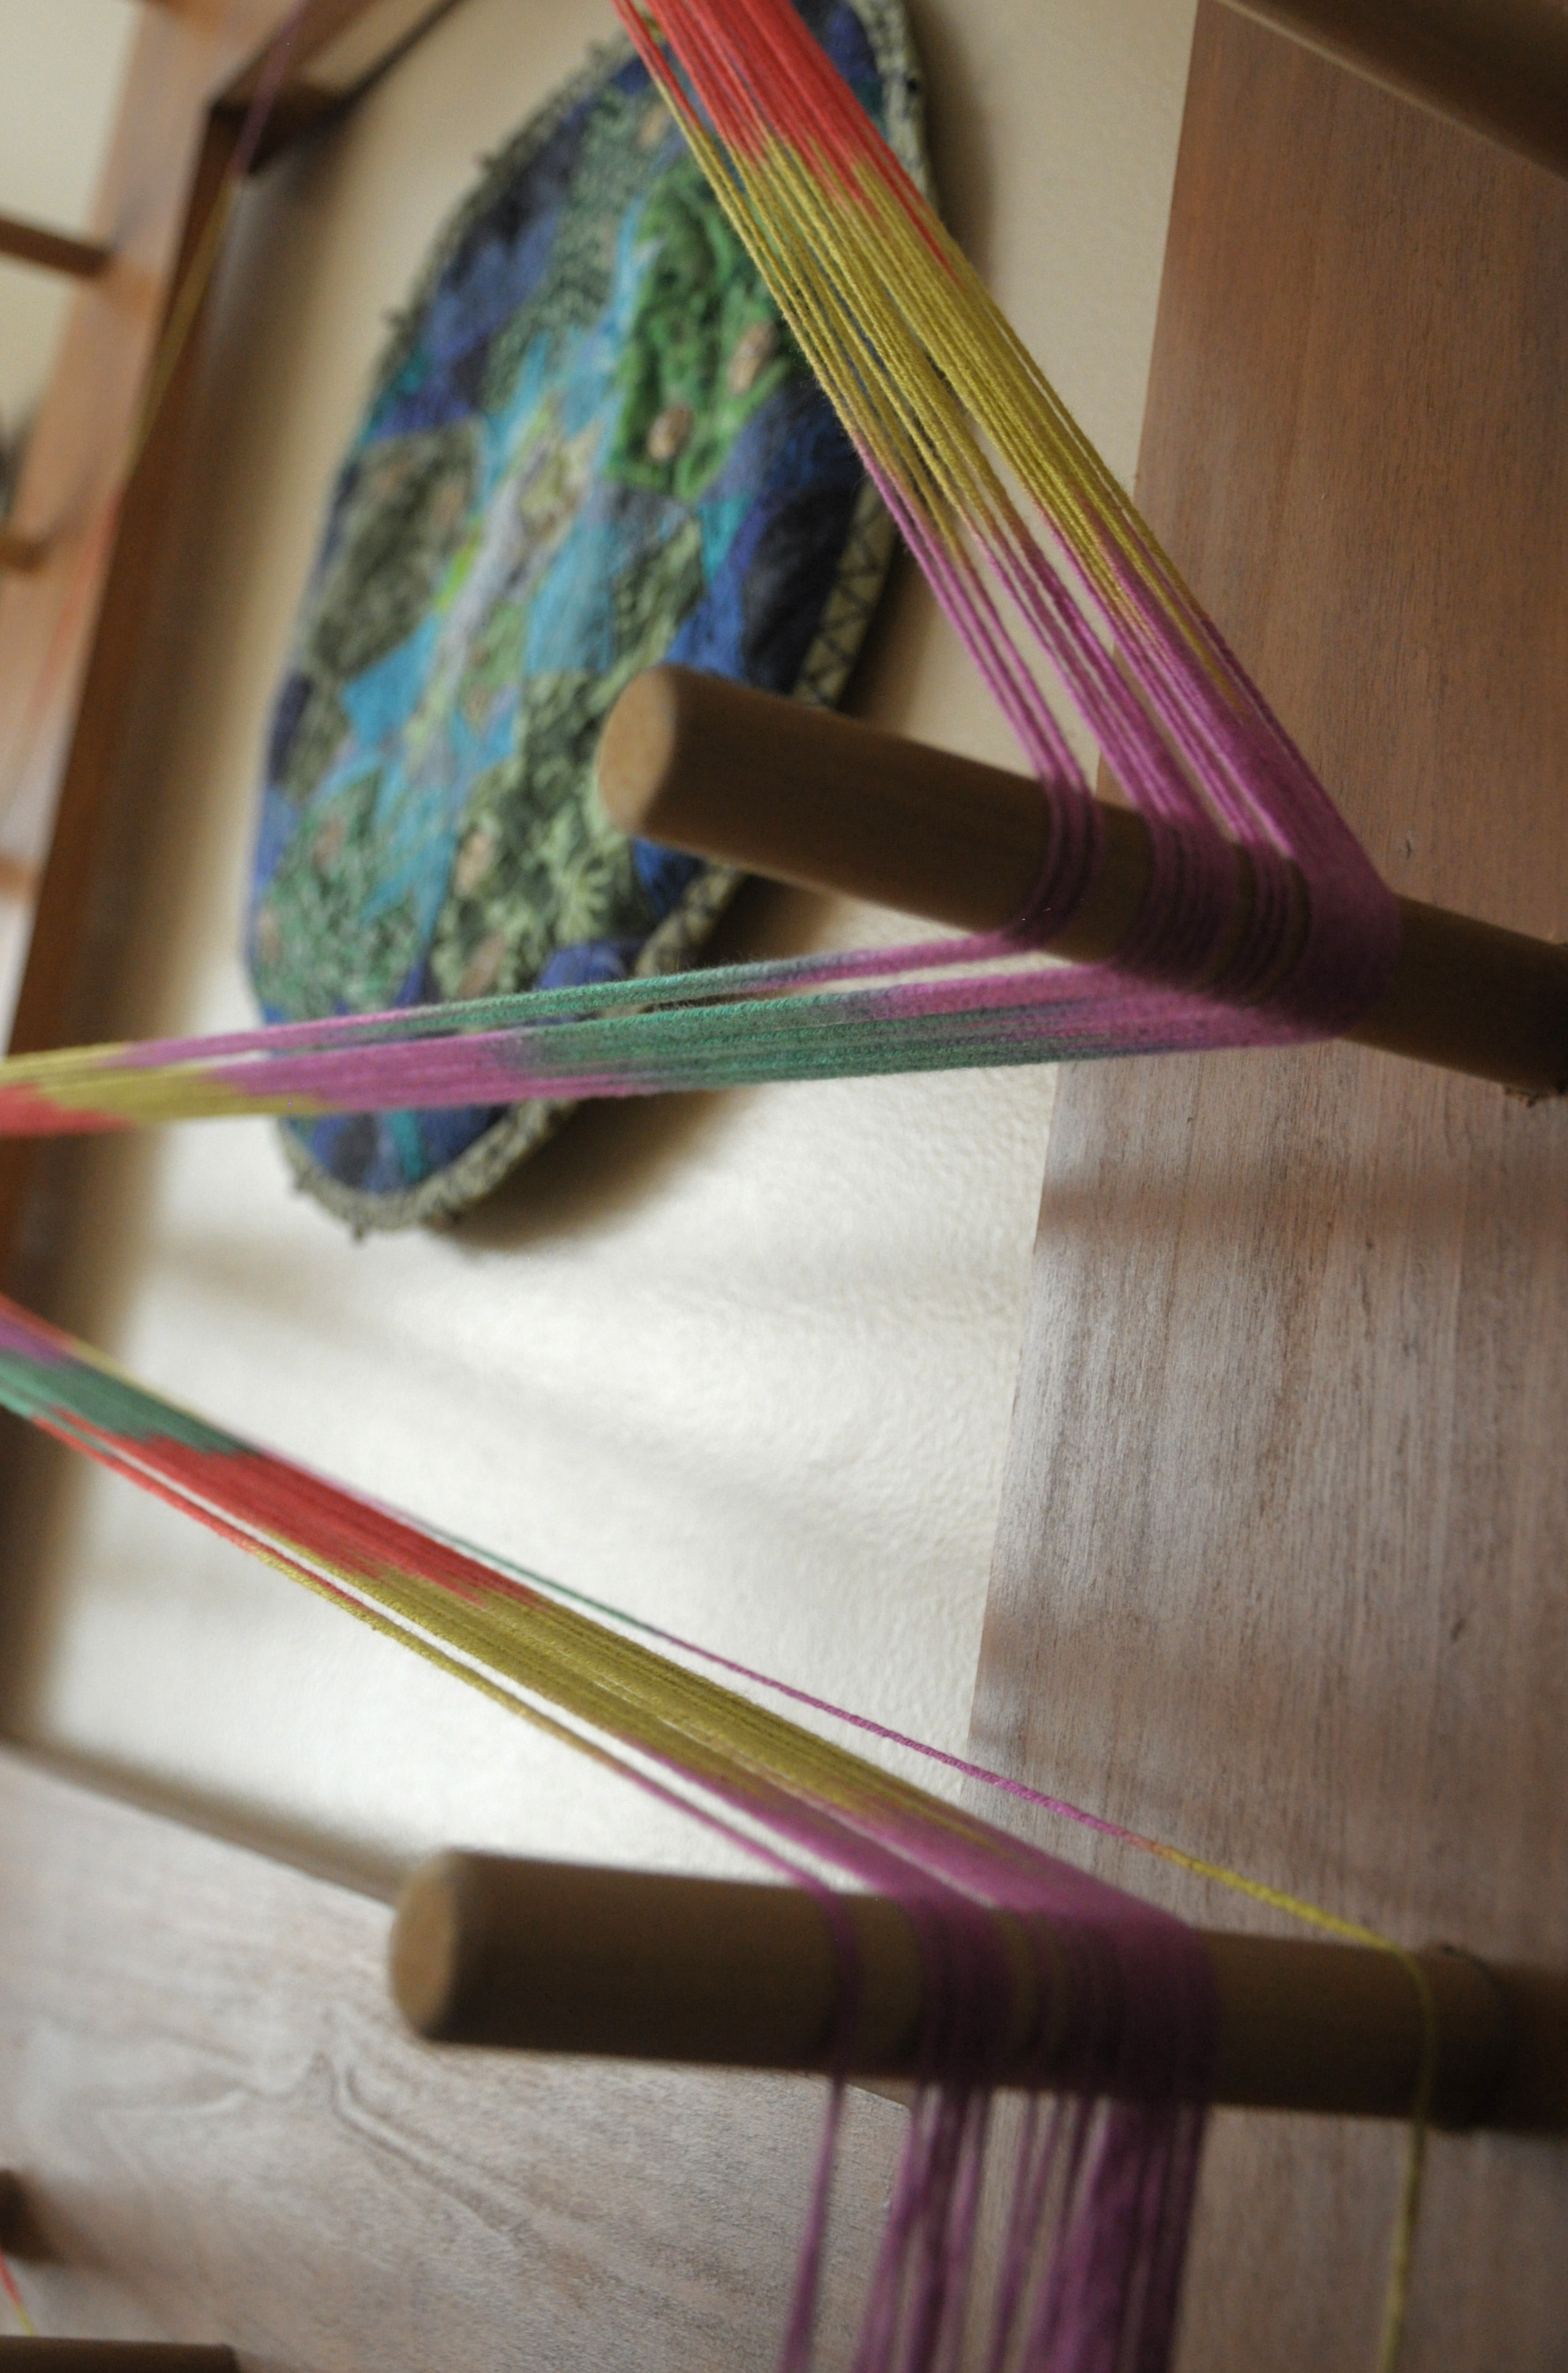
I took about a million pictures of this warp – it was so pretty!

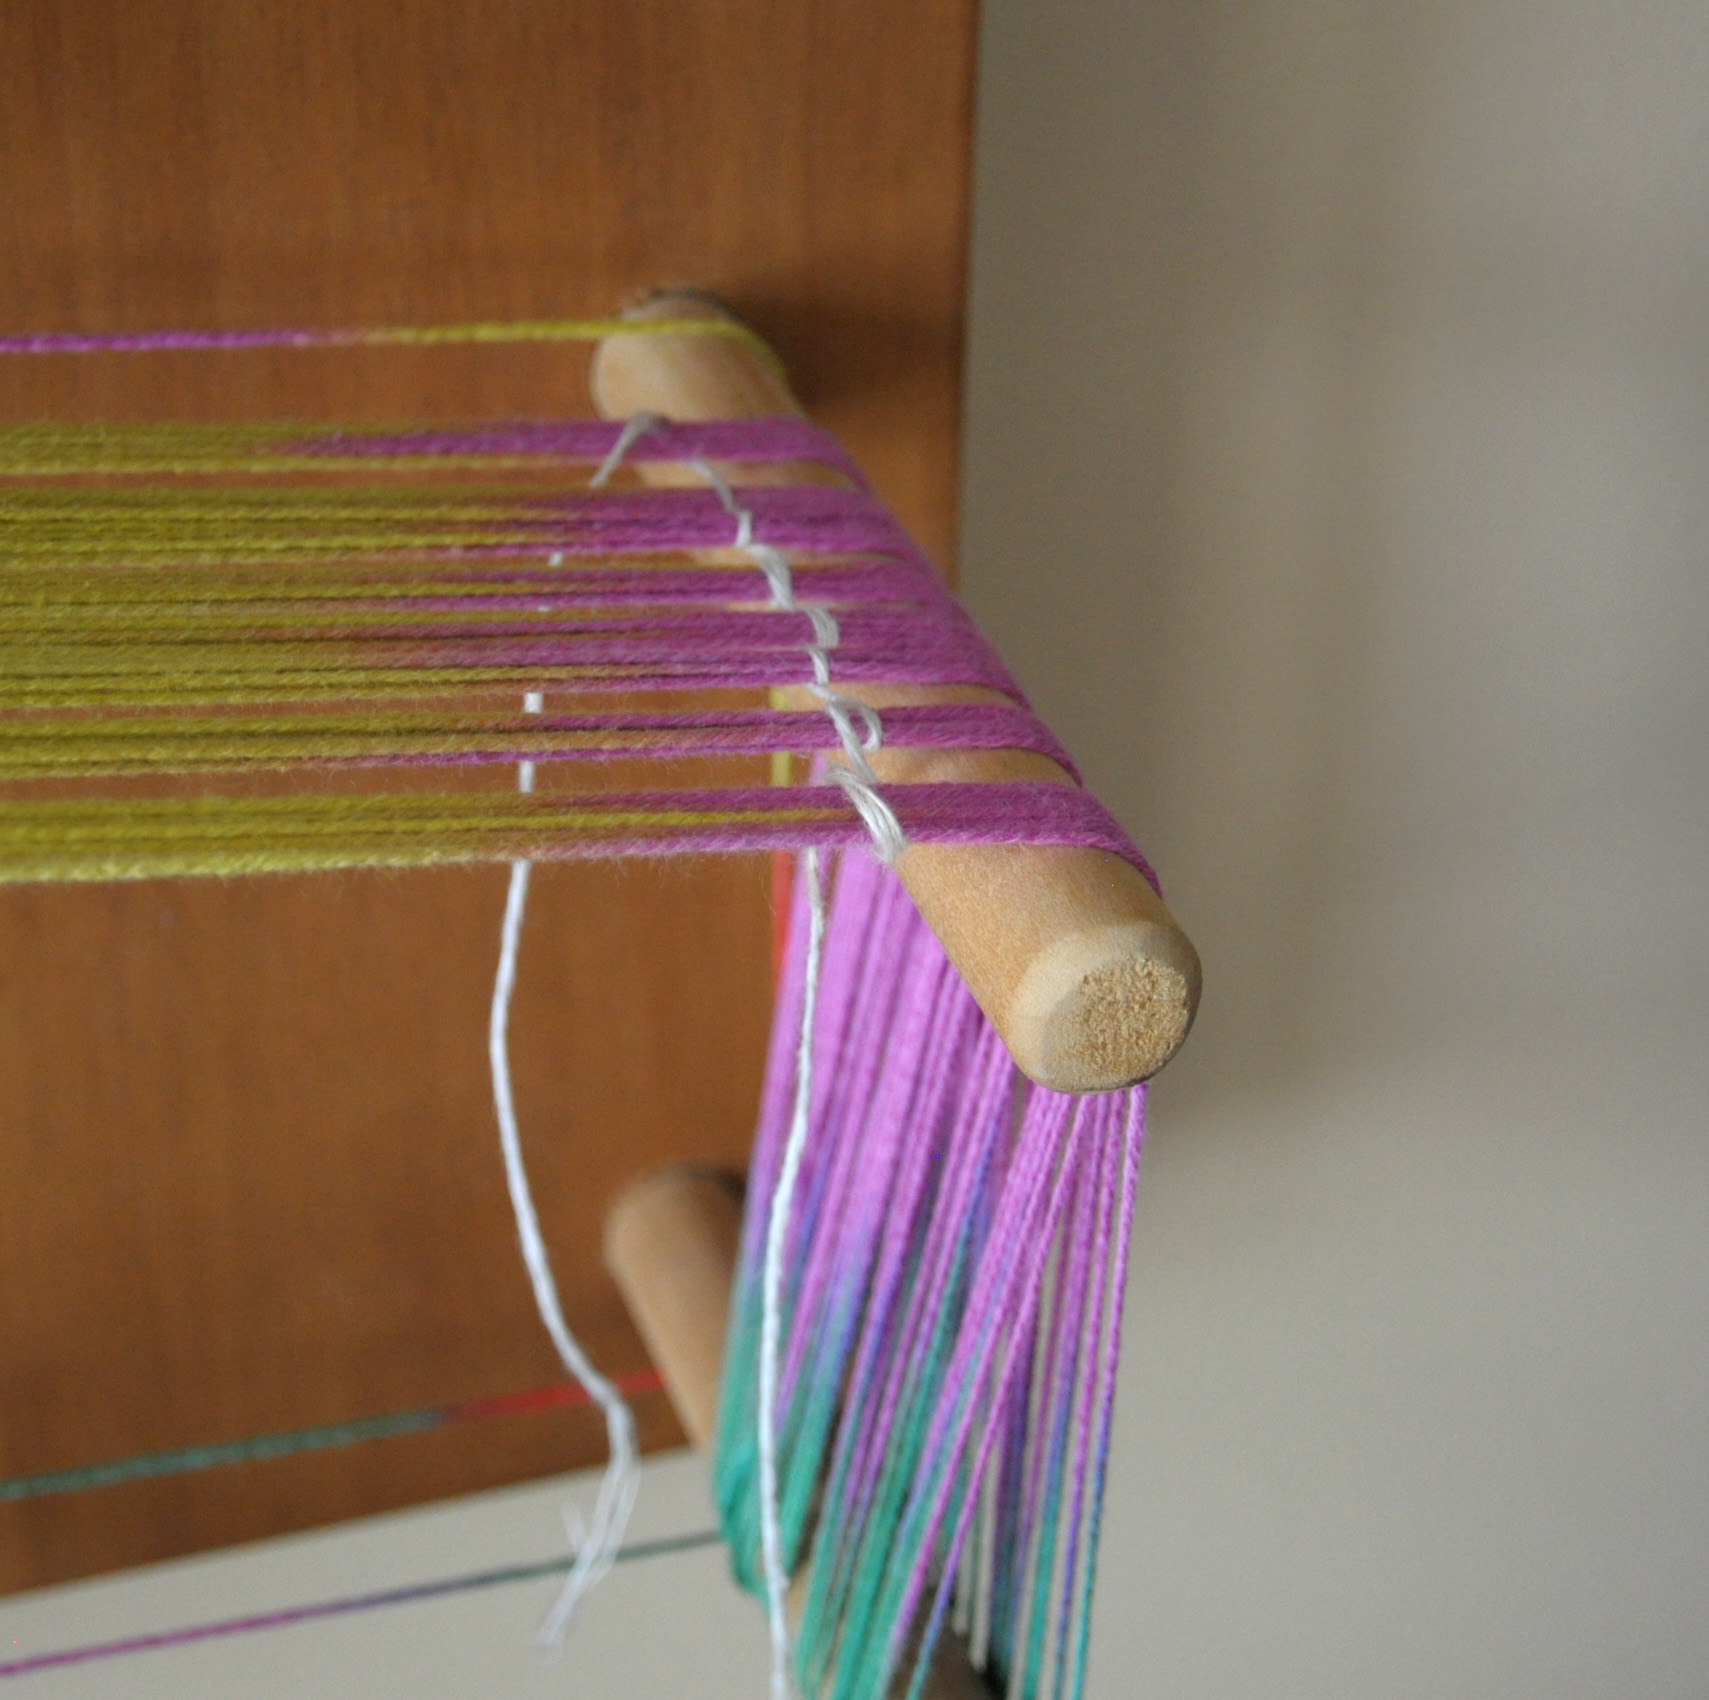
When direct-warping to the rigid heddle, it’s easy enough to count my warp ends. But when using a warping board, I like to use a string to help. I knew that I was going to have 8 stripes of my multi, at 8 ends each. So I just wrapped my contrasting yarn around the warp every 8 ends.

ColorPool_5

After warping my 9 stripes-worth of black, I was all ready to tie-on. In retrospect, I could/should have only cut one end of my warp. If I had done that, I could have simply looped one end around my back dowel, rather than having to tie all the ends on. It’s been awhile since I used a warping board!

ColorPool_6

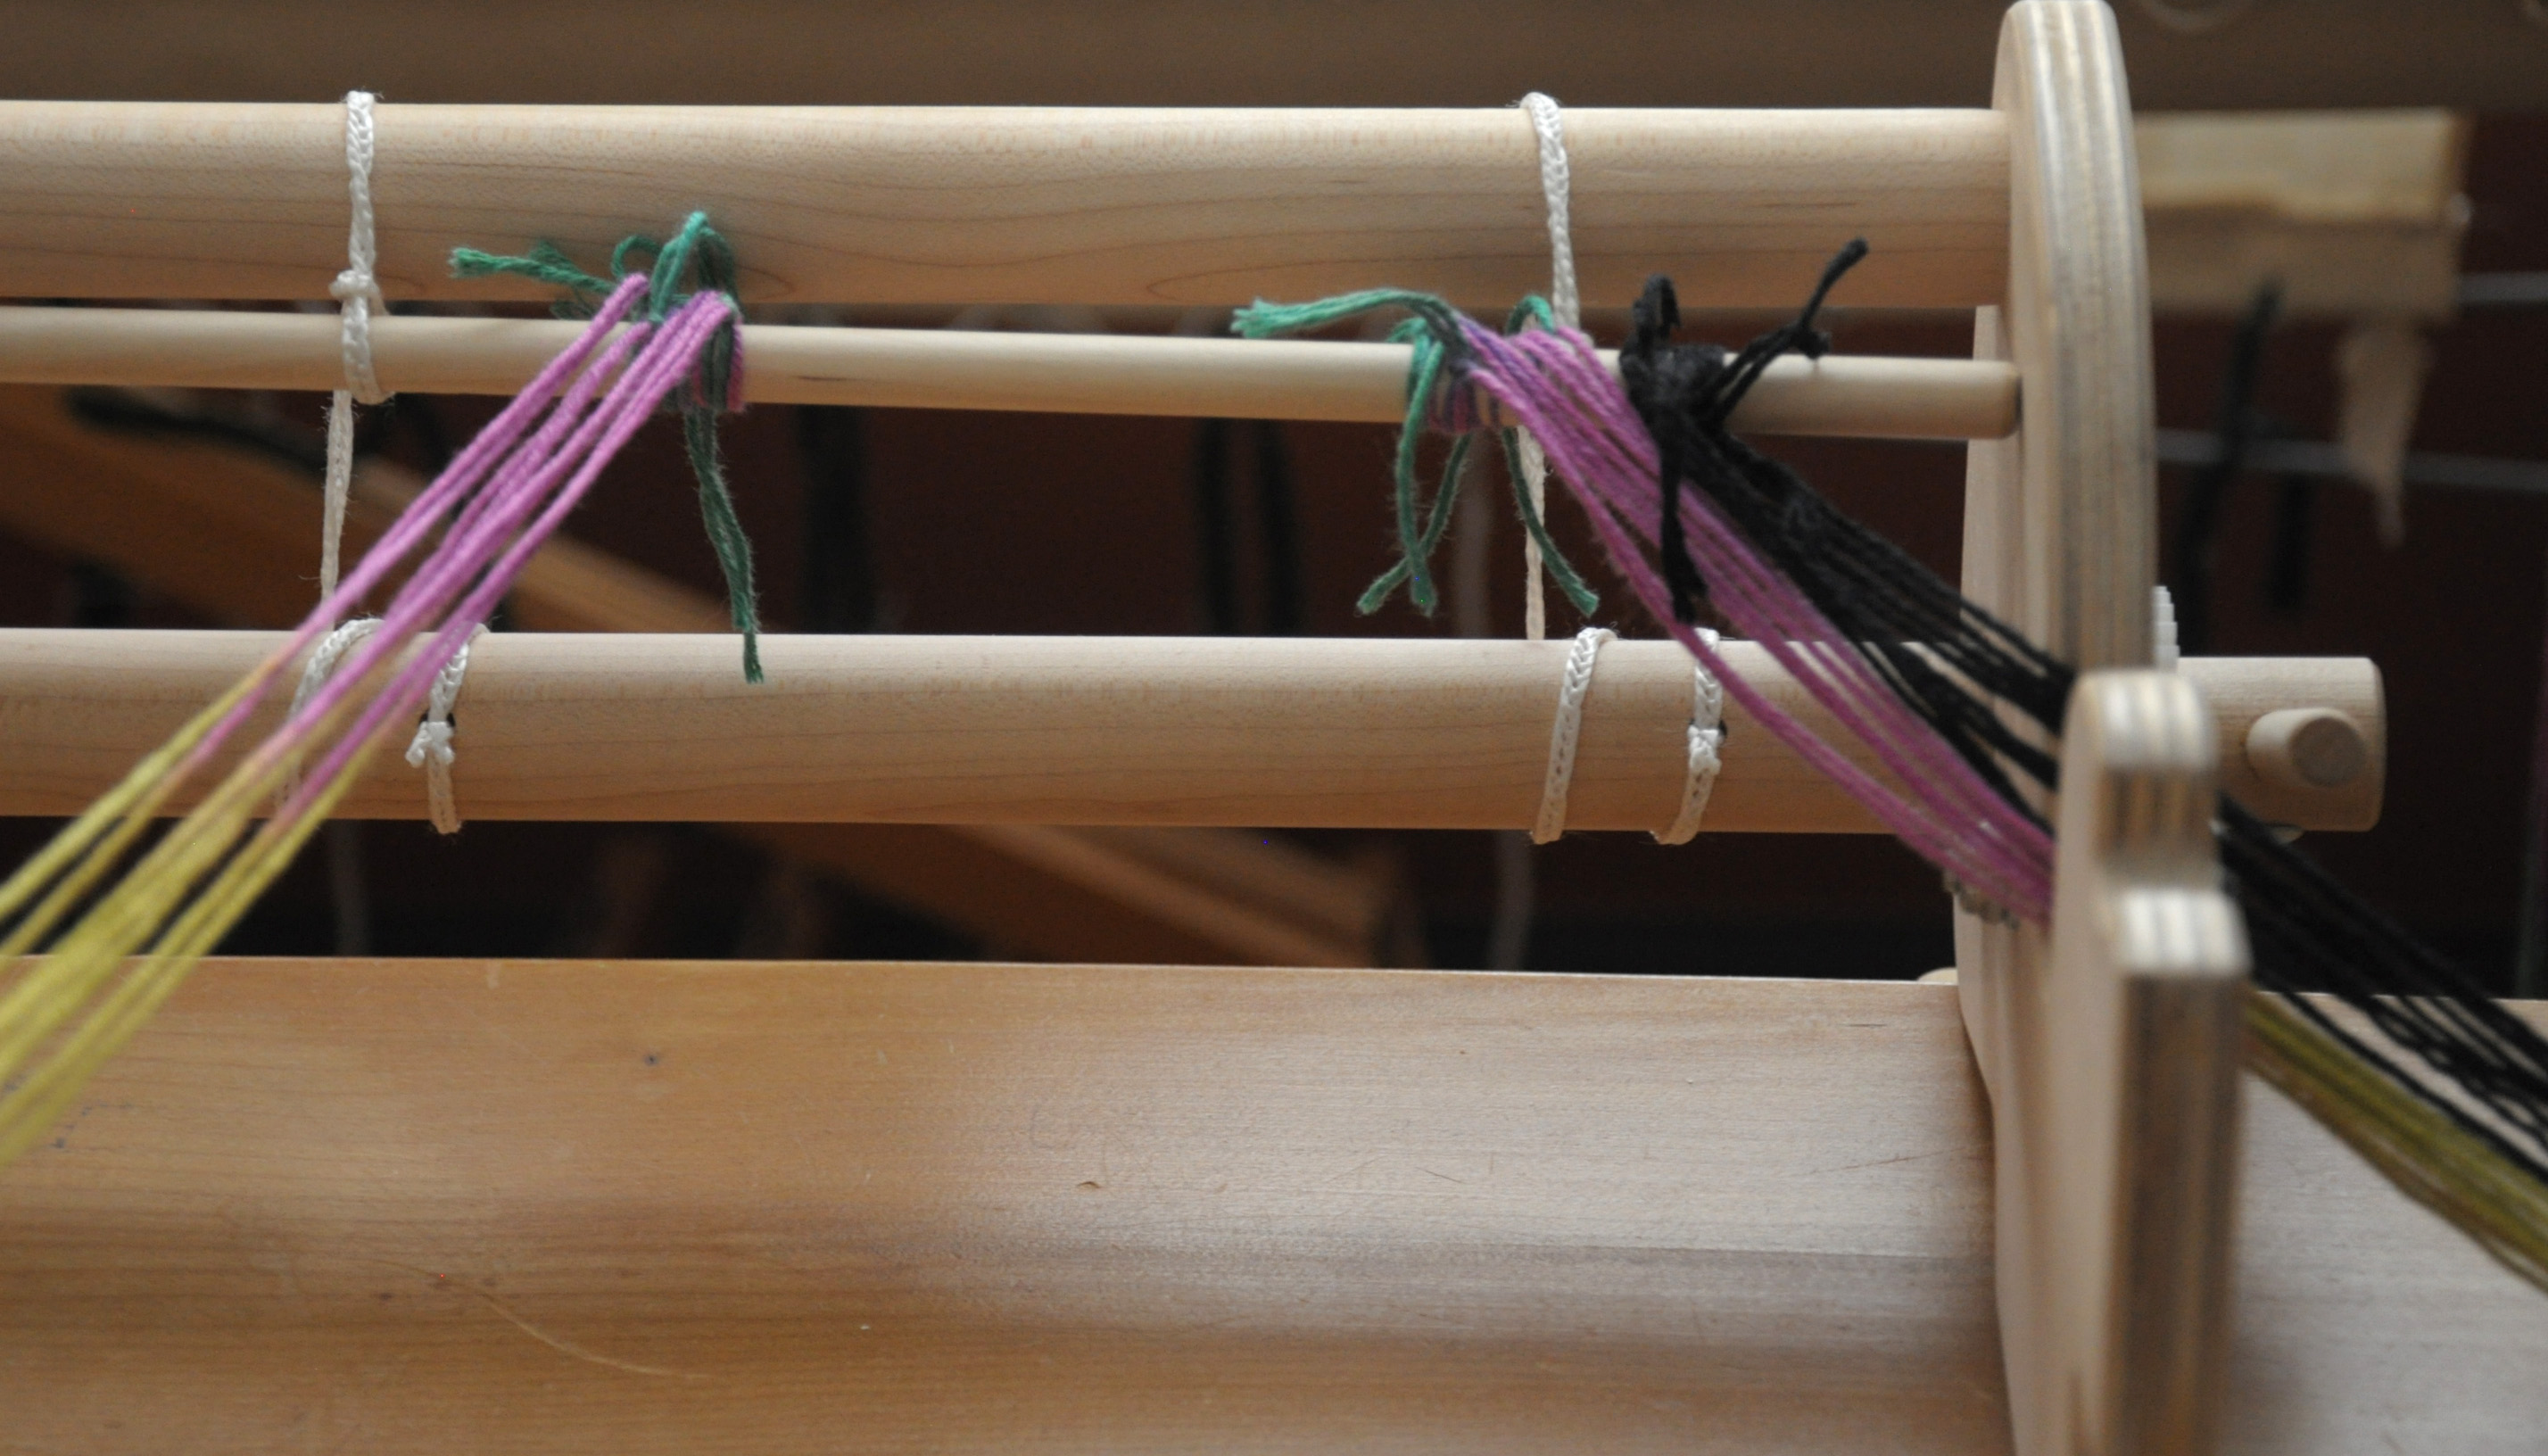
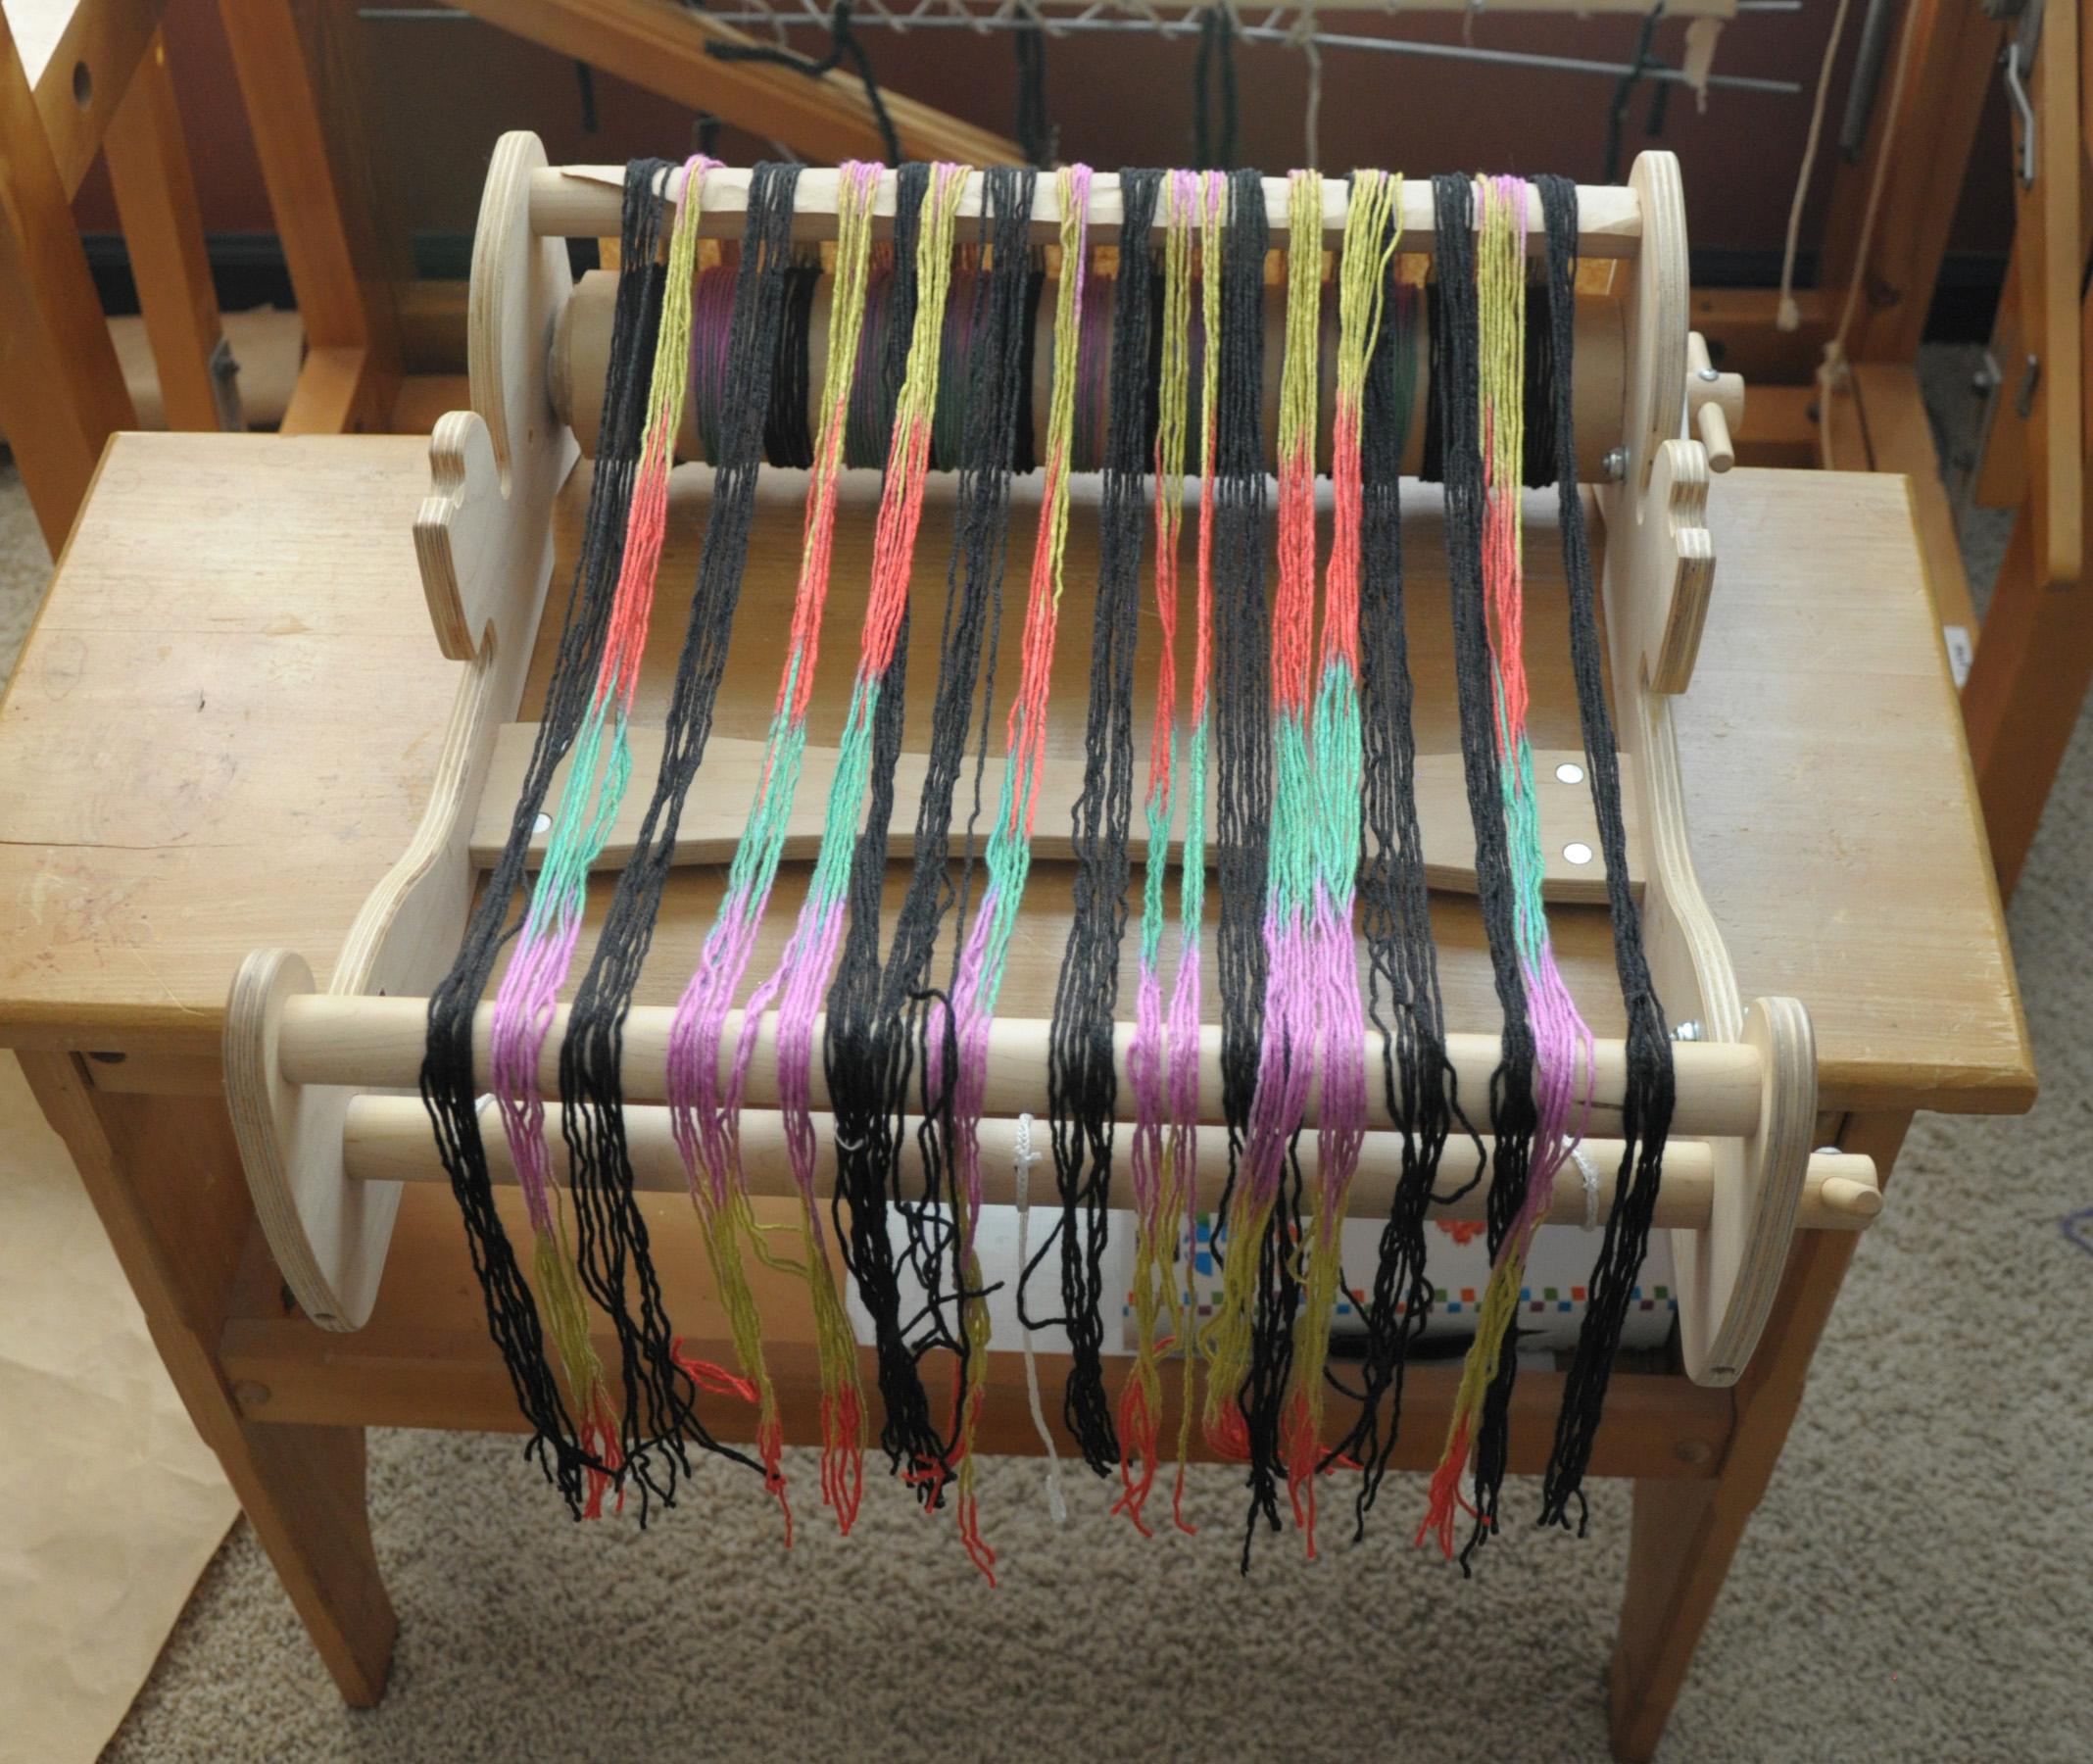
After tying all the ends on, I made sure they were even and ready to be wound on.
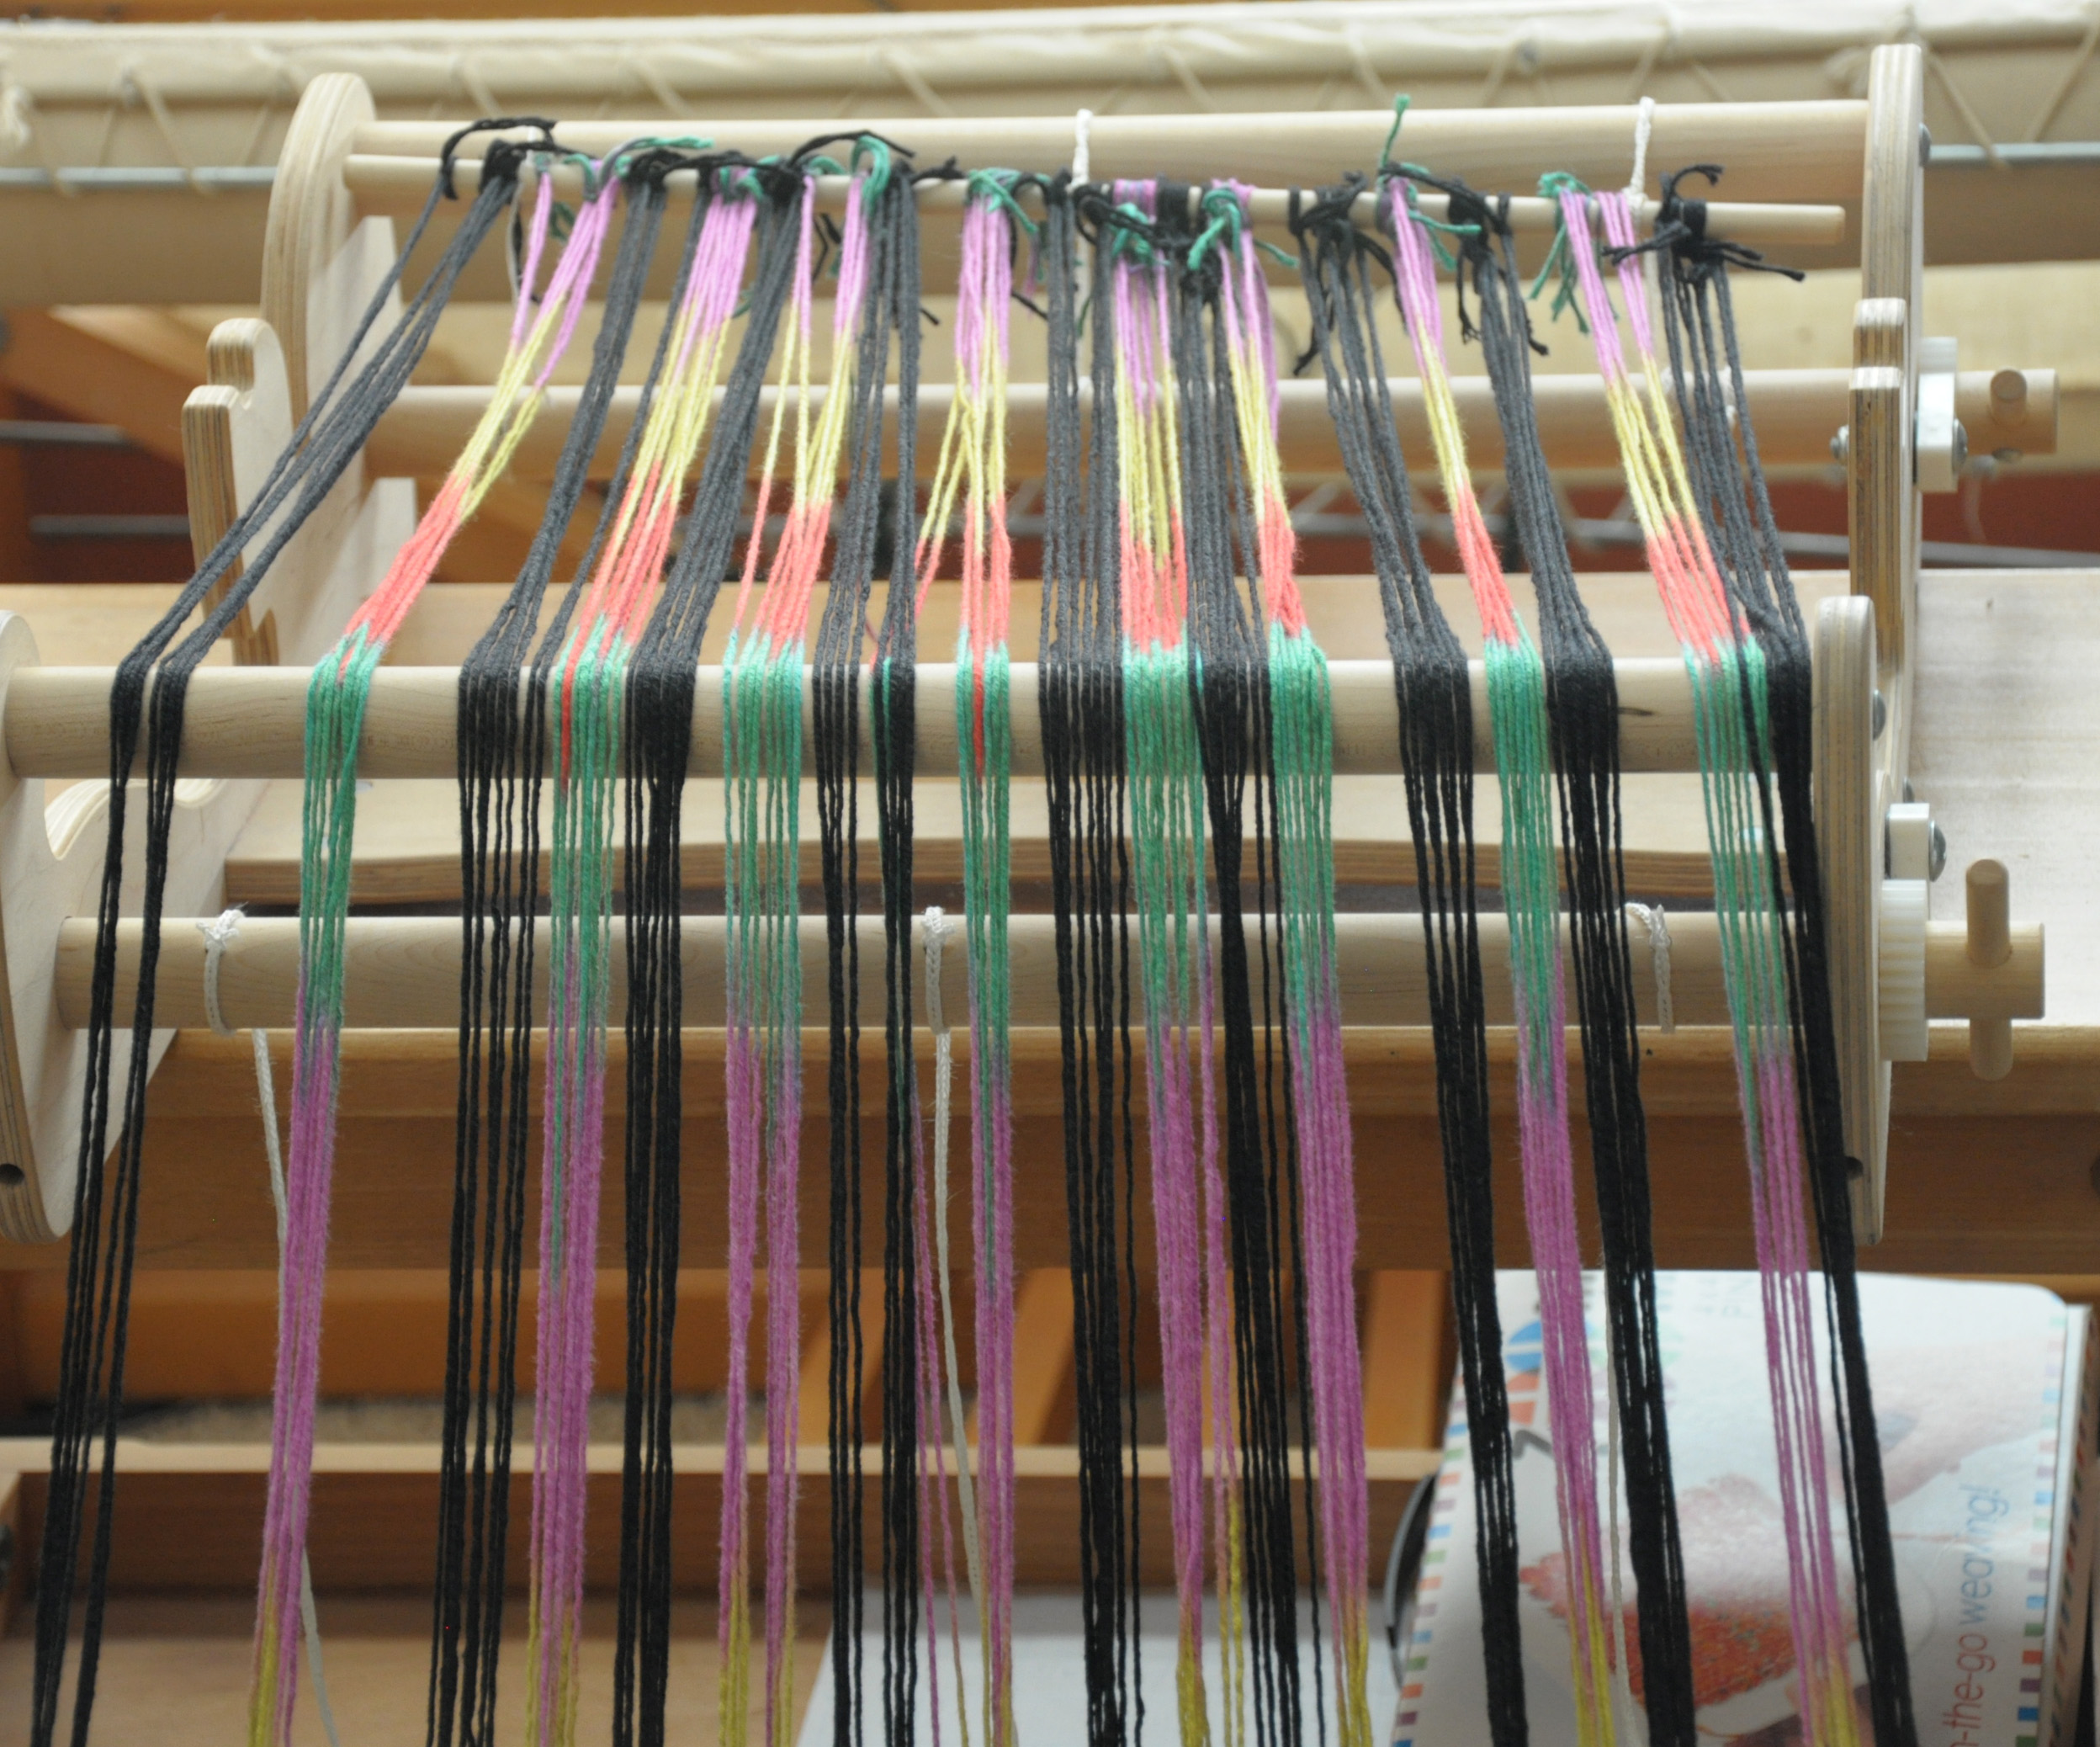
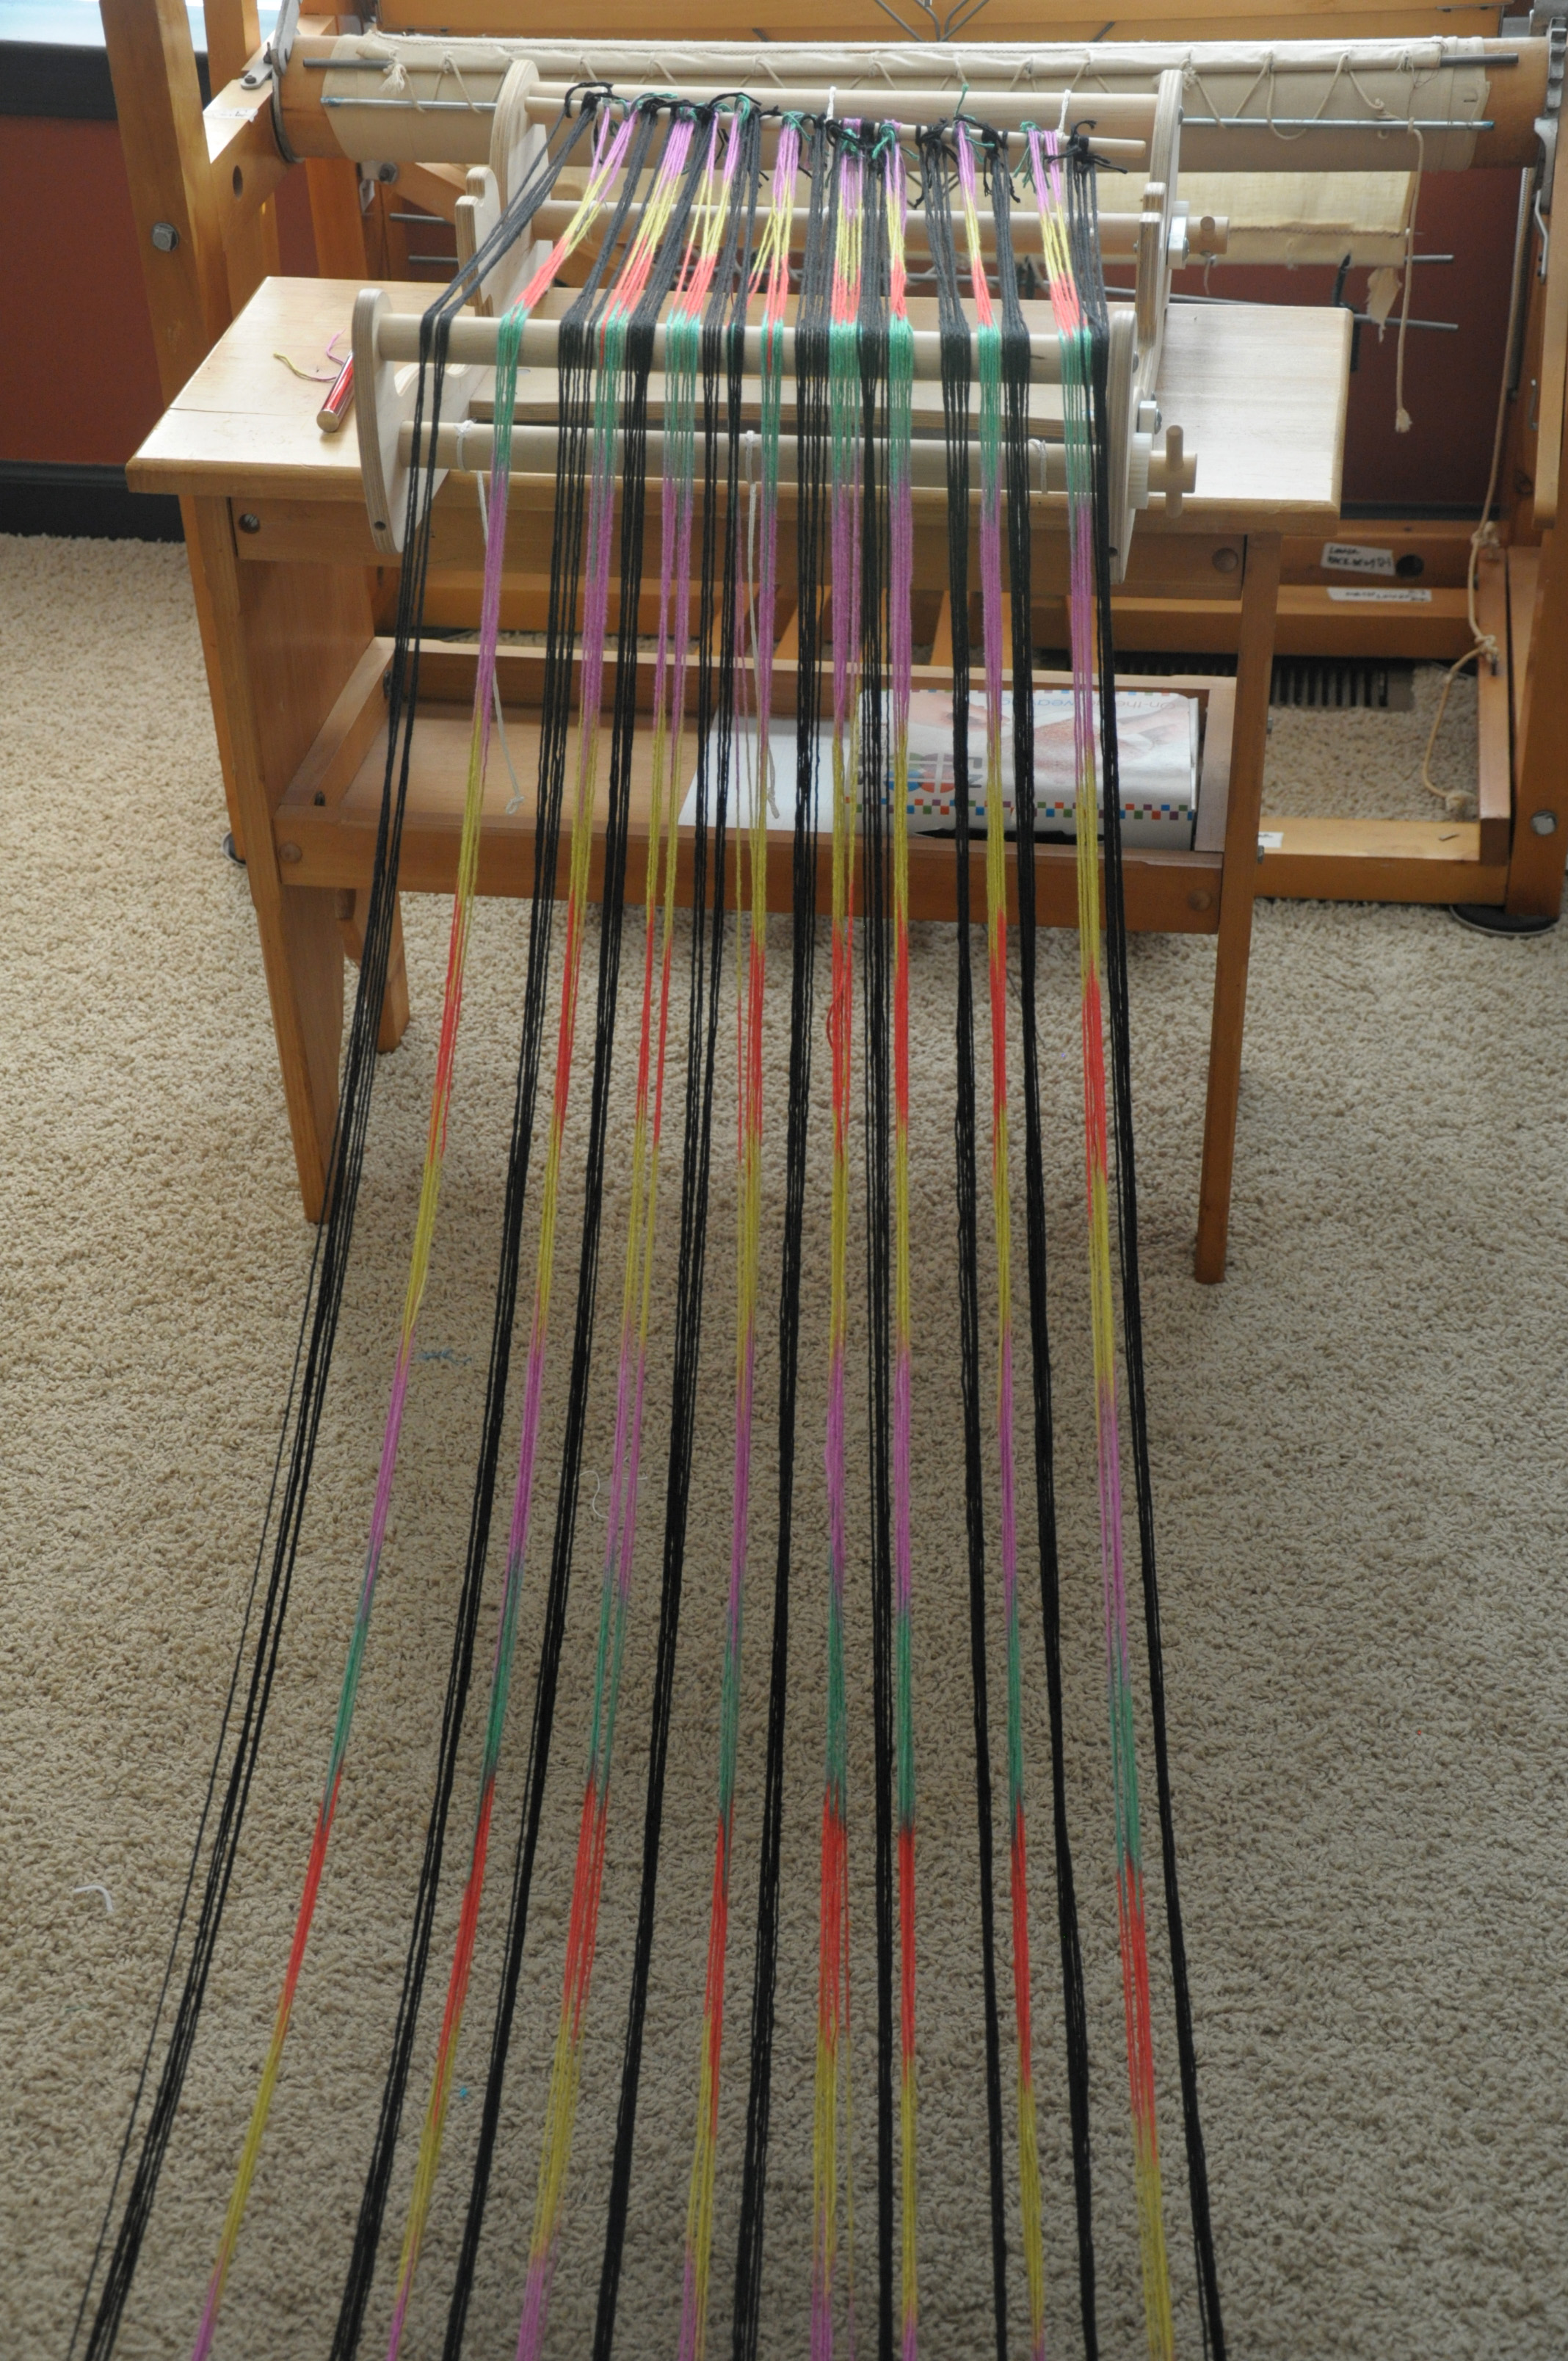
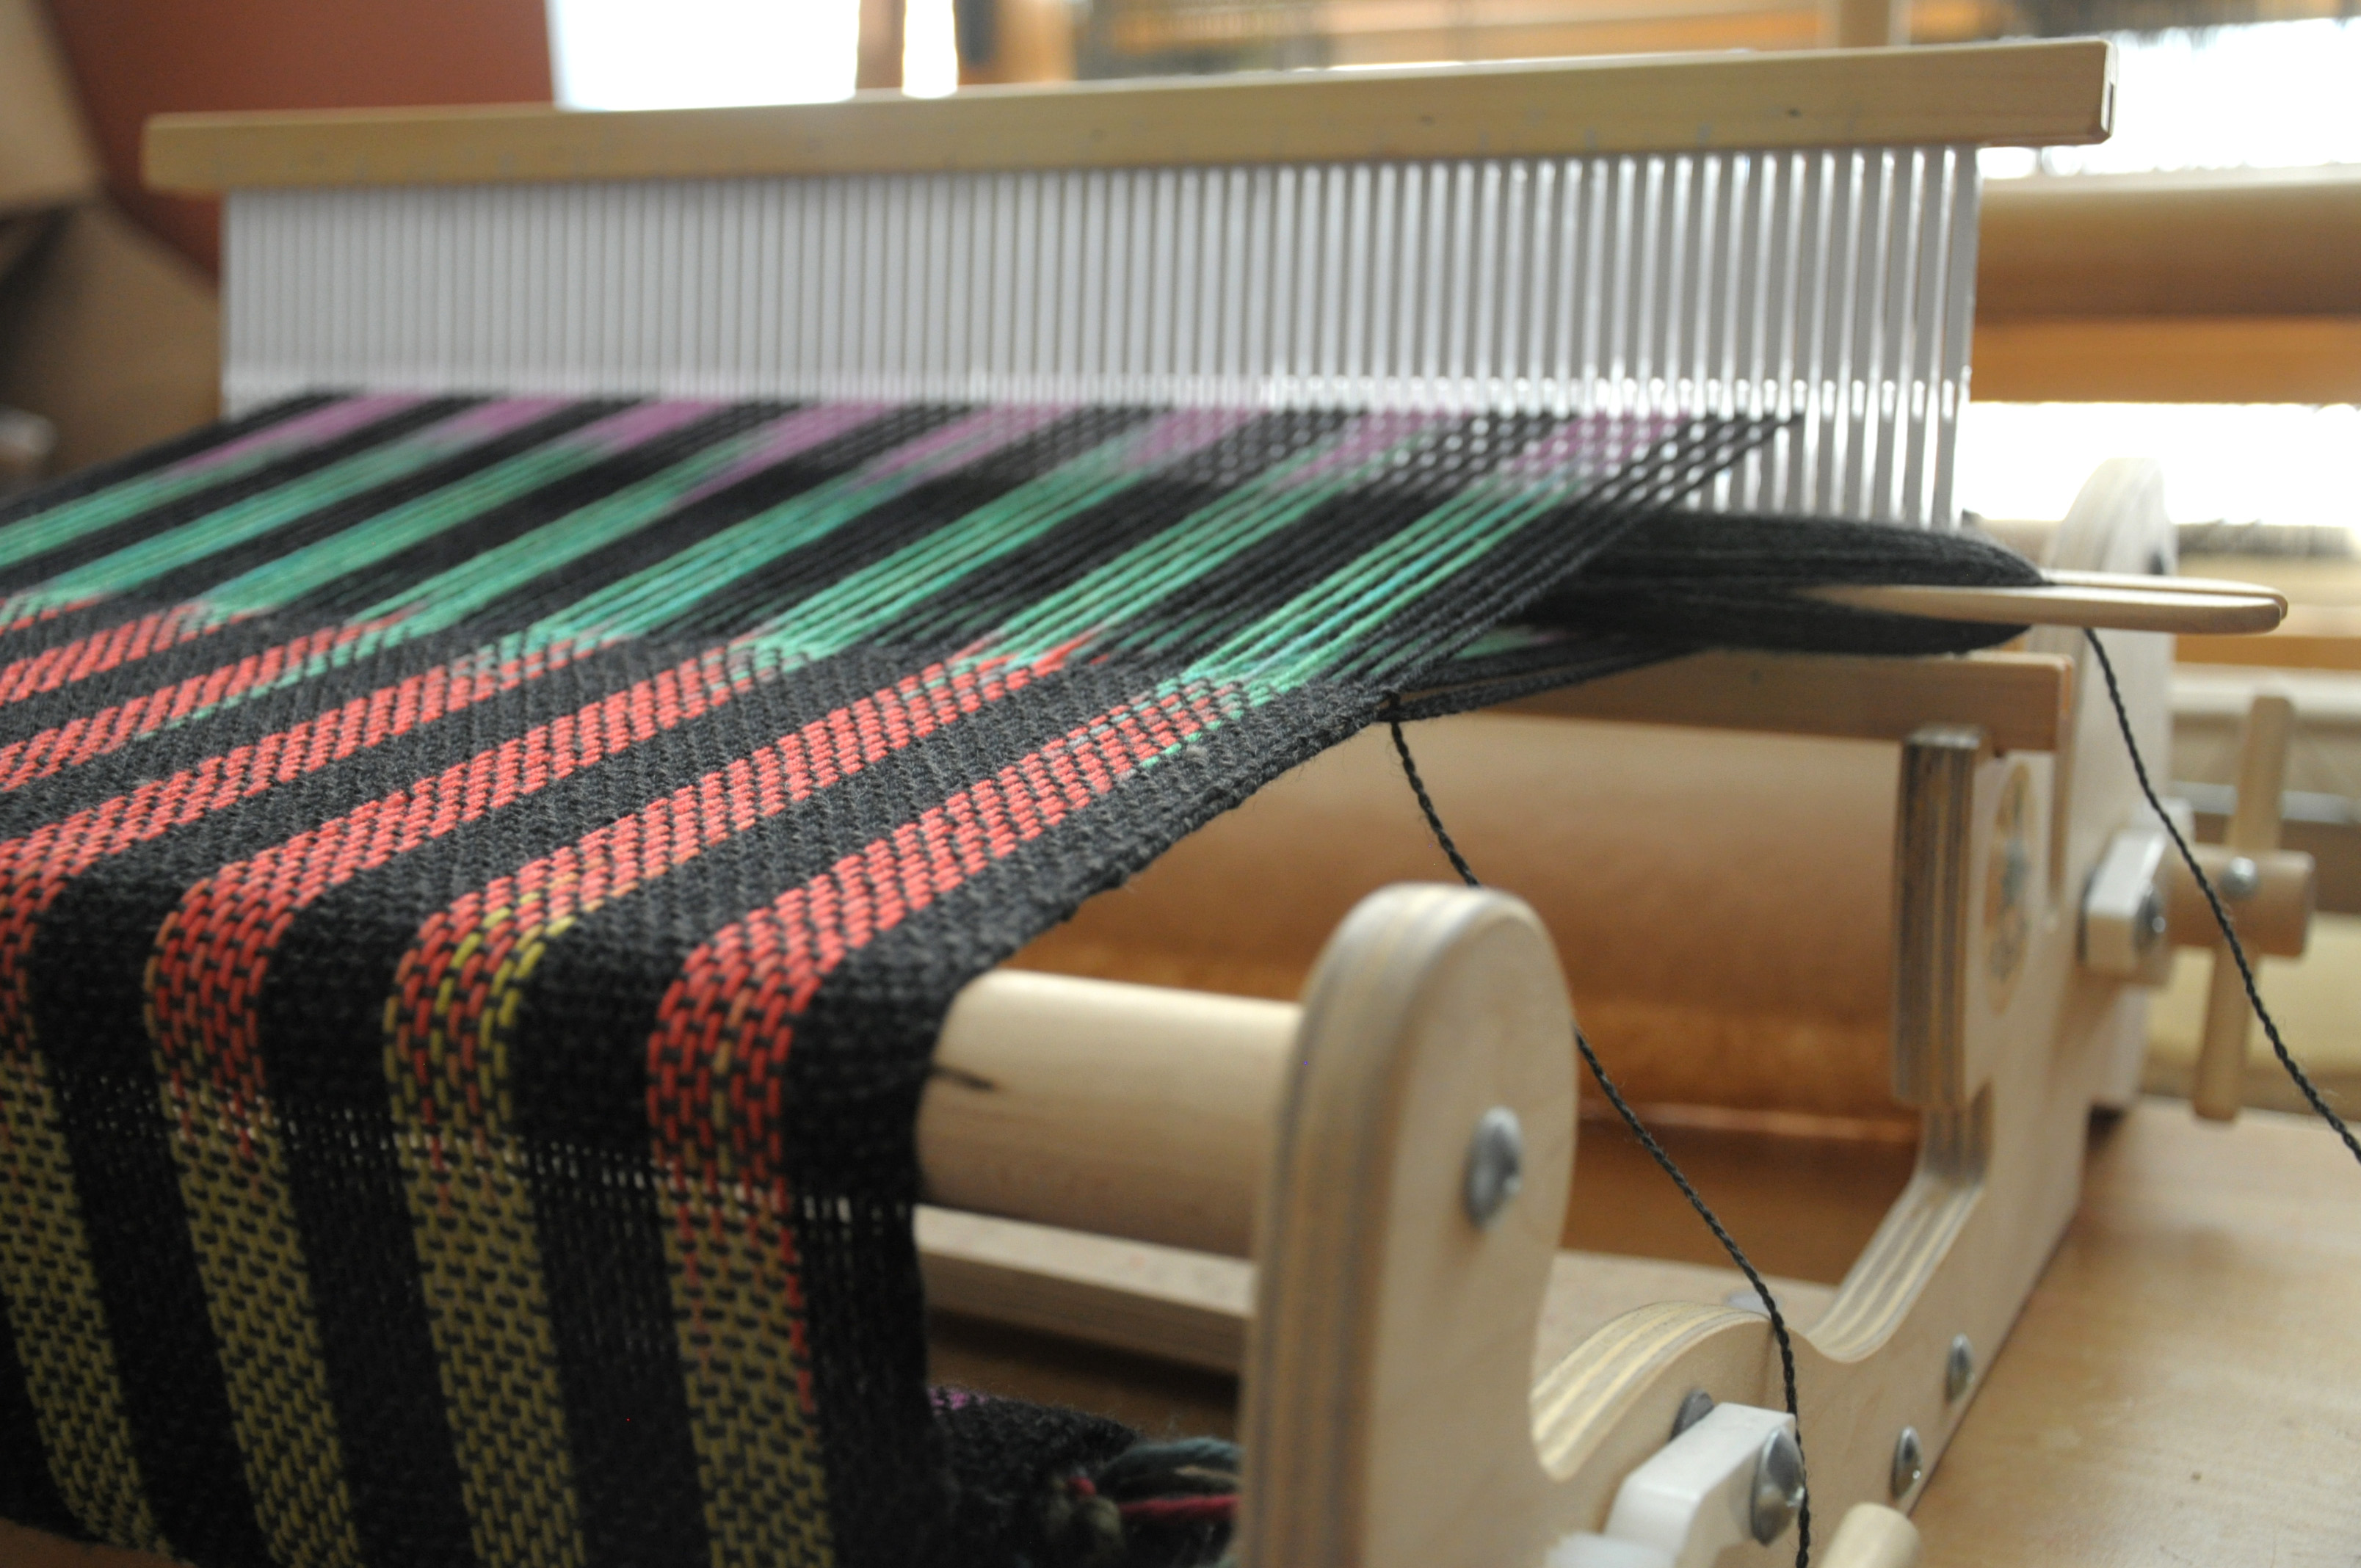
ColorPool_7

ColorPool_8

After winding:

ColorPool_9

And after tying onto the front dowel.

ColorPool_10

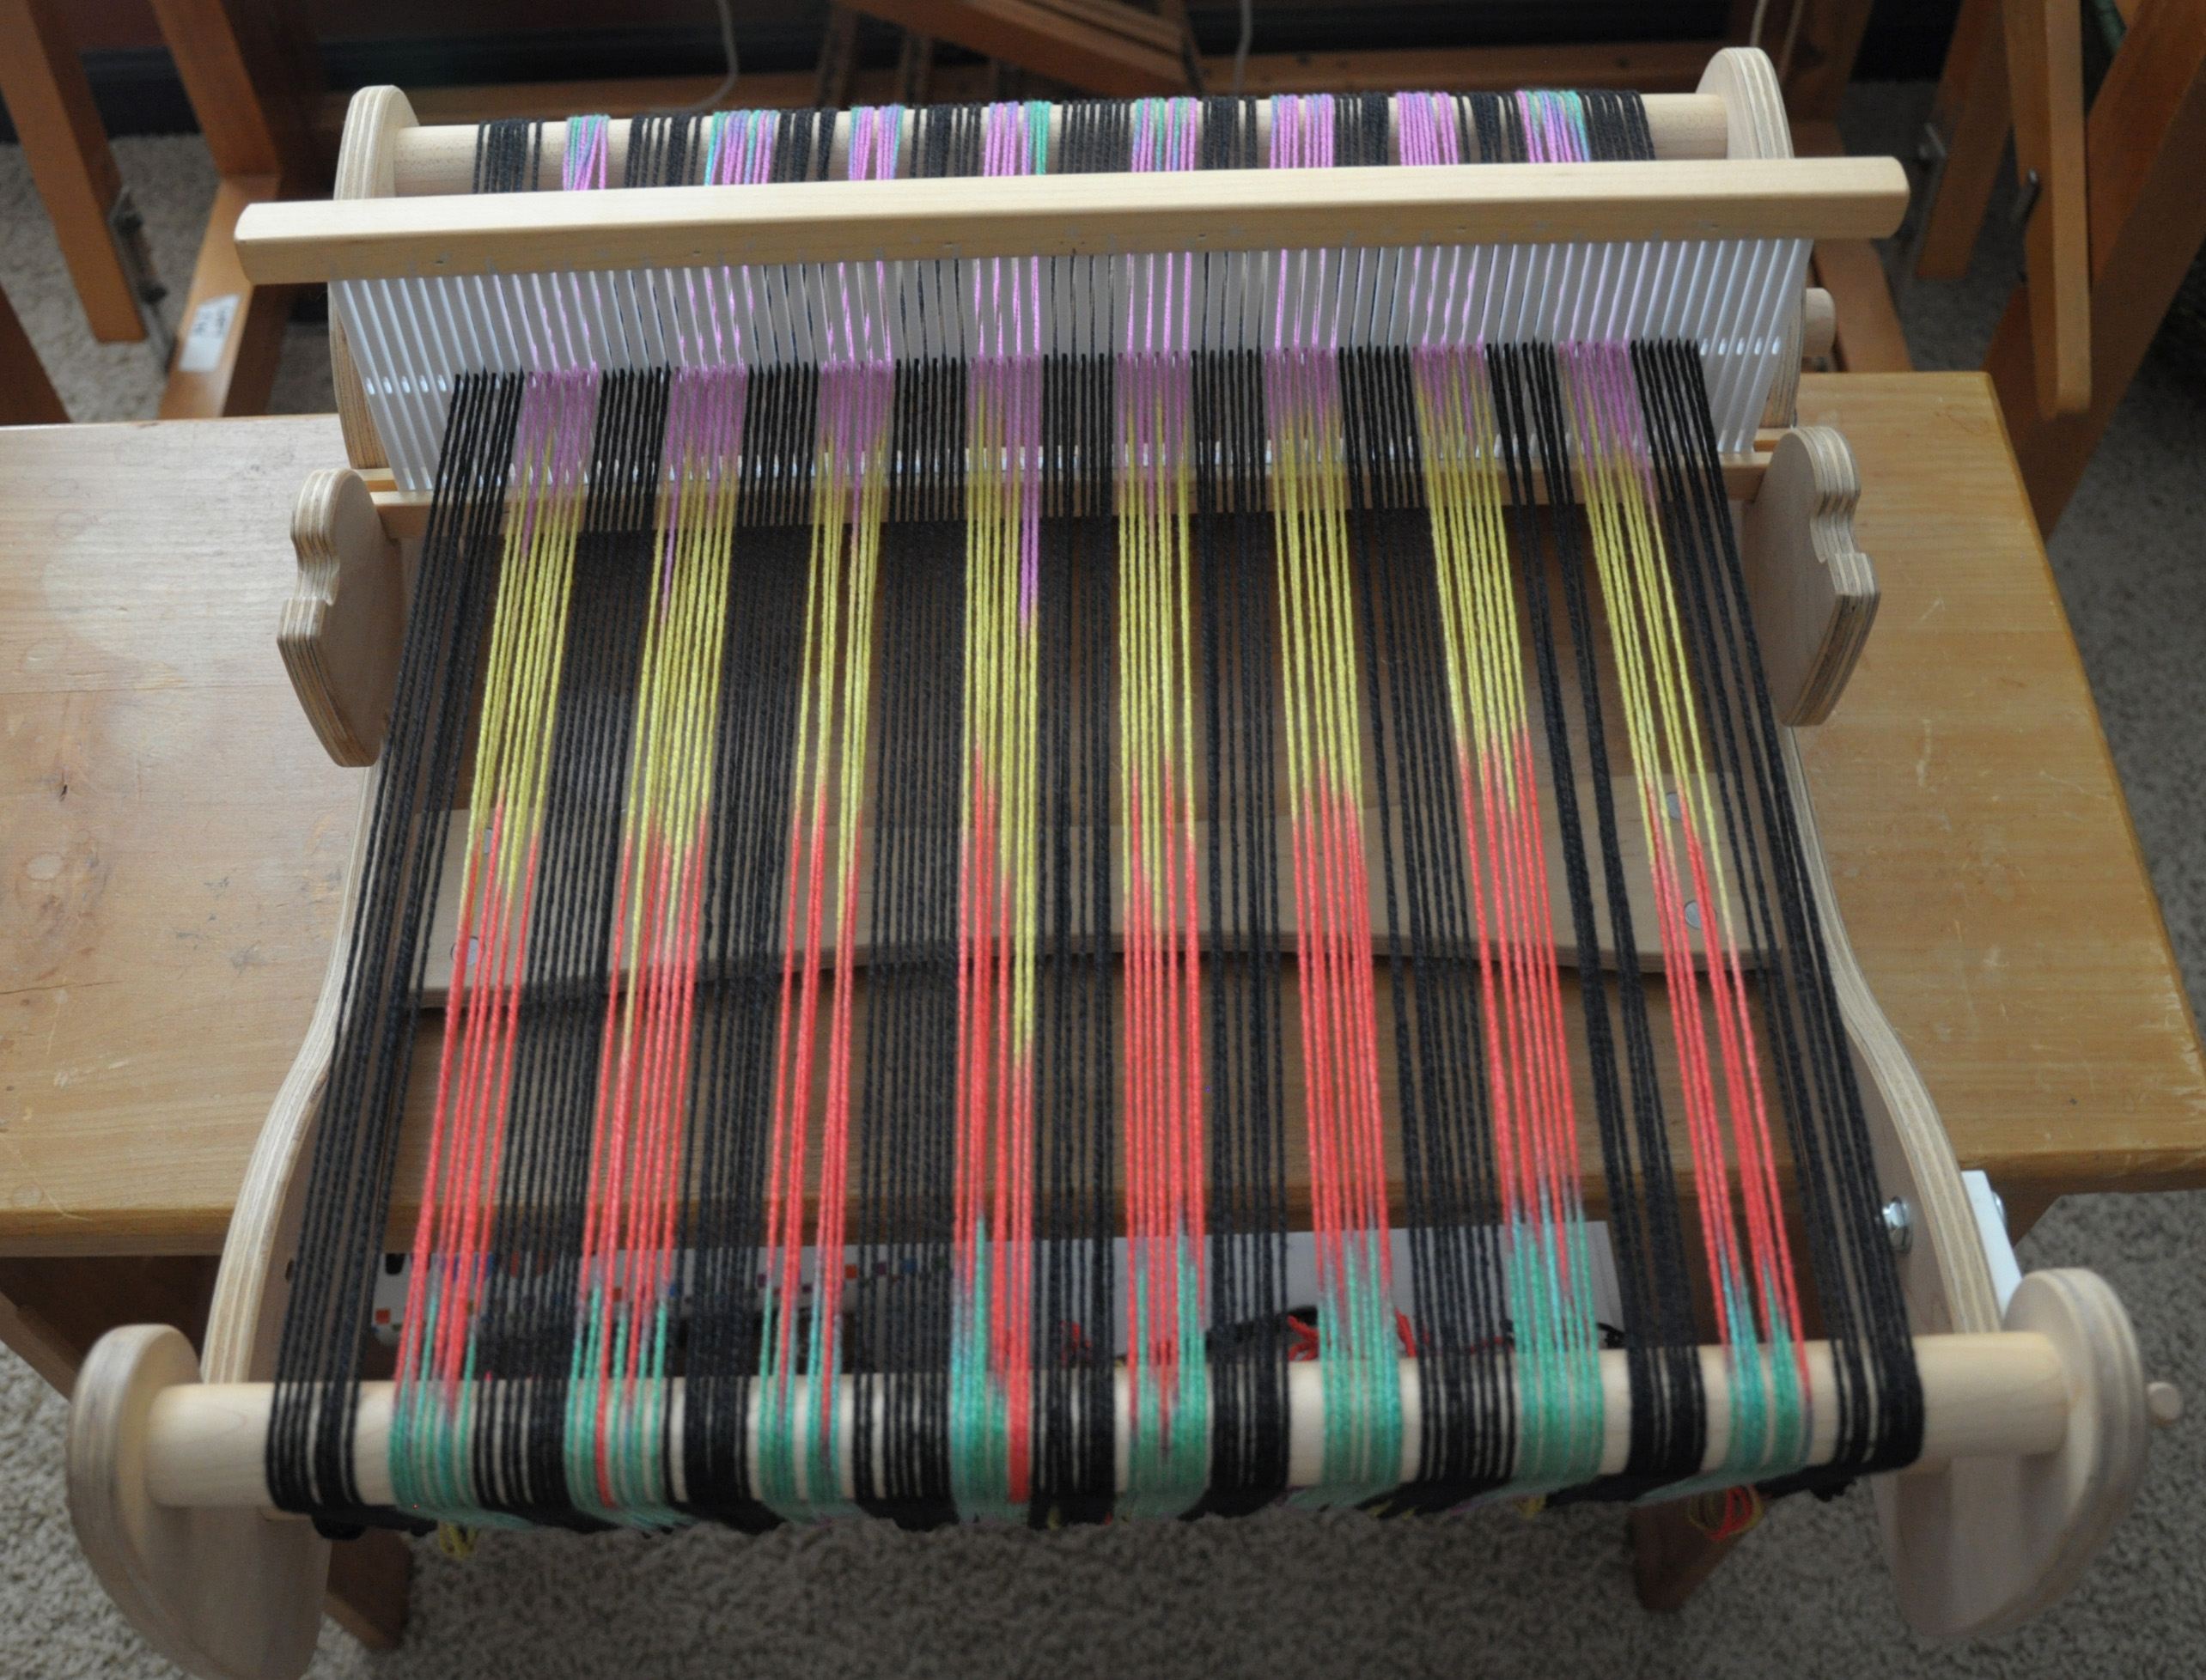
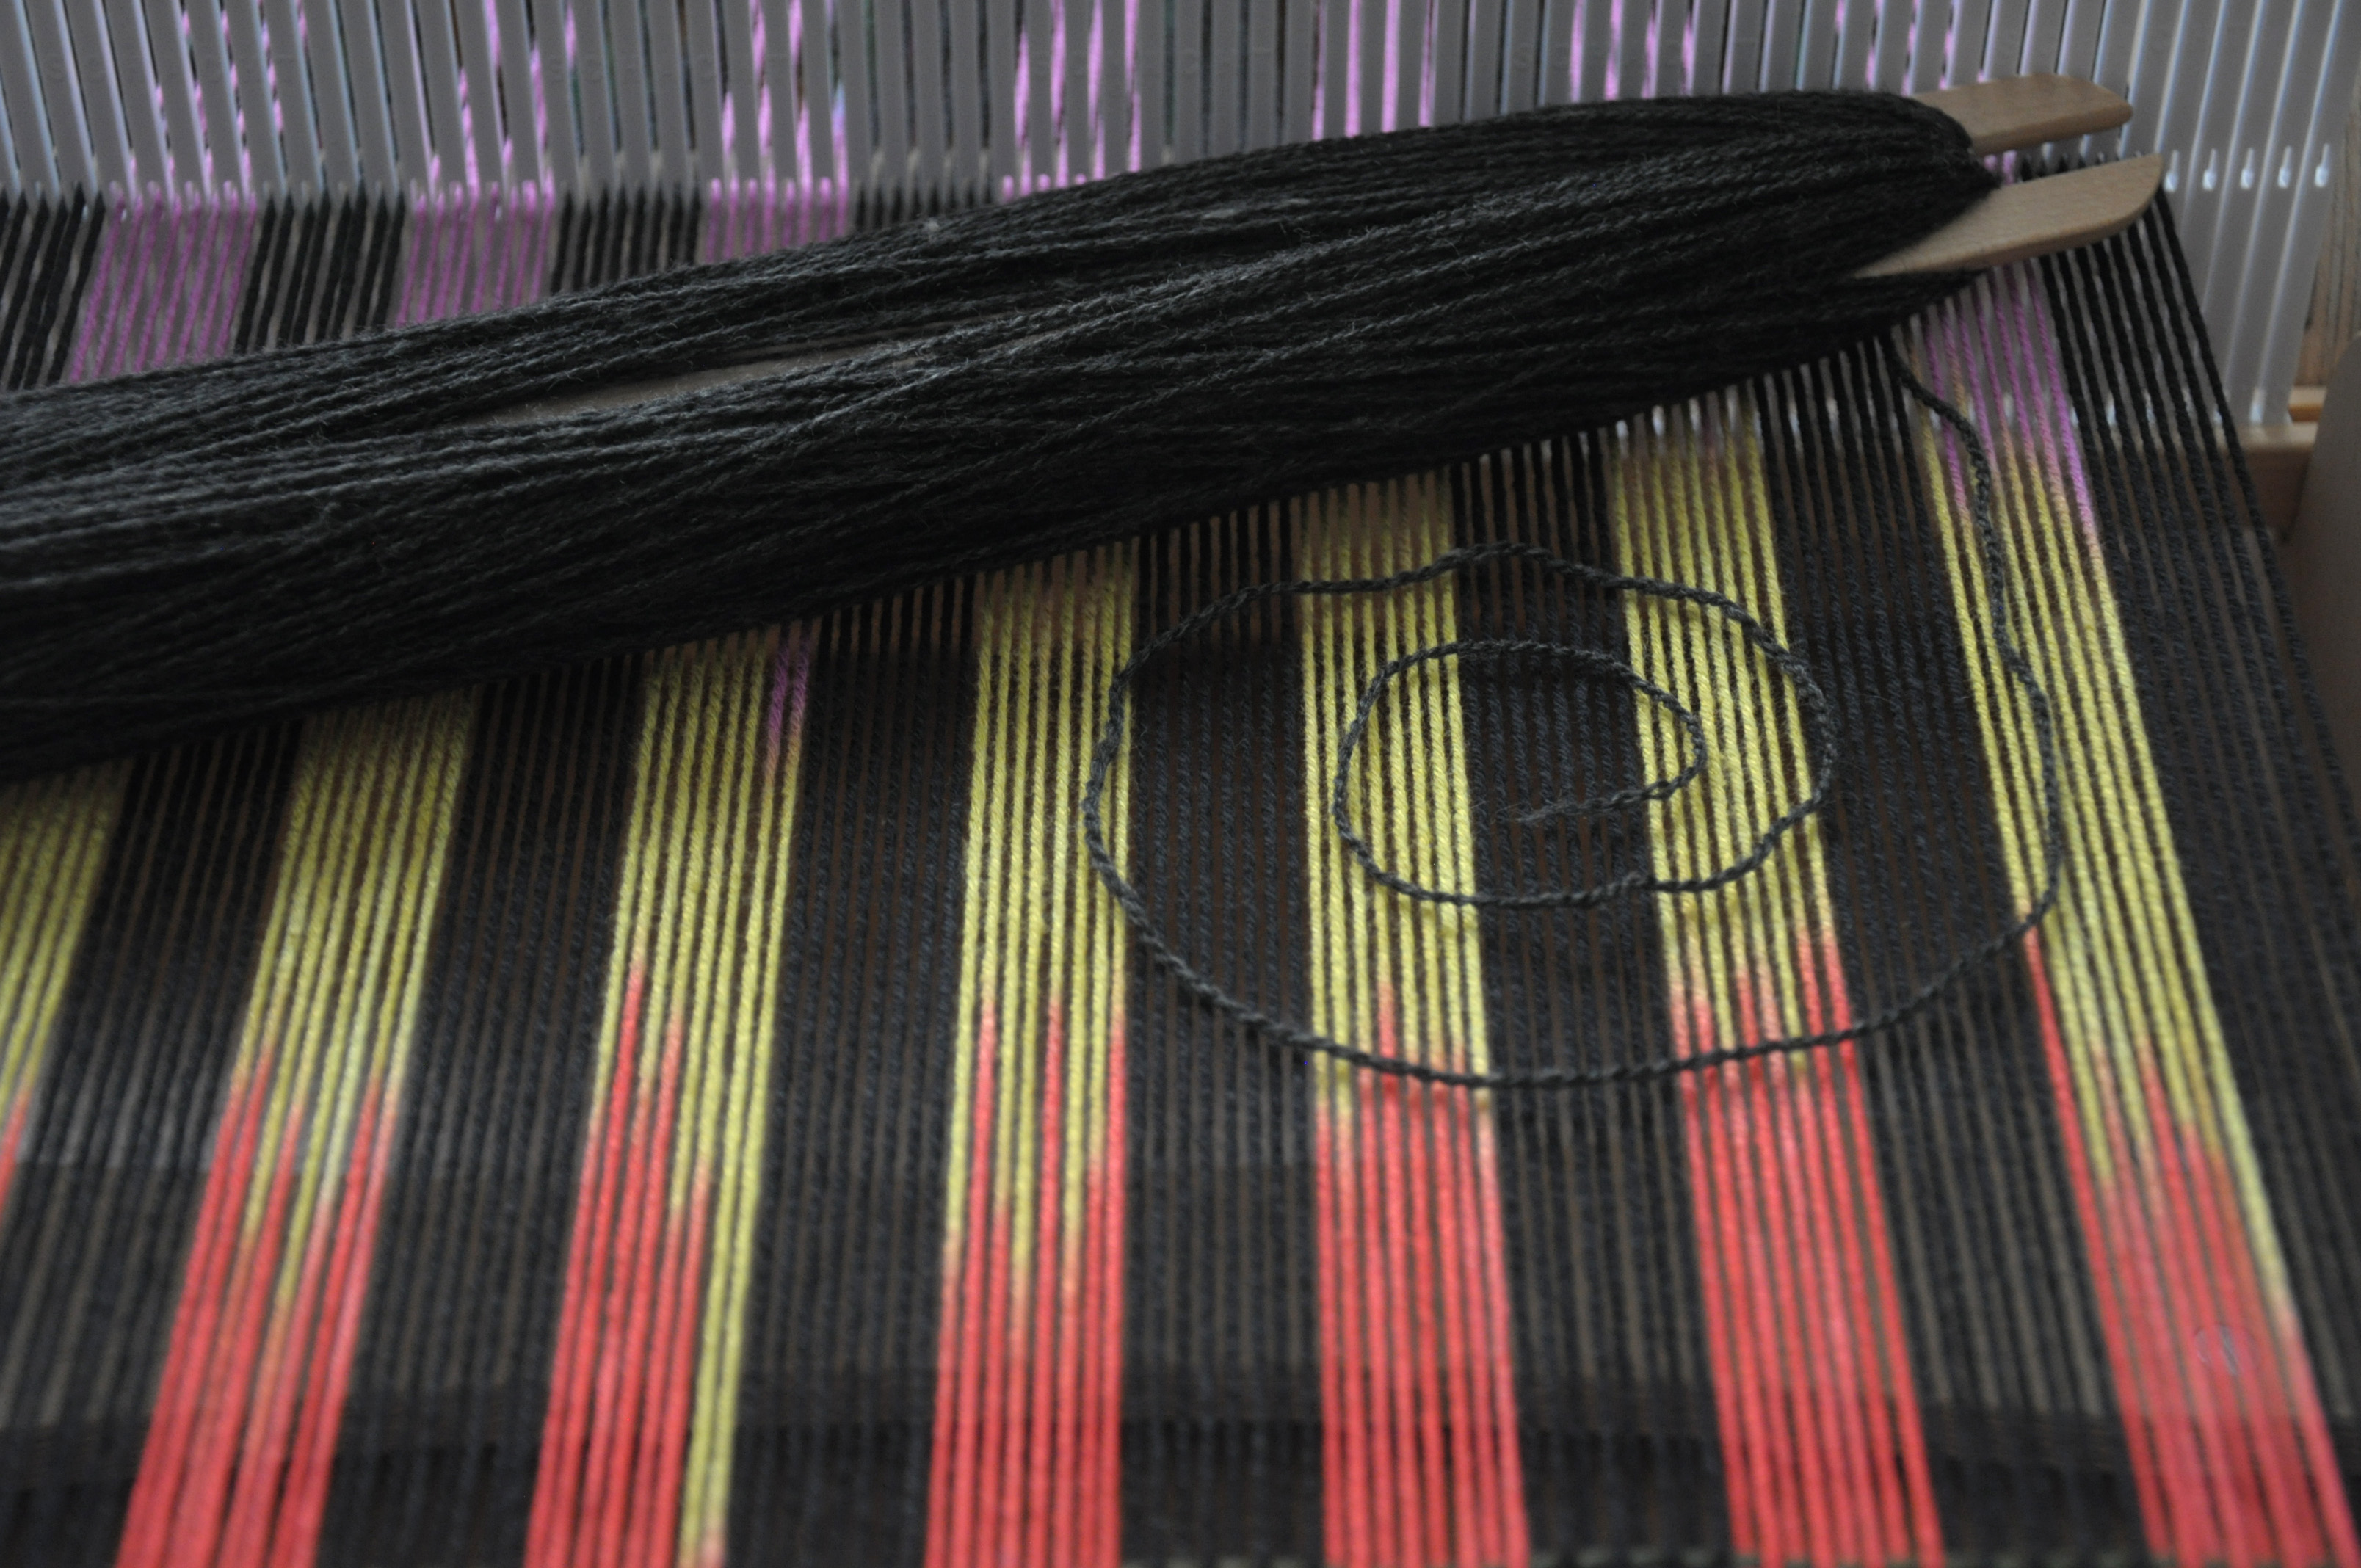
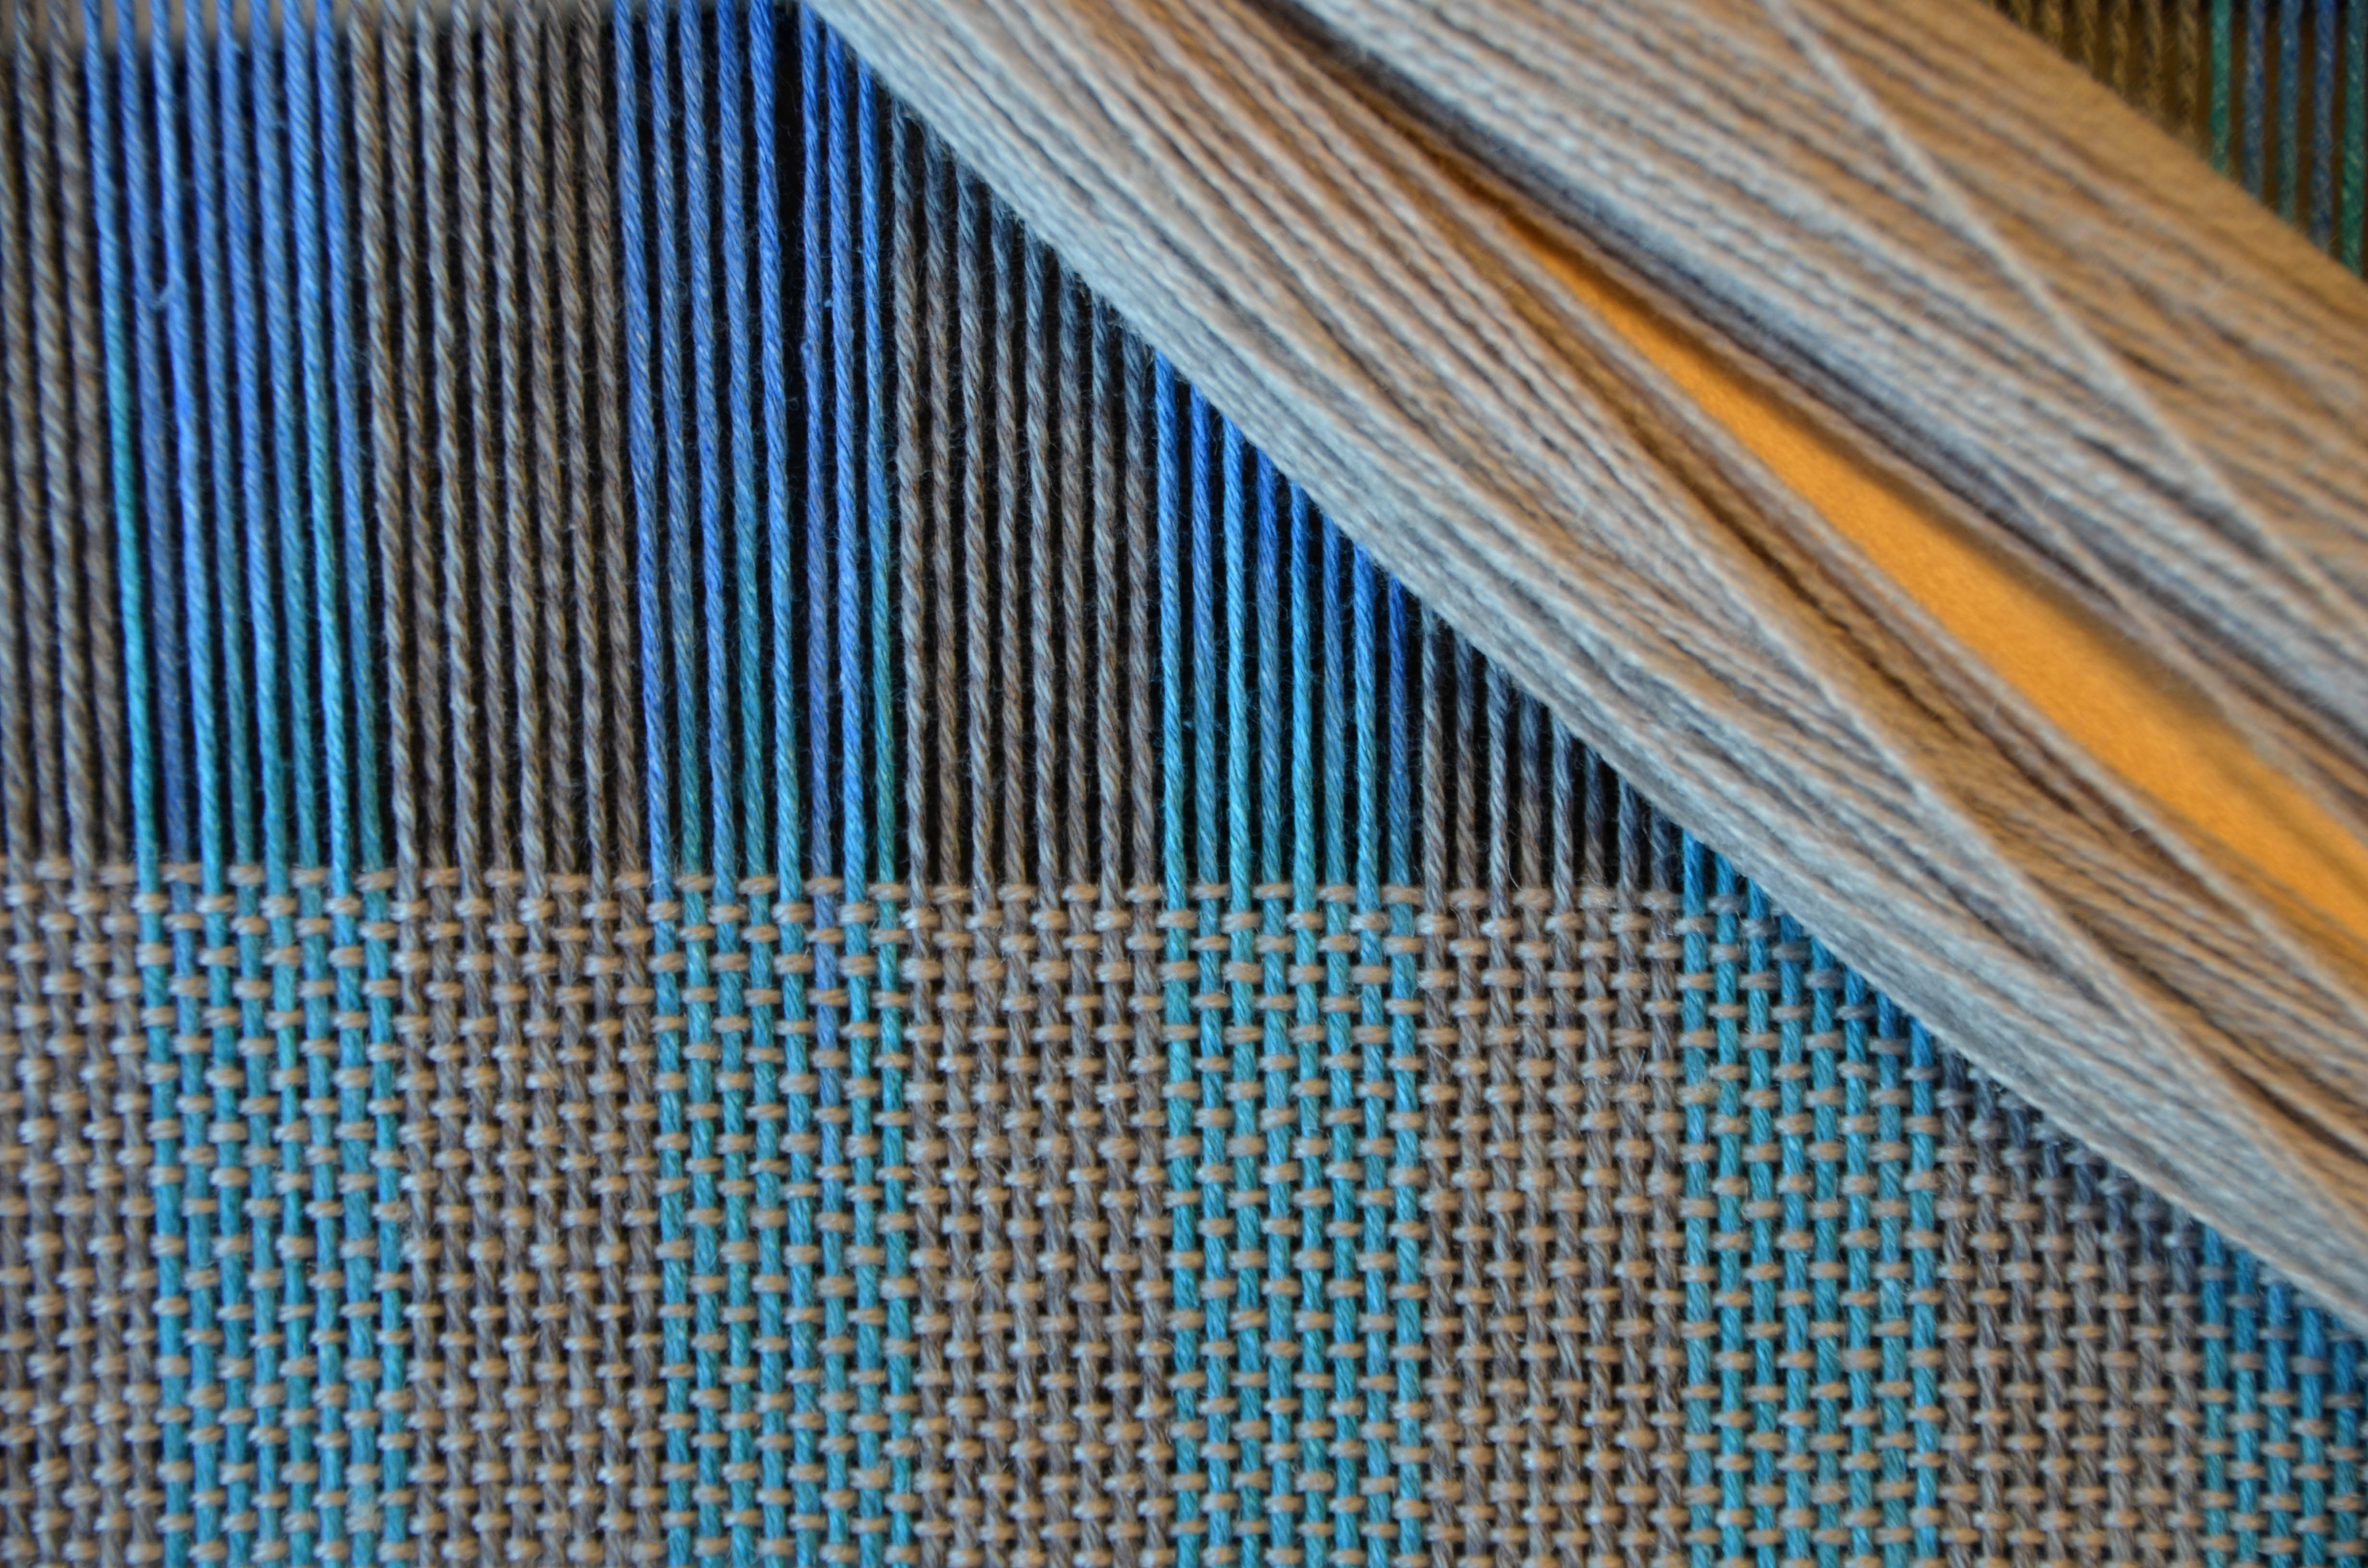
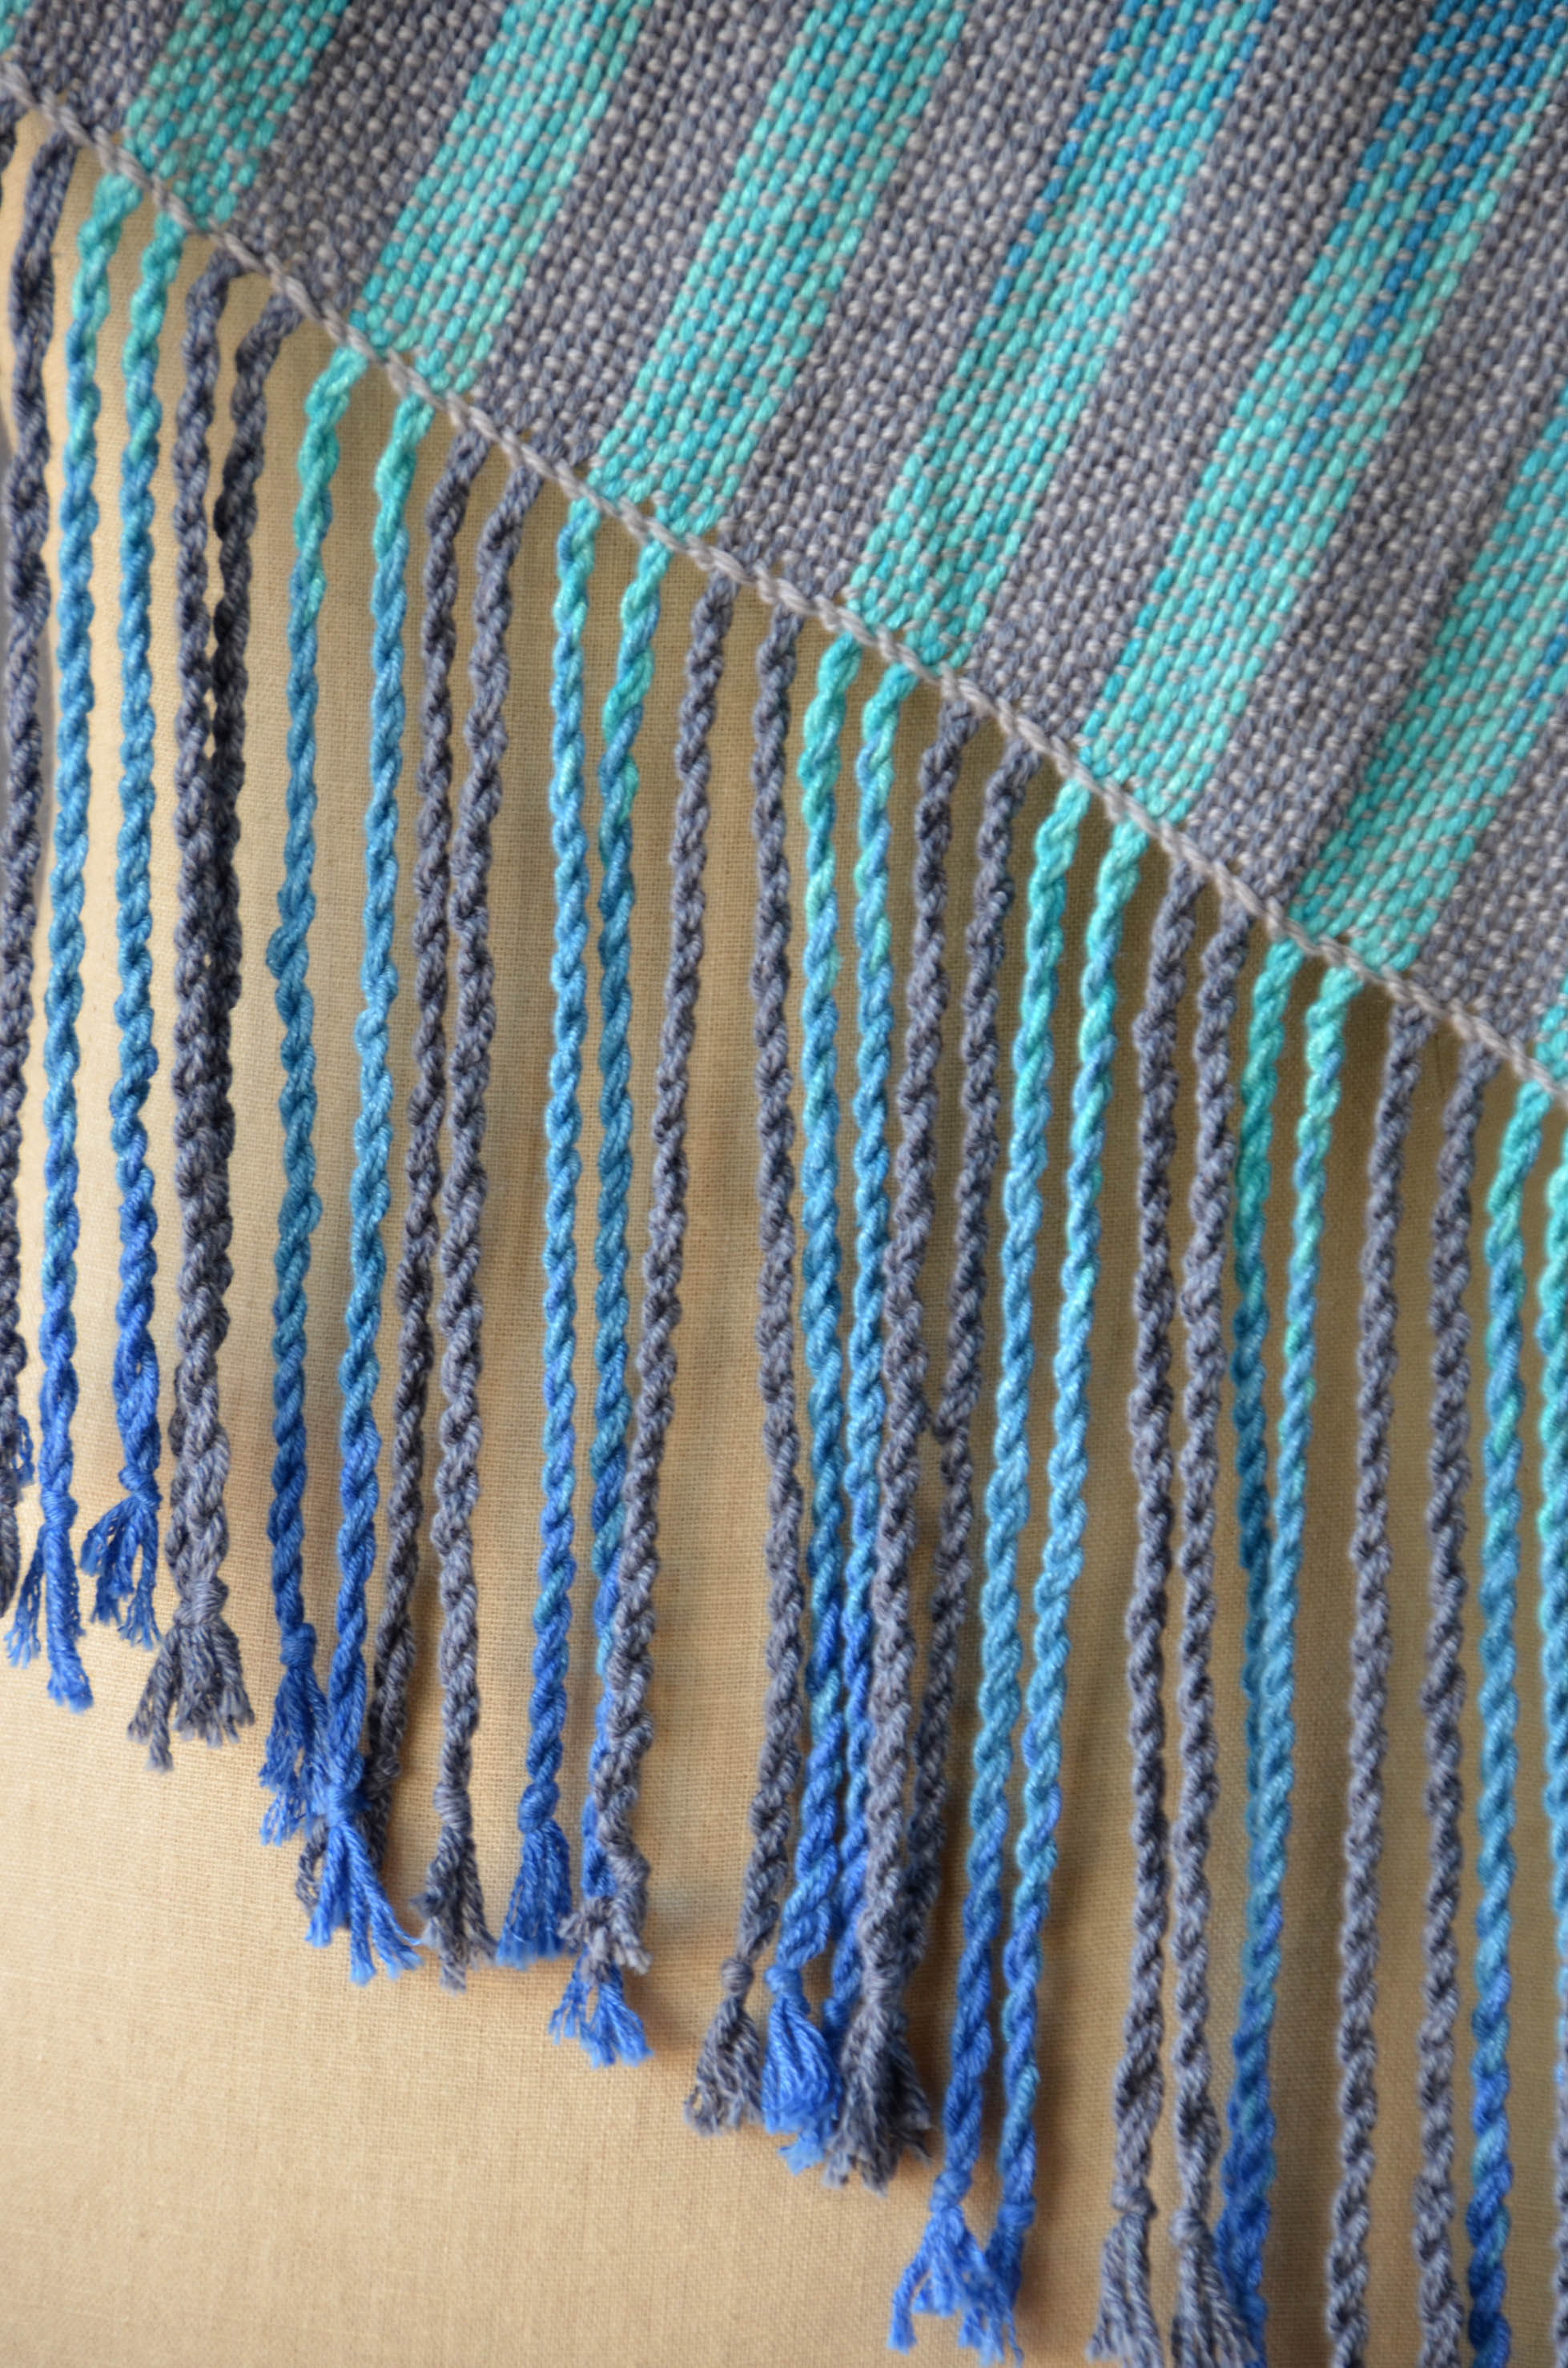
You can see that my color sections are not perfectly lined up, but that’s okay! I really love the way they sort of bleed into each other. I can’t wait to weave this scarf.

ColorPool_11


Free Pattern Friday – Summer Shawl

It’s Free Pattern Friday!

SummerShawl

Today, the crocheted Summer Shawl in Bamboo Pop.

This pattern comes to us courtesy of Alice Gossette and Kat Koeller of LYS The Thankful Ewe in New Bremen, Ohio.  It’s another example of why you should stop in at your local yarn shop – there are some really great ideas waiting for you there!

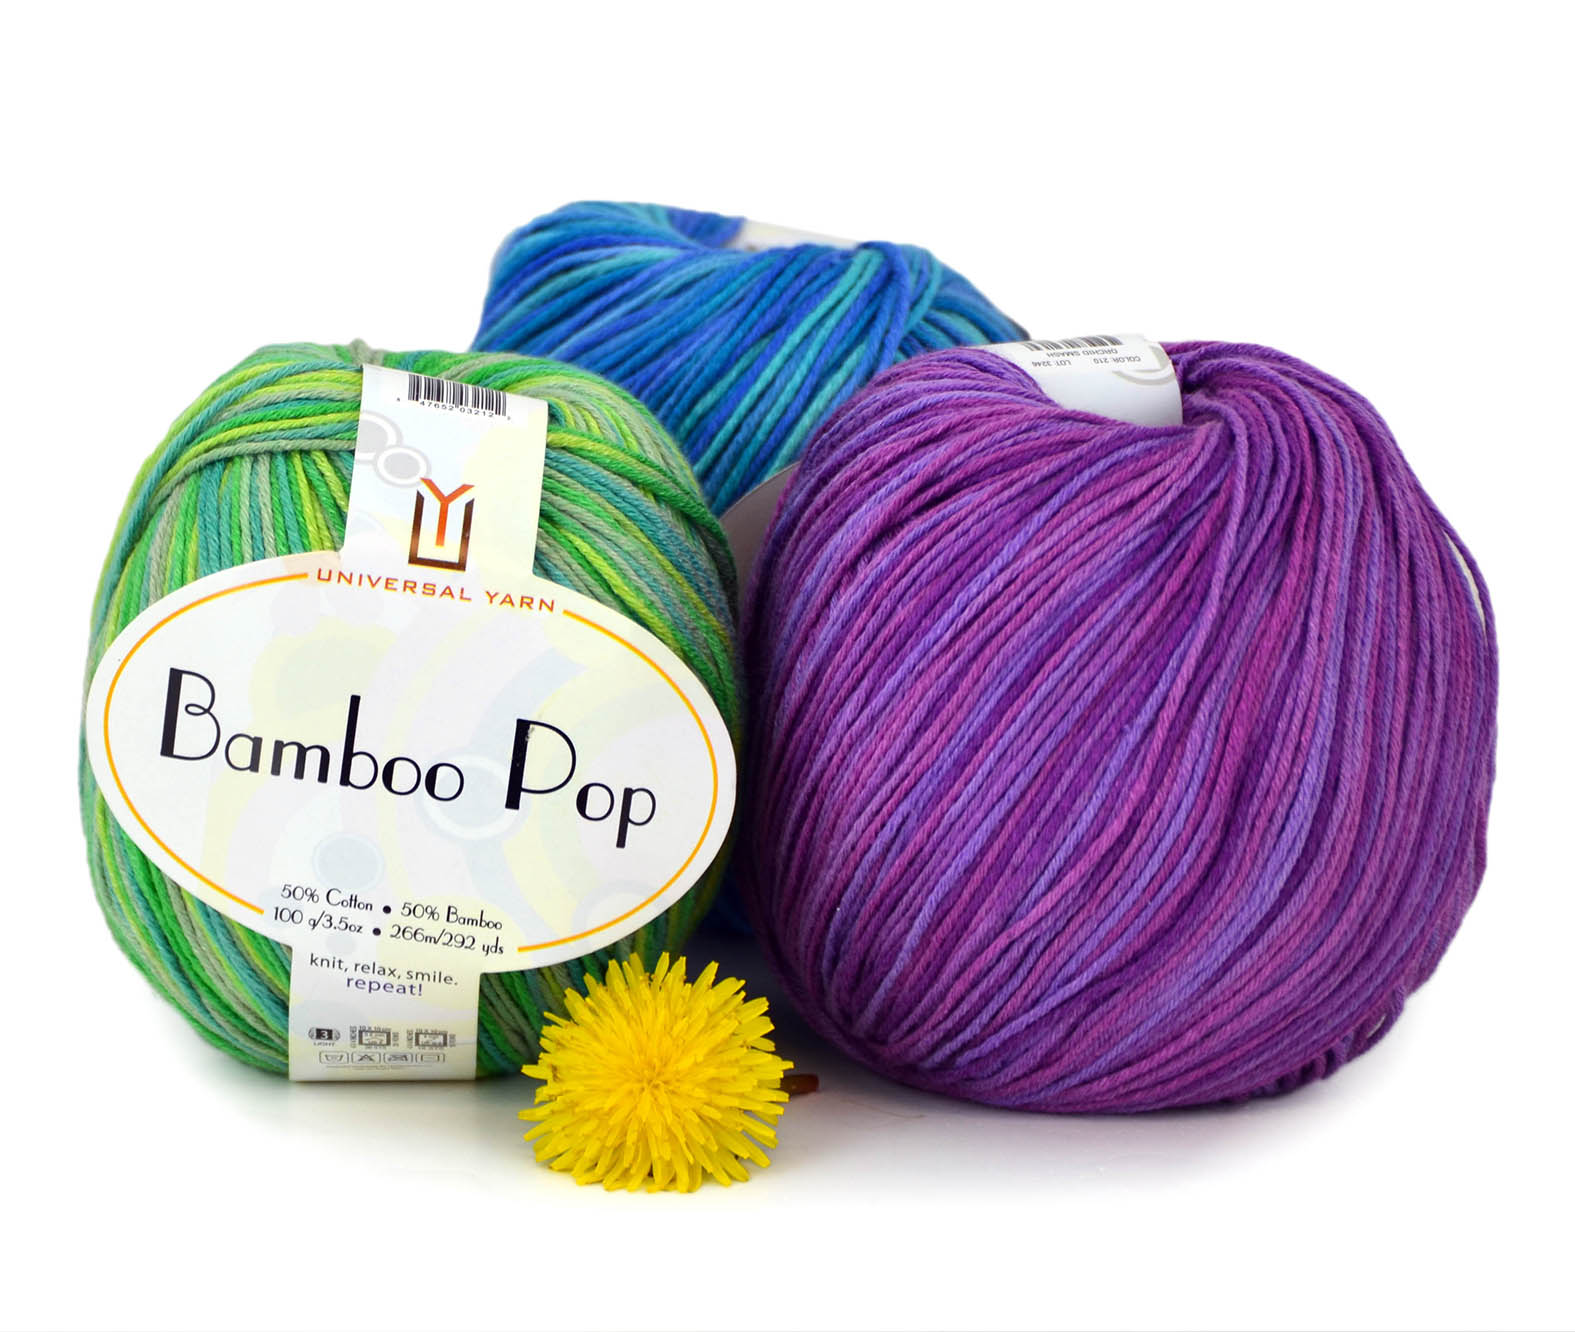
This is a five ball project in Bamboo Pop (292yds/100g) – 2 balls of 109 Clover for the large triangle, then 1 each of 108 Lime Green, 118 Marmalade, and 107 Ocean for the stripes nearer the top.  The designers note that the top stripe took almost all of the blue, so you might want to snag an extra ball, just in case.

I love the inclusion of the vibrant band of gold.  This would be an easy one to customize with your own personal palette, or to add a variegated color to.  Color 203 Golden Seas strikes a nice balance between all of the colors included here.

We hope you have a fantastic weekend, and find time to kick back with a project and take care of yourself.

Happy crafting!

TTE_bambooPopShawl2

Free Pattern Friday – TNNA Cardi

It’s Free Pattern Friday!

Today, the TNNA Cardi in Bamboo Pop.

Here’s how this sweater happened.

“You know what we ought to do at this year’s National Needlearts Association Summer Show?  We ought to all wear matching outfits.”

“Yes!  And they should all be sweaters in our yarn!”

“Yes!!  And we should make them for the entire show staff!!”

Sometimes we get a little carried away.  But hey, go big or go home, right?  And thus was born the TNNA Cardi.

Continue reading “Free Pattern Friday – TNNA Cardi”

Free Pattern Friday – Fun Fringe Scarf

It’s Free Pattern Friday!

Bamboo Pop Flower Fringe Scarf 2_blogToday, the Fun Fringe Scarf in Bamboo Pop.

Bamboo Pop Flower Fringe Scarf fringe_blogLast week we featured Bamboo Pop knit, so this week we’re showing it in crochet.  The scarf features double mesh crochet, a two-row repeat, for the length of the scarf.  The finishing really makes the difference, though – the fun flowery fringe is just too adorable.

Bamboo Pop cotton/bamboo blend makes this a great warm weather piece.

We hope you enjoy this fun, kicky crochet piece.

Happy crafting!

Bamboo Pop Flower Fringe Scarf 1_blog


Free Pattern Friday – Easy Baby Cardi

It’s Free Pattern Friday!

Bamboo Baby flowery blog

Today, the Easy Baby Cardi in Bamboo Pop.

Bamboo Pop ballIs it just me, or is everybody having babies at once?  I have two friends in their third trimester (hi, Cristi and Casey!) and several more whose baby bumps and adoption processes are well underway.  So yes, this is a perfect moment to introduce a basic but beautiful garter stitch baby sweater.  The fact that it uses machine-washable Bamboo Pop (292yds/100g) is icing on the cake.

It’s a good basic design that would work well for boys or girls and would be easy to personalize with some fun buttons.

I’d like to offer a word of advice as a parent.  When you’re considering baby shower gifts, it may be tempting to want to make the smallest size and be done in a hurry.  Consider making the next size up, or even the one beyond that.  Babies grow fast, and you want your recipient to be able to enjoy your gift longer than a week.  Since this pattern takes just two balls for all sizes, there’s no additional cost (besides your time) involved in making the 12-month size and having a gift that the baby will be wearing after all the other presents have been outgrown.

Happy knitting!

Mother’s Day Yarn Art

Mother’s Day is tomorrow!  Are you ready?  Me neither!  Fortunately, Amy came up with marvelous way to put together a handmade gift from your stash in a flash.  Yarn art!

Step one is to find an image that you want to use and draw or trace it onto your card.  We used a cut-down sheet of foam core board.  We’re going to be using adhesive for this craft, so construction paper or thinner paper is a little iffy – we don’t want it to buckle or ripple from the moisture of the glue.

Card 1 Card 2

Amy freehanded her design, but you could also use clip art.  You can see it above with a couple of flowers already filled in with Bamboo Pop.  We’ll show you how to do that in the next step!Card 3 Card 4


Outline your design with glue (we used Alene’s clear gel tacky glue).  It’ll be easier to do a small section at a time rather than the whole thing – it’s easy to accidentally smear your yarn through the glue if the whole card is covered in it.

Card 5 Card 6

Card 7

Position your yarn over the outline and stick it down.  We used the point of a pencil to press the Bamboo Pop to the card.  It keeps glue off the fingers and it’s more precise.

After you do your outlines, fill in the area inside, then if you wish you can cover any remaining space.  Be as creative as you want.  Incorporate straight lines, whirls and swirls, unusual colors or shapes – it’s all up to you!

Card 8 Card 9

I love the touch Amy included of the chain stitch around the edge of the card!

Finish it off with a personalized message on the back.  Draw your own, or use clip art or illustration from the internet.

Voila! A personalized card that you made yourself without making yourself crazy.  We’ll hope that Amy’s mom gets the card before she reads this post!

Happy crafting!