Tutorial – Magic Circle

Sample Swatches of crochet stitches lay in an arrangement next to three crochet hooks. The heading "AJ's Crochet Corner, Tips and Tricks" is present.

Crocheting into a magic circle makes evenly placing your starting stitches a snap! This technique offers a way to place as many stitches as you need into a perfectly circular shape with the tug of some yarn.

Using a magic circle takes away the guesswork involved with a different method of creating a circular base, where you create a chain, then slip stitch to form a ring. Because this other method with a starting chain has a fixed circumference, it may leave a gap in the center if you make it too big, or be impossible to work into if it’s too small. With the magic circle being adjustable, these sizing problems while starting a project magically disappear!
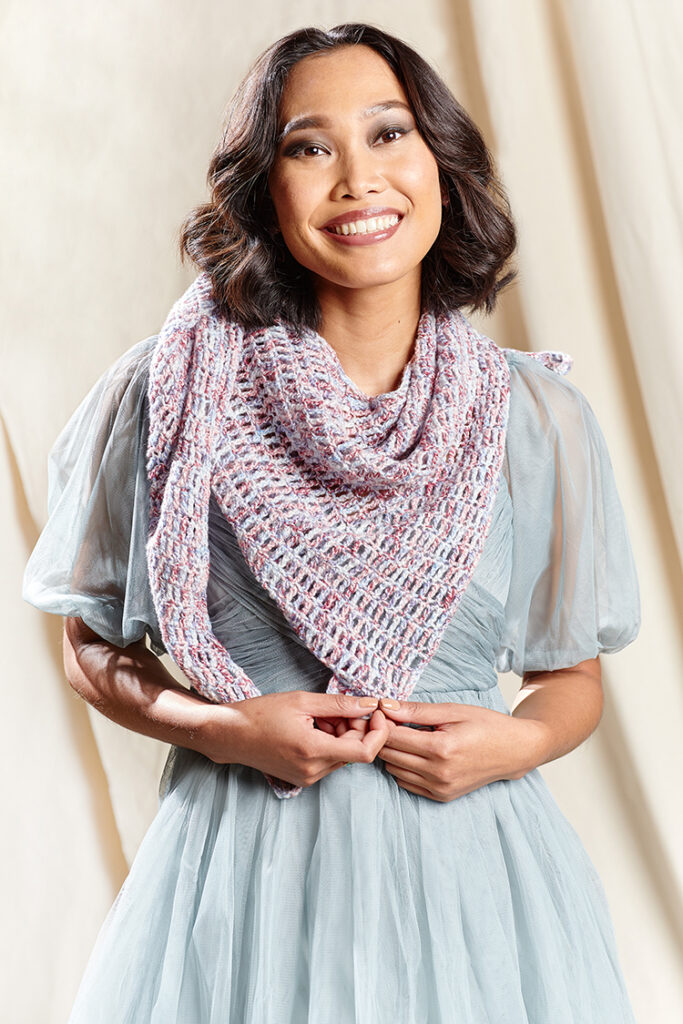
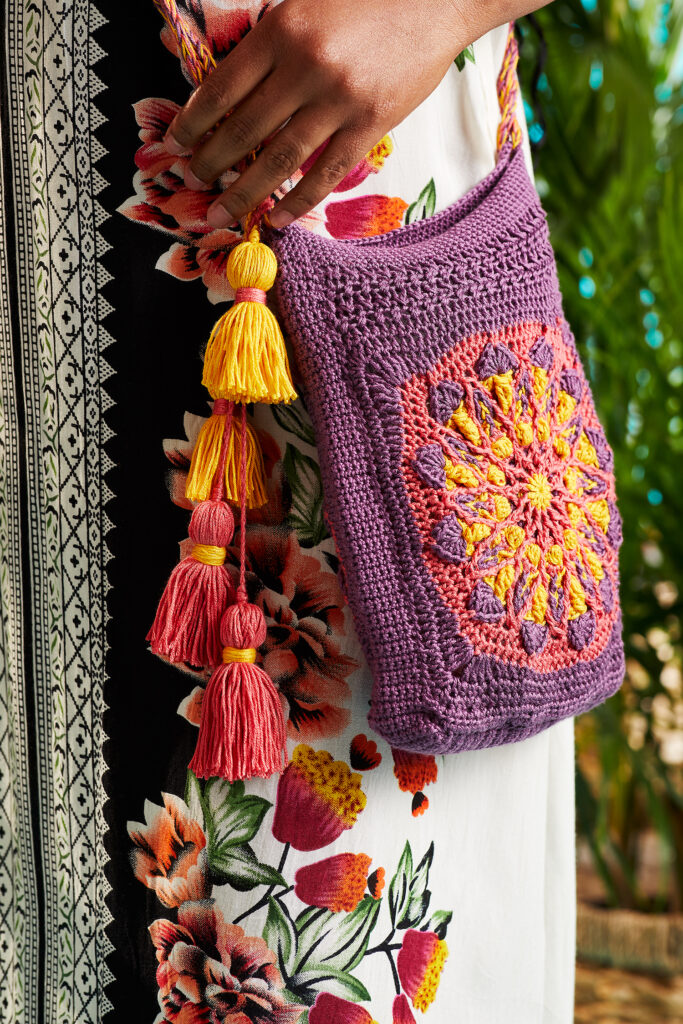
One thing that can be a bit tricky is that not everyone calls this method a “magic circle” as seen in the Paradise Pouch. When getting started with a pattern, you may also read “adjustable ring,” as seen in the Cotton Candy Swirl, or a blend of both called a “magic ring.” It can also be called a loop, as in “magic loop” or “adjustable loop.” Lastly, you may see it represented visually in a chart, denoted by a swirled shape before any stitches start, like in the Spice Market Shawl. Now that you know what to look for, let’s take a look at how to do it! There are just 6 simple steps to do to create a magic circle.

Step 1: Create the circle.
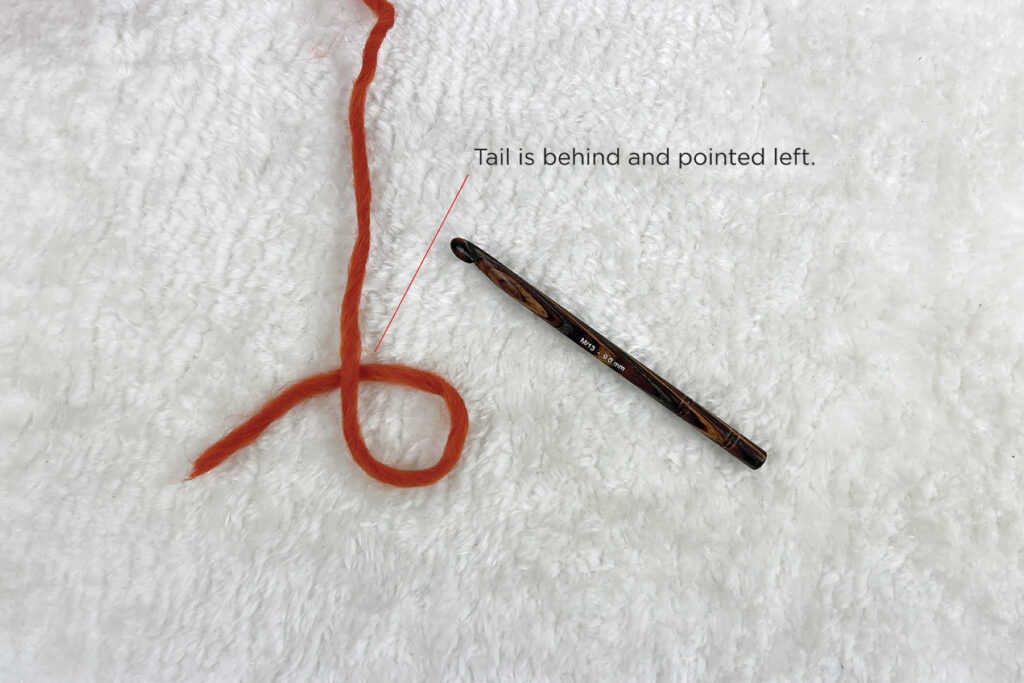
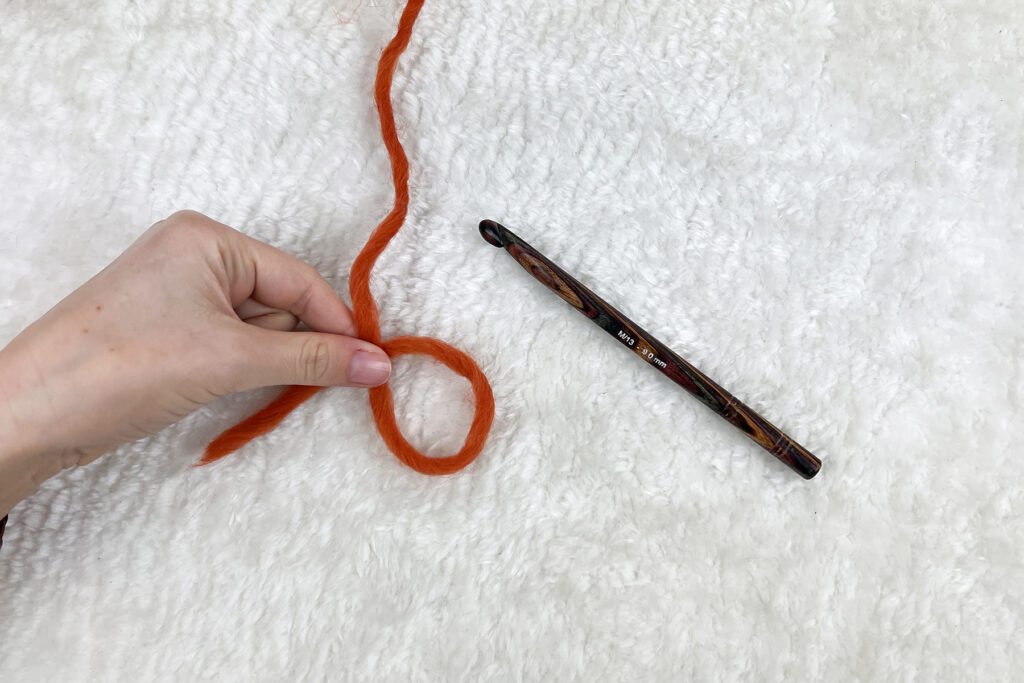
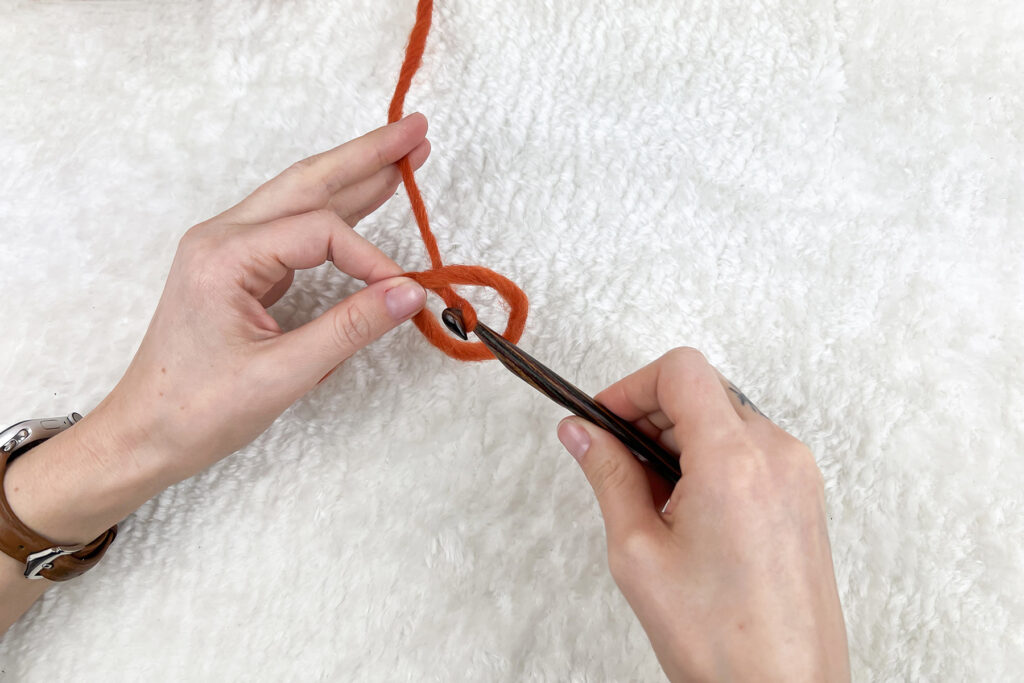
Create an initial loop by laying flat, if it helps, or held in your hand. Place the tail behind the working yarn, and pointed to the left.
Pinch yarn where it overlaps to hold the loop in place while you work.

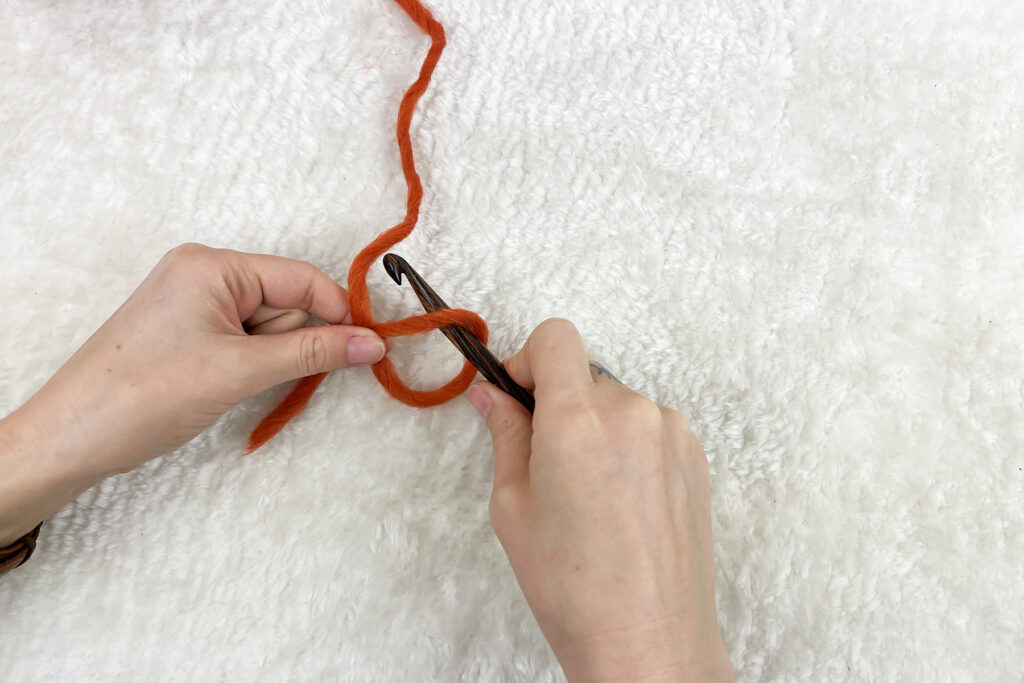
Step 2: Insert hook.

Reach your crochet hook into the loop.

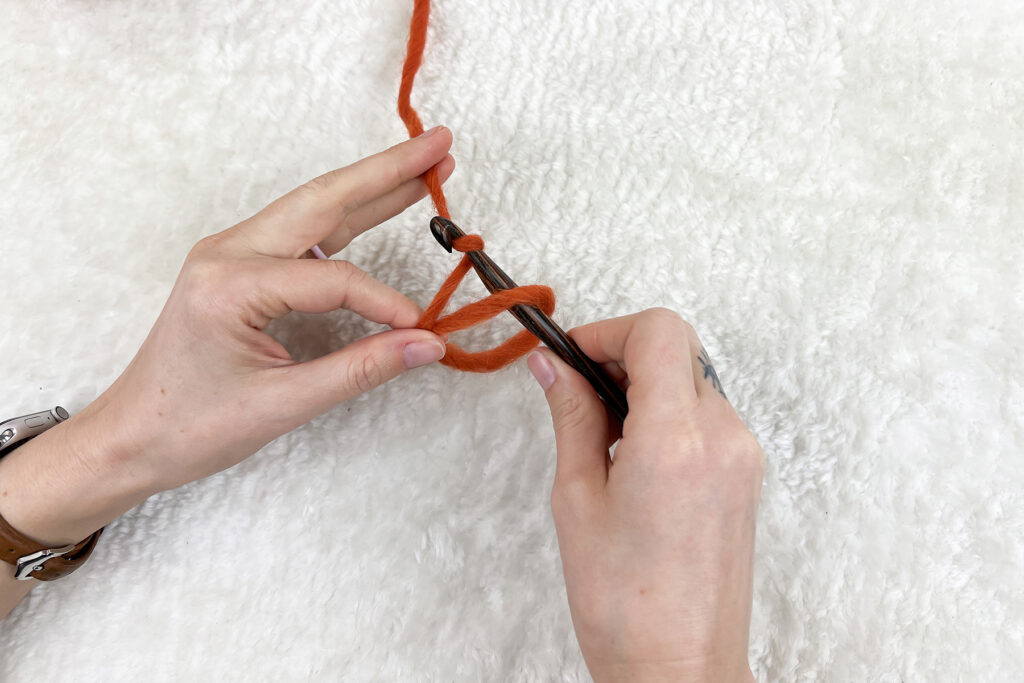
Step 3: Yarn over.

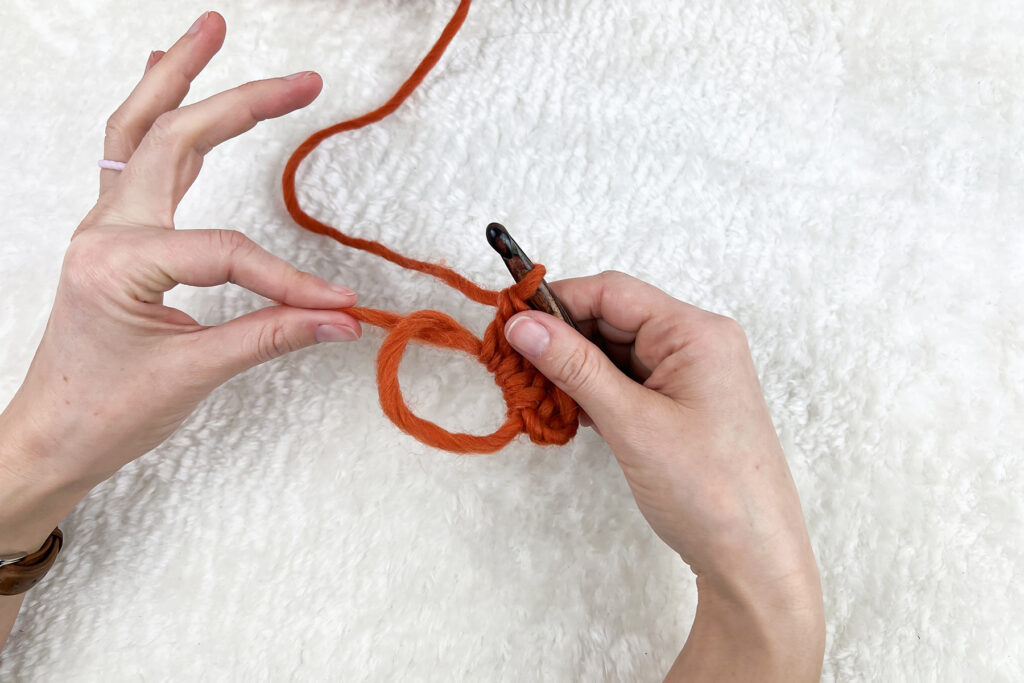
It may feel strange to tension the yarn while pinching the circle. You may try holding it as seen above or switch to holding the circle with your thumb and middle finger to tension with your pointer finger. I have a habit of starting like this then switching my grip when I begin chaining and stitching as normal (as shown, beginning in step 5).

Step 4: Pull through.

Pull the working yarn through the loop with your crochet hook.

Step 5: Chain, then stitch into the middle of the circle. The pattern you are following will indicate how many chains, then stitches to create.
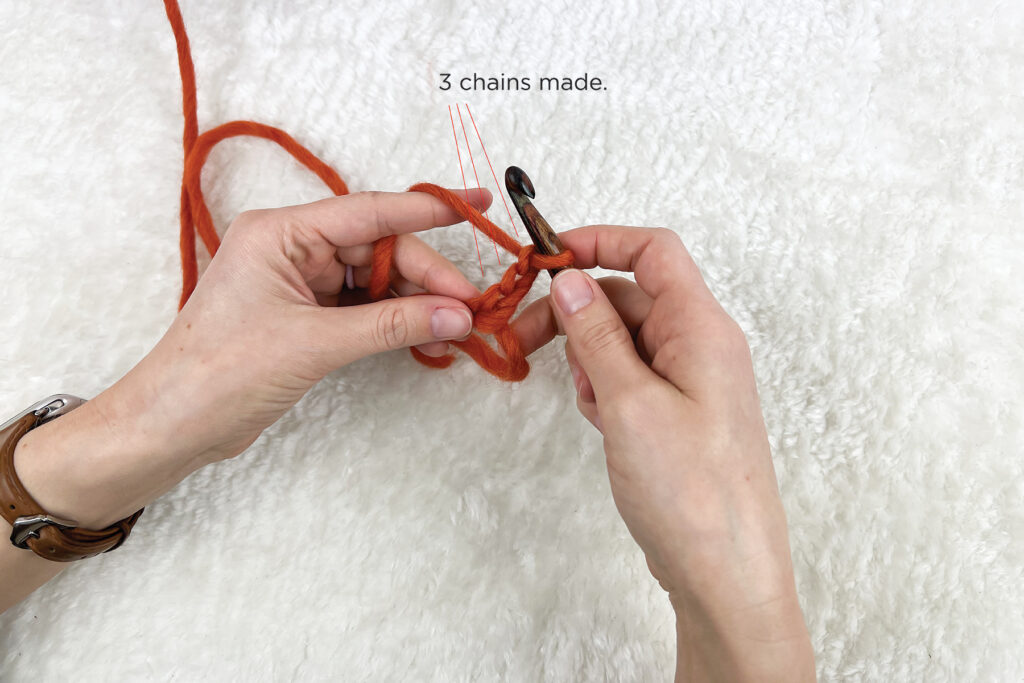
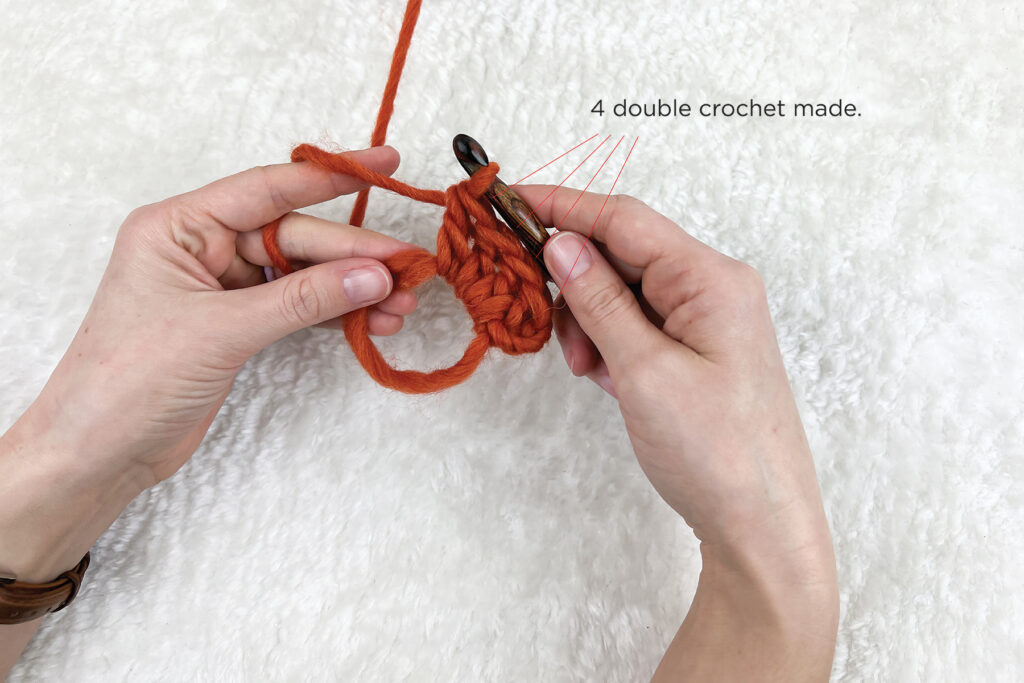
Here I chain 3, then double crochet 4 times into the loop to demonstrate the technique. But you can do this with any number of, or type of stitches!

Step 6: Close the circle.

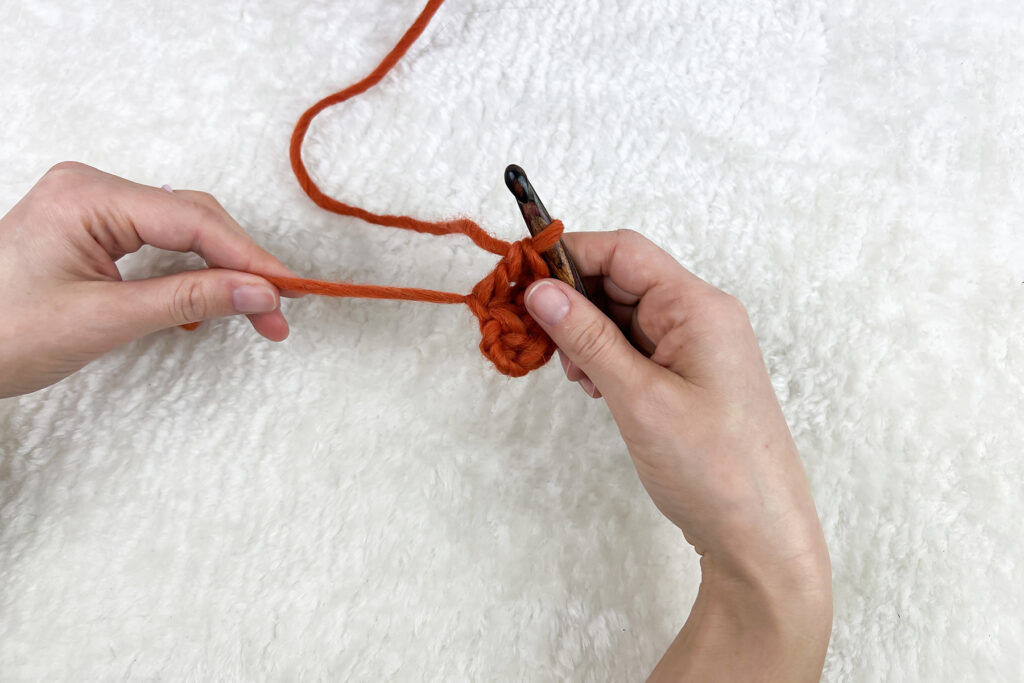
Release your hold on the circle, and pinch the tail of the yarn.
Pull the tail of the yarn until the circle is completely closed.

It’s as easy as that! From here, you continue following the pattern as normal, and will weave in the tail along with any other ends as a finishing step. I hope you find this tutorial helpful, and that you feel inspired to try a new project in the round!

That’s all for now, and Happy Stitching!
Ashley Jane
Bella Cash Socktober Mystery Knitalong – Week 2

Welcome to Week 2 of the Bella Cash Socktober Mystery Knitalong! It has been a week since we shared about color choices and how to select your colors for the project. We hope you’ve selected your colors, received your Bella Cash yarn, and are ready to get to the best part: knitting!
Use this graphic on Ravelry and on social media to share about the knitalong.
Before we dive in, I just want to give a quick refresher about the knitalong, especially for those who might have missed my last post.

Each week in October I’ll be revealing a different portion of the pattern. The pattern is updated on our website every Wednesday and you can find it here (link).

This is a mystery knitalong, but if you don’t want to commit without seeing the socks first you can find spoiler images here (link).

If you join, we’d love for you to spread the love and share your progress on social media using the hashtag #UYSocktoberMKAL and tagging us on Instagram (link) and Facebook (link). Join in with chatter here on the blog and in our Ravelry forum (link).

Please add your project to Ravelry, too! You can find the Ravelry listing here (link). You can use the graphic above and on the Ravelry listing for your project page, too.

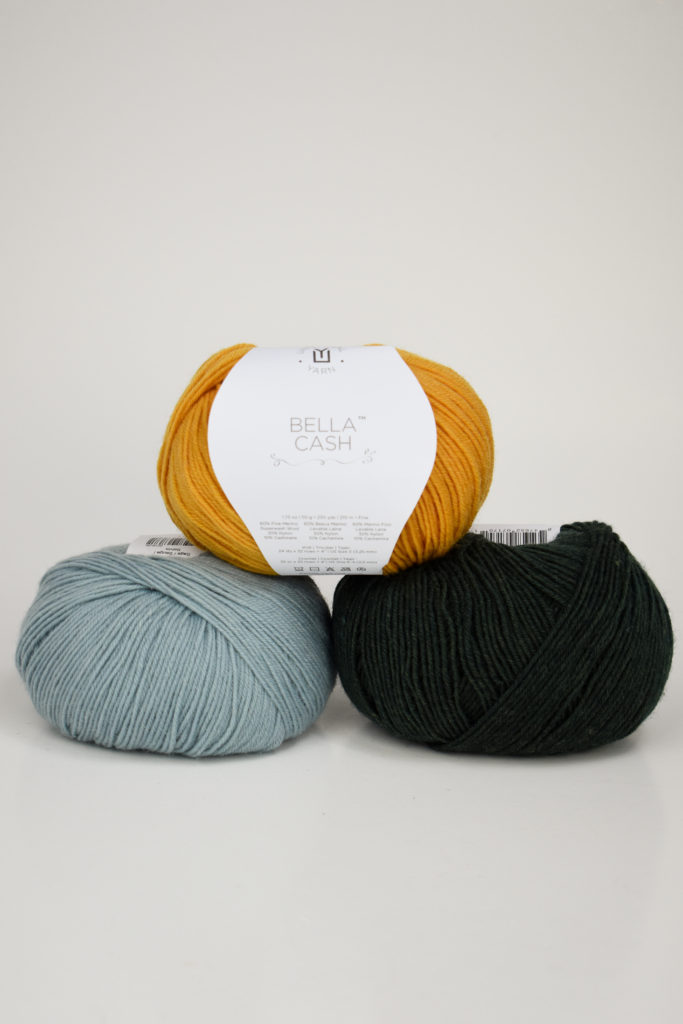
These are the suggested colors for the Sweet Dumplin’ Socks: #126 Forest (MC), #116 Sage (CC1), & #124 Mustard (CC2).
This week is exciting because it means you’re finally able to cast on your socks! It’s all about the cuffs. You’re sure to knock this portion out in no time at all. Without spoiling too much, I will say that the left and right socks in this pattern are the same. With that in mind, you may choose to start both of your socks this week. There are a couple ways to do this. One method would be knitting two-at-a-time (TAAT) socks – and you can find a great tutorial by Very Pink Knits for that method here (link). Personally, I’m not a fan of the method because I find it to be a bit fiddly and annoying to keep my yarn organized, but I know many knitters who swear by it. Another option is to knit them concurrently, but separately. Work the cuff for one sock, then set it aside and work the second sock cuff. You can either use two sets of needles for this method or place stitches on holders. Of course, you can absolutely knit these socks one at a time. That’s how I’ll be knitting my pair. The choice is yours!

Speaking of choices, knitters have many options for knitting small circumferences in the round. Many knitters are loyal and true to double-pointed needles. Some are fans of 9″ circular needles. Other knitters, myself included, love the Magic Loop method. It’s my go-to method whether I’m knitting socks, mitts, sleeves, or hats. If you haven’t tried the Magic Loop method, you’re in luck because I’ve created a tutorial to show you how to get started.
Learn how to knit small circumferences using the Magic Loop method.
I hope you enjoyed the tutorial and find it helpful. If you have any questions, don’t hesitate to reach out. Remember, you can share your progress on social media using the hashtag #UYSocktoberMKAL and tagging us on Instagram (link) and Facebook (link). Join in with chatter here on the blog and in our Ravelry forum (link).

See you next week!