This is part 10 in a 12 part series highlighting designs from our 12 Days of Winter, Series 4 Edition.
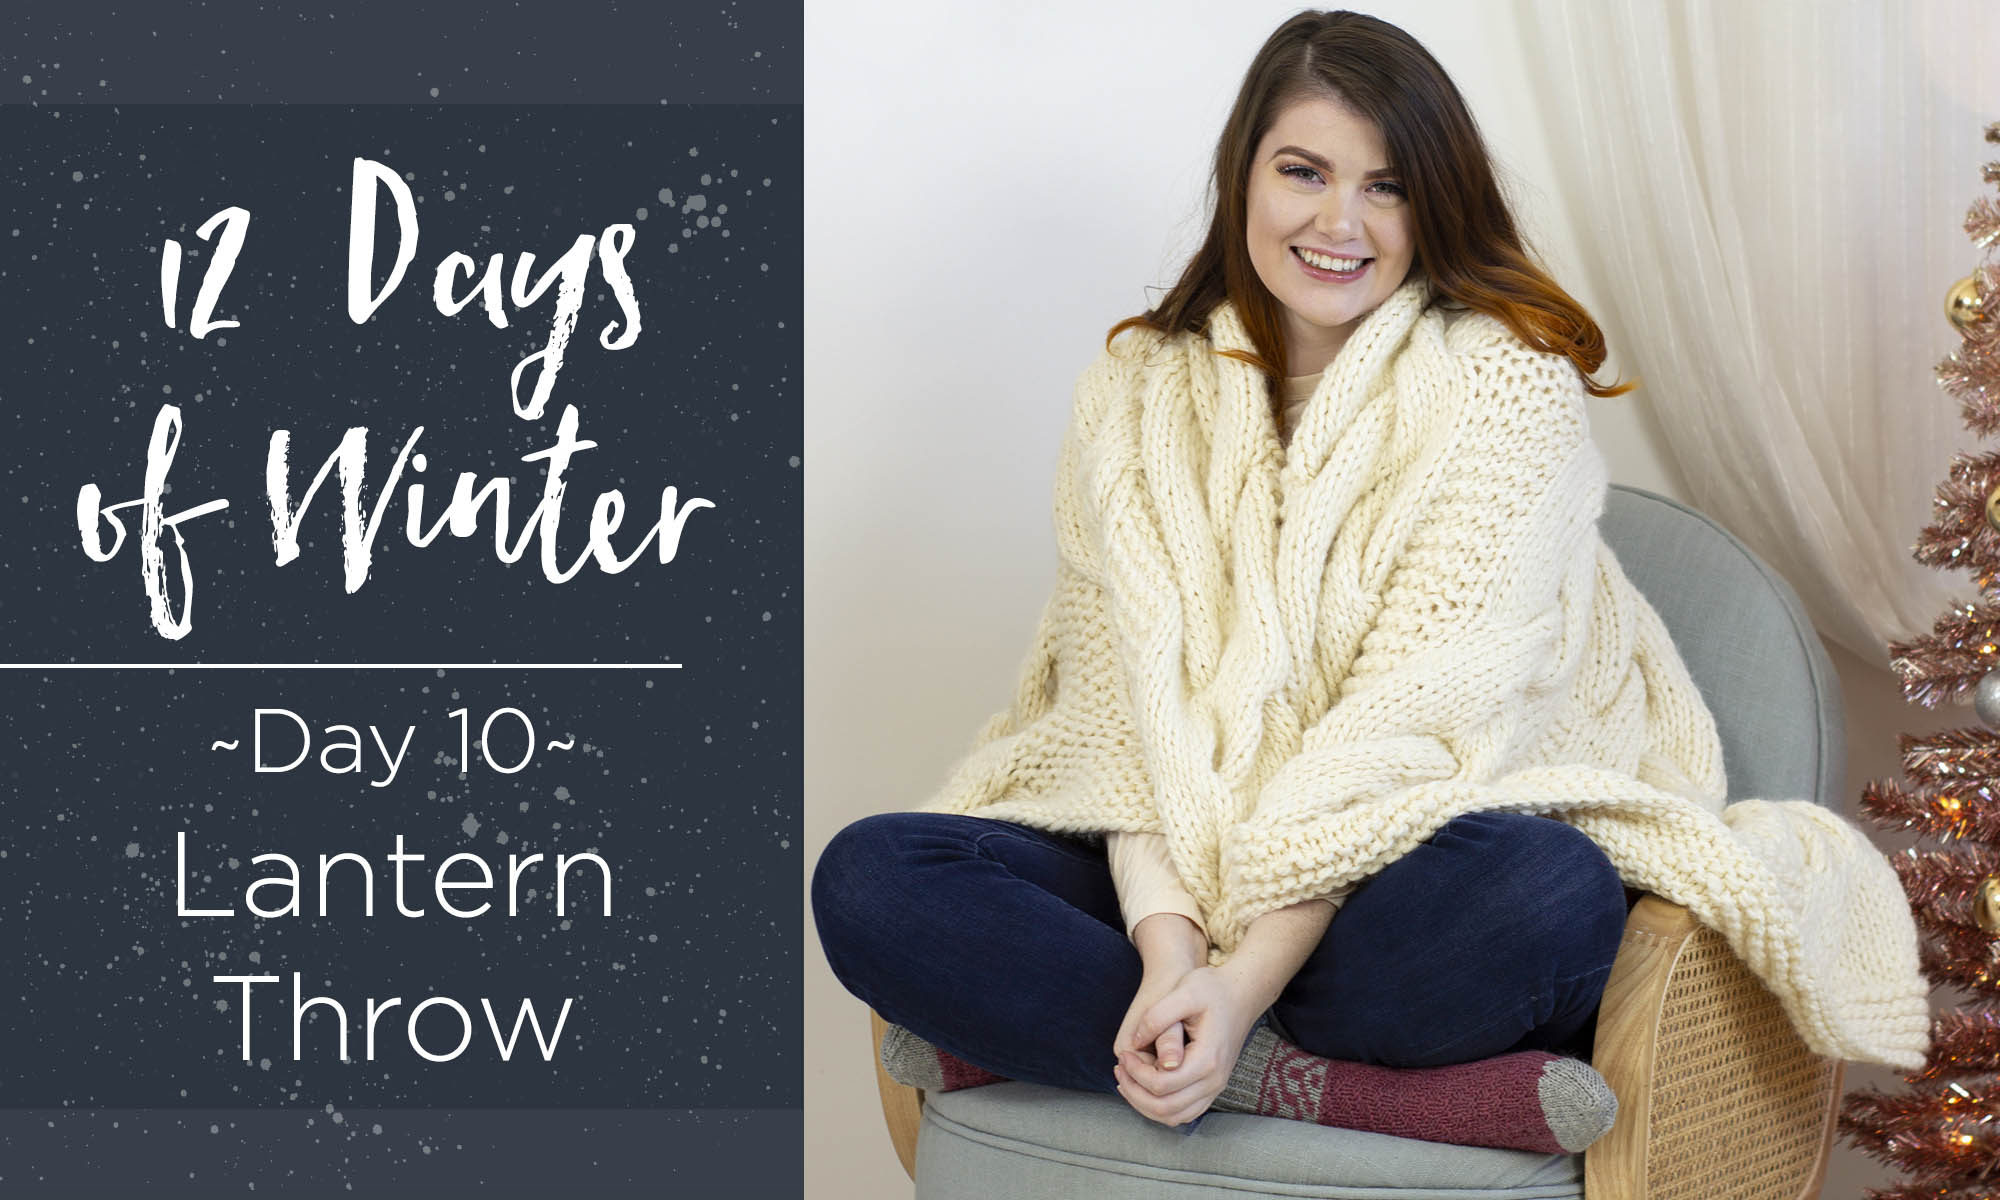
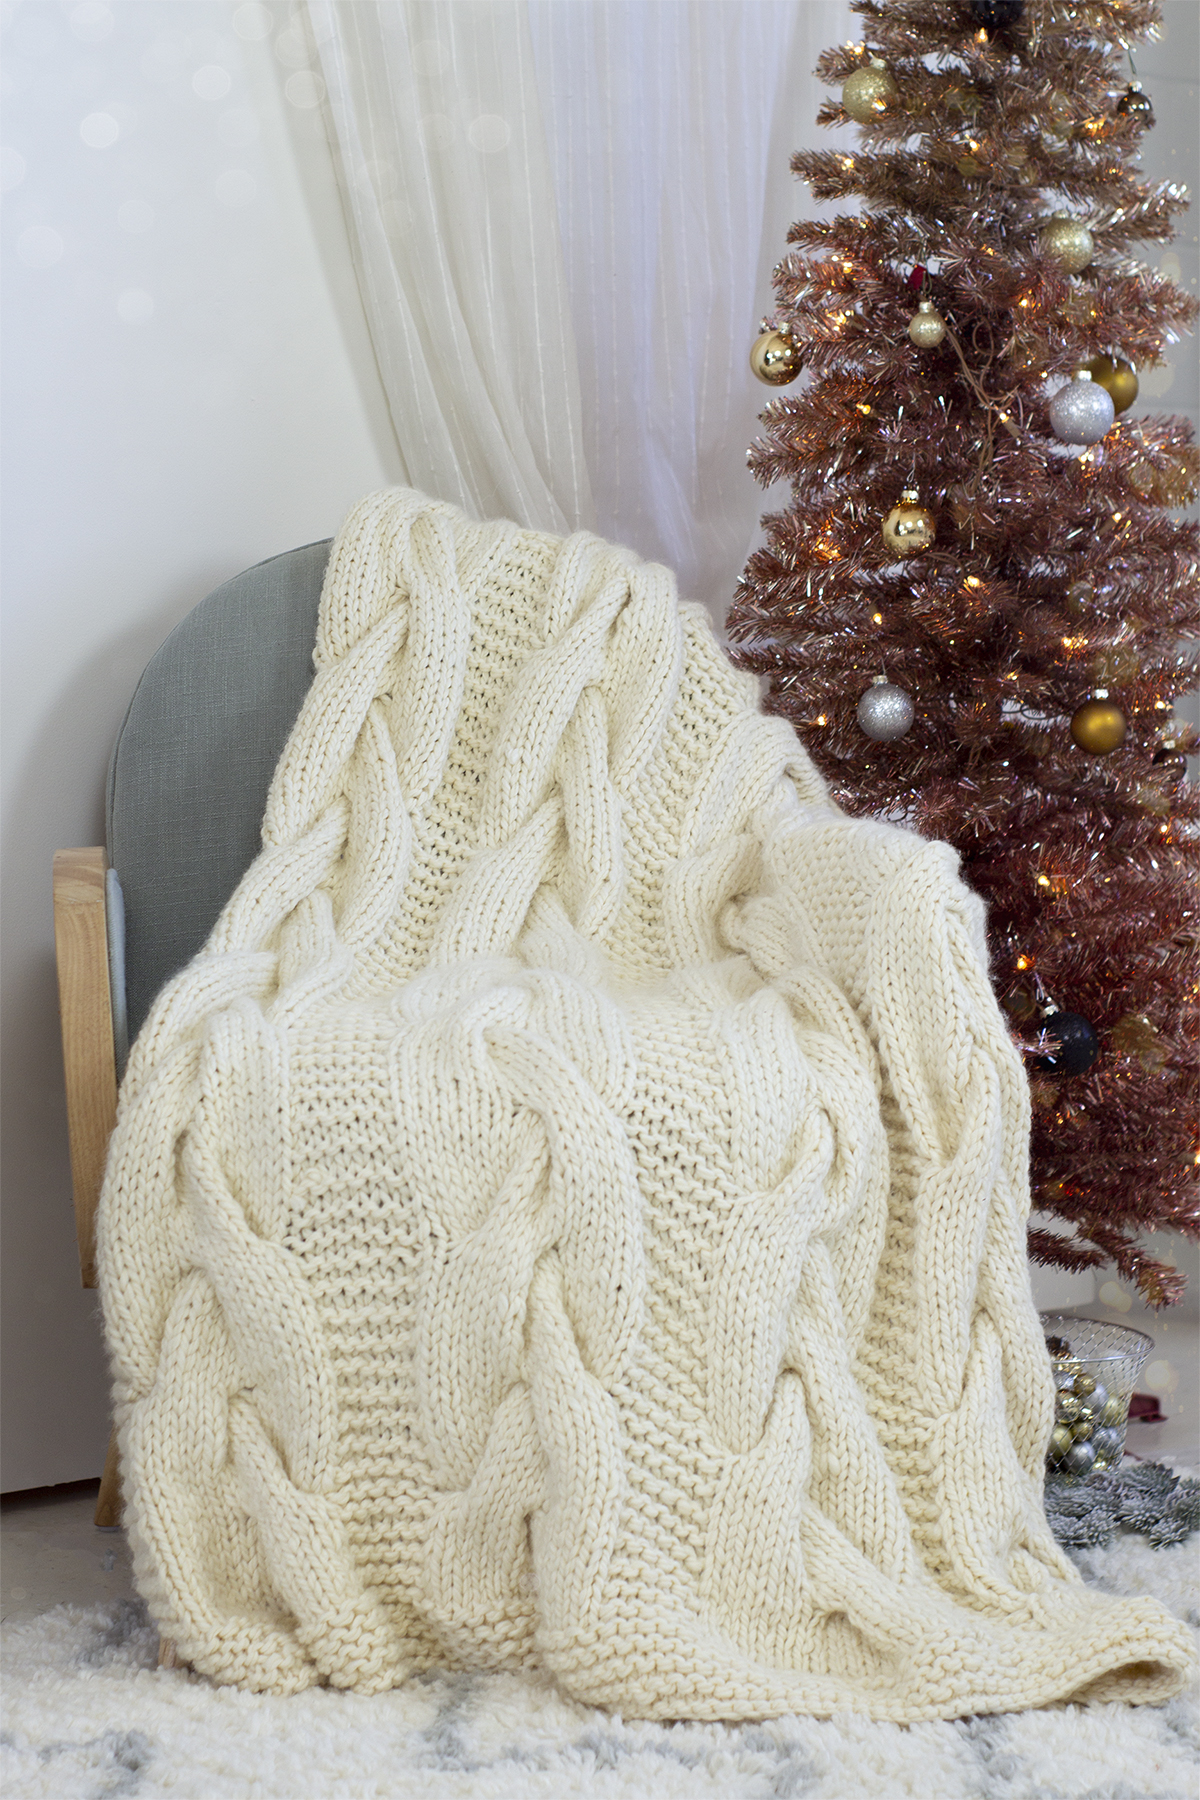
It’s Day 10 of the 12 Days of Winter Kit Collection, Series 4! Today is all about a nice throw to keep you warm and cozy all winter long. Say hello to the Lantern Throw. If snuggling up under a thick blanket with a cup of cocoa and a good book sounds like the perfect winter evening, you won’t want to miss this plush project!
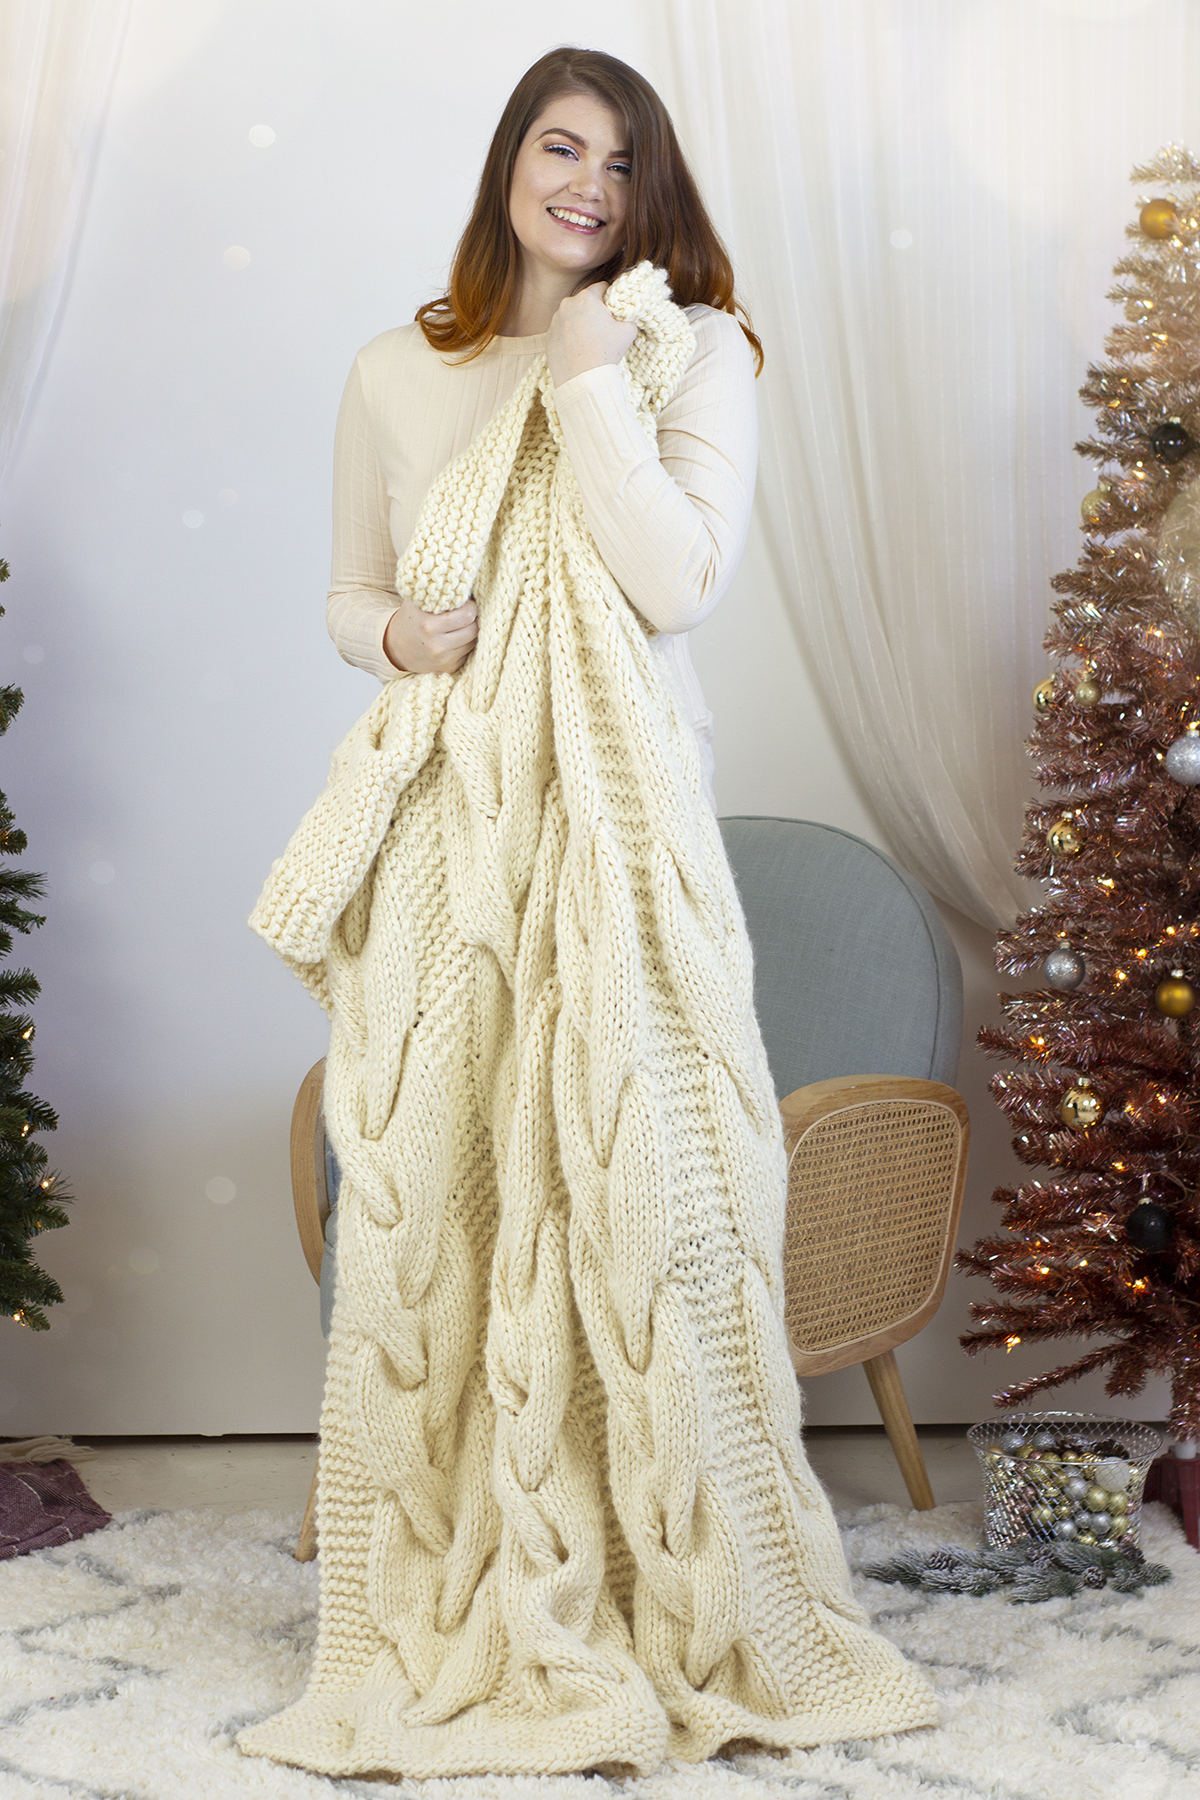
The generous size of this blanket is perfect for sharing and is sure to cover your toes.
Chunky projects seem to be all the rage, and it’s no wonder, because projects made with super-bulky yarn work up satisfyingly fast. That’s certainly the case with the Lantern Throw. Blanket projects, even when knitting with worsted weight yarn, can be a big undertaking with progress that feels somewhat slow. However, add in some nice, thick yarn and it’s as though you’ve hit fast-forward. That’s why I chose to use Be Wool for this design. I love just that you can get such a large blanket out of less yarn than it takes to make most sweaters.
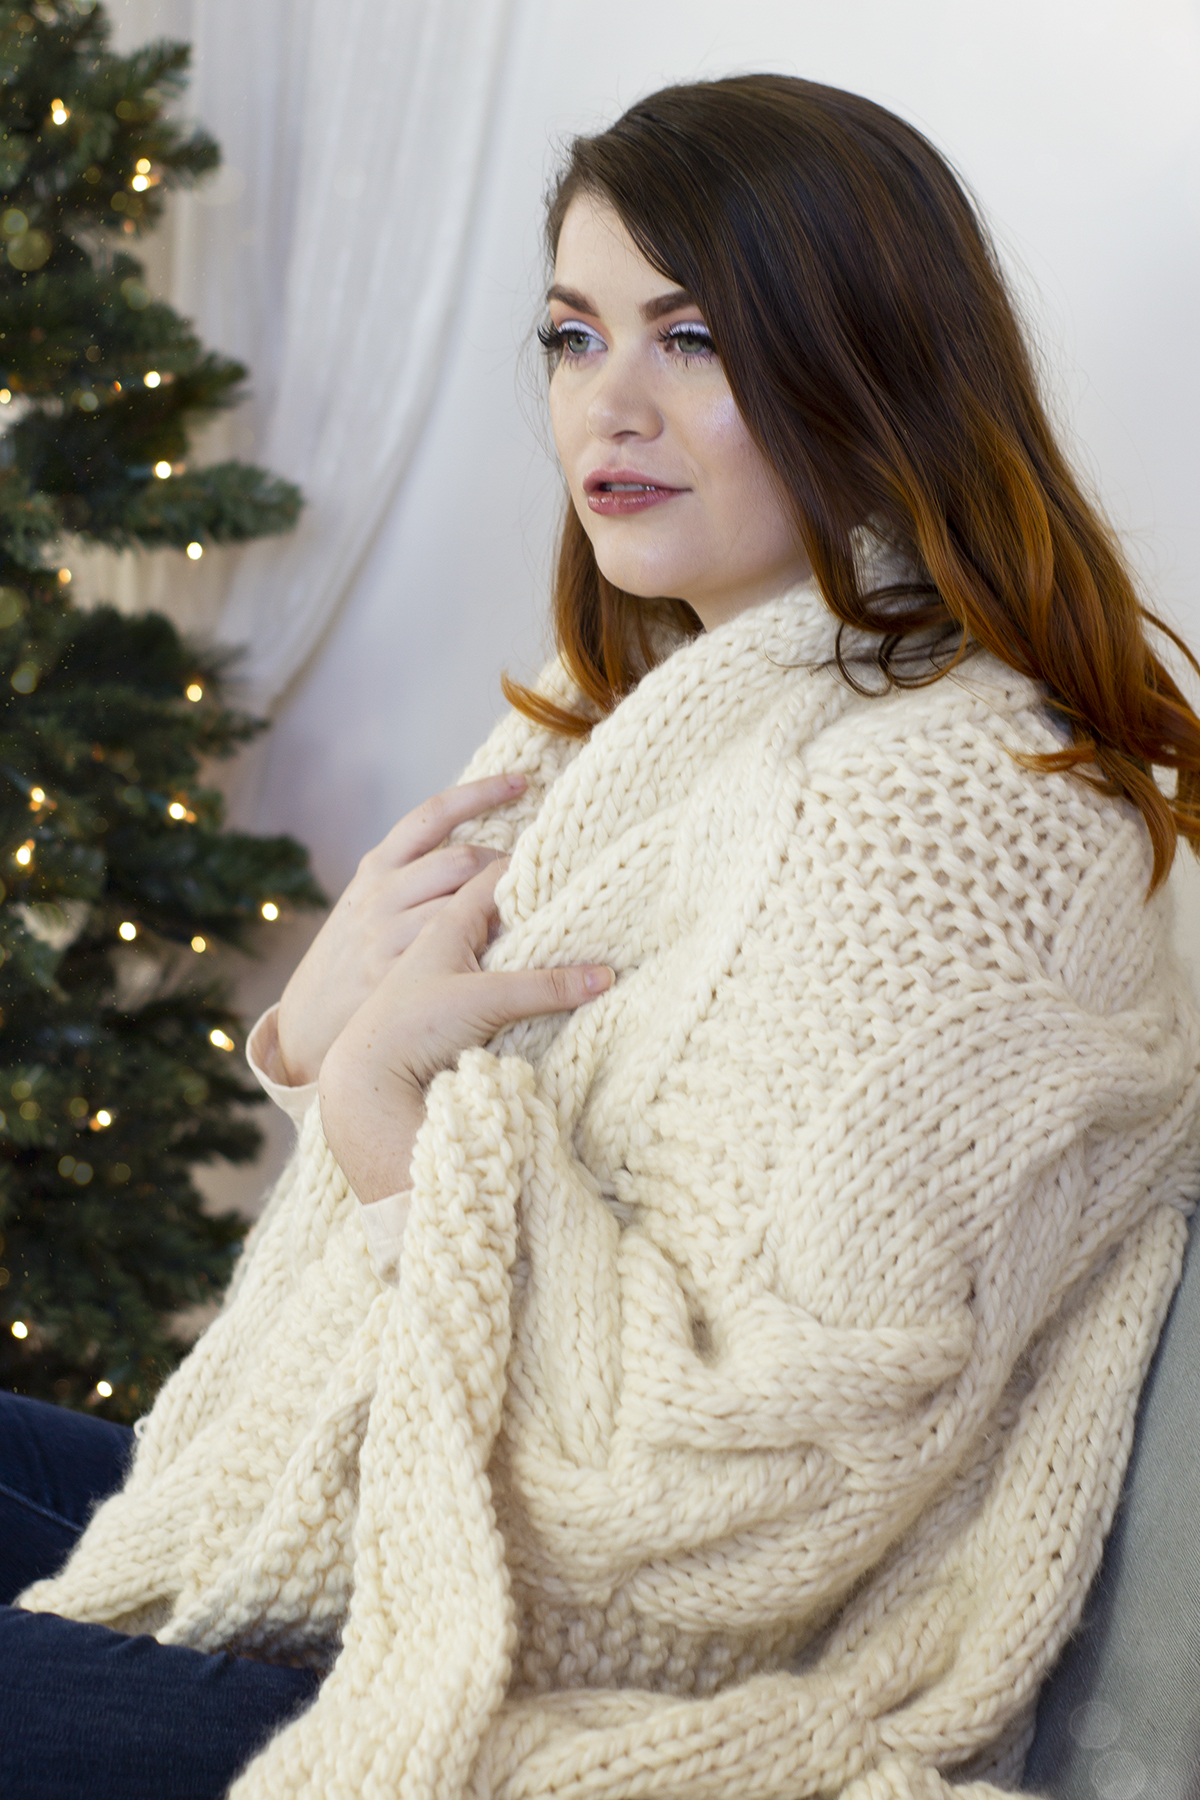
Snuggle up to this cozy blanket – it’s irresistable!Be Wool is a super soft, bouncy blend of 60% acrylic and 40% wool. It’s perfect for homewares because it’s machine-washable and easy to care for. We suggest US Size 17 (12 mm) needles for this yarn in order to create a fabric that isn’t too dense and has just the right amount of drape without sacrificing structure.
Chunky braided cables add to the beauty of this otherwise simple design.
The Lantern Throw is decorated with oversized cables throughout. The specific type of cables are Braided Cables in a motif in which each cable mirrors another. If you haven’t knit braided cables before, or if you are completely new to cable knitting, fear not because I’ve got your back. I’ve created a thorough tutorial where I show you exactly how to knit the cables used in this pattern.
I hope you enjoyed that tutorial and that it gets you on the right track for knitting your own Lantern Throw. Remember, you can find the Lantern Throw and the rest of the 12 Days of Winter kits at your local yarn store. Click here to find a shop that carries our yarn near you.
This is part 5 in a 12 part series highlighting designs from our 12 Days of Winter, Series 4 Edition.
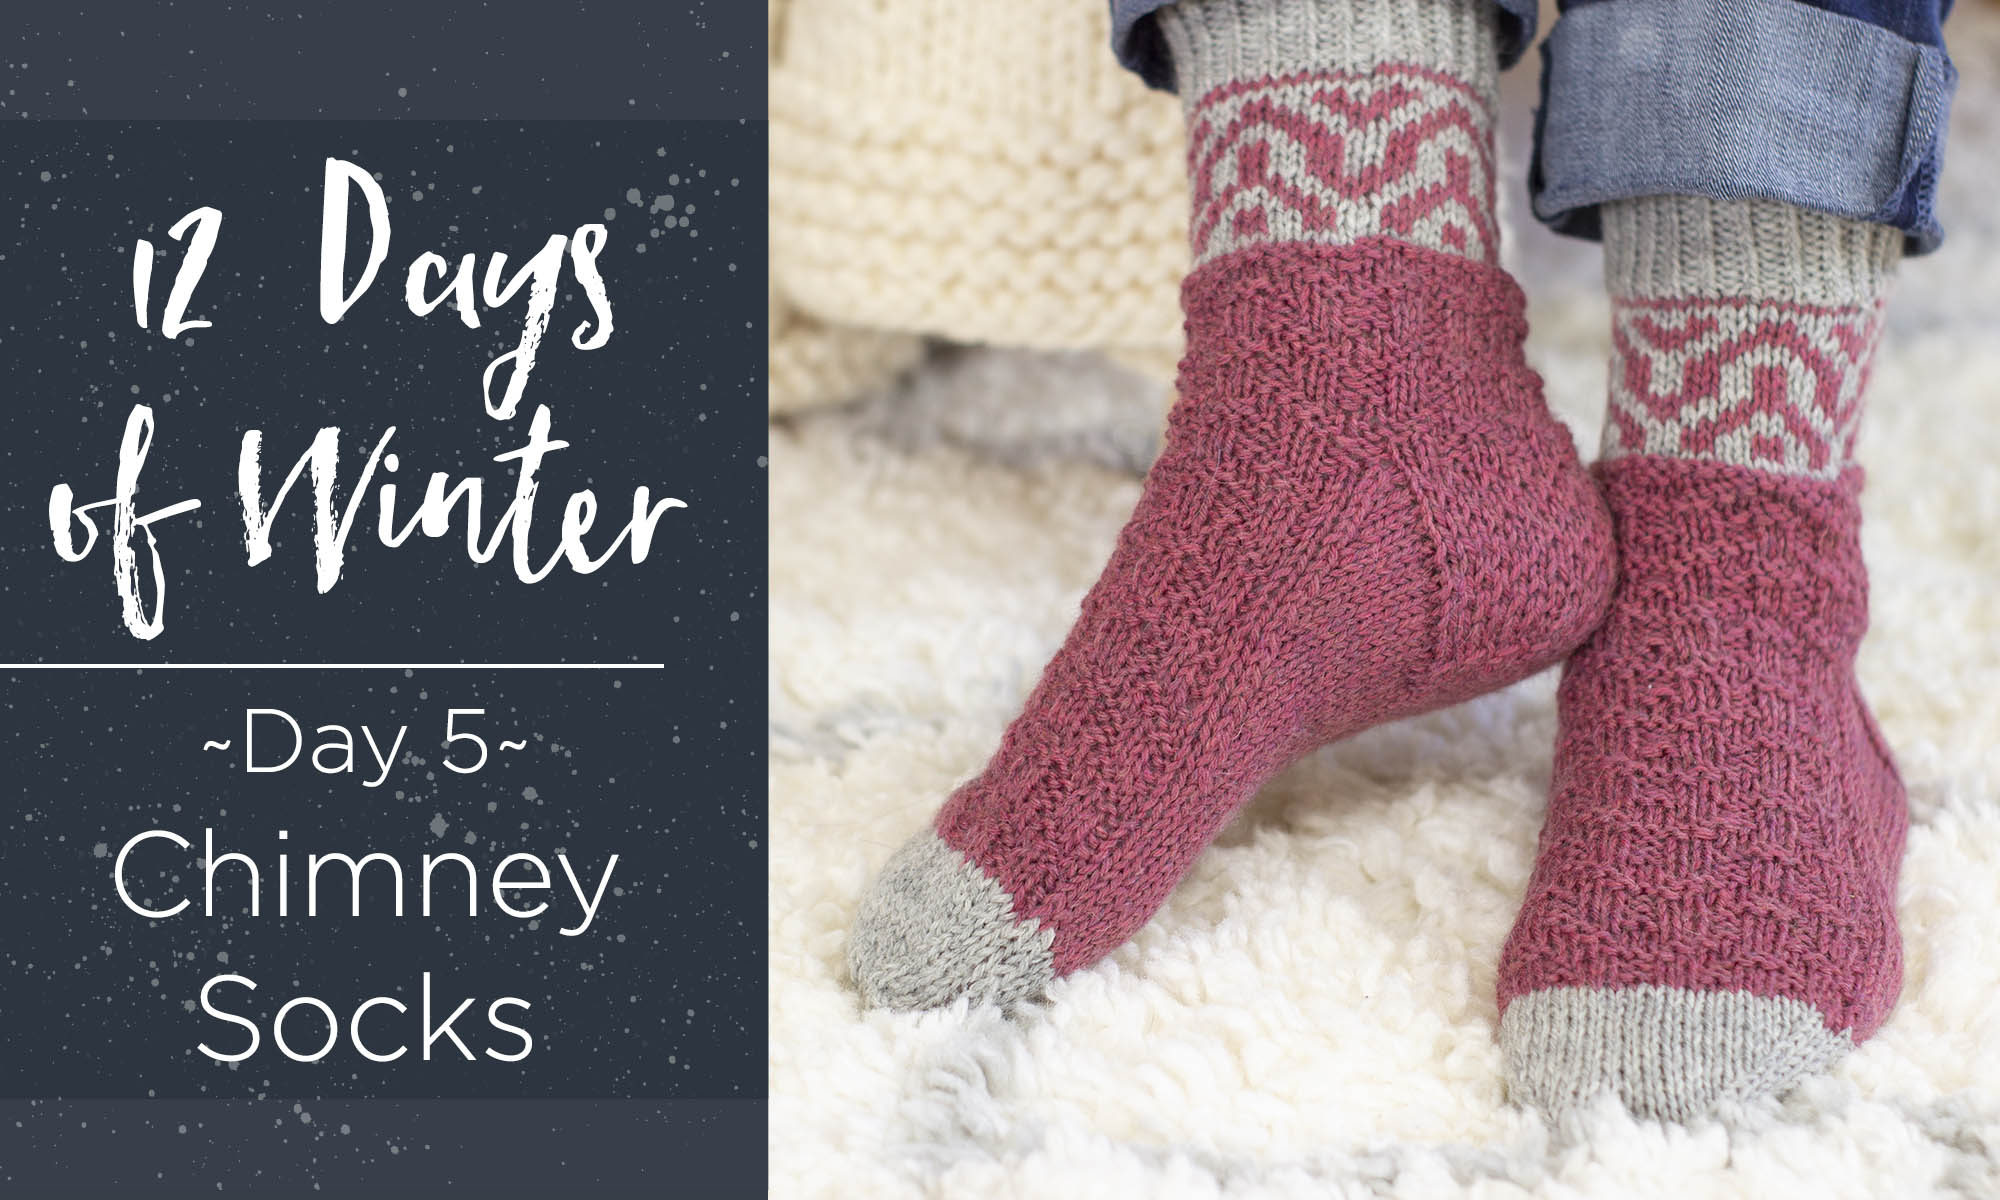
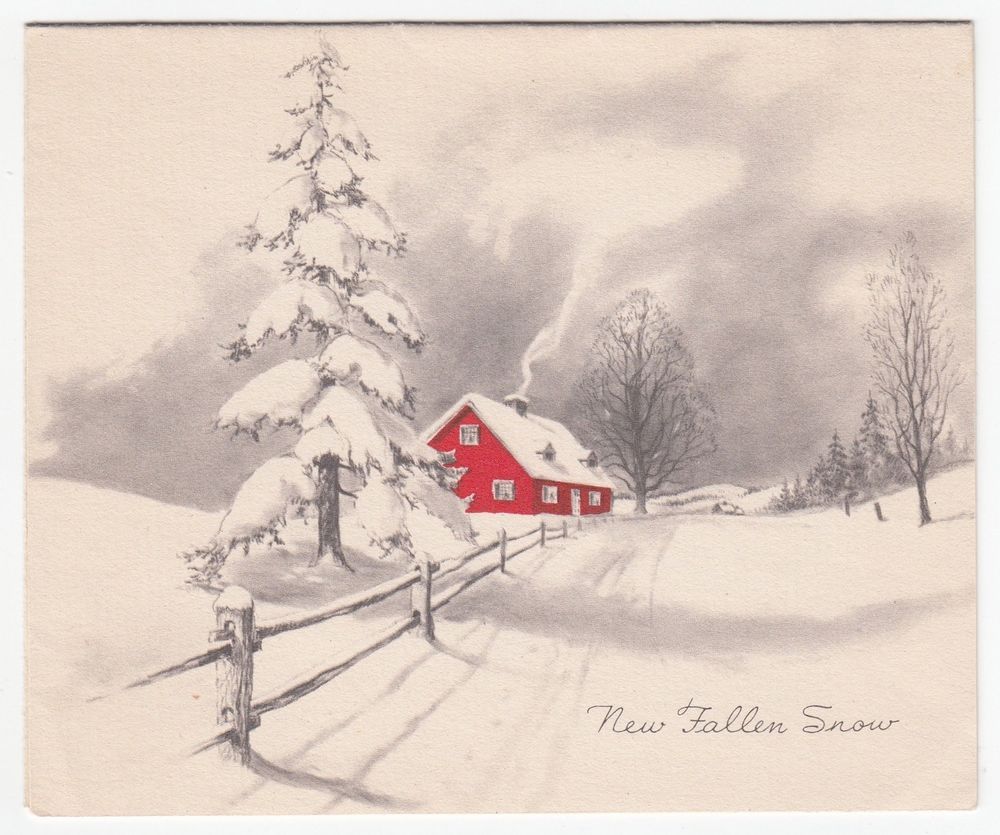
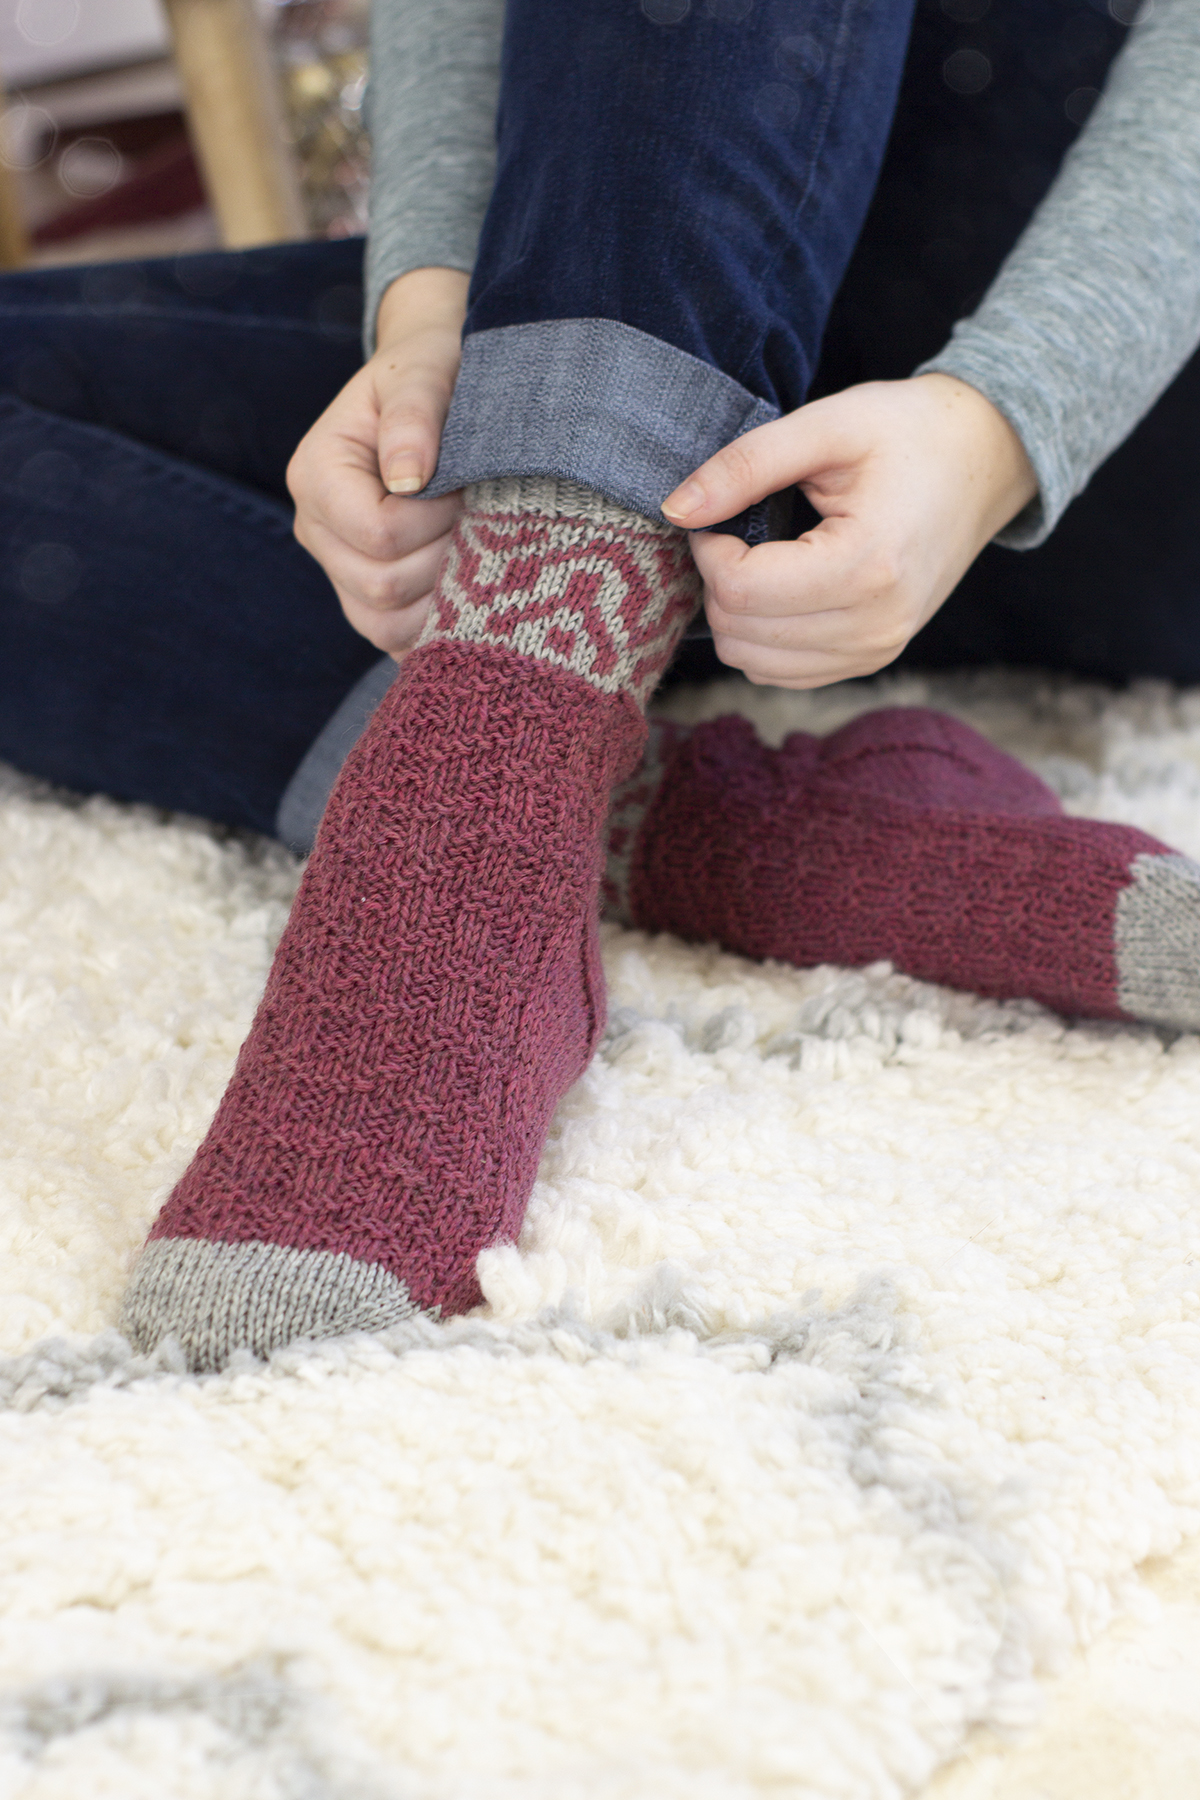
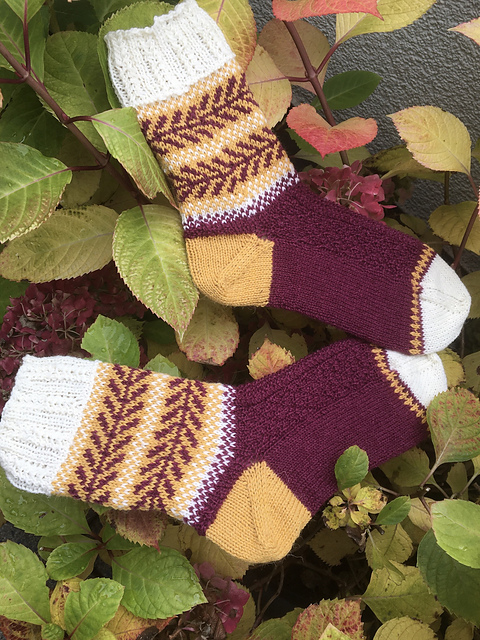
Few things are more comforting than cuddling up with a good book while warmed by the heat of a fireplace. Growing up, I spent so many winter days doing just that. I would devour book after book, with the pages illuminated by the light of the fire, and it’s something I miss dearly about my childhood home. For the fifth installment of the 12 Days of Winter Kit Collection, I wanted to create a design that conjures the comfort of the days when I could sit by the fire. The result? The Chimney Socks.
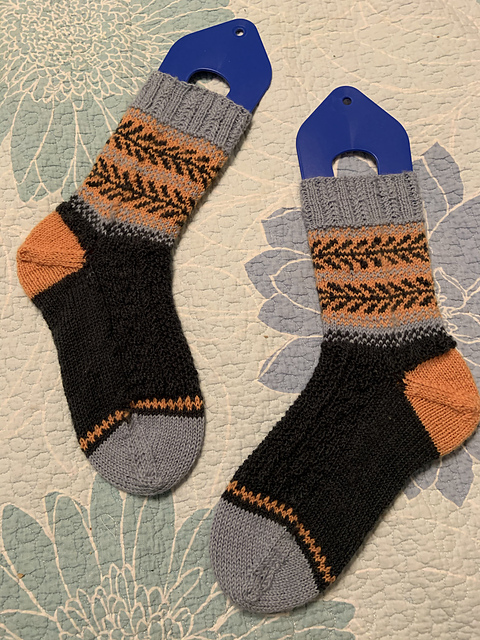
The Chimney Socks are cozy house socks that feature graphic colorwork and a knit-purl texture to match. The socks are knit using two colors of 100% wool, Deluxe DK Superwash. I chose #848 Coral Heather and #839 Smoke Heather to emulate billows of smoke emerging from a brick chimney.
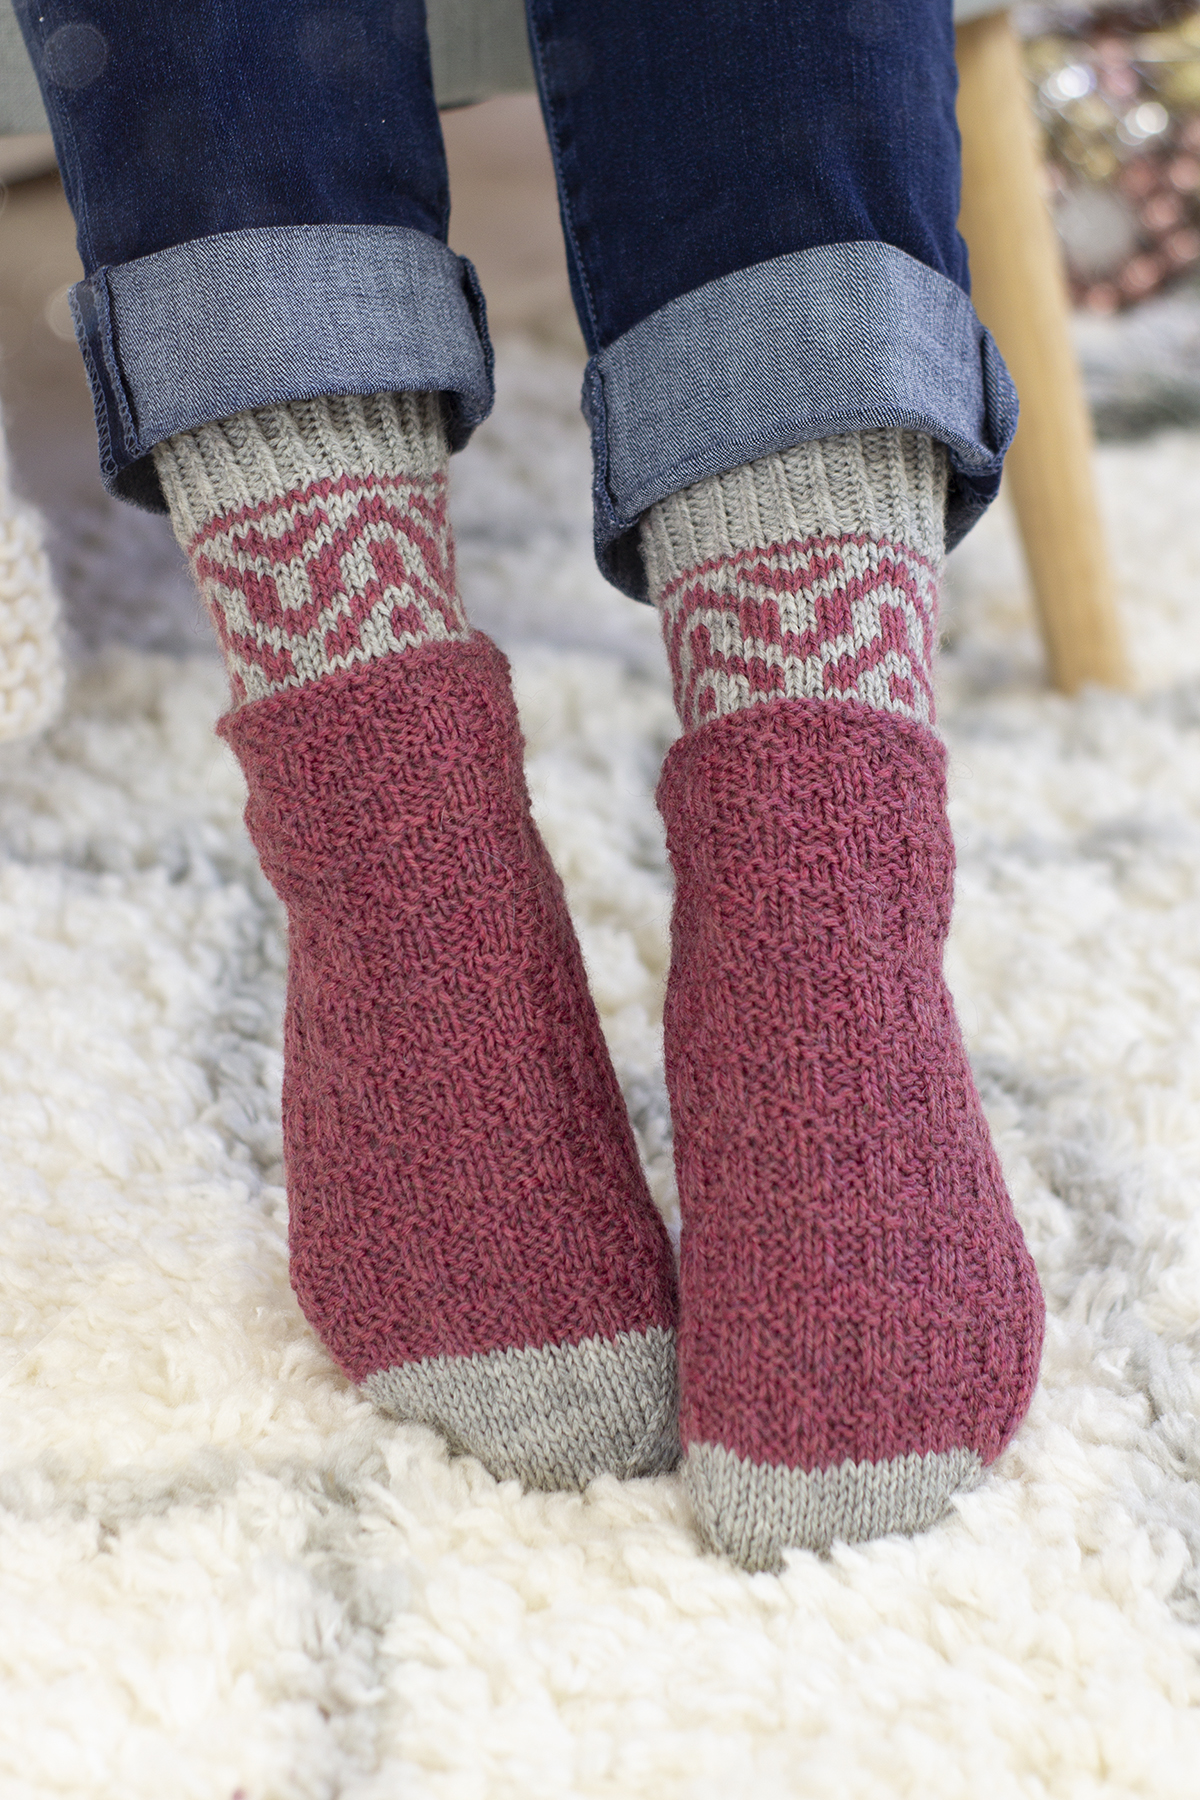
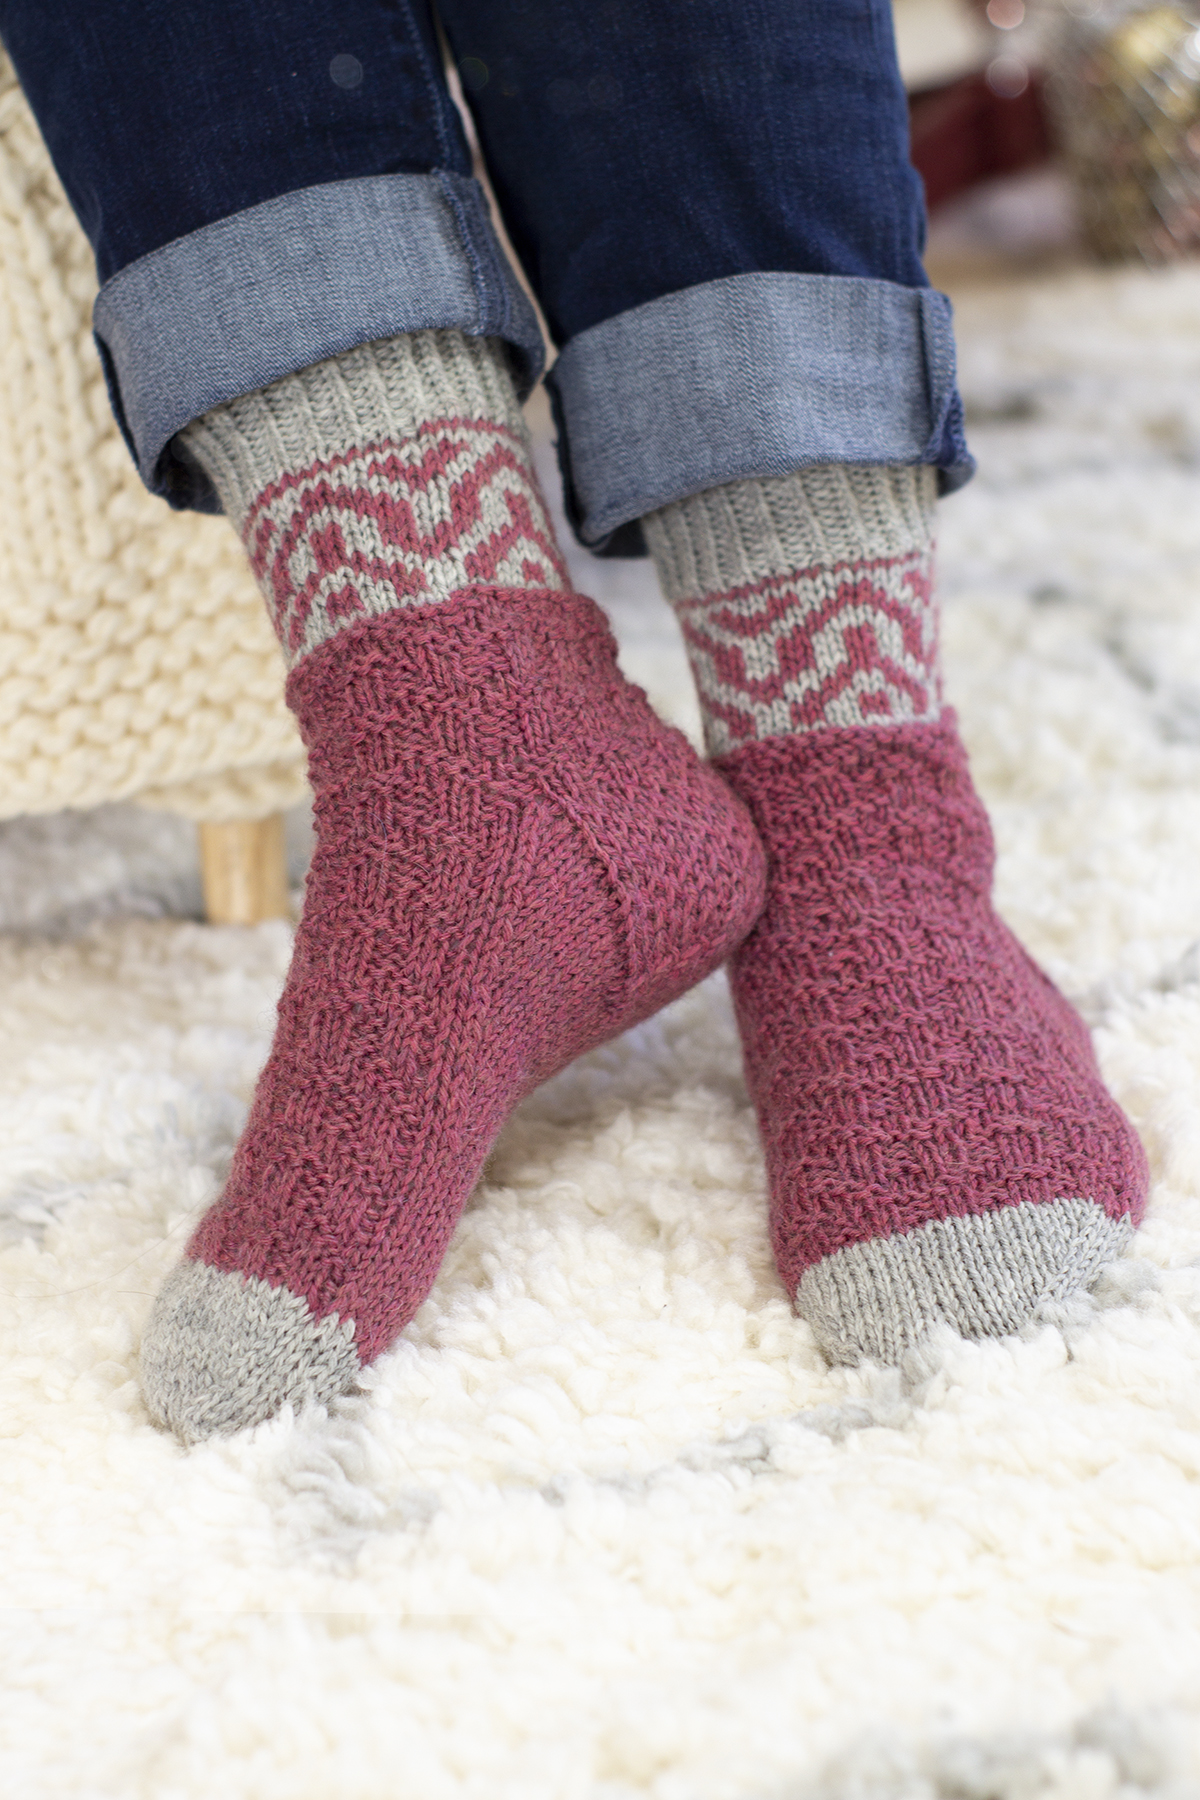
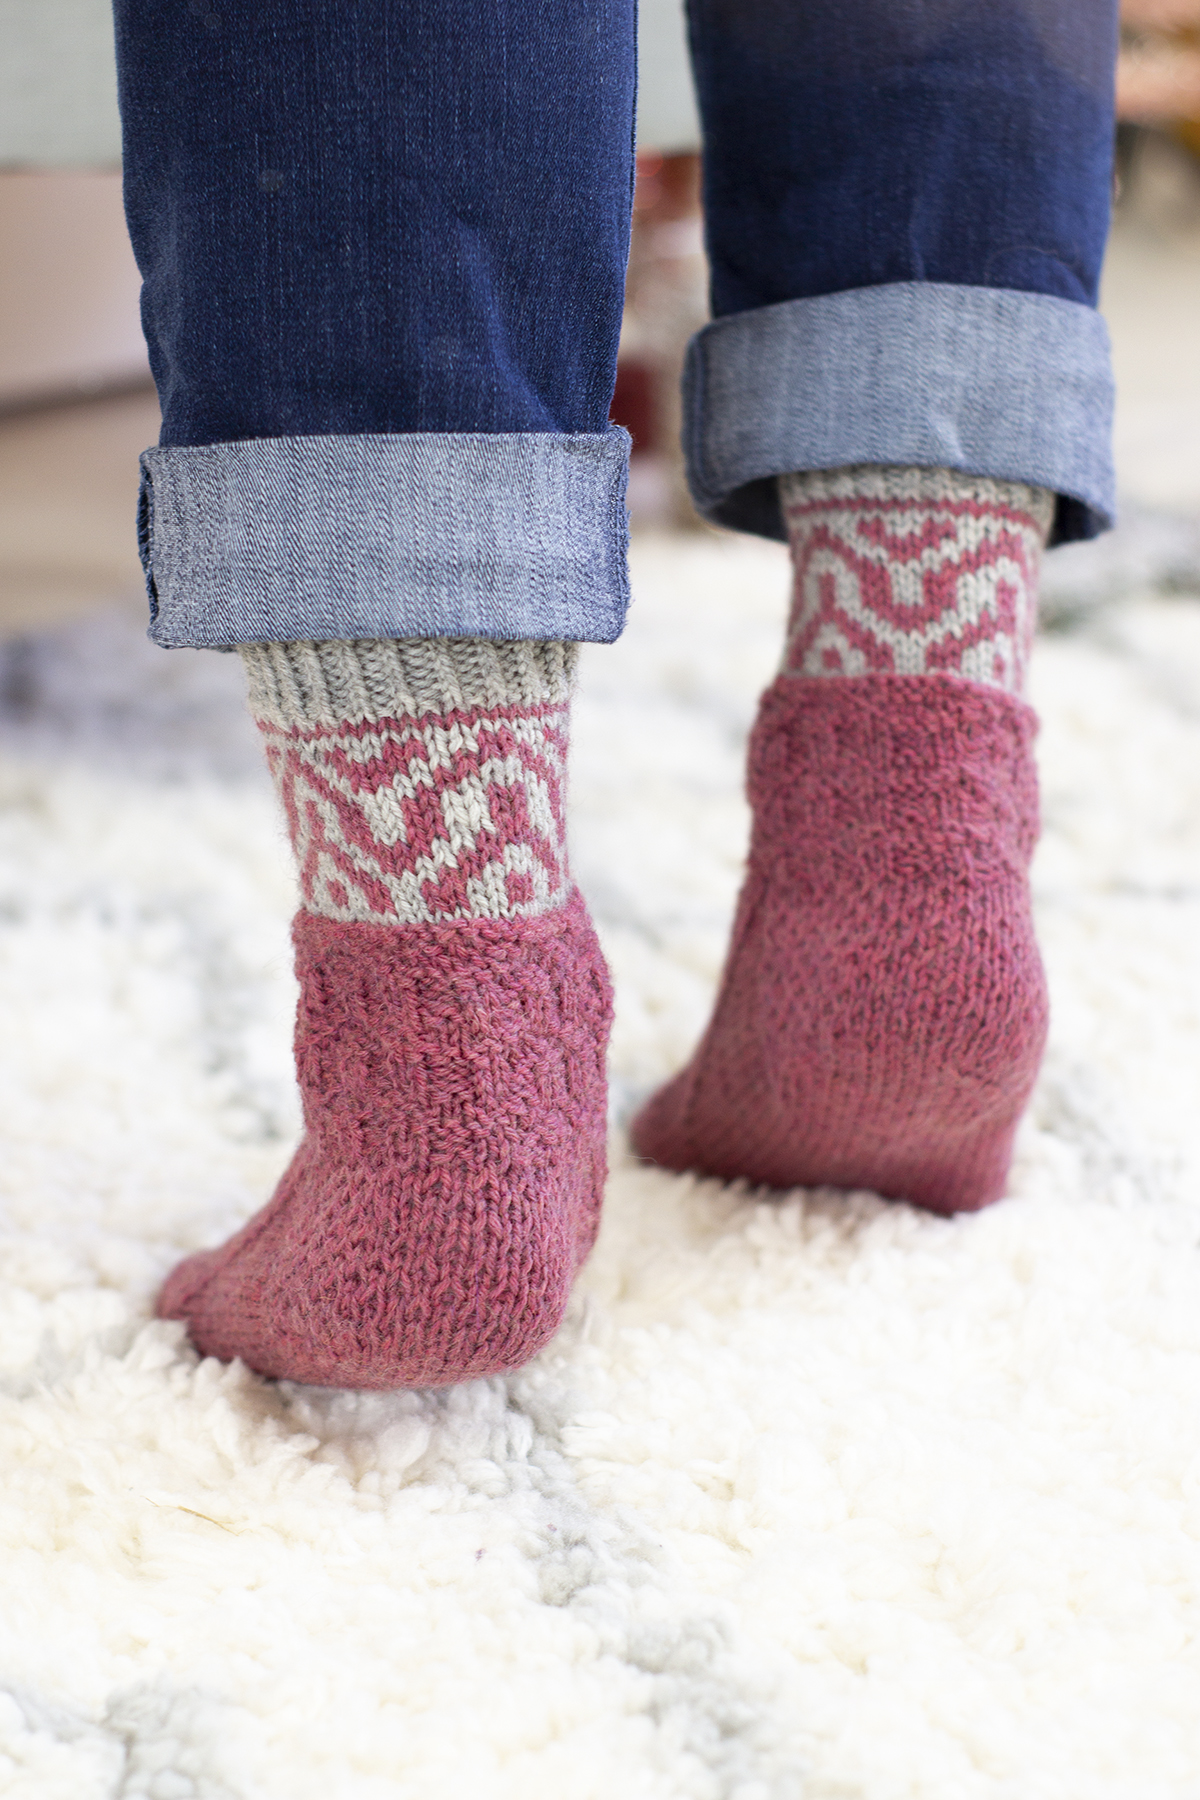
The cuff features tidy twisted ribbing in grey. It is followed by a pretty stranded colorwork motif that reminds me of little houses. Then, the same motif is transformed into a textural pattern for the foot. The toes are knit using the contrast color to balance out the cuff and leg of the pattern.
The Chimney Socks are knit from the cuff down. They feature an Eye of Partridge heel flap and gusset, creating a sturdy sock with a perfect fit. I love how quickly these socks knit up. As someone with second sock syndrome, heavier socks are perfect for me because they knit up quickly. They also make great beginner socks for the very same reason. Plus, they are just ridiculously cozy. I have multiple pairs of DK-weight socks and I get so much wear out of them during the winter.
These socks feature an Eye of Partridge heel with a gusset.
You know what else is great about this kit? It includes enough yarn to knit two pairs of socks! Simply reverse the main color and contrast color for a coordinating set. It’s perfect for giving a gift to yourself and to a loved one!
Remember, you can find the versions of the Chimney Socks Kit and the rest of the 12 Days of Winter kits at your local yarn store. Click here to find a shop that carries our yarn near you. Happy knitting!
This is part 4 in a 12 part series highlighting designs from our 12 Days of Winter, Series 4 Edition.
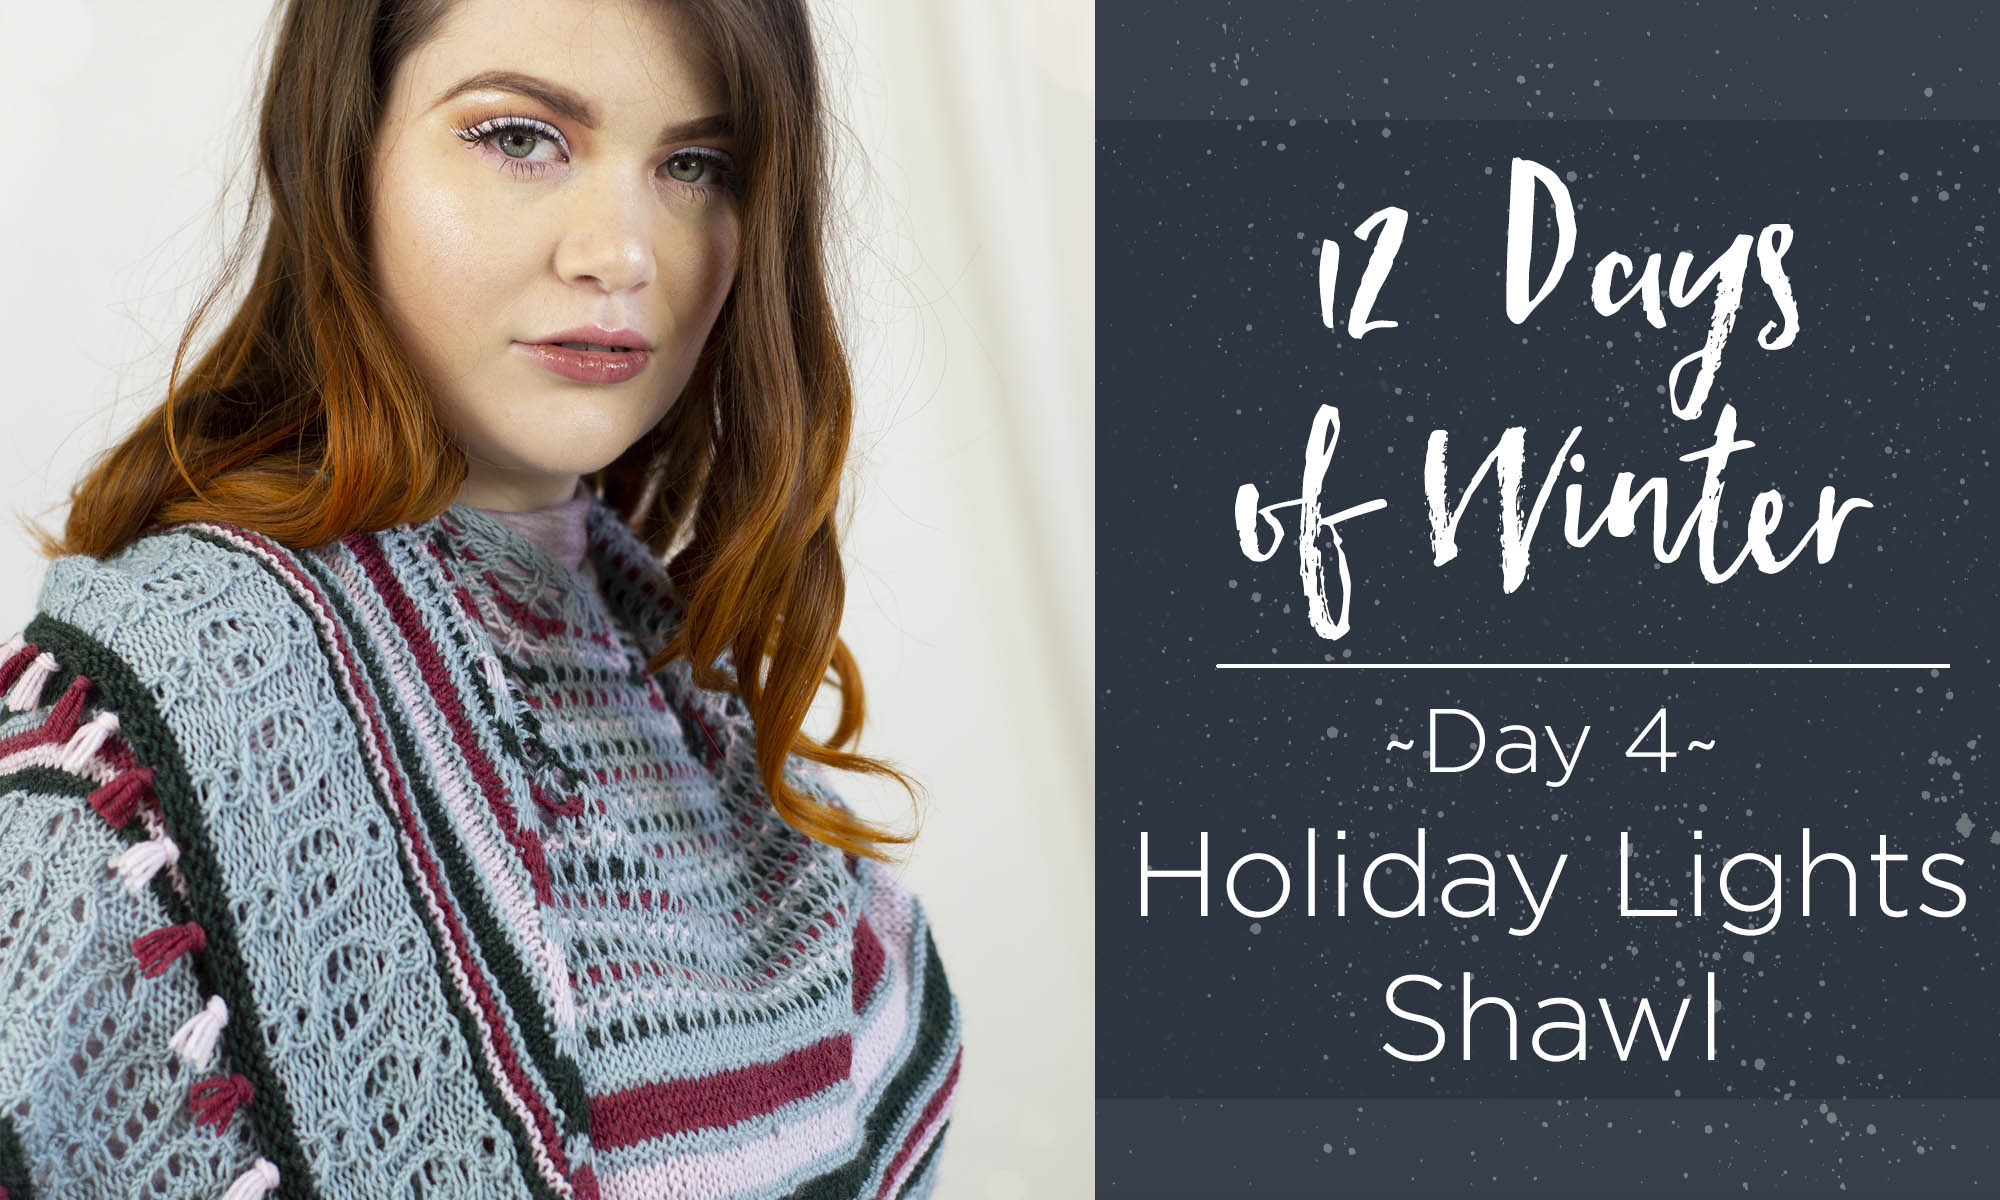
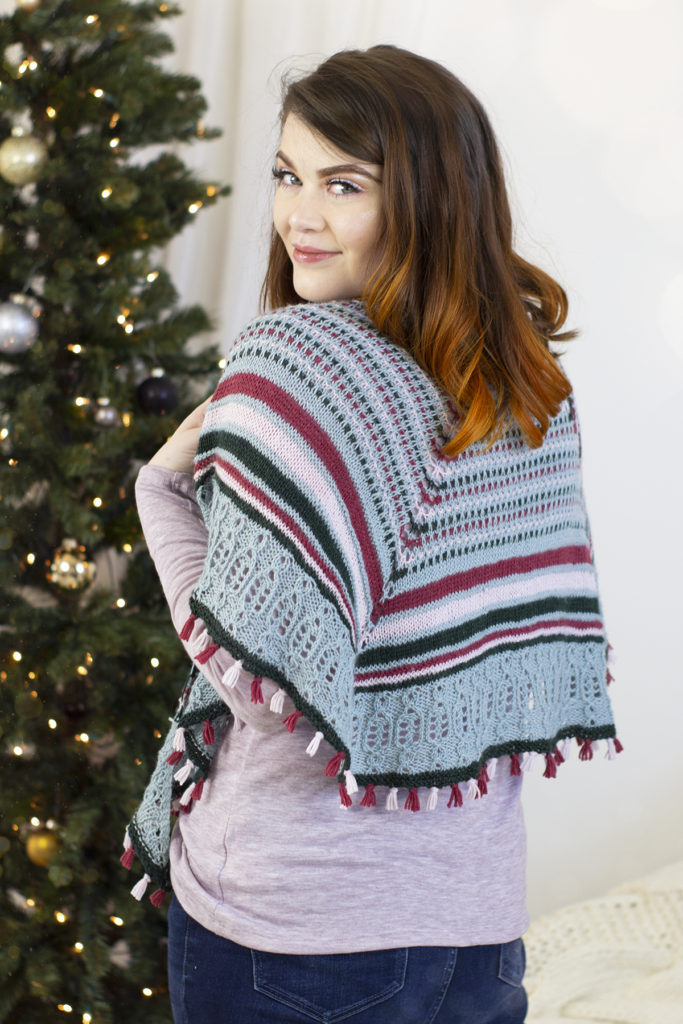
It’s Day 4 of the 12 Days of Winter Kit Collection! Today I’m excited to share a fun and festive design knit in luxurious and lightweight Bella Cash. Say hello to the Holiday Lights Shawl!
A sampling of stripes and textural stitches make this project an addictive knit!
If the name didn’t give it away, the shawl was inspired by strings of holiday lights that are so abundant during the season. I think festive lights are something we can all appreciate. Whenever I pass by a home brilliantly illuminated with thousands of little lights I feel such a childlike sense of awe and wonder. It just feels so magical to me!
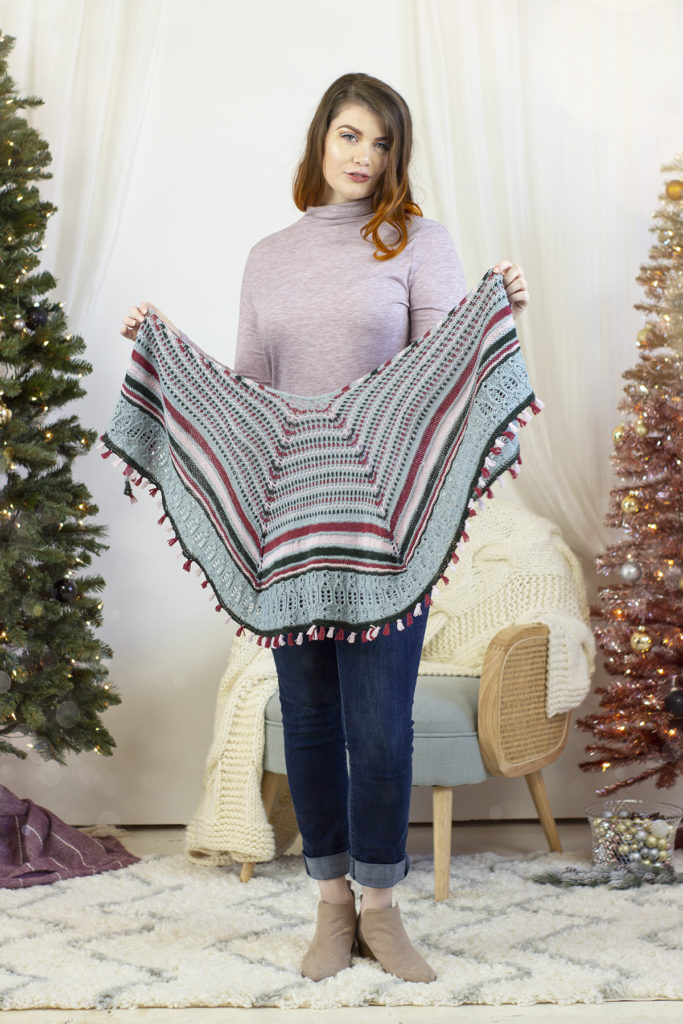
The Holiday Lights Shawl features a semi-circular shape.
There are three elements that remind me of lights in this fun pattern. Slip stitches and texture to create the effect of dappled lights throughout the first section of the shawl. Following the first section of “lights,” addictive-to-knit stripes incorporate garter stitch for a graphic and bold effect.
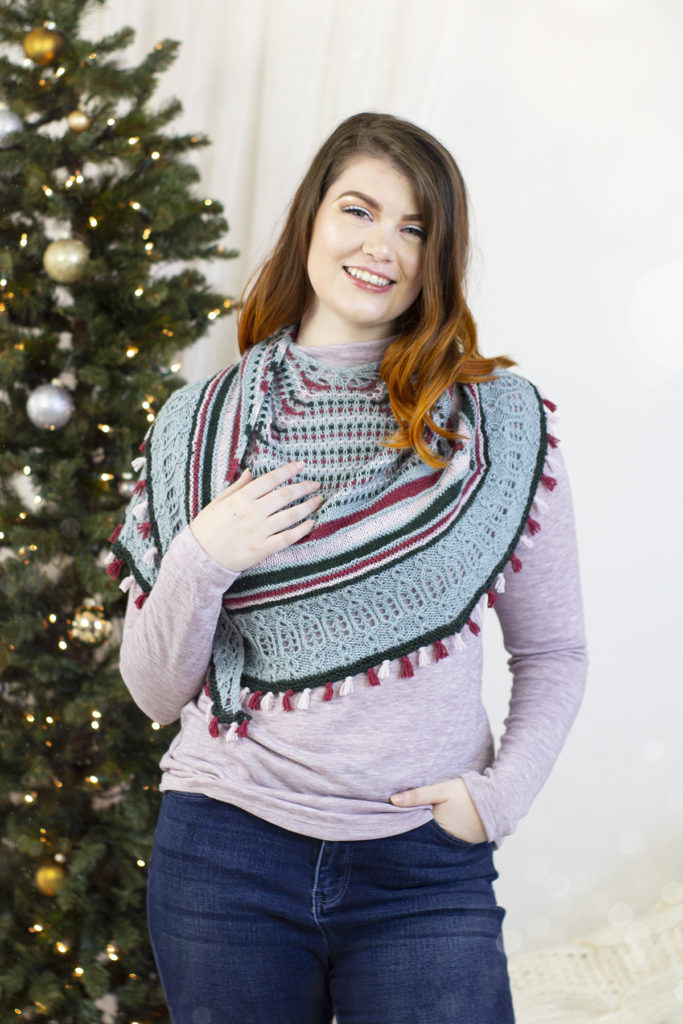
You can wear this shawl wrapped bandana-style around your neck. This is my favorite way to style shawls.
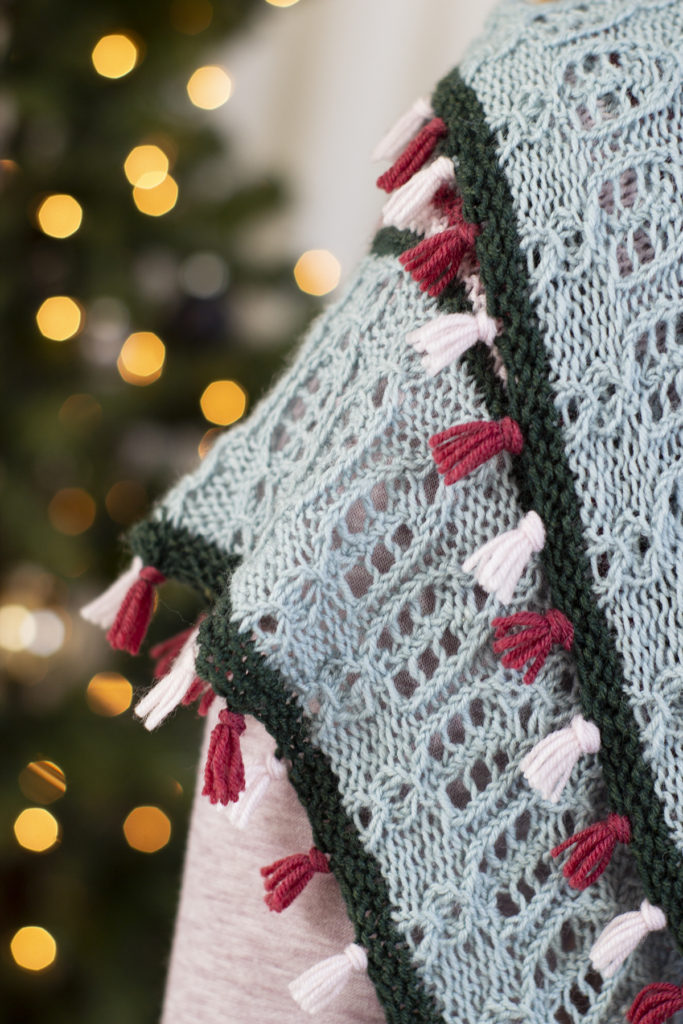
The second set of lights adorn the border of the shawl and use a touch of lace, twisted stitches, and one of my favorite decorative stitches: the lifted knot stitch. Before I move onto the final string of lights (can you guess what that might be?) I want to share a little tutorial for working the Lifted Knot Stitch (LKS).
I hope you enjoyed the tutorial and that it makes things a bit easier as you knit. Now, the final touch: the mini fringe across the bottom edge. Soft and festive, the fringe reminds me of little gleams of lights during winter nights.
Peppermint-colored mini fringe decorates the bottom of the shawl.
Remember, you can find the Holiday Lights Kit and the rest of the 12 Days of Winter kits at your local yarn store. Click here to find a shop that carries our yarn near you. Happy knitting!
Happy November and welcome to Week 6 of the Bella Cash Socktober Mystery Knitalong! Hopefully by now you’ve been able to finish your socks. We’re so excited to be able to reveal them to you this week!
Use this graphic on Ravelry and on social media to share about the knitalong.
Each week in October I revealed a new portion of the pattern. Now that each piece of the puzzle has been fully revealed, I hope you’ll enjoy seeing the projects of others. If you didn’t have a chance to join last month, no worries! It’s never too late to knit socks, right? You can find the pattern for the Sweet Dumplin’ Socks here (link). Grab your colors of beautiful merino/cashmere/nylon Bella Cash here (link).
We hope you’ve added your project to Ravelry, too! You can find the Ravelry listing here (link).
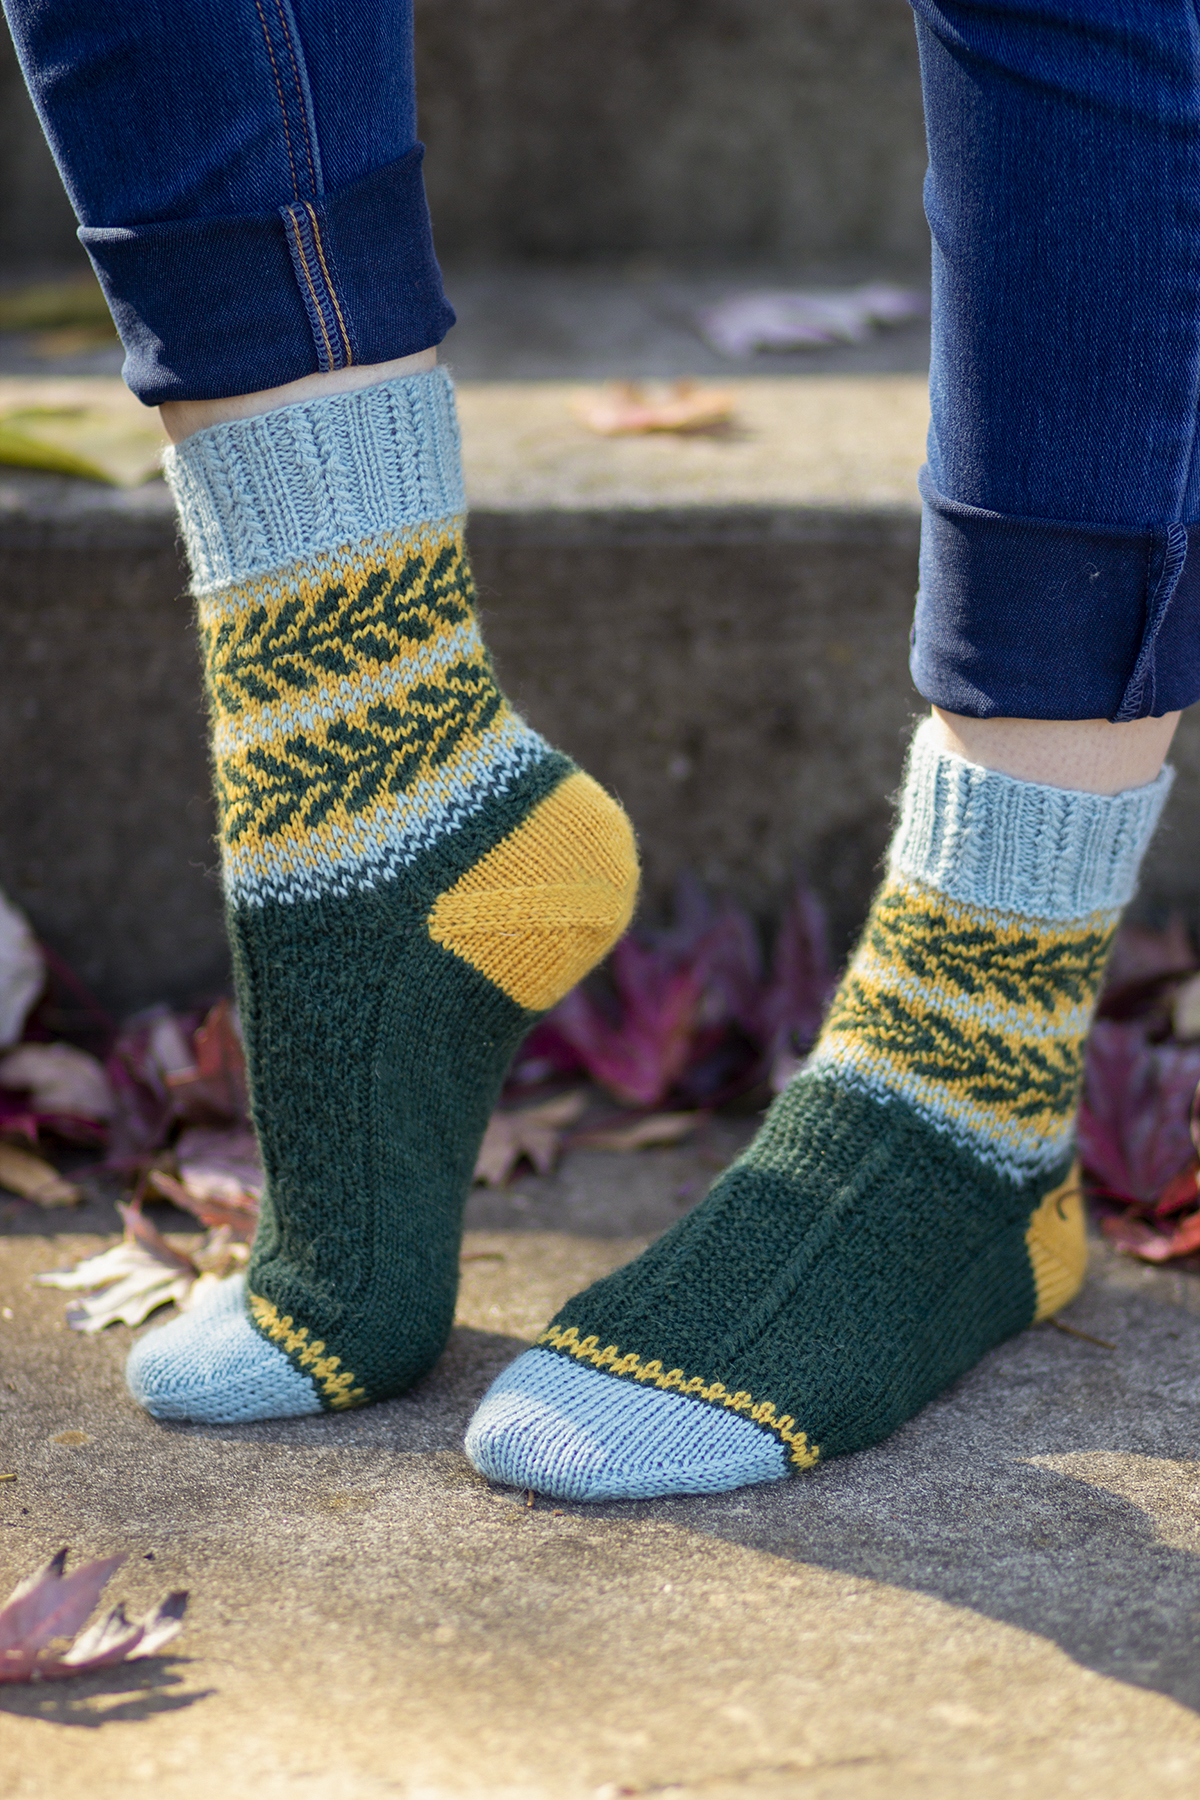
The finished Sweet Dumplin’ Socks in their full glory!
I’m so excited to fully reveal the completed socks. I had so much fun designing and knitting them, and I hope the process has been great fun for you, too. The mornings and evenings around here have grown quite chilly, so I’m excited to be able to start wearing mine! This week I want to share a few photos of your projects in addition to our versions here at the office. You might recall that Aubrey, Yonca, and Heather all joined in on the fun. We’ve already revealed their color choices, but it’s great to see them knit up!
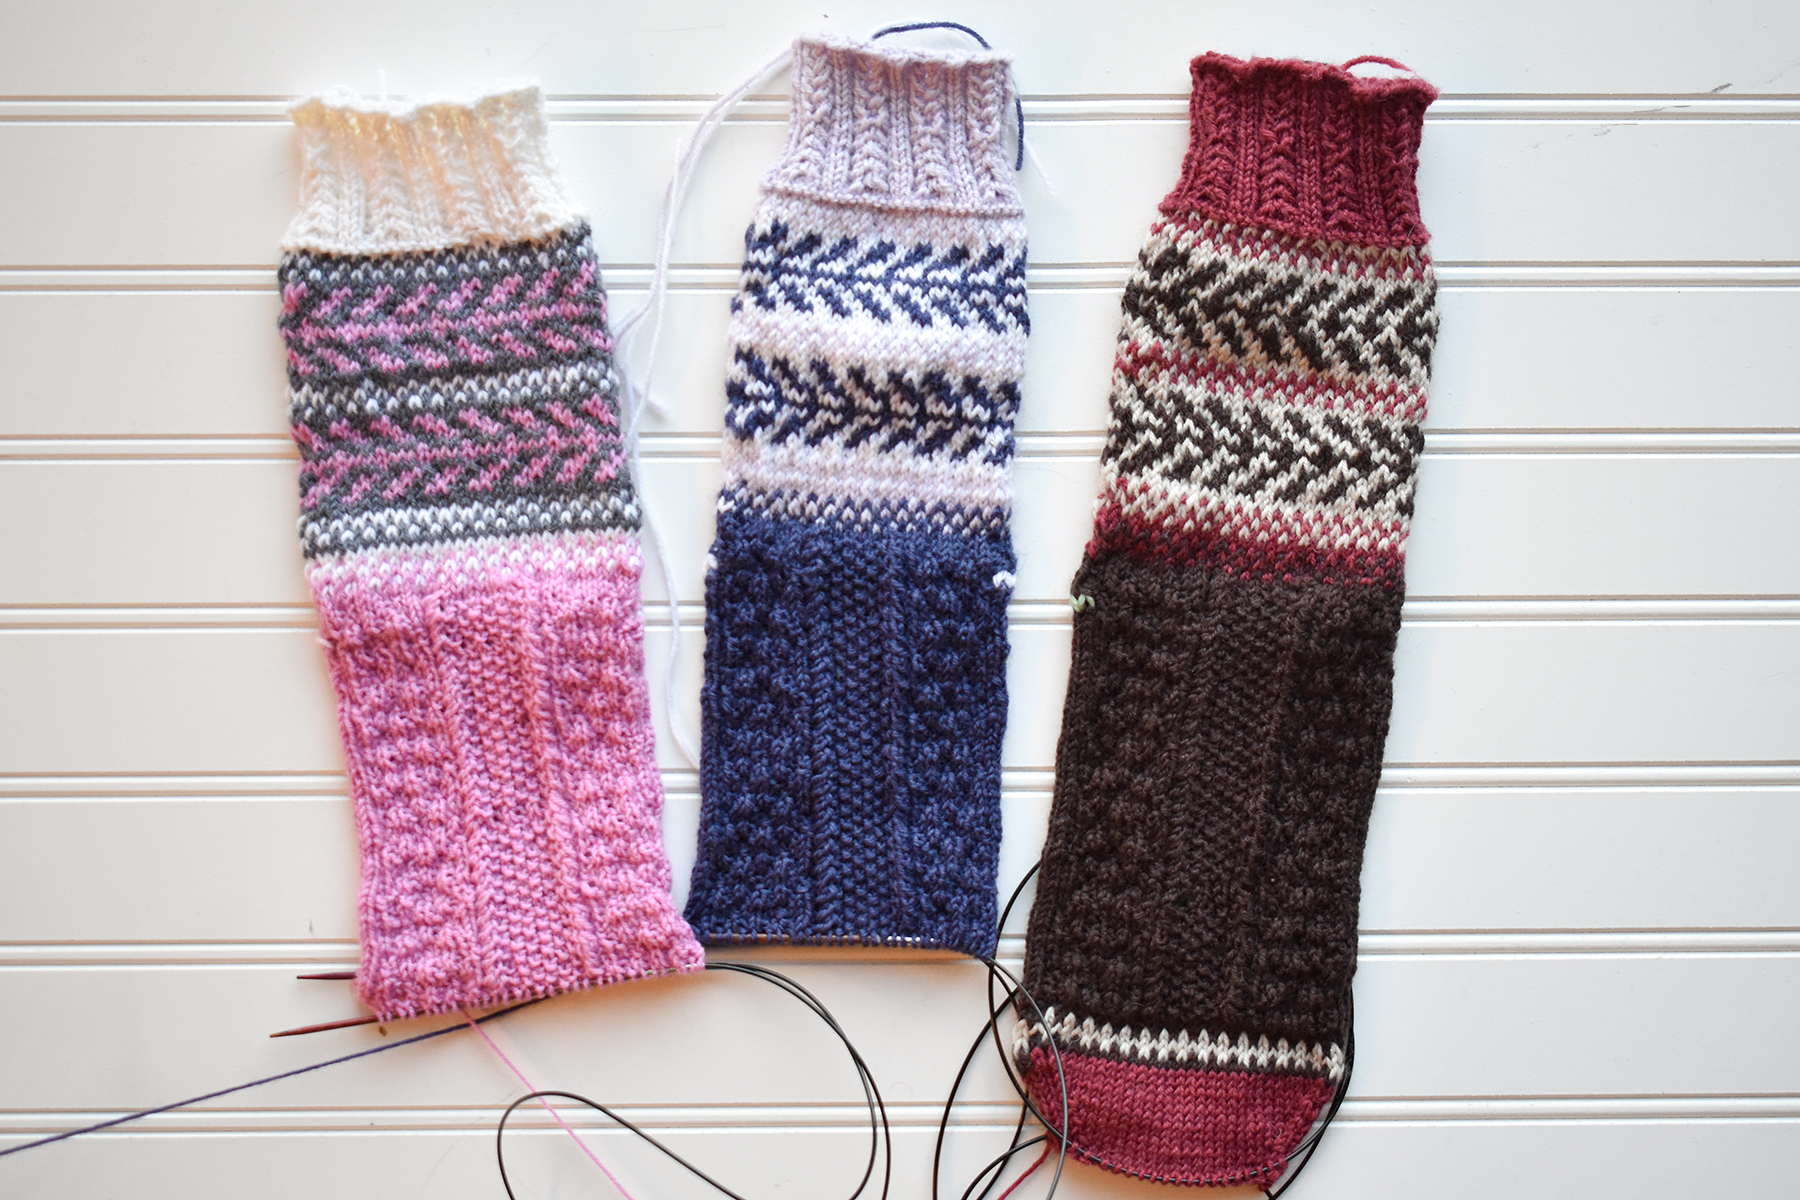
From left to right: Aubrey’s sock, Yonca’s sock, Heather’s sock.
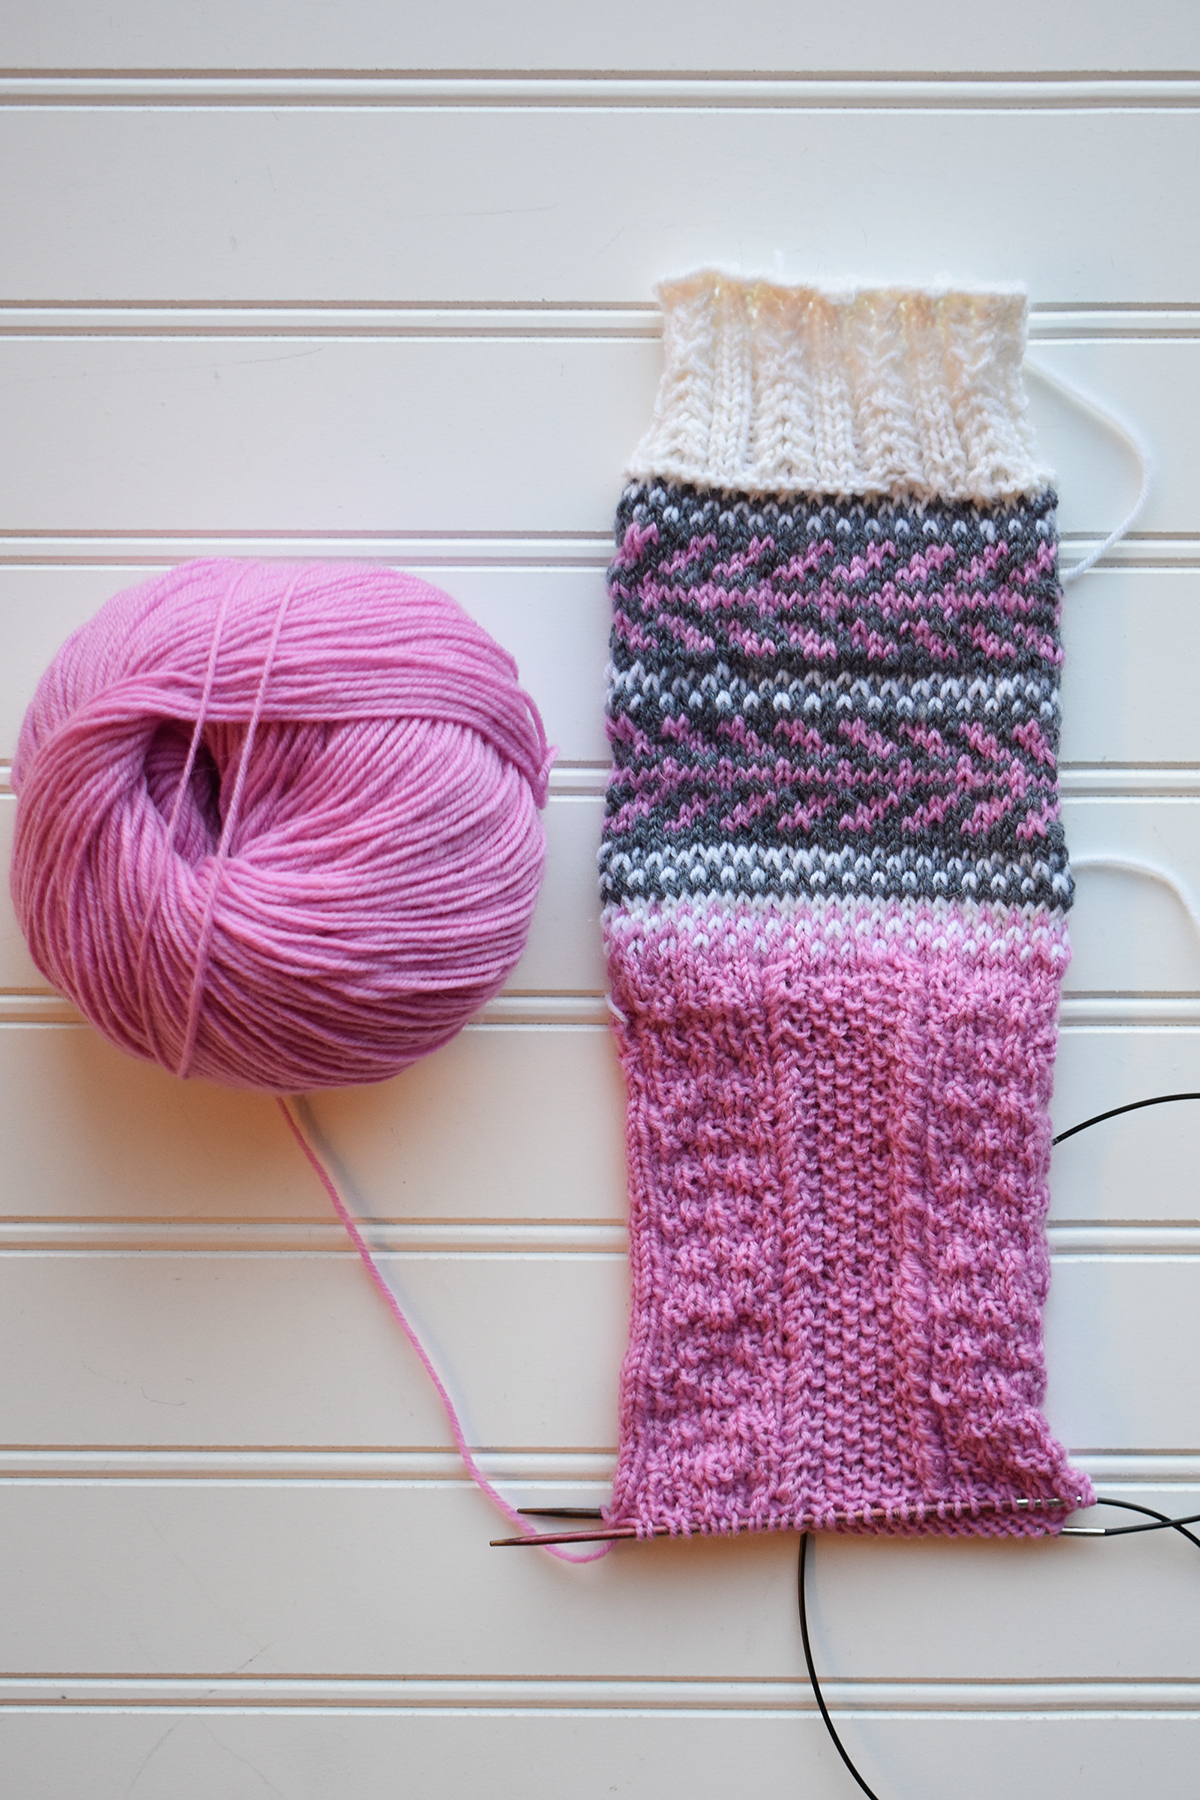
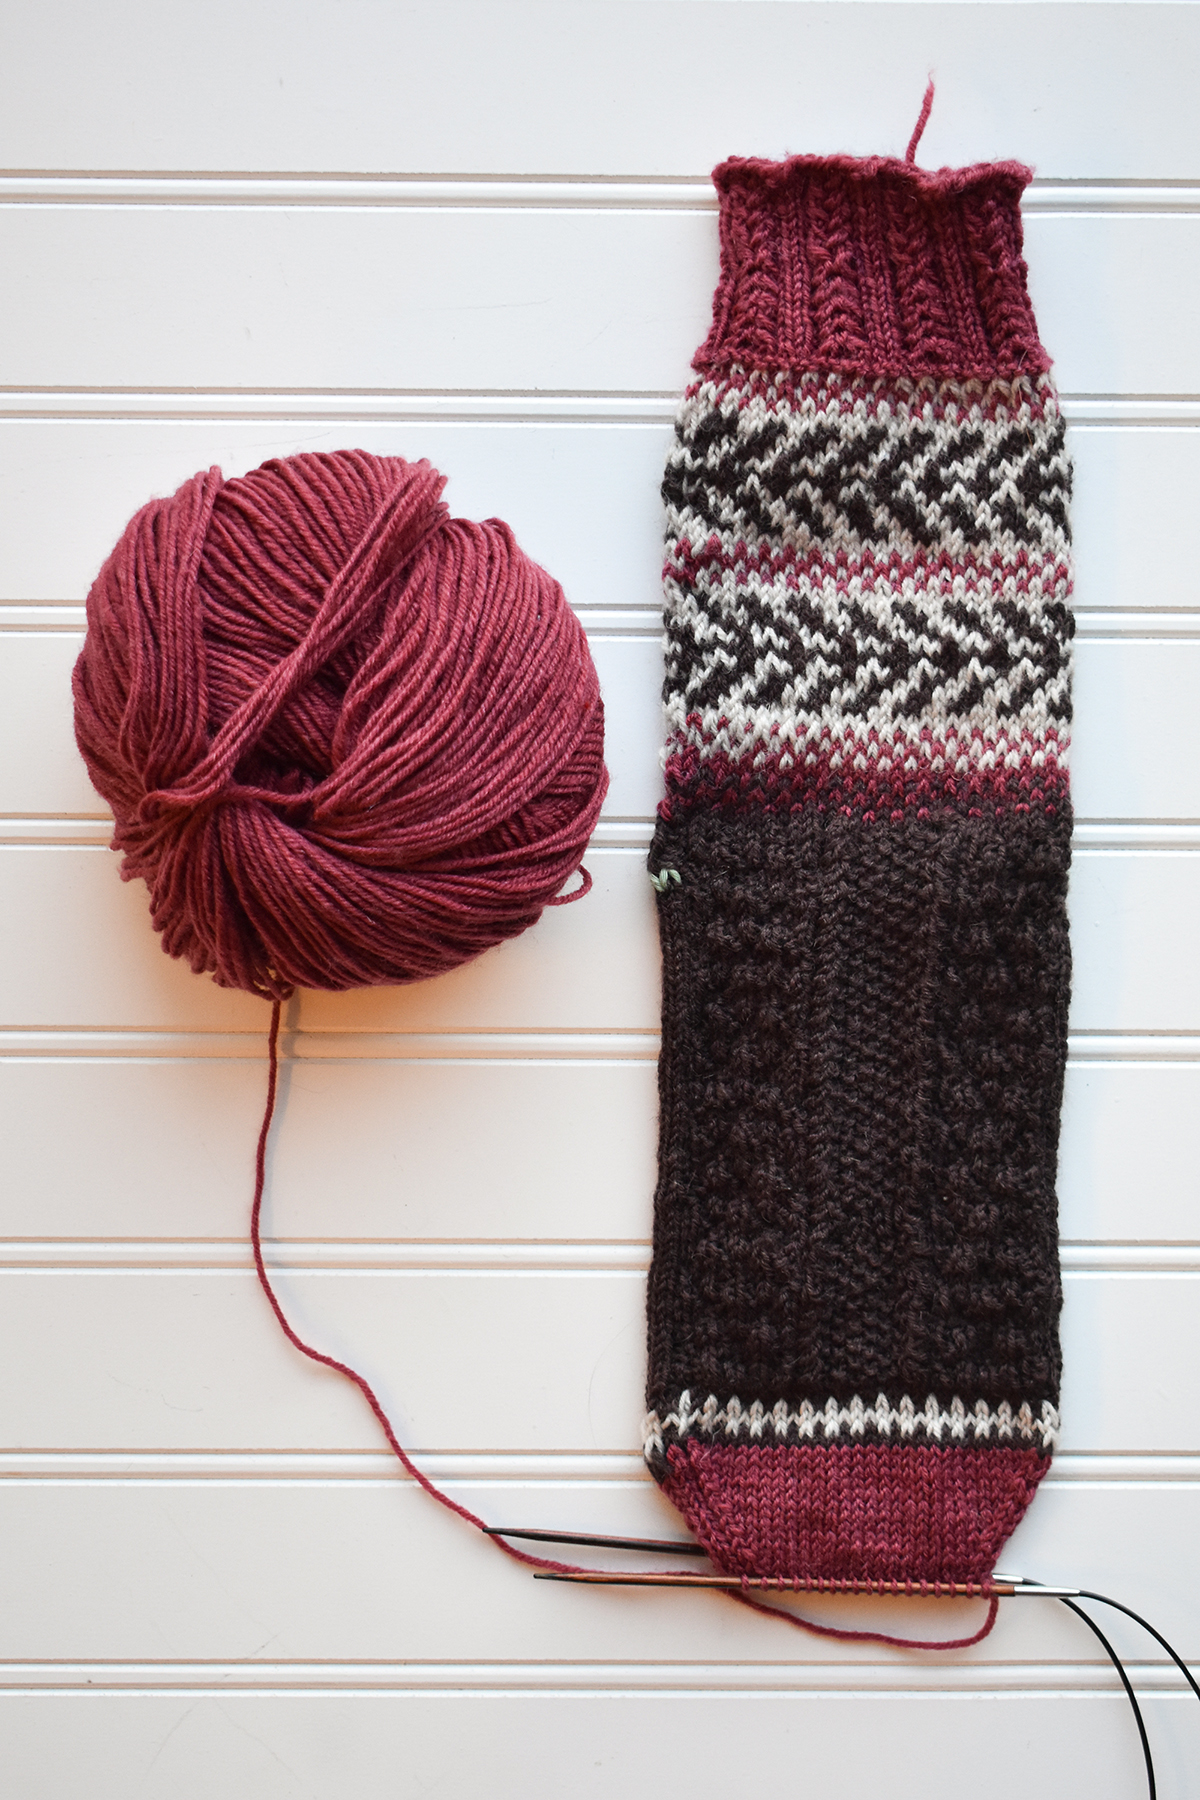
First let’s take a look at Aubrey’s progress. She hasn’t quite reached the toe and heel portion yet, but she’s well on the way. I so love how she opted to arrange her colors. The pink as the main color is so fun, and I love the slate grey as the background color.
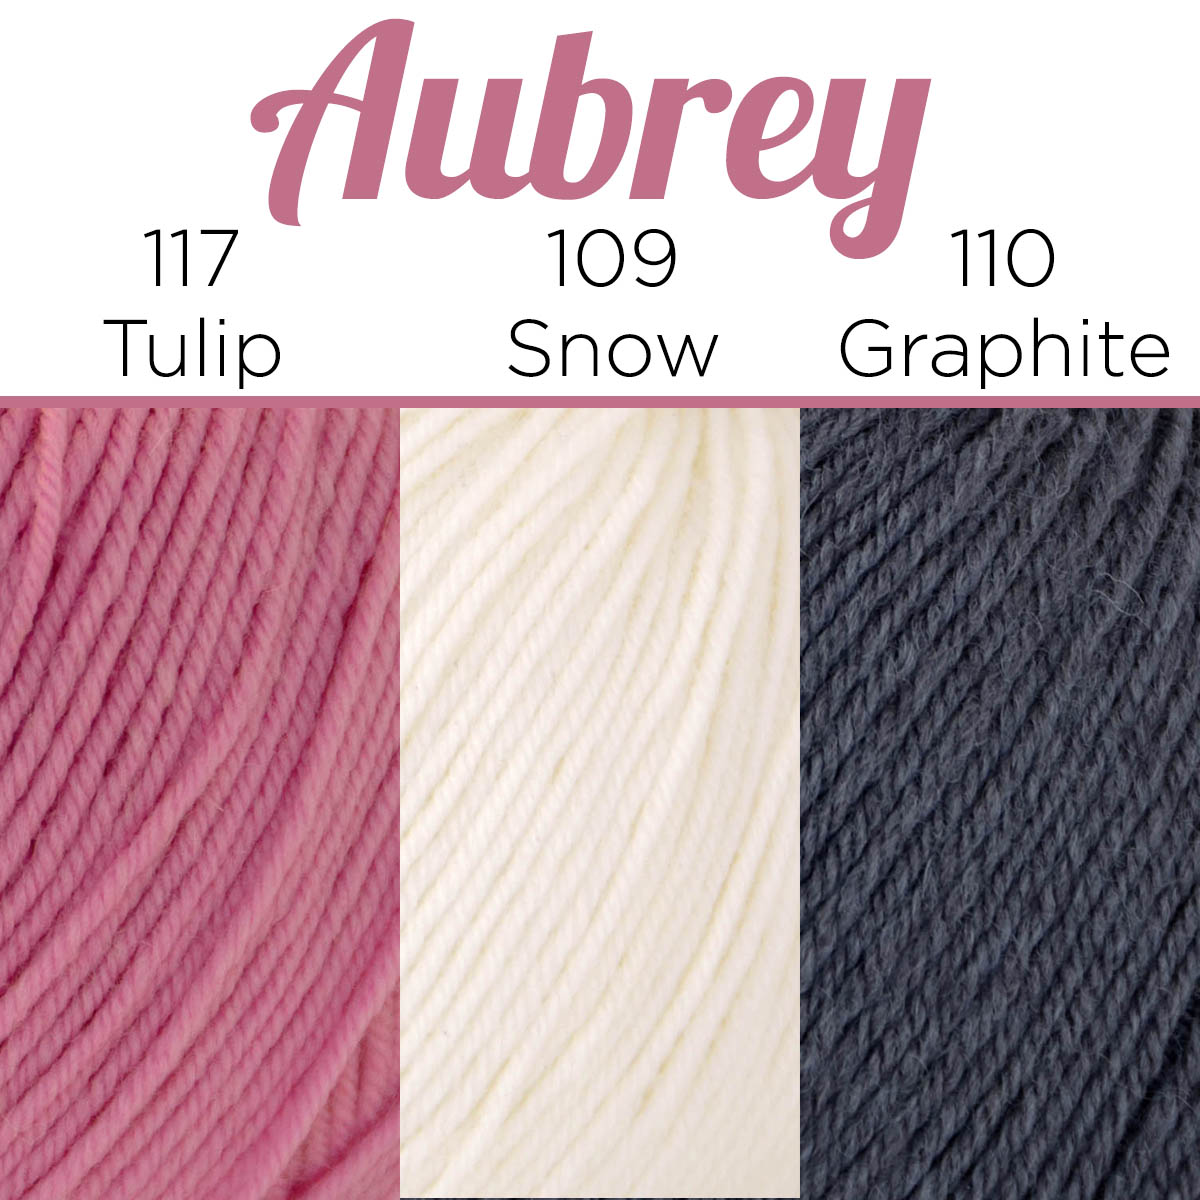
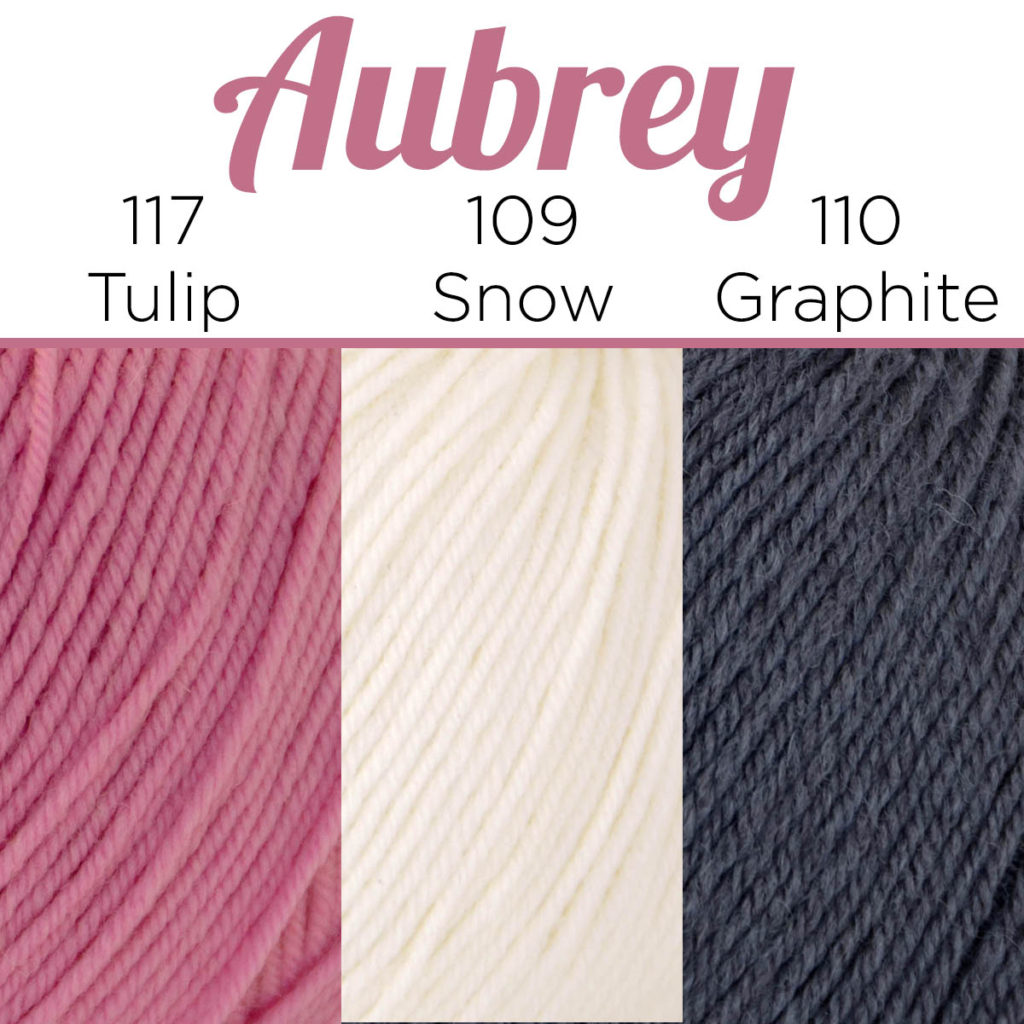
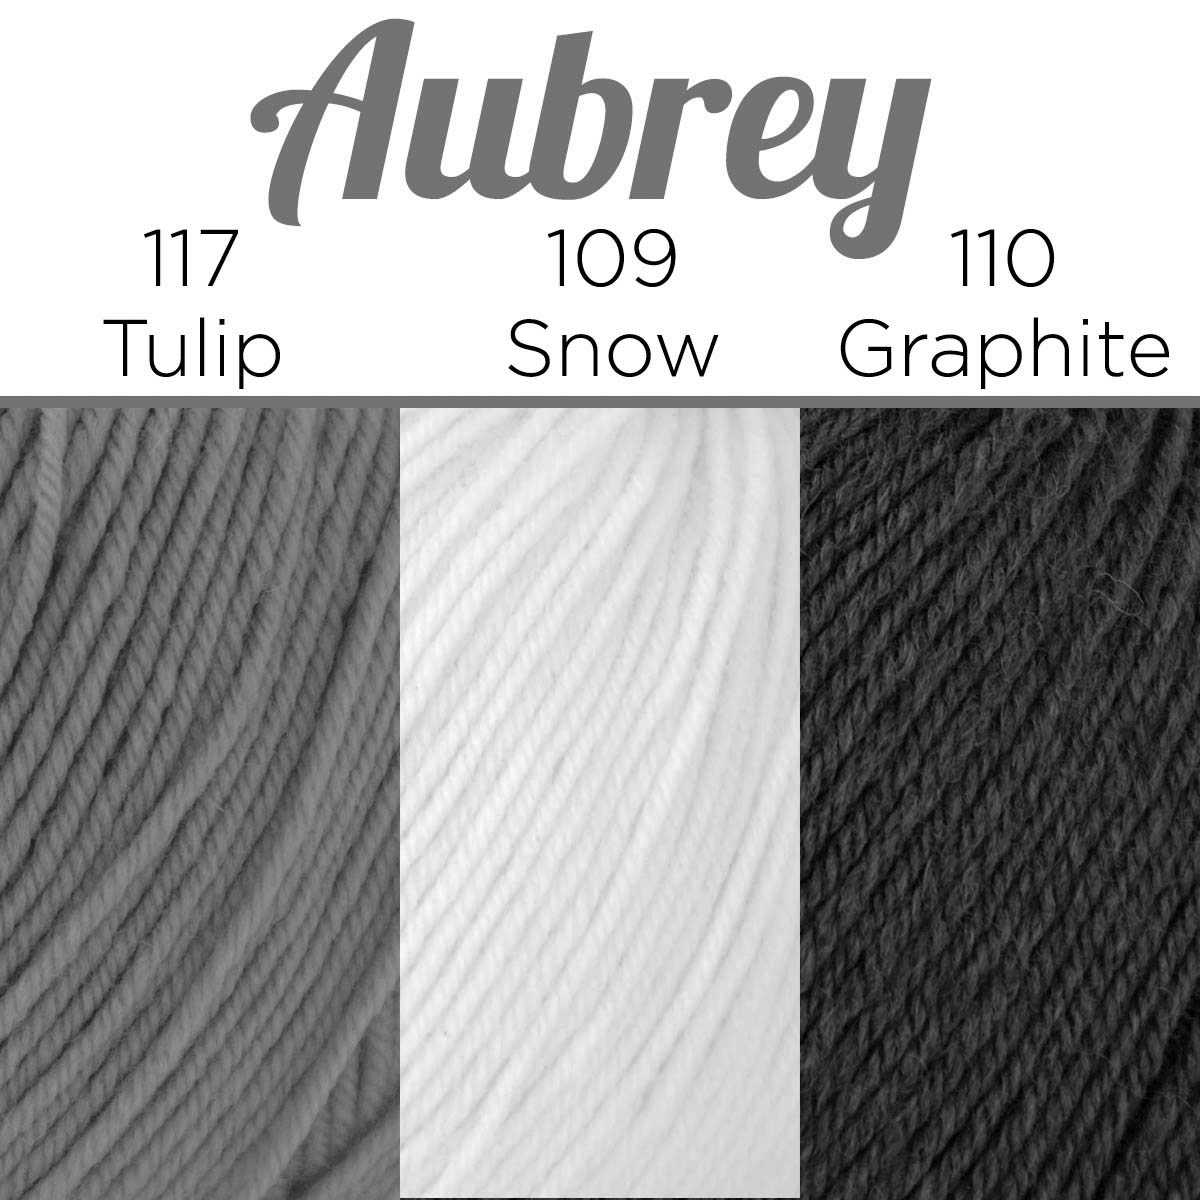
Aubrey’s color choices.
Aubrey used 117 Tulip as the main color (MC), 109 Snow as contrast color one (CC1), and 110 Graphite as contrast color two (CC2). Here is how it looks knit up:
Aubrey’s Sweet Dumplin’ Socks progress.
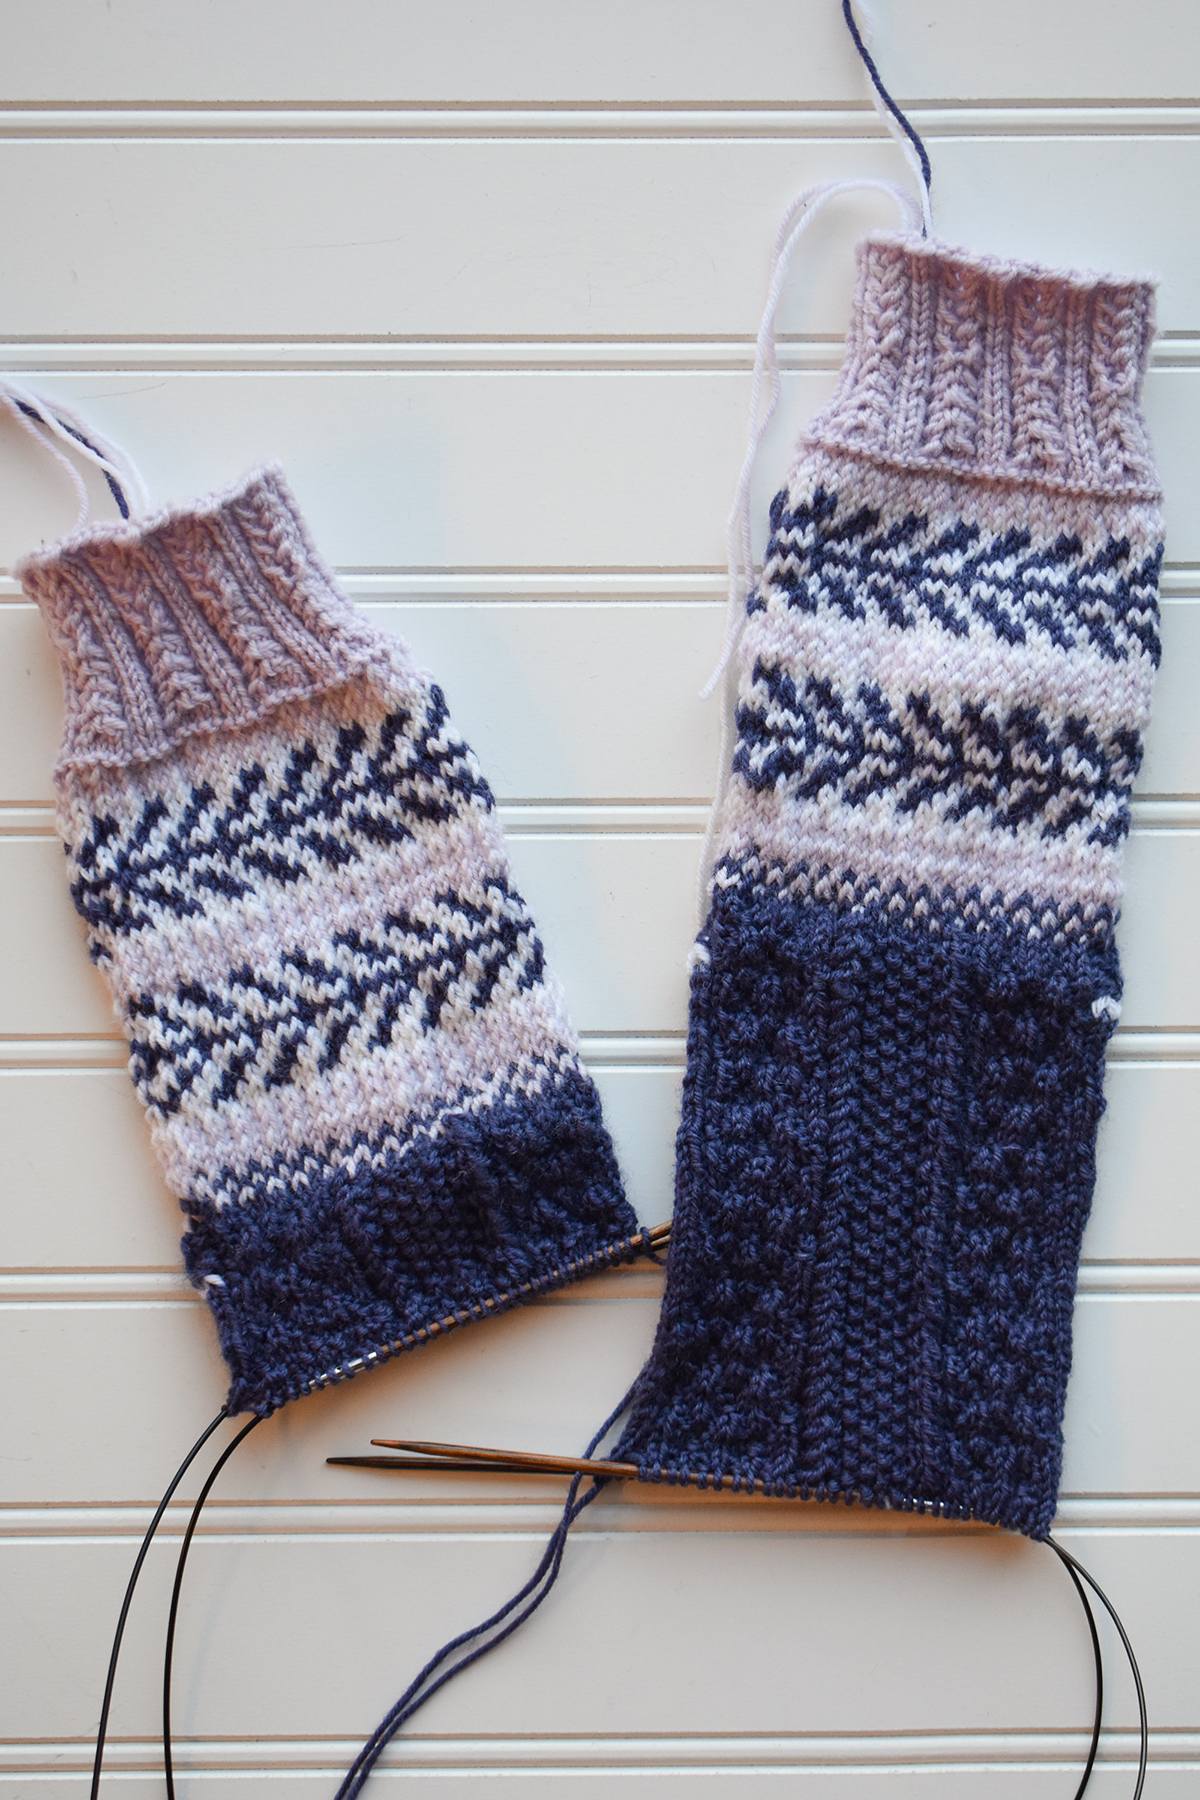
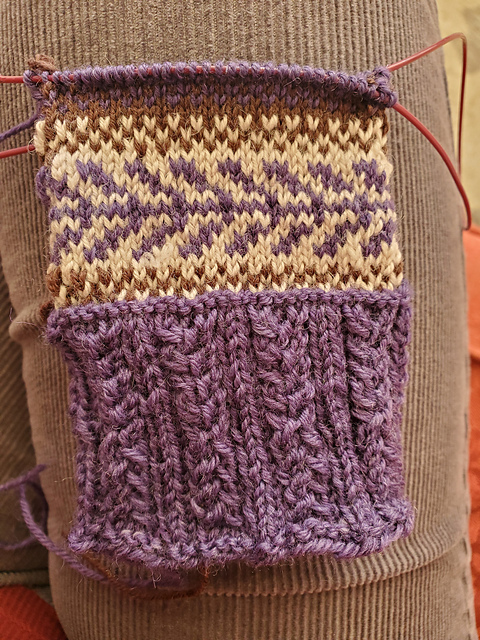
Next we have Yonca. Like Aubrey, she hasn’t yet reached the toe and heel portion. However, she’s been knitting her socks simultaneously, so she’s actually pretty darn close to finishing the pair. Here were her color choices:
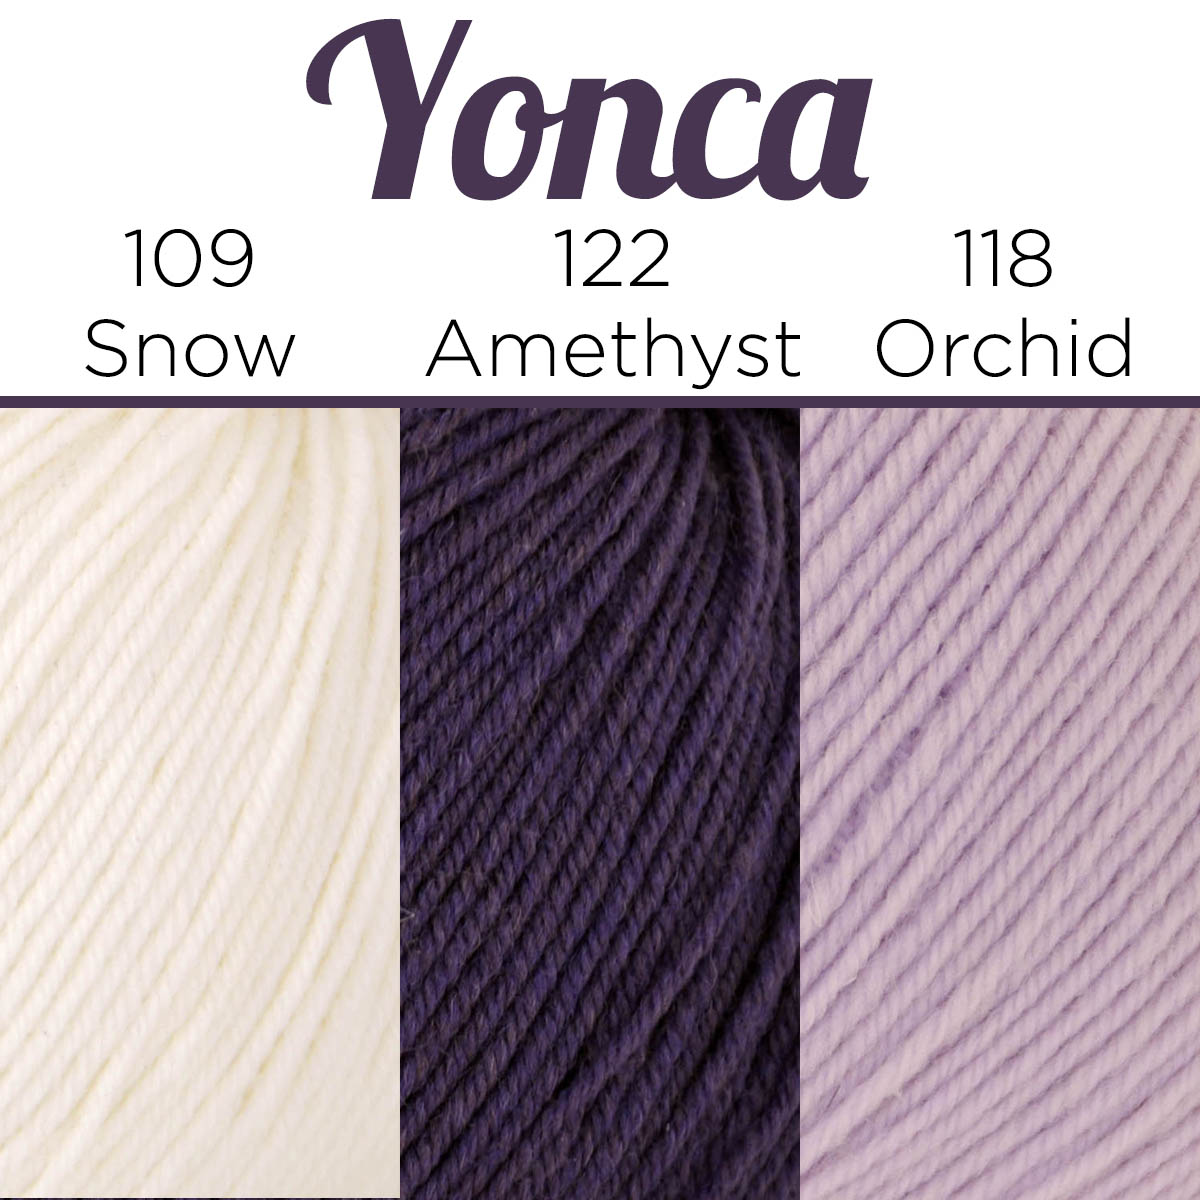
Yonca’s color choices.
Yonca used 122 Amethyst as the MC, 118 Orchid as CC1, and 109 Snow as CC2. The subtlety of Snow and Orchid together is just beautiful, and the Amethyst really provides a pop.
Yonca’s Sweet Dumplin’ Socks progress.
Finally, let’s take a look at Heather’s hot chocolate-inspired palette, for her aptly named “Hot Chocko Sockos”. She’s nearly finished with the toe. I have a feeling these will be off her needles in just a couple of days.
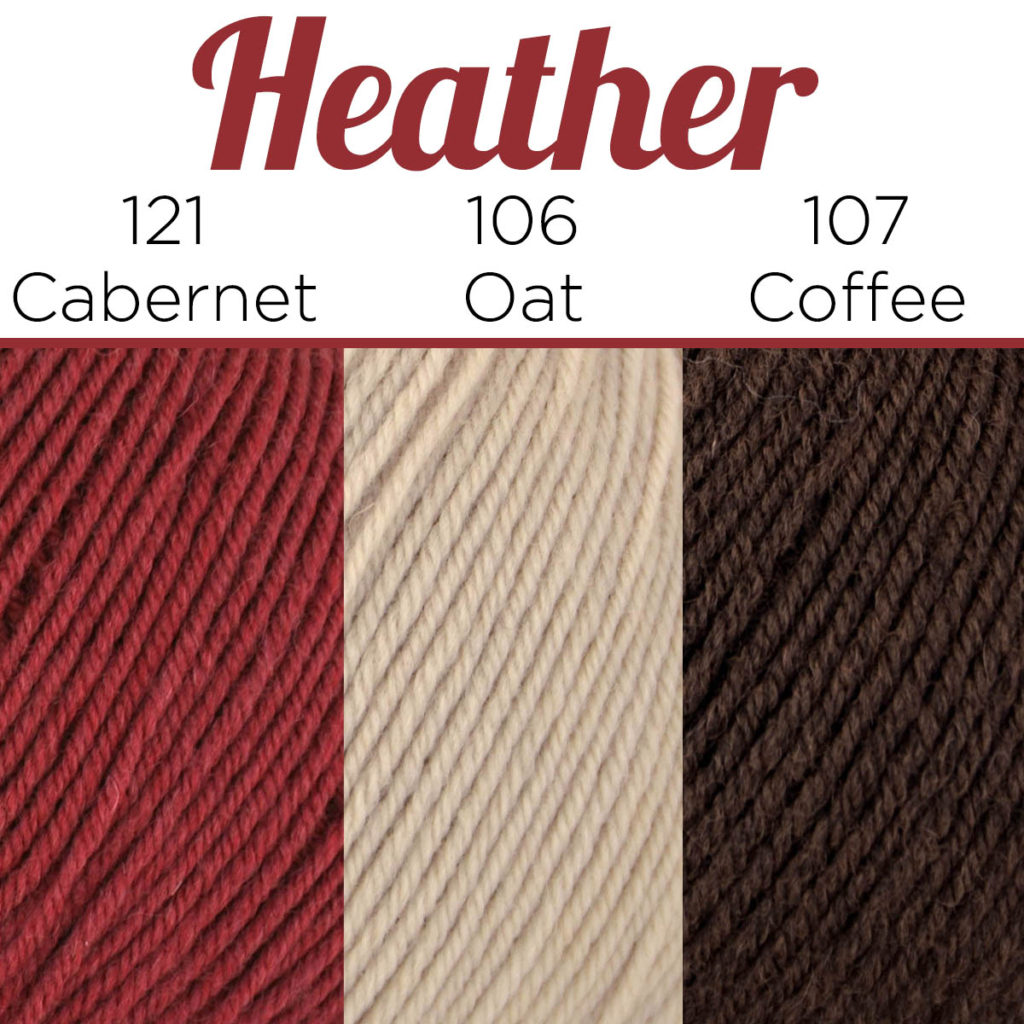
Heather’s color choices.
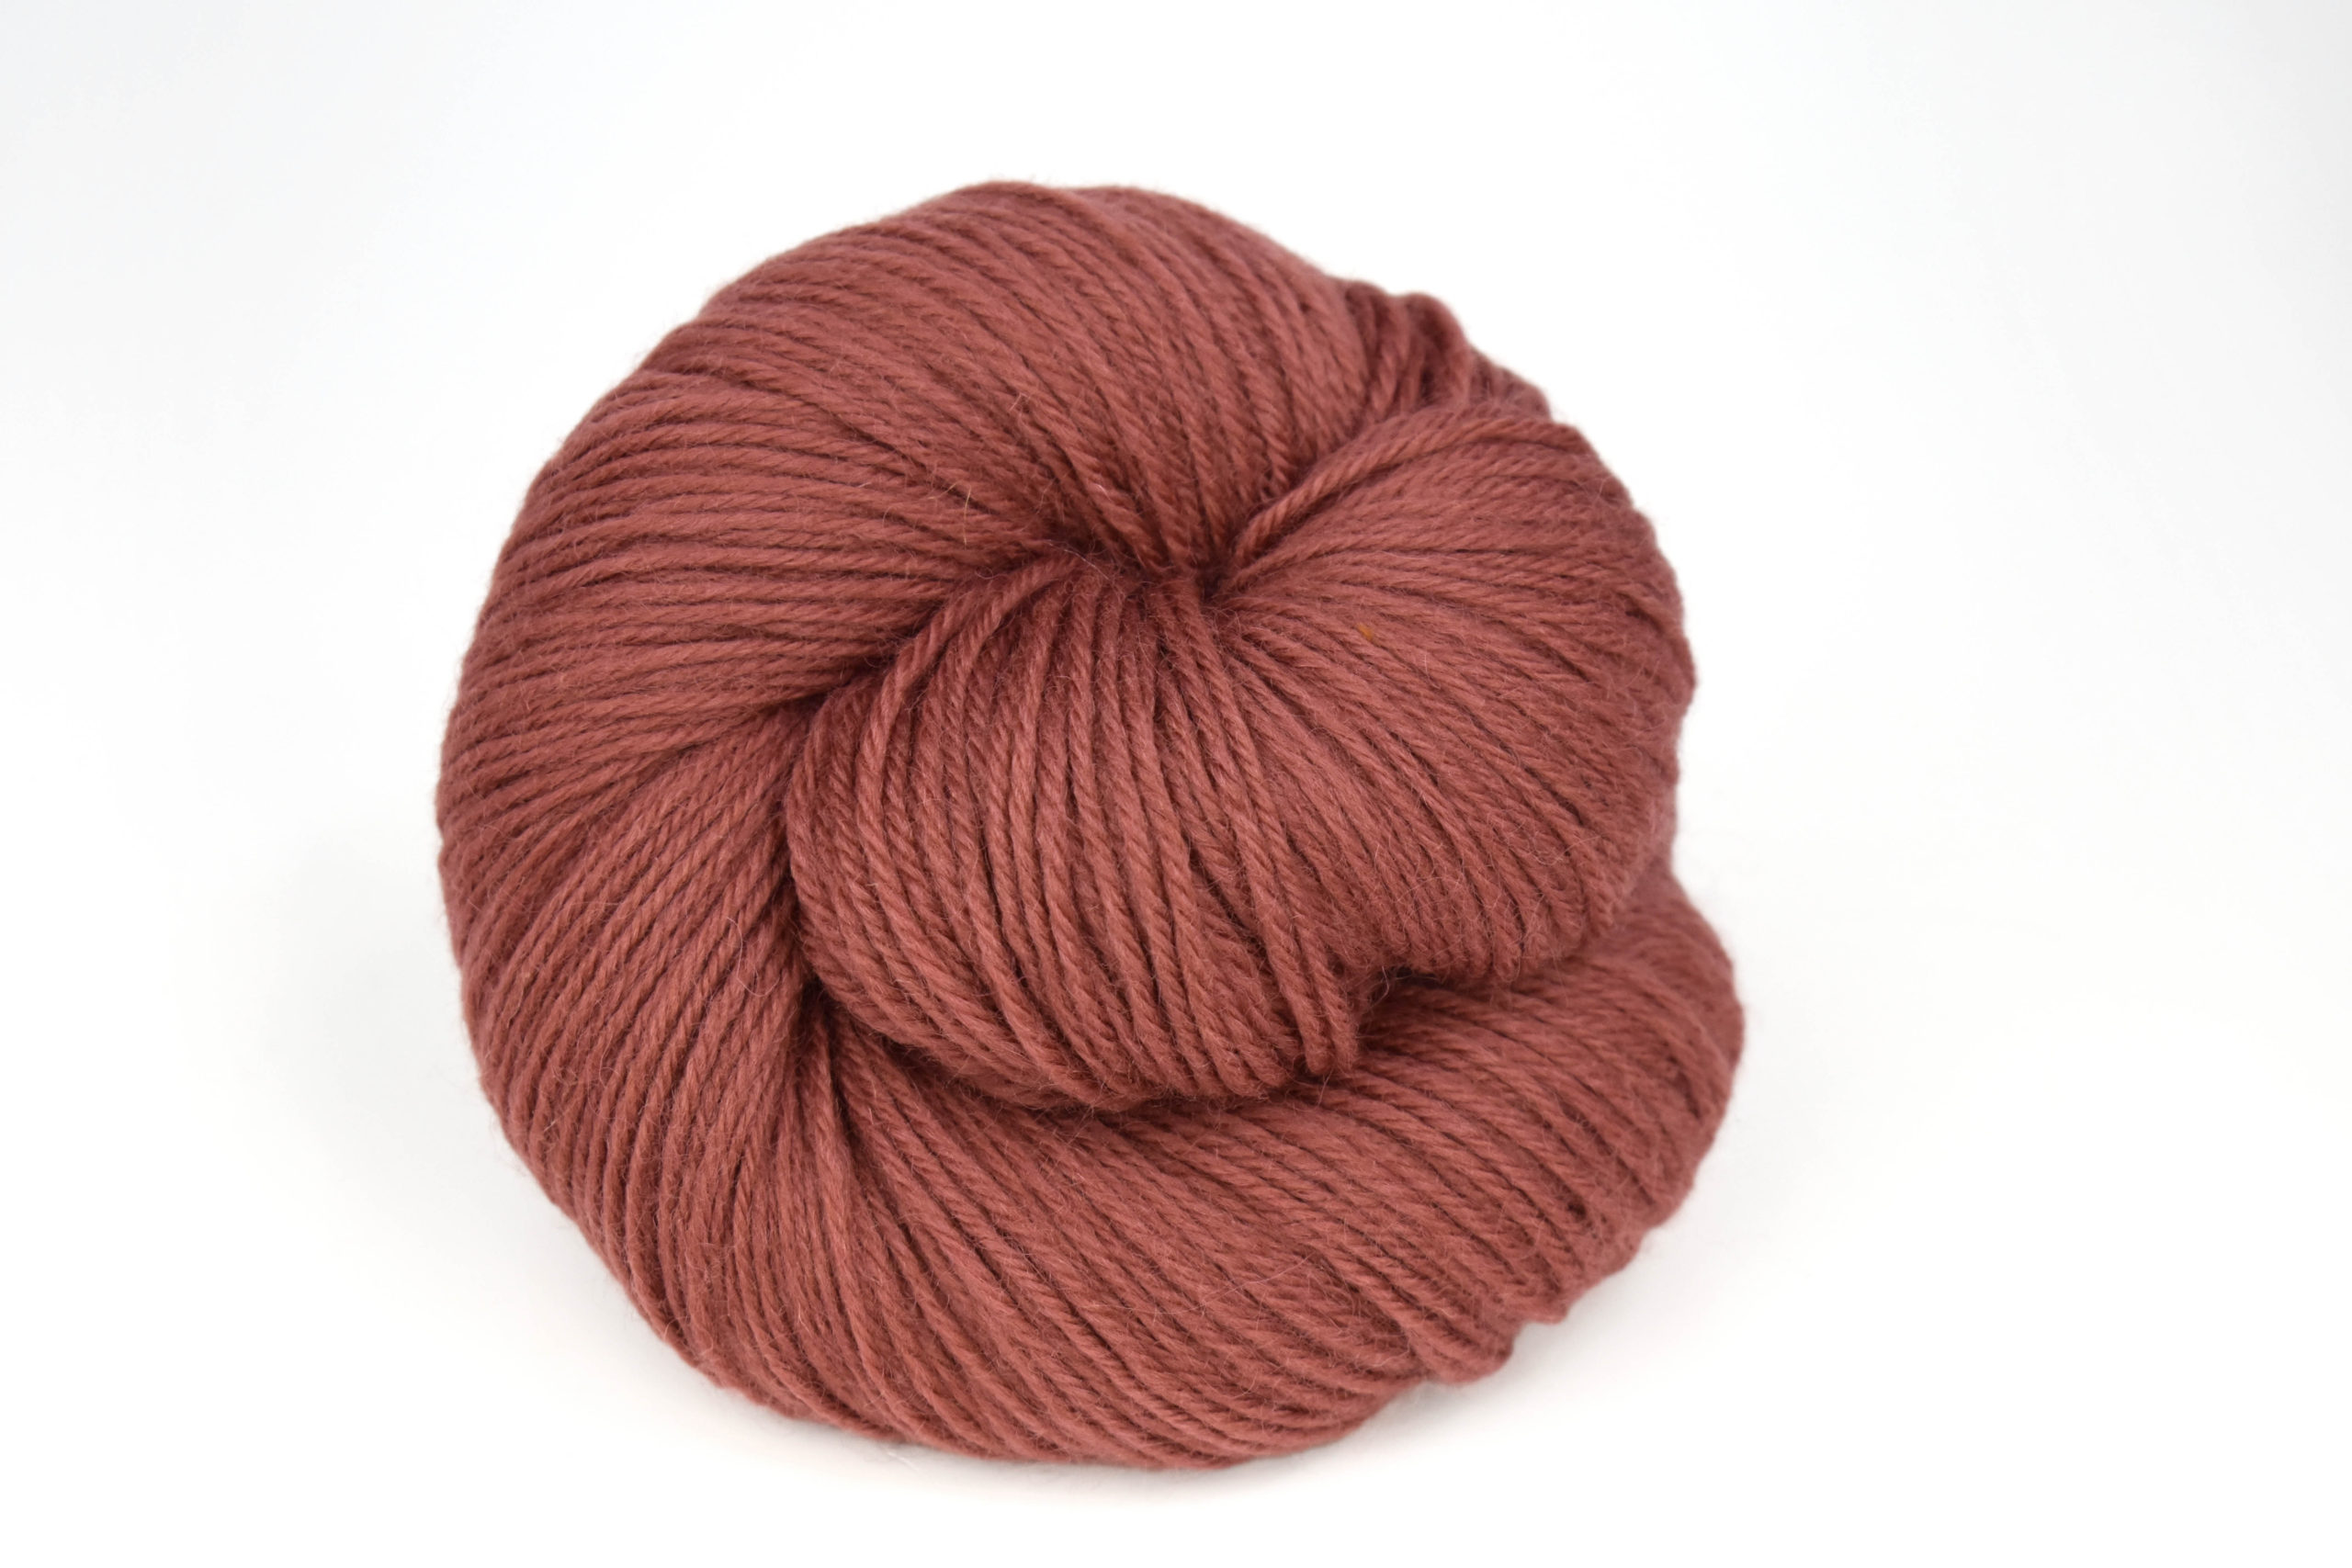
Heather chose to use 107 Coffee as the MC, 121 Cabernet as CC1, and 106 Oat as CC2. The results are so autumnal and I would love a pair of socks in the same color combination!
Heather’s Sweet Dumplin’ Socks.
Now let’s take a look at some of your socks! I’d like to give a special thanks to those who participated in the Ravelry chats – it was so fun to watch your progress and interact with you as the weeks ran along. Some knitters chose the sample colors, and others went in totally different directions. Let’s have a look!
Sati of Rows and Roses yarn shop modified her socks to be a bit shorter. She also chose a warm, autumnal palette for her socks.
Sati’s socks using Bella Cash 103 Violet, 106 Oat, & 107 Coffee.
Thatgirlknit and 4Laurel both chose to use the sample colors for their Sweet Dumplin’ Socks. They look great!
Left: 4Laurels’ Sweet Dumplin’ Socks; Right: Thatgirlknit’s Sweet Dumplin Socks
FrauReisende created this stunning version – and FAST. It seemed like she shared a progress photo of the next portion the same day as it was revealed from week to week. It was so fun to watch her fly through her knitting, and the colors are simply perfect. For a similar version to hers, I’d suggest using Bella Cash in the following colors: 103 Violet (MC), 109 Snow (CC1), and 124 Mustard (CC2).
FrauReisende’s Sweet Dumplin’ Socks.
BlaueOdonata blew me away when I saw that she added beads to her colorwork motif. Beads! Absolutely genius. This autumnal pair of socks was suddenly transformed into something well-suited for Christmas. For a holiday version of your own, I’d suggest using Bella Cash in 126 Forest (MC), 121 Cabernet (CC1), and 111 Cream (CC2).
BlaueOdonata’s Sweet Dumplin’ Socks.
Fireboysgirl used colors extremely similar to Yonca’s, but needed to improvise since she was working from her stash. Her modification to the toes is so fun.
Fireboysgirl’s Sweet Dumplin’ Socks.
UDalily created a really fun, vibrant version. My favorite detail is how she mirrored the colorwork motif for the left and right sock. Now why didn’t I think of that?! For a similar version, I recommend using Bella Cash 123 Maldives (MC), 121 Cabernet (CC2), and 126 Forest (CC2).
UDalily’s Sweet Dumplin’ Socks.
Looking at everyone’s different socks reminds me of what I love so much about knitting. The possibilities are really endless. You can choose any colors you love to make a project uniquely yours. Is there a detail on the pattern you’d like to adjust? Go for it! As a designer, I get a ton of inspiration out of seeing how others creatively modify my designs. I always want to encourage people to step outside of the box and view patterns are guidelines rather than rulebooks. It truly fills me with so much joy to see people creating beautiful things from our yarns.
Thank you so much for joining me over the last month for the Bella Cash Socktober Mystery Knitalong. Check back in with us on Friday, when we’ll reveal more photos of the finished socks for our Free Pattern Friday. Happy knitting!
Welcome to Week 5 of the Bella Cash Socktober Mystery Knitalong! You’ve nearly made it to the finish line! We have continued to enjoy seeing peeks at your Sweet Dumplin’ Socks progress, and we can’t wait to see more!
Use this graphic on Ravelry and on social media to share about the knitalong.
Just like my last post, I want to give a refresher about the knitalong for those who might be joining in late. Don’t worry – if you haven’t started, newcomers are more than welcome. To play a little catch-up, here is where you can find my previous blog posts:
Each week in October I’ll be revealing a different portion of the pattern. The pattern is updated on our website every Wednesday and you can find it here (link). Grab your colors of beautiful merino/cashmere/nylon Bella Cash here (link).
This is a mystery knitalong, but if you don’t want to commit without seeing the socks first you can find spoiler images here (link).
If you join, we’d love for you to spread the love and share your progress on social media using the hashtag #UYSocktoberMKAL and tagging us on Instagram (link) and Facebook (link). Join in with chatter here on the blog and in our Ravelry forum (link).
Please add your project to Ravelry, too! You can find the Ravelry listing here (link). You can use the graphic above and on the Ravelry listing for your project page, too.
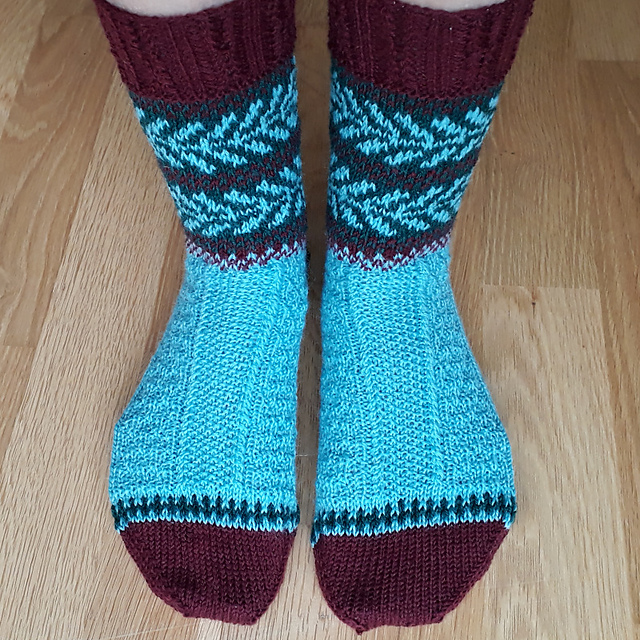
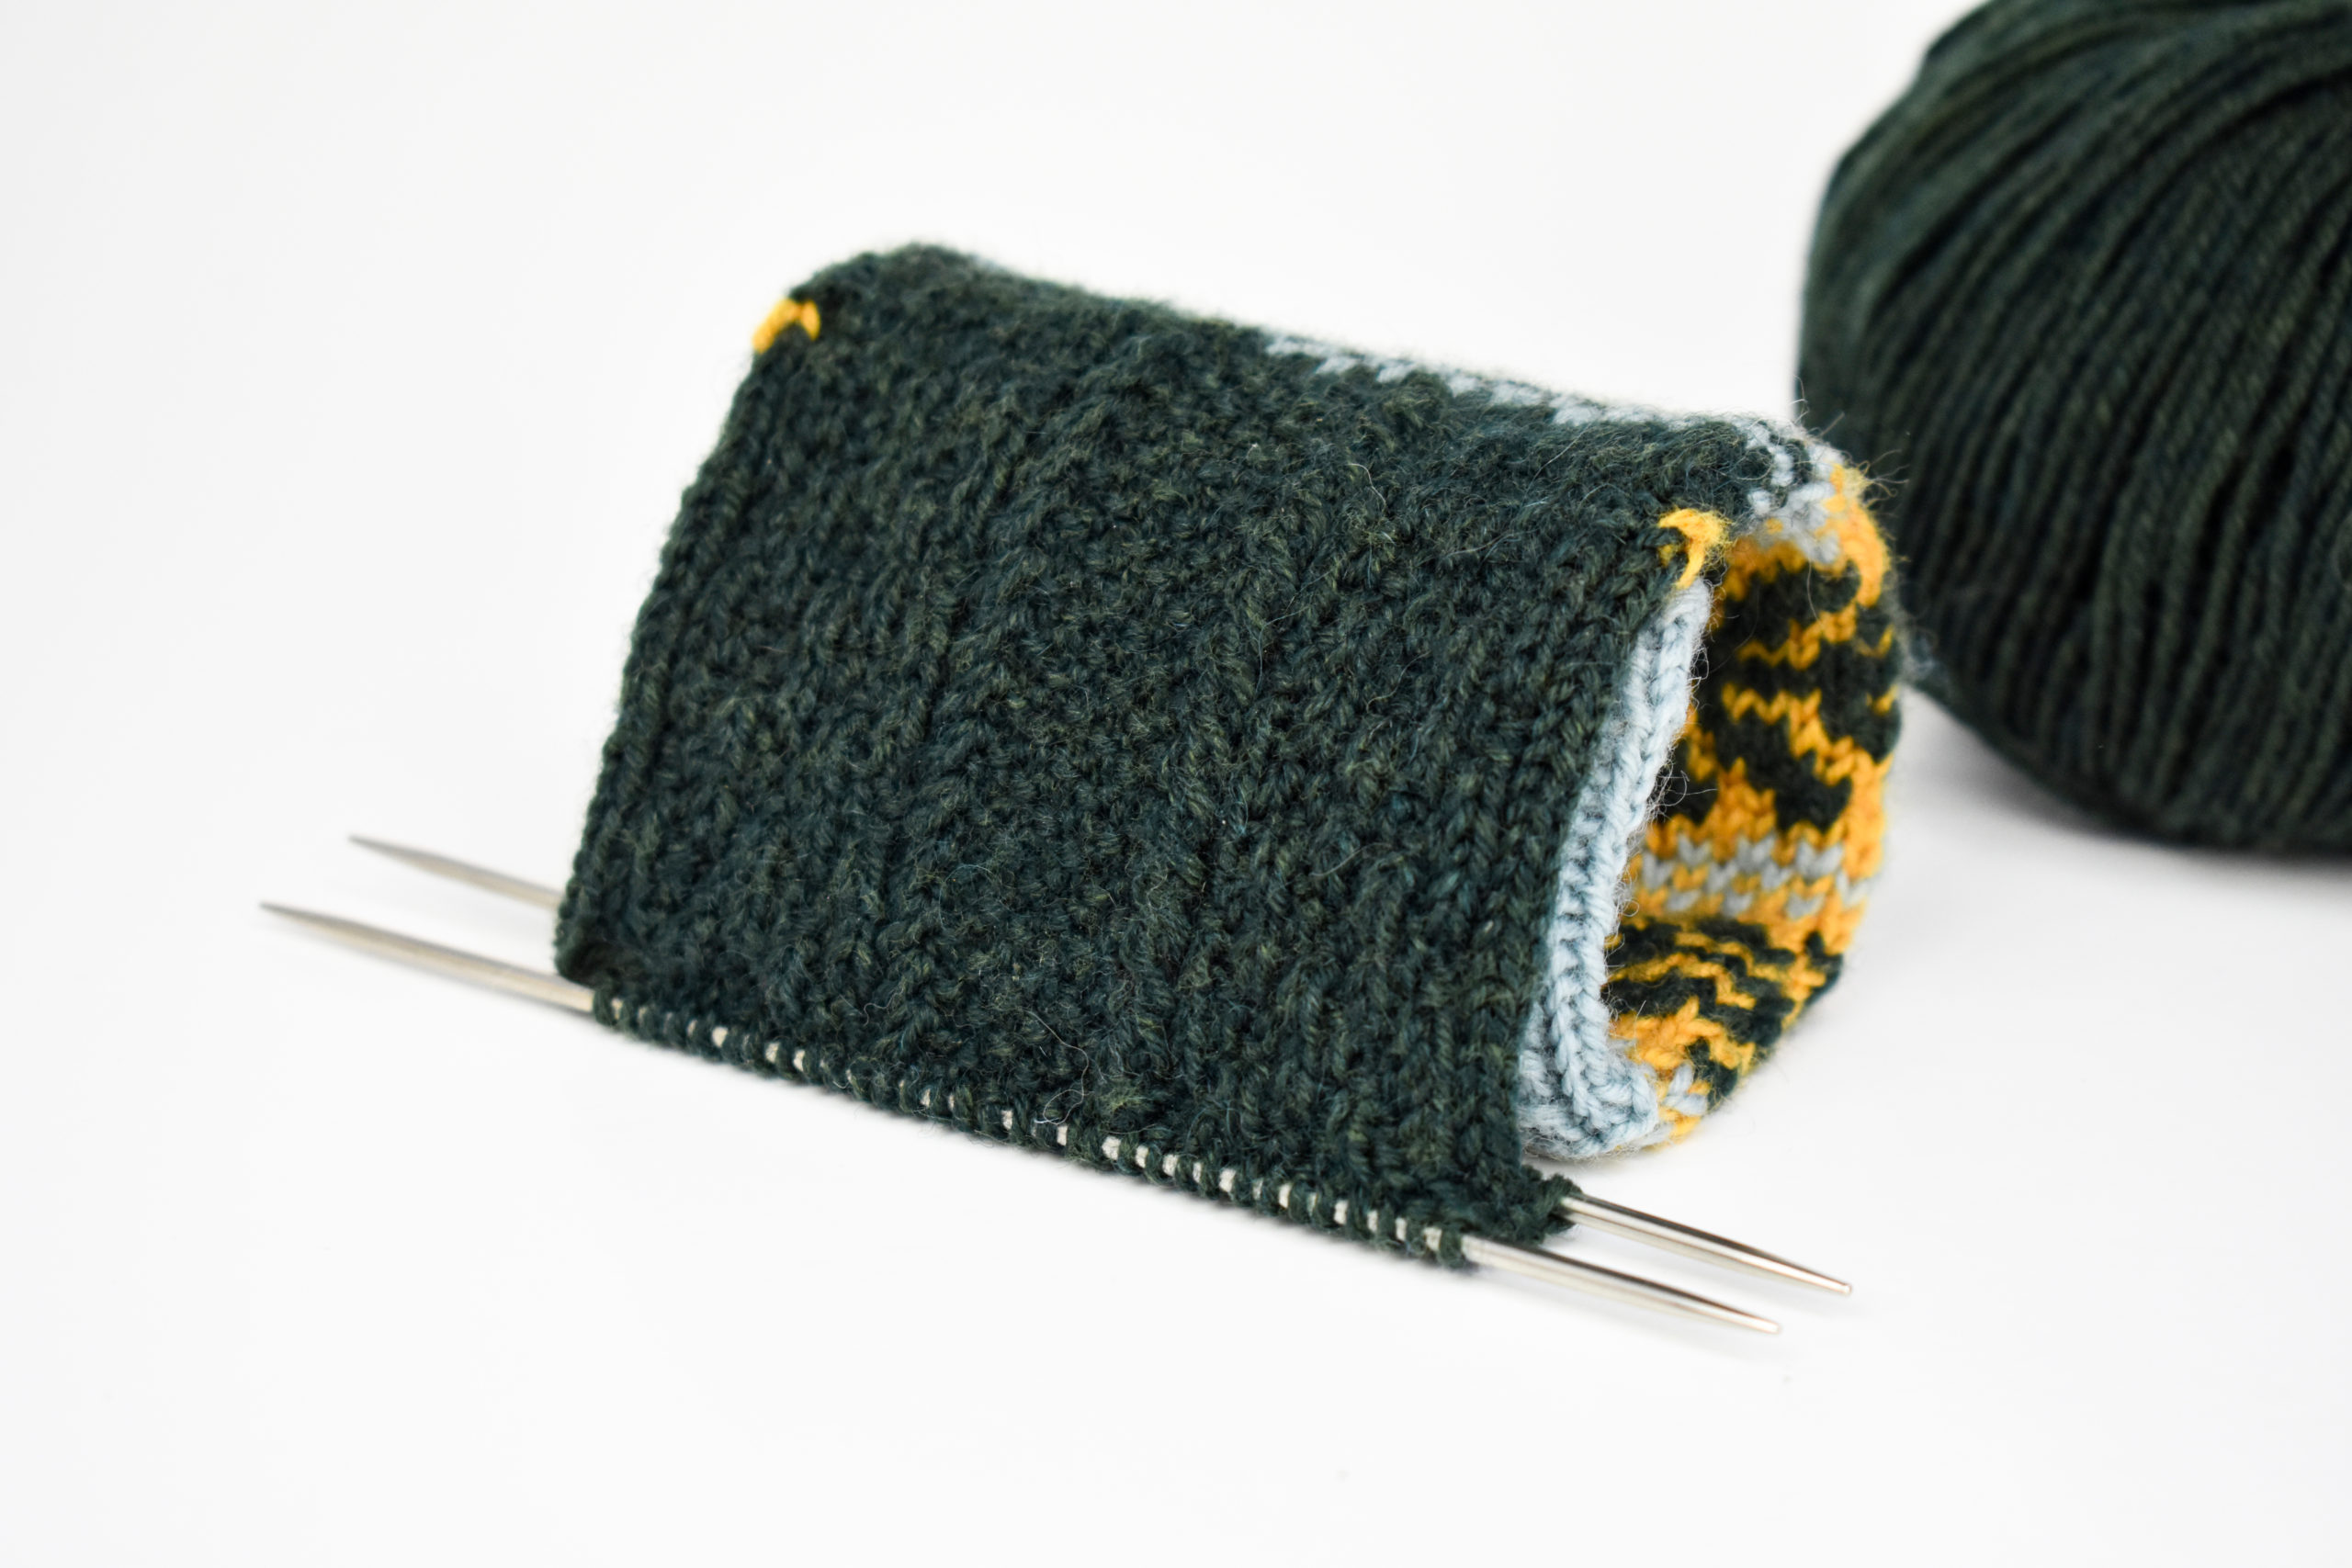
Detail of the Foot pattern of the Sweet Dumplin’ Socks.
Last week you worked on knitting the foot, which features fun twisted stitches and is full of texture. I hope you enjoyed it! This week you’ll be reintroducing color to your socks. A nice touch on the toe and a good pop in the heel. You’re in the final stretch and are finally going to be able to cozy up in your brand new socks!
This week you’ll indulge in two techniques that we already have tutorials for. First, you’ll finish the toes by grafting using Kitchener stitch. You can find a helpful tutorial on how to work this stitch here (link). After you finish your toes, you’ll need to pick up stitches from the waste yarn you placed last week to create the heel. We shared a photo-tutorial for working afterthought heels here (link).
So are you ready to get started? The next portion of the pattern is now available for your knitting pleasure! Next week I’ll share our progress at the office as well as some photos of the socks you’ve shared. I can’t wait because there are some really beautiful versions of these socks being created!
Remember, you can share your progress on social media using the hashtag #UYSocktoberMKAL and tagging us on Instagram (link) and Facebook (link). Join in with chatter here on the blog and in our Ravelry forum (link).
Welcome to Week 4 of the Bella Cash Socktober Mystery Knitalong! We’re getting so close to the final stretch now that the cuff and leg are complete! Watching your projects come to life has been so inspiring. We’ve seen some lovely peeks at your Sweet Dumplin’ Socks progress, and we can’t wait to see more!
Use this graphic on Ravelry and on social media to share about the knitalong.
Just like my last post, I want to give a refresher about the knitalong for those who might be joining in late. Don’t worry – if you haven’t started, newcomers are more than welcome. To play a little catch-up, here is where you can find my previous blog posts:
Each week in October I’ll be revealing a different portion of the pattern. The pattern is updated on our website every Wednesday and you can find it here (link). Grab your colors of beautiful merino/cashmere/nylon Bella Cash here (link).
This is a mystery knitalong, but if you don’t want to commit without seeing the socks first you can find spoiler images here (link).
If you join, we’d love for you to spread the love and share your progress on social media using the hashtag #UYSocktoberMKAL and tagging us on Instagram (link) and Facebook (link). Join in with chatter here on the blog and in our Ravelry forum (link).
Please add your project to Ravelry, too! You can find the Ravelry listing here (link). You can use the graphic above and on the Ravelry listing for your project page, too.
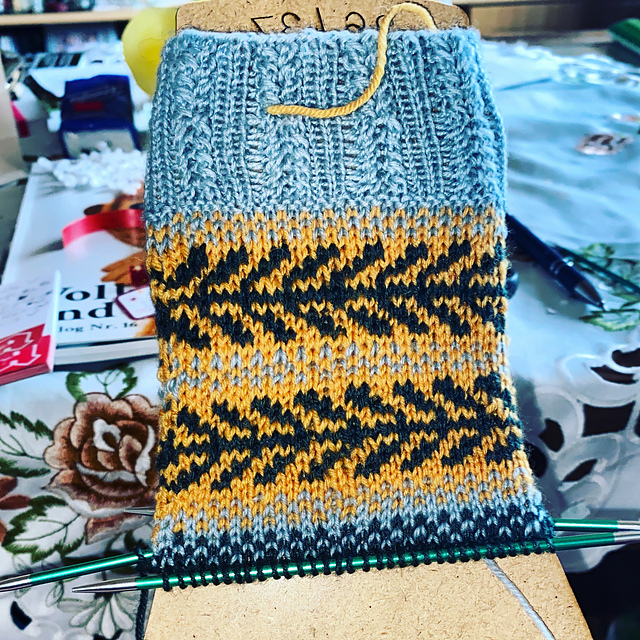
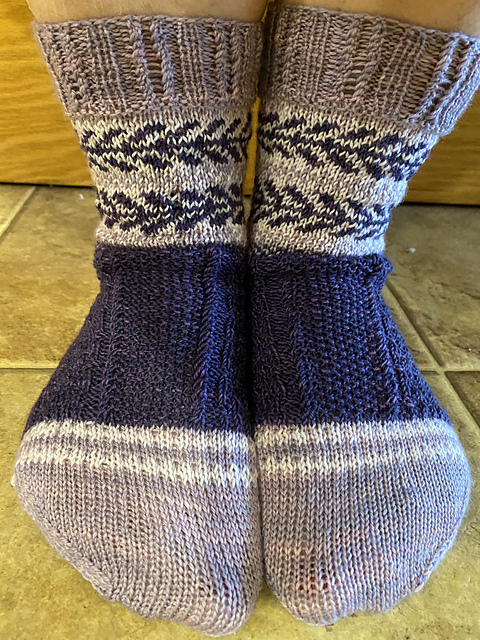
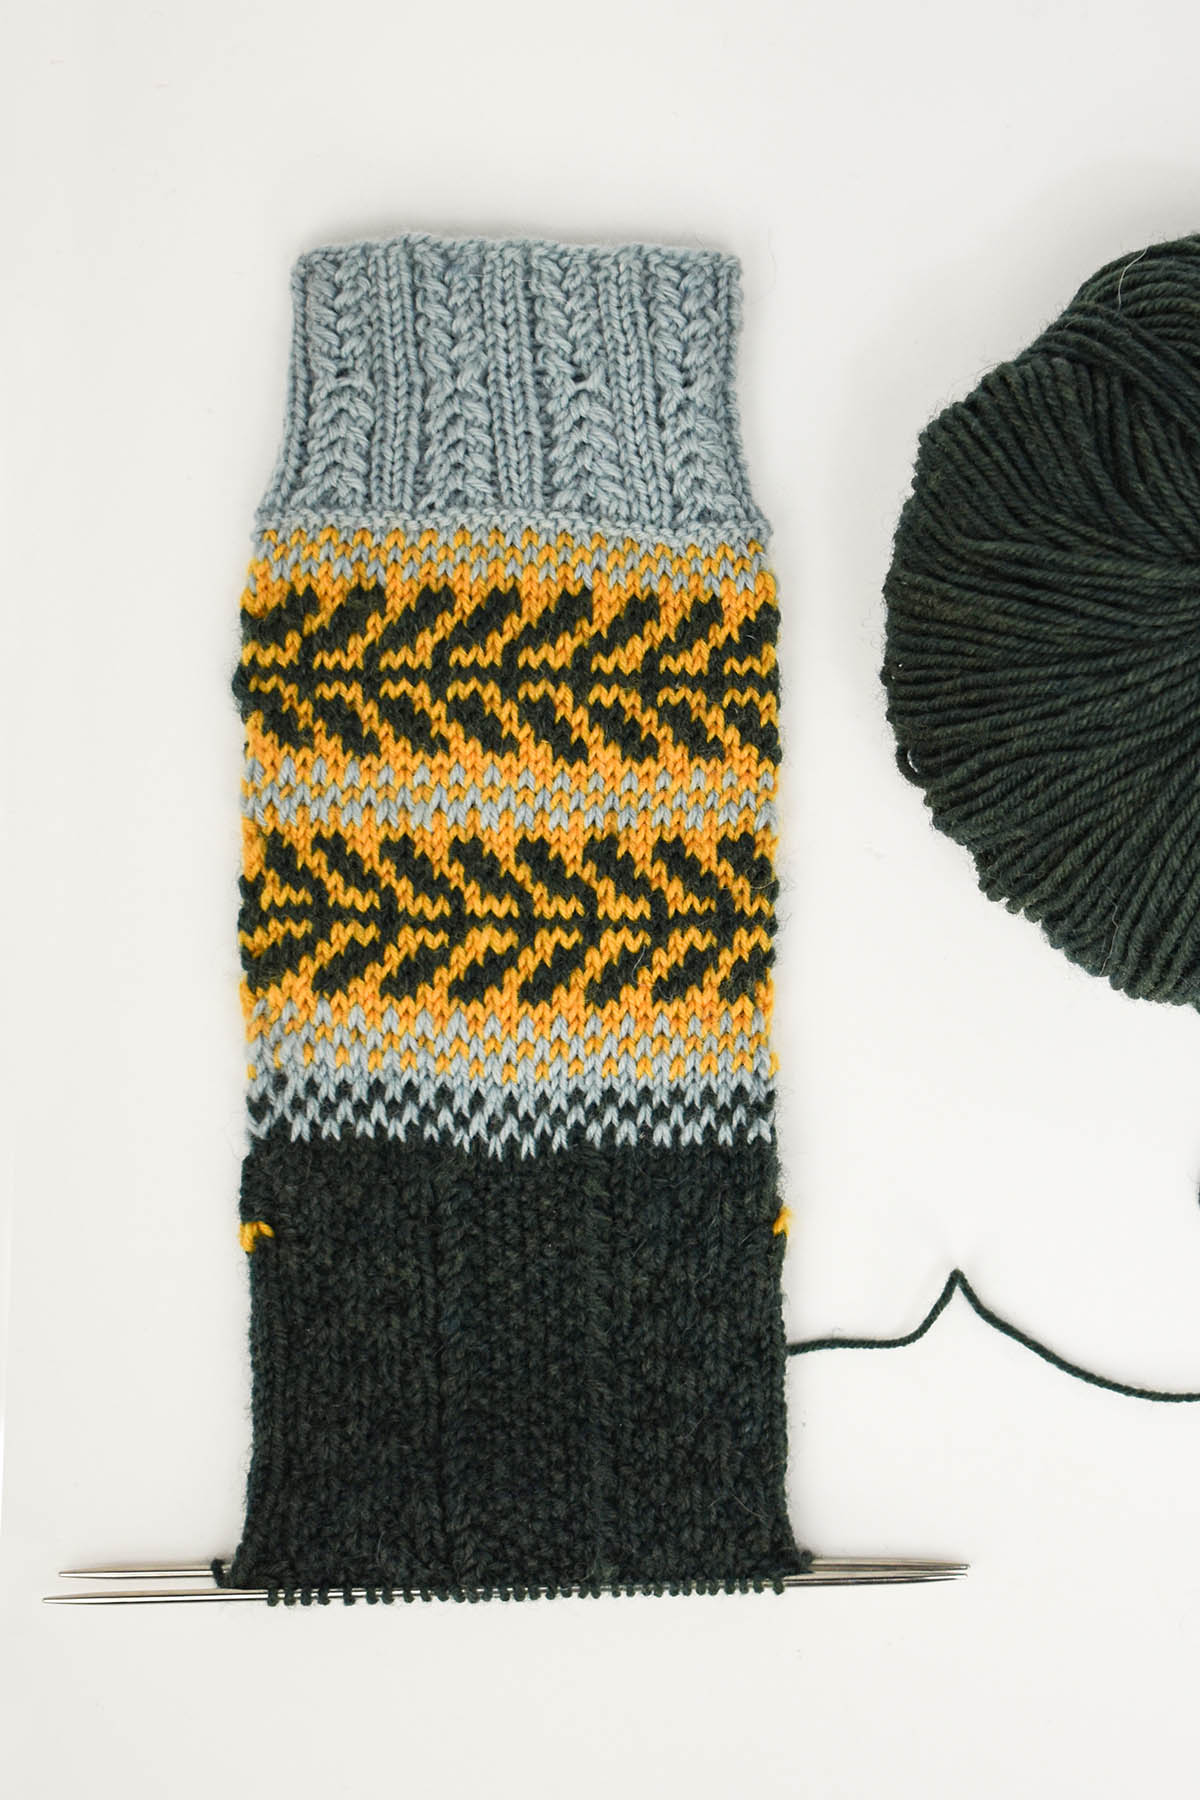
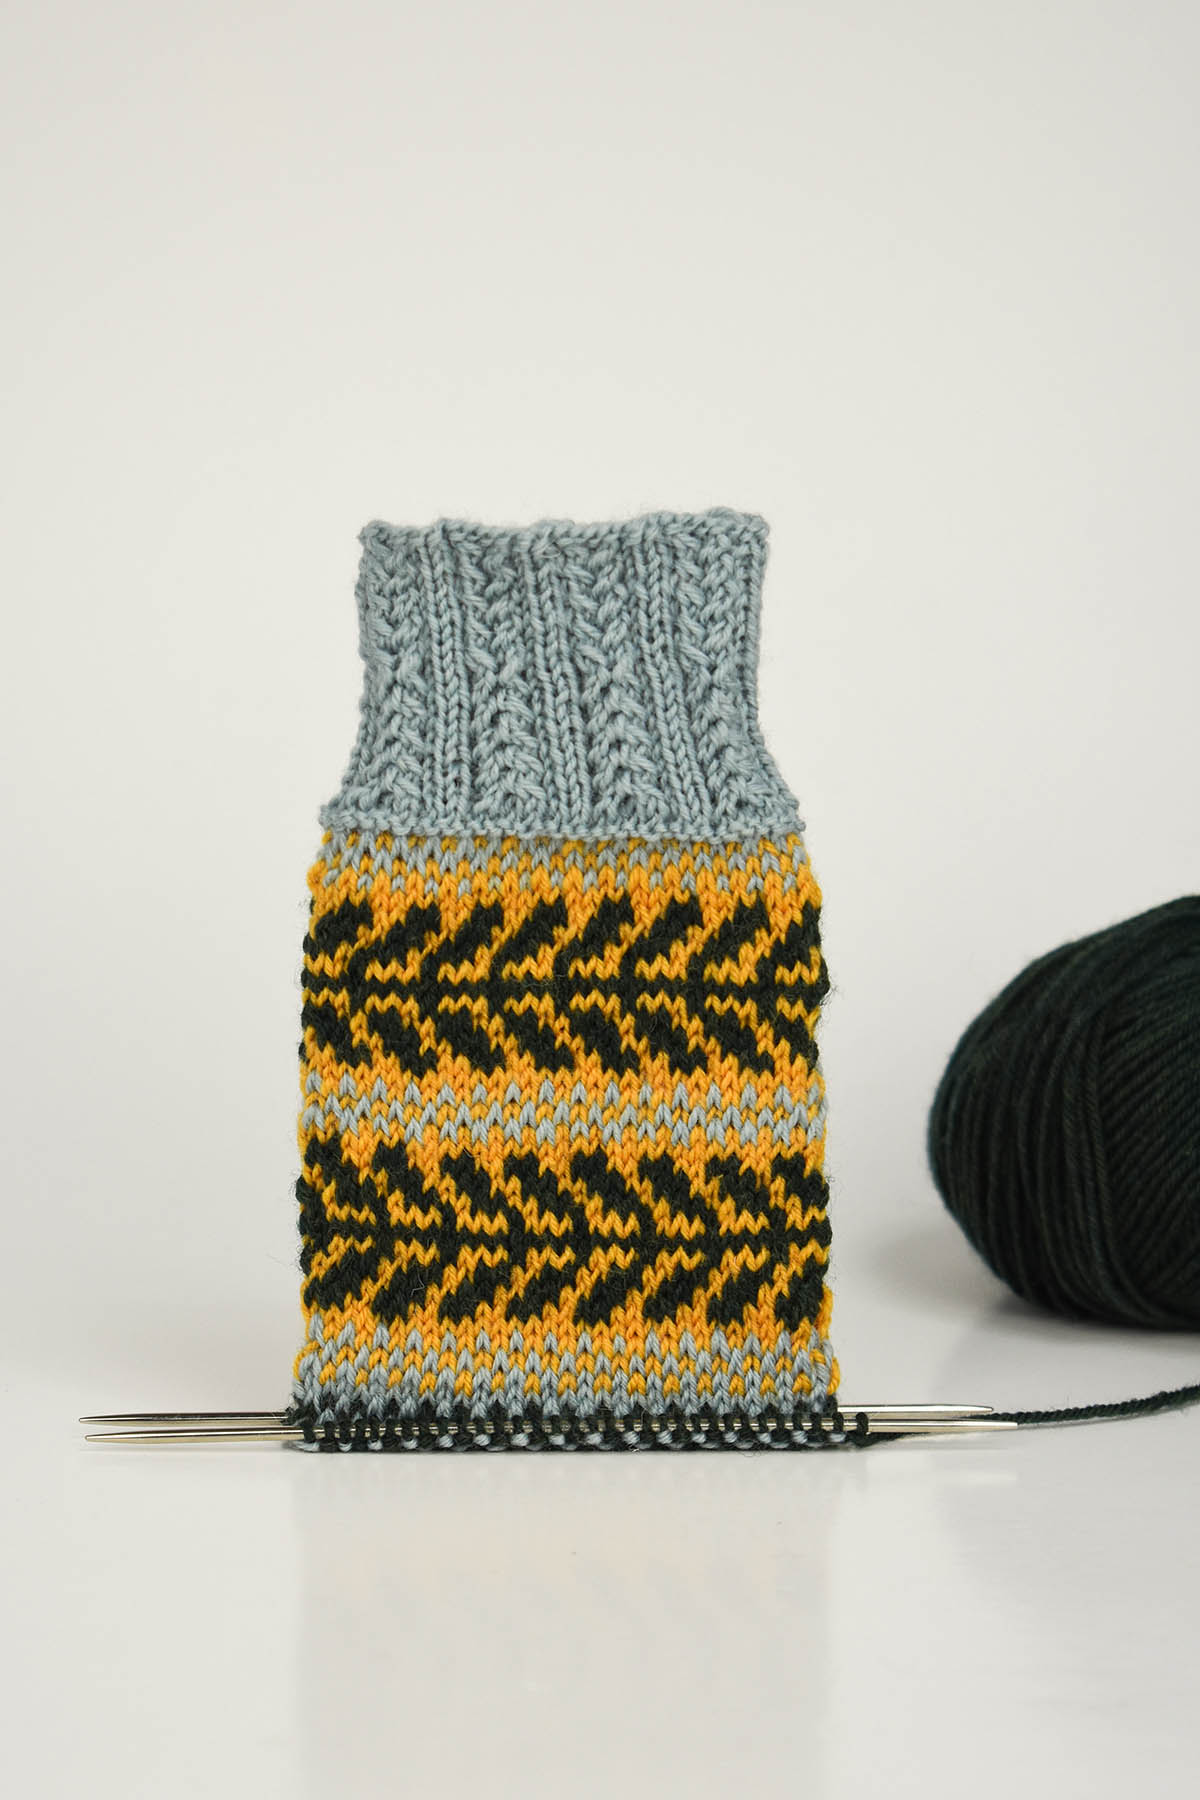
If you finished Week Three, your socks should look like this.
If you’ve been following along, whether by knitting or knitting vicariously, you’ll have seen the colorwork portion of the pattern, pictured above. The bold vine motif worked in the main color really pops against the contrast colors. For this week, though, you’ll return to working with a single color and have the opportunity to play with a fun textural pattern that is every bit as addicting as the leg and cuff.
This week you’ll be working on the foot. What’s that? Did you think I skipped the heel? Fear not – the heel is not forgotten! But, these socks feature an afterthought heel. Sorry for the small spoiler, but you were bound to find out in the first few rows of this portion! This is one of my favorite methods for knitting socks because I simply love the look of them, plus I feel like they make the knitting fly by. I’m not going to get into the how-to of that now, because that’s for another day.
Today I want to talk a bit about foot length to help ensure your socks fit well. Keeping the after-though heel in mind, it’s important to note that the heel will add to the final length of the foot. So will the toe. So, how long should you knit the “Foot” portion from this week? To answer that you need to know what the total length of the Foot should be, measuring from the back of the heel to the tip of the toes.
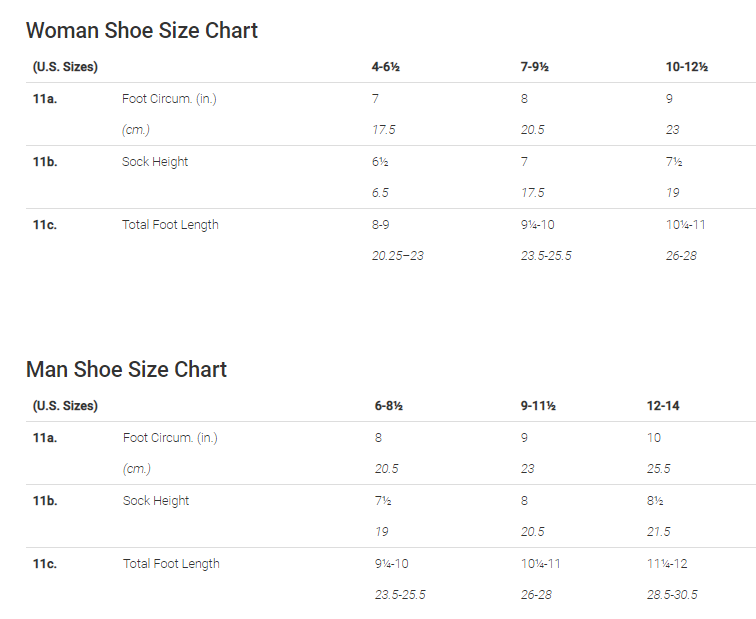
The Craft Yarn Council’s Foot Size Charts
If you aren’t sure, there are various sources available that tell you the average lengths for various shoe sizes. The Craft Yarn Council has handy sizing charts for standard body measurements, including foot sizes. The chart above suggests foot lengths based on shoe sizes. The Craft Yarn Council chart is pretty general, but more specific charts are available. I found this shoe size chart to be extremely helpful because it gives precise measurements for each shoe size in inches, centimeters, and includes conversions to sizing in different geographic locations. Sizing charts are especially helpful if you’re knitting for somebody else.
Measuring your own foot length is simple. Simply place a sheet of paper on a flat surface, then stand on it and trace your foot as closely as possible. Using a tape measure, measure your foot from the back of the heel to the longest toe. After you know your foot length, knitting the foot of the sock is a breeze. Simply work the foot pattern as long as the pattern instructs (this is different for each size). This pattern takes into account the total length the heel and the toe add to the sock, so the length of this portion will be different from your actual foot length. That’s all there is to it, so you can get cracking on the Foot portion of the pattern!
Remember, you can share your progress on social media using the hashtag #UYSocktoberMKAL and tagging us on Instagram (link) and Facebook (link). Join in with chatter here on the blog and in our Ravelry forum (link).
Welcome to Week 3 of the Bella Cash Socktober Mystery Knitalong! Time is flying, but hopefully, you’ve had time to finish up the first portion of the pattern. We’ve seen some lovely peeks at your Sweet Dumplin’ Socks progress, and we can’t wait to see more!
Use this graphic on Ravelry and on social media to share about the knitalong.
Just like my last post, I want to give a refresher about the knitalong for those who might be joining in late. Don’t worry – if you haven’t started, there is plenty of time and all are welcome.
Each week in October I’ll be revealing a different portion of the pattern. The pattern is updated on our website every Wednesday and you can find it here (link).
This is a mystery knitalong, but if you don’t want to commit without seeing the socks first you can find spoiler images here (link).
If you join, we’d love for you to spread the love and share your progress on social media using the hashtag #UYSocktoberMKAL and tagging us on Instagram (link) and Facebook (link). Join in with chatter here on the blog and in our Ravelry forum (link).
Please add your project to Ravelry, too! You can find the Ravelry listing here (link). You can use the graphic above and on the Ravelry listing for your project page, too.
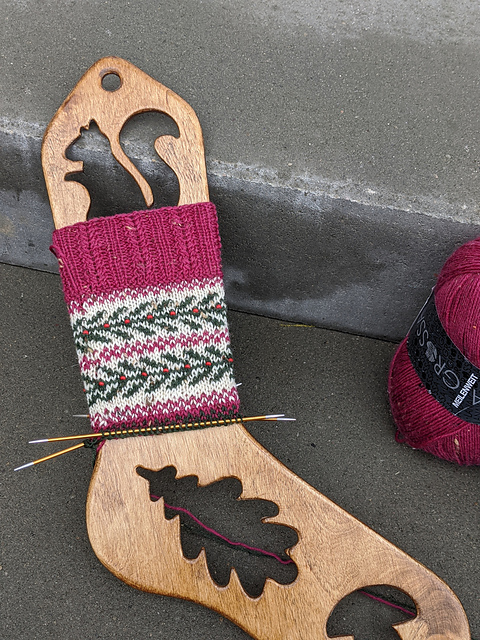
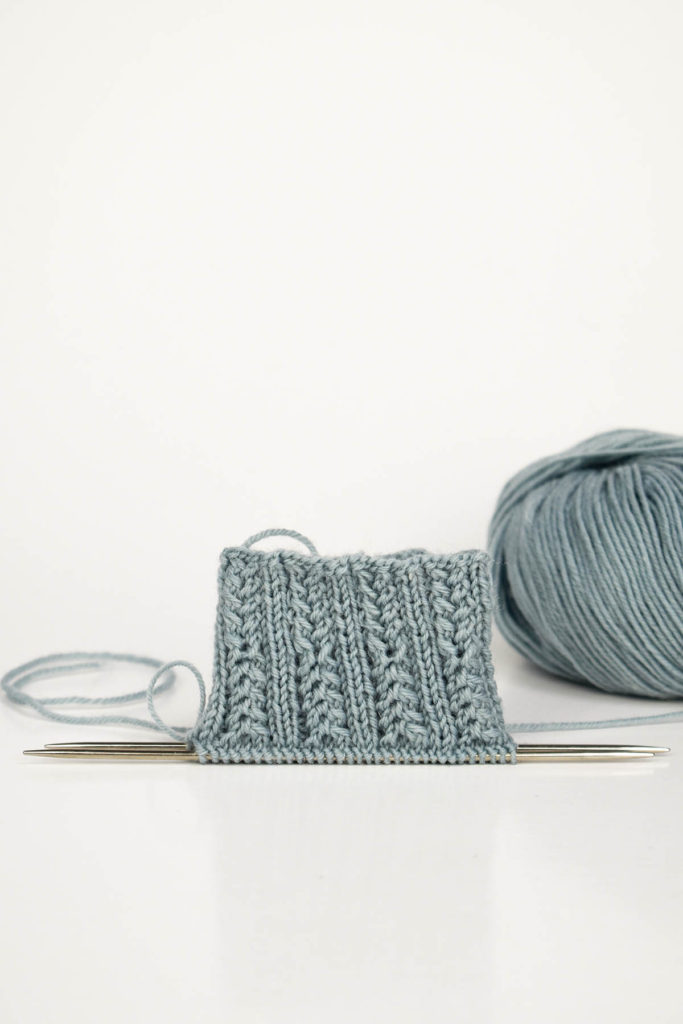
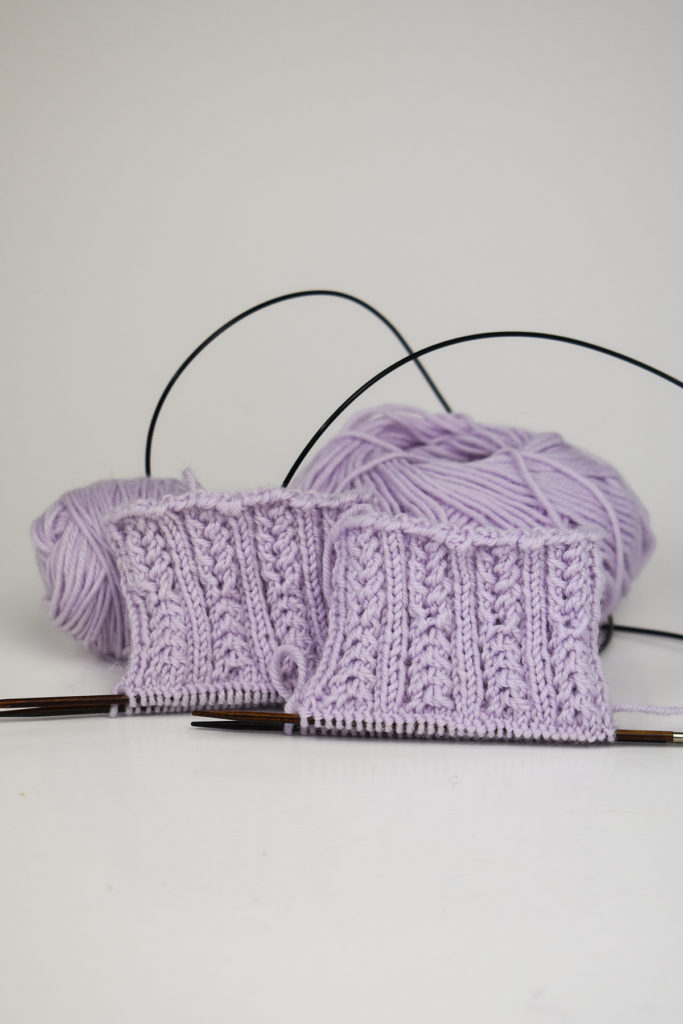
The cuff features a twisted stitch rib pattern, bordered by a purl row at the bottom. Ready for the next step?
Last week was all about casting on and working the cuff of your socks. If you’ve completed this portion of the pattern, it should like the image above. The cuffs are worked in a contrast color and feature a decorative rib pattern with twisted stitches. Midway through the cuff, the twisted stitches reverse directions. This detail echoes the motif you’ll be working this week on the leg of the pattern (hint, hint!).
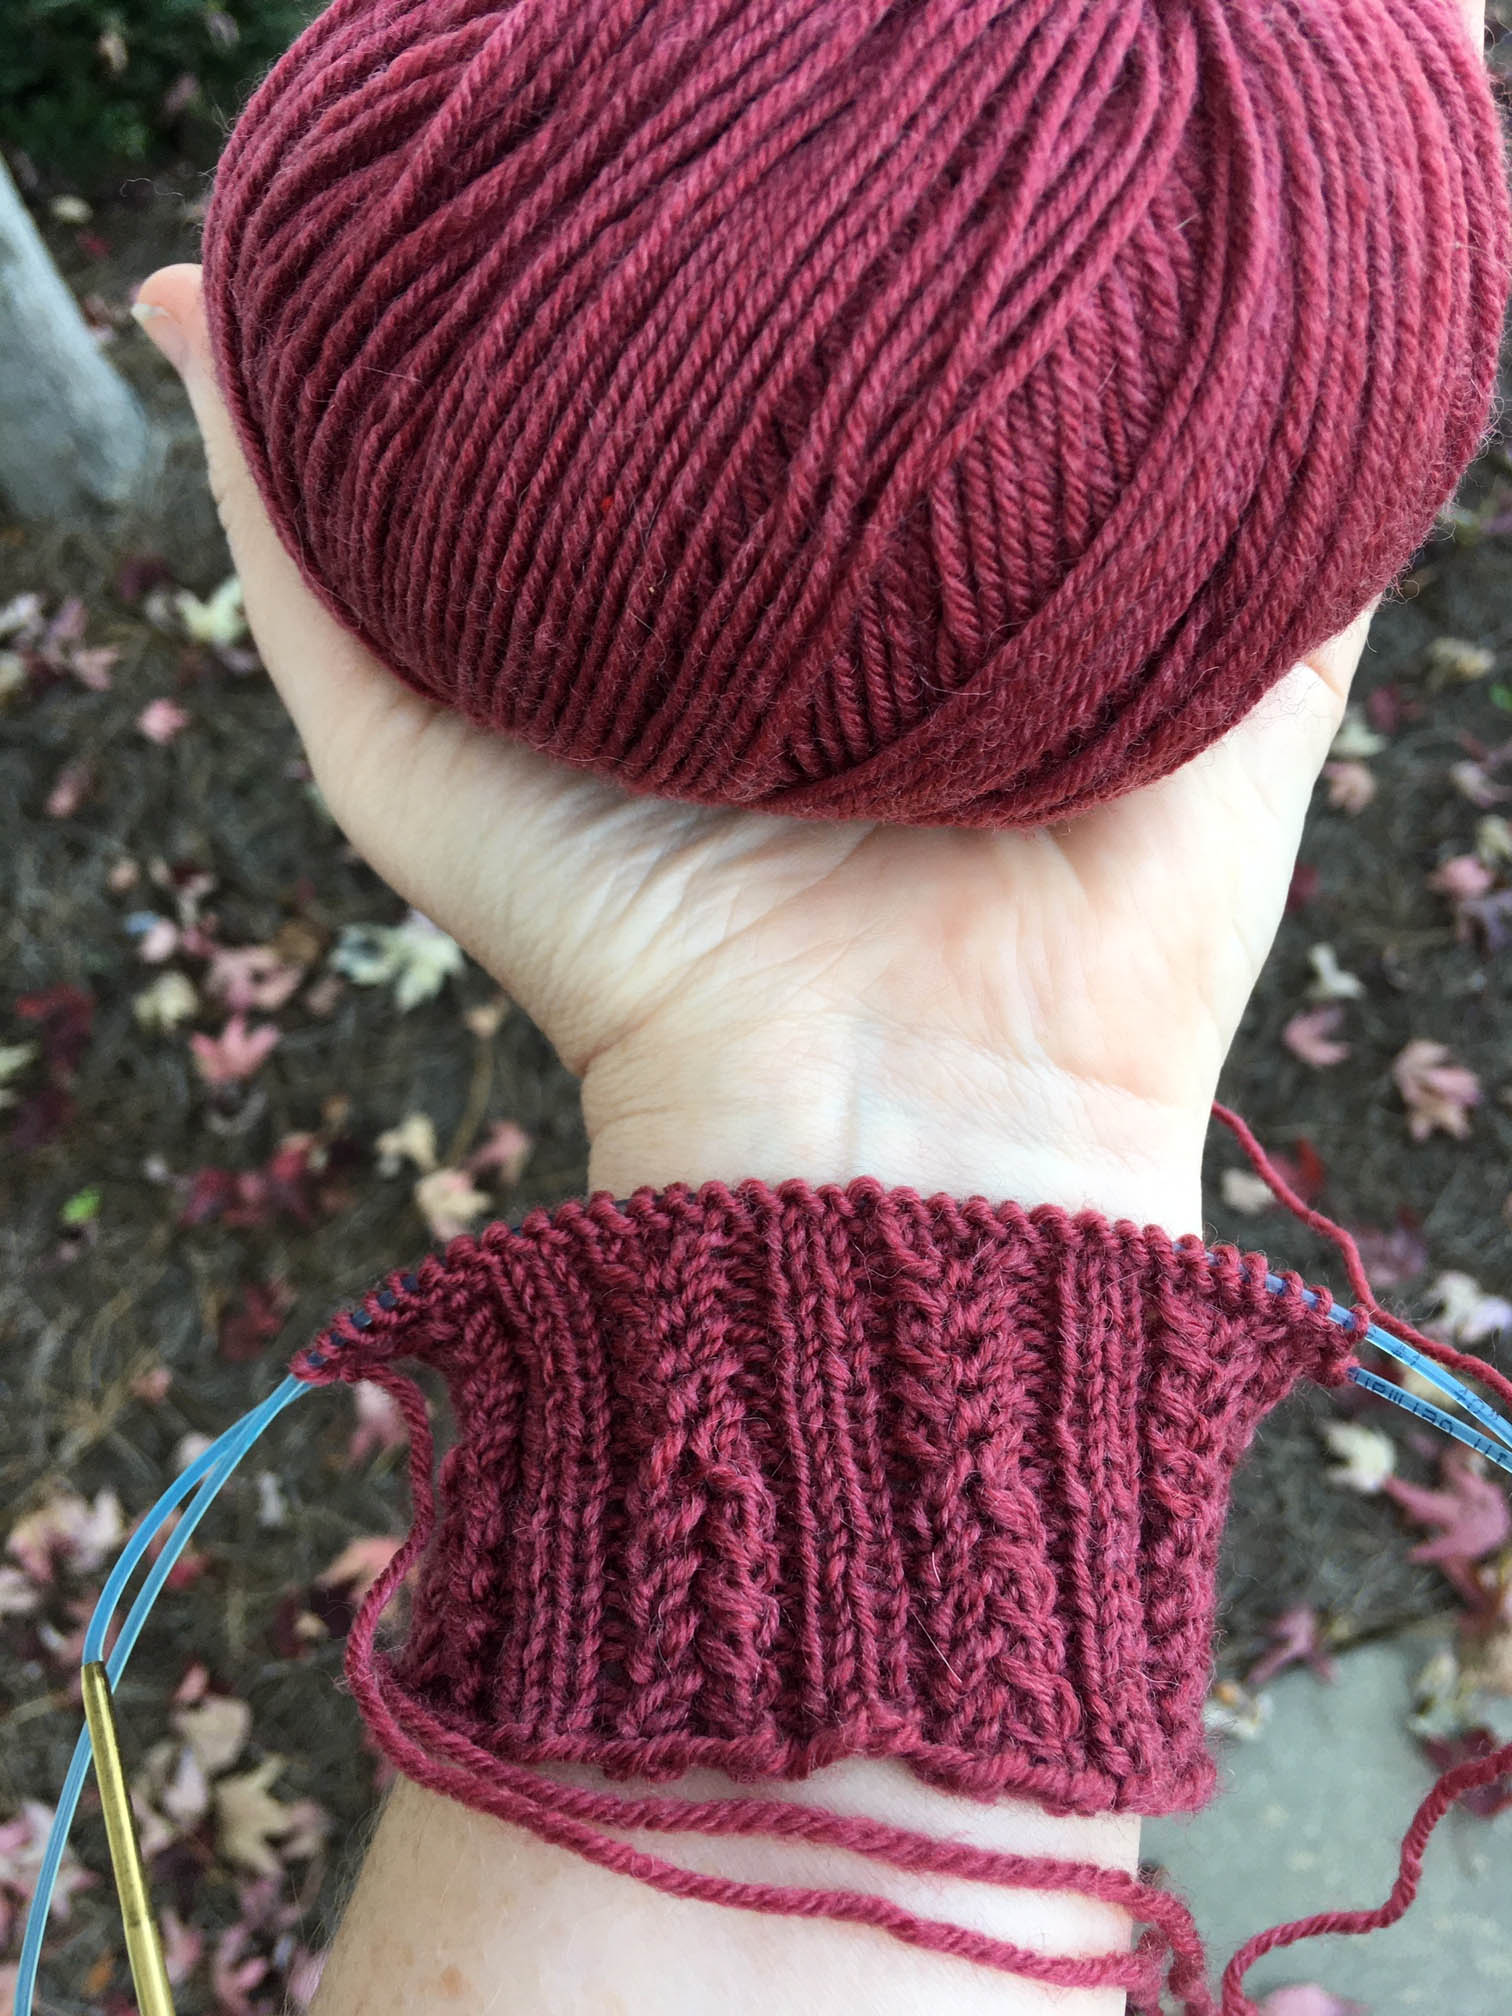
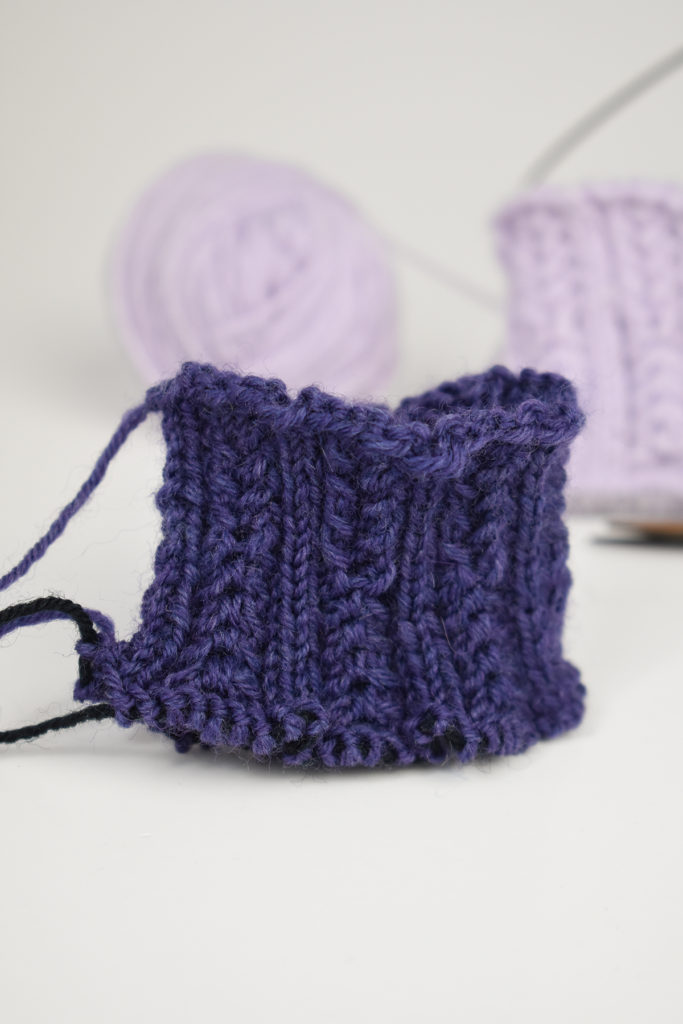
Heather made great progress on her cuff this week, and it looks gorgeous in Bella Cash #121 Cabernet.
It has been so exciting to see your progress photos on social media! Some beautiful socks are being born right now in a variety of fun colors. Here in the office, everyone is chipping away at their patterns, too. Heather, our social media maven, shared the picture above of her cuff. Aubrey, designer and Instagram superstar, got a bit of a late start, but it’s coming along, too.
Left: Yonca’s correct cuffs using 118 Orchid (CC1). Right: Yonca’s mistake cuff using #122 Amethyst (MC)
Yonca, our wonderful managing director, hit a bit of a bump in the road. Earlier this week she proudly stopped by to show me her progress. Her stitching looked fantastic – but one thing was off – the color! She accidentally used her main color for the cuff. It would have been totally fine, except that there isn’t enough contrast between her contrast colors to make the next section shine. Determined and always optimistic, she simply ripped back her work and cast on with the right color. I actually ripped out my cuff three times before settling on the stitch pattern and making a mistake or two. Mistakes happen in knitting, folks, it’s part of the process!
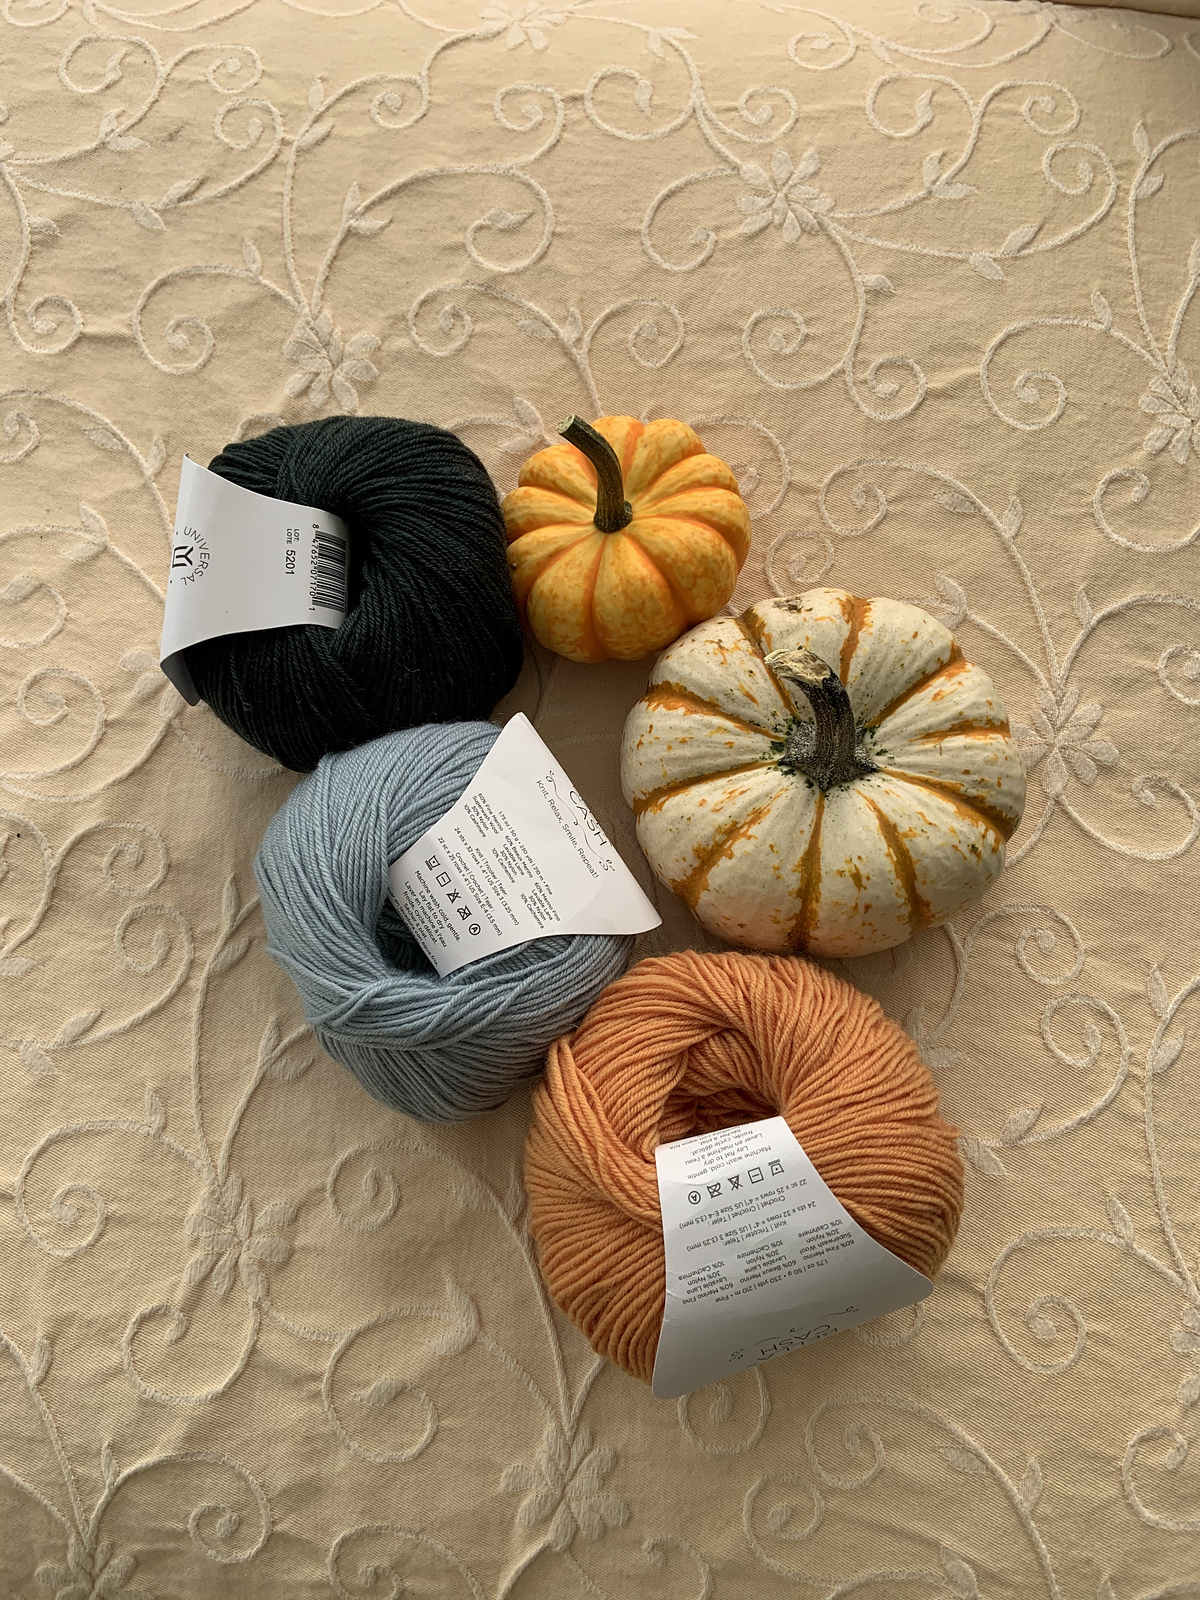
I couldn’t resist sharing this cute photo that 4Laurel shared on Ravelry of Bella Cash with pumpkins for the Sweet Dumplin’ Socks. Do you see the color inspiration?
This week you’ll see the work you put into picking your colors really come through because you’ll be doing stranded knitting! If you’re new to stranded colorwork, fear not! The pattern repeat is small and can quickly be memorized. It’s just a four stitch repeat with floats no more than three stitches. Let me warn you…this section is downright addicting. It’s longer than the last section, but it works up so quickly.
Although last week I provided a tutorial as part of my post, this week I want to direct you to a post I wrote in 2018 that includes useful tips and tricks for stranded knitting. You can find that post here (link). In that post, I talked about working with charts, managing your yarn, and ensuring your tension is just right. It’s relevant to this week’s portion of the pattern, so I encourage you to take a look.
That’s it for this week. I am looking forward to seeing more of your progress! Remember, you can share your progress on social media using the hashtag #UYSocktoberMKAL and tagging us on Instagram (link) and Facebook (link). Join in with chatter here on the blog and in our Ravelry forum (link).
Welcome to Week 2 of the Bella Cash Socktober Mystery Knitalong! It has been a week since we shared about color choices and how to select your colors for the project. We hope you’ve selected your colors, received your Bella Cash yarn, and are ready to get to the best part: knitting!
Use this graphic on Ravelry and on social media to share about the knitalong.
Before we dive in, I just want to give a quick refresher about the knitalong, especially for those who might have missed my last post.
Each week in October I’ll be revealing a different portion of the pattern. The pattern is updated on our website every Wednesday and you can find it here (link).
This is a mystery knitalong, but if you don’t want to commit without seeing the socks first you can find spoiler images here (link).
If you join, we’d love for you to spread the love and share your progress on social media using the hashtag #UYSocktoberMKAL and tagging us on Instagram (link) and Facebook (link). Join in with chatter here on the blog and in our Ravelry forum (link).
Please add your project to Ravelry, too! You can find the Ravelry listing here (link). You can use the graphic above and on the Ravelry listing for your project page, too.
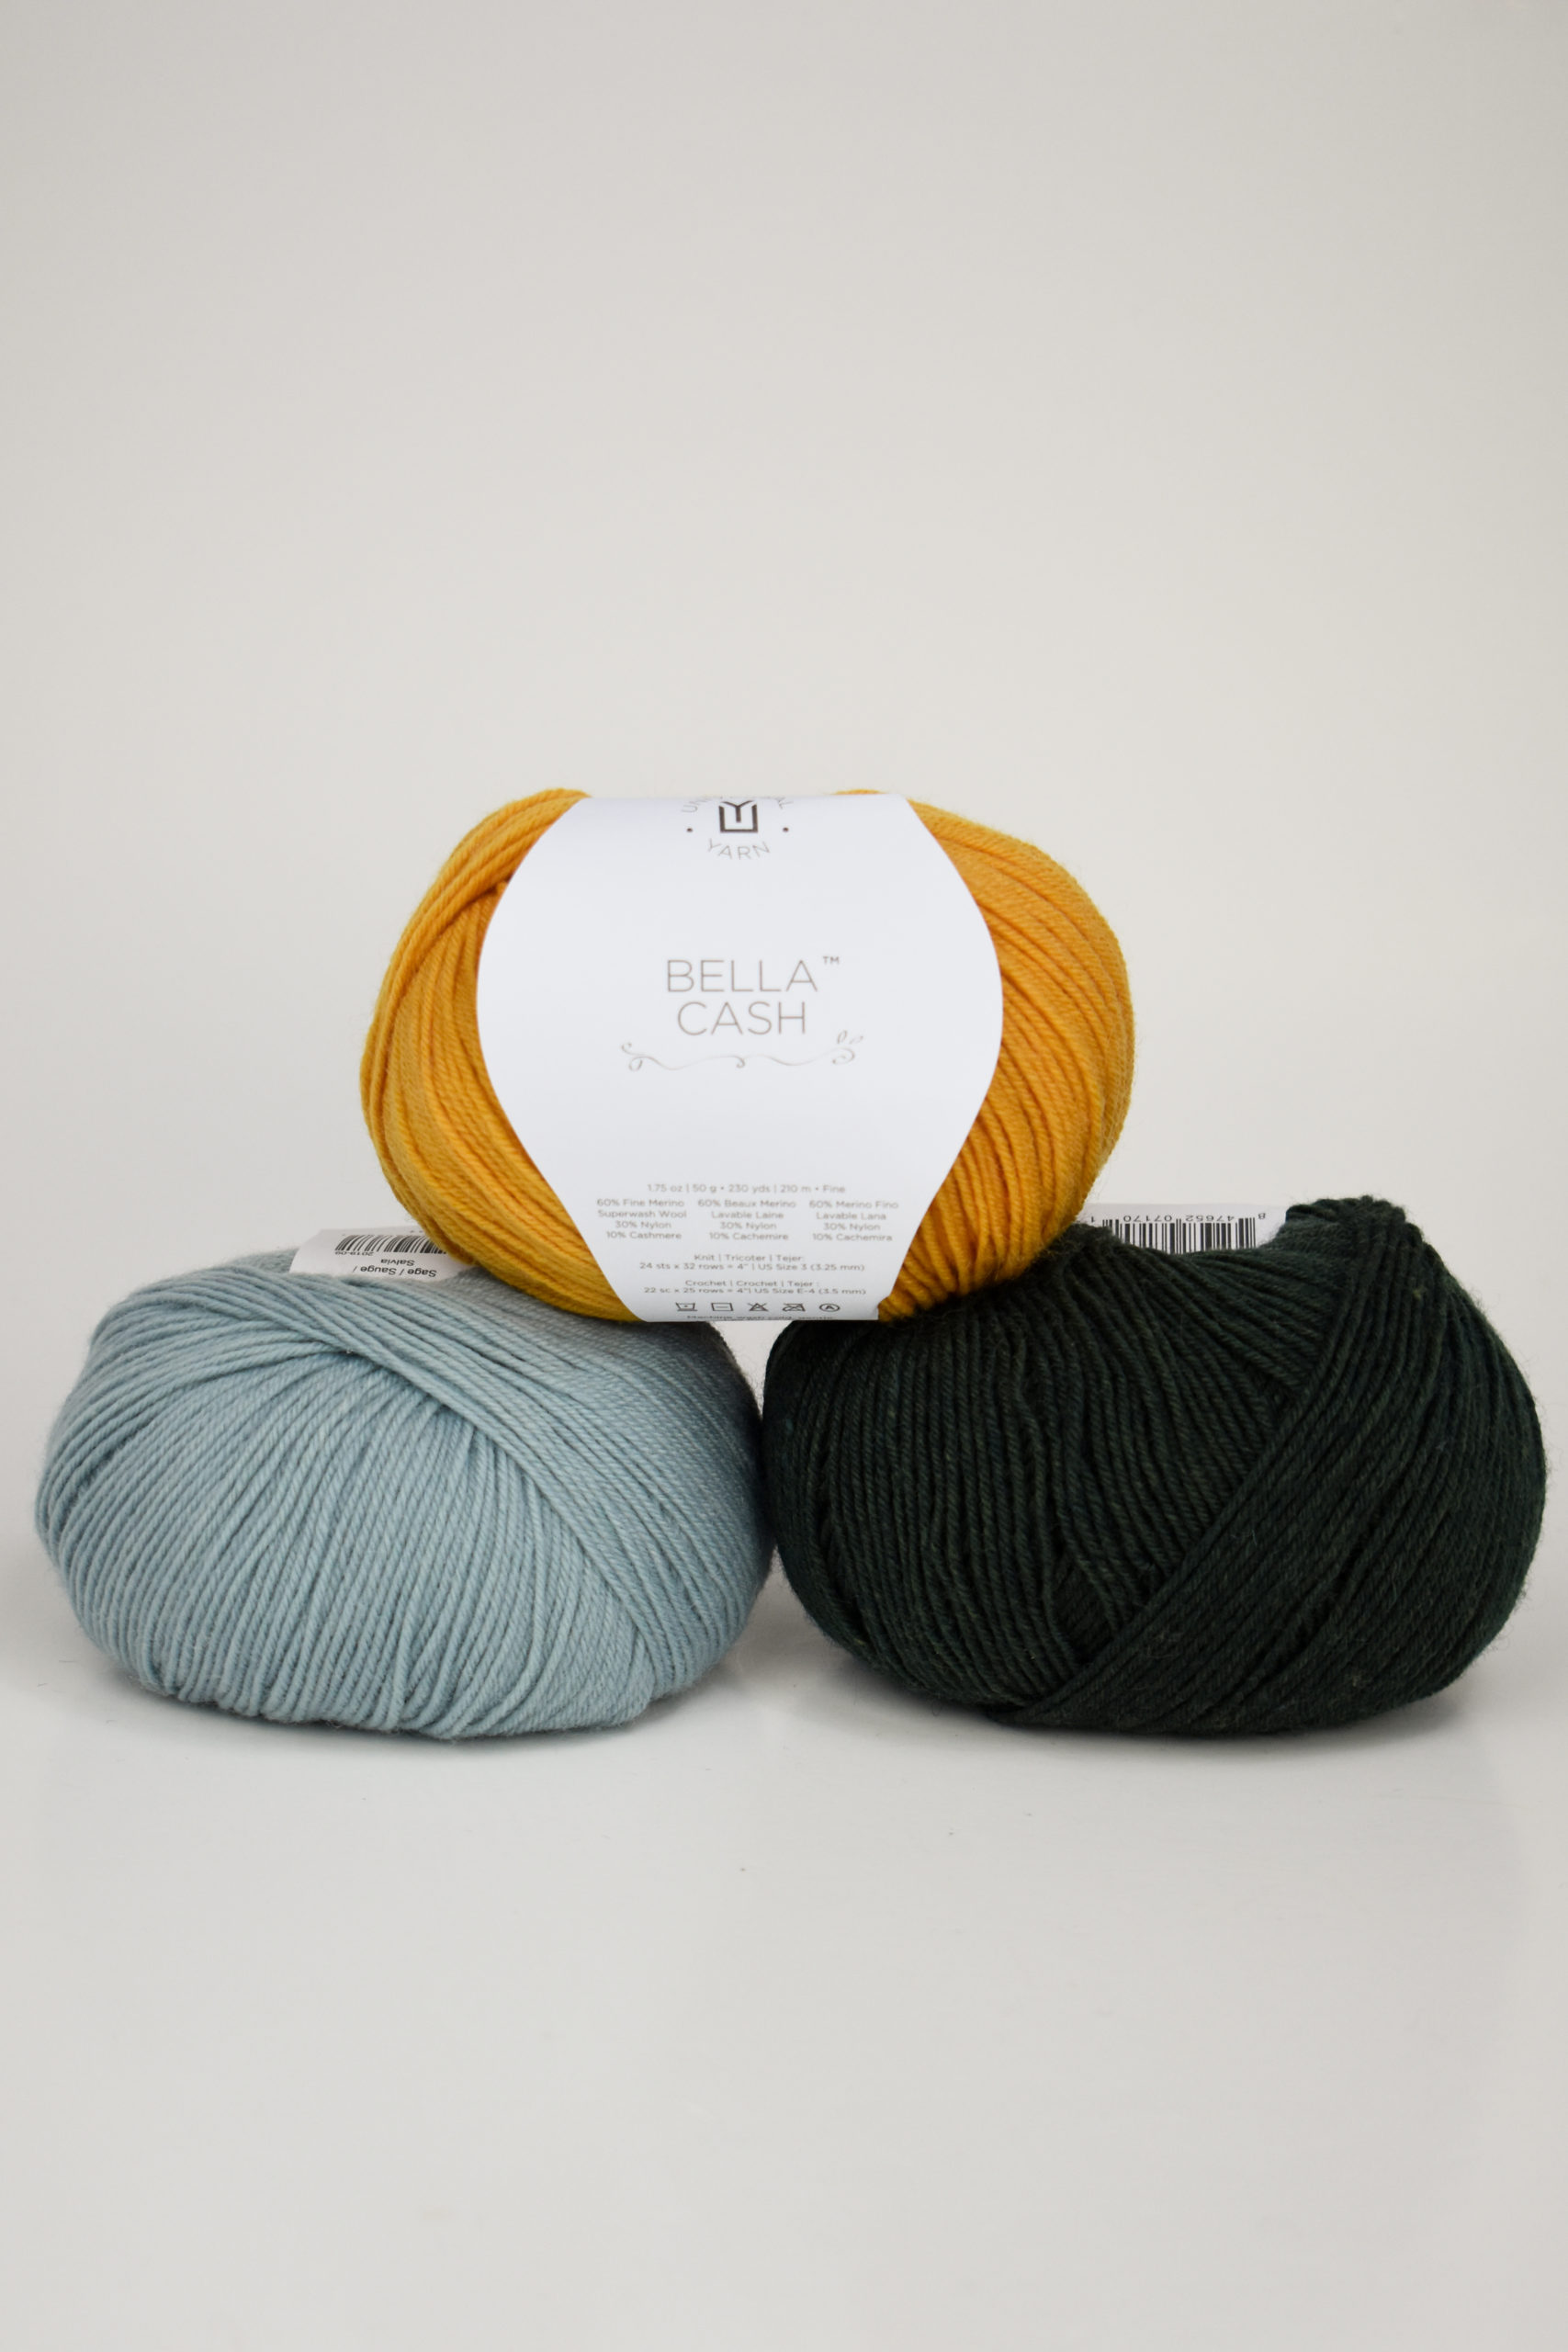
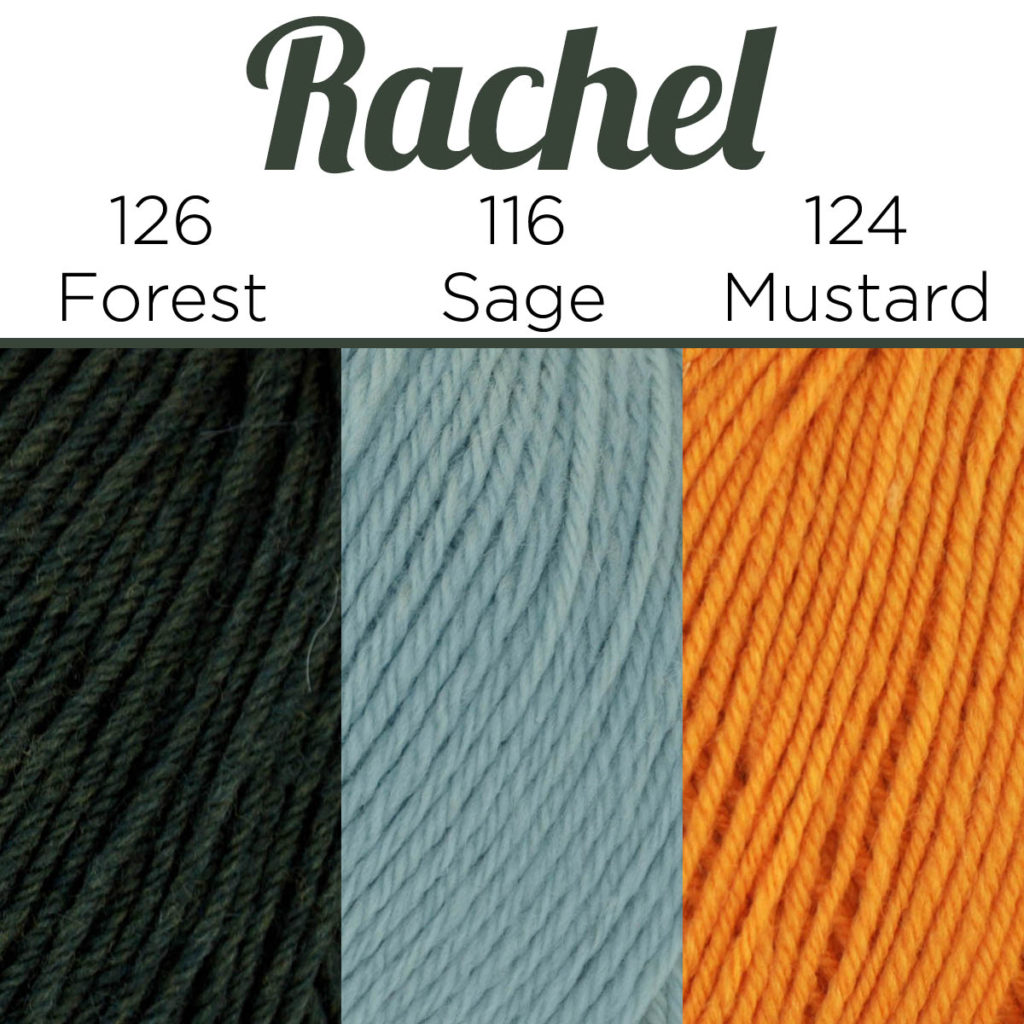
These are the suggested colors for the Sweet Dumplin’ Socks: #126 Forest (MC), #116 Sage (CC1), & #124 Mustard (CC2).
This week is exciting because it means you’re finally able to cast on your socks! It’s all about the cuffs. You’re sure to knock this portion out in no time at all. Without spoiling too much, I will say that the left and right socks in this pattern are the same. With that in mind, you may choose to start both of your socks this week. There are a couple ways to do this. One method would be knitting two-at-a-time (TAAT) socks – and you can find a great tutorial by Very Pink Knits for that method here (link). Personally, I’m not a fan of the method because I find it to be a bit fiddly and annoying to keep my yarn organized, but I know many knitters who swear by it. Another option is to knit them concurrently, but separately. Work the cuff for one sock, then set it aside and work the second sock cuff. You can either use two sets of needles for this method or place stitches on holders. Of course, you can absolutely knit these socks one at a time. That’s how I’ll be knitting my pair. The choice is yours!
Speaking of choices, knitters have many options for knitting small circumferences in the round. Many knitters are loyal and true to double-pointed needles. Some are fans of 9″ circular needles. Other knitters, myself included, love the Magic Loop method. It’s my go-to method whether I’m knitting socks, mitts, sleeves, or hats. If you haven’t tried the Magic Loop method, you’re in luck because I’ve created a tutorial to show you how to get started.
Learn how to knit small circumferences using the Magic Loop method.
I hope you enjoyed the tutorial and find it helpful. If you have any questions, don’t hesitate to reach out. Remember, you can share your progress on social media using the hashtag #UYSocktoberMKAL and tagging us on Instagram (link) and Facebook (link). Join in with chatter here on the blog and in our Ravelry forum (link).
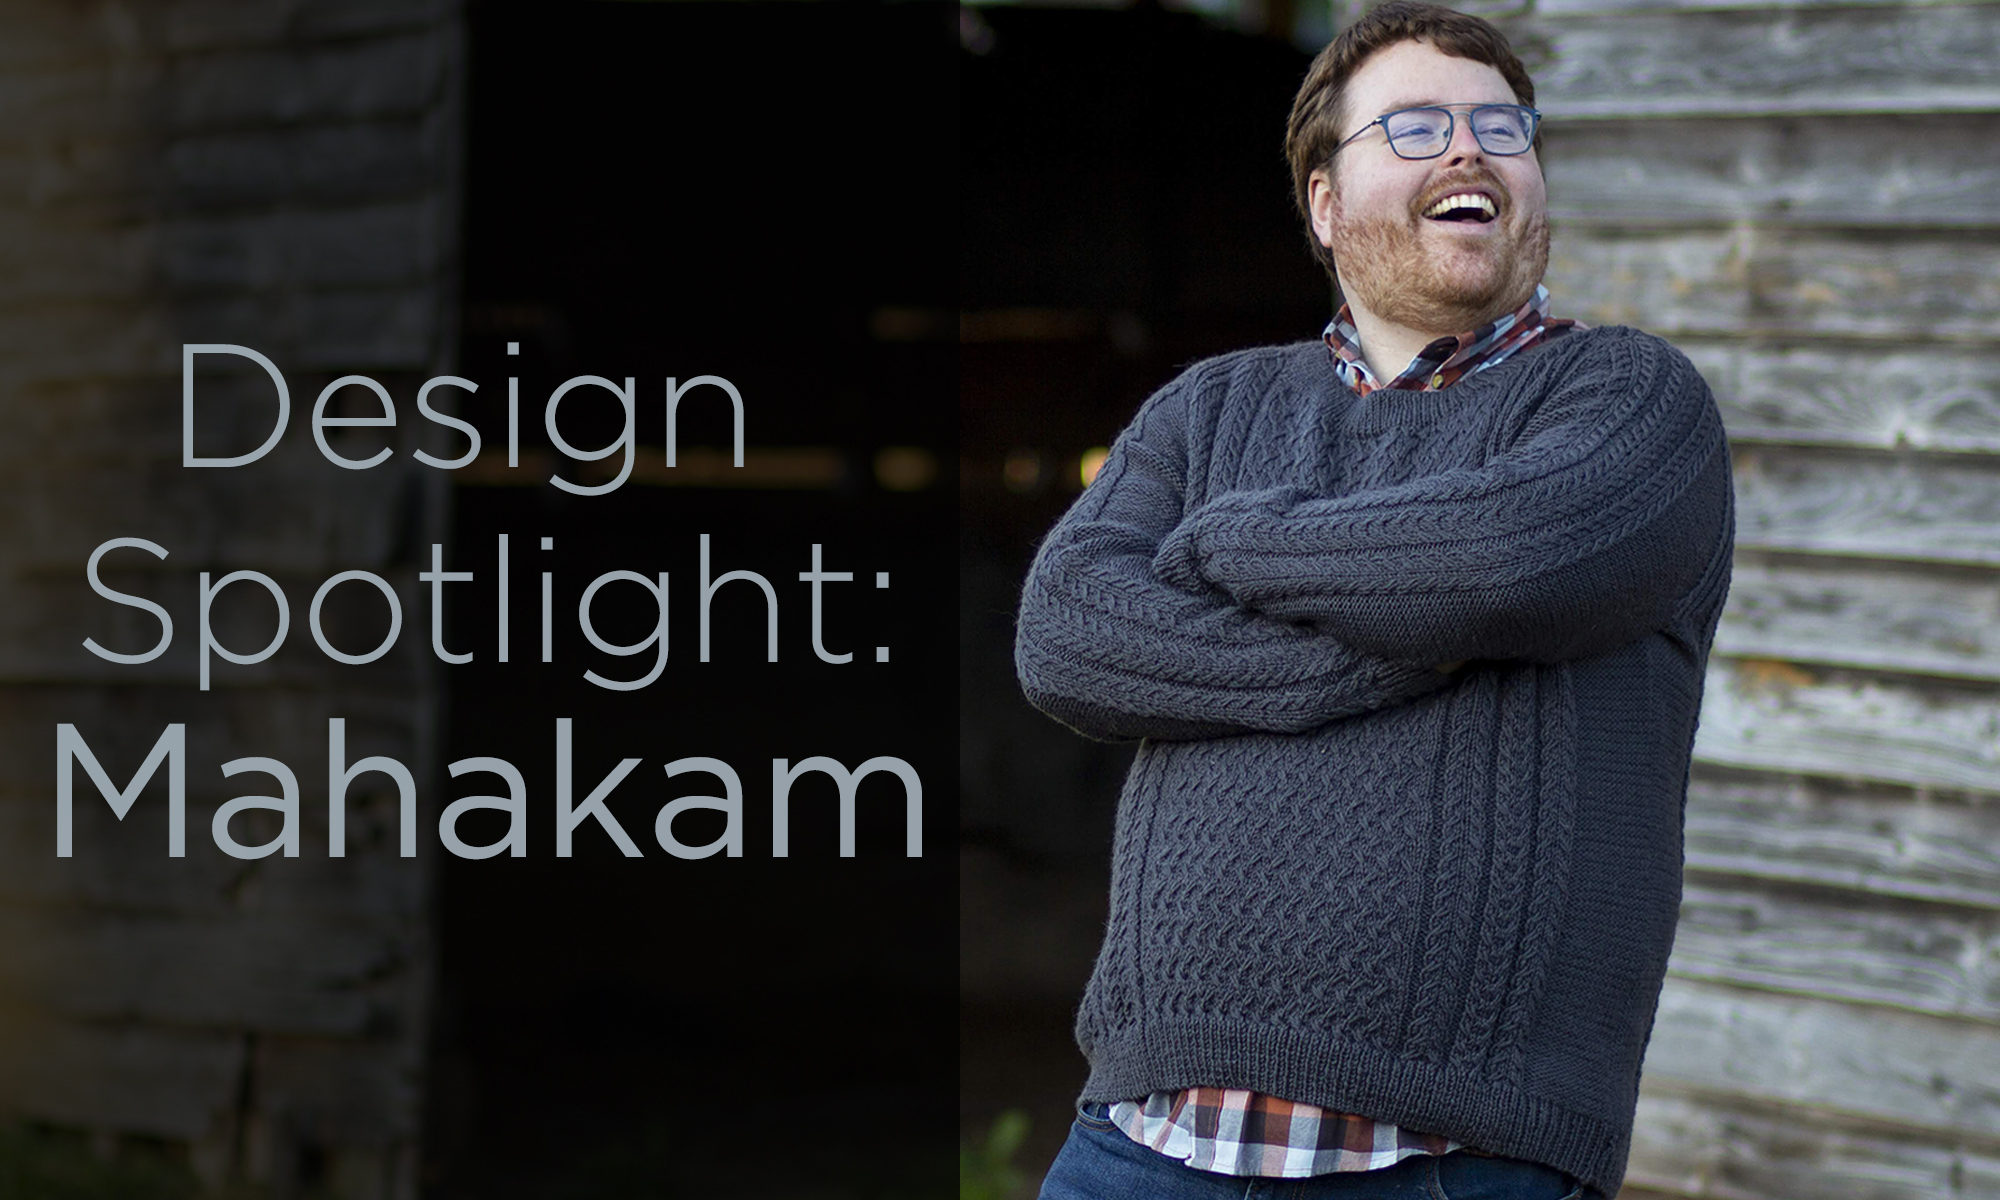
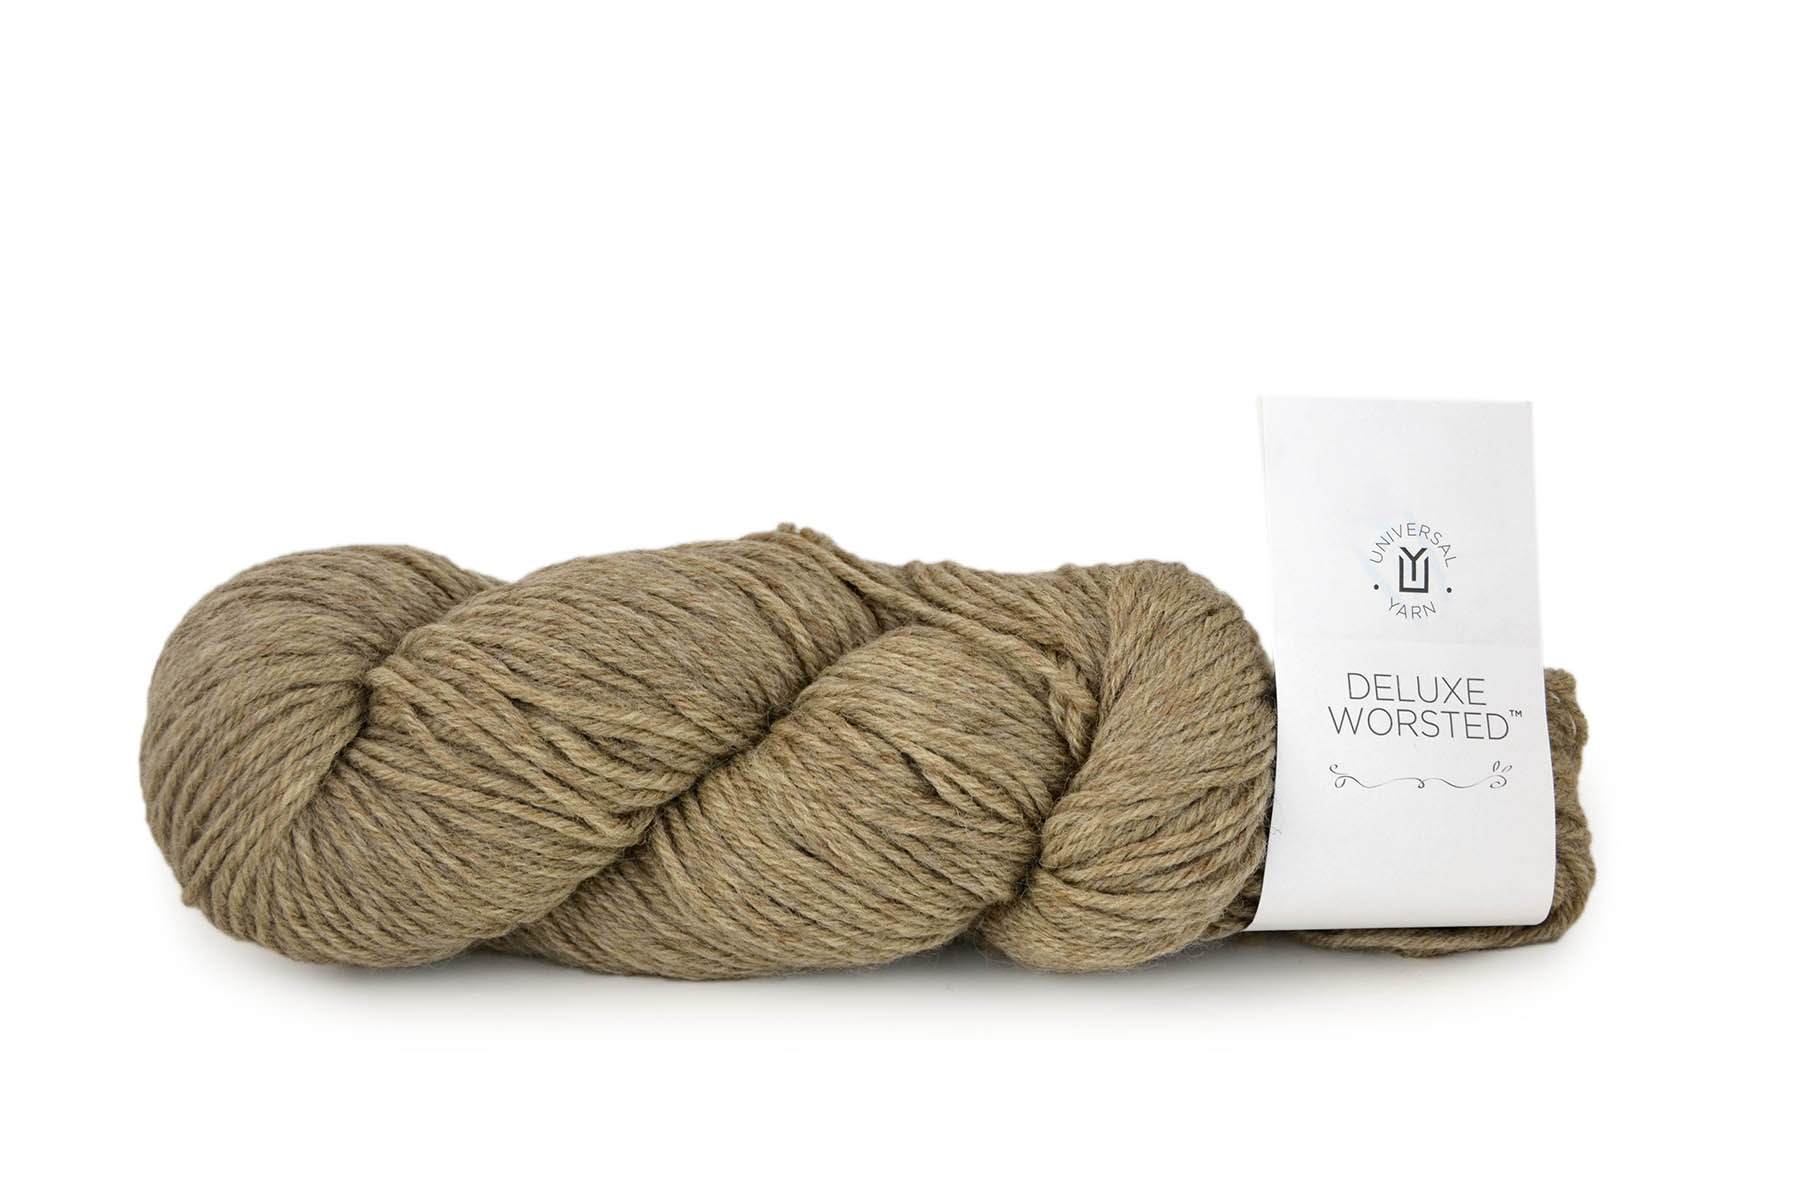
I’ve said it before and I’ll say it again, I love Deluxe Worsted. Today, we’re excited to share that we’ve given this yarn a facelift. We’ve narrowed down the color palette to be more cohesive and, excitingly, we are now able to offer this yarn at a more accessible price point. Deluxe Worsted is a gorgeous, 100% non-superwash wool yarn that is a stash staple. You should see my own stash – there is plenty of it!
I love Deluxe Worsted for its versatility. It looks great in every stitch pattern – from cables to colorwork, you simply can’t go wrong. It is a round, 4-ply yarn that is smooth and soft without compromising durability. That’s why I chose it for my recently published design, Mahakam.
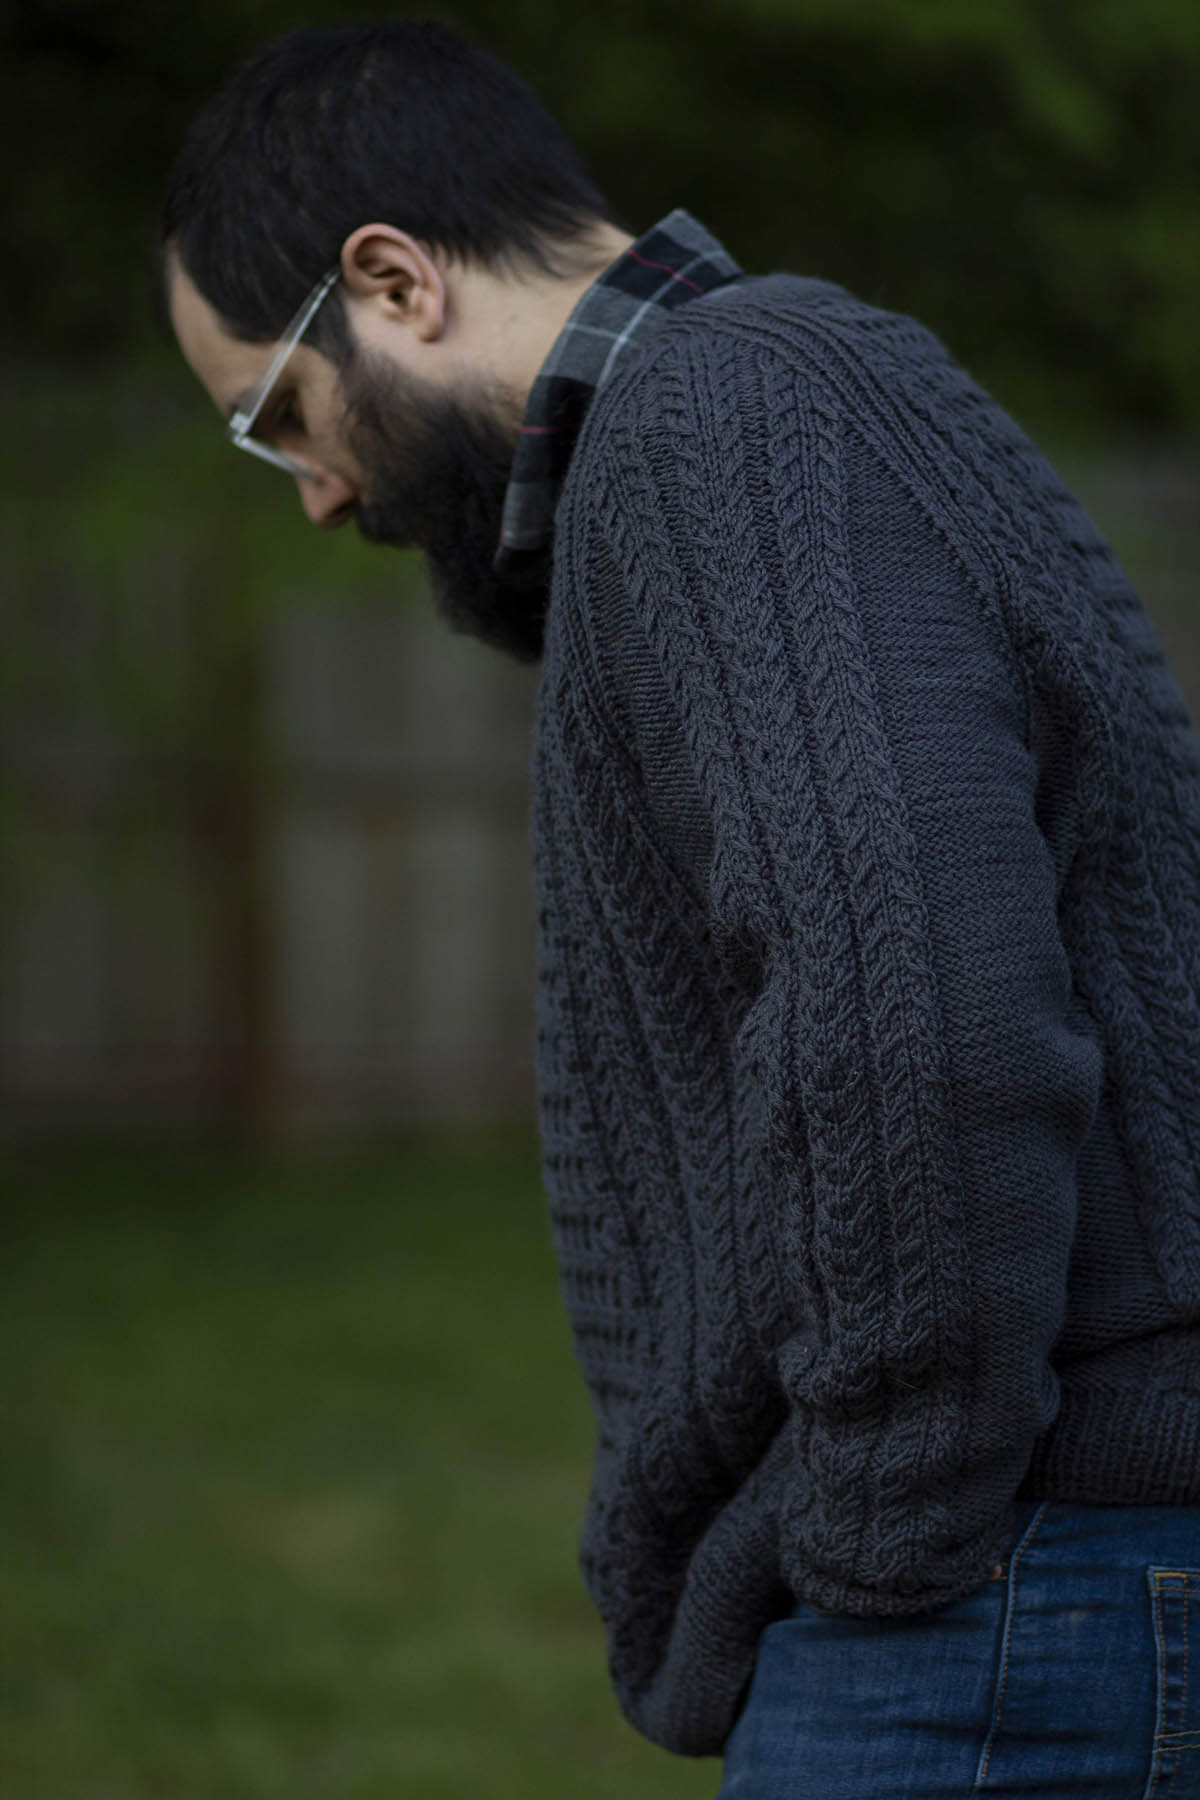
My husband, John, in his Mahakam pullover.
Published in the First Fall 2020 issue of Knitty, I designed this pattern specifically with my husband in mind. It needed to be a great layering piece, but more interesting than a plain stockinette stitch sweater. It also needed to be knit in a color he’d love wearing on a regular basis. After all, if something is going to be handknit, it needs to get a lot of love!
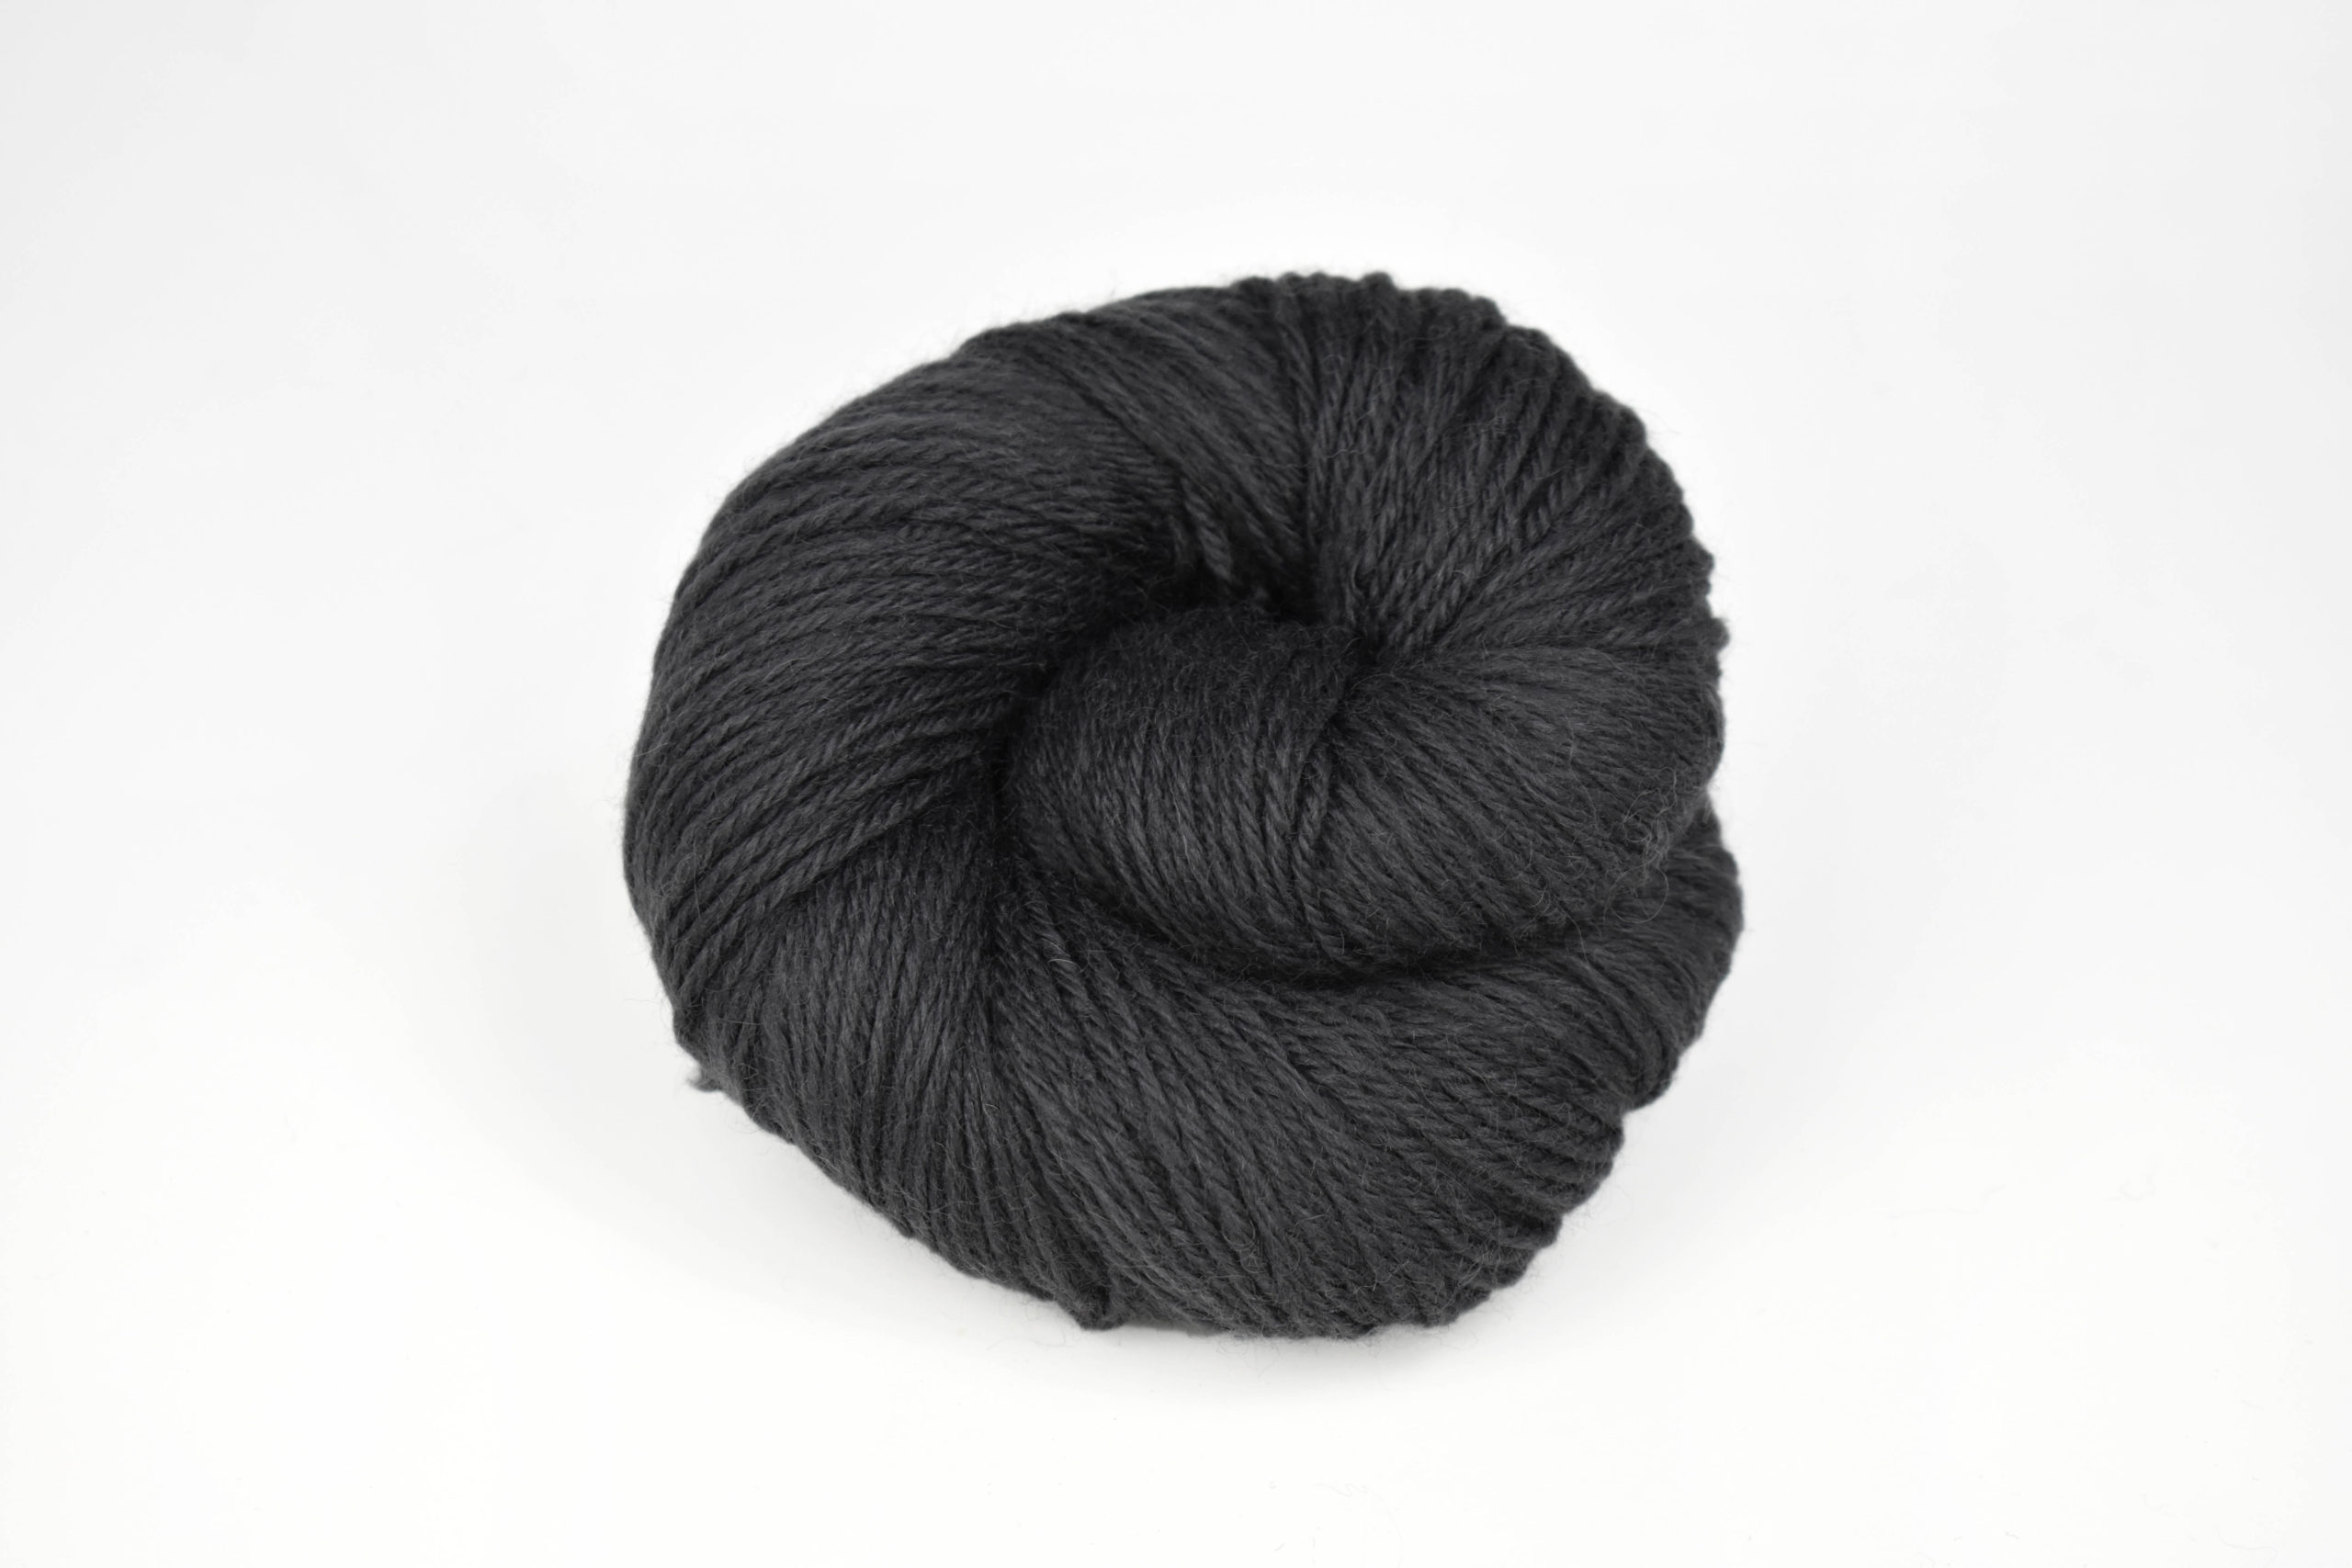
Although John definitely isn’t afraid of a little color, I wasn’t too surprised when his attention went straight to the neutrals. His top choices were #12172 Dark Crystal and #12178 Turkish Coffee. Although the colors are similar in tone and value, Dark Crystal is cooler and more grey while Turkish Coffee is a warmer, black-brown hue. It was hard to choose between the two, but who can resist a color that references the Jim Henson masterpiece, The Dark Crystal? After all, both of us love puppets (and Muppets, obviously), and take at least an annual trip to the Center for Puppetry Arts in Atlanta.
Deluxe Worsted #12172 Dark Crystal
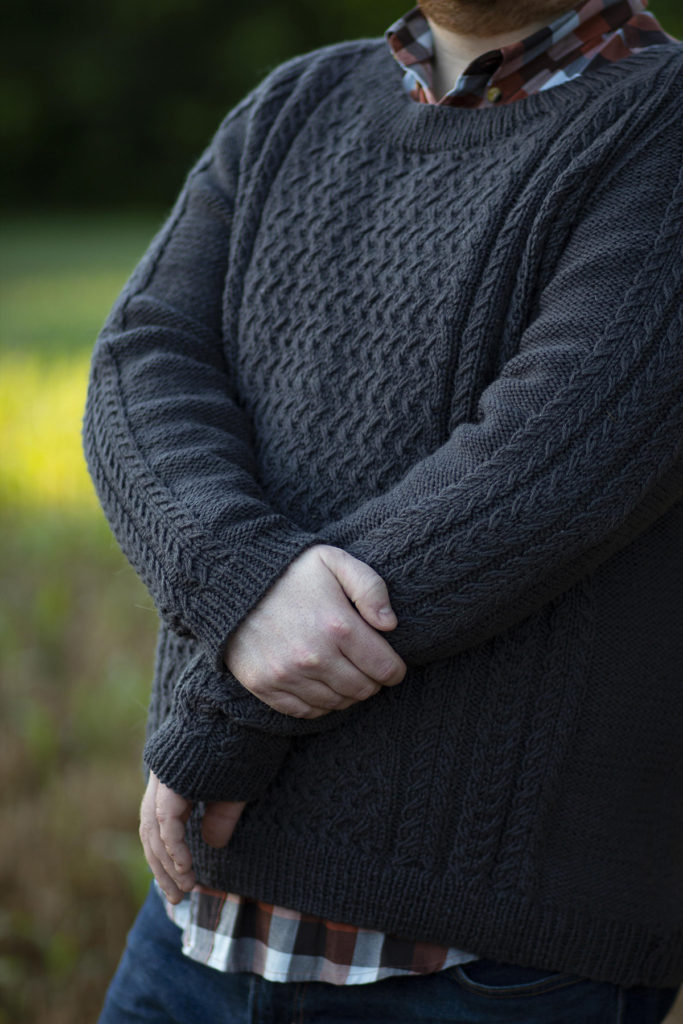
After selecting the color, I knew the fabric needed to be rich in texture, so I turned to slip stitch cables to feature throughout the body and sleeves. I made some little swatches first, just to make sure John was happy with them. Even when using such a dark color, the texture isn’t lost thanks to the wonderful stitch definition of Deluxe Worsted.
The textural slip-stitch cables are also featured on the sleeves and body.
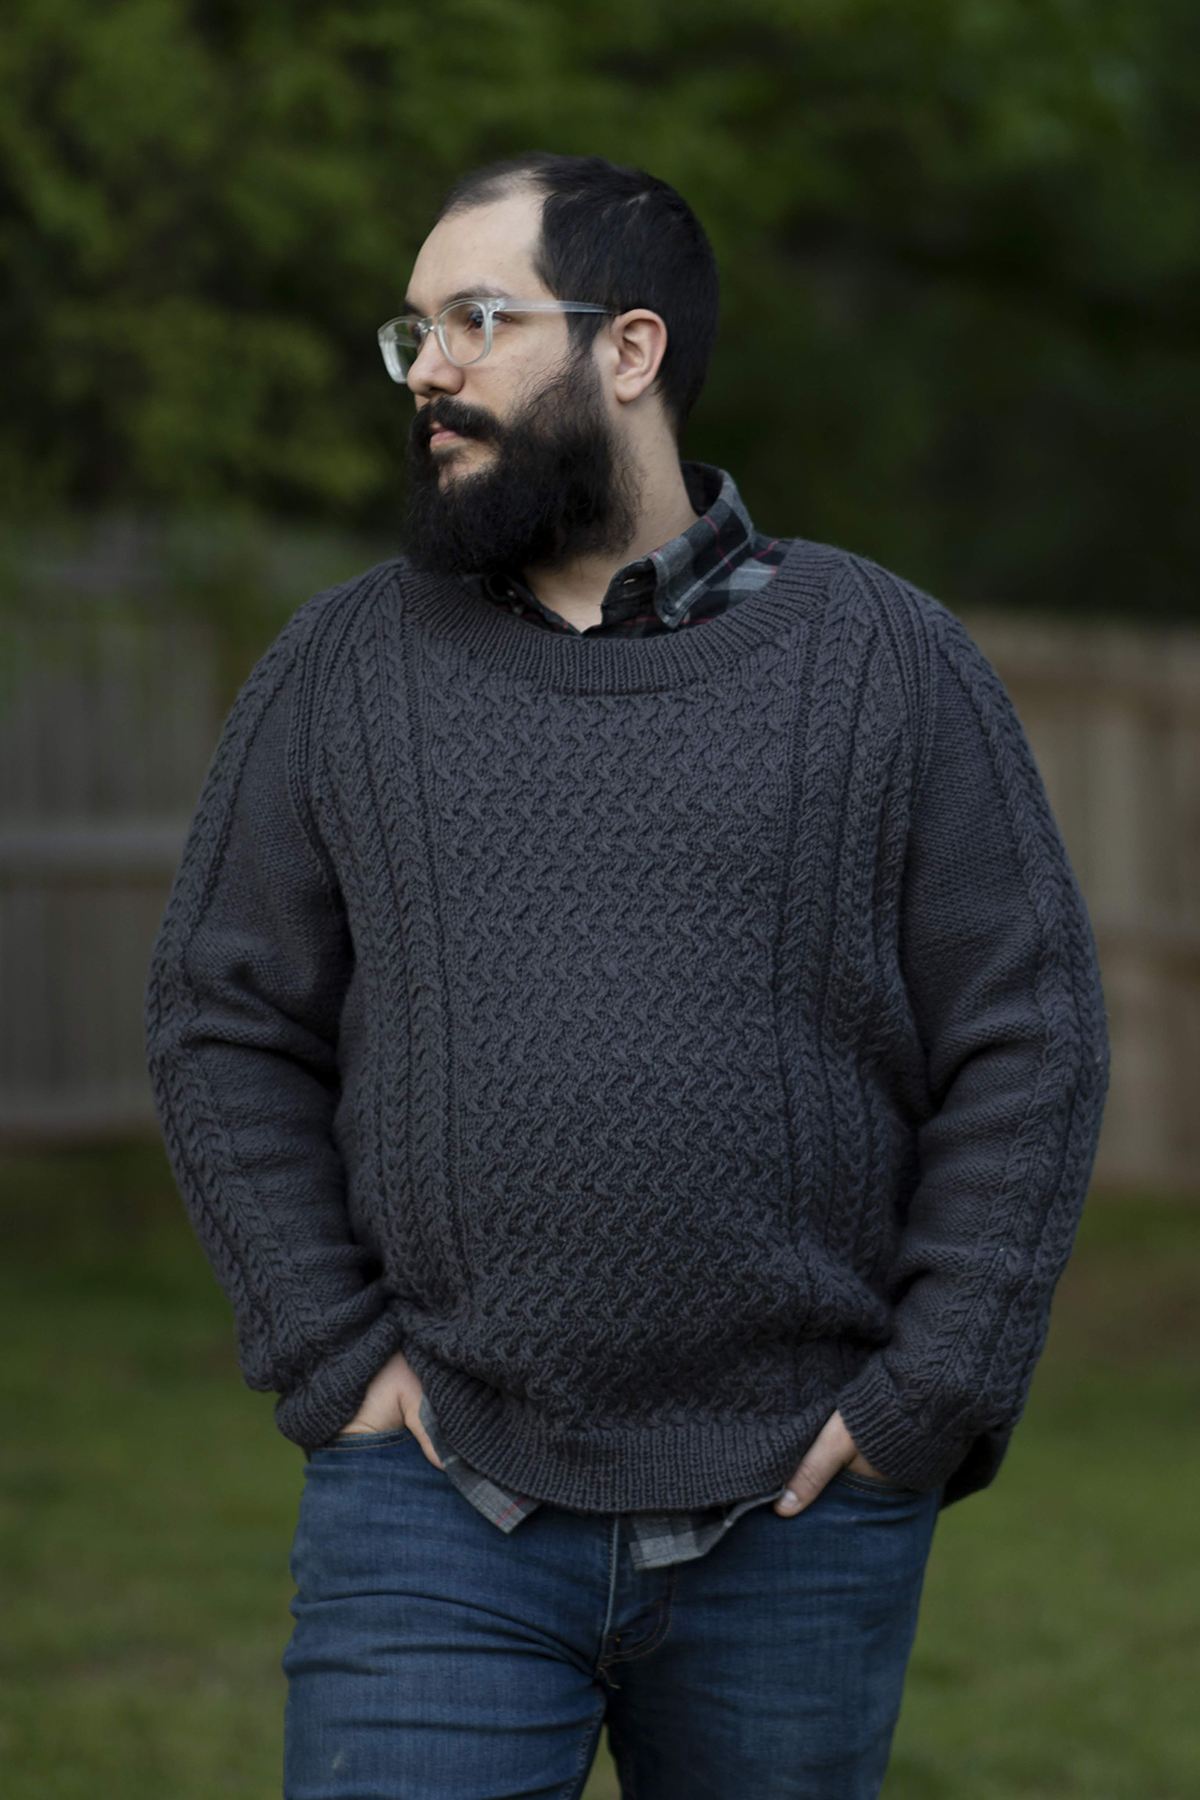
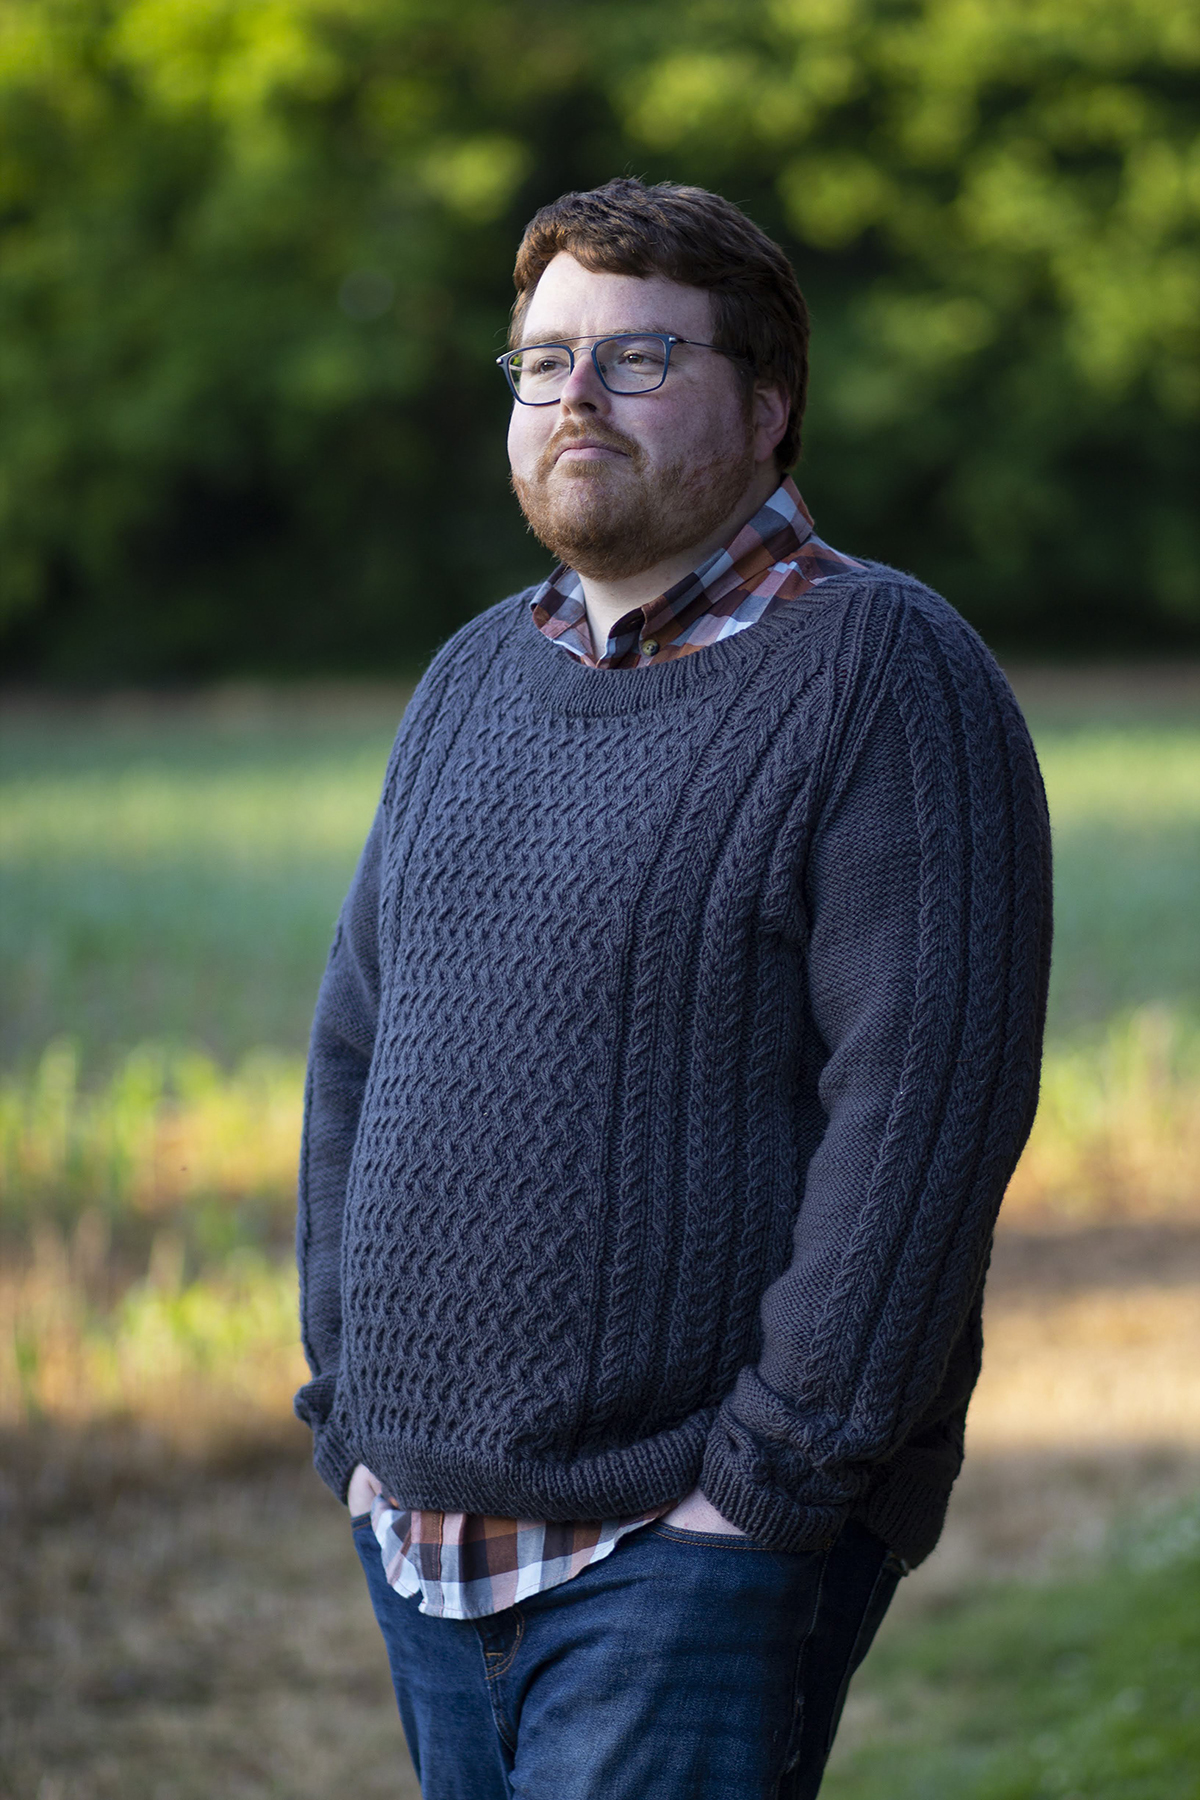
John was adamant about this sweater being relaxed and a bit oversized – pretty much as cozy as possible. However, I also wanted to create a design that could look great worn either way – relaxed and casual or more form-fitting and tailored. So, I also asked my friend, Michael, to model the sweater. I love how the fit is a bit tidier on him. It’s always nice to see how garments look on various body types. Both John and Michael loved the sweater, so I feel like my design was pretty successful.
Michael chose a pop of orange to peek out from beneath this sweater. A stylish and autumnal touch.
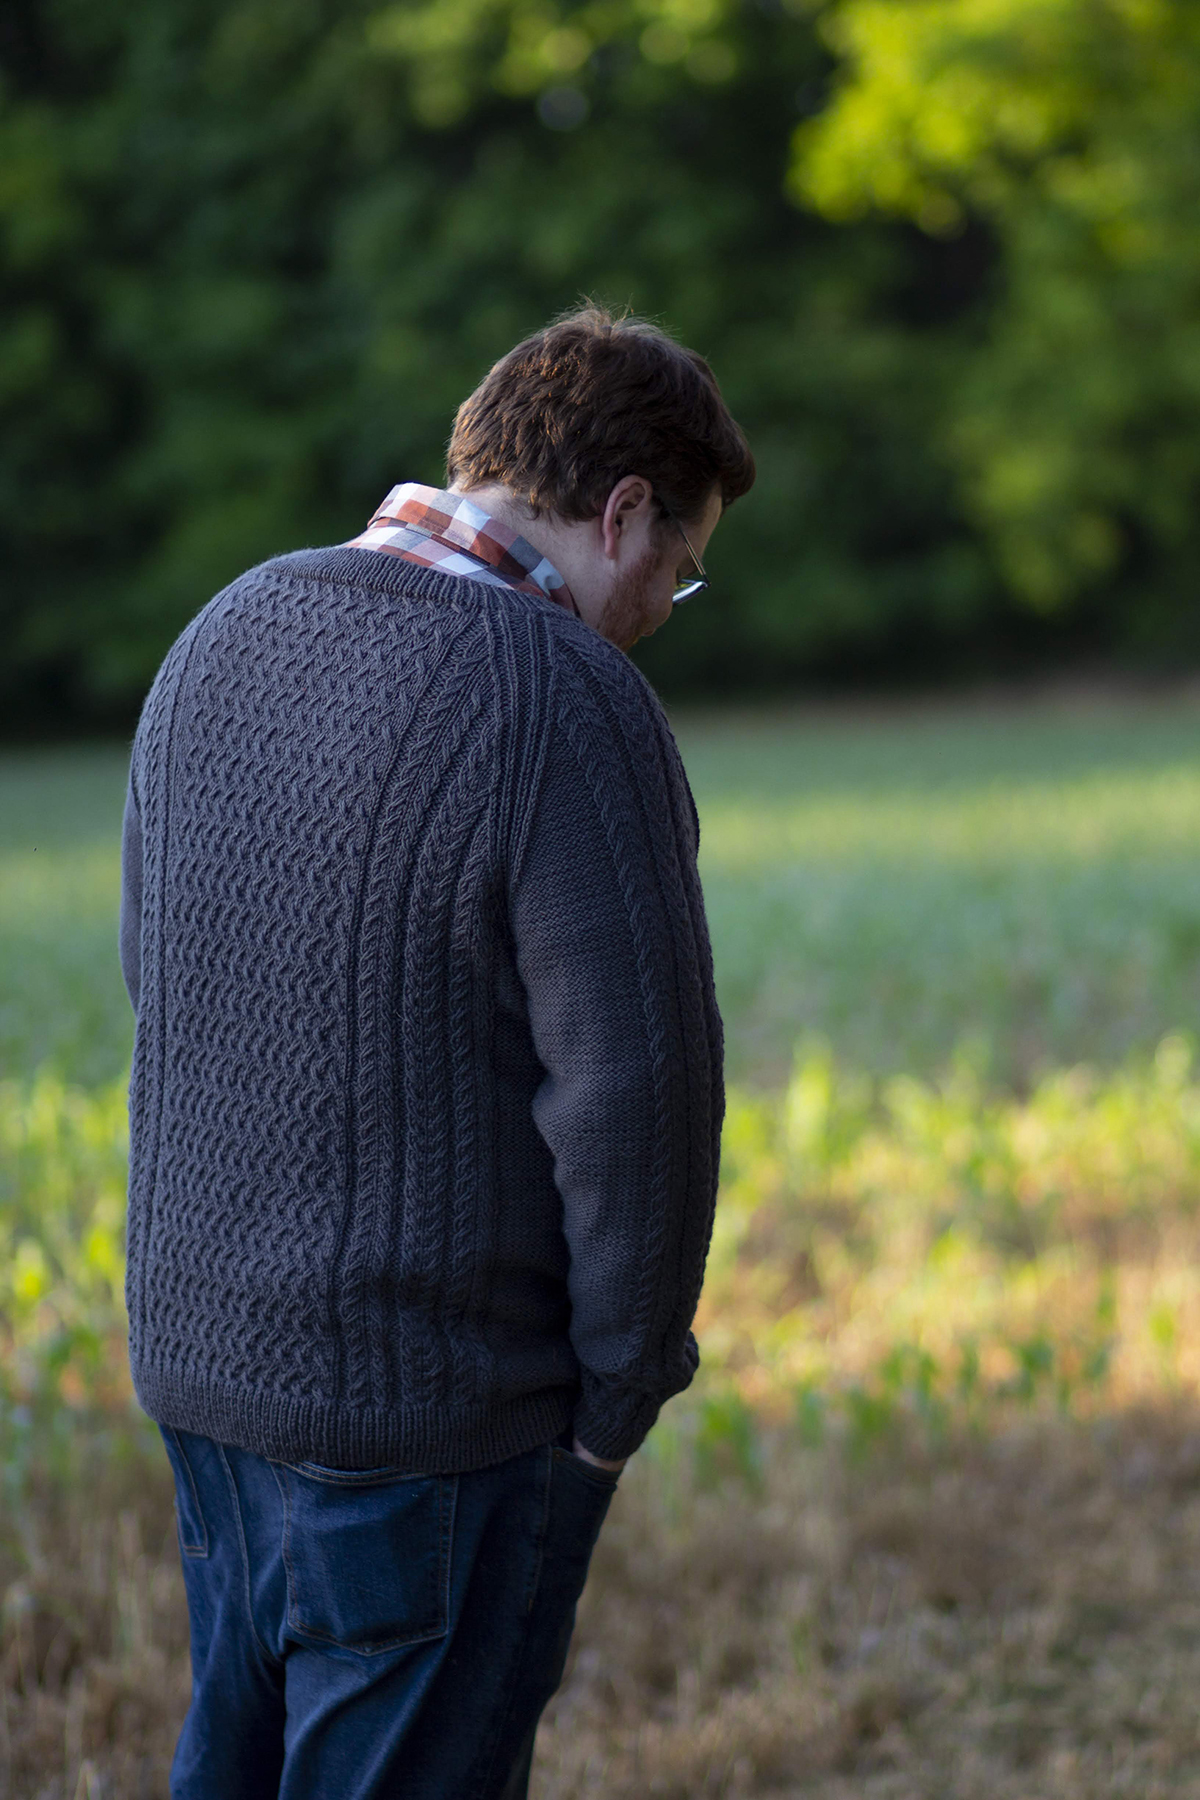
Mahakam is knit from the bottom up in pieces and seamed. I love seams because they add structure and longevity to knitwear. It features raglan shaping and a K1, P1 Rib hem, sleeve cuffs, and neckband. The slip-stitch cables decorate the front, back, and sleeves.
Deluxe Worsted shines in textural stitch patterns, like those used in Mahakam.
Naming patterns is one aspect of design that is fun, but also a bit challenging. While sometimes I know what I want to name a sweater during the early stages of designing, other times I don’t know until the sweater is finished. The latter was the case with Mahakam. Given that it’s delightfully woolly, I couldn’t help but think of this pullover as the perfect piece for trips to the mountains this time of year. Mountains led me to think of mining, and mining led me to think of dwarves. In short, this combination paired with my current obsession with all things related to The Witcher, I decided to name the sweater Mahakam after the mountainous region where dwarves live and thrive.
The textural pattern is also featured on the back of Mahakam.
Although the pattern as written could easily be considered unisex, I’ve been thinking about designing a women’s version of this sweater. It might be nice to give the waist subtle A-line shaping and crop it a bit. A split hem would also be a nice touch. If I decide to move in that direction, I think I’ll use #12281 Clay, which is a lovely terra cotta hue.
Deluxe Worsted #12281 Clay
I hope you enjoyed hearing a little more about this design. If you’re interested in knitting Mahakam, you can find the pattern on Ravelry (link) and in Knitty (link). Don’t forget, Deluxe Worsted is now available at a more accessible price point! You can find Deluxe Worsted at your local yarn store, or on our website, where you can see all of the colors. Which color would you choose?
Happy Socktober! This year we’ve decided to celebrate with a mystery sock knitalong! I’m so excited about this month-long event and hope you’ll join in on the fun. We’re using the unsung hero of sock yarns, Bella Cash. Bella Cash is a yarn that blends extra fine merino, cashmere, and nylon for projects that are luxurious, soft, and durable.
Use this graphic on Ravelry and on social media to share about the knitalong.
Let’s start with the knitty-gritty. Each week in October I’ll be revealing a different portion of the pattern with you in the following order:
9/30/20: Week 1 – Colors
10/7/20: Week 2 – The Cuff
10/14/20: Week 3 – The Leg
10/21/20: Week 4 – The Foot
10/28/20: Week 5 – The Toe & Heel
11/4/20: Week 6 – Wrap-up
If you join, we’d love for you to spread the love and share your progress on social media using the hashtag #UYSocktoberMKAL and tagging us on Instagram (link) and Facebook (link). Join in with chatter here on the blog and in our Ravelry forum (link).
Please add your project to Ravelry, too! You can find the Ravelry listing here (link). You can use the graphic above and on the Ravelry listing for your project page, too.
Does the thought of knitting something without knowing what it will look like first scare you? Not to worry – you can find spoiler images here (link).
Now that we’ve covered the details, let’s dive into the first week!
This week is all about preparing to knit your socks. The first thing you’ll need to do is choose your colors. The first segment of the pattern is available now (link) and it includes a bunch of information about choosing colors that make your heart sing. Everyone in the office is joining, and I’m going to share our color choices with you today.
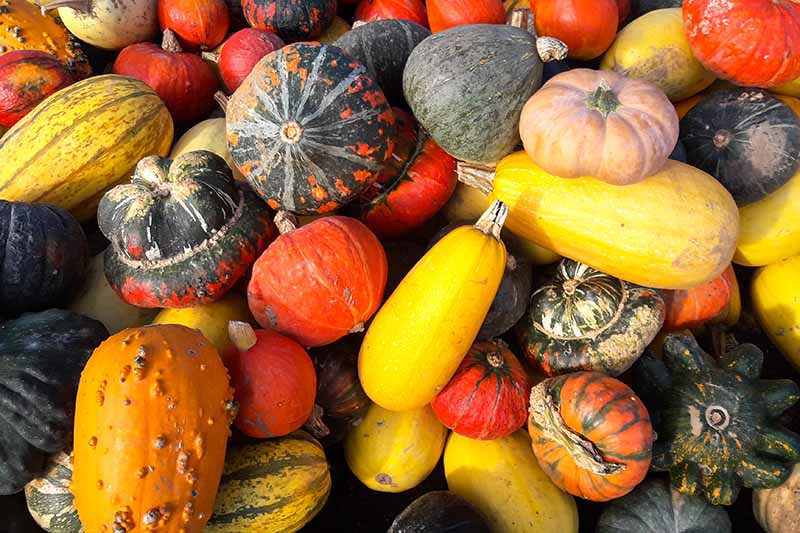
I’ll start with my own color choices. Put simply, I wanted my socks to exude all of the autumn vibes. I chose two colors with subtle contrast and one color to pop among them. I looked to colorful autumn squash, pumpkins, and gourds for inspiration. That’s actually why I’ve named these the Sweet Dumplin’ Socks. They’re named after the delicious and colorful variety of squash (bonus recipe ideas here!).
You can’t have a knitalong solo, so I was thrilled when Aubrey, Heather, and Yonca told me they wanted to join. I asked each of them to tell me a little bit about their color selections.
Fellow designer and Instagram maven, Aubrey, chose colors that remind me of Valentine’s Day. Here is what she had to say:
“I’m a die-hard romantic, and I love nature. I chose to pick a trio that expressed the contrast between softness and harshness found in nature. In this case roses – my favorite (very romantic) flowers, and marble. I’ve always loved gemstones and geology. I’m so looking forward to wearing my socks while I indulge in some favorite movies and warm tea during the cold months coming up!“
Her selection is so beautiful, and it’s lovely to see the vibrant pink hue paired with two neutrals. It makes me picture a vase of beautiful pink roses on a gorgeous marble countertop.
When Heather, our social media connoisseur, agreed to join, my initial hunch was that she’d choose some blissful blues for her socks. She surprised me, though, with this earthy color combination.
“When I heard about Rachel’s concept for fall socks, I decided to lean into it. Normally I go for blue tones, but this time I decided to embrace the season. I’m calling mine Hot Choco Sockos, and am looking forward to sipping some marshmallow-topped hot chocolate while wearing my completed socks. Rachel actually shared a really great spicy hot cocoa recipe last winter that I’m going to use. You can find it here.”
As an autumn-colors gal, I’m smitten with this combination! They are aptly named, and I’m pretty sure a nice mug of Mexican hot chocolate would be perfect for sipping between rows while knitting.
Last, but certainly not least is Yonca, our fabulous managing director. I love her combination of a beautiful jewel tone with a pretty pastel and snowy white. When I asked her about her colors, here is what she said:
“I’ve always loved shades of pink and purple, but for some reason, I haven’t worn those colors in years. This knitalong seemed like the perfect opportunity to introduce a little more color to my wardrobe.”
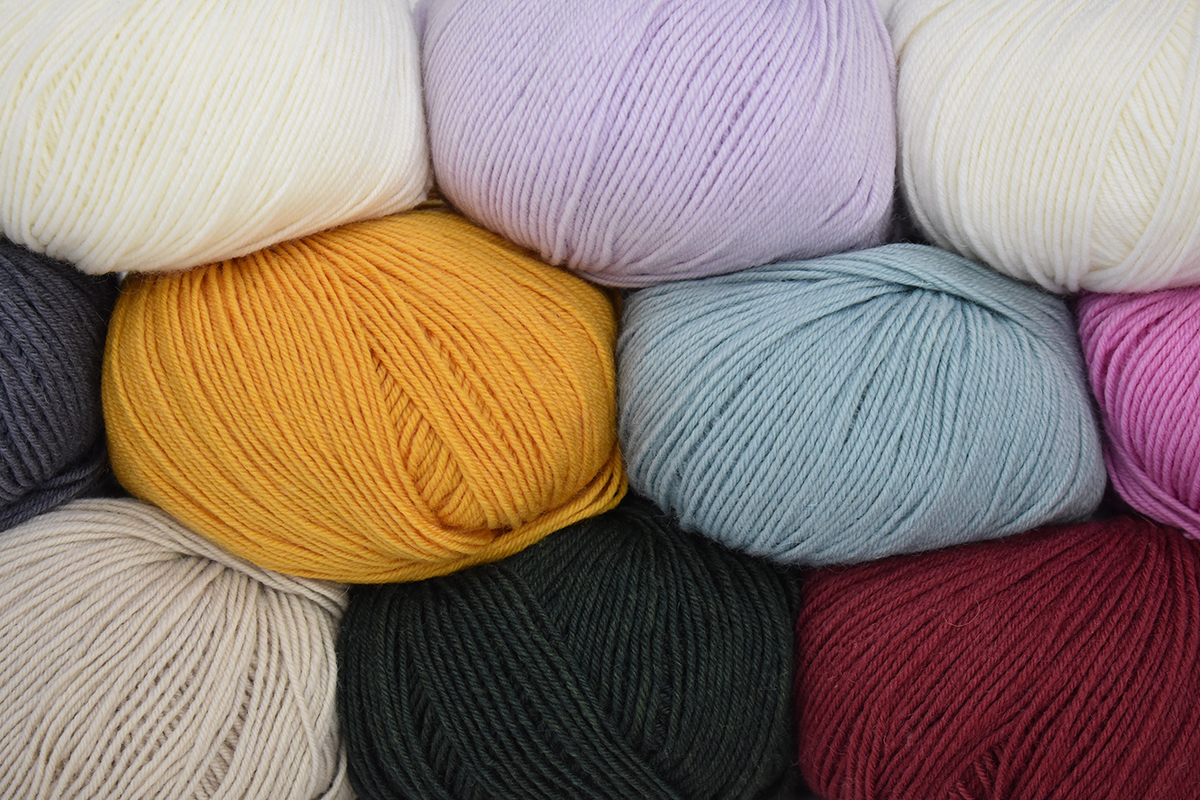
I love how different all of our colors are. There is nearly no overlap between our color choices. With 26 colors of Bella Cash to choose from, there is a virtual cornucopia of color combinations. The color wheel is a useful tool for understanding how colors interact with one another.
In this week’s portion of the pattern, I chat a little bit about how you can use the color wheel as a tool for helping you choose colors. You’re probably already familiar with the primary colors: red, yellow, and blue, as well as the secondary colors: orange, green, purple. However, have you thought about how to use these colors together?
Looking at the color wheel I’ve created above, you can see arrows that point to colors that are complementary to one another. Complementary colors are opposite hues on the color wheel, for example, red and green. These colors create a strong contrast when placed next to one another. Choosing opposite colors would be a great starting point when selecting the main or contrast color for your socks. Take a look at the combination below for a great example of how you could combine complementary colors in your socks.
Left to Right: #102 Blush, #120 Pistachio, #101 Apple
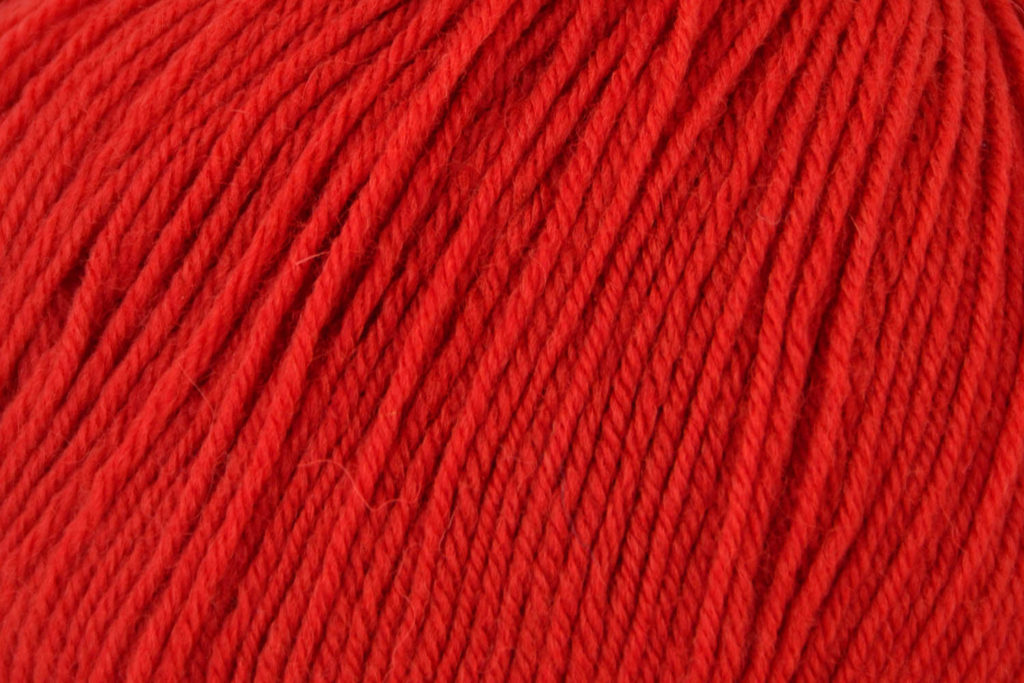
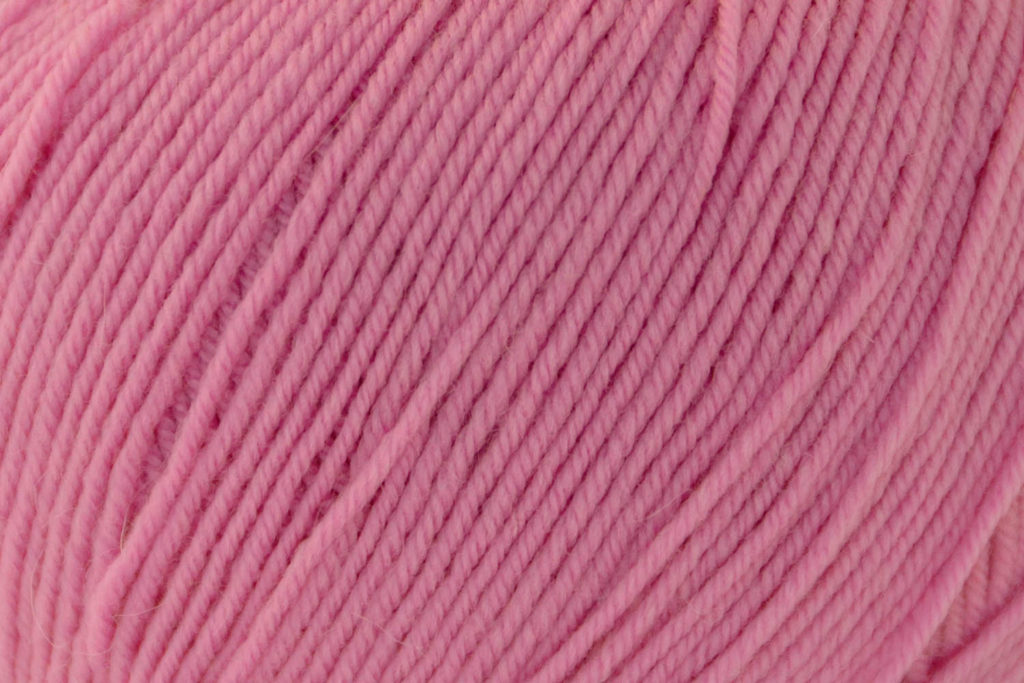
You could also choose to use analogous colors. Analogous colors are colors that are next to each other on the color wheel. One example of this would be the colors between red and purple. Purple, pink, and red are analogous colors, which are shown in Bella Cash colors below.
Left to Right: #103 Violet, #117 Tulip, #118 Orchid
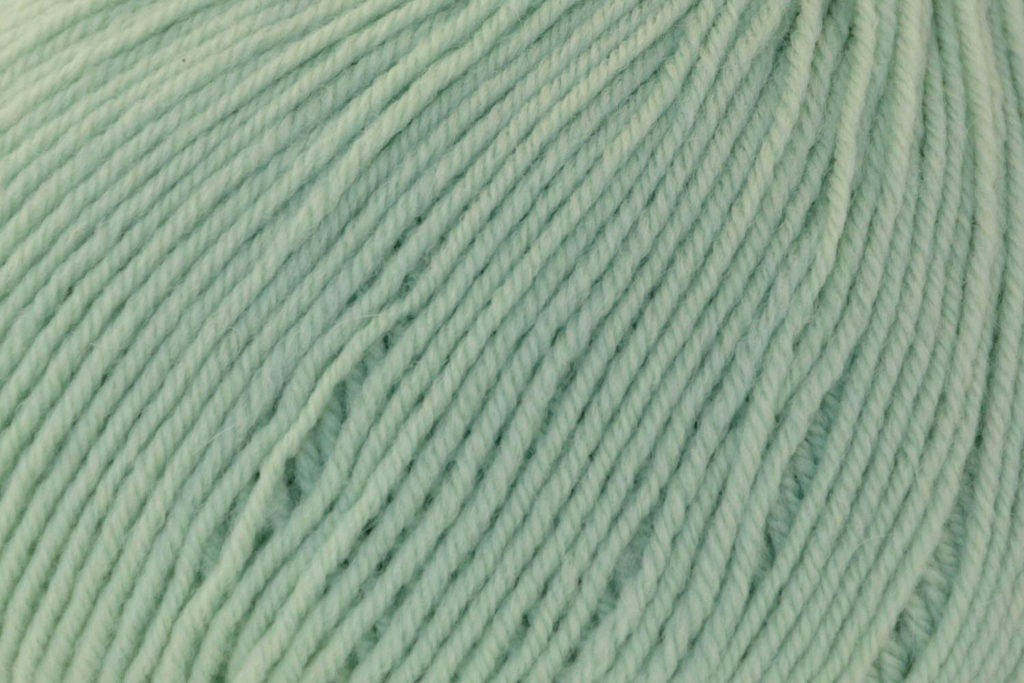
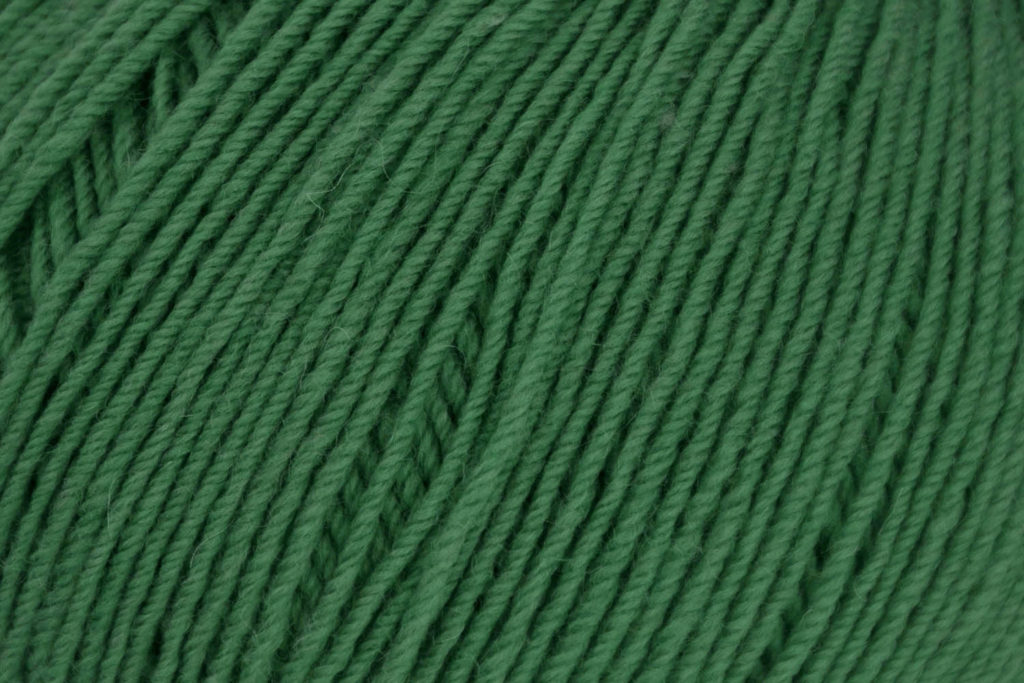
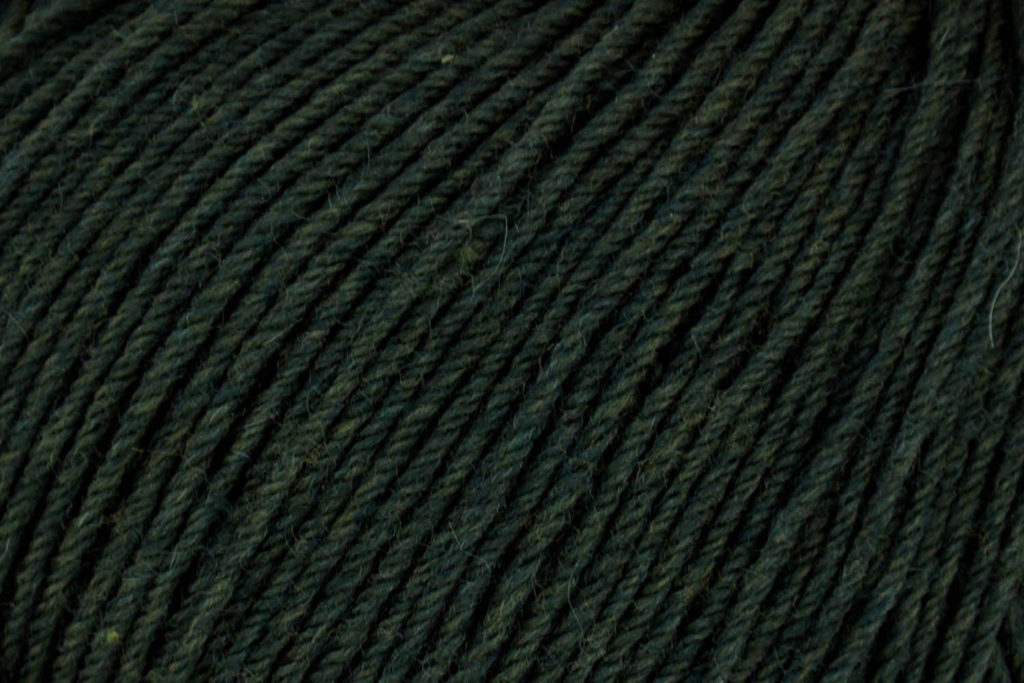
Monochromatic colors are all colors of the same hue. You might also refer to this as a gradient of colors – think of a greyscale, but all the same hue.
Left to Right: 120 Pistachio, 125 Emerald, & 126 Forest
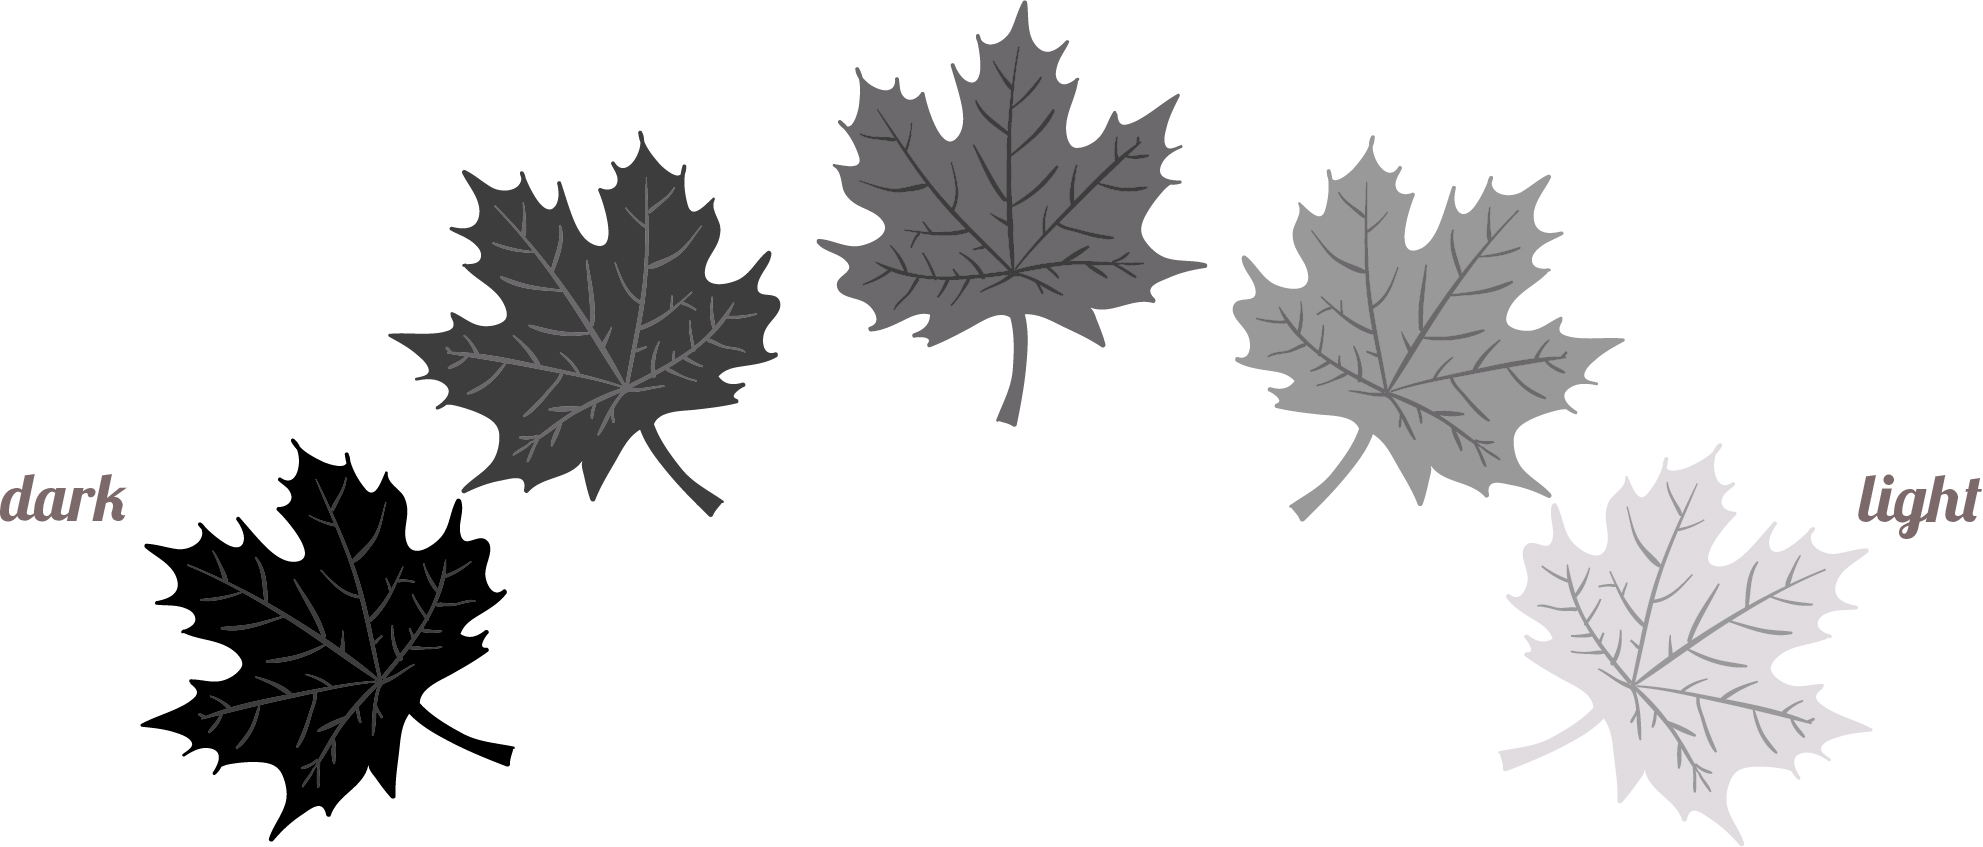
Speaking of a greyscale, another factor to consider when selecting your colors is their value. Value is the relative lightness or darkness of a color. A greyscale is a great way to think about value of a color.
Like I mentioned earlier, I chose two colors with subtle contrast and one very dark color to pop among them. You could also choose colors that have a dark, medium, and light value so that each color pops even more. Aubrey’s palette is a great example of dark-medium-light. Notice how there is a clear distinction in the darkness and lightness between each of her colors. If you aren’t sure how your colors will look together, you can take a quick snapshot with your phone using black and white mode.
Need more inspiration? Take a look at the first part of the pattern. I highlight more color combinations and chat a bit about the color wheel, much like I’ve done in this post. Whatever colors you choose, I’m sure you’re going to create a beautiful pair of socks! What colors do you have in mind? Let us know in the comments below!