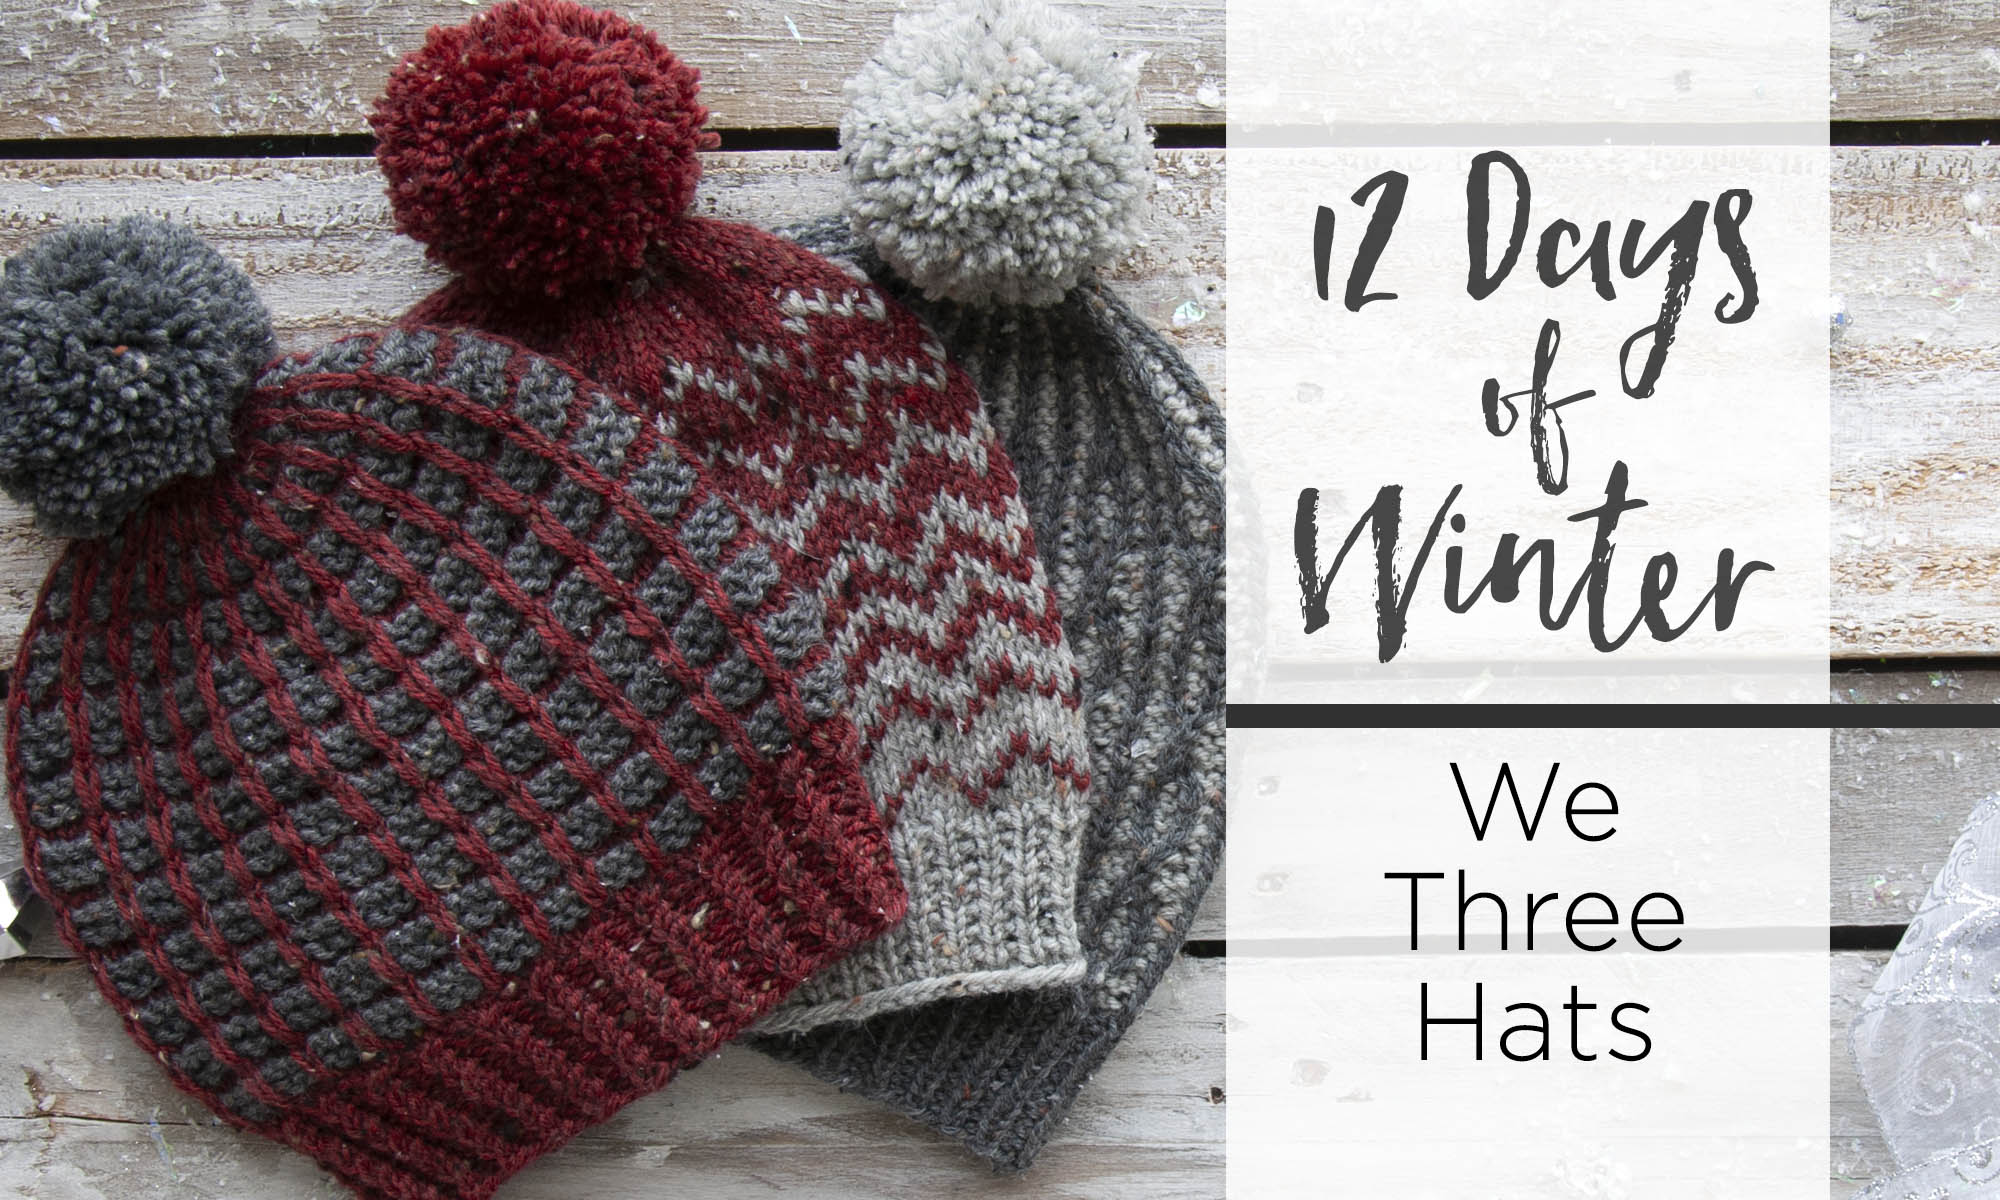
This is part 3 in a 12 part series highlighting designs from our 12 Days of Winter, Series 2 Edition.
Hats make such a satisfying knit. They’re small and portable, make great gifts, and they’re a fun medium to try out a new technique with.
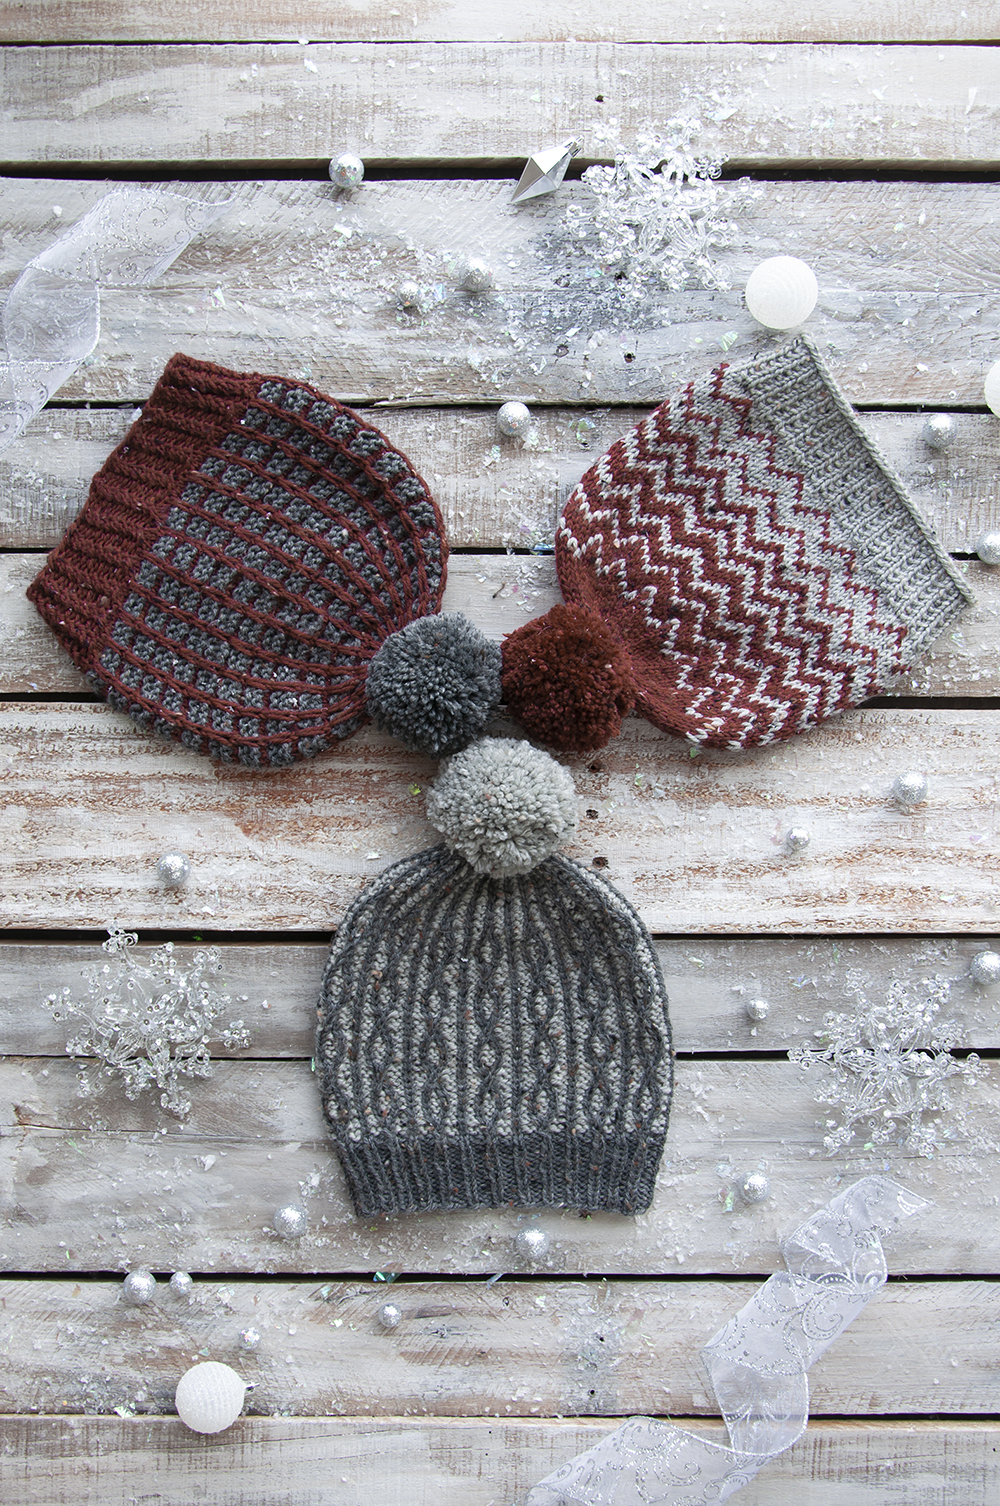
The We Three Hats pattern (pattern link) includes three different hat patterns that can be made out of three colors of Deluxe Worsted Tweed Superwash. All hats are knit from the brim up to the crown. Each hat is a bit different, but one thing they all have in common is a coordinating pom-pom.
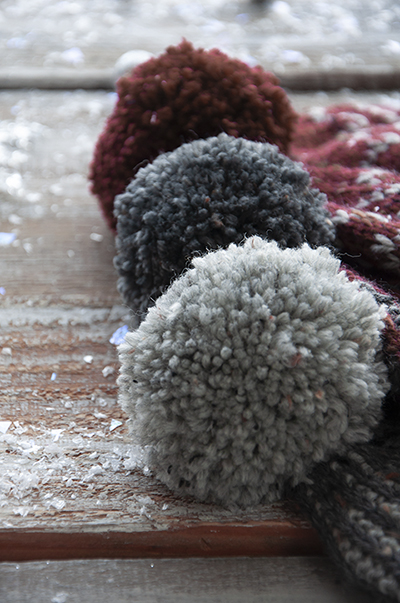
To pom-pom or not to pom-pom: that is the question.
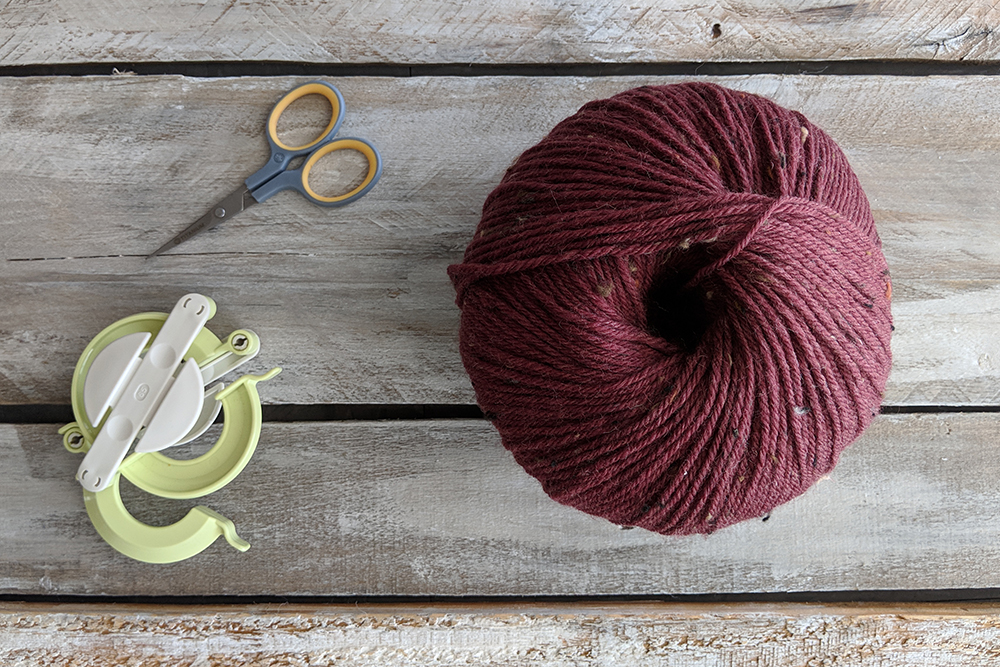
And for me, the answer to that question will inevitably be: heck yes! I love pom-poms, all sizes. I have made many pom-poms in my life using lots of different techniques. I’d like to share with you my favorite way to make a pom-pom, along with a few little tips.
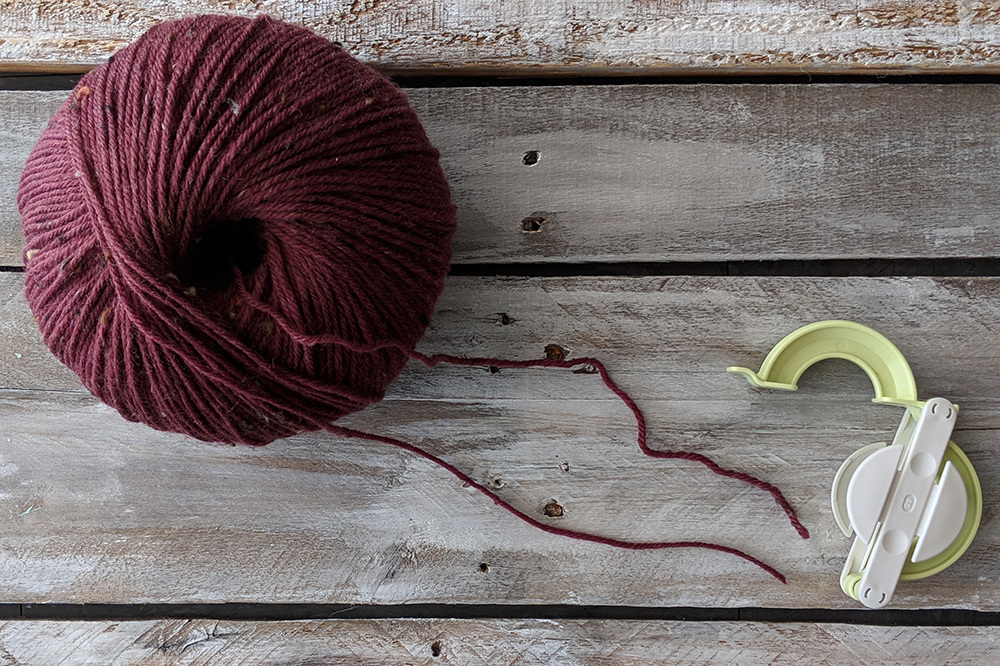
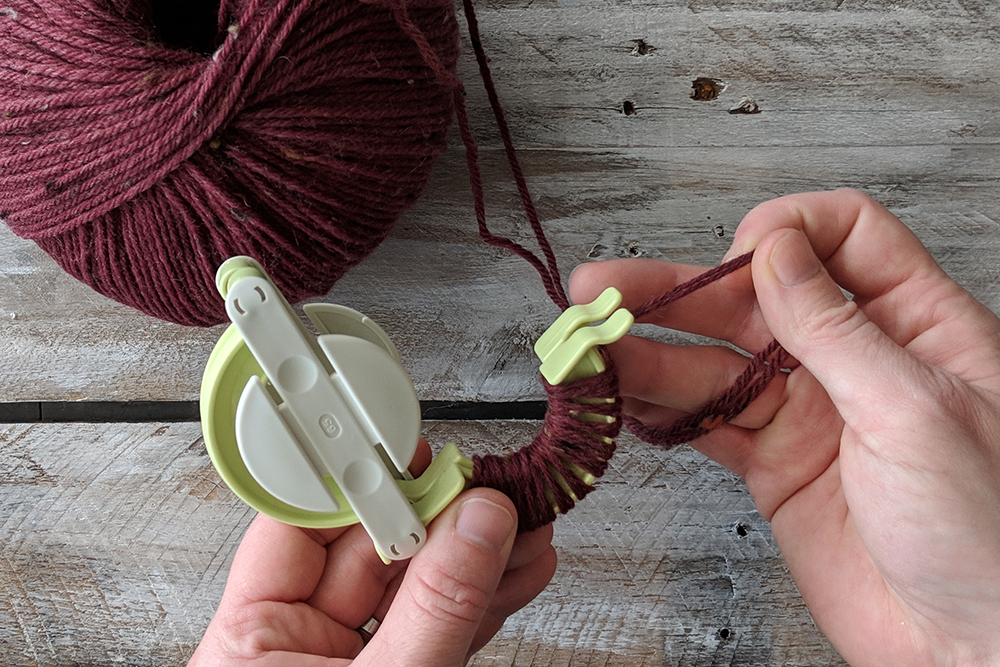
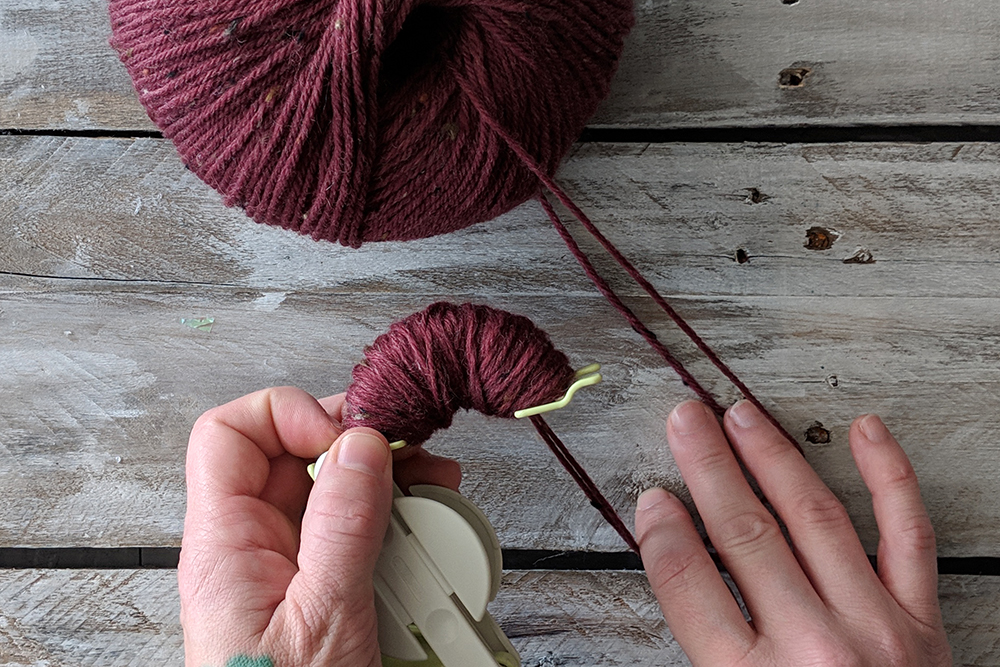
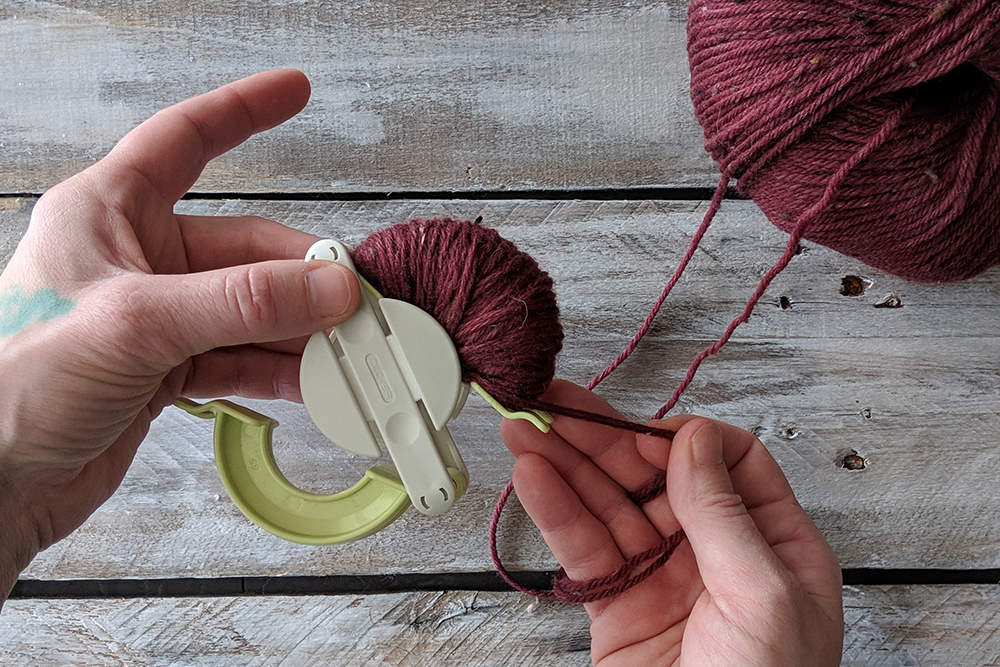
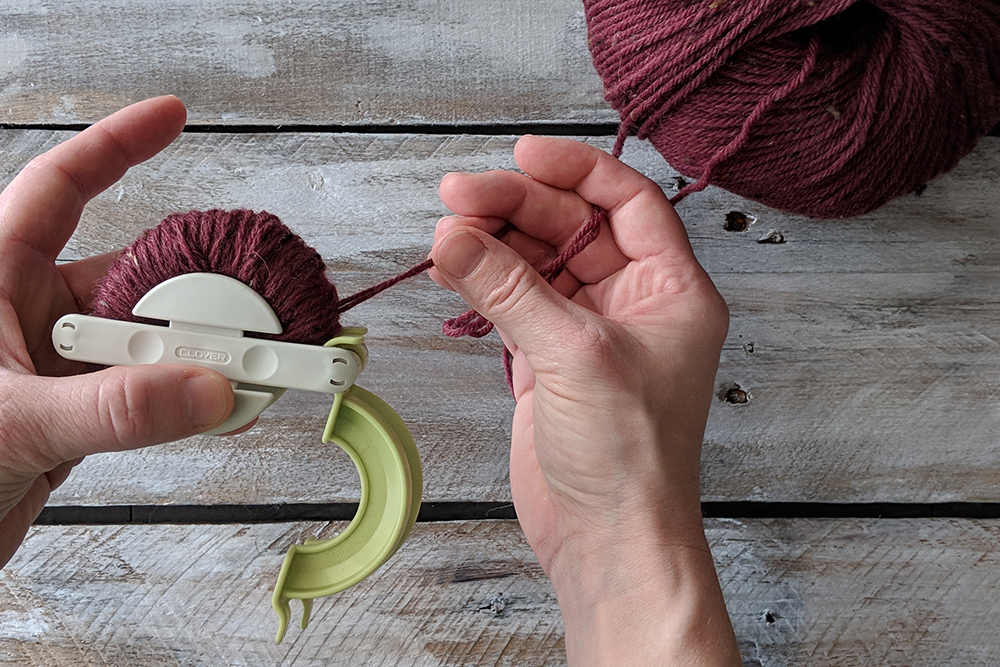
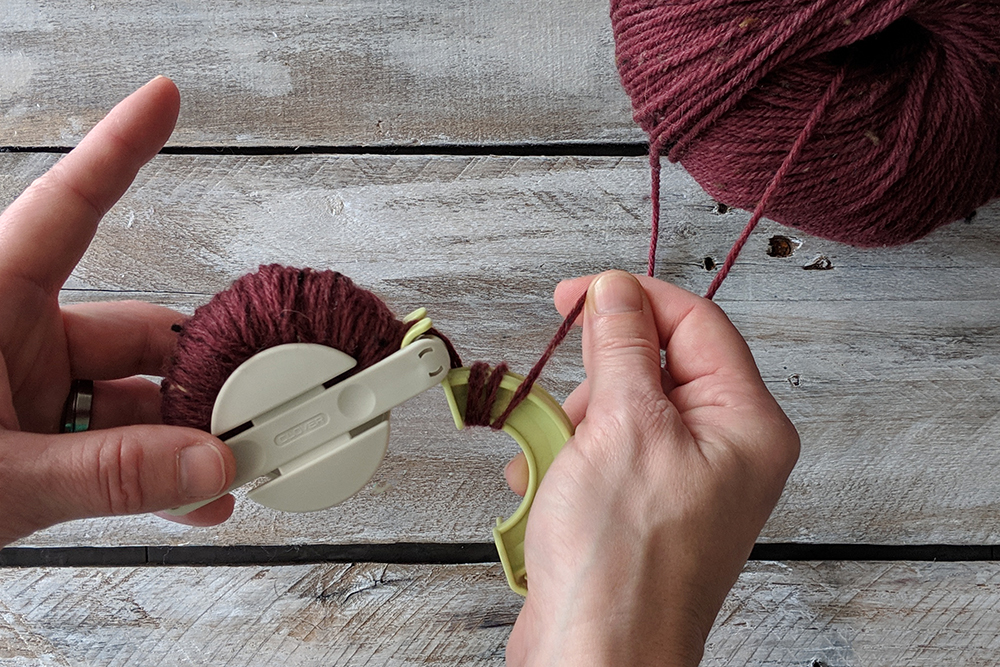
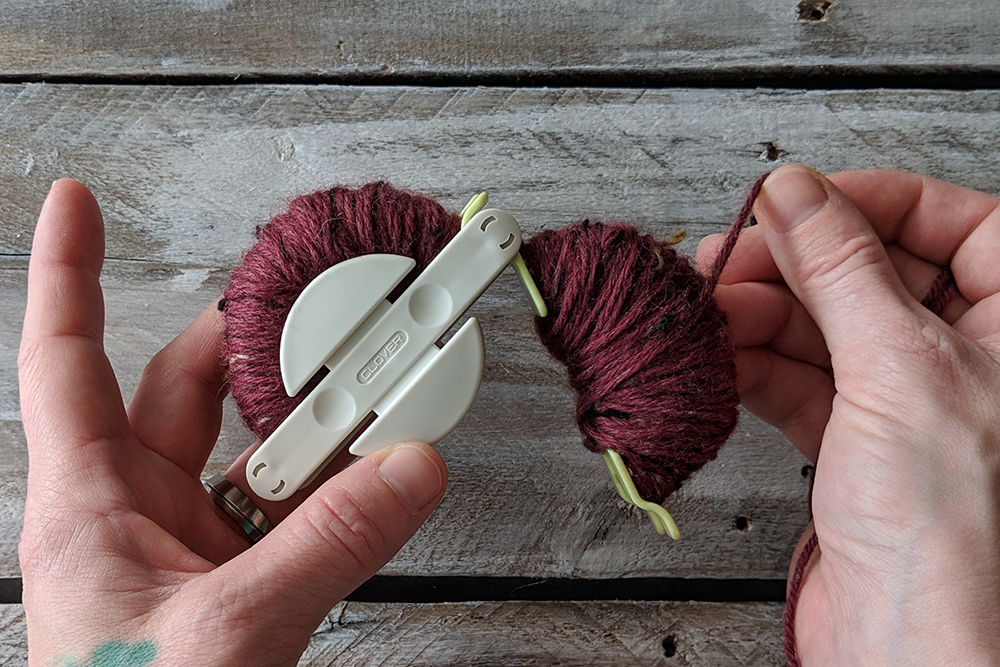
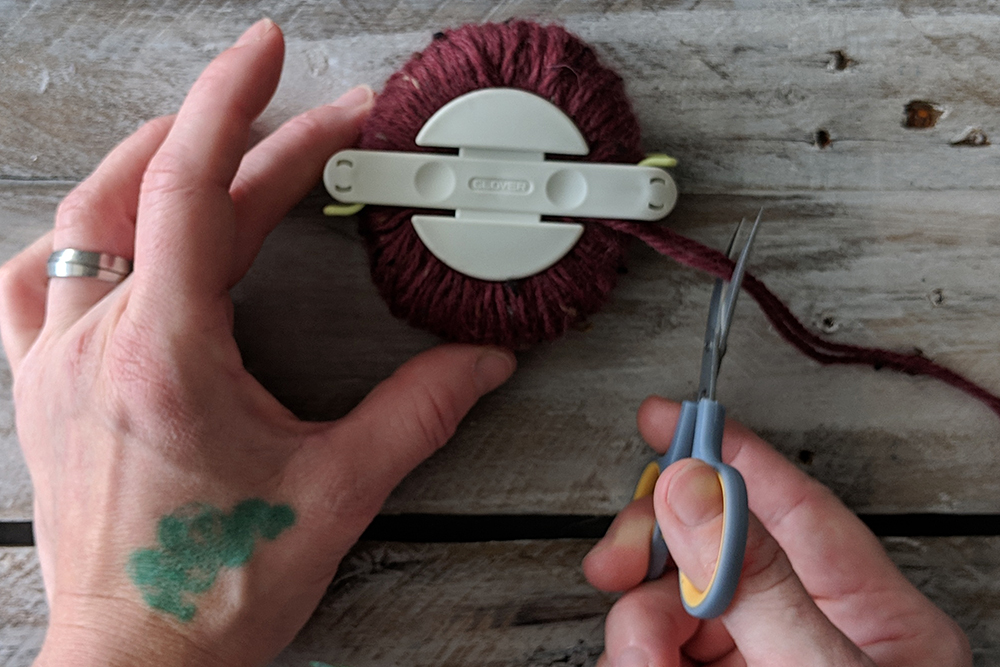
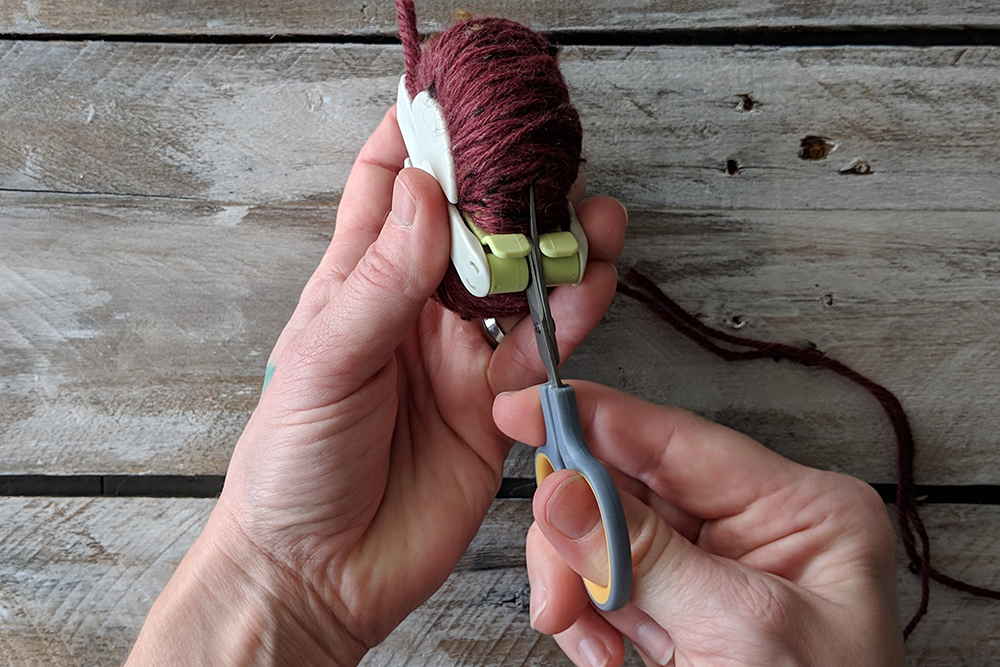
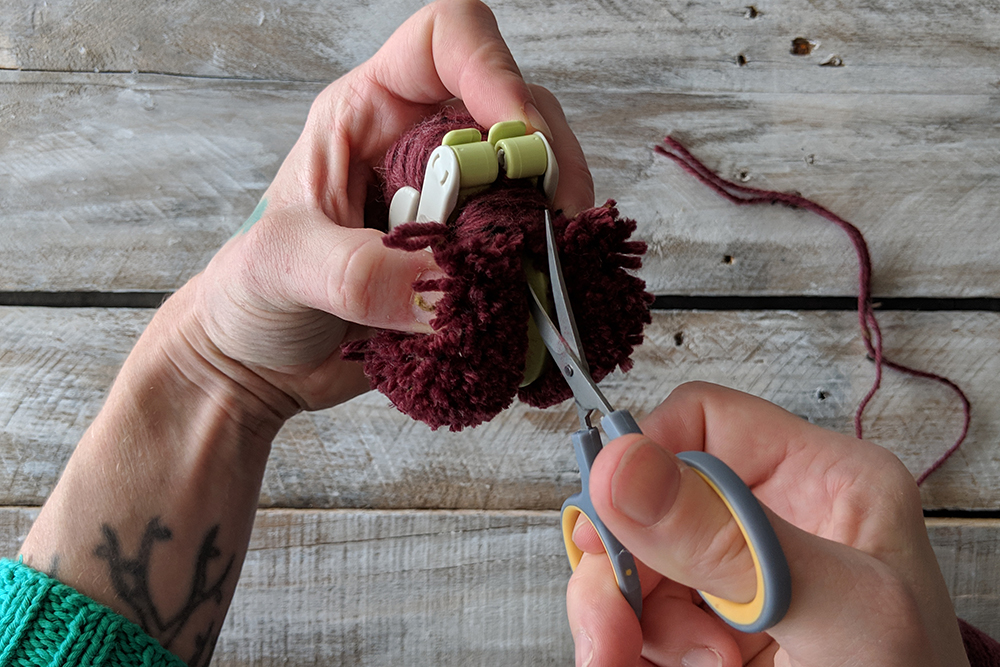
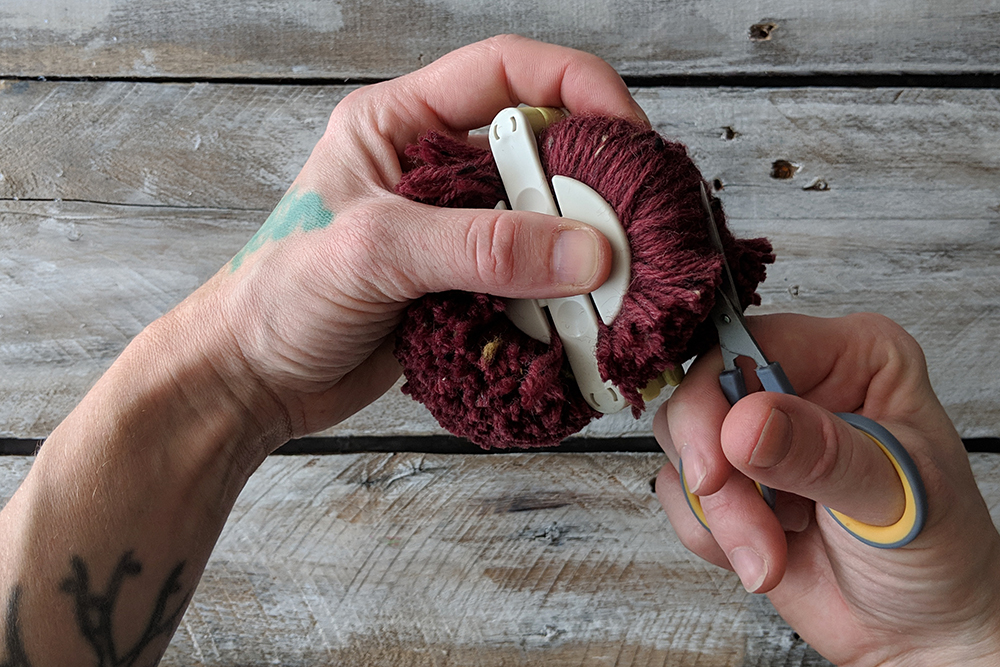
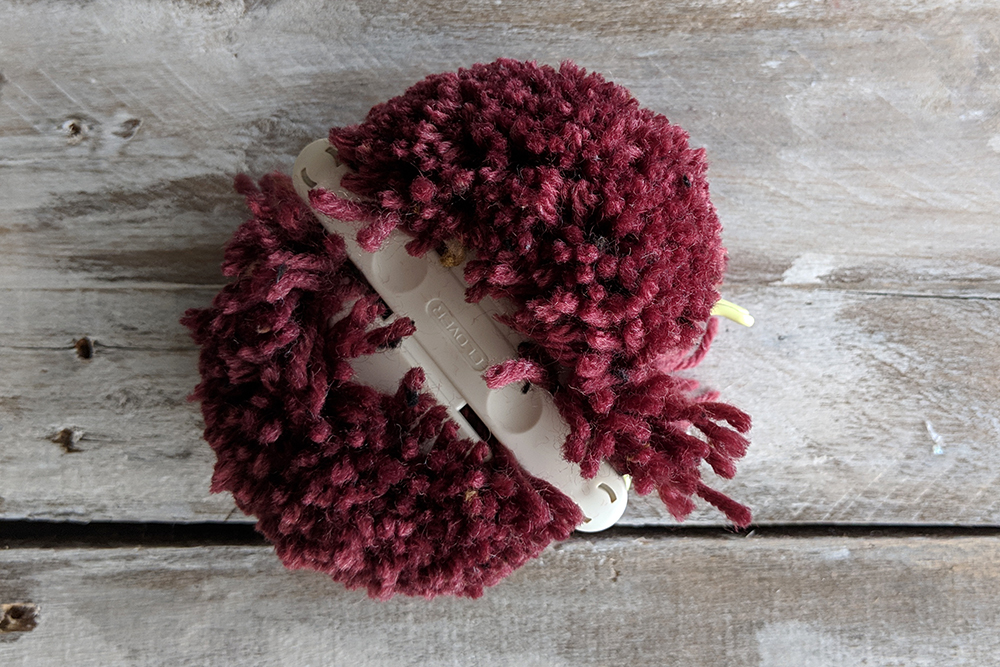
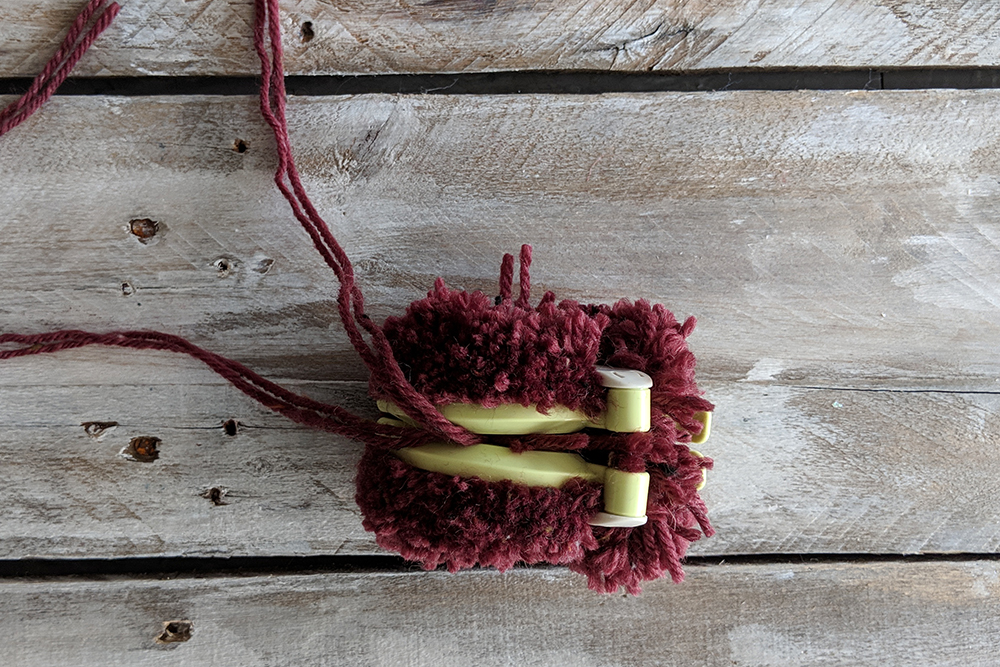
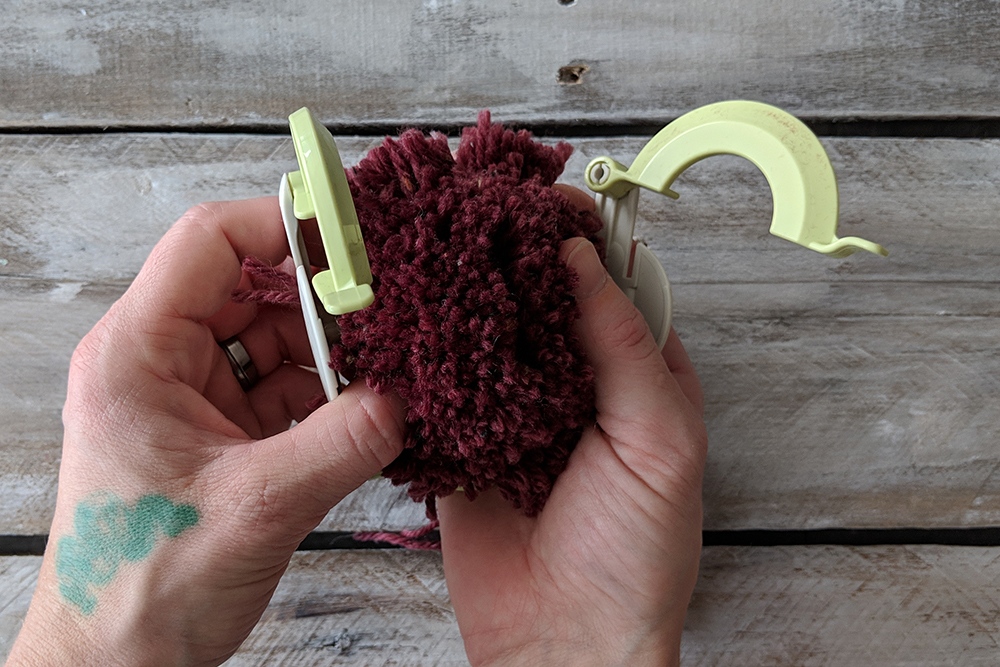
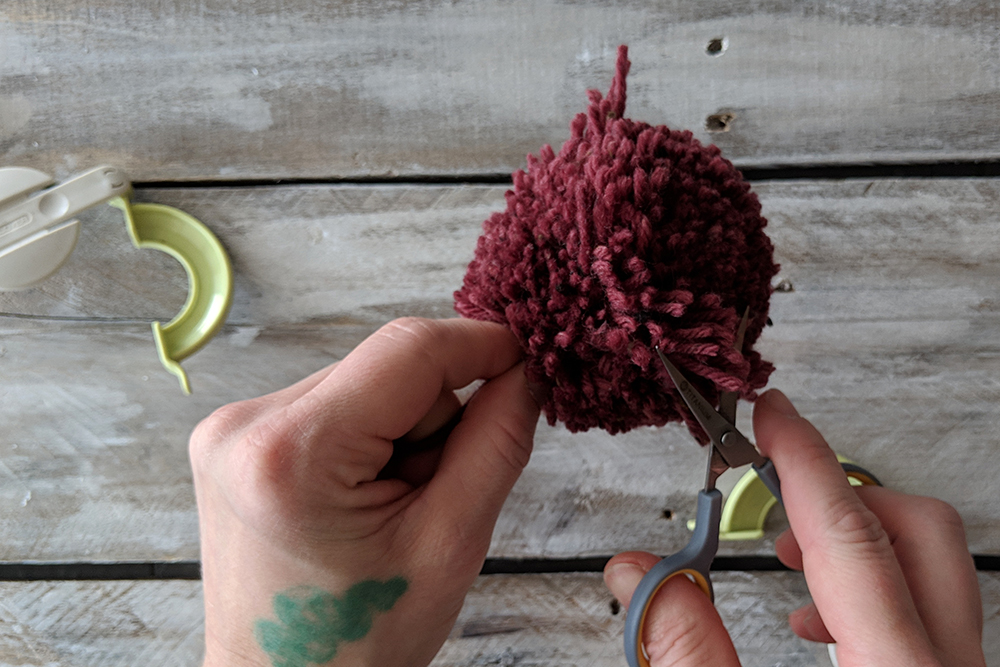
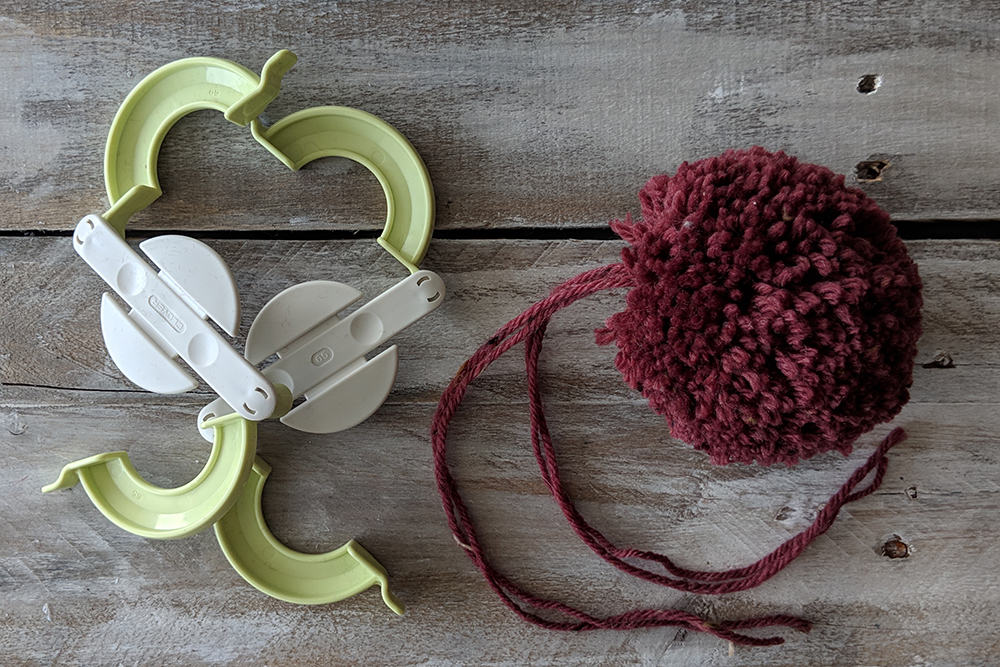
I’ve also used a homemade cardboard circle variation of this pom-pom maker shown in the photo. But I do love Clover’s manufactured sets. They come in lots of sizes and are pretty foolproof. Plus, they hold up a lot better than cardboard!I like to use two strands of yarn because it makes wrapping the pom-pom maker go twice as fast. I use yarn from the inside and outside of the ball.To begin, open up the hinges from both discs, along one side of the pom-pom maker. Begin wrapping yarn around both sides of the arced plastic pieces.Continue wrapping yarn around the maker with even tension.Think you’ve wrapped enough? Think again! Wrap yarn until it feels like the pom-pom maker is over-full. I usually try to count my wraps on one side so I can match the number on the following side.This thing is wrapped as much as possible. Time to wrap the other side. Be sure to finish on the end as shown, so you carry the yarn to the other half of the maker to continue wrapping.Close the side of the maker that is now wrapped in yarn and open up the other hinged side.Start wrapping this second side as much as you did the first side.This is going to be a beautiful and full pom-pom. I can tell already!Cut the yarn. There is no need to leave a tail. But also cut two 12″ strands of yarn to set aside for later to secure the pom-pom.Start cutting the pom-pom. The Clover pom-pom makers are very easy because you just cut in the groove between the two discs. Sharp scissors are a must for this step.Cut all the way around the first half of the maker freeing these strands.Then cut around the second half. Take care that the two halves of the pom-pom maker do not come apart yet. The strands are not yet secure.Our pom-pom, unsecured, but cut. Not too pretty yet, but we’re getting there!Take those 12″ strands that you set aside from earlier and tie them around the pom-pom, along the same groove where you cut apart the strands. I like to use two strands for this step because I like a full pom-pom, and there will be a lot of stress put on this tie yarn. If the yarn you’re using to make your pom-pom breaks easily, use a different yarn for the tie like linen, cotton, or acrylic. Two strands of my working yarn (Deluxe Worsted Tweed Superwash) were plenty strong enough in this case.It is now safe to remove the pom-pom maker from the pom-pom.It’s looking pretty good, but needs a little haircut to even out the edges.Voila. Pom-pom!
Remember, you can find Series 2 of the 12 Days of Winter Kit patterns on Ravelry.
Please follow and like us:
6 Replies to “Day 3 of Winter – Series 2 Edition”
Just started the Climbing Cables hat. In the Materials it says you need size 7 and 5 needles. I think the rib is done in size 5 and the hat in 7, but no where in the pattern does it state that. I am concerned that a new knitter would be confused or perhaps I’m missing something.. Additionally, the two colors for this hat are B and C. In the Shape Crown portion, Round 5 uses color A. color A does not appear anywhere in the chart for this hat and I can’t see it in the phot. Again, I don’t think this is right. Can you confirm?
Hi Joyce,
Yes – you’re absolutely right on both points. All three hats will begin with the smaller needle and then switch to the larger needle during crown shaping. And regarding the text for the Shape Crown portion – the chart is correct, but you’re right – there were a few typos with “A” instead of the correct color. Here’s how that section should read:
Rnd 1: * With C k1, with B p2, with C k2tog, with B p2; rep from * to end – 14 (15, 16) sts dec’d, 84 (90, 96) sts rem.
Rnds 2-4: * With C k1, with B p2; rep from * to end.
Rnd 5: * With C k1, with B p2tog; rep from * to end – 28 (30, 32) sts dec’d, 56 (60, 64) sts rem.
Rnds 6-8: With C k1, with B p1; rep from * to end.
Break B, cont with C only.
The pattern has now been updated and errata listed on the pattern page on Ravelry. Thanks so much for reaching out!
I have another question. On the chart, on row 1 you start with 7 stitches per repeat (112 stitches on large size all together). On row 2 the chart still indicates 7 stitches per repeat, but because of the knit 2 together from the first row, you have only 6 stitches (96 in total). I assume it is necessary to m1 after the first 2 purl stitches in order to have 7 stitches for the repeat again. Am I missing something?
Hi Joyce,
Are you referring to the crown shaping on the Climbing Cables hat? After Row 1 of the crown shaping, you have decreased one stitch per repeat, so no – you will not want to work any increases. The chart indicates only 6 stitches on Rows 2-4 of crown shaping.
If you’re talking about the main Climbing Cables chart (used for the body of the hat), there are no decreases on Row 1 of this pattern. There is a RT (right twist) which is a 1×1 cable cross, but not a decrease.
I am doing Checkered plaid hat. Medium is 78 stitches. 78 is not devisable by 4. So I am going to make one twice. Pattern is confusing. Doesn’t tell you anywhere to use smaller needles for ribbing.
Hi Teri,
Yep, after working the brim, you will work an increase round. After that increase round, you have 104 stitches which is divisible by 4.
And you’re absolutely right about the needle issue. This was omitted from the first printing of the pattern but has now been updated. For every hat, cast on and work the brim with the smaller needle, and then switch to the larger needle for the hat body.
Is there something else that’s confusing about the pattern? I’d be happy to talk you through any of it! Please feel free to email me directly: AGunderson@universalyarn.com


Just started the Climbing Cables hat. In the Materials it says you need size 7 and 5 needles. I think the rib is done in size 5 and the hat in 7, but no where in the pattern does it state that. I am concerned that a new knitter would be confused or perhaps I’m missing something.. Additionally, the two colors for this hat are B and C. In the Shape Crown portion, Round 5 uses color A. color A does not appear anywhere in the chart for this hat and I can’t see it in the phot. Again, I don’t think this is right. Can you confirm?
Hi Joyce,
Yes – you’re absolutely right on both points. All three hats will begin with the smaller needle and then switch to the larger needle during crown shaping. And regarding the text for the Shape Crown portion – the chart is correct, but you’re right – there were a few typos with “A” instead of the correct color. Here’s how that section should read:
Rnd 1: * With C k1, with B p2, with C k2tog, with B p2; rep from * to end – 14 (15, 16) sts dec’d, 84 (90, 96) sts rem.
Rnds 2-4: * With C k1, with B p2; rep from * to end.
Rnd 5: * With C k1, with B p2tog; rep from * to end – 28 (30, 32) sts dec’d, 56 (60, 64) sts rem.
Rnds 6-8: With C k1, with B p1; rep from * to end.
Break B, cont with C only.
The pattern has now been updated and errata listed on the pattern page on Ravelry. Thanks so much for reaching out!
I have another question. On the chart, on row 1 you start with 7 stitches per repeat (112 stitches on large size all together). On row 2 the chart still indicates 7 stitches per repeat, but because of the knit 2 together from the first row, you have only 6 stitches (96 in total). I assume it is necessary to m1 after the first 2 purl stitches in order to have 7 stitches for the repeat again. Am I missing something?
Hi Joyce,
Are you referring to the crown shaping on the Climbing Cables hat? After Row 1 of the crown shaping, you have decreased one stitch per repeat, so no – you will not want to work any increases. The chart indicates only 6 stitches on Rows 2-4 of crown shaping.
If you’re talking about the main Climbing Cables chart (used for the body of the hat), there are no decreases on Row 1 of this pattern. There is a RT (right twist) which is a 1×1 cable cross, but not a decrease.
Please feel free to email me directly at AGunderson@universalyarn.com if you need any further clarification!
I am doing Checkered plaid hat. Medium is 78 stitches. 78 is not devisable by 4. So I am going to make one twice. Pattern is confusing. Doesn’t tell you anywhere to use smaller needles for ribbing.
Hi Teri,
Yep, after working the brim, you will work an increase round. After that increase round, you have 104 stitches which is divisible by 4.
And you’re absolutely right about the needle issue. This was omitted from the first printing of the pattern but has now been updated. For every hat, cast on and work the brim with the smaller needle, and then switch to the larger needle for the hat body.
Is there something else that’s confusing about the pattern? I’d be happy to talk you through any of it! Please feel free to email me directly: AGunderson@universalyarn.com