
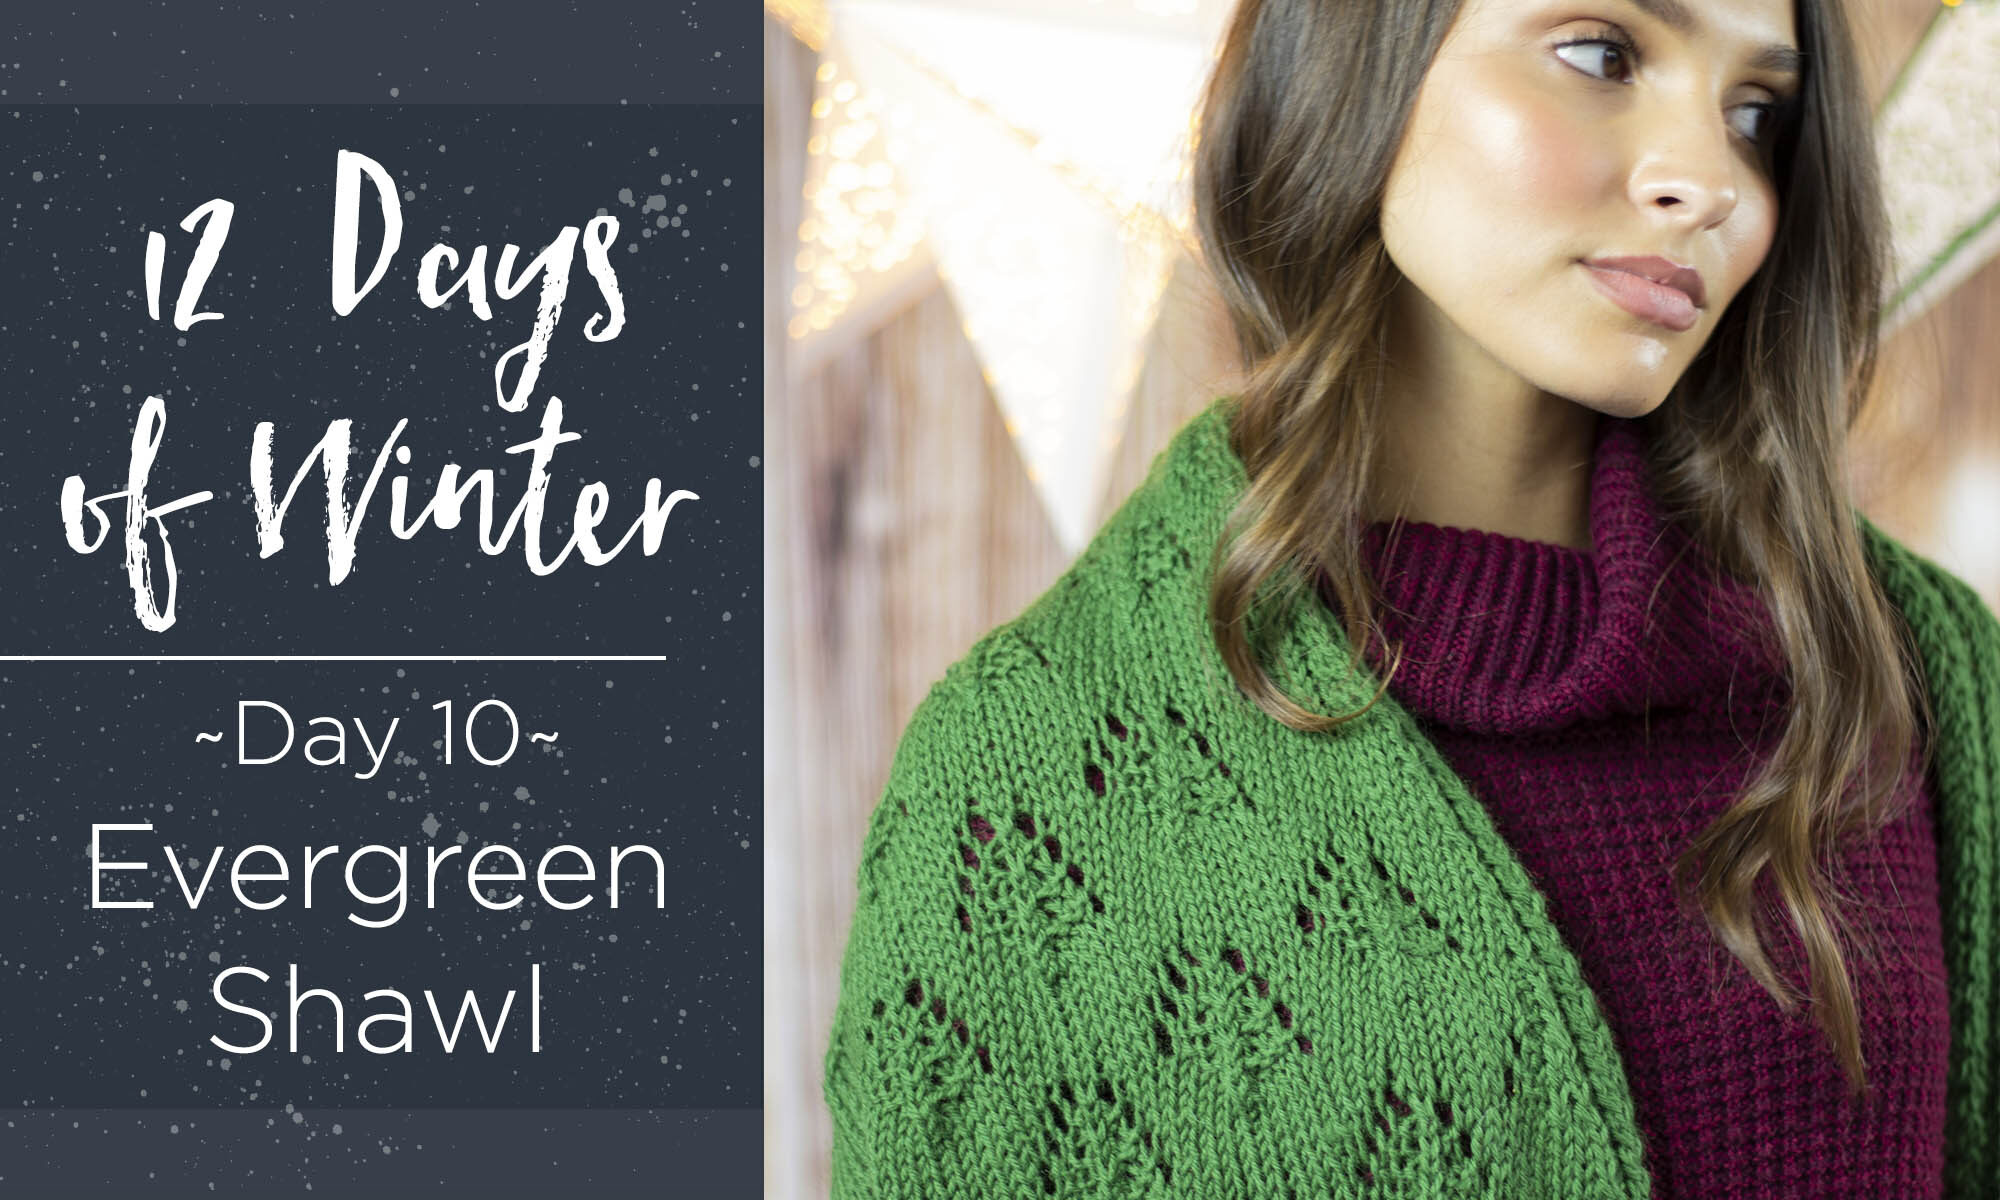
This is part 10 in a 12 part series highlighting designs from our 12 Days of Winter, series 5 Edition.
Are you new to lace knitting, or are you already a fan? Either way, you’re in for a treat today as we take a closer look at the oversized, extra cozy Evergreen Shawl!
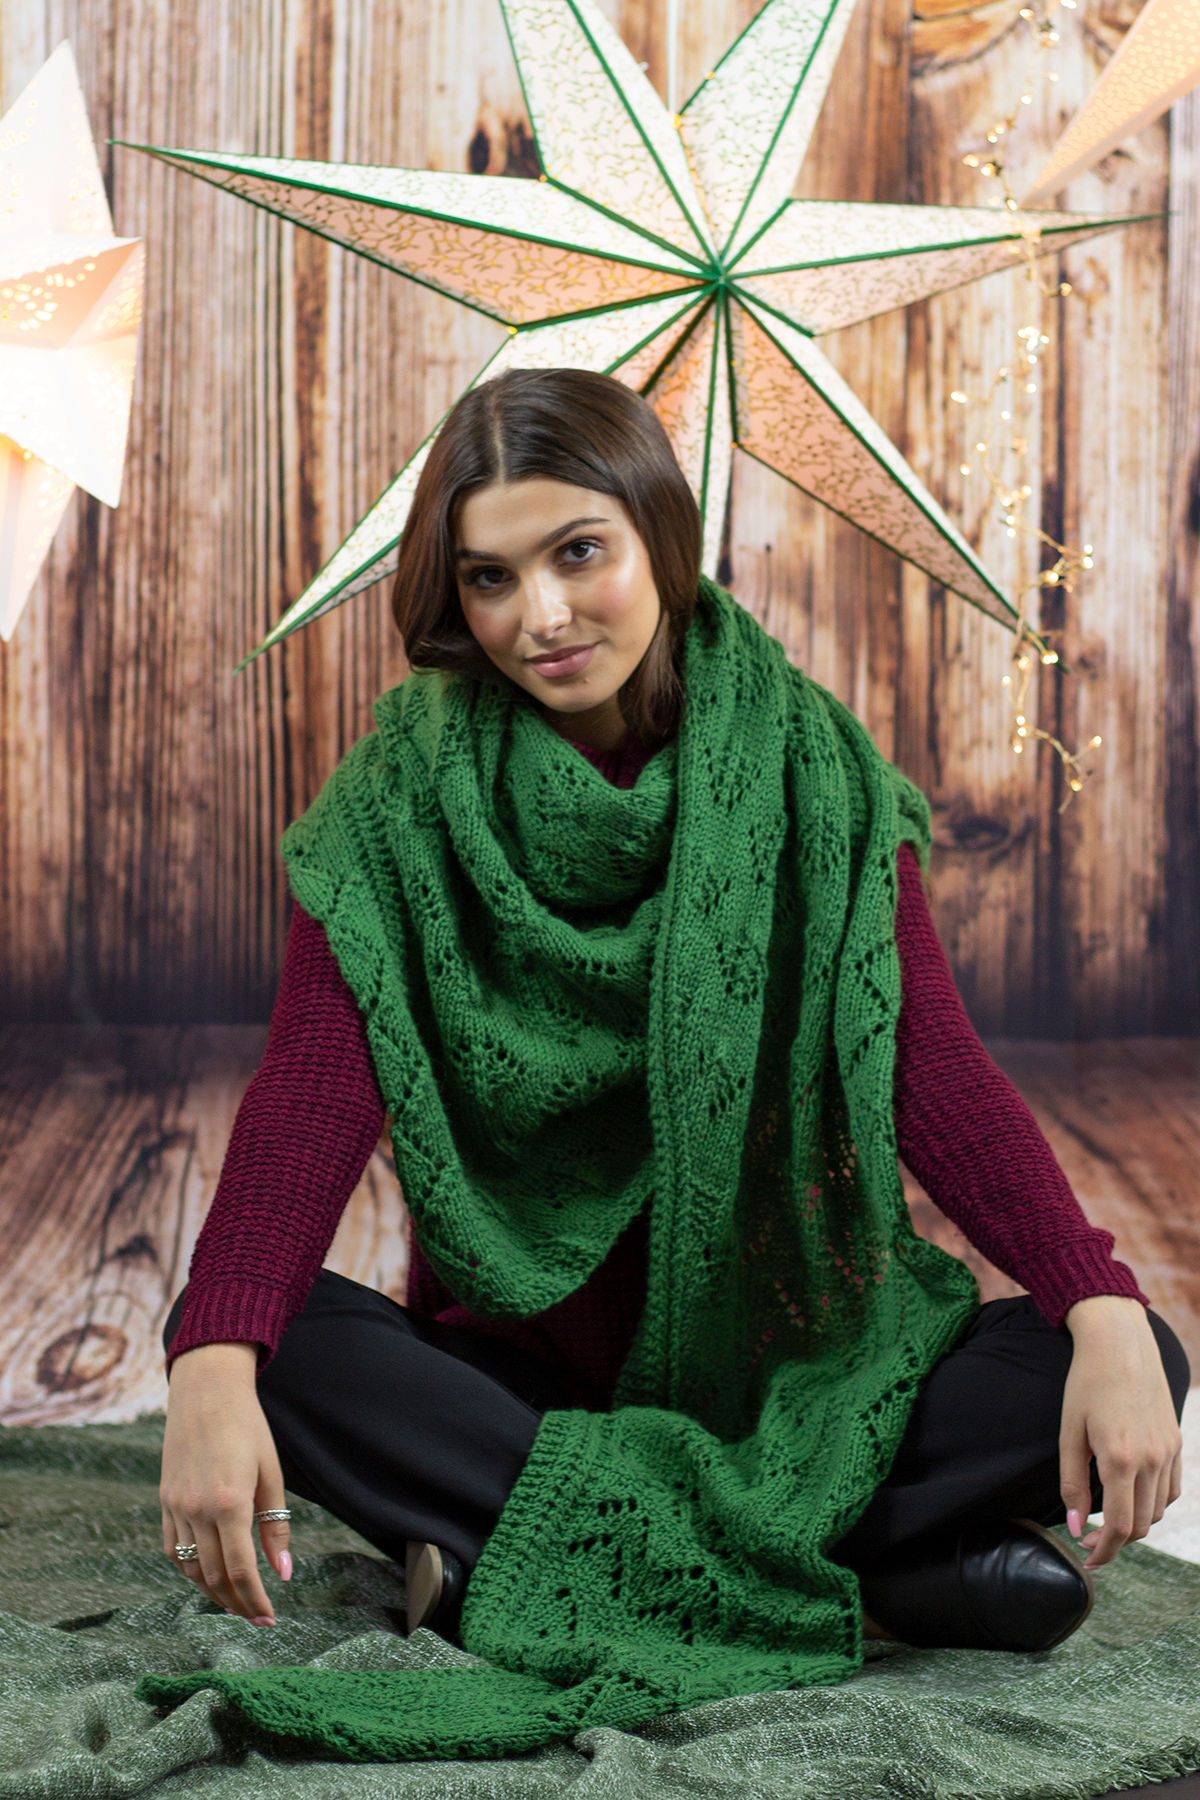
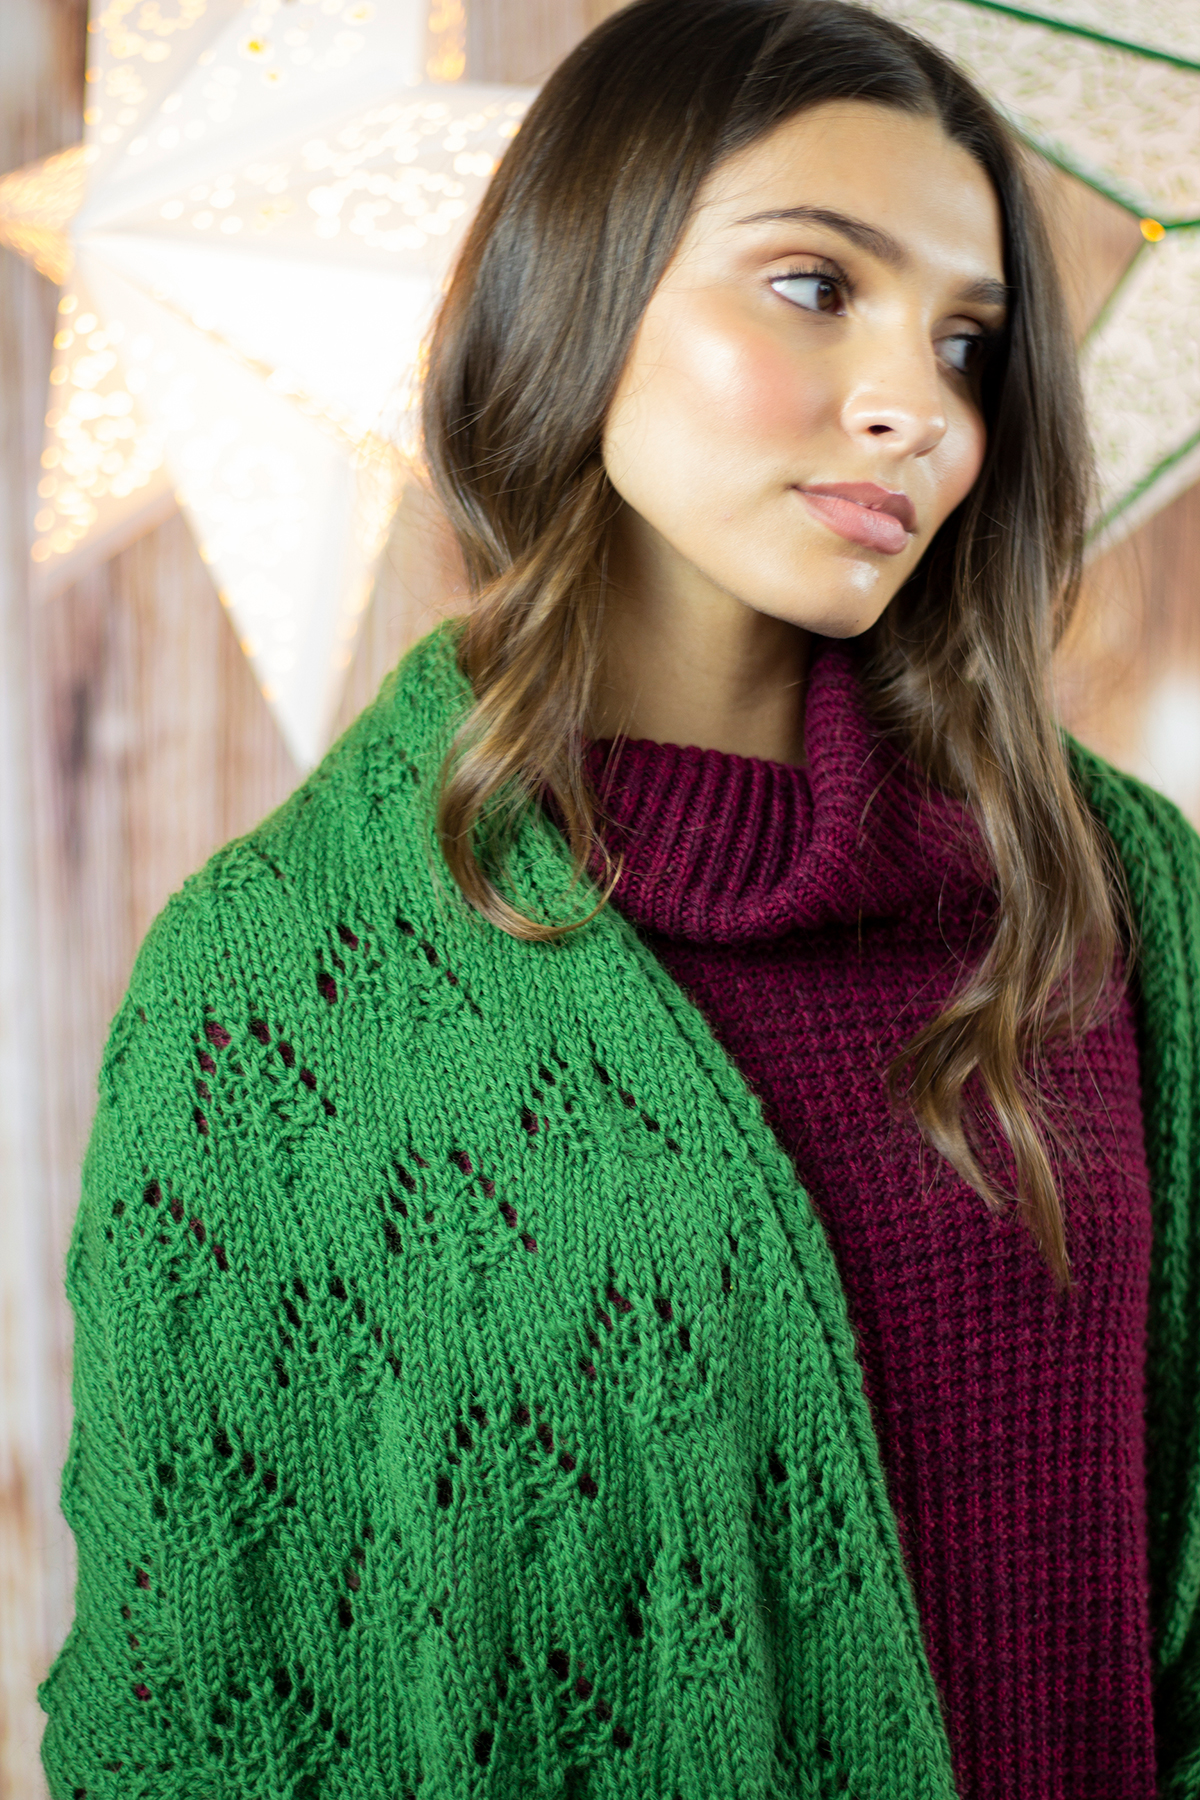
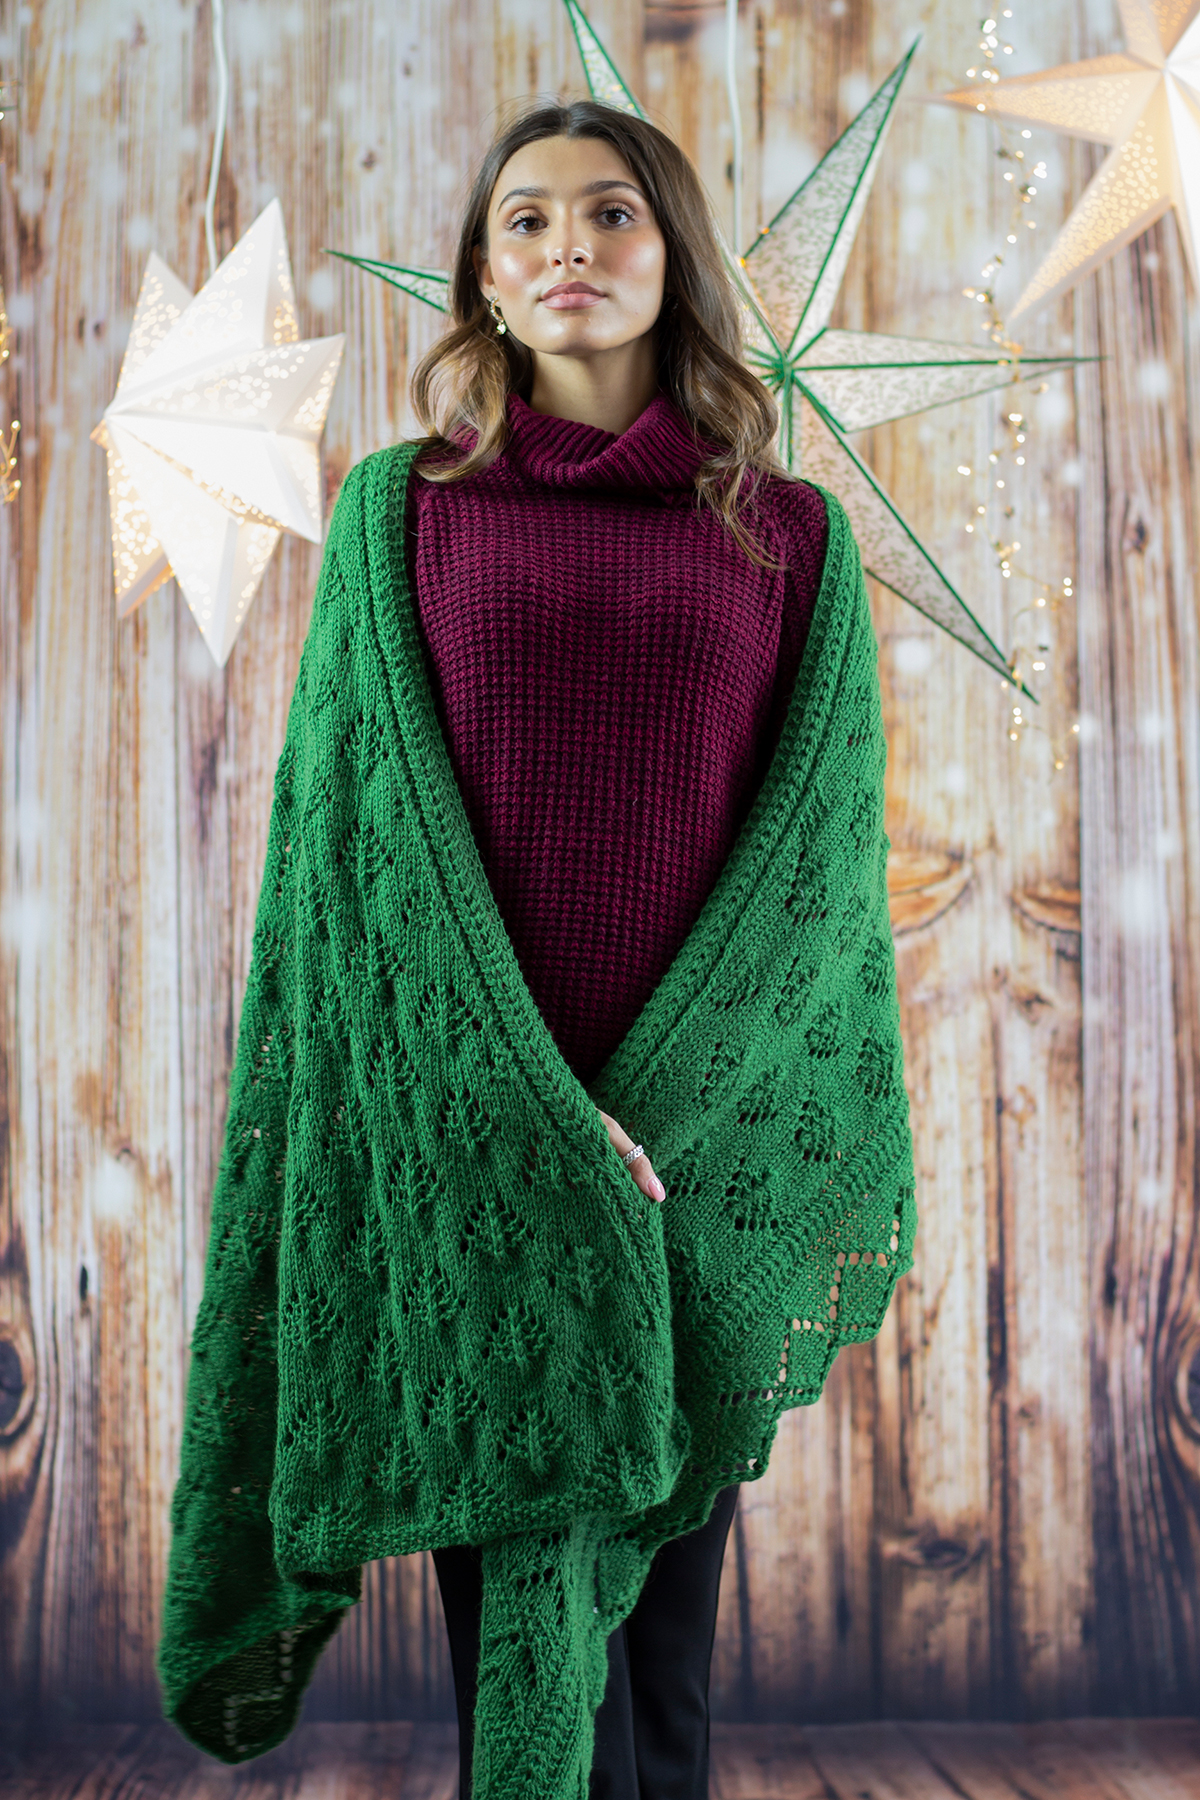
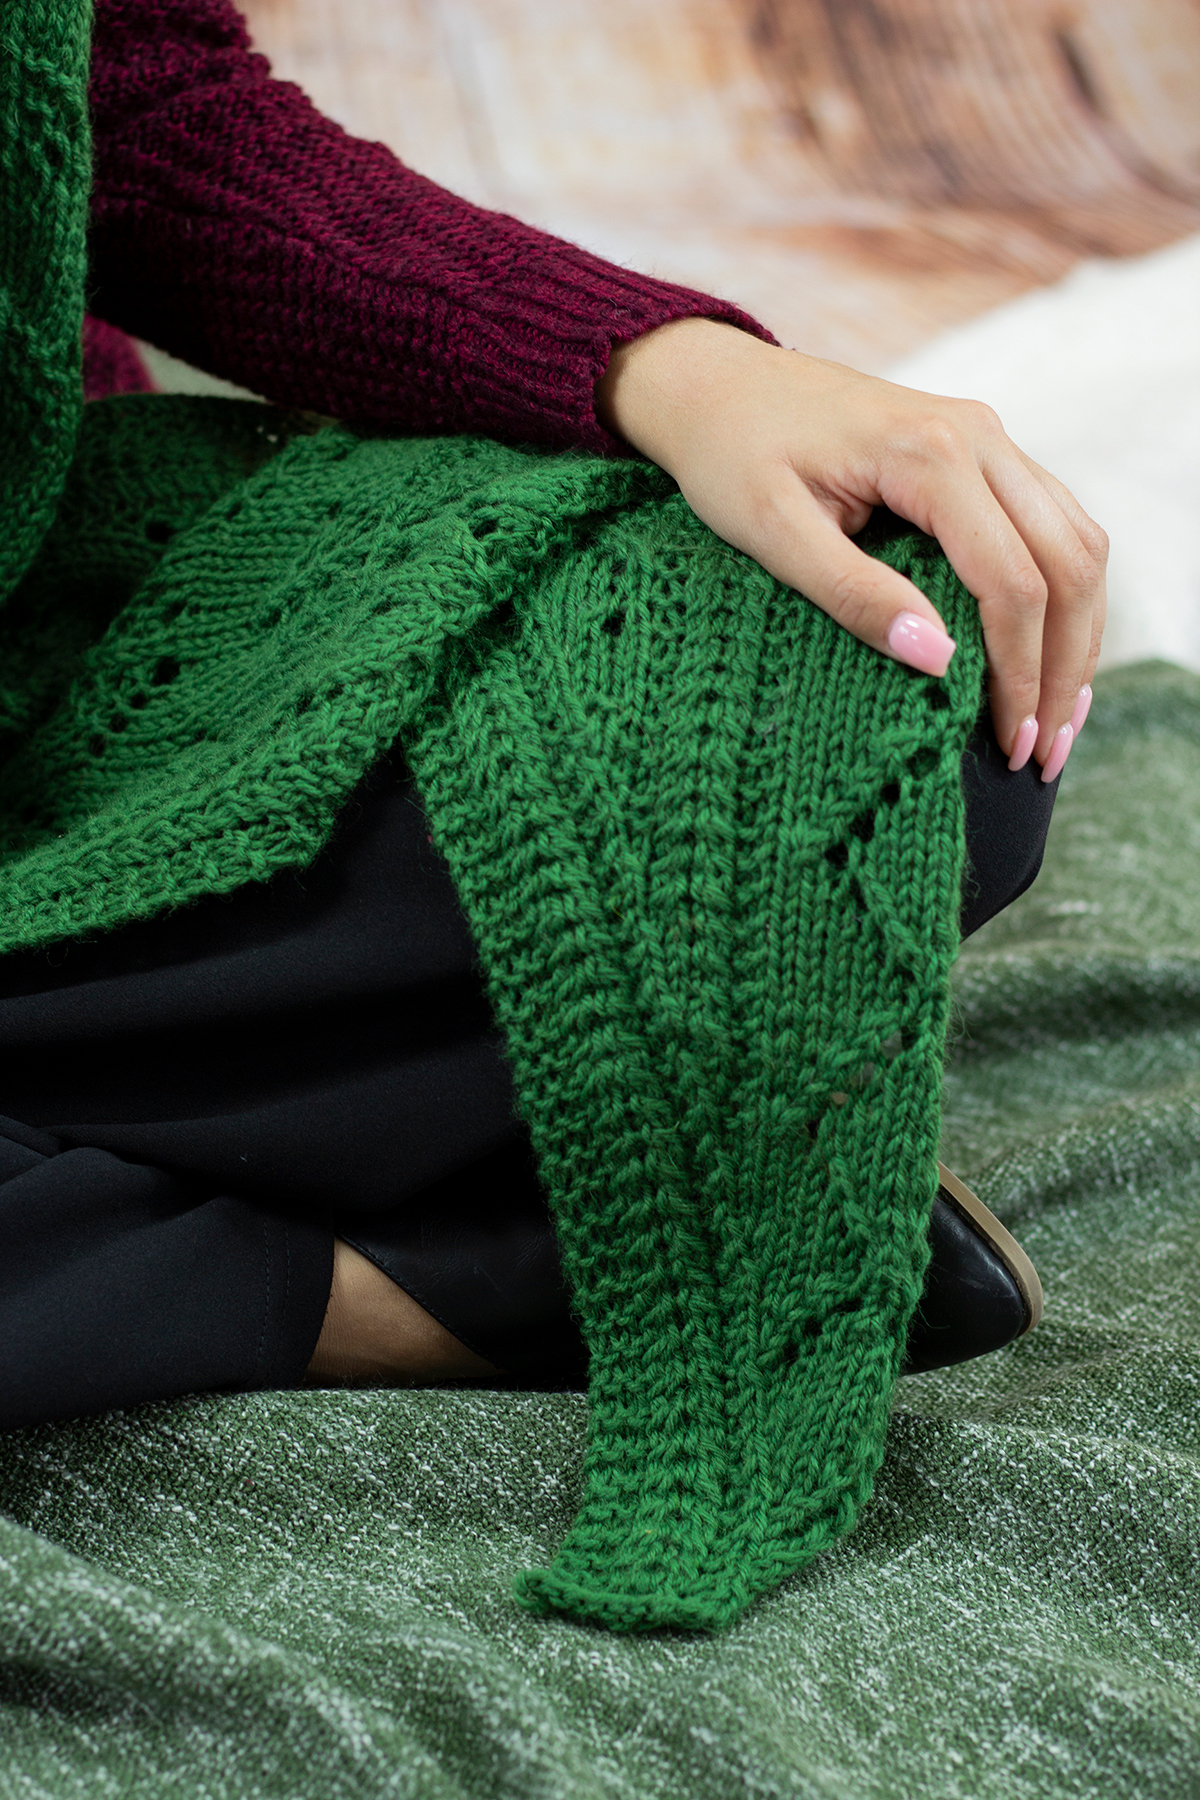
First, though, let’s chat about this lovely design and all the special details. When I wear shawls, I love an oversized one, especially in the winter. You can wrap them around your neck and shoulders a couple of times – and you can’t have too many layers, wouldn’t you agree? 😉 I chose Deluxe Worsted, our classic, 100% non-superwash wool yarn, in the color 12296 Green Leaf for this piece. Since the shawl is covered in lacy fir trees, the color seemed like the perfect fit.

In this pattern, you’ll get to indulge in the following techniques:
- yarnovers
- basic increases and decreases
- right and left twists
- knitting flat
This shawl does indeed have perhaps the simplest of shapes: a right triangle with decreases along one edge. The straight edge of the shawl has a gorgeous lace diamond motif, which although beautiful, does cause stitch counts to fluctuate throughout the pattern. So, as you’re decreasing along one edge to shape the shawl, you’ll also need to ensure that you maintain the stitch patterns as established. It’s a nice balance of rhythm and engagement, perfect for someone who wants to stay focused through a knitting pattern.
Although I’d consider this pattern Intermediate level, don’t fret if you’re a beginner who’s craving a challenge. I’m the very last person to discourage someone from trying something new. So, if you have little or no lace experience, or even if you have a bunch, I have a few handy tips for knitting lace that will get you started on the right foot.
My first tip is to sharpen your chart reading skills. This pattern includes helpful charts and written instructions, but I find that charts are a great way to visualize exactly what you’re doing. Back in our first series of the 12 Days of Winter Kit collection, before we even knew it would be a tradition, I shared some tips for reading charts. You can find that blog post at this link.
My next tip is to use sharp needles. I have so many favorite needles that it’s hard to choose a brand. I’m a bit of a needle nerd and I love everything from Addi Lace Tips to any of the ChiaoGoo lines and have had great experiences with Hiya Hiya Sharps. But in truth, your favorite needle brand probably has an option for sharp tips and that’s what you really want. Why? Simply because it makes working those decreases much easier! In this pattern, usually, you’ll only work two stitches together; however, some lace patterns have you work more than that – three, even four together (as in the Dusk Poncho). And if you must do a purl decrease through the back loop, you’ll thank yourself for the investment, trust me!
My final tip for lace knitting is a lifeline – because it’s a lifesaver! I feel like a pro whenever it comes to correcting mistakes in cable knitting or most textured stitches, however, I always find correcting mistakes in lace to be a bit more tricky. As a result, I often tink back (knit backward – get it?) my work or simply rip back until I get to the row where I made the mistake. When you have lots of decreases and yarnover increases, it’s really easy to lose your place. My suggestion is to insert a lifeline. What’s a lifeline? It’s simply a strand of yarn to place through your stitches as a safe spot to unravel your work if needed because all of those stitches will be secure with a strand of scrap yarn threaded through.
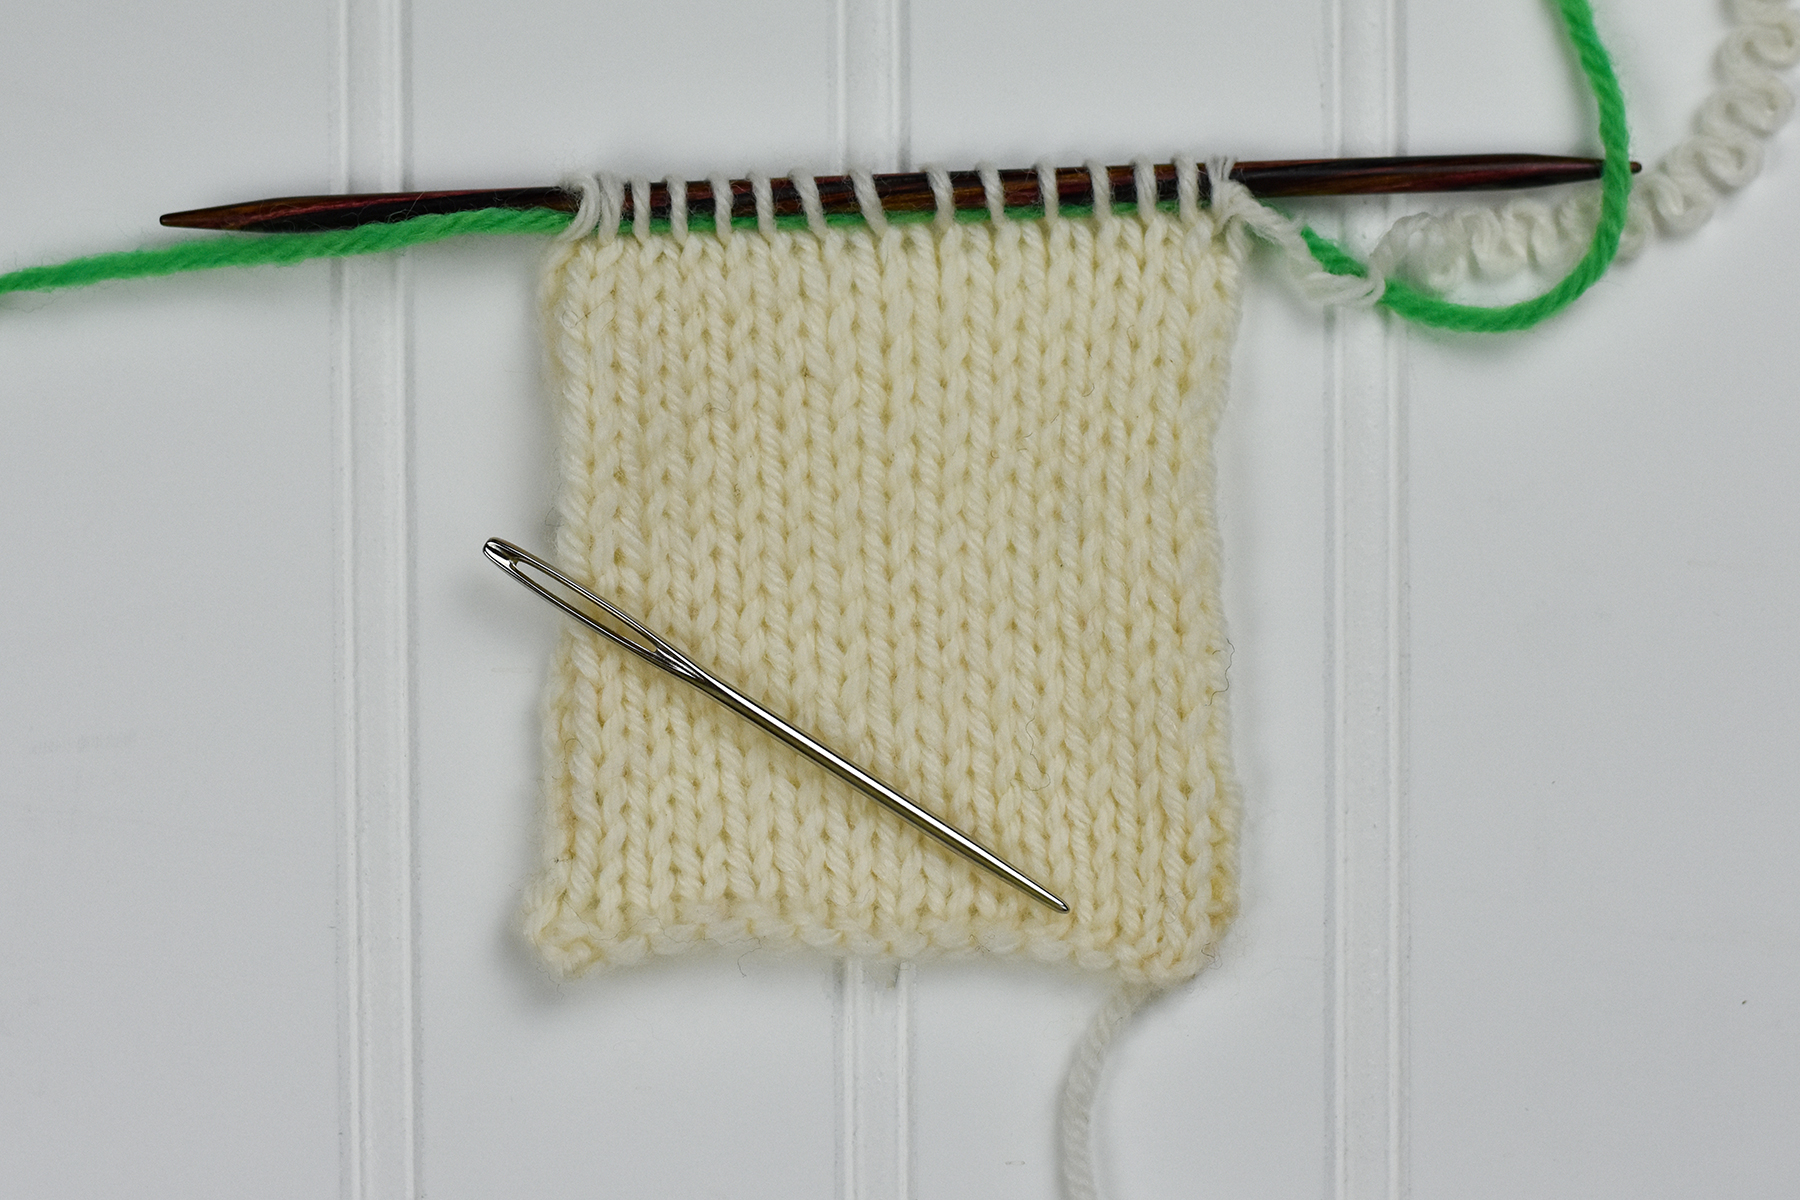
Option 1: This is probably the most preferred method, especially if you’re knitting lace. Before you start knitting your row, thread a piece of scrap yarn that’s about six to eight inches wider than your work and simply glide the tapestry needle through each live stitch without removing the needles. You’ll work just below the knitting needle, as pictured in the example photo above. The ideal place for a lifeline is before a fresh row repeat – this way you know exactly where to start once you unravel your work.
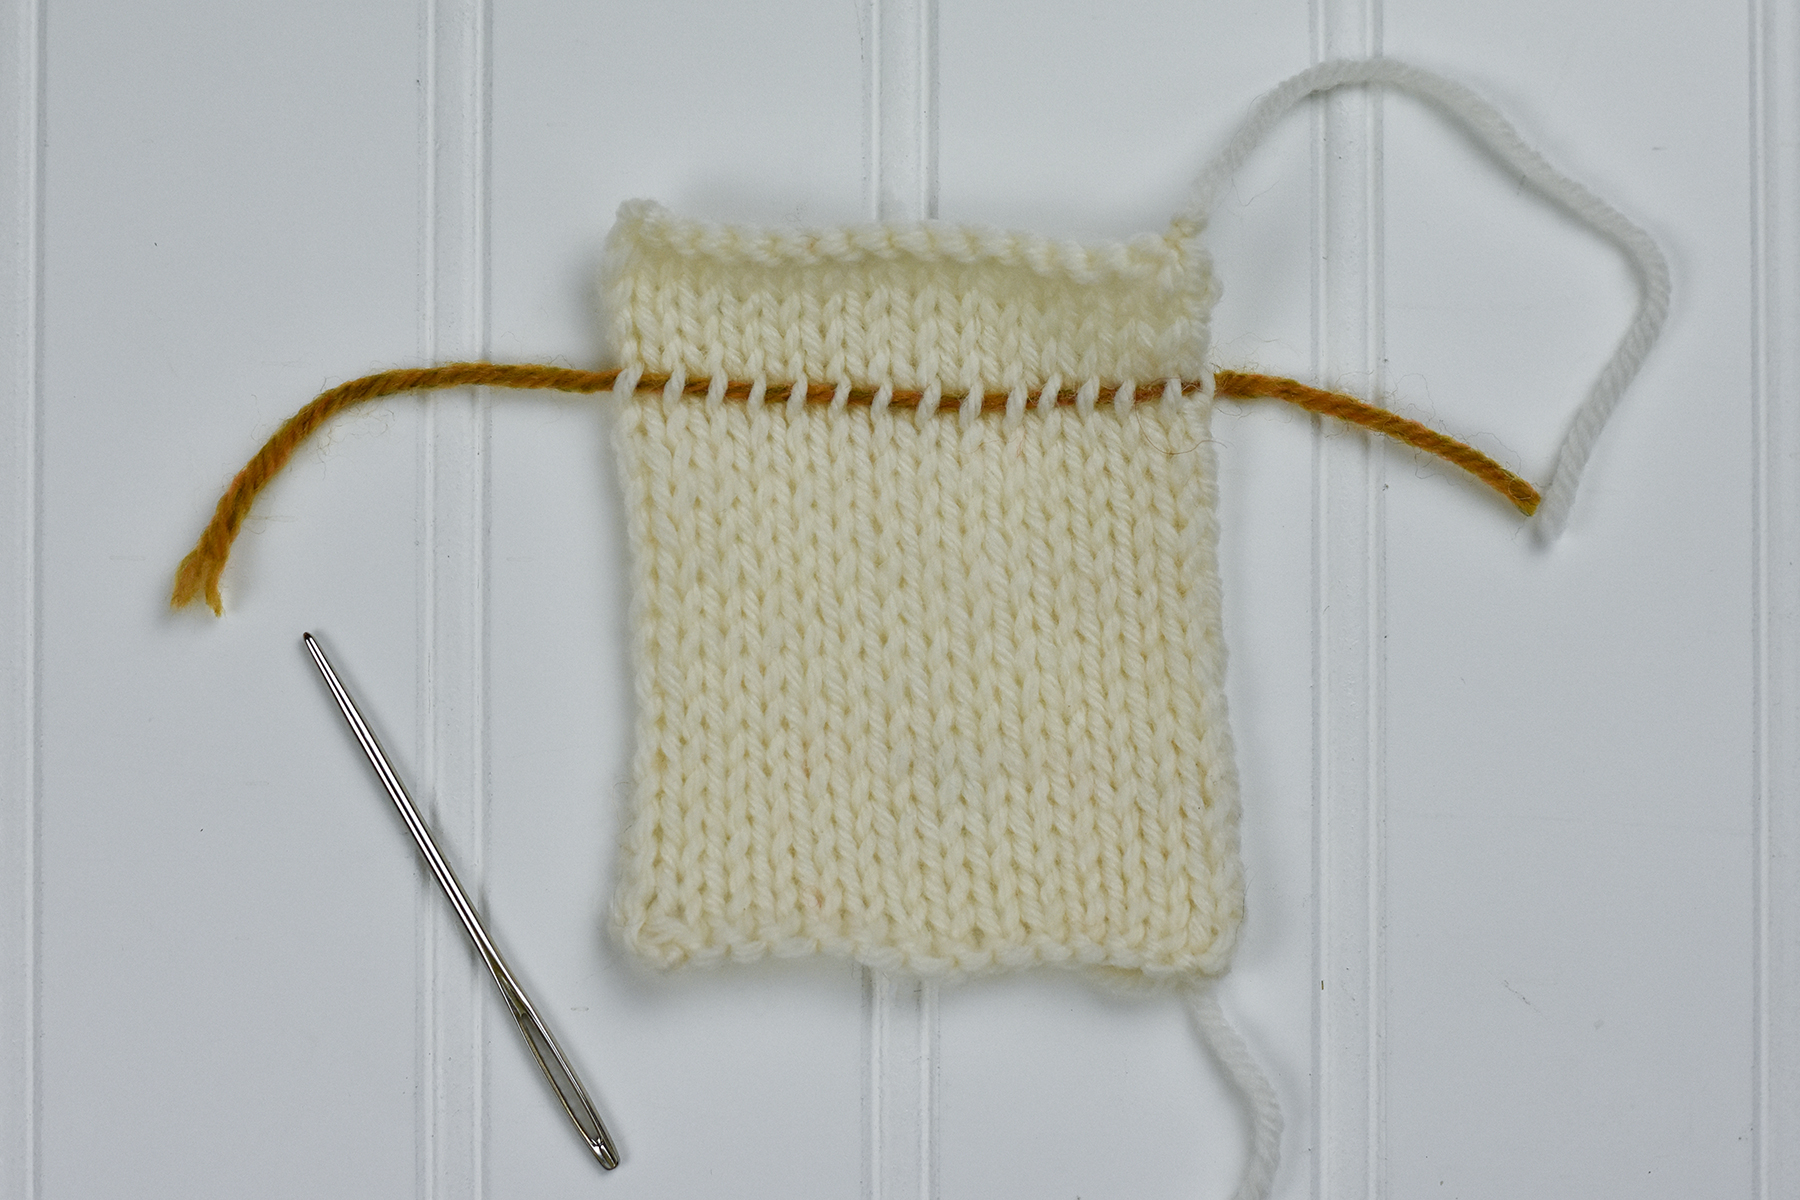
The second option is great for moments when you’ve forgotten to insert a lifeline…or if you were overly confident only to find out you made a mistake later. Oops! And I have to say, I’m GUILTY! Have no fear, though, because you can still insert a lifeline any amount of rows below (see above photo). This time, all you’ll do is thread the tapestry needle the same way you did in the first option I described. Then, carefully thread the needle through one leg of each stitch across the row. Picking up each leg of the stitch from below is a bit trickier, but if you take your time you’ll be good to go, I promise. Then you can rip back all the way to the lifeline and your stitches will remain secure.
That’s it for my lace knitting tips and I hope you find them to be very useful. If you have any questions don’t hesitate to reach out to us because we’re always happy to help. Do you have any lace tips you’d like to share? Let us know in the comments below!
Remember, these exclusive kits can be purchased at local yarn store retailers near you. Each kit comes with the pattern, the yarn required to make it, a mini Universal Yarn project bag, and stitch marker. Use our store locator to find your nearest Universal Yarn retailer!
Happy crafting!