
Universal Yarn Creative Network
Inspiration By Design
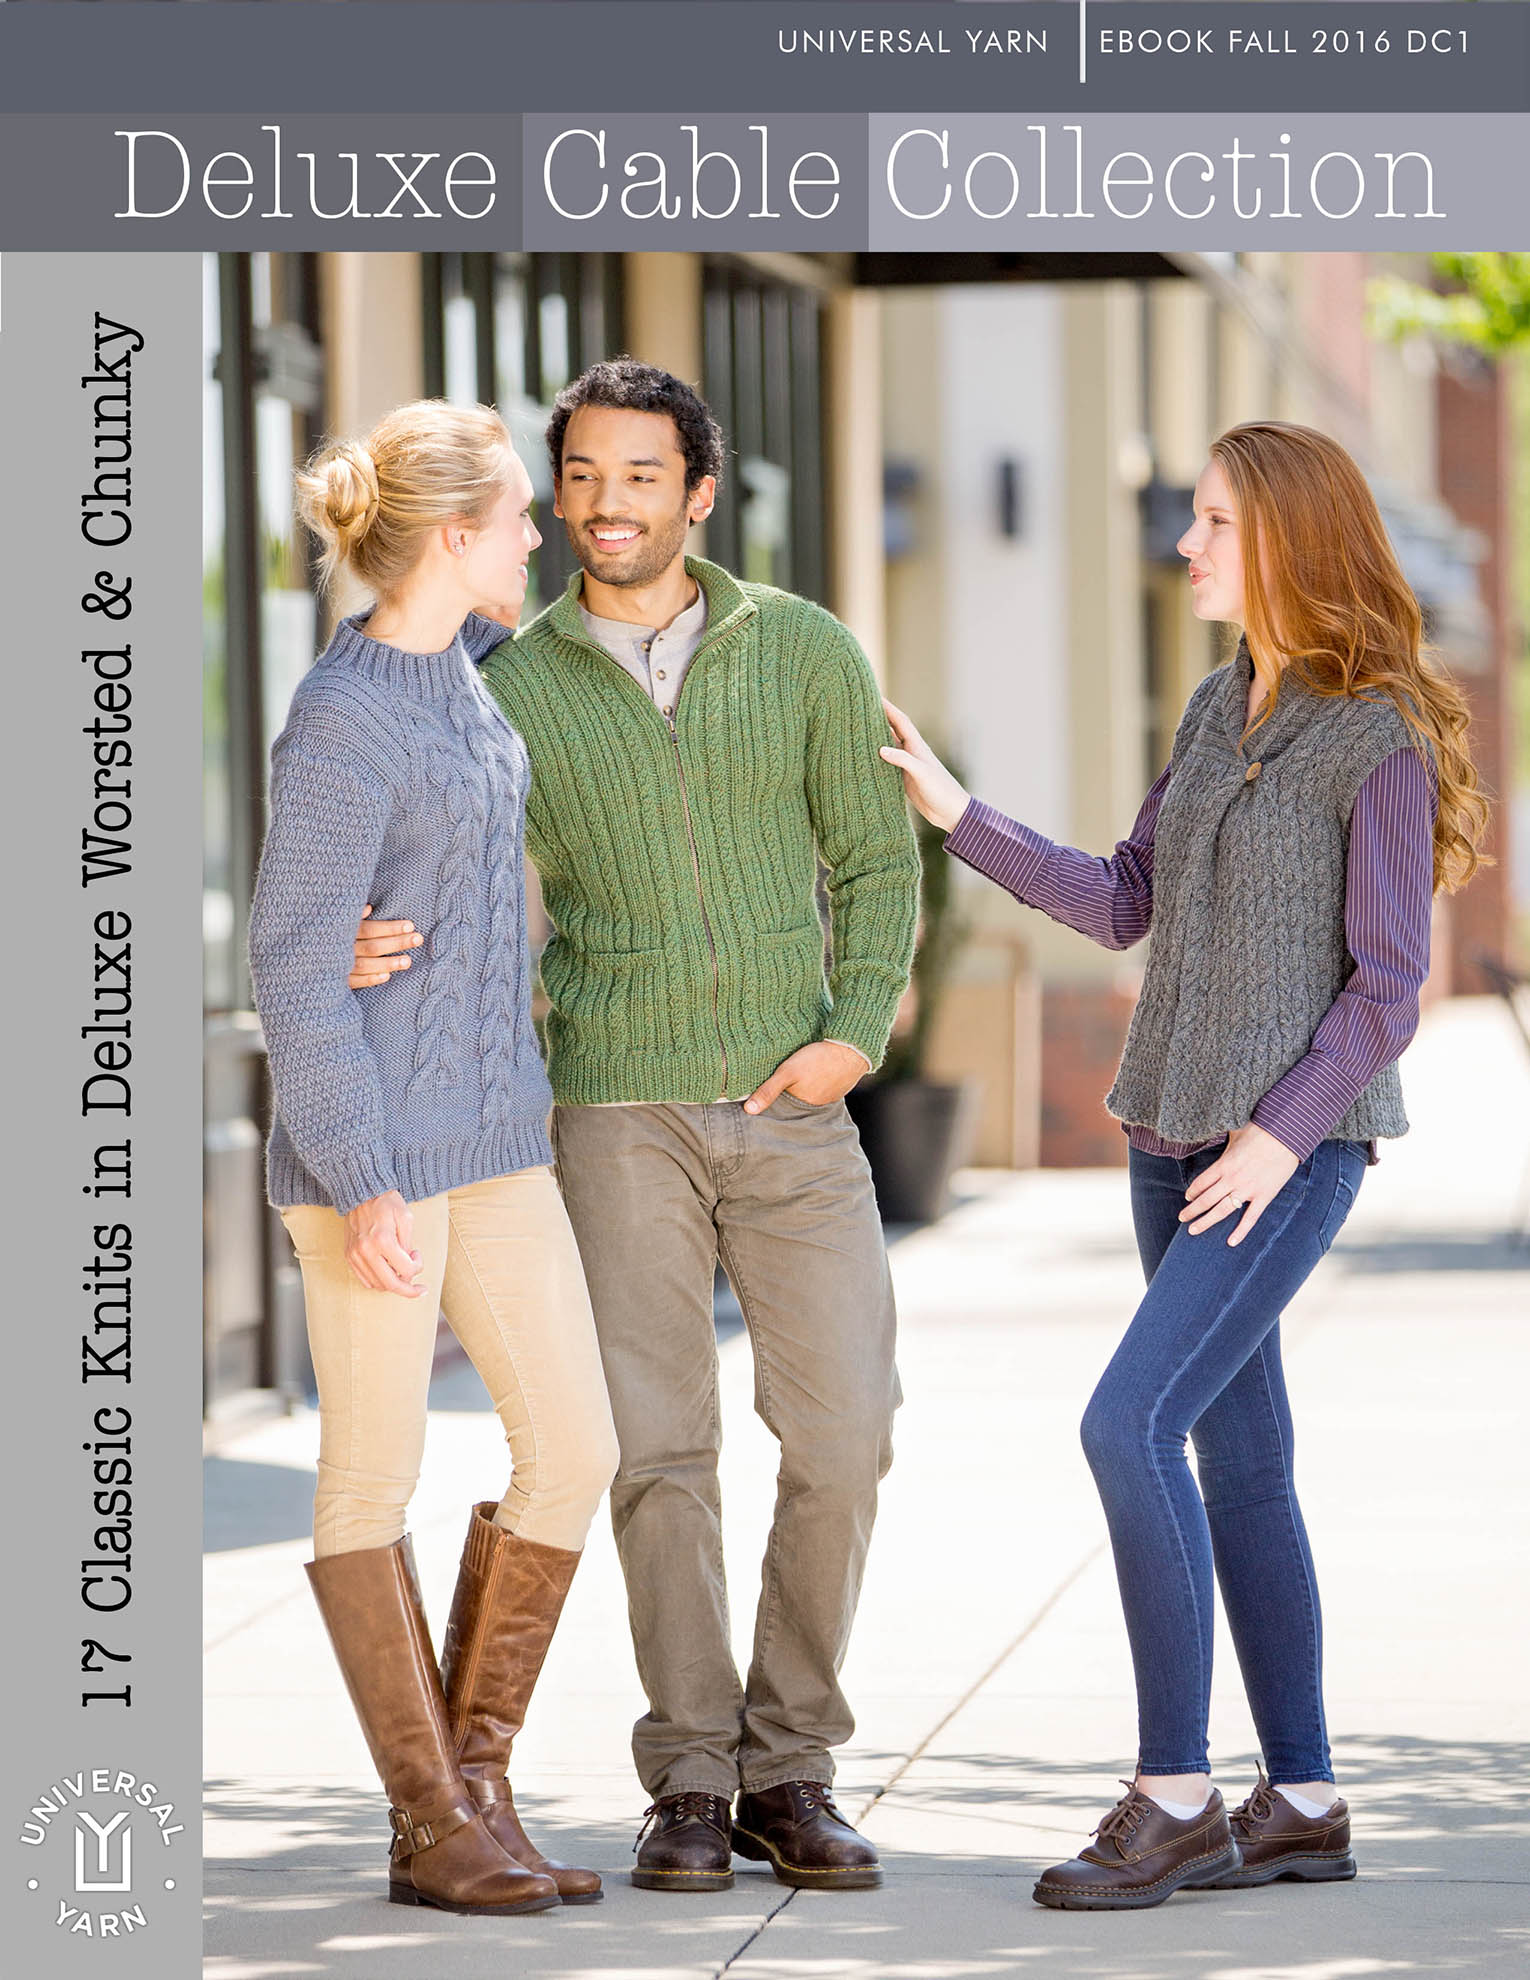
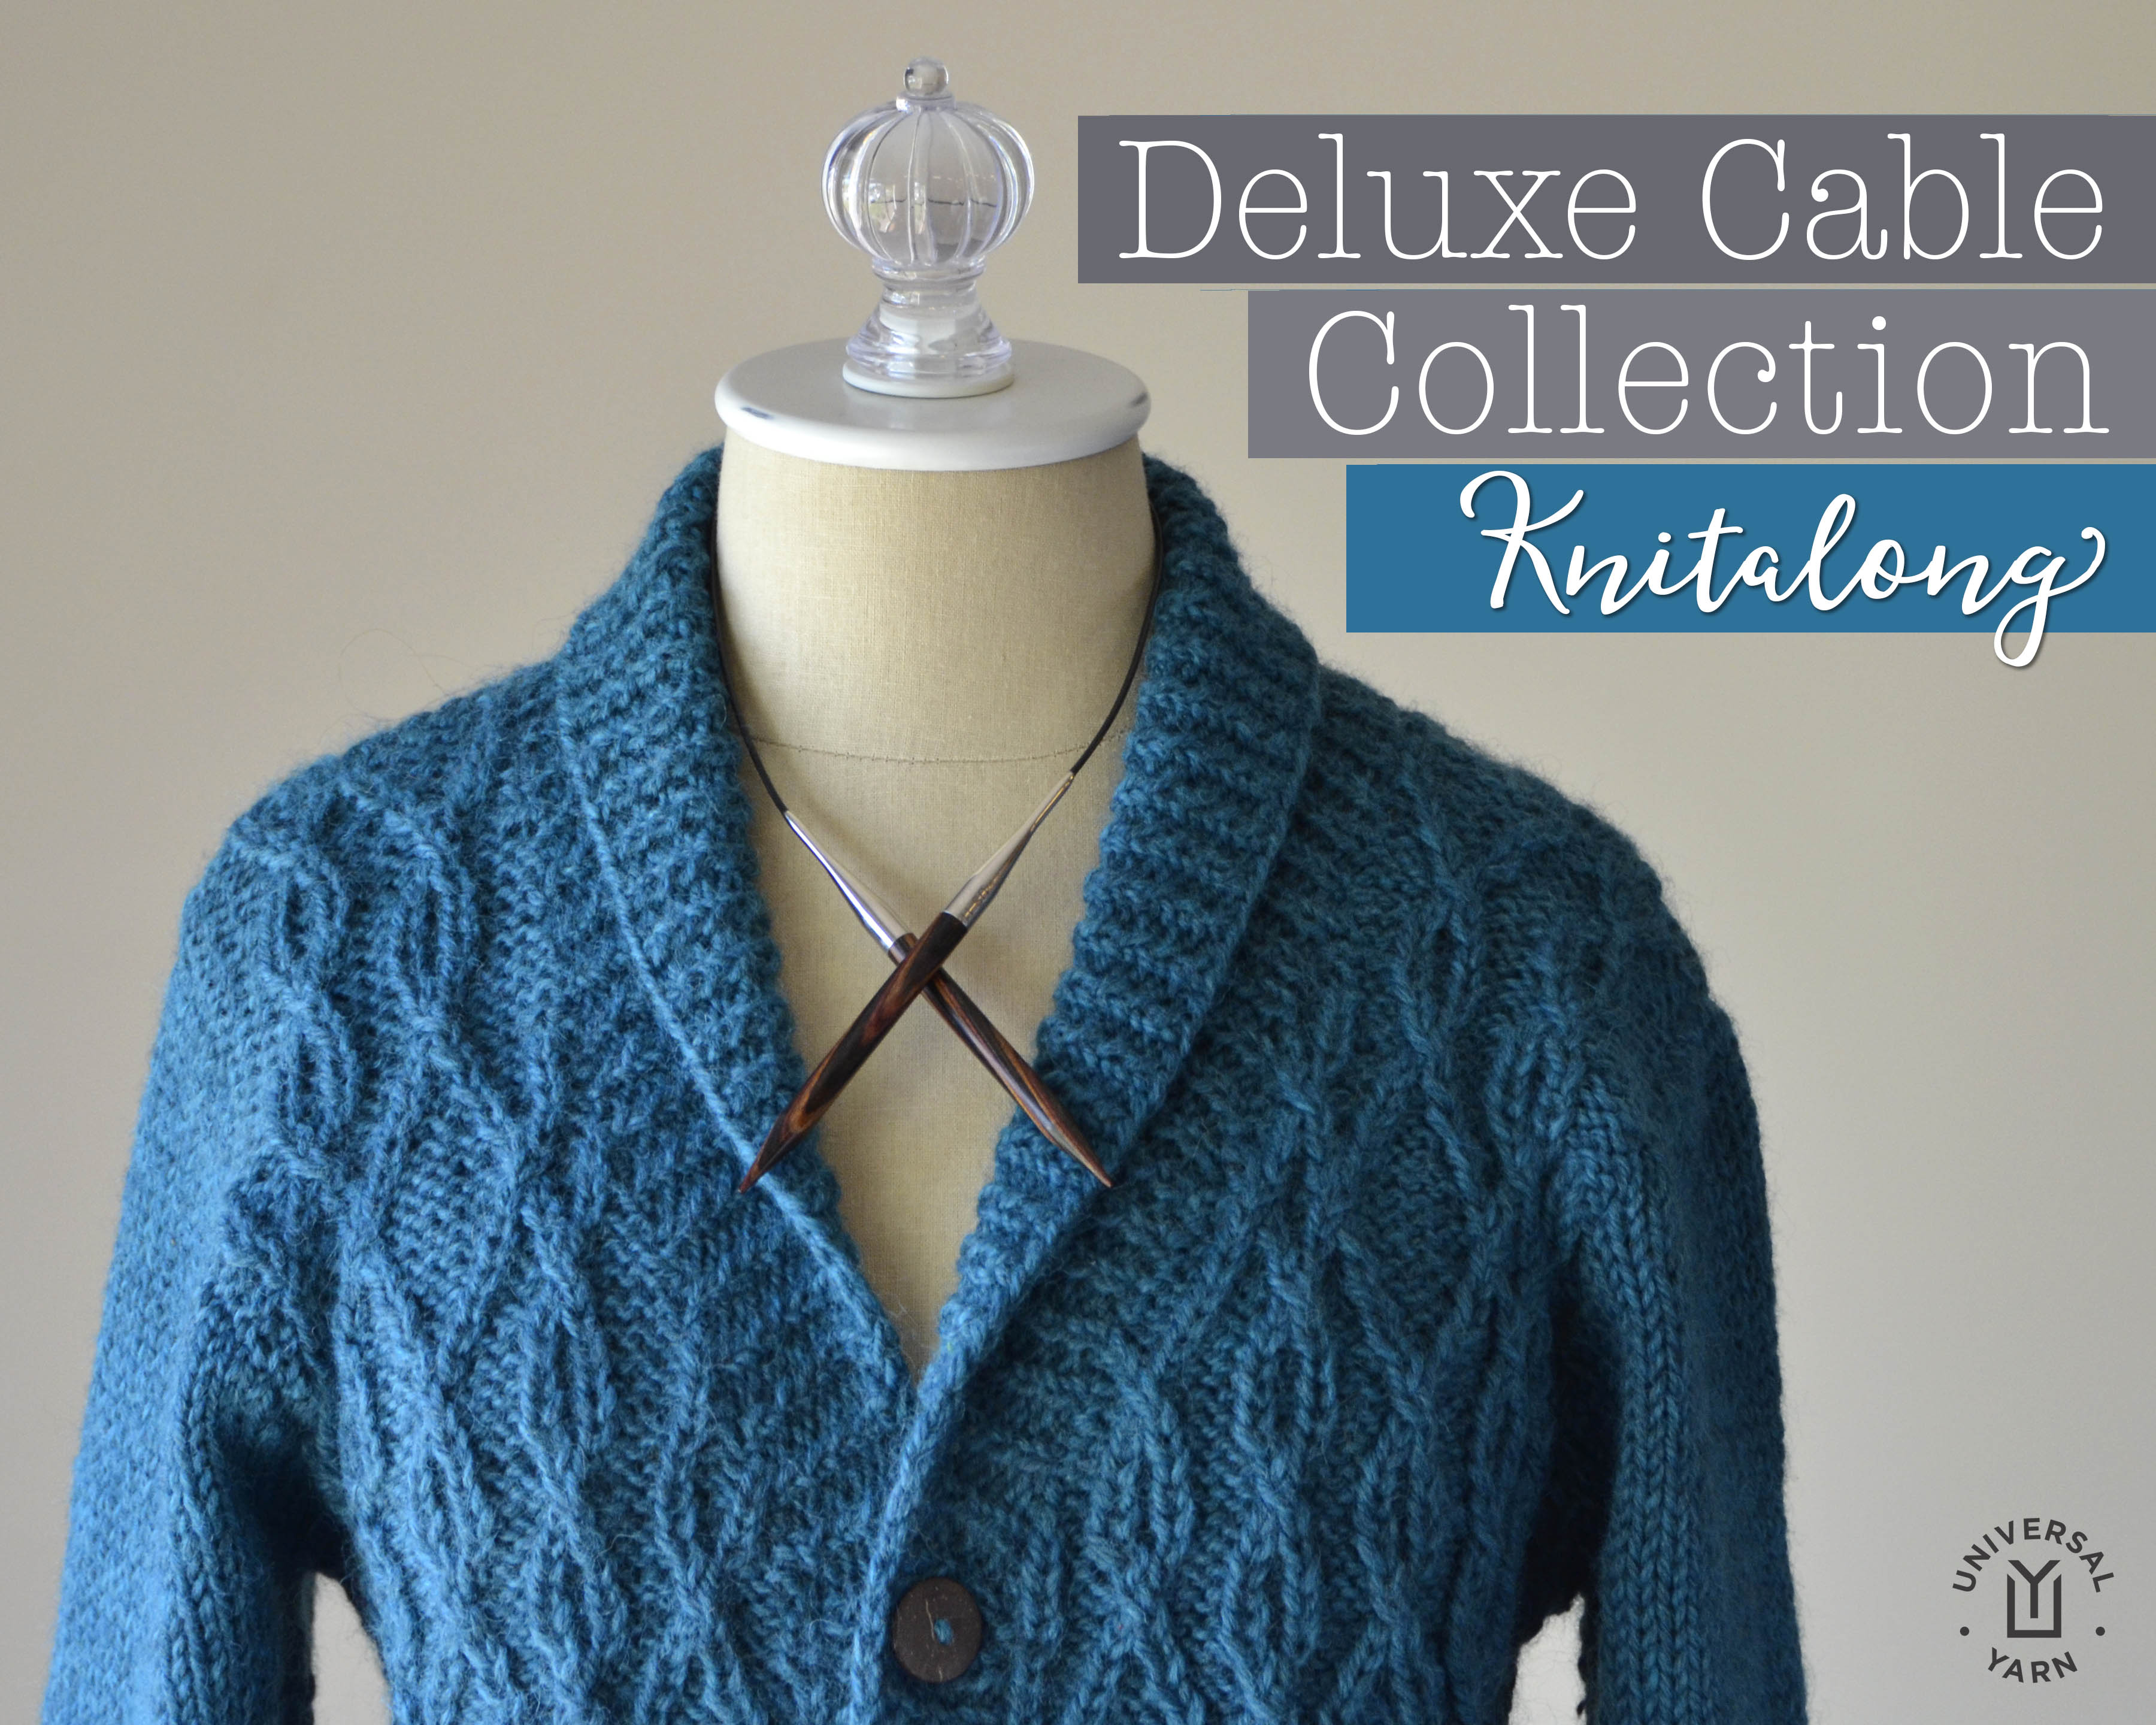
It might be February, but many of us are still working on projects from last fall’s Deluxe Cable Collection.
As a reminder, this is our ongoing blog series covering projects from the Deluxe Cable Collection. You can learn more about the knitalong by reading previous blog posts here, viewing the collection here, and joining our Ravelry group here.
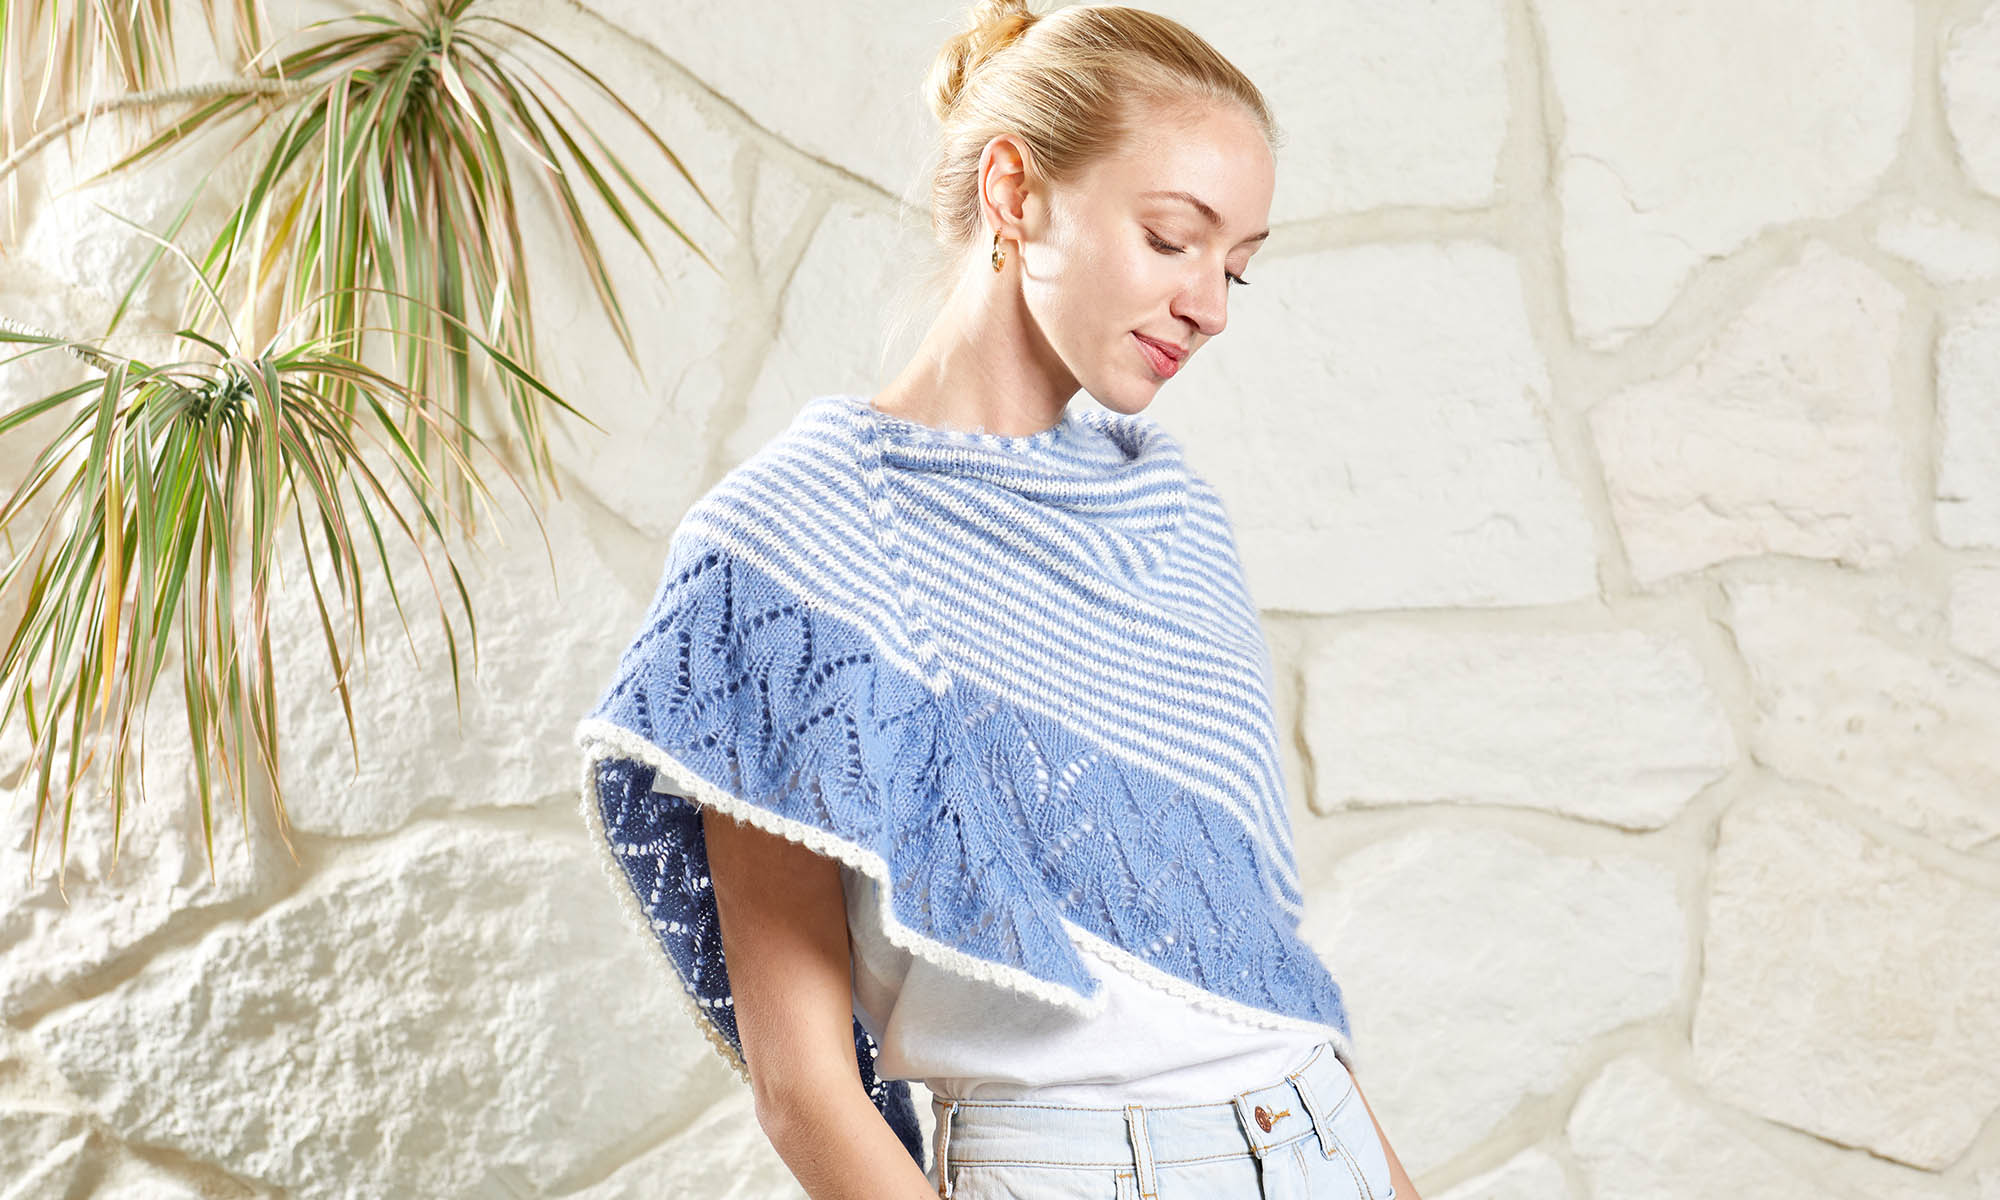
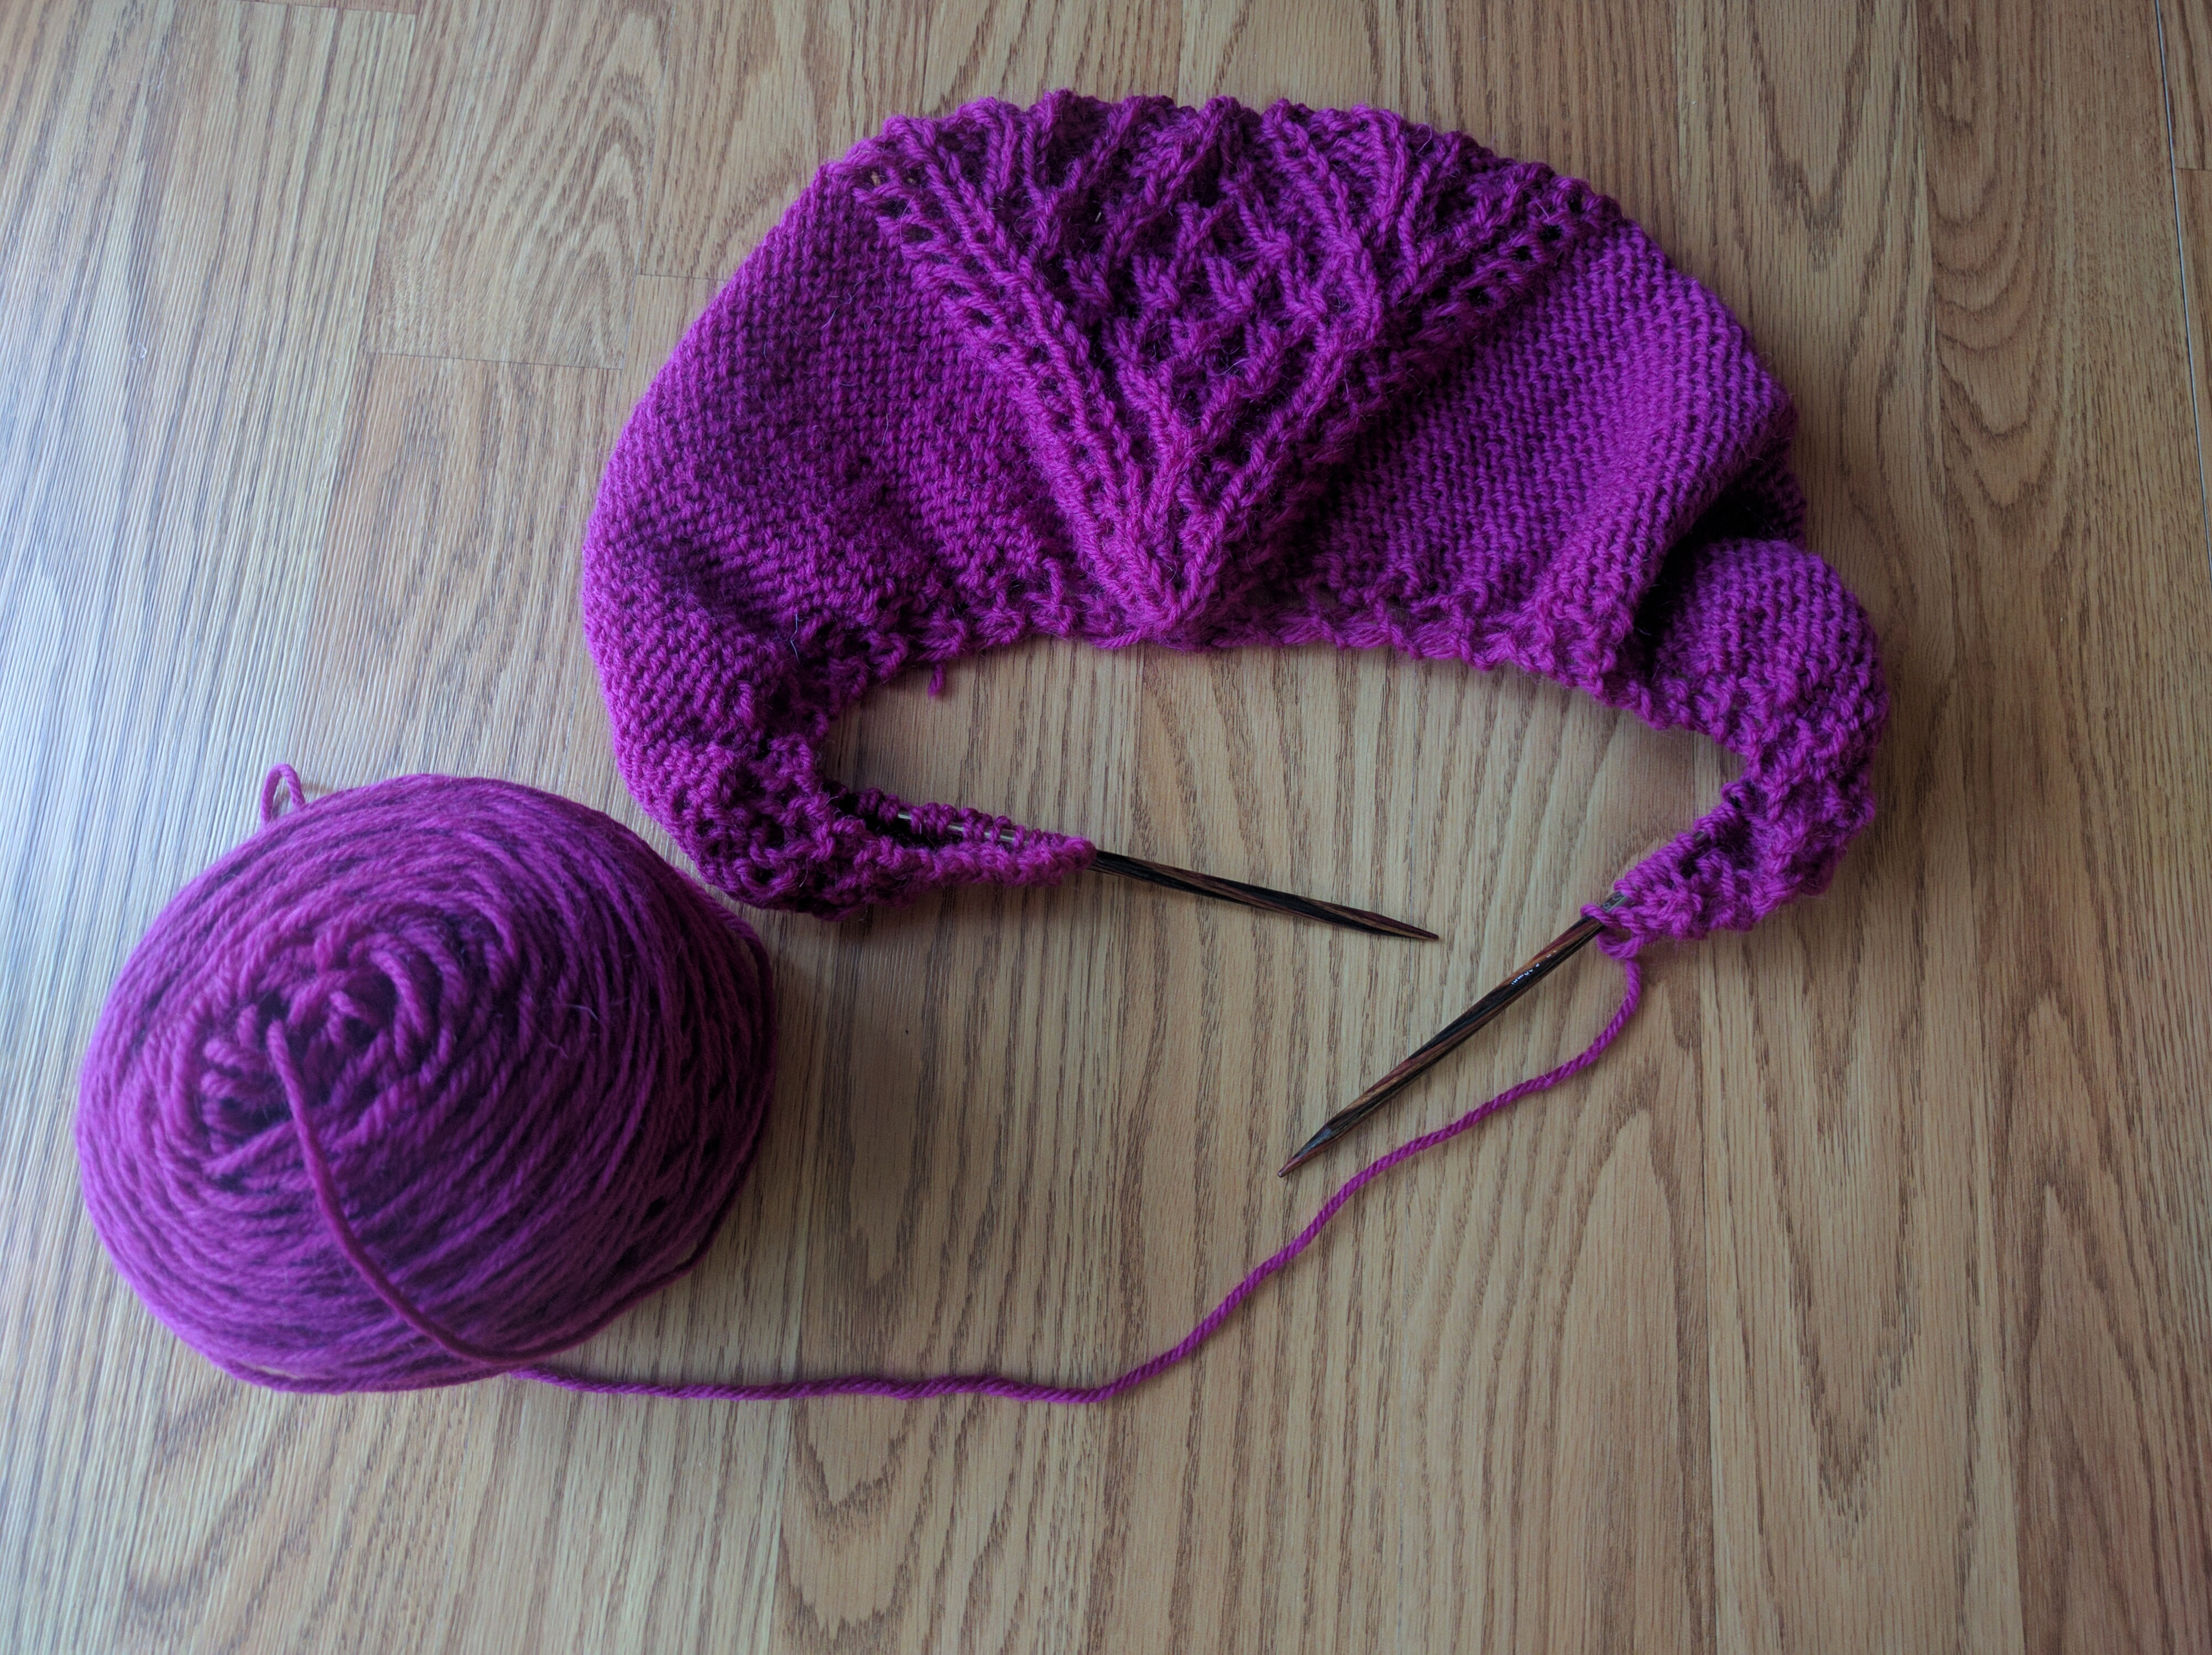
Our Sales Director Yonca has completed both ponchos from the collection. We don’t have a shot of her Catawba River Poncho which she knit up in Deluxe Chunky 91904 Pomegranate Heather (which might be my most favorite shade of Deluxe). Below is free pattern Valentina worked in this same color.
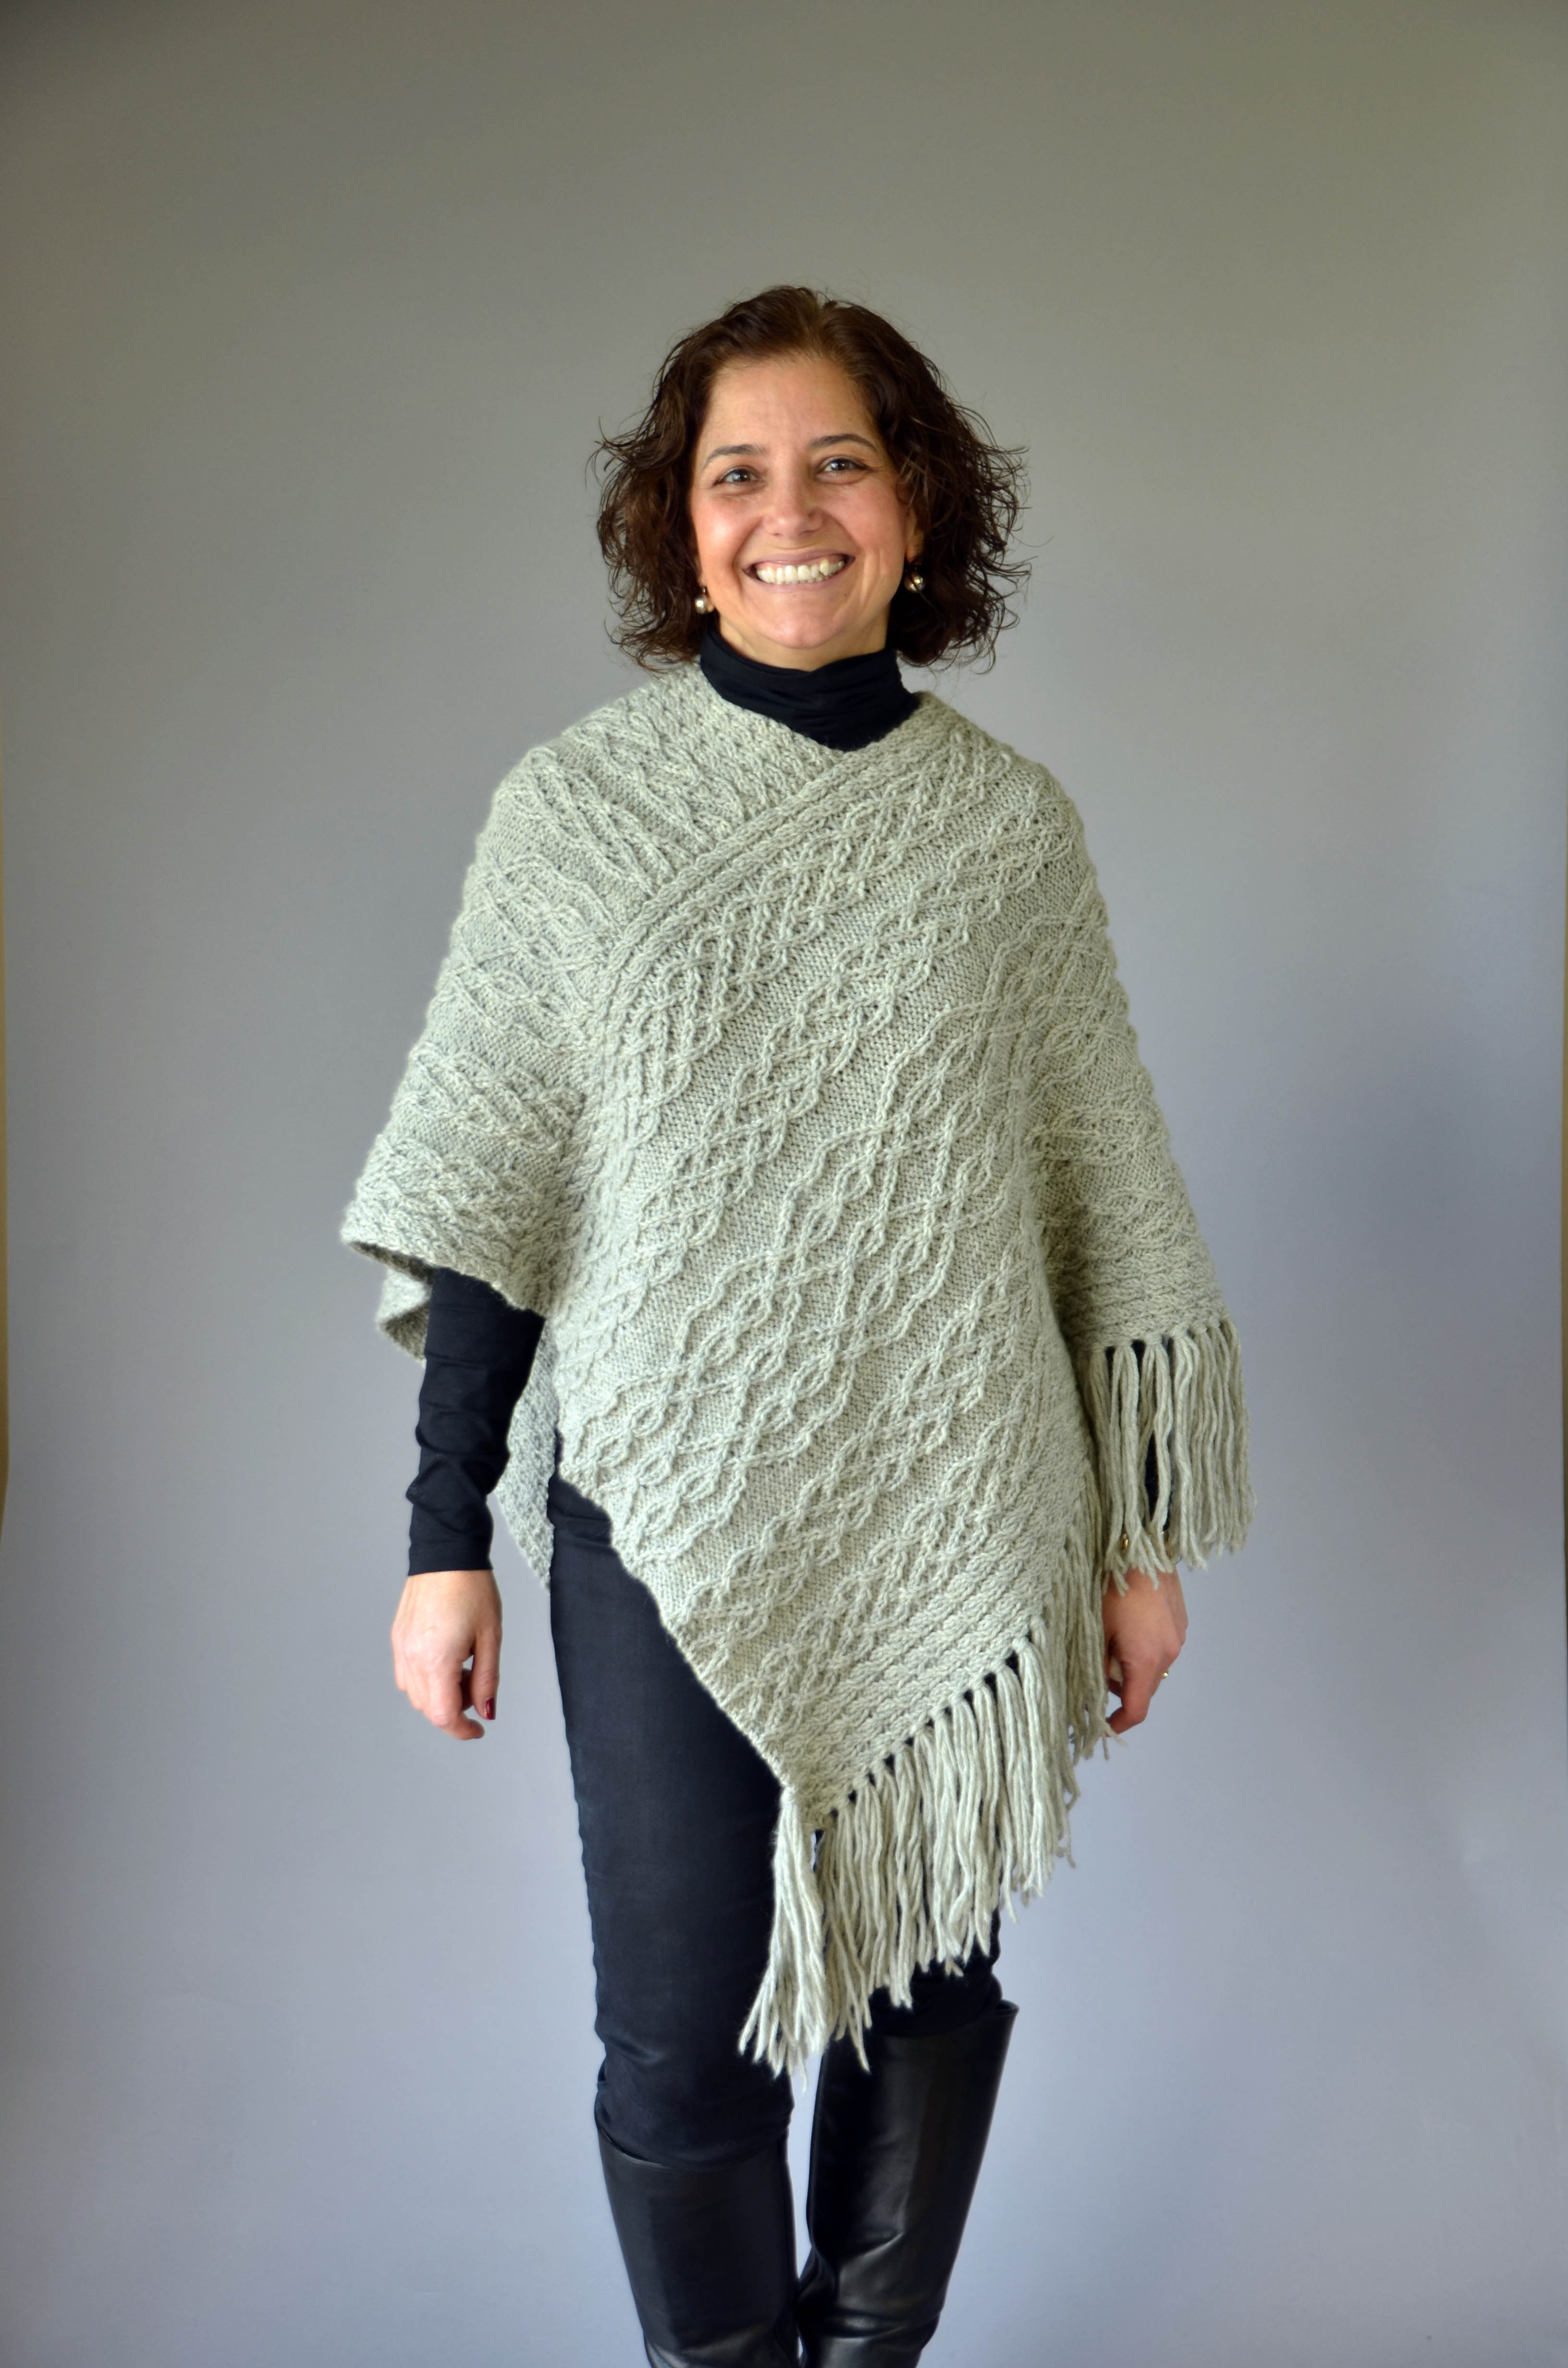
But Heather did manage to catch Yonca the other day as she wore her new Cumberland Poncho in Deluxe Worsted here at the office.
Is she adorable, or what? Yonca made a couple of small changes to the pattern.
First, since she is a rather petite woman, Yonca knit each panel a little bit shorter is called for, which resulted in a bit less circumference in the finished poncho. Her gauge was also a bit tighter than called for in the pattern, but it worked out in her favor, giving the piece a bit less depth, as well.
Second, Yonca added only half the fringe called for in the pattern. Which I adore! A few weeks ago, she had her poncho here in the office to show us how it was coming along. At that point, the entire thing was knit and seamed with half the fringe attached. She put it on to show us, and we convinced her that it looked totally awesome only partially fringed. And she was delighted to hear this, particularly since that is a lot of fringe to attach and she was getting rather burned out of doing it!
I love these changes that get made along the way (especially when they involve less work!)
How about you? Are you still plugging away on a project from this ebook? I’d love to hear about it!
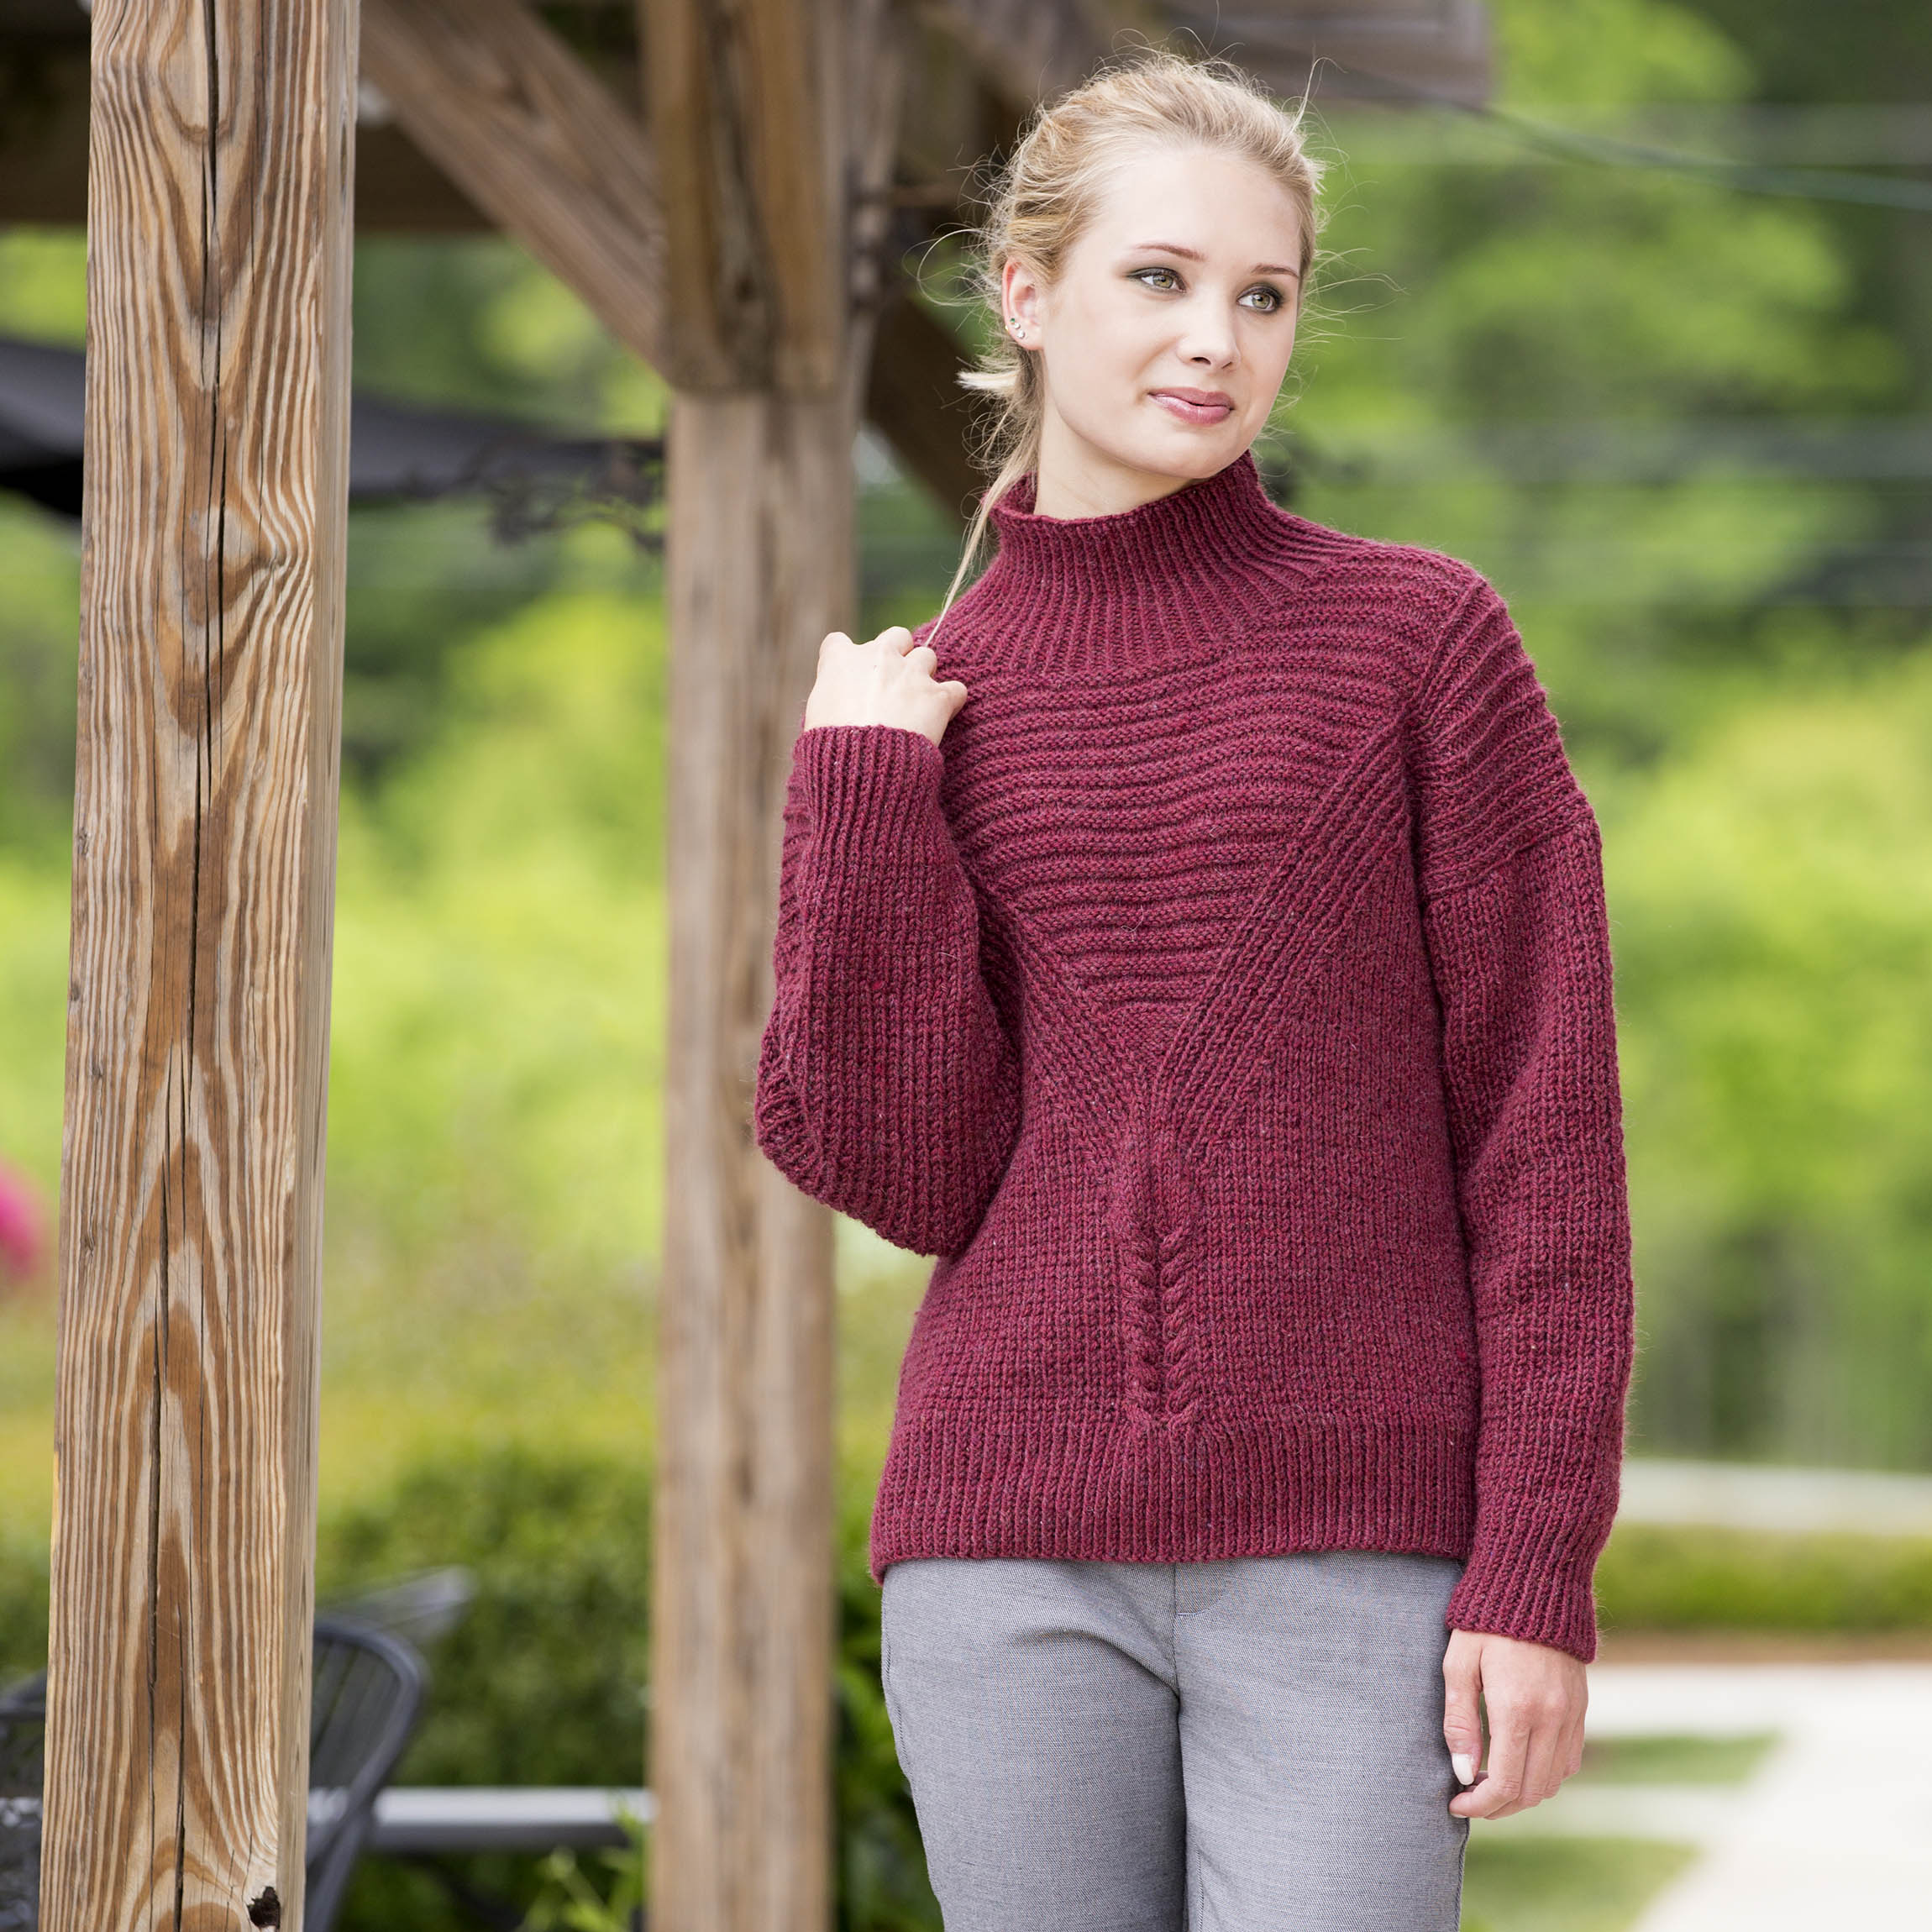
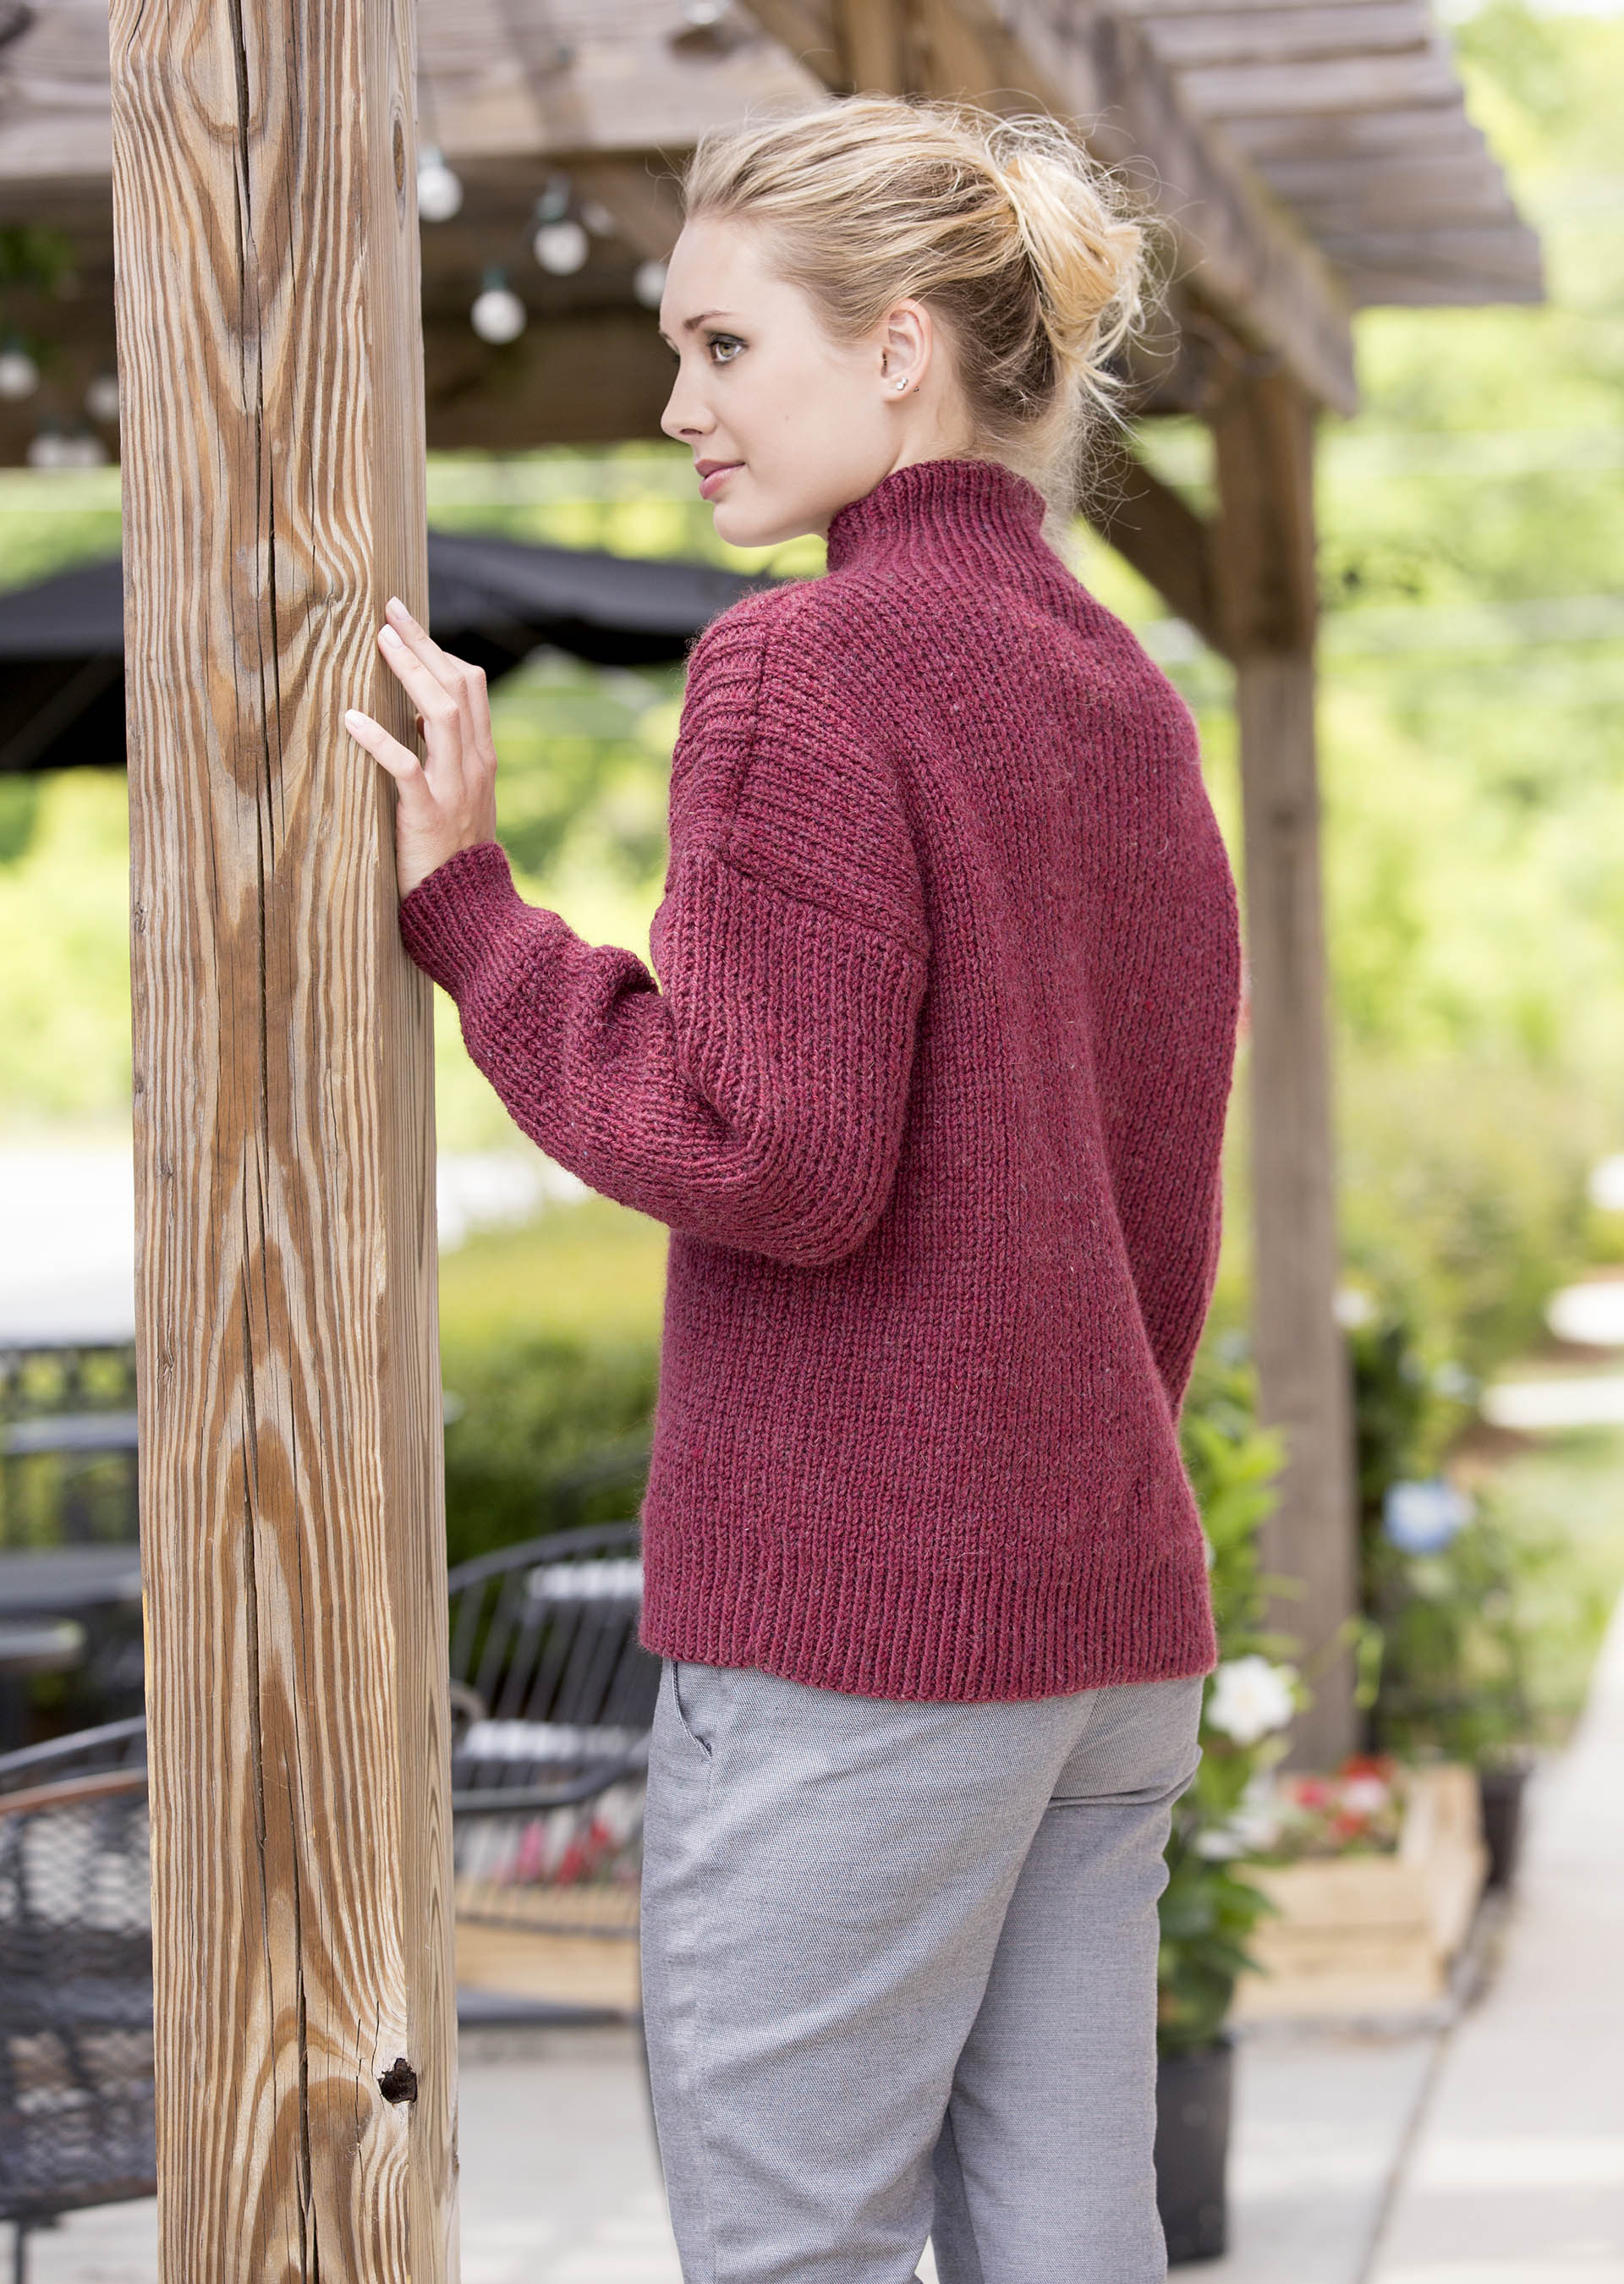
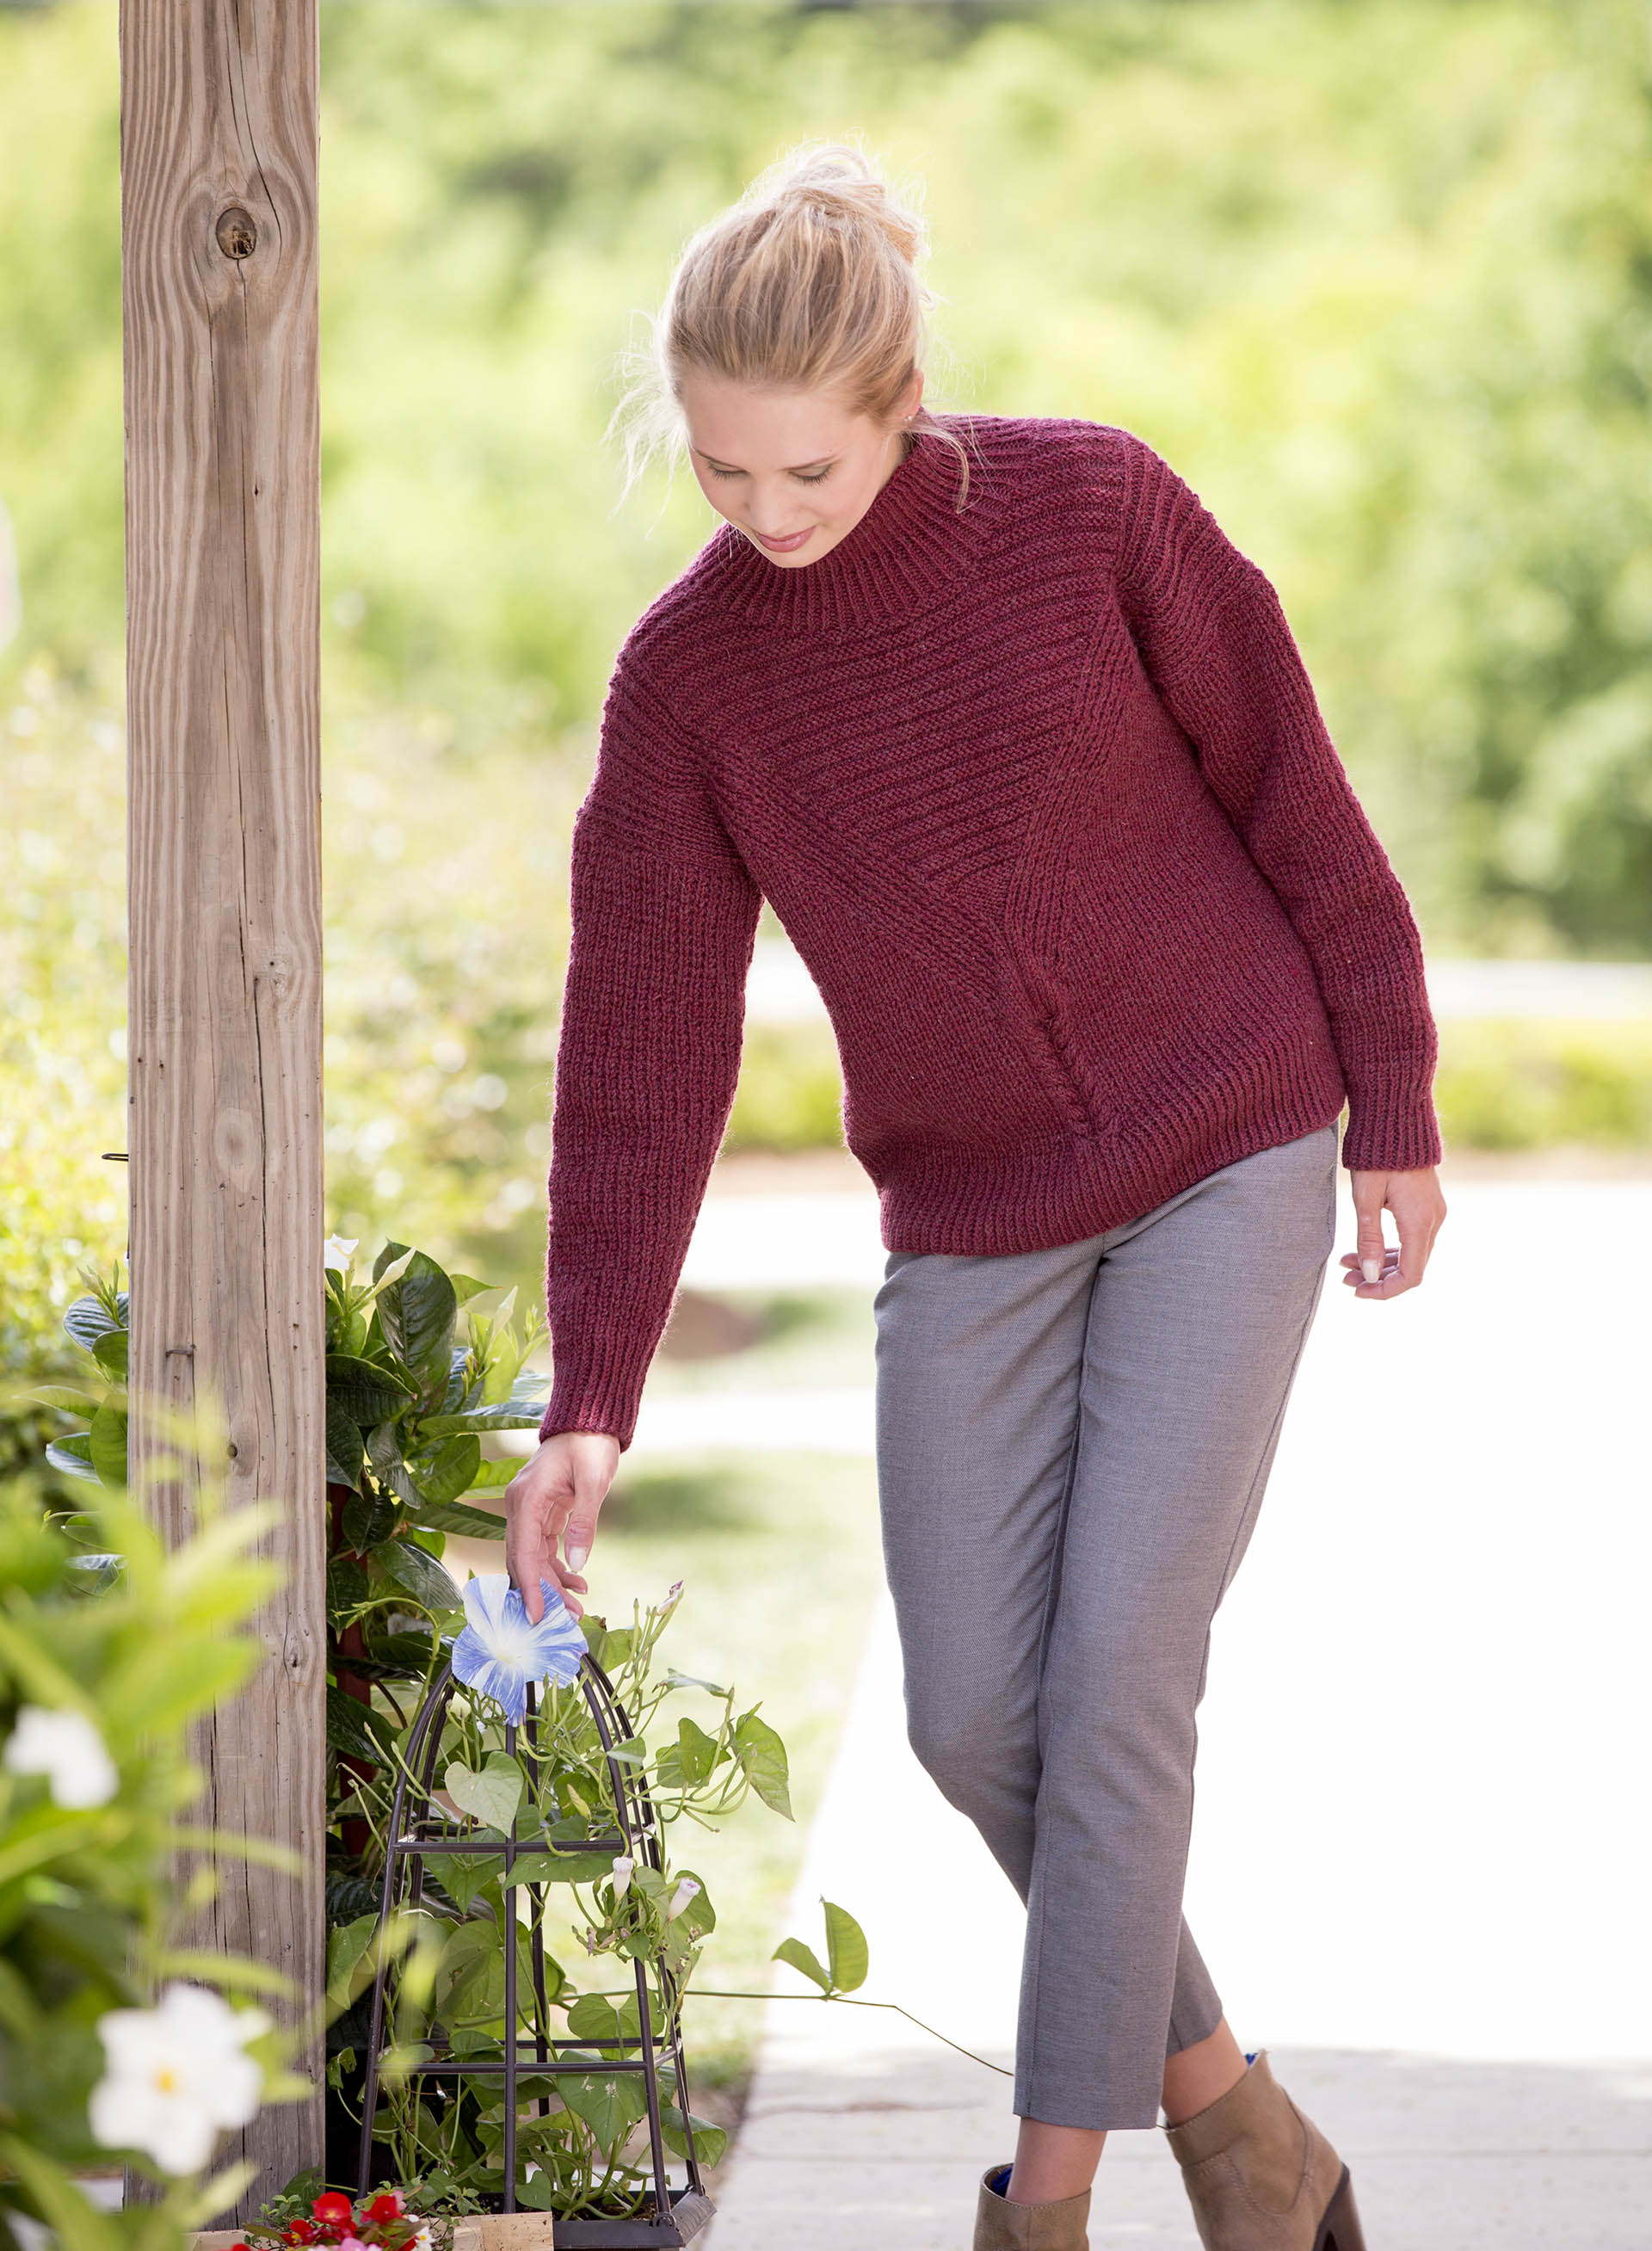
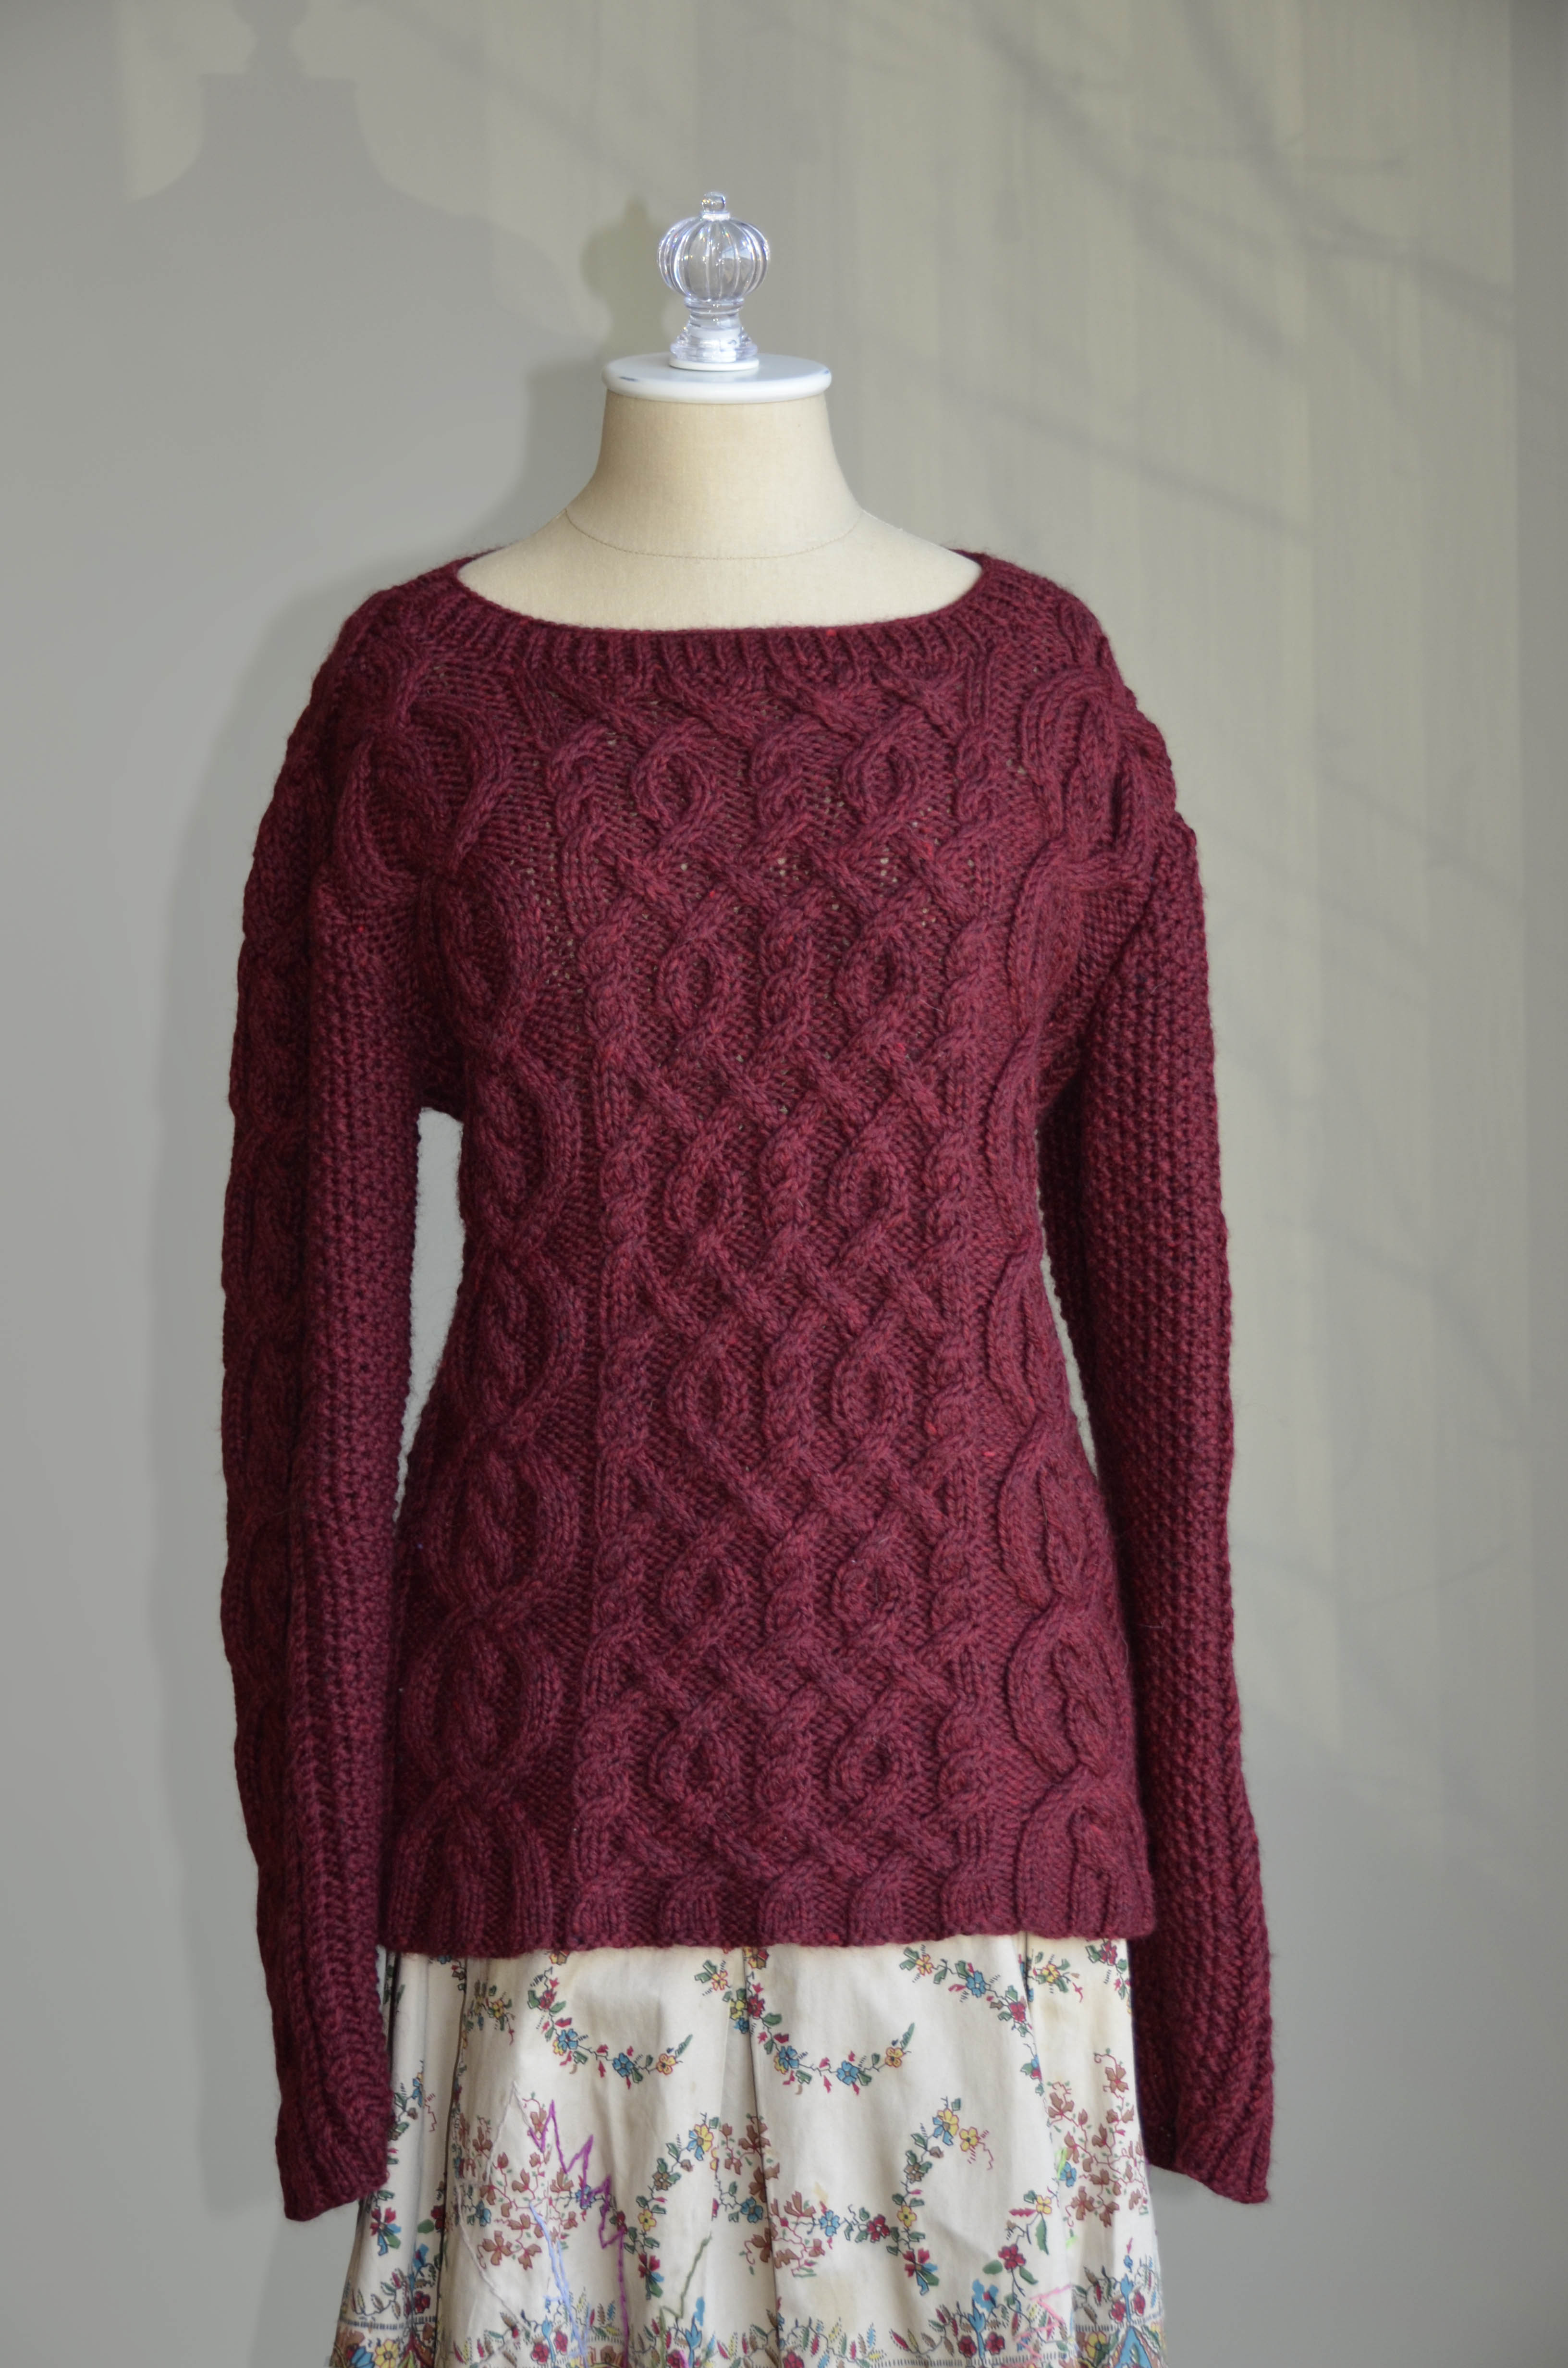
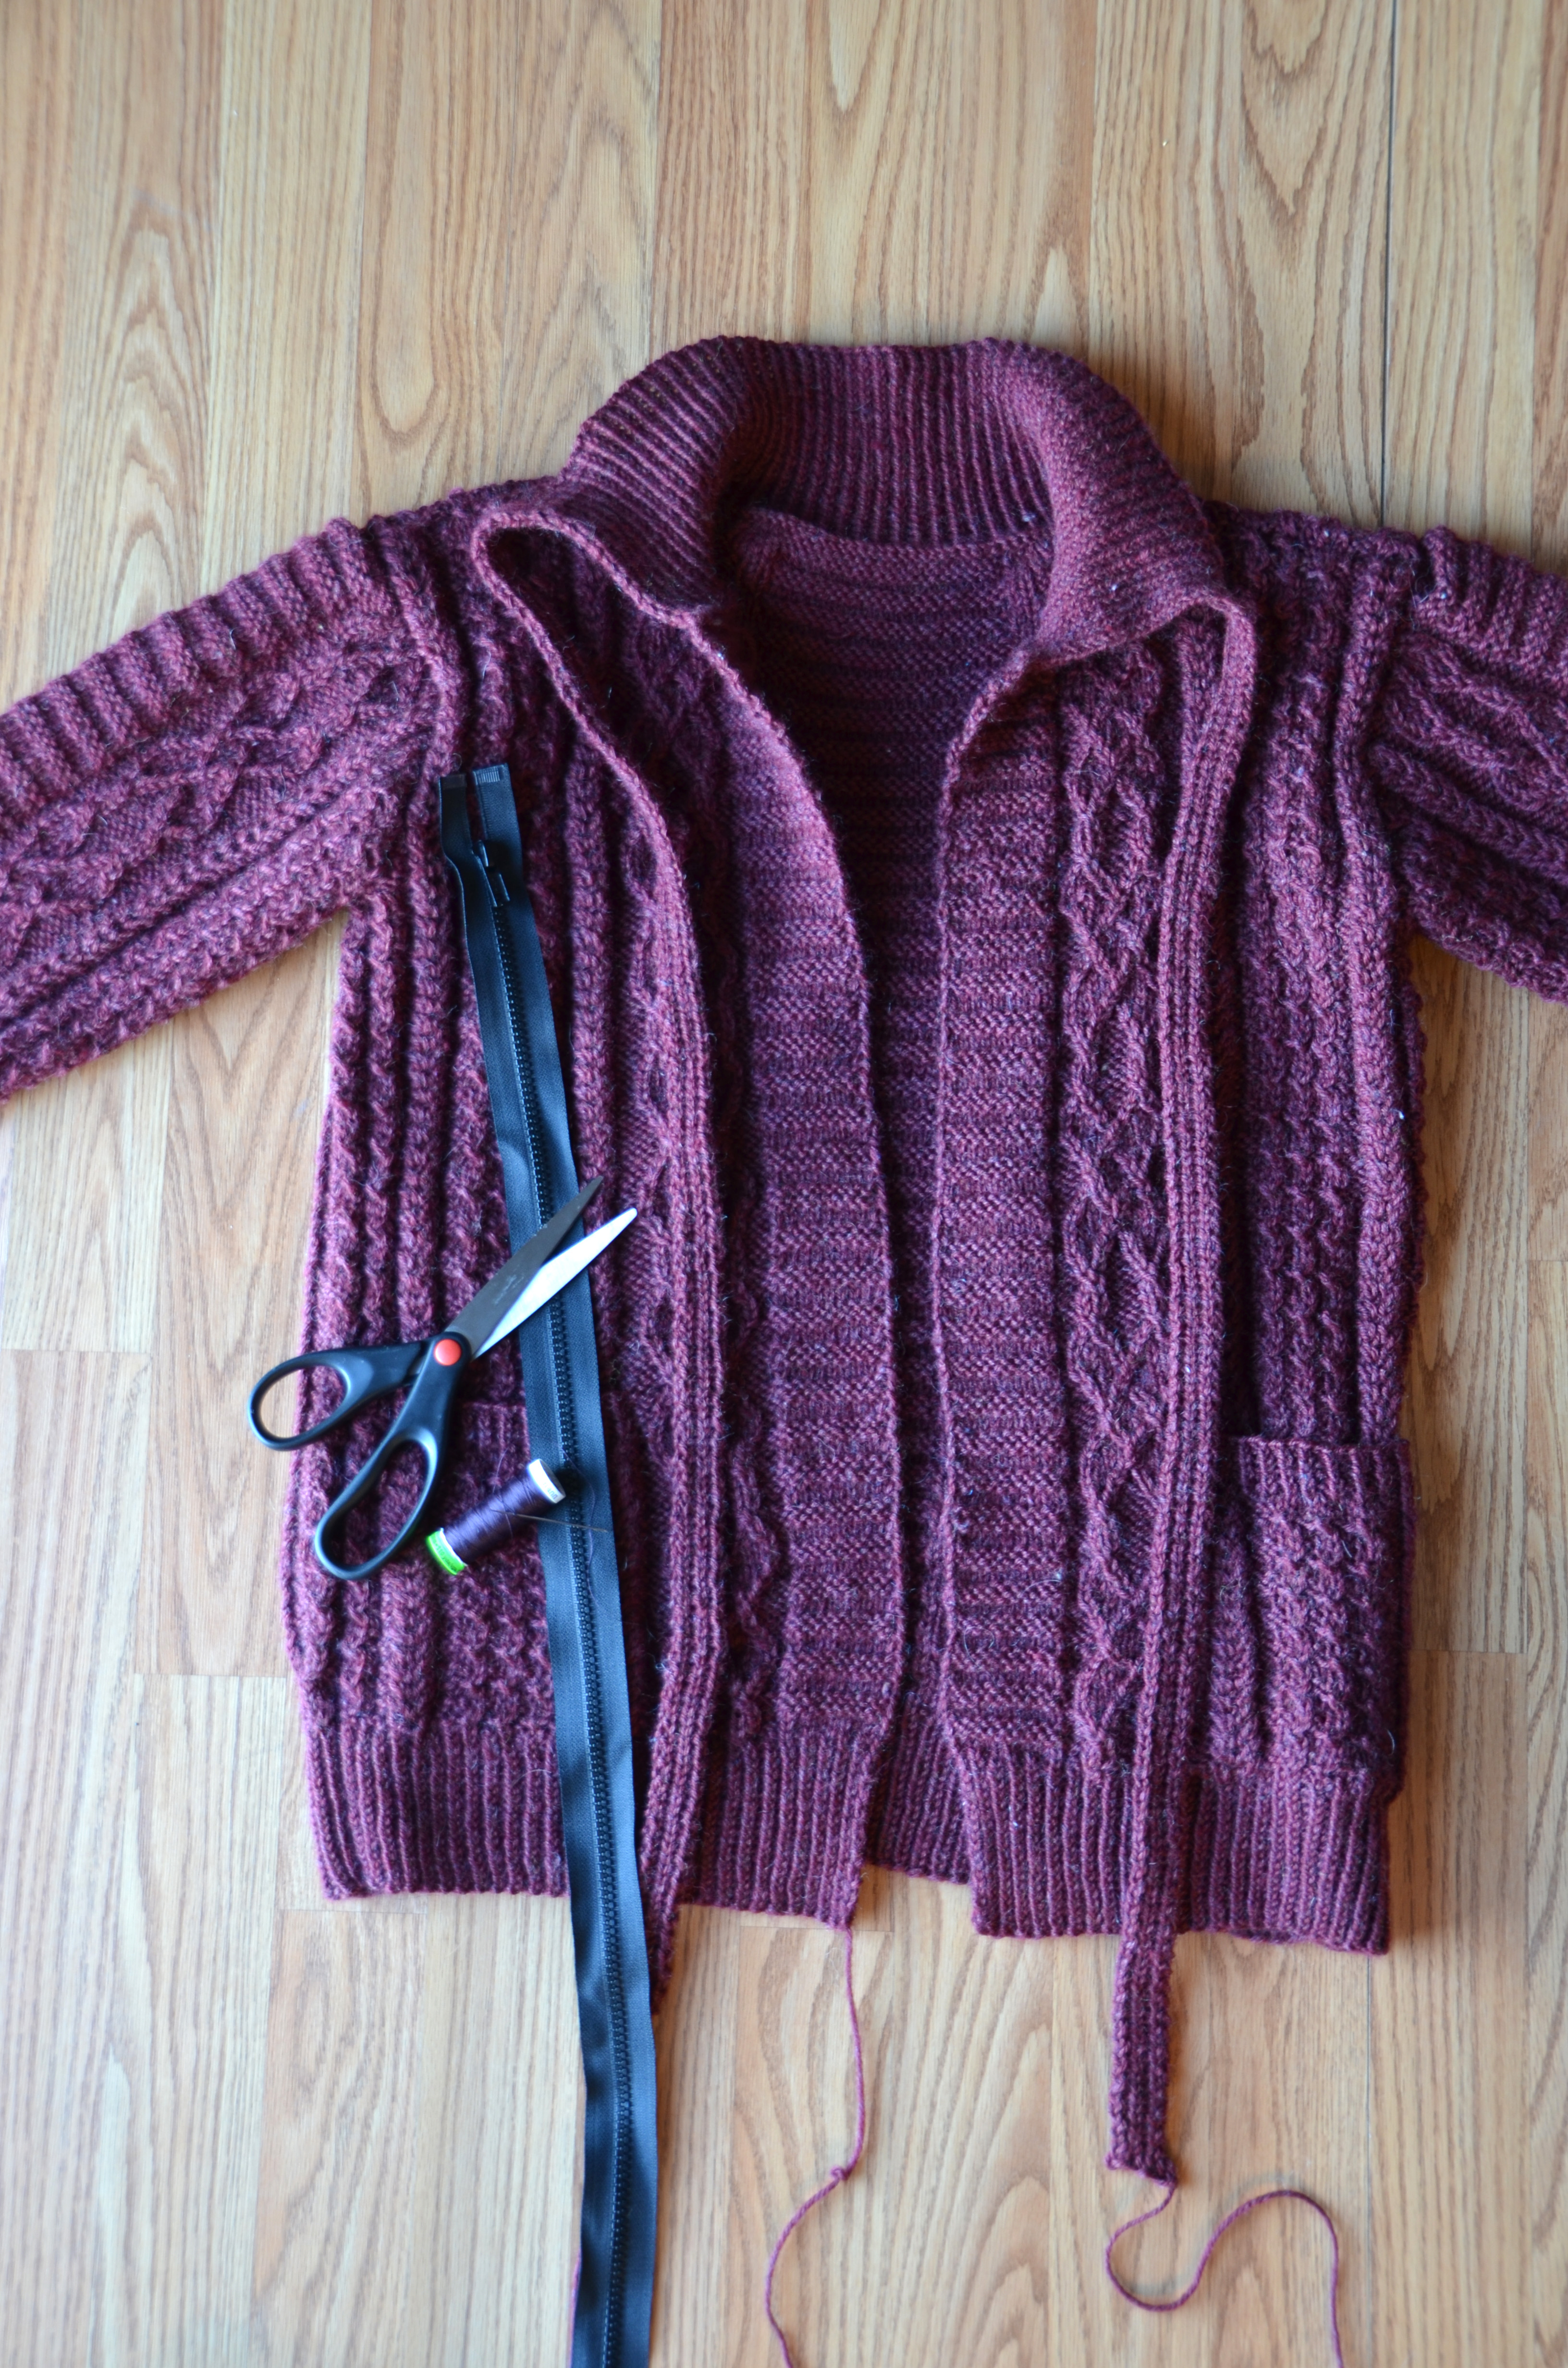
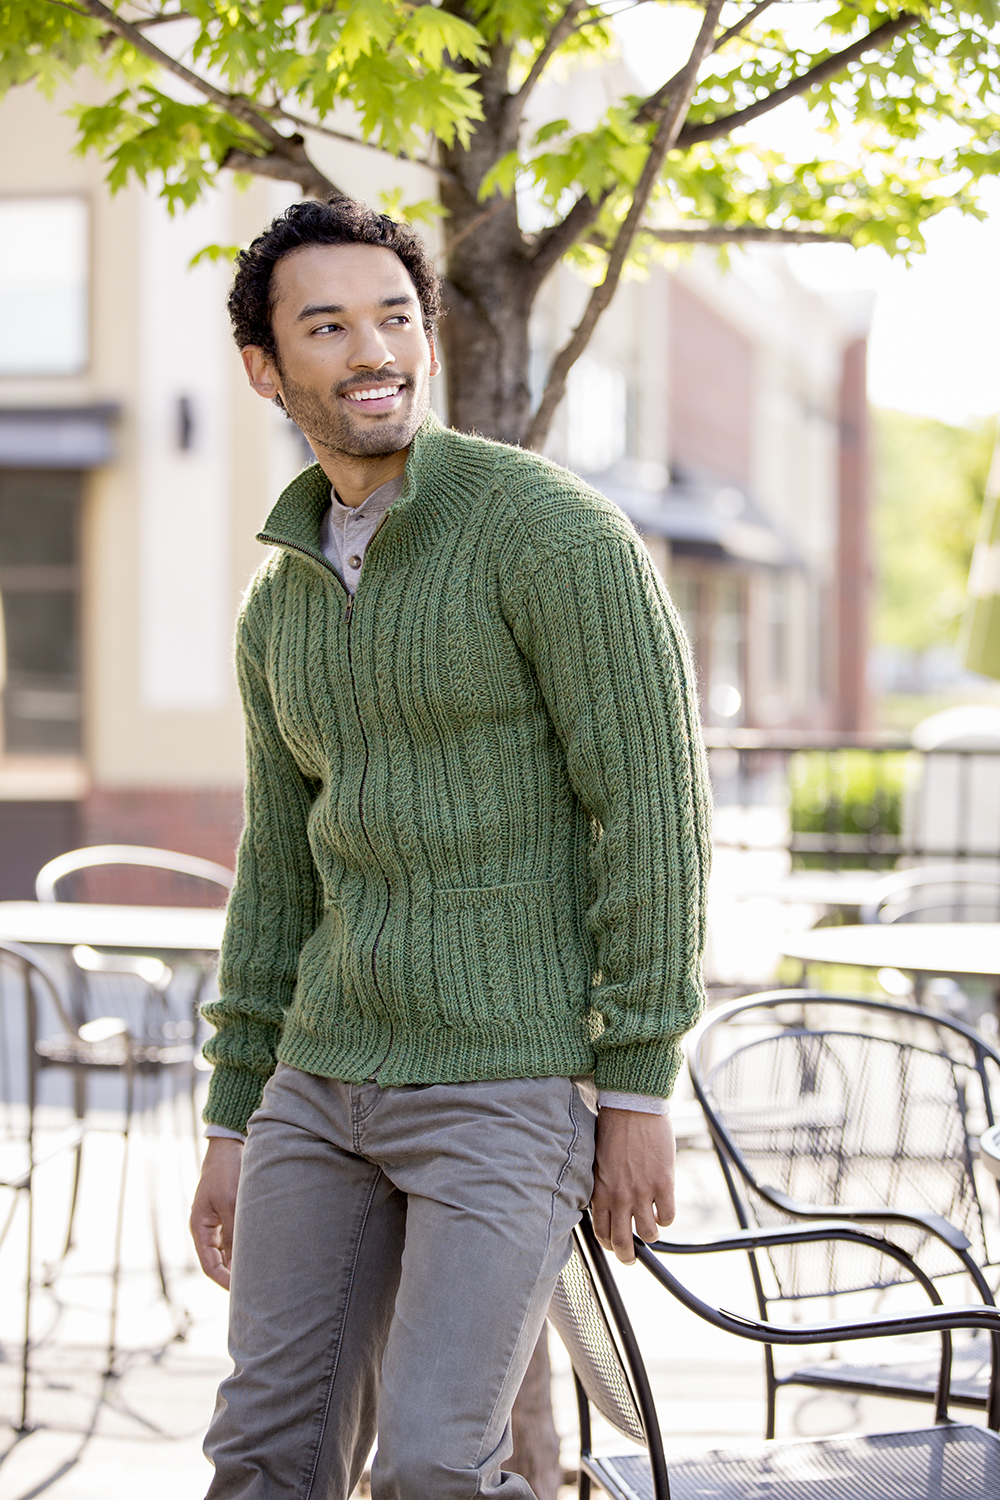
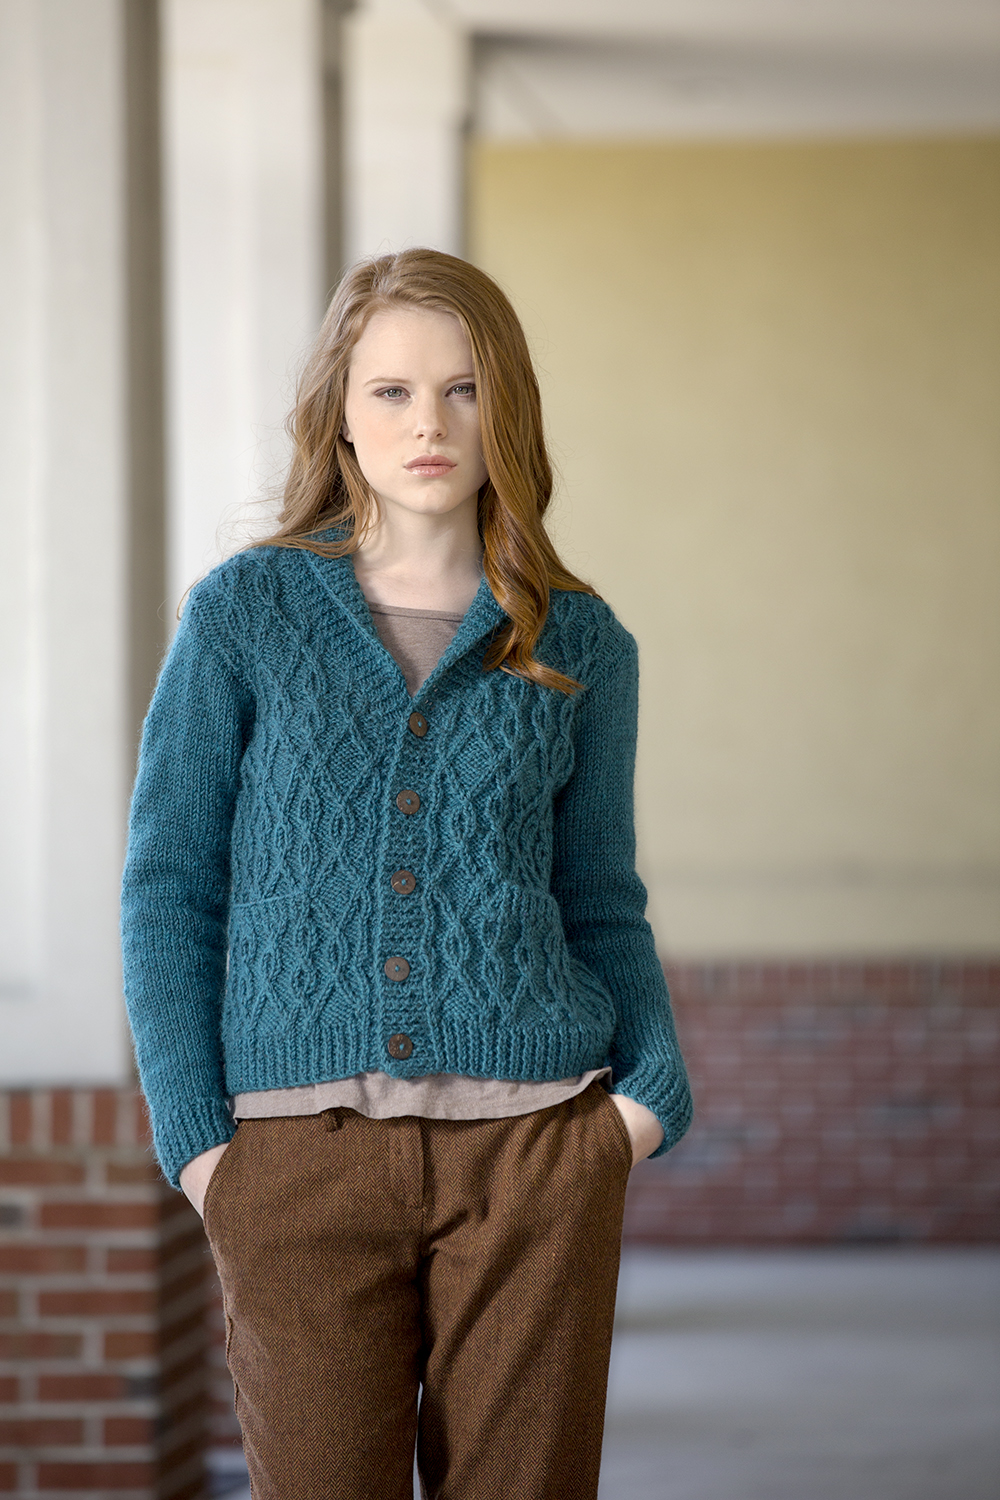
With the holidays upon us, I know many of you are busy plugging away at gift projects. Me? I’m as selfishly knitting as ever and just finished my modified Wesley Heights. Though I finished knitting the pieces and seaming the sweater many weeks ago, I just sewed in my zipper, and I’m going to show you how.
As a reminder, this is our ongoing blog series covering projects from the Deluxe Cable Collection. You can learn more about the knitalong by reading previous blog posts here, viewing the collection here, and joining our Ravelry group here.
I basically knit the Wesley Heights pullover, but followed instructions for the Greensboro Cardigan for collar and zipper facings. Stitches for the collar are picked up around the neck edge and knit upward. Then, the first and last 6 stitches of the collar are continued to form the zipper facings.
It’s important to block your knitting before measuring for the zipper length and installing it. Zippers and knitting can be tricky, since zipper tape is typically woven and non-stretchy. But I’m going to show you what you can do to avoid the puckery zipper look.
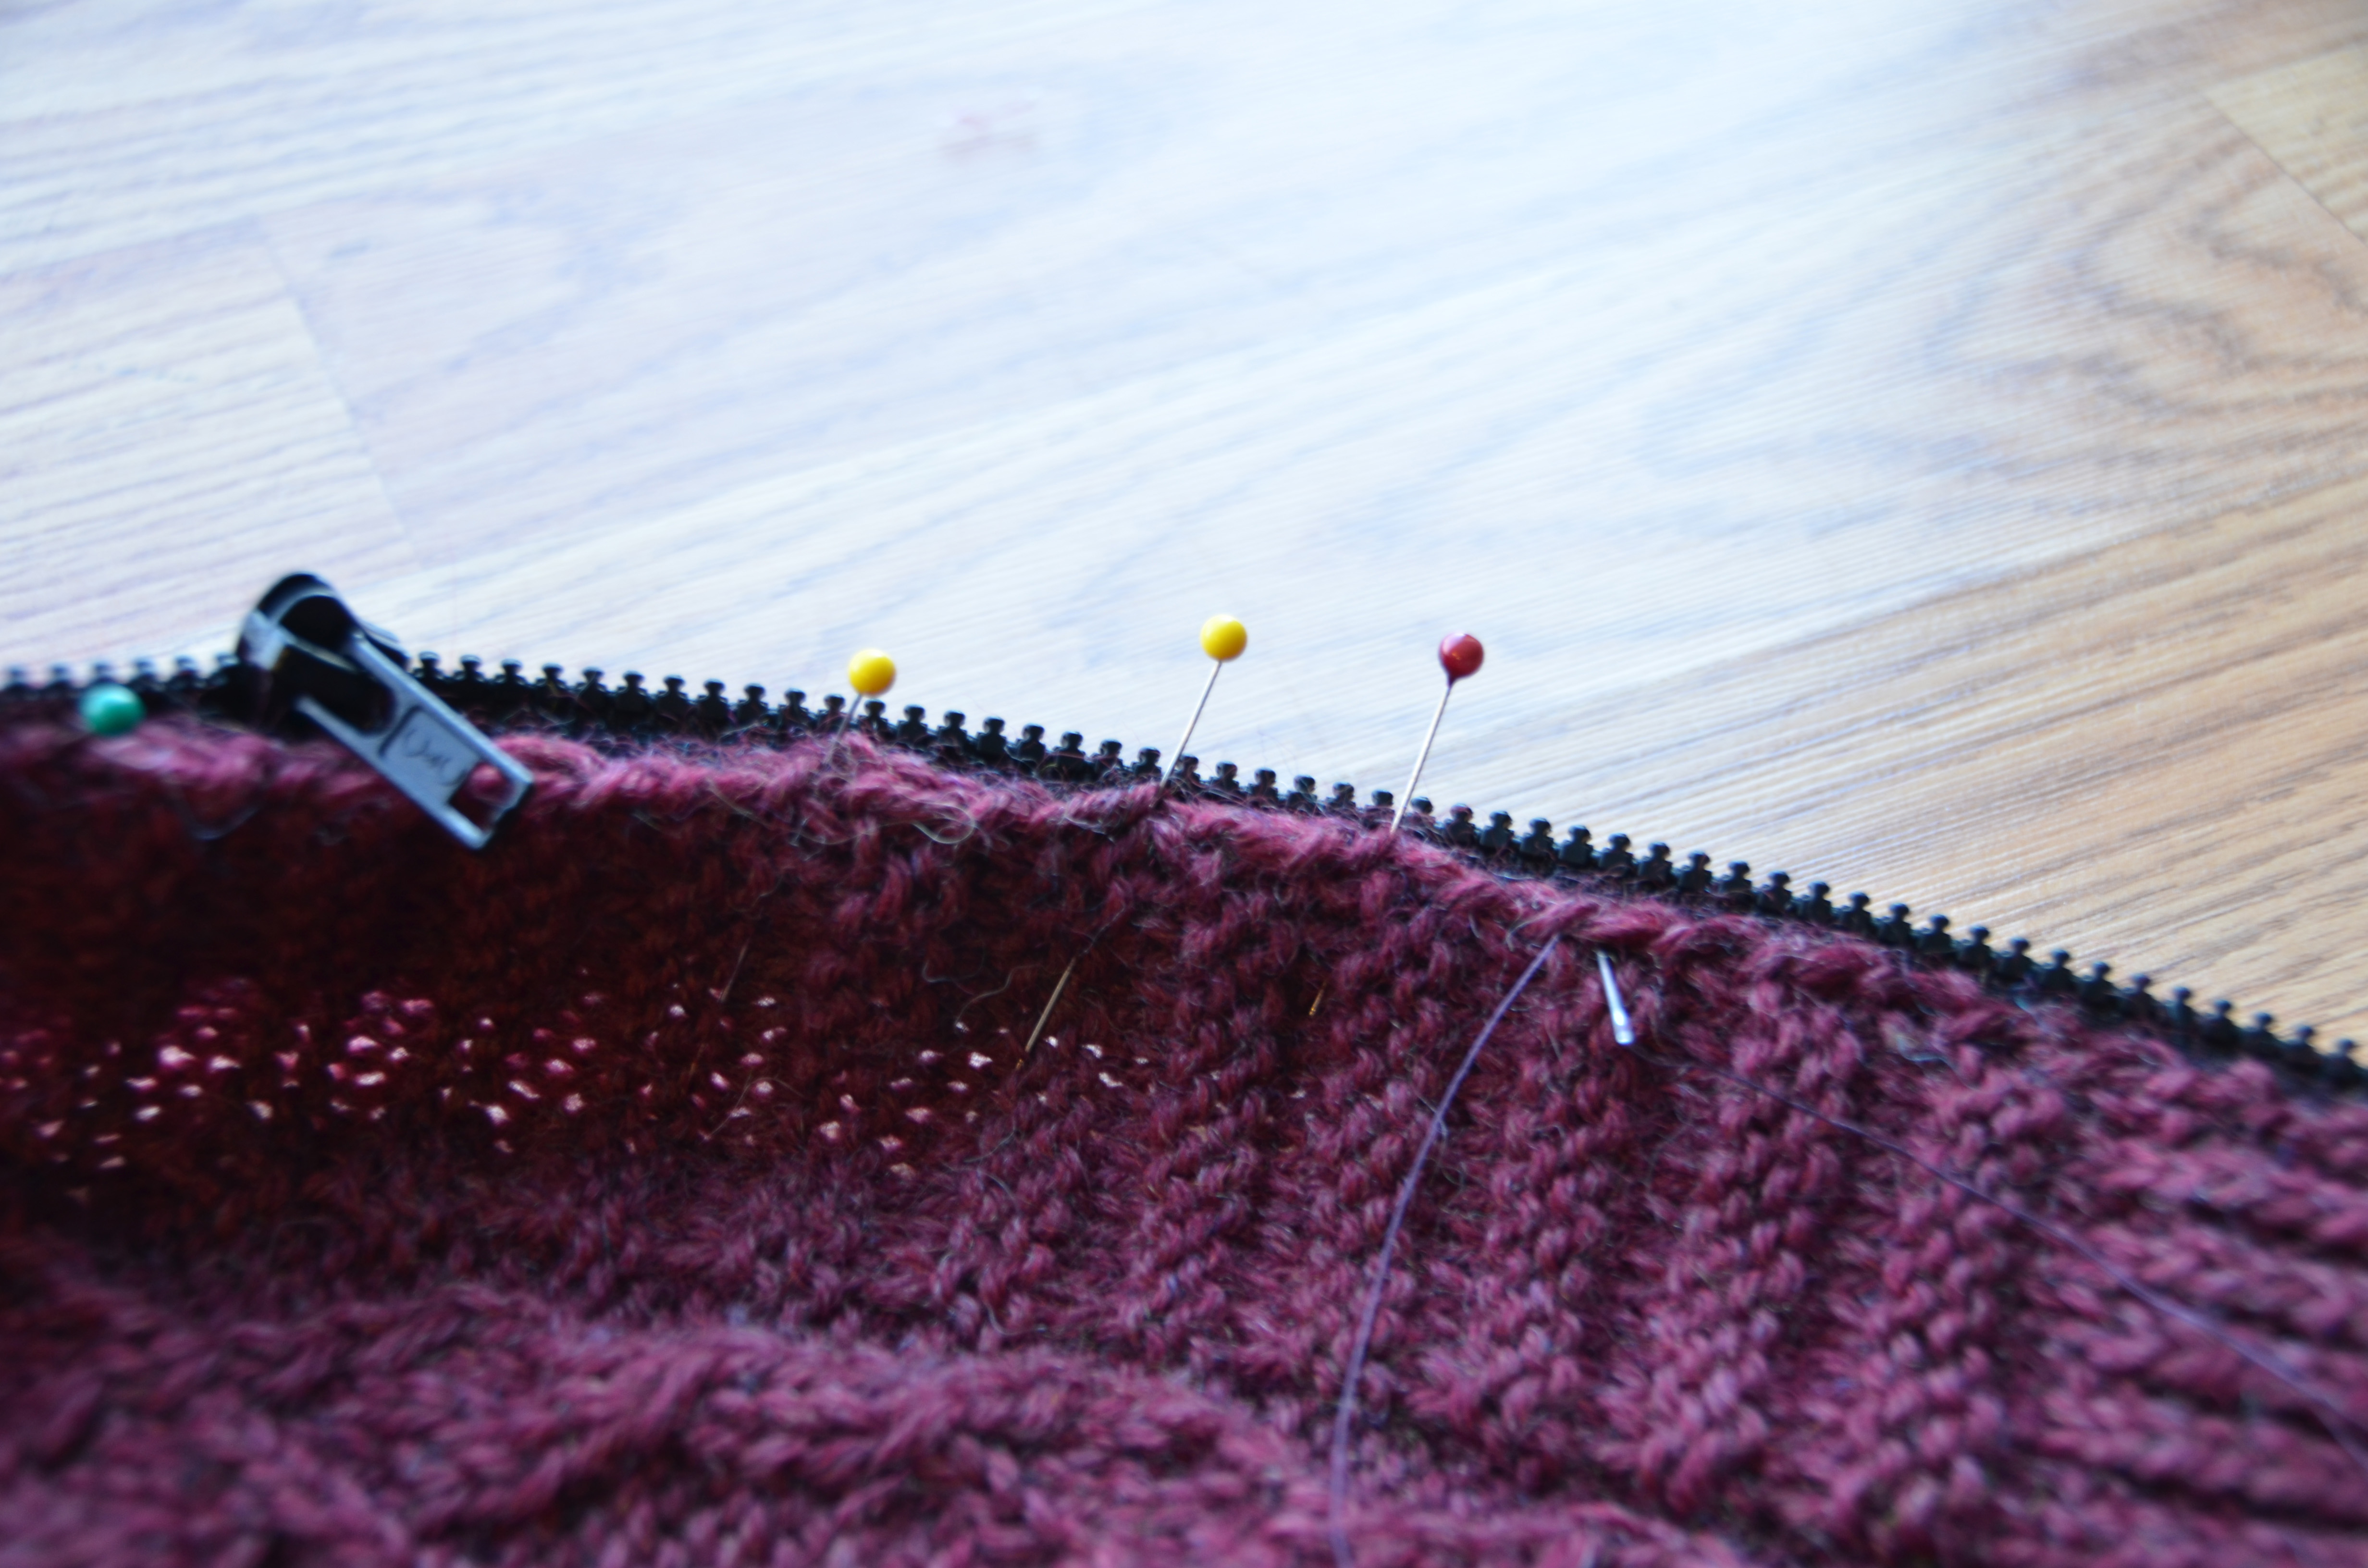
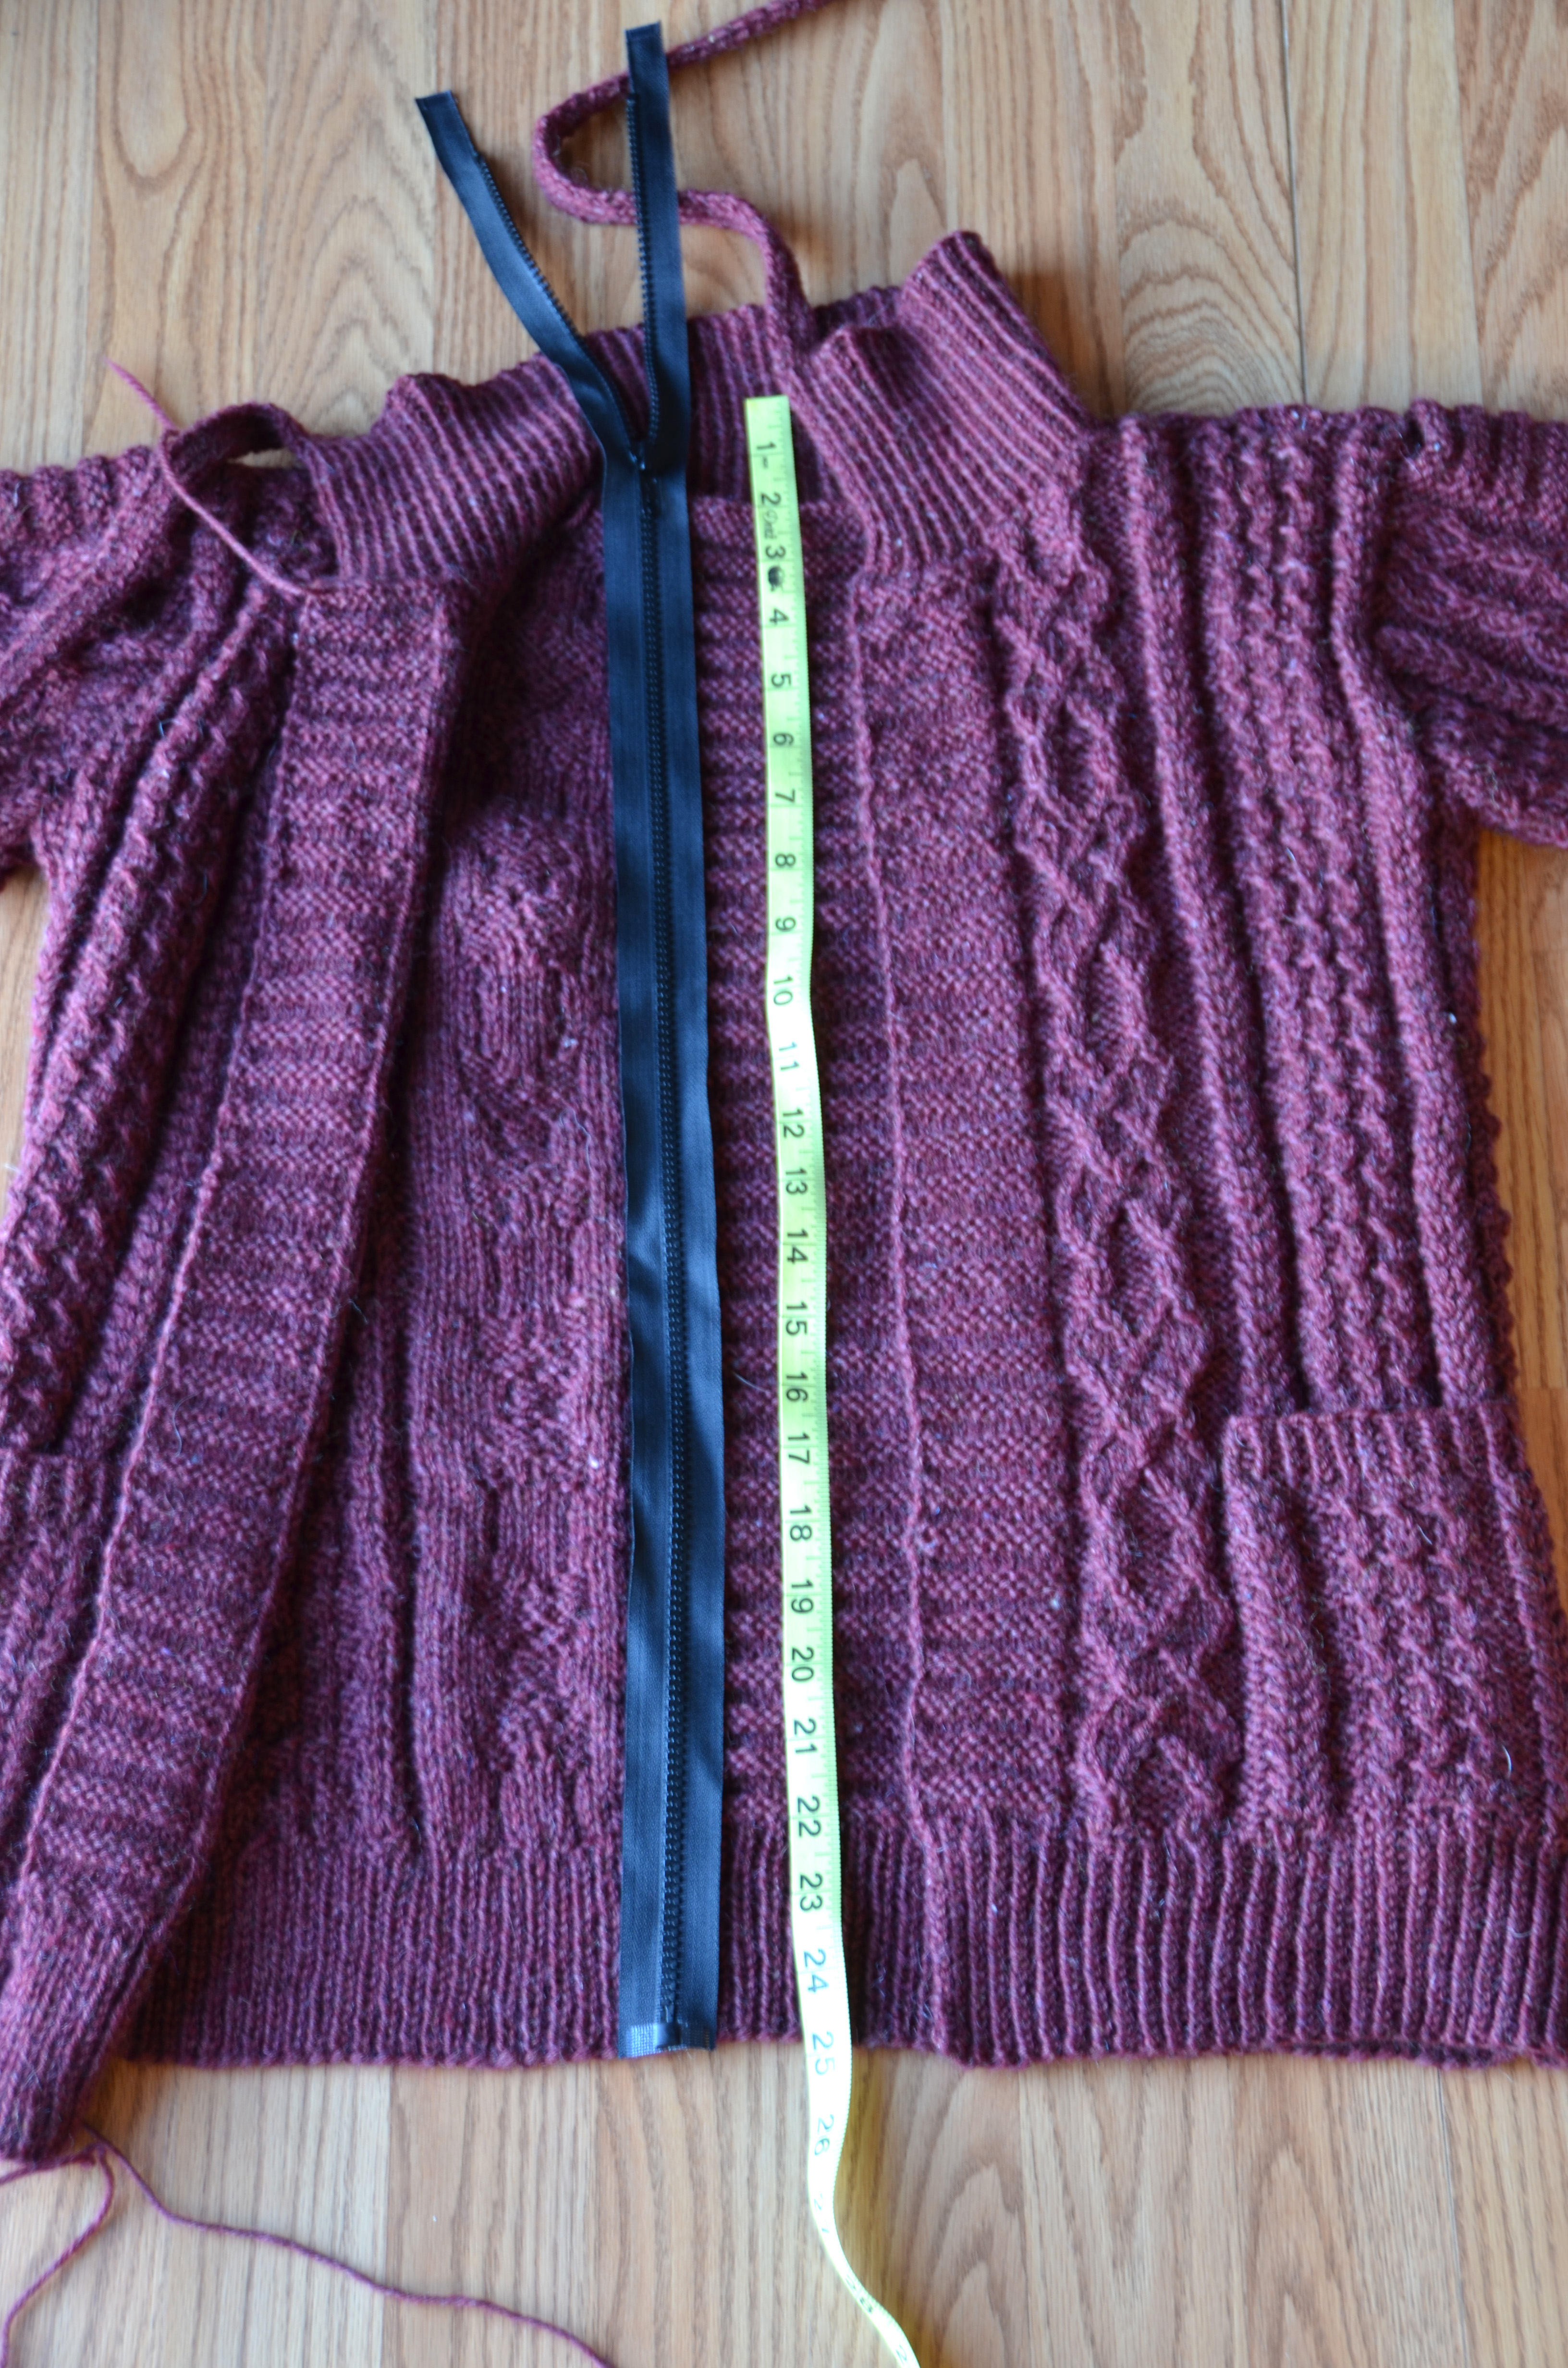
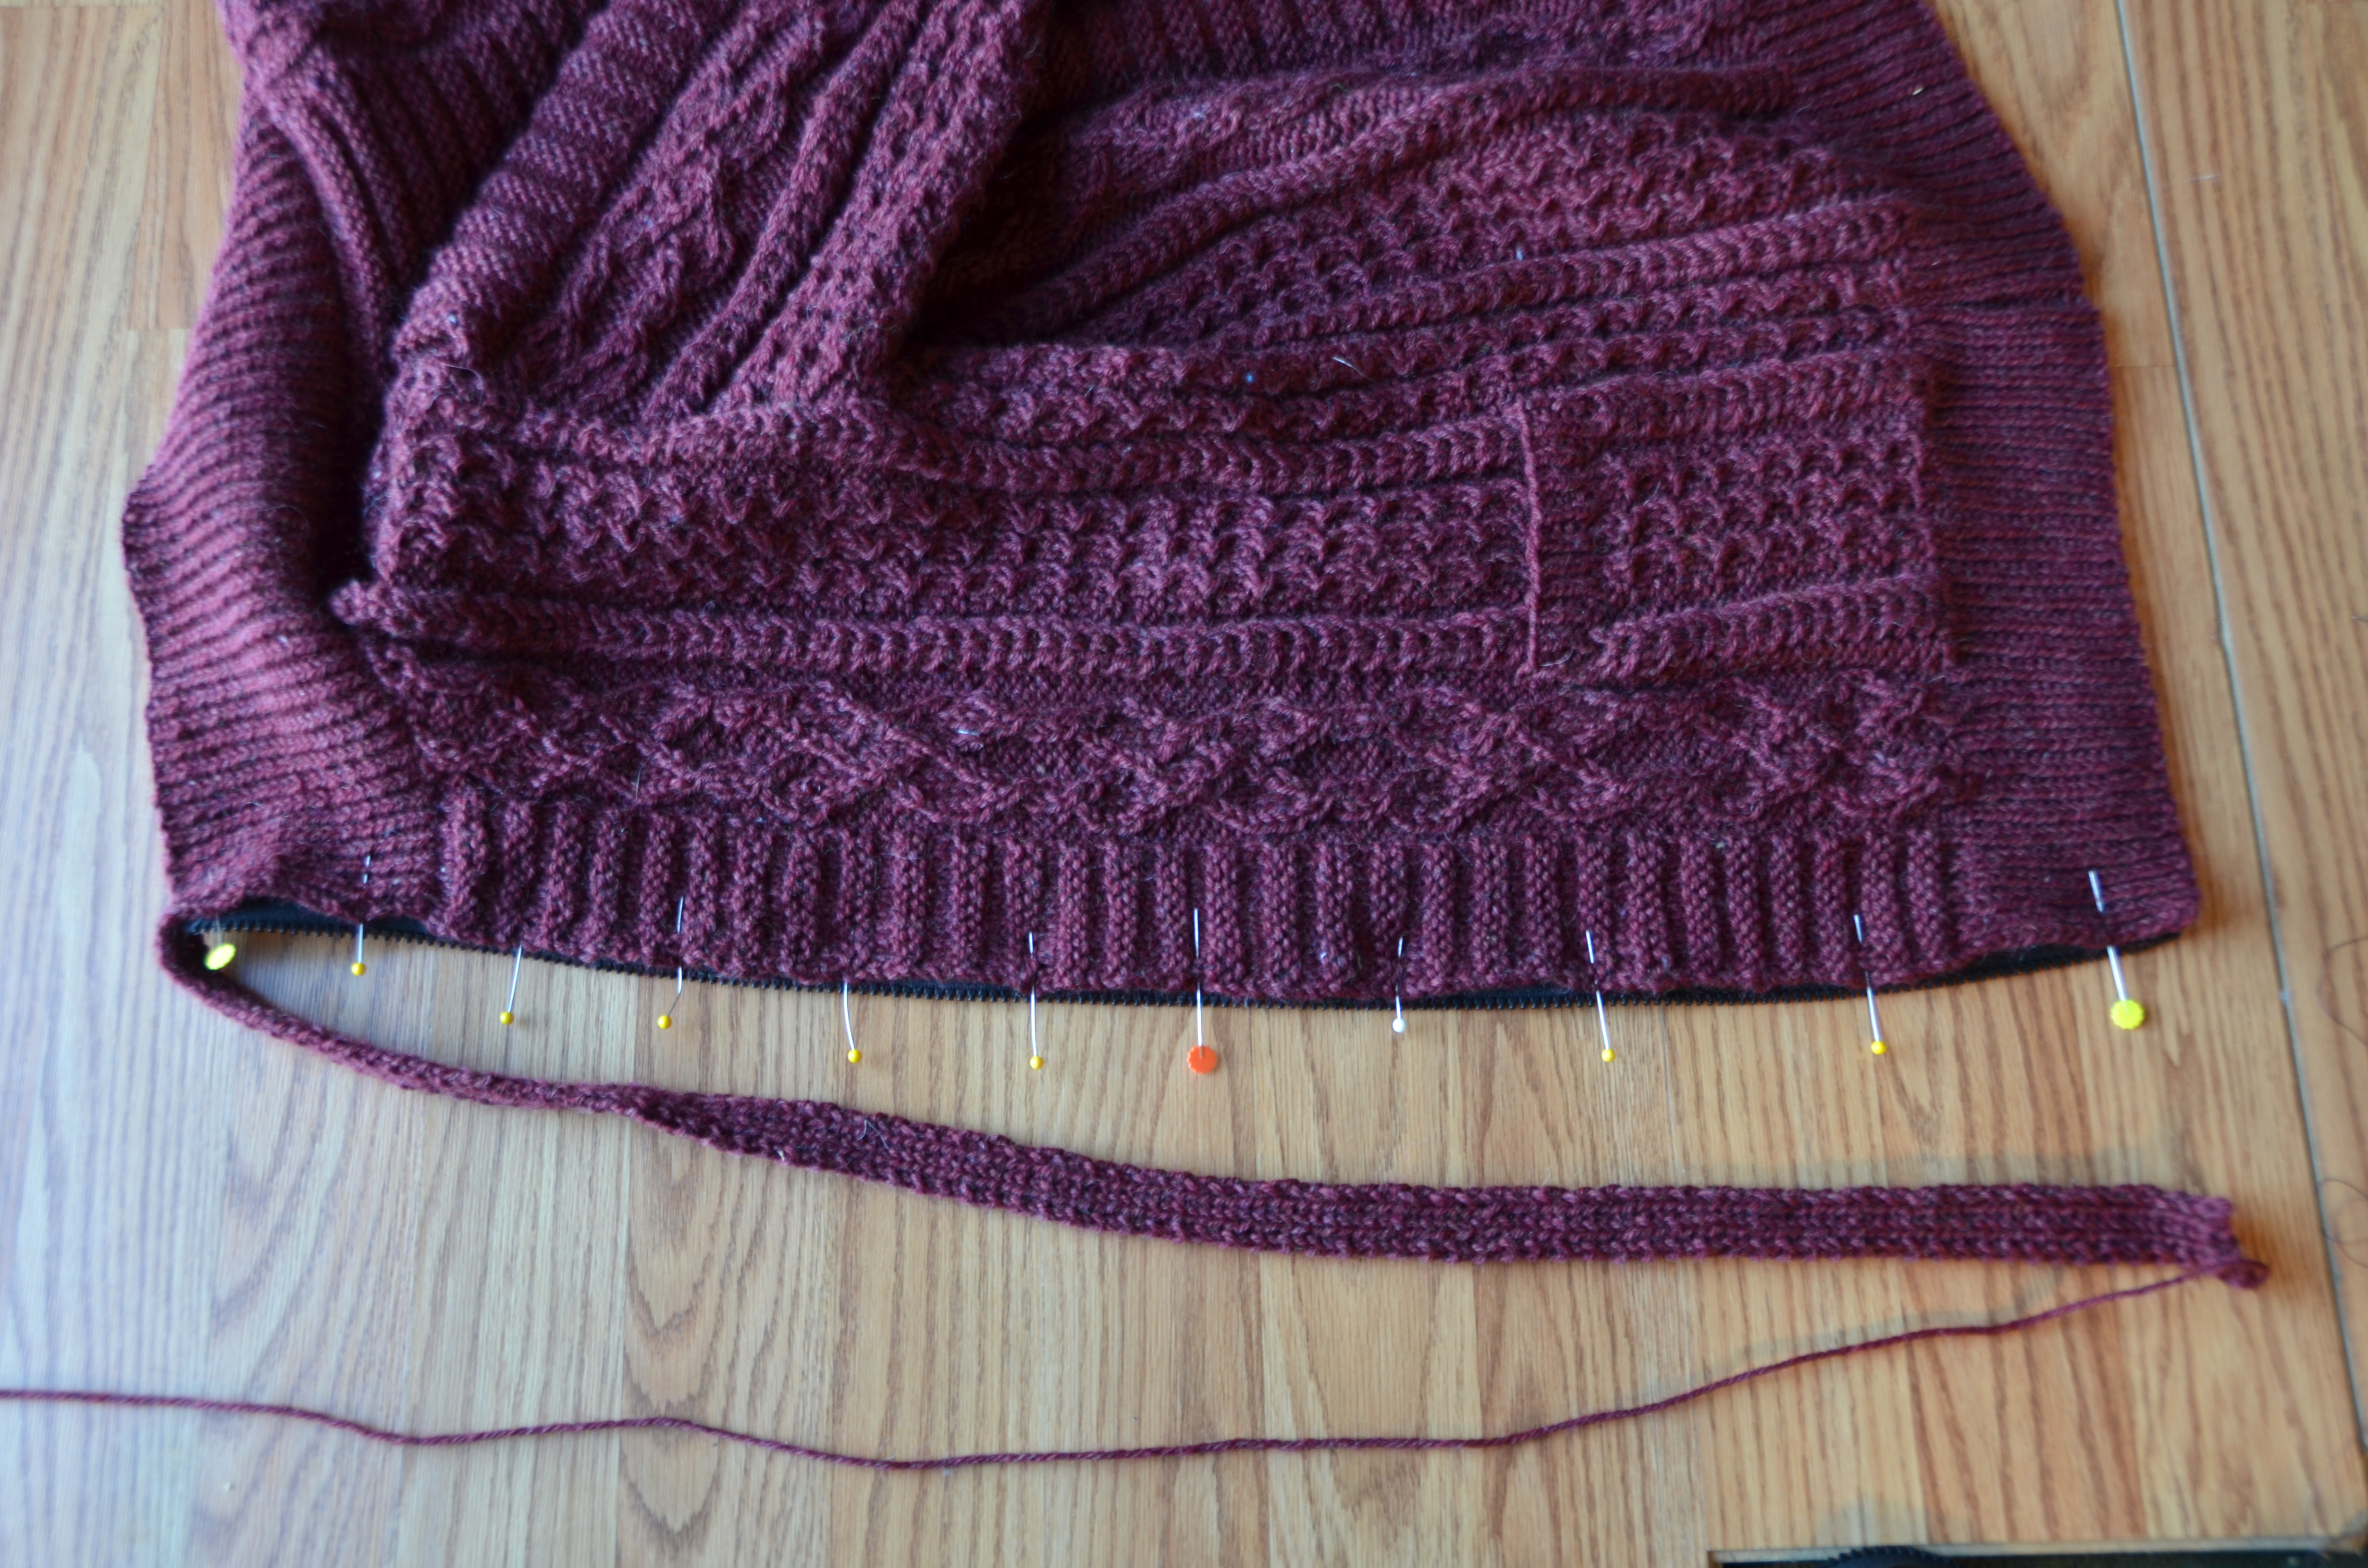
Open up your sweater and measure along the front opening from the very bottom edge to the top of the collar. I like to leave a small margin of about 1/4″ at the top and bottom before the zipper begins and after it ends. Mark with a pencil or with pins (as shown) where the zipper tape needs to be cut.
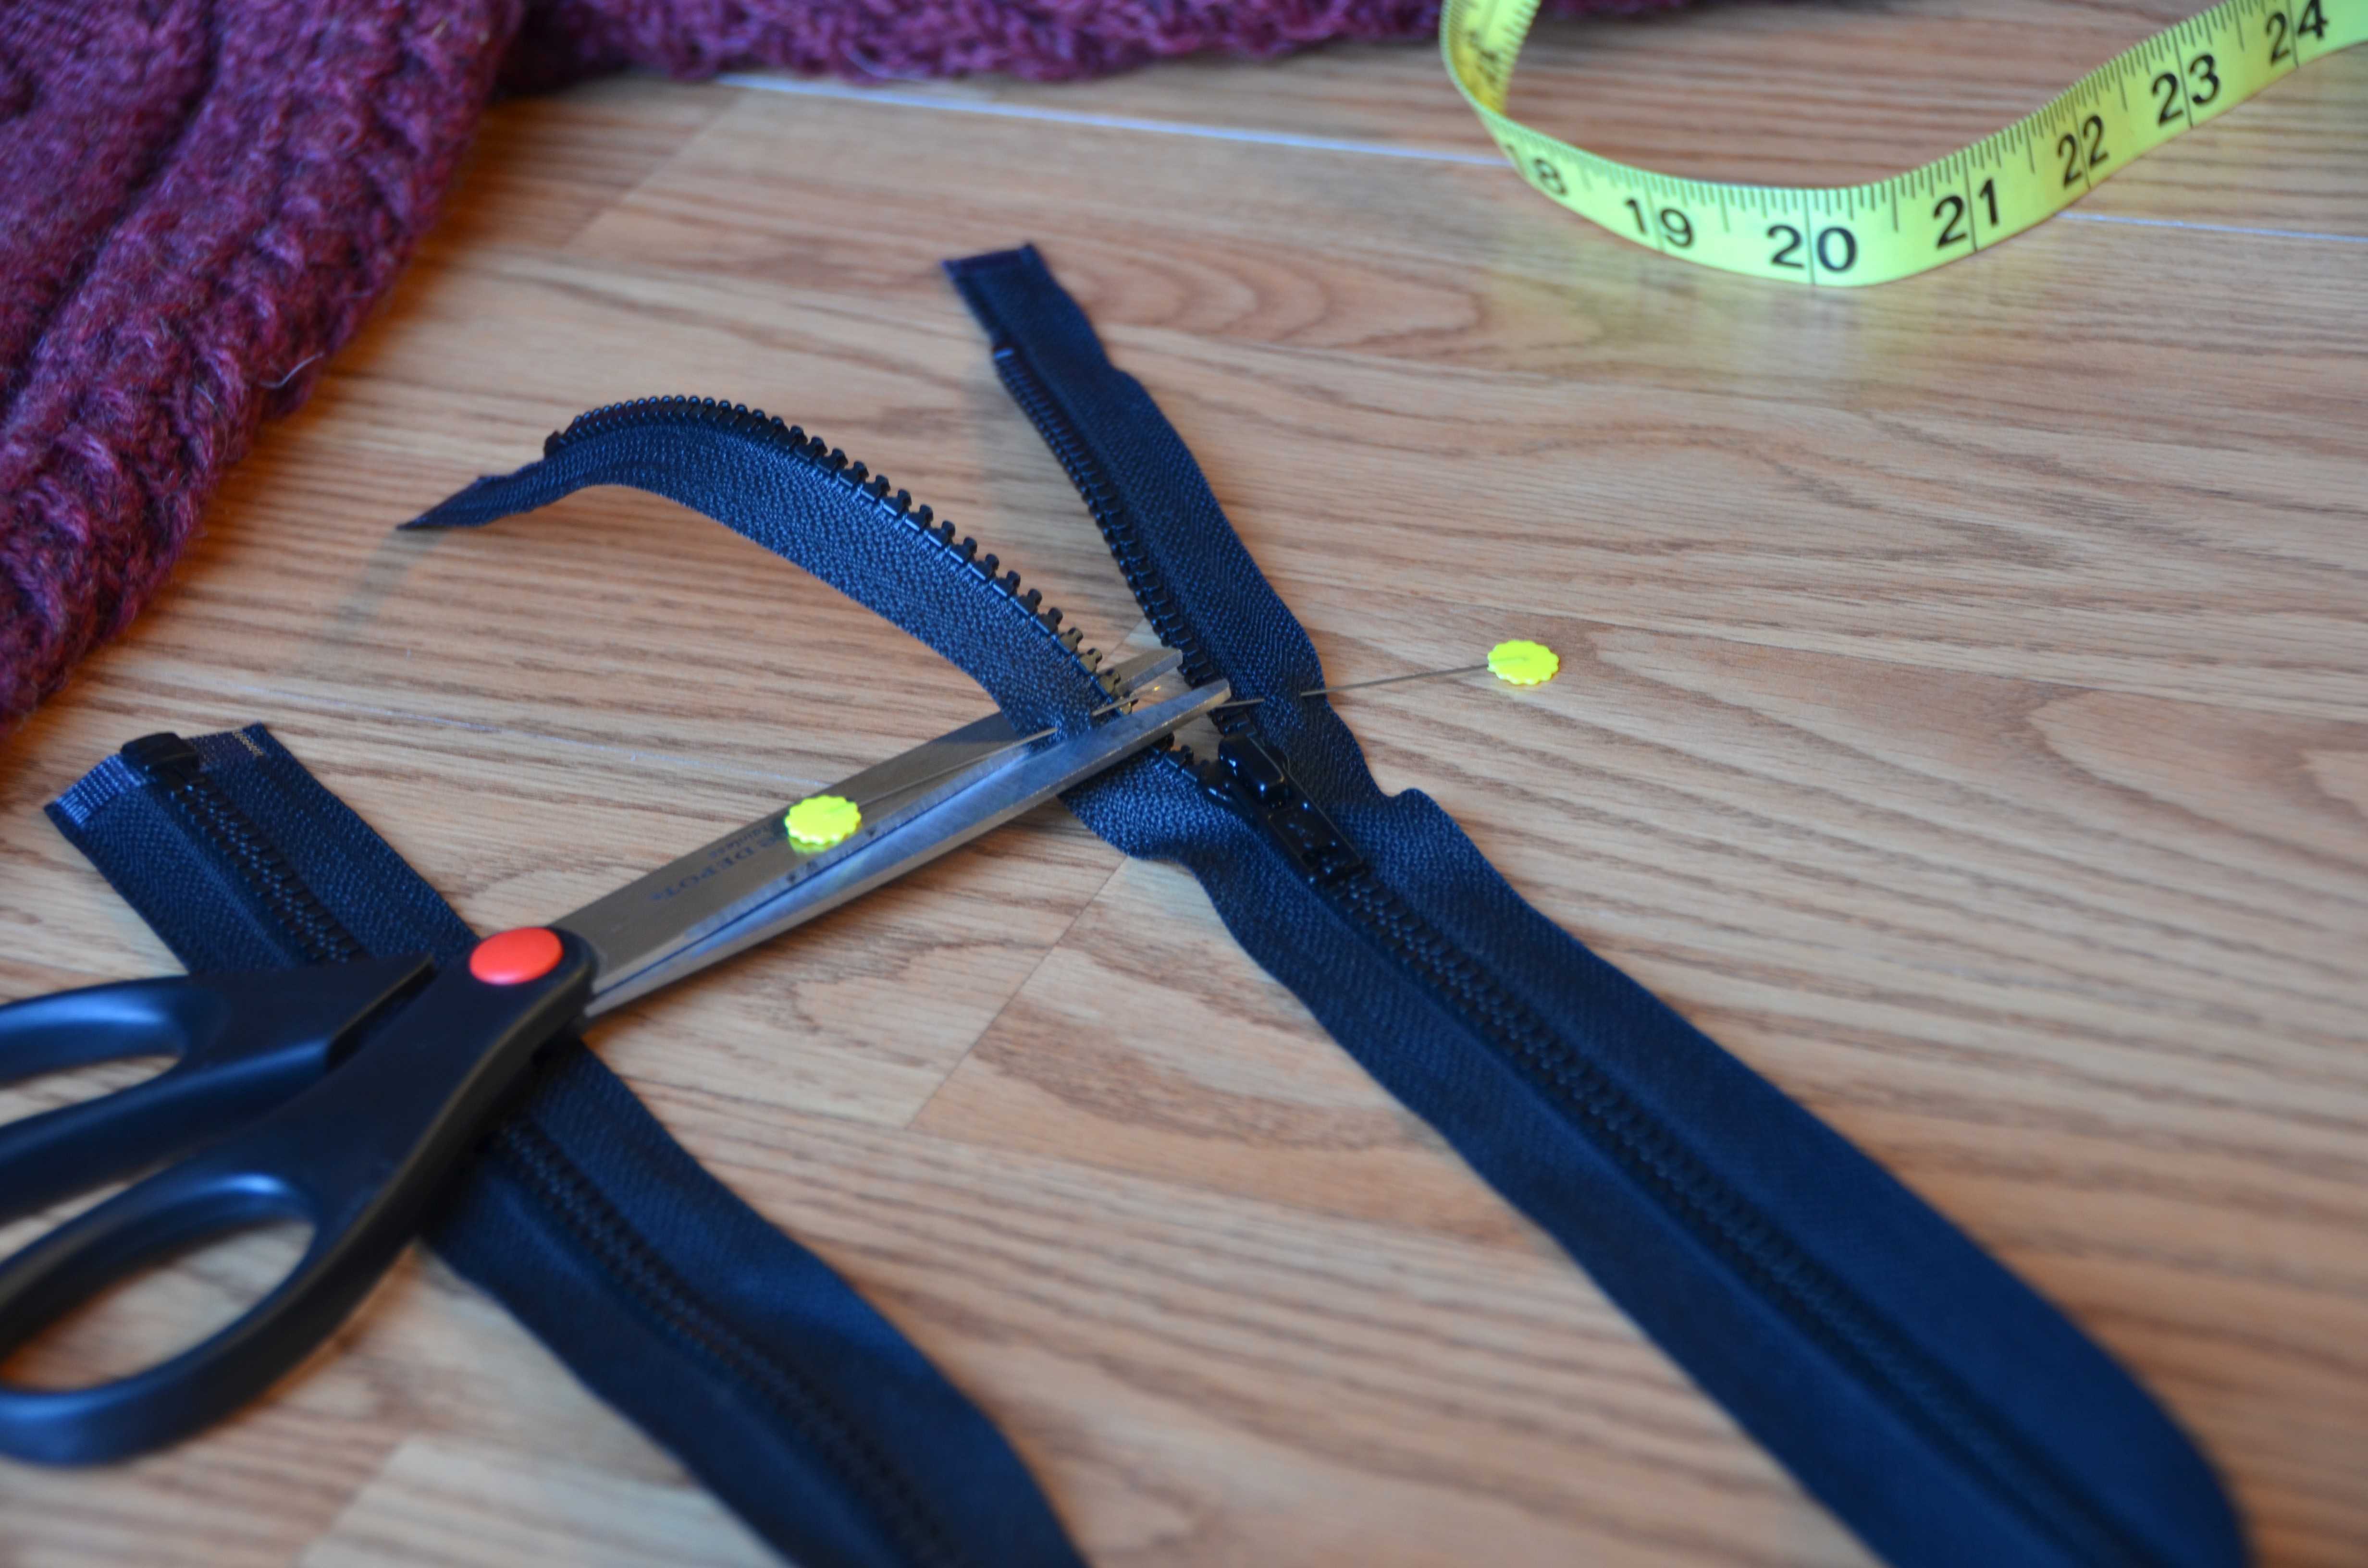
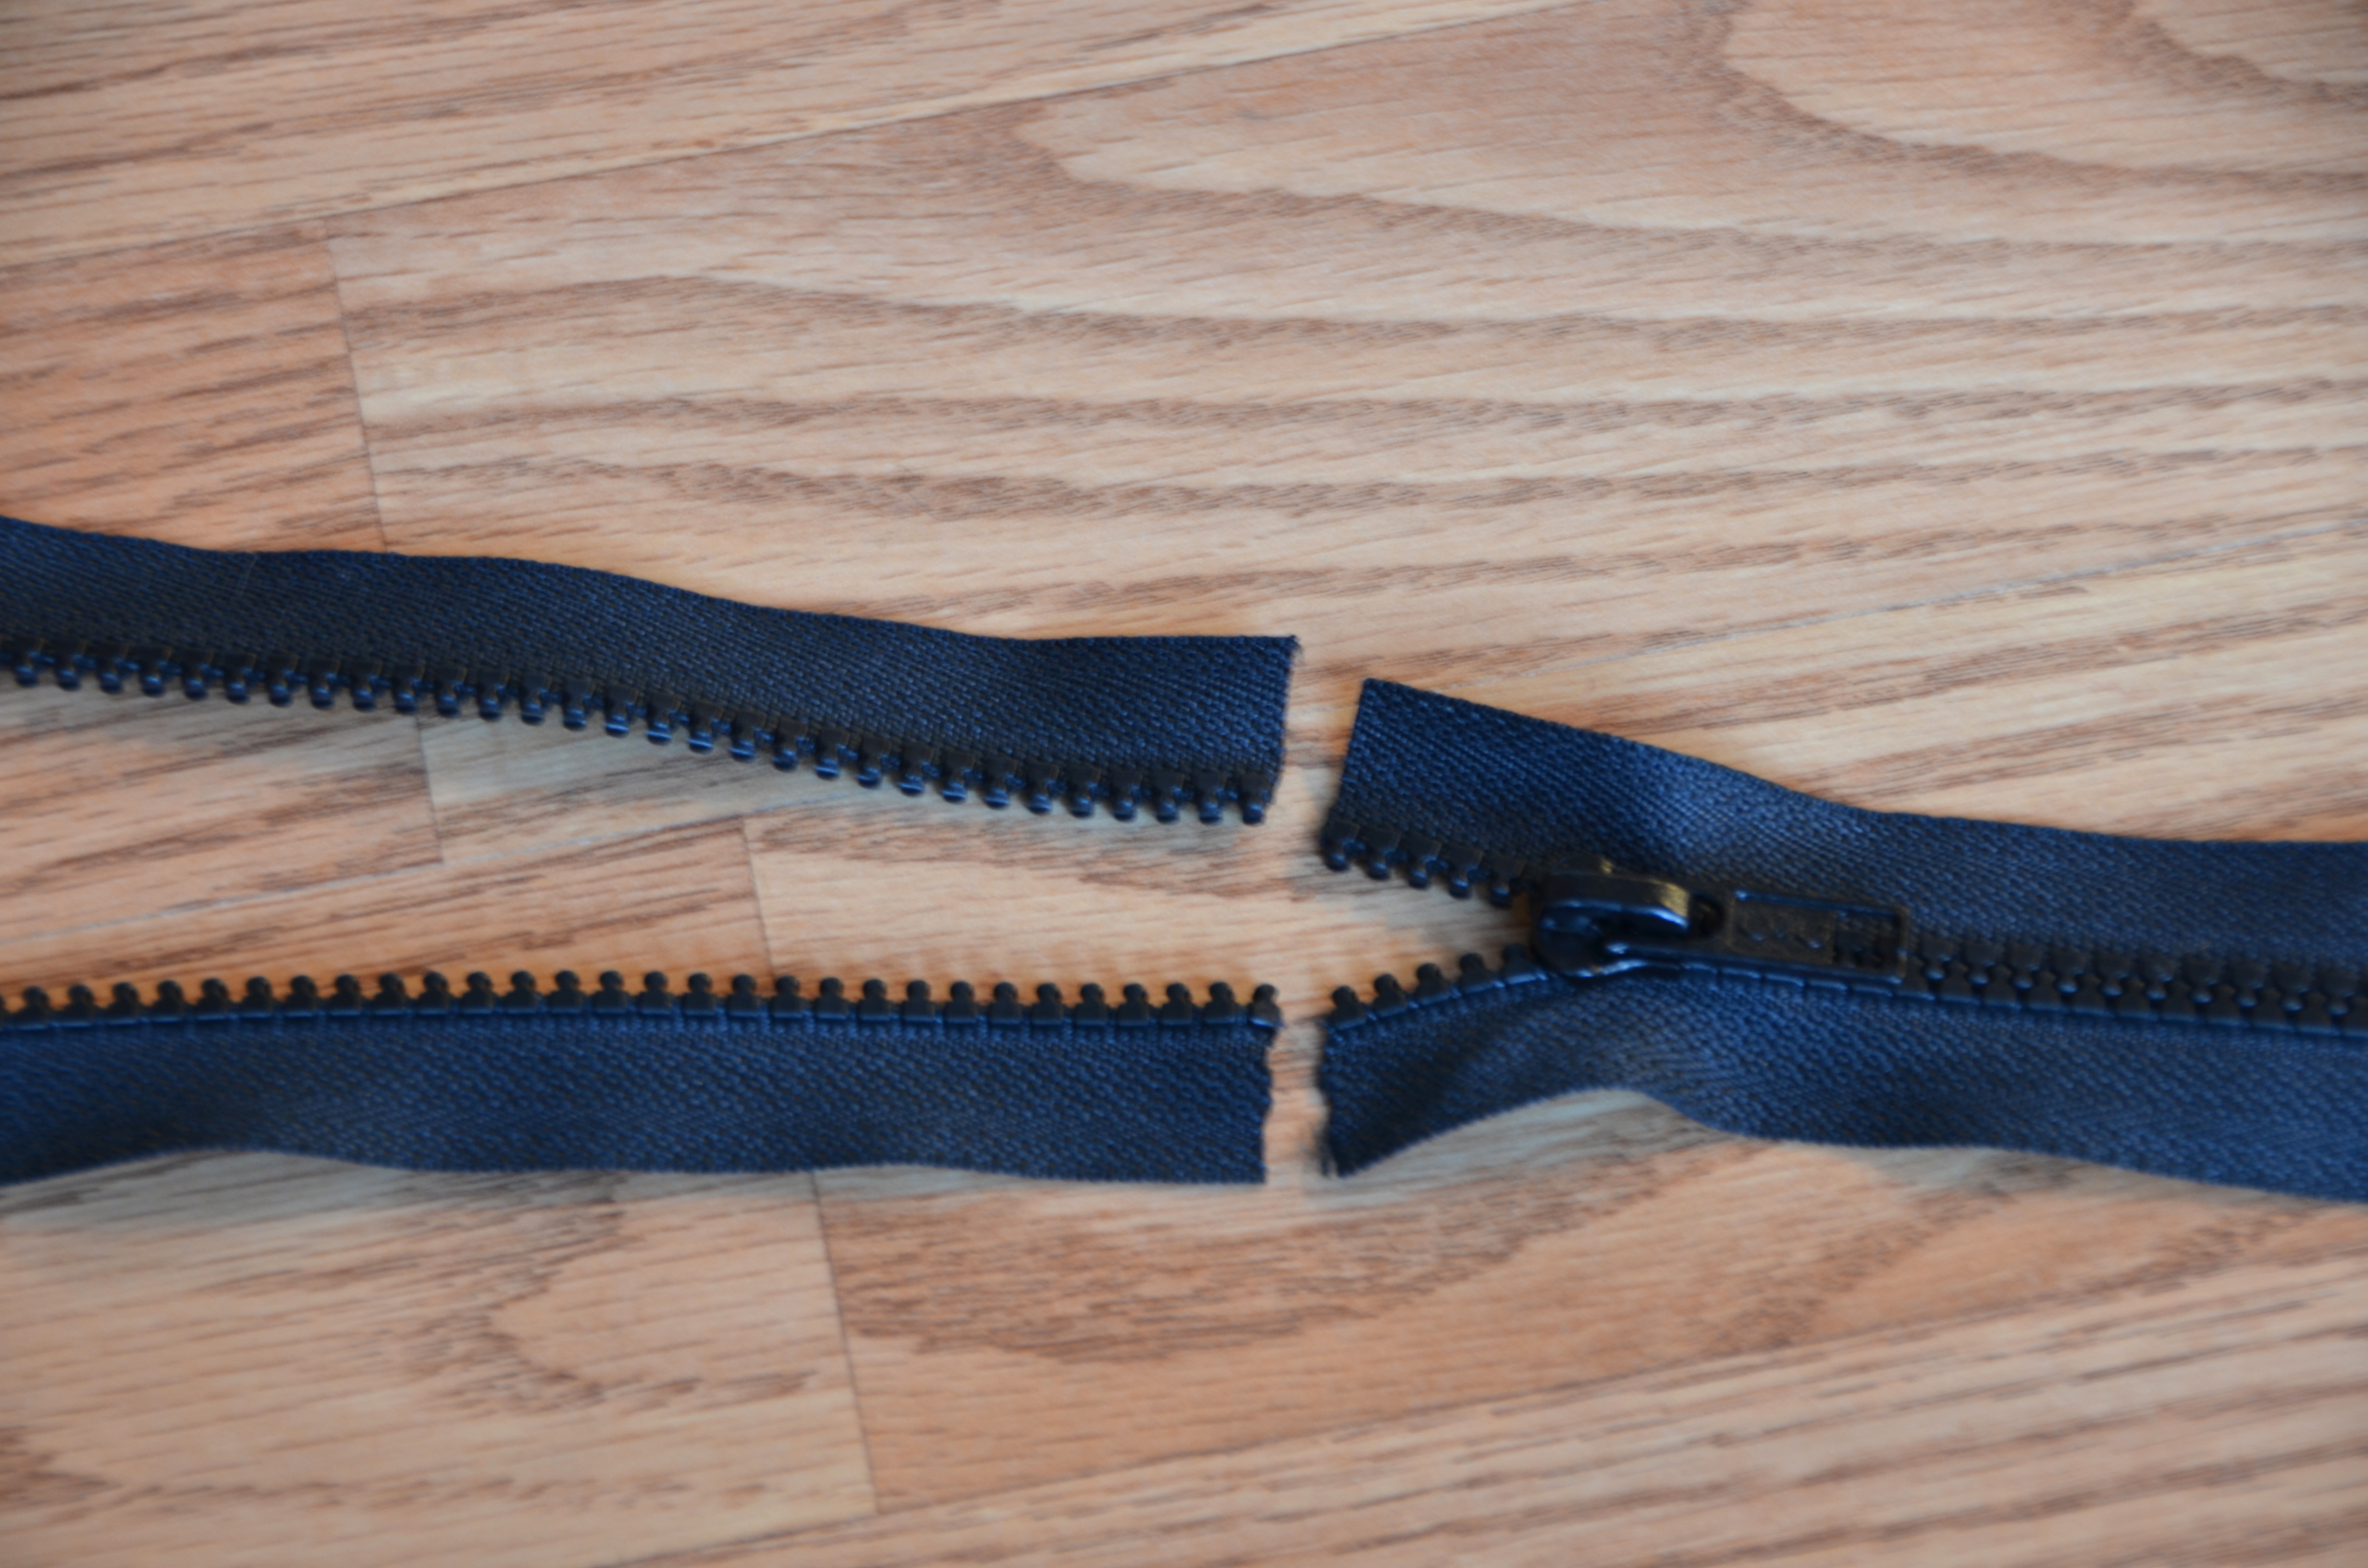
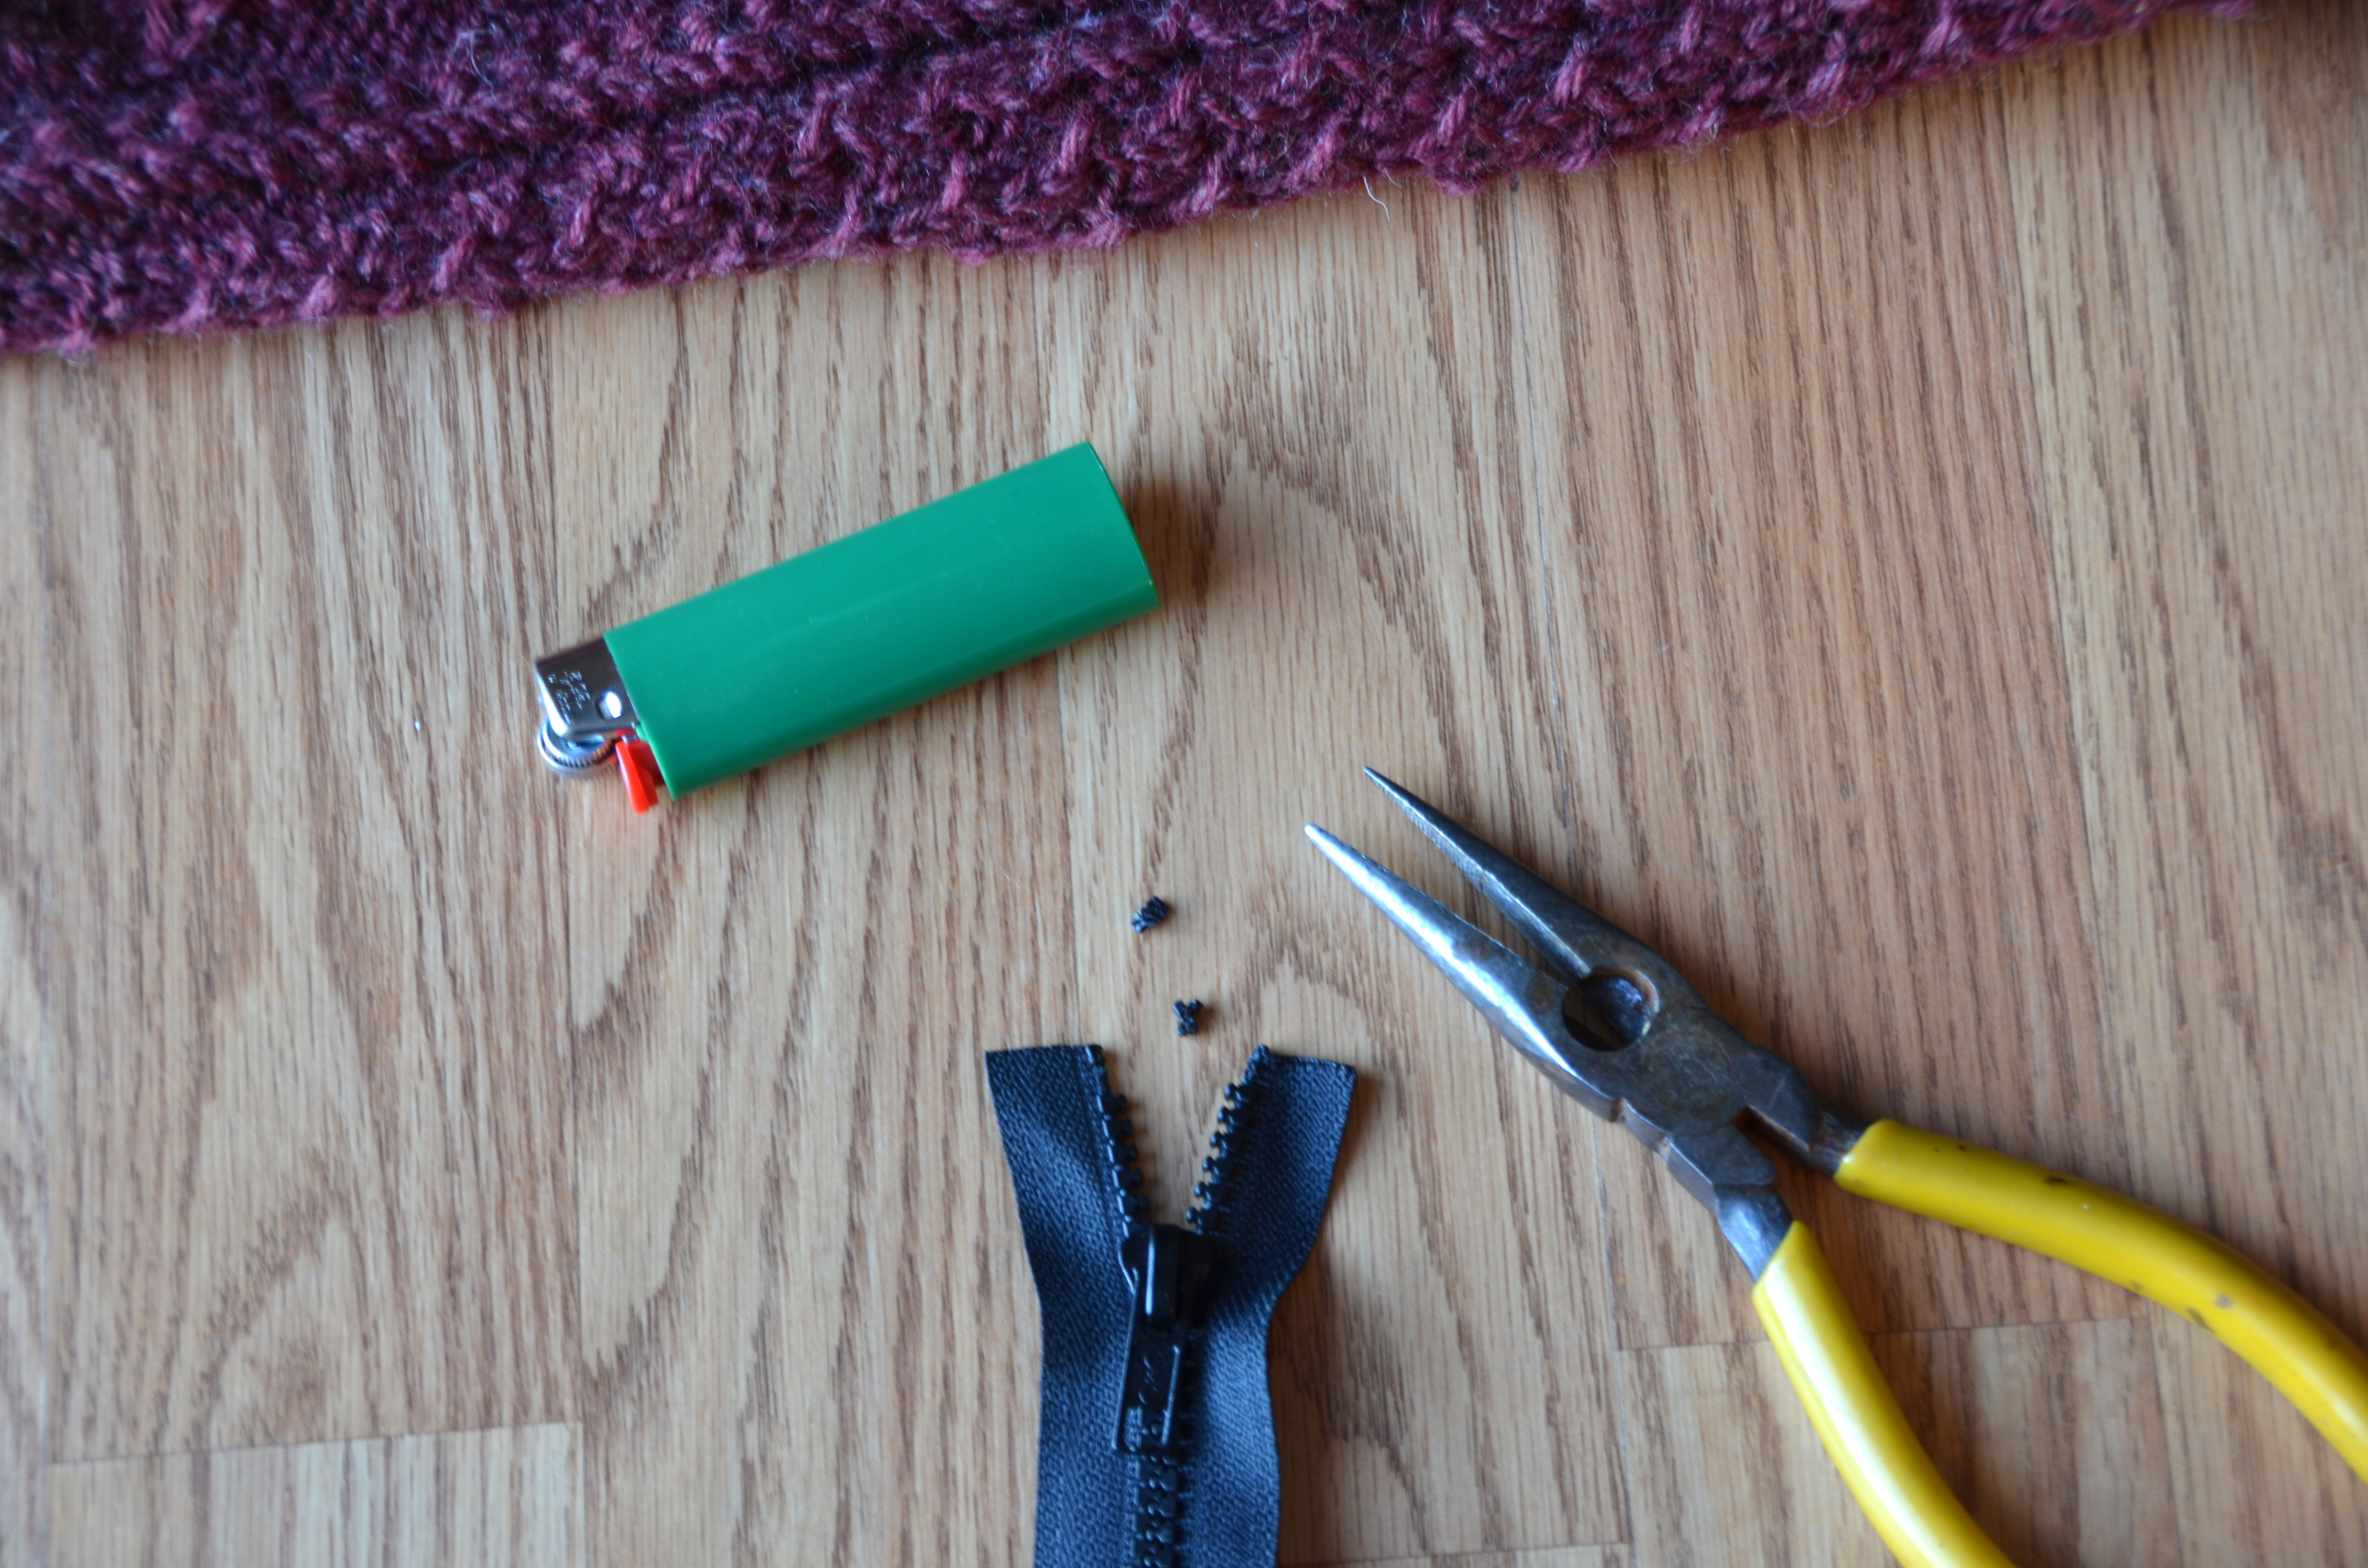
Next, we’re going to pretty-up that cut edge. I’m using a plastic zipper in the photo below. This method works great for a zipper with metal teeth, too. With pliers, carefully remove the 2 teeth from the top of the tape. If your metal zipper came with a stop (which looks like a metal tab), you can remove it from the piece you cut off and reattach to the newly shortened zipper.
Then, take a lighter or other flame and carefully melt the end of the tape. This will not work for a cotton zipper tape – it only works on polyester, nylon, acrylic – something that will melt when burned. Be careful, you want to barely melt the end just to stop the fraying of the tape where you cut it.
If you have a cotton or plant fiber tape, fold under the end and sew it down.
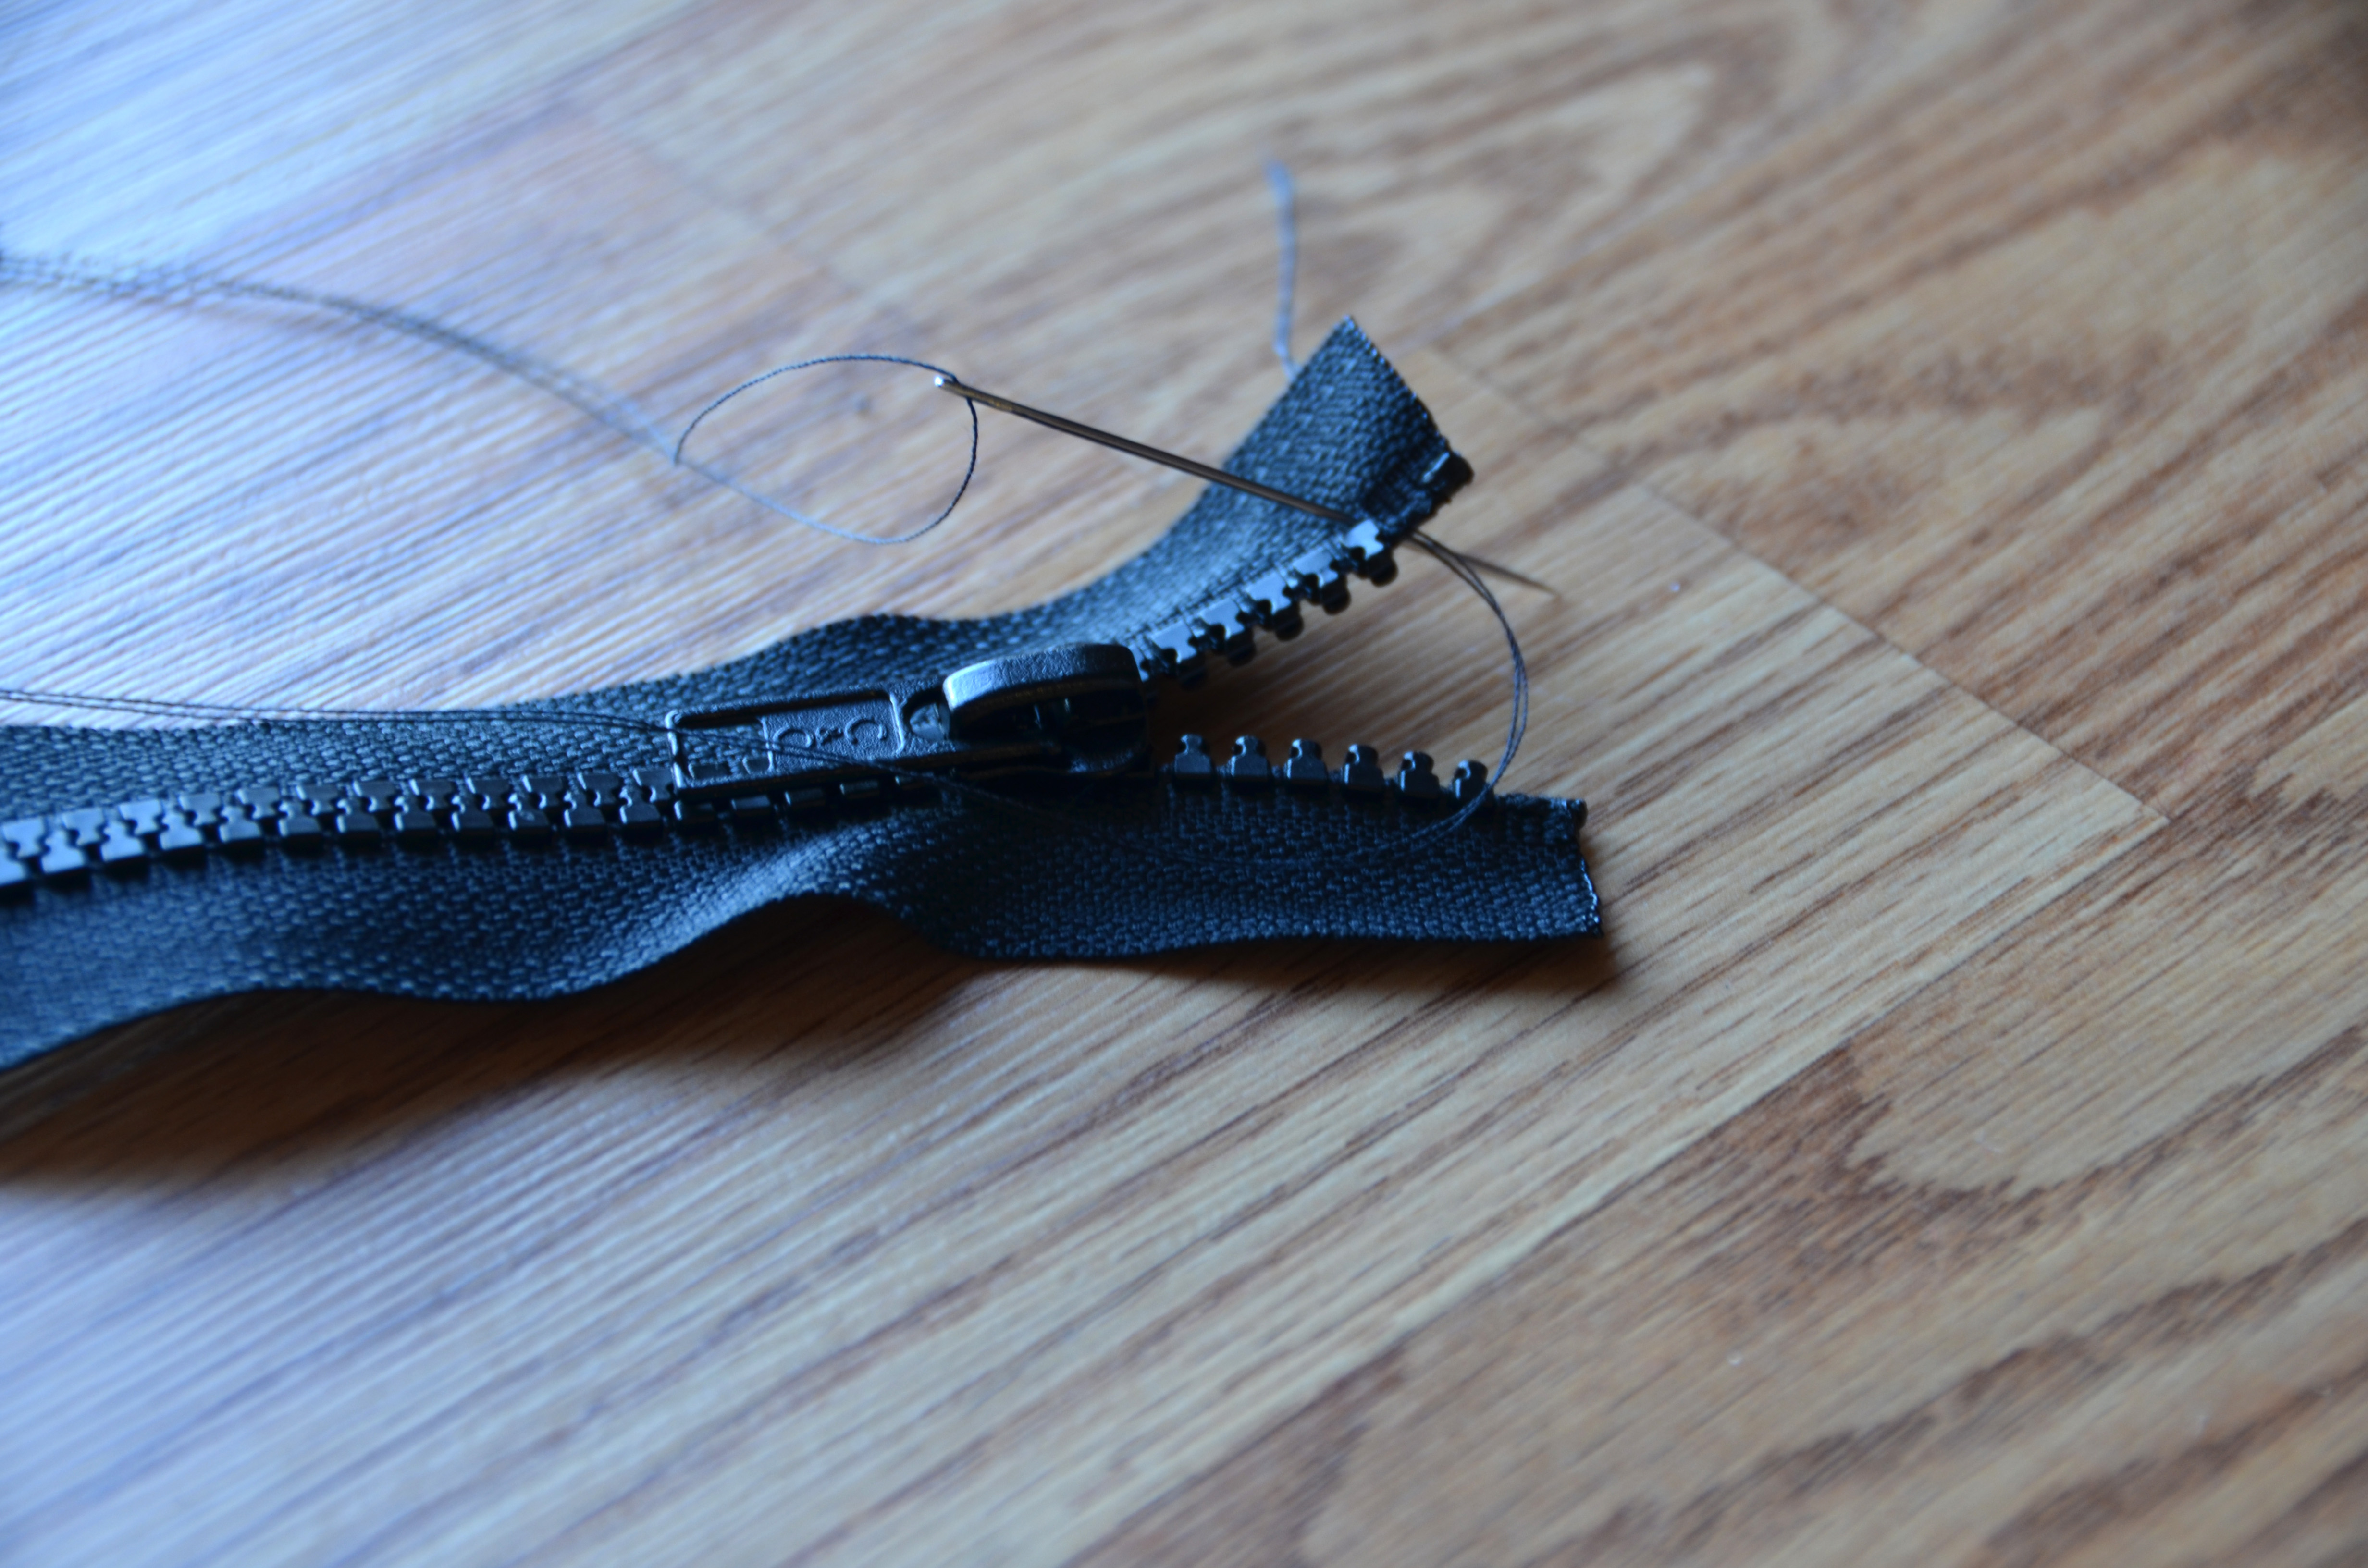
This next step probably isn’t necessary for this particular zipper installation since my zipper will be sandwiched between the sweater and knitted zipper facing. But I’ve been burned before with forgetfully sliding my zipper off the top of the tape, so I like to do everything possible to prevent that! By whip stitching around the top of the tape just above the teeth, this will prevent the zipper from sliding off. Or if you had a metal zipper with a zipper stop and reinstalled it, there is no need for this step.
Next, unzip your zipper (you did buy a separating zipper, right?) and lay out the appropriate sides on their respective fronts.
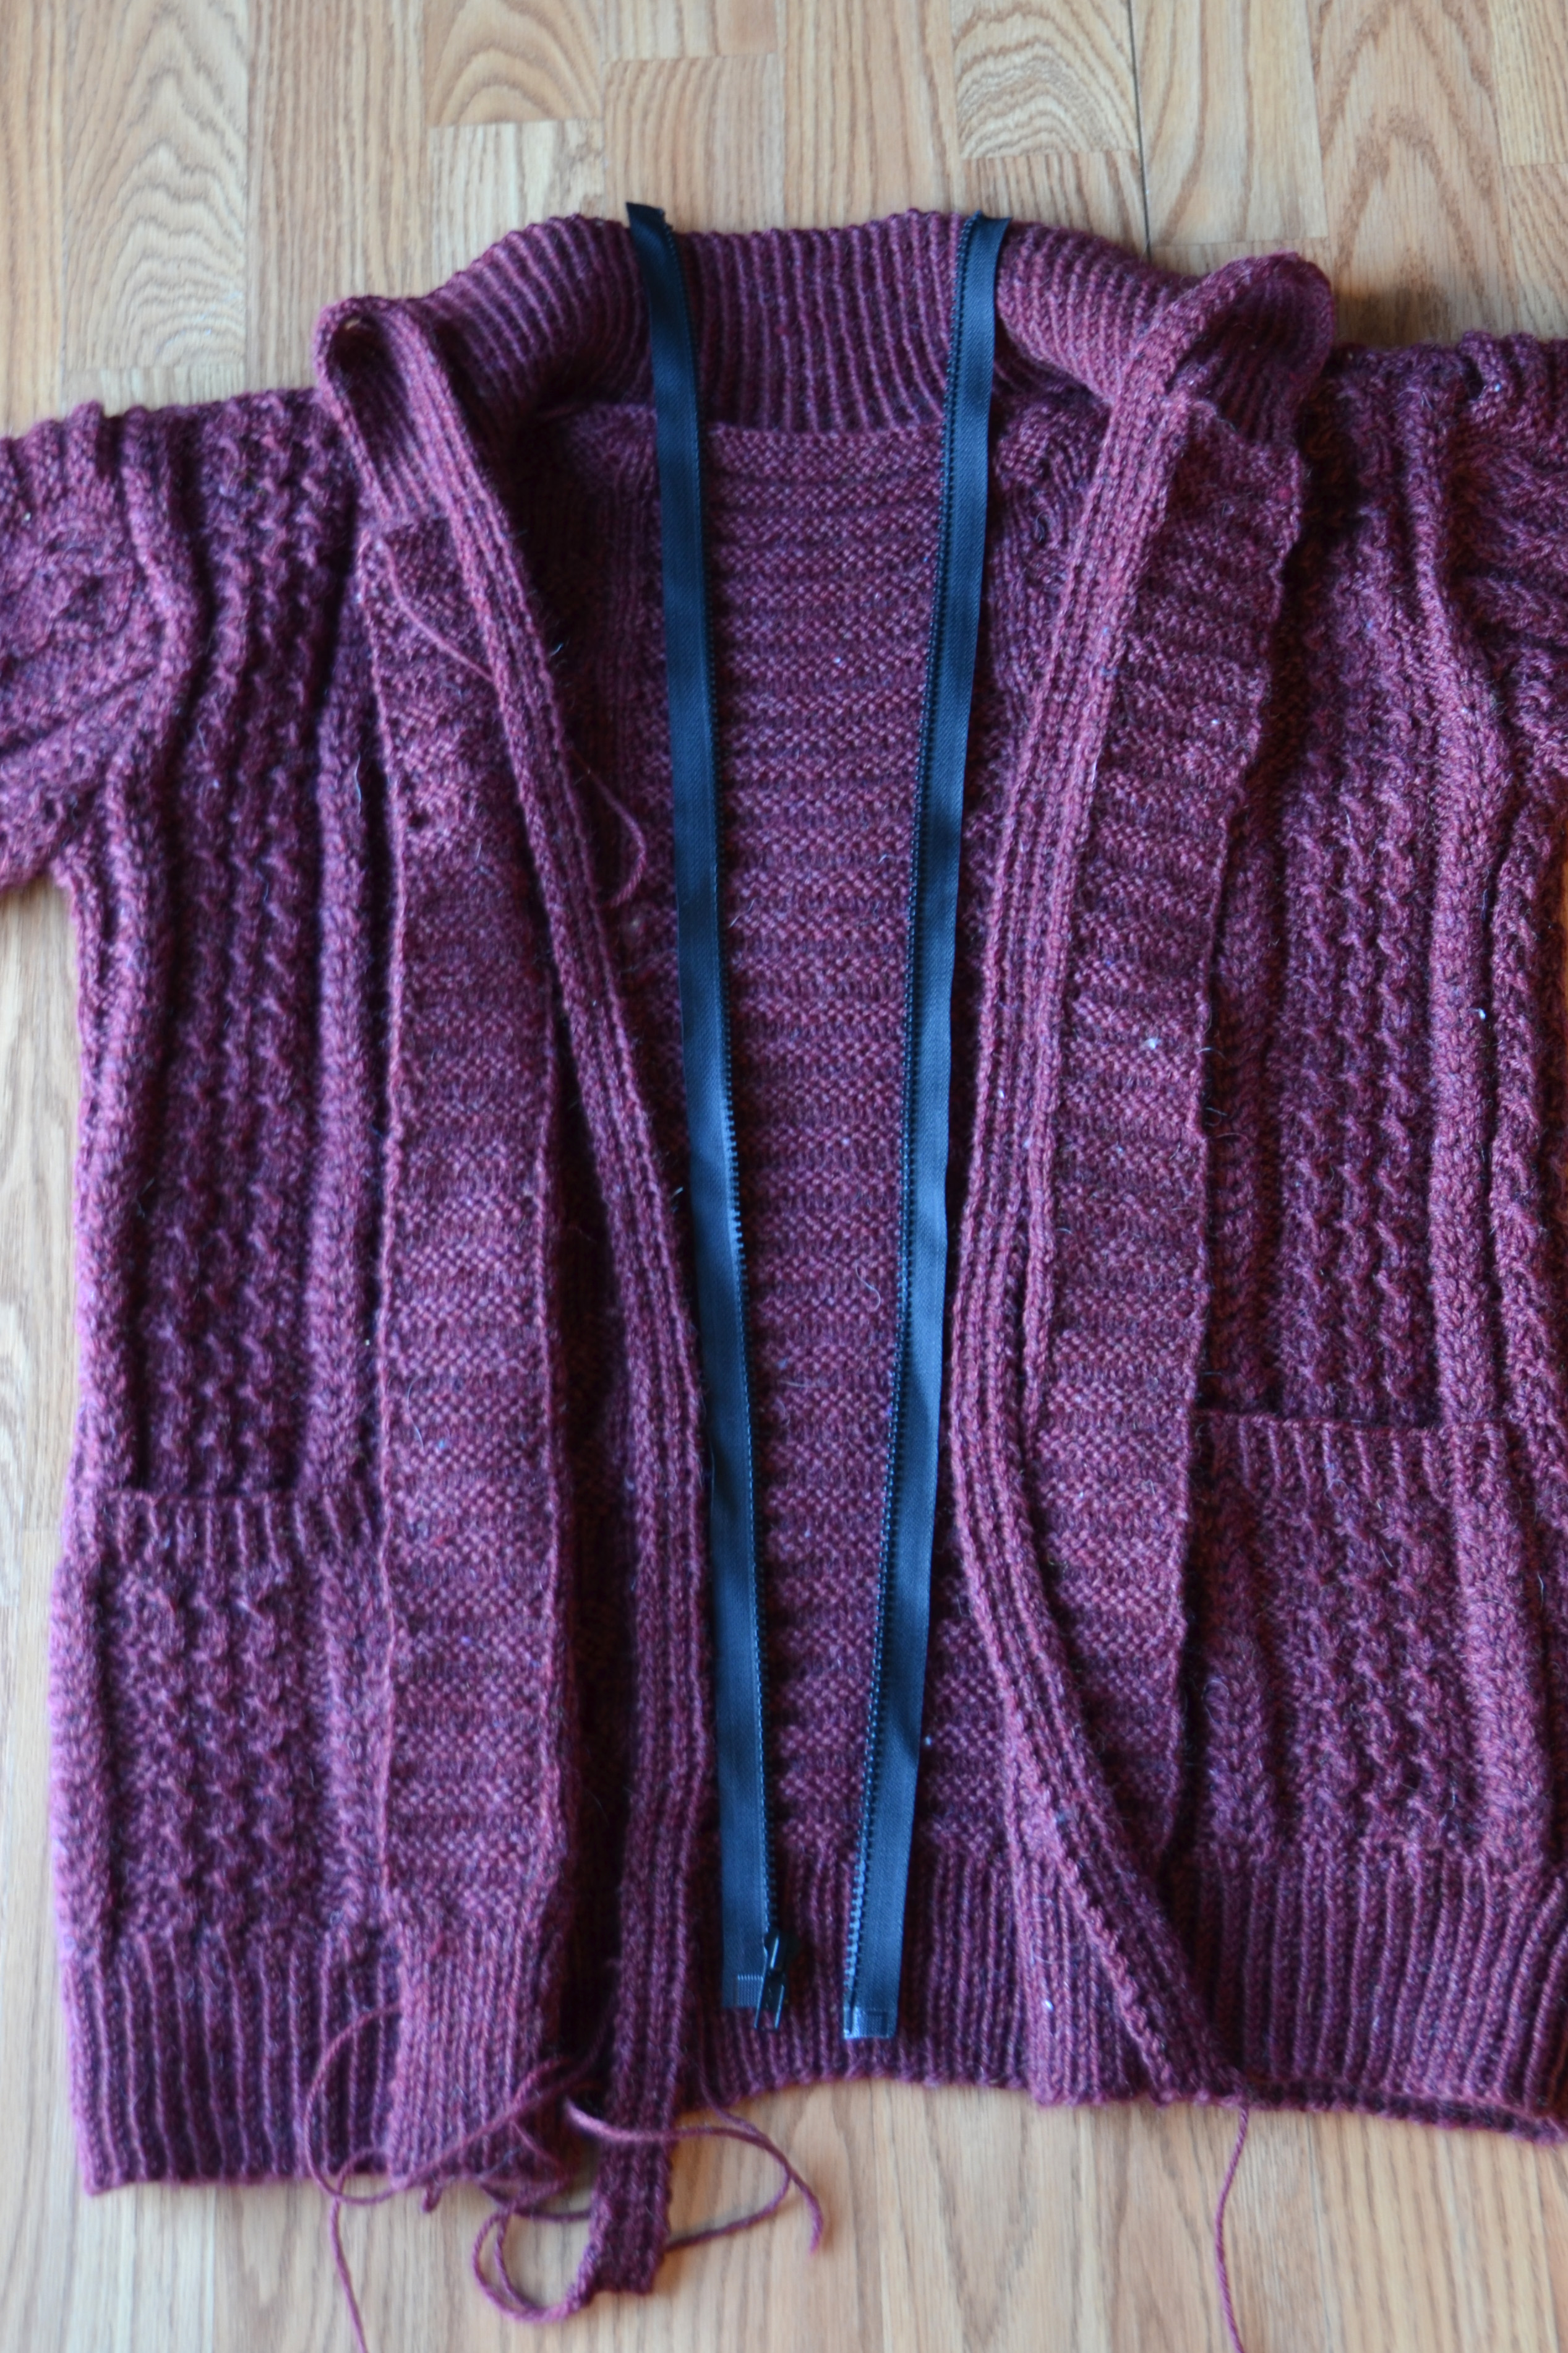
Triple check your zipper placement!
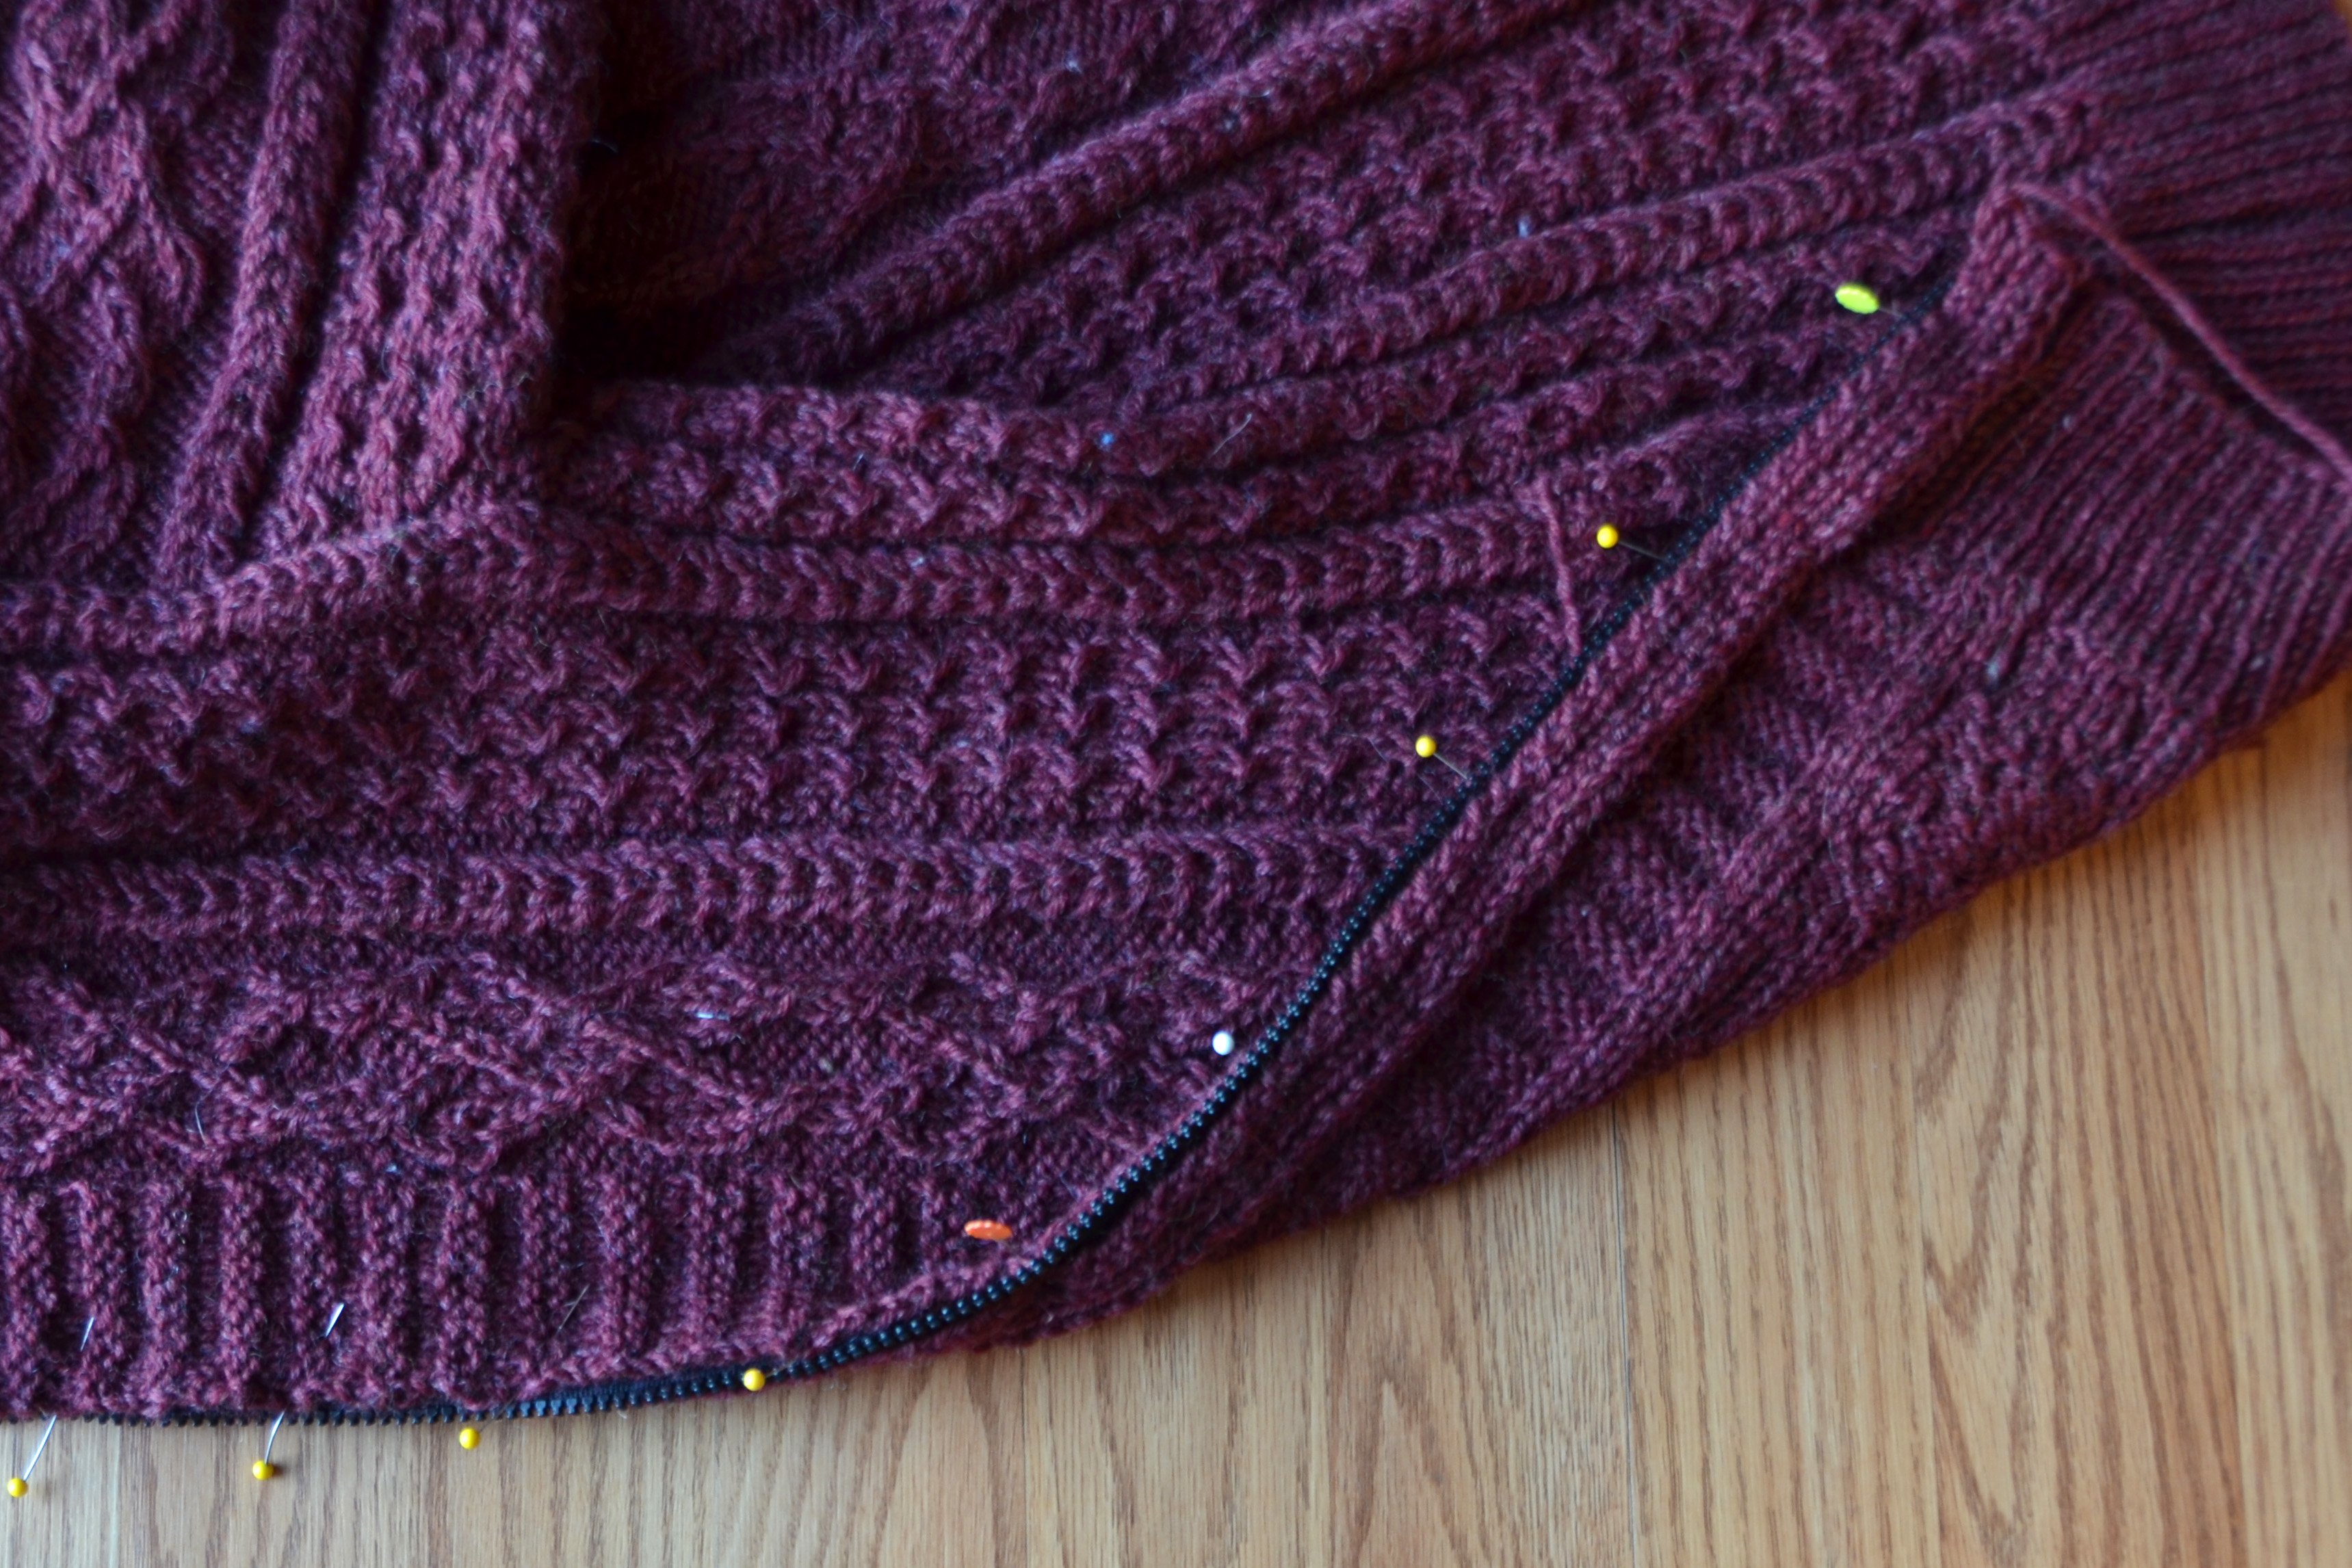
Next, pin your zipper to the sweater front. Ignore the facing for now. It’s much easier to pin it to the sweater front first and then add the facing. Begin by pinning the upper and lower edges of the zipper to the sweater. Then add in pins at halfway points between other pins until the whole thing is pinned down. Use lots of pins – you can never have too many pins!
After the front is fully pinned to the zipper tape, one by one, remove a pin and add in the knitted facing. The zipper tape will be sandwiched between the front of the sweater and the zipper tape. You’ll want to leave a margin sticking out a little bit beyond the zipper teeth so that the knitting doesn’t get caught when you’re using the zipper.
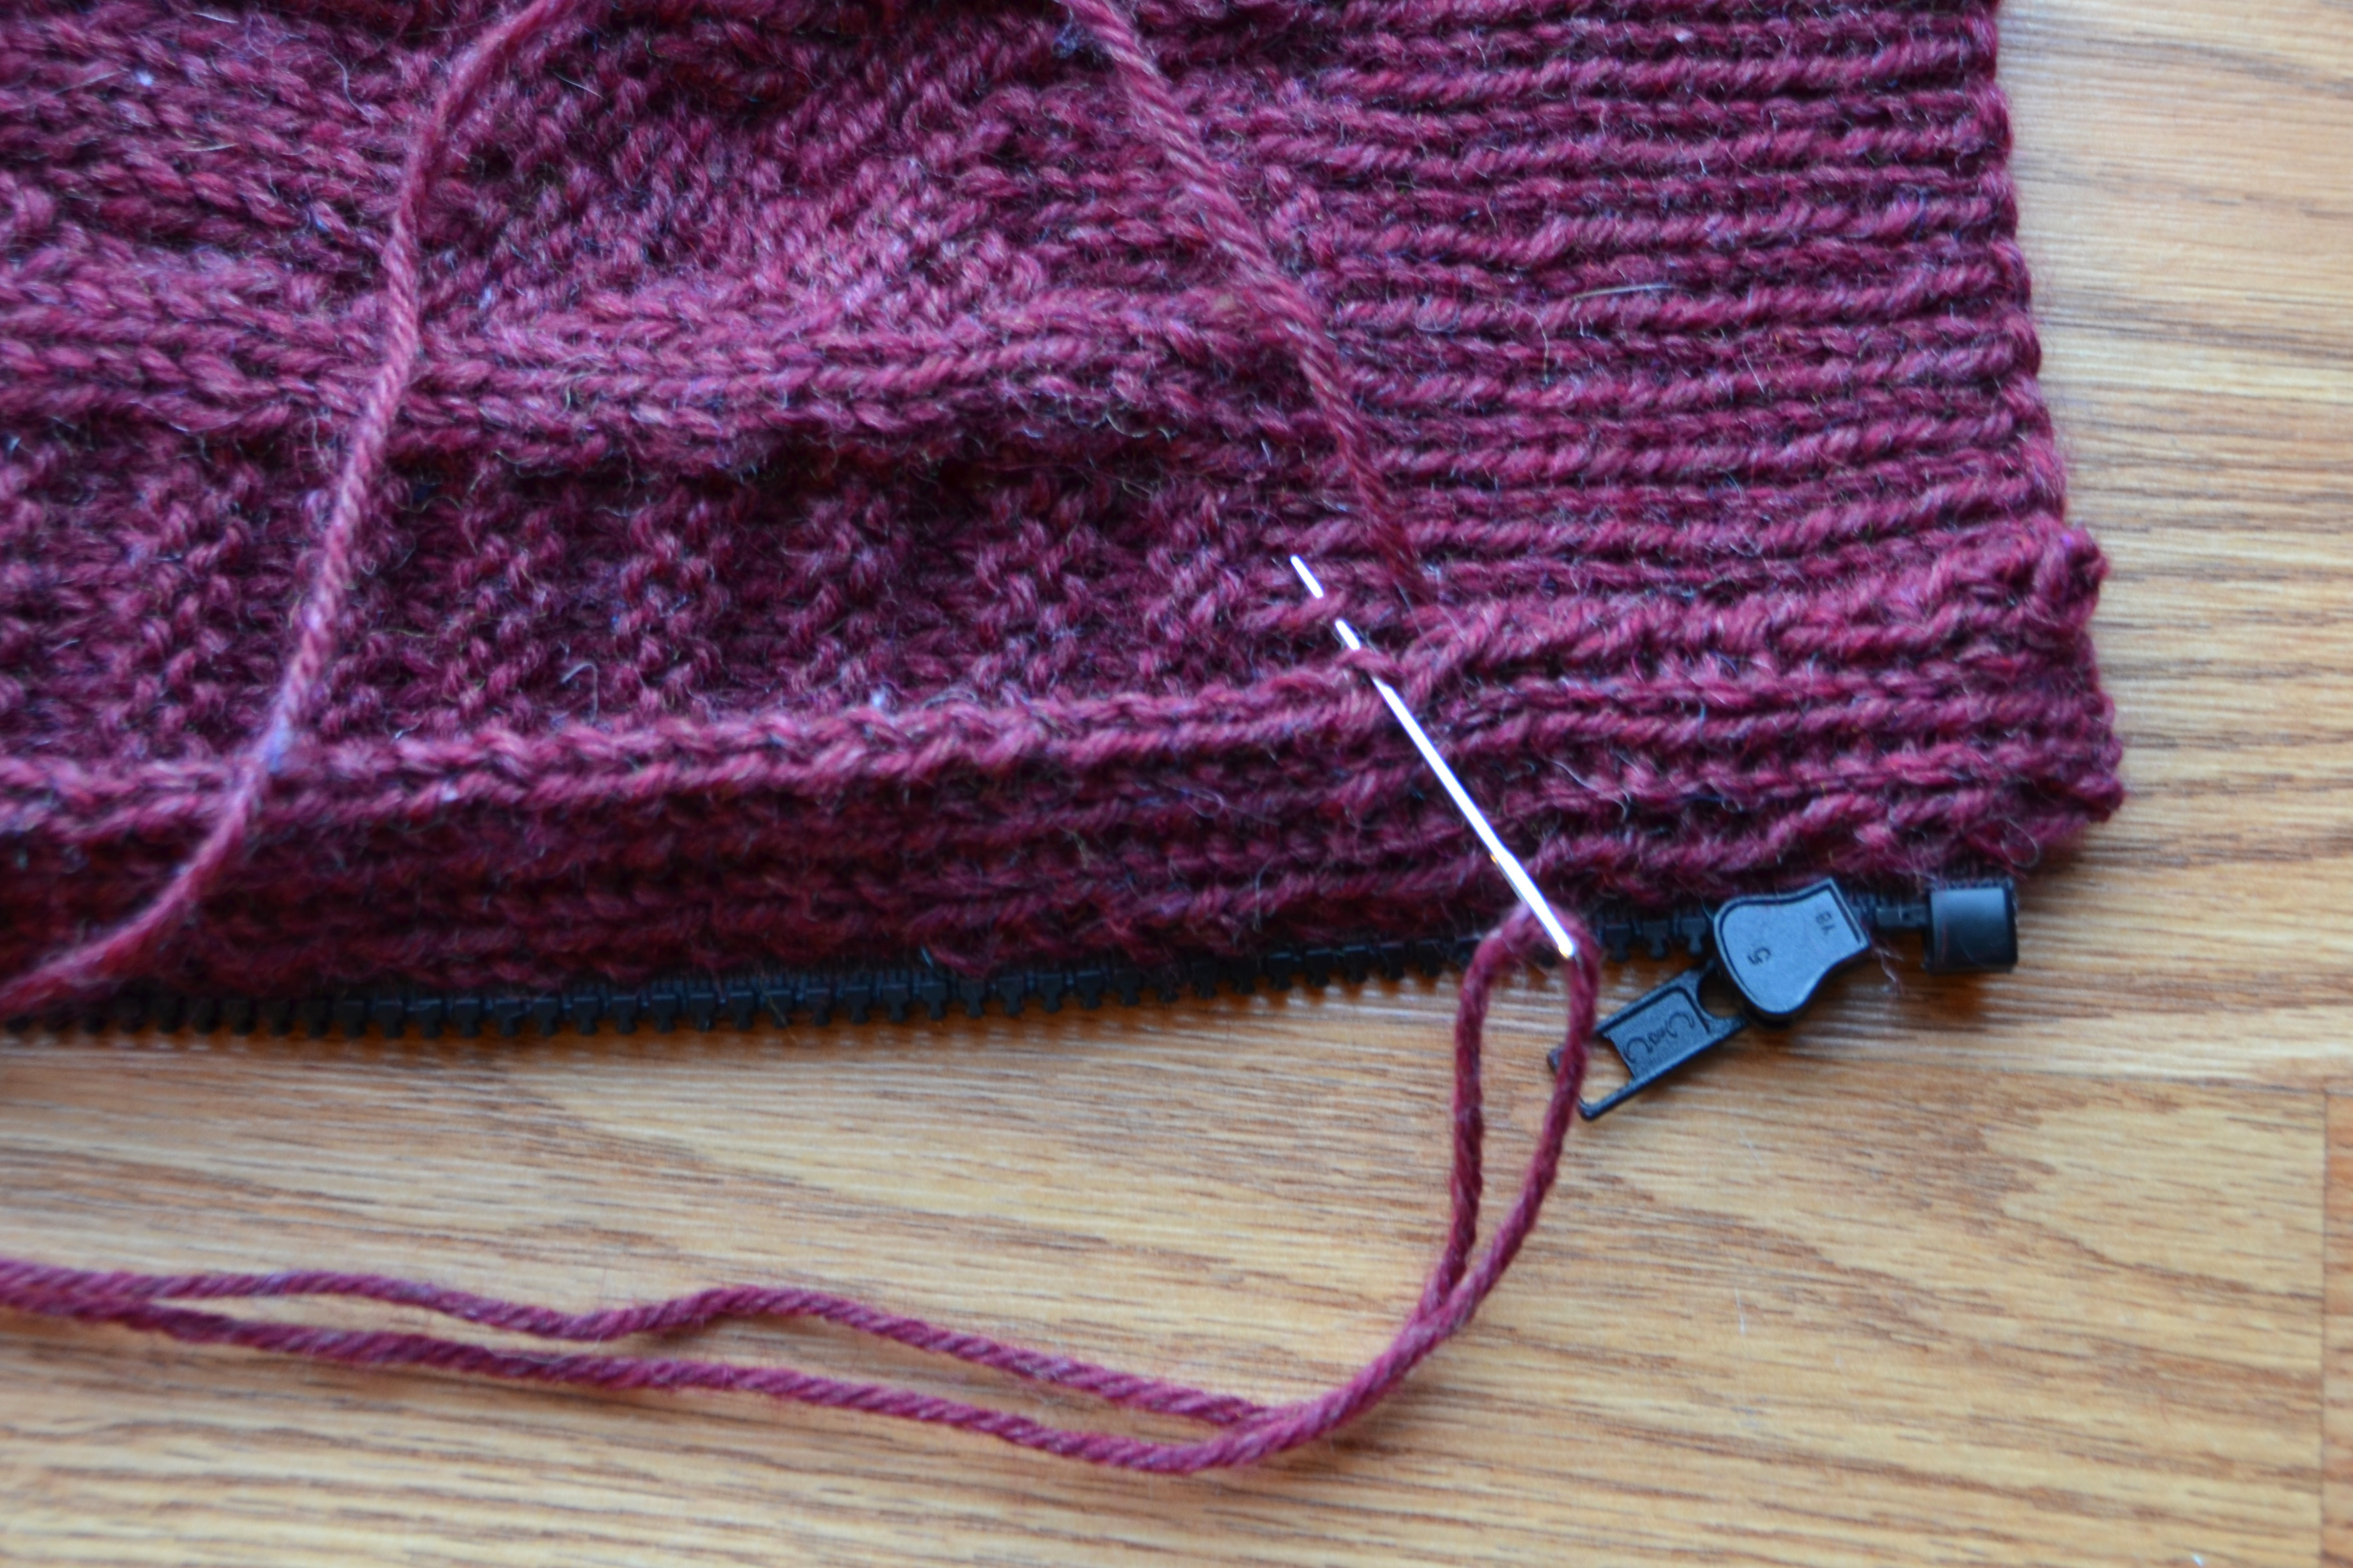
Use thread that matches or will blend in with the color of your yarn. Take small stitches and go slowly. You are sewing through 3 layers, so take care and make sure the needle is entering and exiting the fabric where you want it. I kept 1 stitch in stockinette on my edges, so I’m using that as my guide for where to sew.
I use a running stitch, but make a back stitch every inch or two – basically whenever I remember.
Once the zipper tape is sewn to the sweater, it’s time to sew the other edge of the facing down. I left long ends when I bound off my facing for this very purpose. I also split the yarn in half to reduce bulk for the seam.
Once all your sewing is done, give the facings a light steam inside and out, and you’re done!
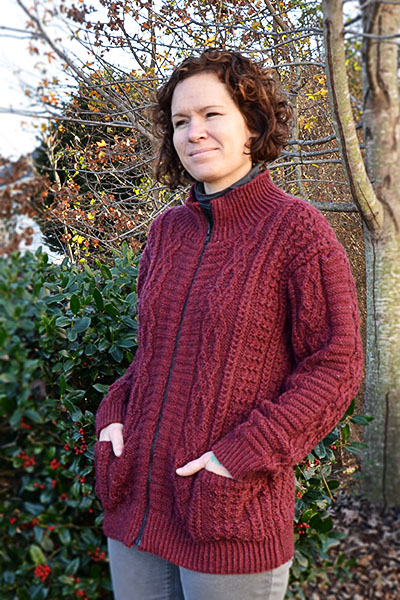
I love putting on a new sweater! And I’m lazy, so having a zipper is a big draw for me. Sometimes I like a buttoned sweater. But I like being able to zip and unzip a cardigan makes me happy. And pockets. And cozy!
How are your Deluxe Cable Collection projects coming along?
It’s been a little bit quiet on the ol’ western front with the Deluxe Cable Collection Knitalong. But I can assure you, those of us with projects still on the needles continue to plug away!
As a reminder, you can learn more about the knitalong by reading previous blog posts here, viewing the collection here, and joining our Ravelry group here.
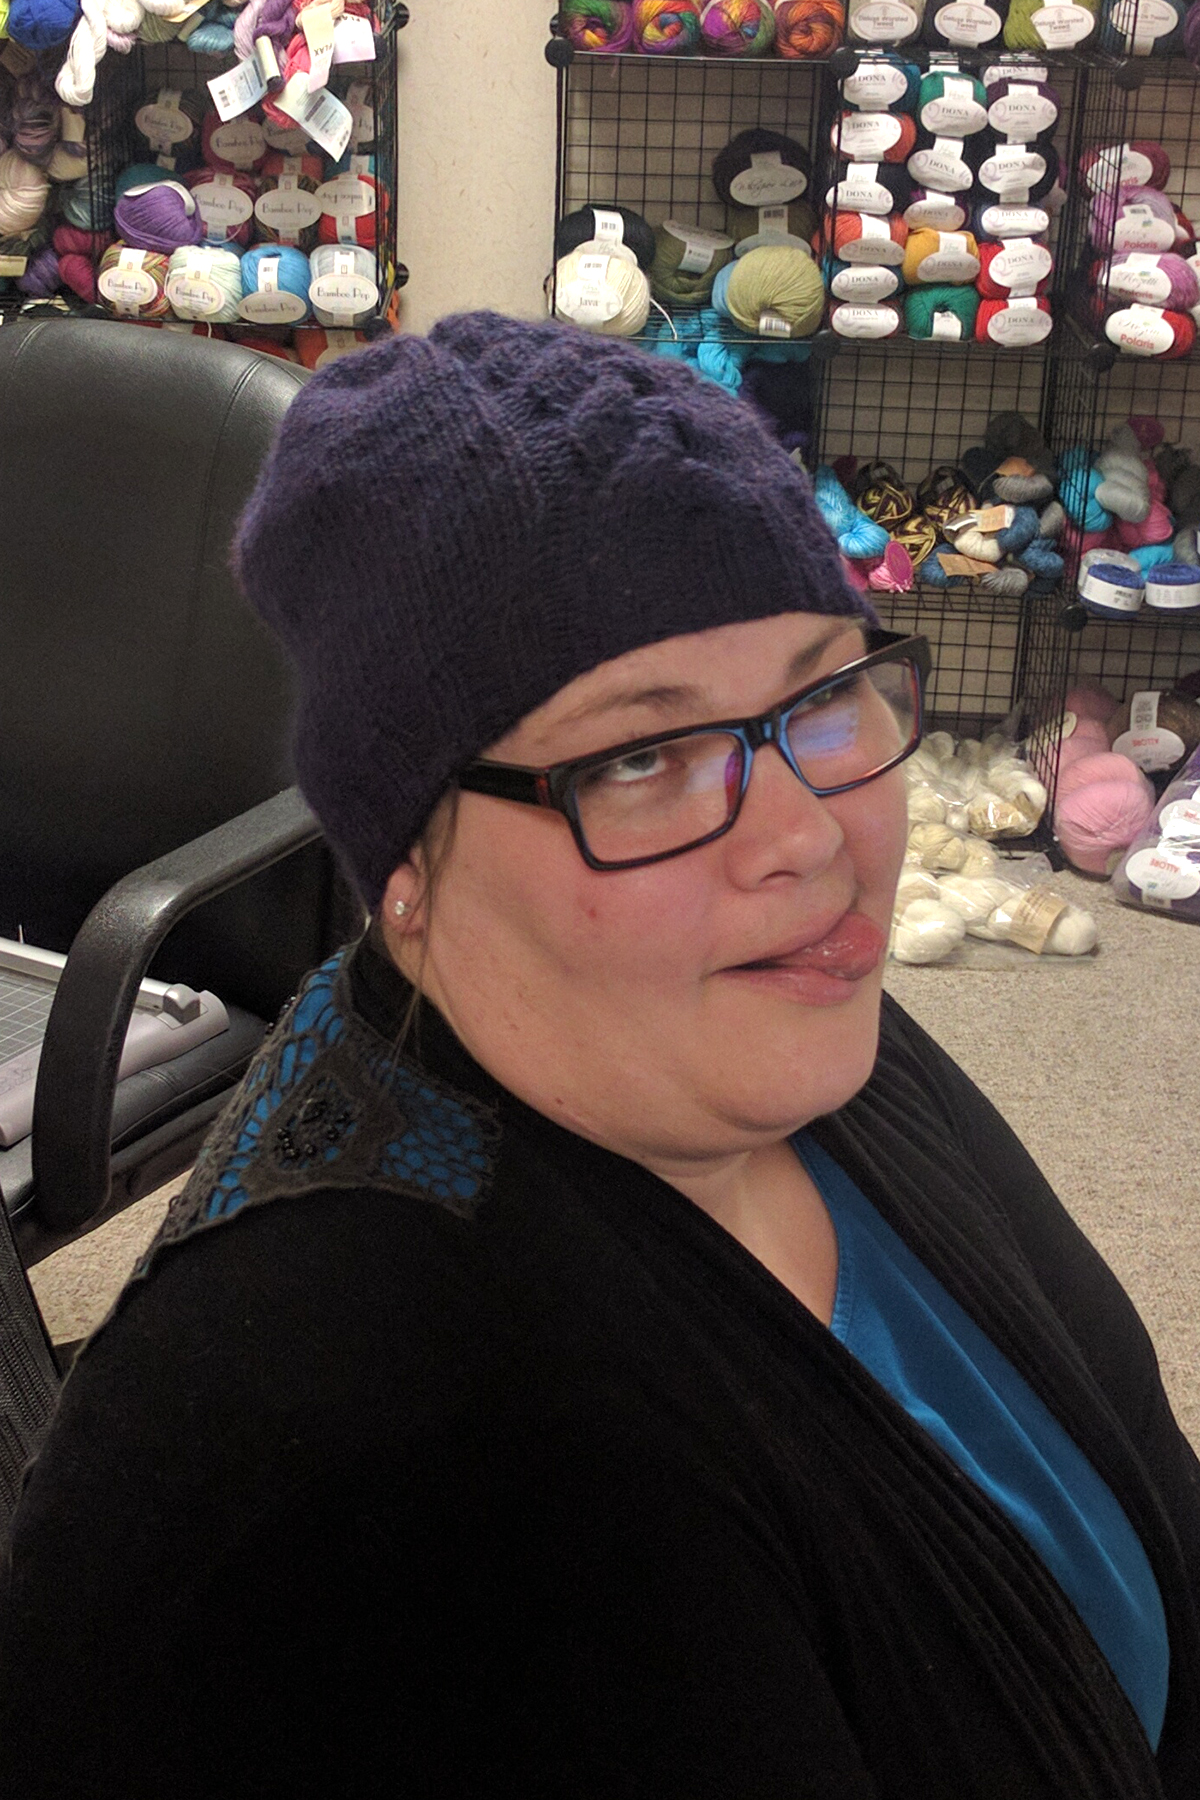
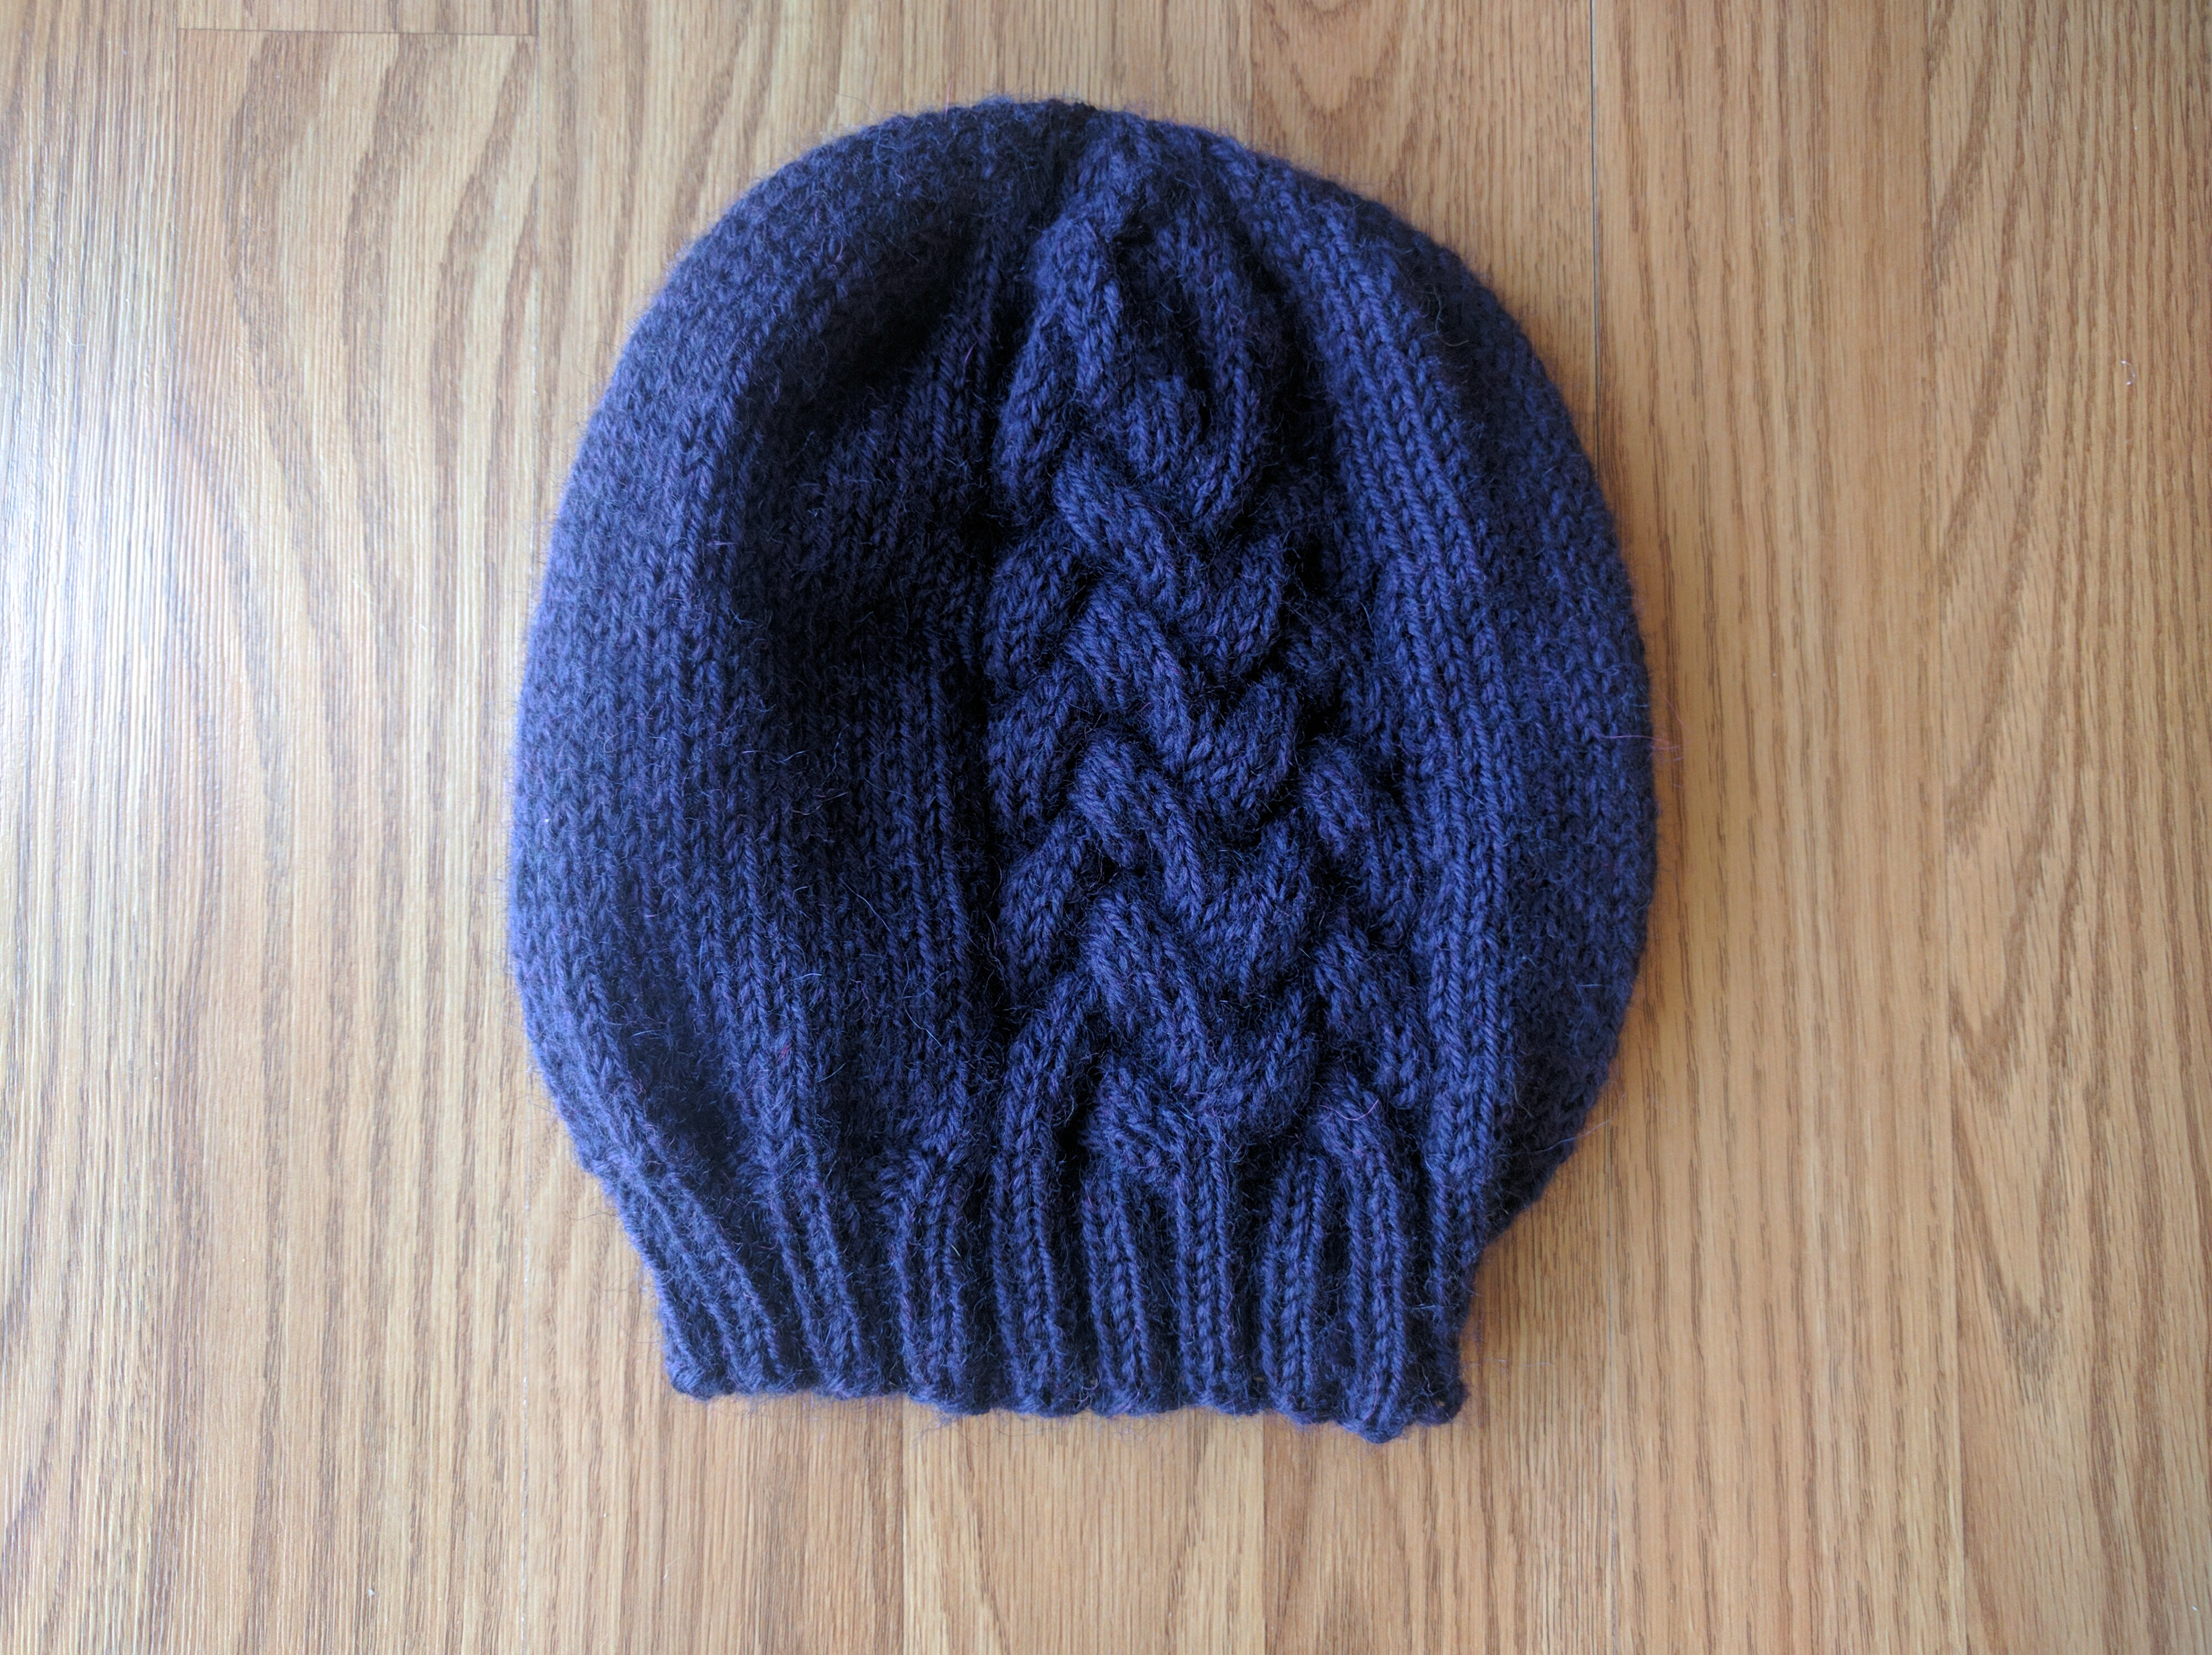
Heather finished her Tillery Socks last month, but she didn’t stop there. She is now the proud owner of her very own two-color Cold Mountain Hat:

Look how happy she is! I would be too if I had a hat that looked super-awesome with my blue hair.
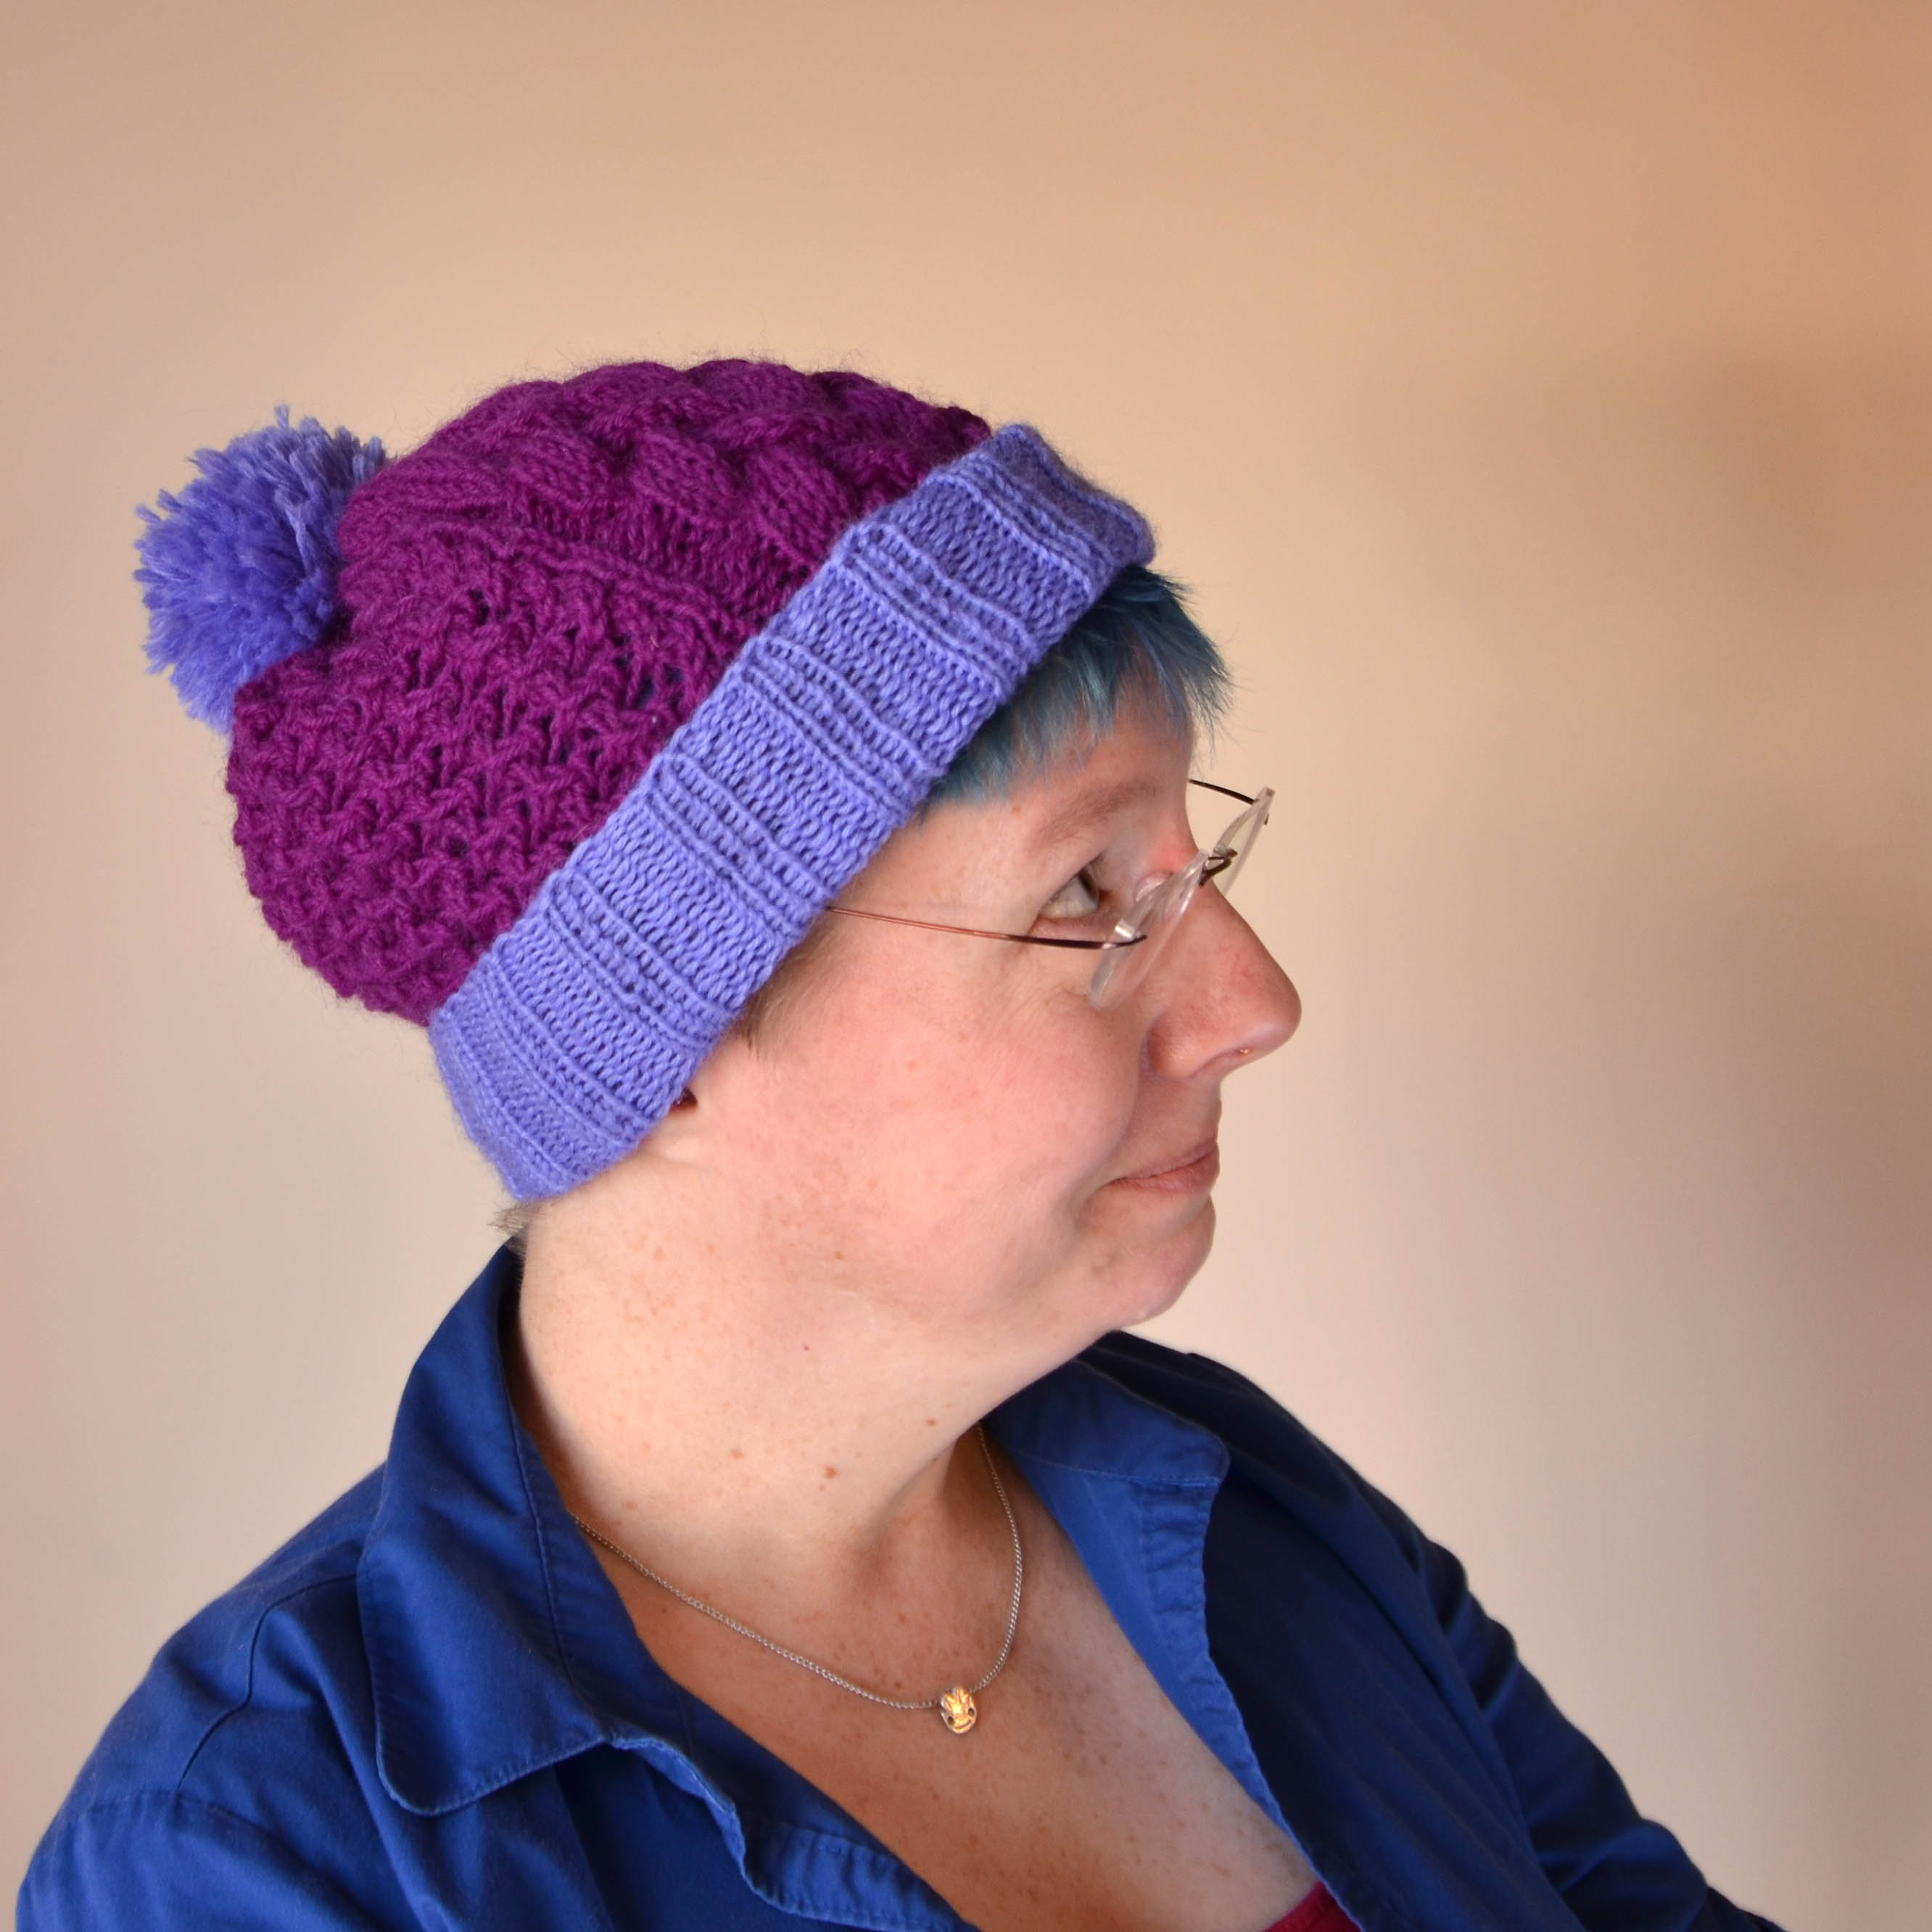
You can just barely see those blue locks peeking out from under the double-folded brim, but trust me: this is a fun color combination.
I love how Heather took this pattern and made it her own, through something as seemingly simple as different color choices. It always amazes me what a difference color can make in a knitted item or anything else, for that matter!
Often times we see a project and don’t look twice because the color doesn’t suit us. Heather proves that if you like the stitches and the item, the color is the easiest thing about it to change!
Do you love the Deluxe Cable Collection, too? If so, I’d love to hear about what project you’re working on!
I’ll be back next time (hopefully sooner rather than later this time) to demonstrate the finishing on my modified version of the Wesley Heights Pullover. I’m almost there!
If you’re not already knitting along with us during our Deluxe Cable Collection fun times (!) knitalong, you can learn more by reading previous blog posts here, viewing the collection here, and joining our Ravelry group here.
Today, a brief update from Heather, who is knitting Tillery Socks from the collection.

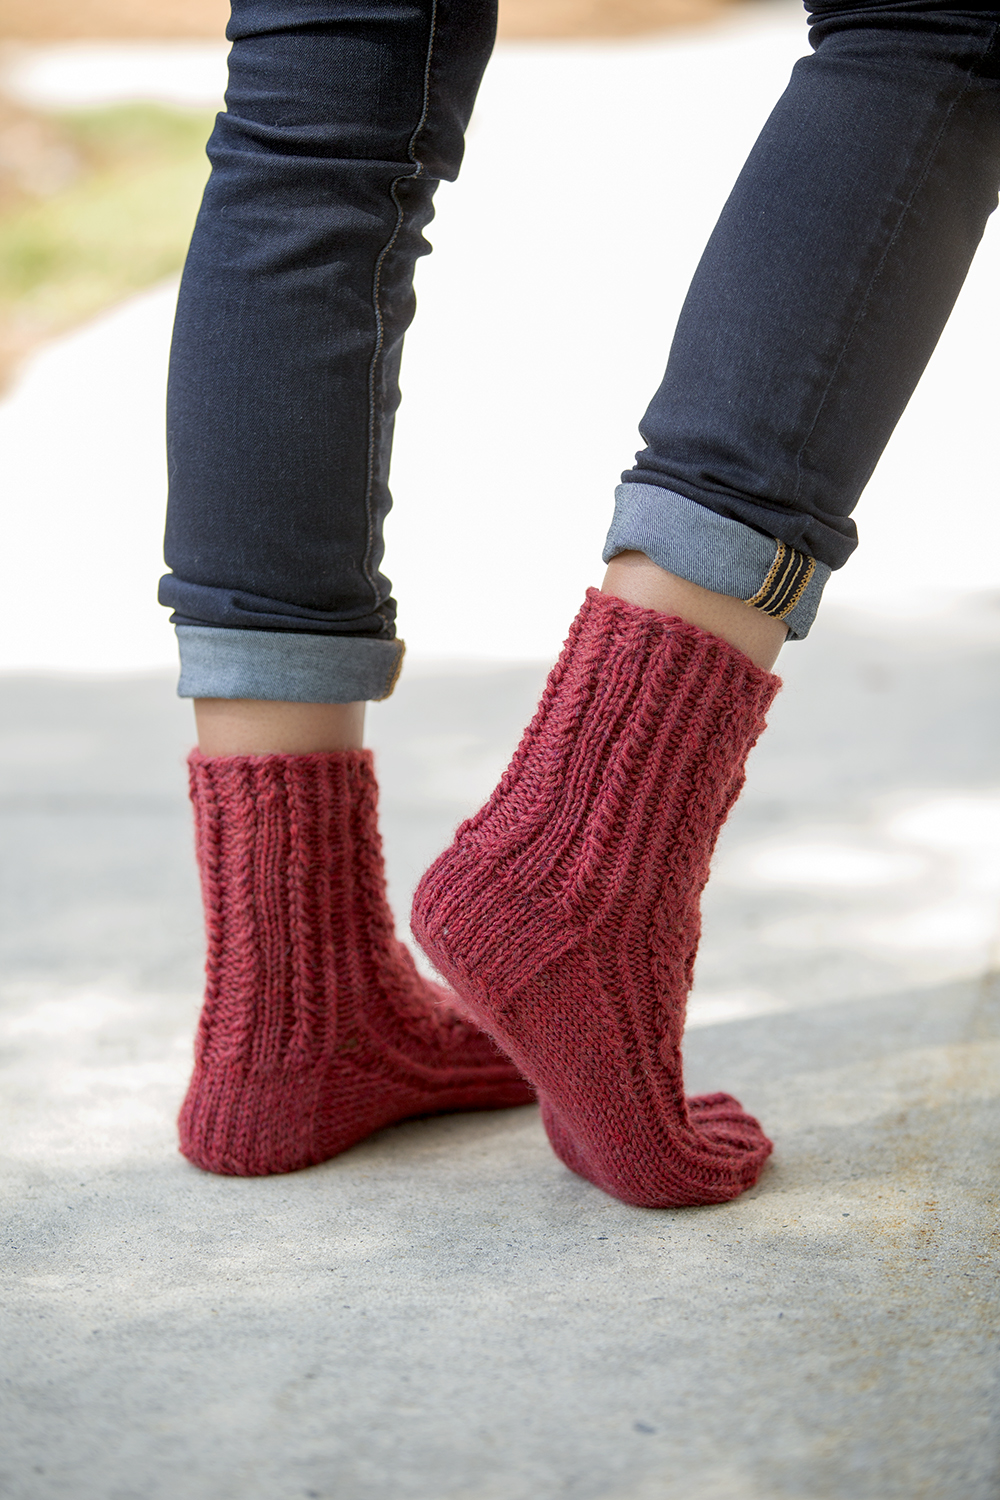
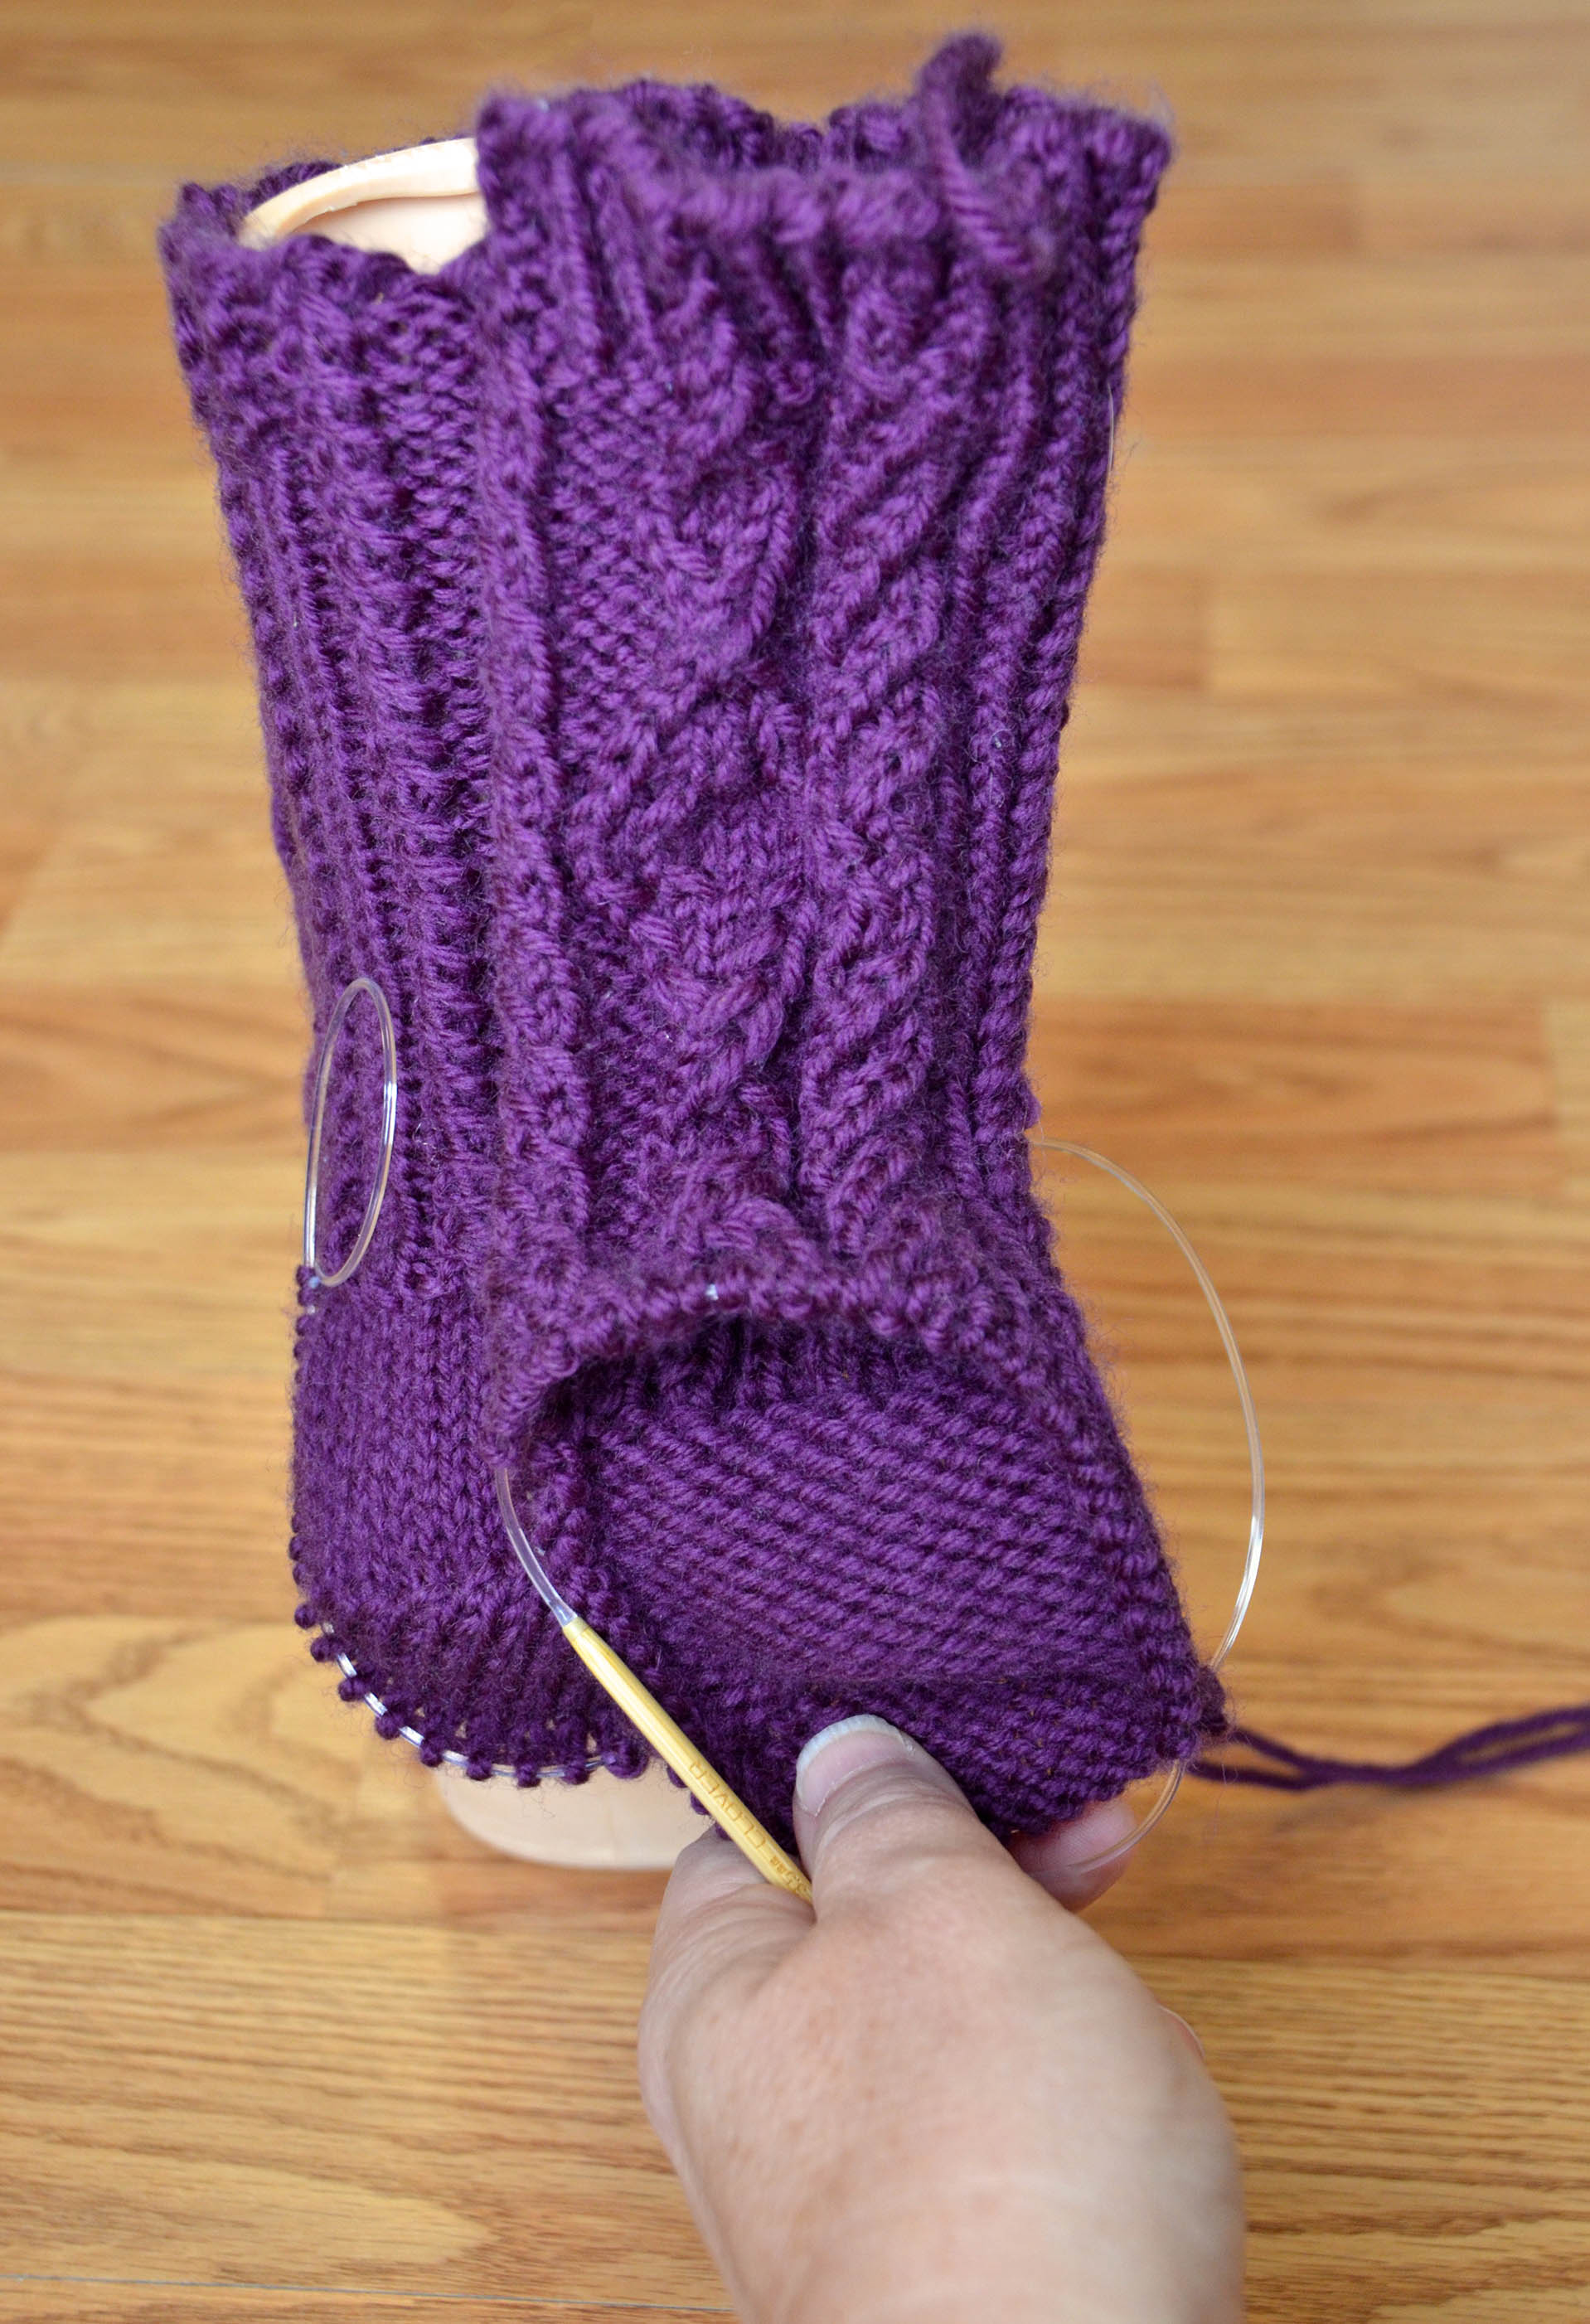
Heather is no stranger to sock knitting, and she knows she maaaayy have a tendency to get bored after the first sock. That is why she’s knitting her socks two at a time on a long circular needle. It’s the best SSS (second sock syndrome) buster I’ve found, too.
You can see the other sock in the upper left corner in the photo above.
Heather turned her heels last week and is now almost ready to shape her toes. So close!
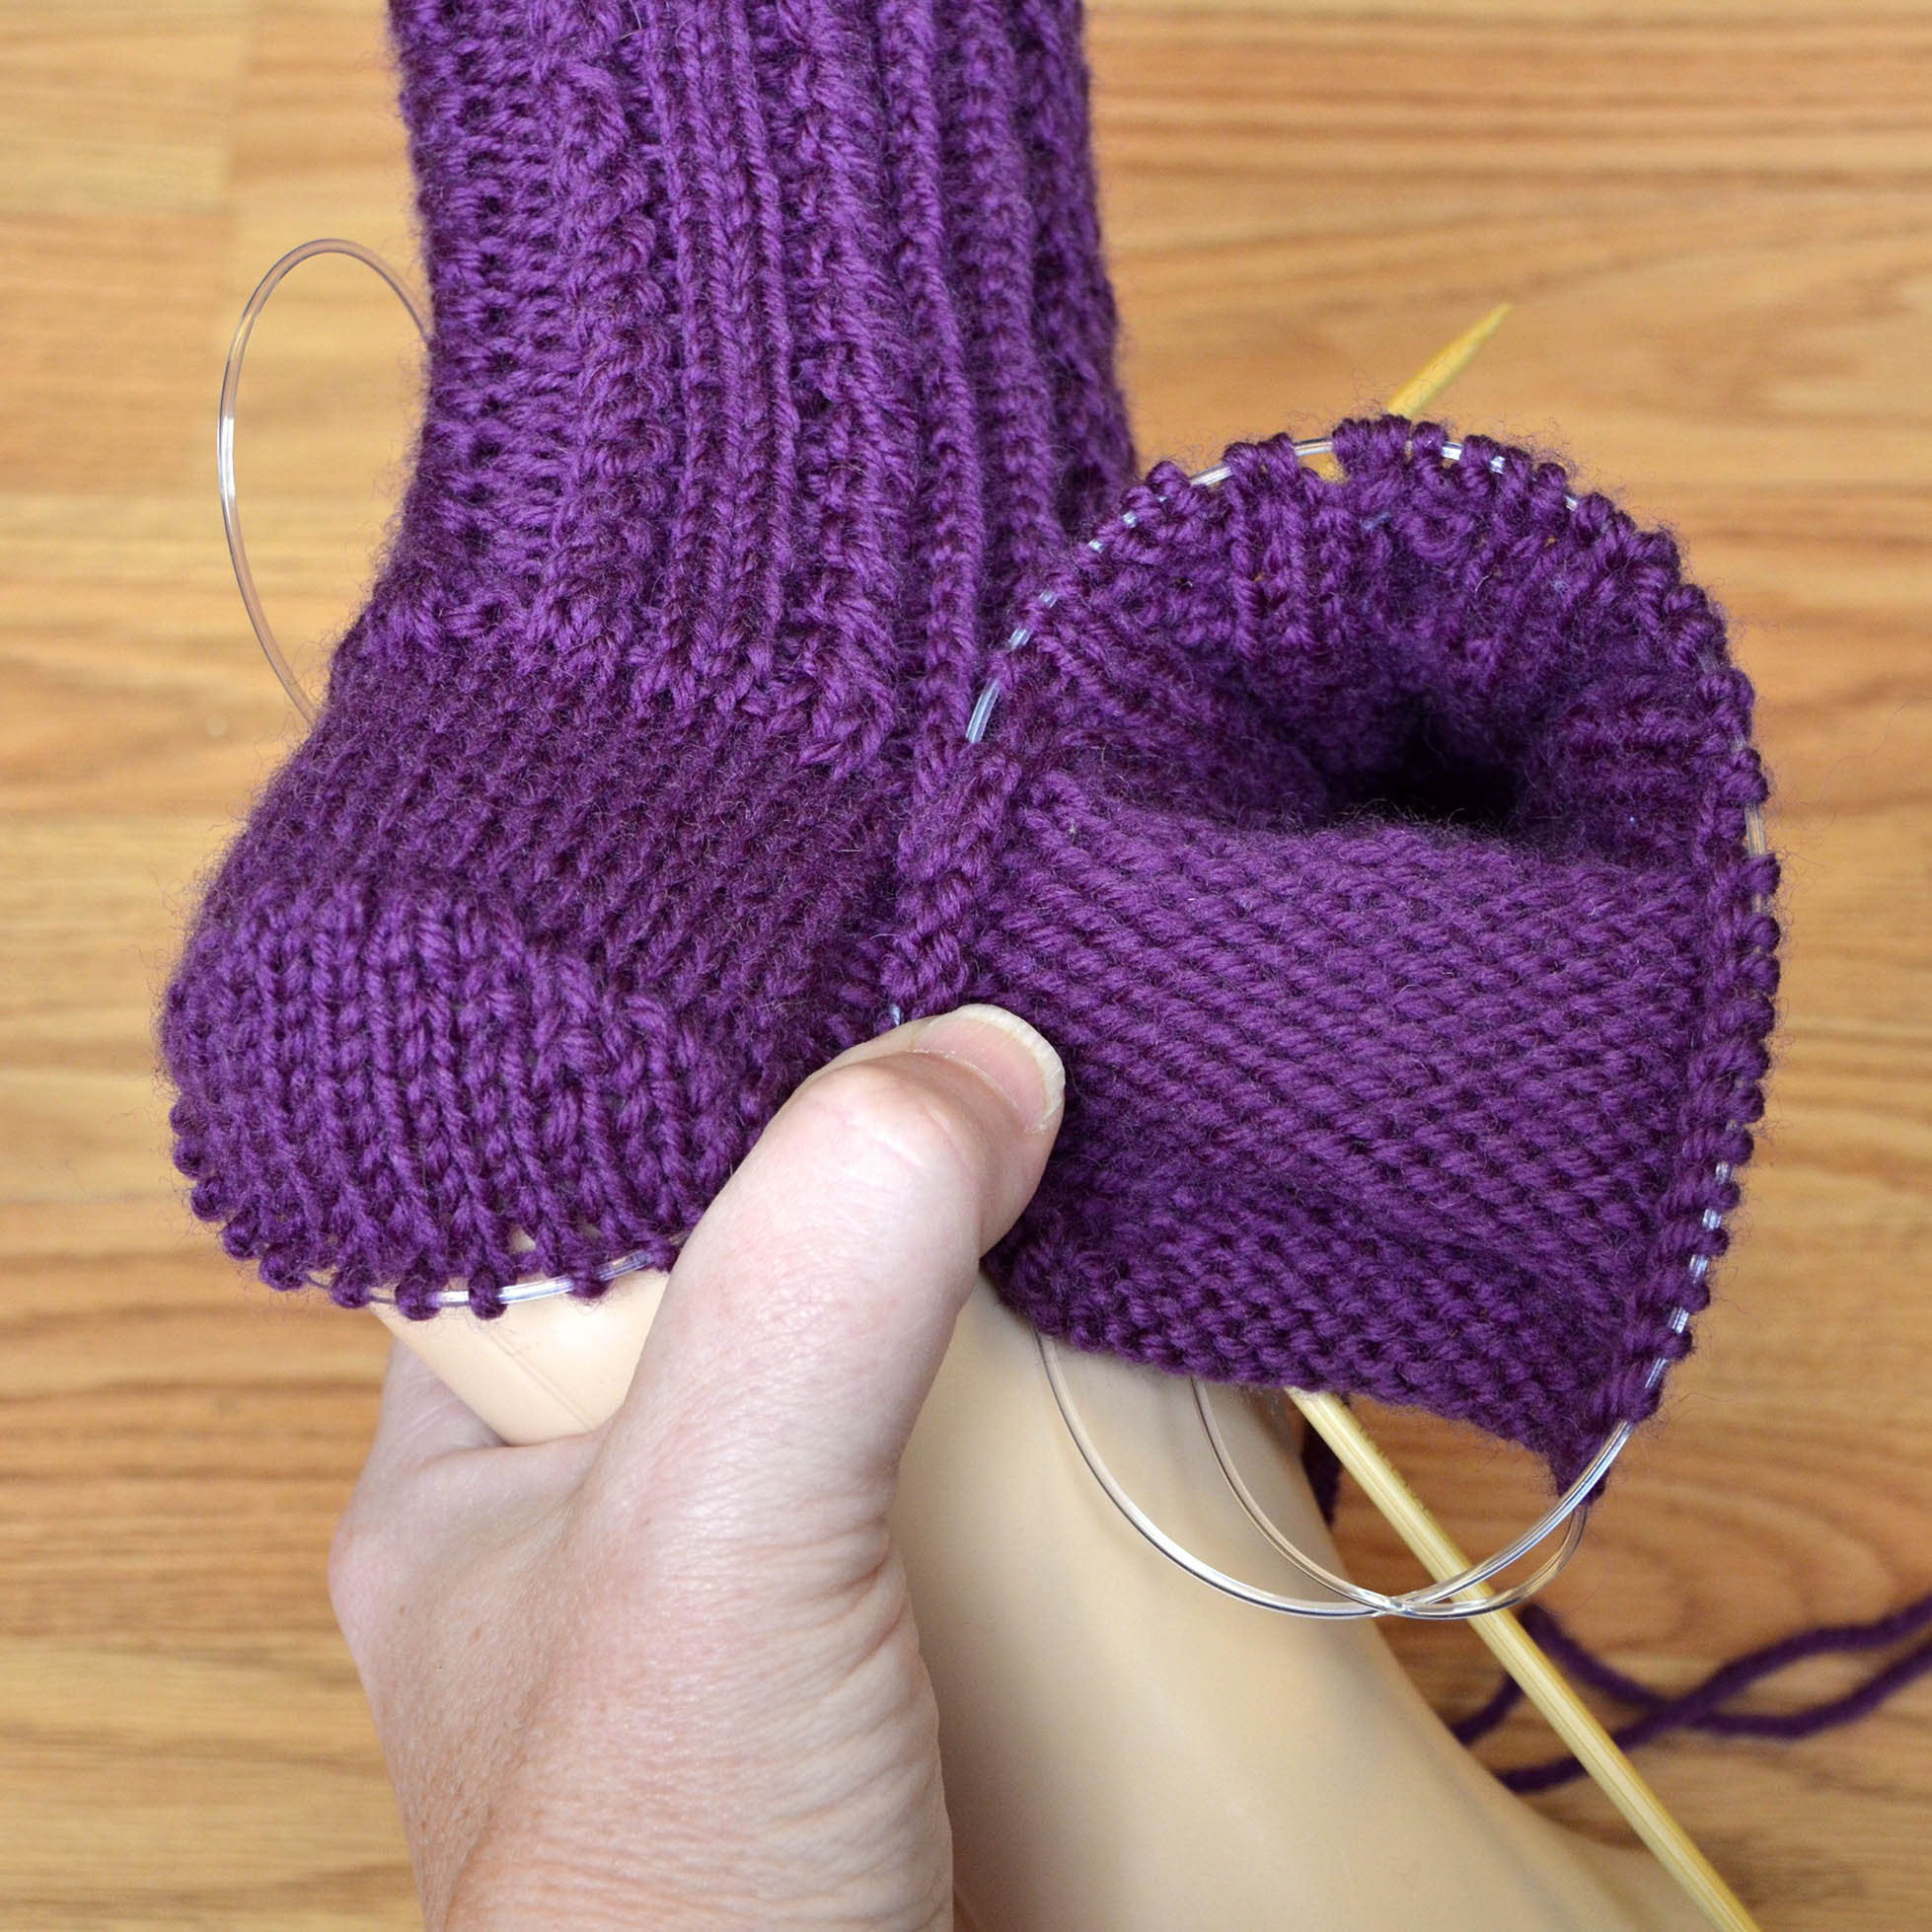
Heather told me she was happy to see this pattern designed with a slip-stitch heel flap, since this will make them nice and sturdy. She plans on wearing these as around-the-house slipper socks. Since Heather is knitting these in Deluxe Worsted Superwash, the care will be super easy, too!
The one thing Heather does point out about working socks two-at-a-time, is that when it comes time to work the heel, only one sock can be done at a time. Stitches for the other sock can stay on the same needle, but have to wait until the first sock’s heel is complete. And since Tillery Socks are knit in worsted weight, this section takes no time at all!
How about you – are you knitting along? I’d love to hear from you!
Hi, Cable Crossers! How’s it stitchin’? If you’re not already knitting along with us during our Deluxe Cable Collection fun times knitalong, you can learn more by reading previous blog posts here, viewing the collection here, and joining our Ravelry group here.
Today I’m going to talk about a topic that drives many a knitter craaaazzzy: increasing in pattern. I touched on this topic during our Rocked knitalong last year. You can read that blog post here.
Why are patterns written with the confusing instructions of “maintain increased stitches in pattern” or other similar sounding garble? Well, there are a couple of reasons I do this in some patterns:
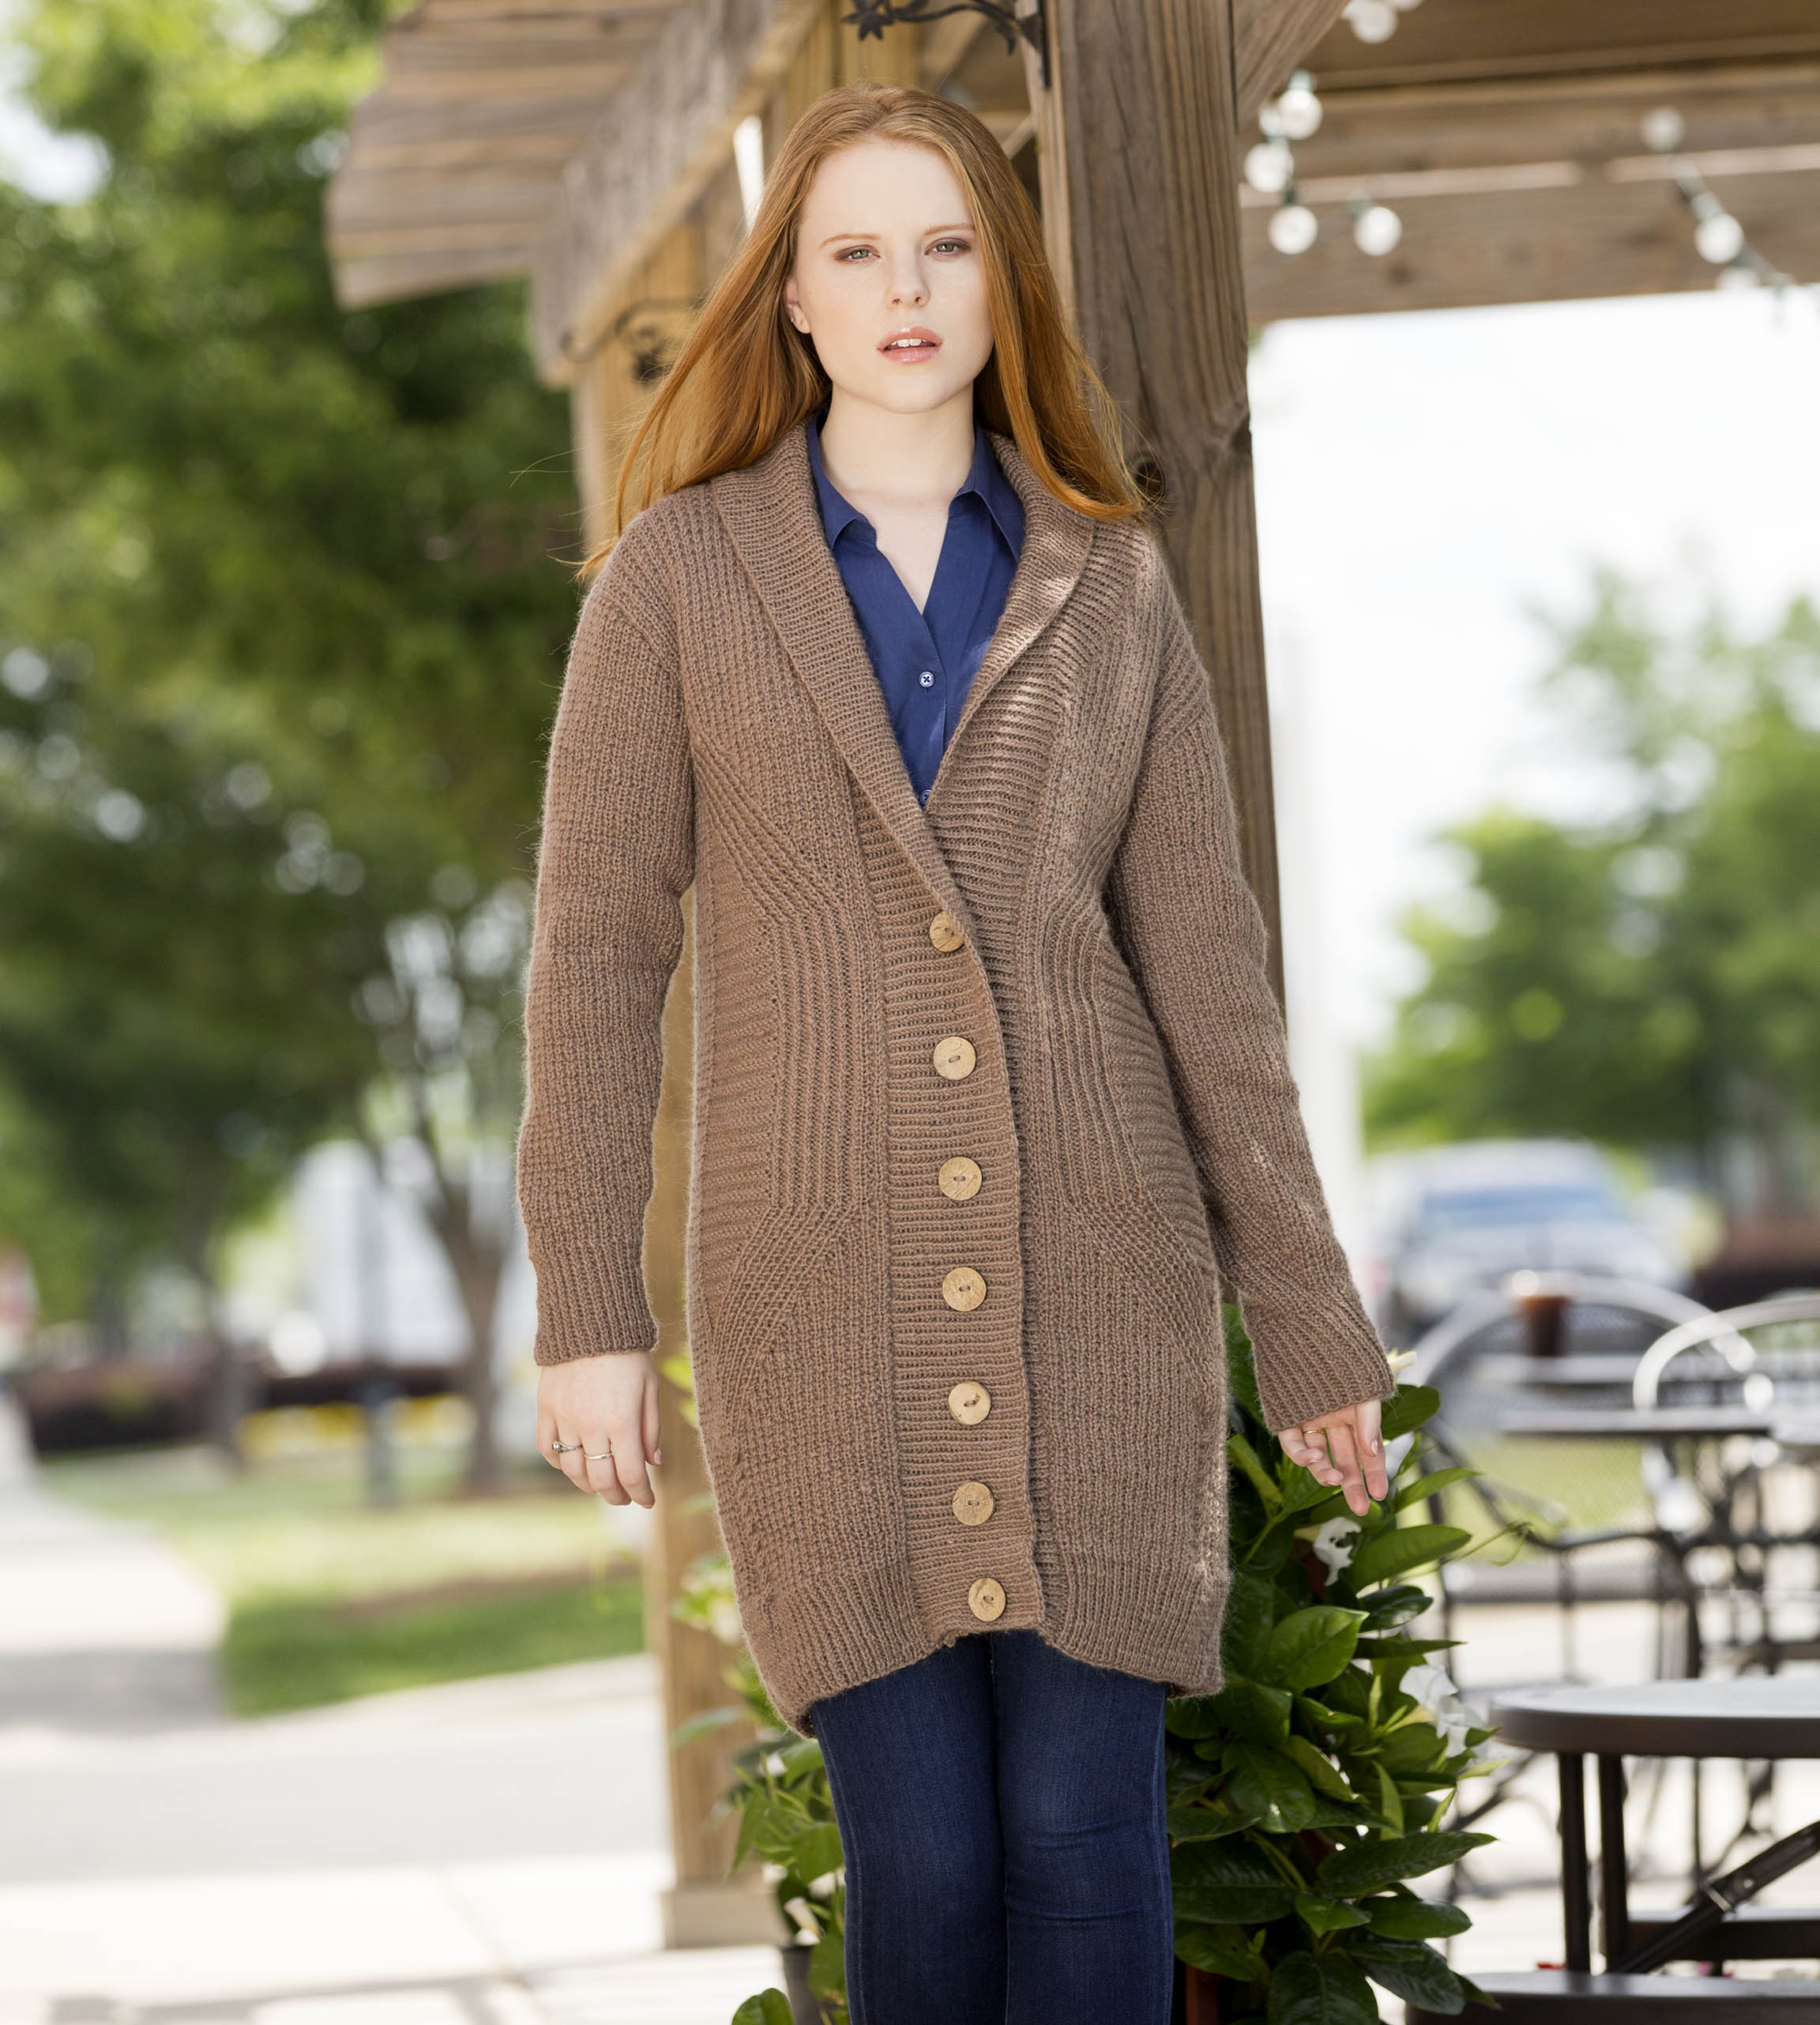
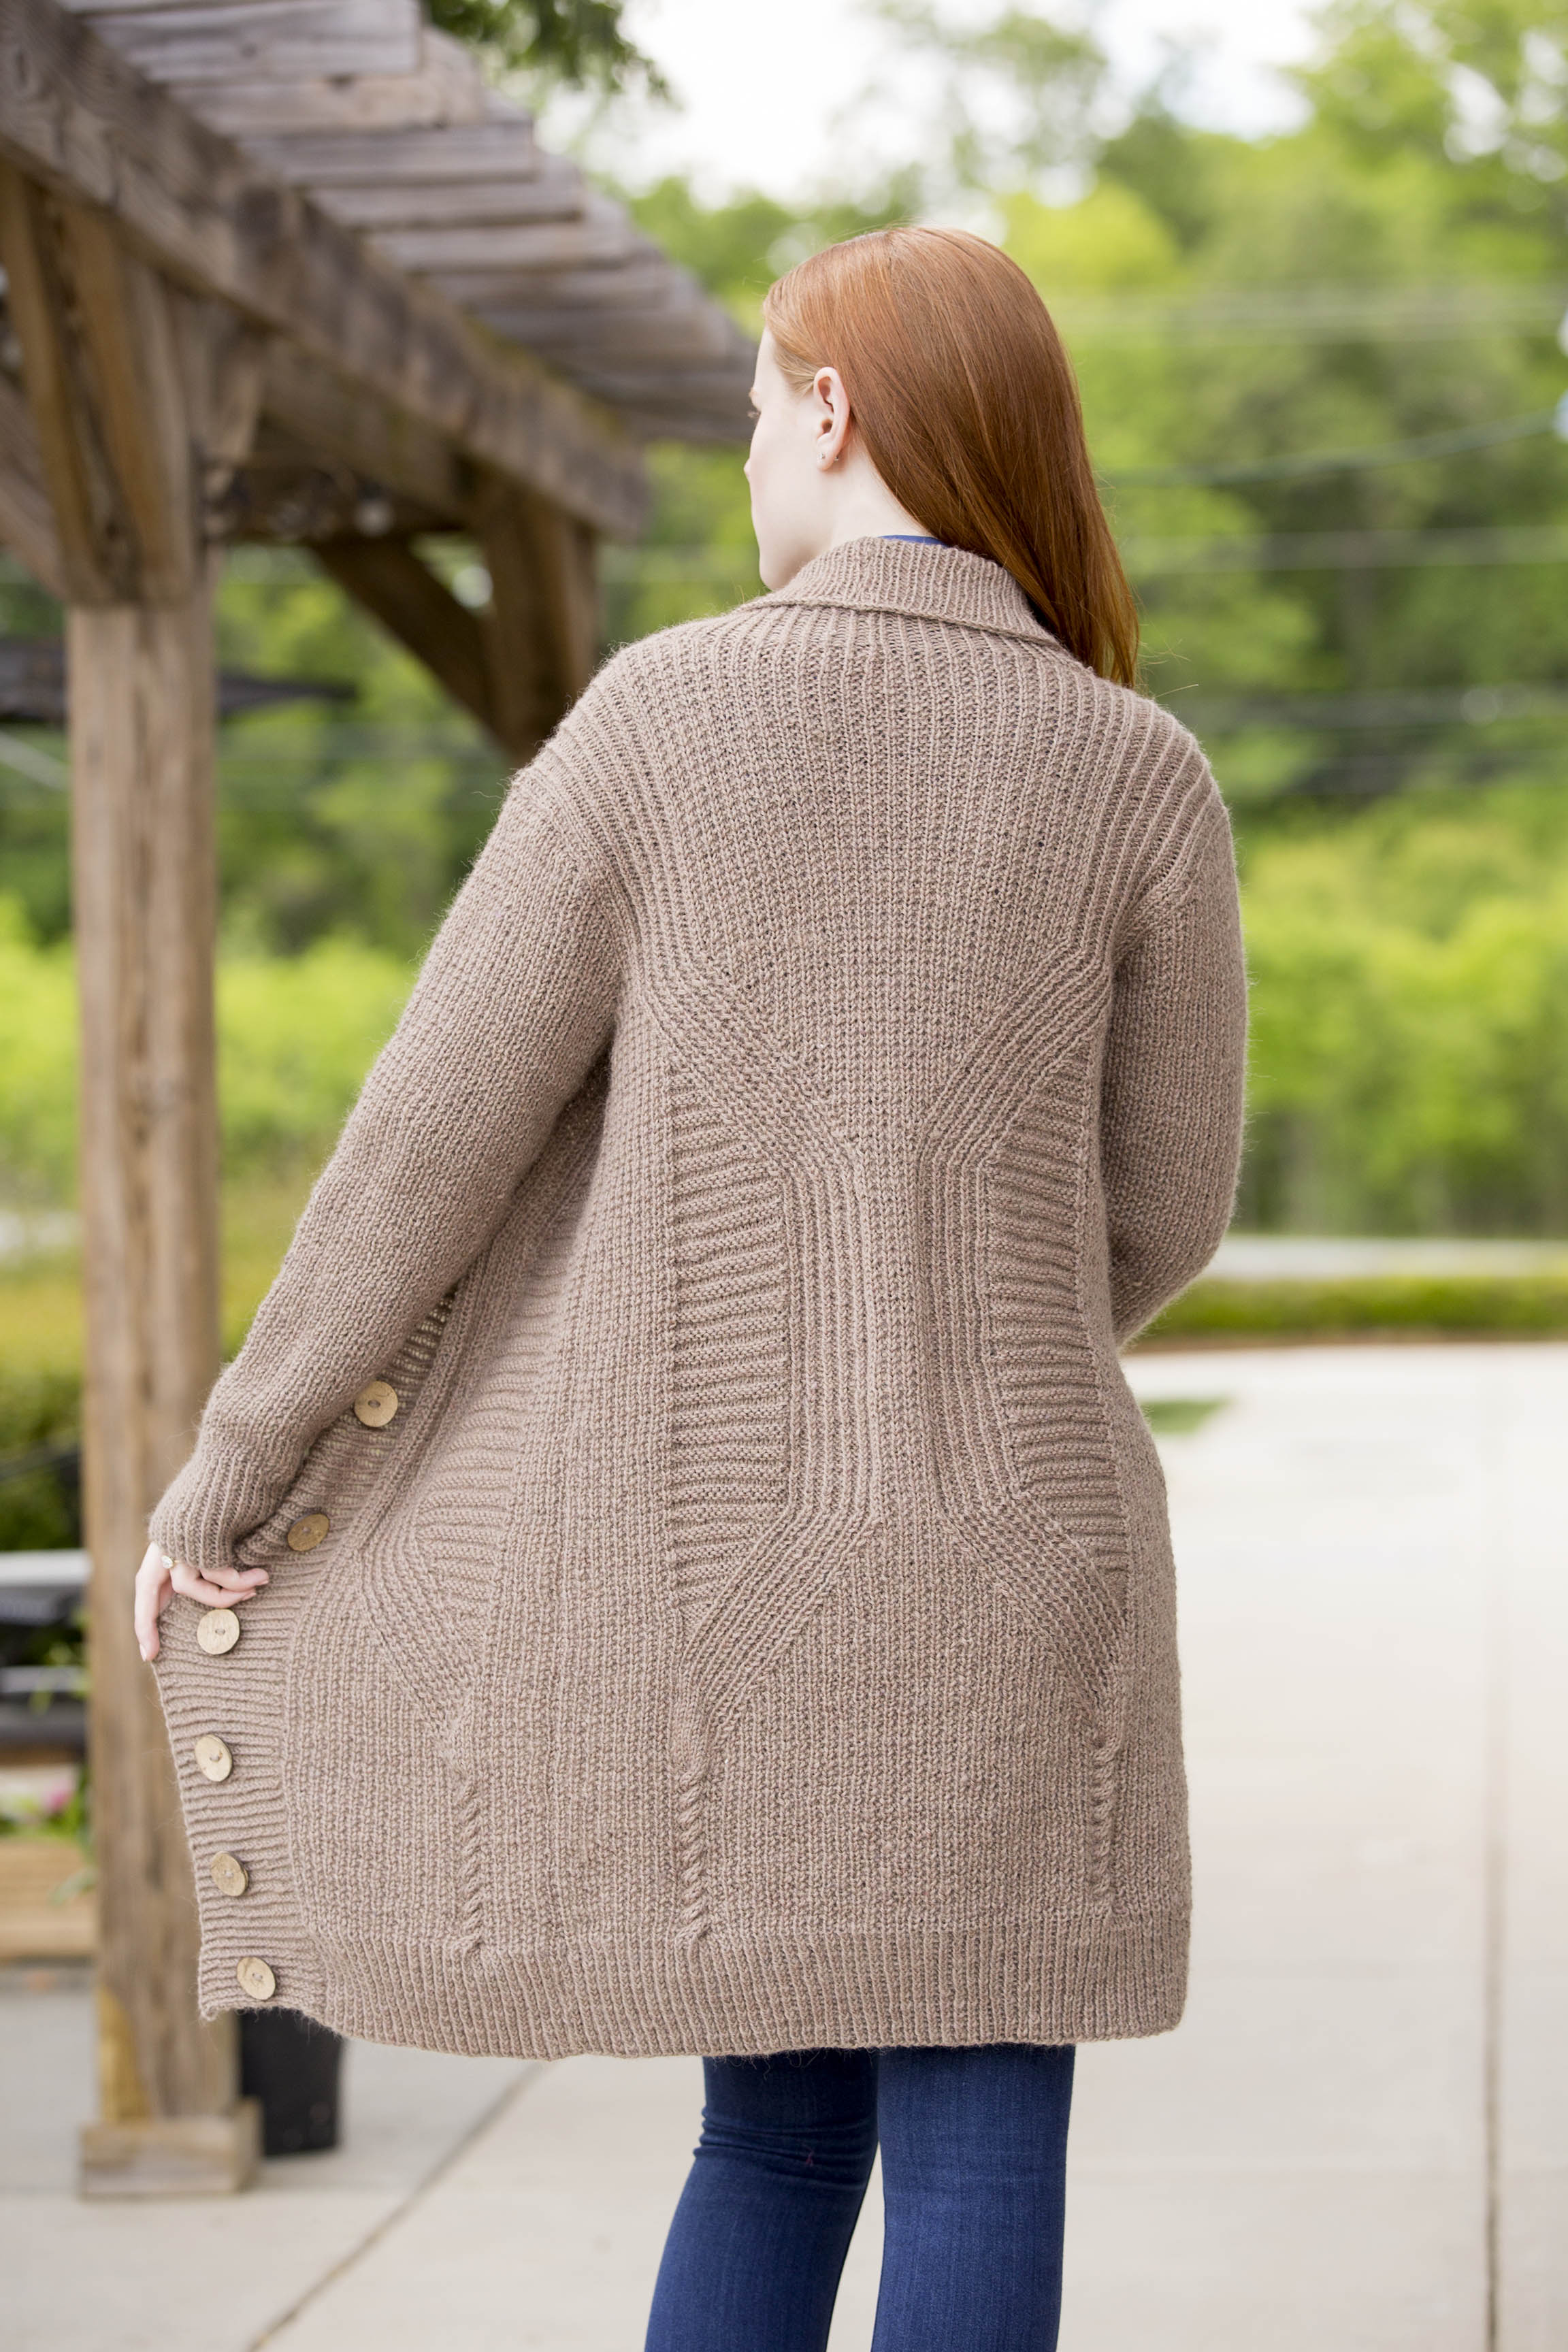
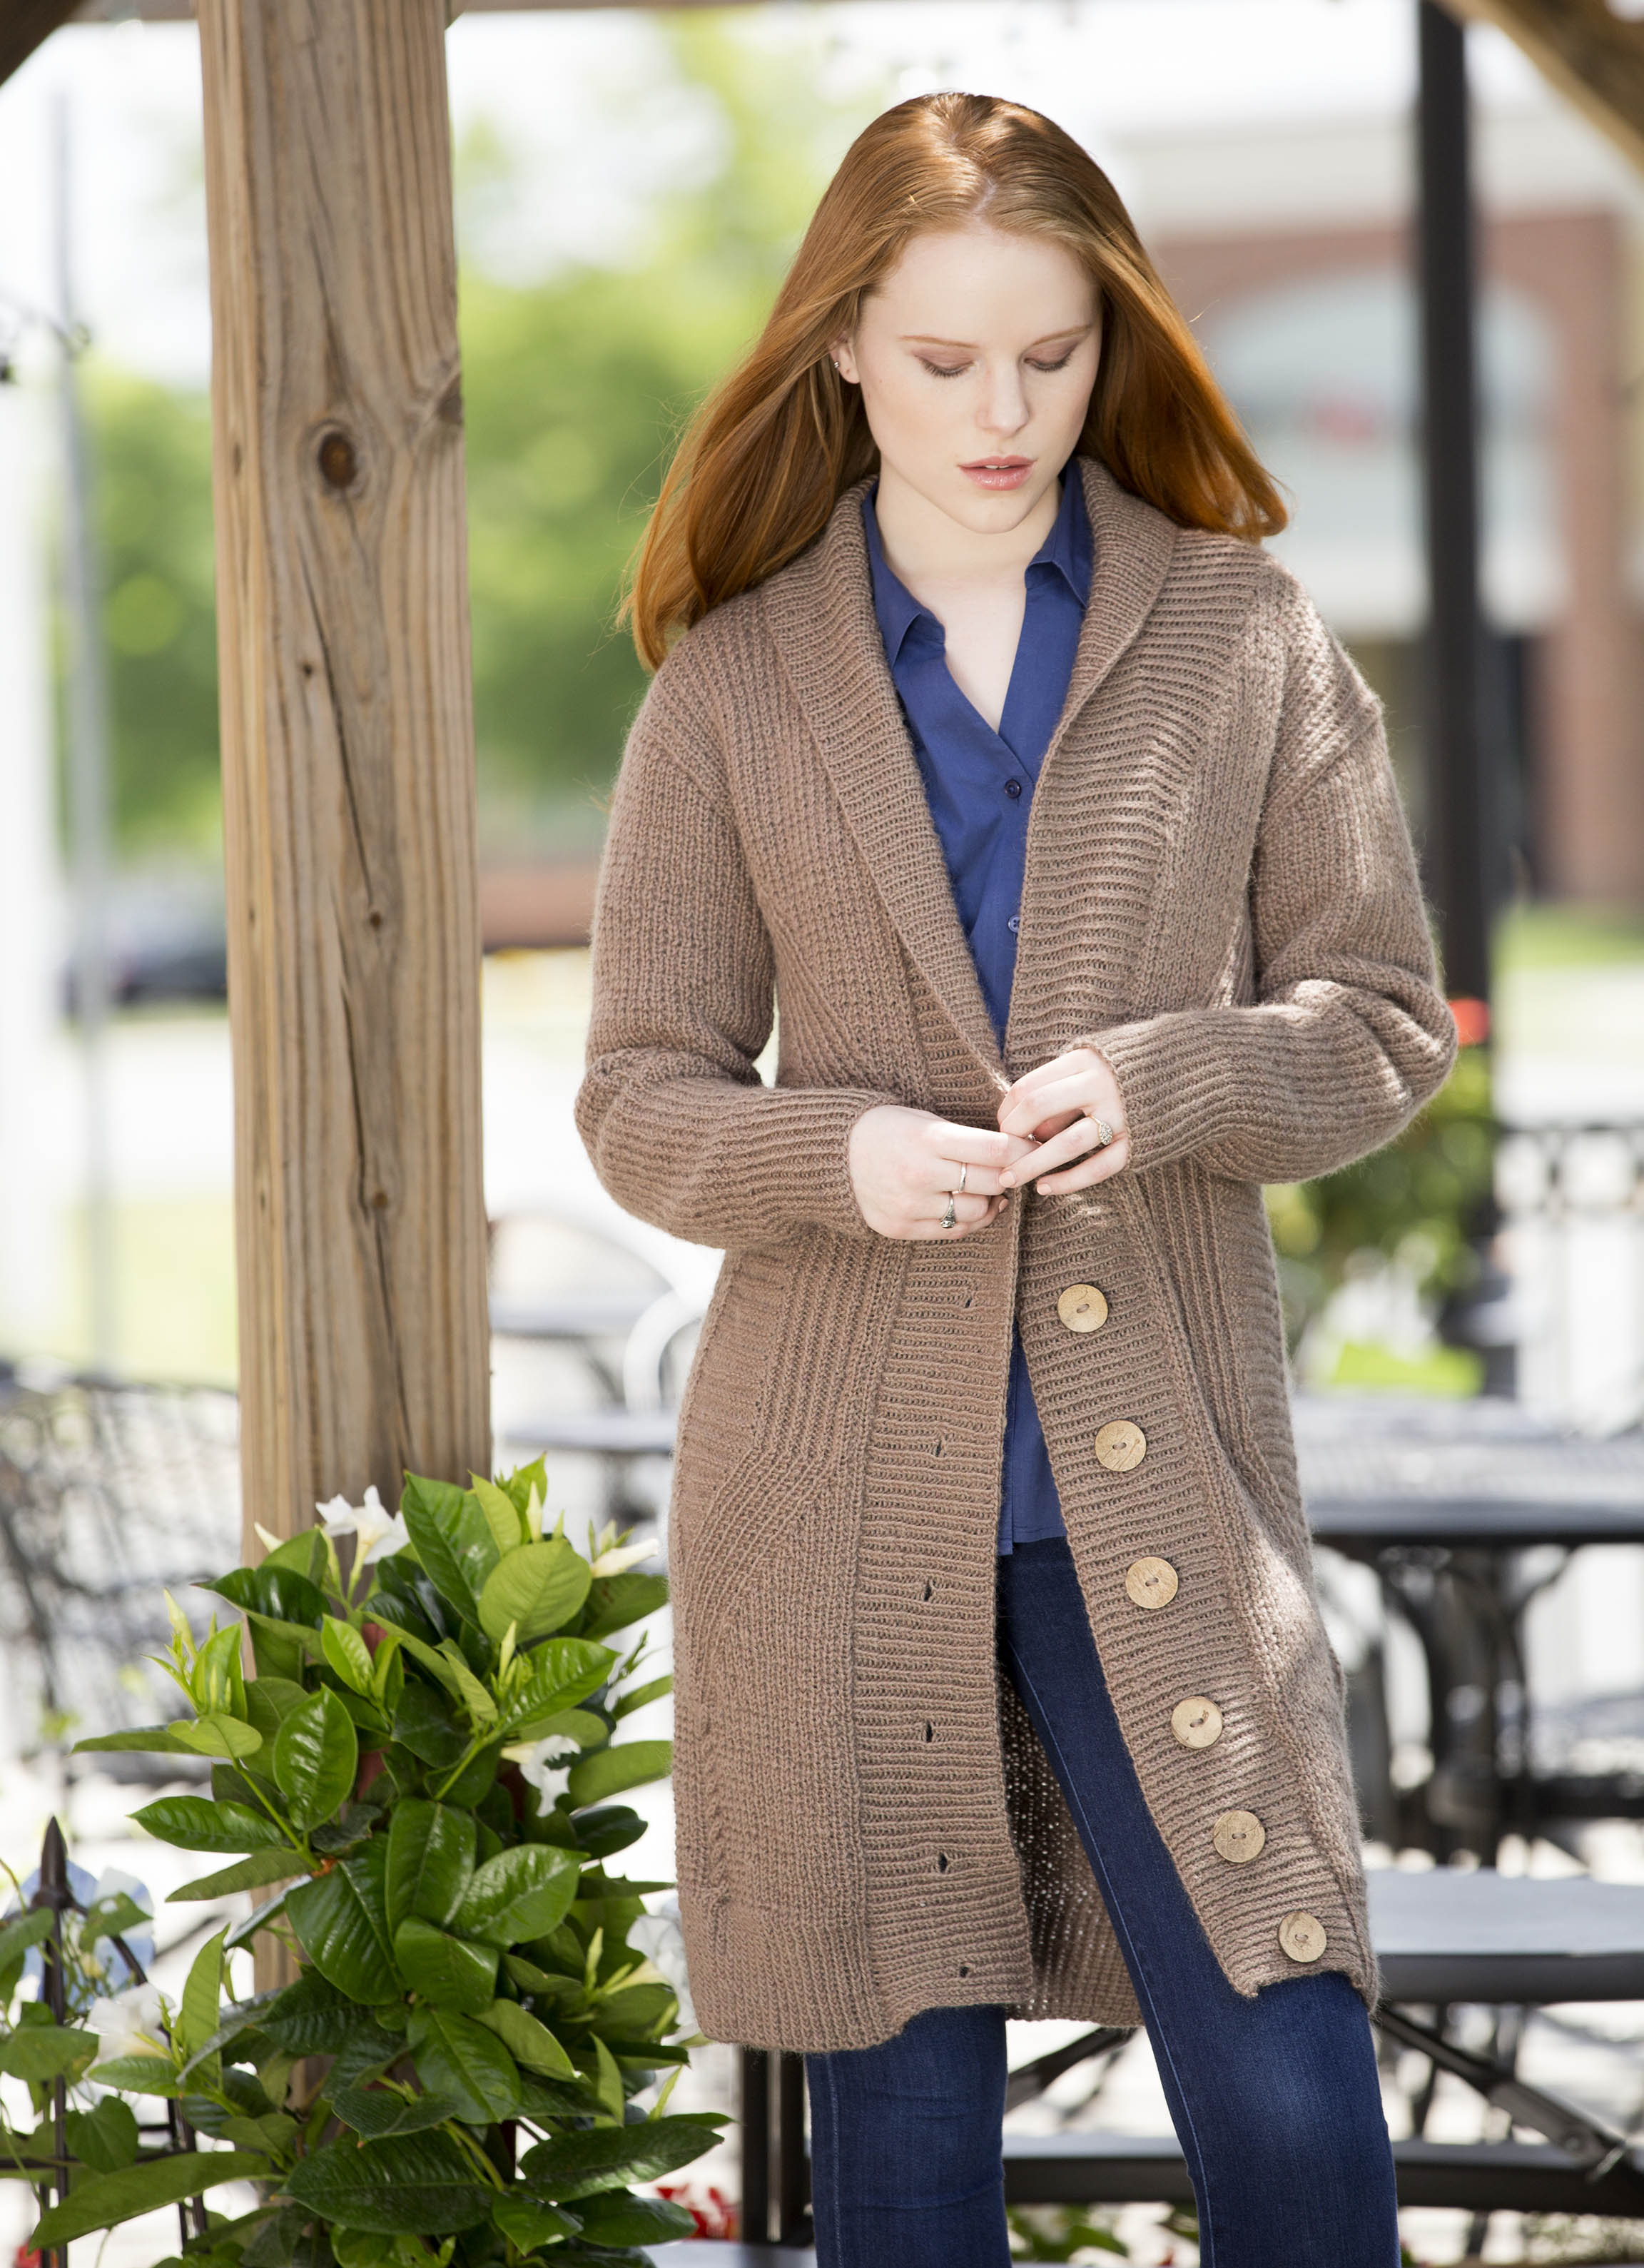
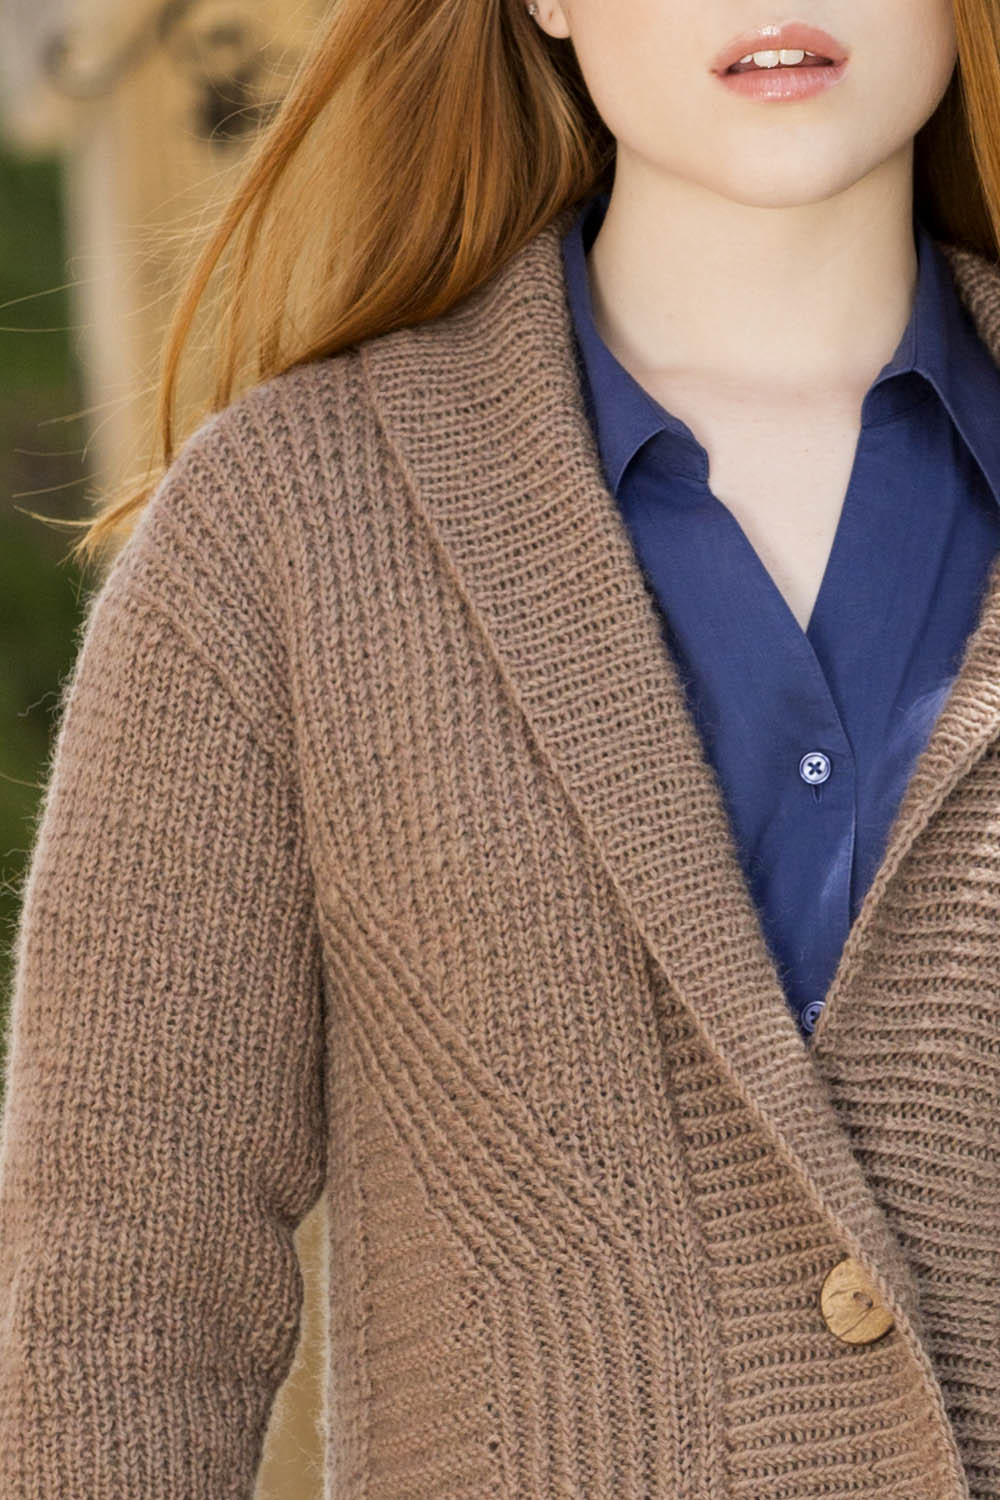
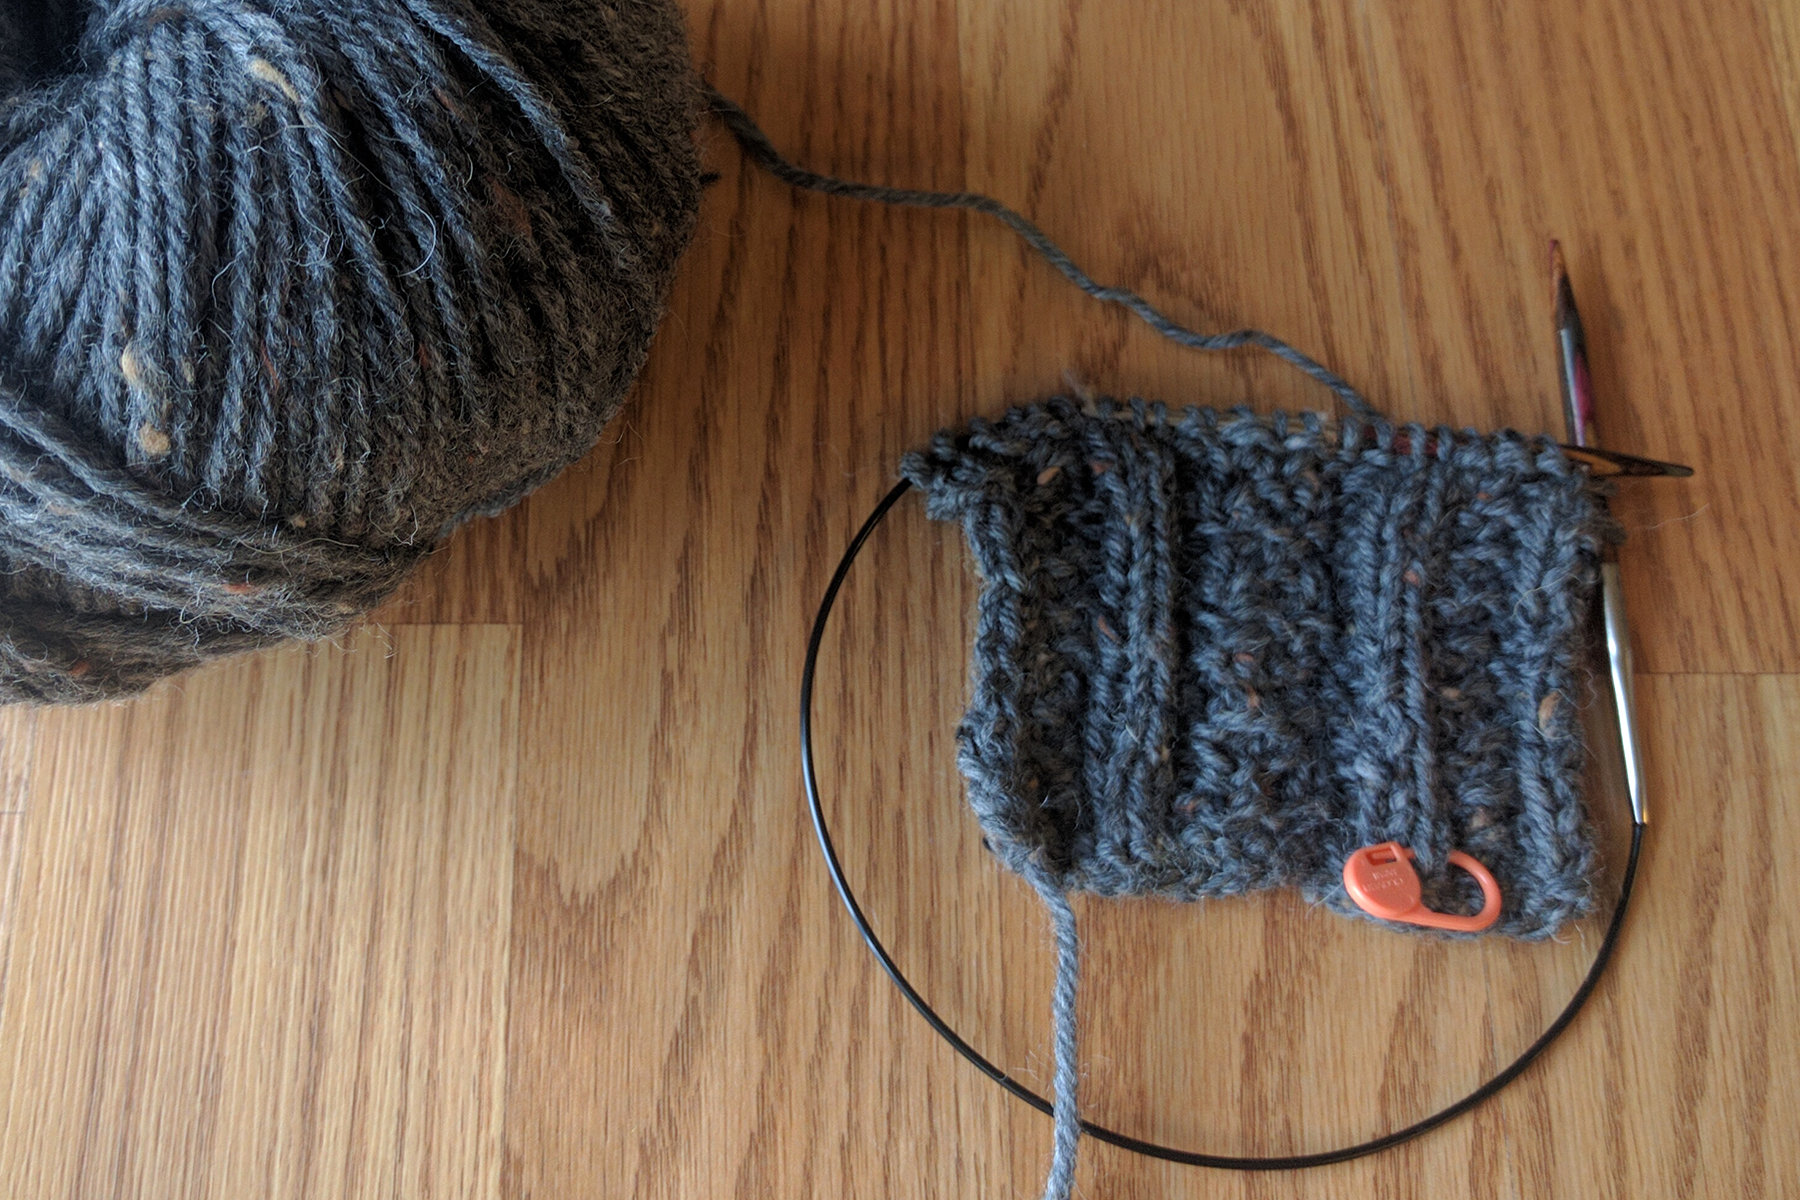
As you may recall, Jannie (a new knitter here in the office) decided to knit the Greensboro Cardigan.
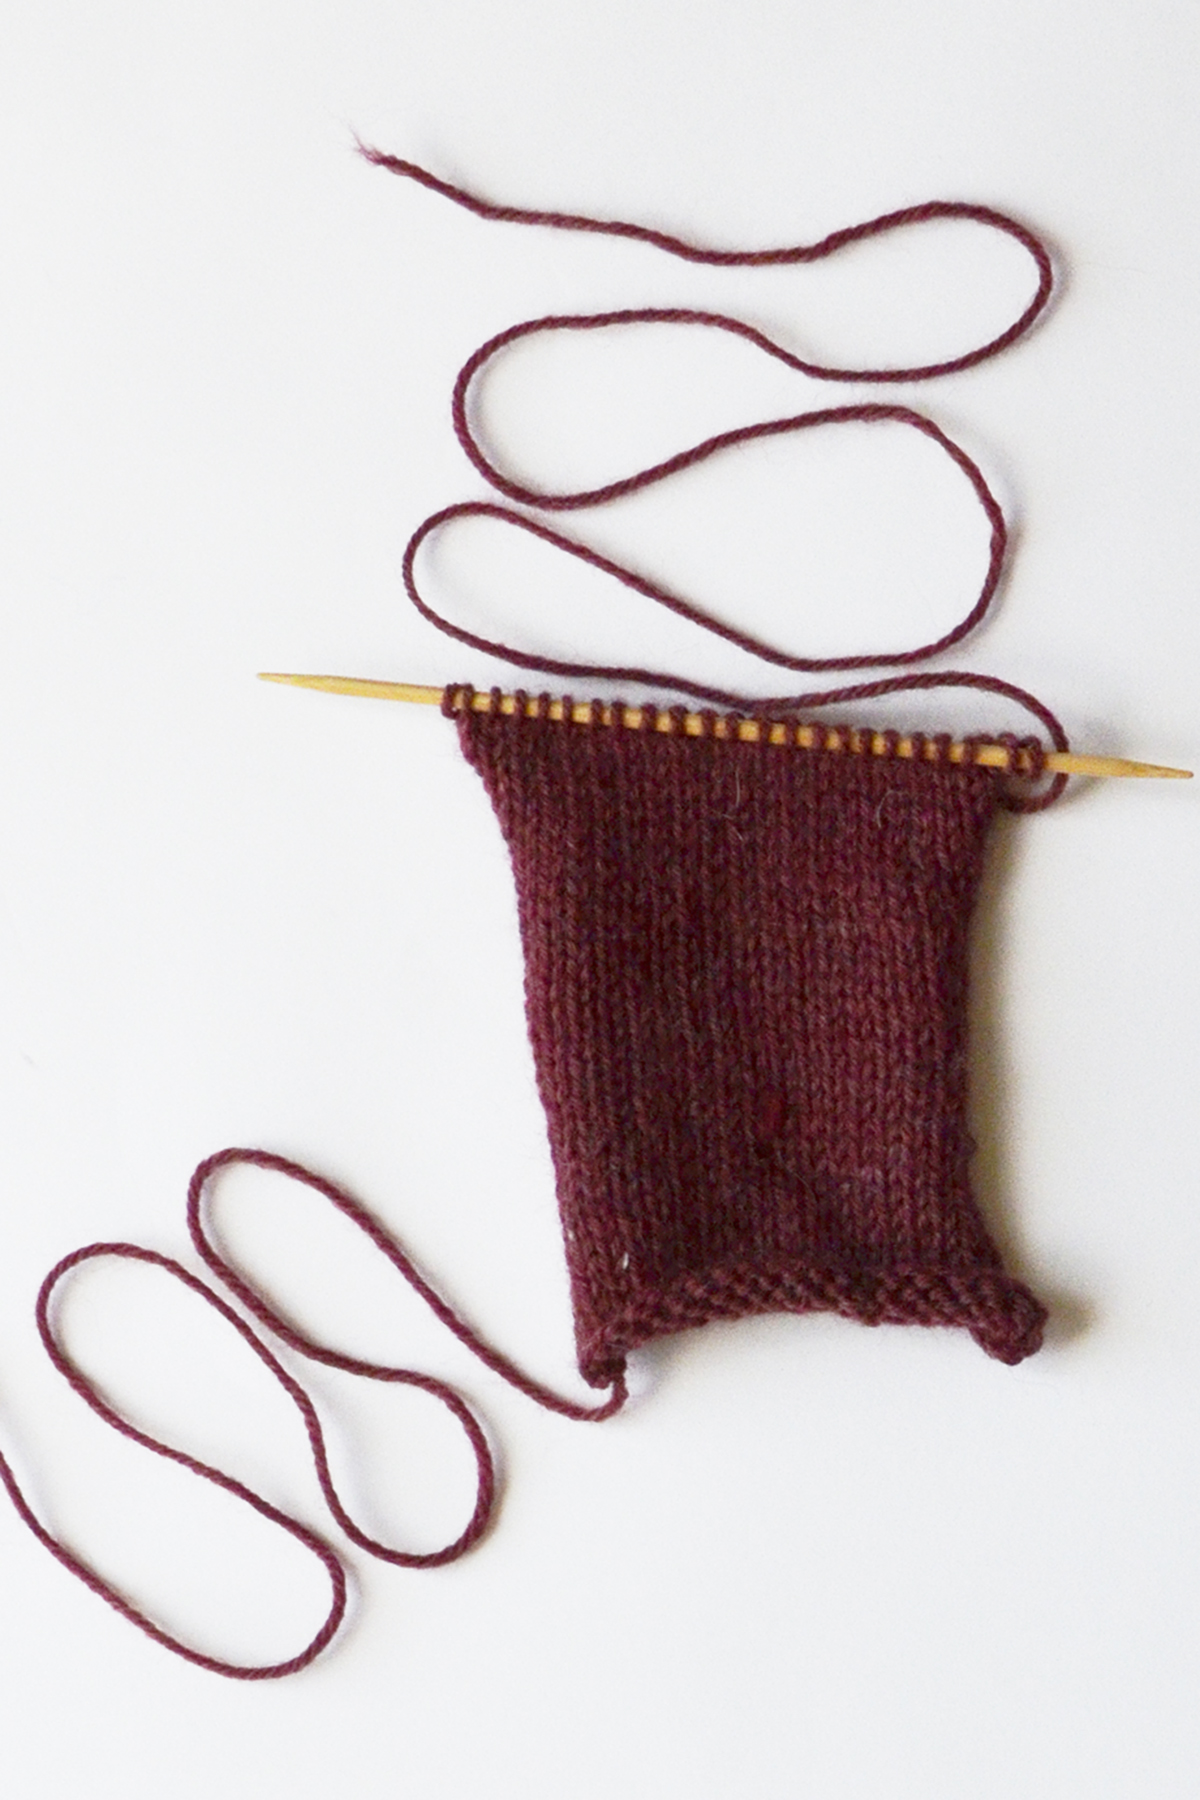
She did a little swatching, and then cast on for her sleeve, shown below:
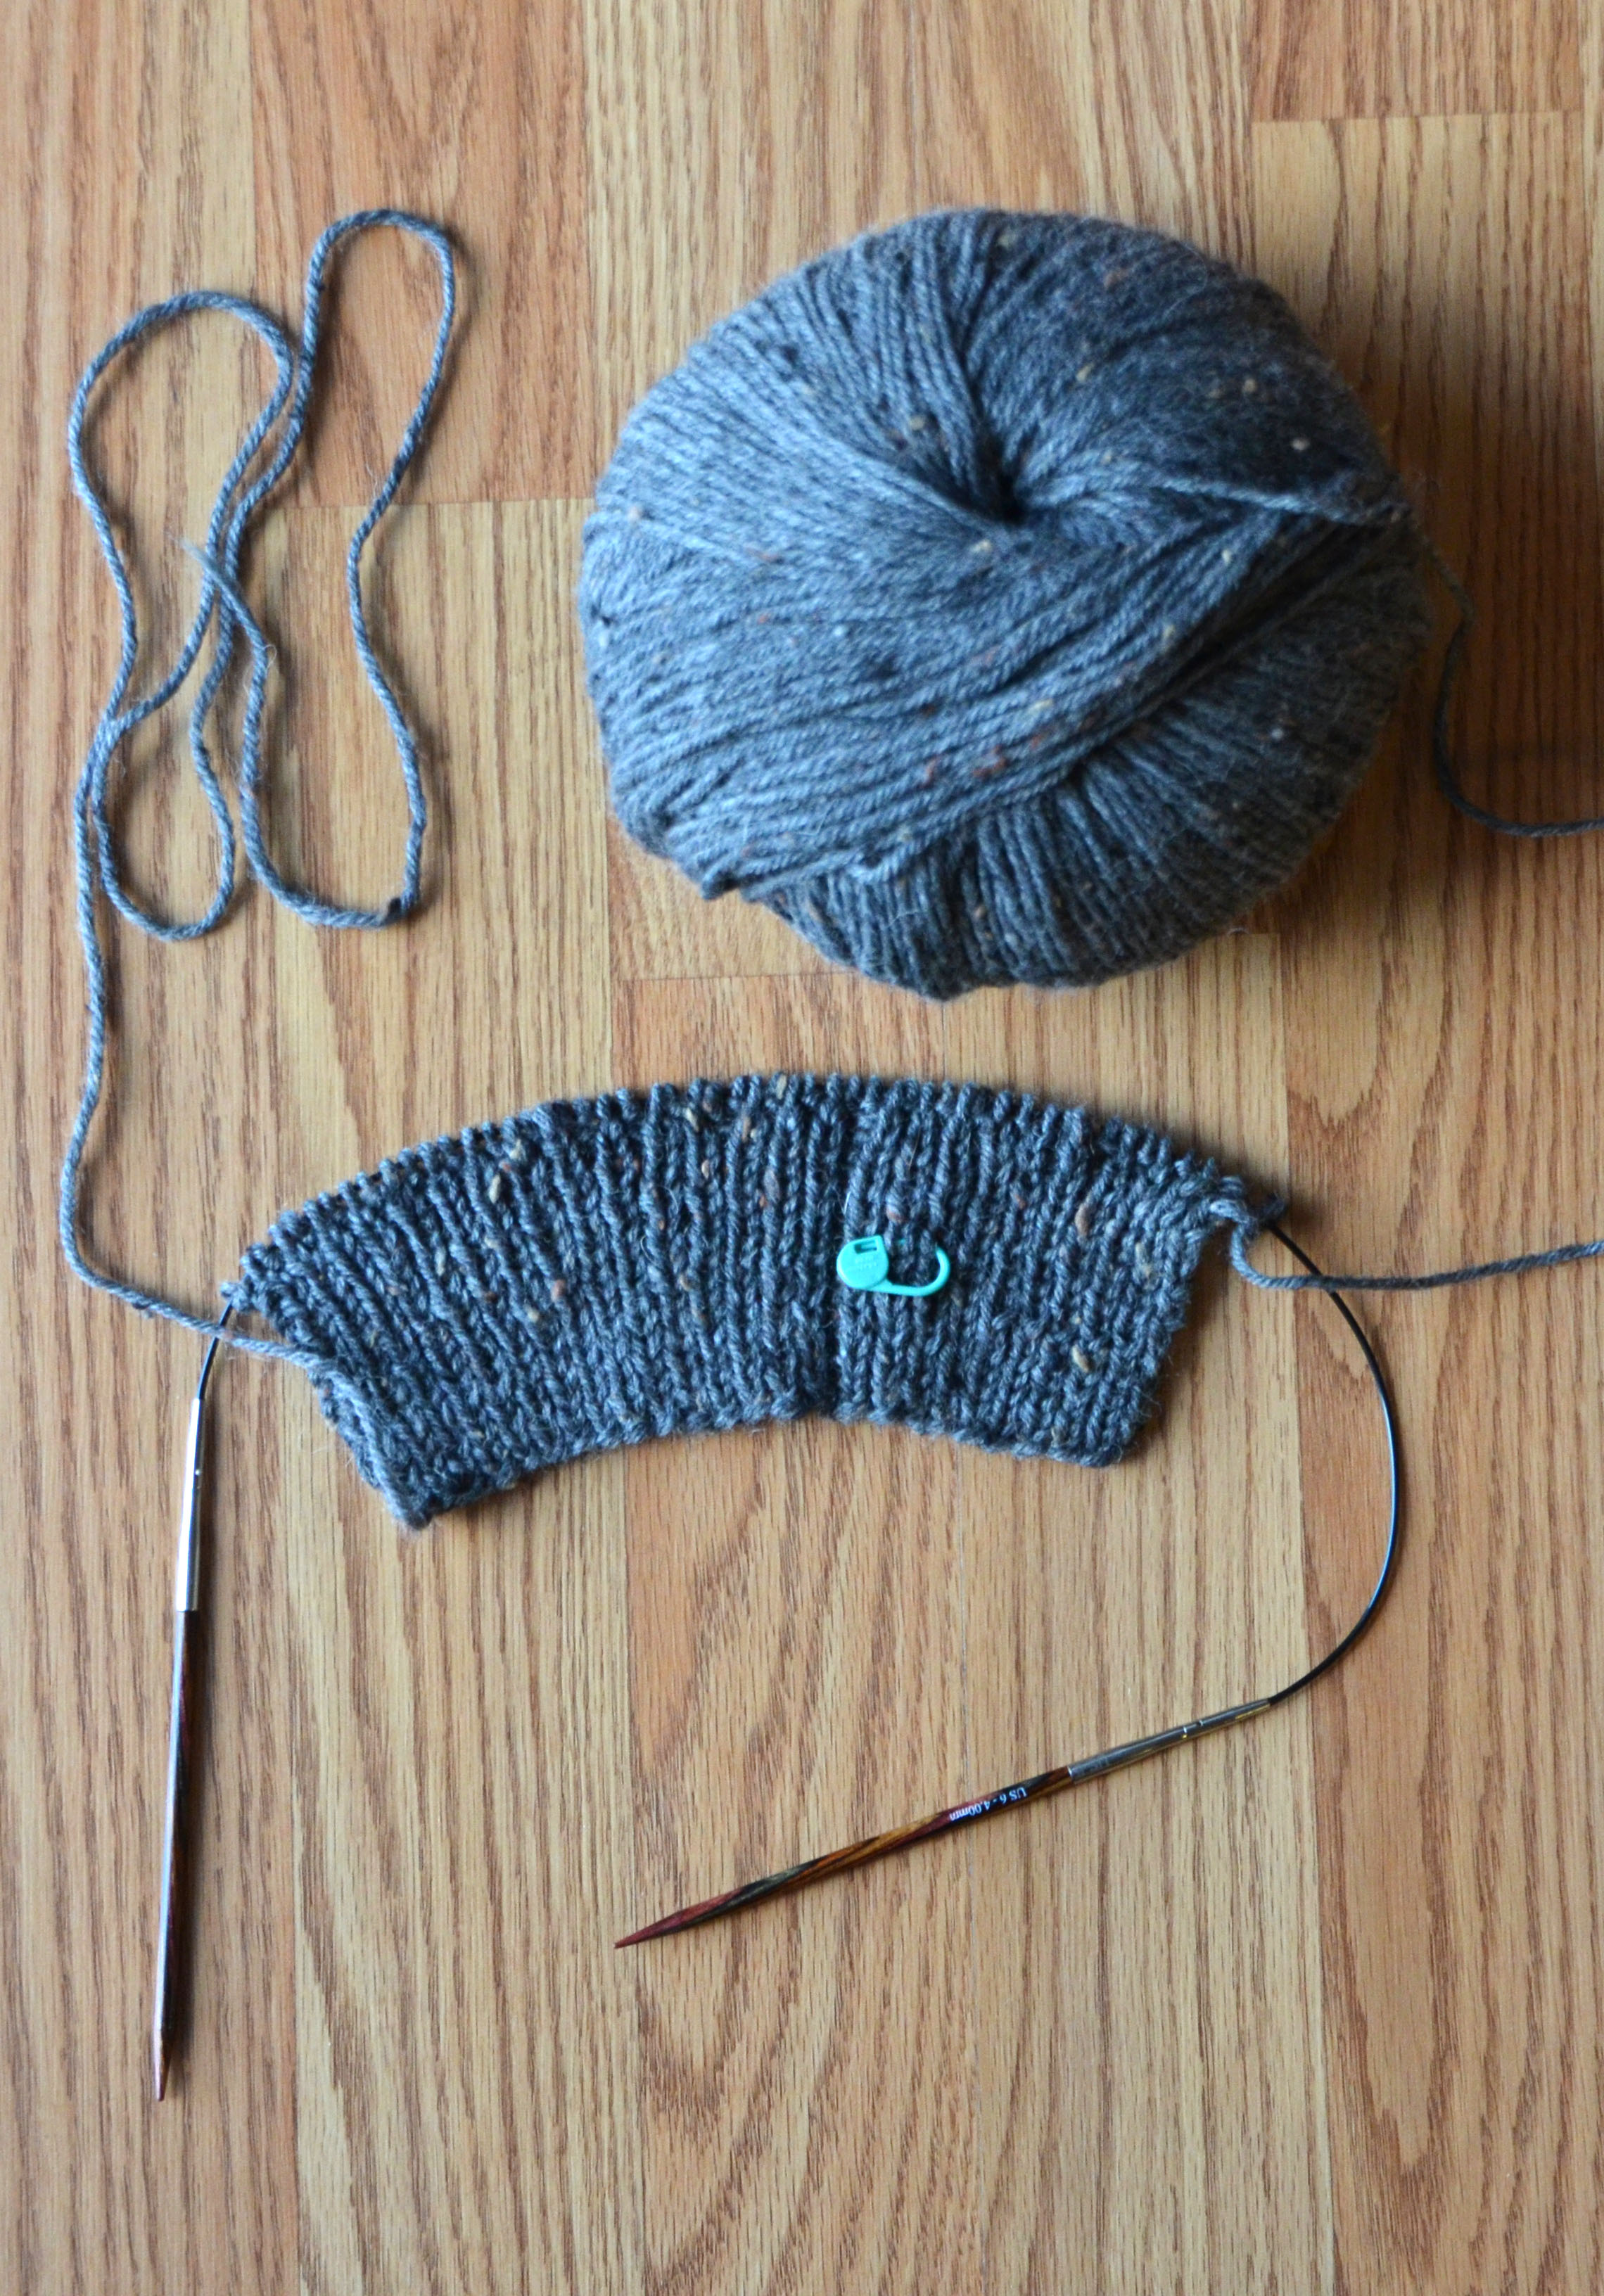
Now that she’s done with her cuff ribbing, it’s time to move onto the pattern. Because Jannie is doing all kinds of new things with this project (making a garment, reading charts, doing twisted crosses), I didn’t want to add increasing in pattern to the mix. So I made her a special chart for her sleeve that shows all of the increases.
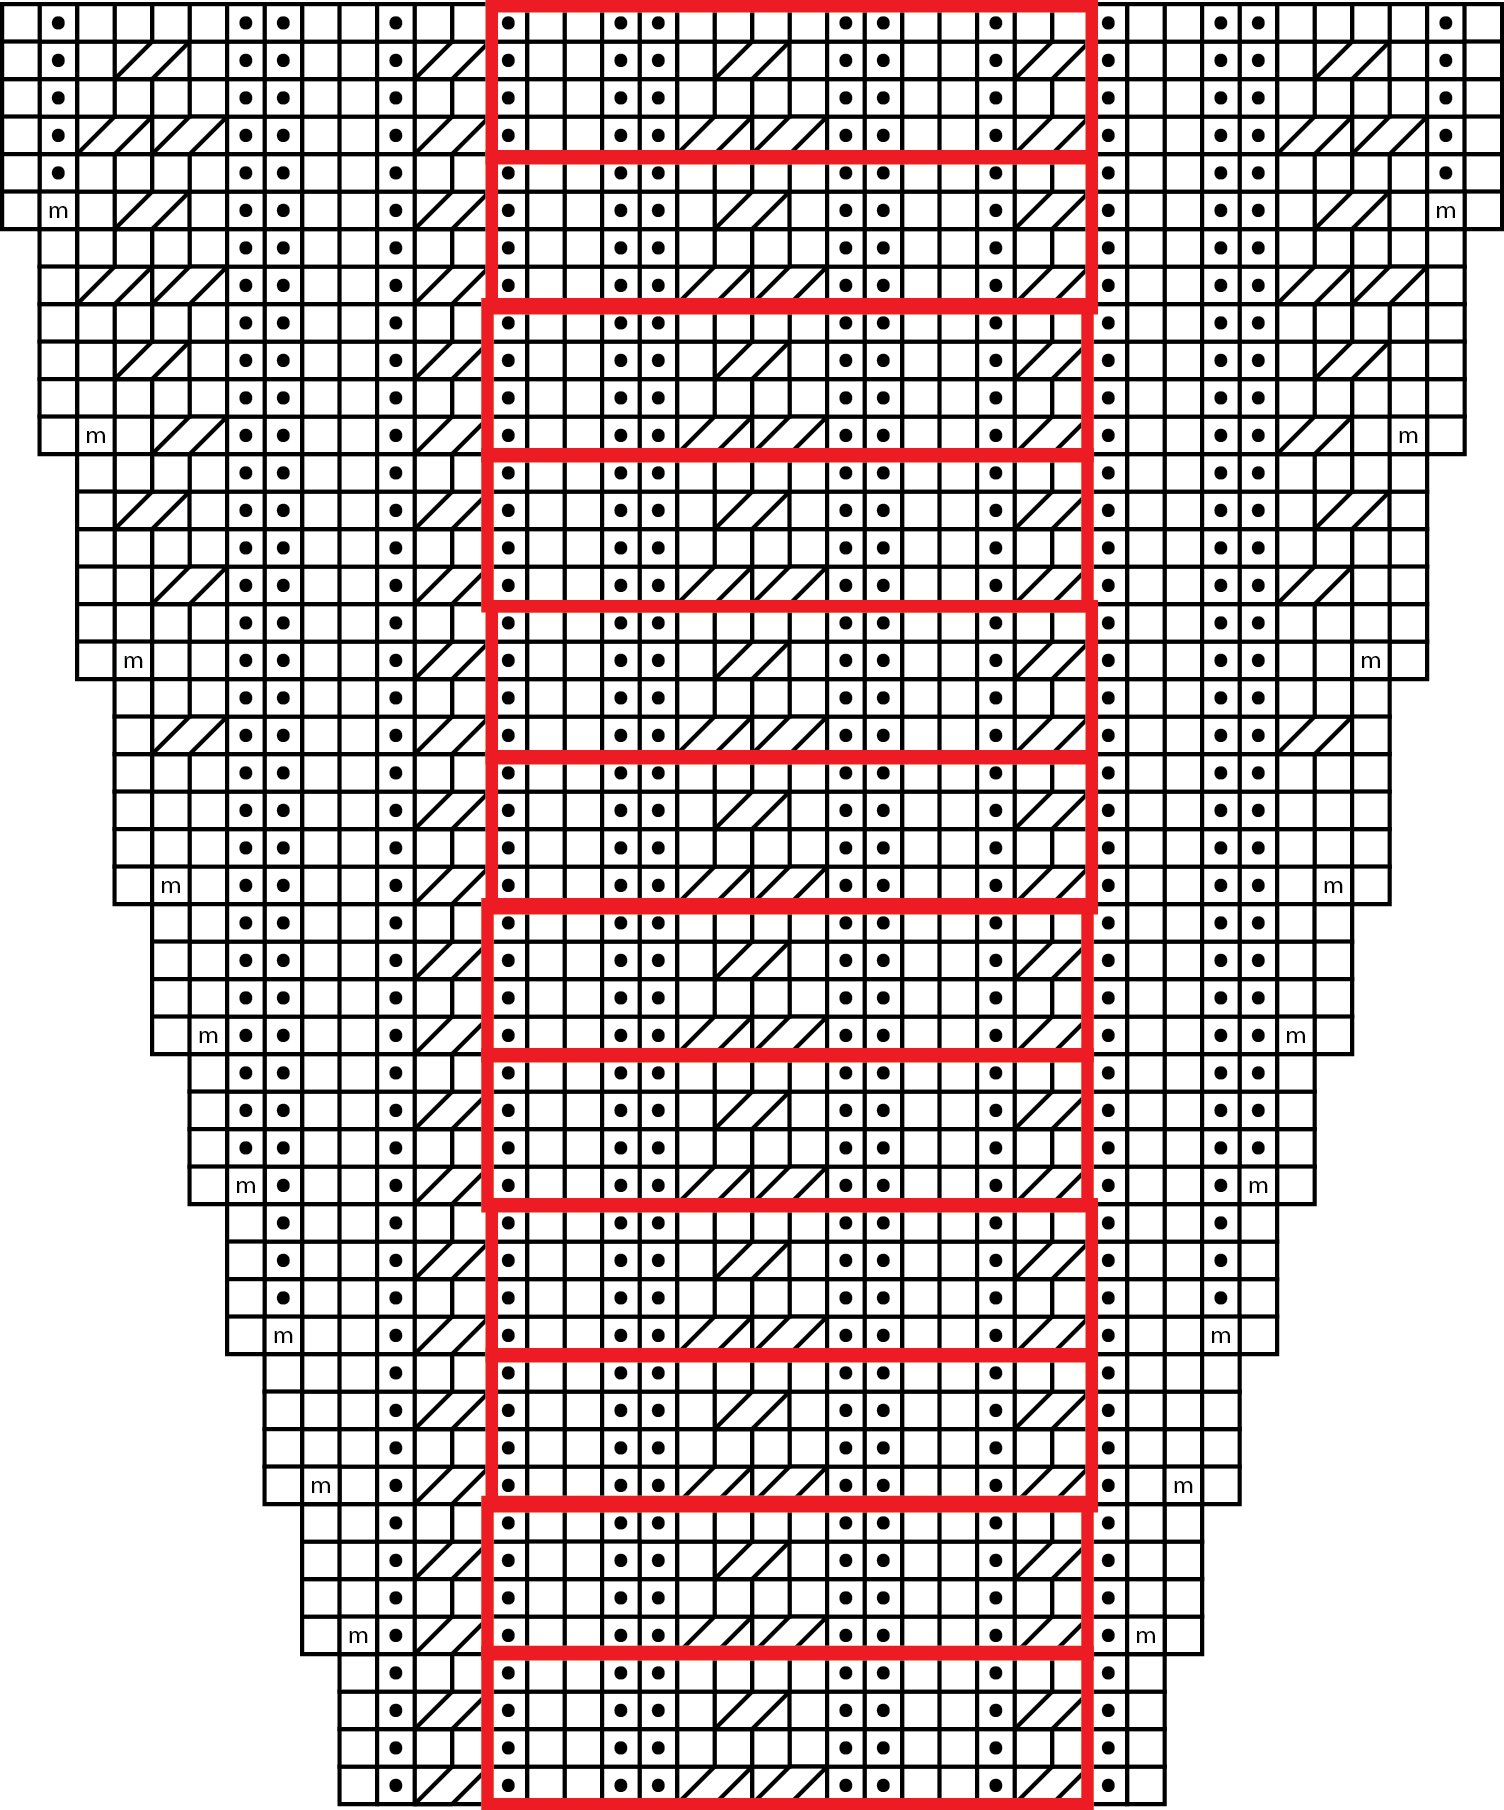
Here is what the chart looks like in the pattern:

The chart shows you the pattern repeat, and where to begin and end for your size. Once the increases begin, you must incorporate these new stitches into the already established cable and rib.
I’ve found that for some knitters, the idea of doing this just clicks. After learning a new stitch pattern, they’ve memorized it enough that intuitively they know what the next stitch should be. Of course this will depend on the complexity of a stitch pattern, as well.
With other knitters, it’s a struggle to wrap their head around. It’s just the difference in how our brains visualize and process. If you’re in the second group – don’t fret. You can do what I did for Jannie – make yourself a custom chart.
If you don’t have a graphics program or know how to make charts like this, it’s okay. You can do it by hand on graph paper. You can even use a spreadsheet program to make charts. After all, we’re just talking about a bunch of symbols inside of squares.
Happy cabling!

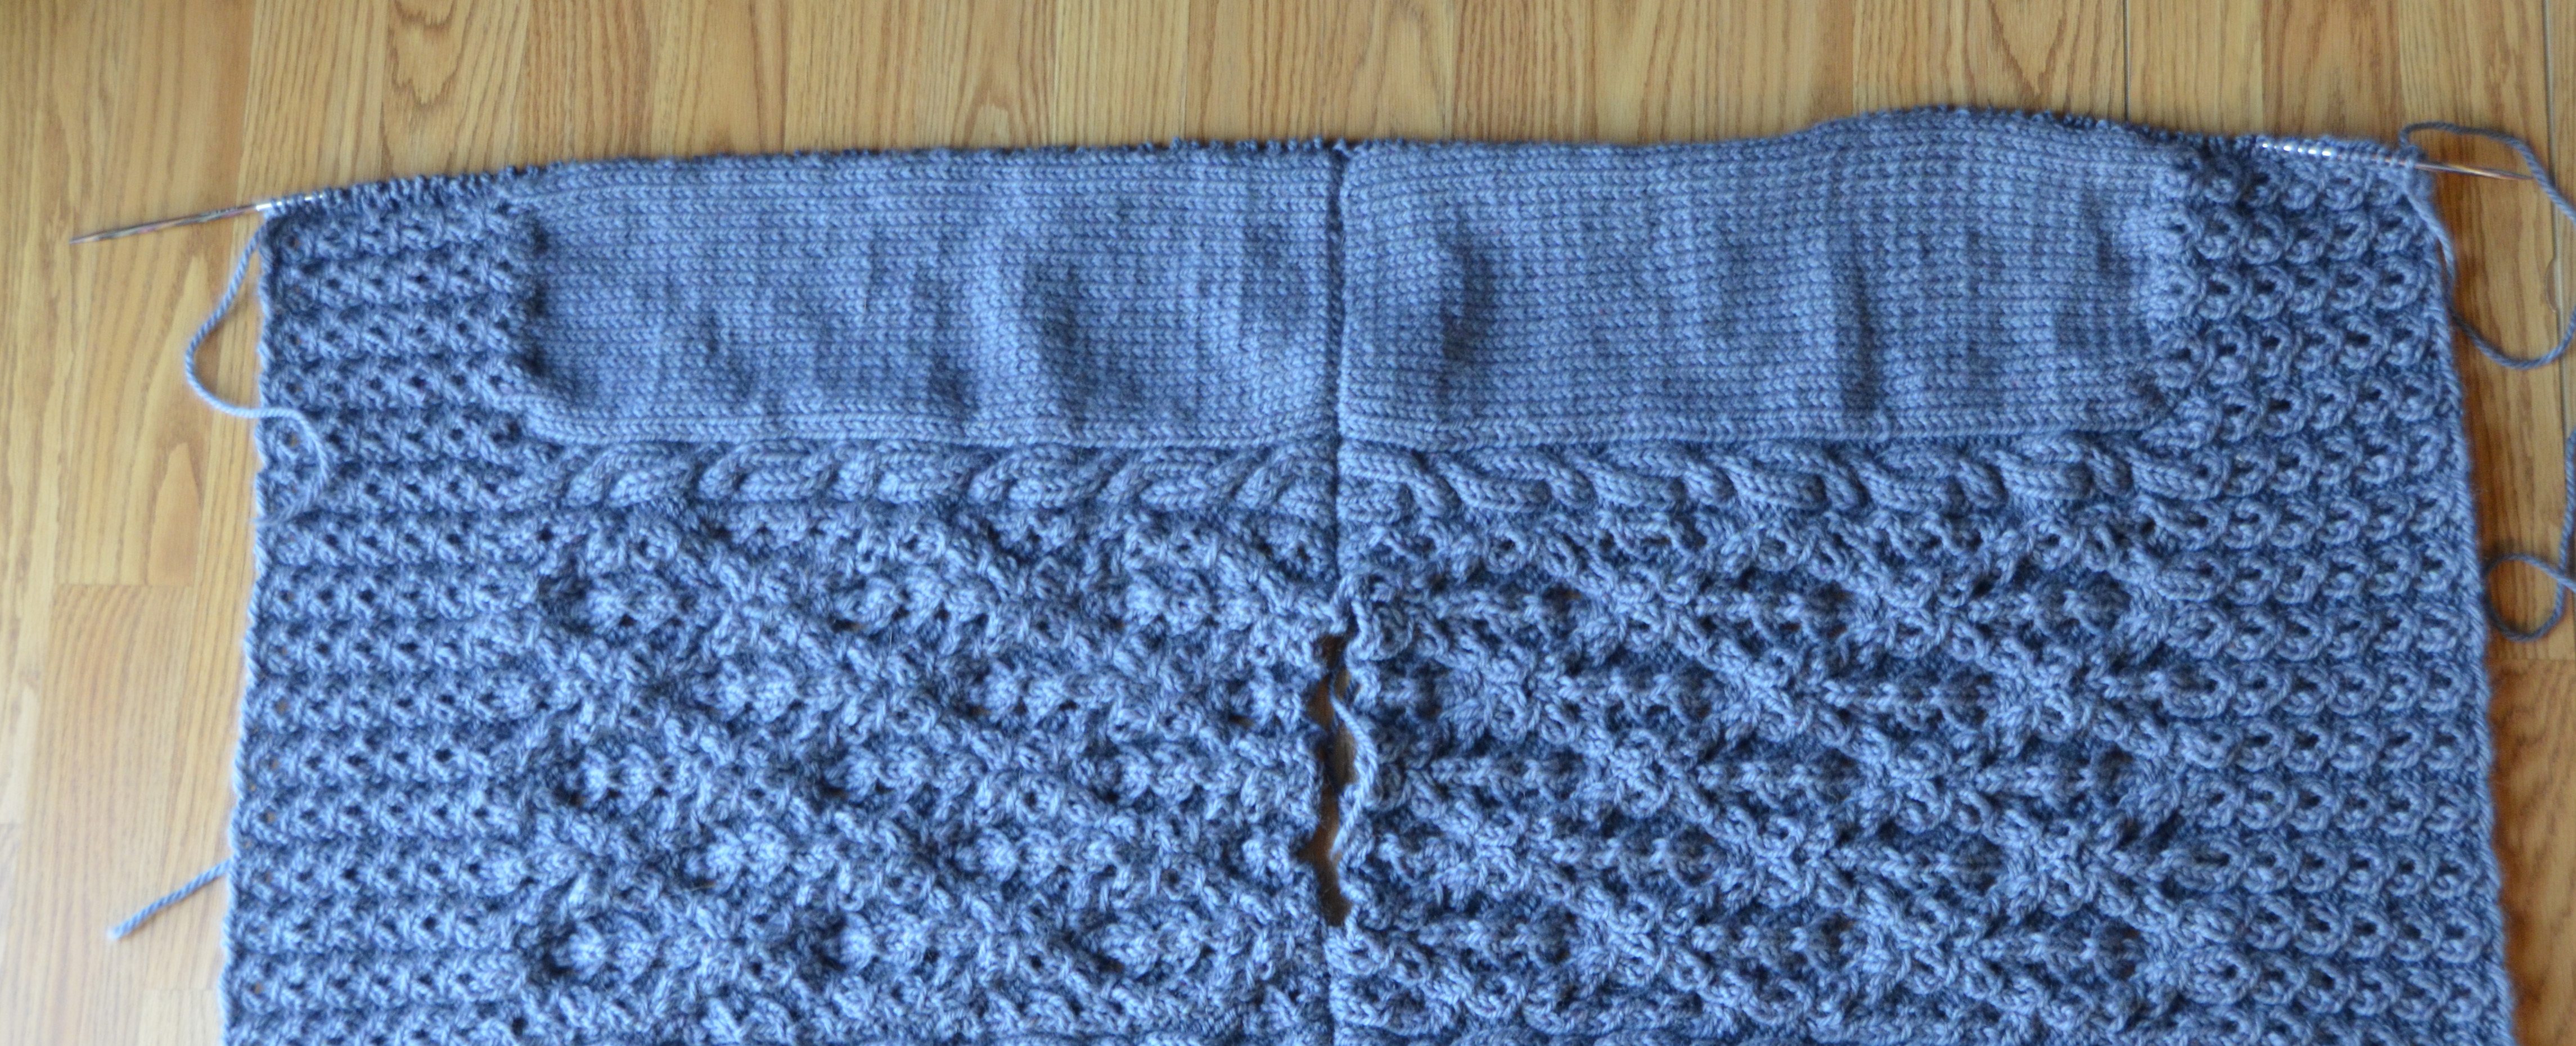
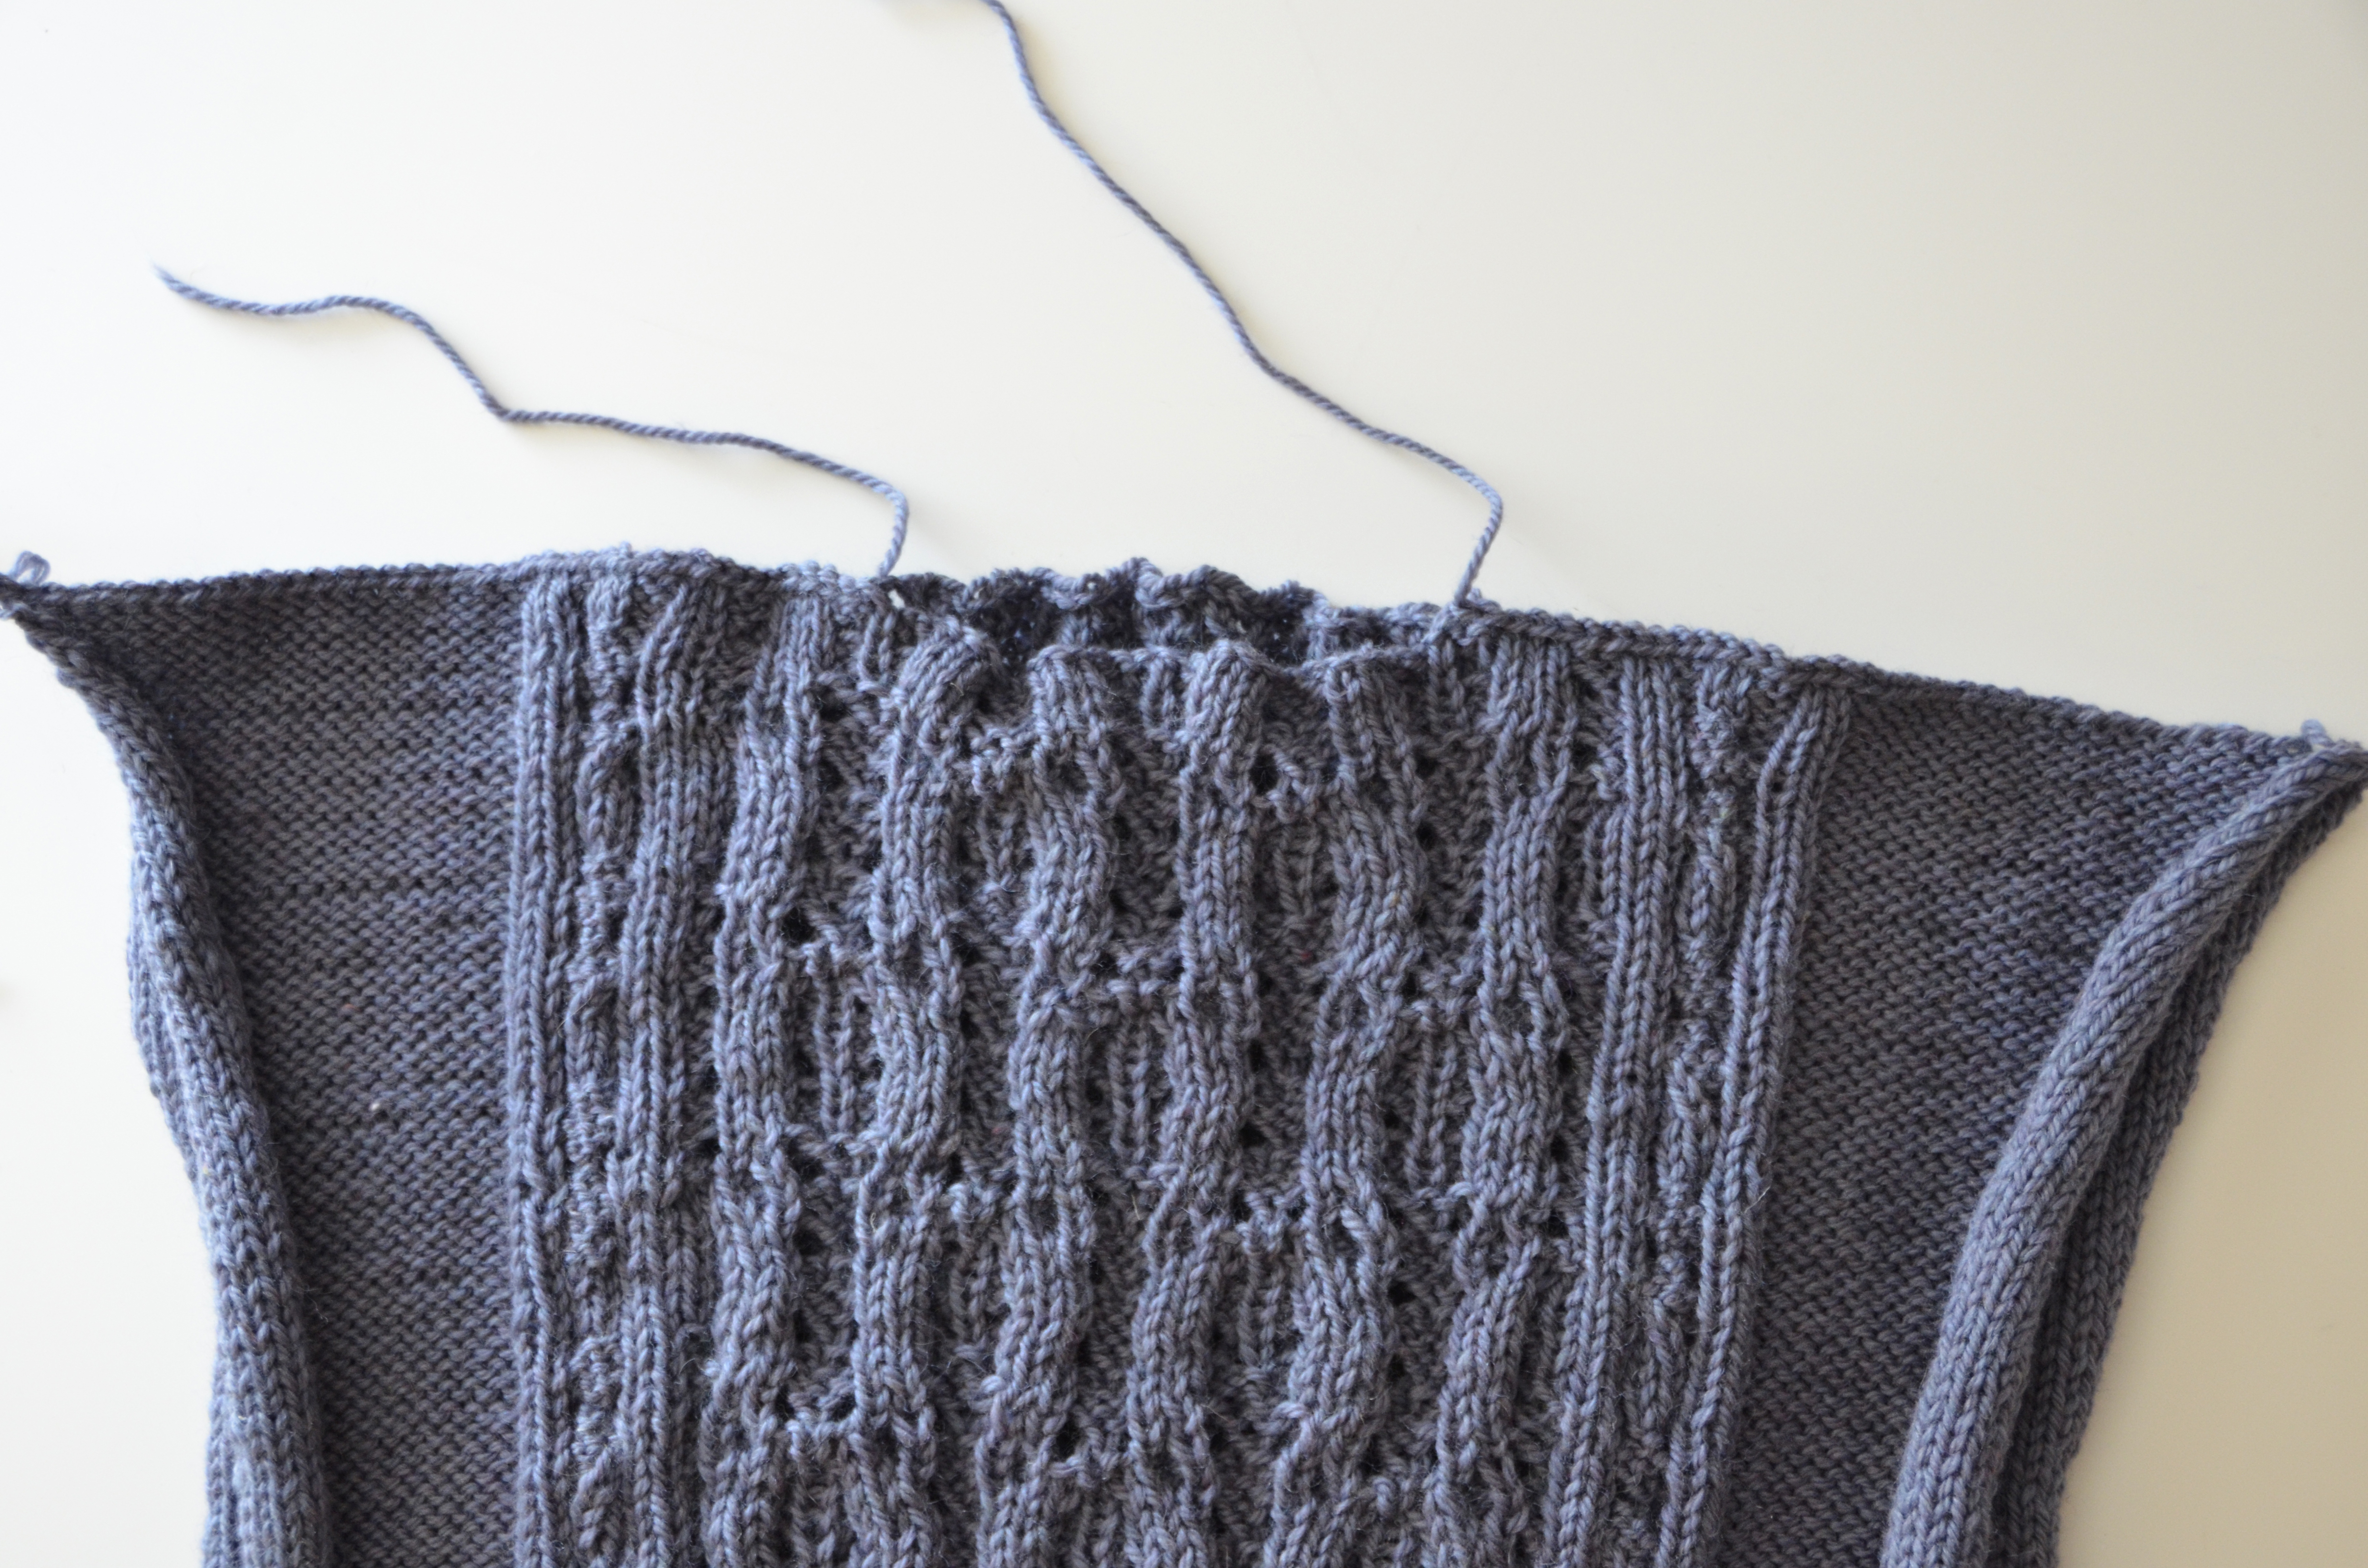
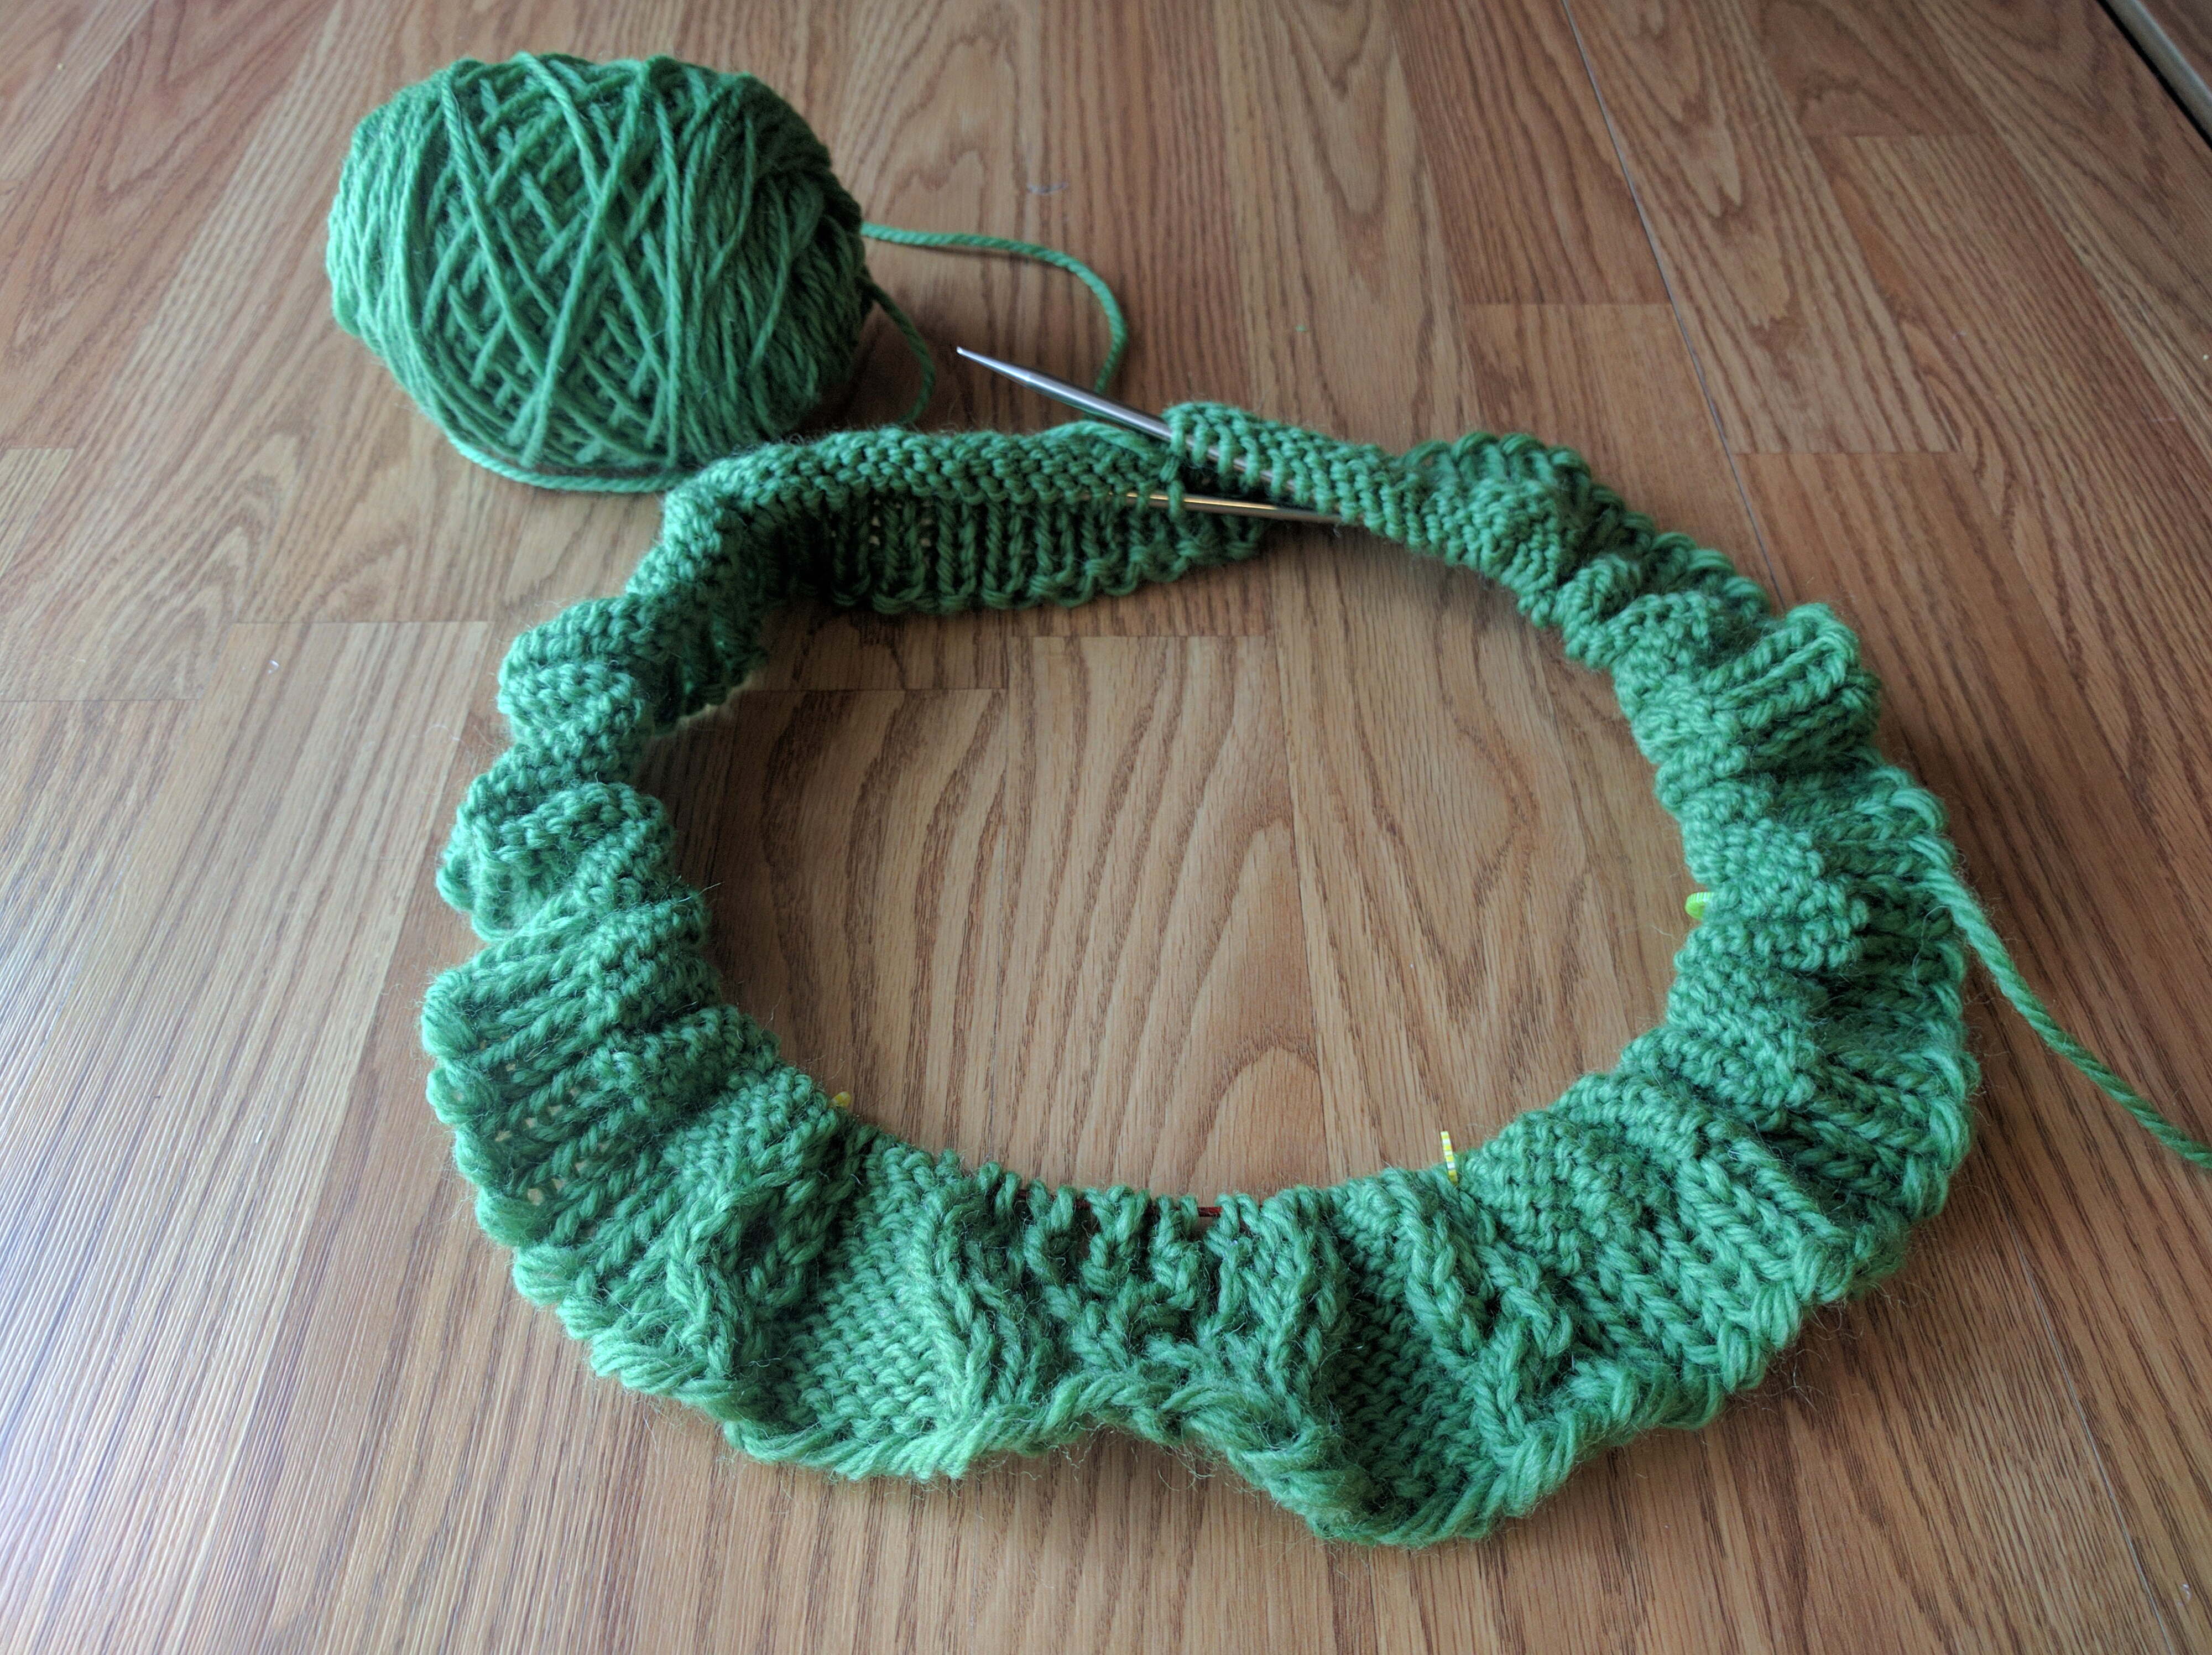
Greetings knitalongers! After joining shoulder seams on my Catawba River Poncho last week, I’m all set to pick up stitches for my side ribbing.
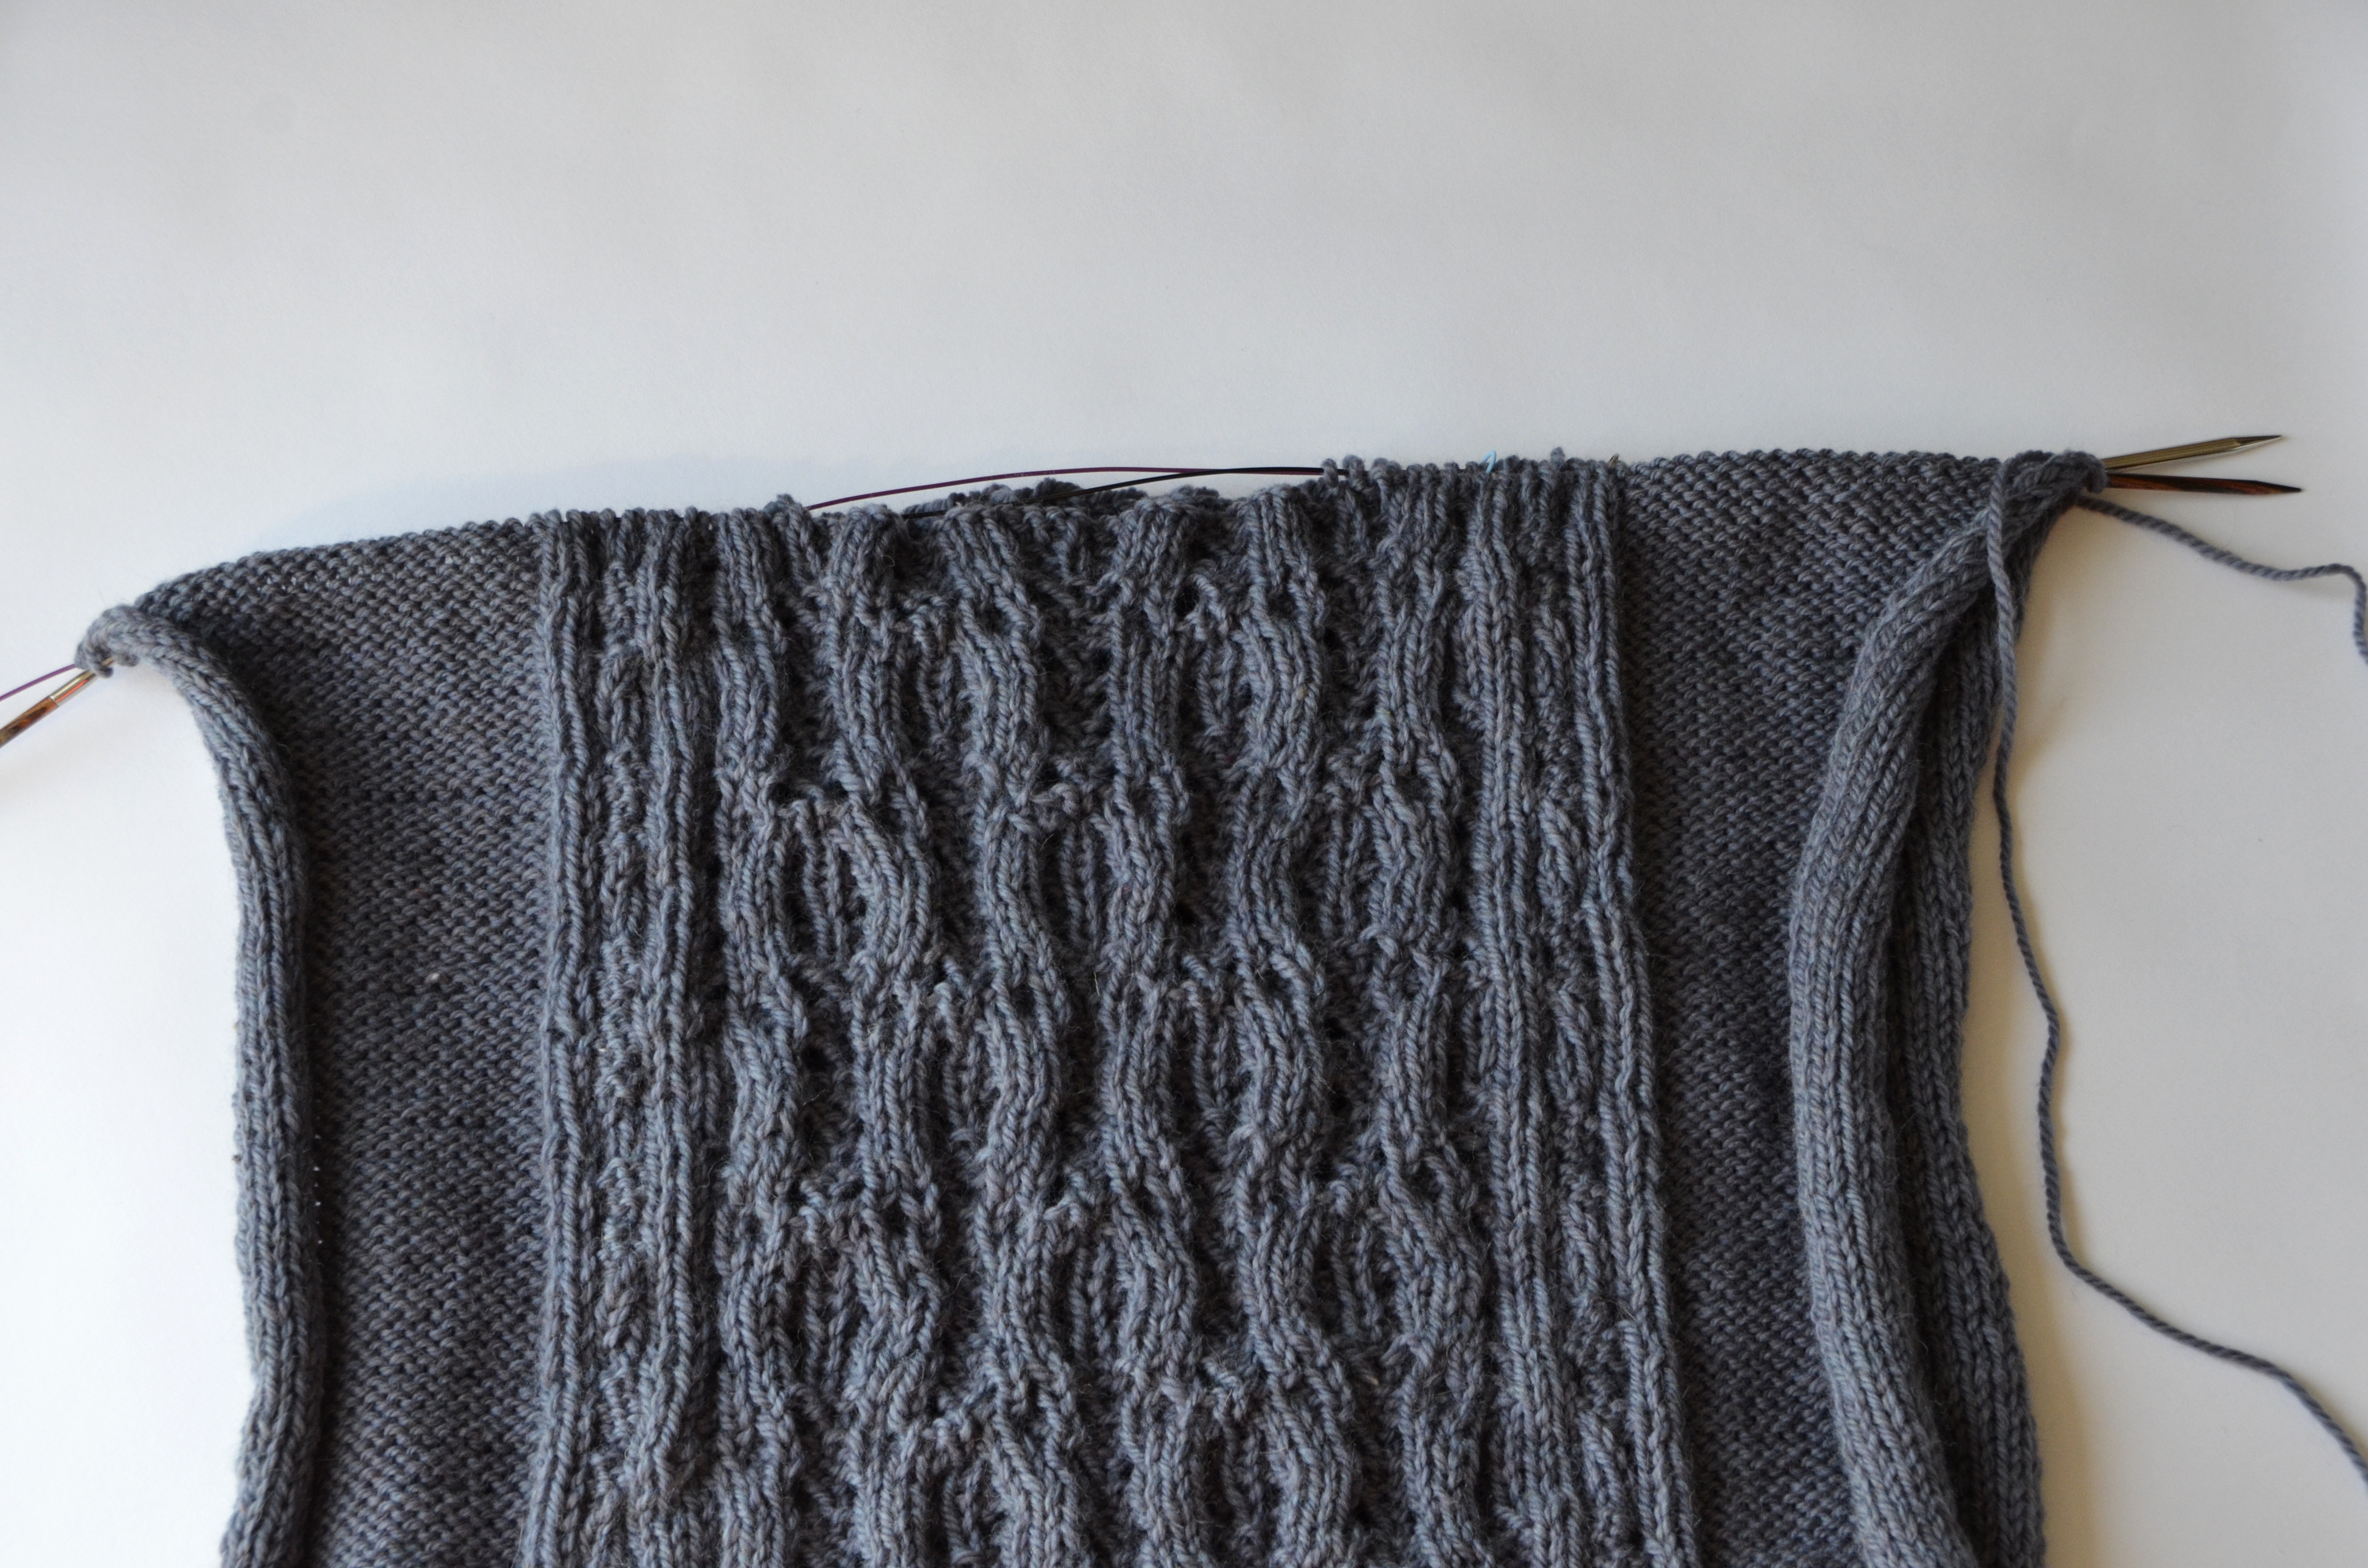
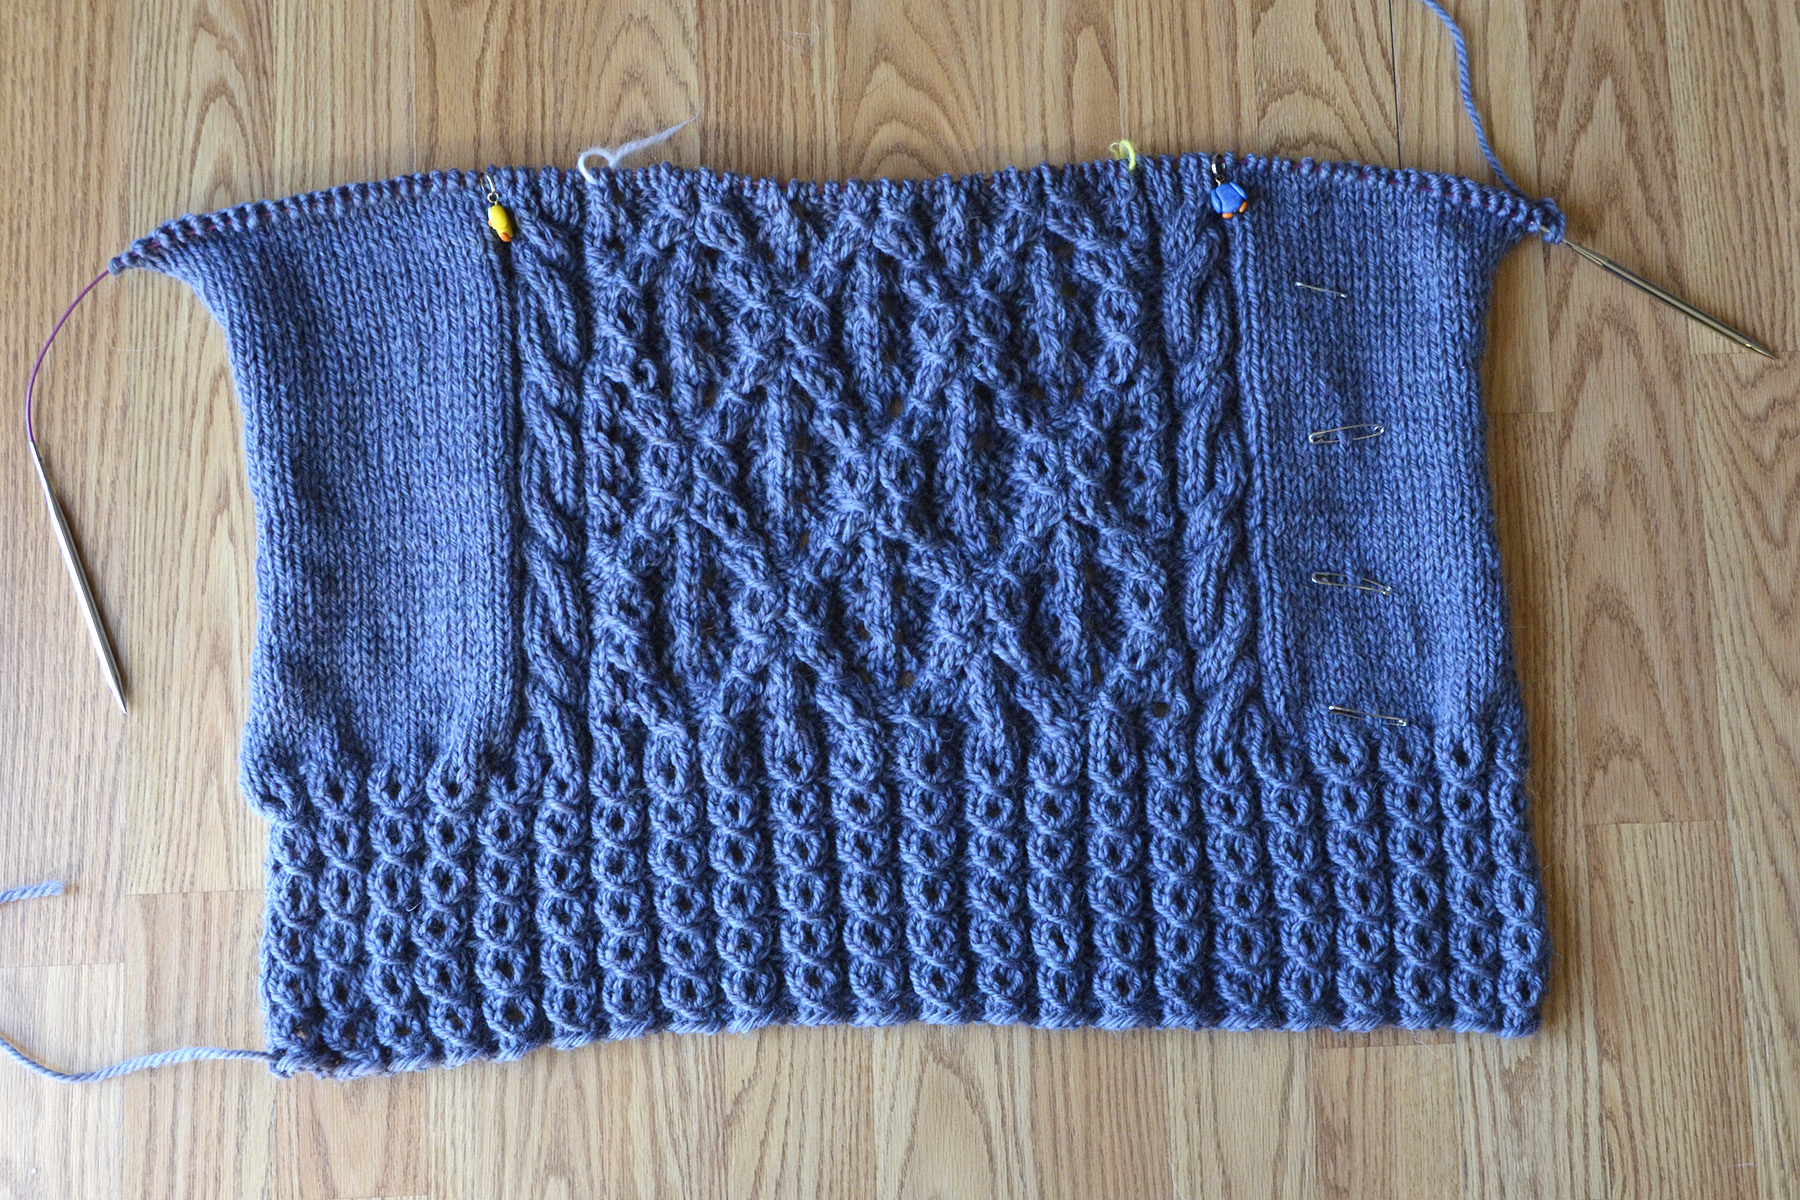
At this stage, my poncho is starting to look like a wearable thing. Which is exciting! All that’s left now is the side ribbing and then the collar. The side ribbing is more of the mock eyelet ribbing pattern, the same stitch pattern that’s used on the hem.
As you can see before the ribbing is added, I have an unattractive rolled stockinette thing going on here at the sides of my piece. But this will soon change.
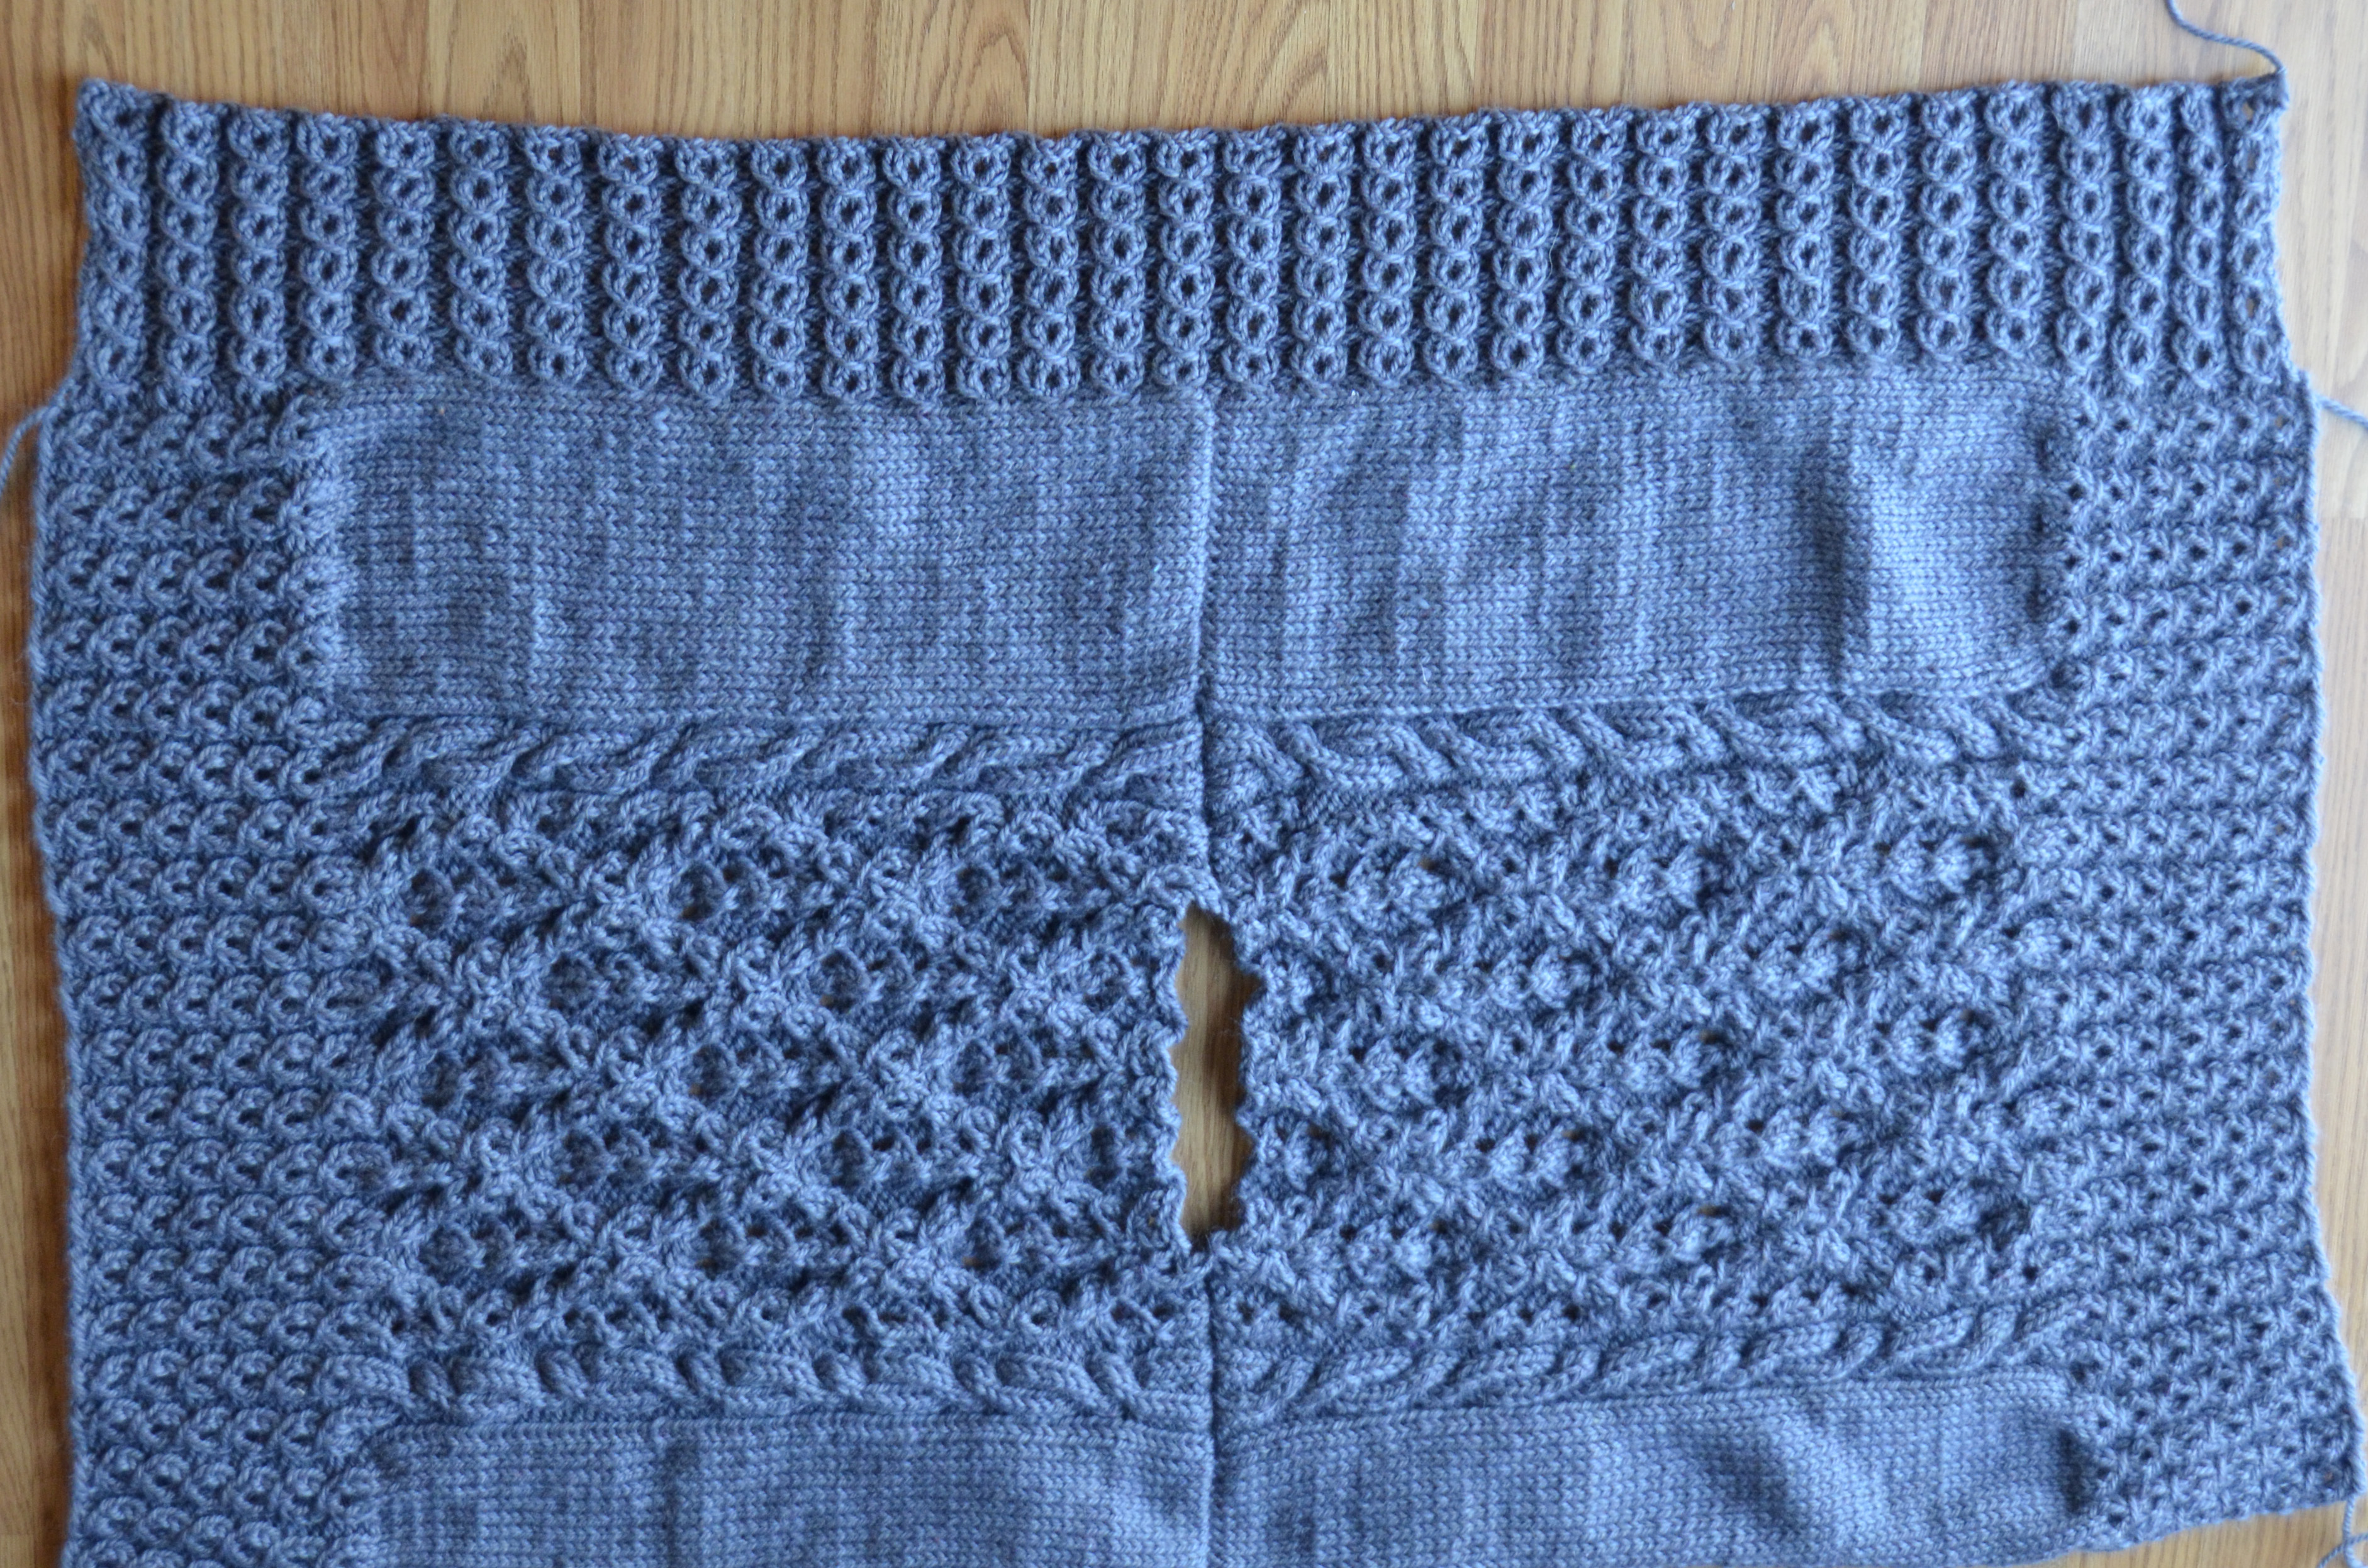
The instructions in the pattern state to “pick up and knit 162 (167, 177) sts. To pick up and knit stitches, I am going to pull through loops of yarn and place them on my knitting needle to form my base row.
But first things first. How in the heck do I figure out how to pick up that many stitches evenly along this thing? It can seem like daunting task, but I’m going to share a few of the little tricks I like to use when doing this.
I’m making the small size, which means I need to pick up and knit 162 stitches. I’m going to break this down into more manageable numbers.
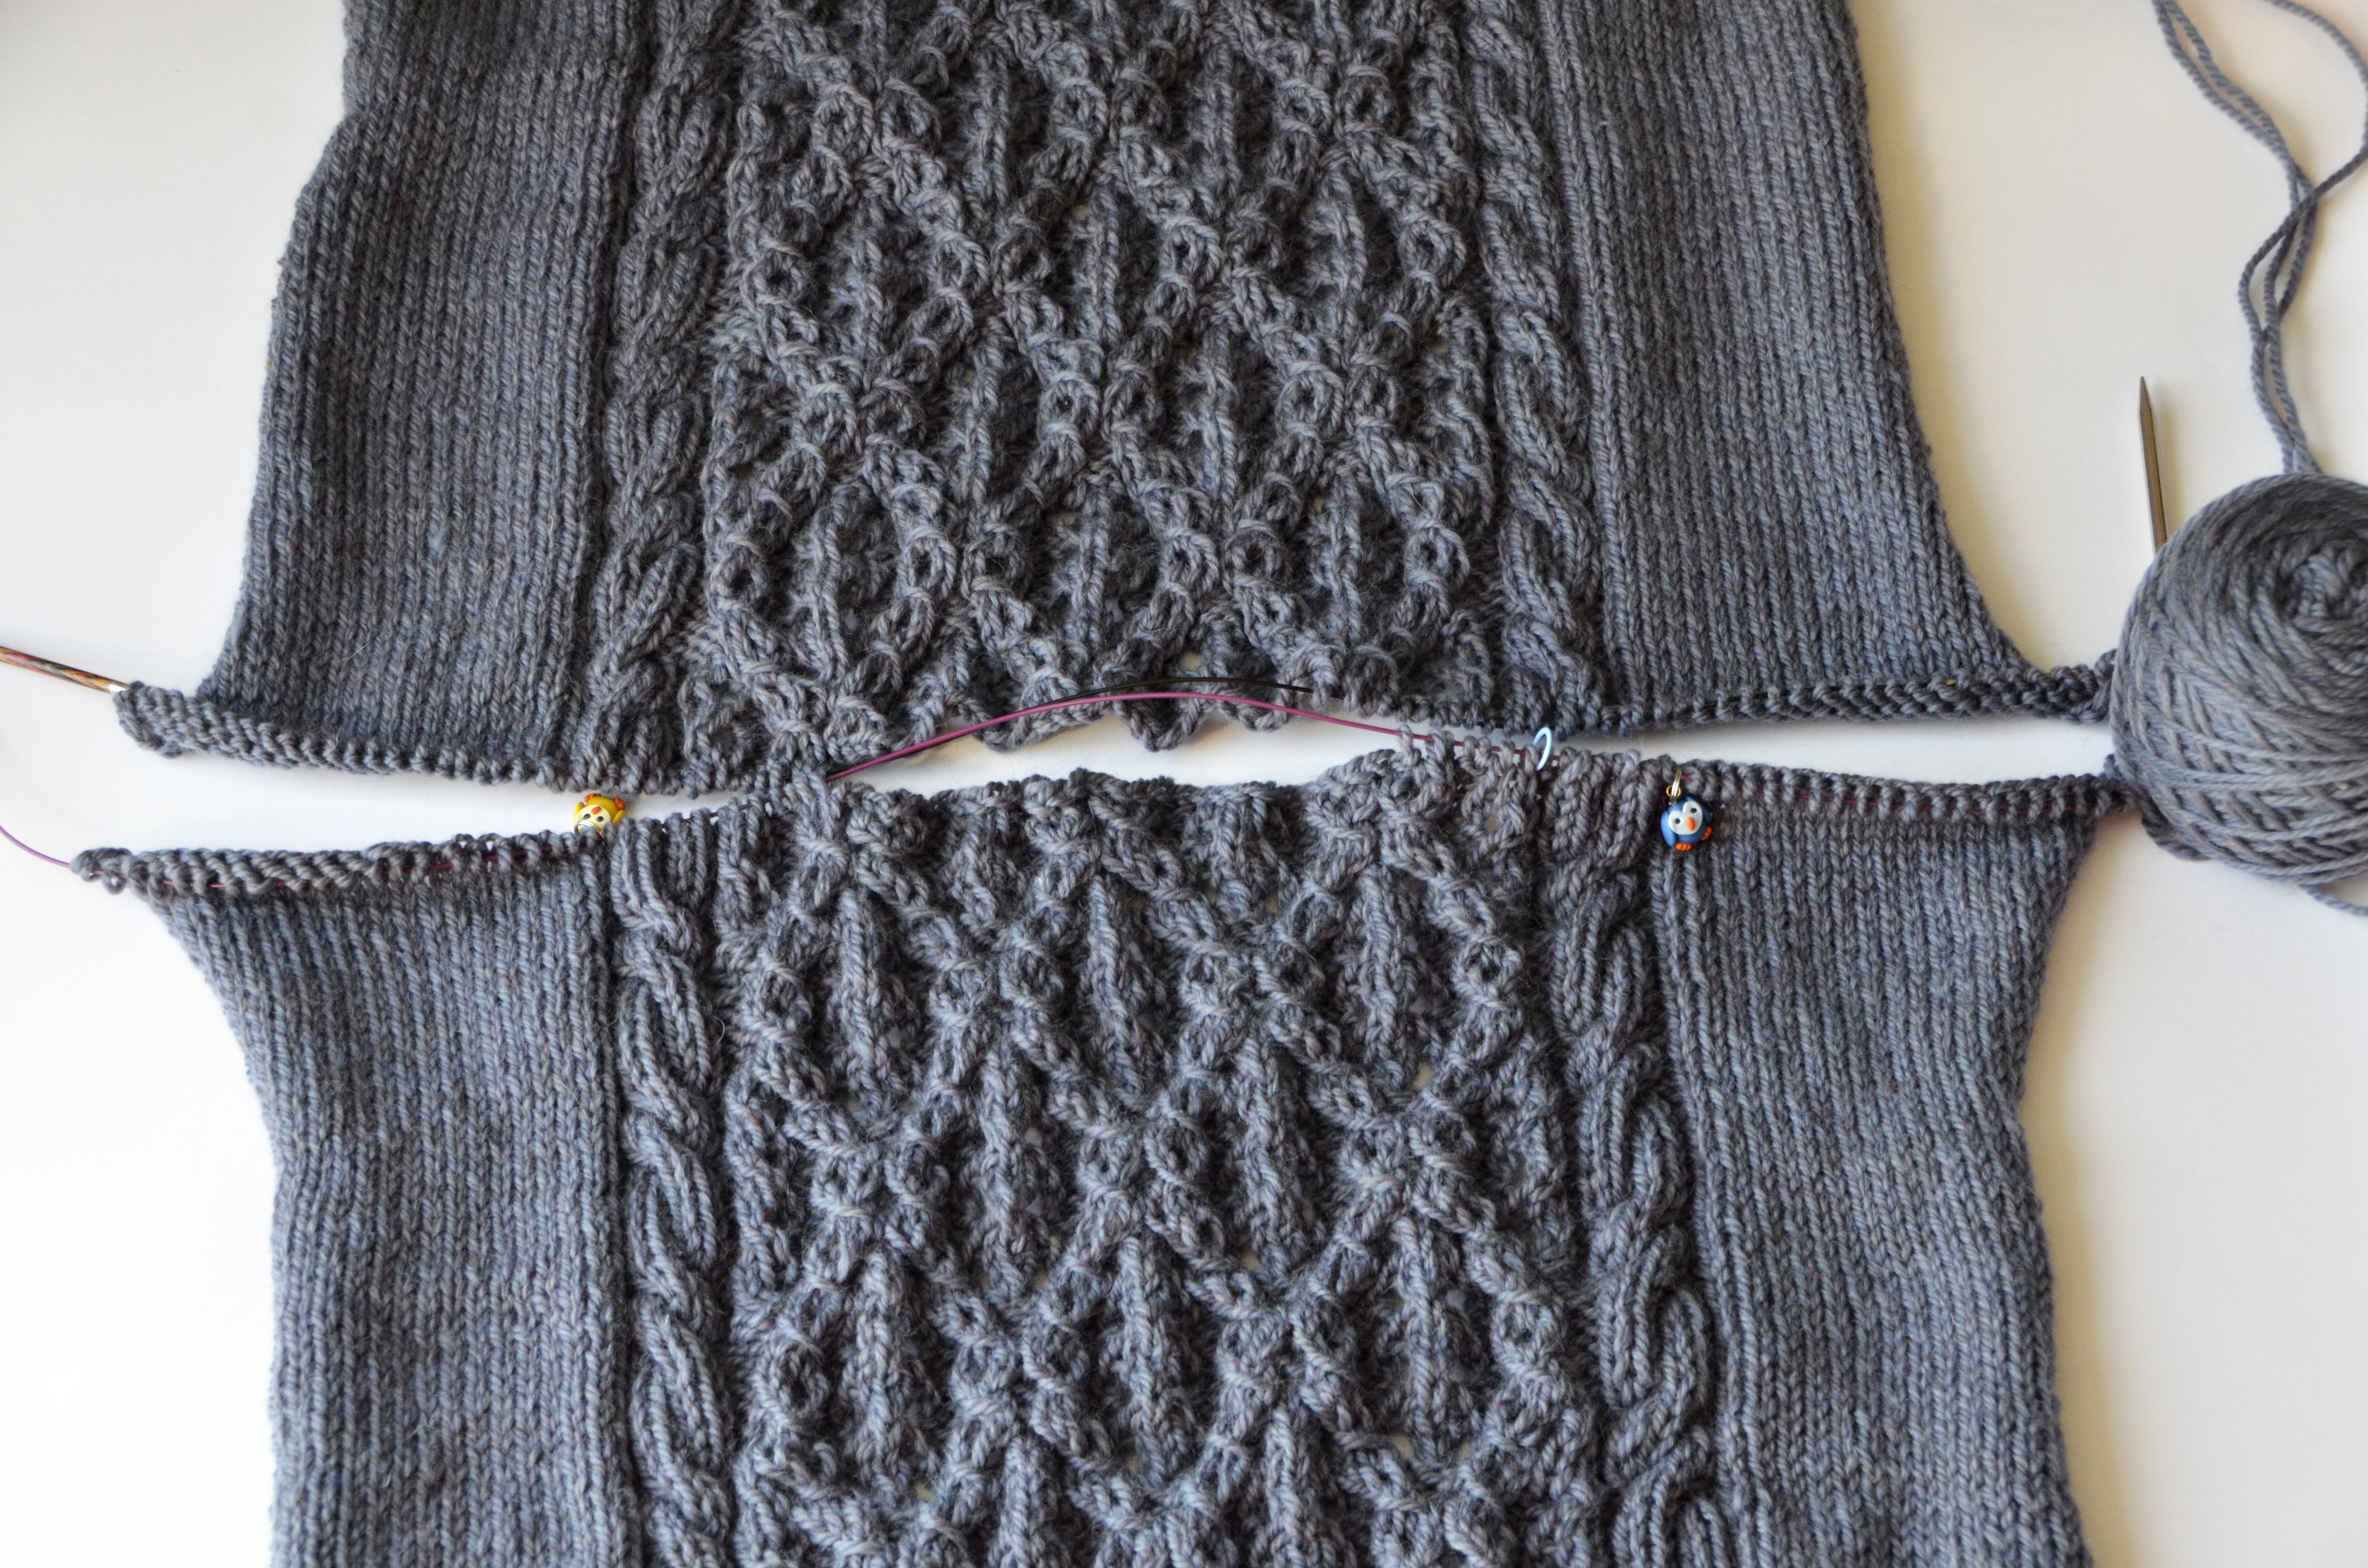
My usual method is to cut the length in half, then in half again, and again, until I get to a small enough section that doesn’t hurt my head. If I wanted in the illustration below, I could have halved the 20 stitch sections to 10, but I’m comfortable with 20 stitches at a time.
162 / 8 sections = 20.25 stitches per section. I’m going to solve this by making 2 of my sections 21 stitches instead of 20. In the scheme of things, a stitch here or there rarely makes much of a difference. I placed safety pins at each of my divisions
Next, I need to figure out the rate at which I’m going to pick up my stitches. I counted the rows in a couple of my 20-stitch sections, and found that each of these had 24 rows. I will be picking up 20 stitches over 24 rows.
Now I’m going to put some of my fancy math skills to work with fractions! 20/24 can be reduced to 5/6. This means I’m going to be picking up 5 stitches for every 6 rows. For you, this number could be the same, but it could also be different. It all depends on your row gauge.
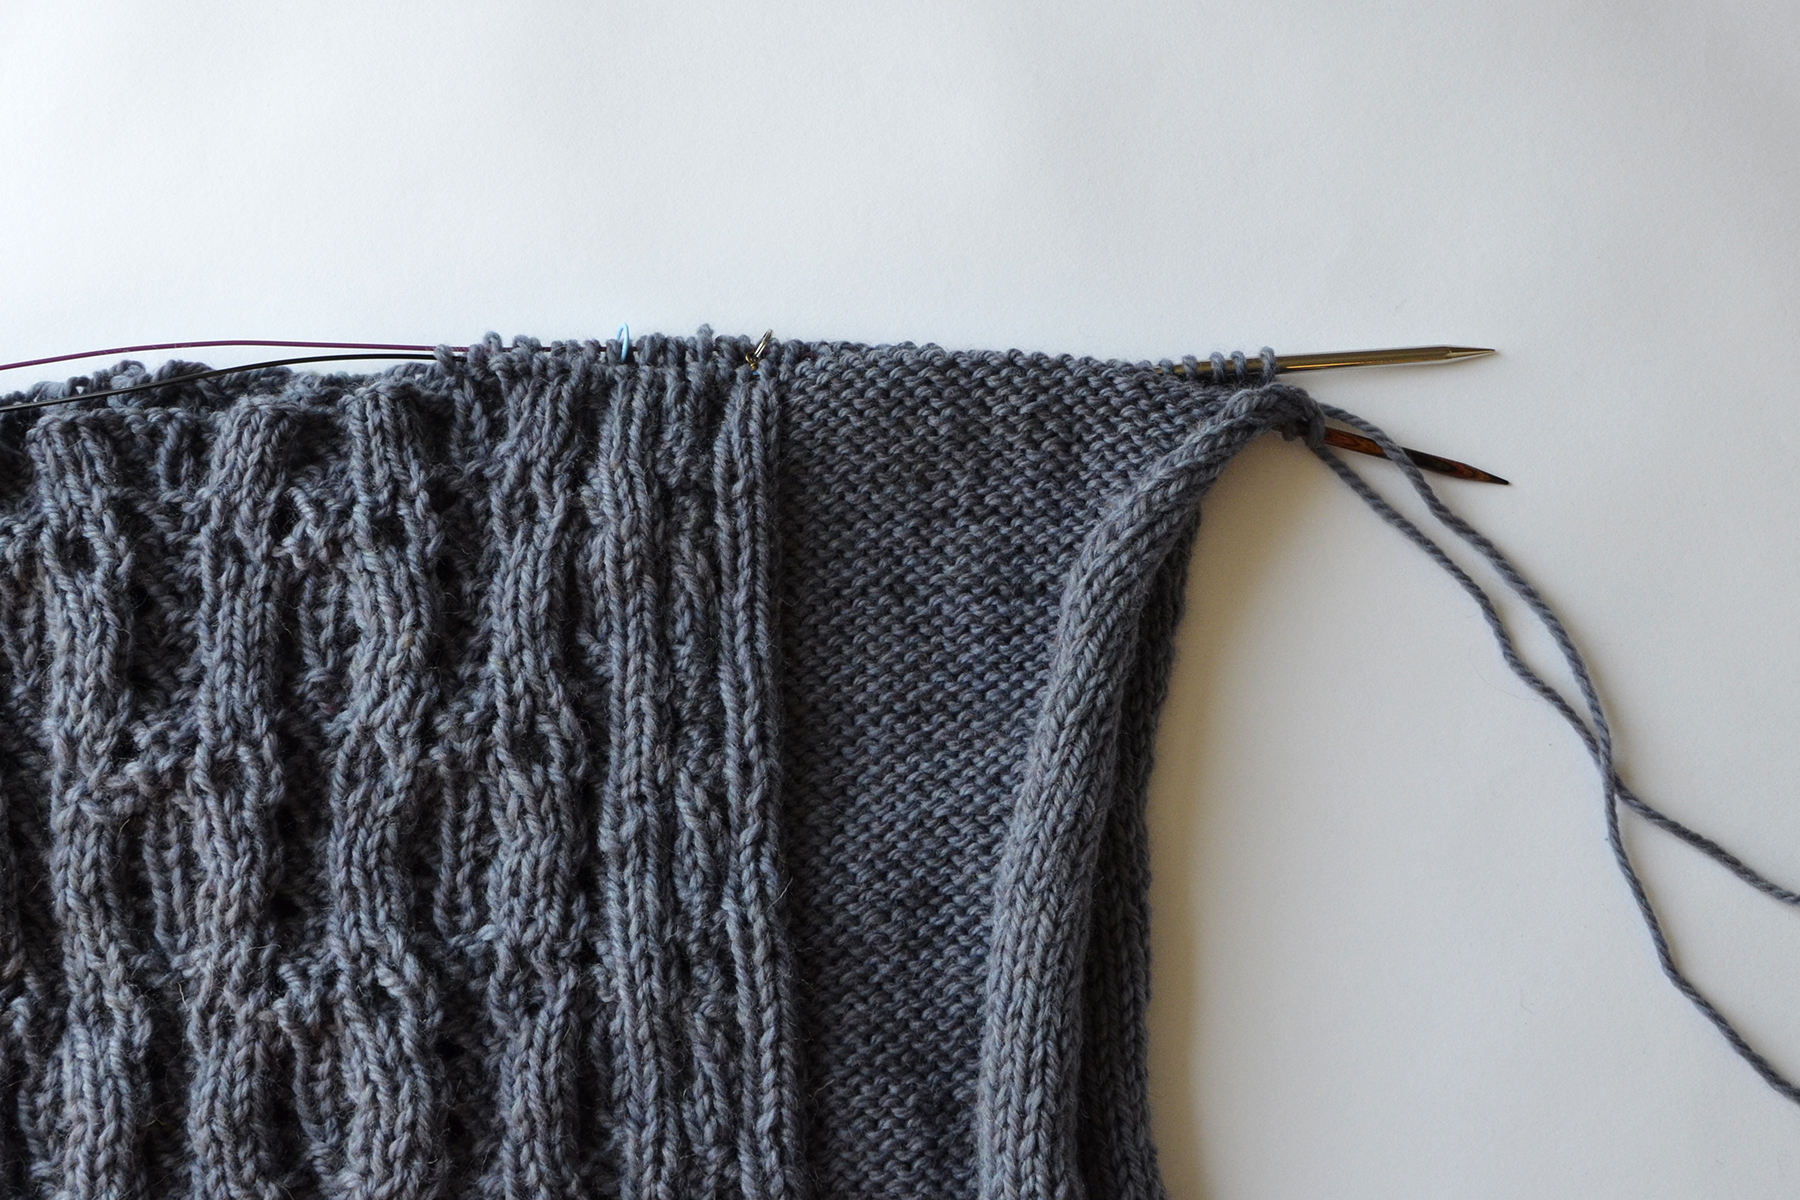
To pick up and knit, I’m first going to start at the right-hand side of the piece. In most cases when I’m picking up stitches, I like to pick up between the outermost stitch and the next stitch in. In a super chunky yarn, I might pick up in the center of the outermost stitch to reduce the bulky of the seam. But Deluxe Chunky isn’t too heavy, so I’m going one stitch in as usual.
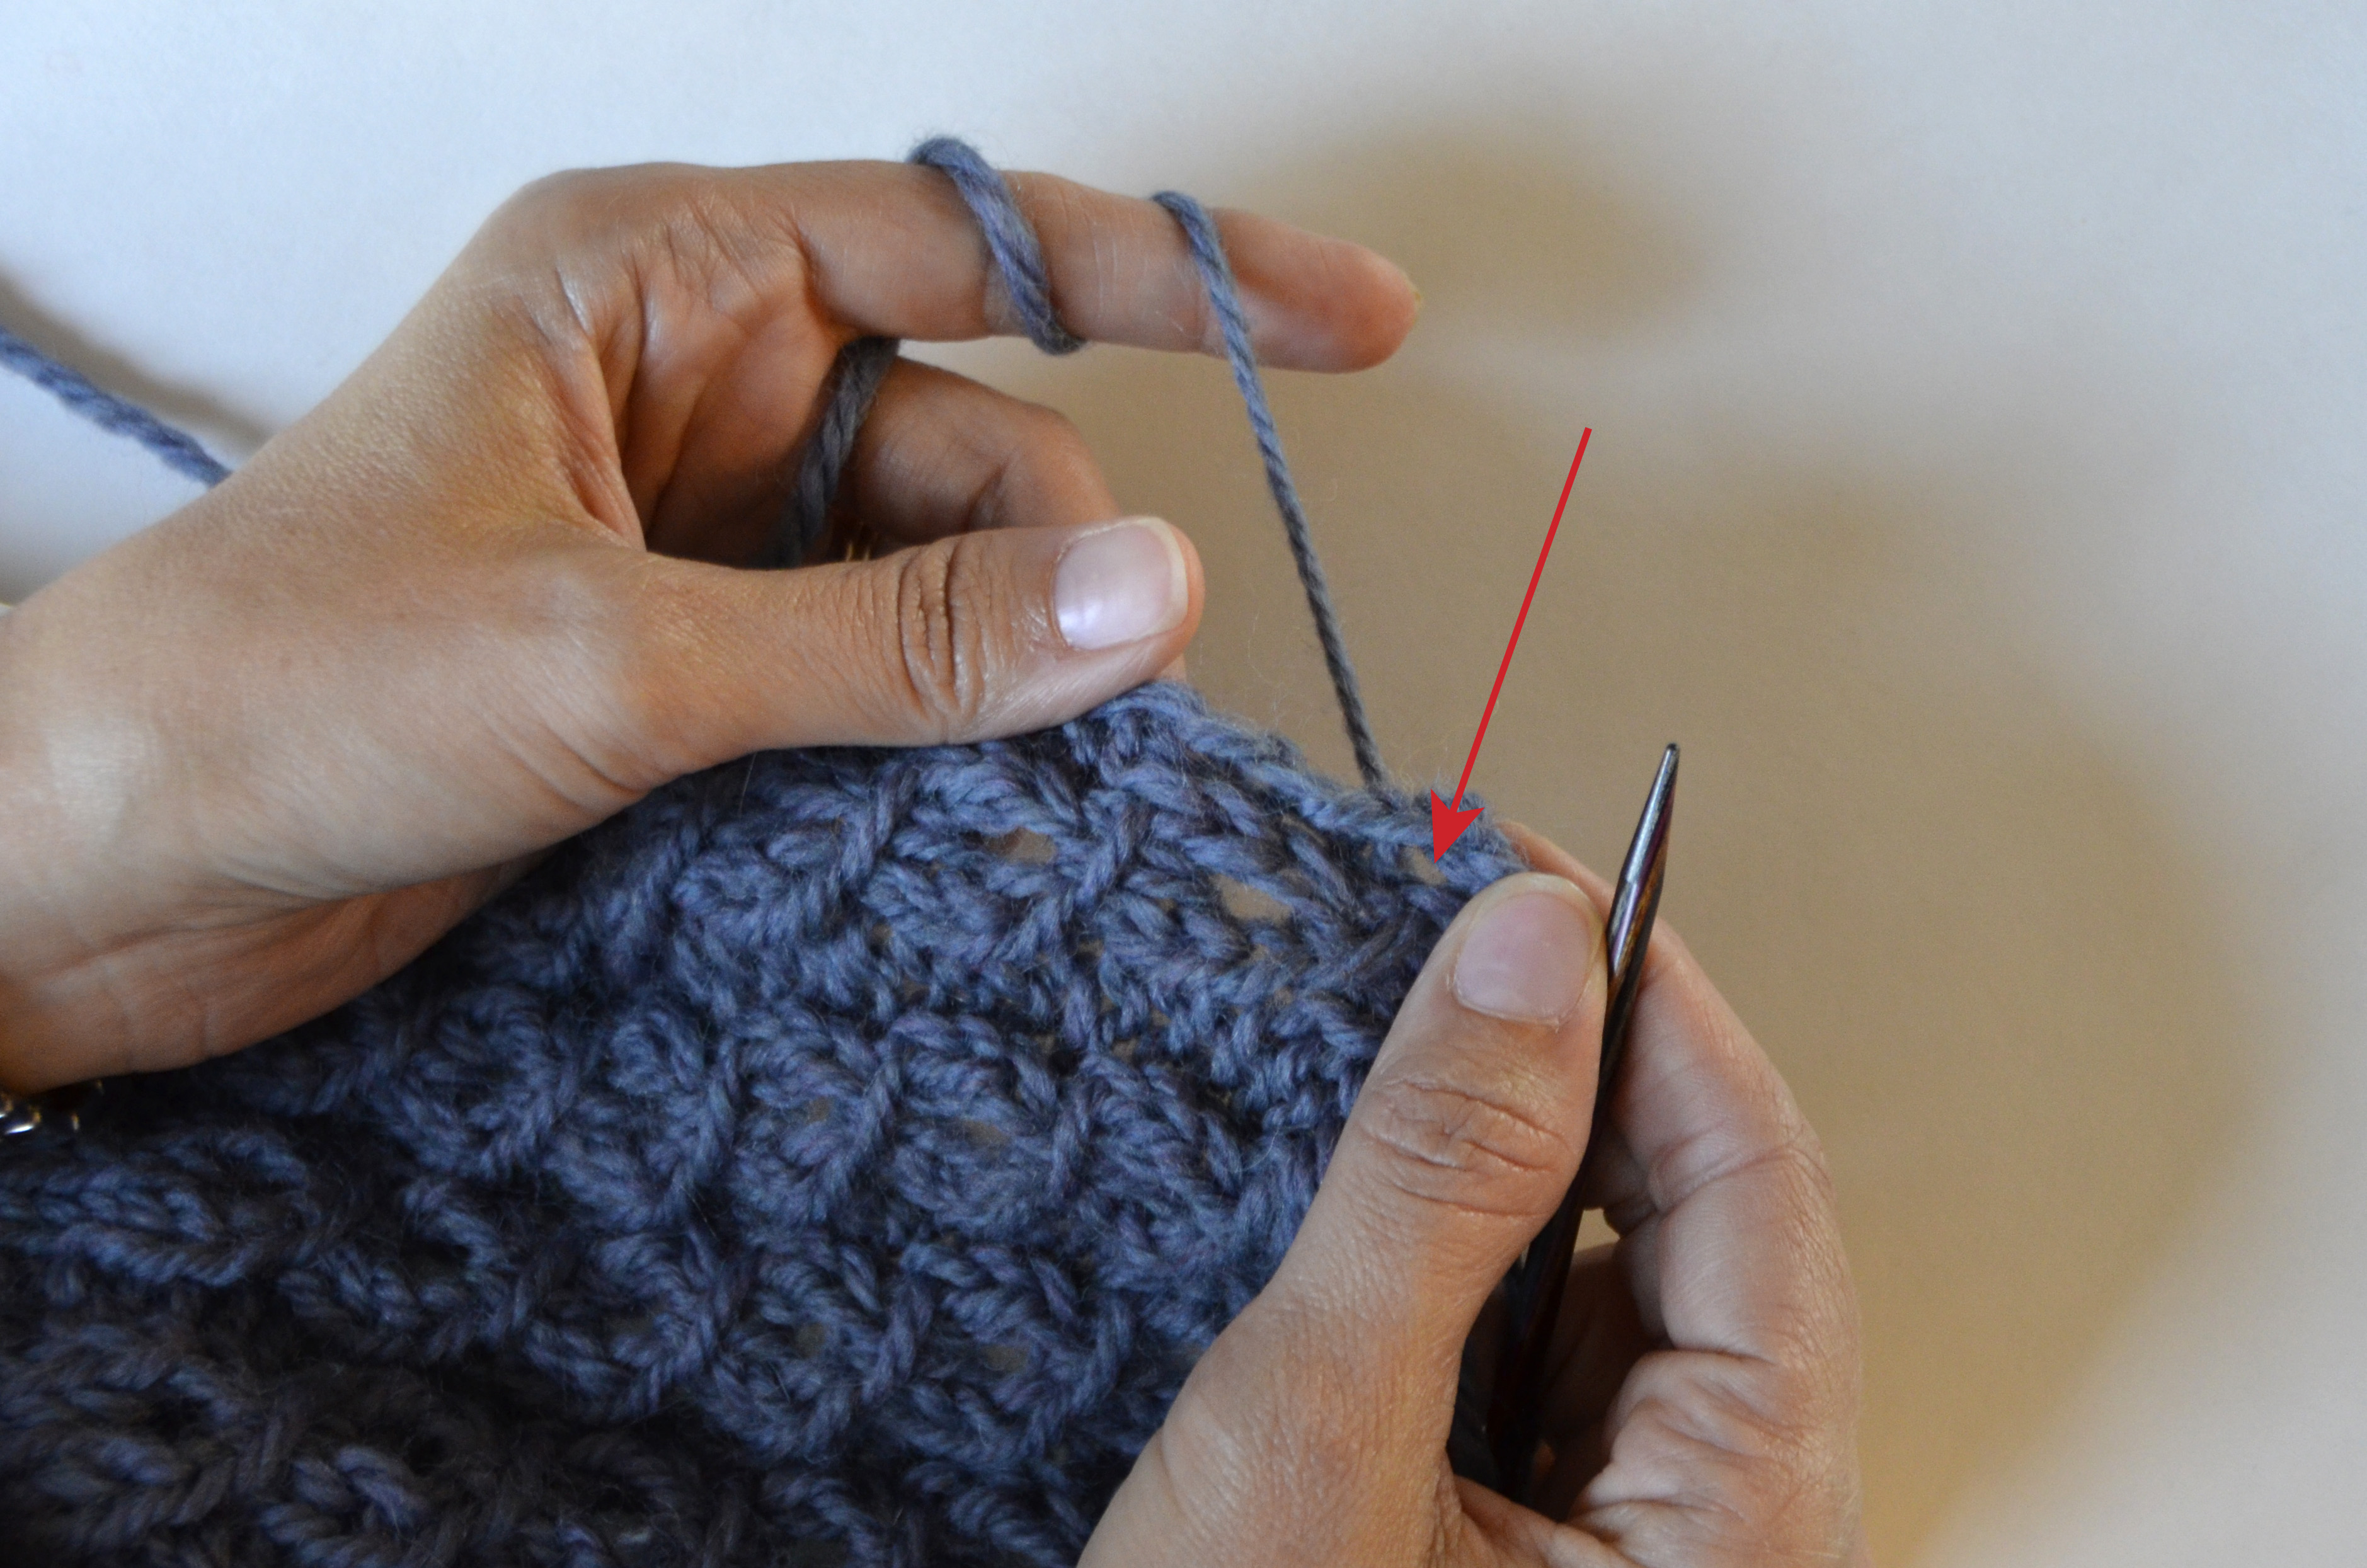
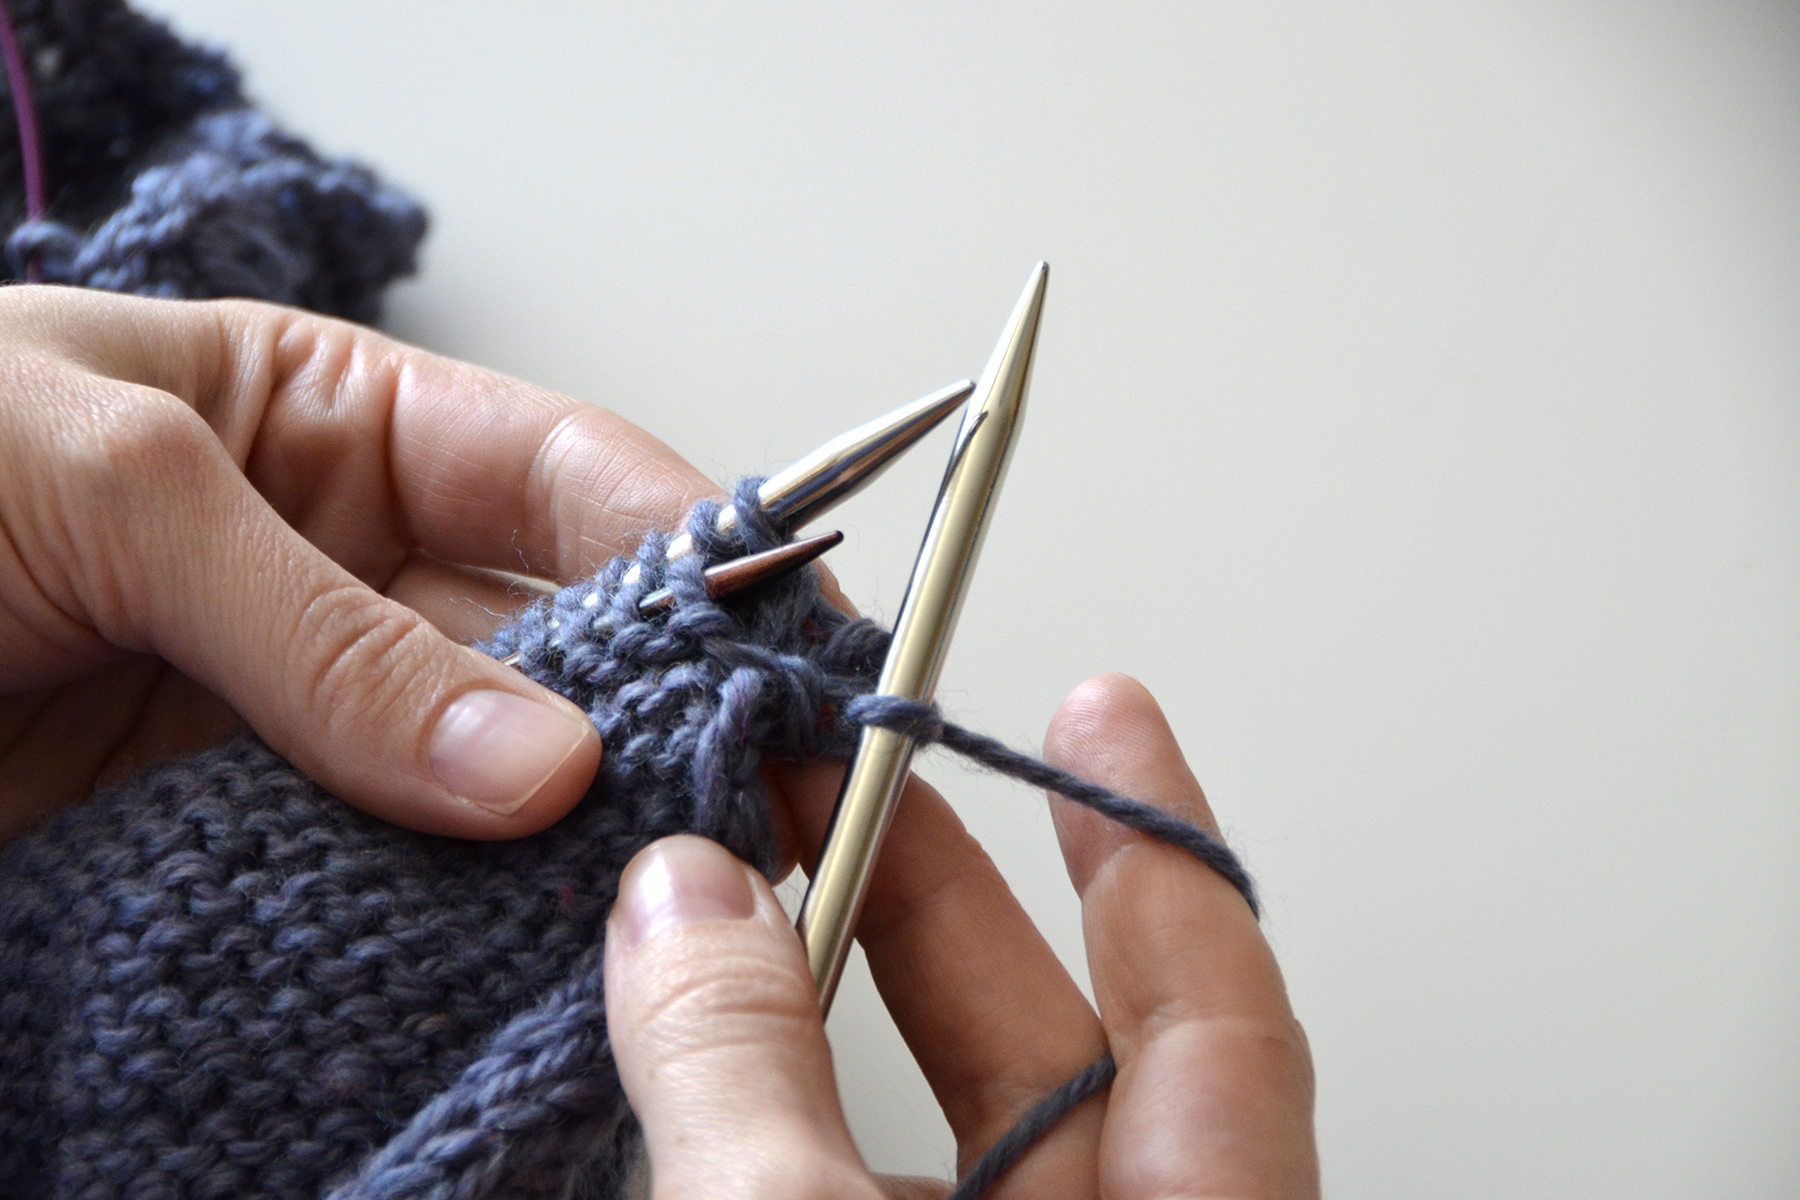
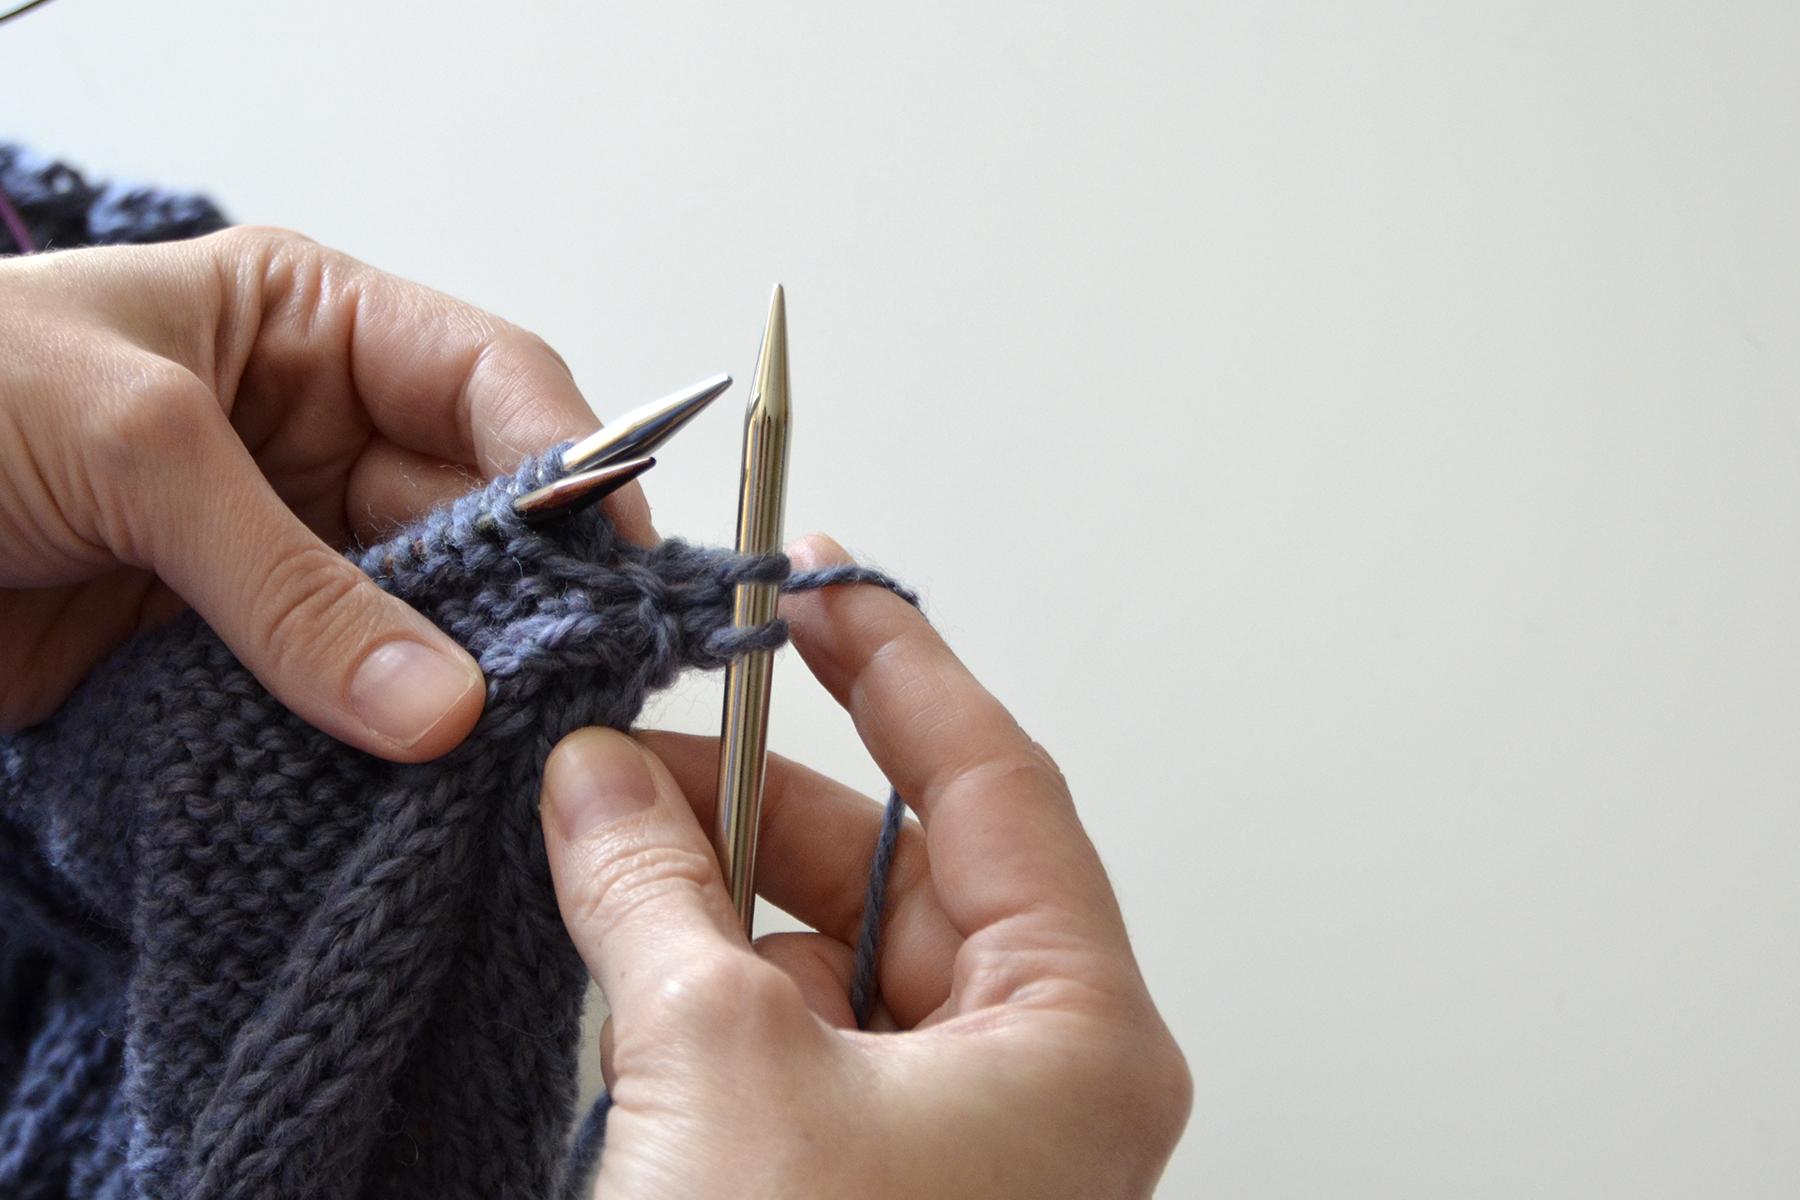
Insert your needle into the space between those first two stitches. Wrap yarn around the needle,
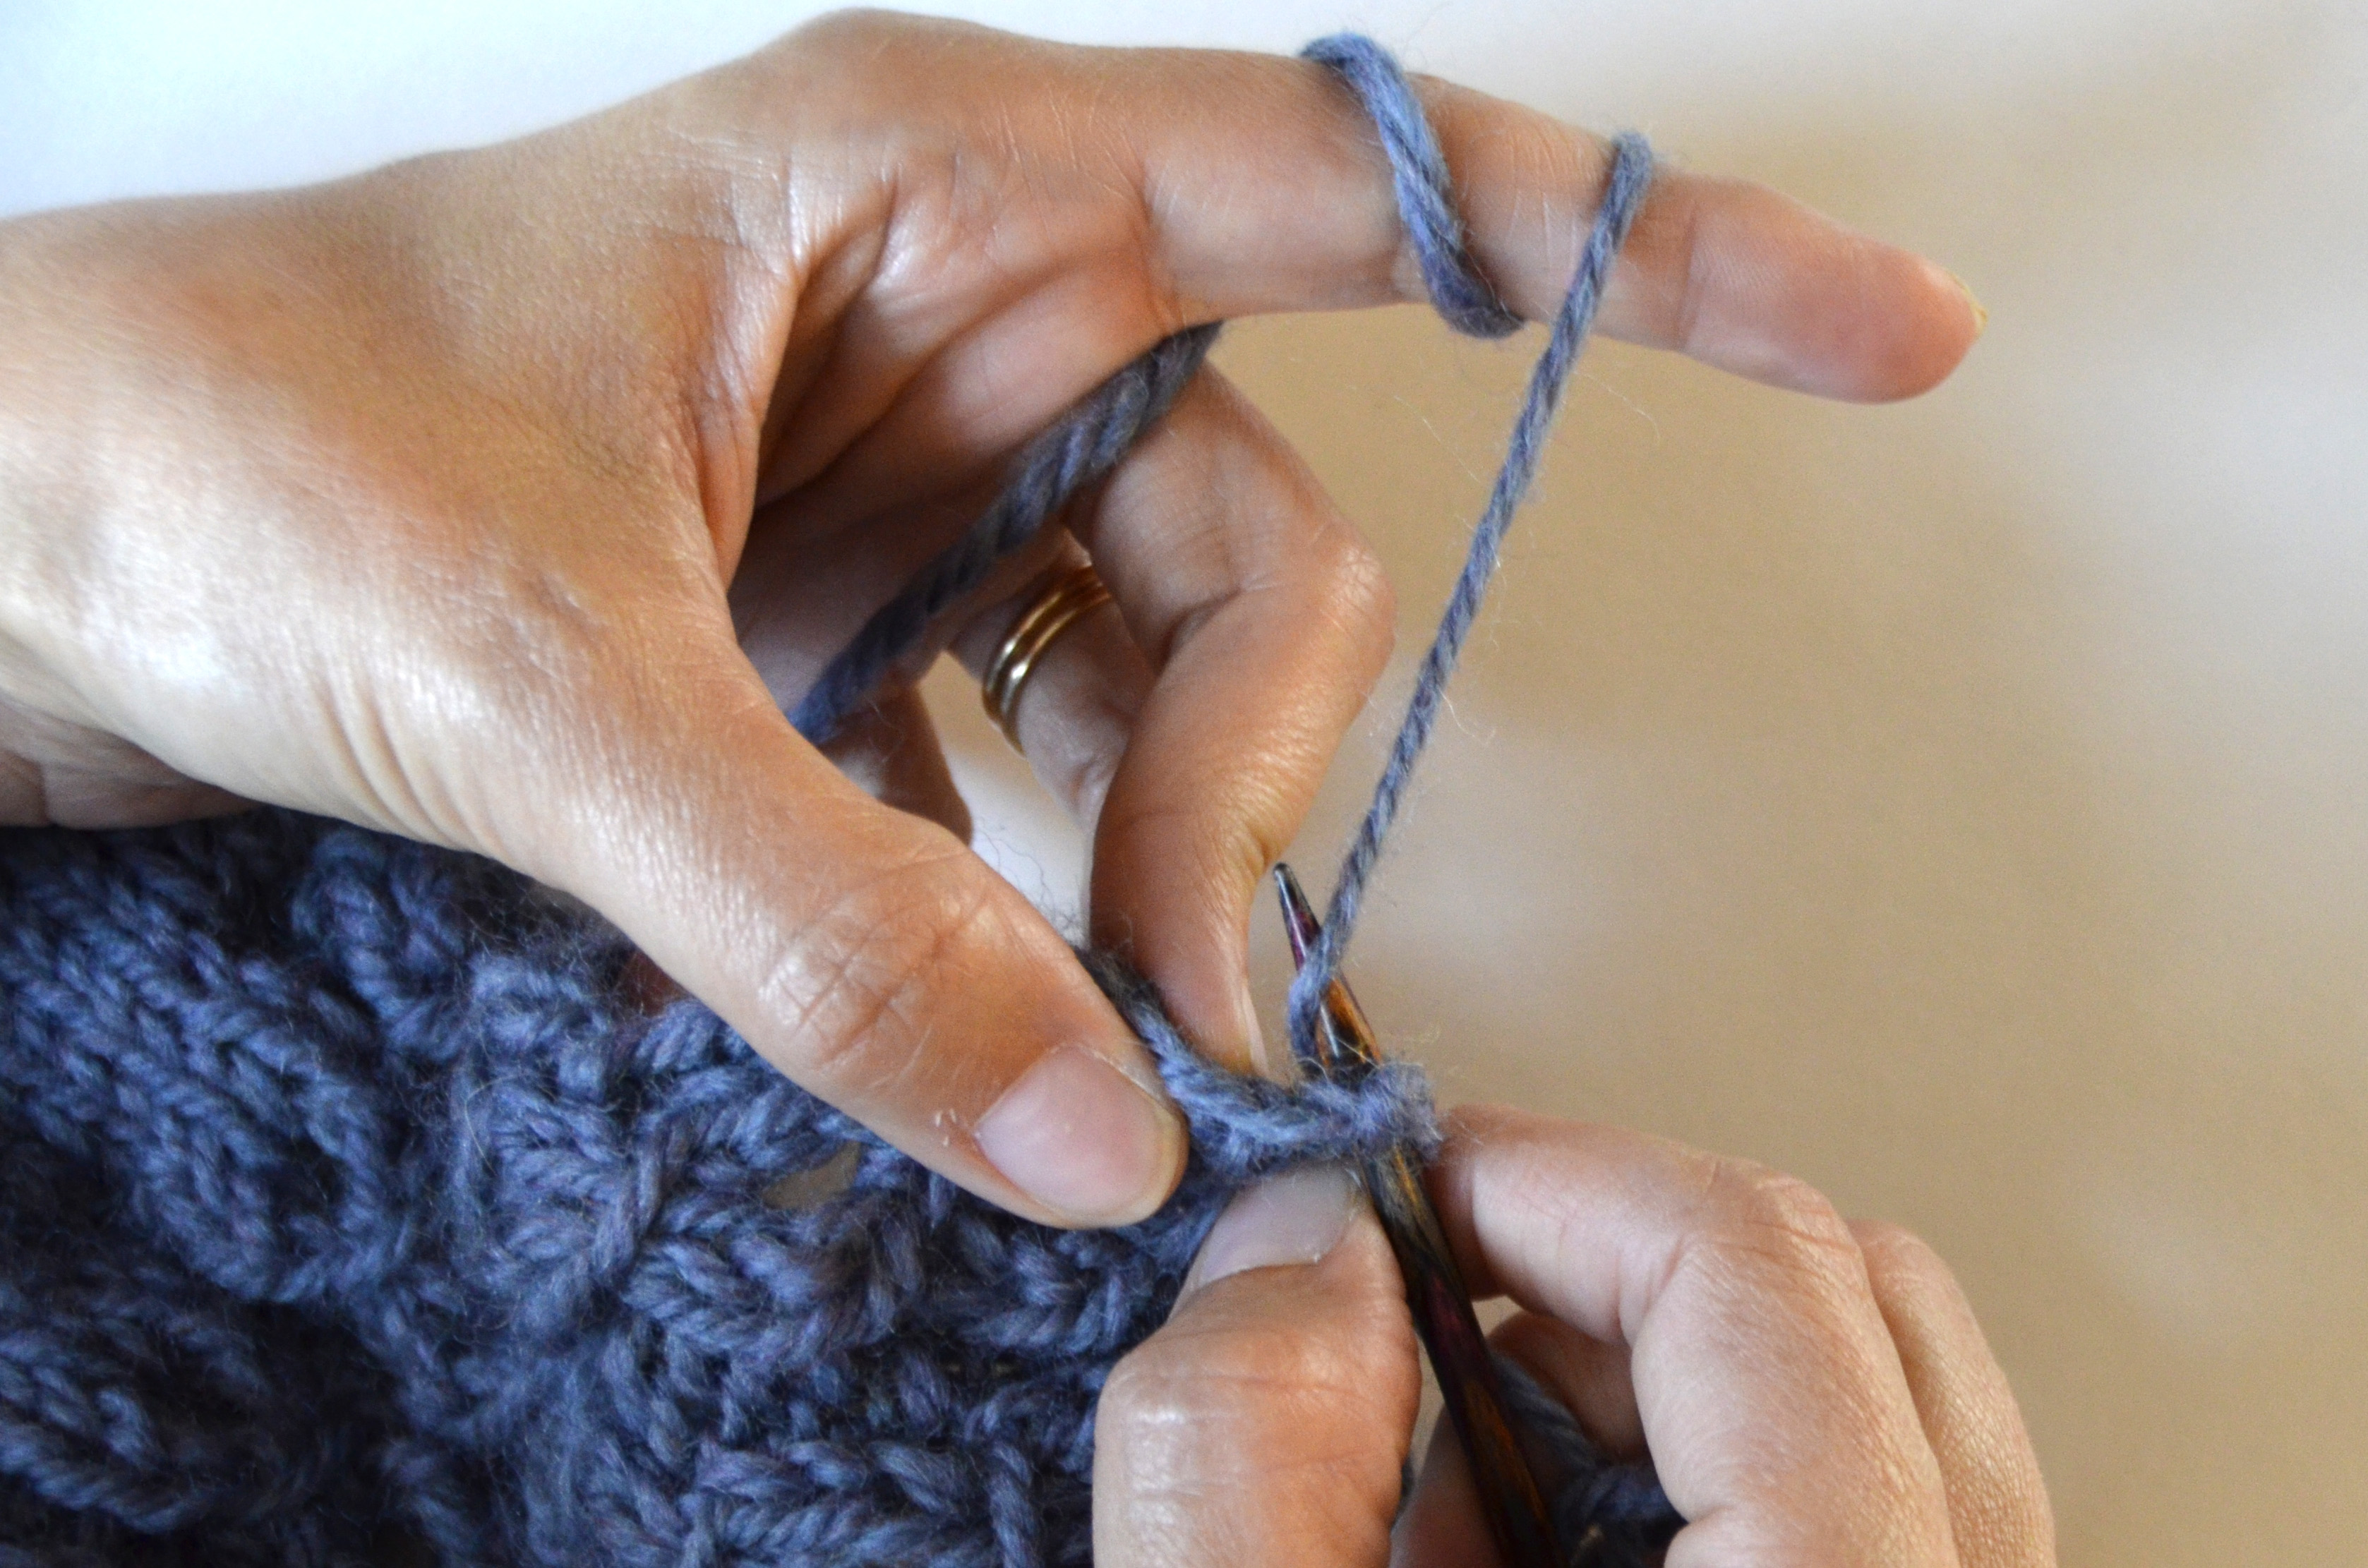
And pull through.
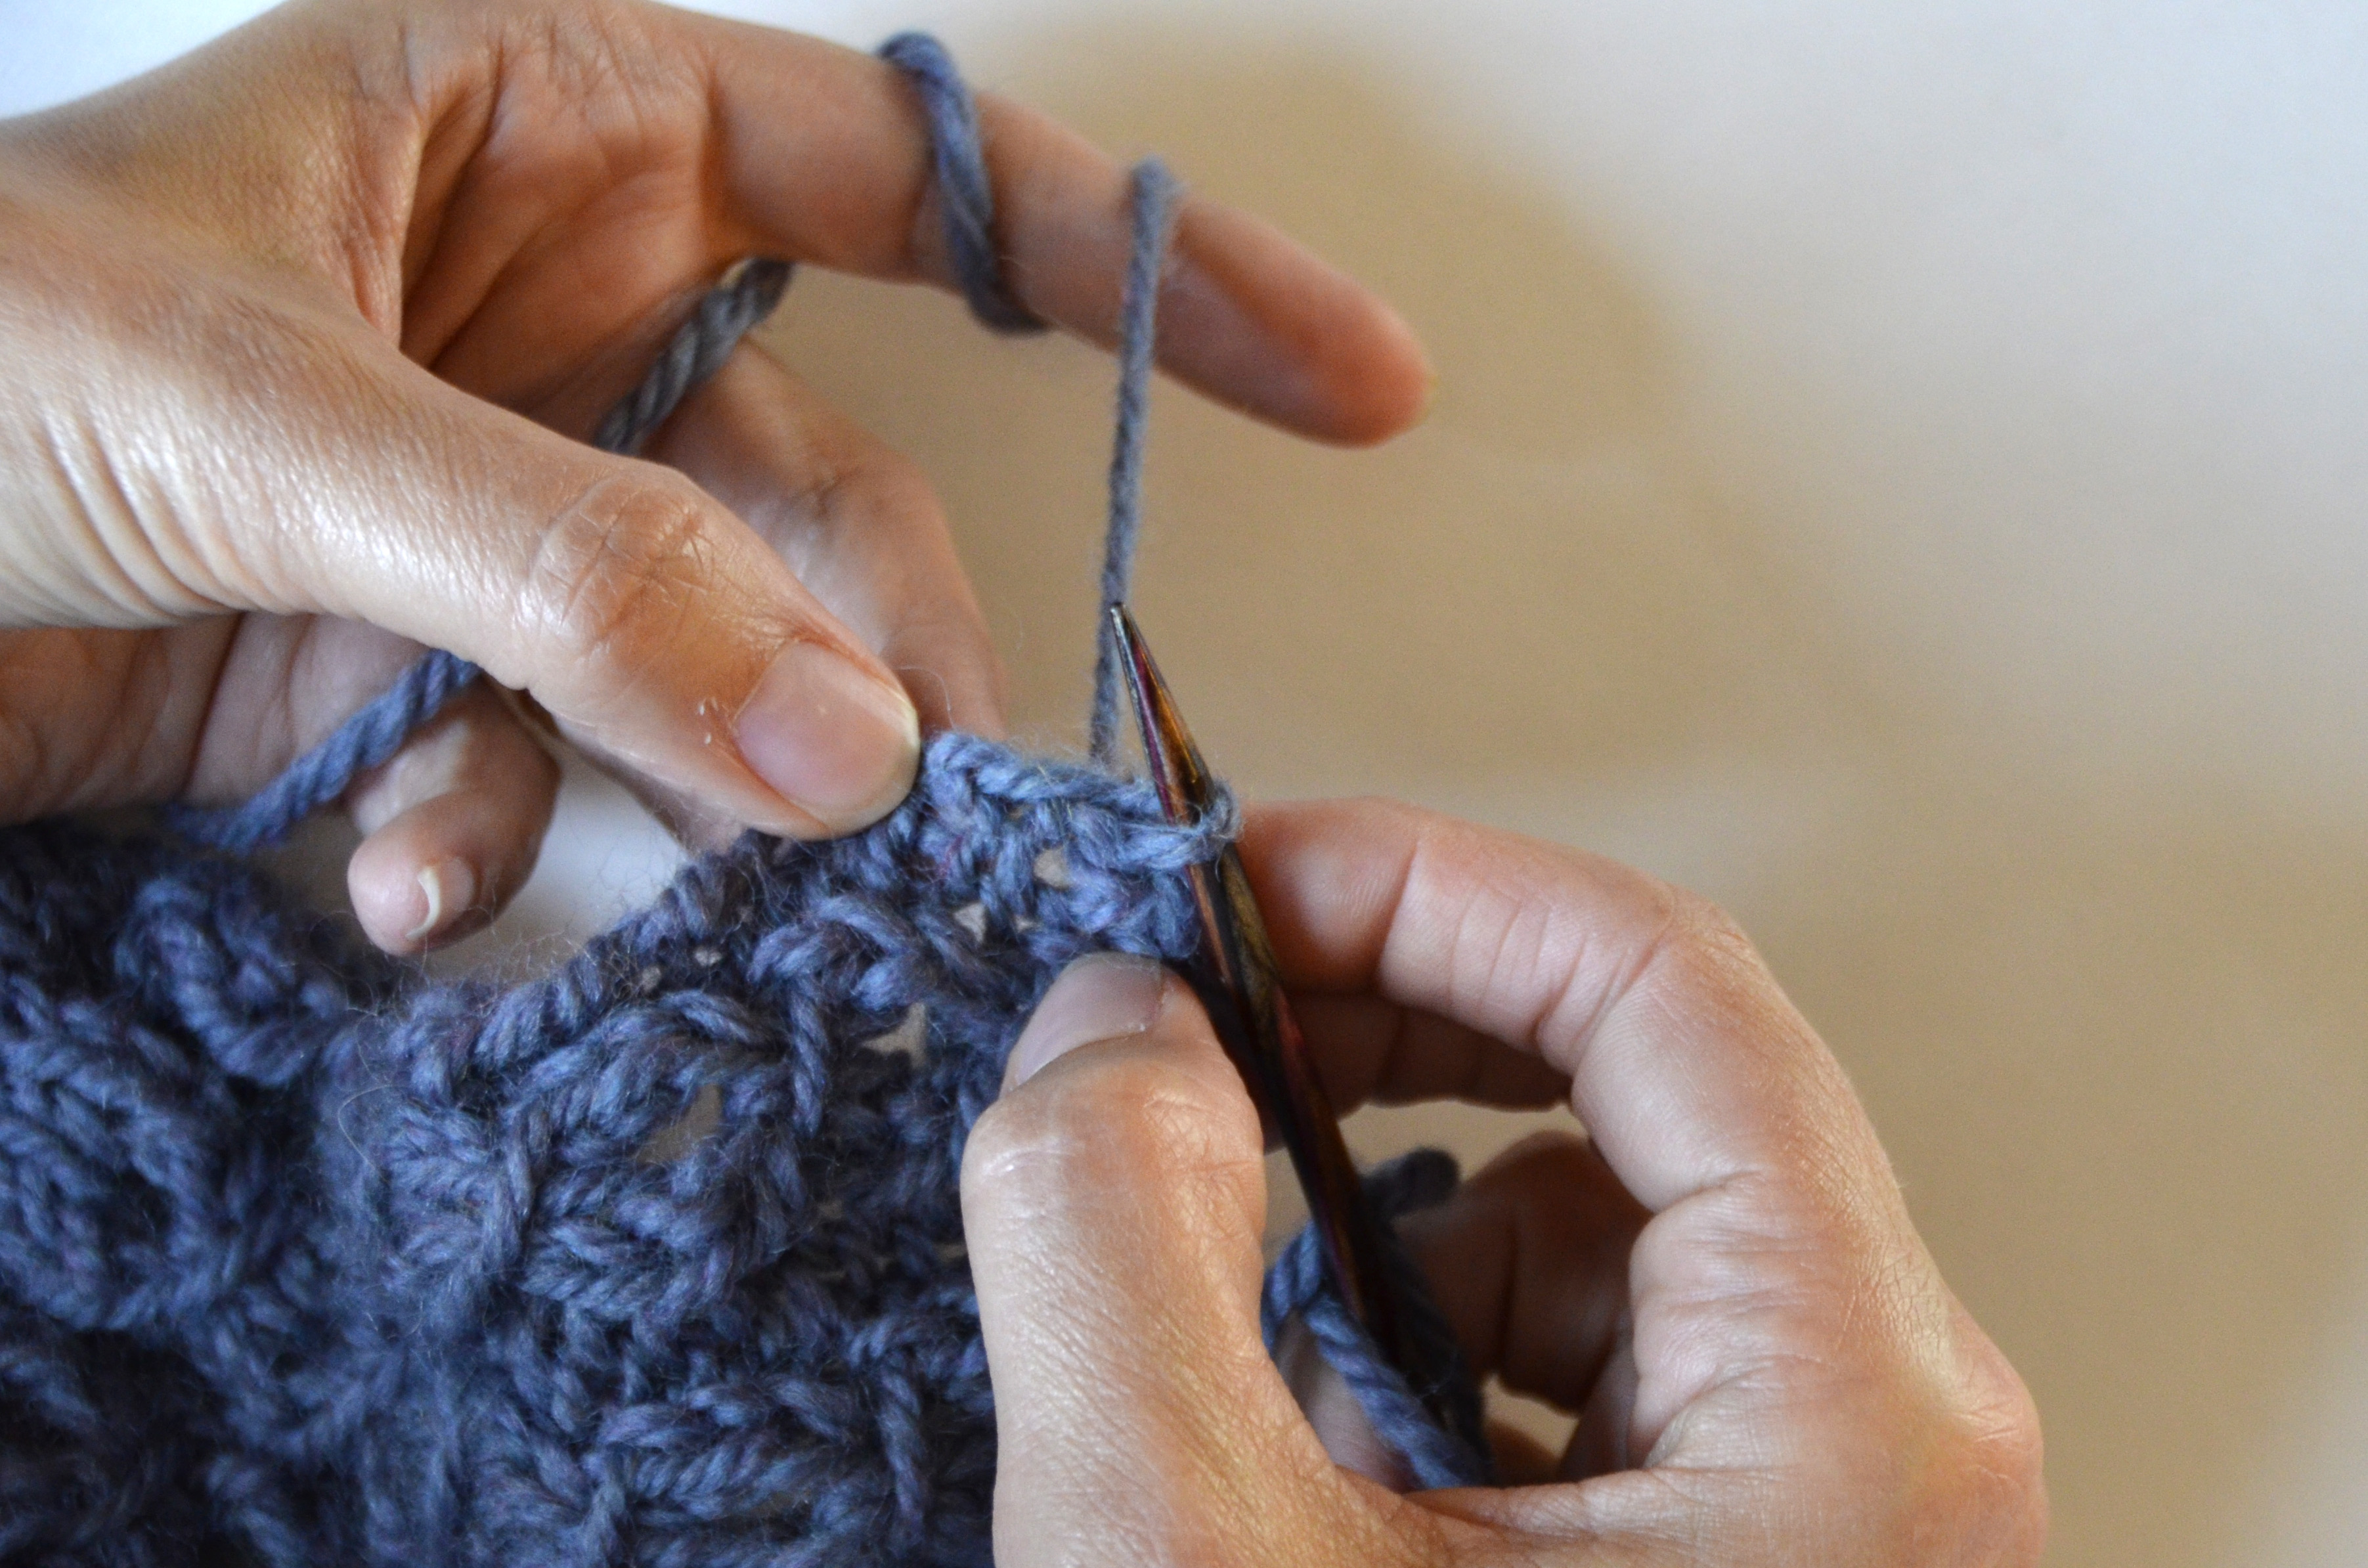
Here we are with a few picked up stitches on the needle.

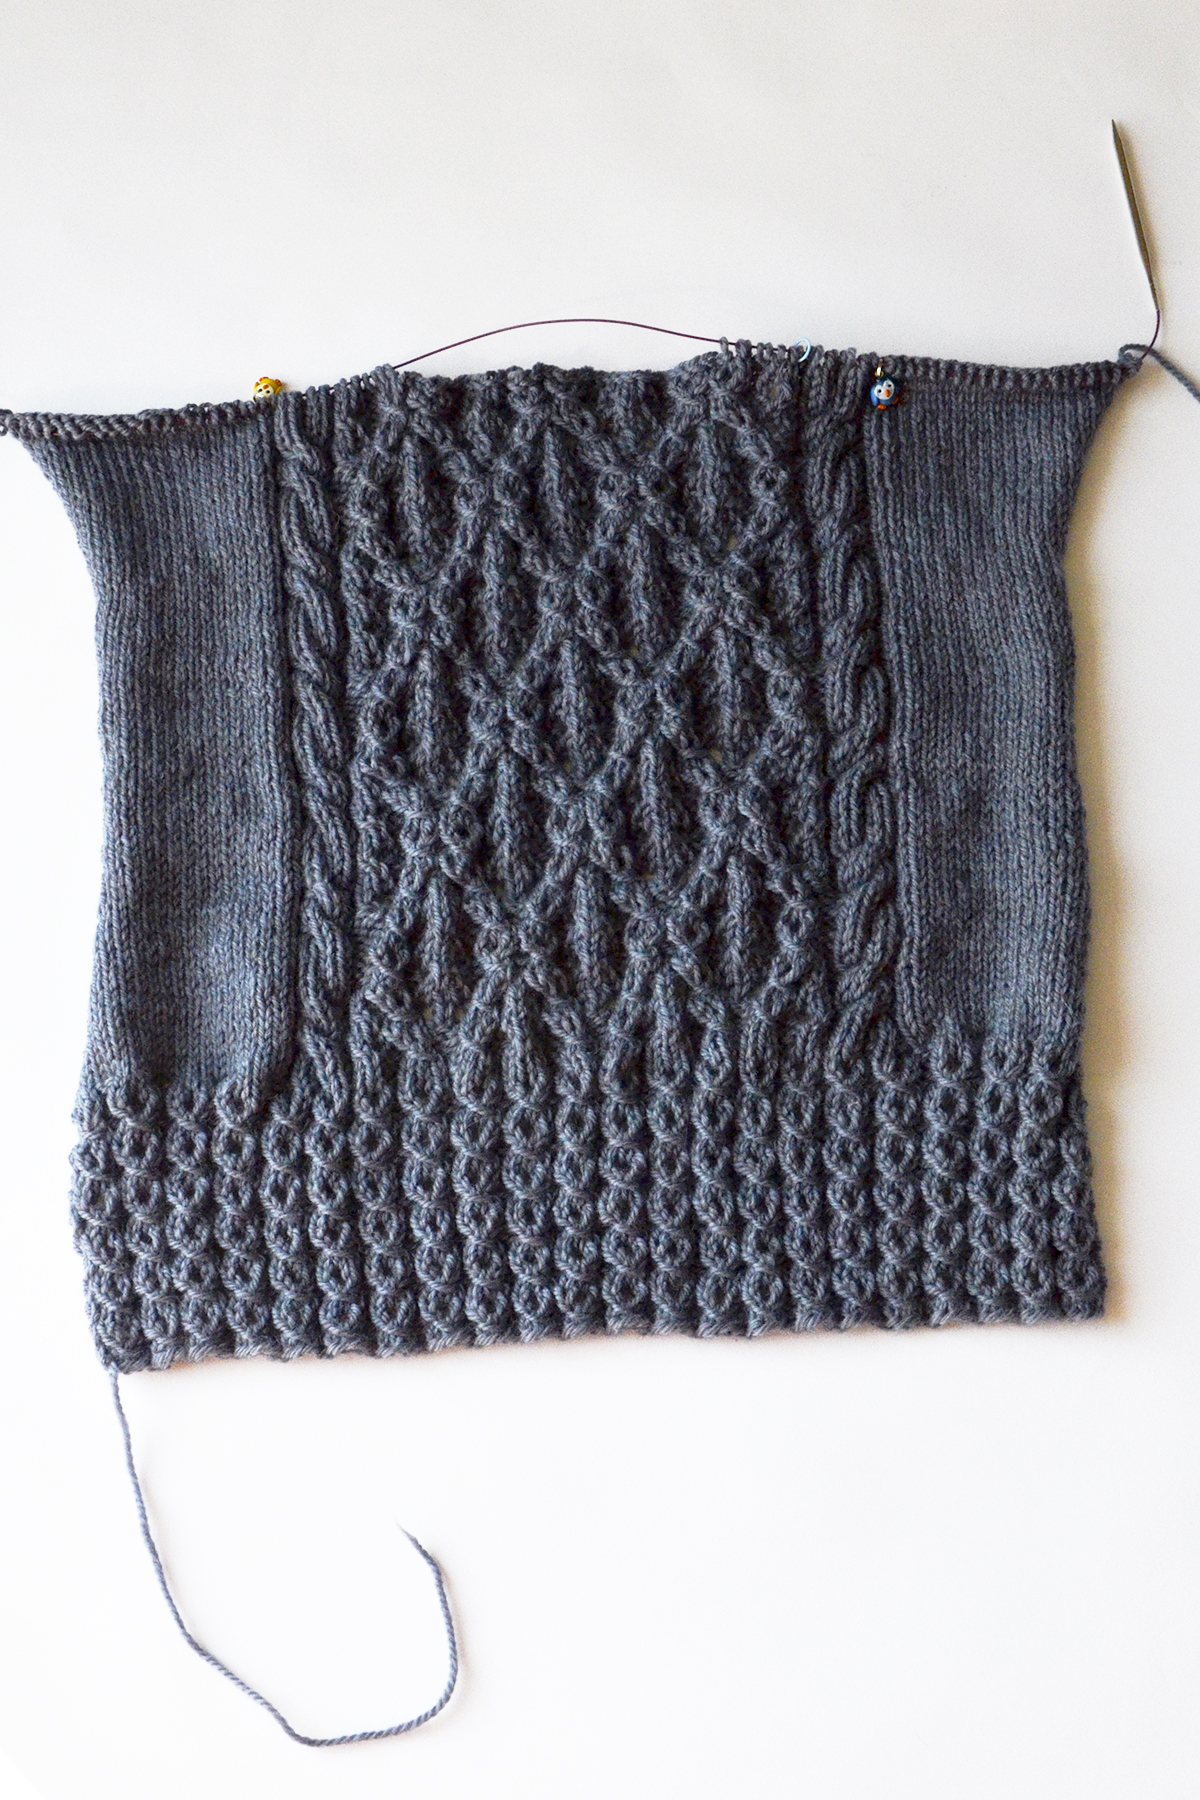
And with the first 21 stitches on the needle. My markers make it easy to see my sections and to count back to make sure I have the right number of stitches.
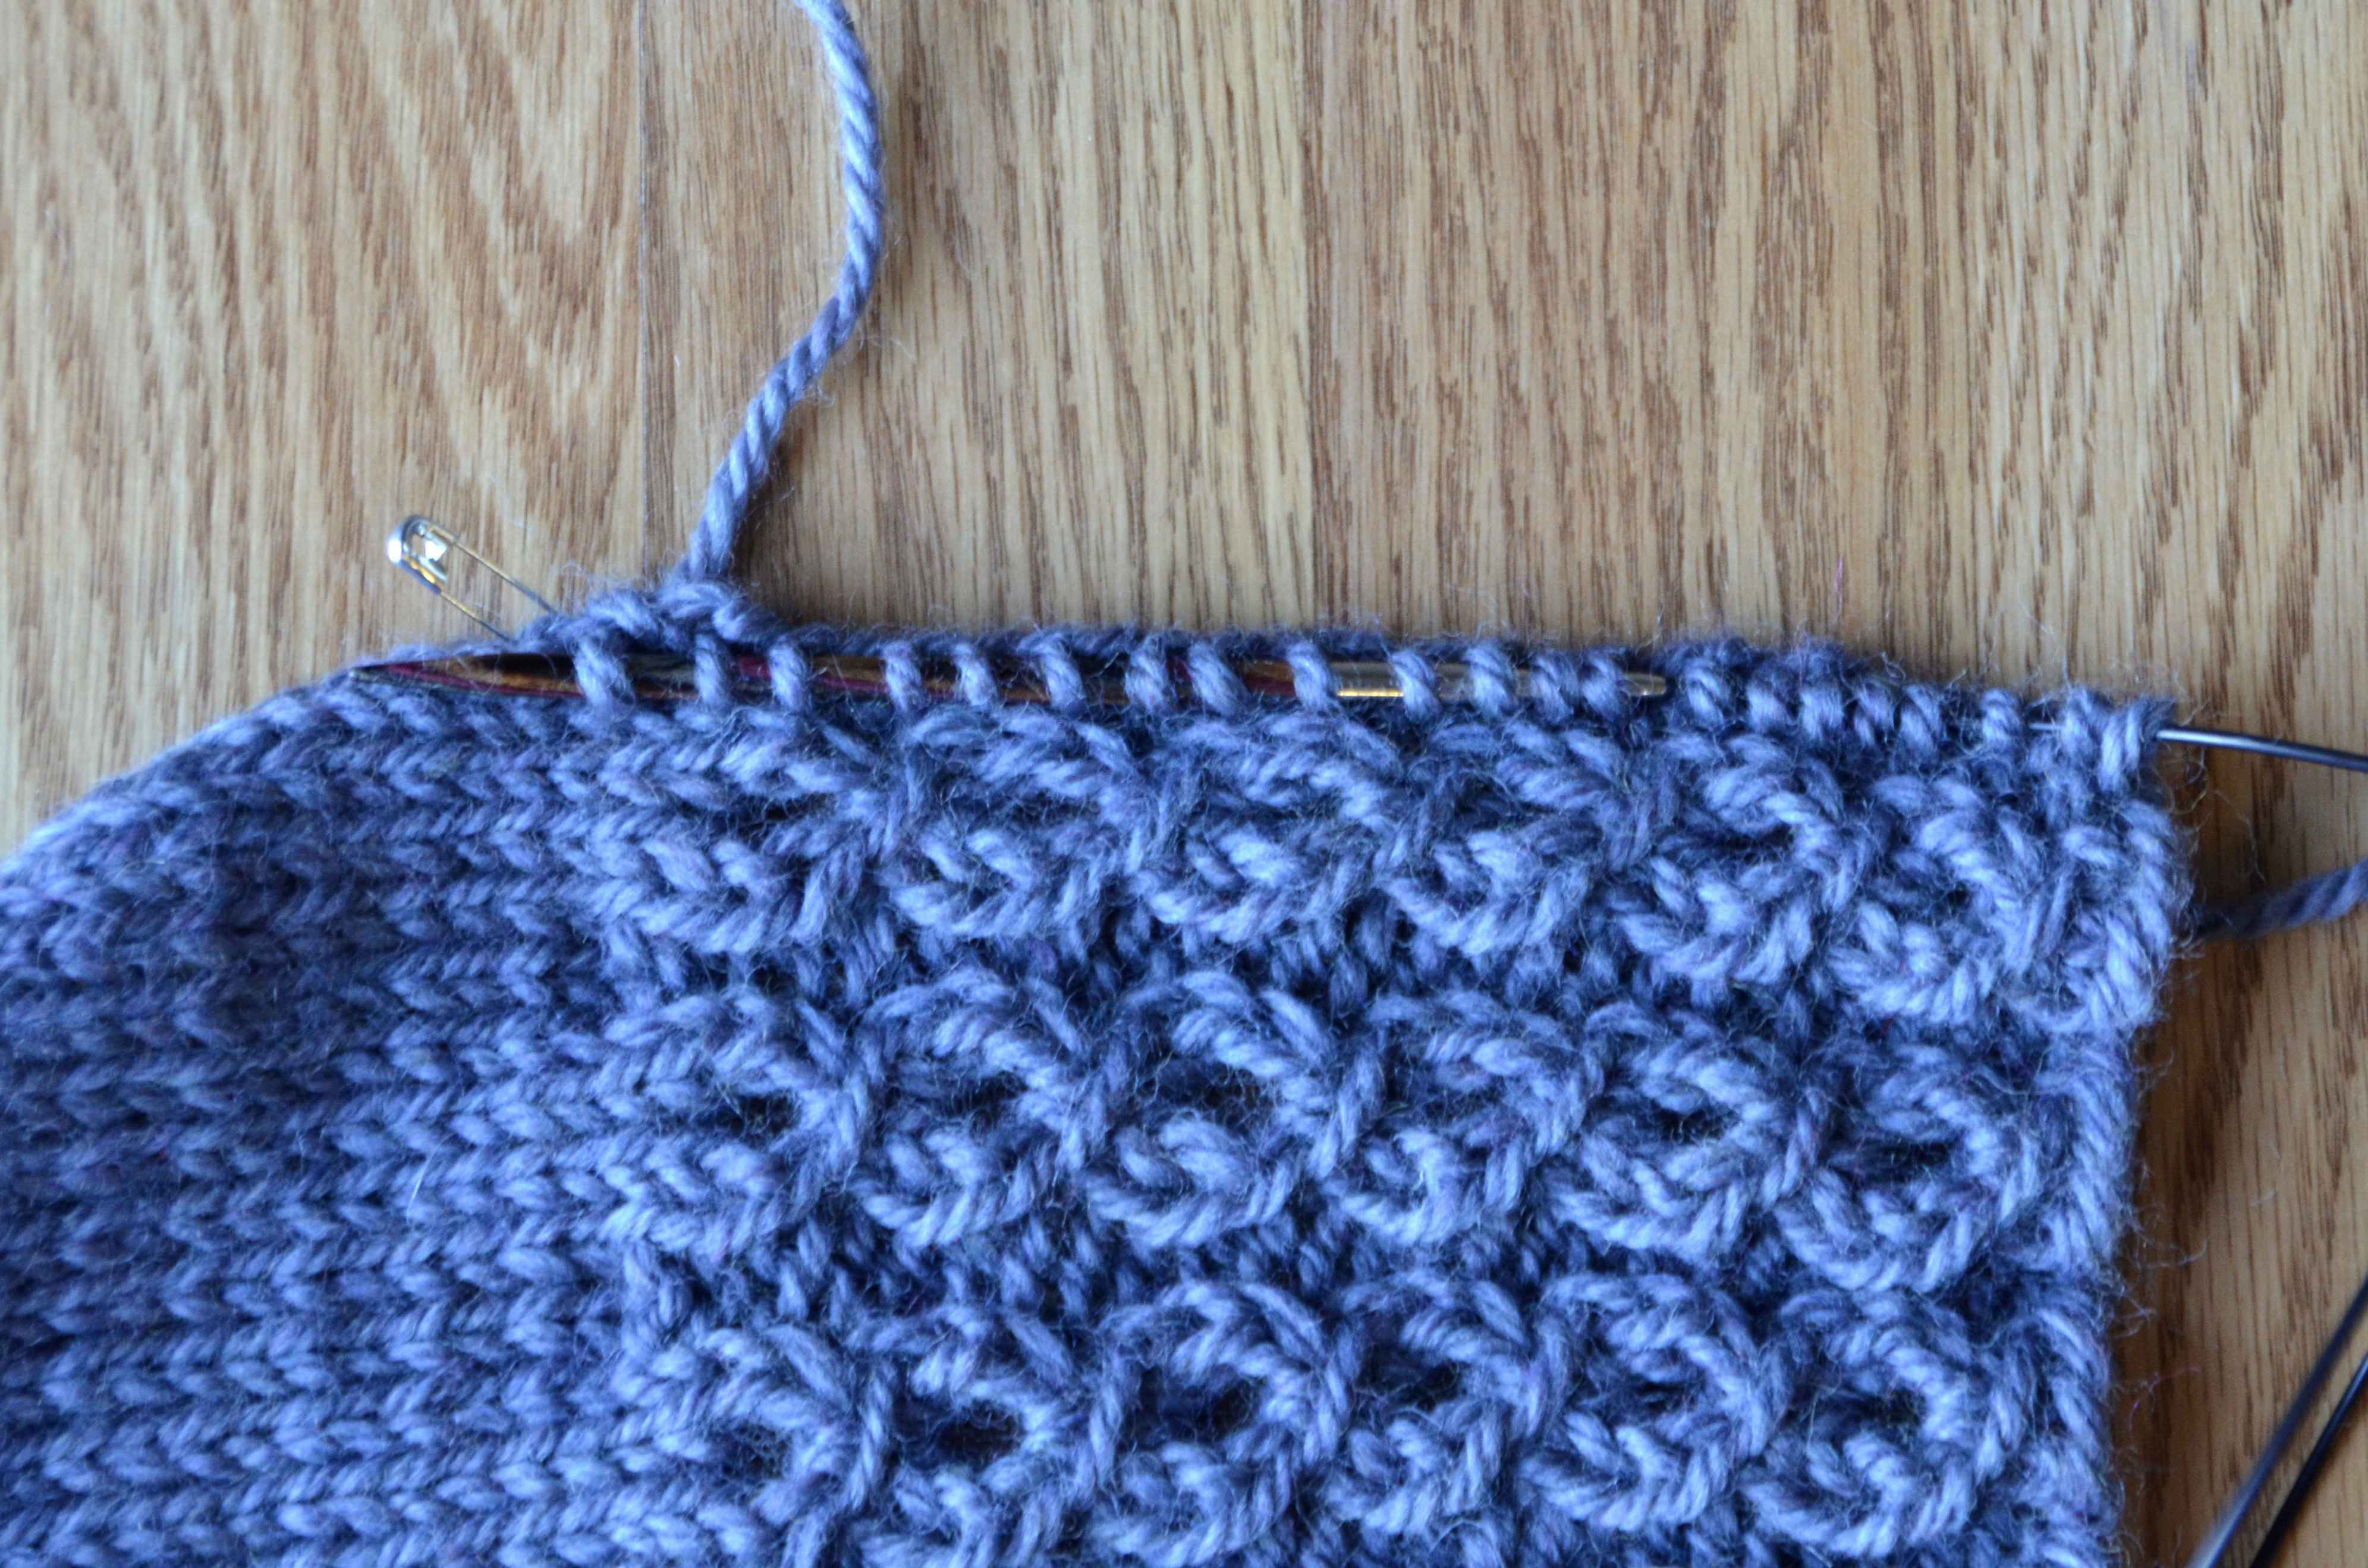
Here are all the stitches on the needle:
What you can’t see here, is that I picked up an extra stitch on one half of the piece. If this happens, it’s no big deal. Just k2tog or p2tog over the next row to adjust.
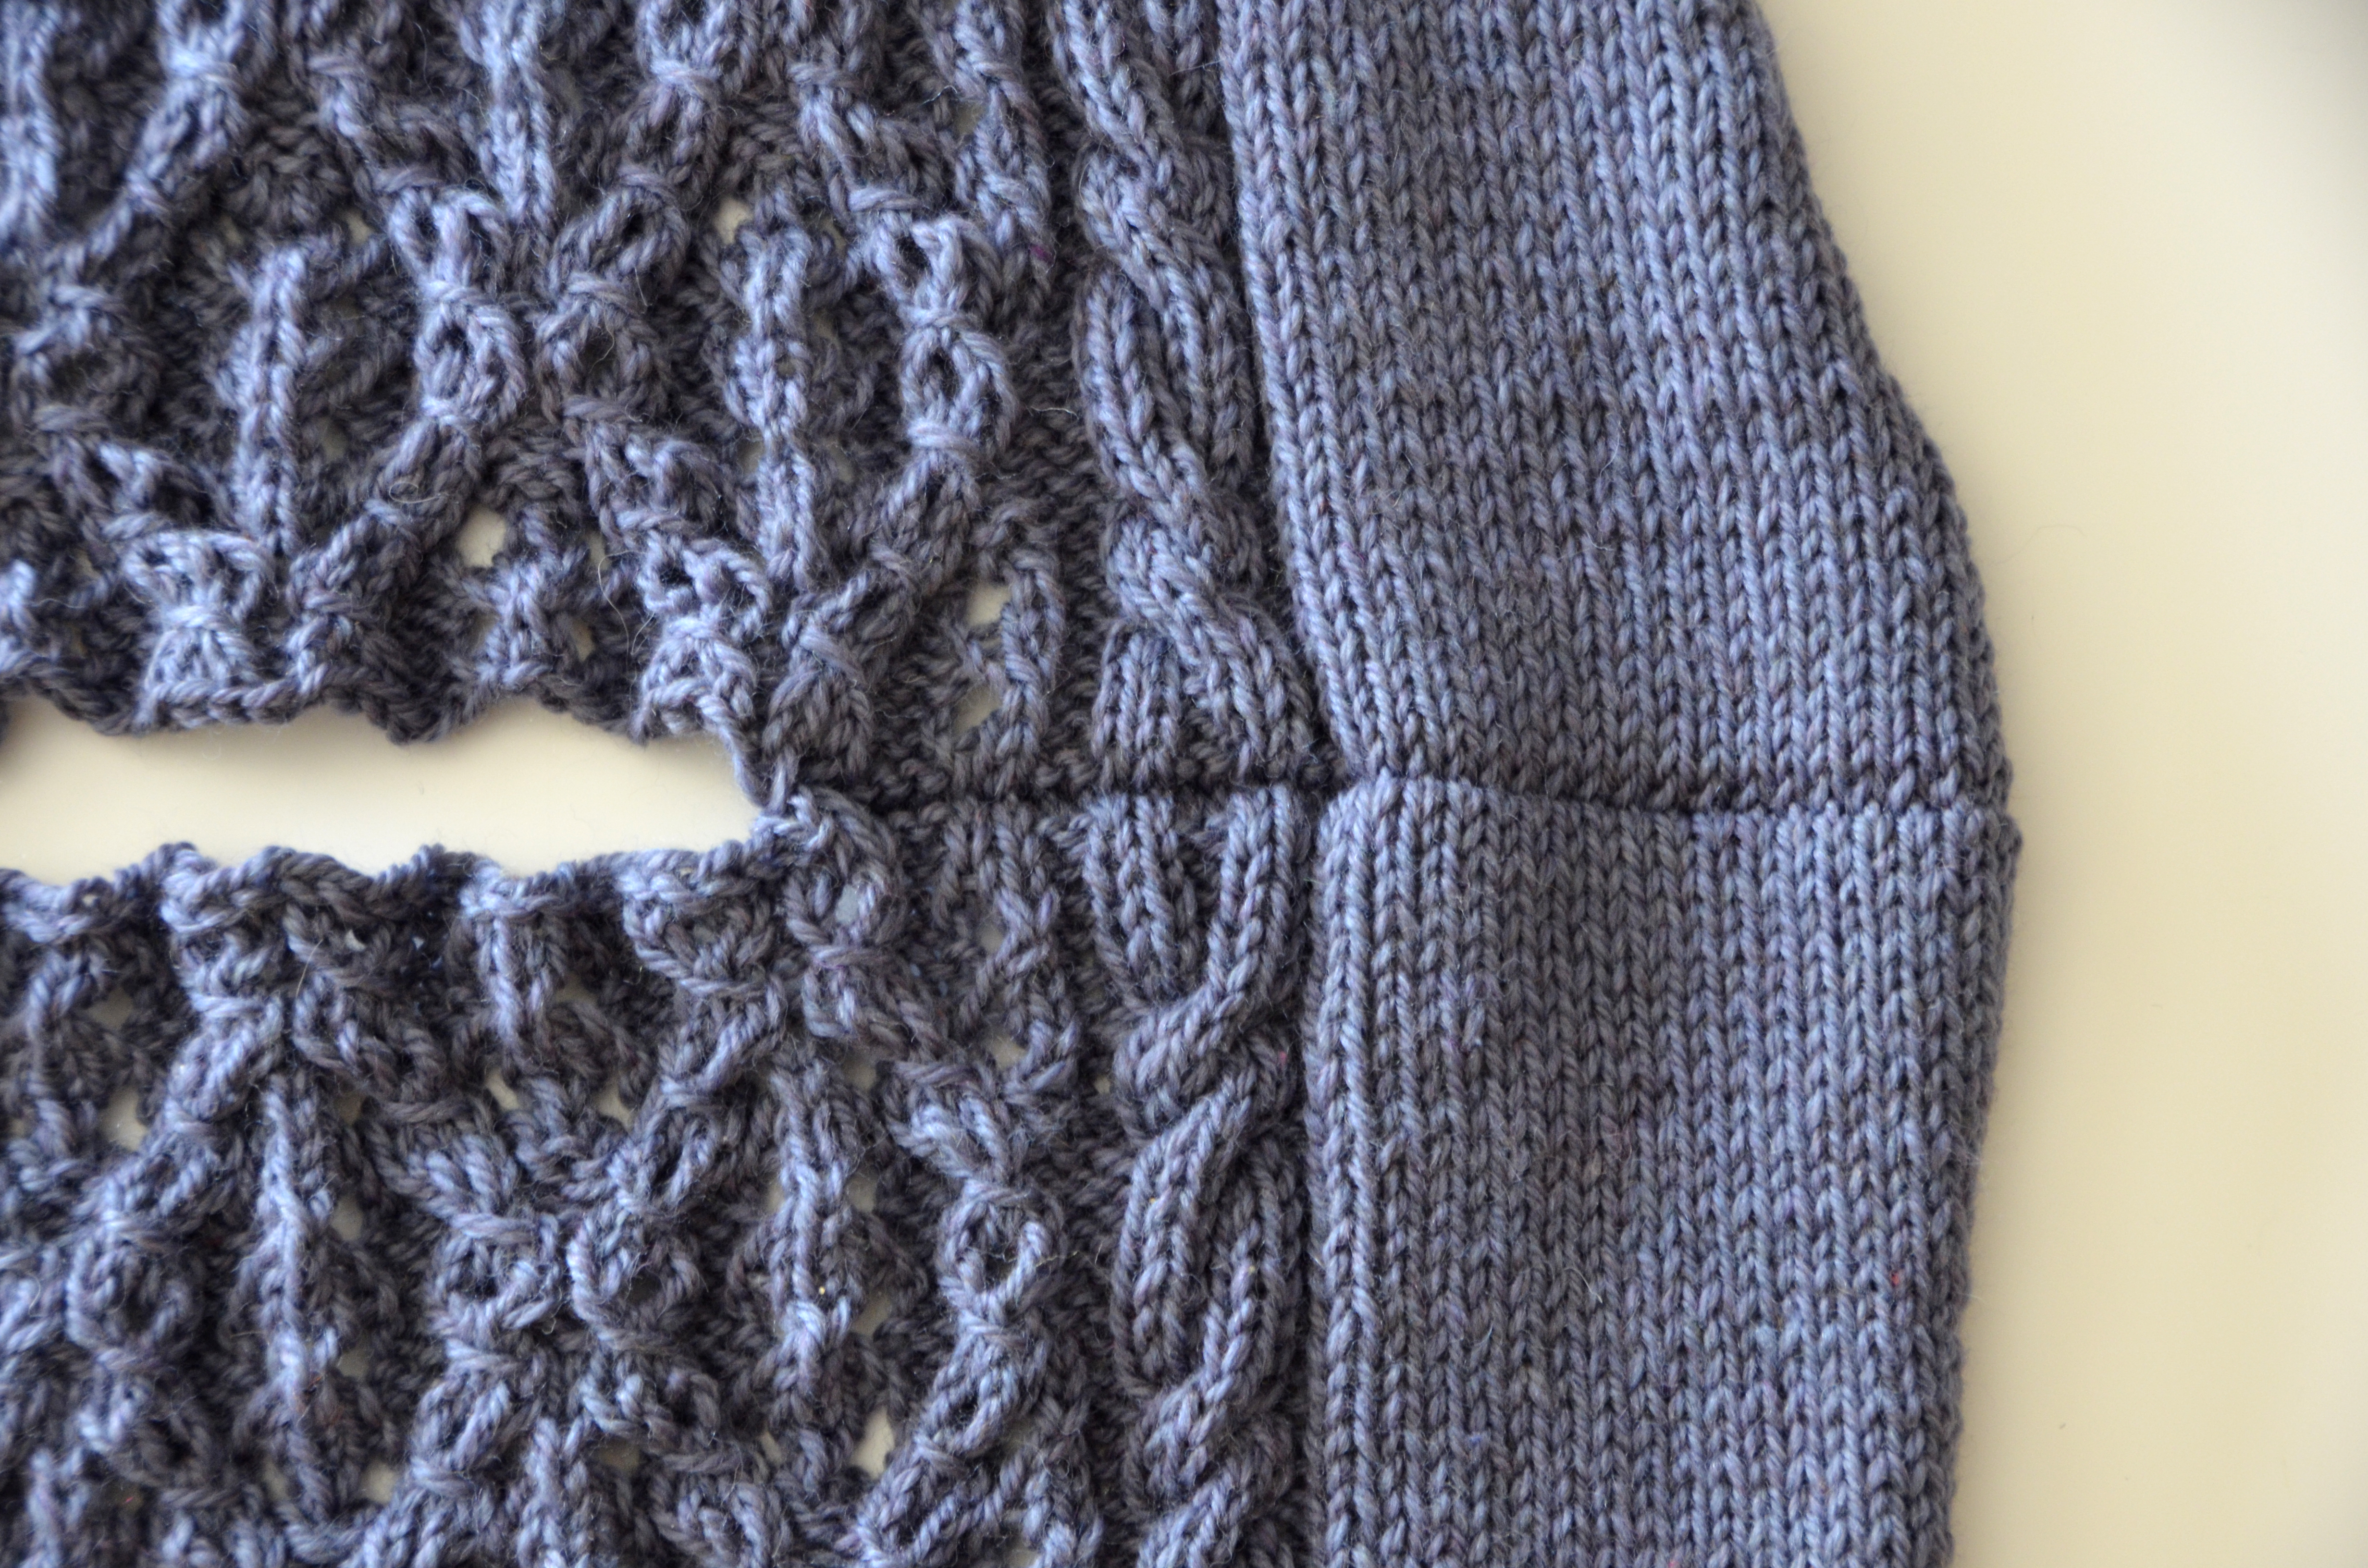
And, the edging completed:
All that’s left is my other side edging, a collar, some blocking, and it’s done!
As I was sitting outside enjoying my evening the other night, I could smell the autumn in the air for the first time this year. It’s coming, people. It’s coming! How is your knitalong project coming?
Our Deluxe Cable Collection Knitalong has been going strong for about 3 weeks now. If you’ve been thinking about joining, you can begin by reading through some of the blog posts here. It’s not too late to start! You can take part in sharing and conversation over on Ravelry in our knitalong group here.
Today I want to cover a technique used in the Catawba River Poncho, the 3 needle bind-off. In this pattern, it is used to join the shoulder seams of the front and back pieces.
Here is my front piece of the poncho. My neck stitches have been bound-off already, and my shoulder stitches are sitting on the needle.
And here are my front and back pieces with shoulders touching. They’re ready to become one!
To begin, place the pieces with right sides together. You can see that I left my yarn attached to one of my pieces – one less end to weave in later!
It’s important for each shoulder to be on a needle. I’m going to be knitting a stitch from each needle together to join them.
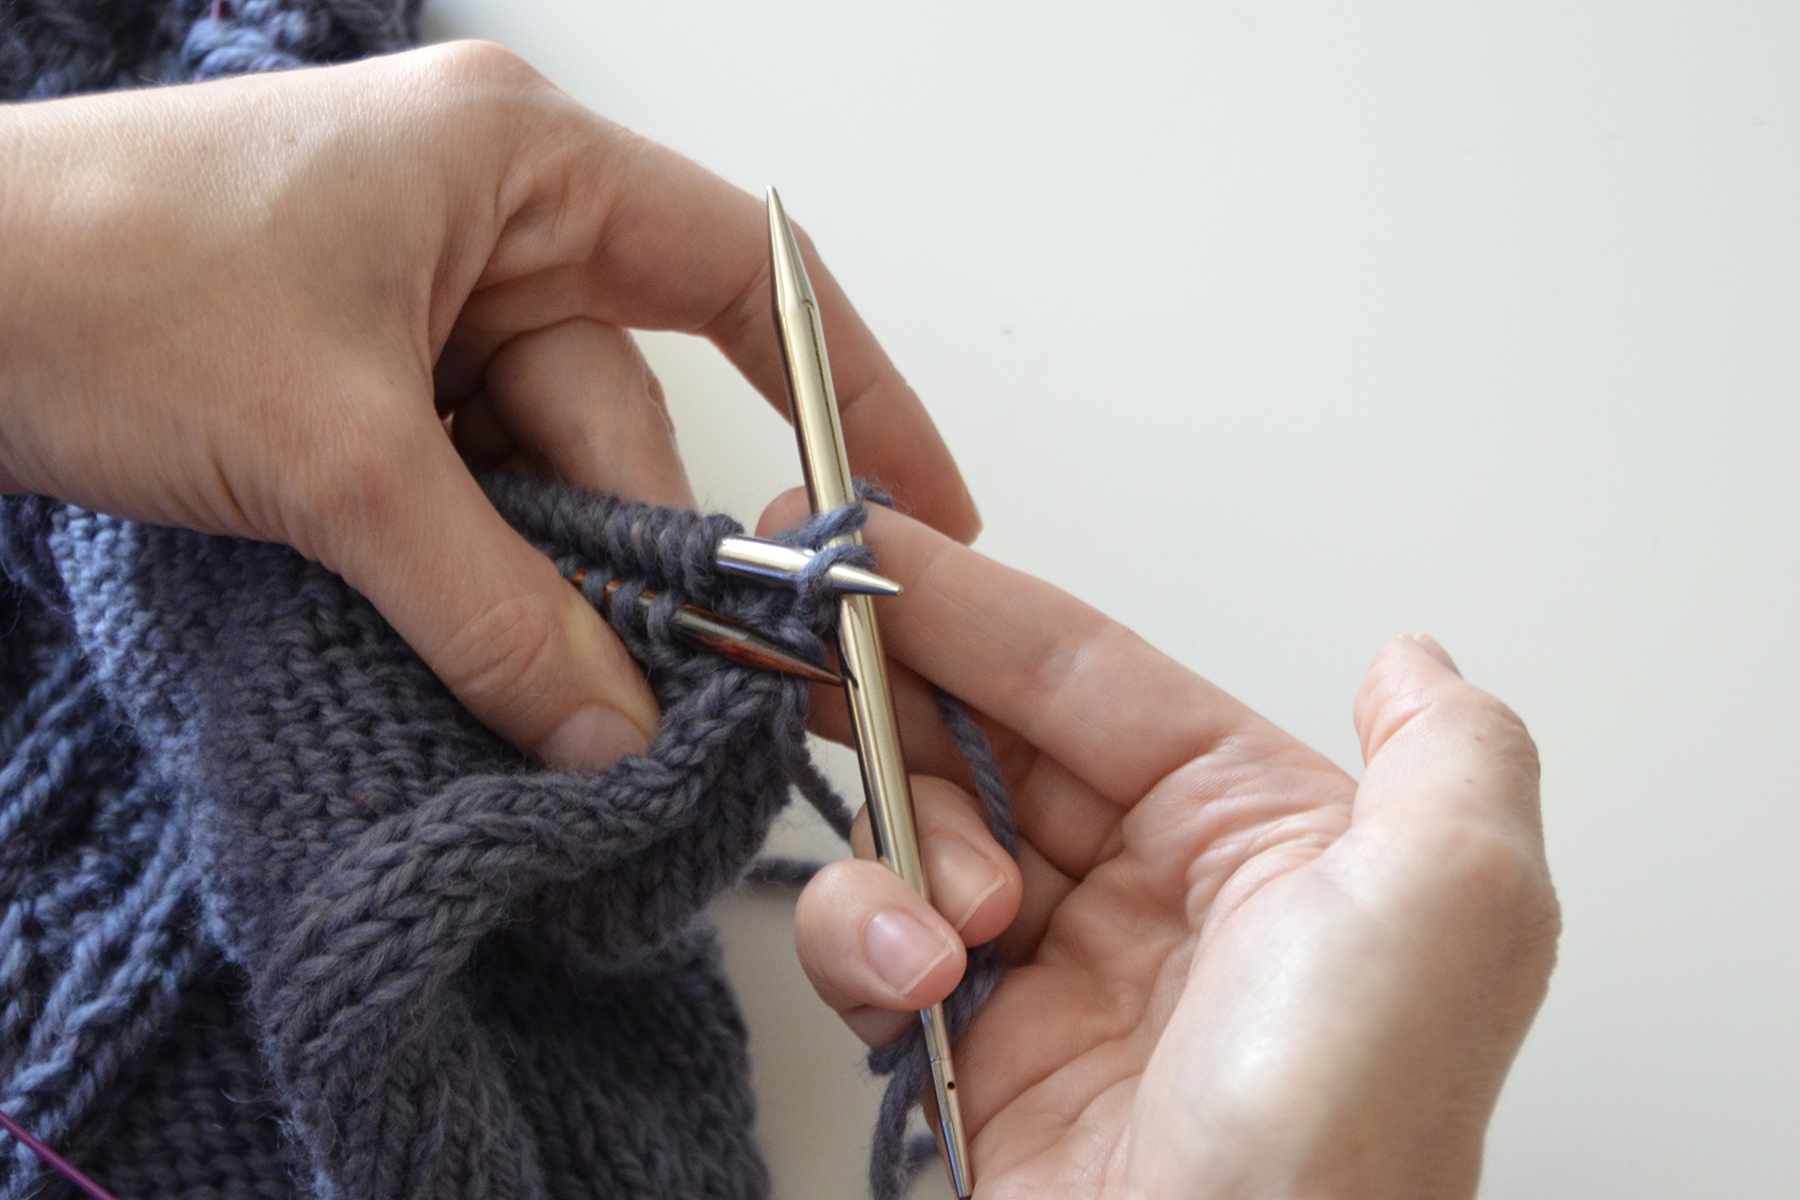
Insert your right needle through the first stitch on the front needle, then through the first stitch on the back needle. Here, I’m just using the needle from the other end of one of my working circular needles. But if you find this awkward, you could use a spare double point or straight needle.

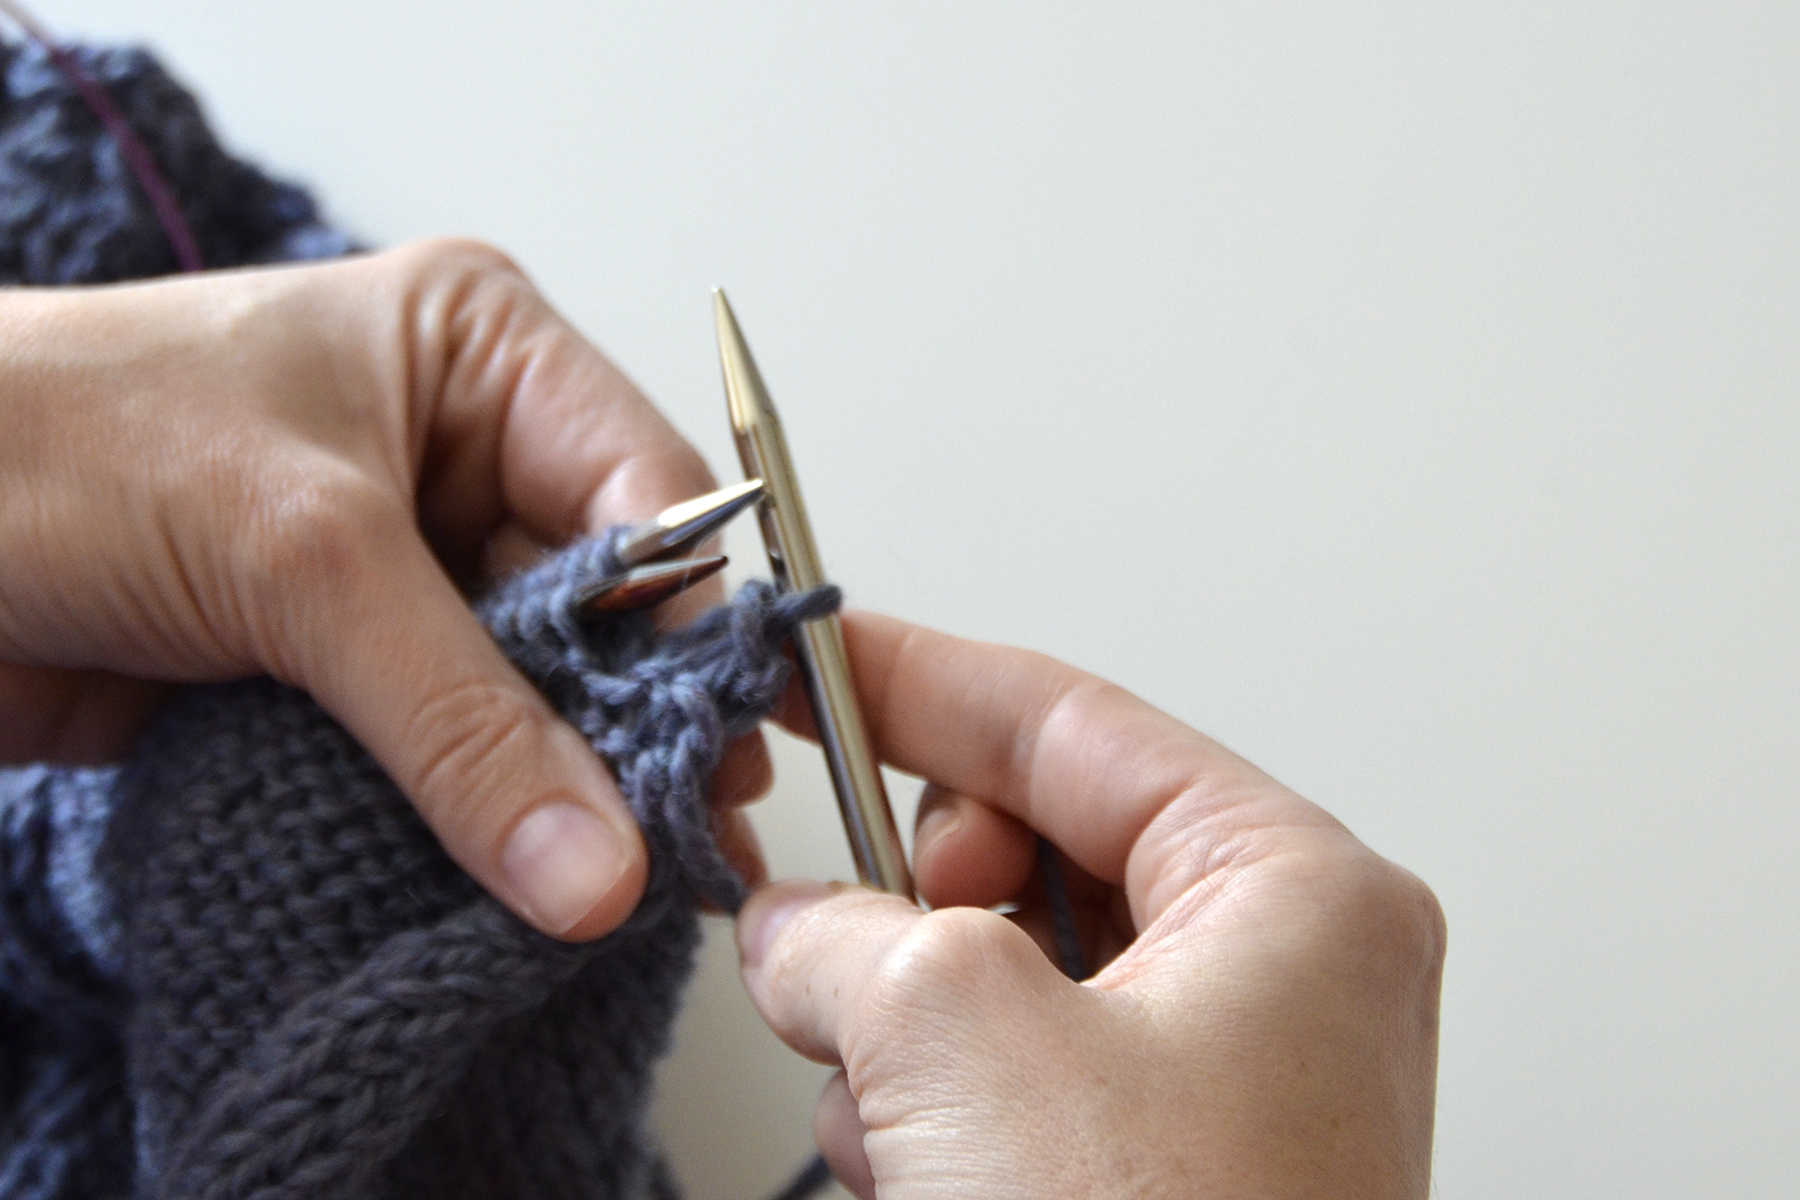
Step 1: Knit the 2 stitches together and slip to the right needle.
Step 2: Knit the next 2 stitches together and slip to your right needle – you now have 2 stitches on your right needle.
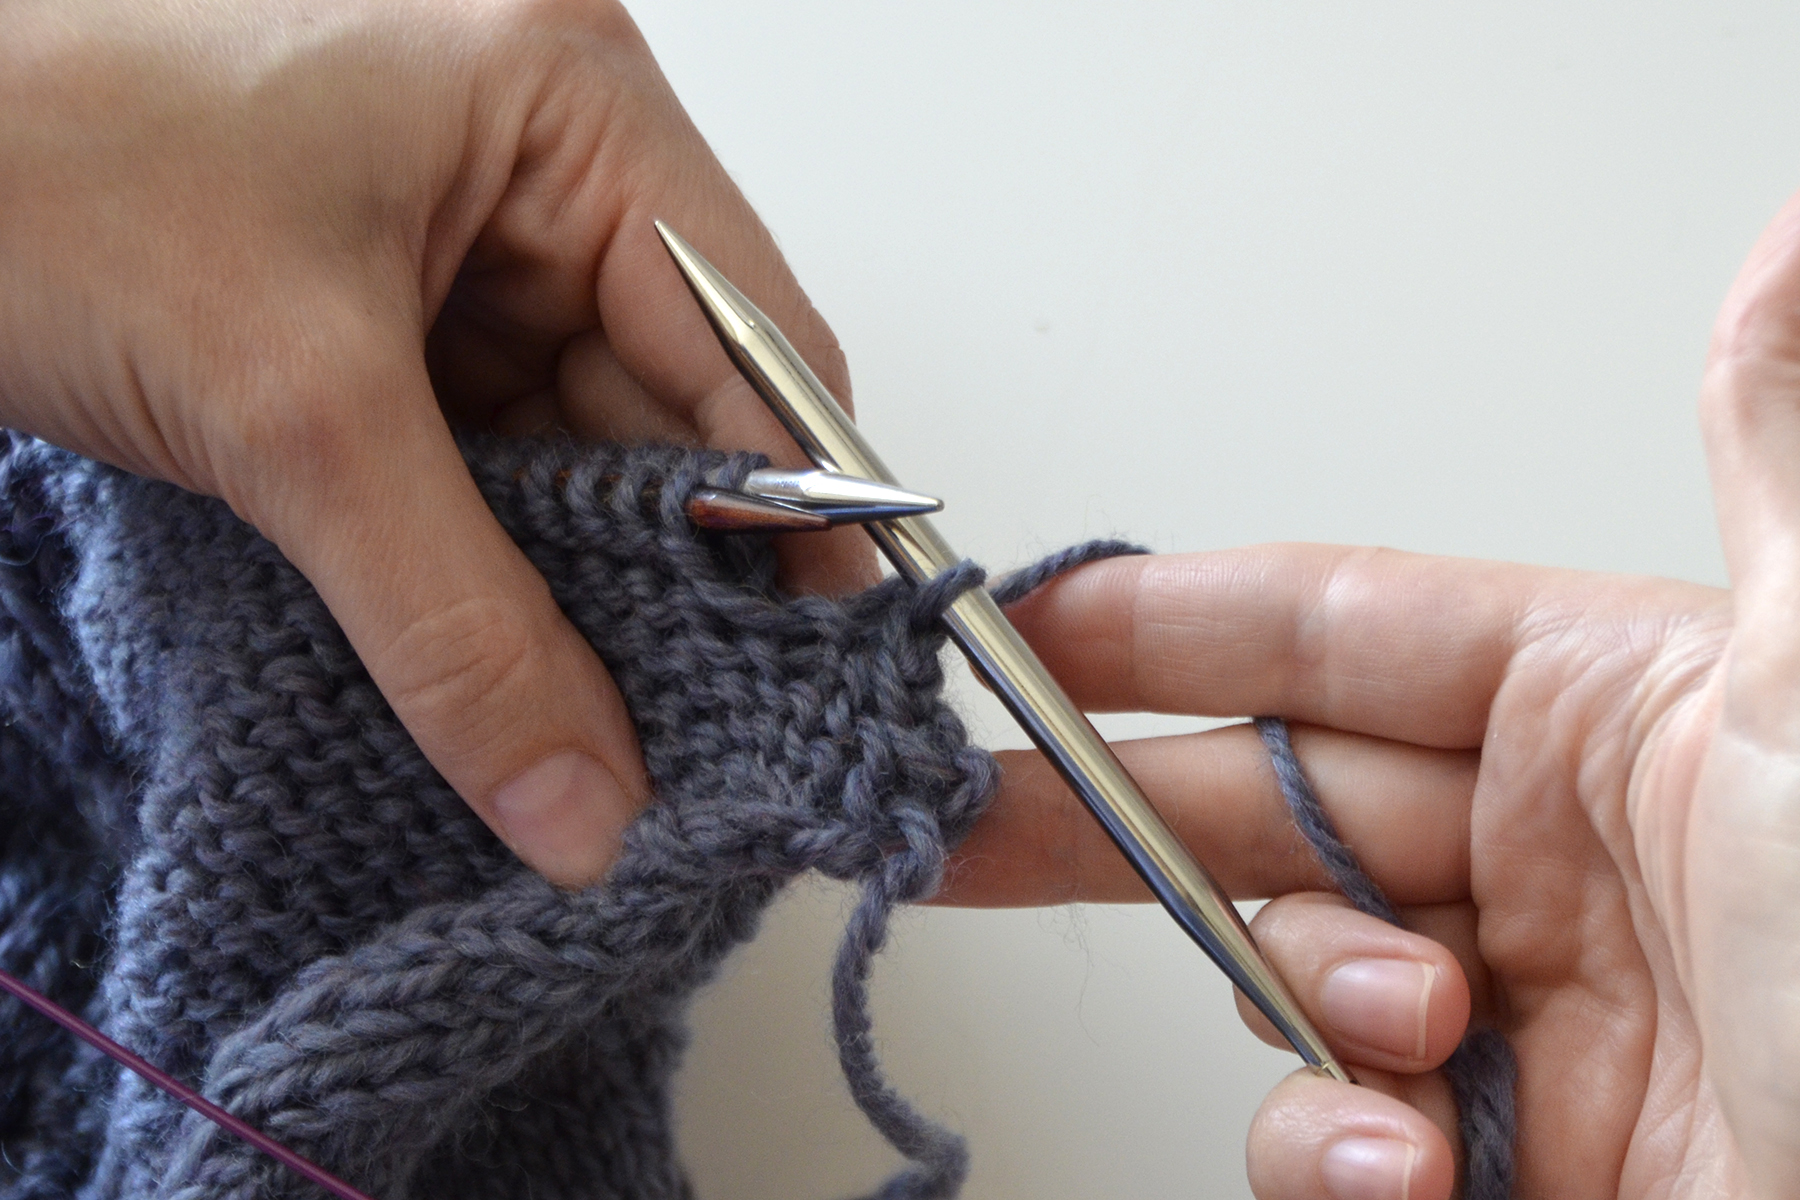
Step 3: Bind off 1 stitch by passing the first stitch on the right needle over the second stitch.
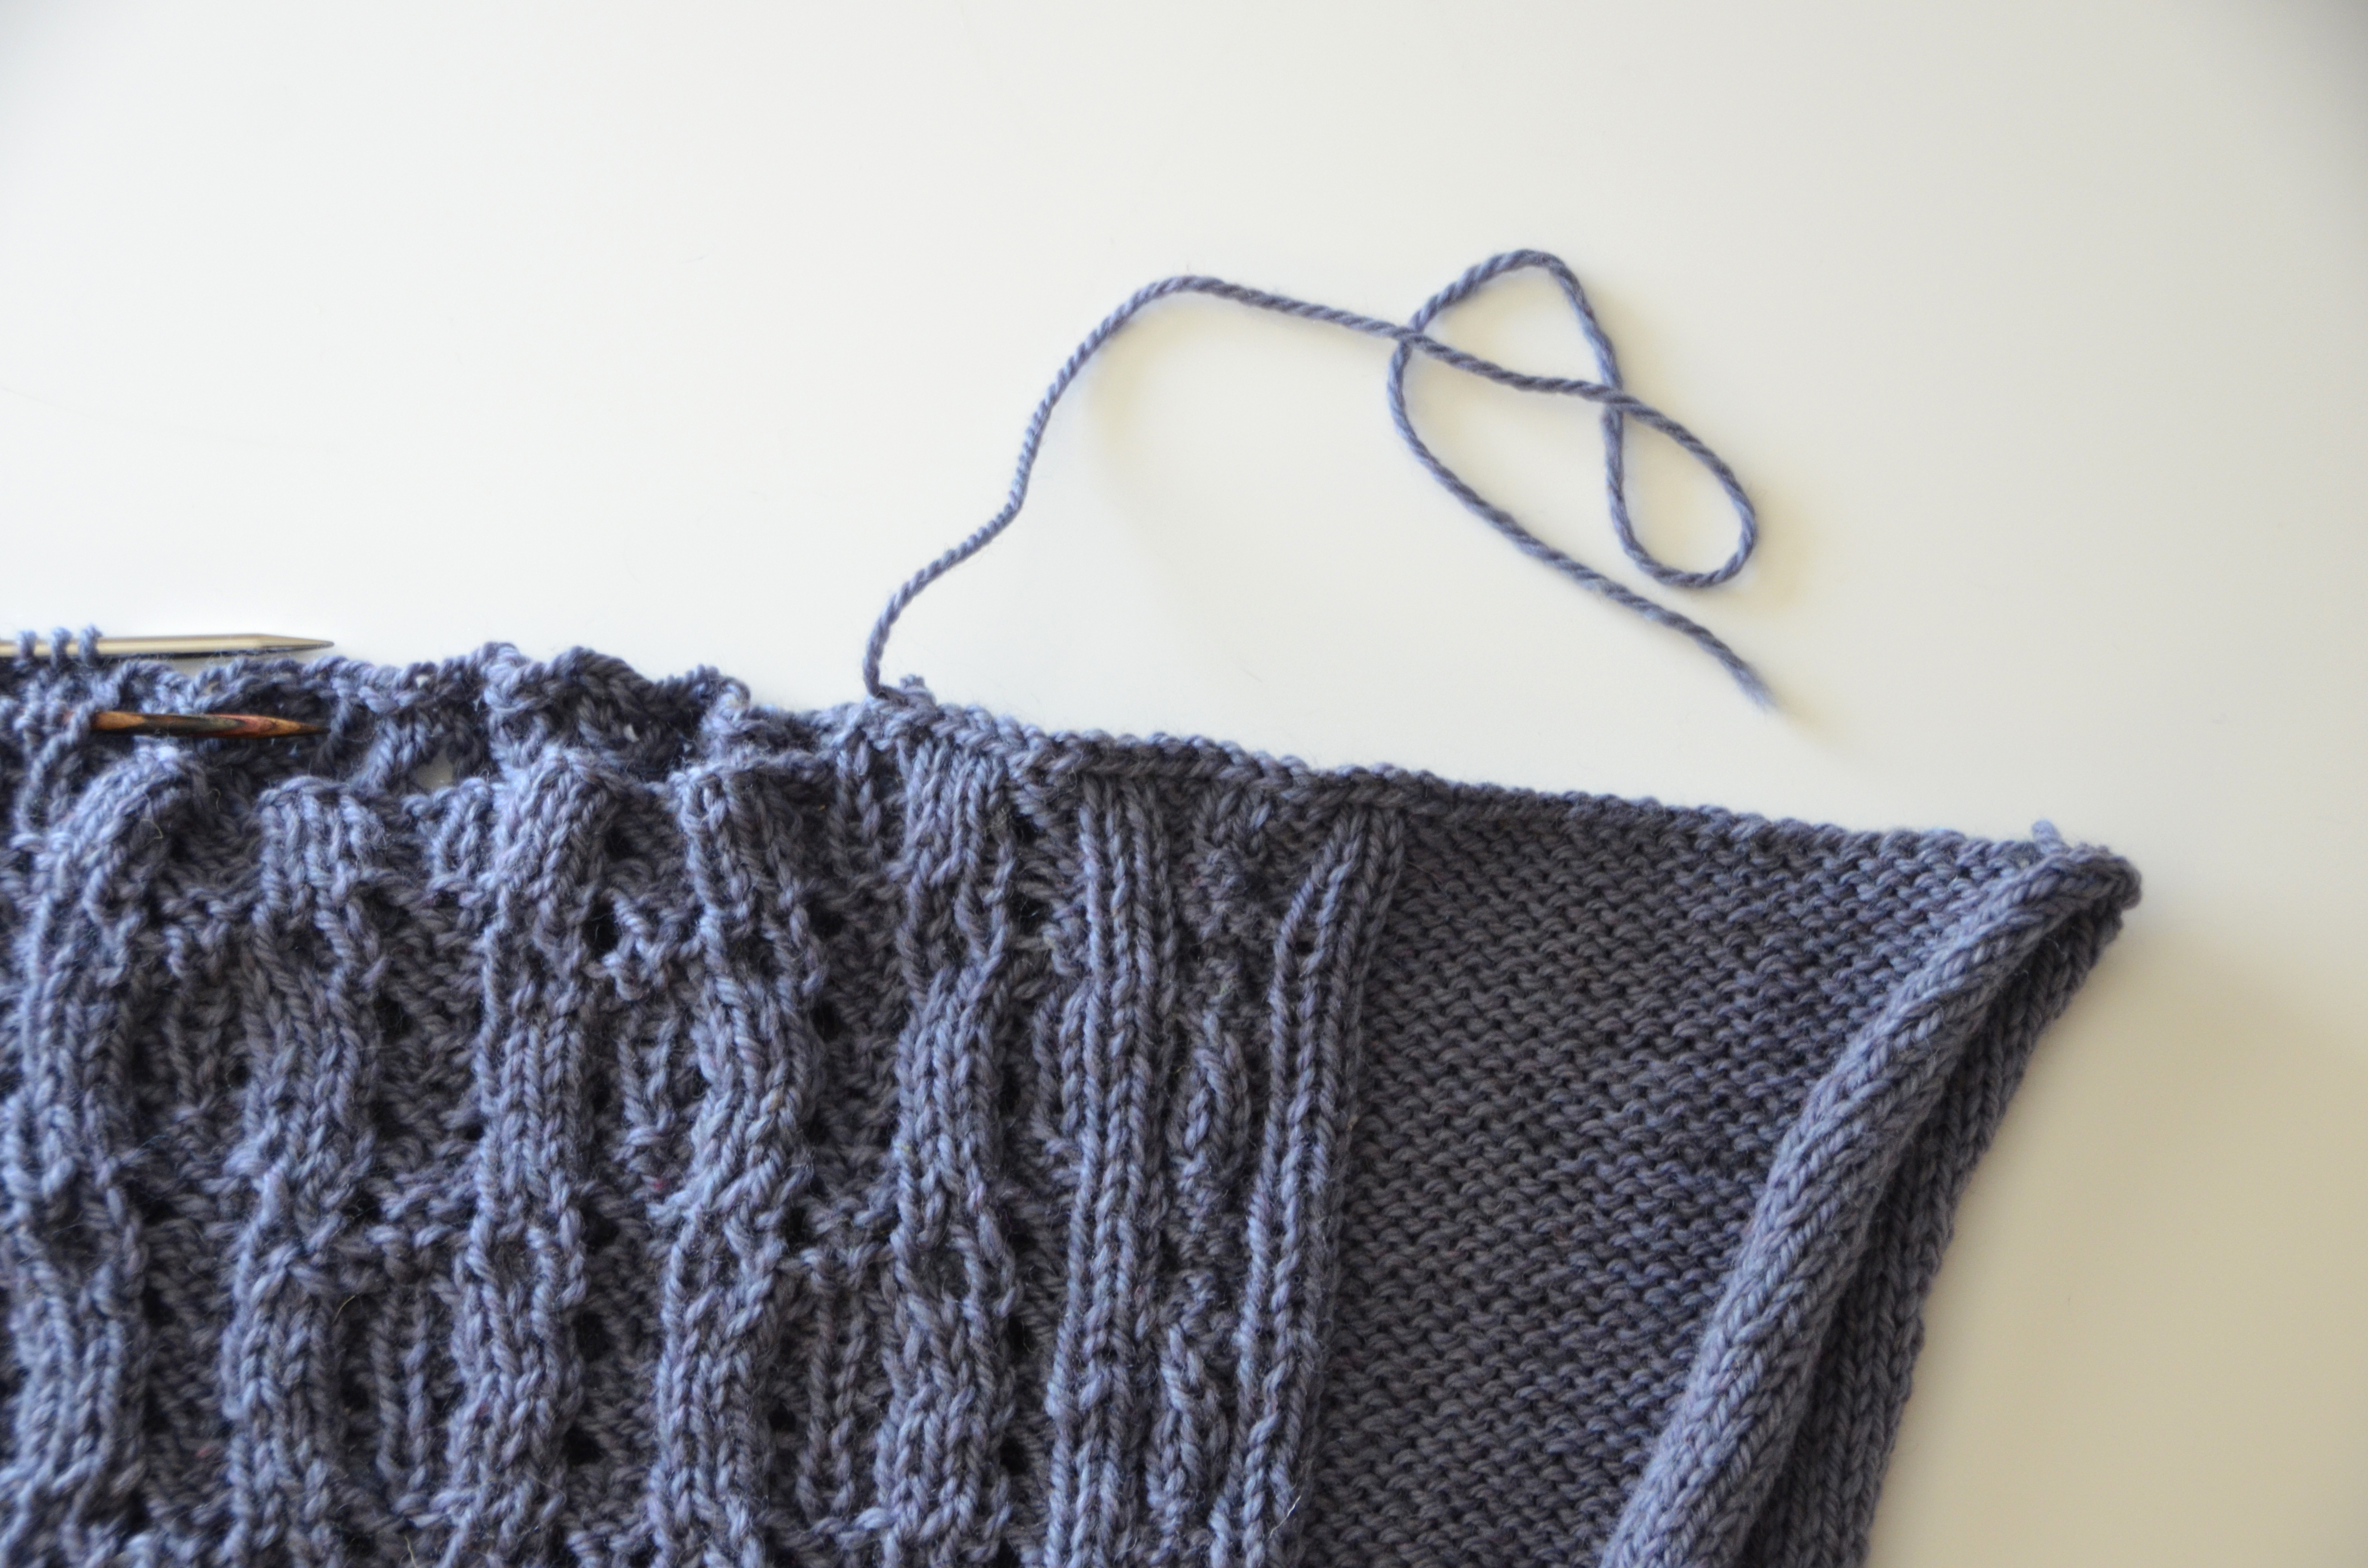
Repeat steps 1-3 for a 3 needle bind-off. Here’s what it looks like after a few stitches have been bound off:
Here is my first shoulder after joining:
Both shoulders:
You can see that this method produces a ridge, which is why it’s typically worked with wrong sides of pieces held together. But every now and then I like to use it as a design element and work it with wrong sides together.
And here’s my shoulder viewed from the right side:
There are a few reasons I love a three needle bind-off. For one, I don’t have any seams to sew. I don’t really mind sewing seams, but I don’t just totally love doing it, either. I’d always rather be knitting than sewing a seam.
Second, a three needle bind-off makes it easy to line up pattern stitches, such as in the Catawba River Poncho. I could acheive the same look with a mattress stitch seam, but I prefer this method when possible.
Third, I find it easier to get a seam with good tension as opposed to a sewn seam. Oh, and fourth, a 3 needle bind-off makes for a very stable seam. Shoulder seams see a lot of stress. Especially in a piece like this worked in a bulky weight yarn, think about how much stress will be placed on the shoulders as the garment is hanging down from it.
Next time I’ll be back to talk more about this poncho! I’m going to be picking up stitches along the sides for my eyelet ribbing.
Are you knitting along? I would love to hear how you’re doing!
How are my fellow knitalongers doing? We’re all plugging away on our Deluxe Worsted Cable projects here in the office. I think we’re all enjoying the laid back nature of this knitalong. There is no pressure. No deadline. No rules, really. Just fun and learning!
If you haven’t joined us yet but think you’re in the mood for some cable knitting, it’s not too late to start! You can begin by picking a project from our latest ebook: Deluxe Worsted Cable Collection. You can read back through my other blog posts talking about the knitalong:
Deluxe Cable Collection Knitalong (launch post)
You can also find all posts related to this knitalong by going the home page of our blog (https://blog.universalyarn.com/) and locating the category “Deluxe Cable Collection Knitalong” on the left side of the page. And be sure to join the discussion over on Ravelry in our dedicated knitalong group.
Let me catch you up with how we’re doing with our projects over here.
Remember Angie who has never done cables before? She is now the proud owner of her very own Cold Mountain cabled hat. She also might kill me for posting this goofy picture of her.
Angie made a couple of mods to this hat. She decided to knit the brim shorter than the original so it is not folded. She also eliminated the lace part and stuck with stockinette instead. I’m so proud of Angie – her cable and hat look so good. She’s waffling on a very important finishing decision: to pom-pom or not to pom-pom.
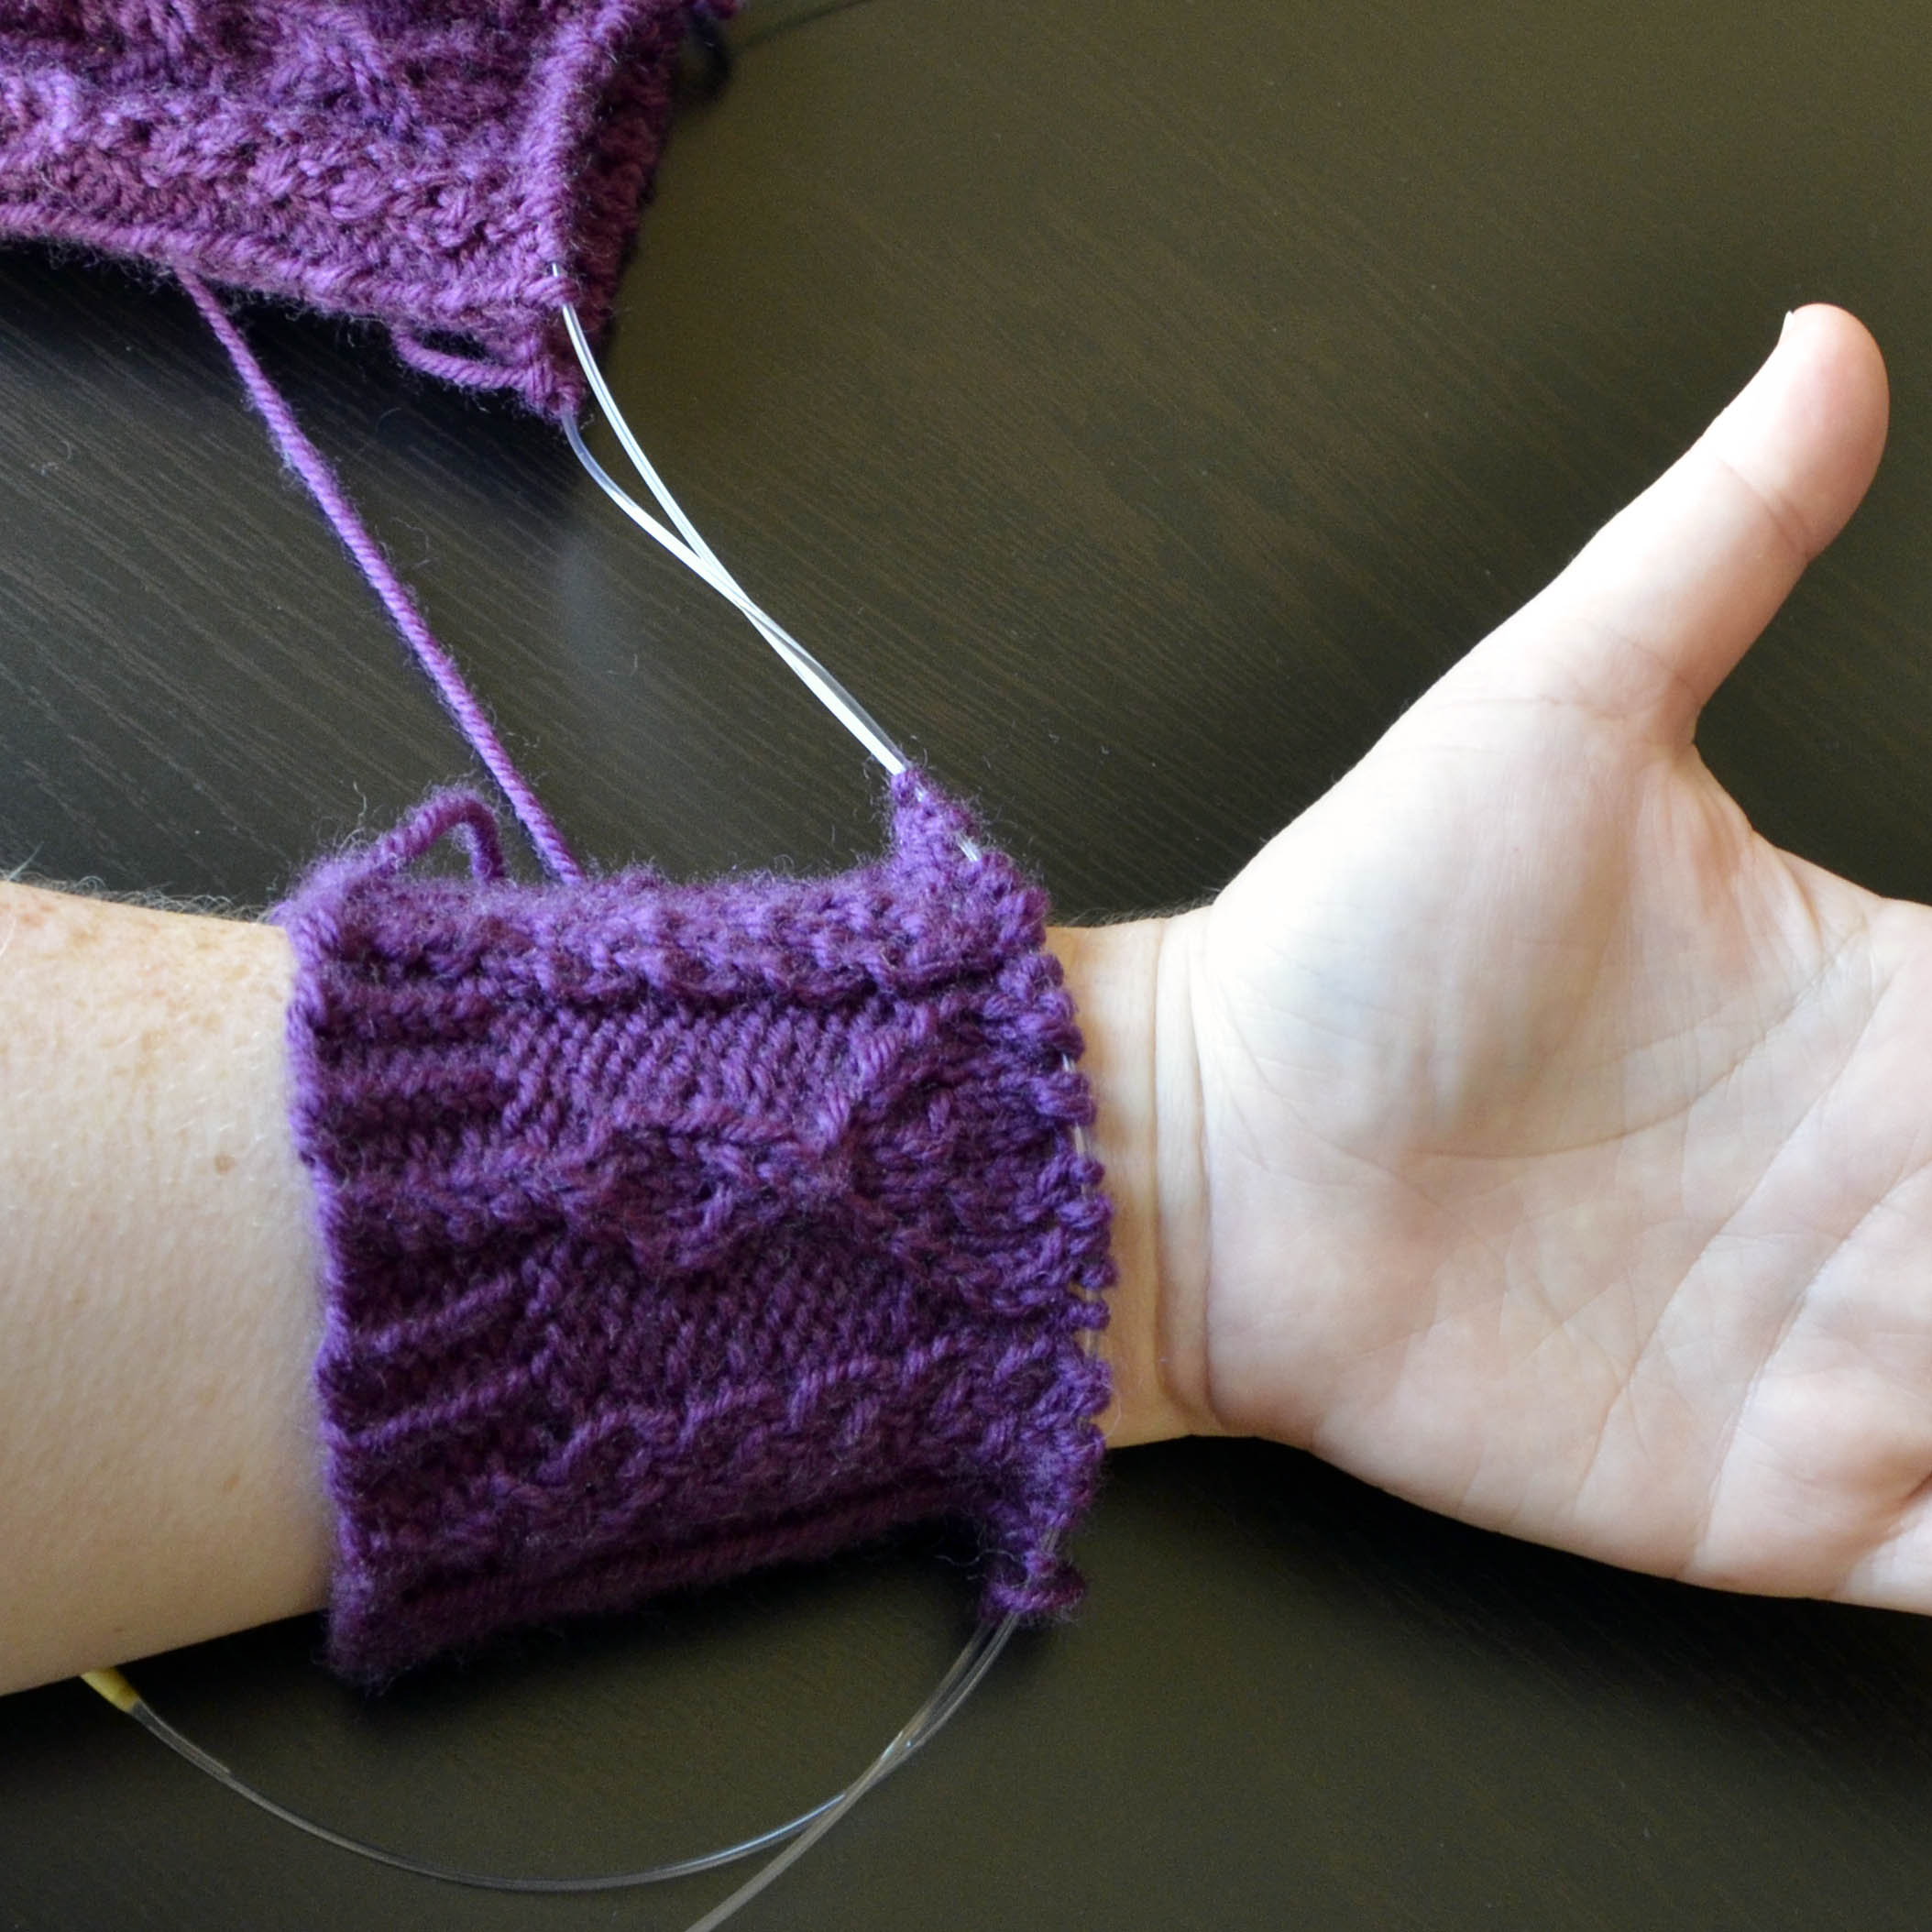
Heather is making progress on her two-at-a-time Tillery Socks. She’s modeling them on her arm here so we can see the patterning better. Seeing them like this, I could definitely imagine these being turned into fingerless mitts or mittens, too.
Jen has cast-on for her Ballantyne Tee, modified to be knit in the round. This project is a nice balance of mindless reverse stockinette along with a little bit of patterning to keep things interesting.
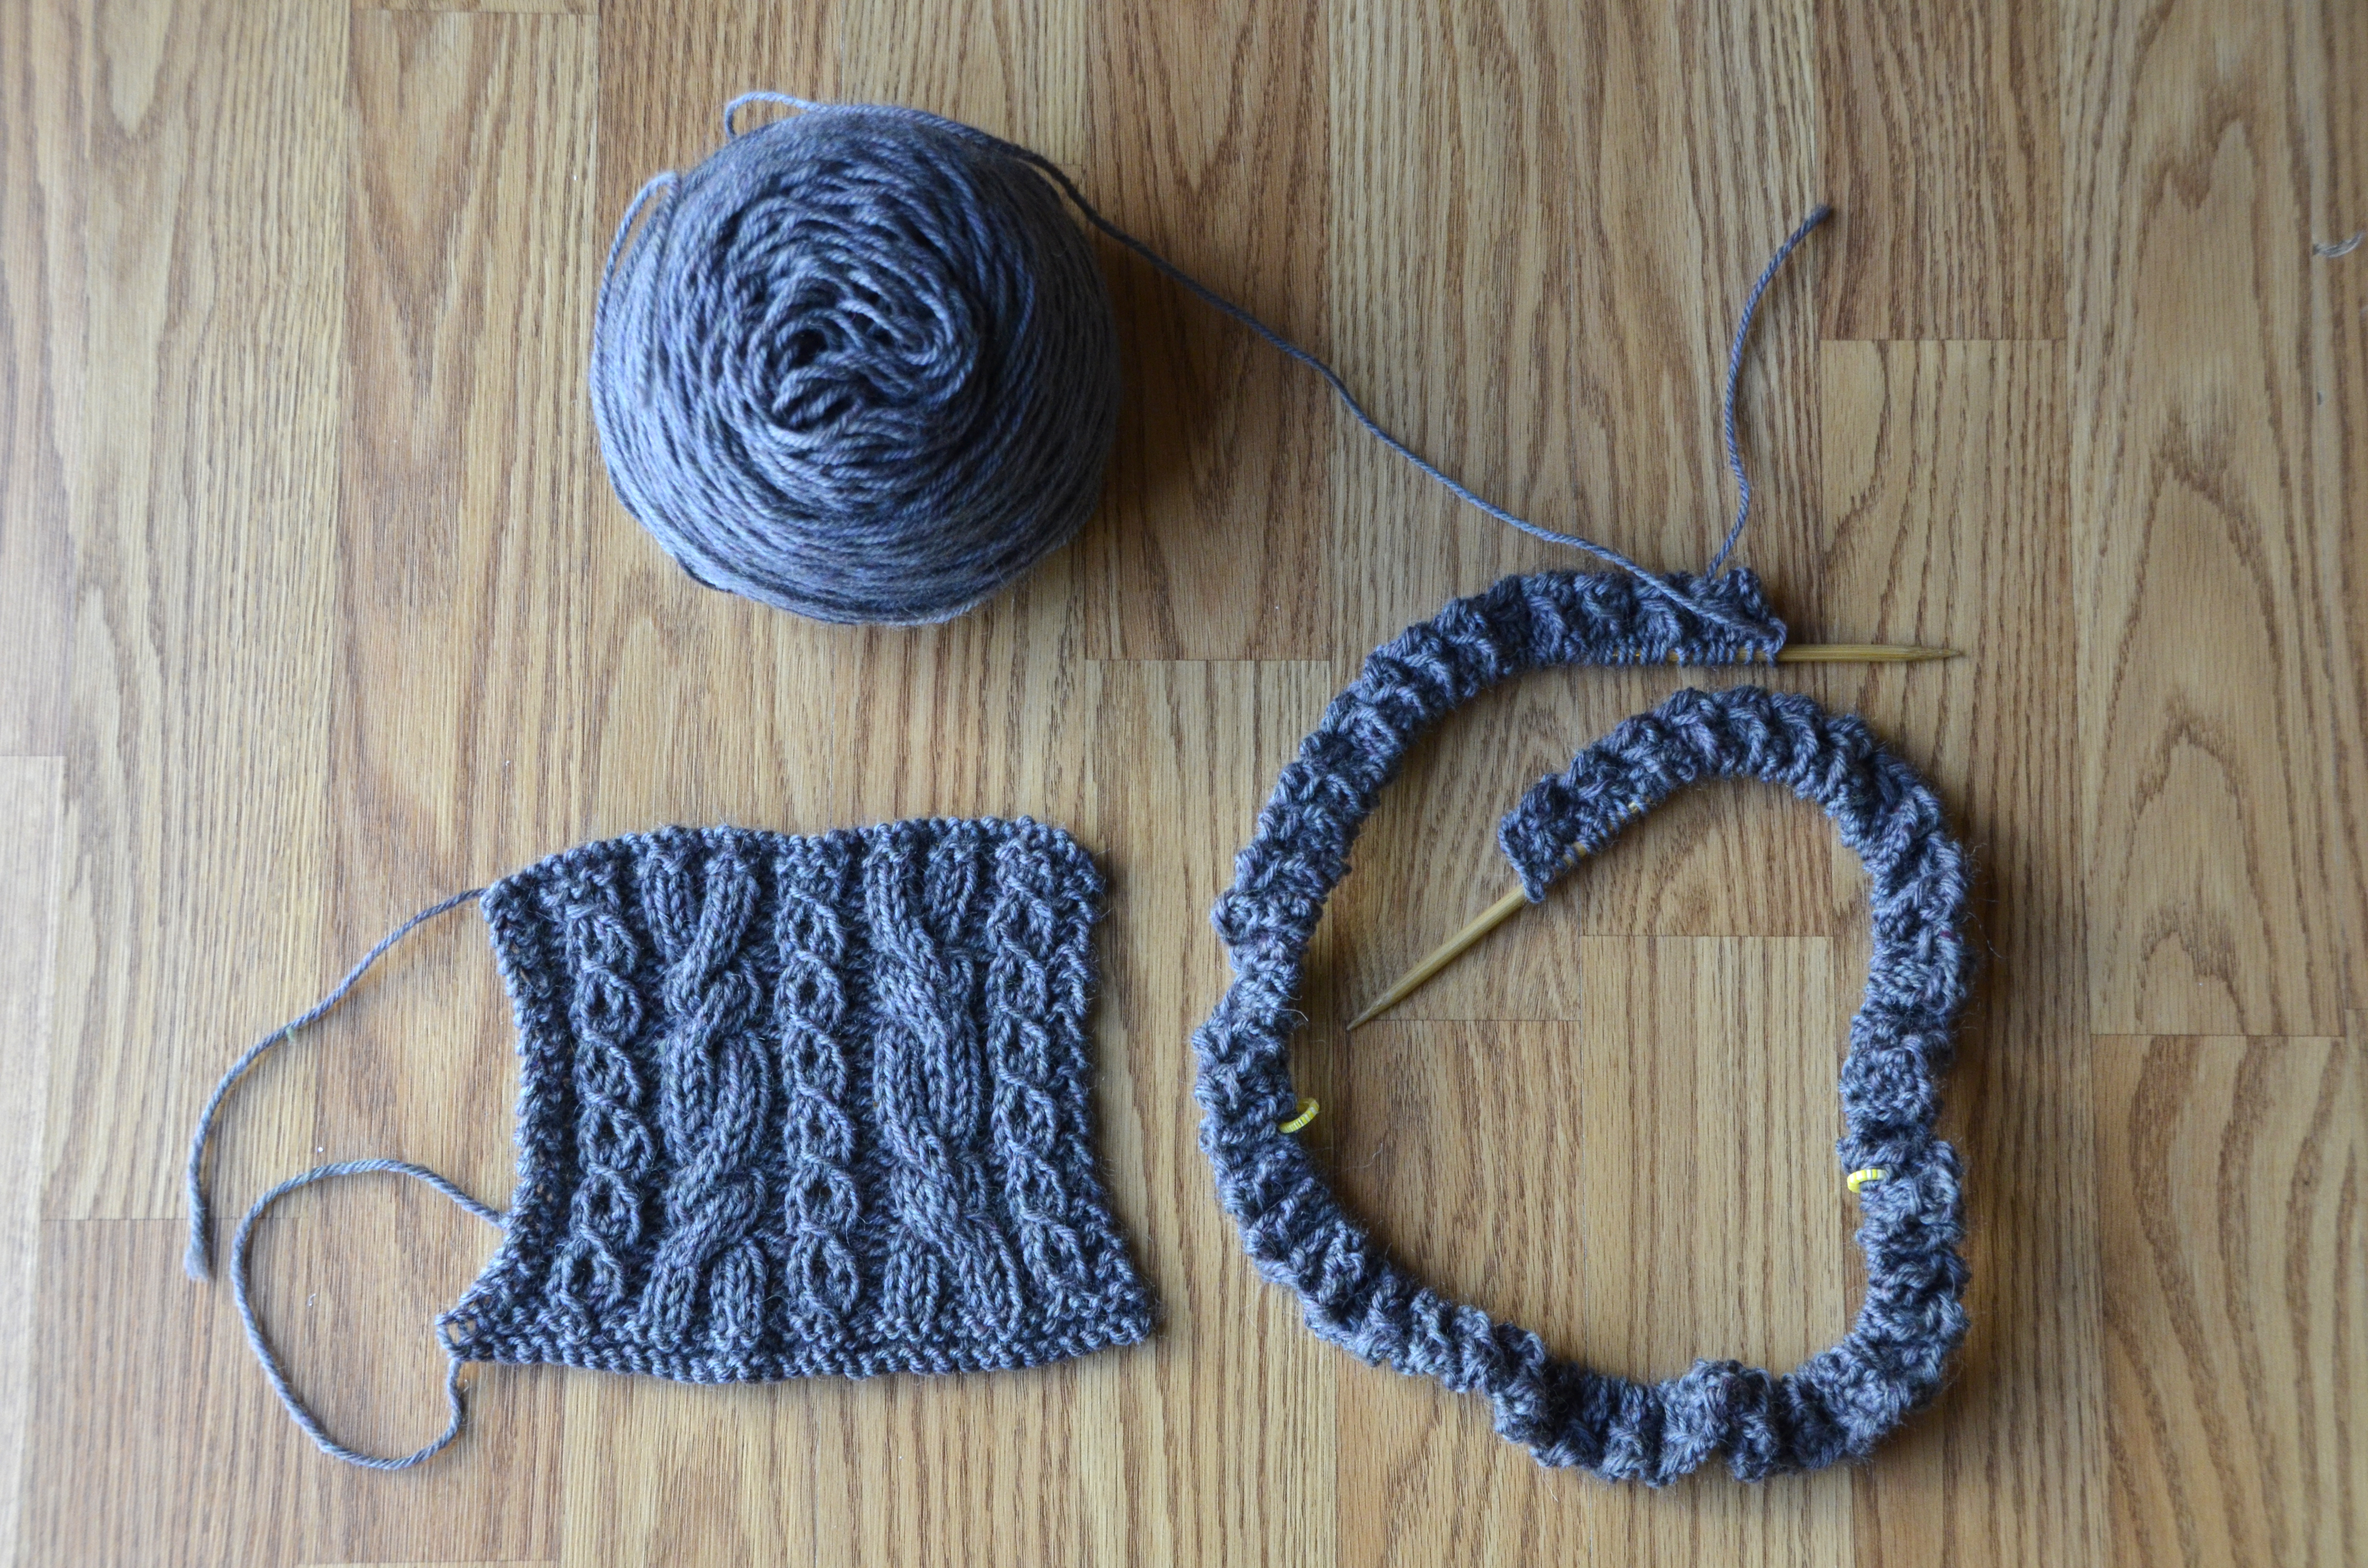
Tori has also opted to go for a one-piece project. Instead of knitting fronts and back separately, she cast on for the body to work it as one. Here’s her Eastover Vest after a few rows, sitting next to her swatch:
If you remember, Jannie is a very new knitter, and this will be her first garment project. So exciting! She started swatching for her Greensboro Cardigan using Deluxe Worsted Tweed Superwash. Jannie was mostly getting the patterning right, but we discovered one little thing – over the twist cable stitches she was knitting these stitches on wrong side rows instead of purling them. But she’s not discouraged and is ready to continue on swatching and practicing the stitch pattern. Good attitude!
Yonca started on her Cumberland Poncho using Smoke Heather in Deluxe Worsted. As is her usual way when working sleeves, fronts, or any other identical pieces, she’s working both rectangles of the poncho on the same needle at the same time. Unfortunately, Yonca discovered an issue with some of her twisted stitches so she’s going to have to rip out and start over. But as we all know, ripping is just part of the process sometimes! Luckily she’s not too far along.

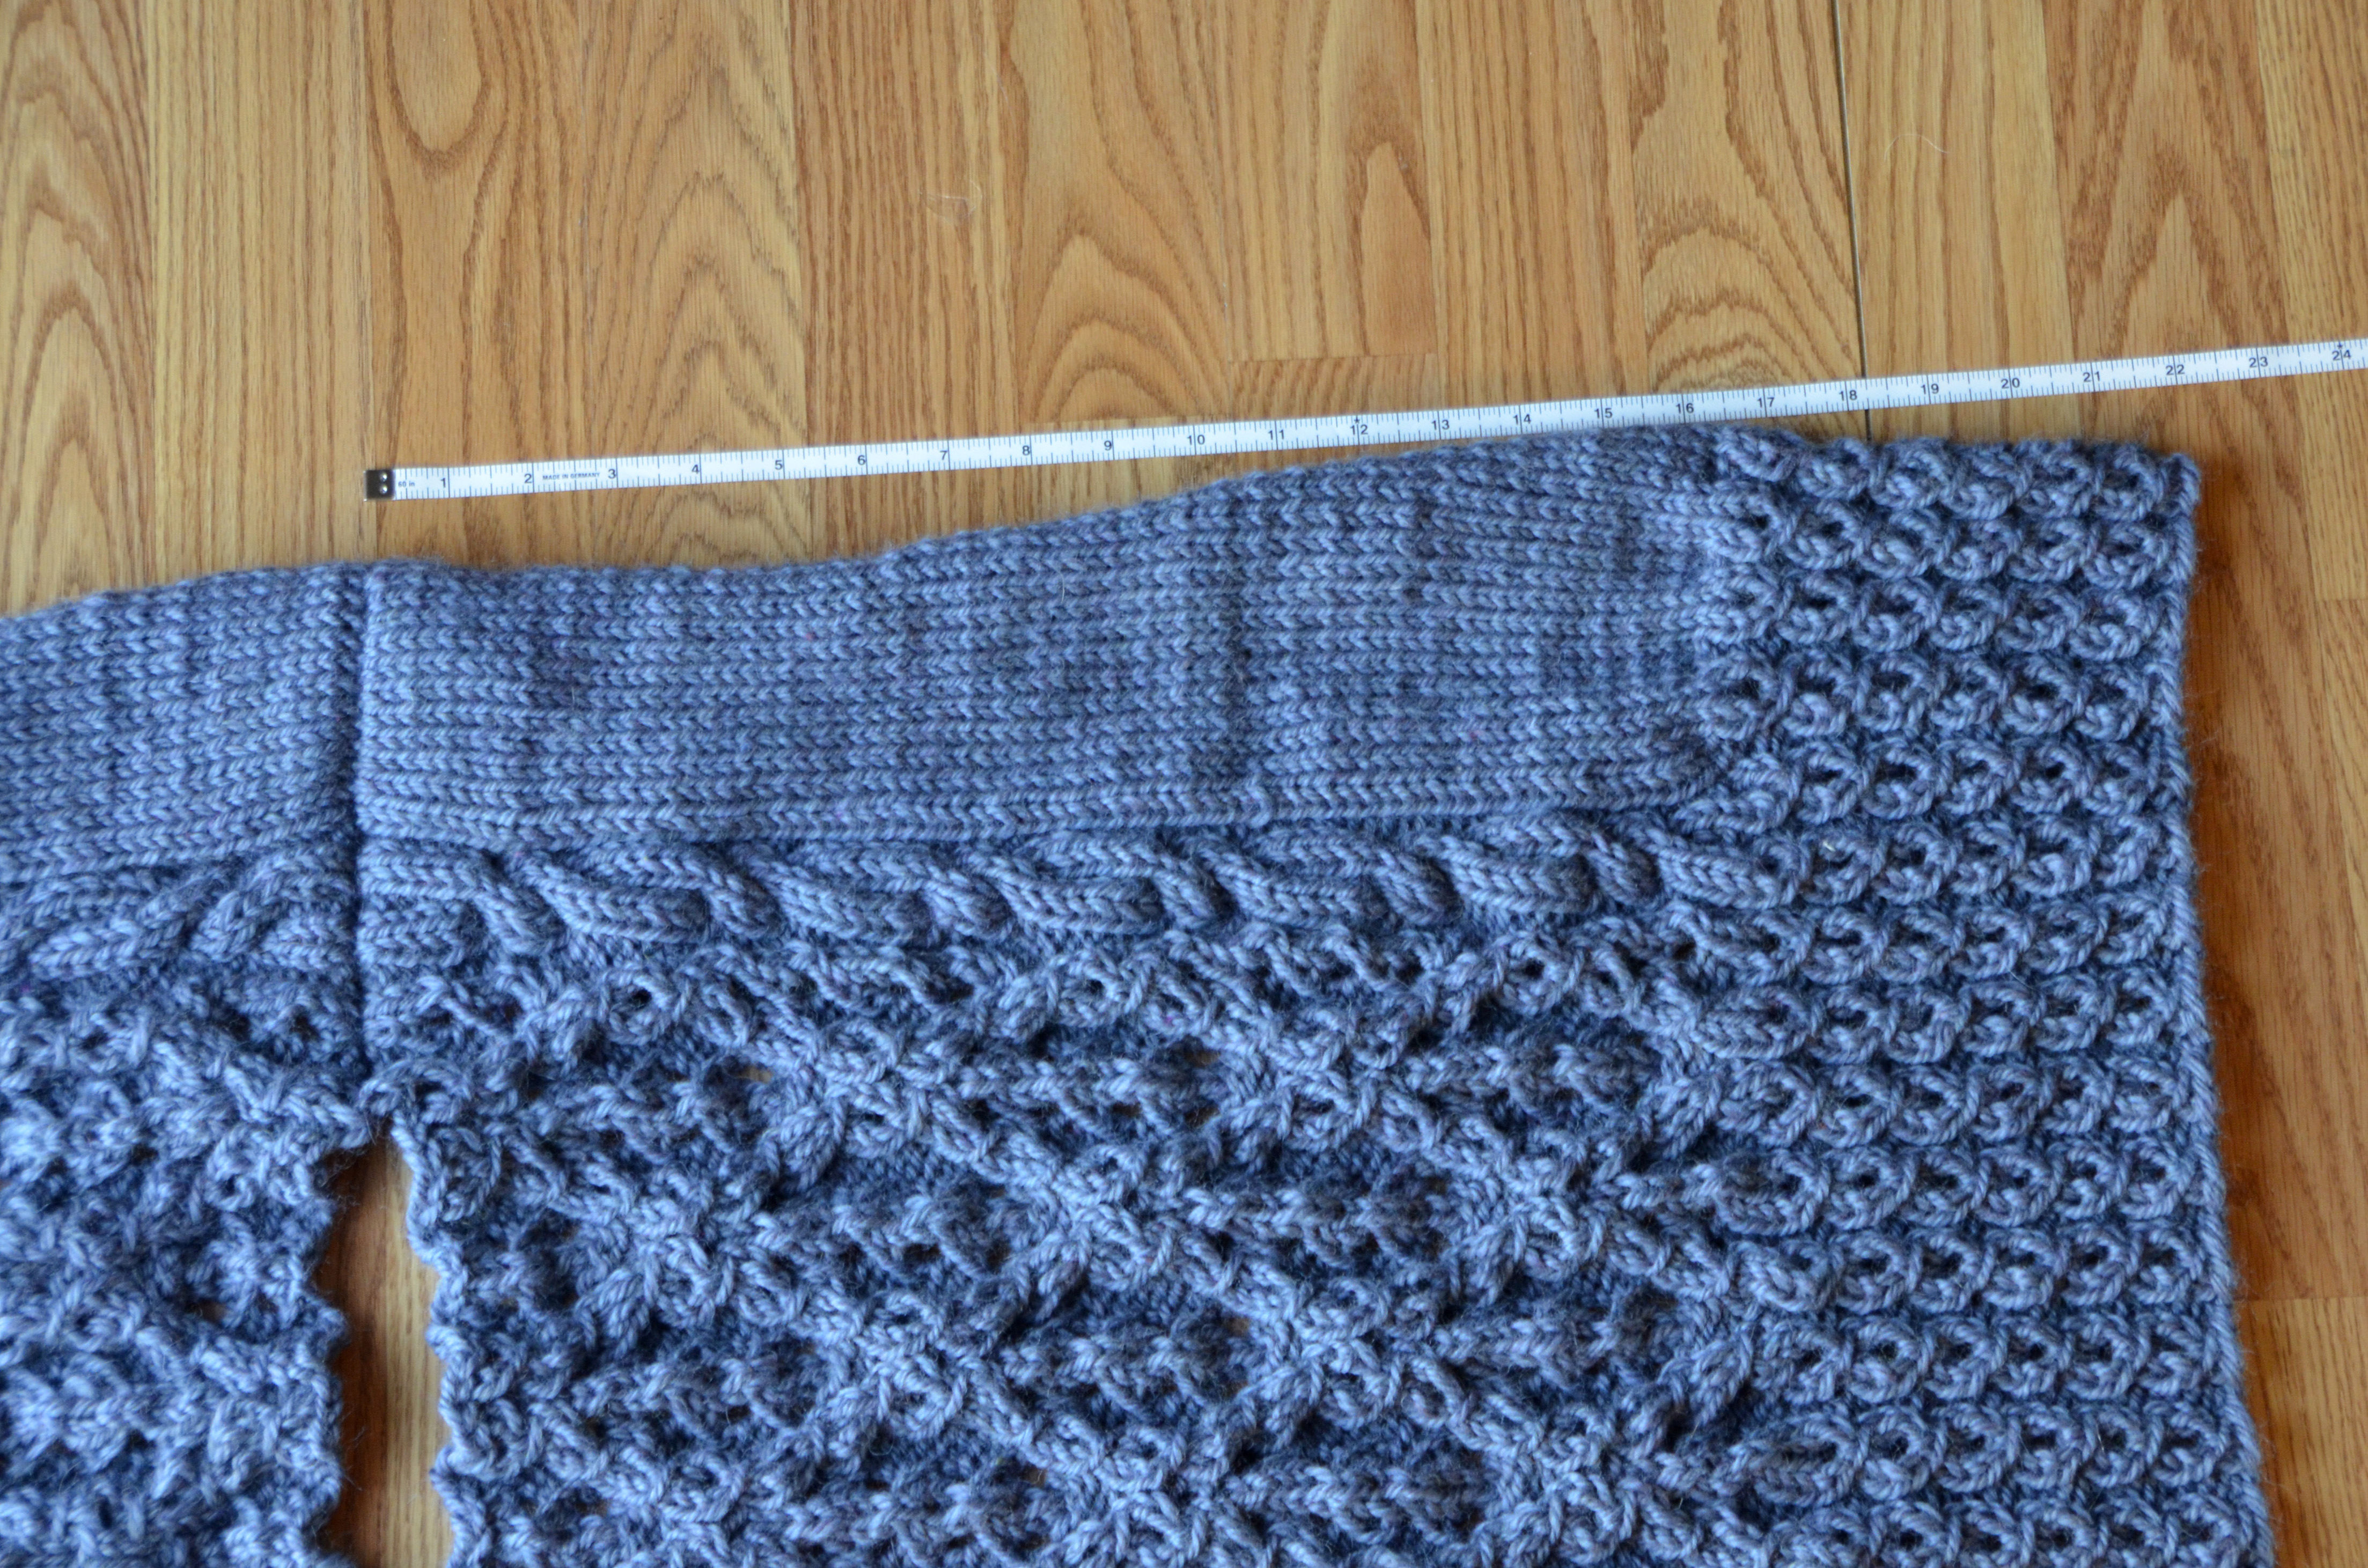
Speaking of ripping, I’ve got quite a bit of this to do myself. I happily bound off the fronts of my Wesley Heights (modified to be a cardigan) the other day. I washed my fronts along with the back piece and laid them out on my blocking mats. So tell me, what’s wrong with this picture?
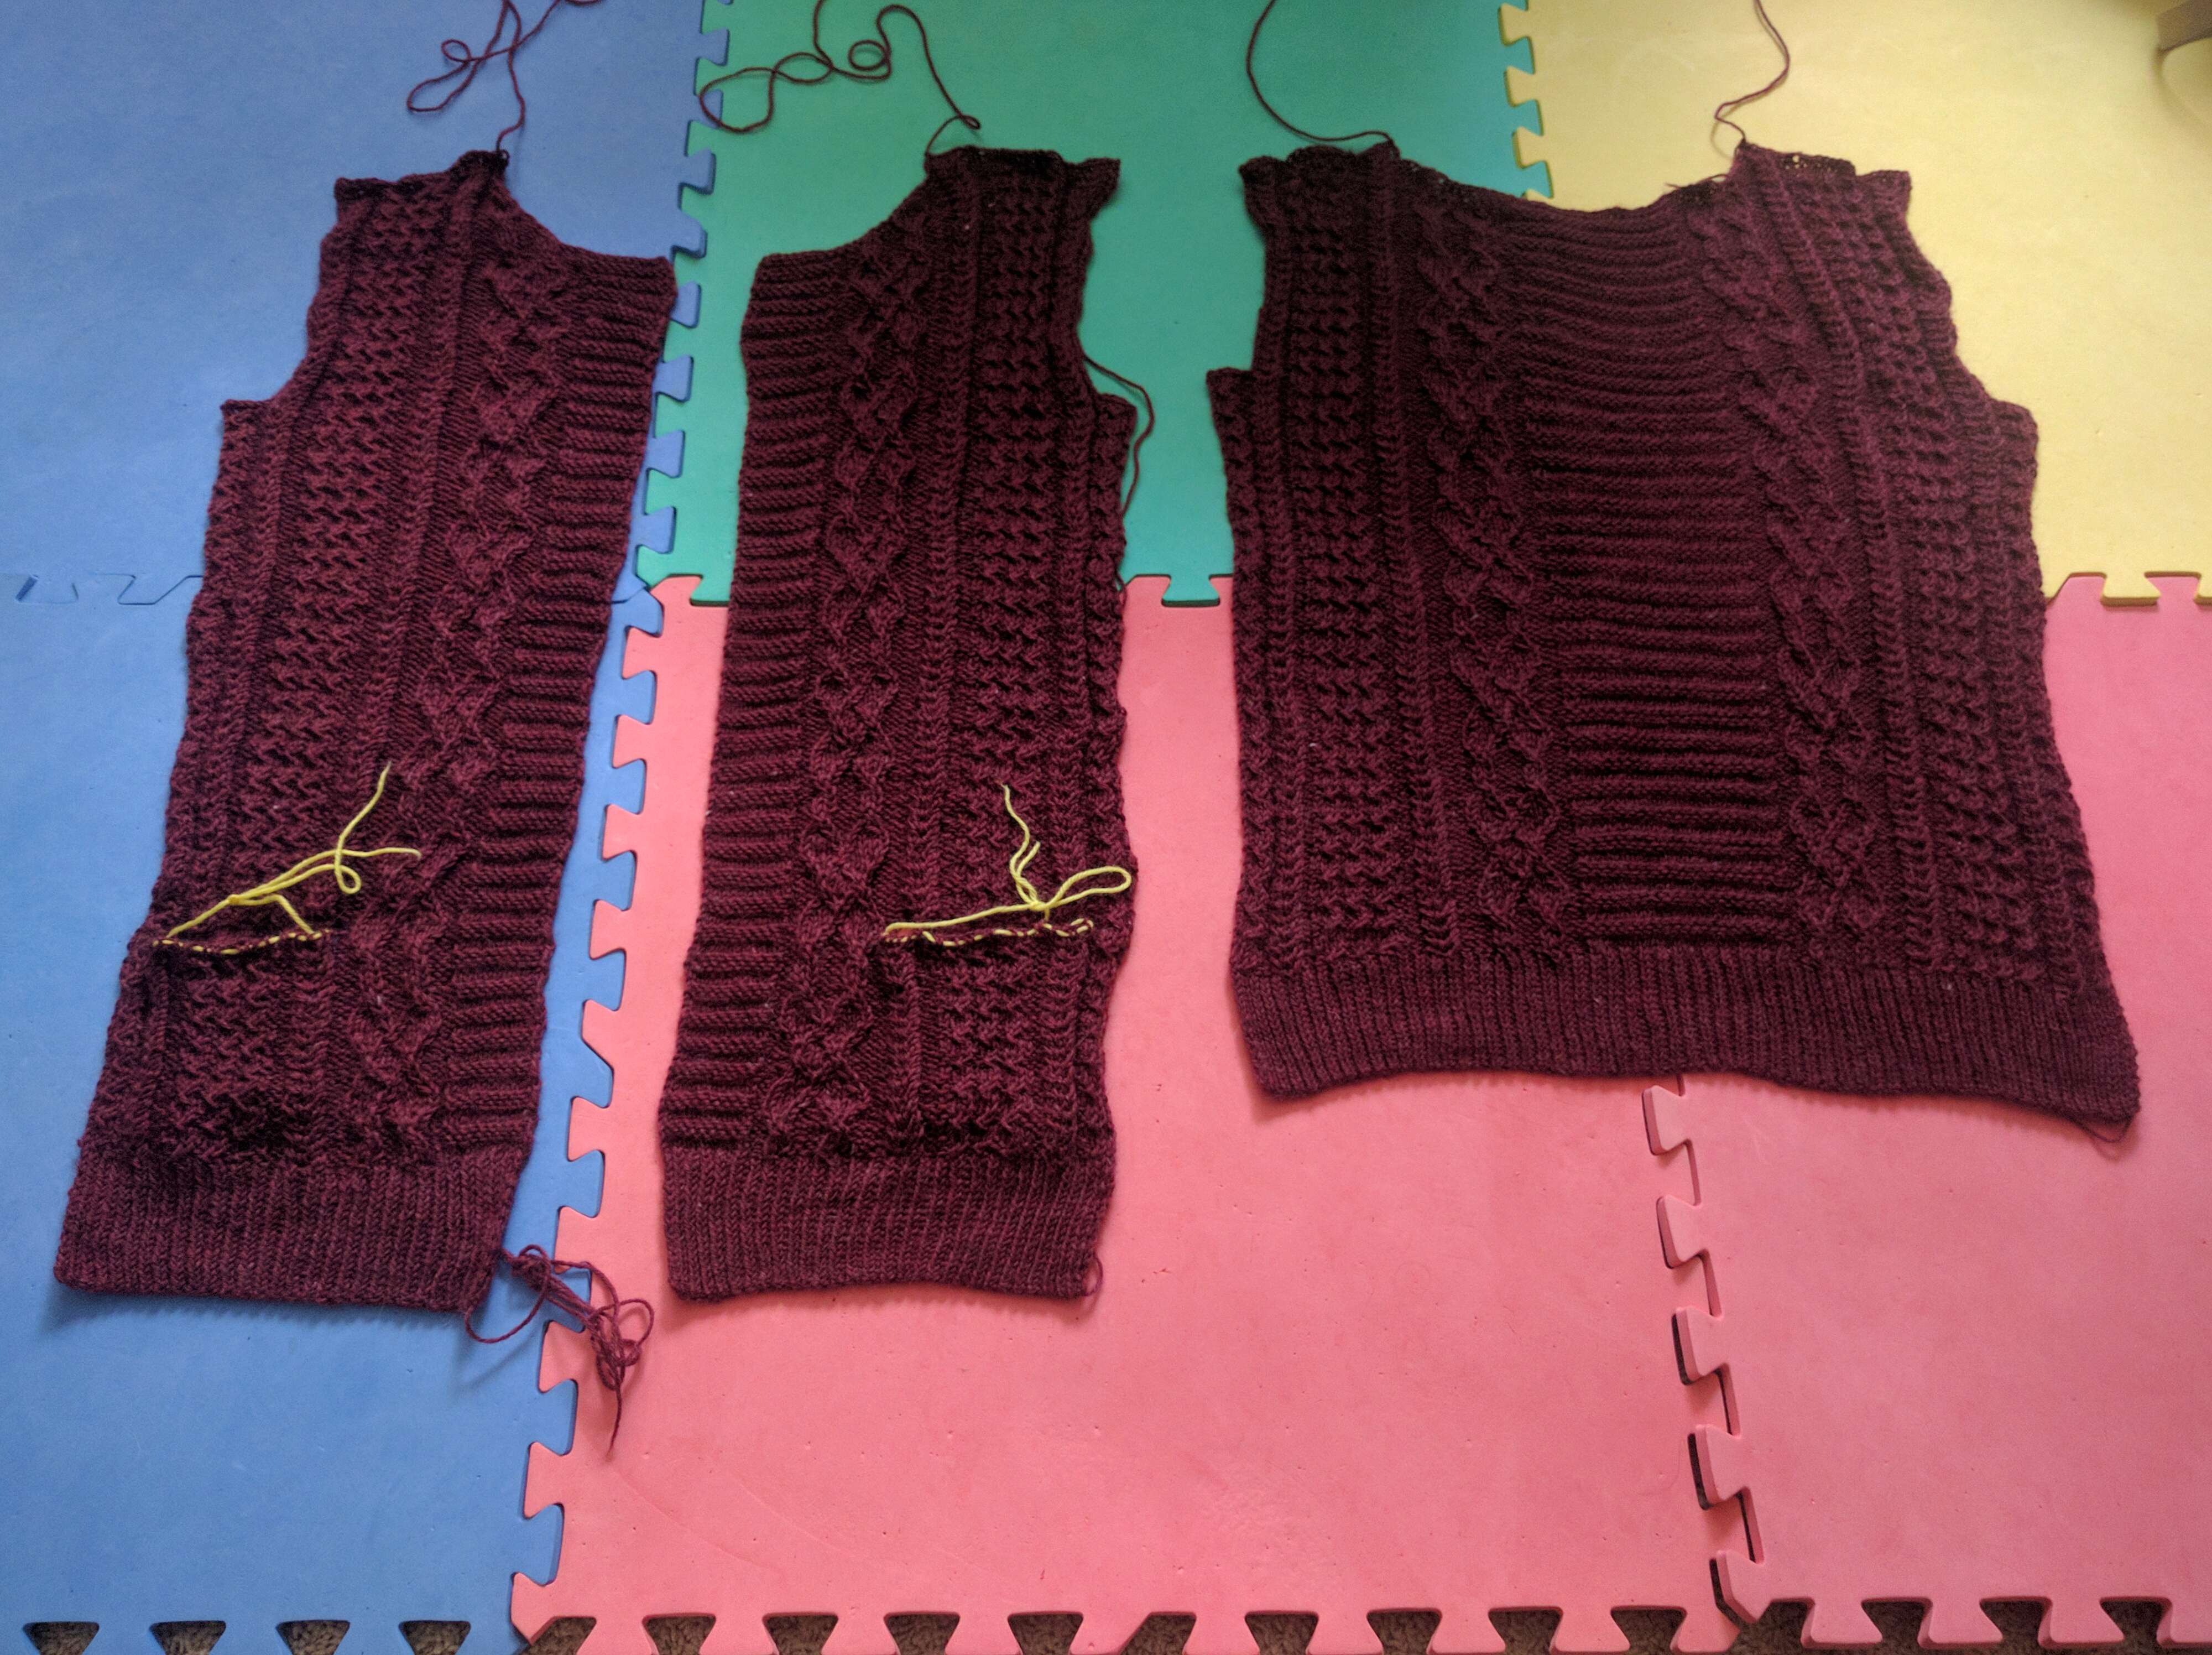
Er, yeah. Even though I made myself a very clear note that to match length from the back piece, I needed to work 3 pattern repeats + 14 rows, somehow I managed to work 1 entire extra pattern repeat before moving to my armhole shaping. I thought I was ready to start seaming and knitting a collar. But alas, to the frog pond I go.
I’m also making progress on my Catawba River Poncho. Look out for tutorials related to this over the next couple of weeks.
And I decided I also need a Dilworth Shawl in a nice bright color:
And that’s it from us? How are you doing? I’d love to hear about it!
As part of our ongoing Deluxe Cable Collection Knitalong, today I bring you a tutorial on adding set-in pockets to a sweater.
There are two cardigans in the collection that are written to have set-in pockets. We have the Tallulah Cardigan:
And the Greensboro Cardigan:
First, let me explain what the”set-in” part of set-in pockets means. There are several ways to incorporate pockets into a piece of knitting. In addition to the set-in method, the other common way to add a pocket is to sew on a patch pocket. With patch pockets, you complete your garment, knit a pocket, and sew it to the outside of your knitting. It can be nice to place the pocket exactly where you want it, but for a sweater that’s patterned, it can be tough to make a patch pocket look nice.
With a set-in pocket, you sew a liner separately. Then, when it’s time for the pocket opening in your garment, you put the pocket stitches on hold and then begin working from the liner set of stitches.
The most beneficial aspect of the set-in pocket, and the reason I chose it for both projects above, is that it makes your pocket blend seamlessly into a heavily patterned garment. Let me explain the how and why!
To show you just how easy it is to put pockets on virtually any cardigan or sweater, I decided to knit the Wesley Heights sweater from the collection (which is written to be a pullover) and turn it into a cardigan. I’m basically making a Greensboro Cardigan with Wesley Heights patterning.
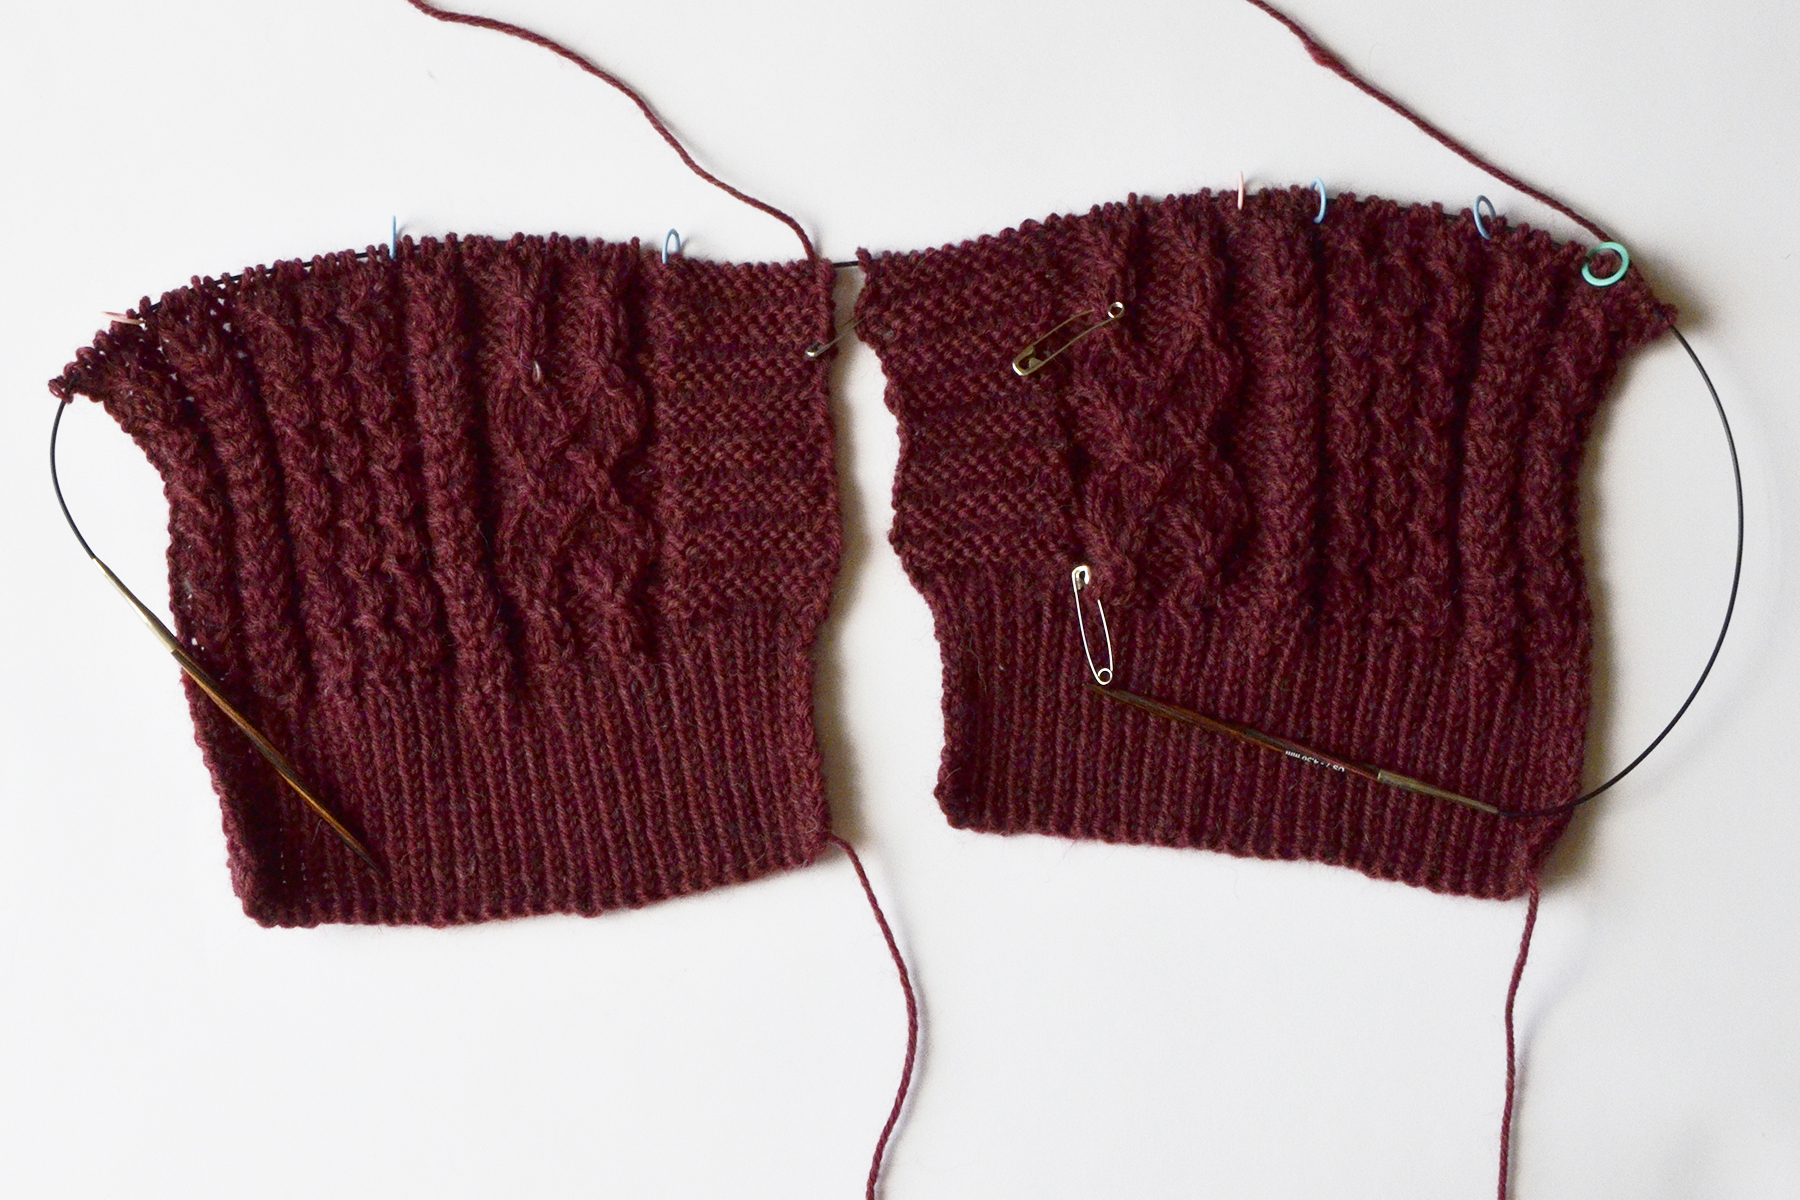
Here are the fronts for my cardigan. I’m working them two at a time on a single circular needle.
I’ve reached the height where I want my pocket opening to be. I have knit a pocket liner for each pocket in the same yarn in simple stockinette stitch. The liner will be going on the inside of the sweater and won’t be seen, so stockinette works fine. It will also provide a smooth surface for my hand to slide into.
First, I knit part of my row up to where my pocket opening will be.

The next step is to place some of my sweater stitches on a holder. I will eventually come back to these stitches and knit my ribbed pocket edging.
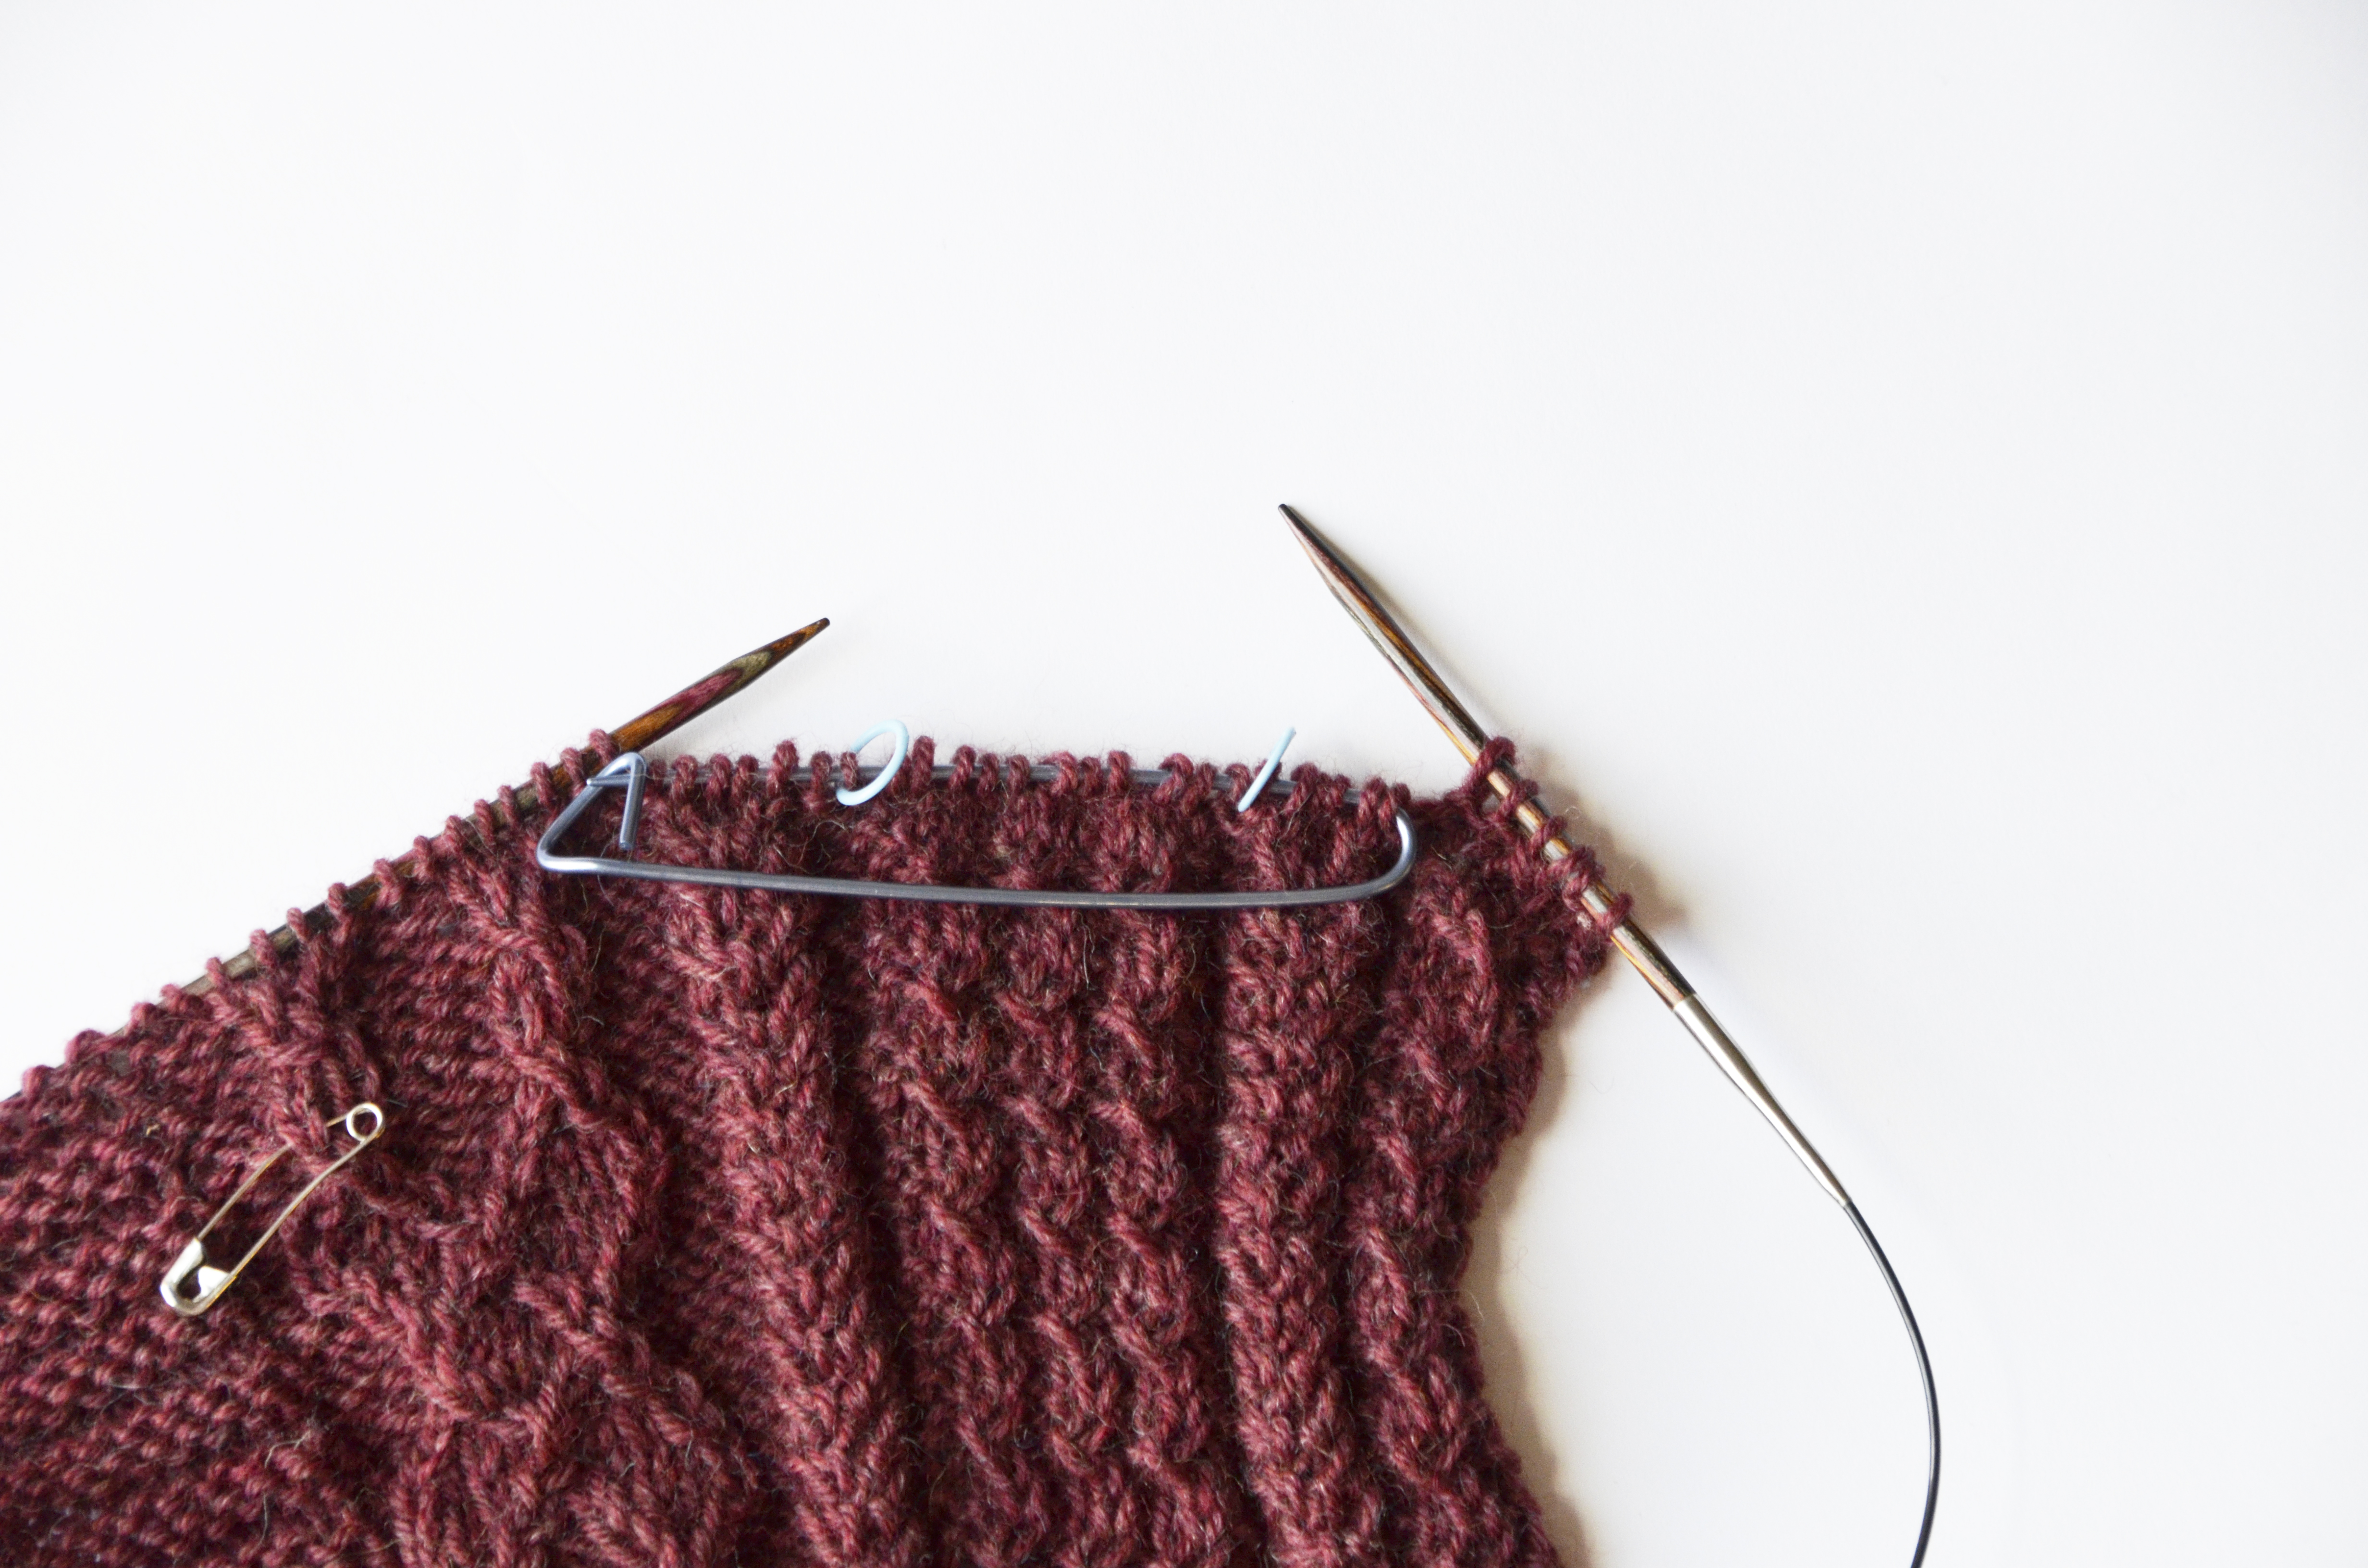
My liner is 25 stitches wide, so I put the next 25 stitches from my front piece on hold also. Next, I work the next row of my twisted pattern stitch over the liner stitches. I am incorporating the liner into my main sweater pattern so it will look like a pocket magically grew out of my sweater.
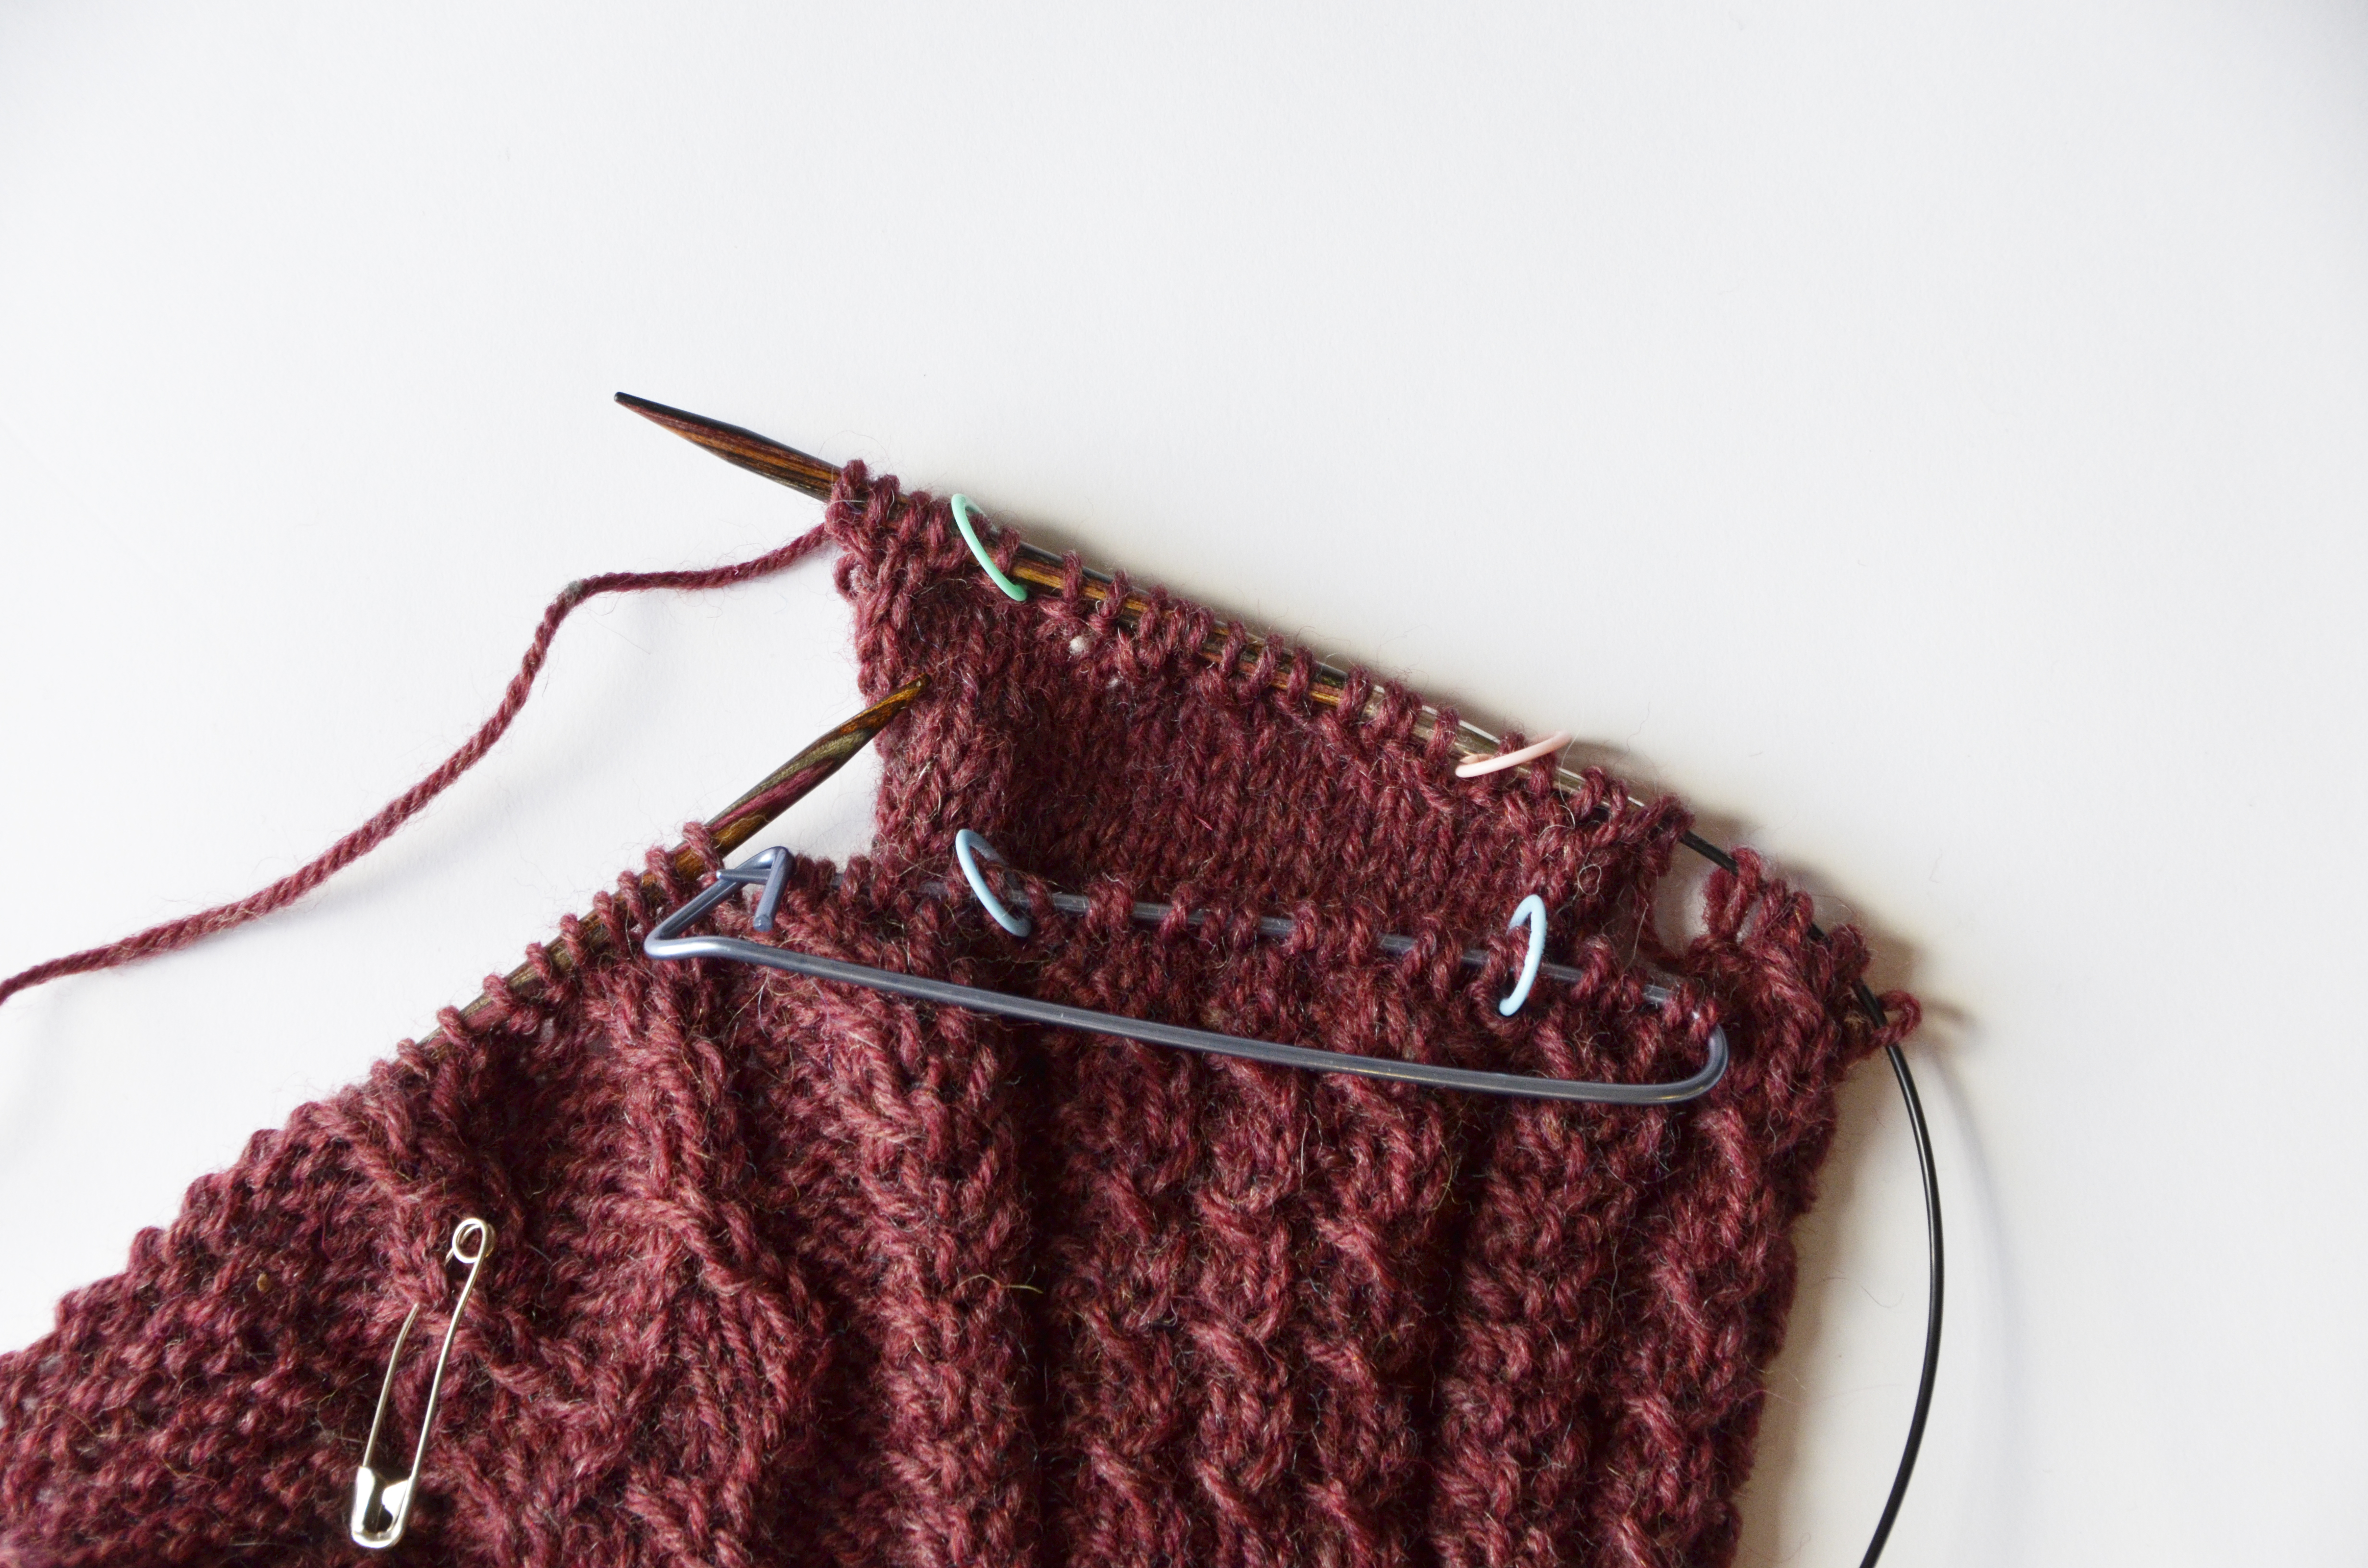
After working in pattern across the liner, I simply finish my row and the rest of my front piece like usual.
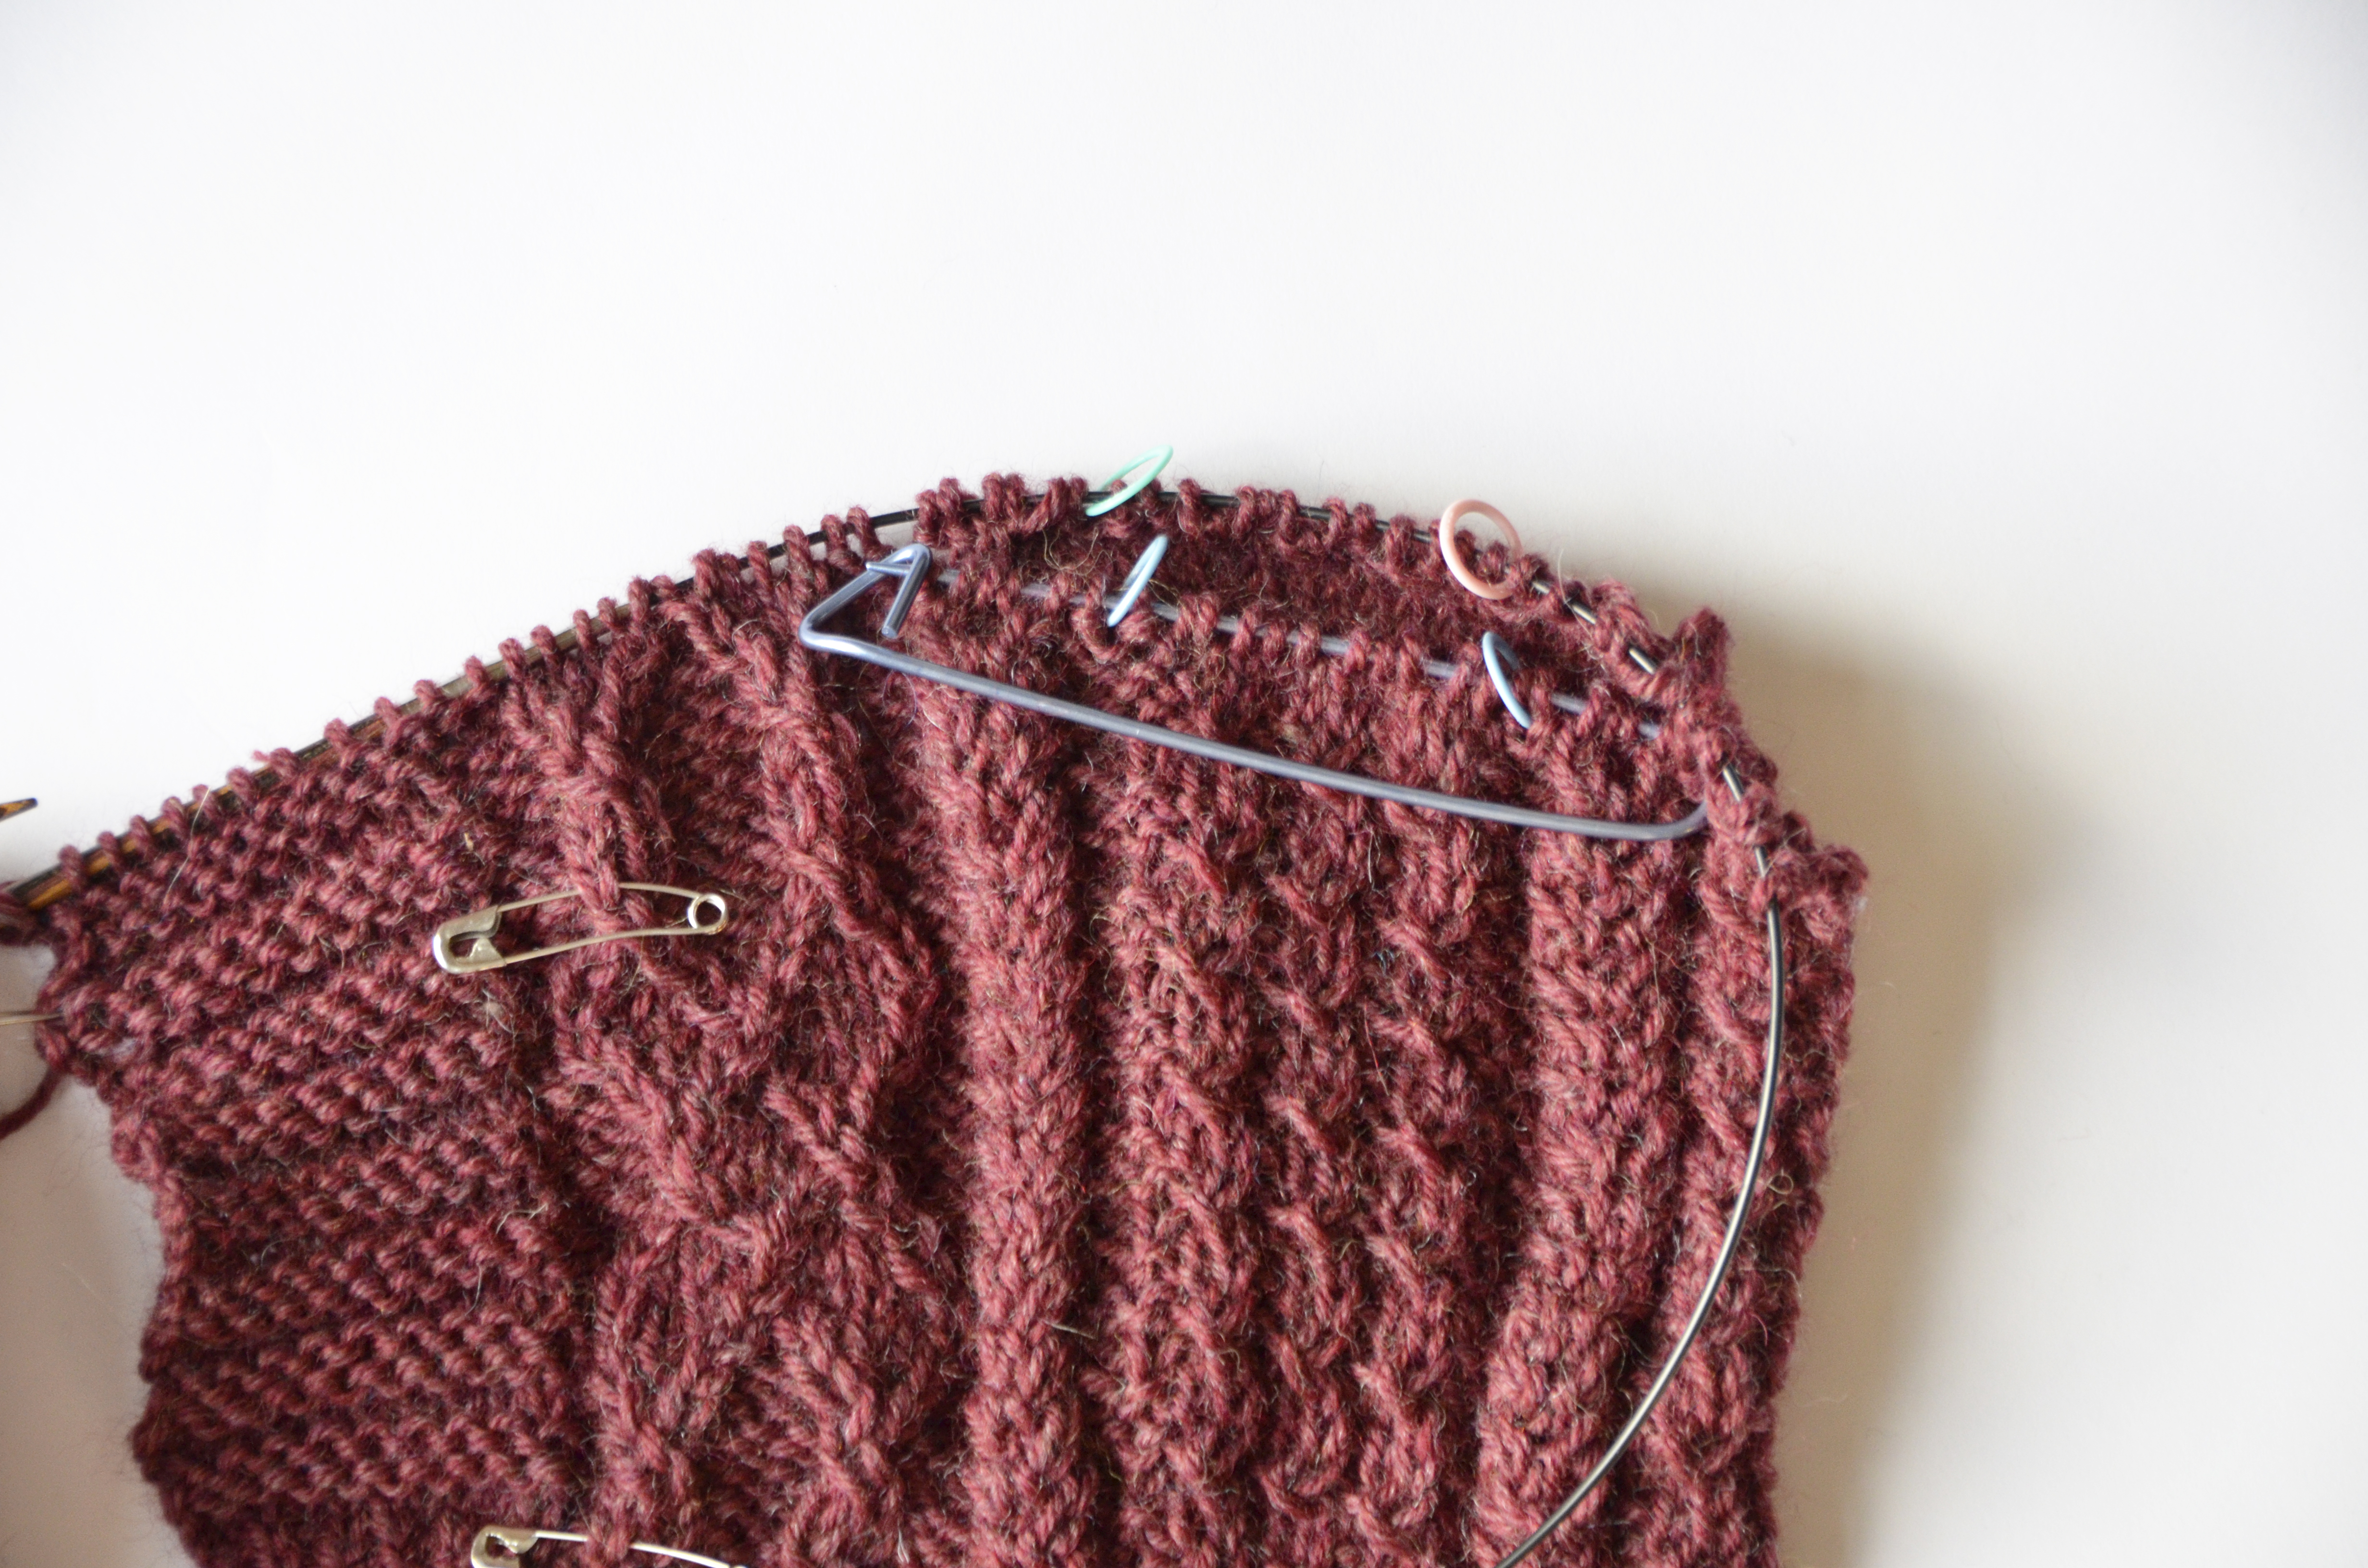
You can see that the liner is sitting behind my sweater front. Once I’ve finished the front, I’ll come back and knit my pocket edging and sew down the liner to the inside. And I’ll show you how – stay tuned!