Be Mine: Free Pattern and Tutorial

Whether you love it or hate it, Valentine’s Day will be here in about a week. What better way to prepare than by knitting yourself (or someone else who is sweet) a shawl? We’ve got you covered – to celebrate Valentine’s Day, we’re offering the Be Mine Shawl for free!

You could ask anyone in the office and they would probably tell you that I have an unrelenting sweet tooth. It is just so difficult for me to turn down sugary sweet snacks. What does this have to do with our Valentine’s freebie? Well, the inspiration for the Be Mine Shawl came from conversation heart candies. (In case you were wondering, I prefer the white, wintergreen flavored hearts.)

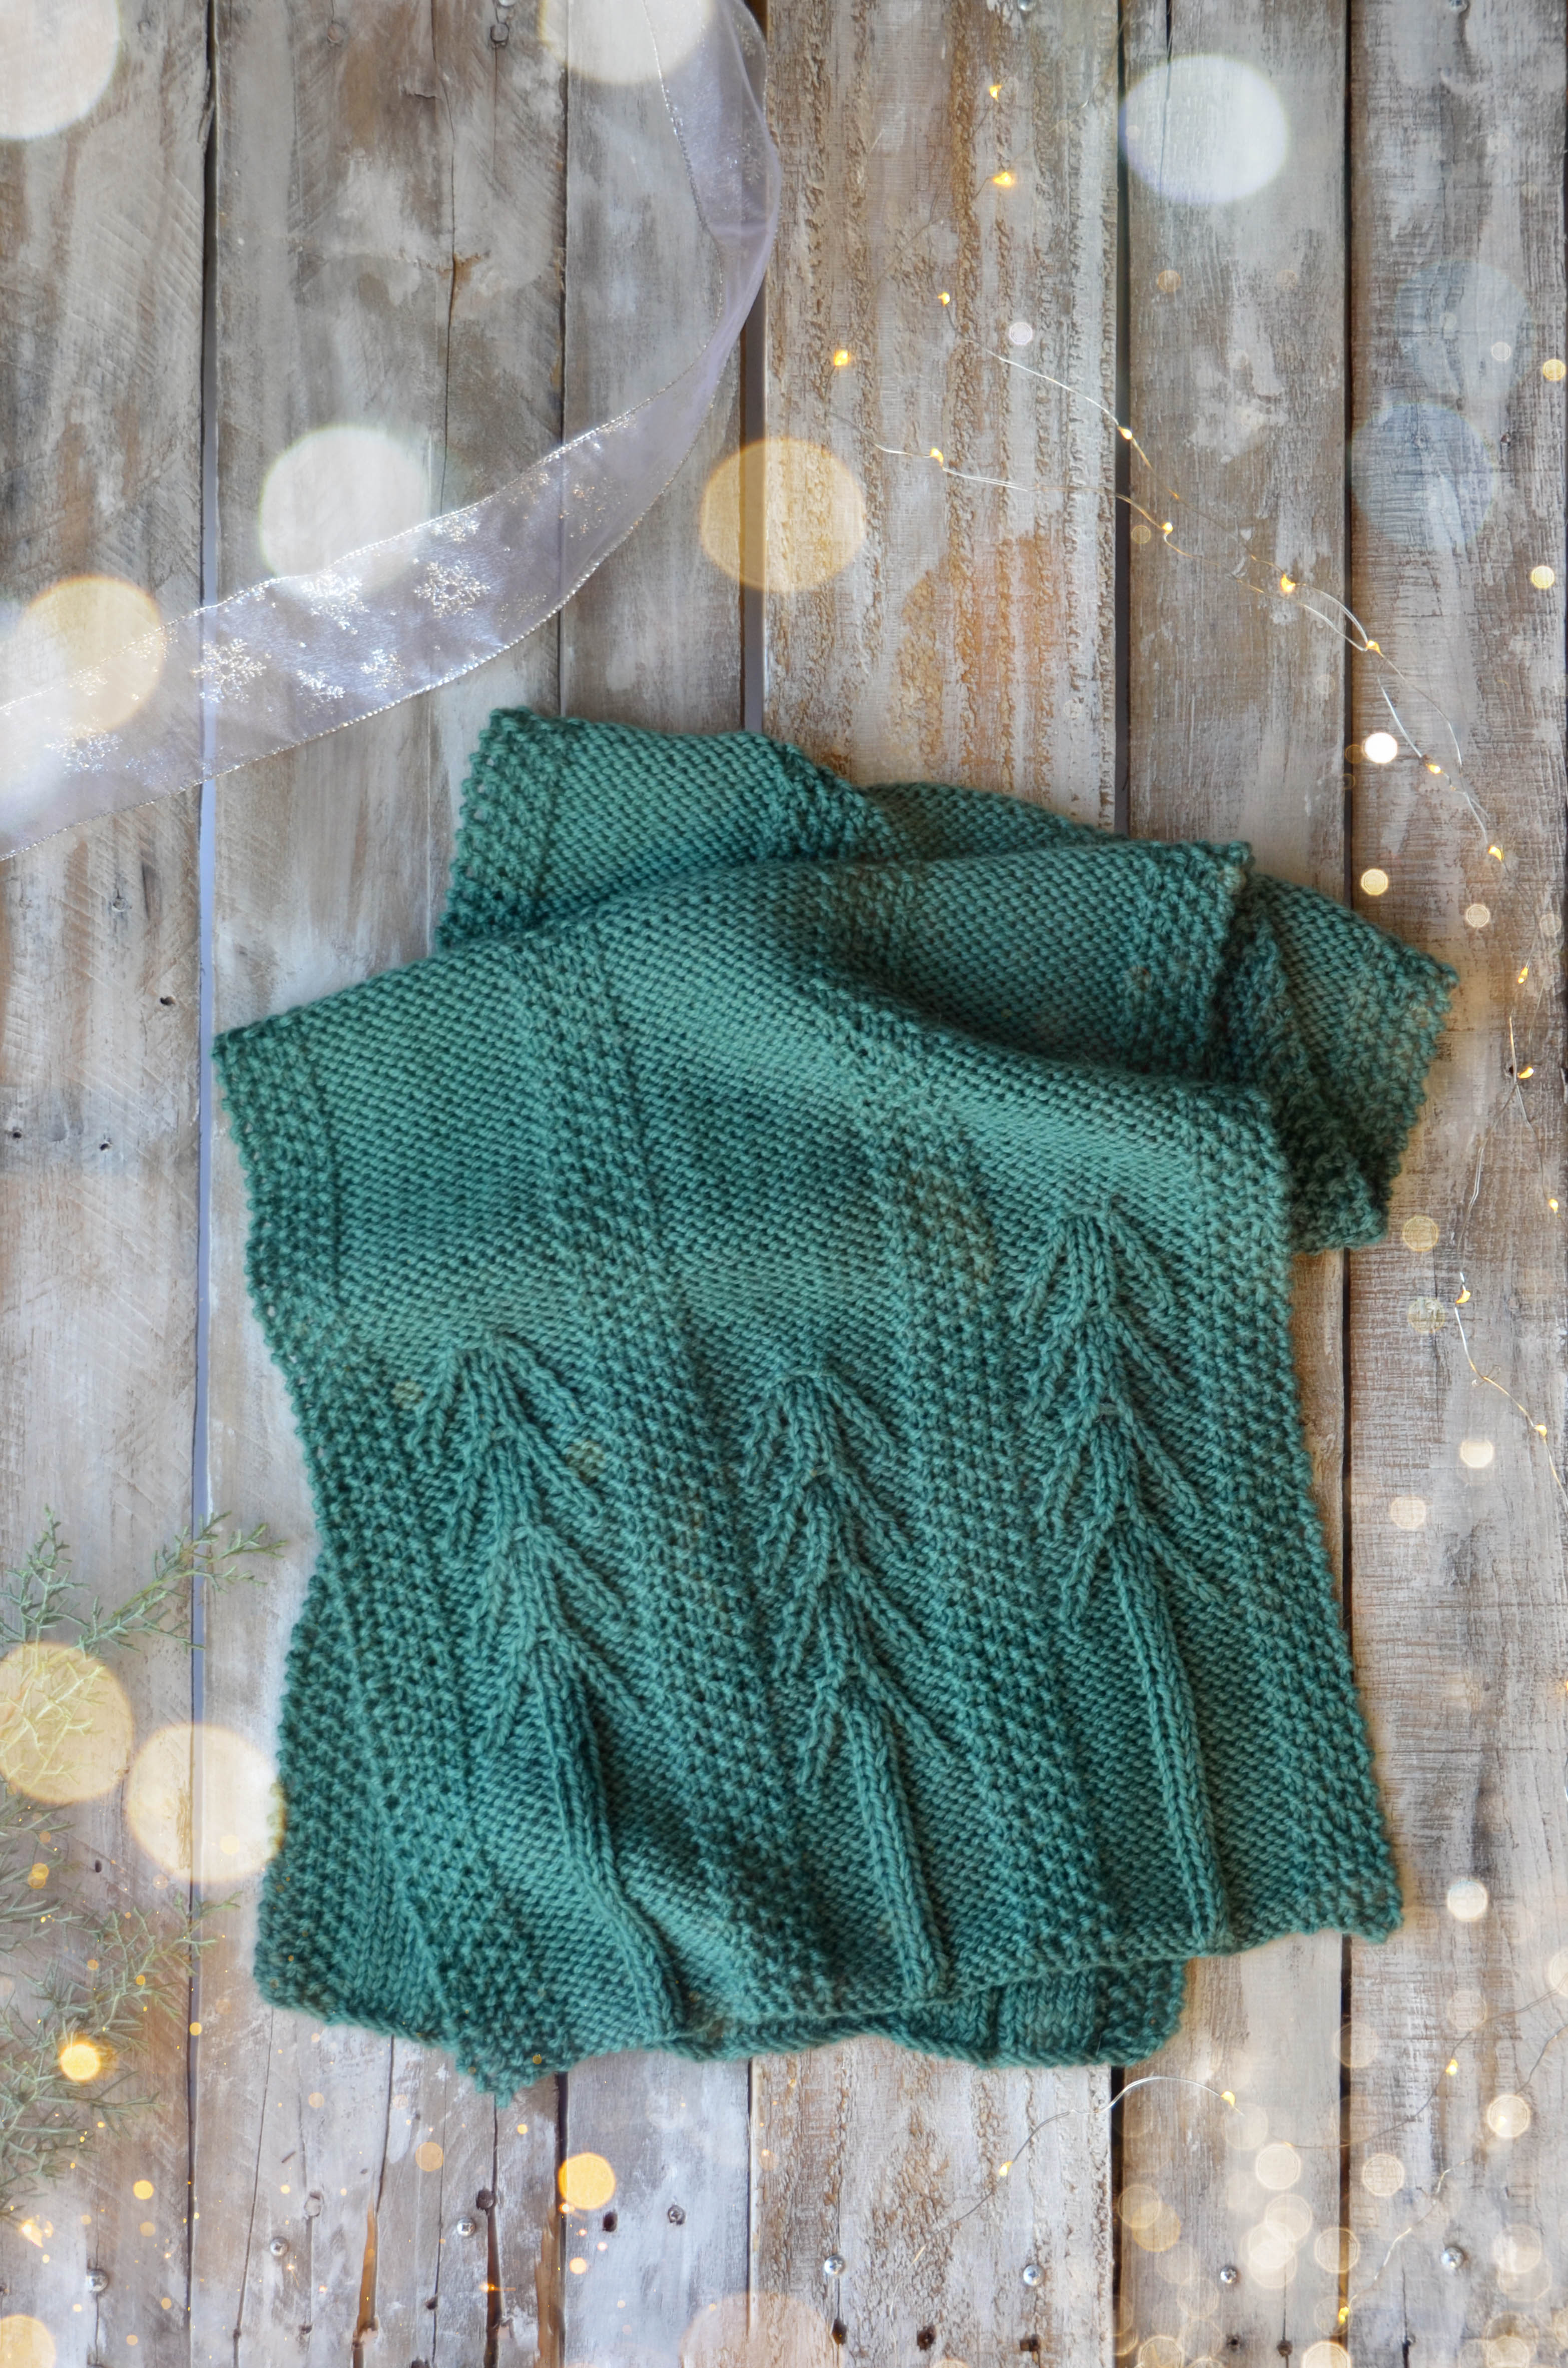
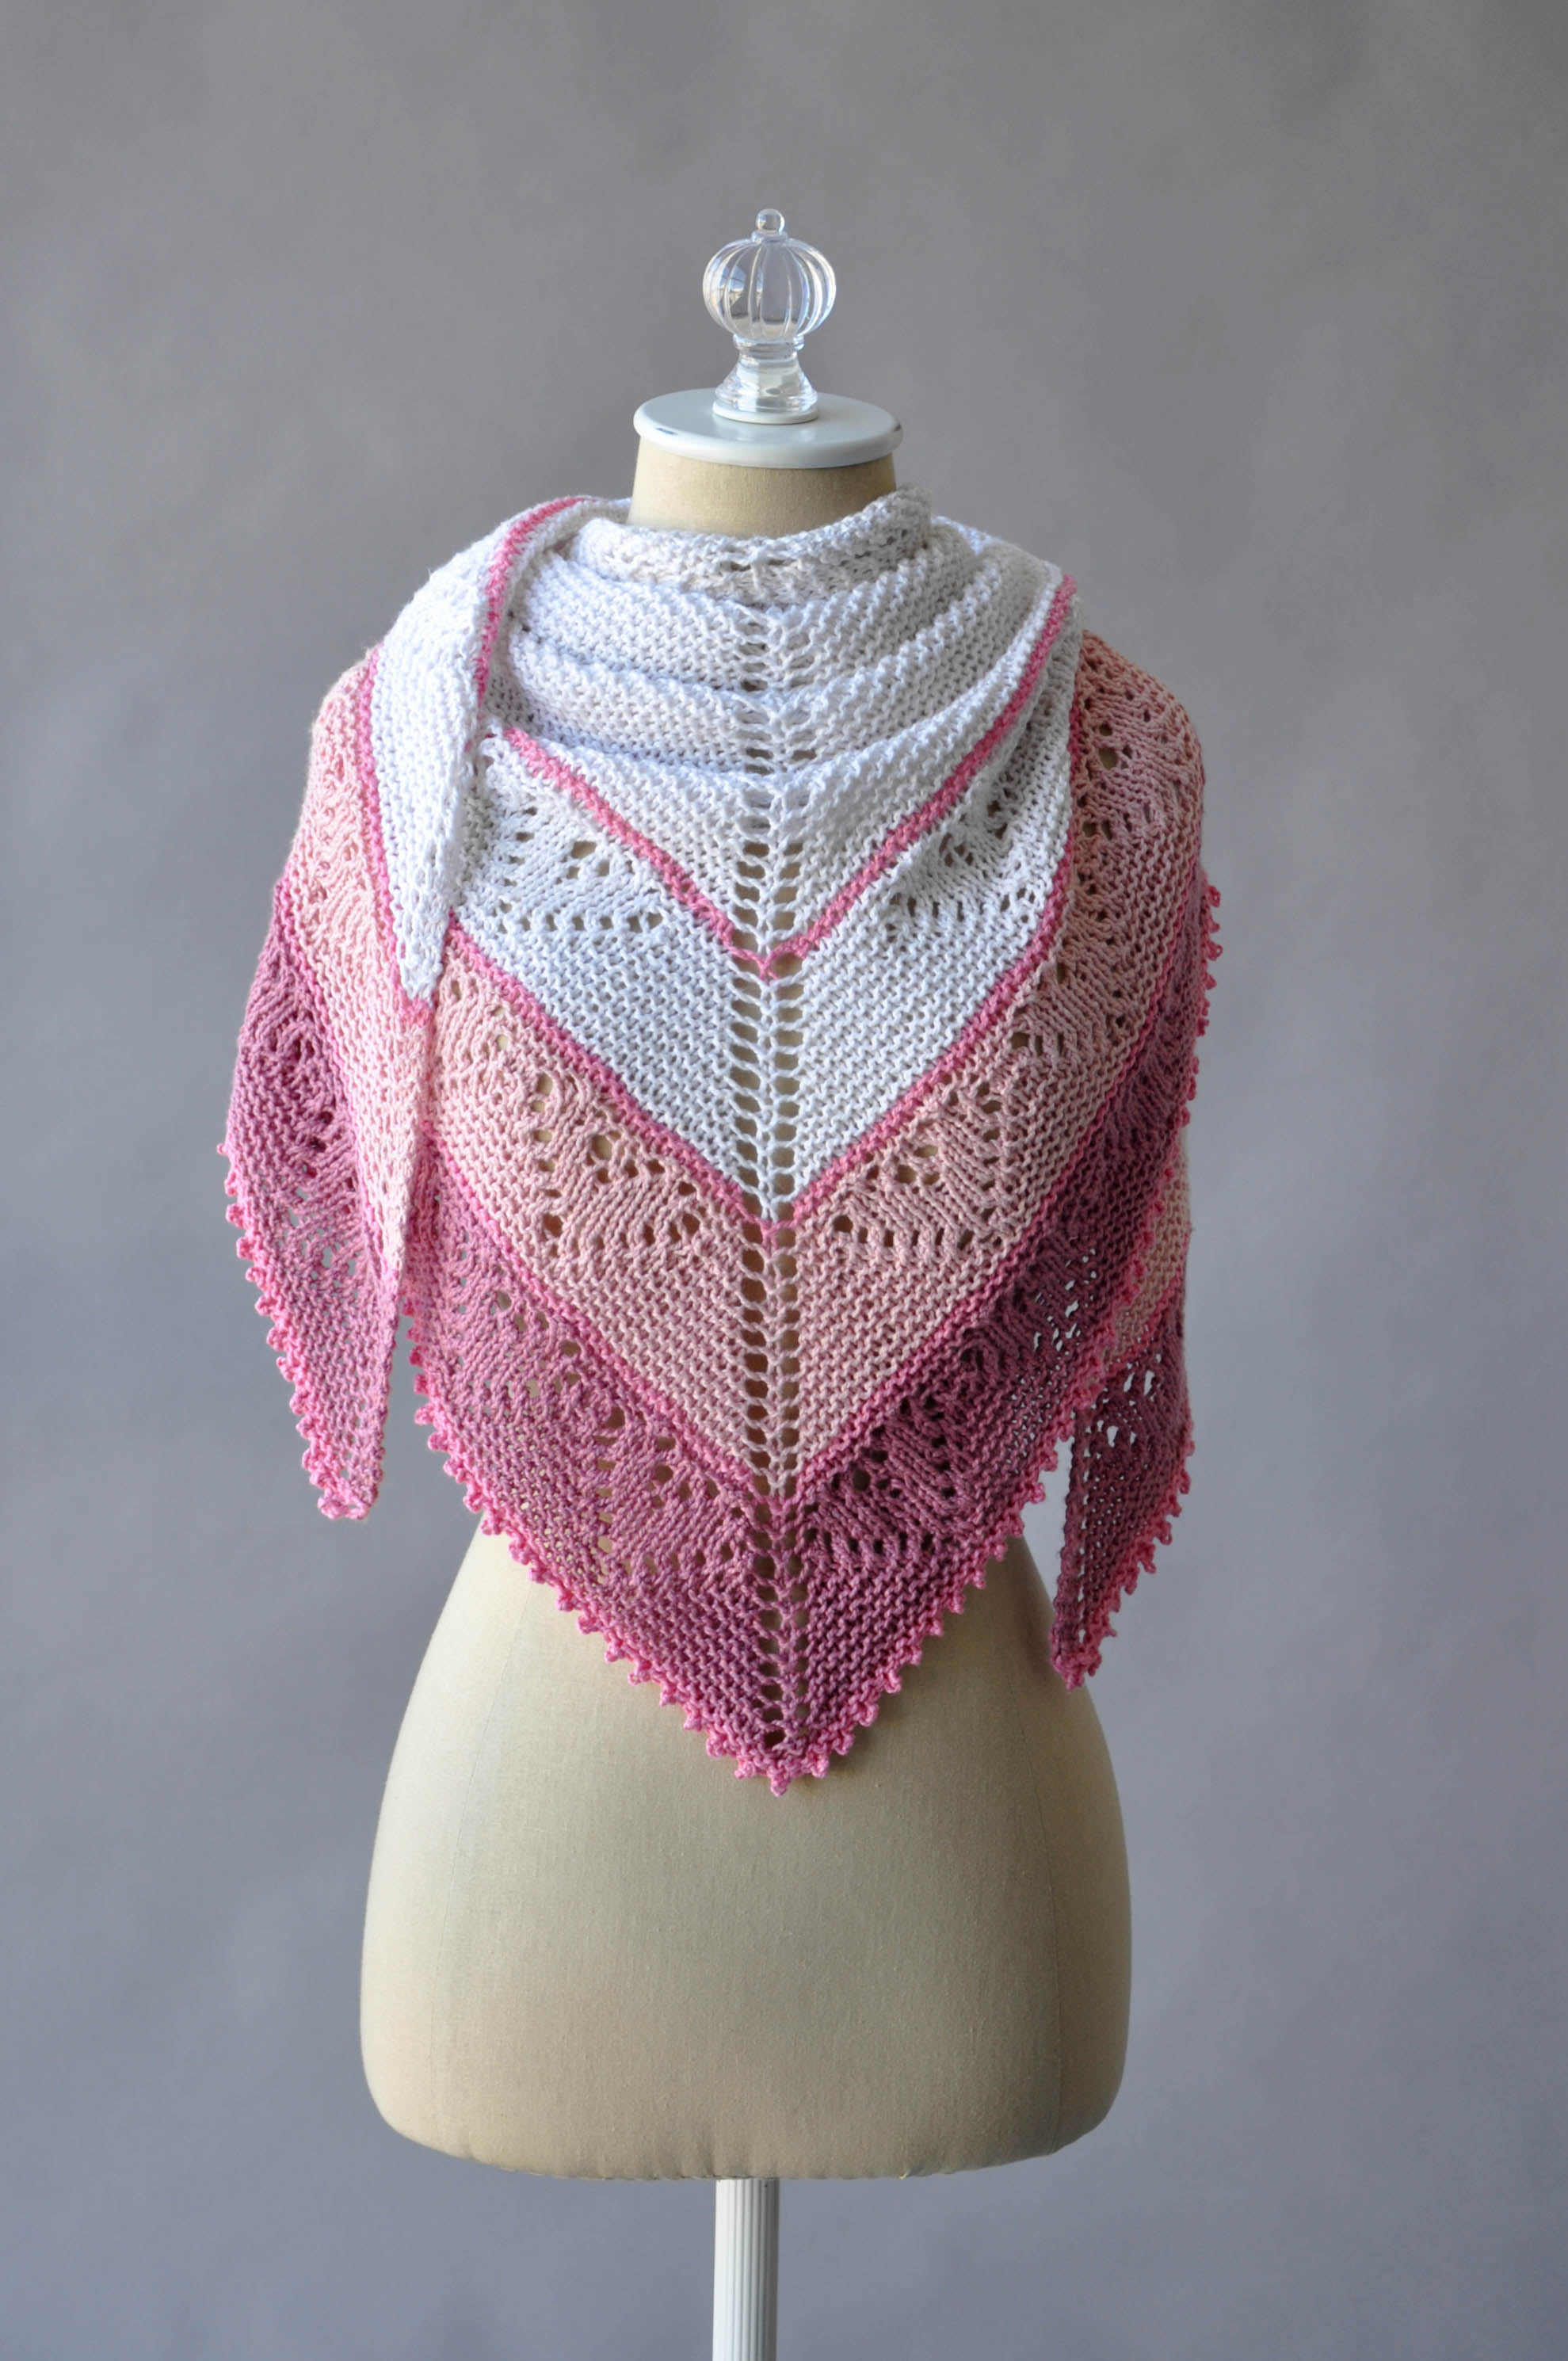
Be Mine is a triangular shawl comprised mostly of garter stitch. It is knit in Fibra Natura Papyrus, a yarn with a luxurious blend of cotton and silk. This yarn is velvety soft and creates a beautifully drapey fabric.

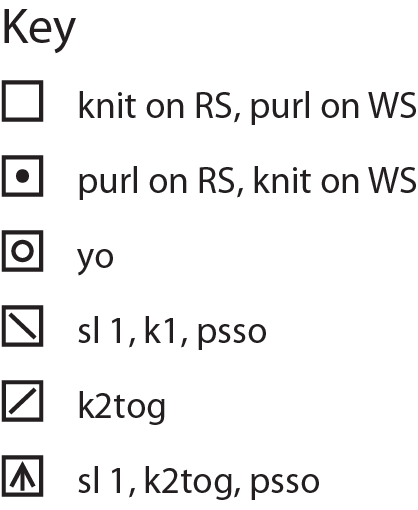
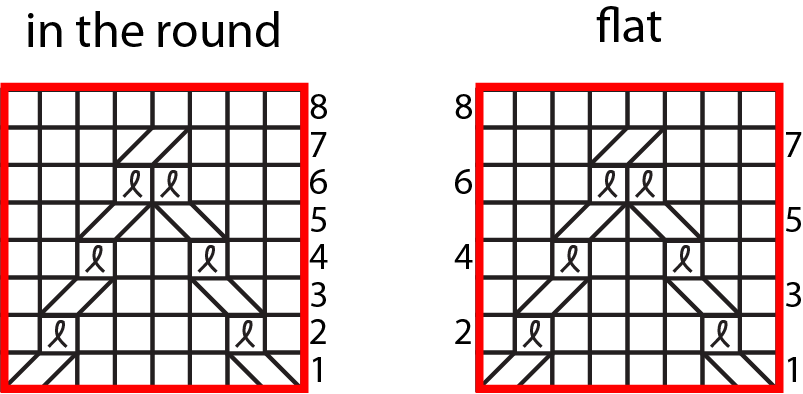
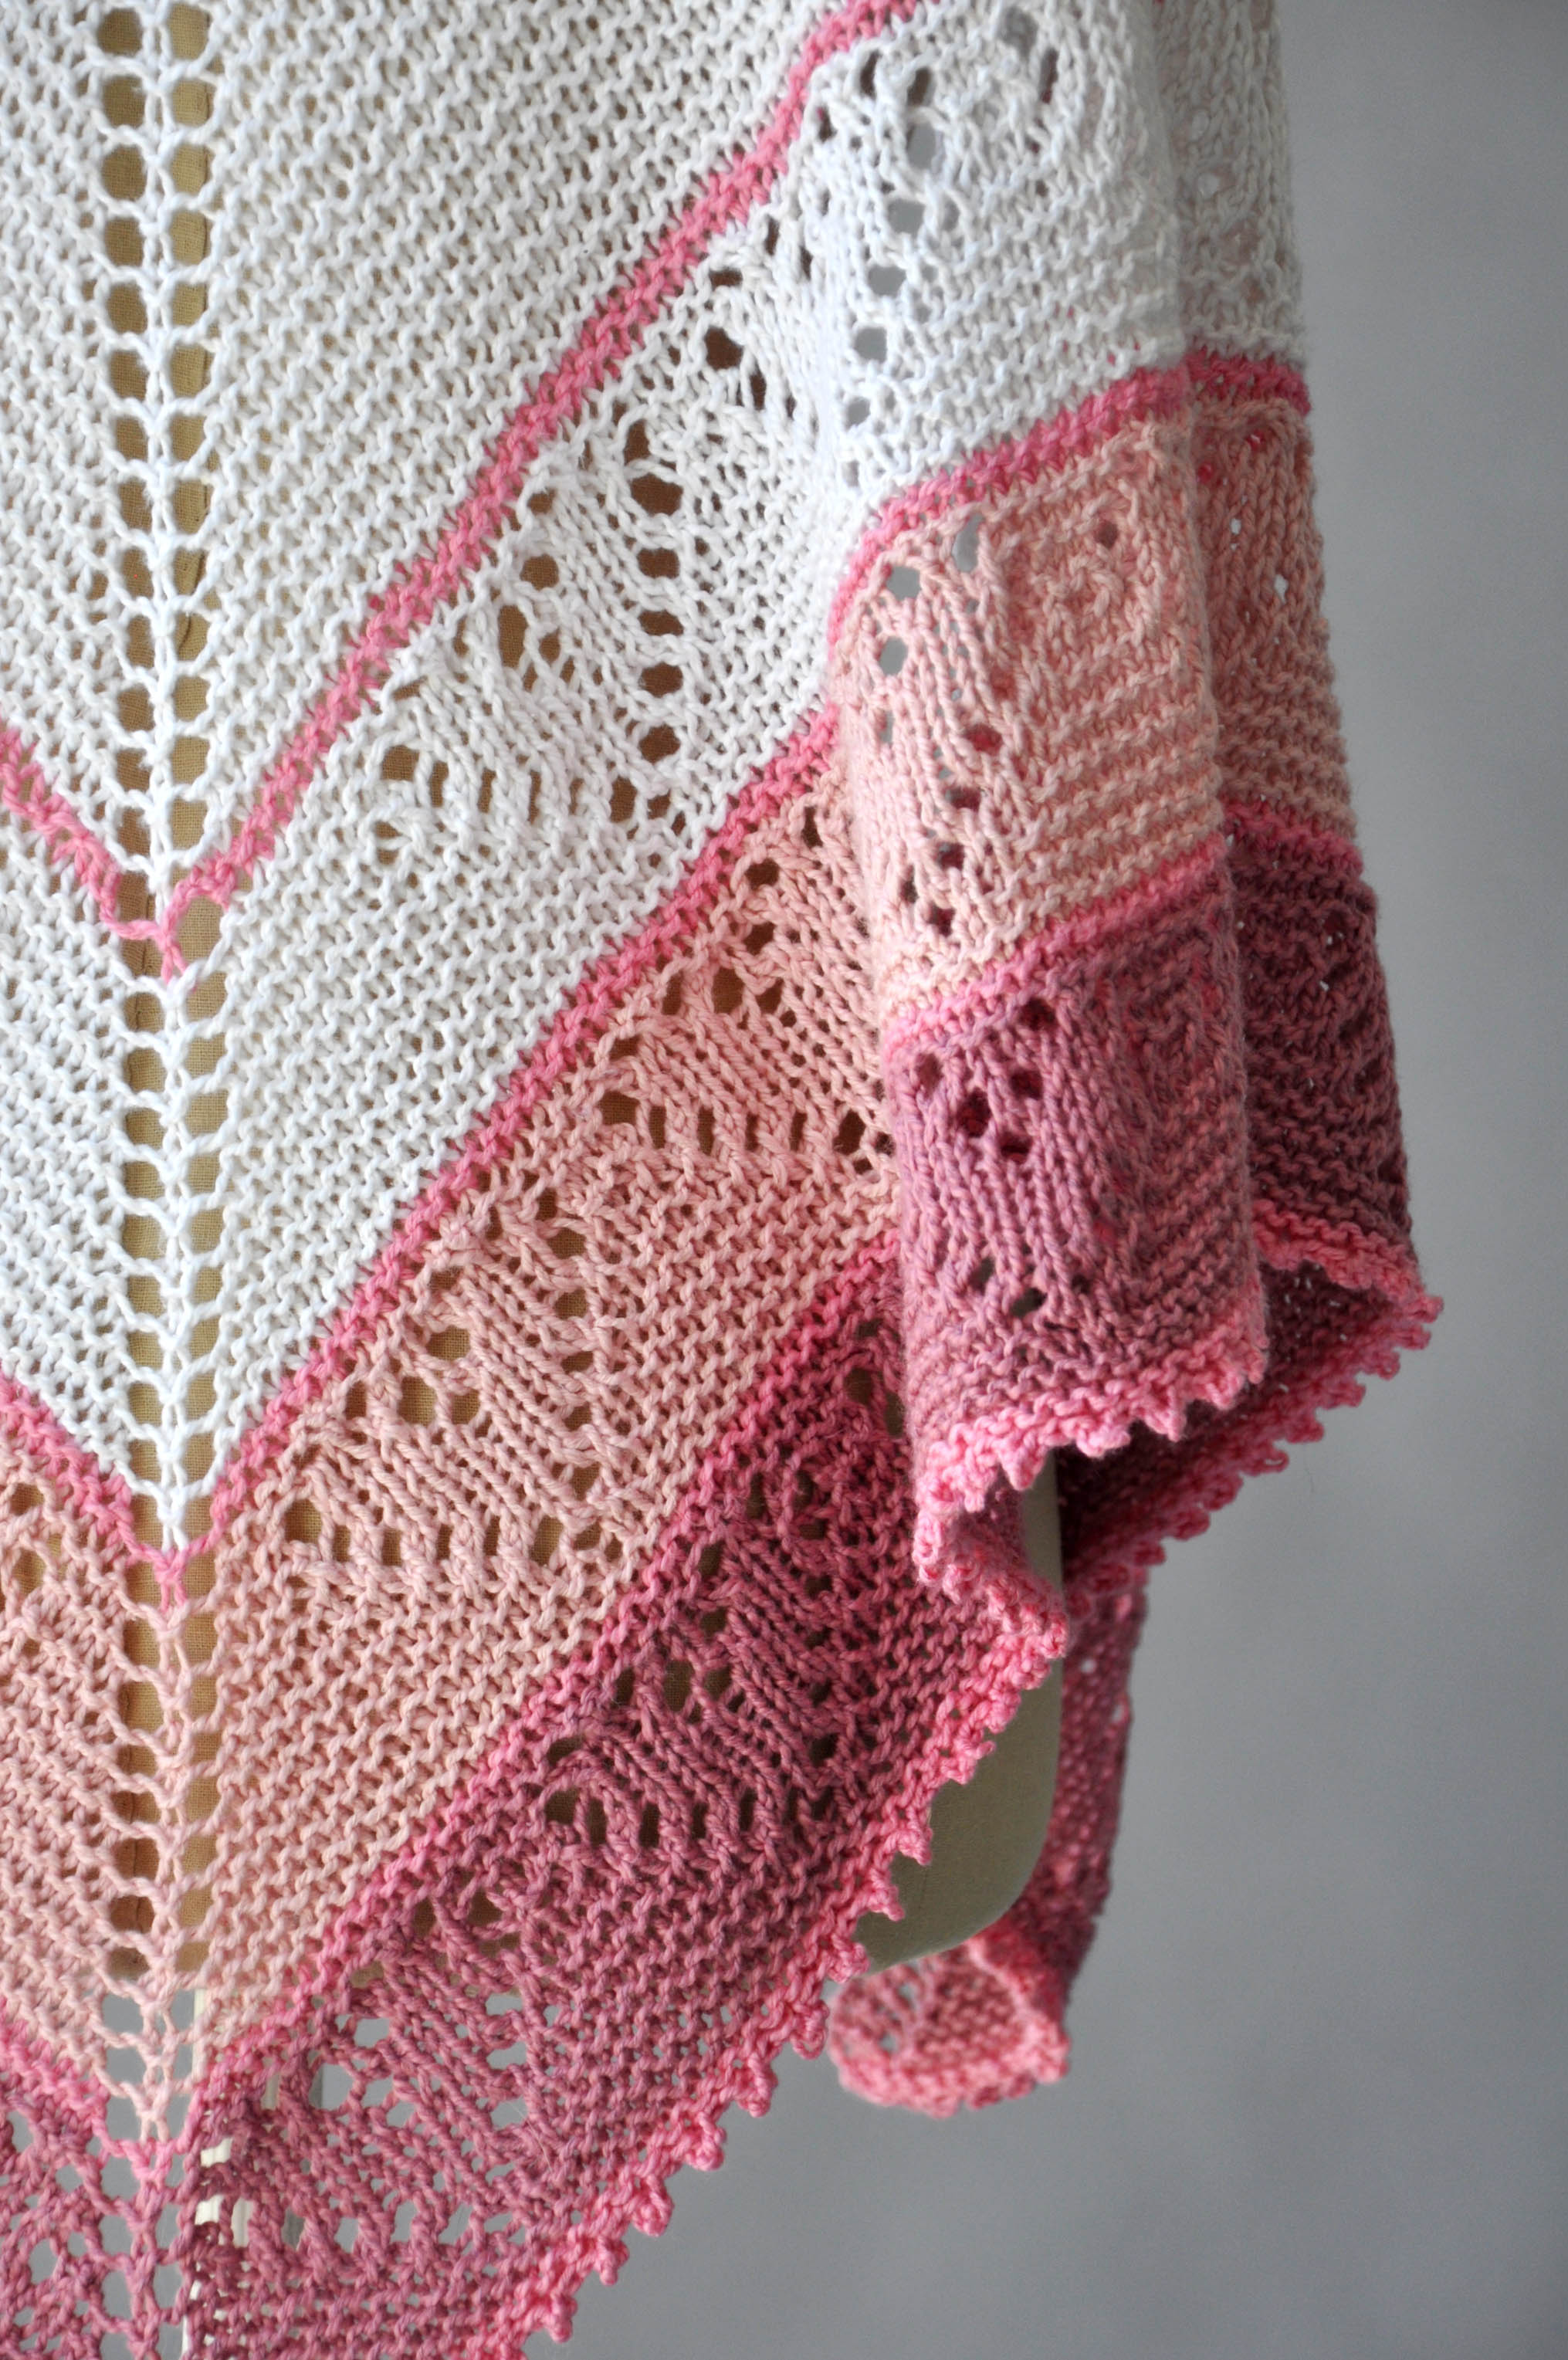
After working the body of the shawl, three bold stripes featuring a lace heart motif are worked to create a lovely border. Small, brightly colored stripes break up the lace sections. Finally, the shawl is finished with a delicate crochet-picot edging. (By the way, back in December Amy posted a tutorial on a Crochet Picot Edging here, but please note that instead of entirely skipping a stitch between picots as directed in the tutorial, you will instead work a slip stitch in the stitch between picots.)

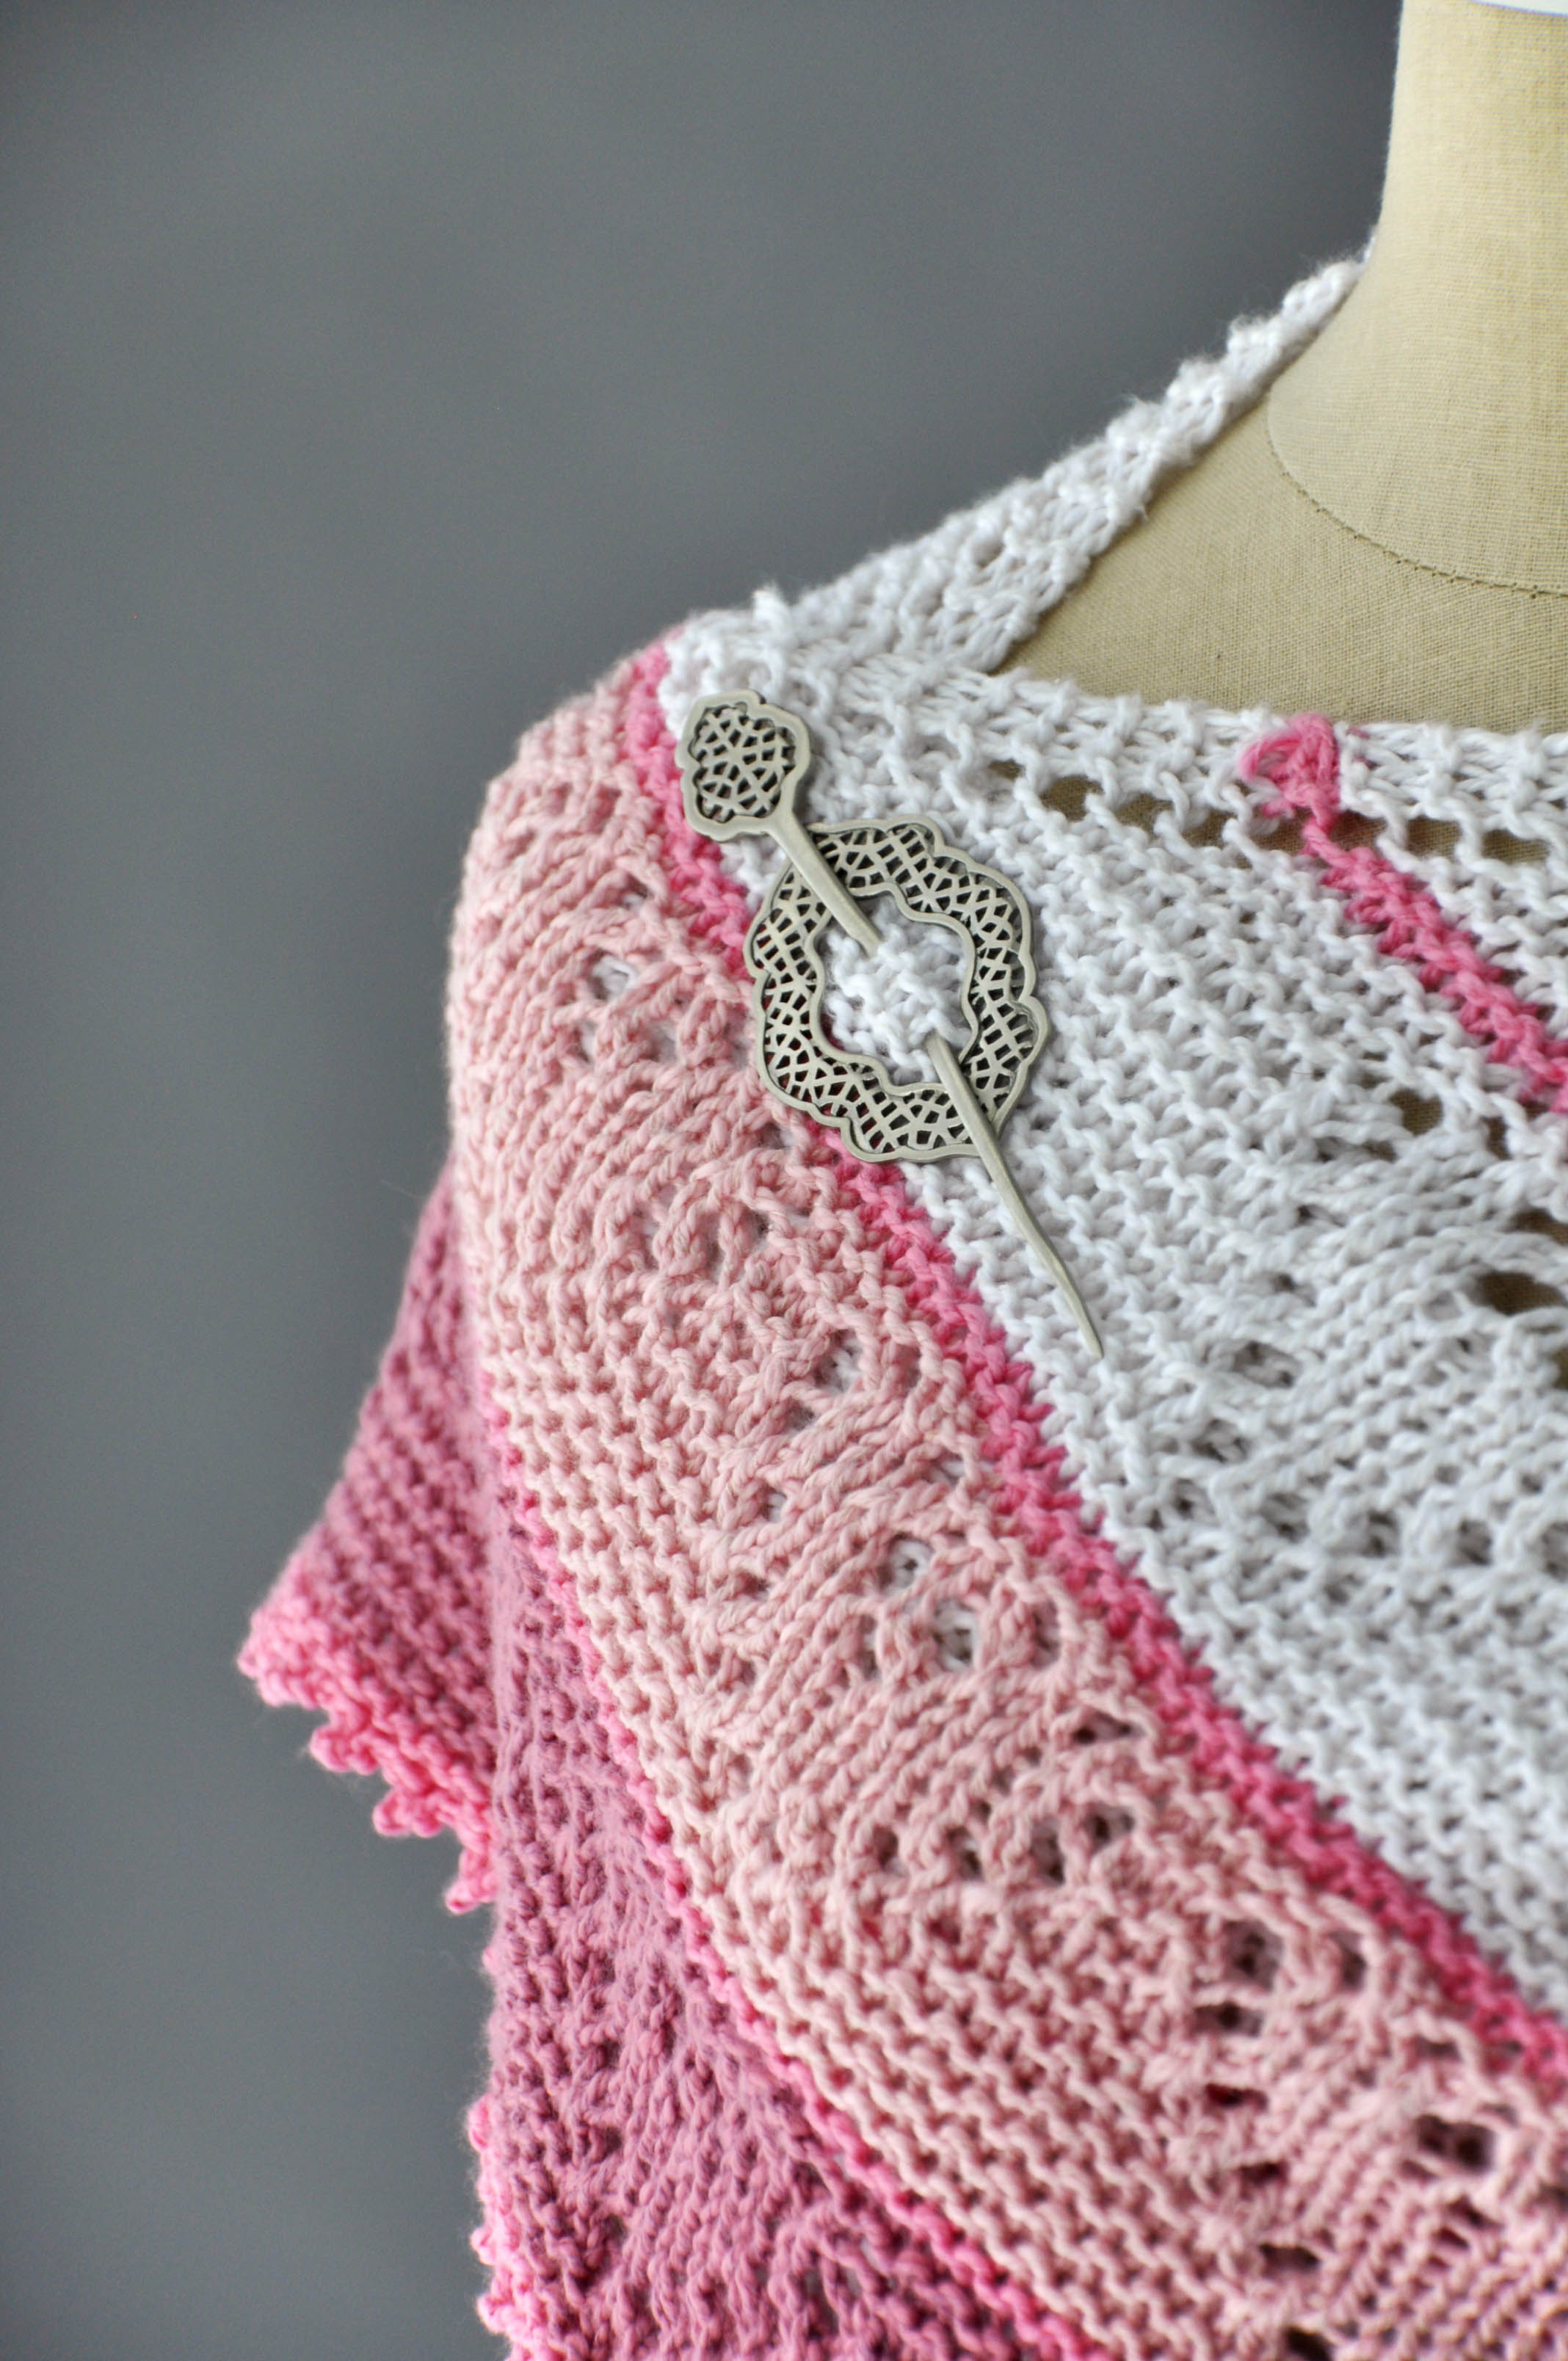
You can find this gorgeous shawl pin by Jul Designs here.


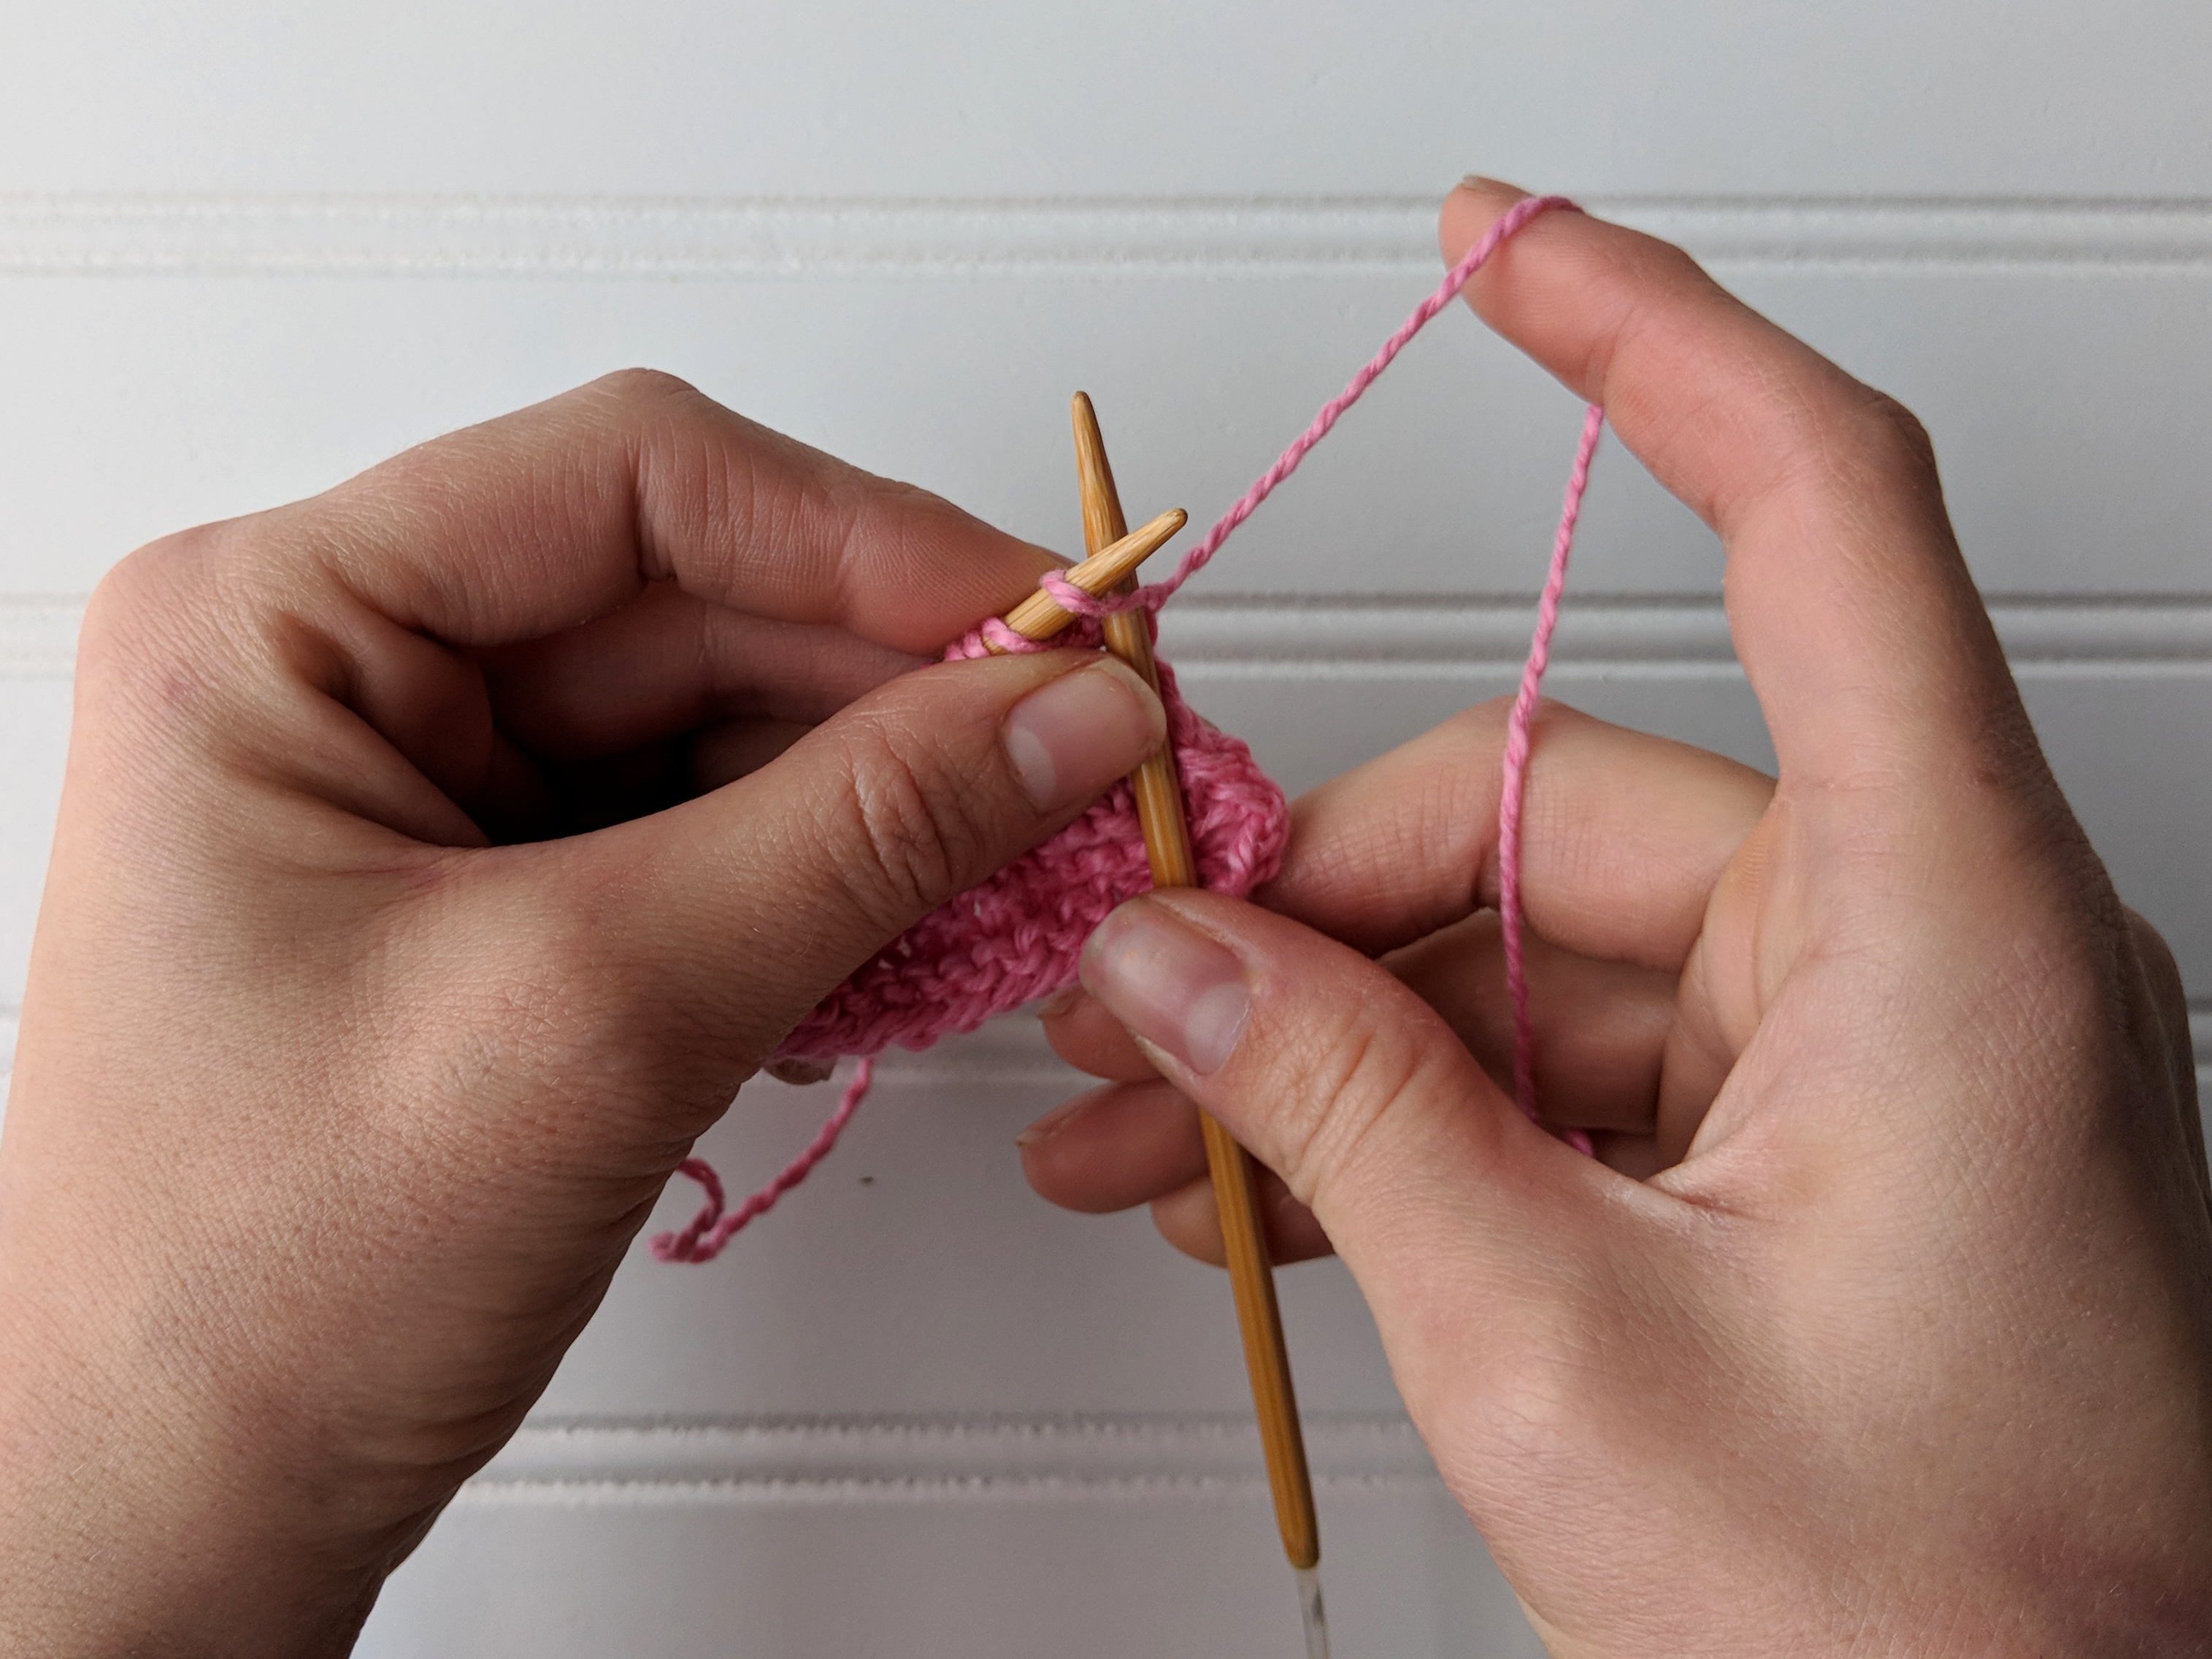
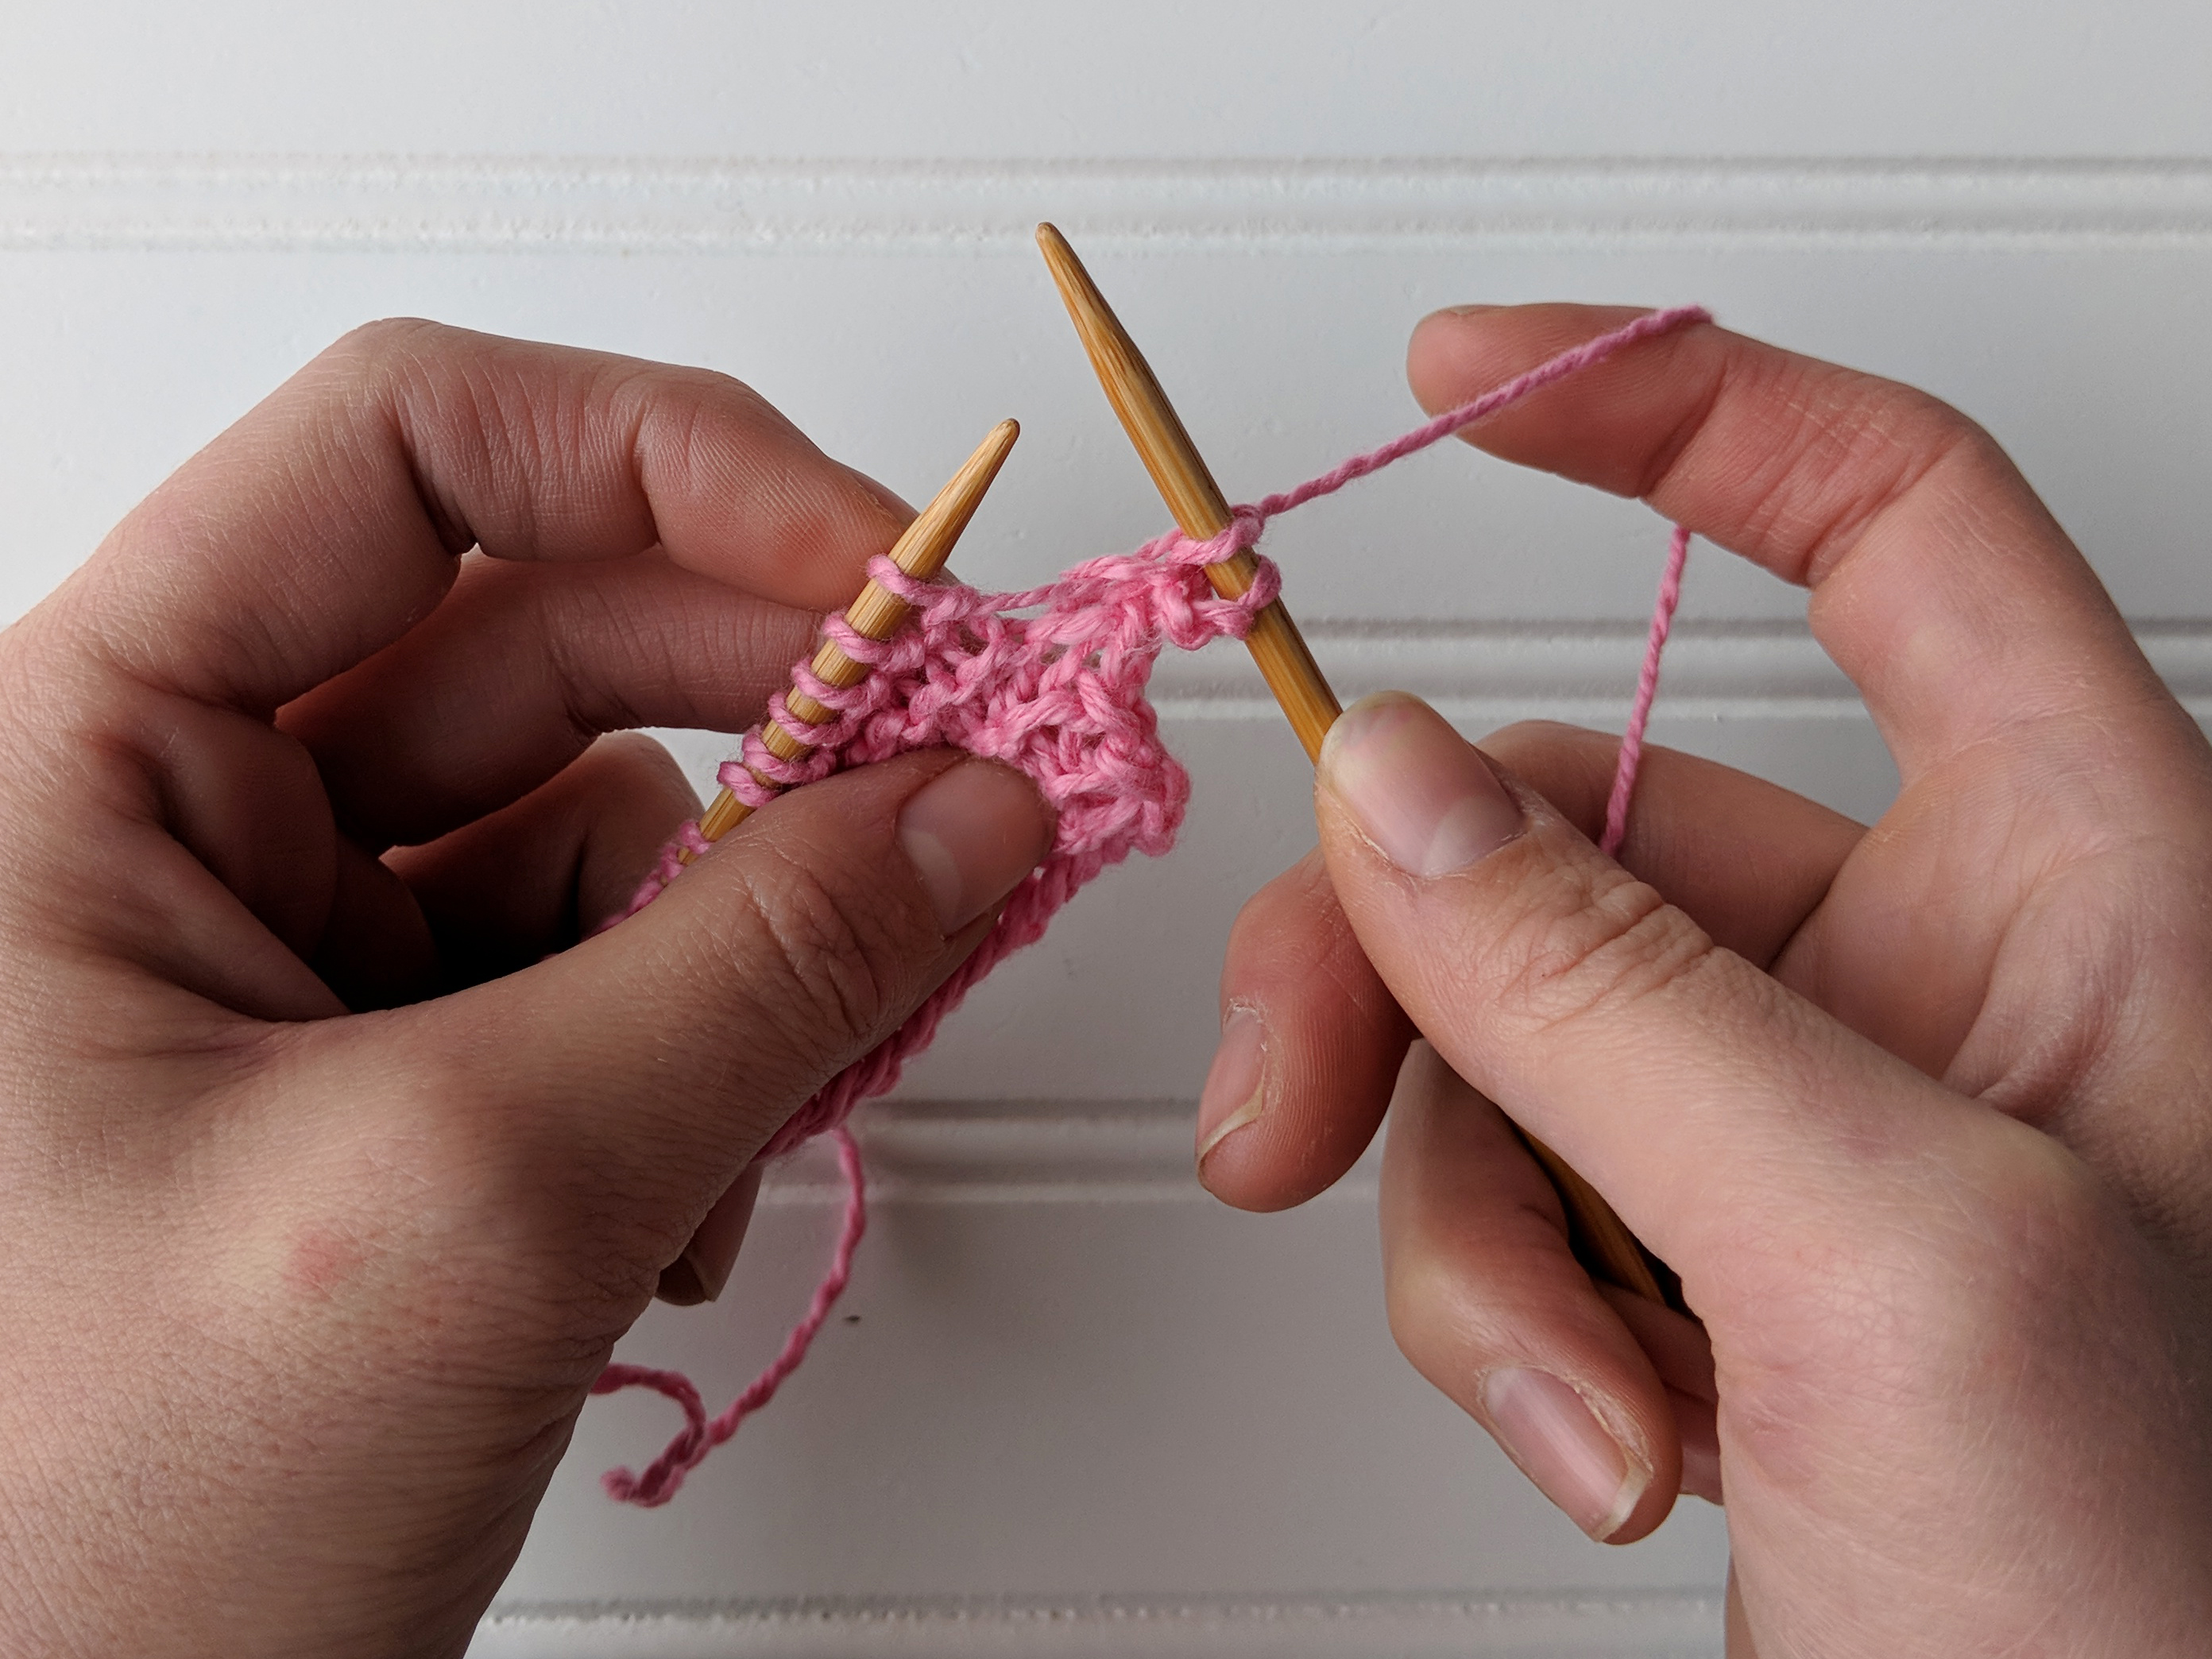
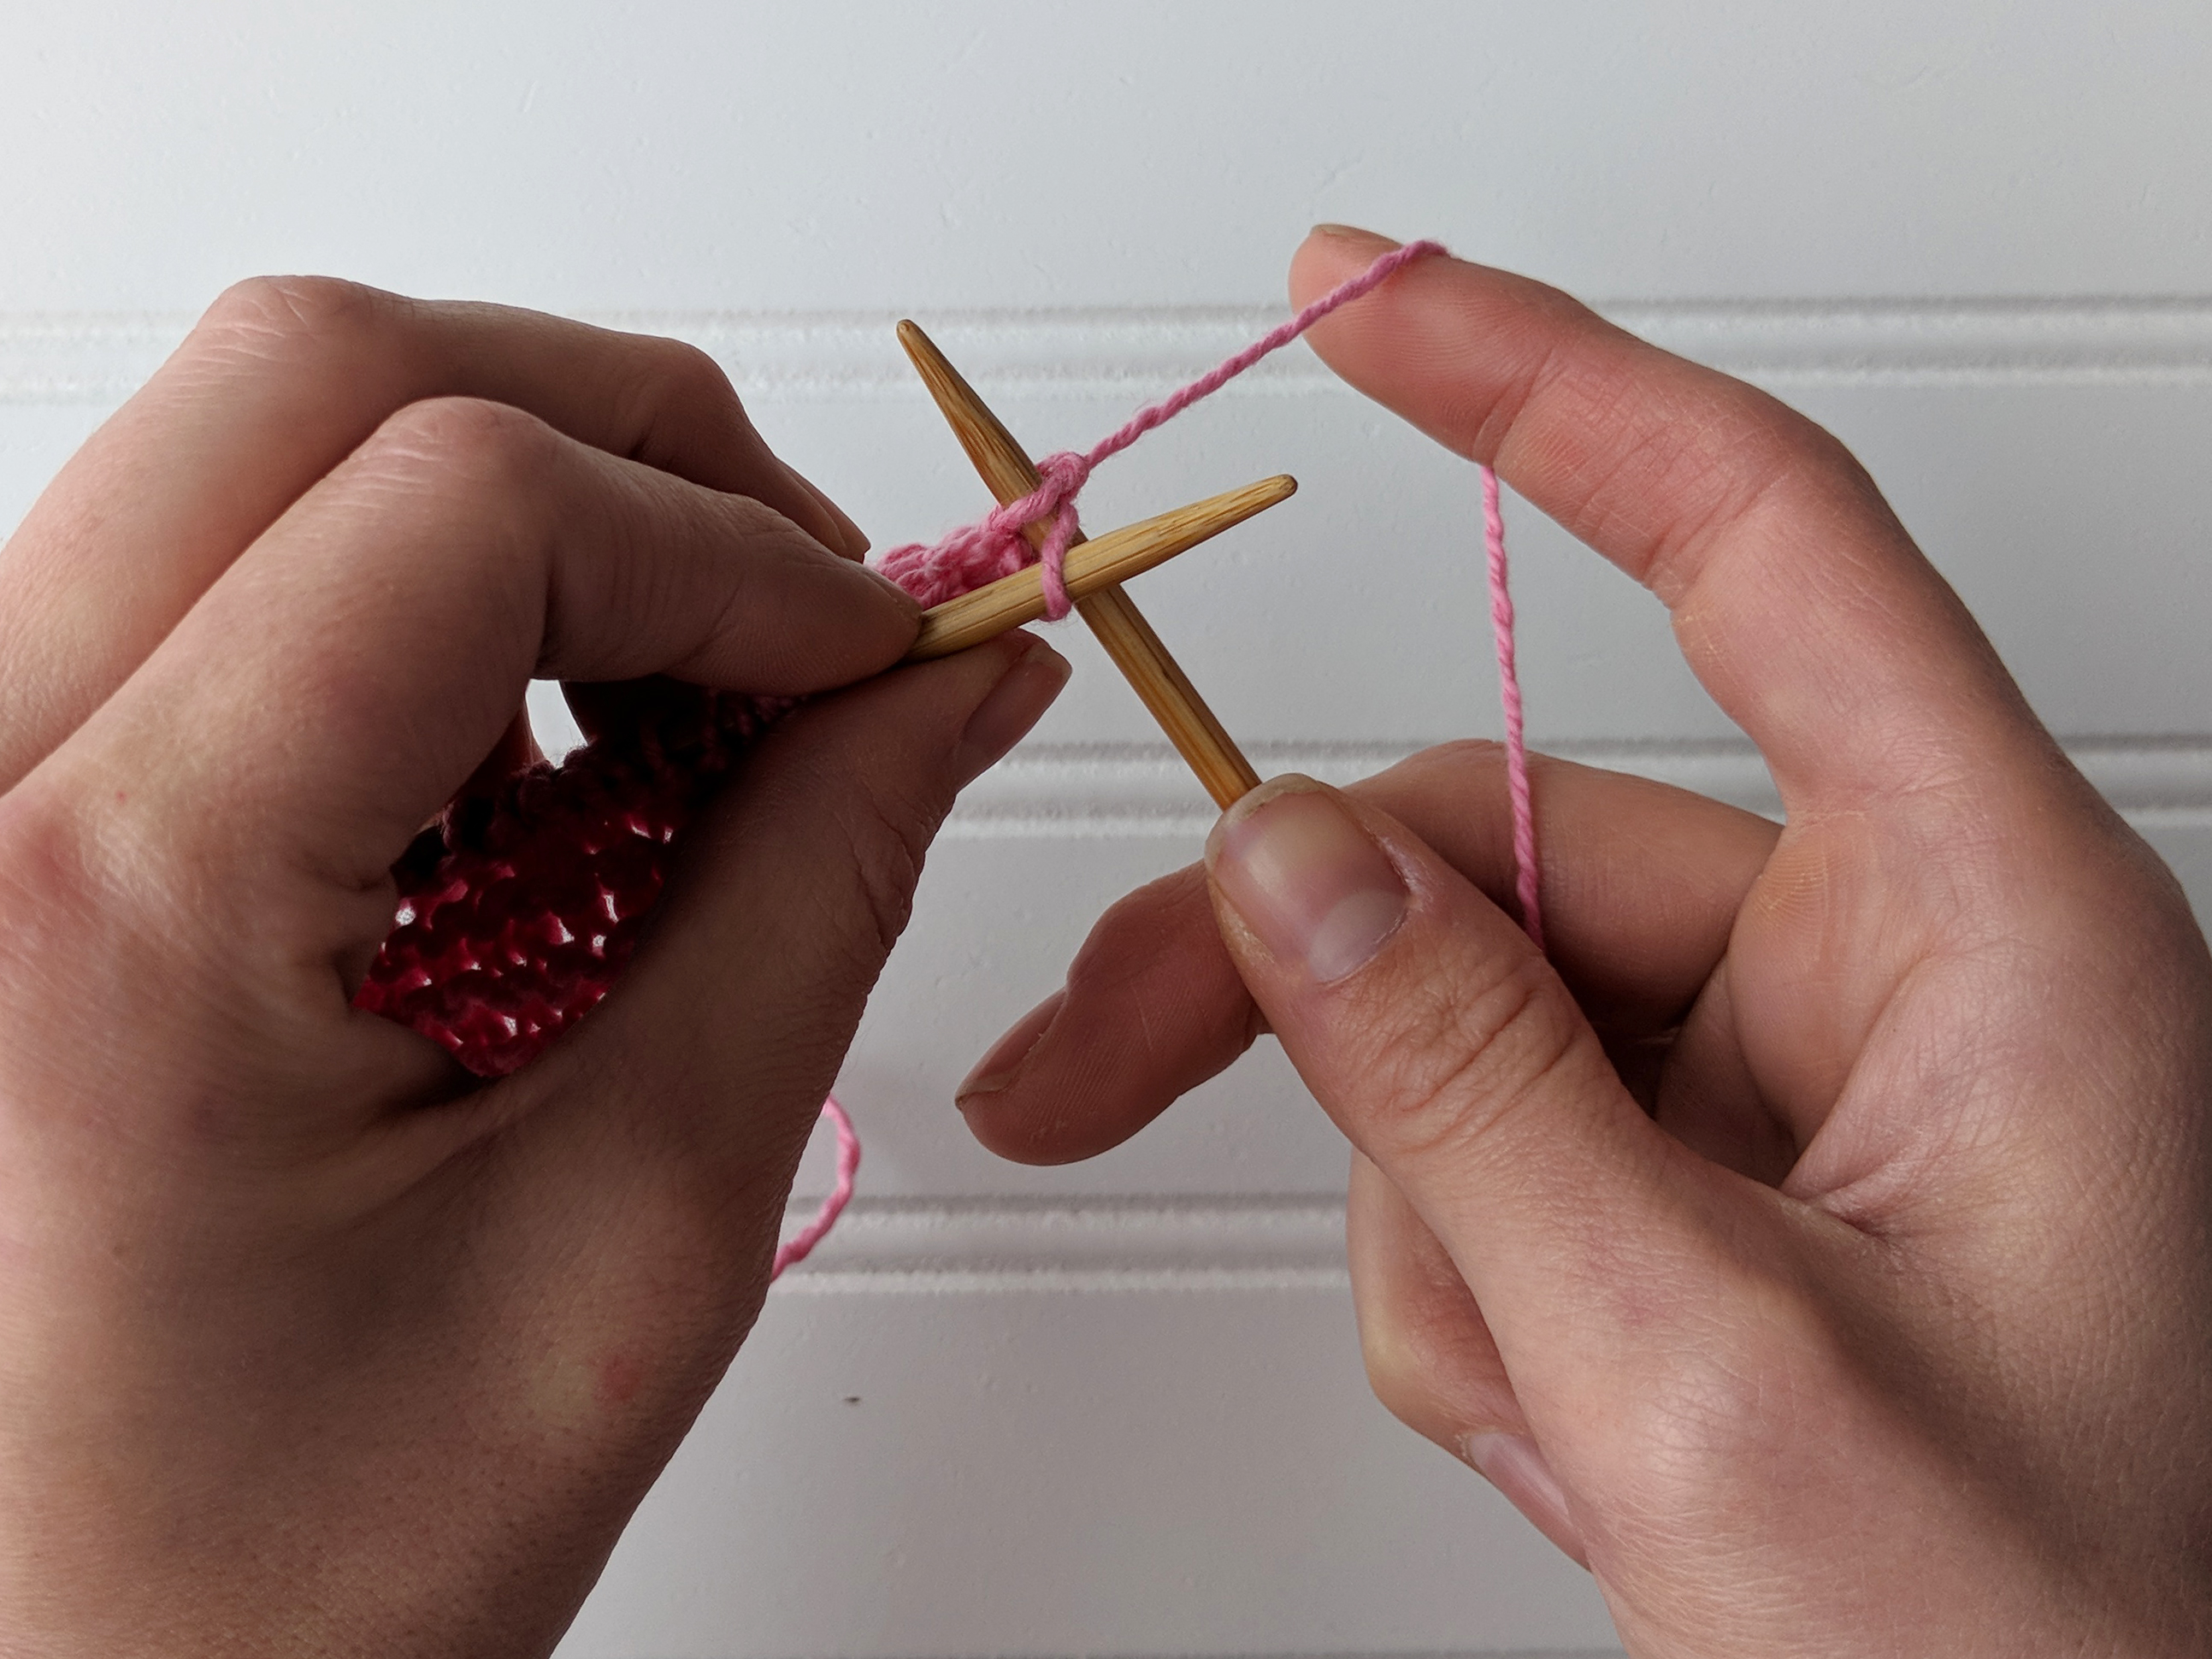
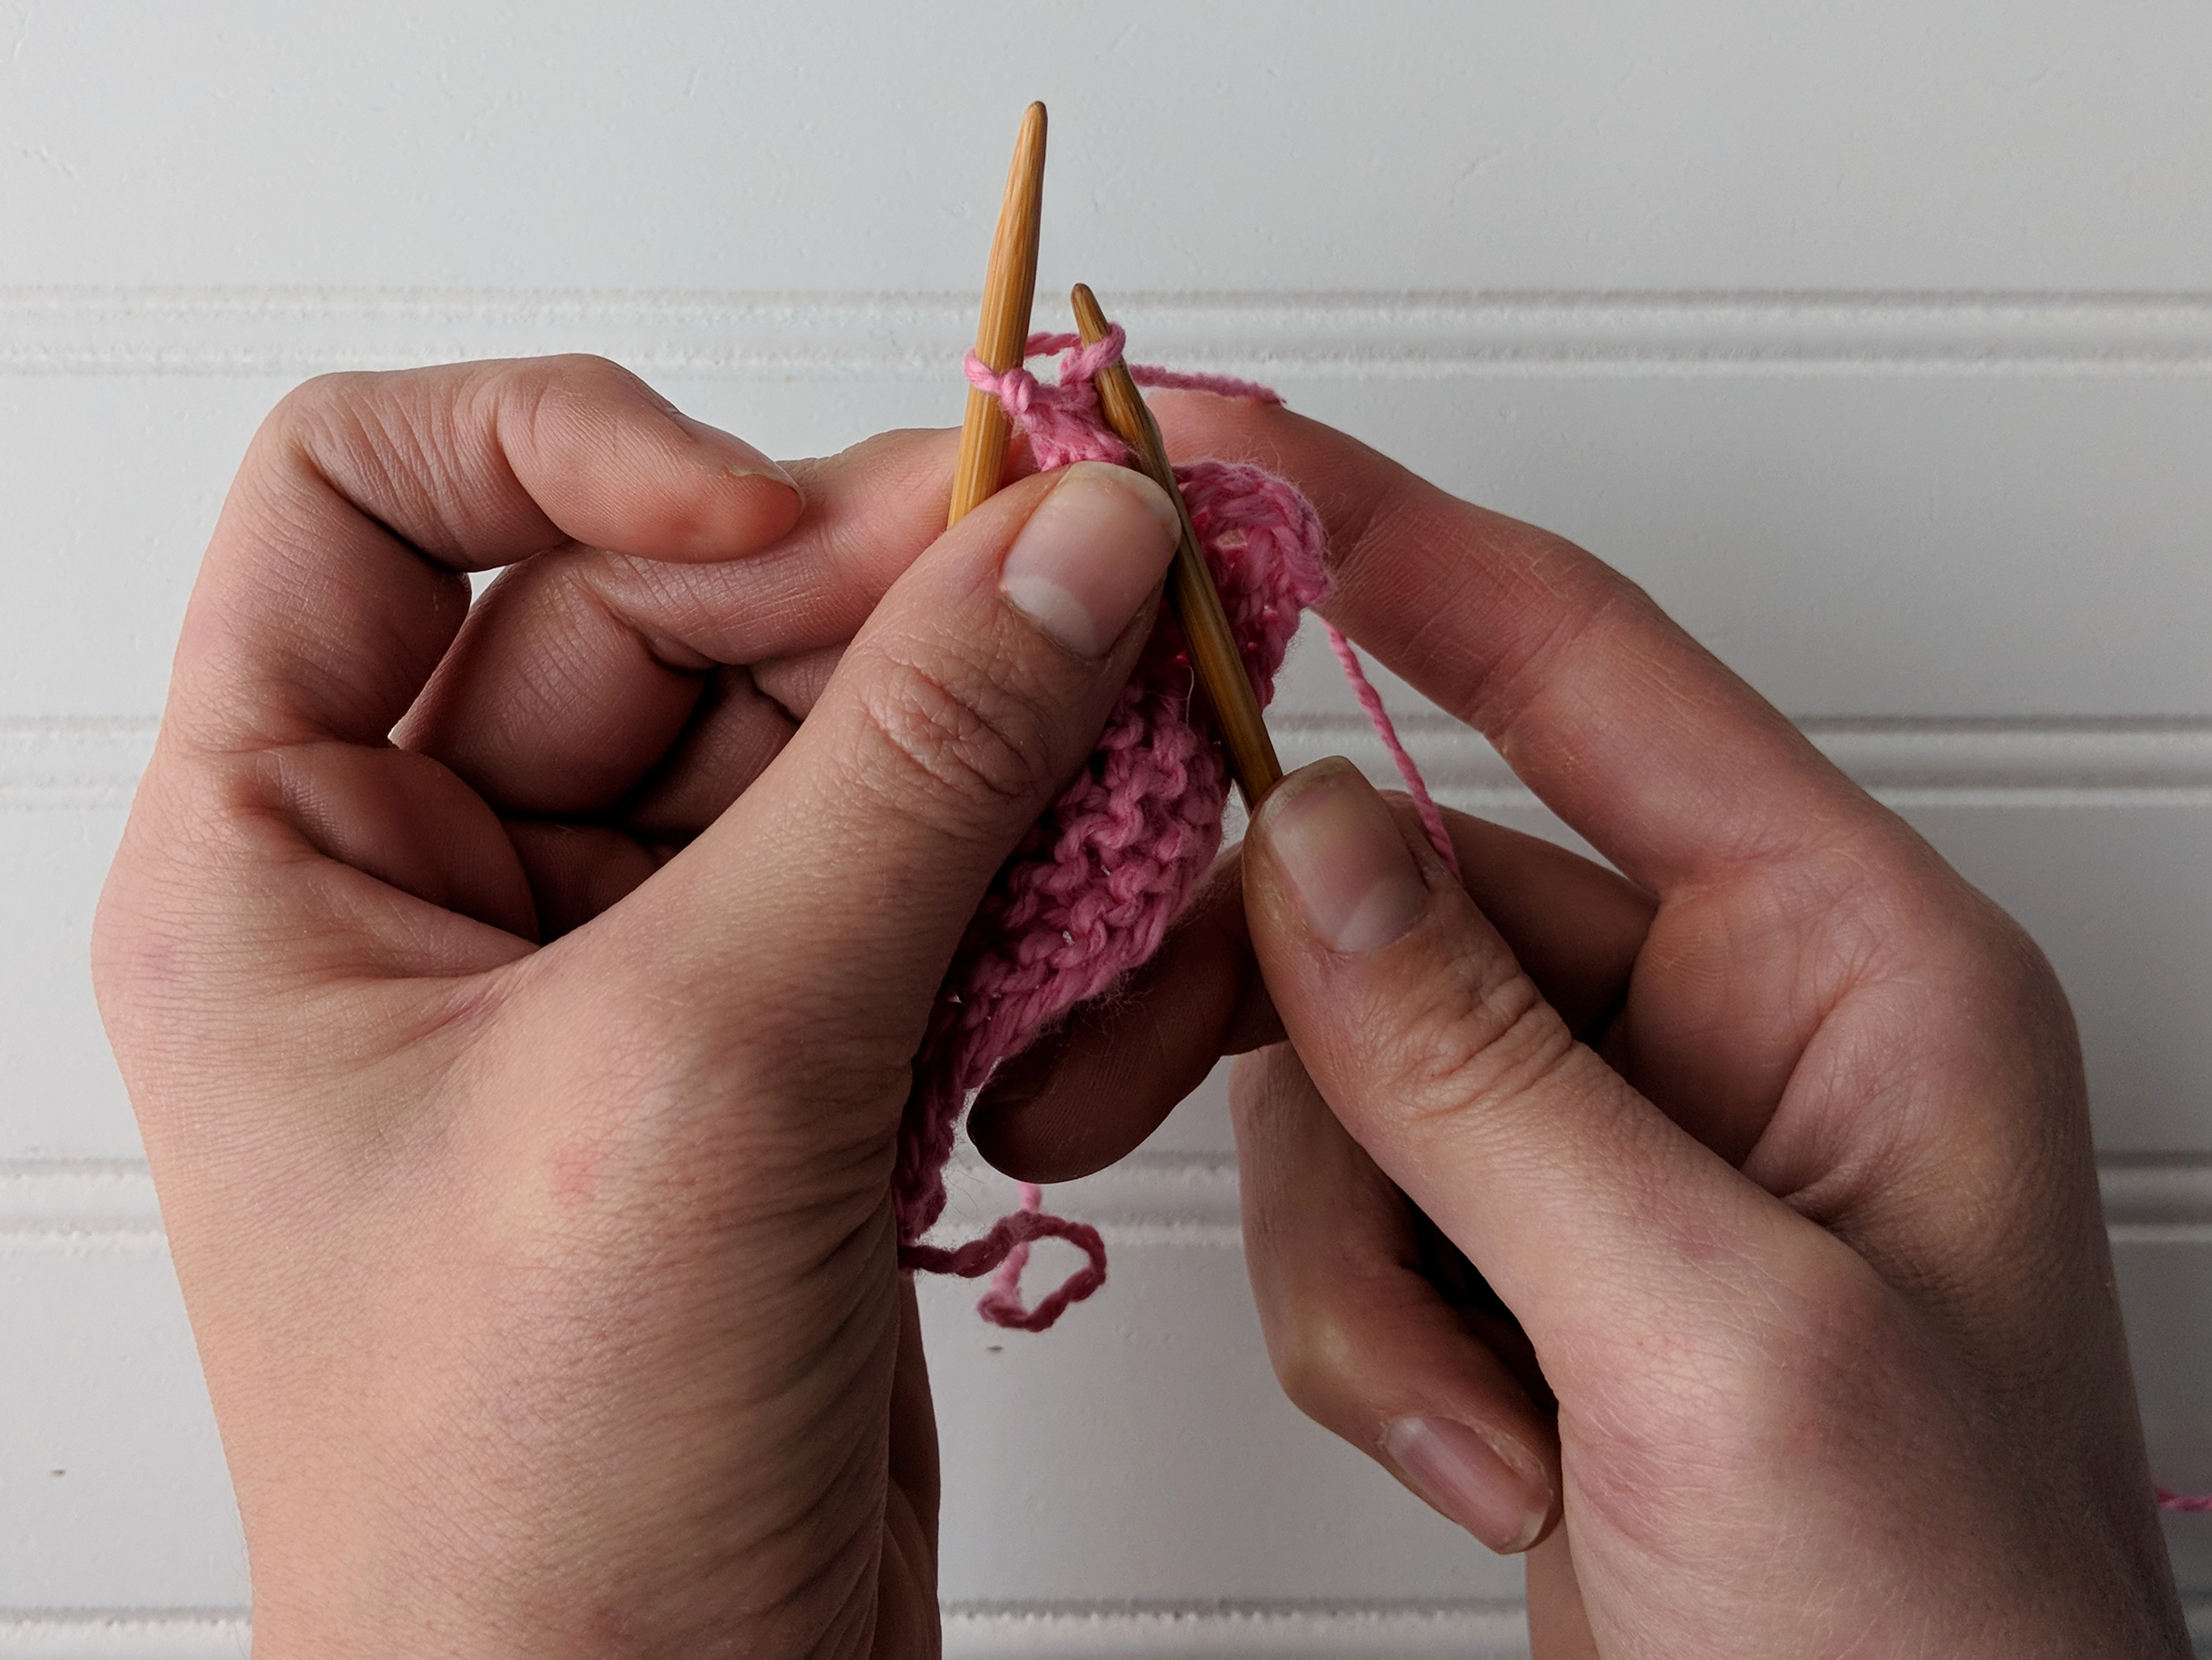
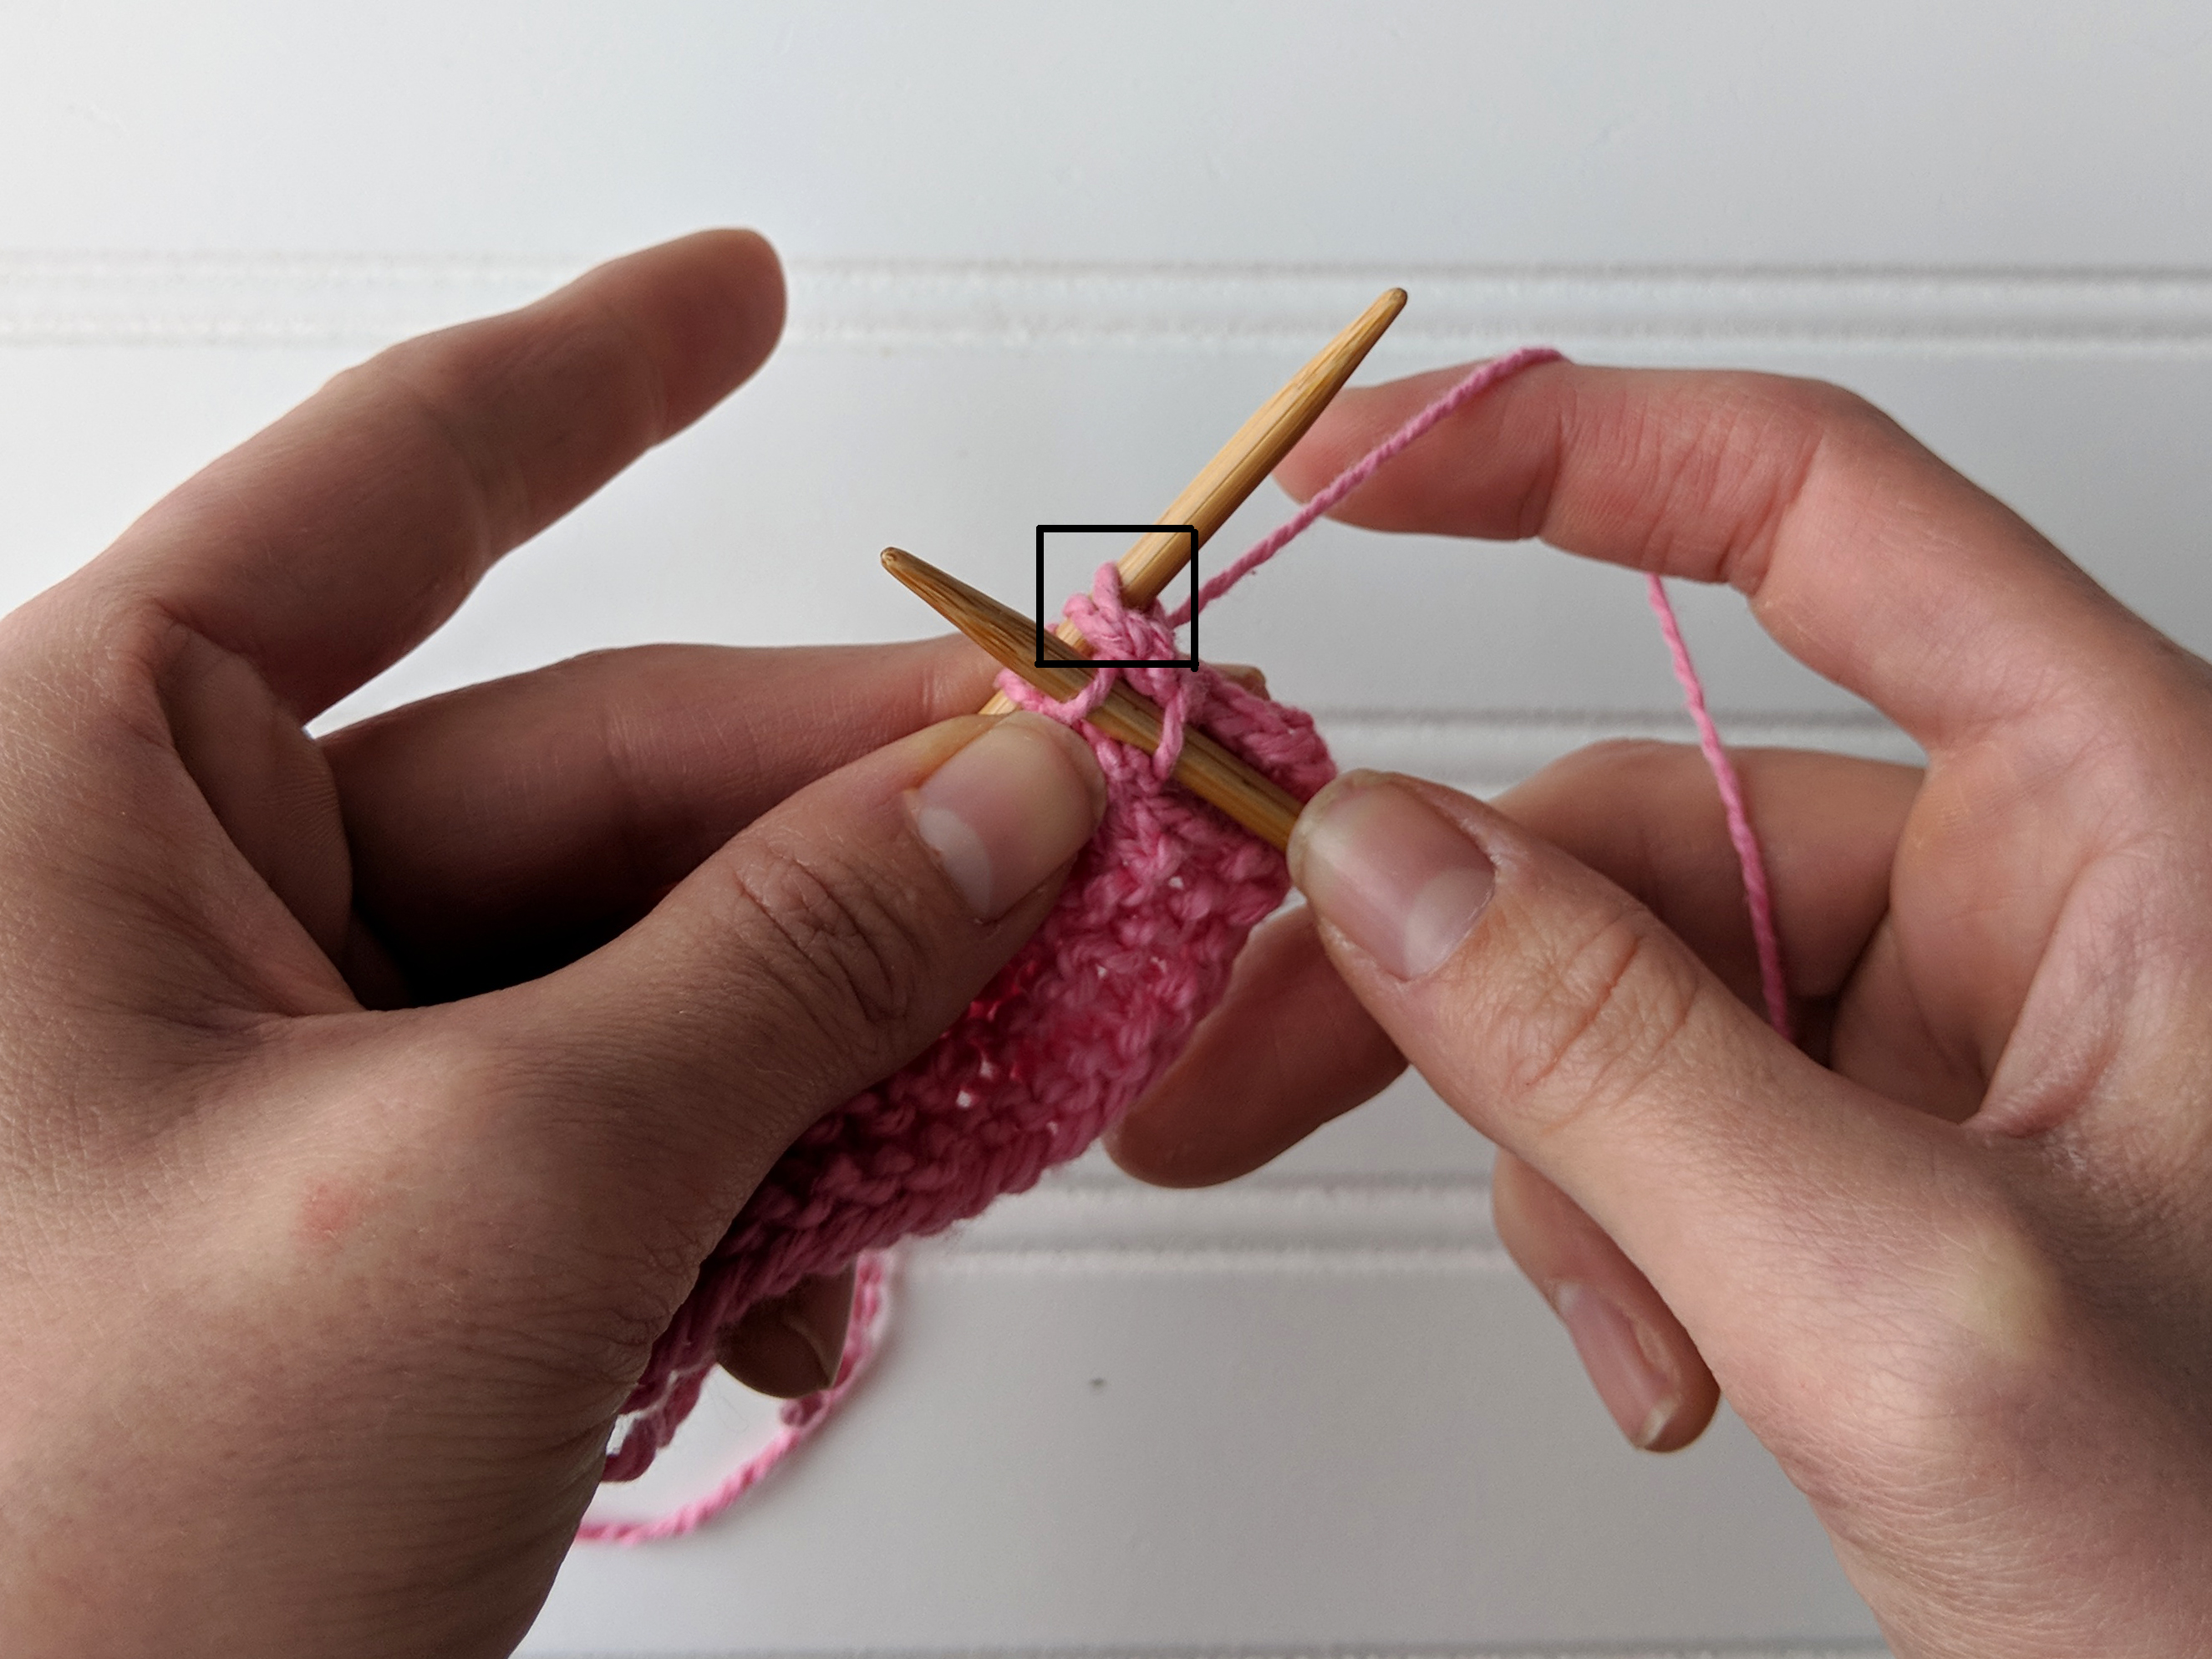
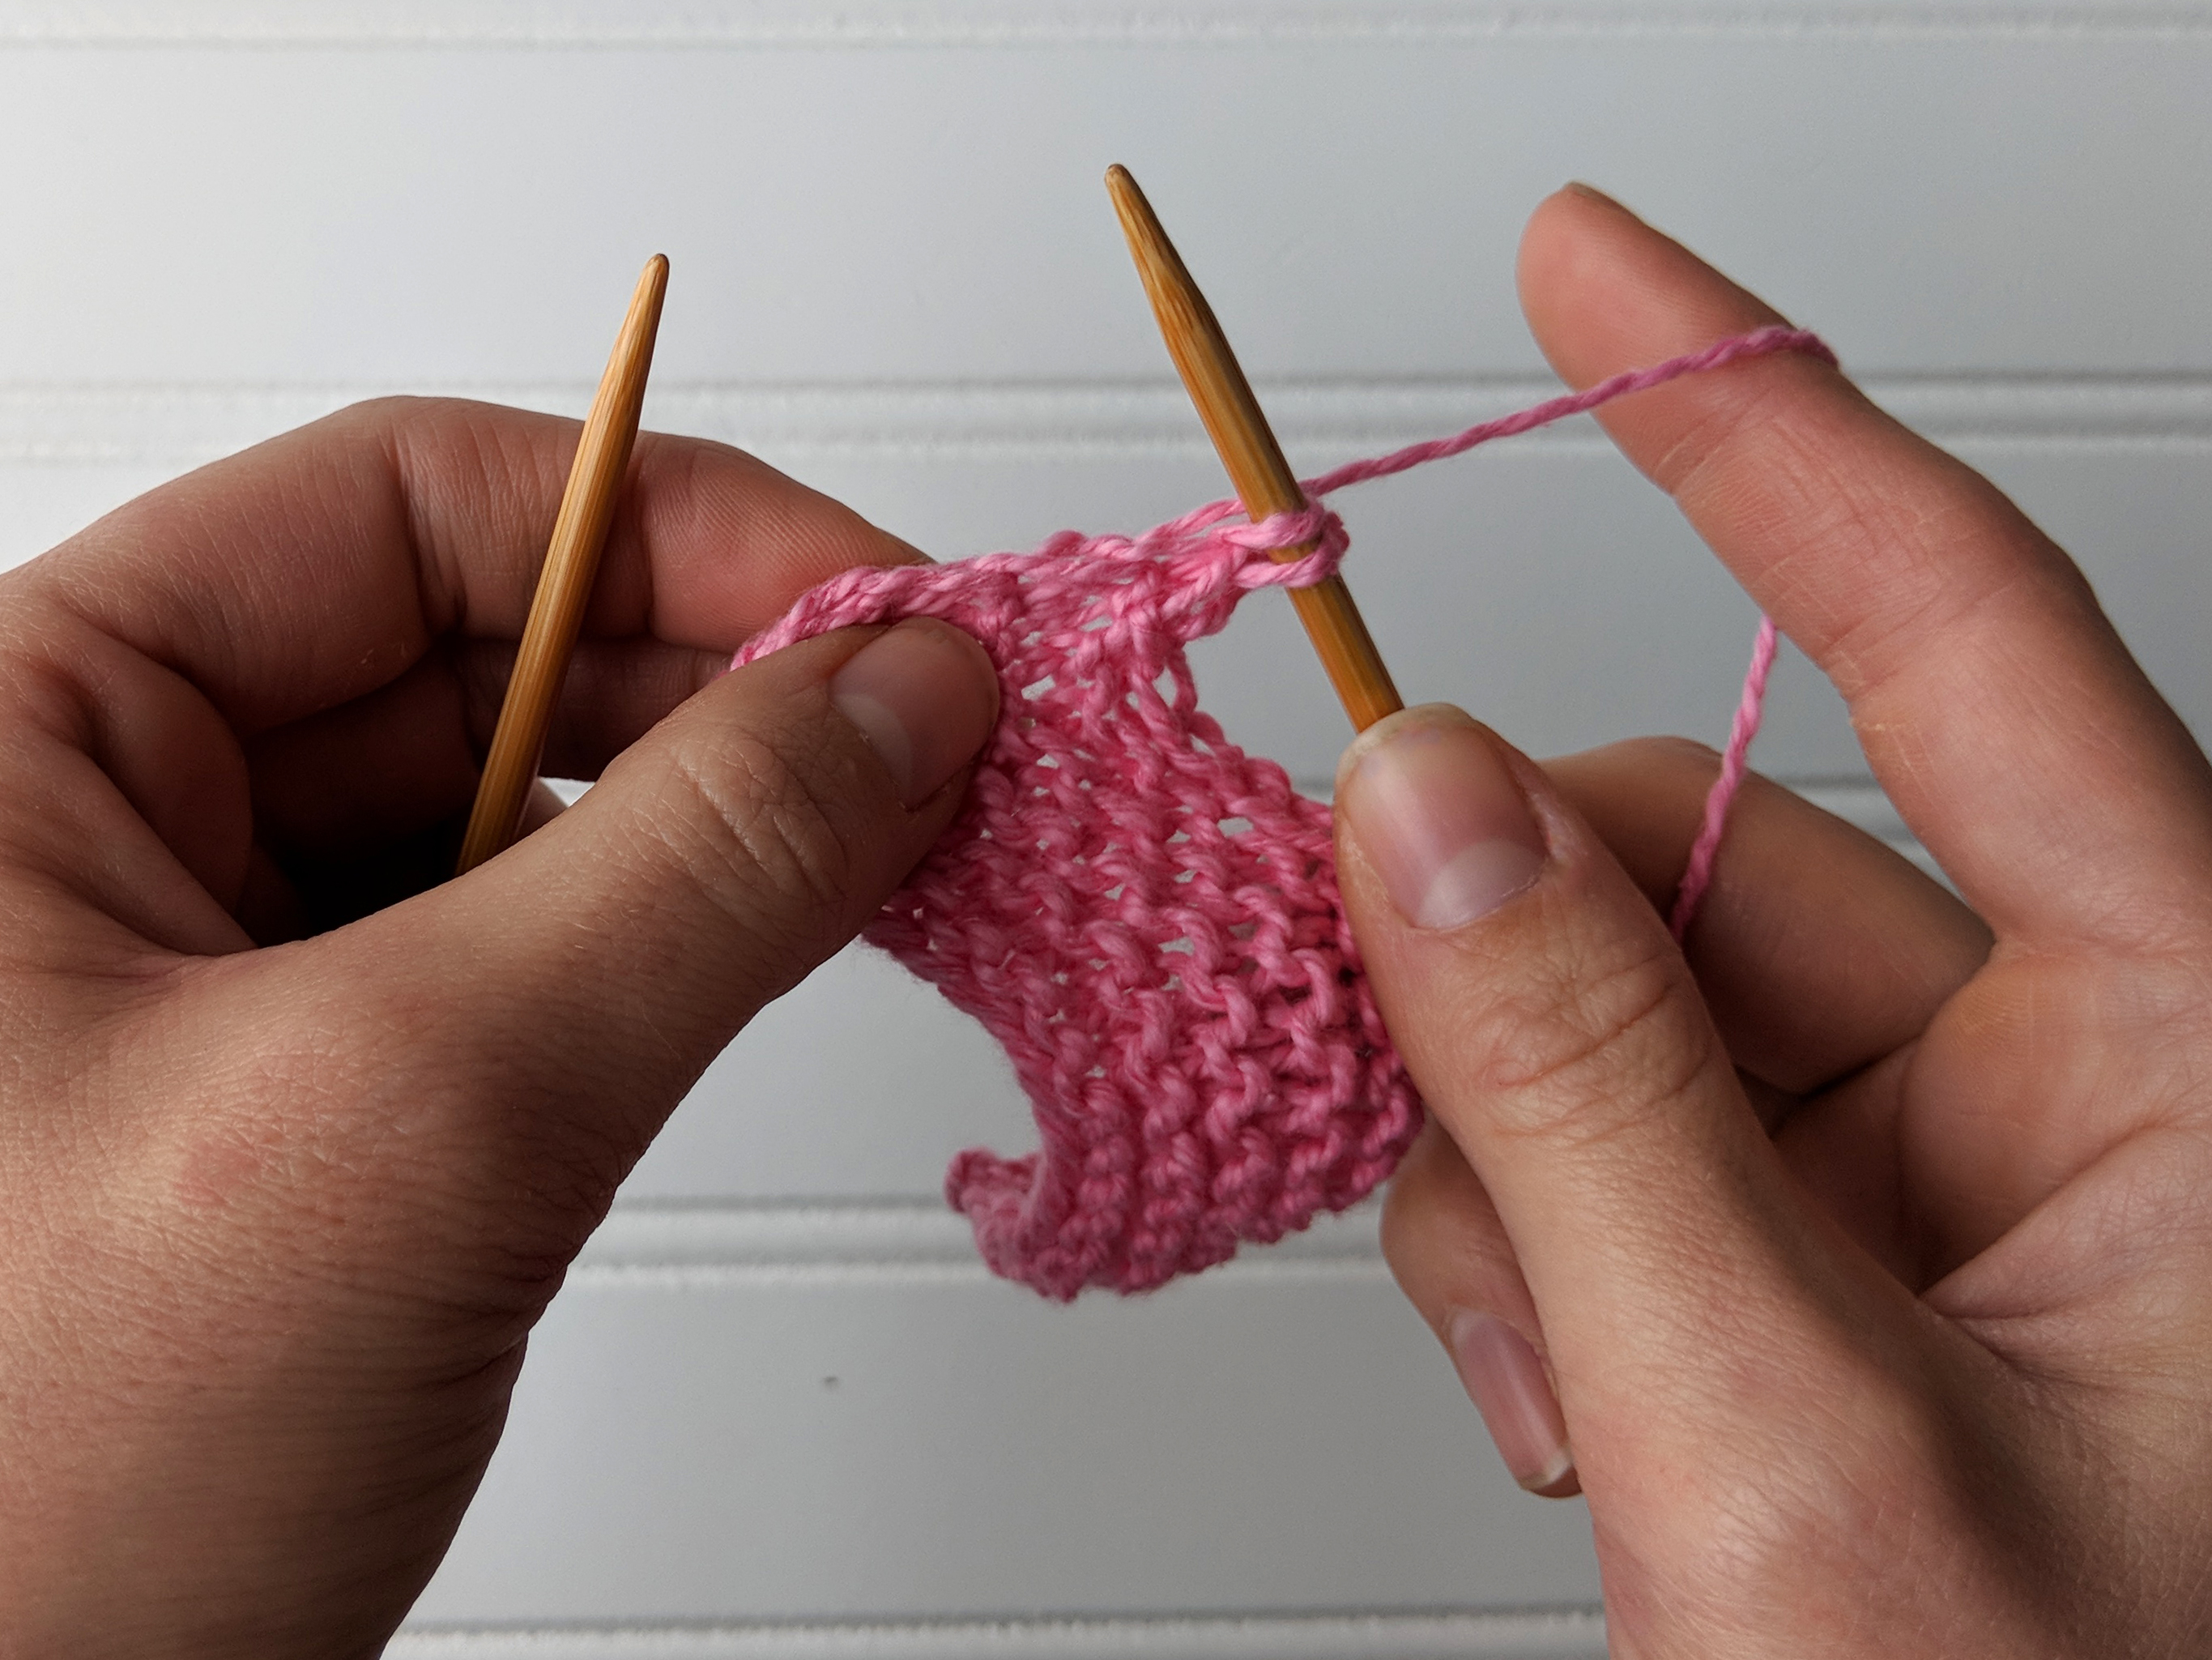
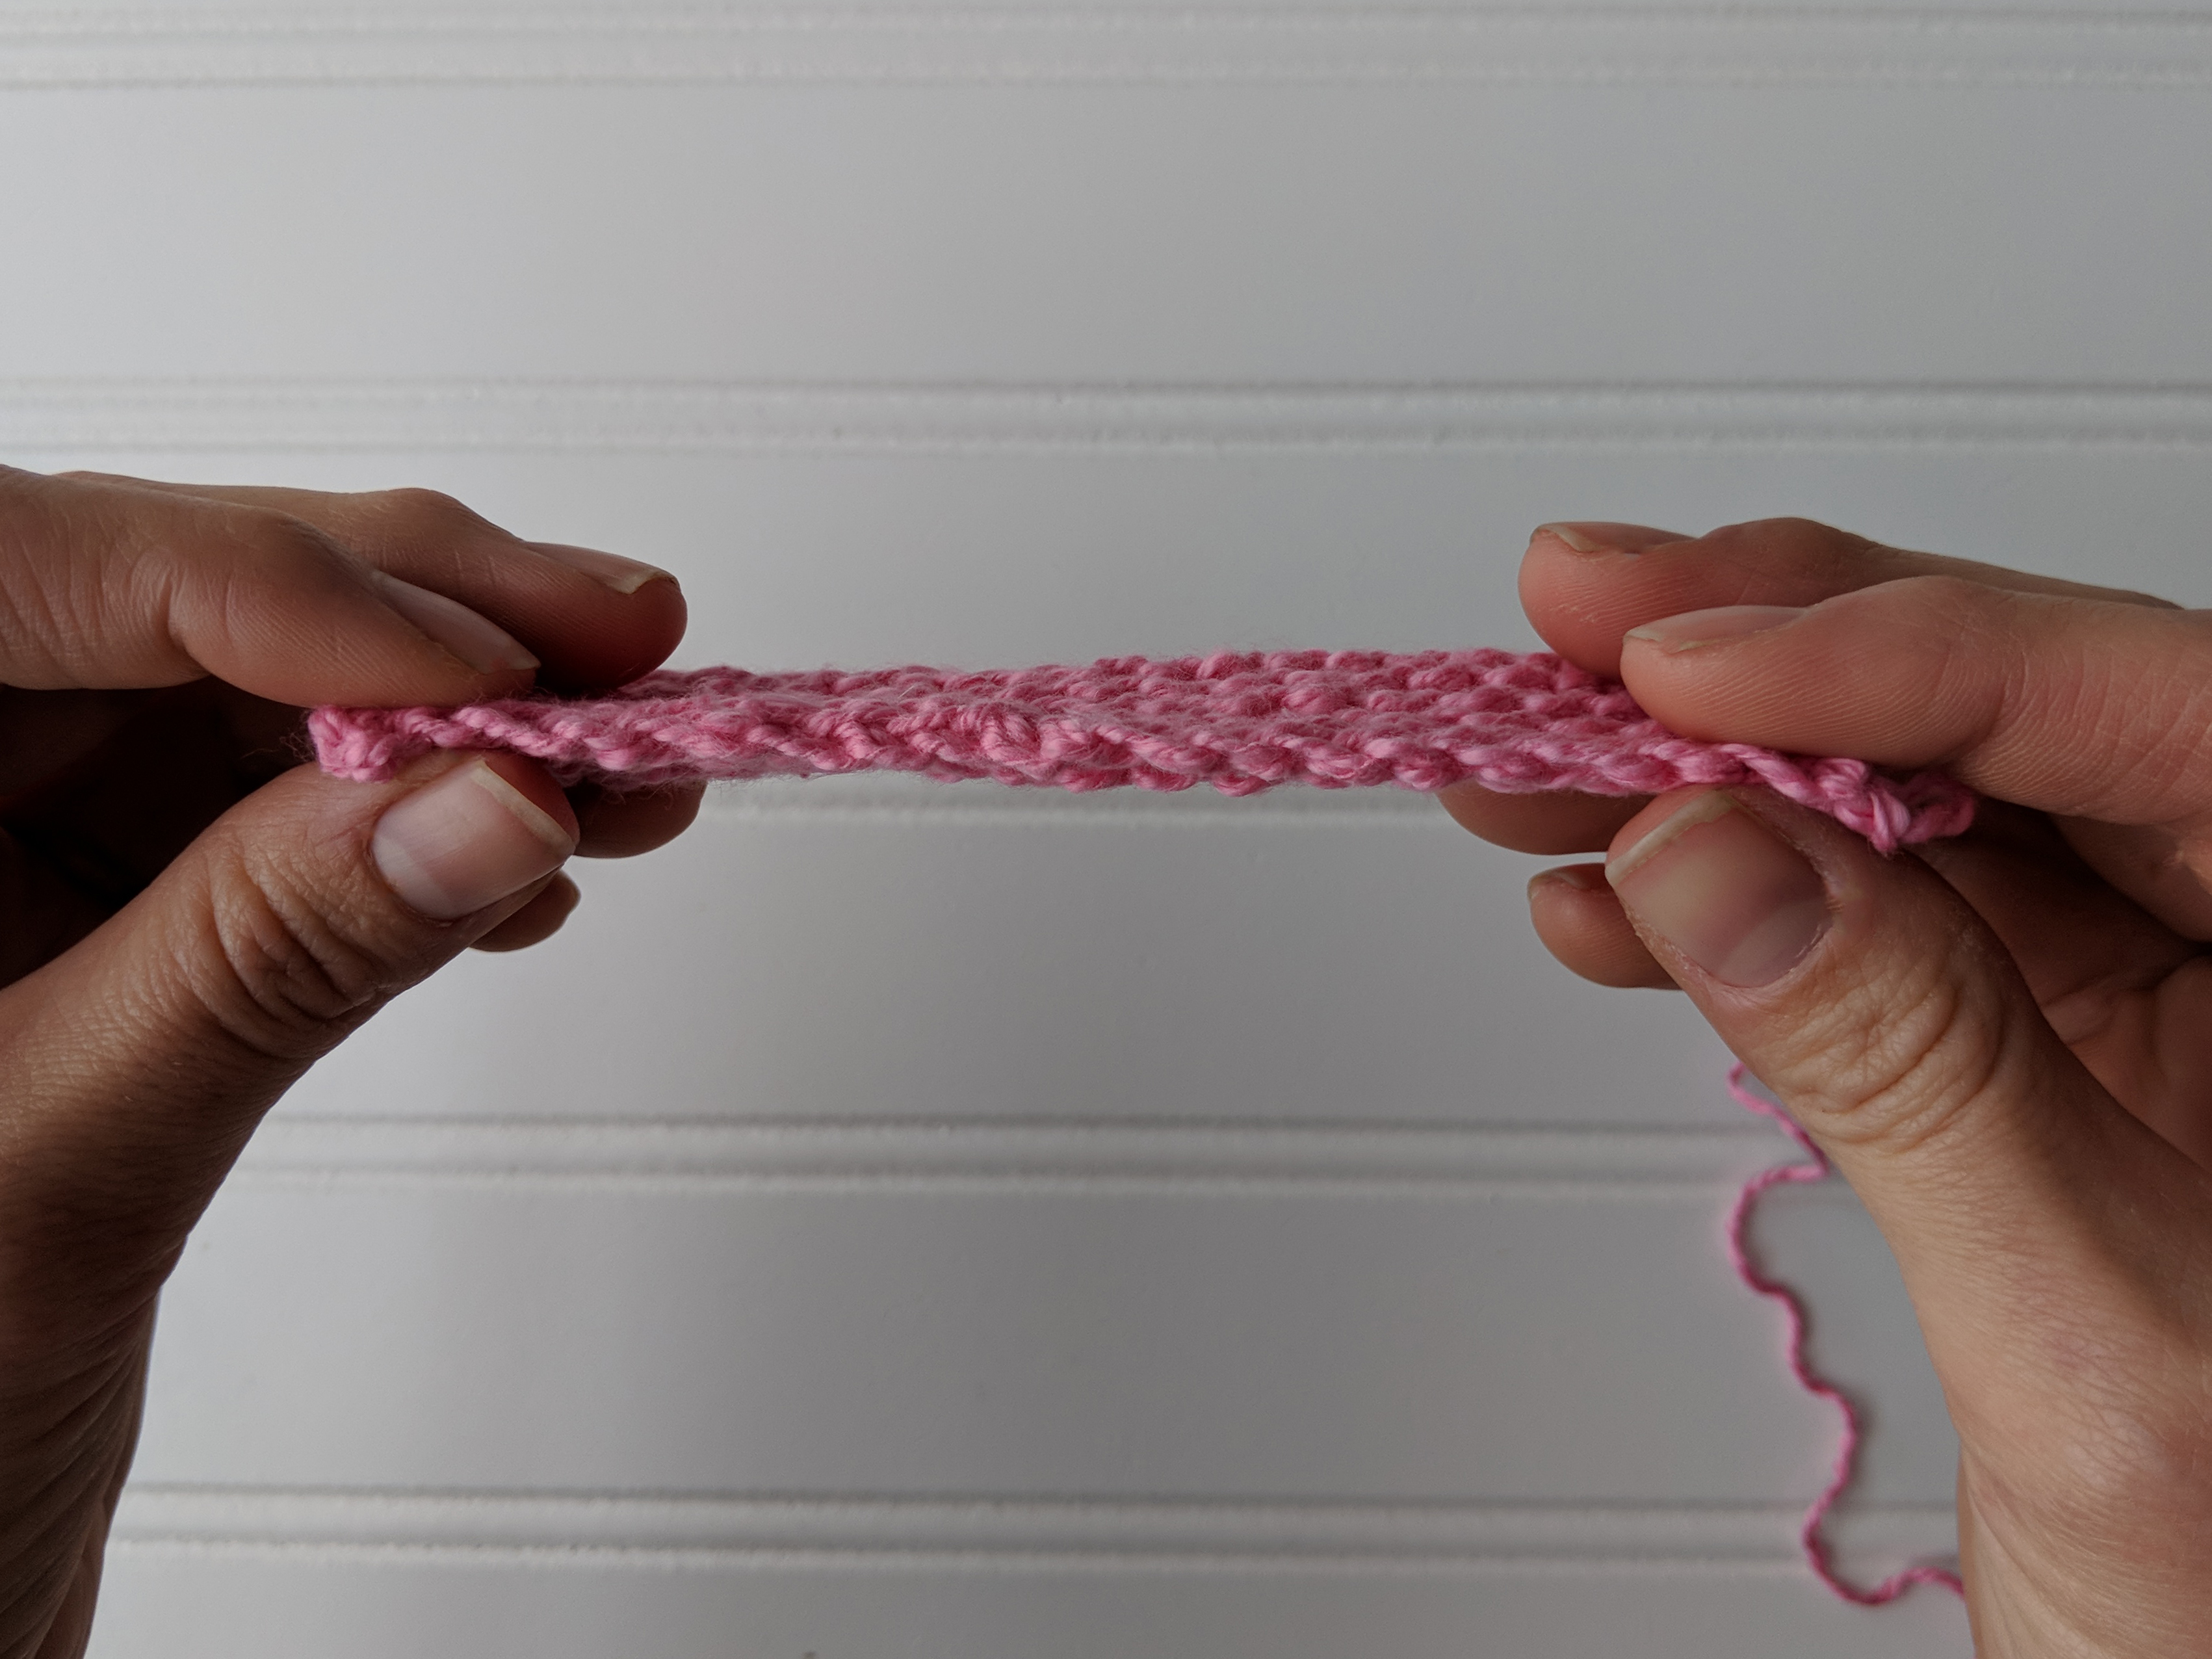
Because Be Mine uses garter stitch, it’s nice to have a beautiful, elastic bind off. As a bit of a tight knitter, I like to use the Suspended Bind-off whenever I want a neat, elastic edge. I highly recommend this technique for this shawl design, and I call for it in the pattern. The method is nearly as simple as your standard bind off. It really just involves holding onto a stitch just a moment longer. If that sounds confusing, don’t worry, because I’ll show you exactly what I mean.

Begin as you would when using a standard bind off by knitting the first two stitches.

Step 1: Slip the first stitch you knit onto the left-hand handle.
Step 2: Do not drop this stitch. Instead, pass this stitch over the second stitch on the right-hand needle as you normally would when binding off, except keep that first stitch “suspended” on your left-hand needle.
Step 3: Next, knit the second stitch on the left-hand needle (note: leave the stitch from the previous step suspended). 
Step 4: Now you will slide the stitch you’ve just knit into and the suspended stitch (outlined above) off of the left-hand needle.
Repeat Steps 1-4 until you have two stitches remaining on your right-hand needles. Finish by binding off these stitches as usual.
Ta-da! You now have a neat, elastic bound-off edge.

Day 6 of Winter

The Pine View scarf is a perfect winter accessory. It’s large, warm, and has an excellent amount of squish because it’s knit in our Deluxe Chunky.

This pattern only uses charts, but don’t let that intimidate you! The stitches are not at all complicated. You’ll get a nice rest at the center of the scarf, too. Personally, I prefer charts over written instructions because I’m a visual person. Charts enable you to see the stitches before you create them.

With that said, some charts can seem overwhelming. You might feel as though you’re getting lost in the grid full of symbols. Fear not, because I’d like to share some helpful tips and tricks for reading charts.

1. Familiarize yourself with symbols.

Take time to review the key and ensure you understand what  each symbol means.

2. Flat or in the round?

Is the pattern flat or in the round? When you knit in the round, charts are read from right to left on every row. Pine View is knit flat, meaning that on right side rows you’ll read right to left, and on wrong side rows you’ll read left to right.

Charts that are knit flat have numbers on both the right and left sides. Charts knit in the round only have numbers on the right side.

3. Stay on track!

Highlighters – Don’t cross out rows—you want to be able to go back and read previous rows in case you make a mistake. And, if you’re like me, you will make mistakes! I probably use highlighters most frequently. Simply highlight the rows you’ve completed, and read from the row above.

Washi Tape – For those who prefer not to see previous rows at all, washi tape is a great solution. It can easily be removed from the paper, so you can hide previous rows and simply peel back the tape to see them.

Stitch markers – For charts that have repeats, use stitch markers. It honestly makes a world of difference. A mistake is less likely to offset the entire row if you’re using stitch markers between each repeat.

You can find this pattern, Day 6 of our 12 Days of Winter collection here.