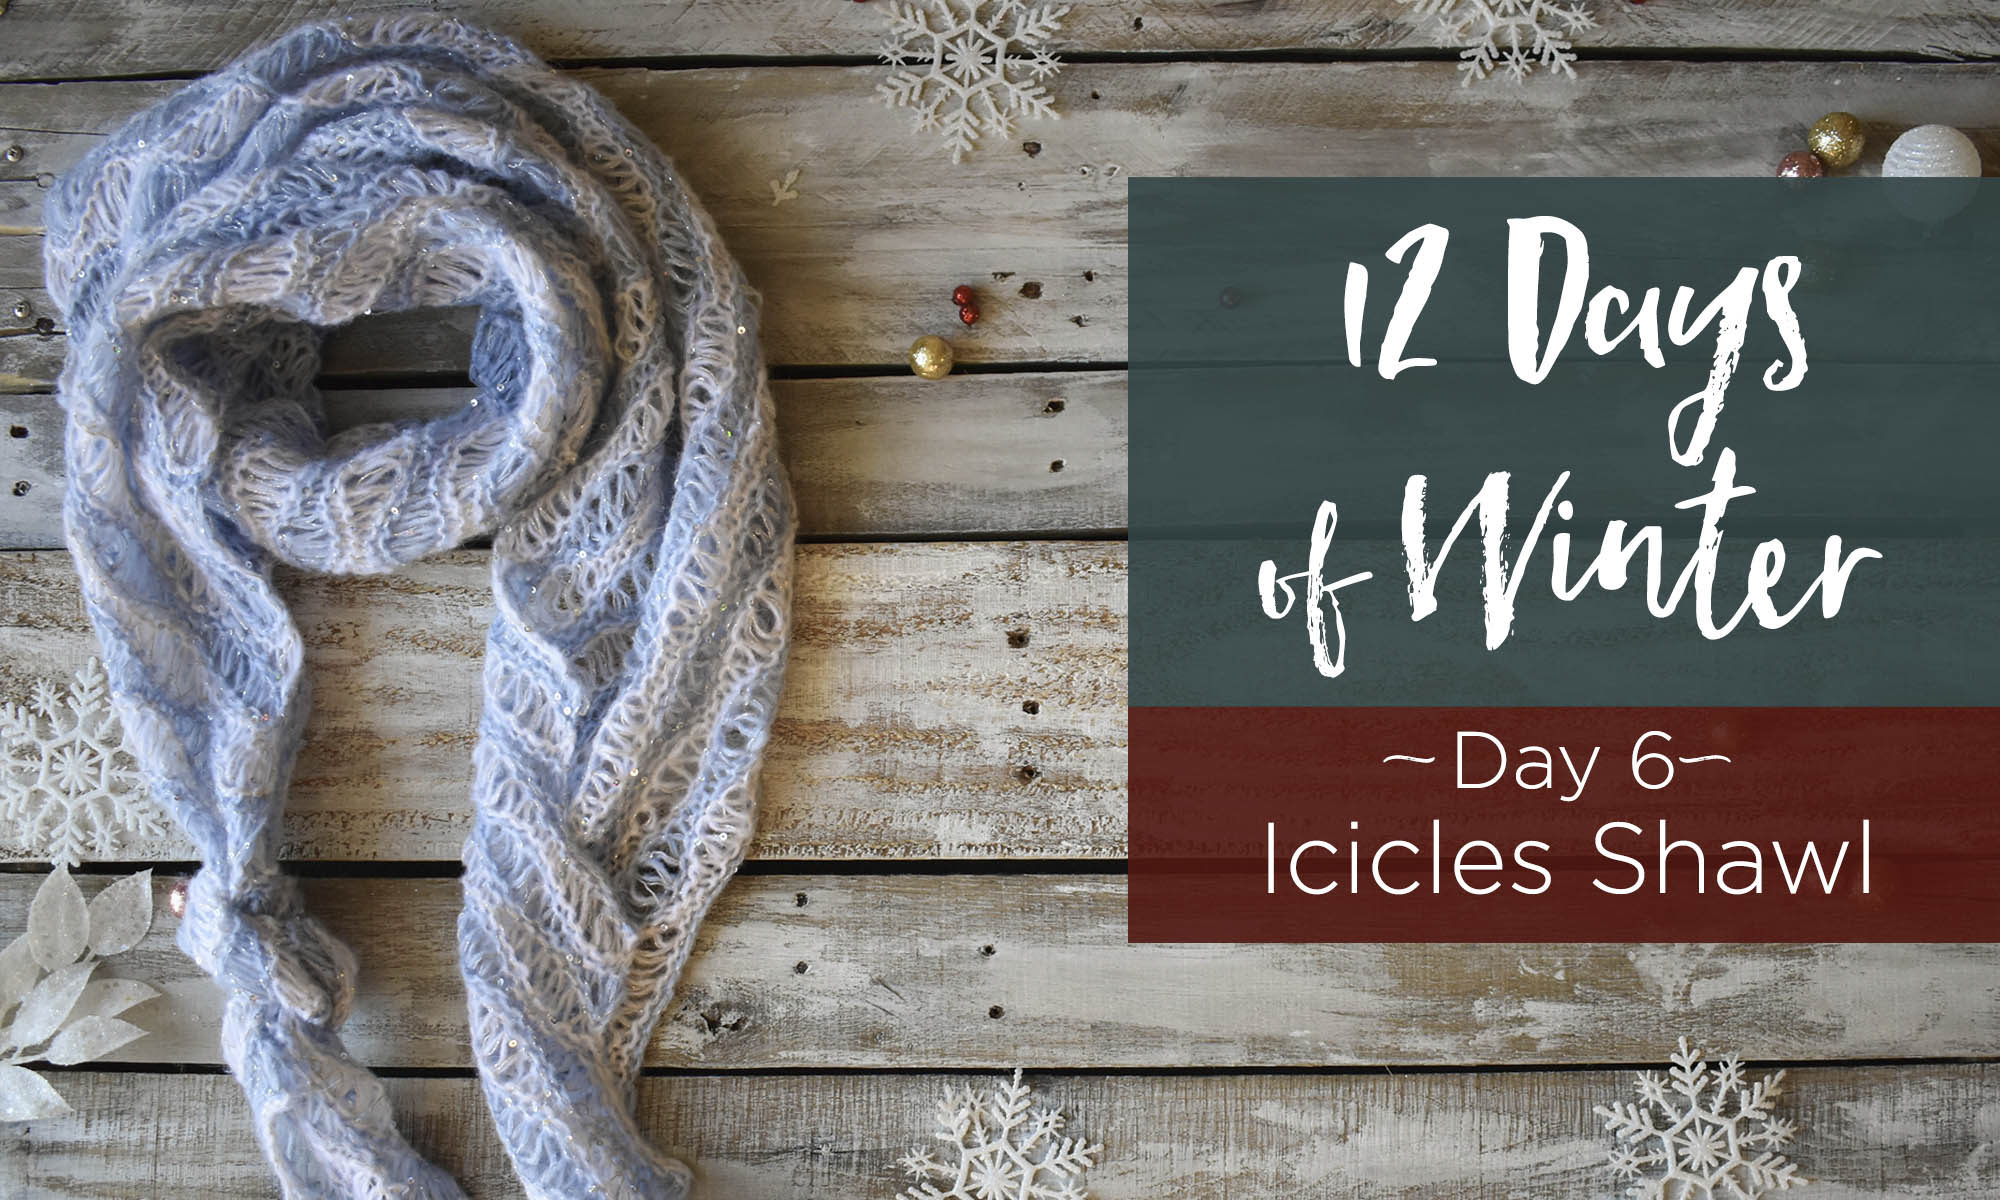
This is part 6 in a 12 part series highlighting designs from our 12 Days of Winter, Series 3 Edition.
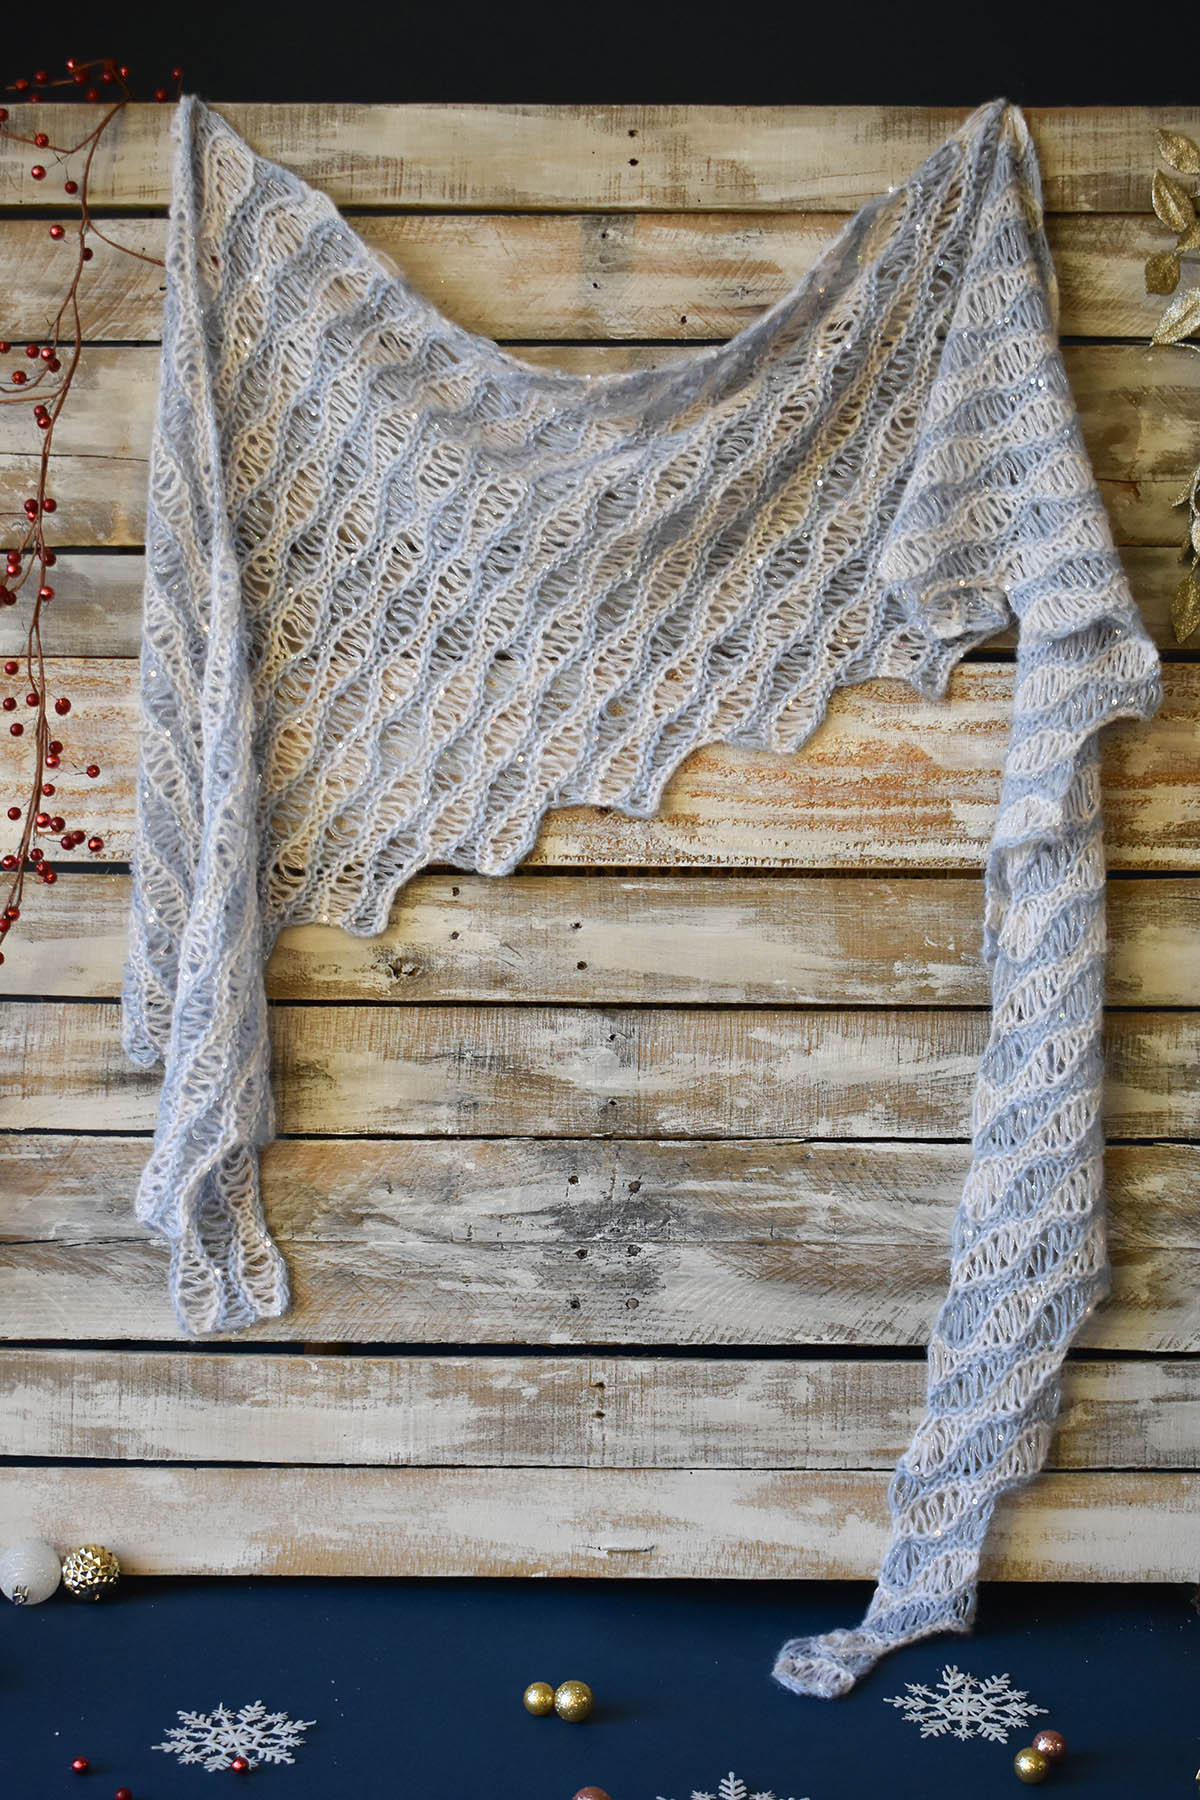
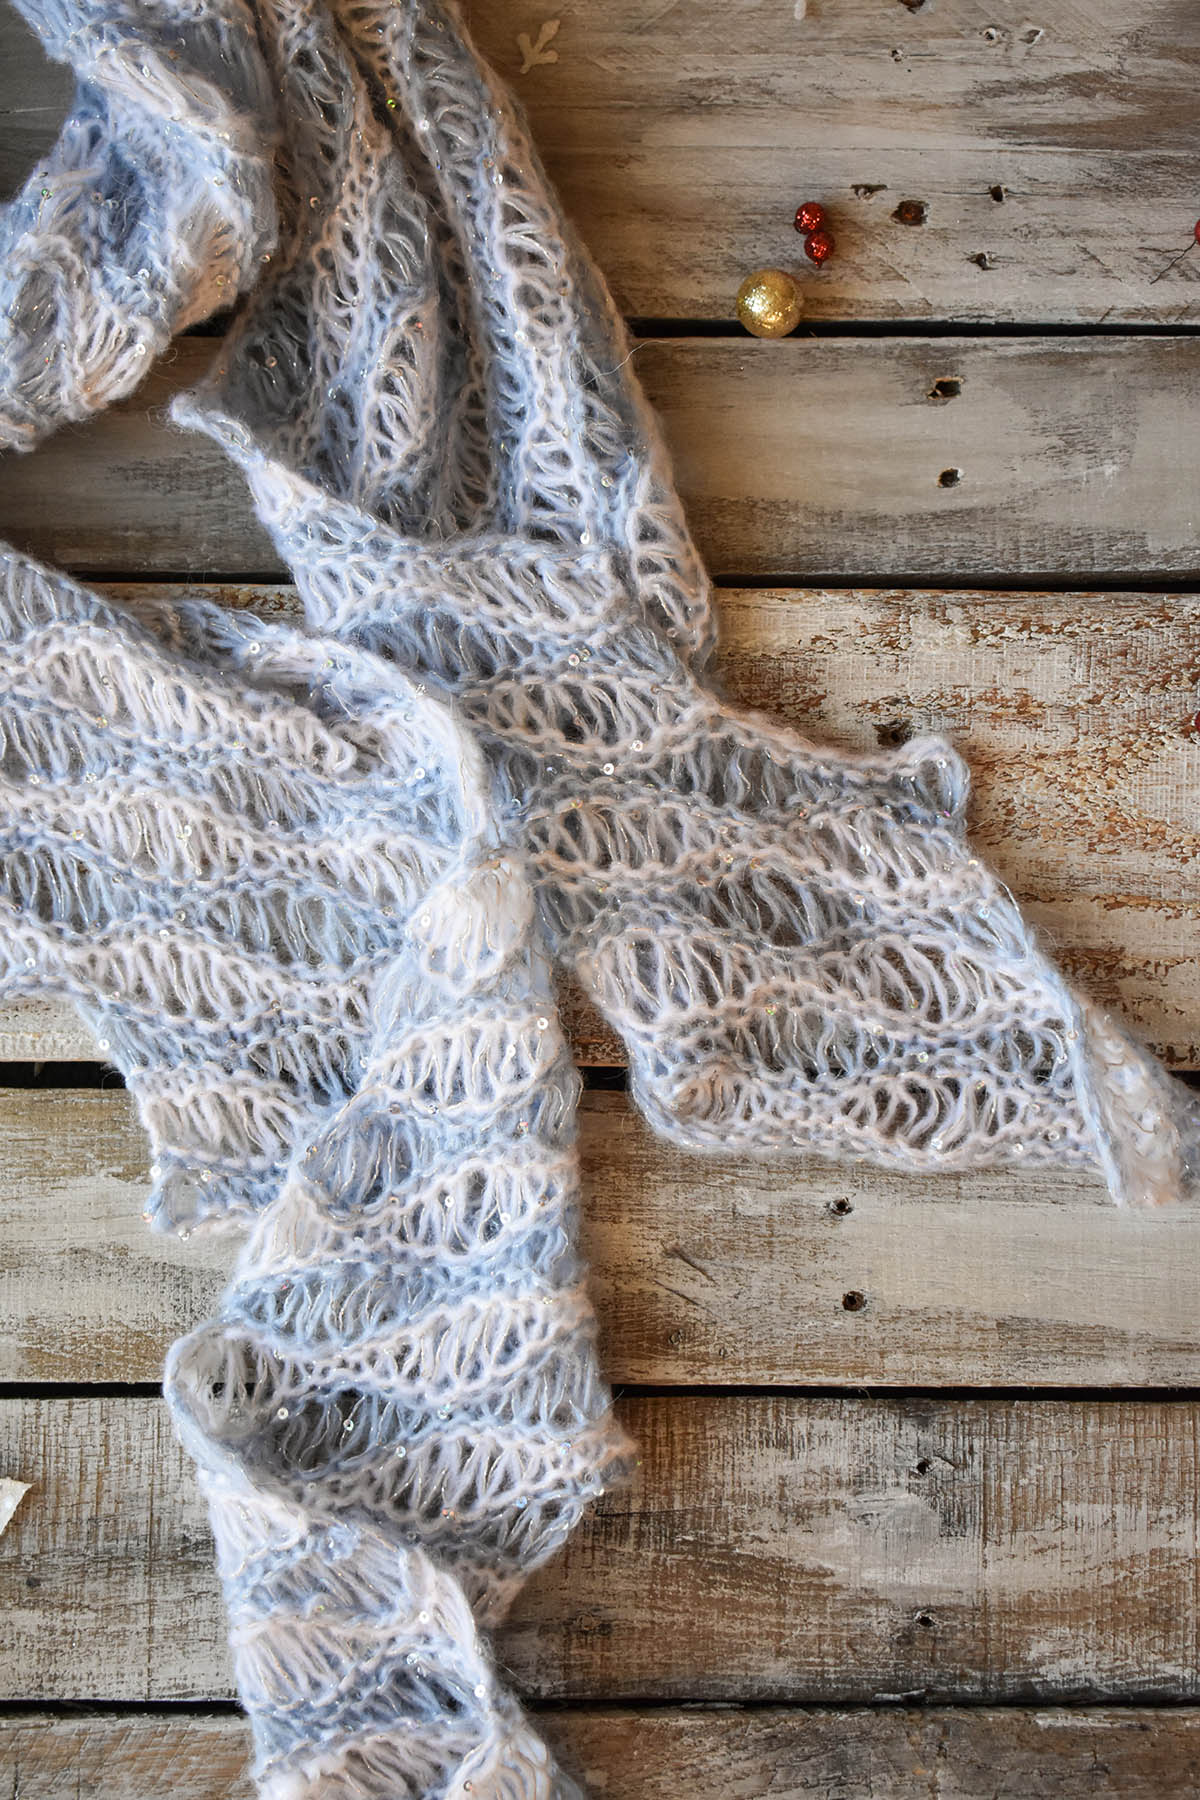
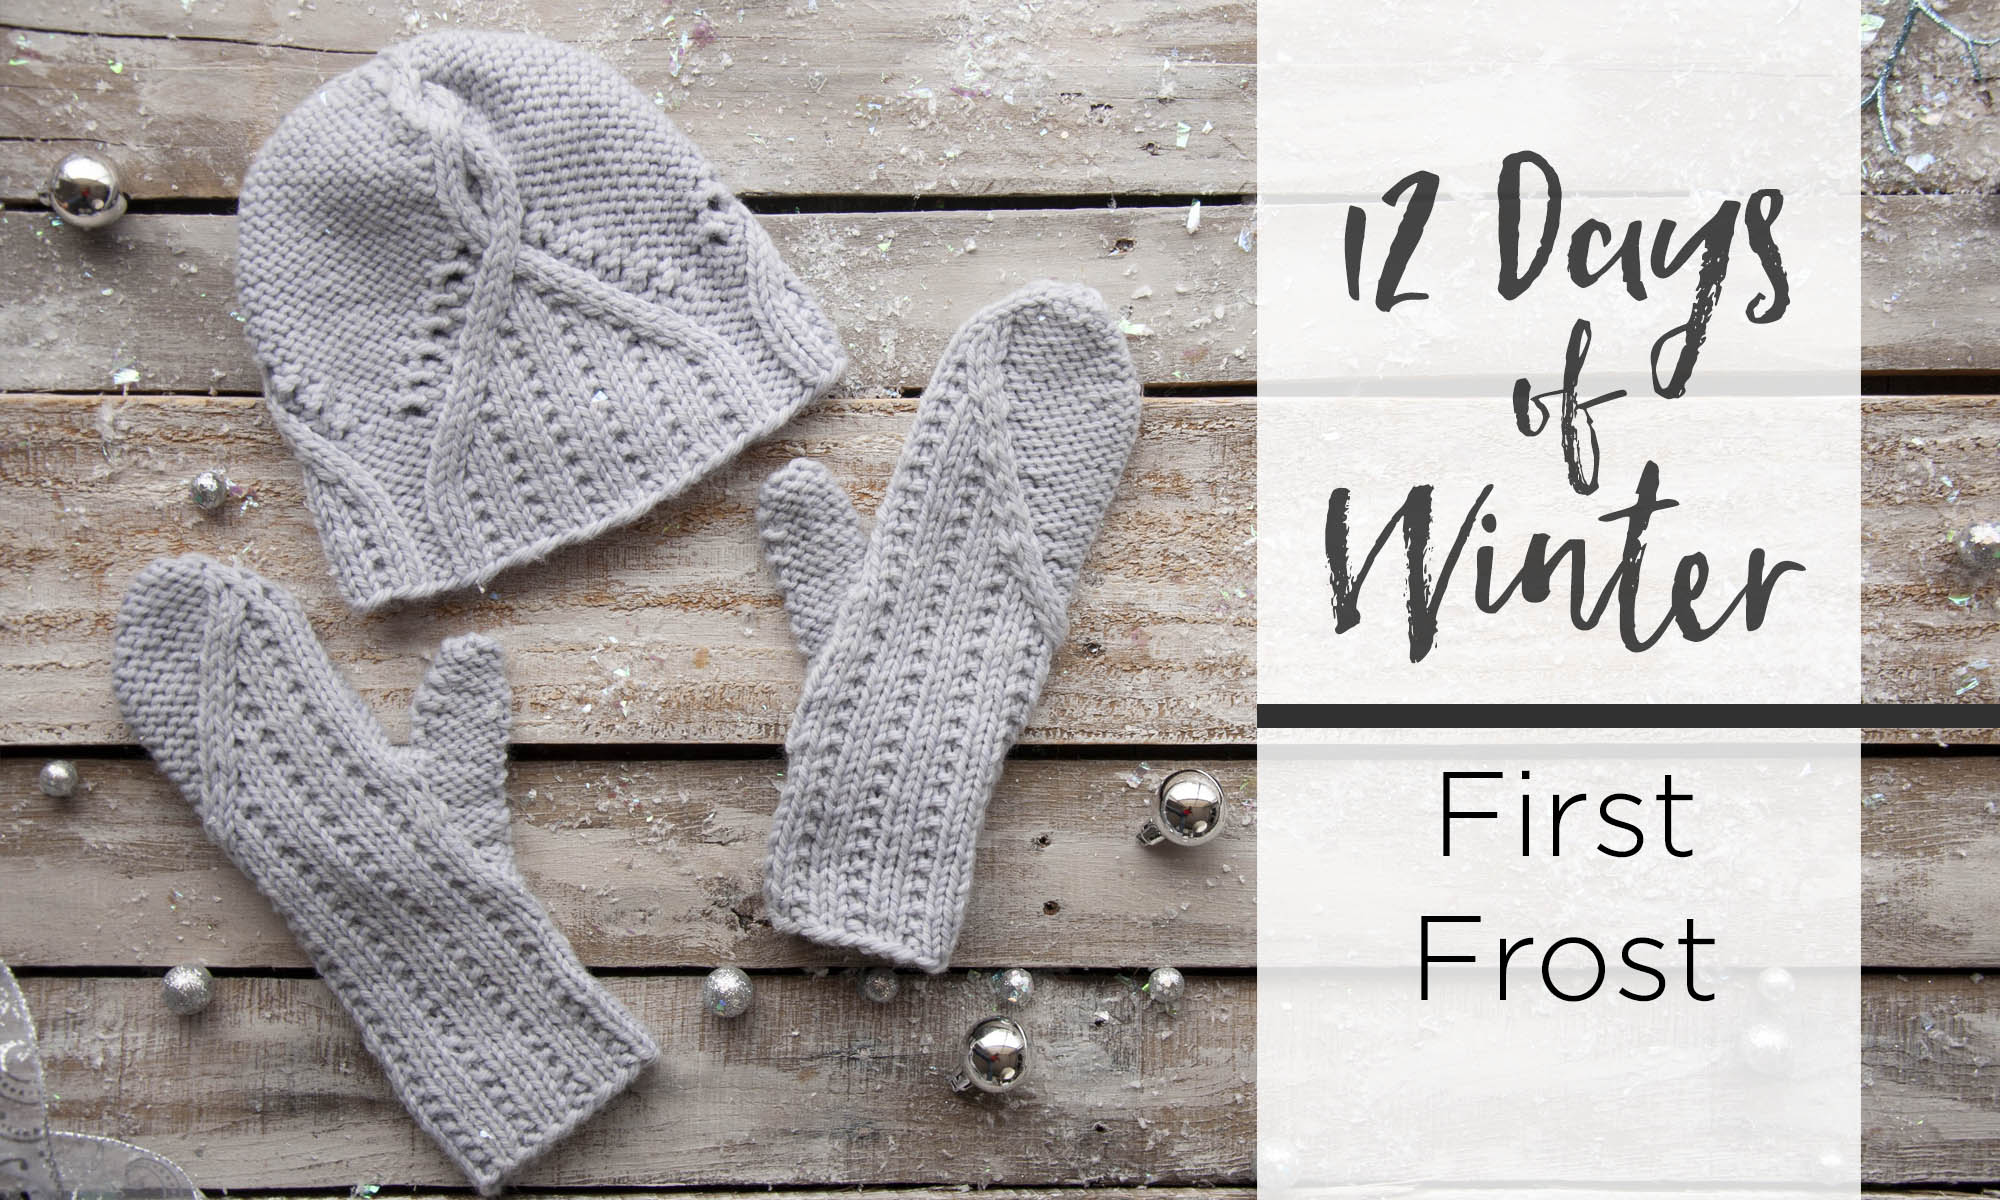
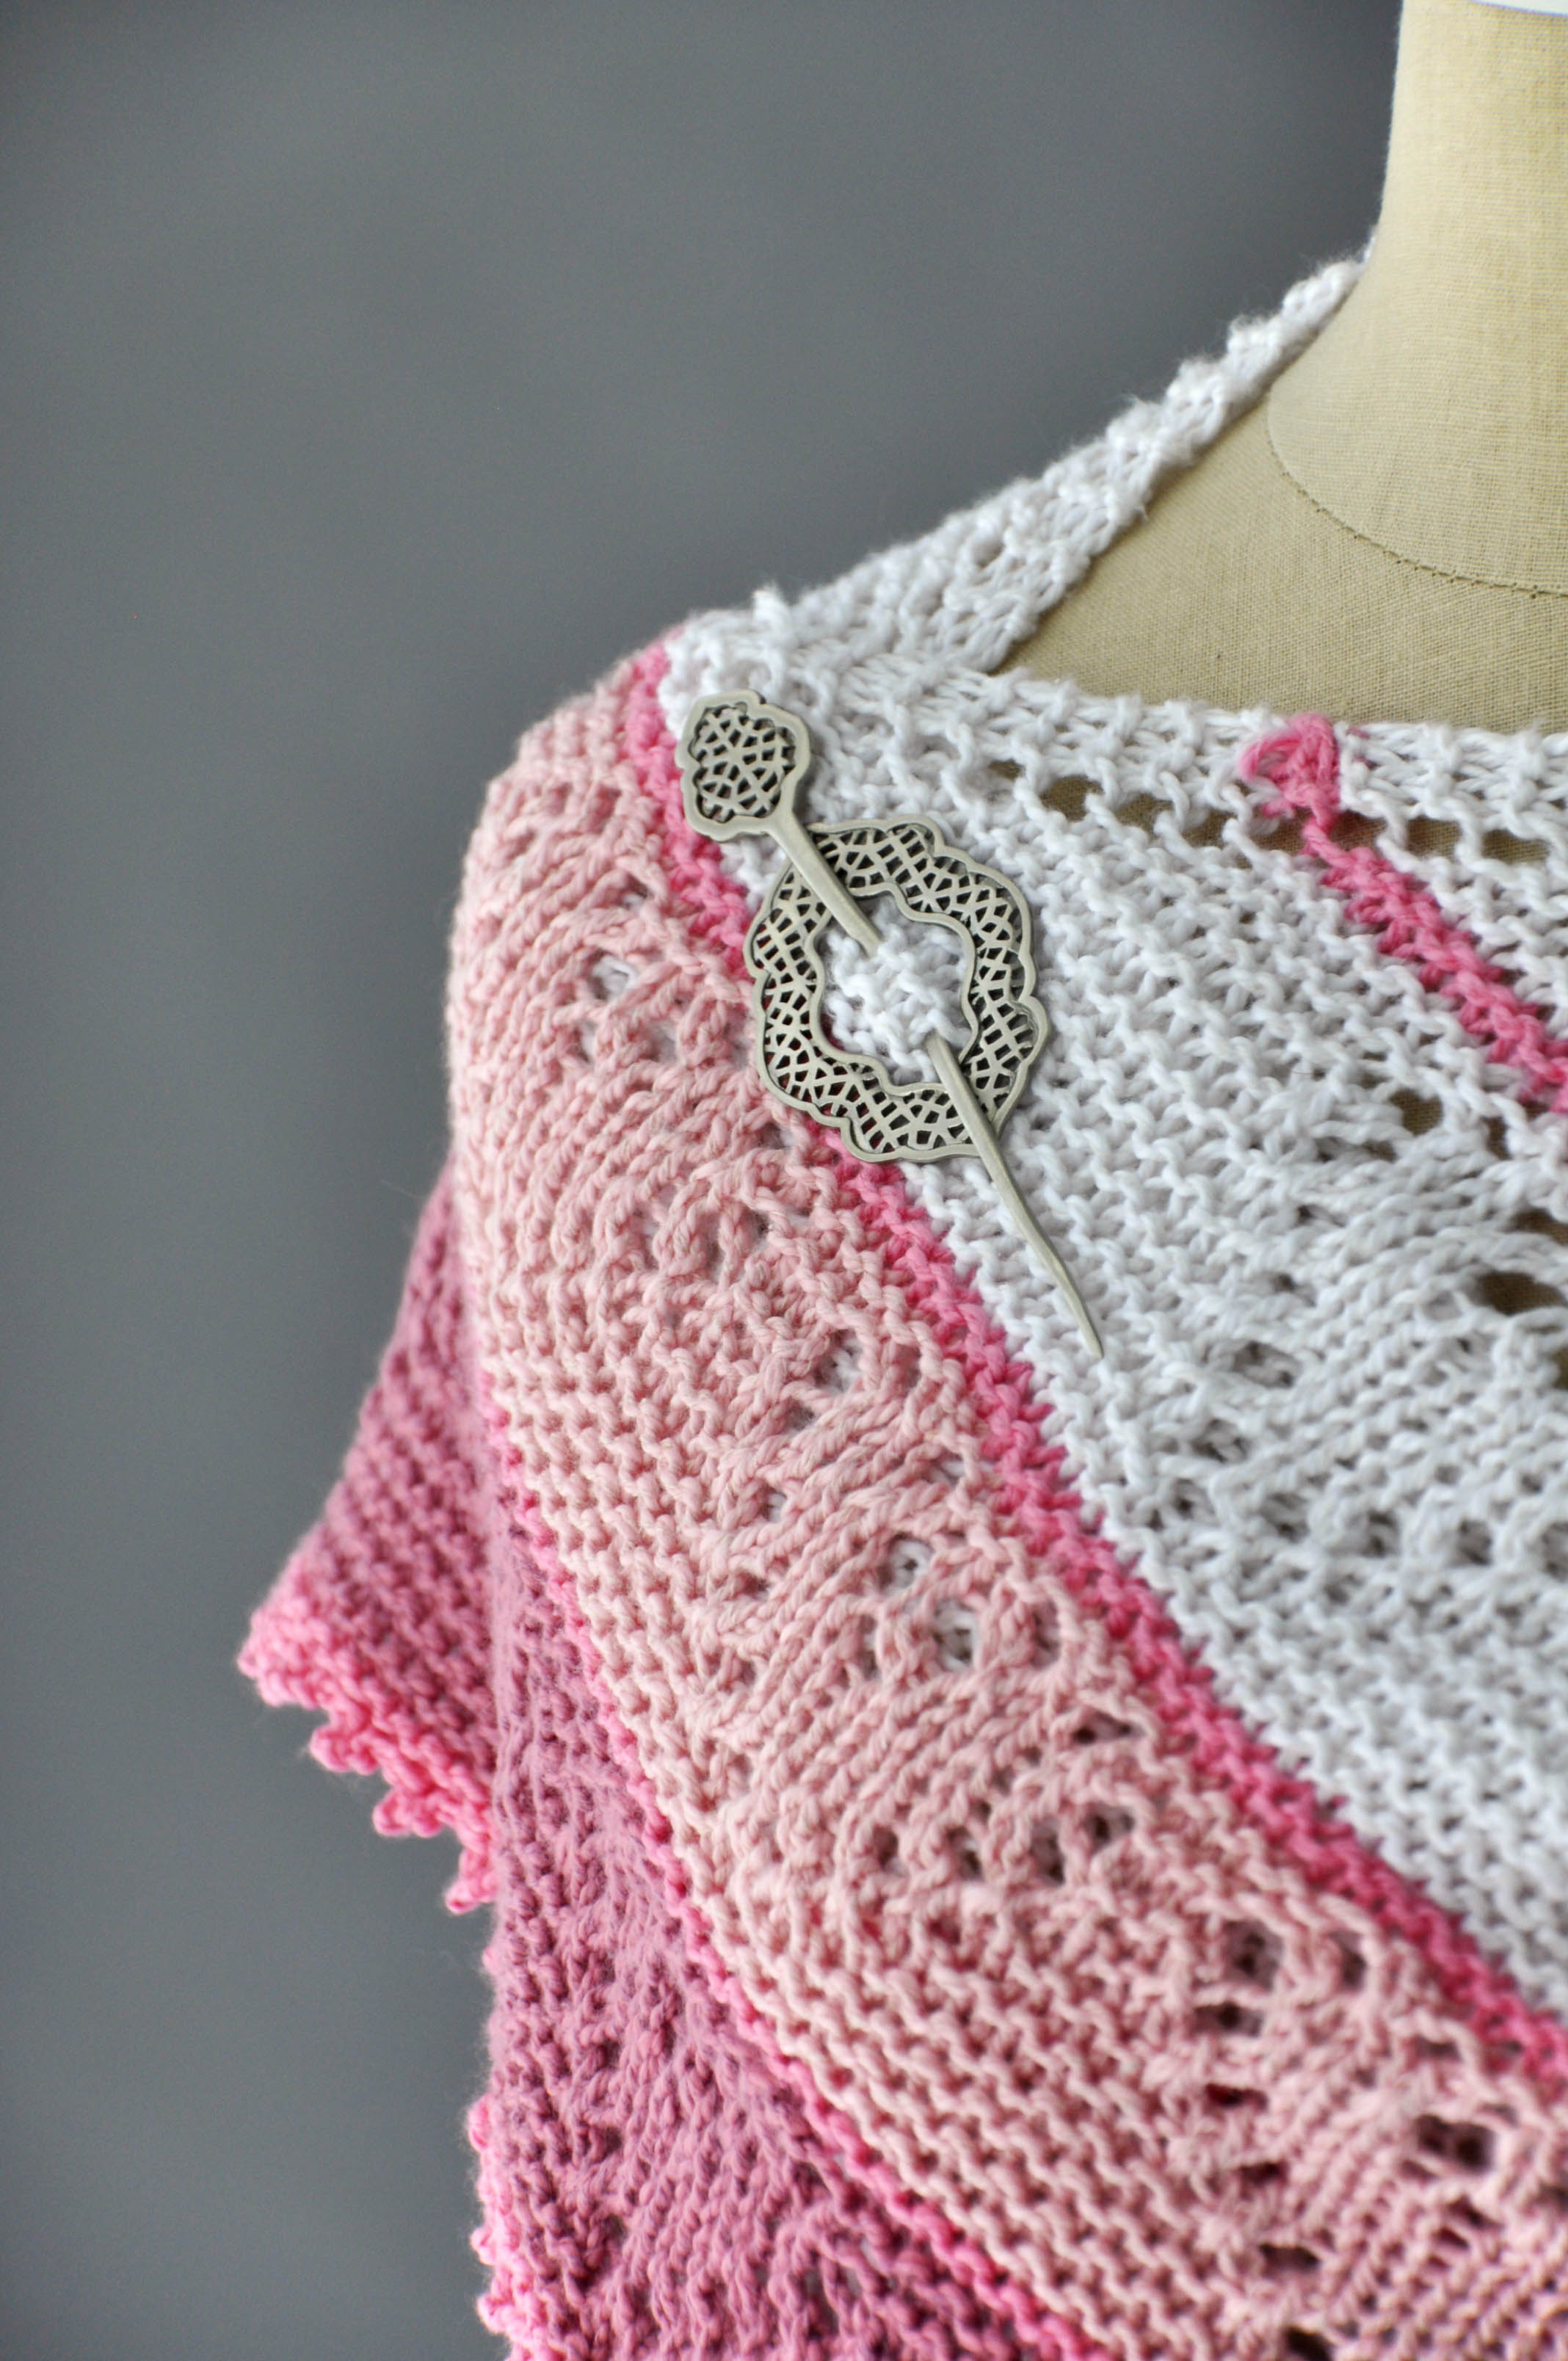
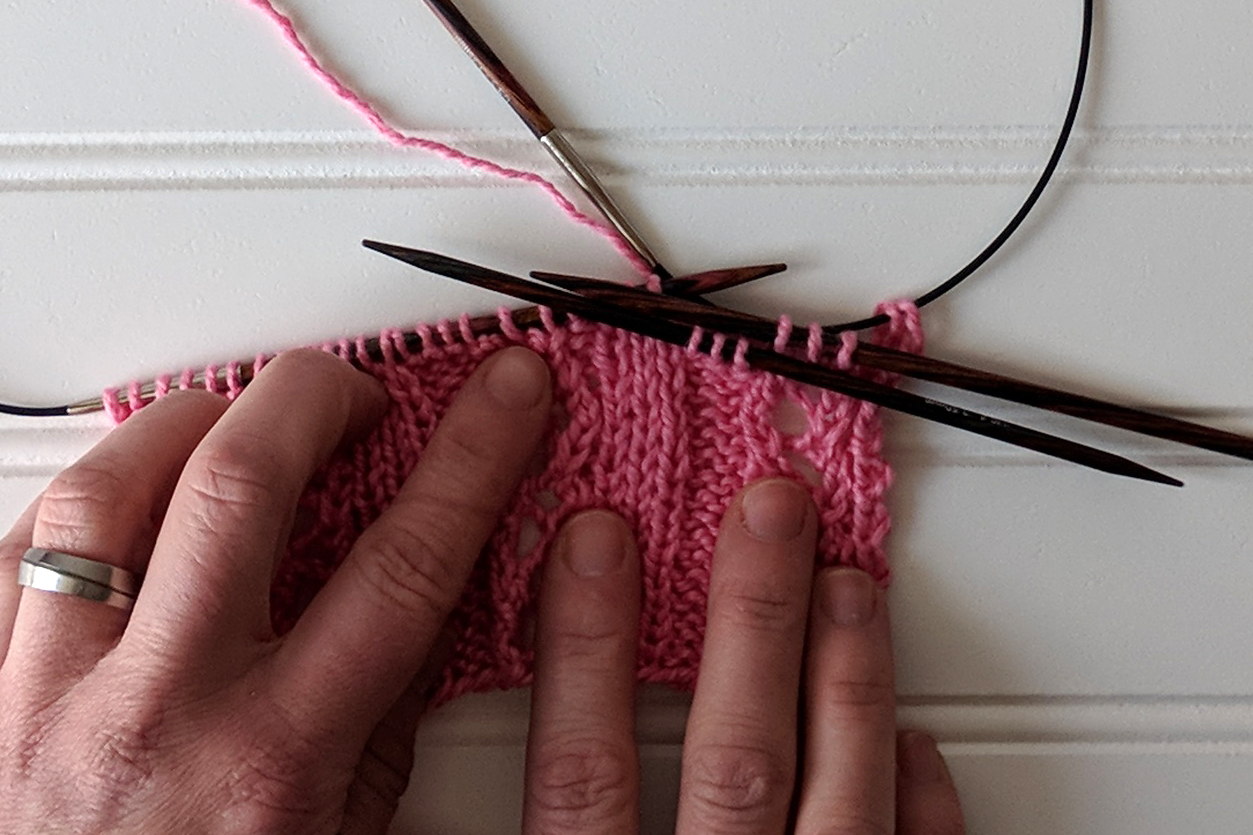
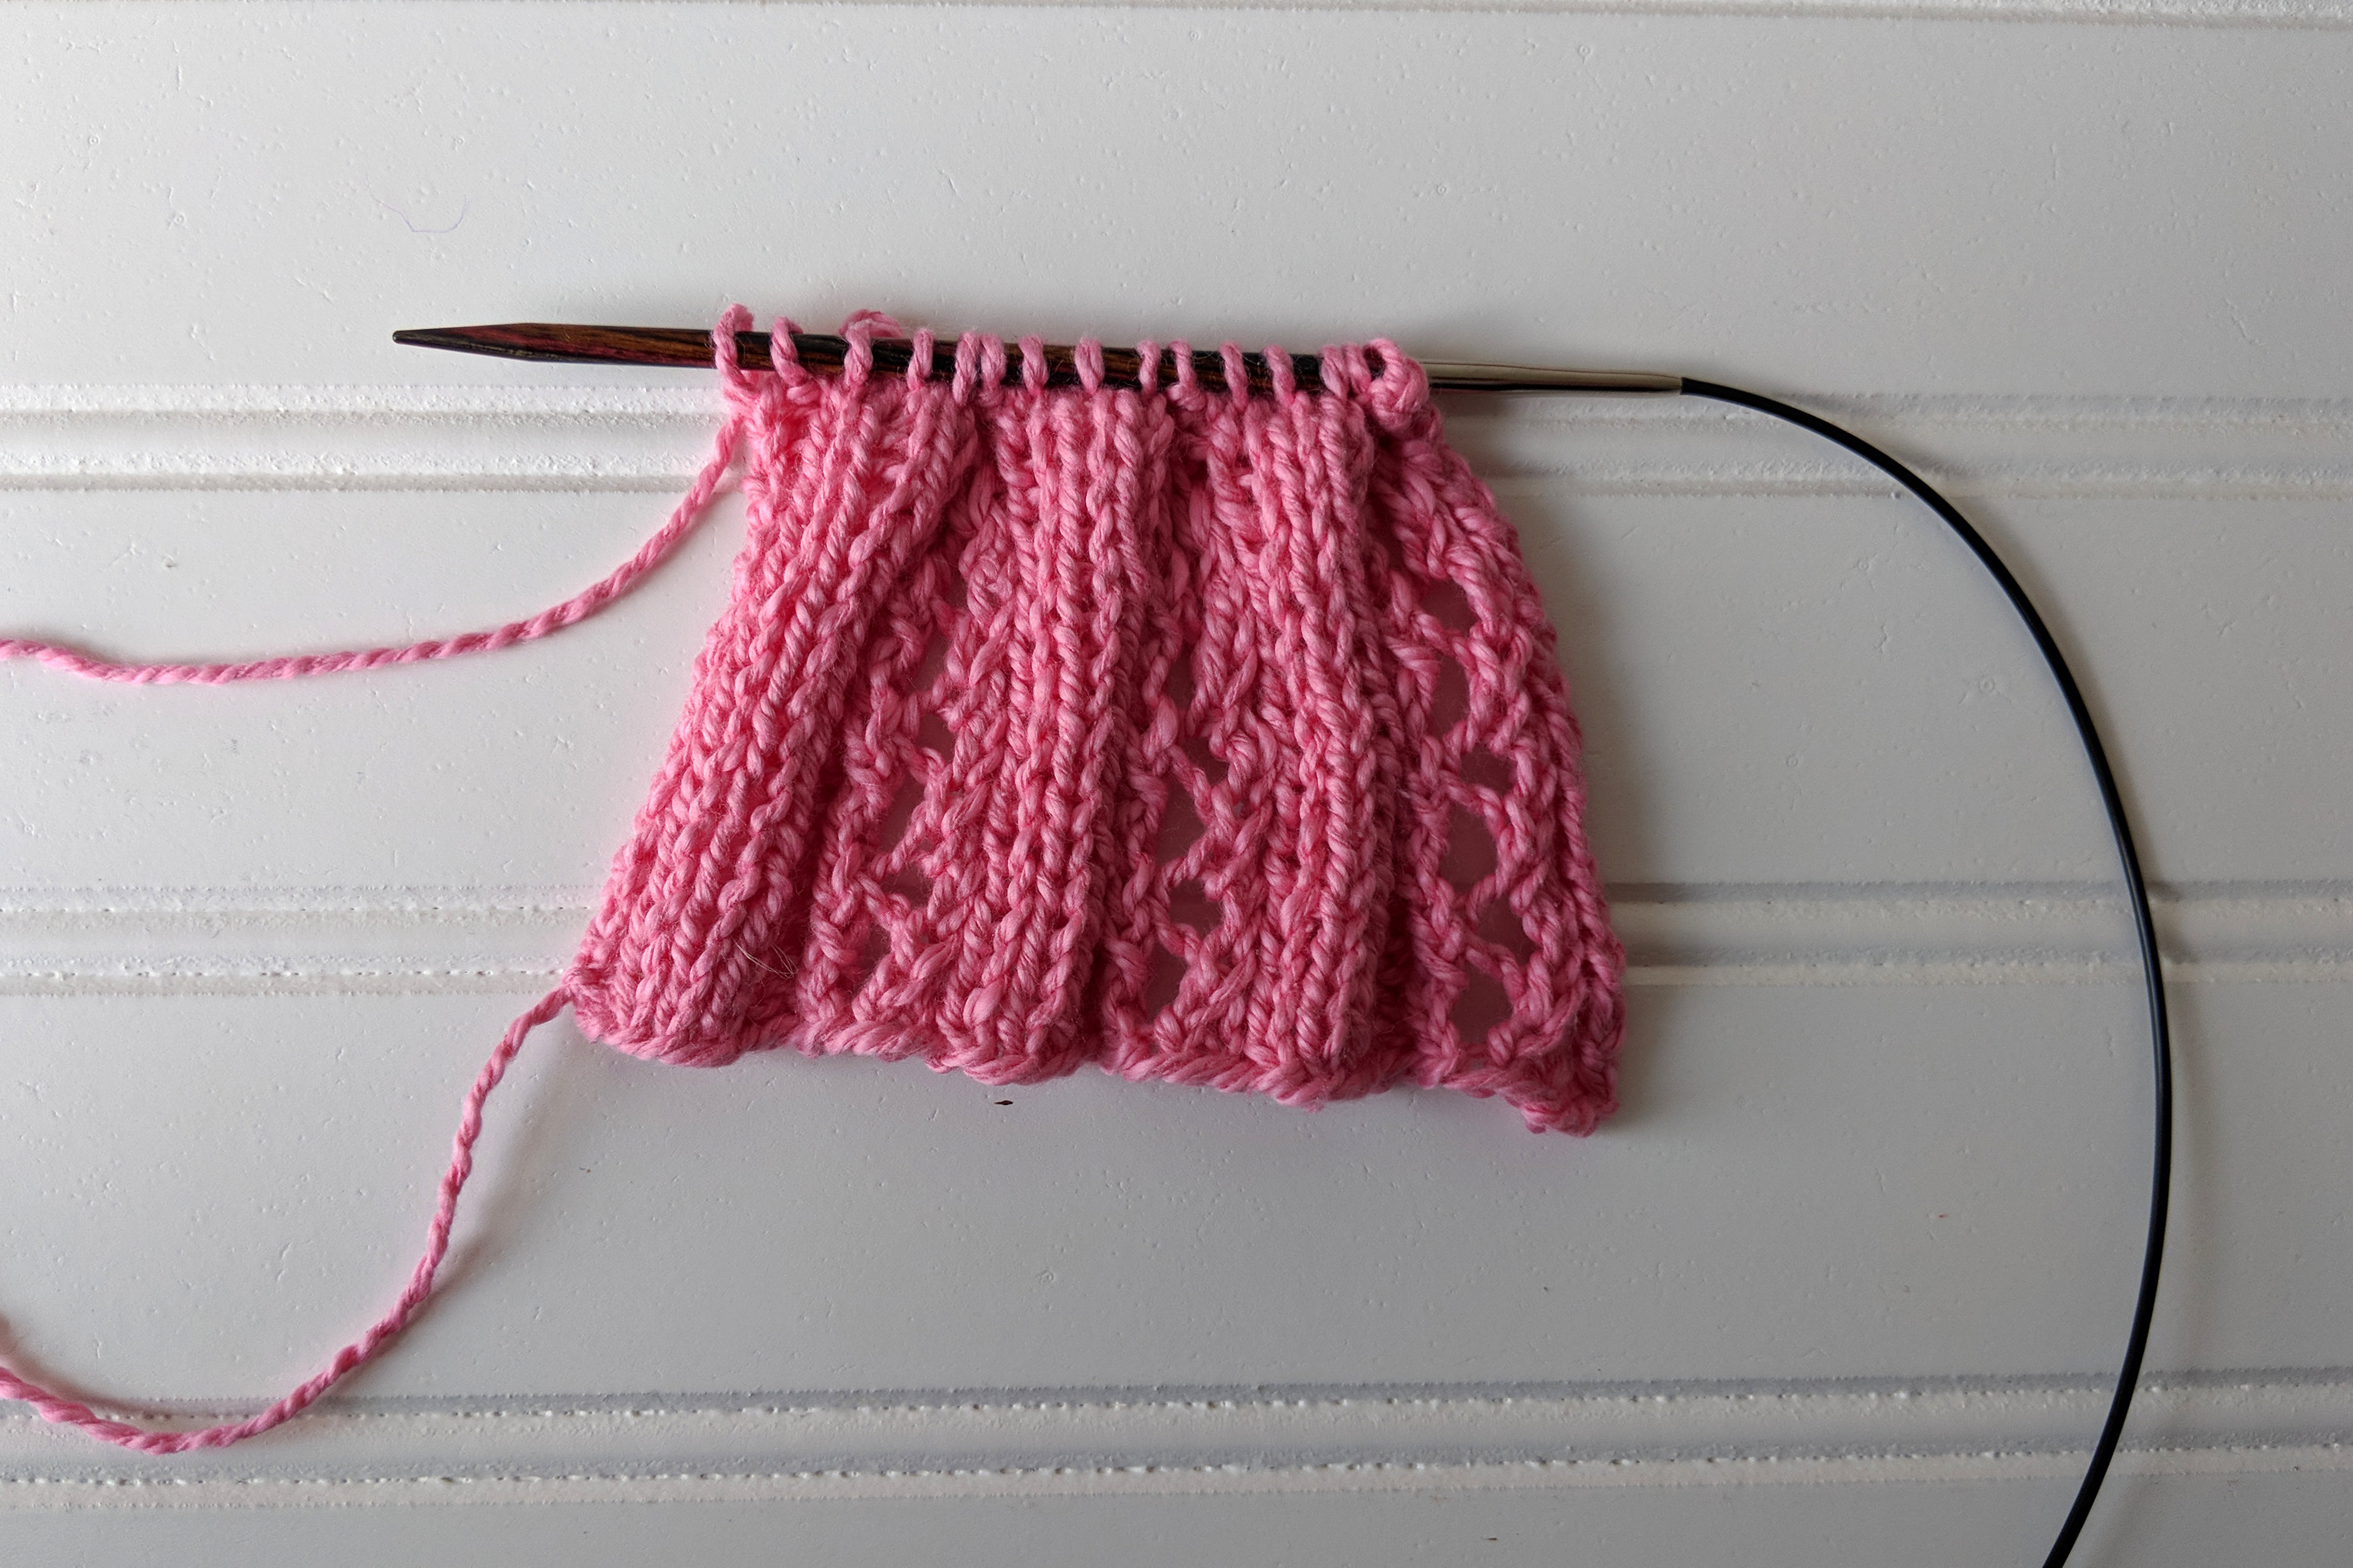
It’s Day 6 of the 12 Days of Winter Kit Collection. Today we’re sharing a show-stopping shawl that’s incredibly quick to knit, largely thanks to beautiful drop stitches. Say hello to the Icicles shawl, designed by Adrienne Larsen.
Knit up using Rozetti Yarns Cotton Gold and Alaska, held together as one strand, this project glistens and glows. Cotton Gold, with its luminous sequins, is one of our favorite carry-along yarns and adds magic to any project. Alaska is a super soft and featherweight yarn with a gorgeous halo. Together, these yarns are a match made in heaven.
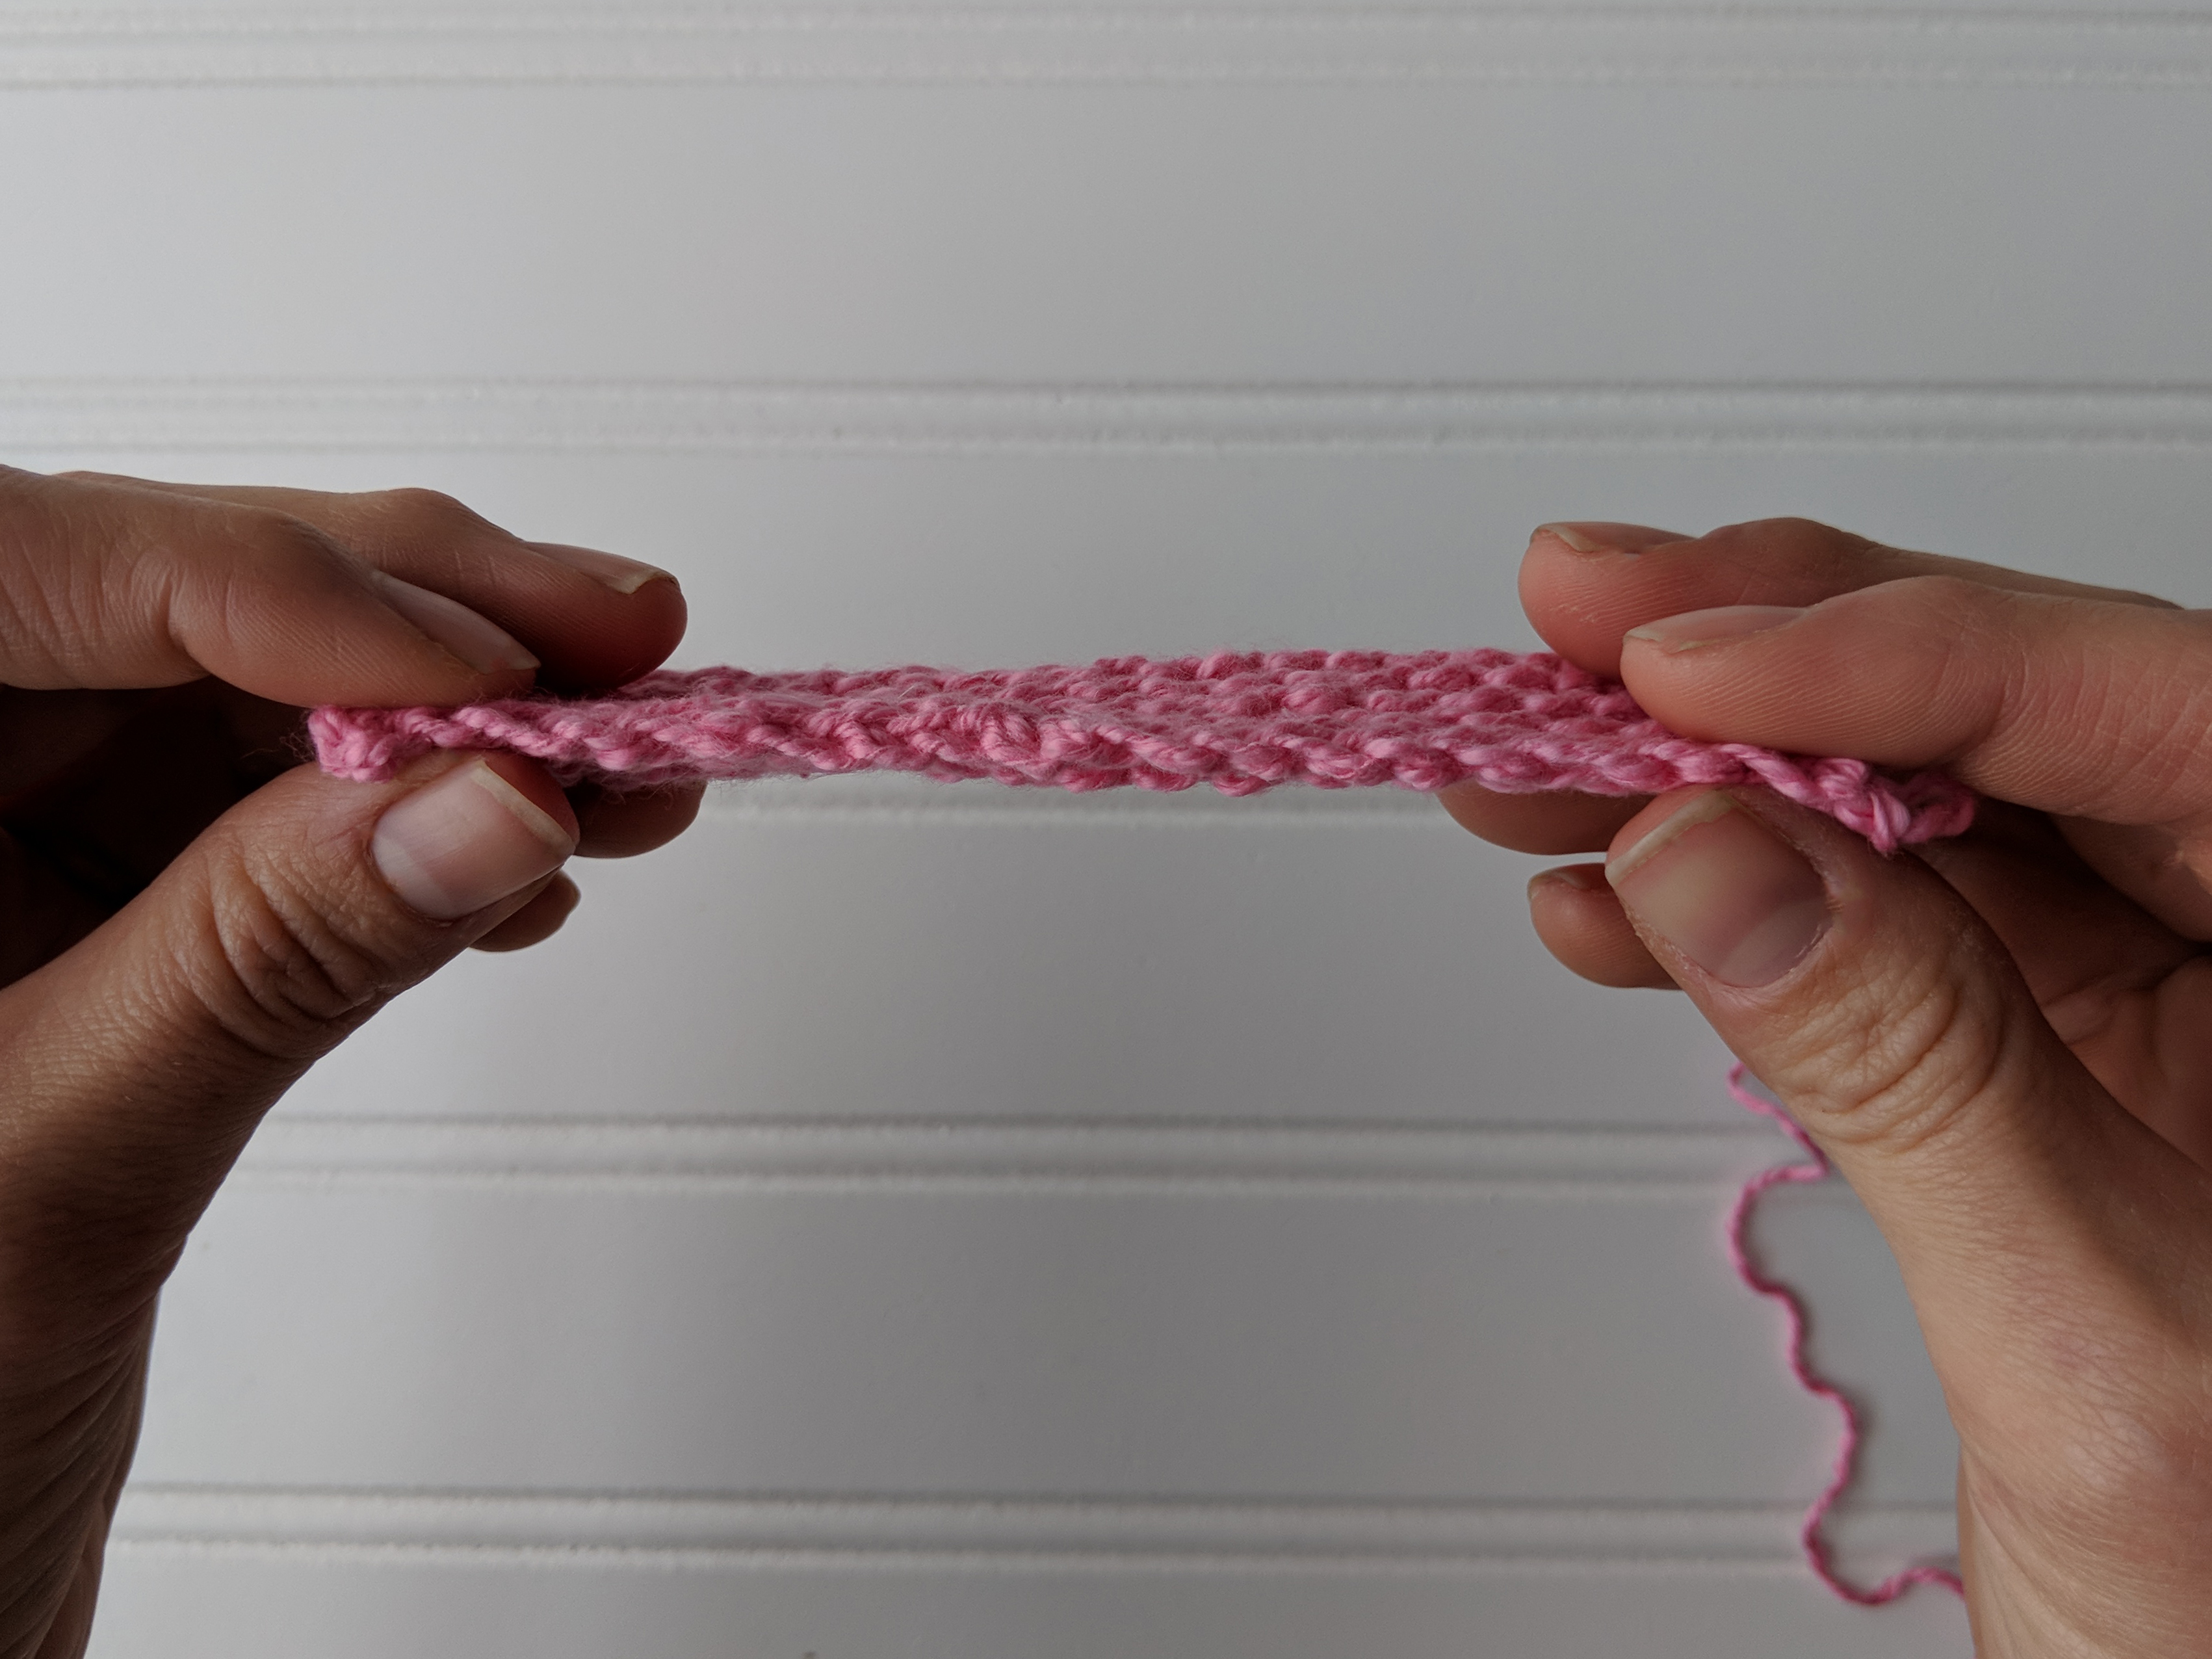
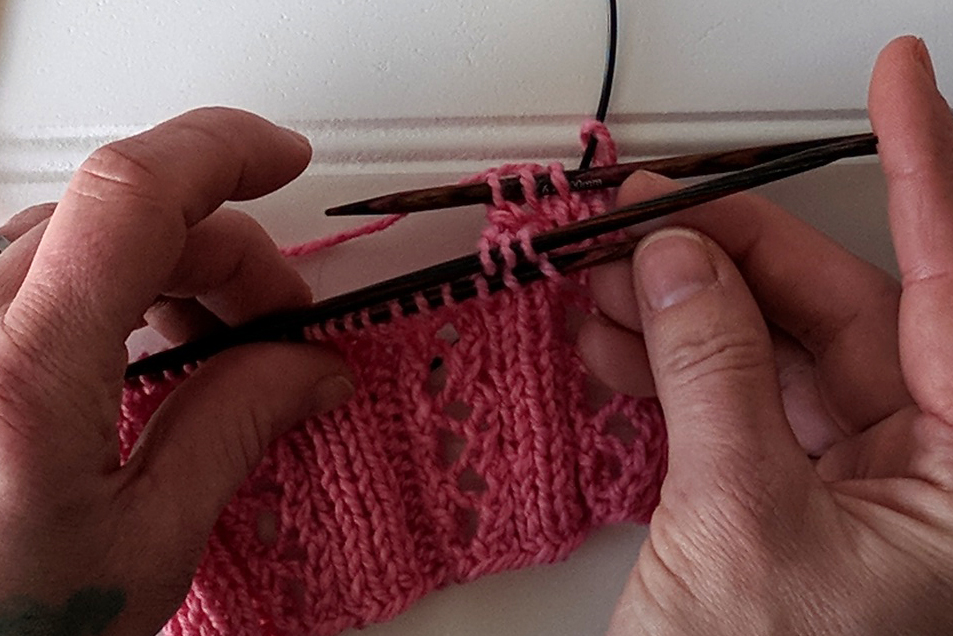
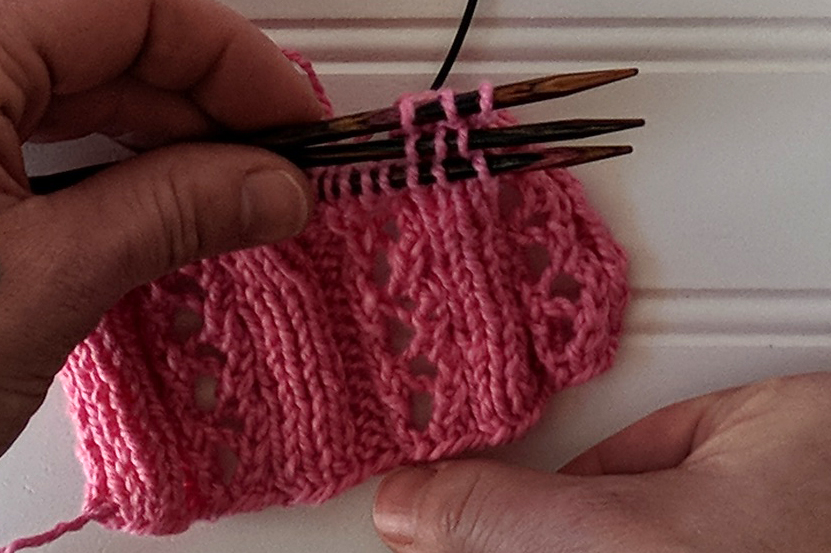
Aside from the glorious yarn combination, the stripes of undulating dropped stitches make this pattern shine (literally!). We love how quickly drop stitches make any project knit up, and they’re easy to work. The Icicles shawl, thanks to the stitch pattern, would be a great last-minute gift for someone truly special. If you’re feeling intimidated by dropped stitches, fear not – these are the good kind of dropped stitches. Today, we have a tutorial on how to work each of the dropped stitches featured in the pattern.
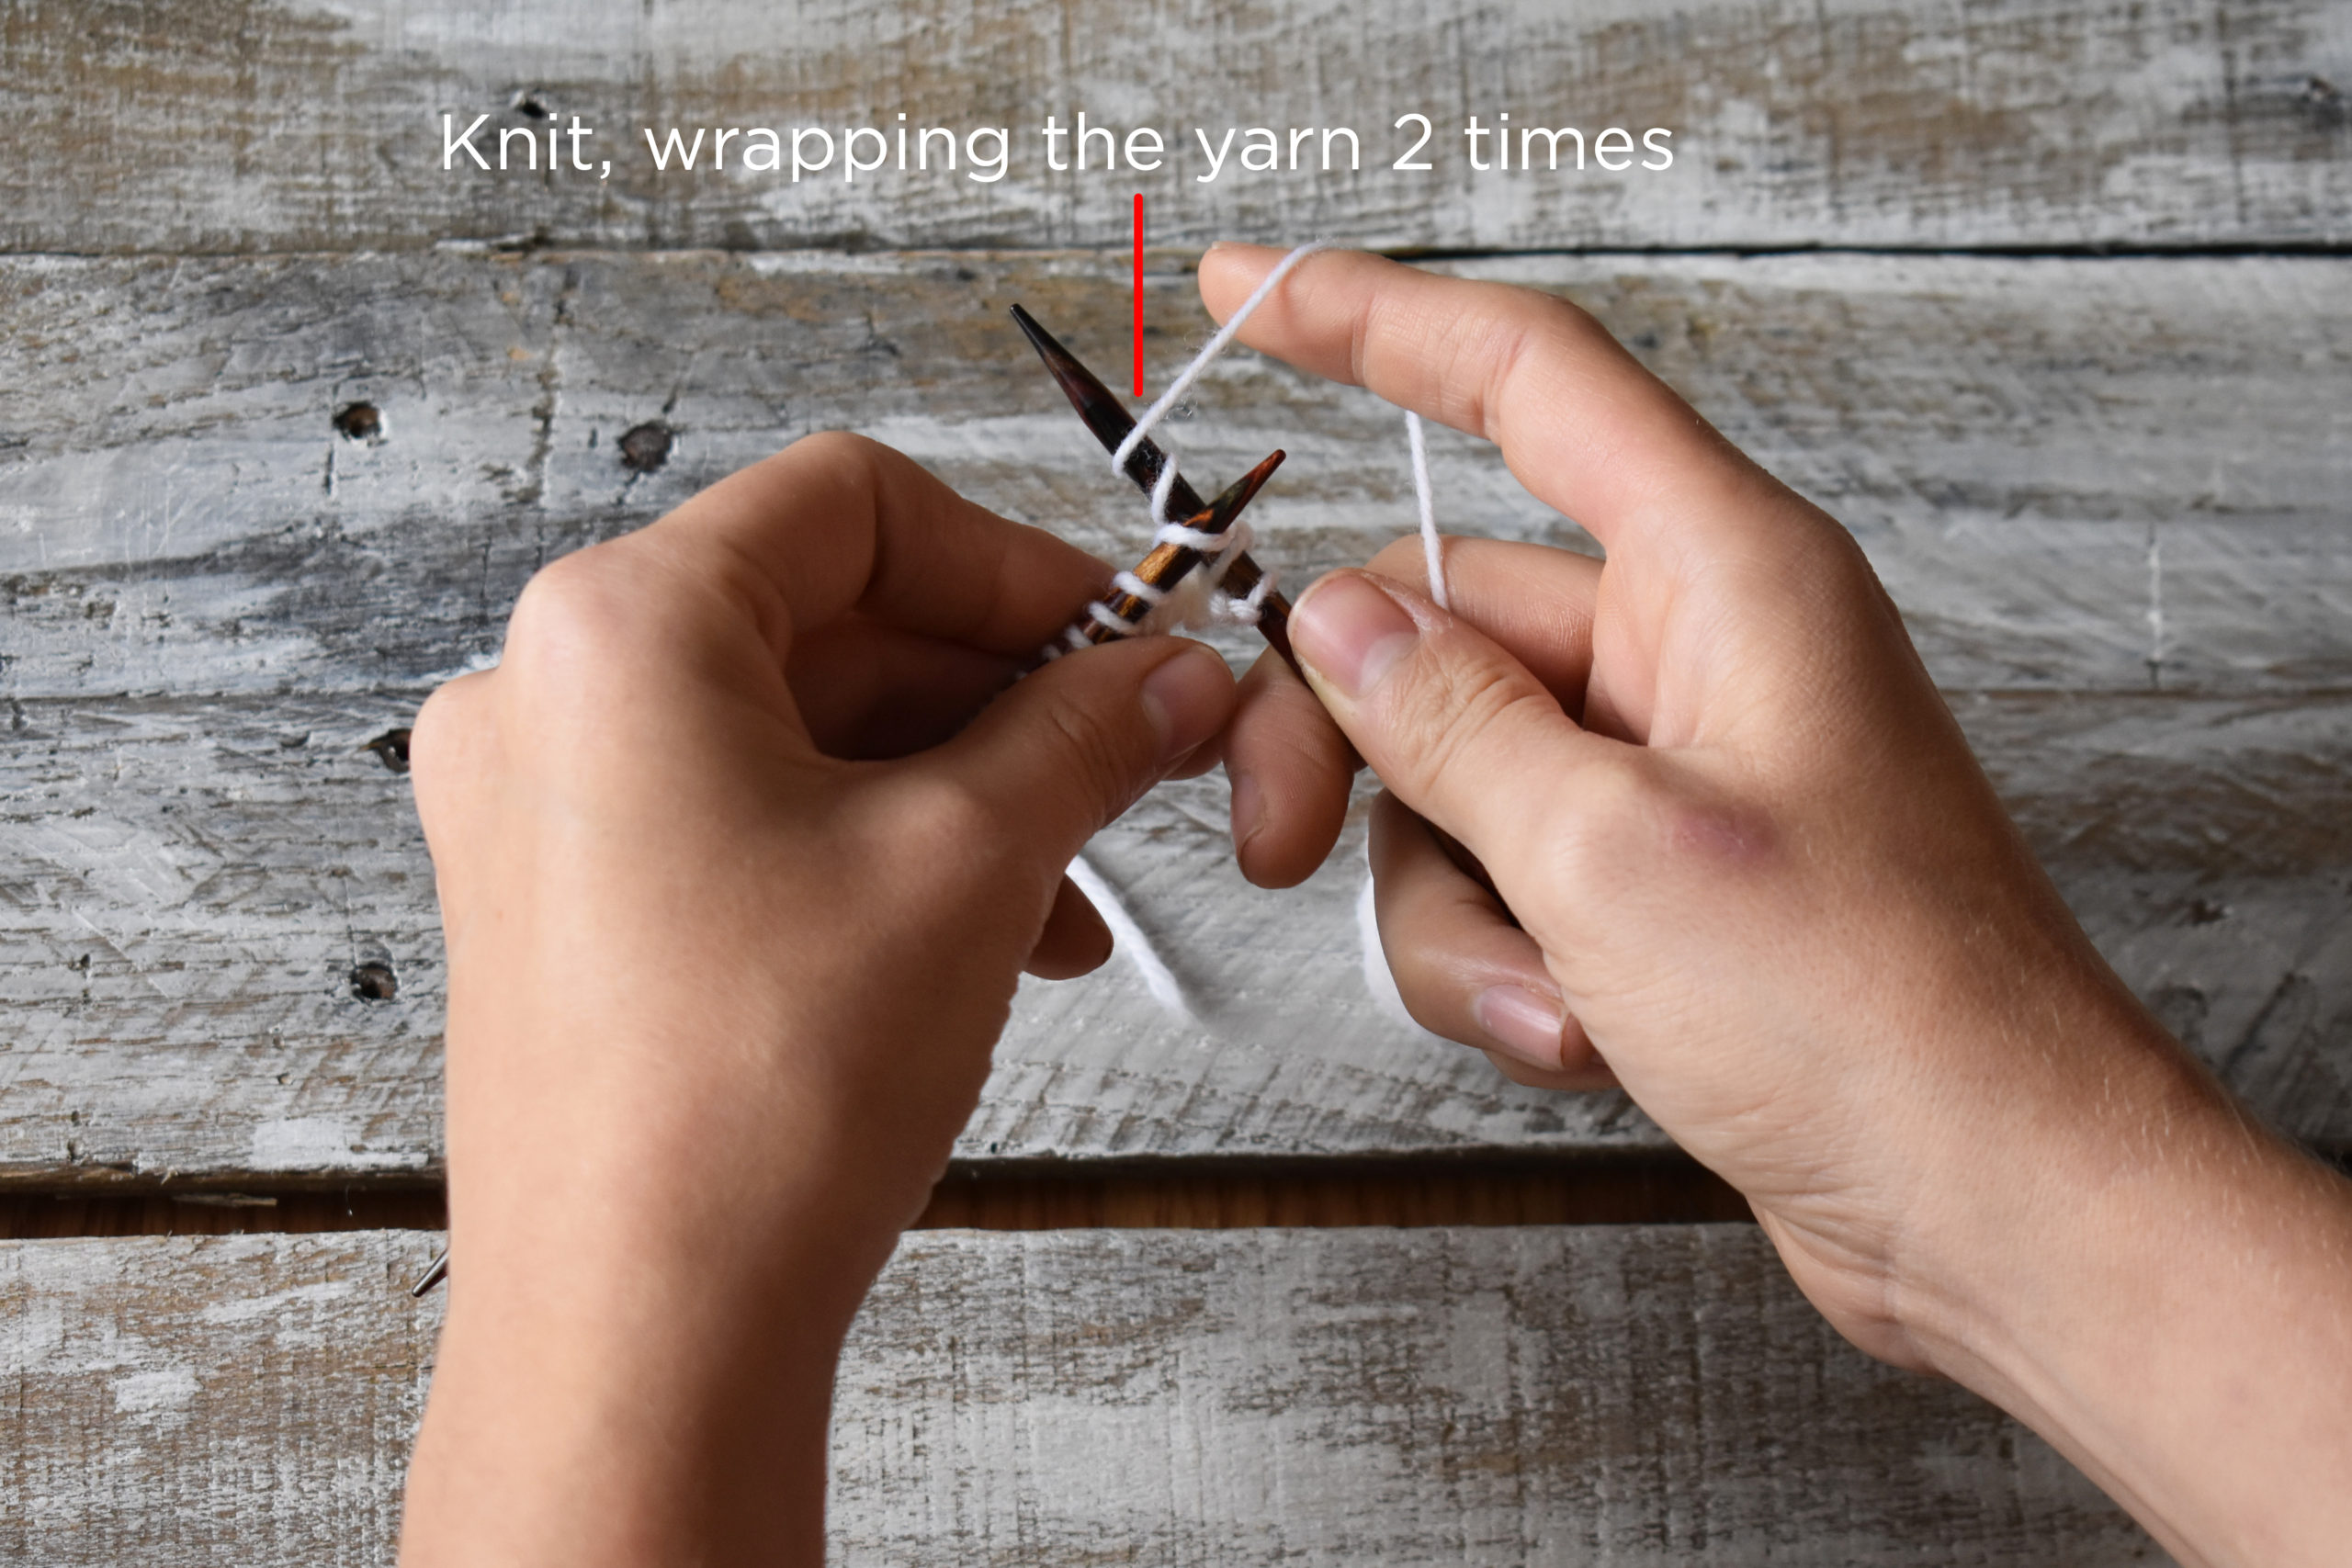
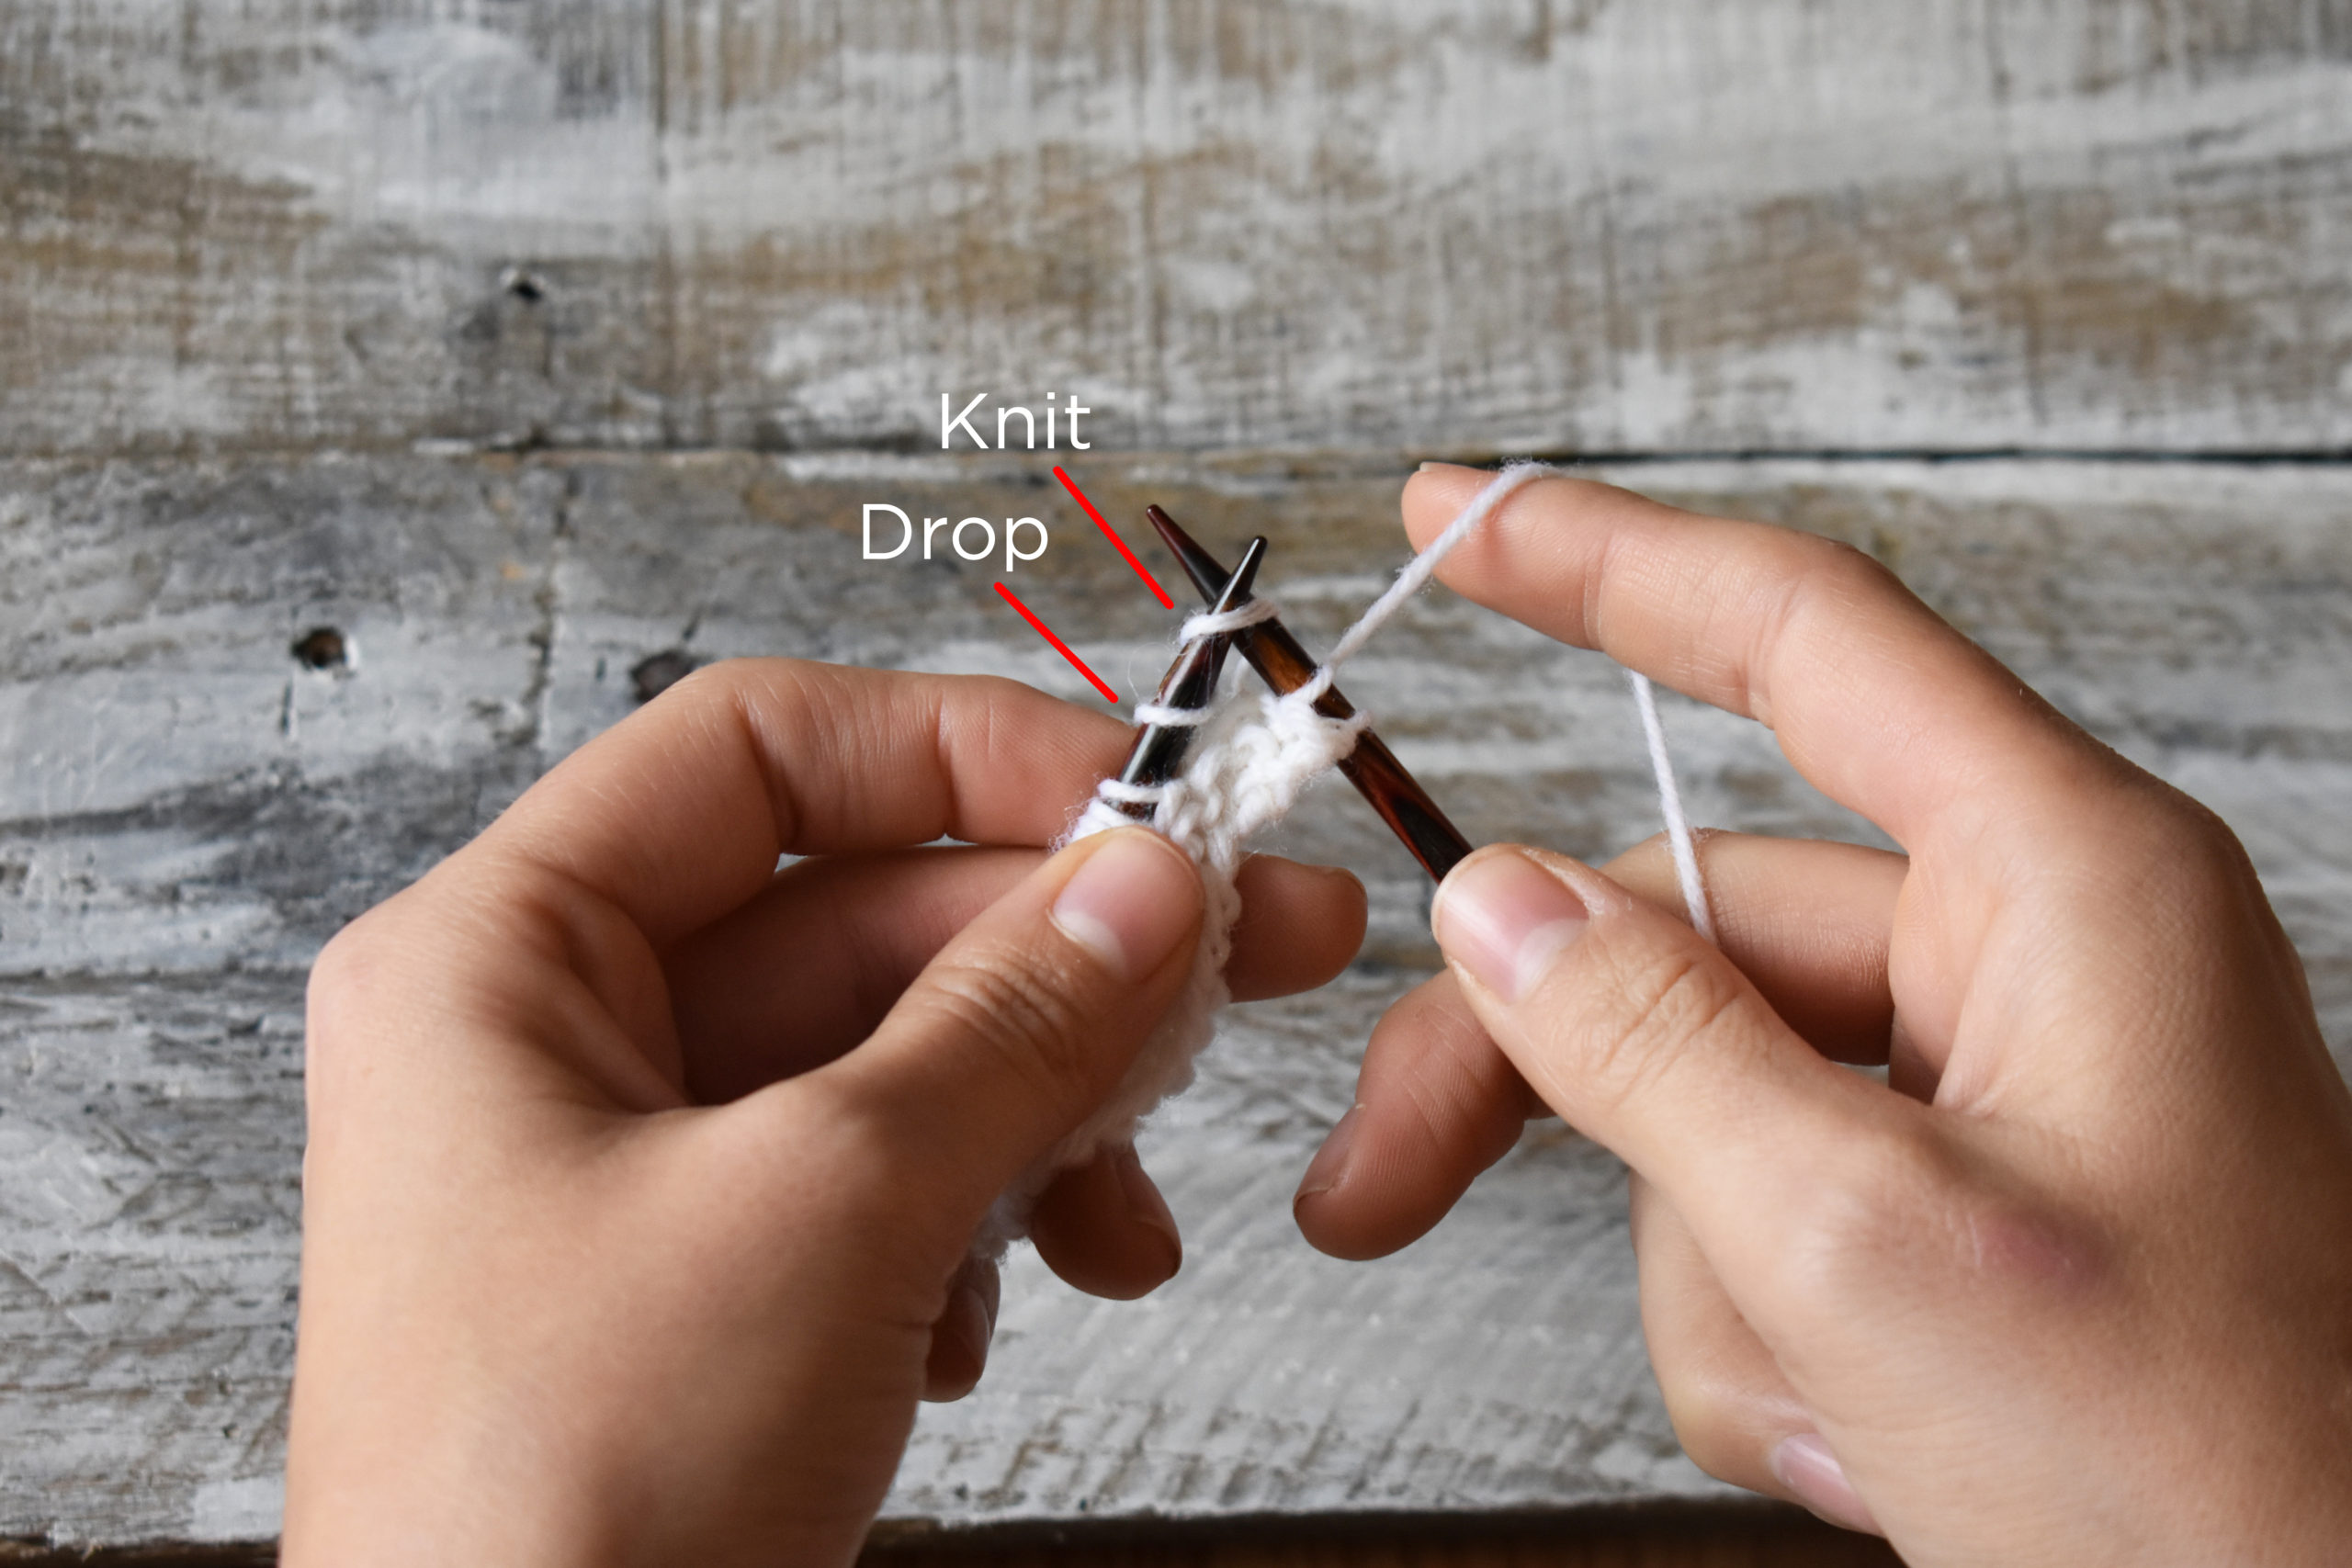
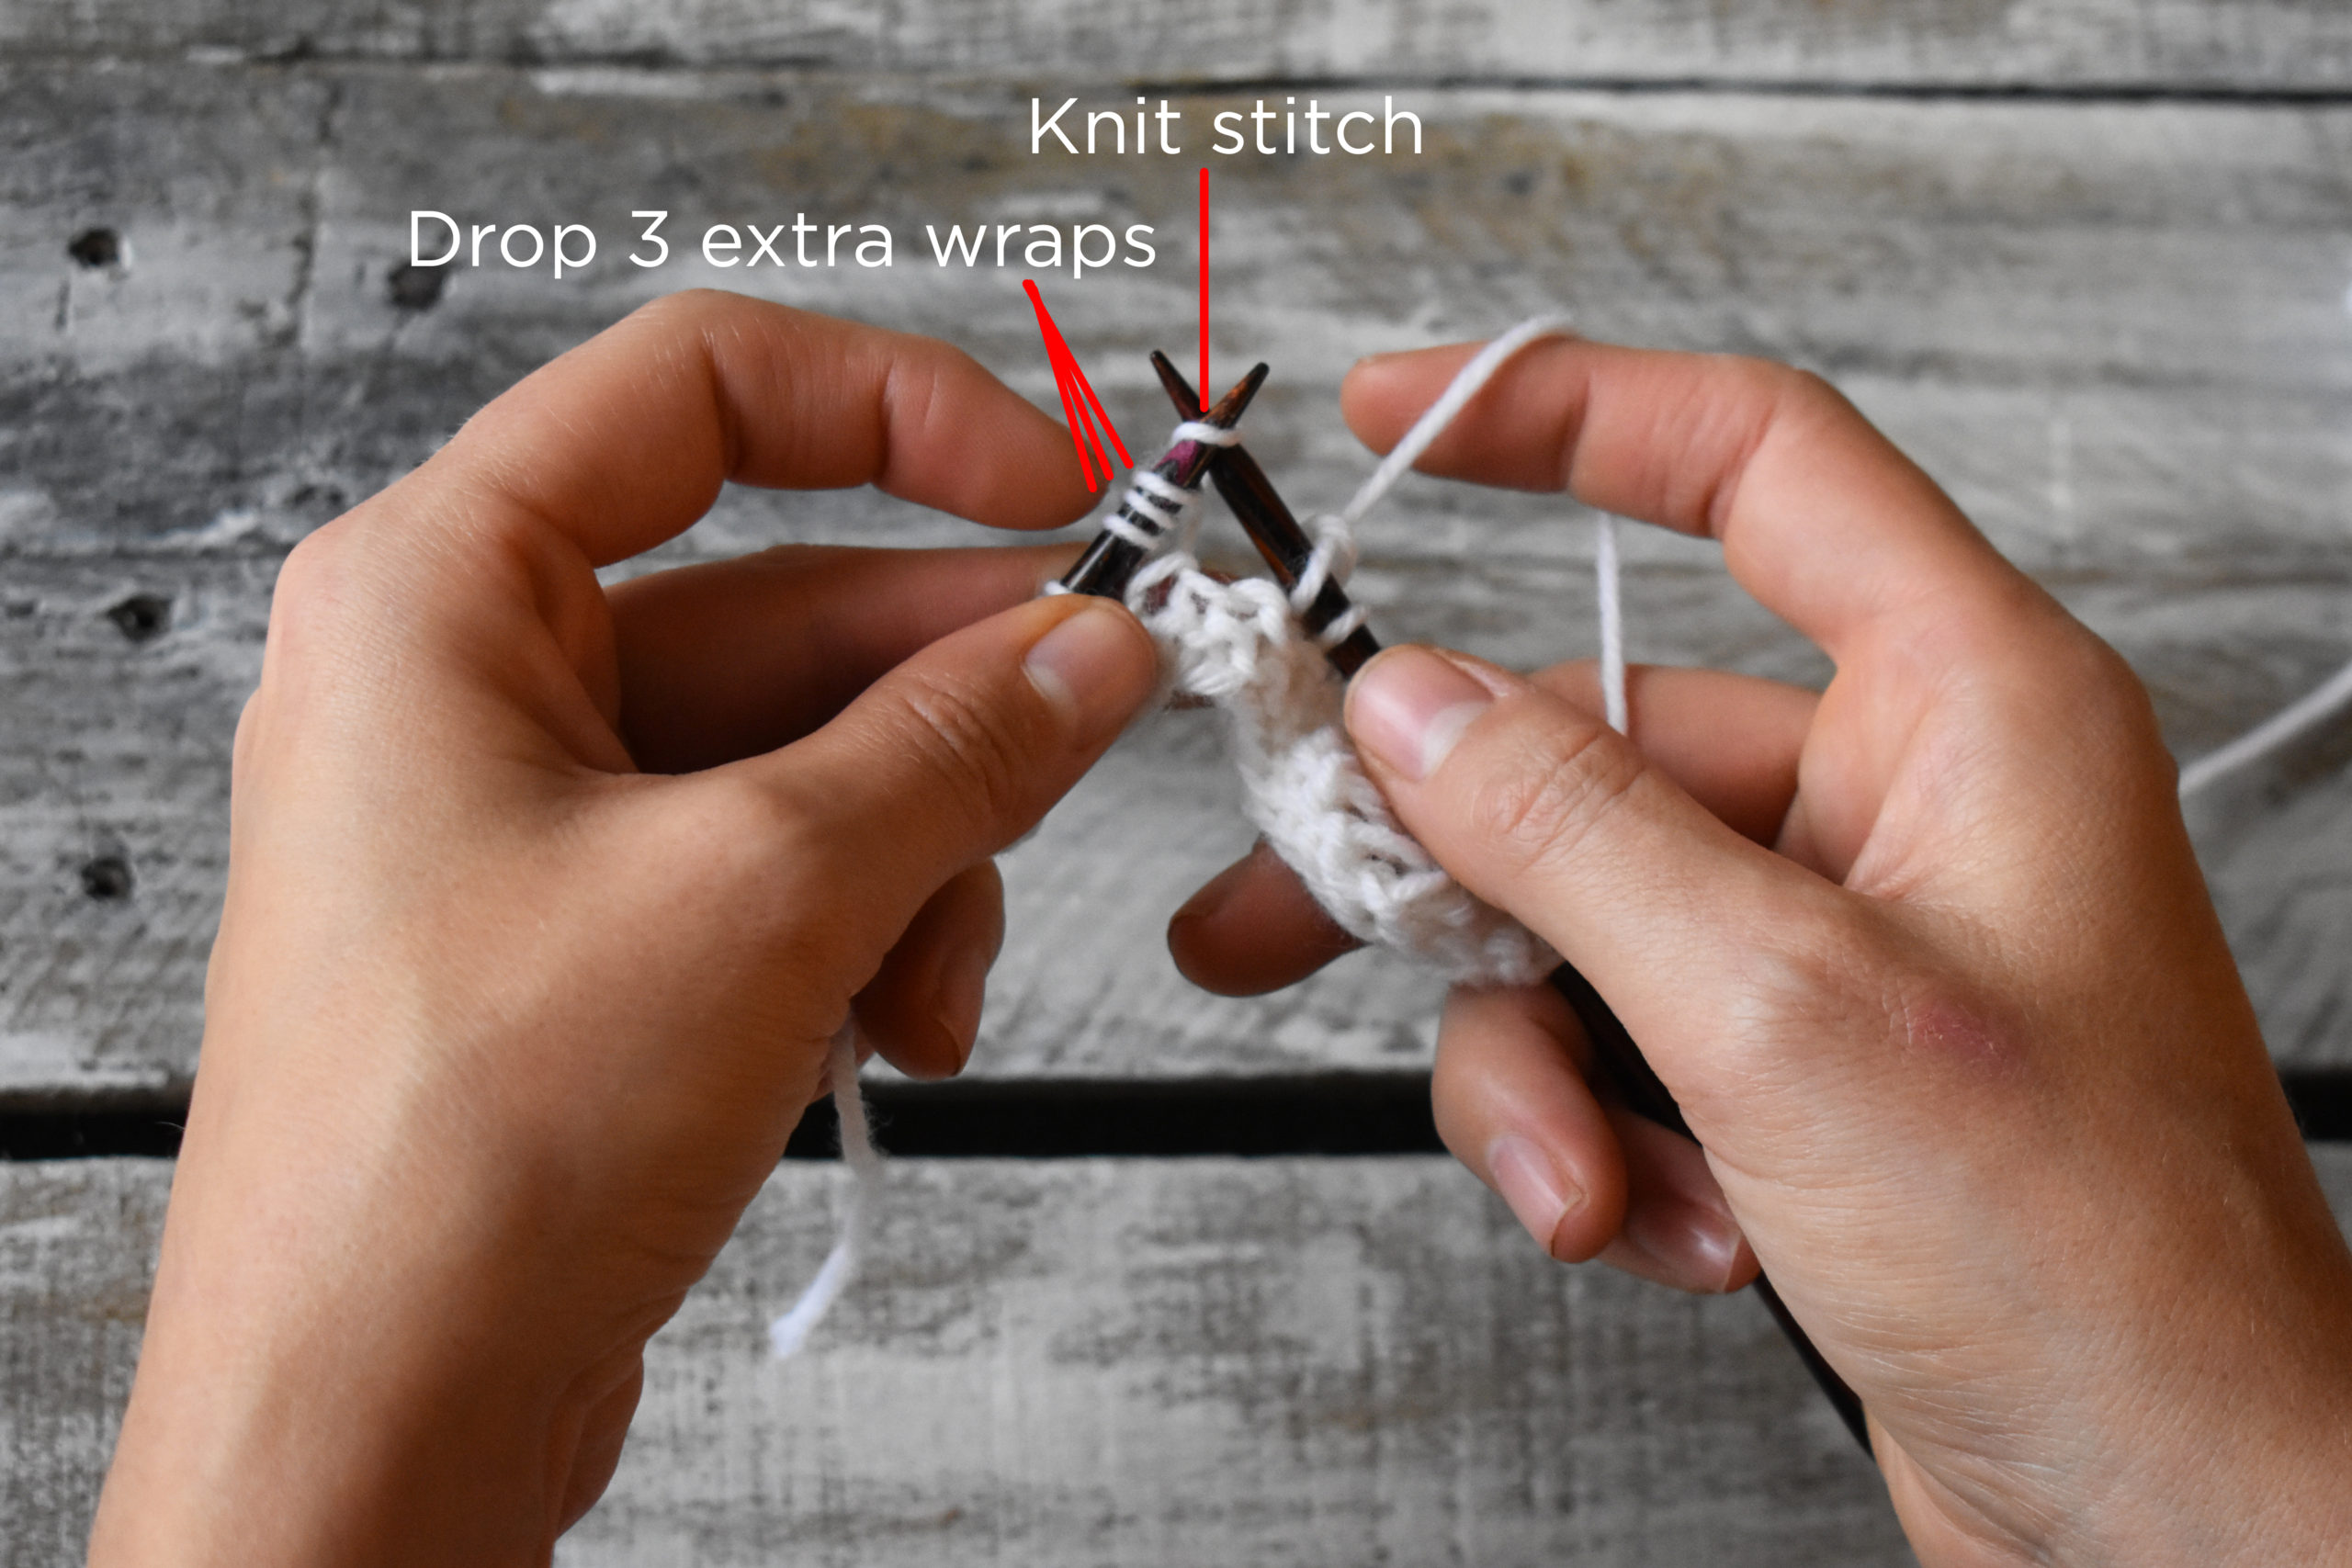
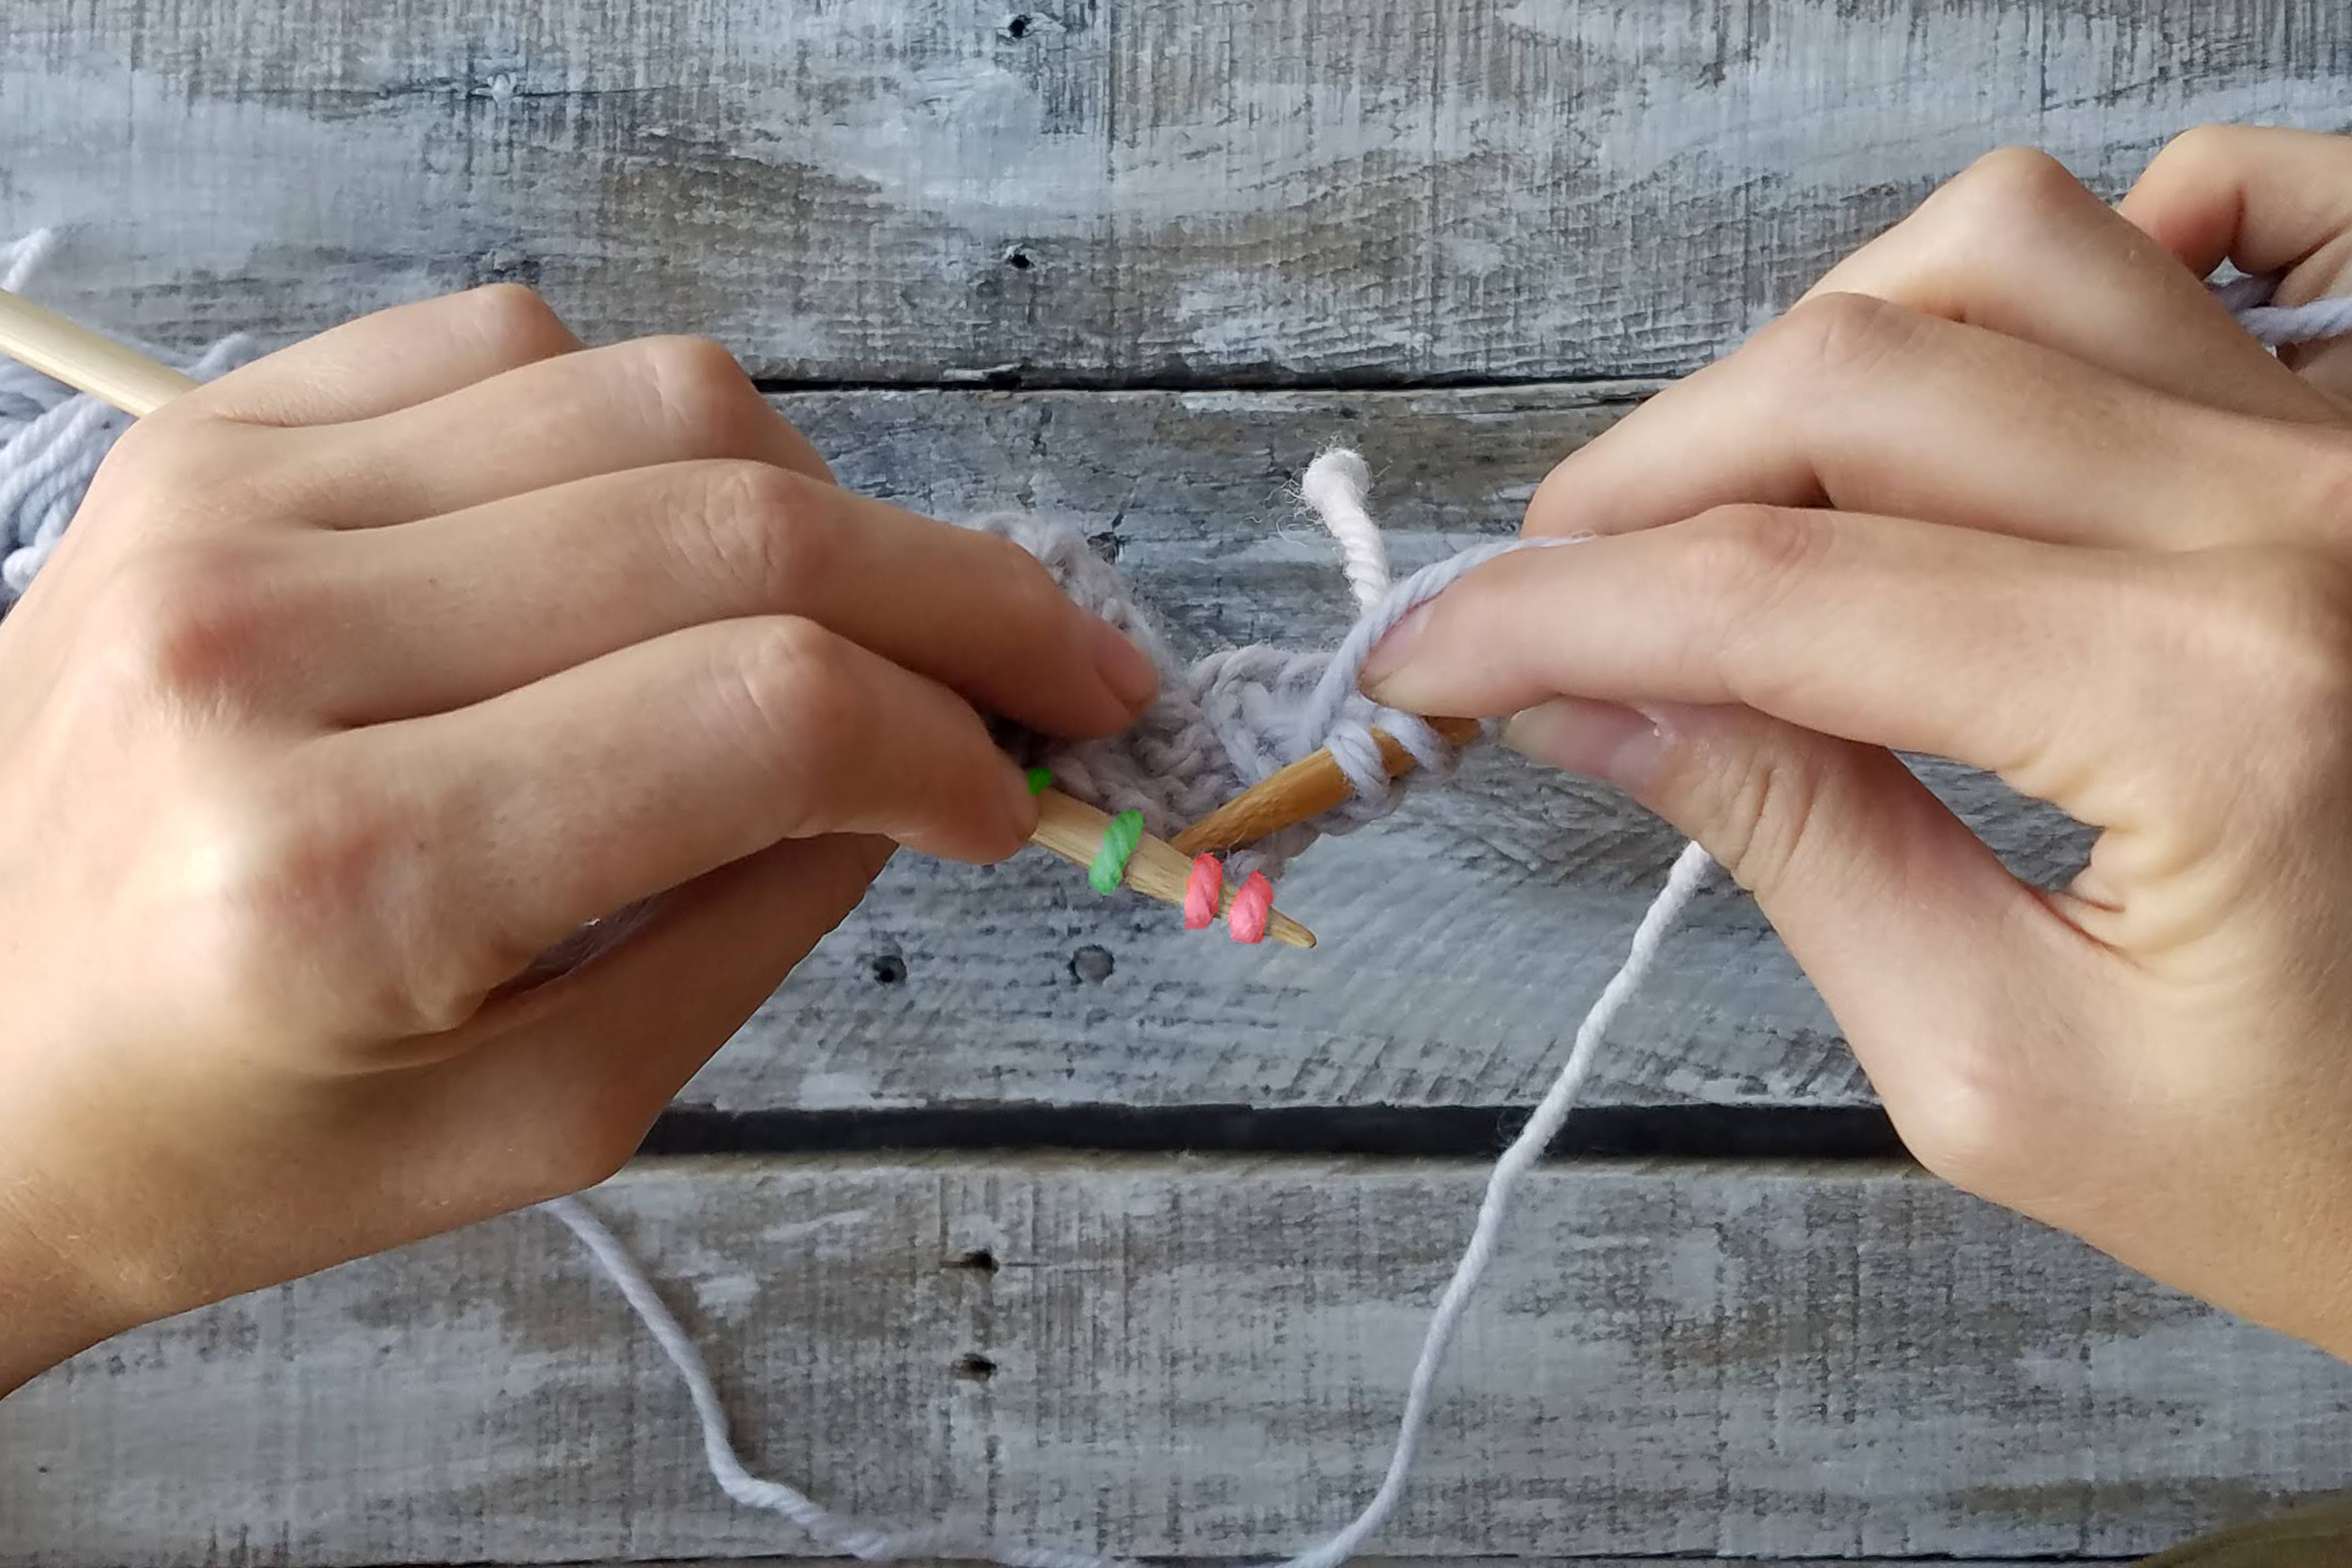
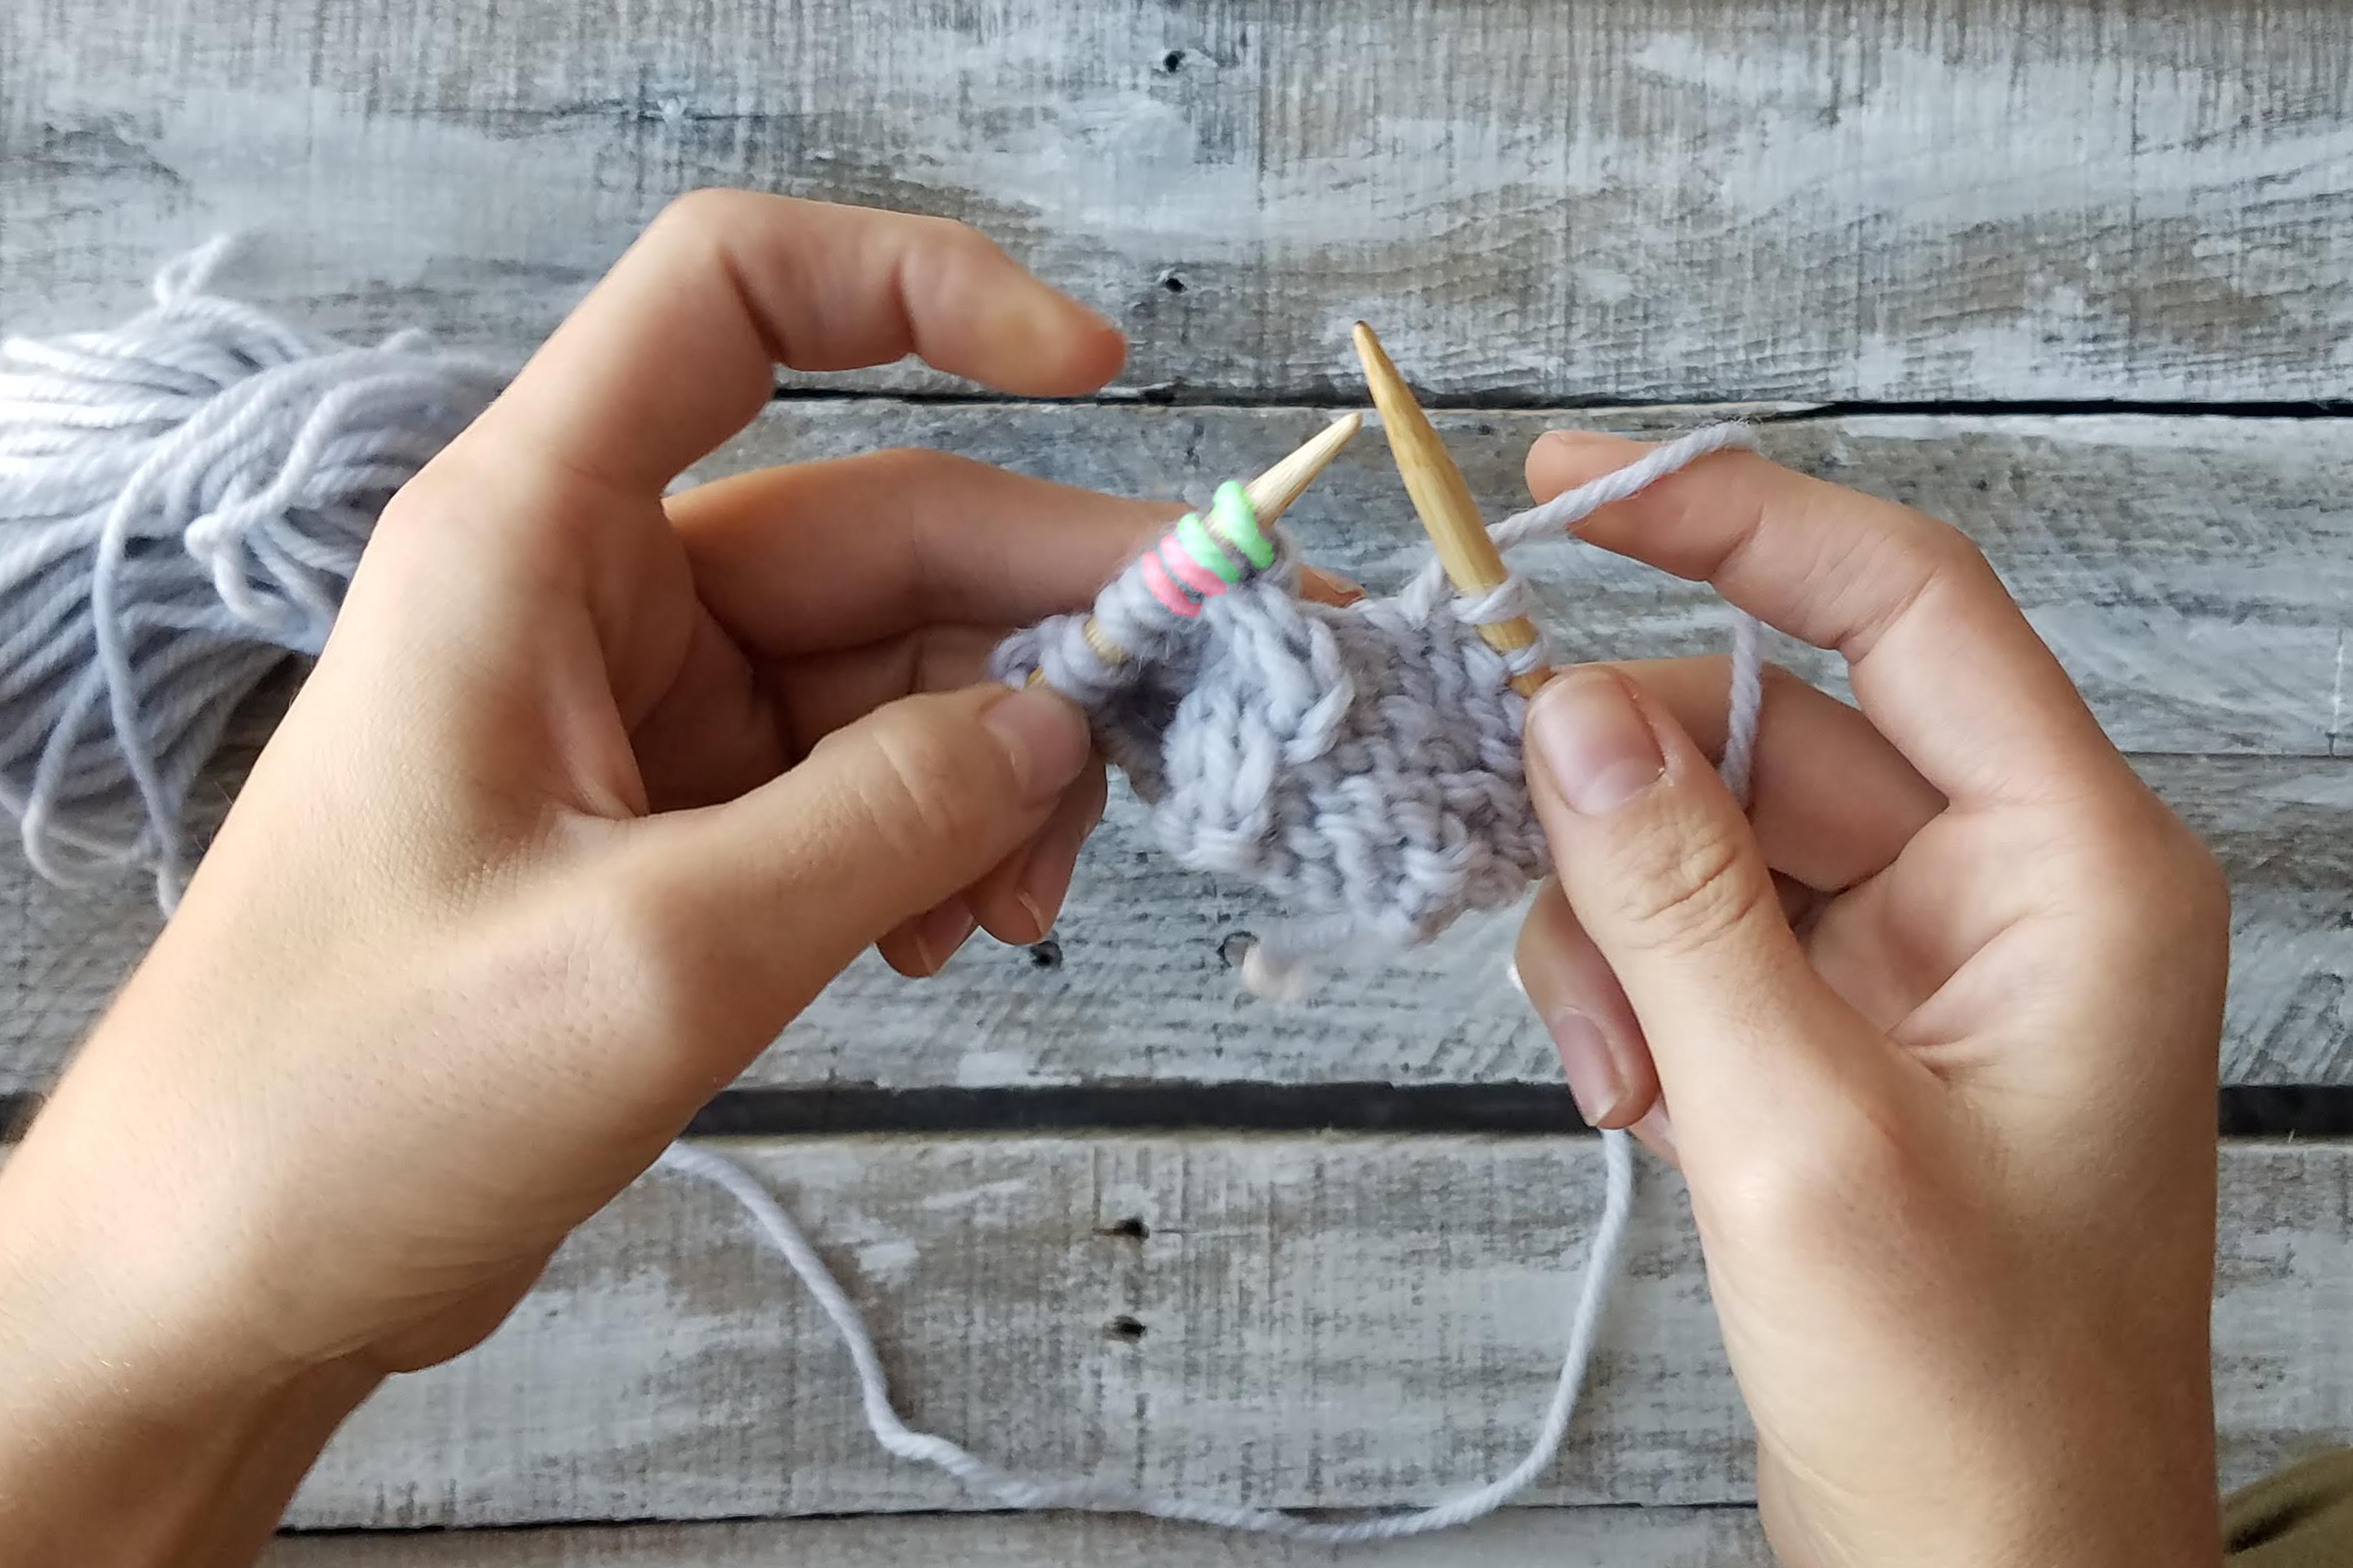
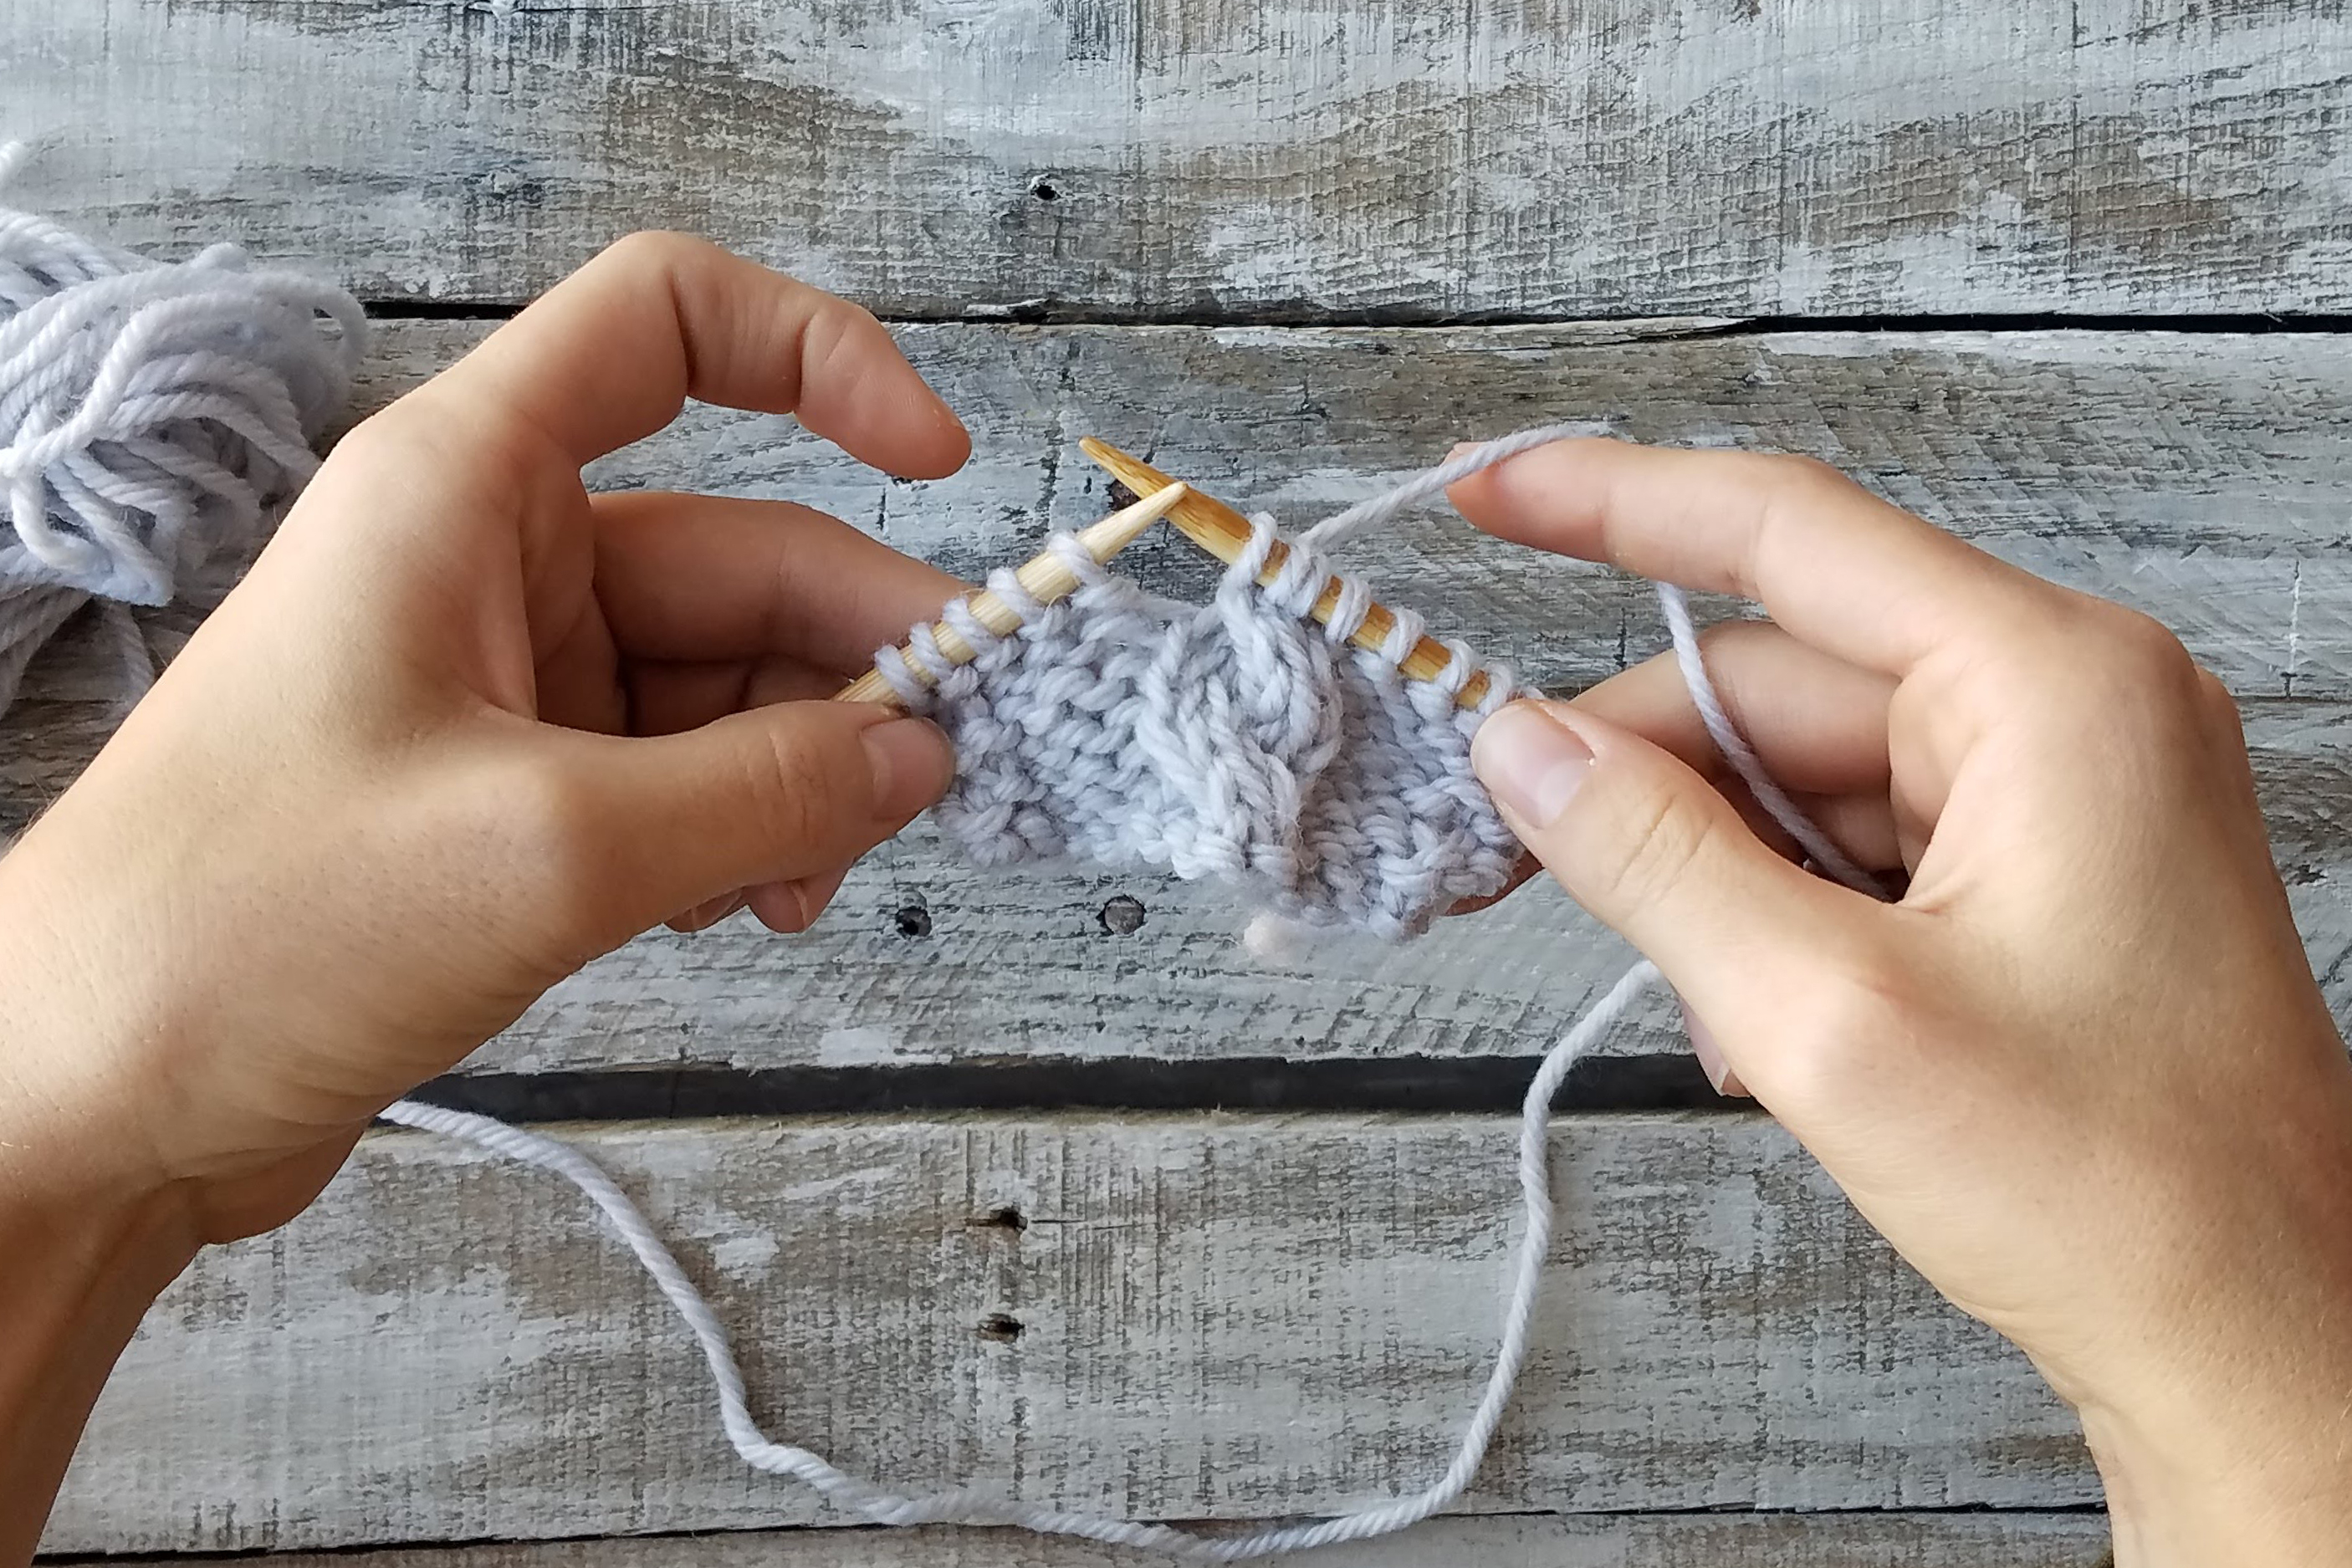
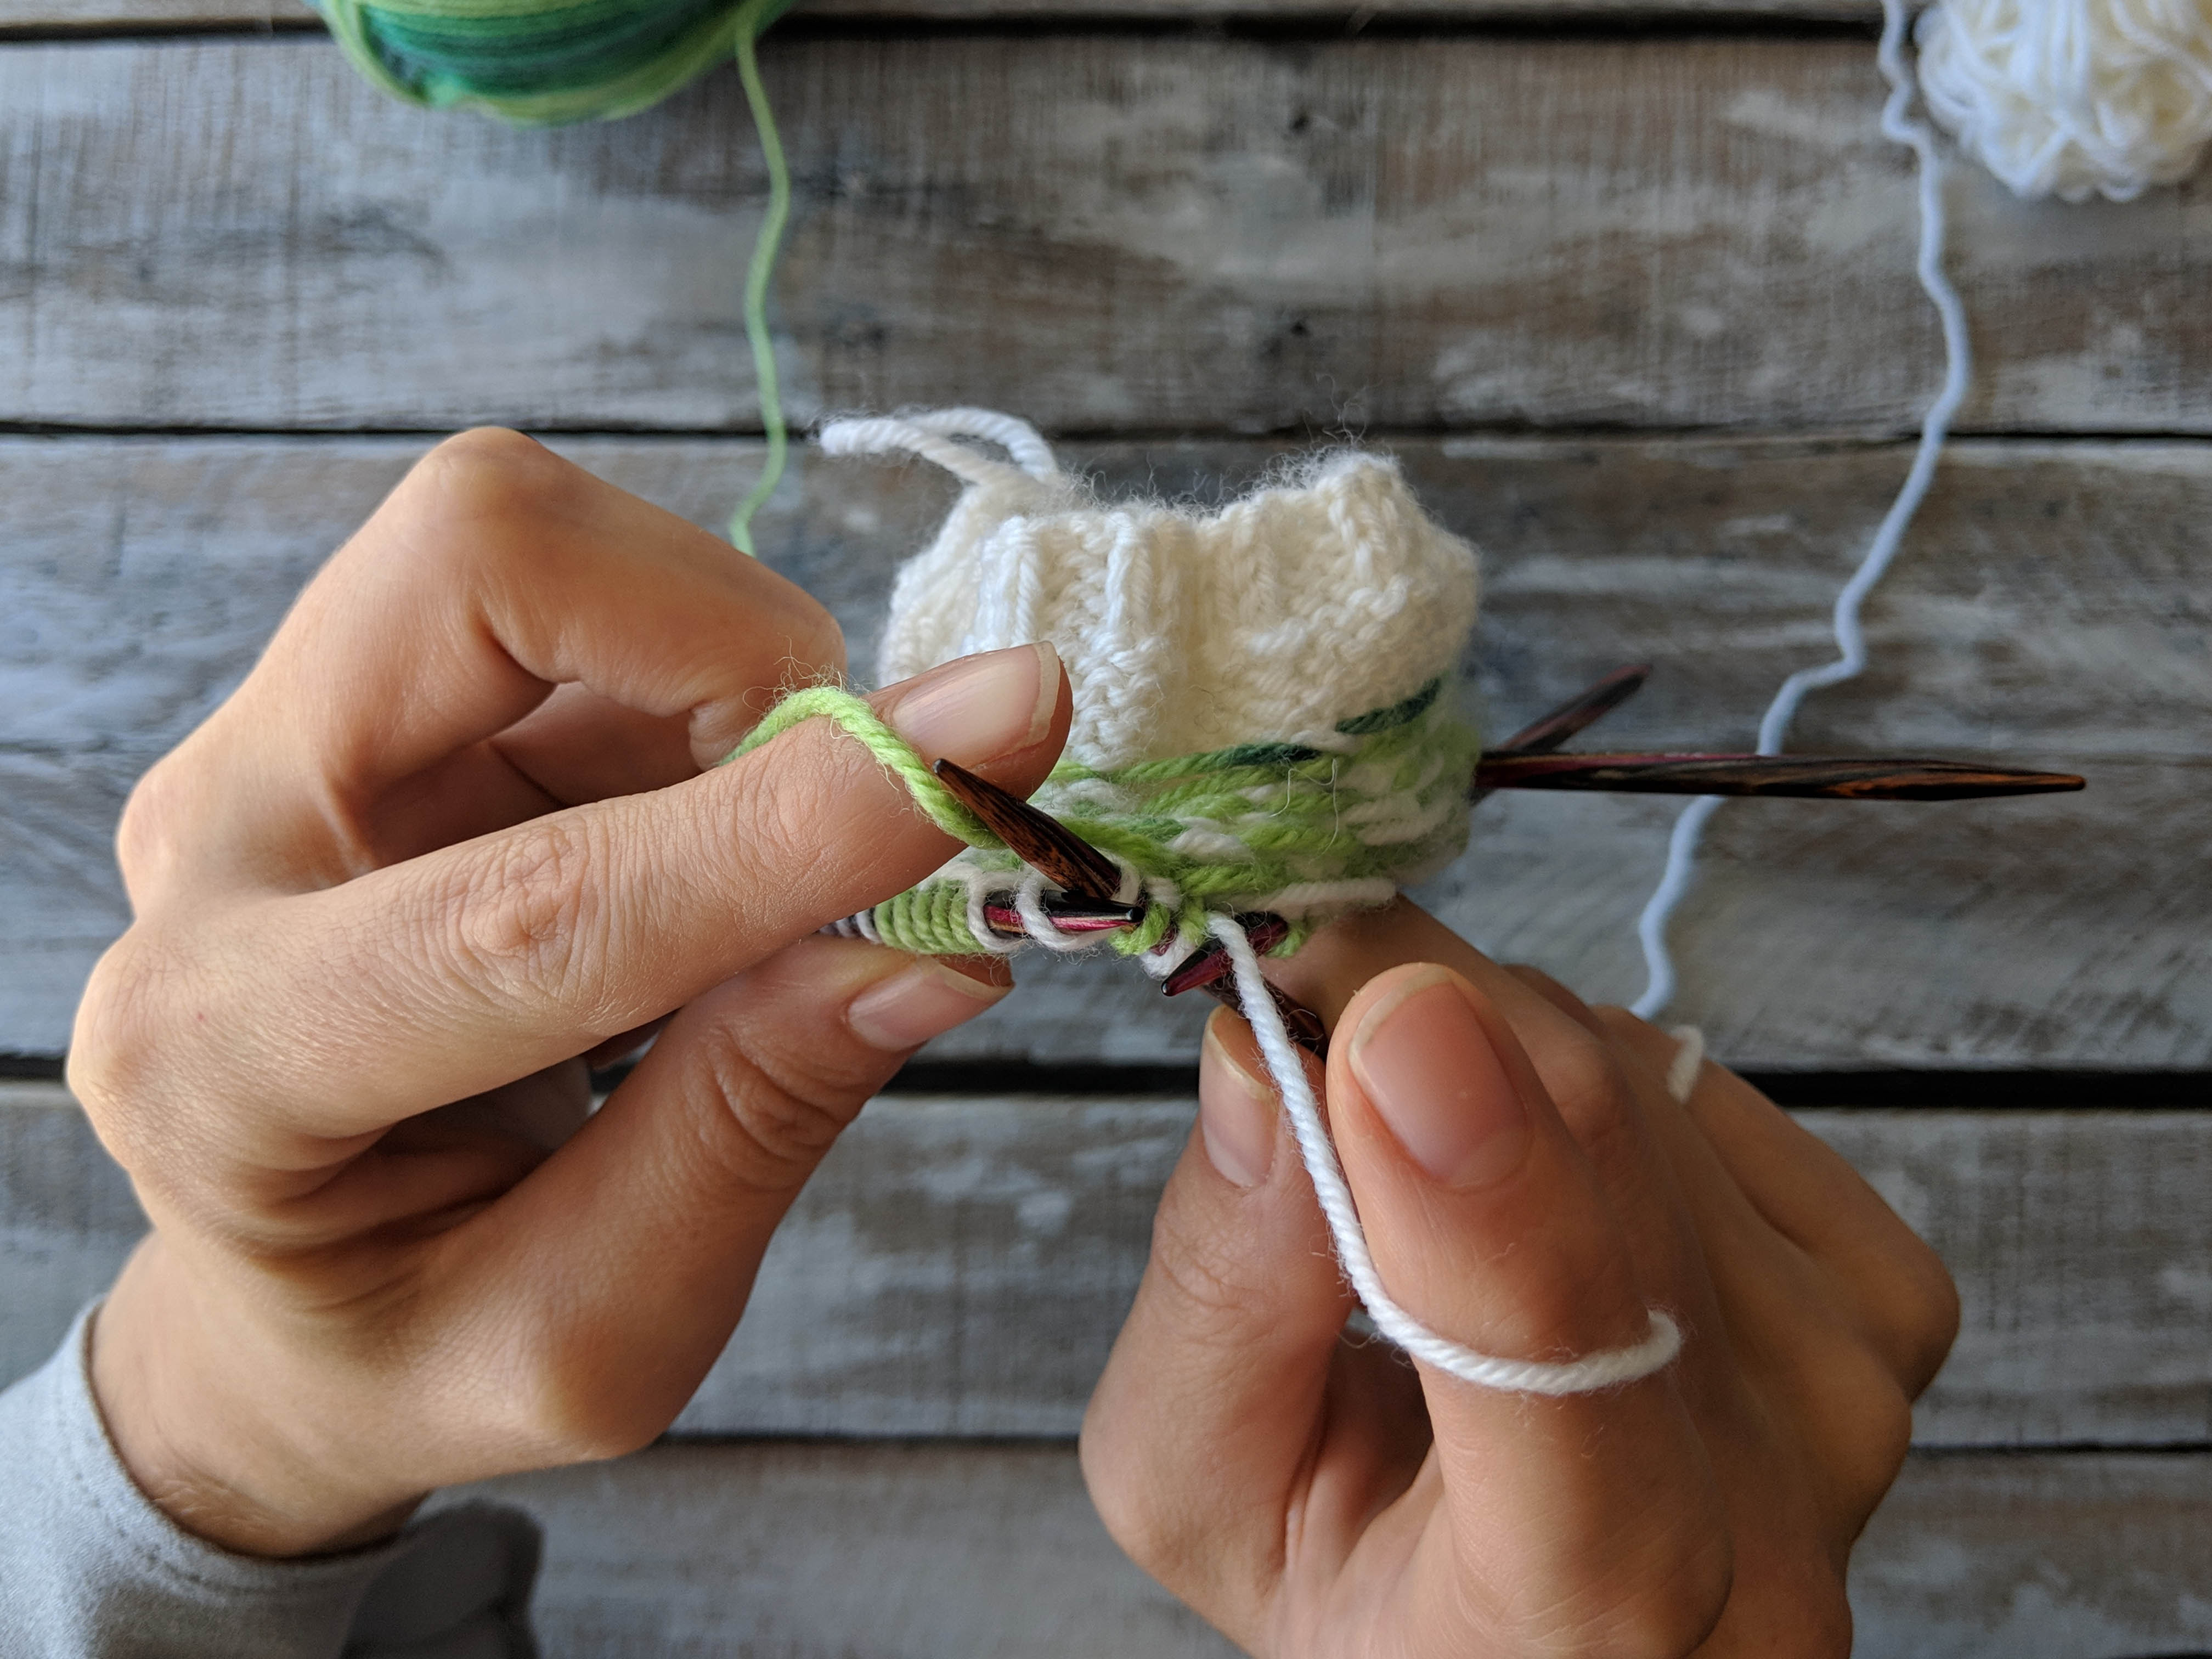
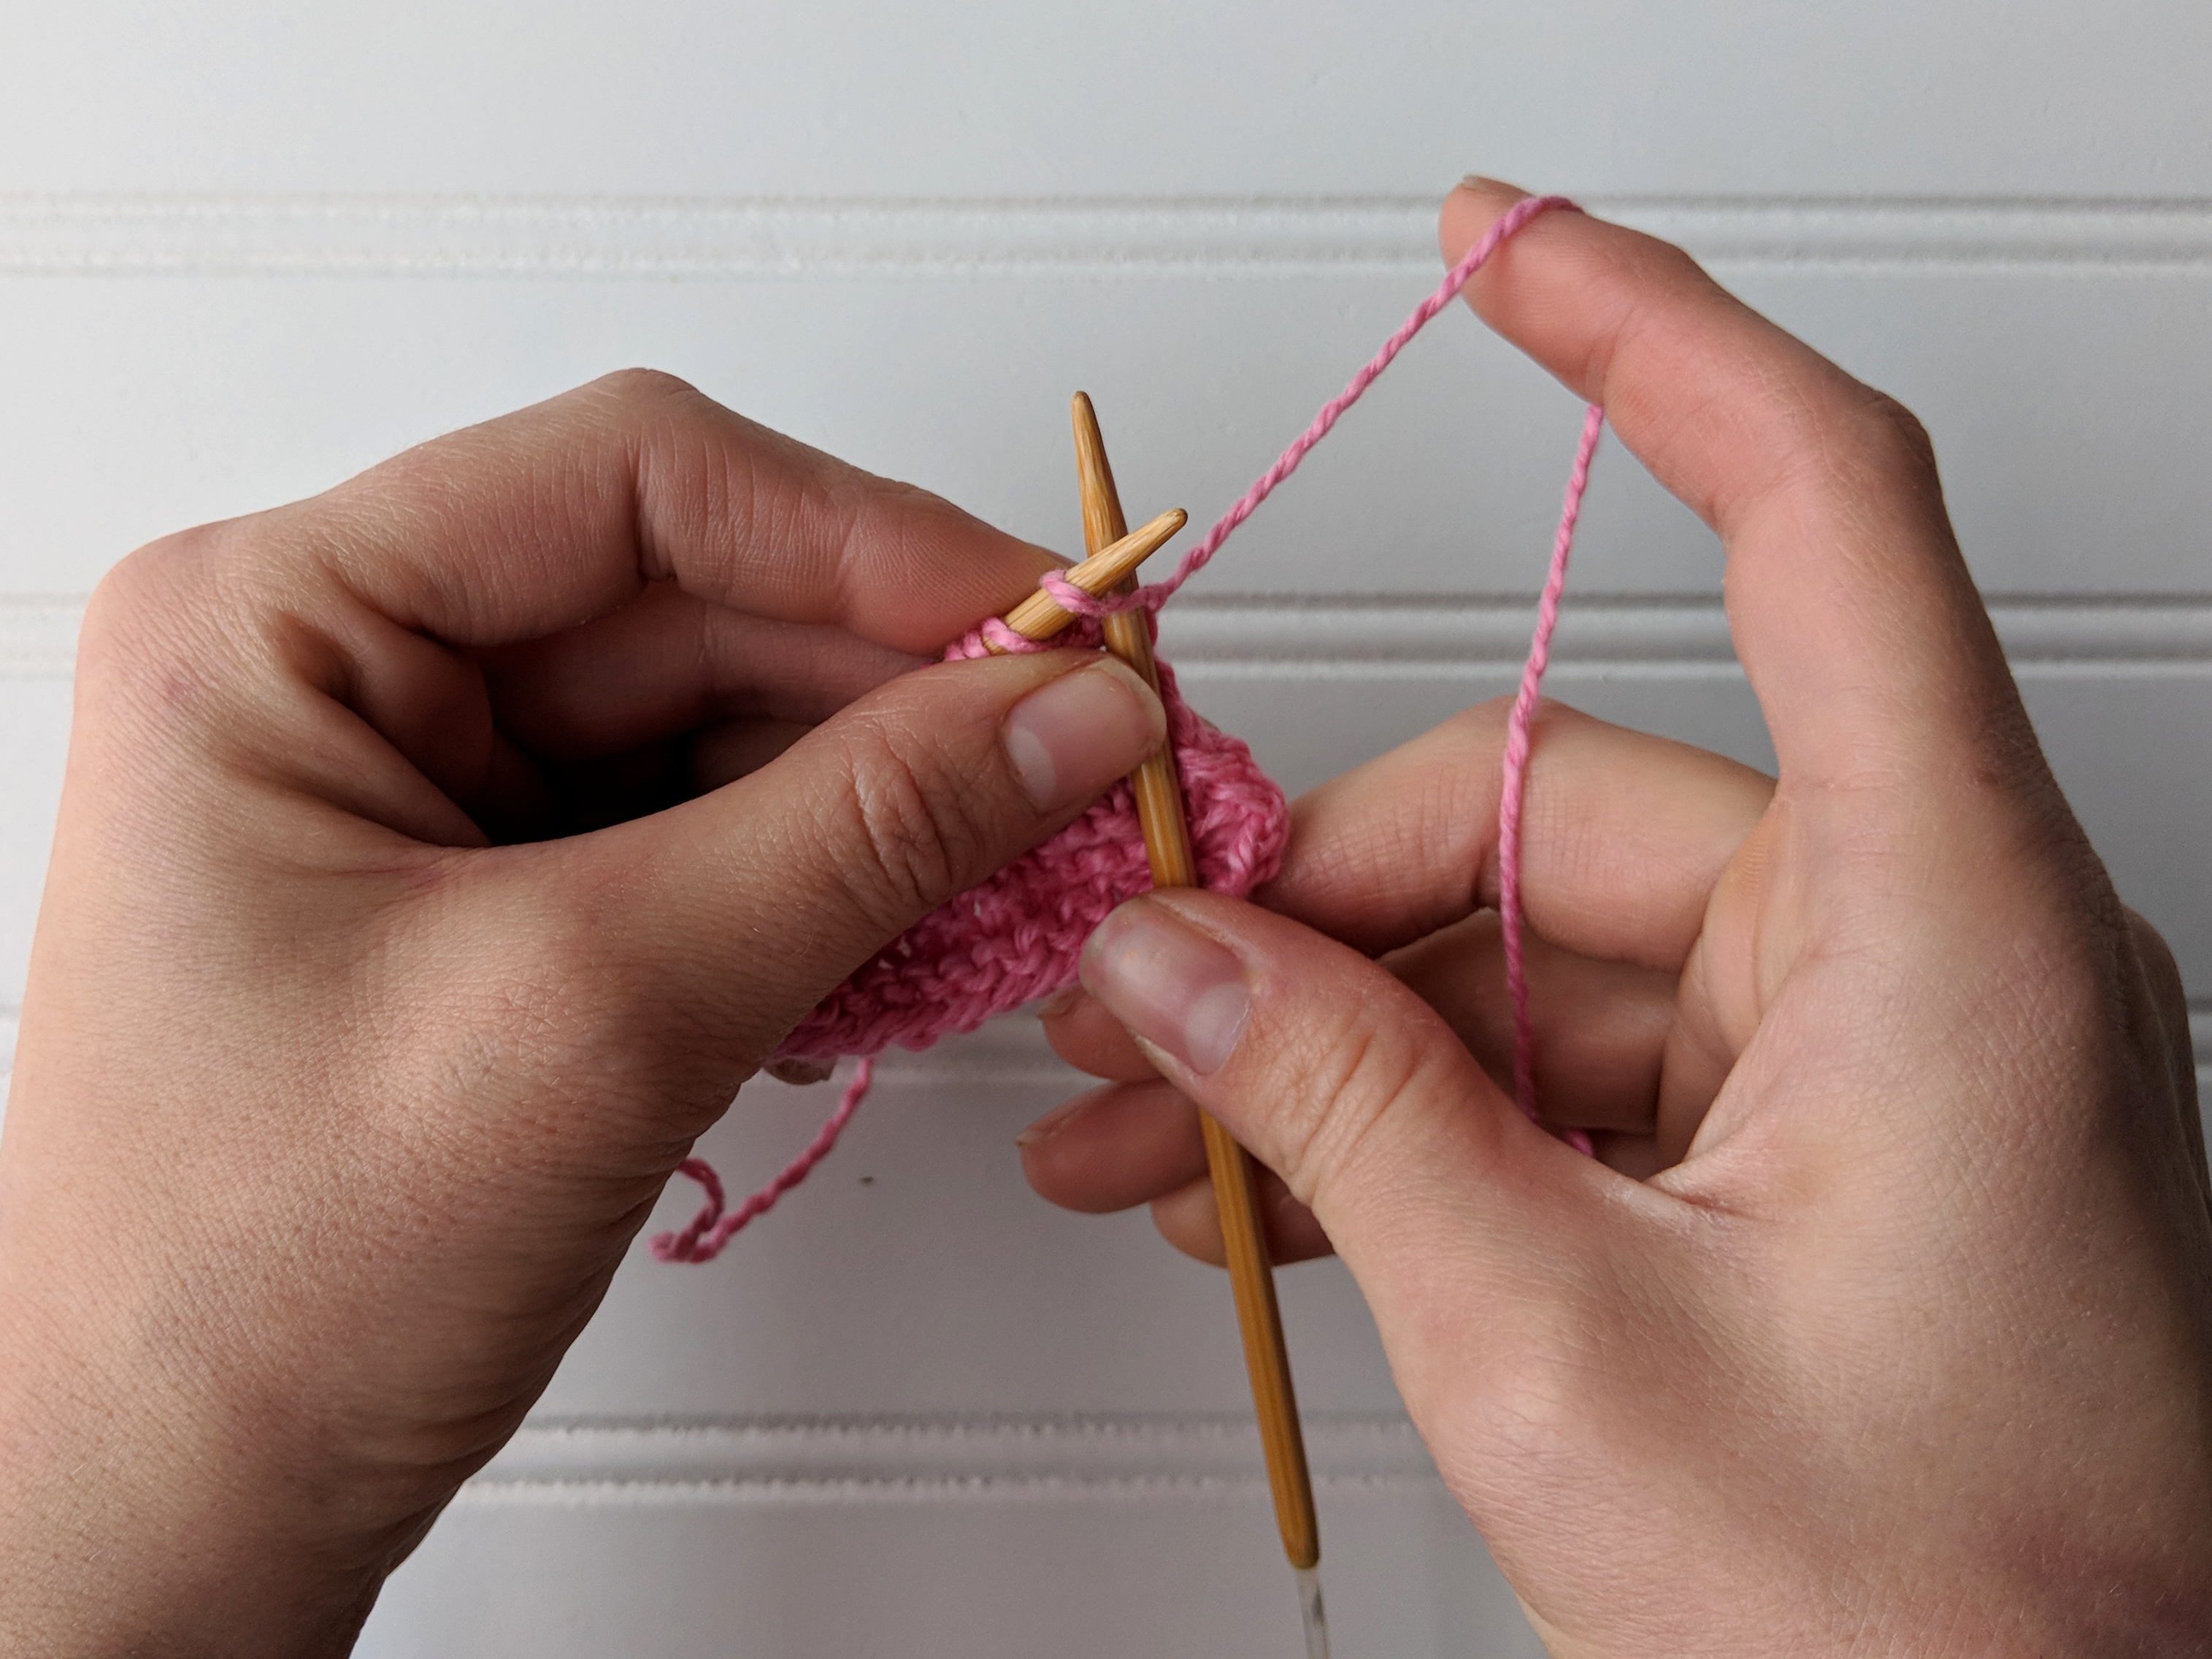
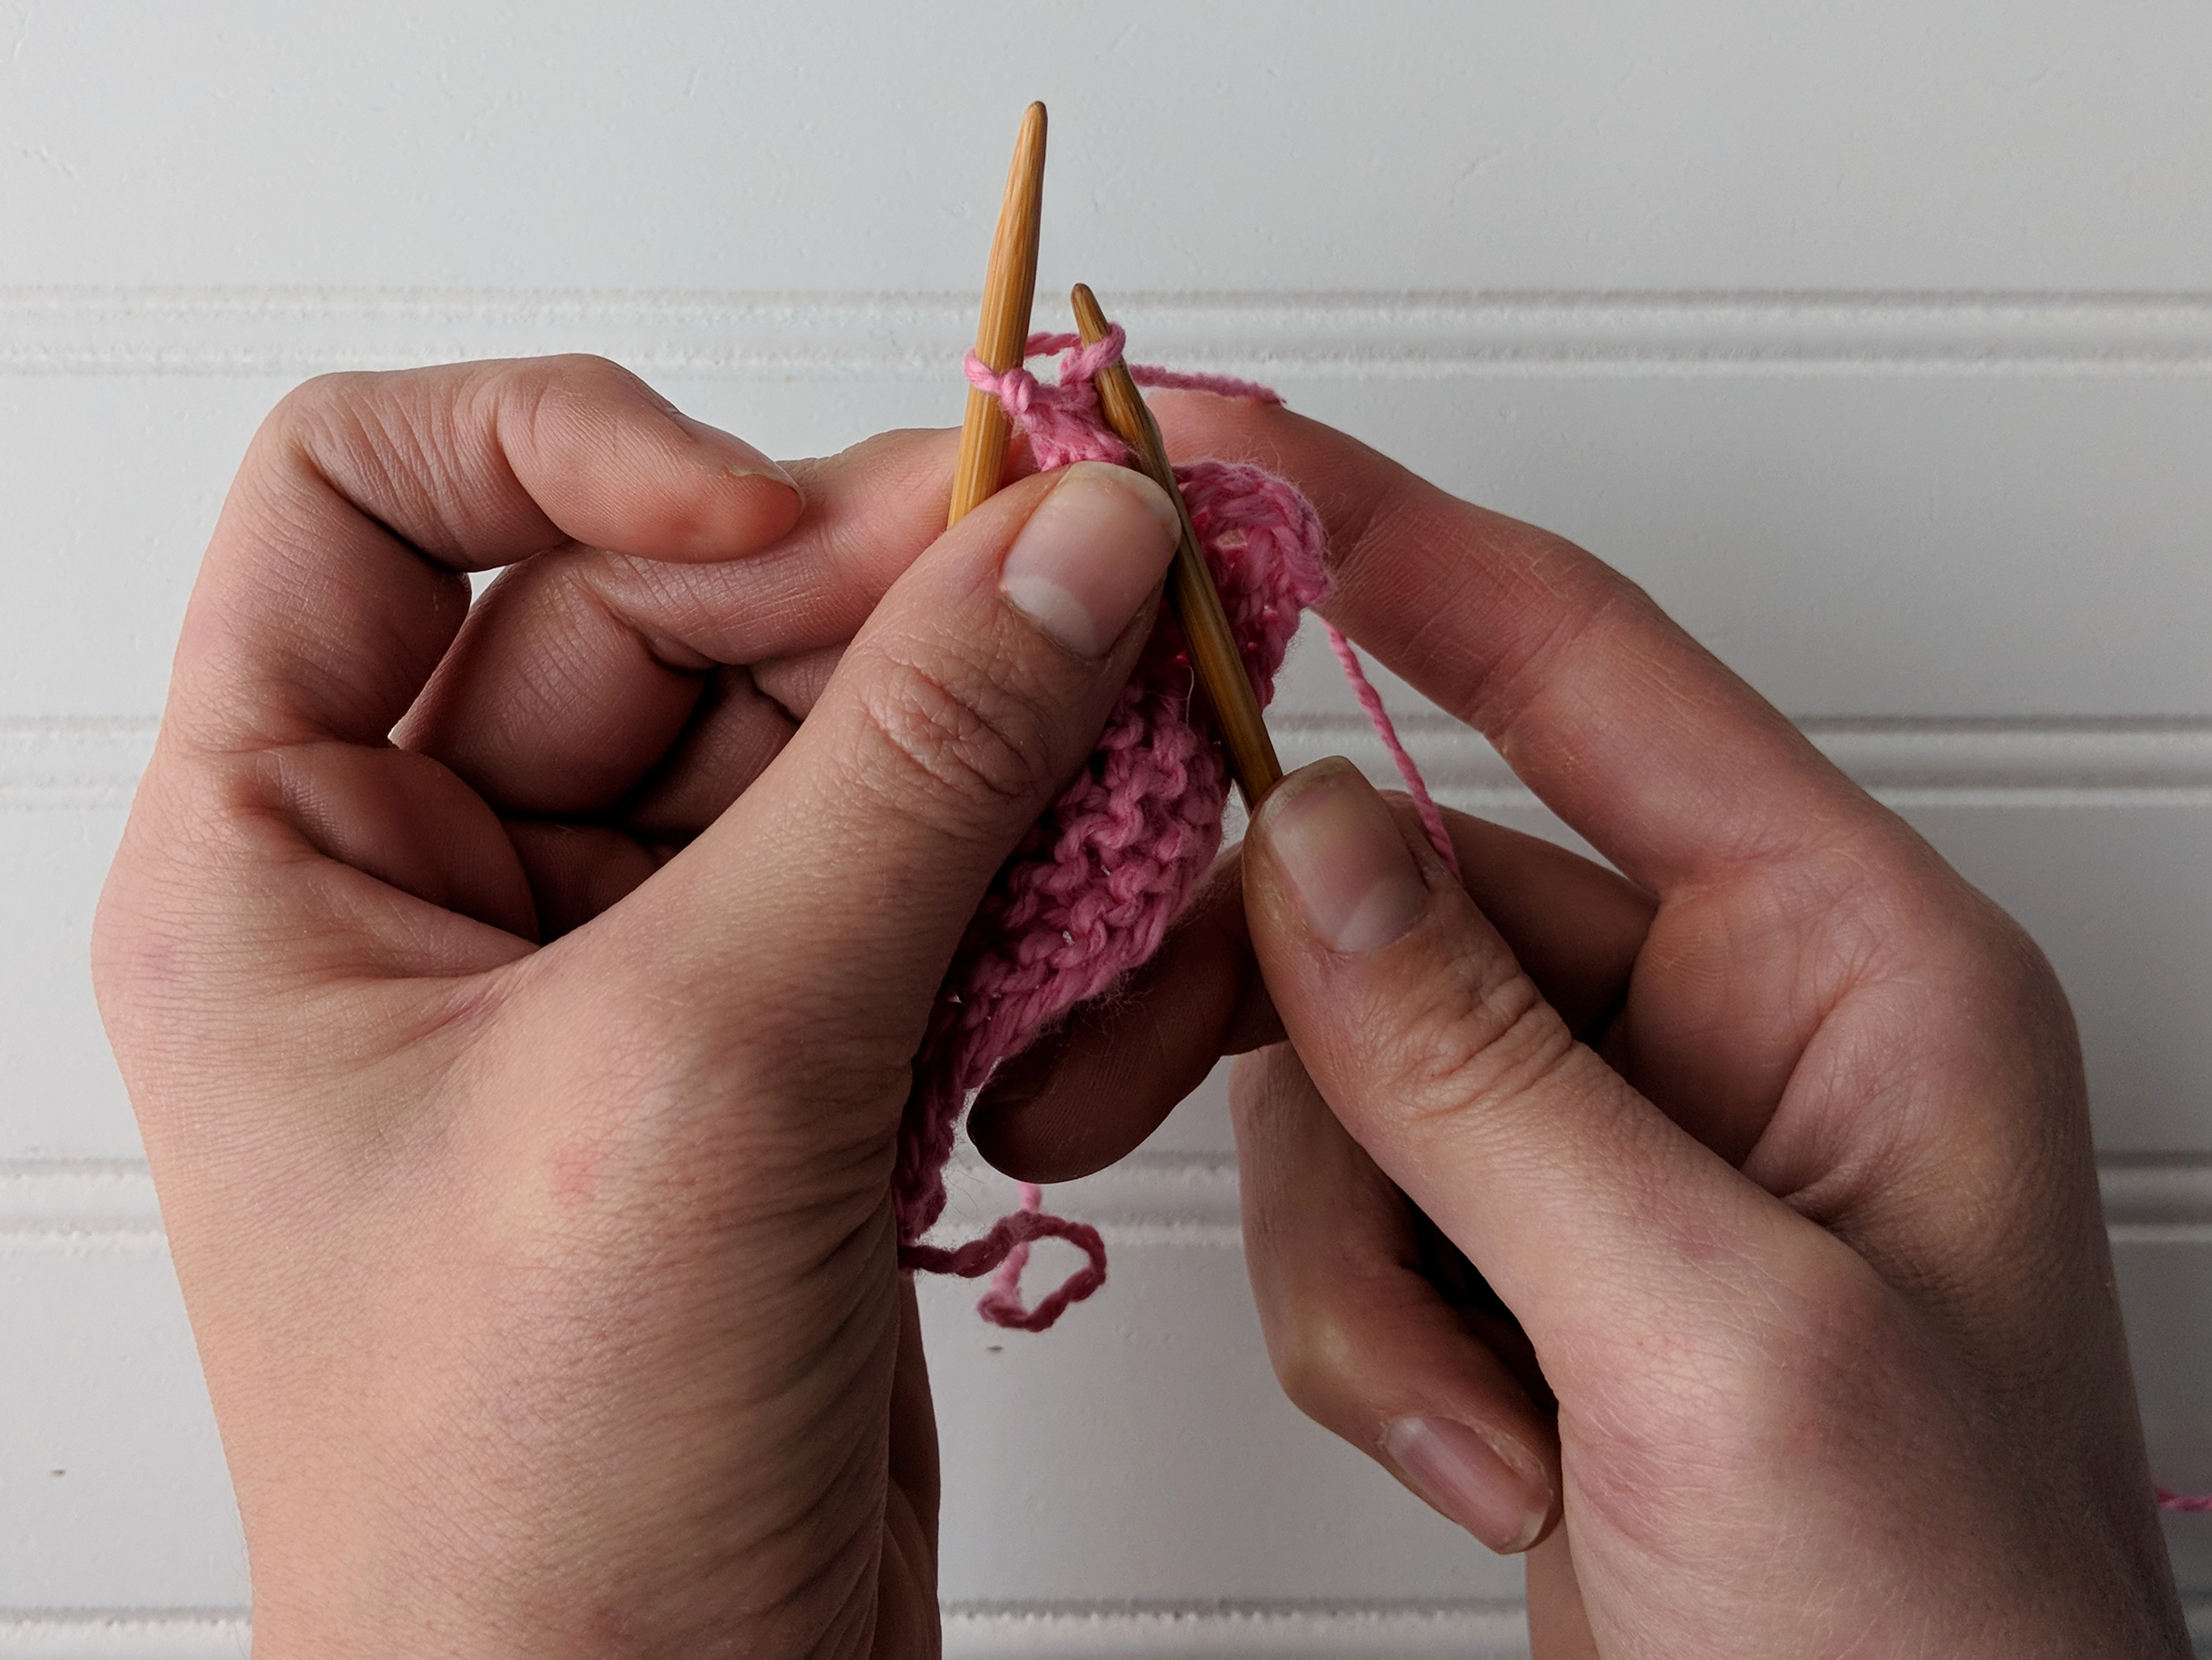
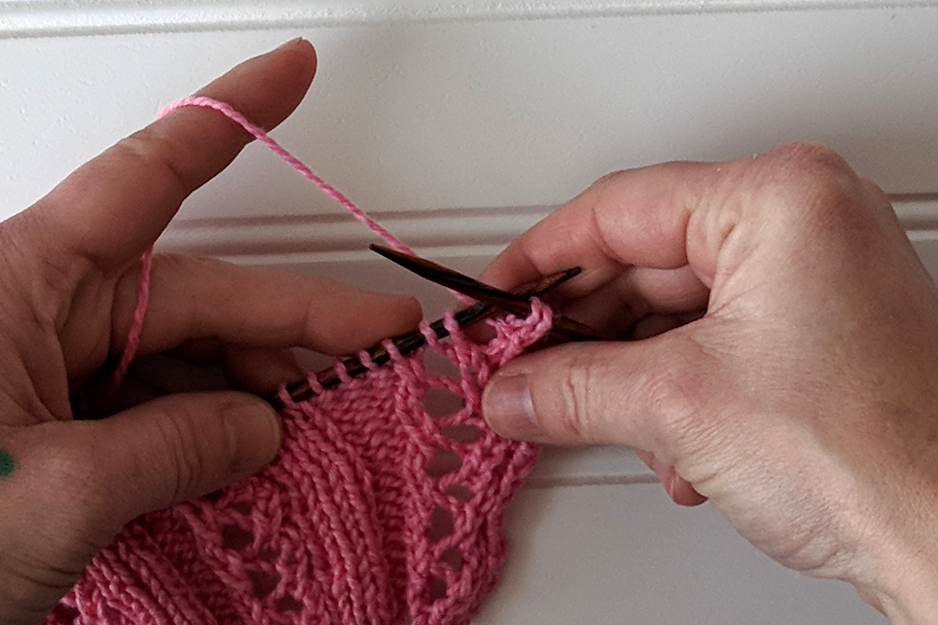
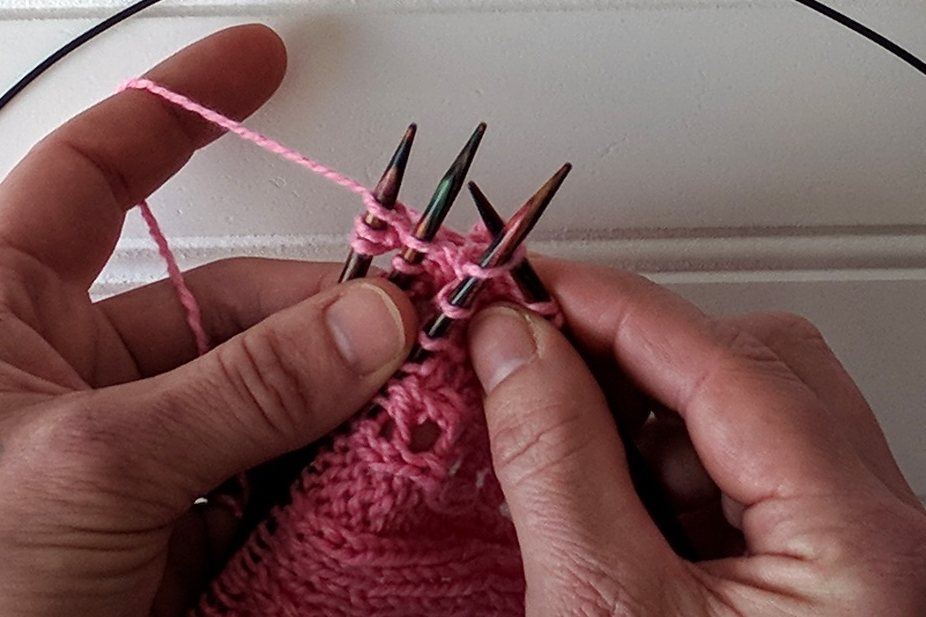
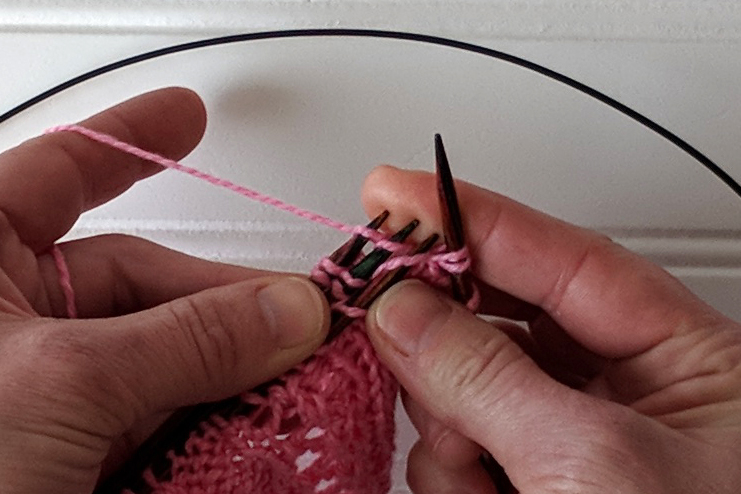
Kw2 – Knit and wrap yarn around the needle two times.
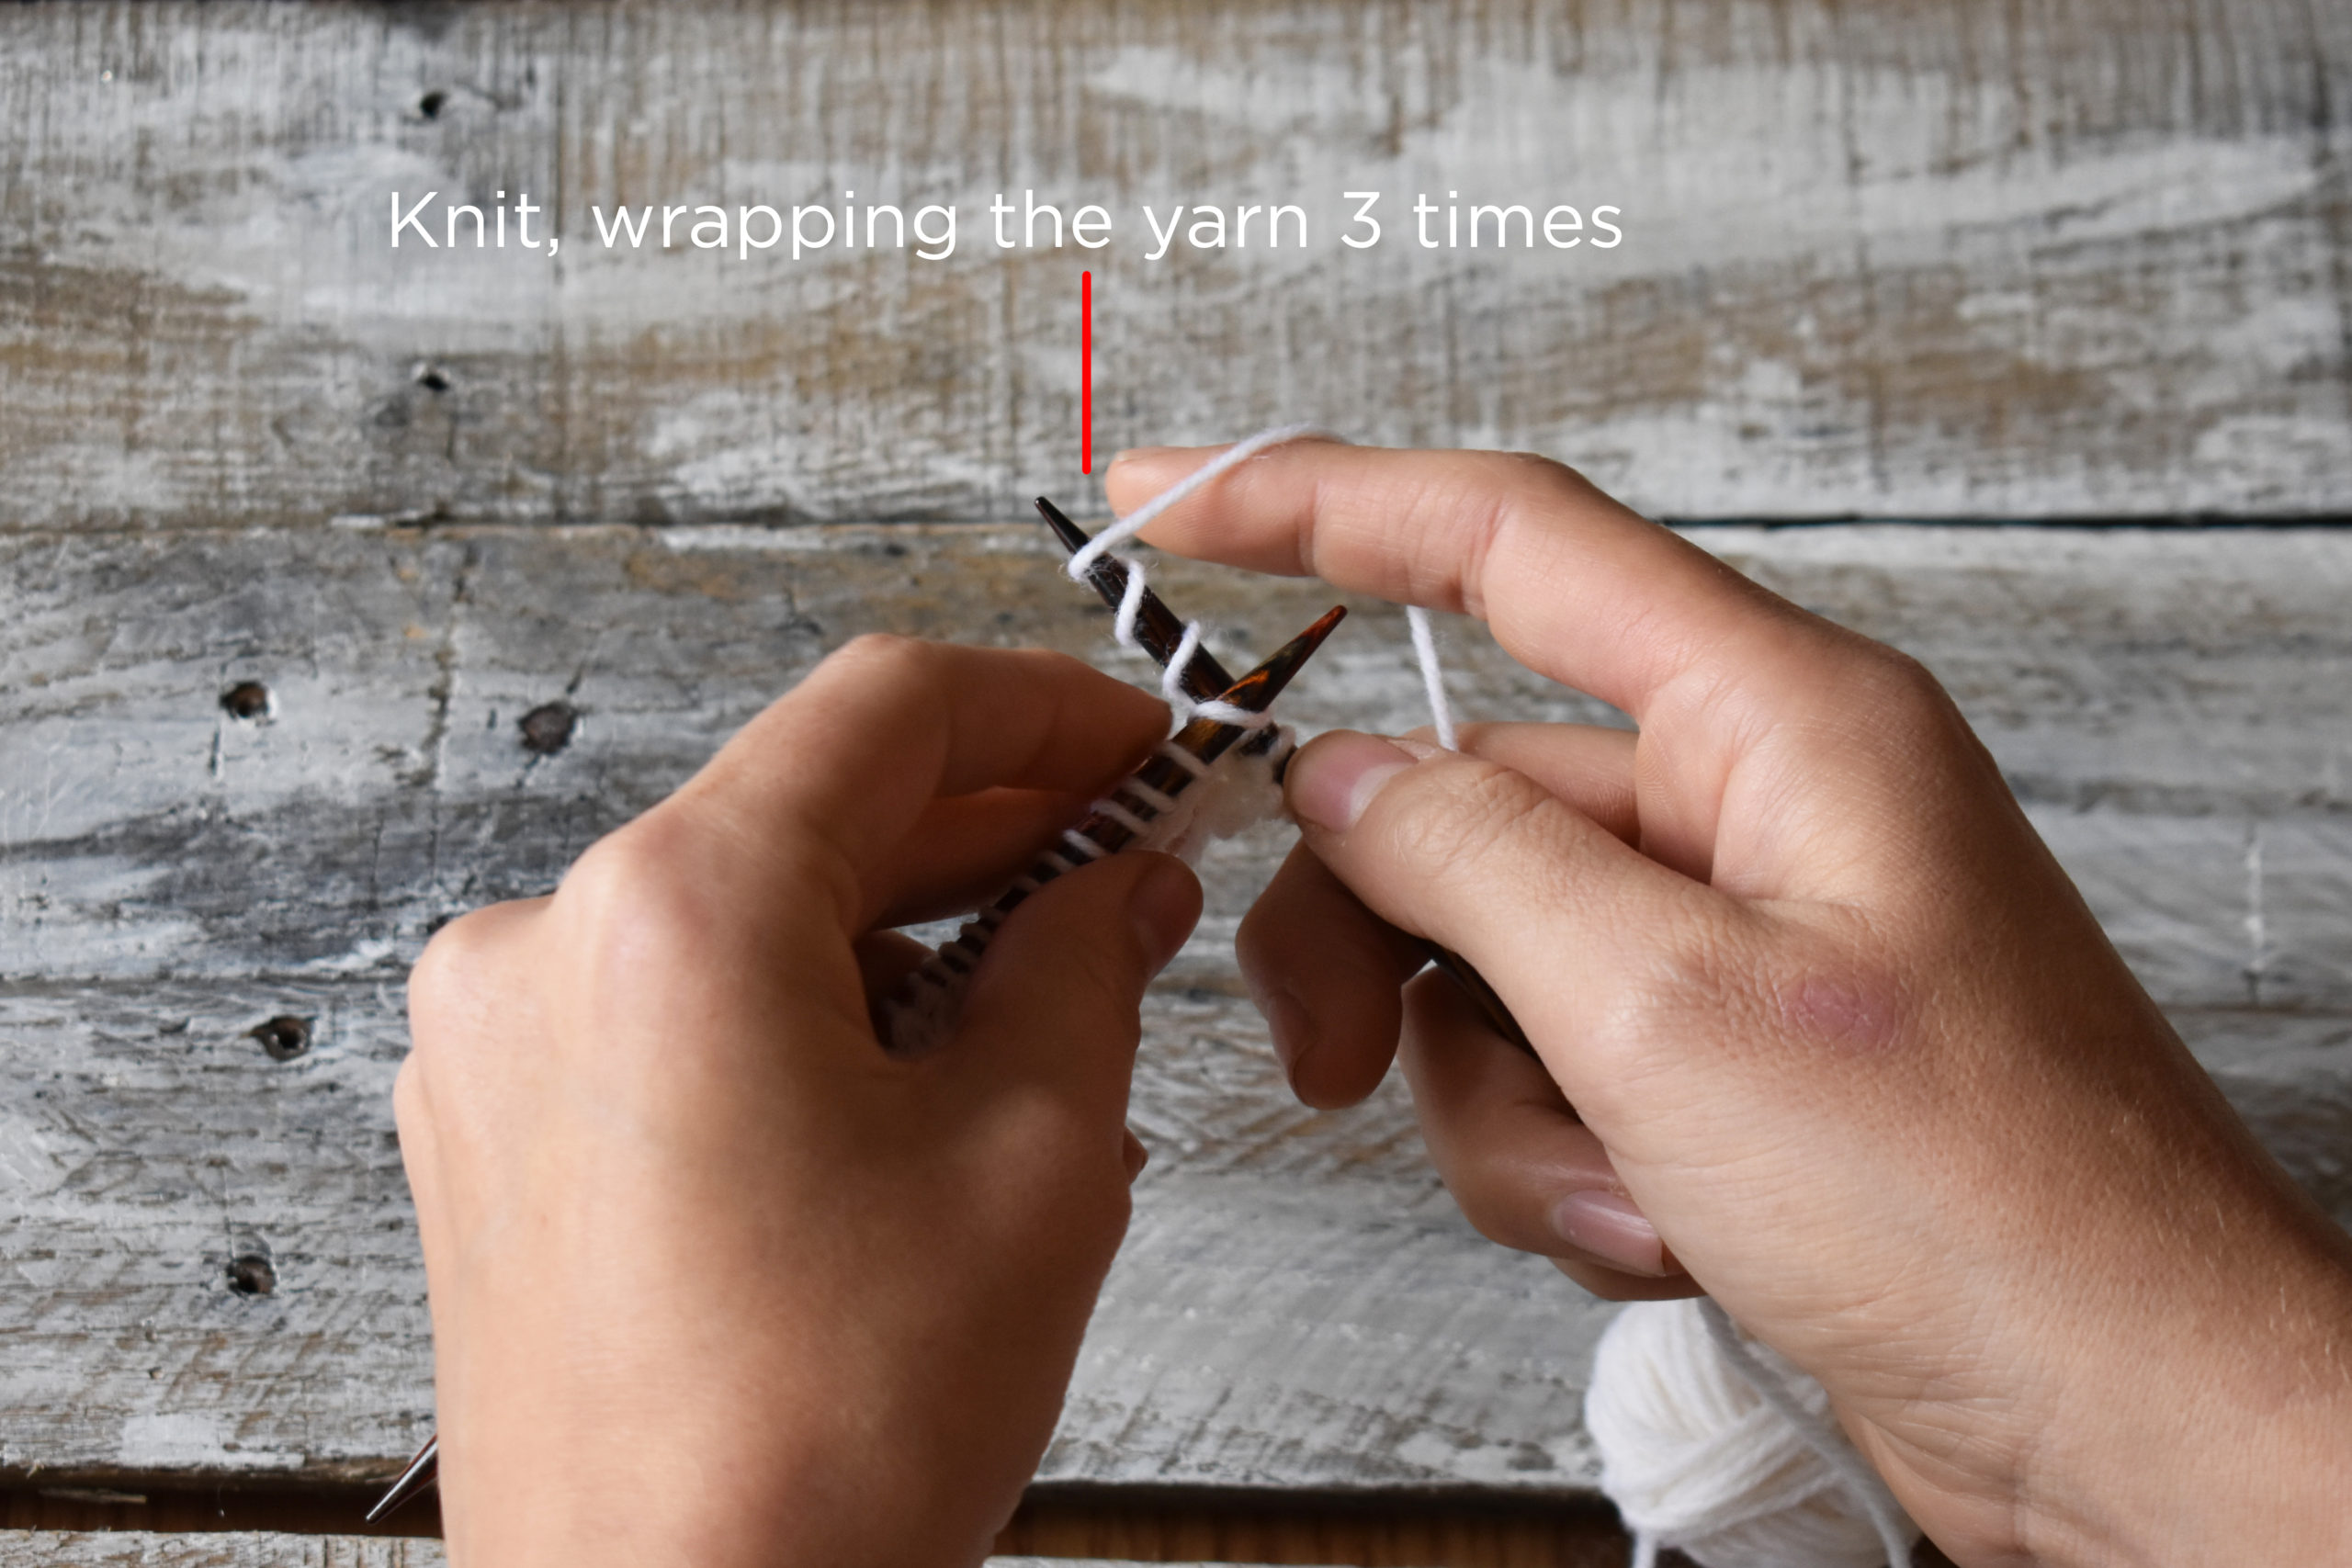
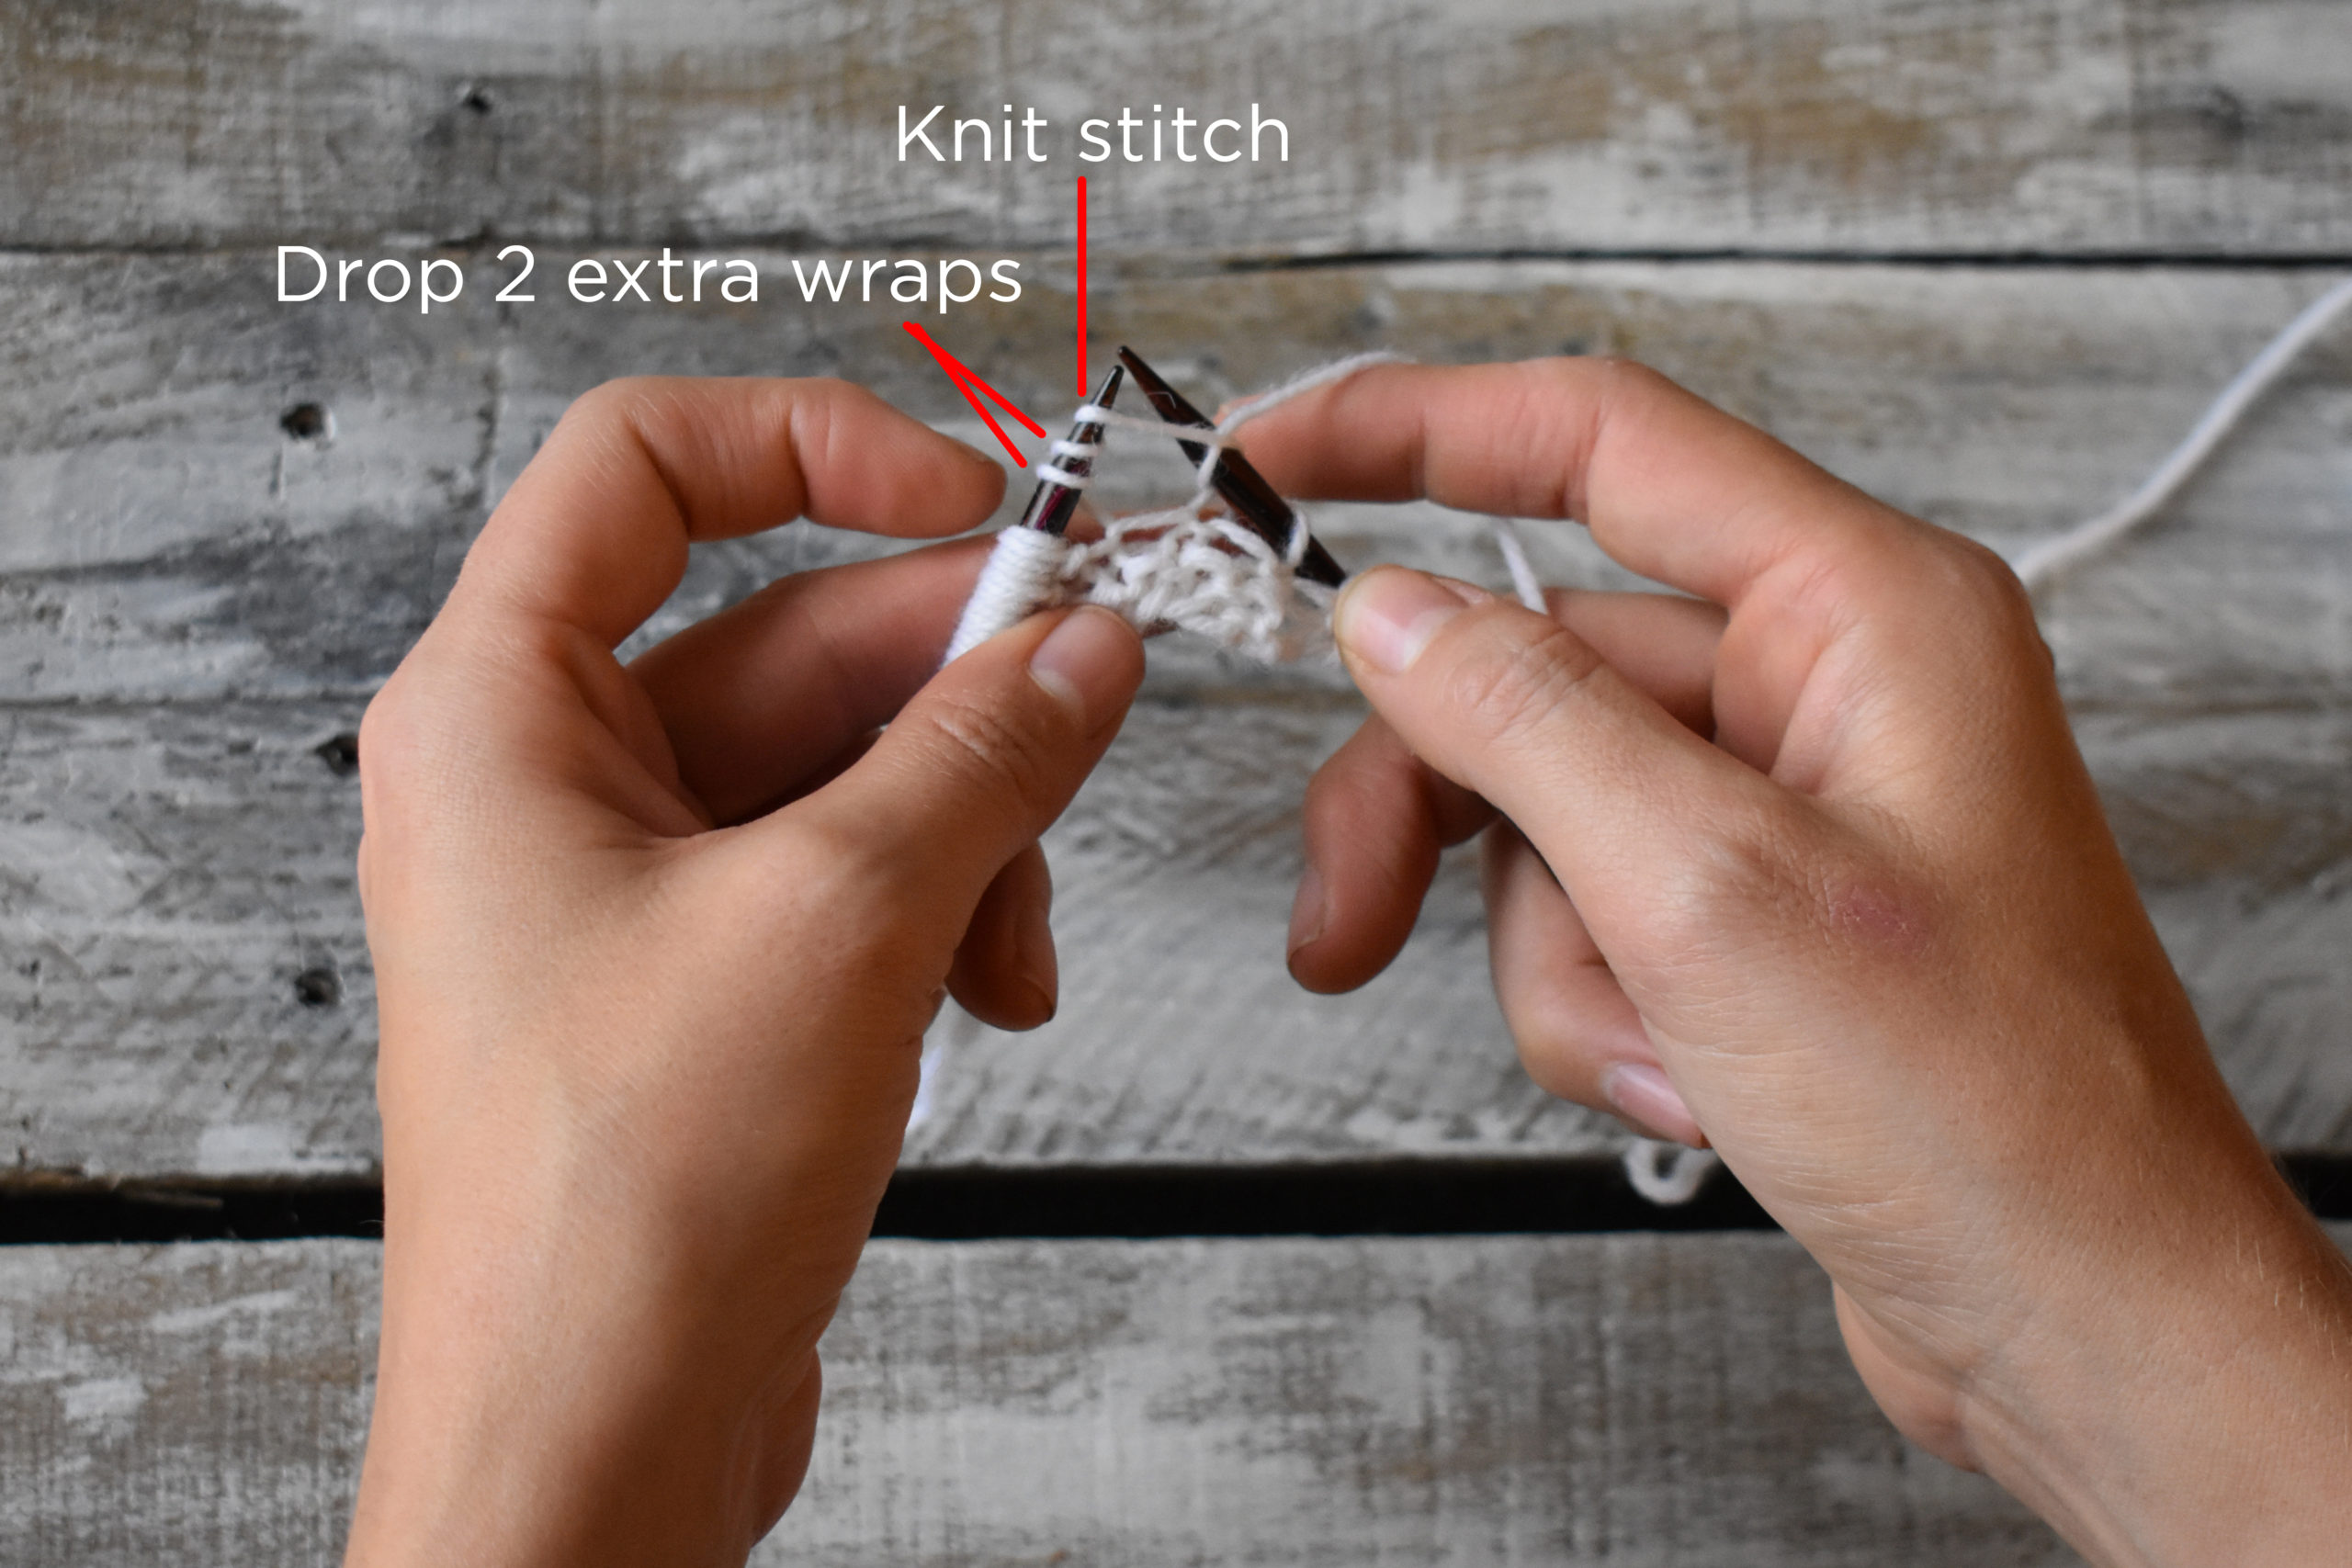
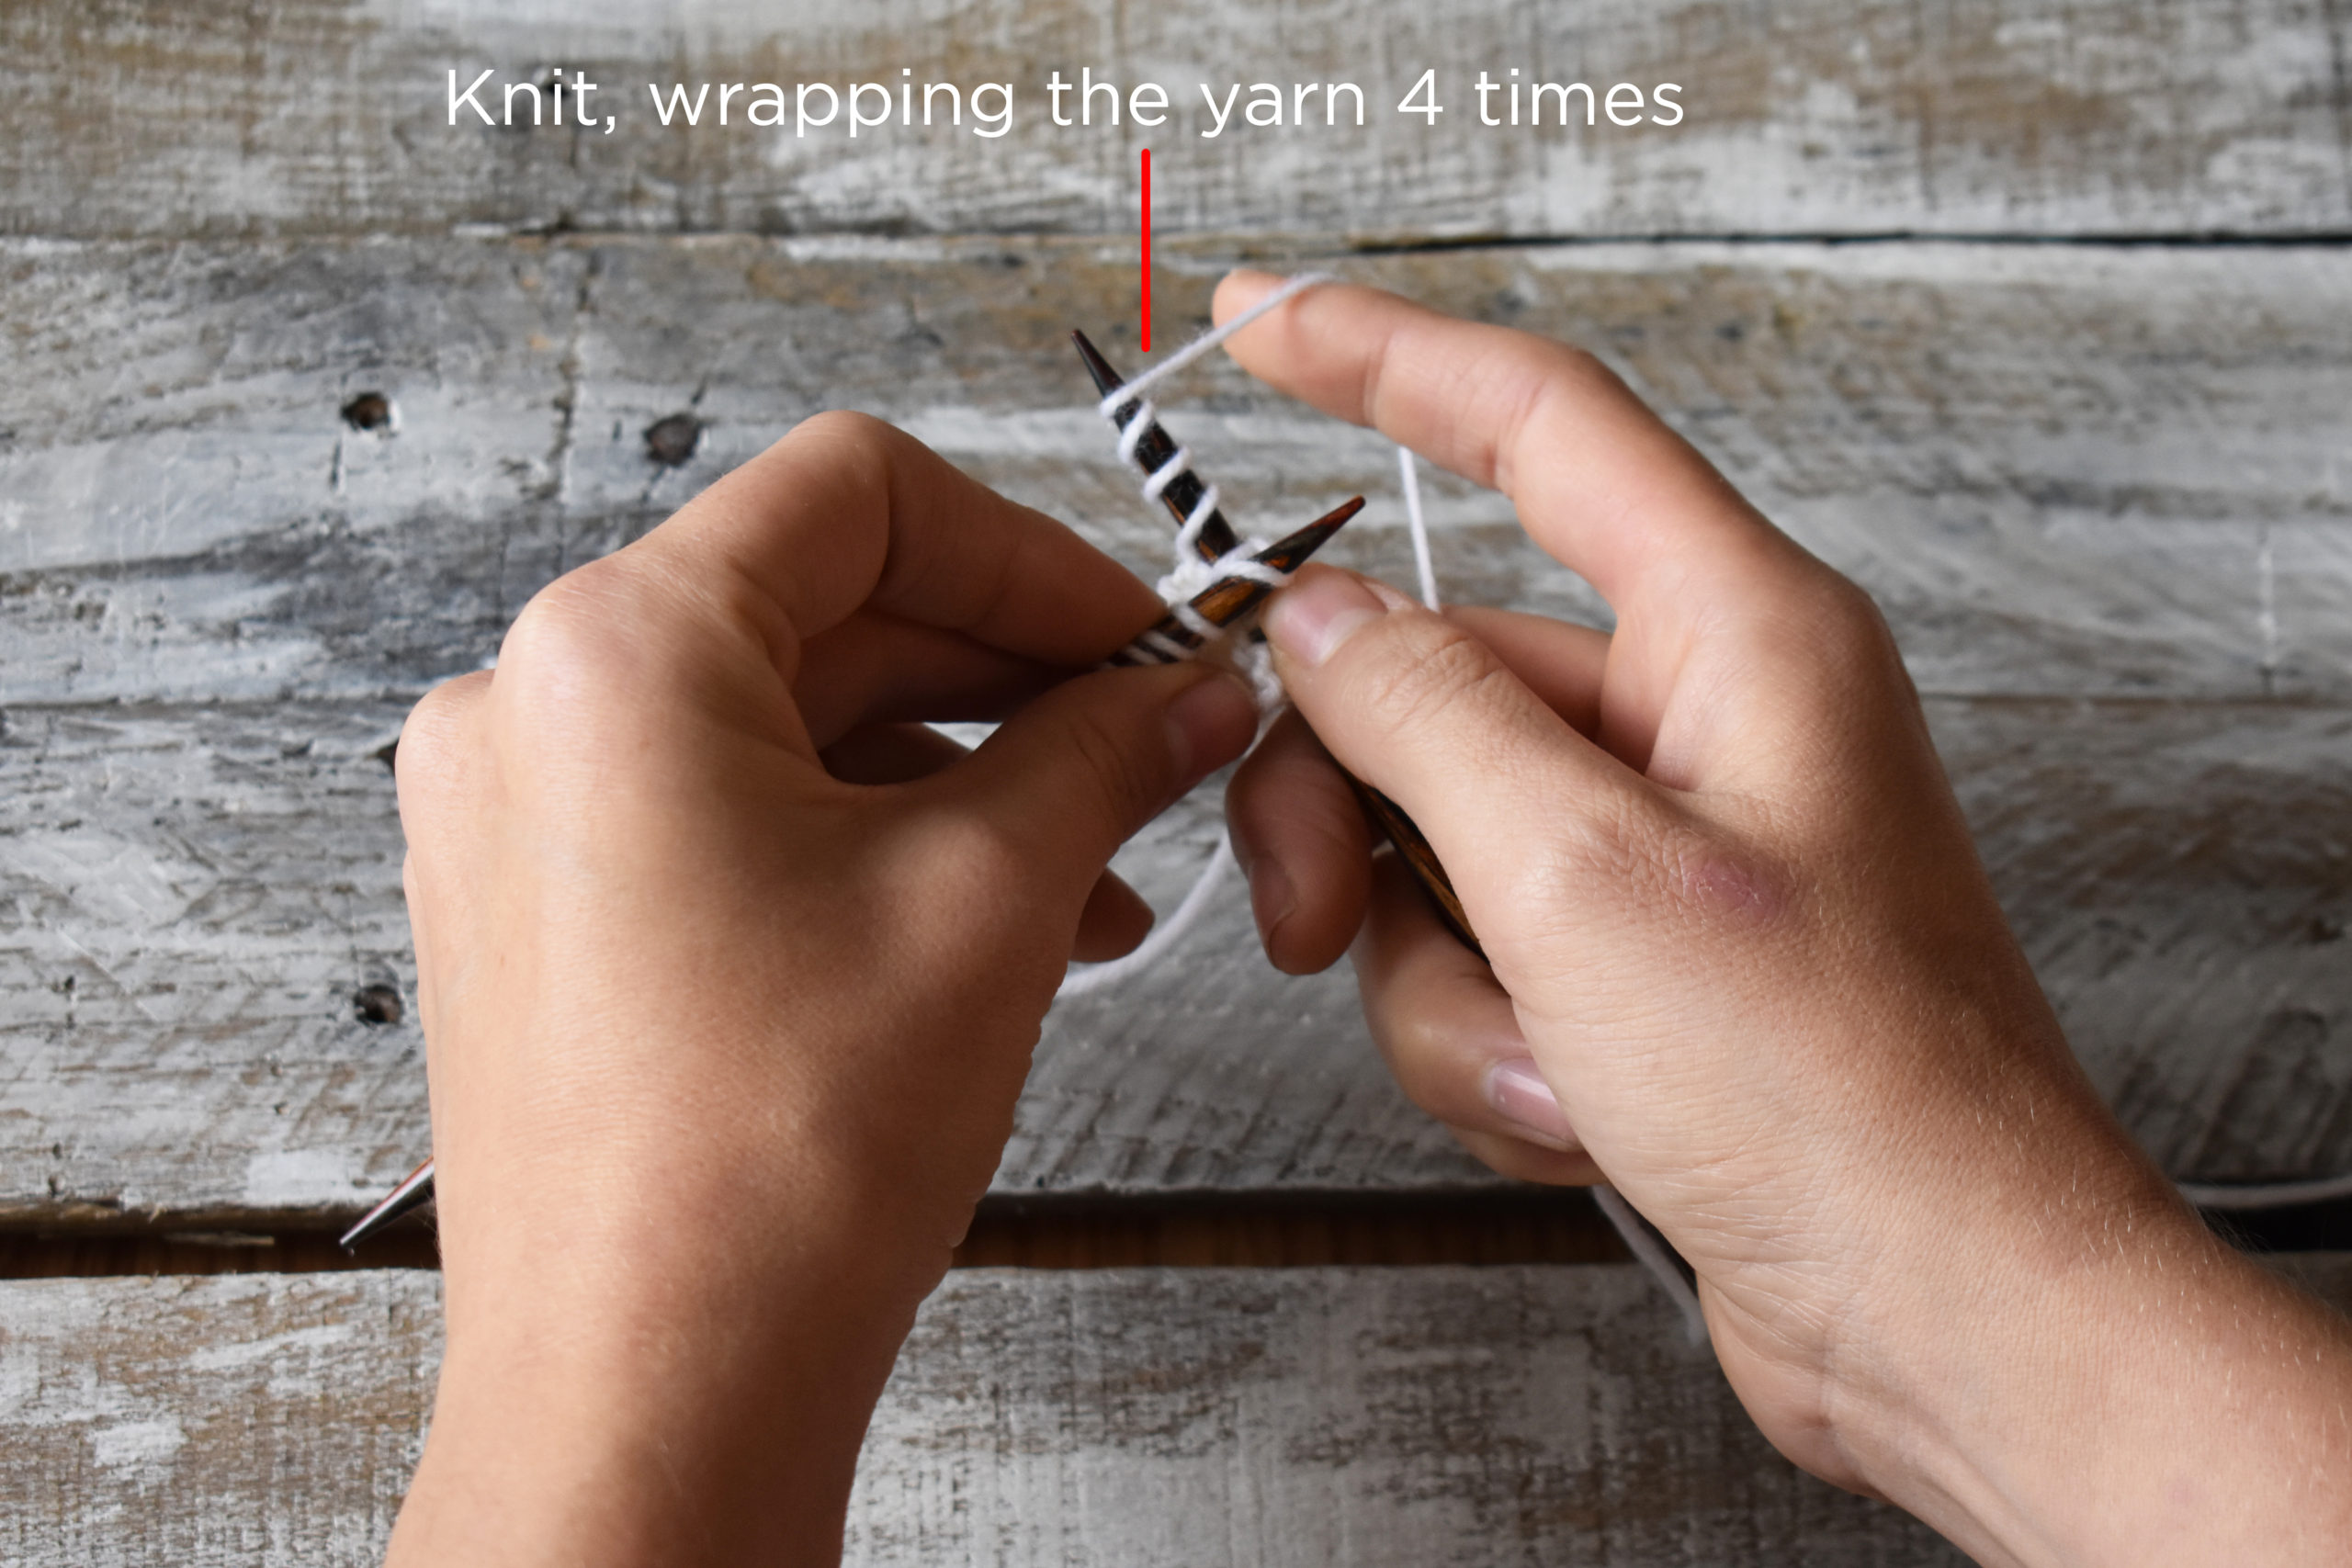
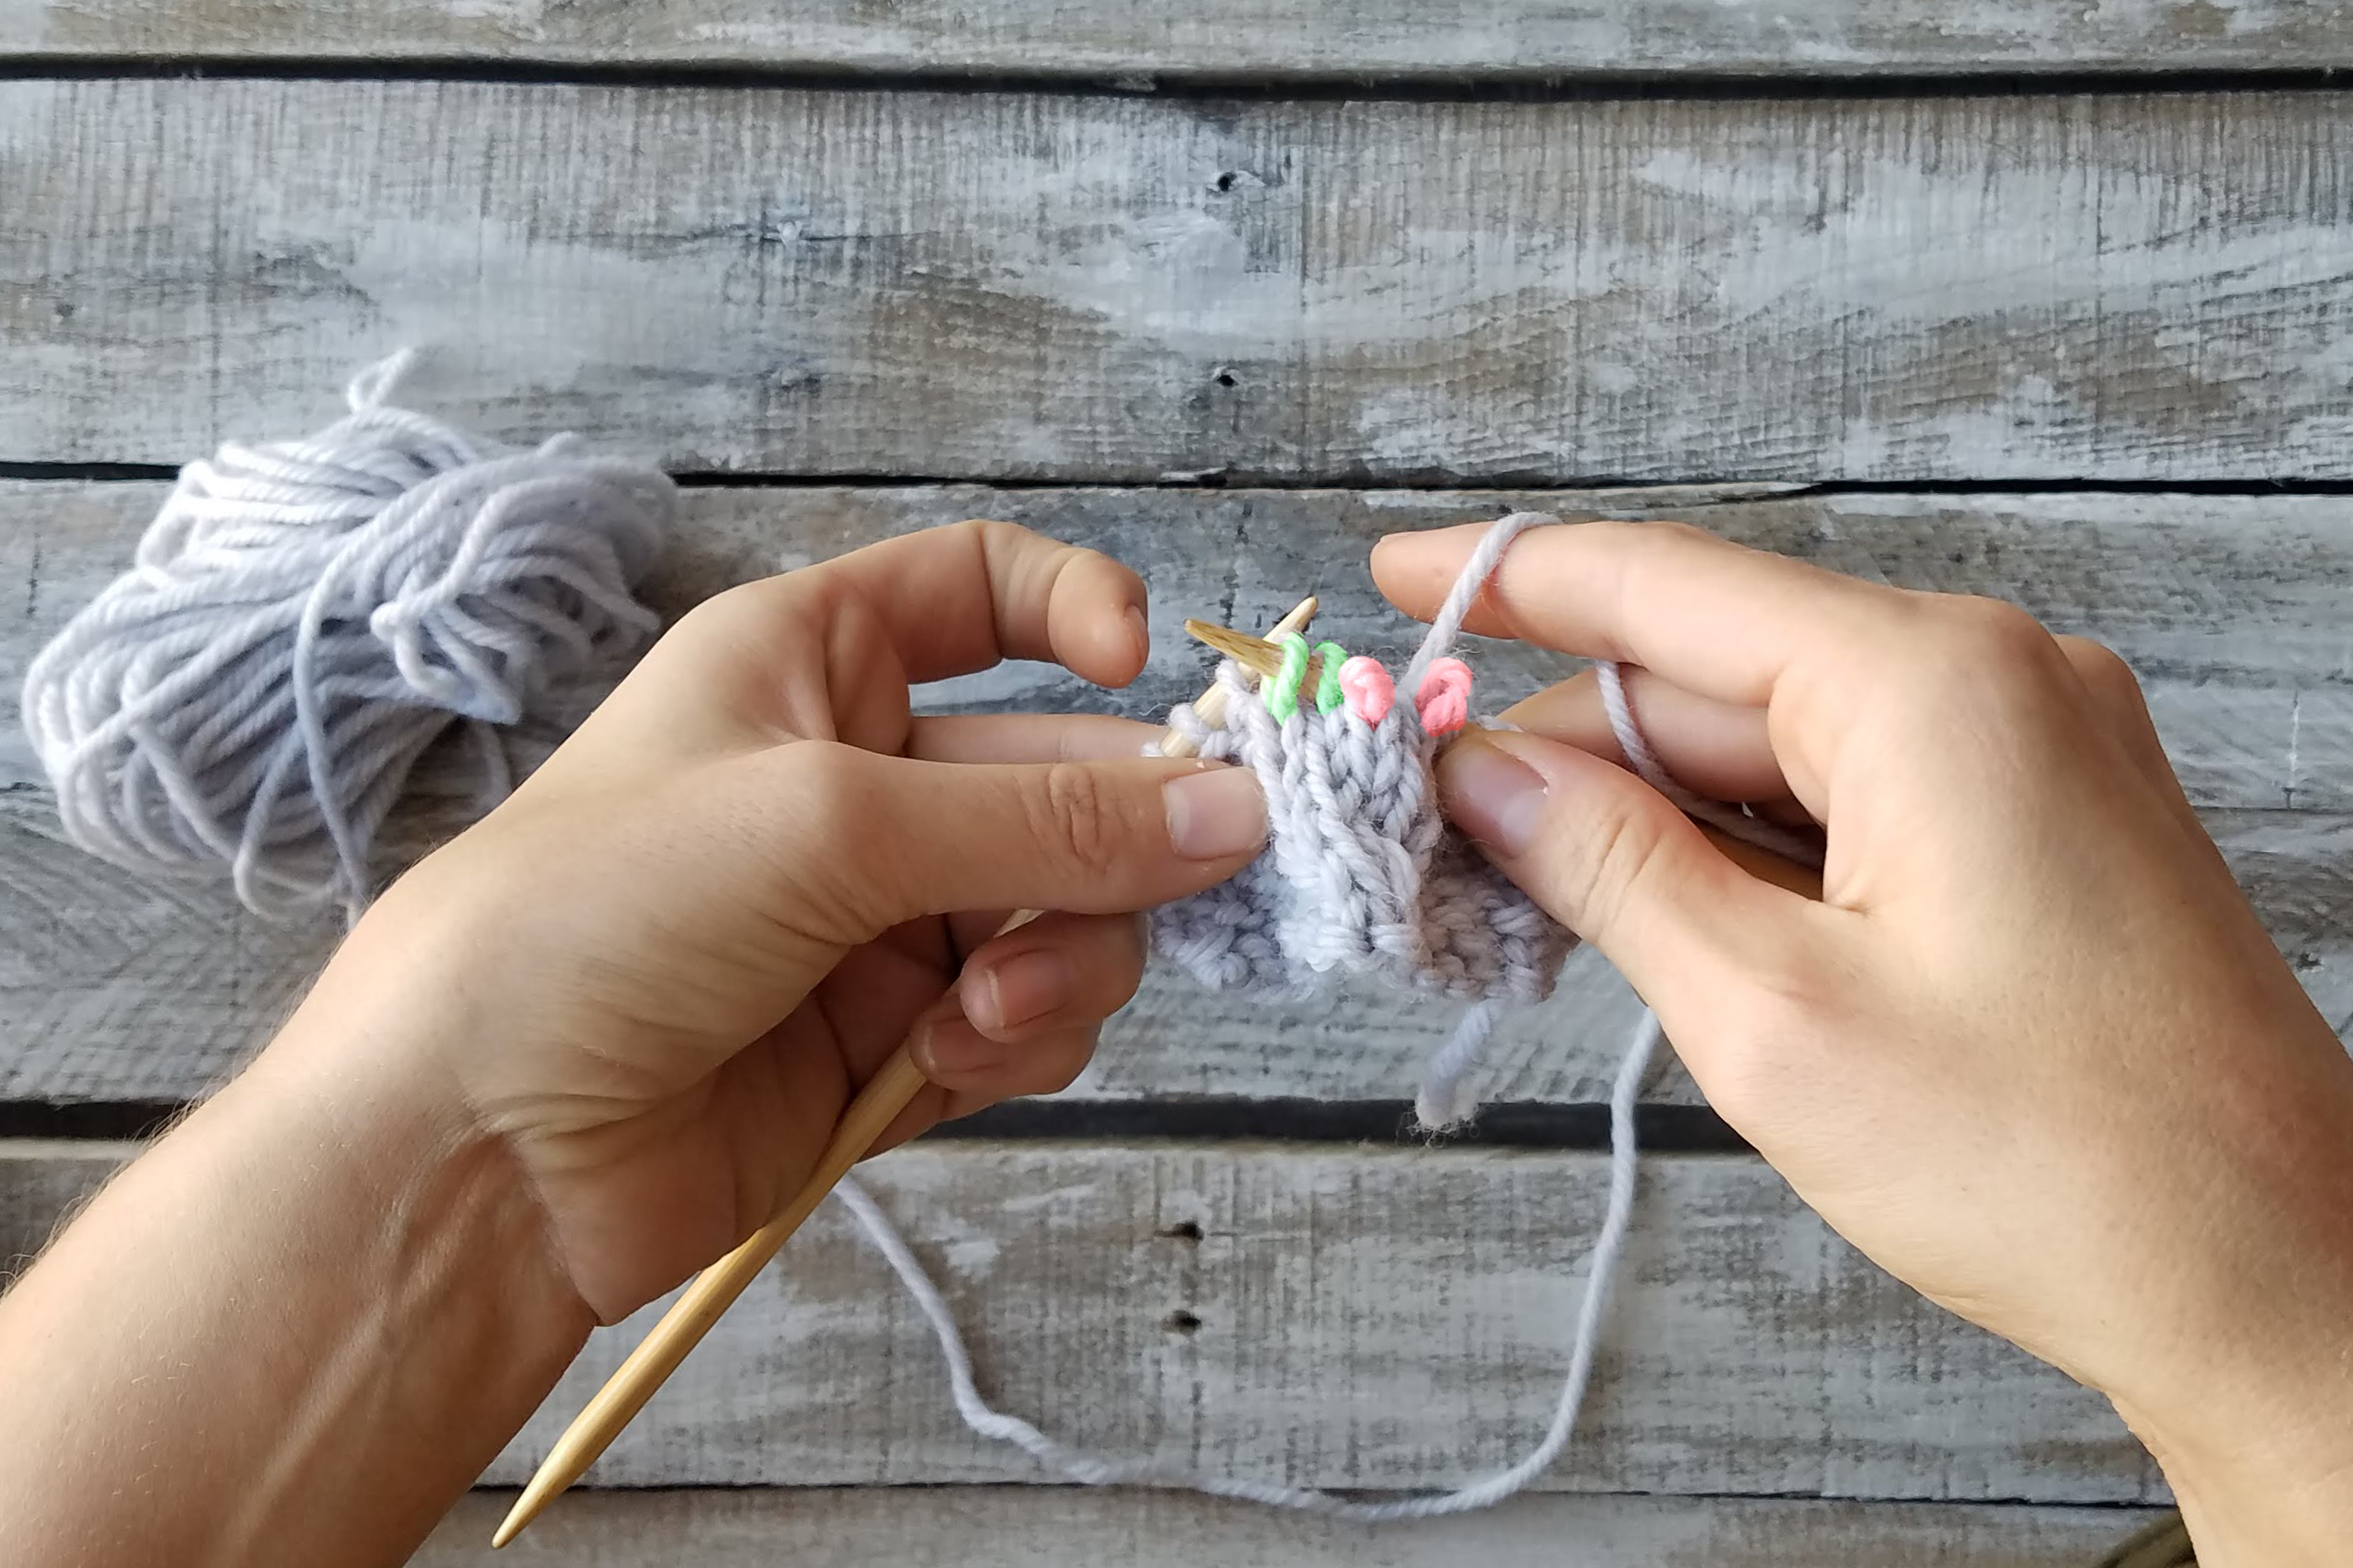
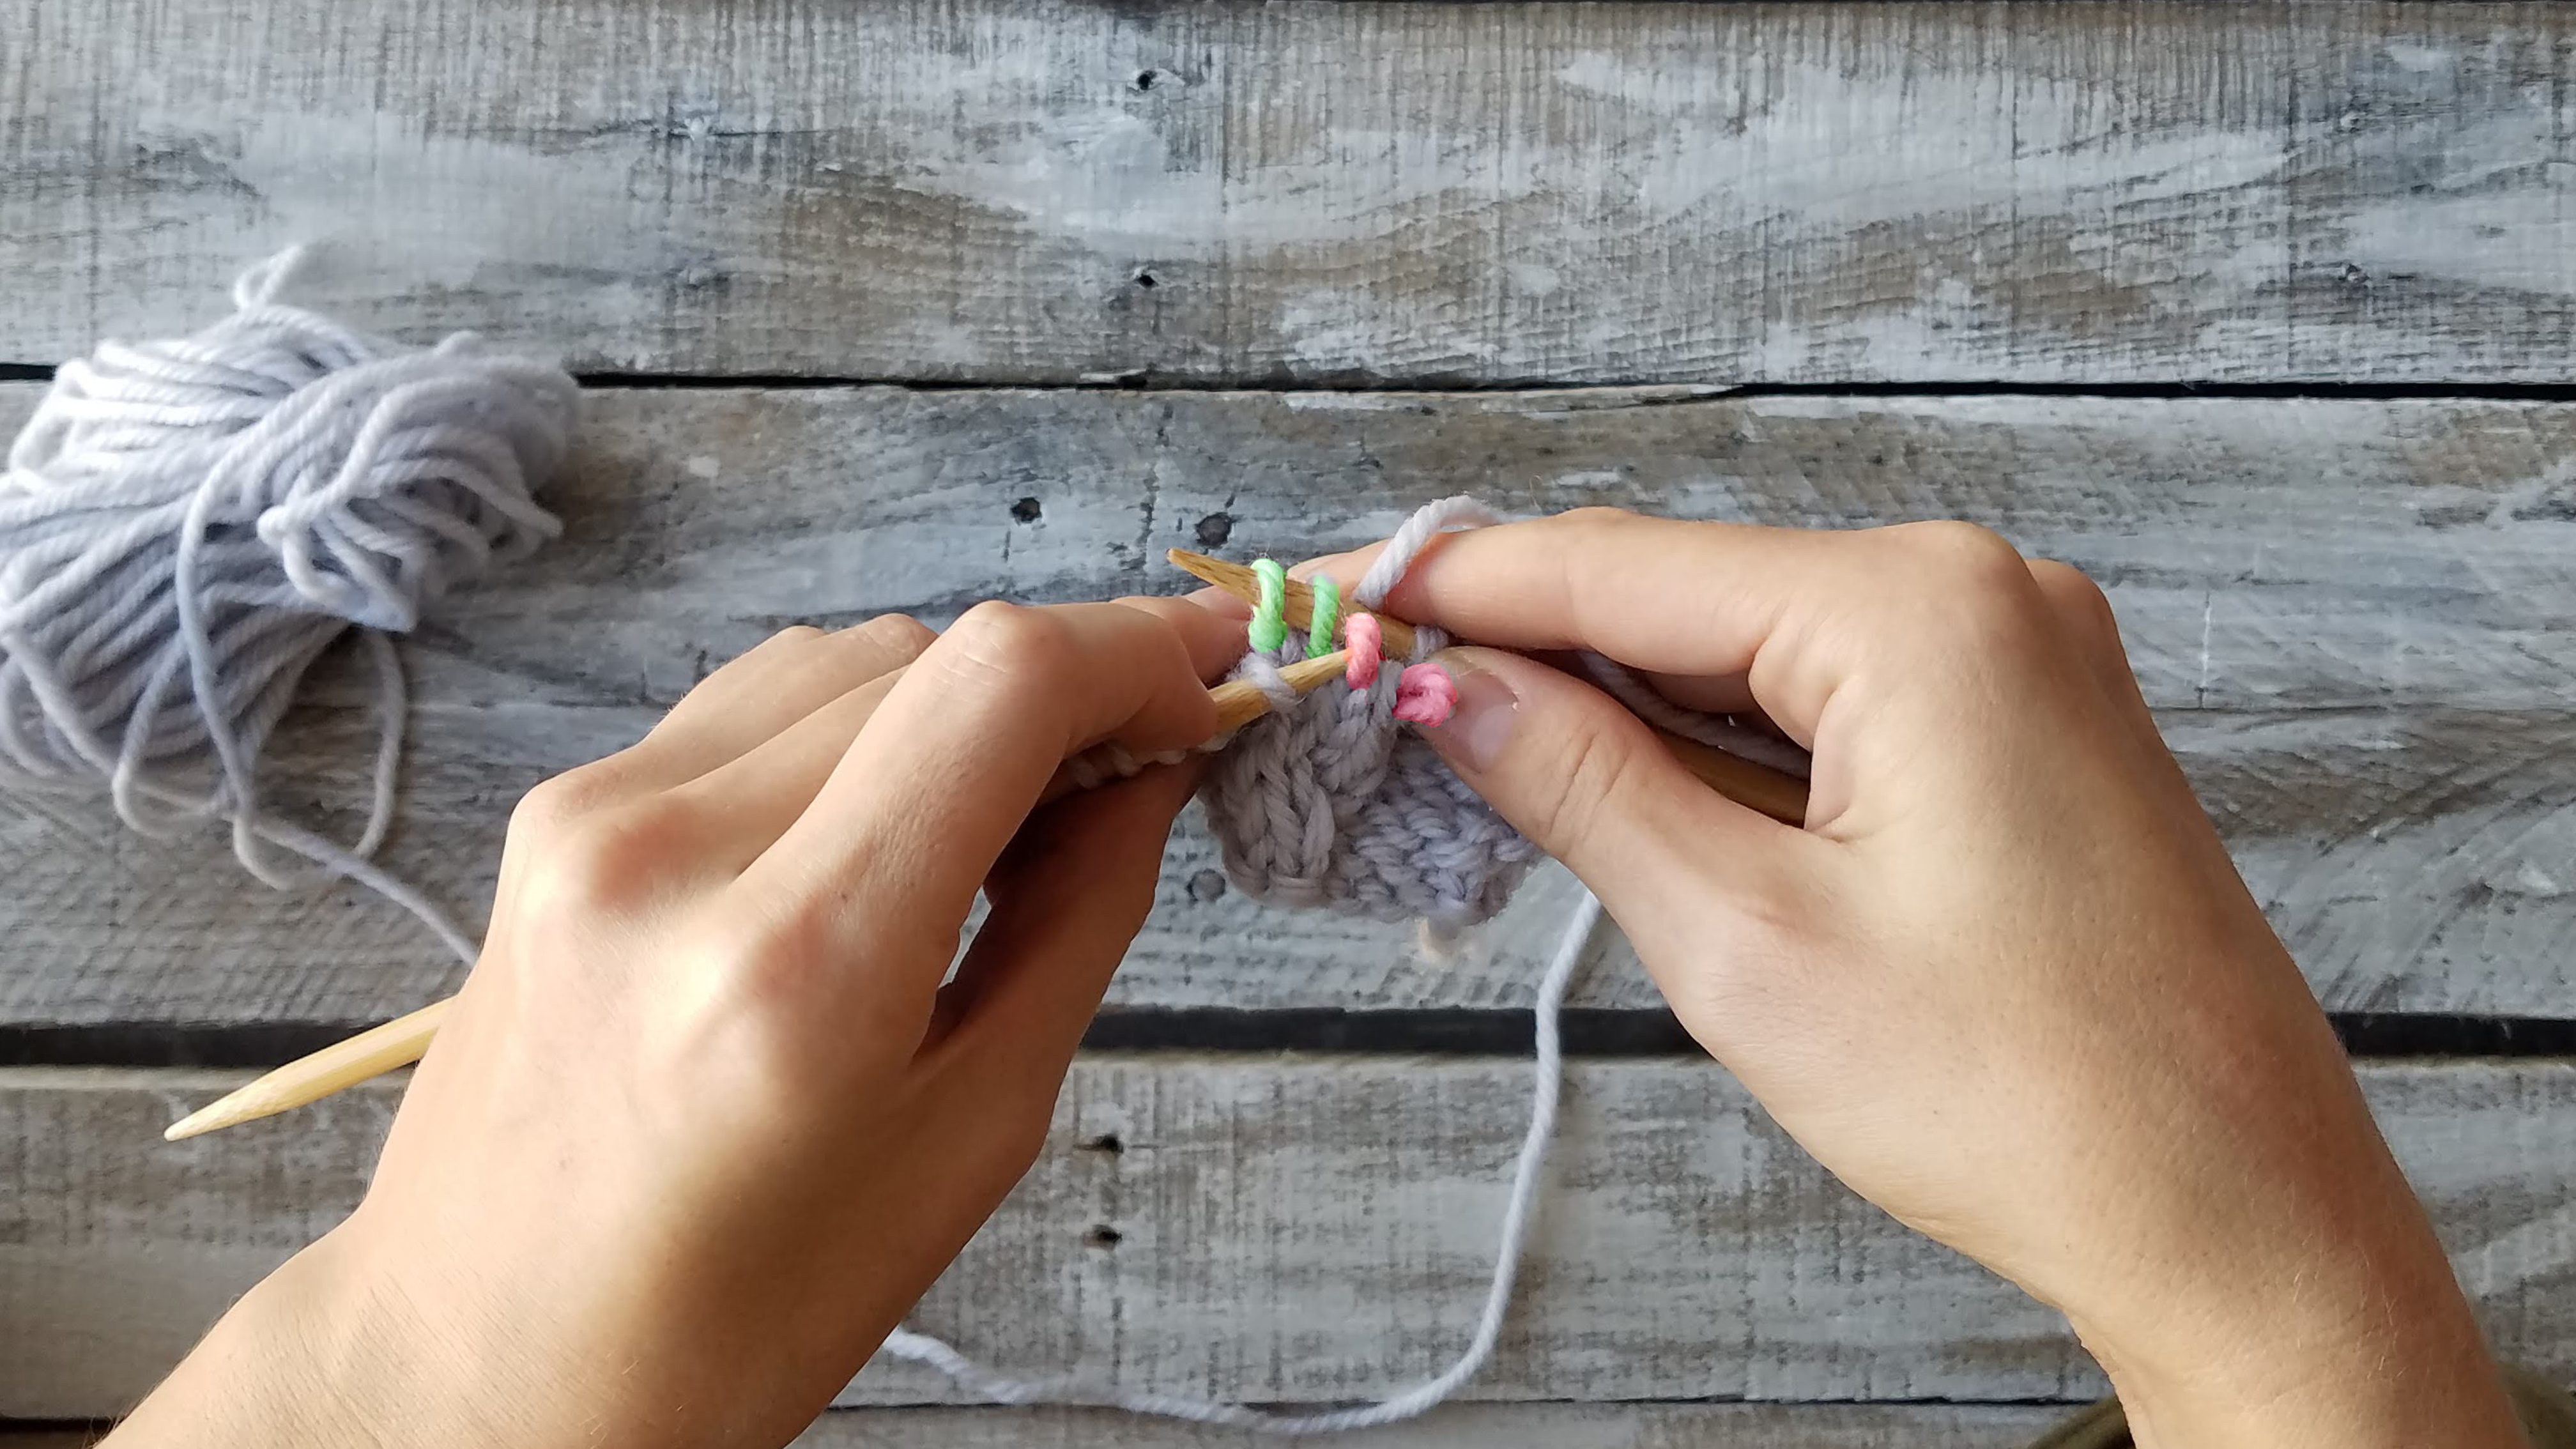
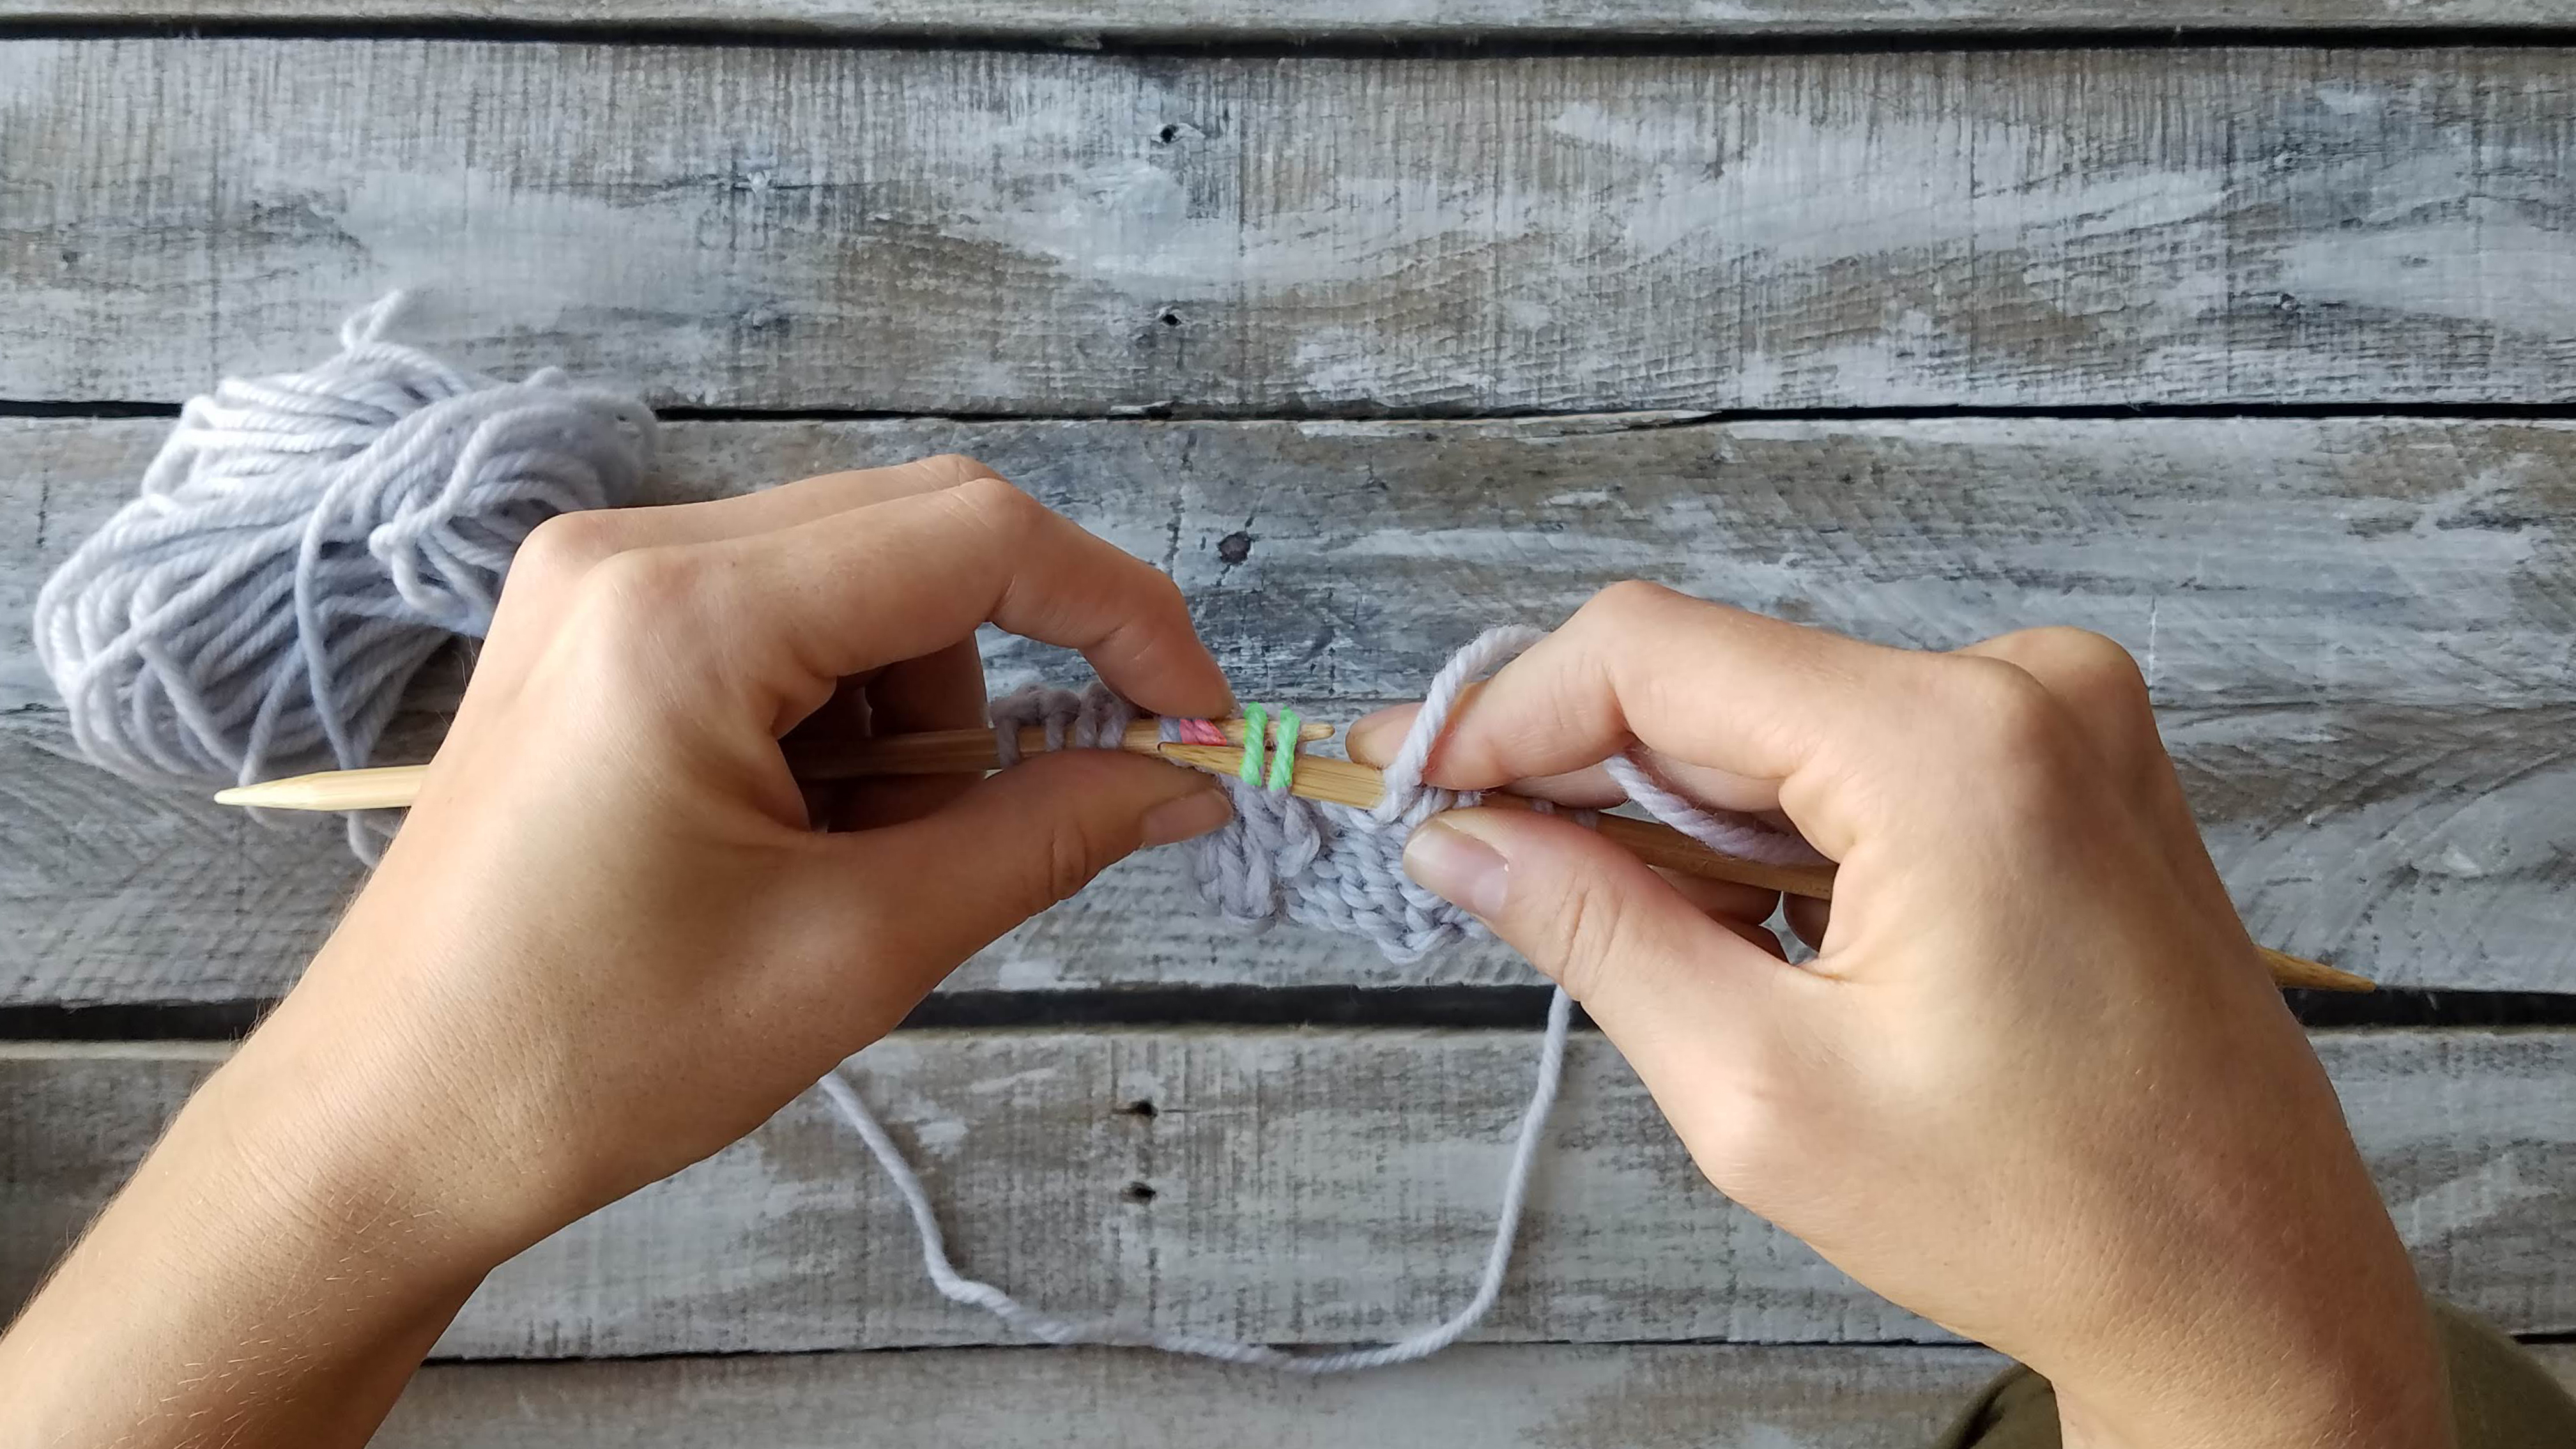
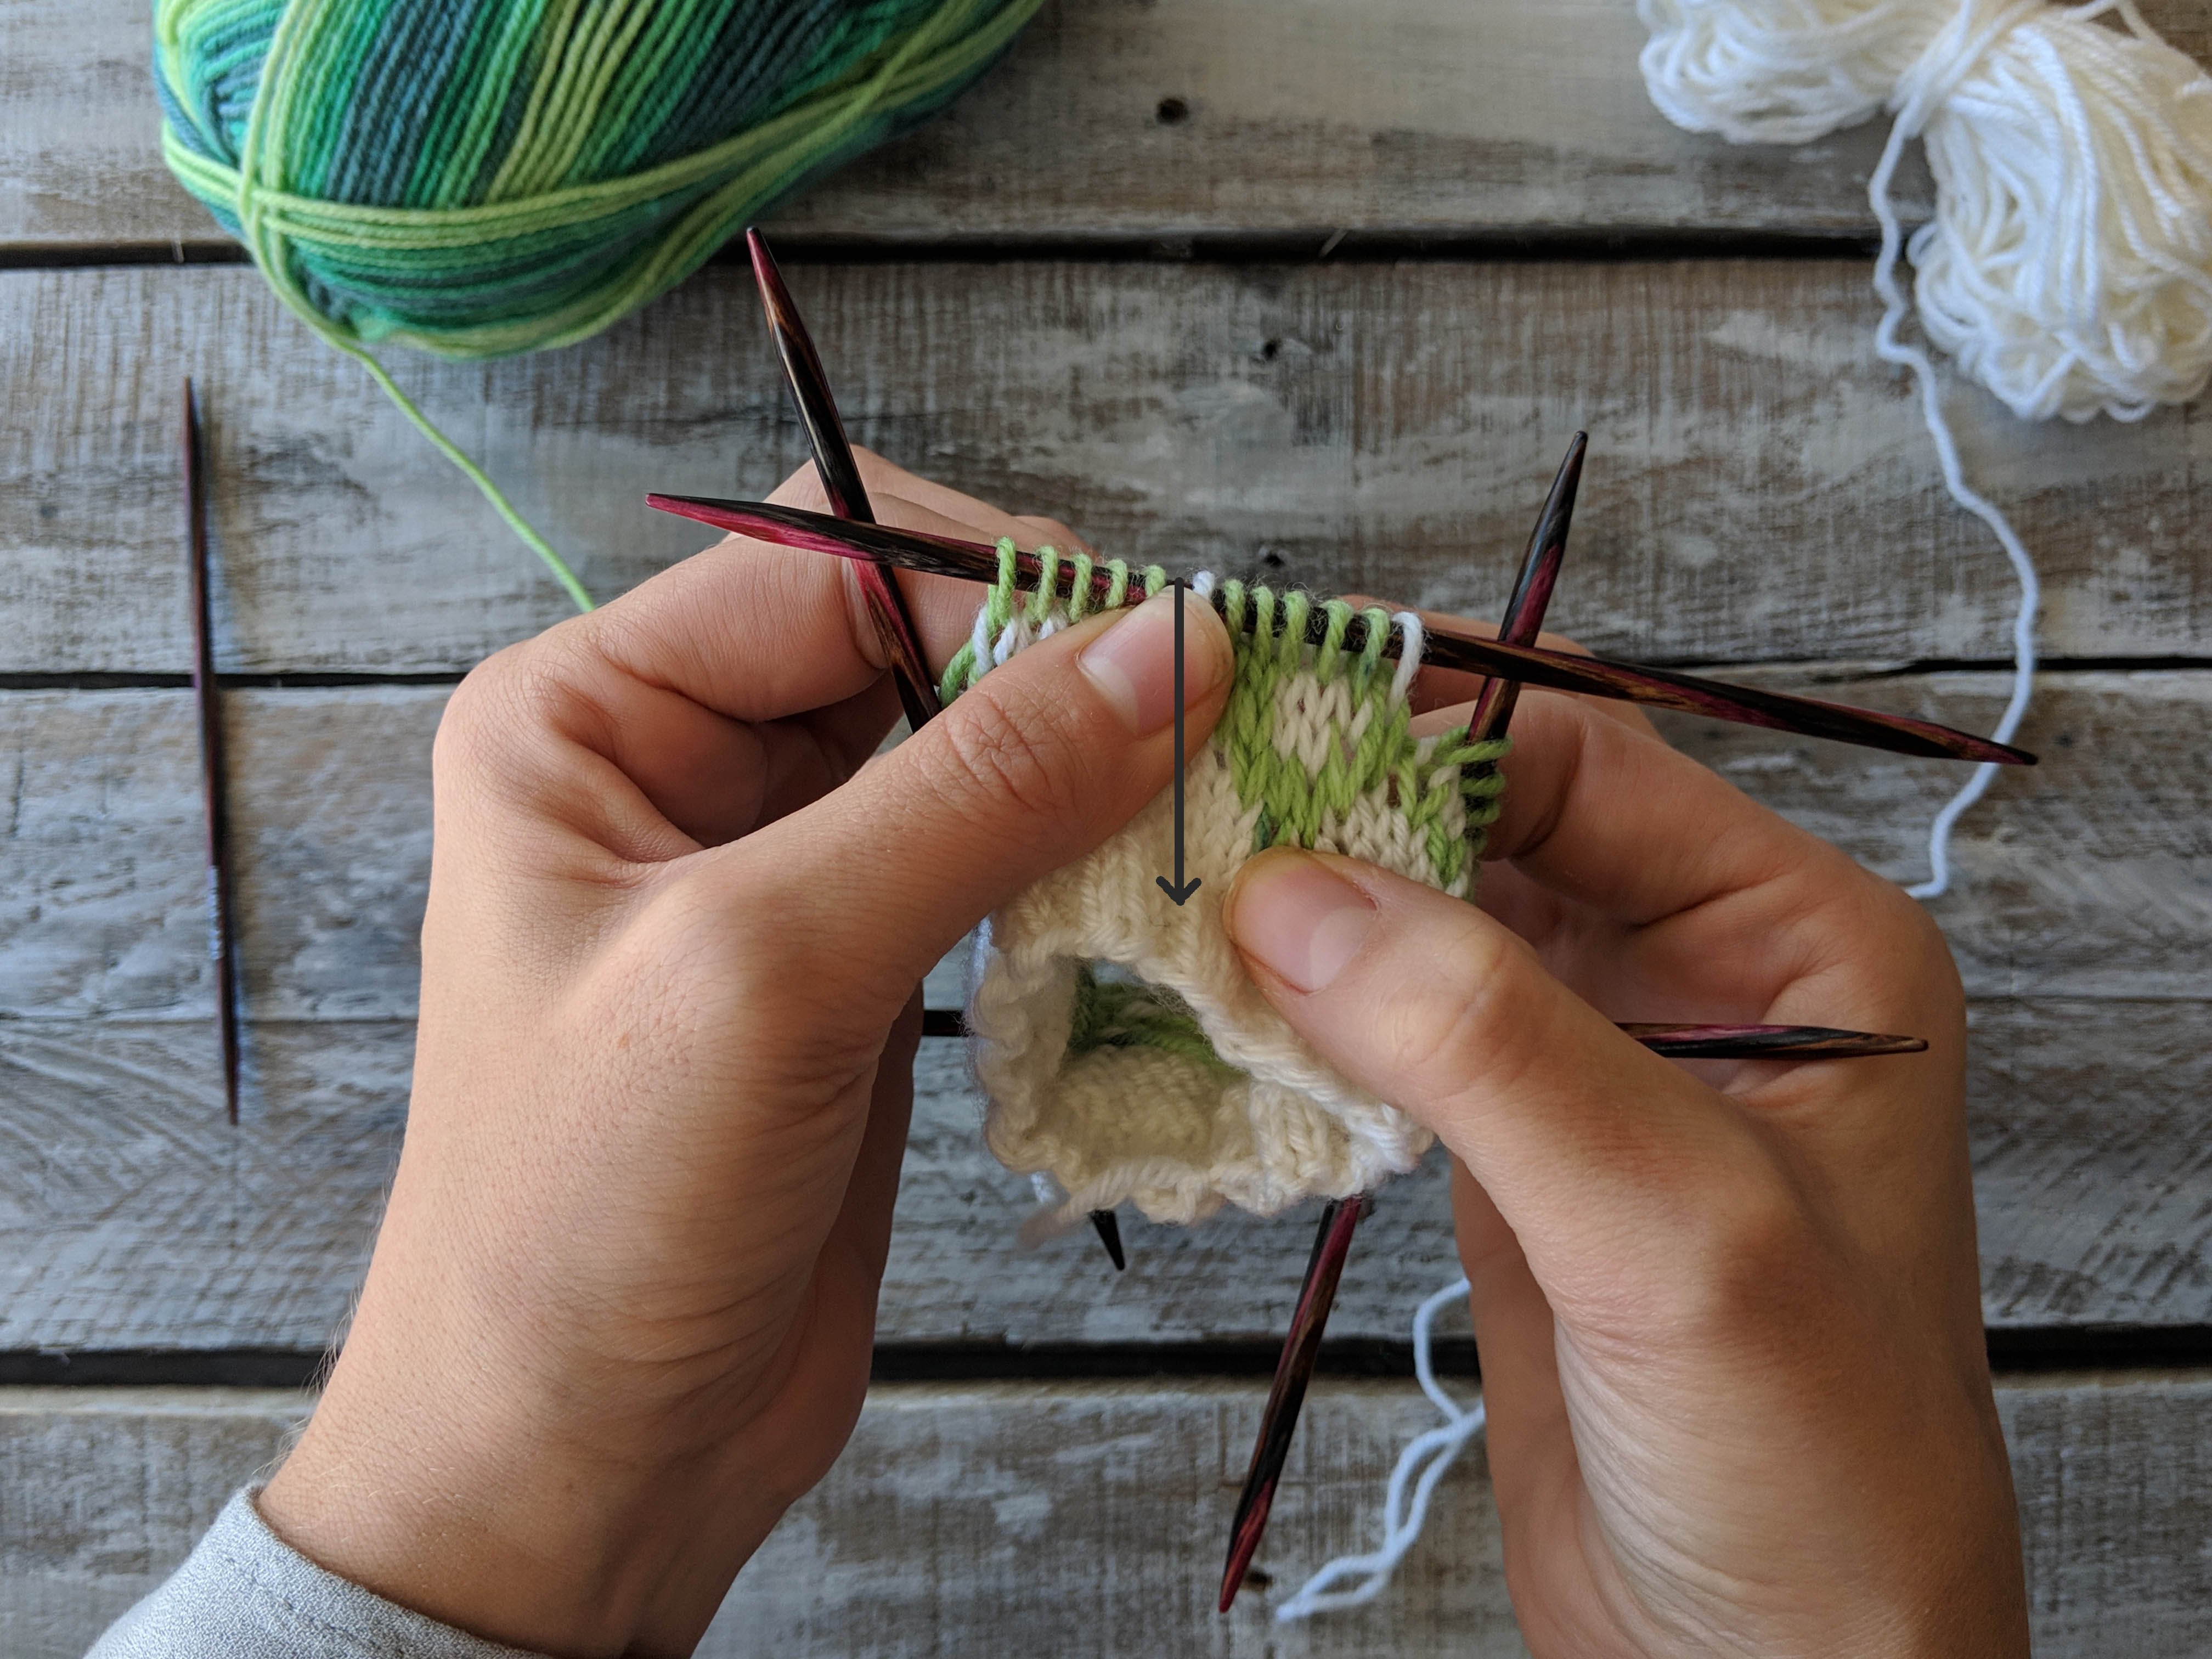
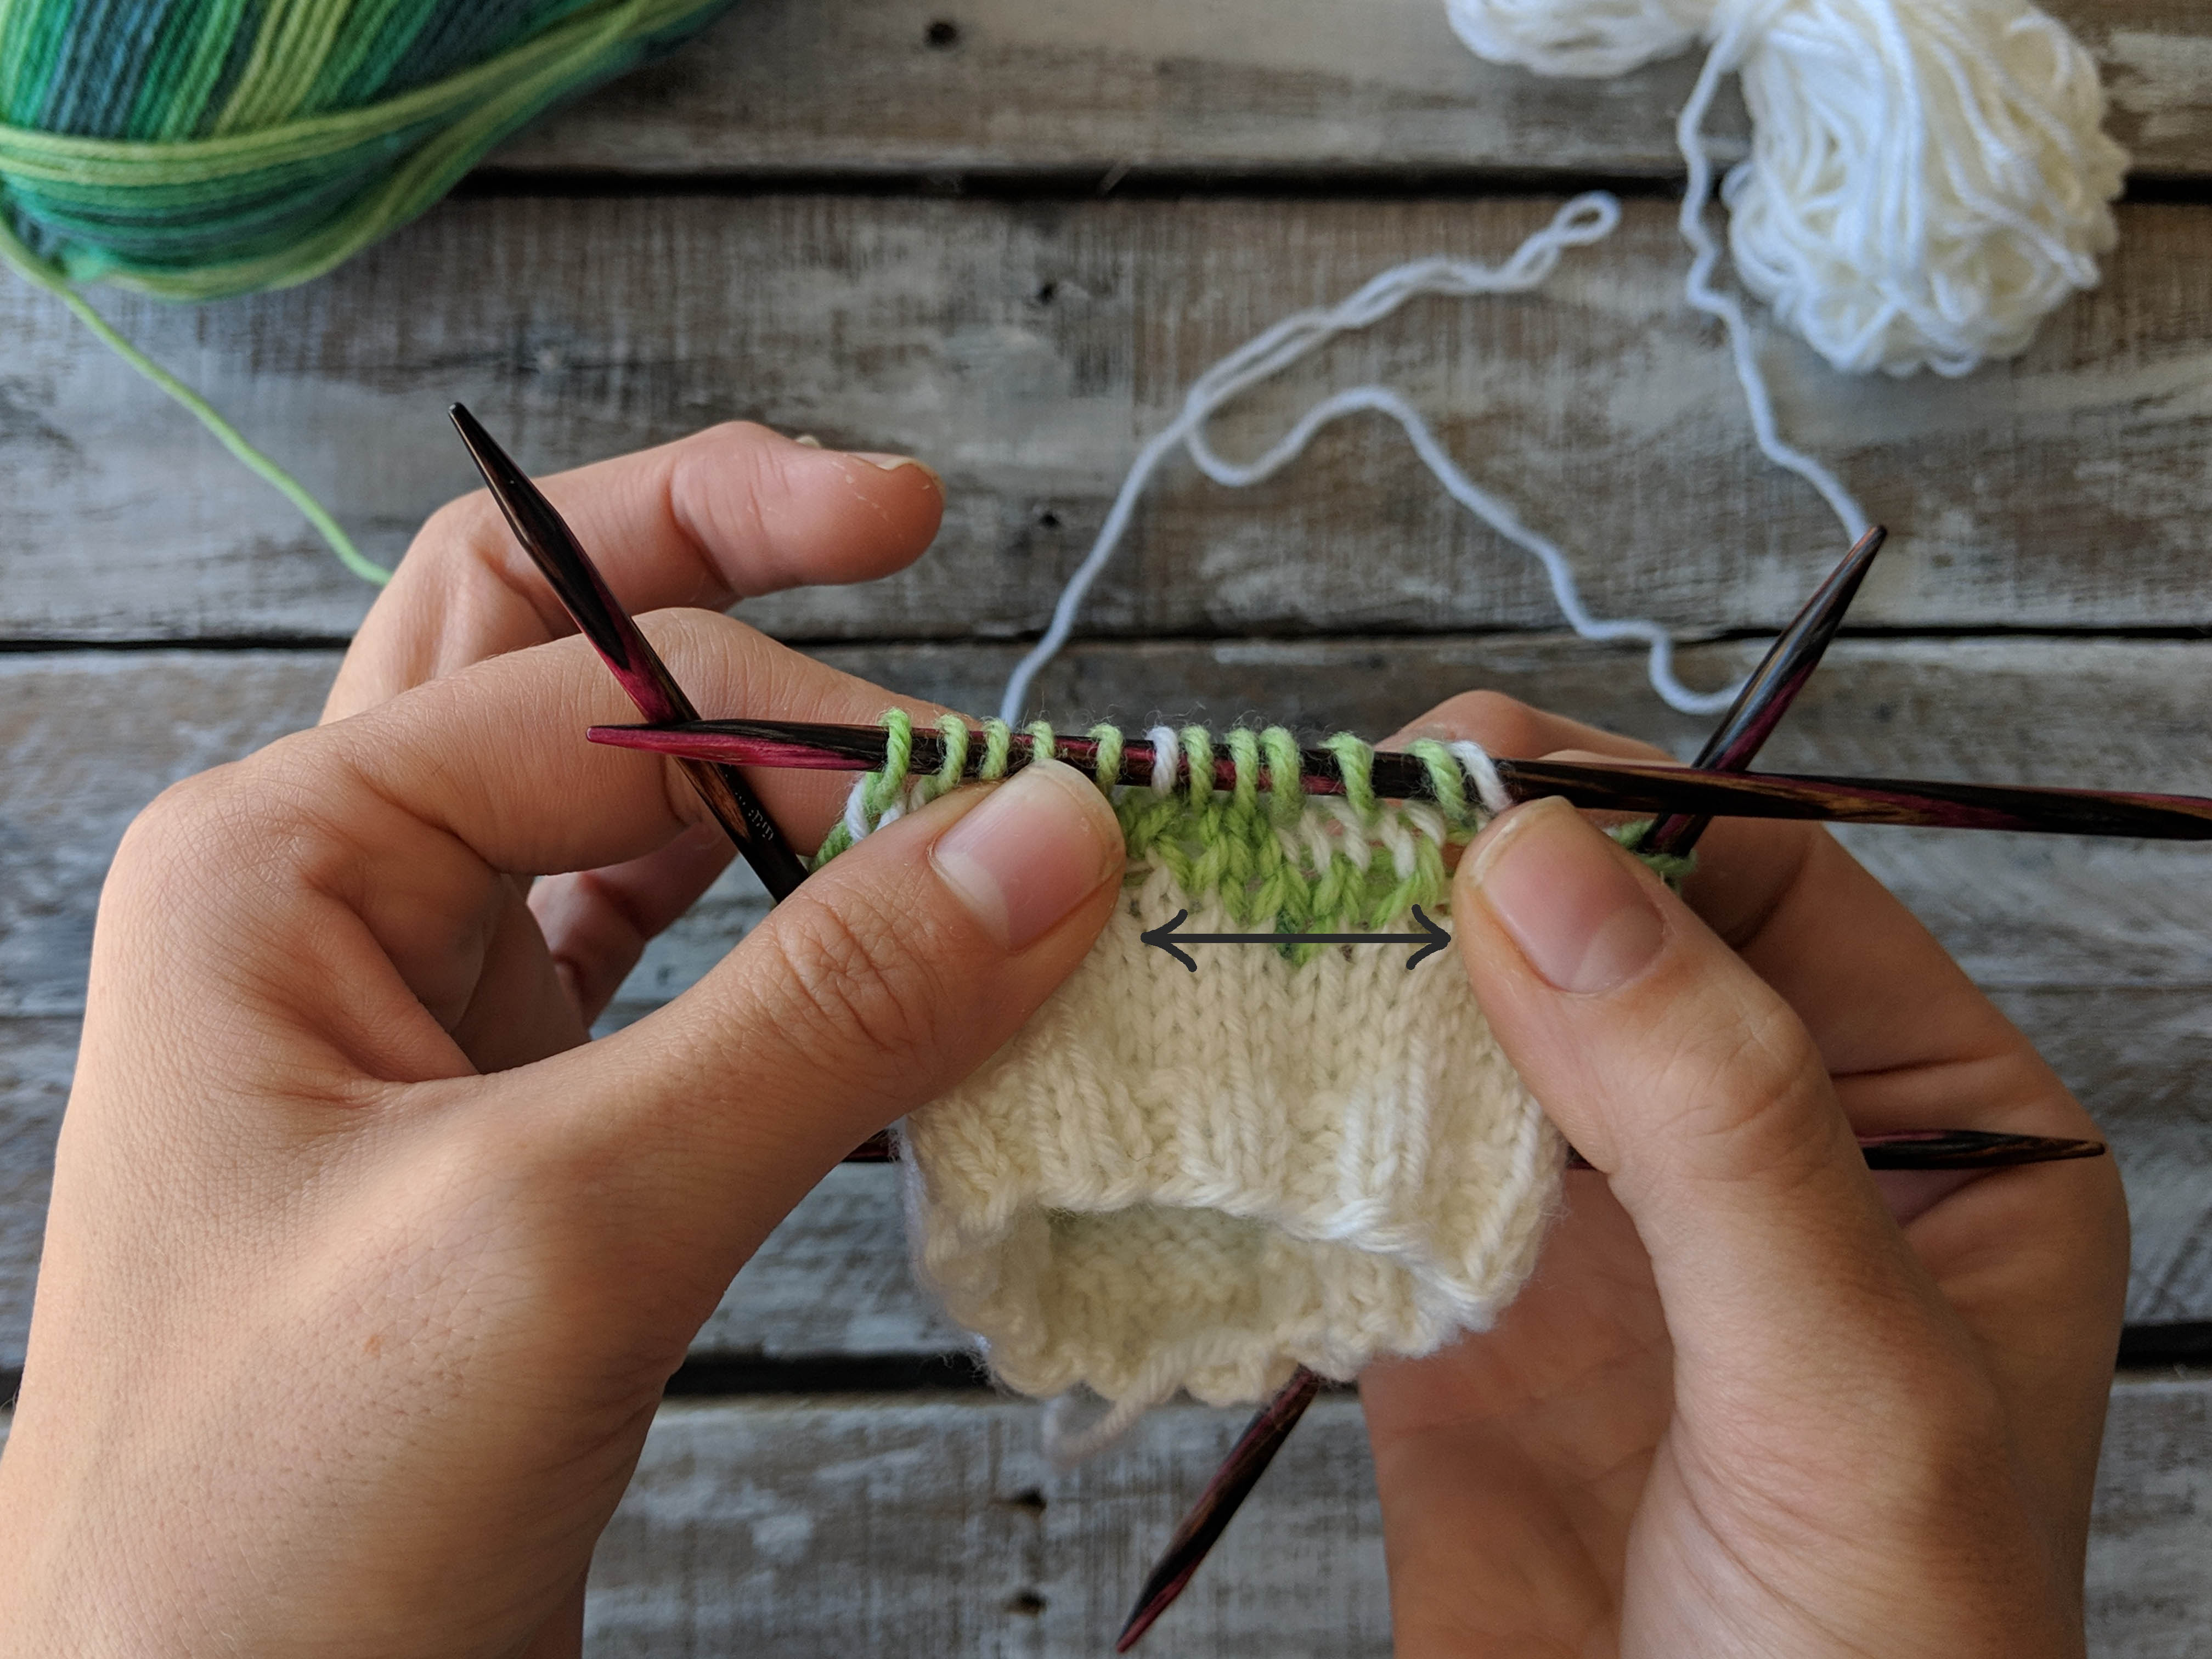
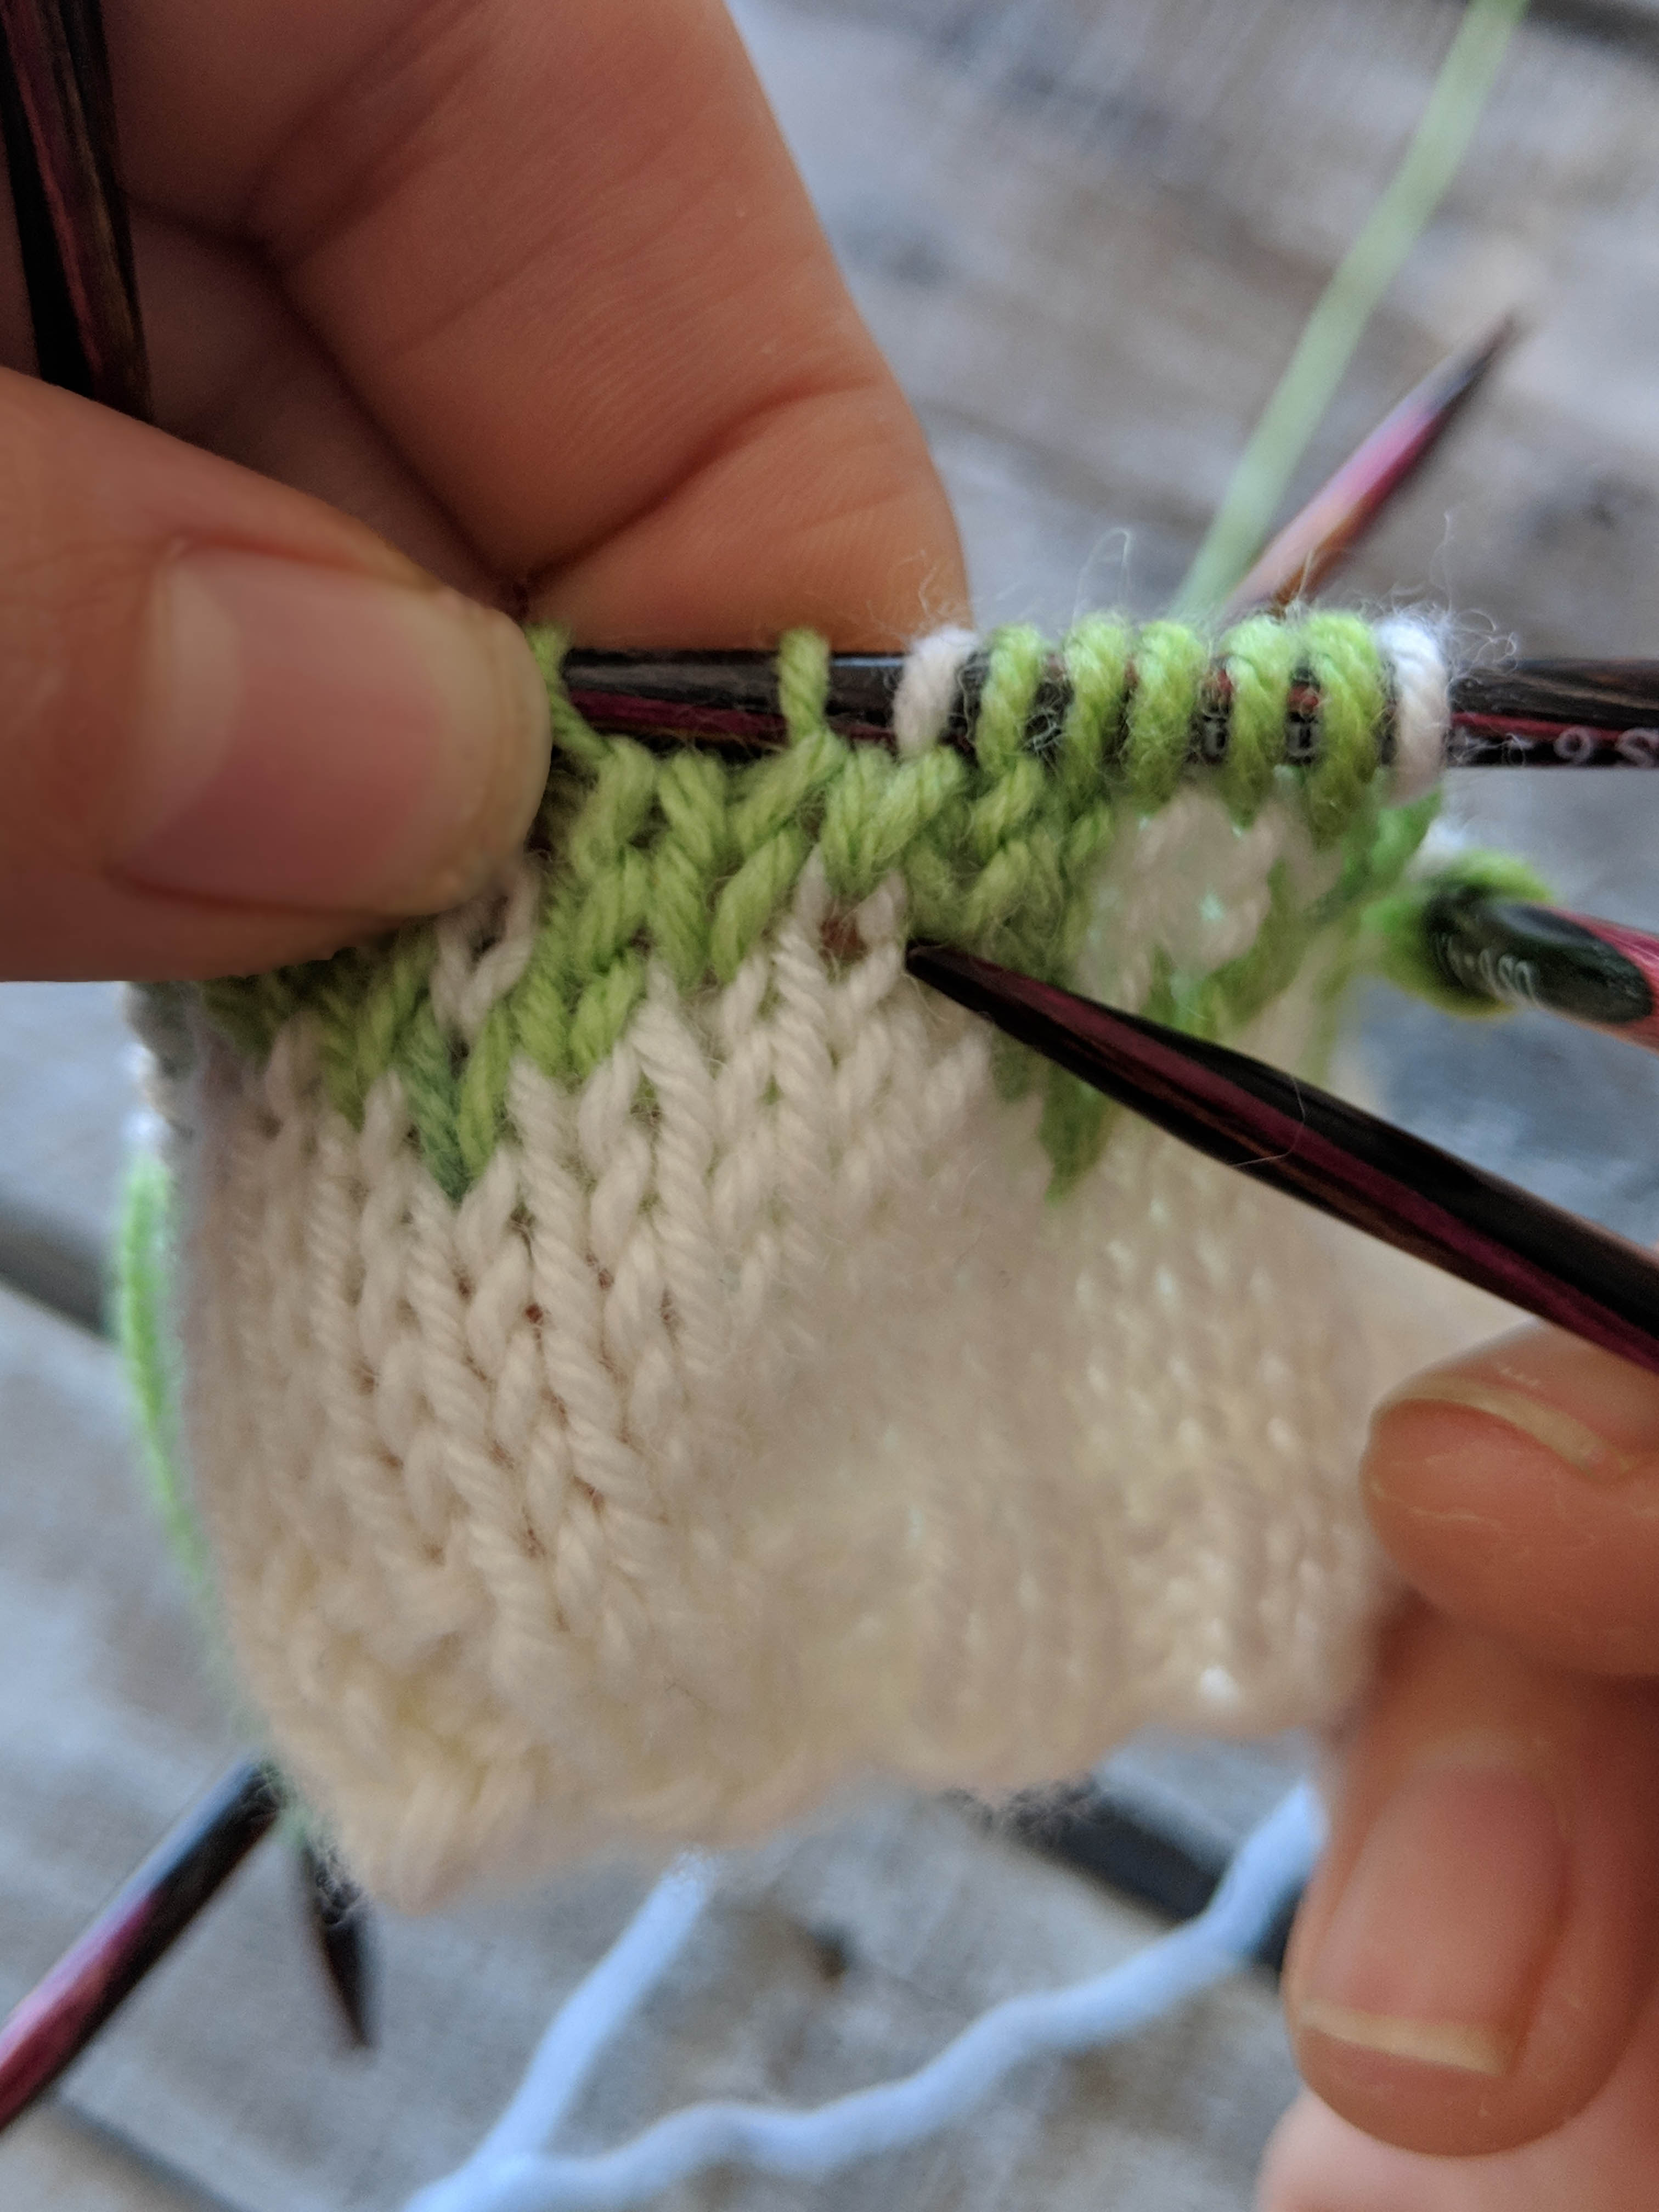
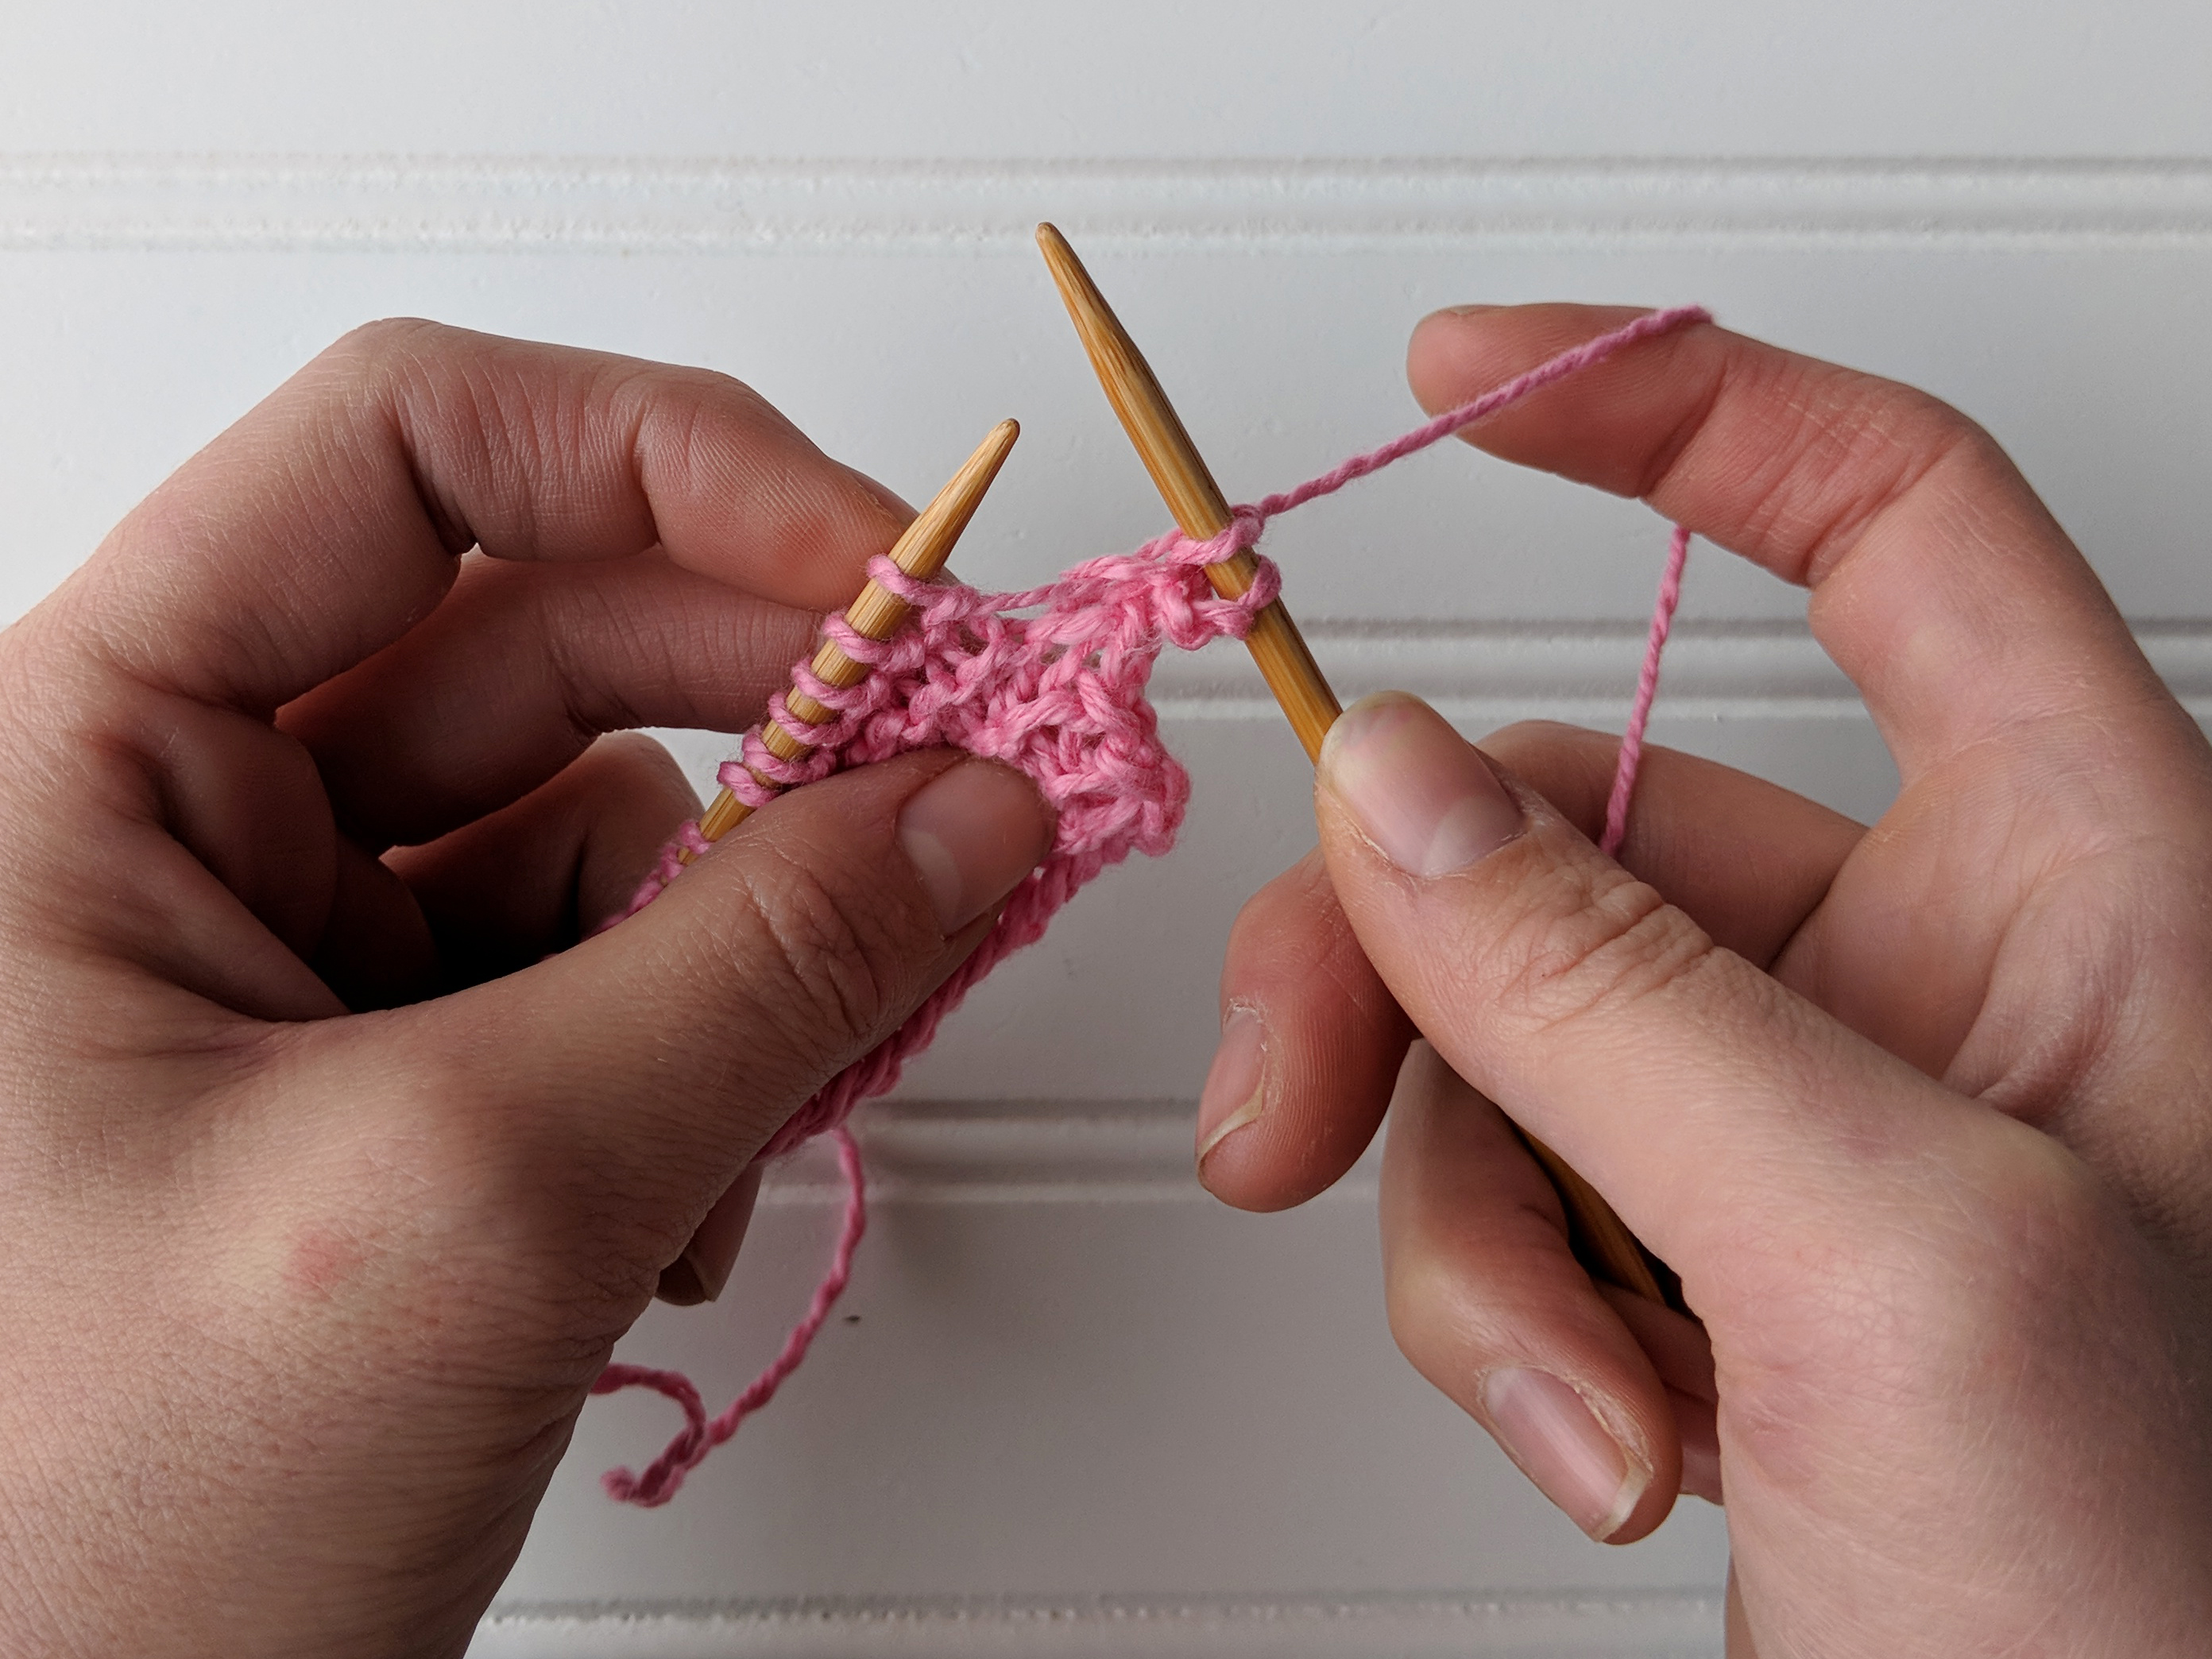
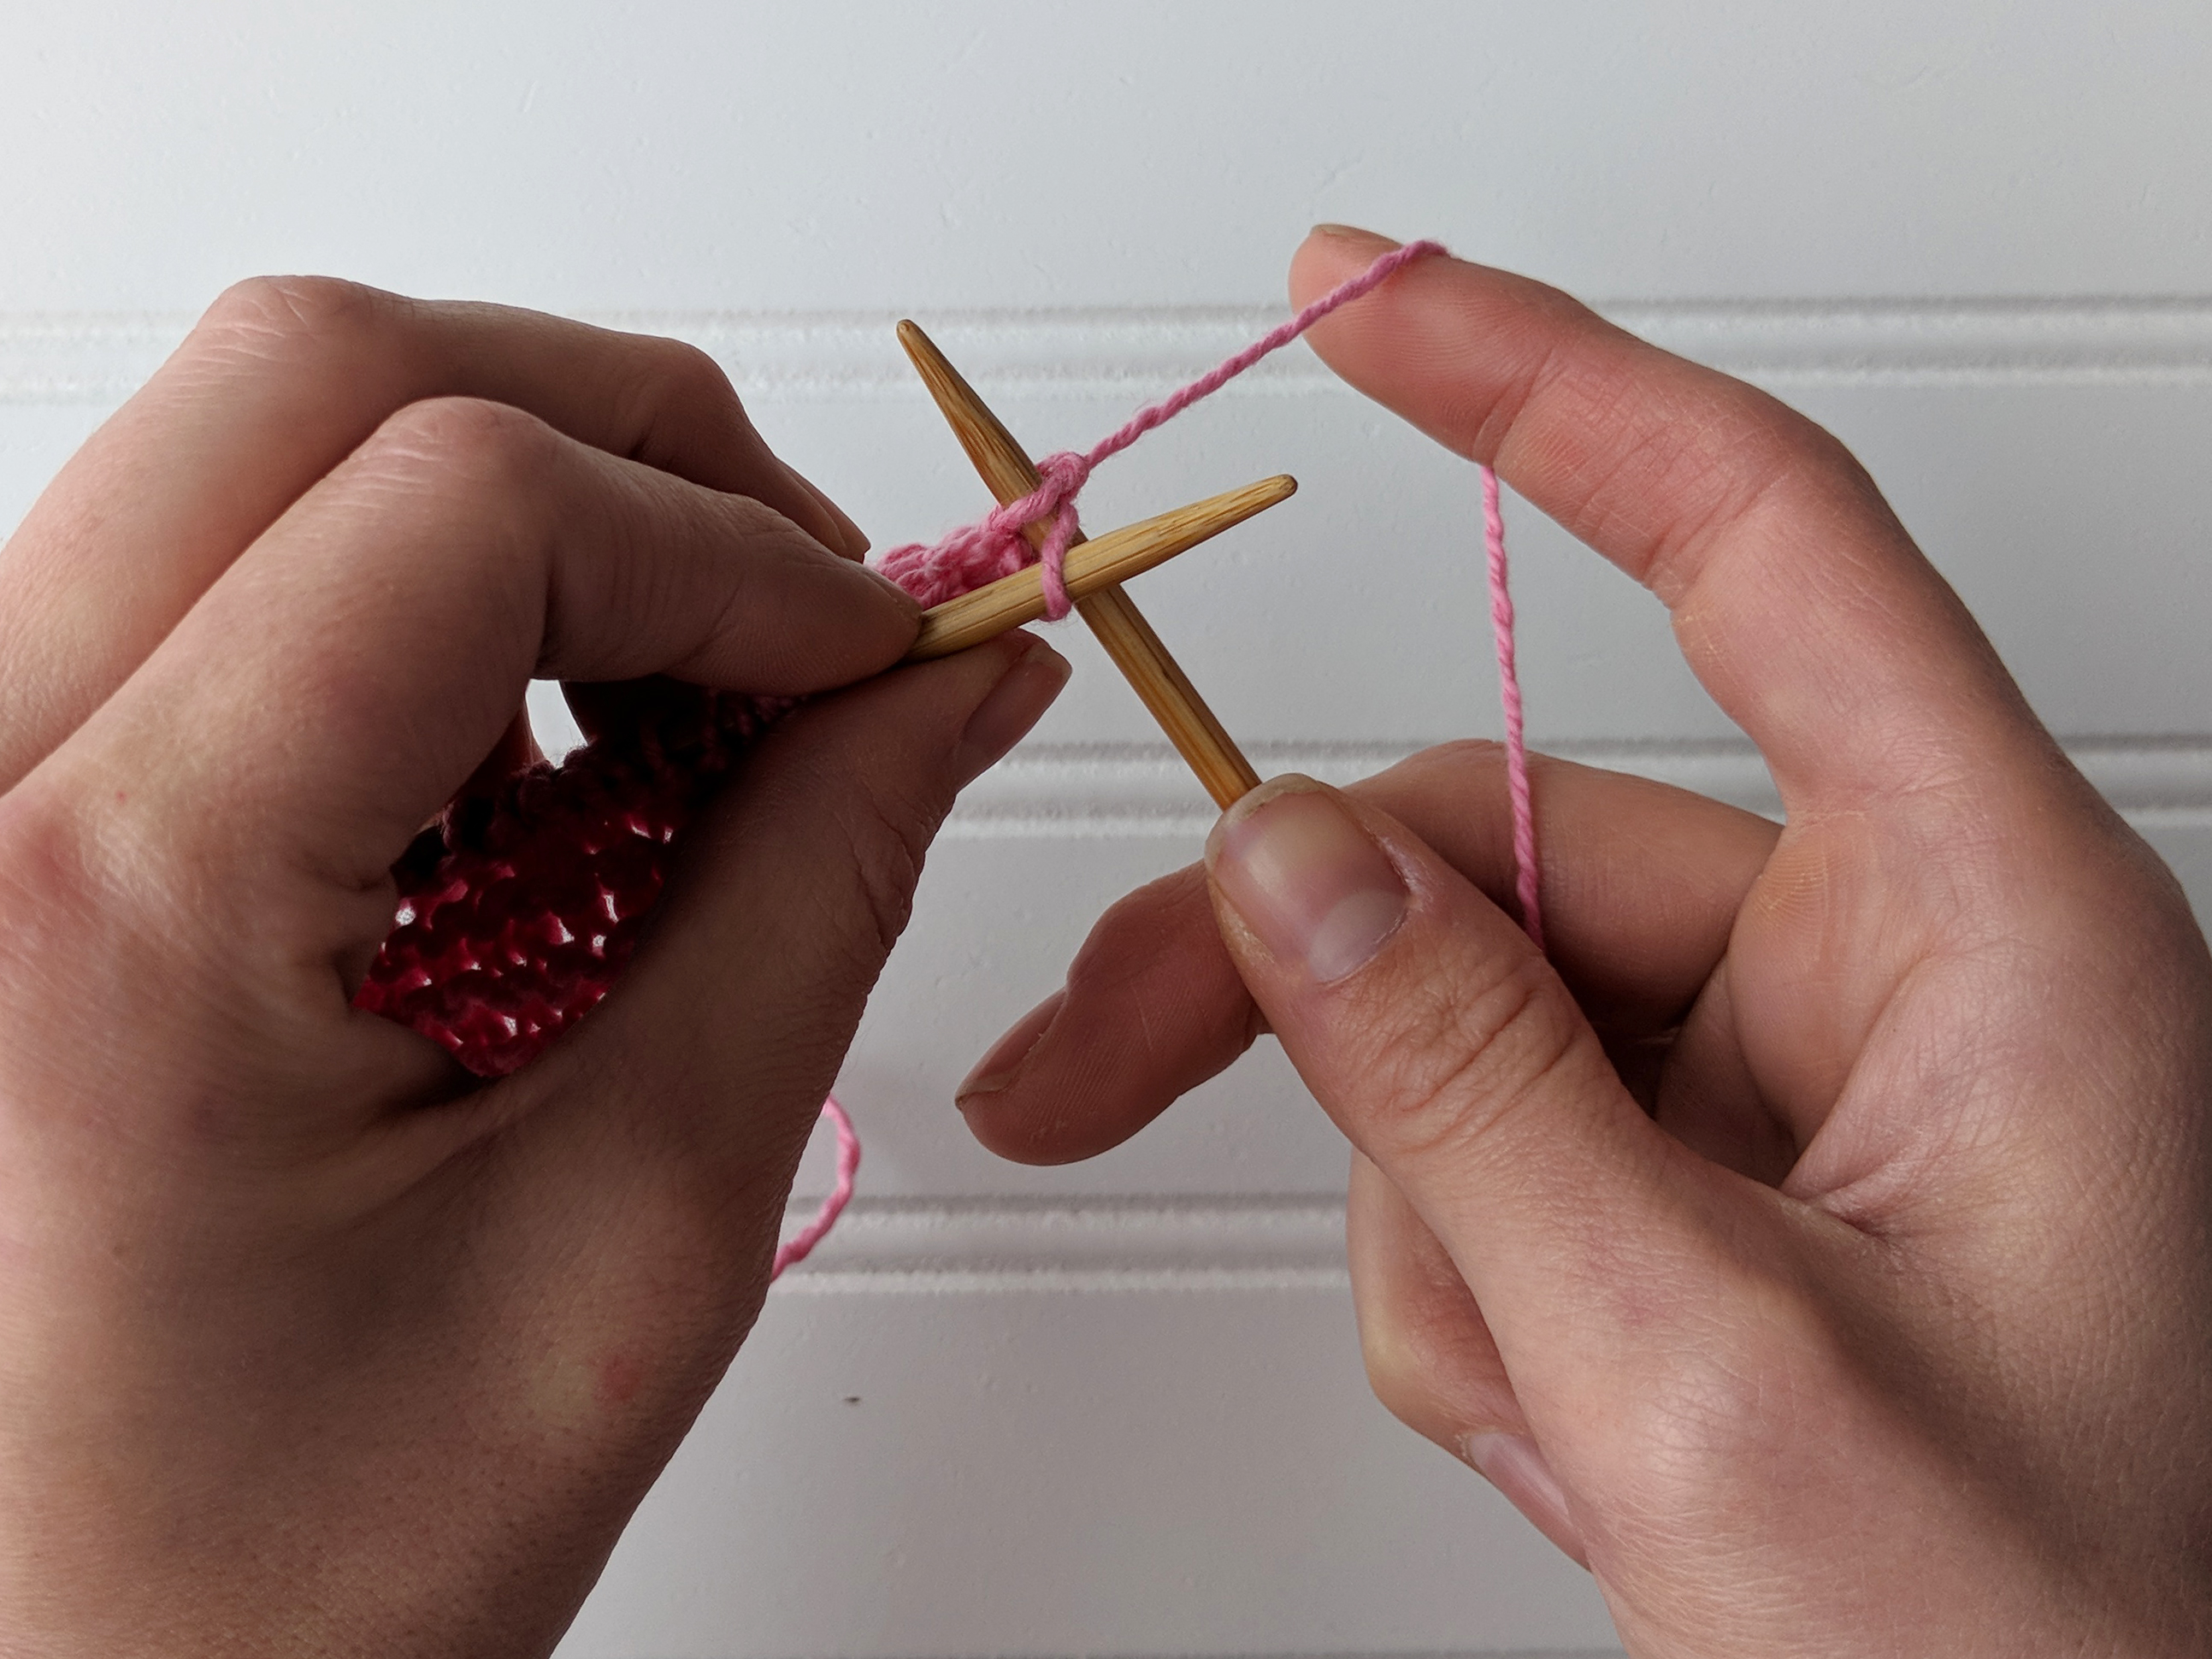
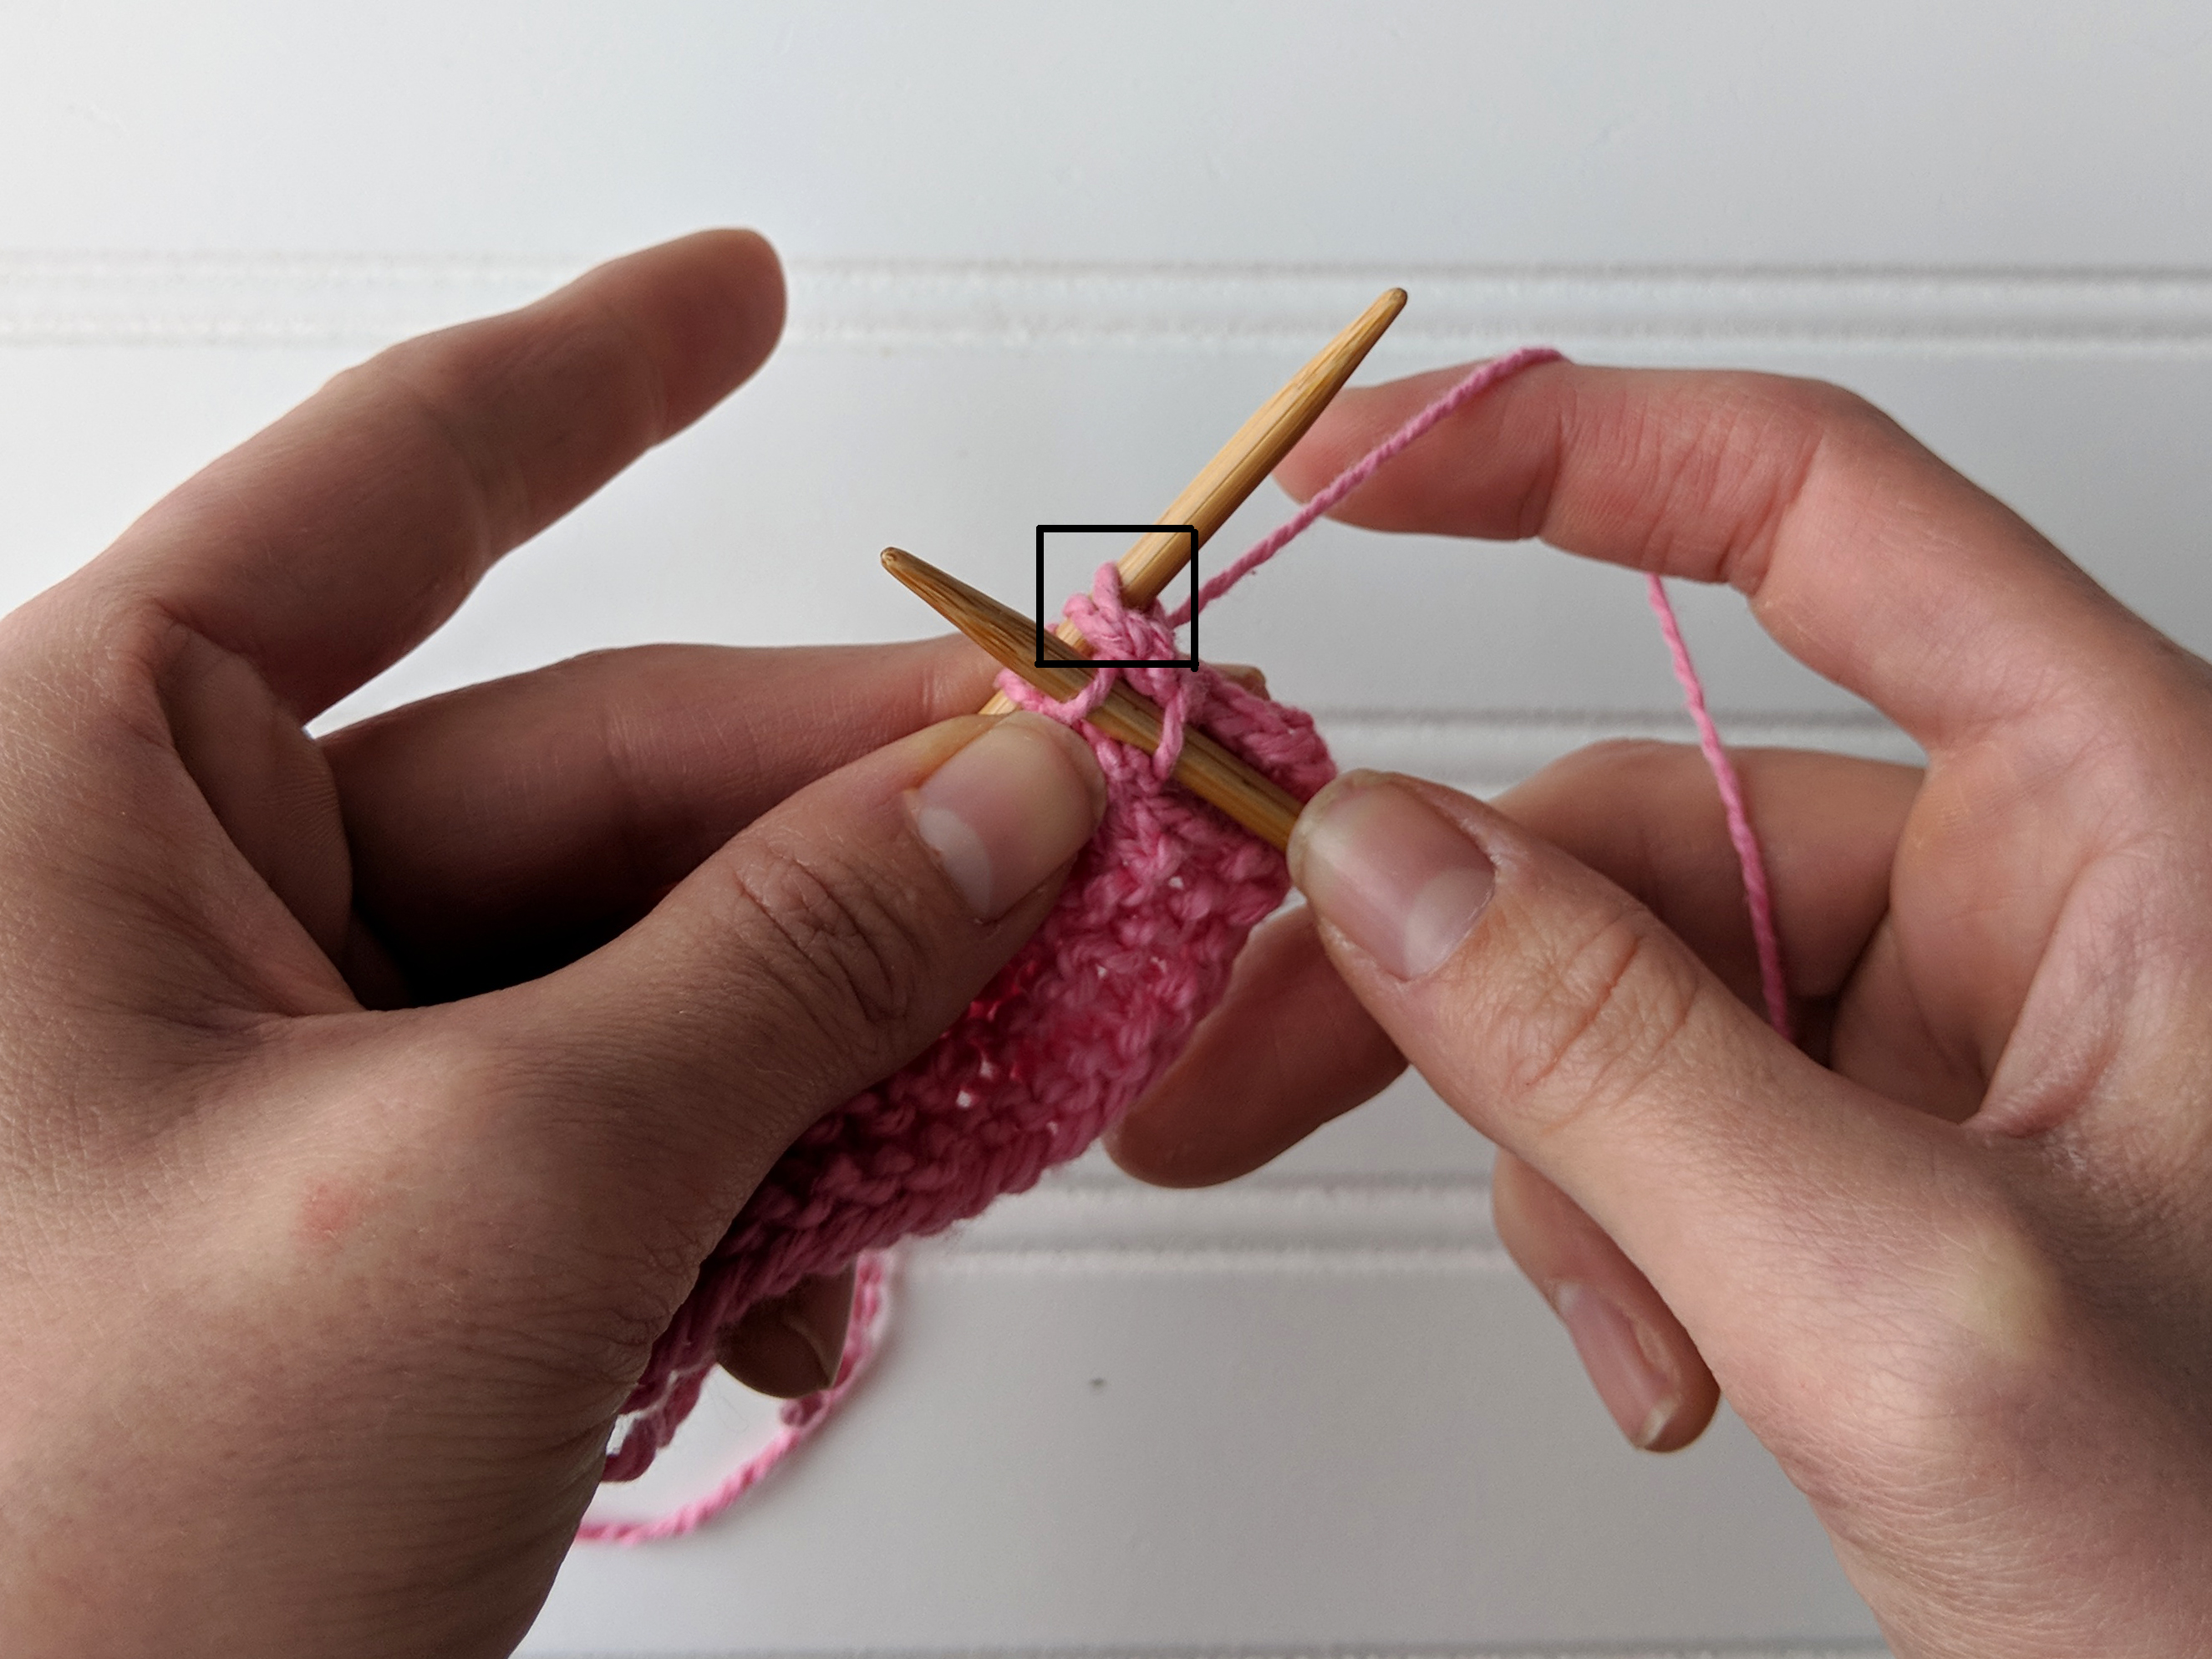
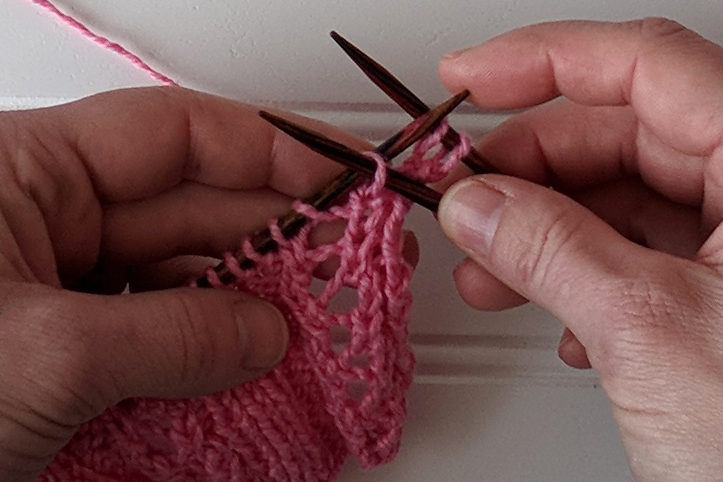
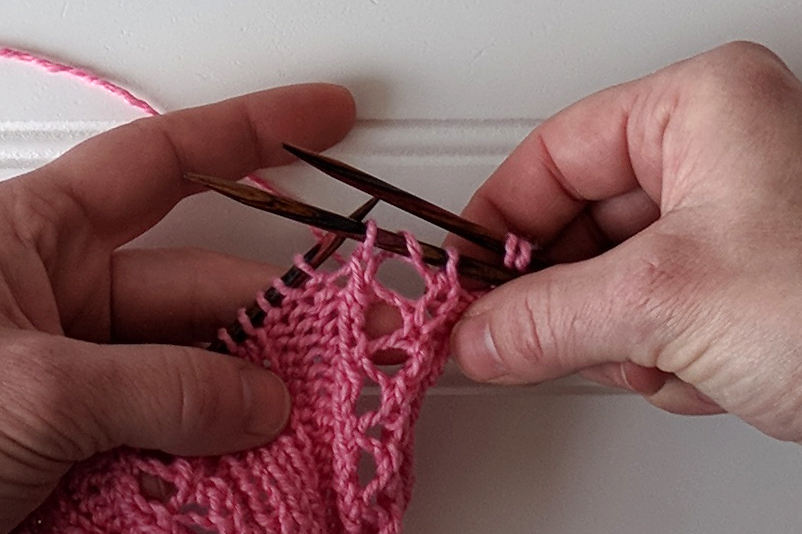
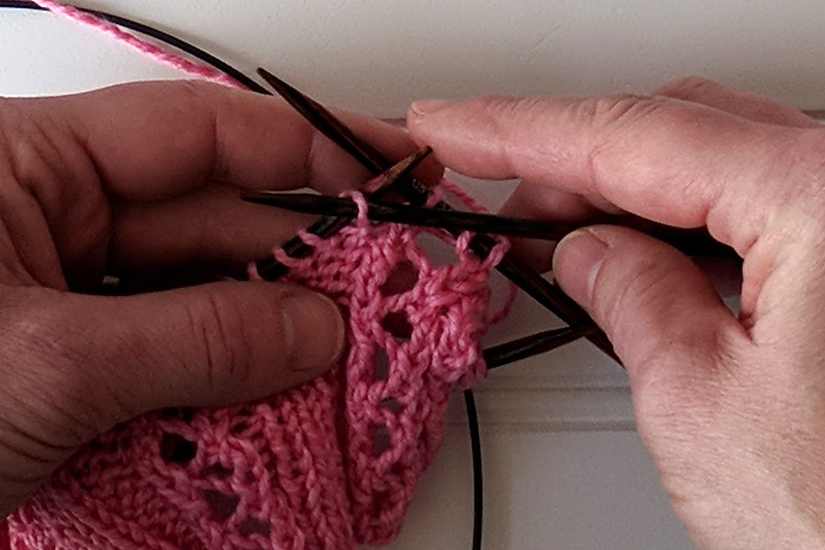
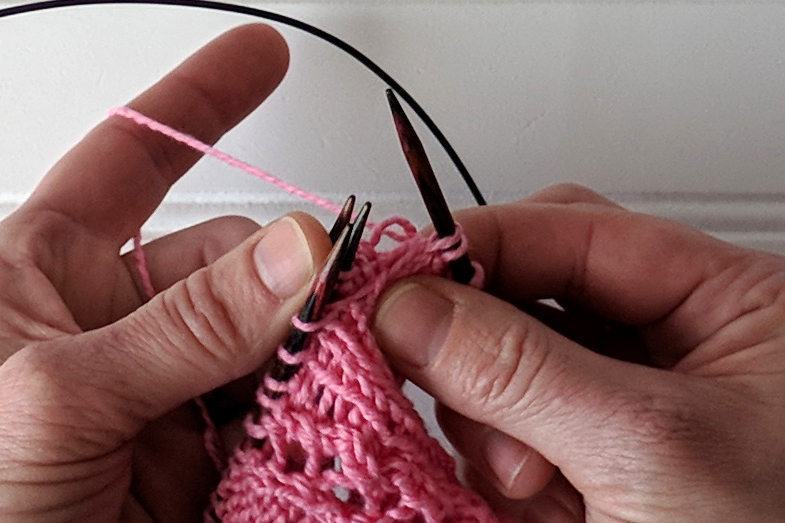
To work a kw2 on a right side row, knit the next stitch, but wrap your working yarn around the needle two times. Pull through. On the wrong side of your work, a kw2 will look like two stitches on your needle, but you’re only going to work into one. The stitch you knit should be the first stitch on your needle, with the extra wrap behind it. Knit the stitch, and drop the wrap. Kw3 – Knit and wrap yarn around the needle three times. To work a kw3 on a right side, knit the next stitch, but wrap your working yarn around the needle three times. Pull through. On the wrong side of your work, a kw3 will look like three stitches on your needle, but you’re only going to work into one. The stitch you knit should be the first stitch on your needle, with the two extra wraps behind it. Knit the stitch, and drop the two extra wraps. Kw4 – Knit and wrap yarn around the needle four times. To work a kw4 on the right side, knit the next stitch, but wrap your working yarn around the needle four times. Pull through. On the wrong side of your work, a kw4 will look like four stitches on your needle, but you’re only going to work into one. The stitch you knit should be the first stitch on your needle, with the three extra wraps behind it. Knit the stitch, and drop the three extra wraps.
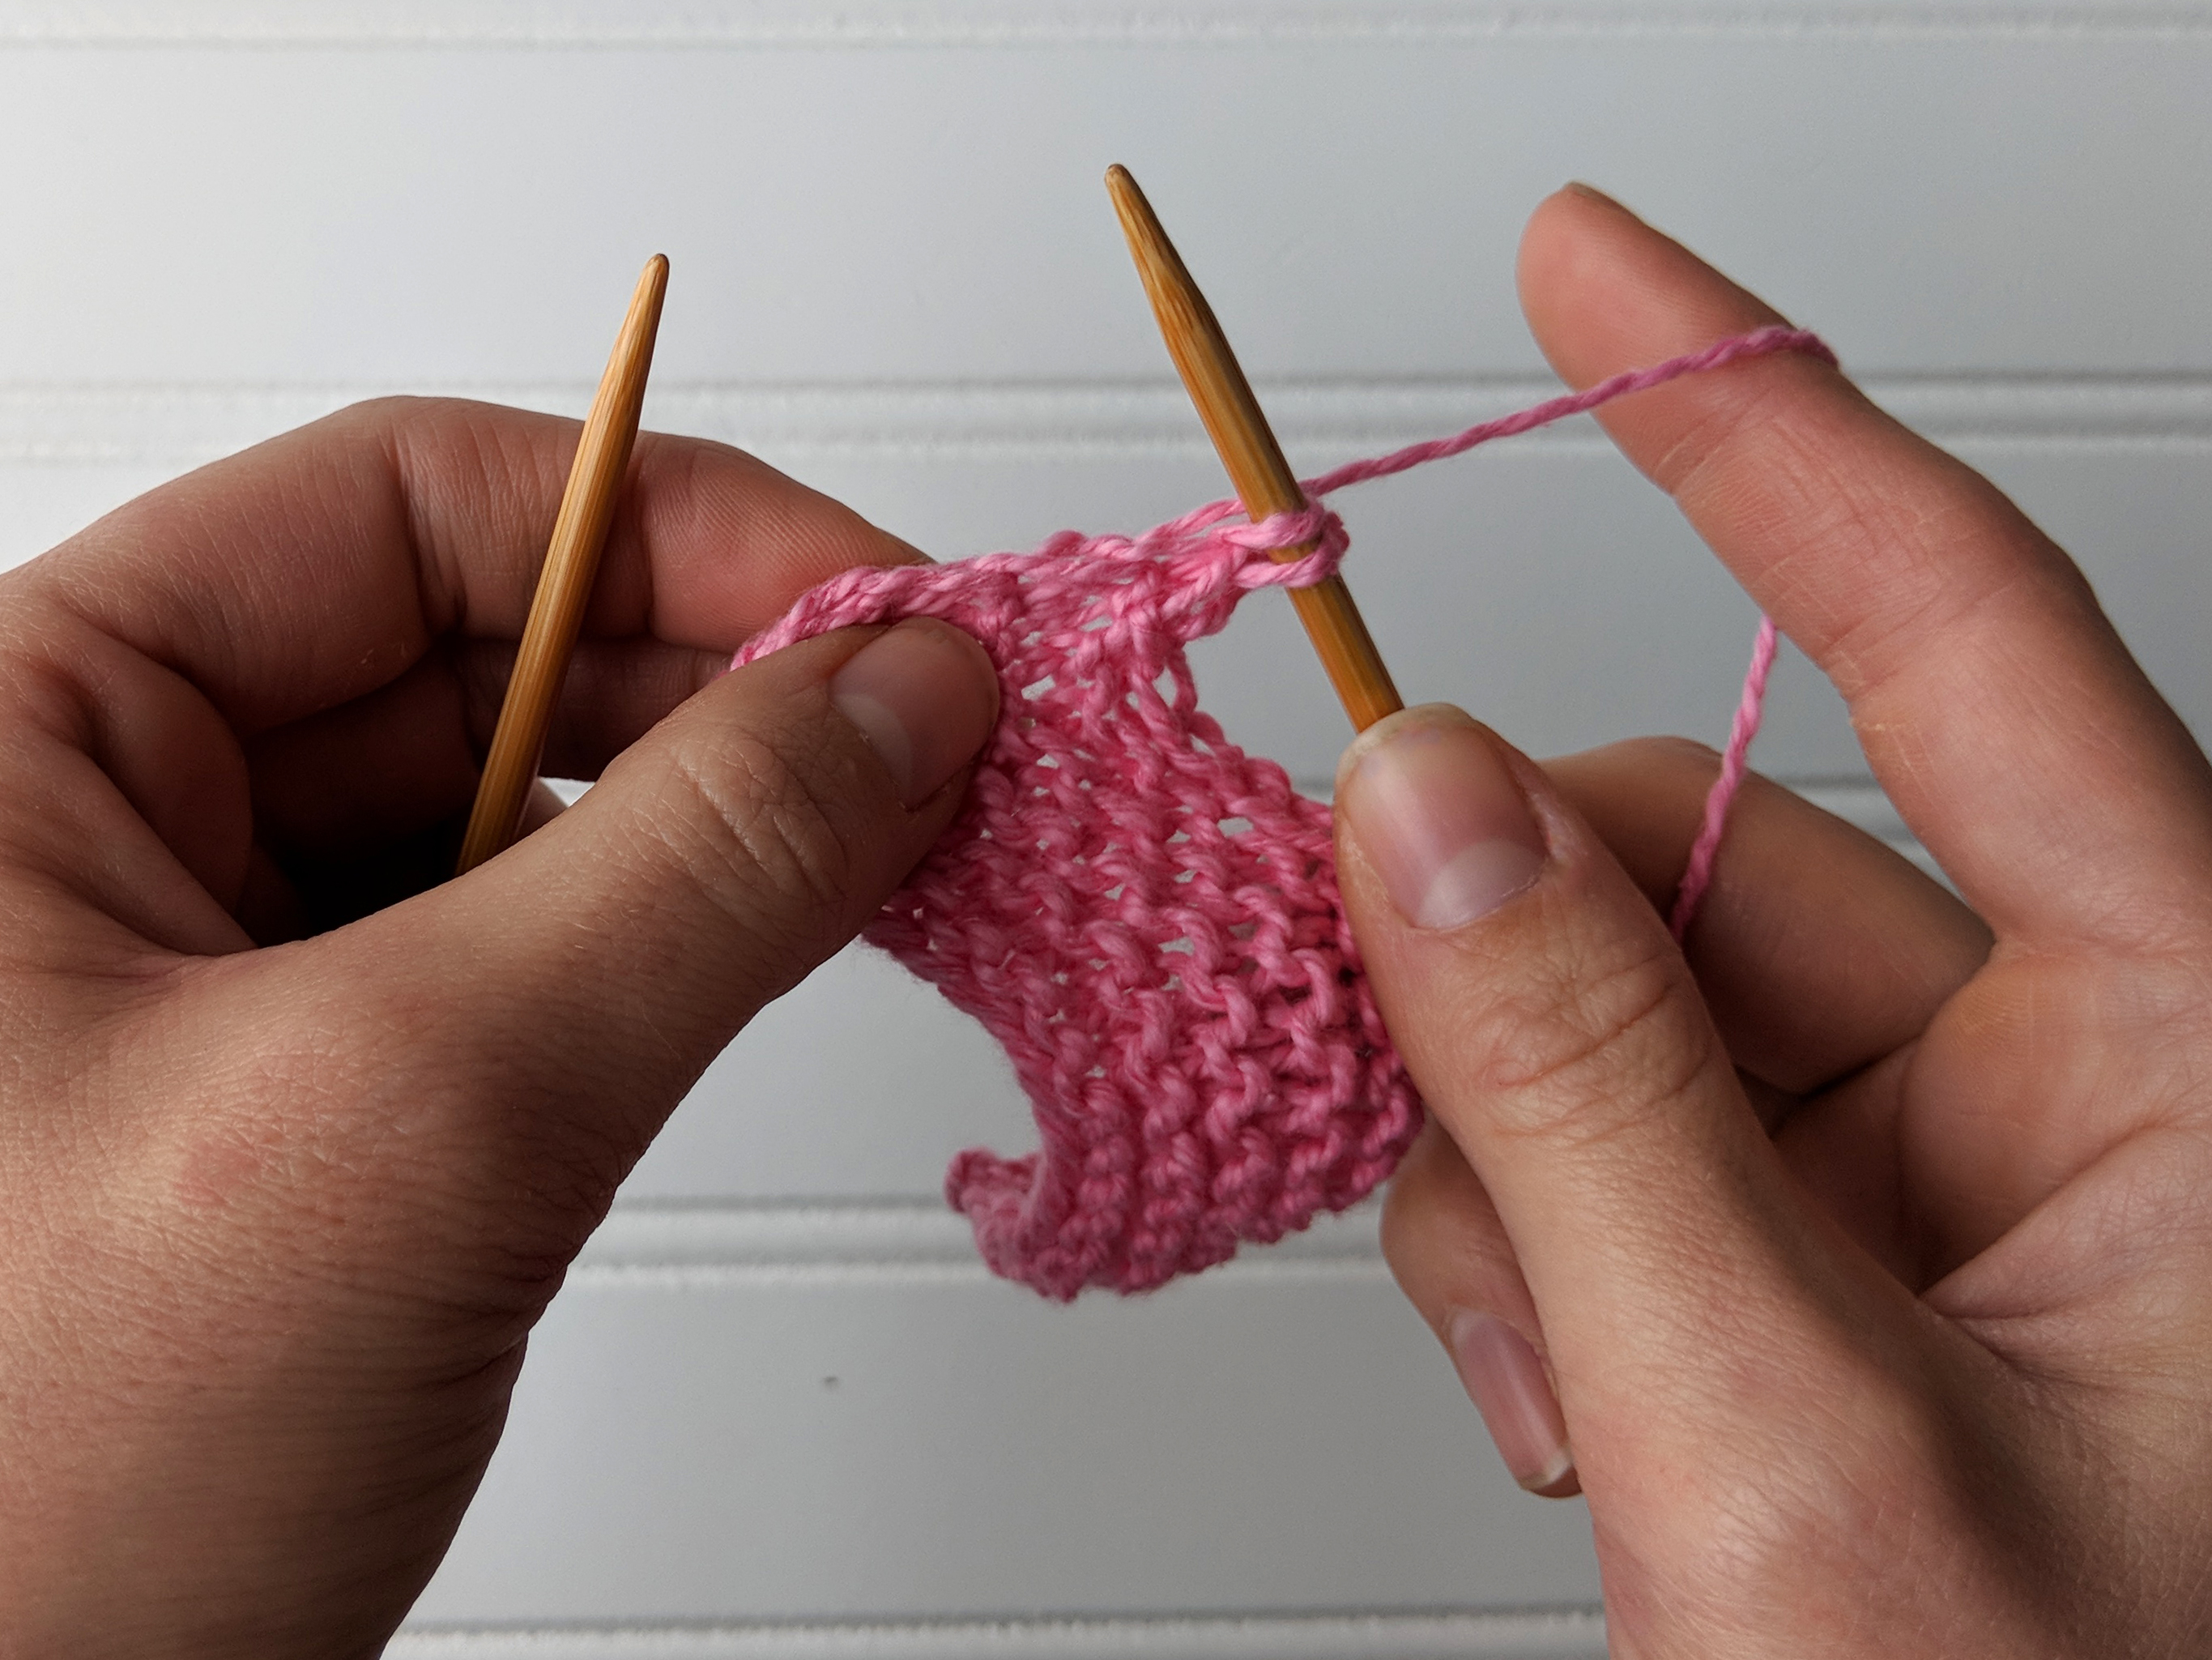
And that’s how you work each of the drop stitches – easy peasy. Depending on how these stitches are ordered in a stitch, you can get a variety of interesting shapes. Working sequentially from a kw2, kw3, and kw4, you create an upward slope in your knitting and working back drown from a kw4, kw3, and kw2 will give you a downward slope. This is how the wavy motif in the Icicles shawl is created. Fun, right?
We hope you’ve found this tutorial to be helpful – and that you’ll have a great time with this technique. Remember, you can find the Icicles shawl kit and the rest of the 12 Days of Winter Kits at your local yarn shop.
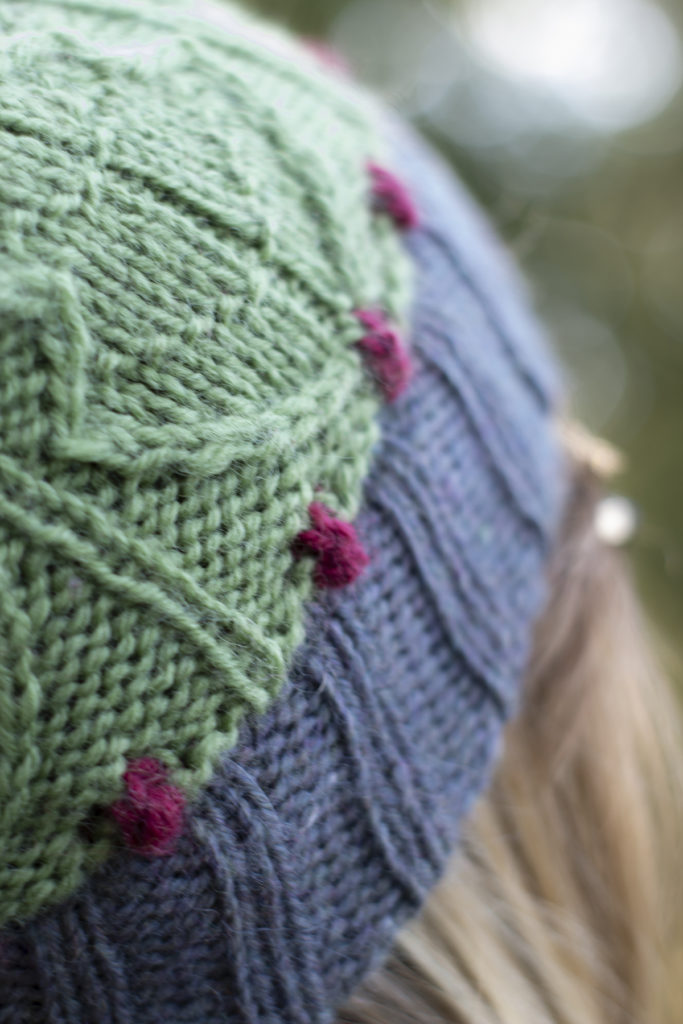
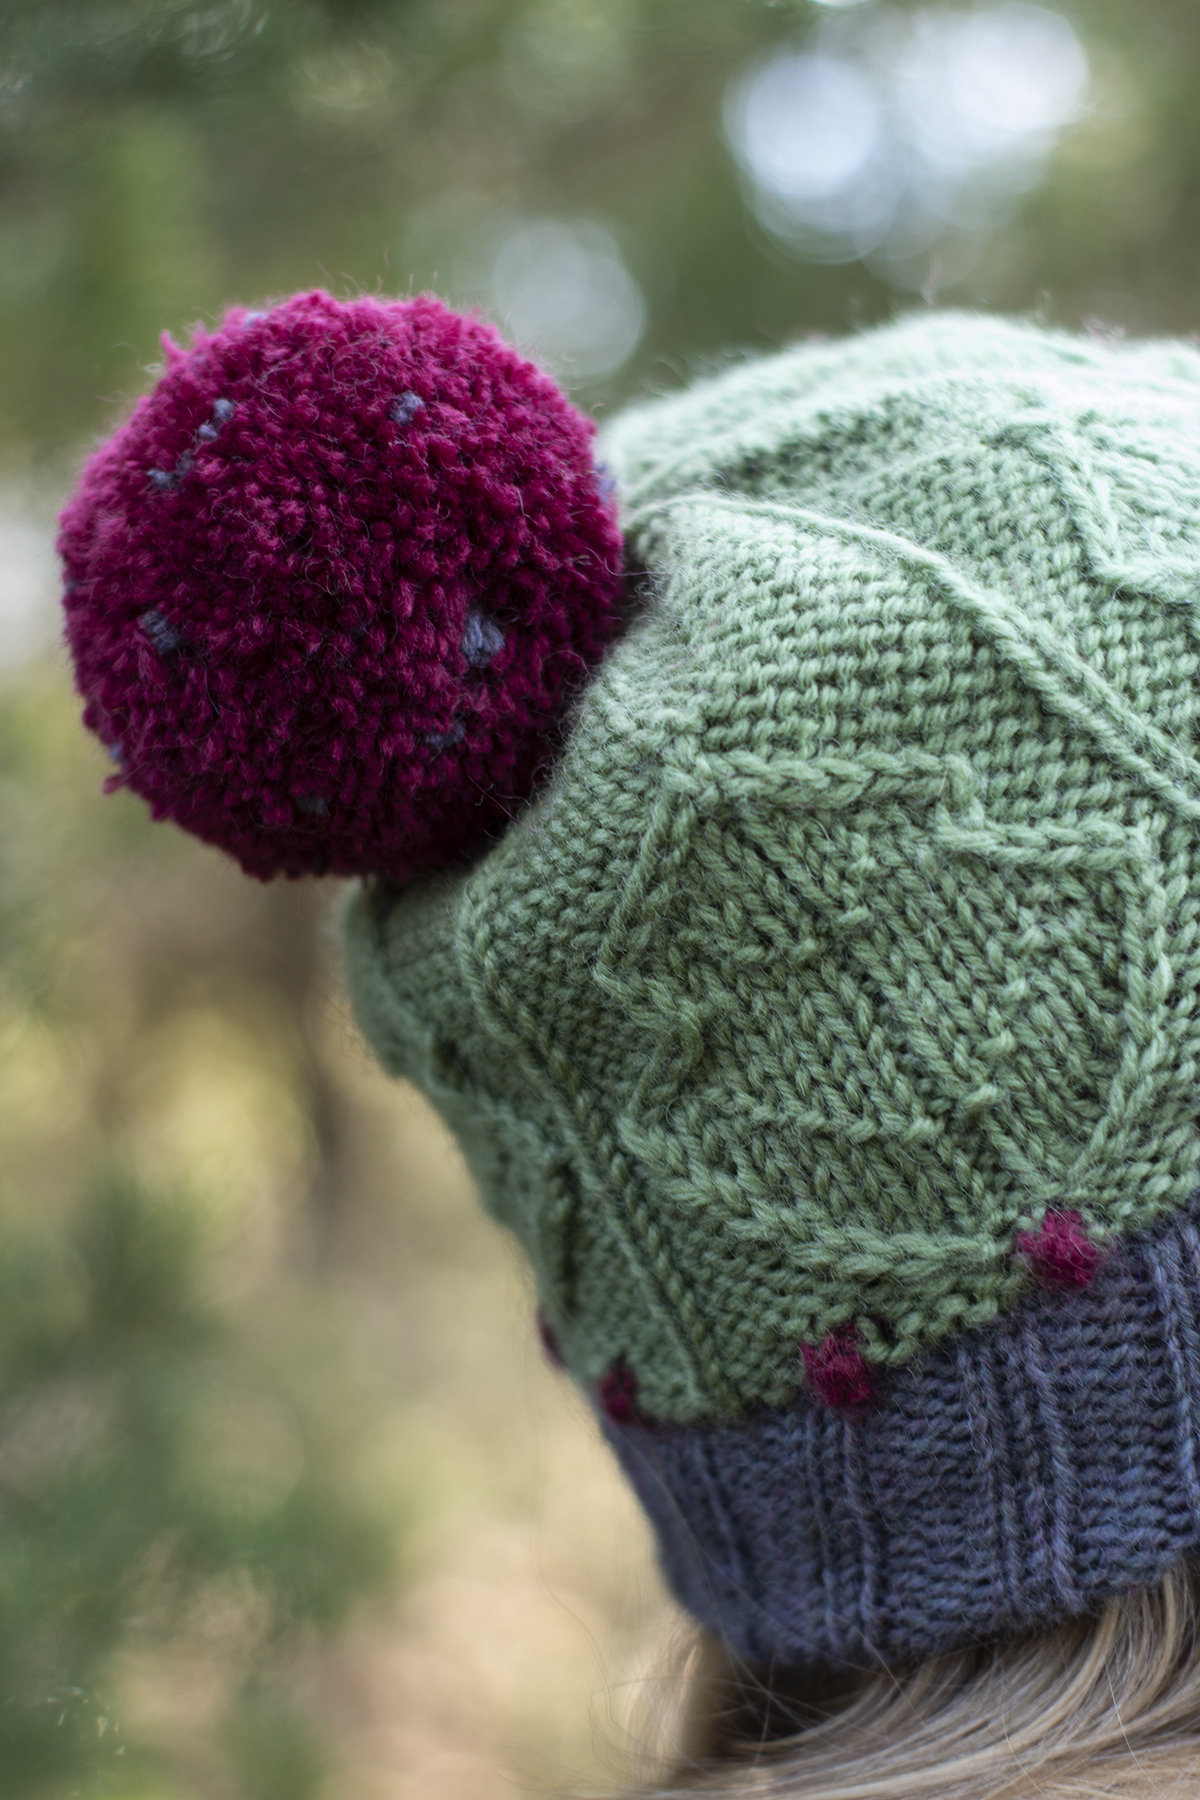
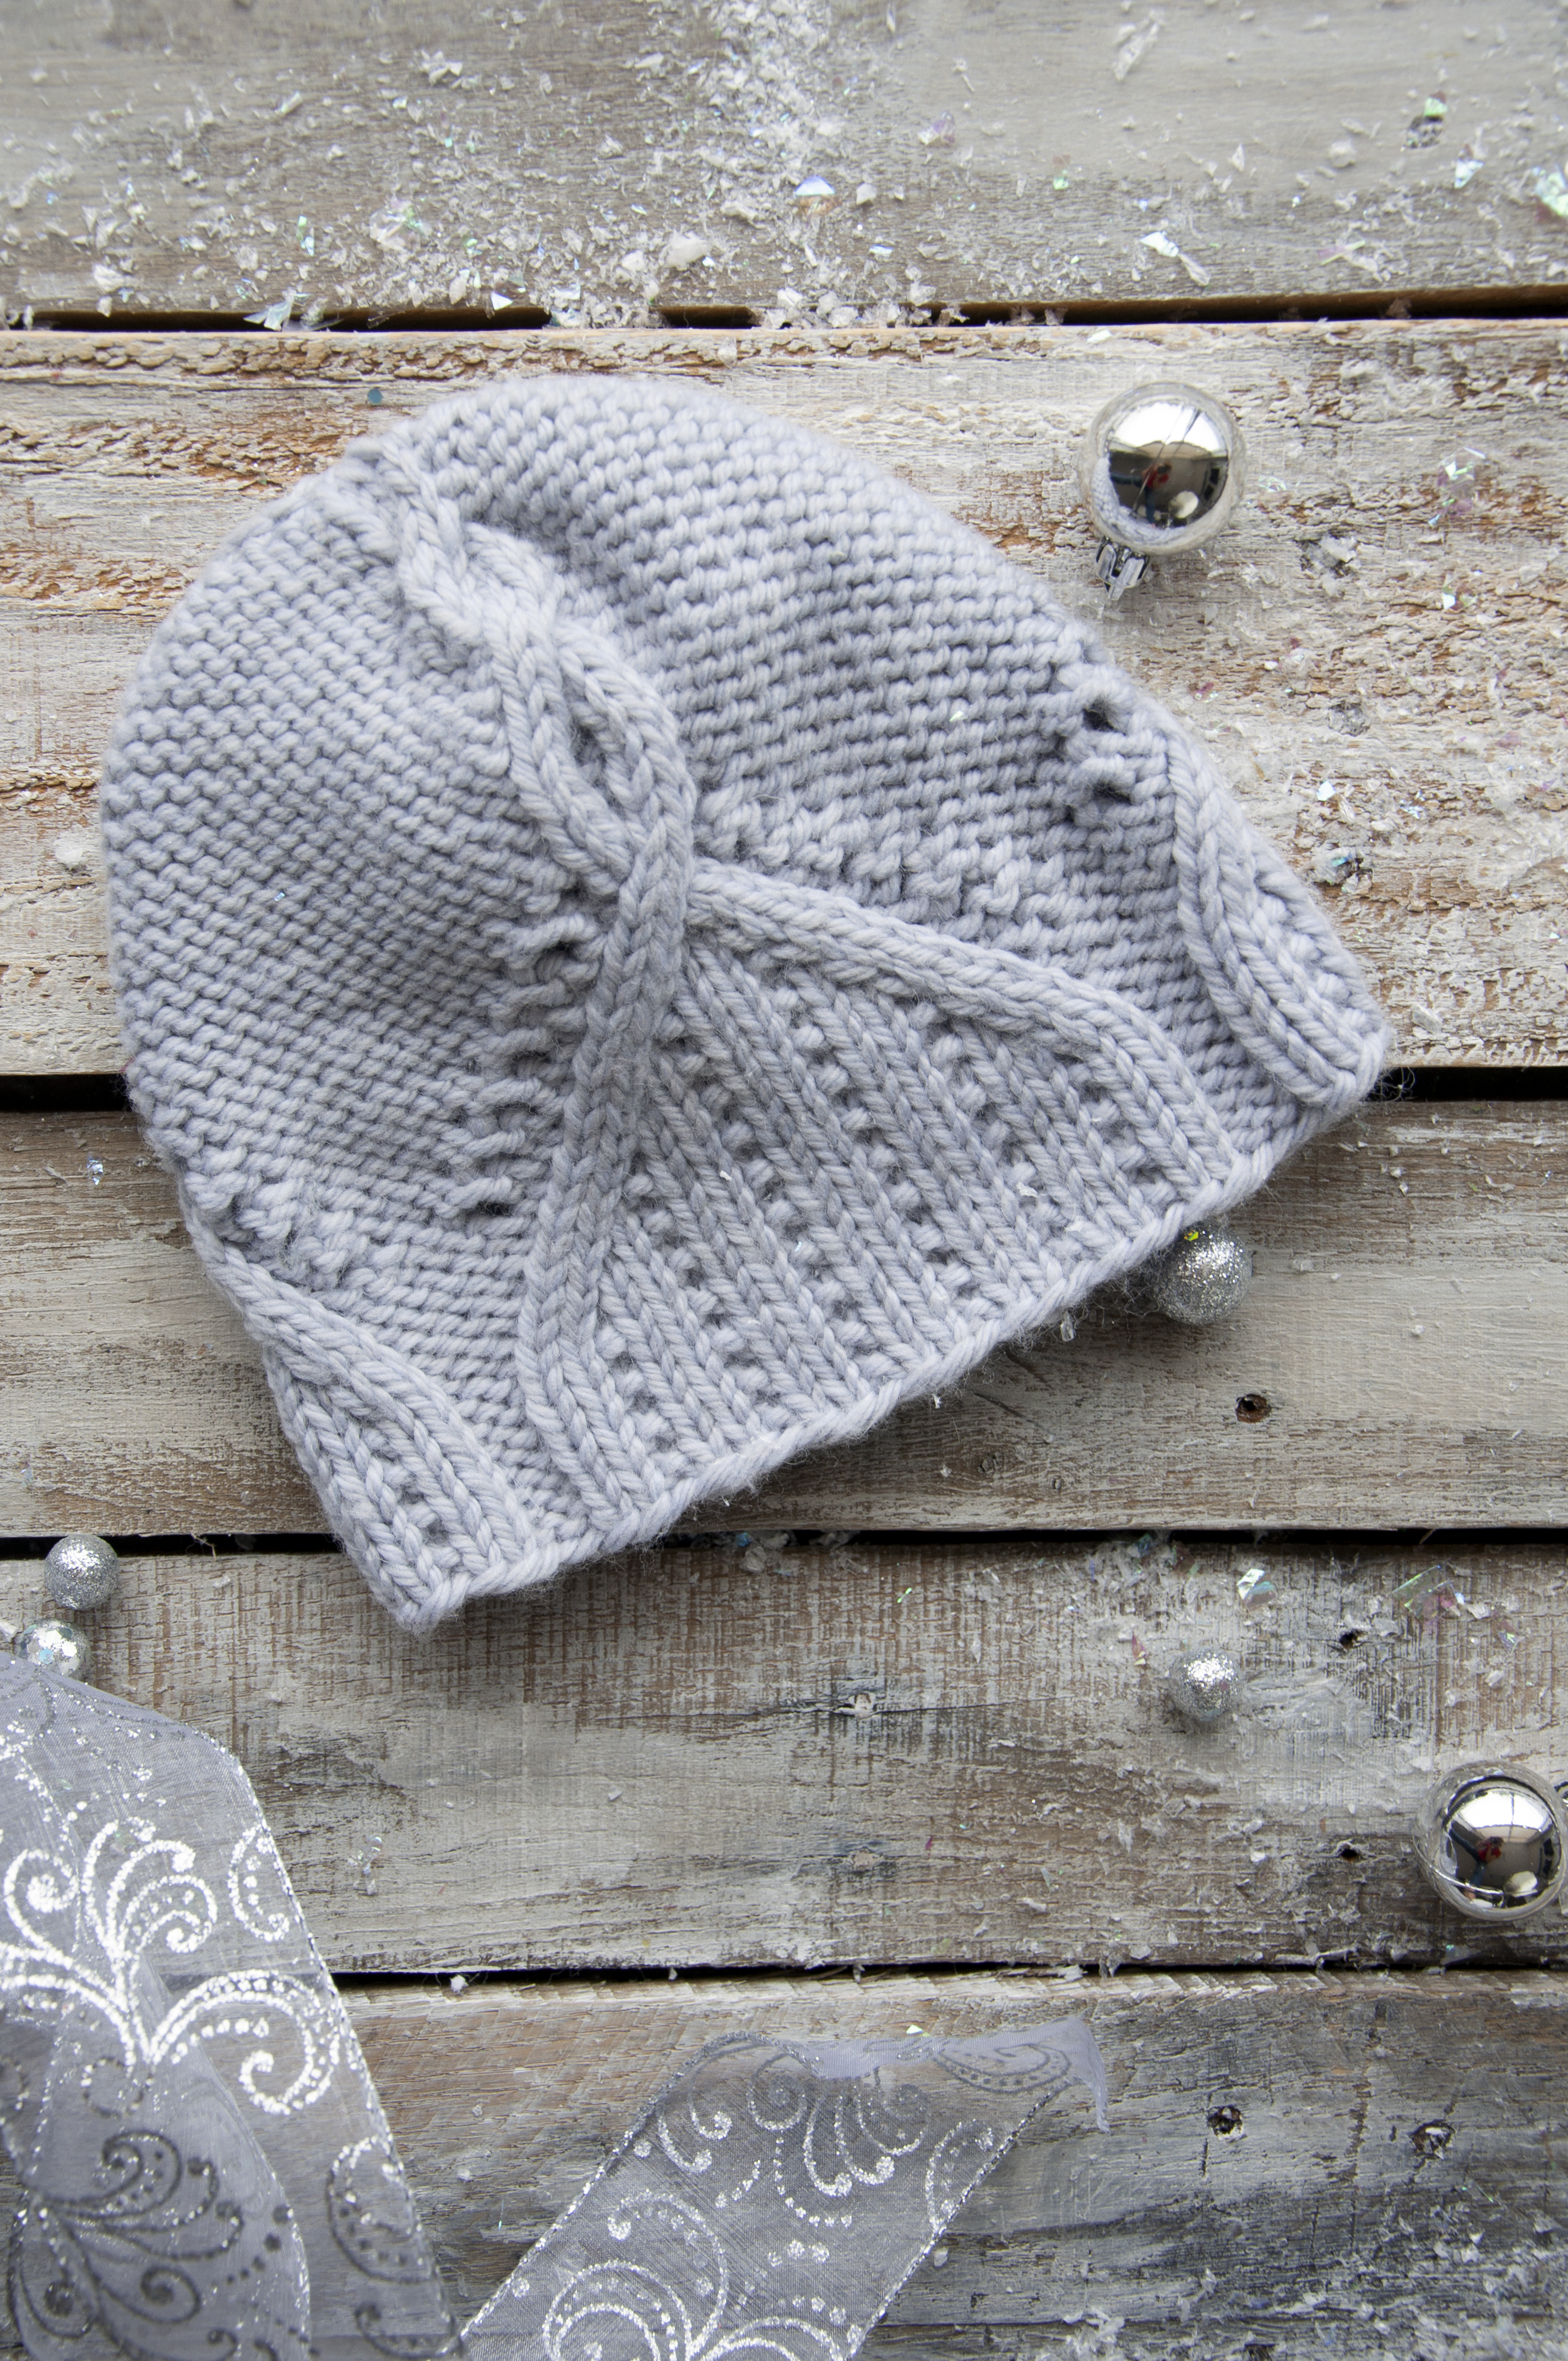
Seasons Greetings from the Universal Yarn Team! Today, we’re pleased to share a special free pattern with you for the Christmas season: the Carolina Holly hat (pattern link)! Holly – like poinsettias, mistletoe, and ivy – conjures images of the holidays. The spiky plant is evergreen and beautiful, and it was the inspiration for the Carolina Holly hat.
Playing with pine cones, as one does.
This free pattern is a load of fun to knit. It takes three skeins of Deluxe Worsted – and that’s enough to make two hats. Of our line of yarns, Deluxe Worsted might just be my favorite. It’s excellent for every type of project, creates long-wearing fabric, and perfectly balances softness with the crunch of pure wool that I love. Plus, there are so many colors to choose from. For this hat I chose Sangria, City Turf, and Slate, but there are so many shades of red, green, and grey in the palette. I encourage you to find the combination that leaves you feeling inspired! Prefer superwash wool? You’re in luck – our machine-washable Deluxe Worsted Superwash would work perfectly as a substitute.
Baby Bobbles!
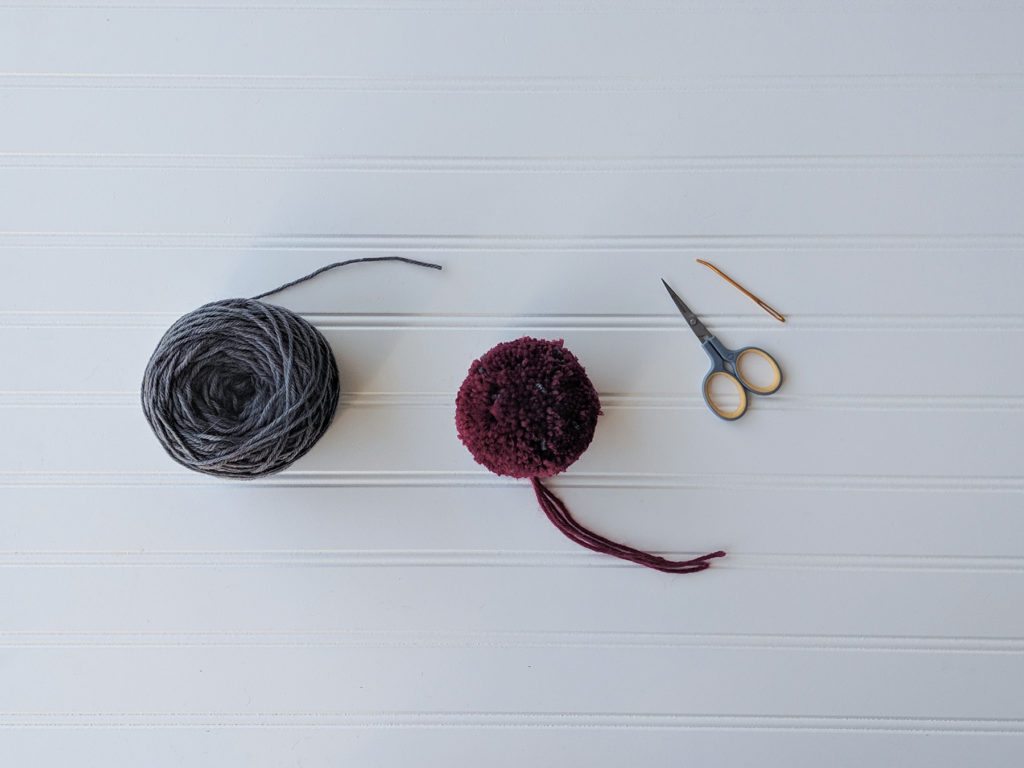
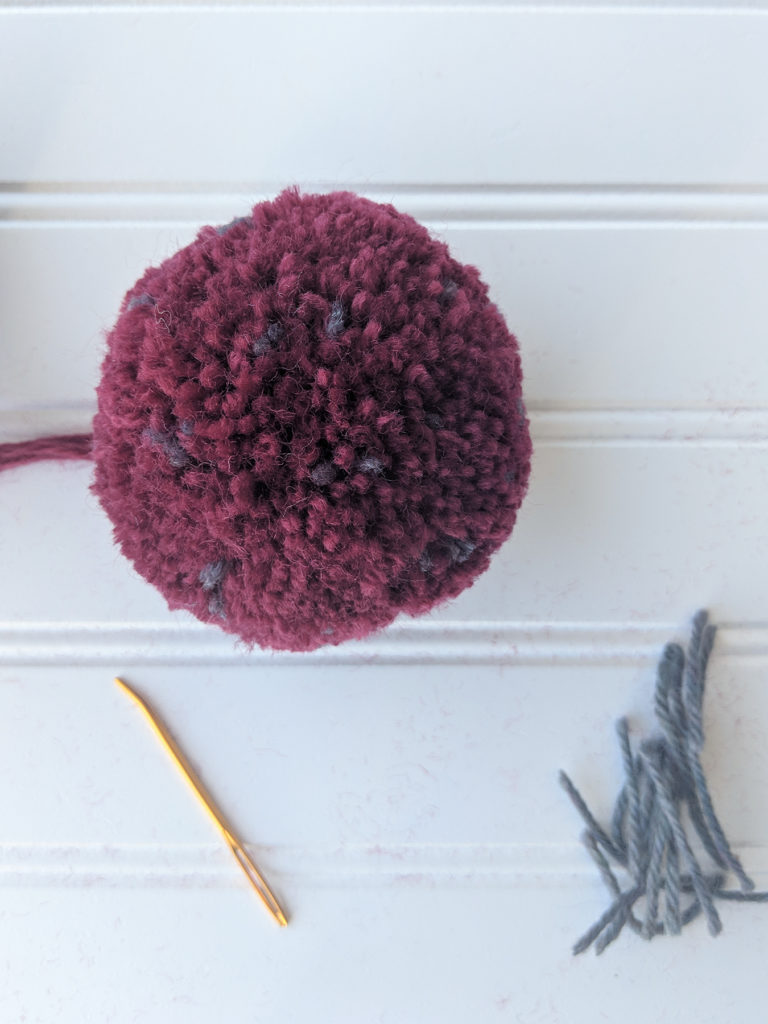
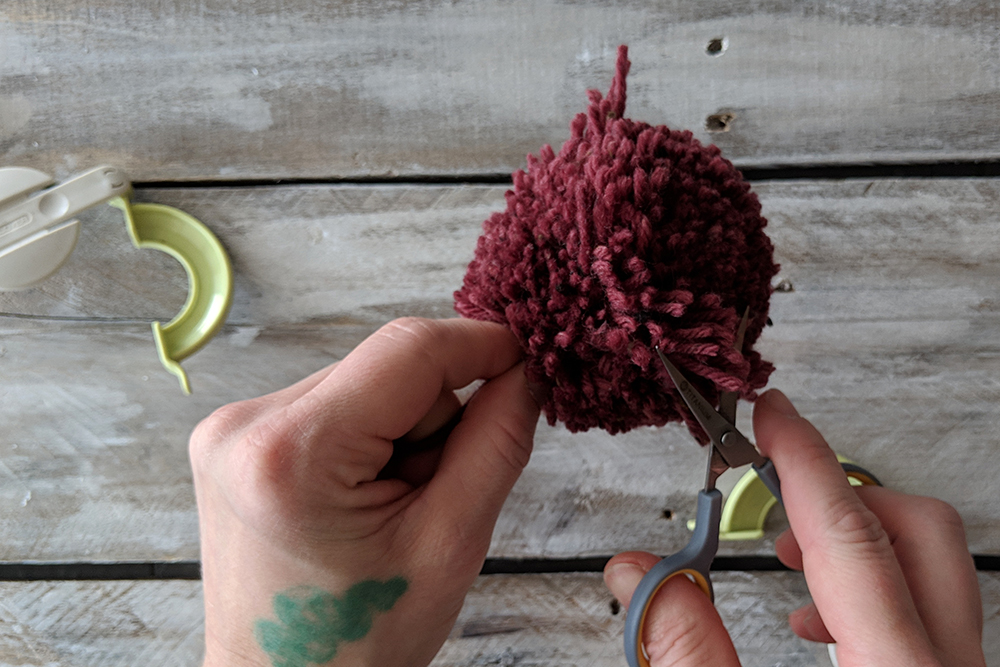
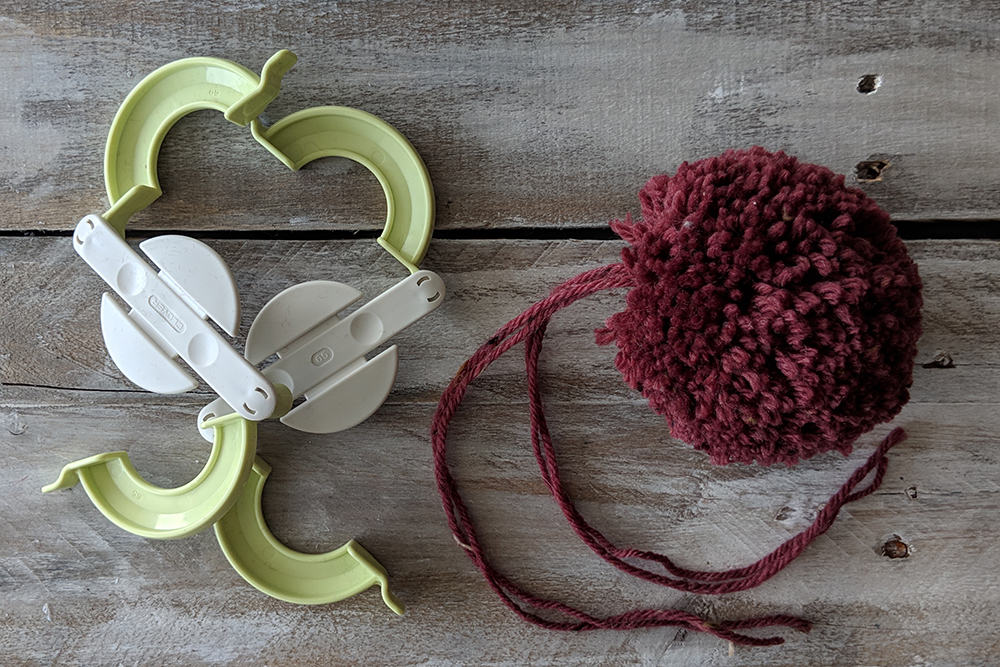
I wanted to give this hat some special touches. A double-thick brim ensures a warm and comfortable fit. A row of mini-bobbles knit in a rich red create little holly berries, and a large red pom-pom balances out the pop of red. Finally, to incorporate the grey used in the brim, the same color is used to add speckles to the pom-pom. The speckled pom-pom idea was not my own. I was inspired by designer Kiyomi Burgin, who has used this technique in her own work. You can find her post on speckled pom-poms here (link).
Subtle grey speckles in a big, poufy pom-pom – what’s not to love?
For your convenience, I’ve also created a tutorial. I hope you find it to be helpful! You’ll need to make your pom-pom before starting. If you haven’t done this before, don’t worry! You can find Amy’s tutorial on how to make pom-poms here (link).
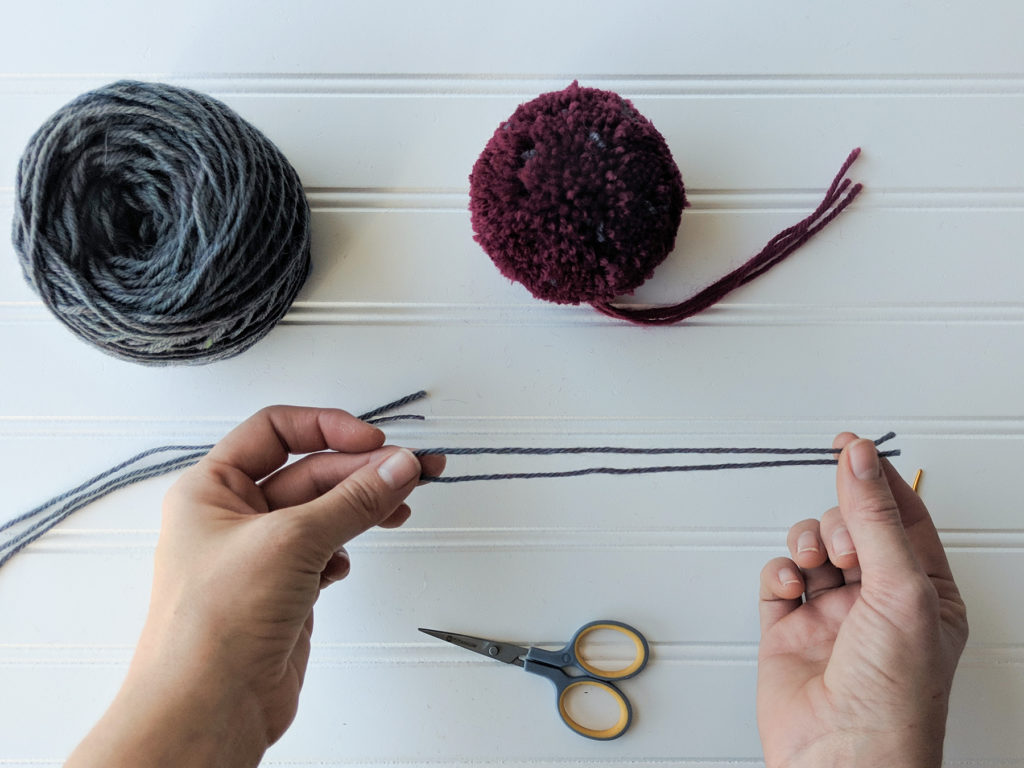
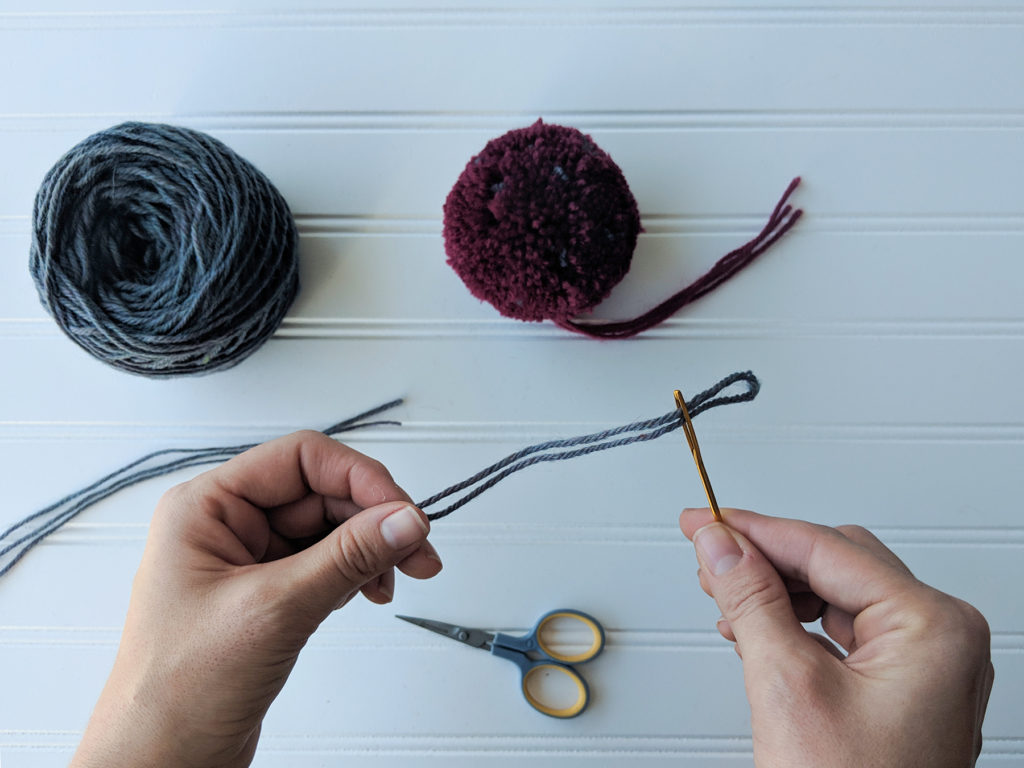
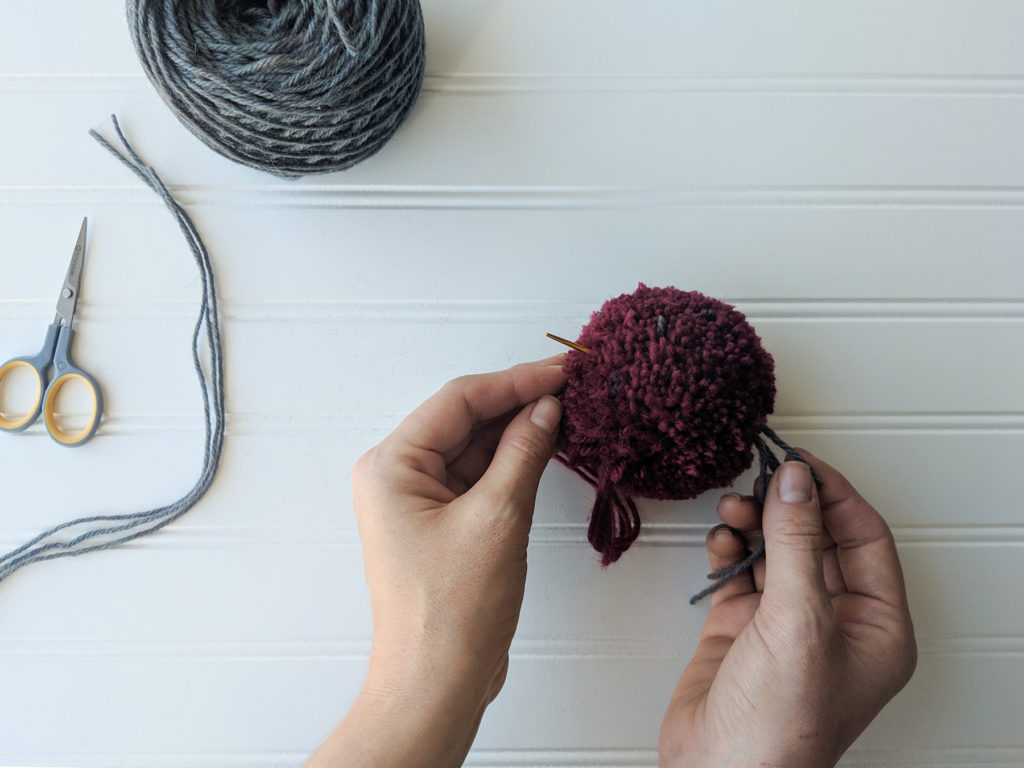
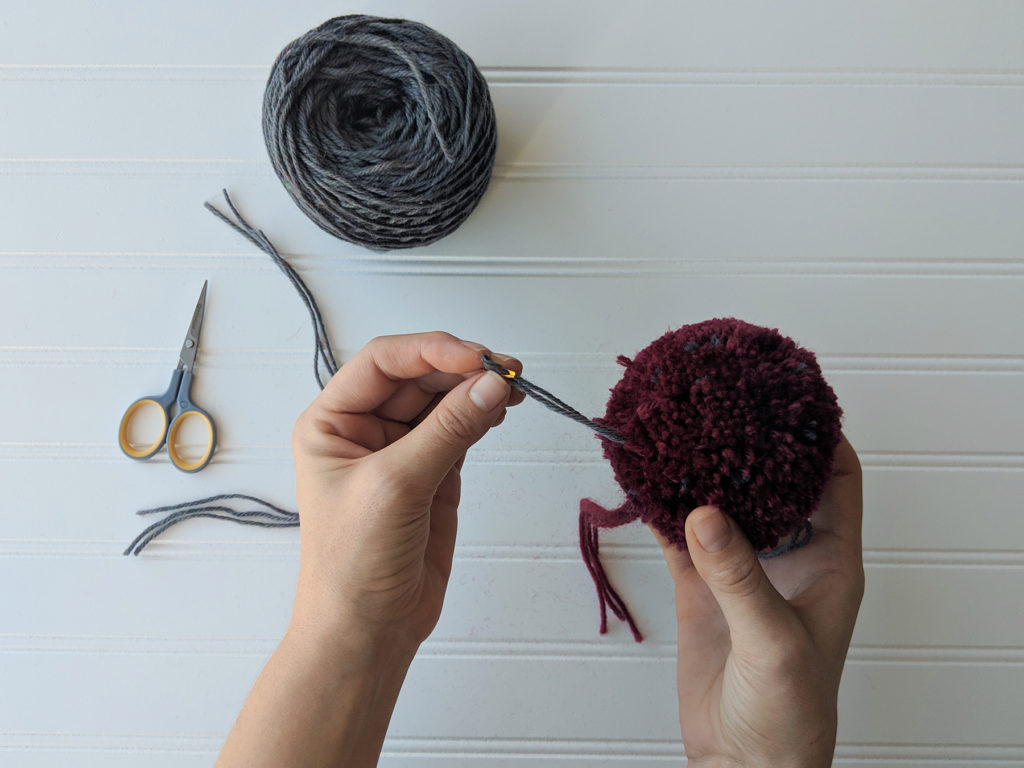
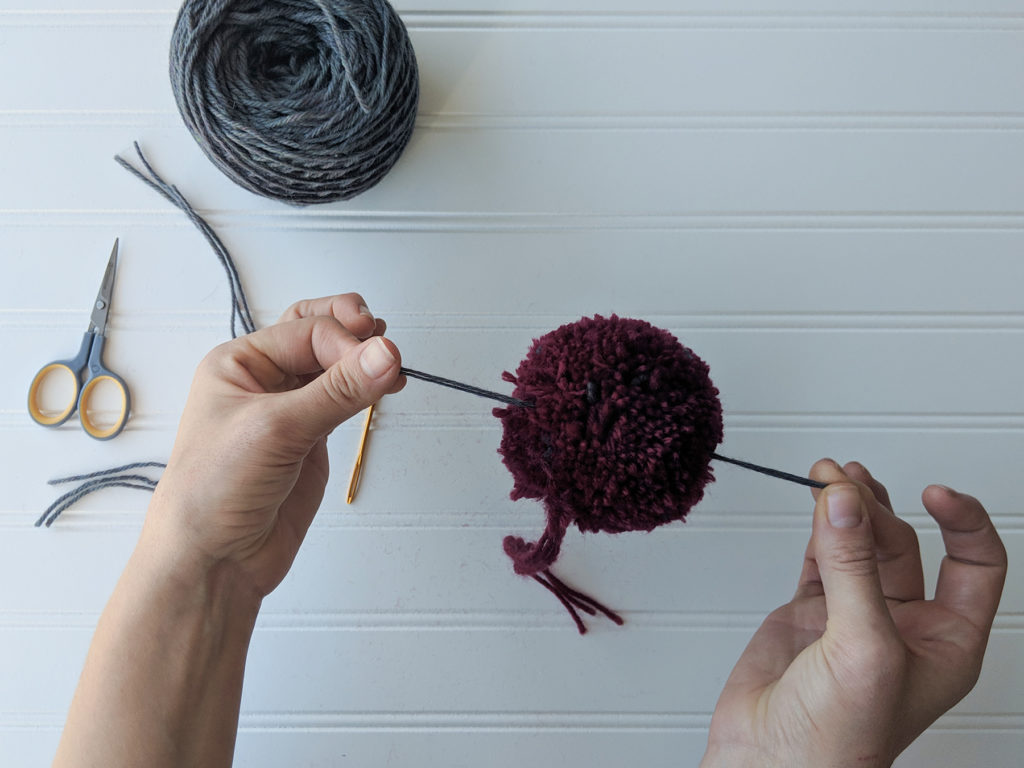
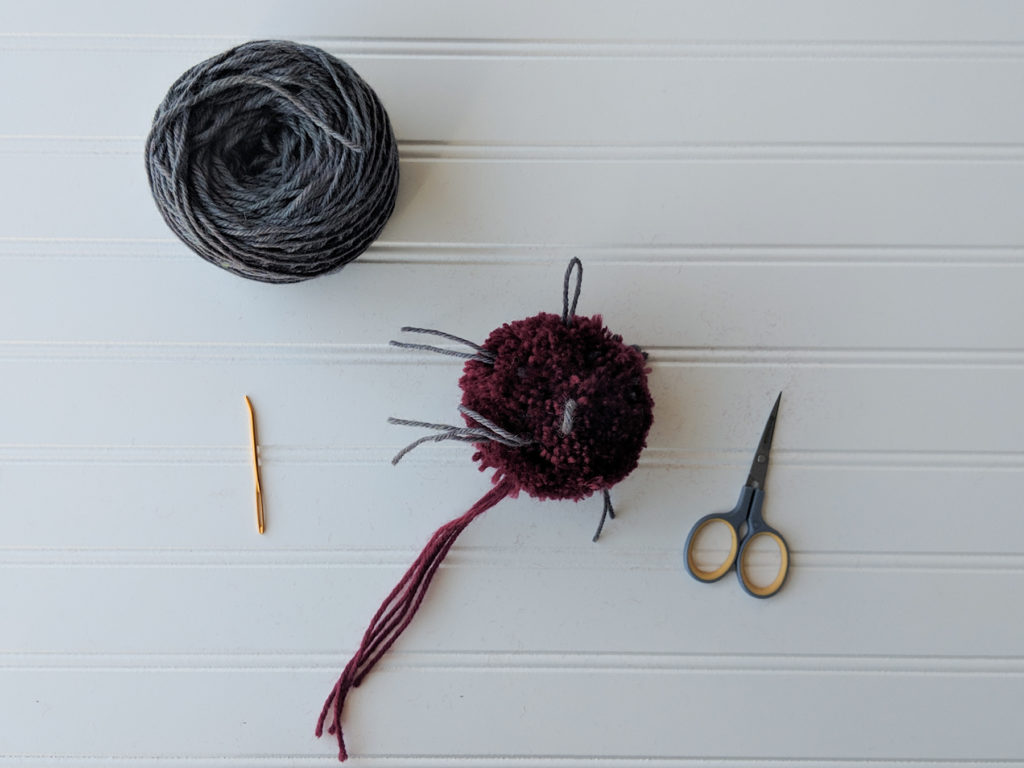
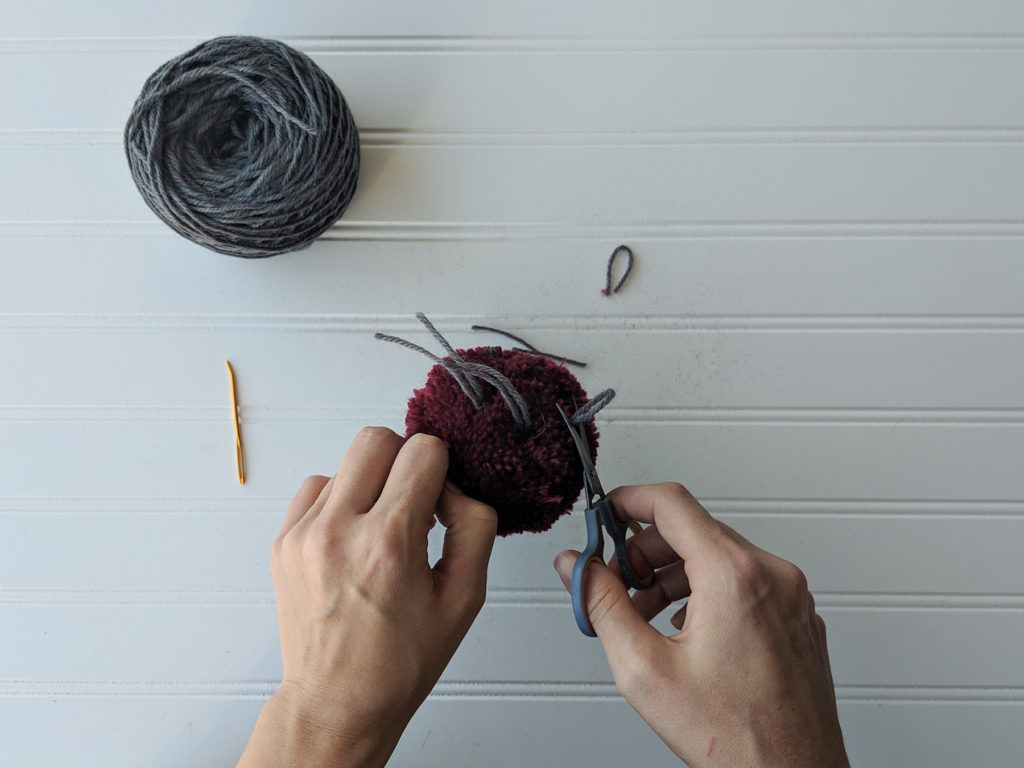
To get started you’ll need a pom-pom, scissors, tapestry needle, and contrast color yarn. Step 1: Cut your contrast color yarn into lengths of approximately 12″. In the pattern I’ve directed you to cut 15 pieces. Fold each piece in half. Step 2: Keeping the strand of yarn folded, thread the tapestry needle.Step 3: Insert the tapestry needle through the center of the pom-pom. Step 4: Pull one end of the strand through the pom-pom, but be sure to secure the other end.Step 5: You should be able to hold each end of the strand as shown. Repeat Steps 1-5 until you’ve used each of the strands you cut. If desired, add more! When you finish you’ll have a medusa-looking pom-pom. Give your pom-pom a trim so that the contrast color ends are flush with the rest of the pom-pom. Finished! Now you can secure your pom-pom to the hat.
Ah, knitting. I love everything about it. However, some techniques sing to me more than others. Cables are one of those techniques. I can never get enough. If I can squeeze them in, I do. They don’t have to be complicated – but they can be. Either way, I love them. I want to knit cables as often as I want to eat Kit Kats or Reeses’ Peanut Butter Cups – all the time!
I actually really like using cable needles, but I occasionally lose them. The crevices on my sofa are likely home to several. So what do you do when you don’t have a cable needle or spare DPN handy? Do you find another project? NO! Of course not! You simply cable without a cable needle. I’m going to show you how with a quick tutorial!
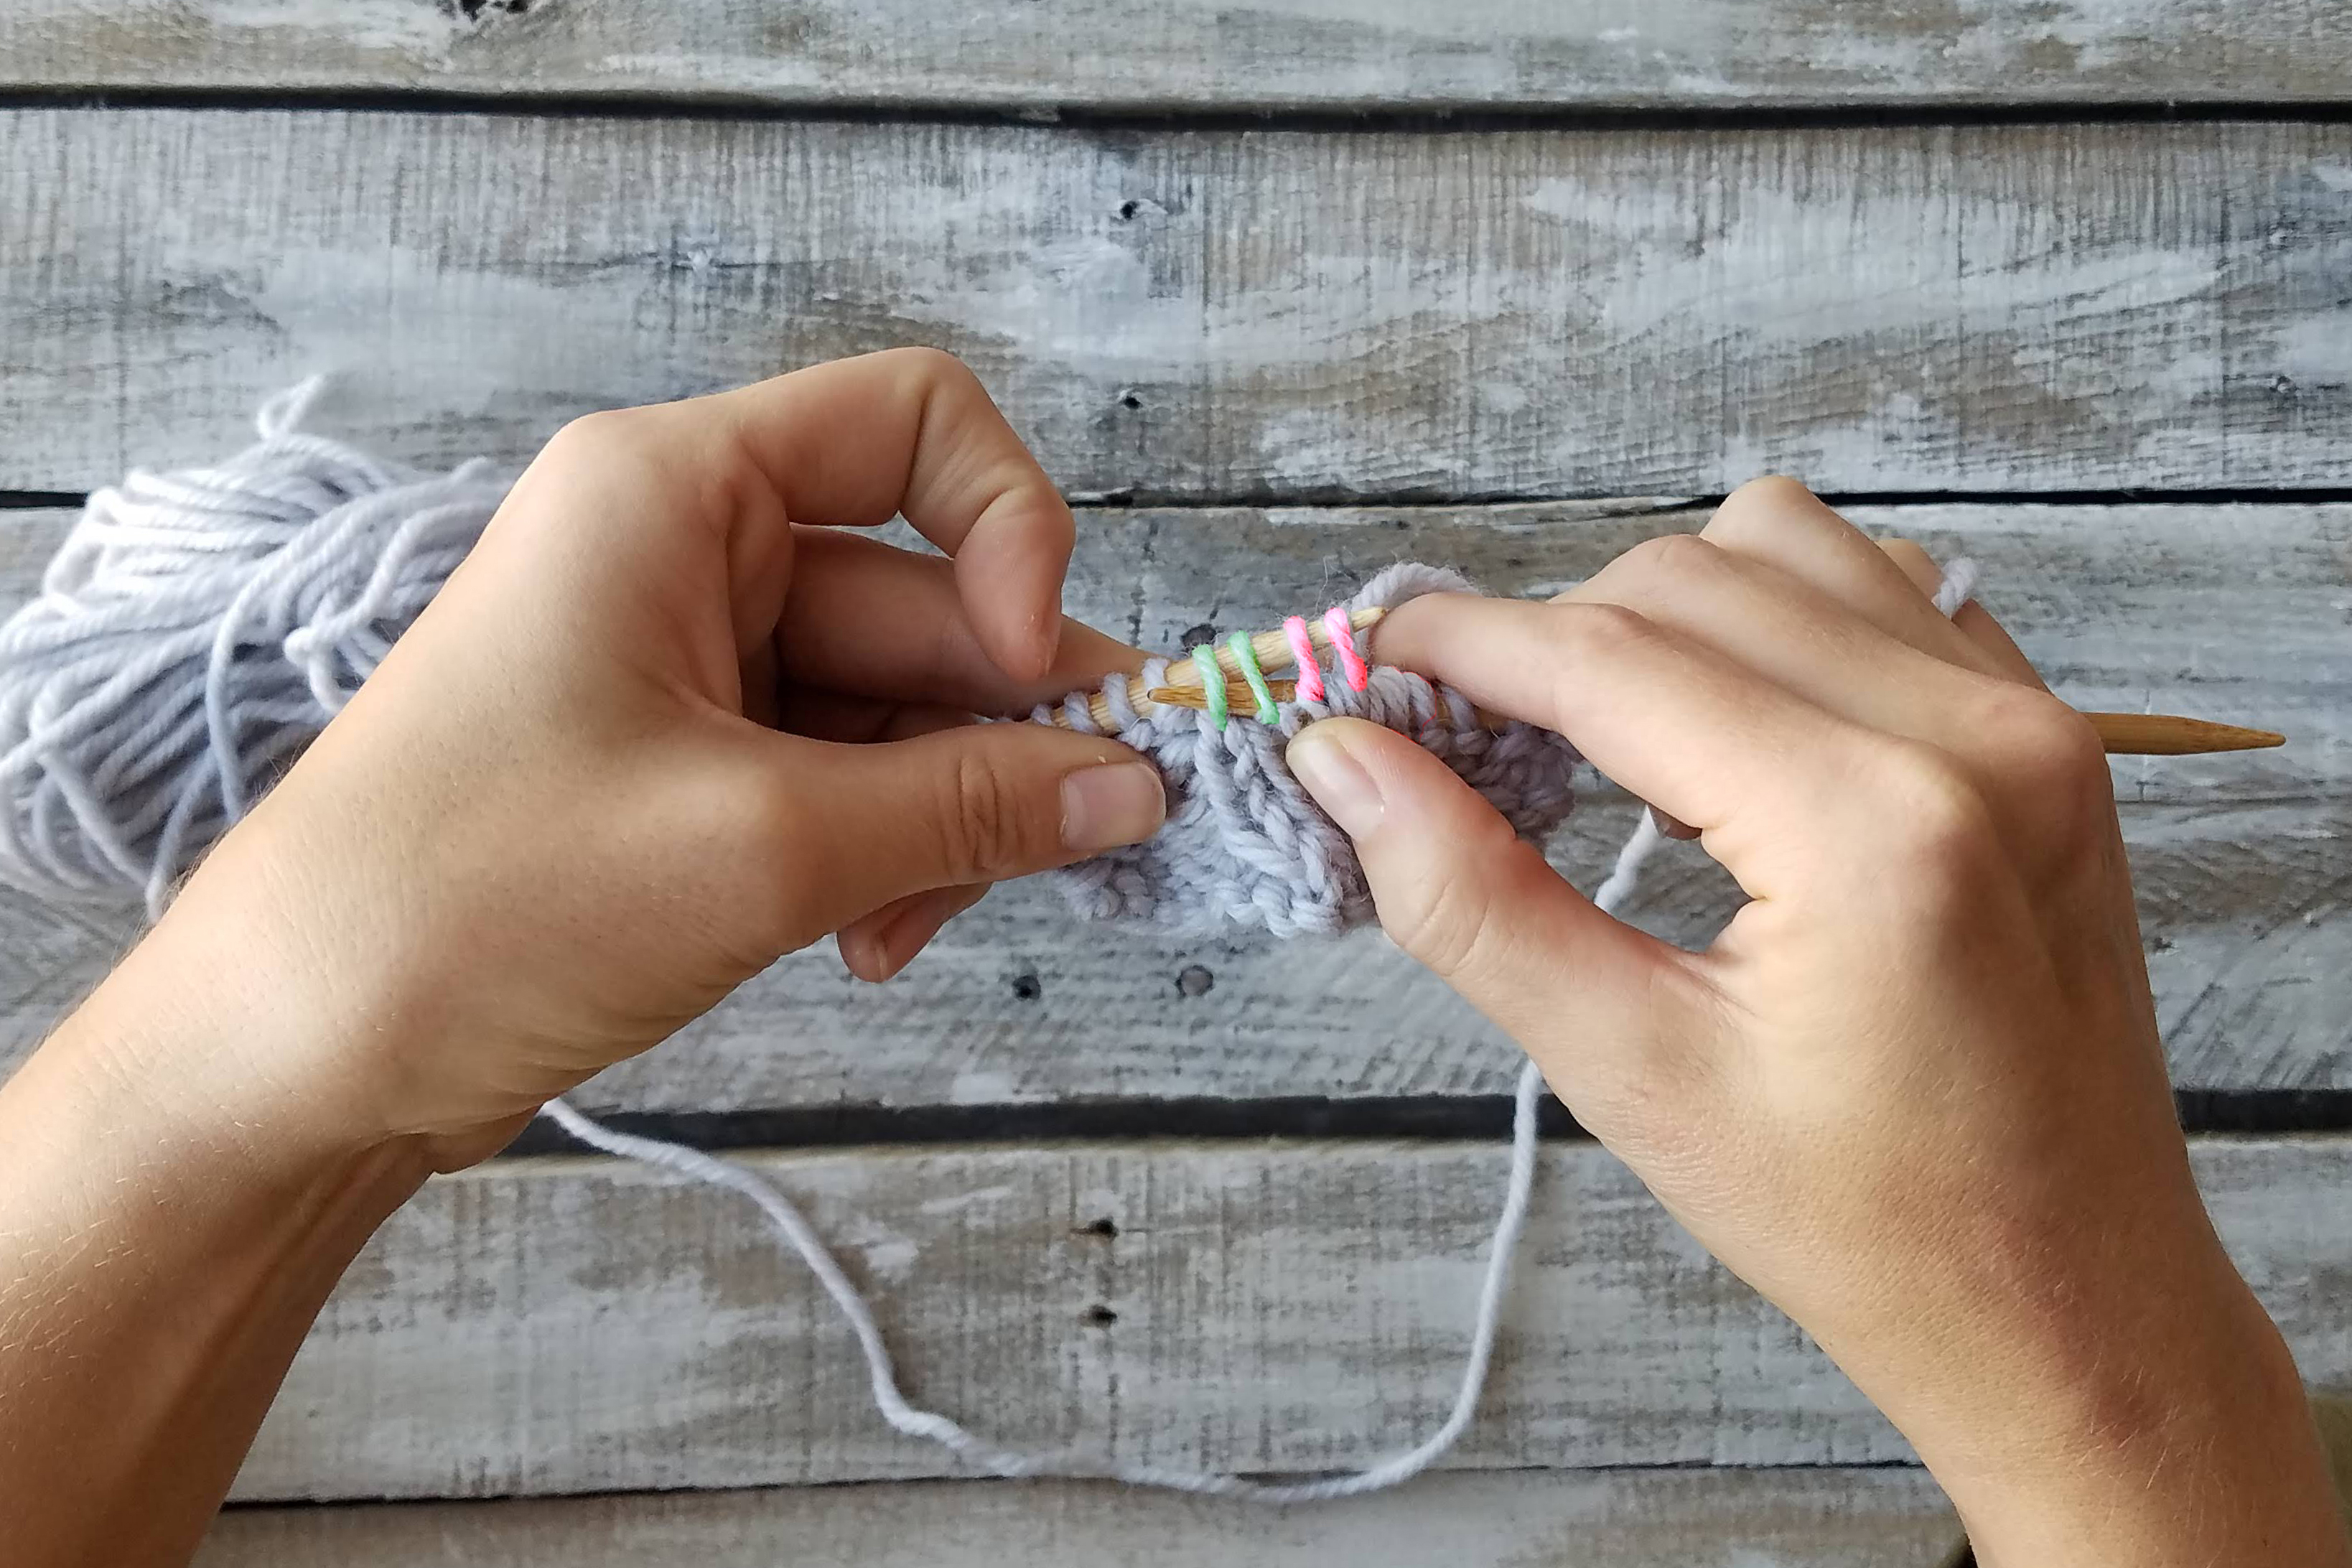
Stitches ready for their next twist.
Cabling without a cable needle is just a matter of rearranging your stitches. I’ve highlighted the stitches we’ll be working with using red and green. In this instance, I am going to cross my stitches to the left.
Going behind the first two stitches (red) on the left-hand needle, slip the third and fourth (green) stitches to the right-hand needle. The first two stitches will be in FRONT of the work. If you were working this as a right cross, the red stitches would be in the BACK of your work, and you would slip the green stitches purlwise from the front.
Alternate view – slipping the green stitches purlwise to the right-hand needle.
Don’t be afraid!
If the above photo scares you, just take a deep breath. It’s really not that scary! When you slip the green stitches, the red stitches will fall off your needle. That is okay – that’s what you want!
Scoop the stitches back up with the left-hand needle.
Carefully scoop the red stitches up with your left-hand needle. Breathe a sigh of relief – your stitches are safe again. Notice, we are simply re-arranging the stitches. * If you were working this as a RIGHT cross, the red stitches would be in the back of your work.
Continue to re-arrange your stitches by slipping the green stitches from the right-hand needle back to the left-hand needle.
You’ve rearranged your stitches. Perfect! Now you’re ready to carry on and knit.
After the stitches are all back on the left-hand needle you may continue knitting as usual. You can already see the twist in your work.
TA-DA!
That’s it! You’ve created a beautiful cable without a cable needle.
I realize that I’ve only included instructions for a 2×2 Left Cross here, but my hope is mainly to give you the courage to go forth without a cable needle. In fact, the pattern features left and right crosses; so if you choose to skip the cable needle you’ll have plenty of time to practice both.
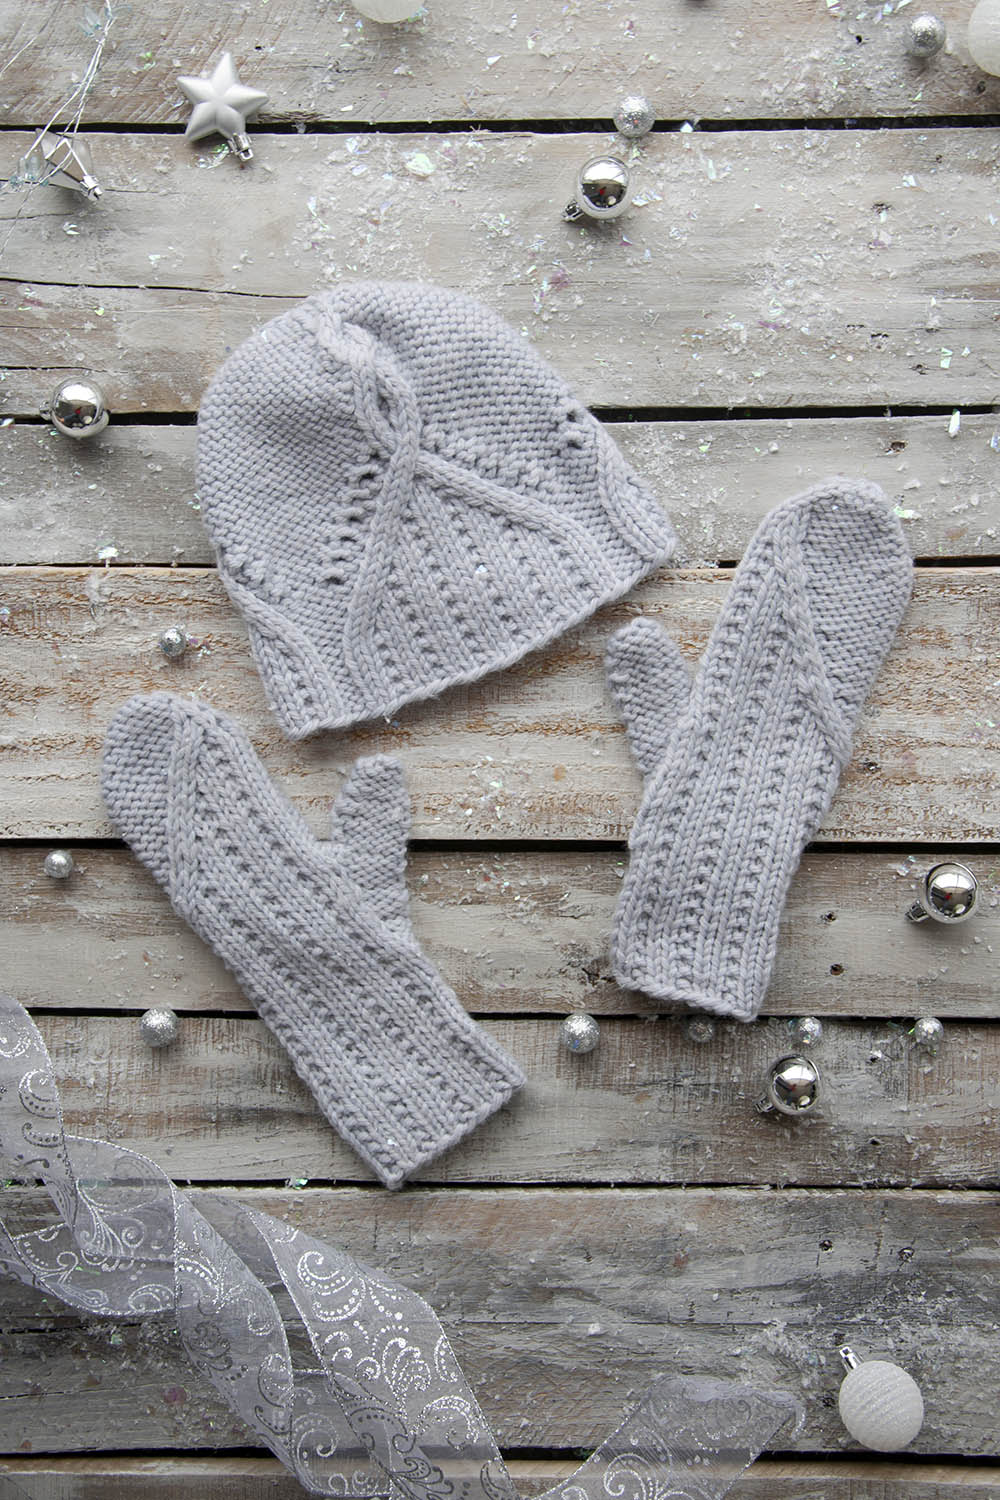
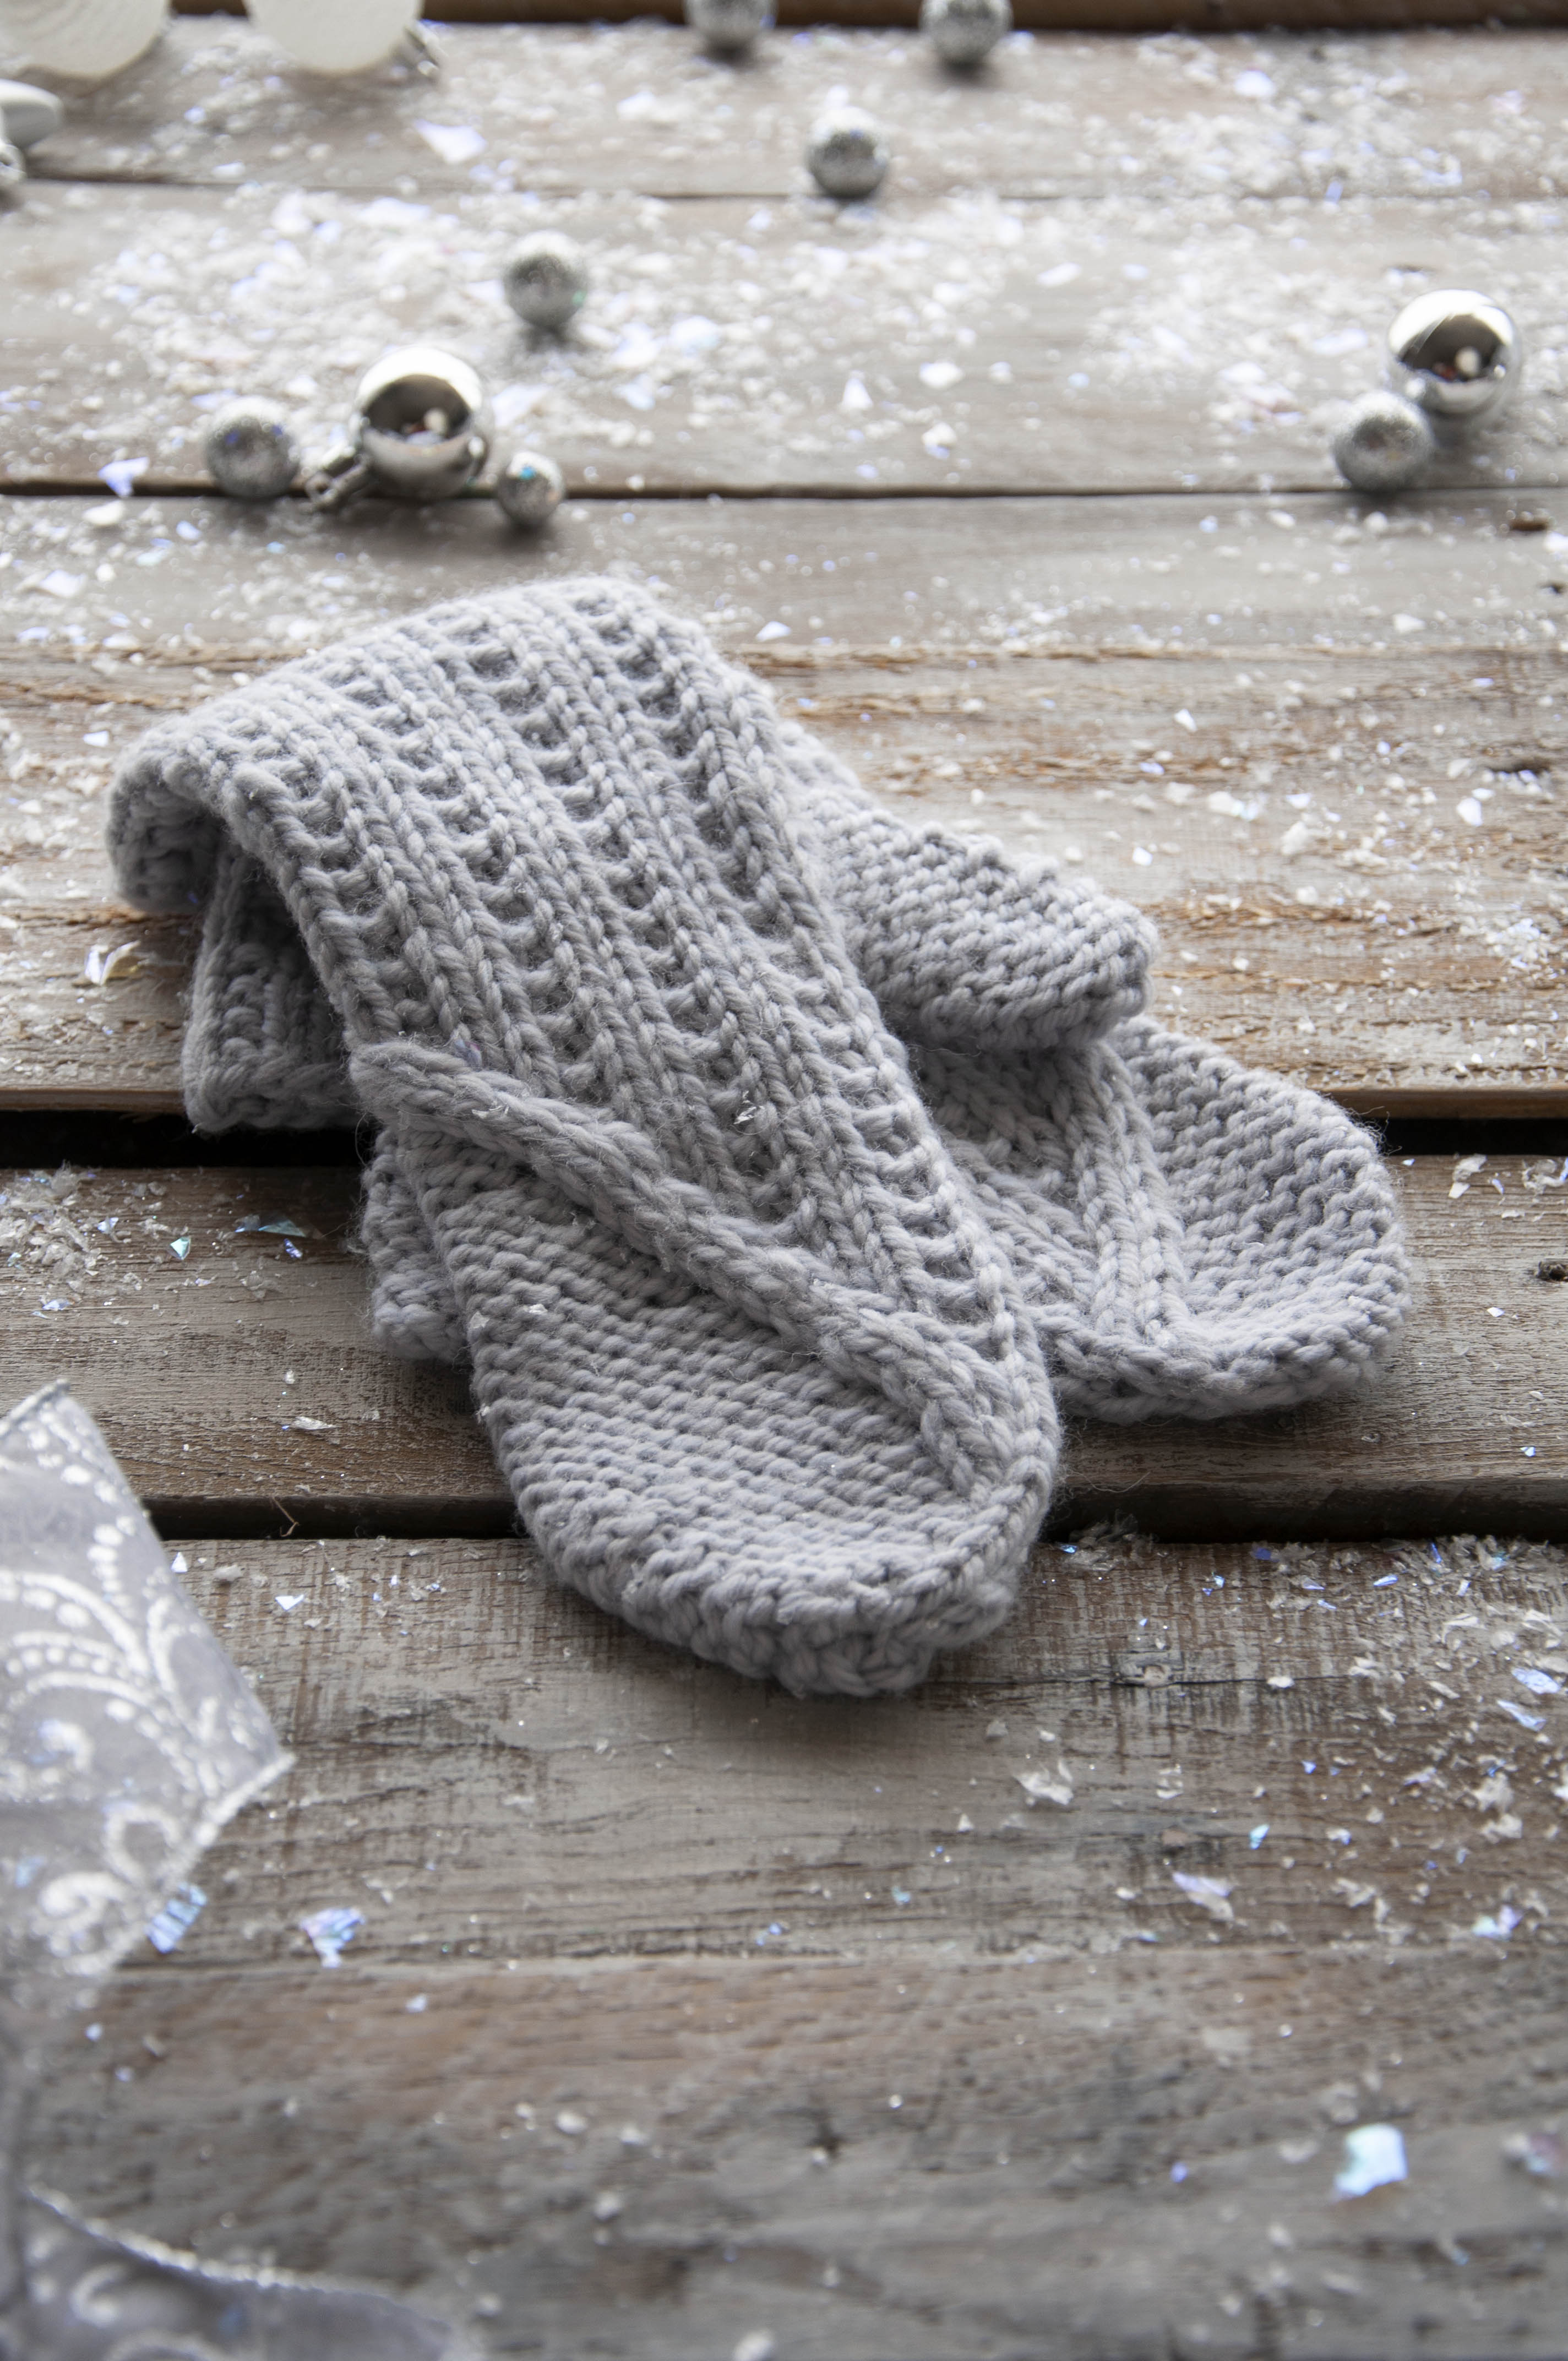
Left and right cable crosses are used to create the traveling cables in the hat. The cables in the crown use right crosses.
You can do this on any number of stitches, but I wouldn’t recommend working cables without a needle on anything more than 3×3 crosses. Any bigger than that and things can start to look sloppy and feel fiddly. Cable needles are great and help to maintain an even tension, but the same results can occur without them. Some find that skipping the cable needle feels faster, too. In personal projects, I go both ways. It depends on my mood and whether I can find my cable needle!
Cable stitches are also used in the mittens.
Remember, you can find the 12 Days of Winter Kit patterns on Ravelry.
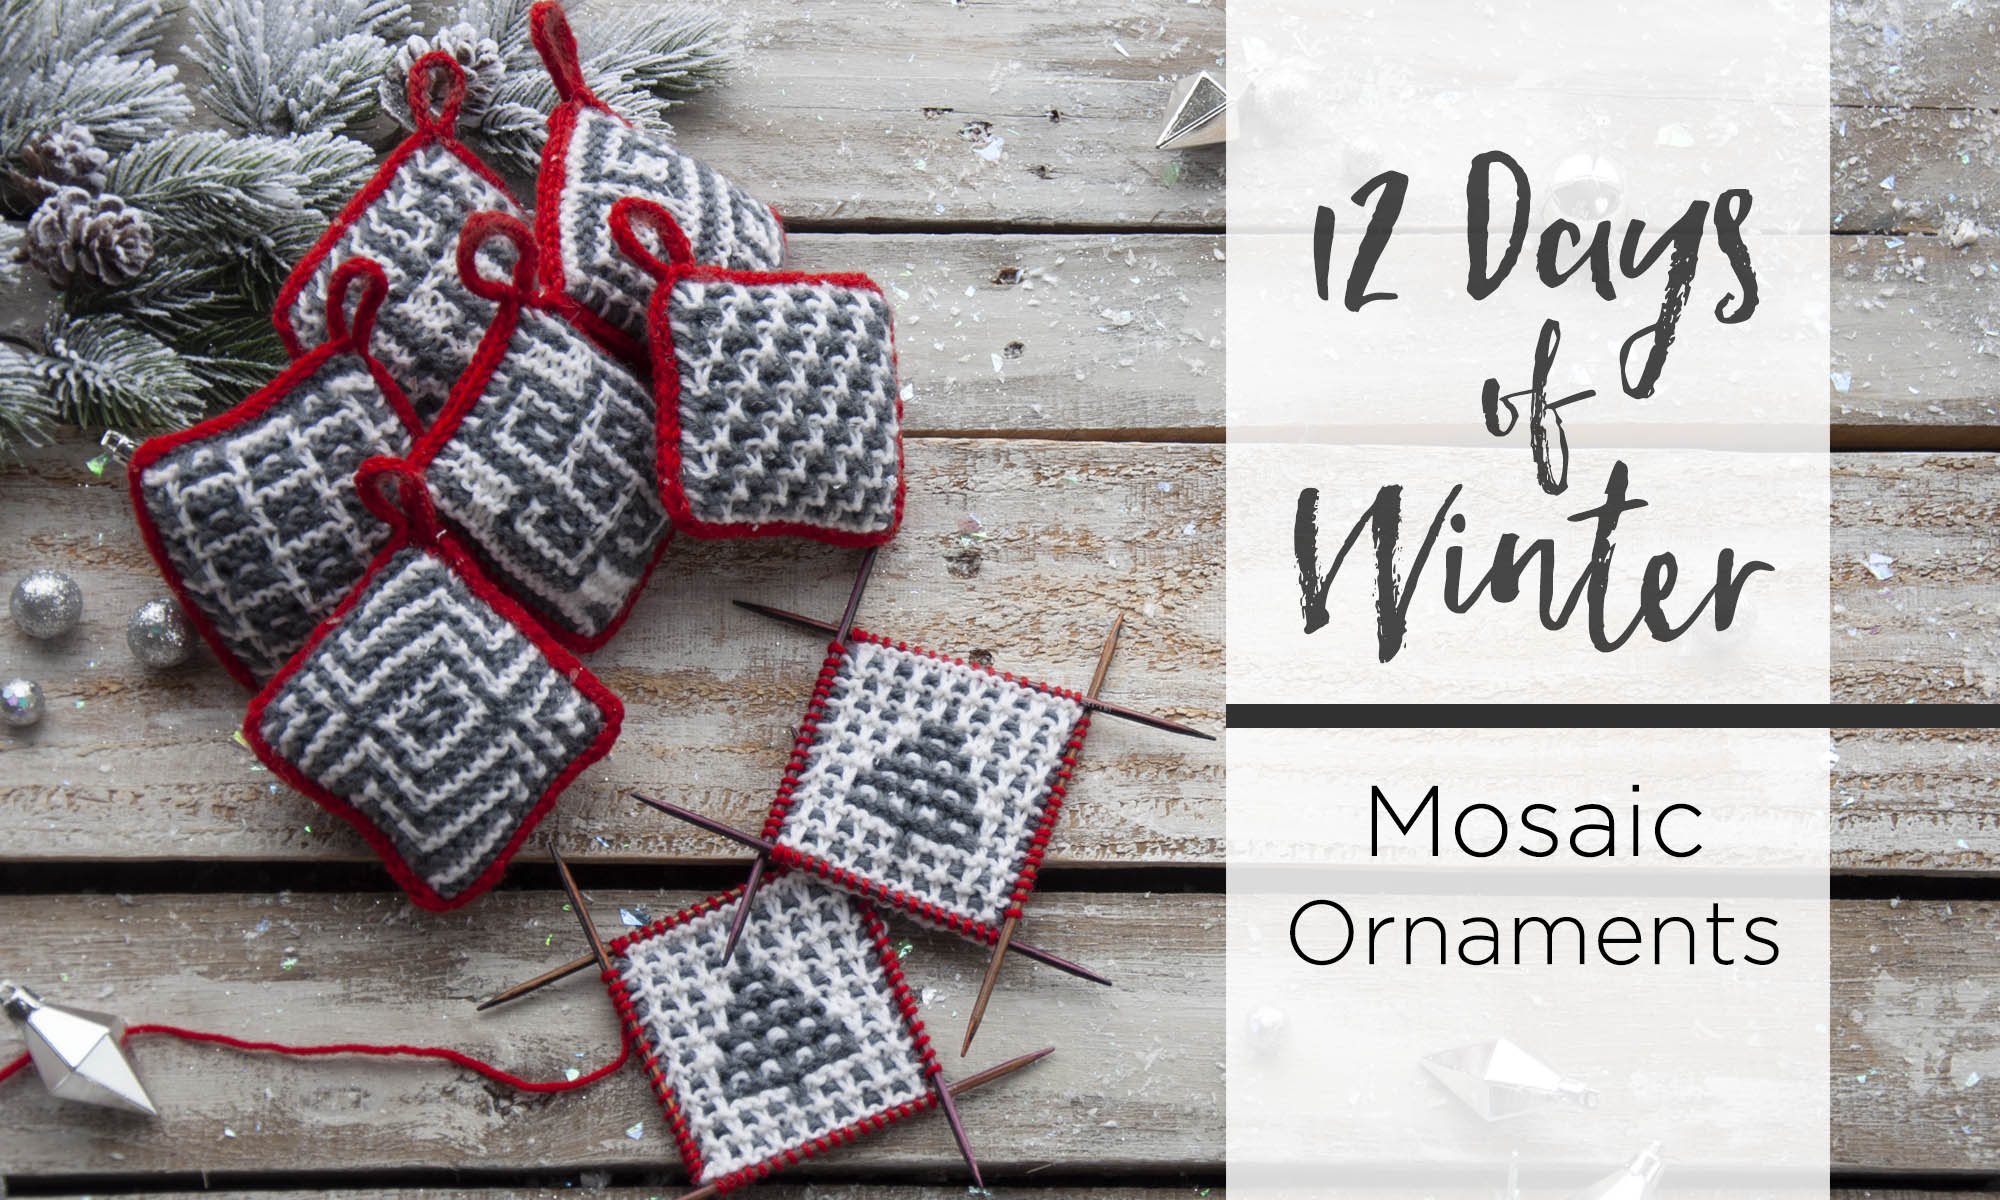
This is part 9 in a 12 part series highlighting designs from our 12 Days of Winter, Series 2 Edition.
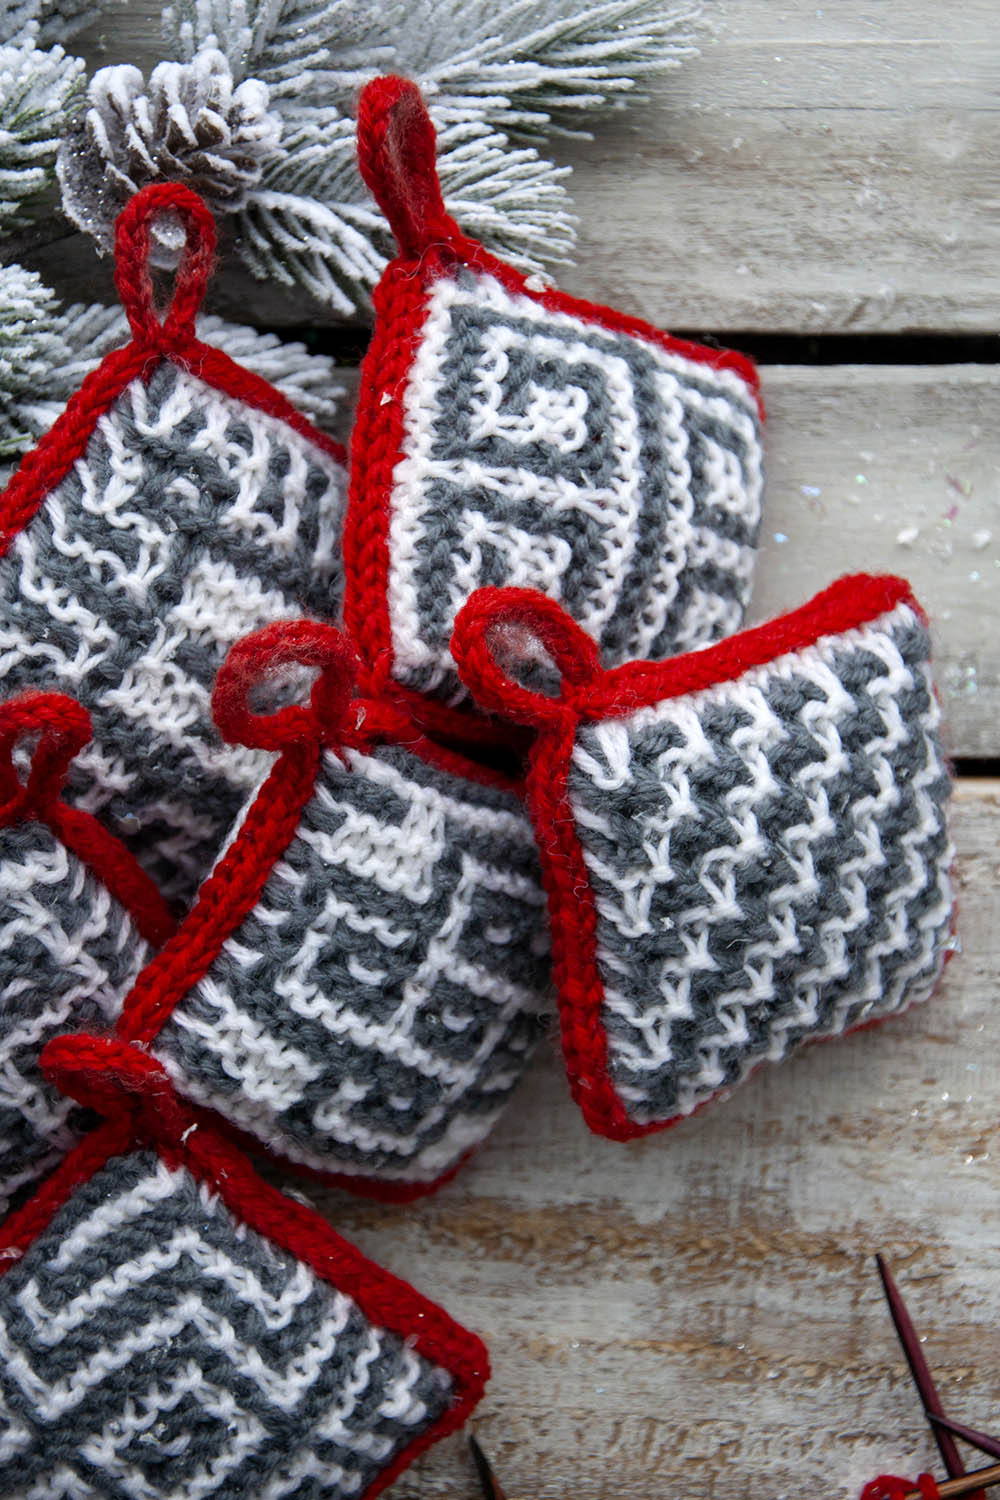
Ornaments are meant to be special. Often they are passed down to us. Perhaps they’ve been collected from some treasured place, or maybe they are handmade. After all, what is more charming than lovingly made handmade items?
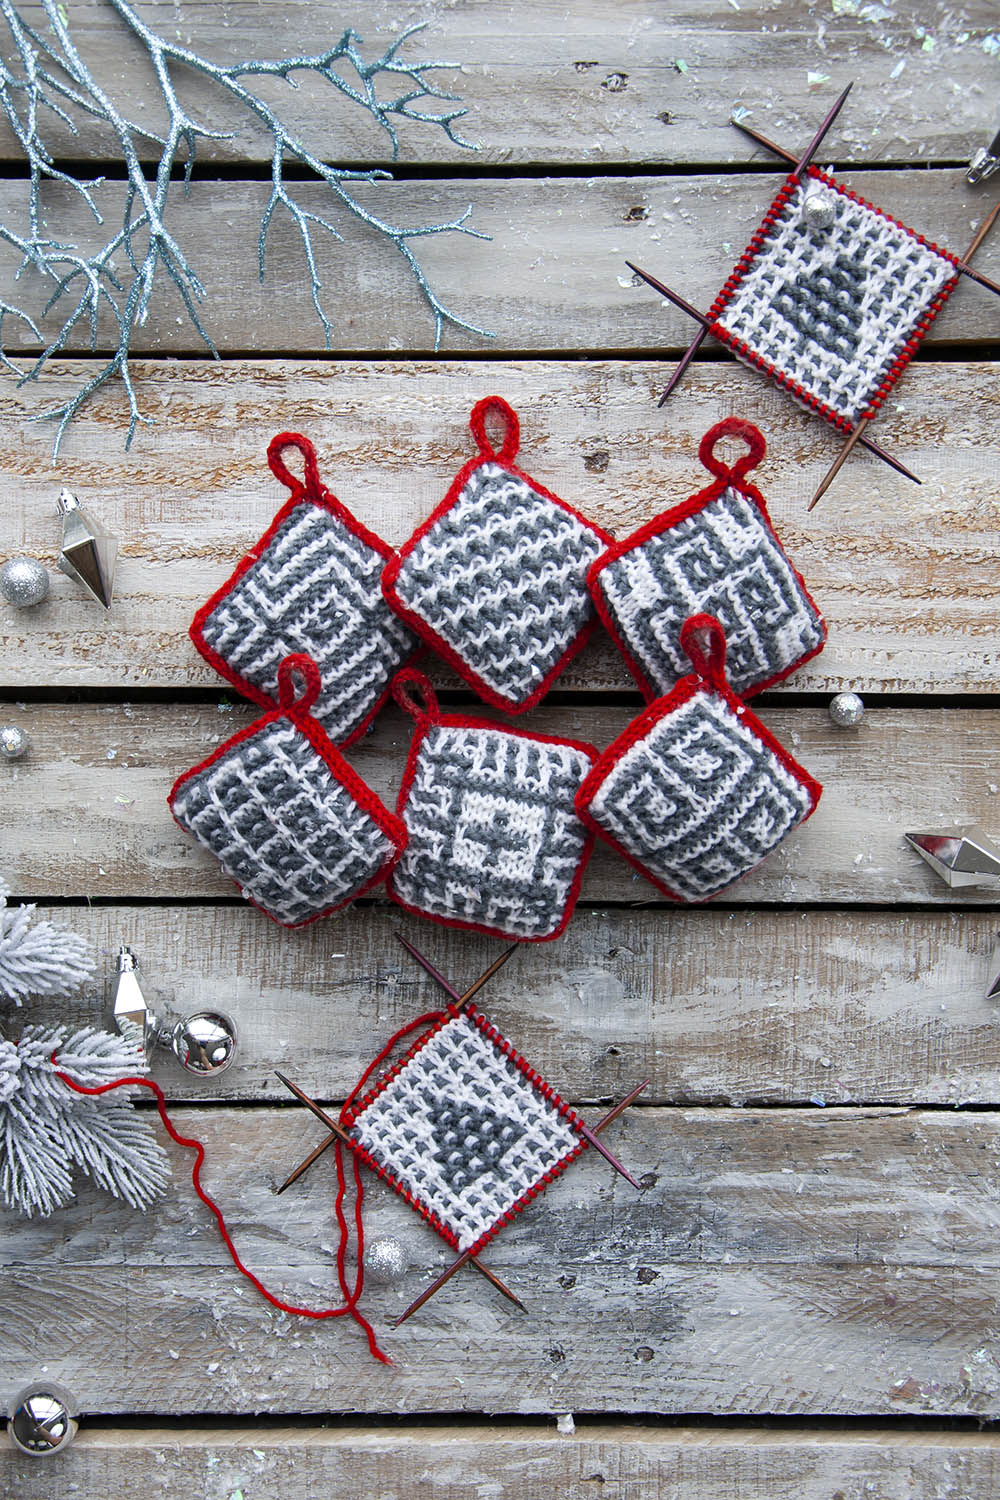
The Mosaic Ornaments pattern calls for 3 balls (1 of each color) of Deluxe DK Superwash. Though there are seven different mosaic designs included in the pattern, the yarn amounts are enough to make at least 40 ornaments. Quite a bargain, eh?
Each ornament begins by knitting the two sides separately. They are then joined with a three-needle I-Cord bind-off. Sound tough? It’s not, because I’m adding a step that takes this from a three-needle bind-off to just (the usual) two needles. Keep on reading to see how I like to do it!
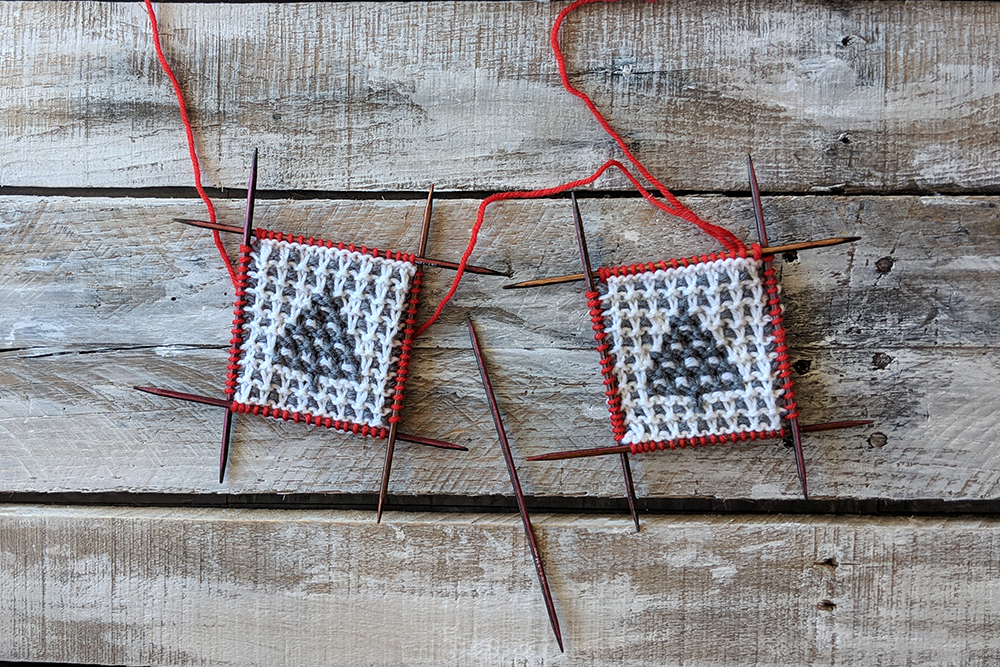
Here you can see that I have two sides of the Trees ornament, all ready to be joined.
What I haven’t shown in these images is that the first step is to pick up and knit stitches all the way around each square with the contrasting red color. So that’s where we are at now – stitches have been picked up around each square.
Next, place both pieces with their wrong sides facing together.
This is similar to the prep for a tubular bind-off.
What I’m doing now is certainly not absolutely necessary, but I find it makes the process so much easier. With a separate double pointed needle (dpn), first I slide a stitch from the front needle onto the spare dpn.
Next, I slide a stitch from the back needle onto this same dpn.
Keep going, alternating front and back needles/stitches until all stitches from one front and back needle have been transferred to the spare.
All the stitches from each needle are transferred. We’re ready to bind off!
Now that the stitches from both needles have been combined onto one needle, all we’re really doing is an I-Cord bind-off, but with one extra step.
To start, cast on two stitches using the knitted method. These are our I-Cord stitches.
Next, knit 1 (the first cast-on stitch), then k3tog tbl (knit three stitches together through the back loops). These three stitches are: the second cast-on stitch, a stitch from the prior front needle, and a stitch from the prior back needle. Slip the resulting 2 stitches back to the working left needle. Then: * K1, k3tog tbl, slip these 2 sts back to the left needle; rep from *
This baby 2-stitch I-Cord is works well to join the sides of the ornament and gives a nice finished look to the project, as well.
Here’s what it looks like after the side is partly joined.
All done!
Remember, you can find the Series 2 12 Days of Winter patterns on Ravelry!
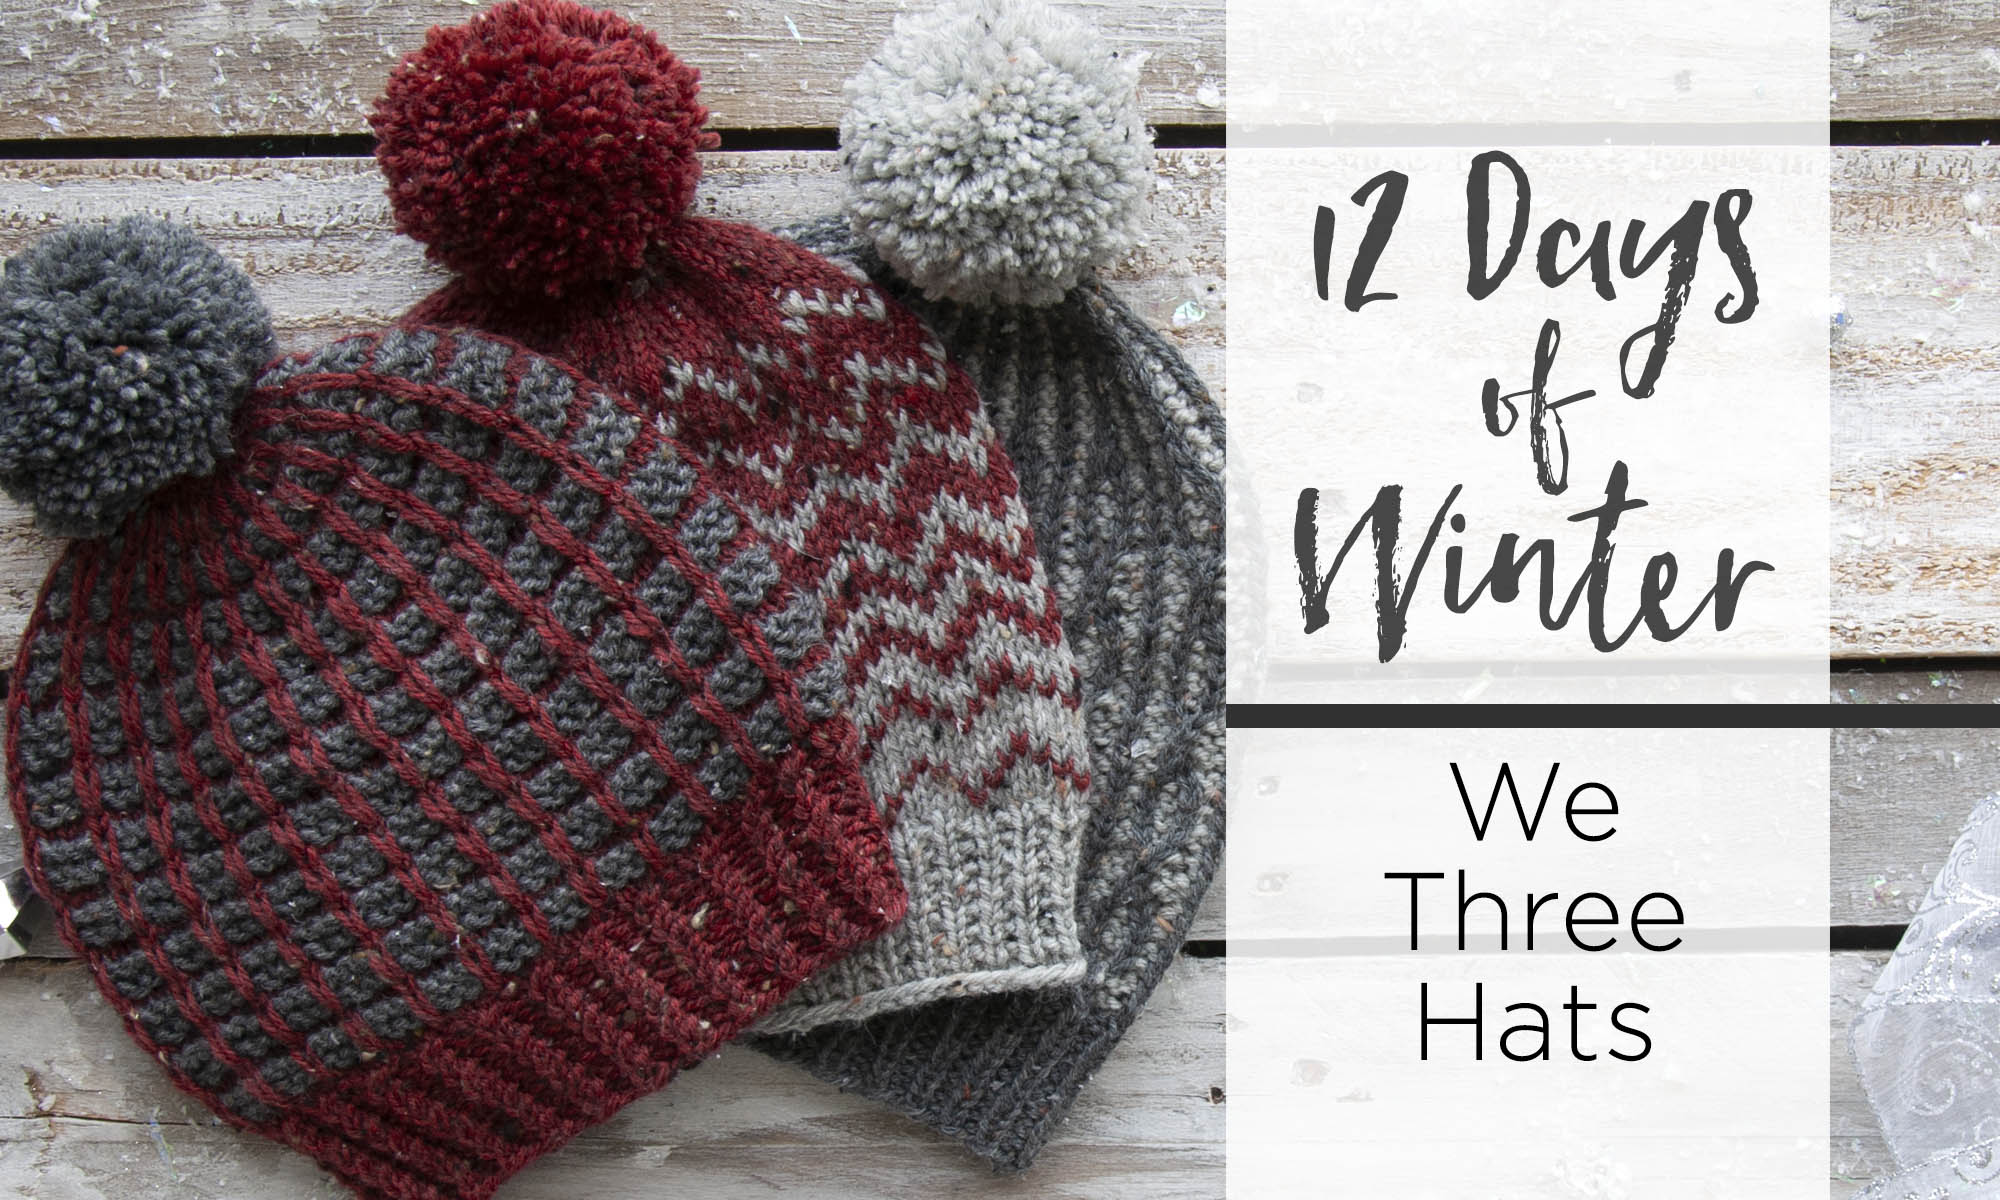
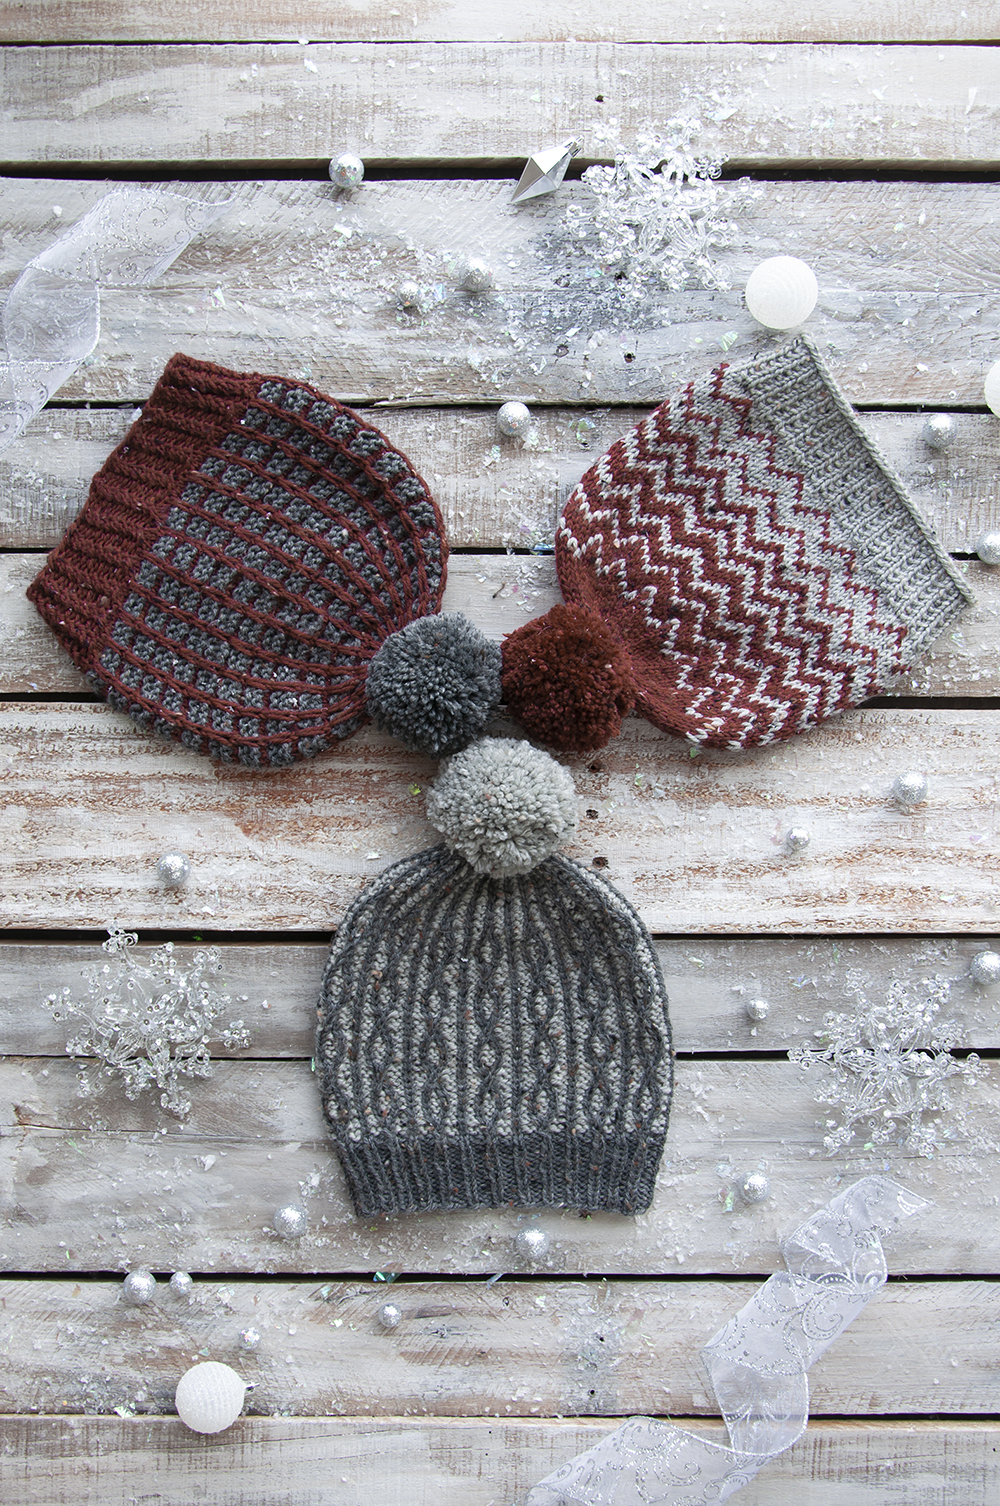
This is part 3 in a 12 part series highlighting designs from our 12 Days of Winter, Series 2 Edition.
Hats make such a satisfying knit. They’re small and portable, make great gifts, and they’re a fun medium to try out a new technique with.
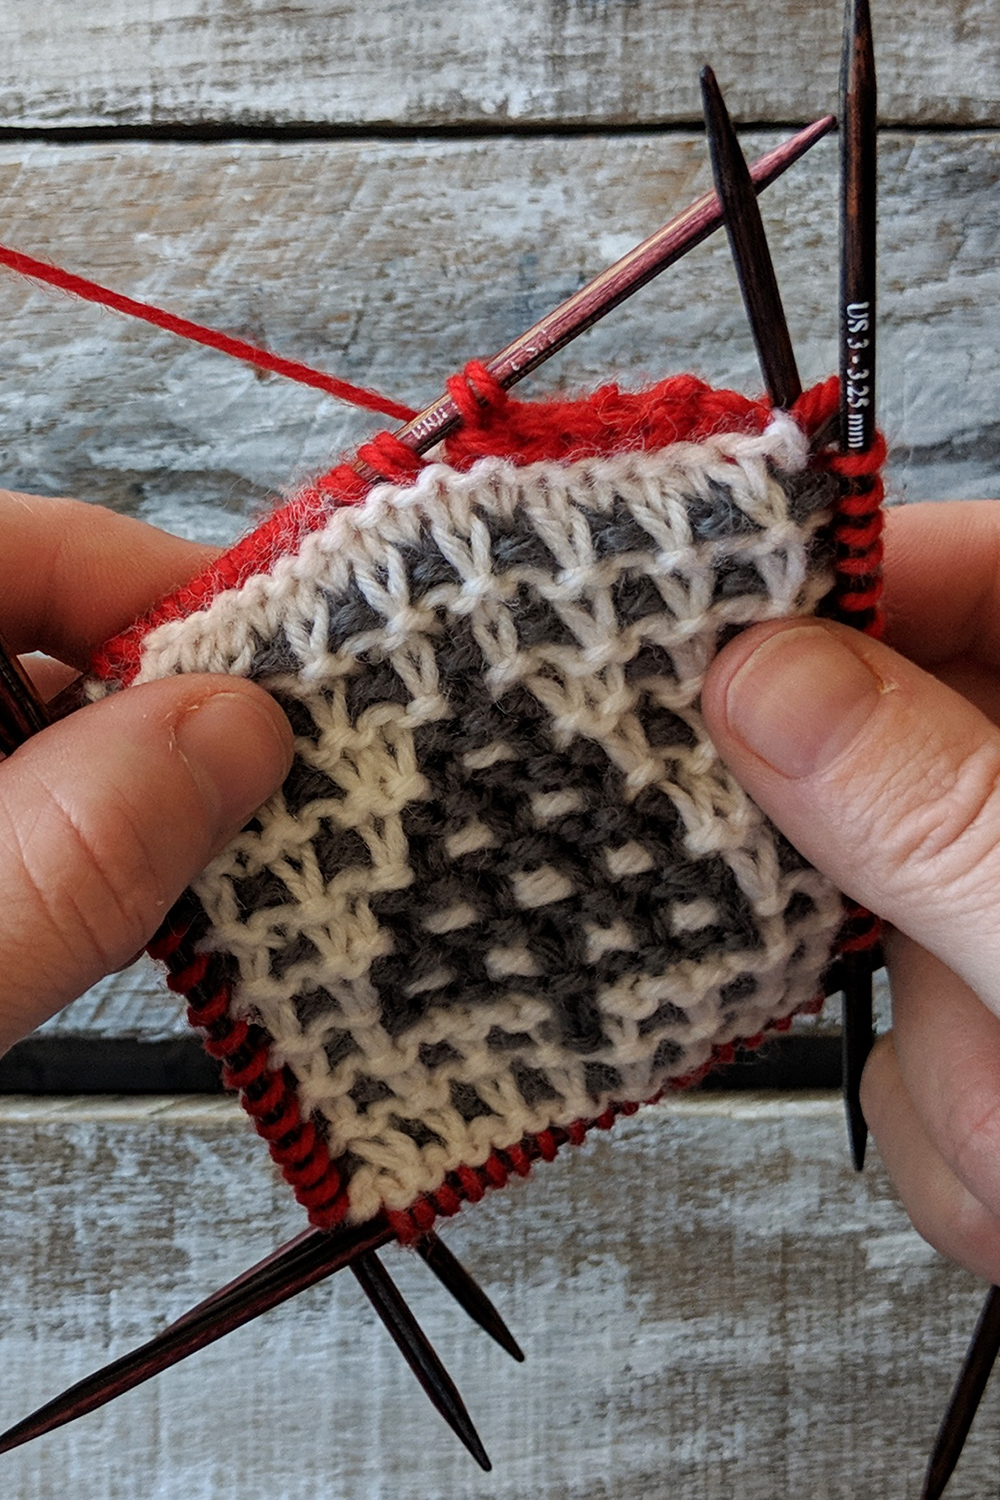
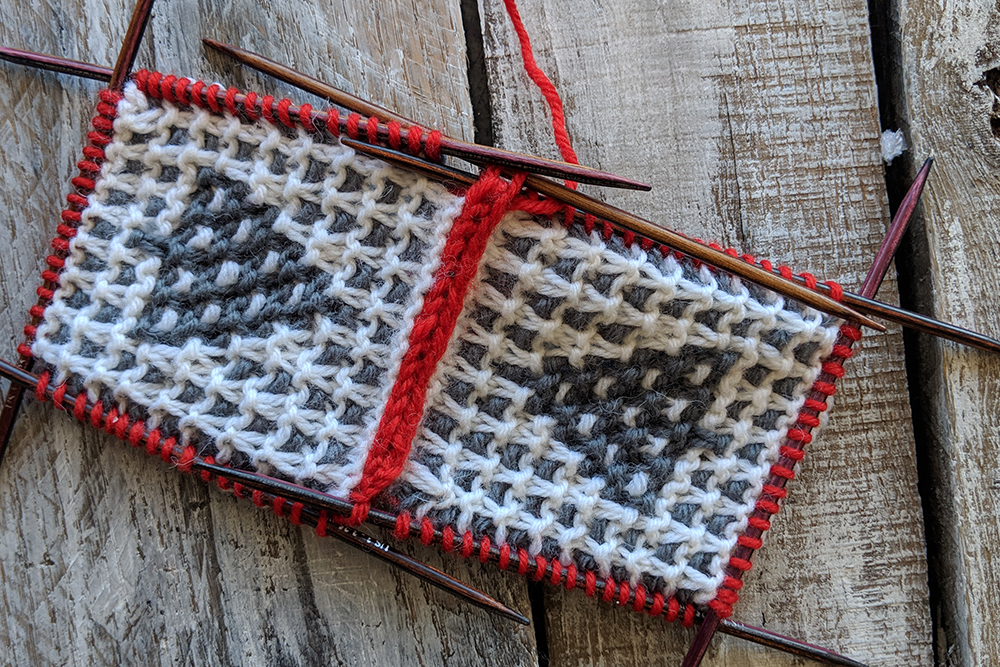
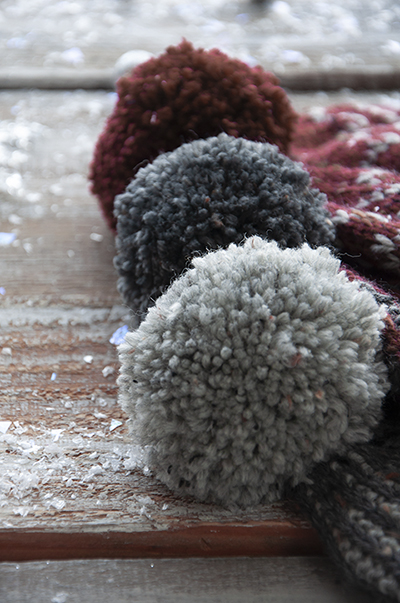
The We Three Hats pattern (pattern link) includes three different hat patterns that can be made out of three colors of Deluxe Worsted Tweed Superwash. All hats are knit from the brim up to the crown. Each hat is a bit different, but one thing they all have in common is a coordinating pom-pom.
To pom-pom or not to pom-pom: that is the question.
And for me, the answer to that question will inevitably be: heck yes! I love pom-poms, all sizes. I have made many pom-poms in my life using lots of different techniques. I’d like to share with you my favorite way to make a pom-pom, along with a few little tips.
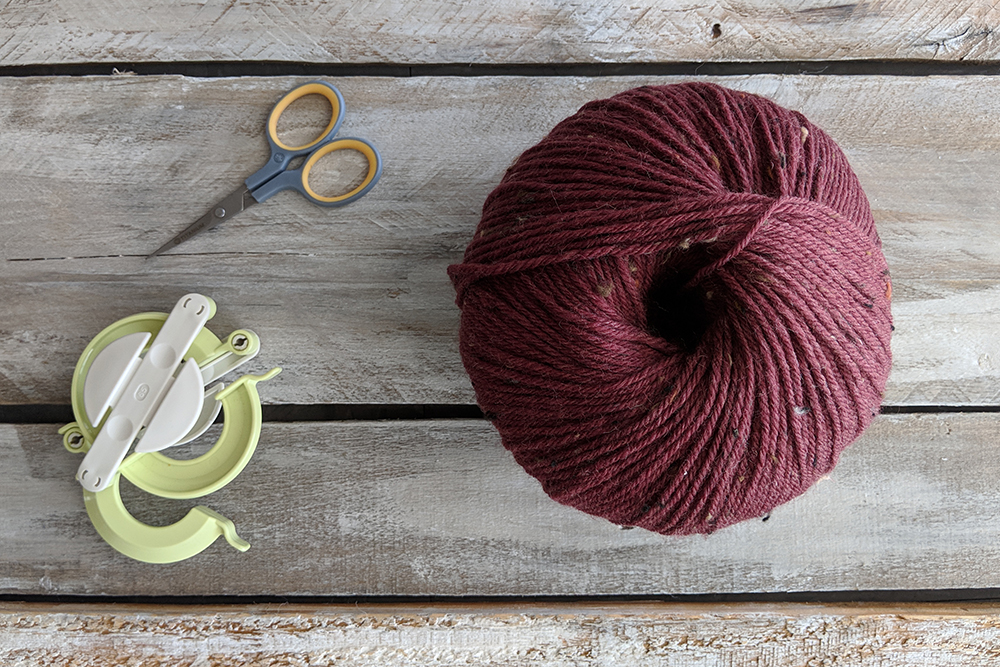
I’ve also used a homemade cardboard circle variation of this pom-pom maker shown in the photo. But I do love Clover’s manufactured sets. They come in lots of sizes and are pretty foolproof. Plus, they hold up a lot better than cardboard!
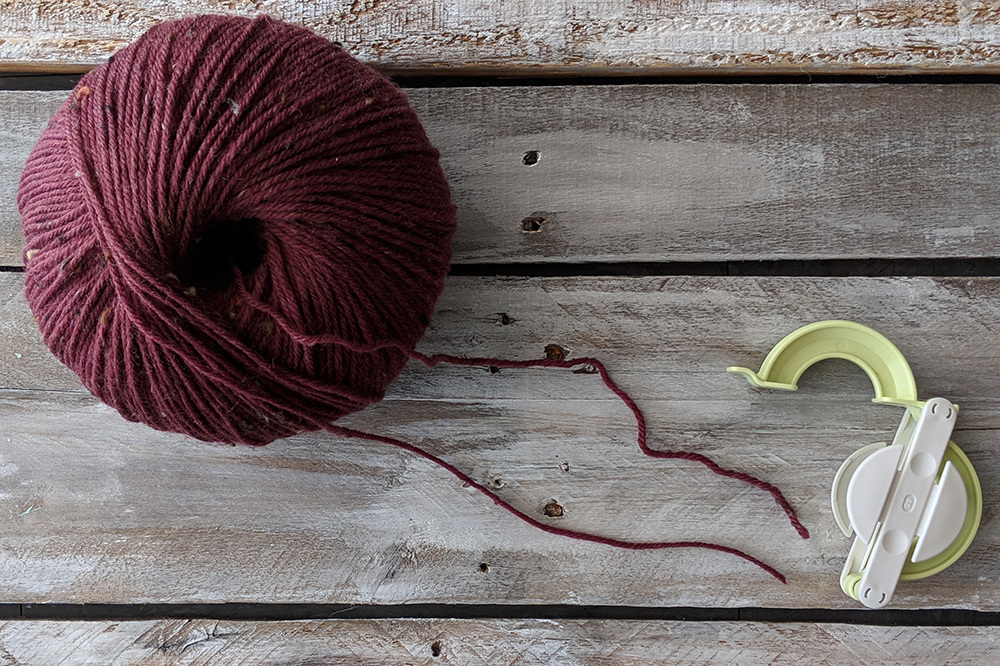
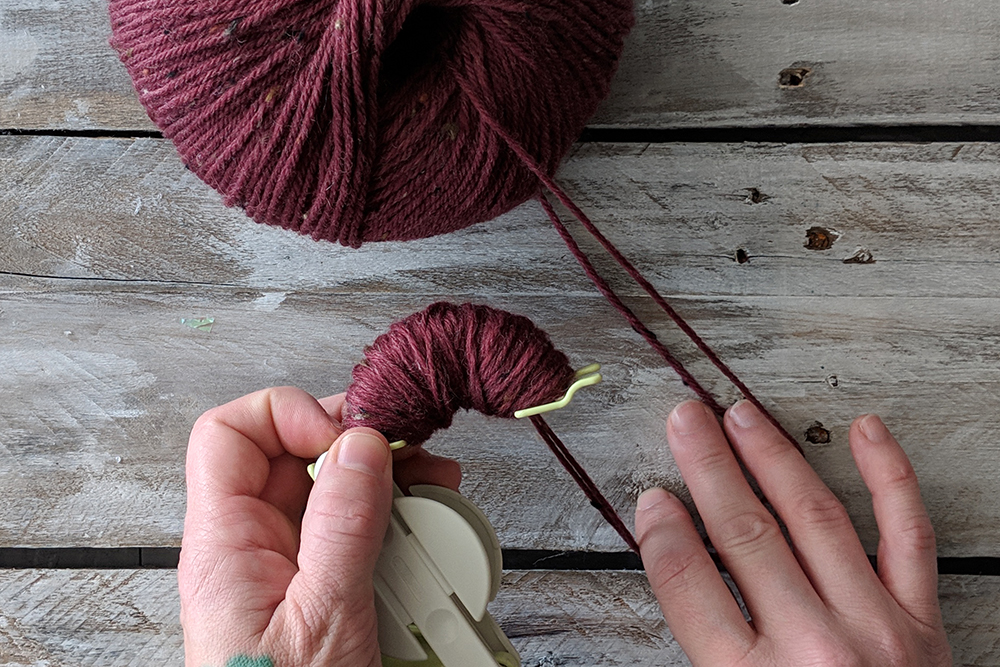
I like to use two strands of yarn because it makes wrapping the pom-pom maker go twice as fast. I use yarn from the inside and outside of the ball.
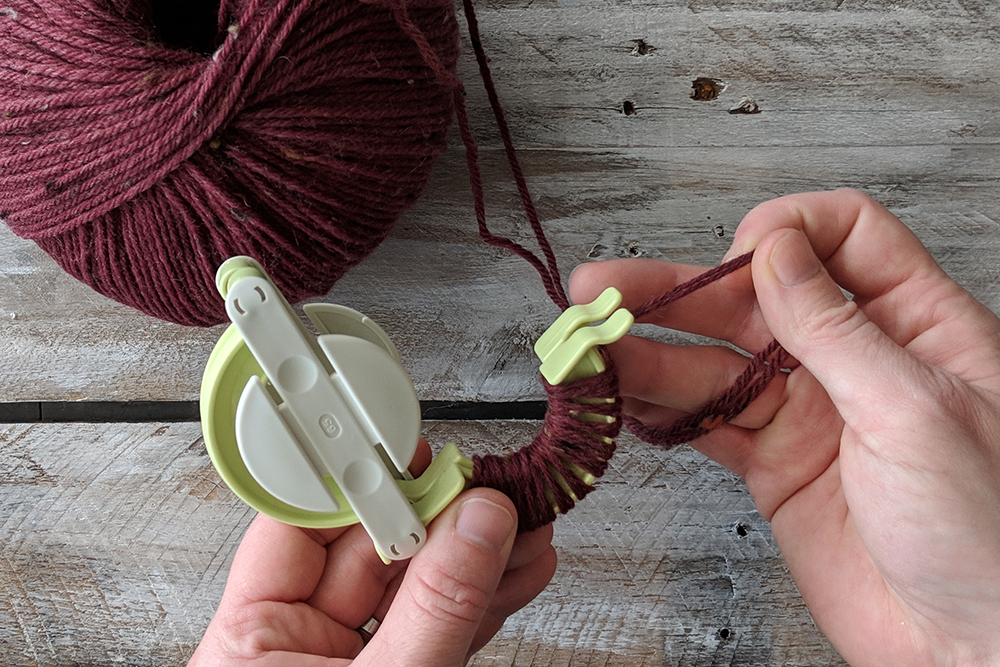
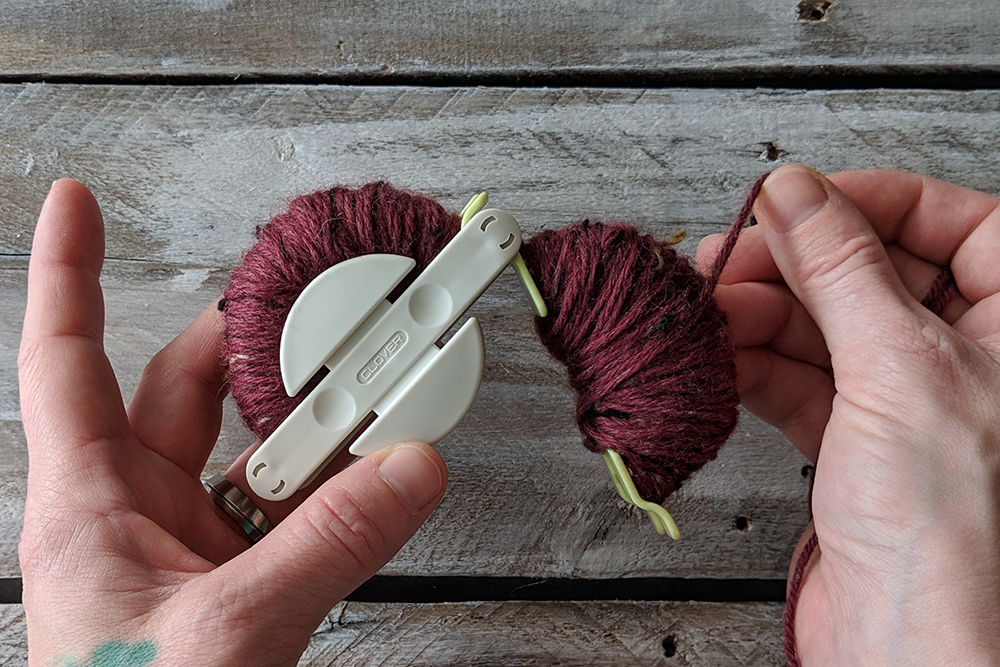
To begin, open up the hinges from both discs, along one side of the pom-pom maker. Begin wrapping yarn around both sides of the arced plastic pieces.
Continue wrapping yarn around the maker with even tension.
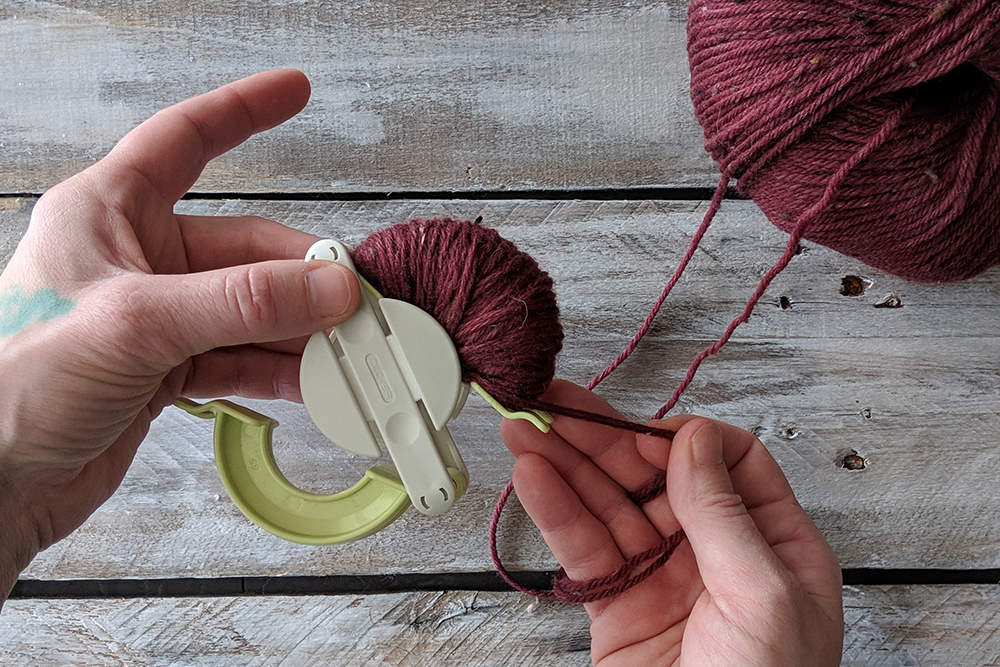
Think you’ve wrapped enough? Think again! Wrap yarn until it feels like the pom-pom maker is over-full. I usually try to count my wraps on one side so I can match the number on the following side.
This thing is wrapped as much as possible. Time to wrap the other side. Be sure to finish on the end as shown, so you carry the yarn to the other half of the maker to continue wrapping.
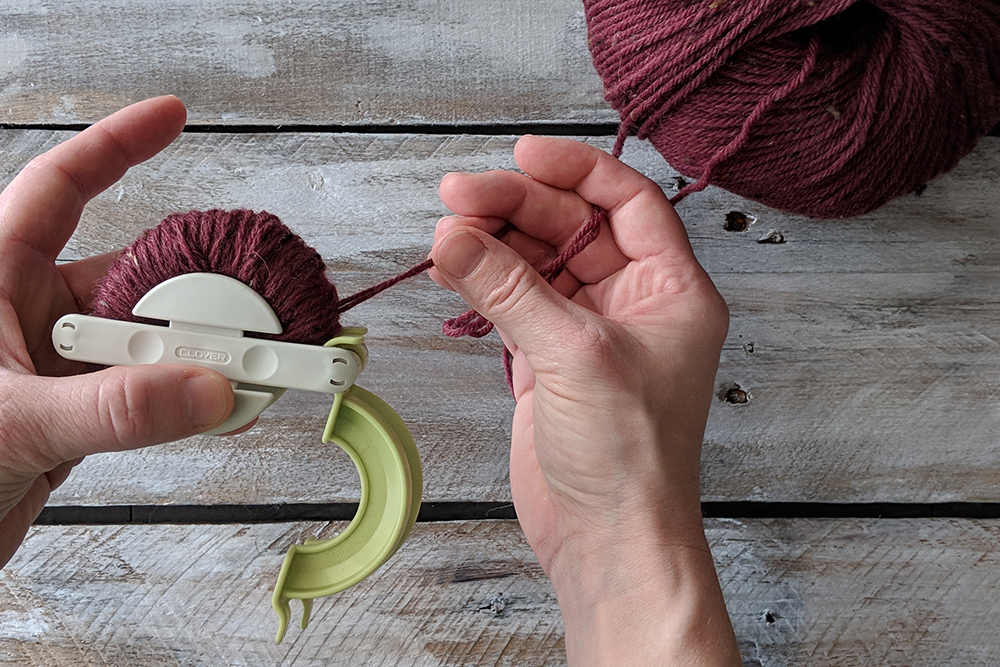
Close the side of the maker that is now wrapped in yarn and open up the other hinged side.
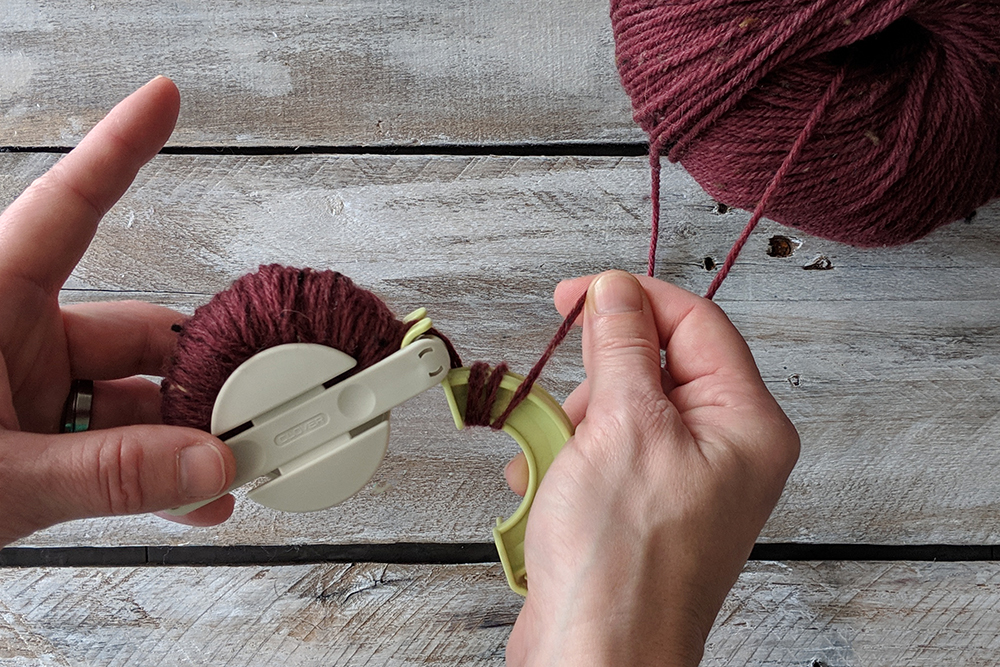
Start wrapping this second side as much as you did the first side.
This is going to be a beautiful and full pom-pom. I can tell already!
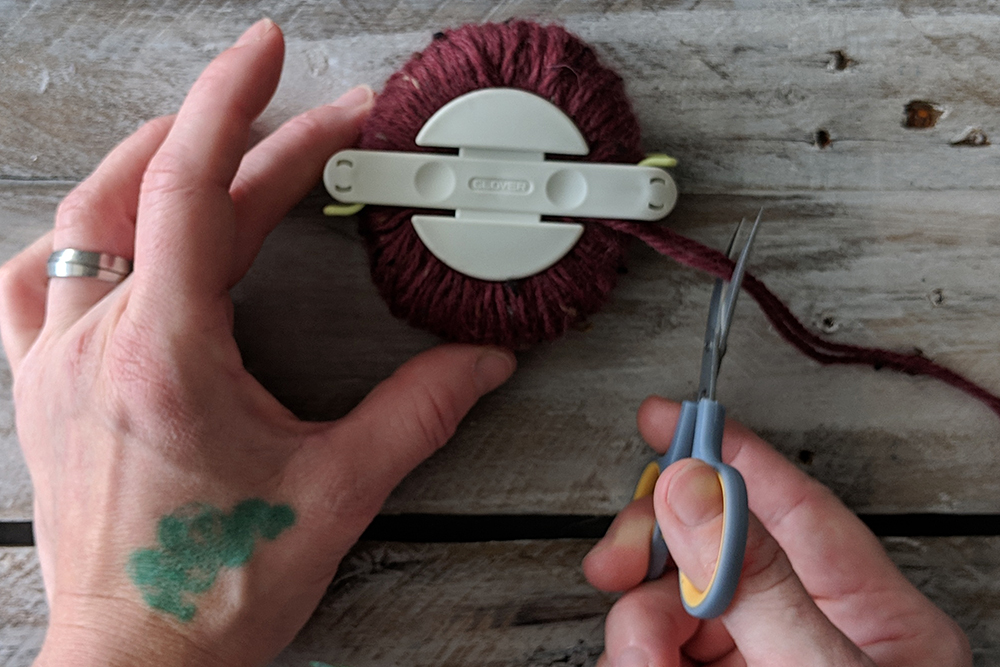
Cut the yarn. There is no need to leave a tail. But also cut two 12″ strands of yarn to set aside for later to secure the pom-pom.
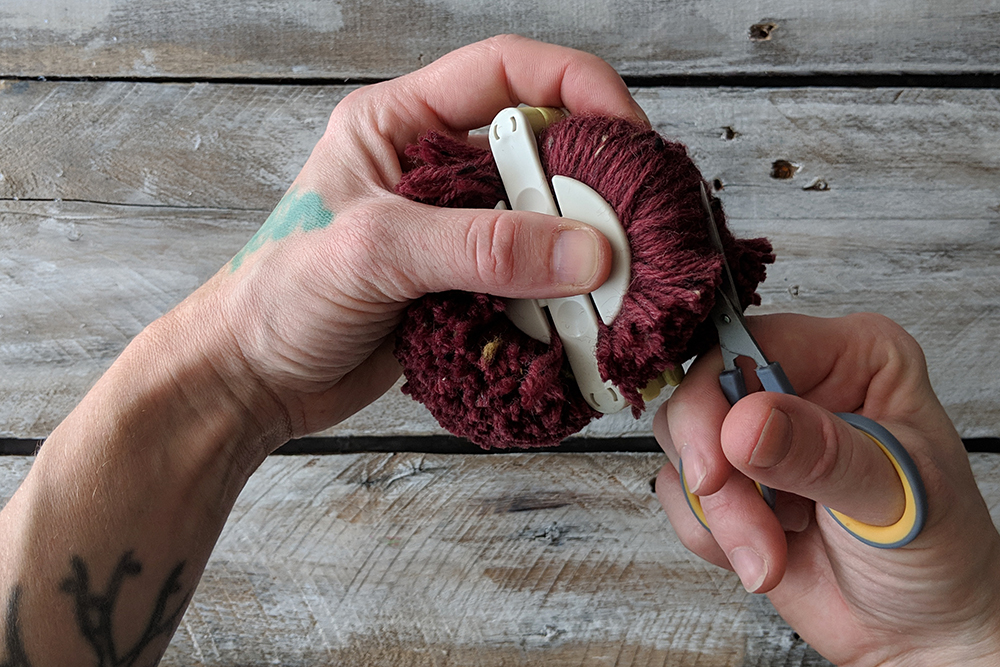
Start cutting the pom-pom. The Clover pom-pom makers are very easy because you just cut in the groove between the two discs. Sharp scissors are a must for this step.
Cut all the way around the first half of the maker freeing these strands.
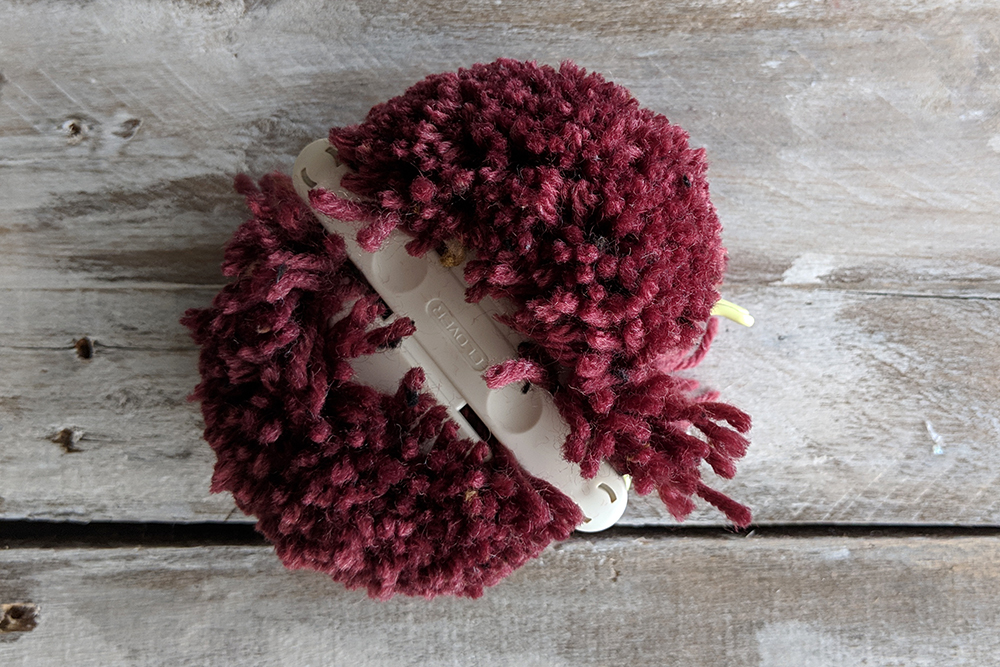
Then cut around the second half. Take care that the two halves of the pom-pom maker do not come apart yet. The strands are not yet secure.
Our pom-pom, unsecured, but cut. Not too pretty yet, but we’re getting there!
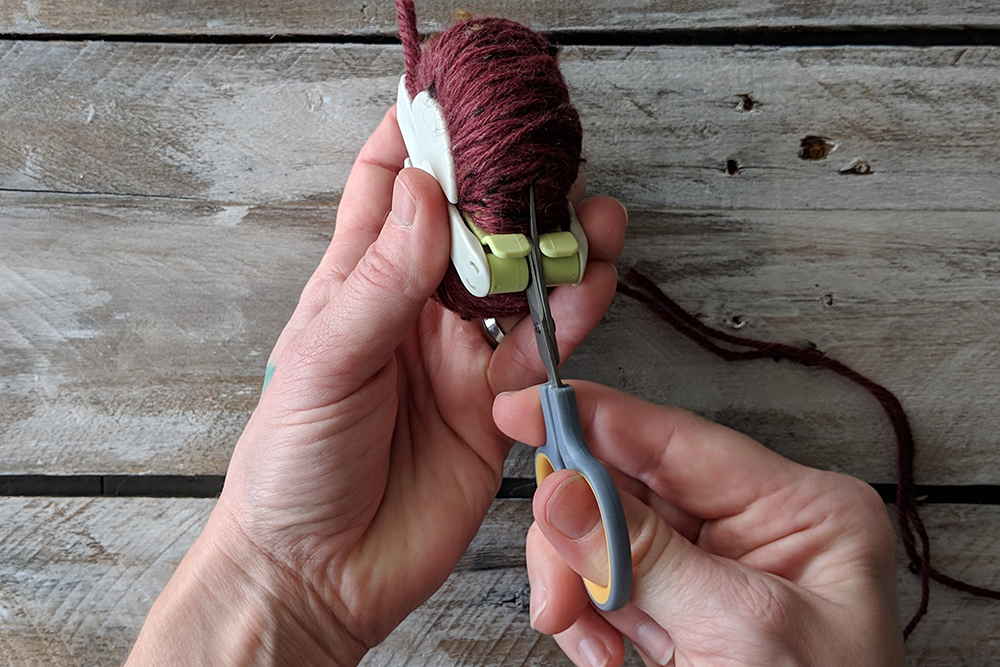
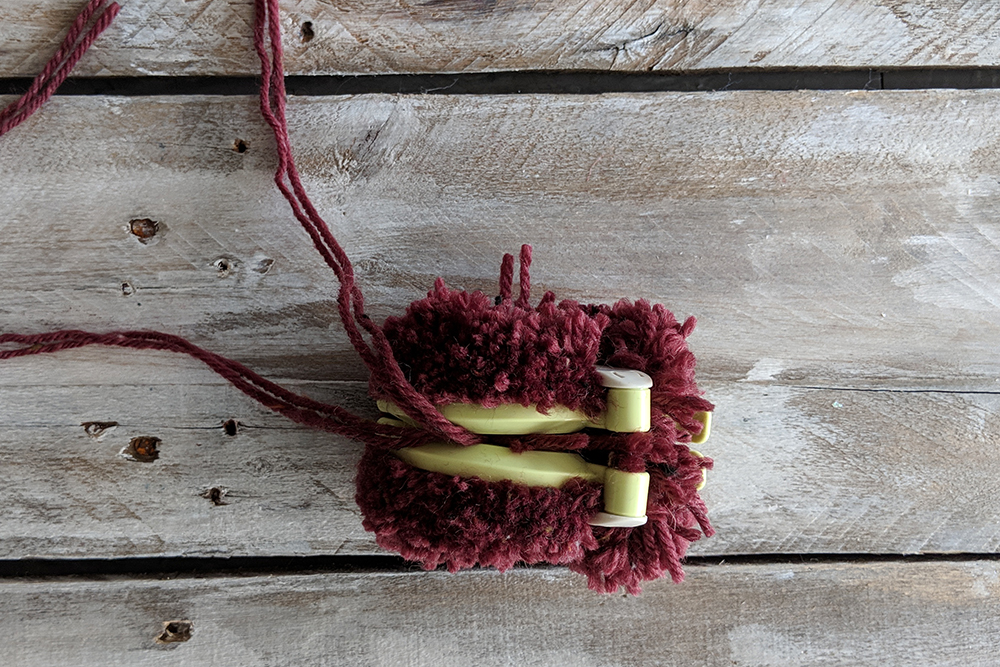
Take those 12″ strands that you set aside from earlier and tie them around the pom-pom, along the same groove where you cut apart the strands. I like to use two strands for this step because I like a full pom-pom, and there will be a lot of stress put on this tie yarn. If the yarn you’re using to make your pom-pom breaks easily, use a different yarn for the tie like linen, cotton, or acrylic. Two strands of my working yarn (Deluxe Worsted Tweed Superwash) were plenty strong enough in this case.
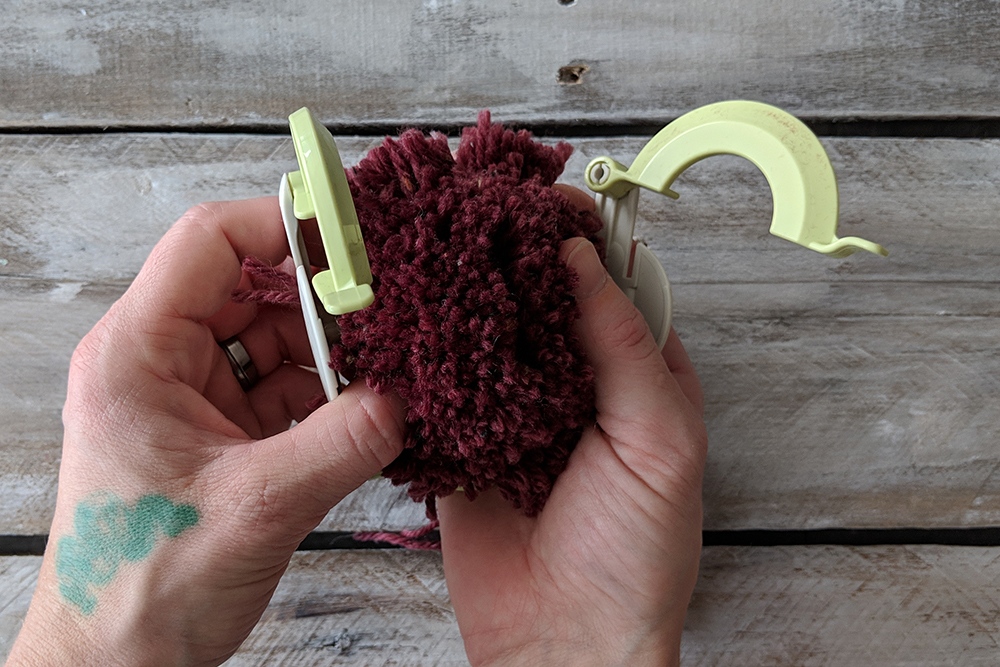
It is now safe to remove the pom-pom maker from the pom-pom.
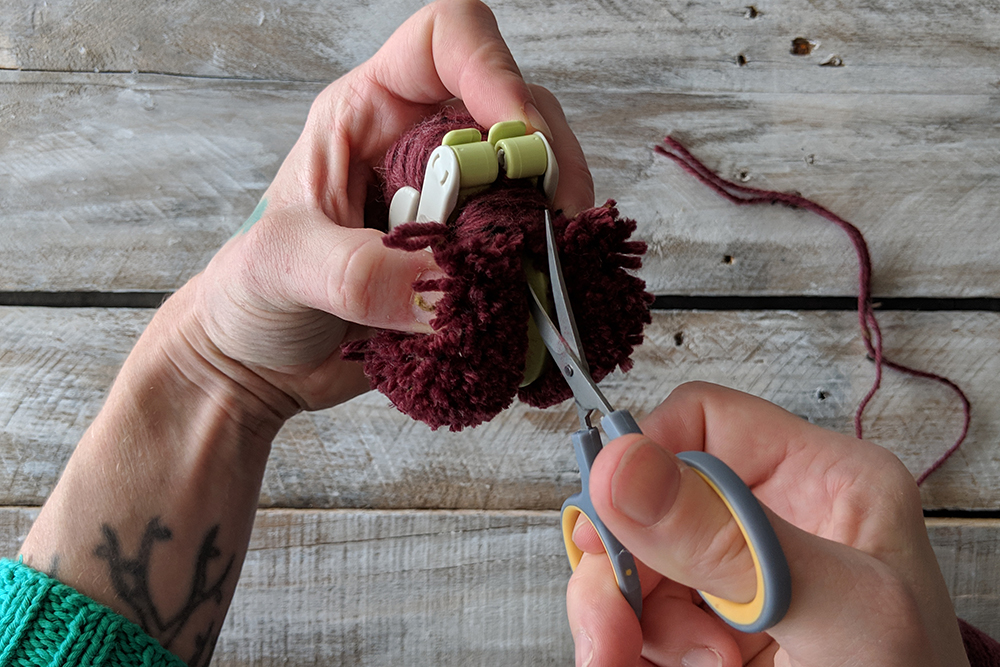
It’s looking pretty good, but needs a little haircut to even out the edges.
Voila. Pom-pom!
Remember, you can find Series 2 of the 12 Days of Winter Kit patterns on Ravelry.
This is part 1 in a 12 part series highlighting designs from our 12 Days of Winter, Series 2 Edition.
We can hardly believe it’s already November. Knitting season is in full swing. Our needles and hooks are full of warm and woolly goodness. We’re preparing for the holidays – working tirelessly on special projects for friends and family. Here at Universal Yarn, we’ve also been working hard to create the second annual installment of a beautiful collection of wintry kits to welcome the season. So, at long last, we’re able to reveal the first of twelve special kits. Say hello to the 12 Days of Winter 2018 Collection!
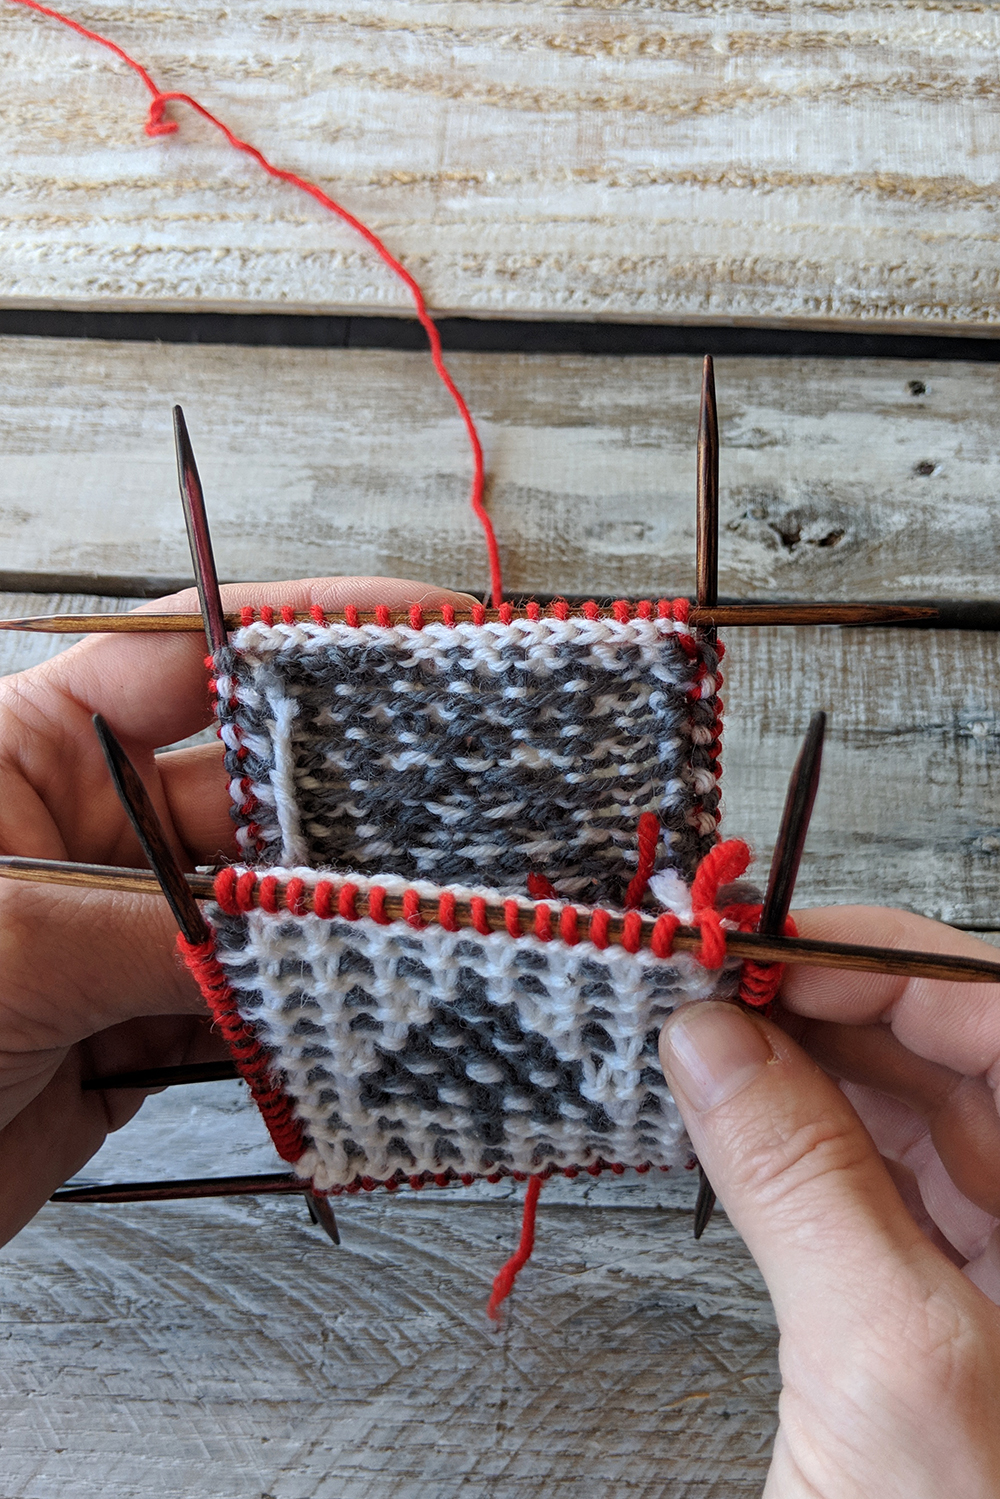
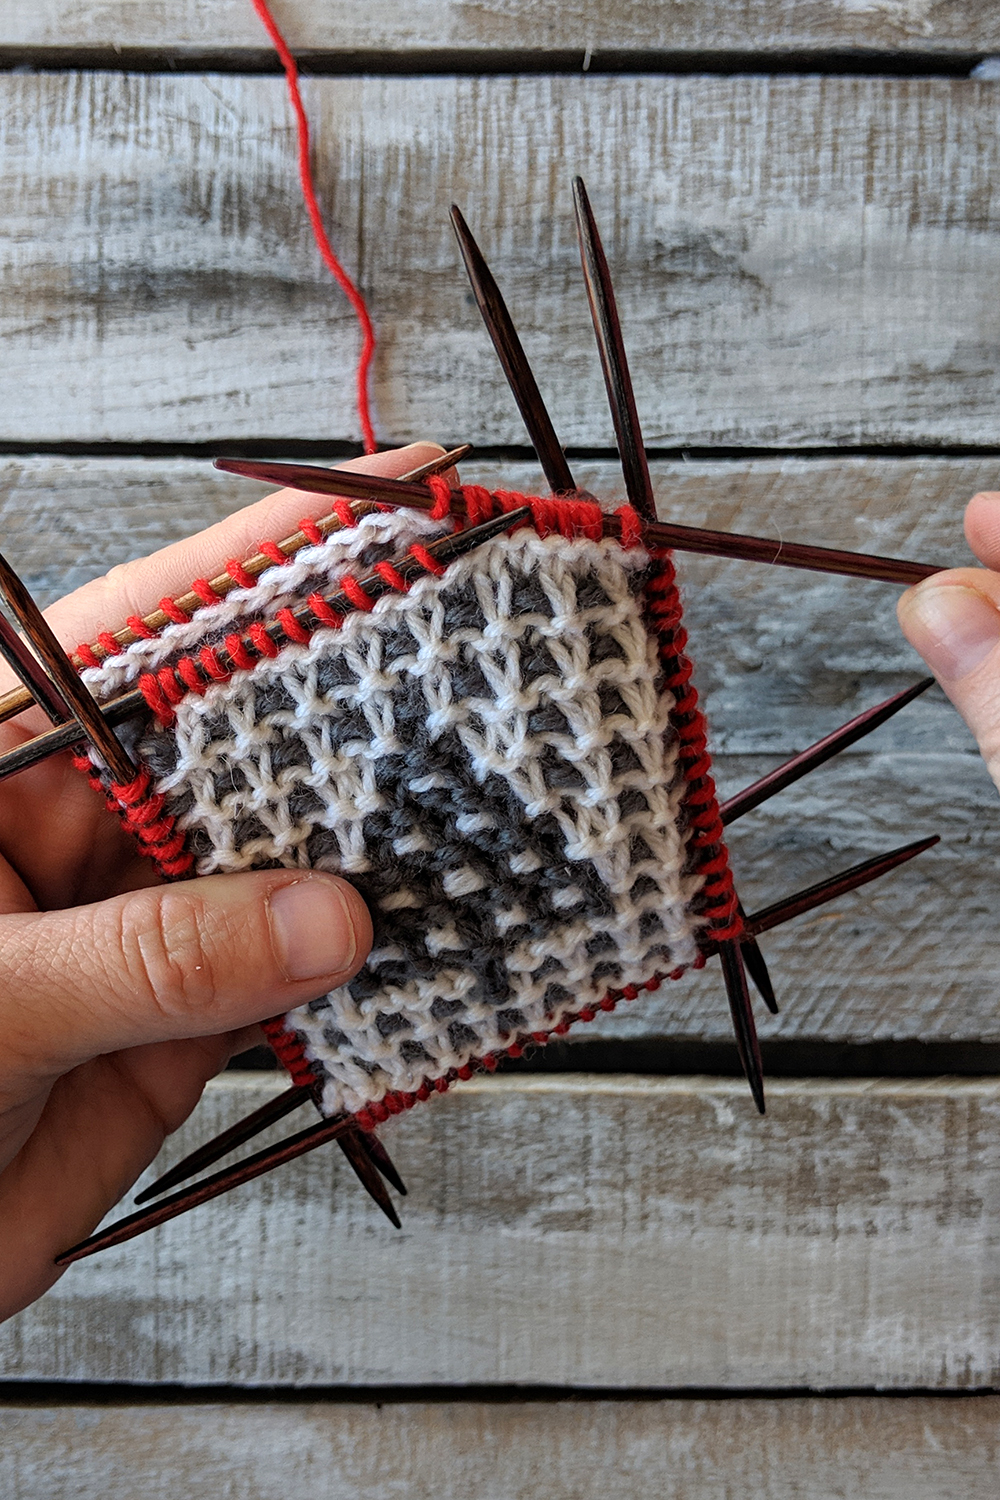
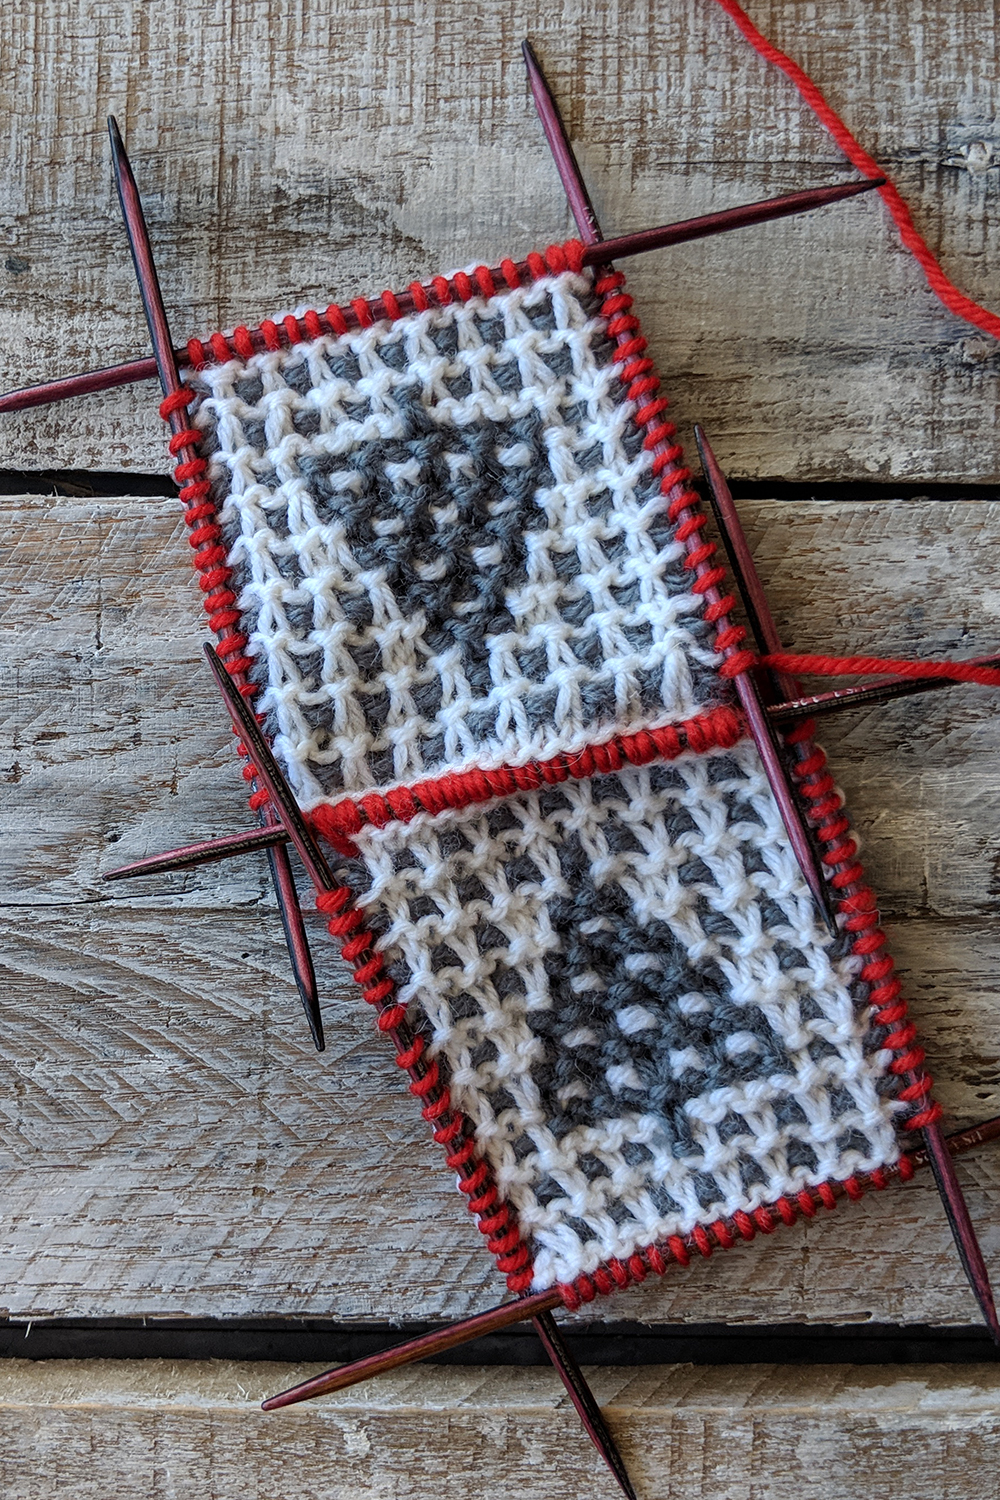
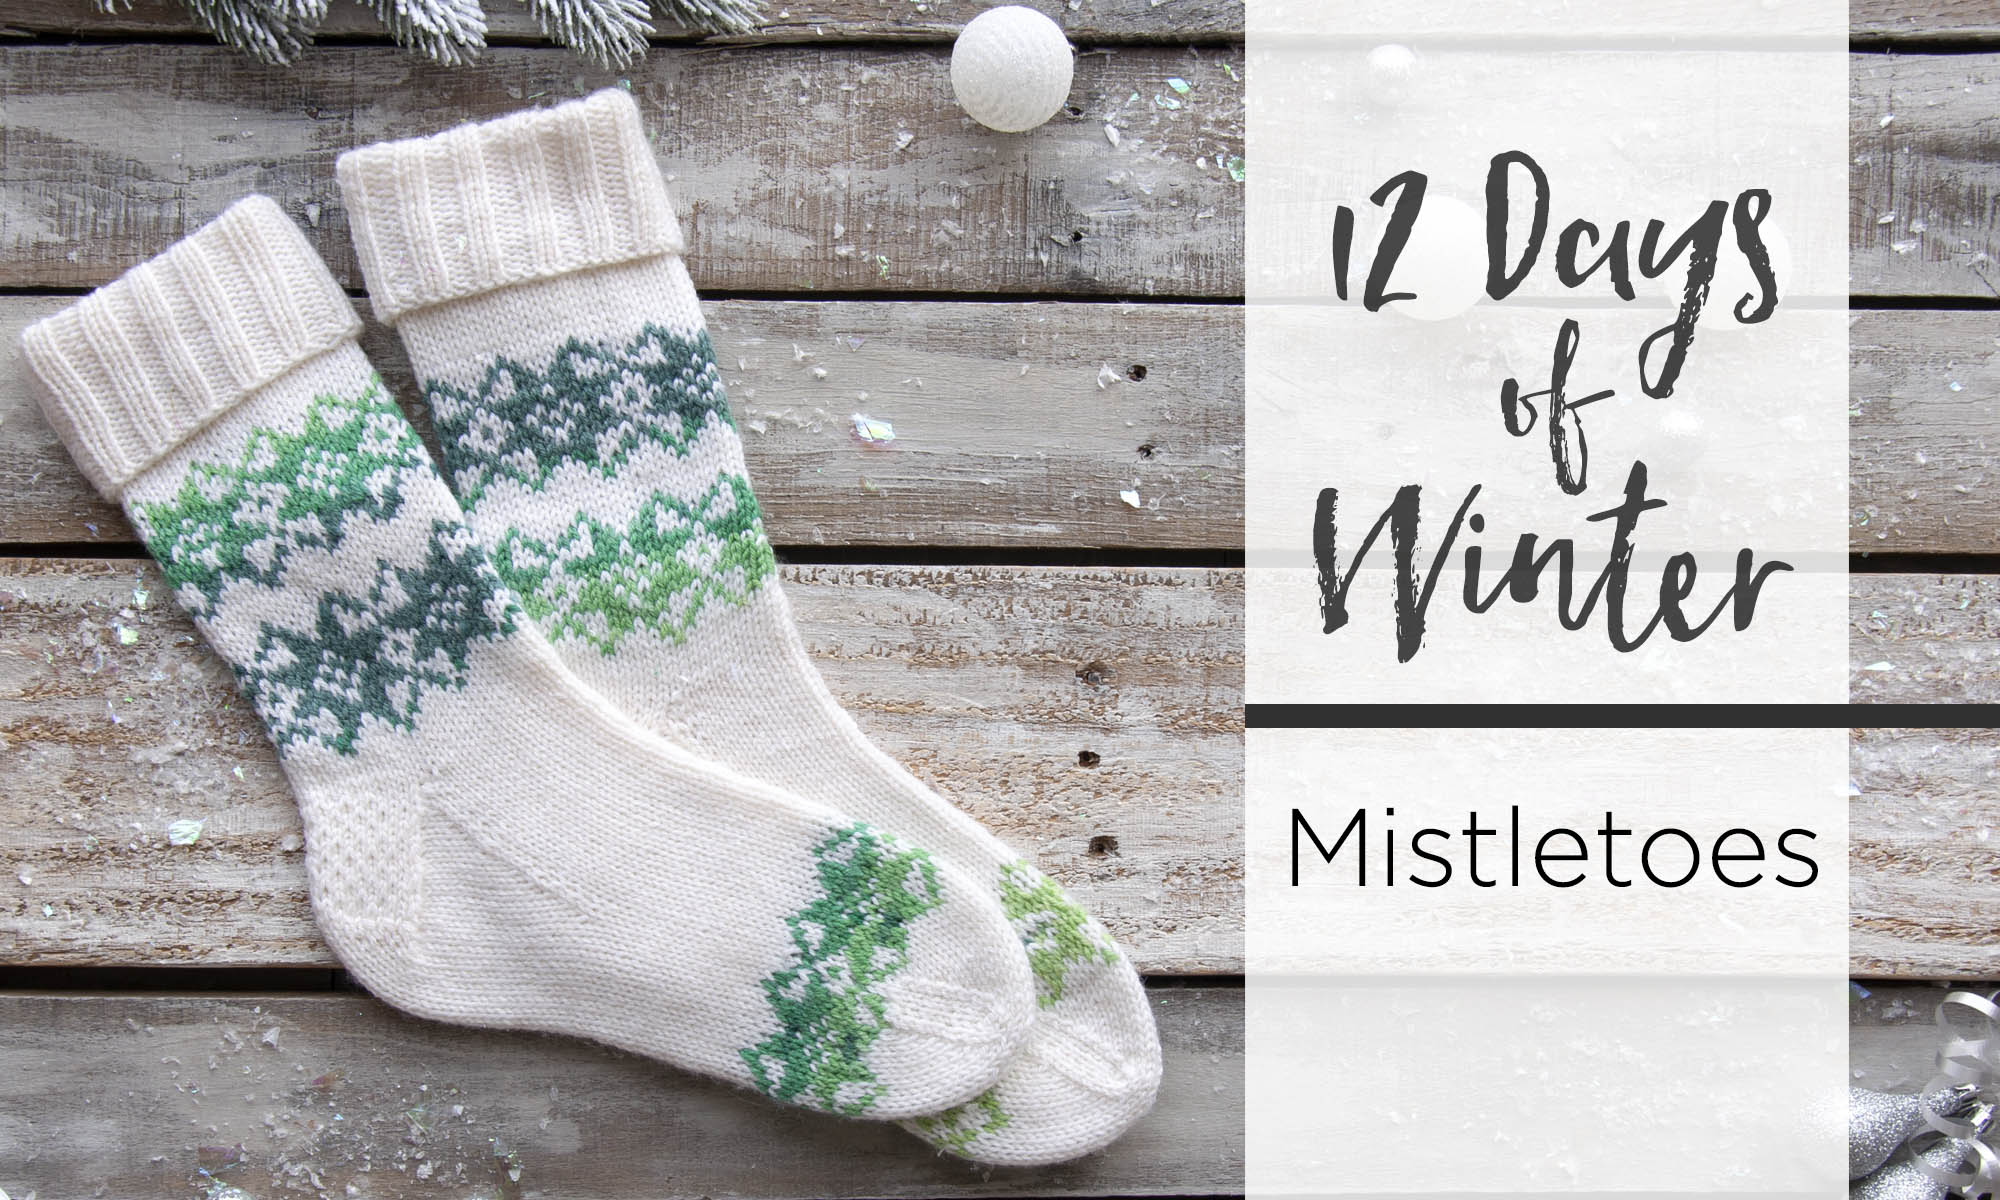
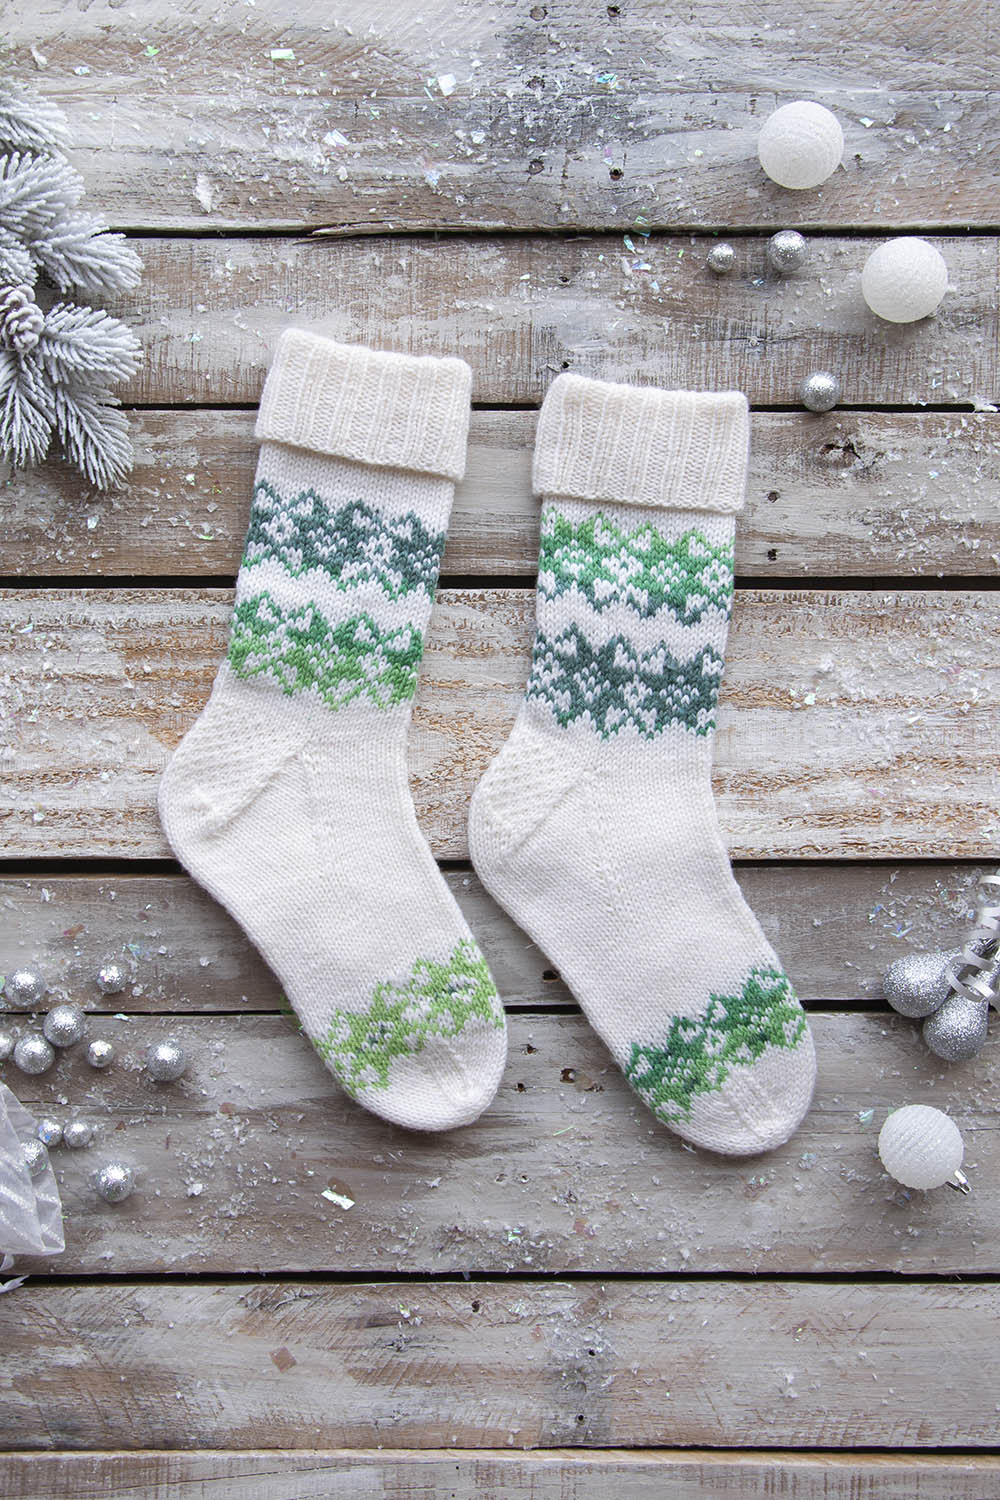
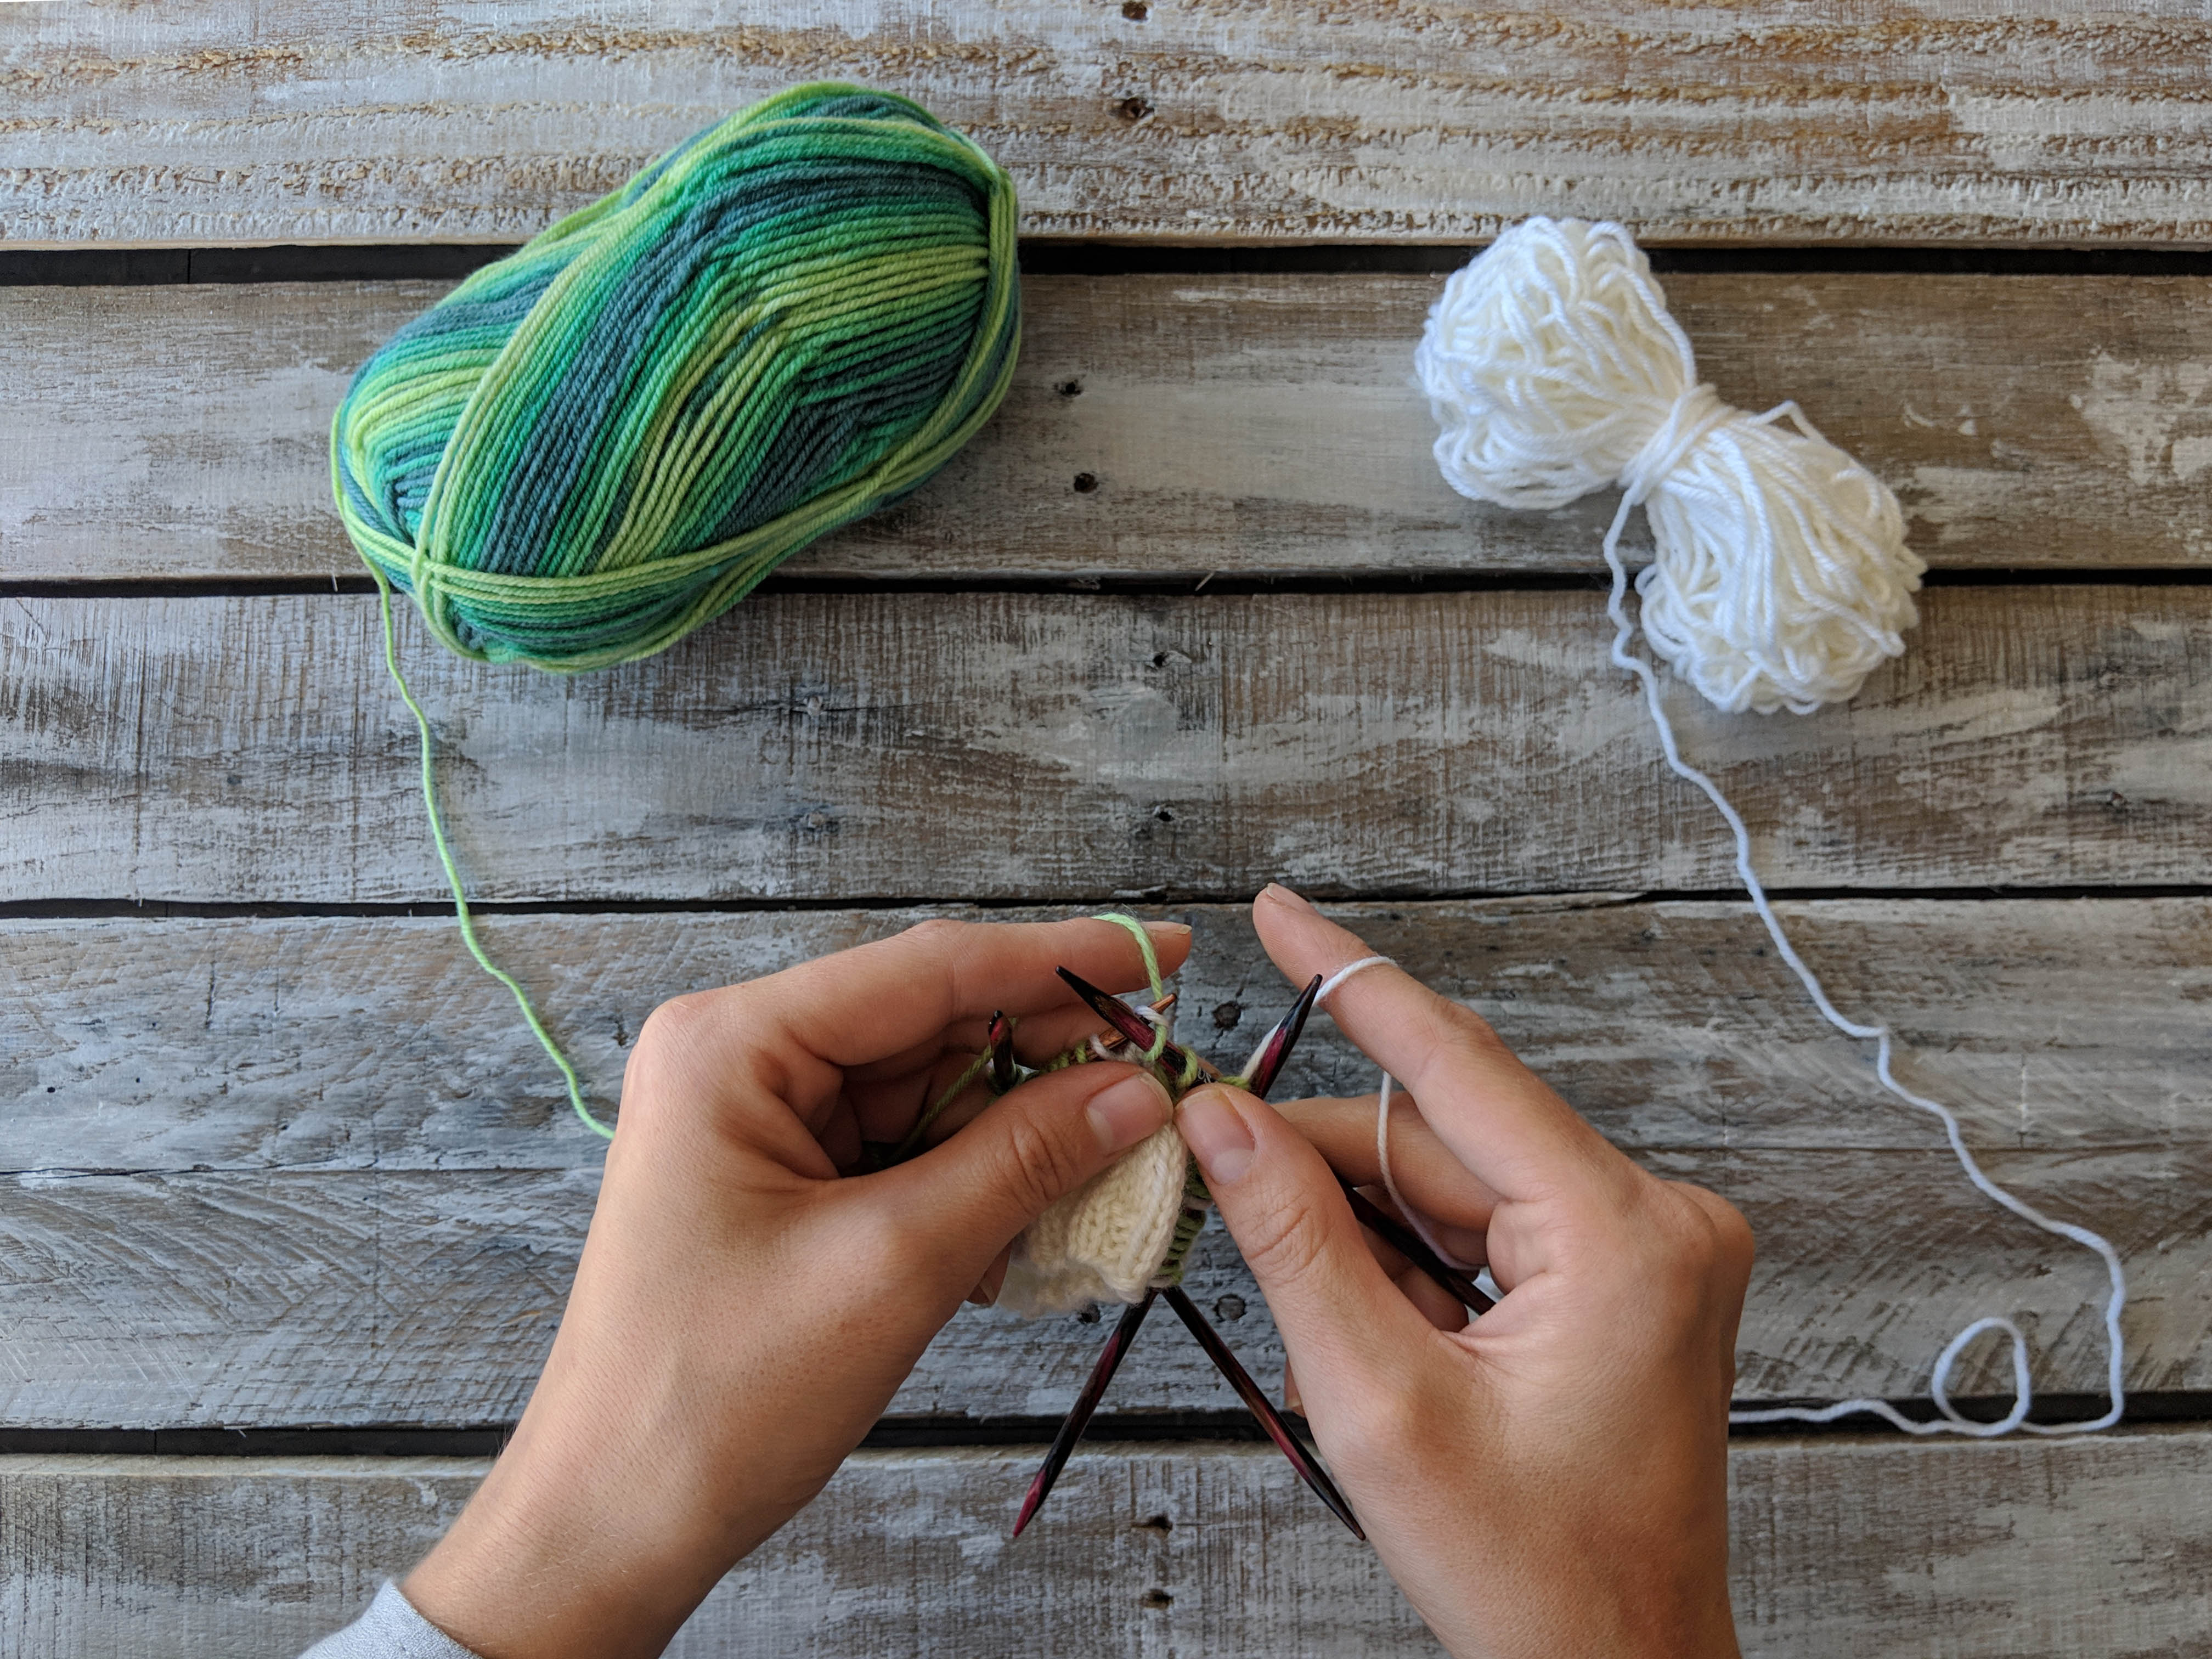
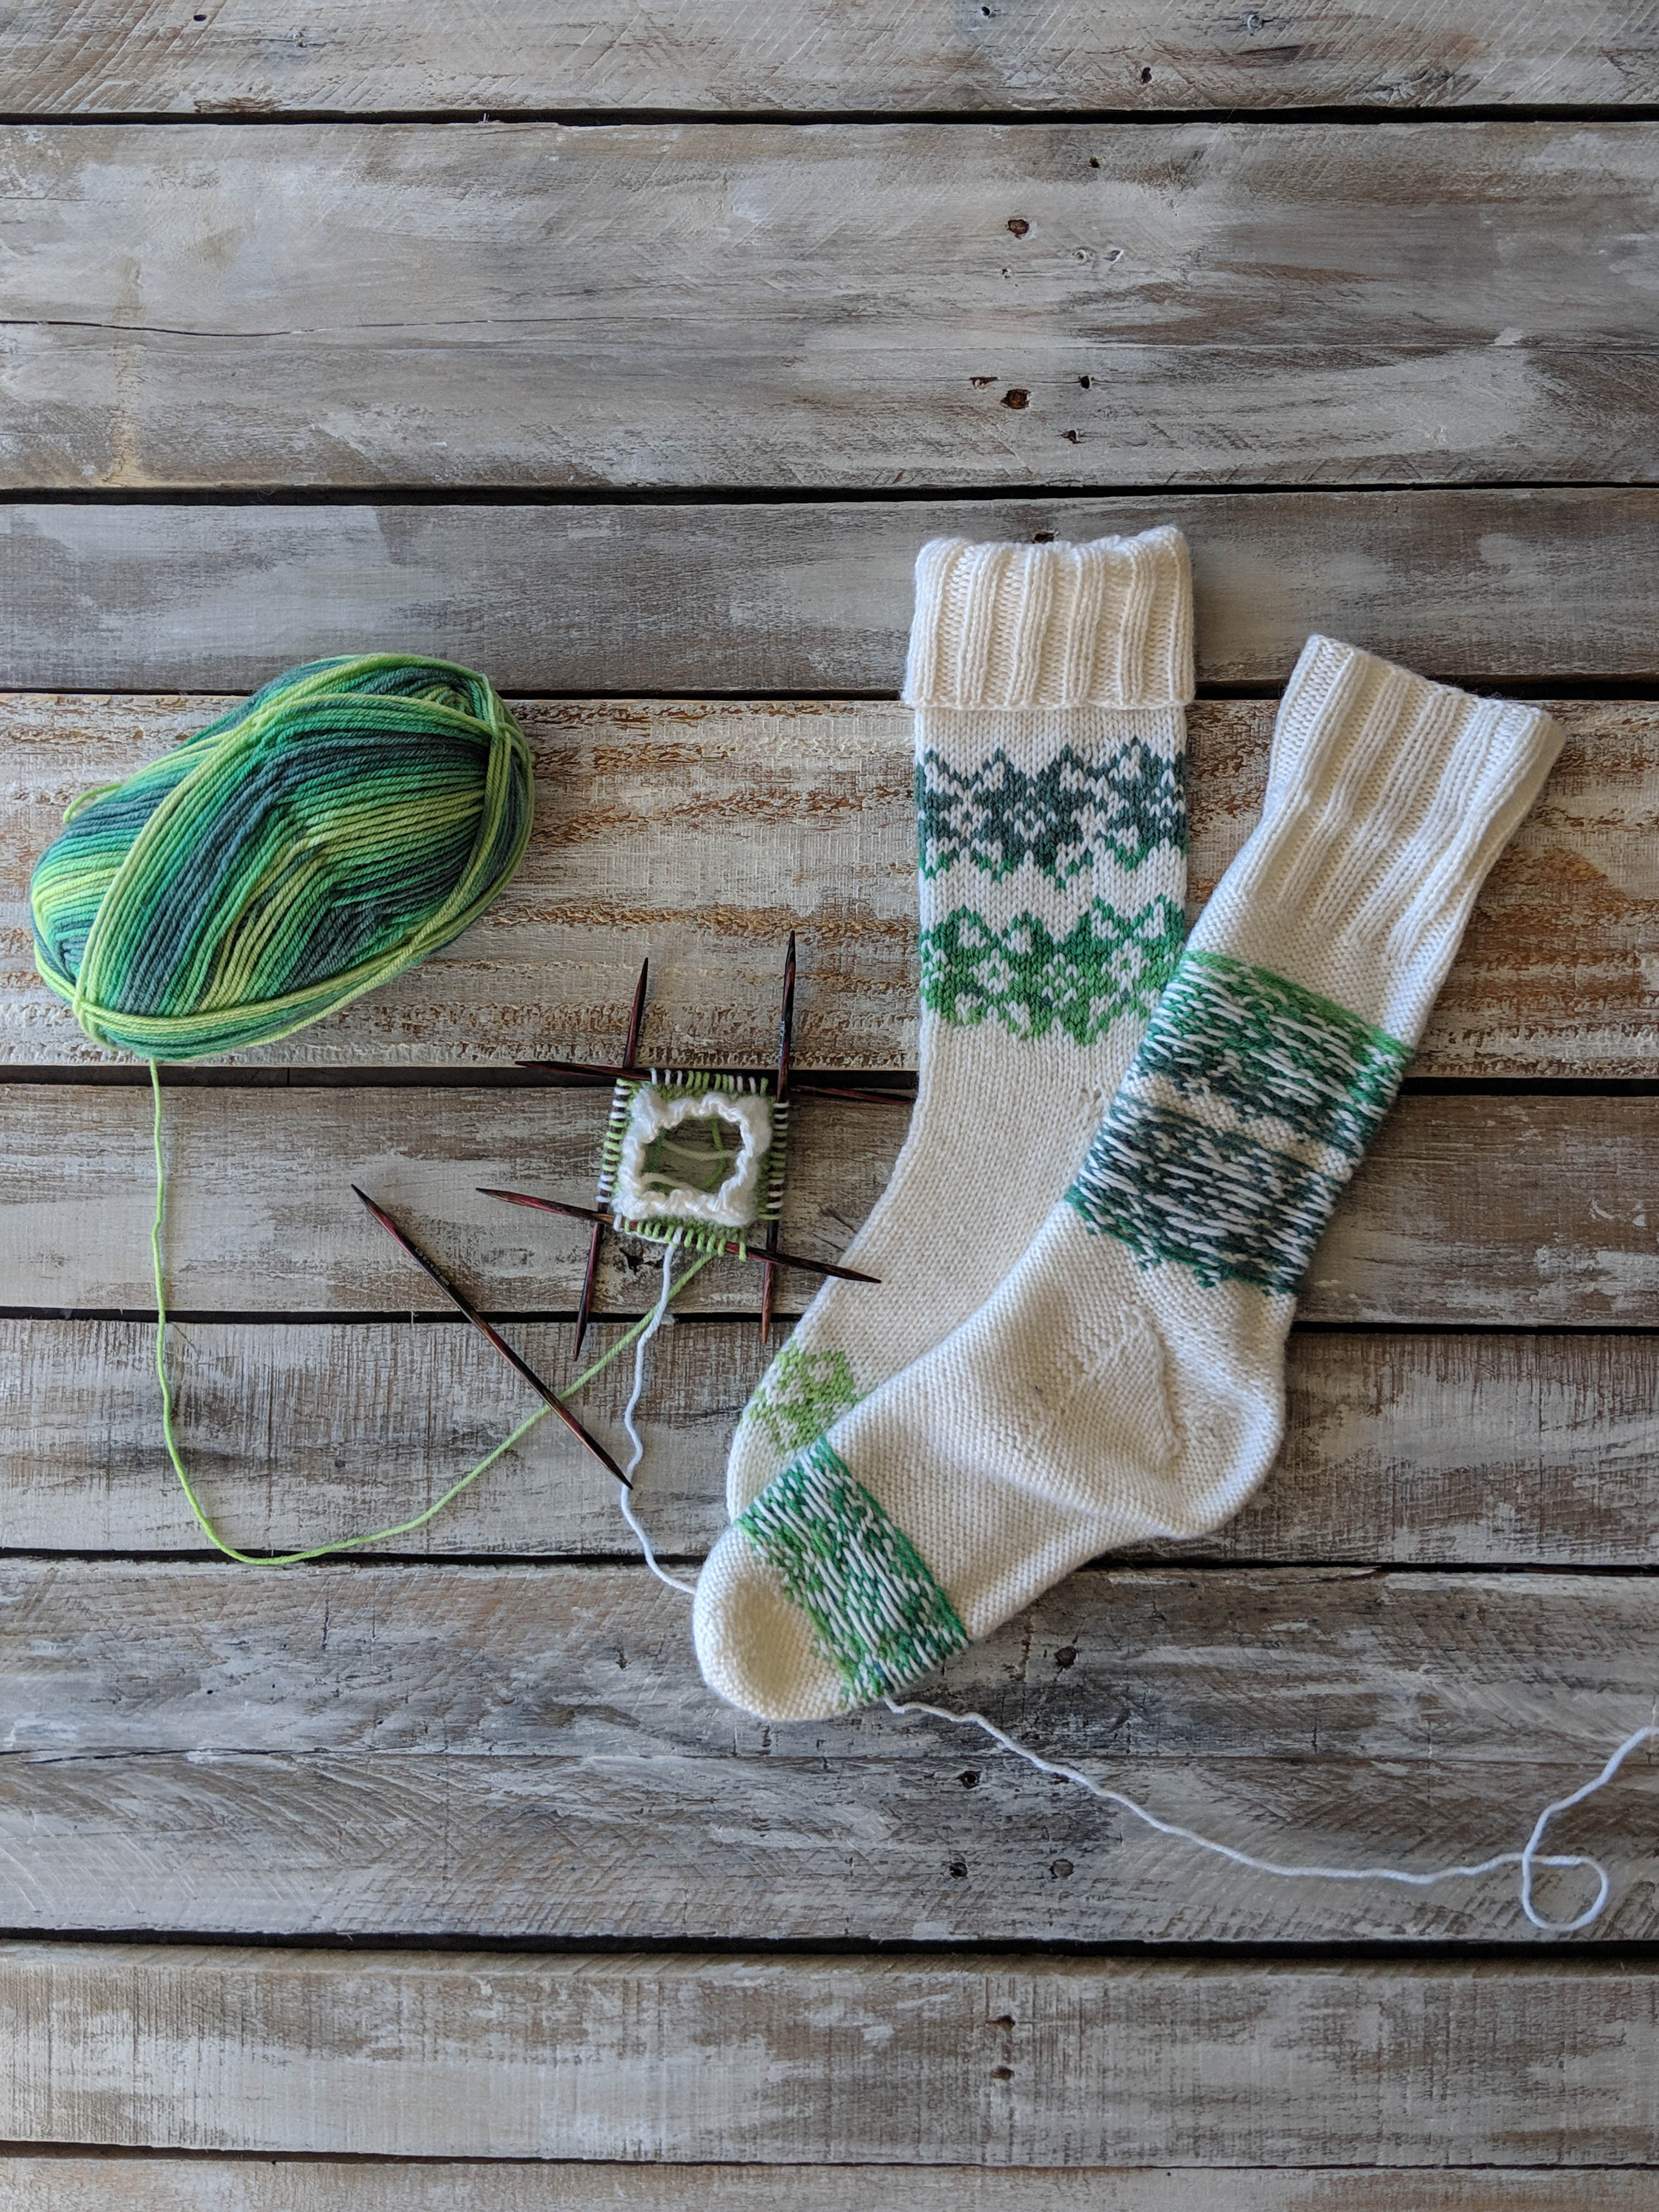
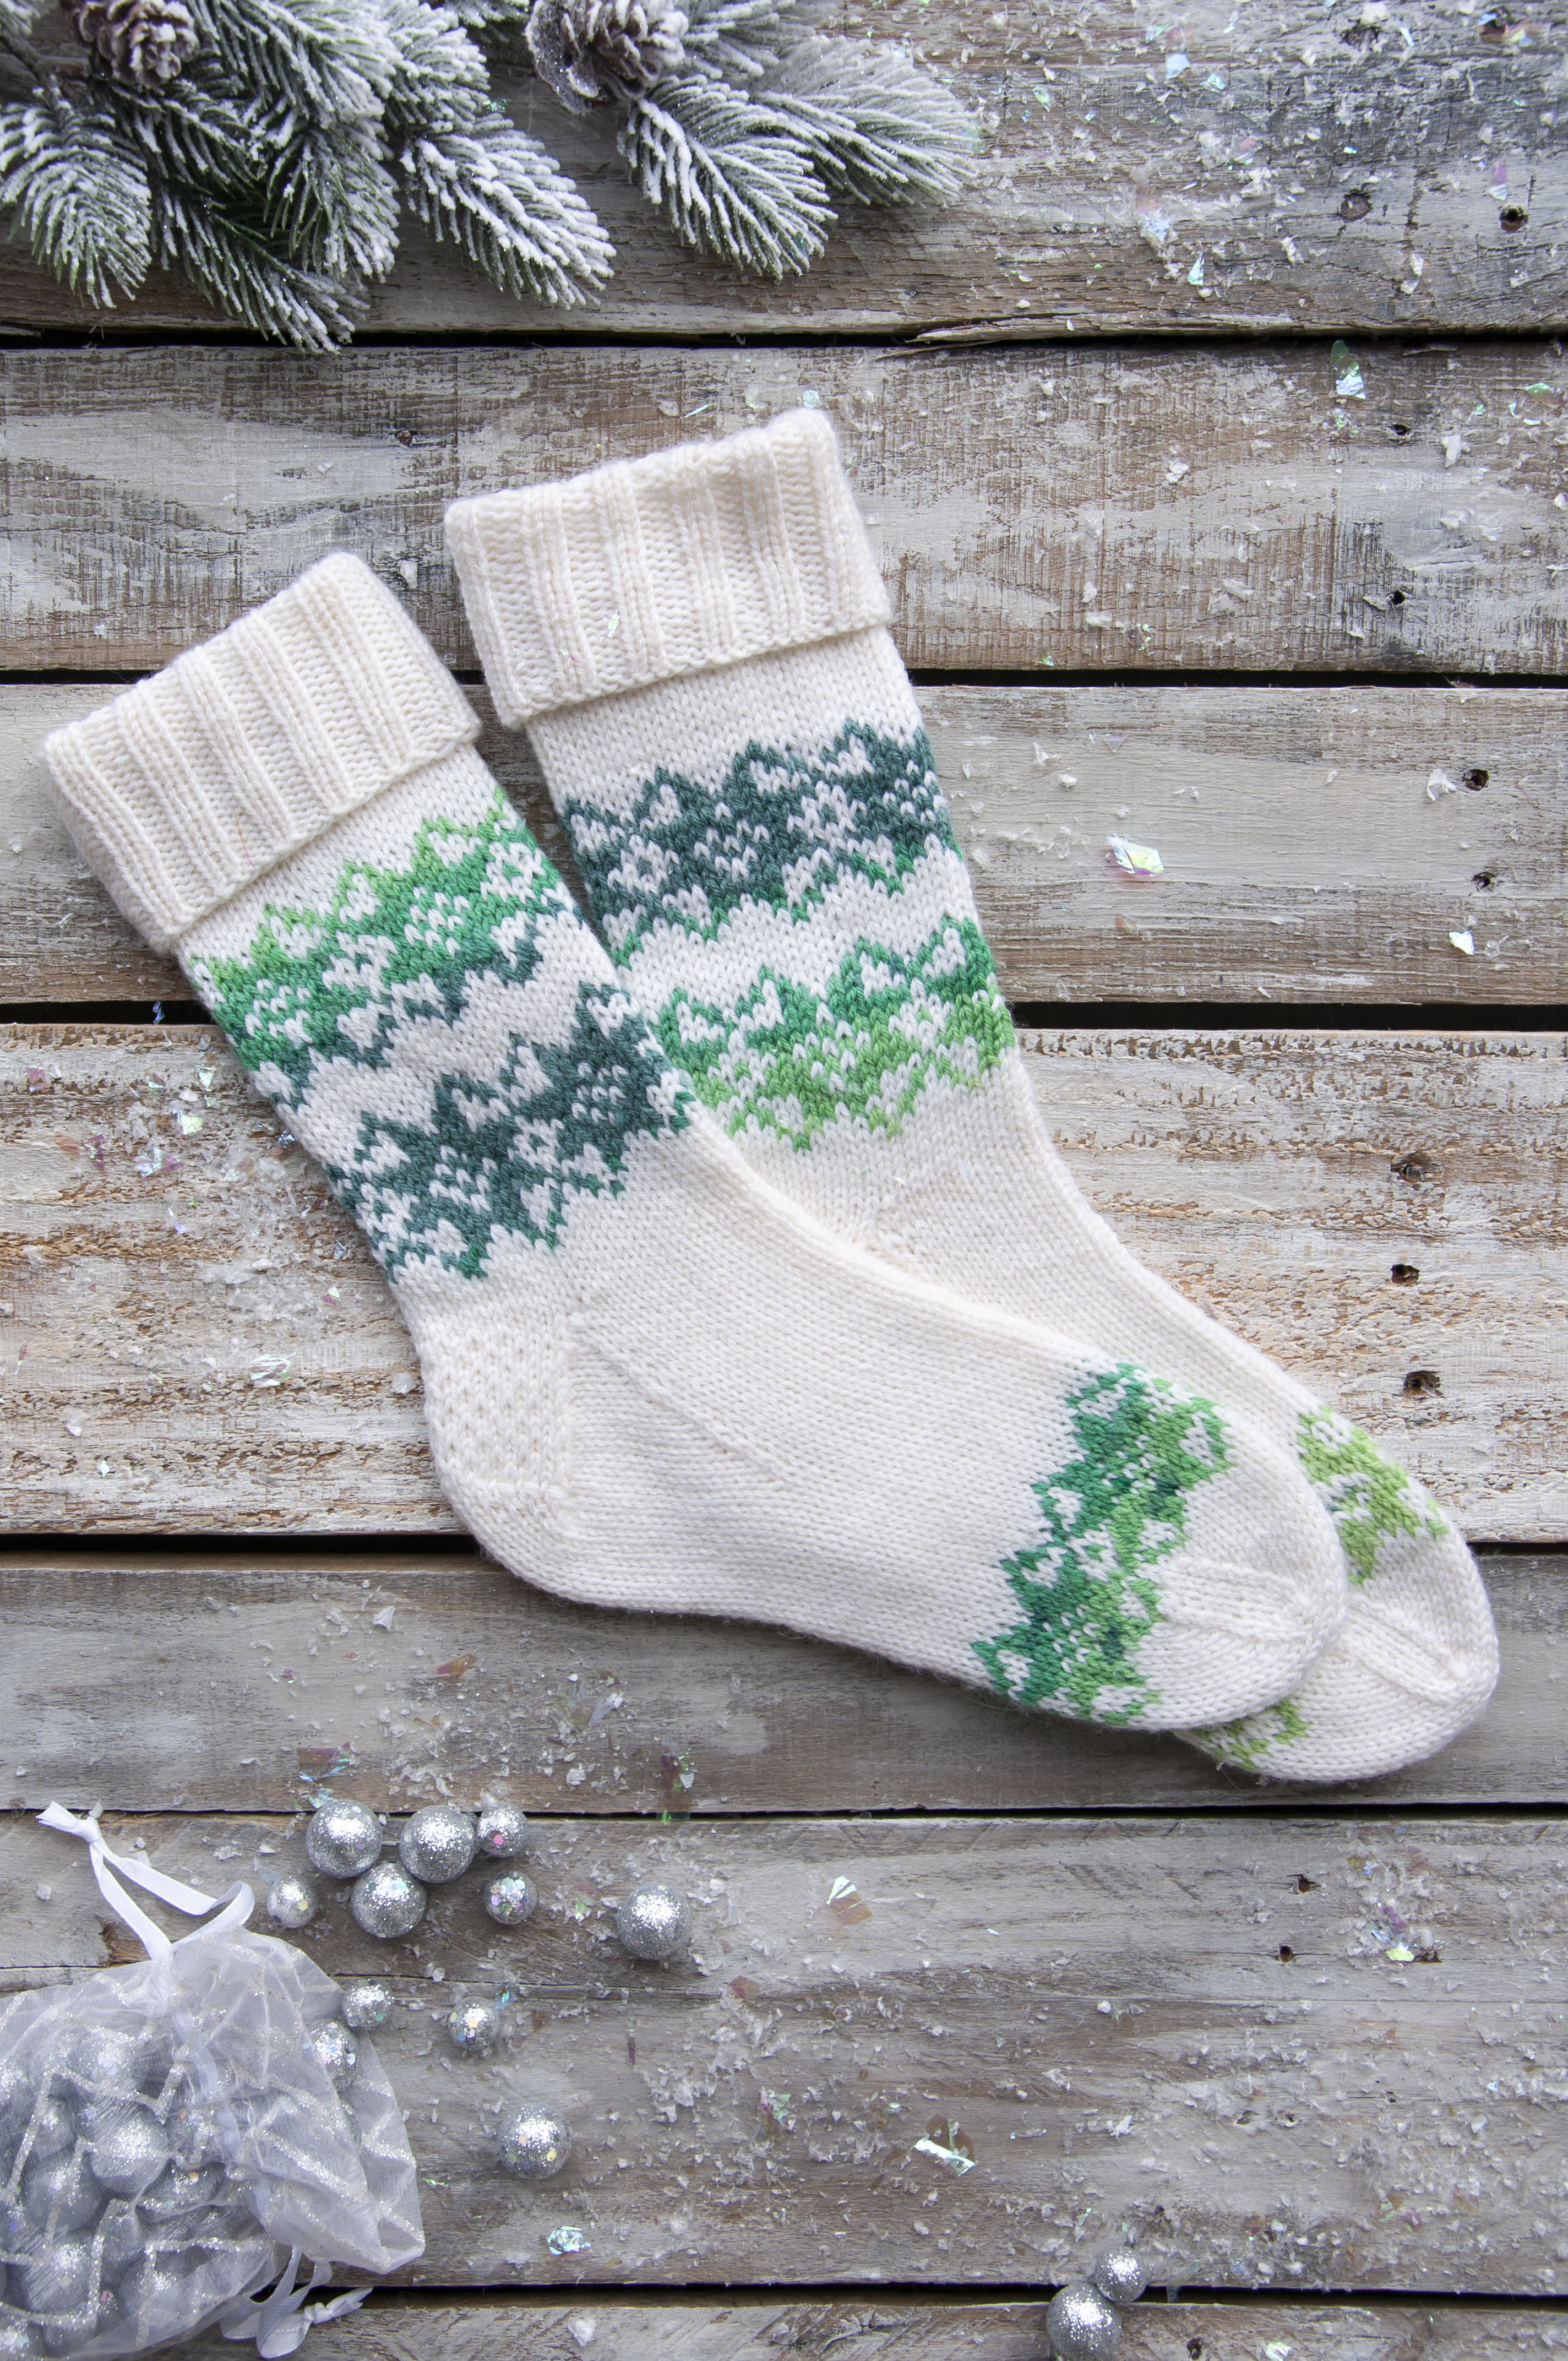
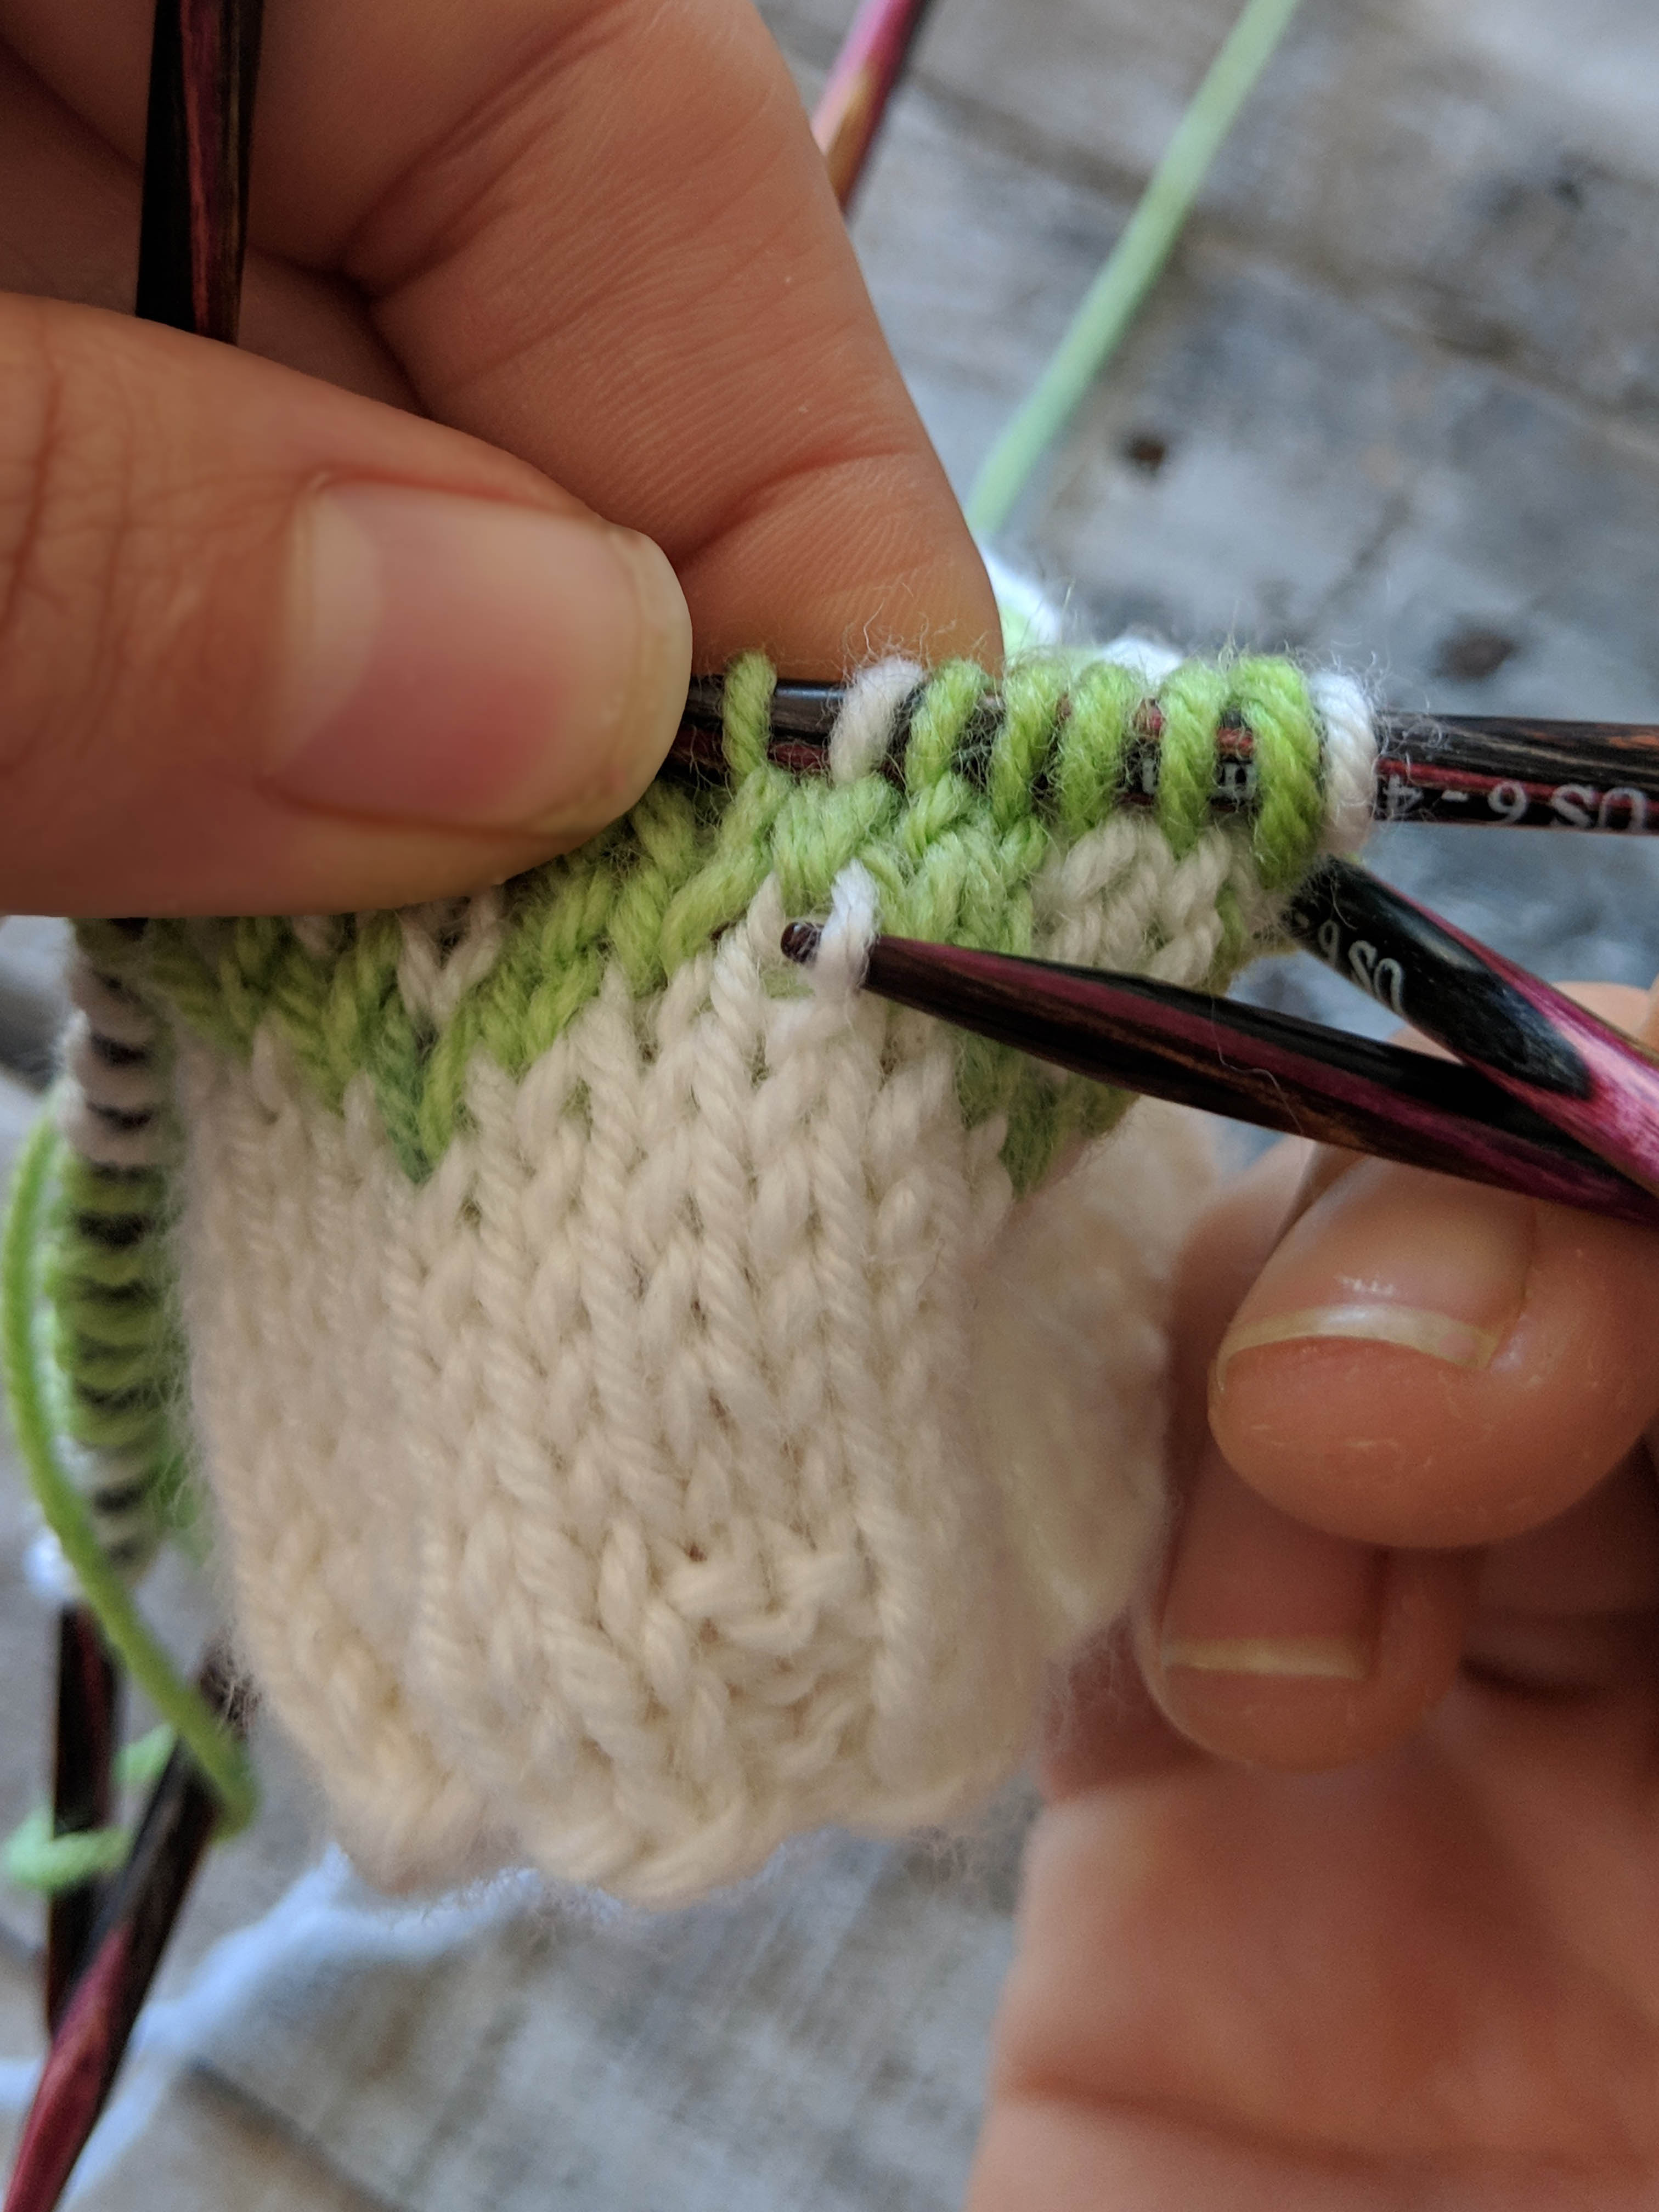
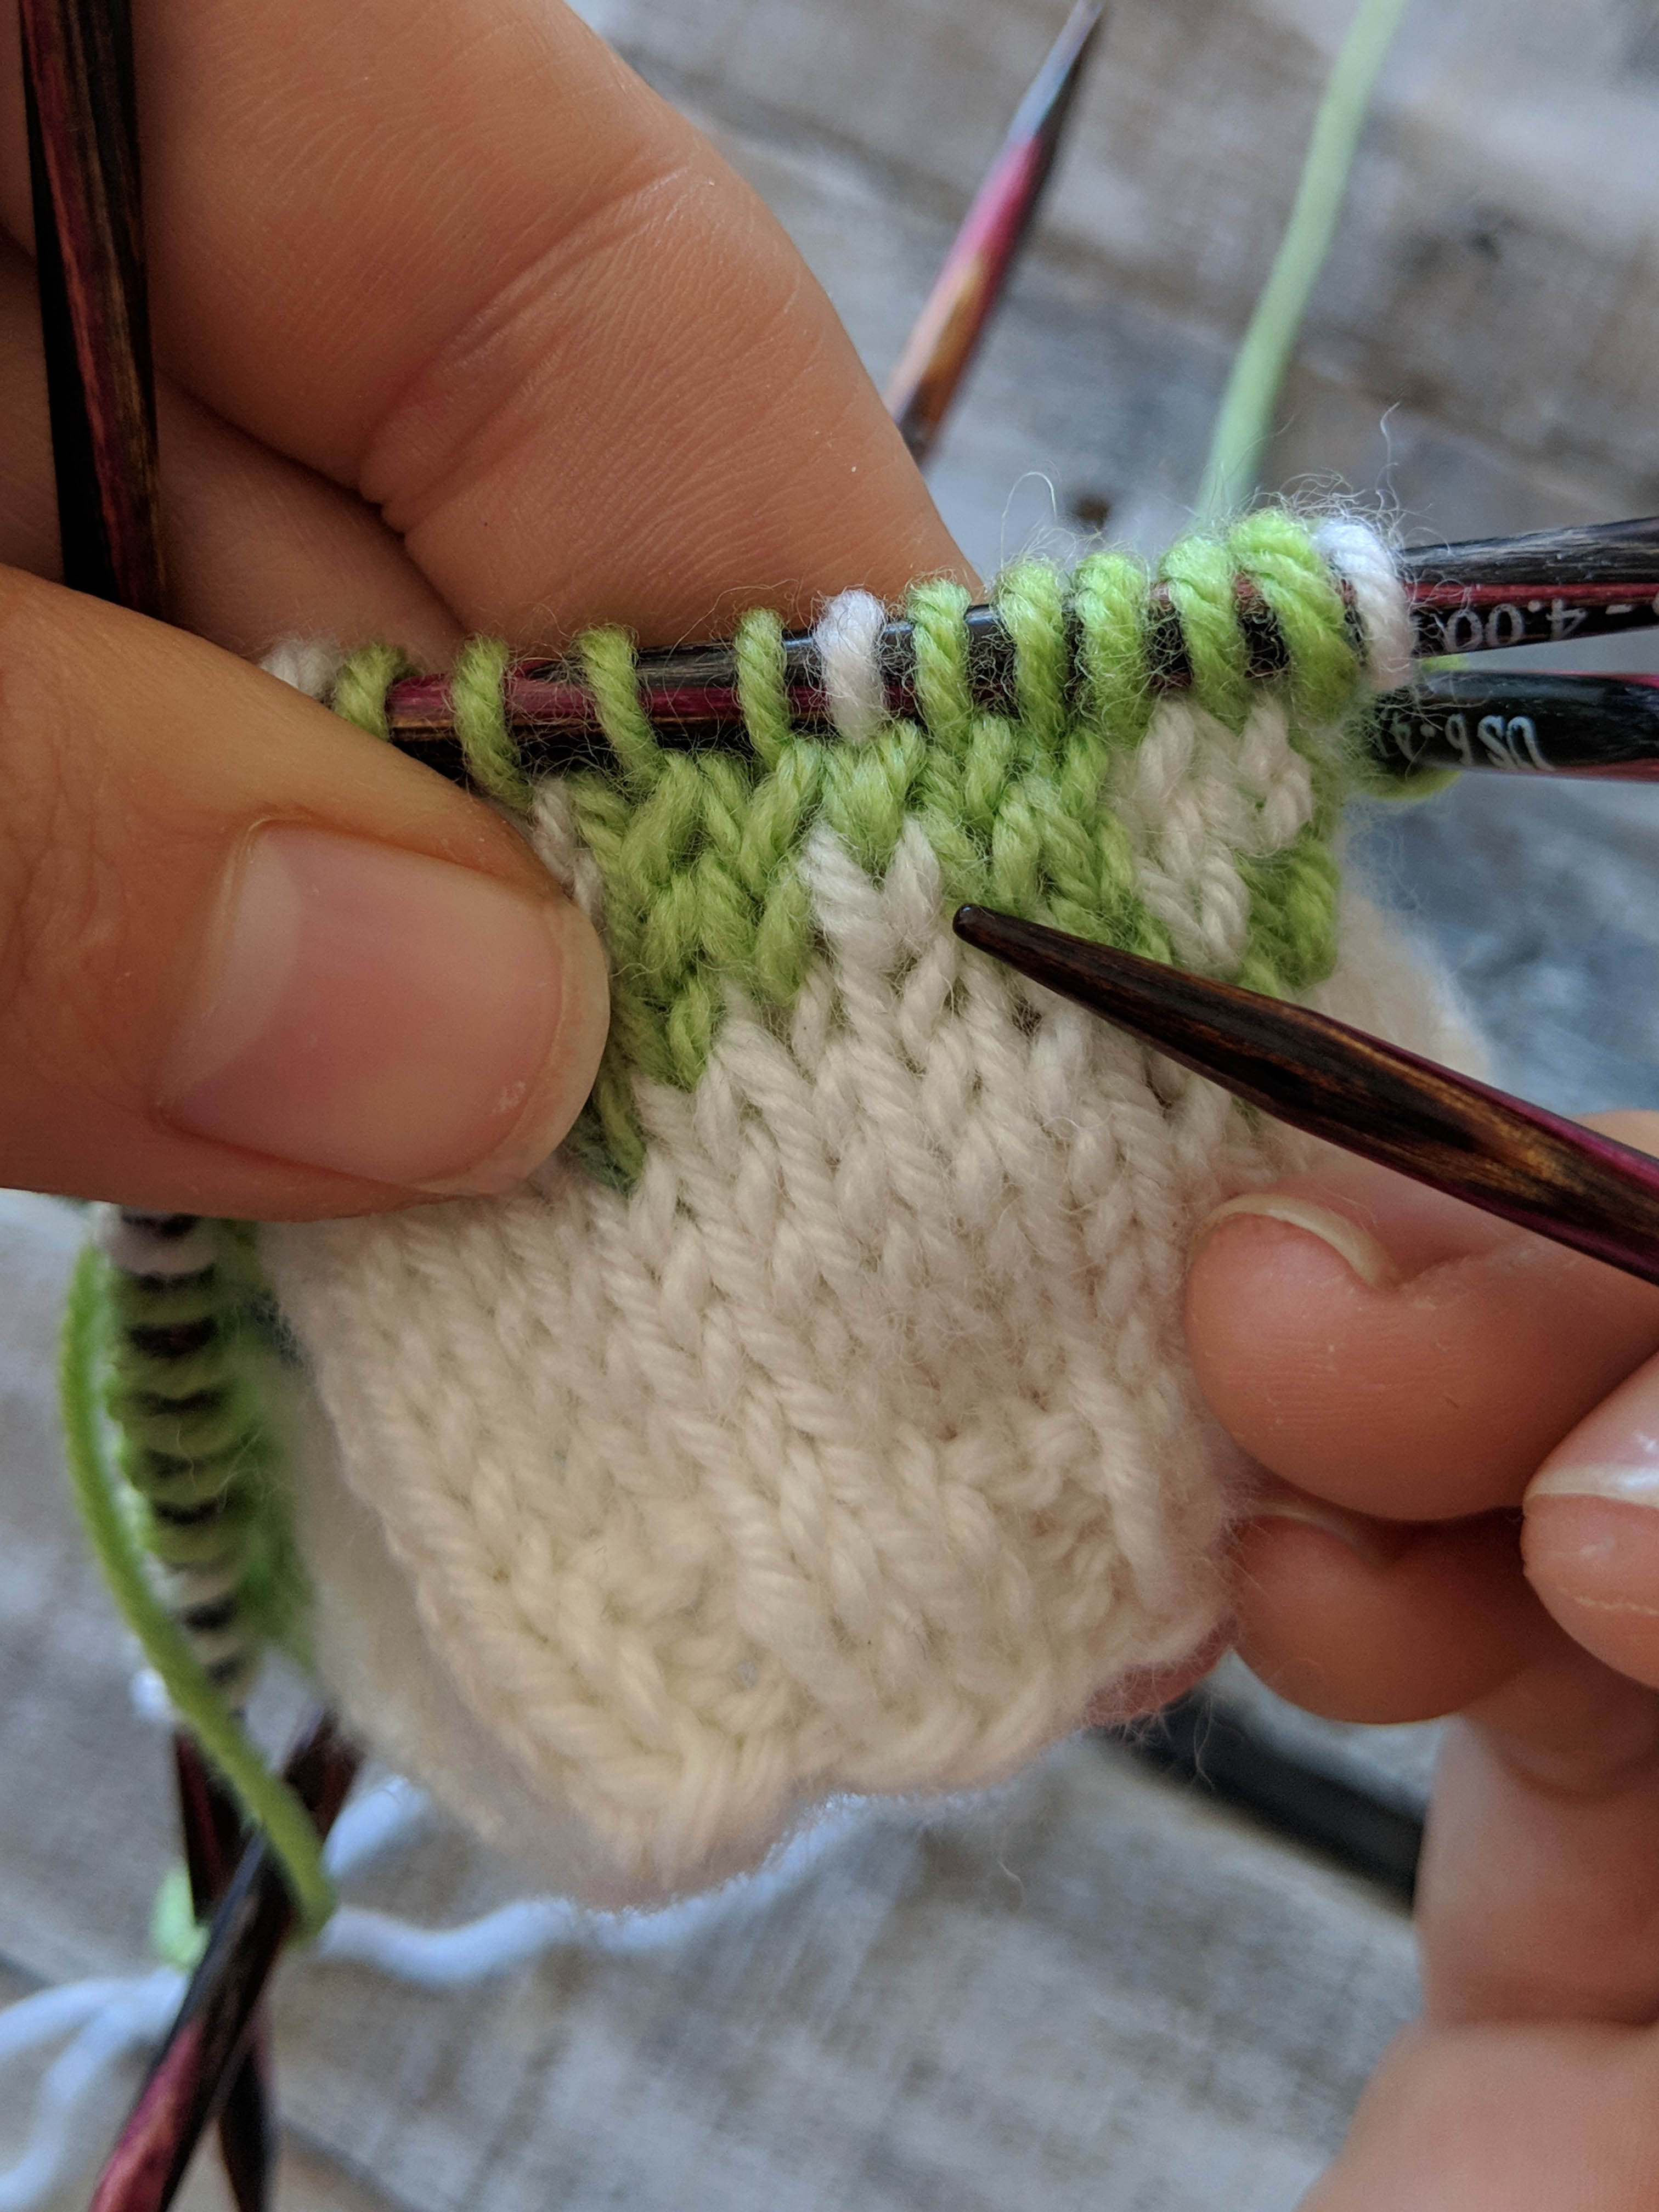
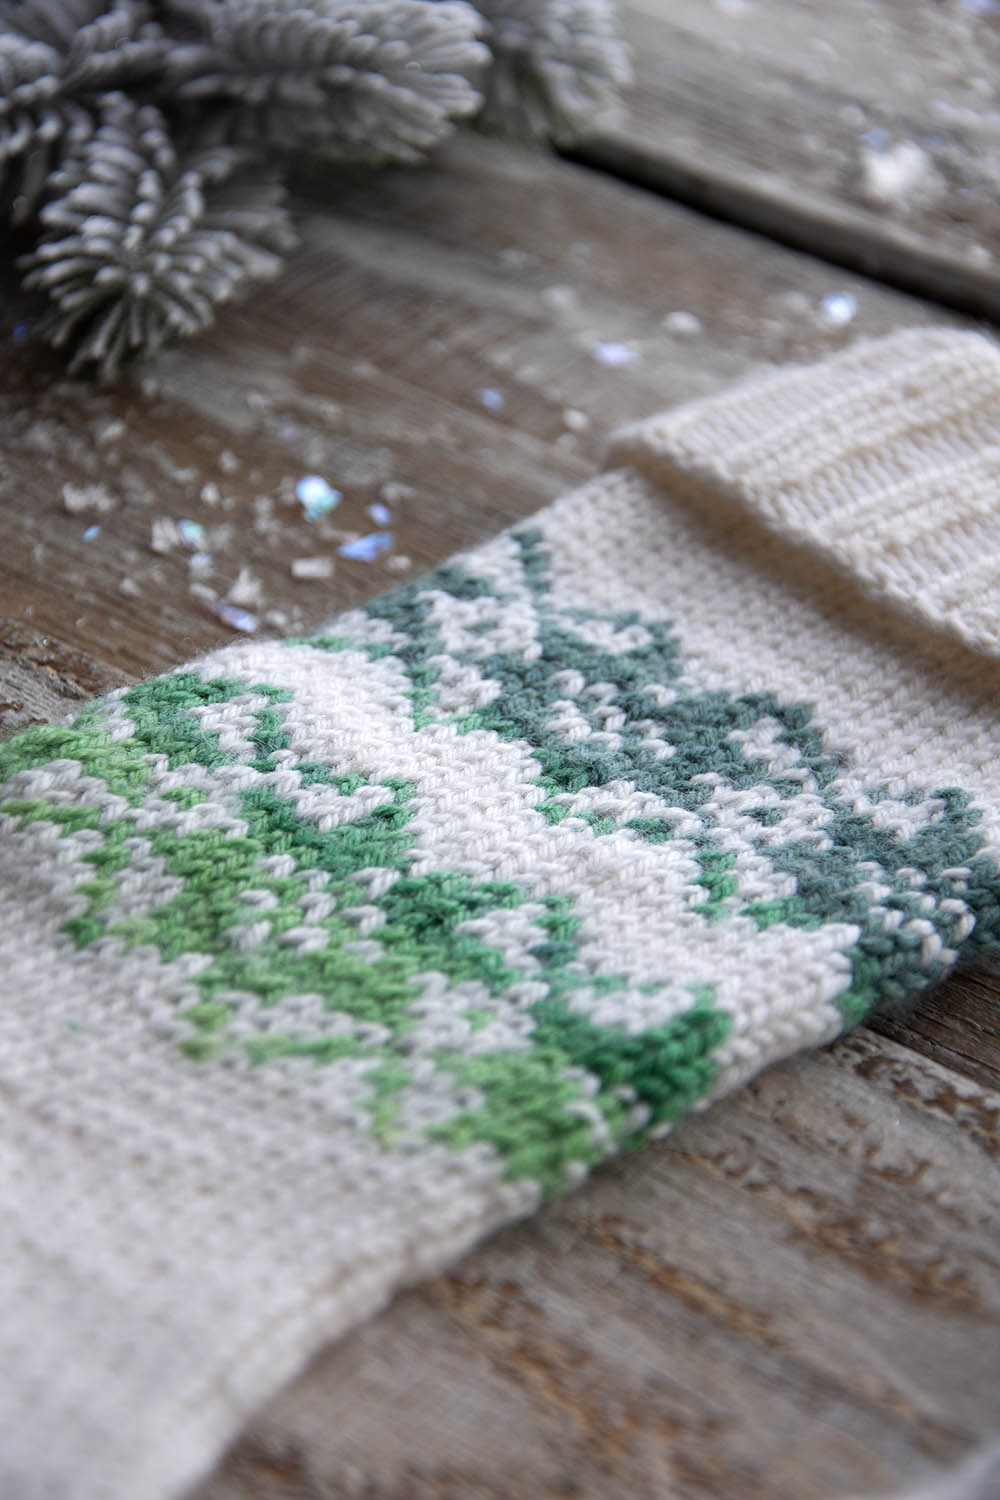
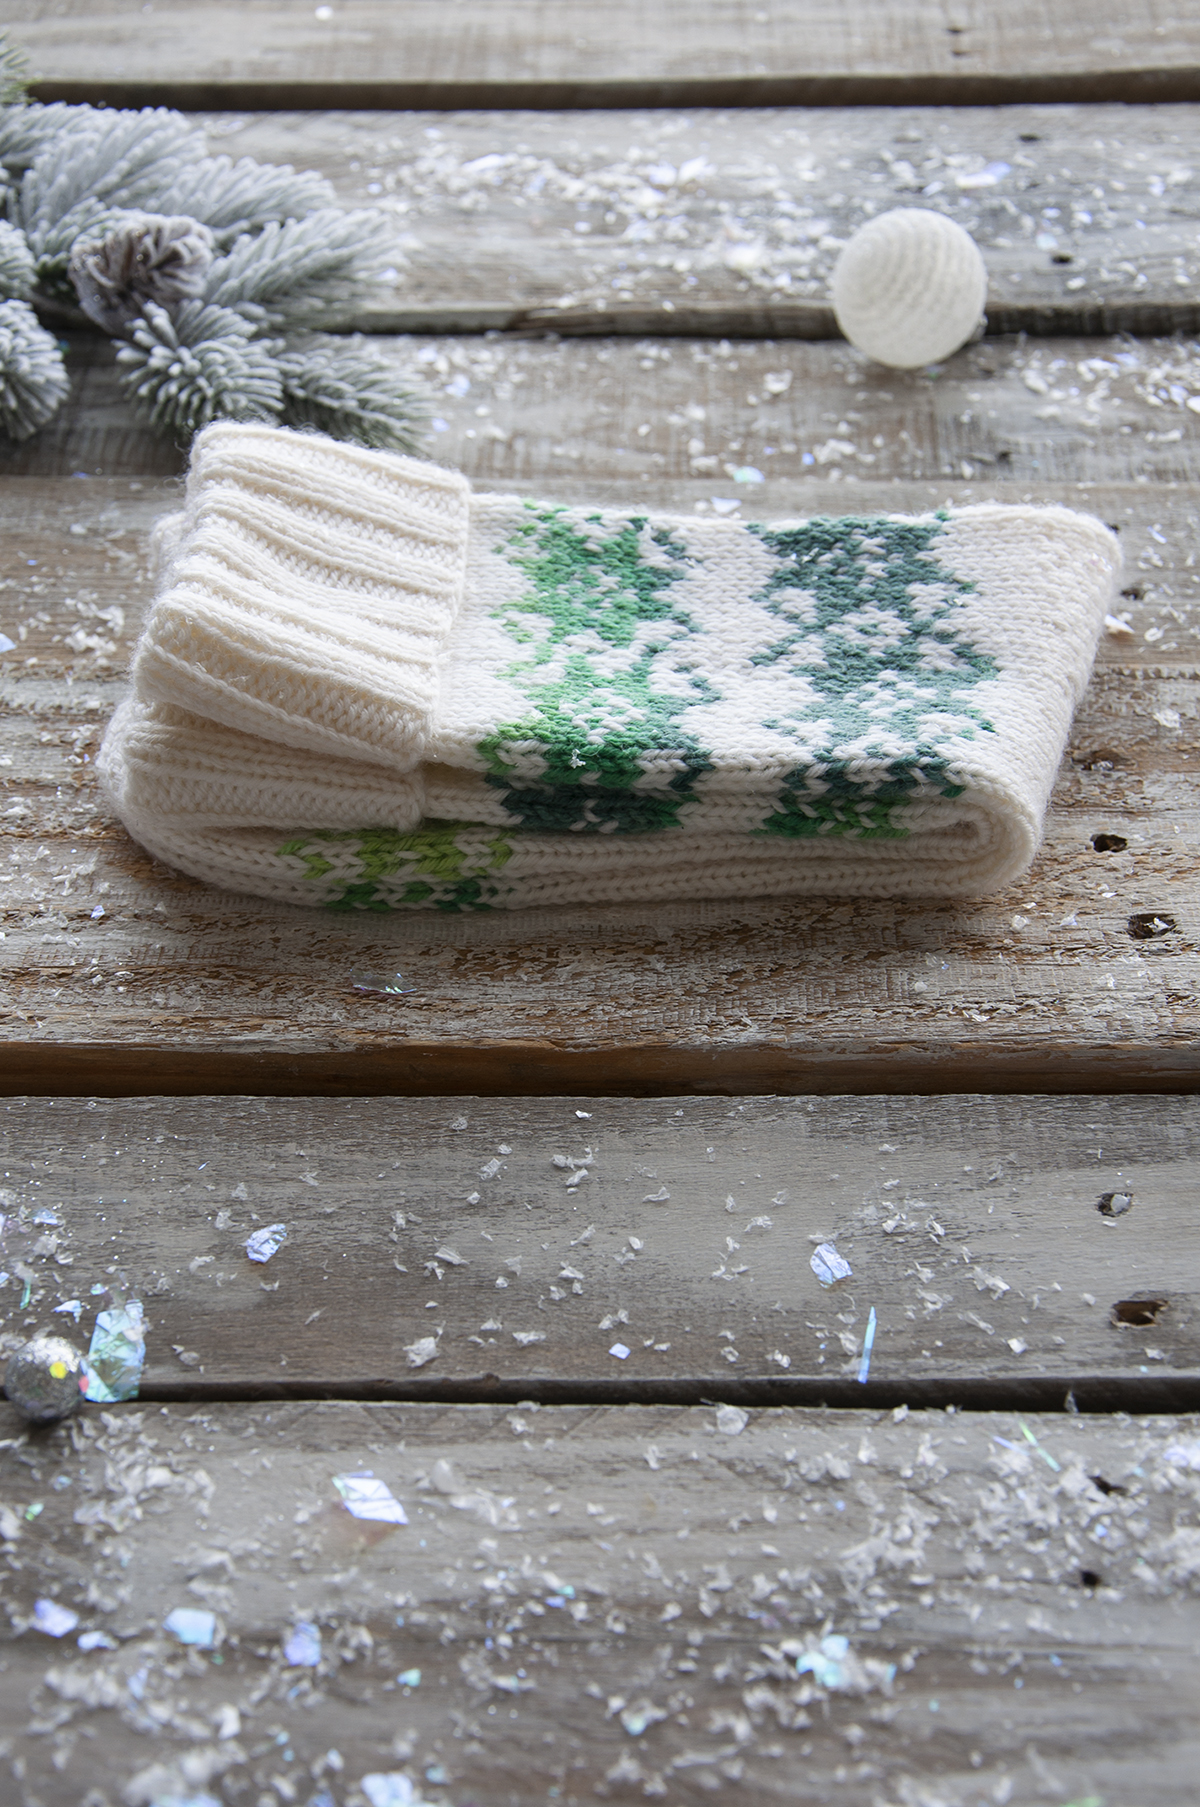
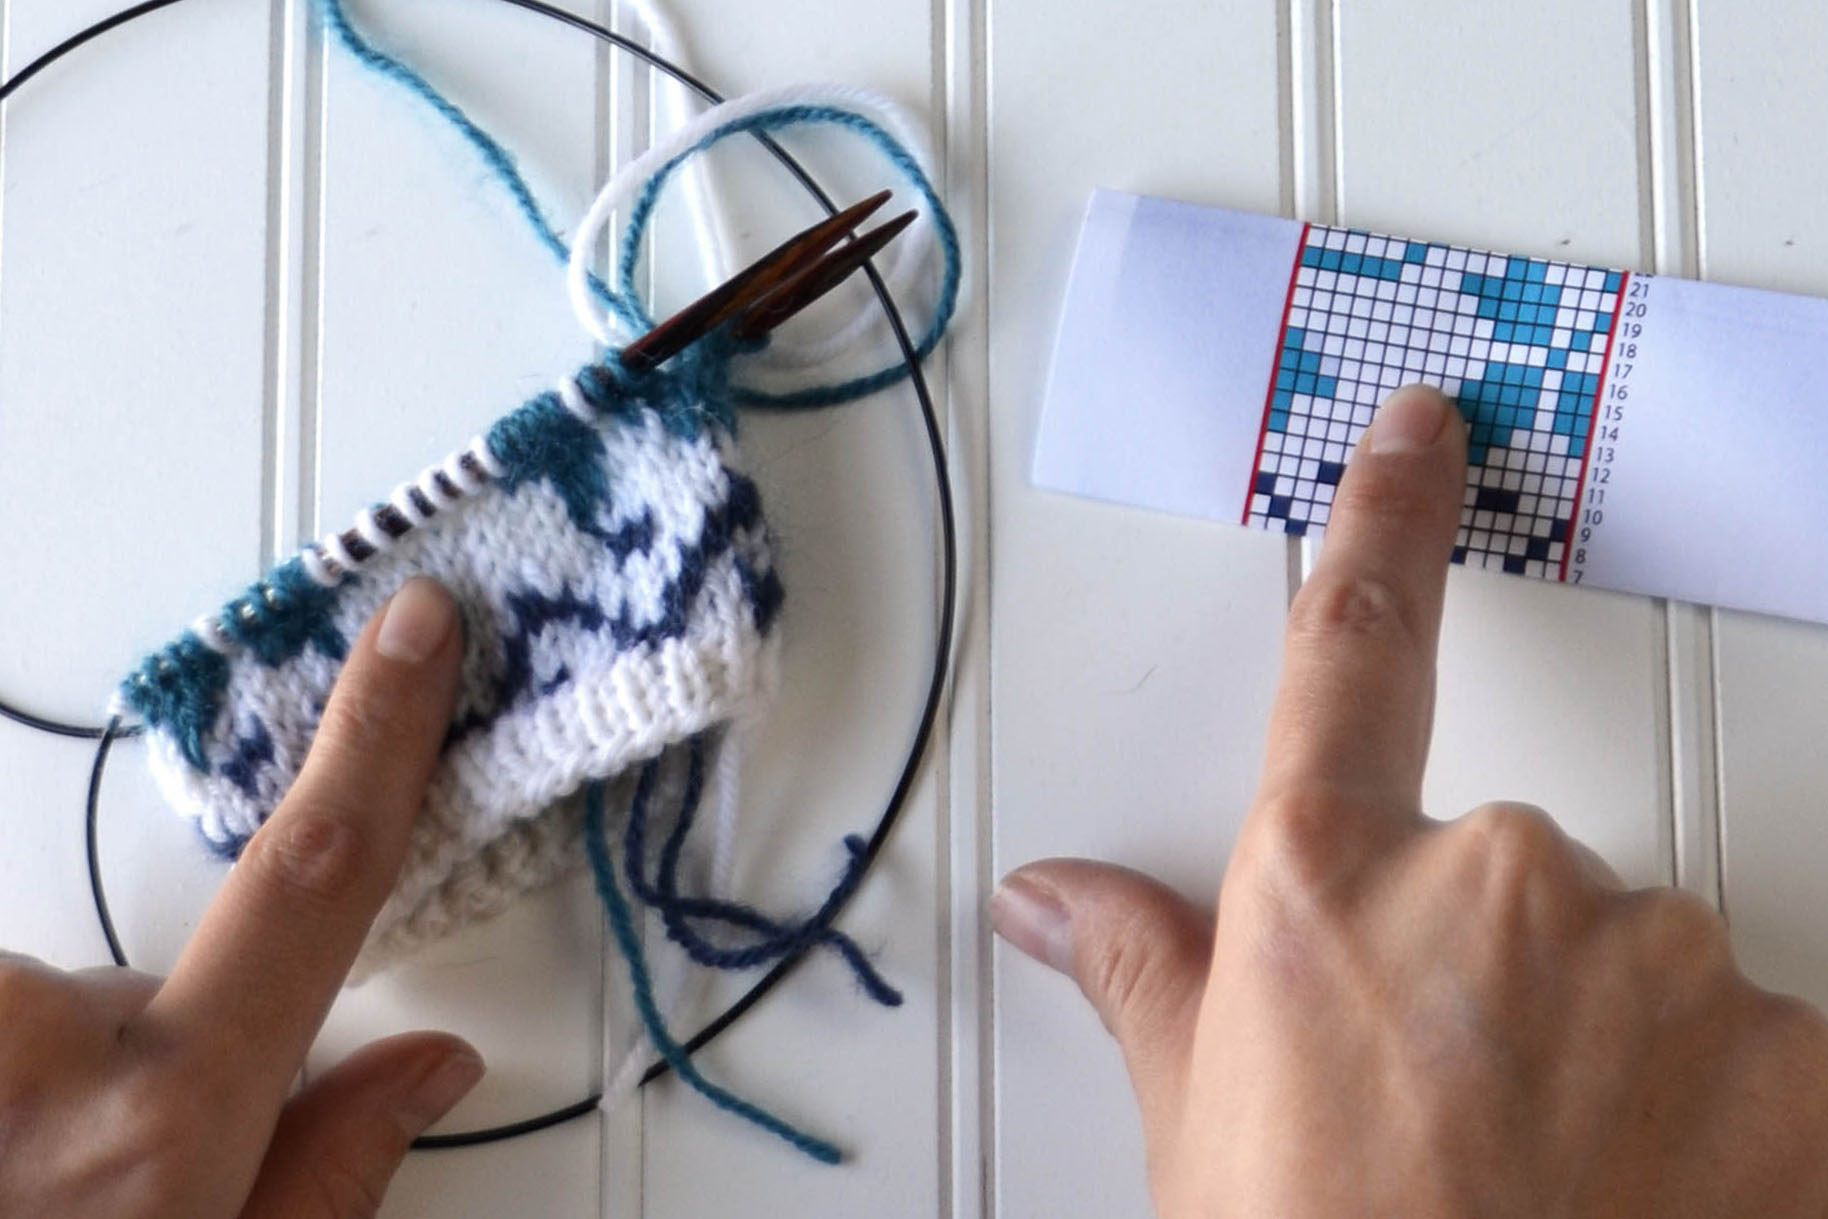
I’m a big fan of stranded colorwork. It may take a backseat to knitting cables, but for some reason, I simply cannot resist a good pair of colorwork socks. The Mistletoes socks combine self-striping Adore Colors and Adore for a visually striking effect.
Notice the changes in color for the colorwork portions. That effect is created by Adore Colors.
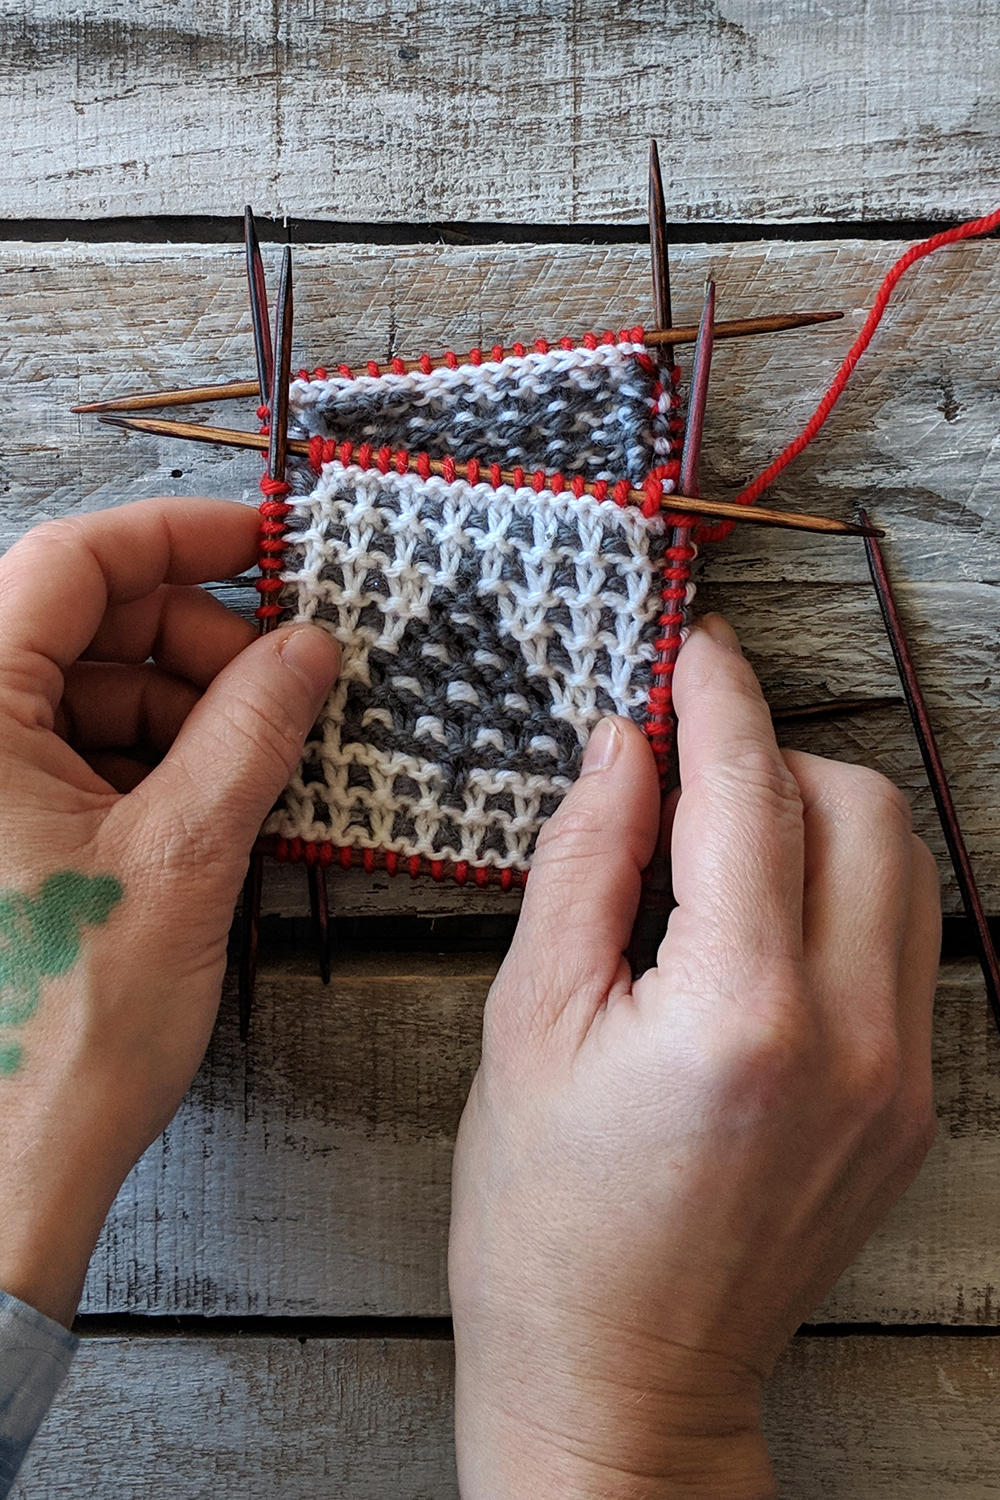
Despite the beauty of stranded colorwork, many knitters find themselves intimidated. Like everything else in knitting, once you’ve done it you realize how simple it really is. If you haven’t done colorwork before I want to empower you to get your feet wet – if you have, I want to encourage you to learn a bit more! Let’s get down to it! I’ve compiled a list of tips and tricks to help you along the way.
Get comfortable with charts. This is something else that can intimidate knitters, but it’s essential for colorwork. I’d actually argue that colorwork is an excellent introduction to reading charts since you’re usually only looking at colors. Last year I included some tips and tricks for understanding charts. You can find the full post here (link).
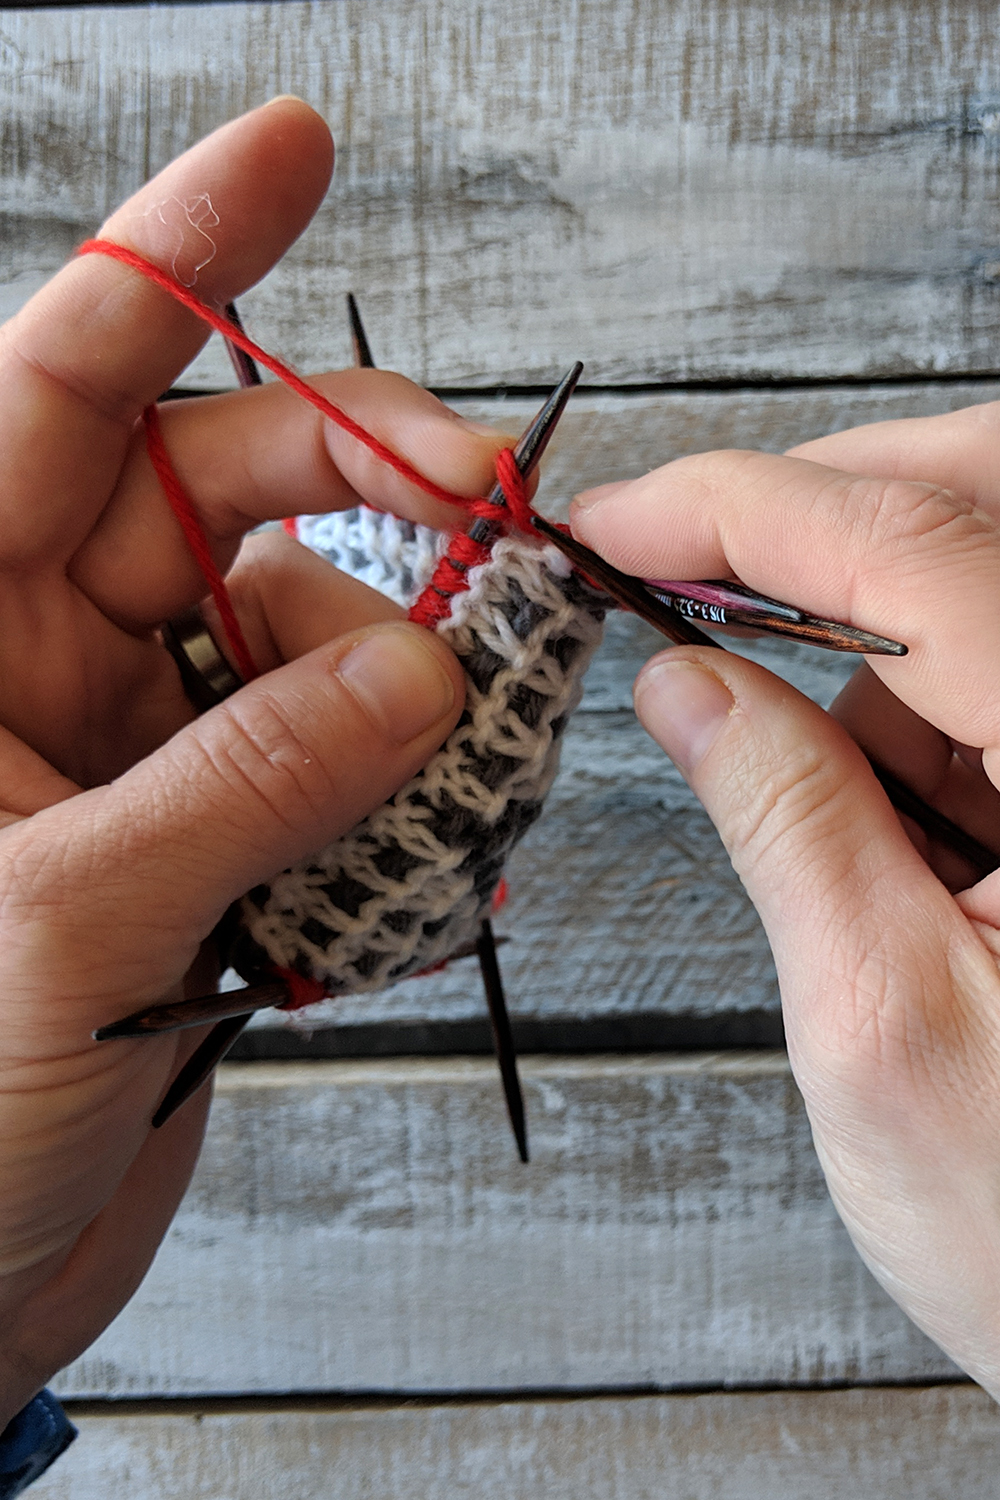
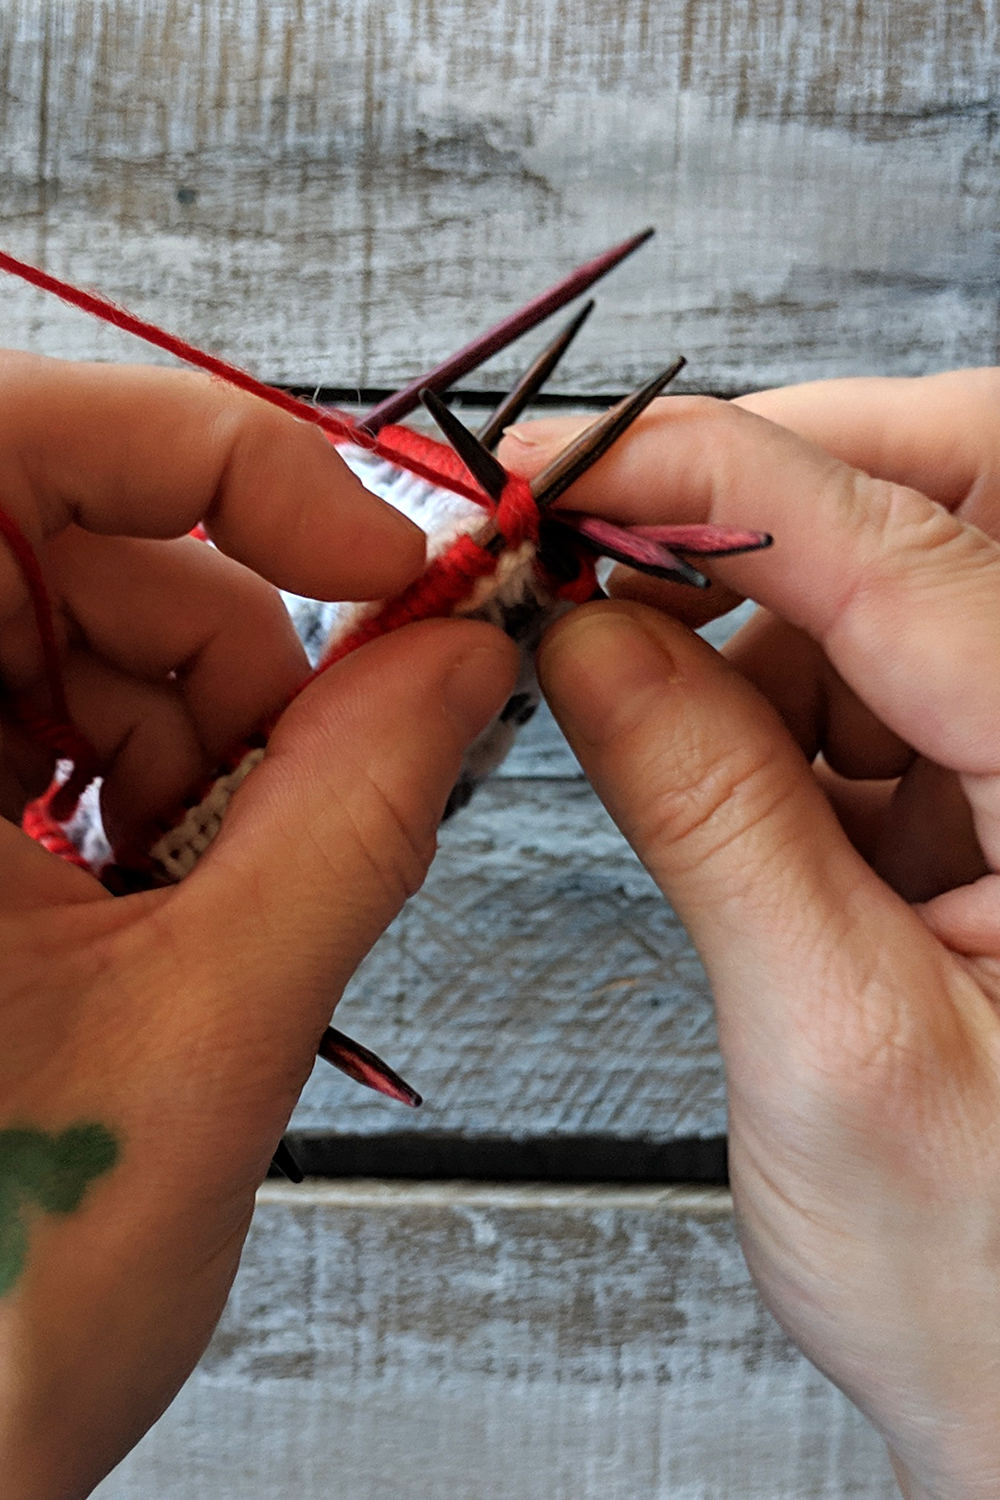
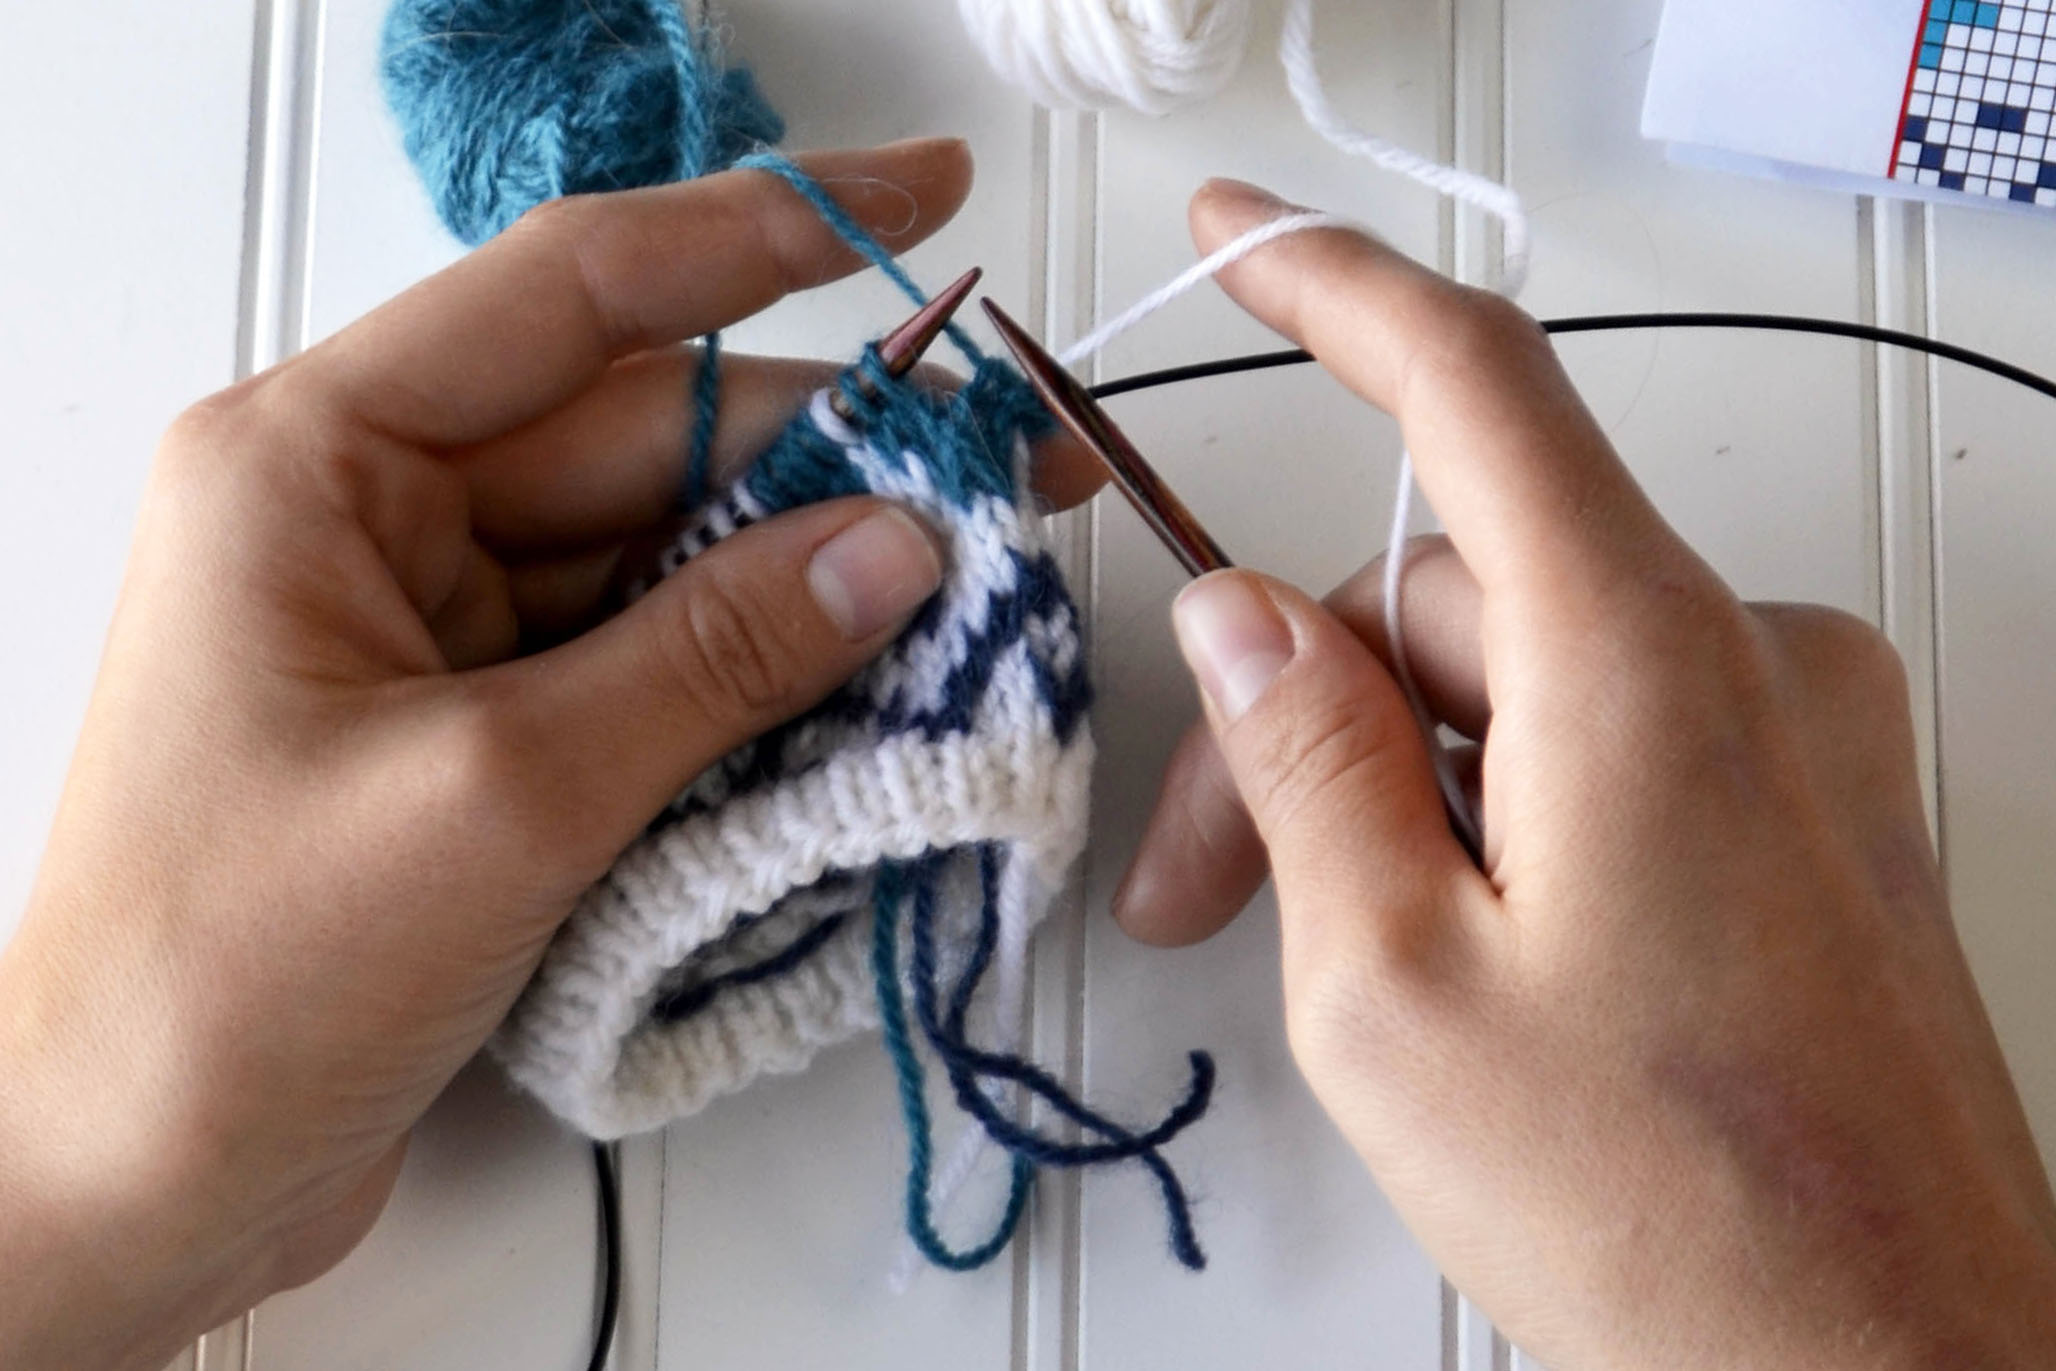
Manage your yarn. Managing your yarn well when knitting colorwork can make the process so much more enjoyable. I recommend keeping each ball of yarn on a separate side to prevent unnecessary, annoying twists and tangles.
Notice one ball is placed on the left and one is placed on the right. This prevents them from twisting around one another.
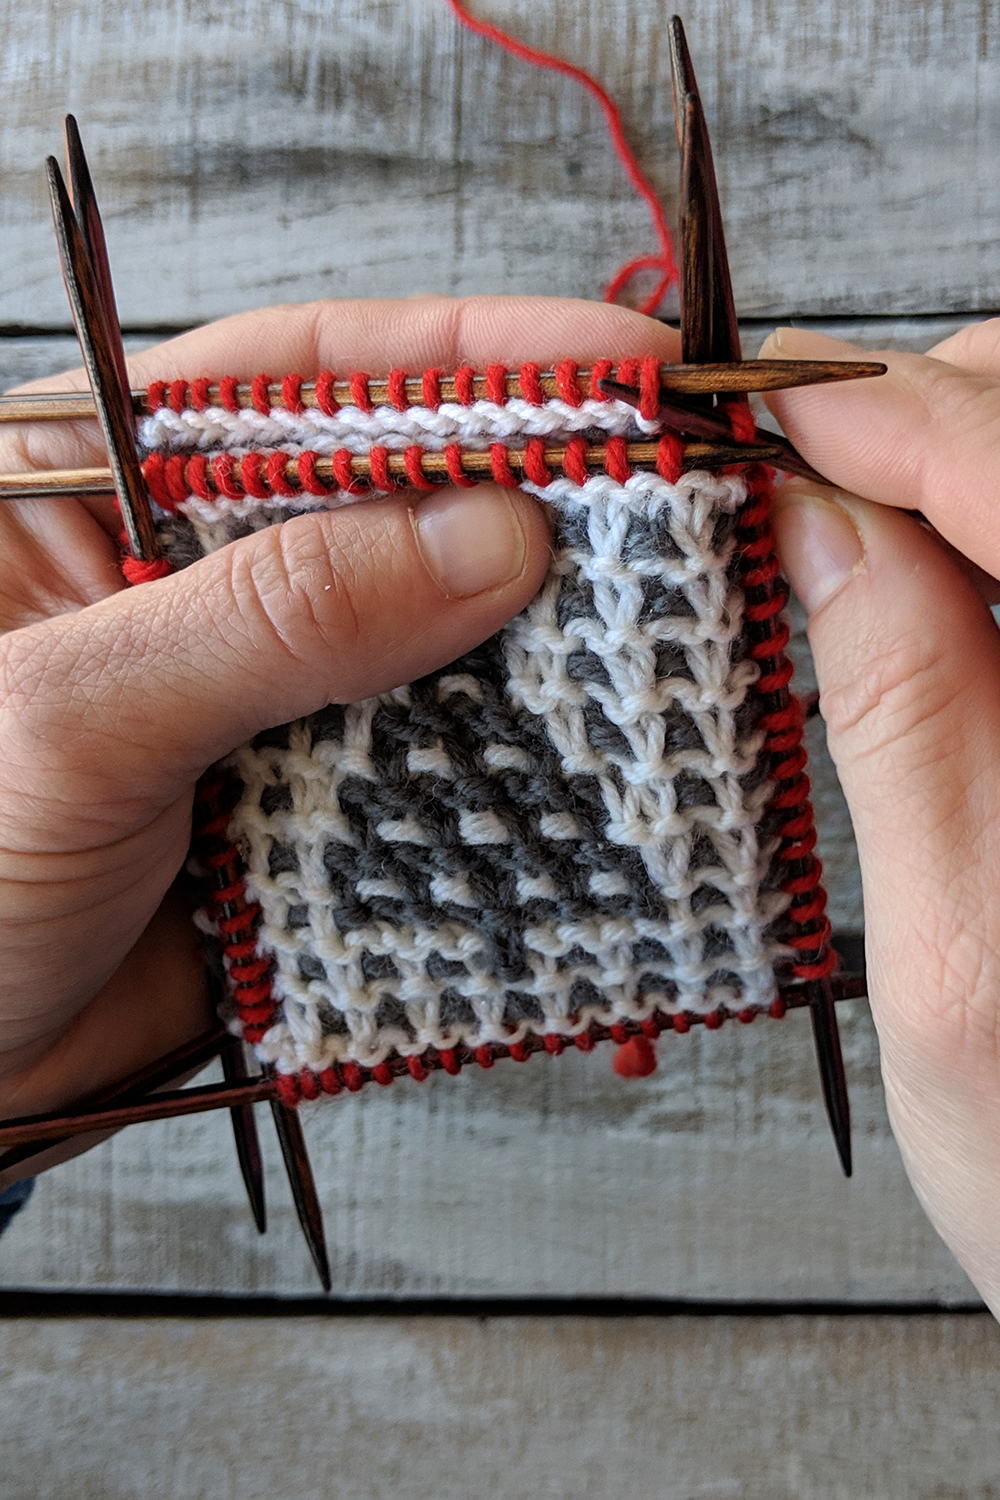
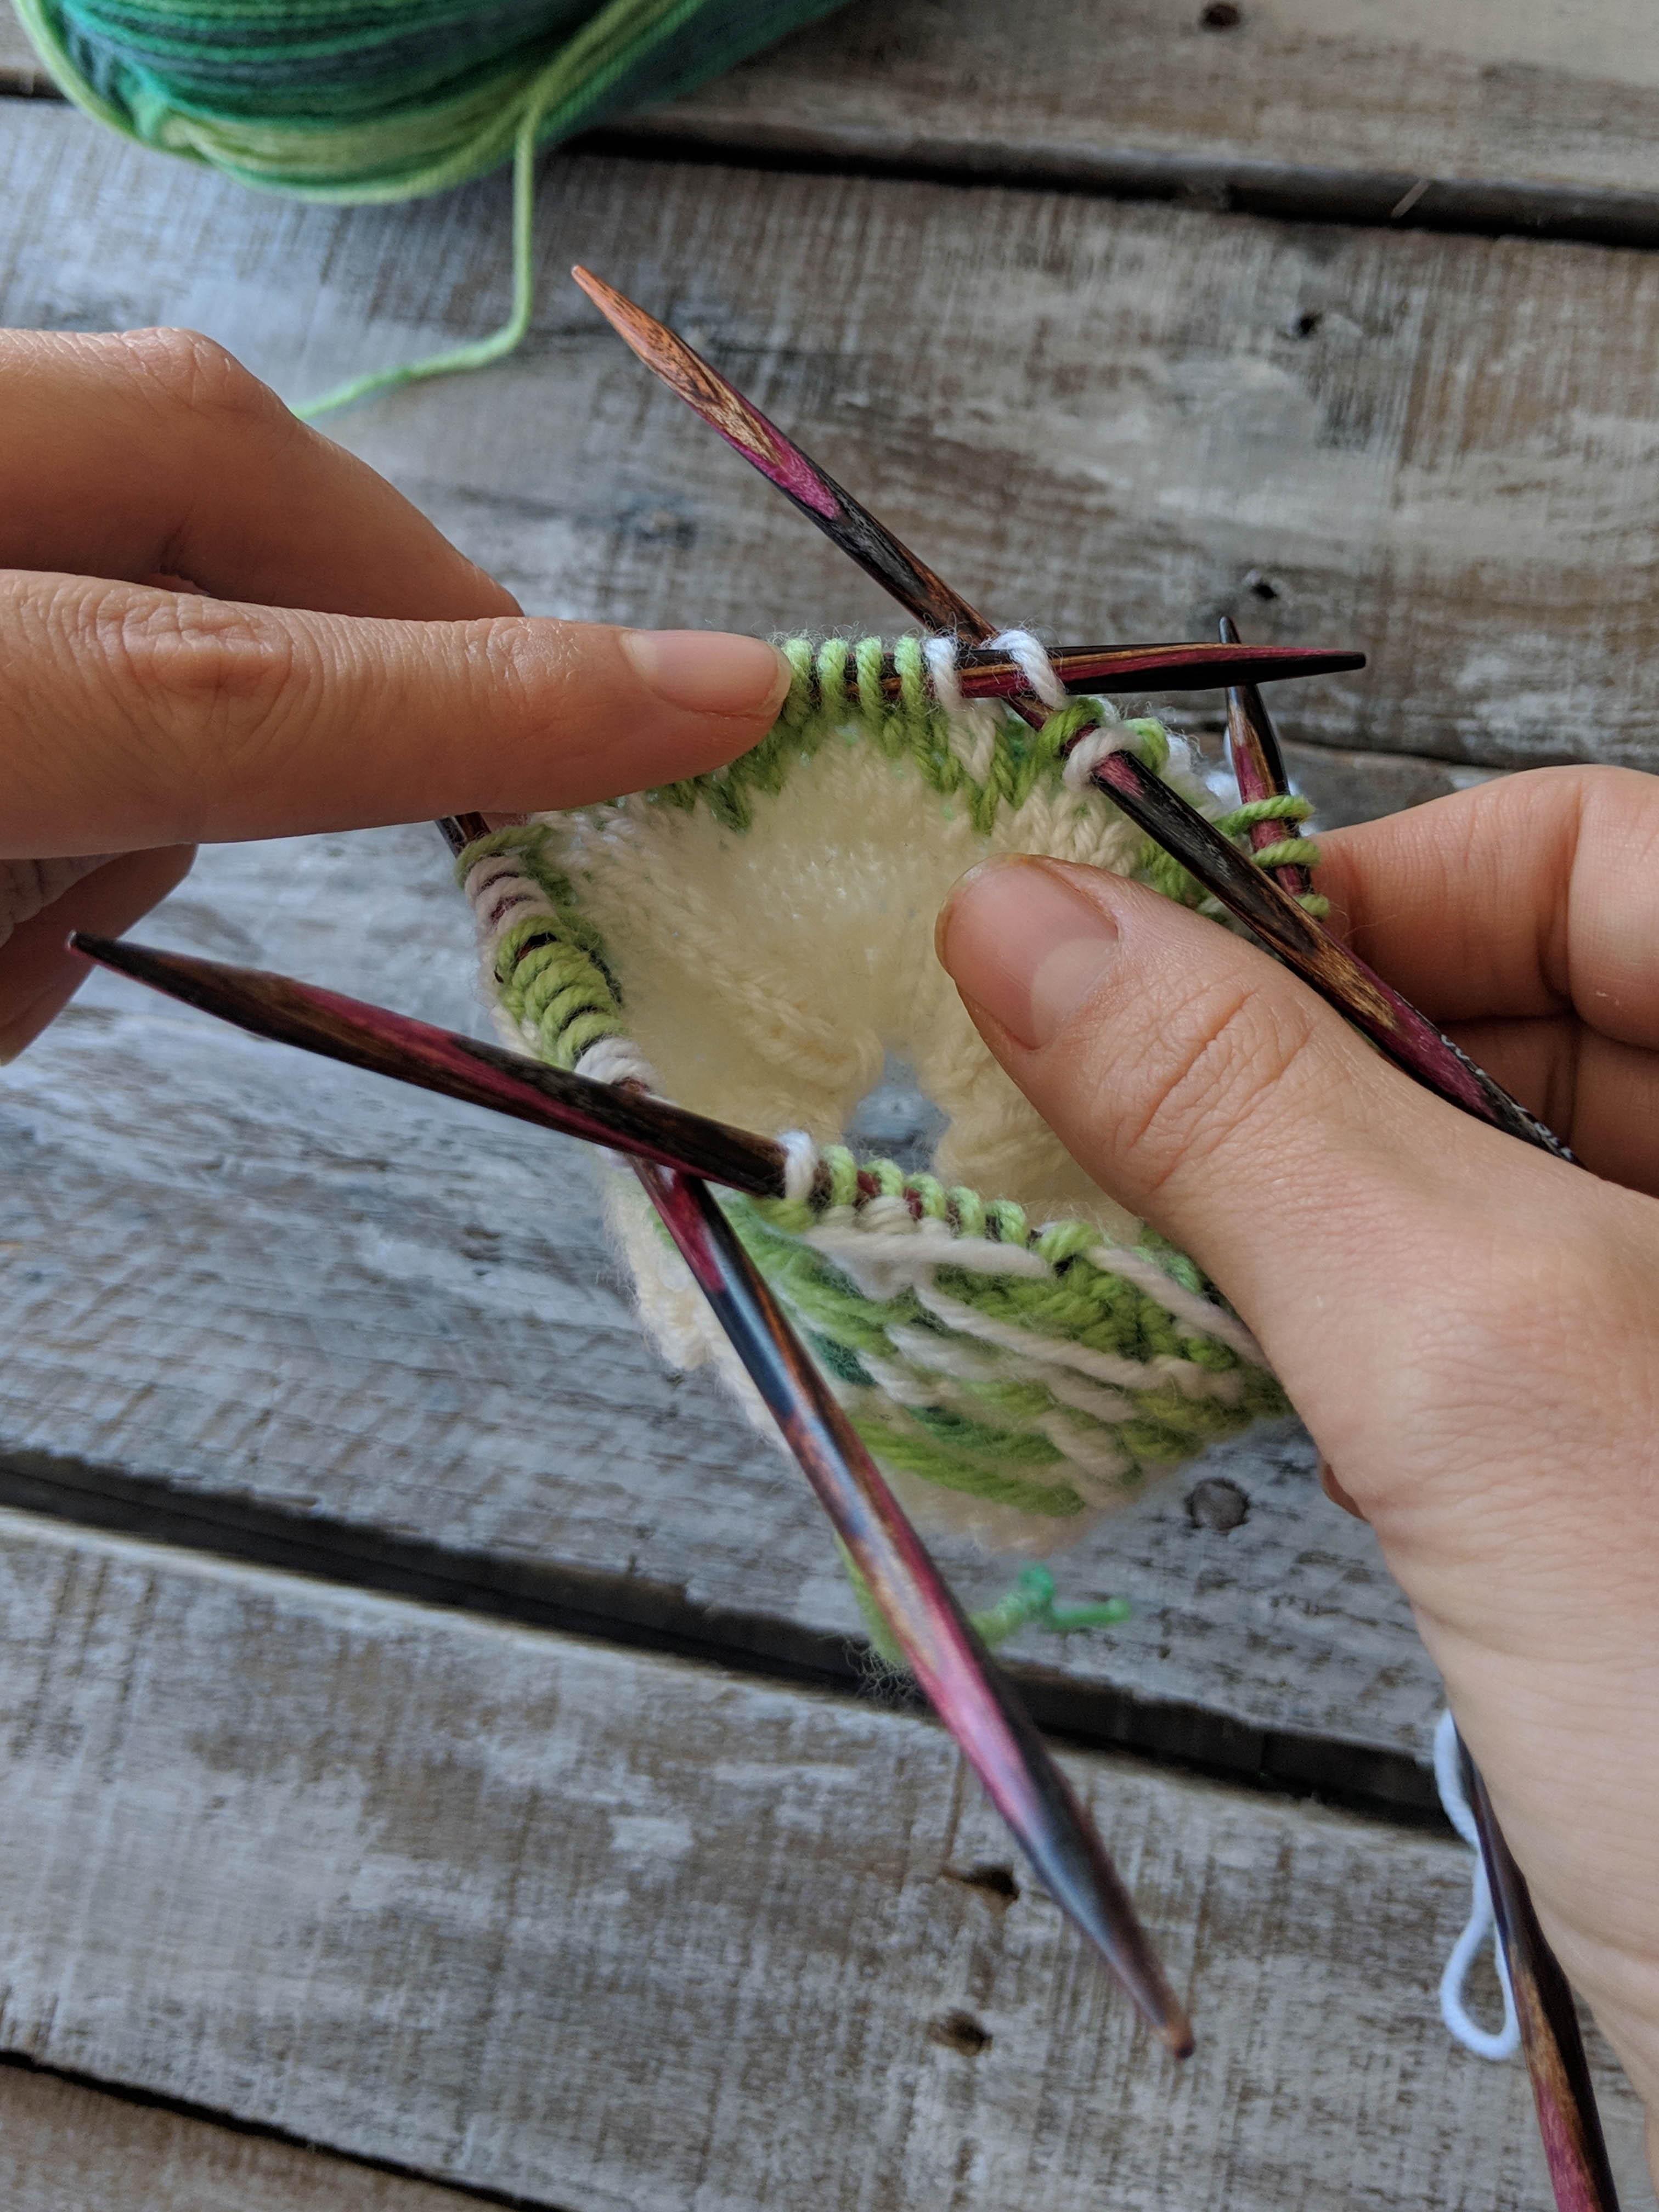
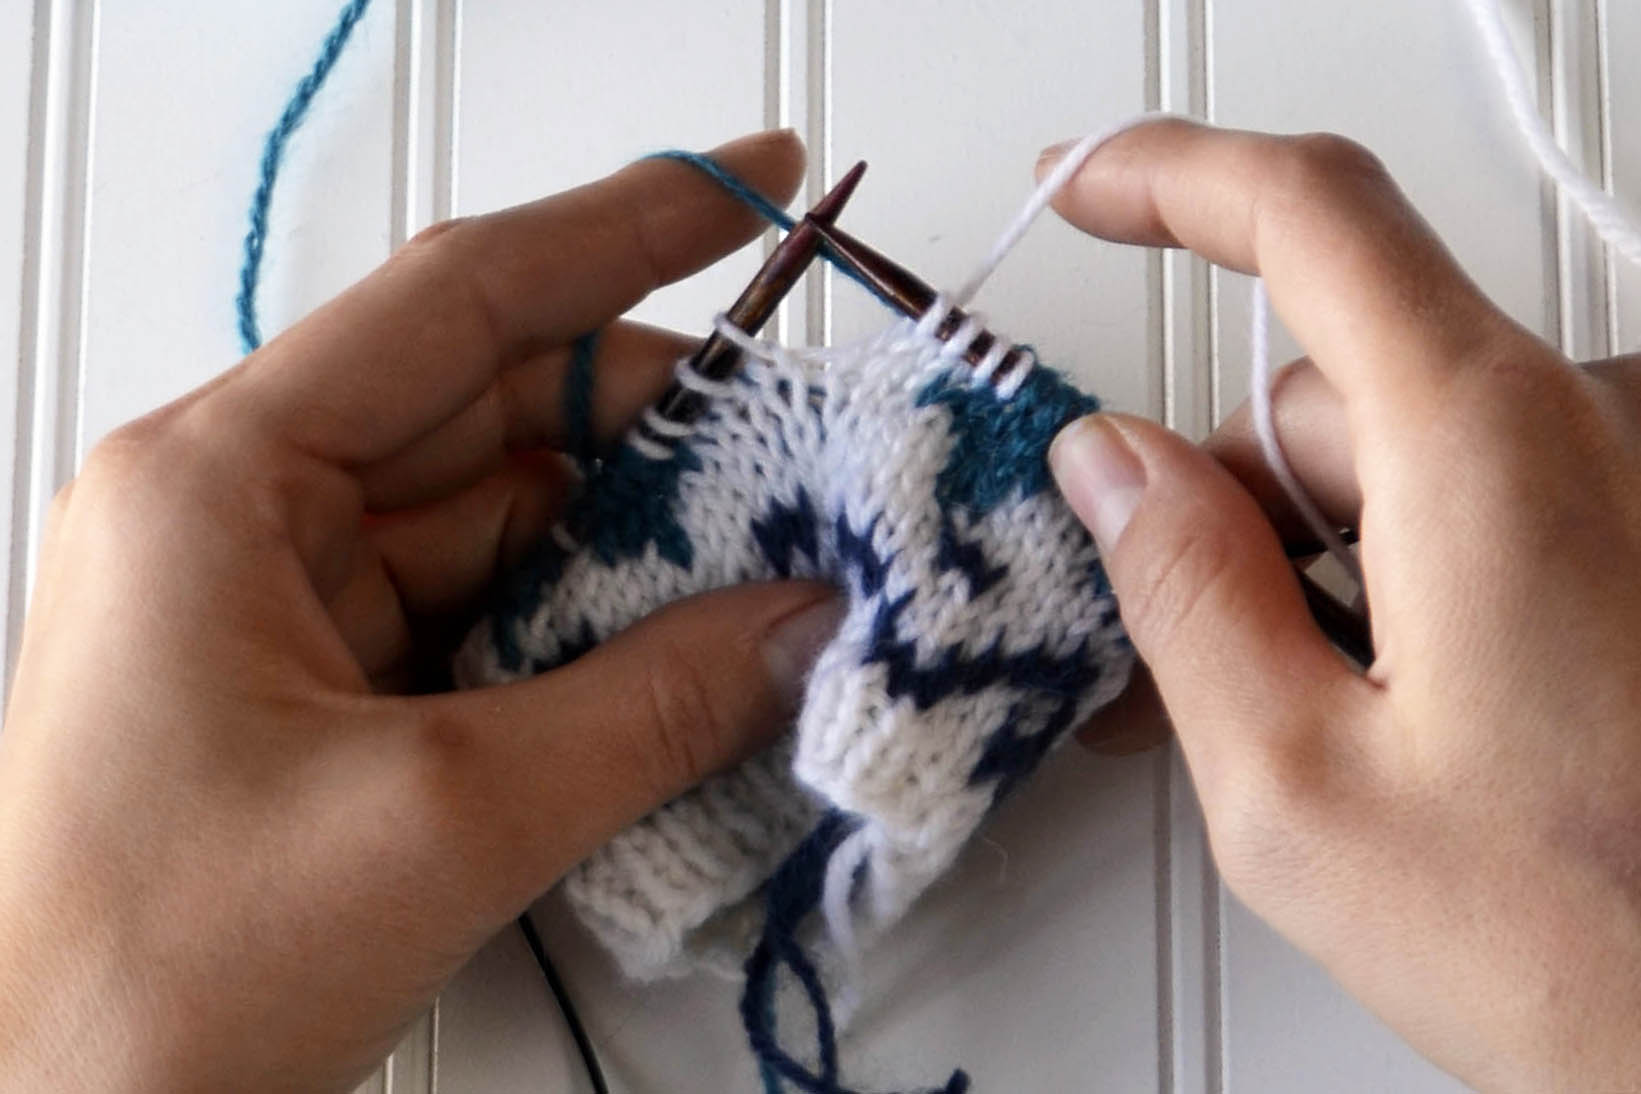
Taking care of tension. This is probably the most important aspect of stranded knitting. To achieve the results you want, your tension should be even. Why? Floats. Since you’re carrying two strands of yarn across the back of your work, one of the yarns will always be “on hold” while you work stitches with the other color.
The right and wrong sides of the work. Notice the floats of yarn on the wrong side. They’re quite pretty!
If your floats are too tight, the fabric will pucker. Puckered fabric is considerably less elastic and will appear a bit bumpy – taking away from the beautiful patterning you worked so hard on. Not to worry, though! There are ways to ensure that your floats are even and not too tight. I’m personally a pretty tight knitter, so I use these techniques, too.
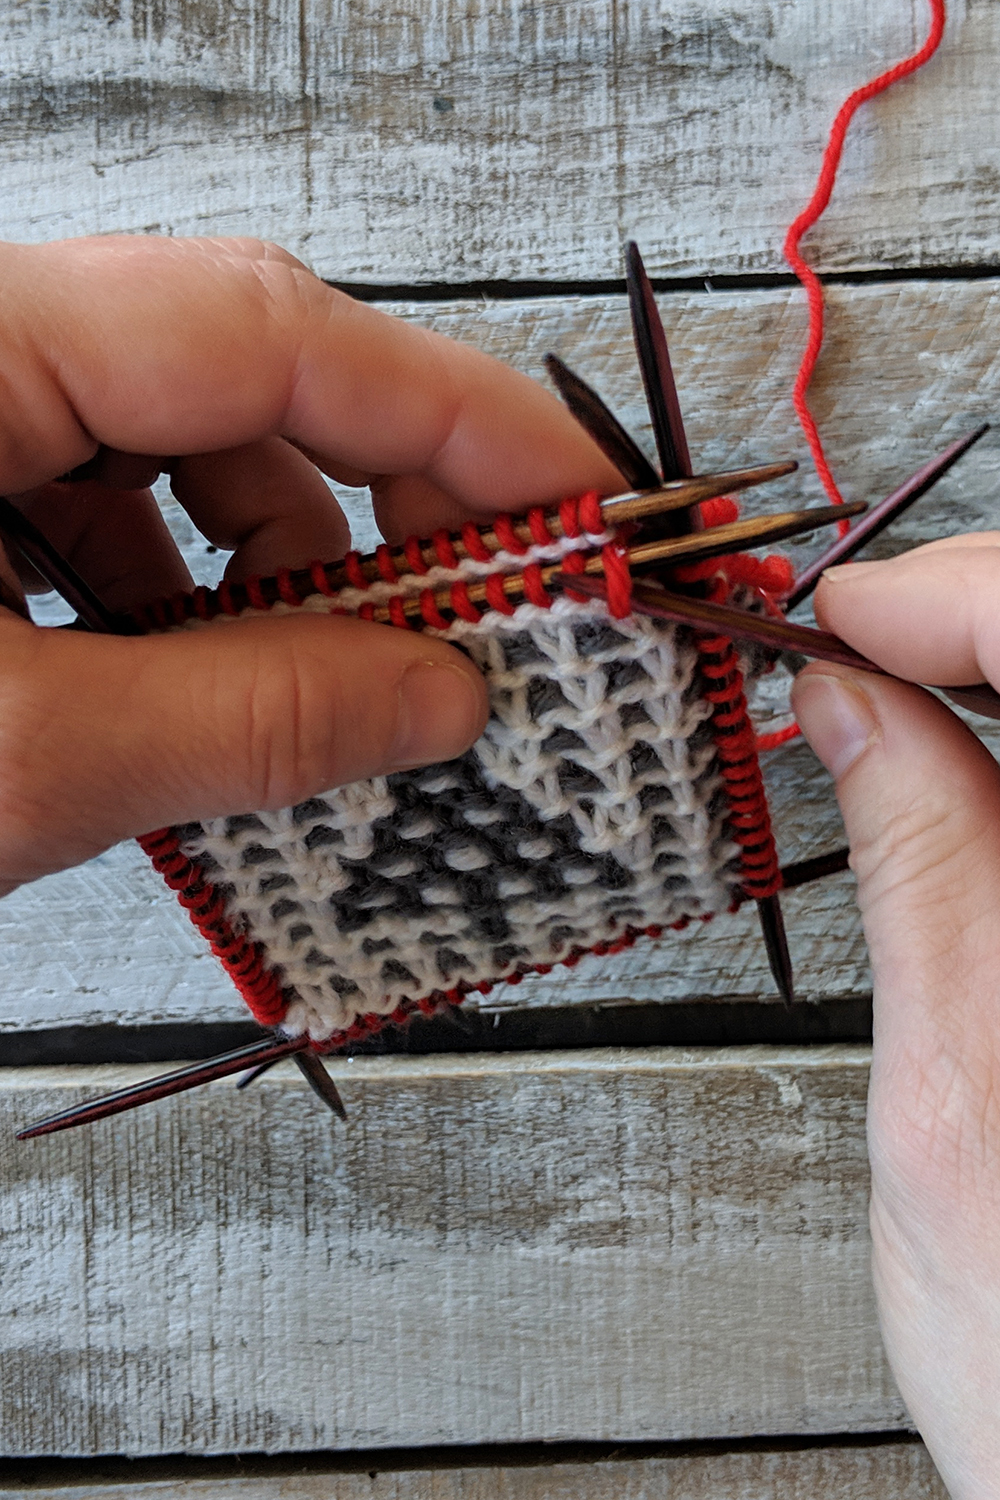
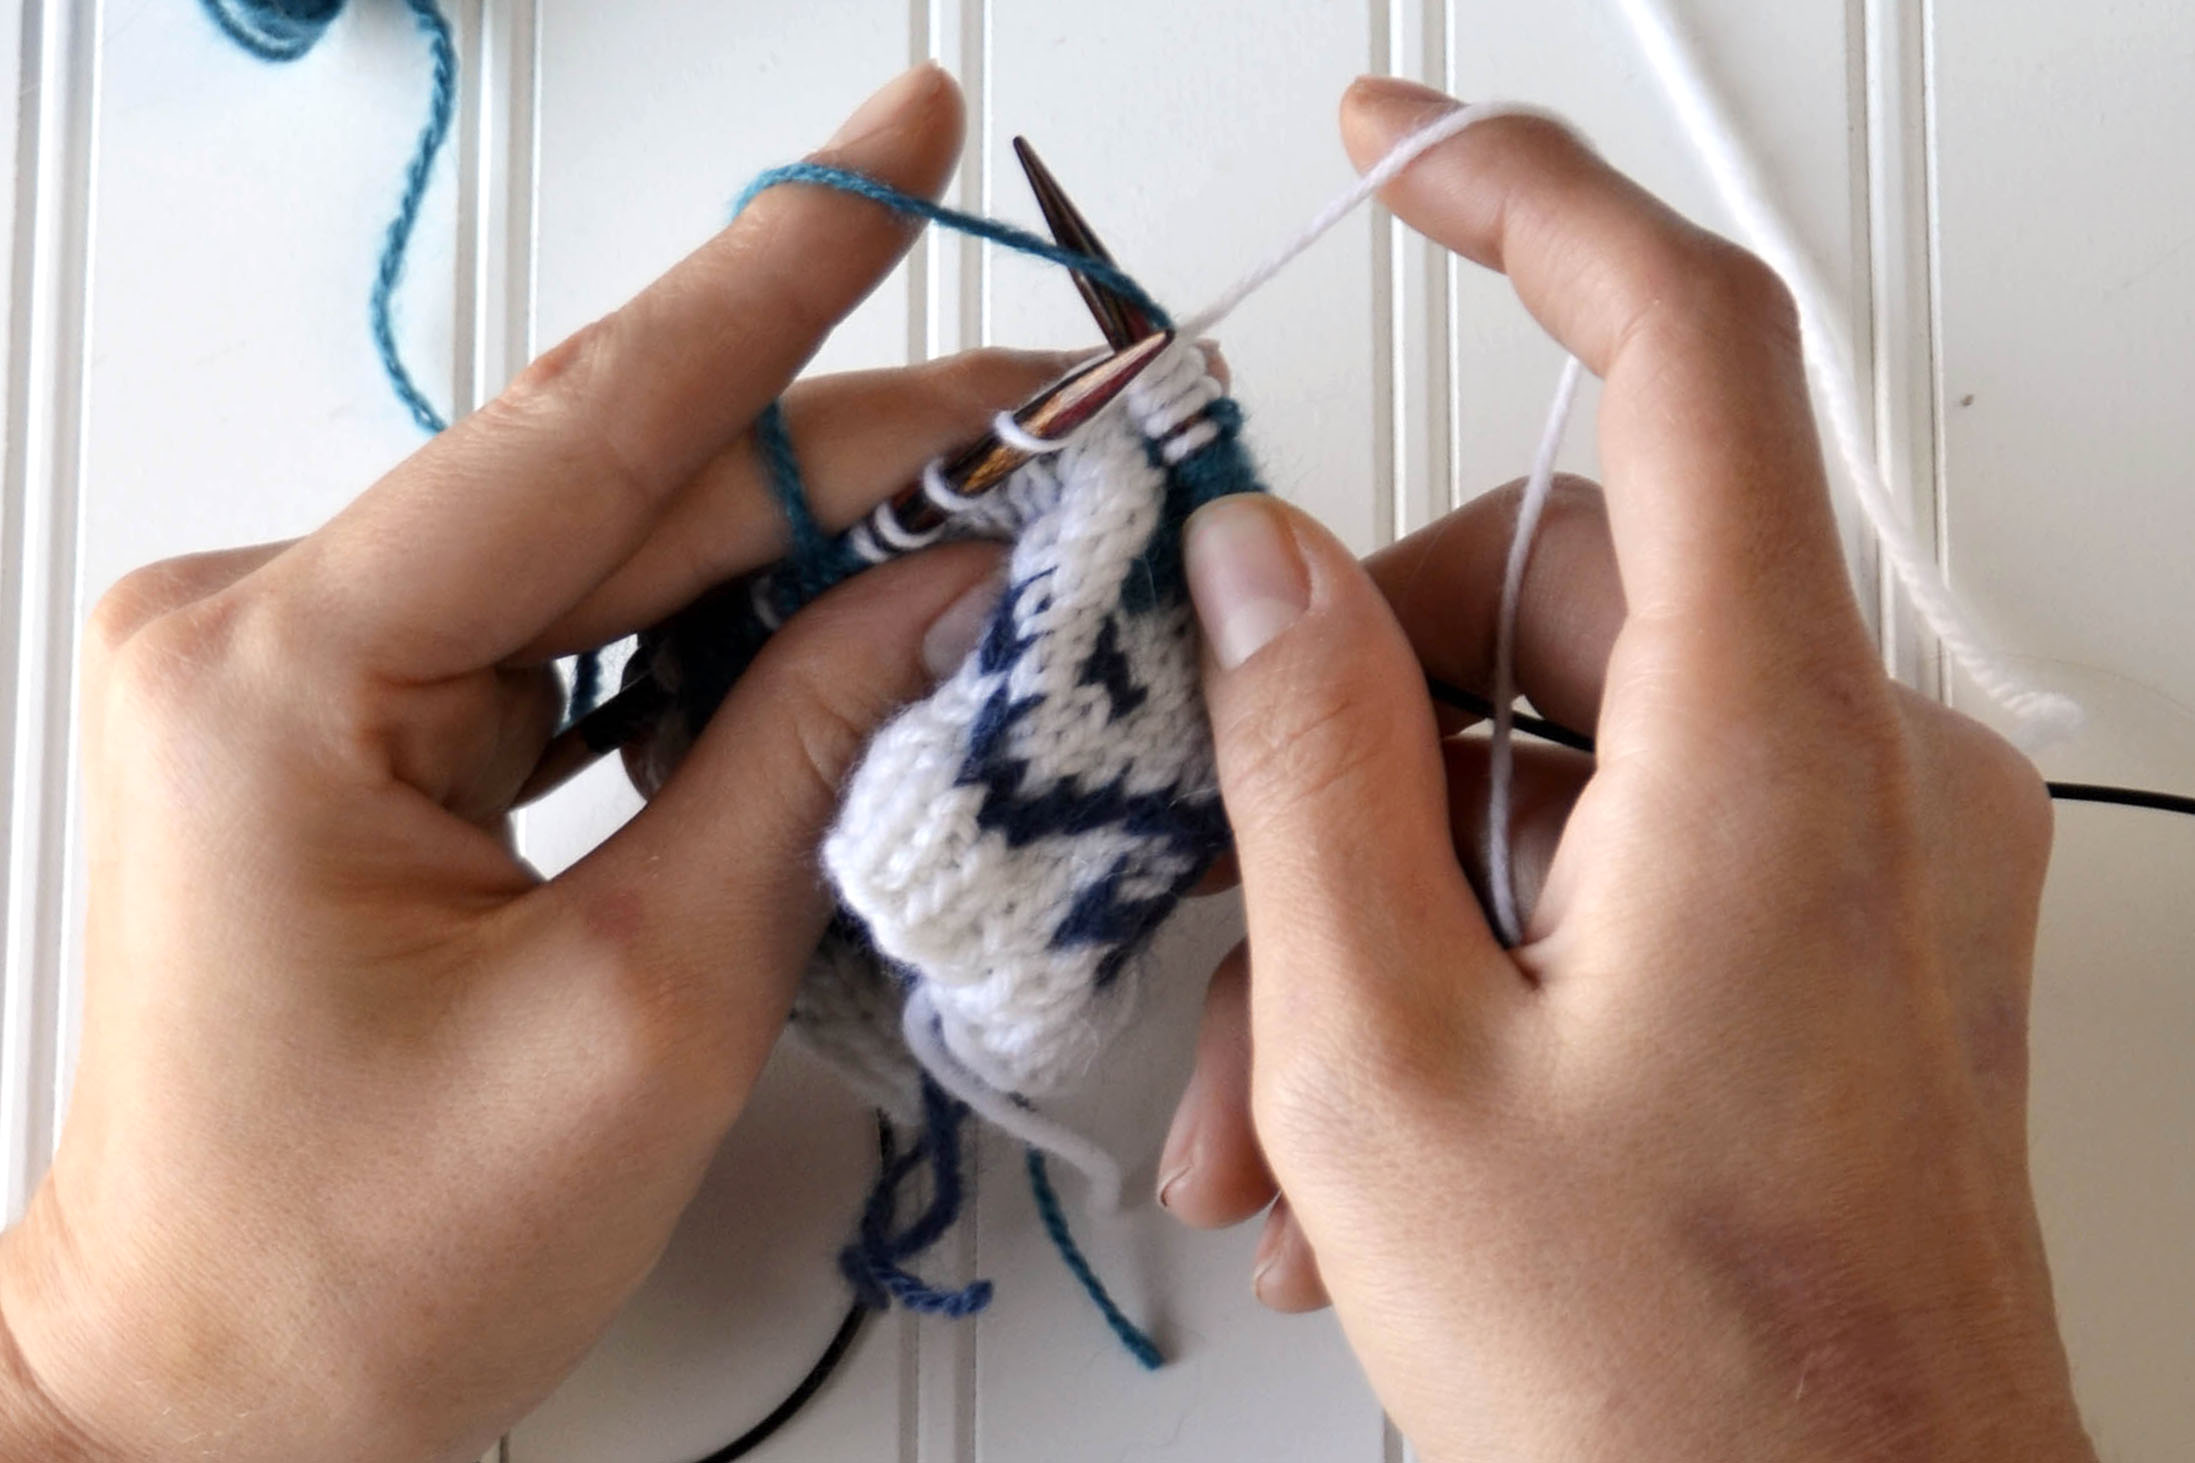
Use larger needles. First things first: swatch, swatch, swatch! Once you do, you’ll realize that your gauge in stockinette stitch is different than your gauge in stranded knitting. To combat the difference, changing needles helps a lot. Expect to use needles that are one to two sizes larger for stranded portions of your knitting. Most patterns, including the Mistletoes, will direct you to do this. However; that’s not always the case. Keep this in mind whenever you’re knitting colorwork.
Turn your work inside-out. This is exactly what it sounds like. By turning your work inside-out, your floats will be facing you while you’re knitting. It doesn’t change the actual knitting at all, but it’s a simple way to manage your floats. By carrying your floats on the outside, you’re allowing them a bit more room. This trick is simple, easy, and effective.
Notice the right side is on the inside of the round.
Notice that the wrong side of the fabric is facing outward.
Gently stretch your work. Chances are that you’ll sometimes have a stitch that’s a bit odd – perhaps a bit too tight or a bit too loose. You can rectify the issue by occasionally stopping to give the fabric a gentle stretch. Don’t be overzealous as that can cause stitches to get more uneven. A little goes a long way.
Gently stretch the work downward.
Gently stretch the work horizontally.
Manually even out oddball stitches. Like I’ve mentioned above, there are instances where a stitch looks a bit wonky. If a gentle stretch doesn’t help you can manually pick the stitches around it to try and even things out.
Oh no! Look at this awful little stitch! It’s far too tight and hidden by the surrounding stitches. Good thing you can work some magic!
Insert your needle behind the right leg and then the left leg of the naughty stitch.
Once you’ve picked up both legs, gently tug on the stitch – give it a little wiggle.
The naughty stitch has realized the error of its ways! You can now see the stitch very well and it looks lovely alongside its friends. Pat yourself on the back for a job well done!
Block it out! Blocking is magic. The process evens out stitches, so when you finish your work be sure to block it! Once the yarn blooms it will fill up any negative space in your fabric allowing your colorwork to shine! Just be sure to follow the care instructions on your yarn label so that you don’t unintentionally damage the fabric. Side note: we have a post to help you understand yarn labels, too. Find it here (link).
Look how pretty and even the colorwork is after blocking.
That’s it! I hope these tips and tricks will help you as you knit the Mistletoes or any stranded colorwork. Remember, you can find Series 2 of the 12 Days of Winter Kit patterns on Ravelry.
You might remember that back in October I introduced the first post about my adventures in naturally dyeing our Superwash Merino Worsted Weight yarn. In that post (link), I gushed about how much I love the warm hues of autumn. Well, it’s spring now – though it certainly feels like summer here in Charlotte. That means it’s time to play with some yarns that are a bit more warm-weather friendly.
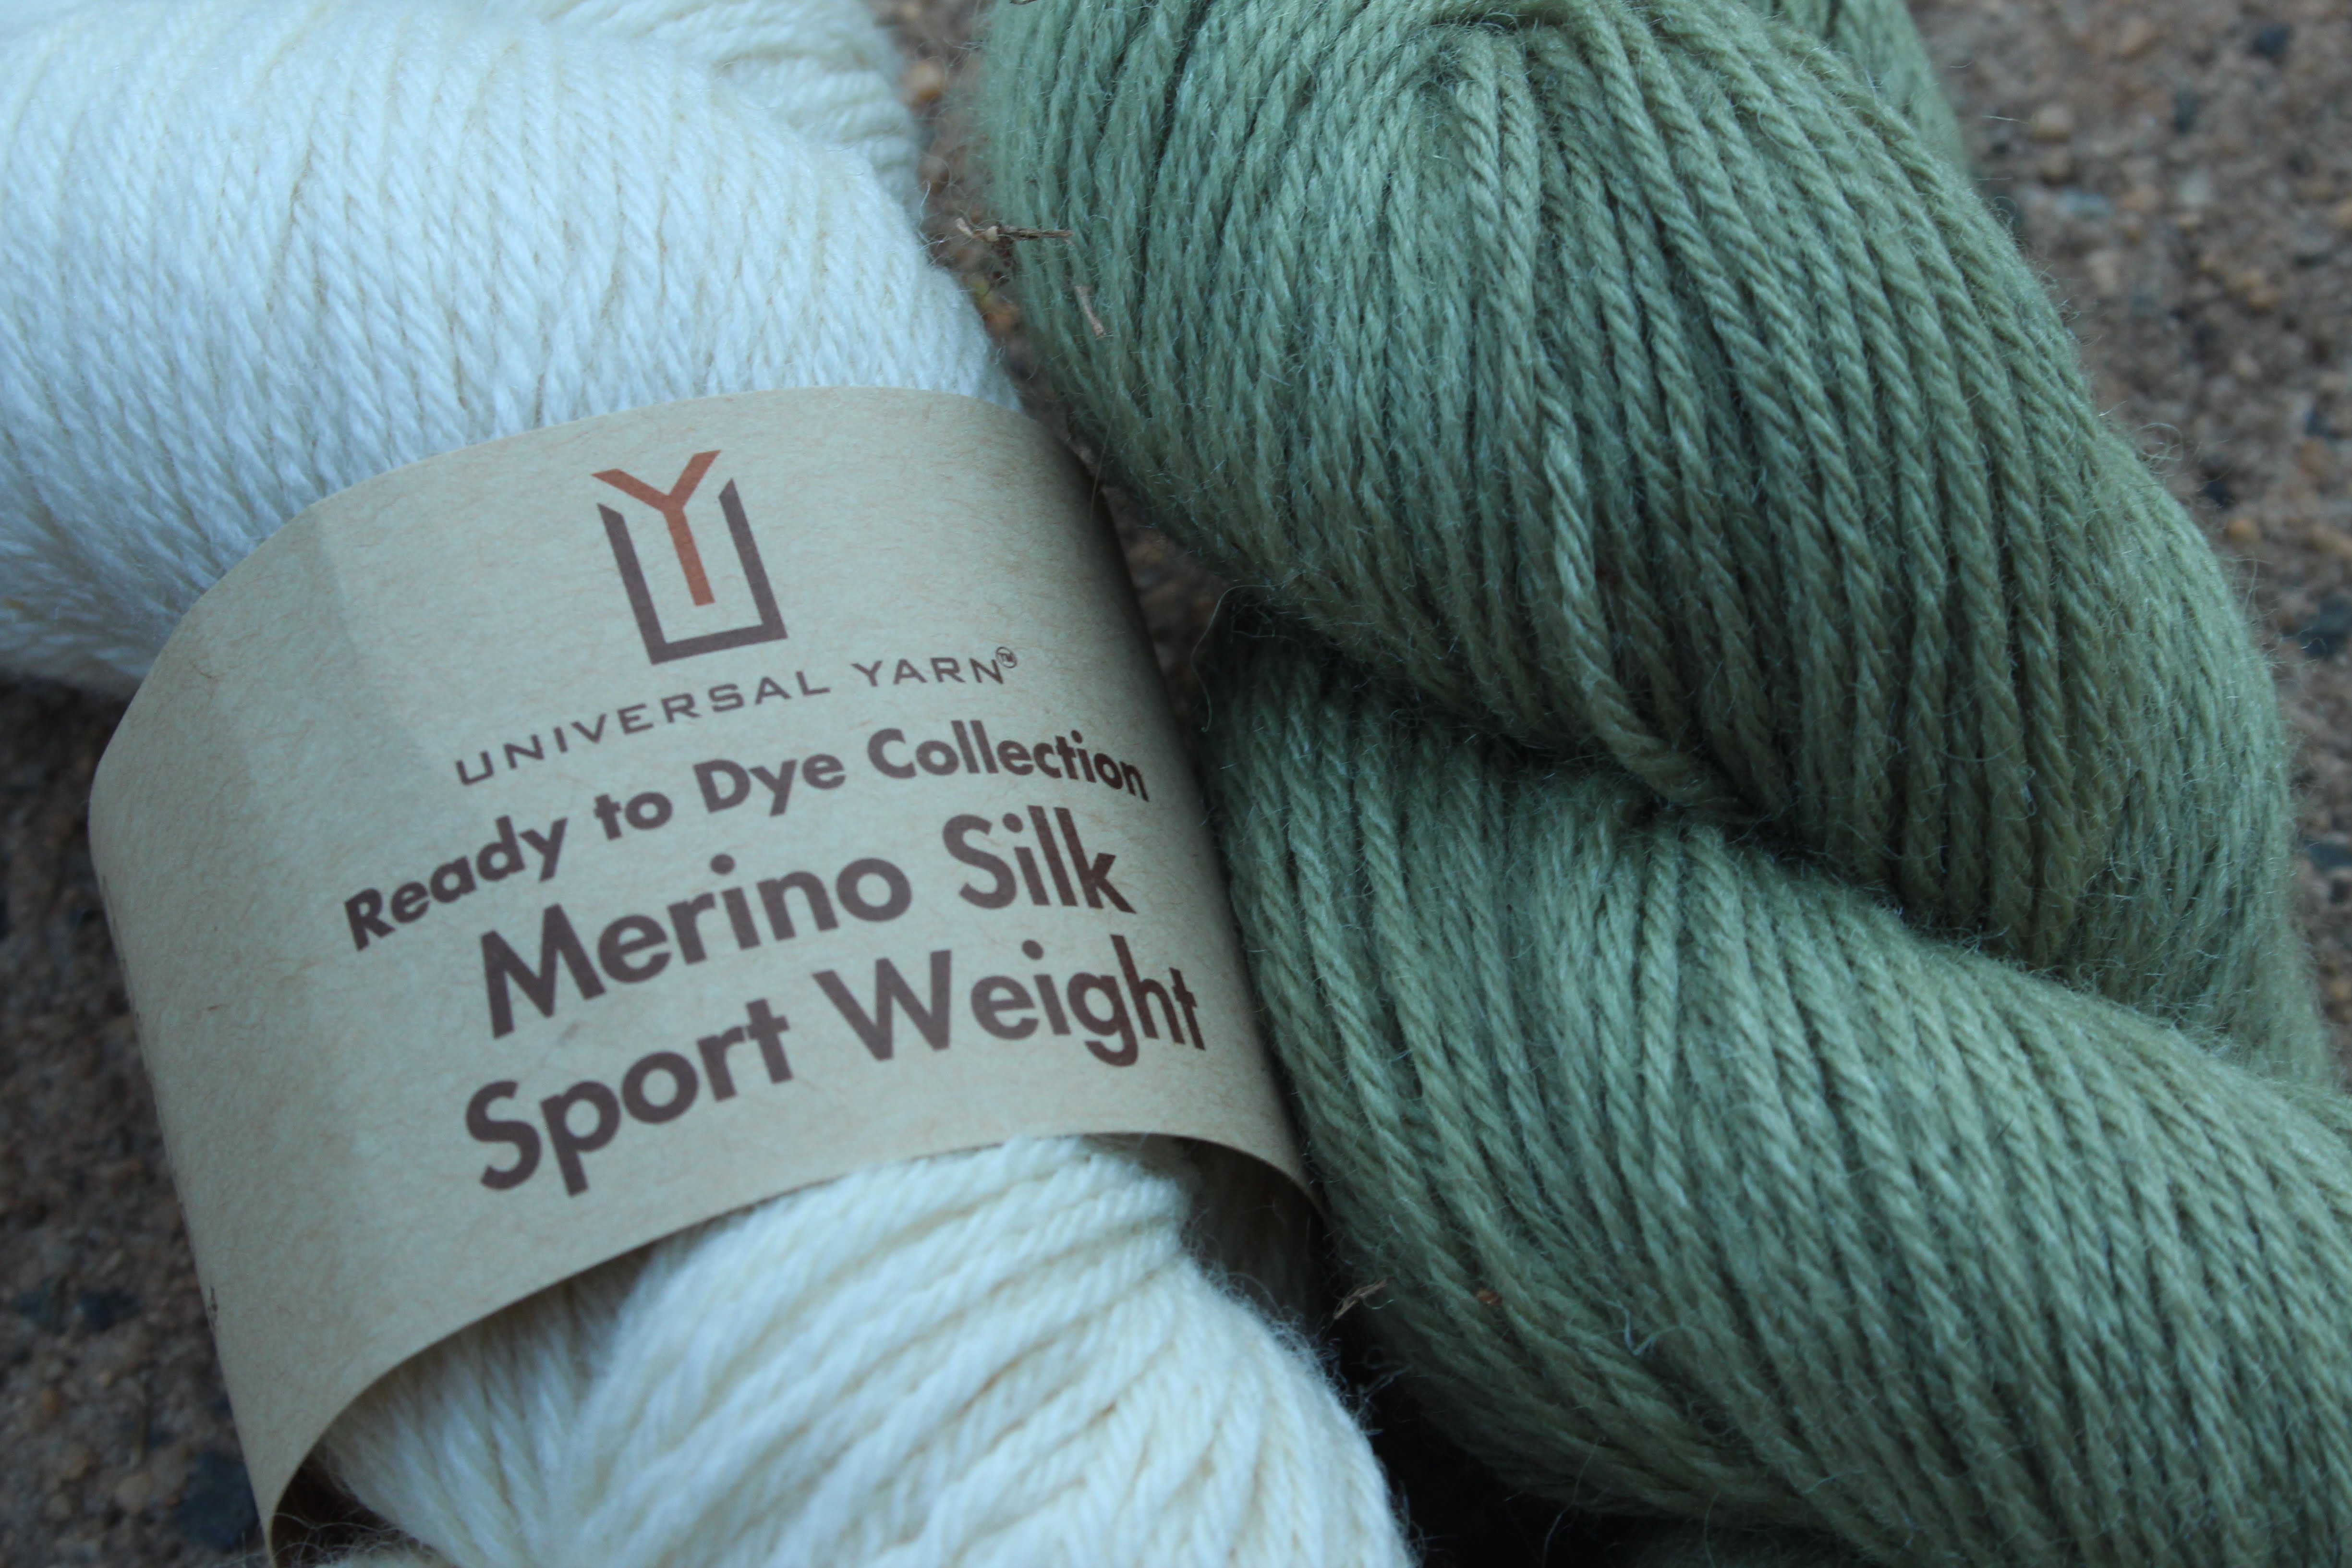
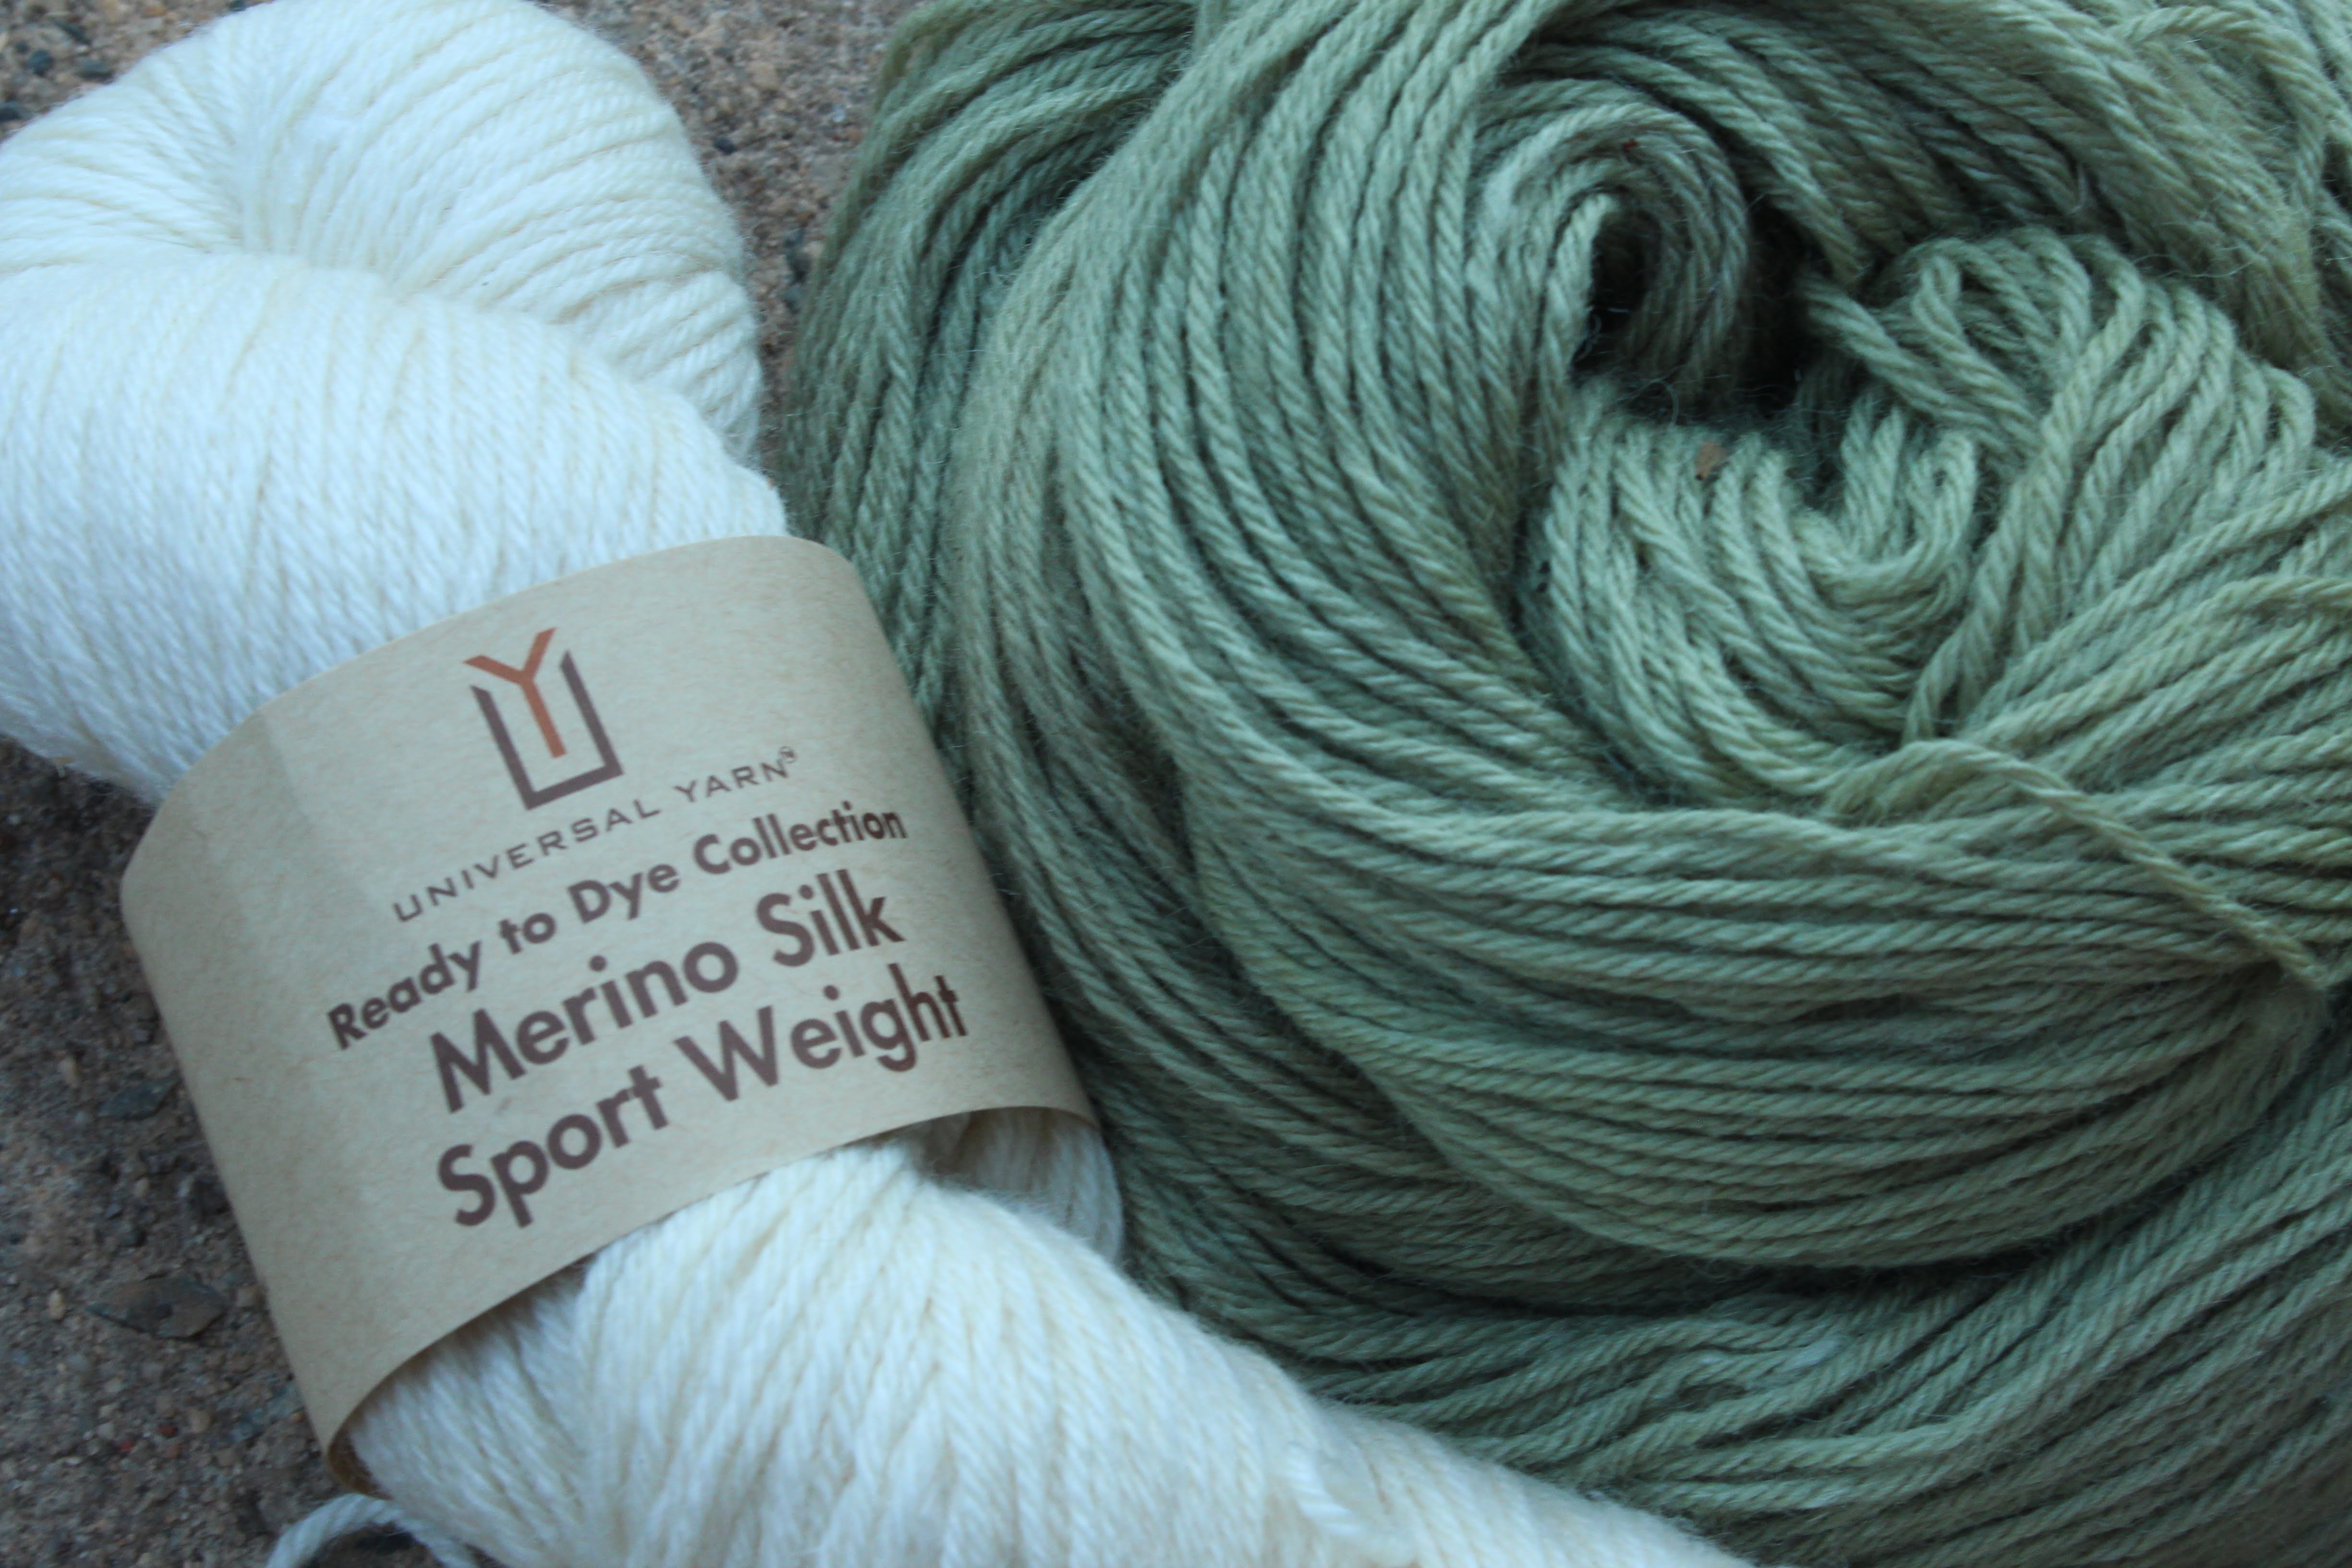
Today I’m using our soft and silky Universal Yarn Ready to Dye Merino Silk Sport Weight. It’s a gorgeous sportweight yarn with enough silk to make it appropriate for garments and accessories to throw over your shoulders on summer nights.
Whenever possible, I like to harvest dyes from the plants growing in and around my yard. I can choose what to grow, and there are endless ways I can experiment. Natural dyeing is, without a doubt, full of surprises, and you’ll understand what I mean when you see the results of my adventure with azalea dye.
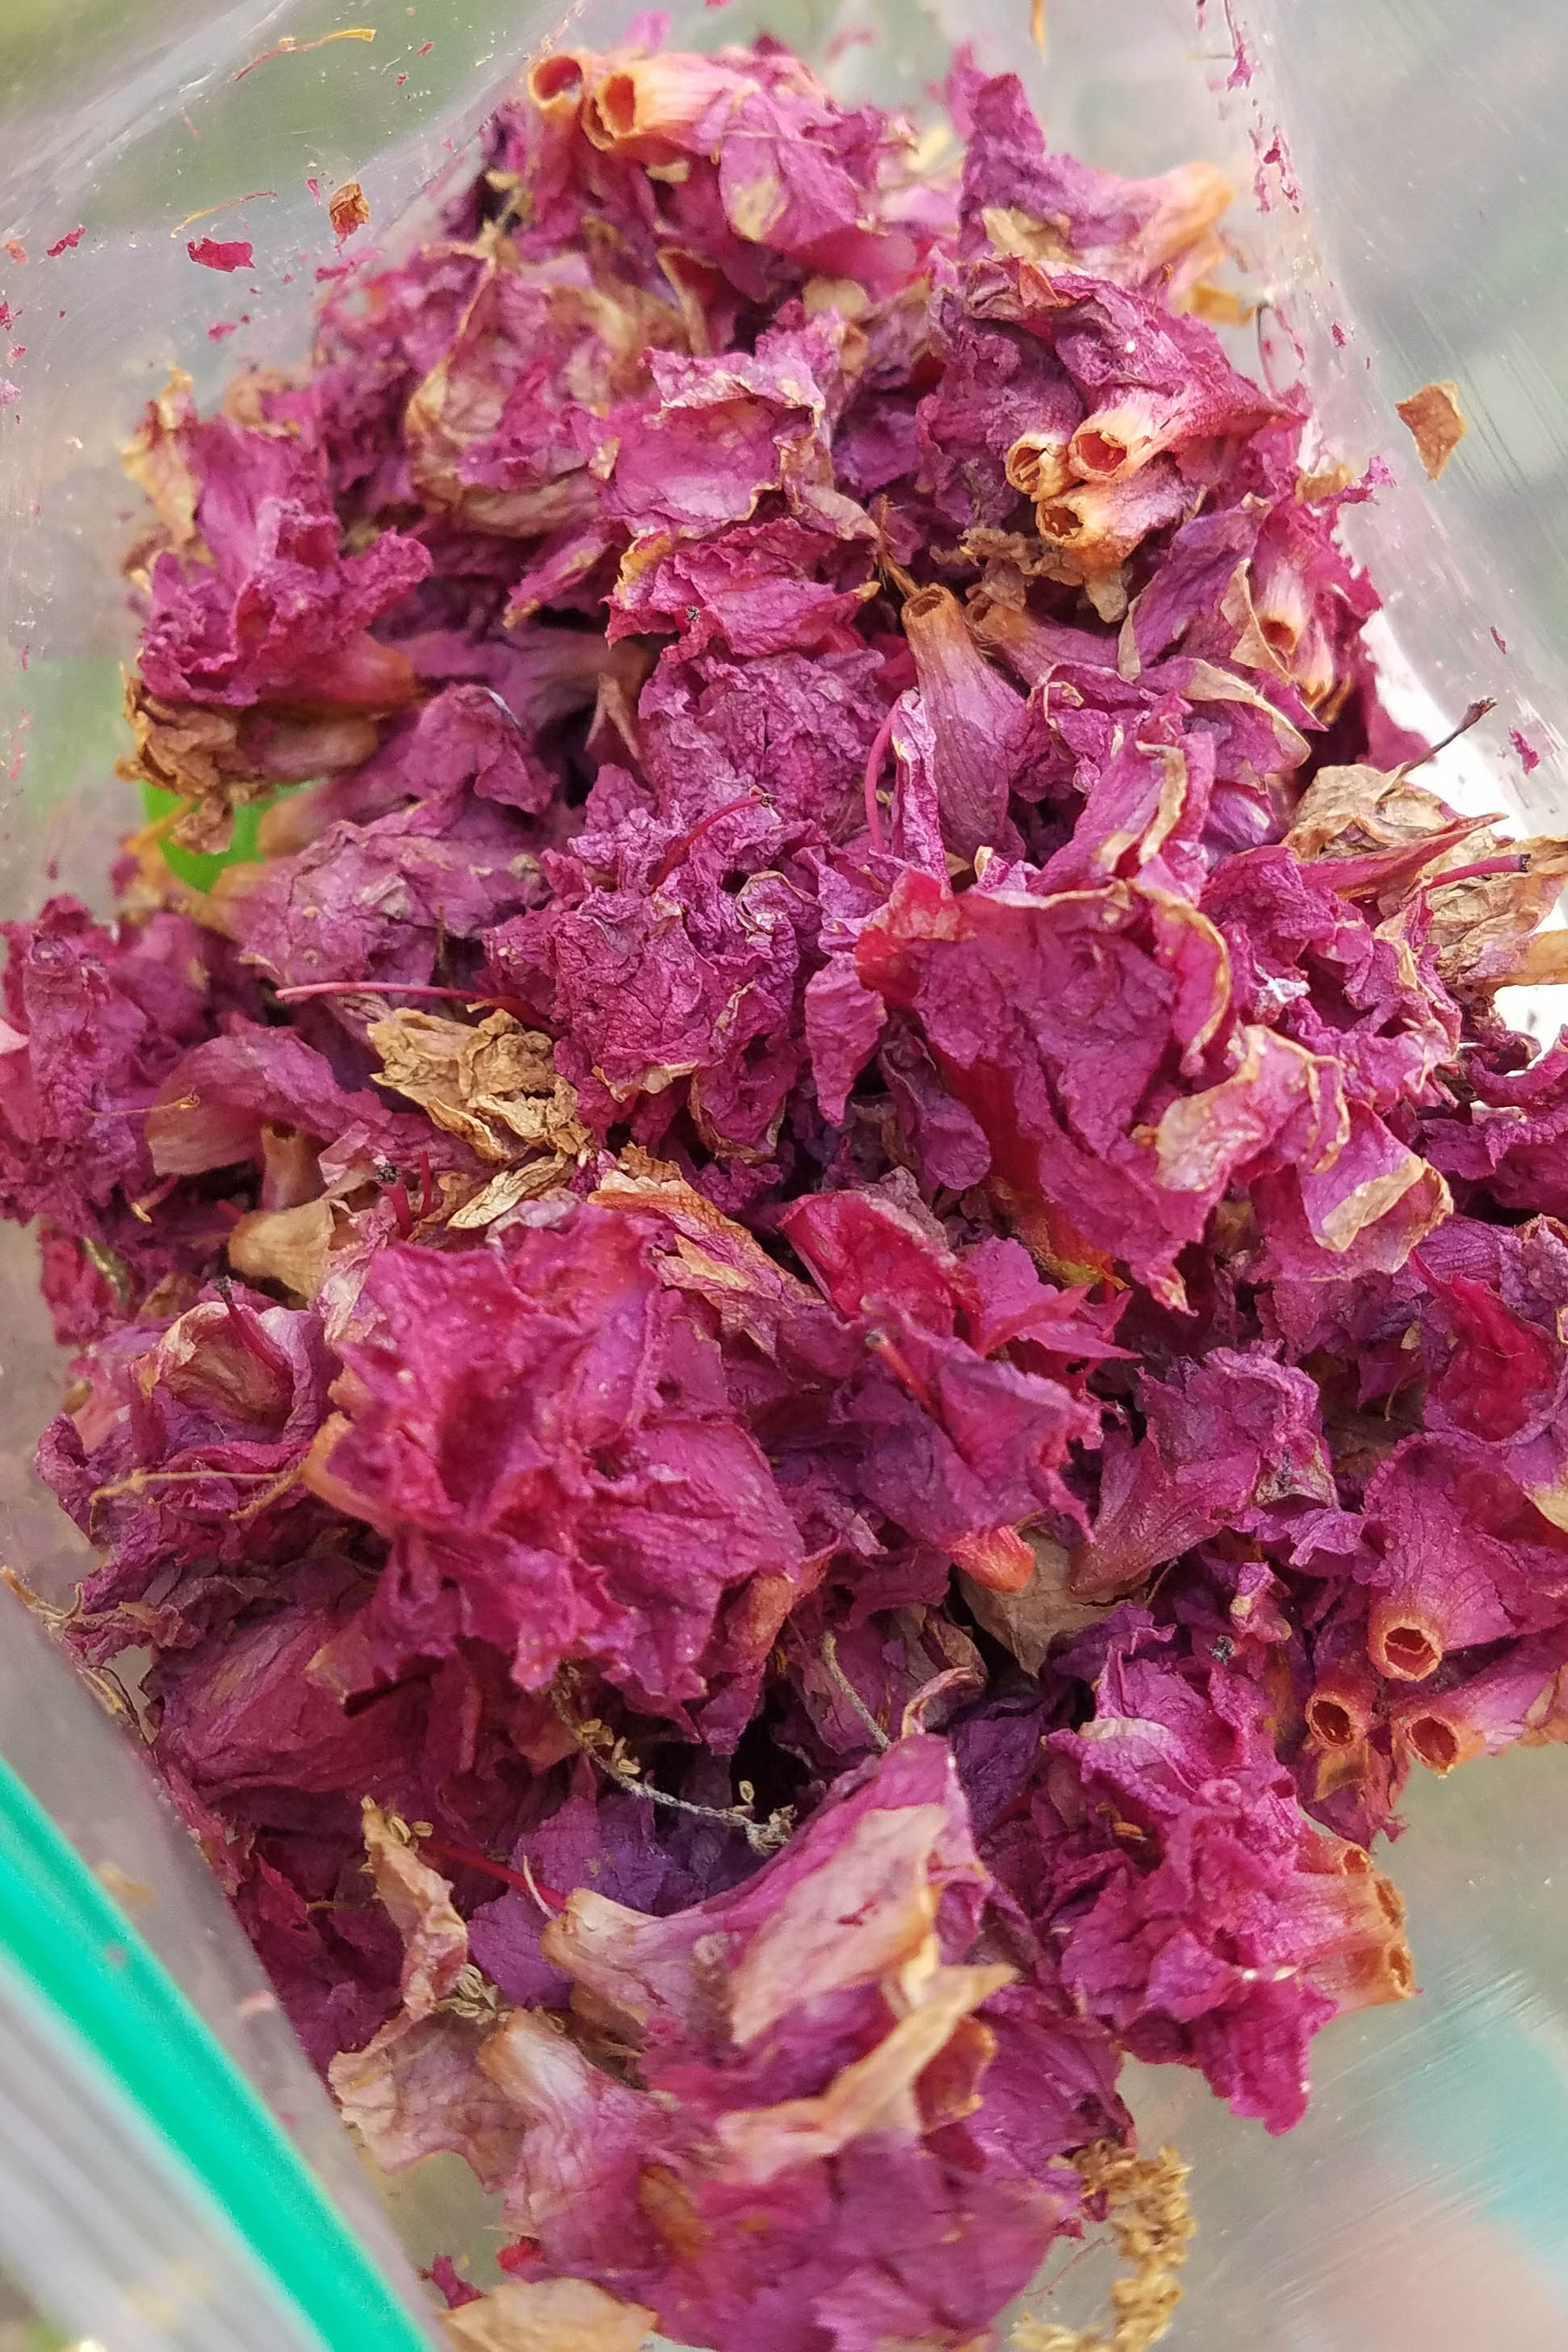
I have a few azalea shrubs around my house. Just weeks ago they were full of brilliant pink blossoms, but now they’ve dried. I was plucking some weeds from my herb garden when it hit me: I have so many dried blossoms! Why not try to dye with them?
I grabbed a freezer bag and stuffed them full of the dried blossoms. Side note: If you use a freezer bag like I did (why didn’t I just grab a bowl?!), remember to simply rinse it and re-use it!
After collected my blossoms, I weighed them. I took into consideration the weight of the bag and ended up with approximately 37g. I could have collected more – I barely put a dent in my shrubs!
For today’s tutorial you’ll need:
1 skein of Universal Yarn Ready to Dye Merino Silk Sport Weight
Approximately 30-40g of dried azalea blossoms
Alum – you can find this in the baking/spices section of your grocery store.
Two stainless-steel pots that you don’t plan to use for cooking – I purchased mine for a few dollars at a thrift store.
Tongs – they don’t need to be stainless steel but choose some that you won’t use for cooking.
A kitchen scale – I can’t recommend this one enough. Although it isn’t essential, if you’re a knitter, you should have one! It’s useful for much more than dyeing.
Measuring cups/tablespoon
White distilled vinegar
Salt
Water
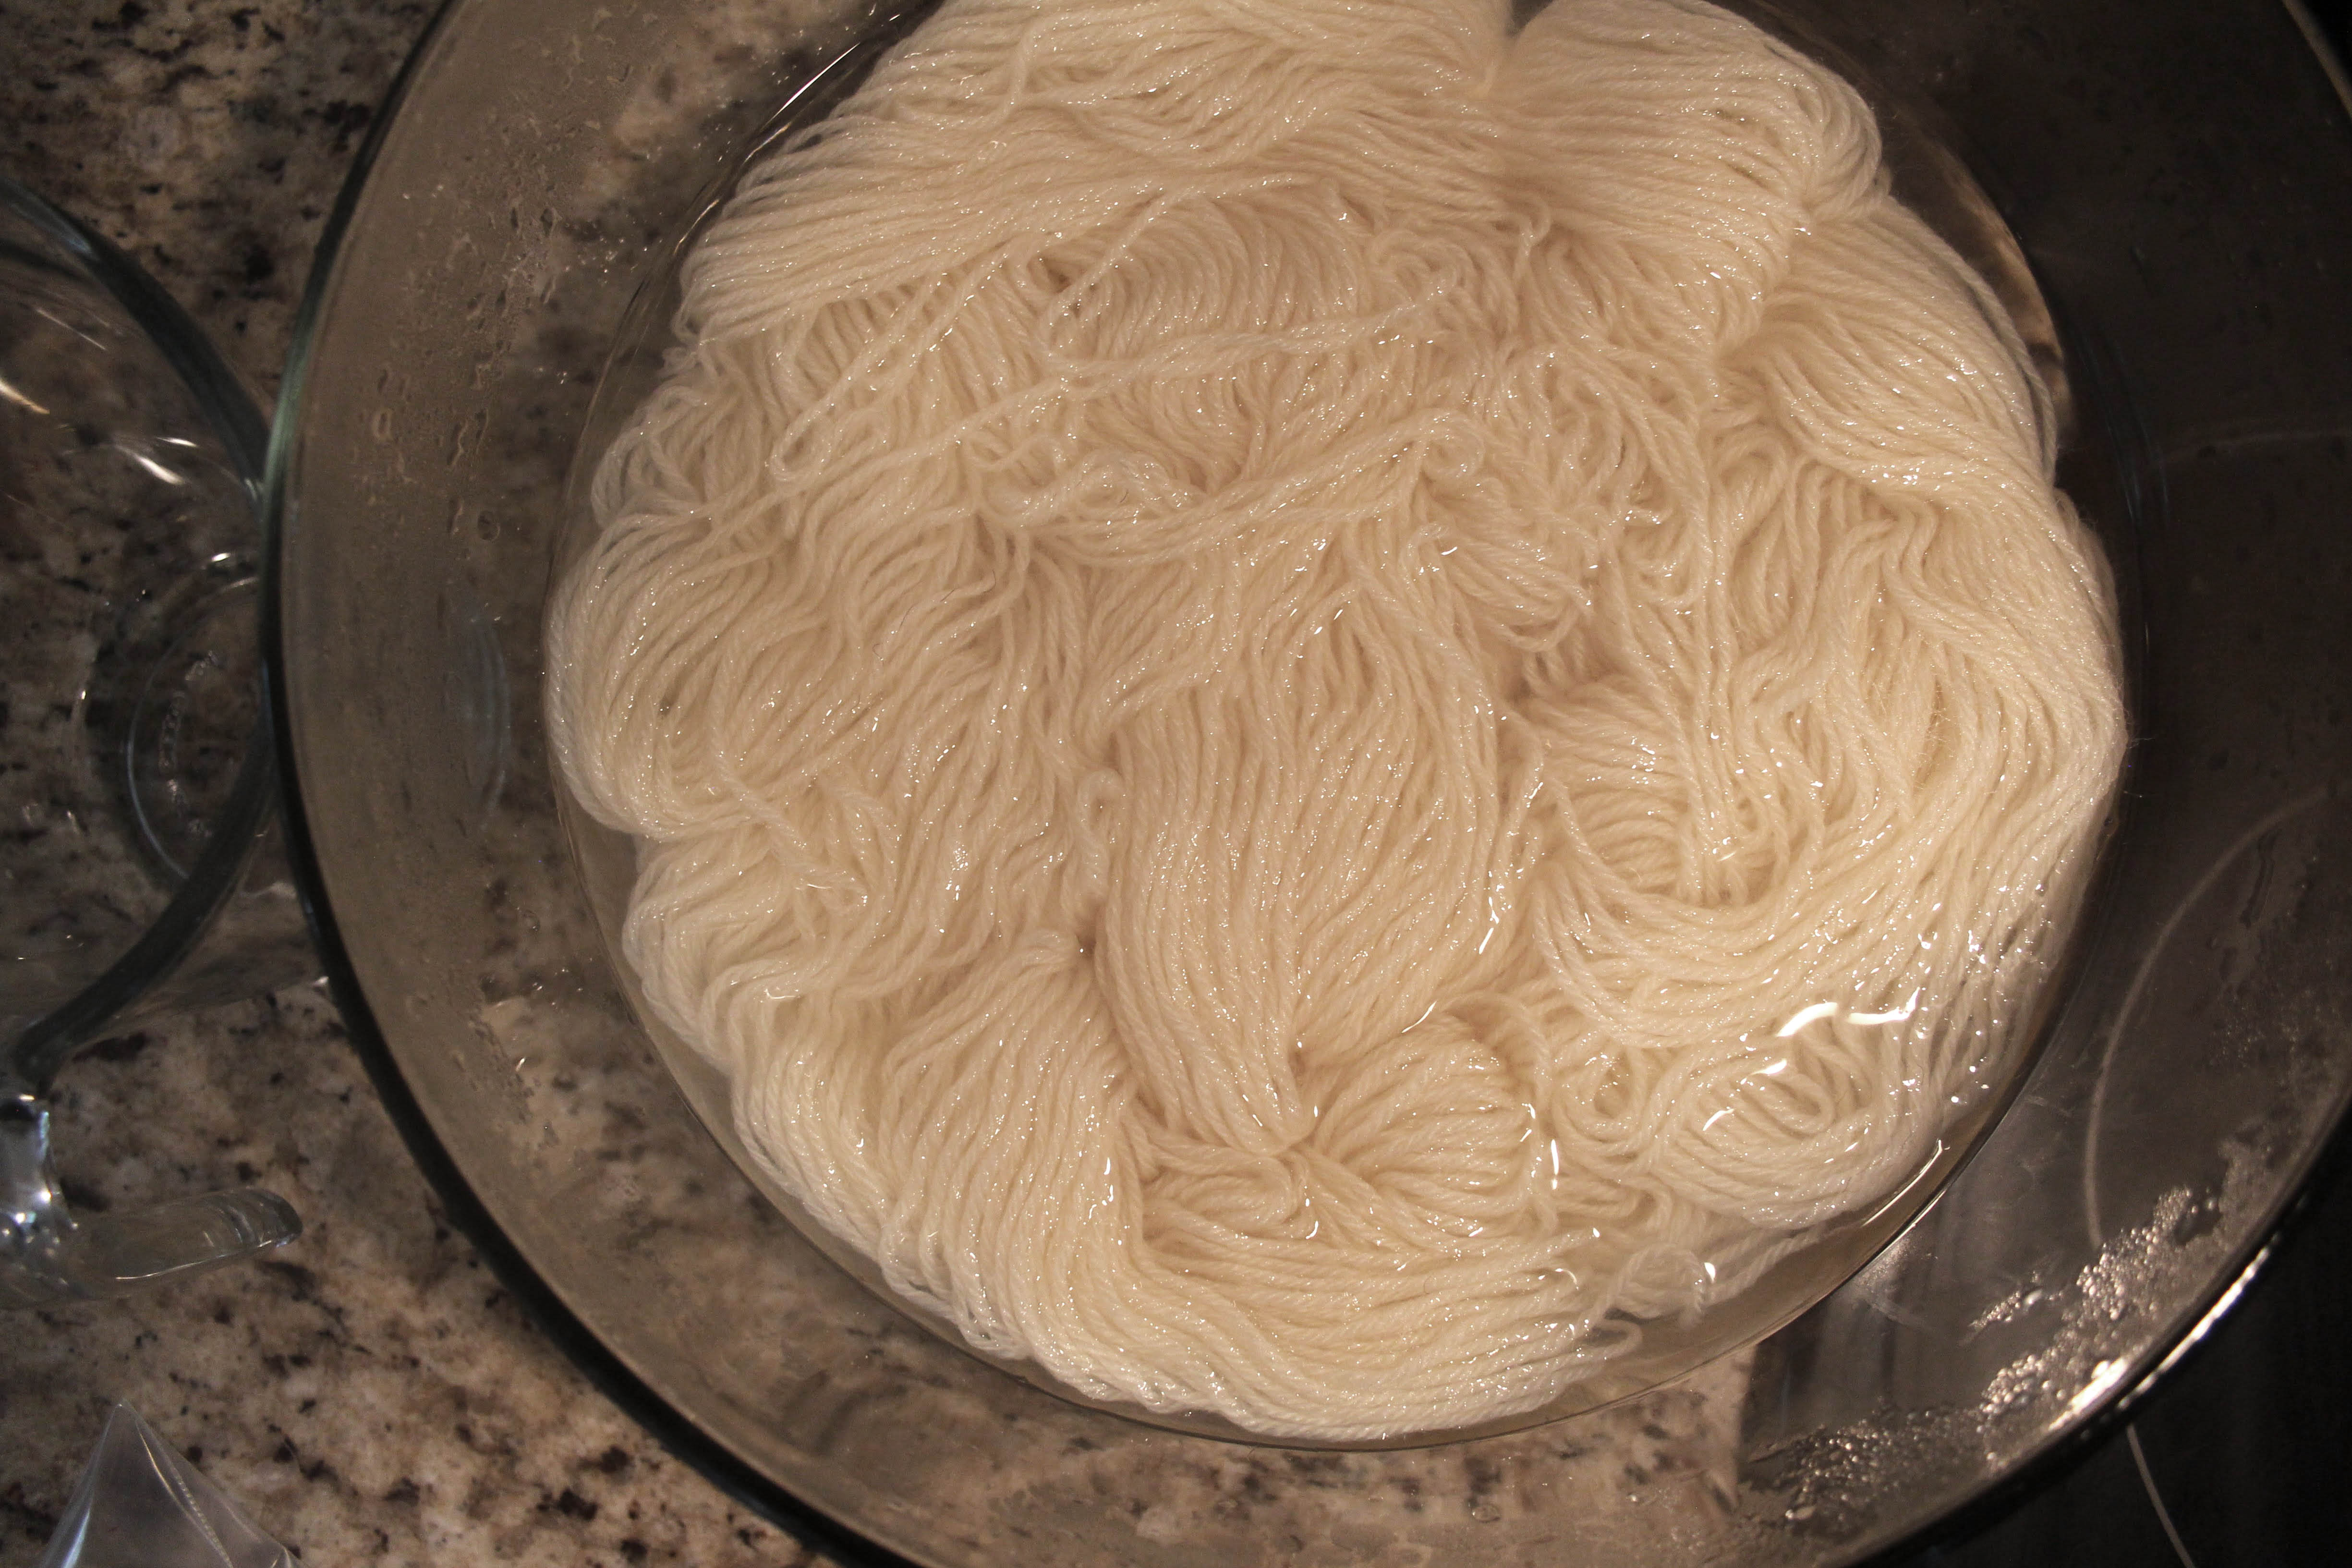
Step 1: Create a mordant and soak your yarn. You can find specific instructions for creating a mordant in my first post (link here). If you’ve been following along and have a jar of mordant already, simply reuse the solution.
Step 2: While your yarn is soaking, prepare your dyebath.
Fill your stainless-steel pot with enough water to allow your yarn to flow freely.
Dissolve 1 tbsp of salt into the water.
Pour ½ cup of vinegar into the water – salt and vinegar help to brighten the dye.
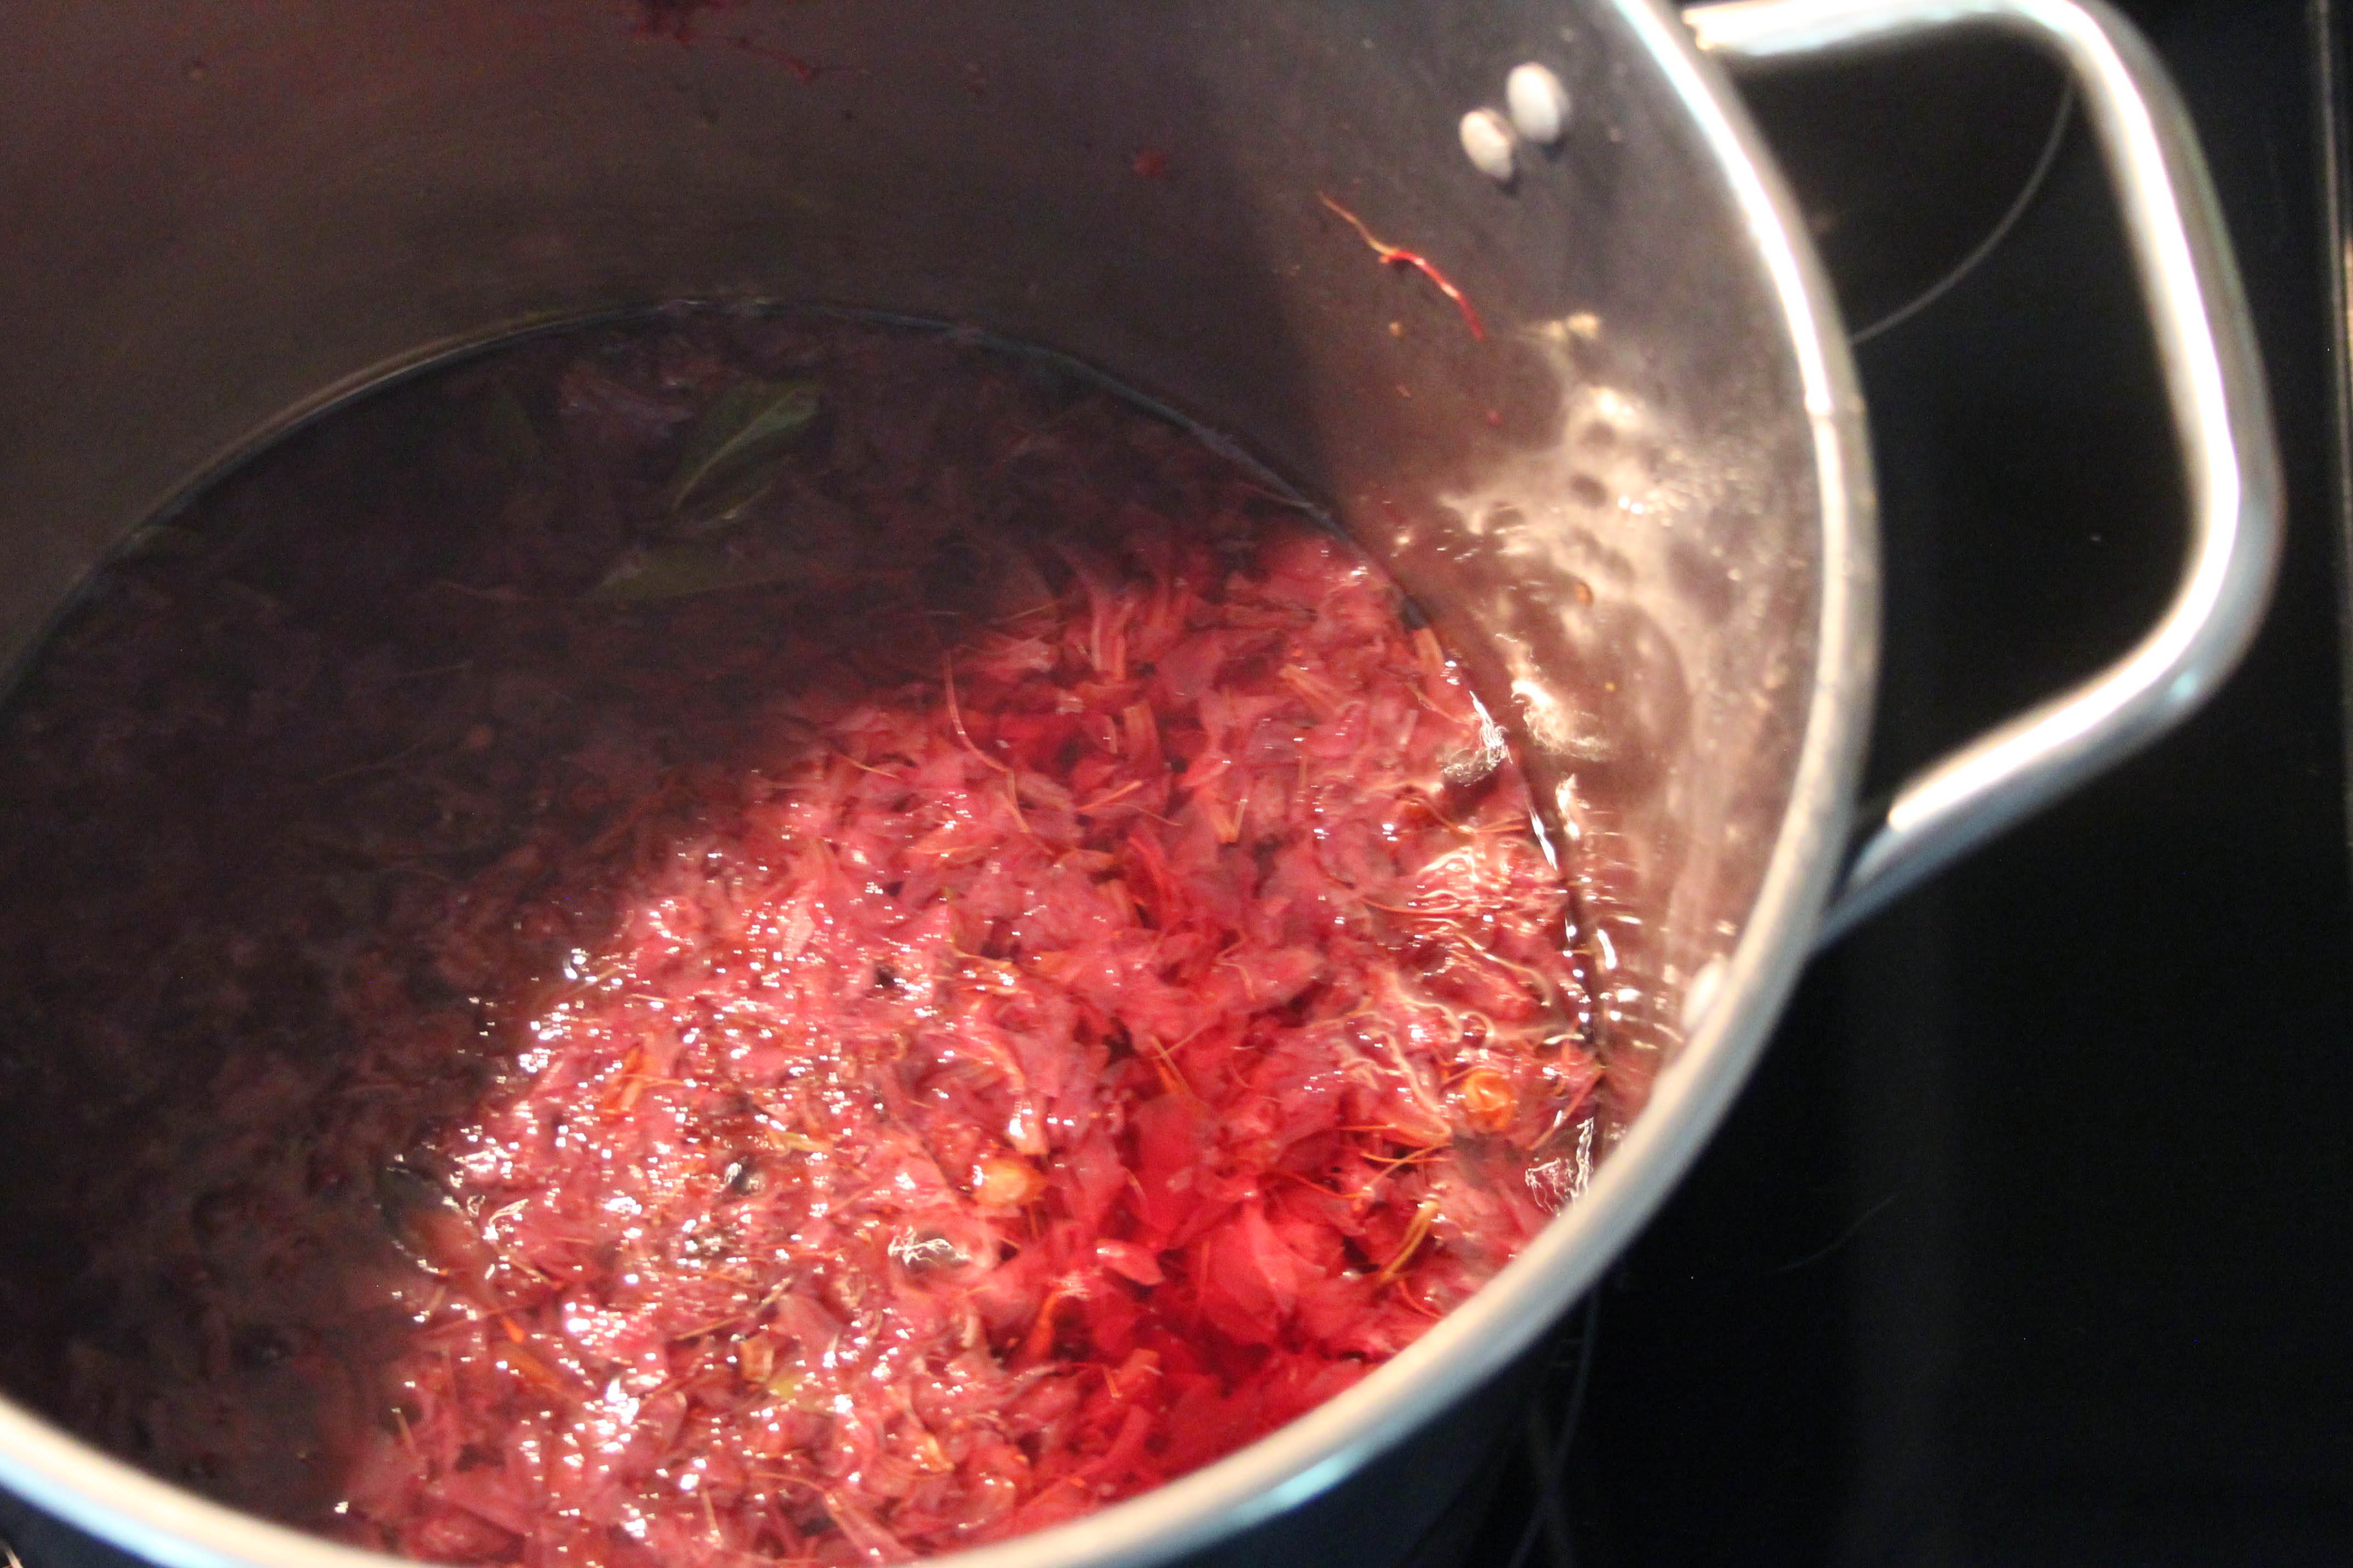
Add your azalea blossoms and use the tongs to stir the pot.
Bring to a simmer over your stovetop. Allow simmering for 30 minutes to an hour.
Lower the temperature so that the water is just under a simmer. If you want a specific temperature, you’ll want the water to be about 190 degrees F.
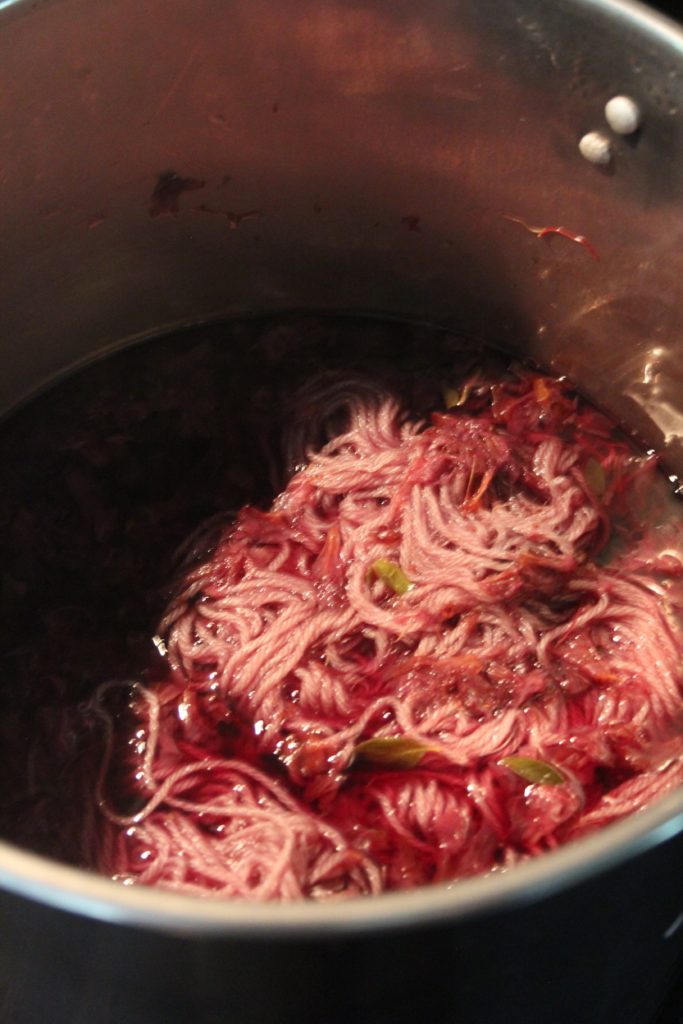
You can see that the dyebath turned into a rosy color.
Step 3: Remove your yarn from the mordant bath, gently squeezing the excess mordant from the yarn.
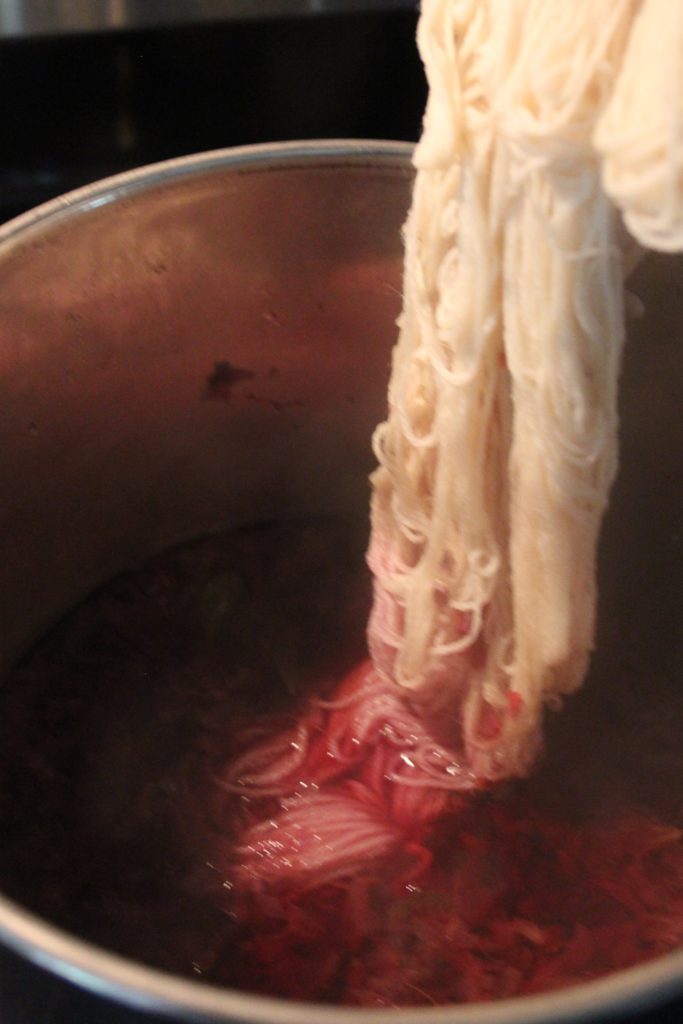
Step 4: Carefully place your yarn into the dyebath.
Step 5: Allow the yarn to soak in the dyebath for about an hour. Turn off the heat and set the pot aside. Do not remove the yarn yet.
Step 6: Allow the yarn to cool in the dyebath – I let mine cool overnight.
Step 7: Remove your yarn and rinse thoroughly. I recommend stepping outside and giving it a few vigorous shakes to remove the remaining plant matter.
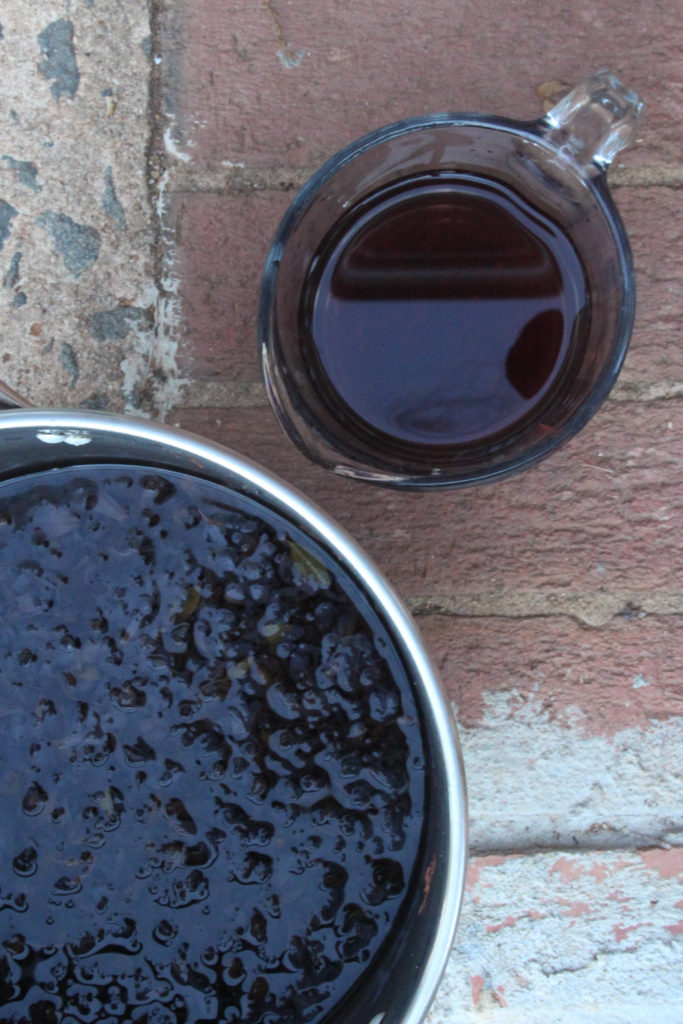
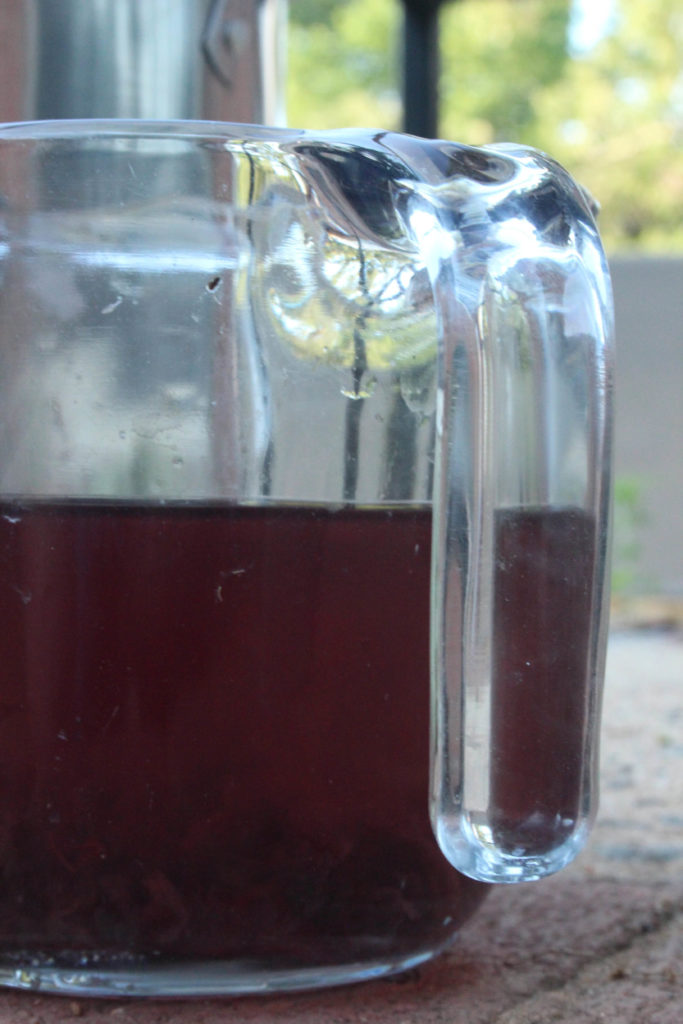
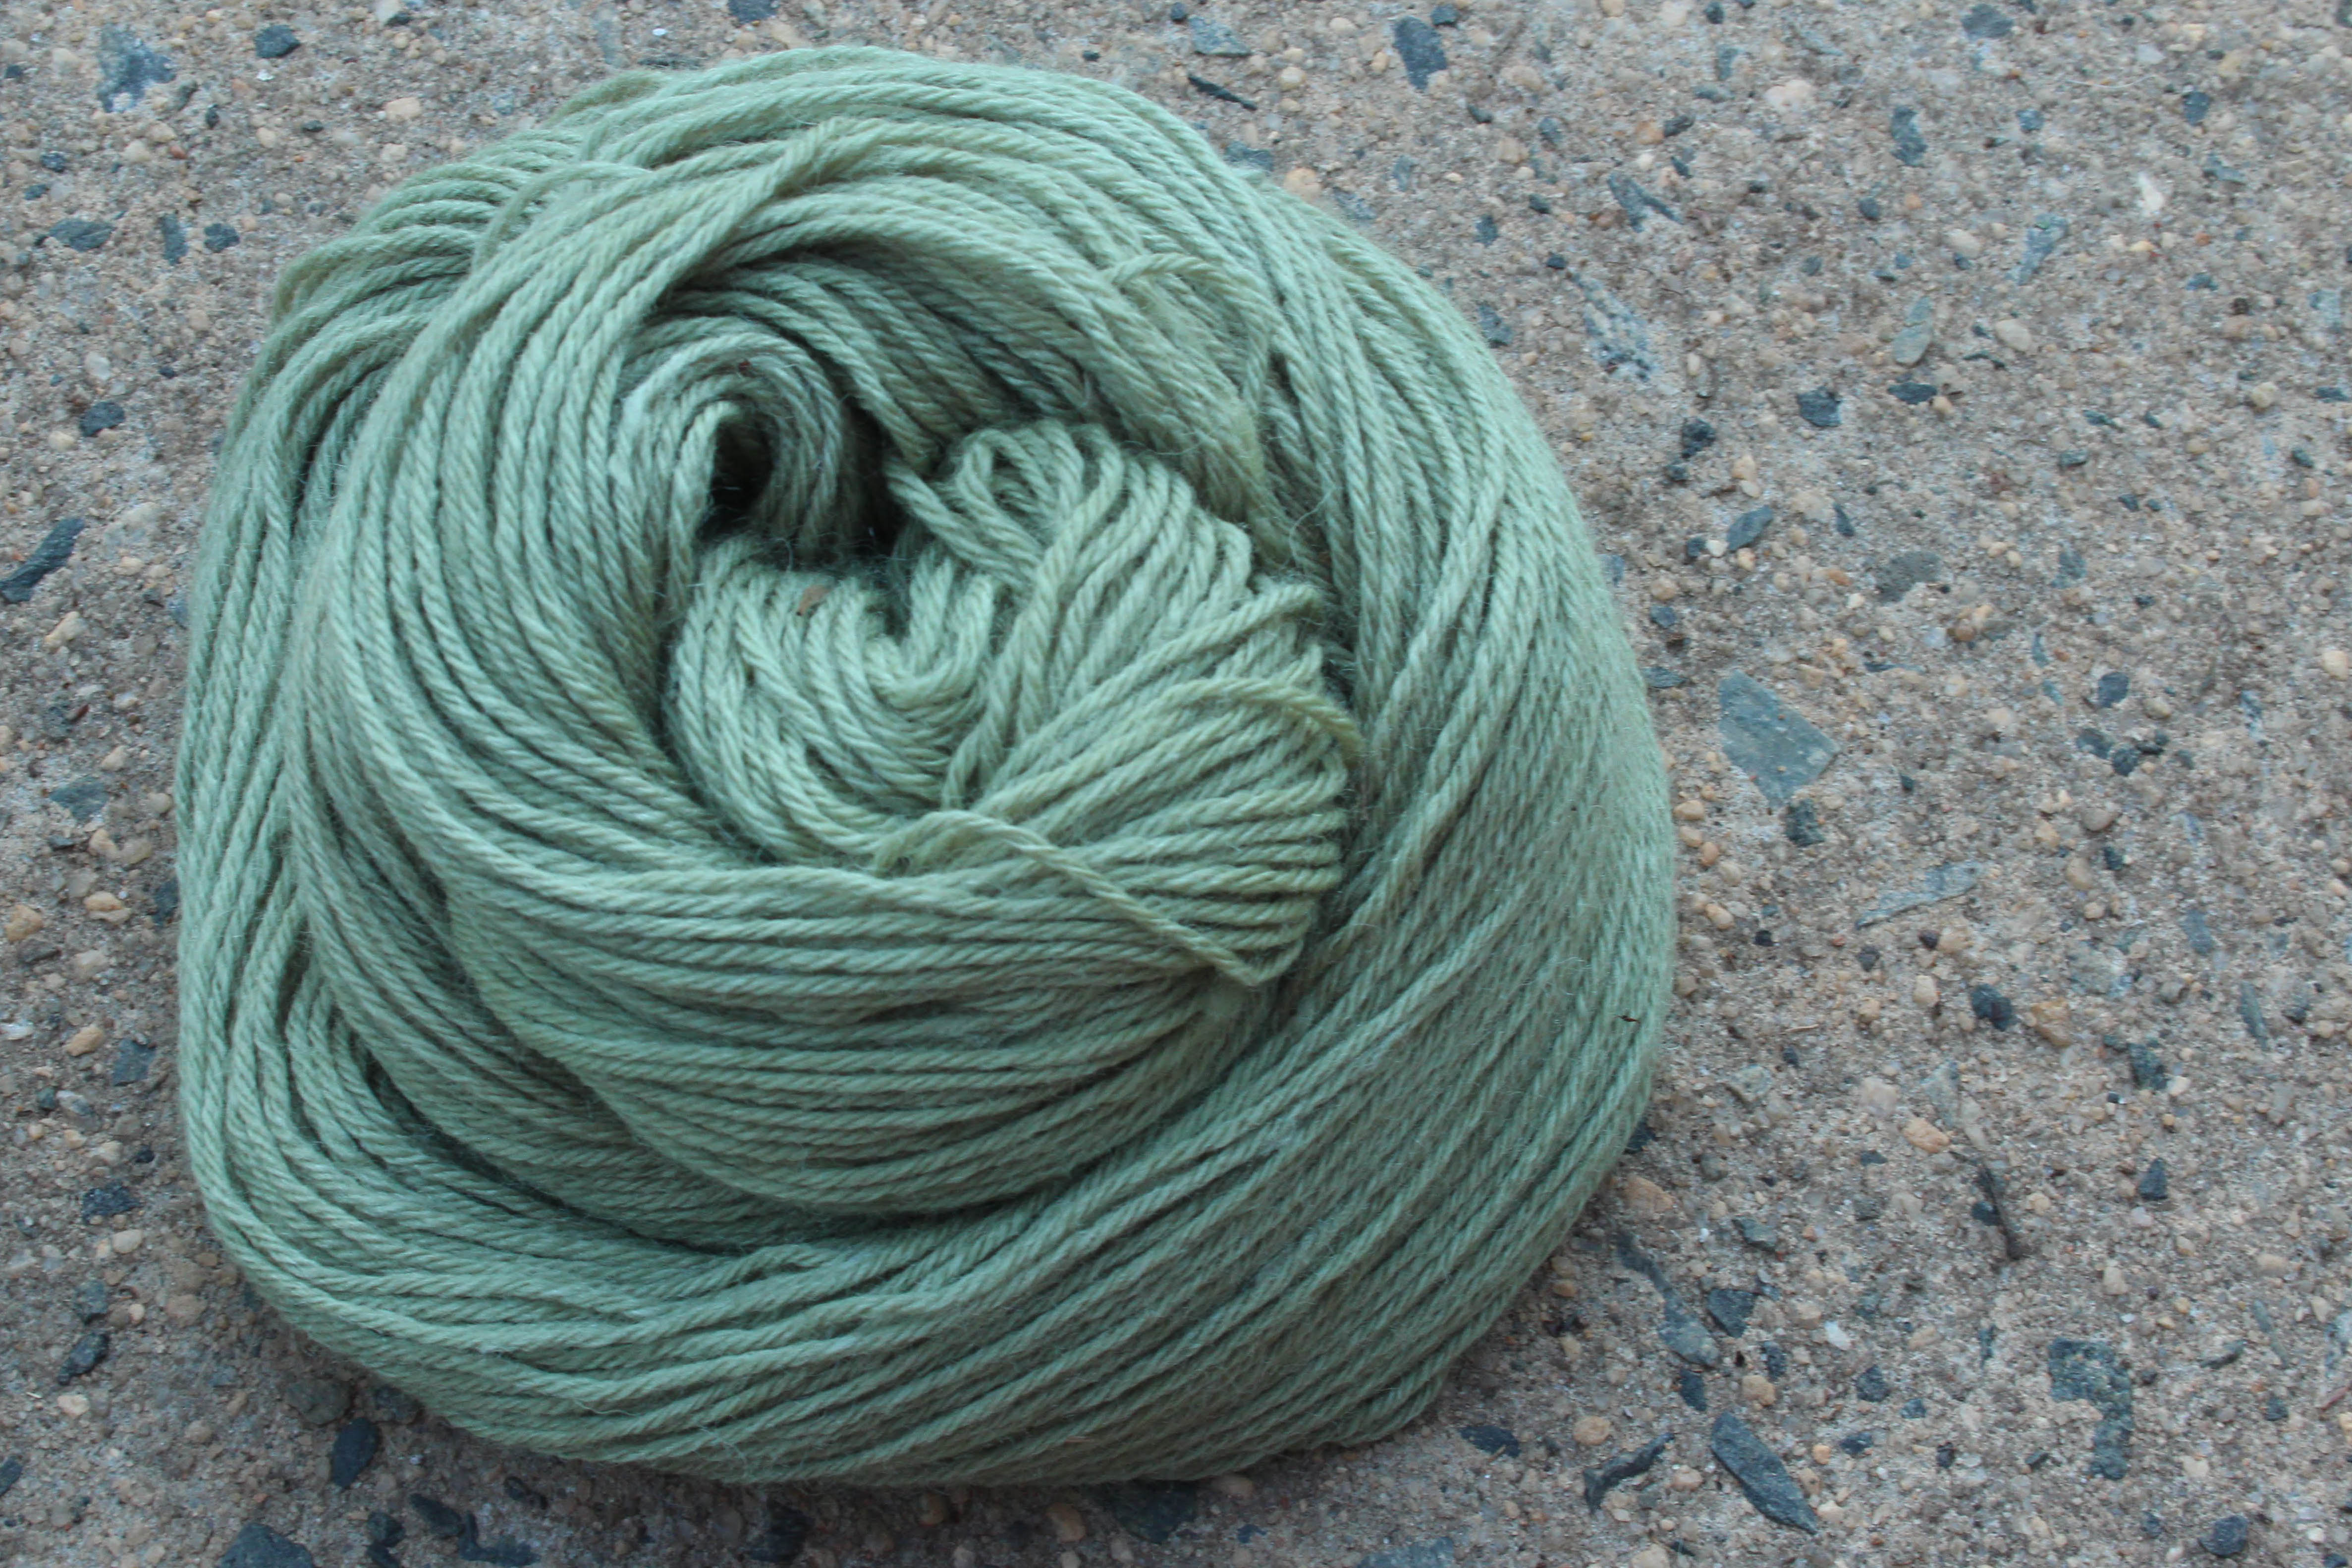
Before I reveal the yarn, I want to take a moment to emphasize how surprising natural dyeing can be. As you can see, the color of the dyebath was initially pretty pink. After about an hour it looked much more like a silvery-purple. I was really excited about those results. Even when the water cooled it remained a deep purple.
So, you might imagine my surprise when I discovered that my azalea dye turned into this…
Isn’t it the loveliest shade of green? I’m over the moon about the results of this dye experiment, and I’m sure I’ll be using azaleas for dyeing again soon. The transformation is pretty stunning.
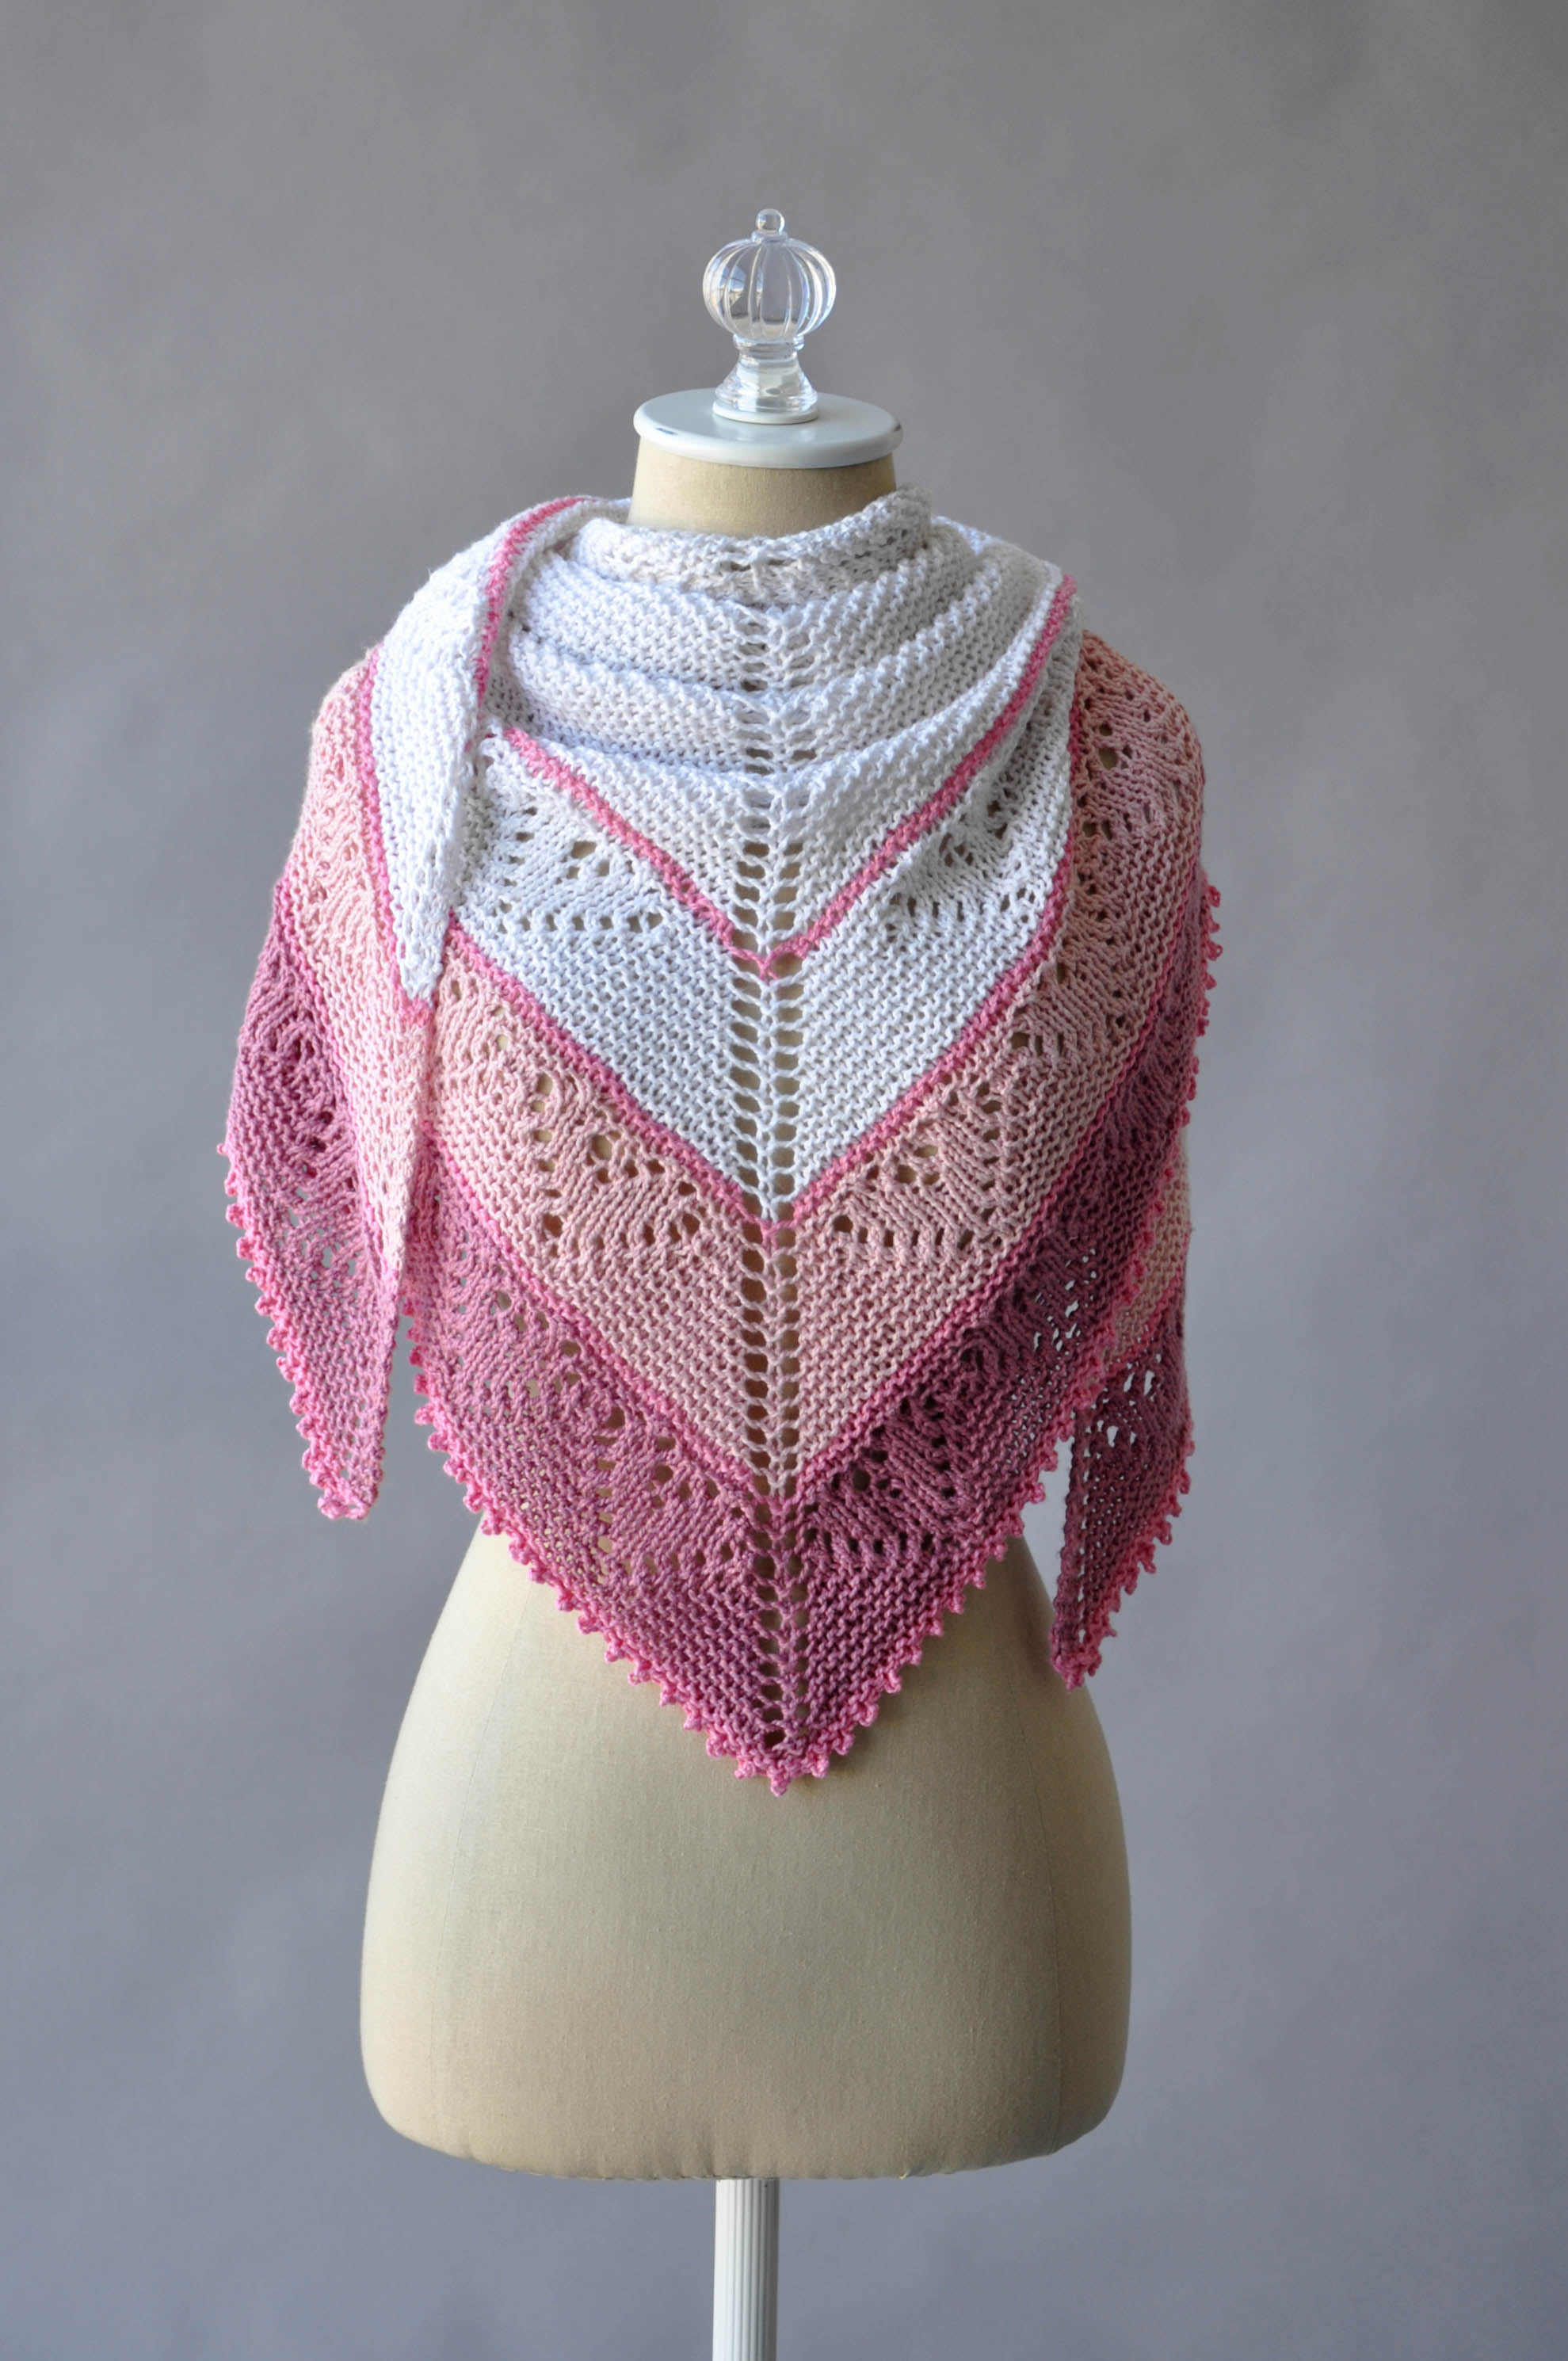
Whether you love it or hate it, Valentine’s Day will be here in about a week. What better way to prepare than by knitting yourself (or someone else who is sweet) a shawl? We’ve got you covered – to celebrate Valentine’s Day, we’re offering the Be Mine Shawl for free!
You could ask anyone in the office and they would probably tell you that I have an unrelenting sweet tooth. It is just so difficult for me to turn down sugary sweet snacks. What does this have to do with our Valentine’s freebie? Well, the inspiration for the Be Mine Shawl came from conversation heart candies. (In case you were wondering, I prefer the white, wintergreen flavored hearts.)
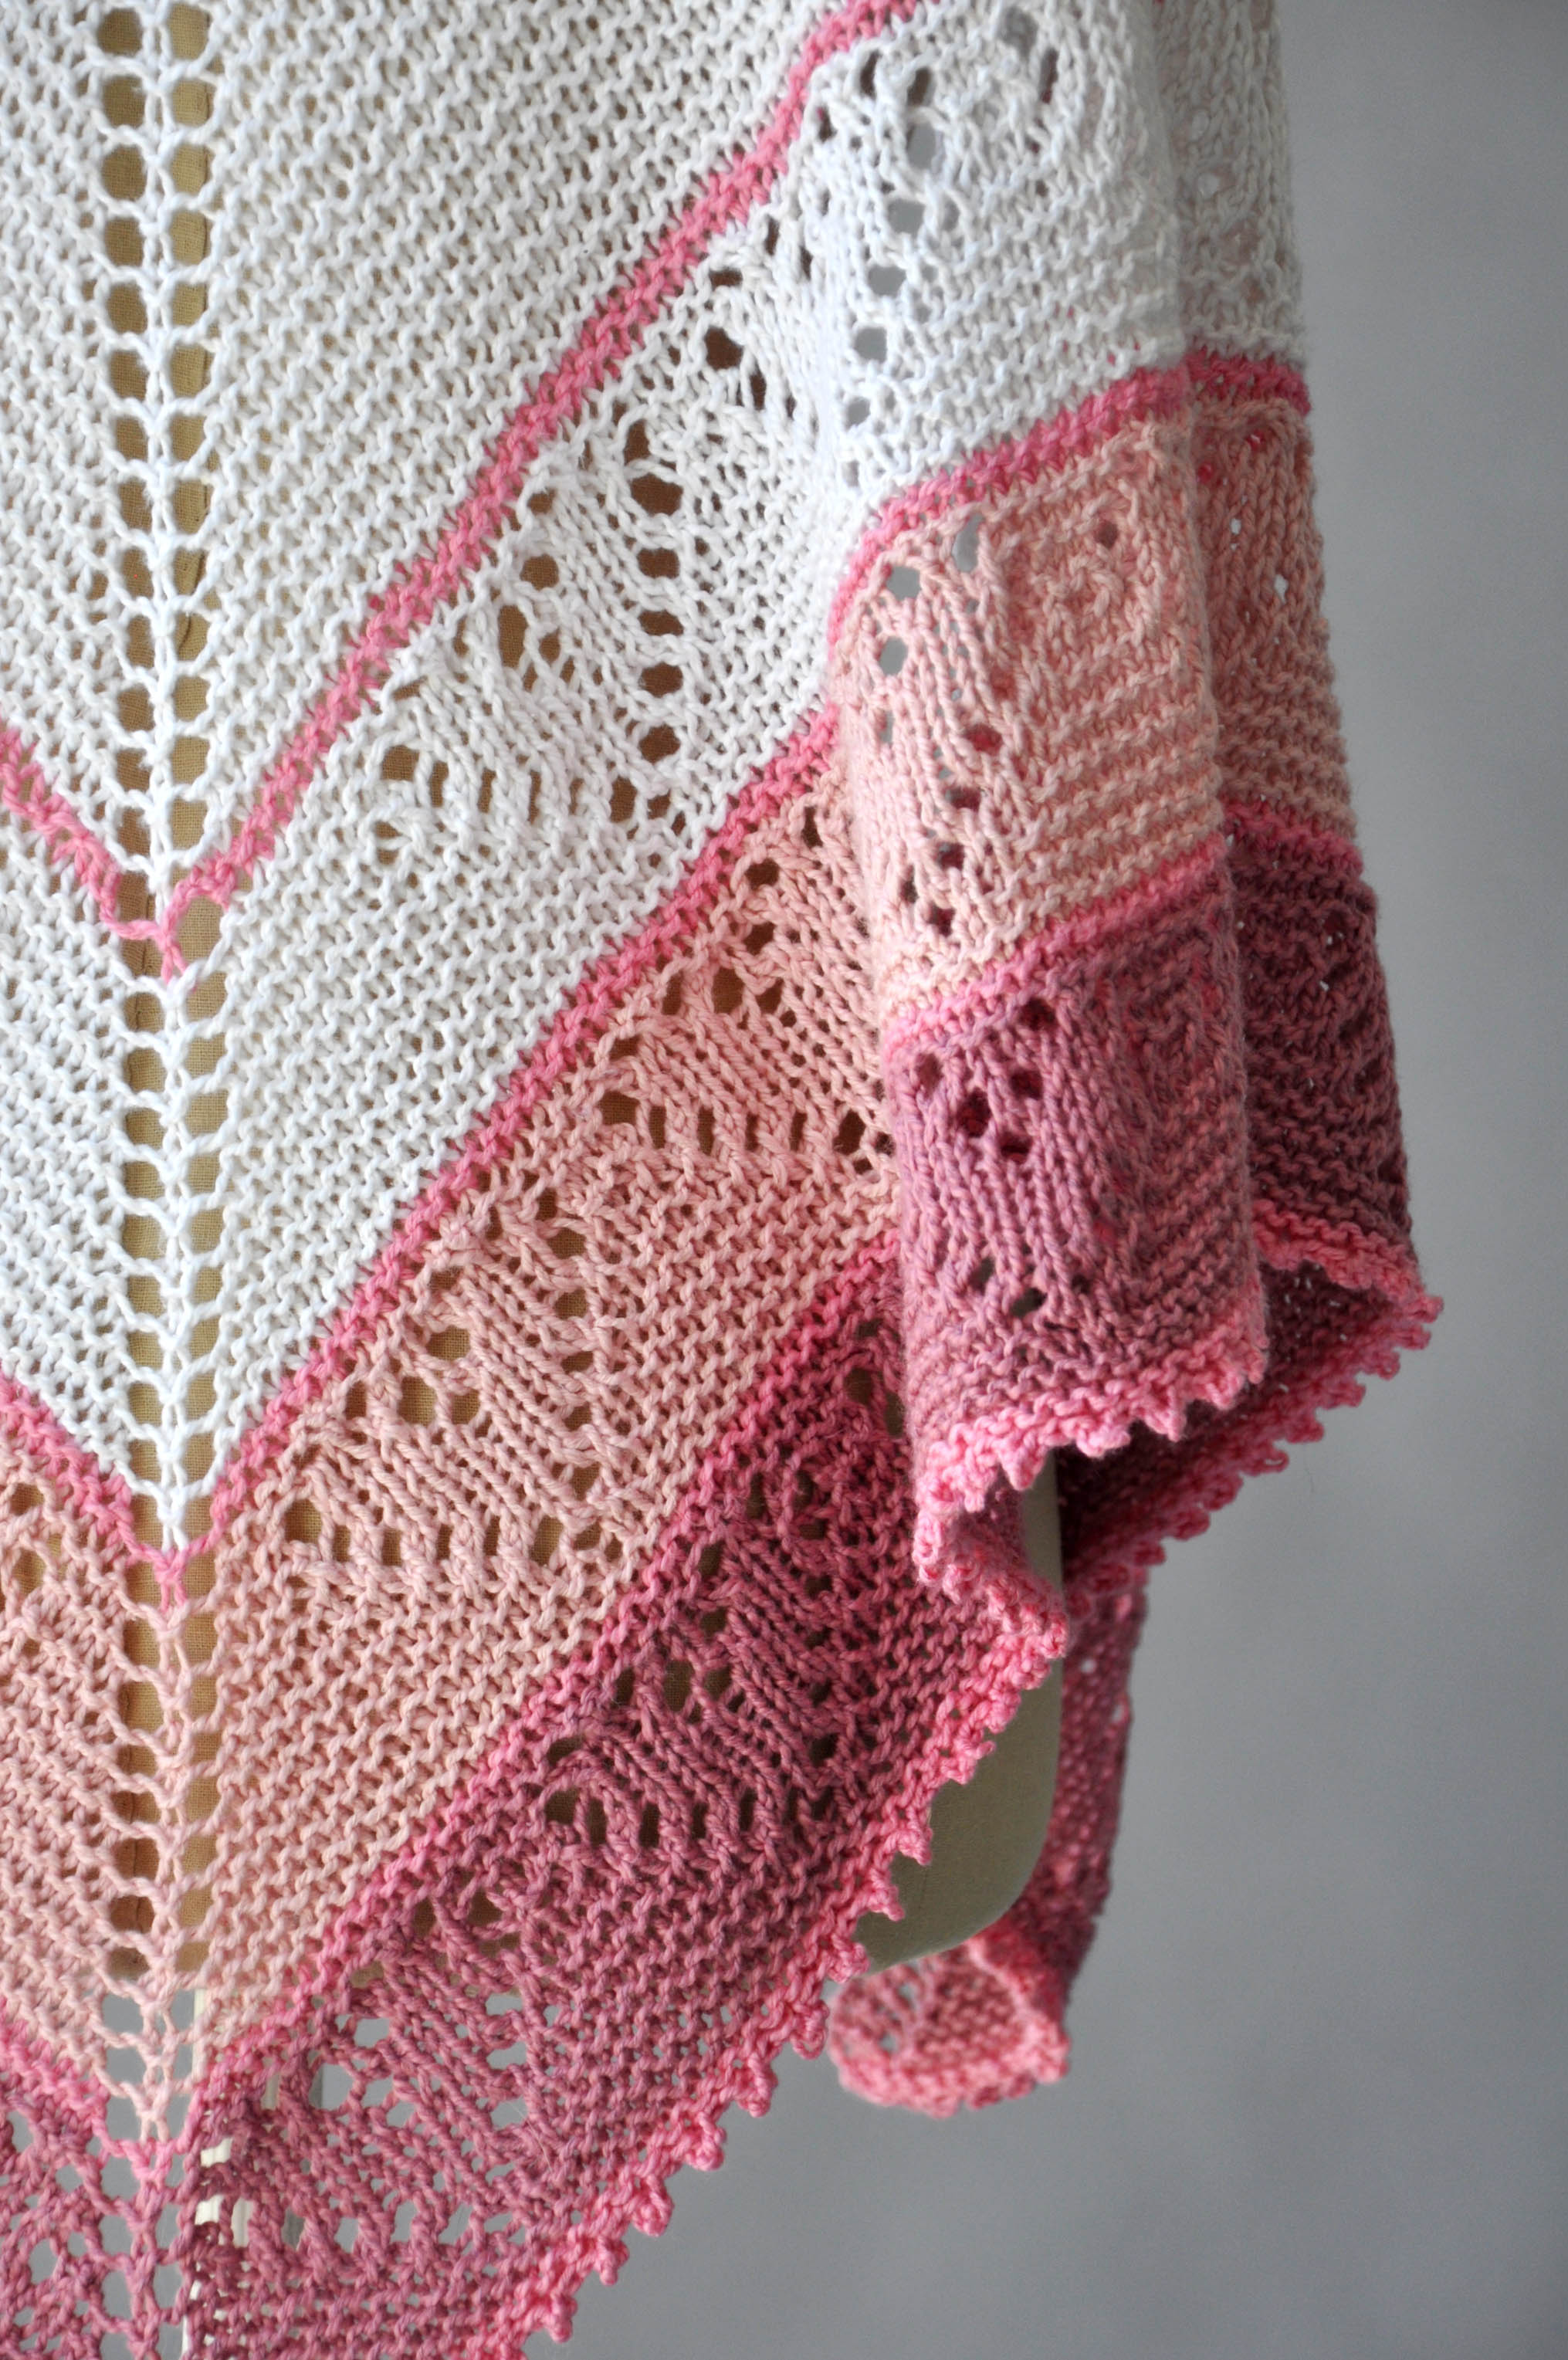
Be Mine is a triangular shawl comprised mostly of garter stitch. It is knit in Fibra Natura Papyrus, a yarn with a luxurious blend of cotton and silk. This yarn is velvety soft and creates a beautifully drapey fabric.
After working the body of the shawl, three bold stripes featuring a lace heart motif are worked to create a lovely border. Small, brightly colored stripes break up the lace sections. Finally, the shawl is finished with a delicate crochet-picot edging. (By the way, back in December Amy posted a tutorial on a Crochet Picot Edging here, but please note that instead of entirely skipping a stitch between picots as directed in the tutorial, you will instead work a slip stitch in the stitch between picots.)
Because Be Mine uses garter stitch, it’s nice to have a beautiful, elastic bind off. As a bit of a tight knitter, I like to use the Suspended Bind-off whenever I want a neat, elastic edge. I highly recommend this technique for this shawl design, and I call for it in the pattern. The method is nearly as simple as your standard bind off. It really just involves holding onto a stitch just a moment longer. If that sounds confusing, don’t worry, because I’ll show you exactly what I mean.
Begin as you would when using a standard bind off by knitting the first two stitches.
Step 1: Slip the first stitch you knit onto the left-hand handle.
Step 2: Do not drop this stitch. Instead, pass this stitch over the second stitch on the right-hand needle as you normally would when binding off, except keep that first stitch “suspended” on your left-hand needle.
Step 3: Next, knit the second stitch on the left-hand needle (note: leave the stitch from the previous step suspended).
Step 4: Now you will slide the stitch you’ve just knit into and the suspended stitch (outlined above) off of the left-hand needle.
Repeat Steps 1-4 until you have two stitches remaining on your right-hand needles. Finish by binding off these stitches as usual.
Ta-da! You now have a neat, elastic bound-off edge.
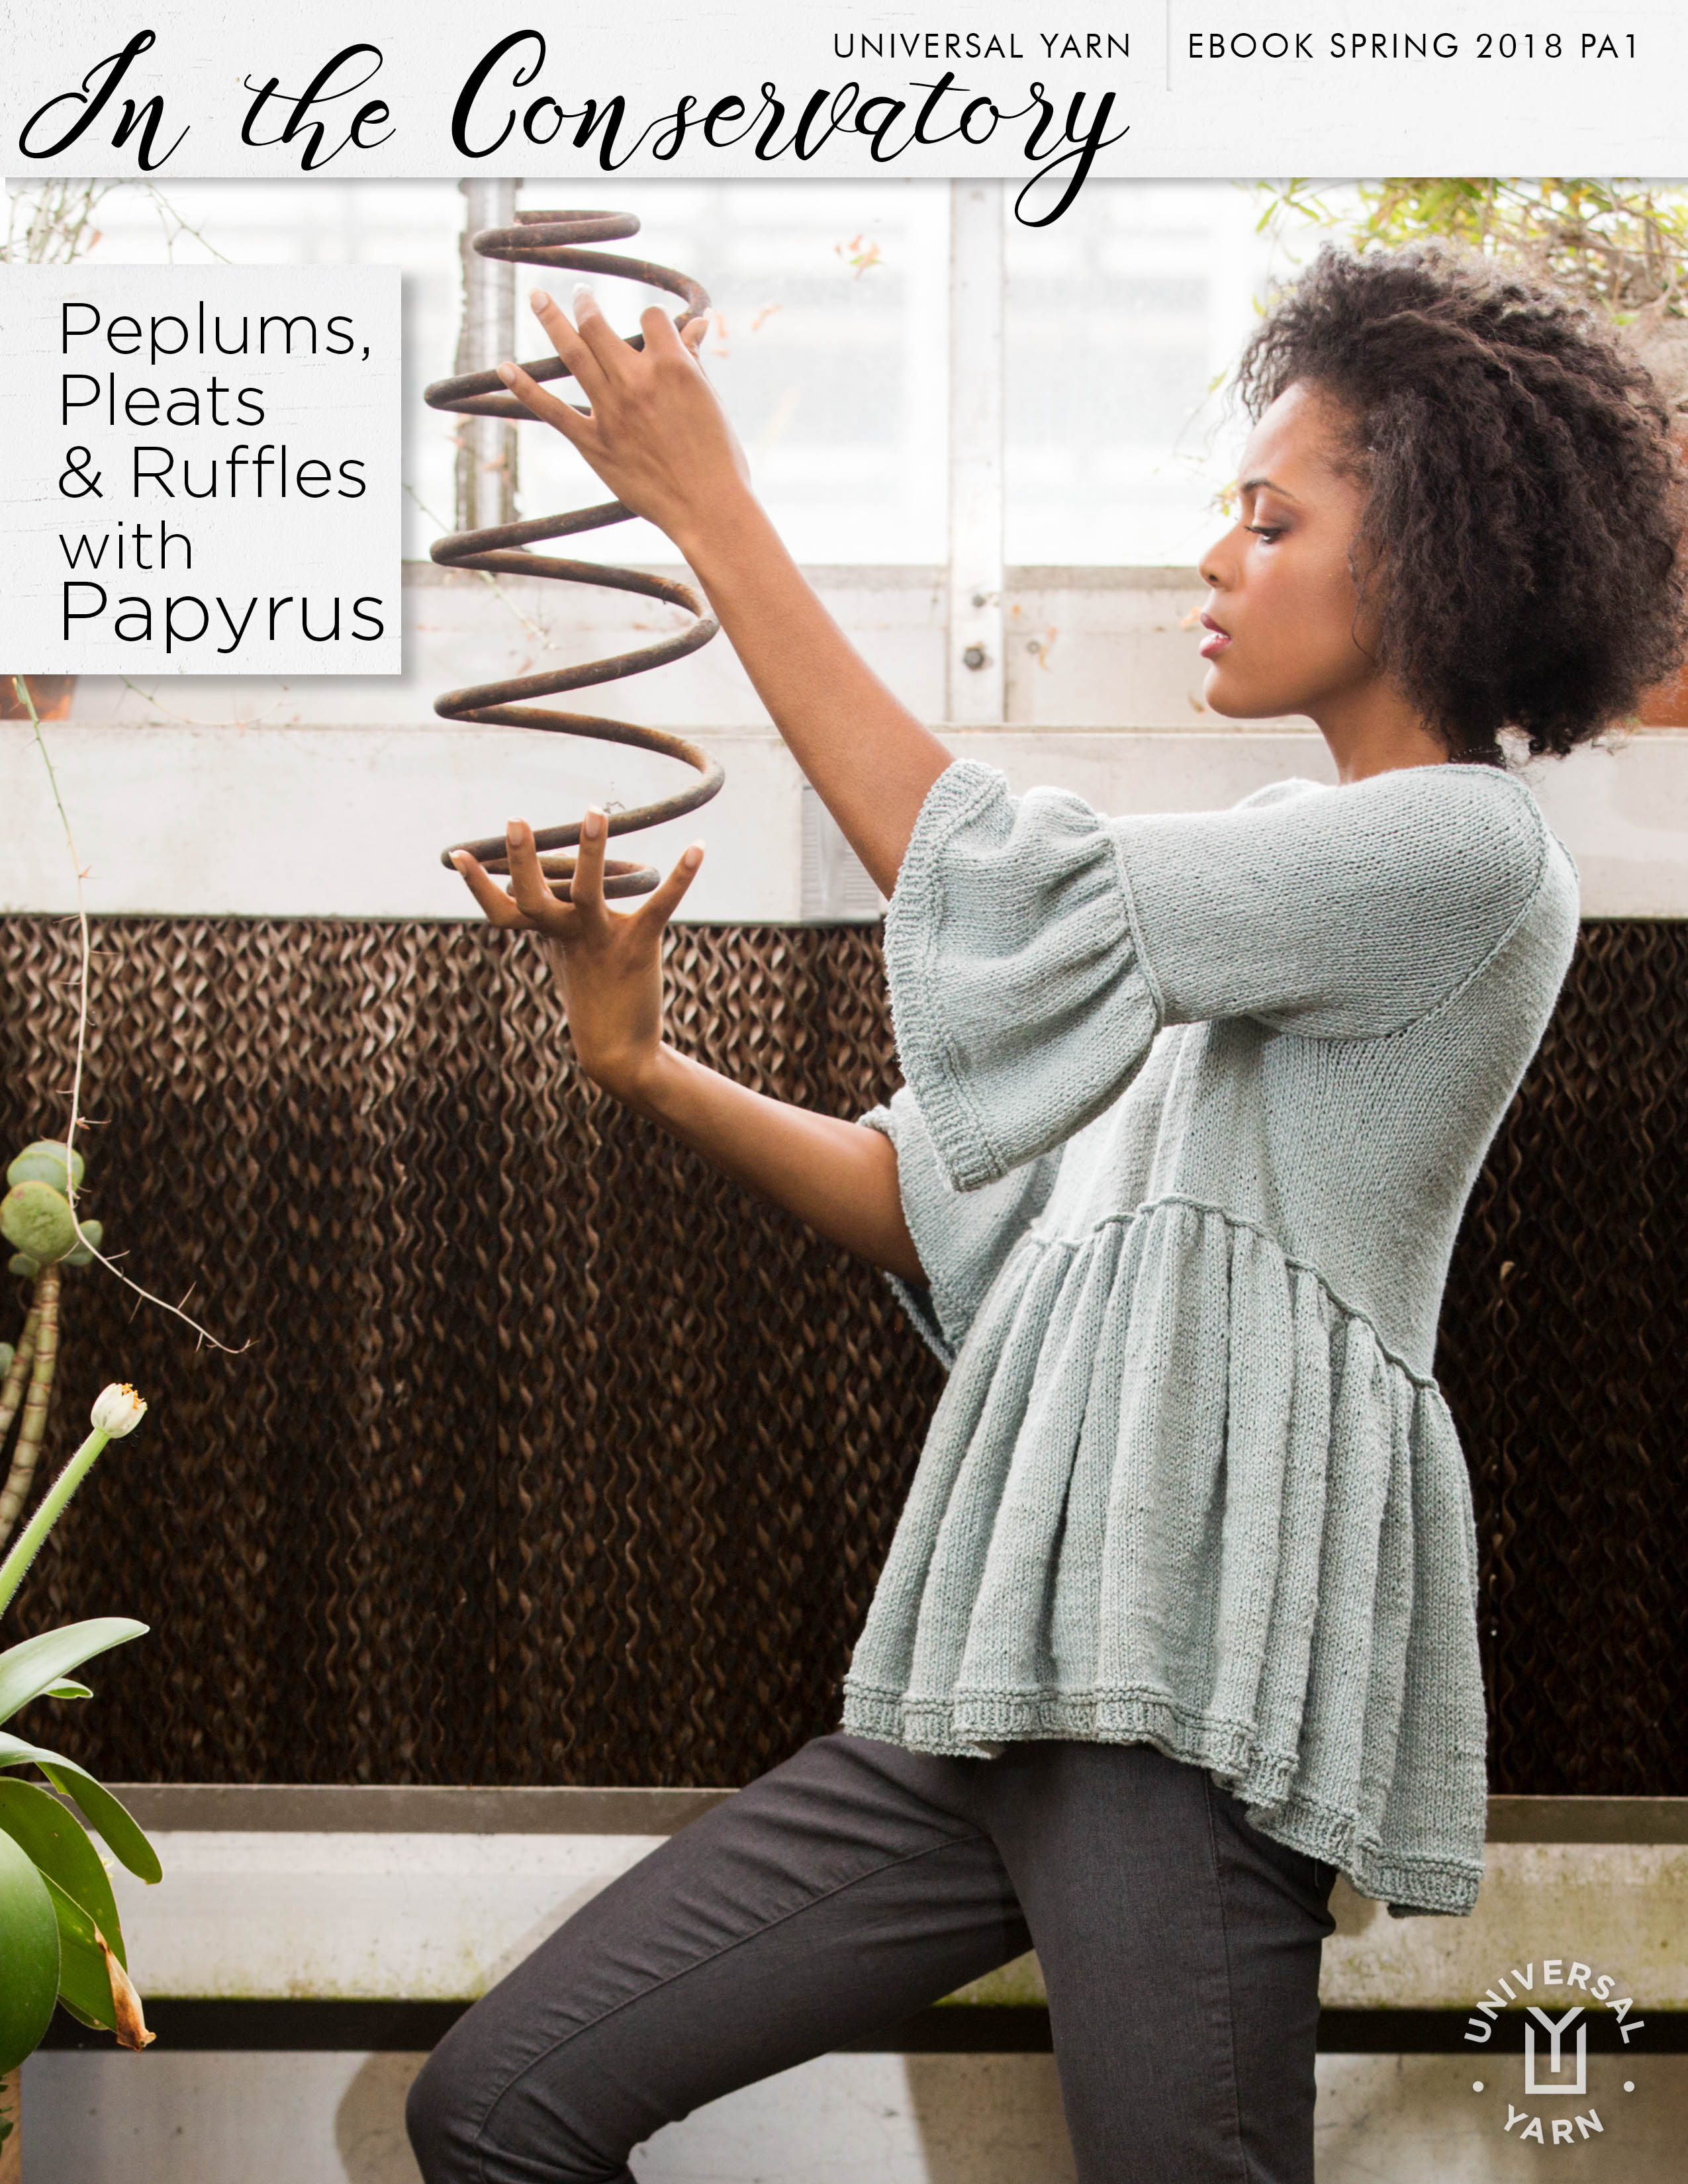
Note the giant spring the model is holding. It’s a “spring” collection. :/
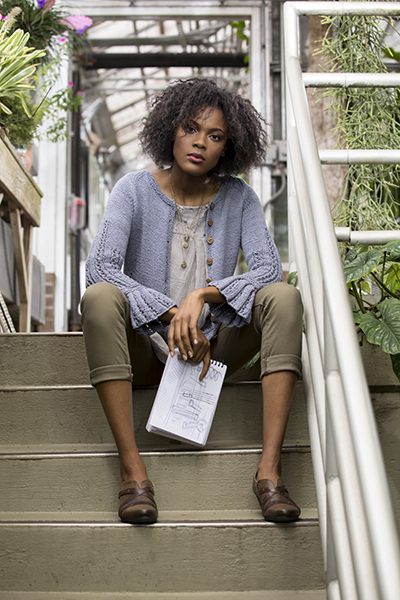
As the cover promises, this collection contains patterns all containing peplums, pleats, and ruffles, all knit in new yarn Papyrus. There is actually just one project that utilizes pleats, and that is the Kaizen cardigan.
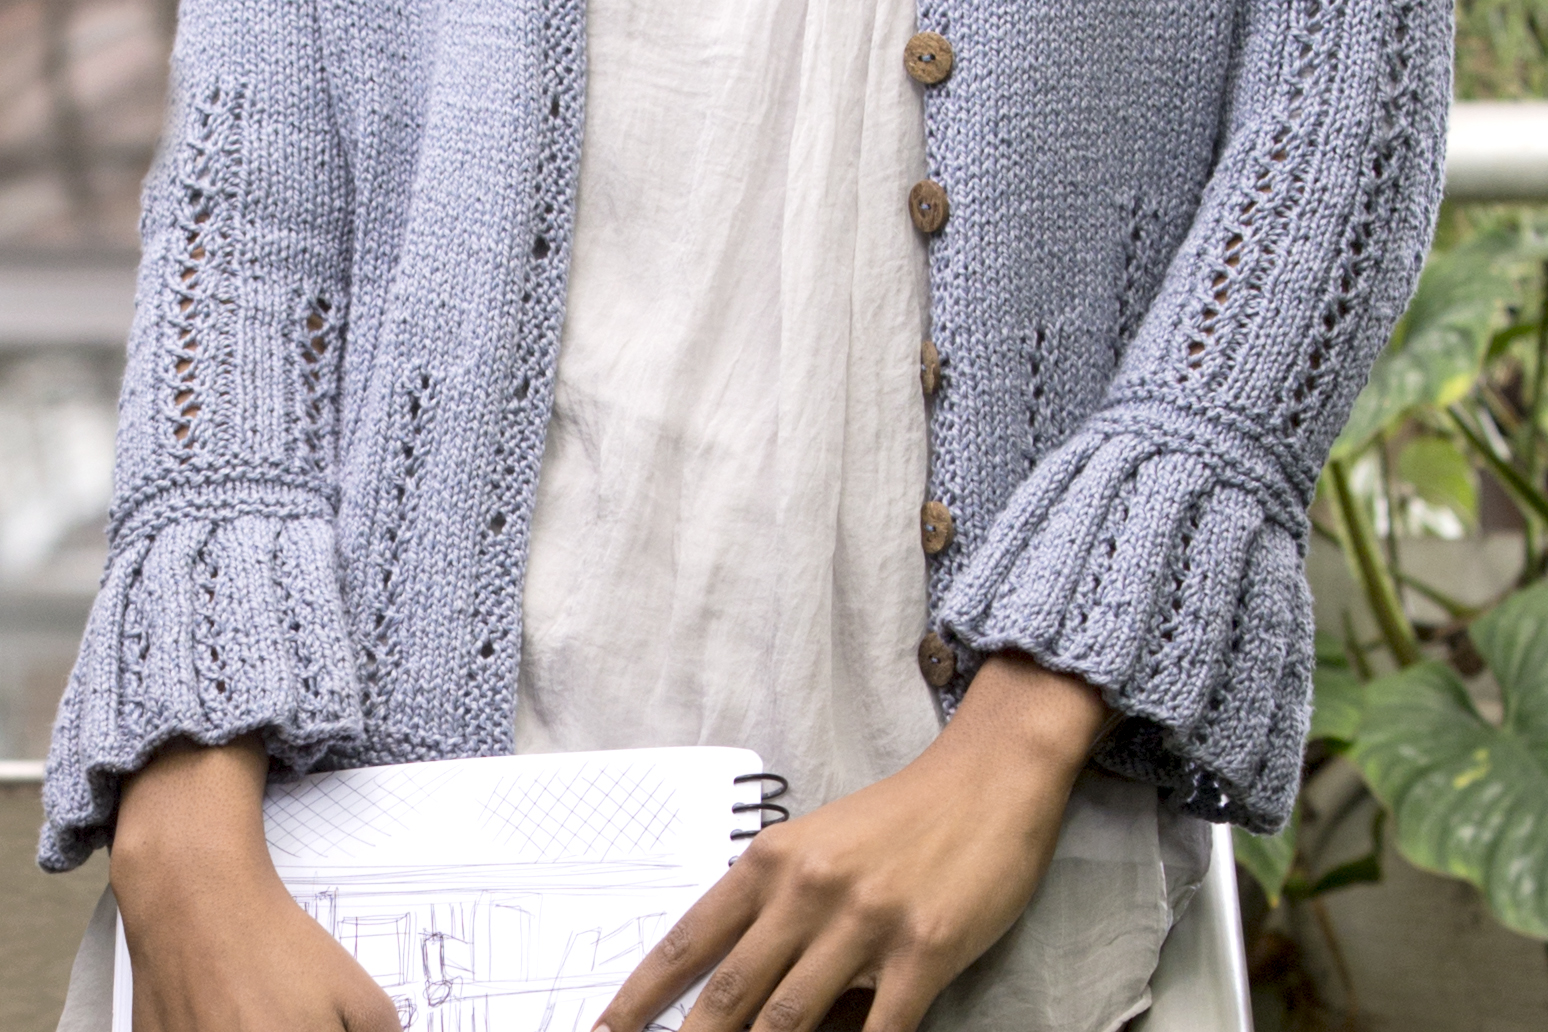
The pleats are added just to the sleeve cuffs here for a touch of feminine playfulness to an otherwise classically shaped cardigan.
Though I did my best to give accurate written instructions of how to make the pleats, this is one of those techniques where pictures really do speak a thousand words. There are a few photos of how to join pleats included in the pattern file, but the following is a much more detailed instruction.
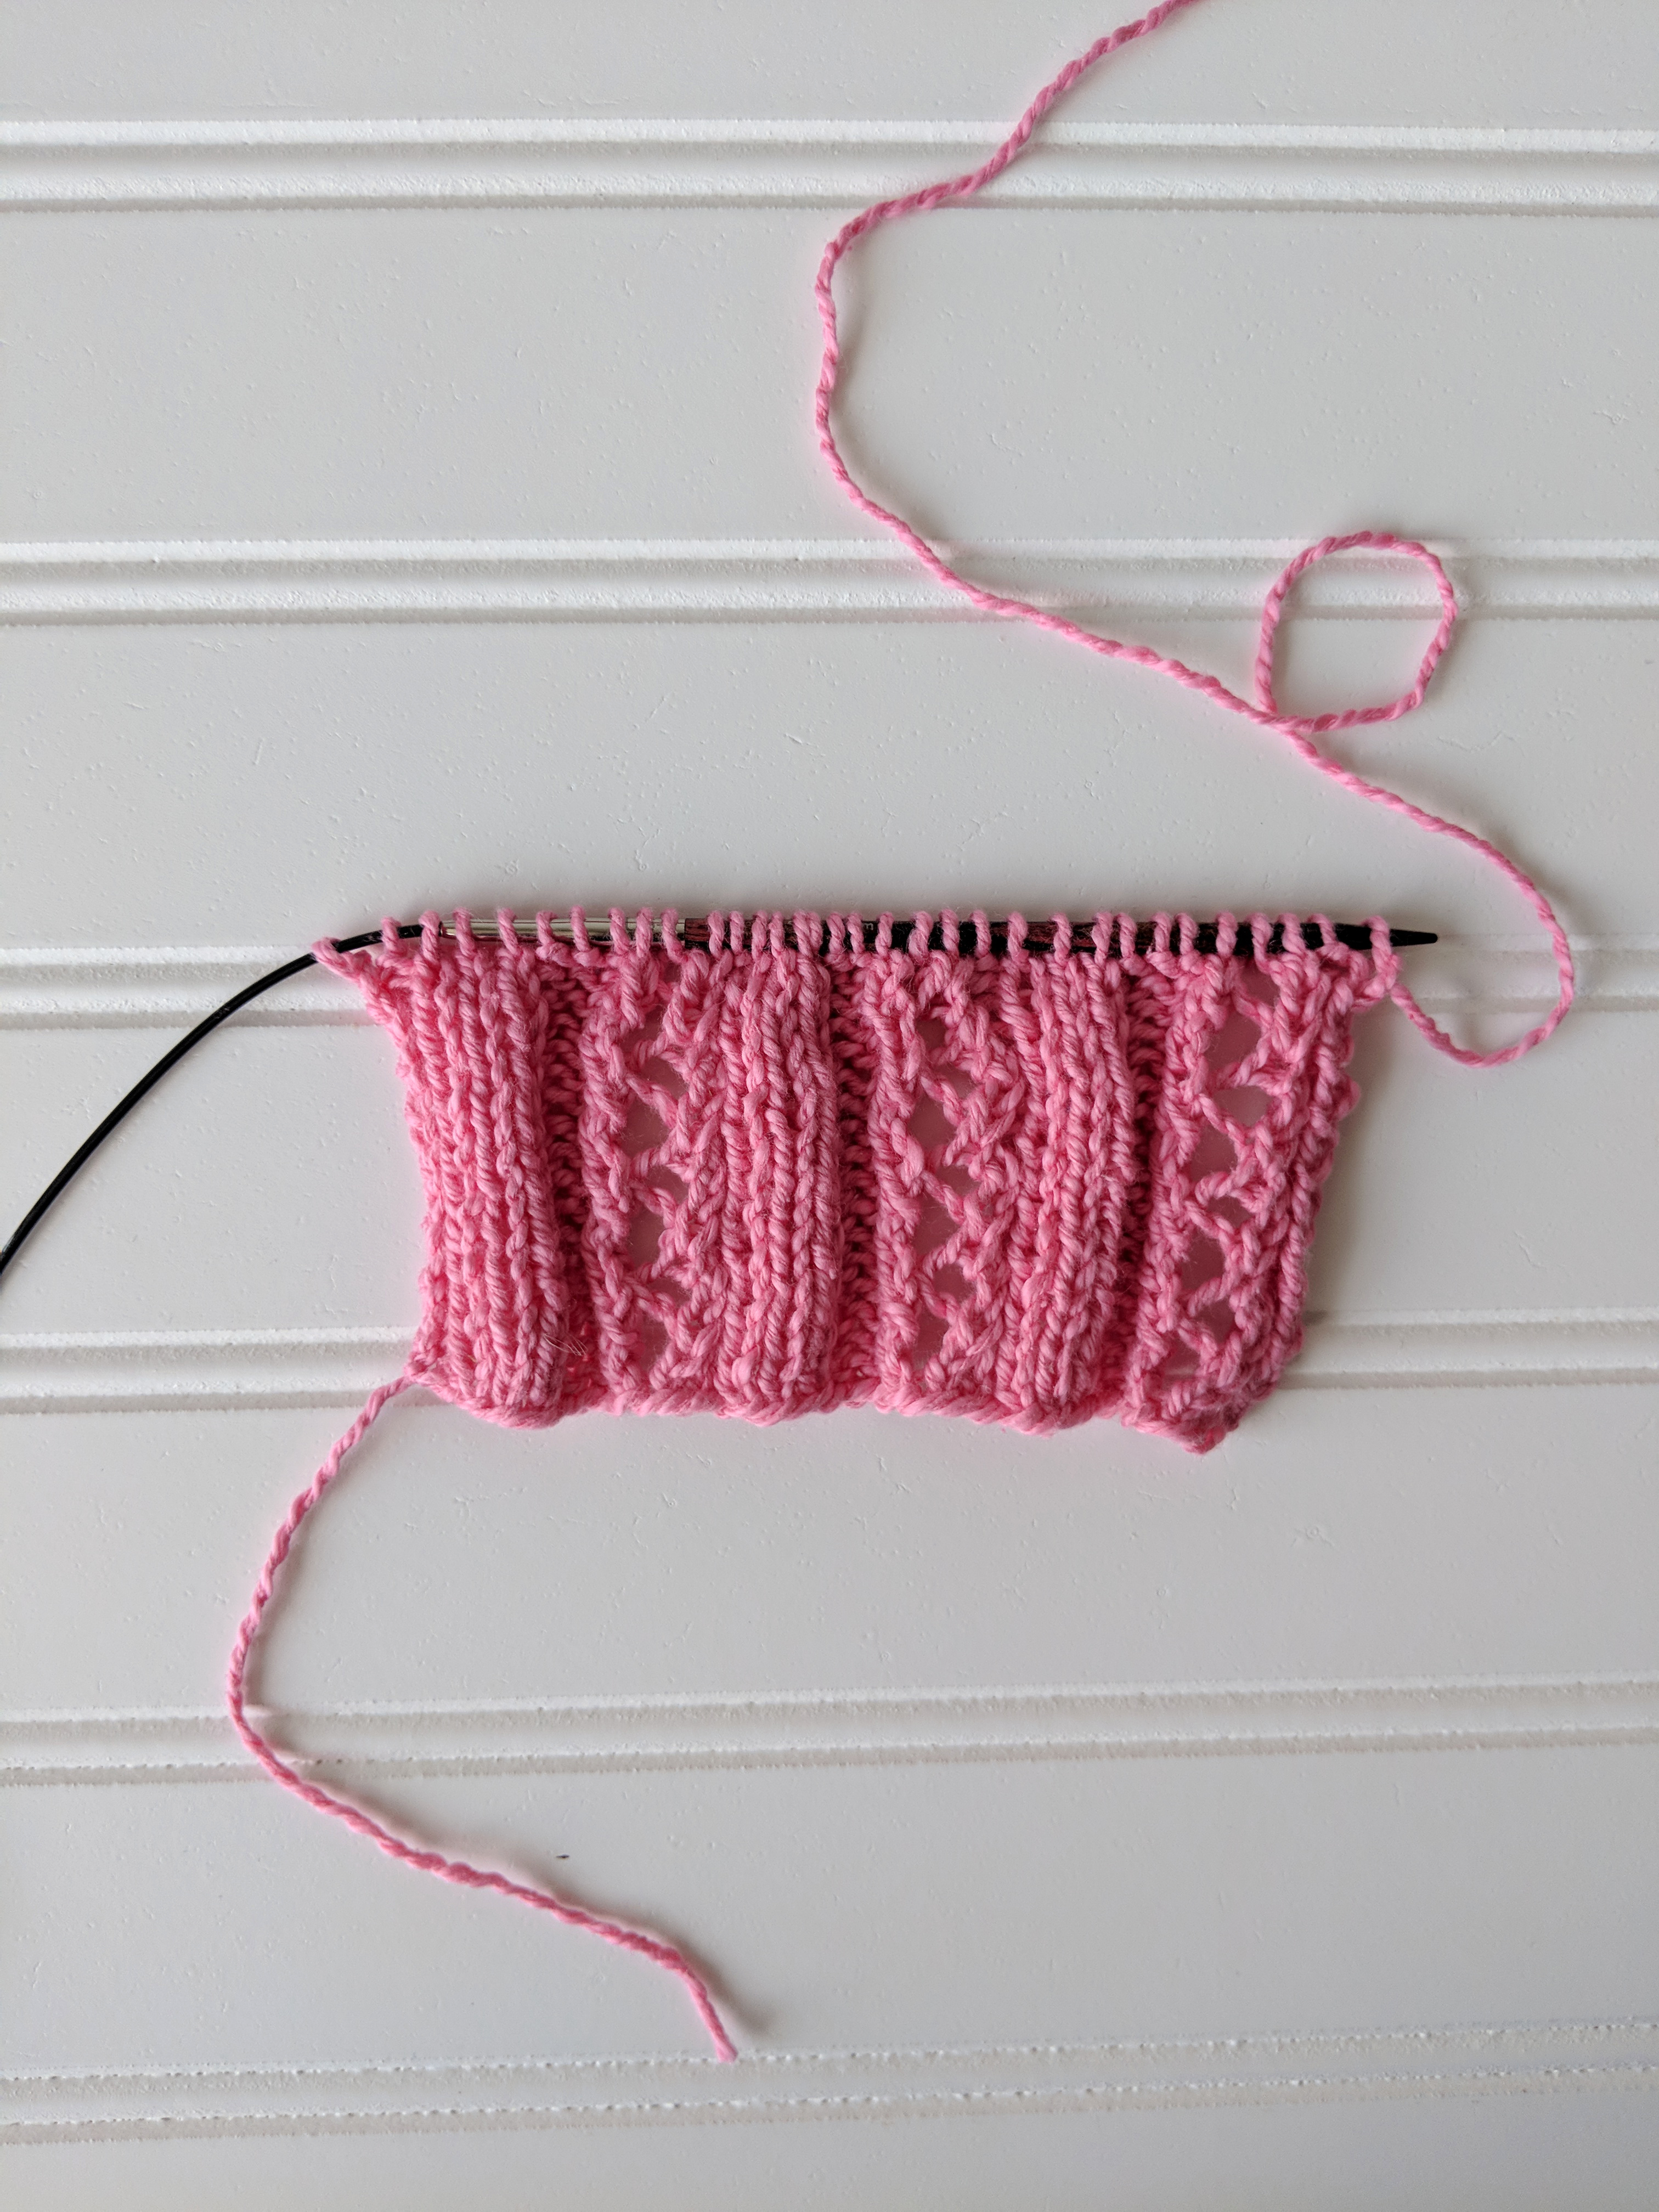
This small swatch shows the cuff prior to the pleat joining. Stitches are reduced by almost two thirds after the pleating process.
First, the edge stitches are worked.
Next, the following 3 stitches (the eyelet column) will be slipped to a double pointed needle.
Eyelet column is now on a spare needle.
Next, the following 3 reverse stockinette (purl) stitches are slipped to a second spare needle.
Now the first 2 stitches of the row on the right needle. We’re going to be ignoring those stitches. After that, we have dpn 1 with the Eyelet Column sts, dpn 2 with the purl sts, and then the working left needle with all remaining stitches.
Rotate dpn 2 counter-clockwise, so that the wrong side of these sts is against the wrong side of the 3 sts after it (the 3 sts on the working left needle)
Wrong sides are now together. Slide the sts from this dpn toward the tip.
Place dpn 1 behind dpn 2 without rotating. Align the tips of all 3 needles in preparation for joining.
Now we’re going to be working k3tog – 1 st from each needle. Insert the tip of the right needle into the first st on the front needle.
Continue by inserting the tip of the right needle into the first stitch on the middle needle, and then the back needle.
Yarn over and pull through all 3 stitches.
Slip the stitches from the needles – k3tog complete. You will be working k3tog 2 more times to finish this pleat.
All com-pleated. Sorry, I couldn’t resist.
If you thought this looked complicated at the beginning, I hope I’ve changed your mind. It’s just a matter of arranging some stitches and working some k3togs.
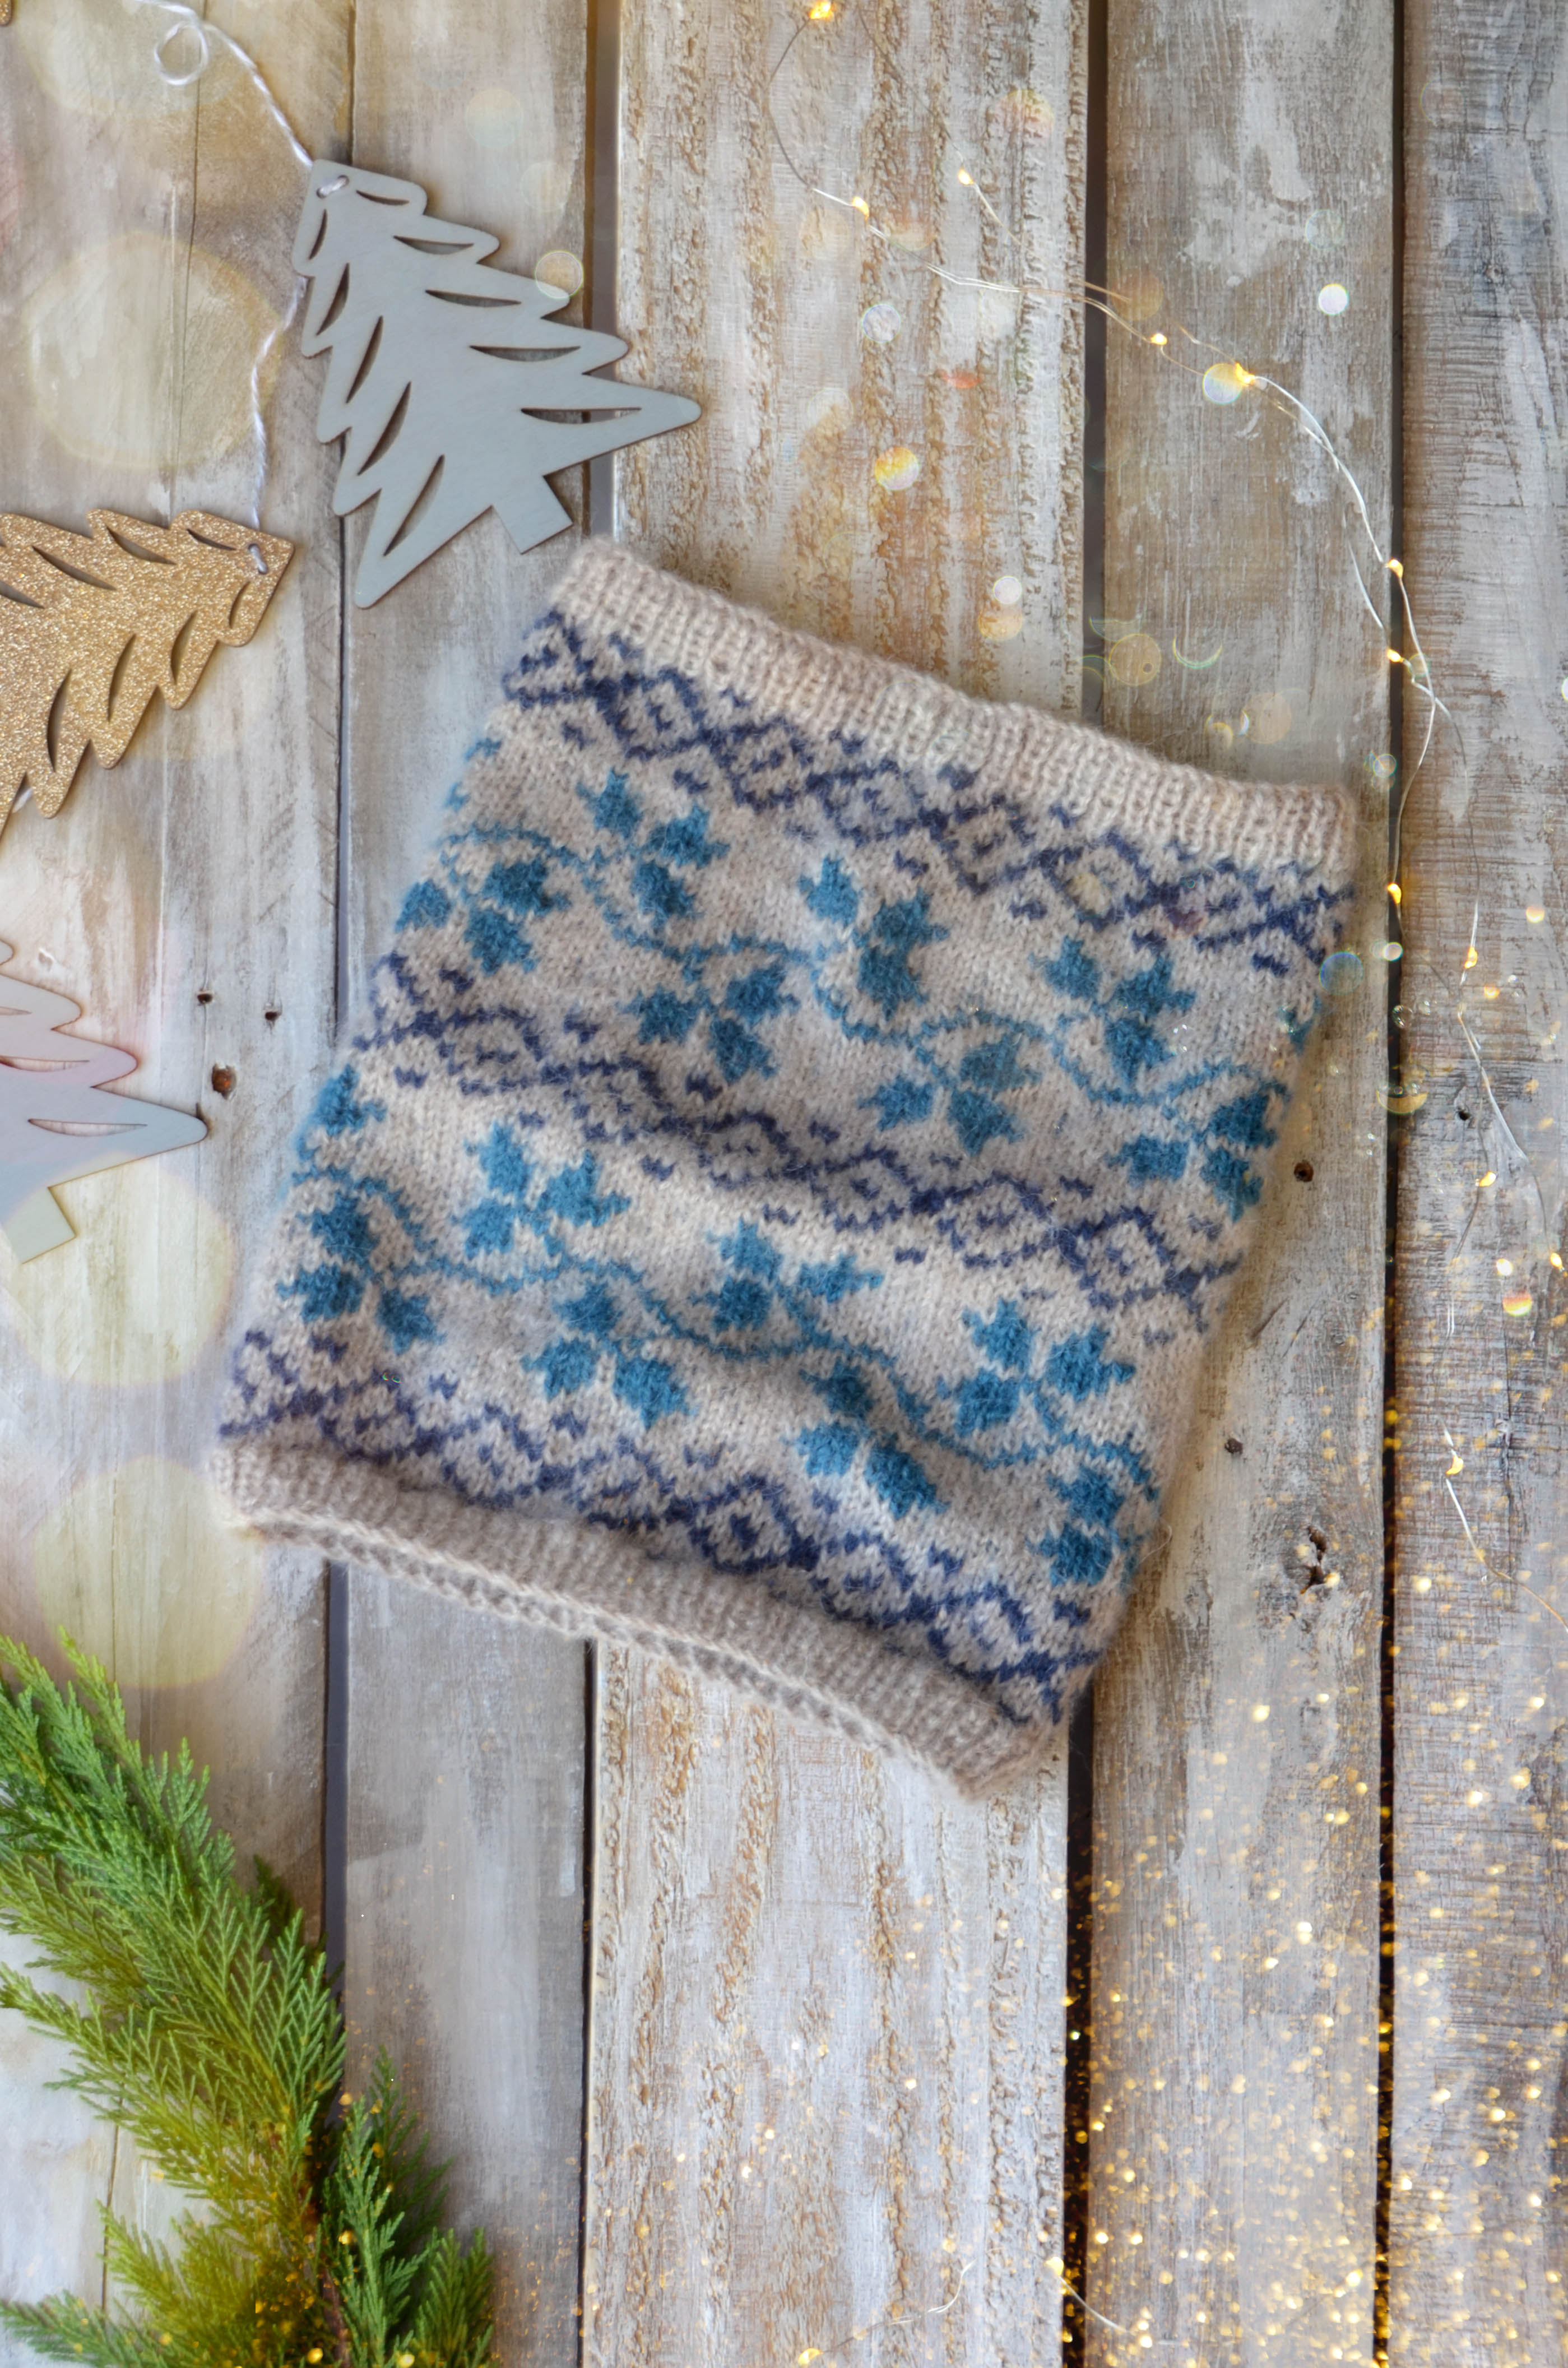
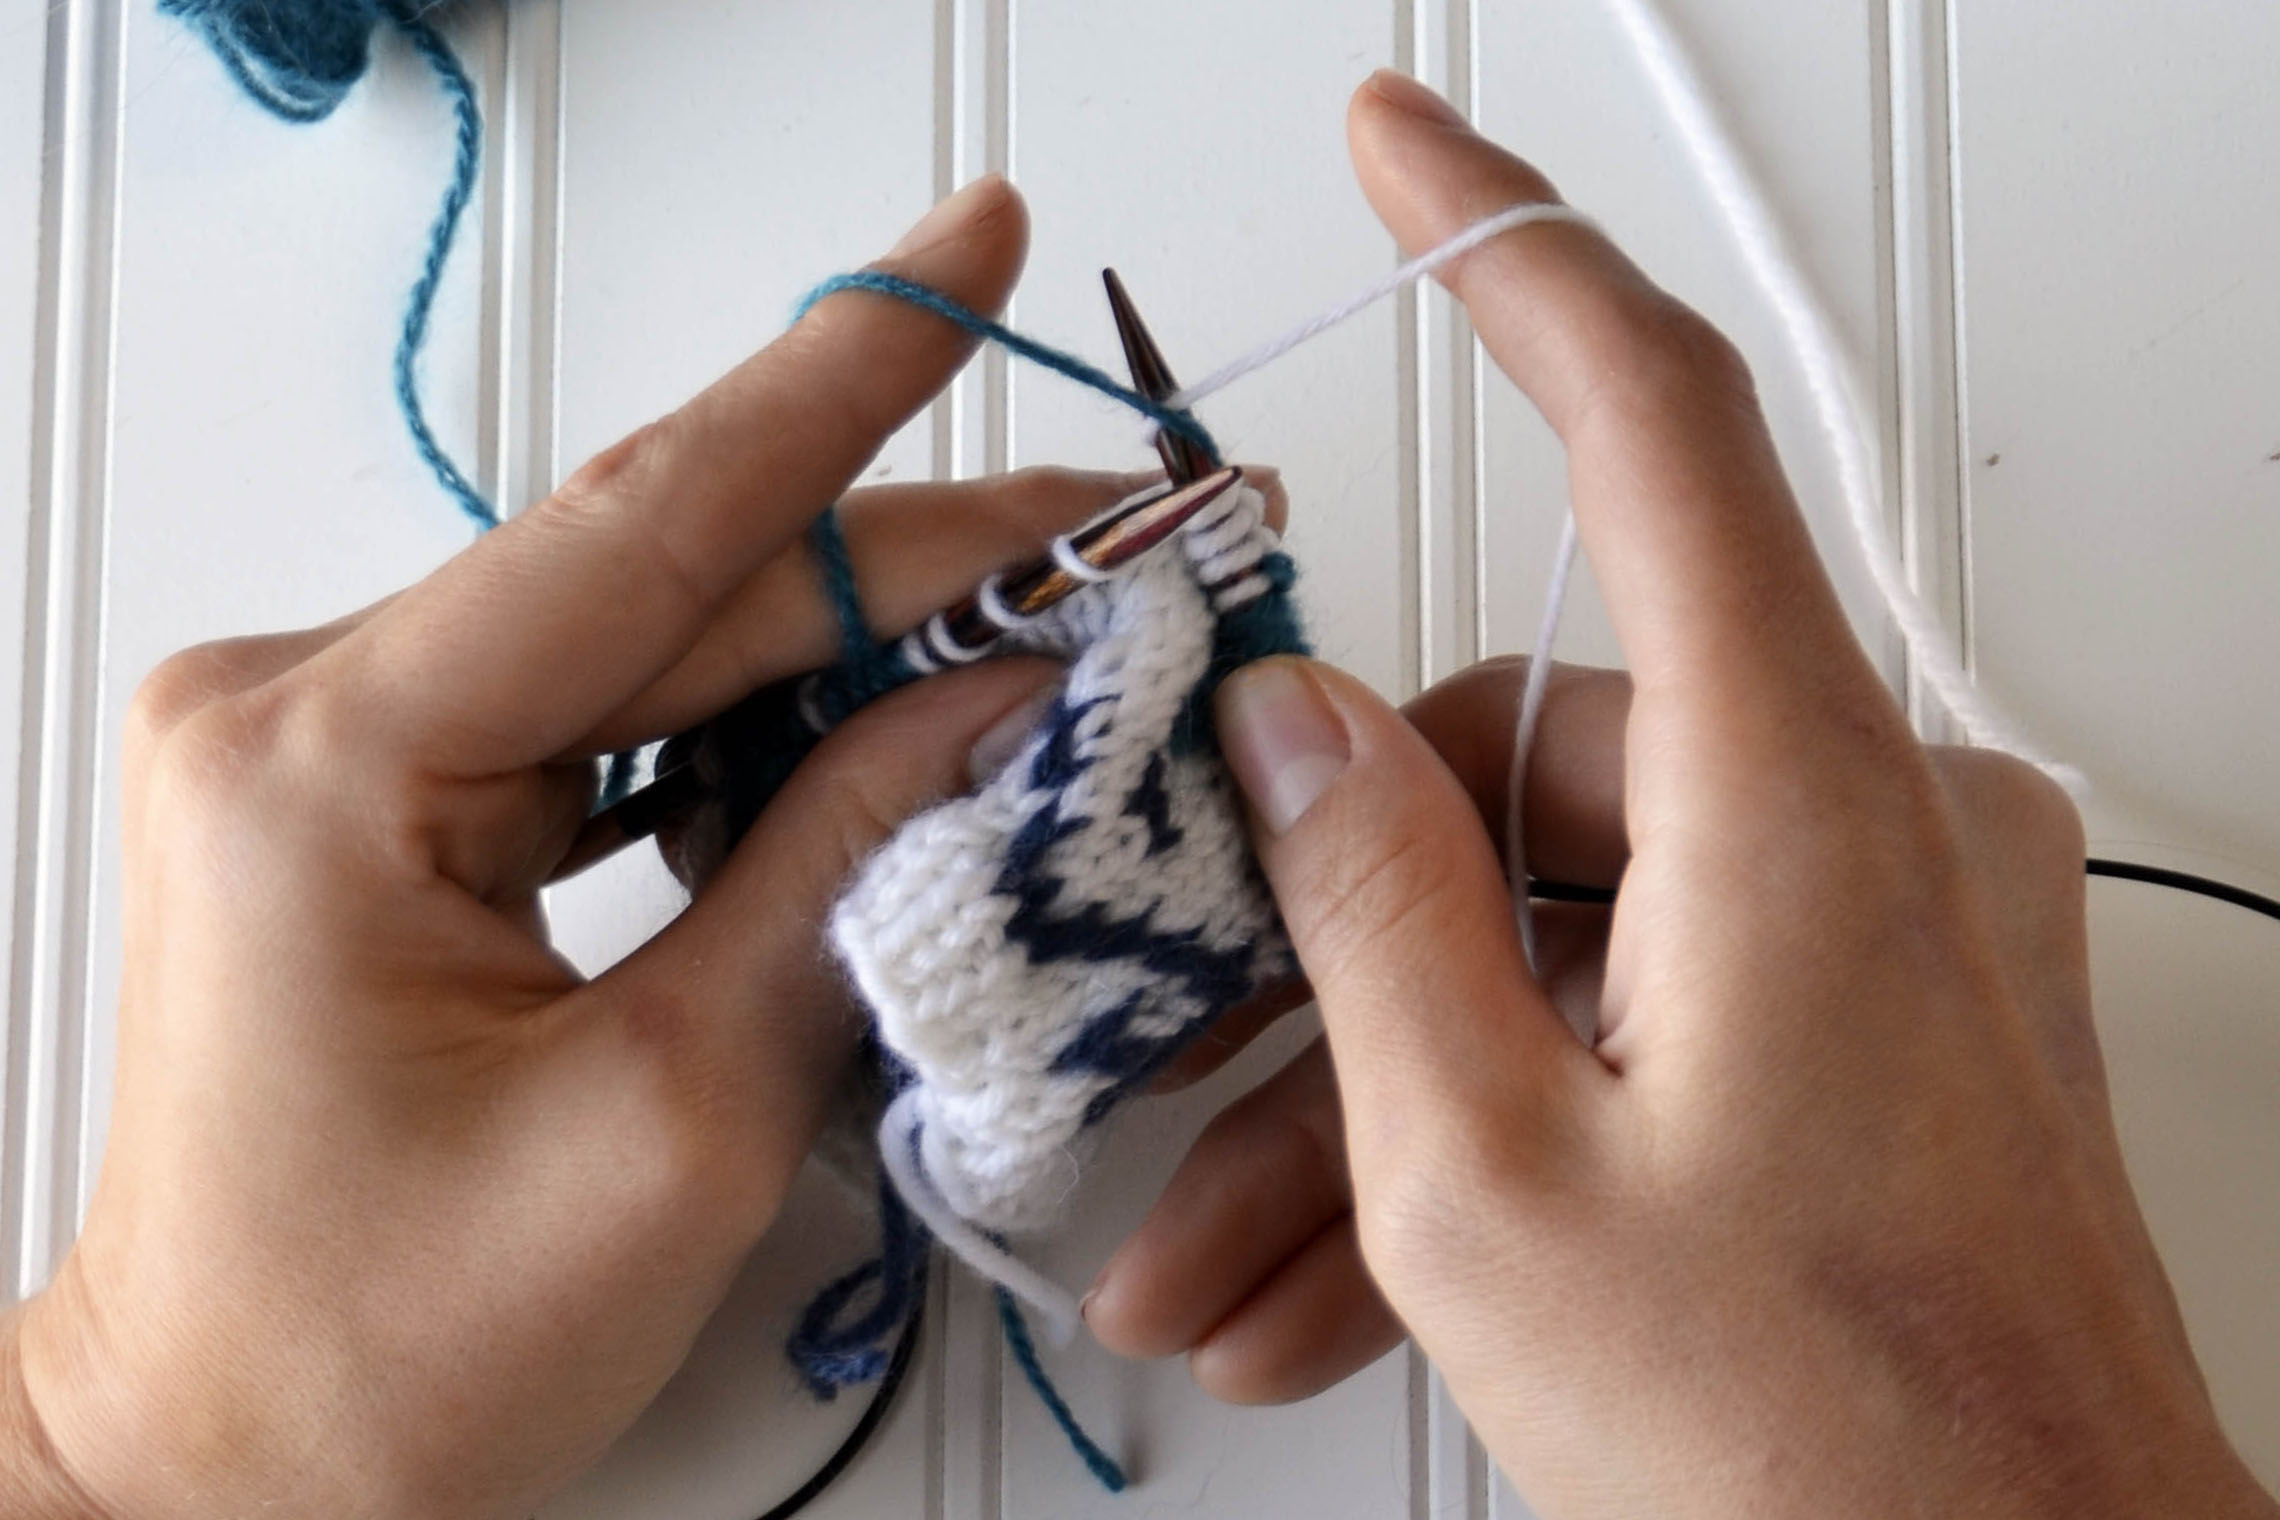
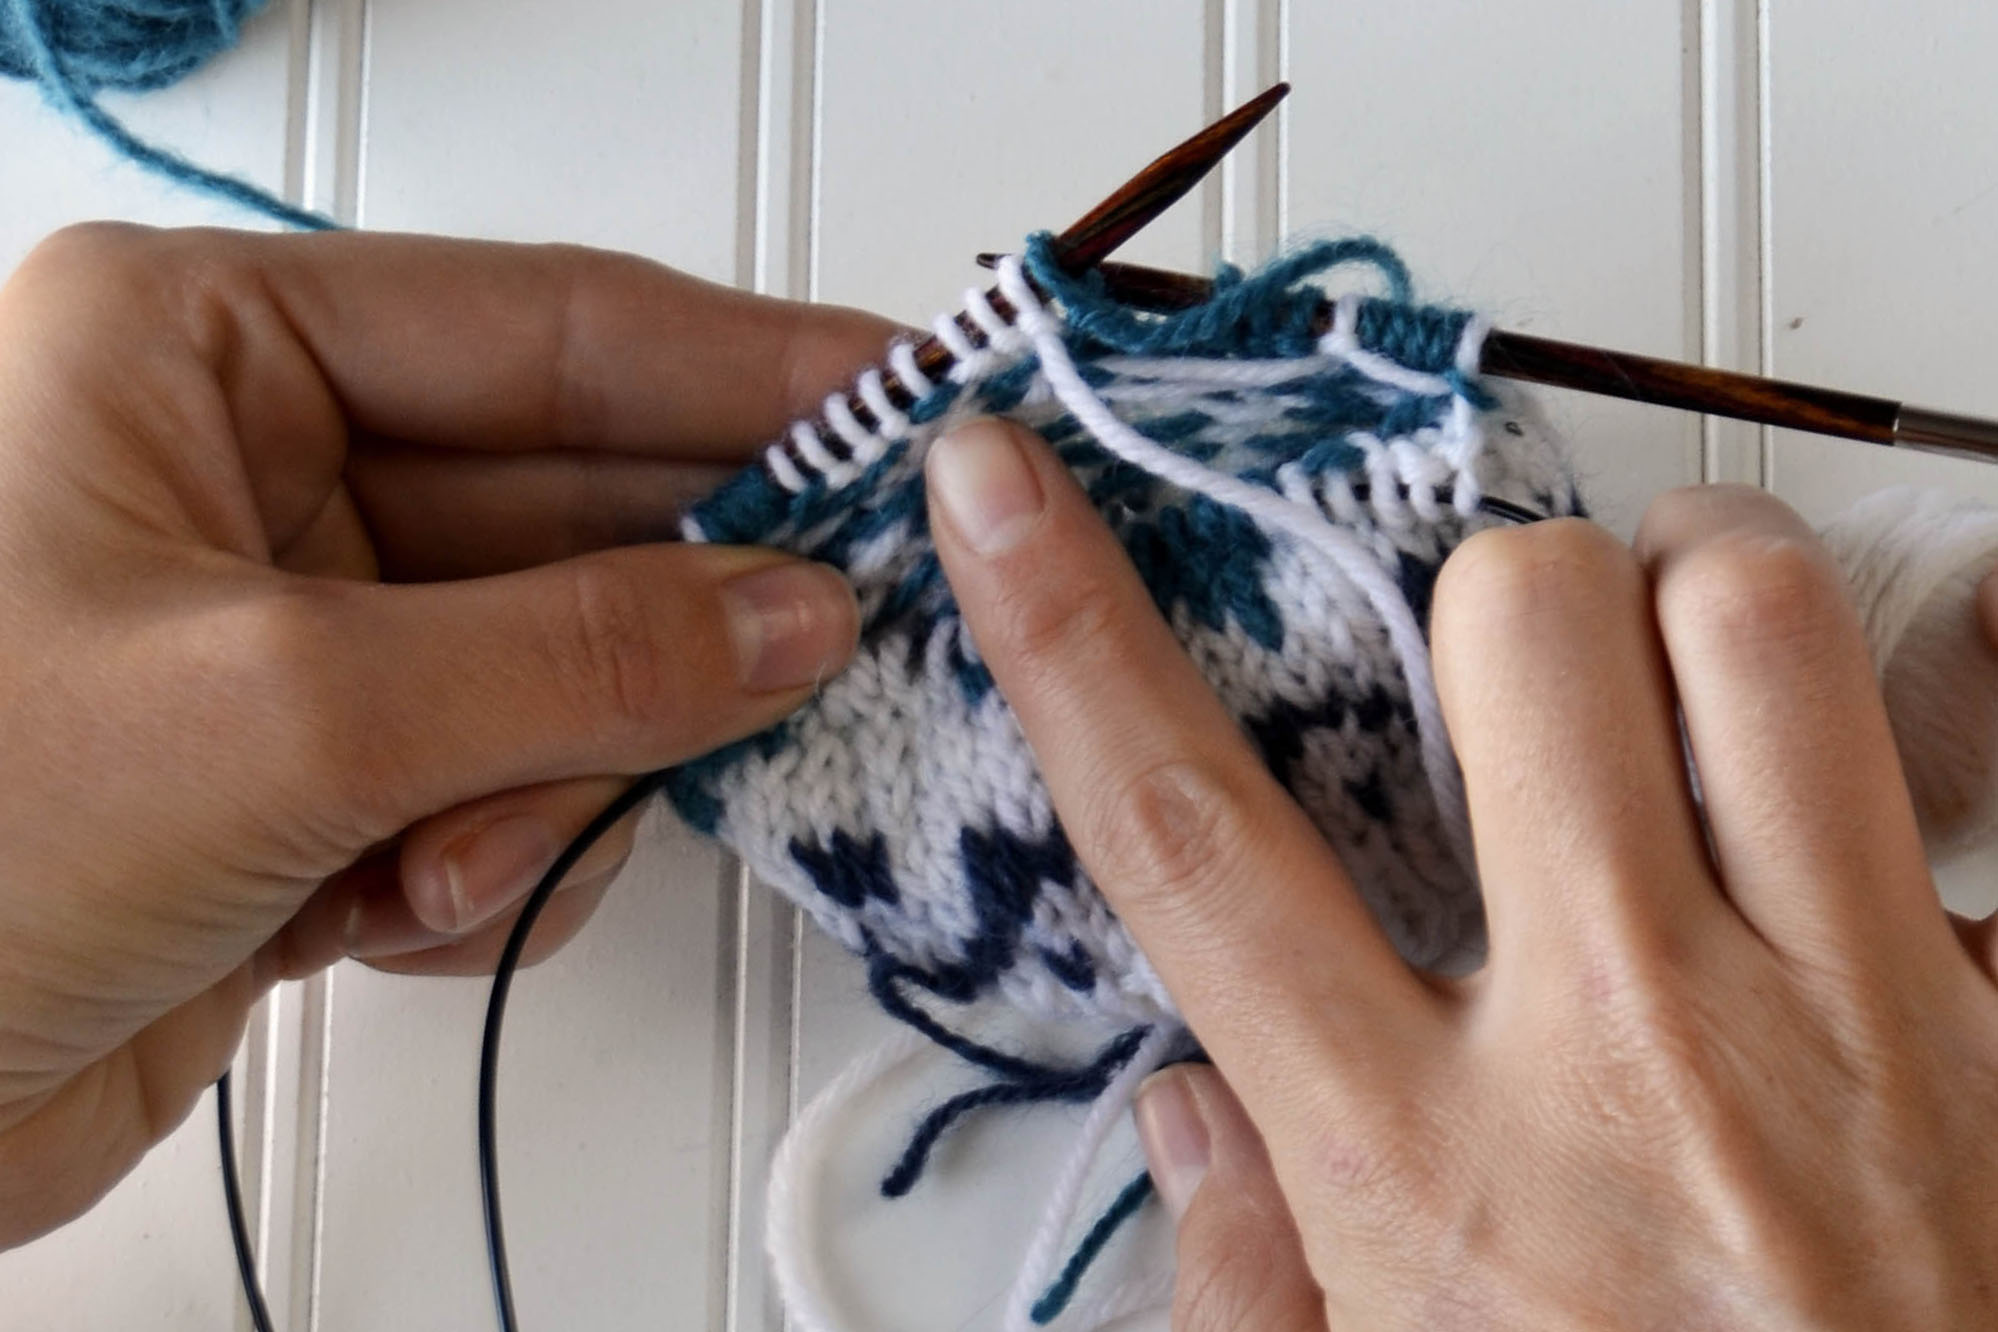
For the last installment of our blog series on our 12 Days of Winter Kit Collection, we’re unveiling the Twining Vines Cowl. Twining Vinesfeatures Amphora. It is a perfect yarn for colorwork because its gorgeous halo blends the fibers together seamlessly. The effect is almost like an impressionist painting.
In addition to carrying two colors throughout this pattern, you’ll also need to trap your floats. It’s simpler than you might think. This tutorial is useful for any stranded project. If you’d like a closer look at the images, simply click on them.
Notice the large number of white stitches between the blue stitches. This is an area you’ll want to “trap” or “catch” your float to prevent any snagging.
Begin by knitting across your row as usual. Continue until you reach the section that requires trapping a float. Usually, an area that requires trapping floats will have more than five stitches.
As a rule of thumb, I trap my floats every five stitches. I’ve knit across four stitches, and I will trap my float on the fifth stitch.
Simply place your non-working yarn over the right-hand needle, but do not knit with it.
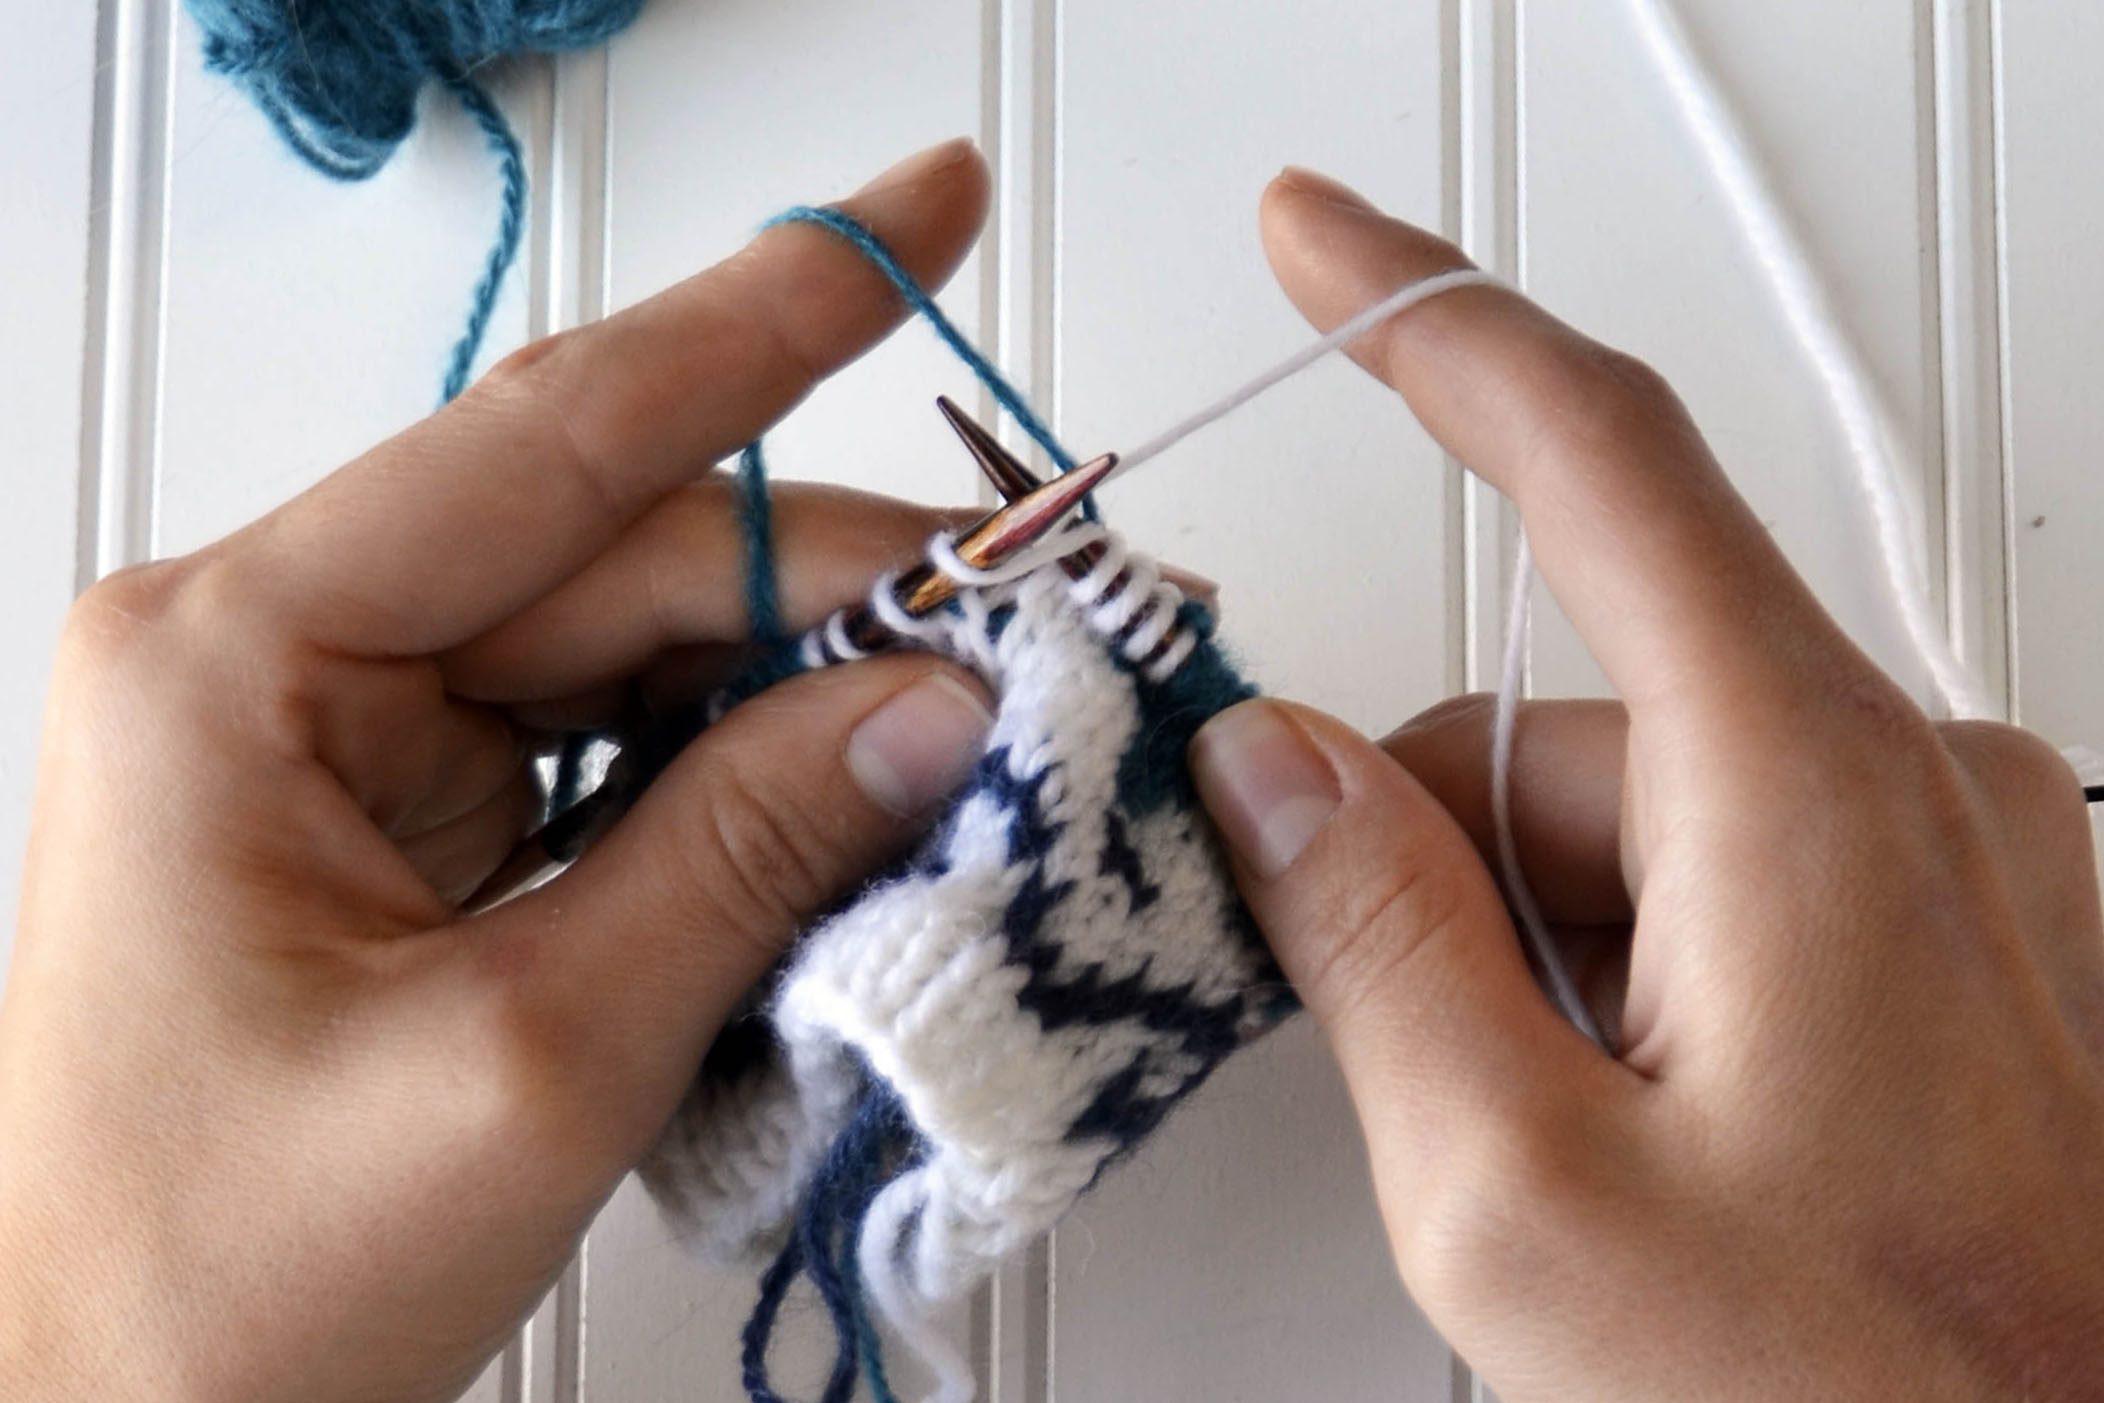
Wrap your working yarn around the right-hand needle to knit. Make sure your non-working yarn (the blue yarn) is over the needle and the working yarn (the white yarn).
Begin to knit the stitch. Notice how I’m holding the blue yarn. It is still above the white yarn, but it is not wrapped around the right-hand needle. Take care not to pull the non-working (blue) yarn through the stitch.
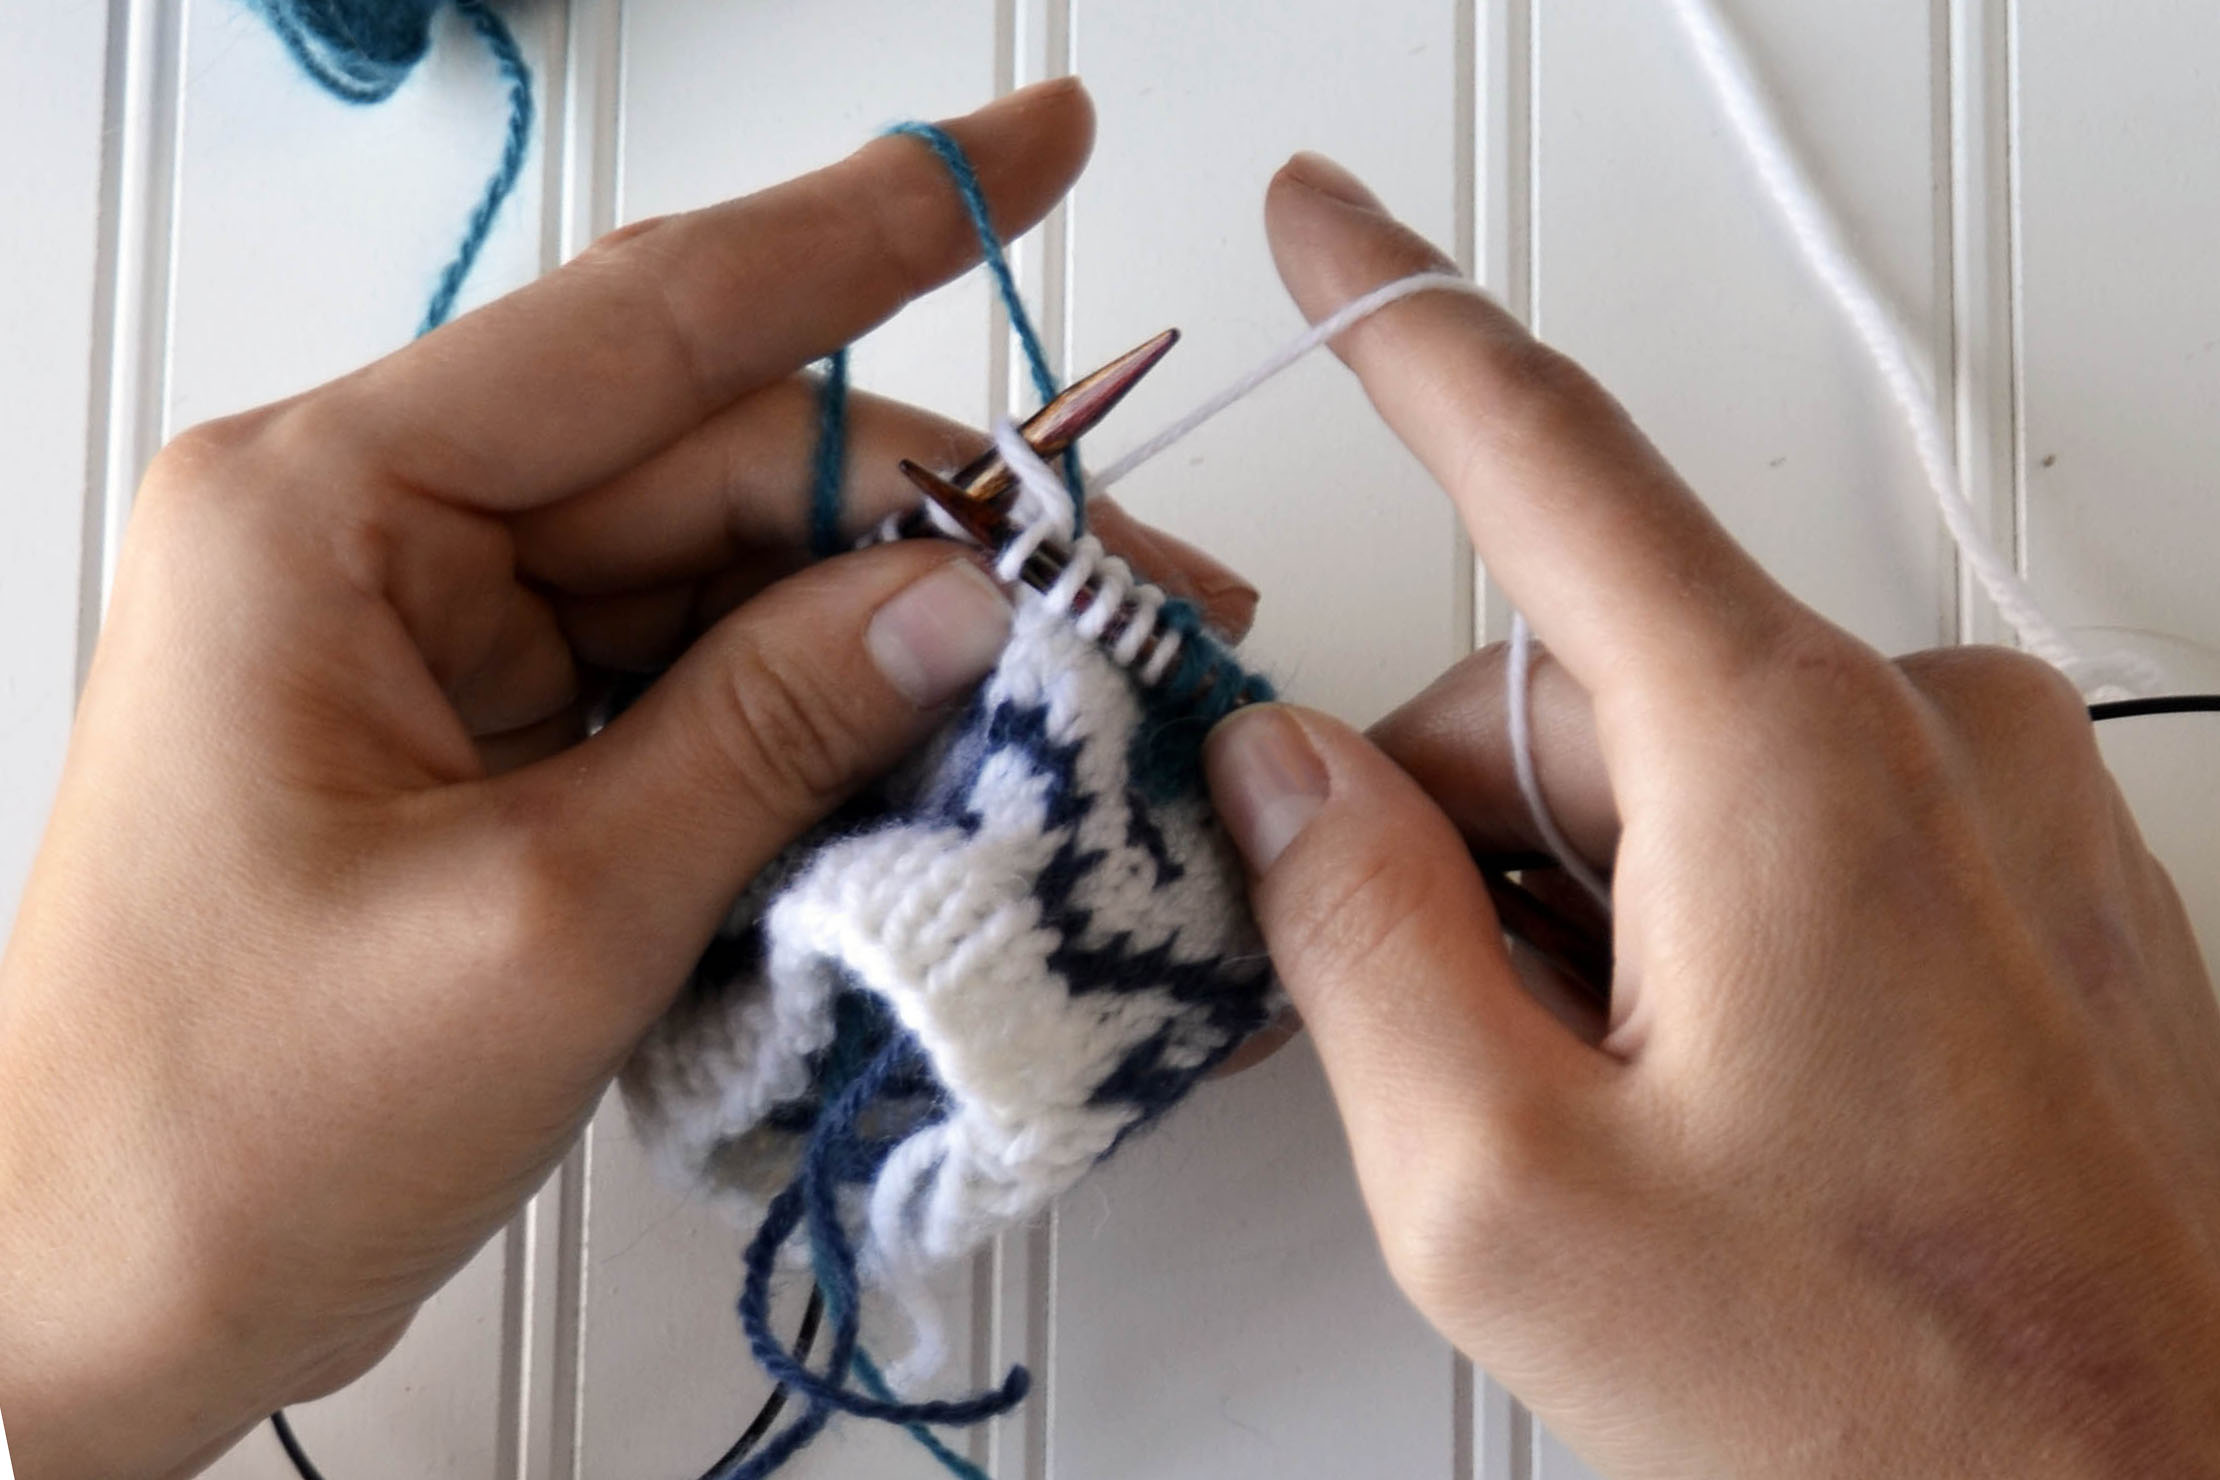
Knit the stitch. As you can see, the blue yarn is still at the back of the work. You can continue knitting as usual after this. That’s really how simple it is!
When you peek at the wrong side of your work, you’ll be able to see where you trapped the float. Notice the blue bump in the middle of the white stitches? That is where I’ve trapped the blue yarn underneath the white yarn.
Just like that, we’ve released all 12 of the patterns featured in our 12 Days of Winter Collection. We sincerely hope you’ve been enjoying our blog series highlighting each pattern. You can find the Twining Vines kit on our website here.
Now that you’ve seen them all, I’d also like to emphasize that tomorrow is Small Business Saturday. What better way to show your support for your local yarn shop than by stopping by to pick up one of our kits on Small Business Saturday?