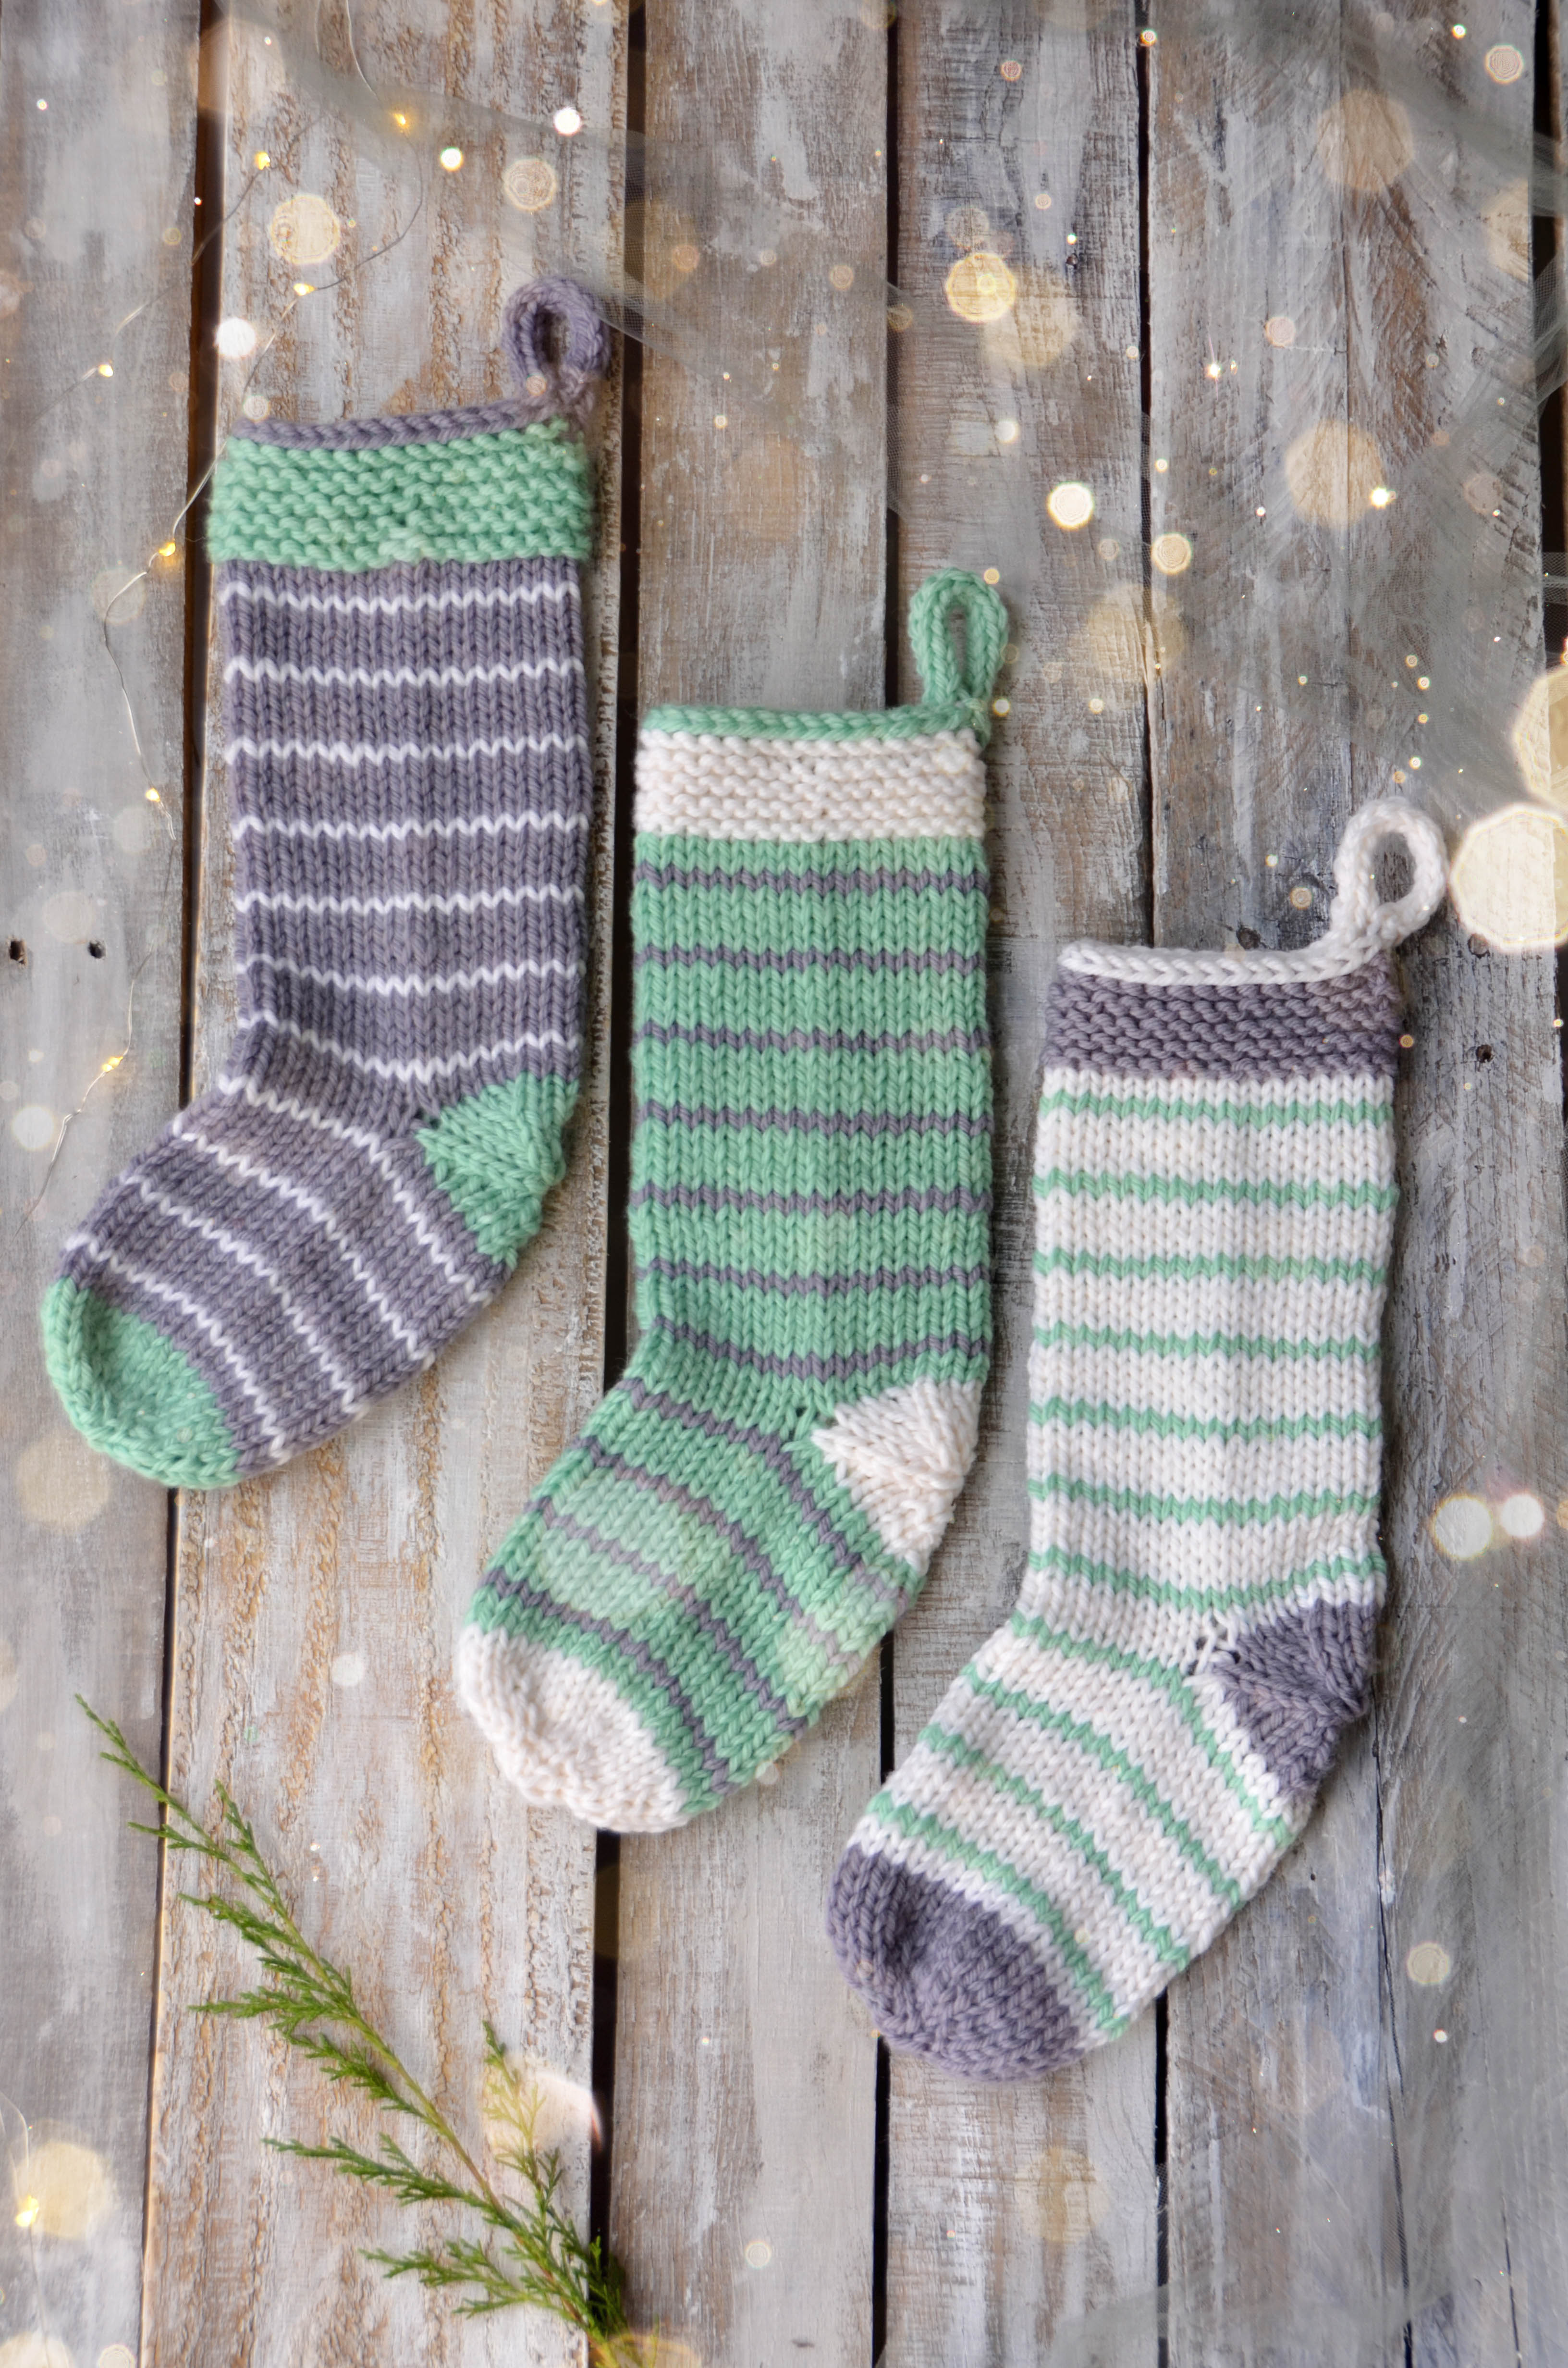
It’s hardly winter without stockings, amiright? Three balls of yarn make three stockings in the Stripe Stockings kit. Knit in Deluxe Bulky Superwash, these will virtually fly off your needles.
The knitting in these is relatively simple – mostly stockinette with a bit of garter and an i-cord bind-off. There are enough details to keep a seasoned knitter entertained, but are simple enough that they would also make a good first sock project.
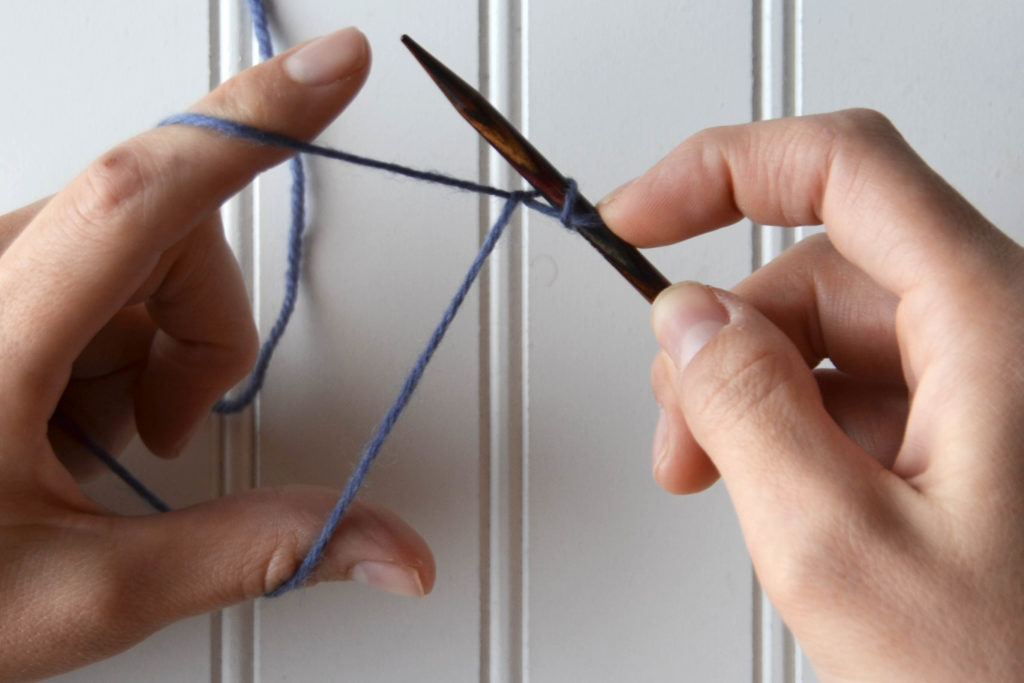
One feature that I’d like to explain more in detail is the afterthought heel. Unlike the common short-row heel which is knit as the rest of your sock is knit, an afterthought heel is added later after the rest of the sock is complete. There are various reasons for choosing this type of heel. My reasoning for doing so in this project was both to keep my stripe sequence uninterrupted and also to make the most of my yarn.
Grab your needles and yarn and let’s get to learning!
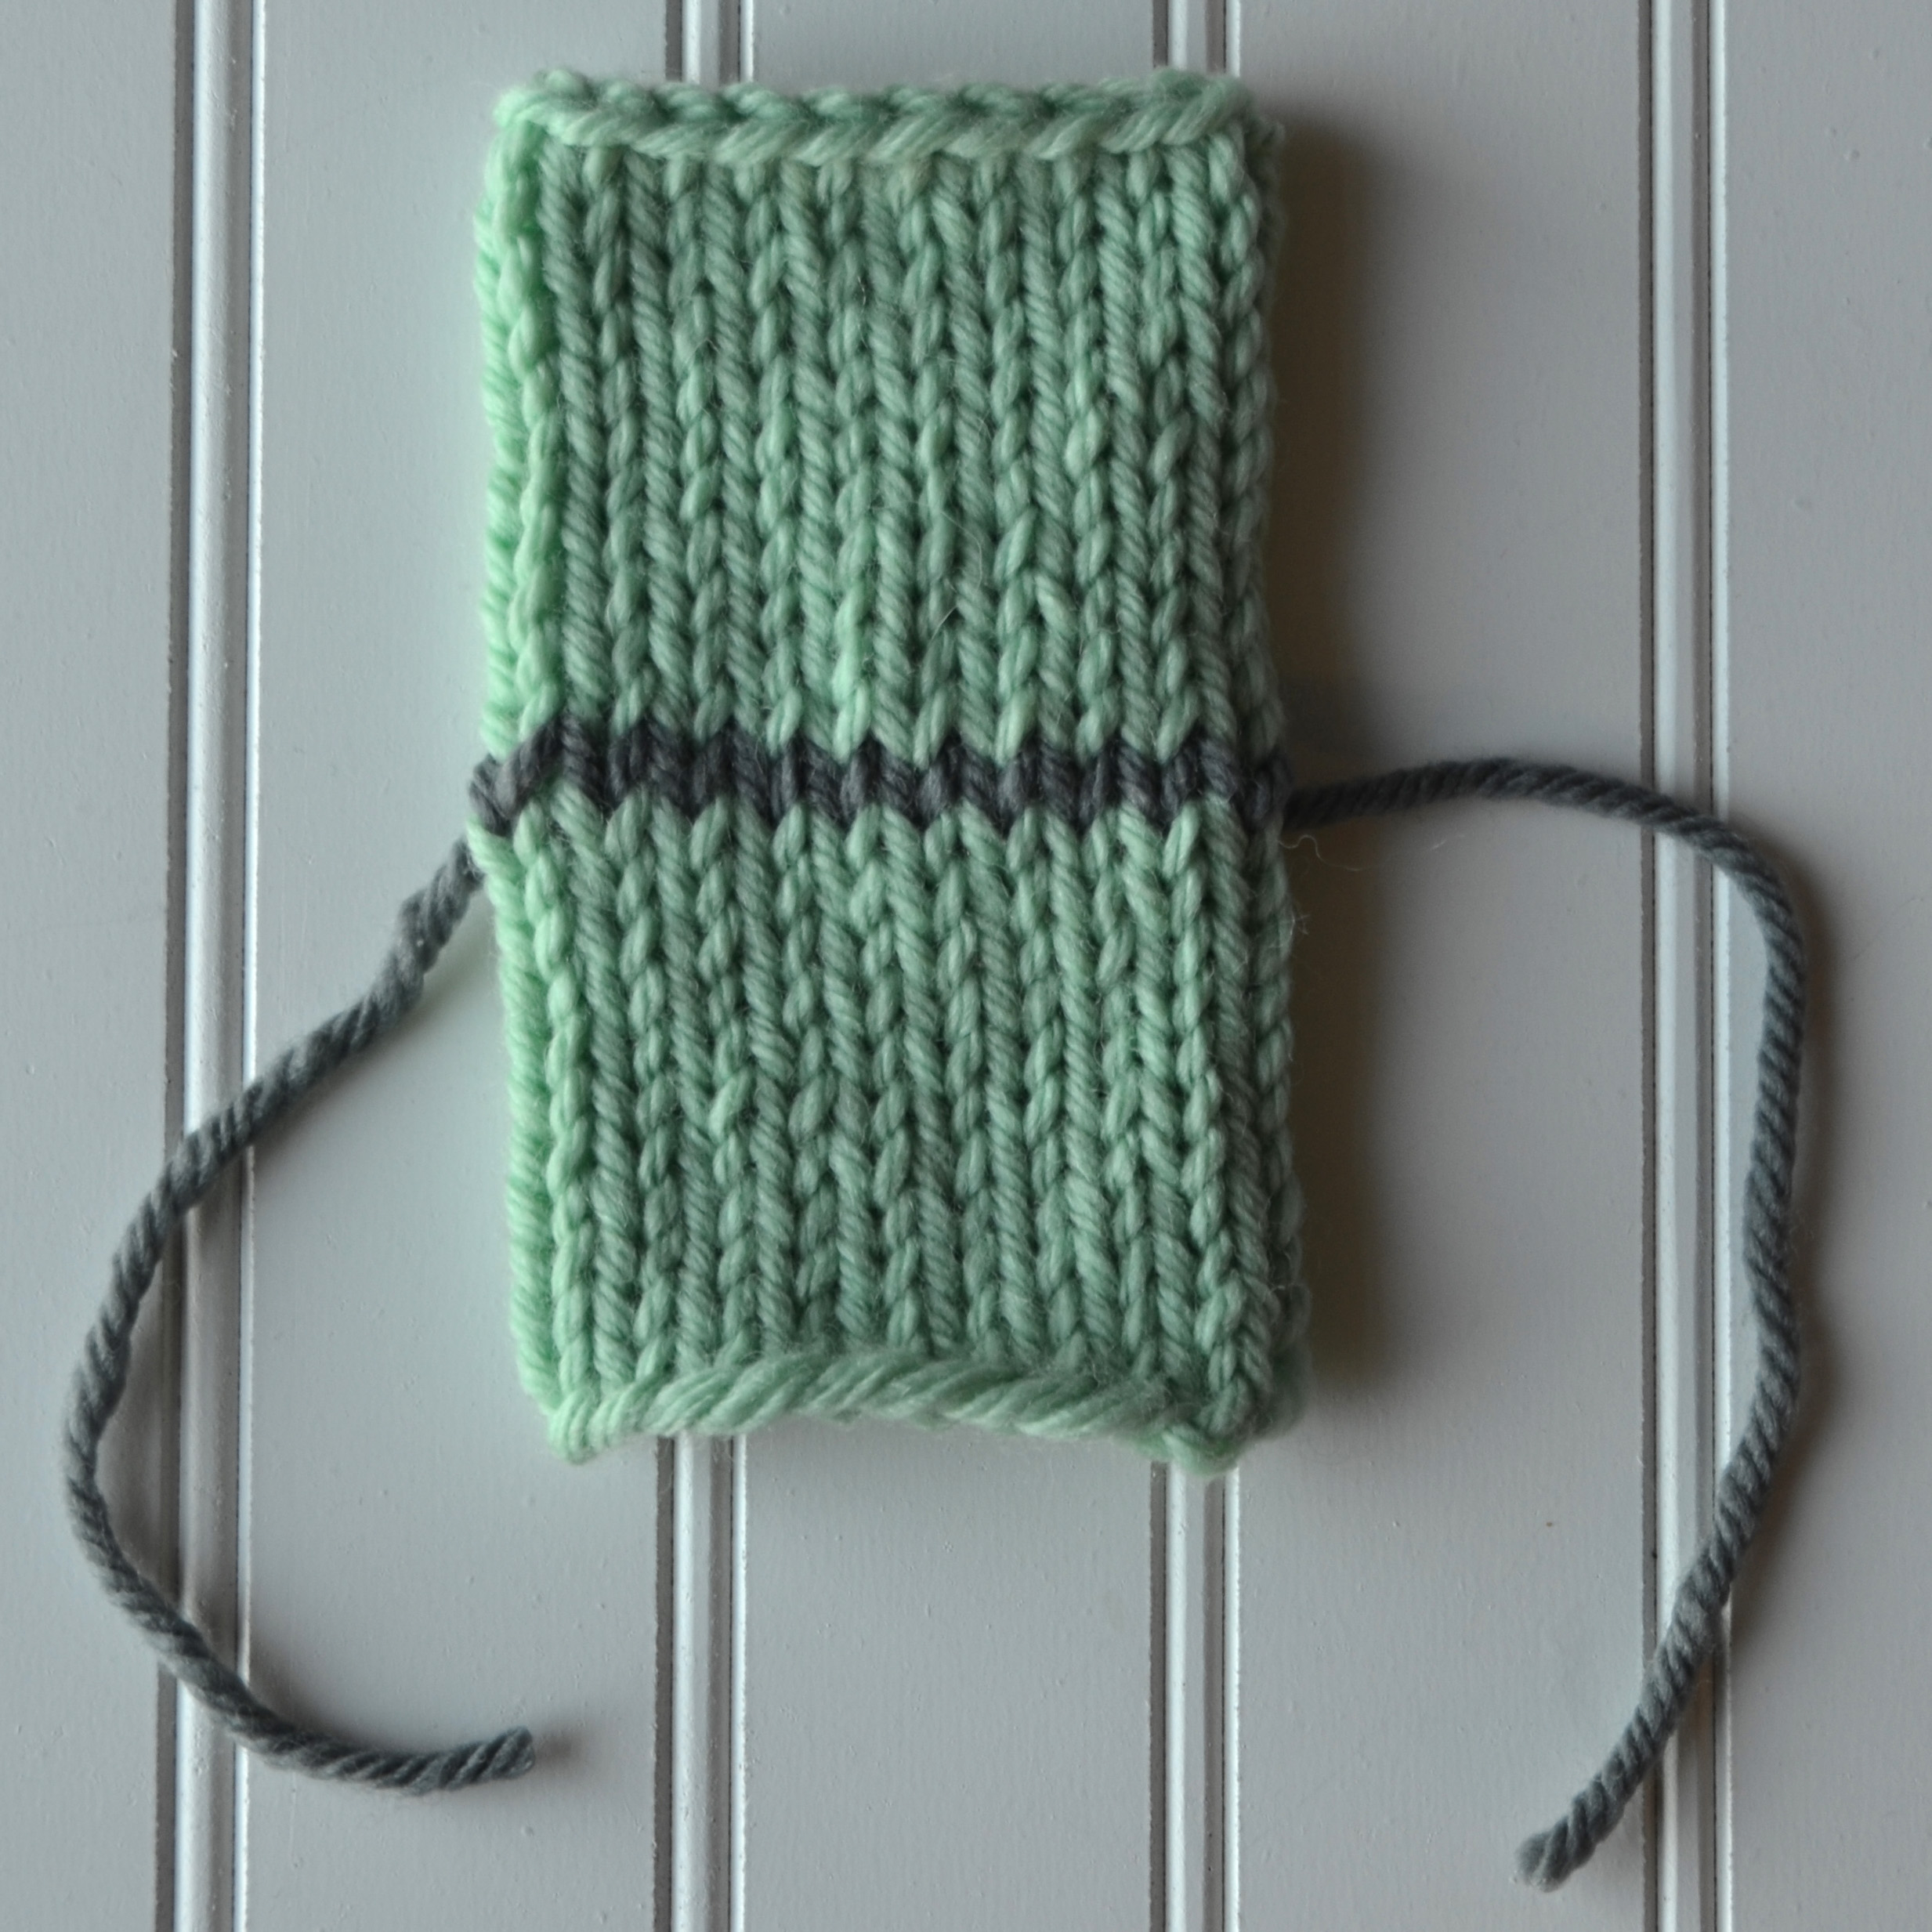
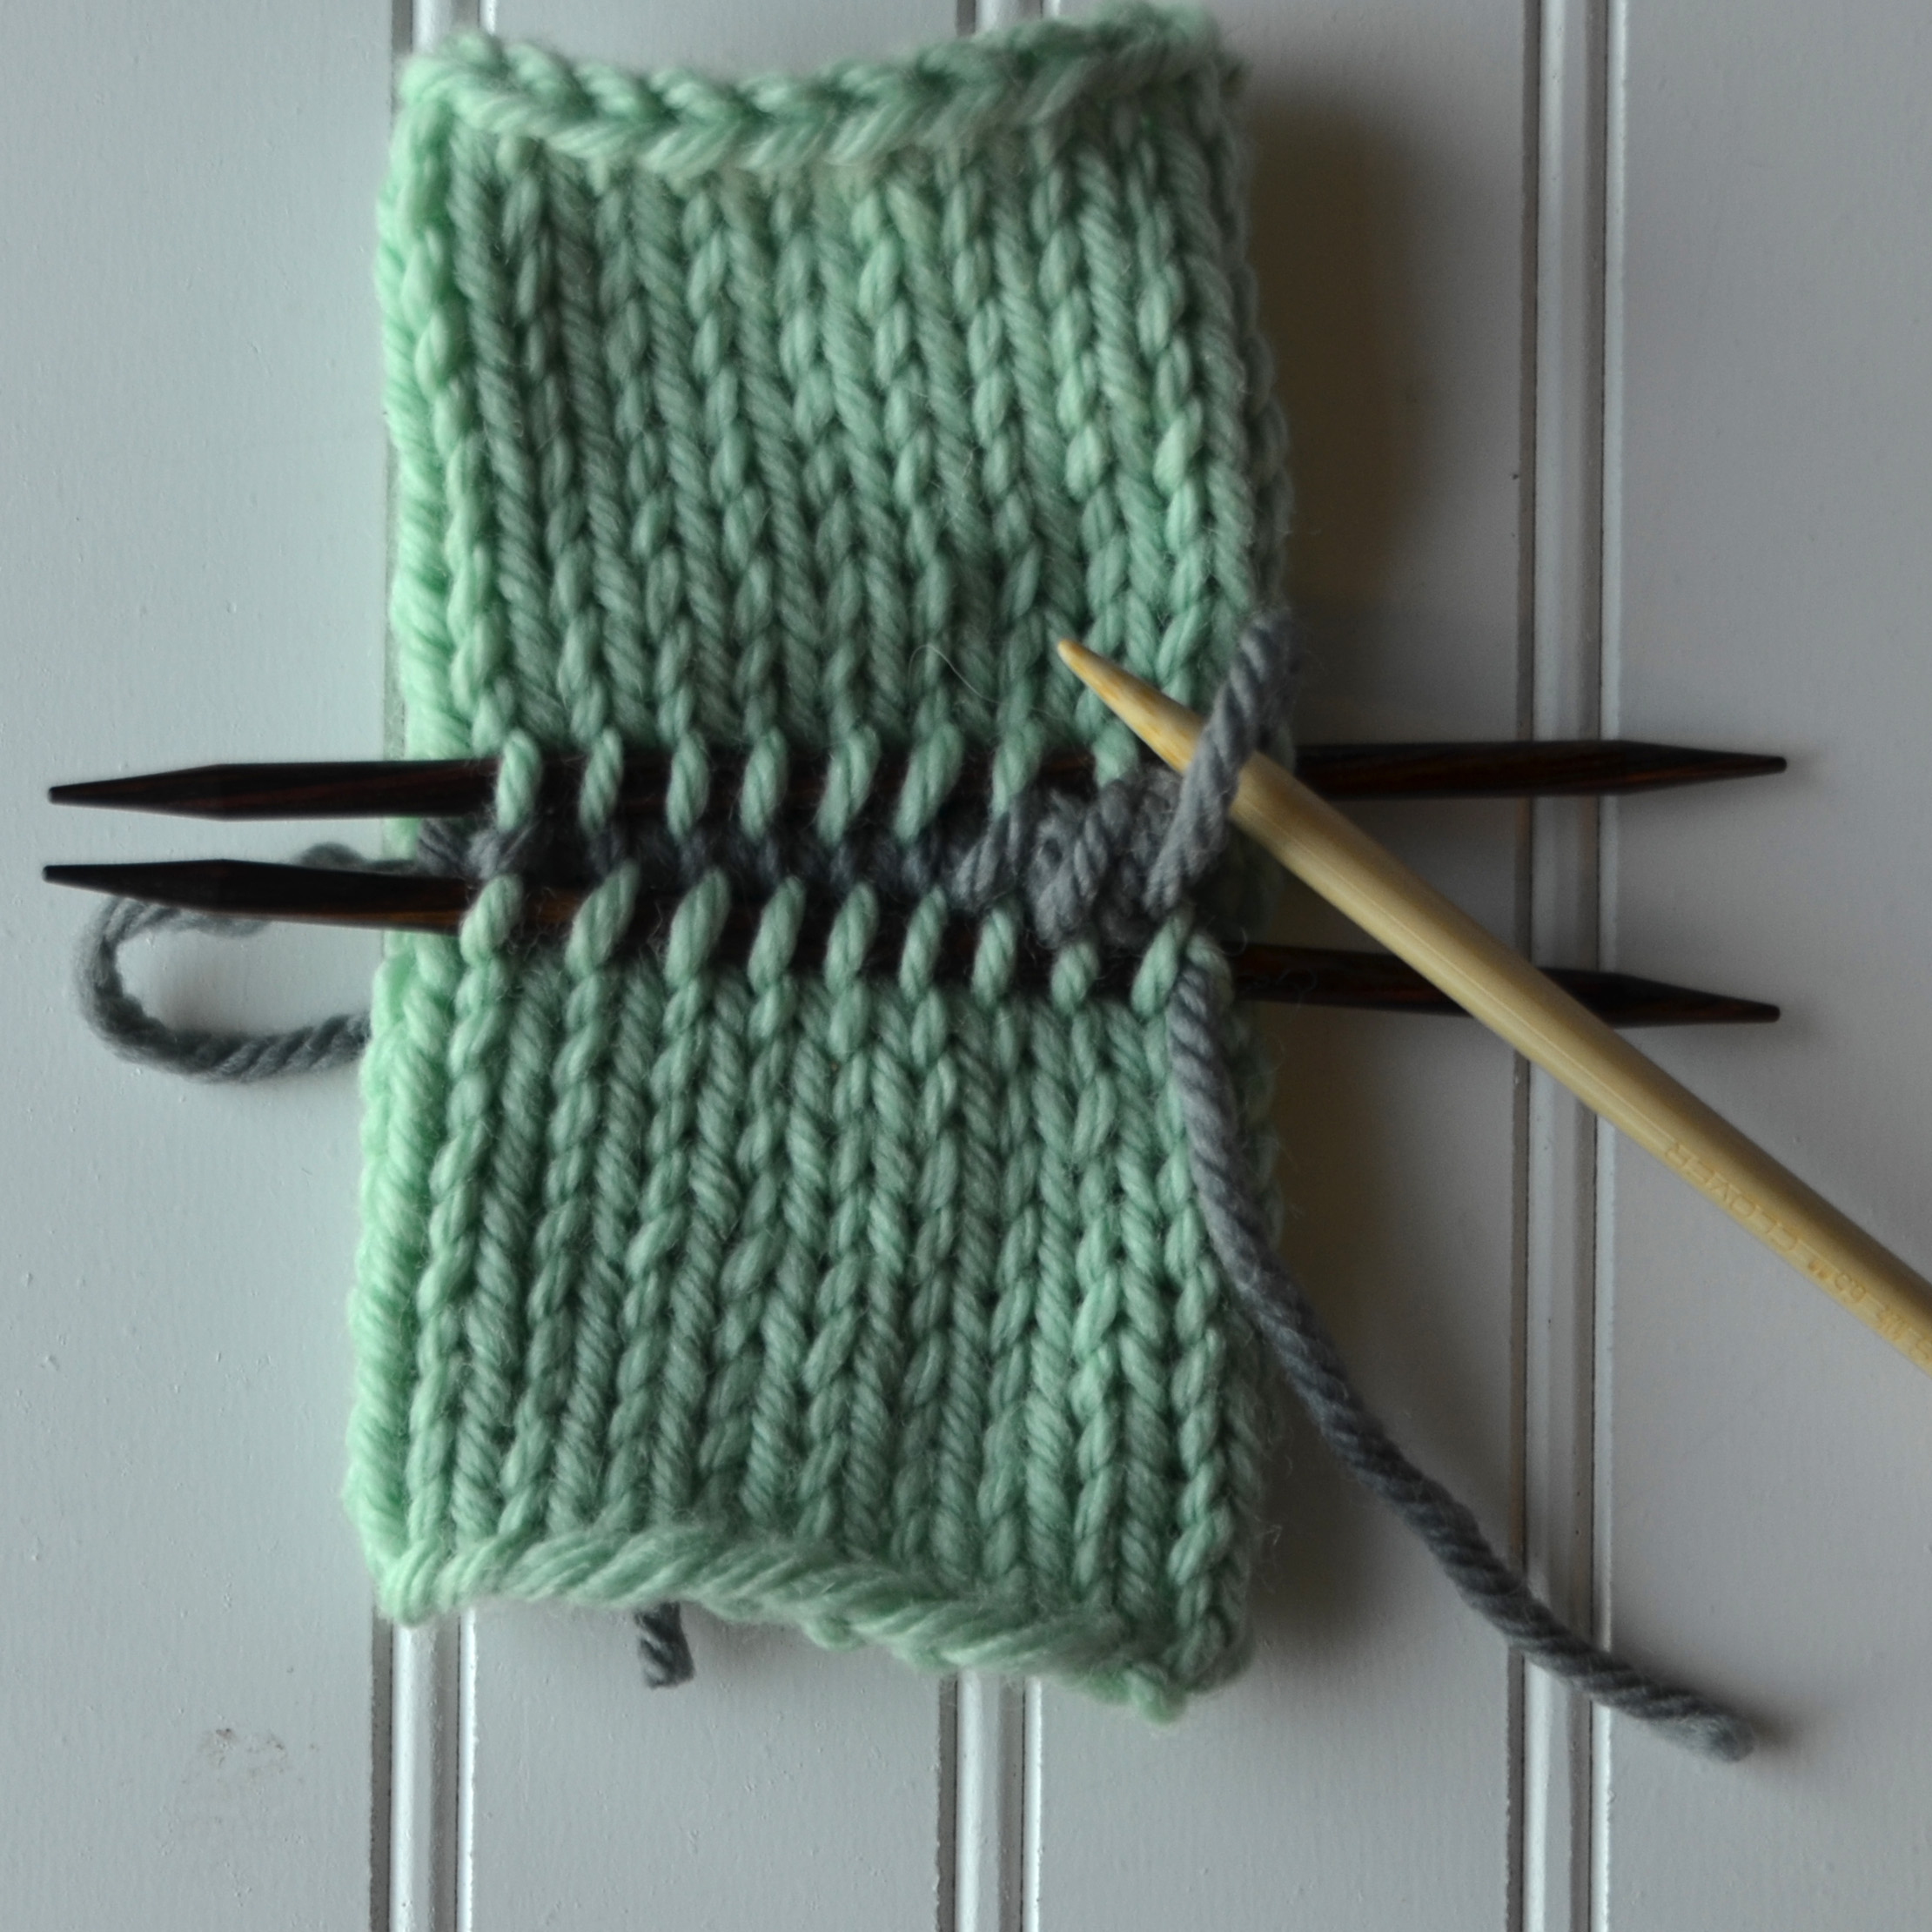
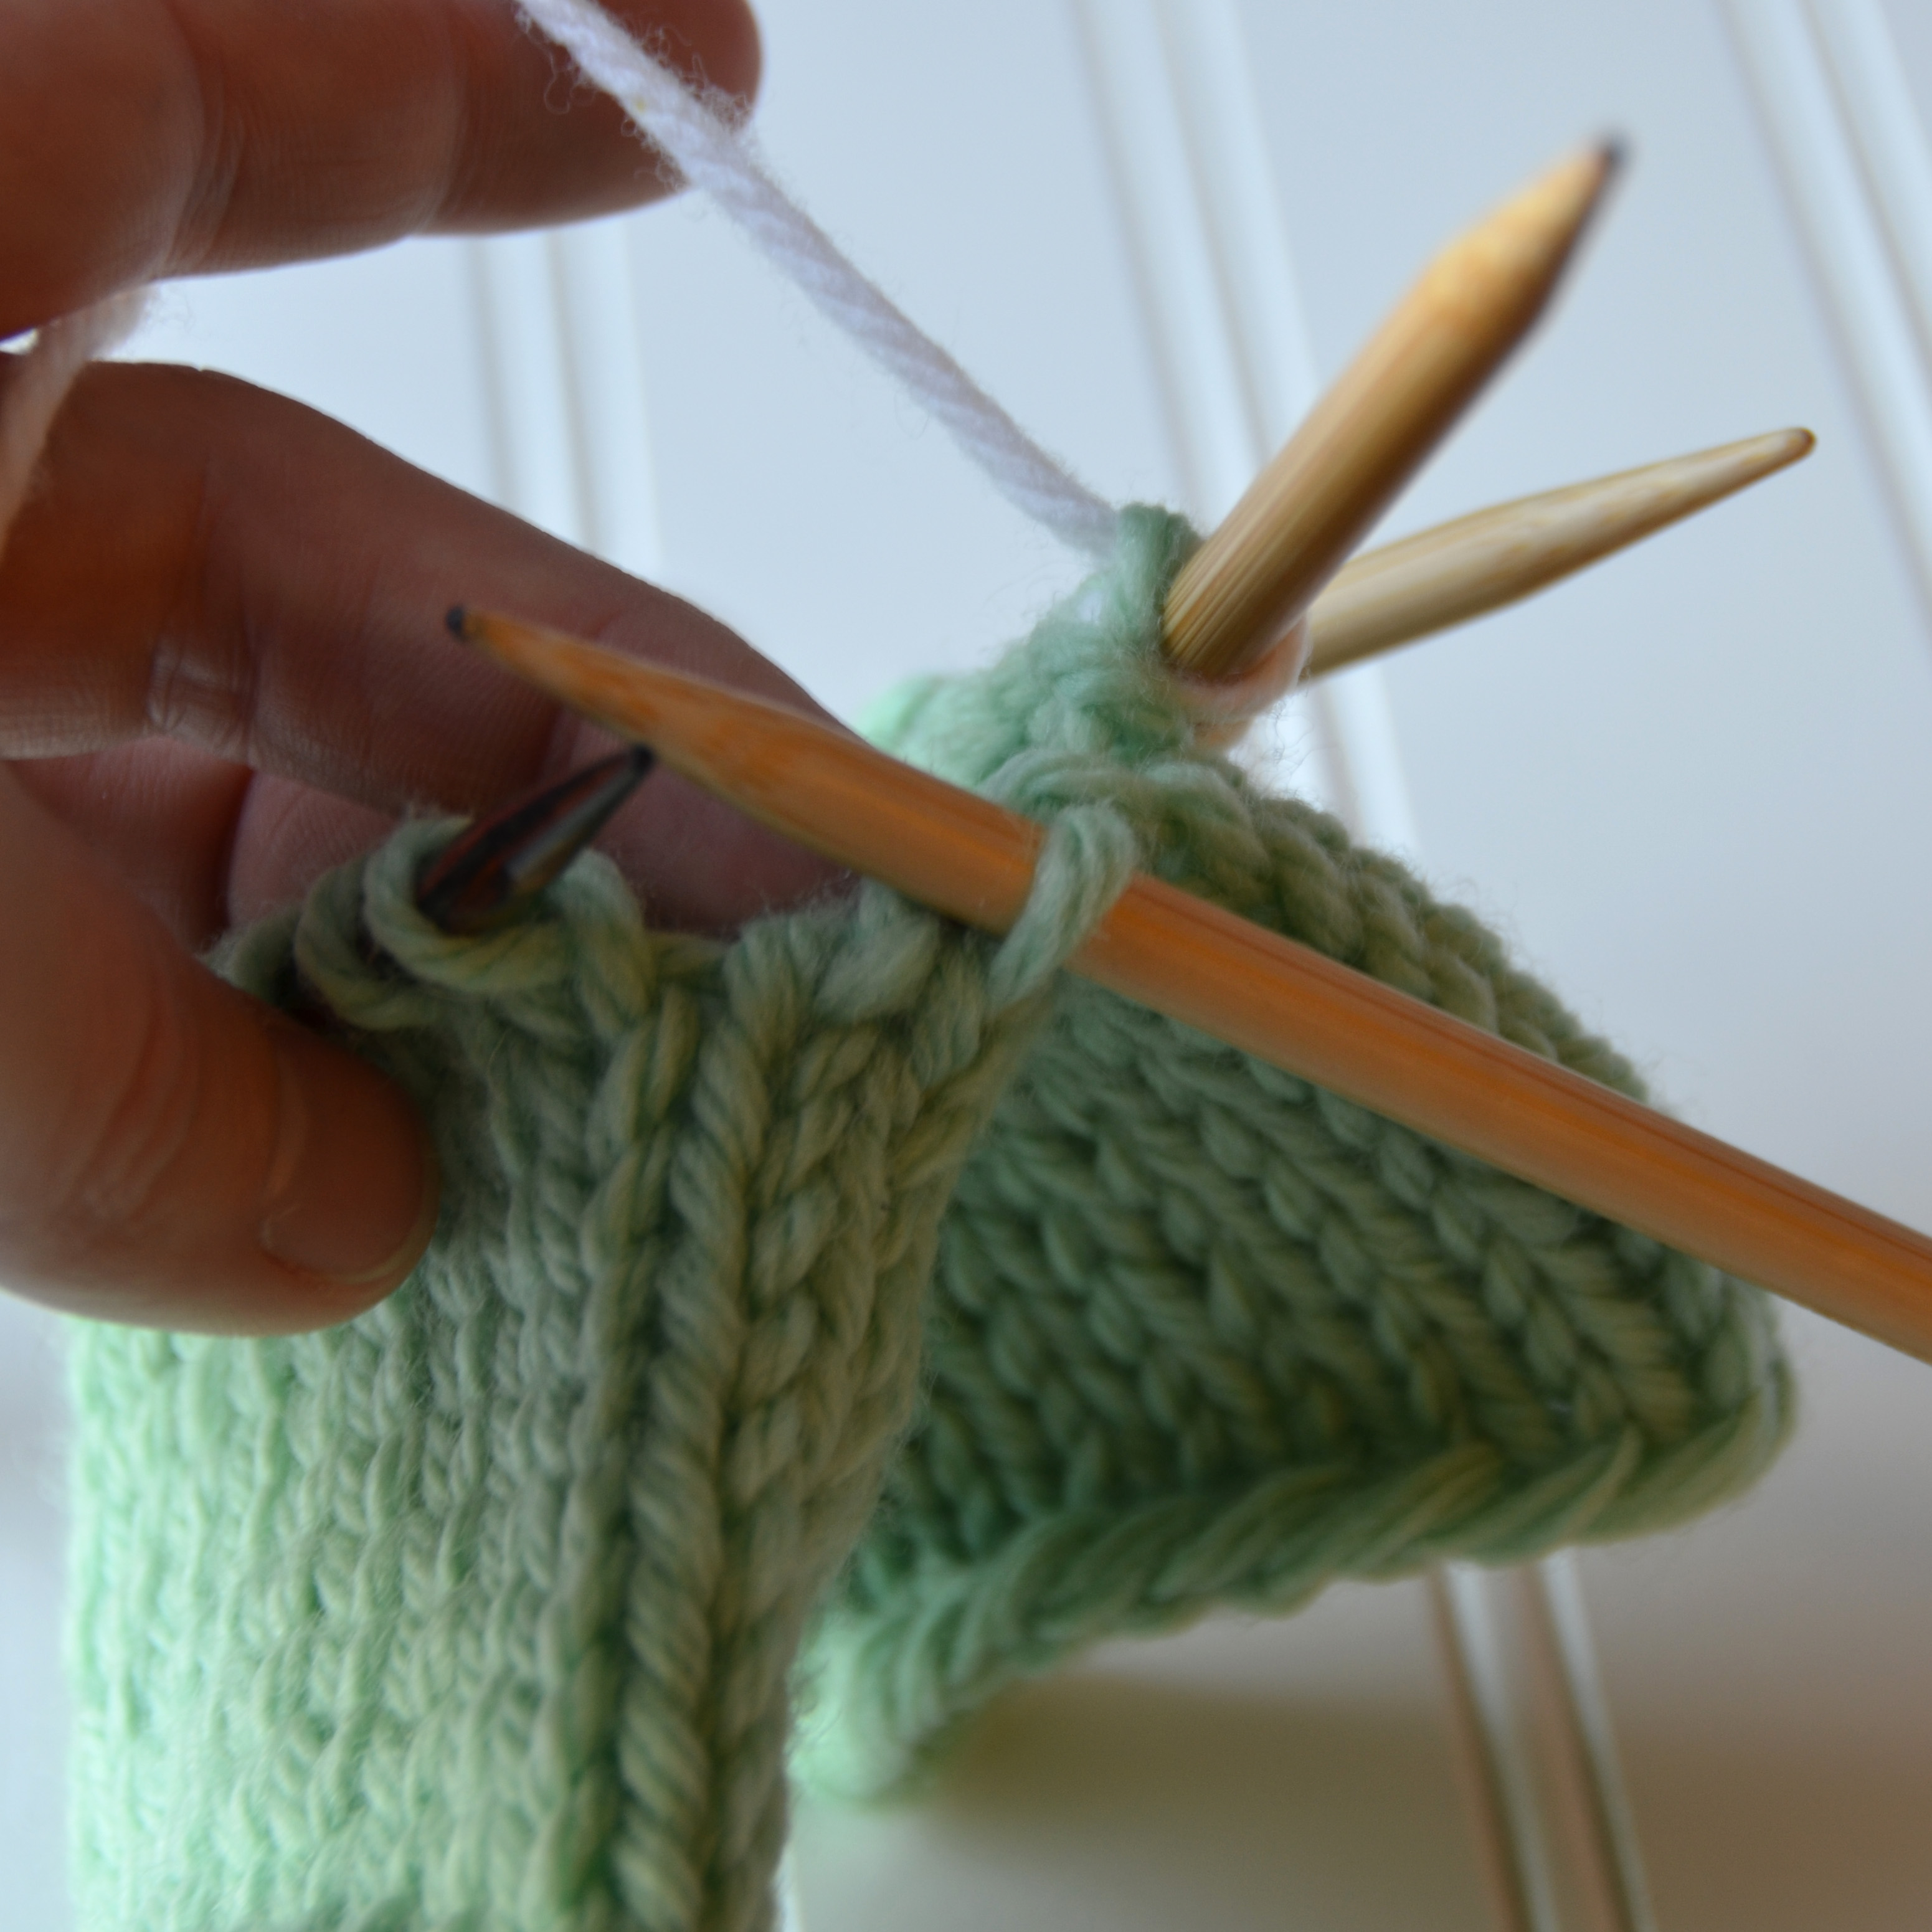
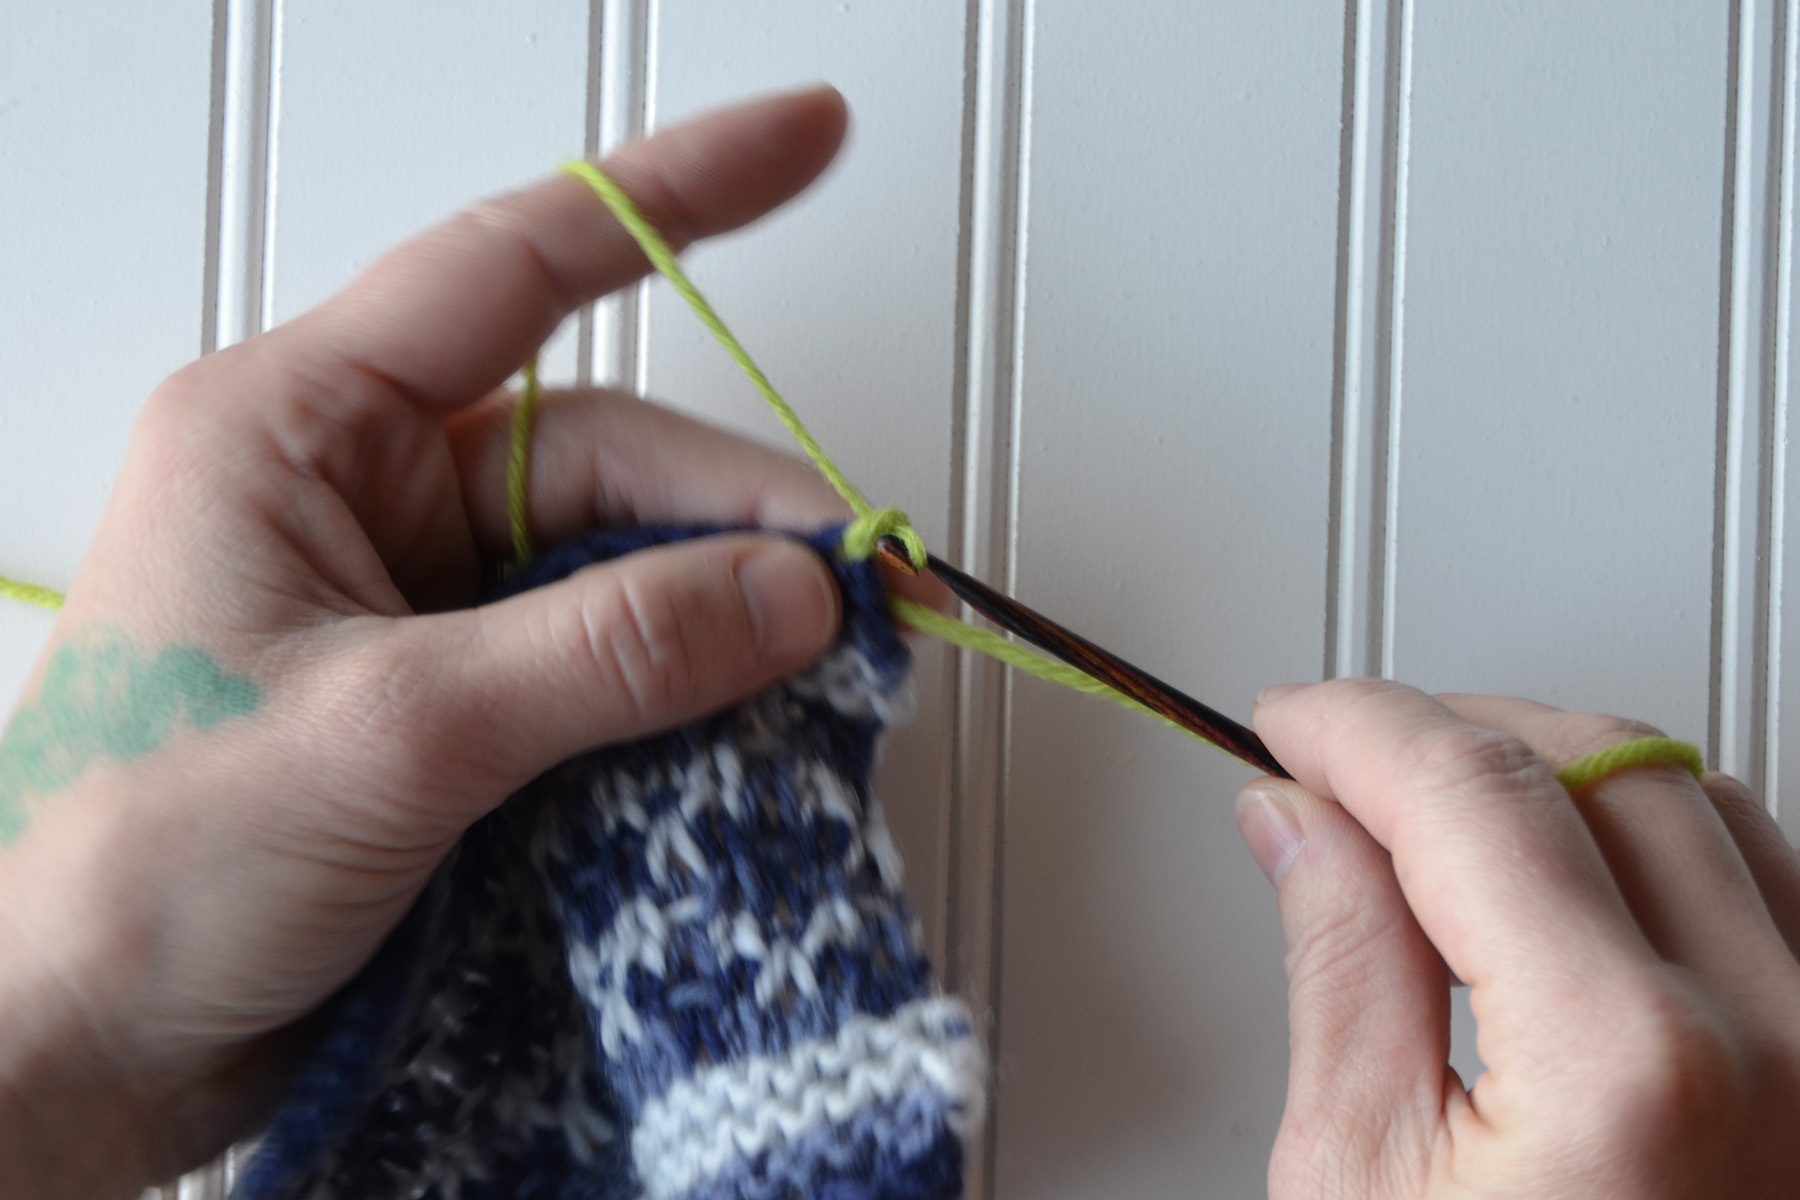
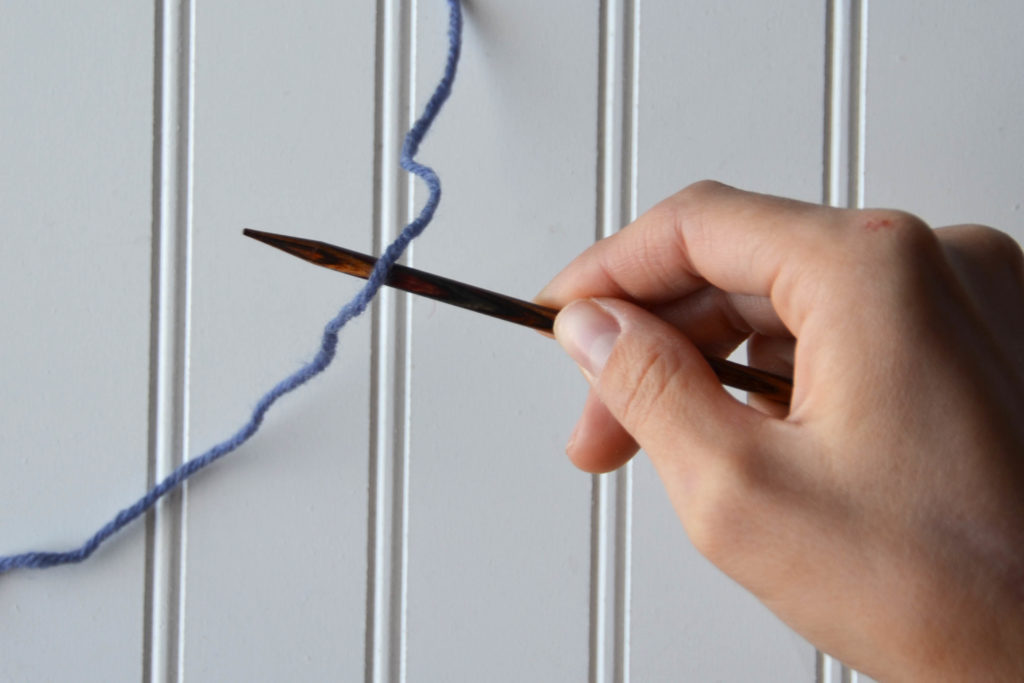
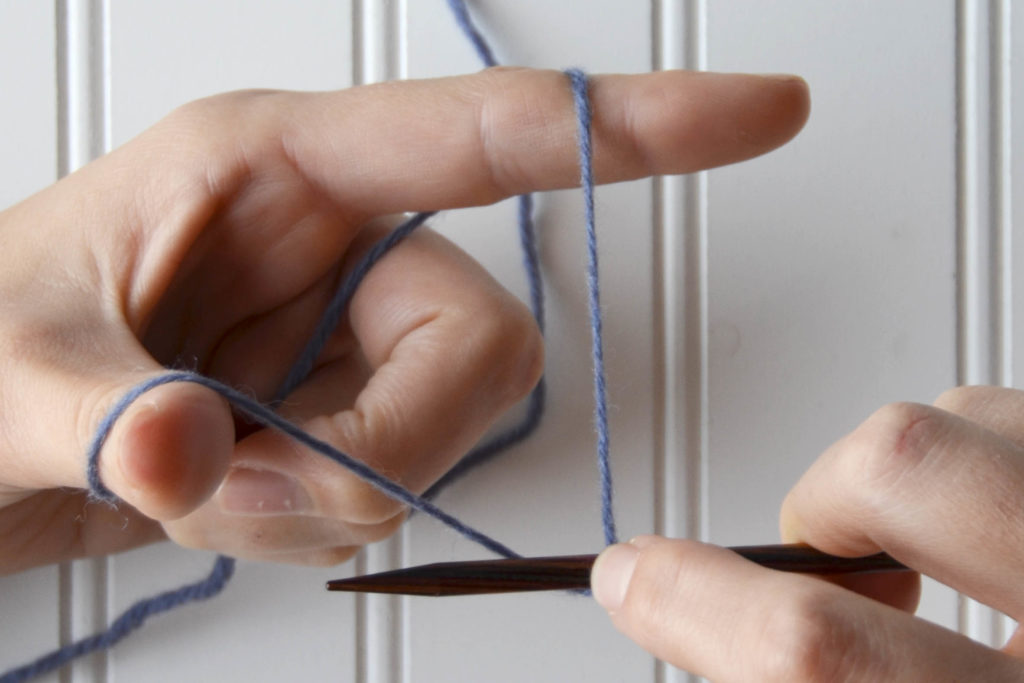
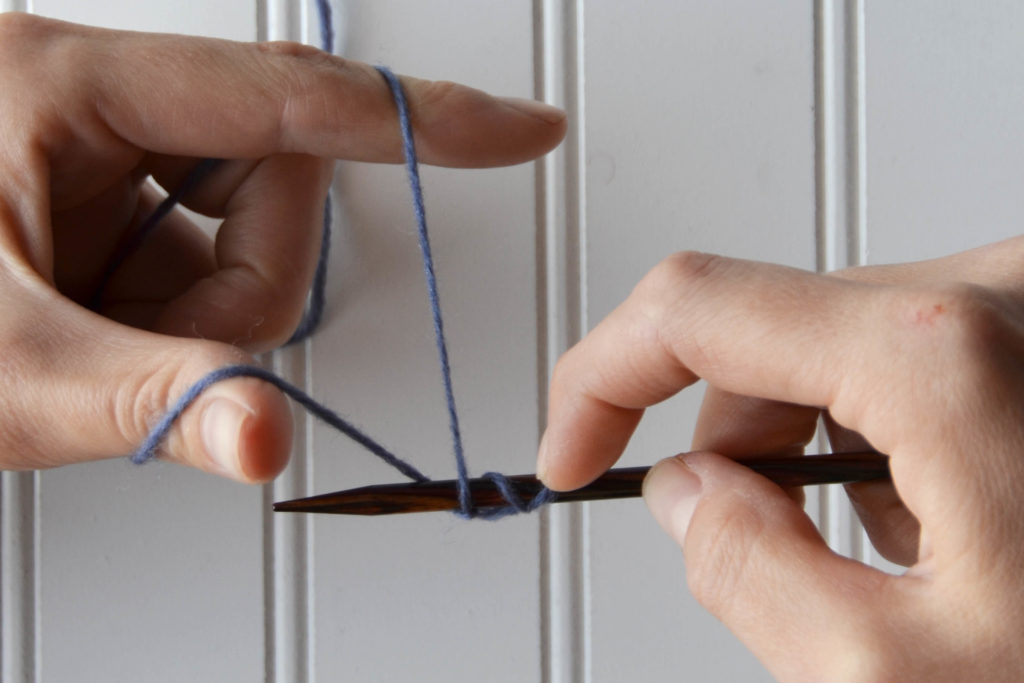
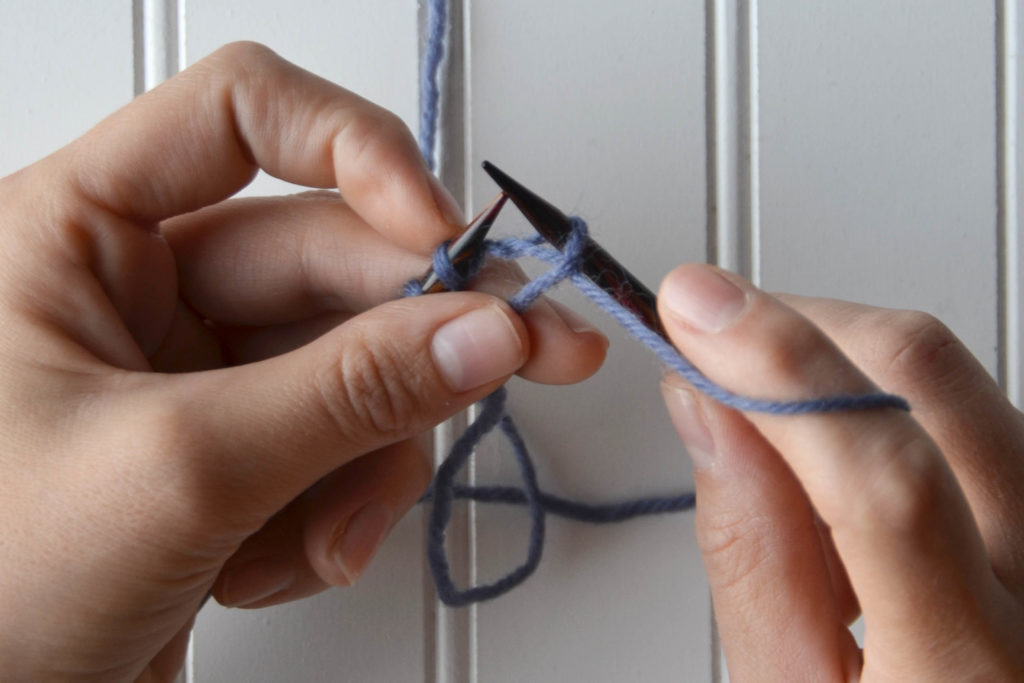
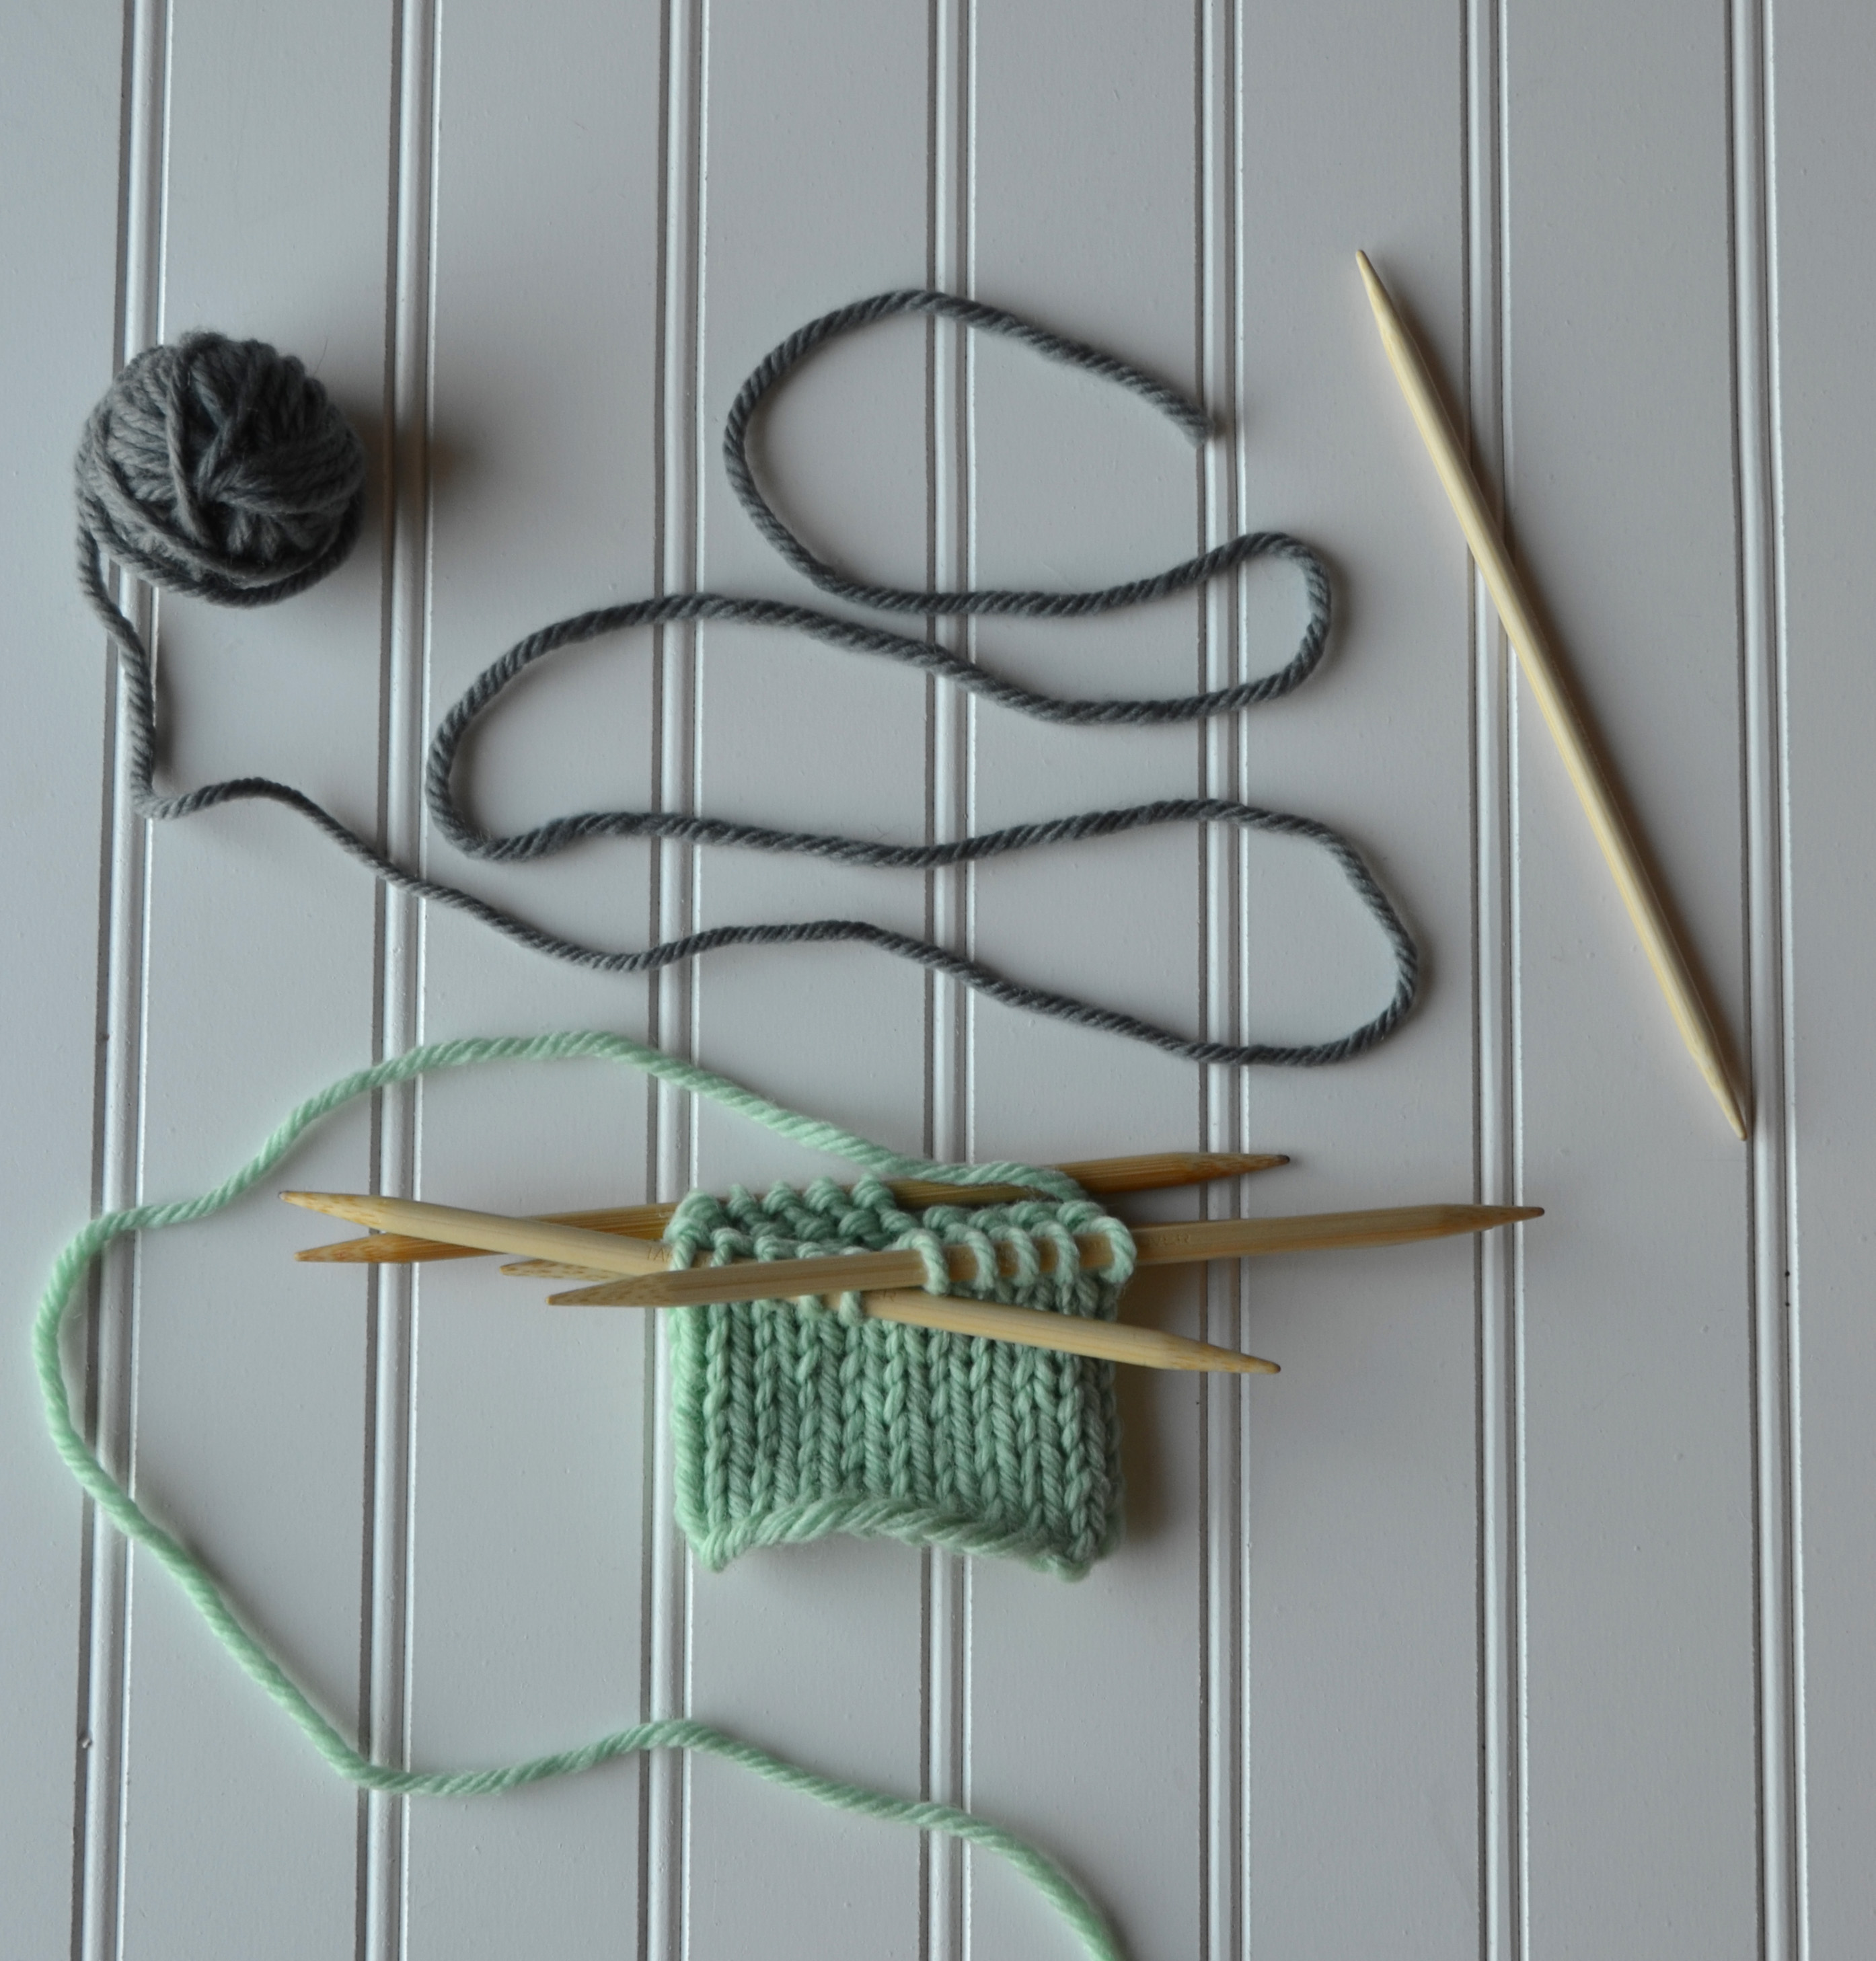
First, knit a stockinette swatch. I am knitting my swatch in the round just like the stockings, but this technique can just as easily be done worked flat in rows.Next, get ready with your waste yarn. This waste yarn is temporarily going to hold the place of where your heel will eventually be.Leaving your working (green) yarn where it is, knit across the heel stitches with the waste yarn. Your pattern will specify how many stitches this is. Typically, it is half of the total sock stitches.
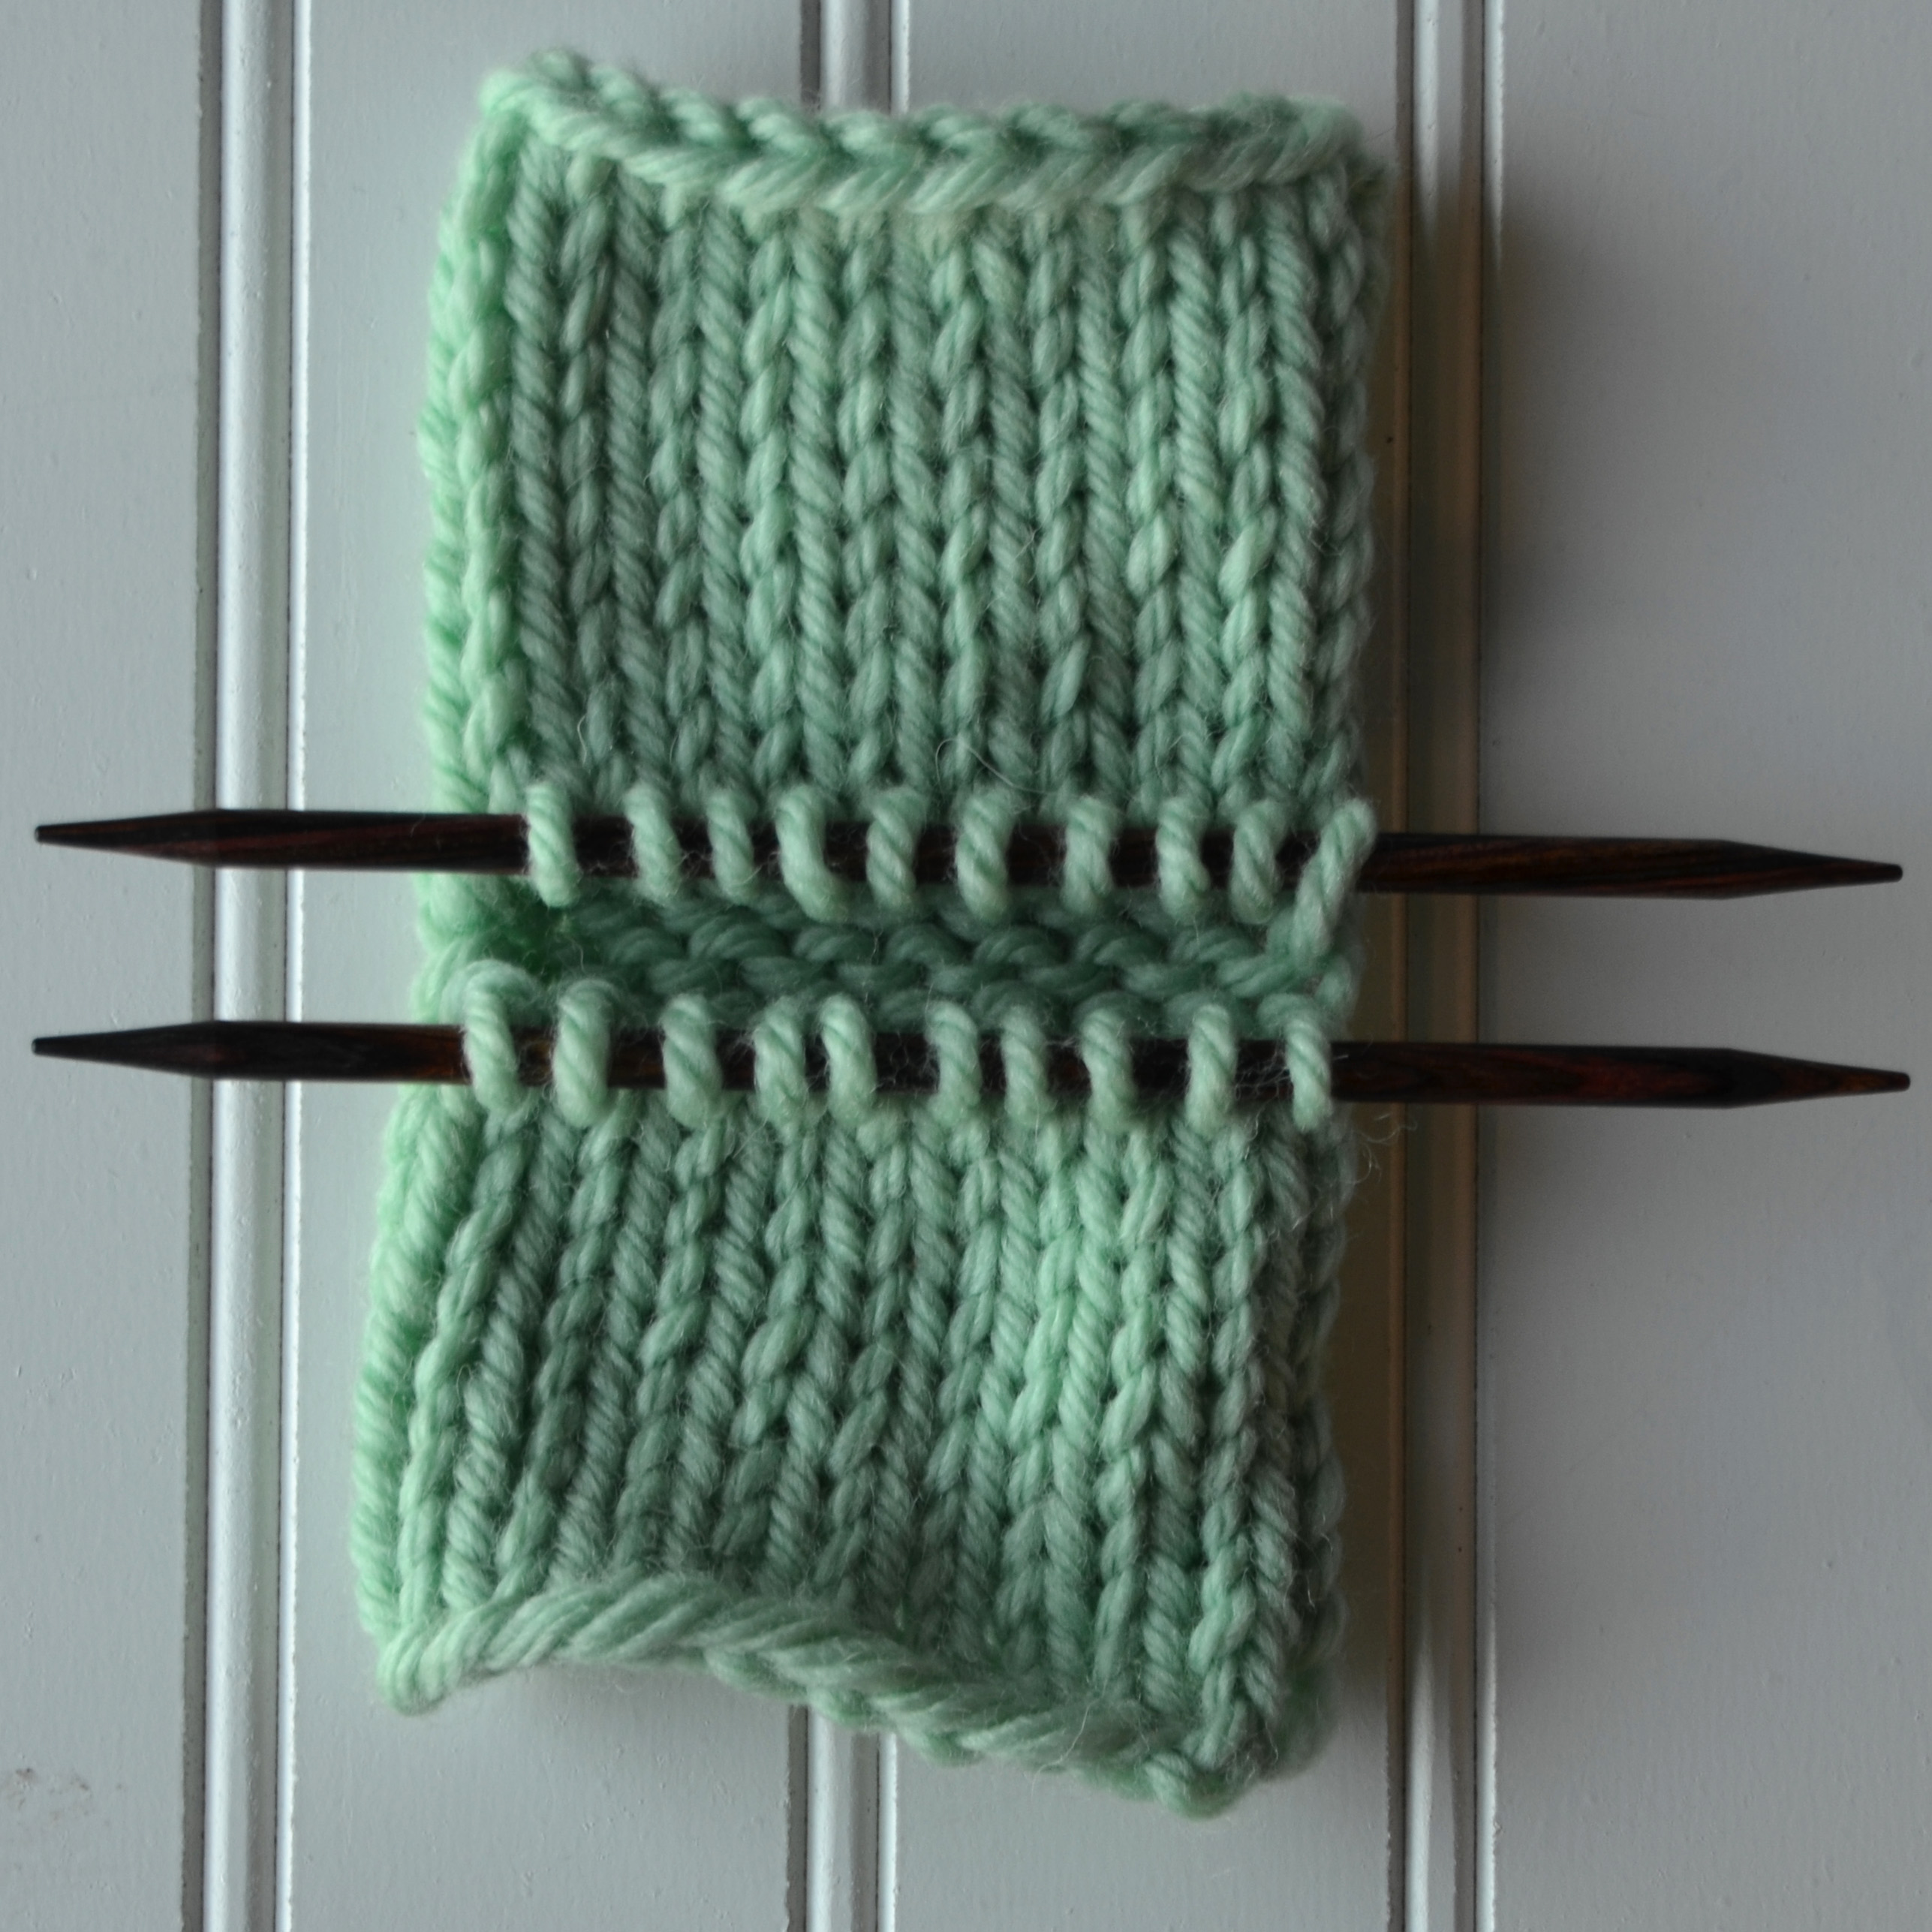
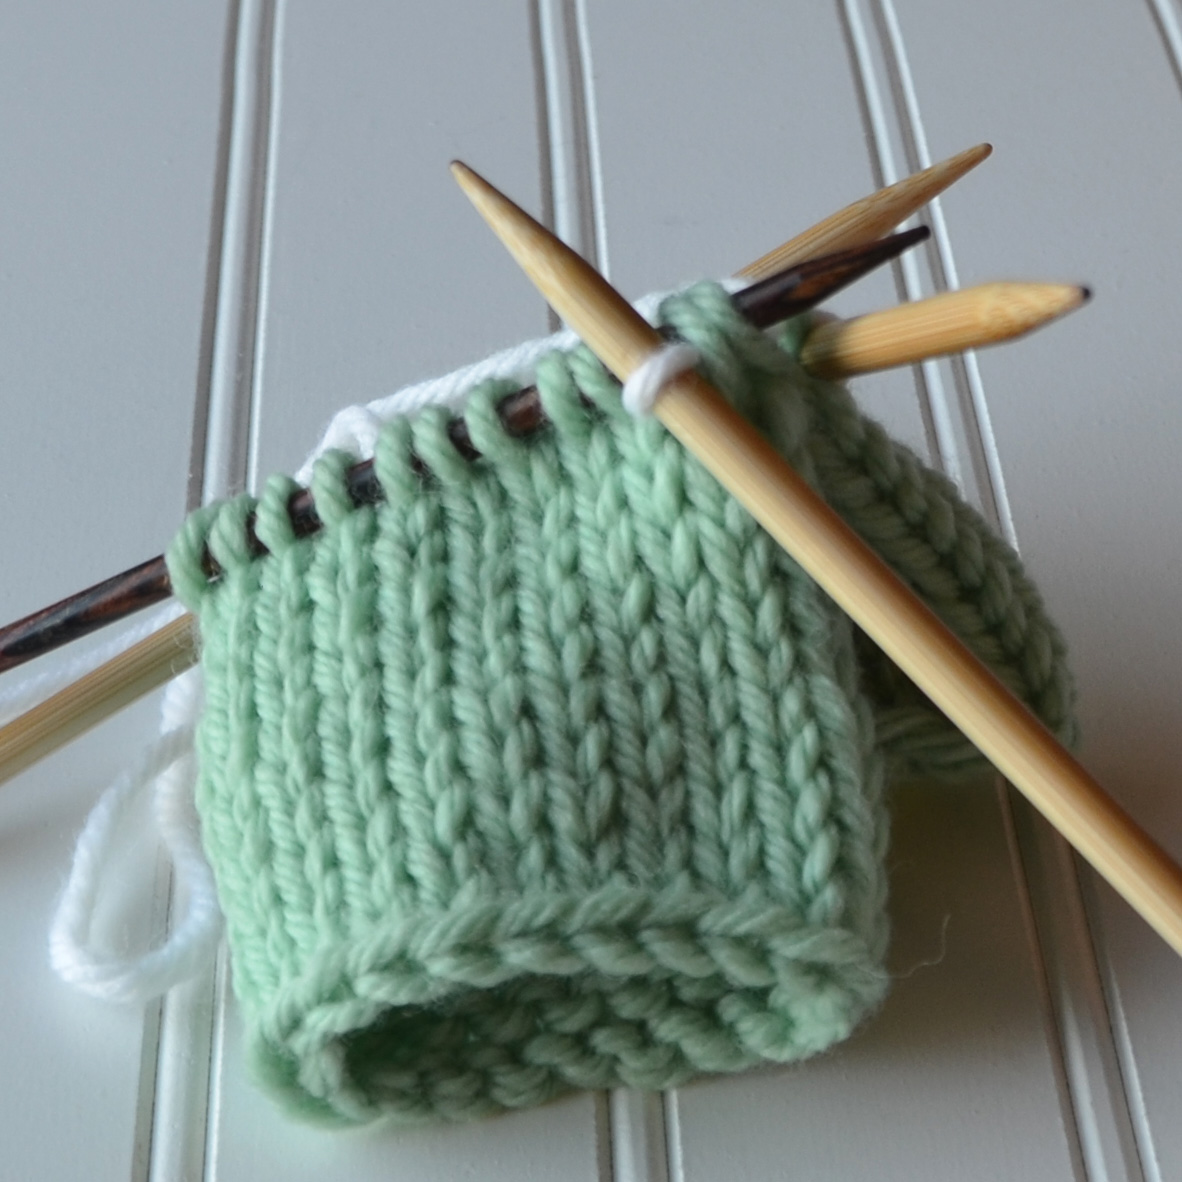
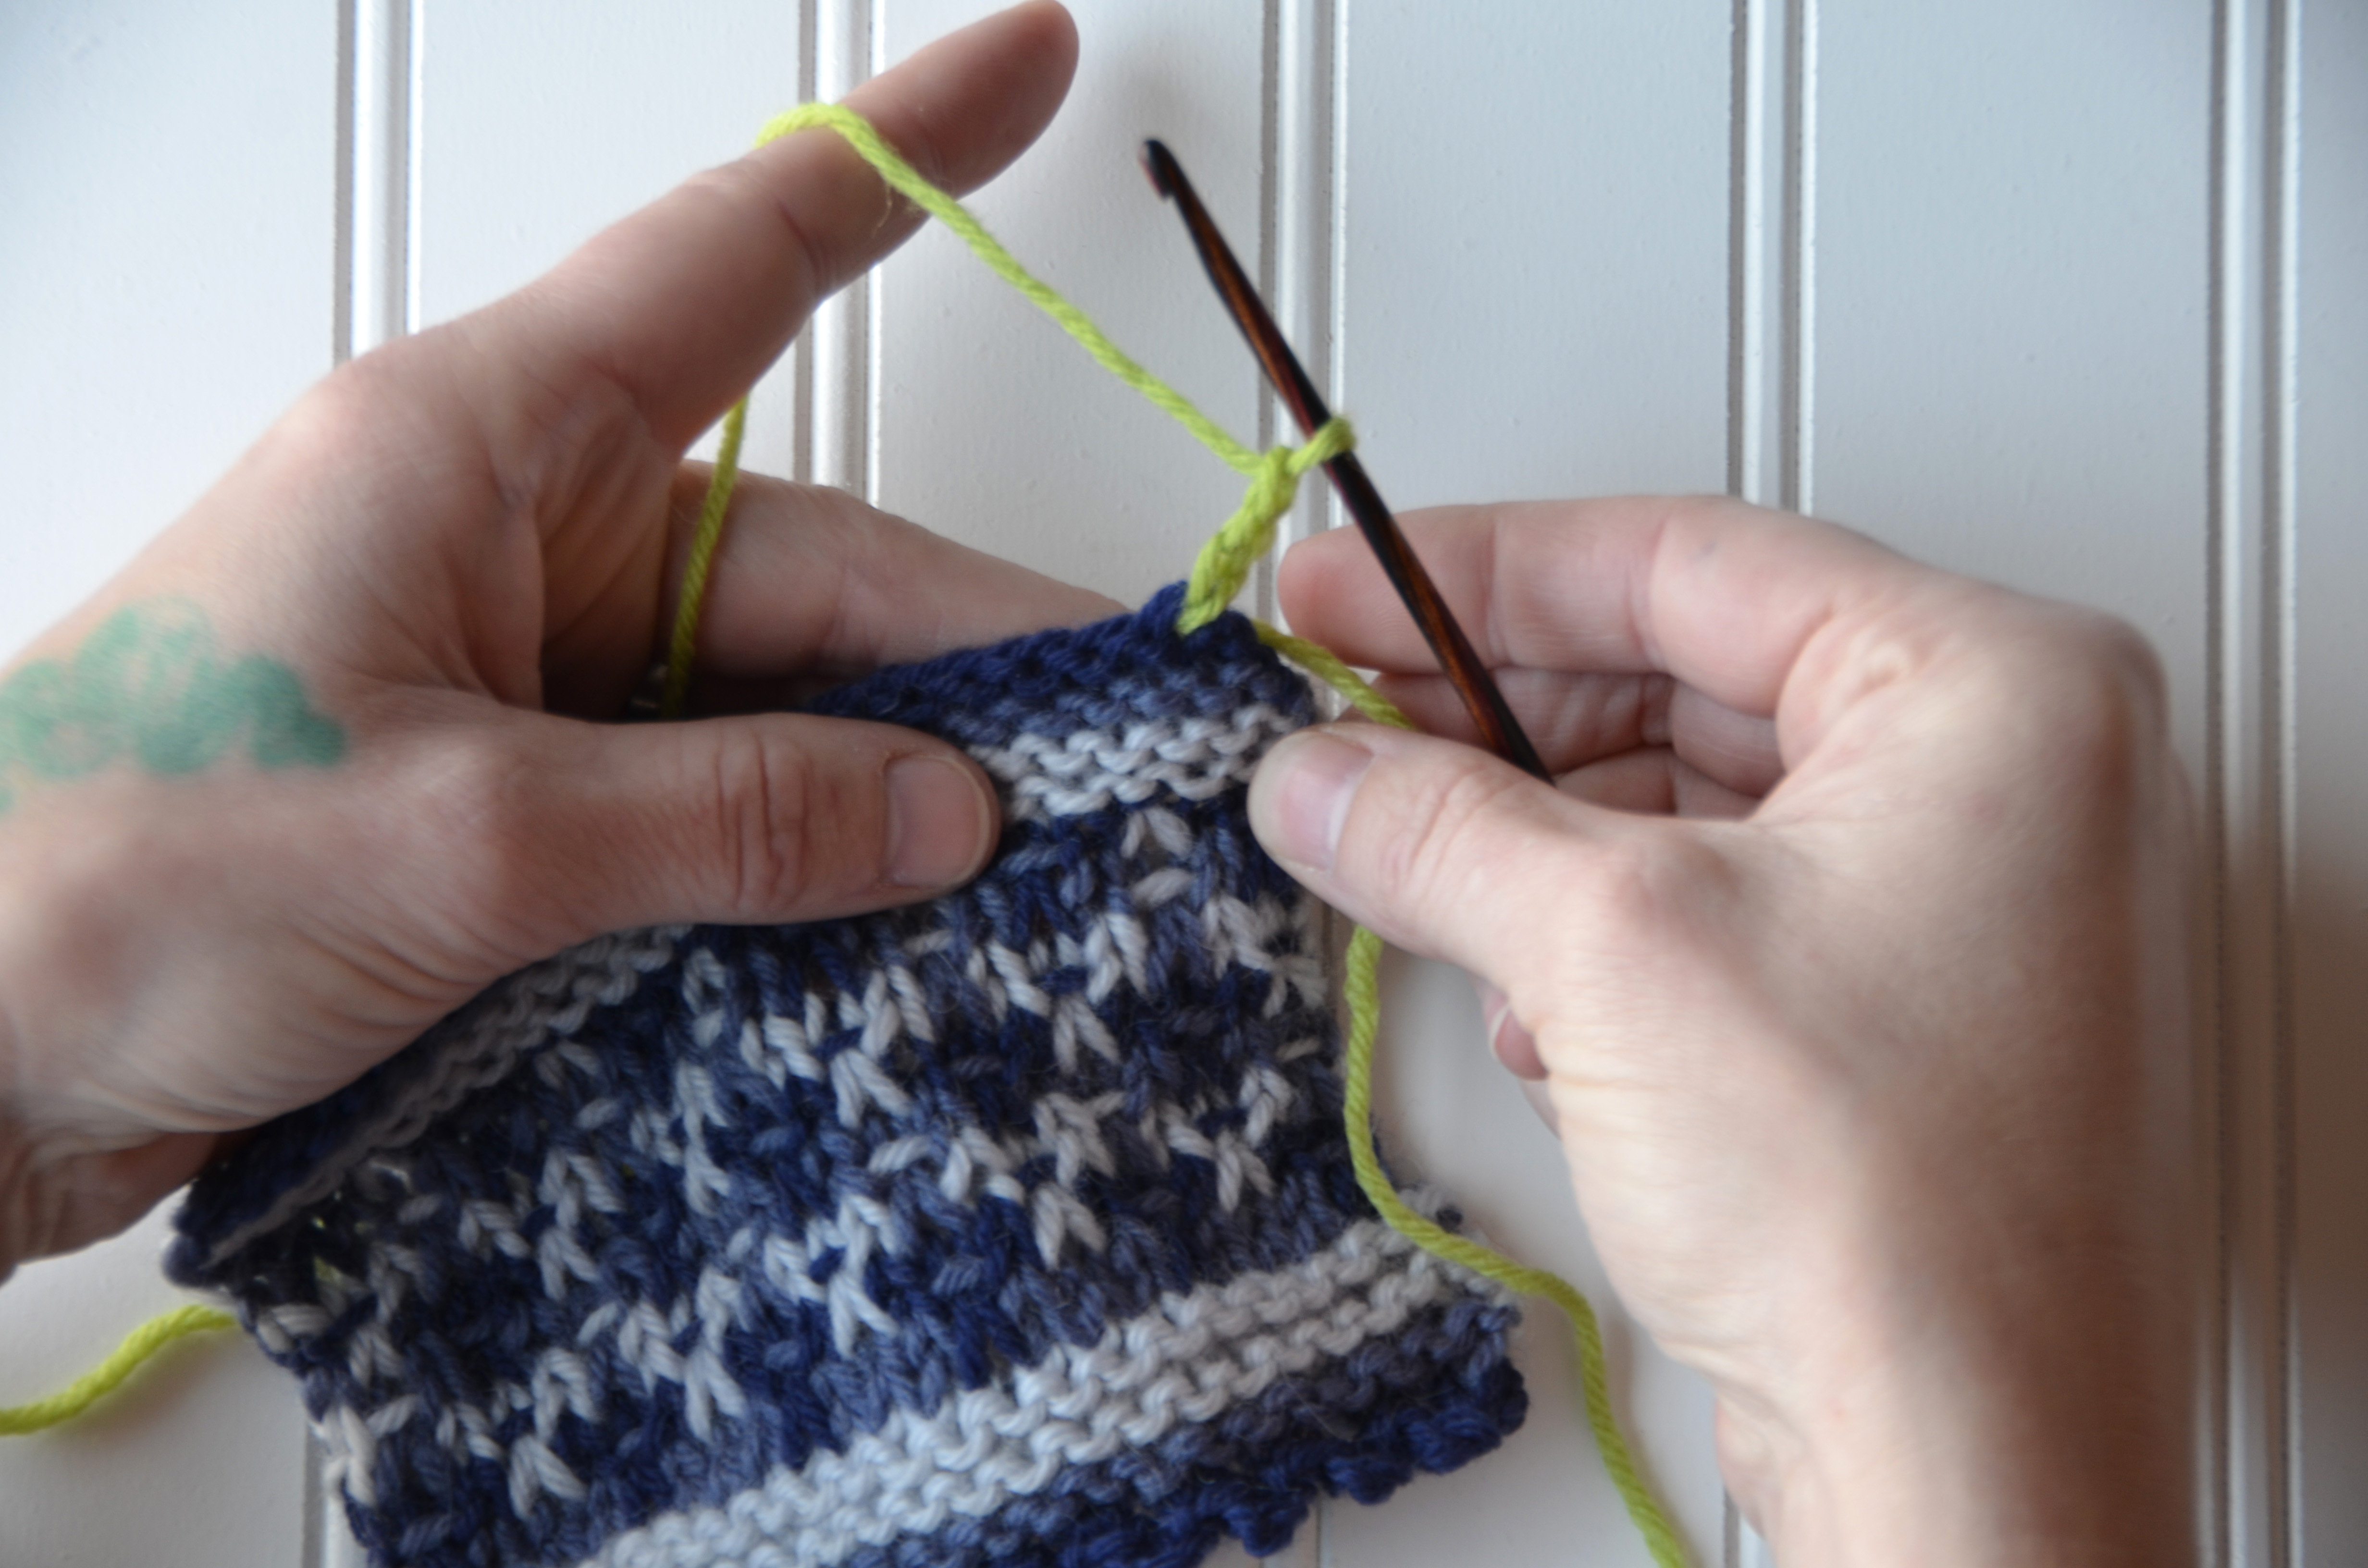
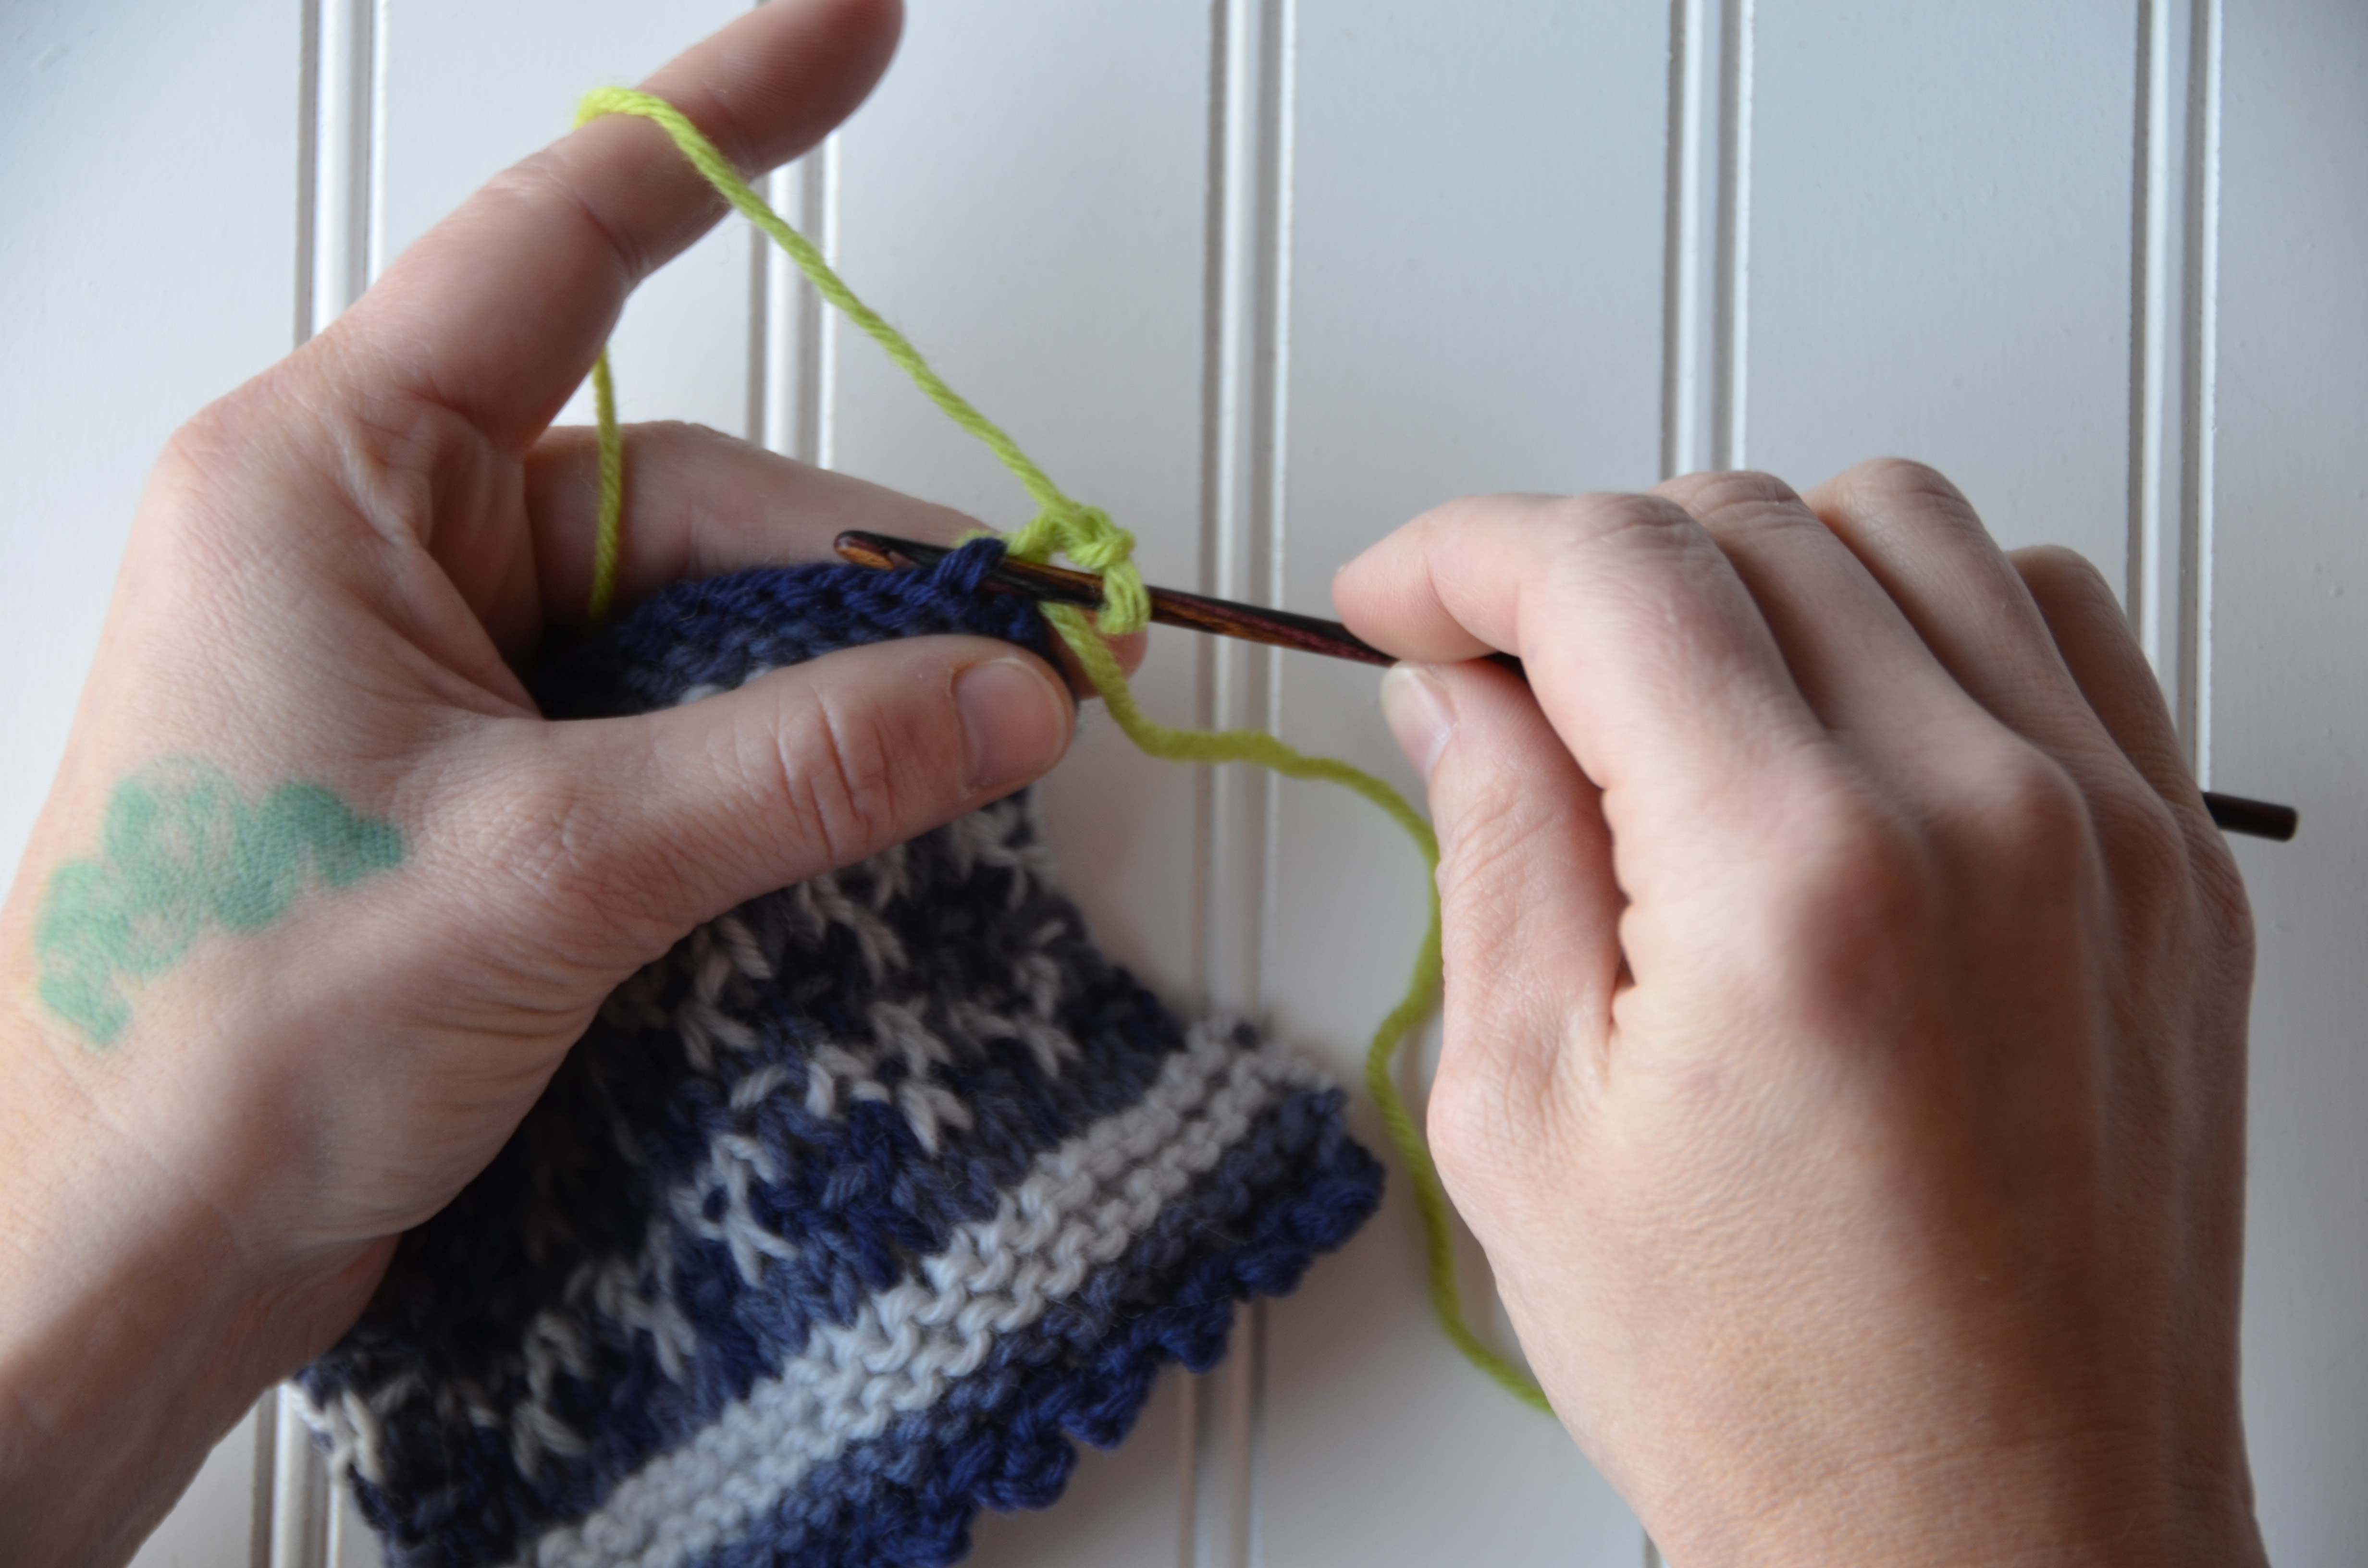
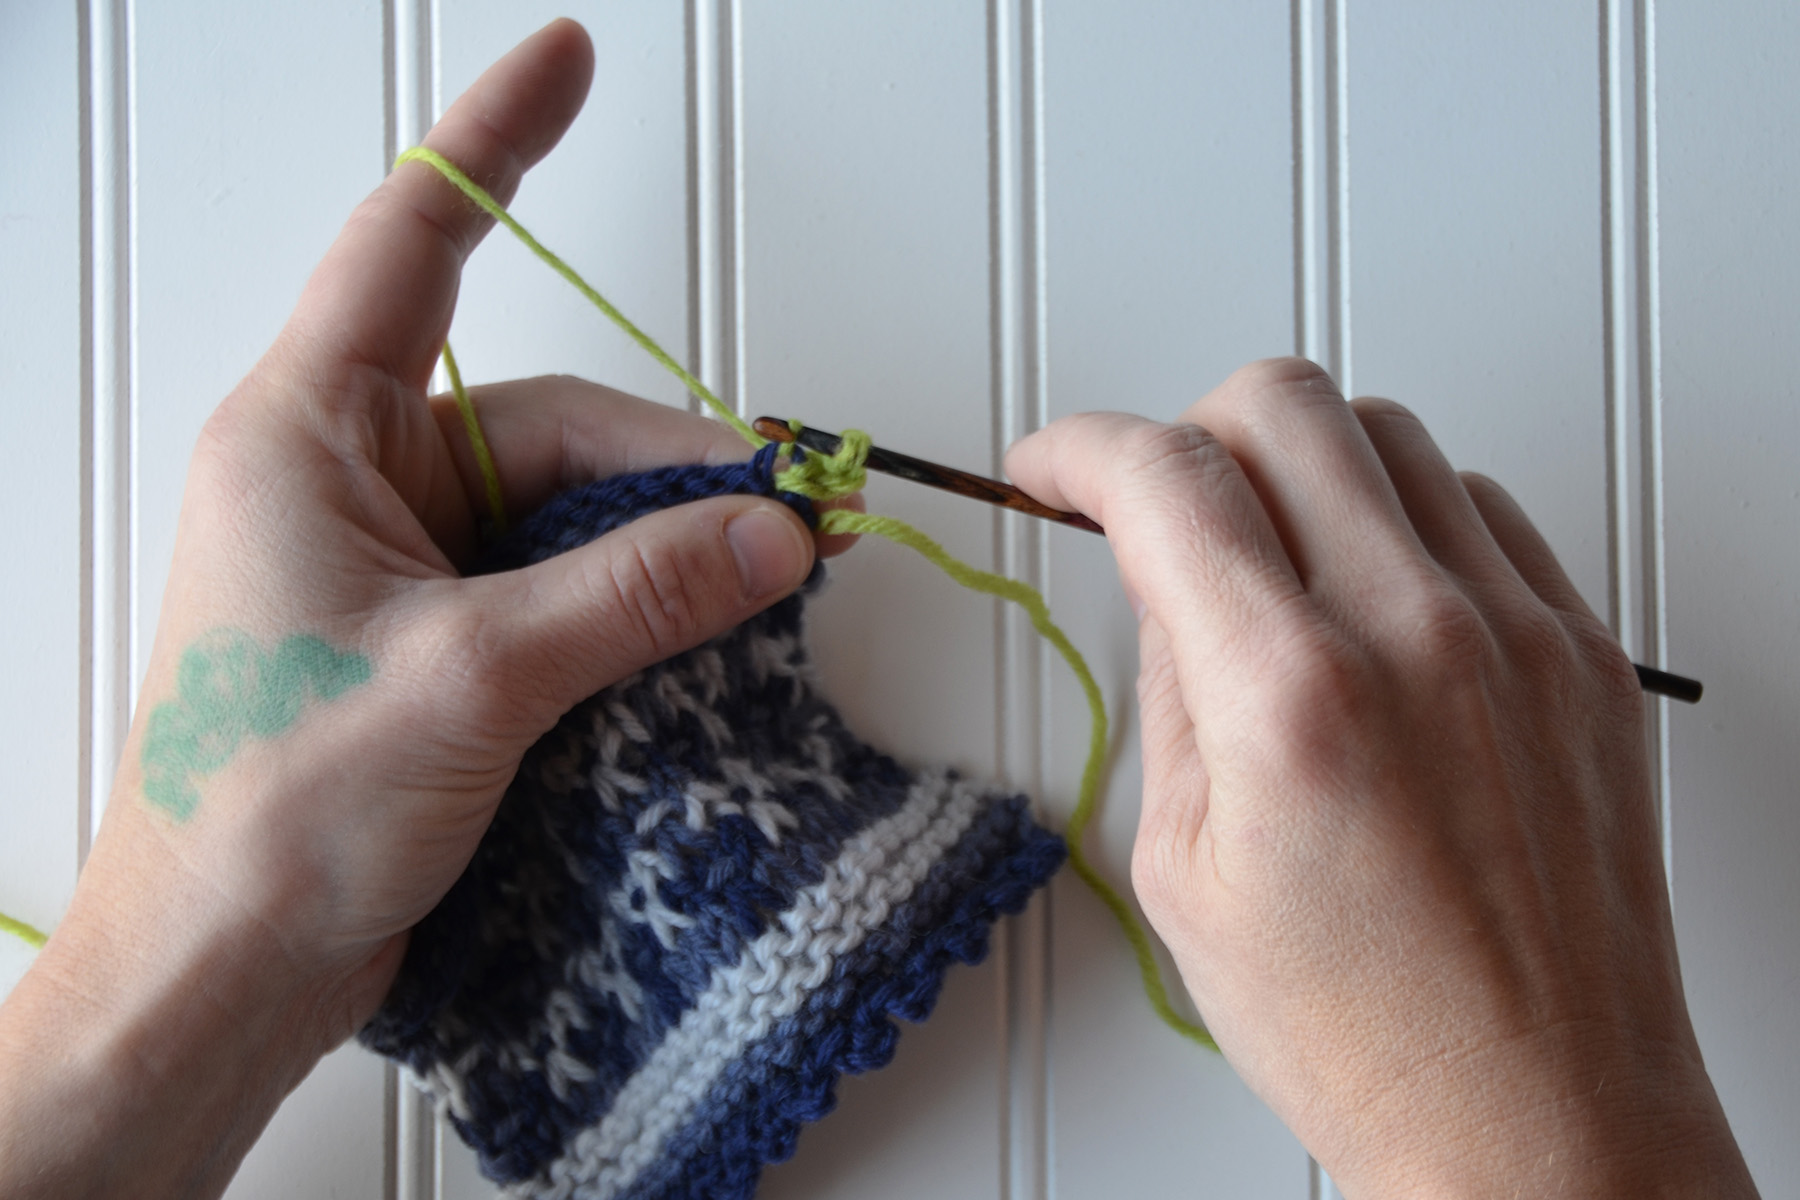
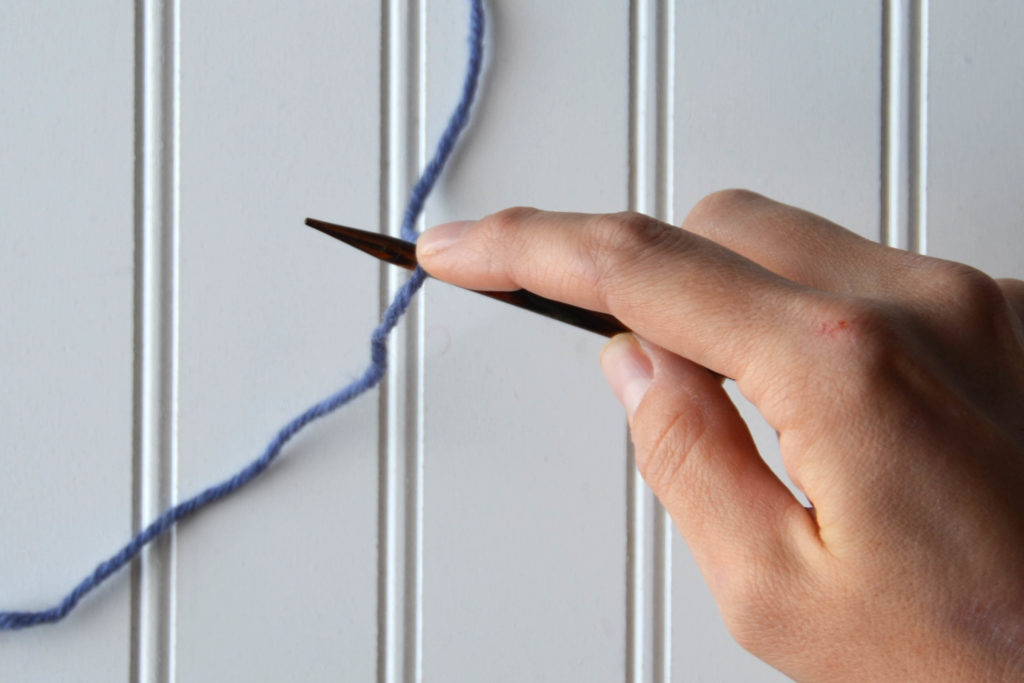
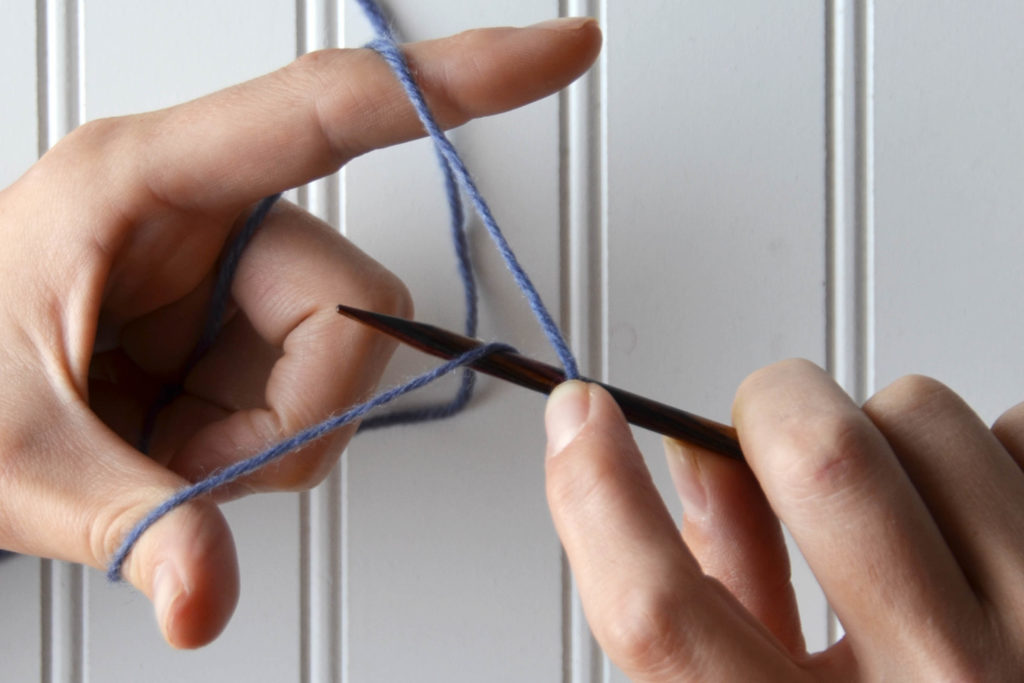
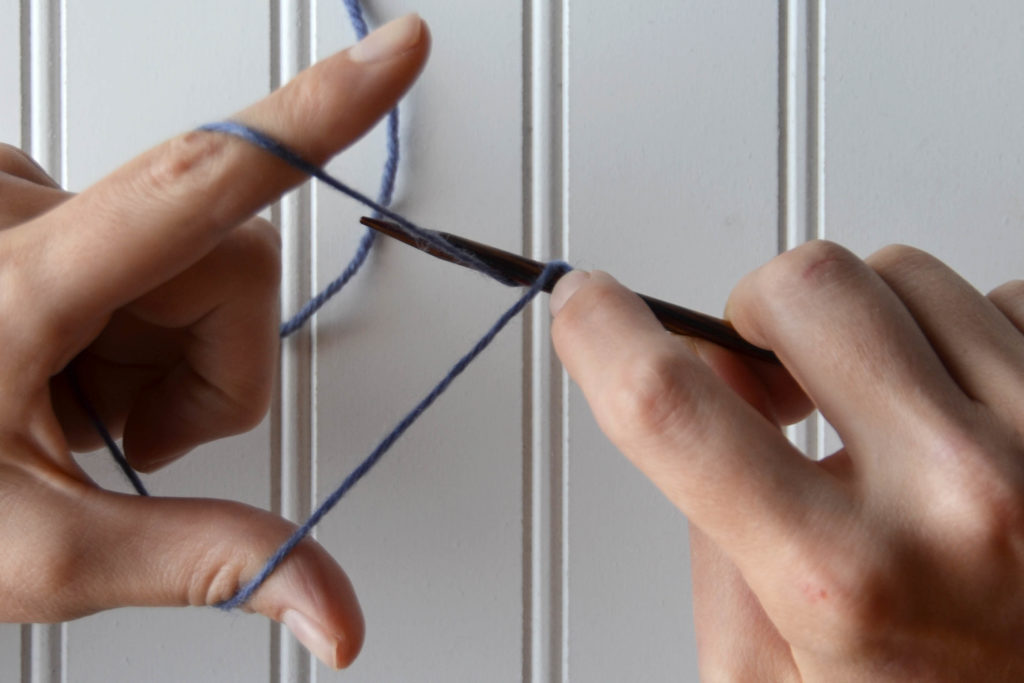
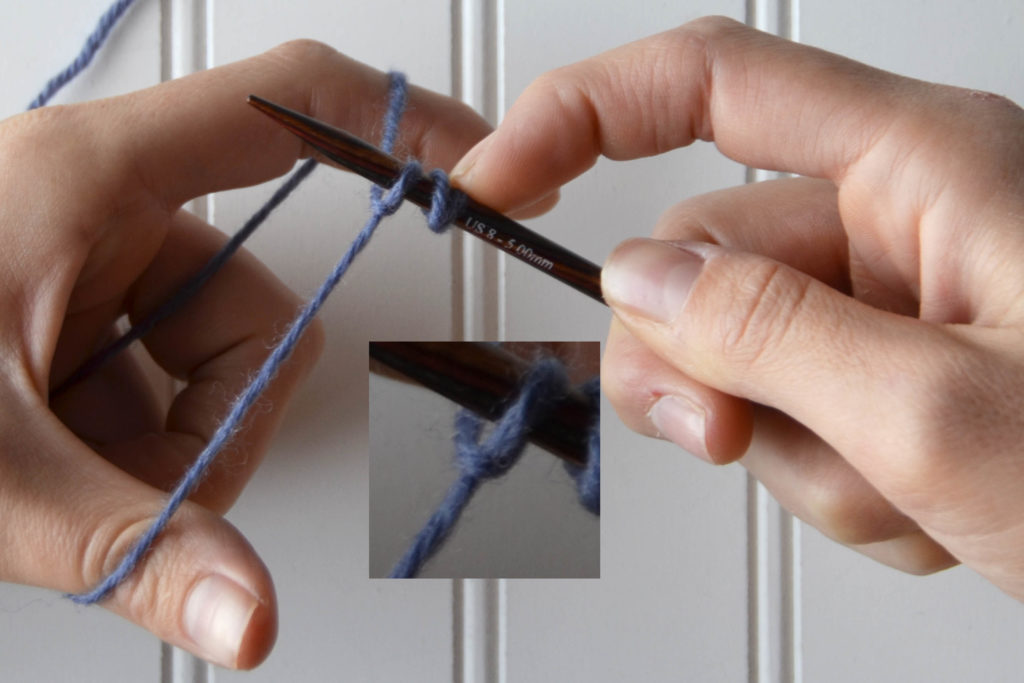
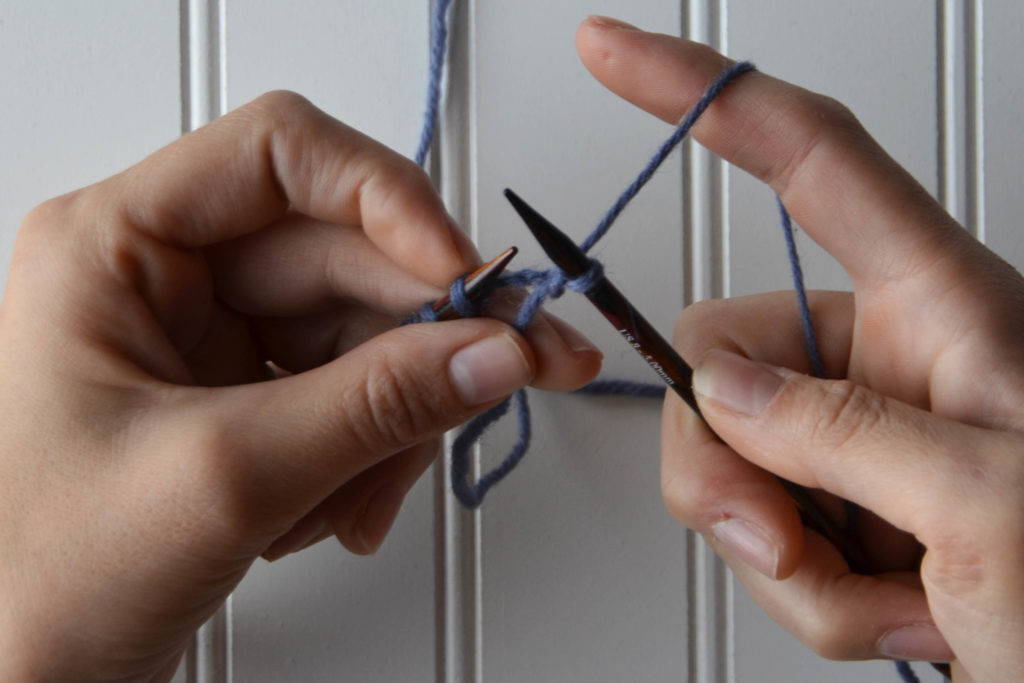
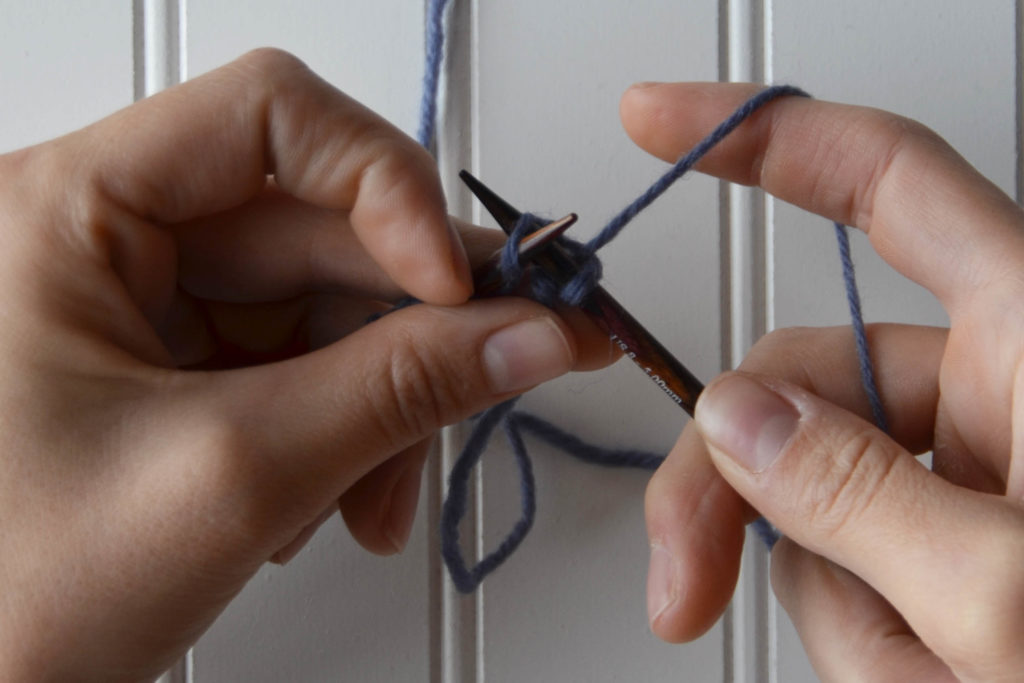
Continue to knit the rest of the sock/swatch. Knit across the waste yarn stitches and on around.
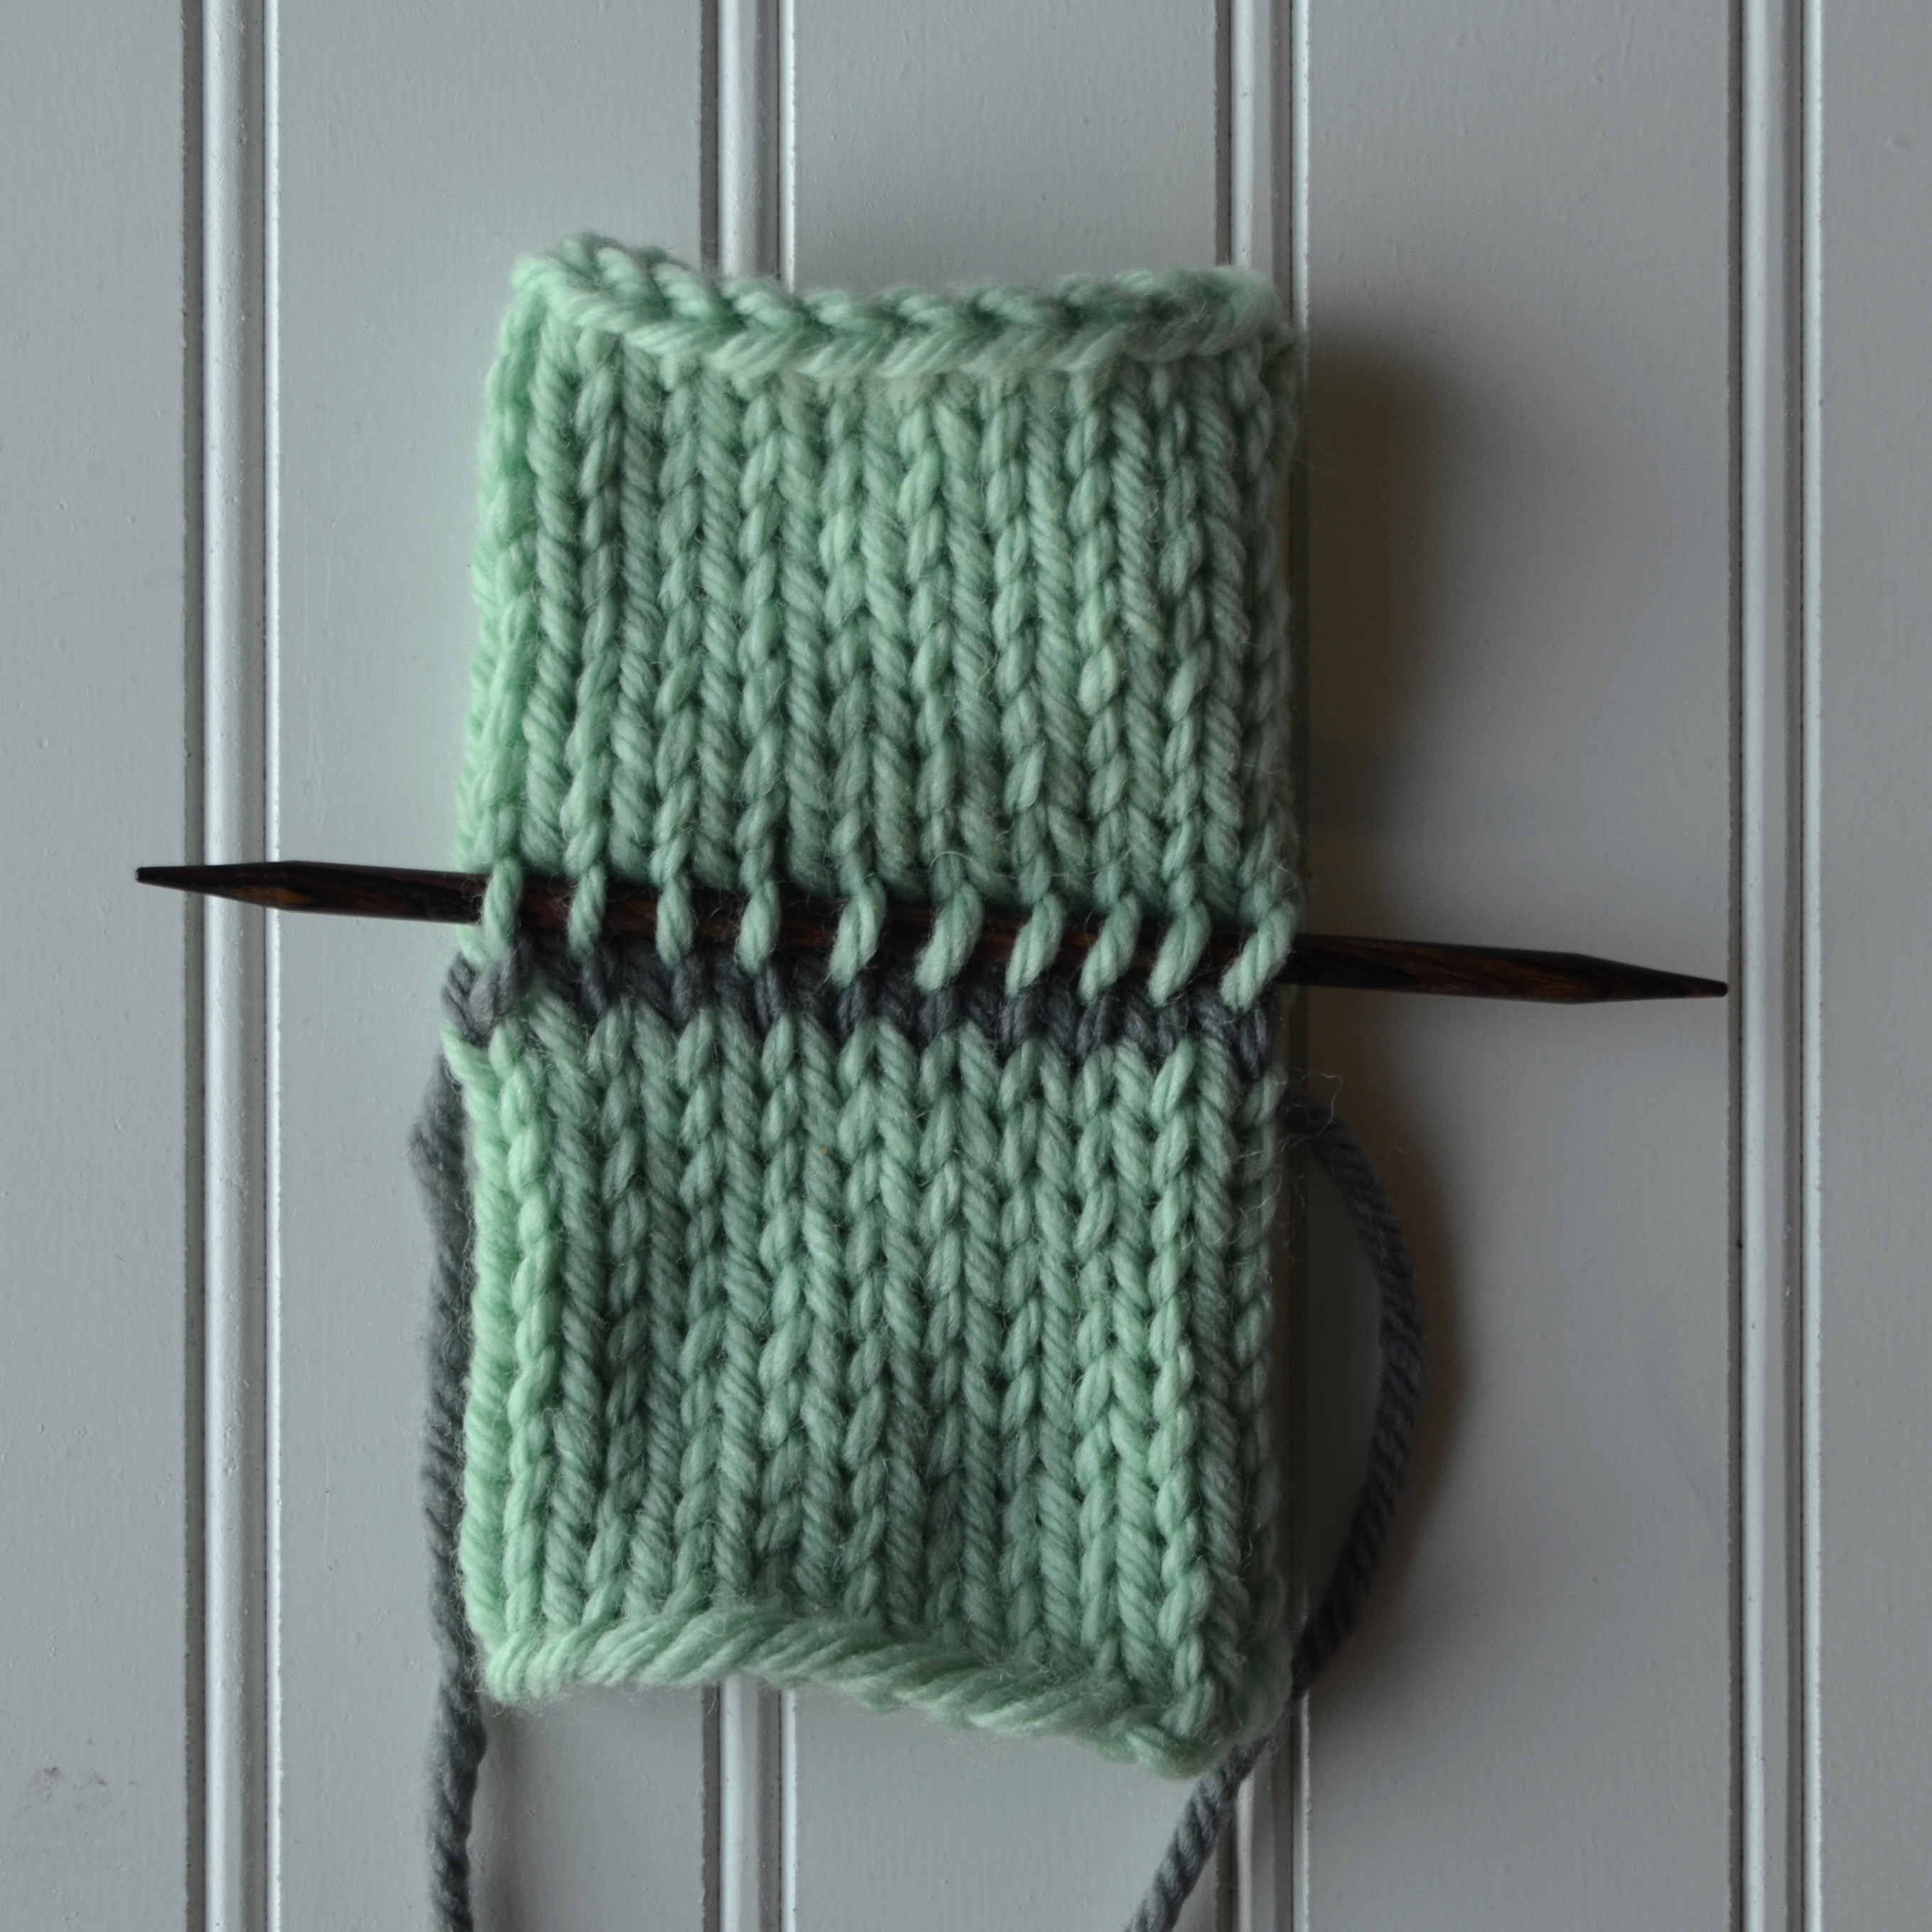
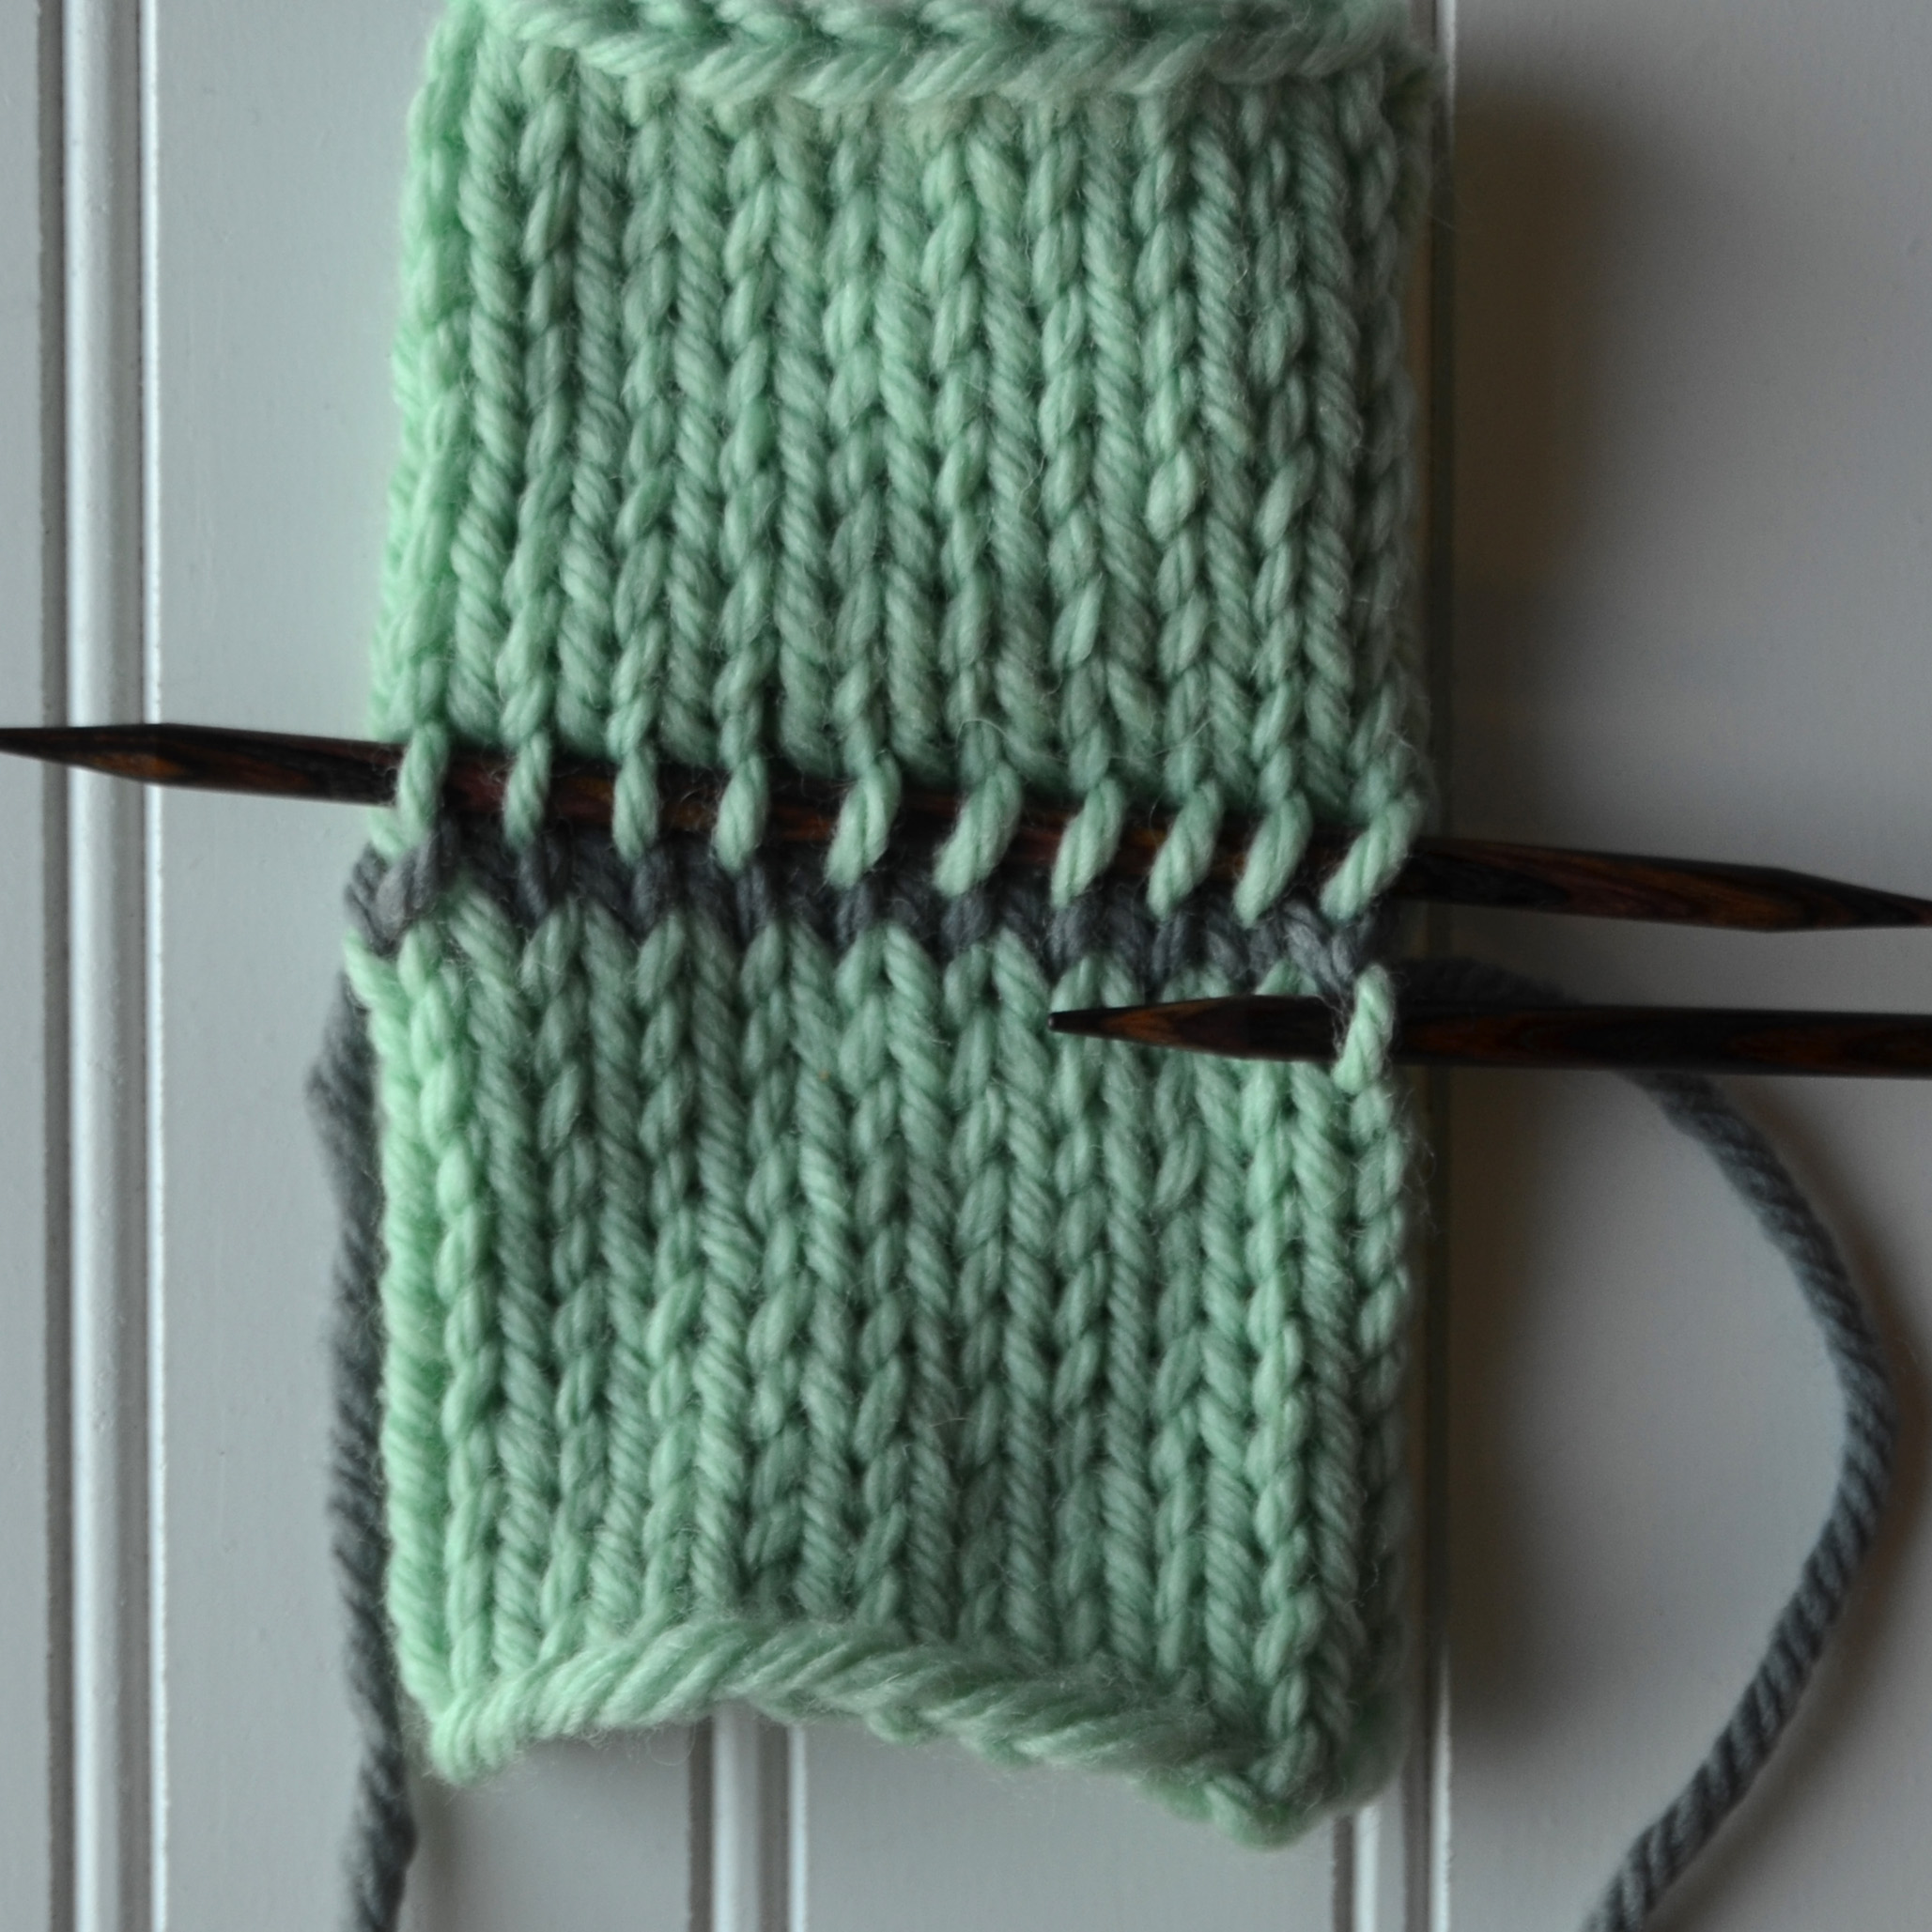
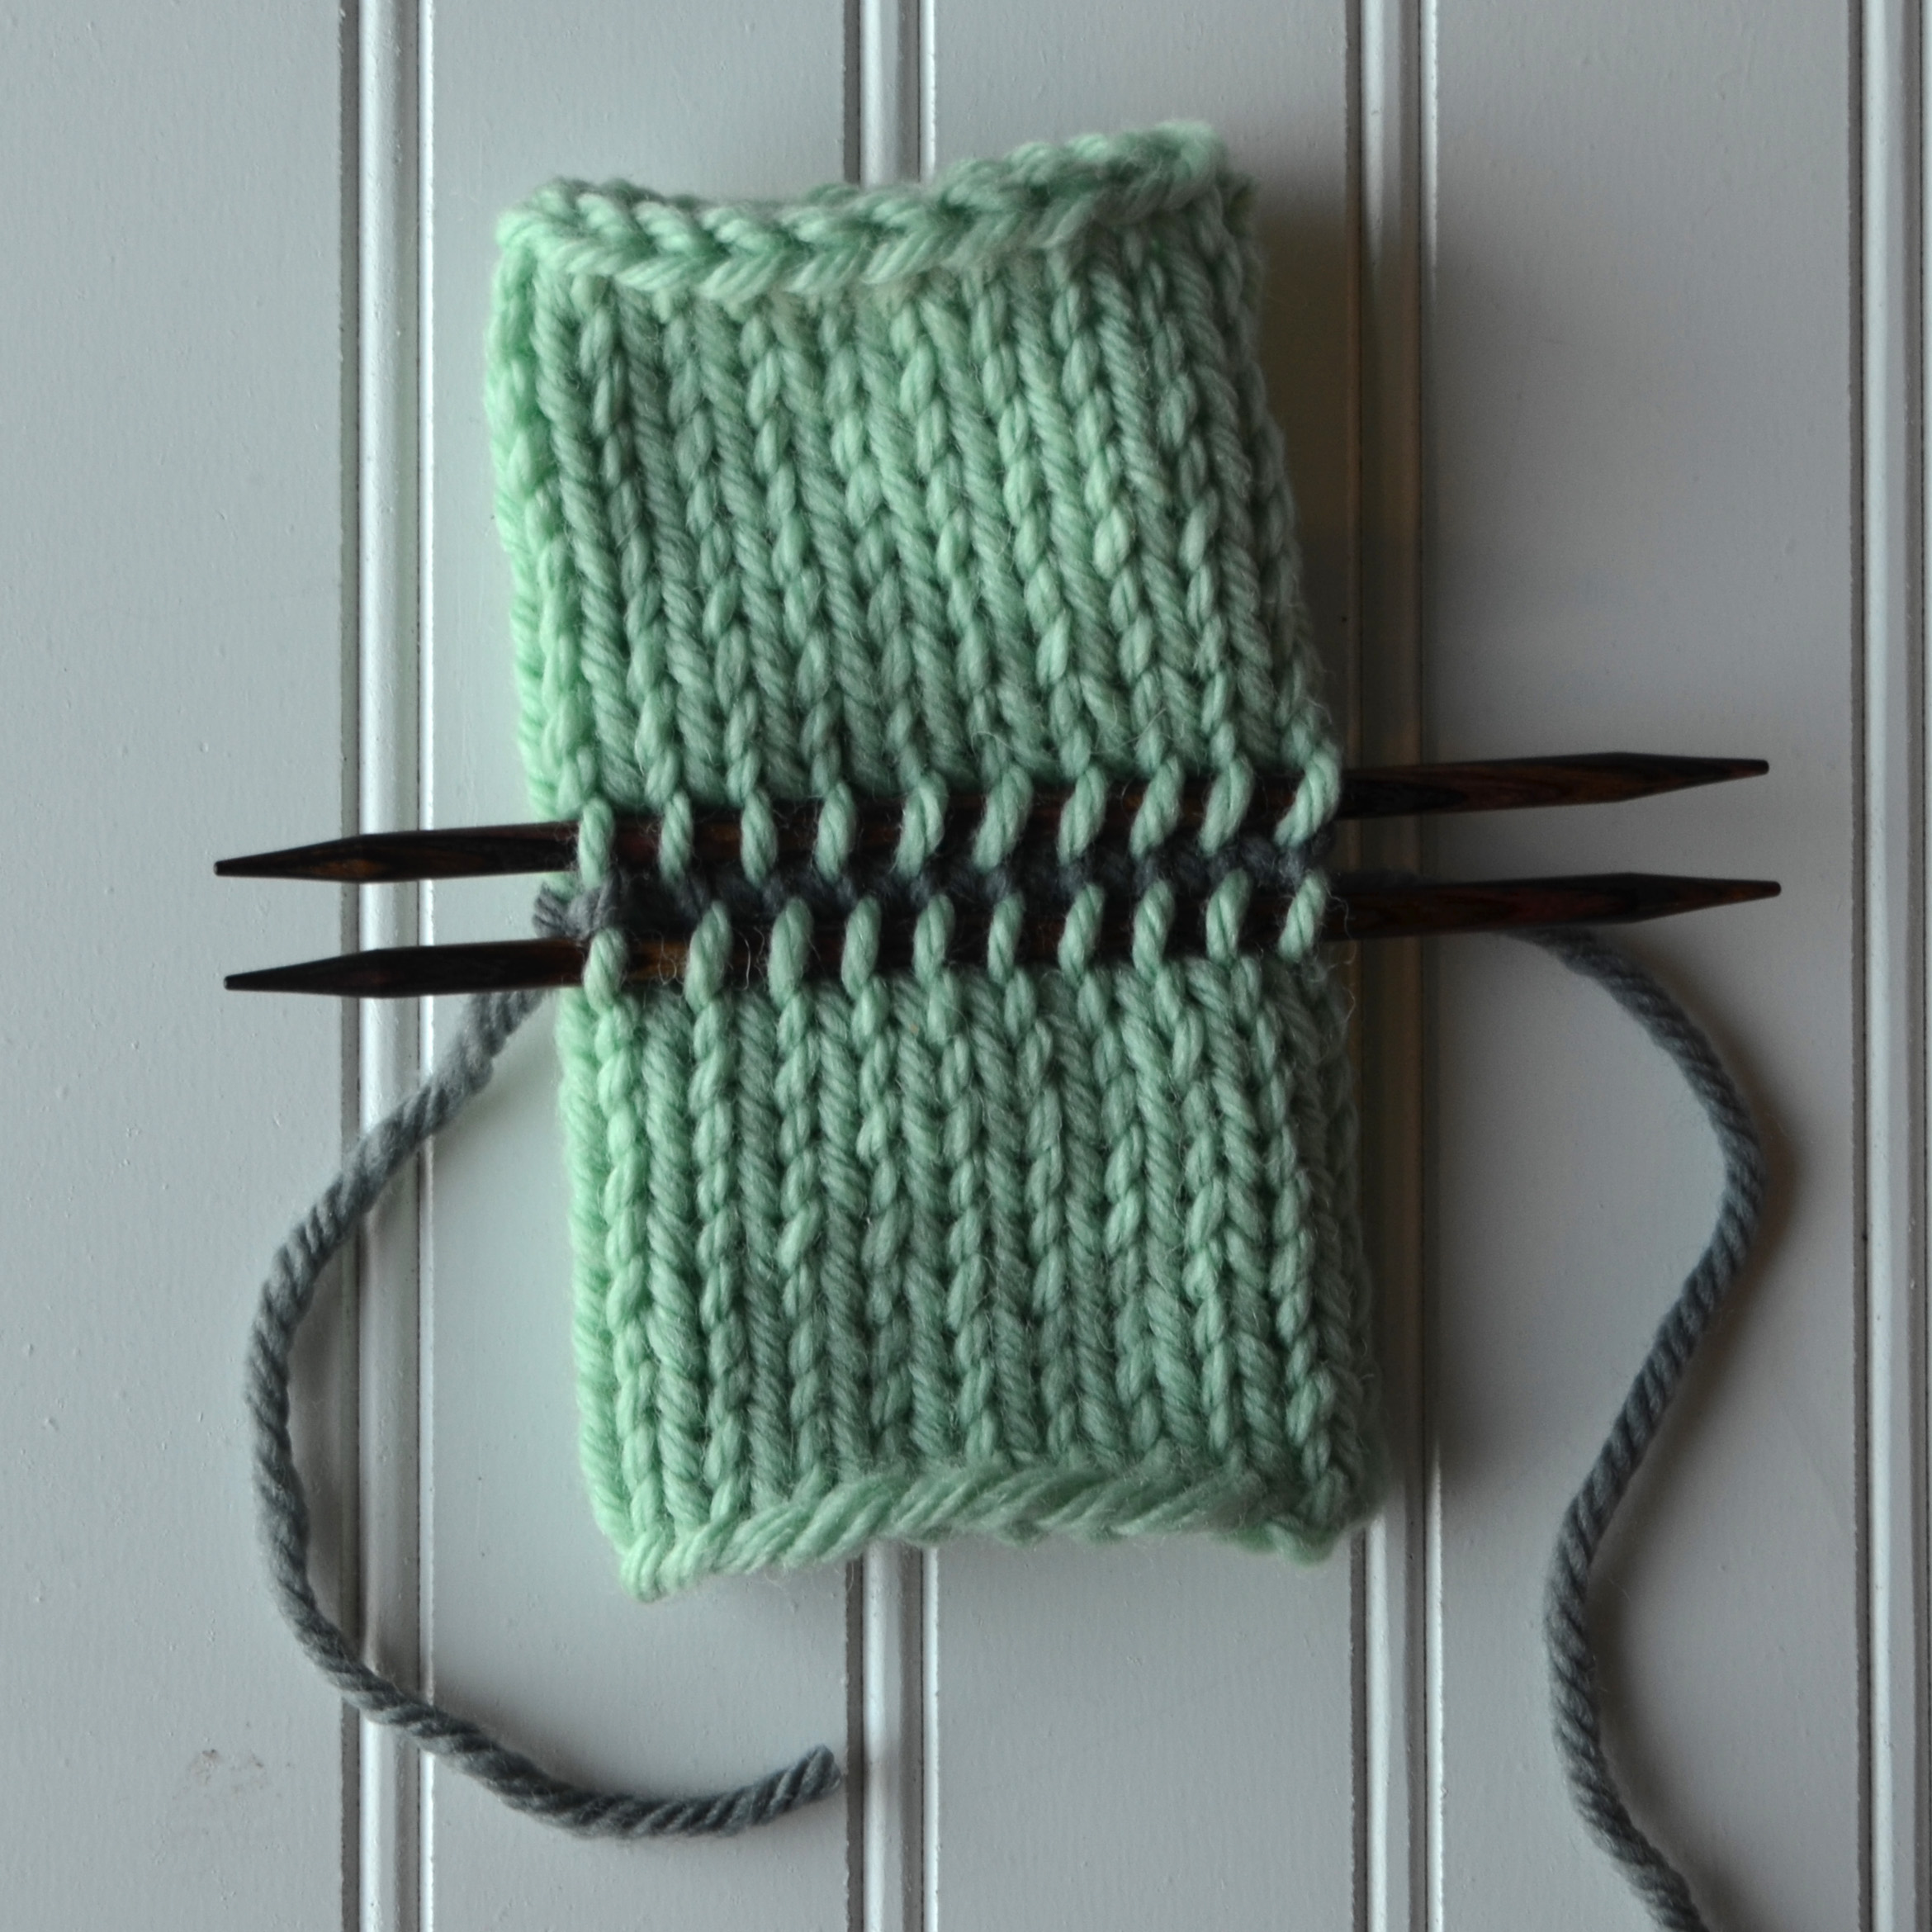
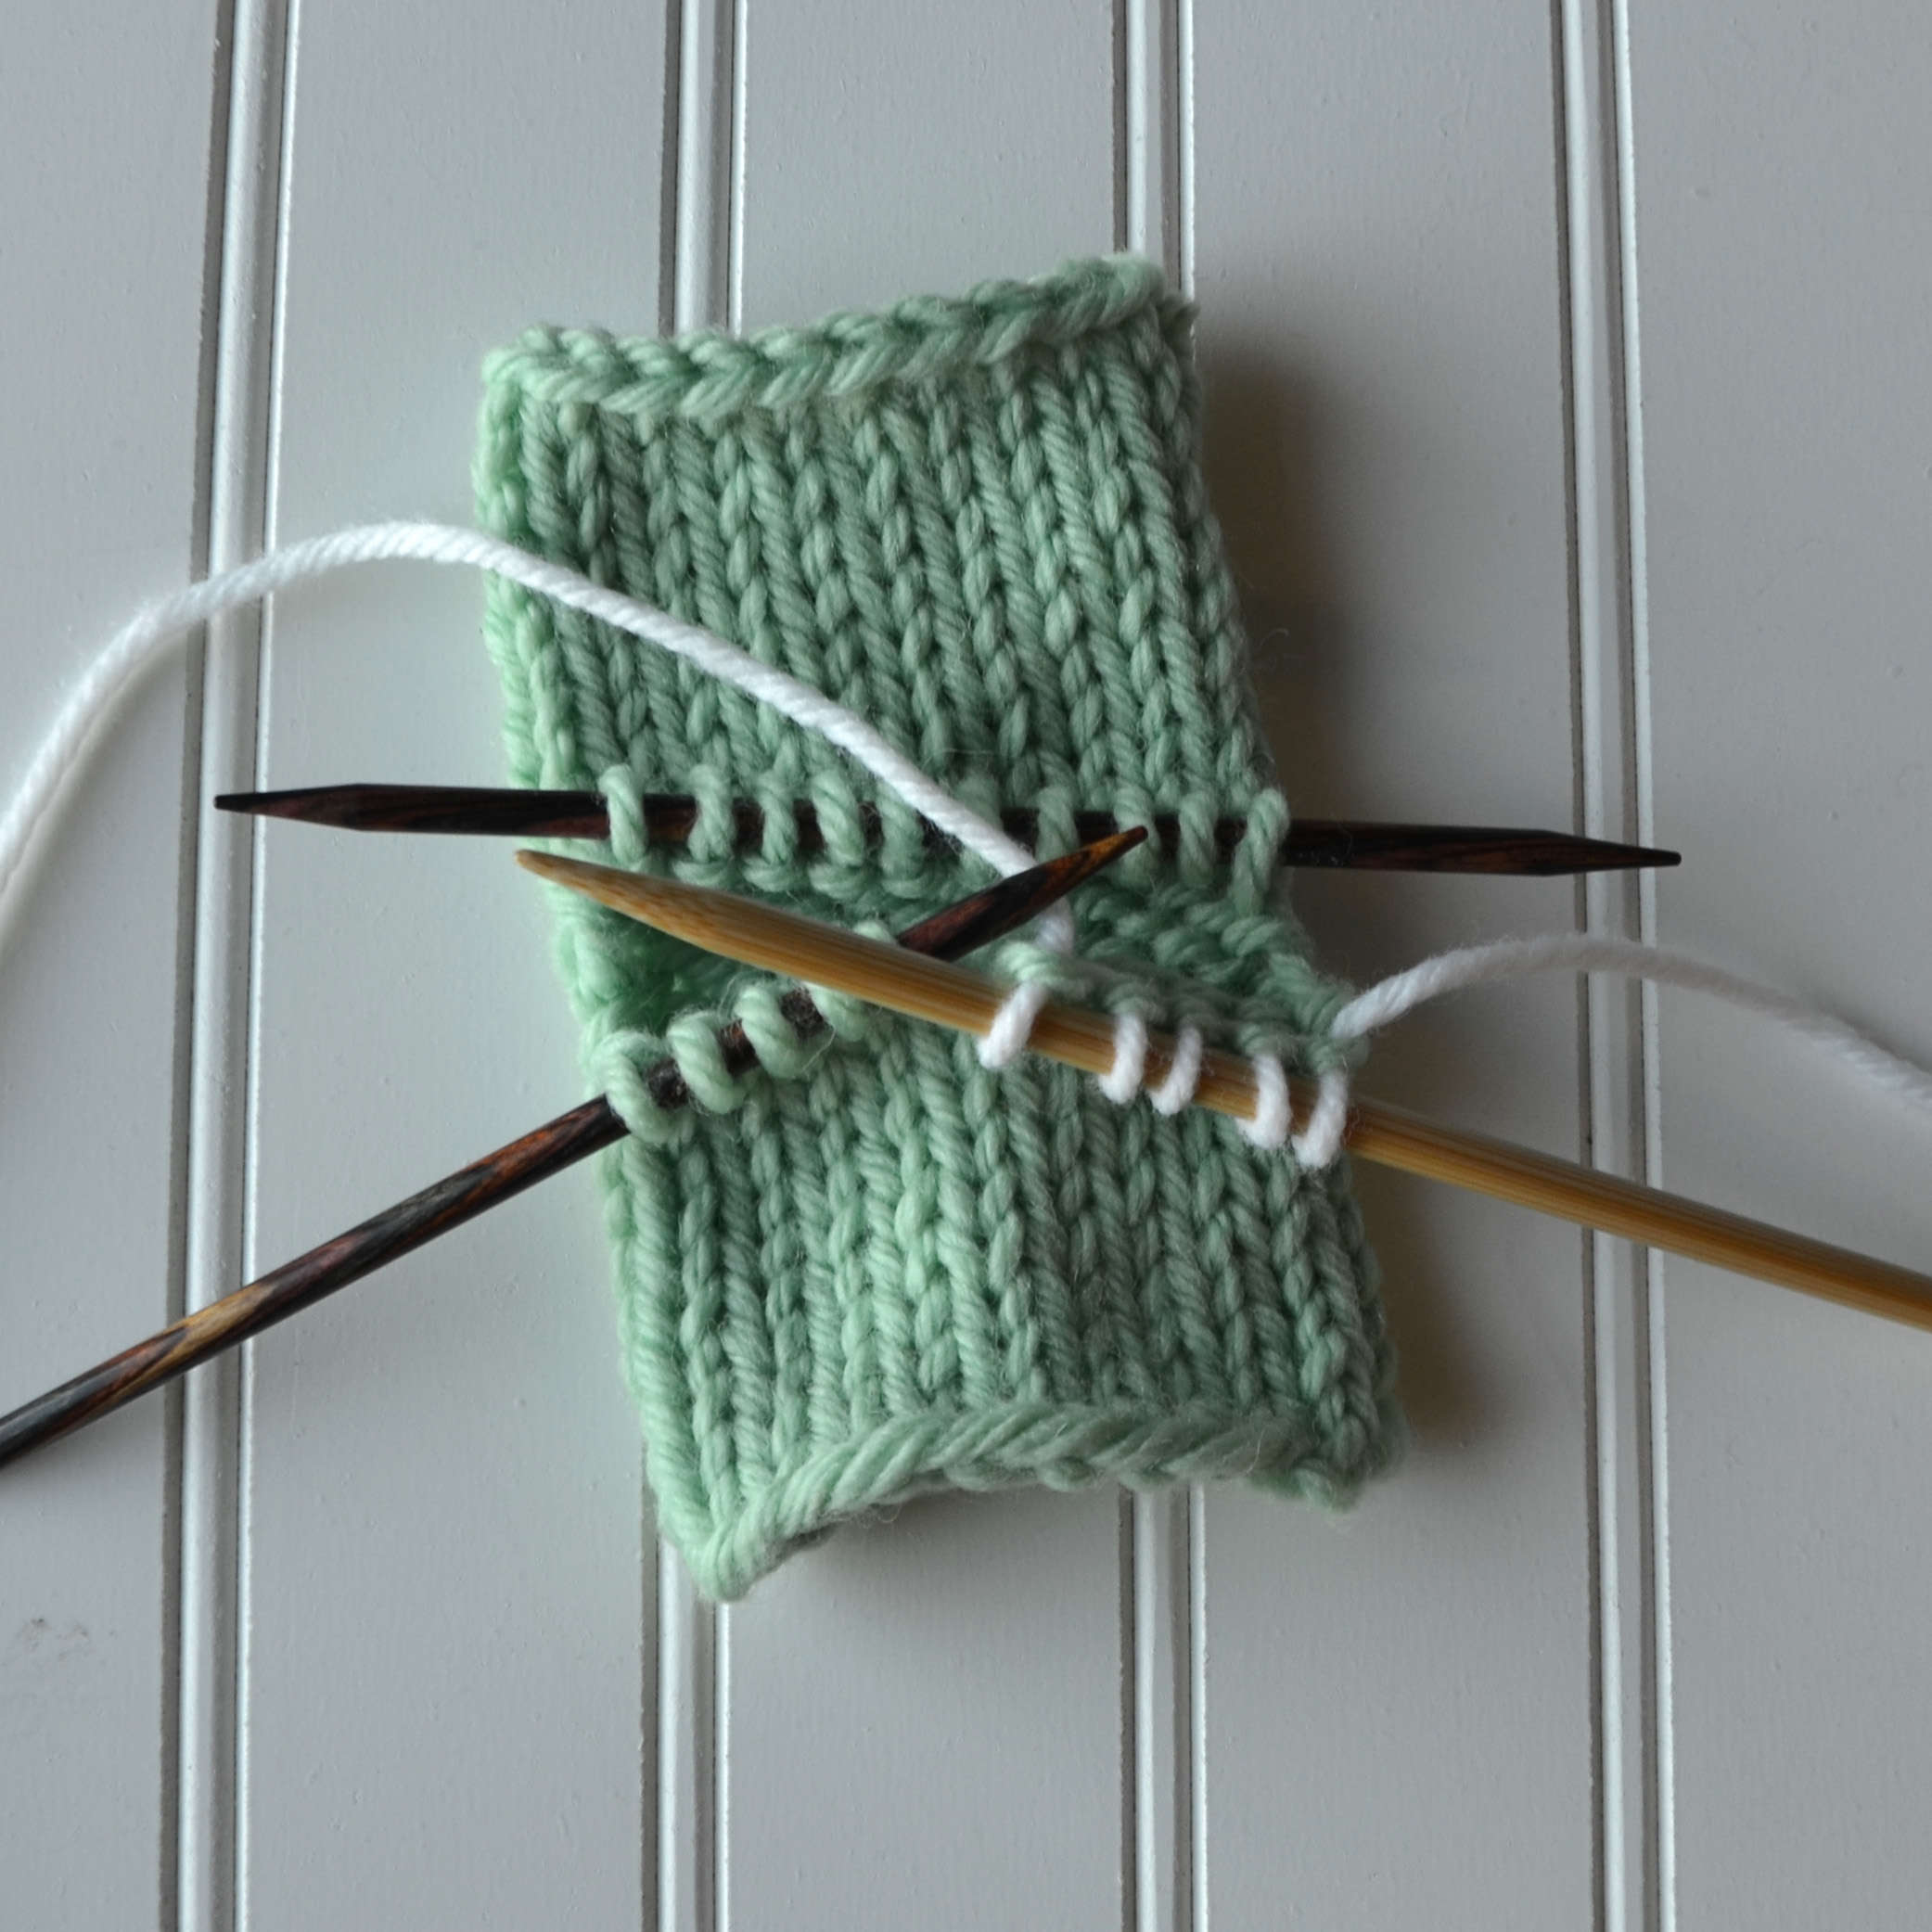
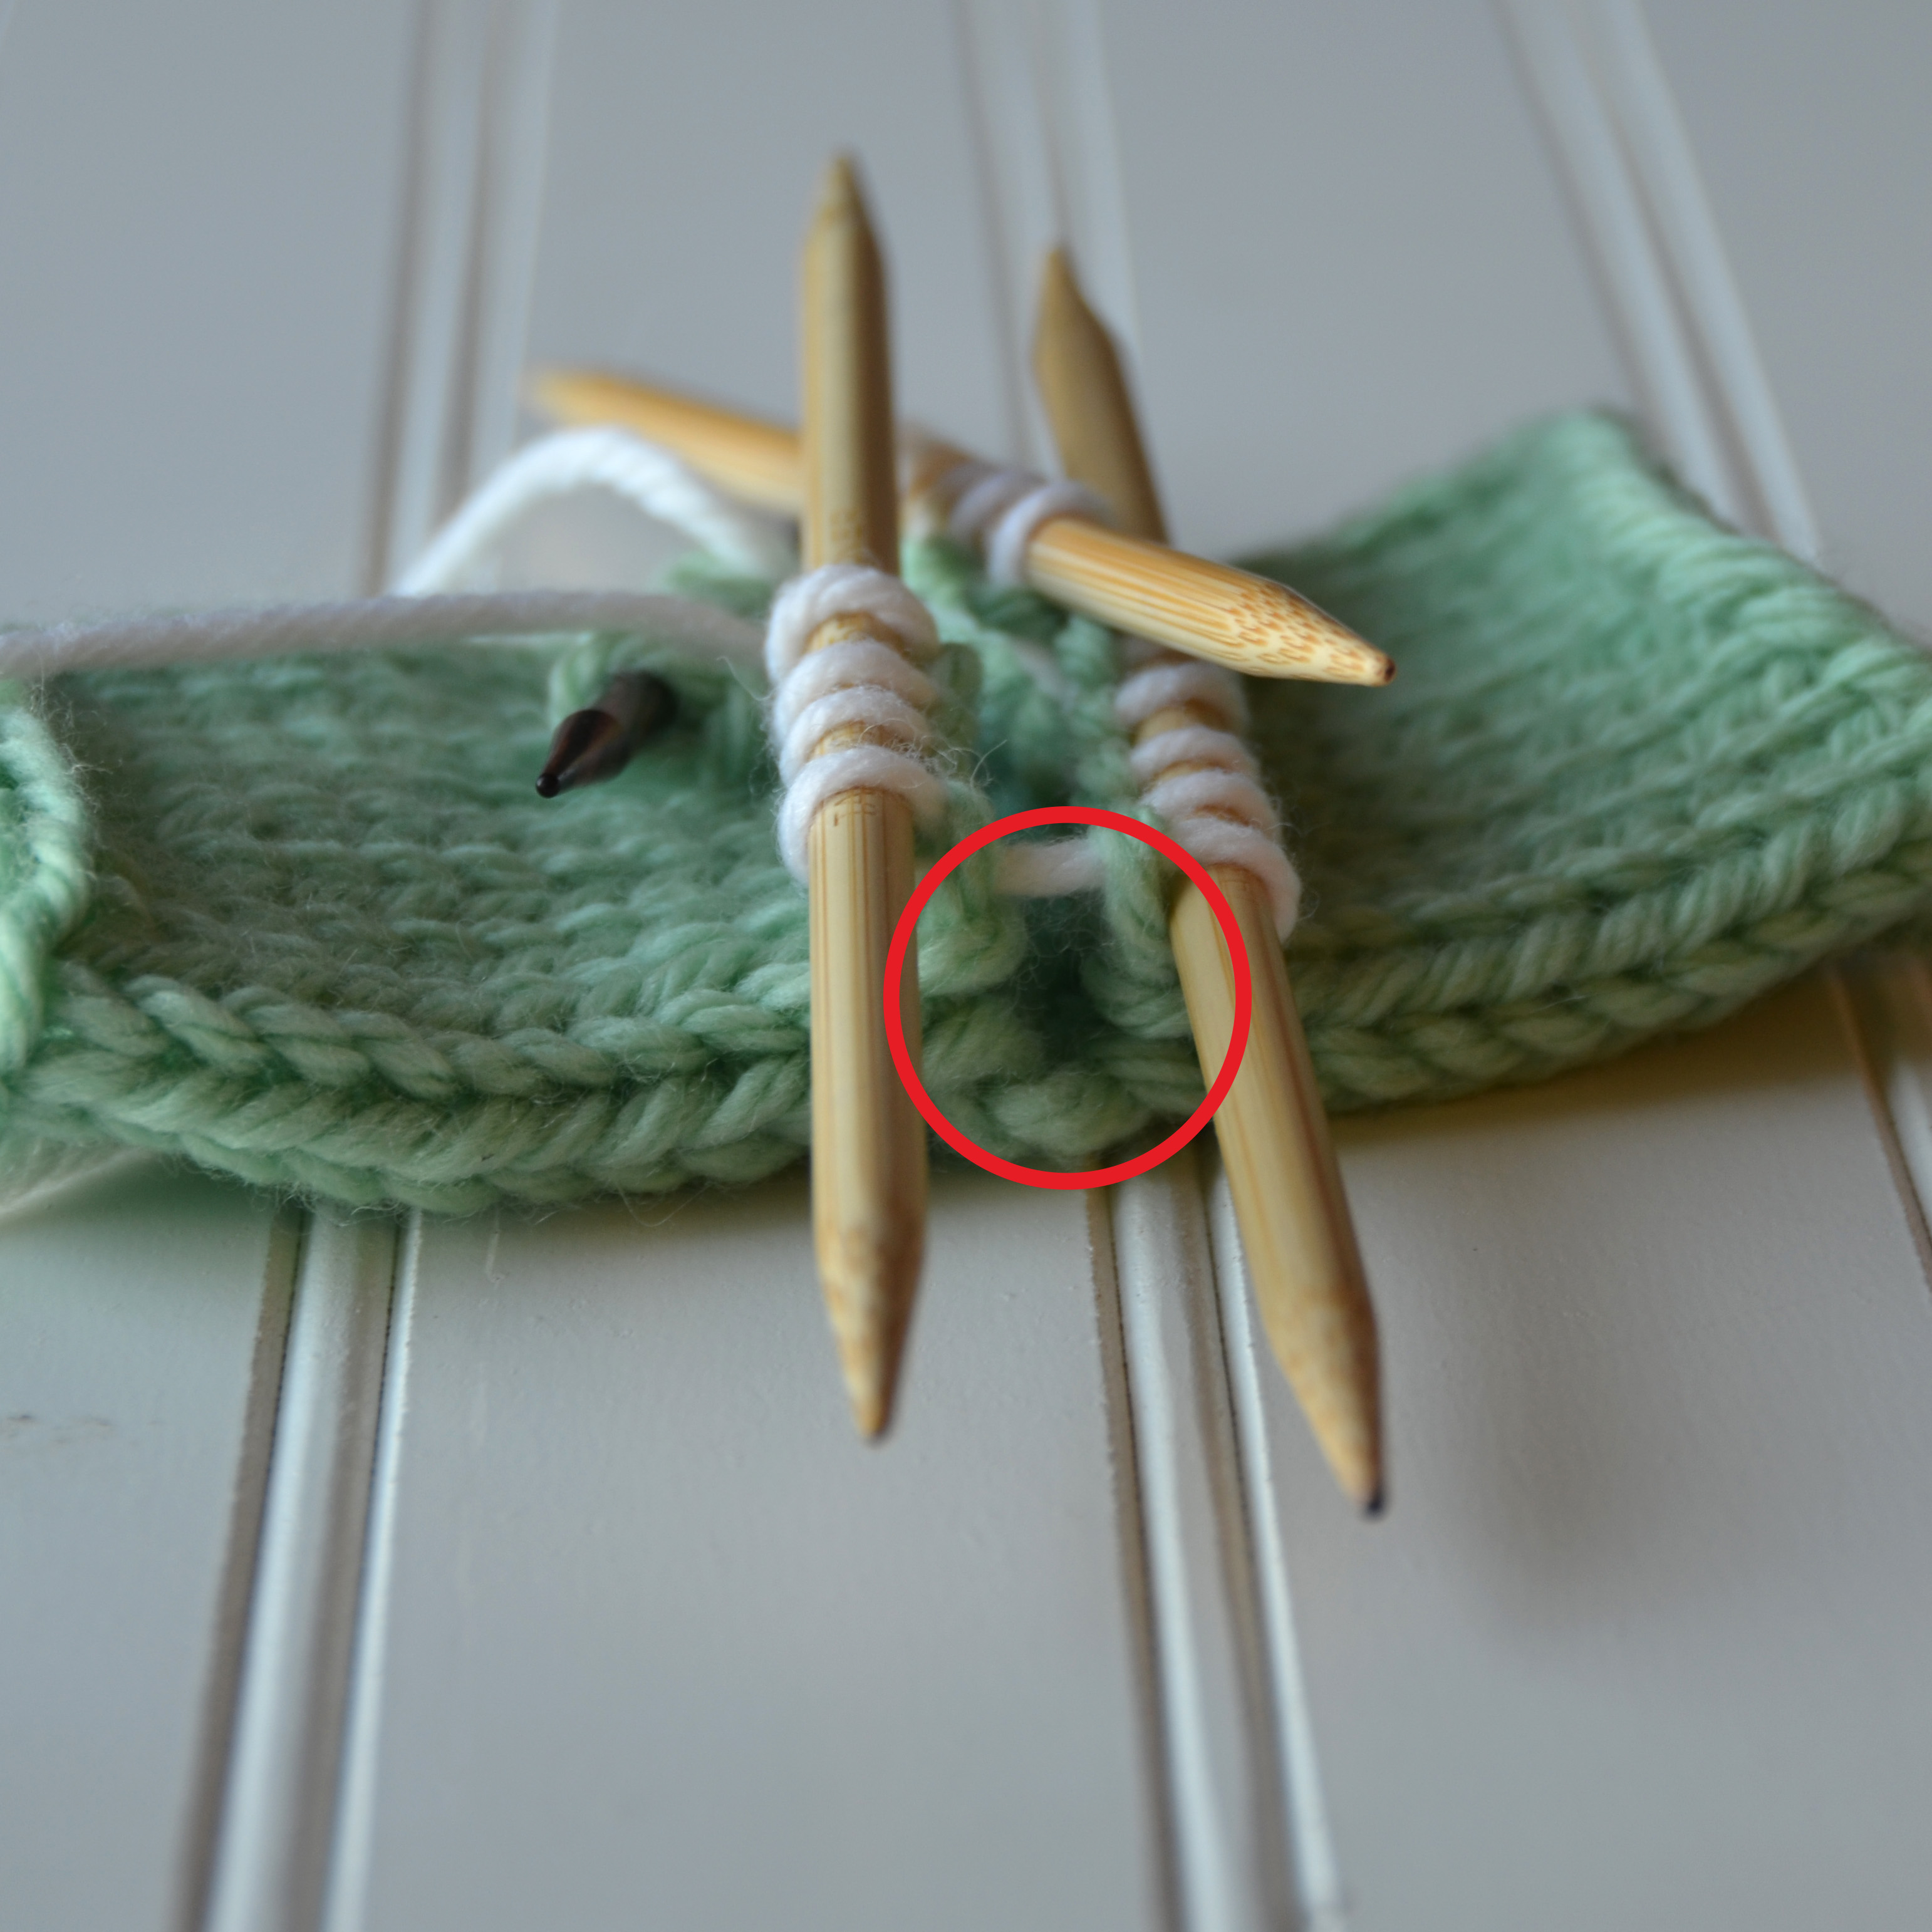
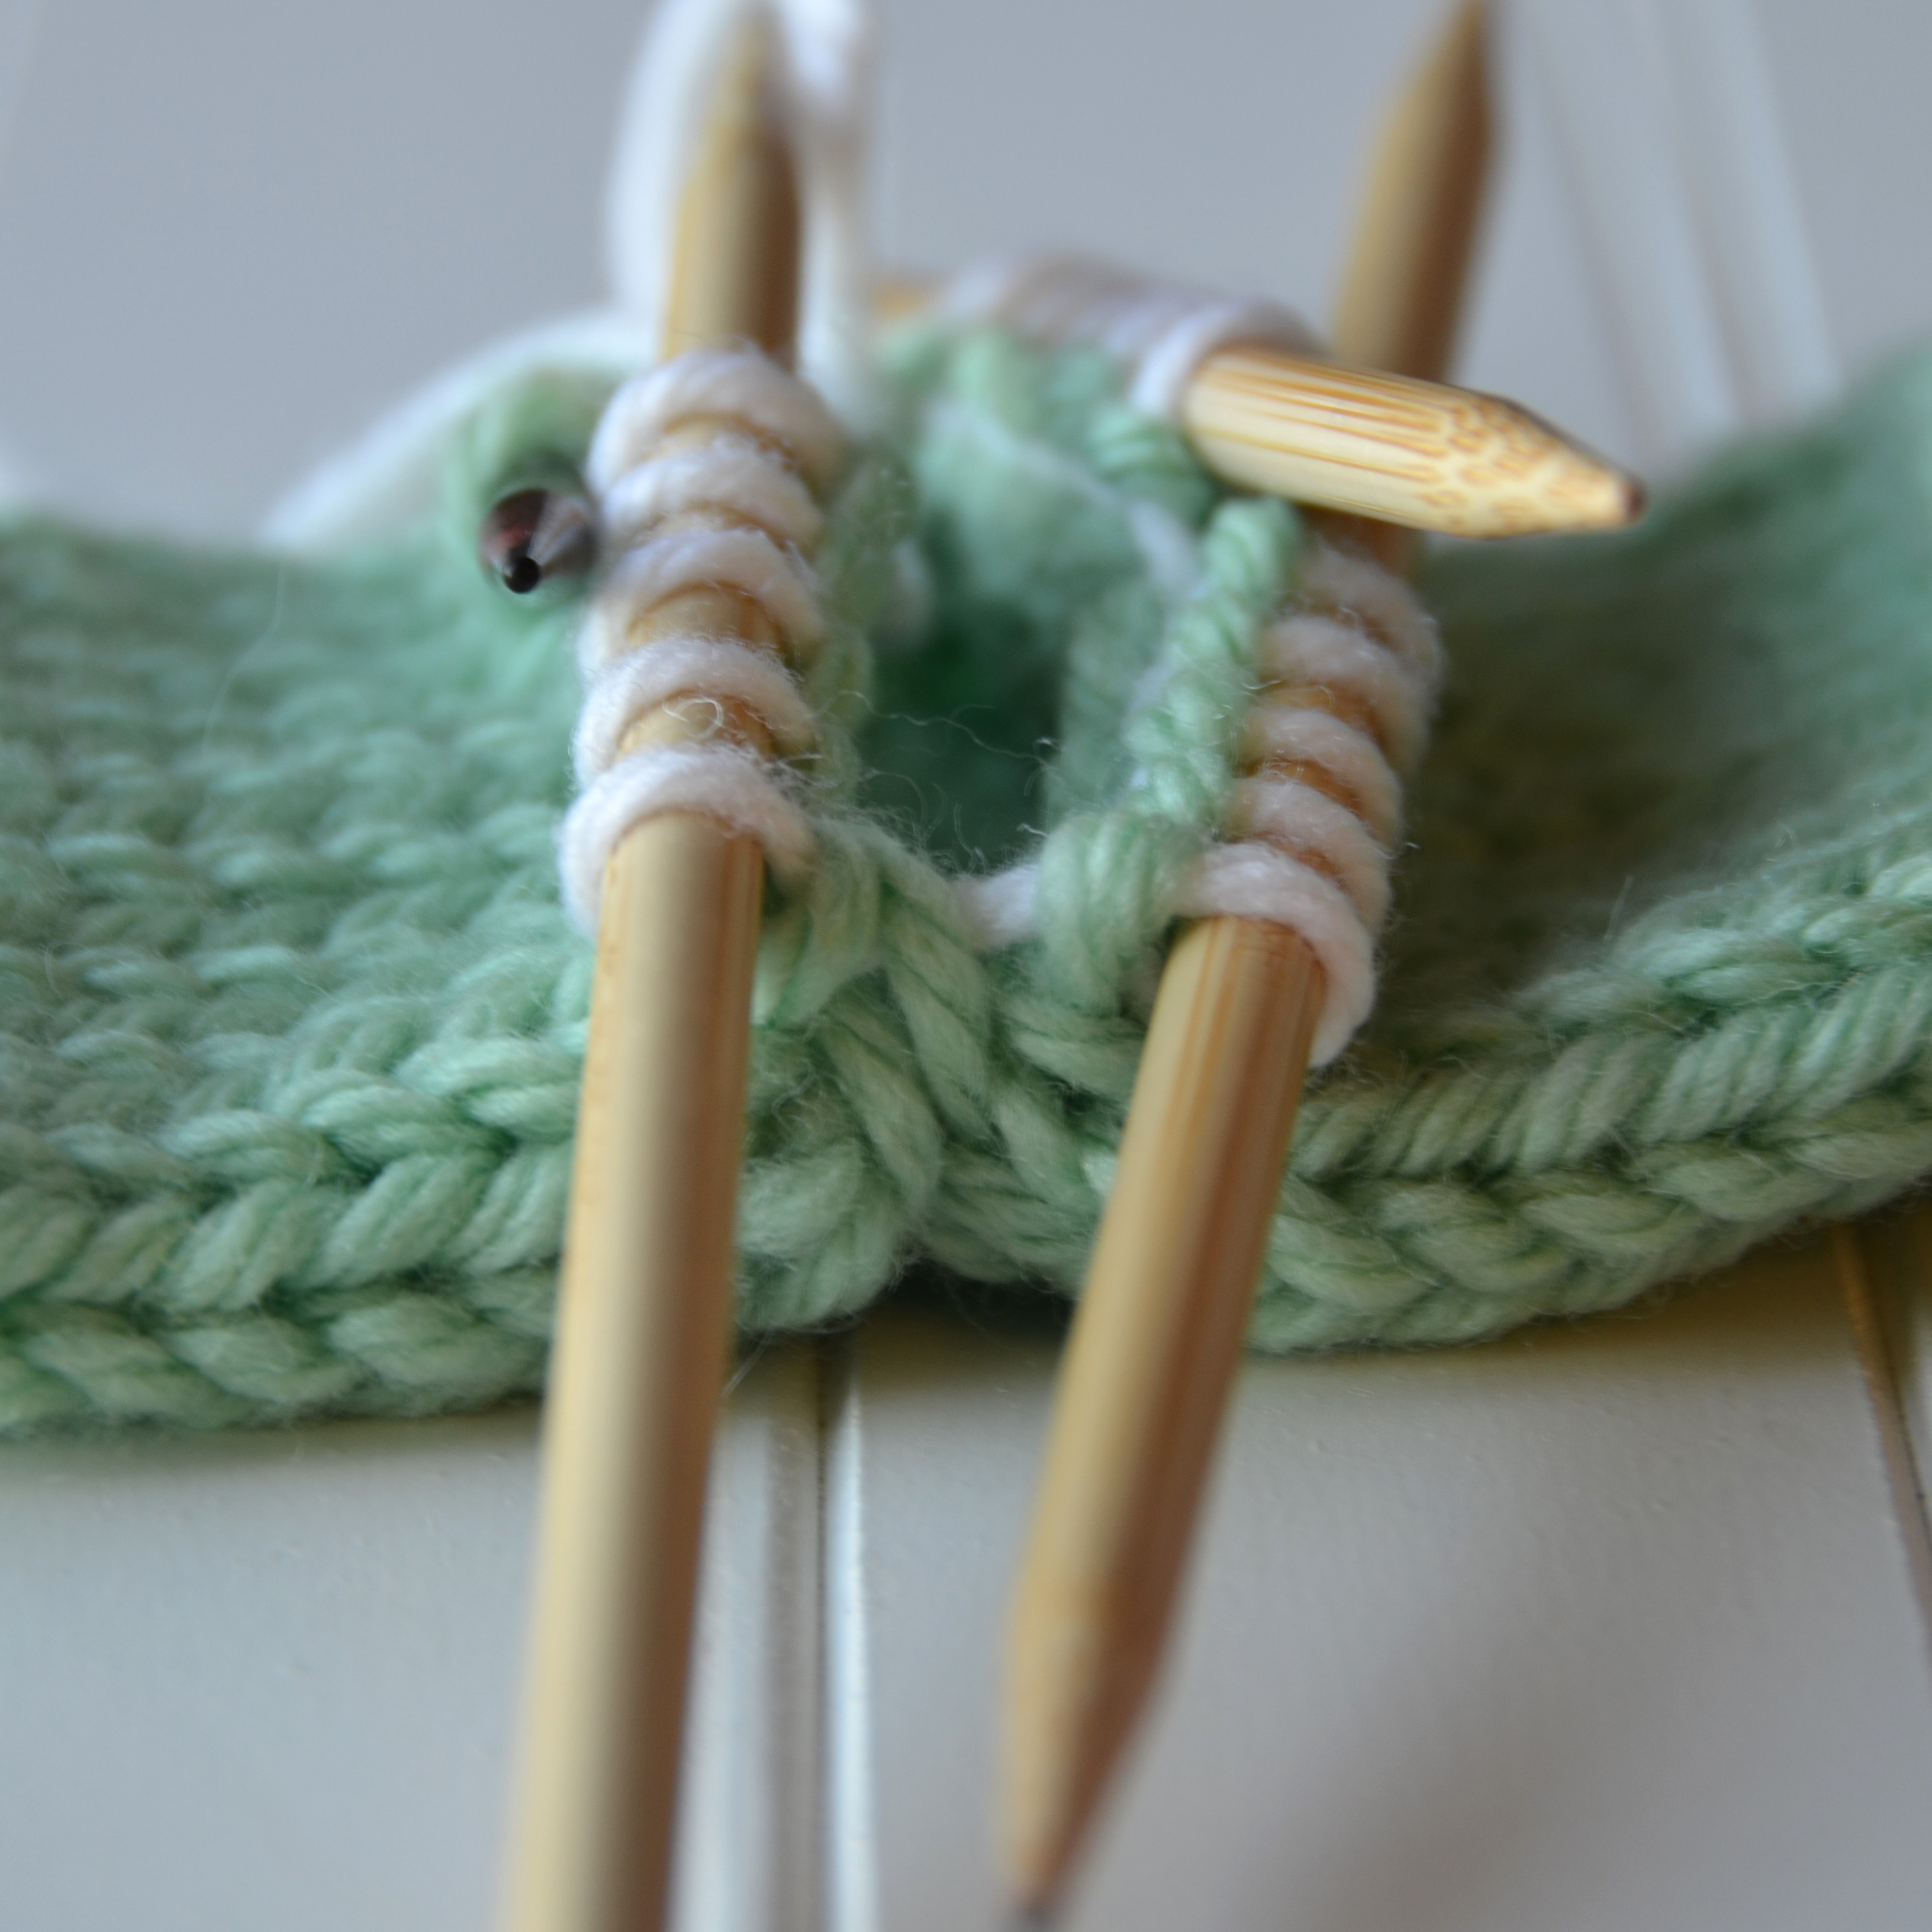
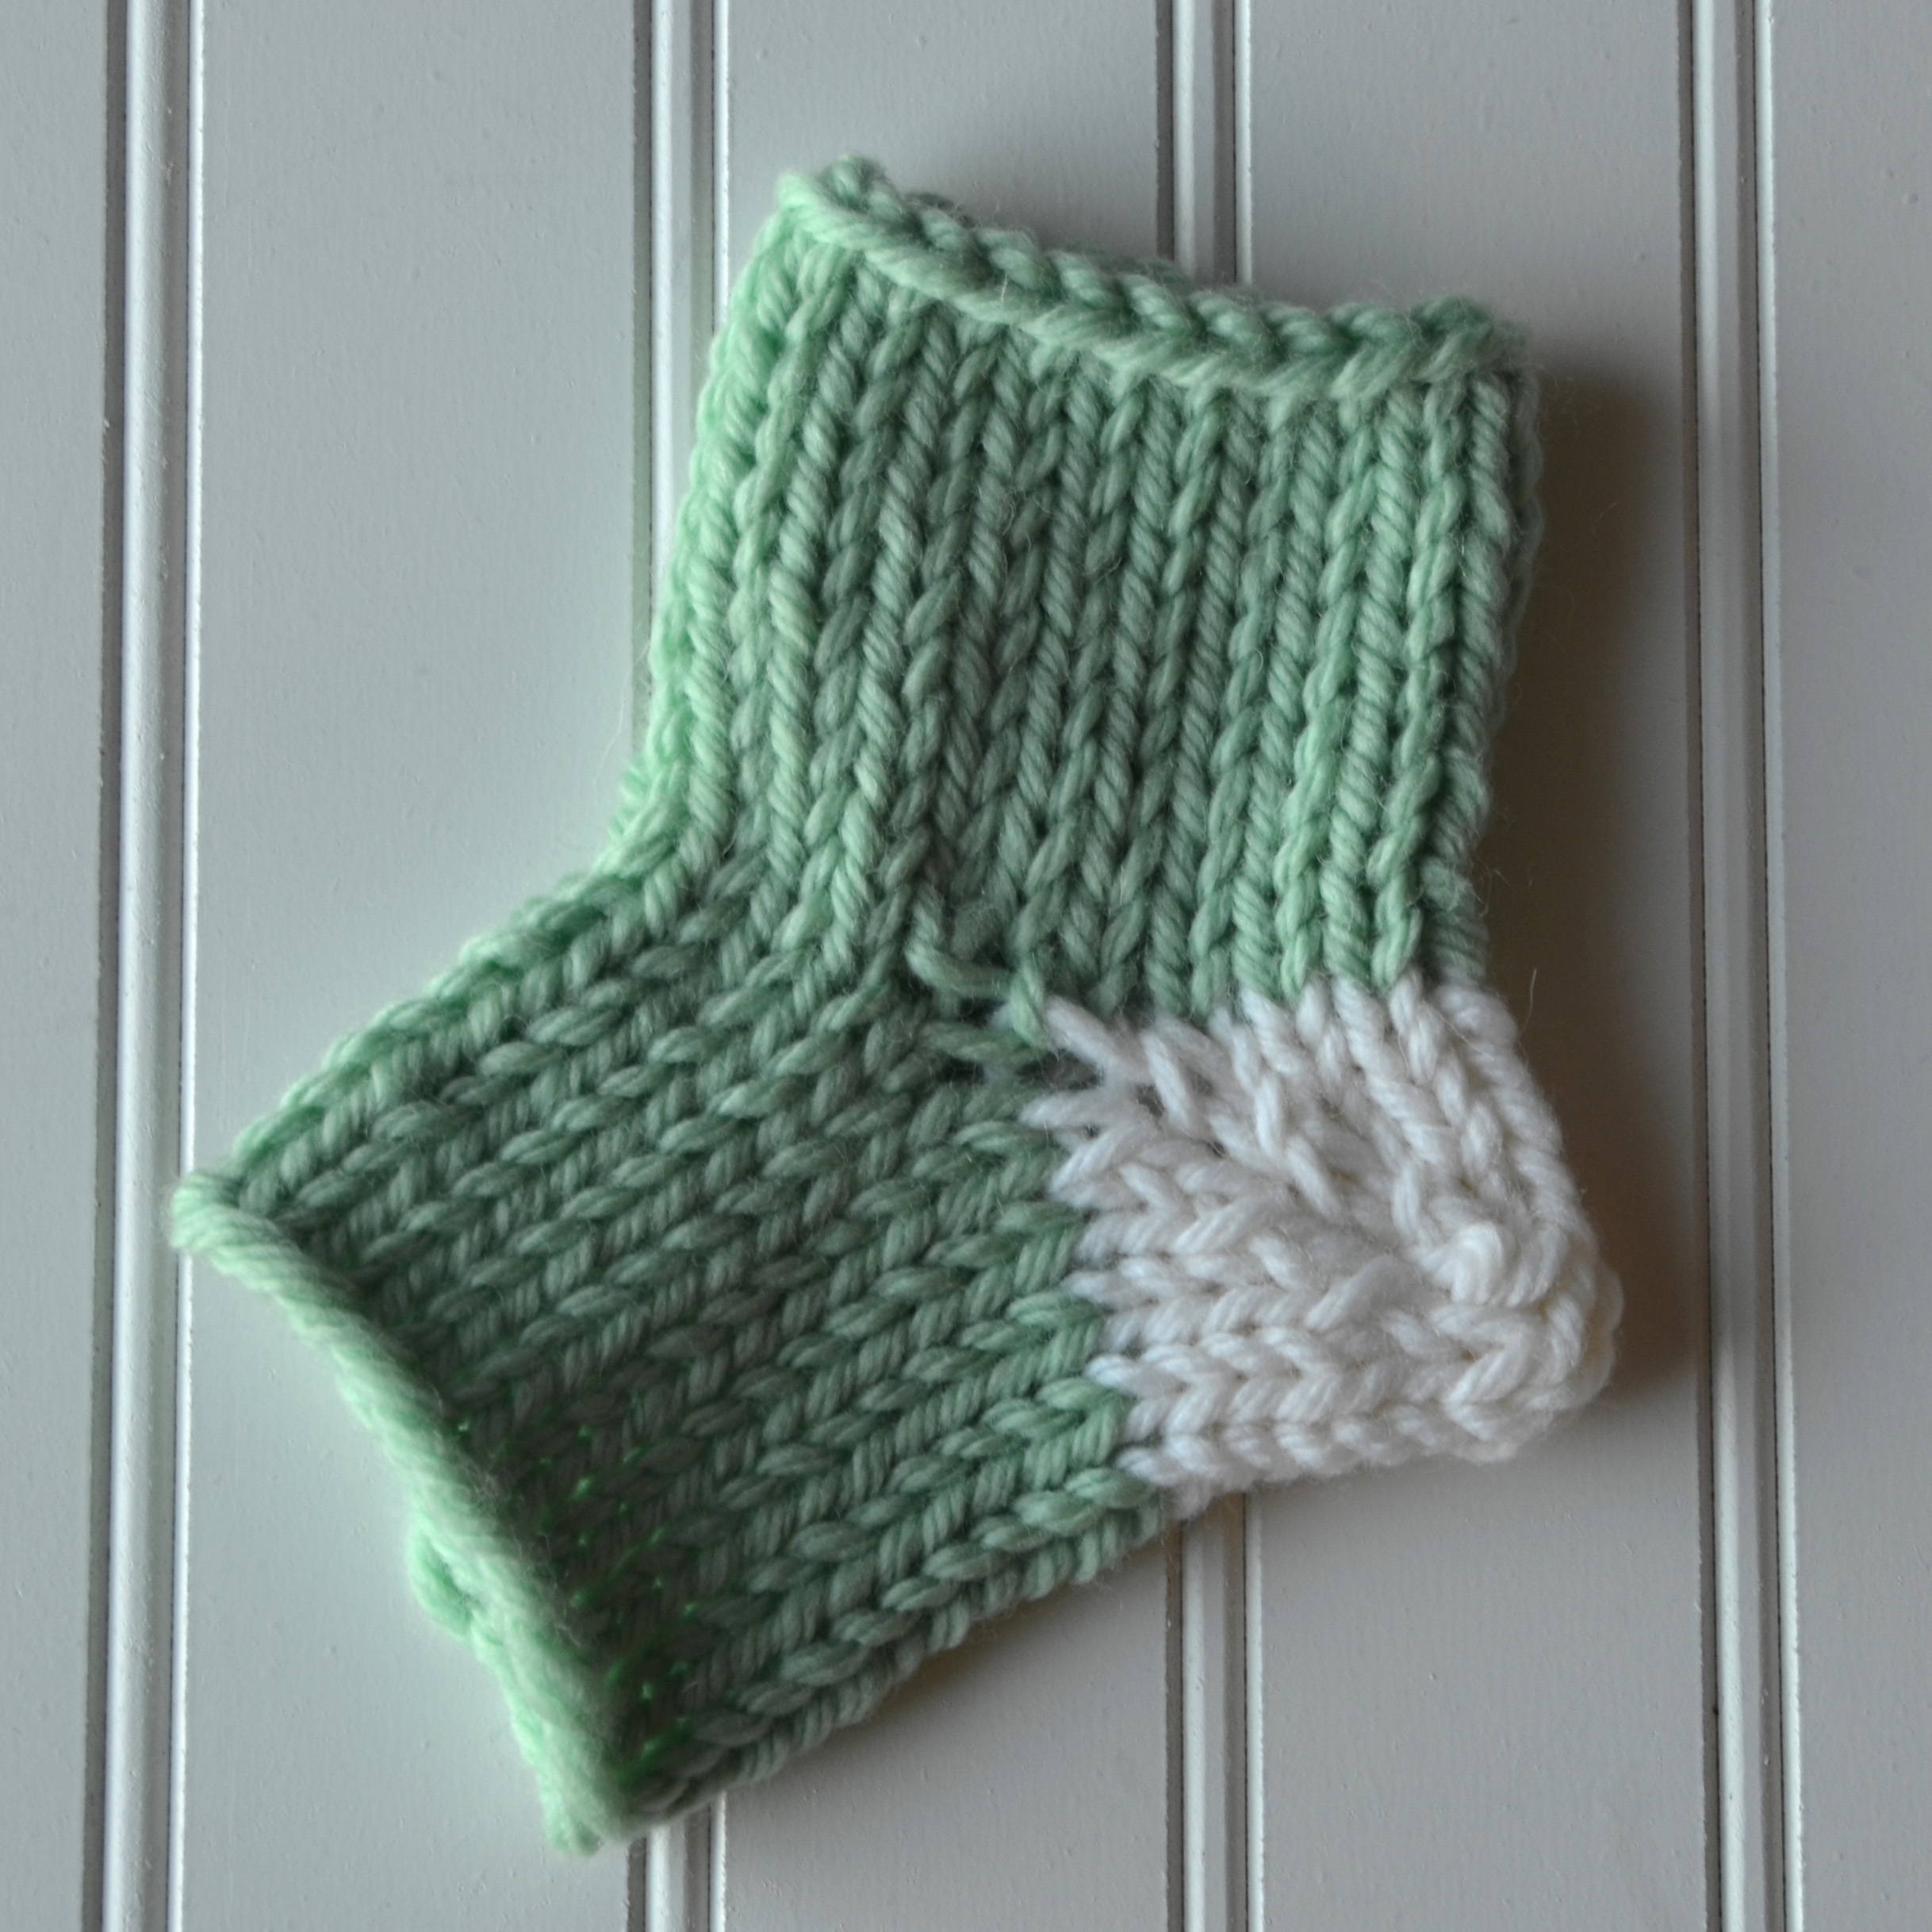
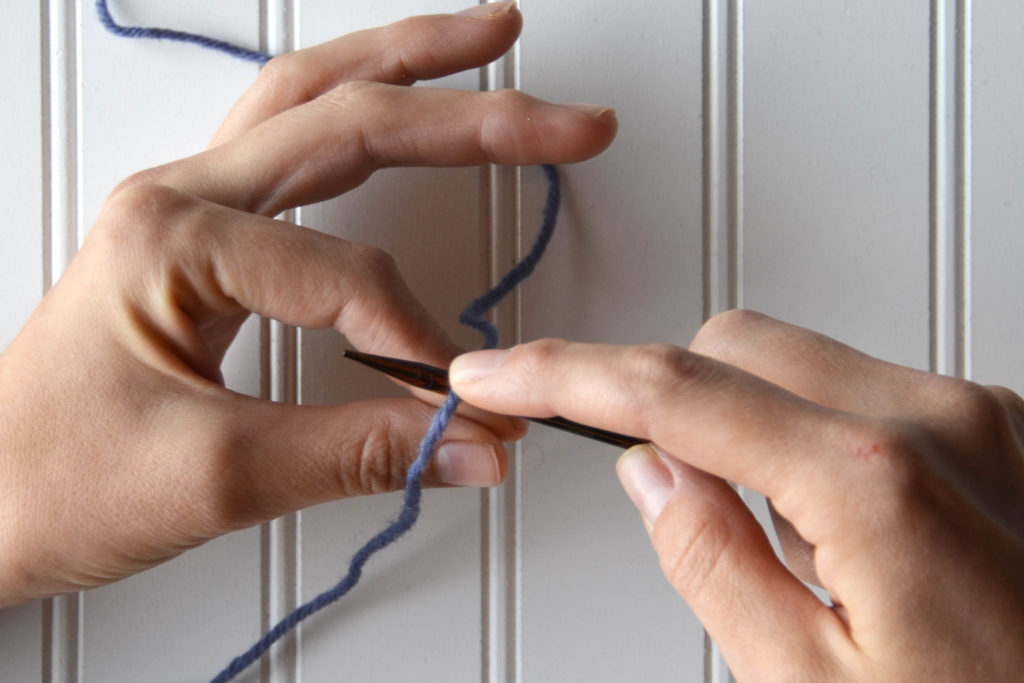
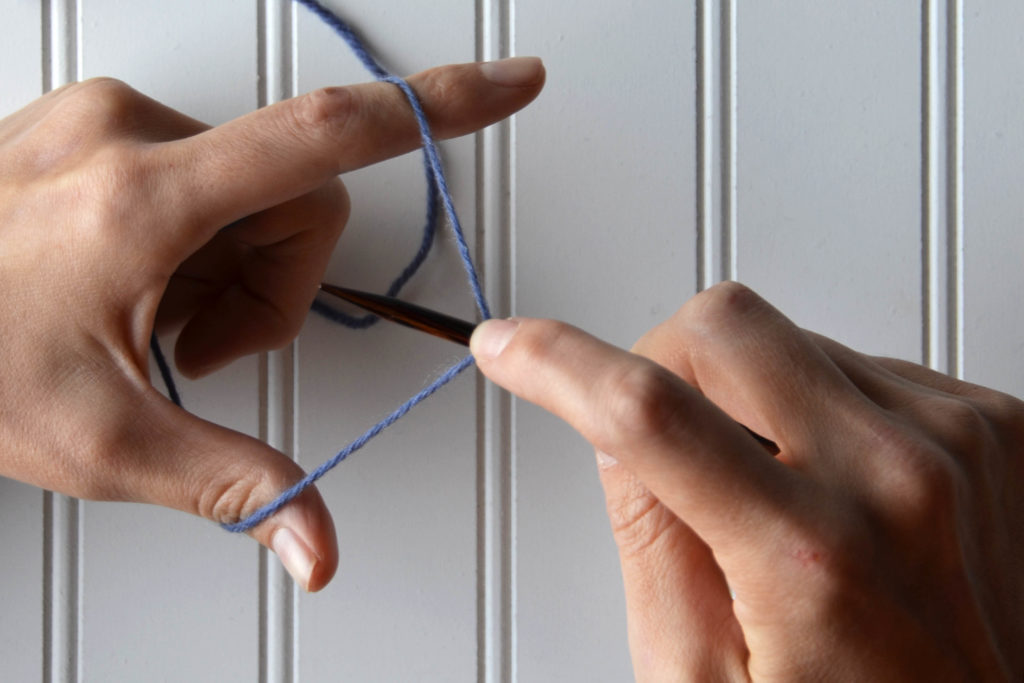
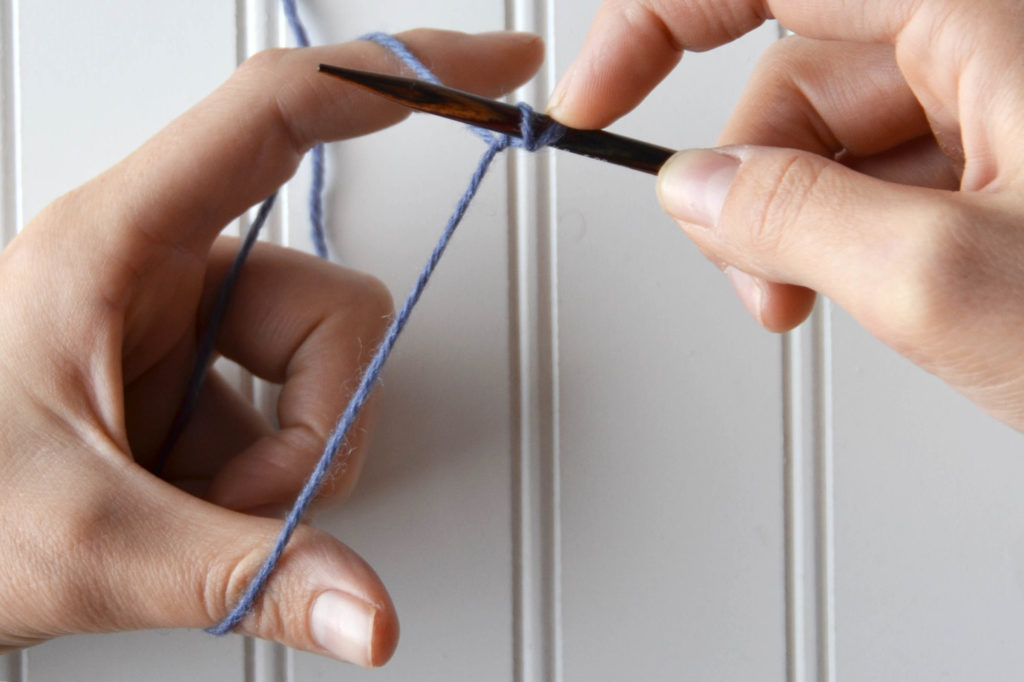
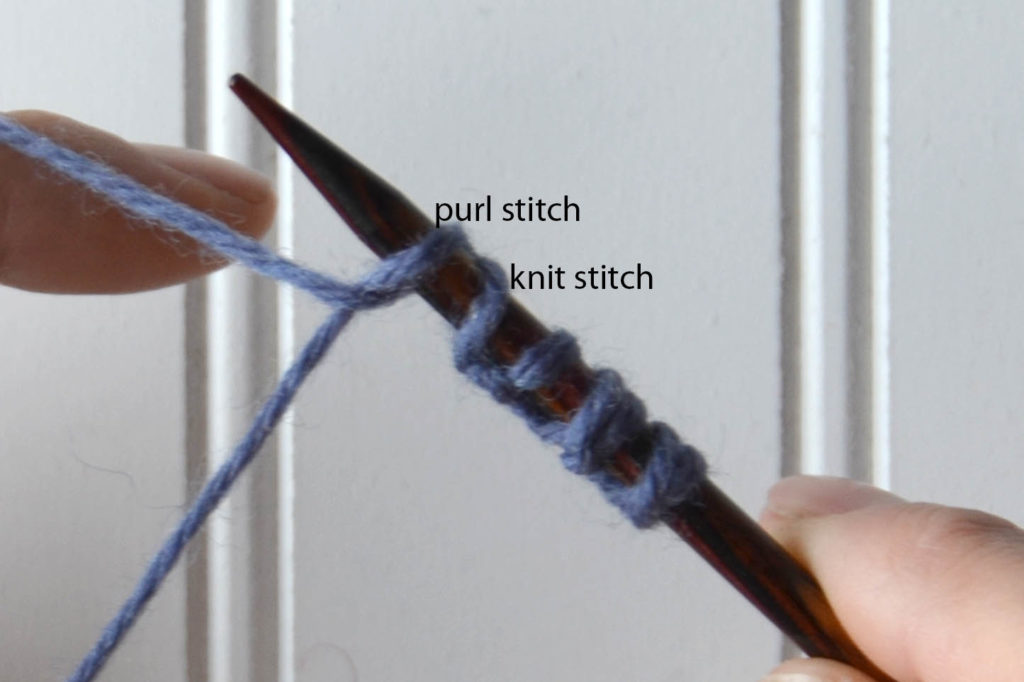
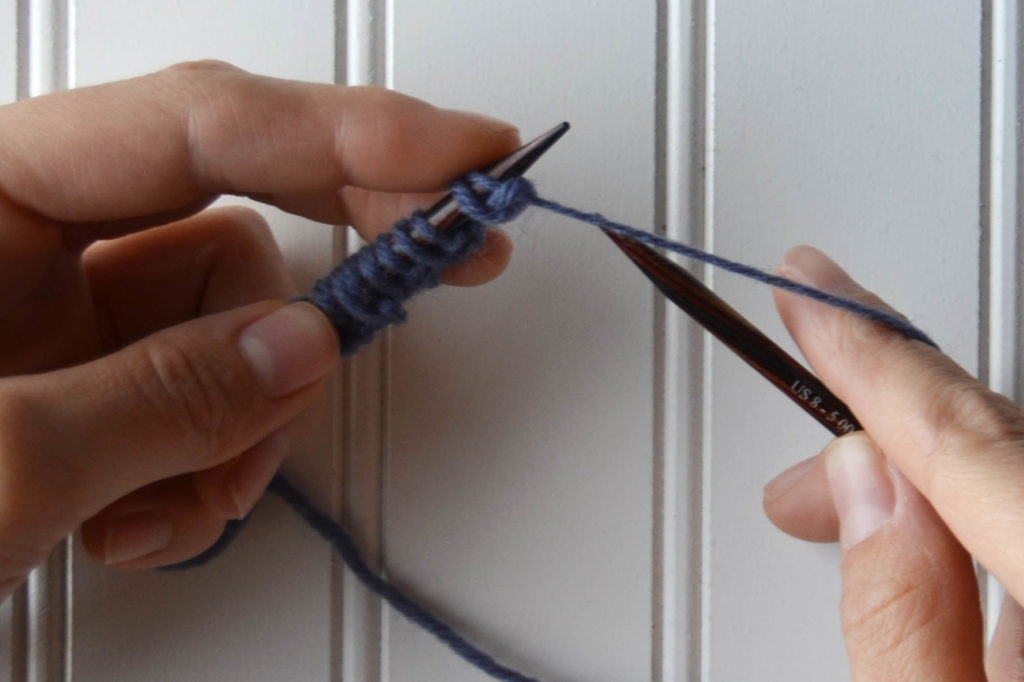
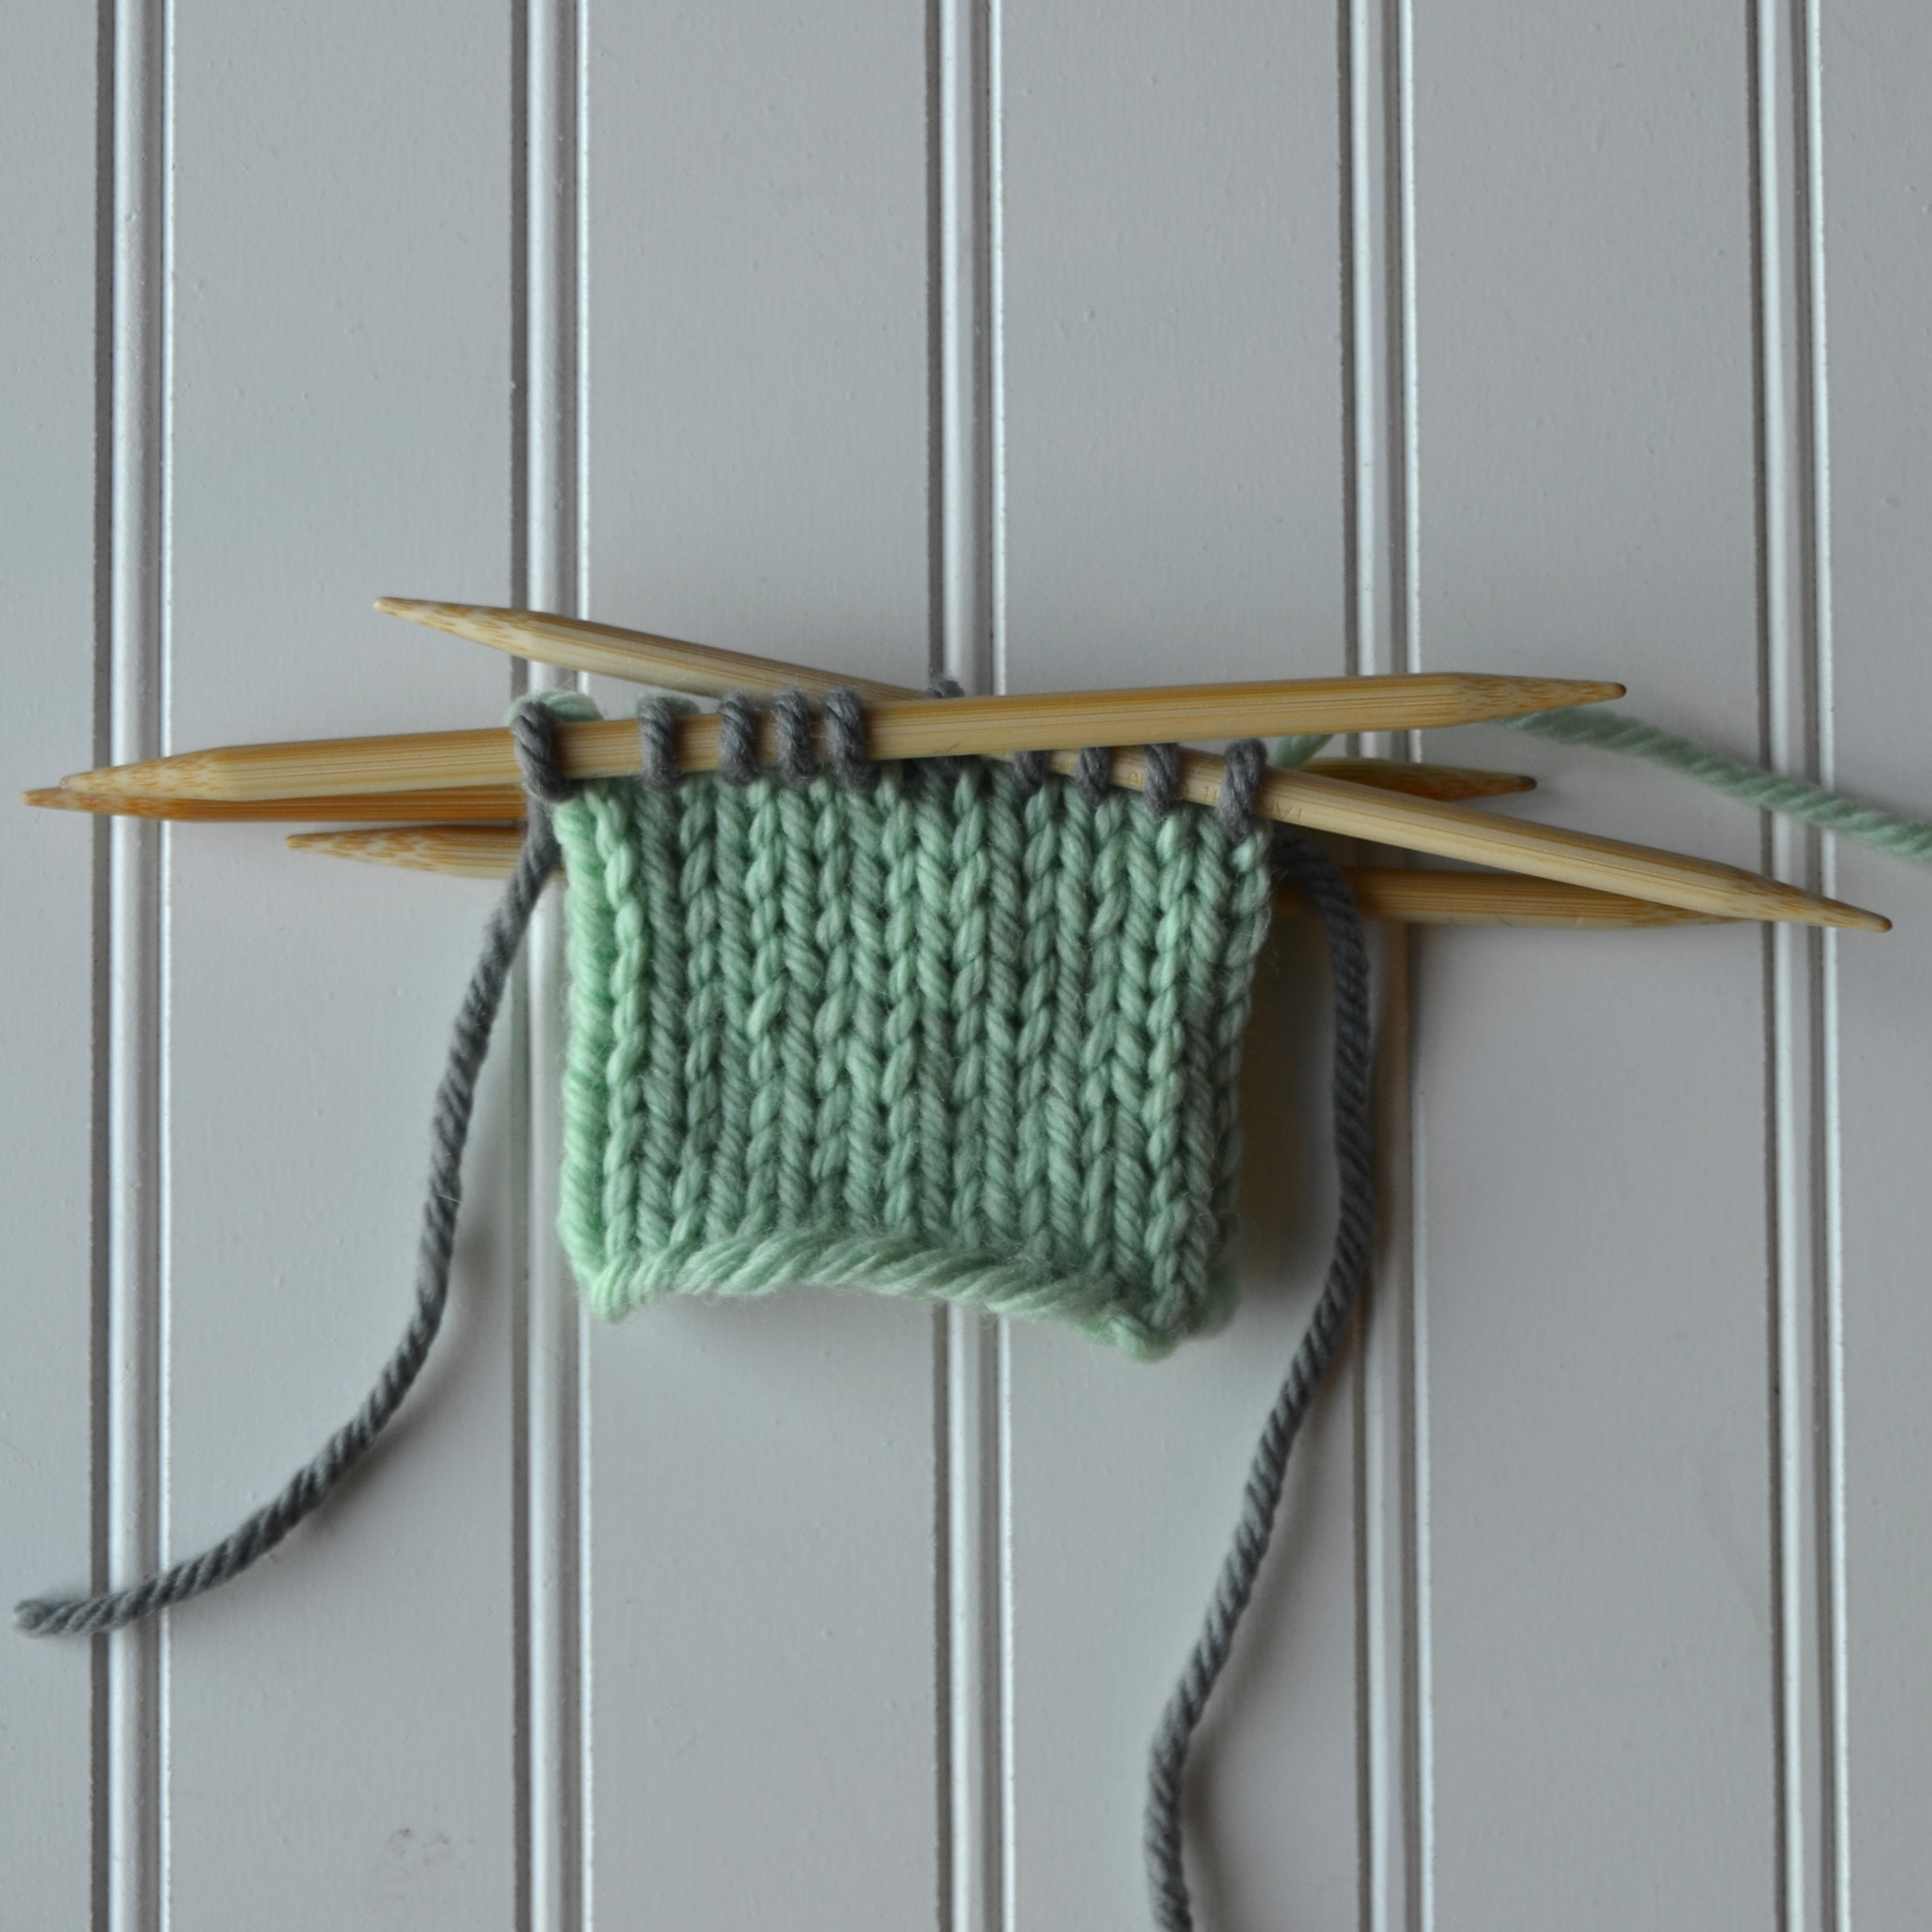
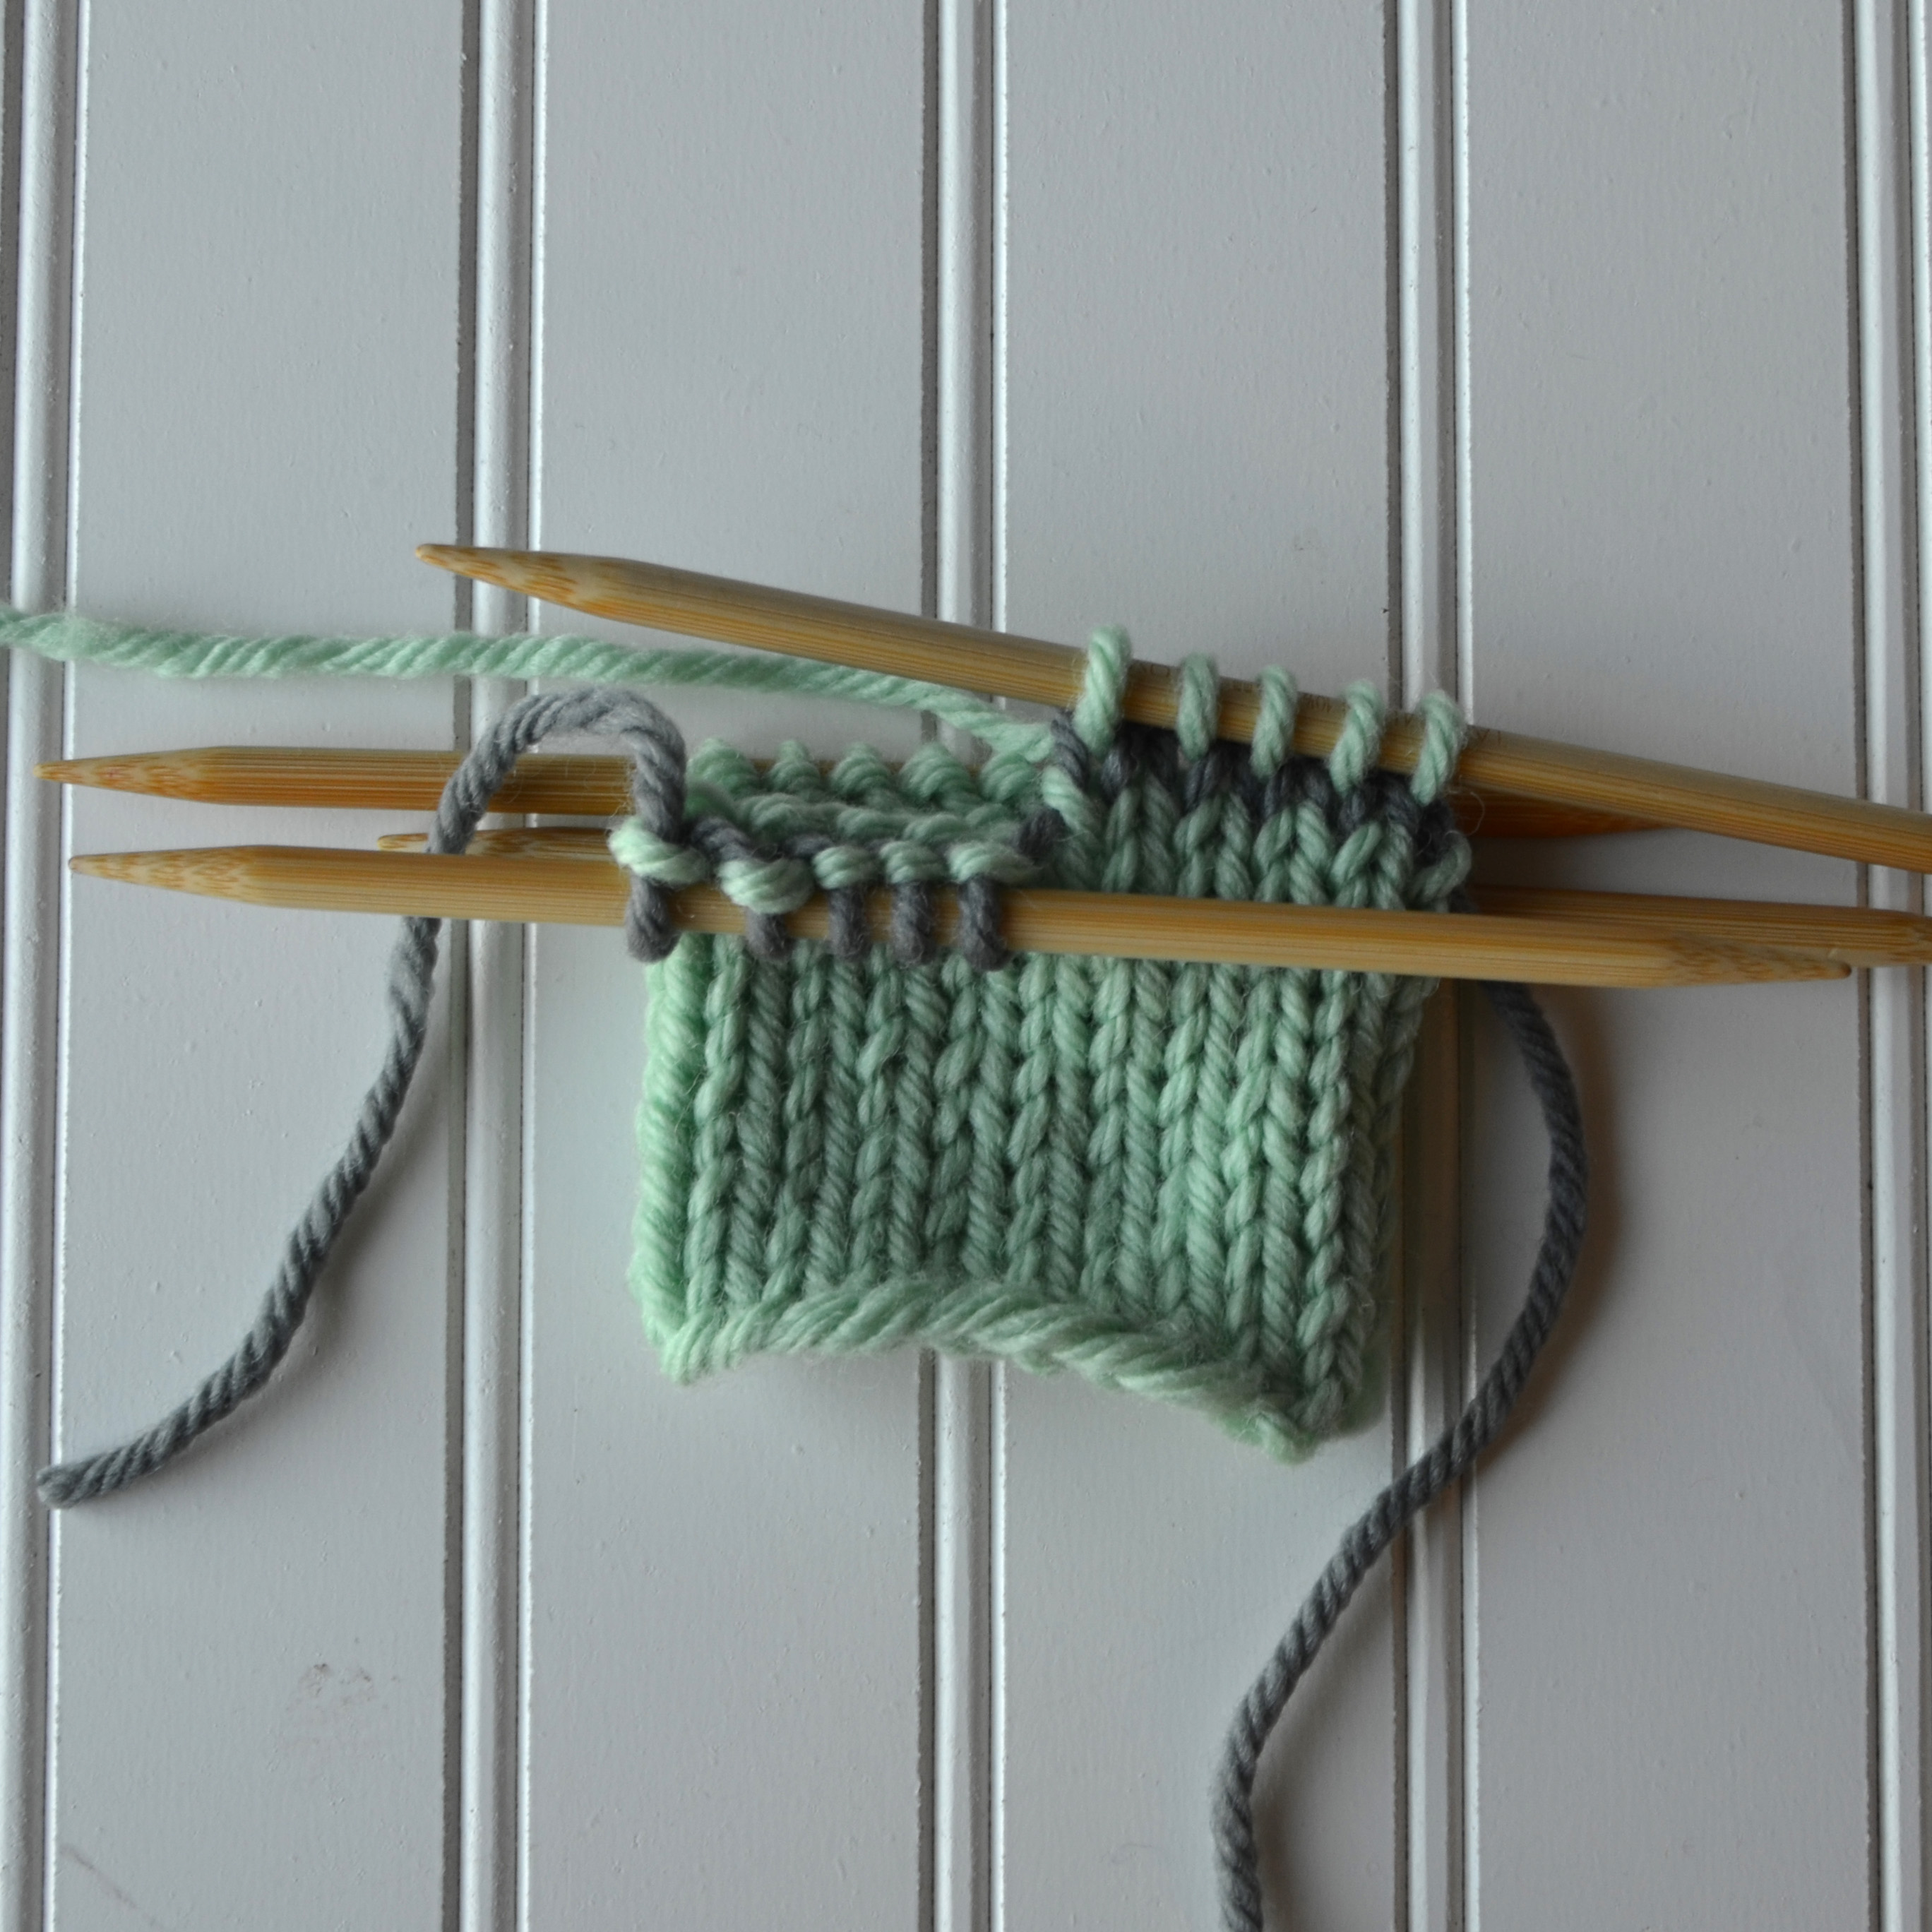
Bind off your swatch.Next, we’re going to place the stitches from the row above and also the row below onto separate needles. I like to use a smaller needle for this step. Pick up stitches with the tip of your needle, going through the front leg of each stitch. By doing this, the stitches will be oriented correctly when you go to knit the first round.My 10 stitches from the row above the waste yarn are now on a needle.Insert a second needle through the front leg of each stitch below the waste yarn.Now we’re ready to remove the waste yarn.With a spare needle, carefully pick out the waste yarn.Waste yarn be gone!Now it’s time to knit the heel, and return to your larger dpns. This first round is usually a plain/knit round.This photo shows what happens in that gap where the waste yarn was if you simply knit across and ignore it.Pick up a stitch from the side of the row where the waste yarn was. It’s best not to pick up the very outermost part of this loop, but to pick up the half of the stitch just inside the opening.Place this picked up stitch on the needle and knit it together with the next stitch, closing the gap. Depending on the pattern and yarn, I might do this twice at each side of the gap. It’s best to experiment and see what looks best with your particular yarn and stitch pattern.And here’s what that gap will look like now. No holes!Knit the rest of the heel as instructed. It’s like a heel magically grew out of your knitting.
I also like this technique for set-in pockets on a top-down sweater. It’s not as hard as you thought it was going to be, right?
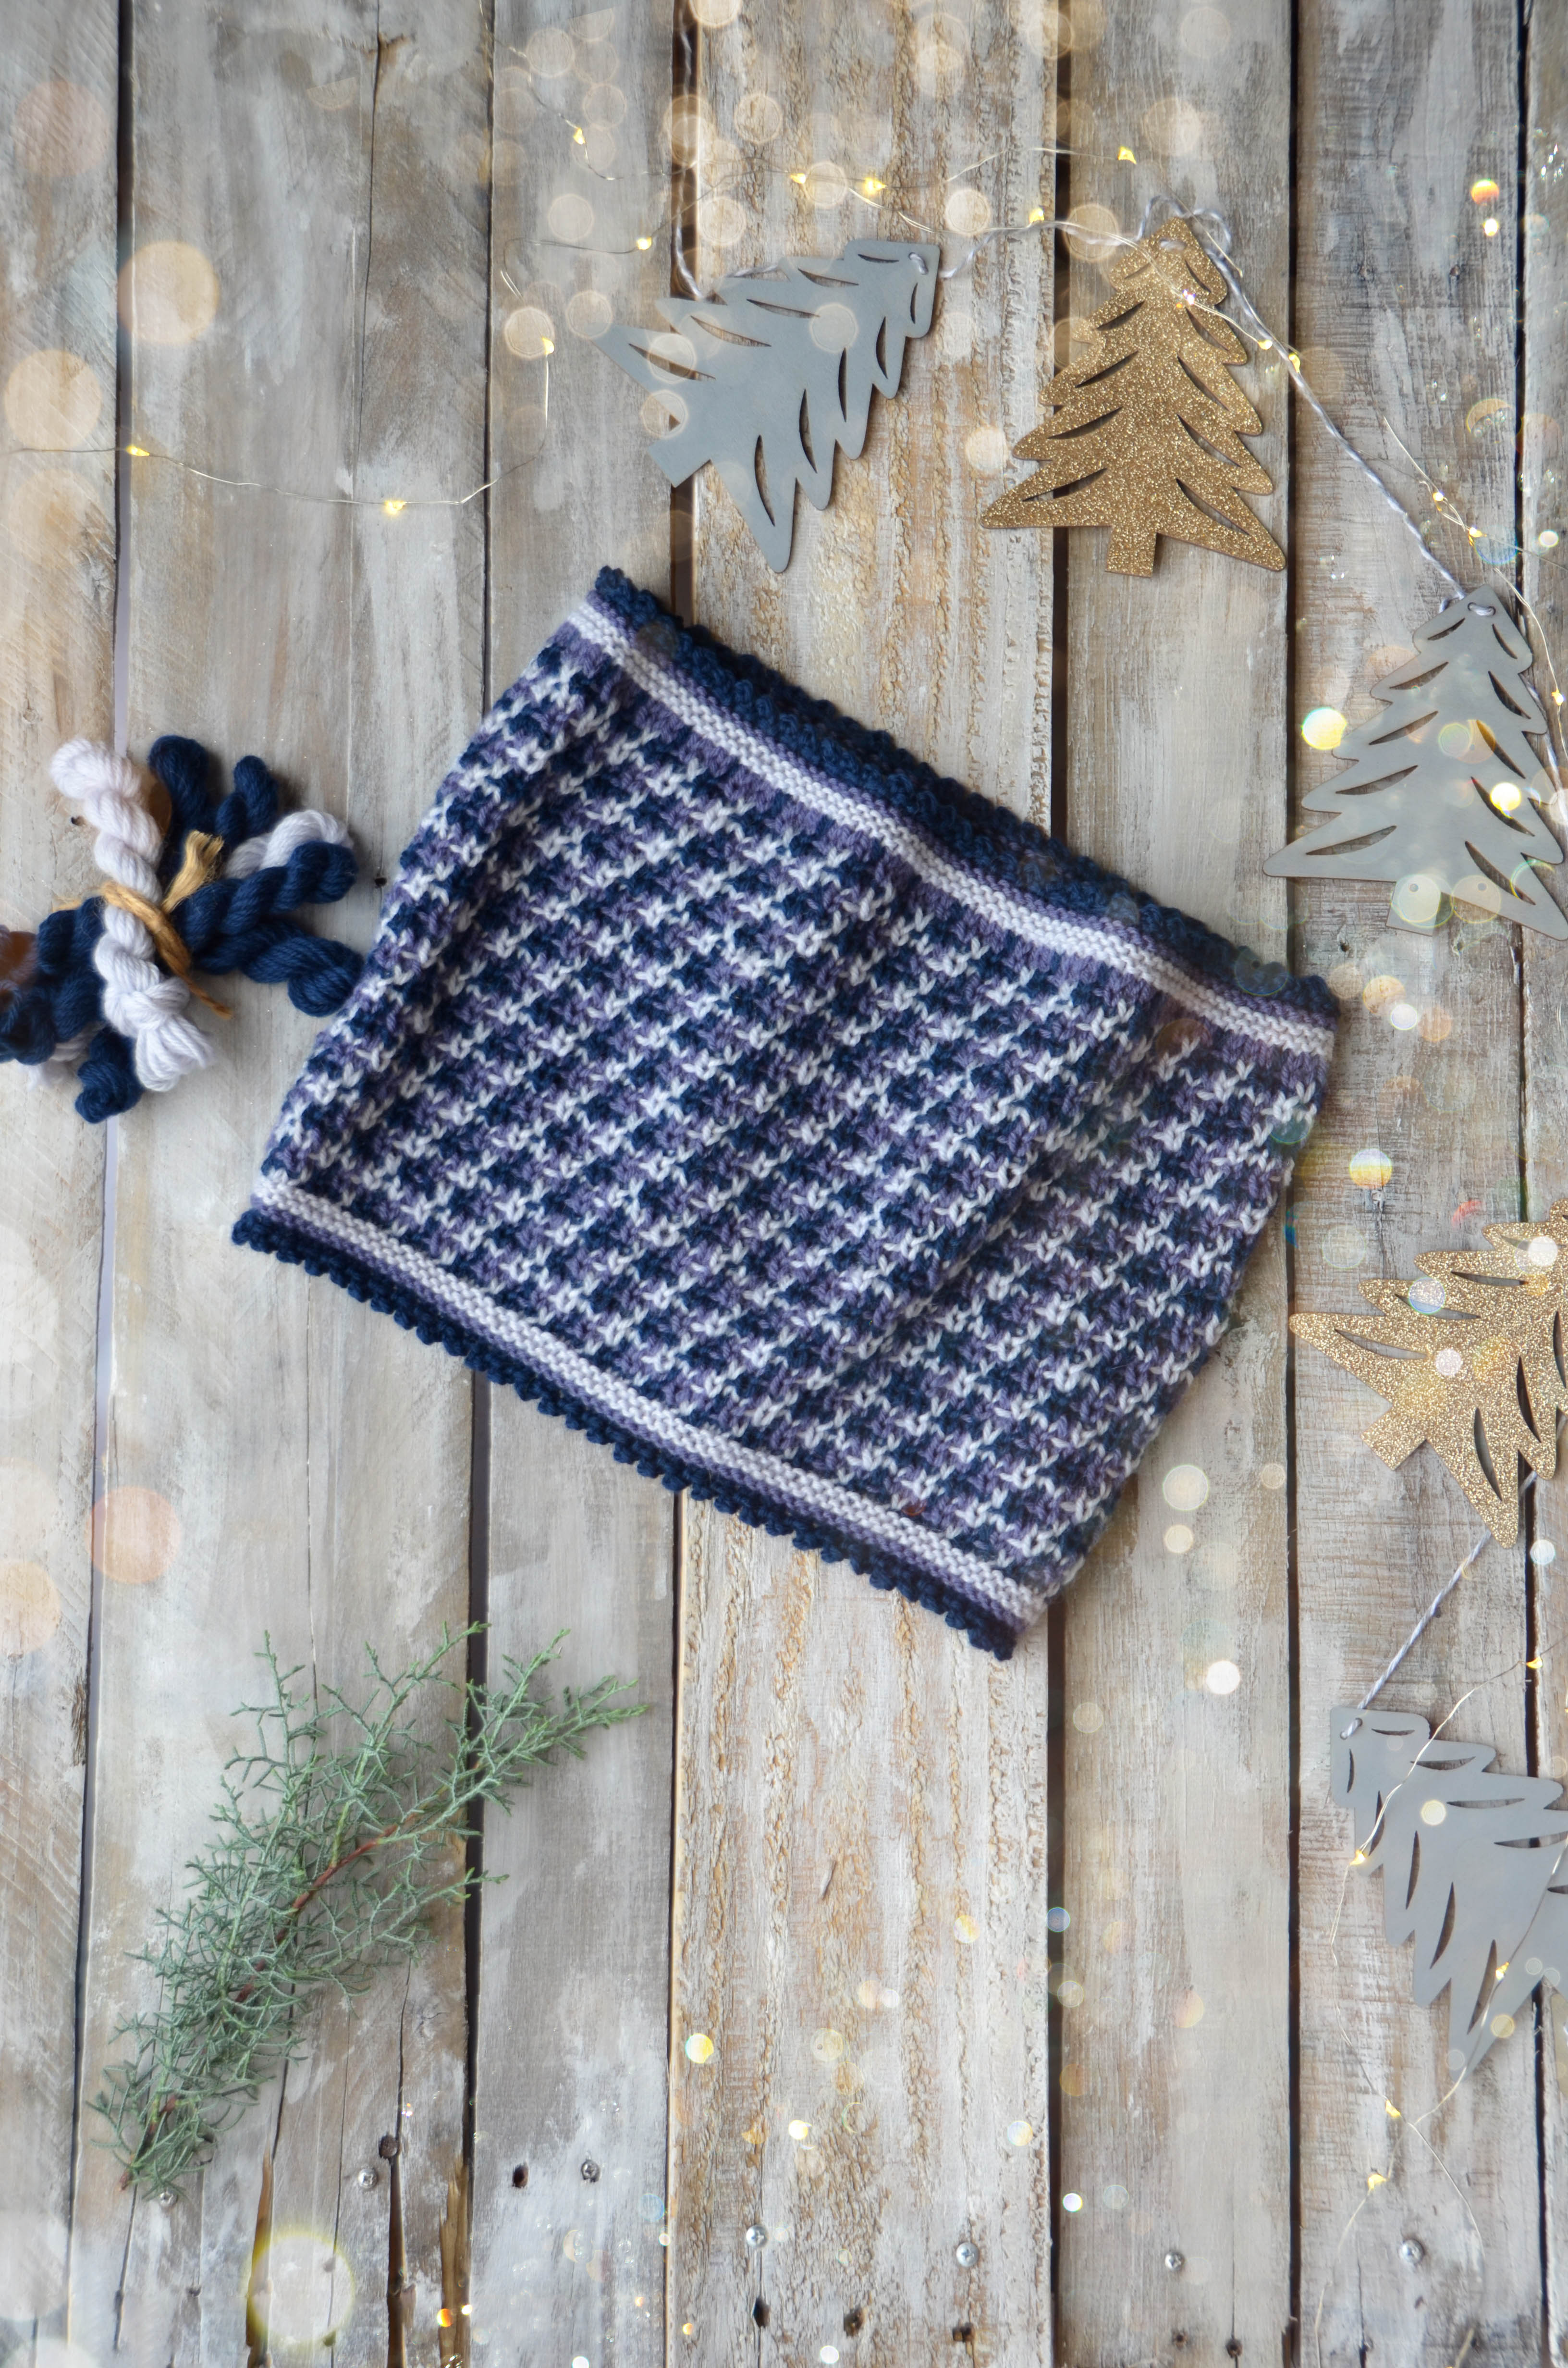
The pattern is written for the smaller size as shown, and also a large size, long enough to wrap around your neck twice. The yarn included in the kit is enough to knit either two small cowls, or one large. So – bonus!
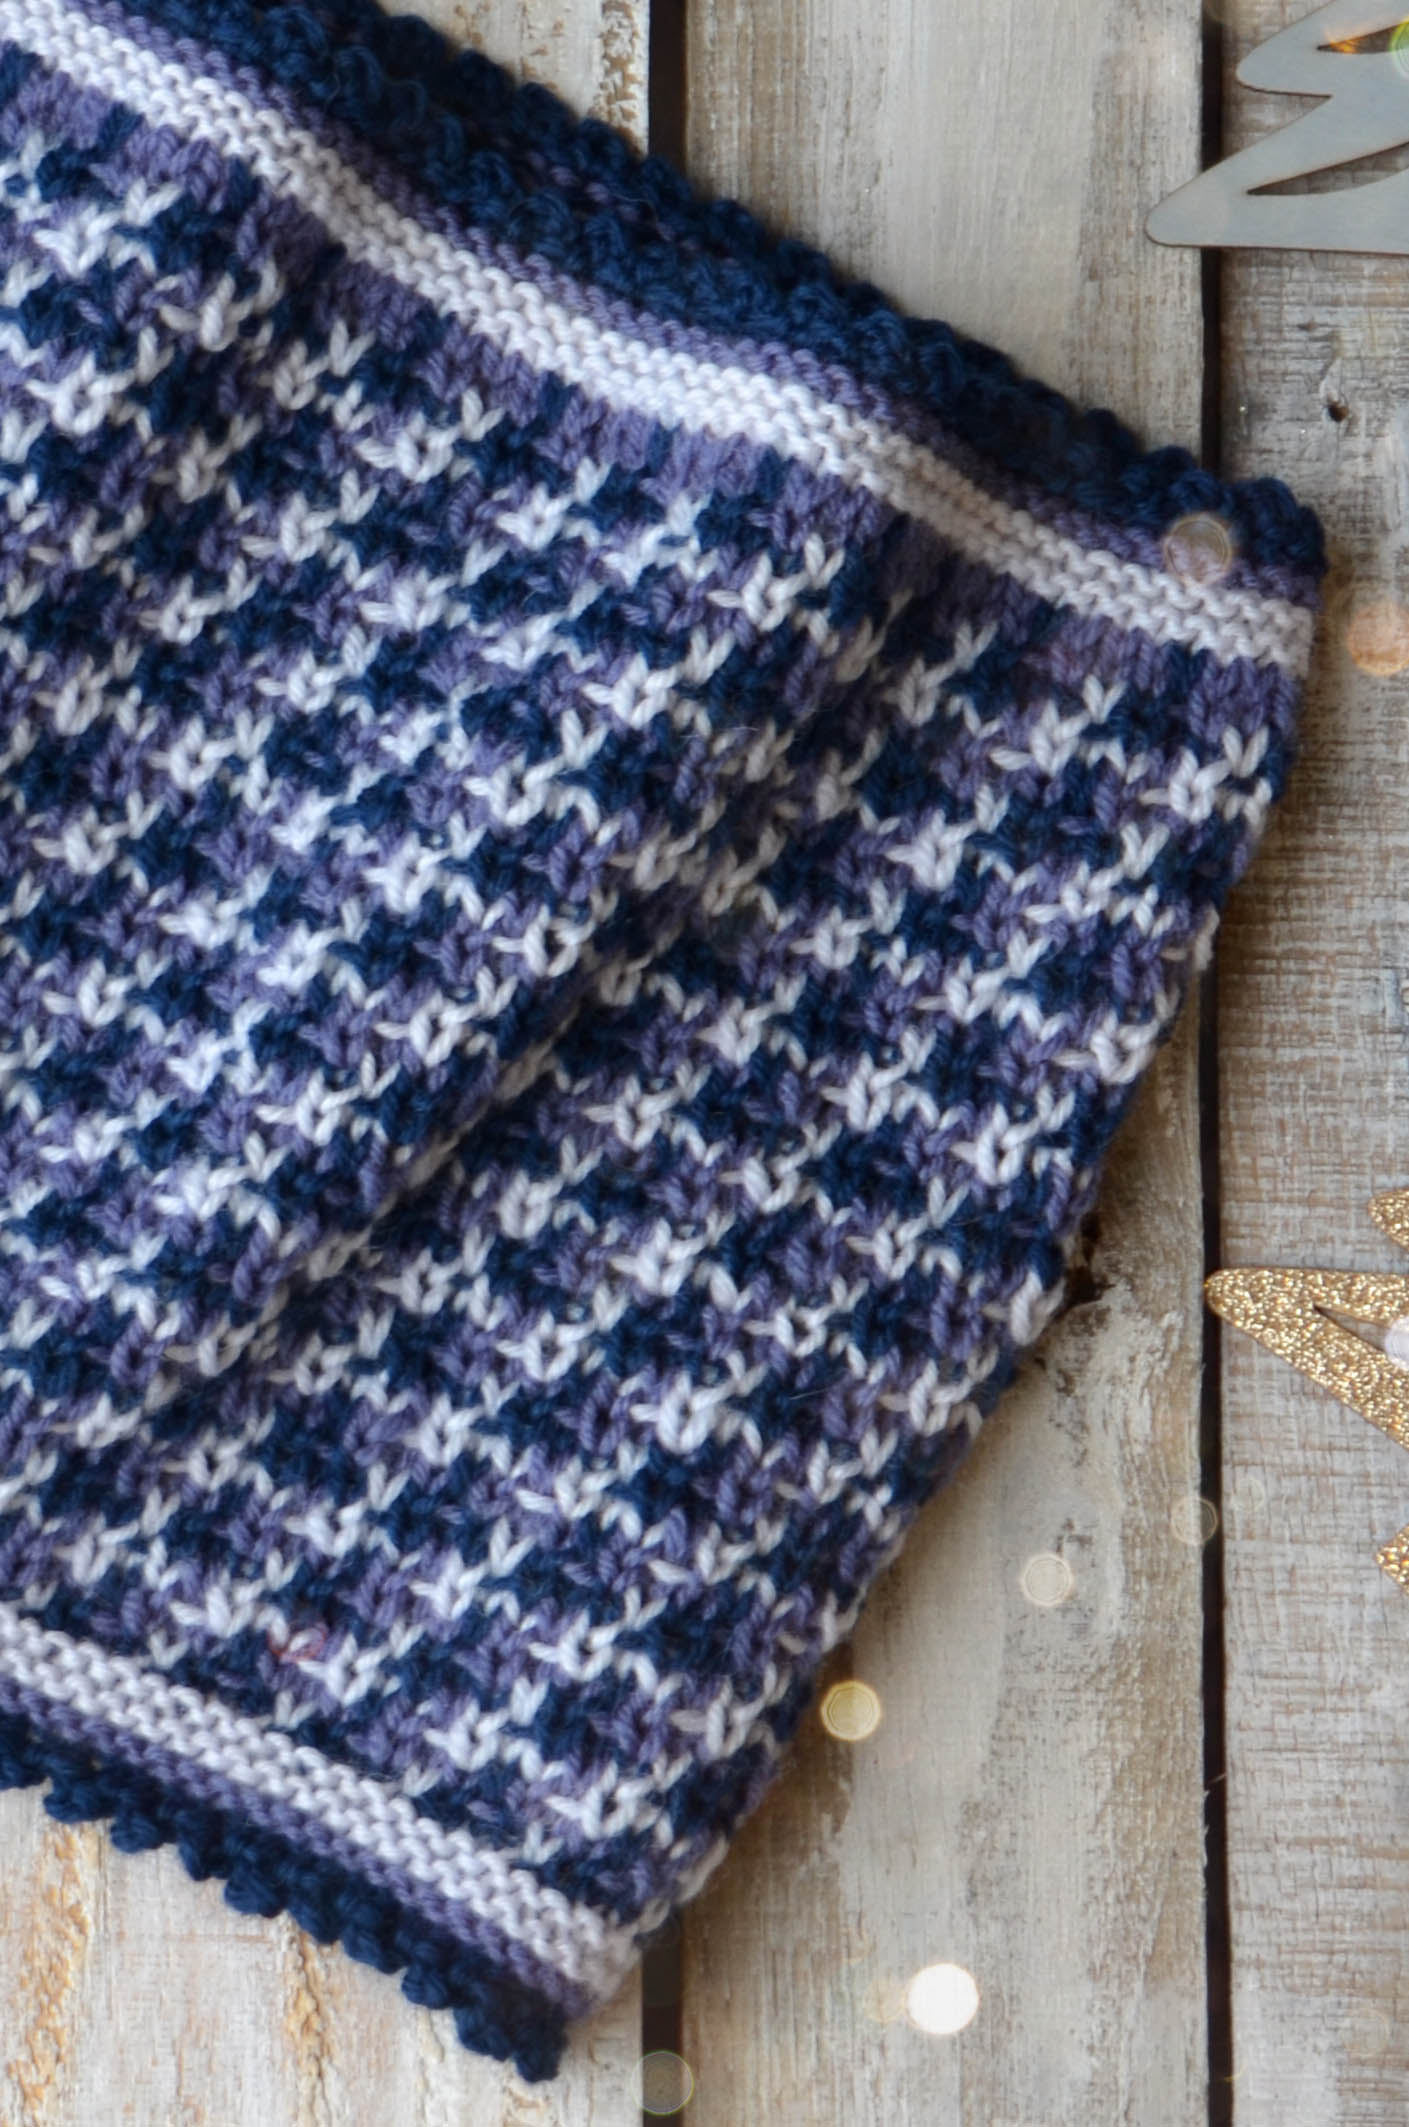
The main body of the cowl is super-duper simple. The complex looking color pattern is just slipped stitches. Colors are changed every two rounds, and only one color is used per round. It hits that sweet spot of knitting where the pattern is just a bit more than stockinette – enough to keep you interested – but easy enough that you can work on it anywhere.
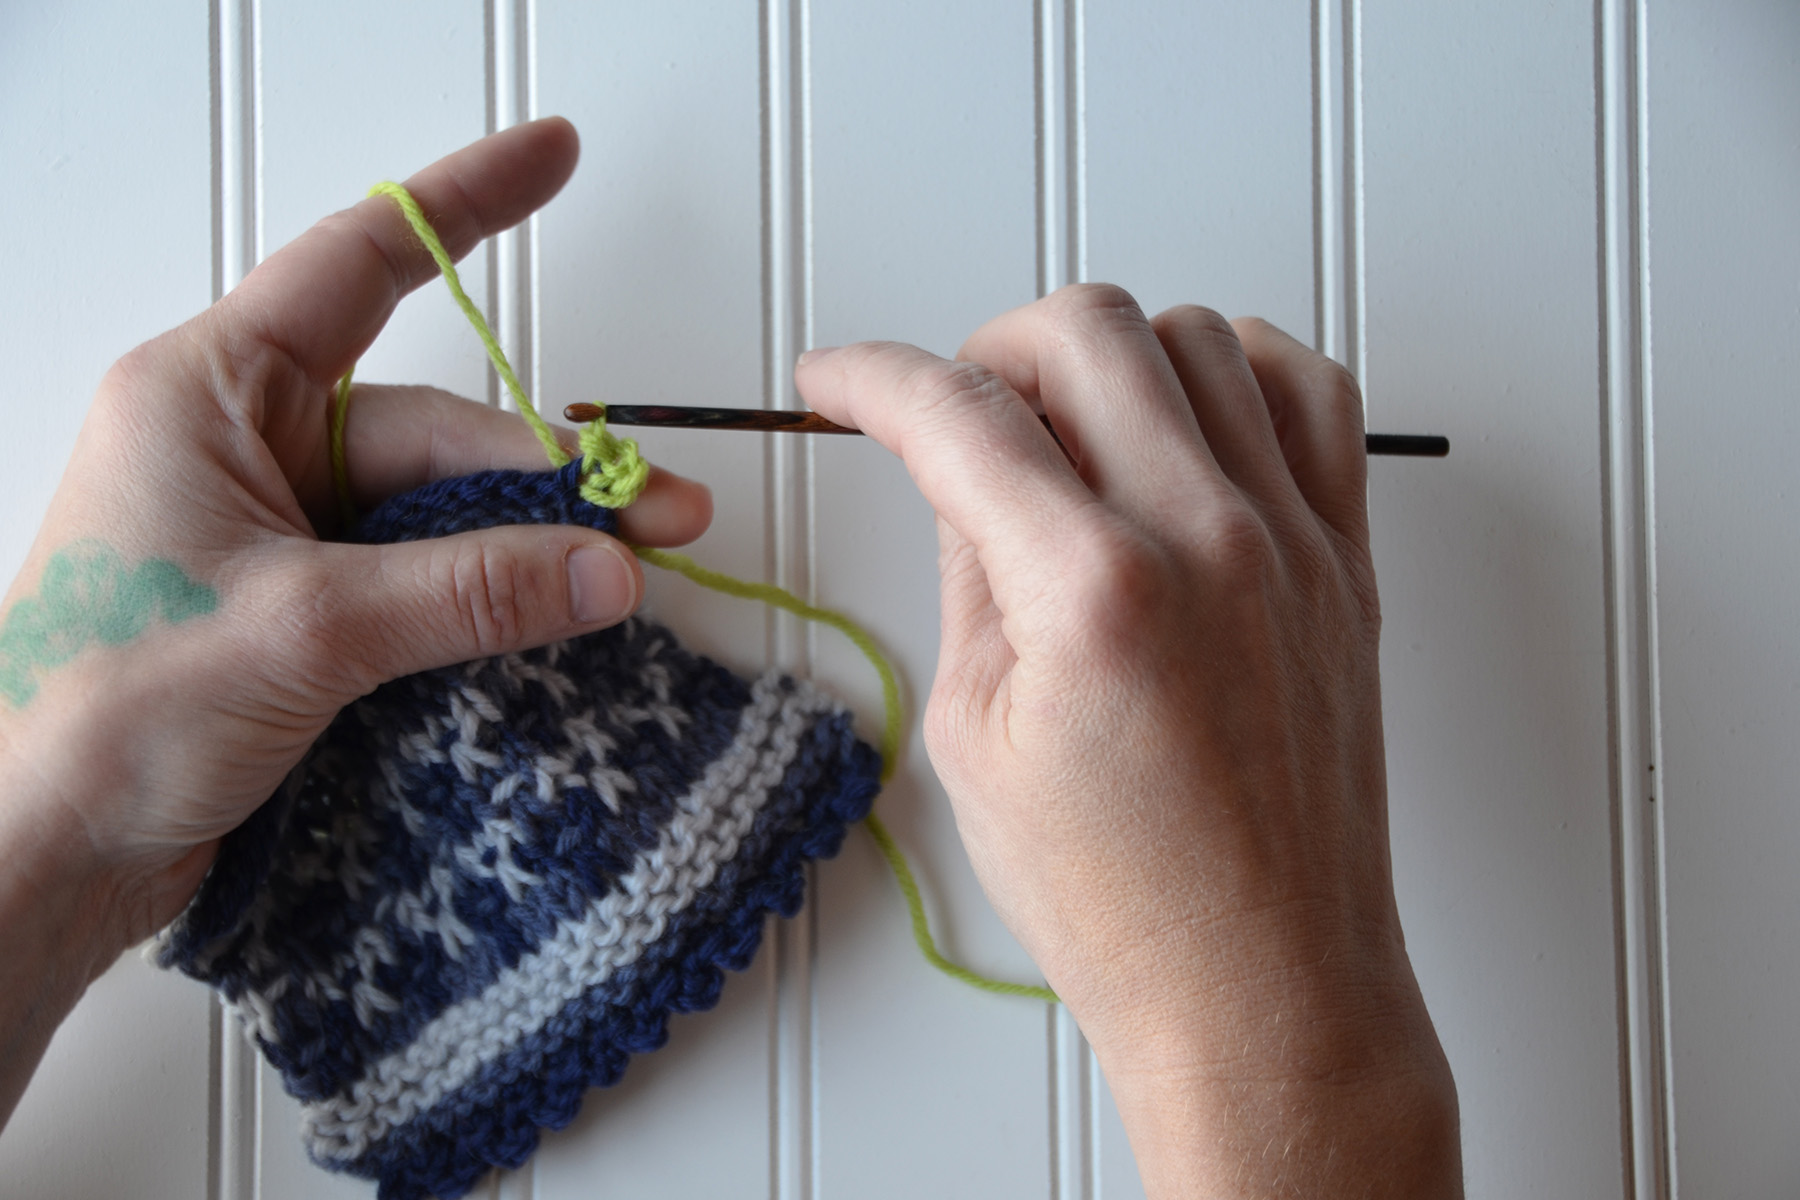
My favorite detail of this cowl is the picot edging along both edges. This could have been done with a knitted picot bind-off, but I chose to use a crochet picot instead. For me, it’s just less fiddly than doing its knit counterpart. Let’s learn how to do it!
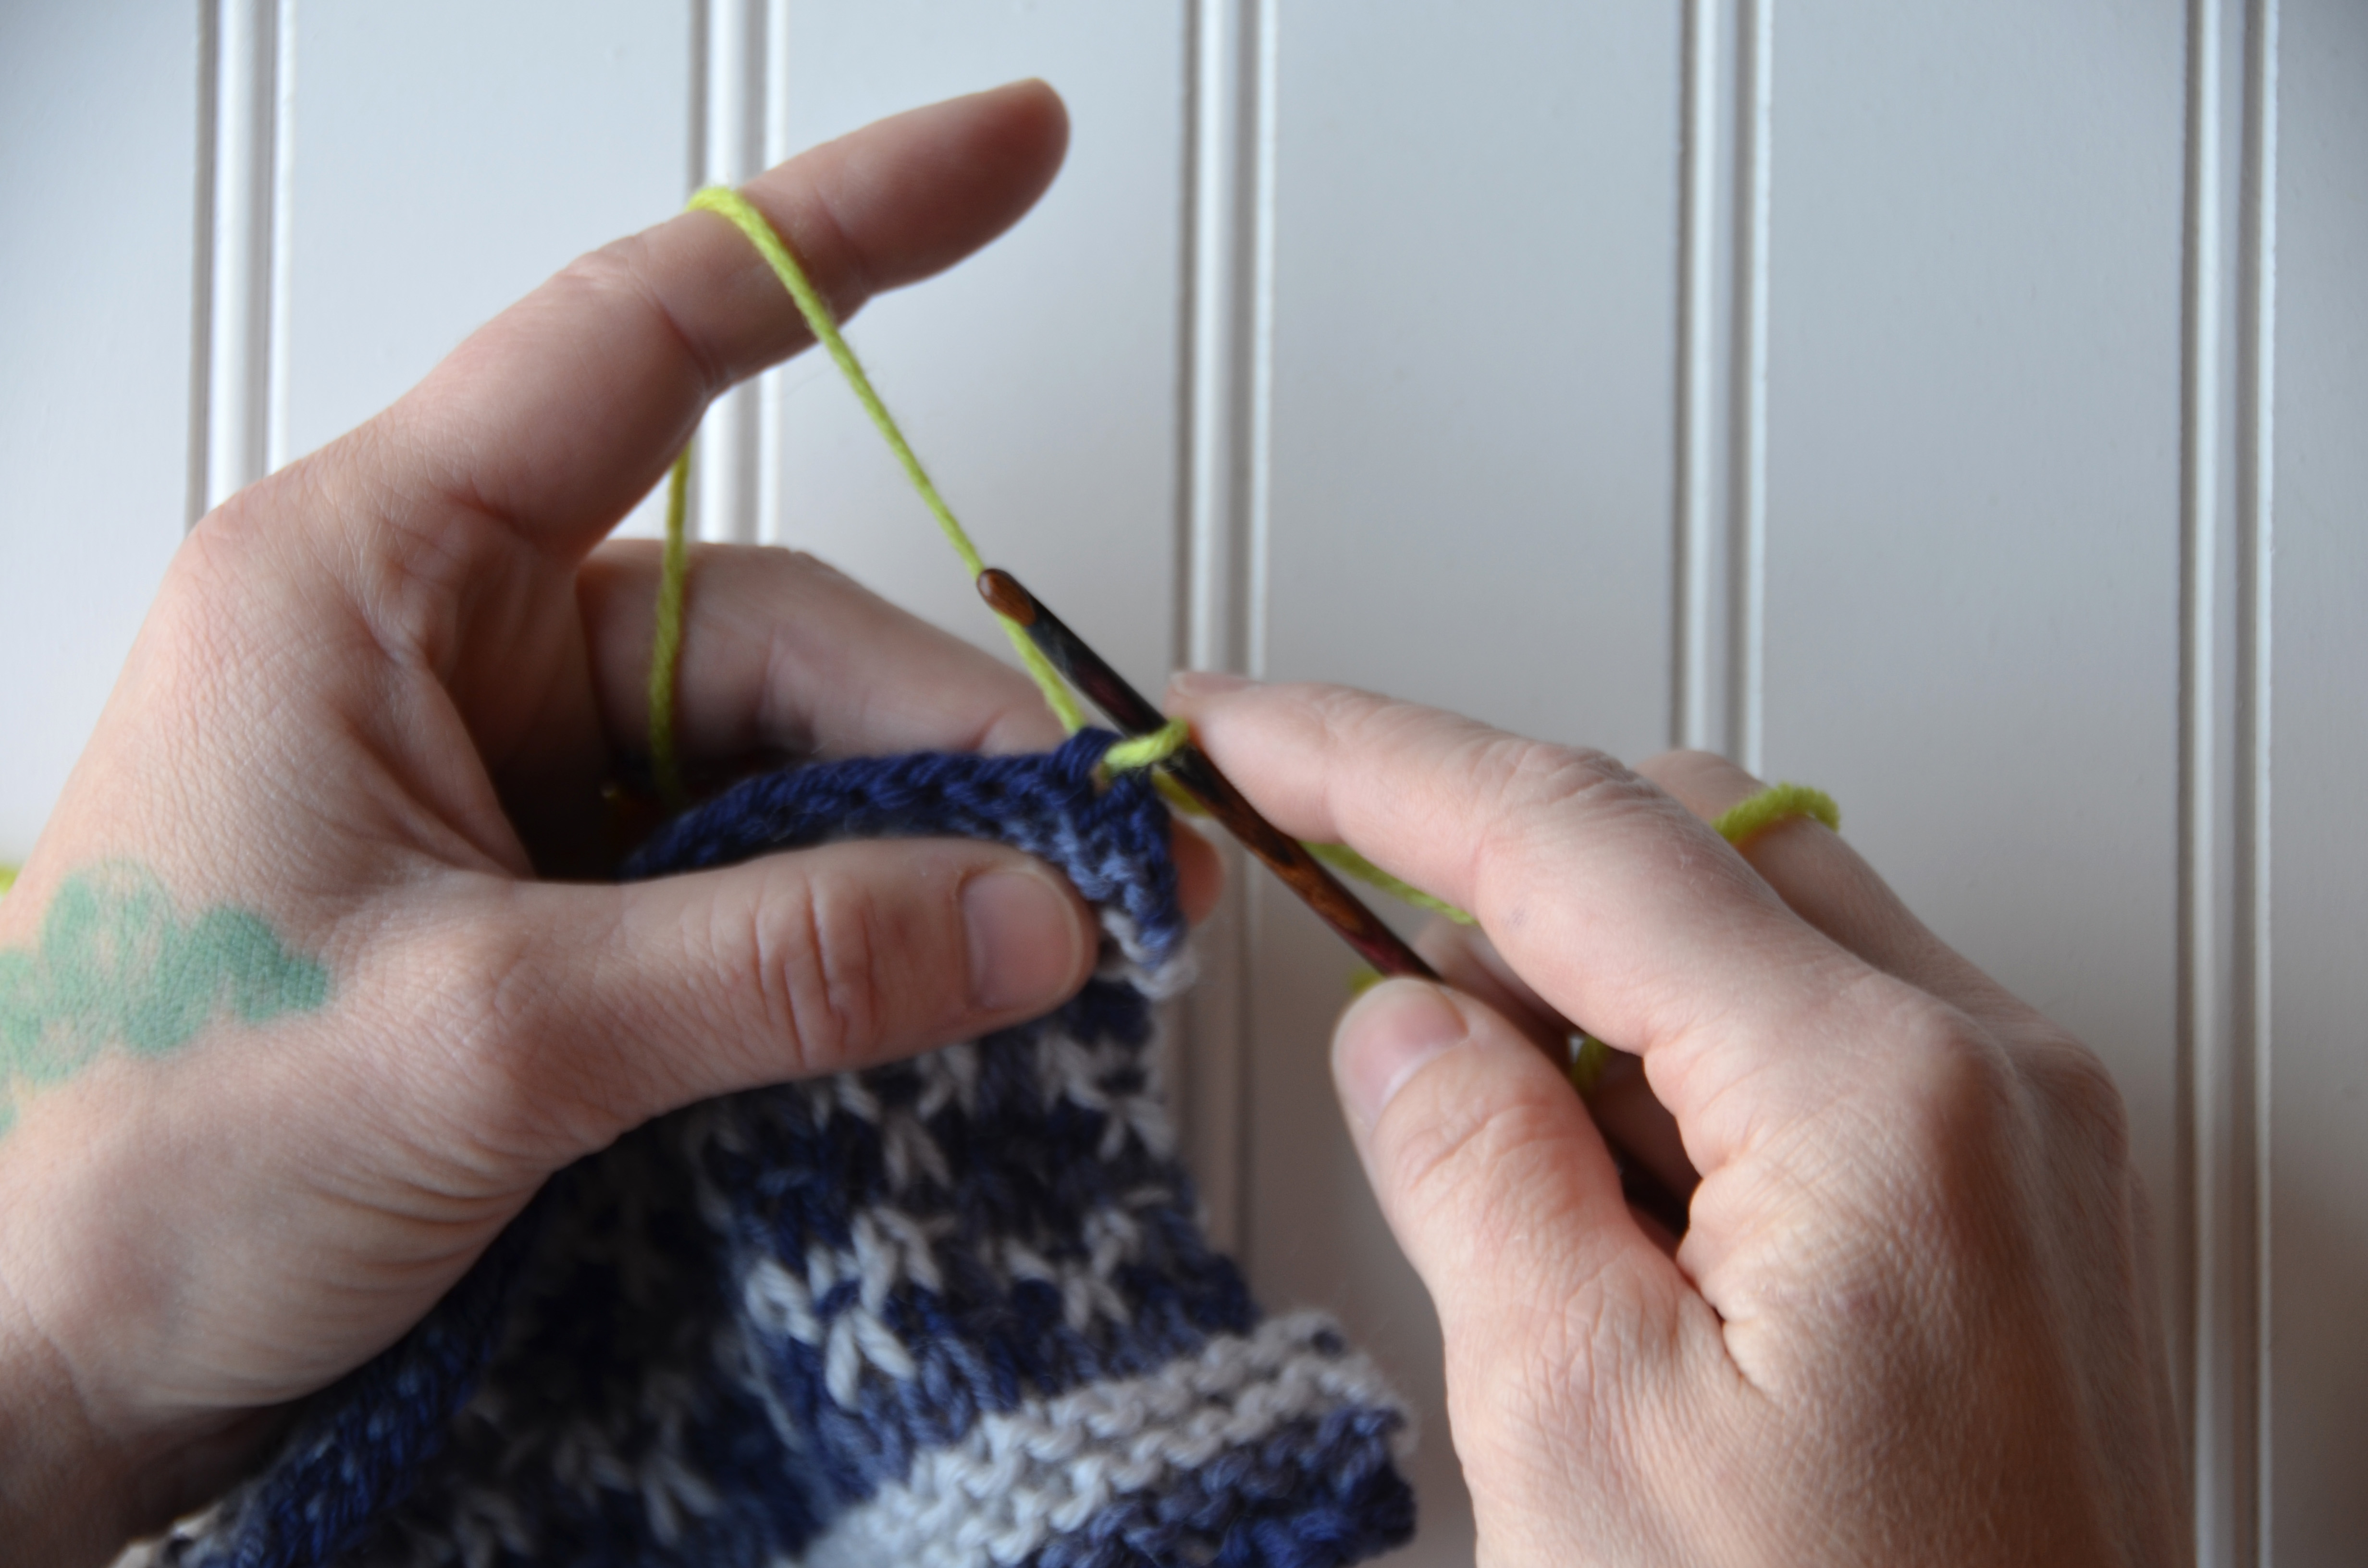
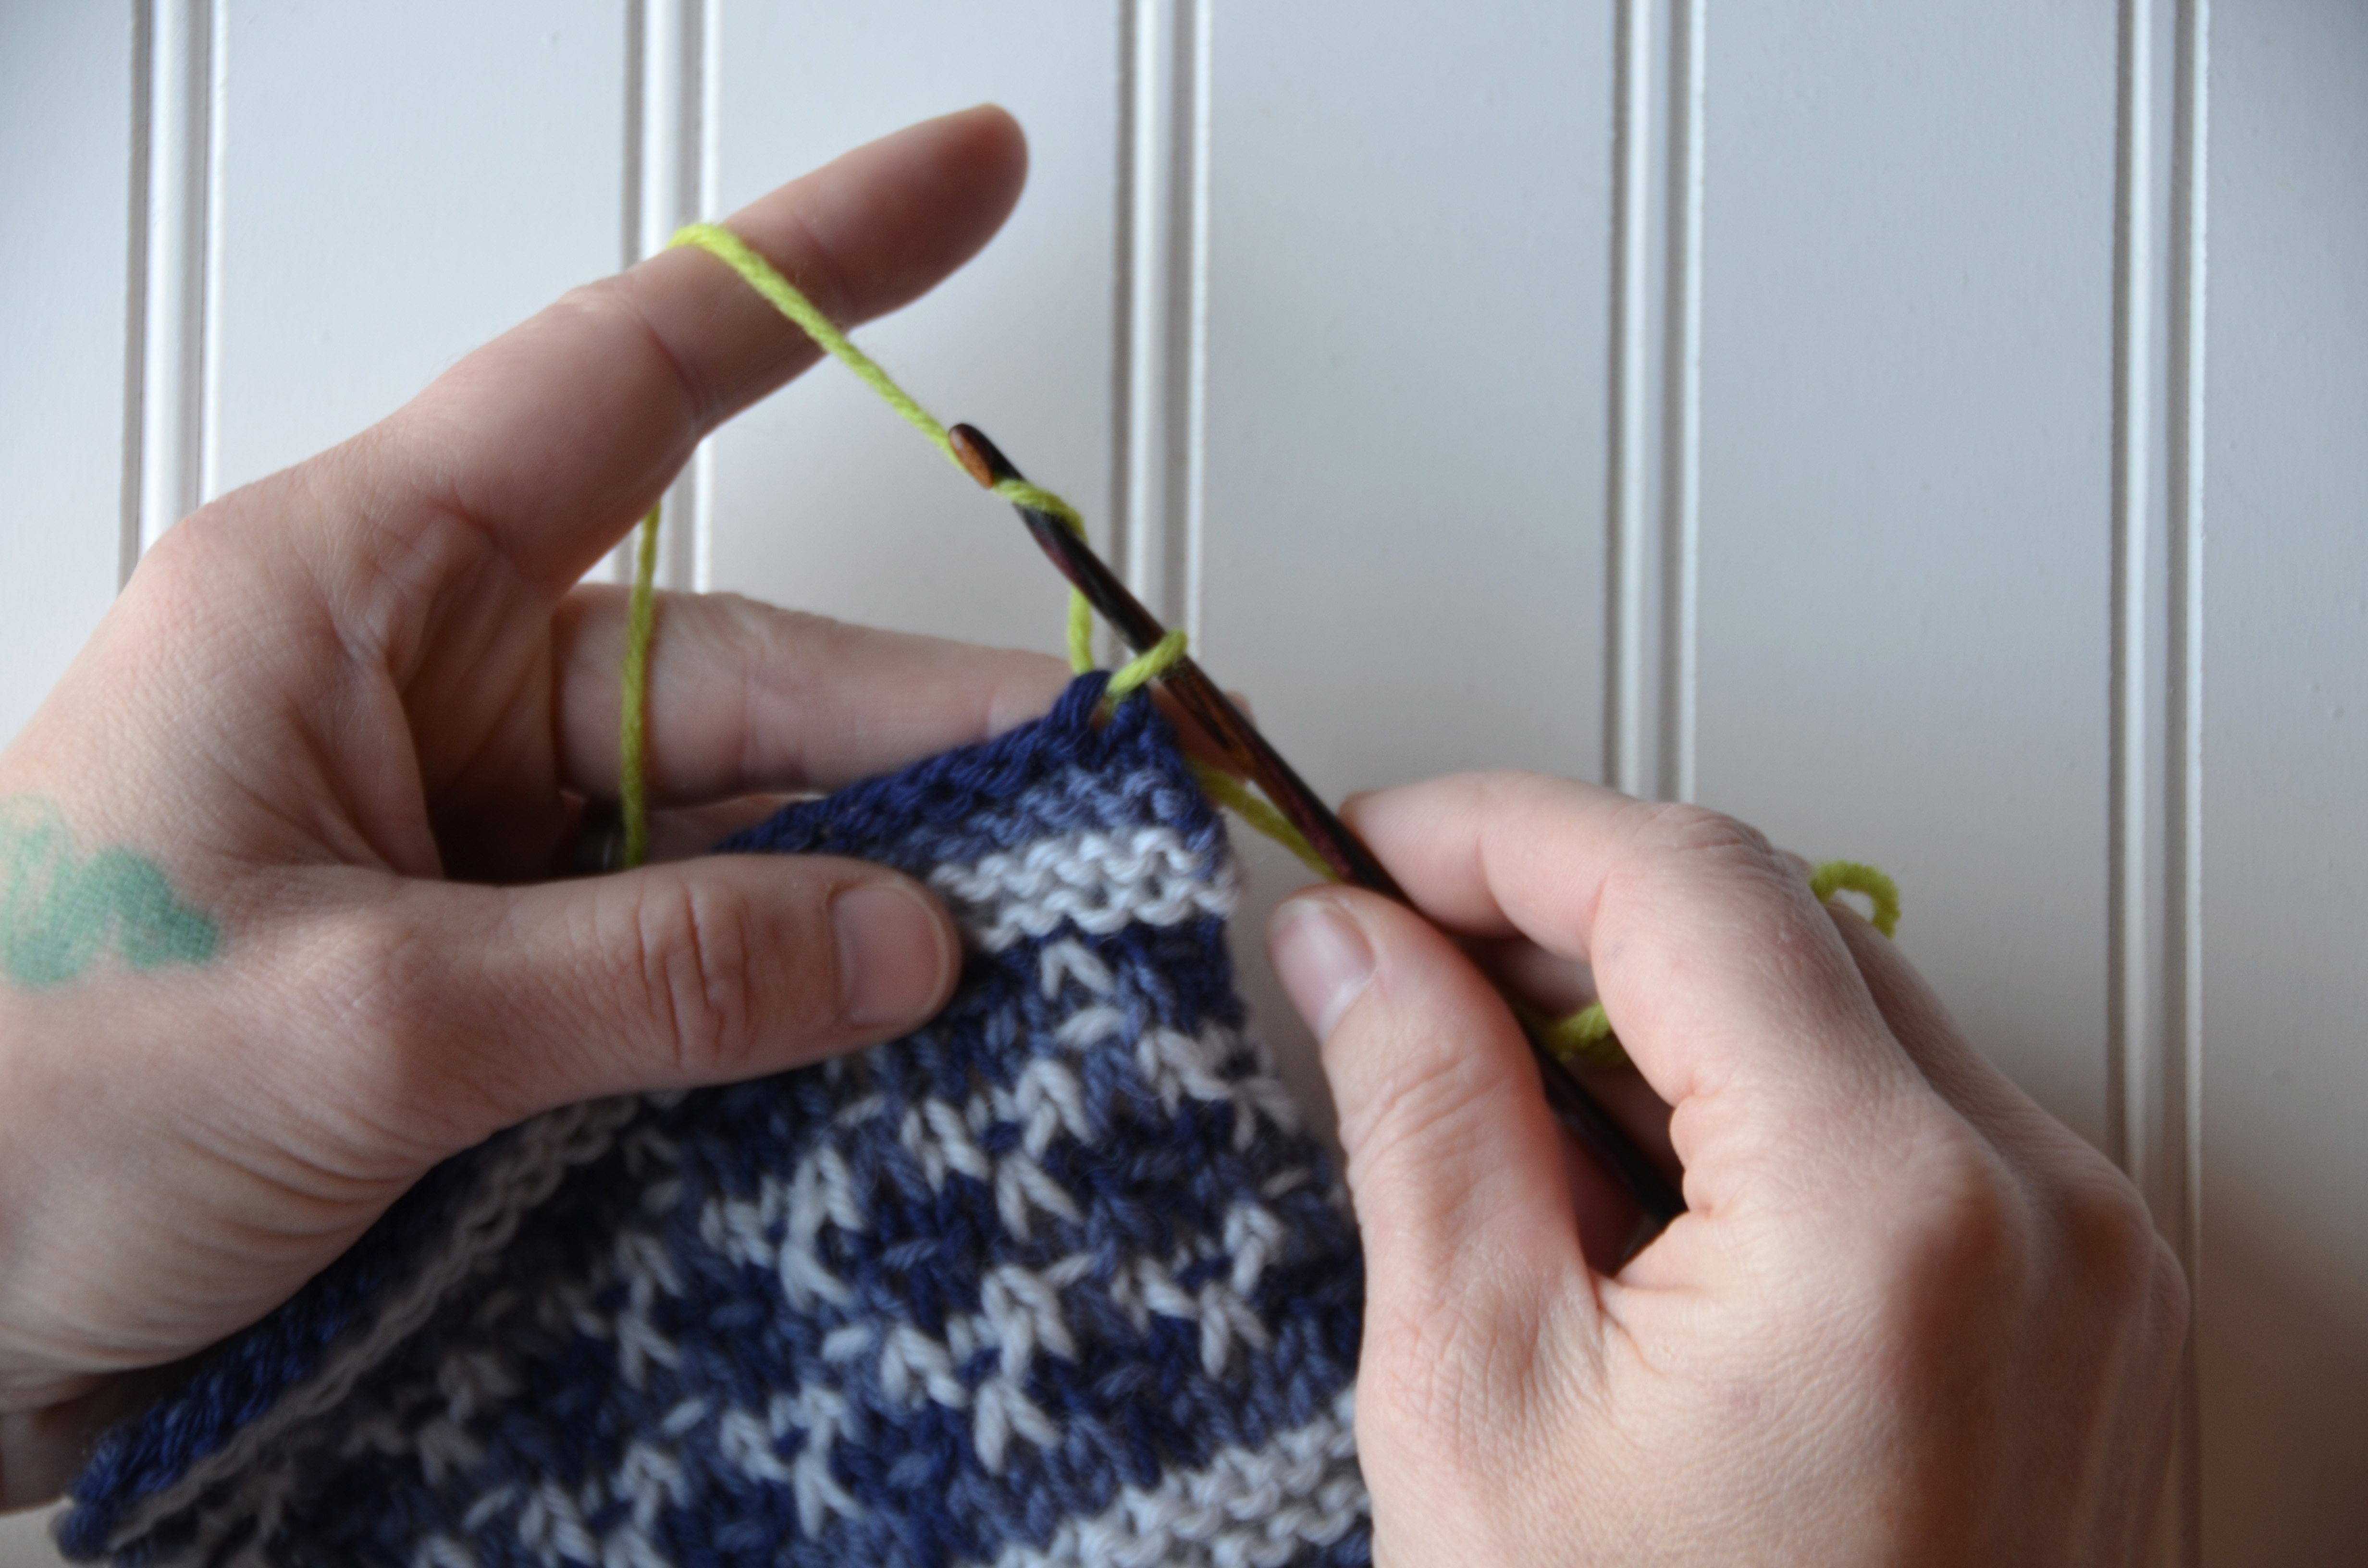
If you need a little closer view on any of the following images, just click on it and it will open in a new browser window.
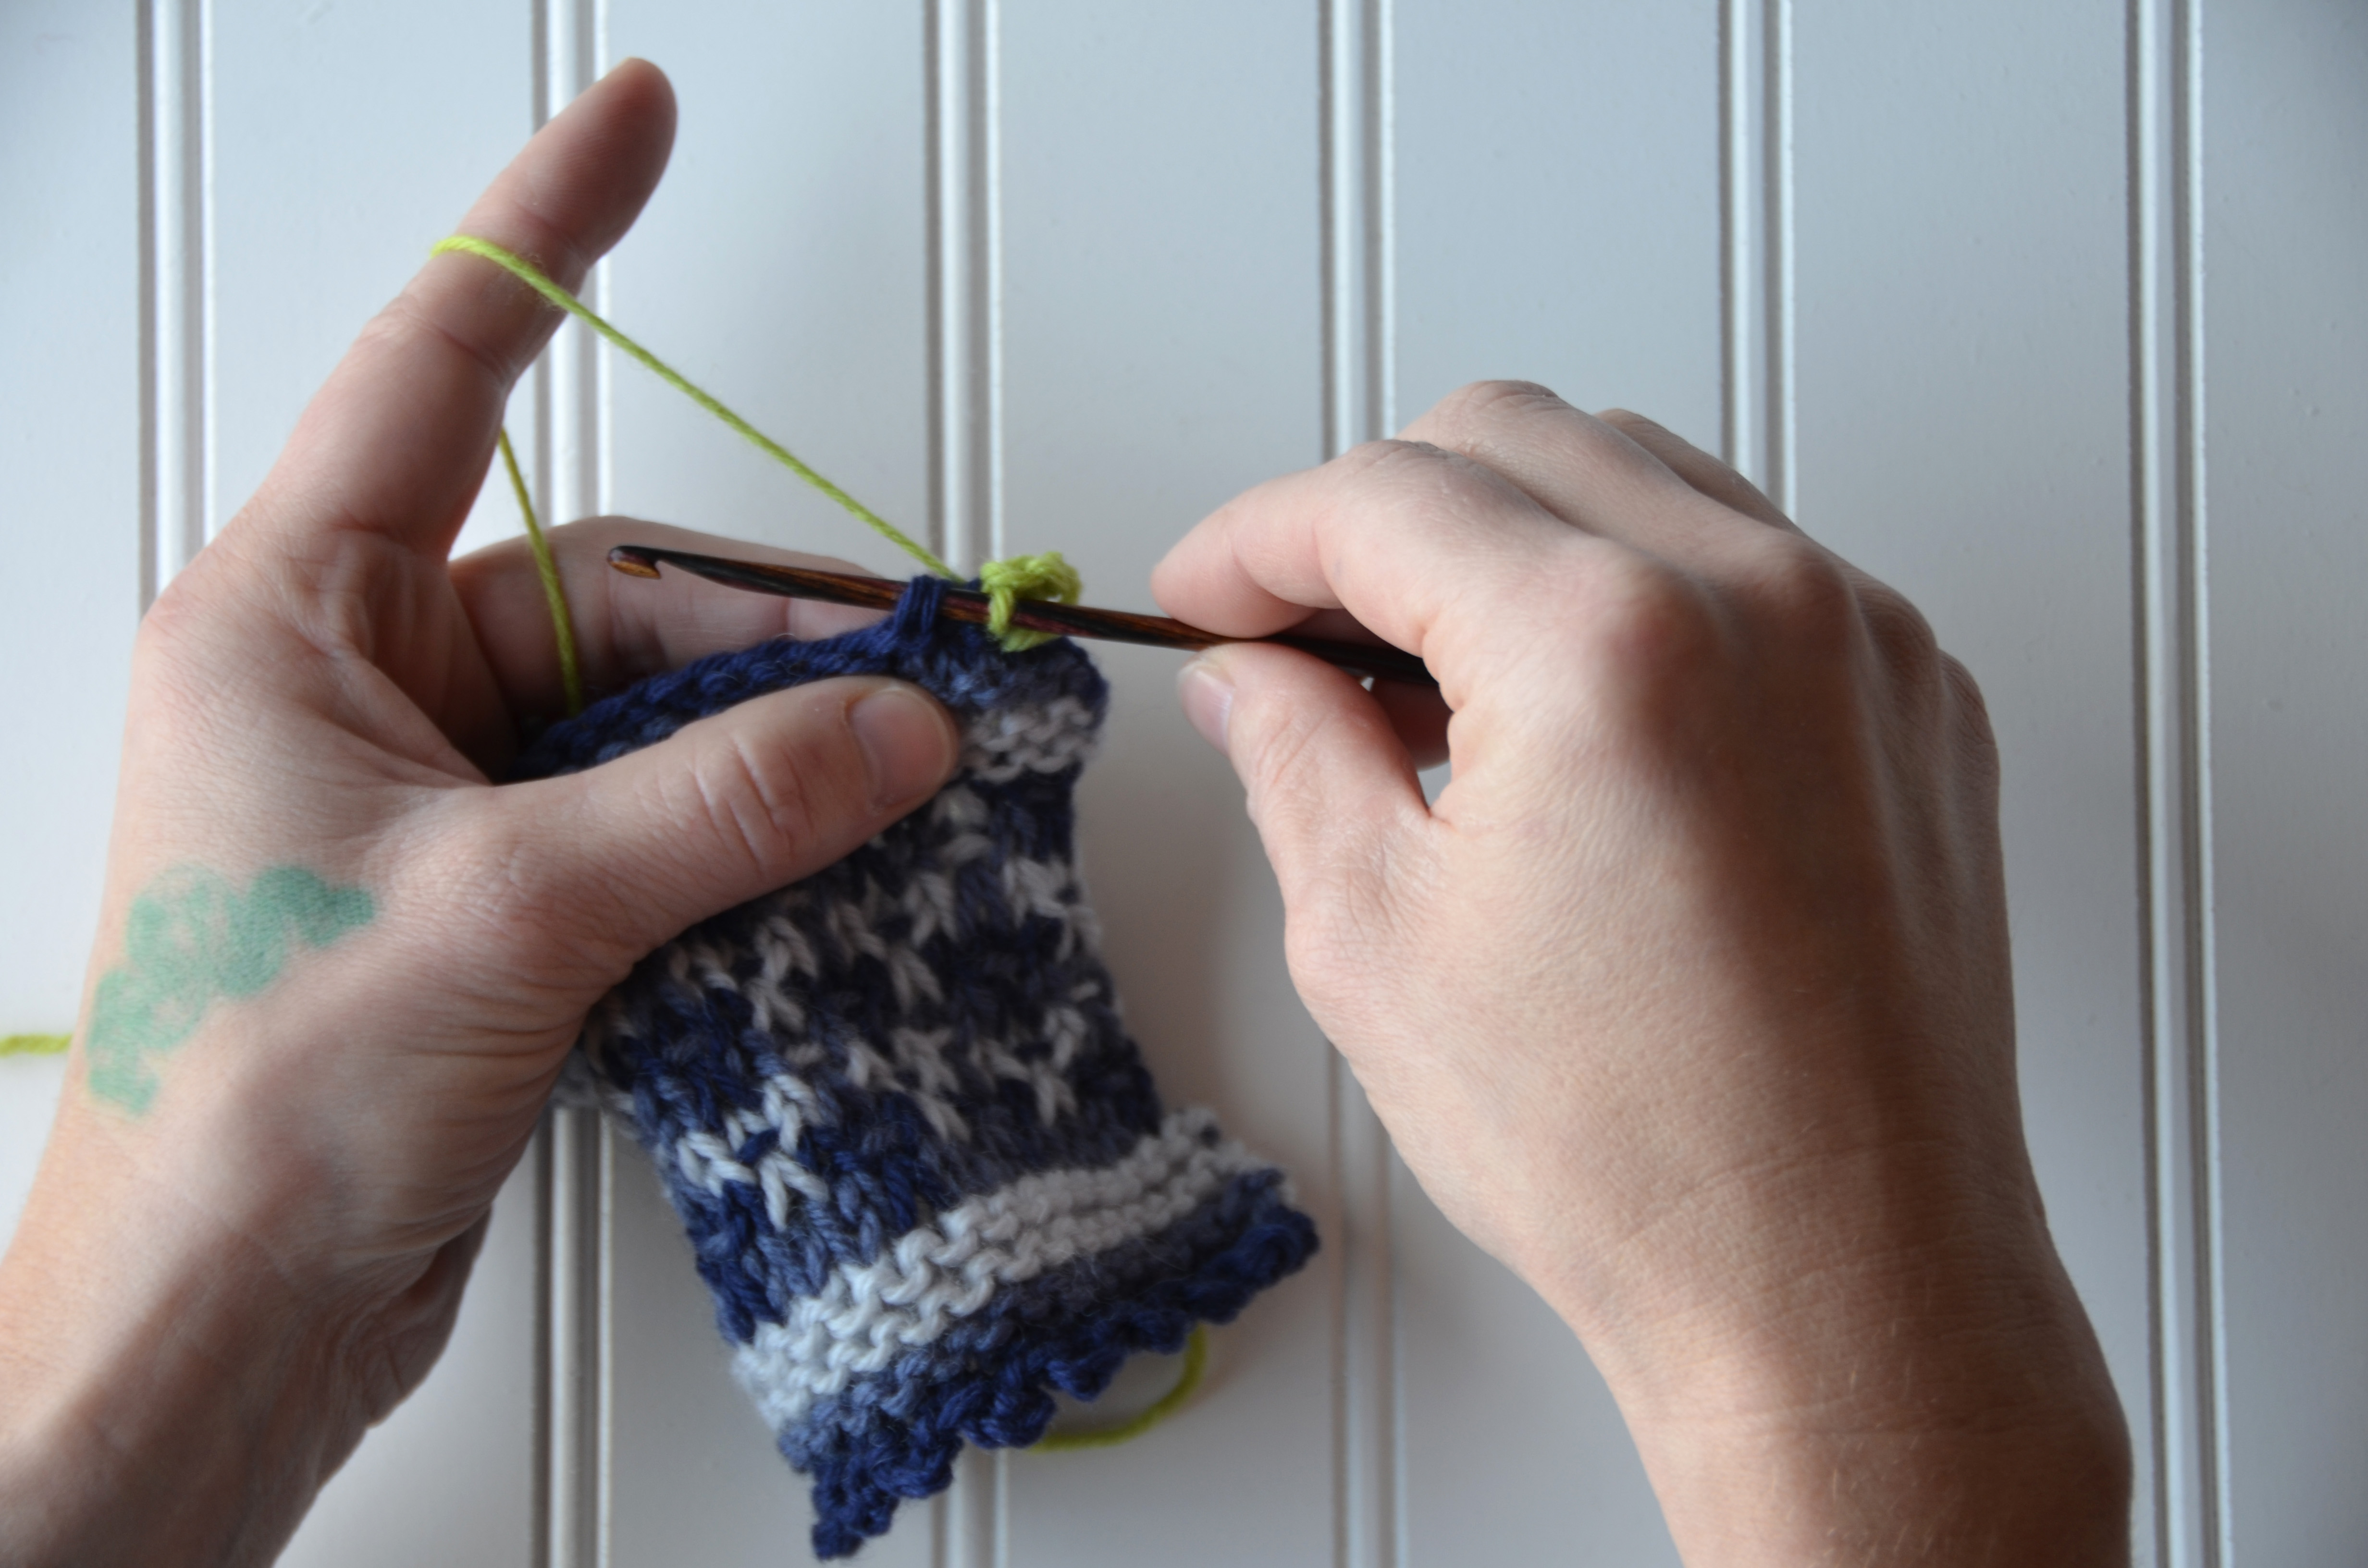
In my swatch, you can see that I’ve already done the picot edging along the lower edge. I’m going to be using a contrast color for the top edge so it’s easier for you to see.Begin by pulling up a loop onto your hook. Be sure to work through both loops of the knit stitch from the cowl as you do this.Step 1: Chain 3. To make a chain, first yarn over as shown.To complete the chain, pull the yarn over through the loop already on your hook.All 3 chains complete.Step 2: Slip stitch into the same knit stitch from the cowl body. To do this, first insert your hook into the stitch, going underneath the same two loops again.Yarn over and pull through the knit stitch.Then pull this second loop through the first loop on the hook to complete the slip stitch.Step 3: Skip the next knit stitch from the cowl body, and slip stitch into the next knit stitch.
Repeat Steps 1-3 for the edging. So you’re going to be working [slip stitch, chain 3, slip stitch] into every other stitch along both edges of the cowl. No big deal, right?
Here’s my swatch after a few more little picots.
Again, you can find the kit for this cowl on our website here (link). Here’s to learning new things!
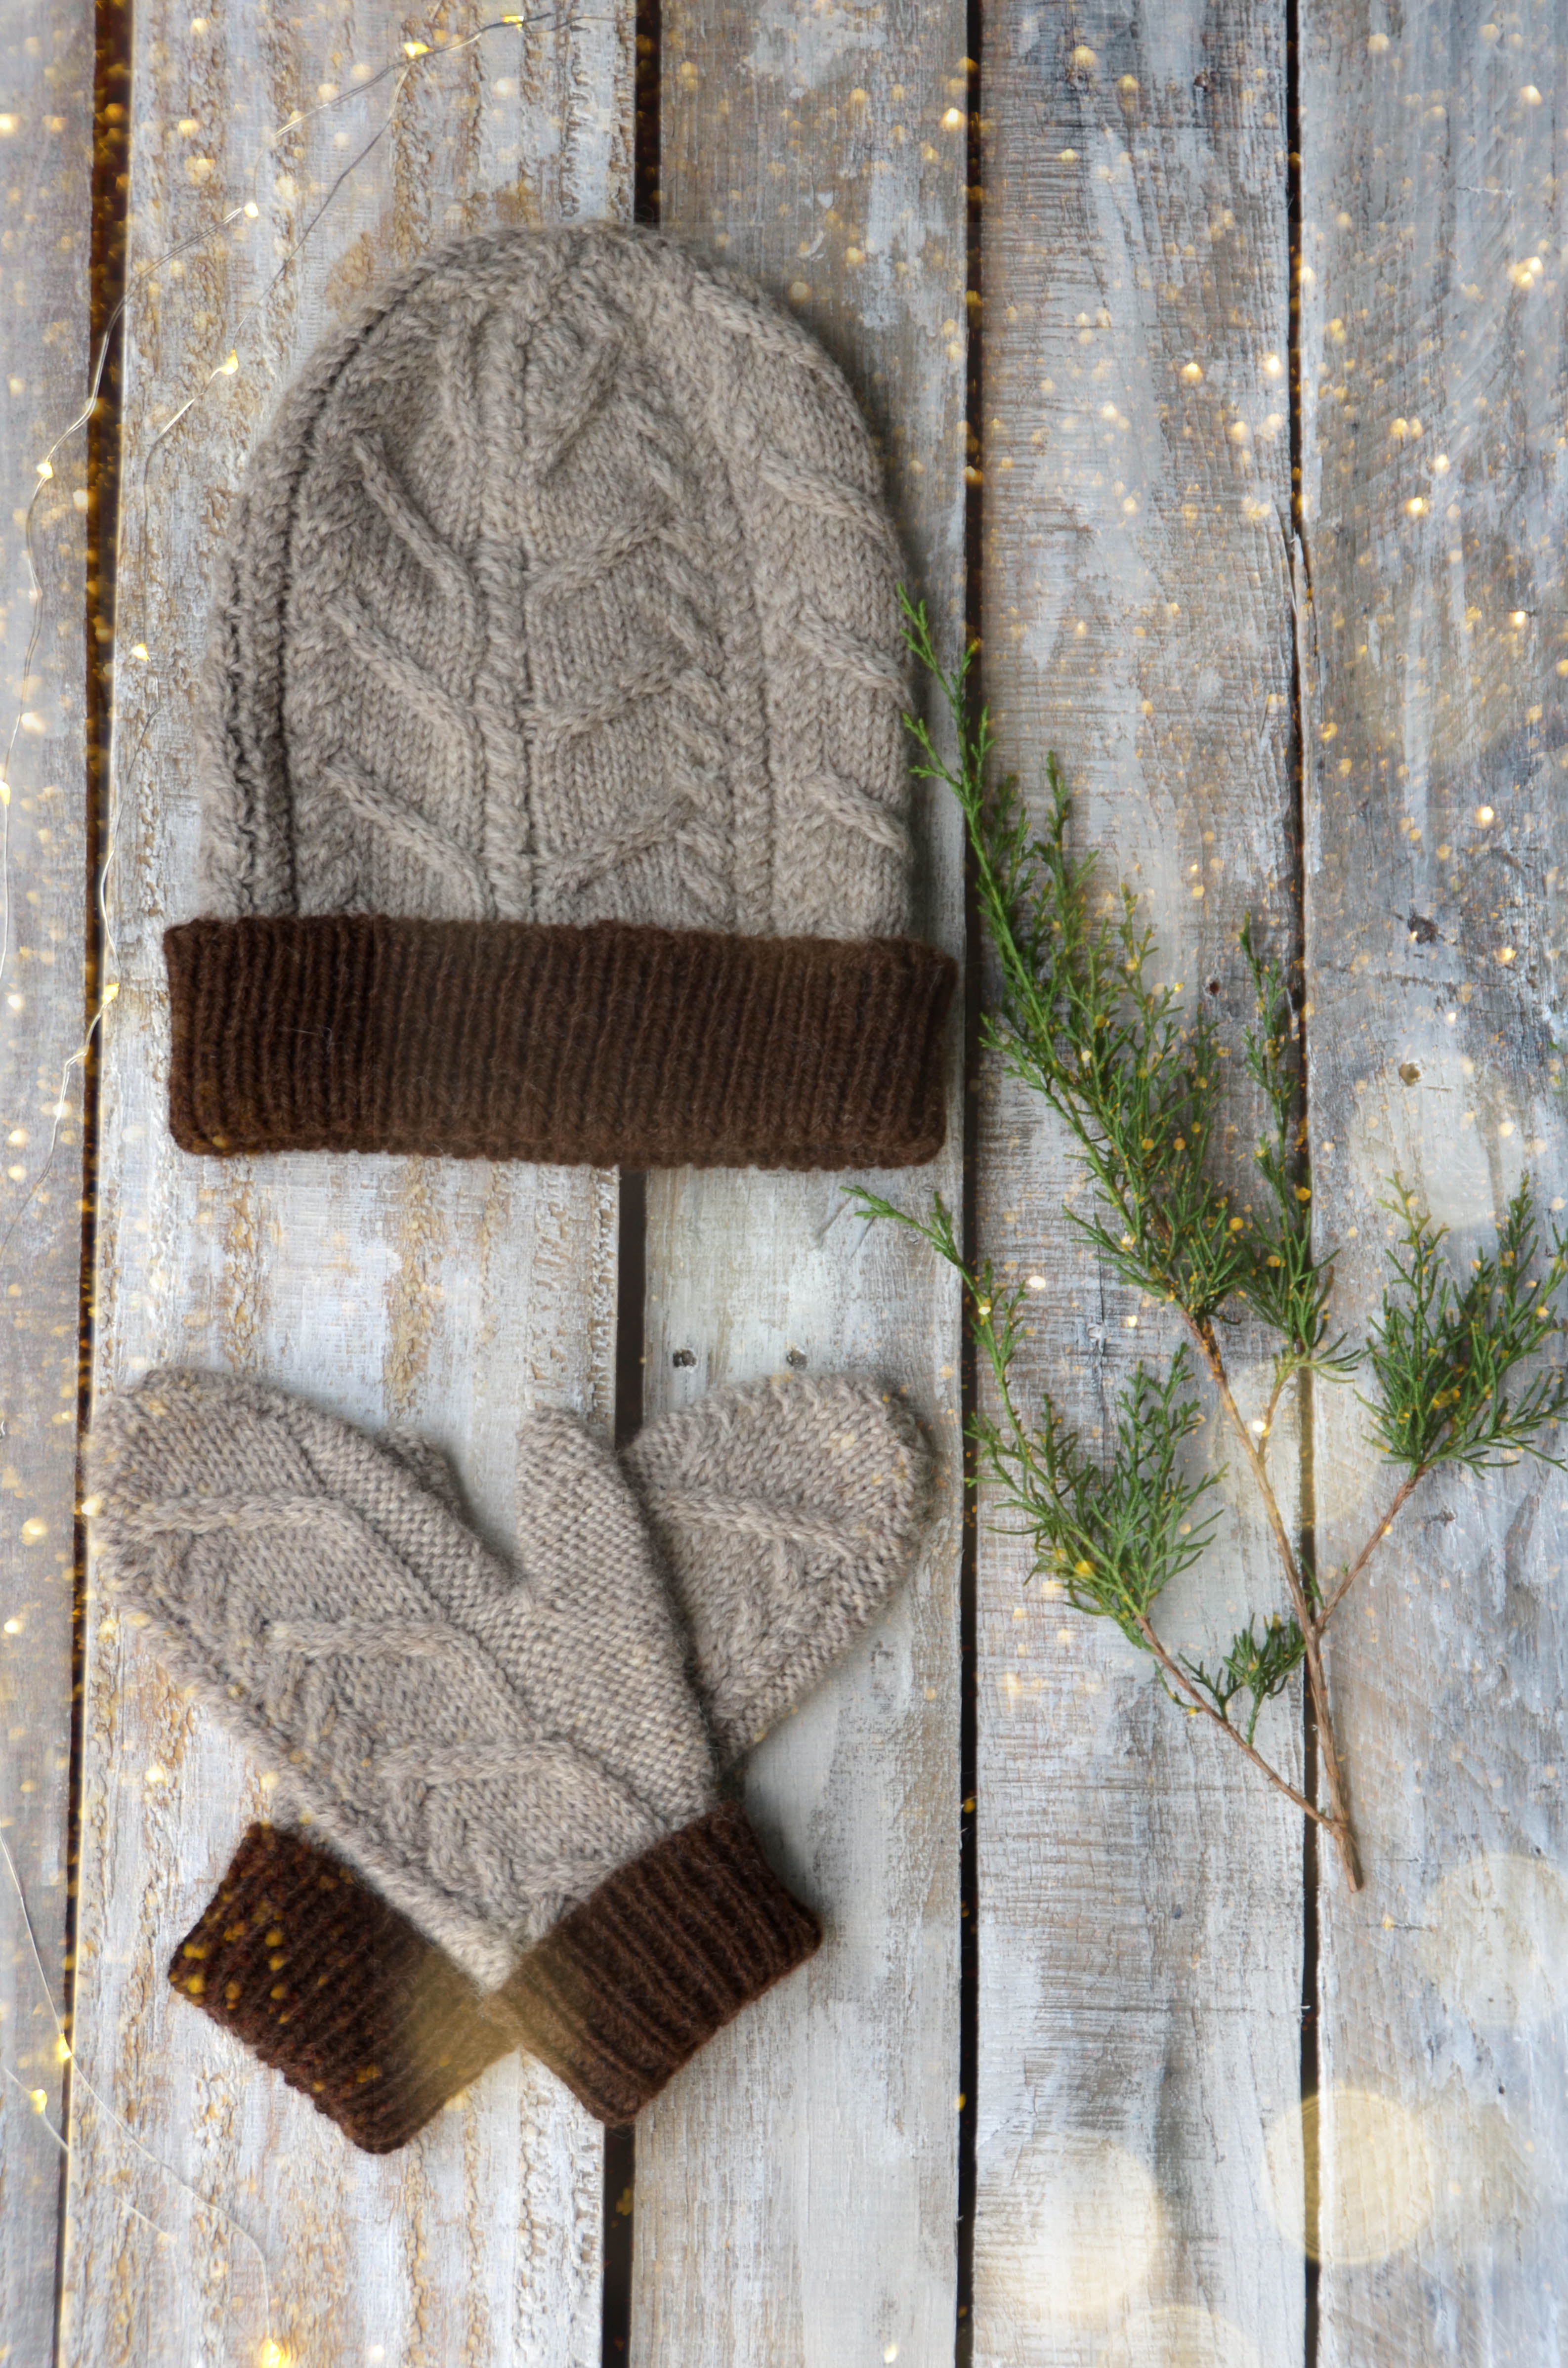
Today we’re introducing the Nutmeg Hat and Mitten Set. The neutral set is incredibly wearable for men and women alike. Personally, I love working with undyed wool. It is rustic in appearance and goes with nearly anything. While I’m a lover of color, I equally adore the natural shades of wool. You can see more of our Deluxe Worsted Naturals collection here.
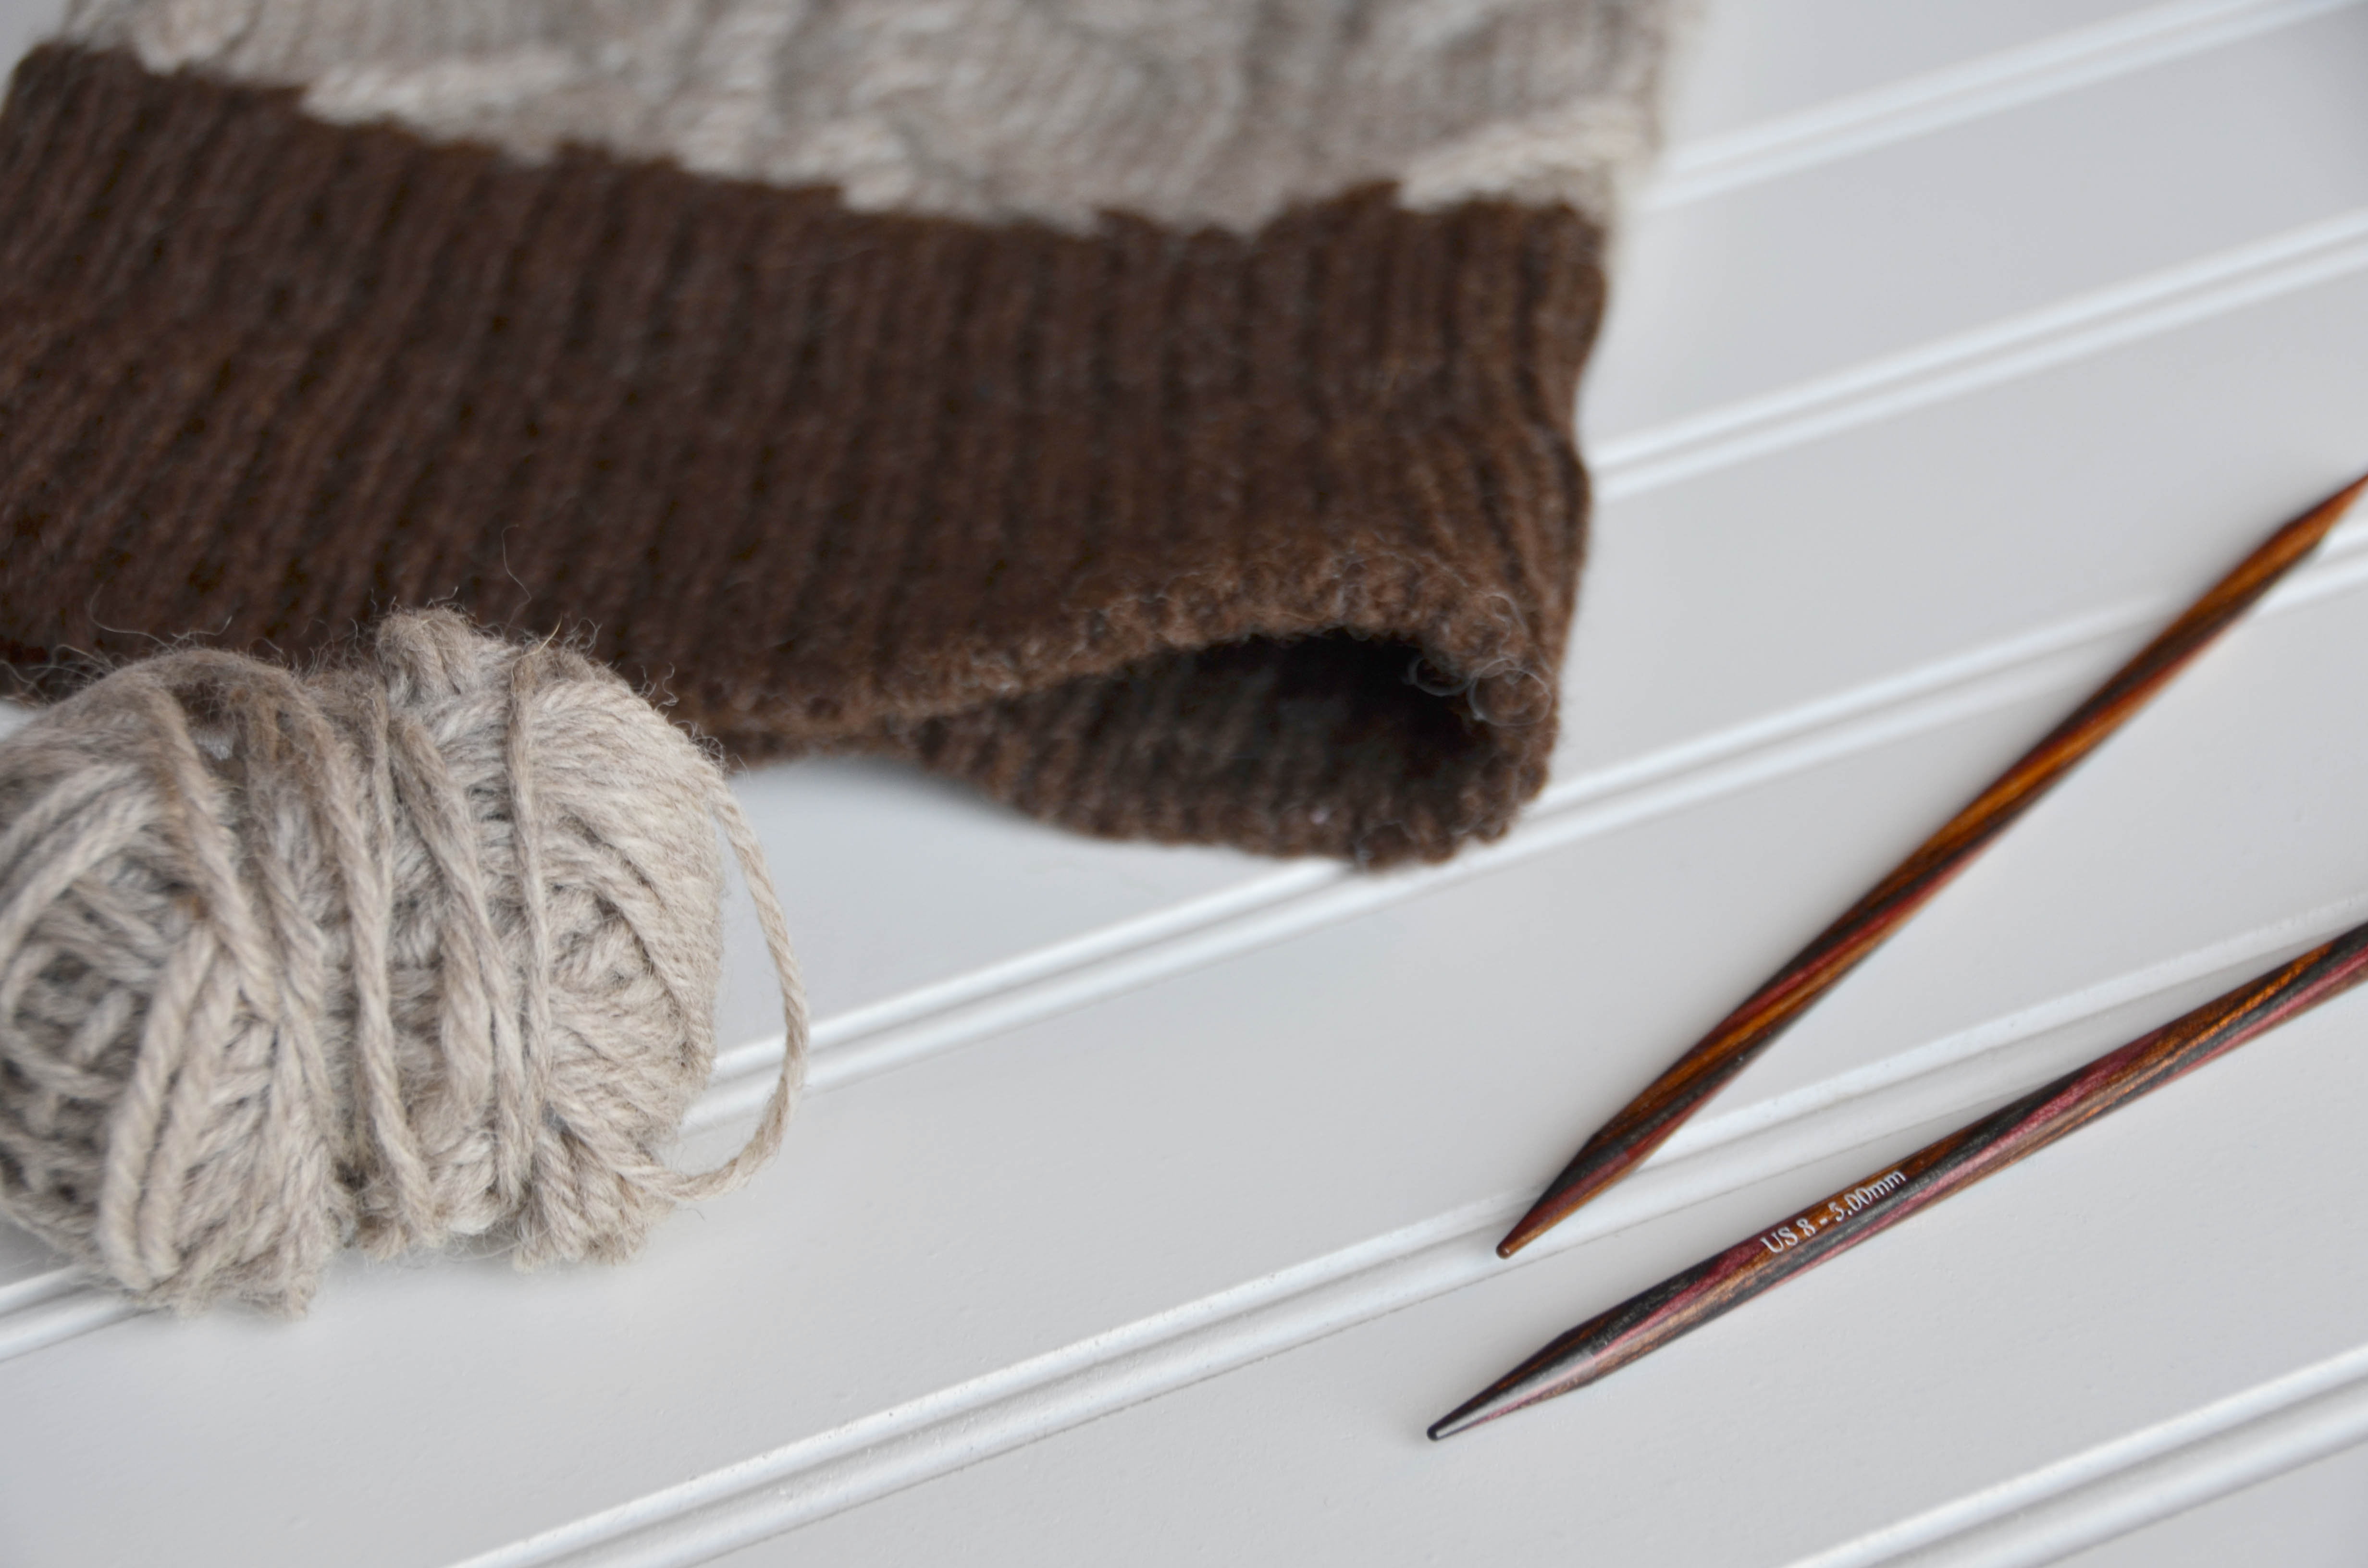
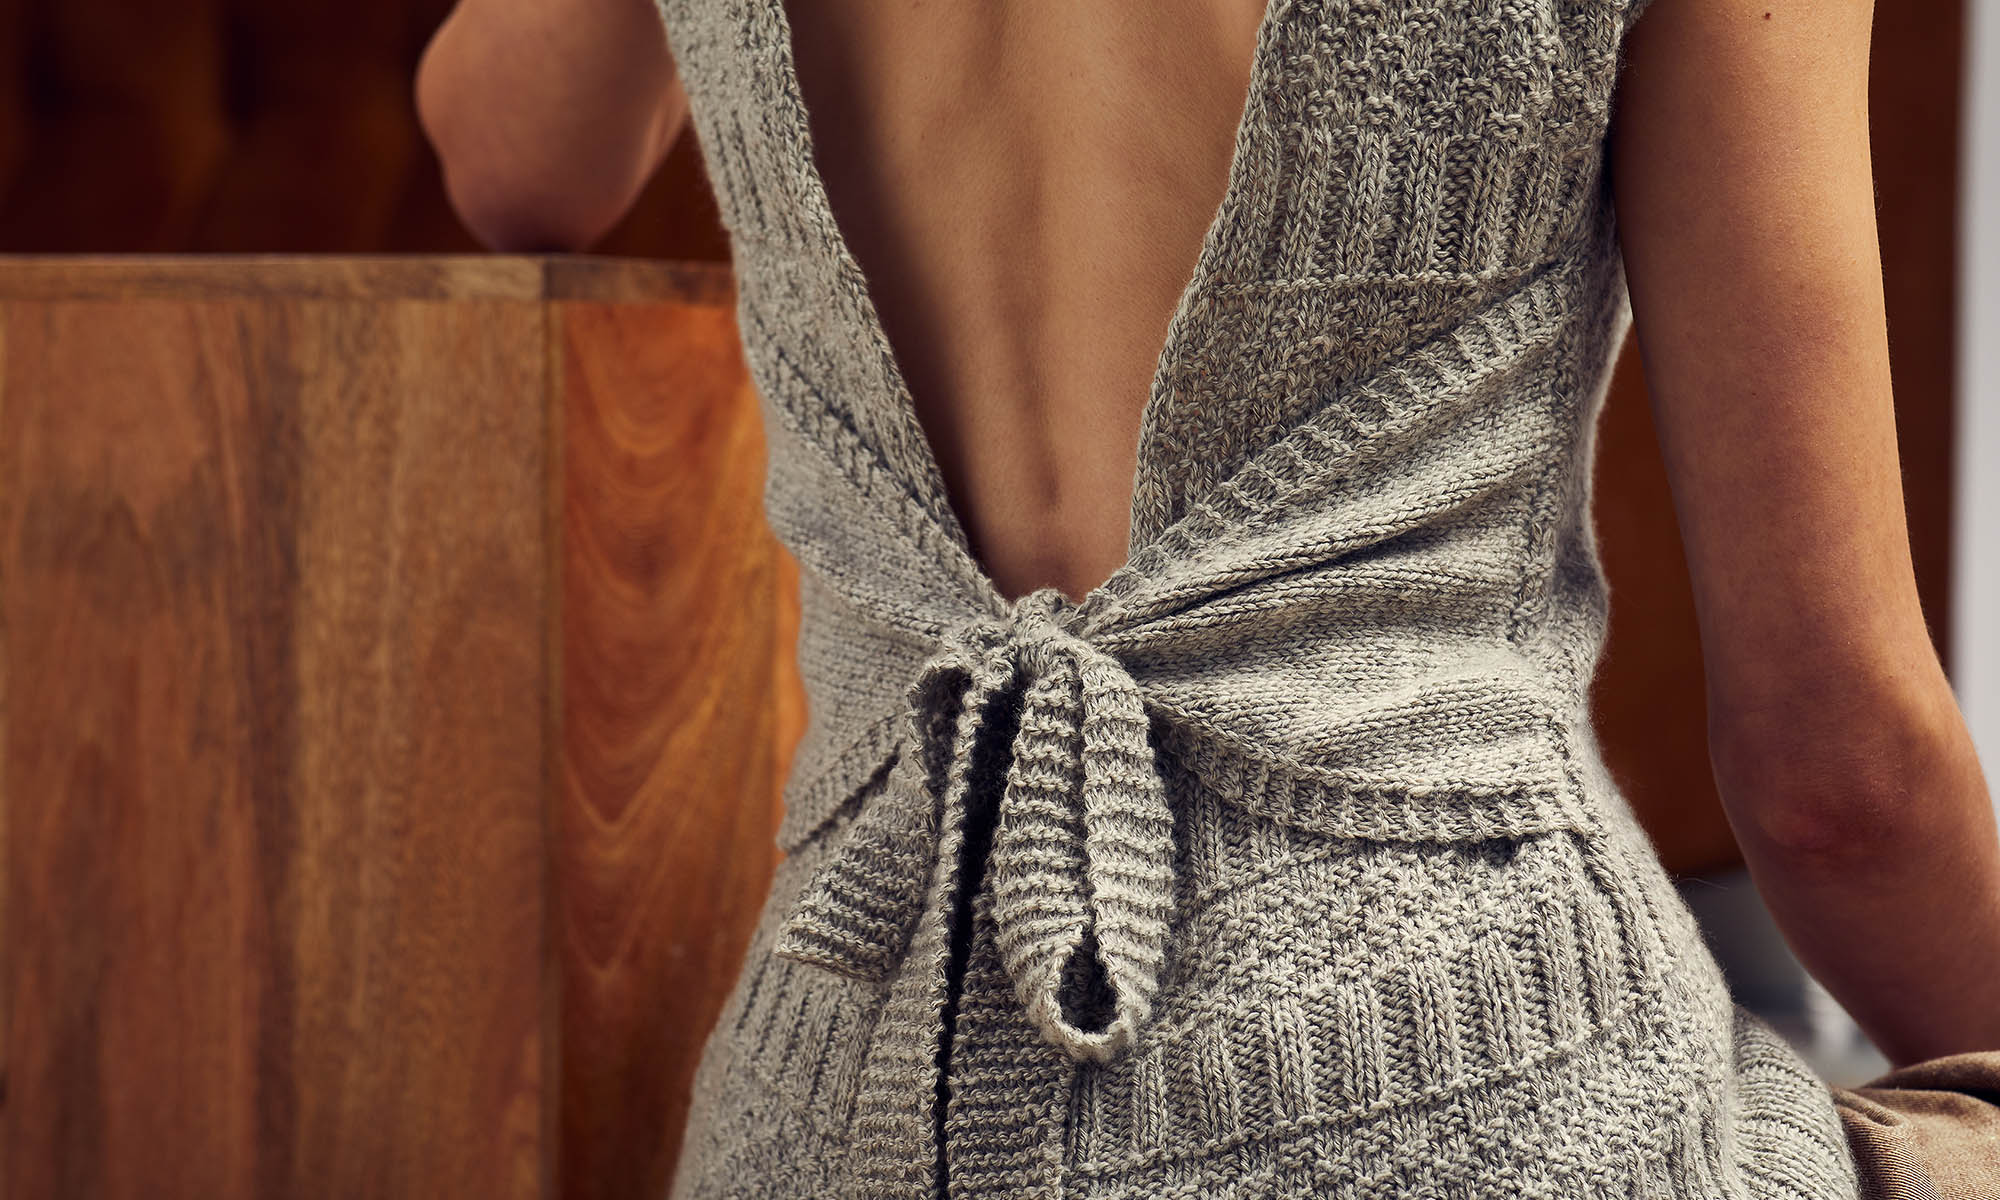
This set features all over cables and a contrasting cuff. I wanted to give this set a professional finish, so I used the long-tail tubular cast-on method.
I can easily recall a time when I felt intimidated by the Tubular cast-on method. Like many things in knitting (and in life), we often perceive new things to be more challenging than they really are. This cast-on method is one of those things. If you look at the Nutmeg set, you’ll notice that the 1×1 Ribbing seems to run seamlessly from the right side to the wrong side. Notice the lack of a cast-on edge in the photo below. You can’t tell where it was cast-on. That is the beauty of a tubular cast-on.
It takes more time than most other methods and it feels a bit fiddly at first, but it’s well worth it. It’s by far my favorite method when I’m using 1×1 Rib.
If you’d like a closer look at each photo, simply click it.
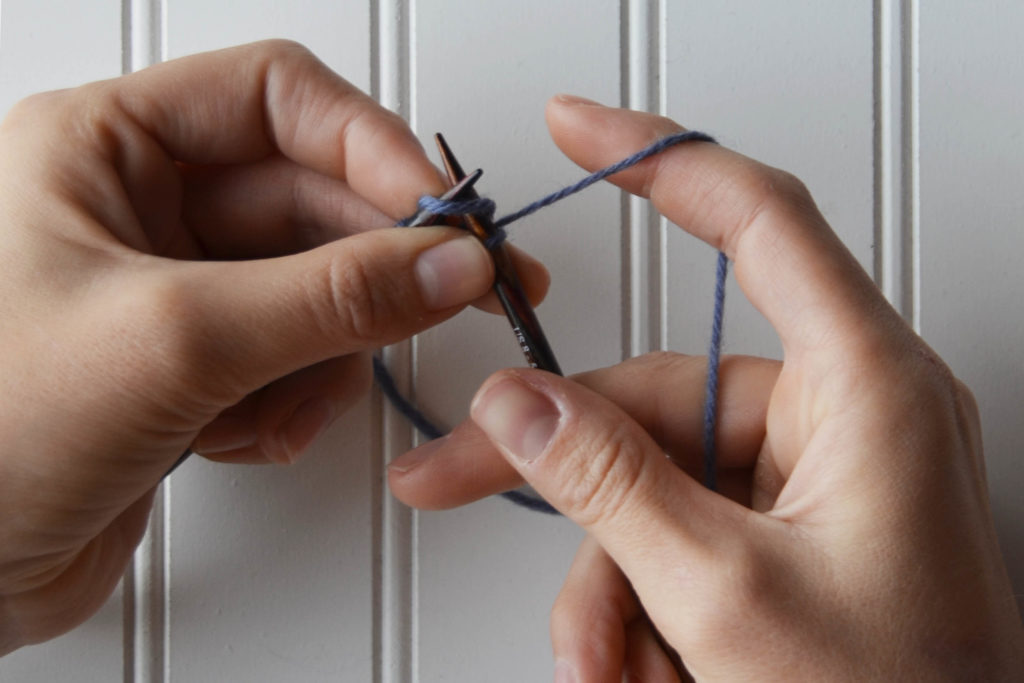
To begin, place your yarn over the needle, leave a long tail as you would with a traditional long-tail cast on. You can use a slip knot, however; I do not so that the cast-on stitches are as invisible as possible.Hold your yarn in place with your index finger. Separate your tail and working yarn with your thumb and your index finger. You’ll do the same way you would for a regular long-tail cast-on.Notice that I’m tensioning my yarn the same way that I would for a regular long-tail cast on.Working from front to back, bring your needle under the yarn around your thumb.Bring the needle up through the center.Working from front to back, bring the needle over the yarn around your index finger and dip underneath it, then underneath the yarn around your thumb.Correct the tension in your yarn. You now have two stitches. Notice how there is not a bump across that stitch? This will be a knit stitch.
The motion for a purl stitch mirrors the knit stitch.
Working from front to back, bring the needle over the yarn around your index finger, dipping below it and bringing the needle back through the center.Working from back to front, bring the needle over the yarn around your thumb, dipping below it and then below the yarn around your index finger.Correct your tension. Notice that this stitch has a purl bump. This is a purl stitch.
Continue in this manner, alternating between knit and purl stitches until you have the required number of stitches.
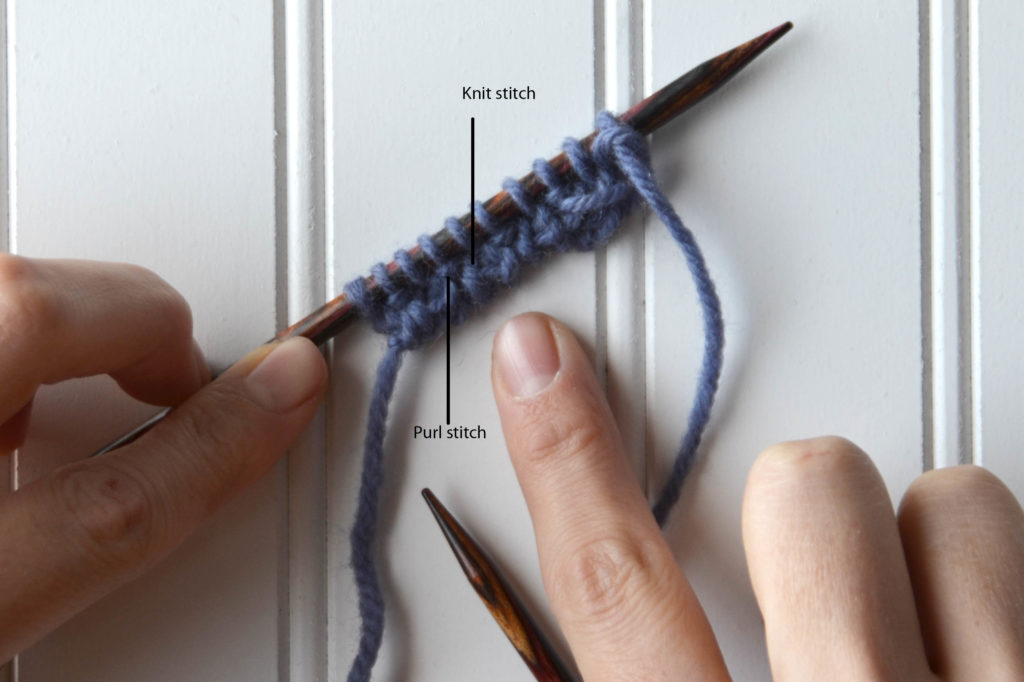
Notice the difference between the knit stitches and the purl stitches.
Once you have the correct number of stitches, carefully turn your work. I highly recommend using your index finger to hold the last stitch you cast on in place. Now you’ll begin working the first foundation row.
Once you’ve turned your work, grab your working yarn and slip the first stitch purlwise with your yarn in front.Bring your yarn to the back.Knit the next stitch through the back loop. This will untwist the knit stitch.
Continue to slip the purl stitches with your yarn in front and knit the knit stitches through the back loop to the end of your work. Turn your work. Now you’ll begin the second foundation row.
Just as in the previous row, slip the purl stitches purlwise with yarn in front.Knit the knit stitches normally–there is no need to knit them through the back loop because these stitches should no longer be twisted.
Repeat the last two steps to the end of the row
On the next row, simply work in K1, P1 ribbing by purling the purl stitches and knitting the knit stitches.
This is what your finished cast on should look like.
Once you’ve finished casting on, you can join your work in the round (as would be the case for the Nutmeg Hat and Mitten Set). There will be a small space you’ll want to seam. Typically I do this just before weaving my tail into the project.
This method works for projects that are knit flat or in the round. It gives your projects such a neat finish. It’s also much more stretchy than a traditional long tail cast-on.
You can find the link to the Nutmeg Hat and Mitten set here.
Happy Halloween! Nothing will make you feel as though you’re creating a witches’ brew like dyeing with lichen. It’s a unique way to get into the holiday spirit.
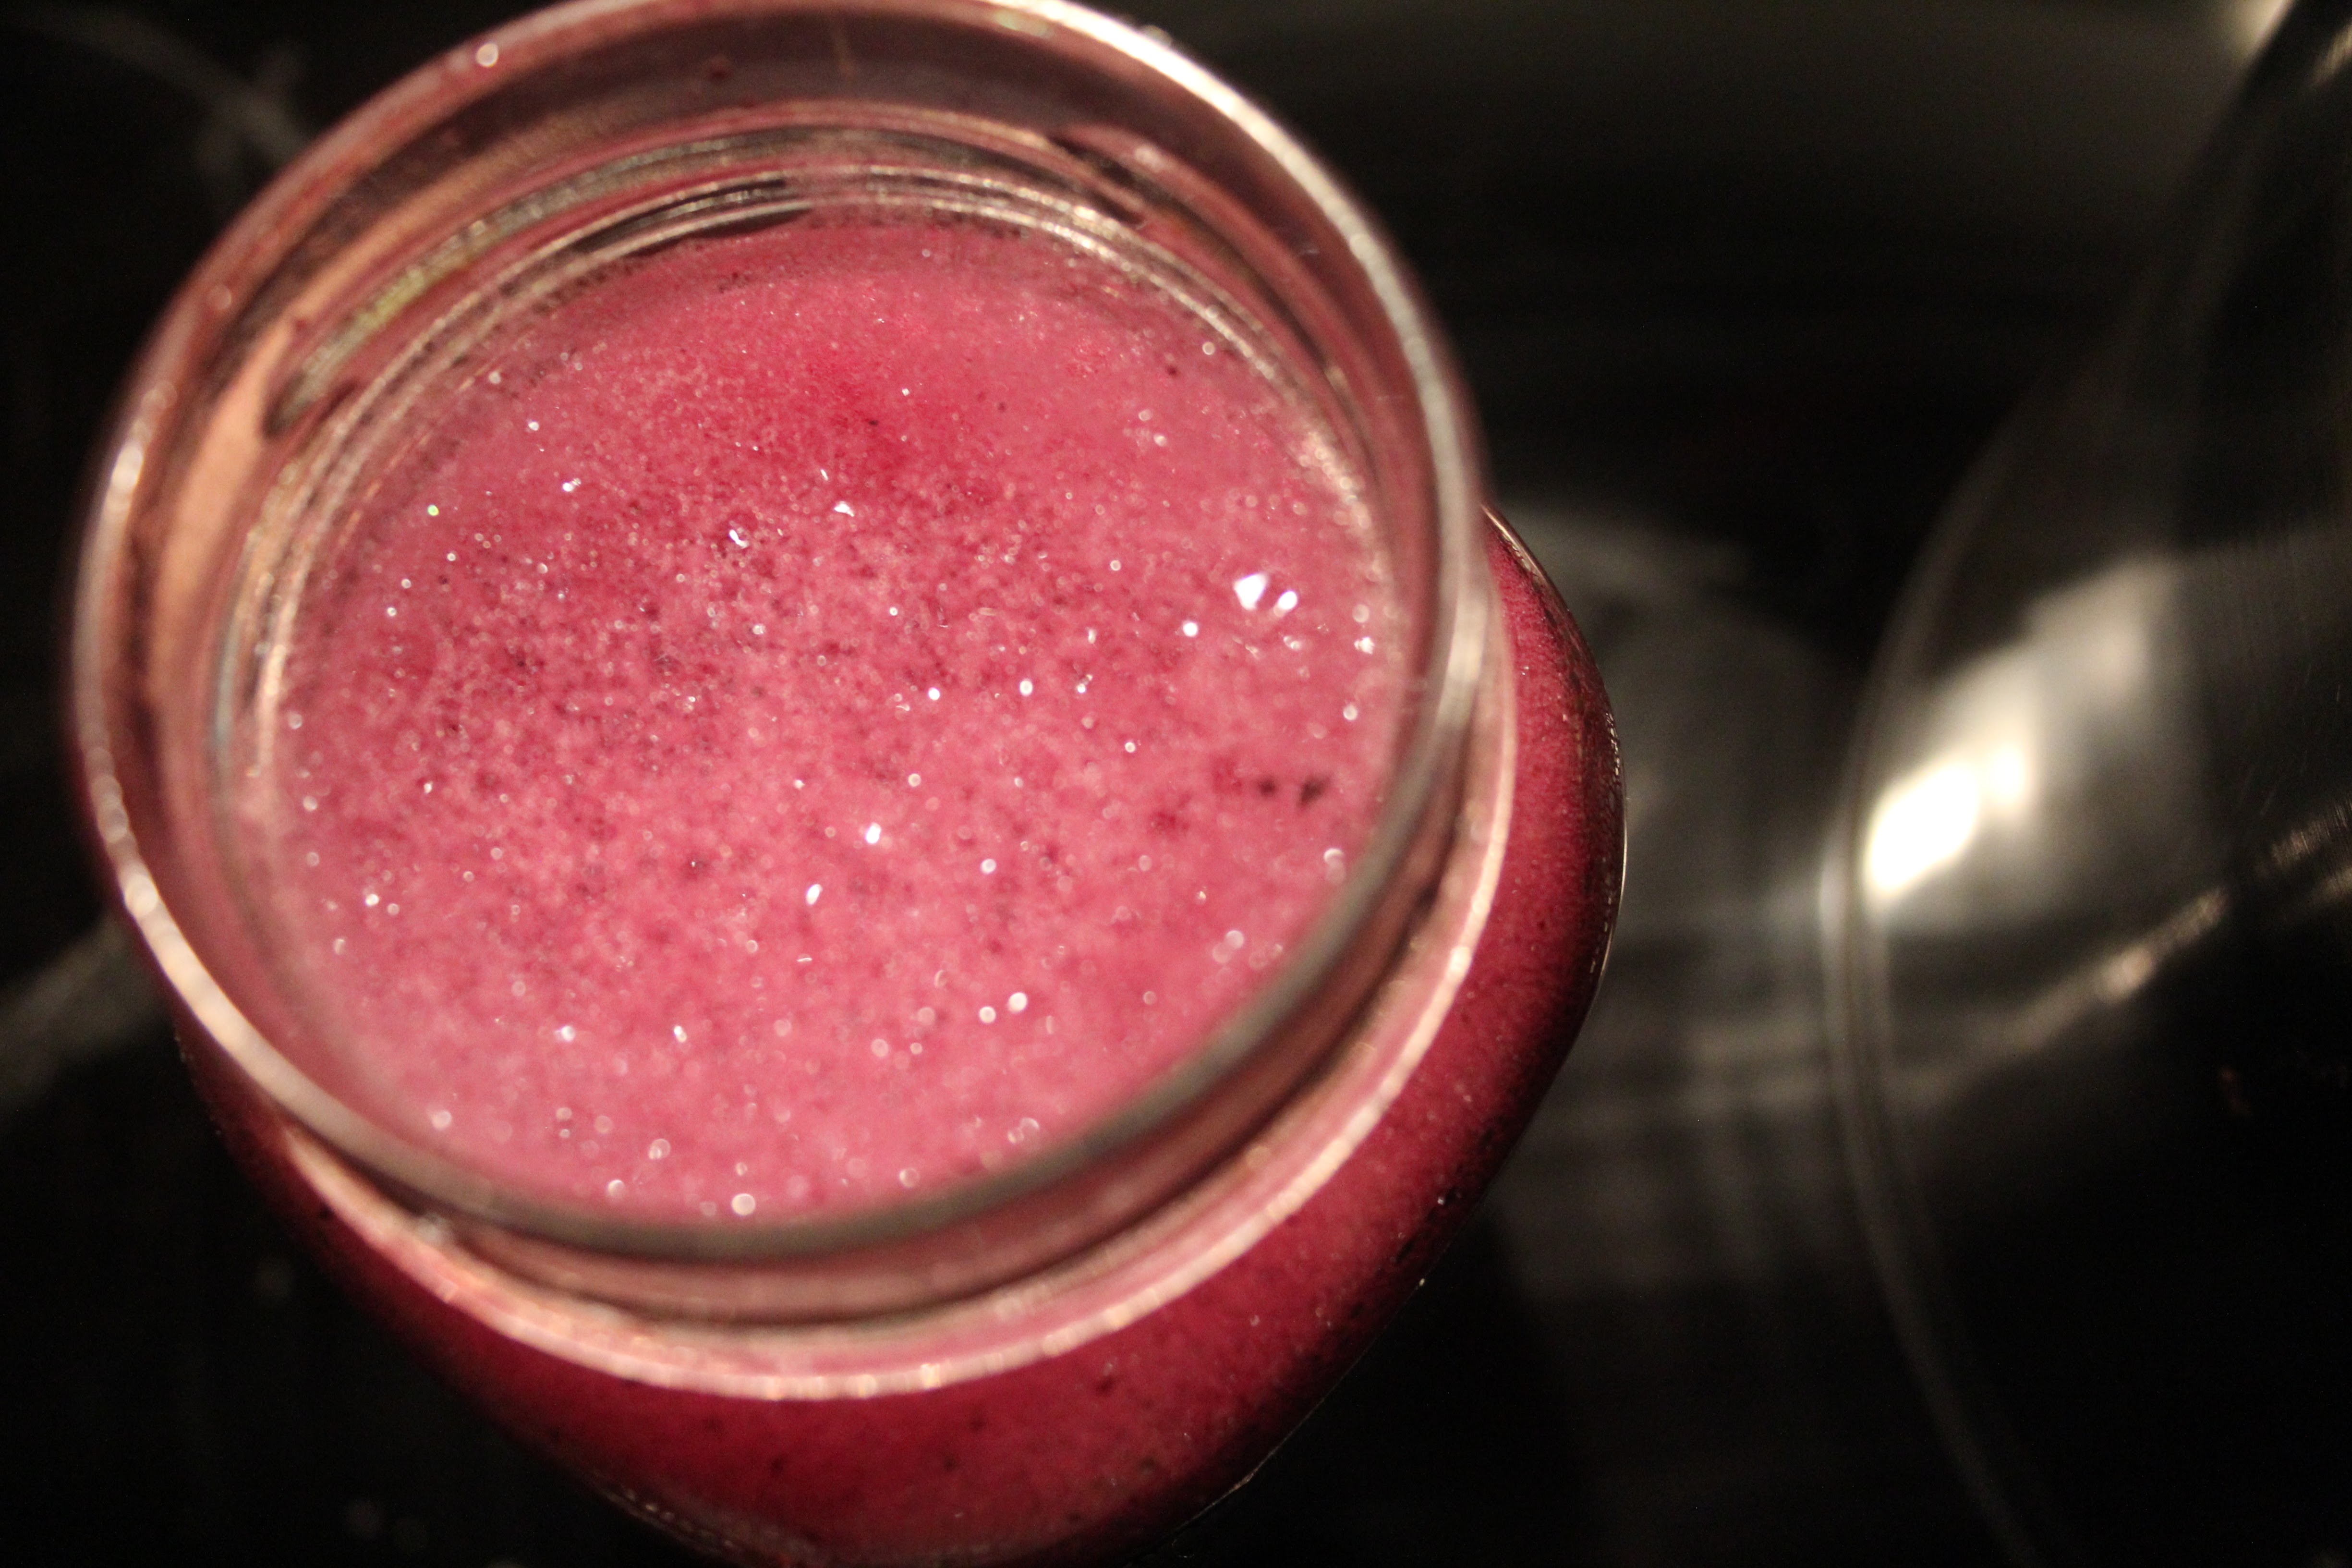
In the second installment of the Natural Dye series, I’m going to show you how to use lichens as a natural dye. If you thought the marigold dye from Part I was fun, you will love this installment. Remember the foamy, magenta liquid in the jar from Part I? That’s the lichen dye.
This dye takes about a month to prepare, but it is well worth the wait. Something about it is magical because you’d never expect such a vibrant color to come from a leathery, grey-brown lichen.
For today’s tutorial you’ll need:
A glass jar – canning jars or recycled sauce jars are perfect
Measuring cups
Ammonia
Water
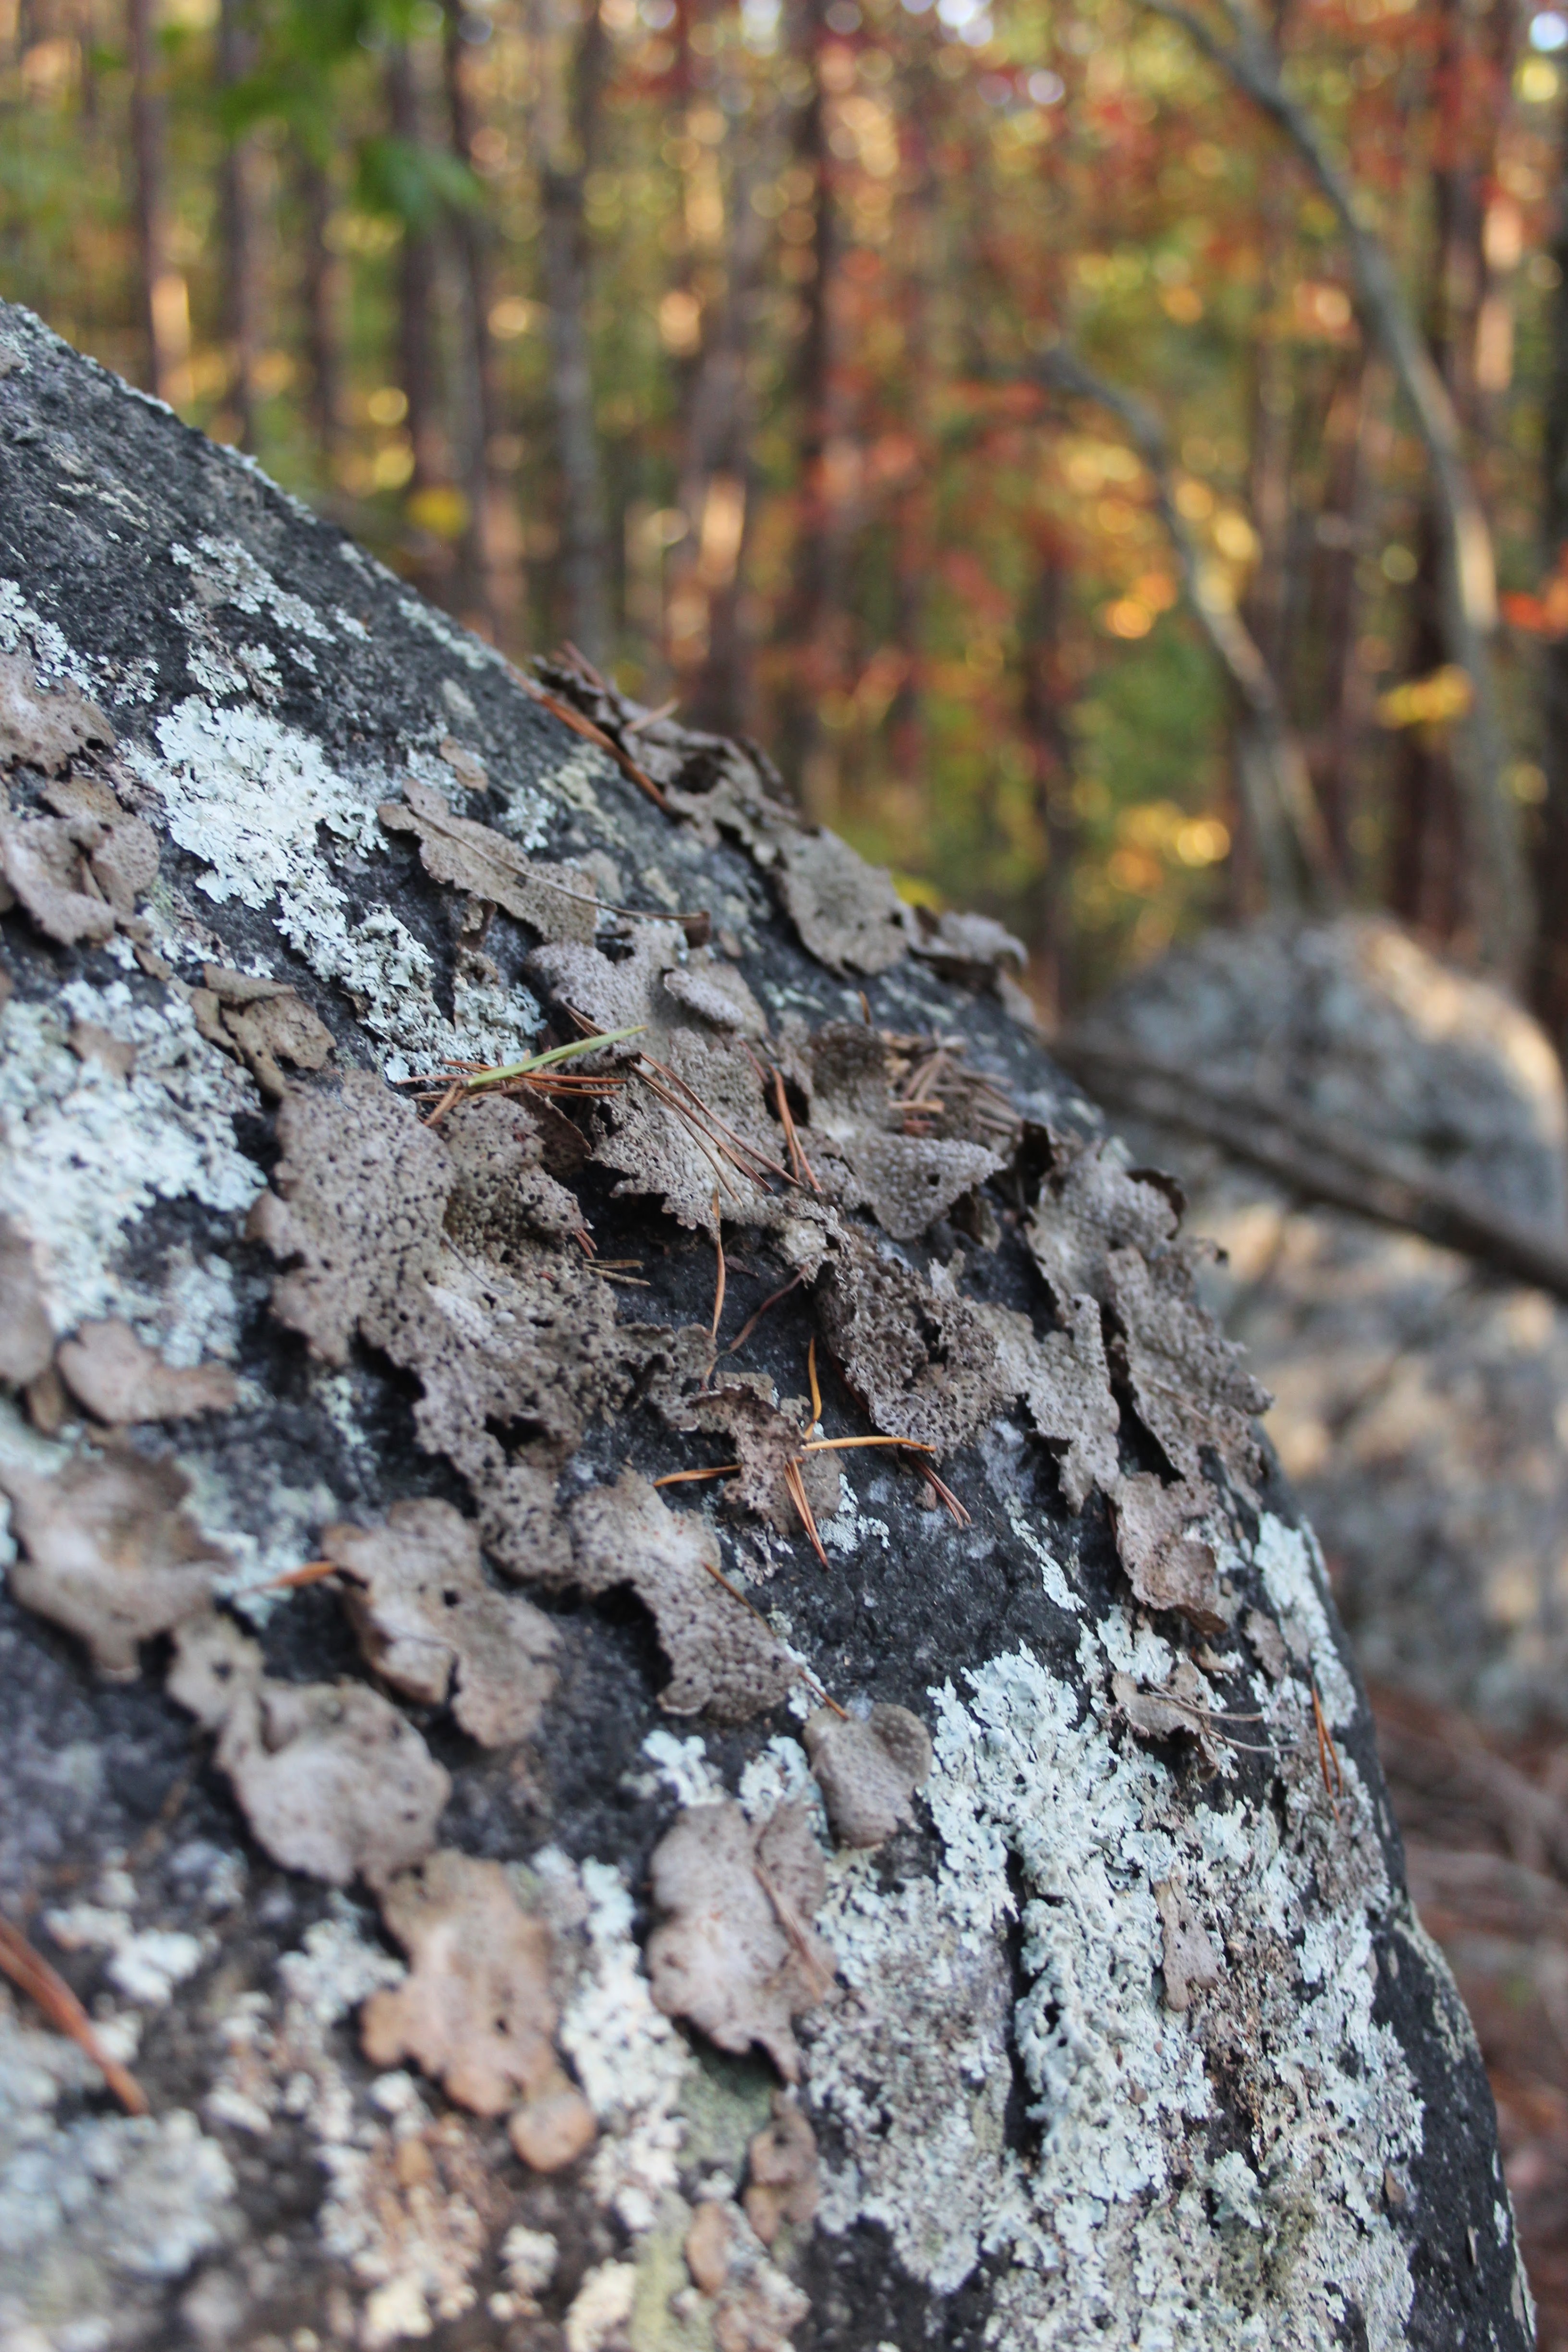
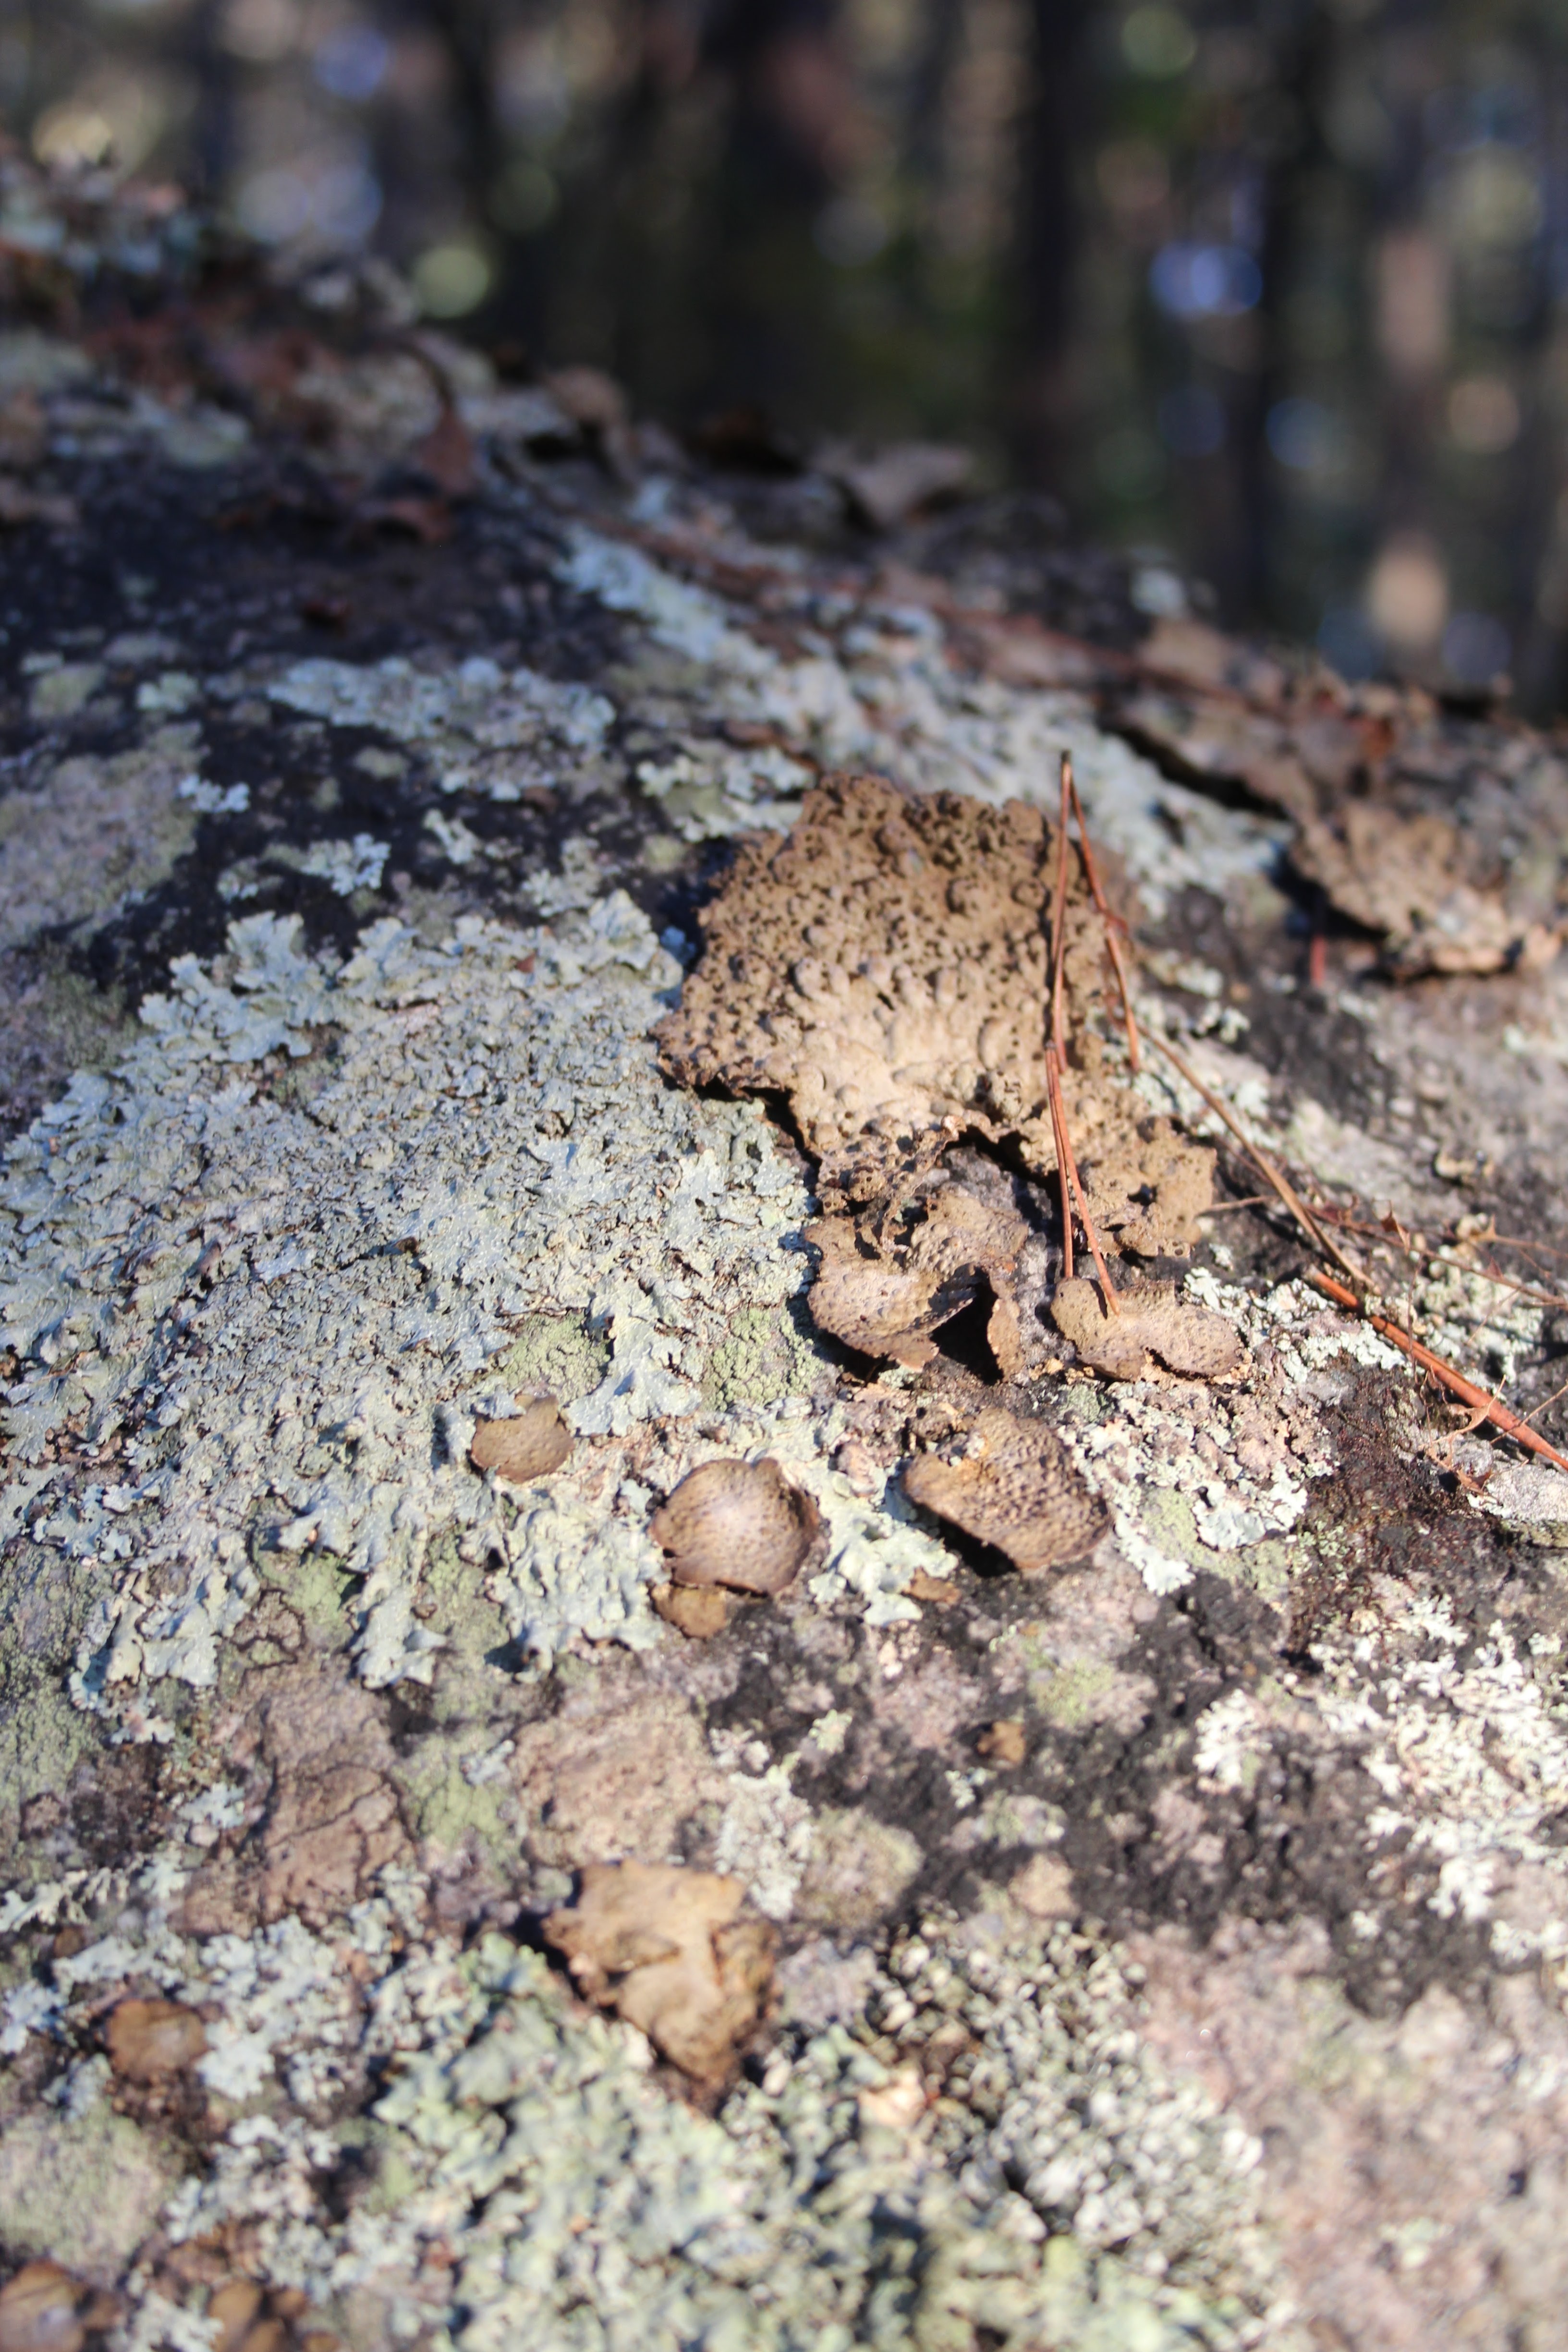
A handful of umbilicaria pepulosa (pictured below) – this type of lichen is abundant on boulders, and there are several variations. For results closest to mine, try to find this lichen. You may achieve different results with another variation, but that is part of the fun of natural dyeing!
Before you get started, I want to include a note on ethics and lichen dyes. Unlike our marigold tutorial, in which I grew and harvested my own plants, lichen dyeing requires you to search public and/or forested land. Be considerate and mindful of your impact on the land and how you may be disturbing the ecosystem. Do not collect more than you’ll need – a little goes a long way. Avoid scraping lichen from stones as much as possible as lichen is slow-growing and may not regenerate. I went out on a windy day over the weekend and found more than enough on the ground surrounding the boulders.
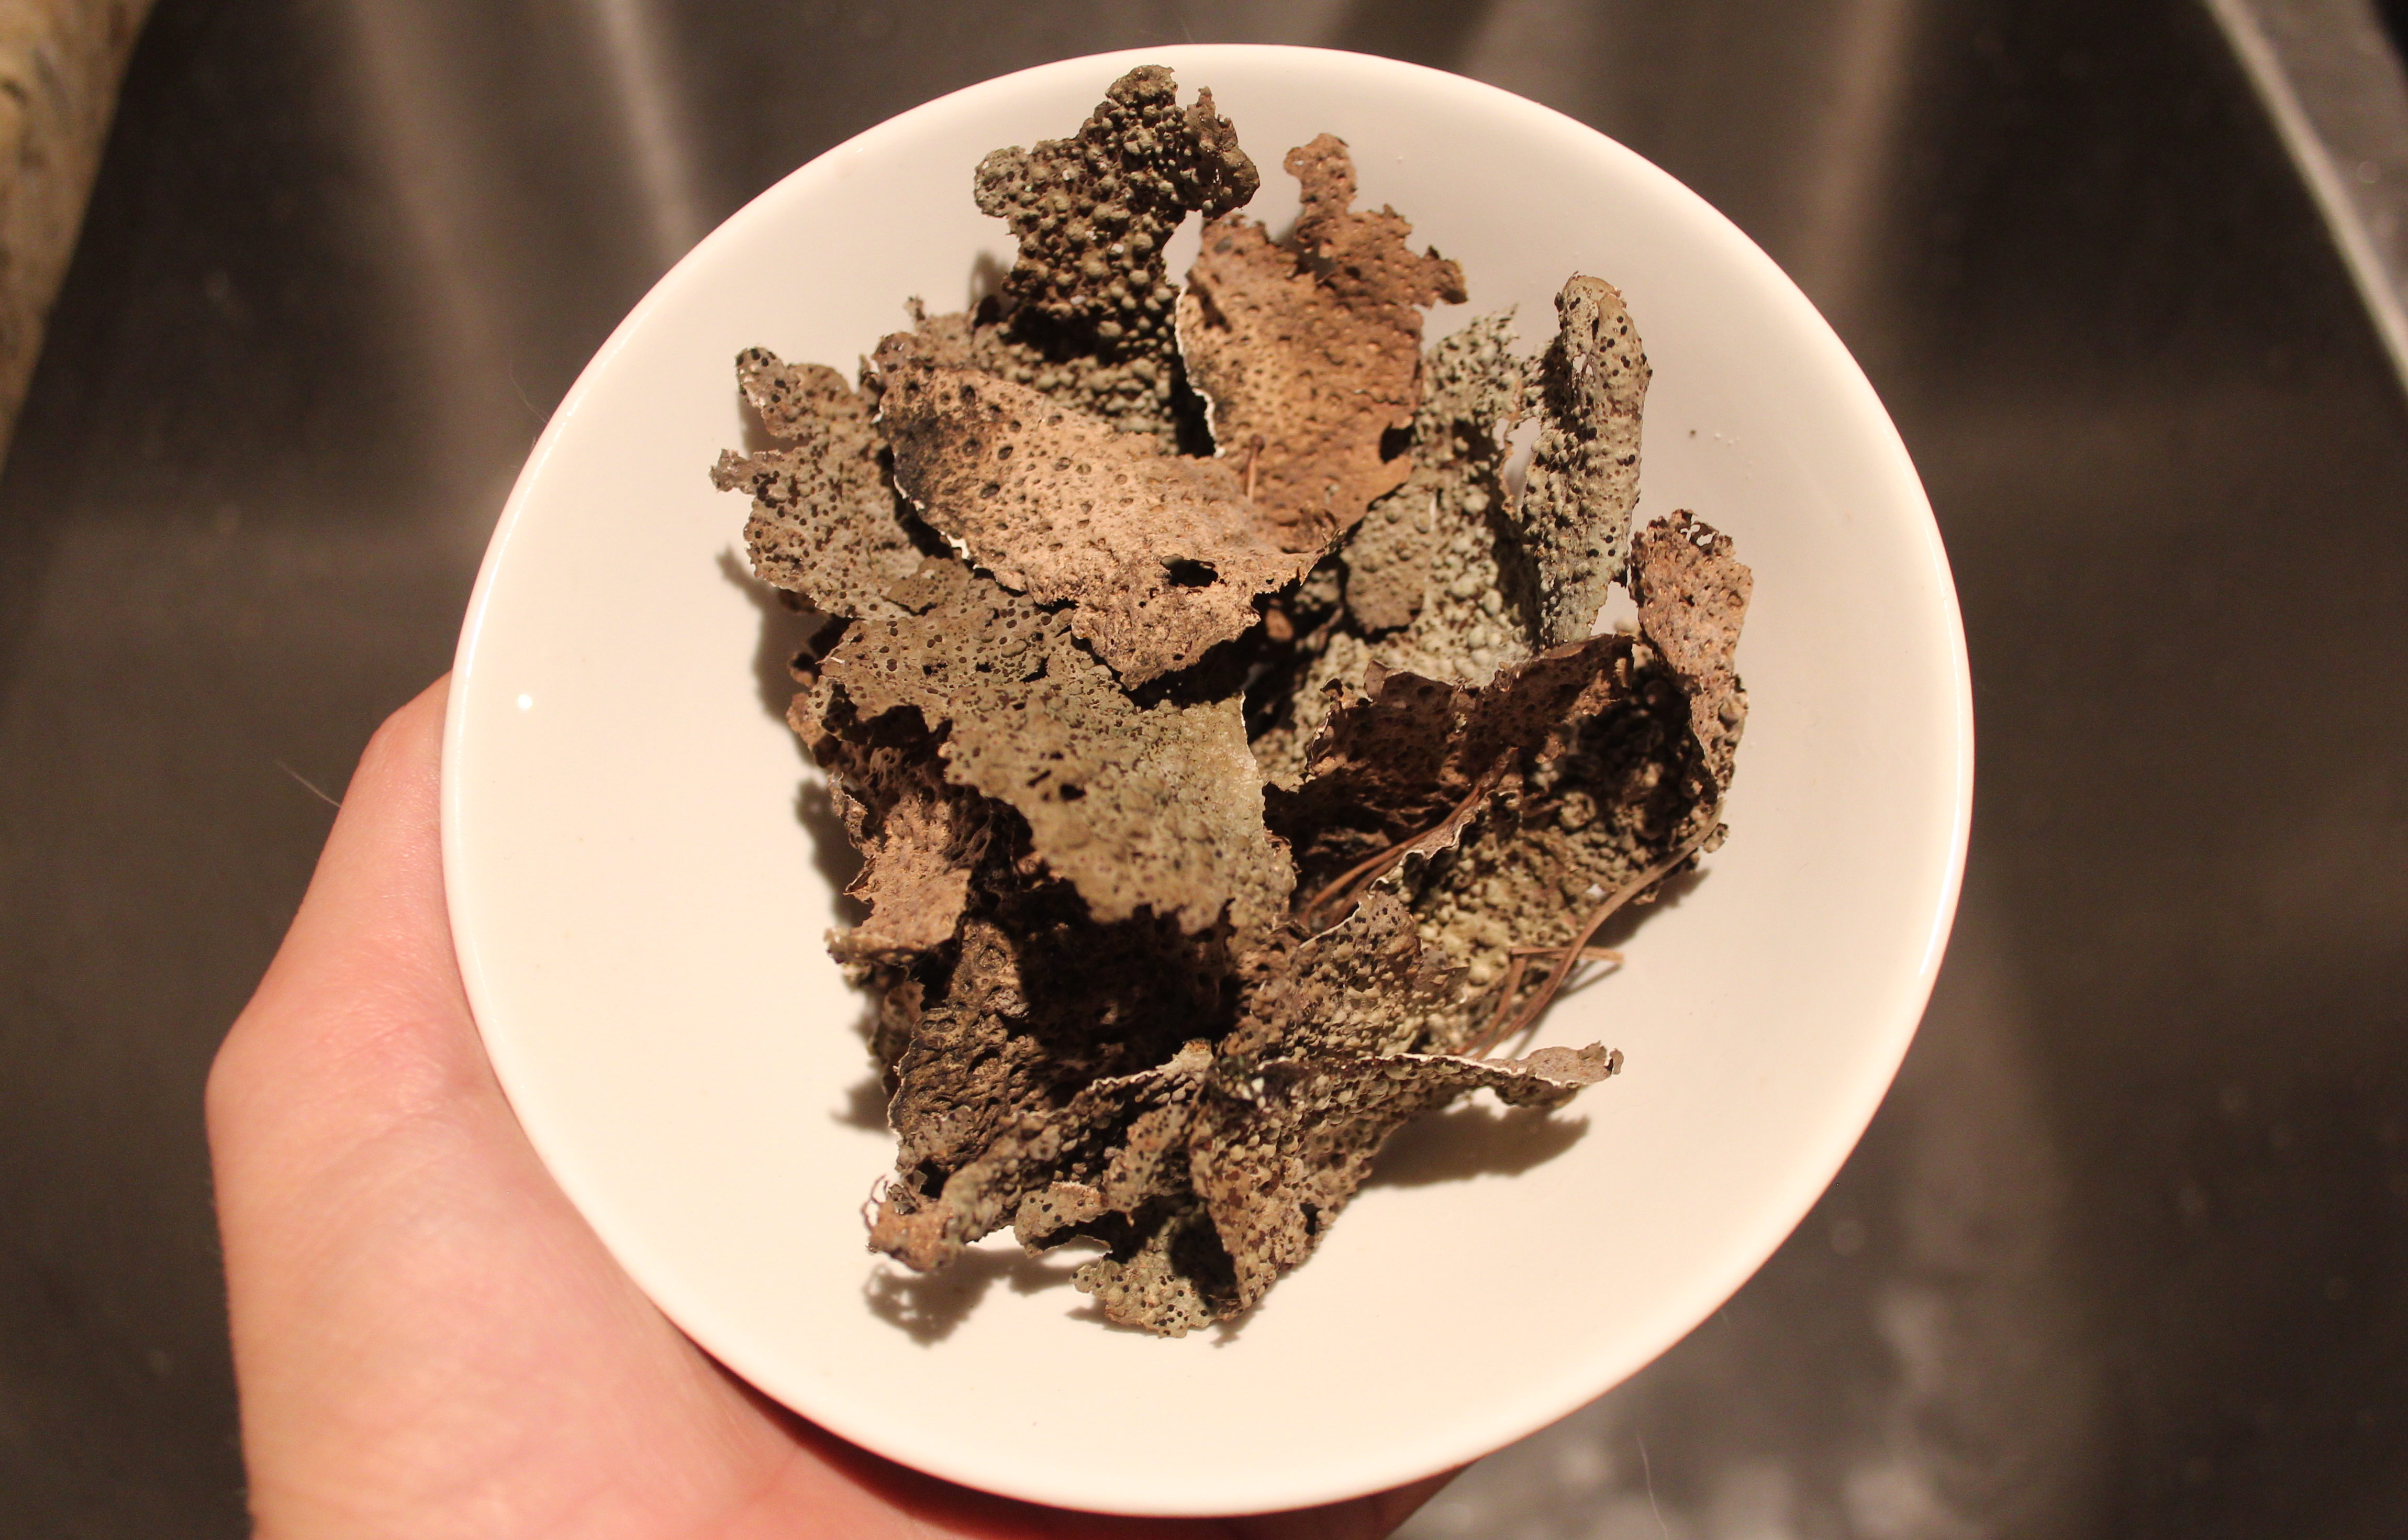
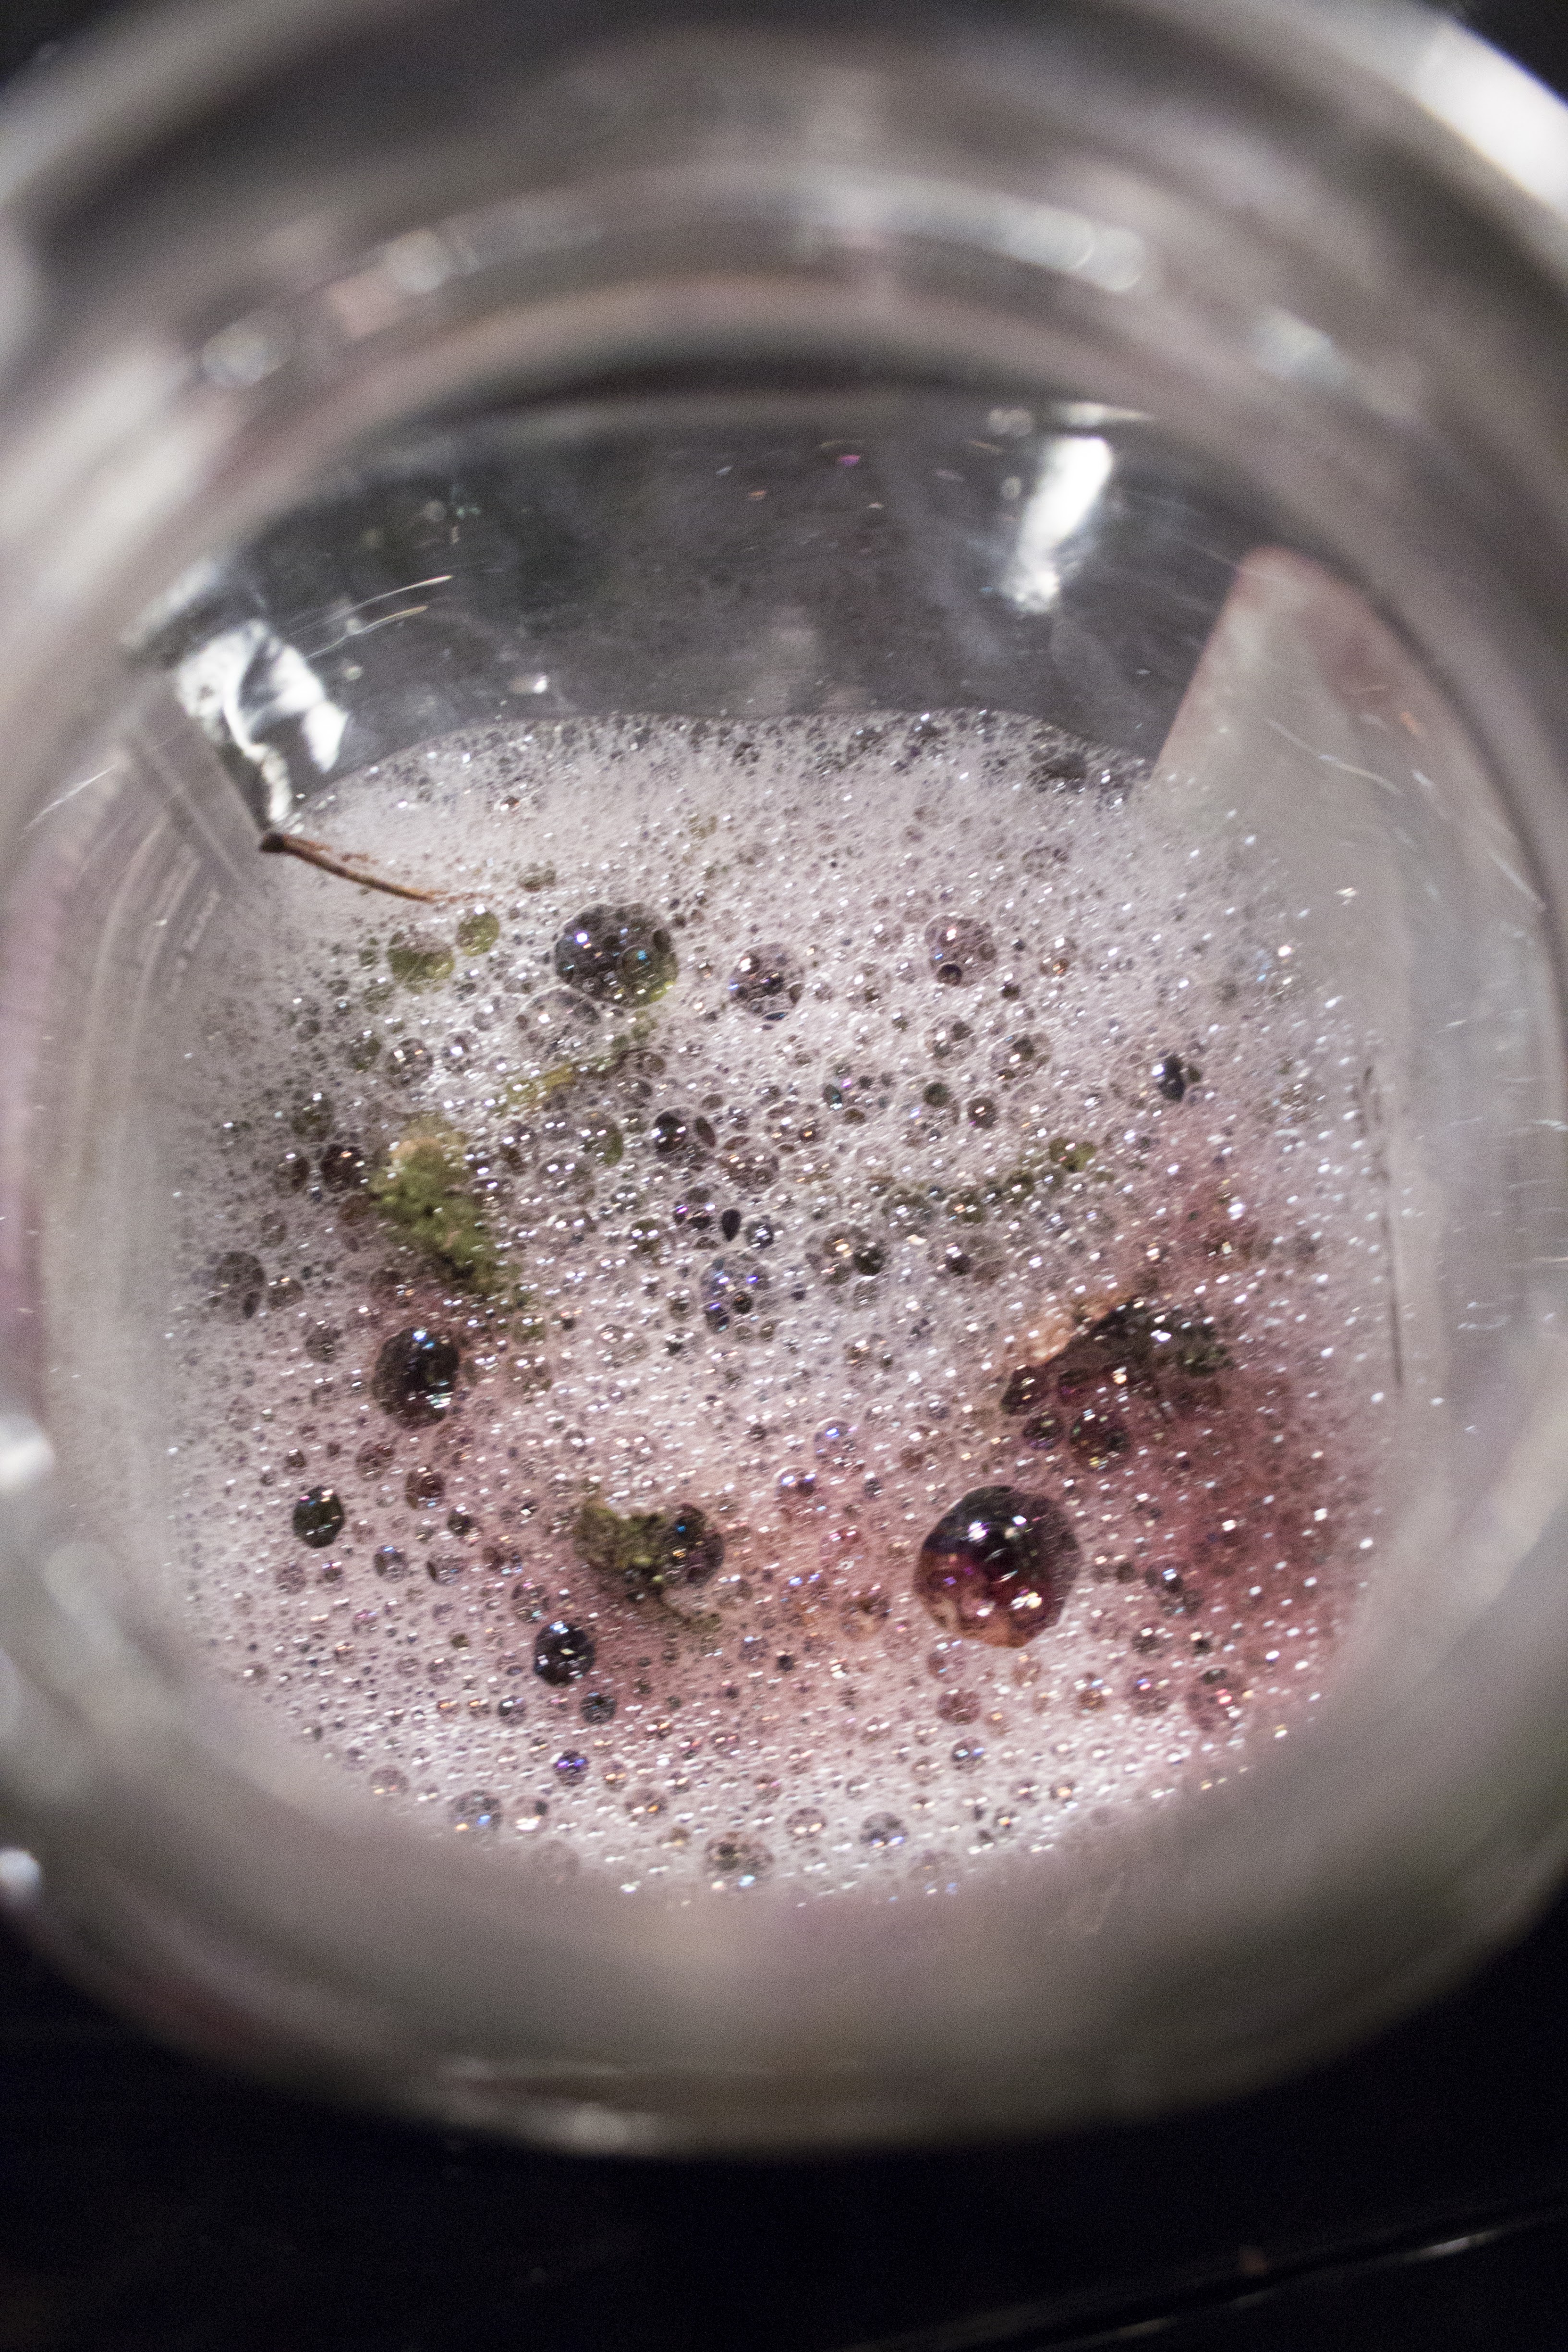
Once you have your lichen, you’re ready to go. To achieve a magenta dye from umbilicaria, an ammonia extraction is required. After you’ve collected your lichen, place your handful into a jar.
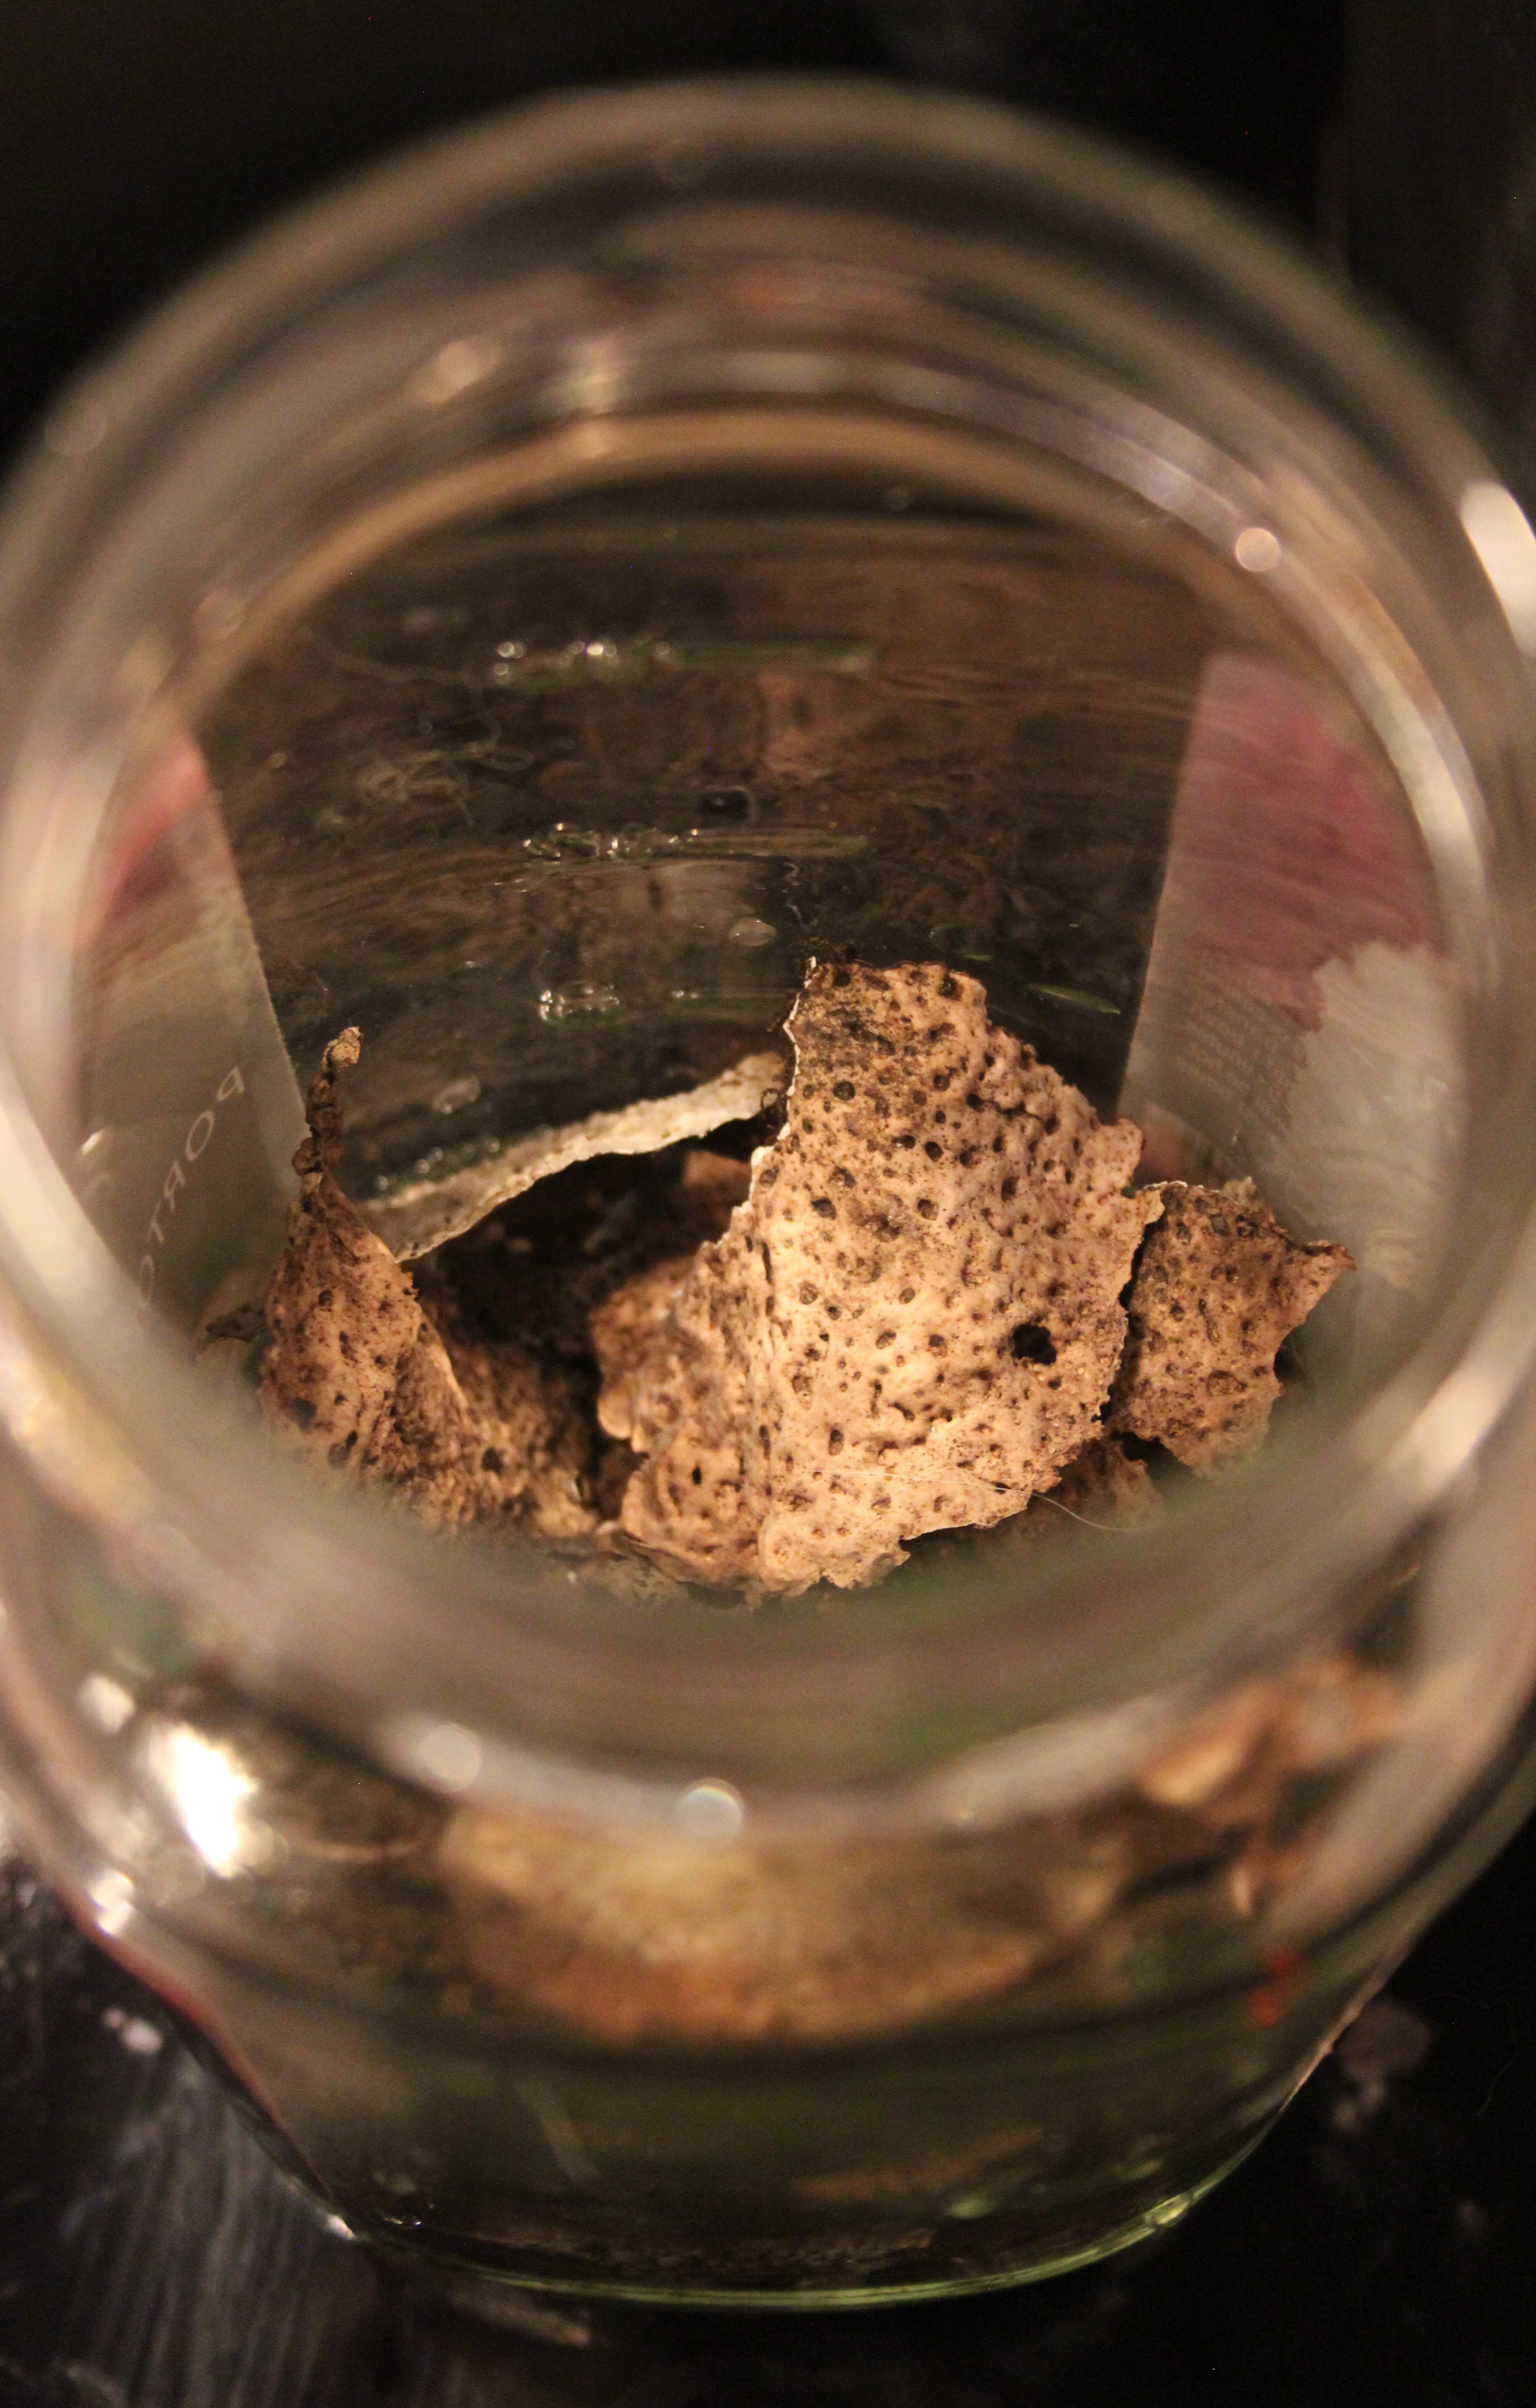
Next, create a 50/50 solution of water and ammonia. I’ve measured out 1 cup each. Pour the solution over the lichen, leaving about an inch of air at the top of the jar. You should notice the solution briefly change to a brilliant shade of red or purple that will fade to brown.
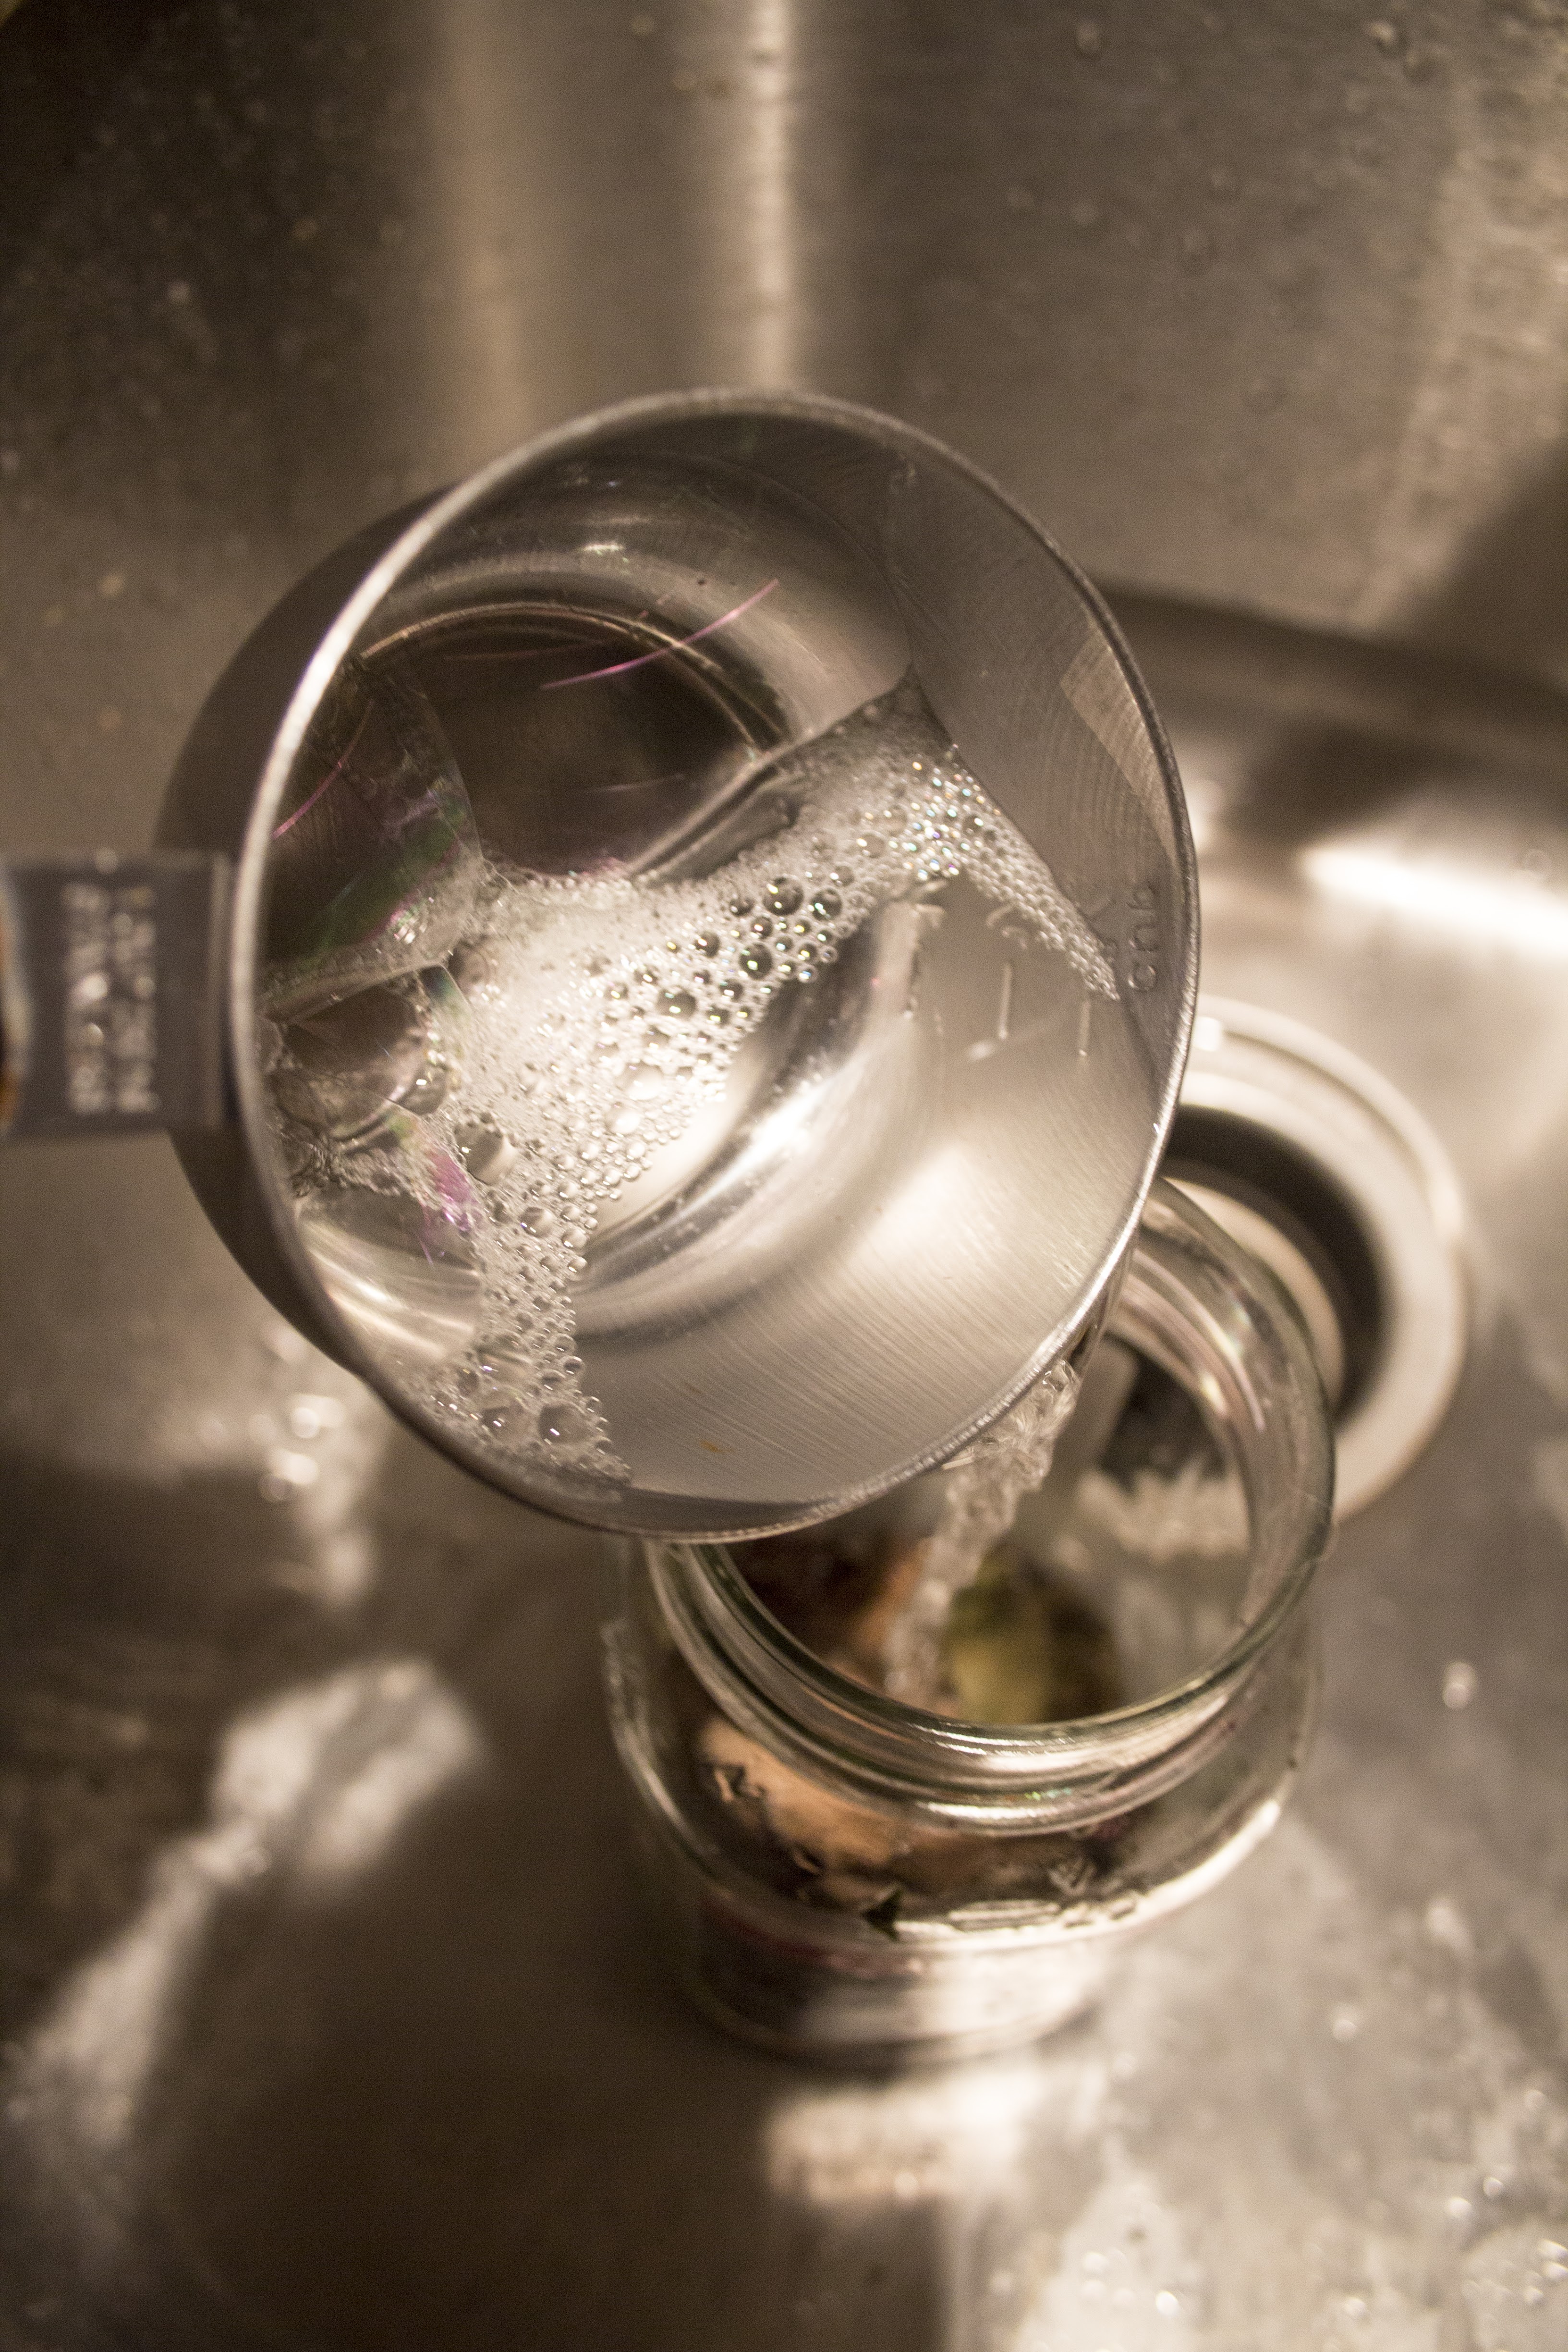
Notice the spot of color in the foam.
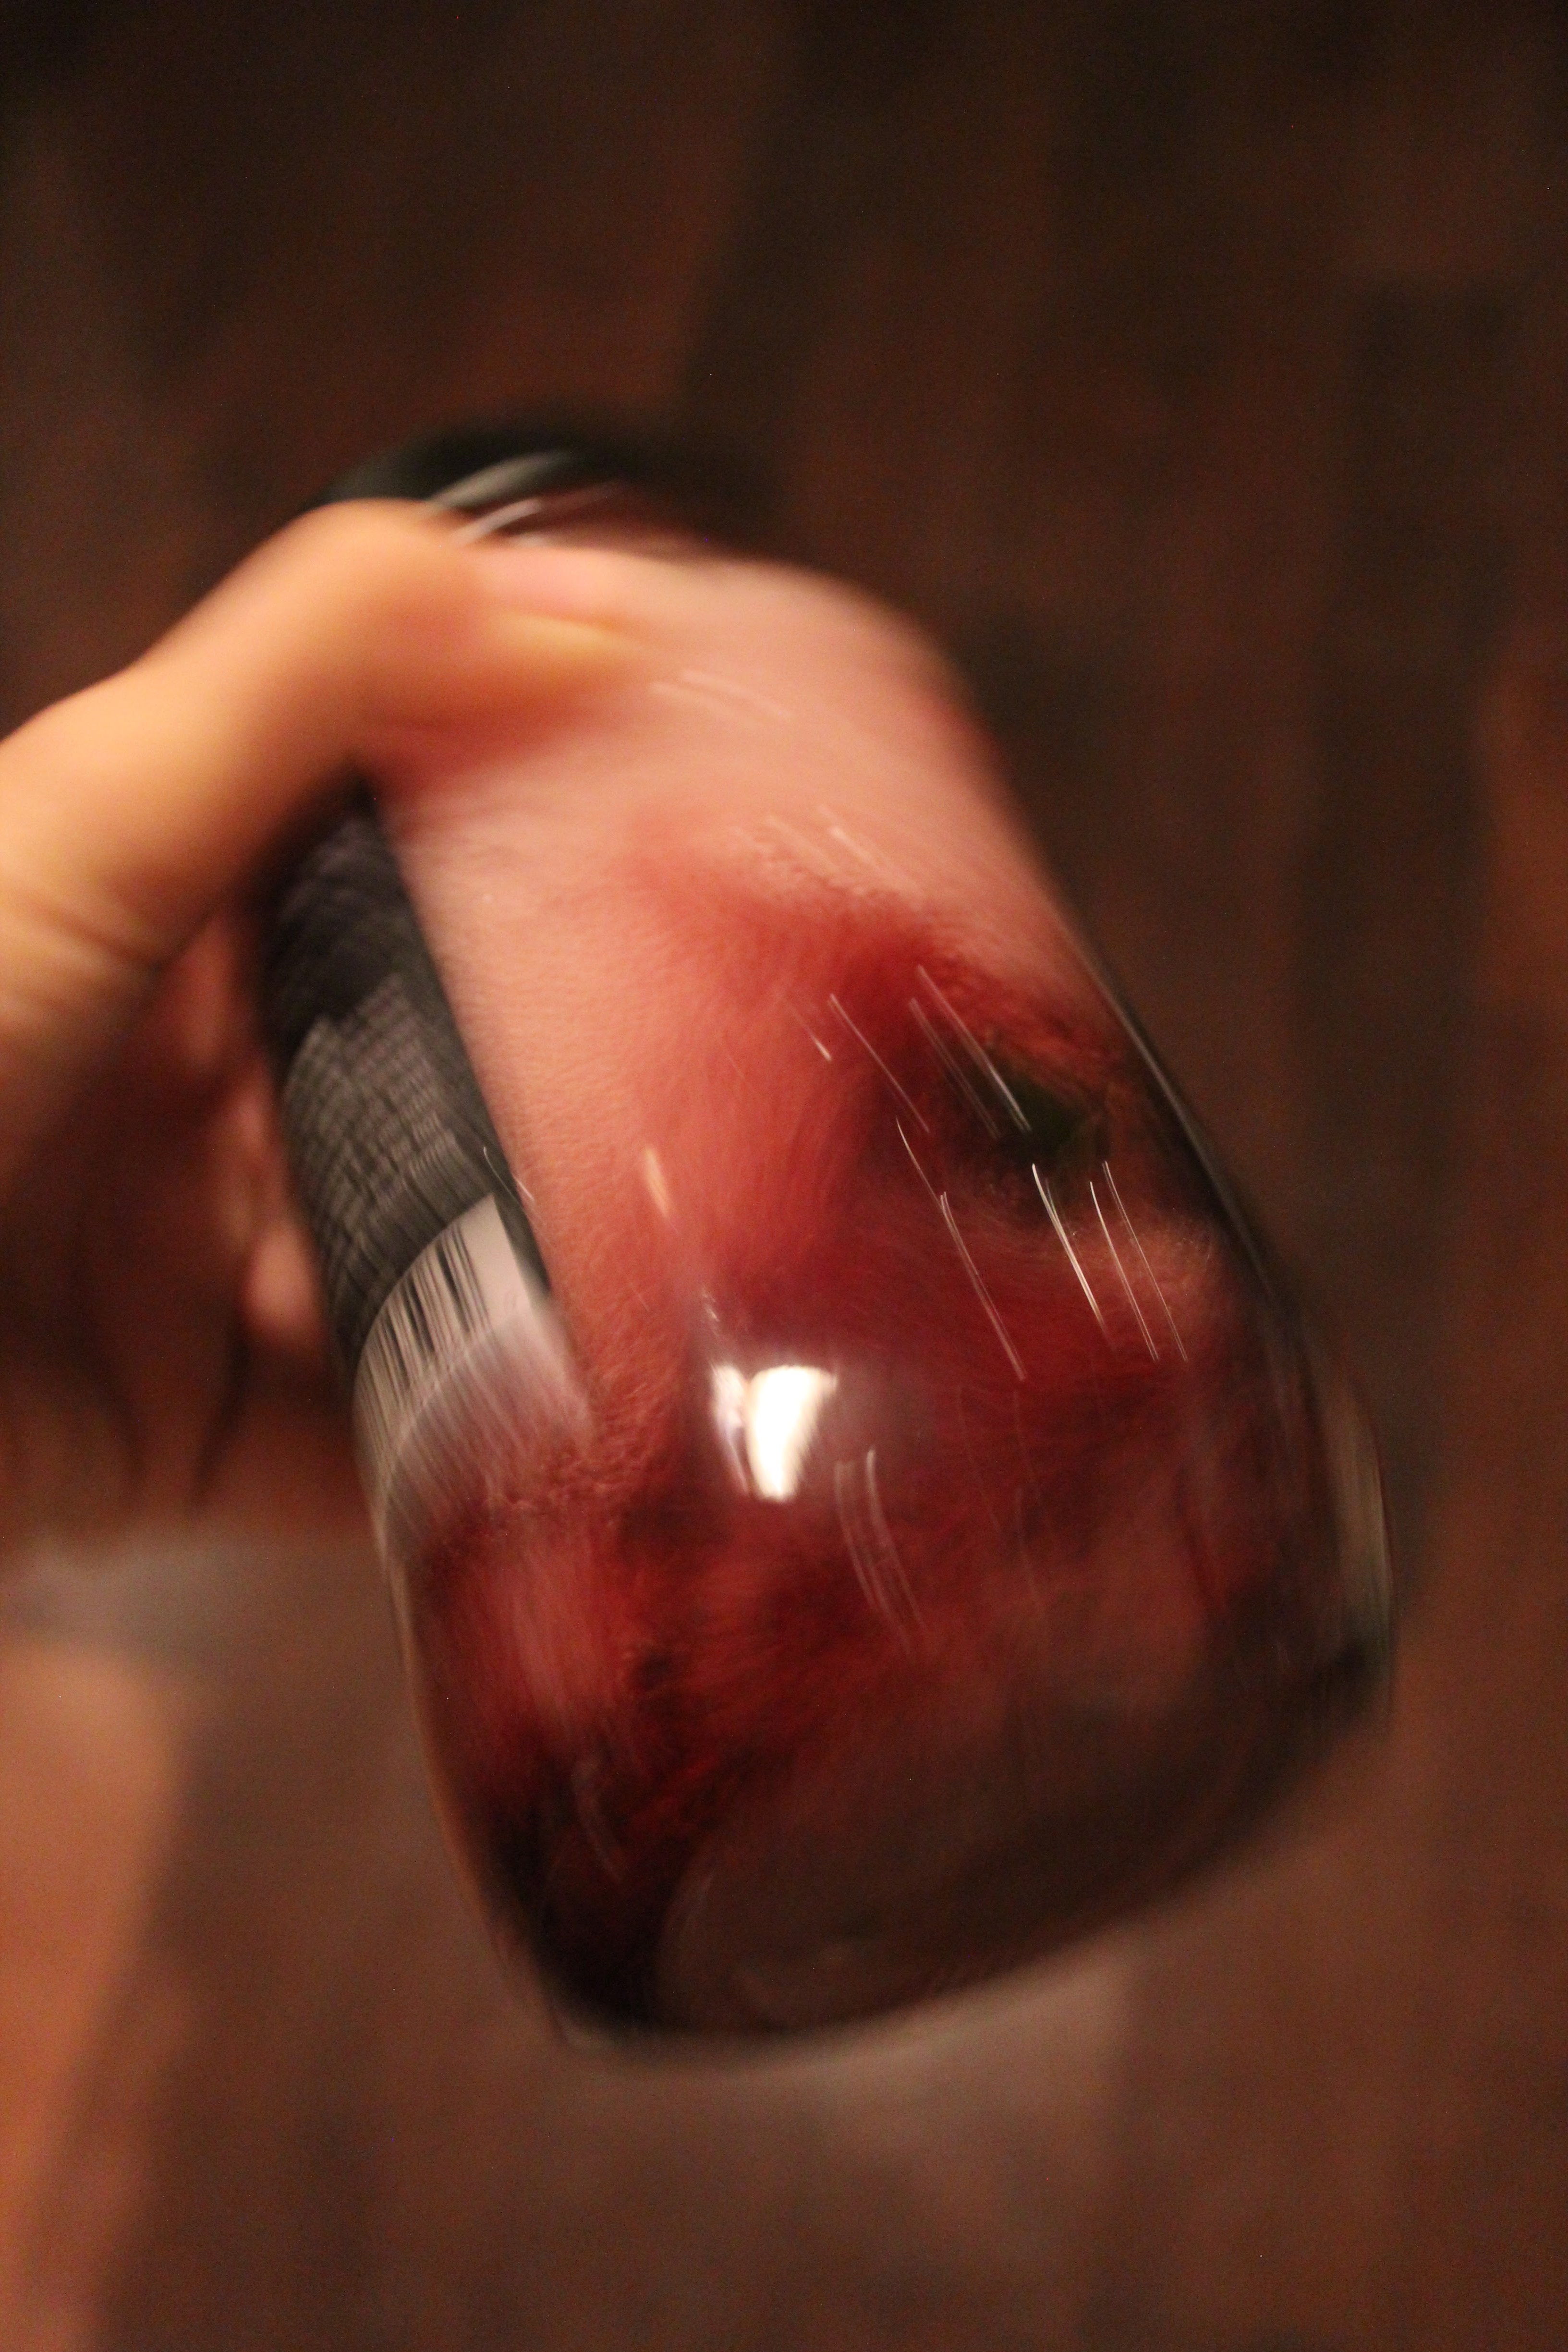
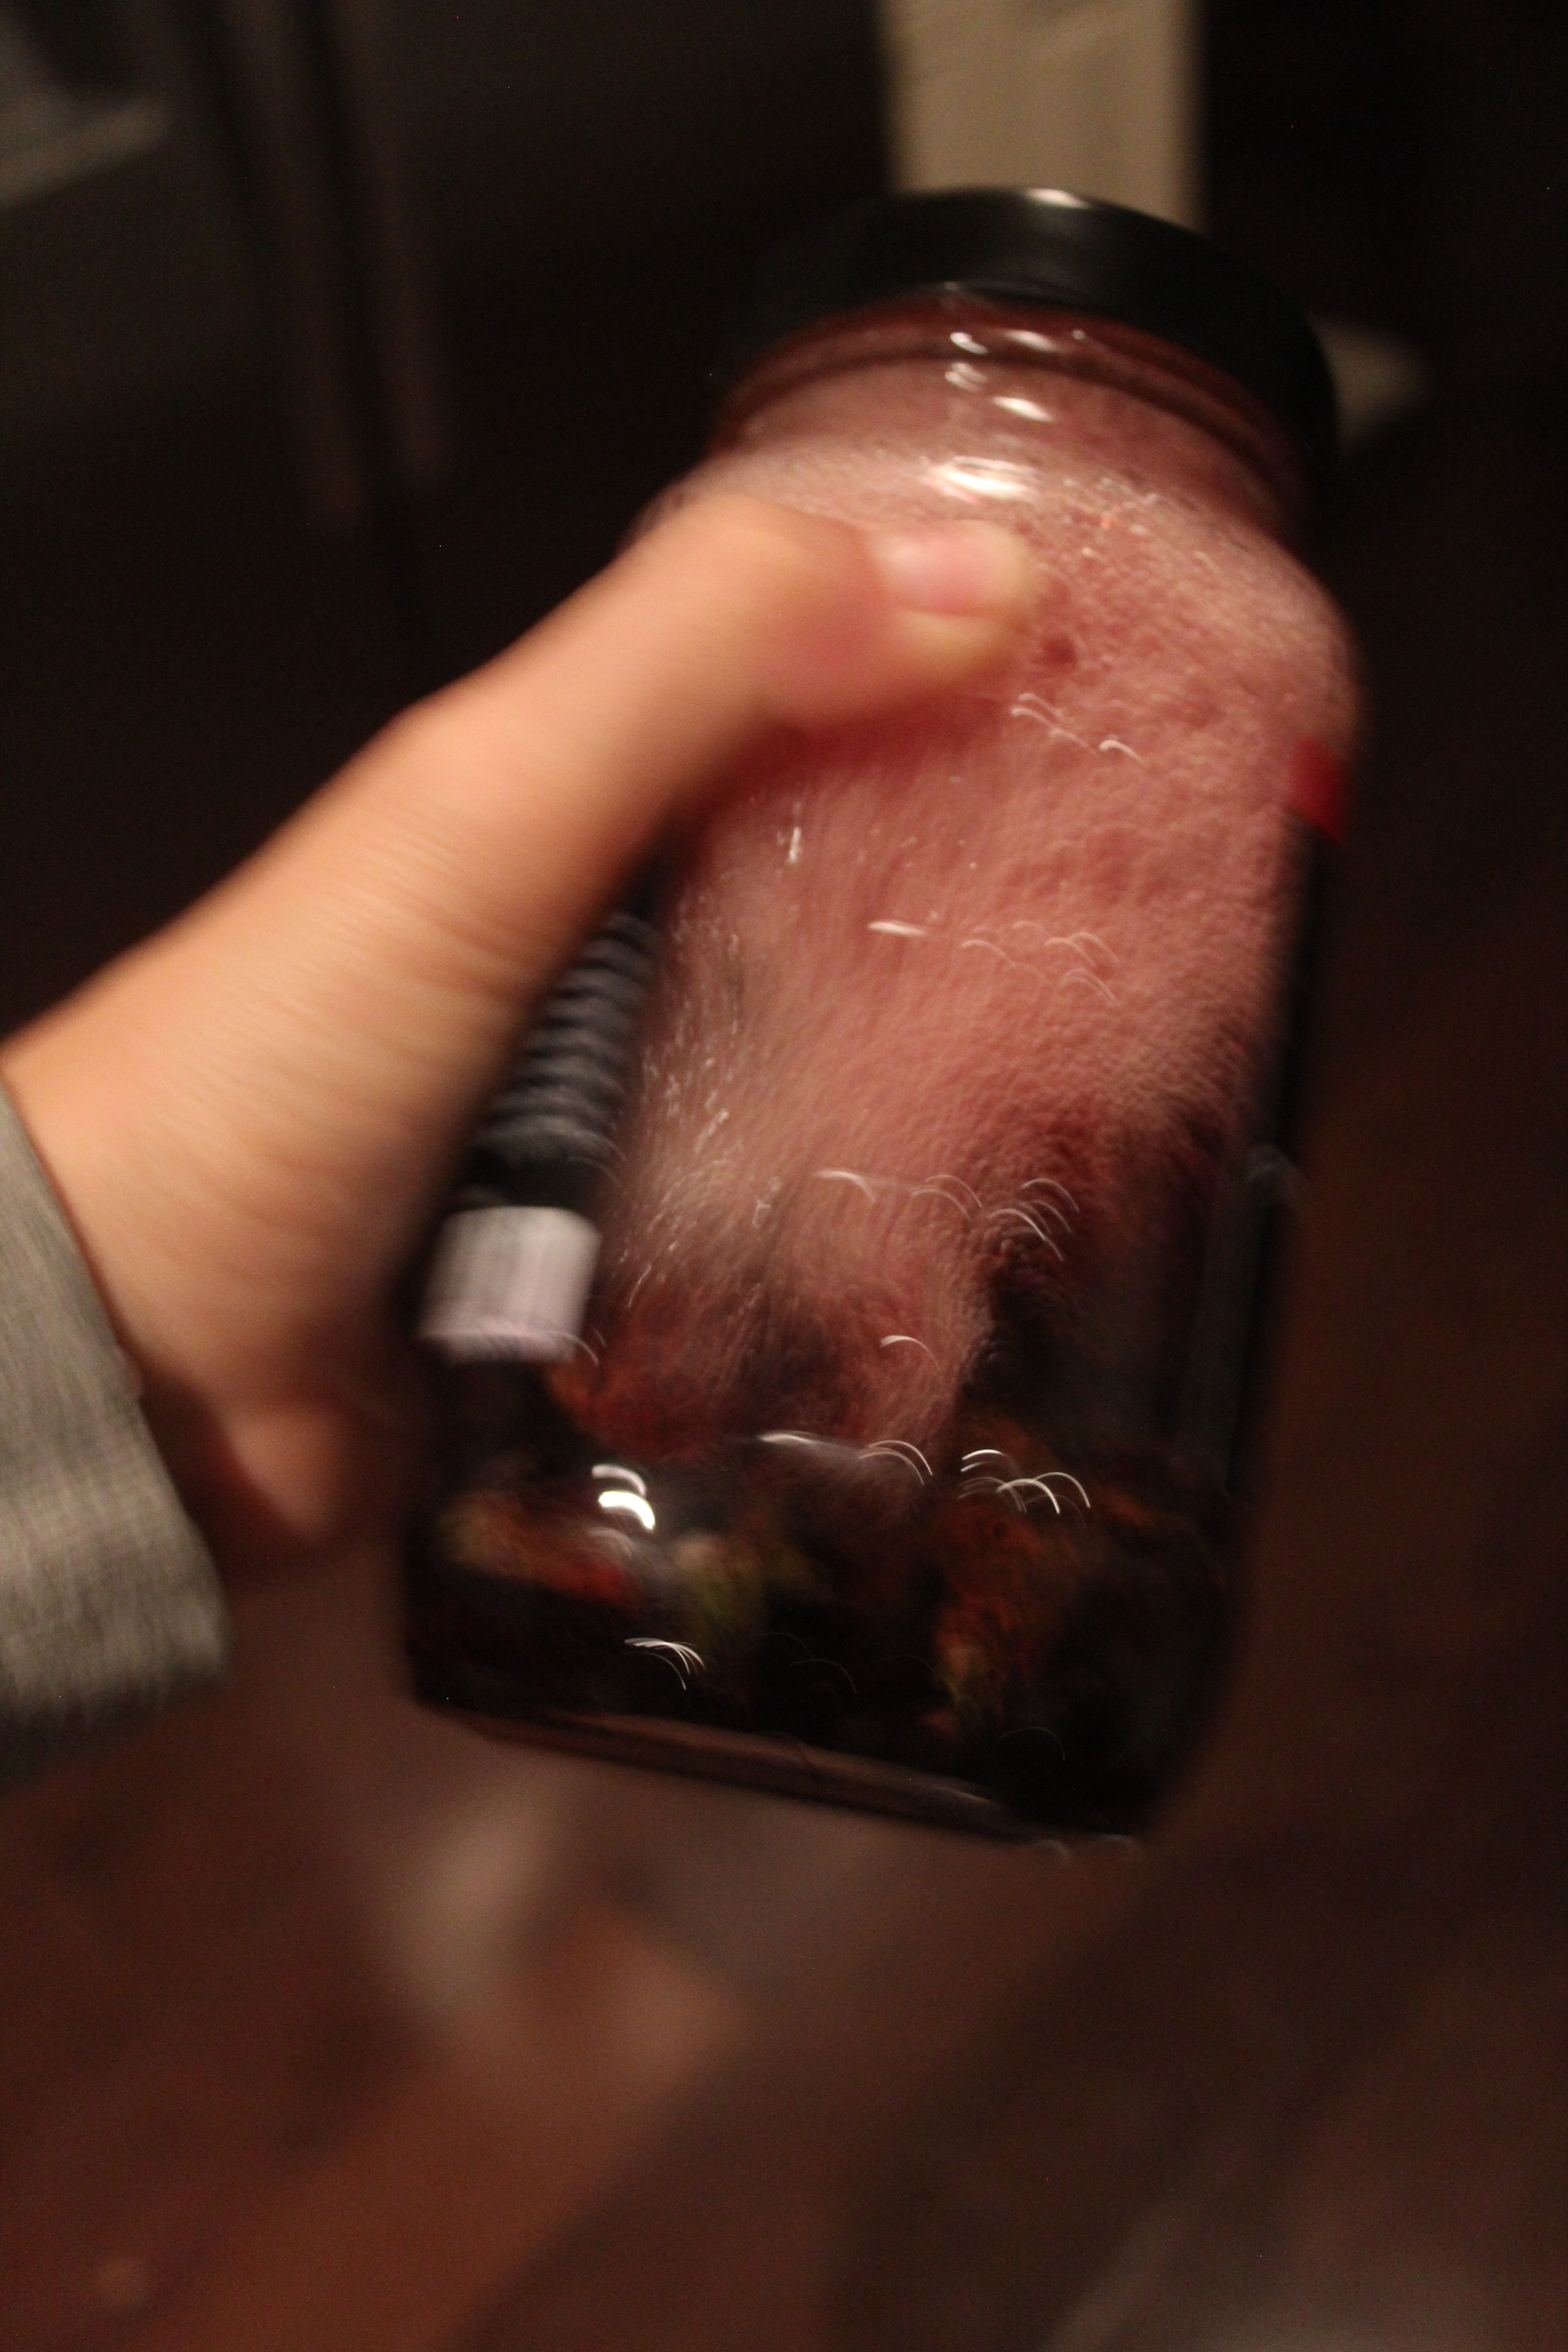
Close the lid tightly and shake to your heart’s content. Give the jar a few shakes each day for about three weeks. Once a week, take the jar outside and carefully remove the lid and swirl the contents of the jar to allow oxygenation. Repeat the process over the next few weeks until the liquid is purple or magenta. This process can take more than three weeks. Do not rush it– it is a practice in patience. I’ve dyed this way many times and have found that I can achieve a gorgeous dye after about a month.
Since I already have another jar of concentration ready to go, I’m going to dive into dyeing.
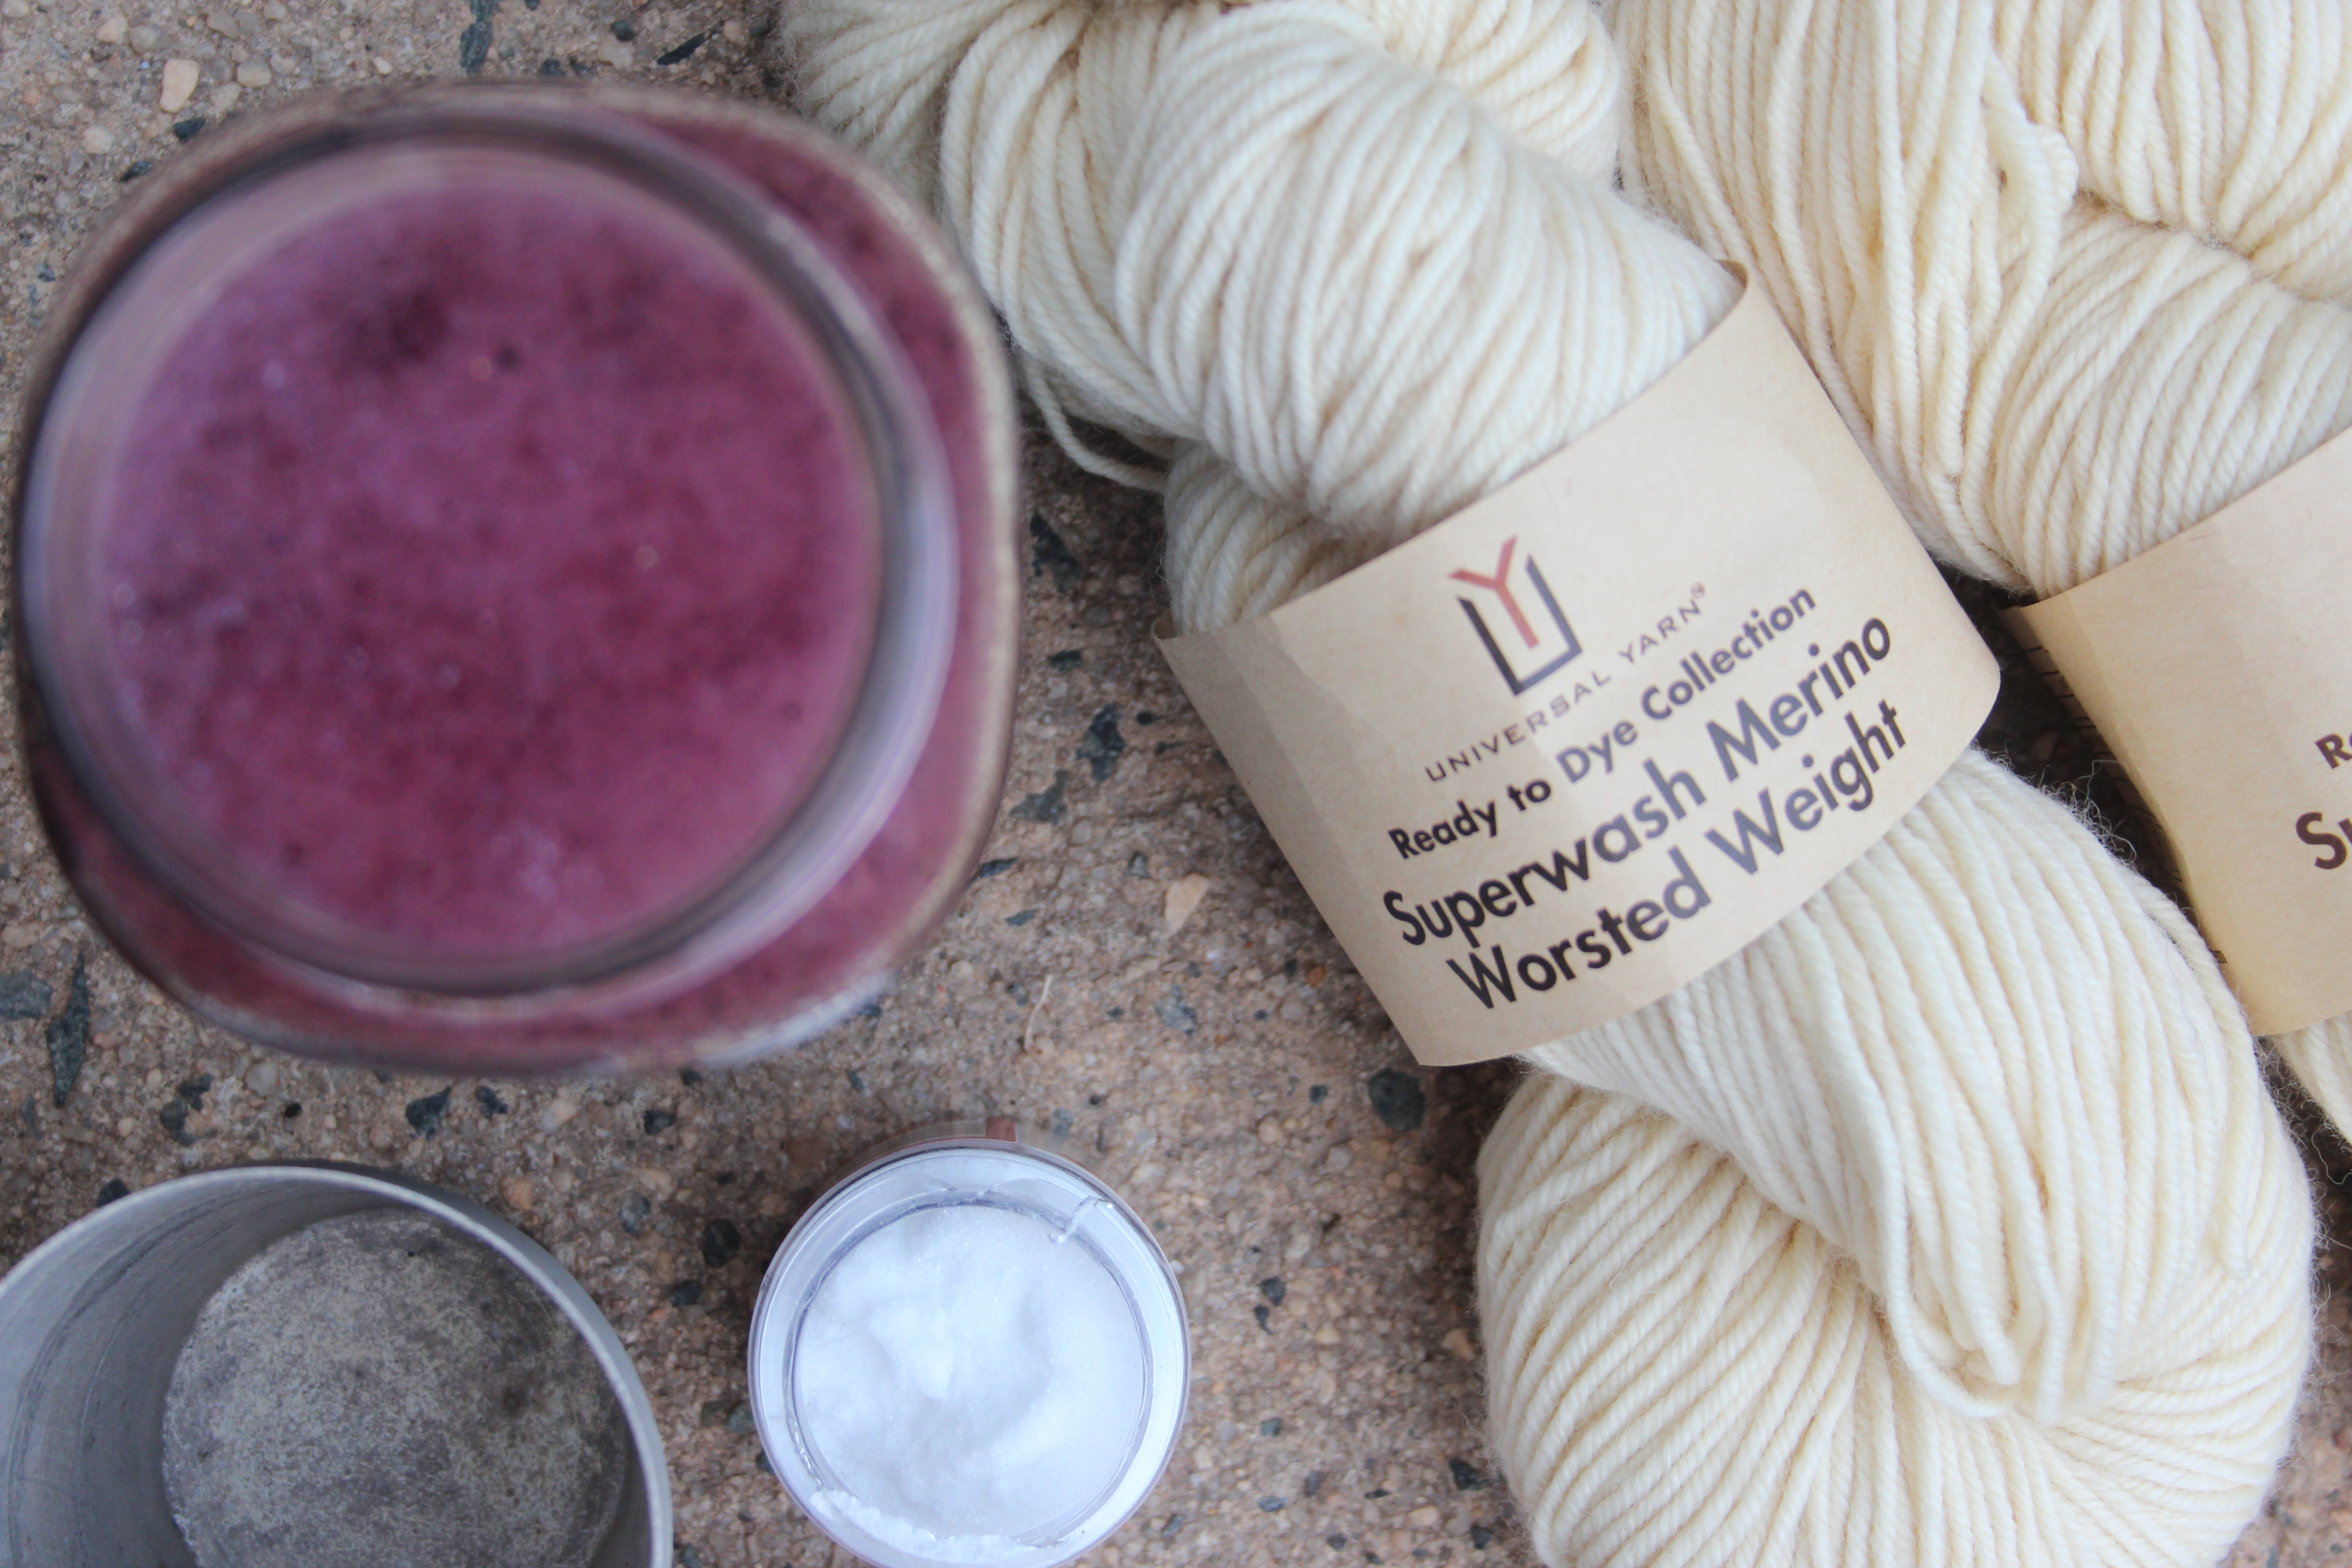
For this part of the tutorial you’ll need:
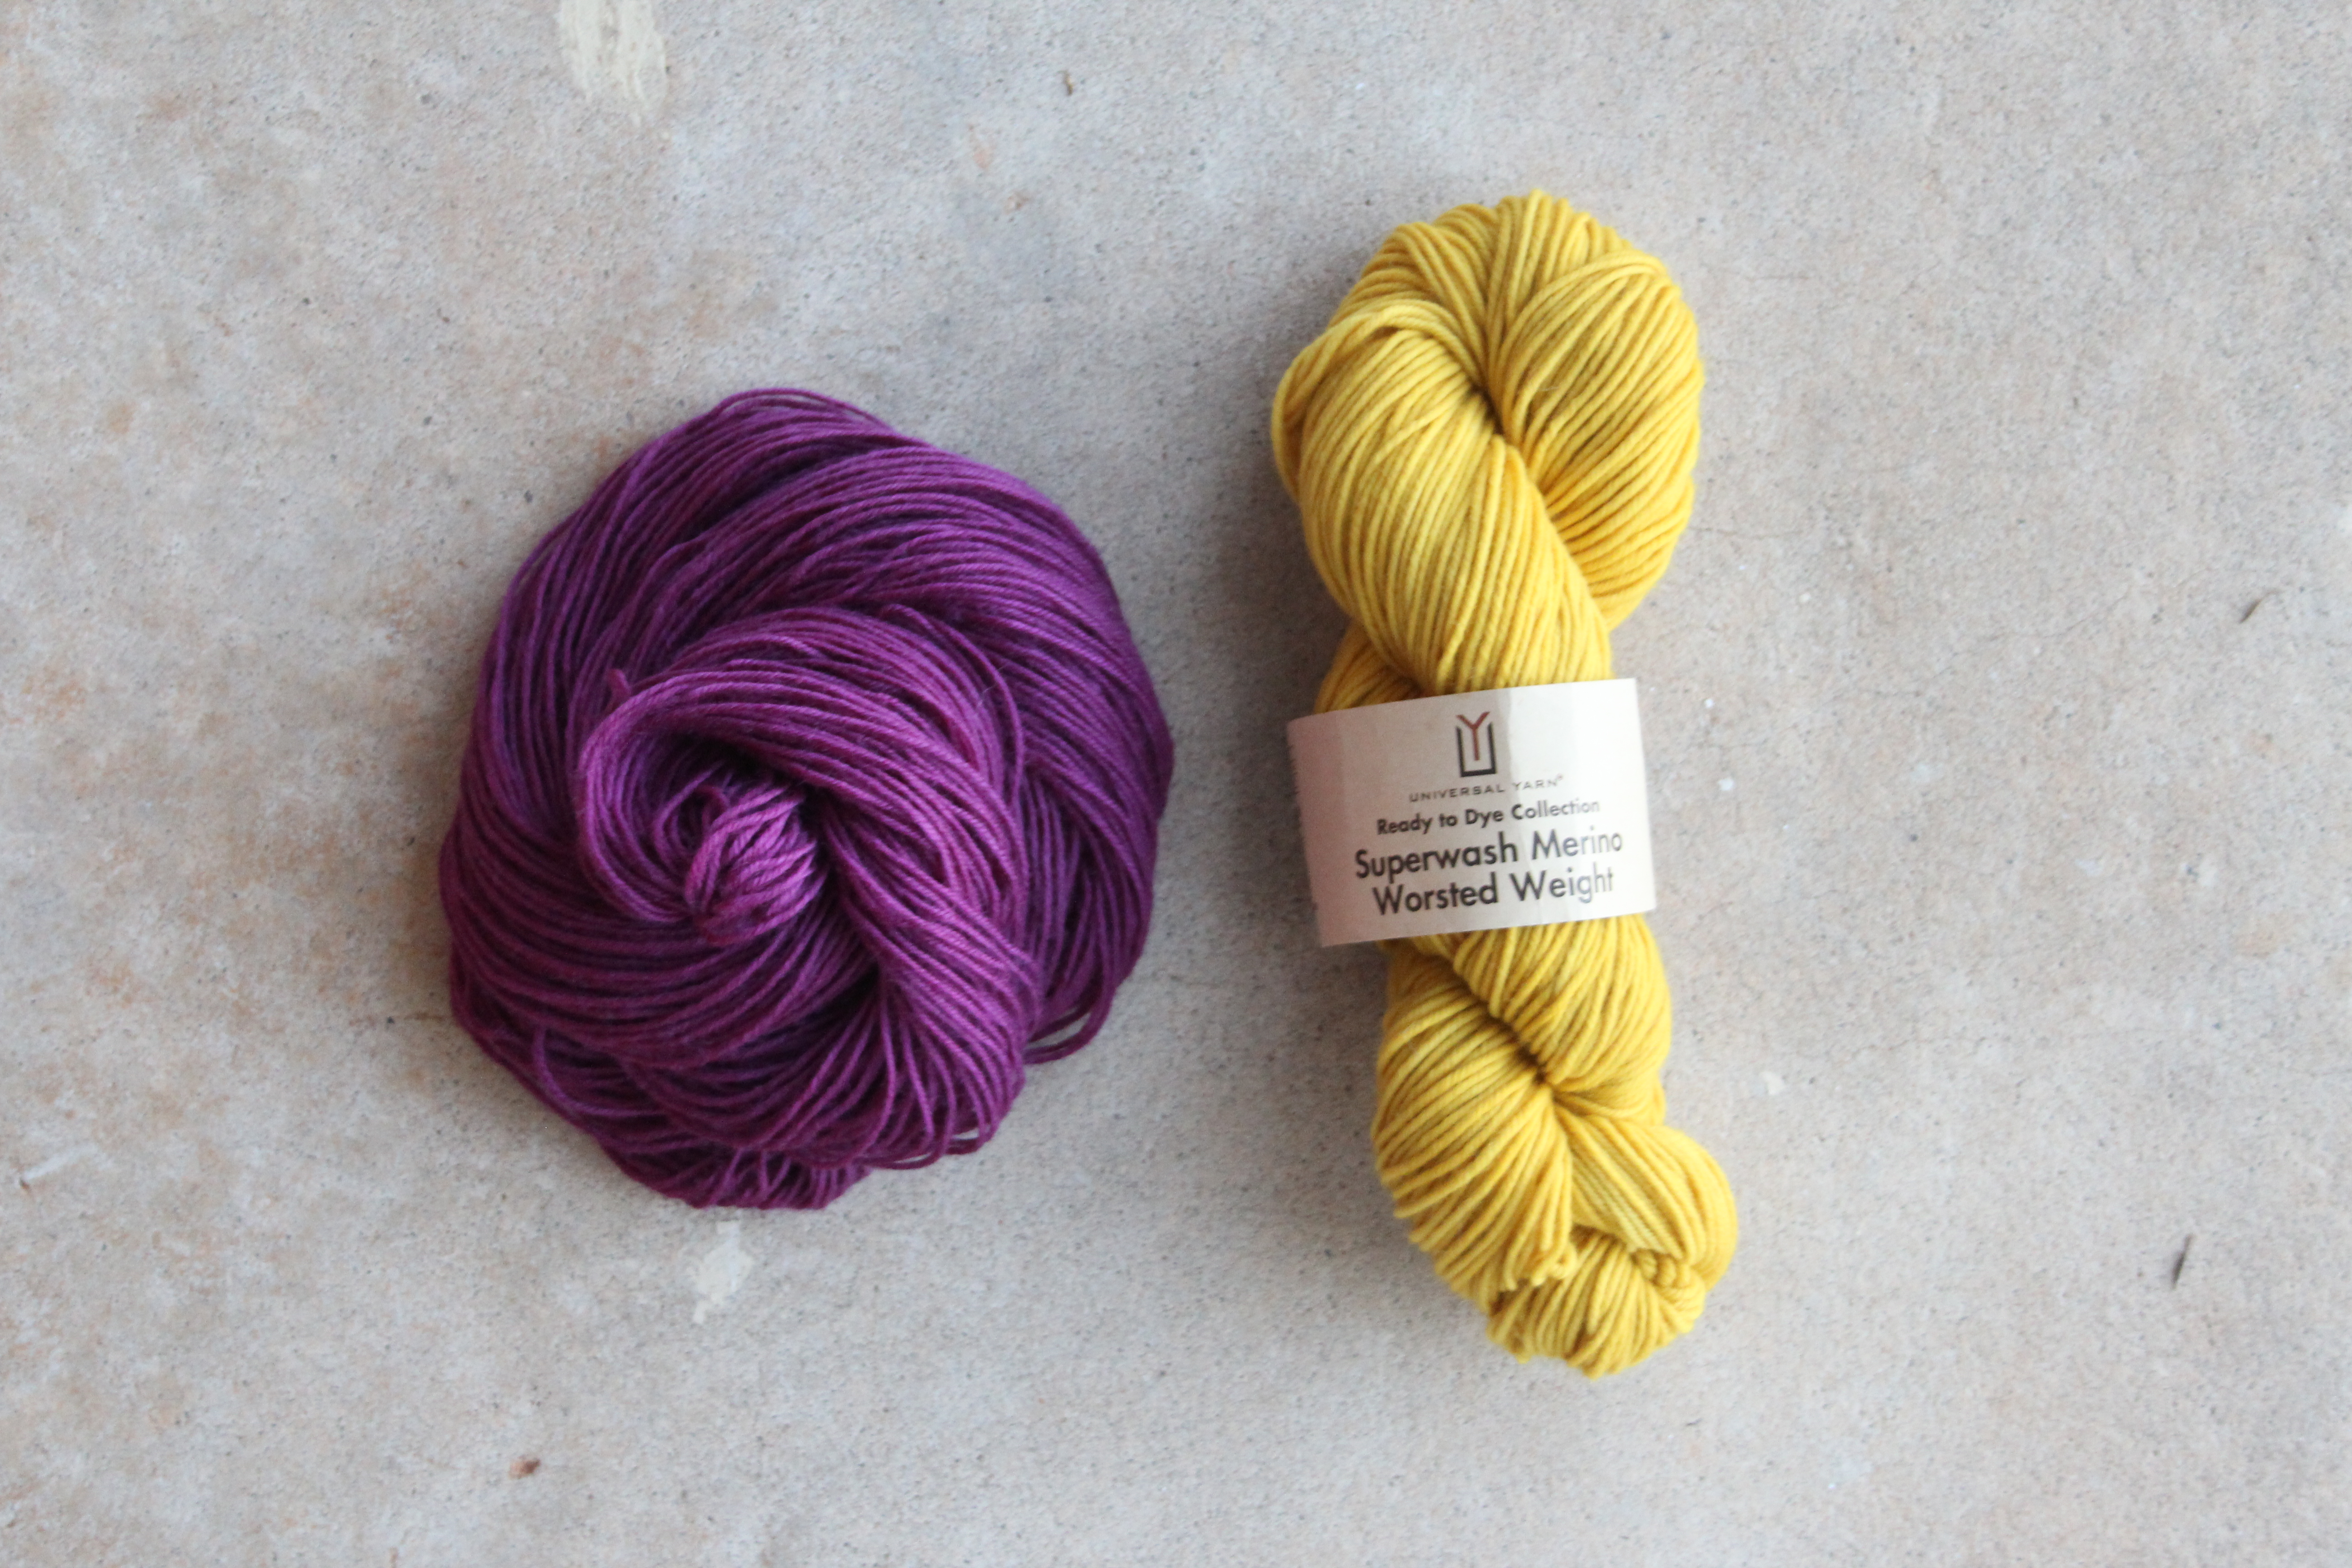
1 skein of Universal Yarn Ready to DyeSuperwash Merino Worsted Weight yarn.
Jar of concentrated dye
One stainless-steel pot that you don’t plan to use for cooking – I purchased mine for a few dollars at a thrift store.
Tongs – they don’t need to be stainless steel but choose some that you won’t use for cooking.
Measuring cups
Water
In Part I, you used a mordant to help fix the marigold dye to the fiber. That step isn’t necessary for this lichen. In fact, it can actually dull the color.
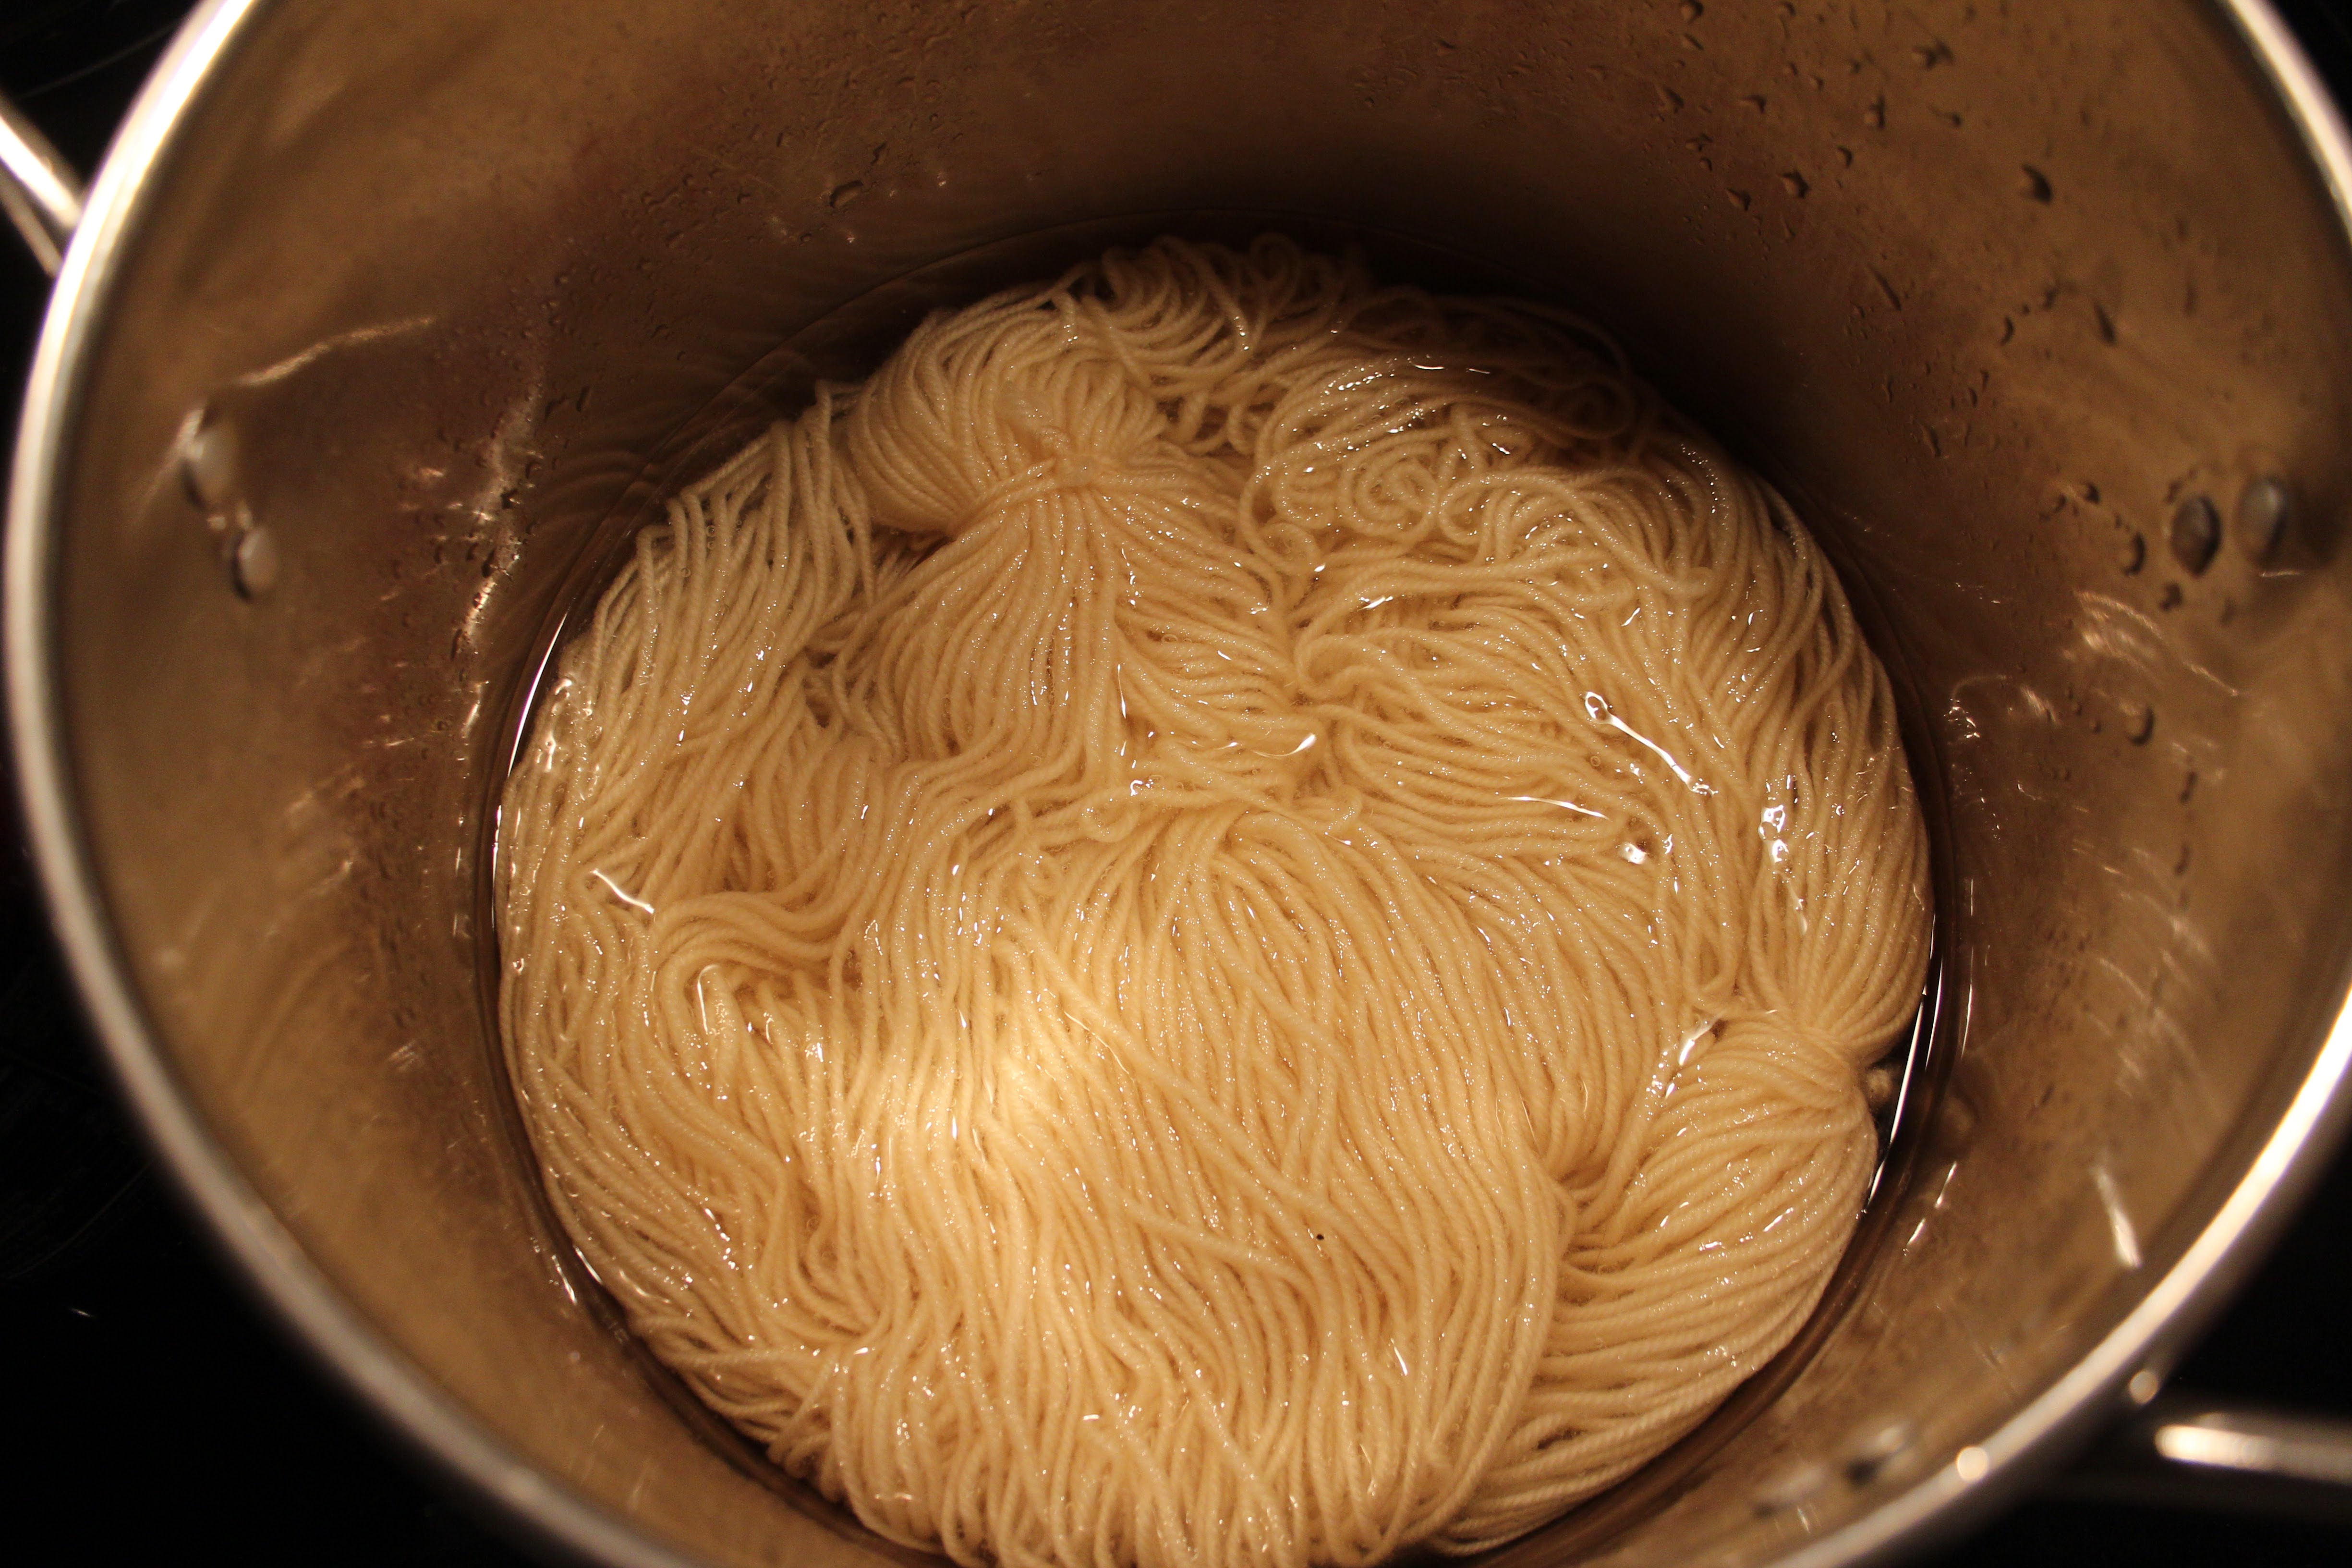
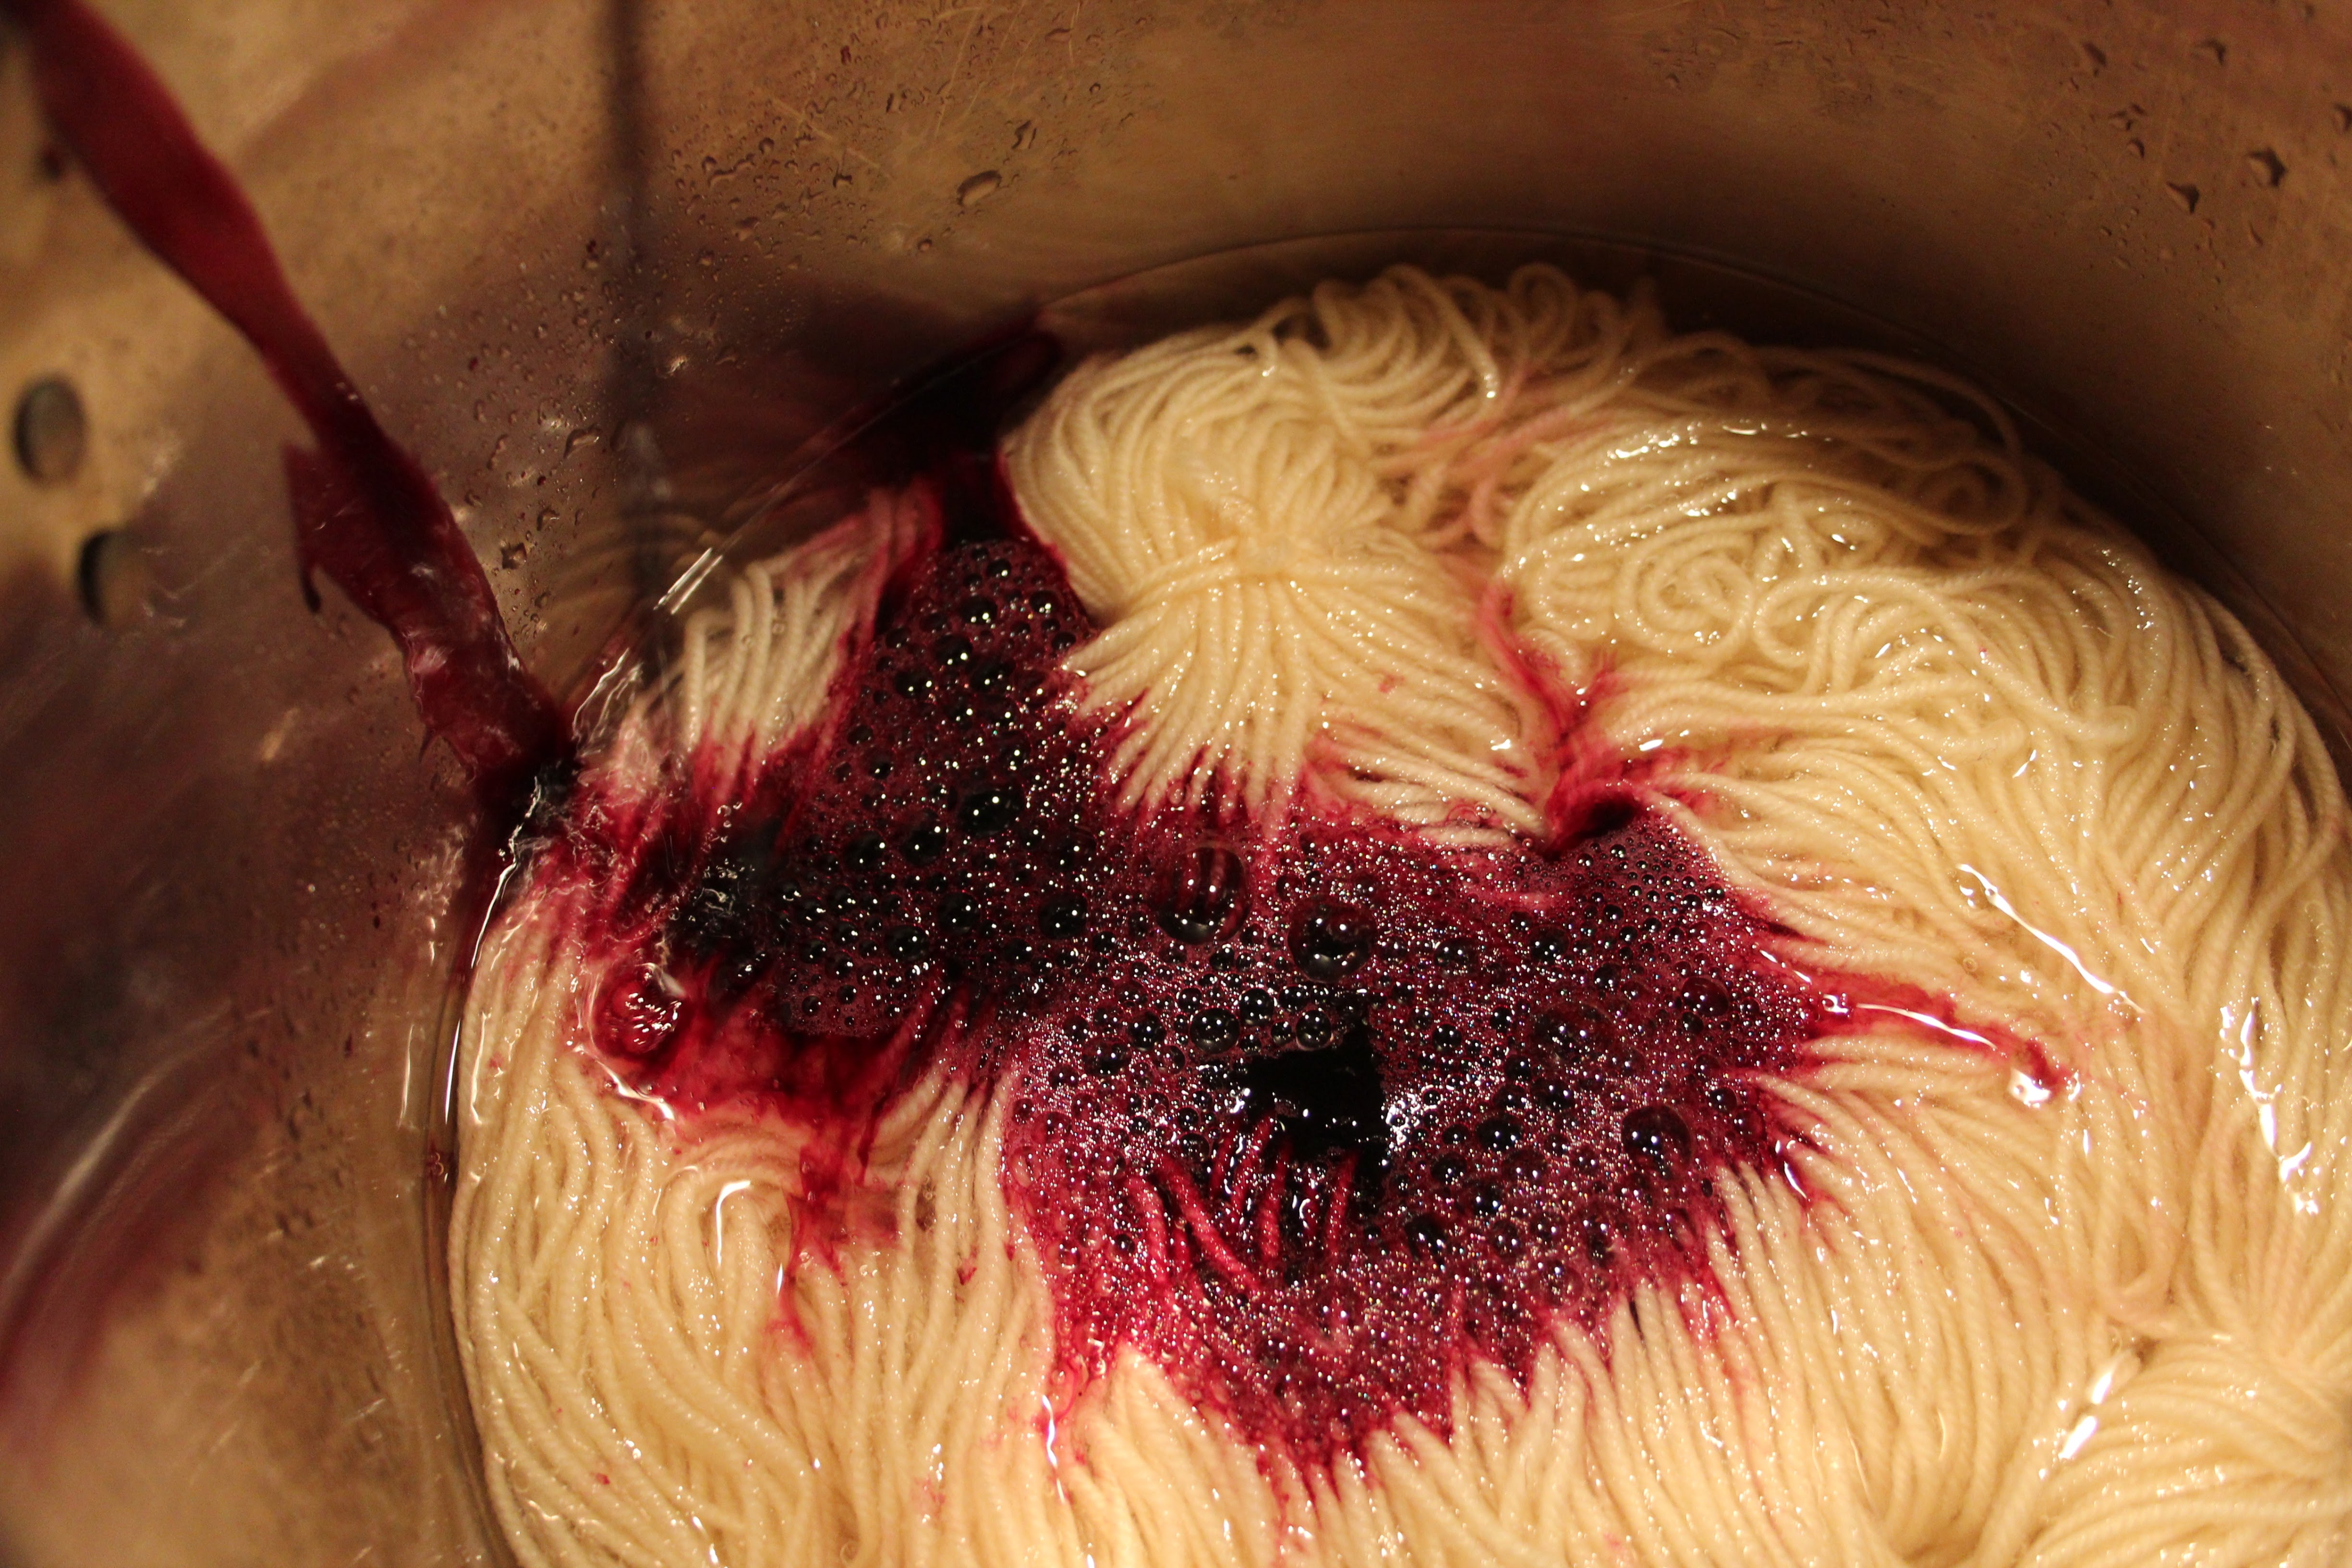
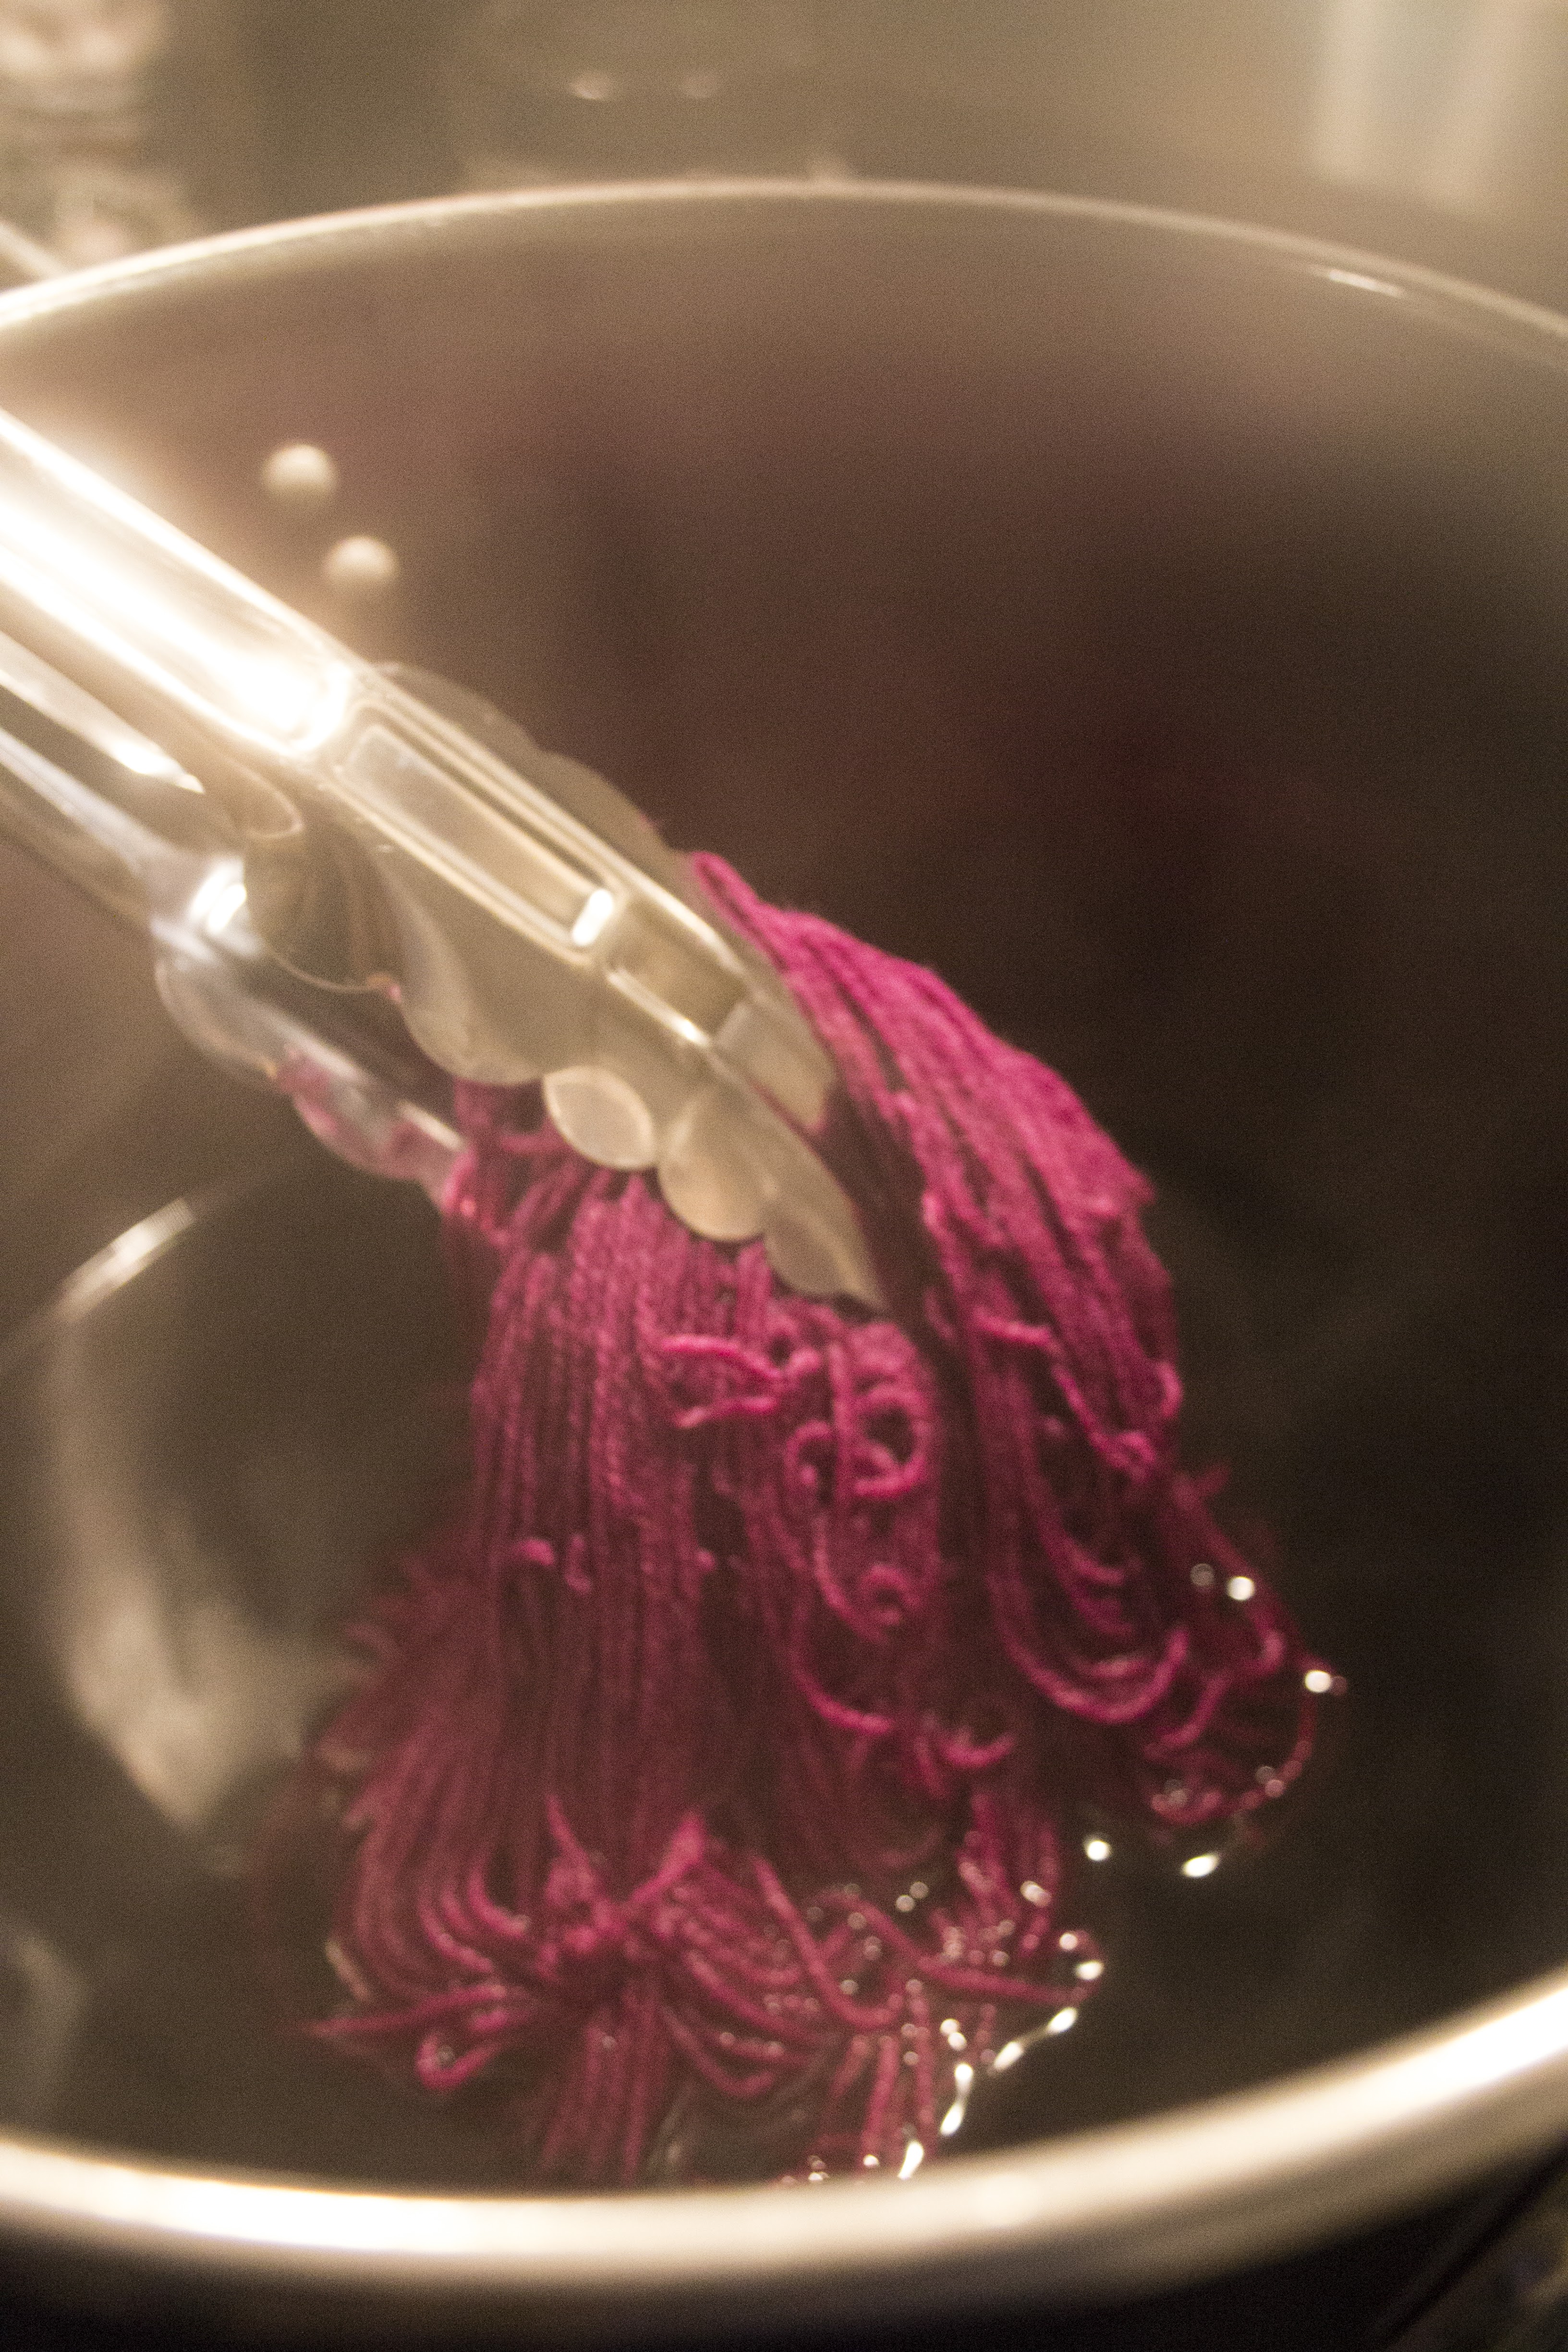
Fill a stainless-steel pot with 4-5 cups of water and place your yarn inside. Set aside for approximately 30 minutes.
Pour off approximately 1 cup of the concentration into the pot. Gently stir and turn the yarn to incorporate the dye into the water. I suggest you open your windows for ventilation as you’ll be warming an ammonia solution over the stove-top.
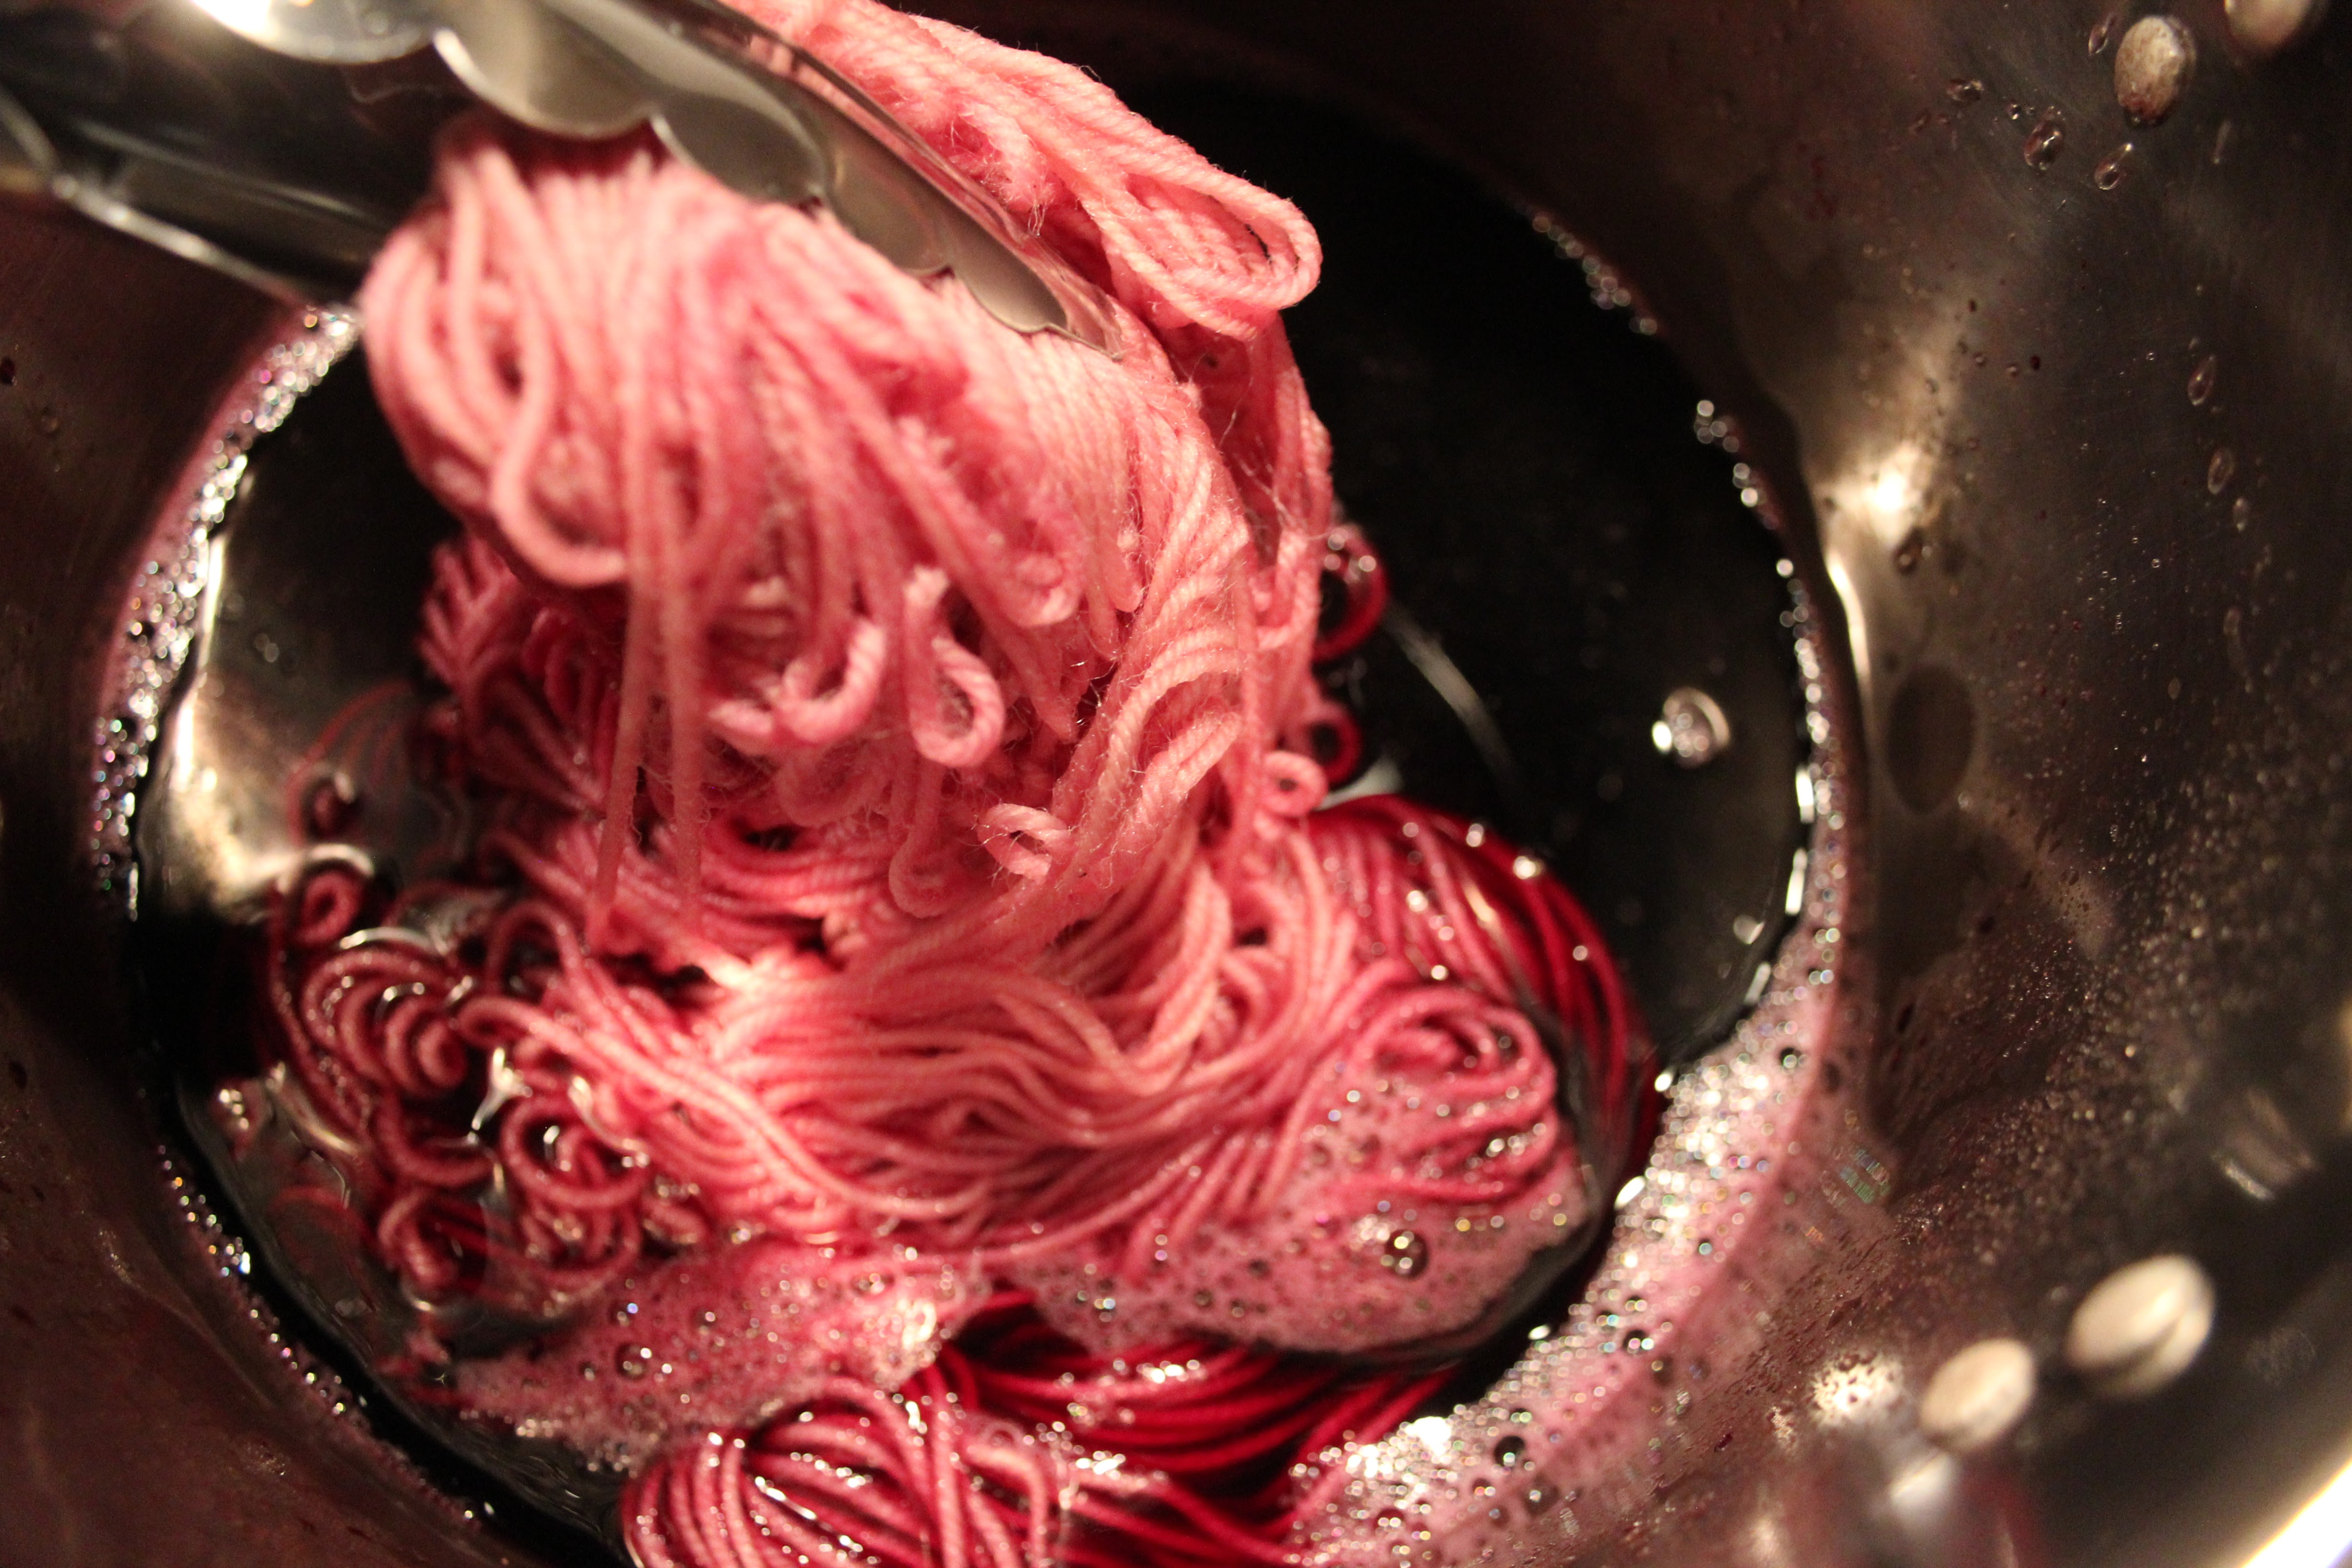
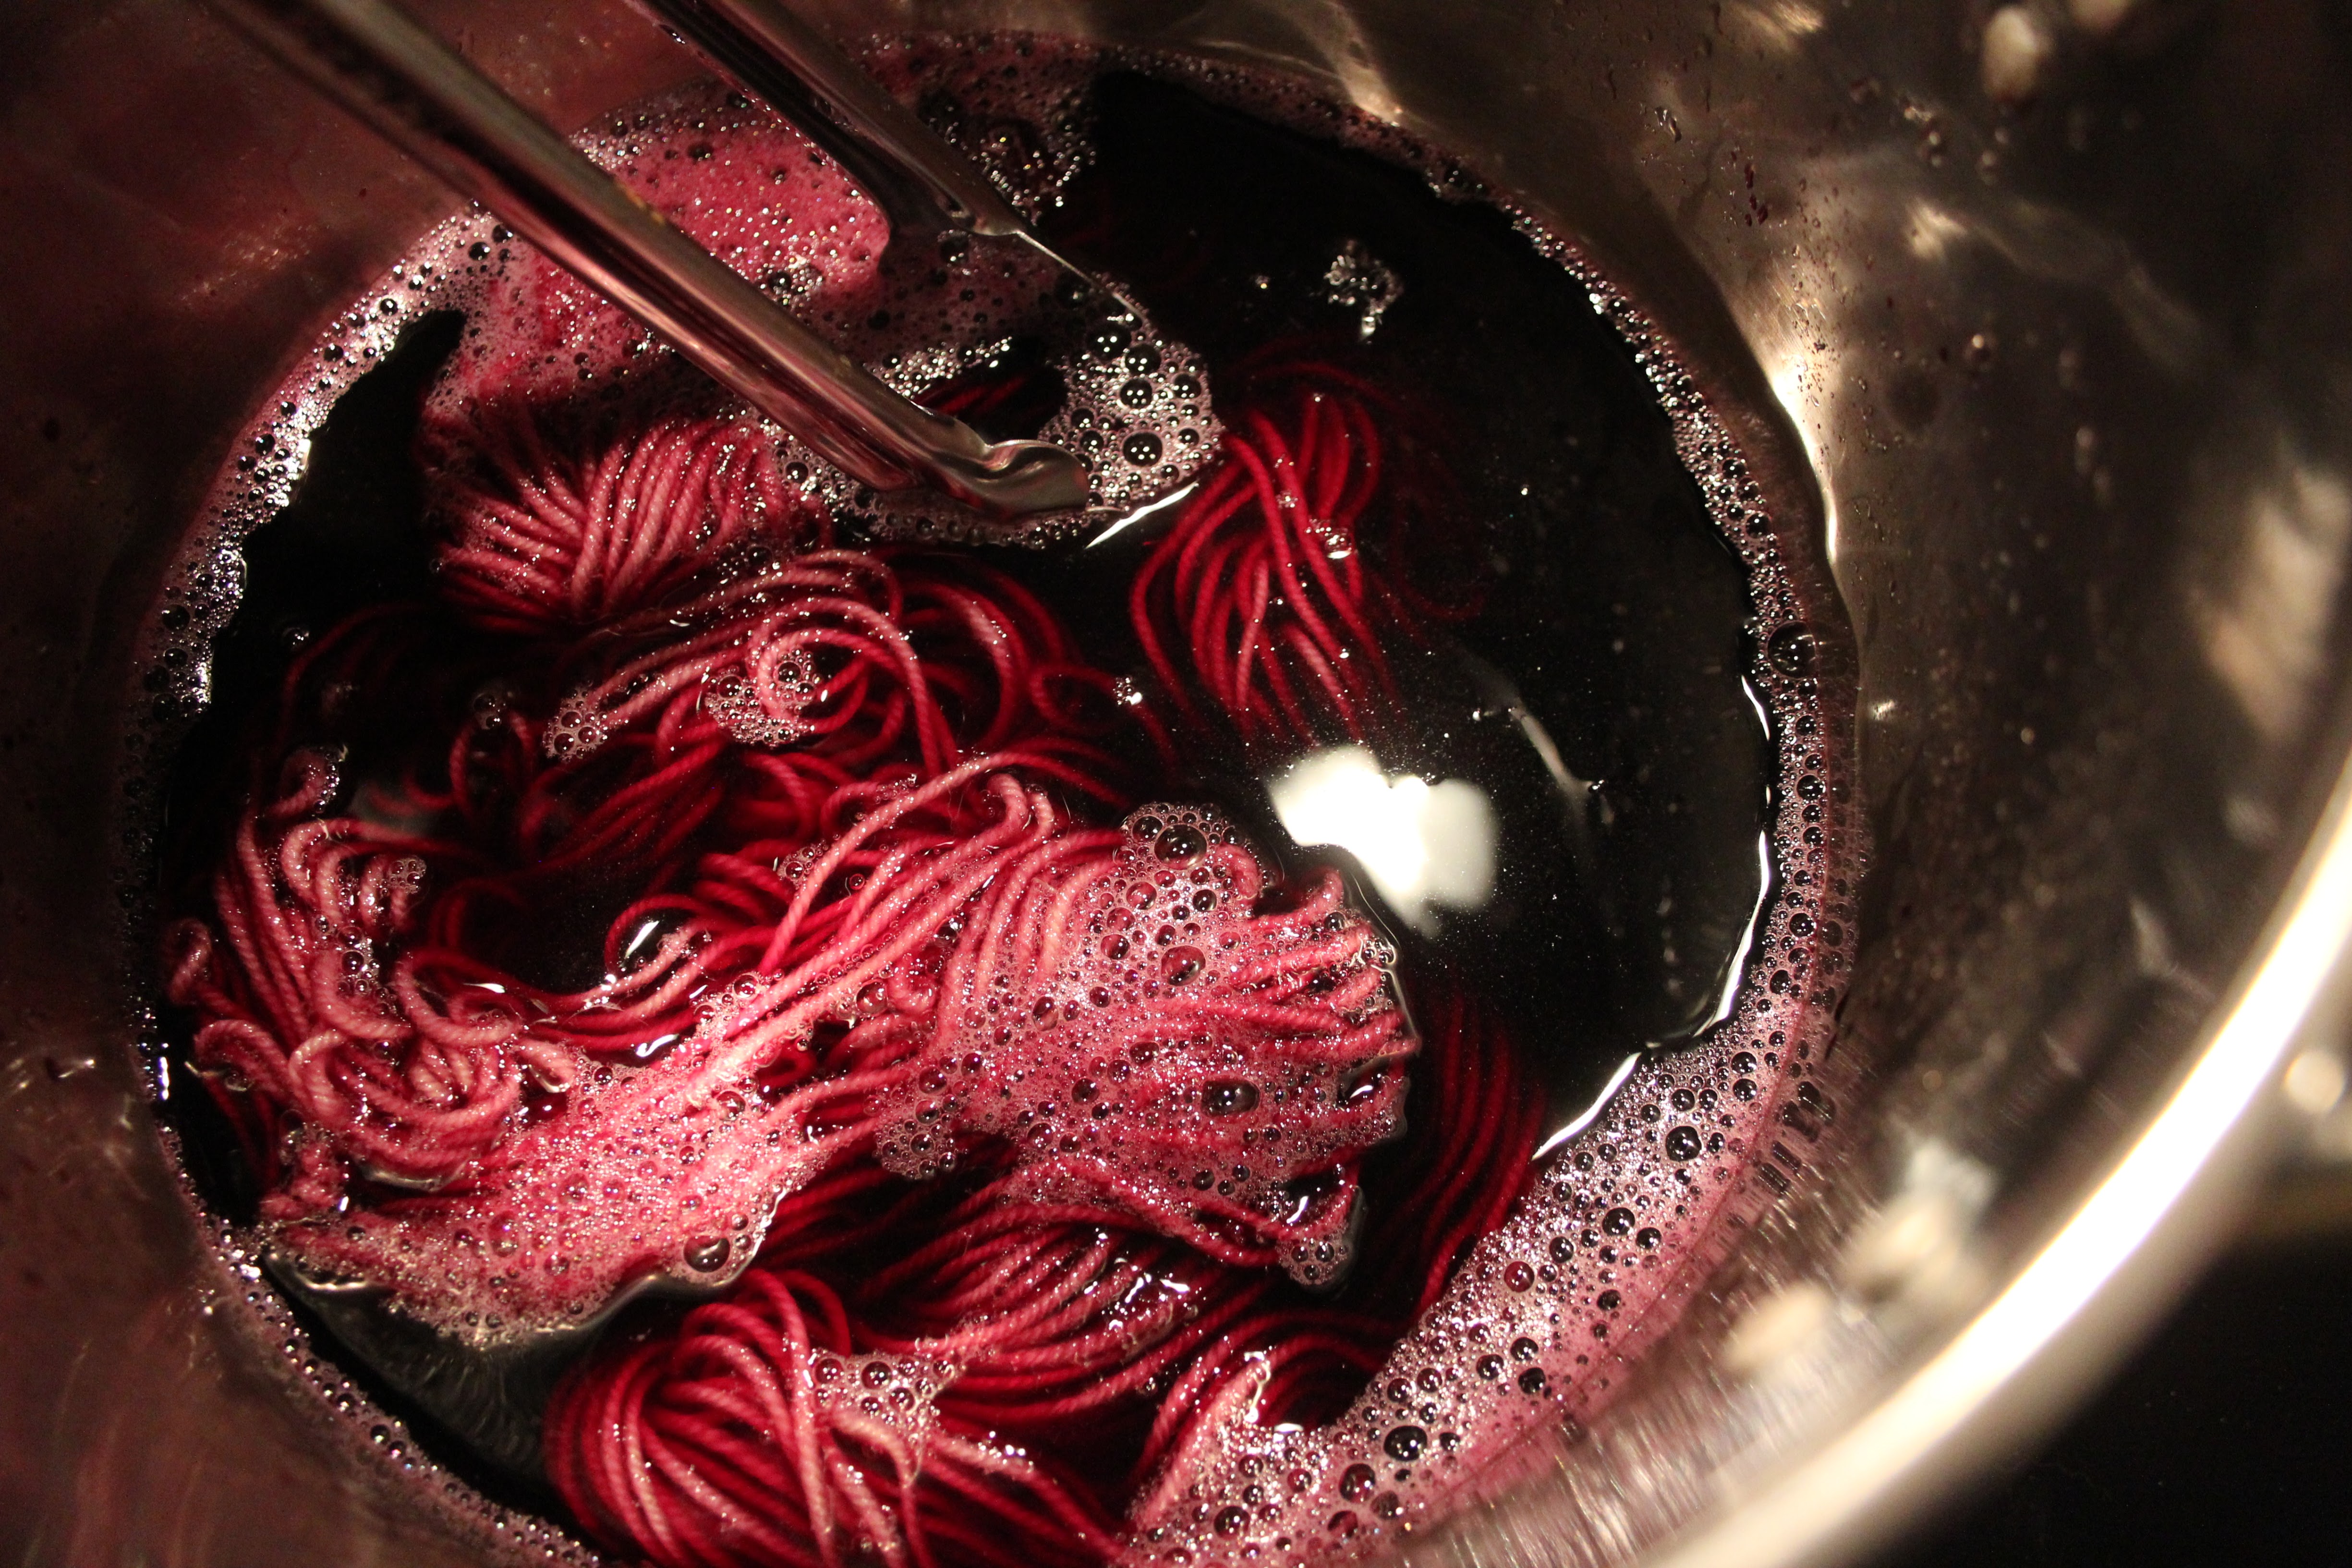
Bring water to just under a simmer. If you have a thermometer it should be about 190 F. Allow the yarn to soak in the dyebath for approximately one hour, occasionally turning the yarn gently with your tongs. Notice how brilliantly saturated the color becomes.
\
Remove from the heat and allow the yarn to cool in the dyebath overnight.
Remove the yarn from the dyebath and thoroughly rinse. I do recommend a gentle detergent or wool wash as the ammonia can be quite pungent. Hang and allow to dry completely. Then, pat yourself on the back for your patience. I told you it was worth the wait!
I’m working on a pattern that uses the yarn from Parts I and II of the Natural Dye series. In the future, I’ll show you how to use natural dyes on some of our other Ready to Dye yarns.

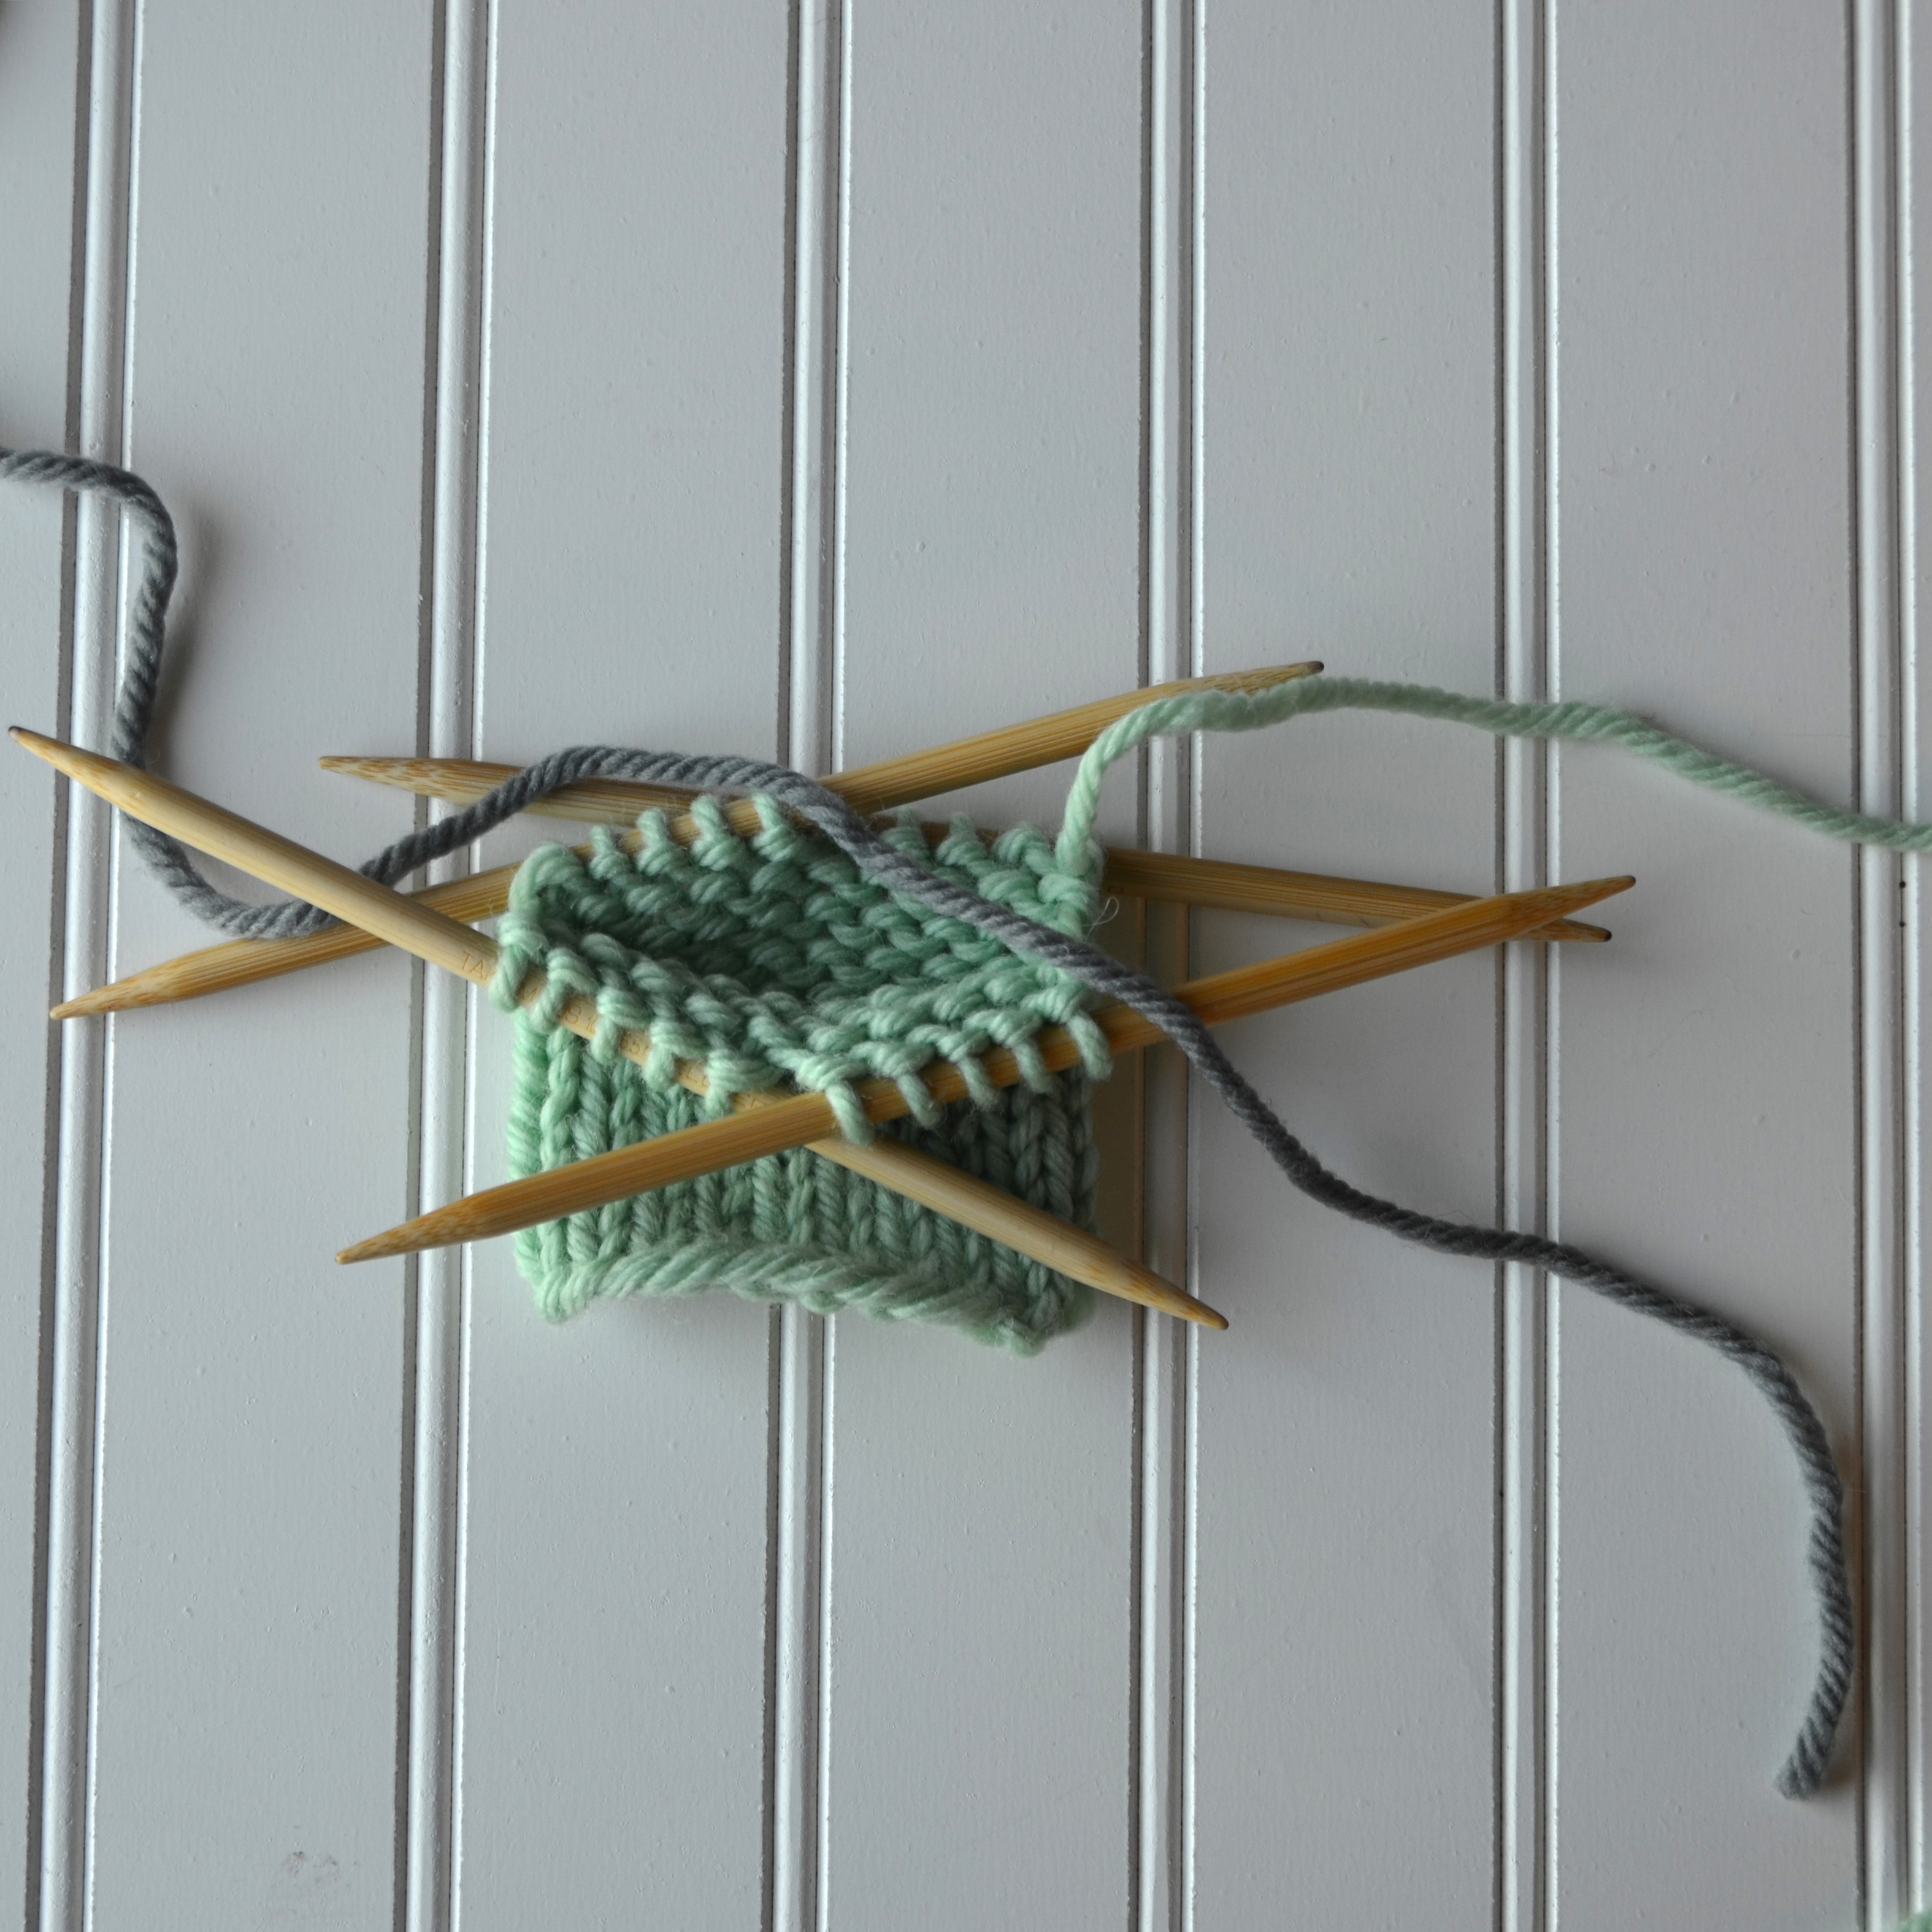
 Continue to knit the rest of the sock/swatch. Knit across the waste yarn stitches and on around.