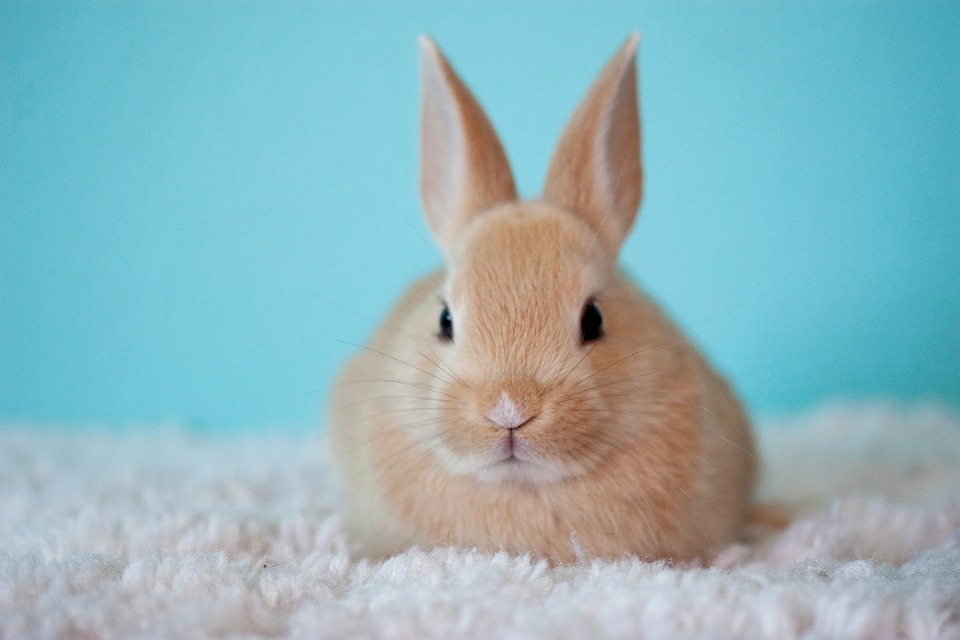
There are so many things to love about Easter: dip-dyed eggs, the first blooms of the year, chocolate filled baskets. And really, Easter candy is the best seasonal candy of the year as far as I’m concerned. But for me, the overwhelming bunny imagery is my favorite part of this spring holiday.
I had a pet bunny as a child named Fuzzy. What can I say? Toddlers are not always great at naming things. But Fuzzy was a great bunny. She hopped around the house, snuggled, and got along great with our dog, Fluffy (do you see a trend in pet naming here?). As a young adult, I had a mini lop bunny named Emma and even managed to litter-box train her.
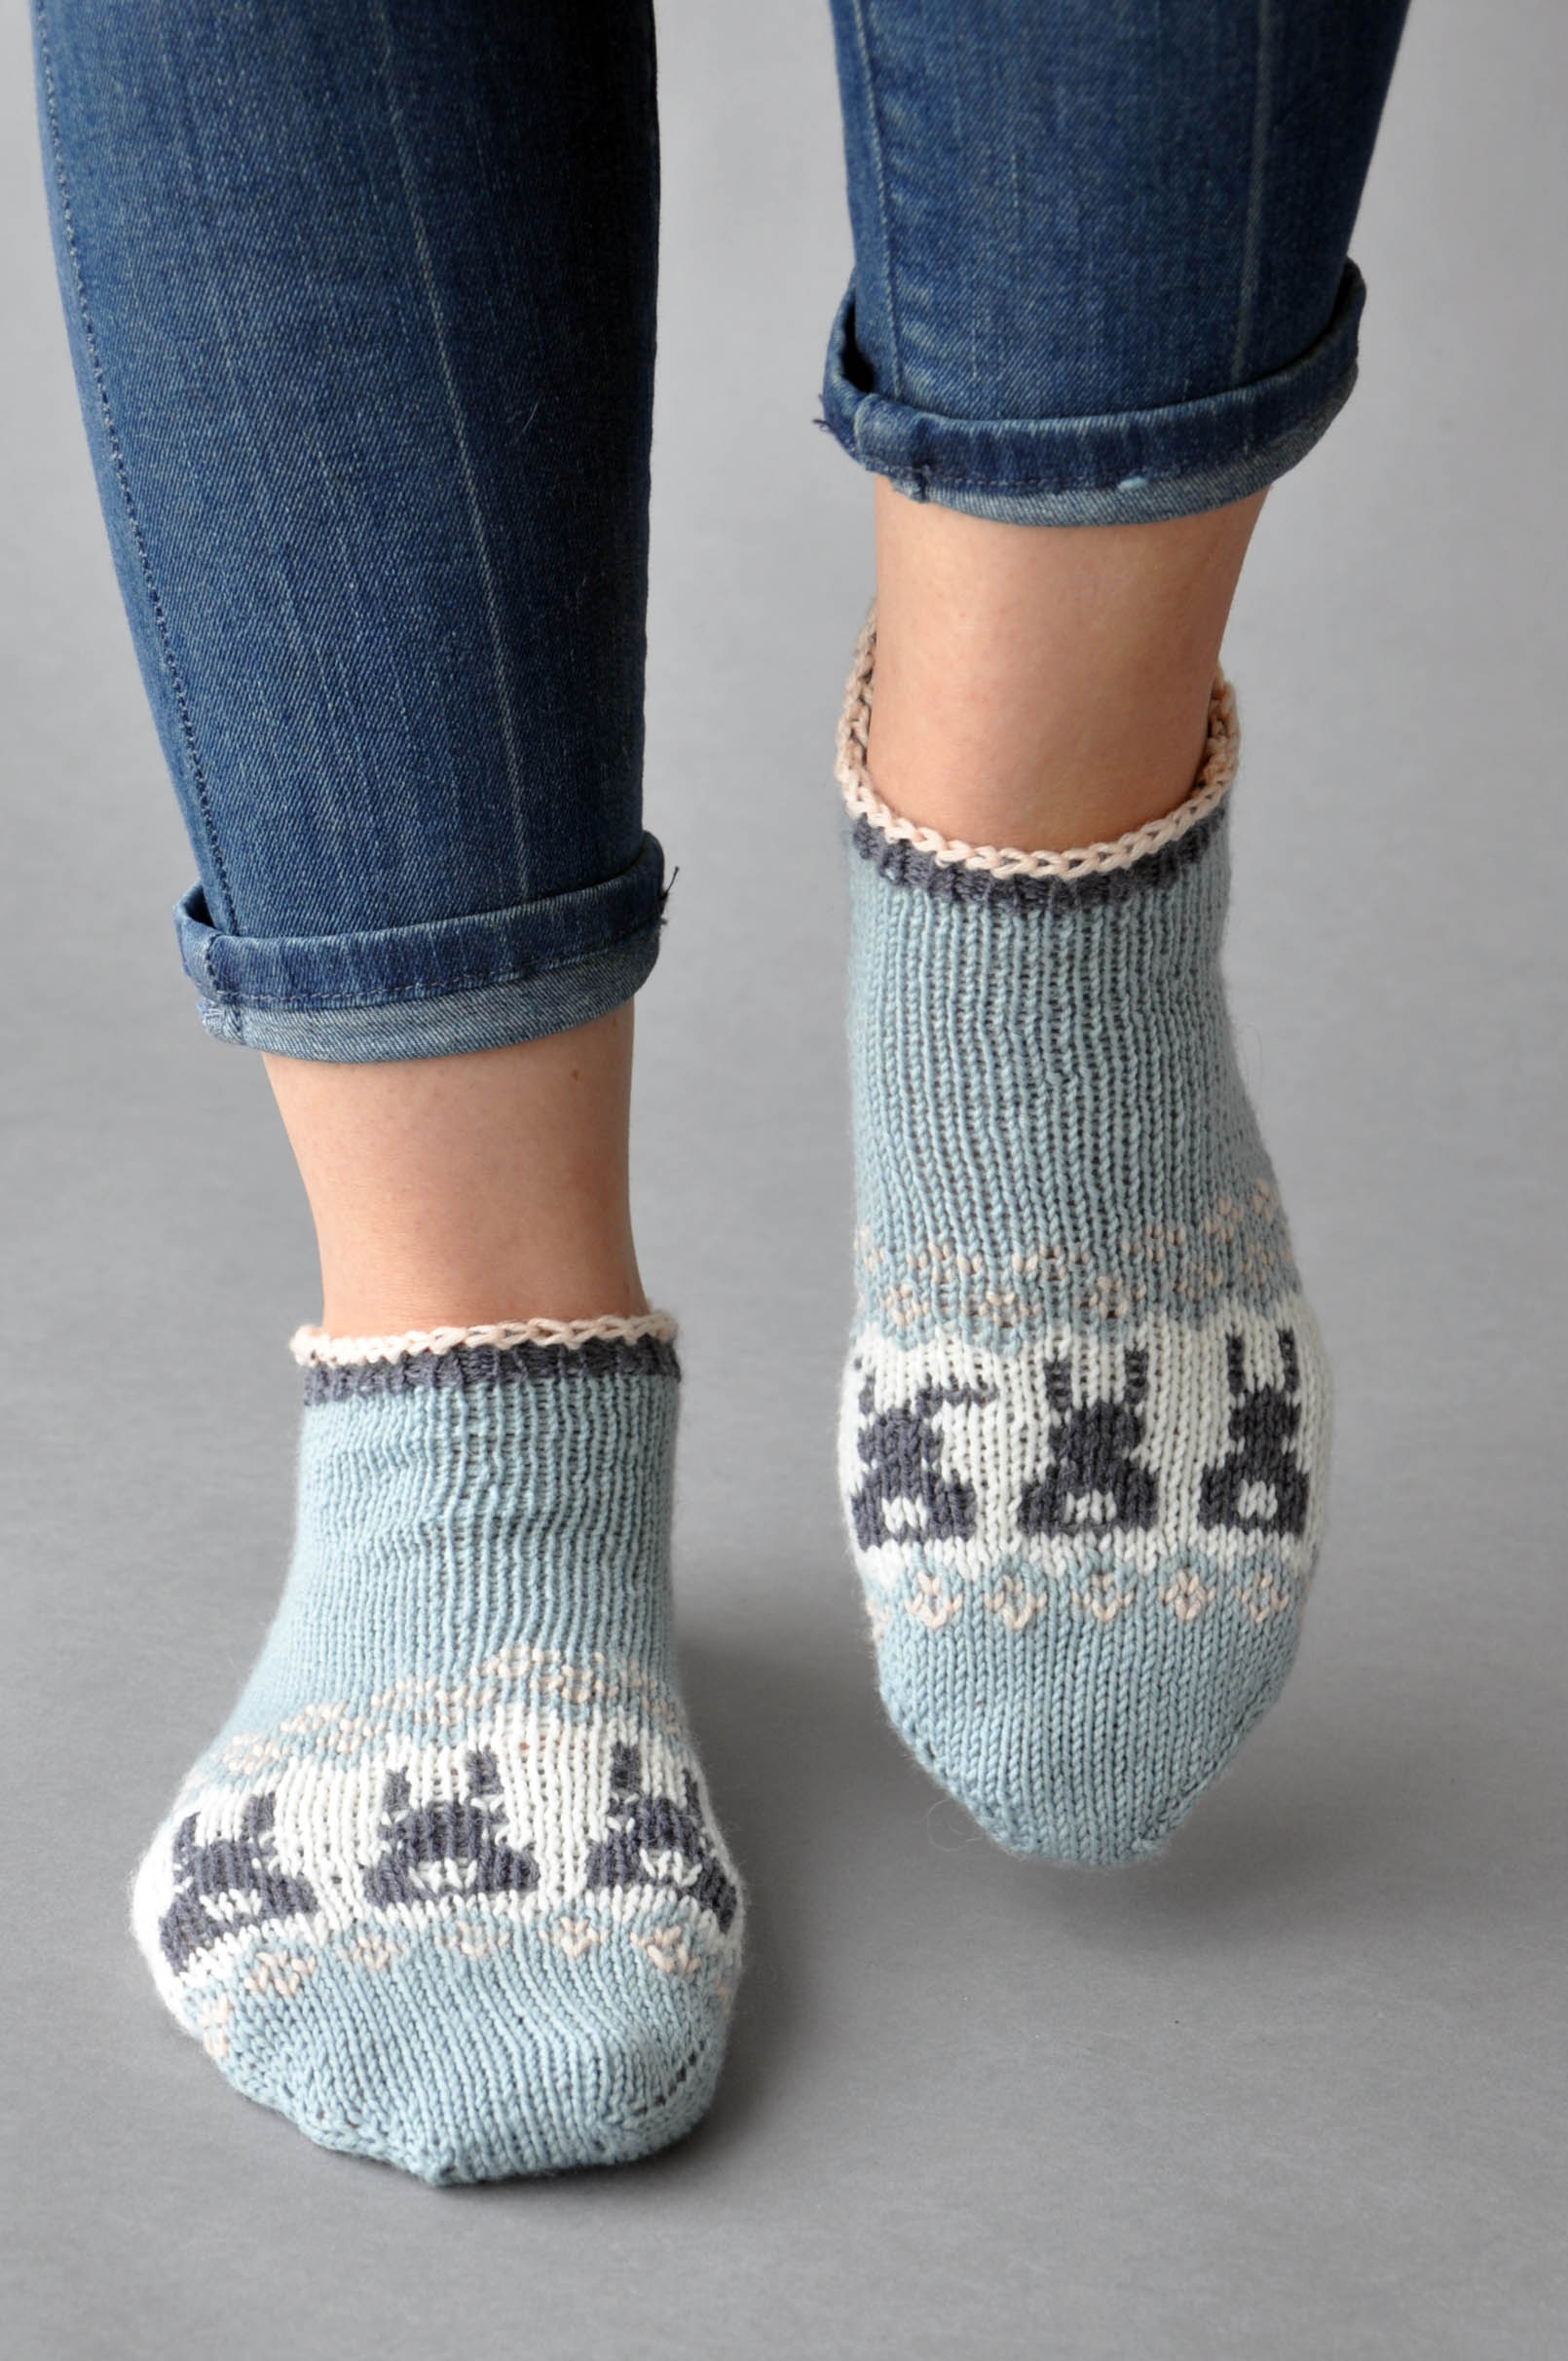
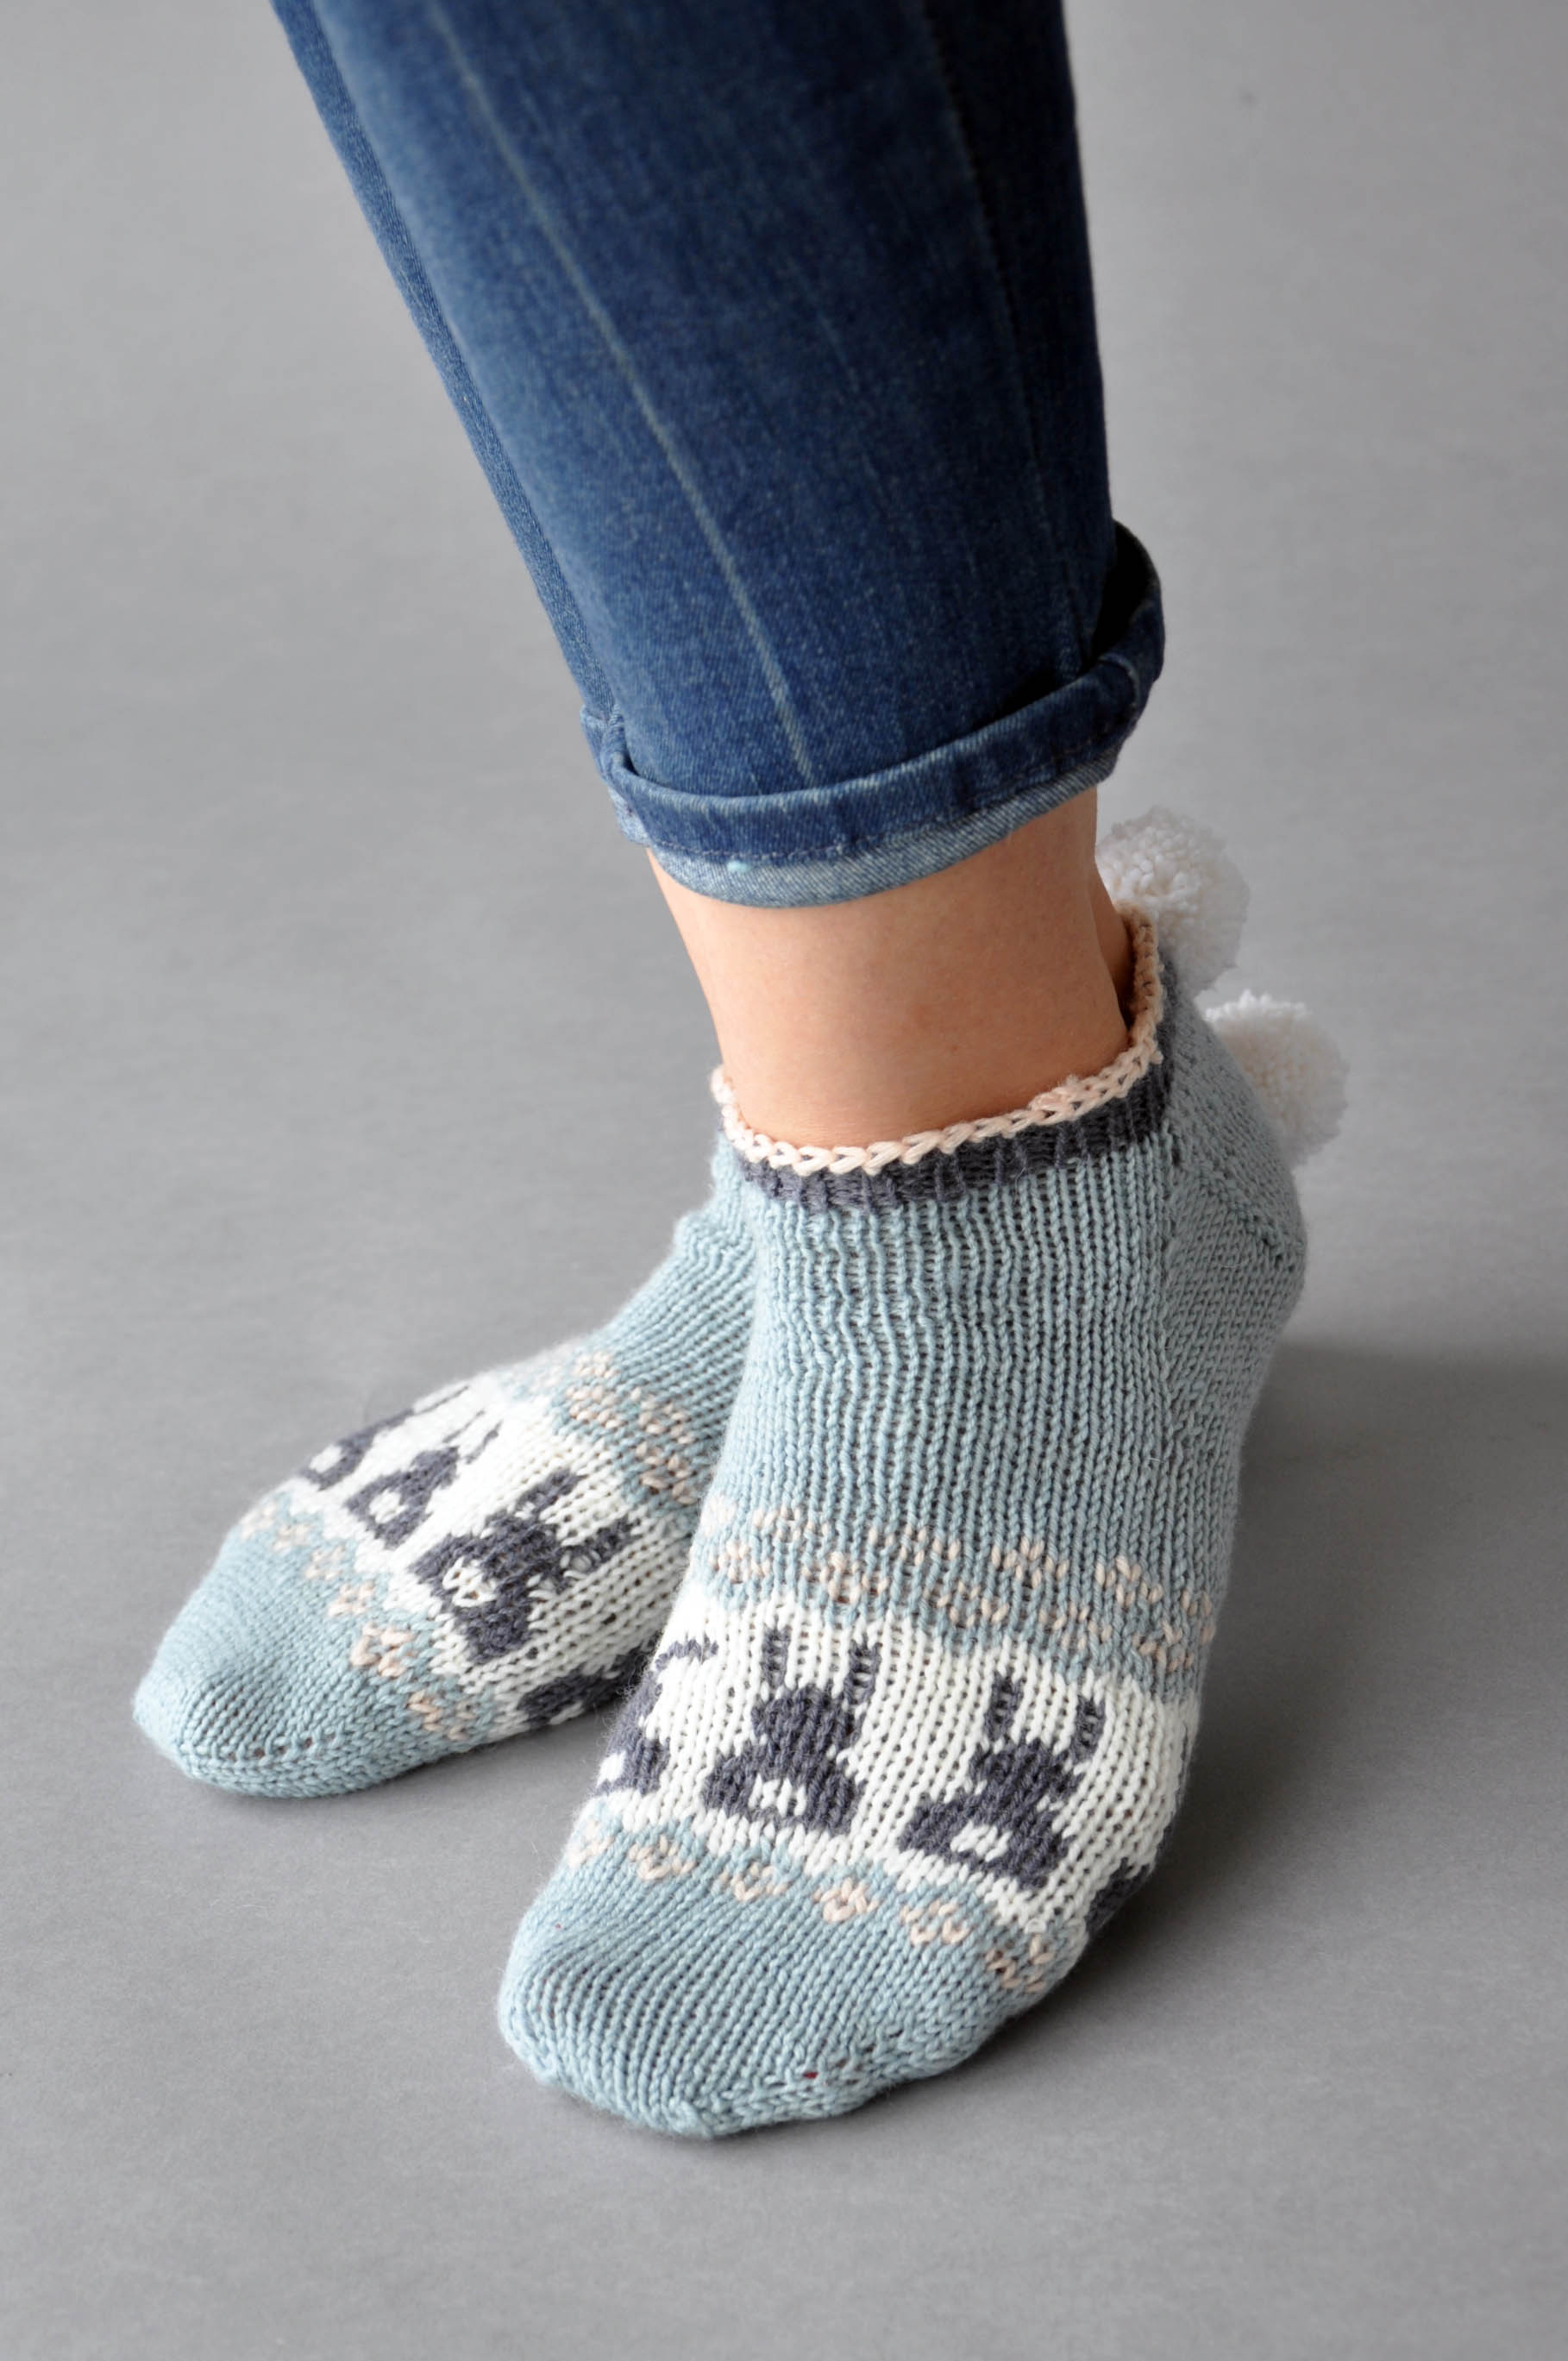
I gave just one of my bunnies a floppy ear. Customize these and make them your own!
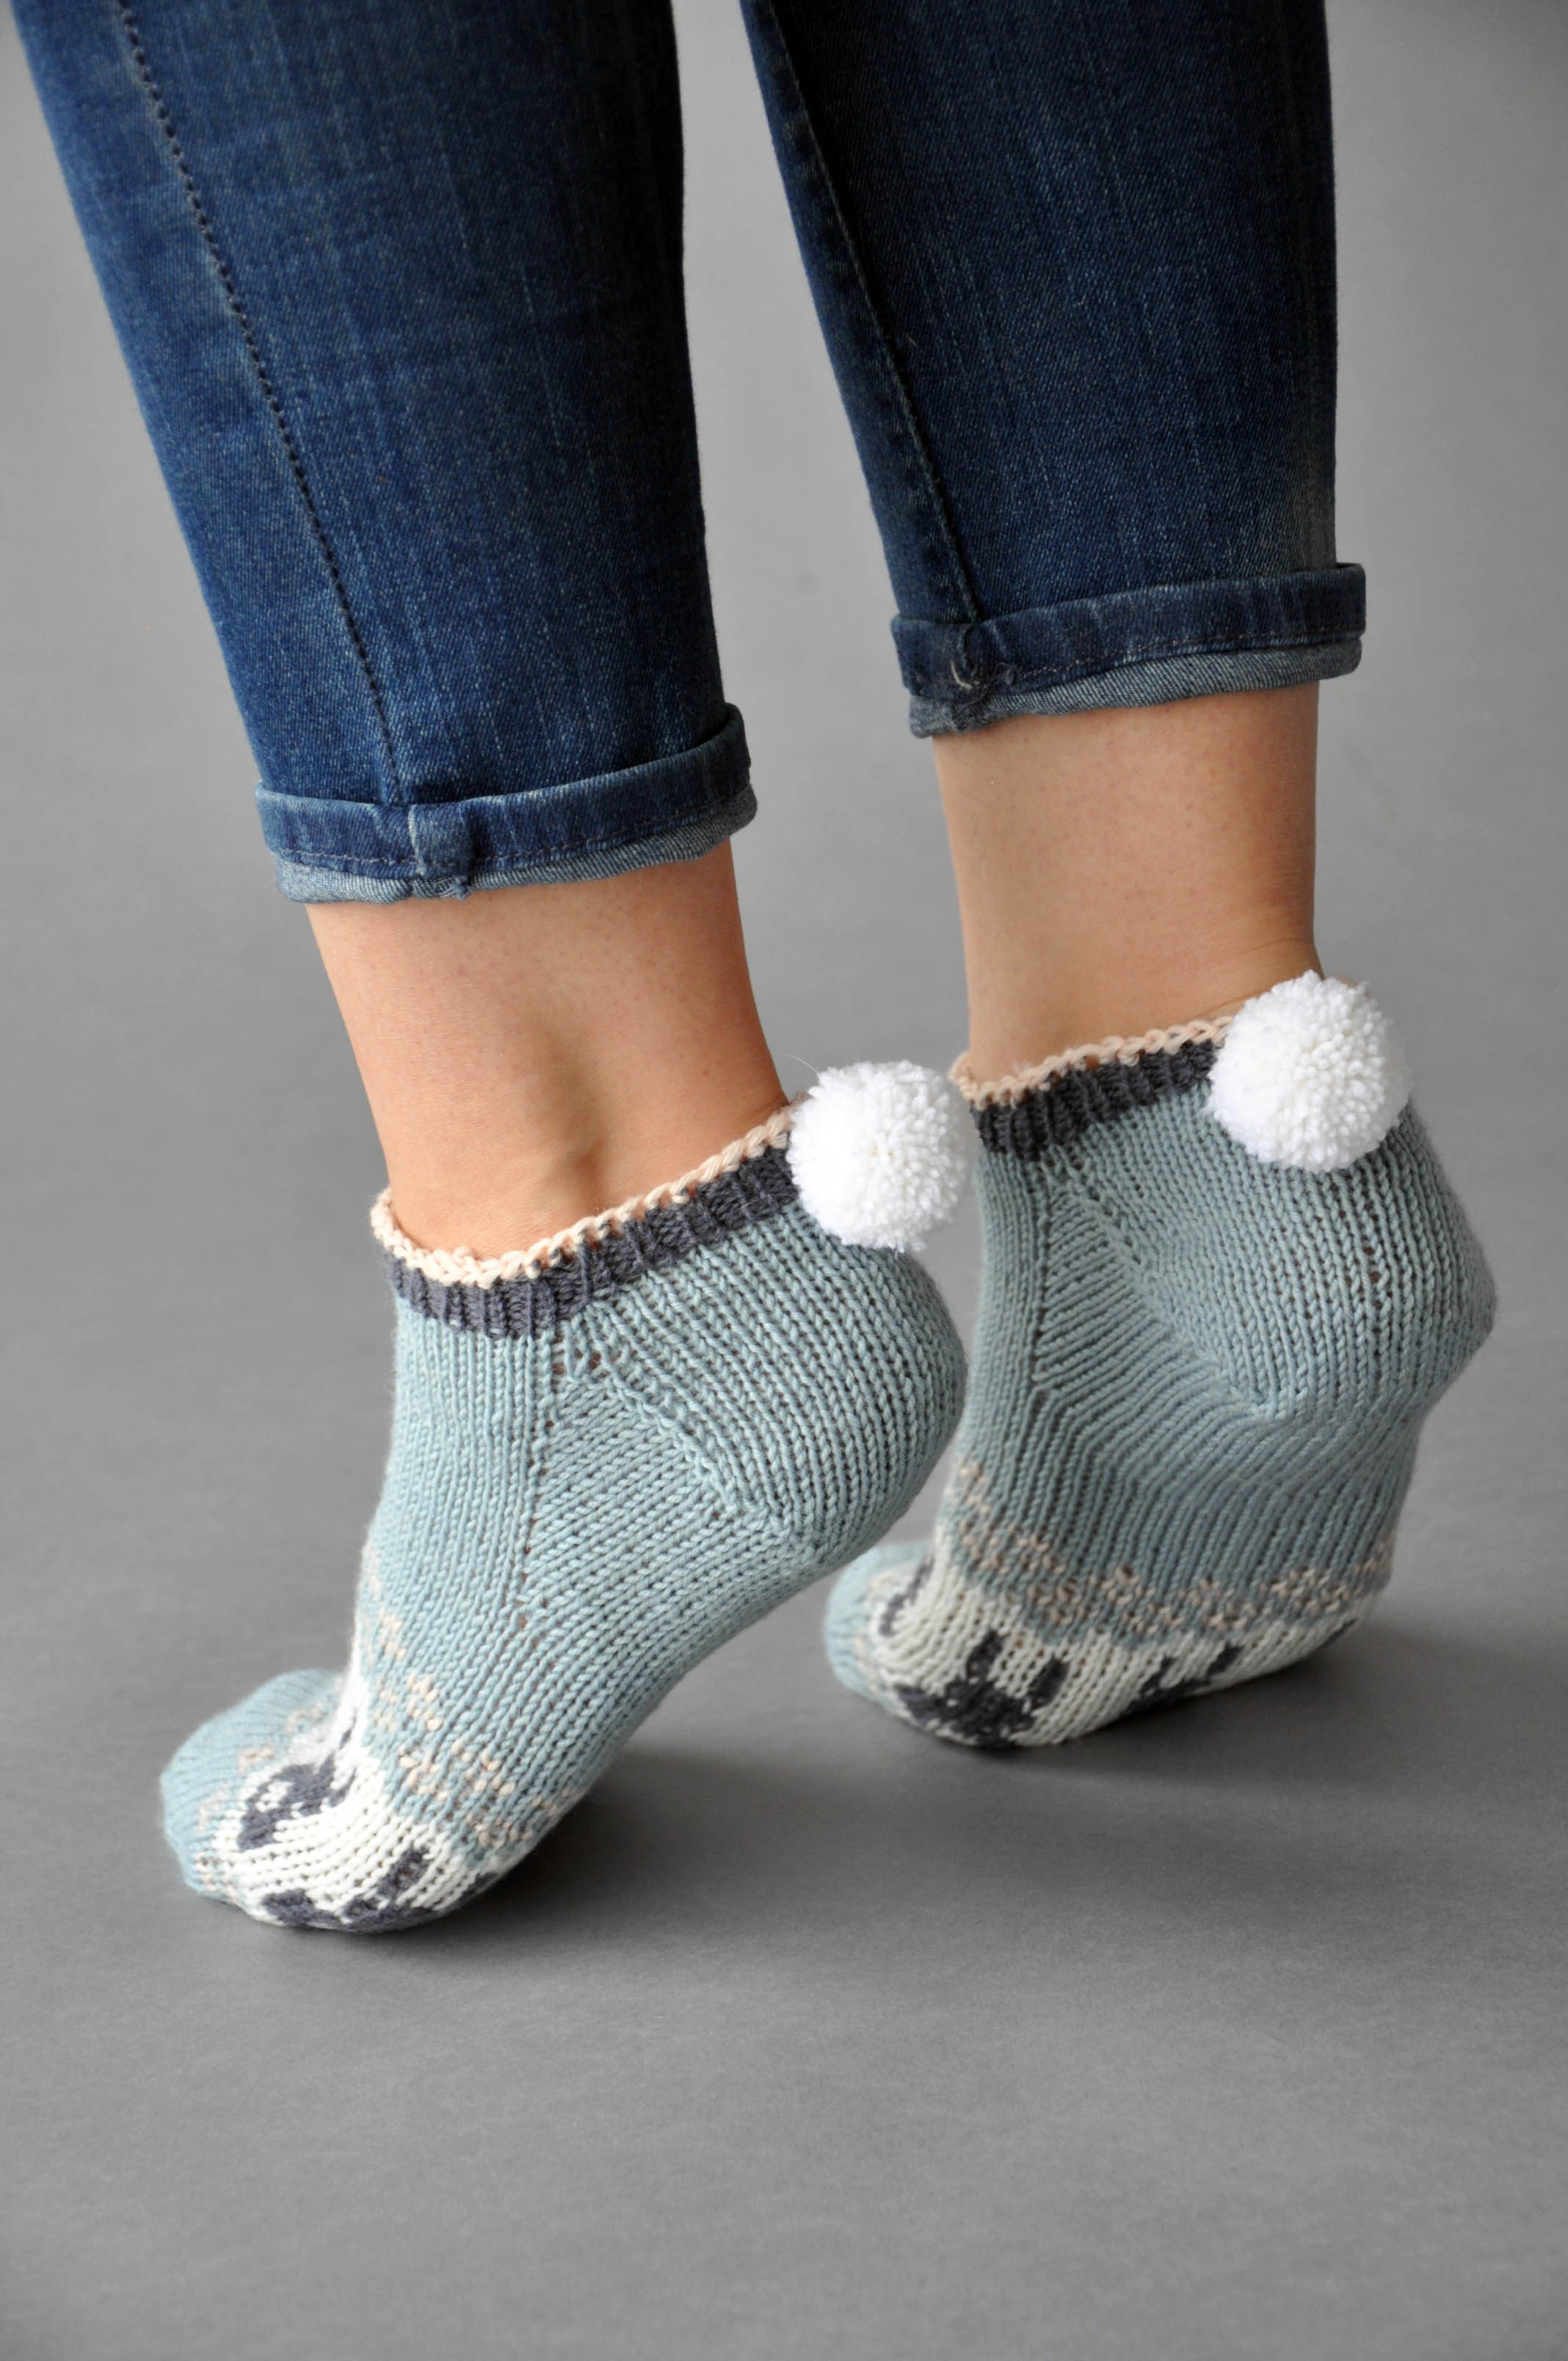
Bunny Got Back socks (pattern link) are my homage to Easter and to my dear departed pet bunnies. They are knit toe-up and it’s easy to customize foot length. I kept them anklet length in order to add useless but adorable pom-poms to the back, but you could easily keep on knitting for taller socks.
I thank Rachel Brockman for her superb foot modeling skills, and Heather Hill for her masterful flavor text at the beginning of the pattern:
I! Like! Warm! Toes and I cannot lie!
You other knitters can’t deny!
When you go toe up with a little short cuff
And a cottontail full of fluff…
BUNNY GOT BACK!
This pair is knit in one of our newer yarns, sport weight Bella Cash. It works wonderfully for socks. Bella Cash is a blend of washable fine merino, cashmere (mmmm), and nylon for strength and elasticity. We’ve been mostly using this yarn in kid projects, but I see sweaters in my future and definitely more socks using this scrumptious blend.
I hope you enjoy this gift for spring. Happy Easter!
Look at how simple that is. This is exactly the kind of pattern that I would have loved as a beginner, and that I still love when I want to make something beautiful and not look away from binge-watching Jessica Jones.
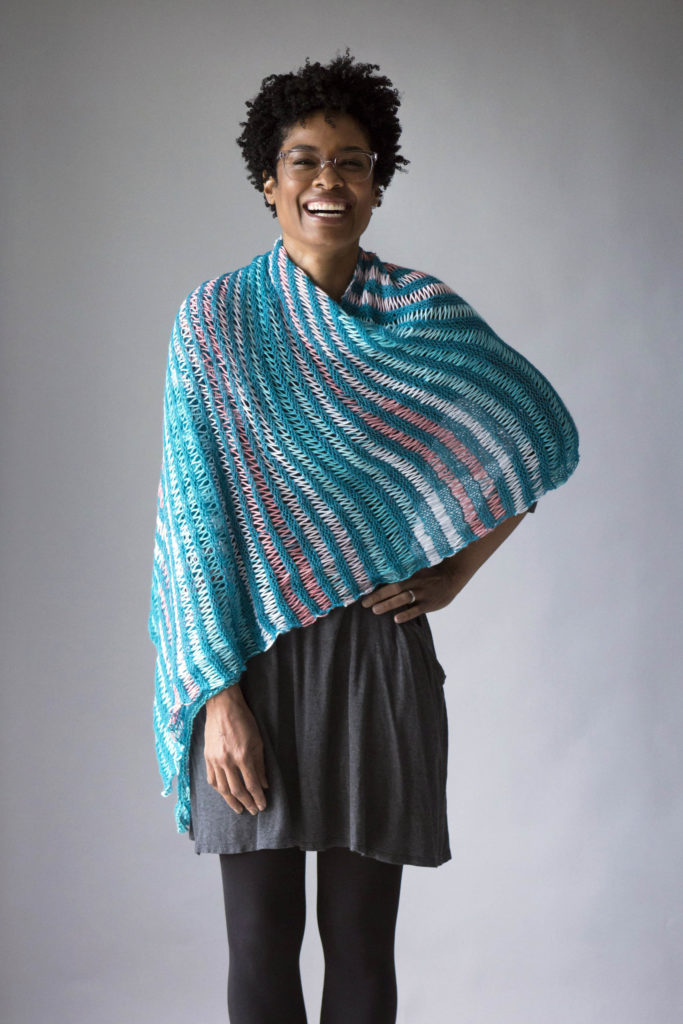
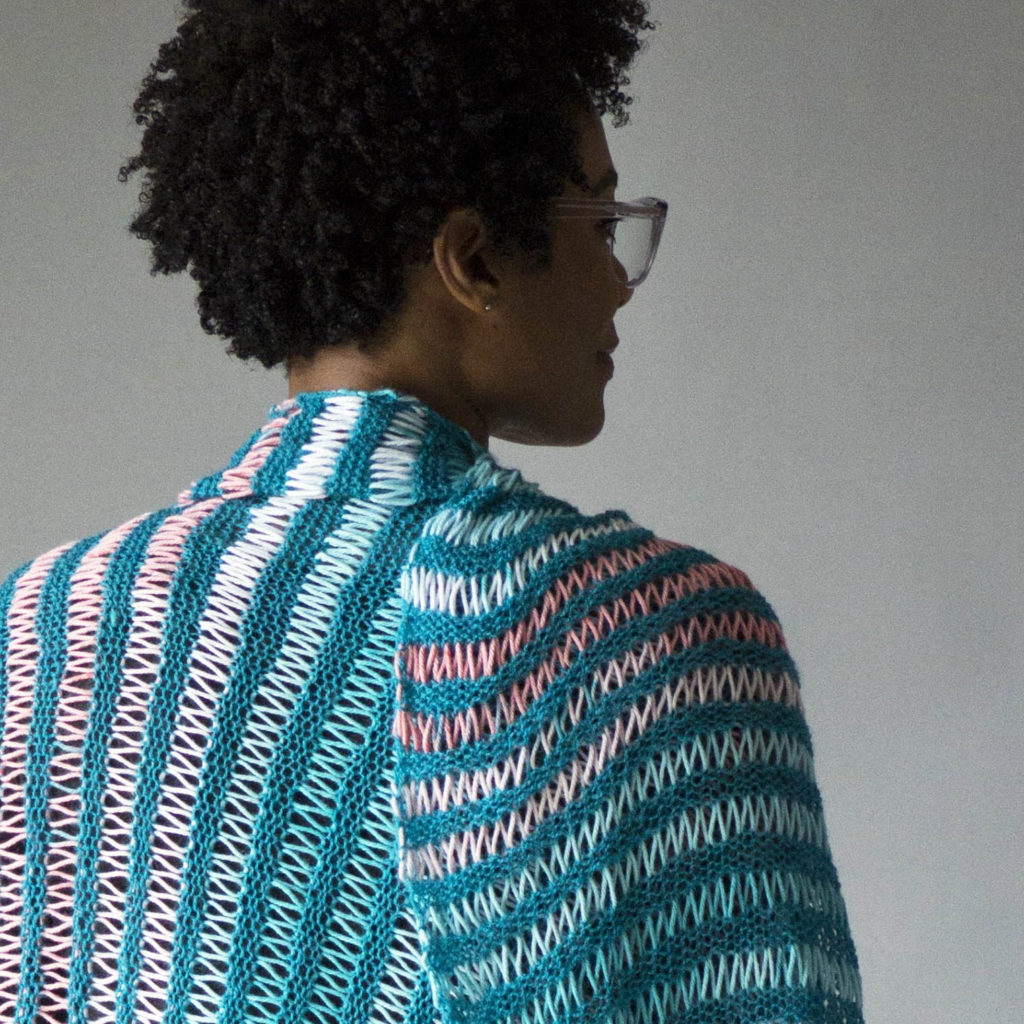
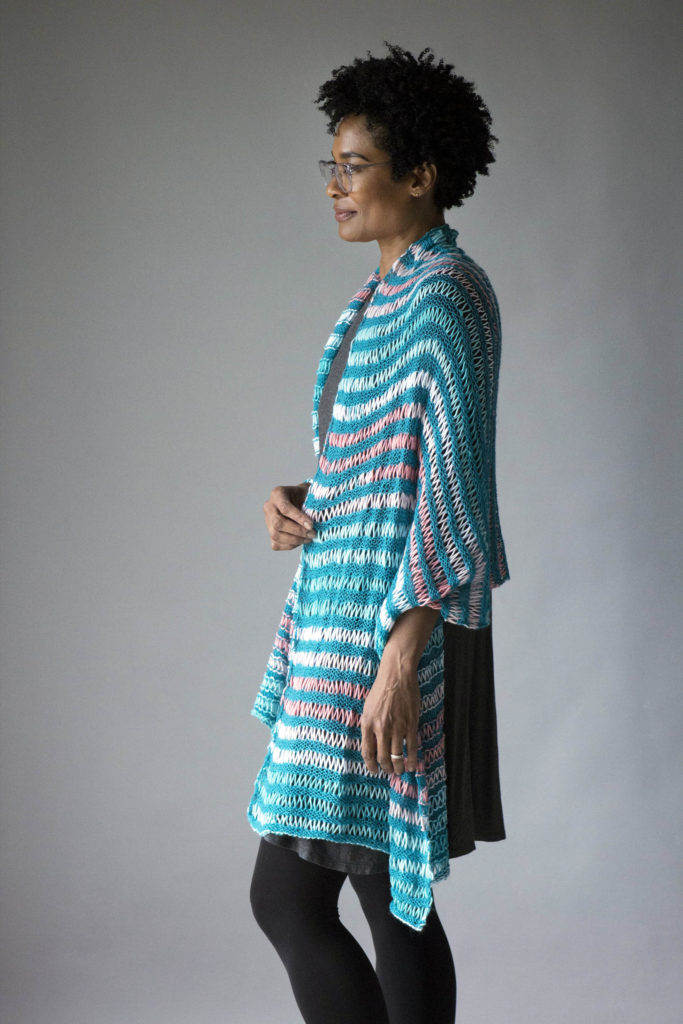
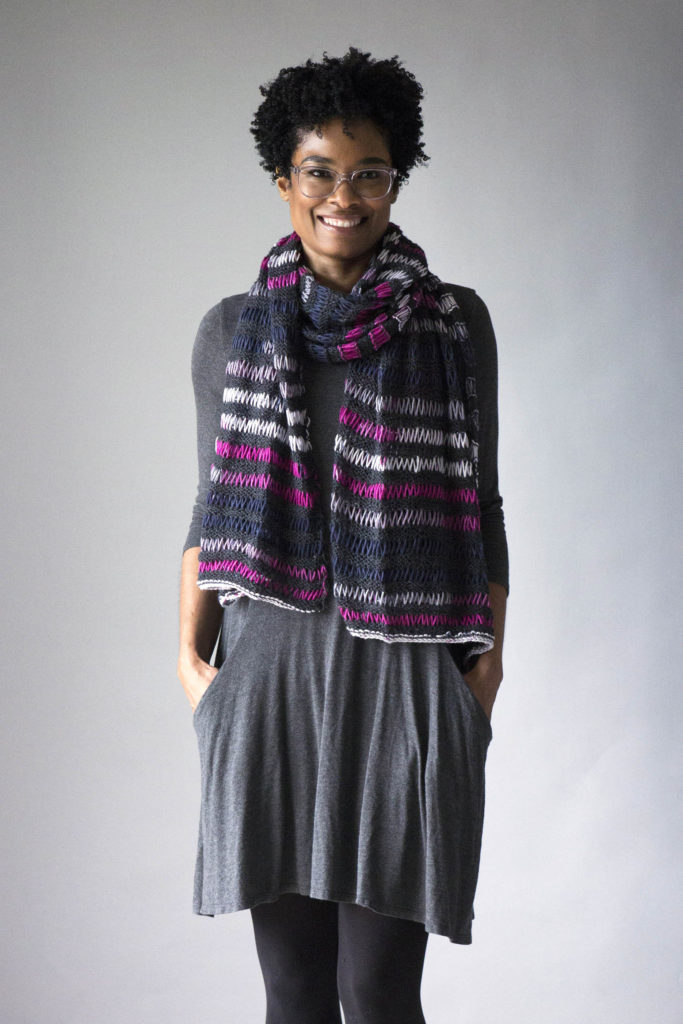
Because it’s dropped stitches on a larger needle (US size 10 1/2), this pattern makes the yarn go a long way. One ball of Whisper Lace wool/silk for the solid bands, two balls of self-striping Cotton Supreme Batik for the wider variegated stripes.
Because the fabric is so loose and drapey, it scrunches up effortlessly – hence the name Scruncher Scarf. Here it is in an alternate colorway, folded in half and wrapped for an accessory that straddles “skinny” and “full.”
Obviously, this would be a great one to experiment with, colorwise. I’ll bet your LYS could put together some fantastic color combos.
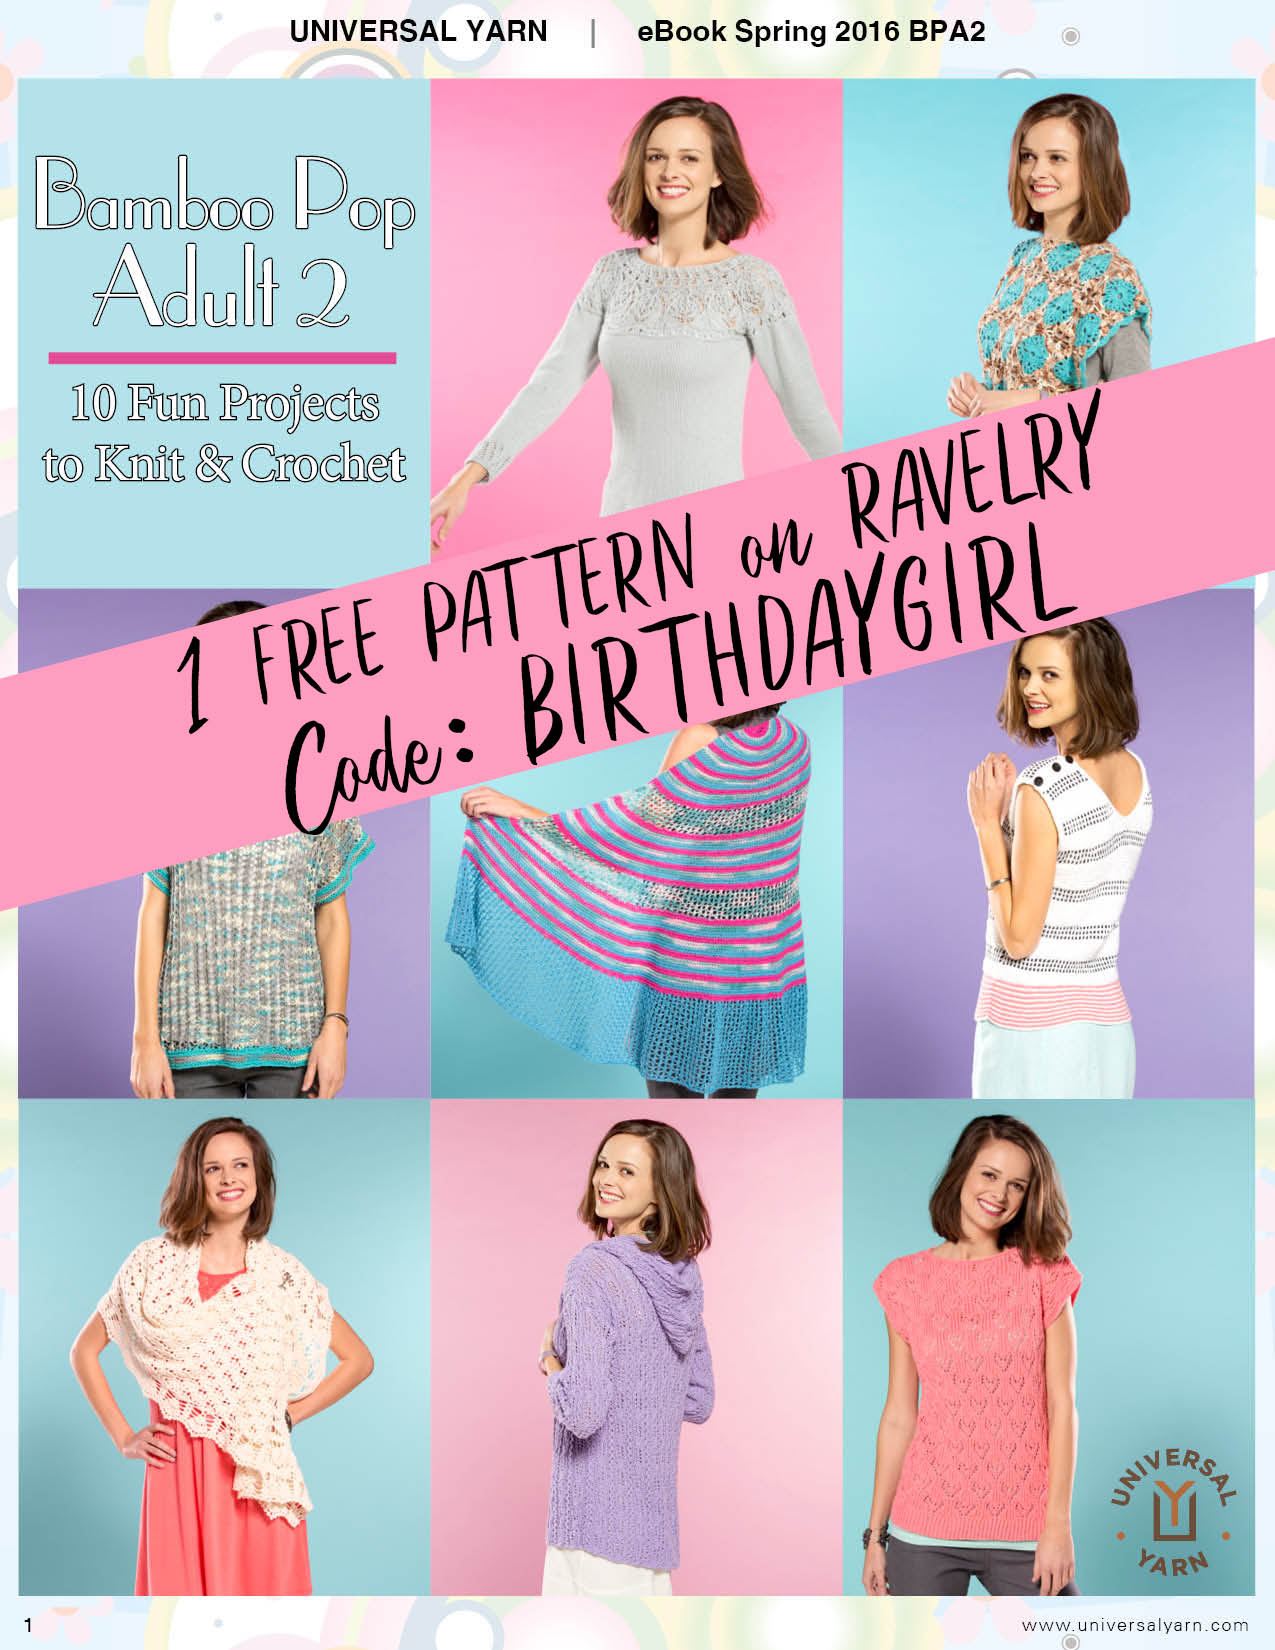
It’s Amy Gunderson’s birthday today, and we’re celebrating!
From now until Monday 3/26/18, grab one pattern from her e-book Bamboo Pop Adult 2 for free on Ravelry! Just use codeBIRTHDAYGIRLat checkout, where it asks if you want to apply a coupon. This is a great collection of knit and crochet designs for Bamboo Pop, a lightweight bamboo/cotton blend perfect for (hopefully) warming weather.
Why are we doing this?
Amy’s the driving force behind our creative team – not only does she knit, crochet, weave, and sew, but she goes out of her way to nurture new talent and form partnerships that help bring our crafting community closer. We want everyone to appreciate her as much as we do!
(Plus, she’s travelling to Germany for the H+H handcrafting show right now, and every time someone downloads one of her patterns it sends a message to her phone, and I think it’d be funny to blow up her inbox while she’s on the road. )
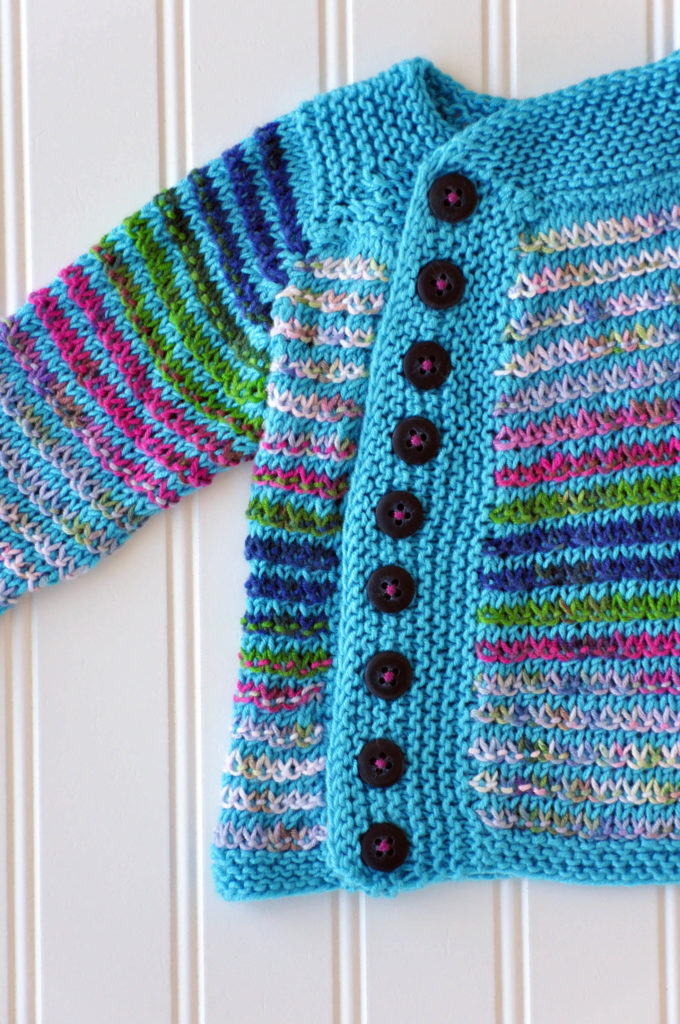
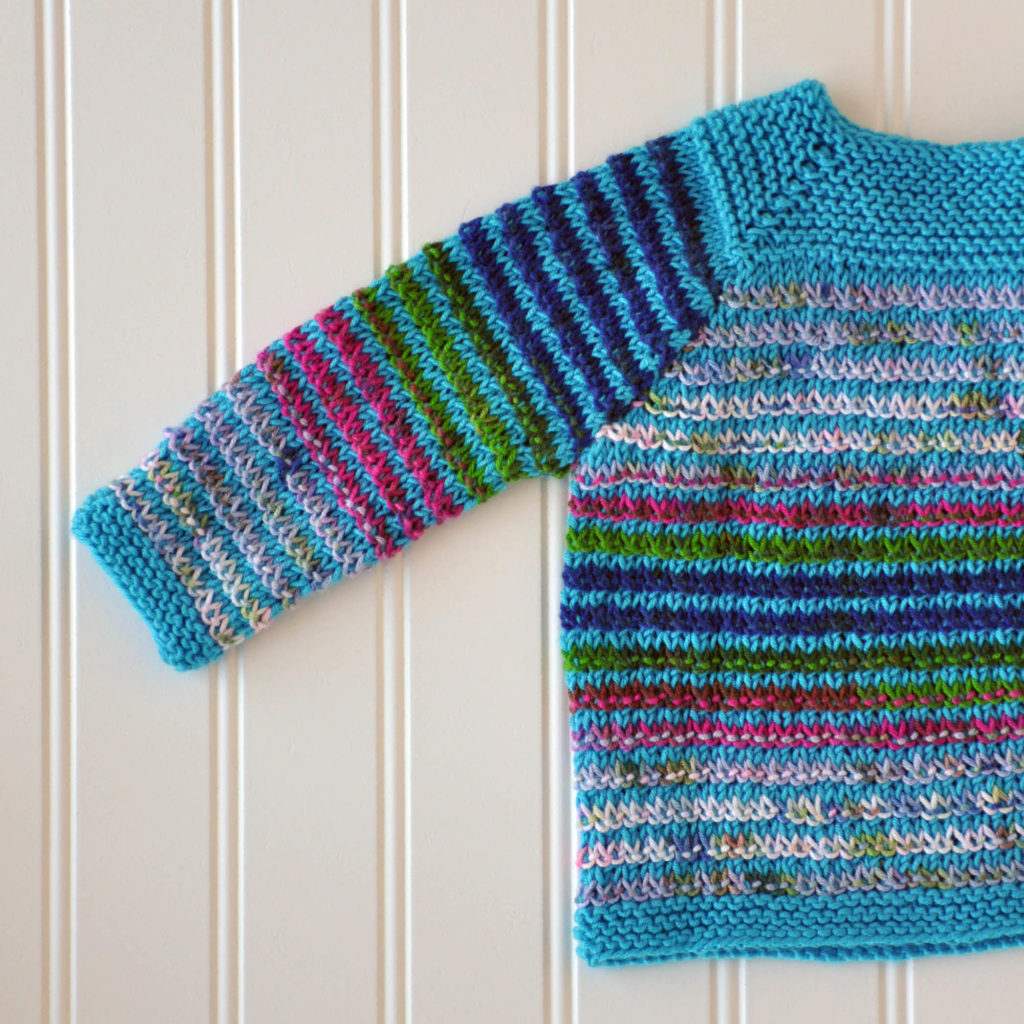
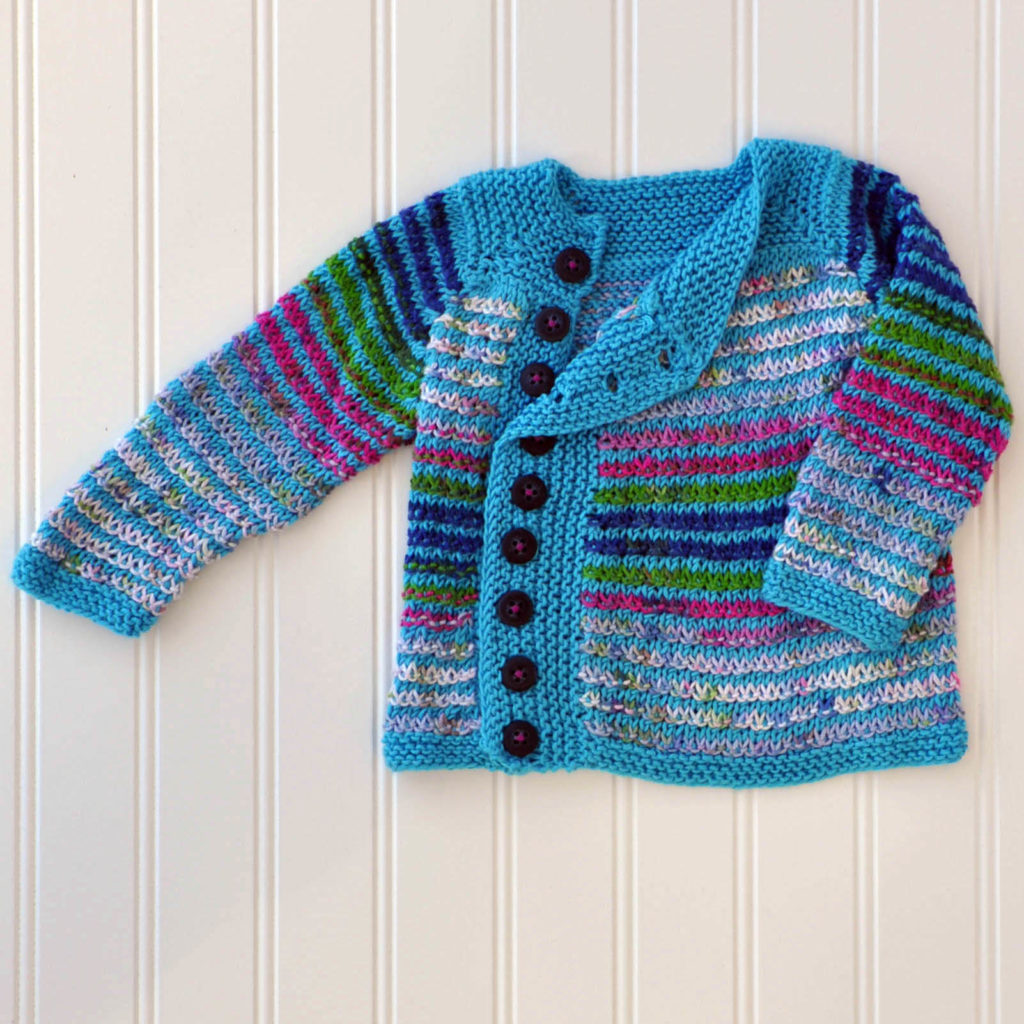
Sized from 3 months to 2 years, this clever cardi uses machine washable Little Bird and its self-striping sibling Little Bird Colors to easily create a bright little jacket for baby.
The front and back are knit flat, as are the sleeves. Then, they’re seamed together.
Add the edging, and your favorite buttons, and you’re ready to go.
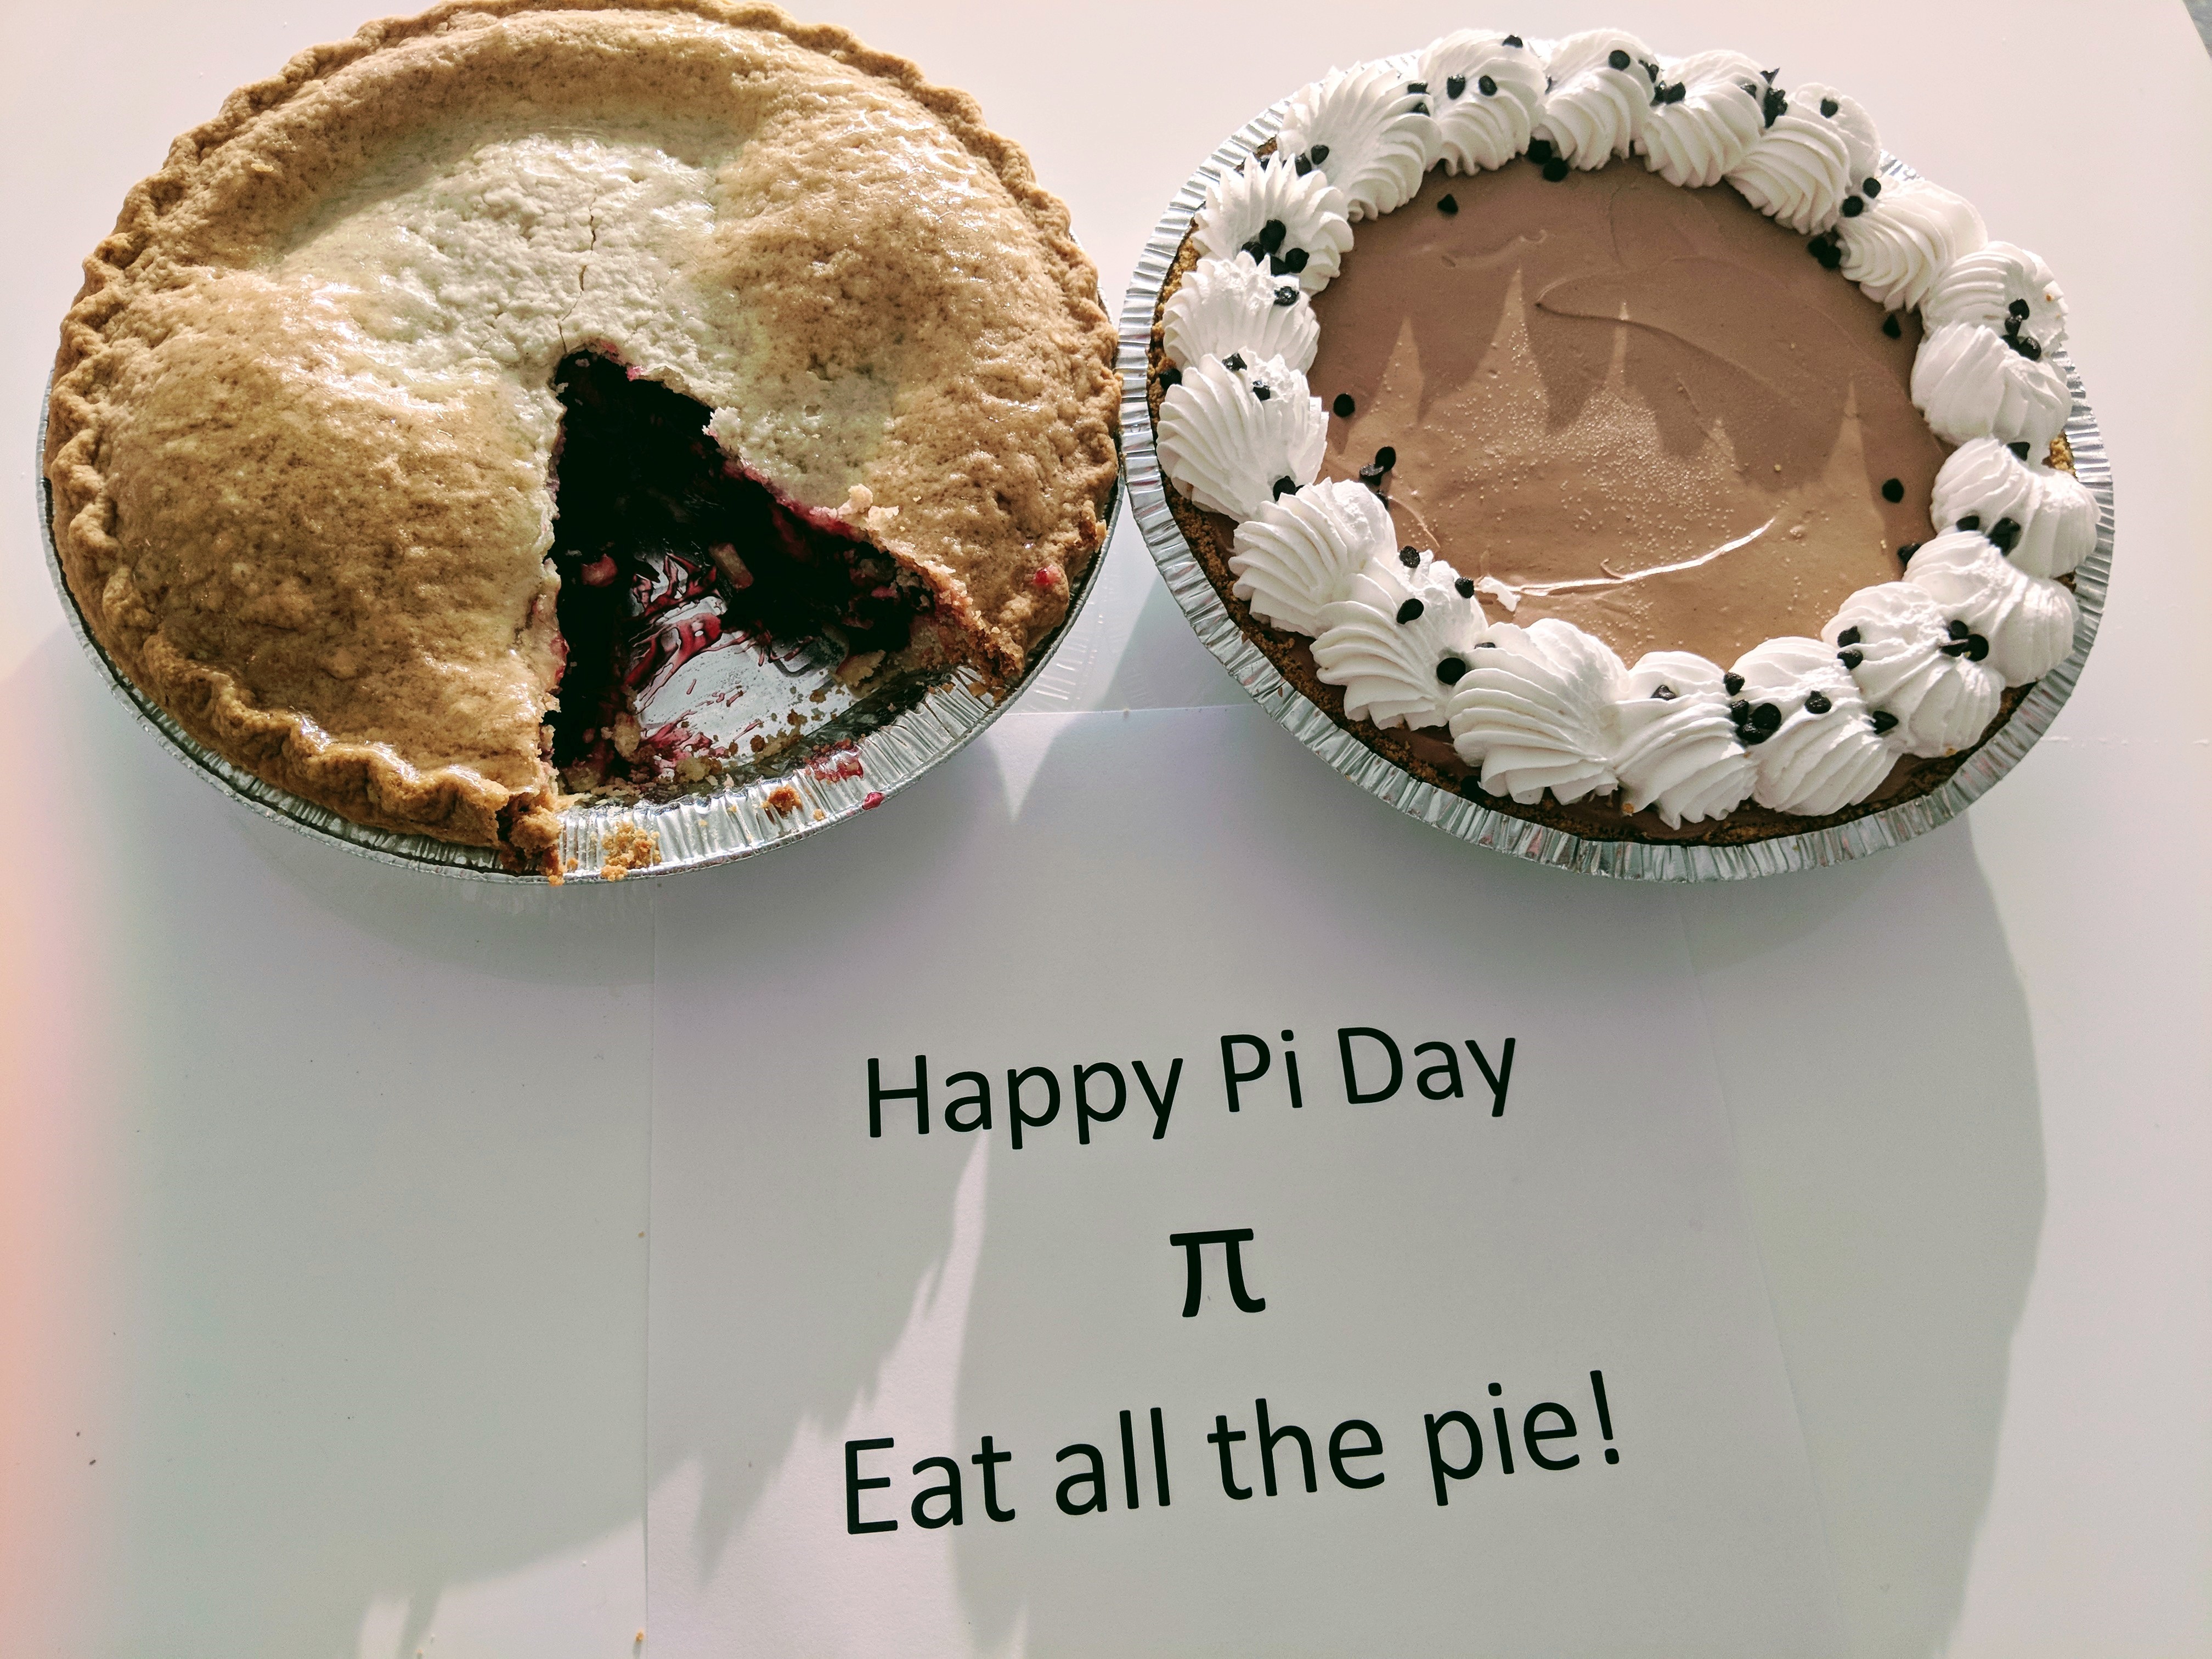
Though we like to celebrate Pi Day with a slice of cherry here at the office, that’s not actually what this math holiday is all about. But I will take any excuse to eat pie. Not that I need an excuse.
But seriously, Pi day is the annual recognizing of the awesome constant number we know as Pi, and that is recognized by this Greek symbol: π. Pi is approximately 3.14, and is the ratio of a circle’s circumference (the length around the entire outer edge of a circle) and the diameter (the width of a circle).
I am a pretty big math geek. Math is logical, useful in so many facets of life, and it never lets you down. Pi is especially cool because it helps to solve the mystery of the unknown. For example, by knowing the formula for pi, and, say, the diameter of a circle, you can calculate the circumference of said circle.
As a knitting designer, I have relied upon Pi on many occasions. Here are a few examples:
The semicircle shawl in Deluxe Worsted begins with a sideways, short-row lower edge, and is then worked upward from there. In order to make a half circle shape considering all of the other aspects of this piece, I applied my love of Pi and magic was made.
Perhaps the most common and well know way of shaping a circular shawl is called the Pi method. Developed by knitting genius Elizabeth Zimmermann, this shape is worked from the center outward and involves only a handful of increase rounds. The basic principle involves doubling the stitch count as the diameter of the circle increases. Typically, a pi constructed piece of knitting begins with 9 stitches, doubles to 18 on round 3, doubles to 36 on round 7, up to 72 stitches on round 13, and so on.
The Burst blanket is purely pi knitting. There are just 6 increase rounds in the entire thing, allowing you to focus solely on the repeating stitch patterns.
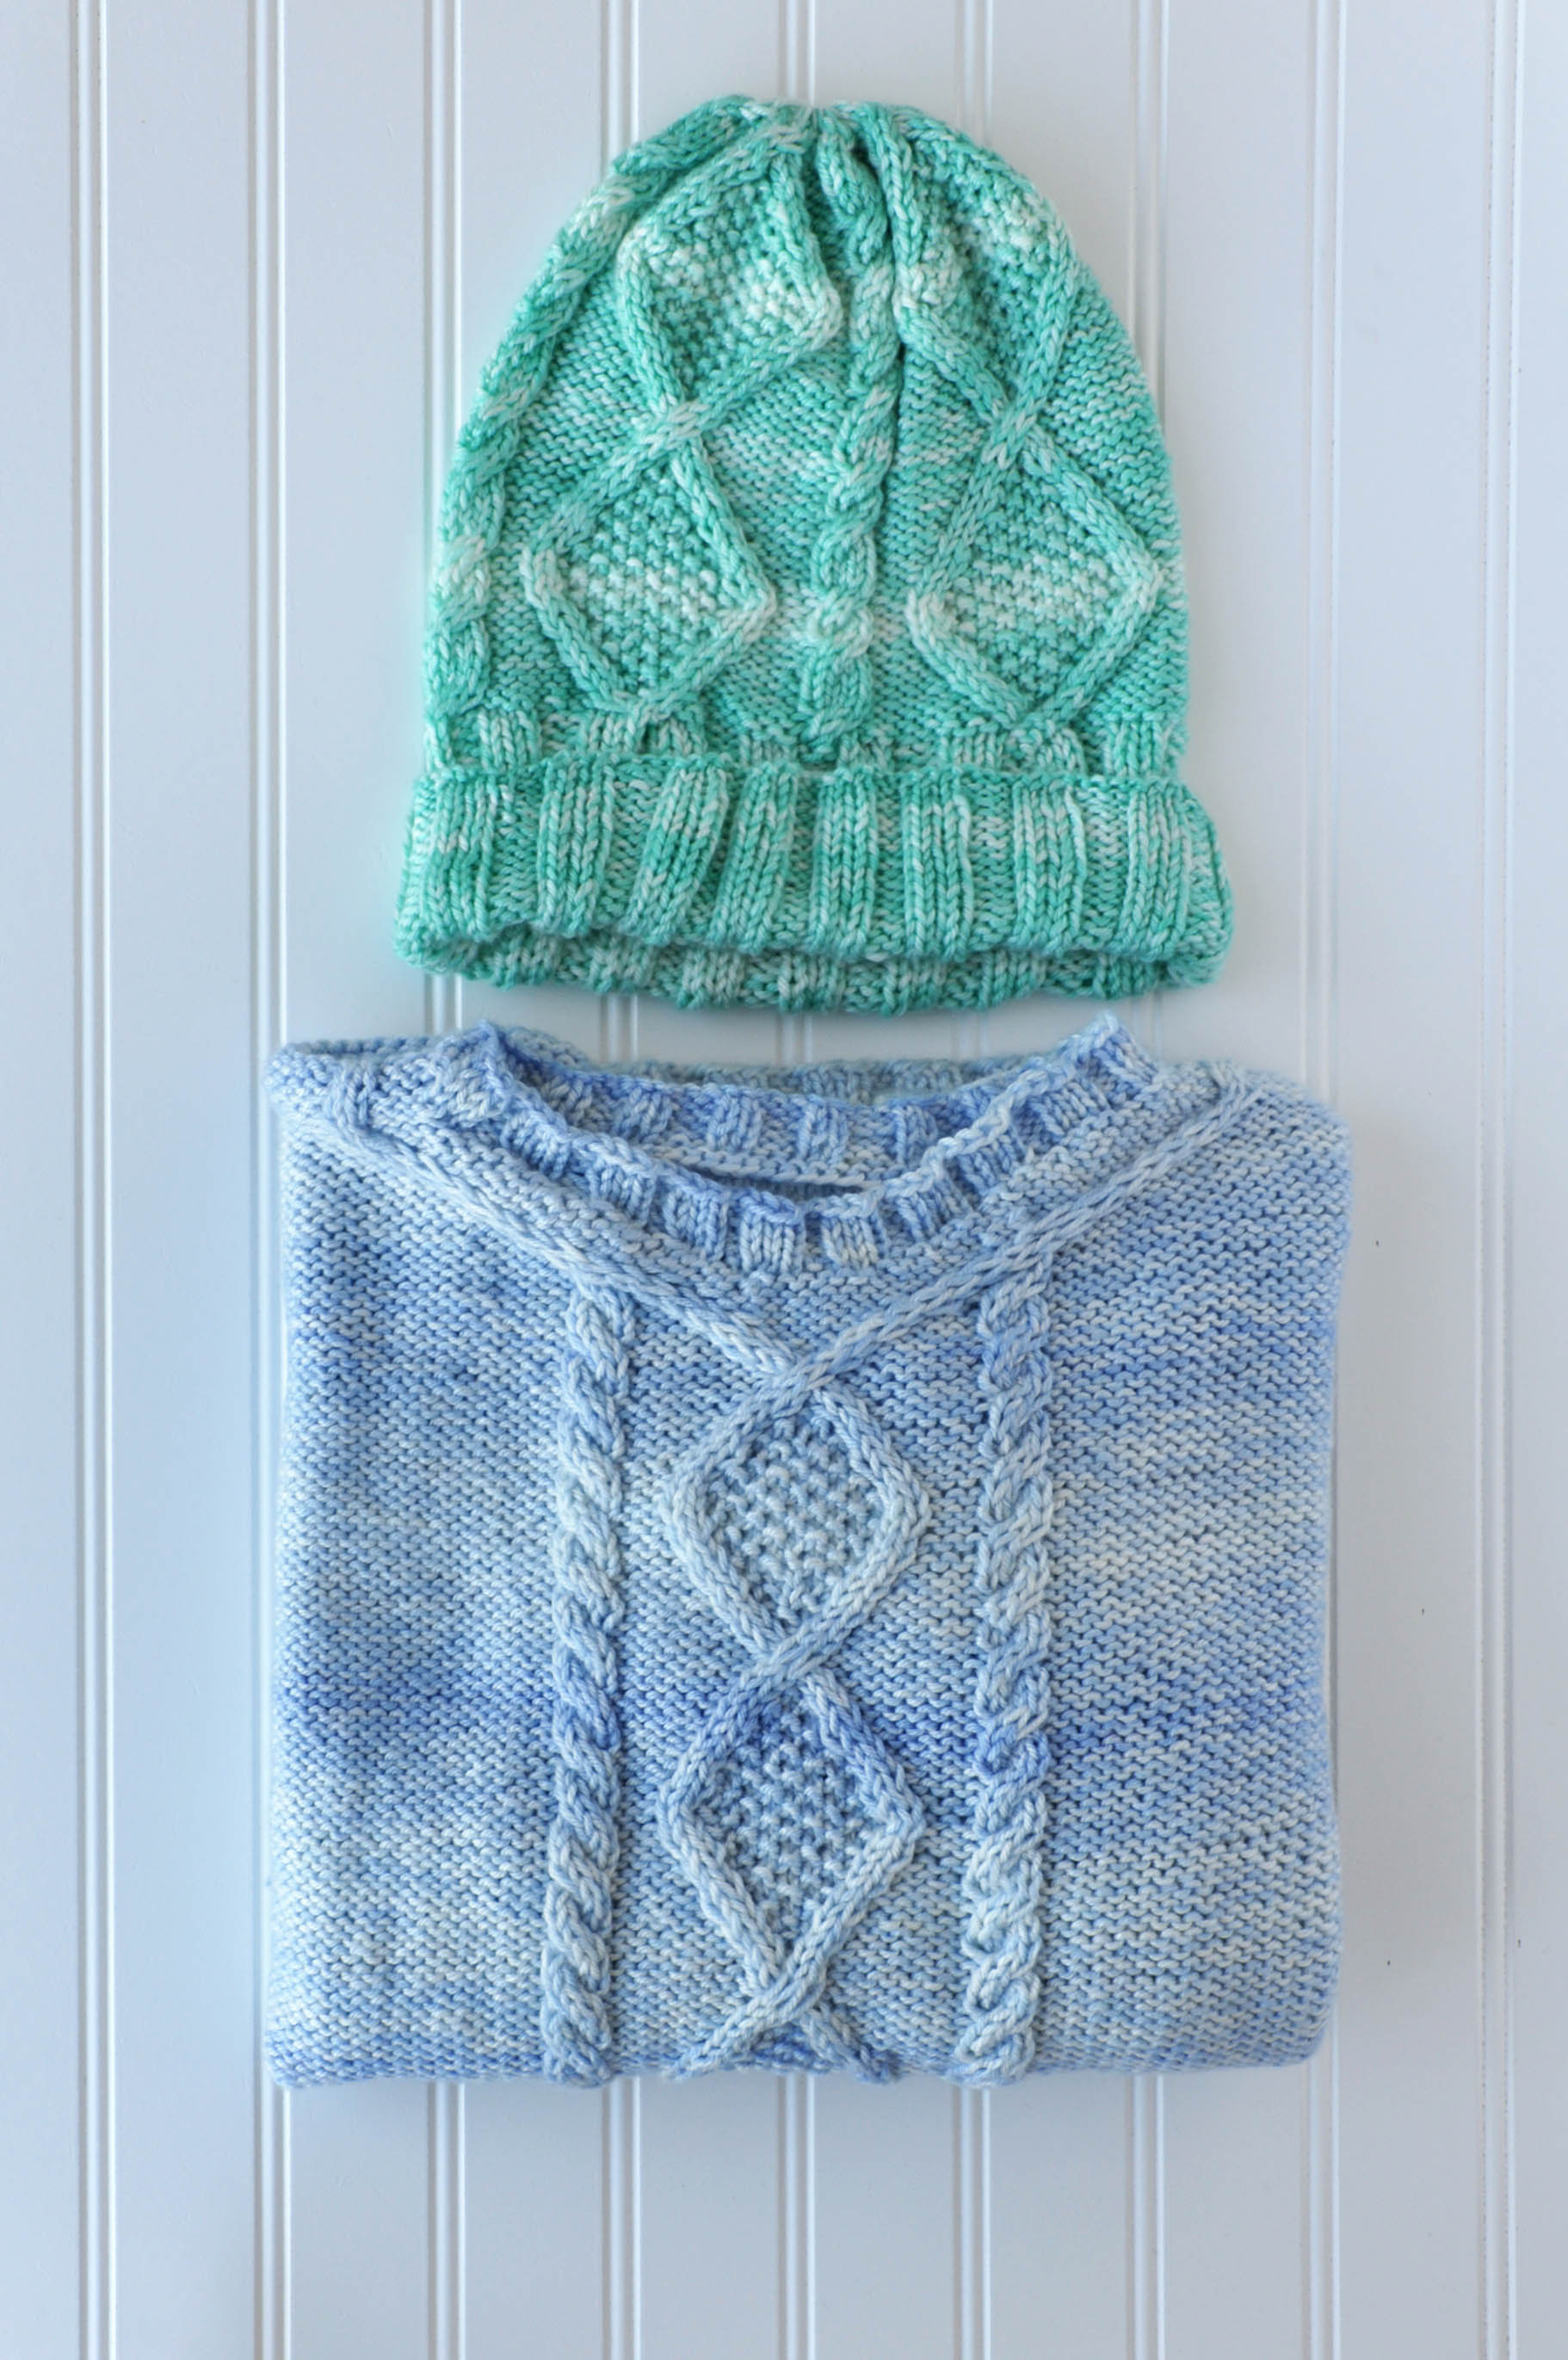
I actually have a lot of thoughts about this pattern, because
1) I love cables, and
2) I heard the “colorful language” around here as the pattern swelled to 4… 5… and finally to 9 pages. That’s what happens with extended sizing (although we don’t really consider it “extended”), and full charts and written instructions.
The consensus is that it was worth it.
There are quite a few things to love here, like sizing from Small to 4X in the pullover…
detailing like twists along the sleeve and texture within the front cables…
and how nicely this does in Uptown Worsted Mist, which is variegated enough to add interest but not so much that it overwhelms a lovely design.
We hope you have a wonderful weekend, and that you take time to do something for yourself.
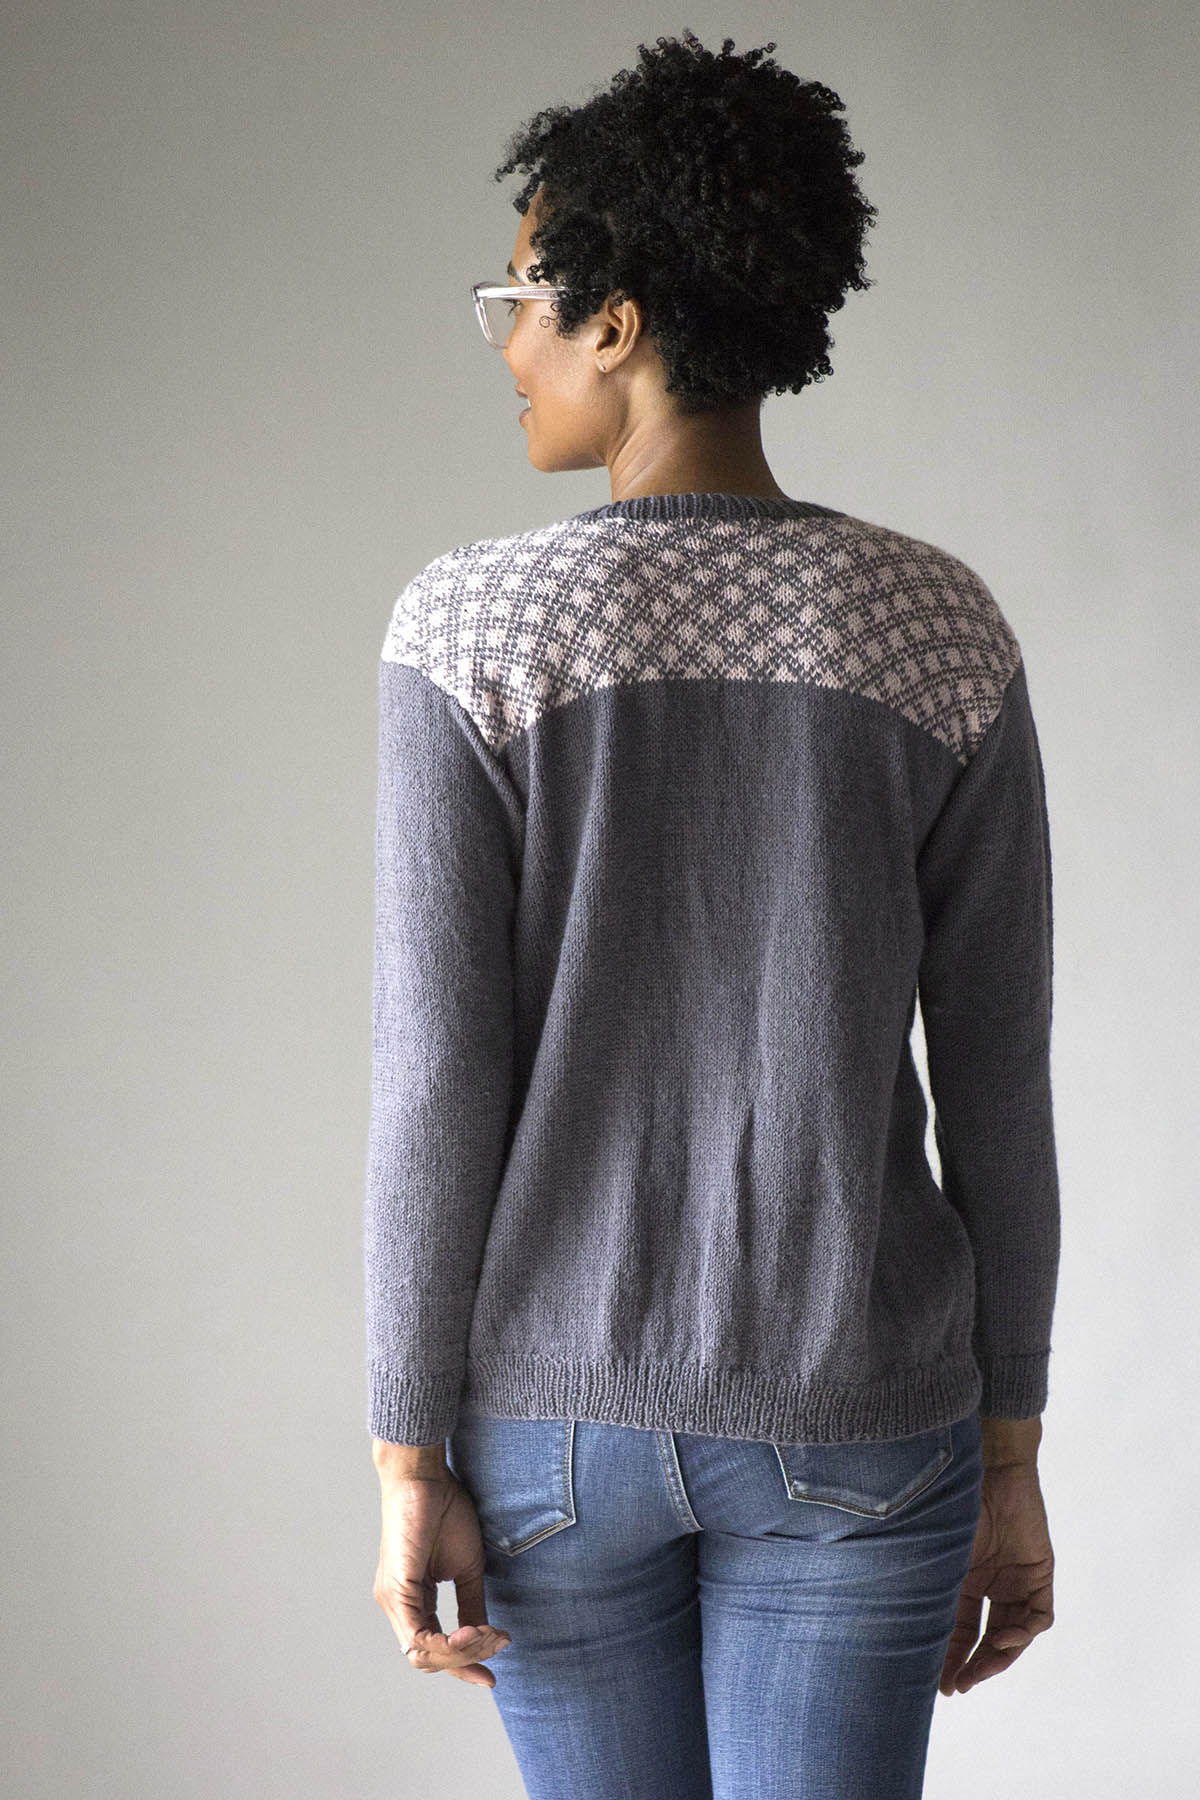
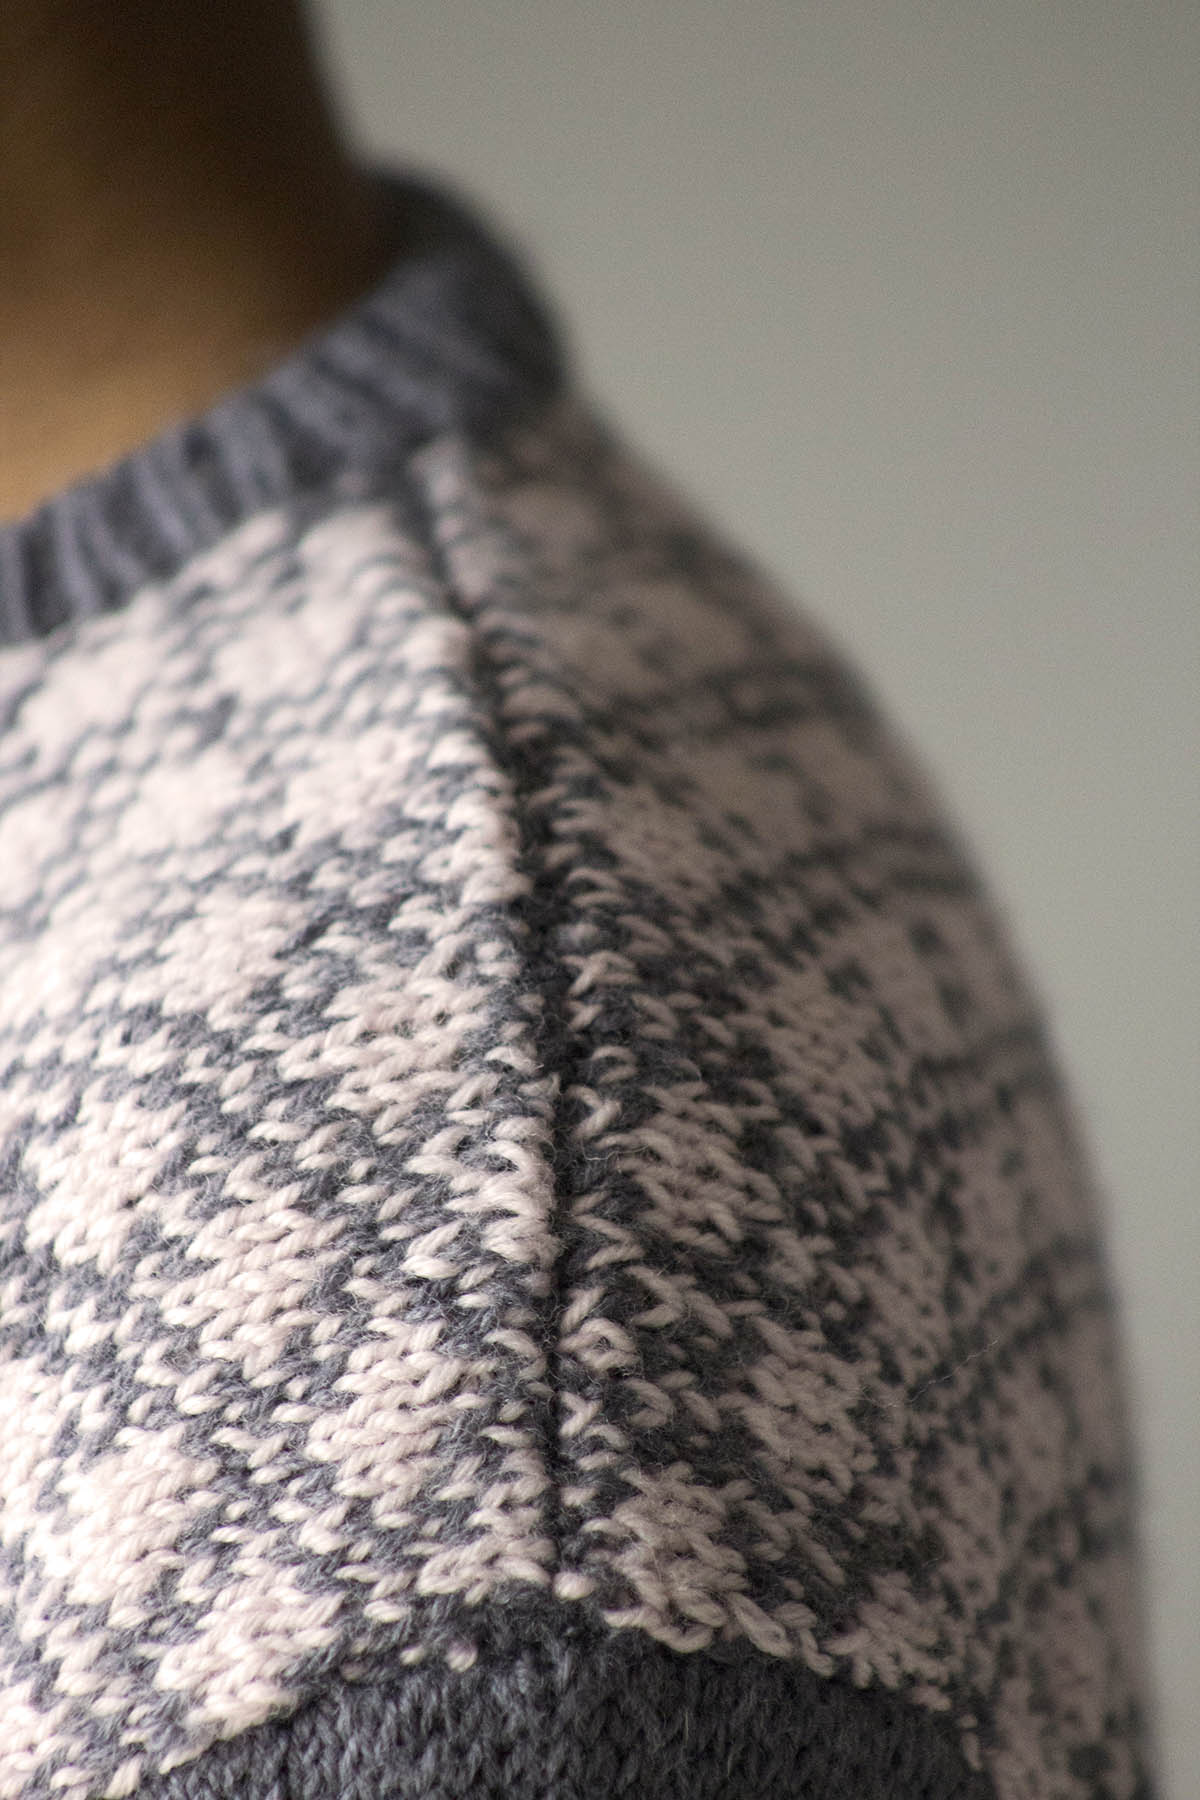
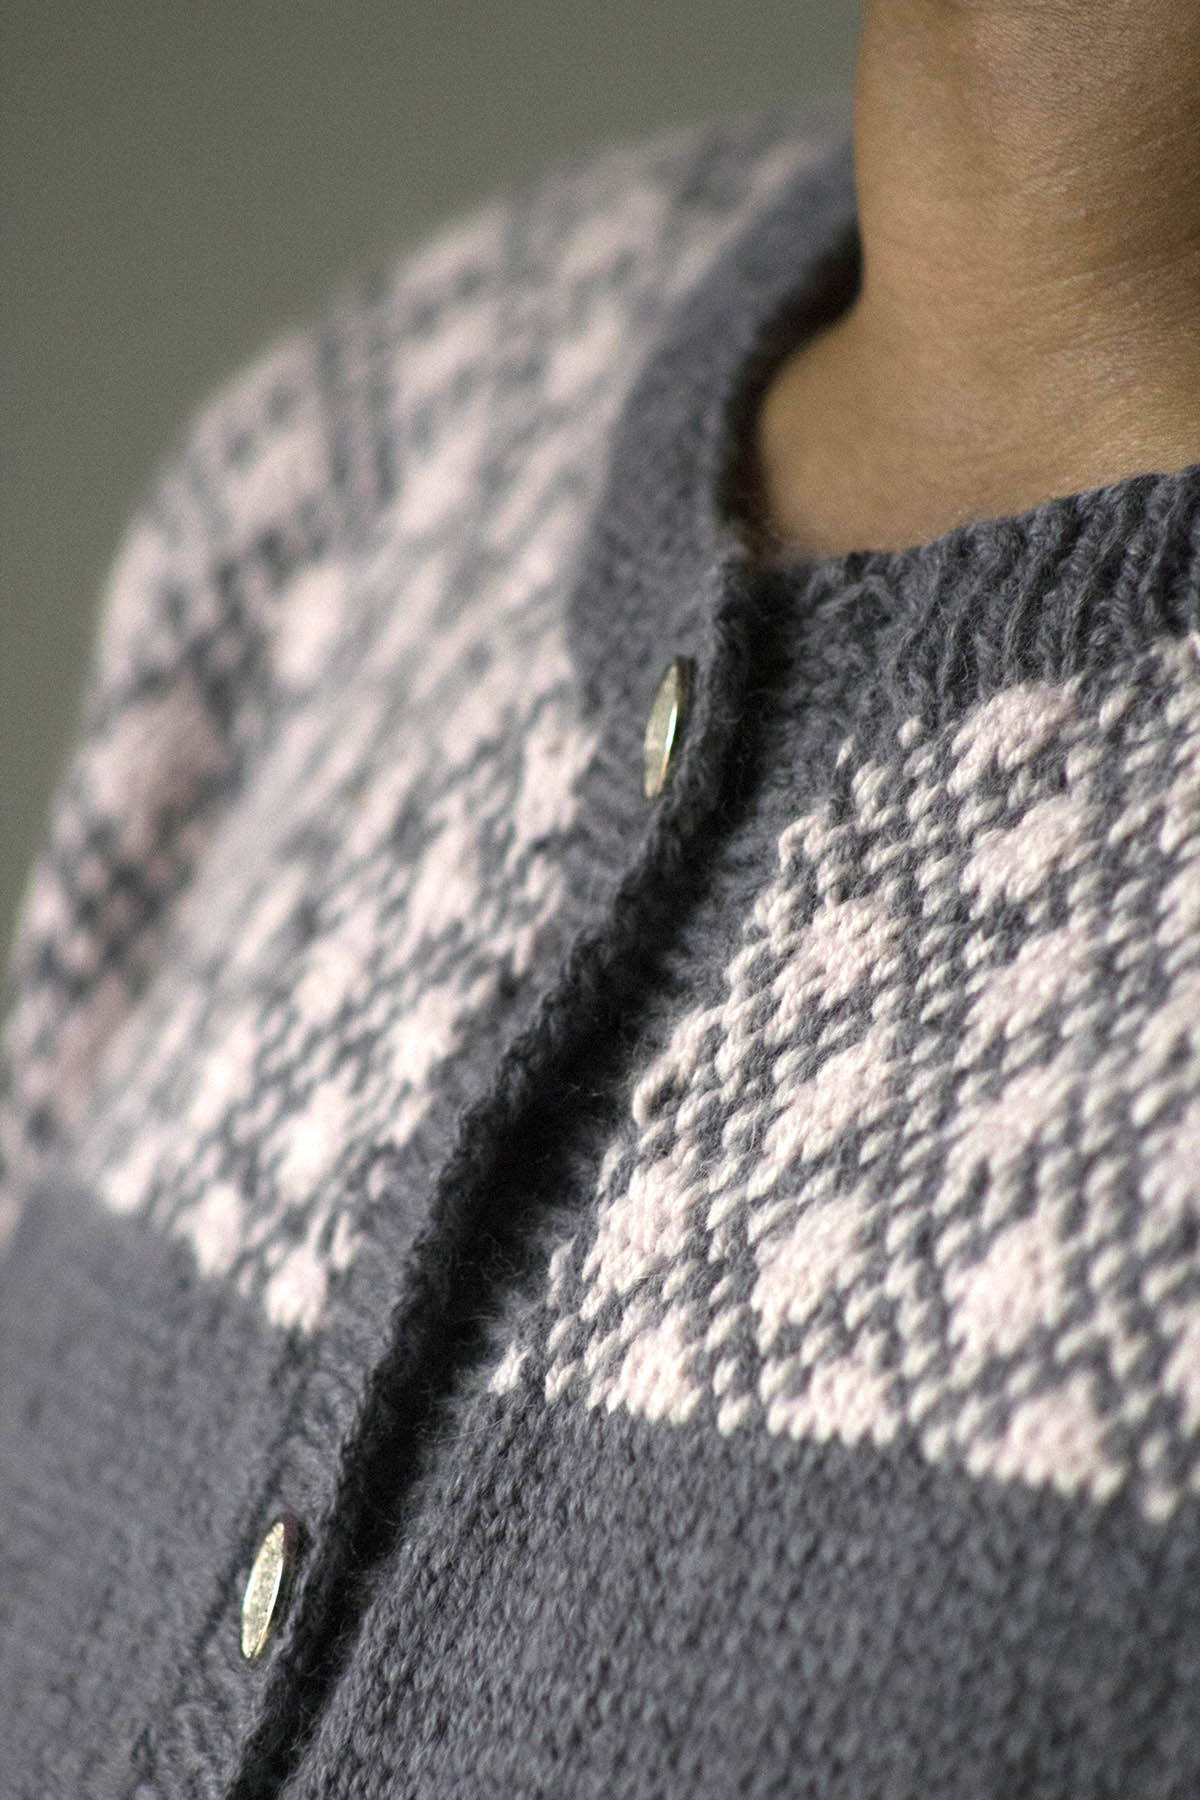
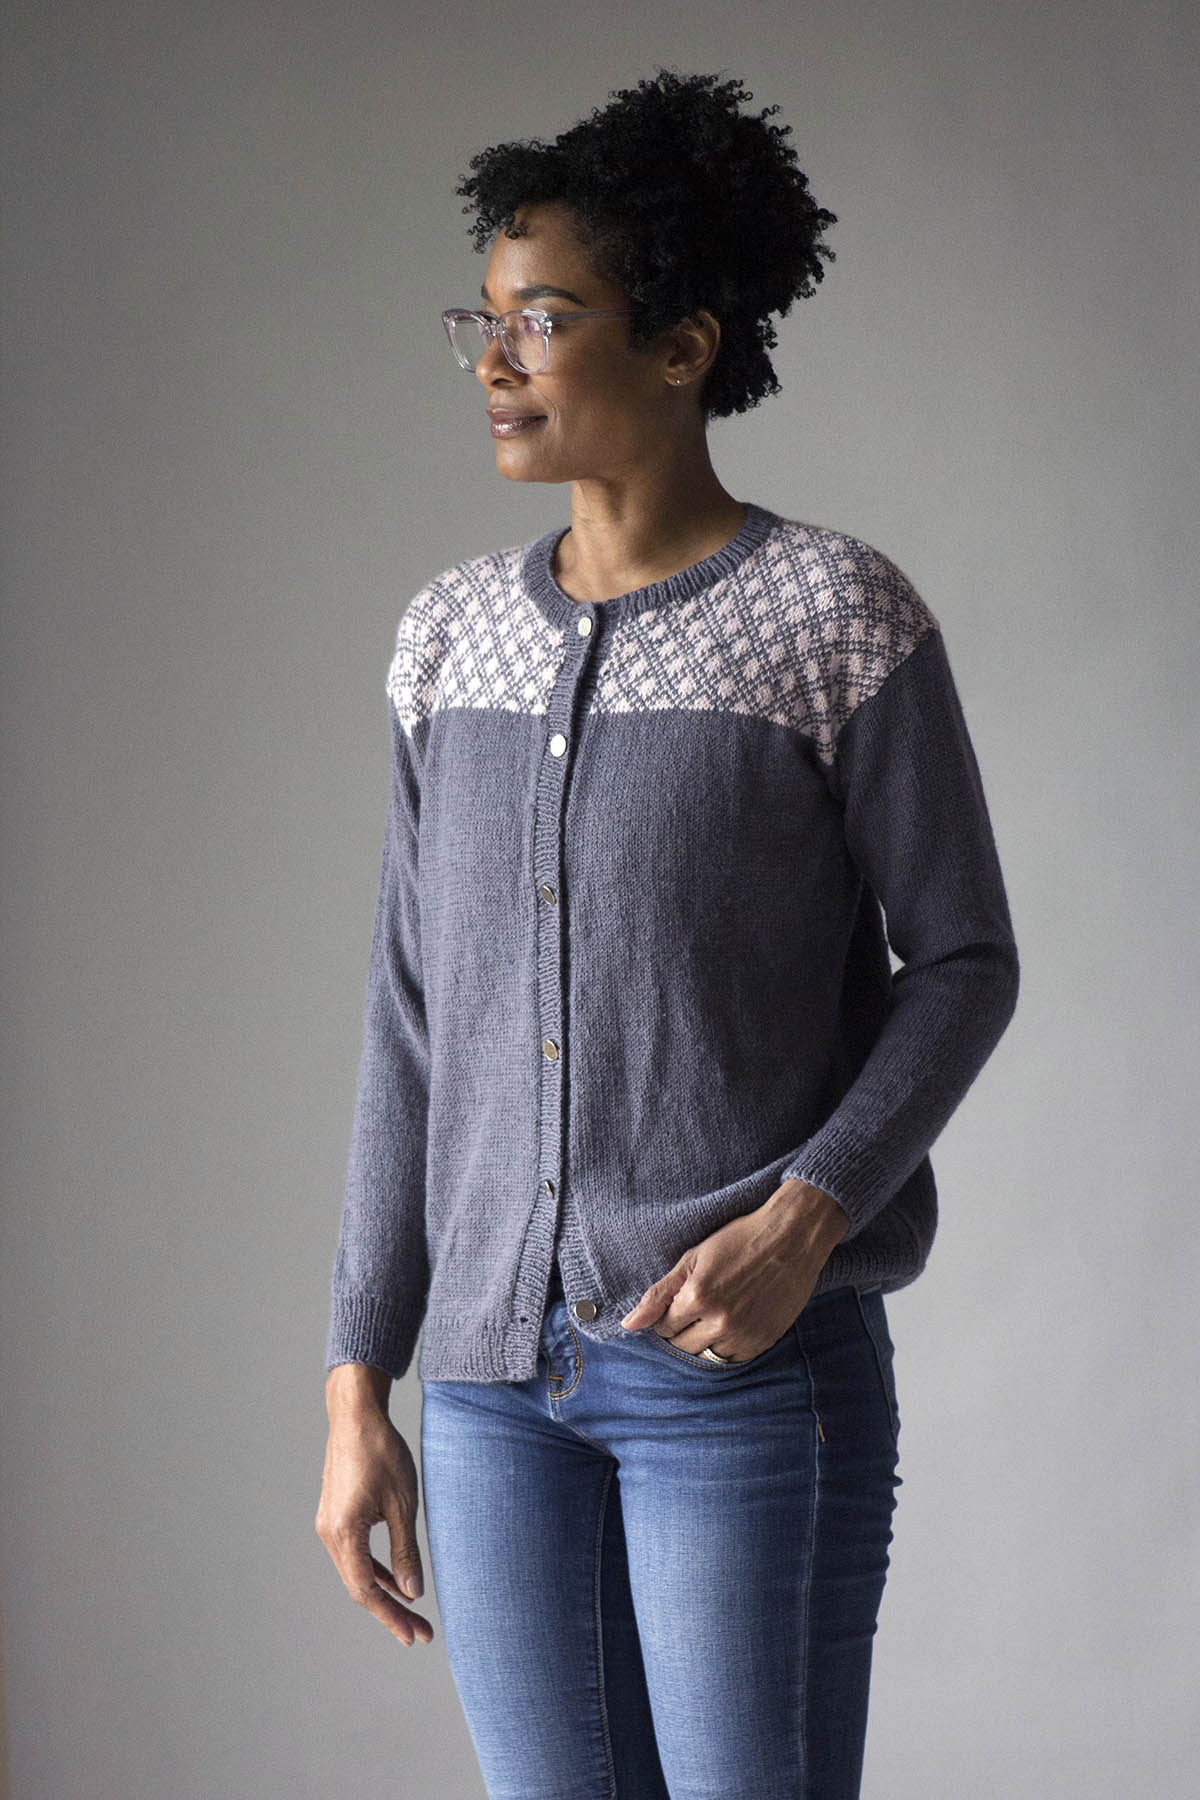
Such a beauty. The Bellissima Cardi is a classic lightweight cardi with classic construction.
Knit it from the bottom up in pieces, then seam.
Bella Cash superwash merino/nylon/cashmere blend creates a soft, lightweight material that moves with you and looks flattering. We love it on size 2 (2.75mm) needles for the Fair Isle yoke. Crisp and well-defined, with a beautiful, smooth texture.
Even though the stitches are delicate, the fabric is machine washable and durable, thanks to the nylon and superwash merino content in Bella Cash. Sized small through 4X, this is a great wardrobe staple. Hard to believe it’s a free pattern!
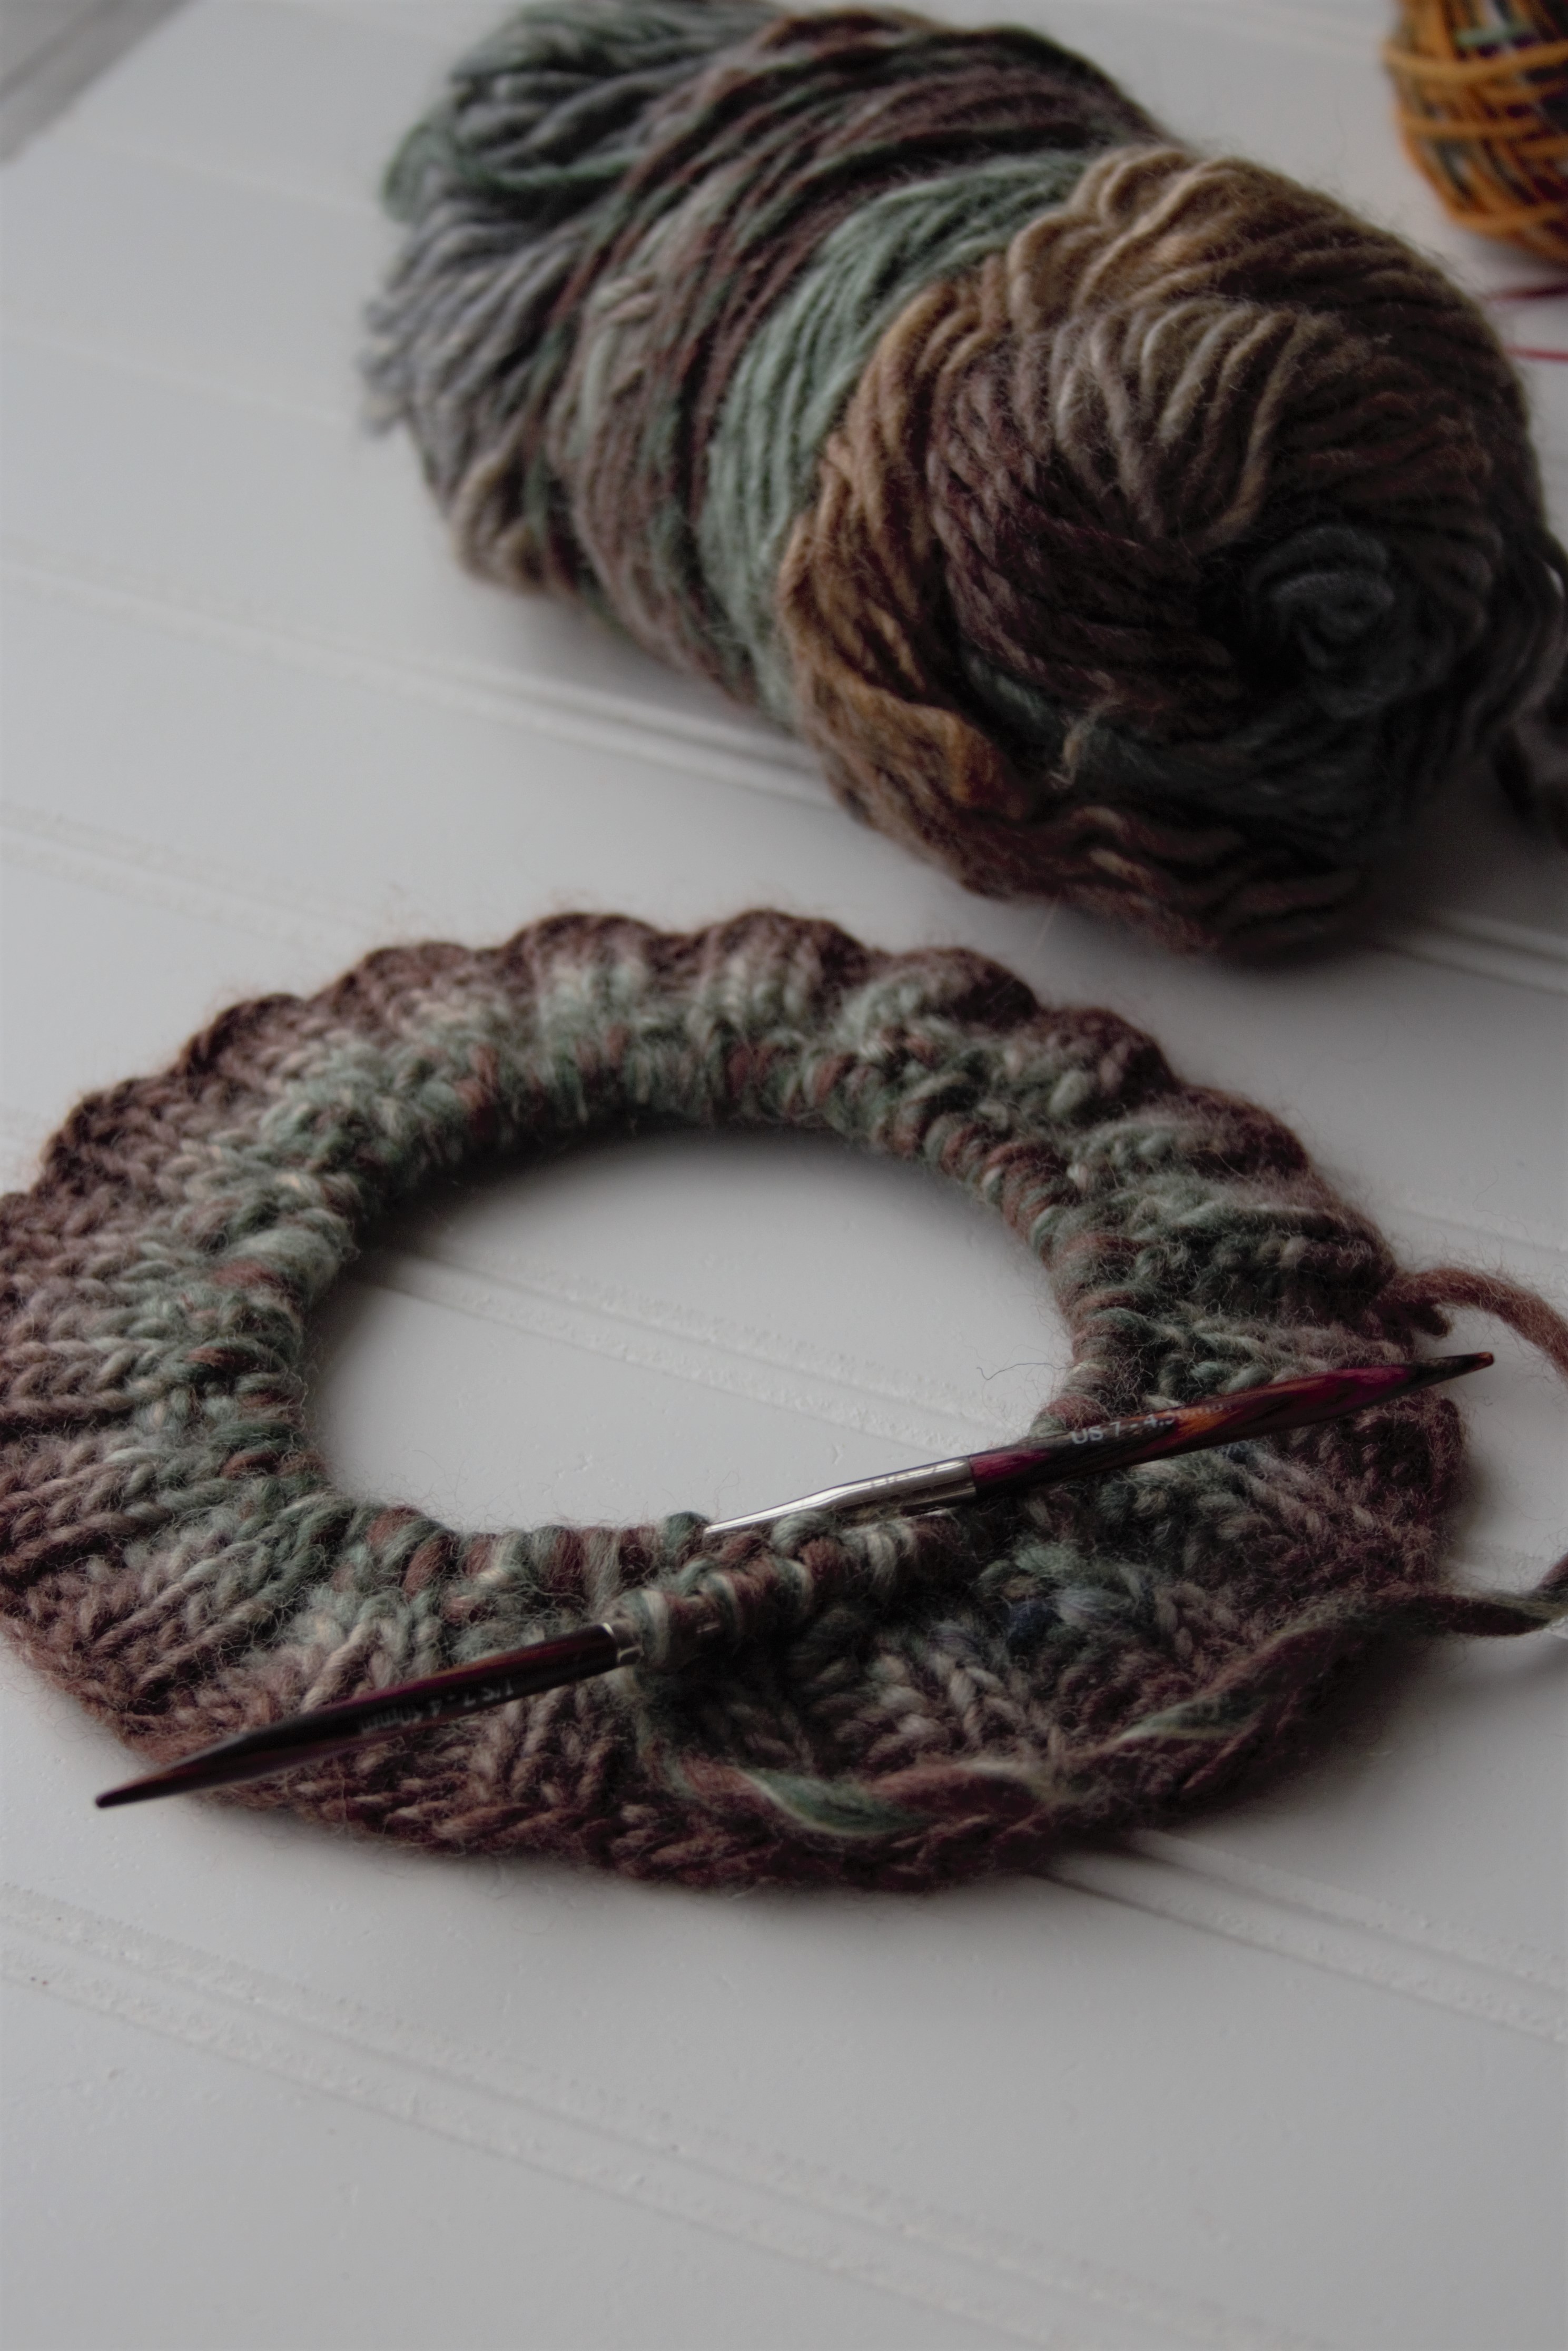
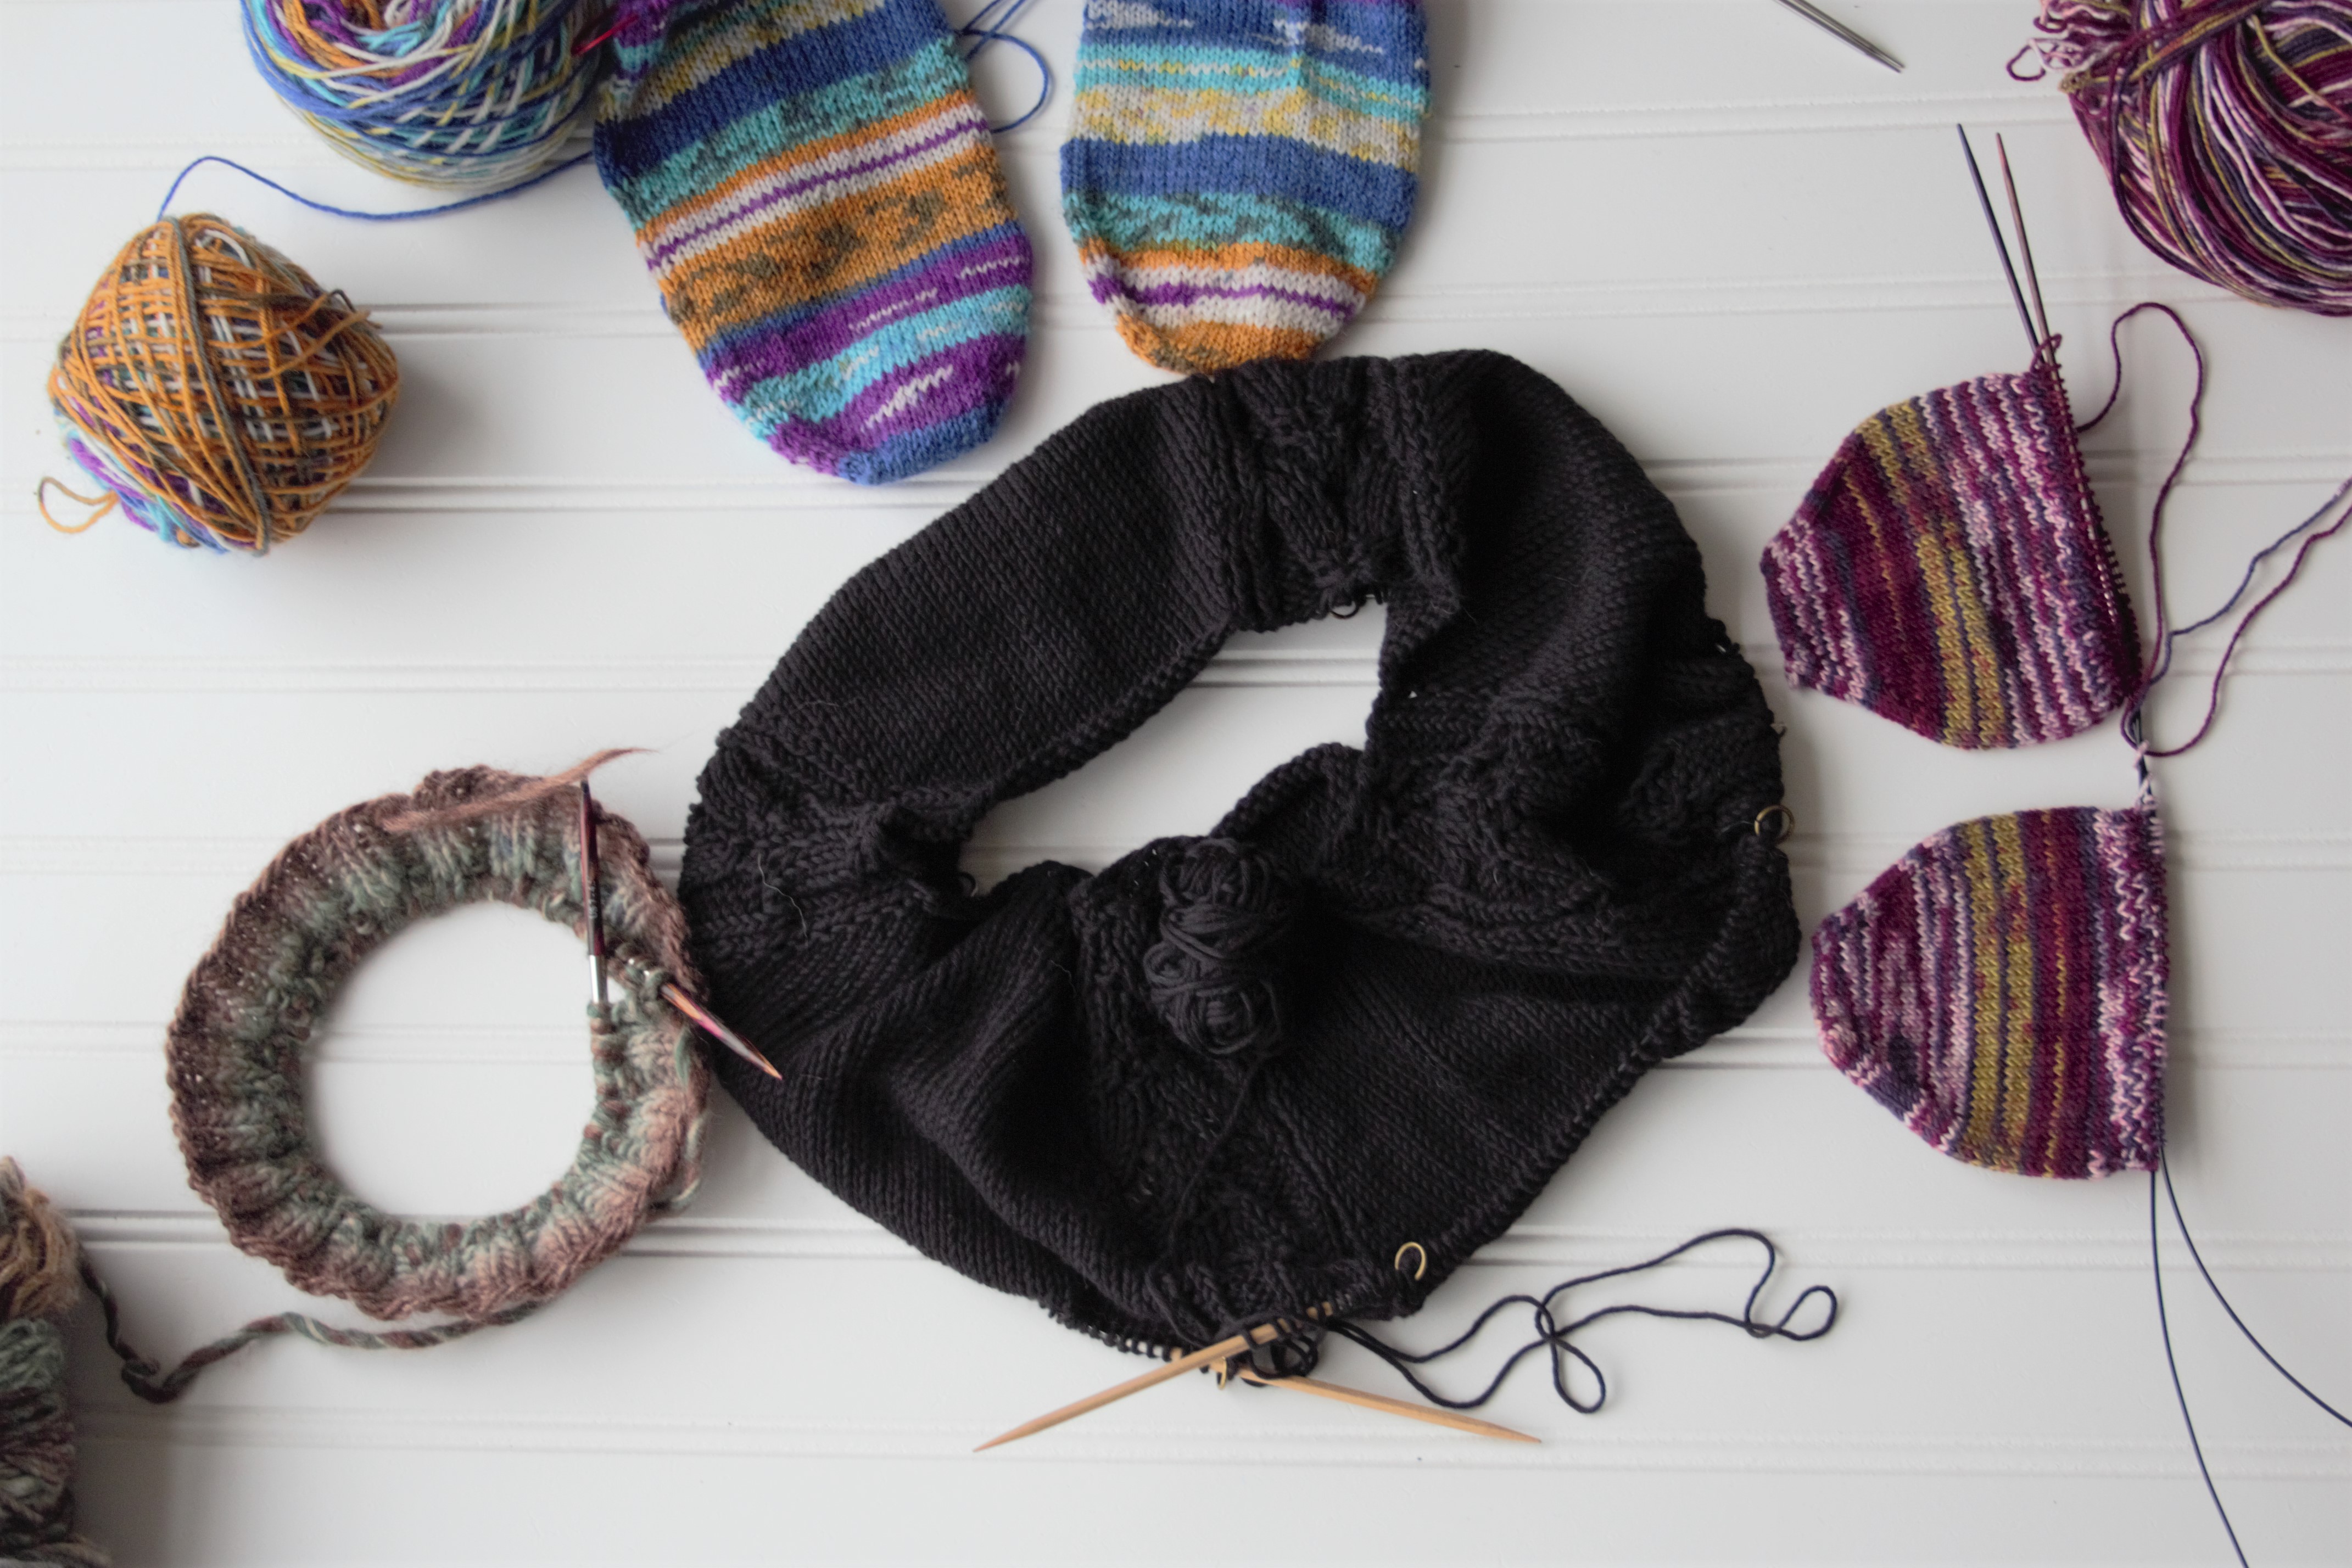
When I decided to write a blog post today I was planning to focus on my Seamless Leaves pullover, but as I was taking photos, an idea popped into my head – why not share what everyone around the office is working on? I moseyed around the office asking our team about what they’re working on and whether I could take a few quick photos of their projects. Sadly, Yonca and Amy are out today (they surely deserve it after a busy weekend at Stitches West), so their own projects aren’t included.
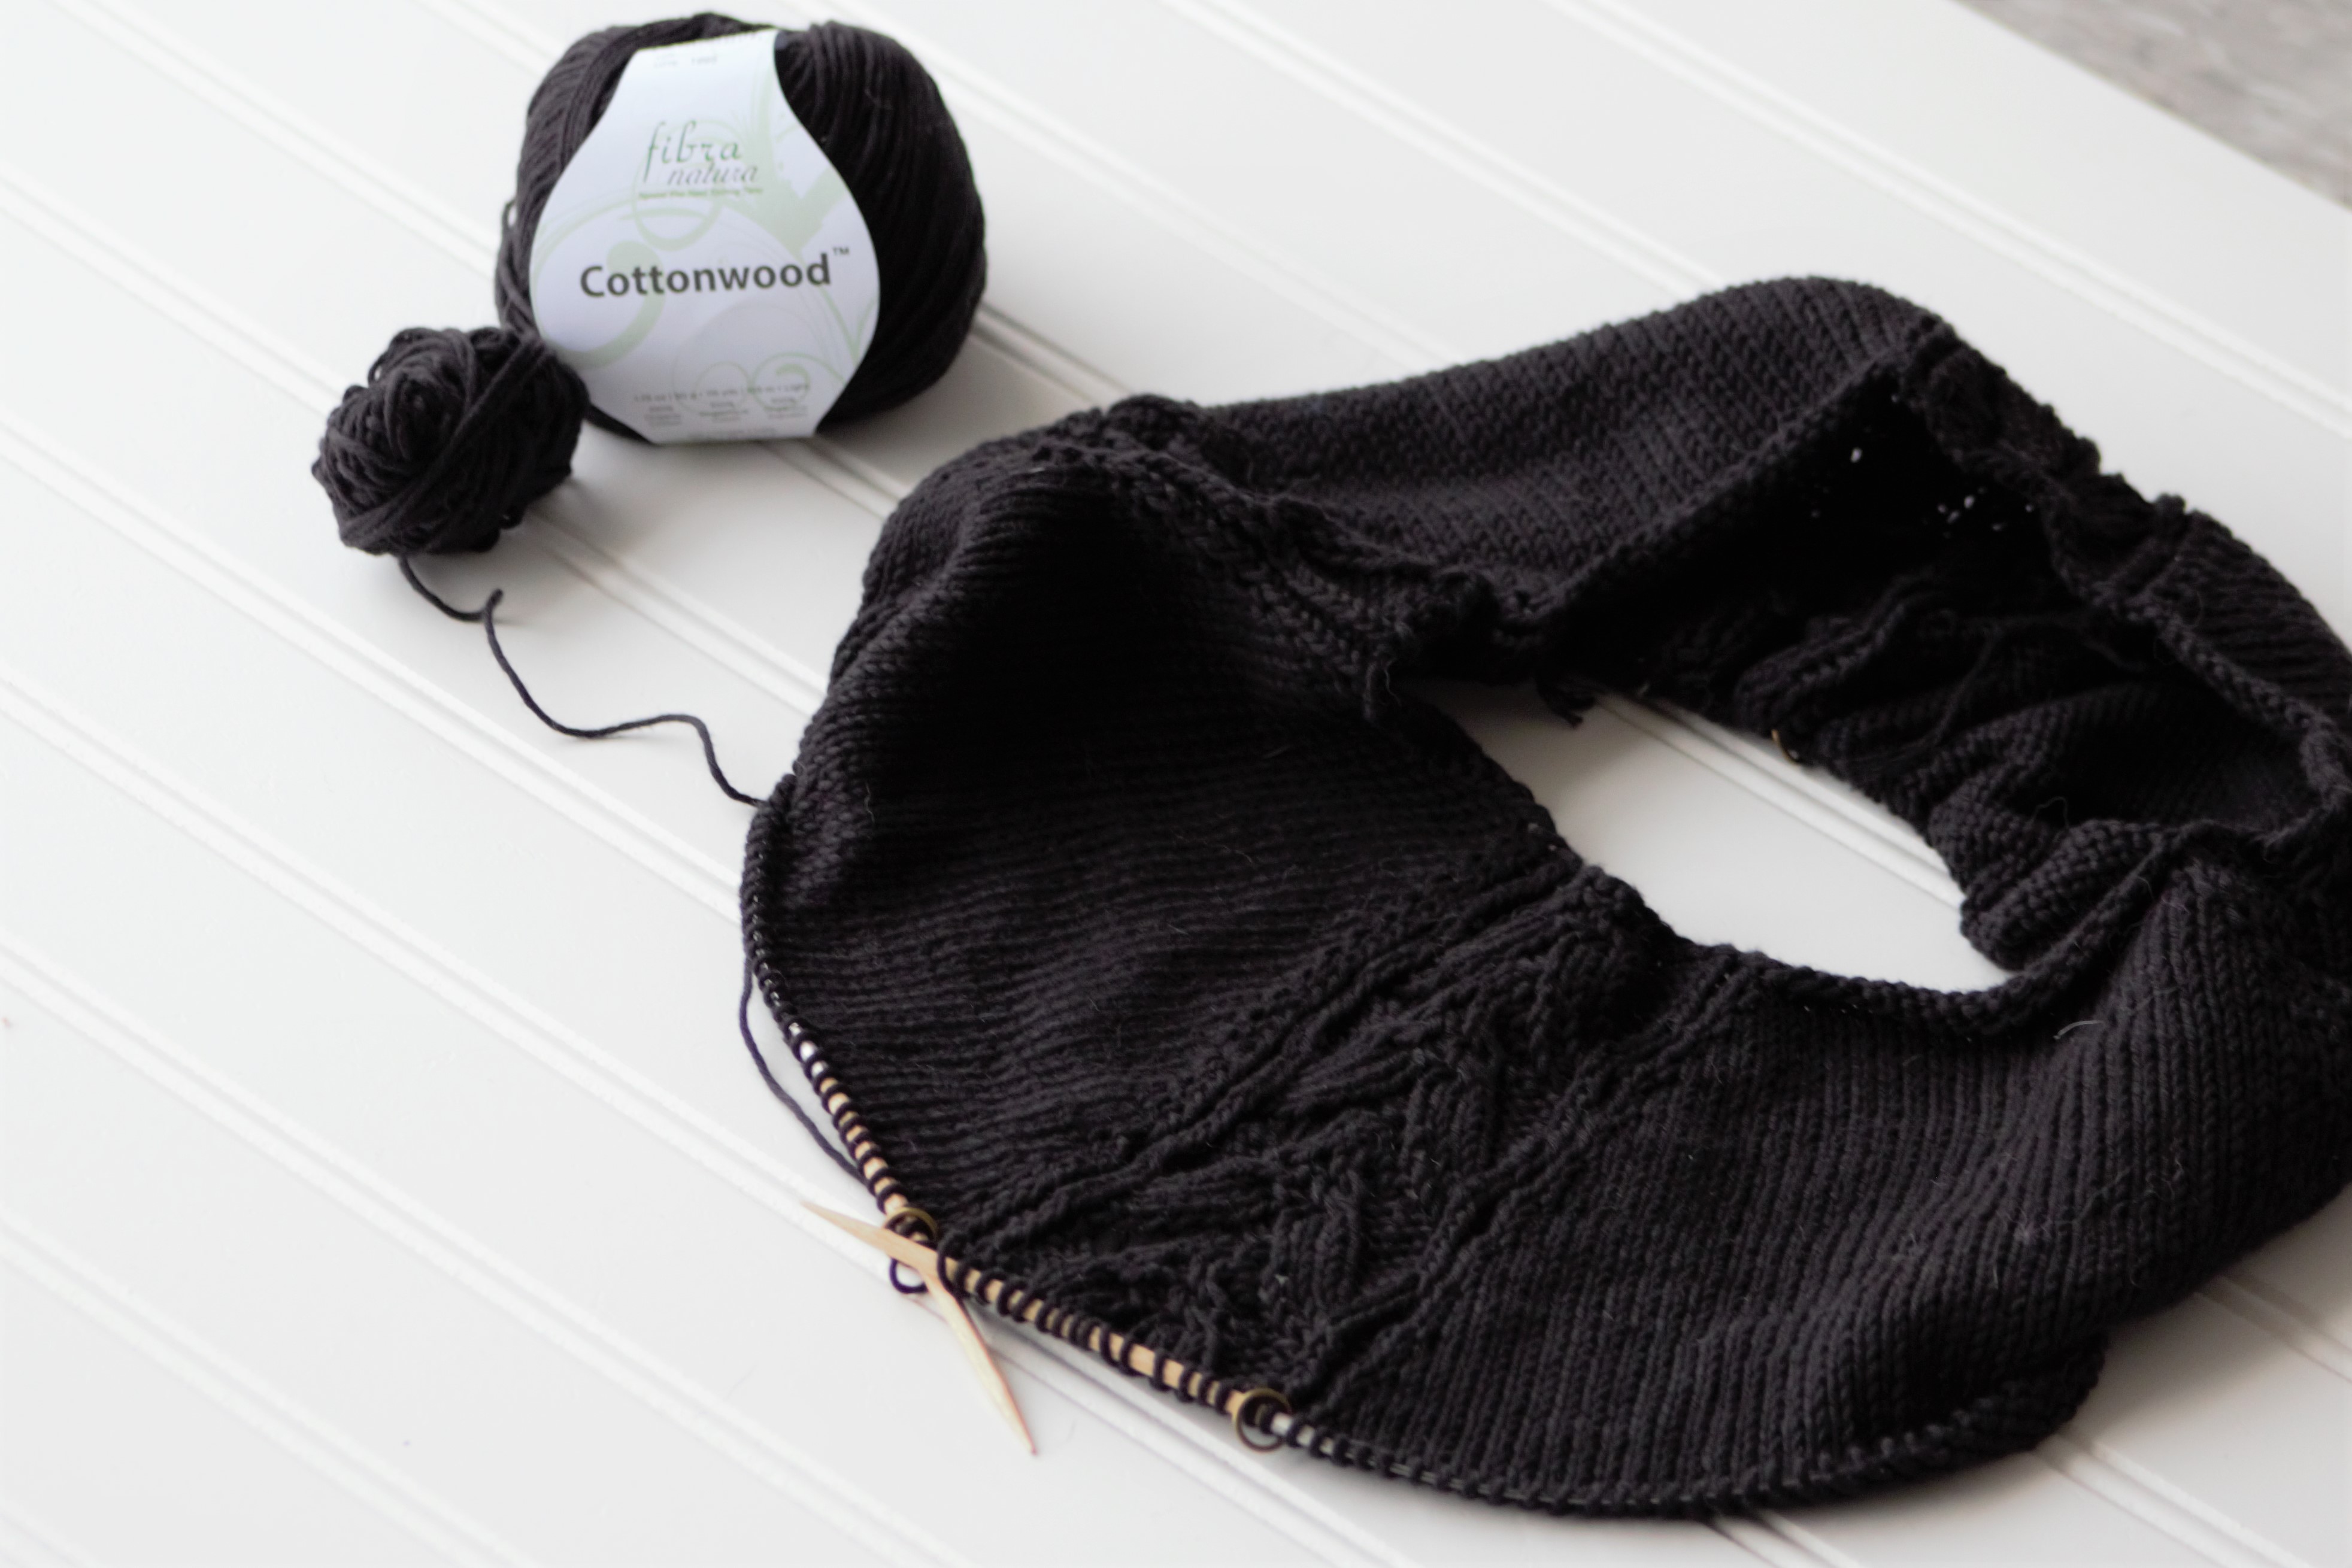
Cottonwood is one of my favorite yarns. It’s eco-friendly and has so many beautiful colors to choose from.
I love so many of the projects in the new collection, Arboretum, featuring projects by the one and only Amy Gunderson using Fibra Natura Cottonwood. Each pattern in the Arboretum ebook is extremely wearable and tempting to cast on, especially when the temperature has been lingering in the 60s and 70s in North Carolina. I decided that I needed to cast on a Seamless Leaves pullover for myself, and I wanted a basic, black version. Because of my inclination to knit things in deeply saturated colors (especially warm colors), I just don’t have enough neutral garments in my wardrobe. This project is my perfect solution.
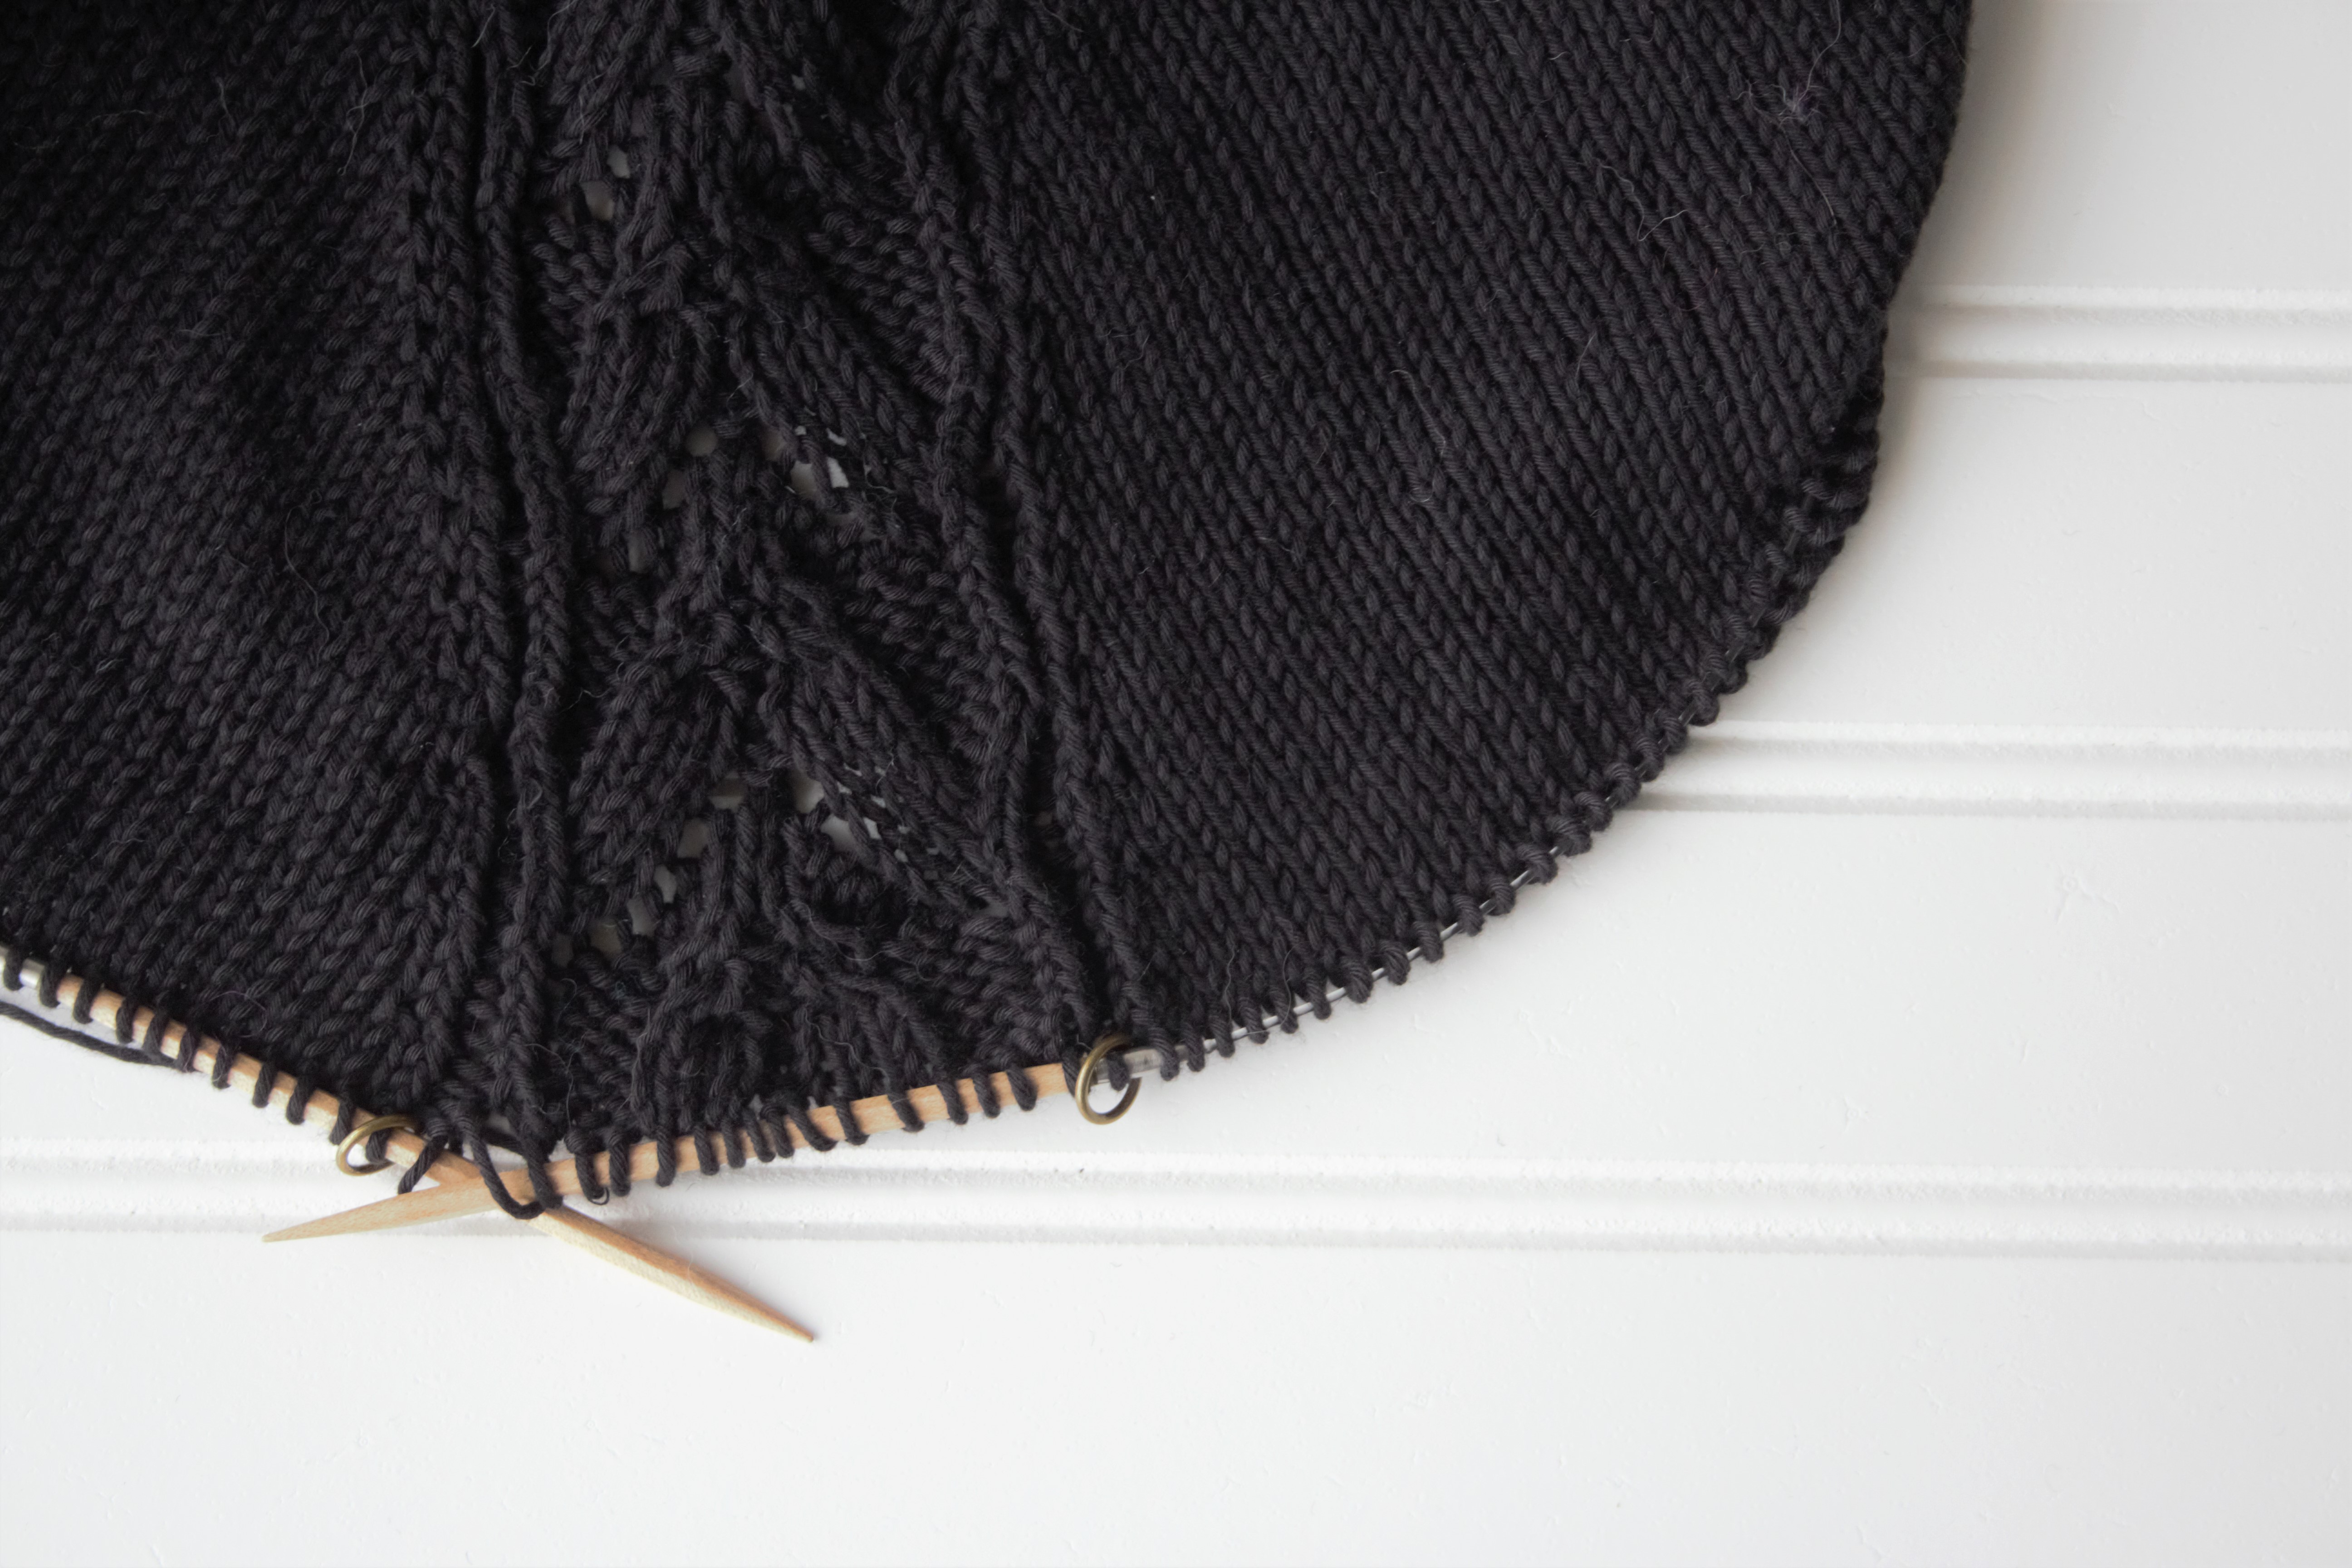
I love the lightweight fabric created by Cottonwood. It’s wonderfully smooth and even with stitch definition that makes the raglan details on this pattern shine.
Even unblocked and worked in such a dark color, these details look great thanks to Cottonwood’s superb stitch definition.
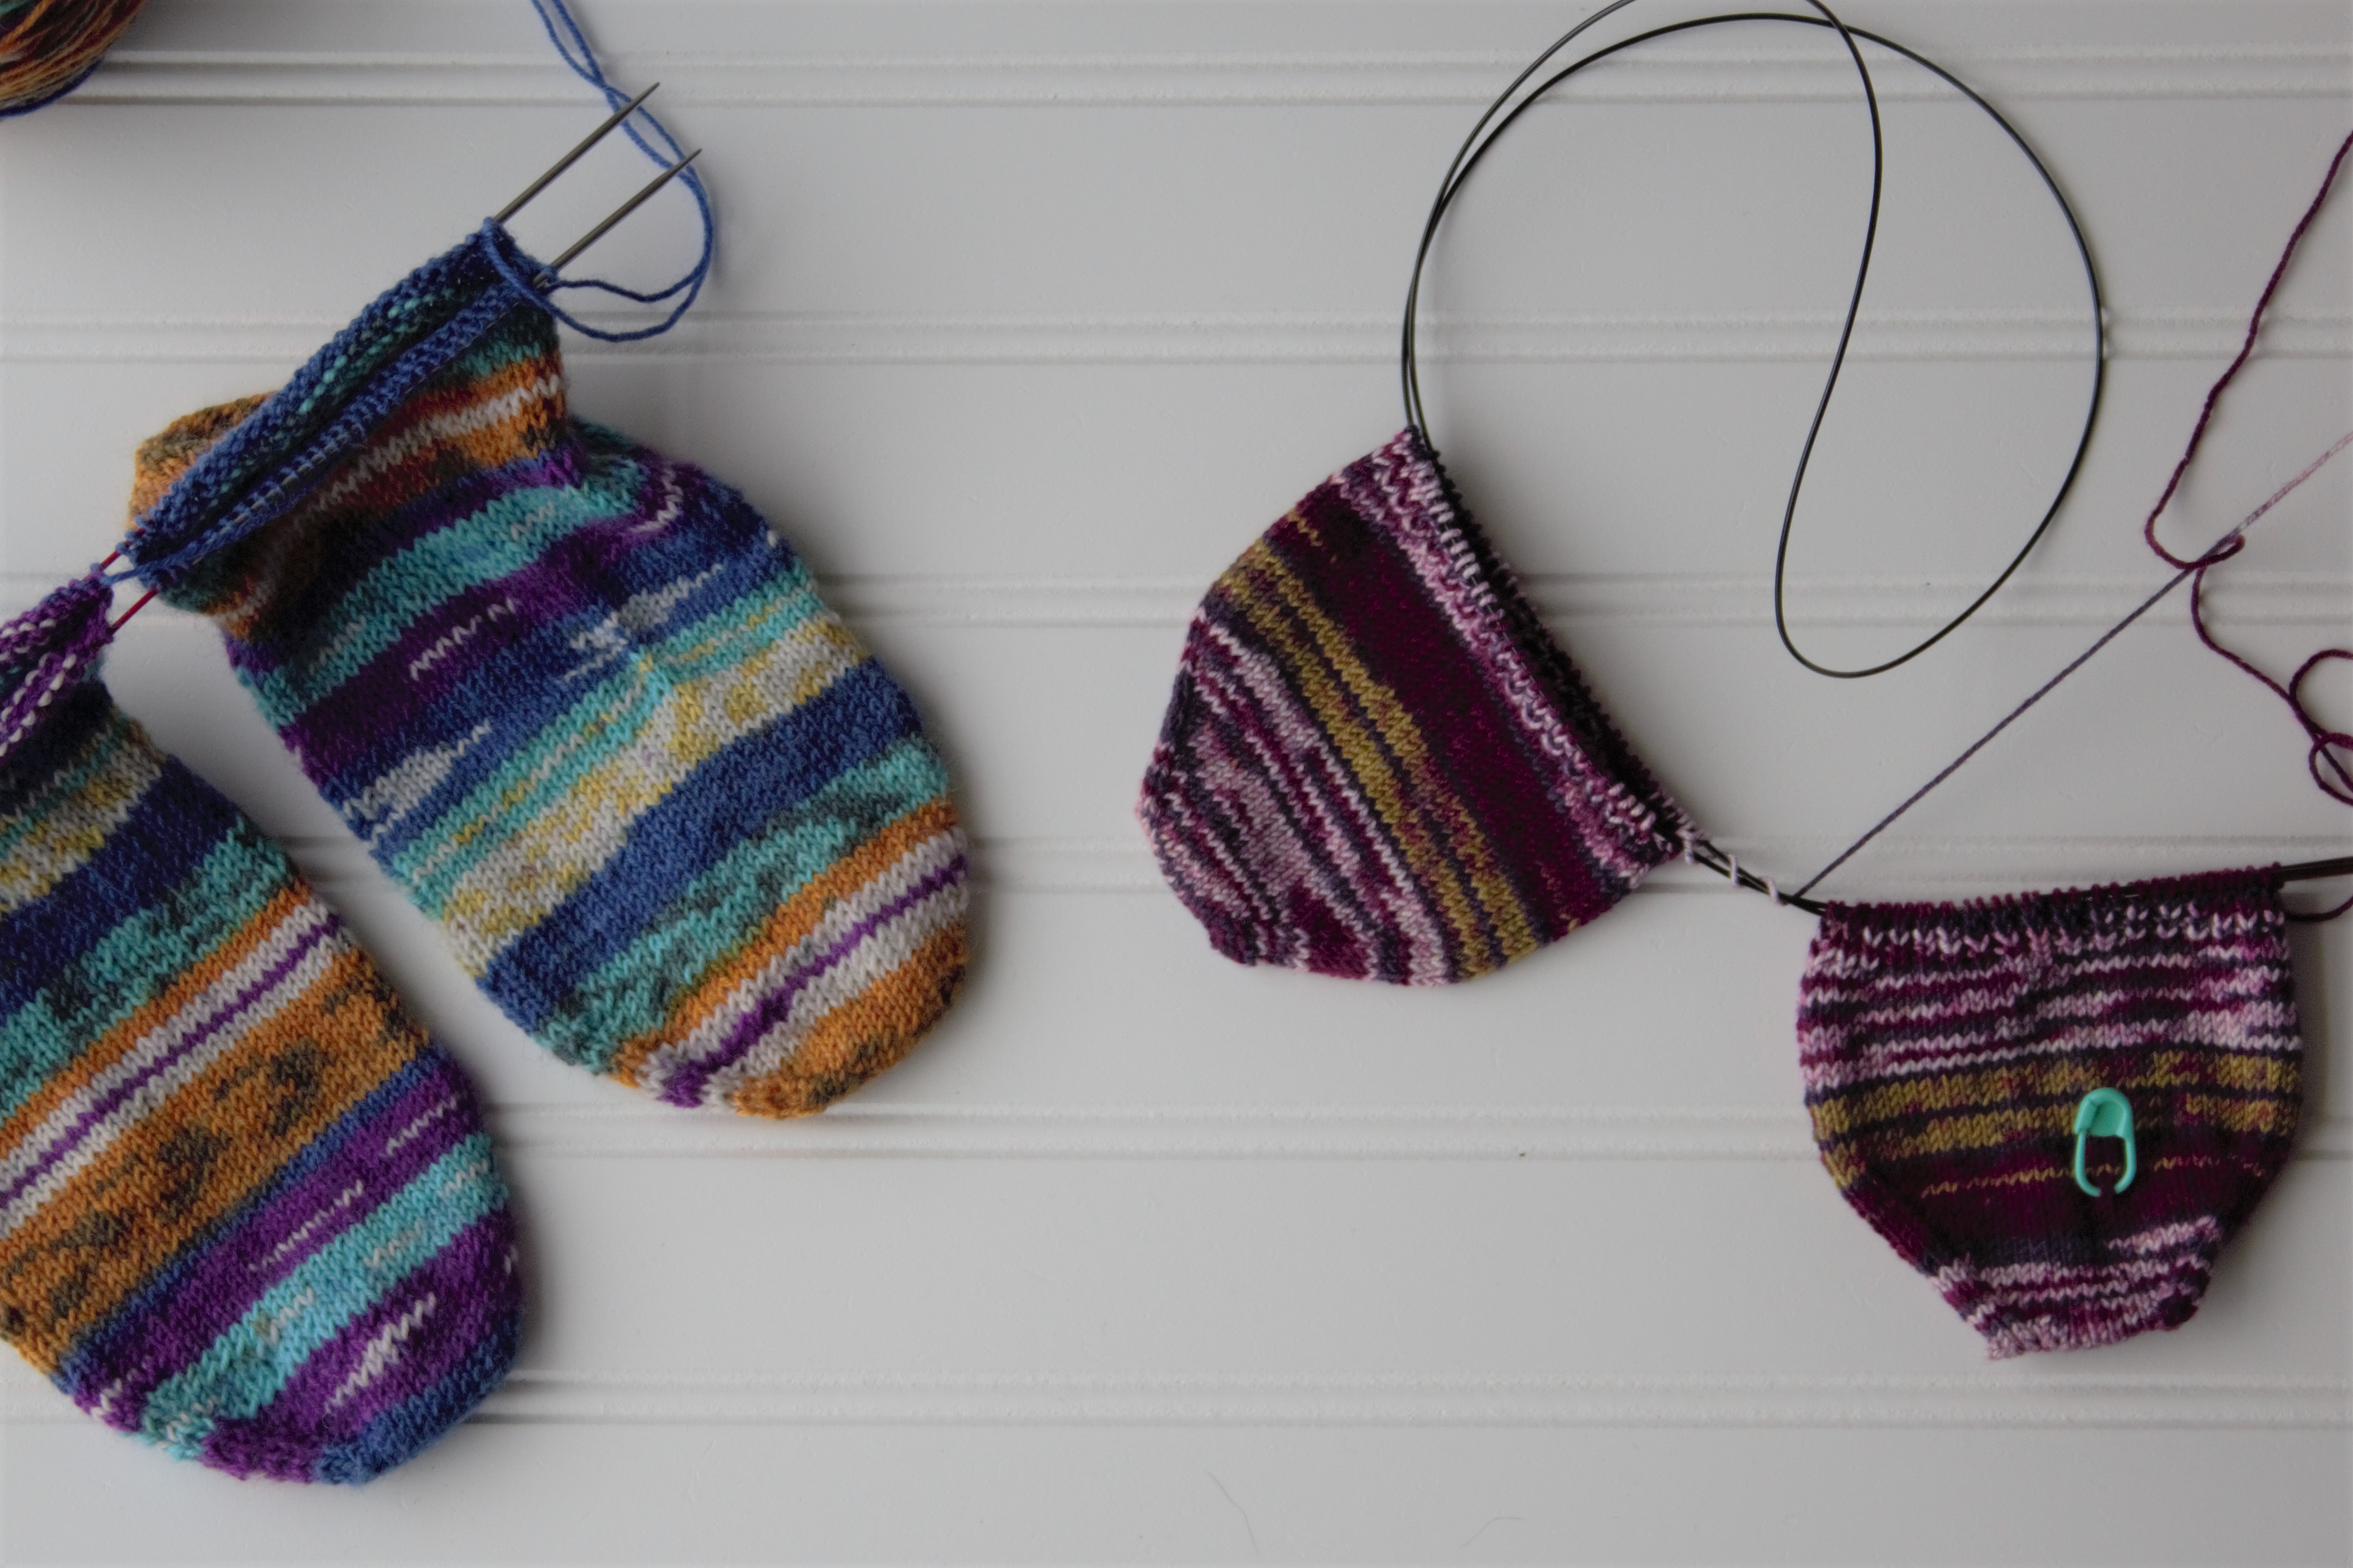
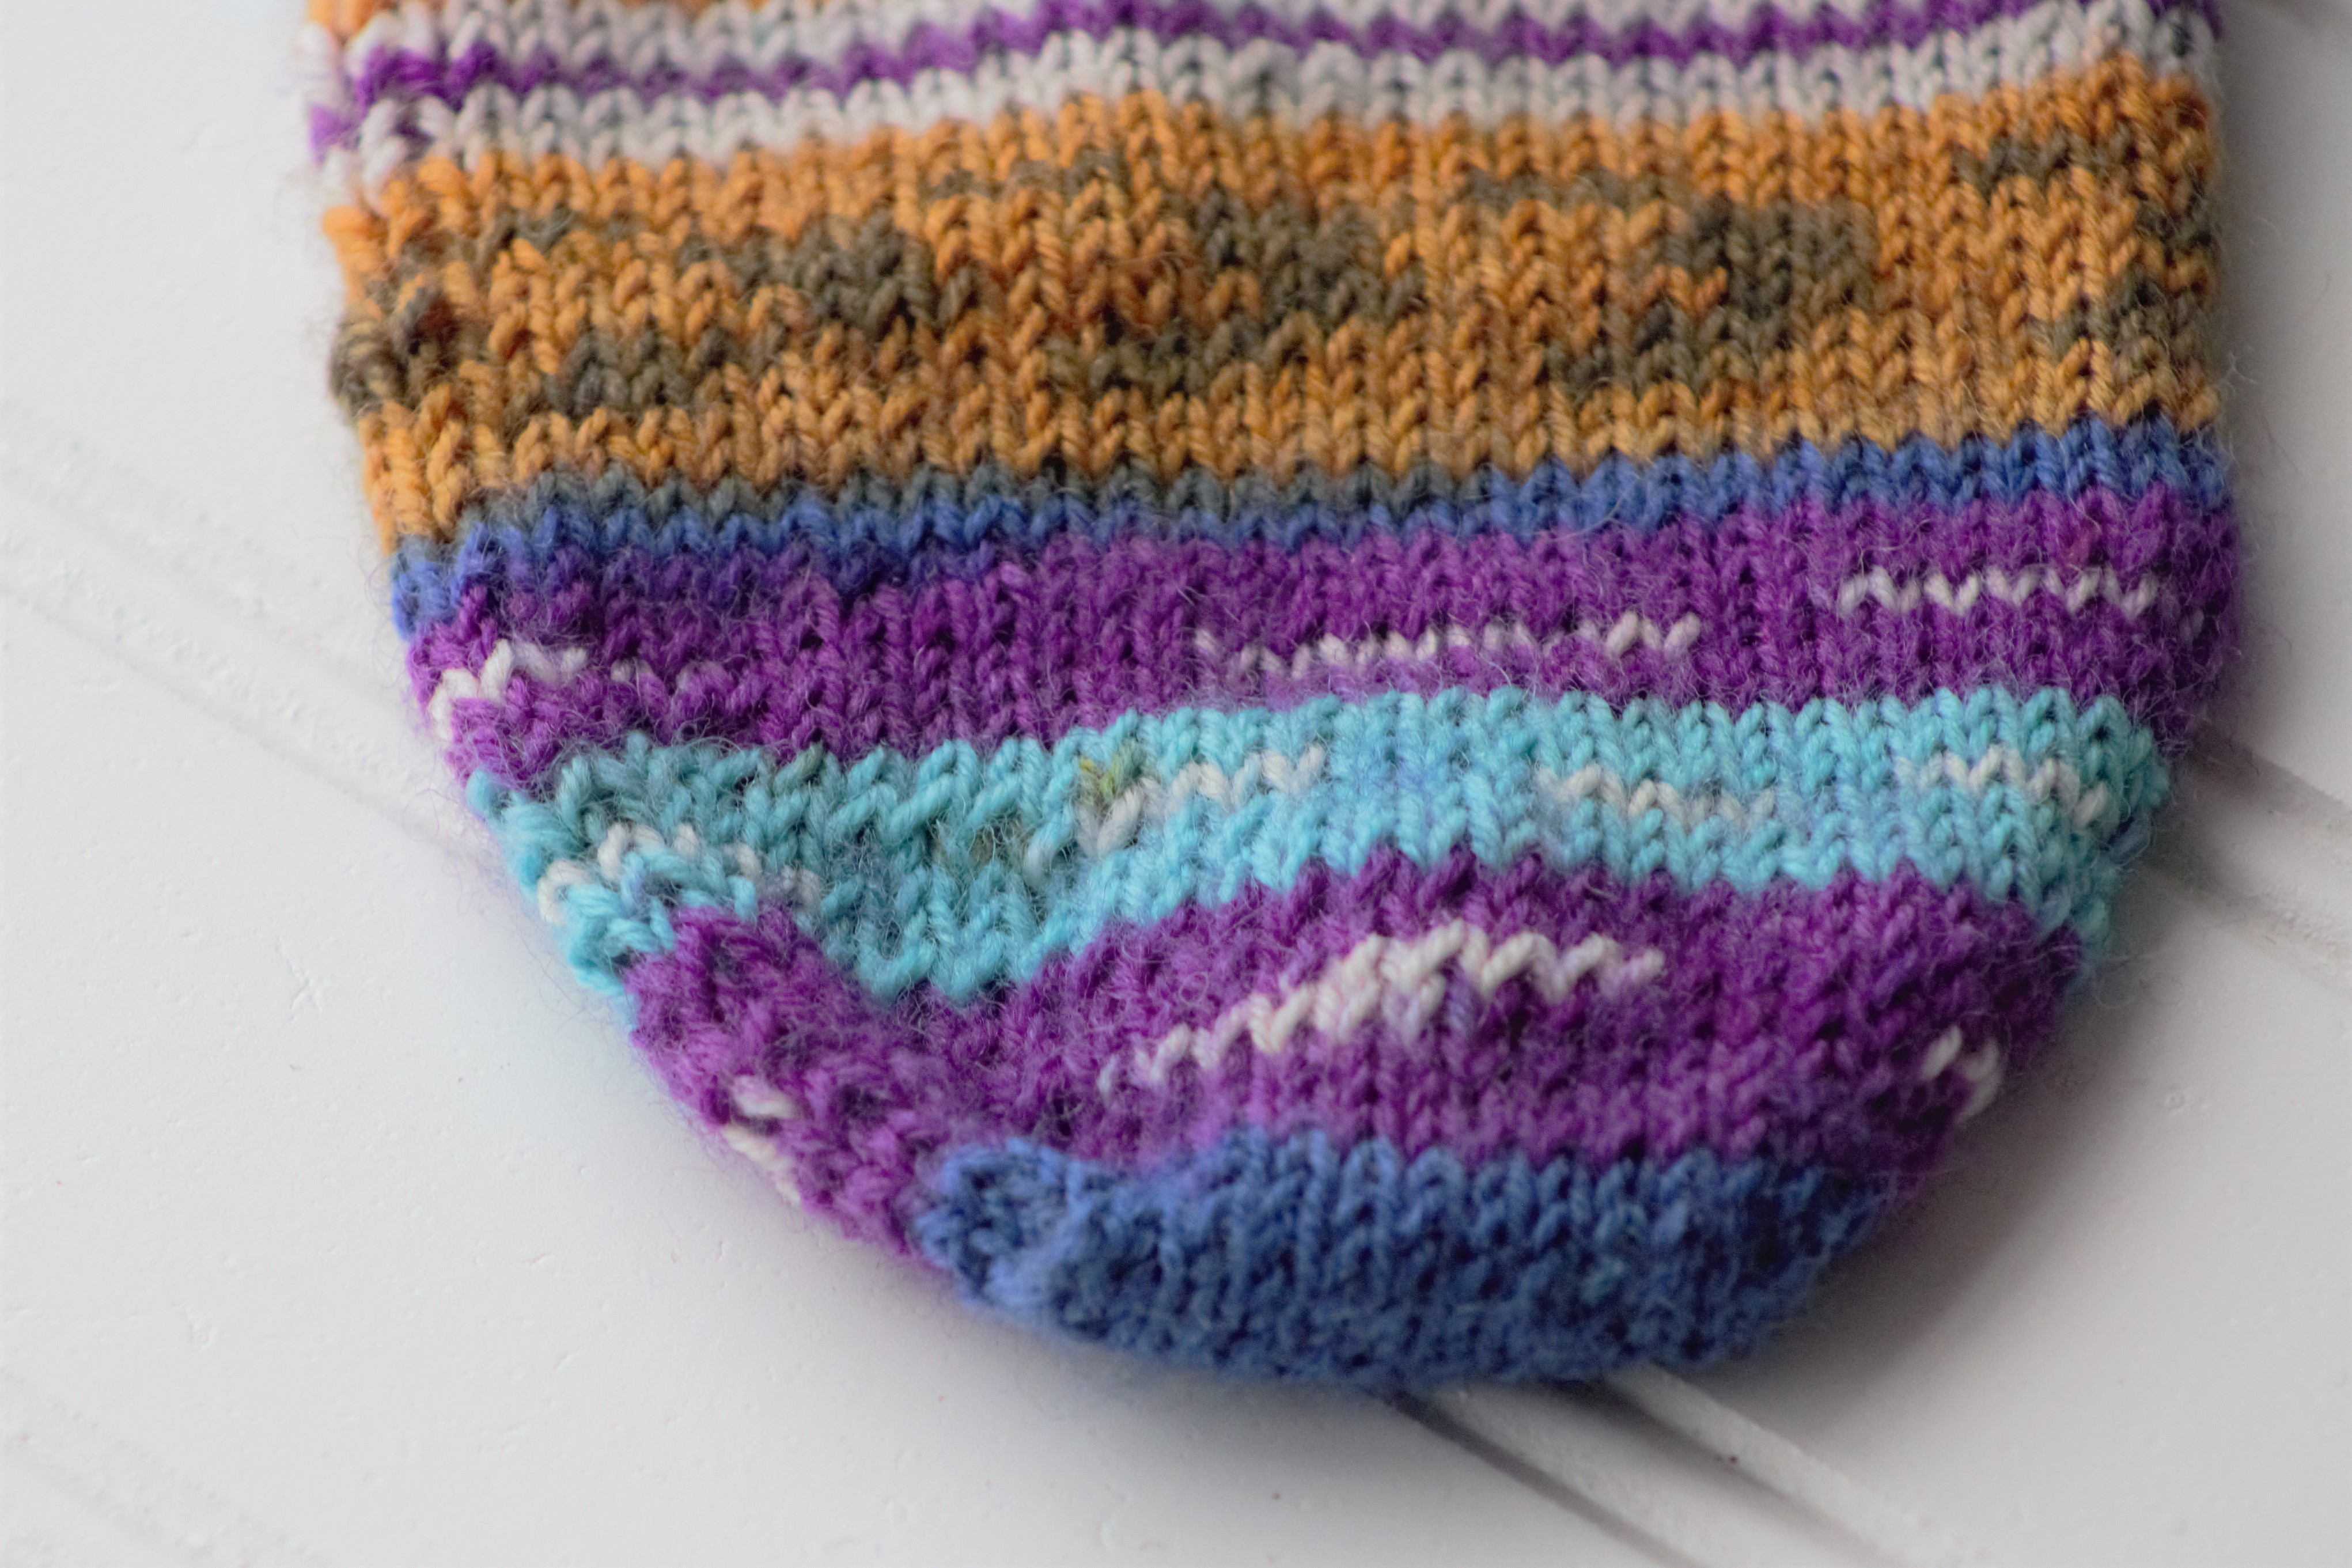
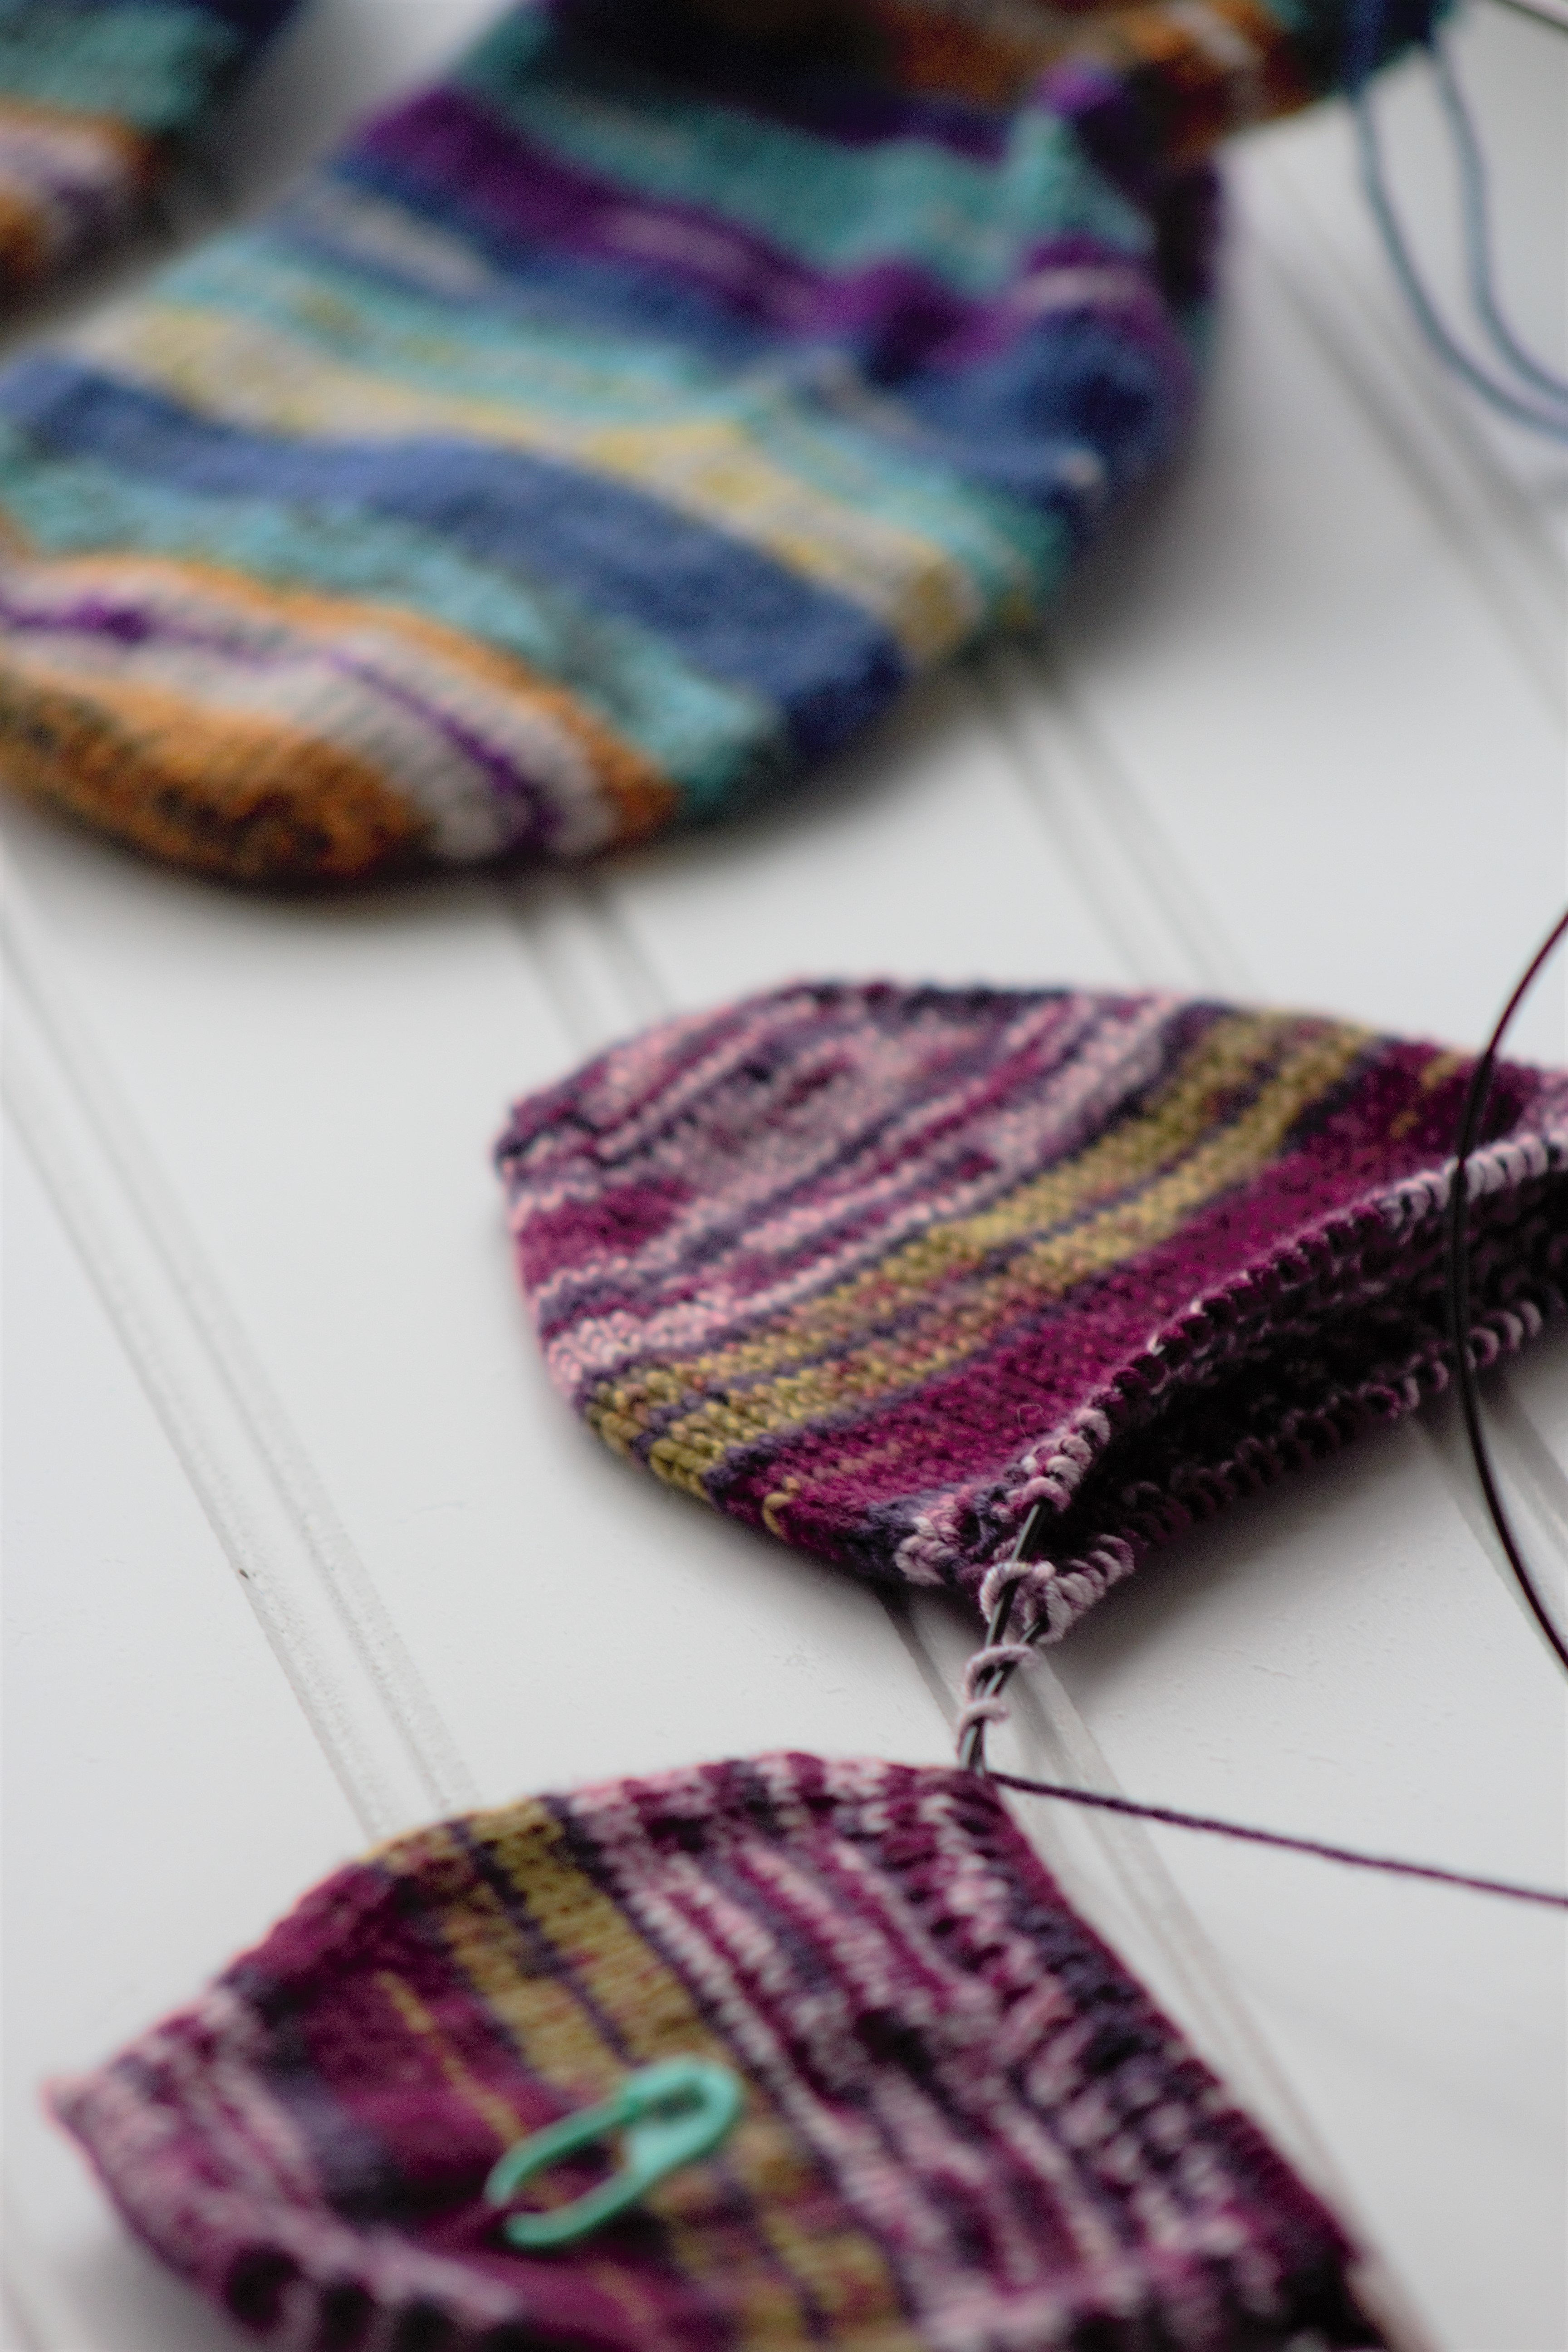
Our sales team seems to be having an affair with two-at-a-time socks, toe-up socks.
Left: Krista’s socks in Pix, Right: Katie’s socks in Allegro
Here’s what Krista had to say about her project:
“I’m always working on a pair of socks. Always. For this project, I am using one of my favorite yarns, Pix, in the Paisley print. They’re a plain vanilla pair (nothing but stockinette) using a basic short row heel. I love how Pix works up in patterns as I’m knitting. This yarn makes a simple project very fun. Socks are perfect on-the-go knitting to keep in my bag.”
Here’s what Katie had to say about her beautiful WIP:
“I enjoy making socks, but I have Second Sock Syndrome and never learned how to do two-at-a-time socks. Krista helped me with the cast-on and now I am loving it! I was even able to just knit at my daughter’s choir concert last night and didn’t mess up. Woohoo; progress! I love the elasticity of Allegro. I am using the color Grape Sonata. I decided to do ribbing over the arch instead of just stockinette stitch because I love my store-bought socks with the ribbing on the foot. We’ll see how it turns out!”
I’m sure they’re going to be perfect! If you’re also a sock knitter, you might be interested in one of our free sock patterns like this one, this one, or this one.
Finally, our social-media extraordinaire (and quite frankly, everything-extraordinaire!), Heather, showed me a deliciously squishy hat knit up in Poems Silk in the Baffin Island colorway. She told me she enjoys a simple hat project when she’s knitting at the movie theater. I have to say, this is always something that impresses me. Whenever I bring knitting to the theater I have the tendency to drop the occasional stitch or insert an unwanted yarn-over. Serious props to those of you who are successful in your endeavors in low-light knitting! Heather’s hat is looking great and we can’t wait to see the finished version.
That’s it for now. I hope you’ve enjoyed a little glimpse into some of our projects! We’d love to share more soon.
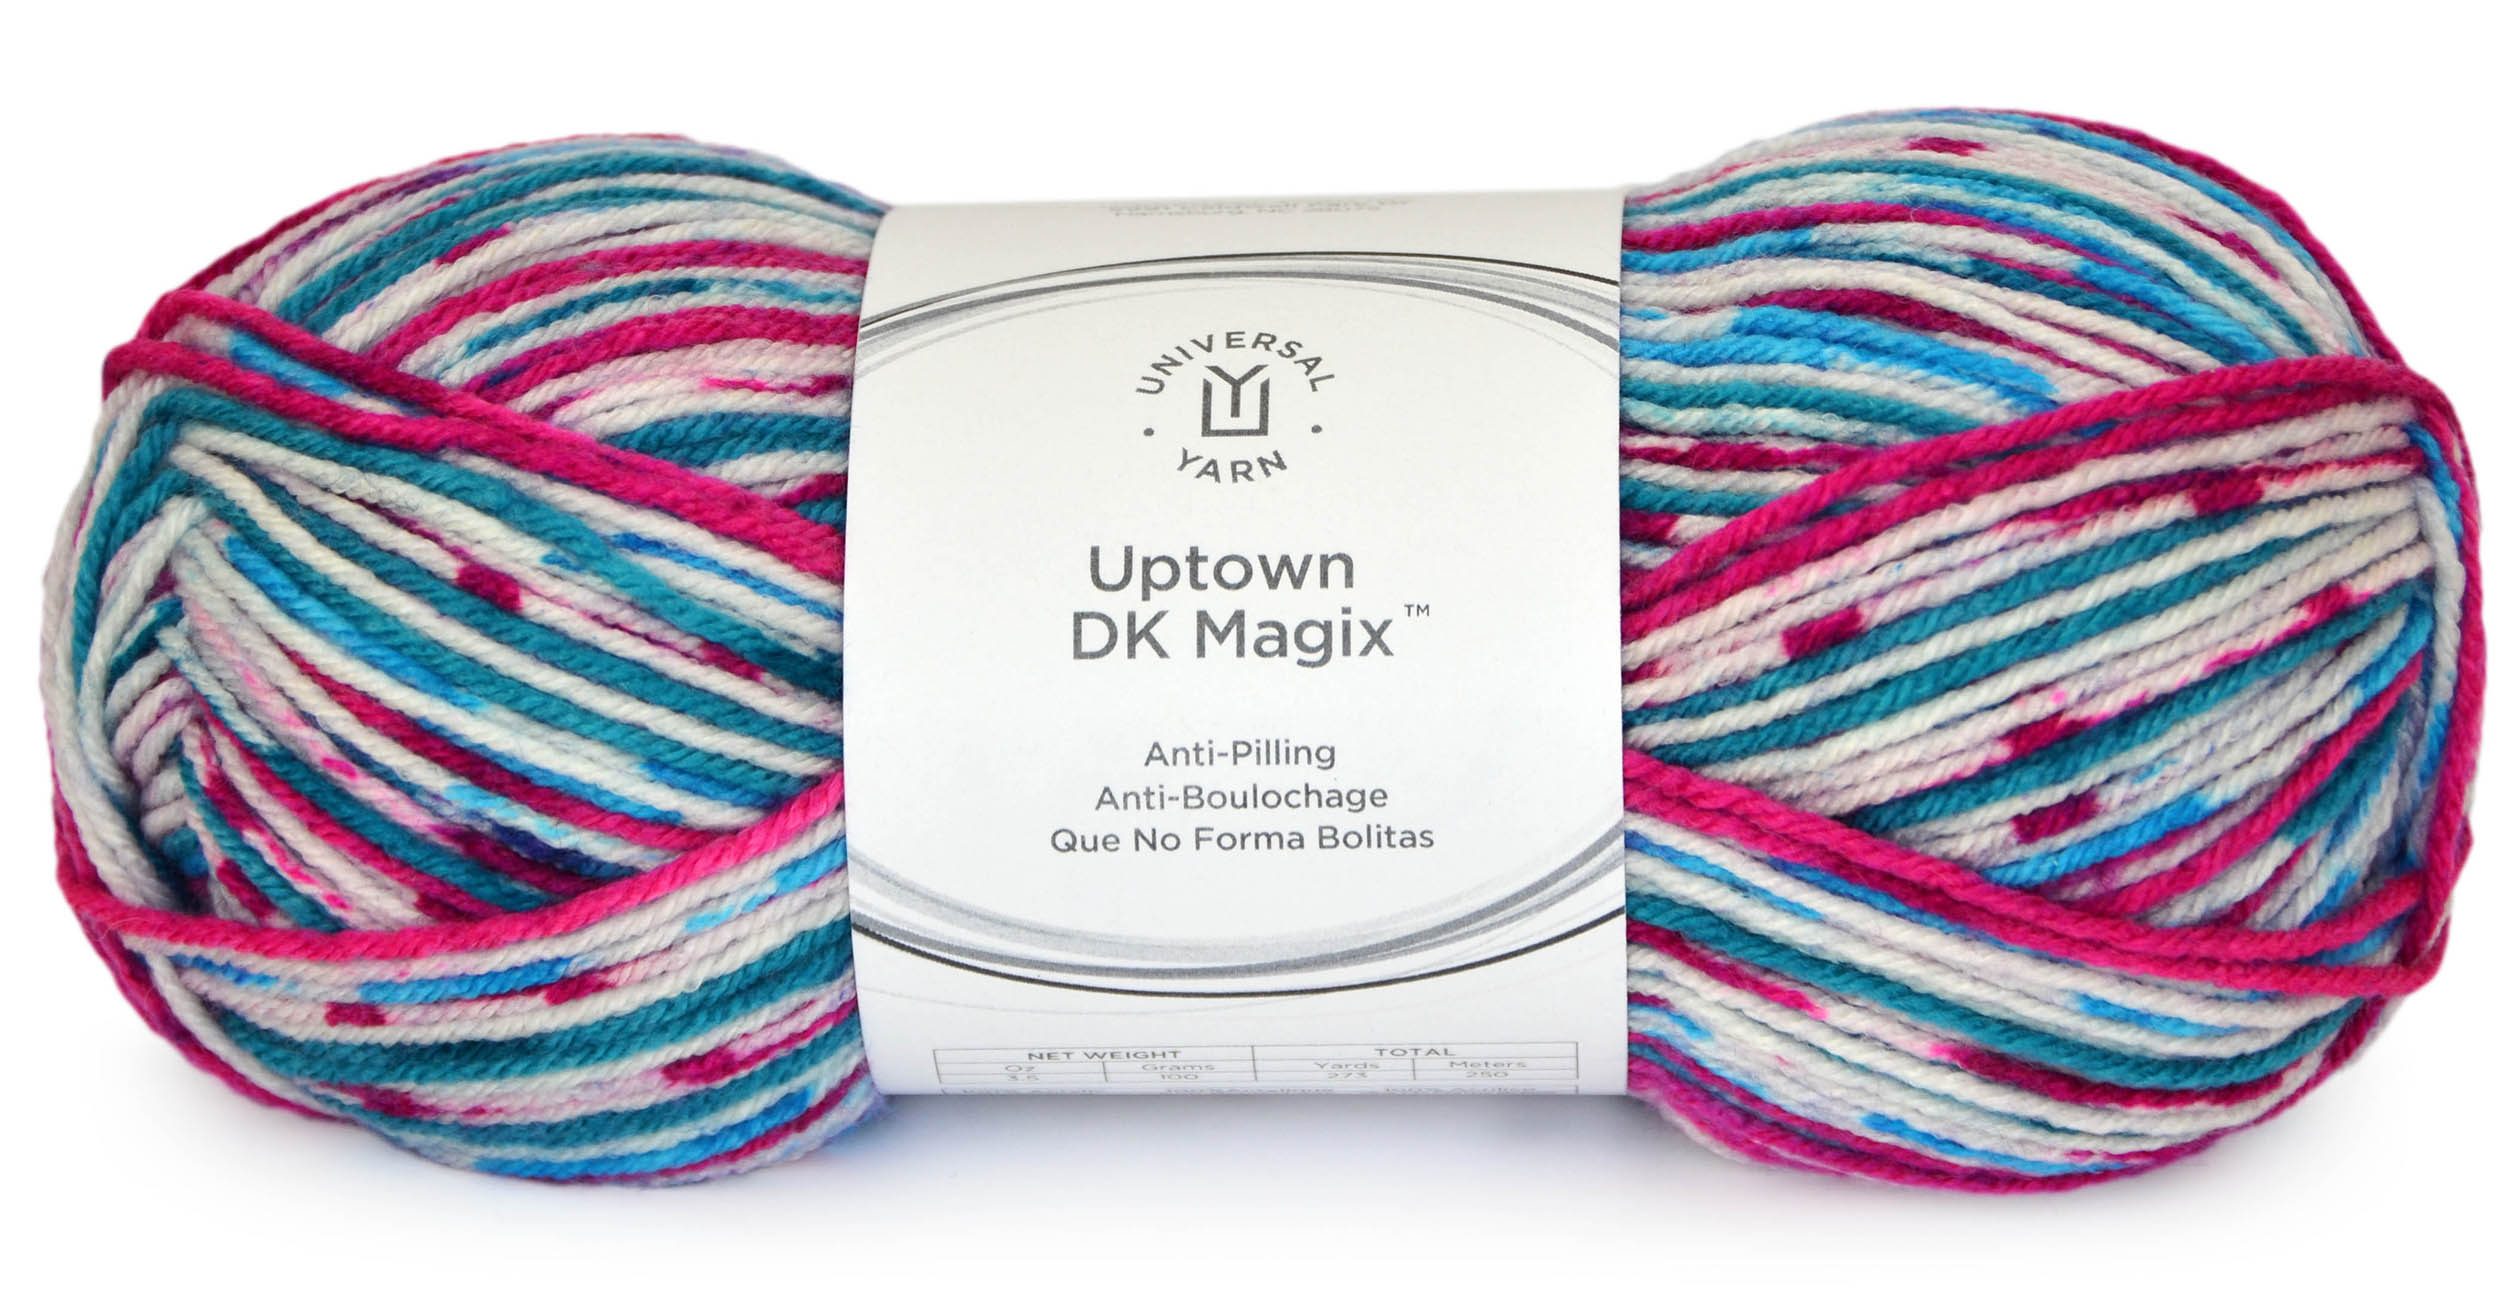
You know those pretty balls of yarn that you look at and love, but you also think, “this looks neat, but what would I do with it?”
Voila. The Wraparound Blankie answers this question by pairing self-patterning Uptown DK Magix with solid Uptown DK to create mitered angles and panels bordered by coordinating bands of vibrant color.
The nice thing about self-patterning yarn is that you really don’t have to do much work to make a complex design. Pick two colors of the solid, two colors of the self-patterning, and go! This pattern is worked in pieces and seamed together, making it a good travel project. Sometimes it’s nice to be able to work on a blanket without actually having a full blanket on your lap.
We hope you enjoy this project, and have a great weekend.
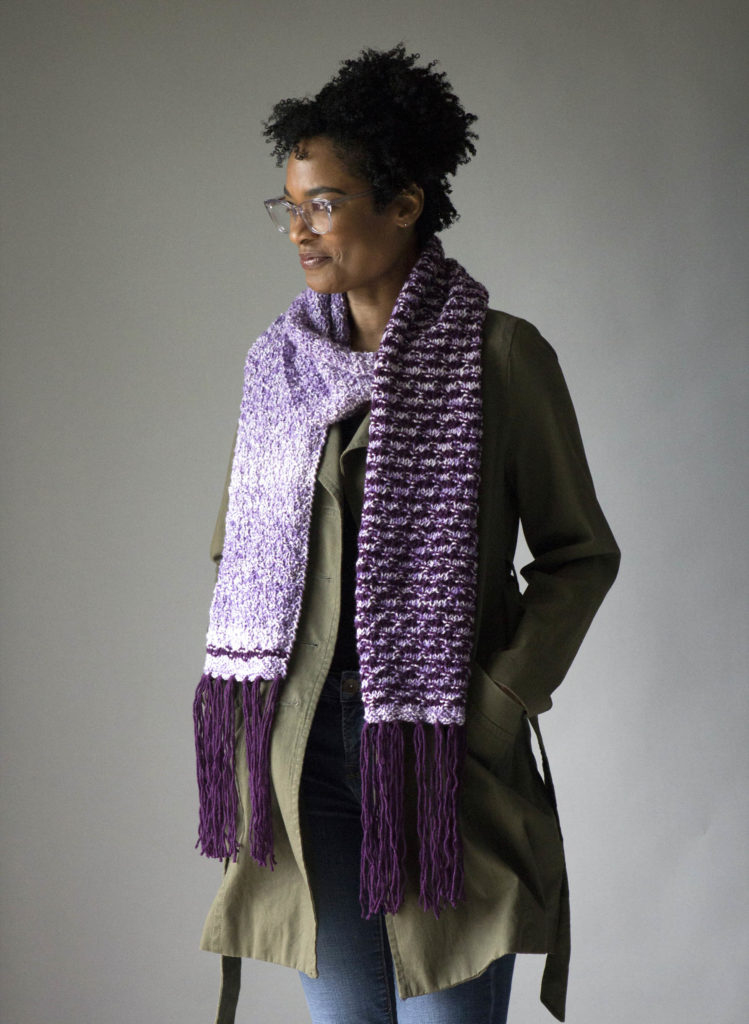
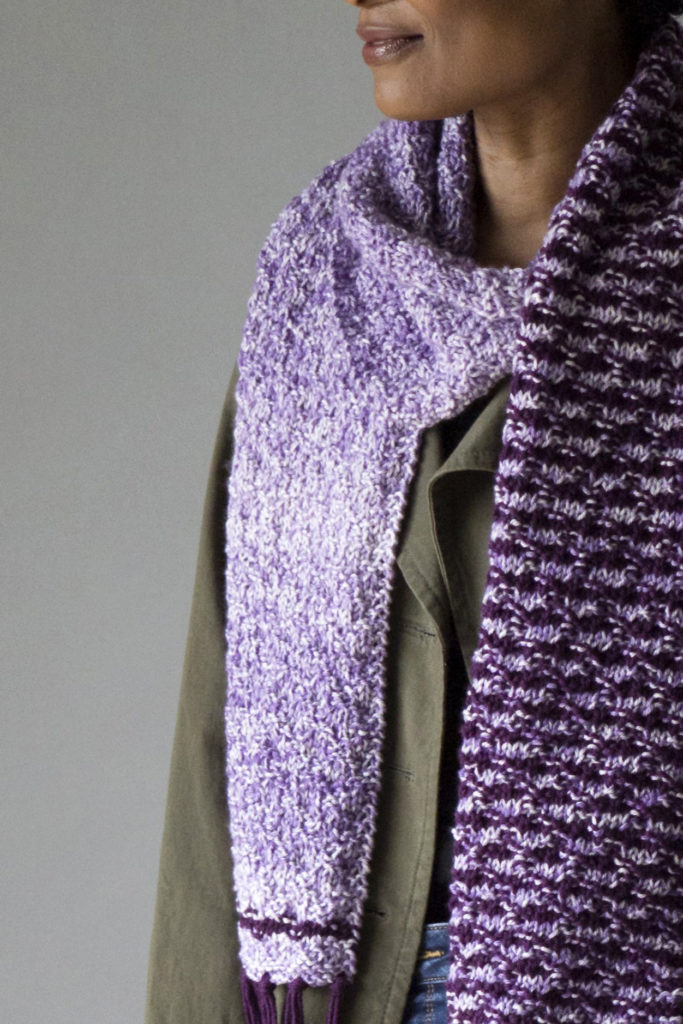
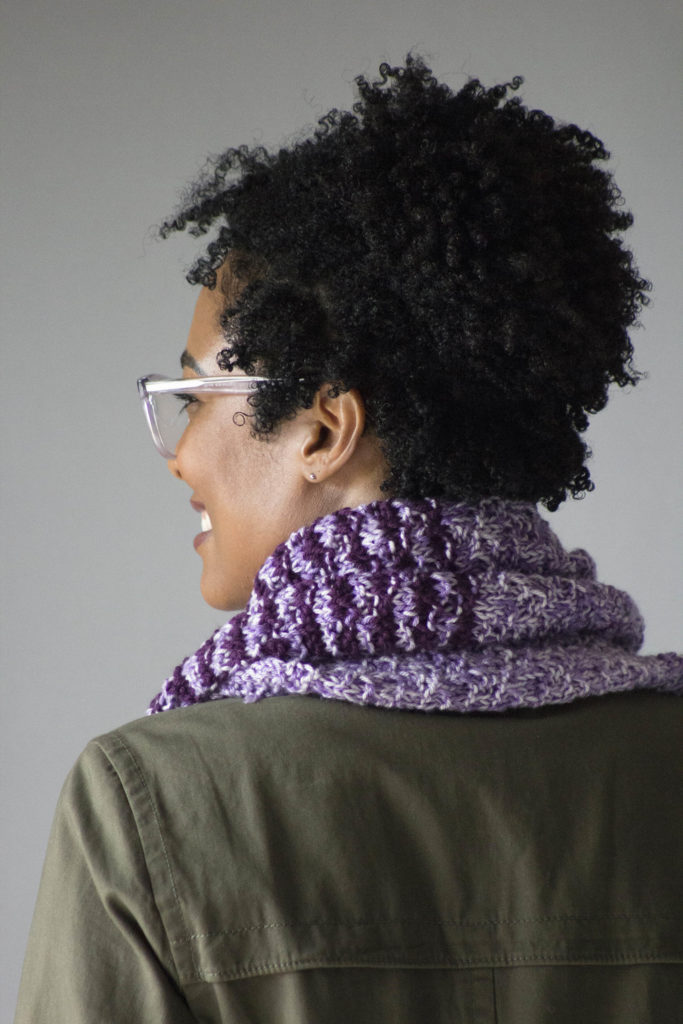
This scarf is a good example of how in a simple design, the placement of color can make a dramatic impact.
The lighter parts are Uptown Worsted Mist, with subtle shading. It’s accented by solid Uptown Worsted, with elements like the end stripe placed to tie the whole thing together. That said, it’s actually an easy knit – all knits and purls. Give it a try!


 W
W