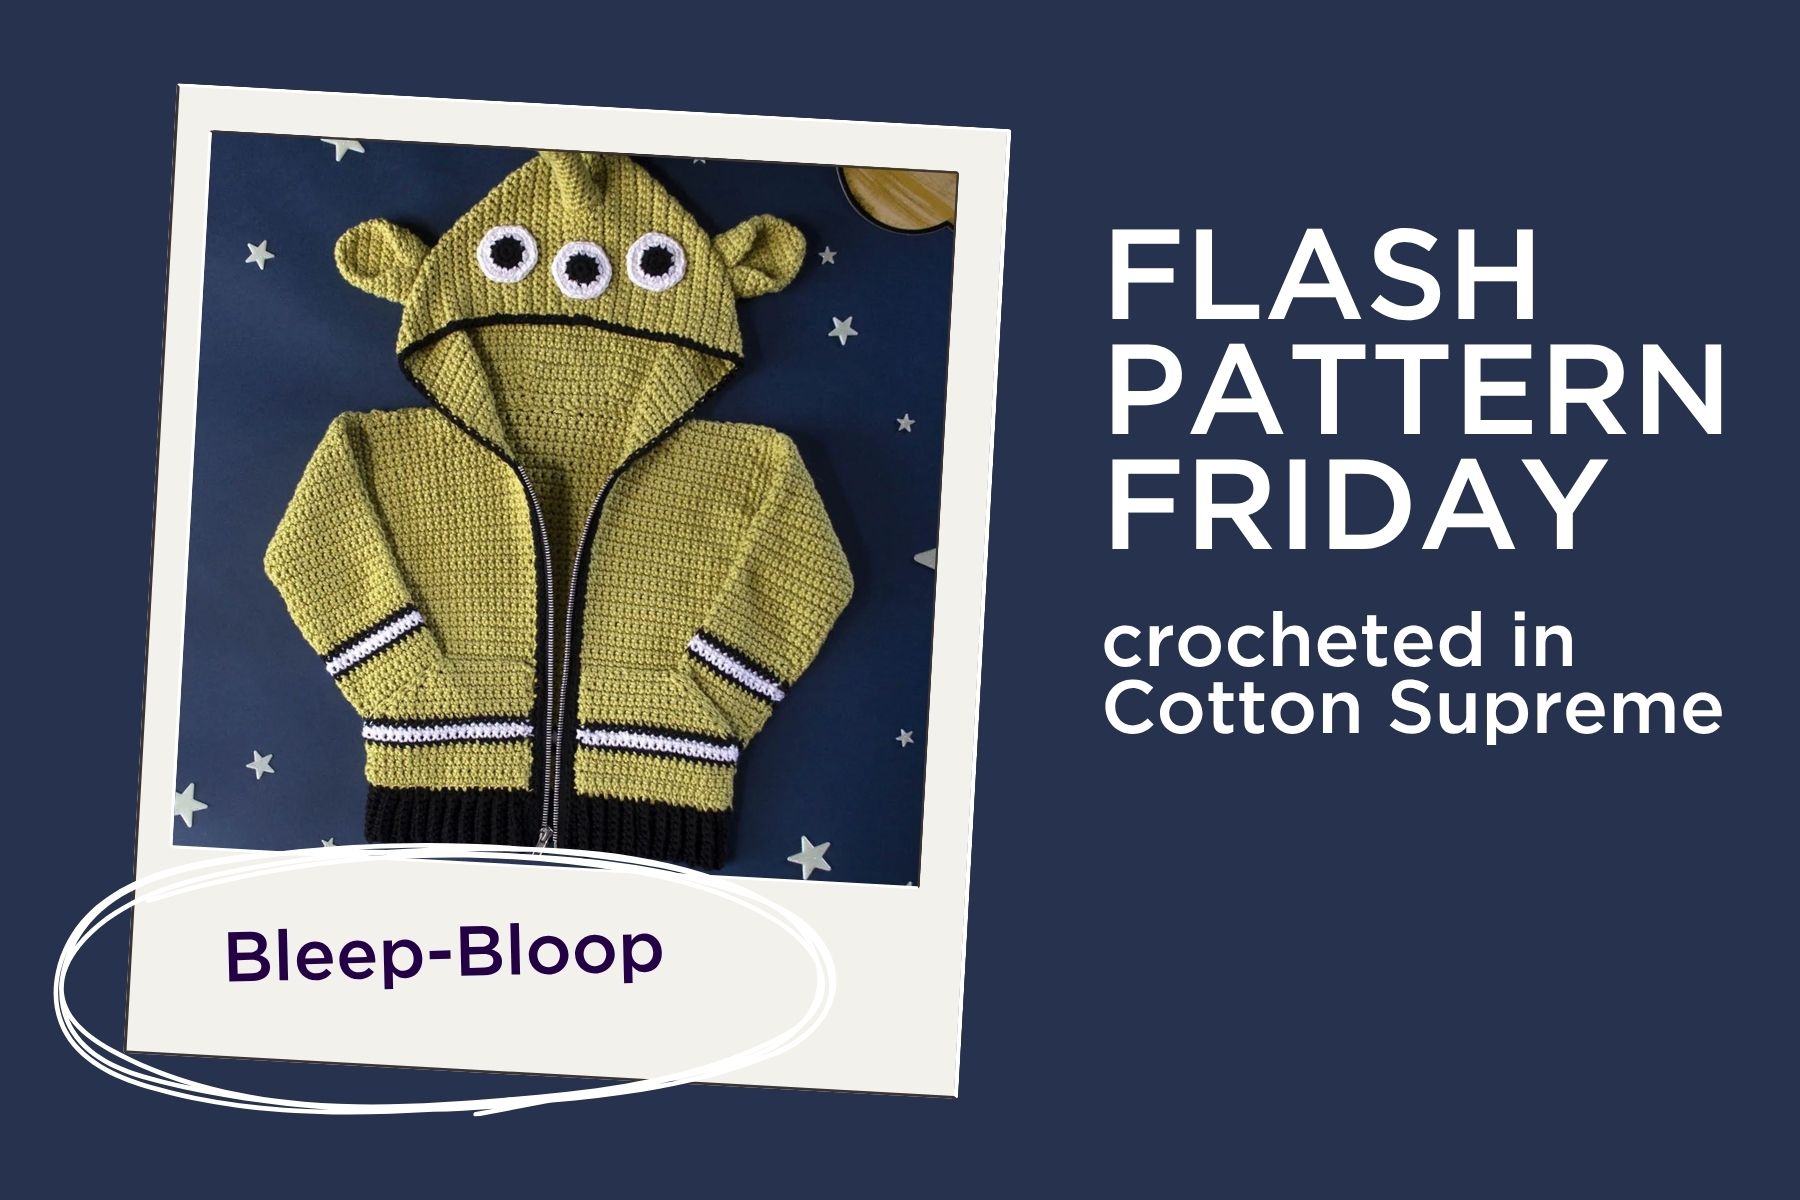
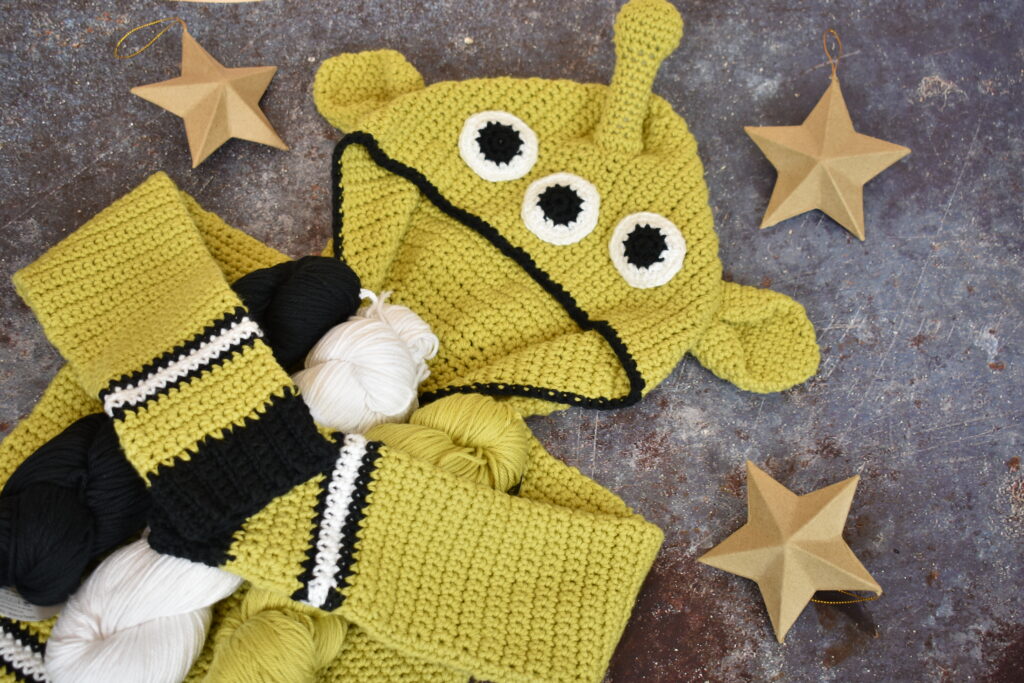
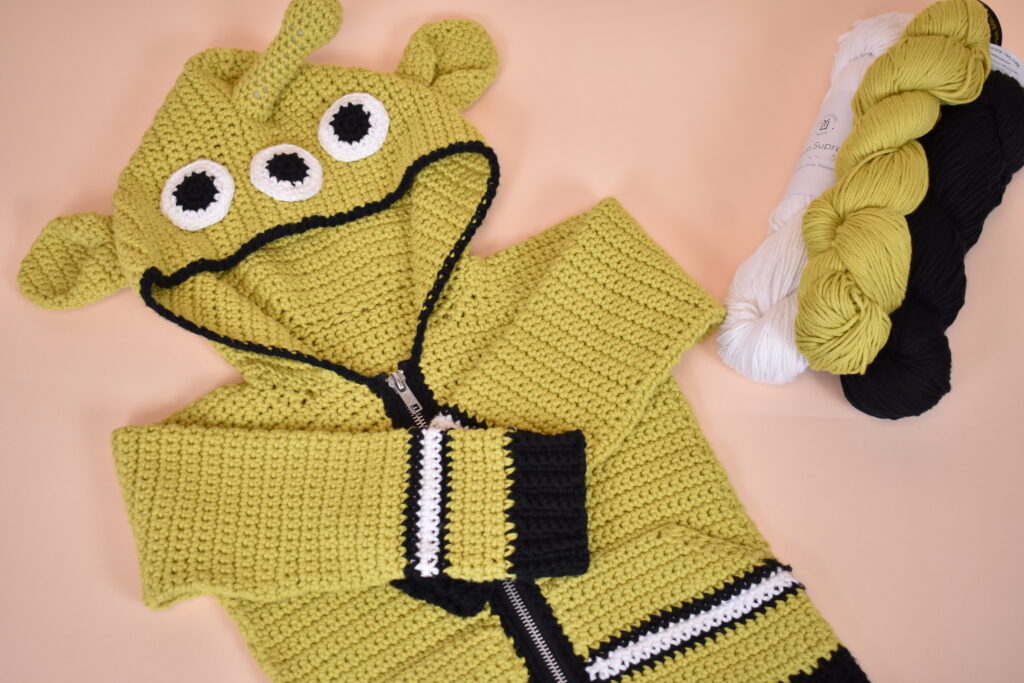
Spooky greetings, and Happy Friday! It’s Halloween, my personal favorite holiday, so we’ve got an extra special deal for you. We’re flashing Bleep-Bloop, a cute kid’s cardigan designed in Cotton Supreme by Amy Gunderson. Bleep-Bloop is the perfect way for your little one to become a galactic explorer as they dream up outer space adventures!
With your crochet hook, our Cotton Supreme yarn, and the creativity you bring to every project, you’ll have an interstellar time bringing Bleep-Bloop to life. The details include kangaroo pockets, a zippered closure, and silly little alien features on the hood! Don’t be afraid to mix and match those ears, eyes, and horn! Maybe your alien has one eye, four ears, and two horns! We can’t wait to see your projects!
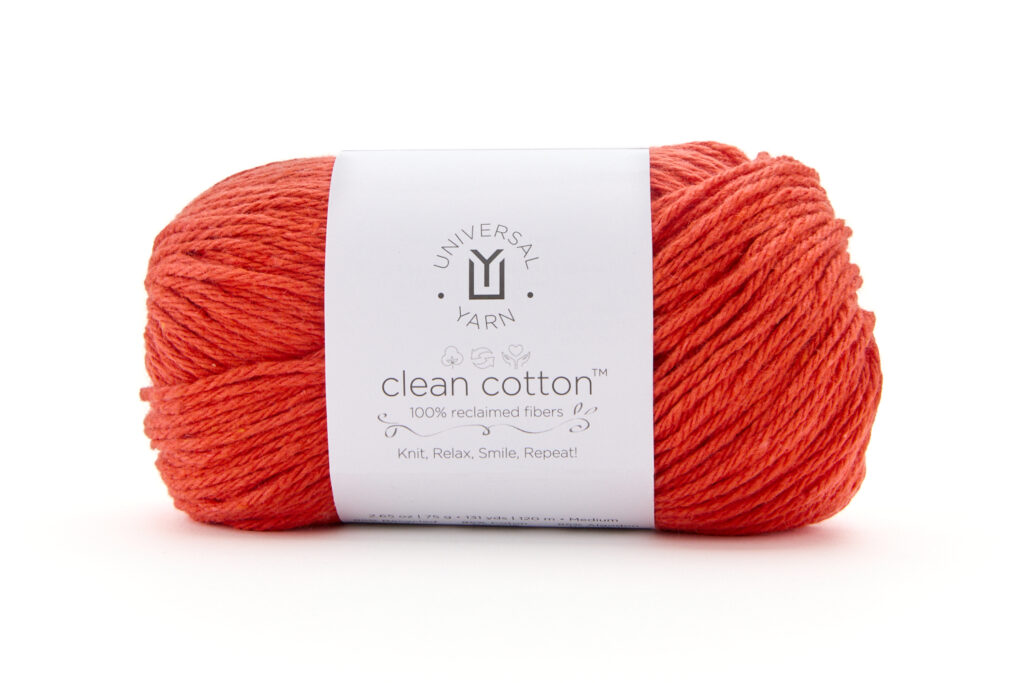
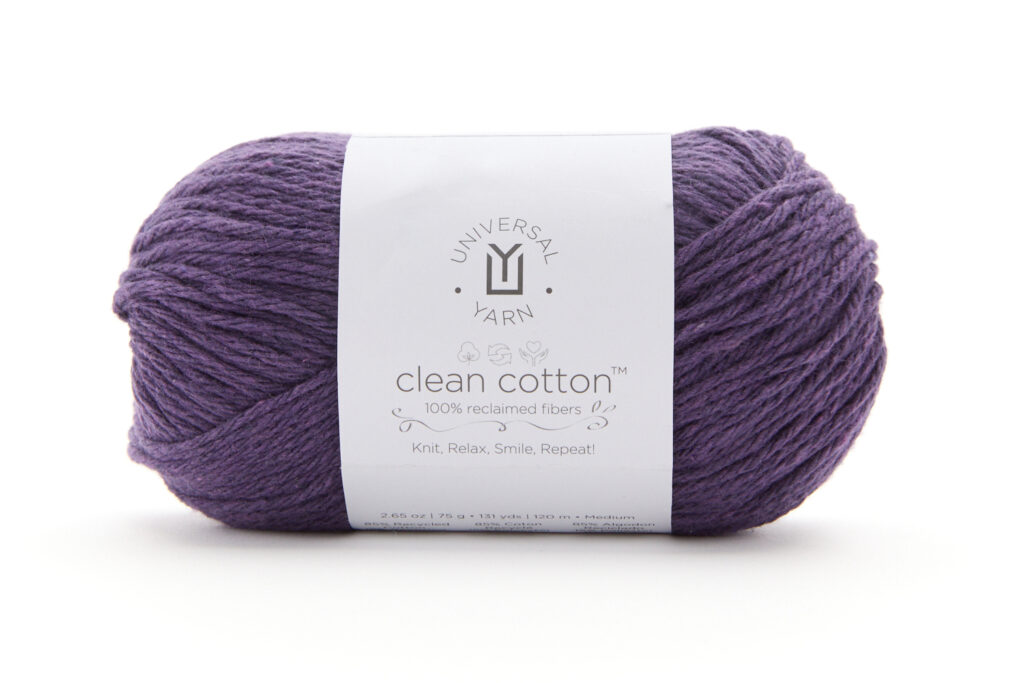
Cotton Supreme is hands down the best choice for Bleep-Bloop. It’s washable, dryable, and most importantly, durable! Over time, and with each wash, it gets softer and softer. That’s not all – we have a wide selection of colors to pick from, so while our Bleep-Bloop is green, perhaps yours is purple or orange!
Bleep-Bloop is free today through Sunday, November 2nd so to get the pattern at no charge, use the “buy it now” or “add to cart” links on the Ravelry pattern page. Then enter the coupon code “FLASH” where you see the “use coupon code” link that appears during purchase.
But keep reading; there’s more! Here’s the extra special deal: 20% OFF sitewide and a FREE skein of Clean Cotton in 107 Tiger Lily OR 114 Nightshade with every purchase.
Today only, 10/31. Skein color selected at random. While supplies last.
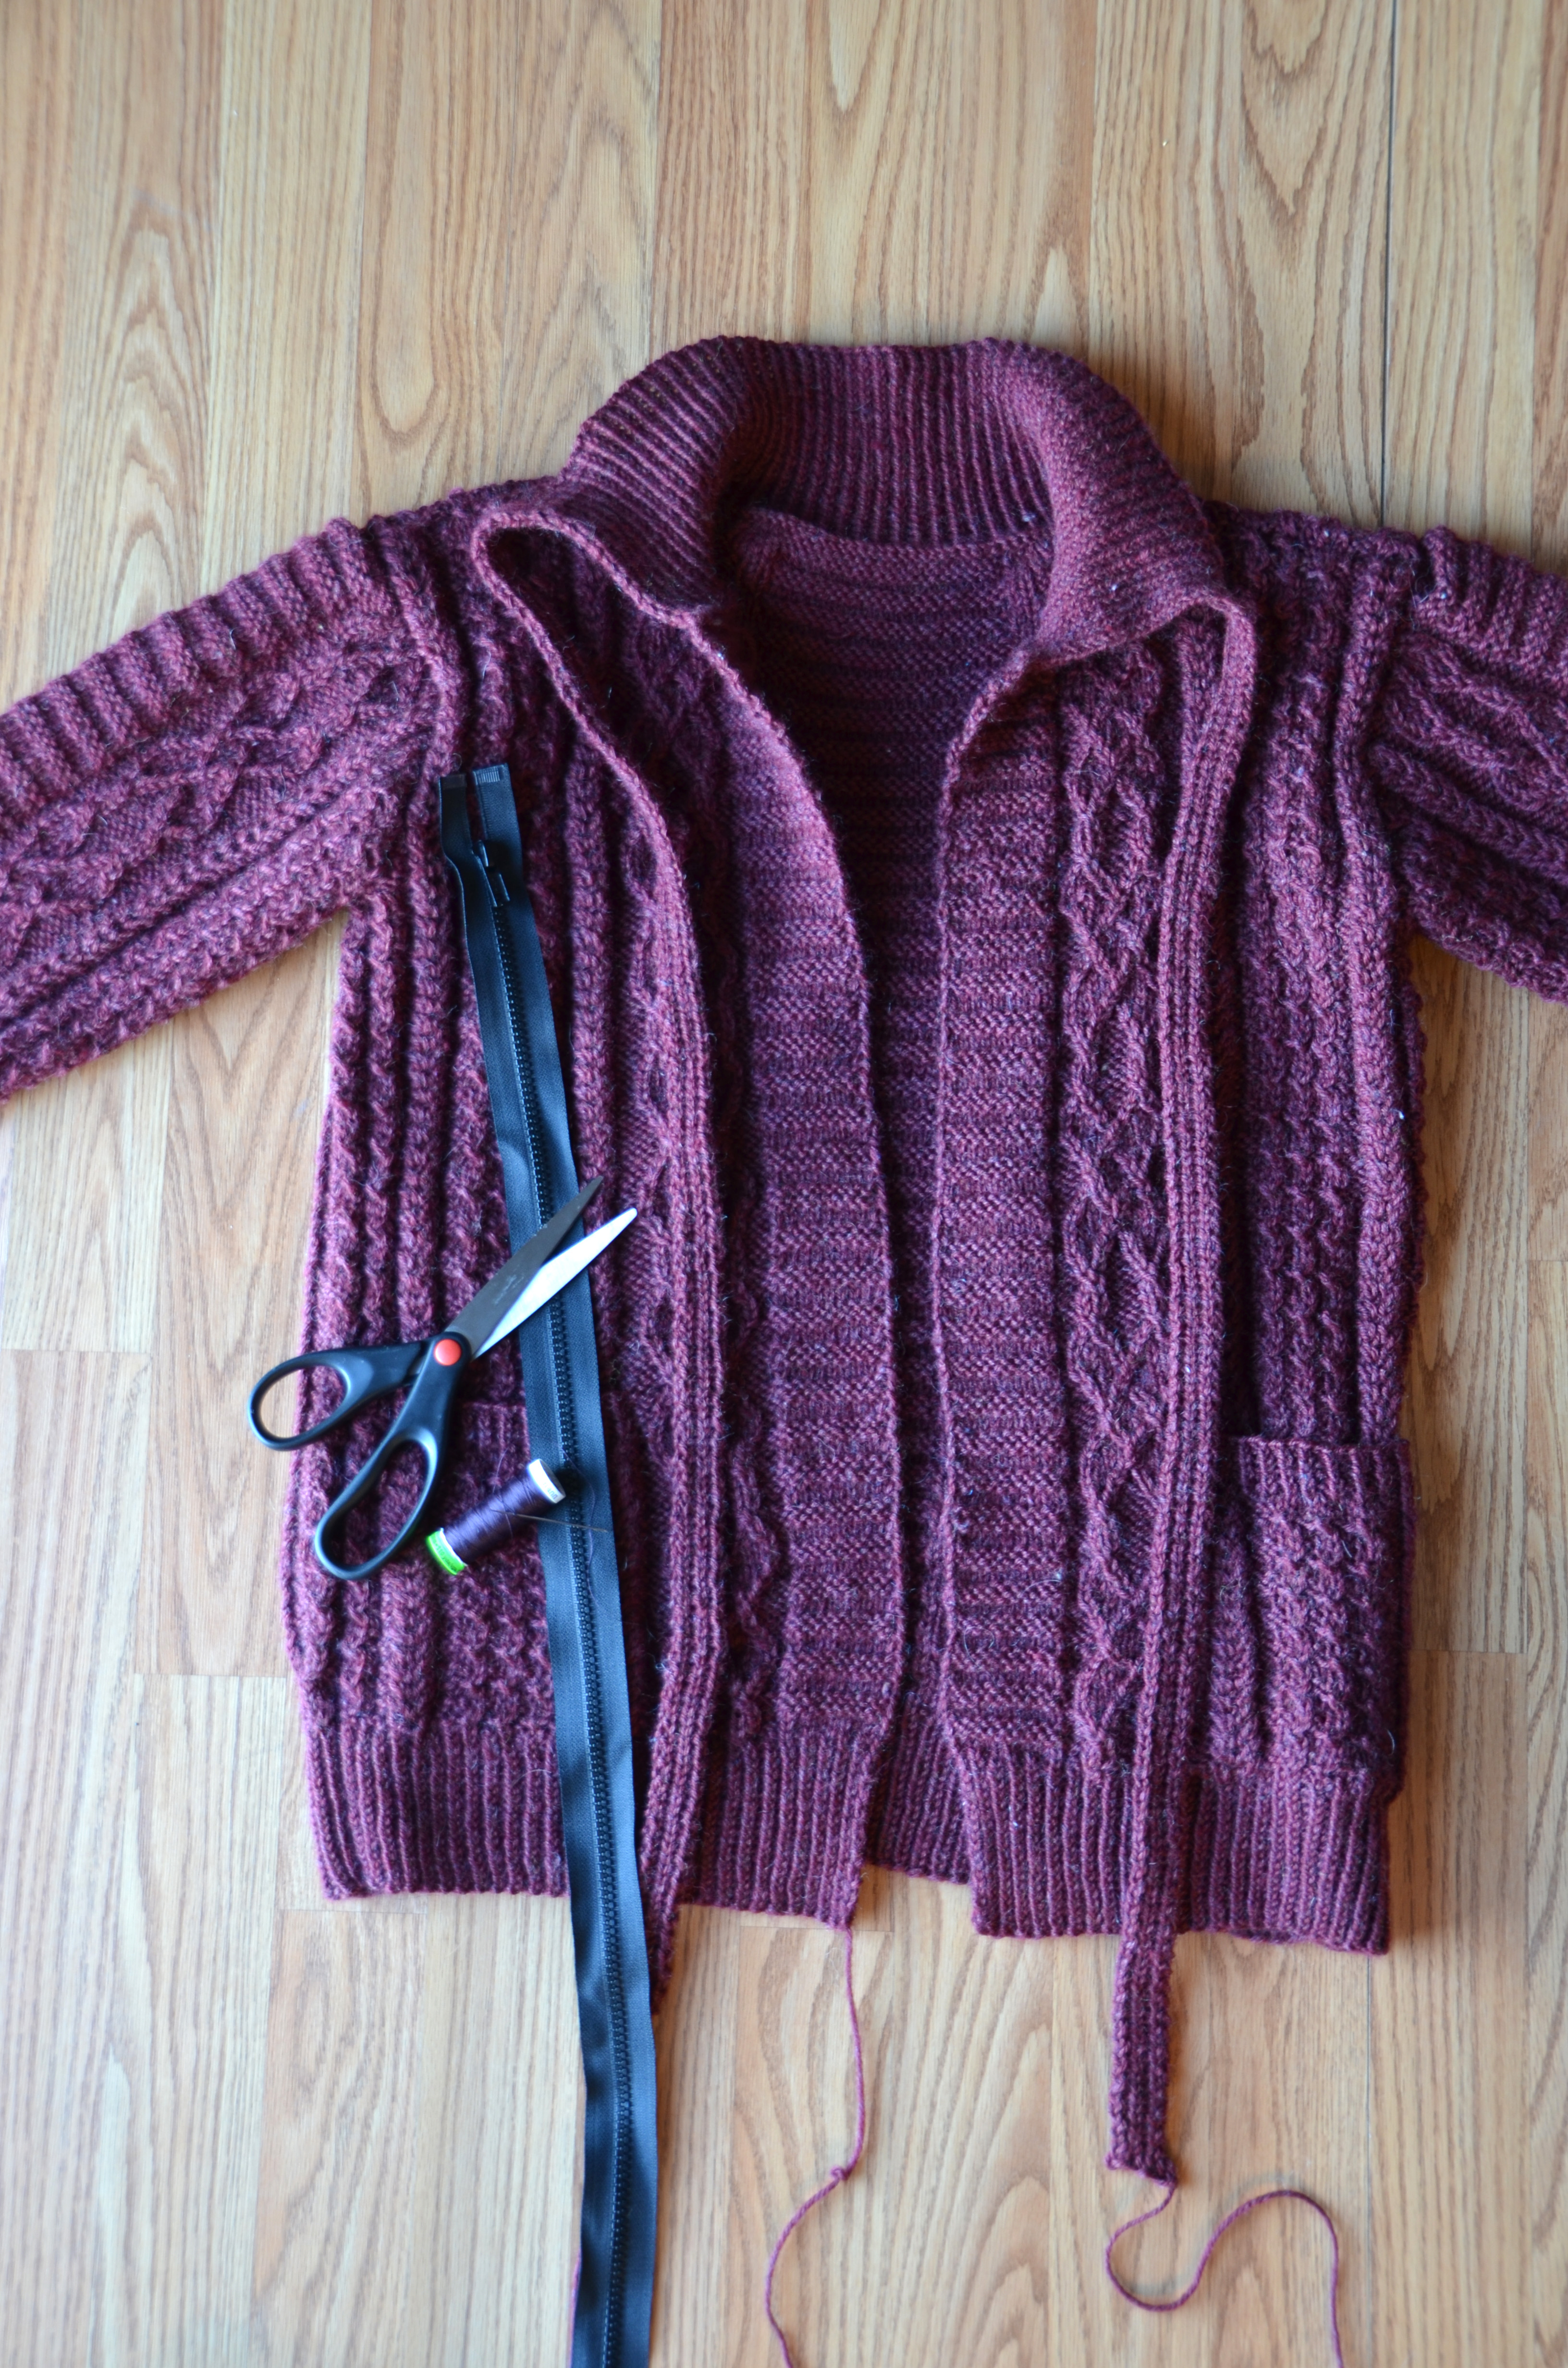
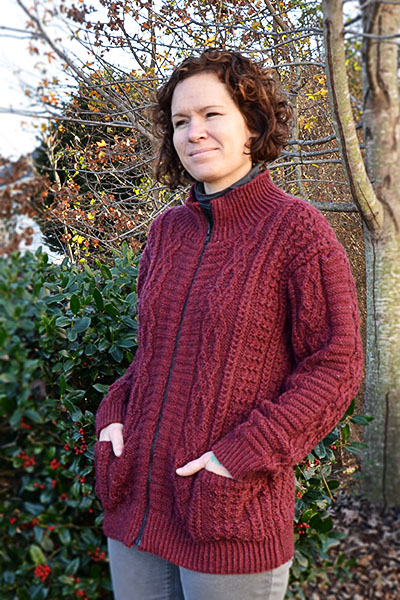
With the holidays upon us, I know many of you are busy plugging away at gift projects. Me? I’m as selfishly knitting as ever and just finished my modified Wesley Heights. Though I finished knitting the pieces and seaming the sweater many weeks ago, I just sewed in my zipper, and I’m going to show you how.
As a reminder, this is our ongoing blog series covering projects from the Deluxe Cable Collection. You can learn more about the knitalong by reading previous blog posts here, viewing the collection here, and joining our Ravelry group here.
I basically knit the Wesley Heights pullover, but followed instructions for the Greensboro Cardigan for collar and zipper facings. Stitches for the collar are picked up around the neck edge and knit upward. Then, the first and last 6 stitches of the collar are continued to form the zipper facings.
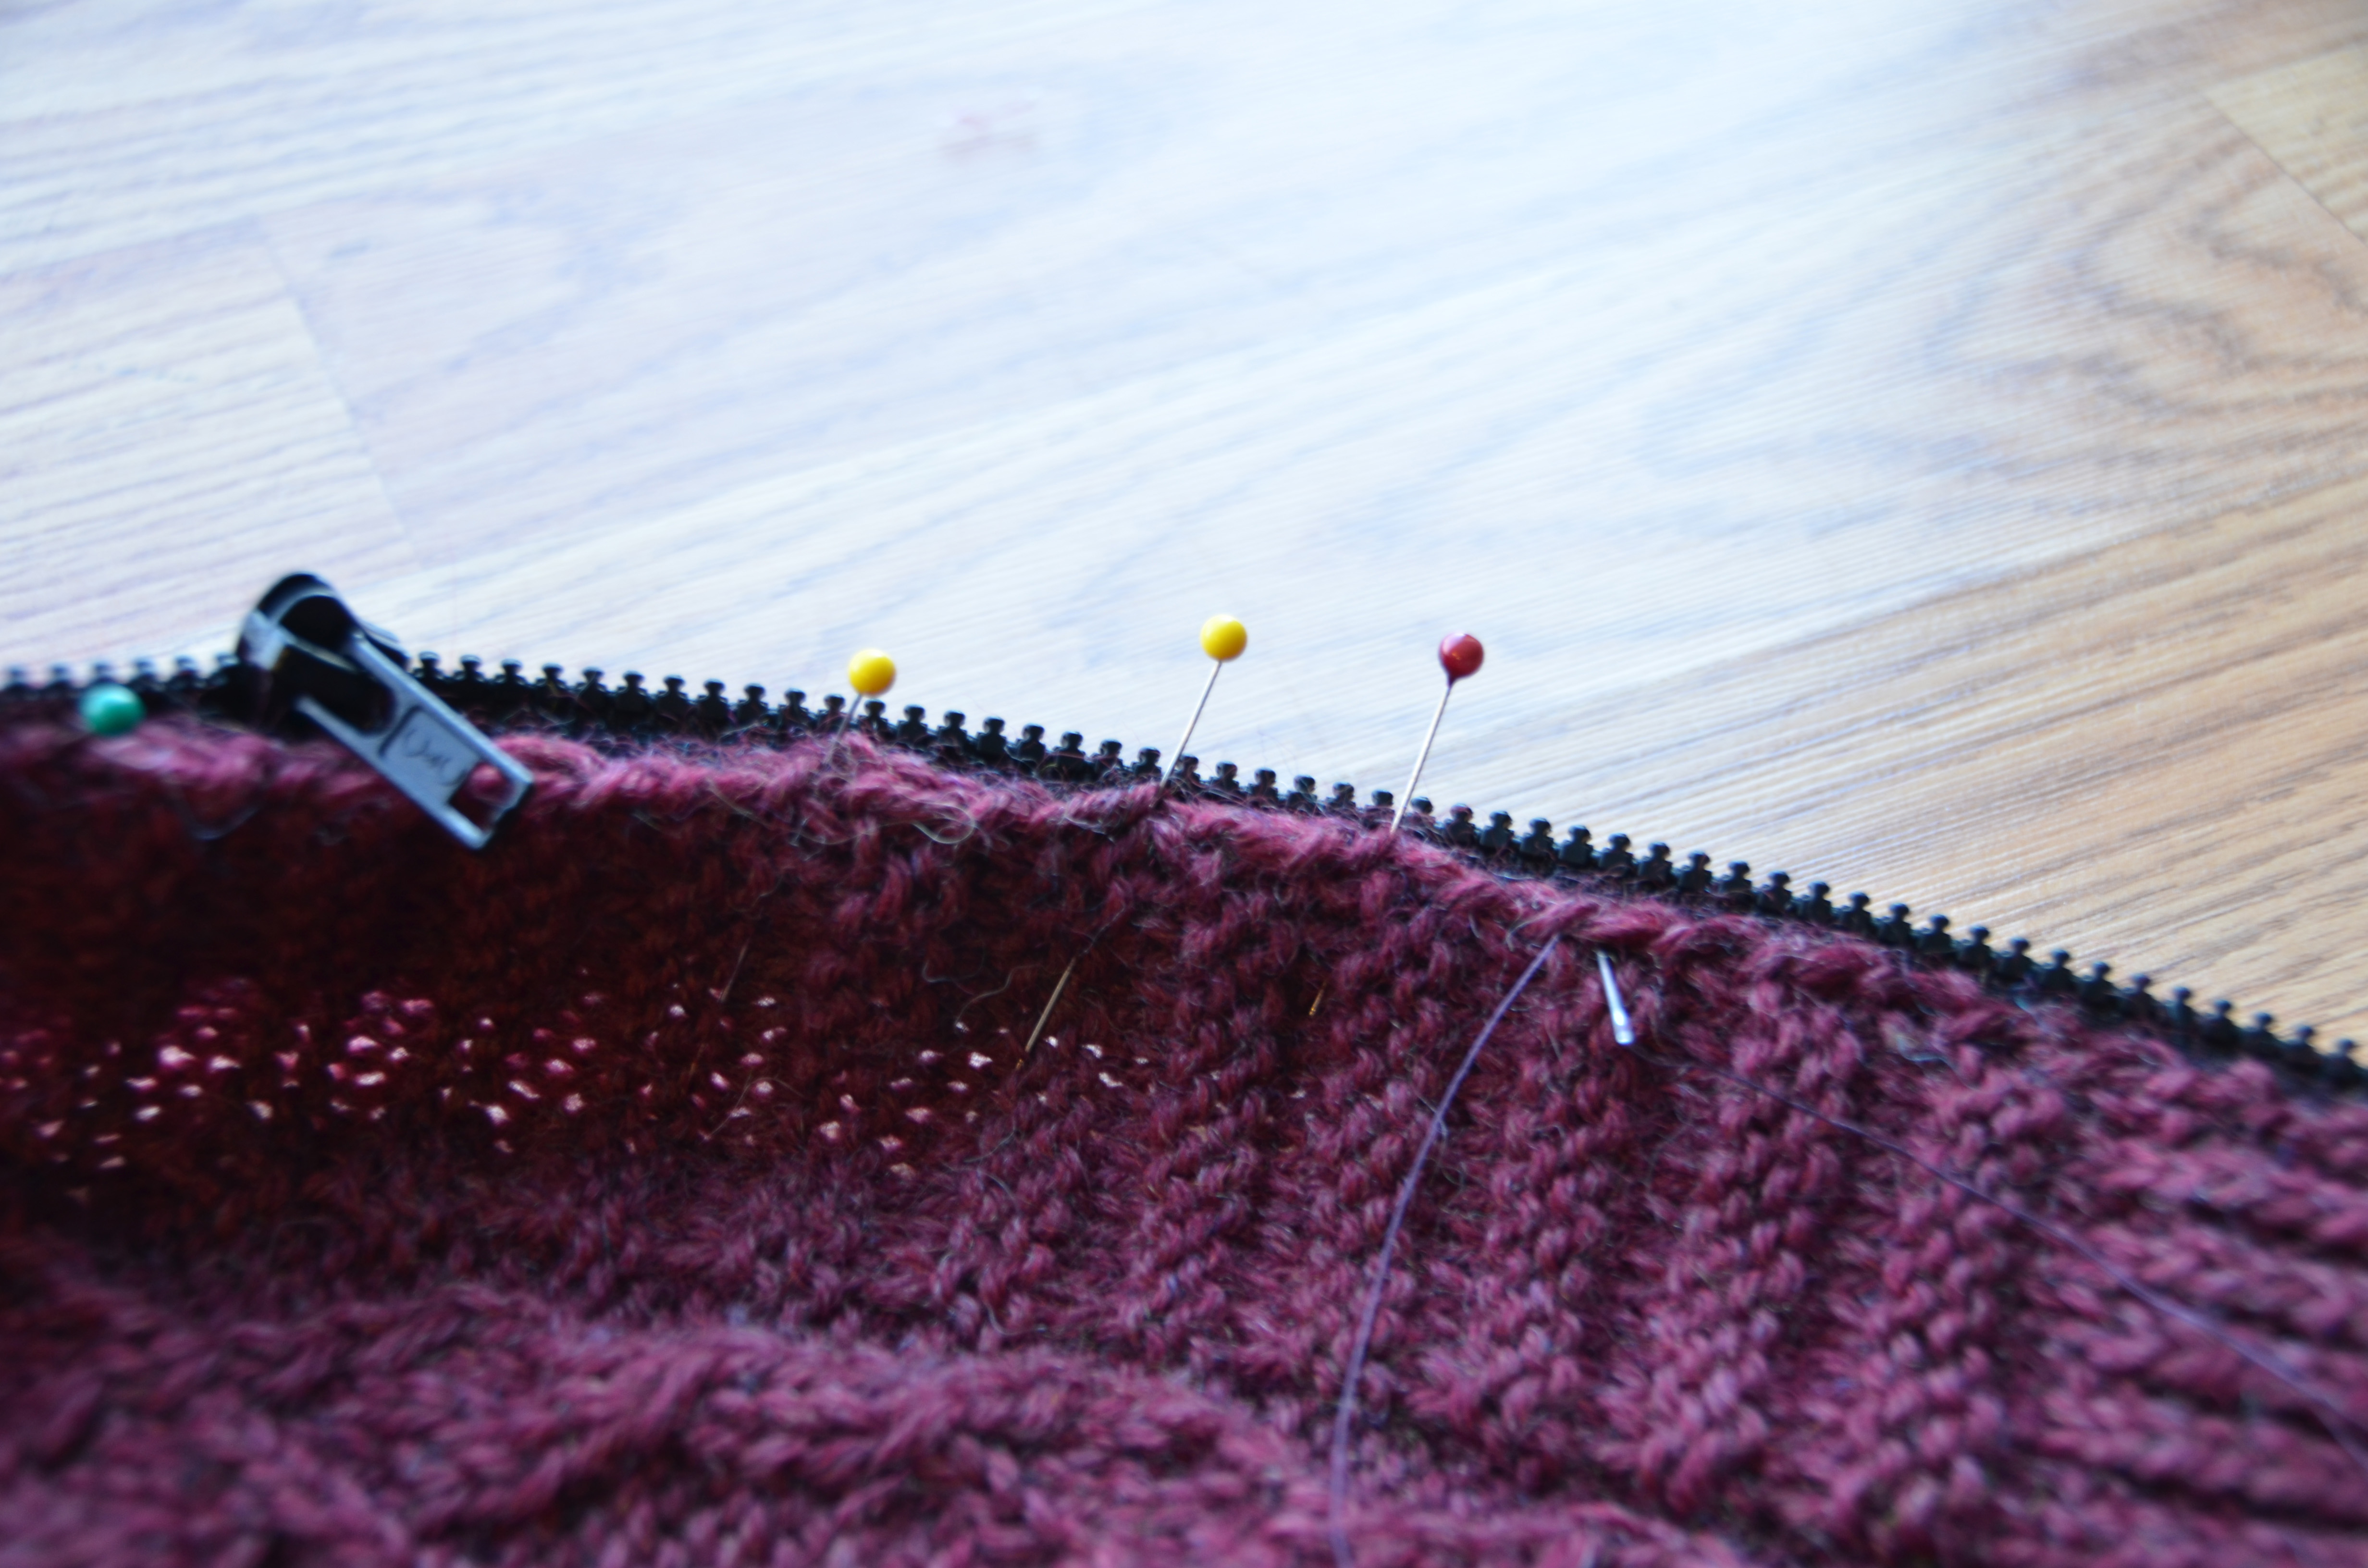
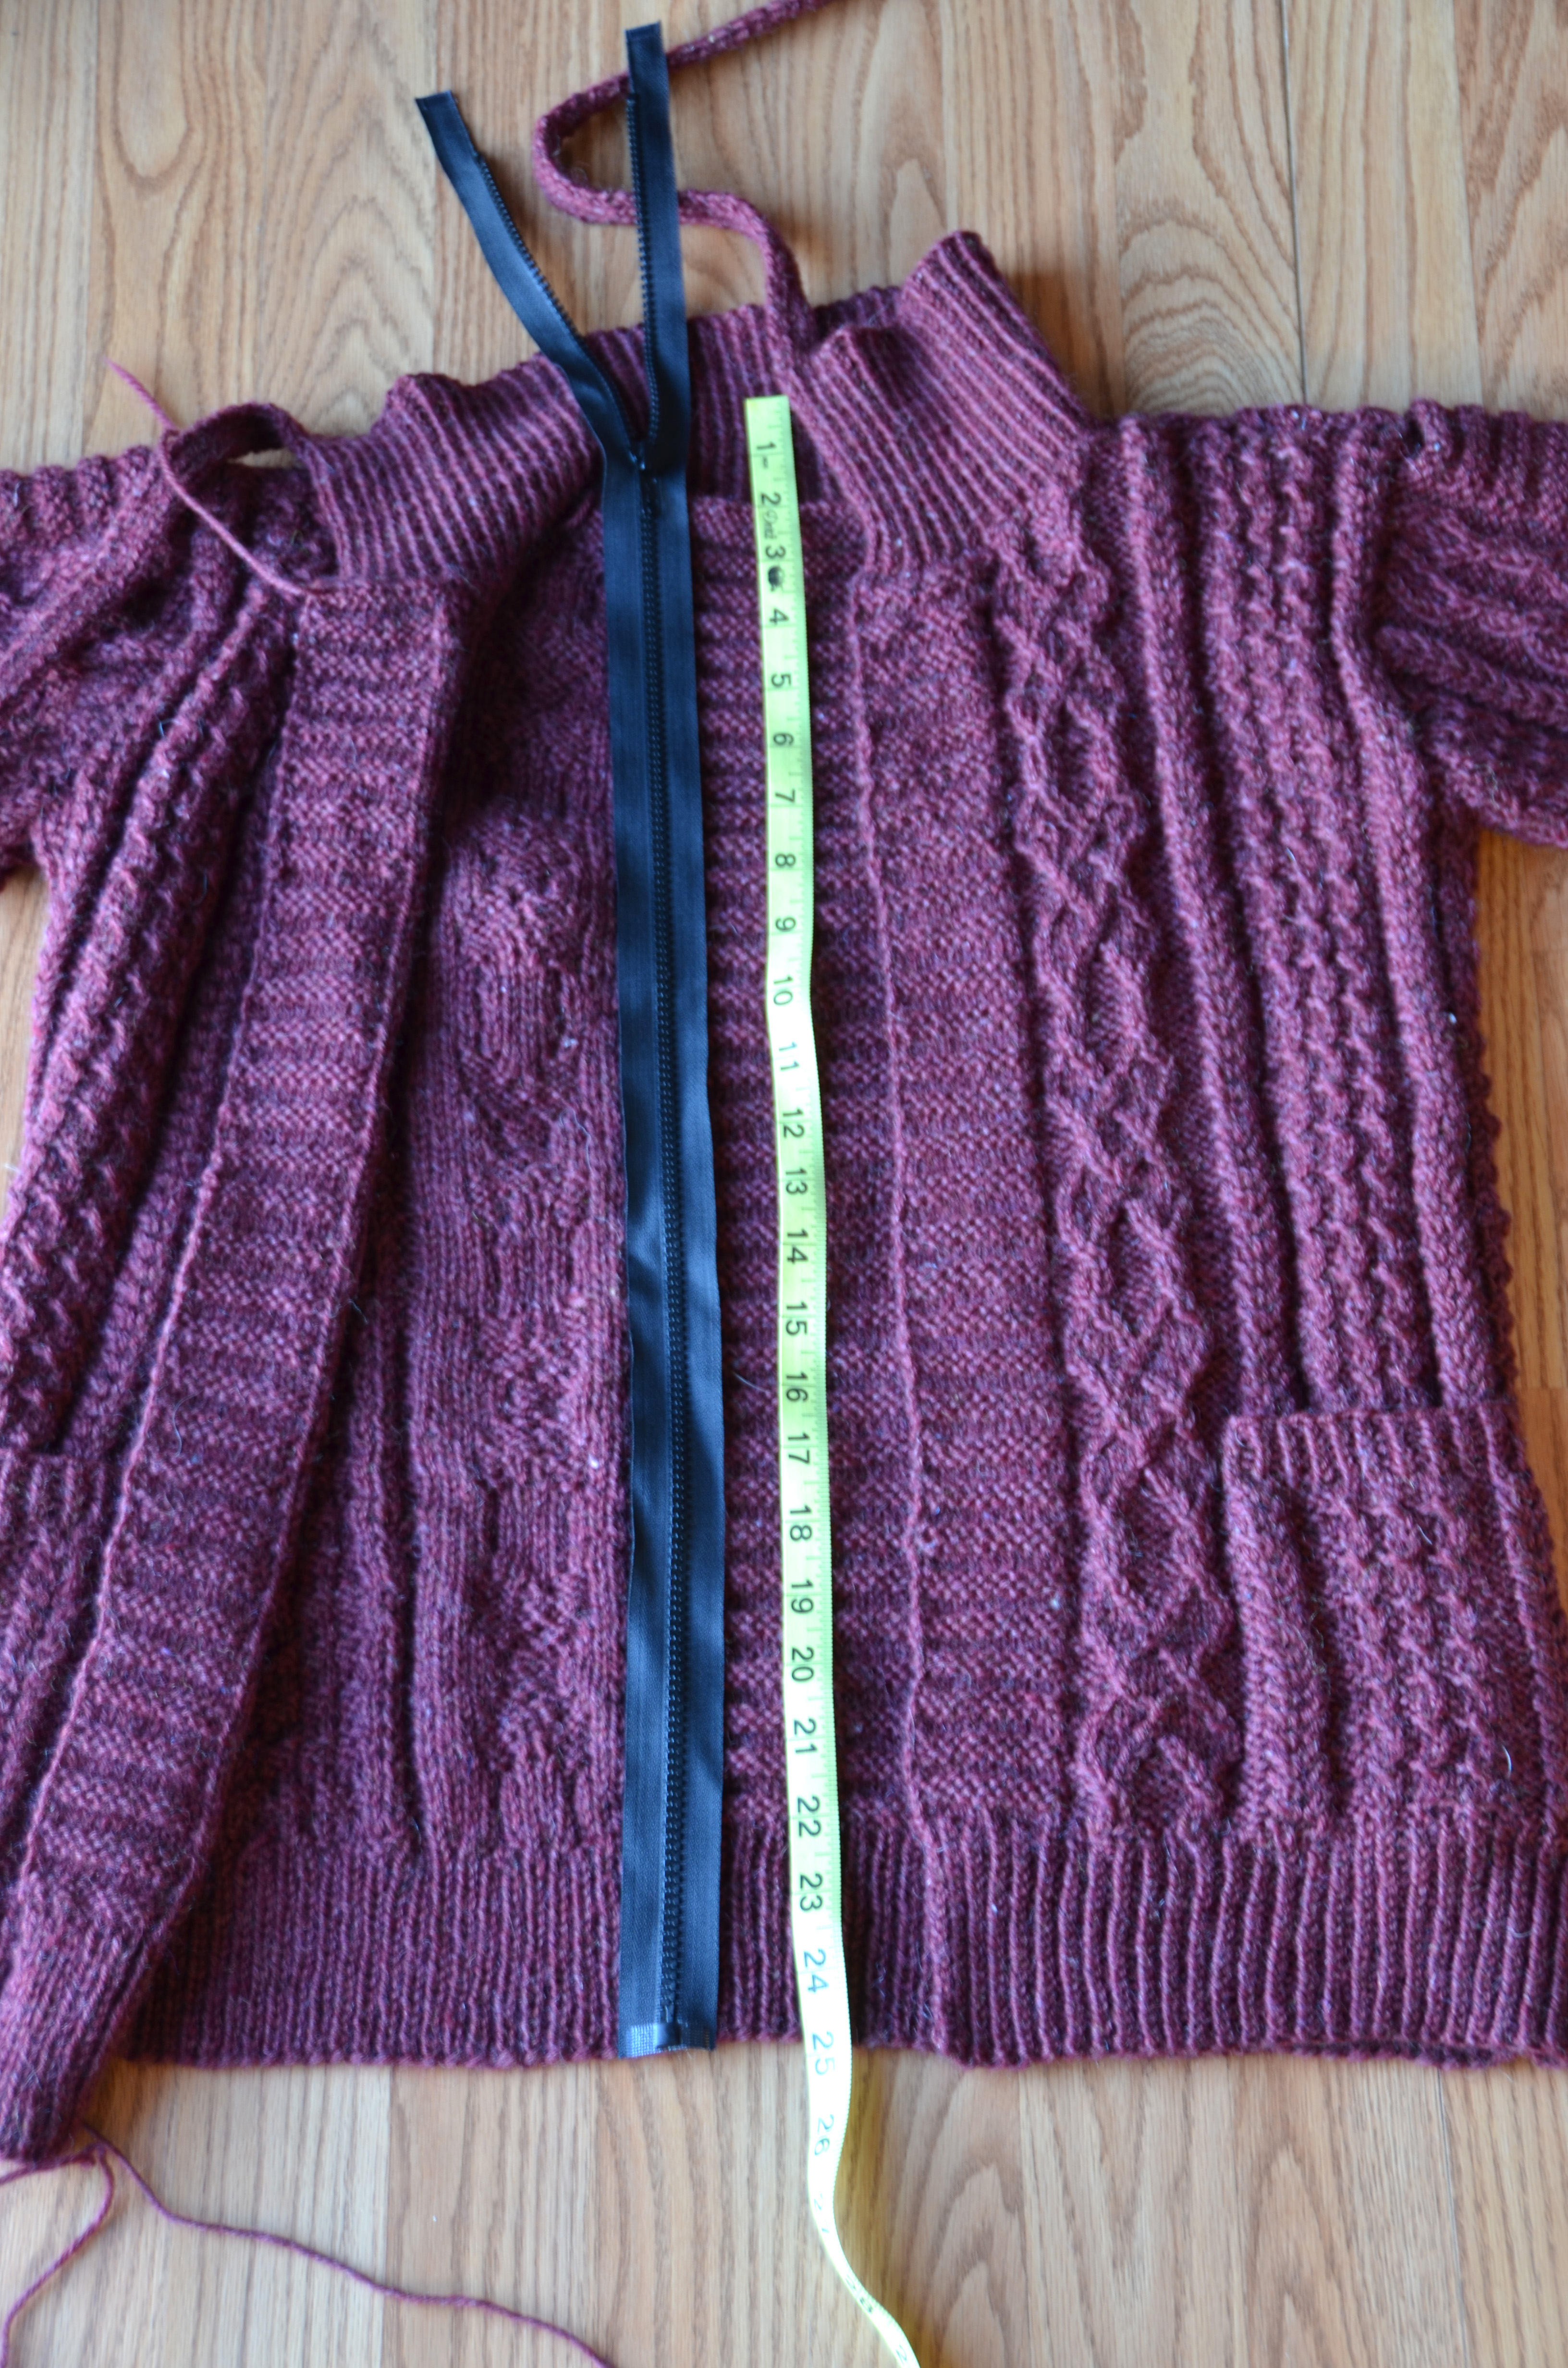
Be sure not to stretch the knitting when measuring for the zipper.
It’s important to block your knitting before measuring for the zipper length and installing it. Zippers and knitting can be tricky, since zipper tape is typically woven and non-stretchy. But I’m going to show you what you can do to avoid the puckery zipper look.
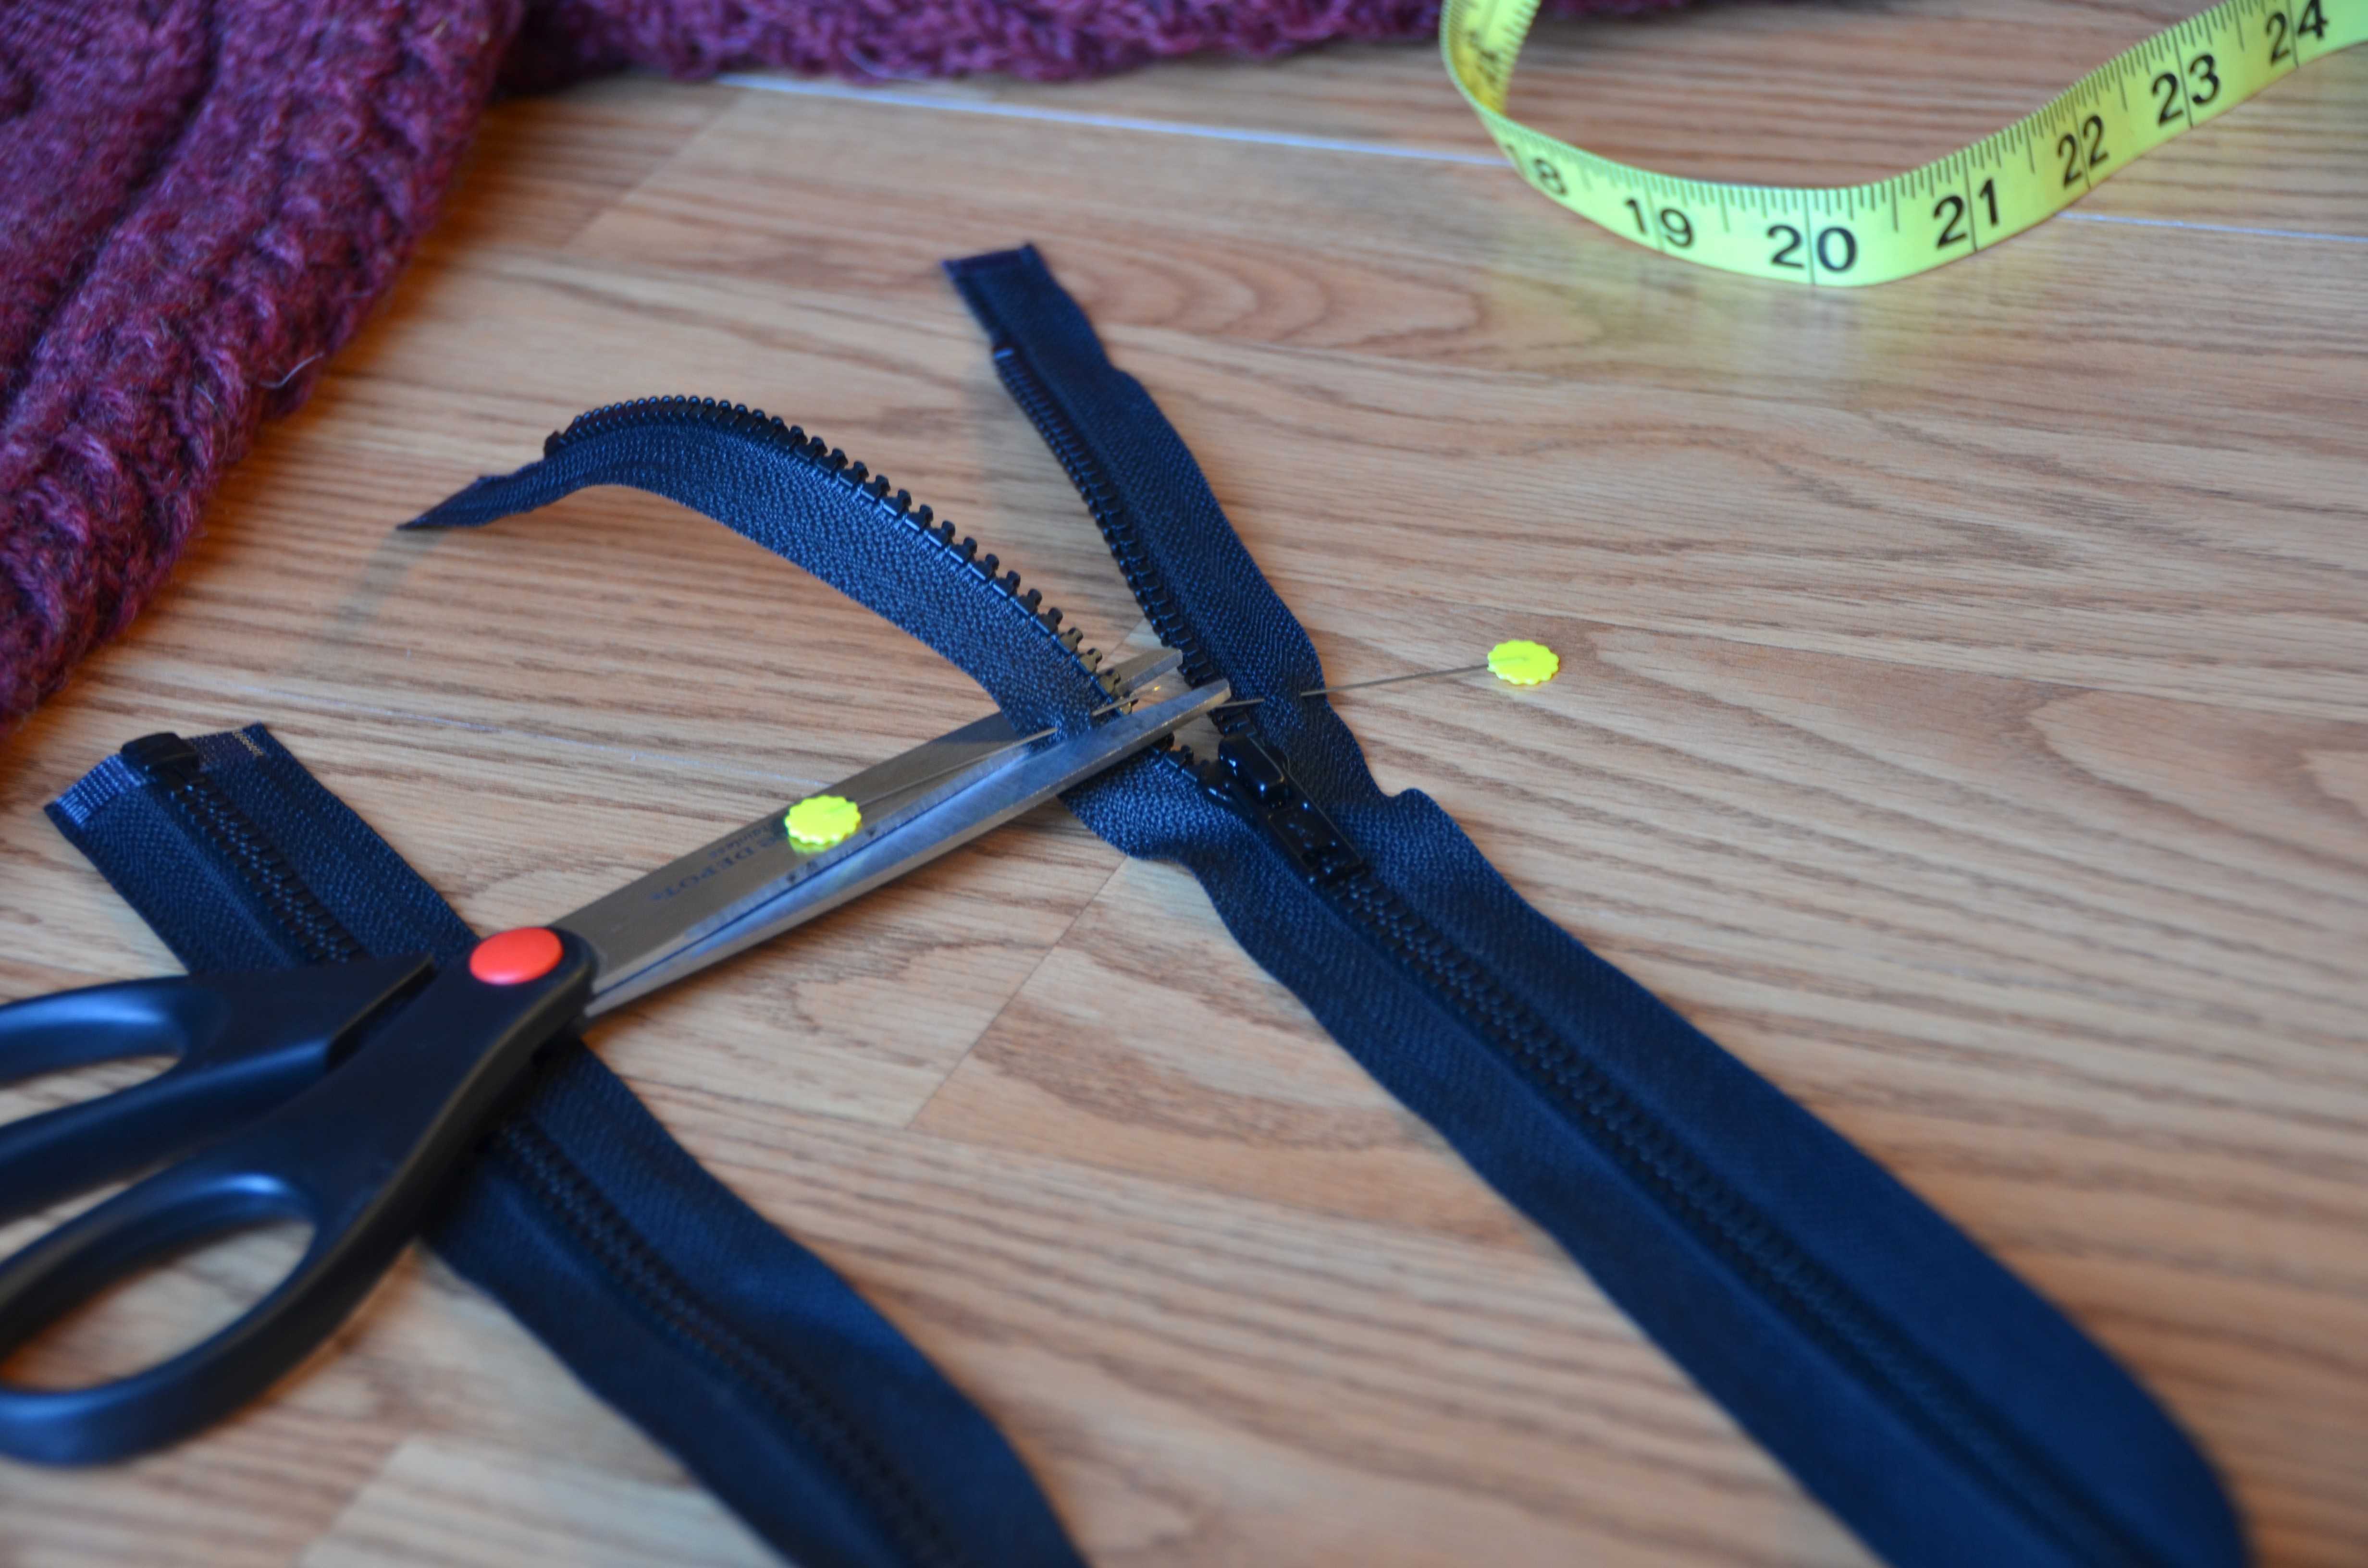
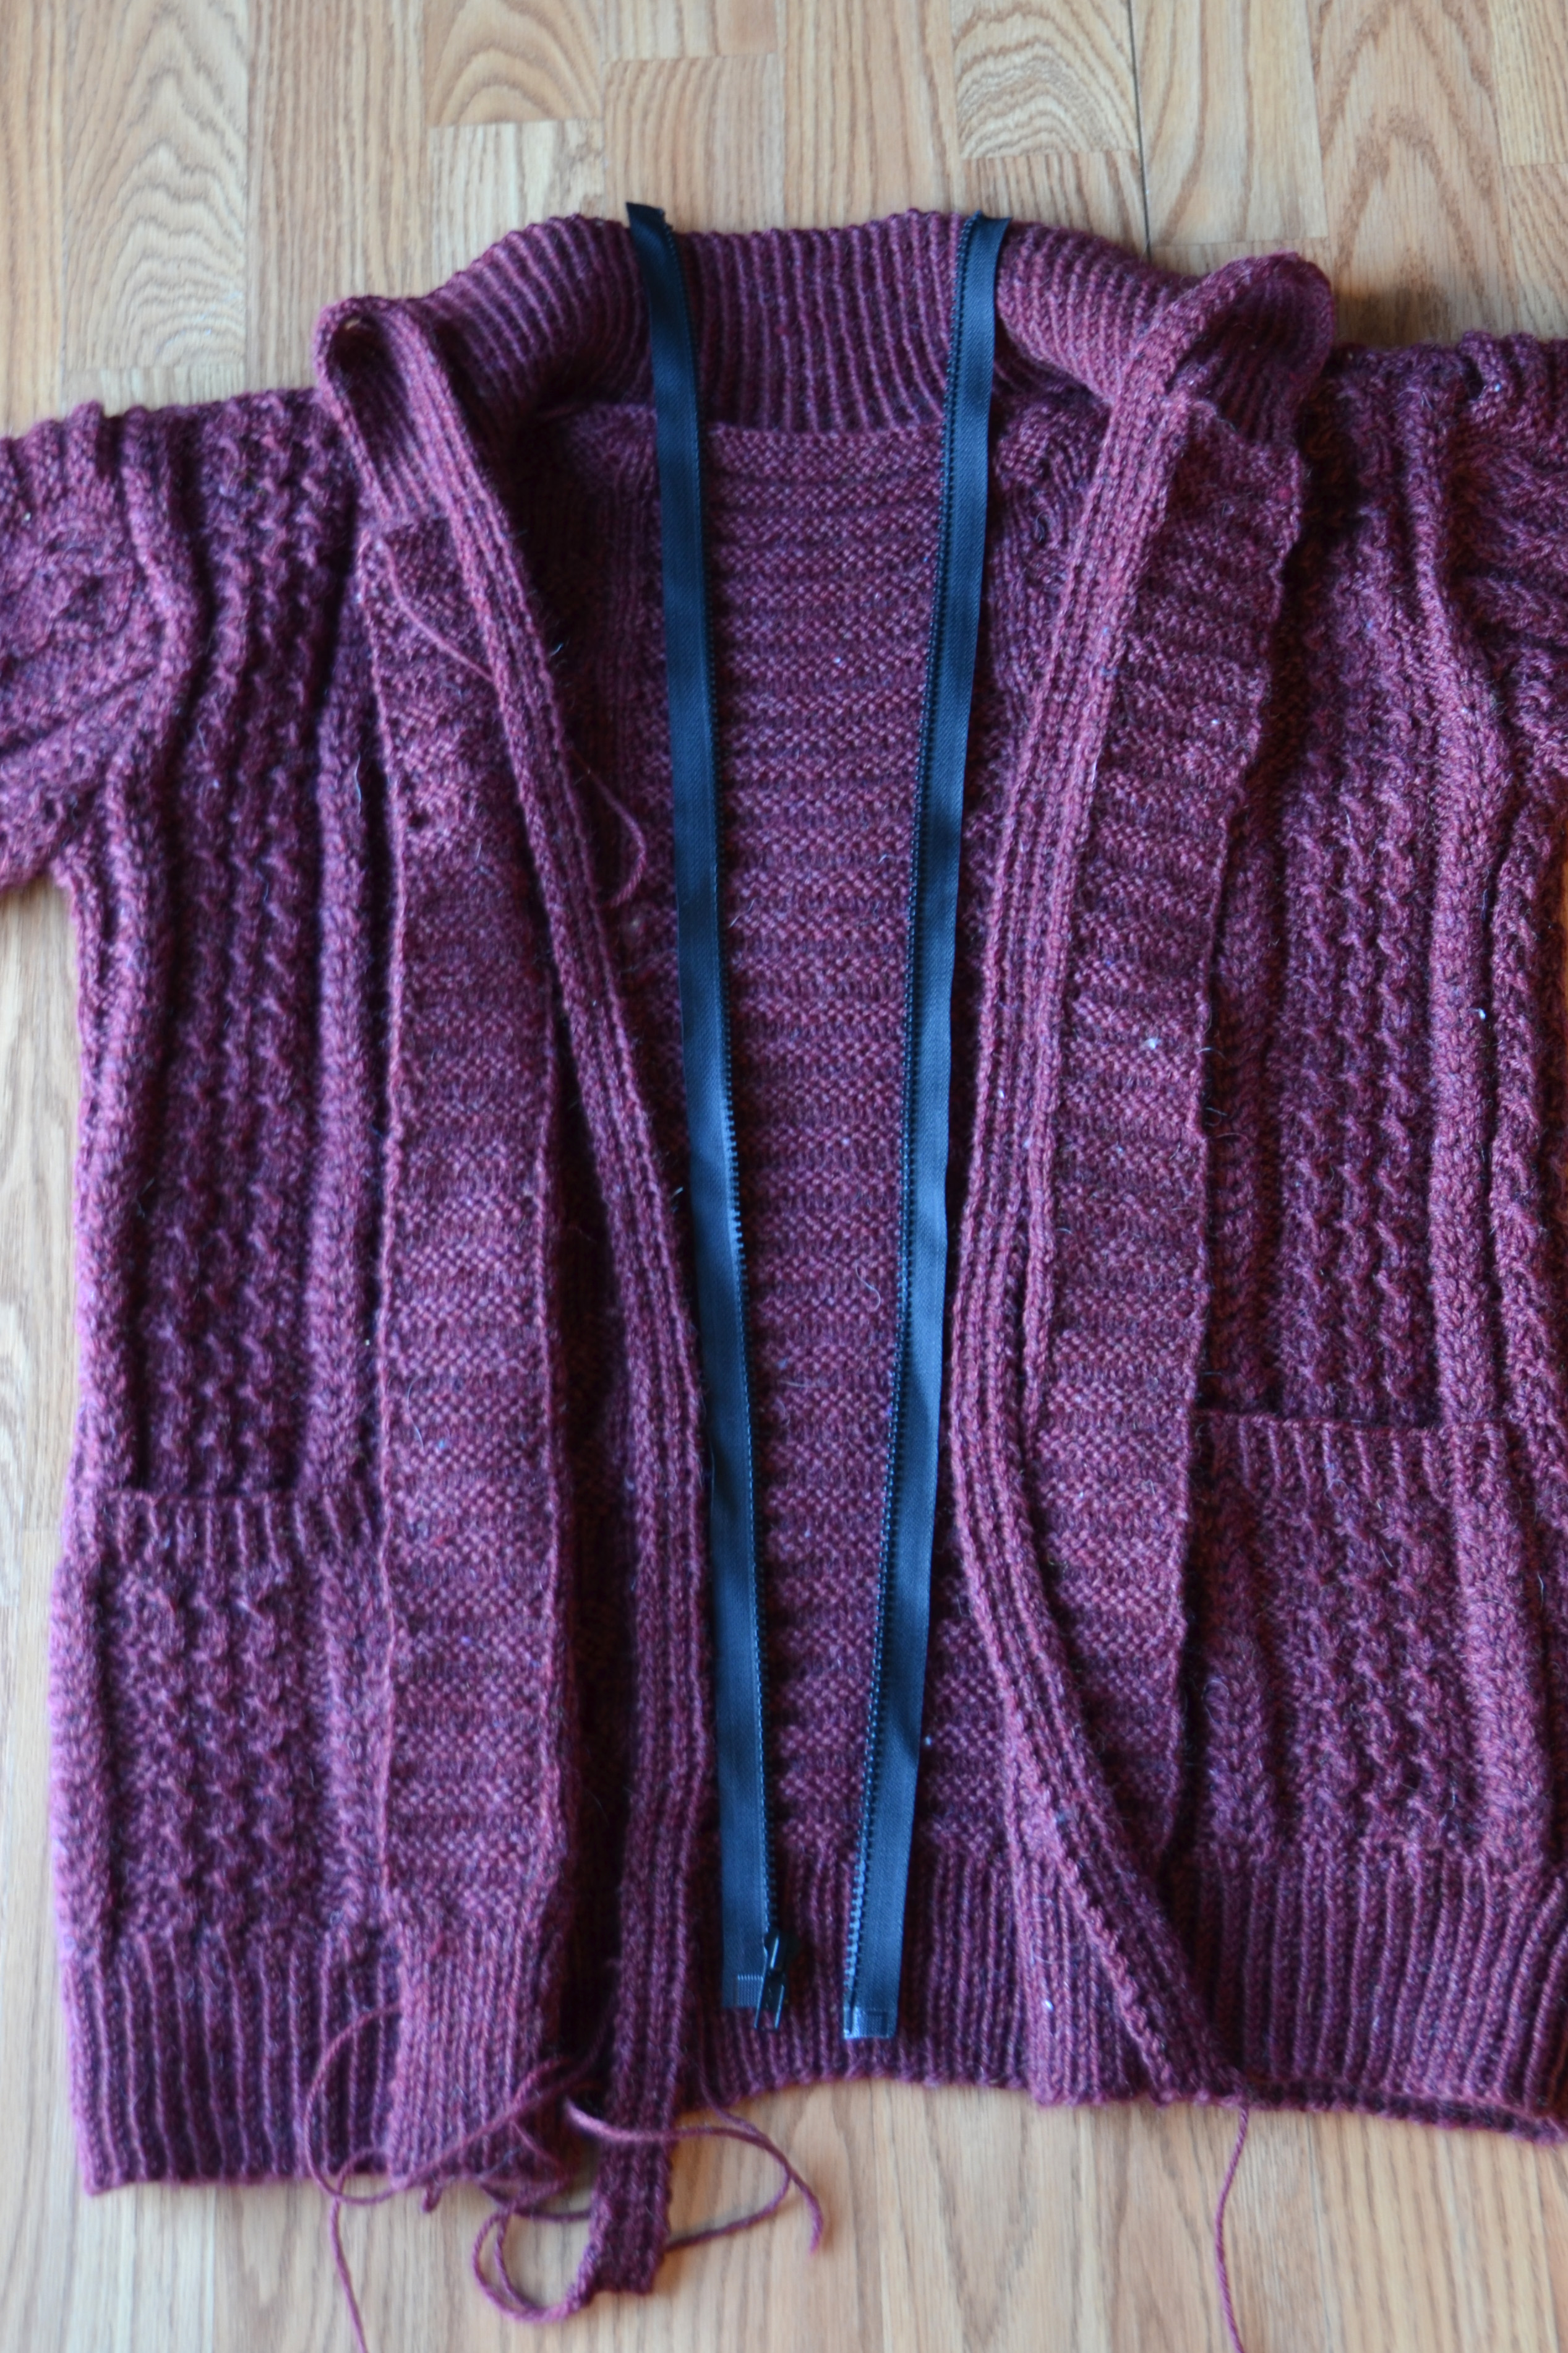
Open up your sweater and measure along the front opening from the very bottom edge to the top of the collar. I like to leave a small margin of about 1/4″ at the top and bottom before the zipper begins and after it ends. Mark with a pencil or with pins (as shown) where the zipper tape needs to be cut.
Don’t accidentally slide your zipper over the top of your just-cut end!
Do not, I repeat, DO NOT slide the zipper off the top of the cut edge!
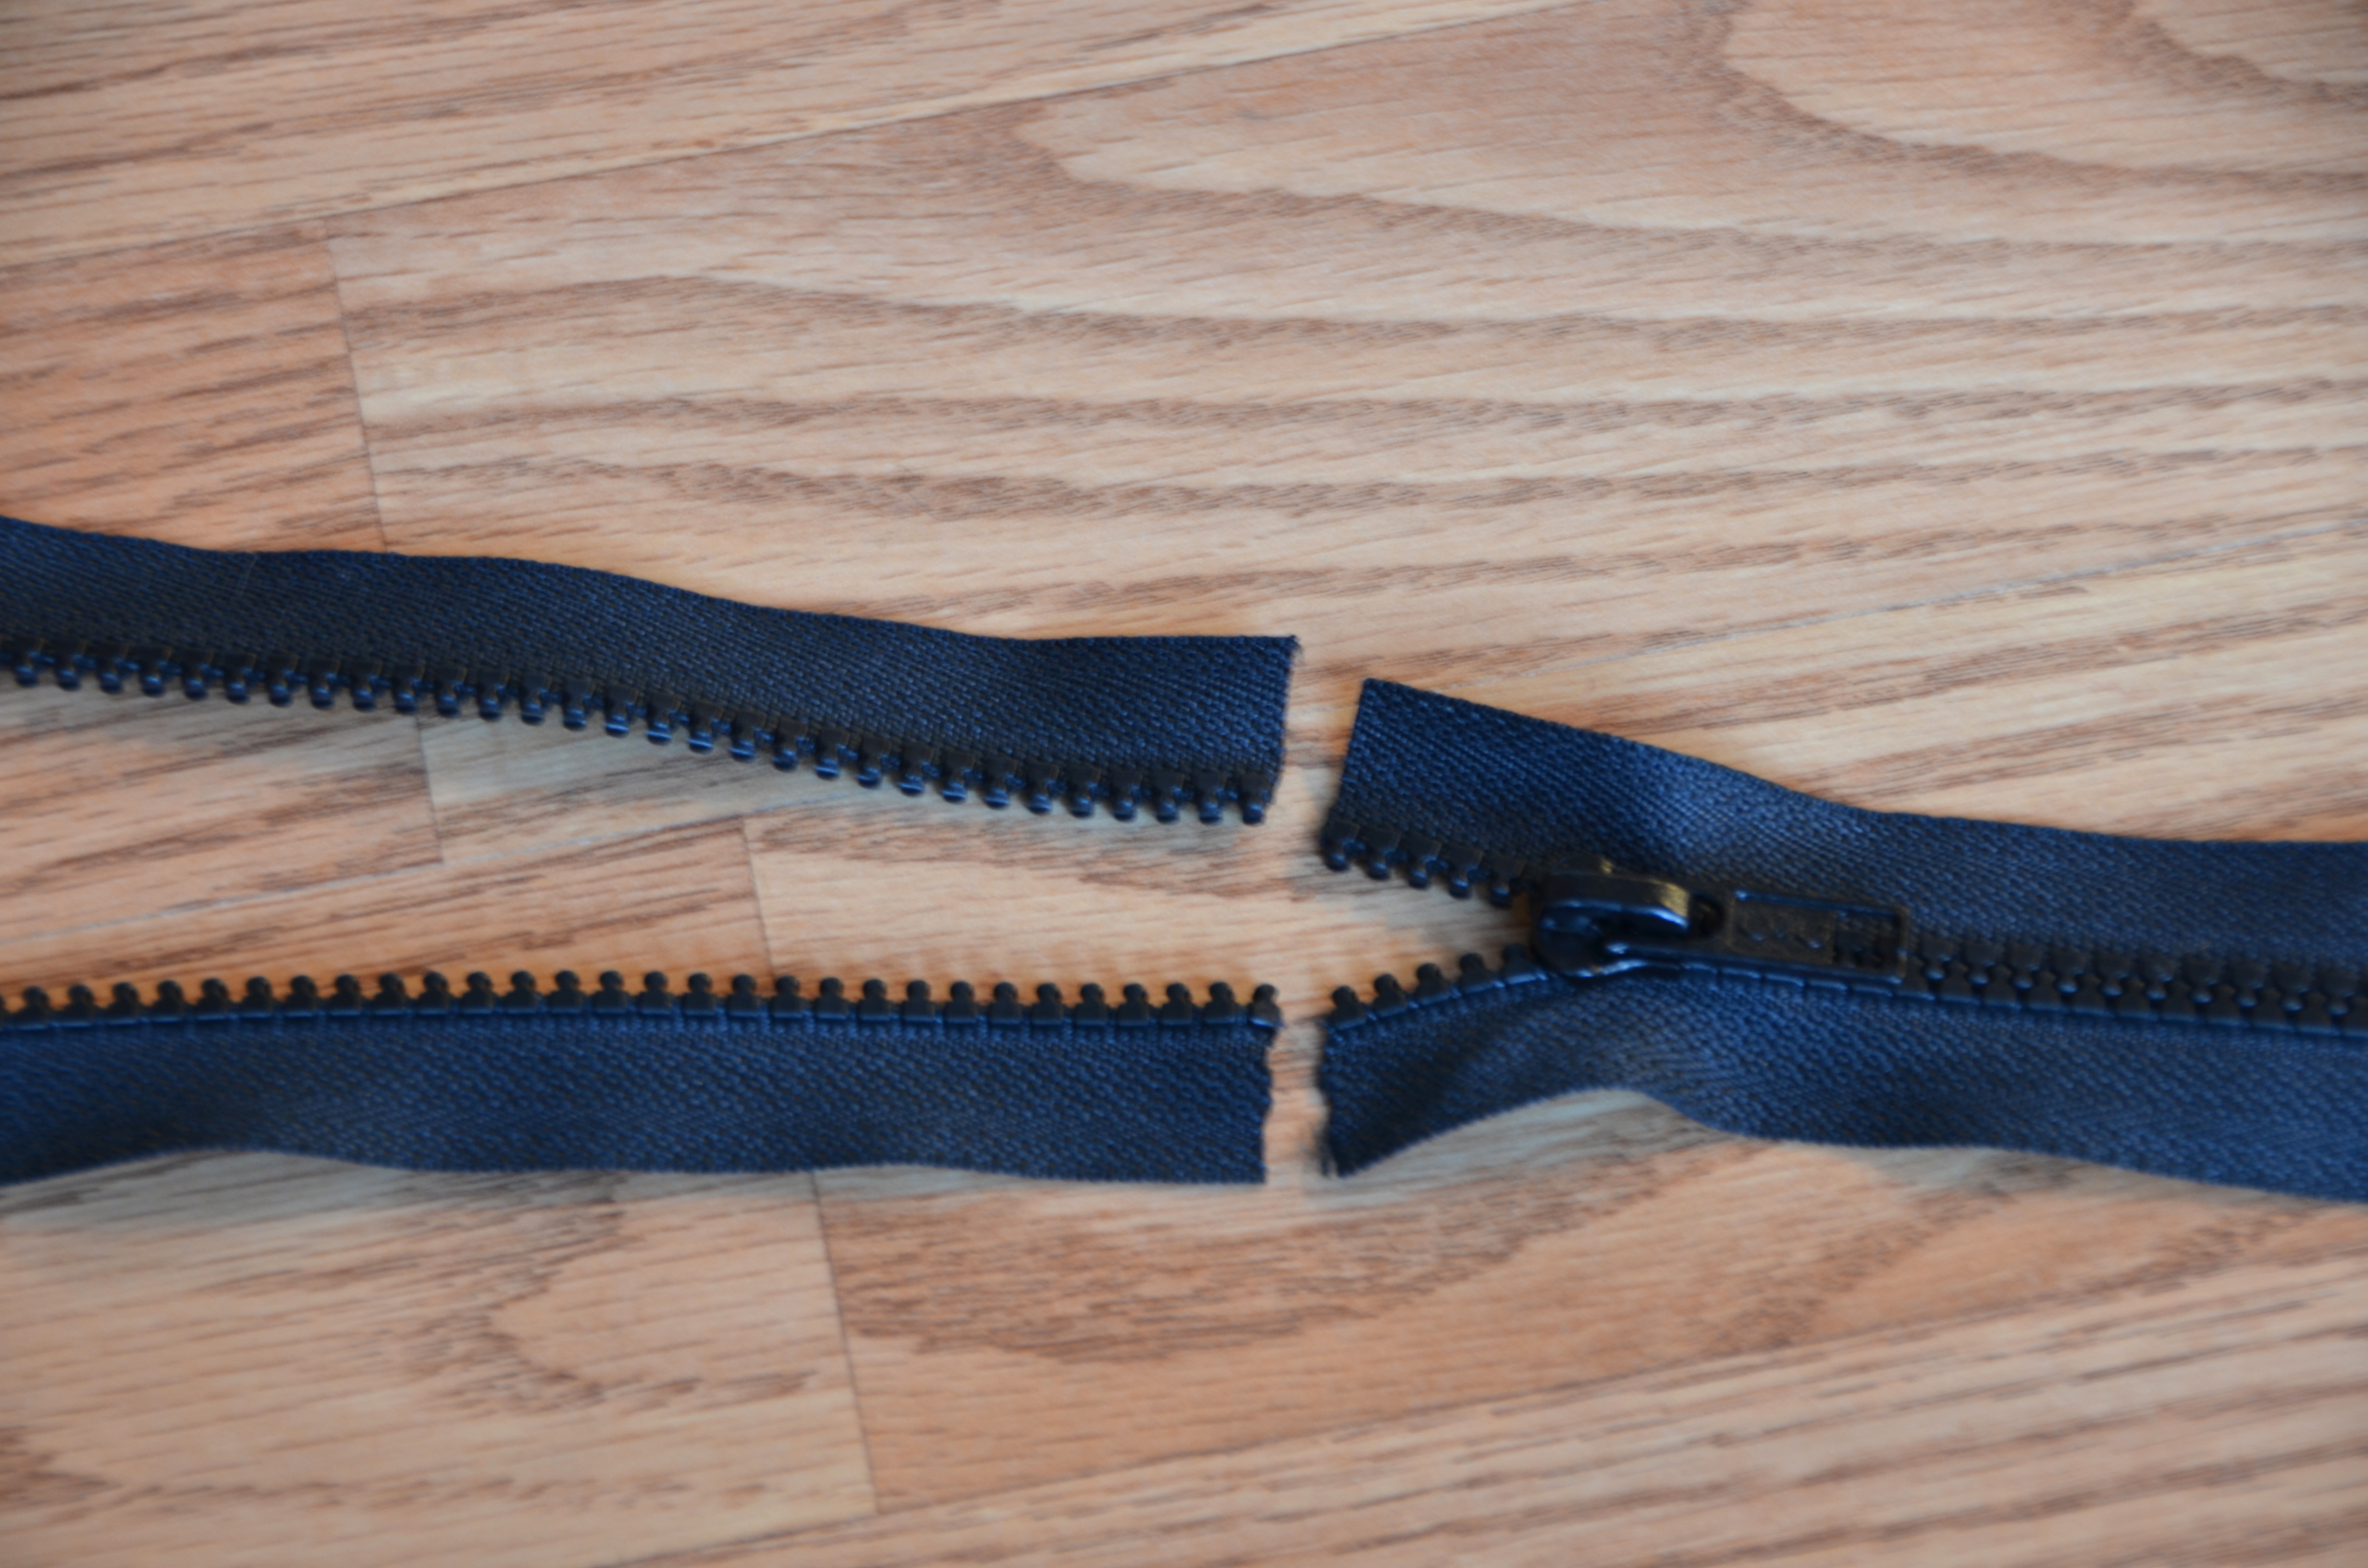
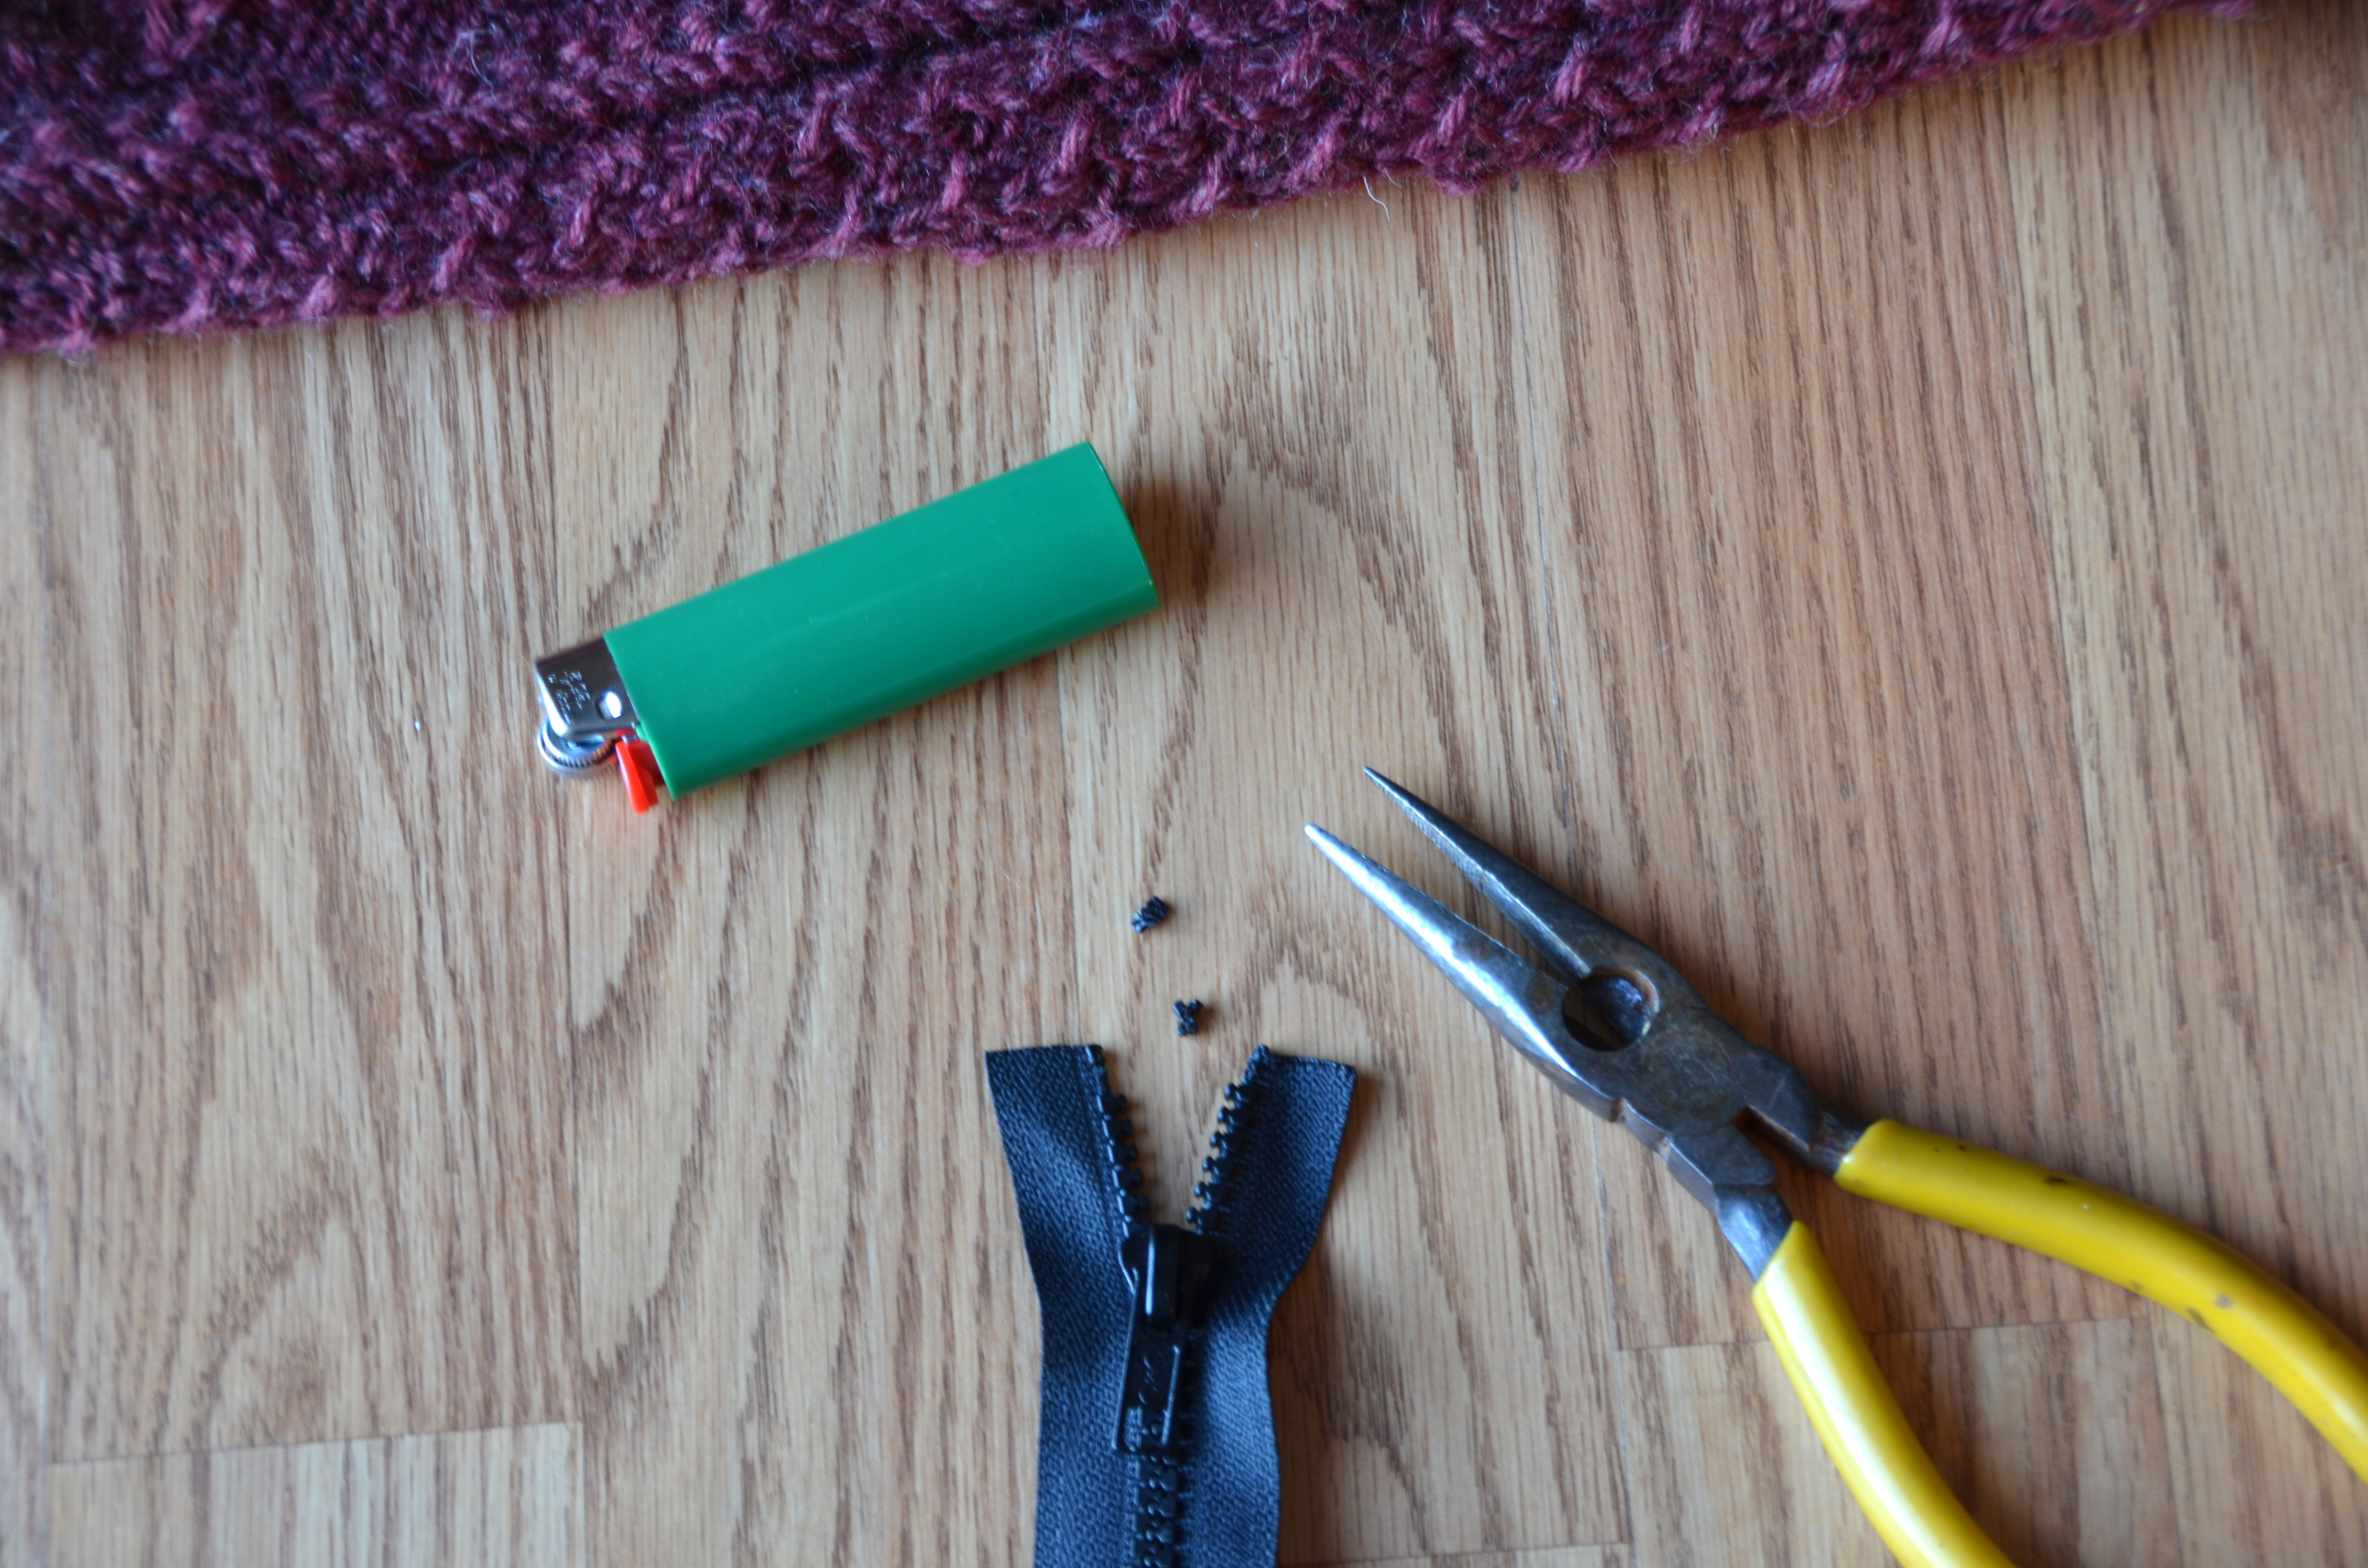
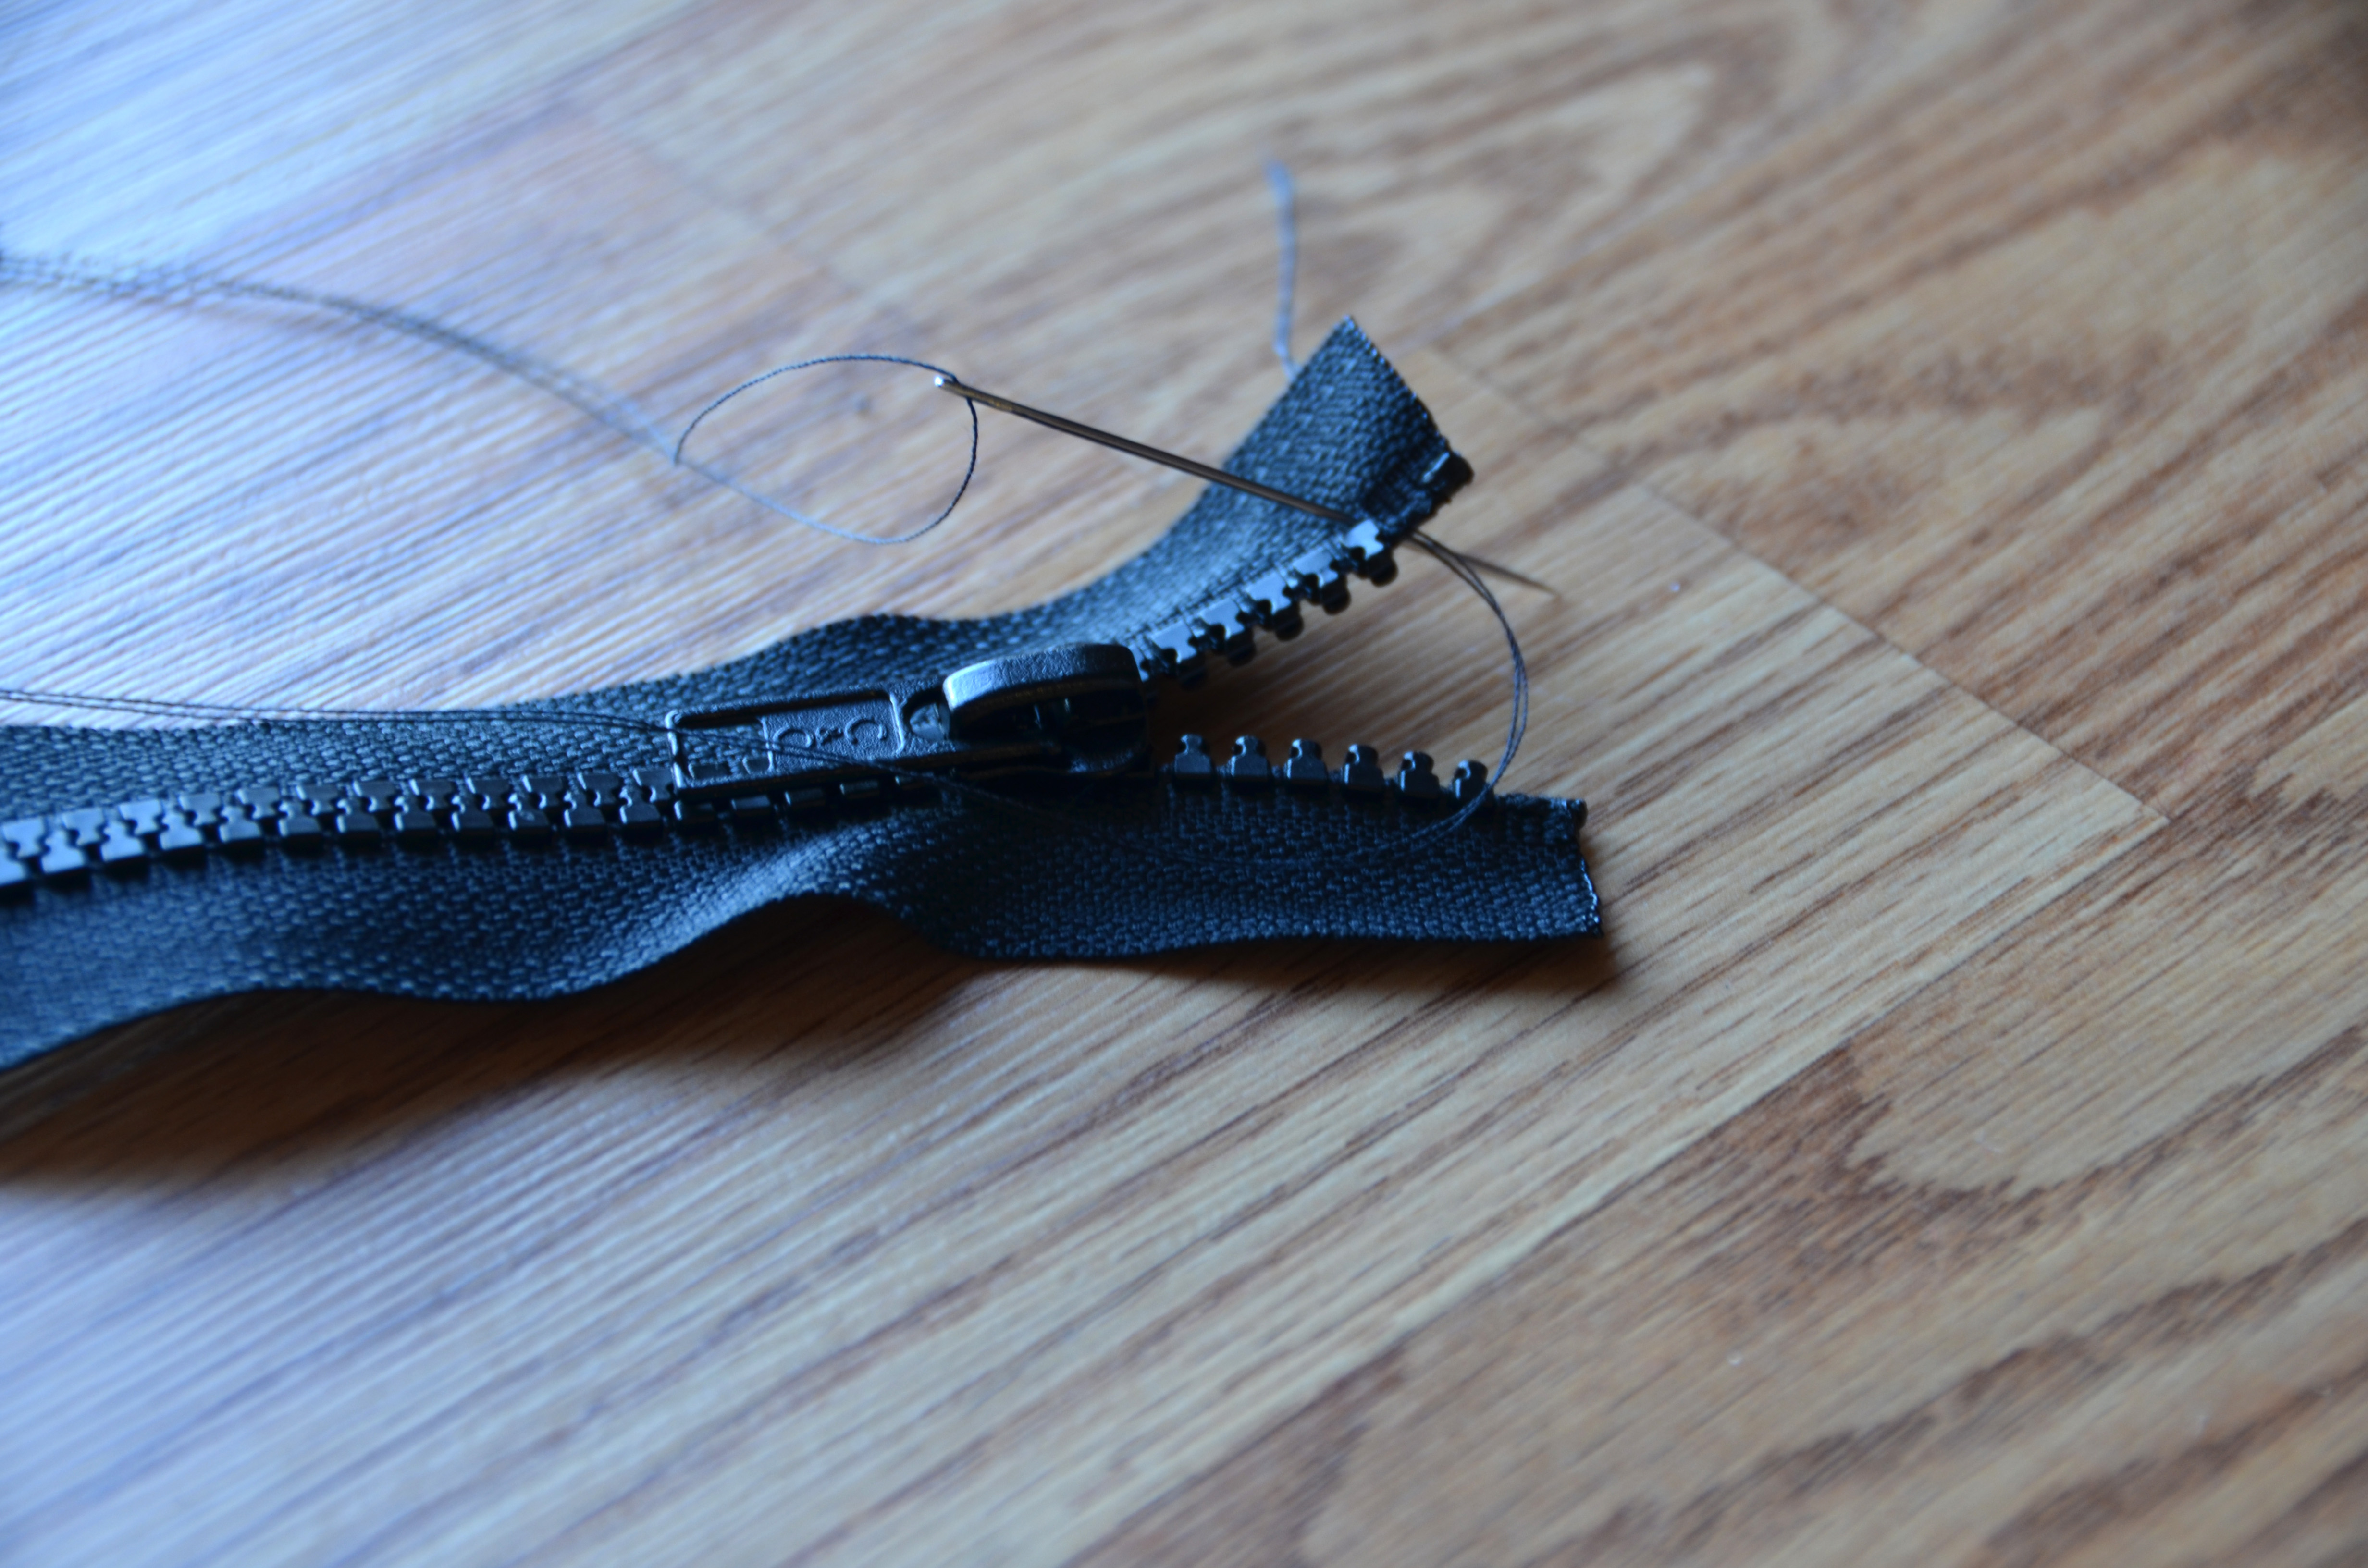
Next, we’re going to pretty-up that cut edge. I’m using a plastic zipper in the photo below. This method works great for a zipper with metal teeth, too. With pliers, carefully remove the 2 teeth from the top of the tape. If your metal zipper came with a stop (which looks like a metal tab), you can remove it from the piece you cut off and reattach to the newly shortened zipper.
Then, take a lighter or other flame and carefully melt the end of the tape. This will not work for a cotton zipper tape – it only works on polyester, nylon, acrylic – something that will melt when burned. Be careful, you want to barely melt the end just to stop the fraying of the tape where you cut it.
If you have a cotton or plant fiber tape, fold under the end and sew it down.
This next step probably isn’t necessary for this particular zipper installation since my zipper will be sandwiched between the sweater and knitted zipper facing. But I’ve been burned before with forgetfully sliding my zipper off the top of the tape, so I like to do everything possible to prevent that! By whip stitching around the top of the tape just above the teeth, this will prevent the zipper from sliding off. Or if you had a metal zipper with a zipper stop and reinstalled it, there is no need for this step.
Next, unzip your zipper (you did buy a separating zipper, right?) and lay out the appropriate sides on their respective fronts.
Triple check your zipper placement!
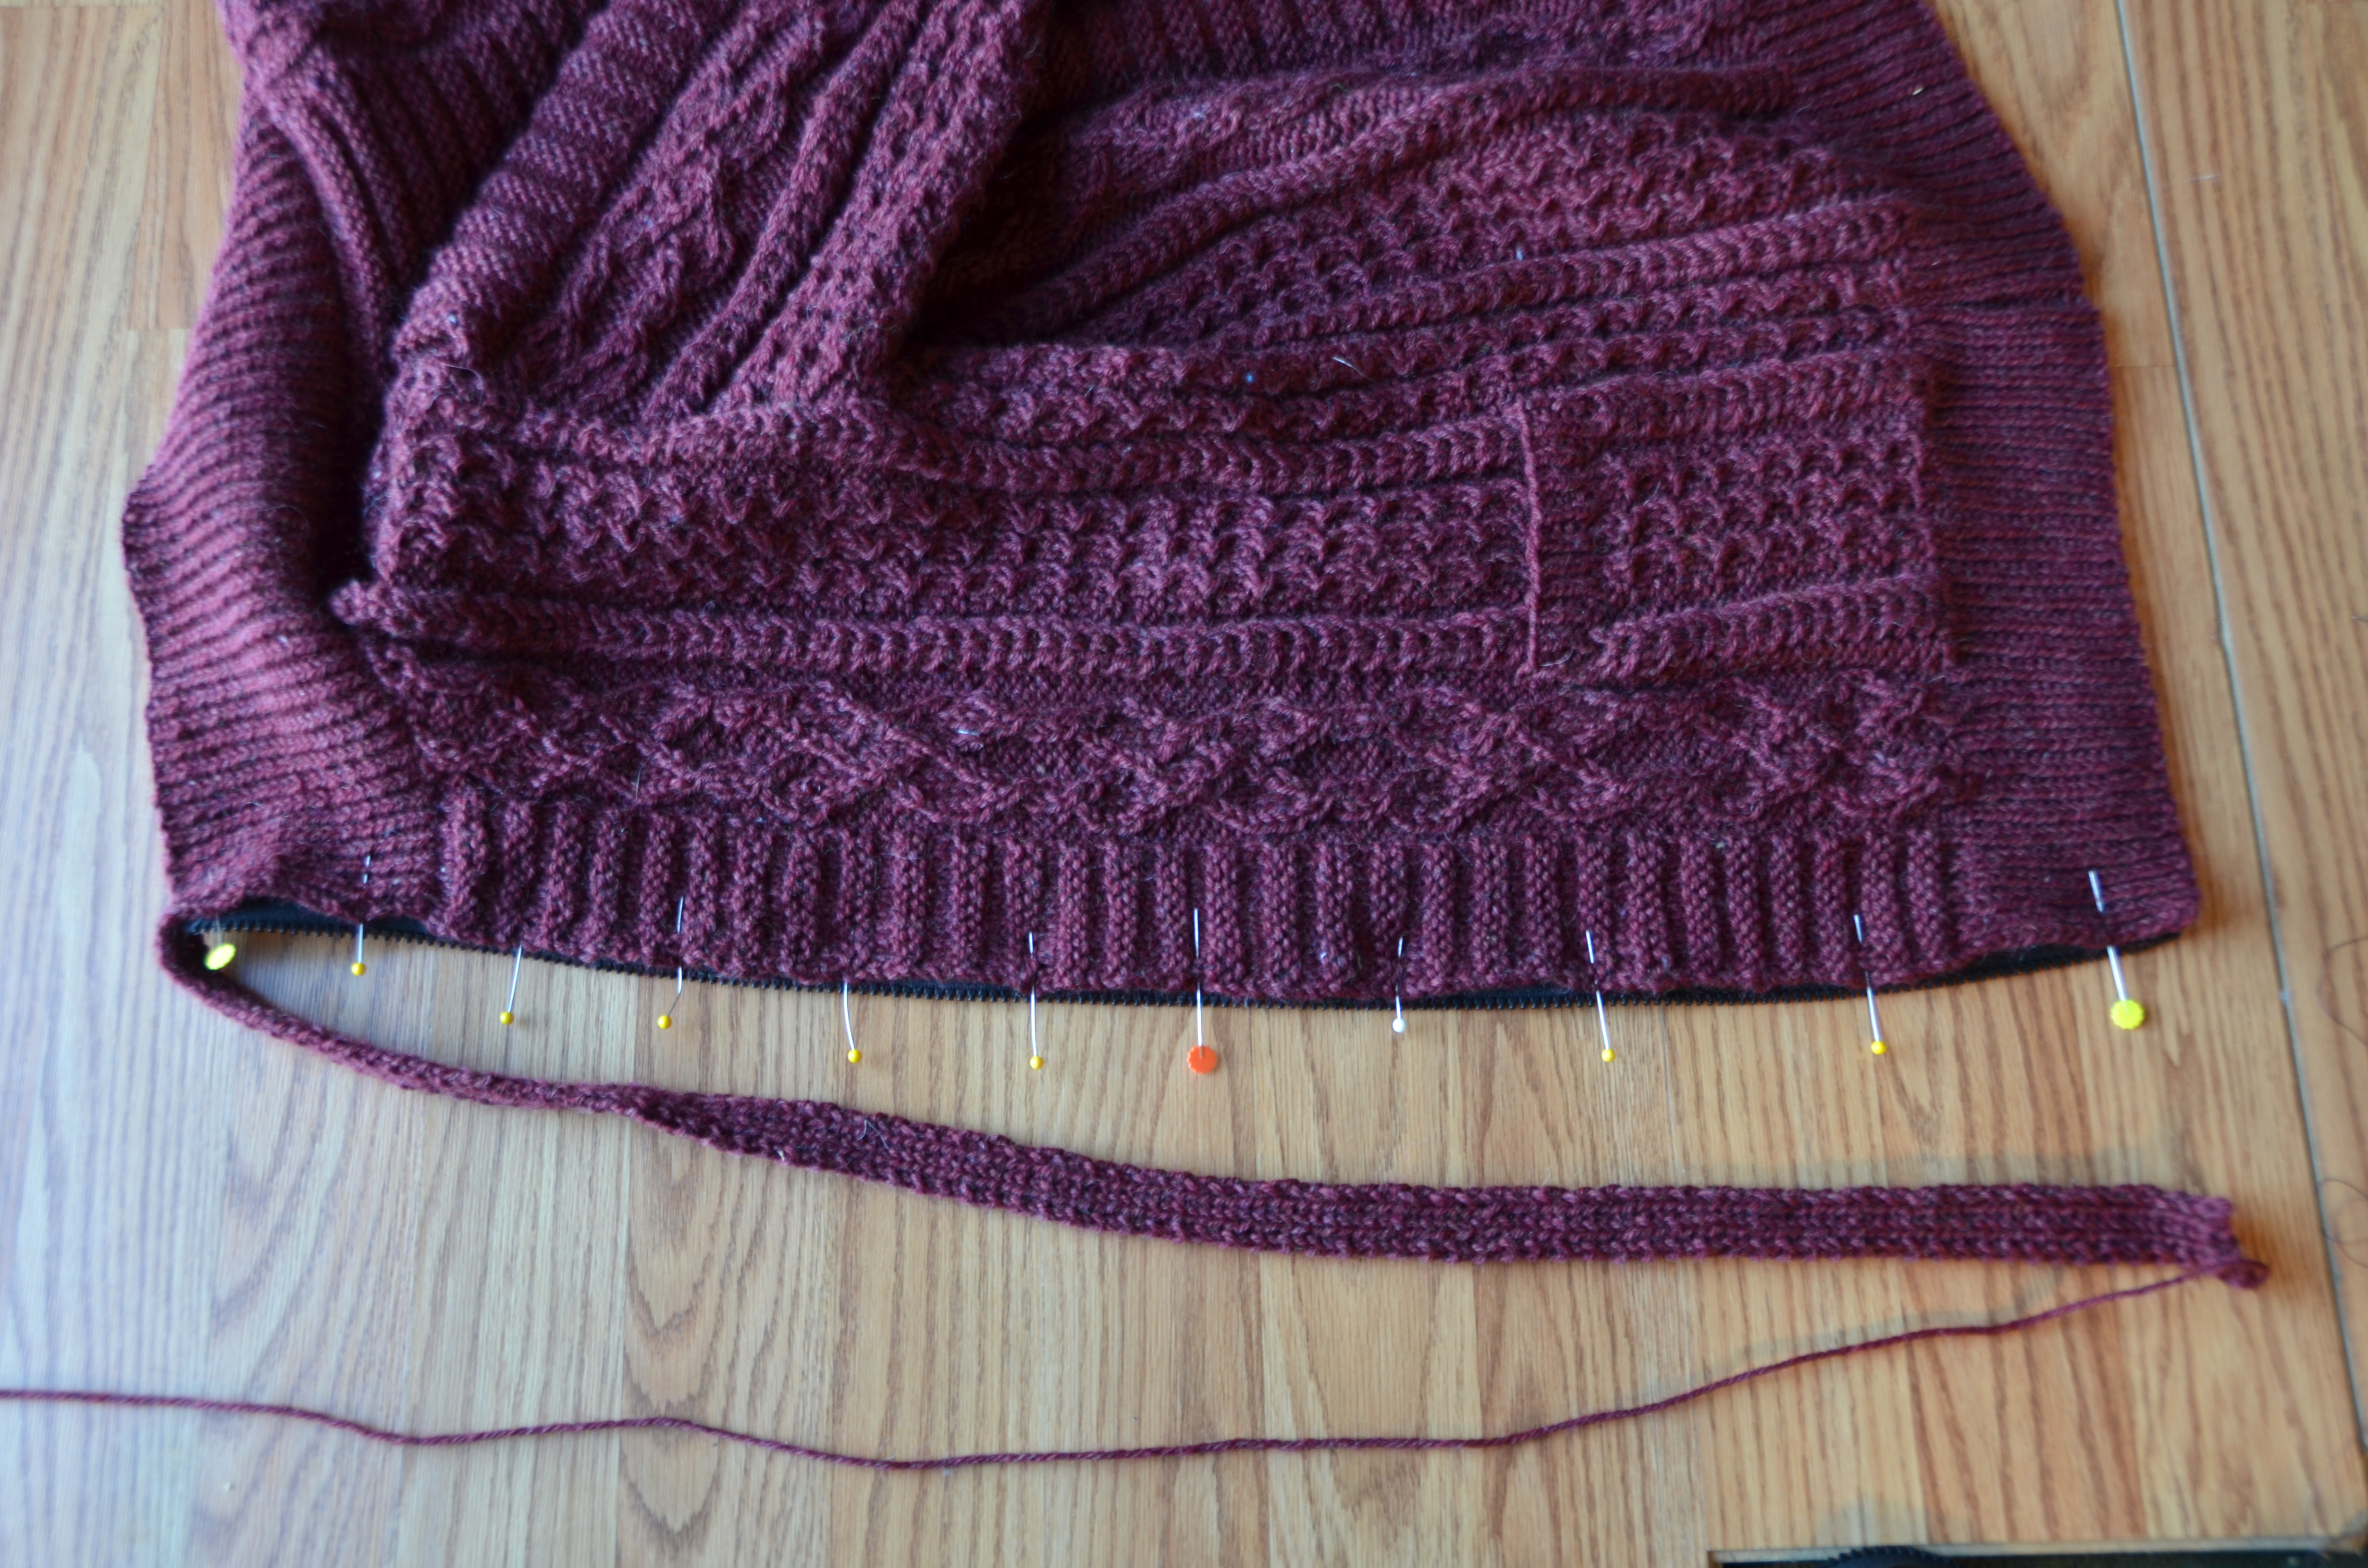
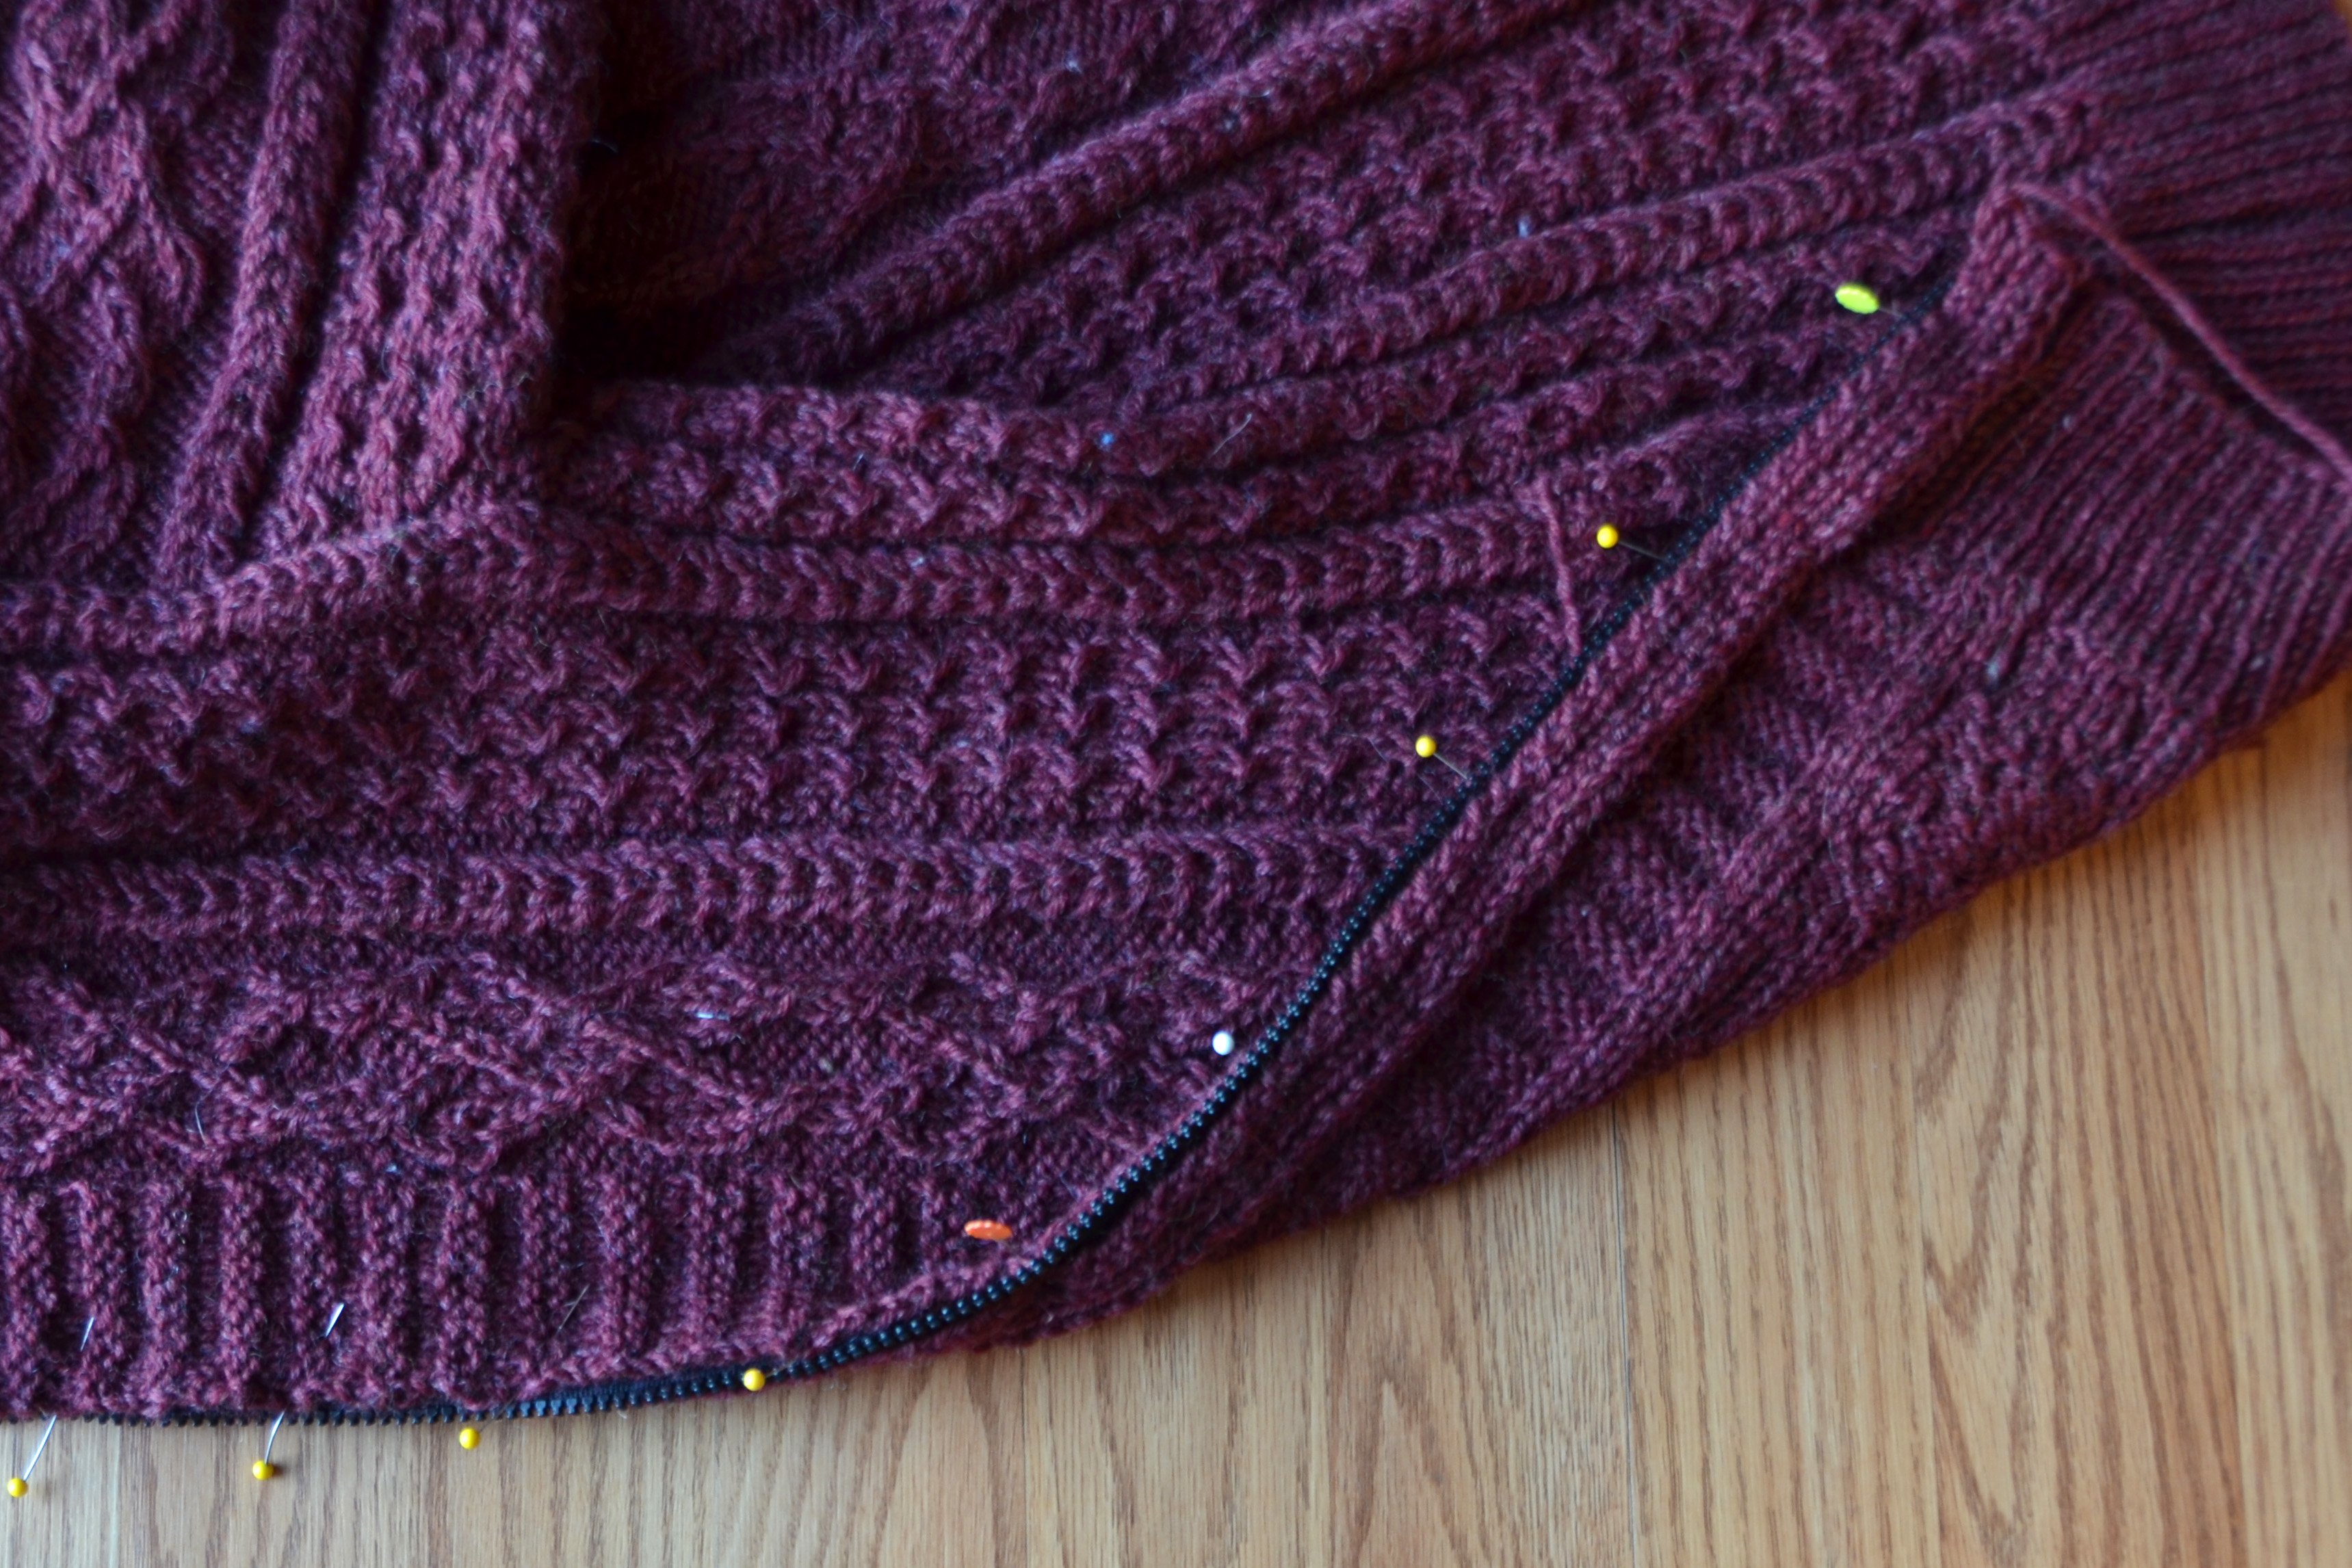
Next, pin your zipper to the sweater front. Ignore the facing for now. It’s much easier to pin it to the sweater front first and then add the facing. Begin by pinning the upper and lower edges of the zipper to the sweater. Then add in pins at halfway points between other pins until the whole thing is pinned down. Use lots of pins – you can never have too many pins!
Use lots of pins!
After the front is fully pinned to the zipper tape, one by one, remove a pin and add in the knitted facing. The zipper tape will be sandwiched between the front of the sweater and the zipper tape. You’ll want to leave a margin sticking out a little bit beyond the zipper teeth so that the knitting doesn’t get caught when you’re using the zipper.
It’s a zipper-wool sandwich. Delicious.
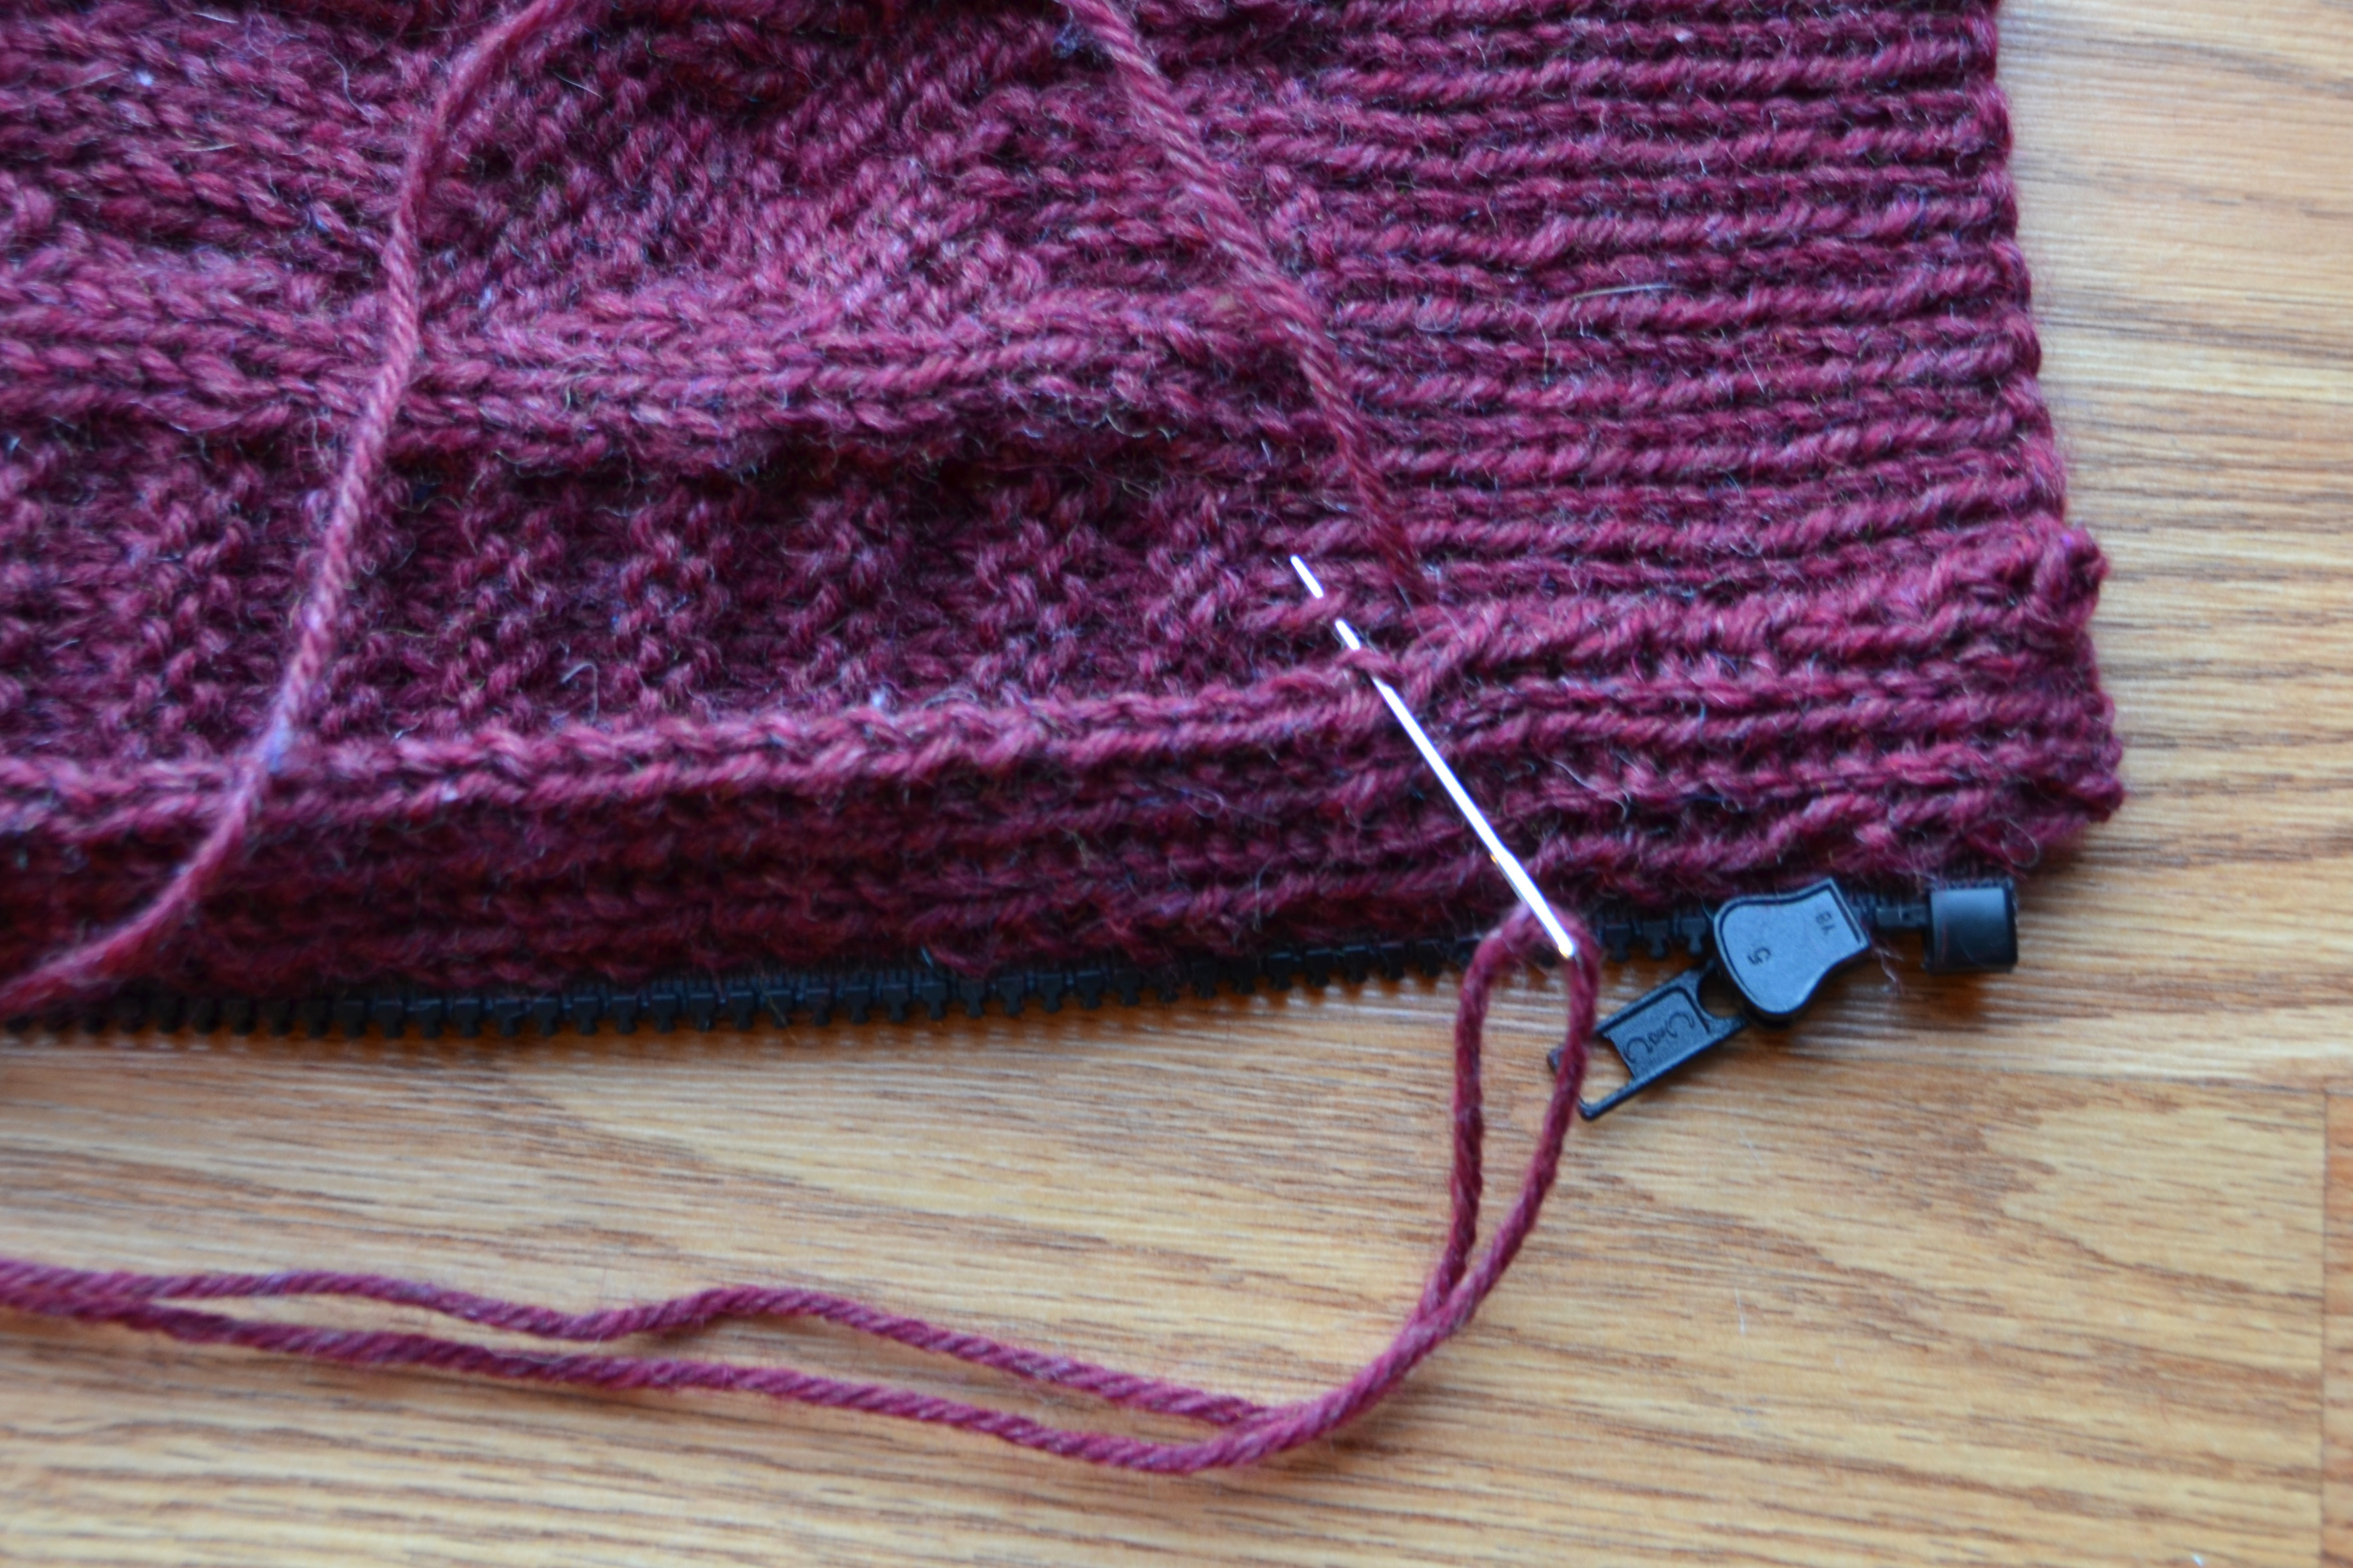
Use thread that matches or will blend in with the color of your yarn. Take small stitches and go slowly. You are sewing through 3 layers, so take care and make sure the needle is entering and exiting the fabric where you want it. I kept 1 stitch in stockinette on my edges, so I’m using that as my guide for where to sew.
This step requires patience.
I use a running stitch, but make a back stitch every inch or two – basically whenever I remember.
Once the zipper tape is sewn to the sweater, it’s time to sew the other edge of the facing down. I left long ends when I bound off my facing for this very purpose. I also split the yarn in half to reduce bulk for the seam.
On the home stretch!
Once all your sewing is done, give the facings a light steam inside and out, and you’re done!
I really am smiling.
I love putting on a new sweater! And I’m lazy, so having a zipper is a big draw for me. Sometimes I like a buttoned sweater. But I like being able to zip and unzip a cardigan makes me happy. And pockets. And cozy!
How are your Deluxe Cable Collection projects coming along?