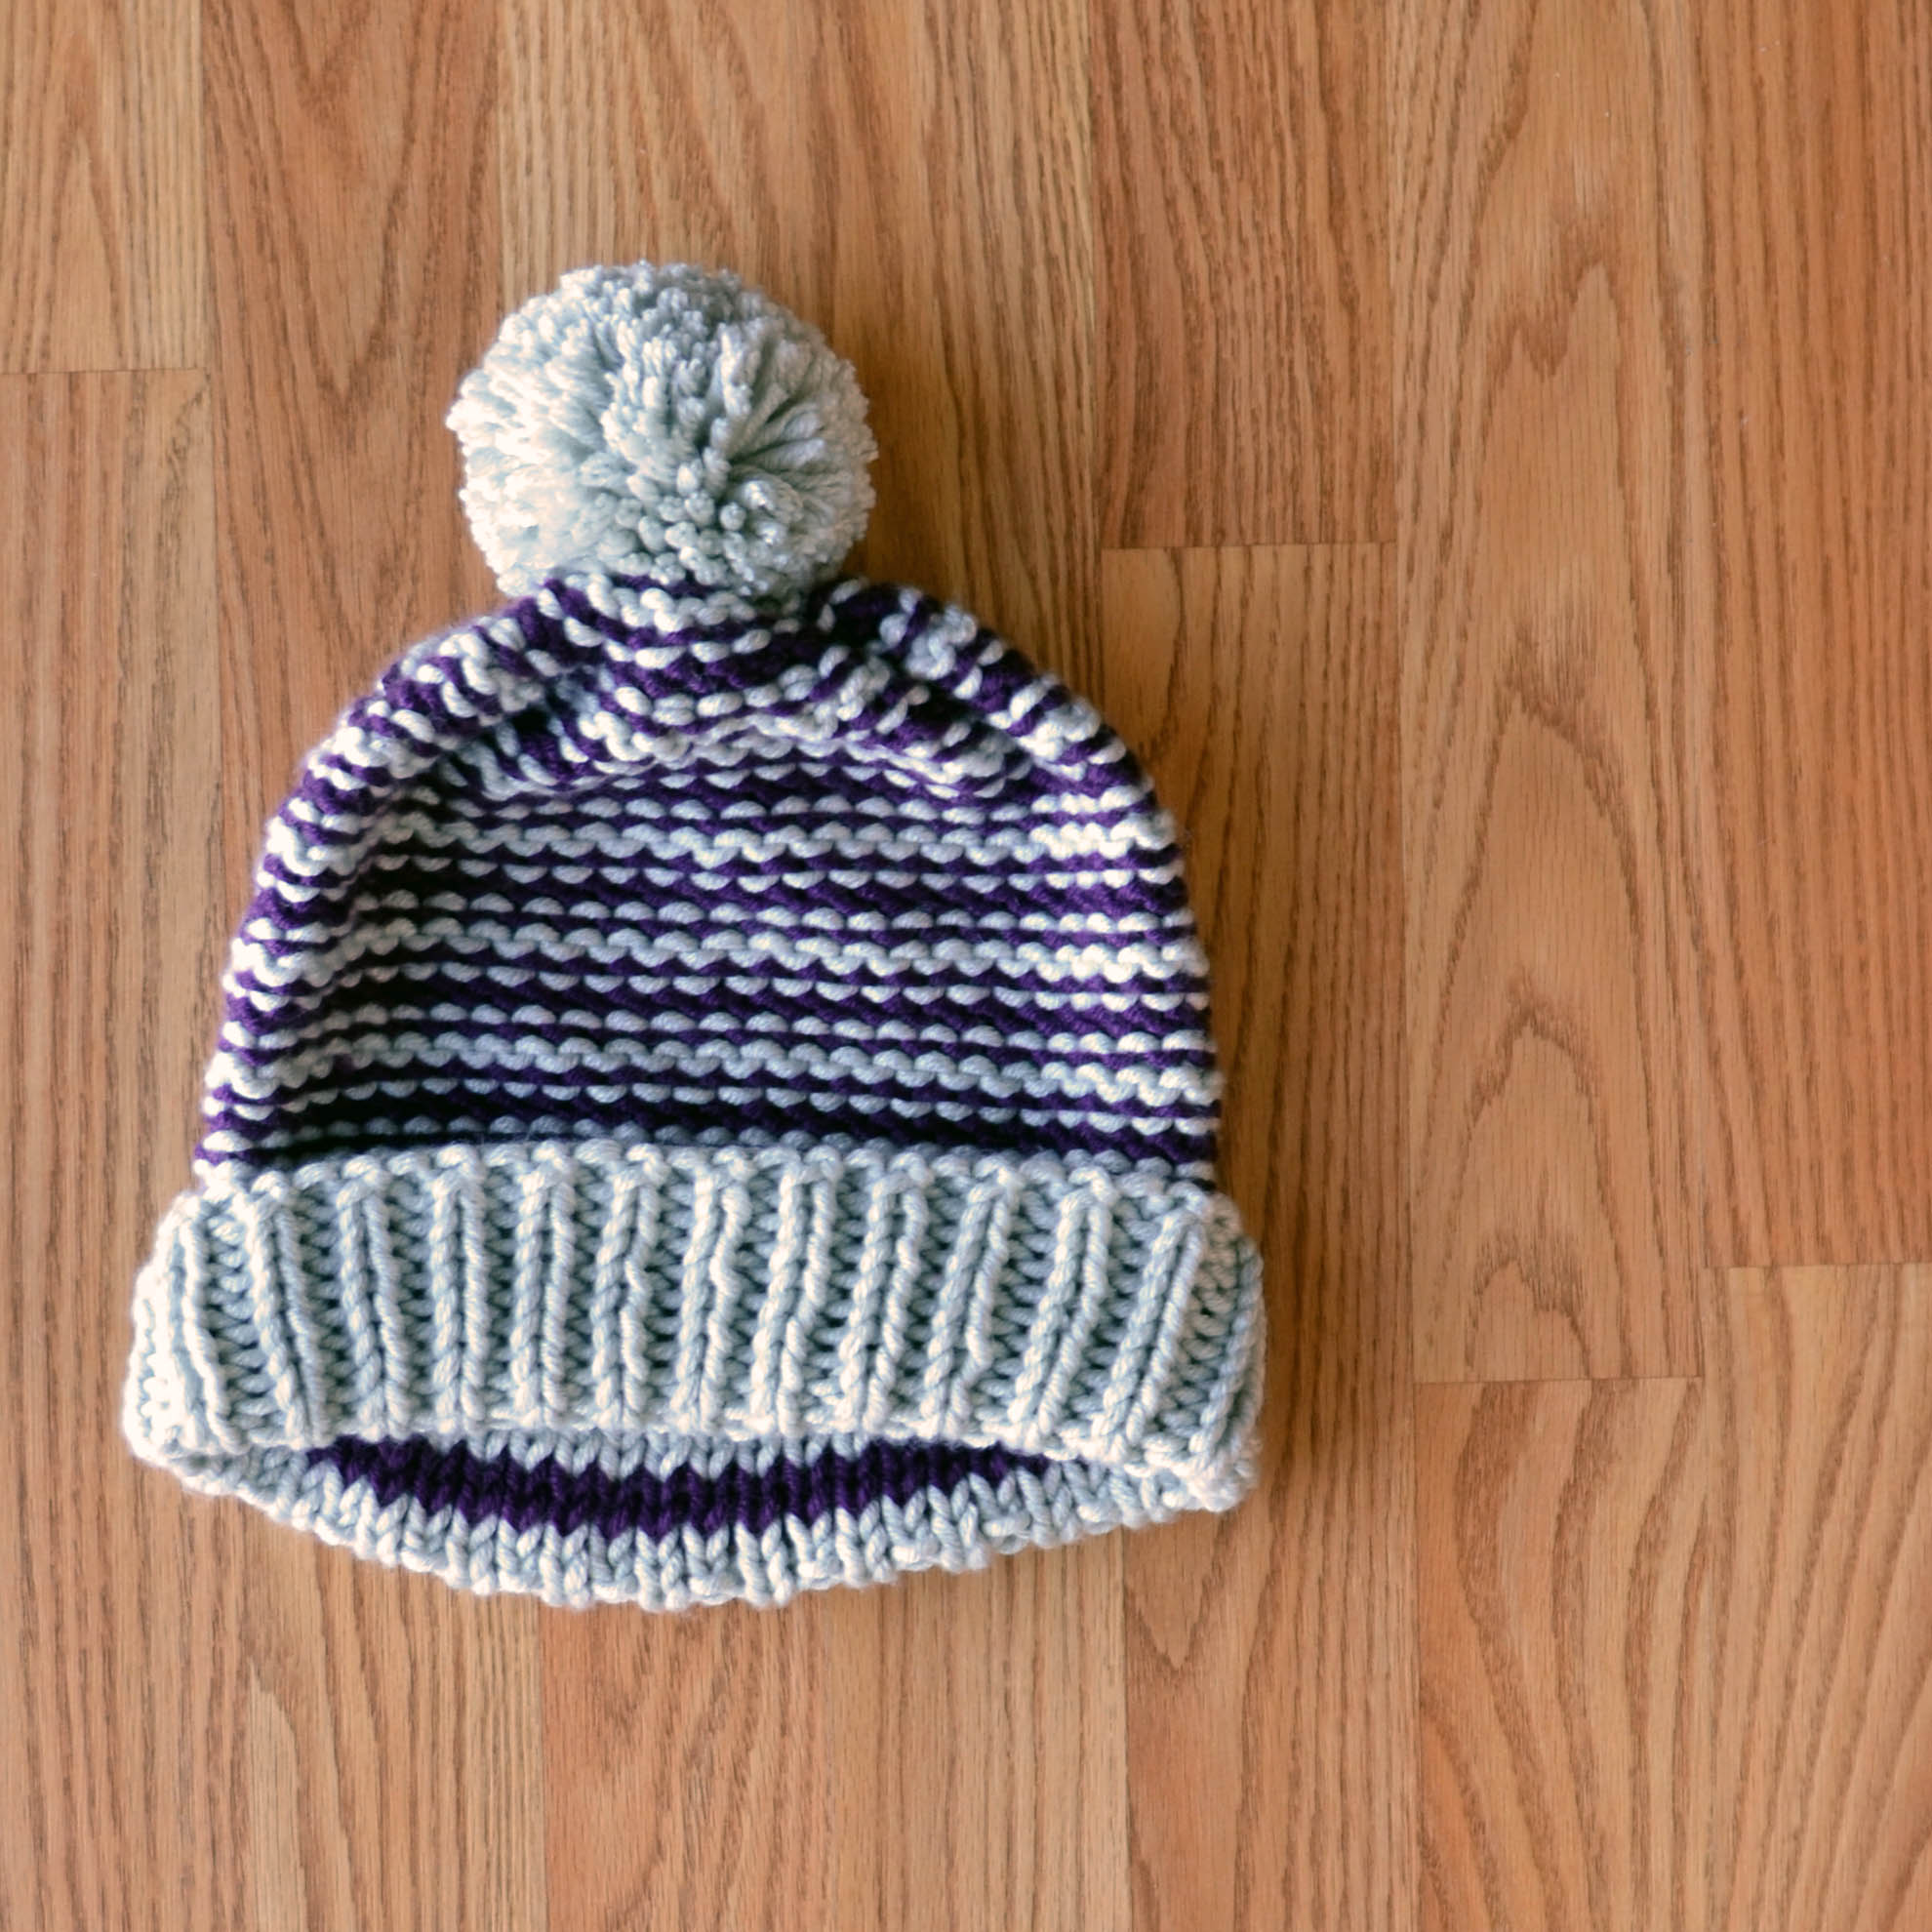
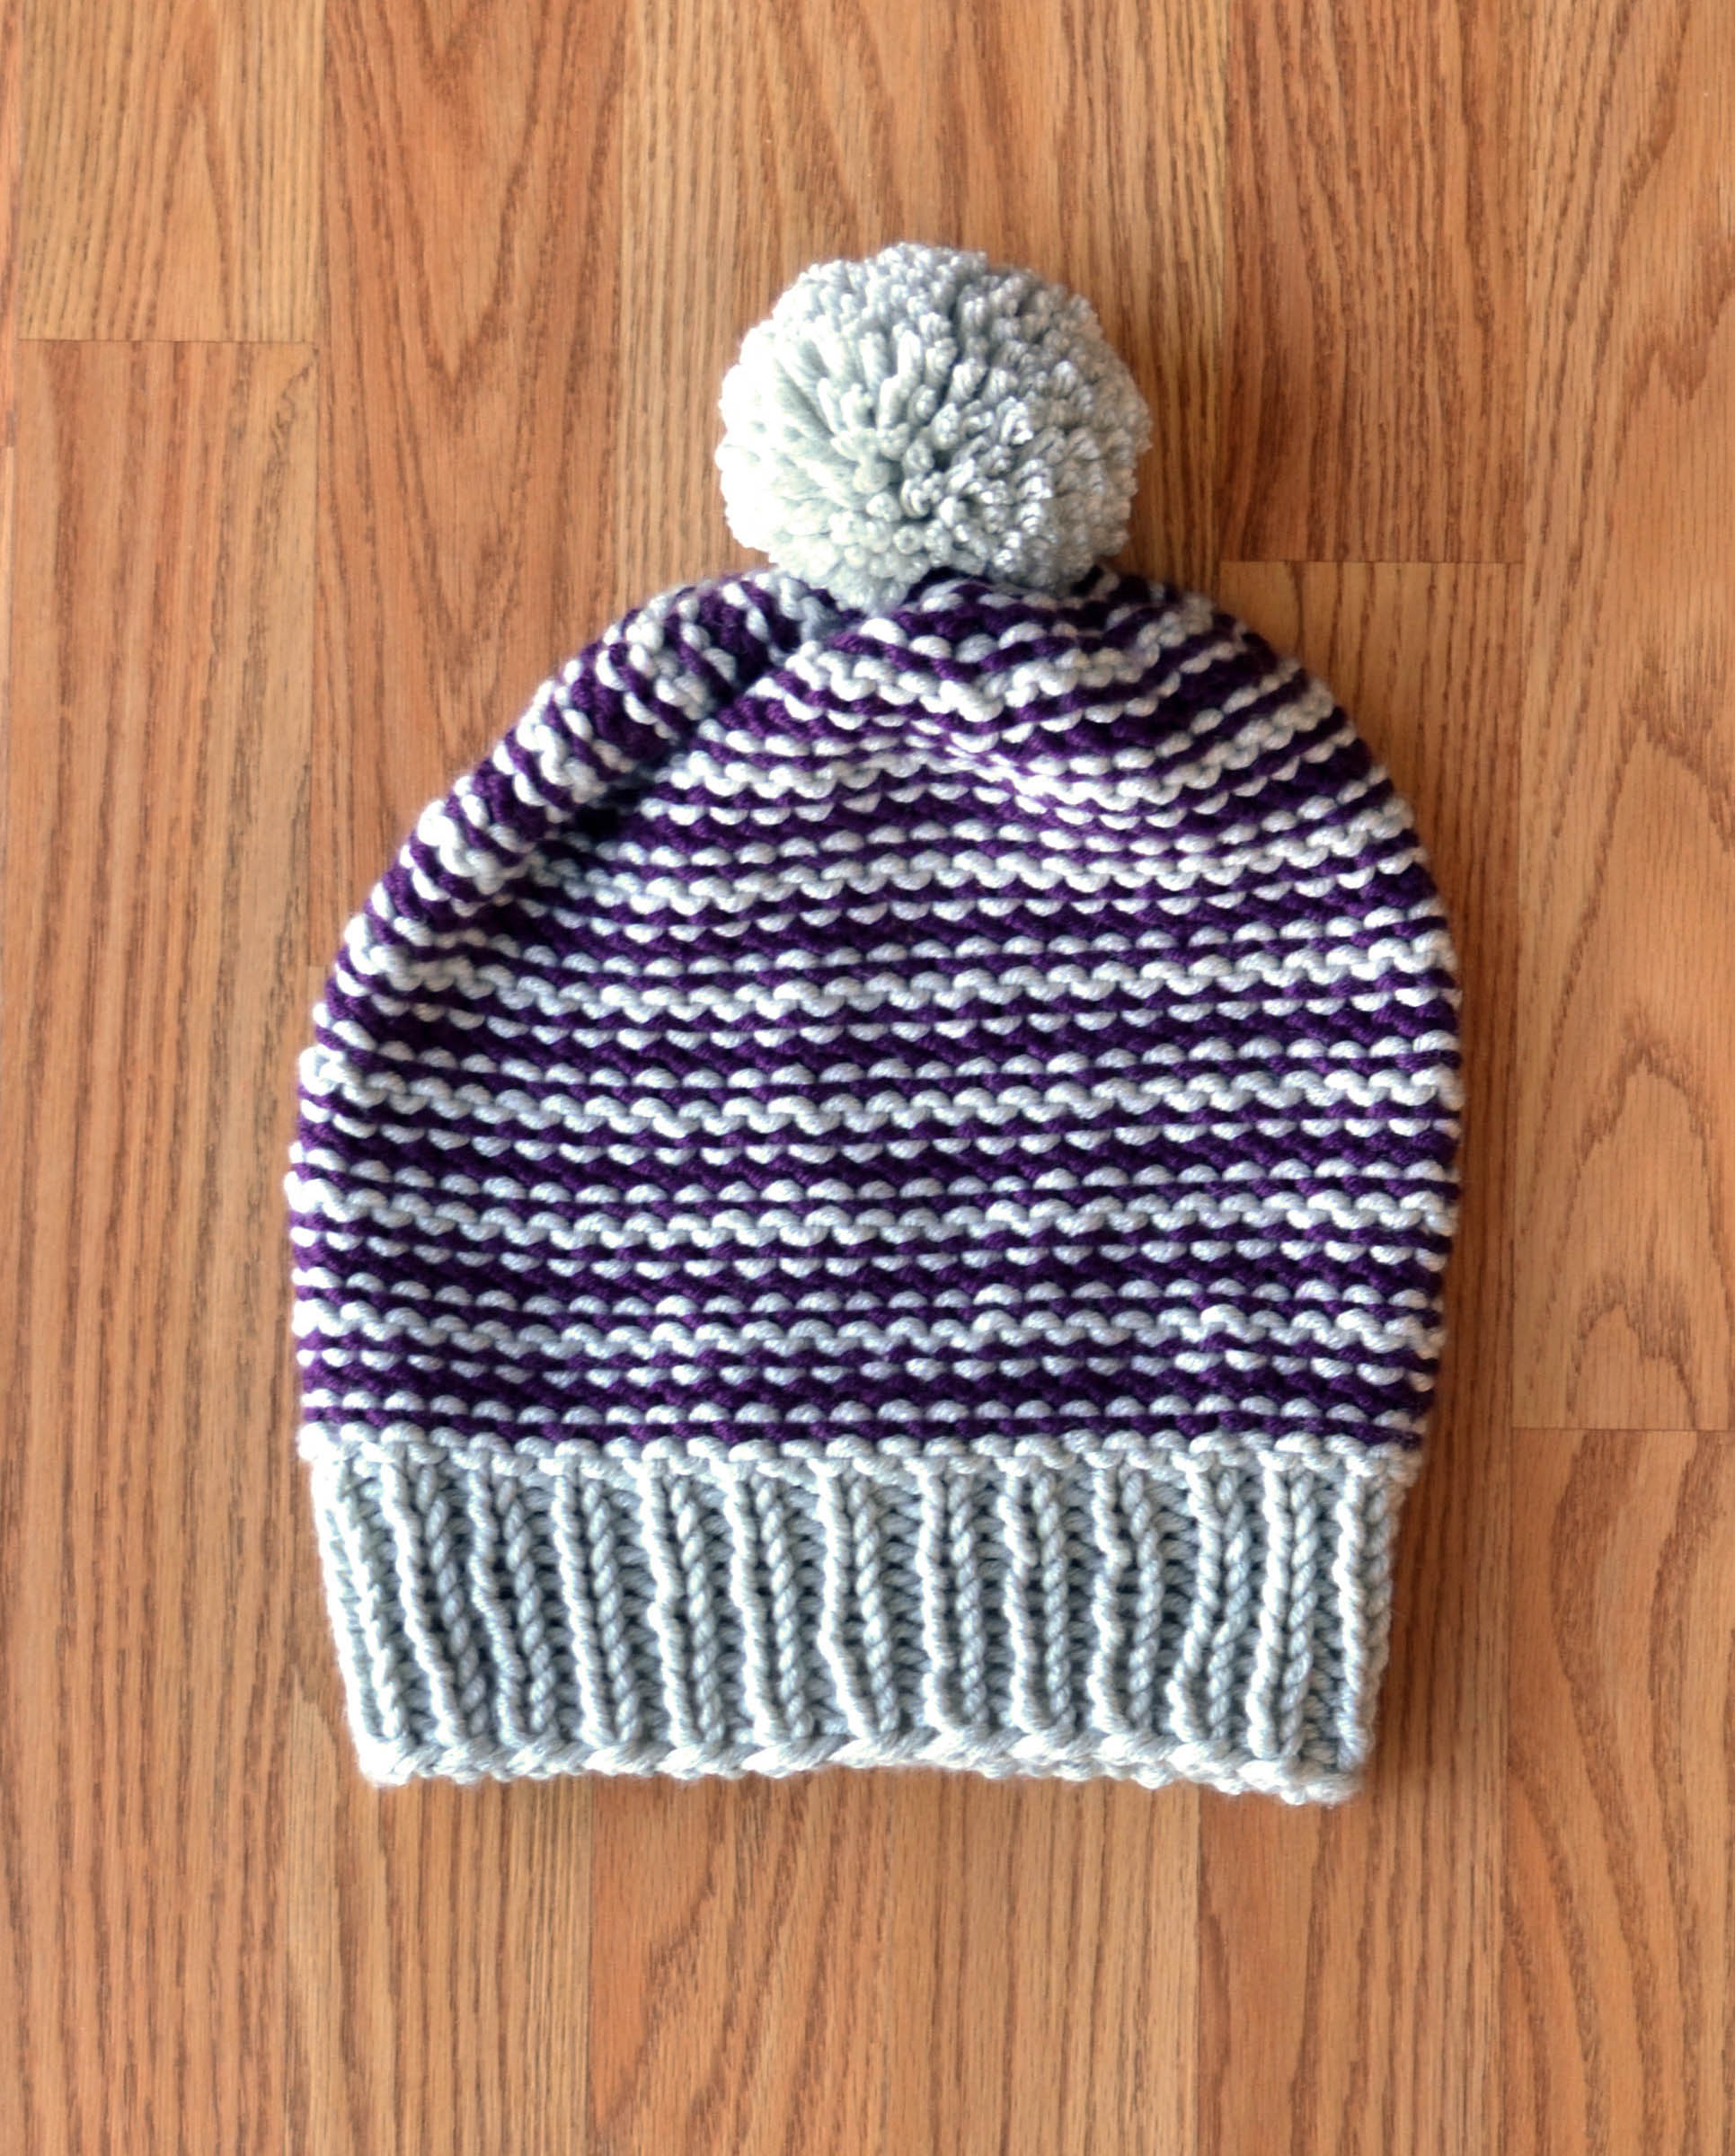
Sometimes you just want to make something fun and quick, you know? Inside Job fits the bill.
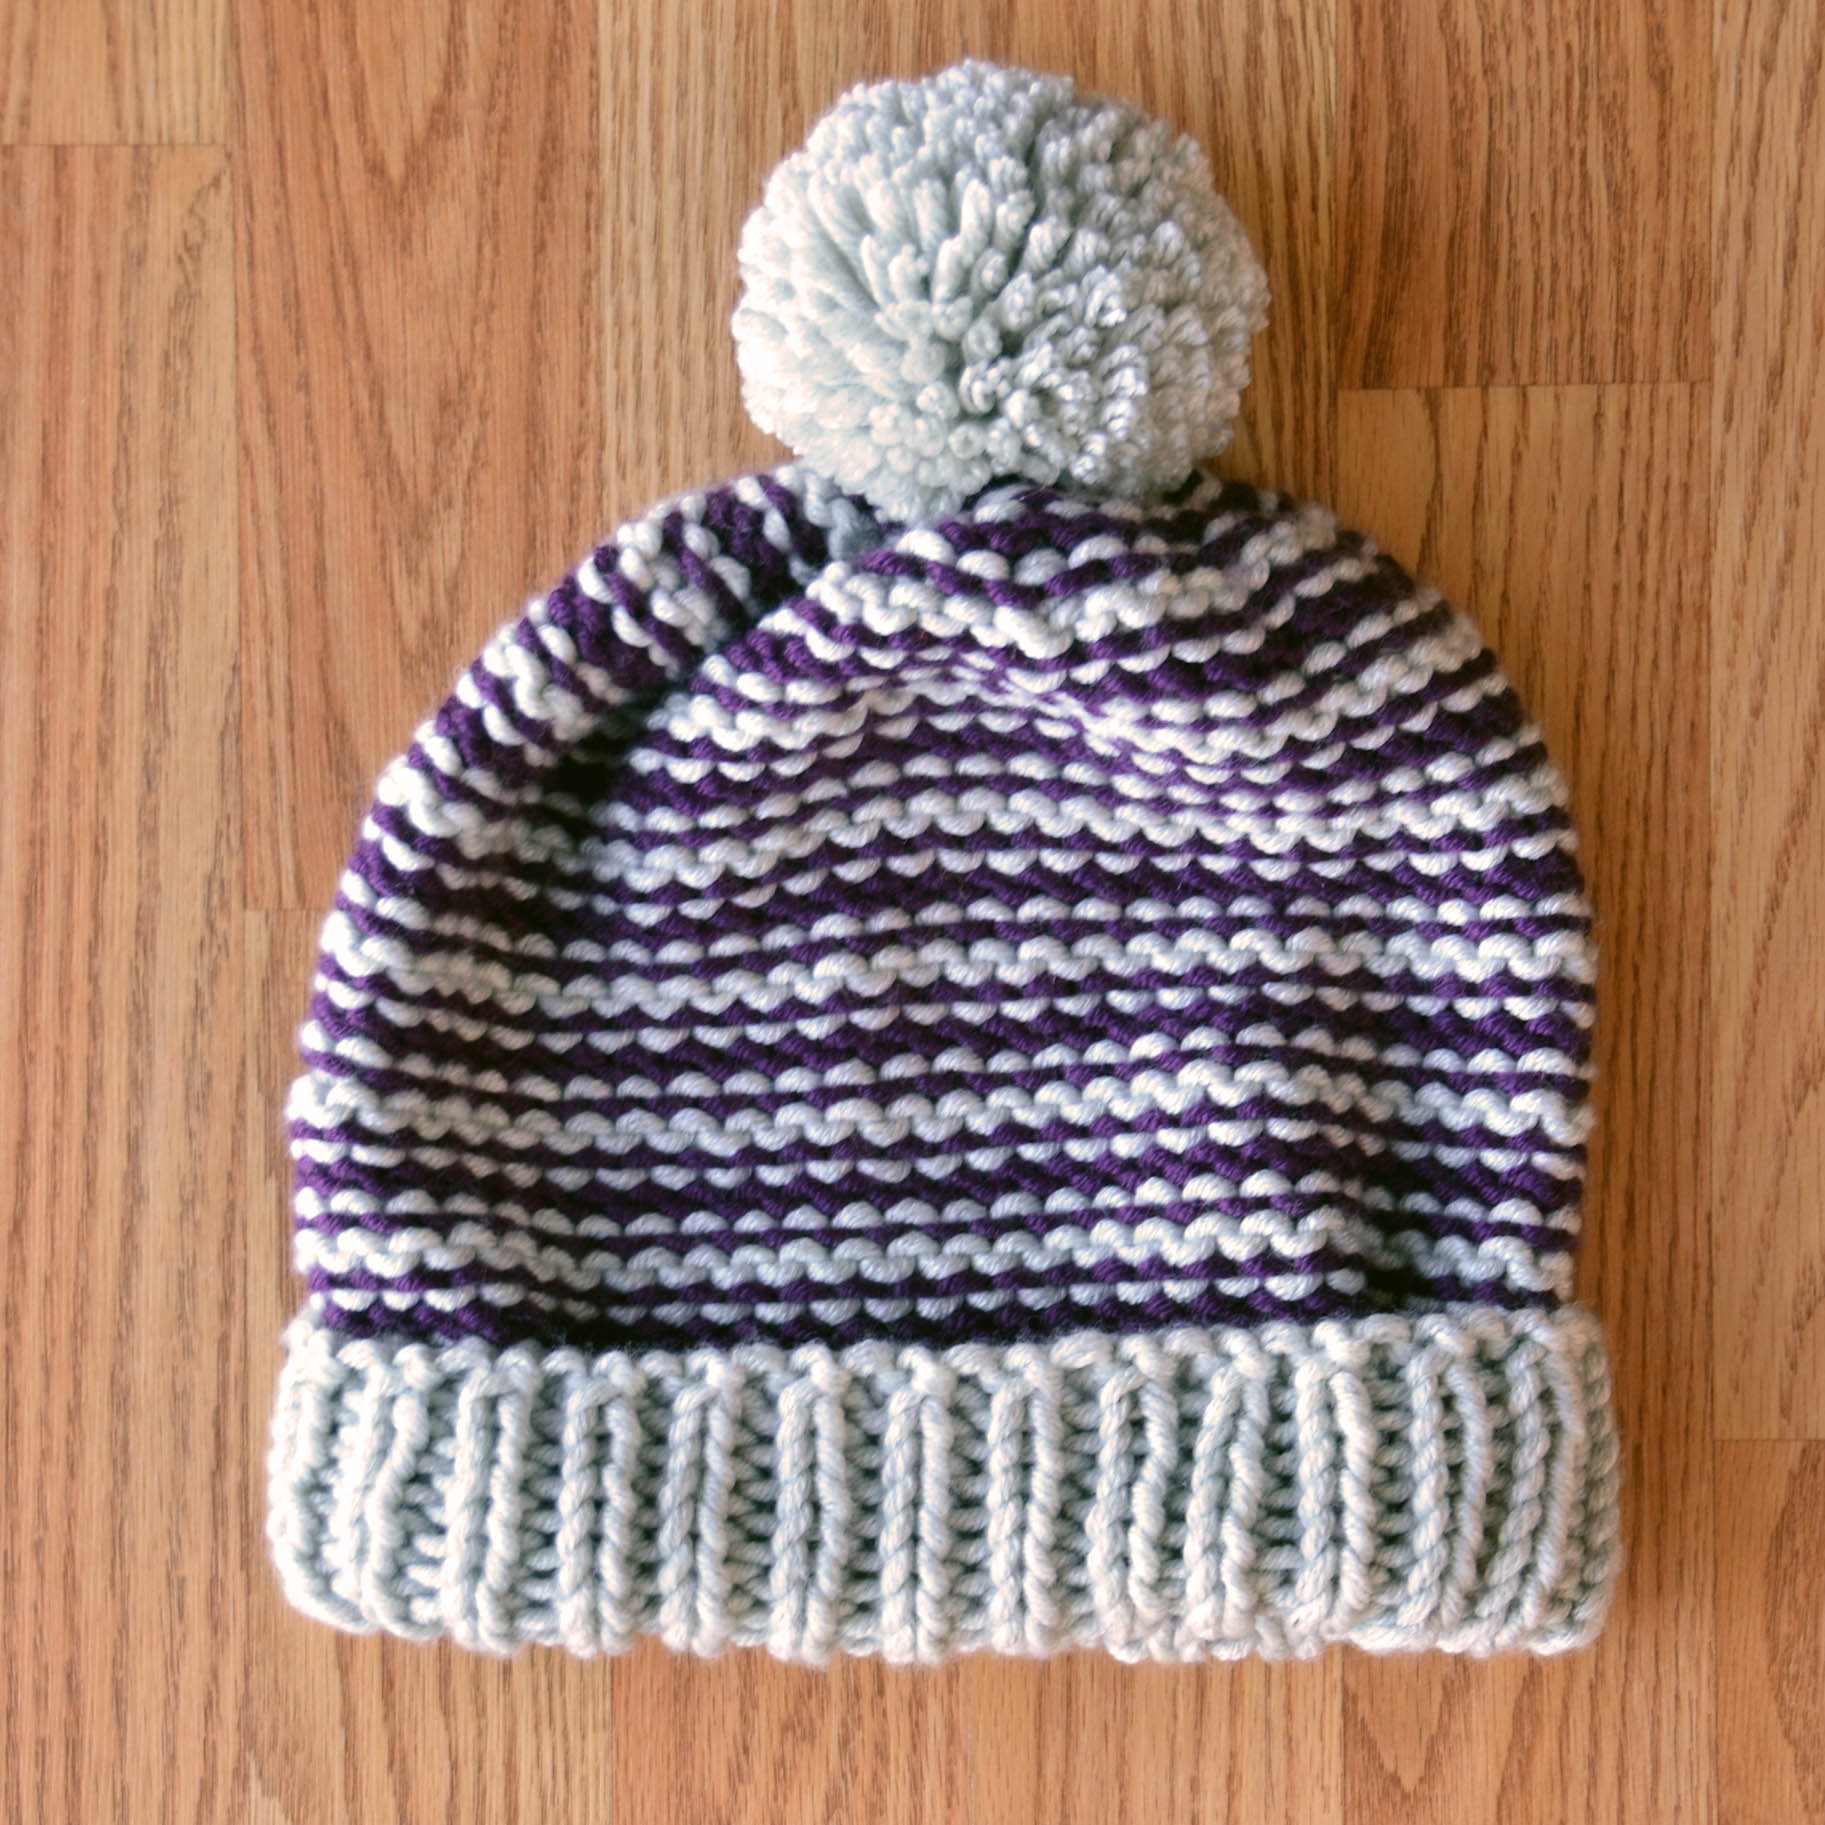
This basic hat flies by in our Uptown Bulky anti-pilling acrylic yarn (87yds/100g). It’s worked from the bottom up in the round, with US Size 11 (8mm) needles for the ribbing and US Size 13 (9mm) needles for the brim. Top it with a cute pompom, and voila!
What makes this hat a little different is that it’s worked in reverse stockinette. The plain striping shows on the inside, and the more intricate patterning shows on the exterior. Hence the name “Inside Job.”
And the adventure continues! You can read the first two posts in my moto jacket series here and here.
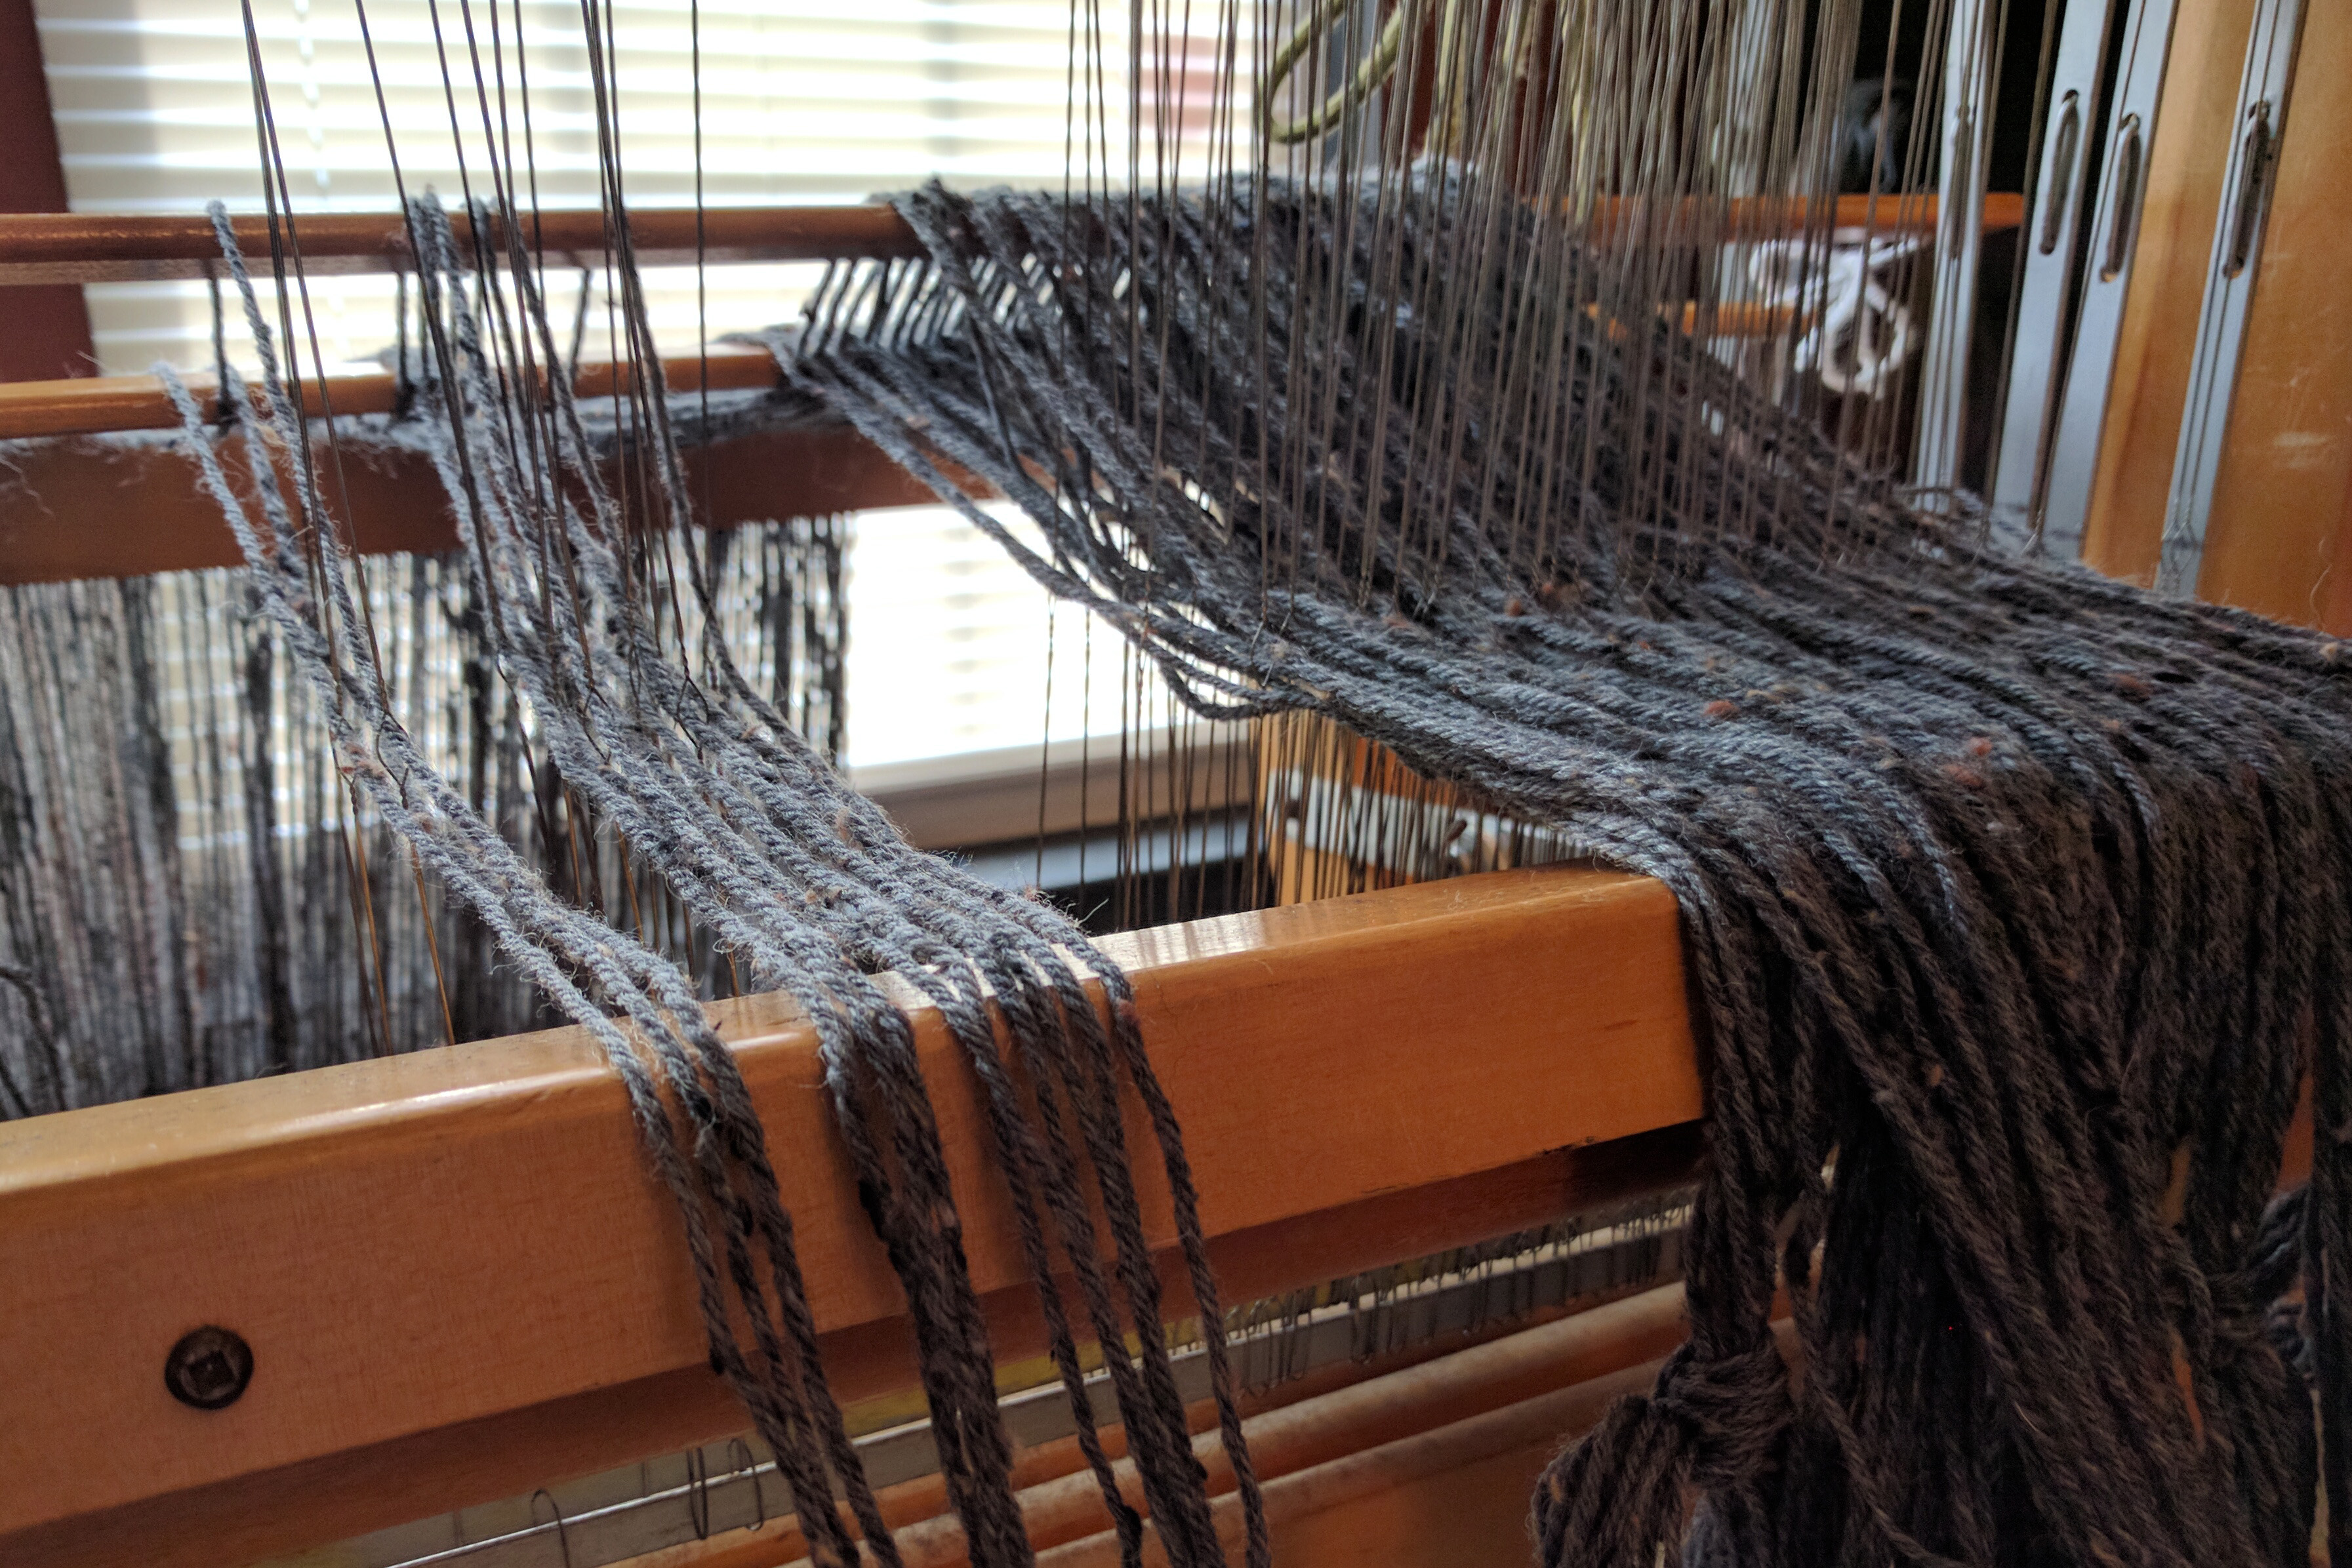
After warping my loom with my monstrously long and wide warp – 280″ long x 36″ wide using Deluxe DK Tweed Superwash, I was delighted to weave the fabric. I wove the same herringbone pattern that I used in my sampler scarf (seen here).
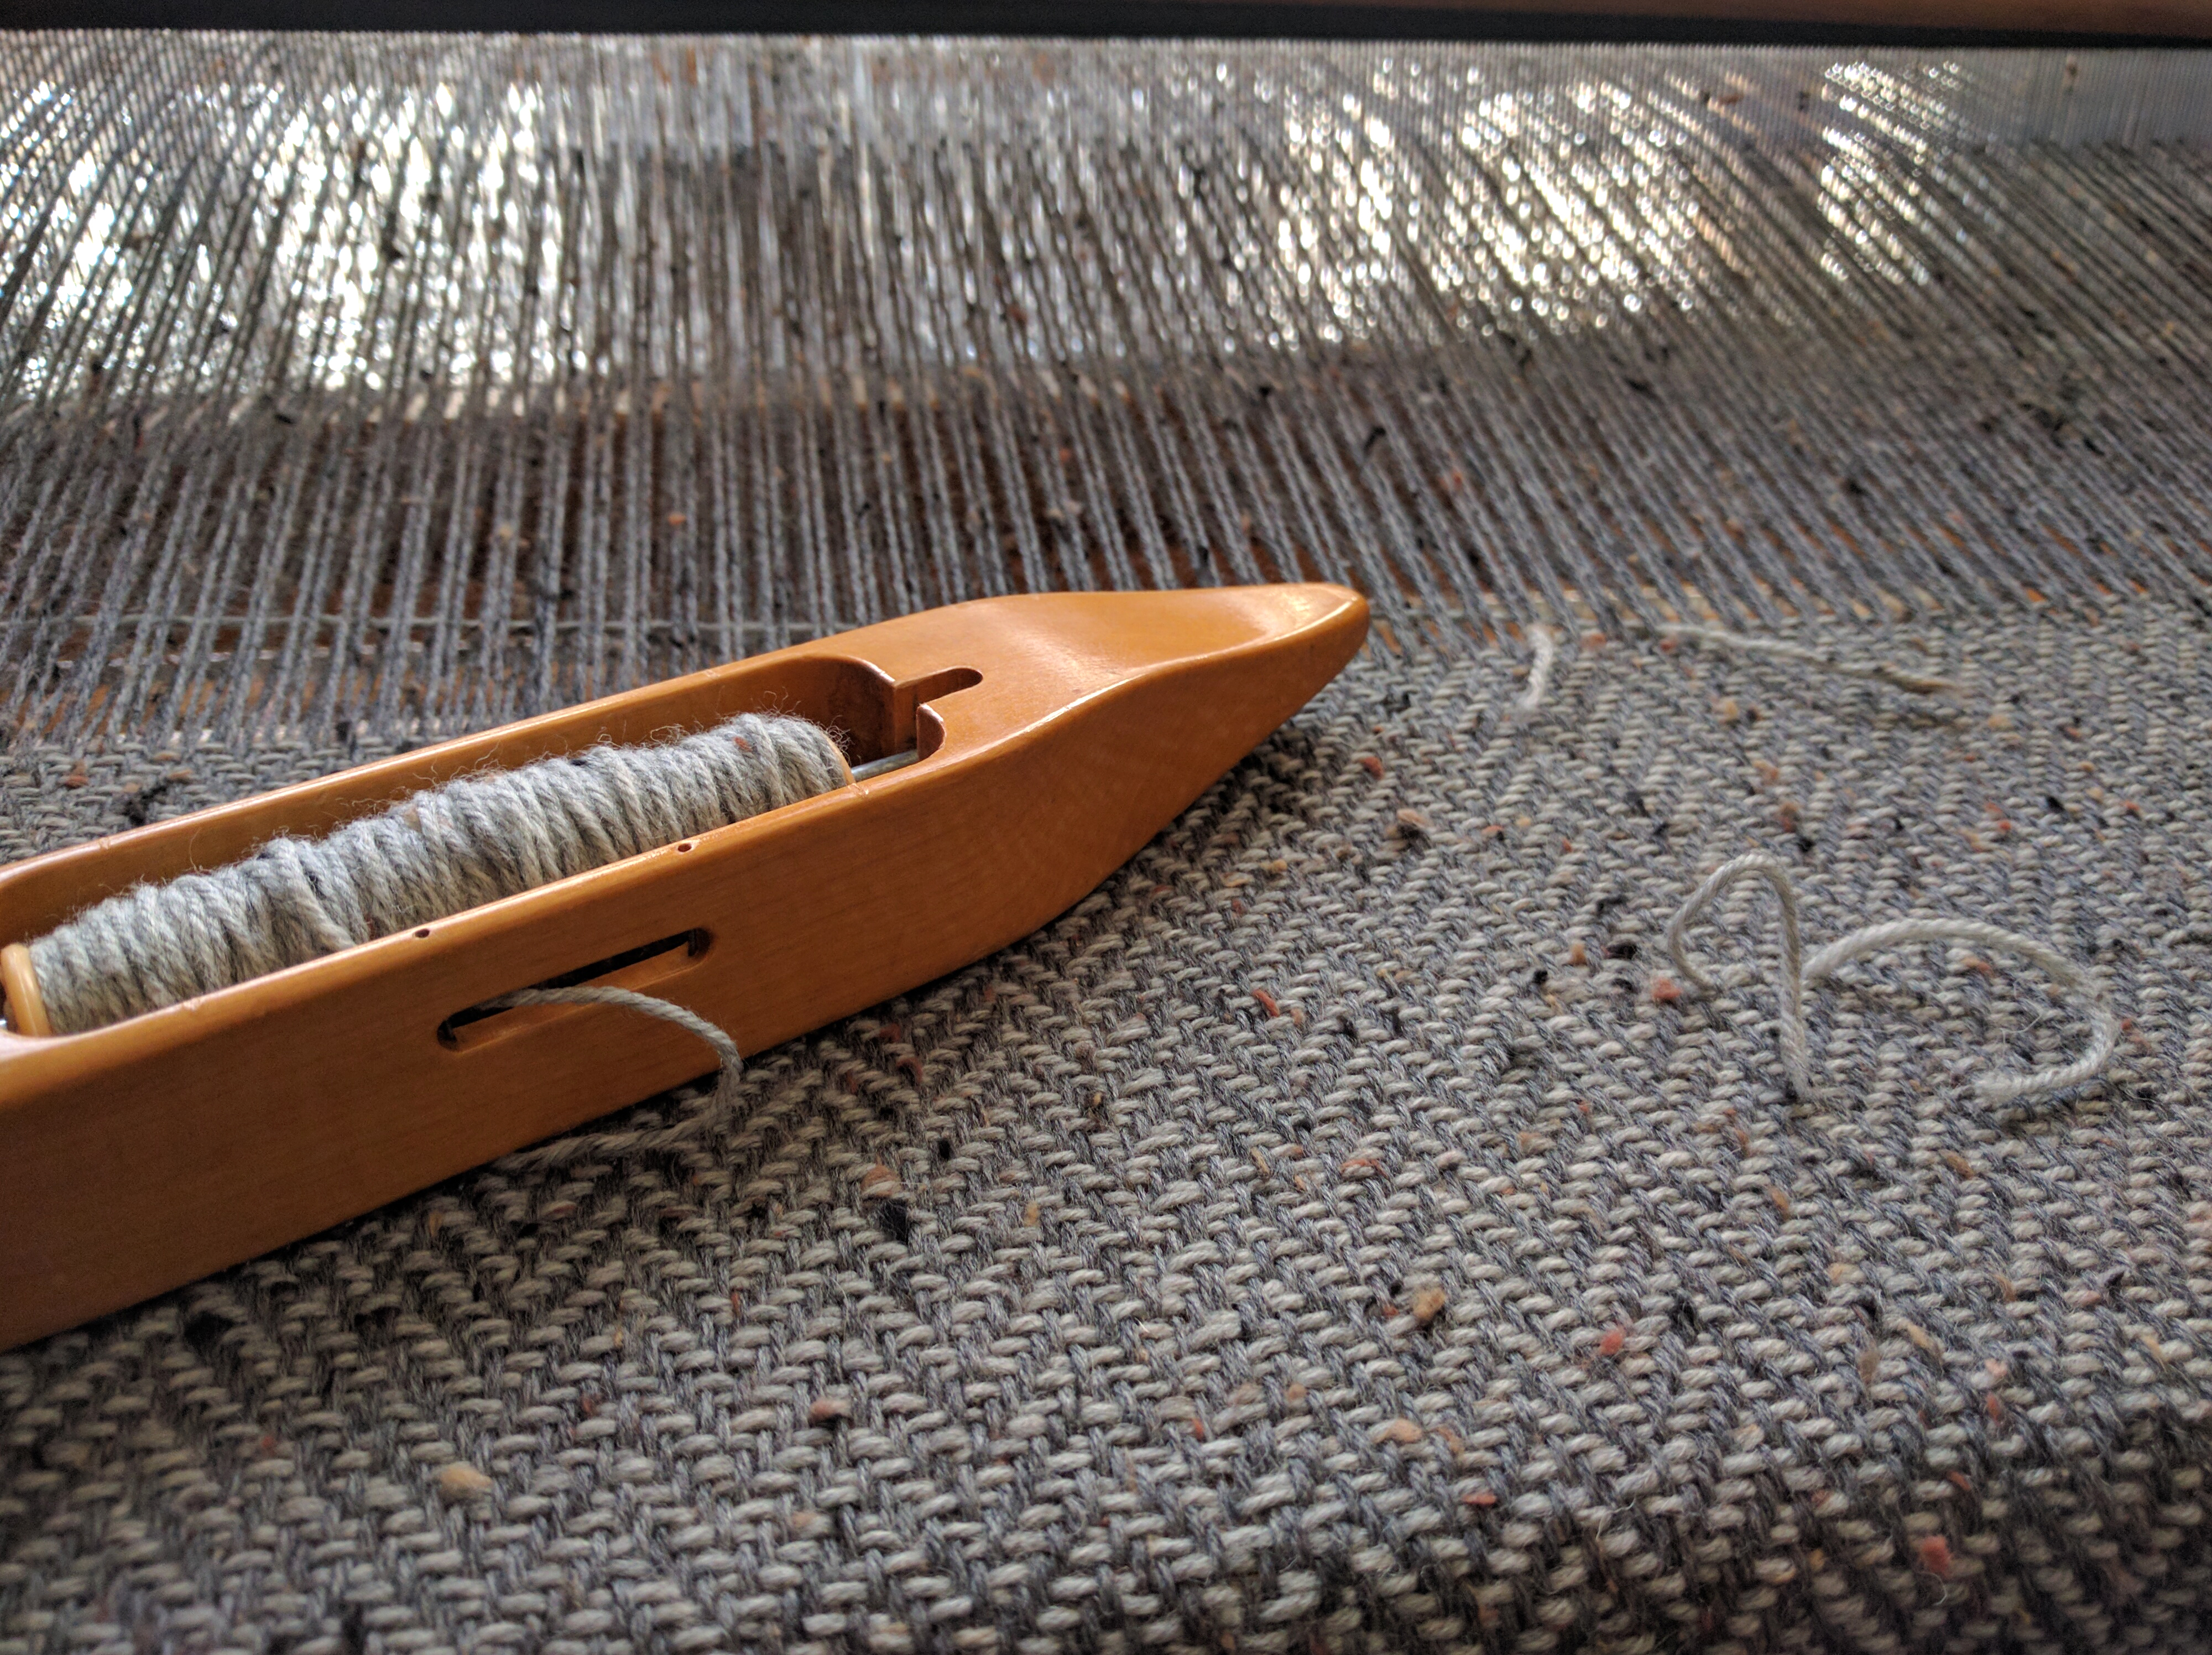
This piece of fabric I’m weaving will be for two jackets. My warp is color 414 Charcoal in Deluxe DK Tweed, and the photo below shows color 413 Smoke as the weft.
One bobbin of yarn lasted for about 3″ on my 36″ wide warp.
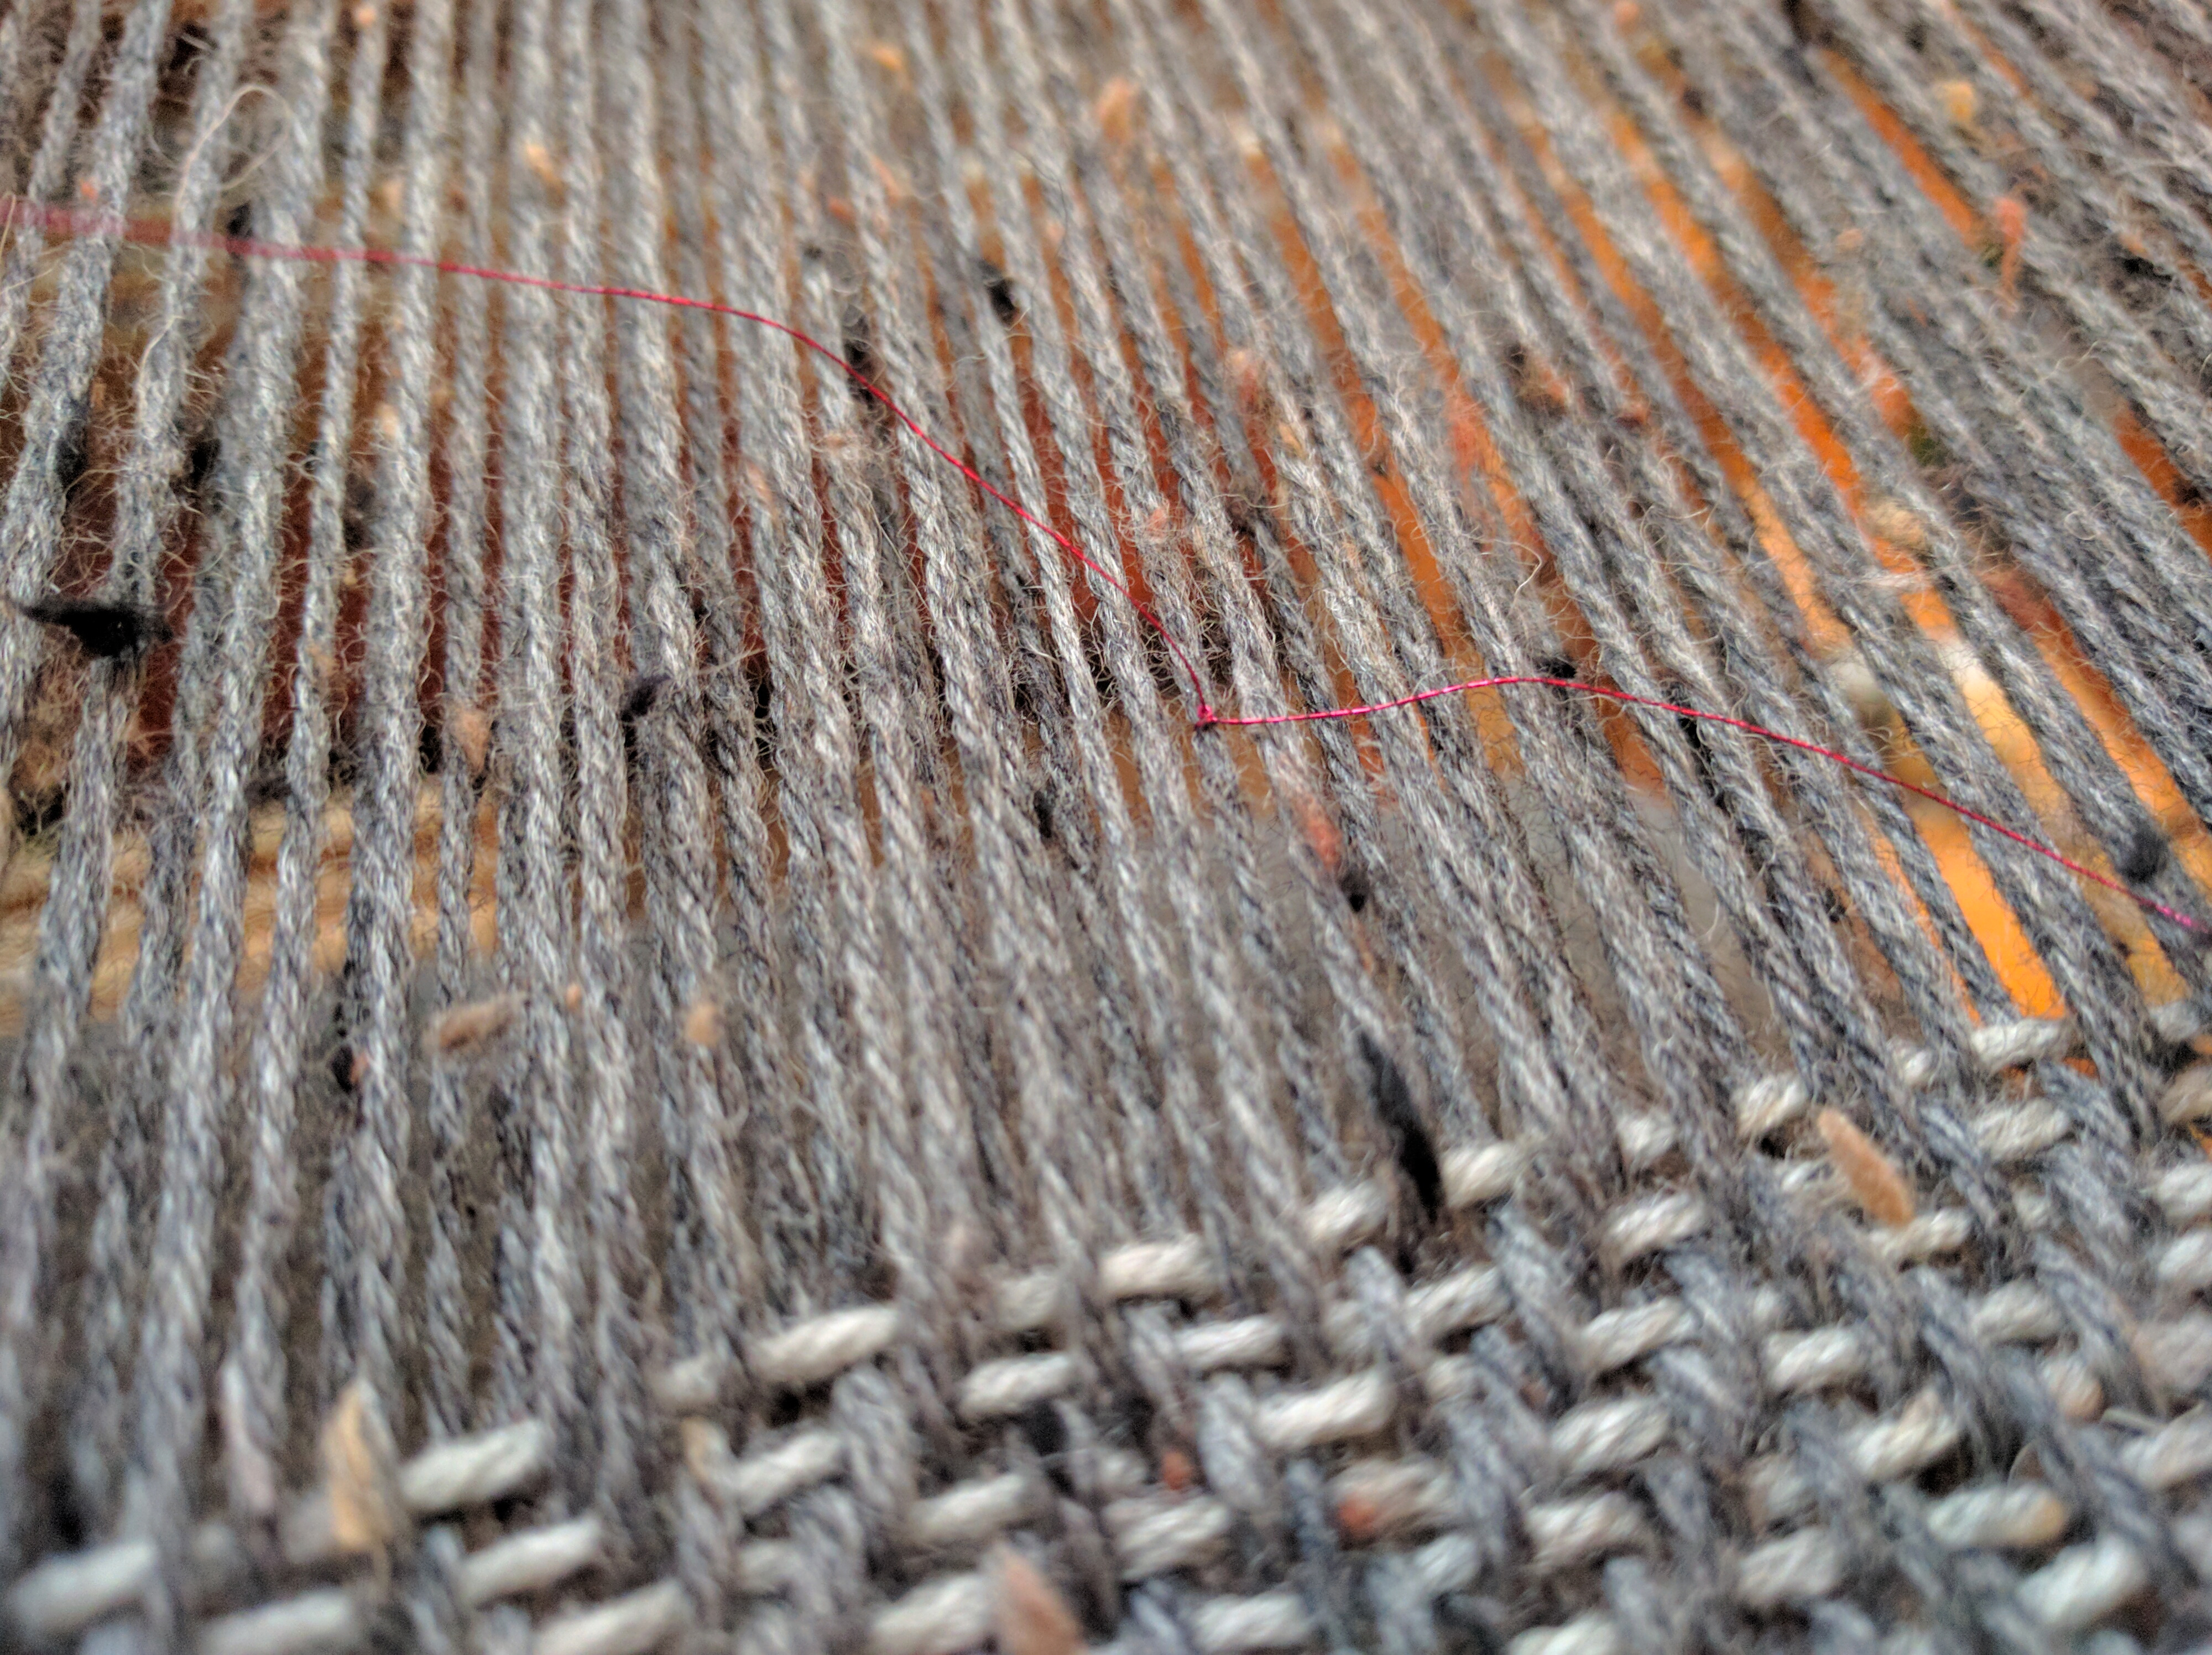
Back when I was winding my warp, I thought to tie some bright thread around some of the warp threads at the halfway point. I’m going to be changing my weft color halfway through since the jackets will be slightly different in color. This thread reminds me it’s time to switch colors!
This contrasting thread tied to the some of the warp threads lets me know I’m at the halfway point.
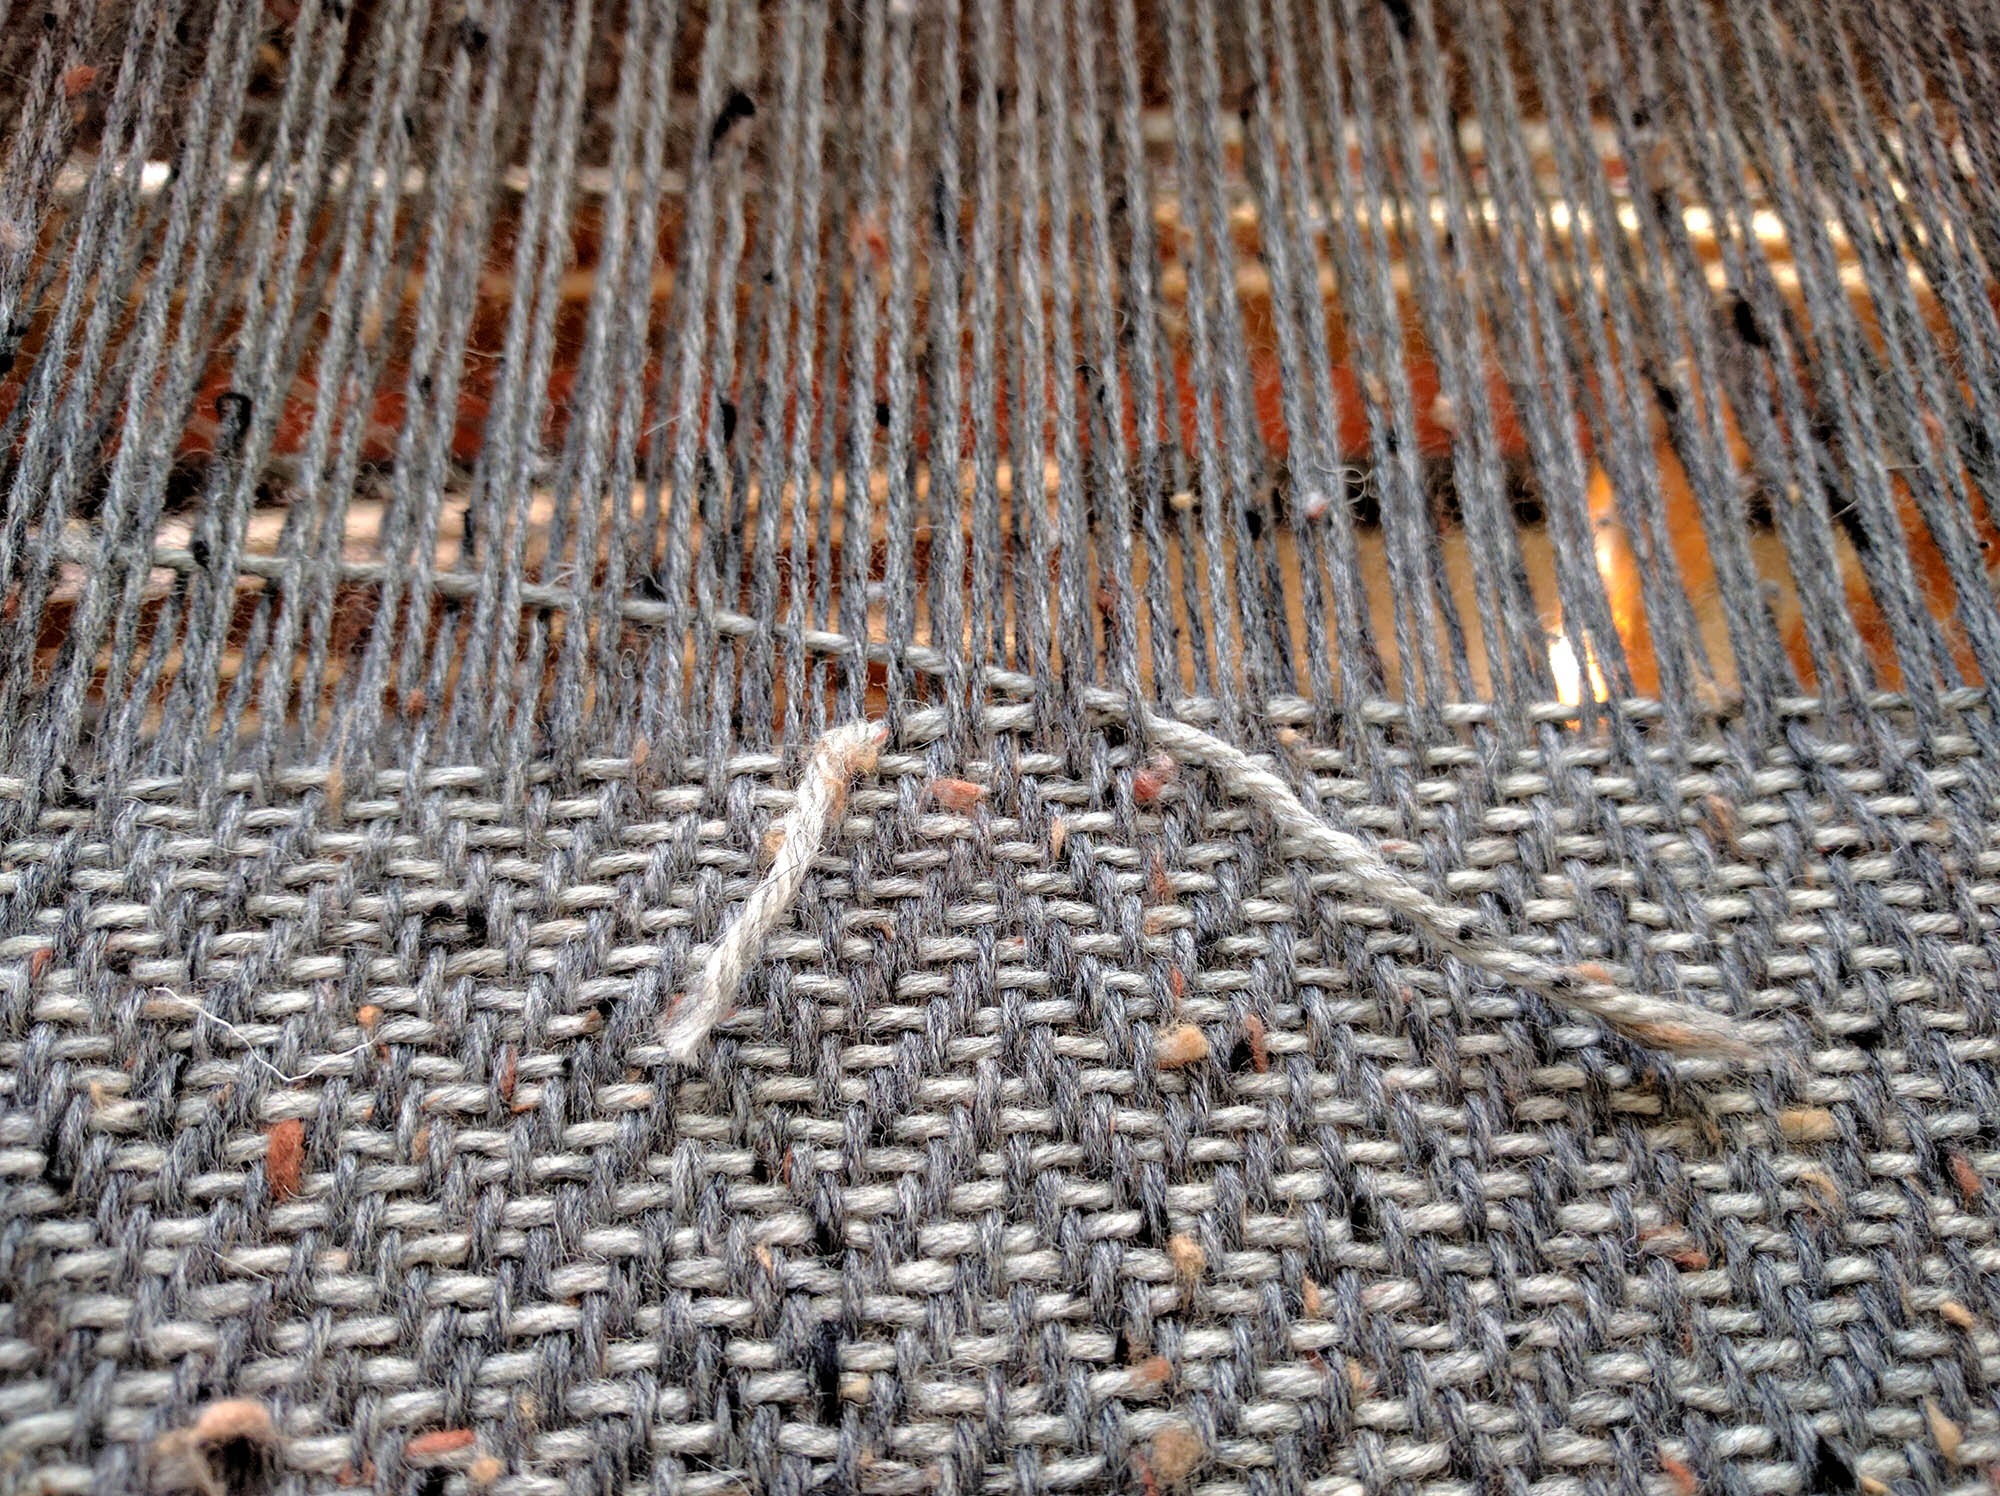
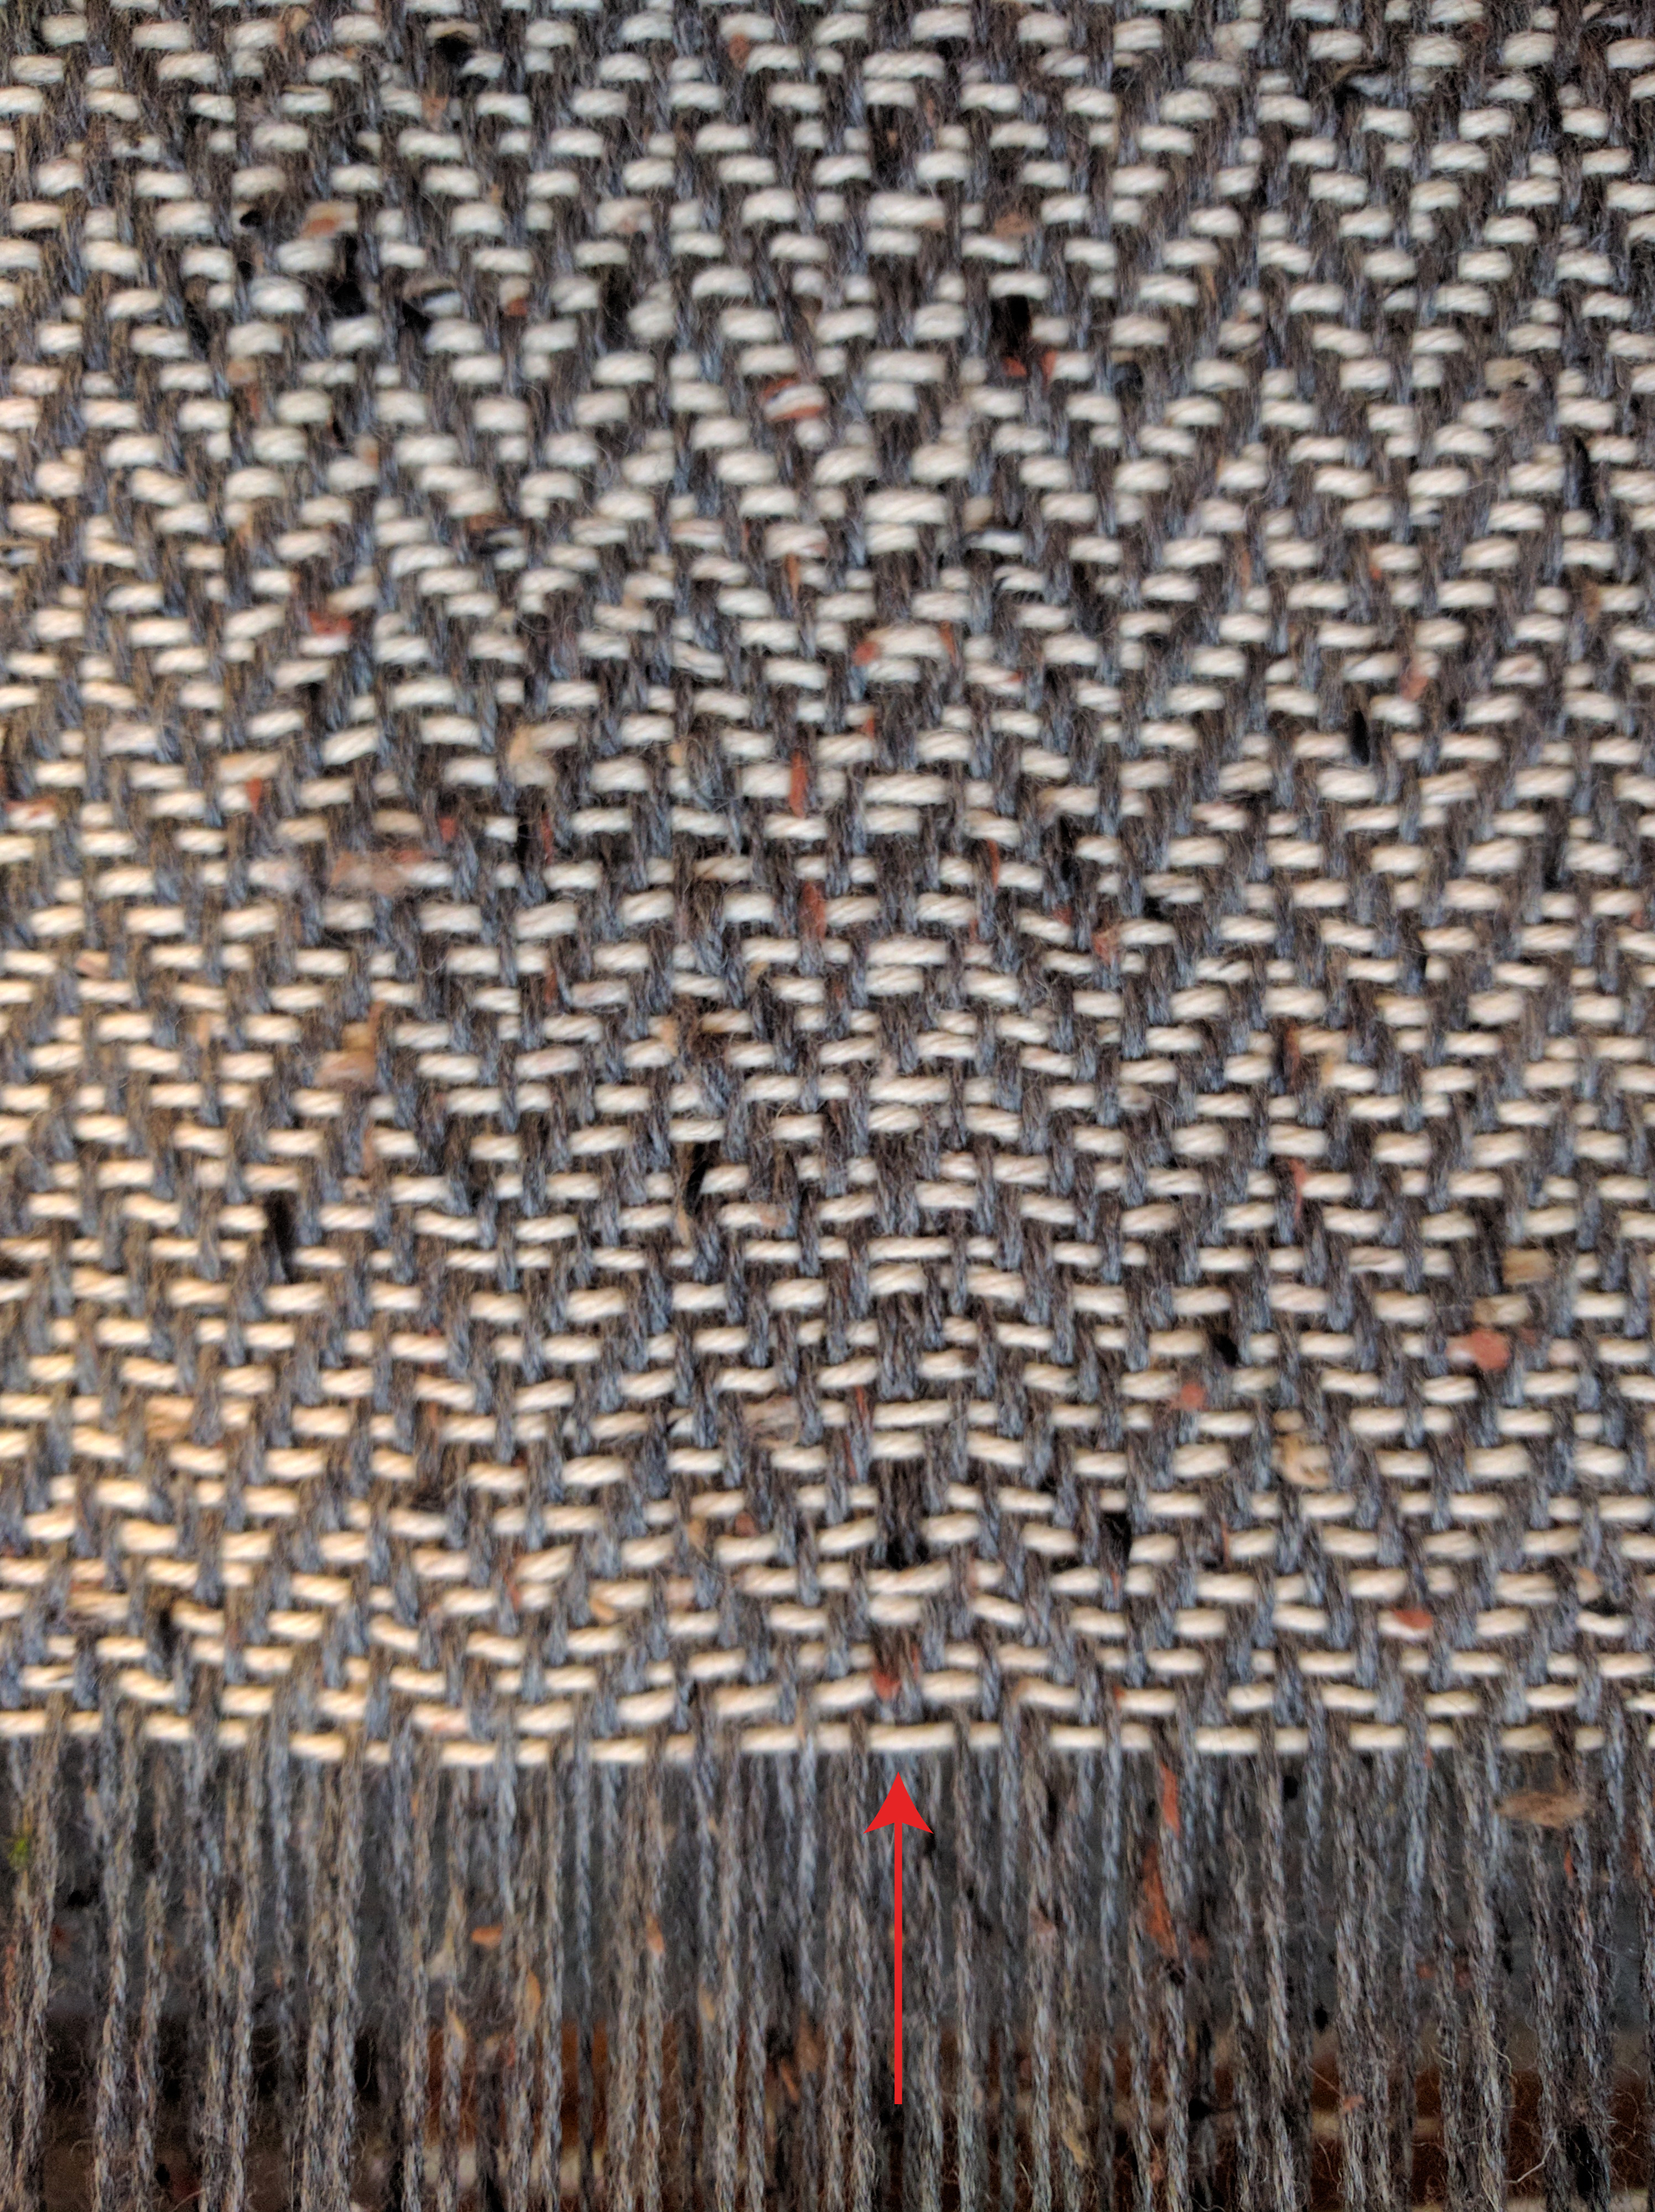
Not too long into the second half of my warp, I realized I had a couple of problems. I managed to mis-thread two heddles, which resulted in a glitch in the patterning. See below for one example.
Uh oh!
I could have fixed the problem right there – I could have broken the warp thread, threaded an afterthought heddle and tied on a new strand, but I opted to leave the mistakes in place and fix them after the fact.
If I had noticed sooner, I would have fixed them right away. But because I had made it this far and knew I’d be doing some repair work anyway, I figured I might as well do the whole length at the same time.
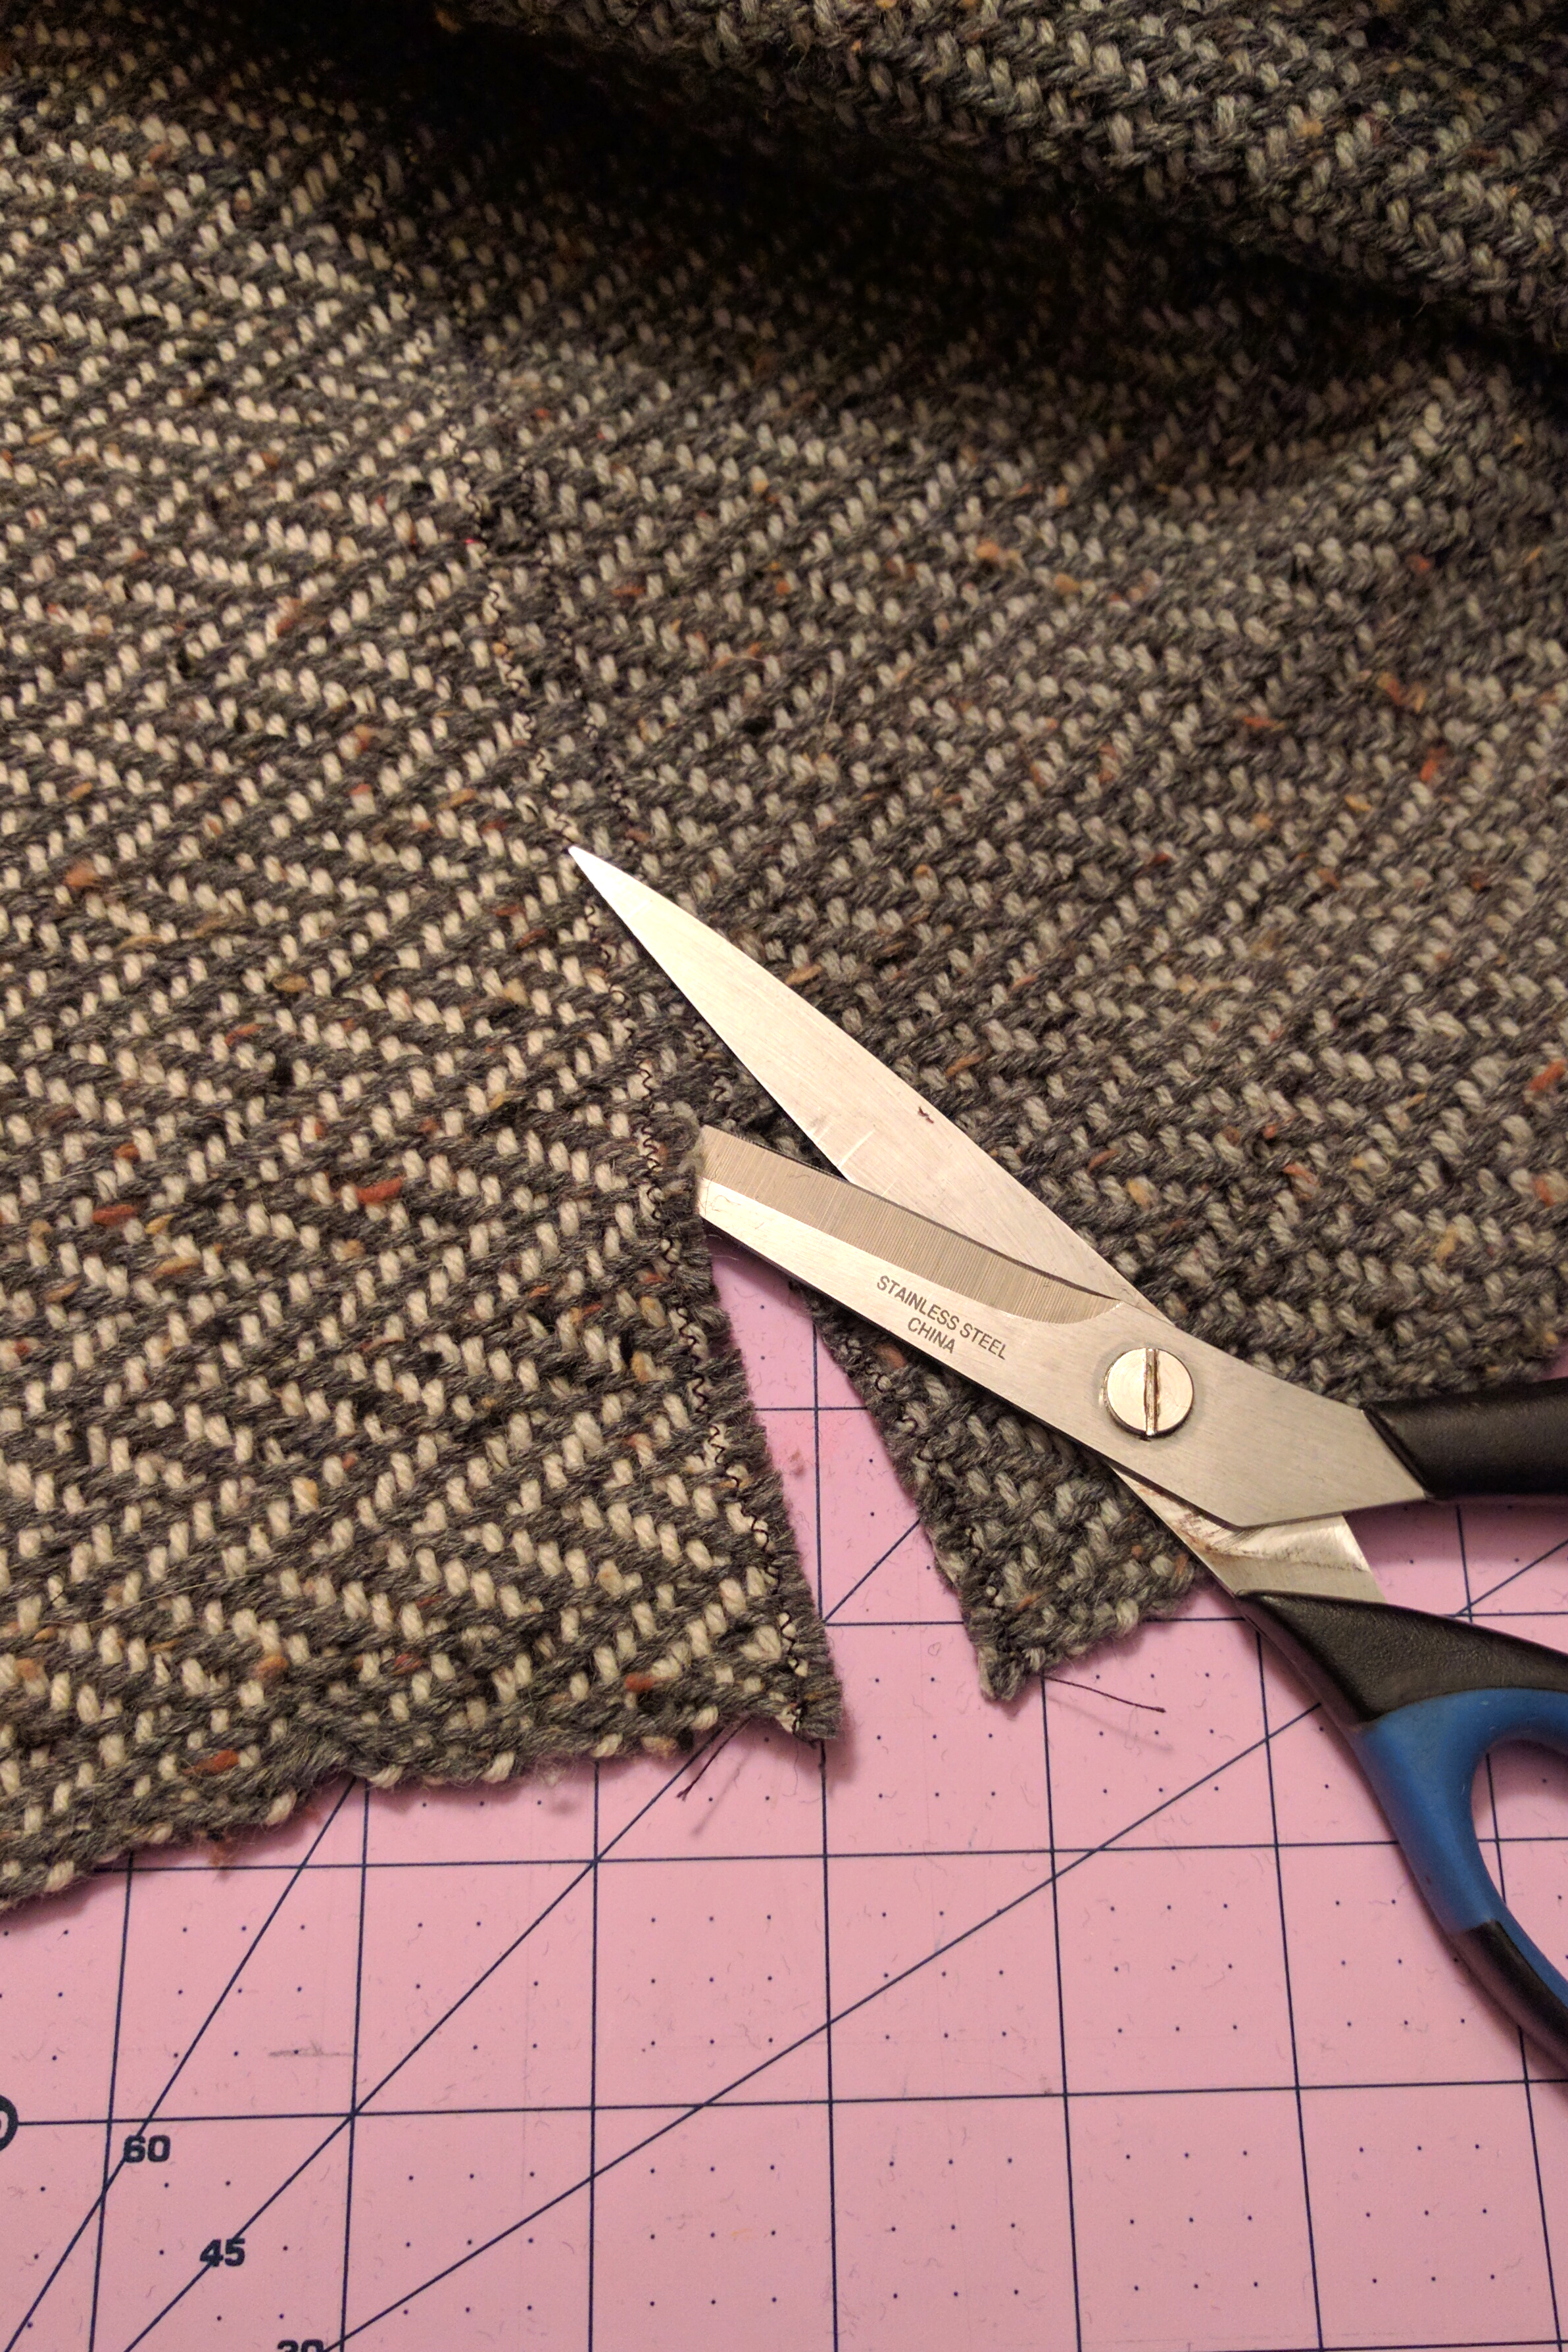
Cutting doesn’t have to be scary!
After cutting my fabric from the loom, I simply knotted the warp ends together – no hemstitching. I then zig-zagged the edges with my sewing machine, and also sewed lines at the halfway point. I figured it would be a lot easier dealing with two 3 yard pieces of fabric rather than a 6 yard piece. I then cut the fabric apart at that halfway point.
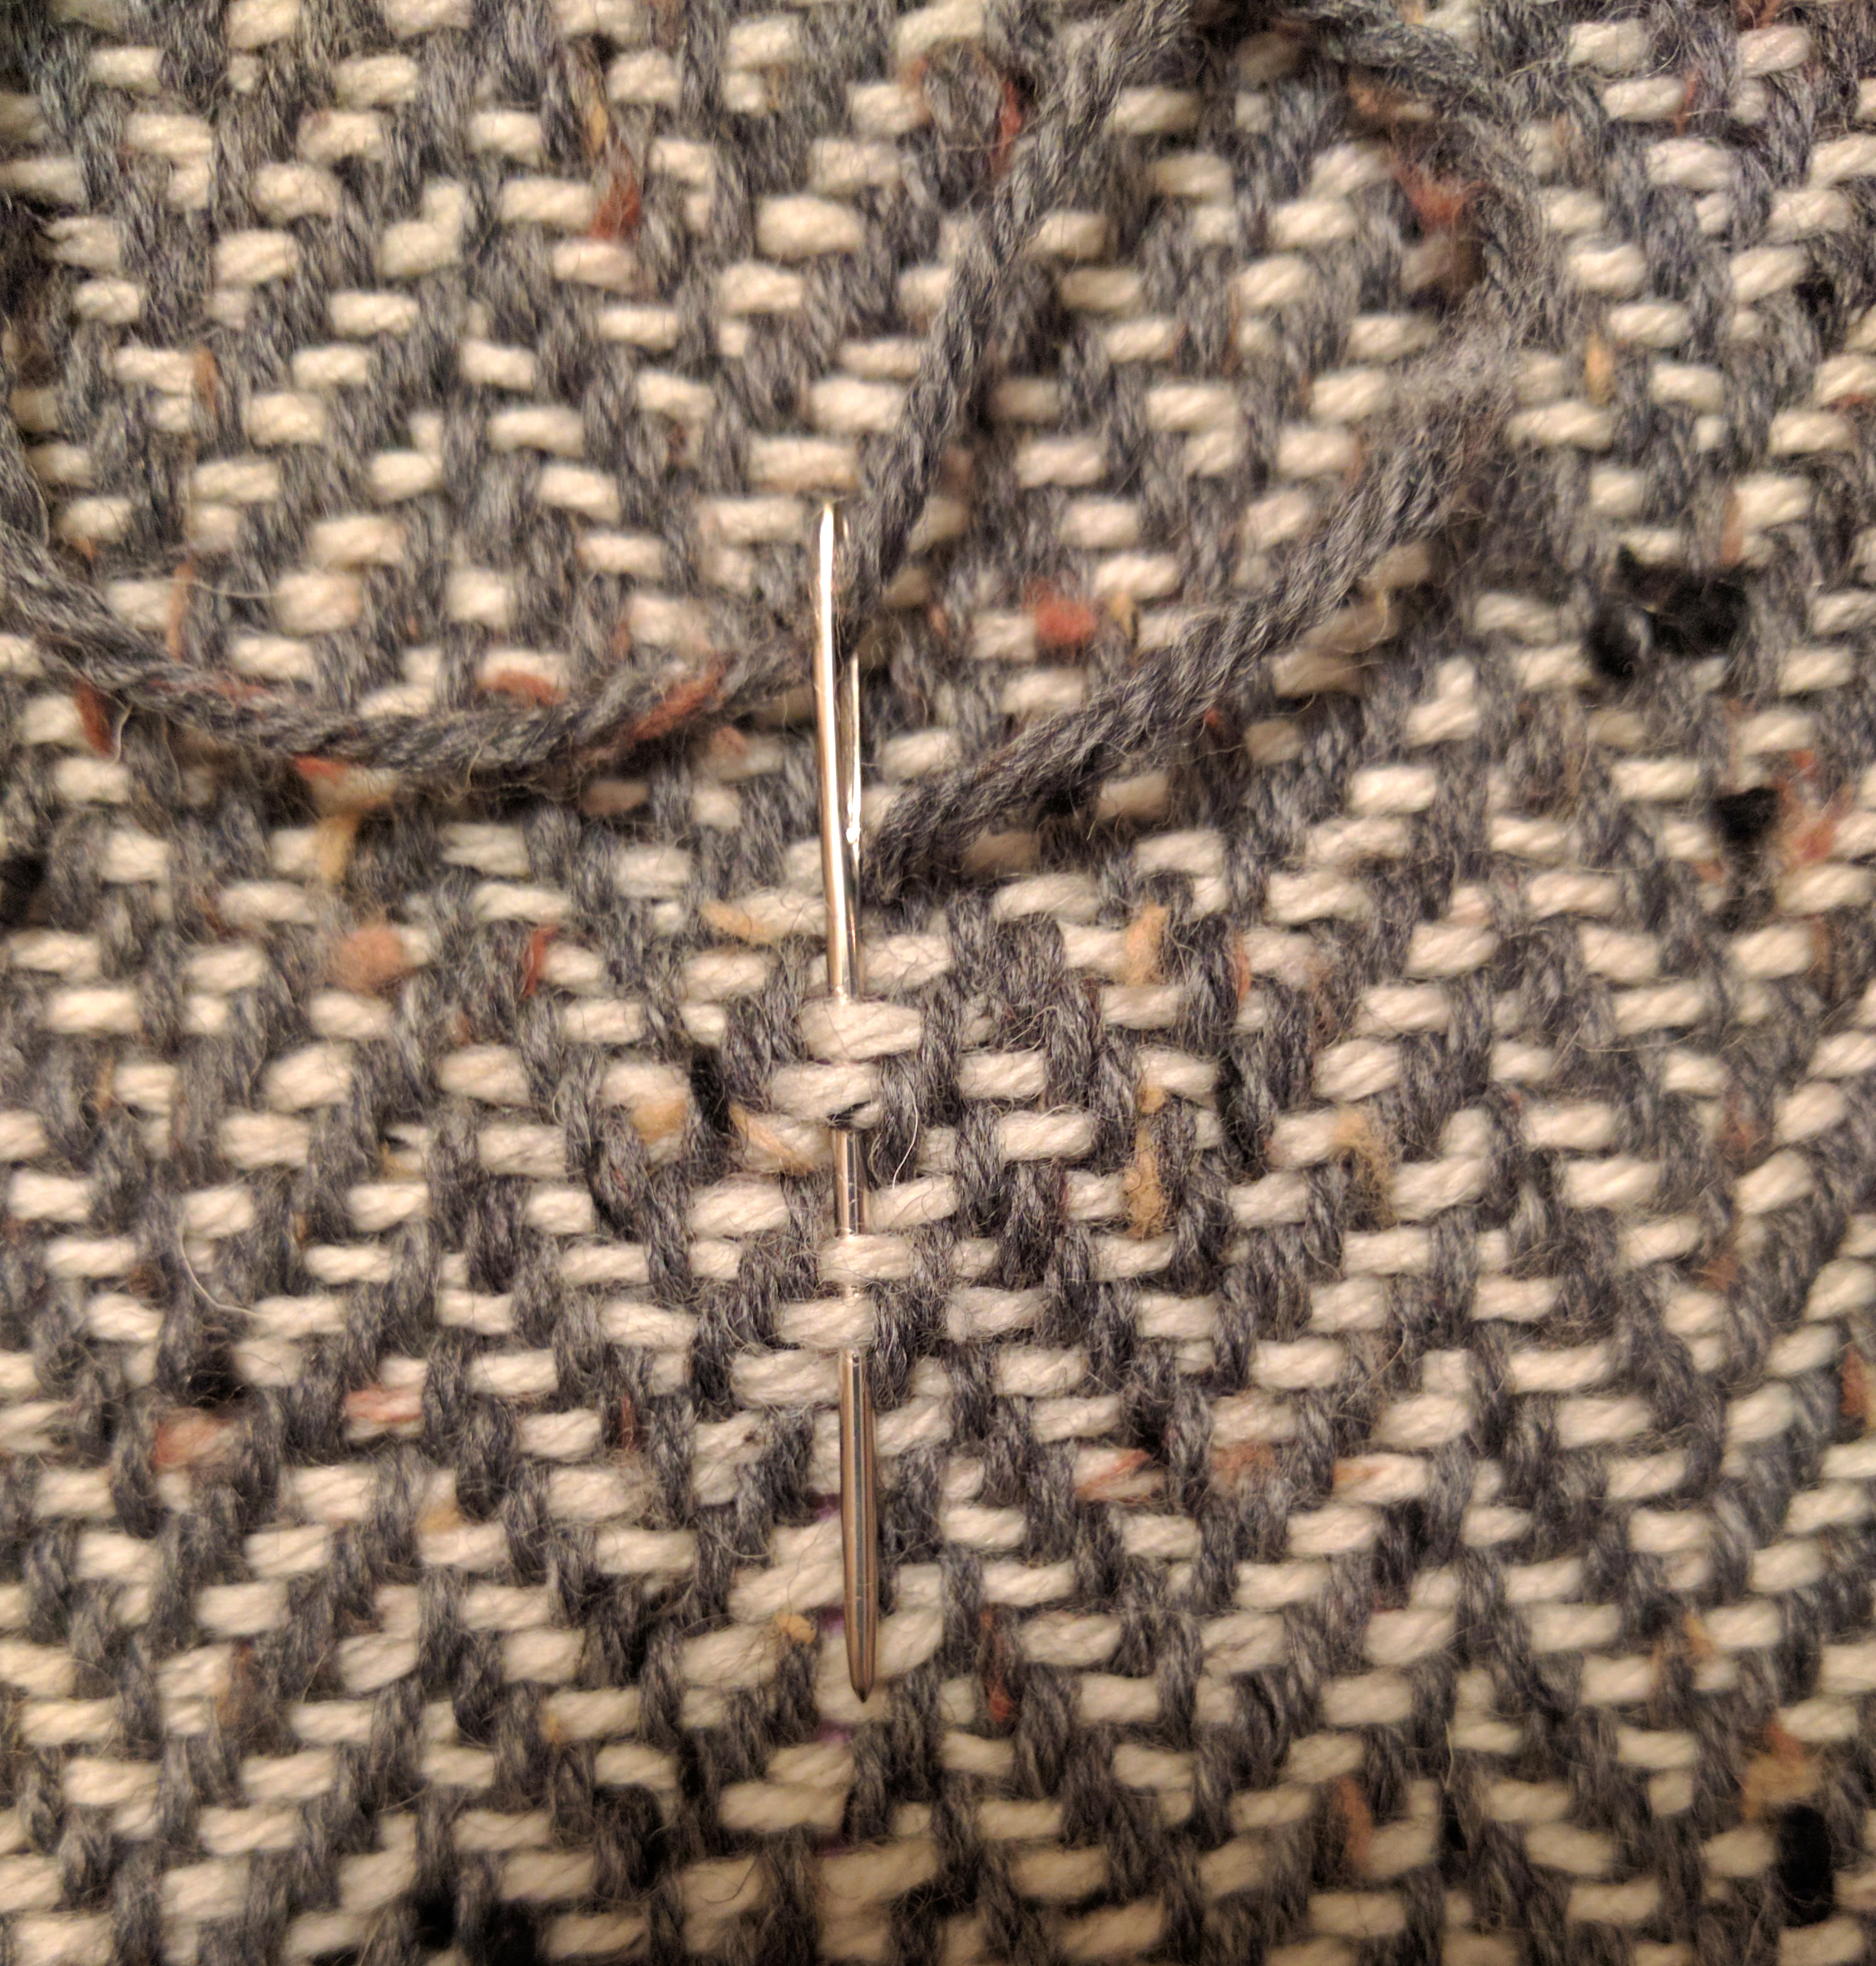
Fixing my warp mistakes.
After my two halves were cut apart, I threaded a tapestry needle and wove the correct placement for my mistaken threading. It was a little tedious, but very doable and wasn’t nearly as bad as I thought it might be.
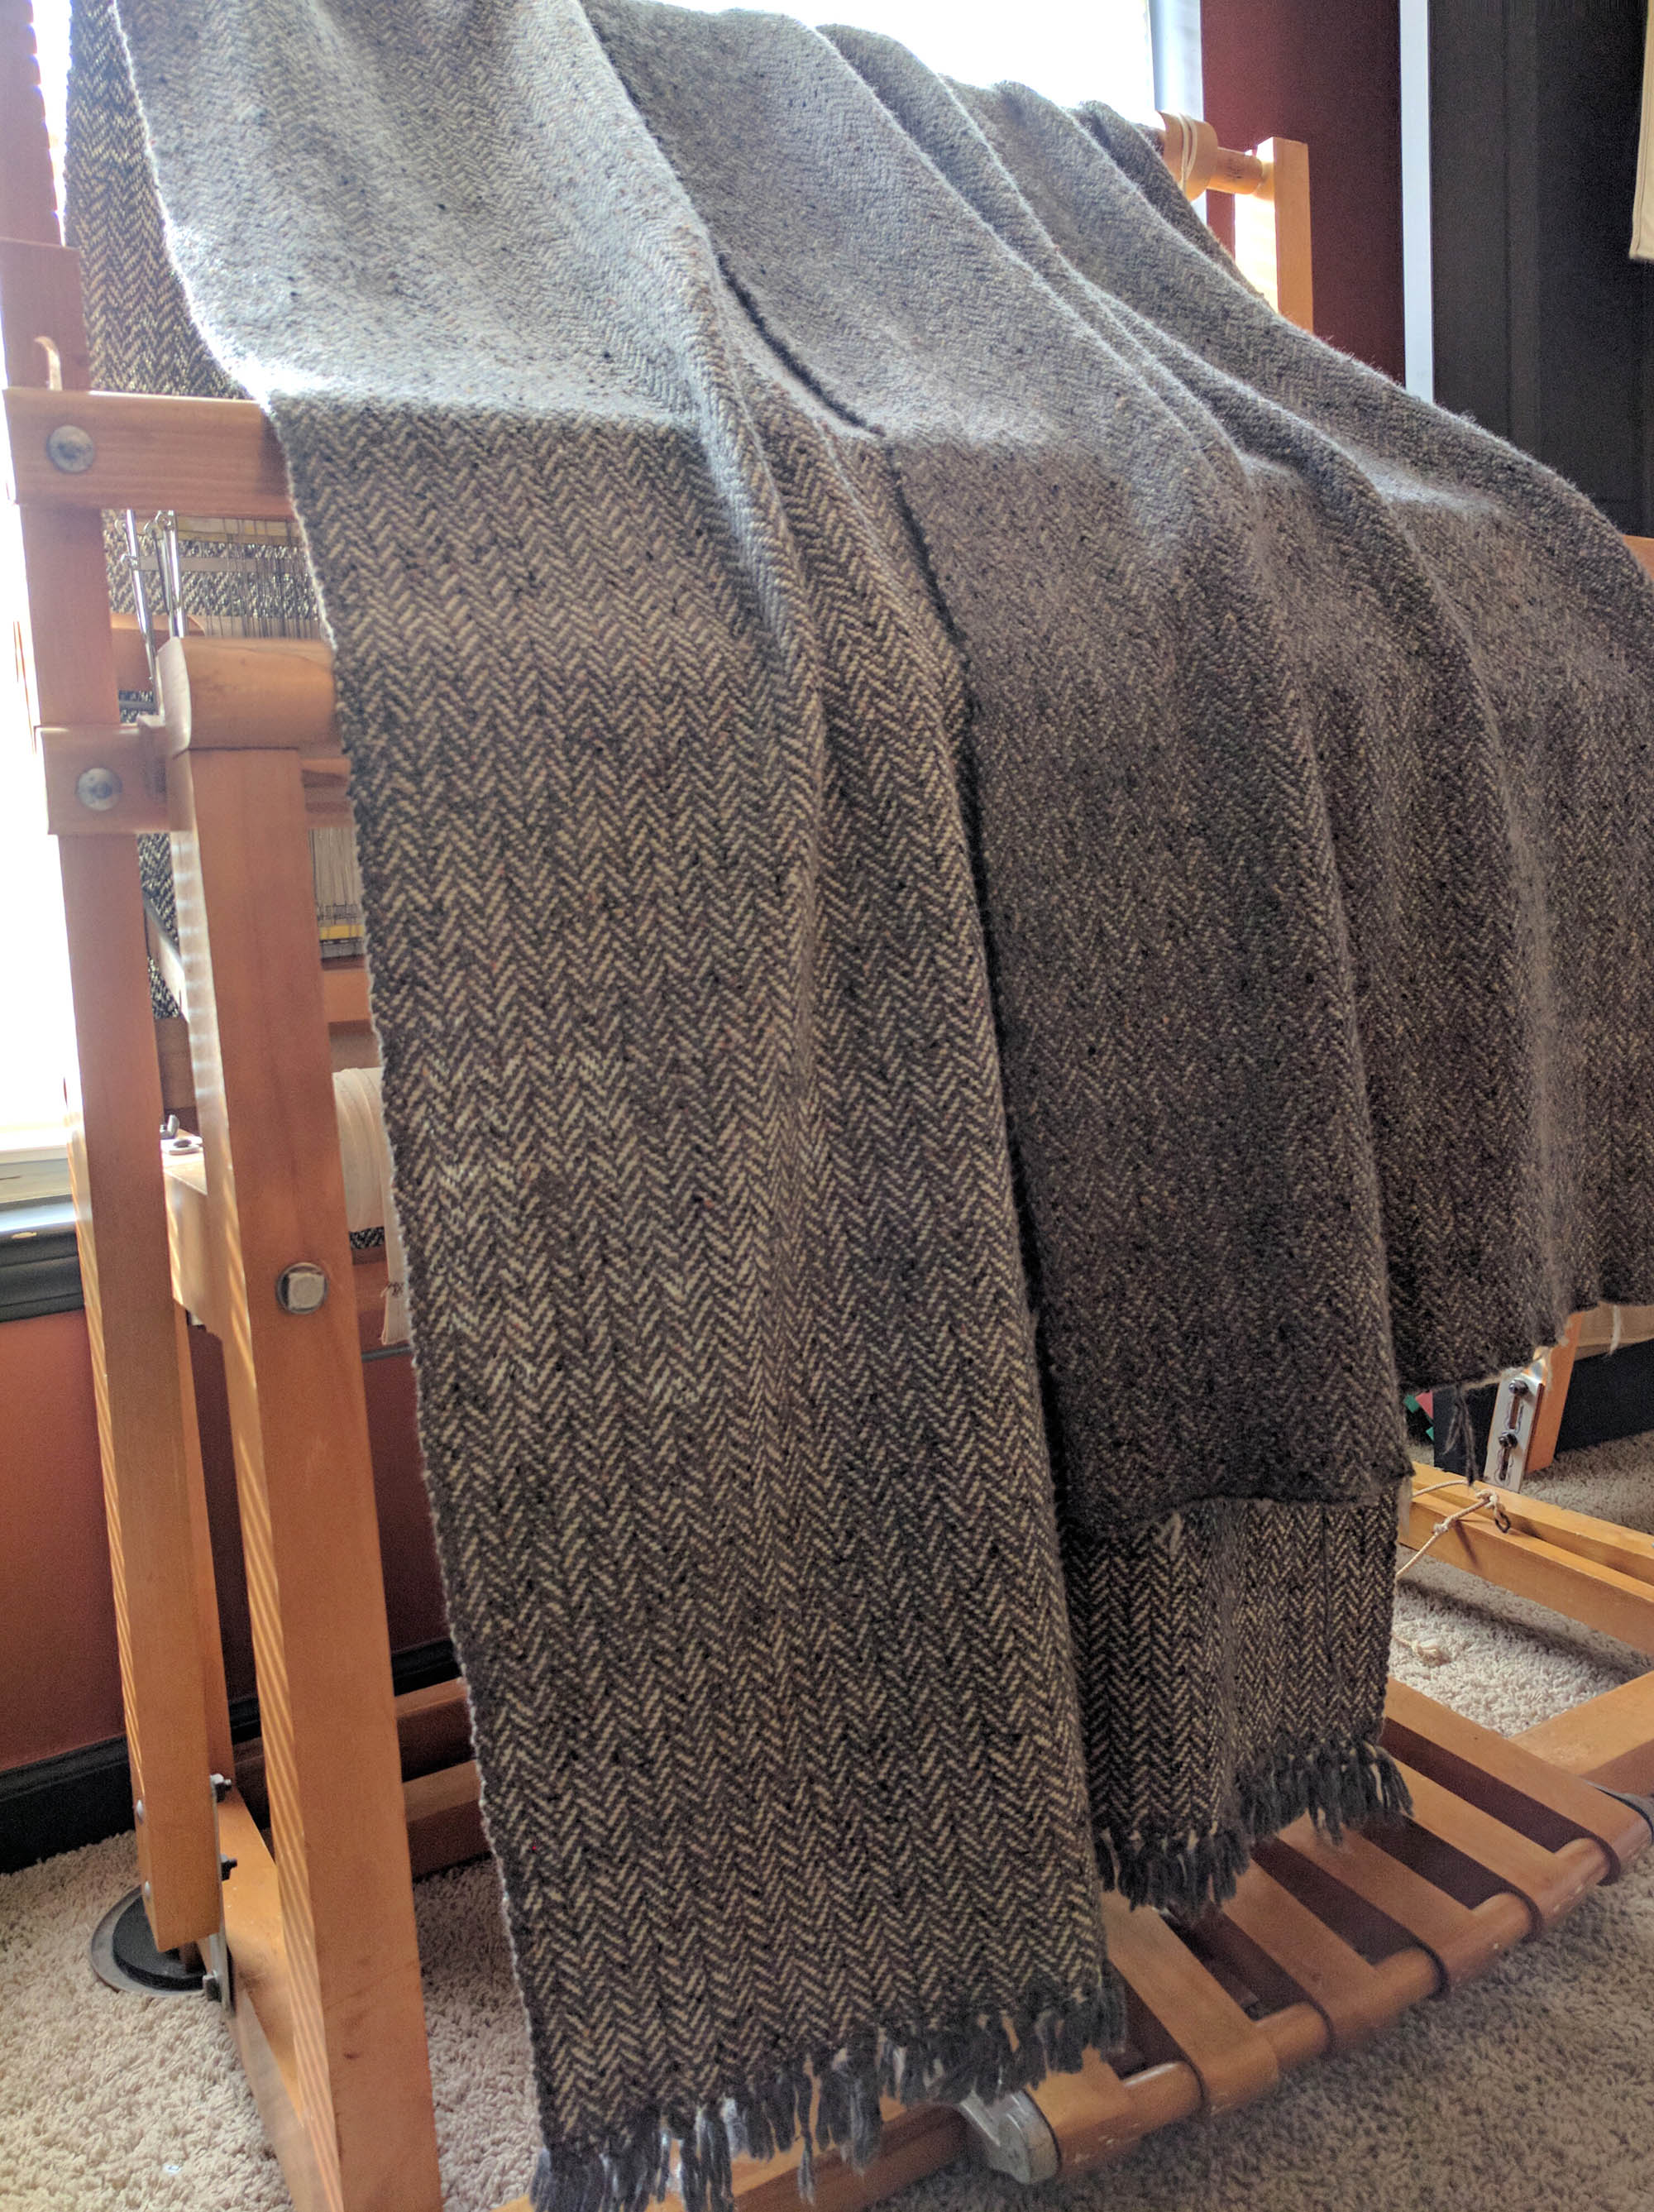
And here are my yardages basking in the sunlight prior to washing. I threw both of the pieces of fabric into my machine and washed and dried them on gentle cycles. Because I wove a fairly dense fabric, the fabric changed very little after finishing. But I already knew that would be the case since I was a good little weaver and did a sampling first.
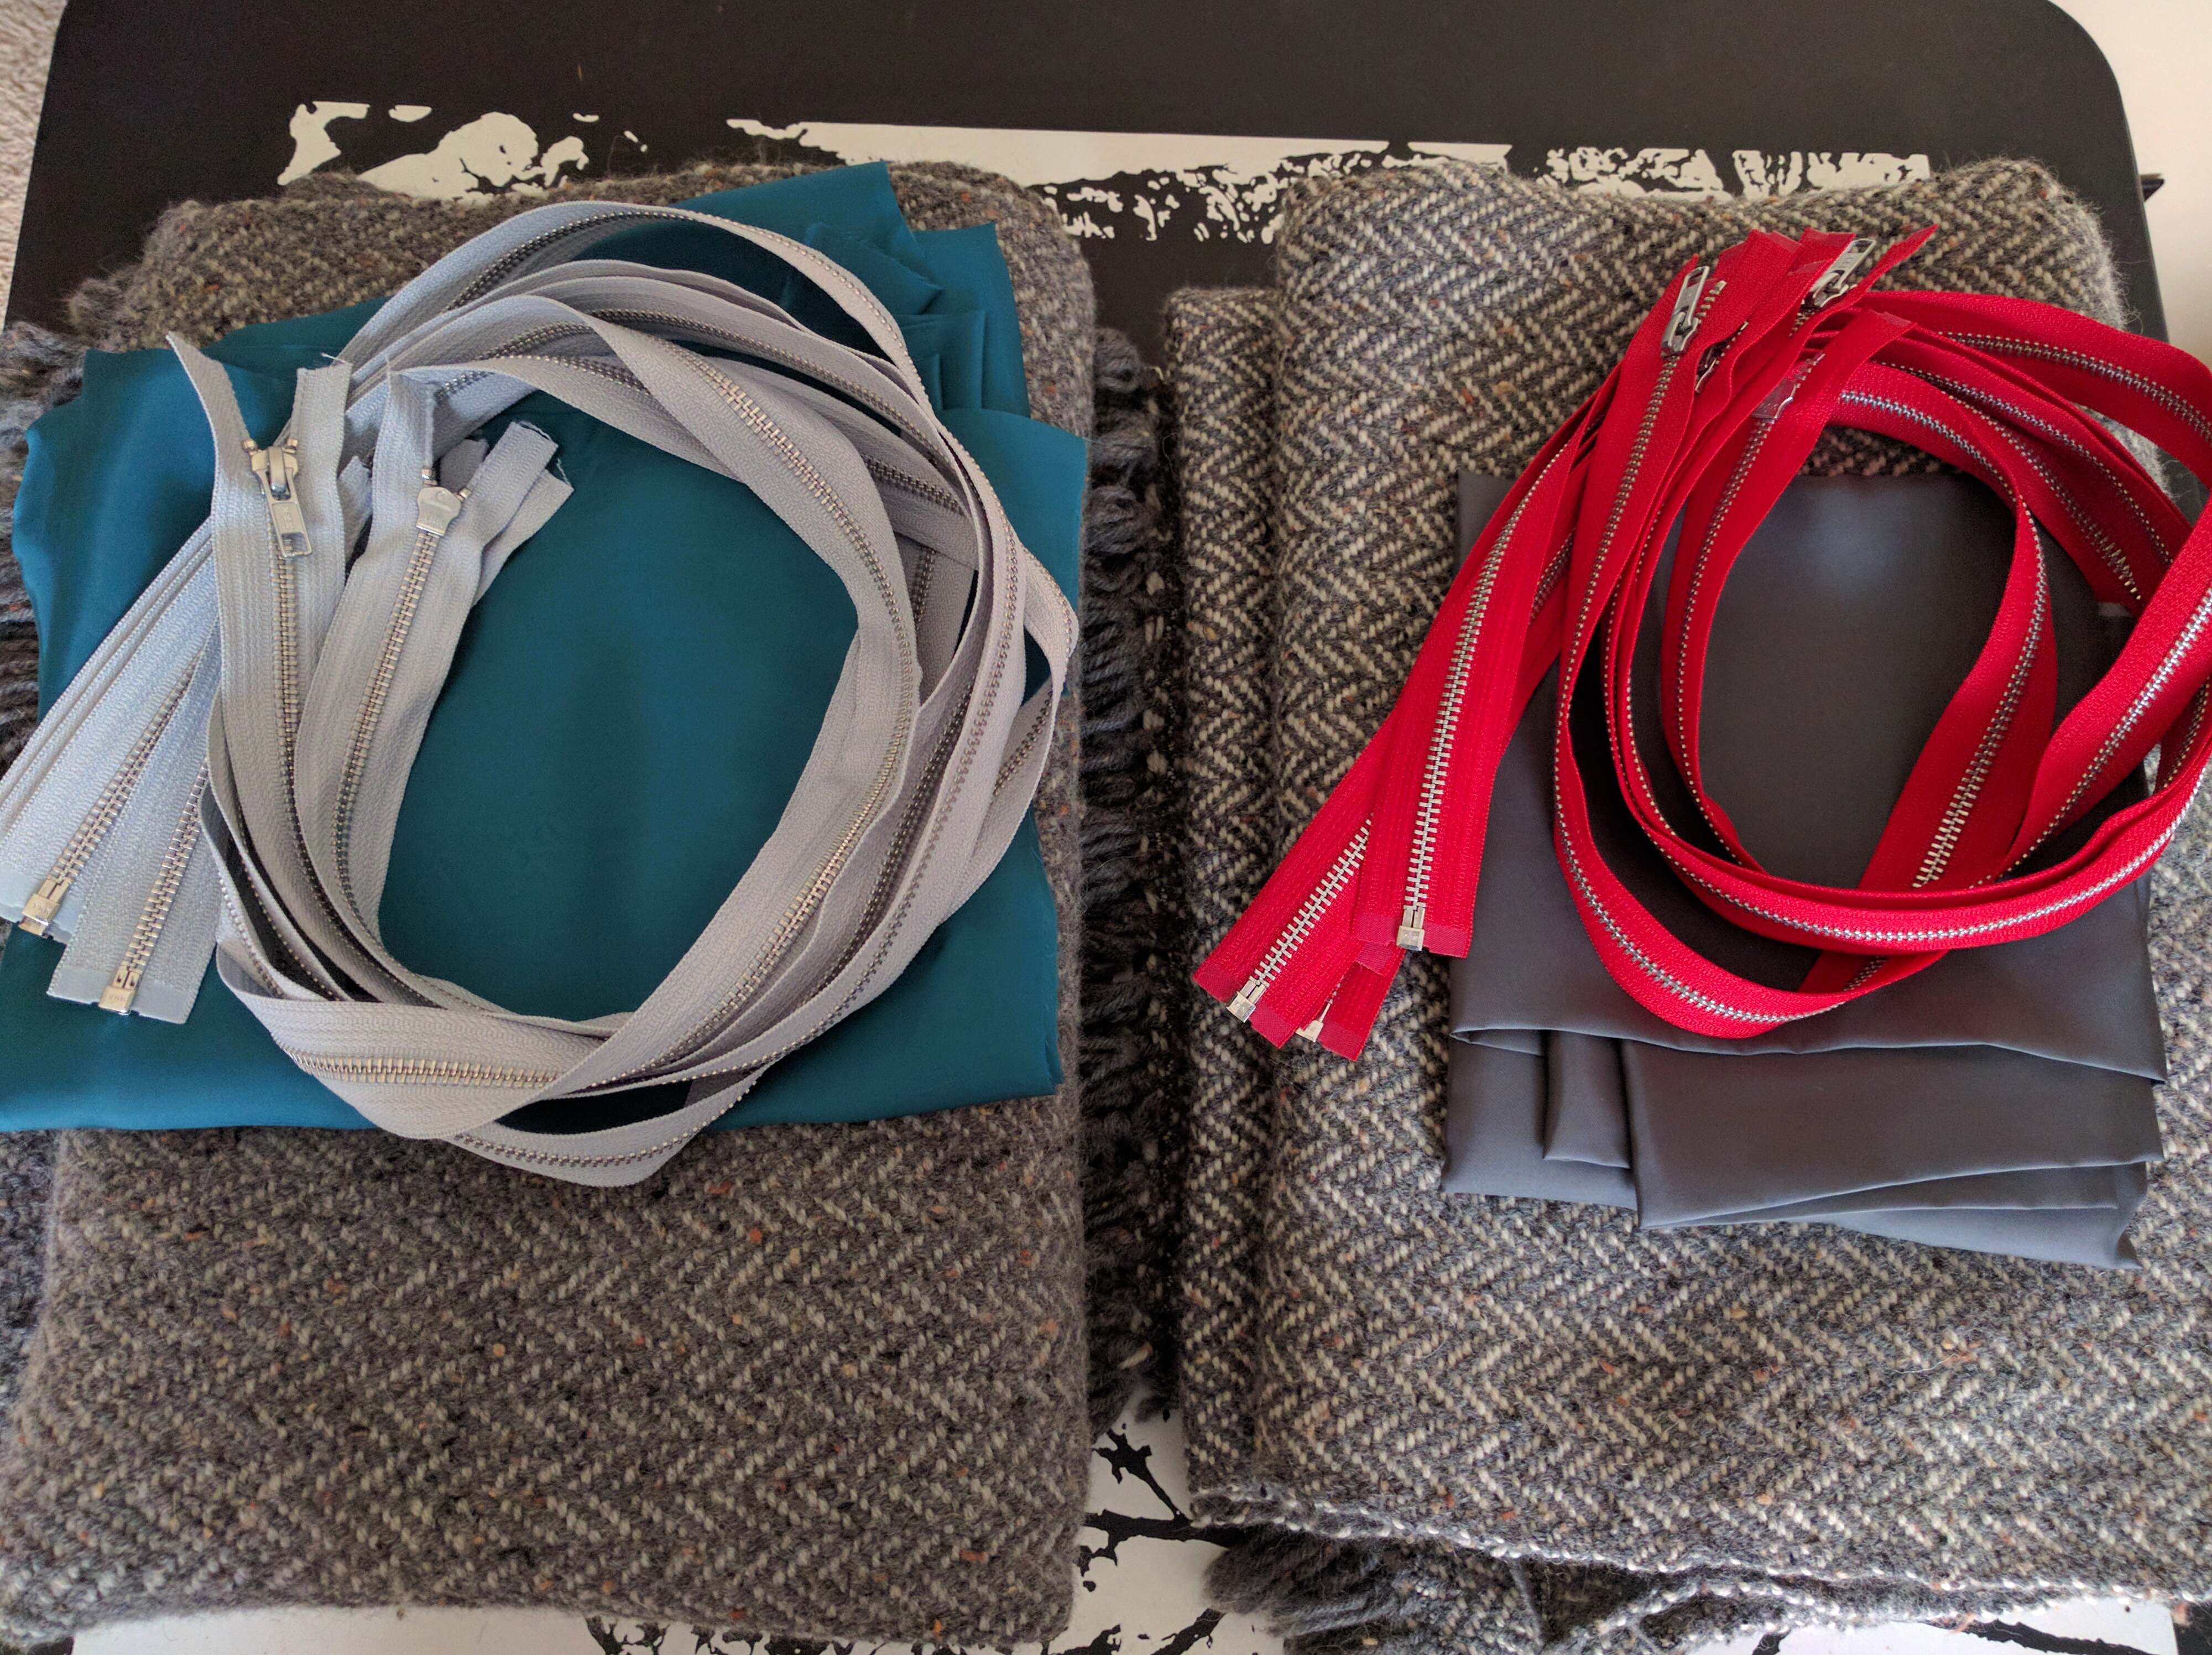
Zippers, lining, fabric: go!
My jacket will be made from the stack on the left – gray on gray fabric, teal lining, and gray zippers. Yonca chose cream to go with her gray for the fabric, matching gray lining, and bold lipstick red zippers.
My goal is to be finished with these jackets by next weekend’s TNNA. So if you’re planning on attending, stop by our booth and check them out. Otherwise, I’ll be back in a couple of weeks here on the blog with all the sewing details.
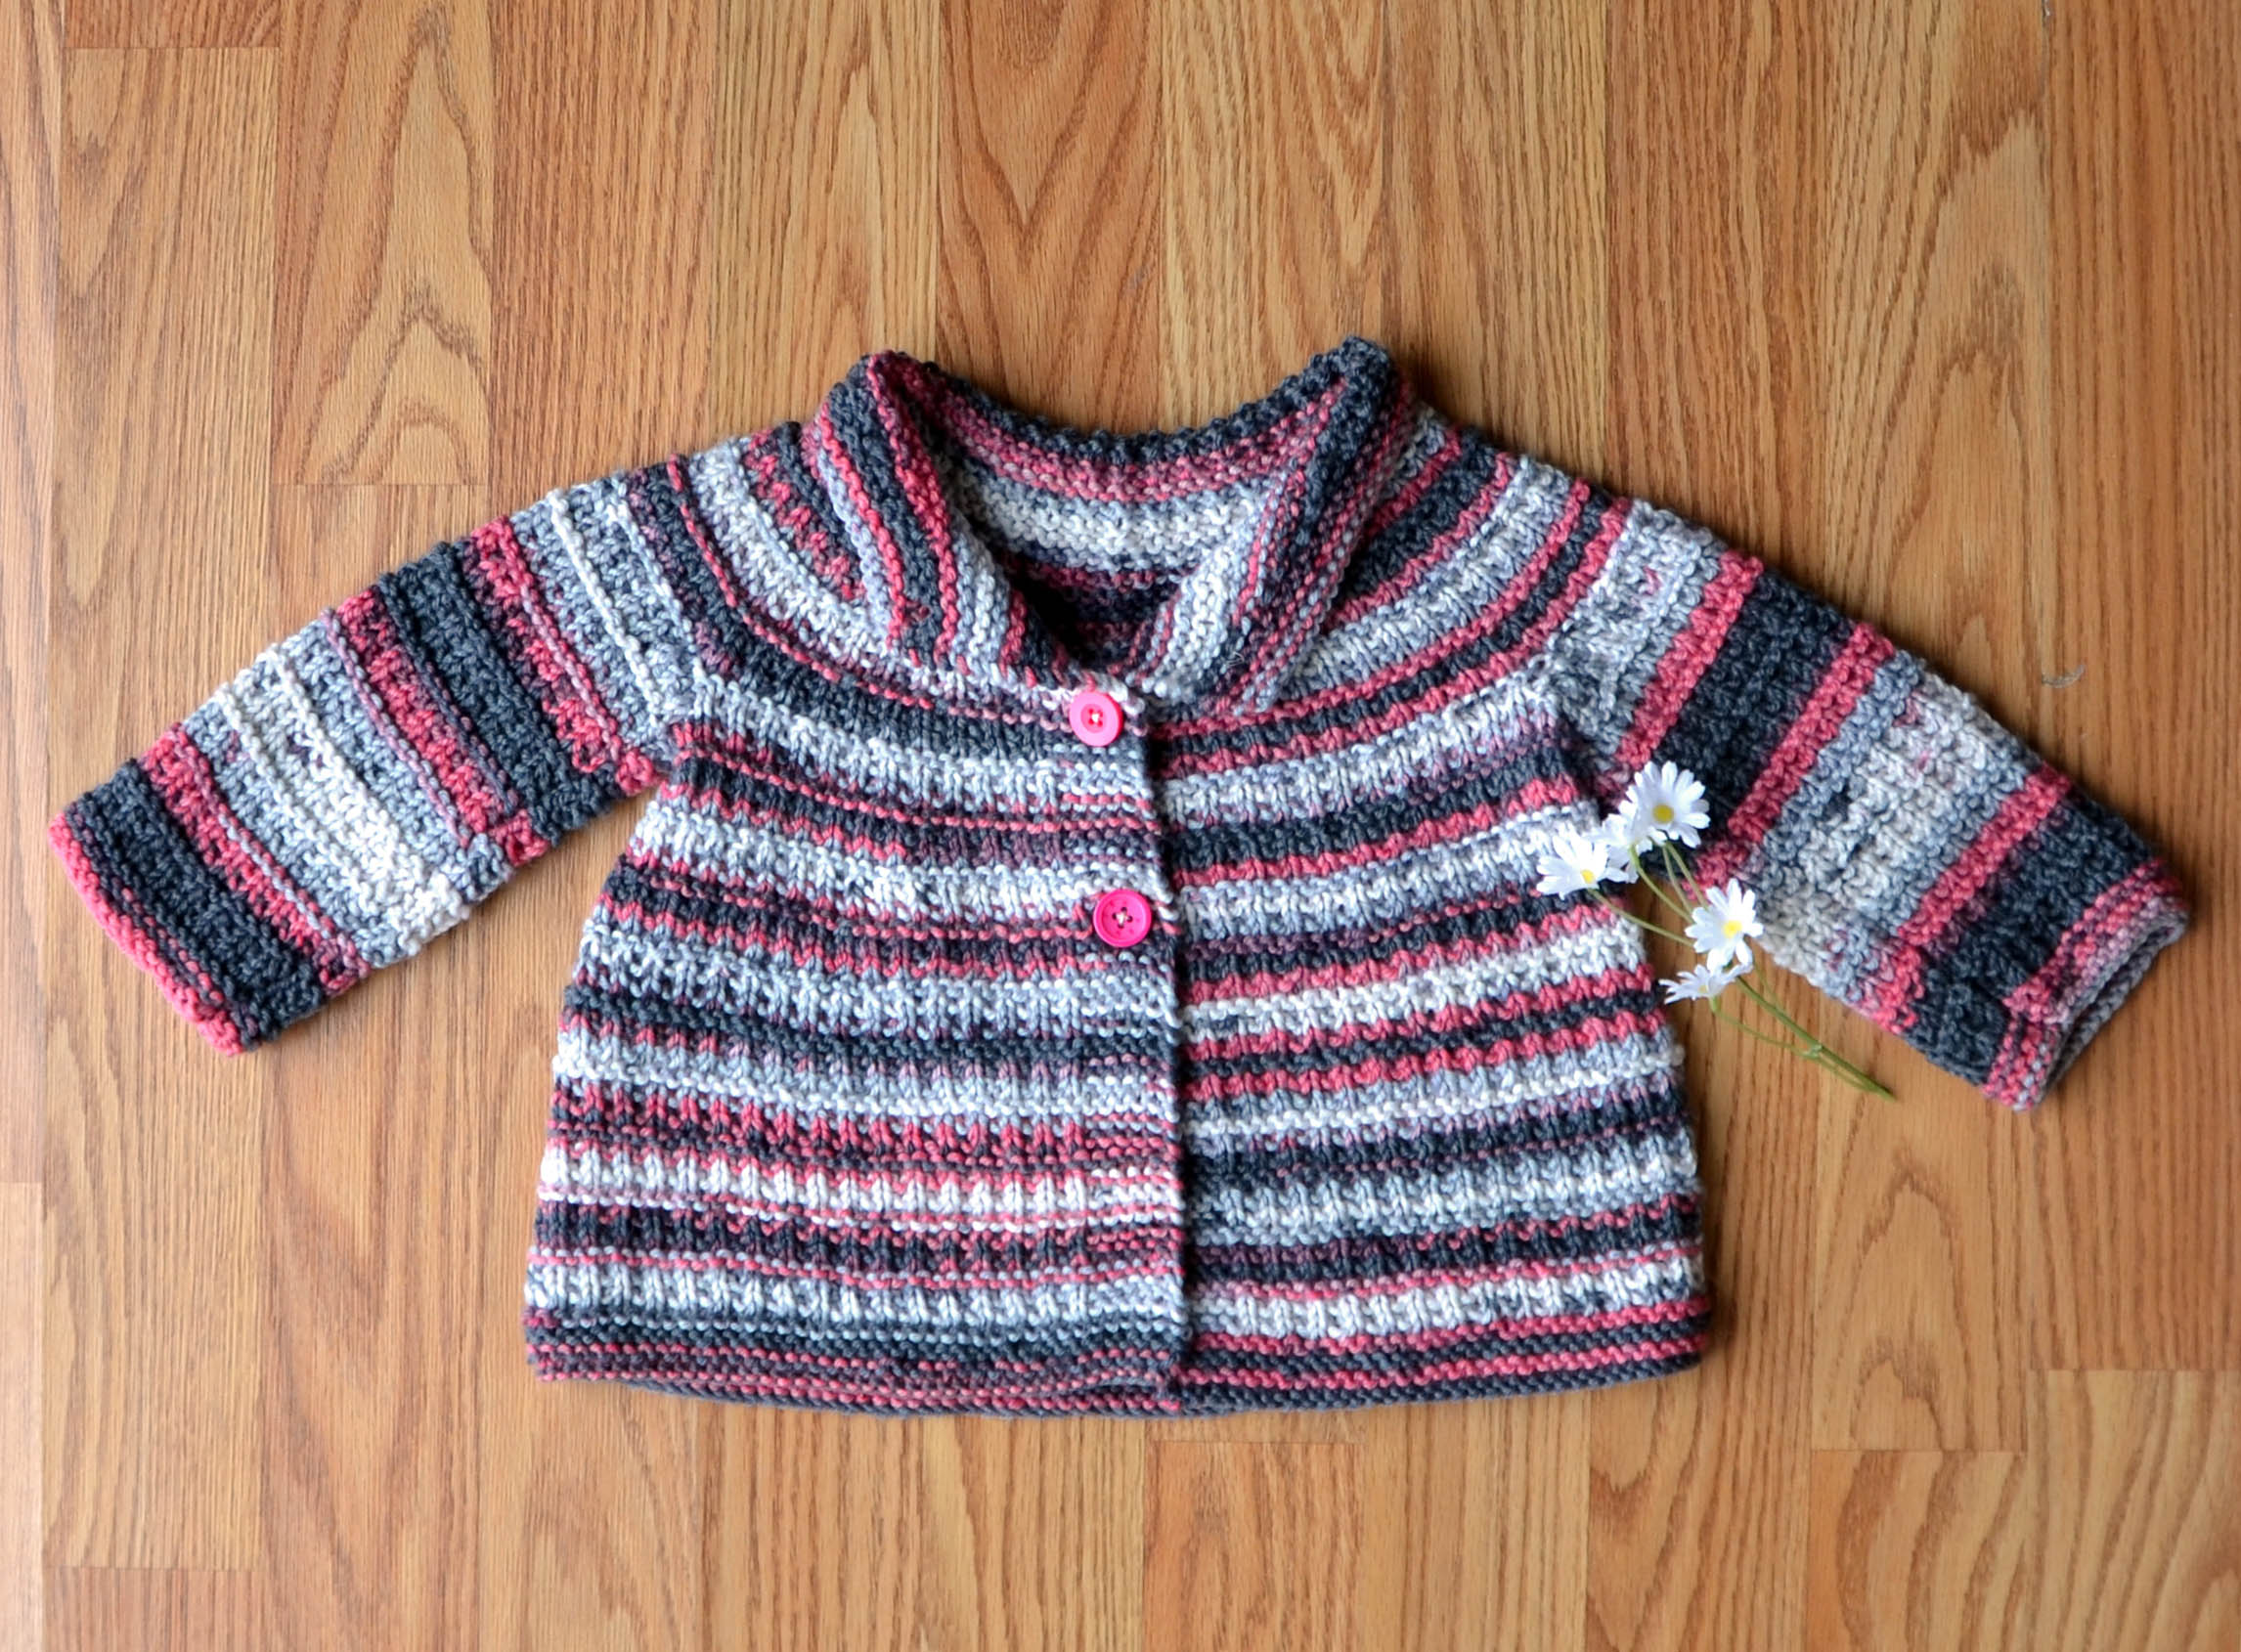
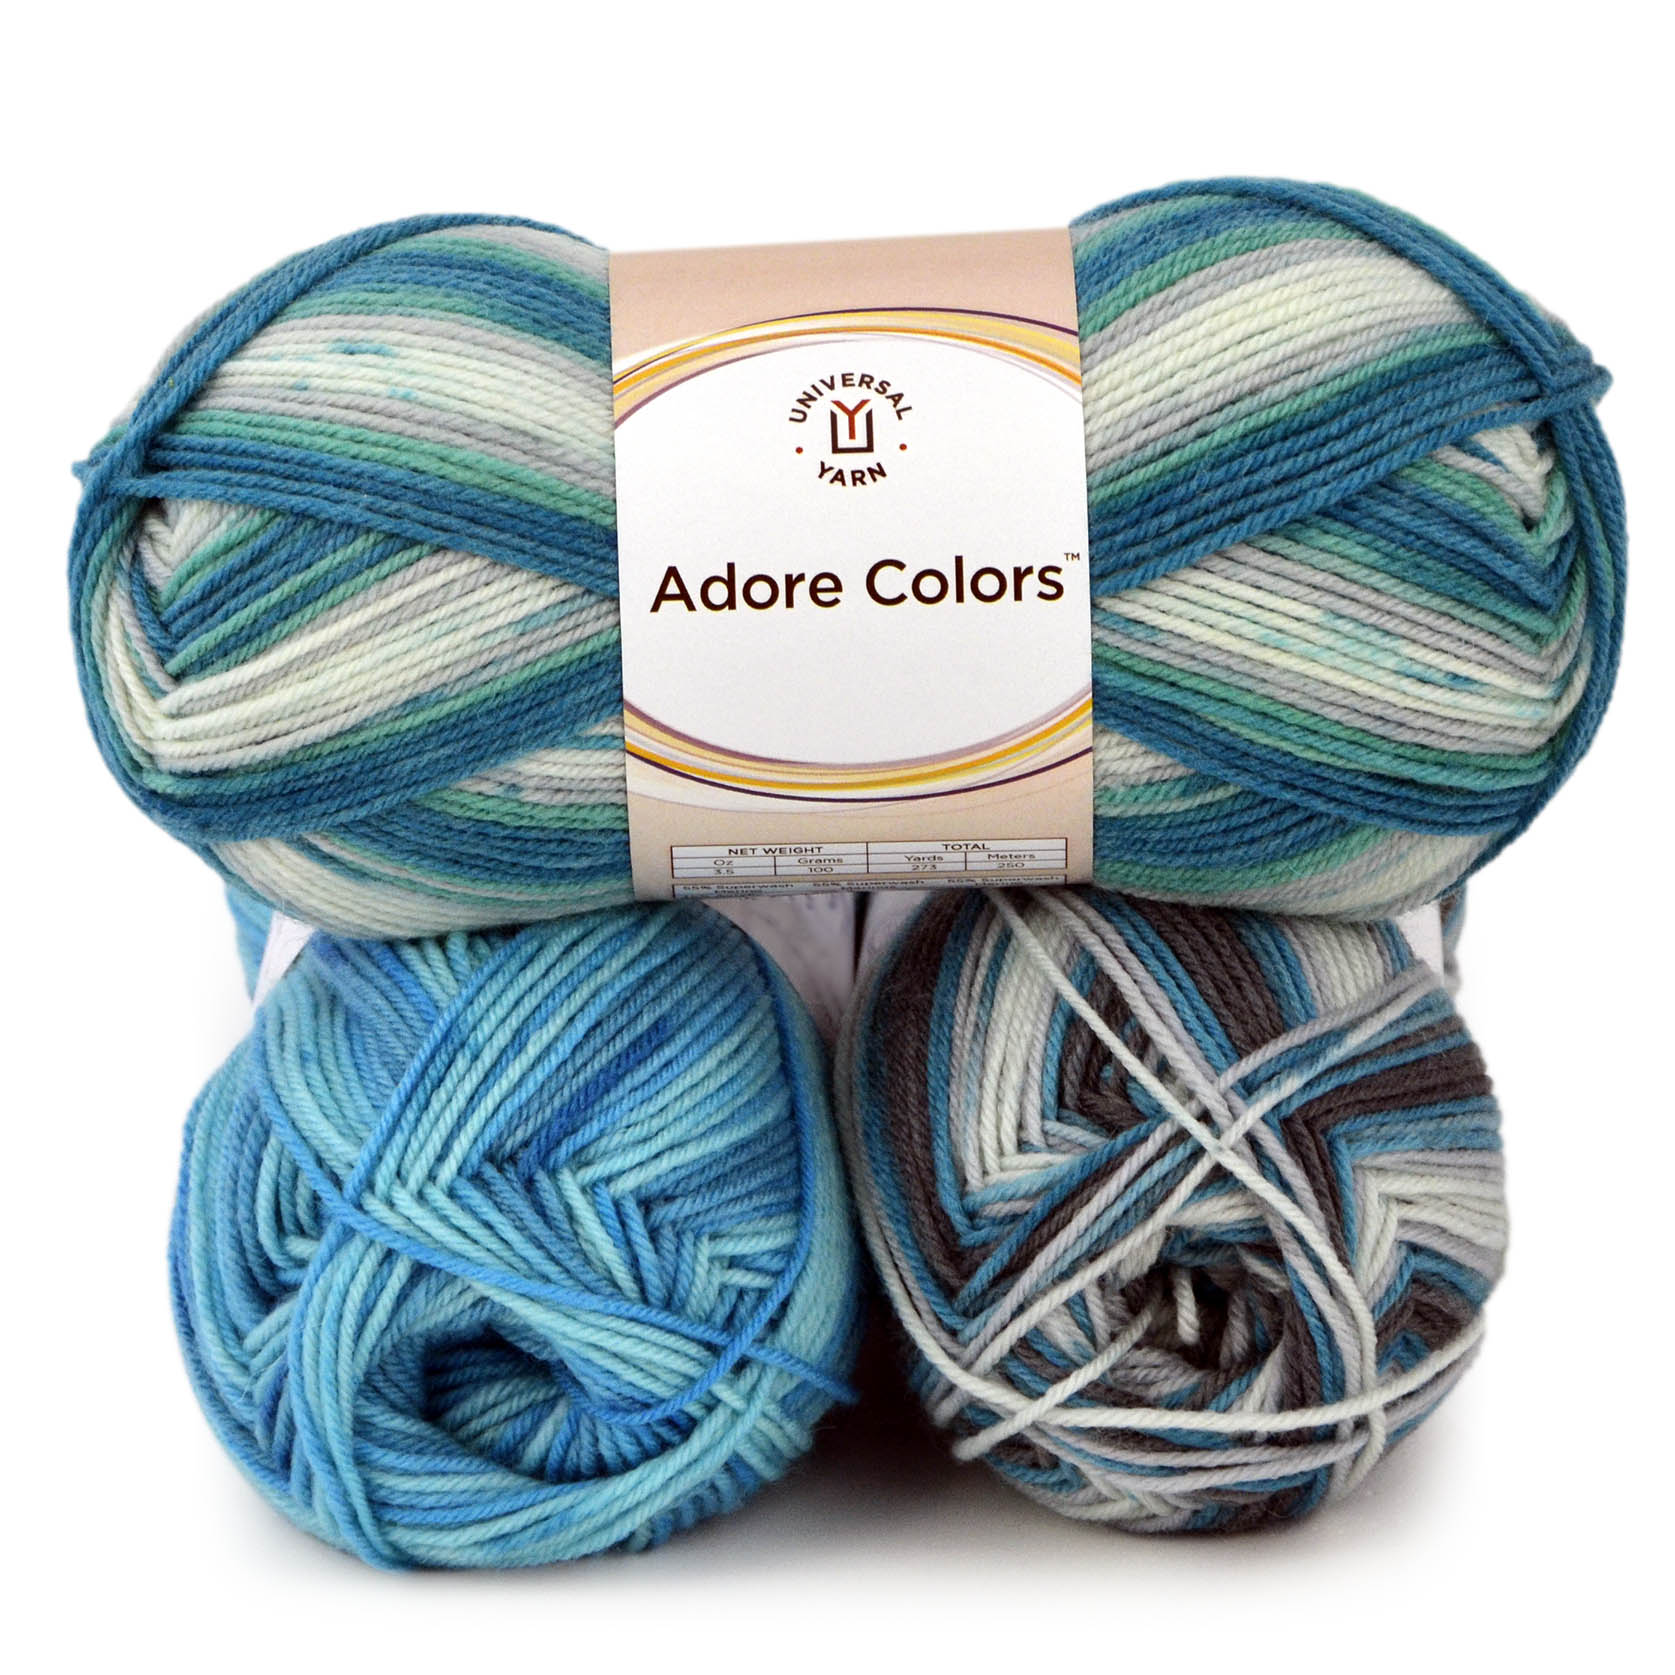
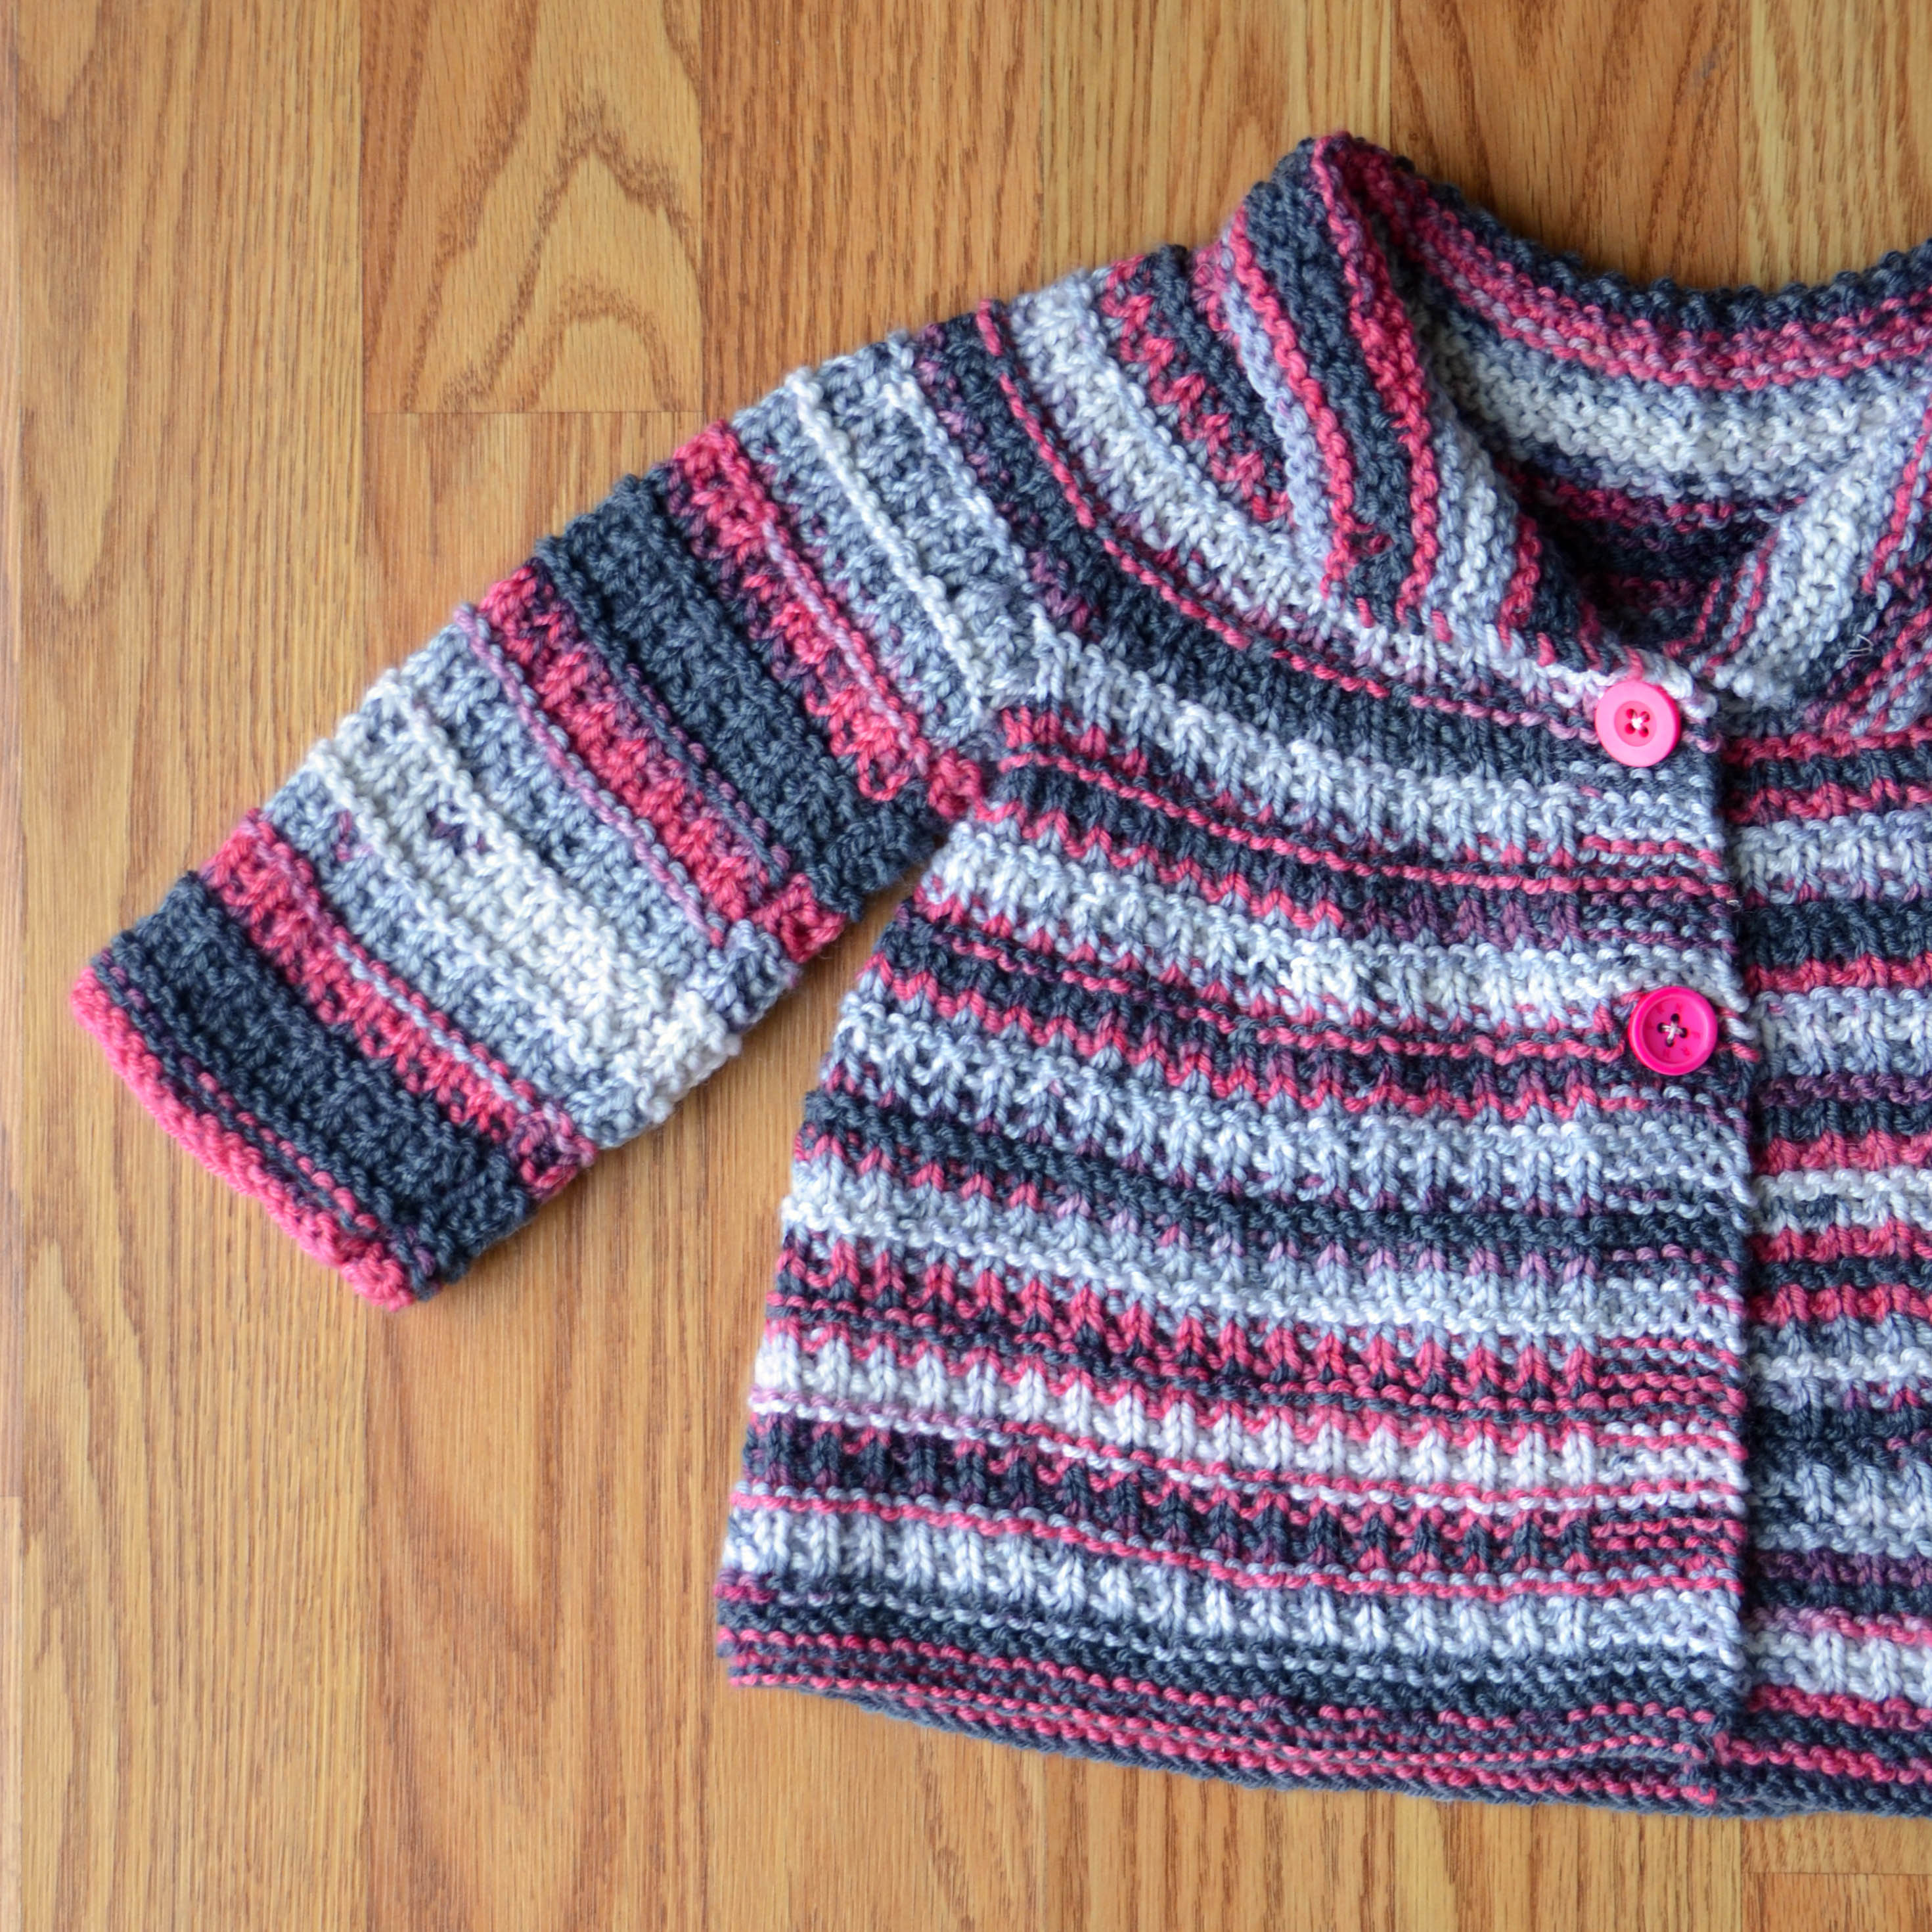
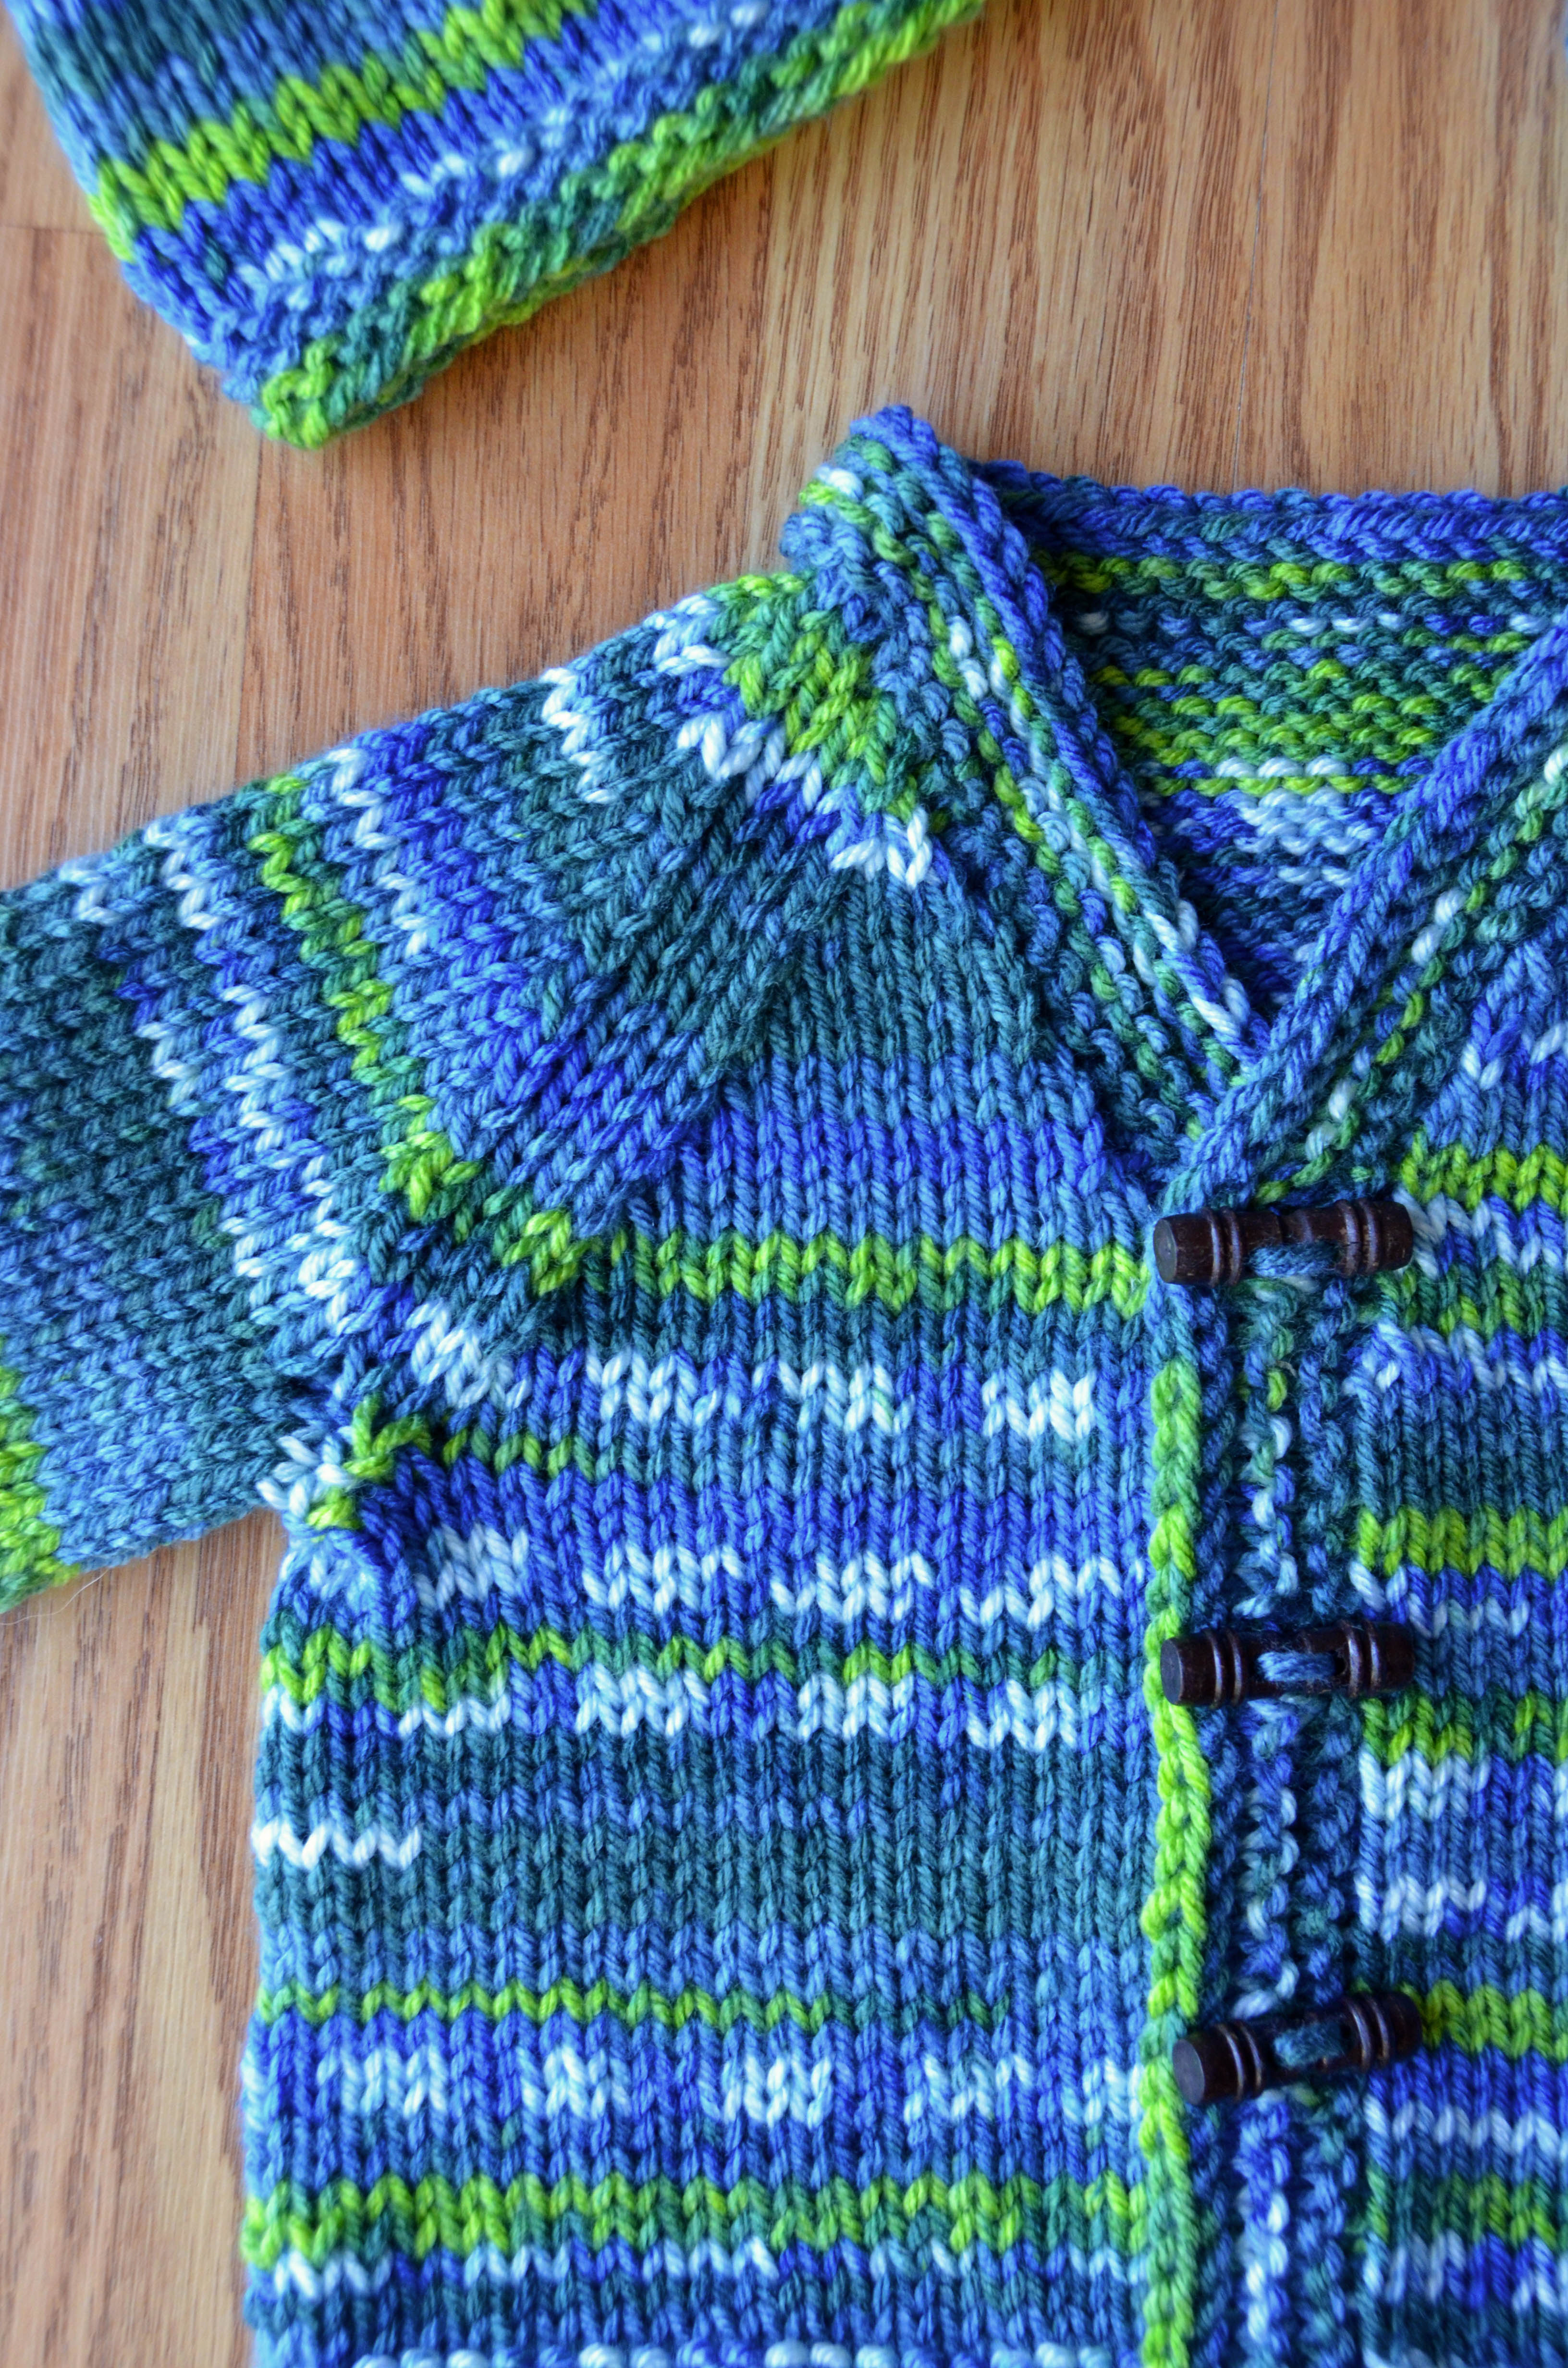
Self-striping yarn looks so cute in baby knits! It’s a great way to add color without complicating the design. Adore Colors is a great choice for this, and it doesn’t hurt that it’s a soft, machine washable blend of our anti-pilling acrylic and superwash merino. Lucky baby. Well, not just baby – this jacket is sized up to 6 years.
Work the cardi from the bottom up in one piece until you get to the yoke. Sleeves are worked flat to the yoke. Then join the sleeves and the body and work upward. You’ll want three or four buttons, depending on size. There’s one button hidden under the collar, so you can fasten it closed around the neck in case of really cold weather.
We hope you enjoy this cute little jacket – and that you and yours stay warm!
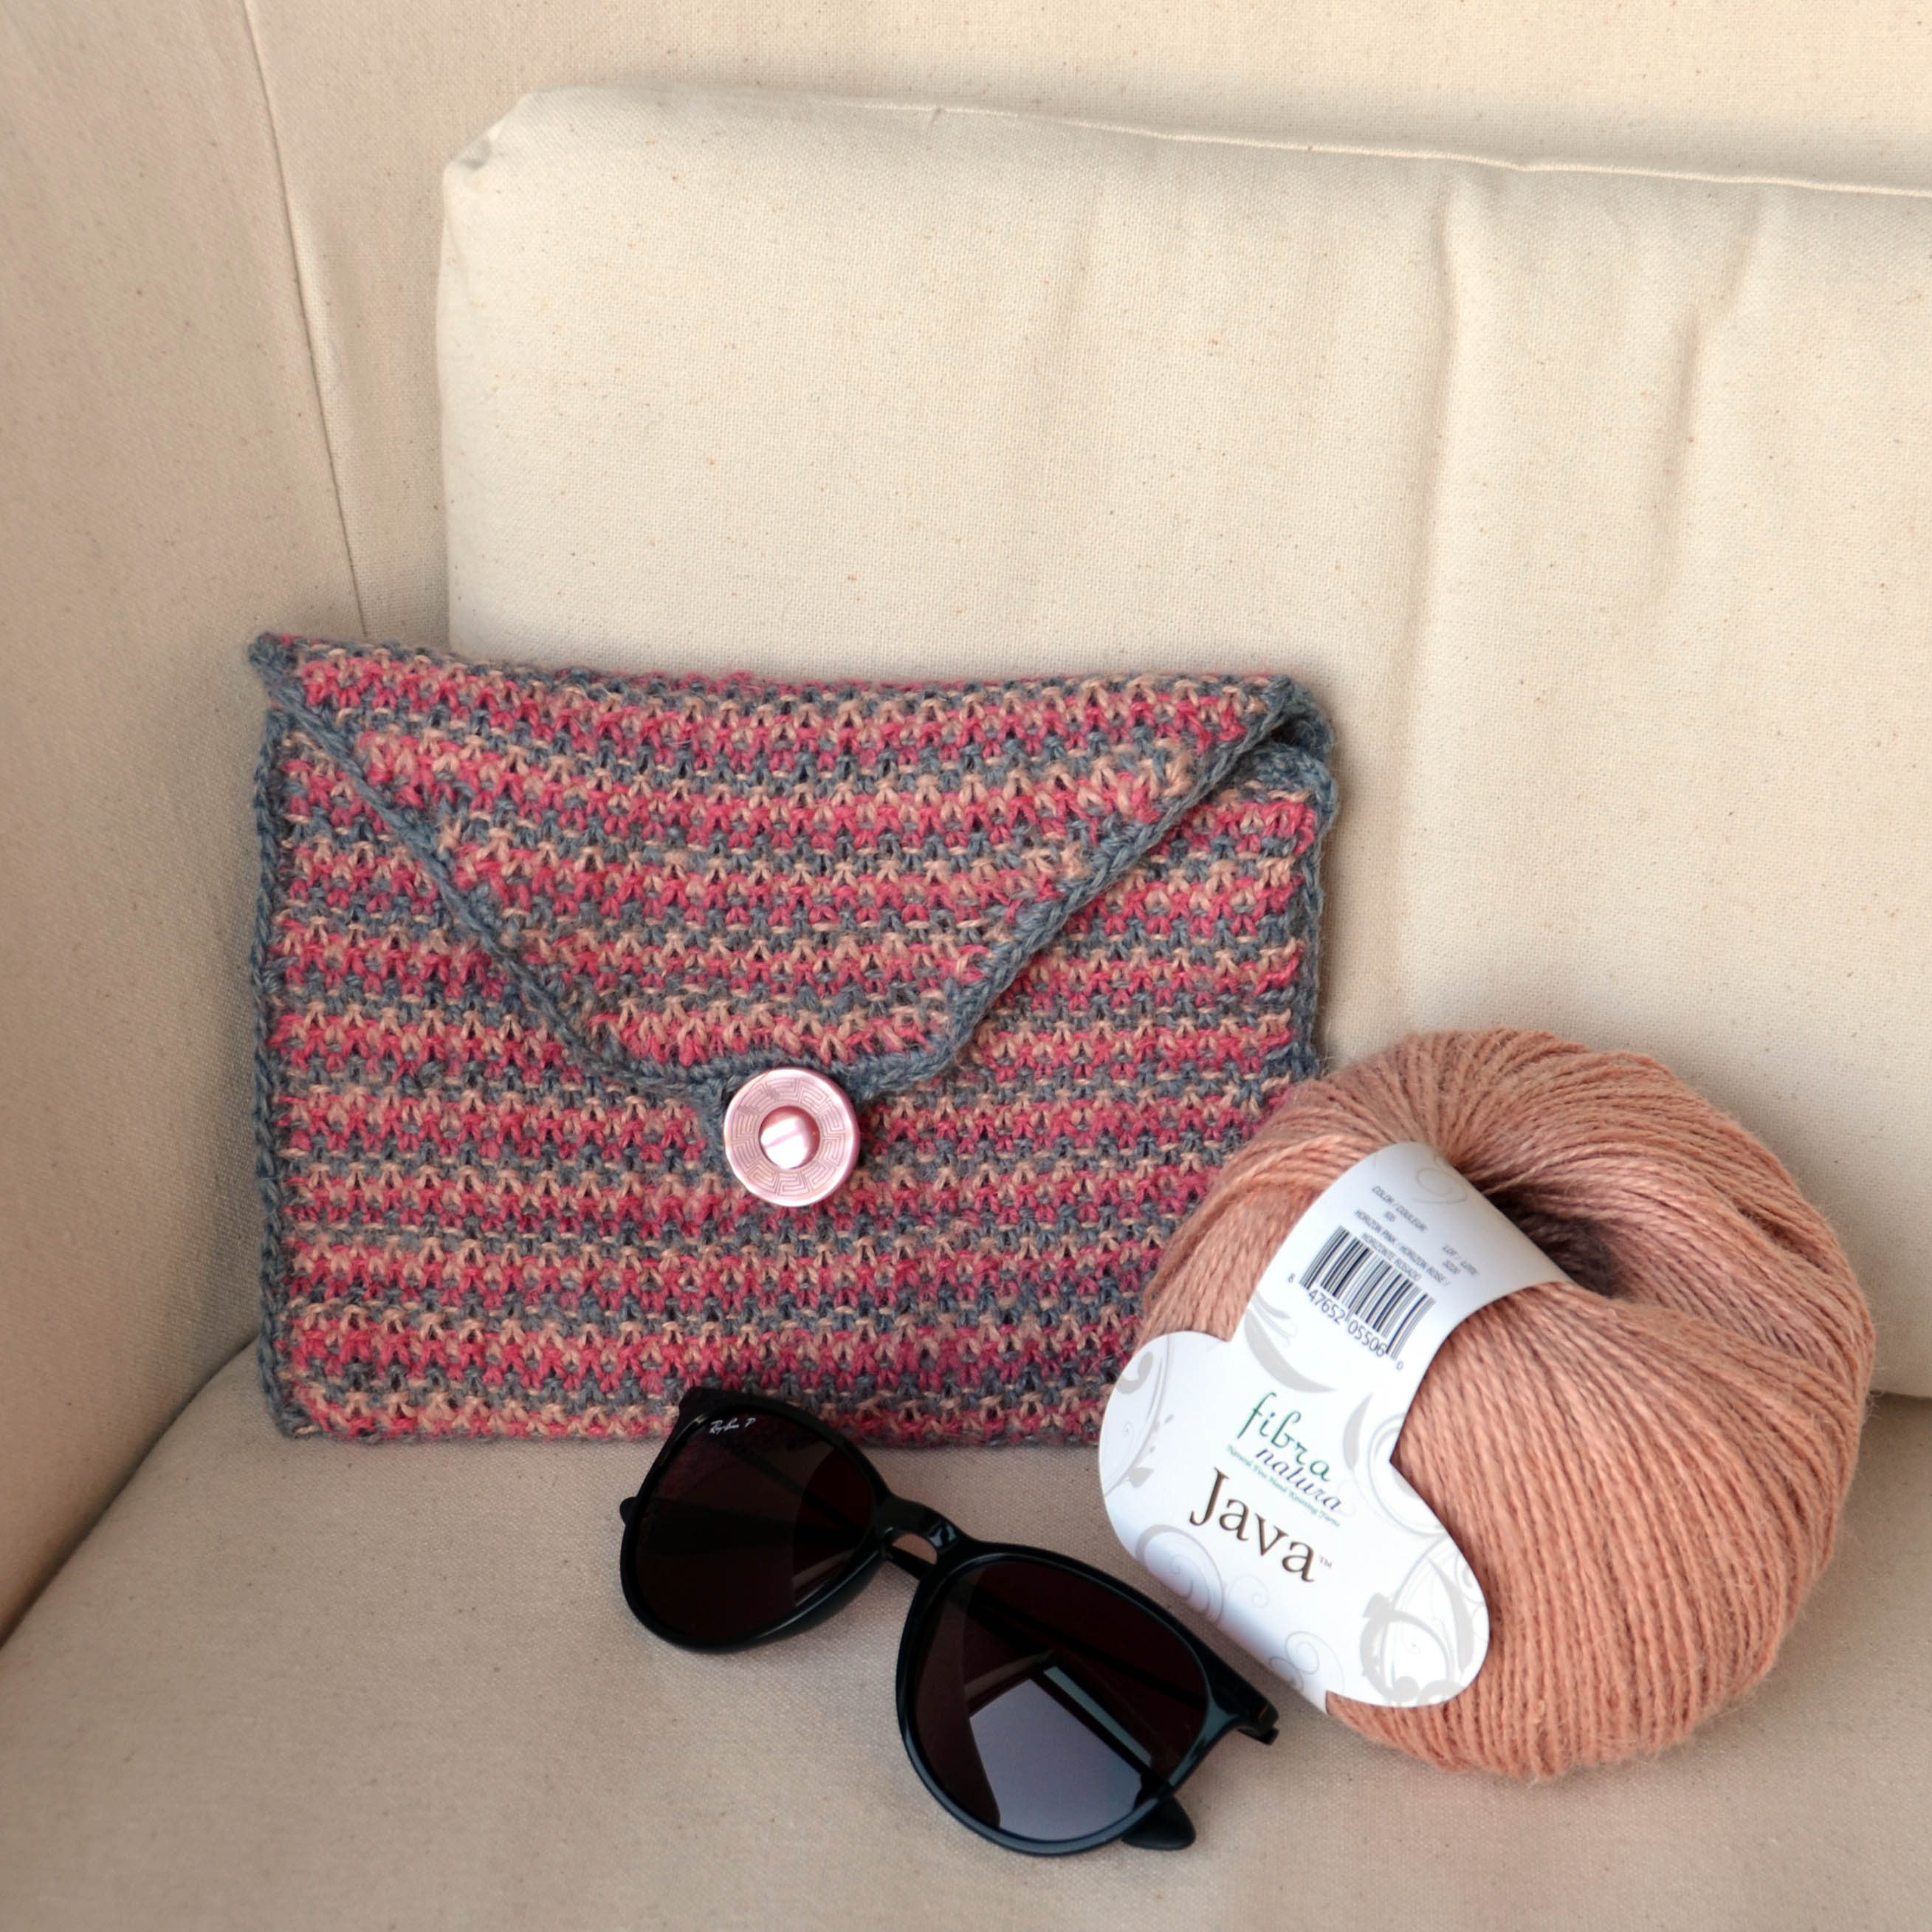
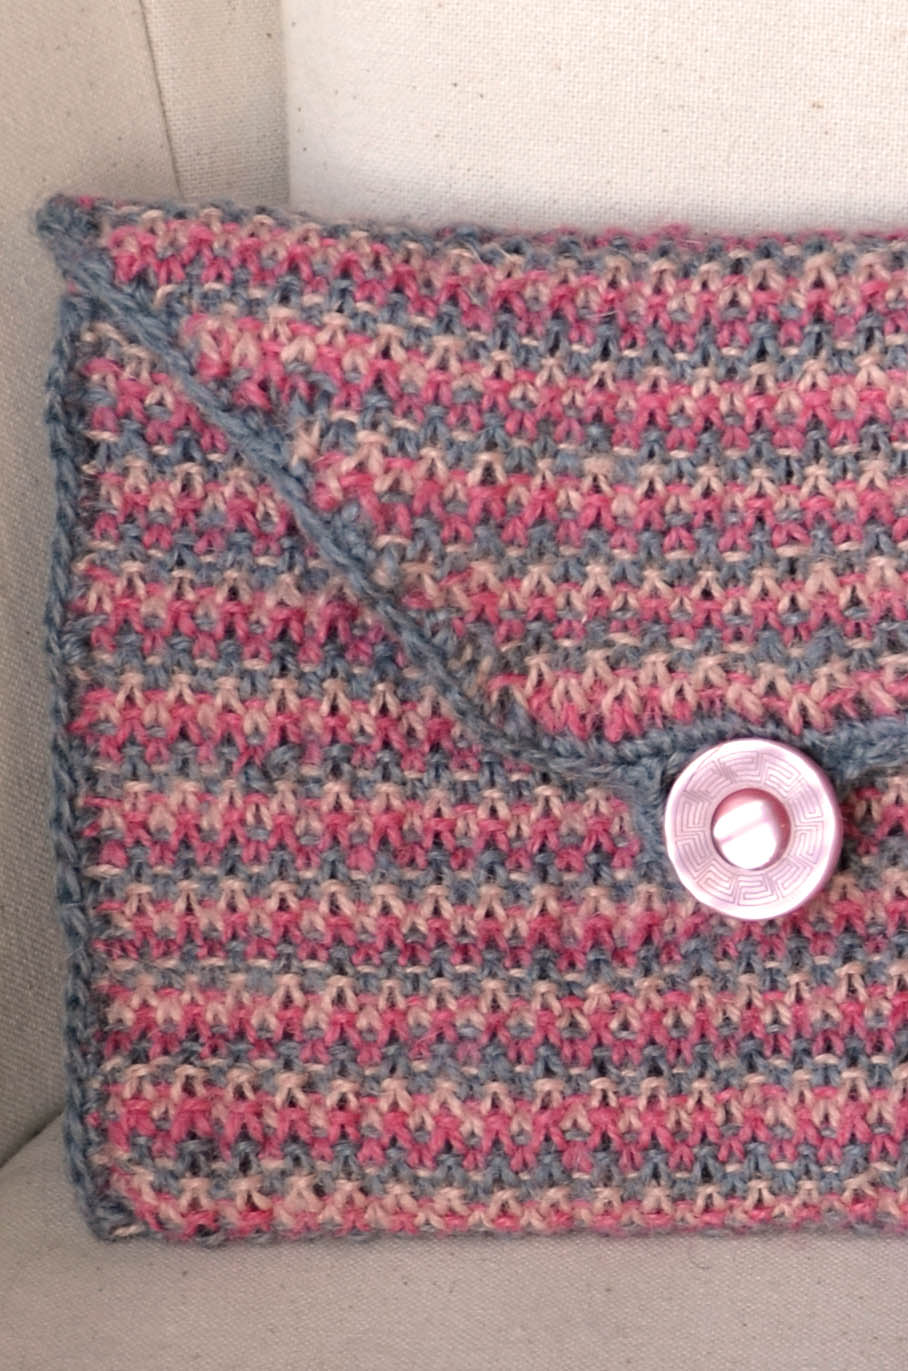
So cute! This little envelope purse is made in Fibra Natura Java (219yds/100g), a 100% hemp yarn. Fast-growing and vegan, hemp is a natural fiber that’s easy on the environment. It works beautifully in this quick-to-knit project.
The clutch is worked flat, then seams, edging, and a button loop are added in single crochet. No lining is needed.
We hope you enjoy this stylish little free project.
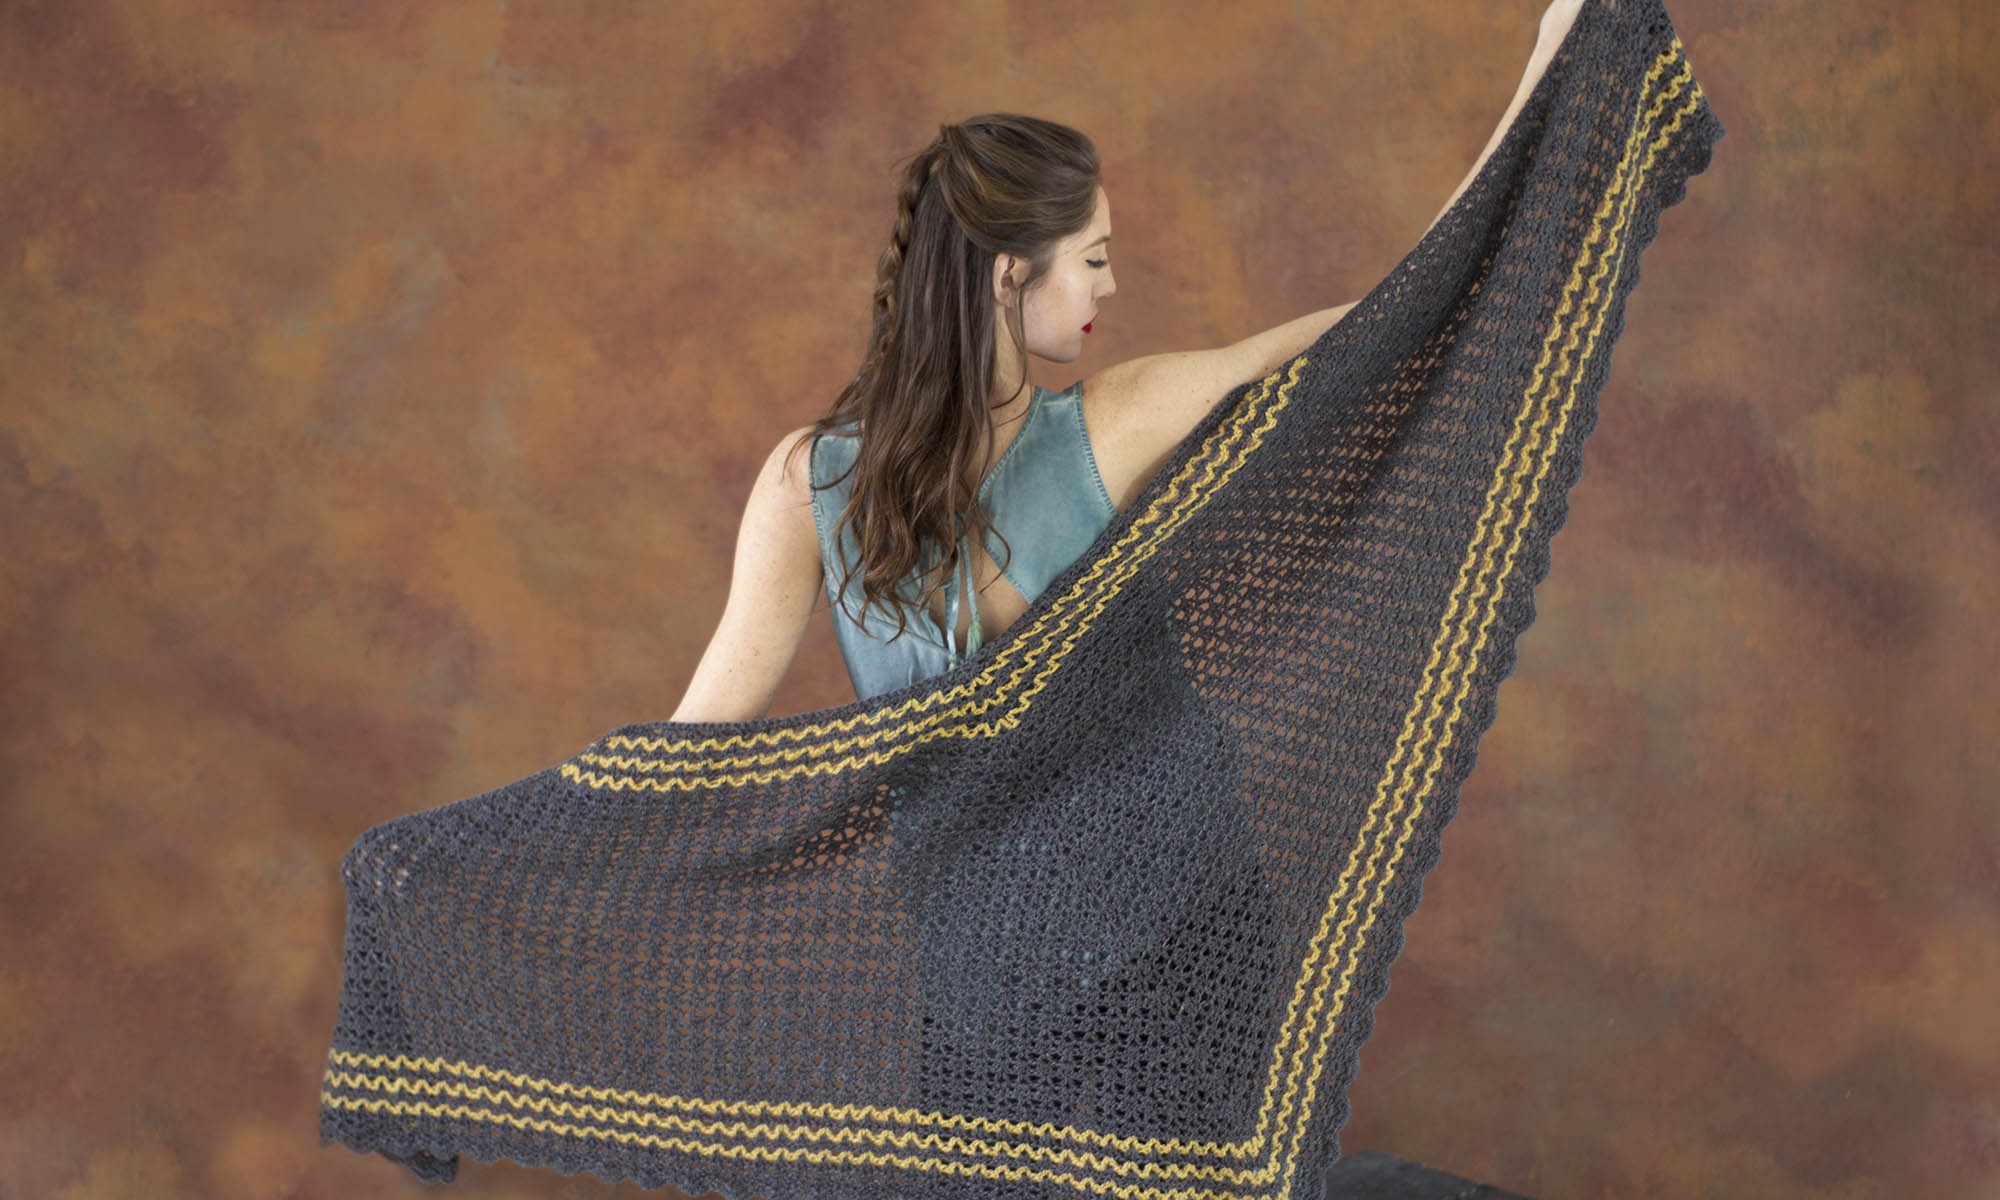
Even though we’re in the depths of winter, that doesn’t mean things have to be drab and bleak. This Chevron Wrap is a colorful delight, and the selection of Uptown is a good one. With 60+ colors, Uptown Worsted anti-pilling acrylic is a great choice for mixing and matching stripes for whatever palette pleases you. As pictured, this features four of our brand new colors for Spring:
This is an easy knit. It’s a two-row repeat with only one color per row. The stitch repeat is a piece of cake – knit a few, increase, knit a few, decrease. The centered decreases create the columns of stitches that rise into the next color.
Wouldn’t this also look lovely widened, as a colorful home decor throw?
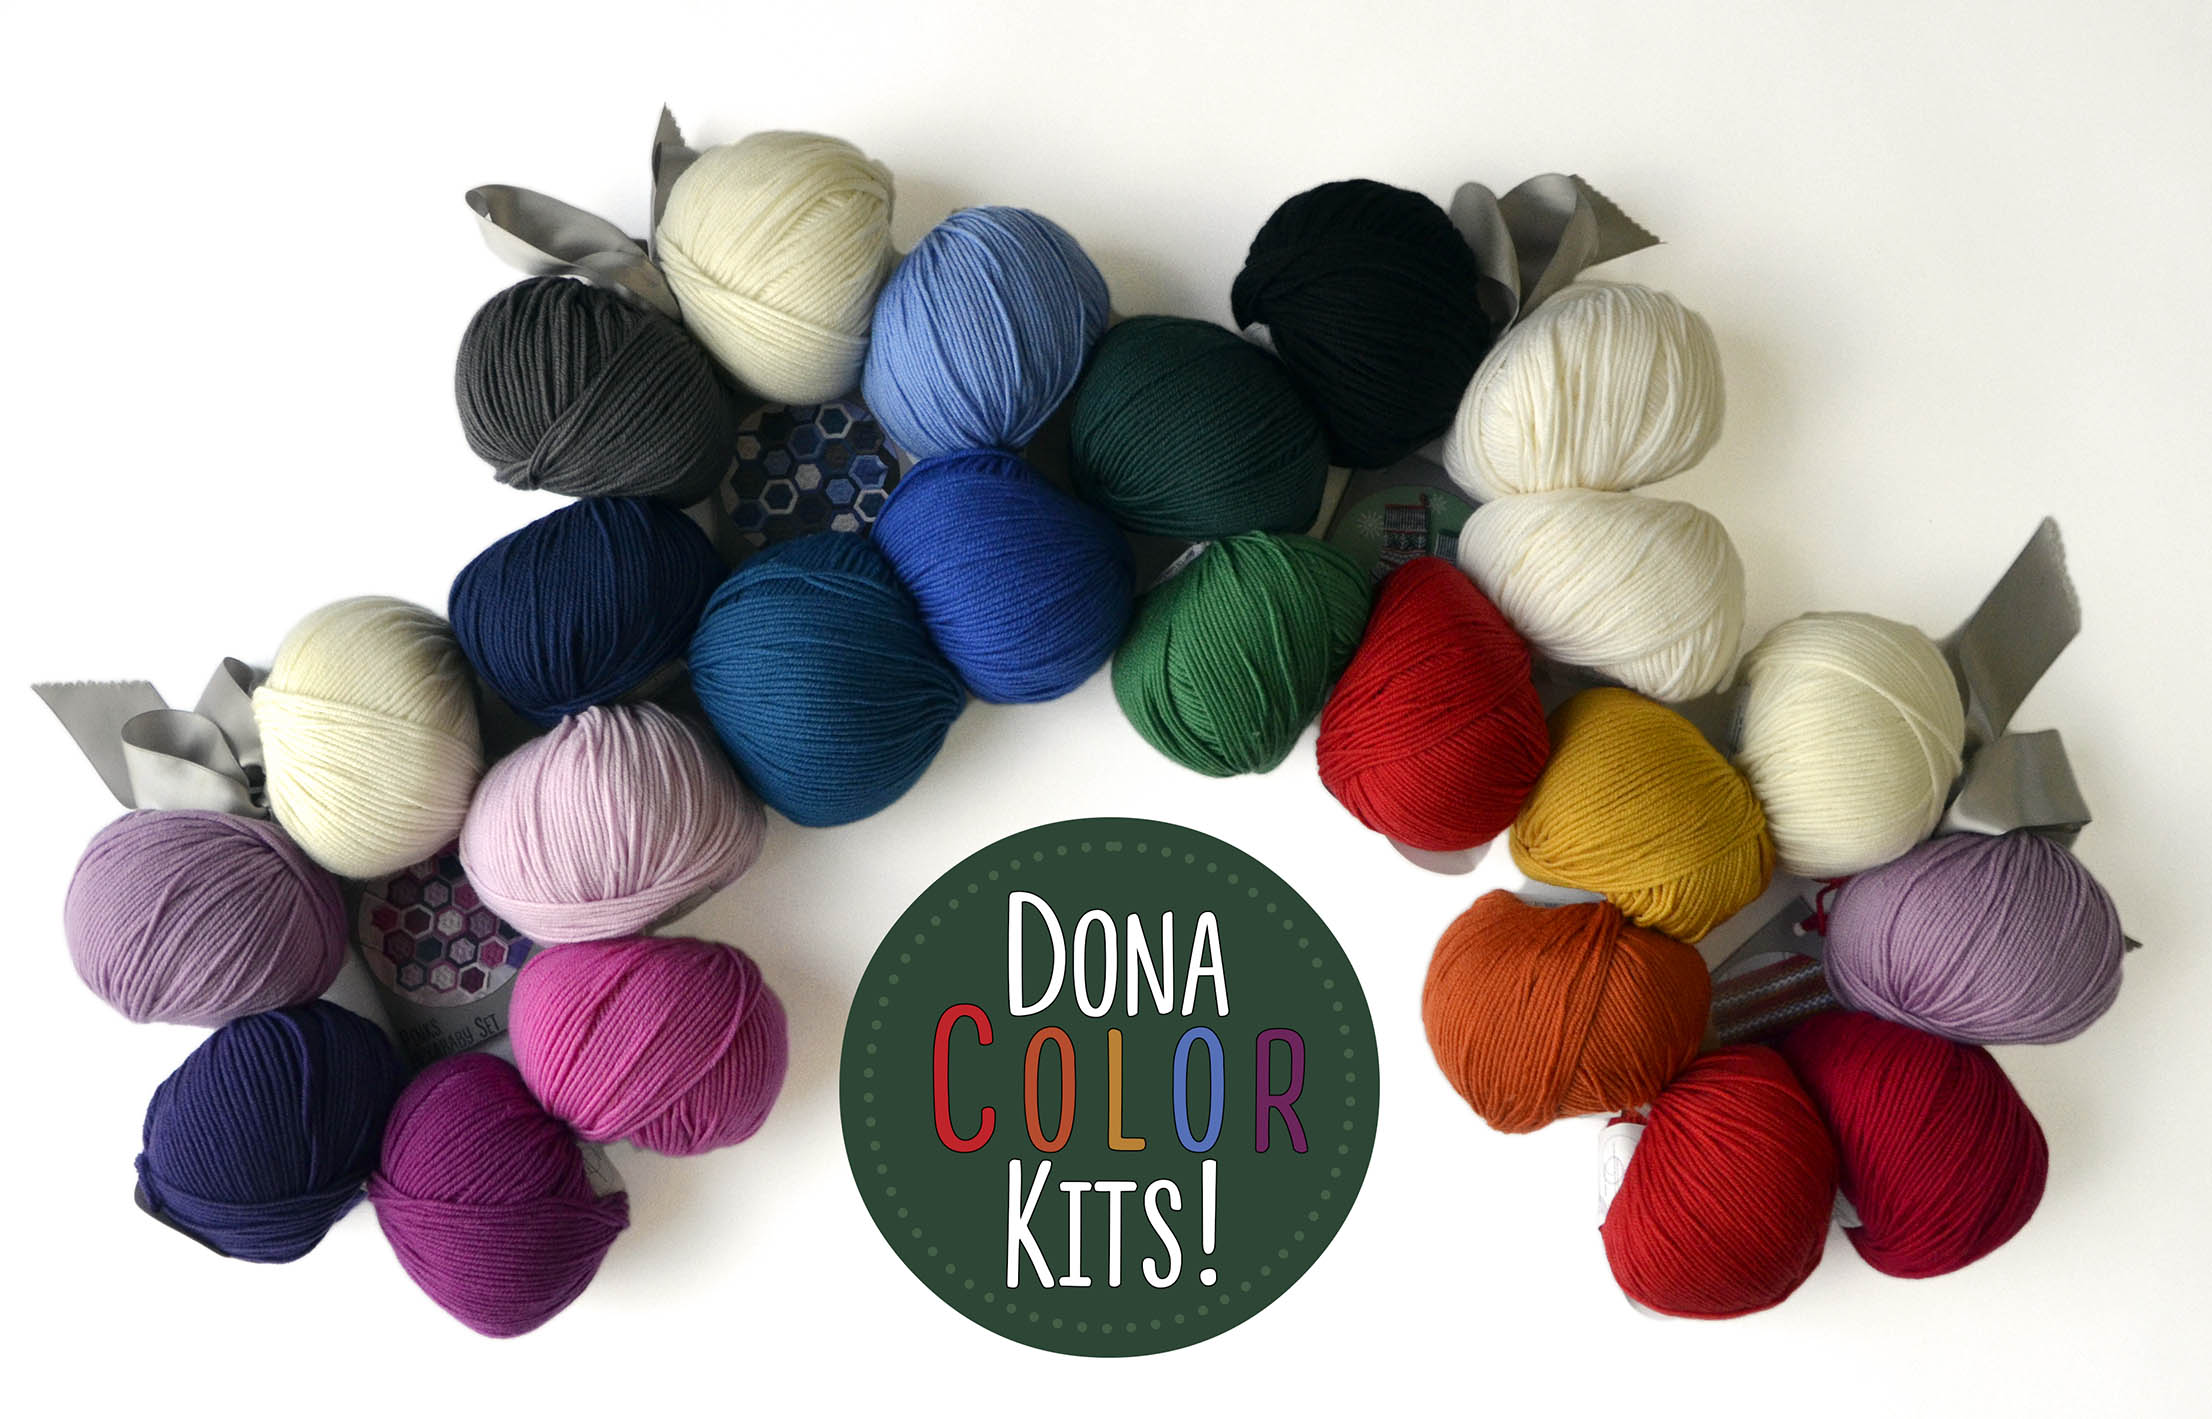
You’ve got everyone else covered for the holidays, but what do YOU want?
Did you get a gift certificate to your LYS? Need something to point to for that well-meaning relative? You know the one – they want to do right, but then they panic and get you a bunch of random skeins from a grab bag. Sure, it’s the thought that counts, but when you say “you shouldn’t have!” maybe you’d rather not mean it. It’s so much easier to point at a color kit and discreetly clear your throat.
This set shows why we love self-patterning Uptown Tapestry so much. A basic knit turns colorful so easily!
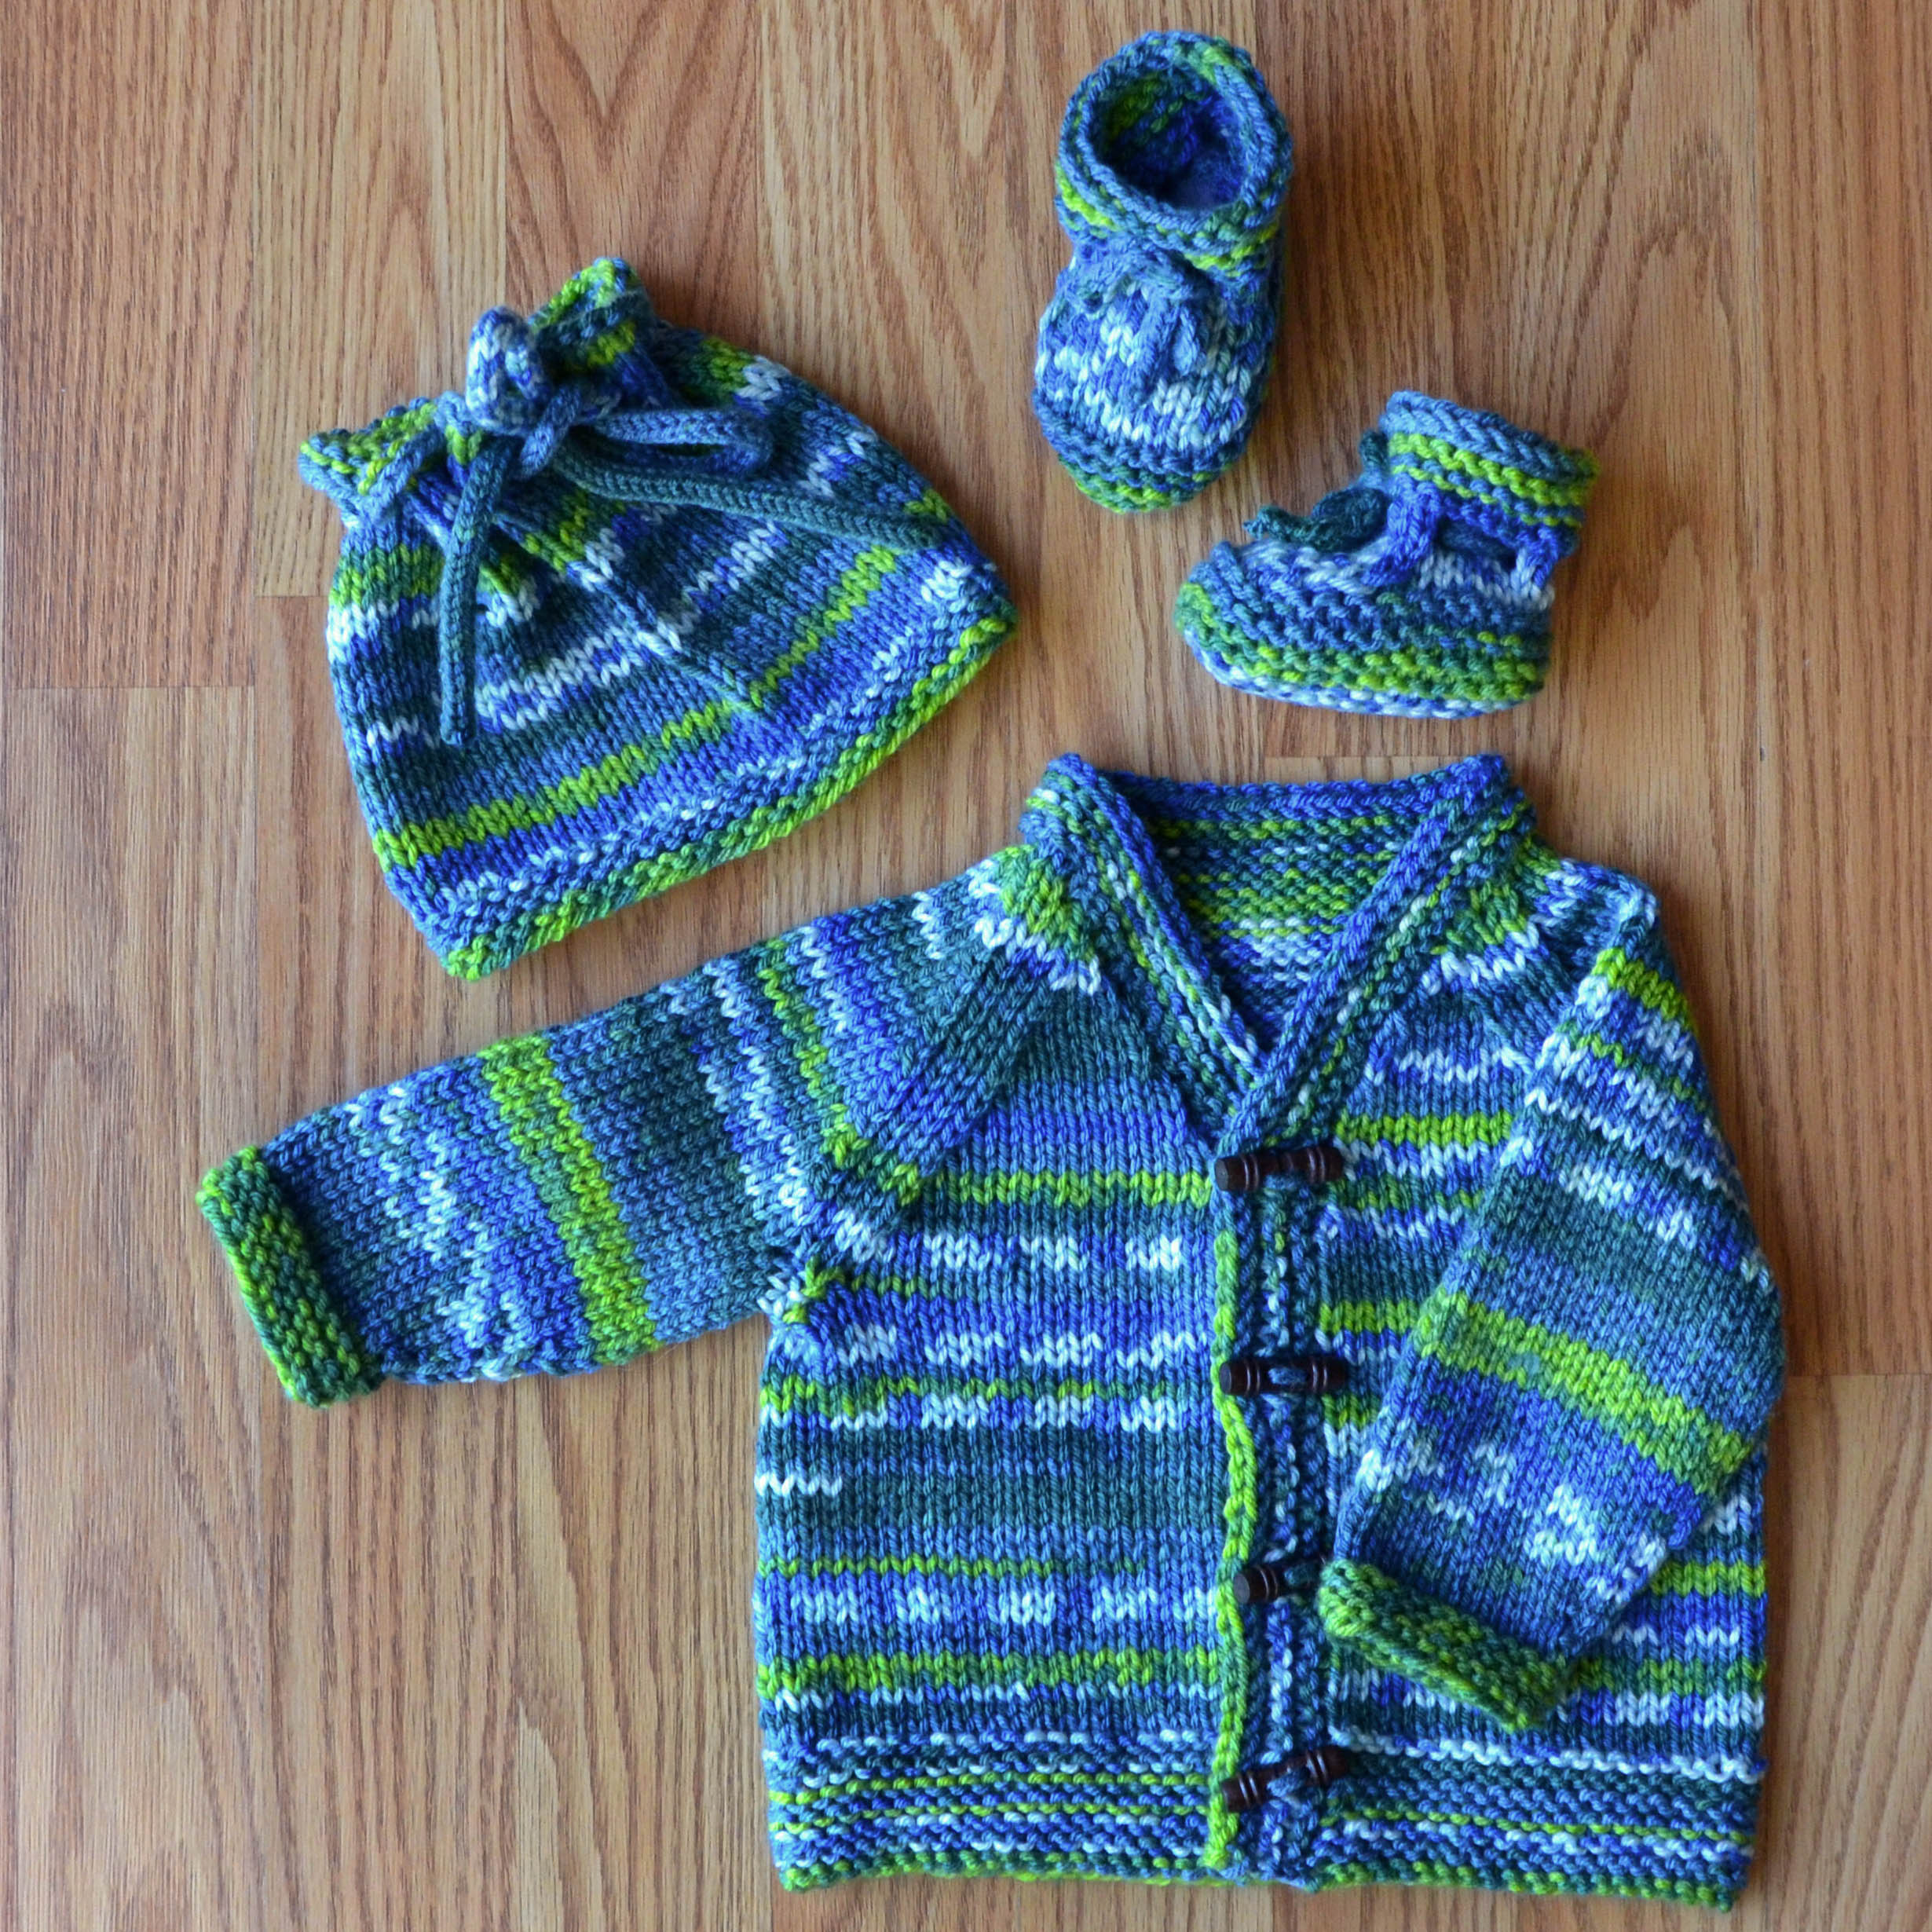
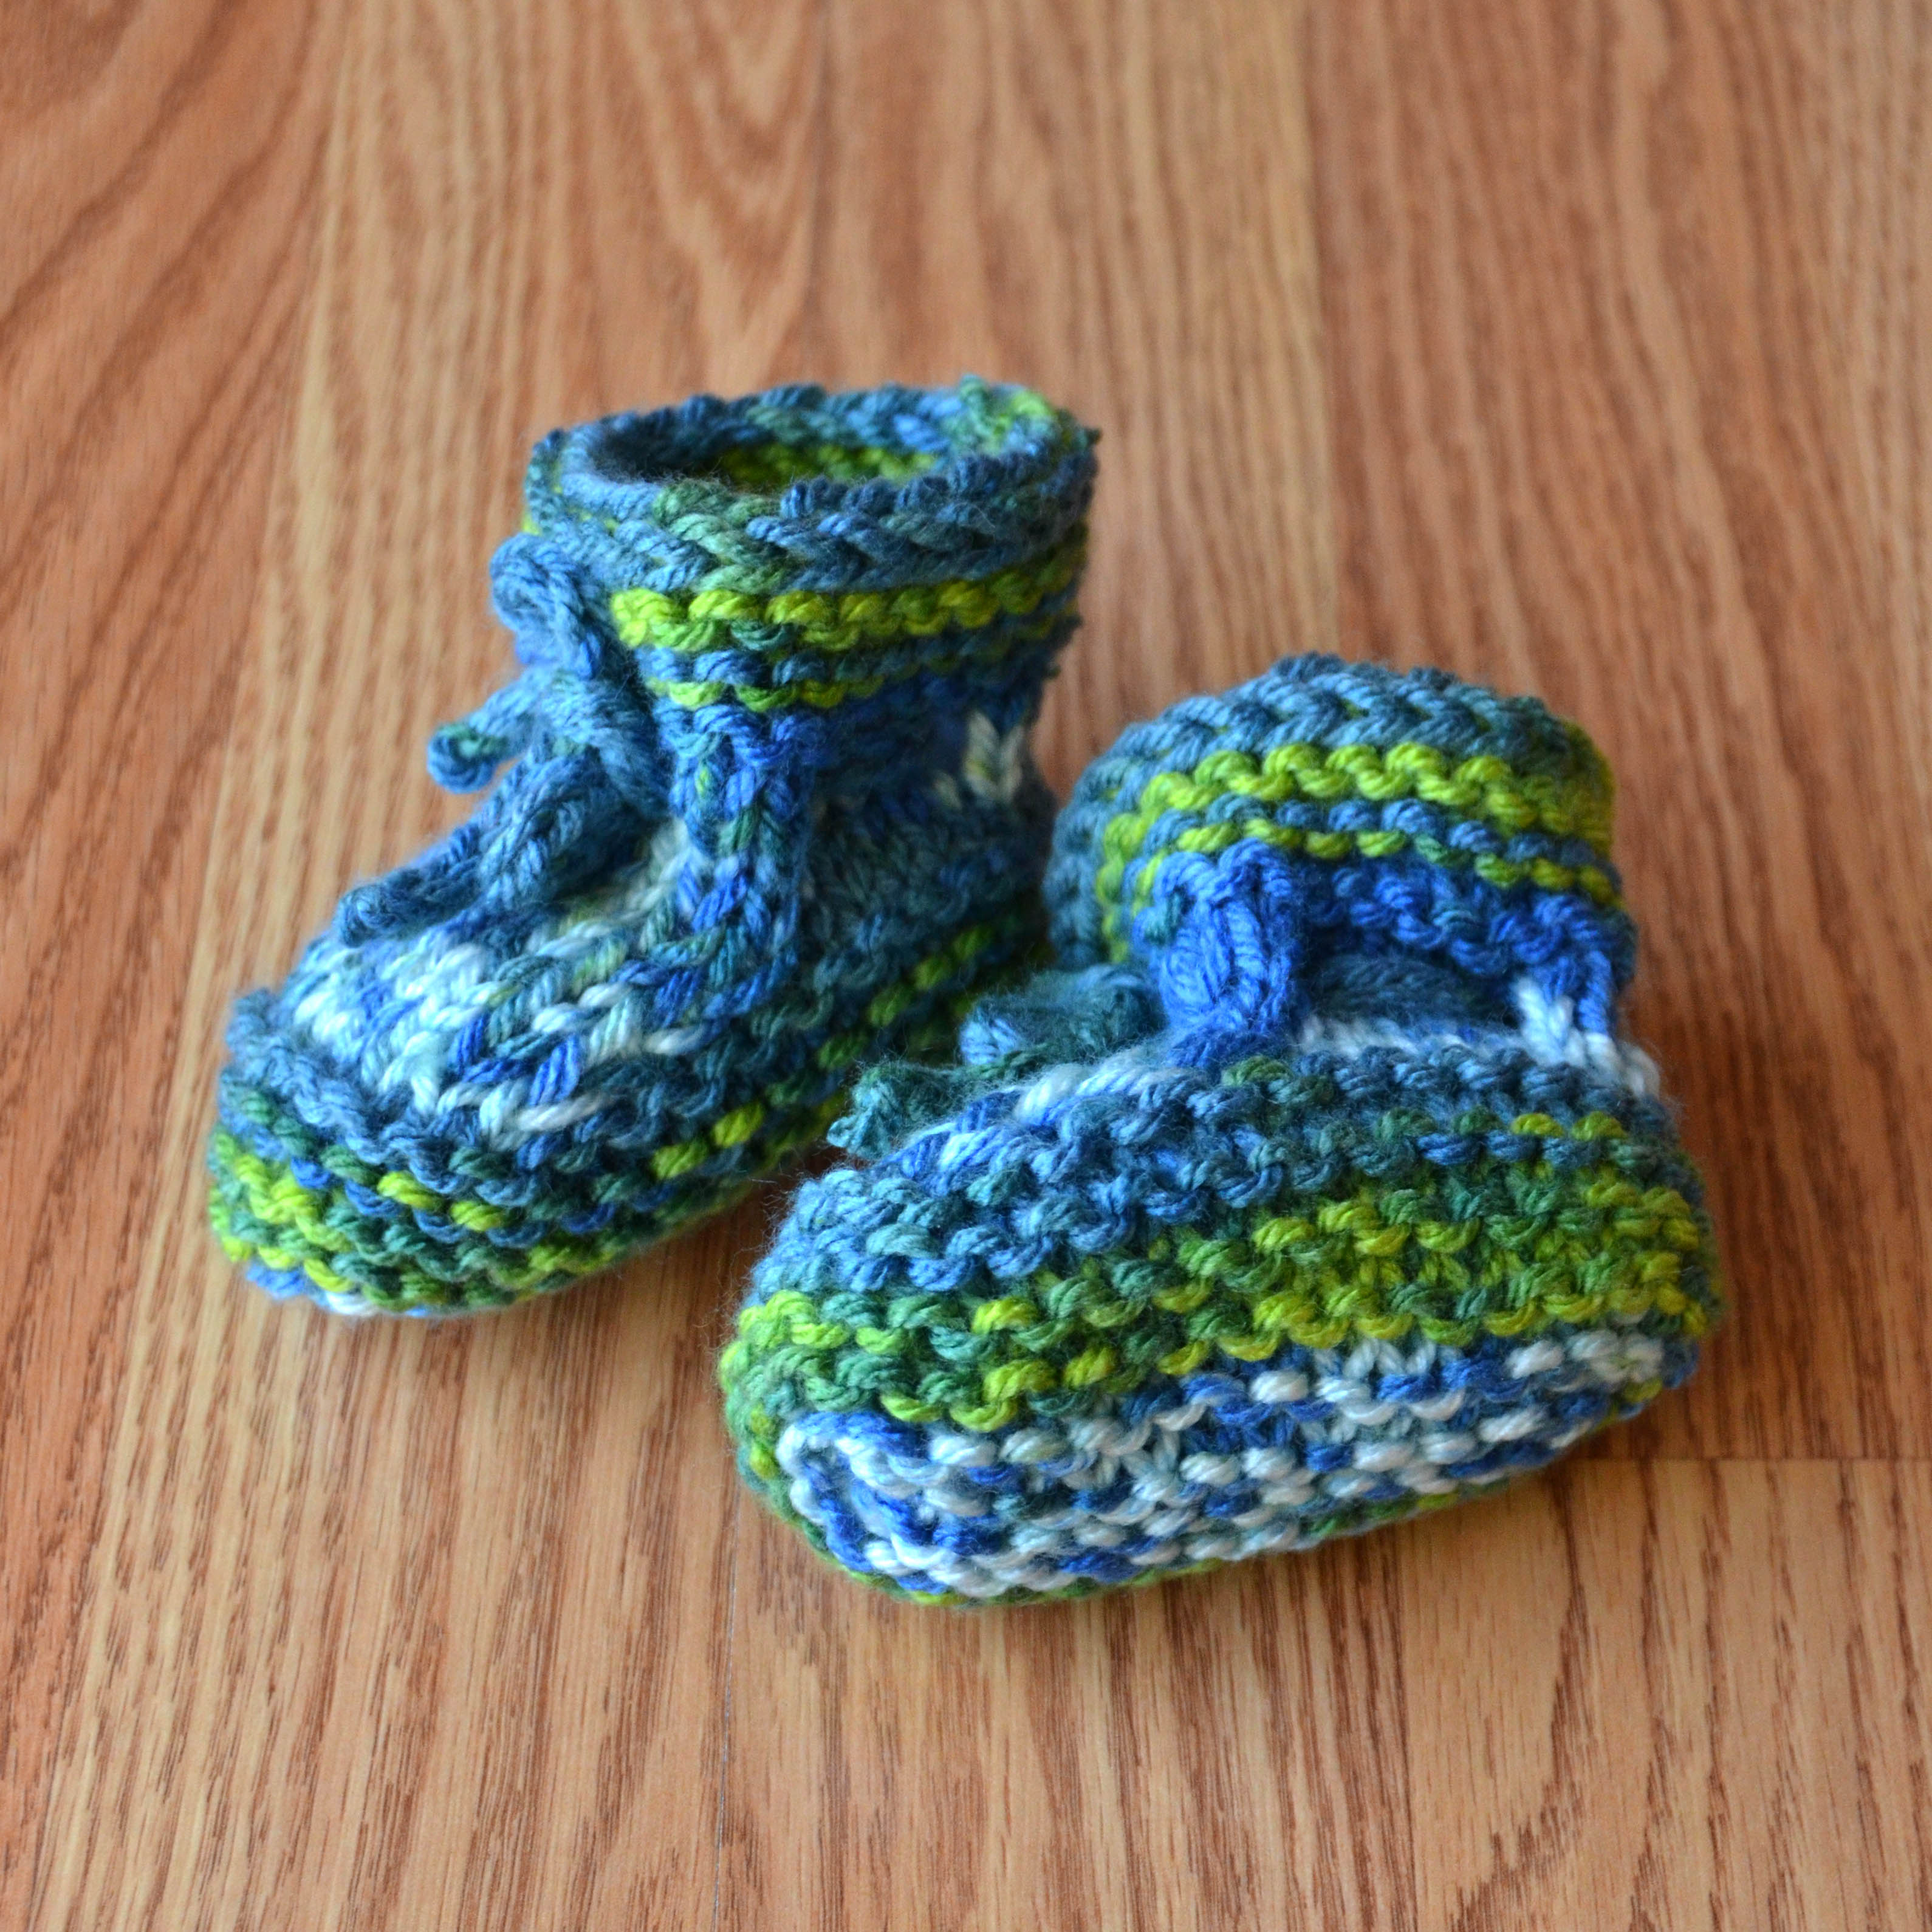
This is a cute little 3-skein set. A classic kid cardi, with hat and booties.
The cardi is knit in one piece from the bottom up. If you want to get sleeves and each bootie to match, you’ll want to find the same place in the patterning on your balls. Of course, babies look awfully cute in hand-knits, matching or not.
We hope you enjoy this cute little set. Happy knitting!
After my successful sampling with my herringbone scarf a couple of weeks ago, I got set to wind a much larger warp – enough to make fabric for two moto jackets. I neglected to get photos of the warping process. I used the warping board I’ve shared photos of on this blog before. And this warp was so long, I almost didn’t have enough warping pegs!
Here are the specs for this giant piece of fabric I’m about to weave:
My pattern calls for 2 1/4 yds of 55″ wide fabric. Because my loom has a maximum width of 36″, I had to do a few calculations in order to get the total square yardage I need. What I came up with was a really long warp!
280″ of tweedy goodness.
432 ends means 432 heddles to thread. And then, 432 ends to feed through the reed. Whew!
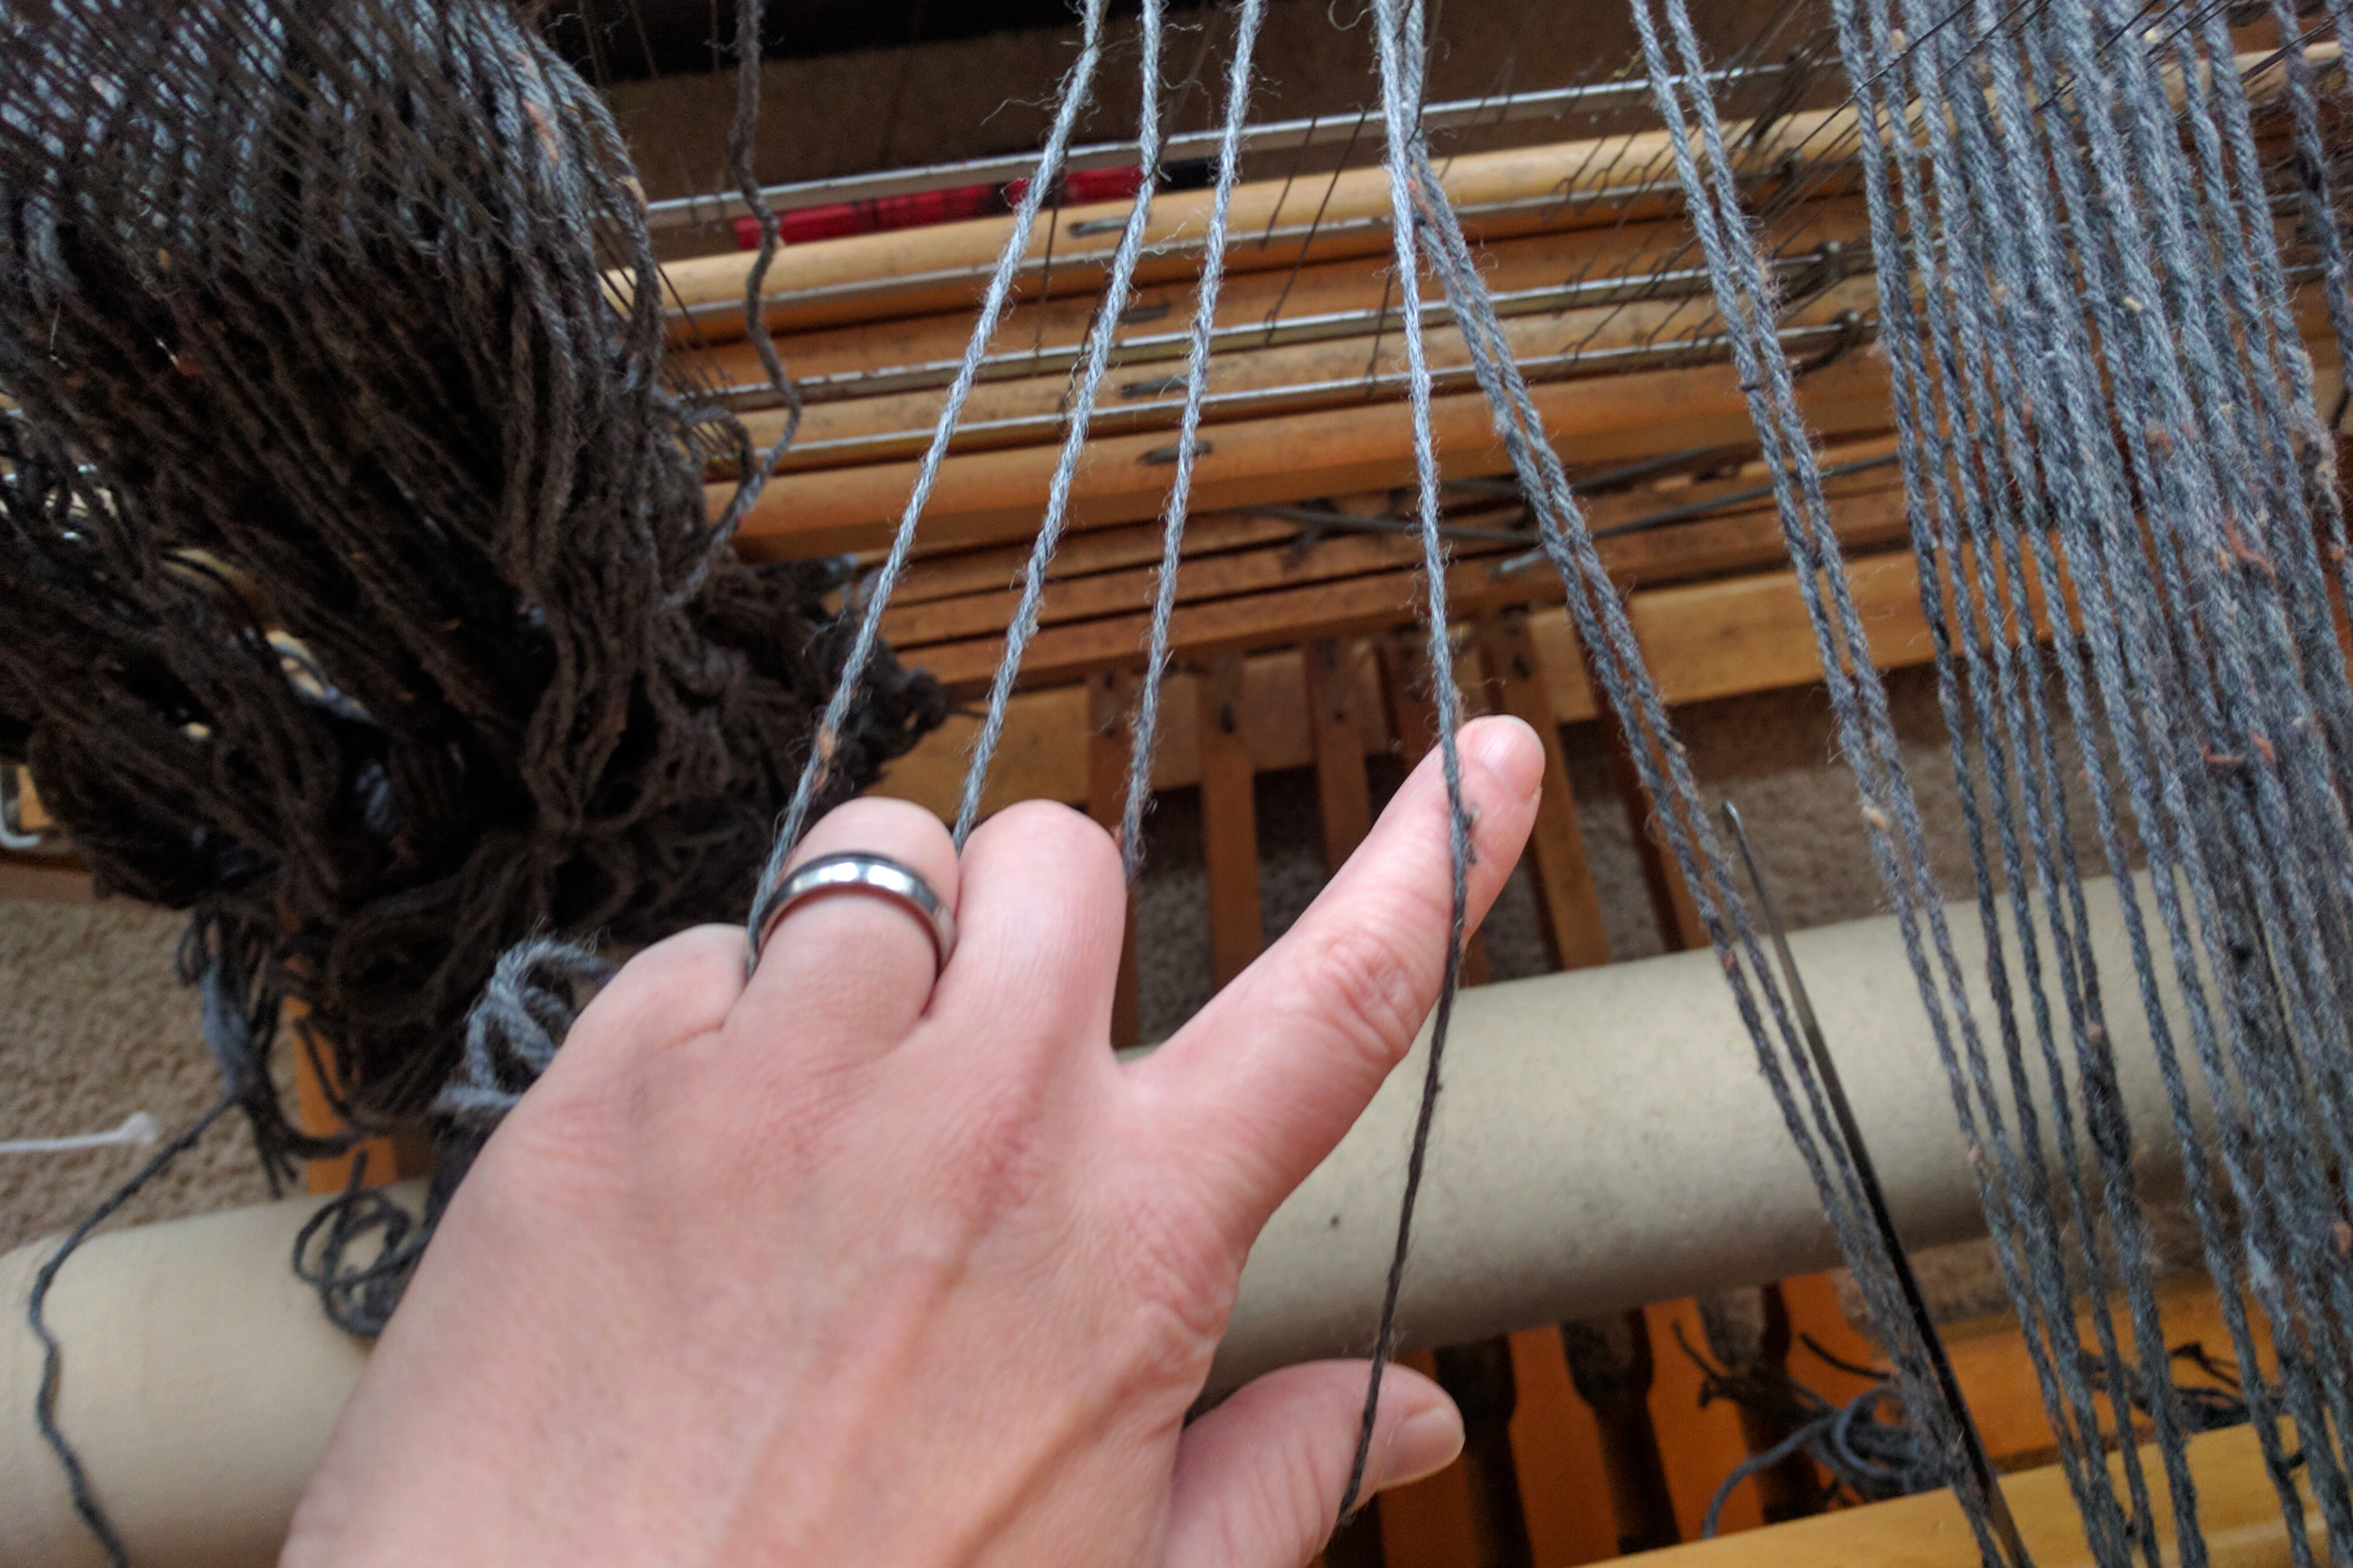
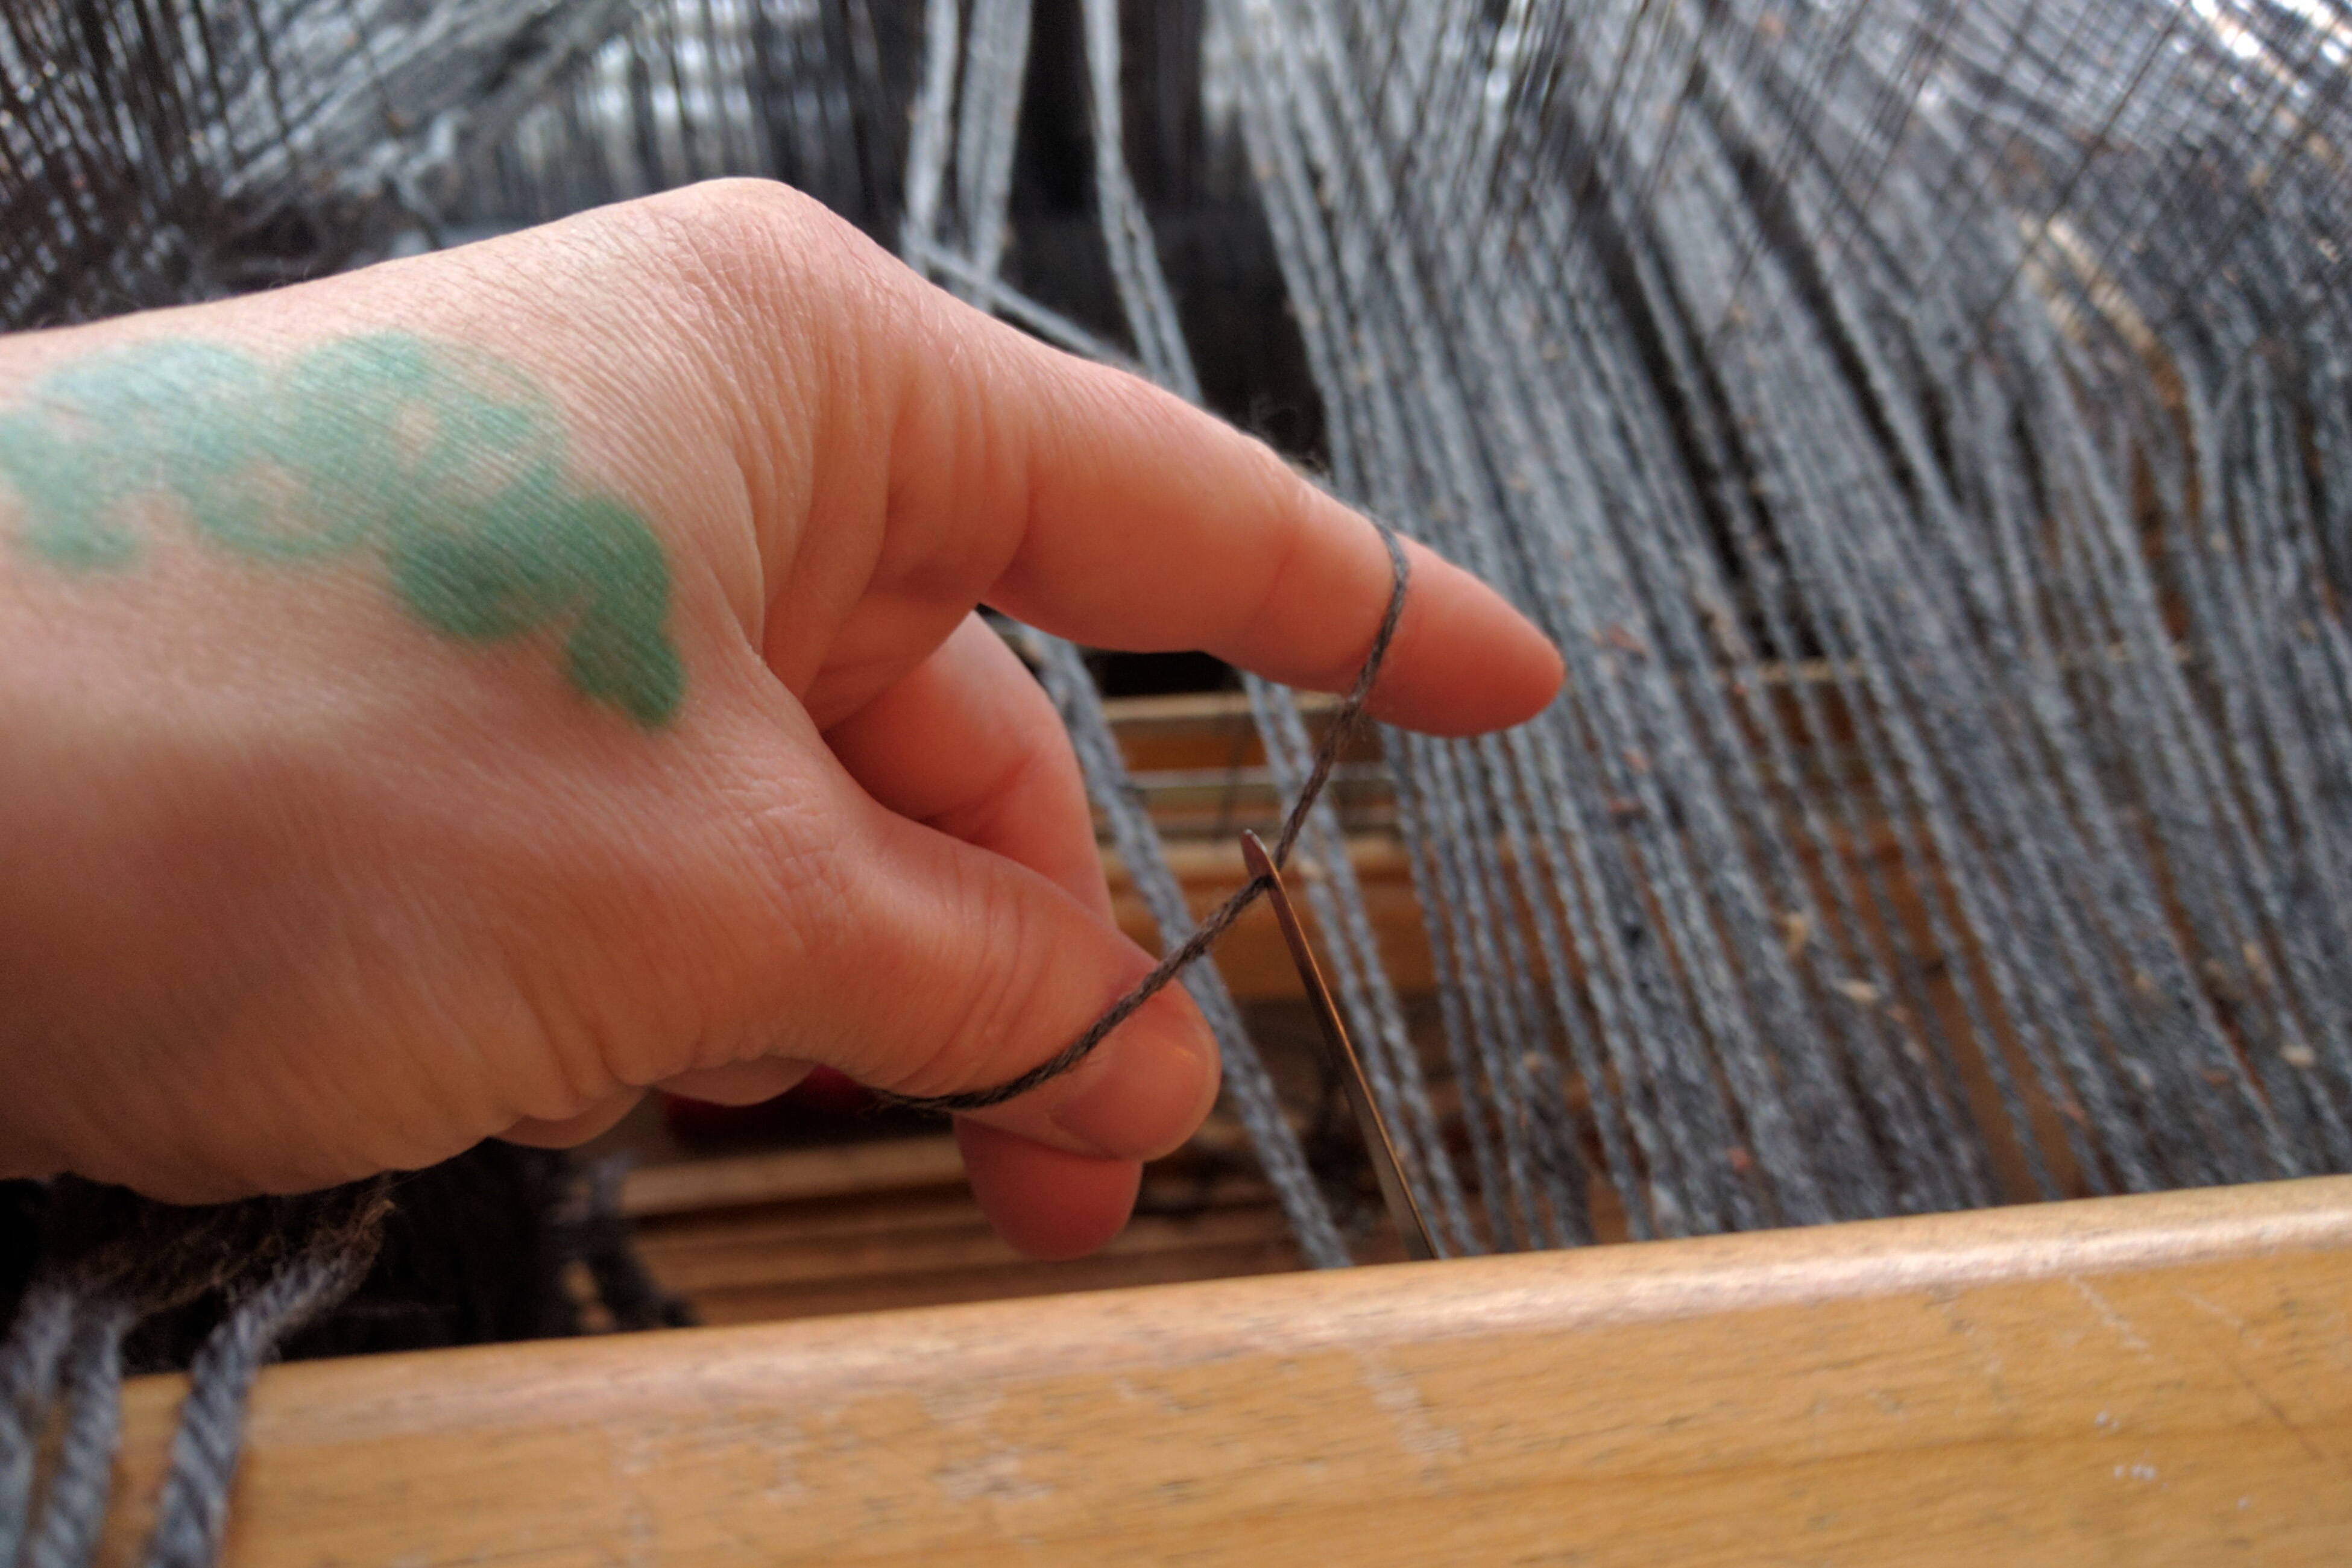
When I’m threading the reed, I like to do it 4 ends at a time. I take my left hand and grasp the next 3 ends as shown below, holding my hand behind the reed.
It’s important to make sure the ends coming from the heddles go into the reed in the correct order.
Then I feed the next end from my left hand and grab it with my threading hook. It’s a good way for me to stay organized during this process.
Opposable thumbs are really awesome.
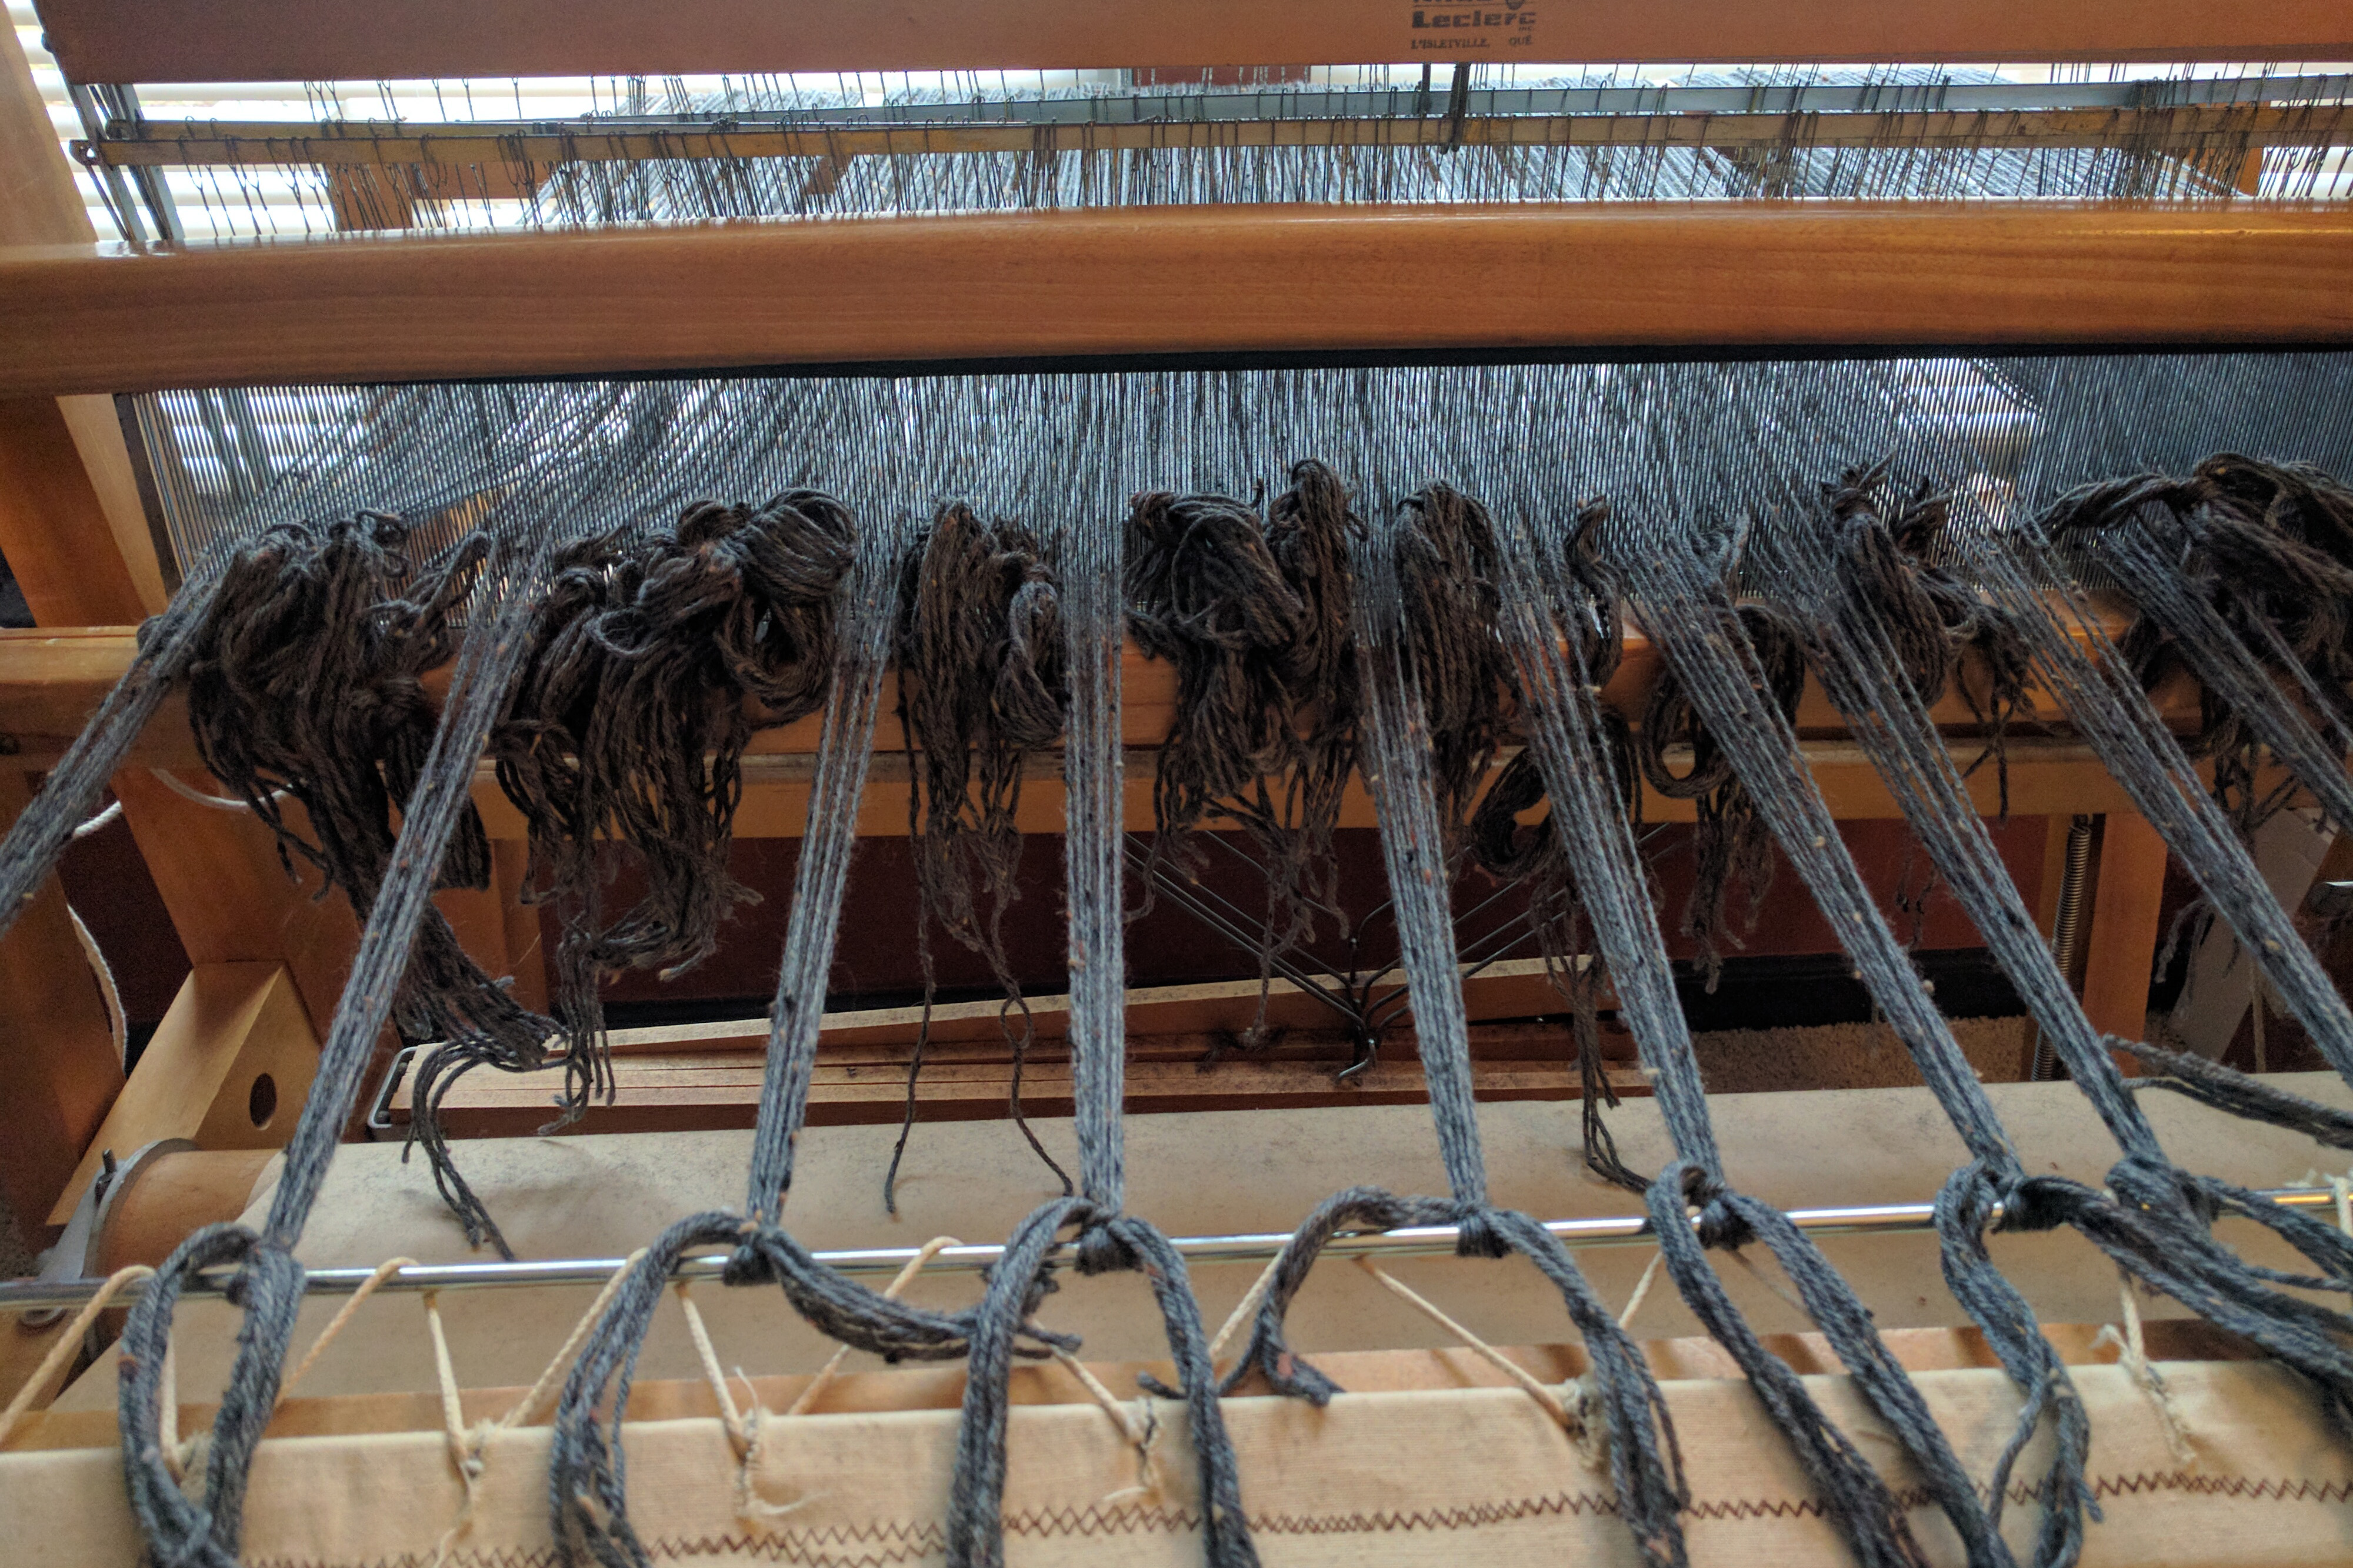
Tying onto the front apron rod means I’m almost ready to weave!
Gotta be evenly tense here.
I’m just getting started here. Once I’ve woven this giant piece of fabric, it’s onto jacket making. And this project is going to go quickly since my deadline is next month’s TNNA show. Stay tuned!
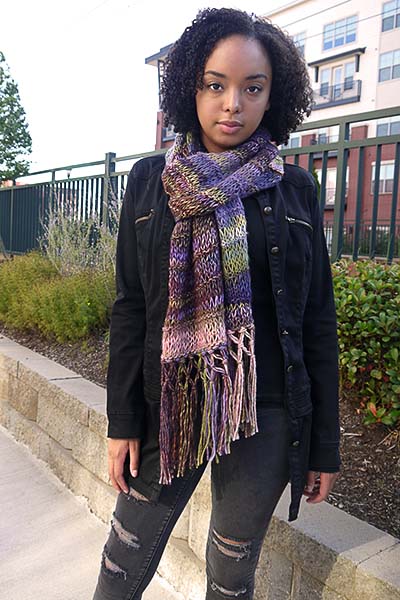
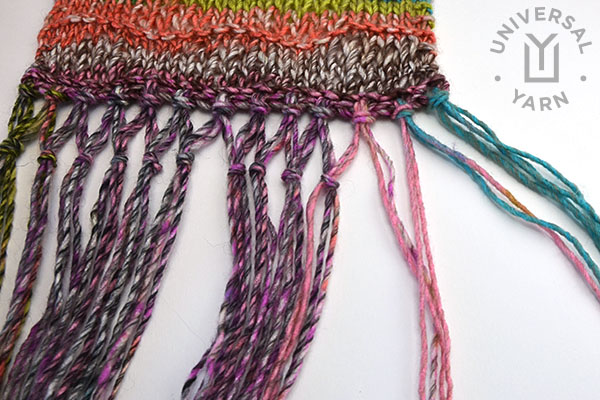
The Summit Scarf from our Colorful Commute e-book features triple knotted fringe. It is an easy way to add a lot of visual interest to your project. It may look complicated, but it’s really quite simple and doesn’t take much more time or effort than plain fringe. Today I’ll show you how to do it!
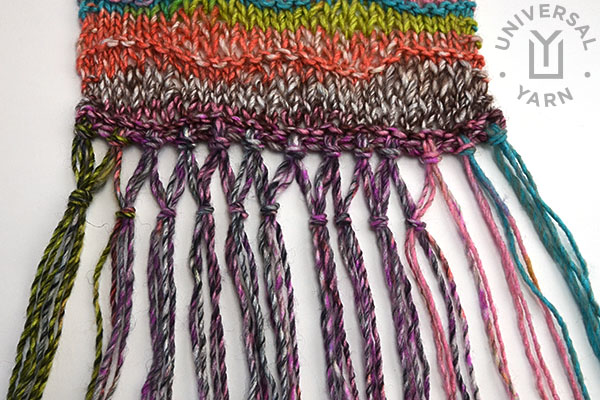
Step 1: Begin as you normally would when adding fringe to a project, for this scarf I cut 21” strands of yarn. Then, holding two strands together as one, I attached groups of fringe to the edge of the scarf, about one group every other stitch.
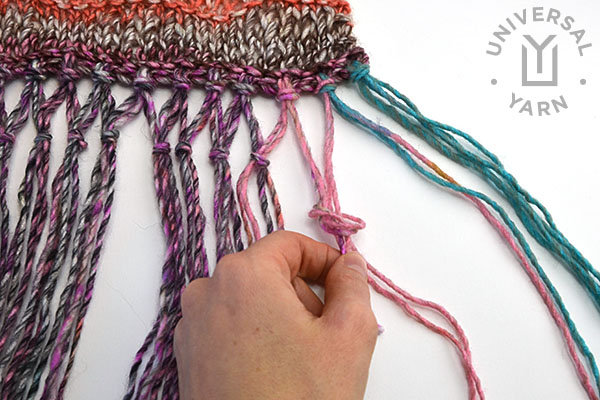
Step 2: Take half of one group of fringe knot together with half of next group of fringe 1” below first row of knots. I did not split the first and last groups of fringe.
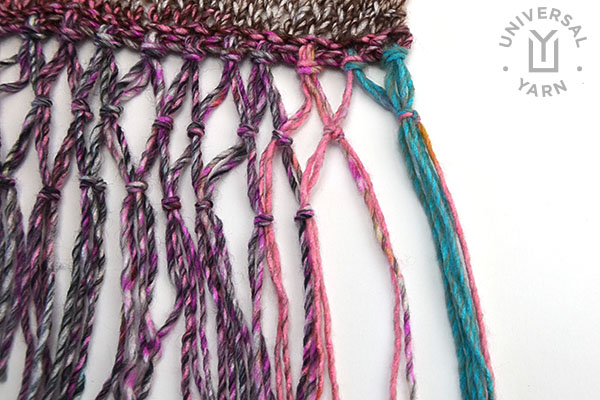
Step 3: Repeat for another row of knots. To finish, trim fringe evenly.
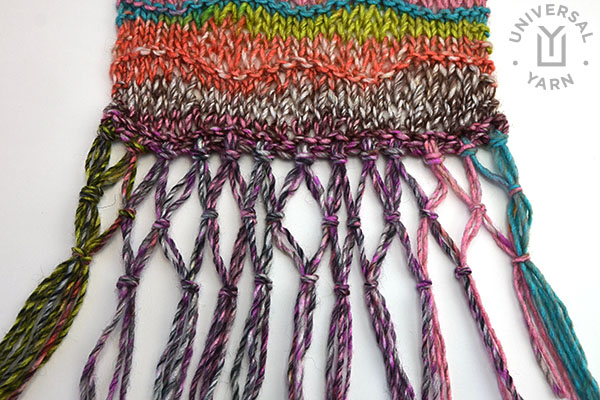
That’s all there is to it! You can keep adding more rows of knots to create some really amazing and intricate looking fringe, use longer strands of yarn when increasing the number of knotted rows. Beads can be placed above the knots (or even in place of the knots) to add some sparkle – there are so many possibilities.
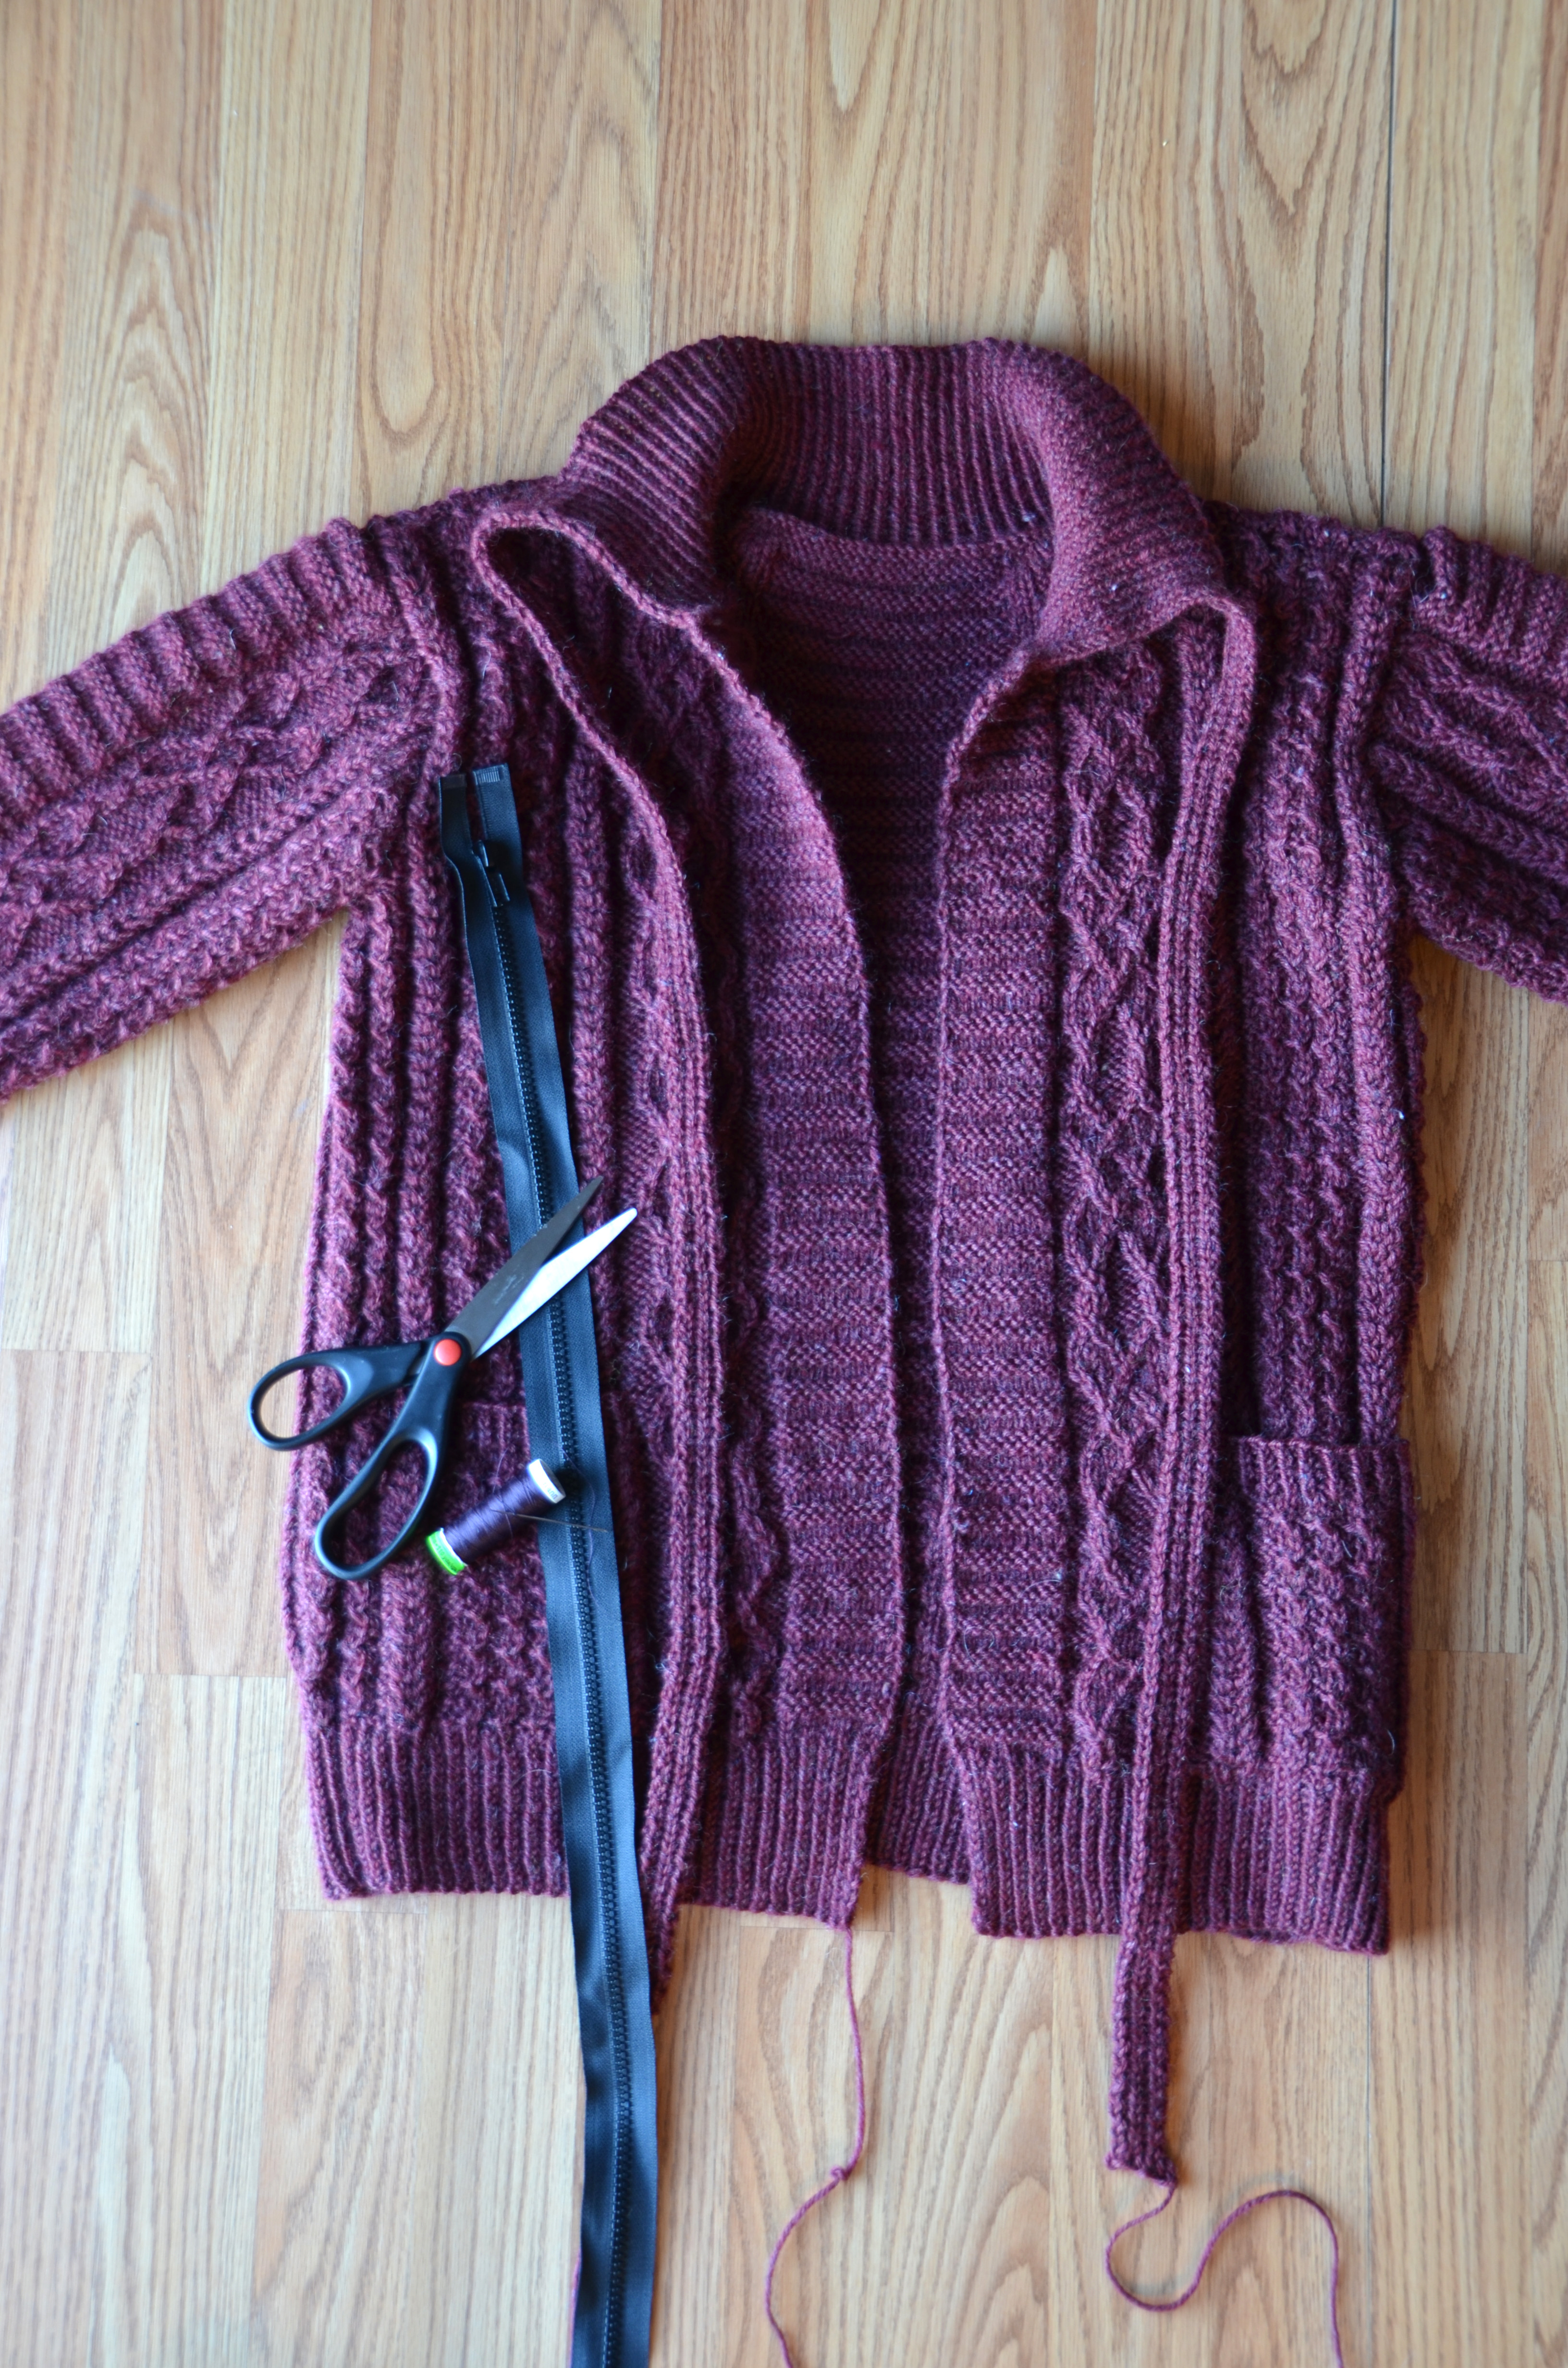
With the holidays upon us, I know many of you are busy plugging away at gift projects. Me? I’m as selfishly knitting as ever and just finished my modified Wesley Heights. Though I finished knitting the pieces and seaming the sweater many weeks ago, I just sewed in my zipper, and I’m going to show you how.
As a reminder, this is our ongoing blog series covering projects from the Deluxe Cable Collection. You can learn more about the knitalong by reading previous blog posts here, viewing the collection here, and joining our Ravelry group here.
I basically knit the Wesley Heights pullover, but followed instructions for the Greensboro Cardigan for collar and zipper facings. Stitches for the collar are picked up around the neck edge and knit upward. Then, the first and last 6 stitches of the collar are continued to form the zipper facings.
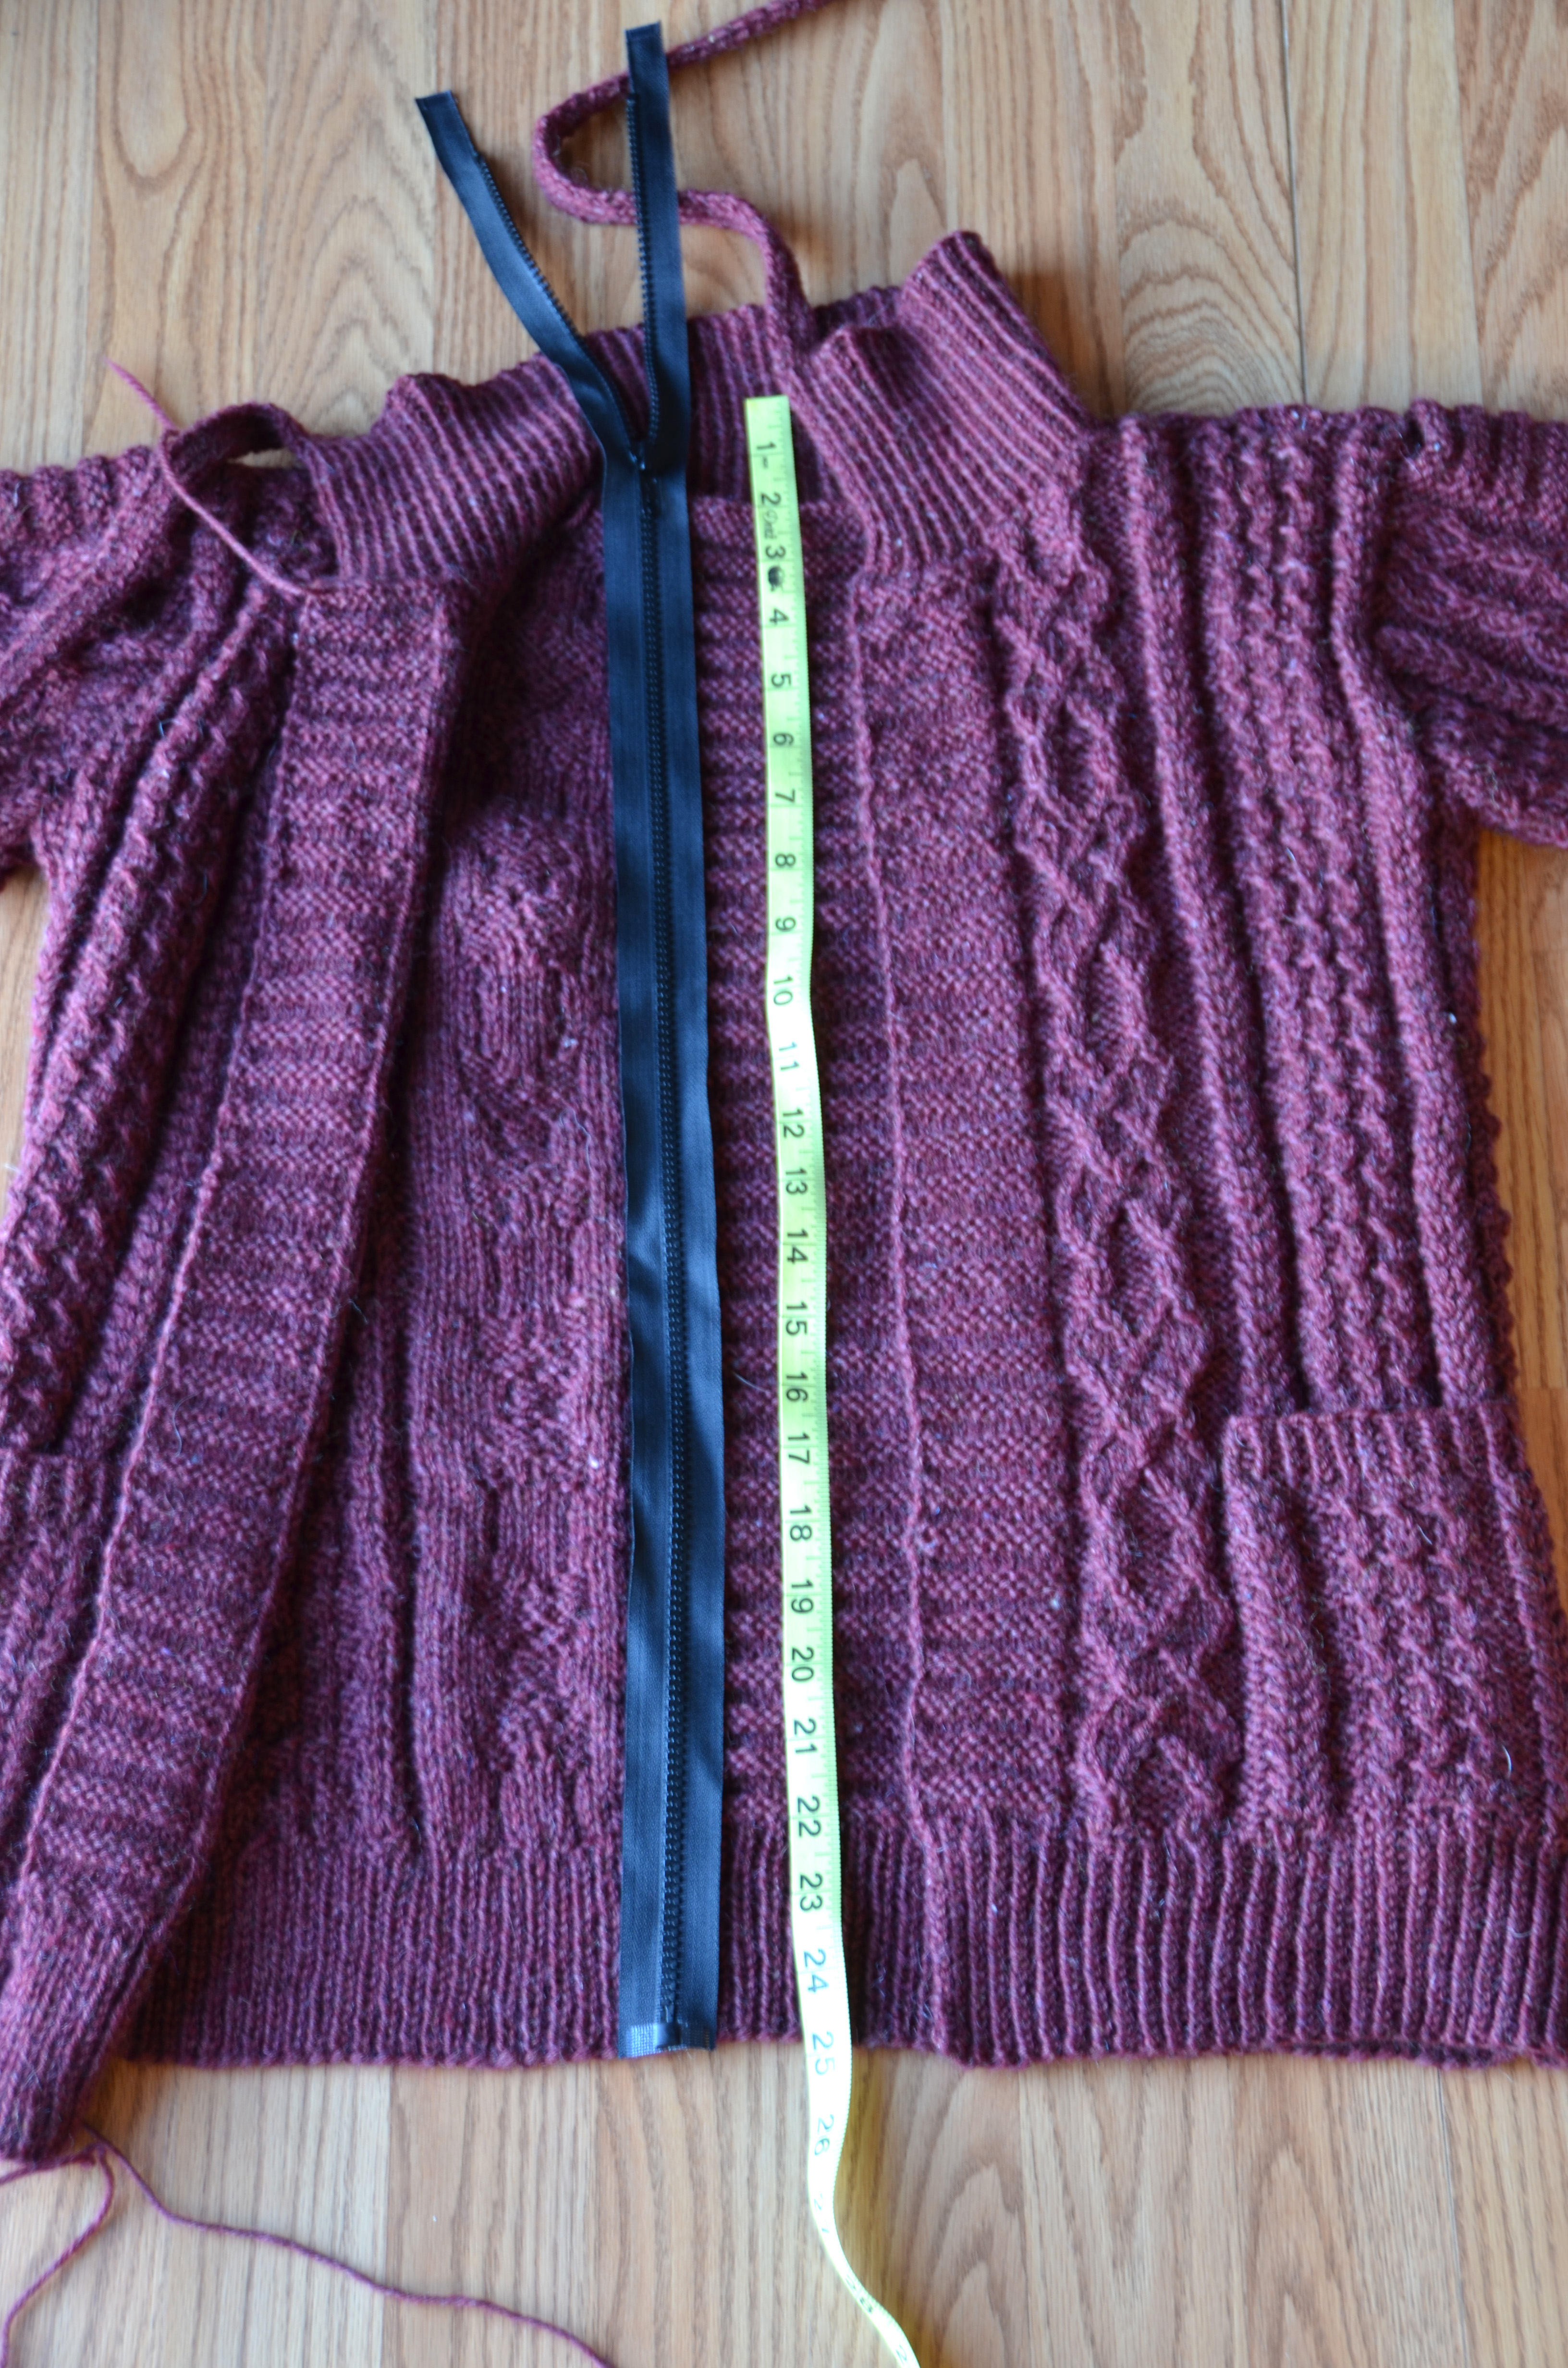
Be sure not to stretch the knitting when measuring for the zipper.
It’s important to block your knitting before measuring for the zipper length and installing it. Zippers and knitting can be tricky, since zipper tape is typically woven and non-stretchy. But I’m going to show you what you can do to avoid the puckery zipper look.
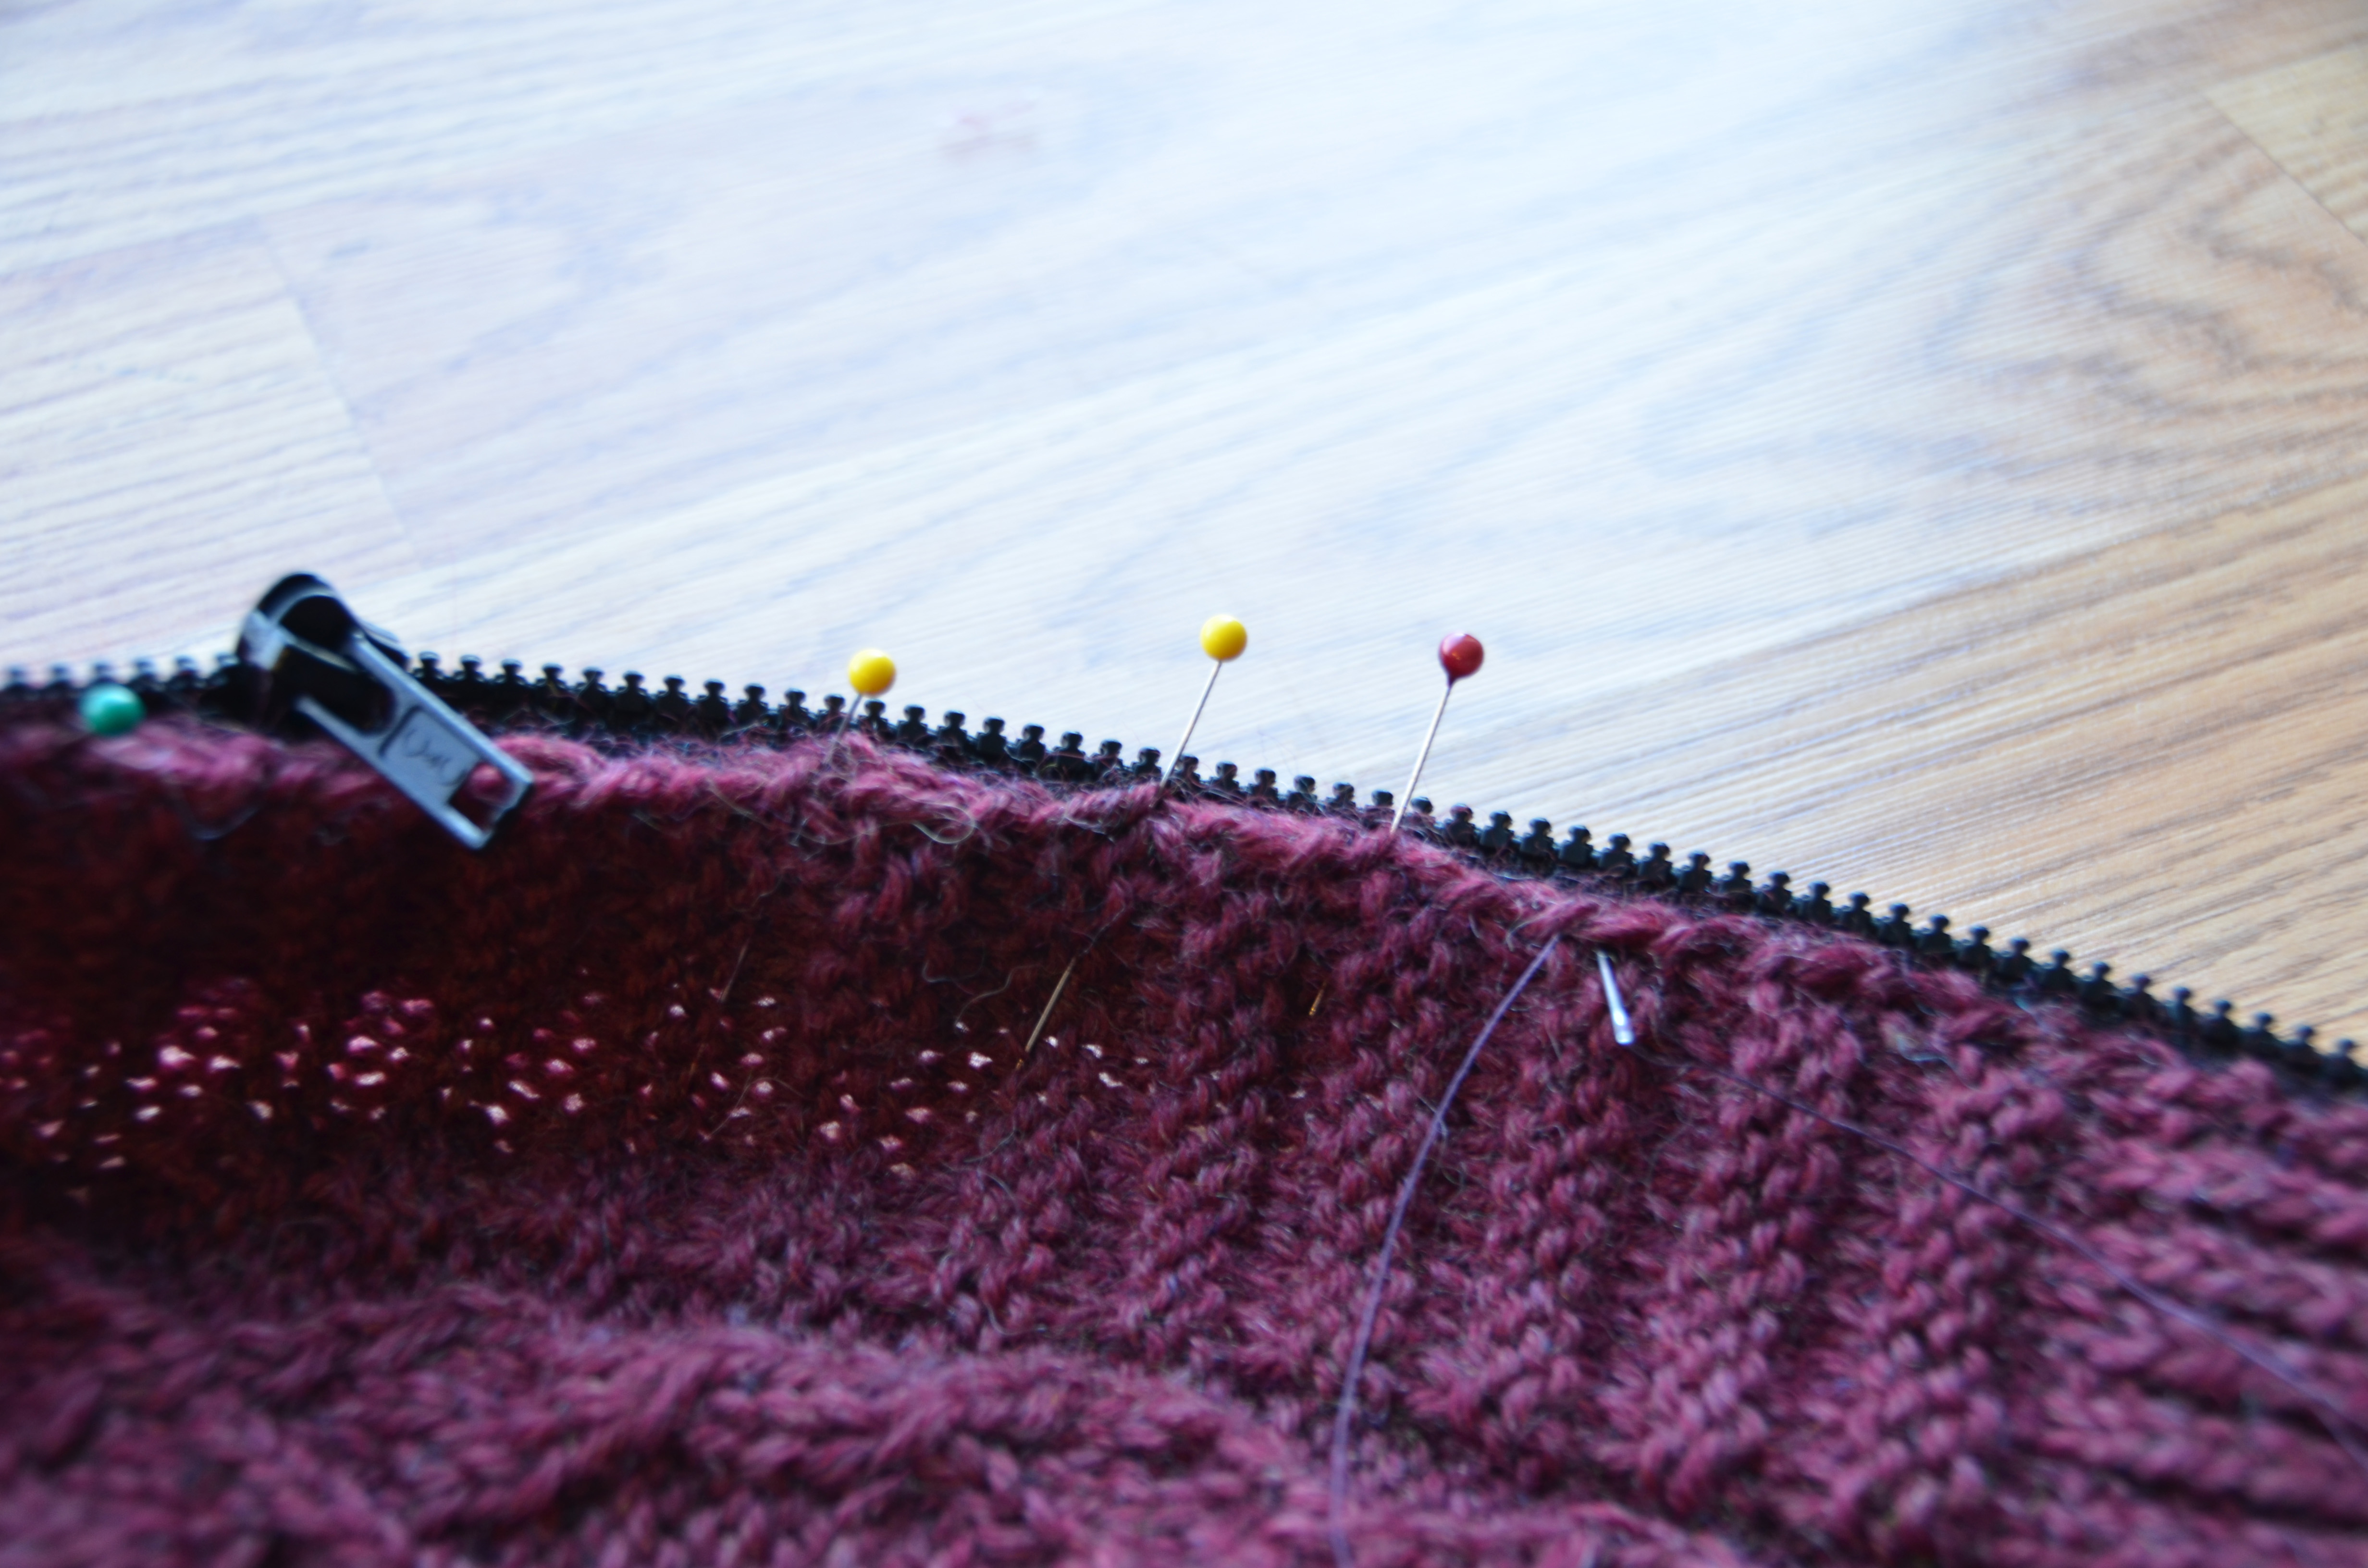
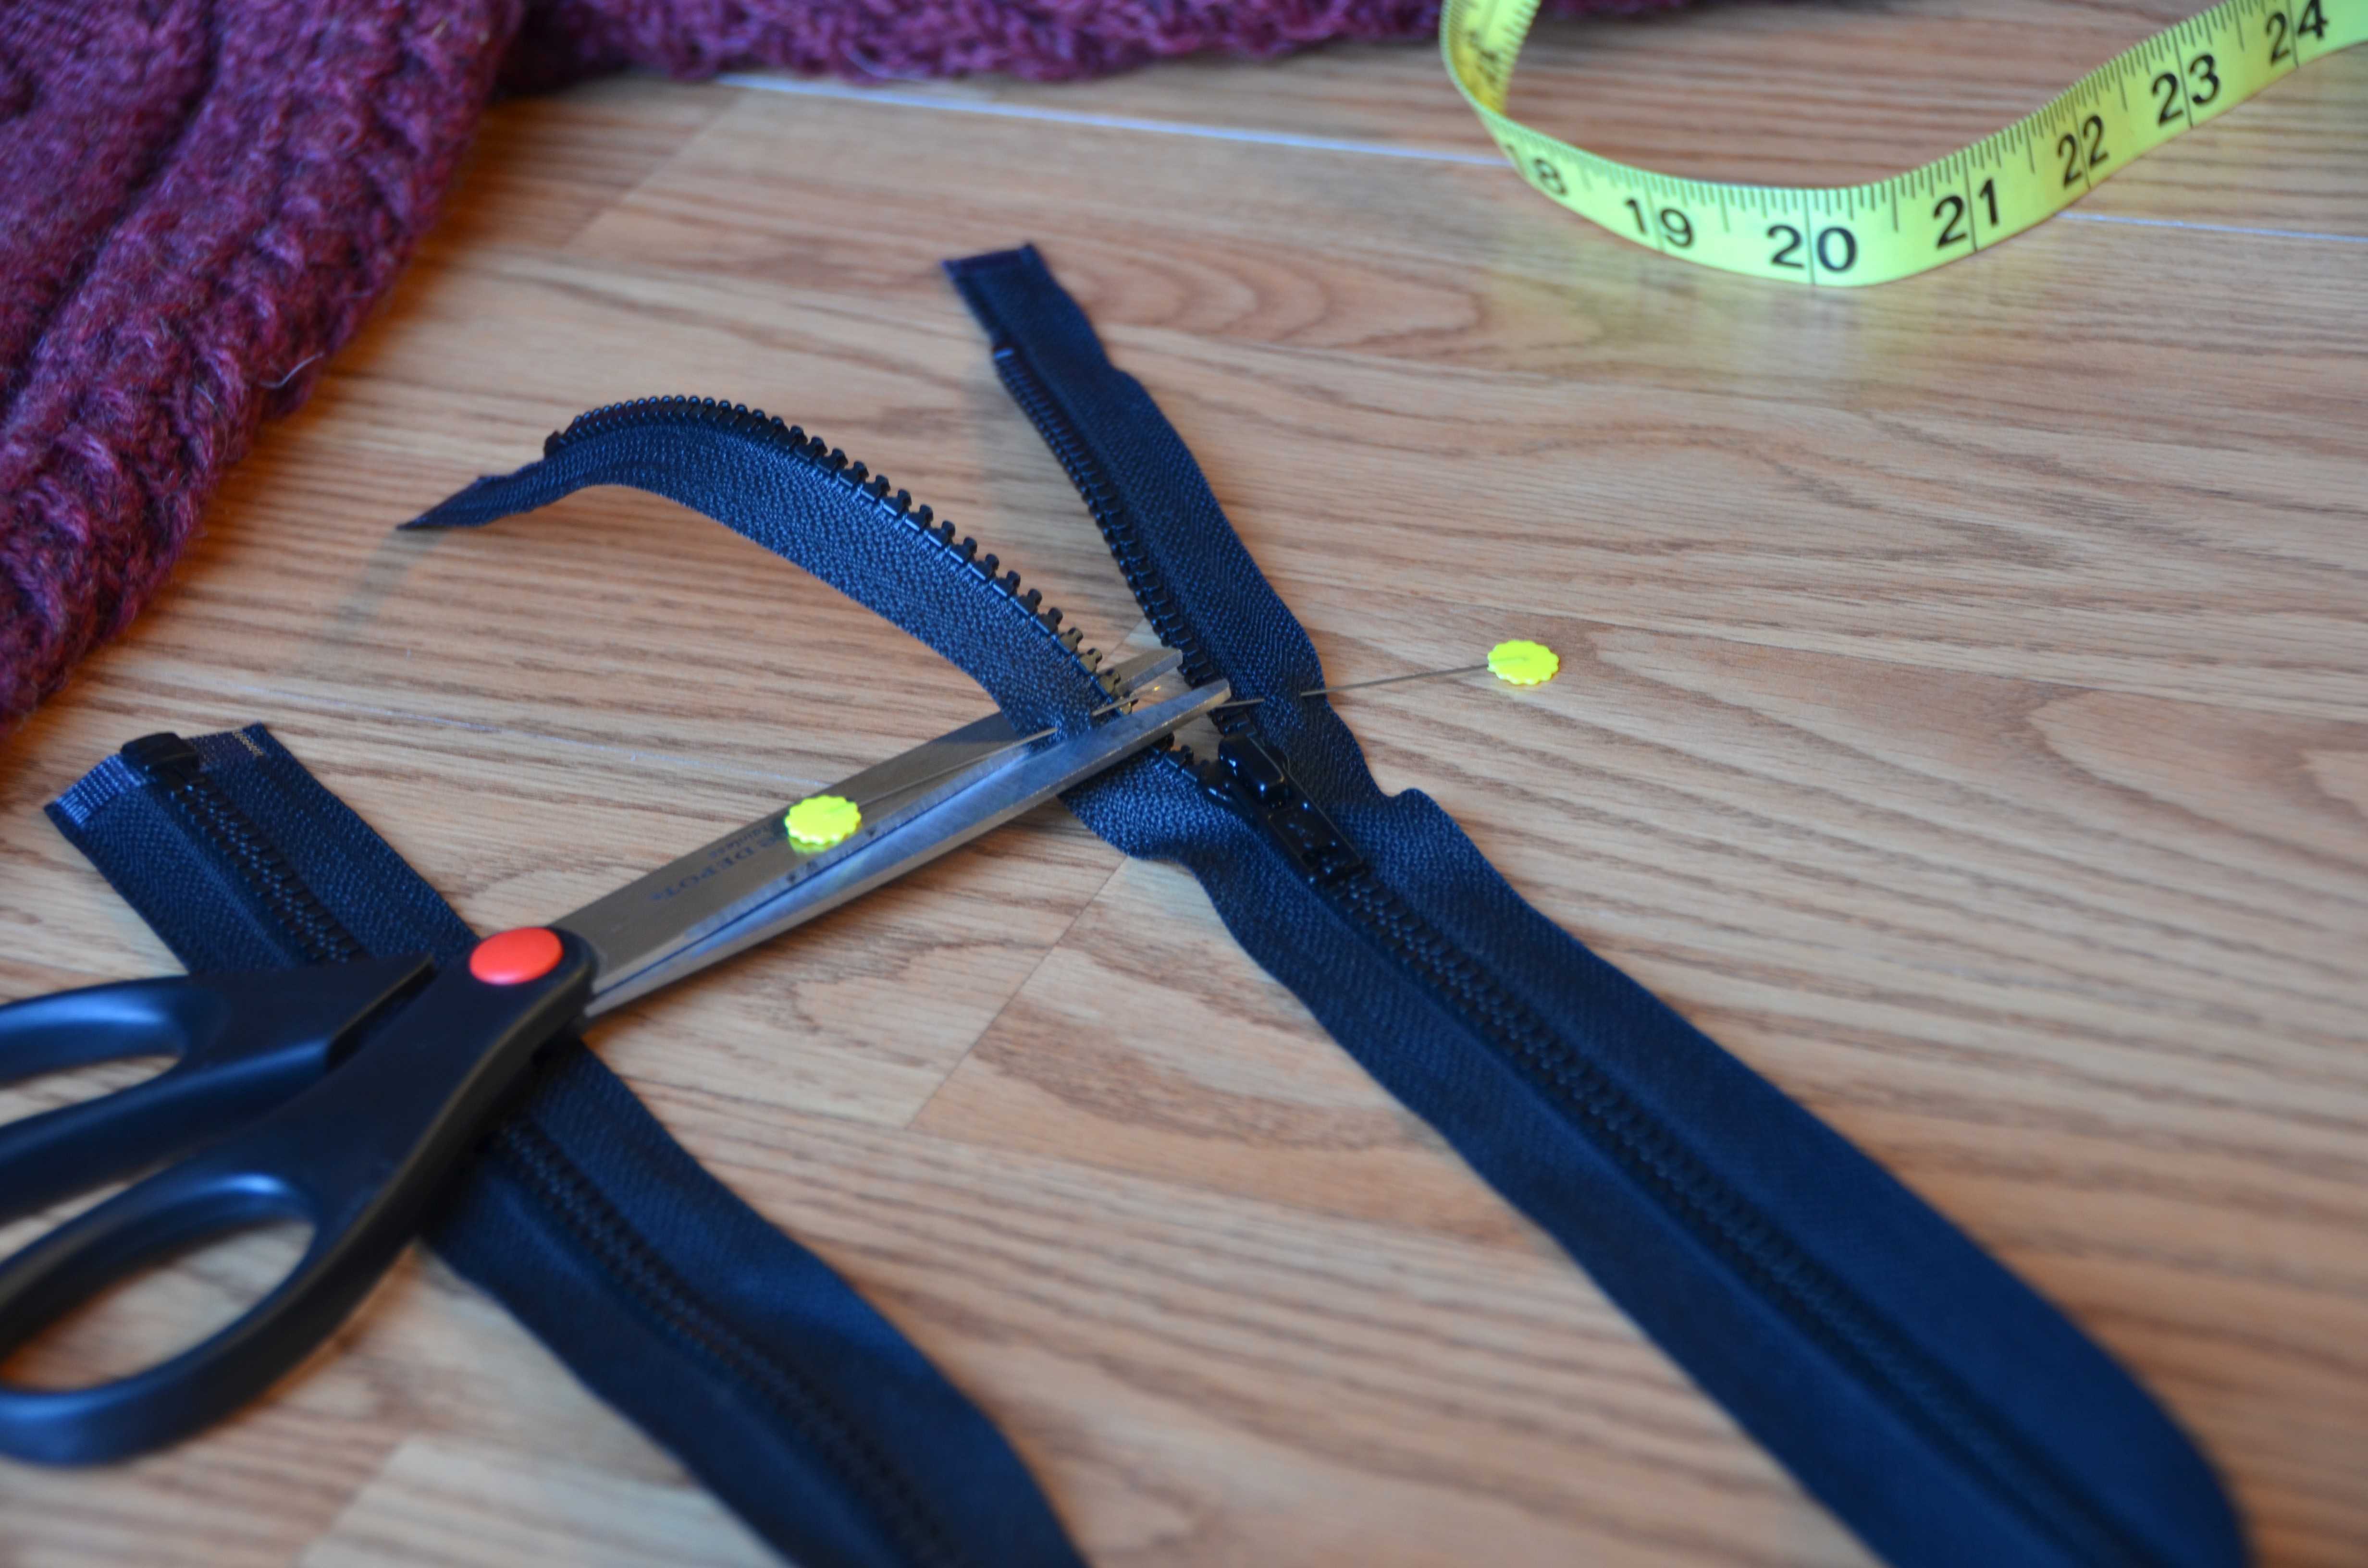
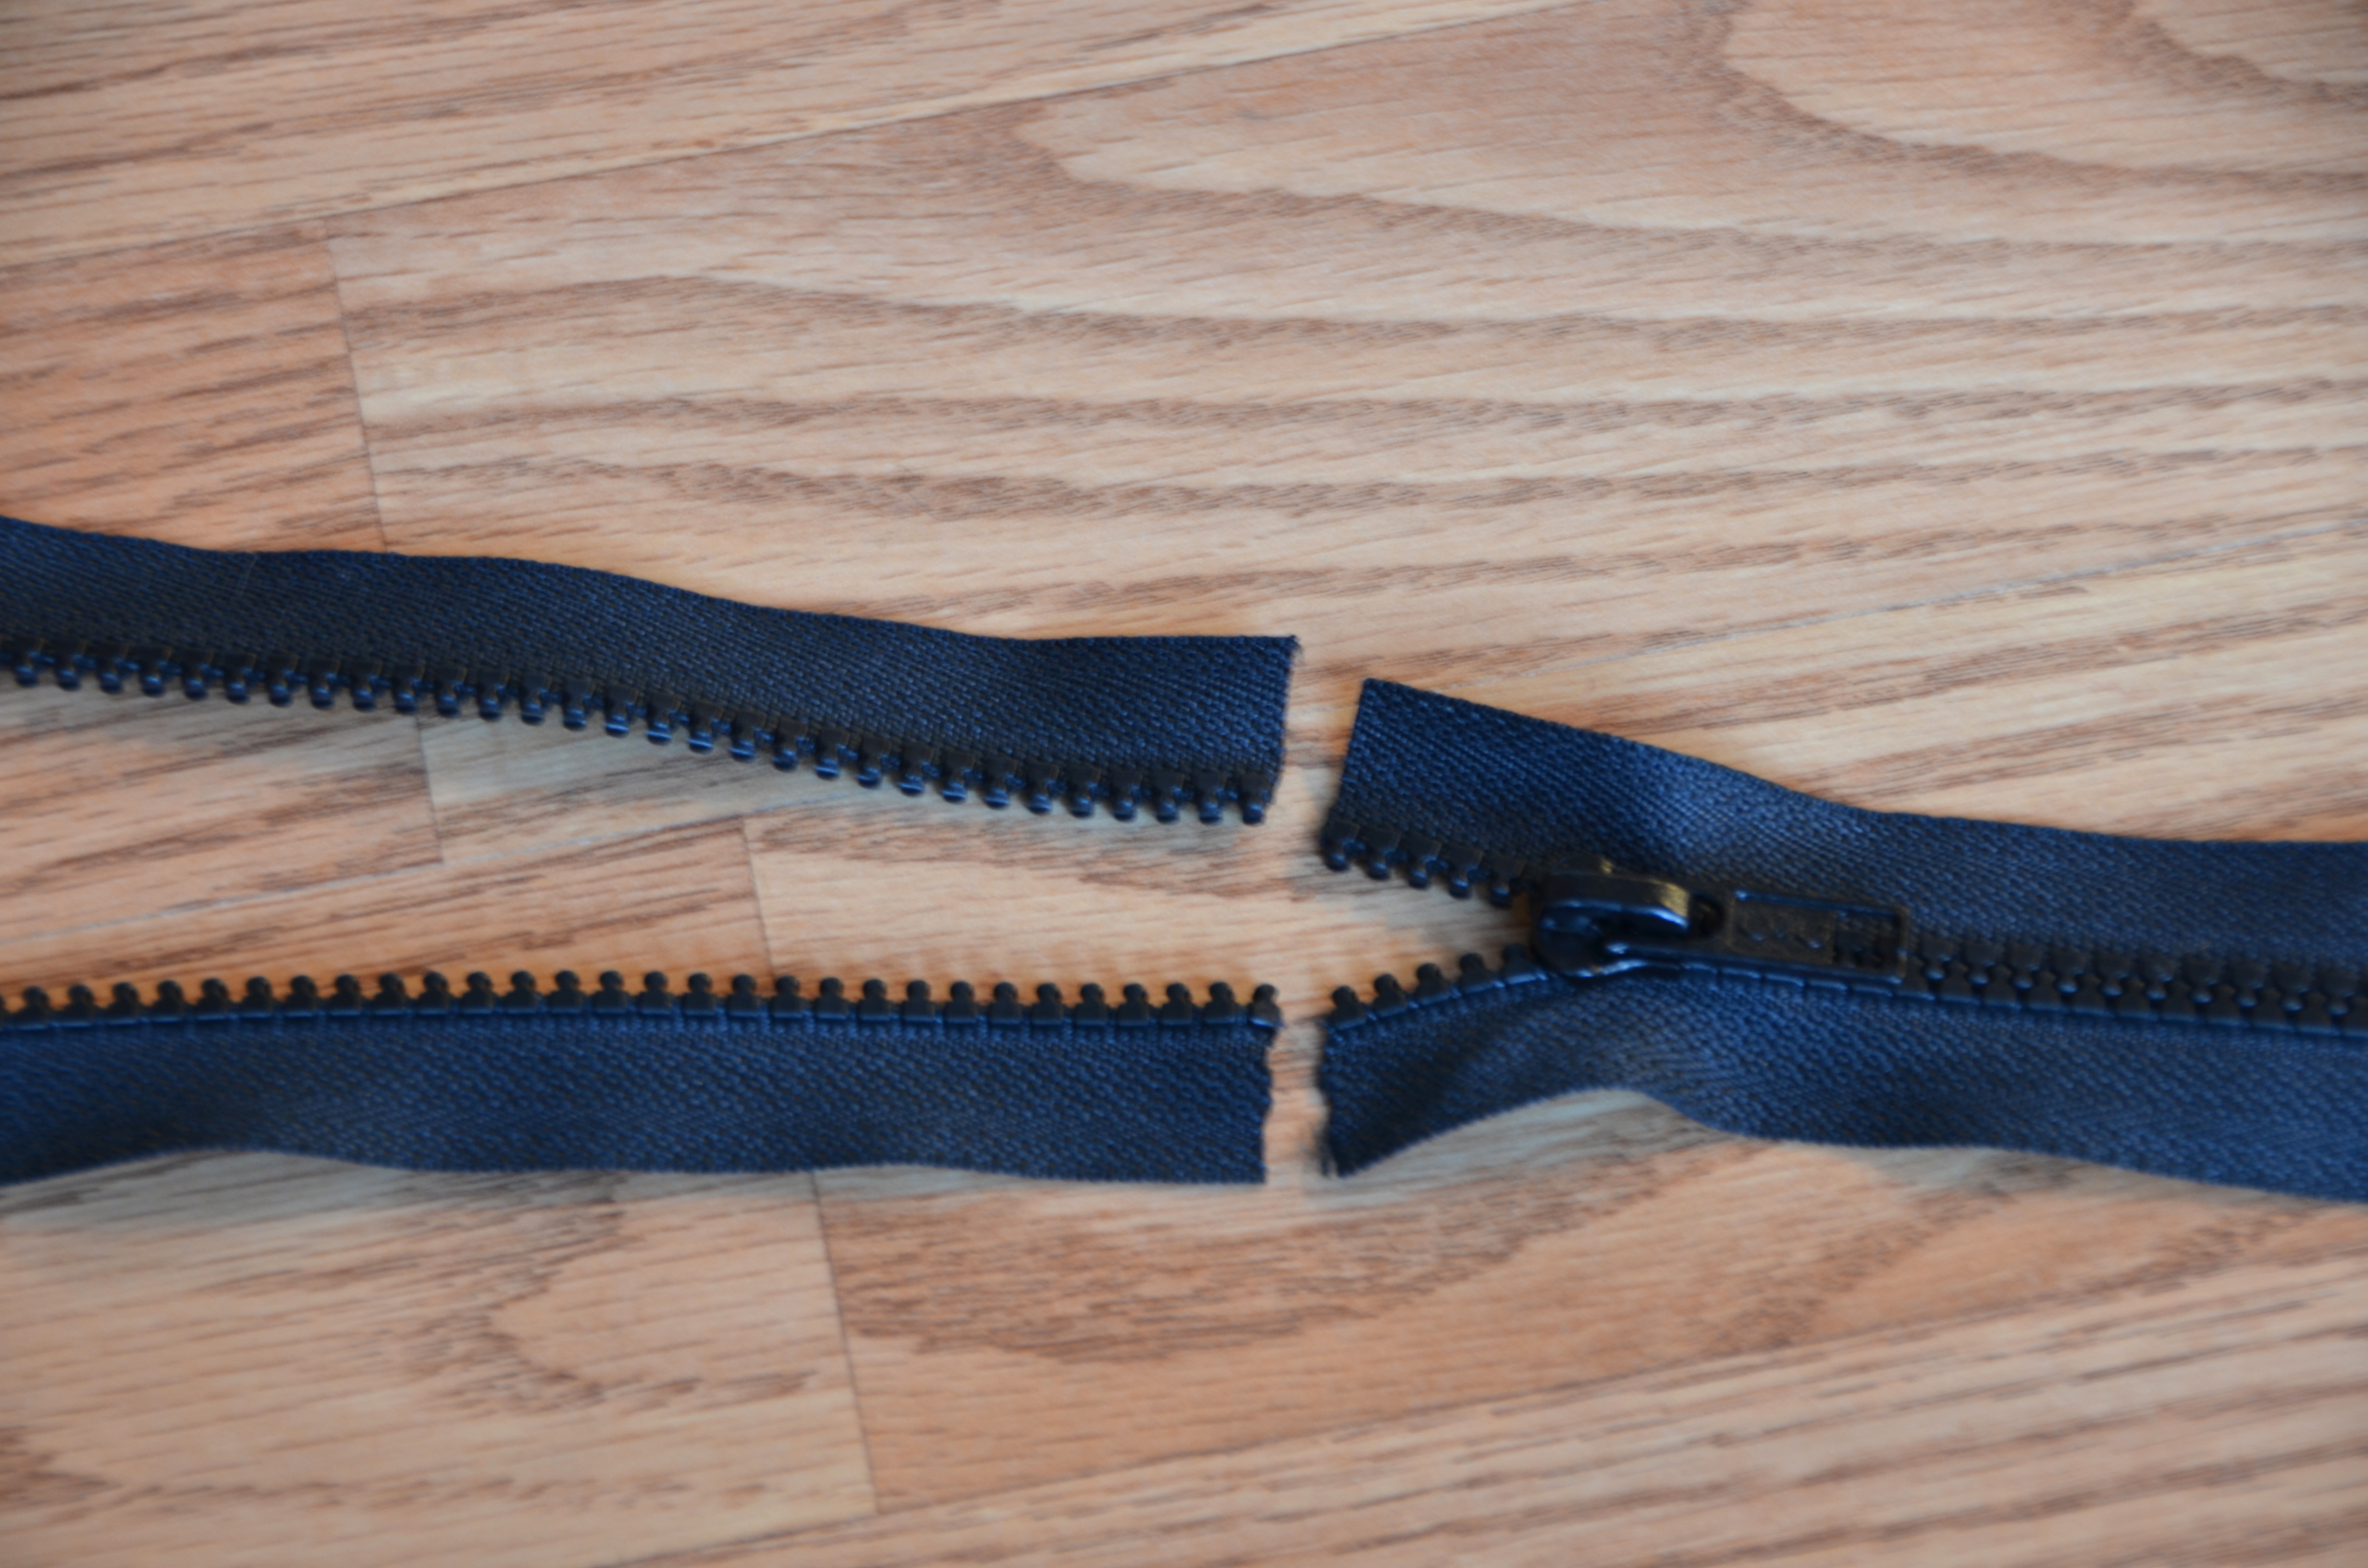
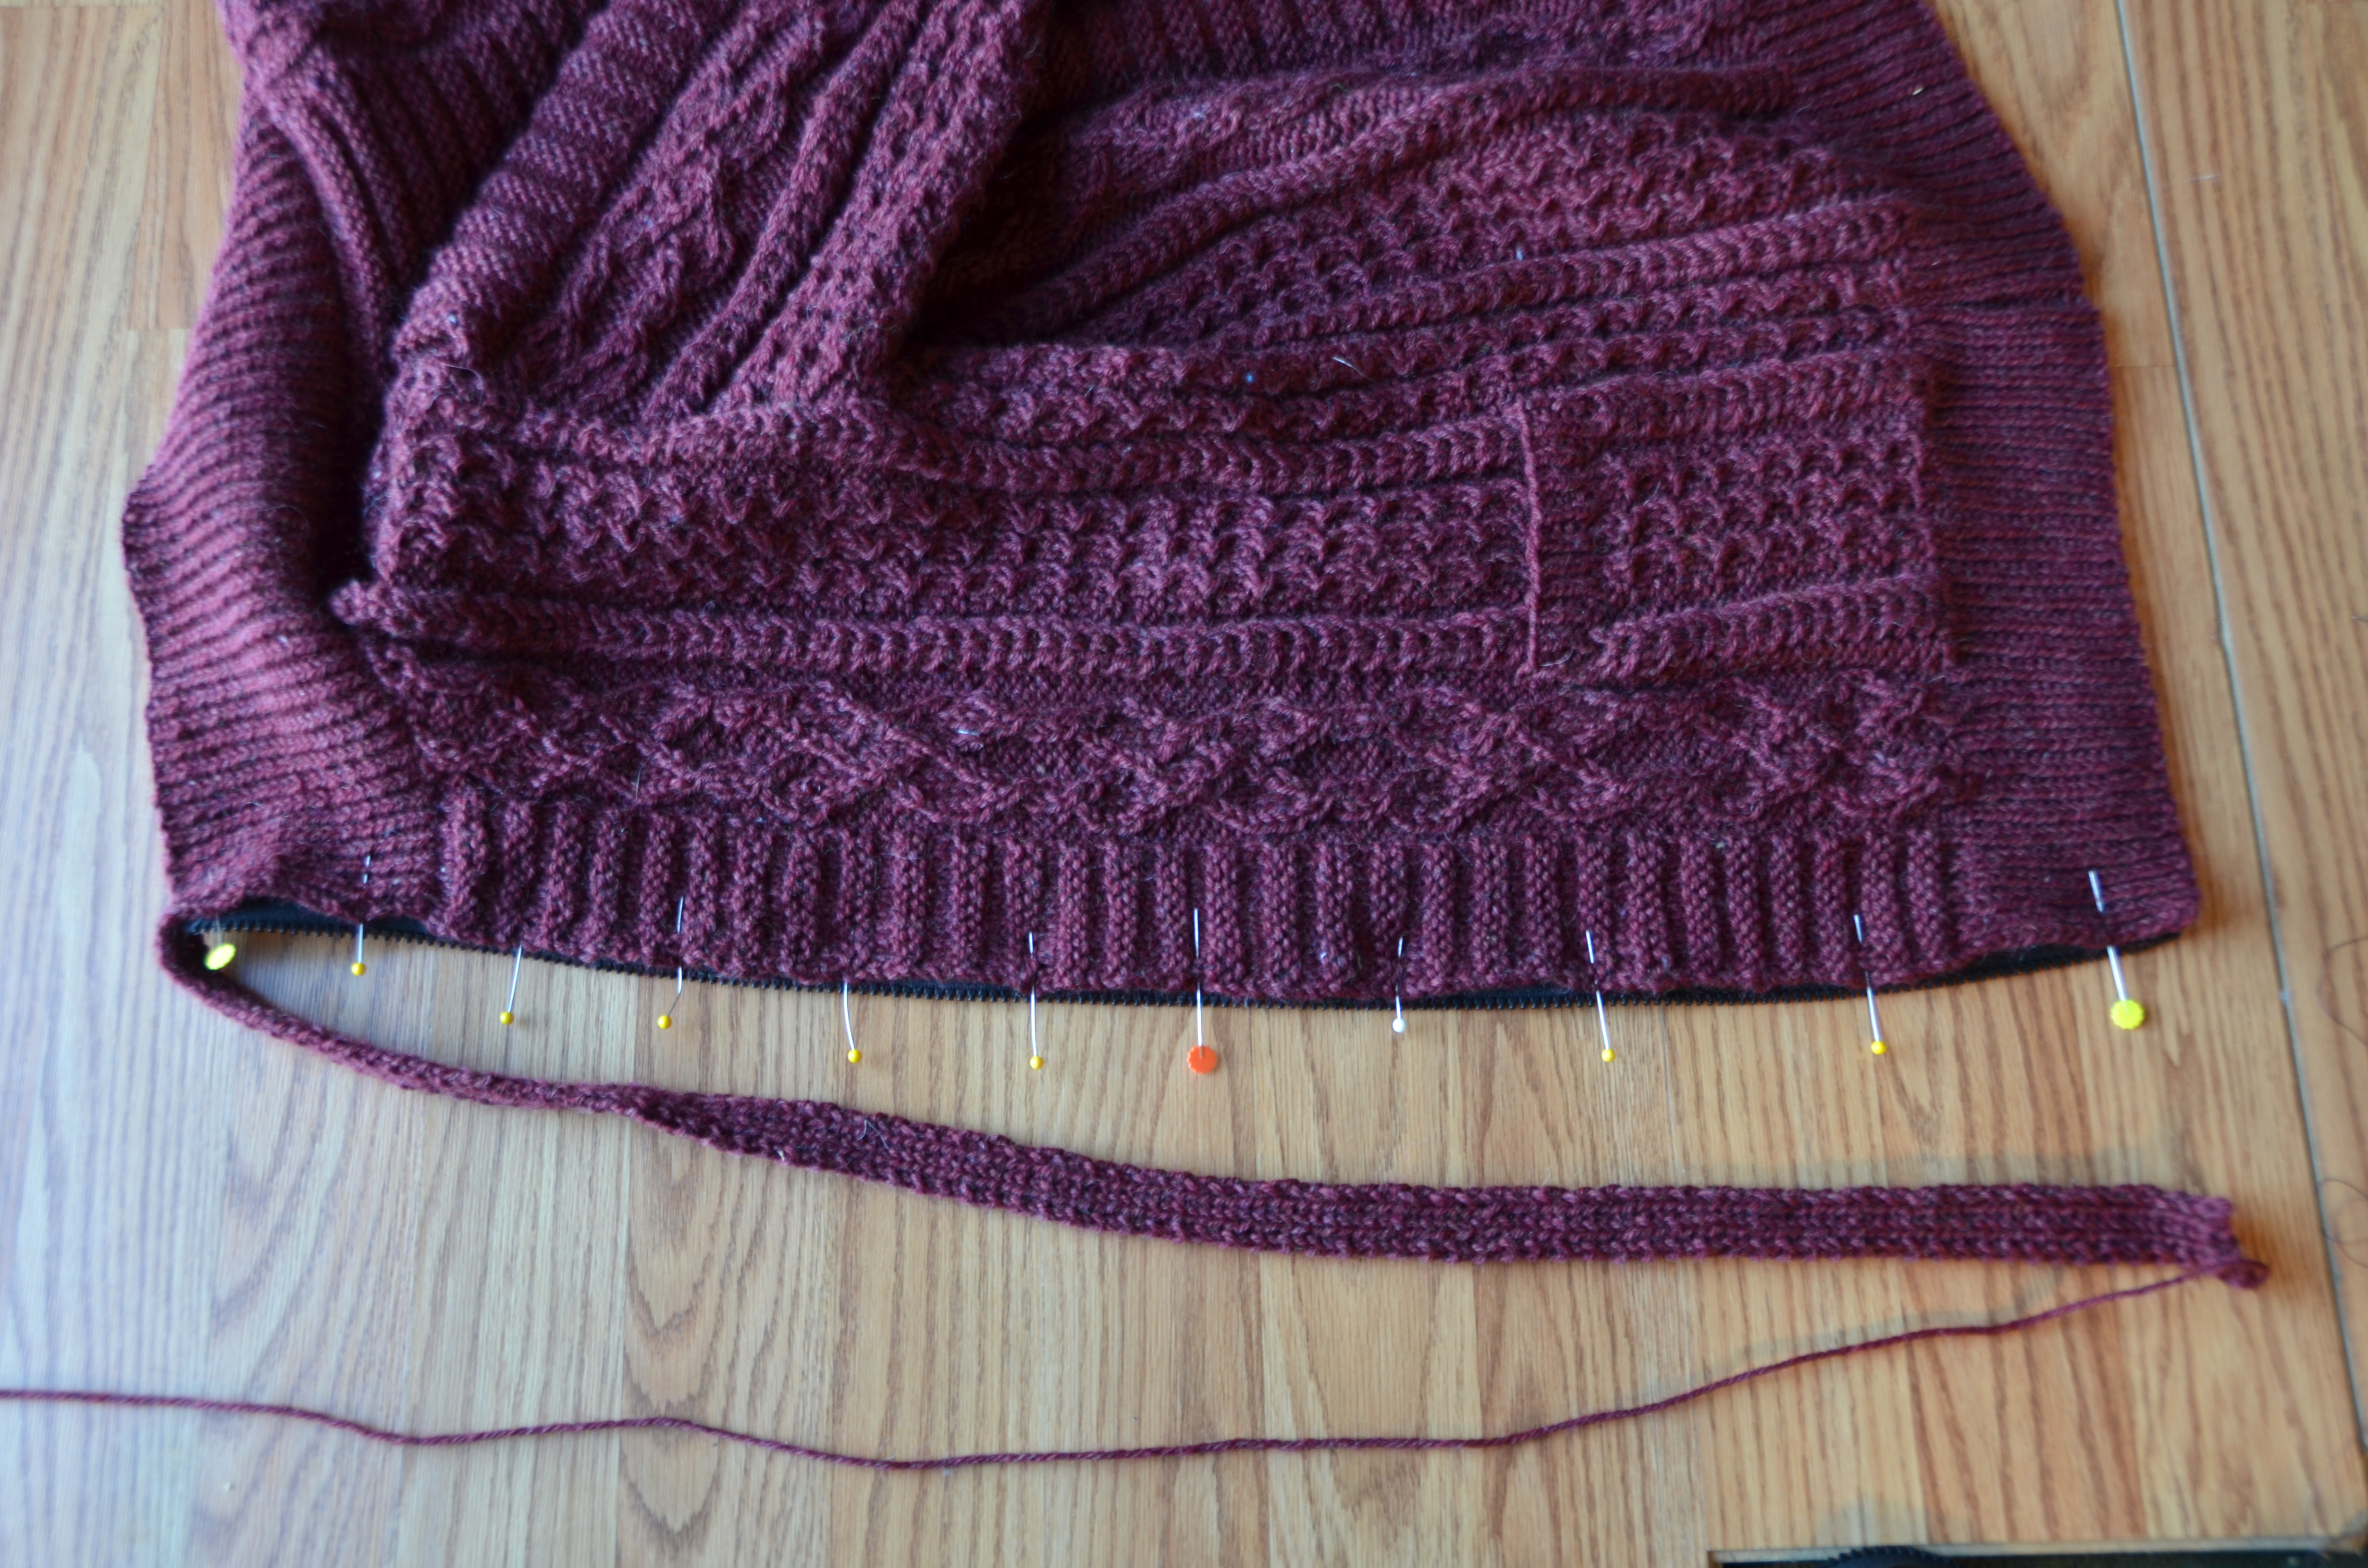
Open up your sweater and measure along the front opening from the very bottom edge to the top of the collar. I like to leave a small margin of about 1/4″ at the top and bottom before the zipper begins and after it ends. Mark with a pencil or with pins (as shown) where the zipper tape needs to be cut.
Don’t accidentally slide your zipper over the top of your just-cut end!Do not, I repeat, DO NOT slide the zipper off the top of the cut edge!
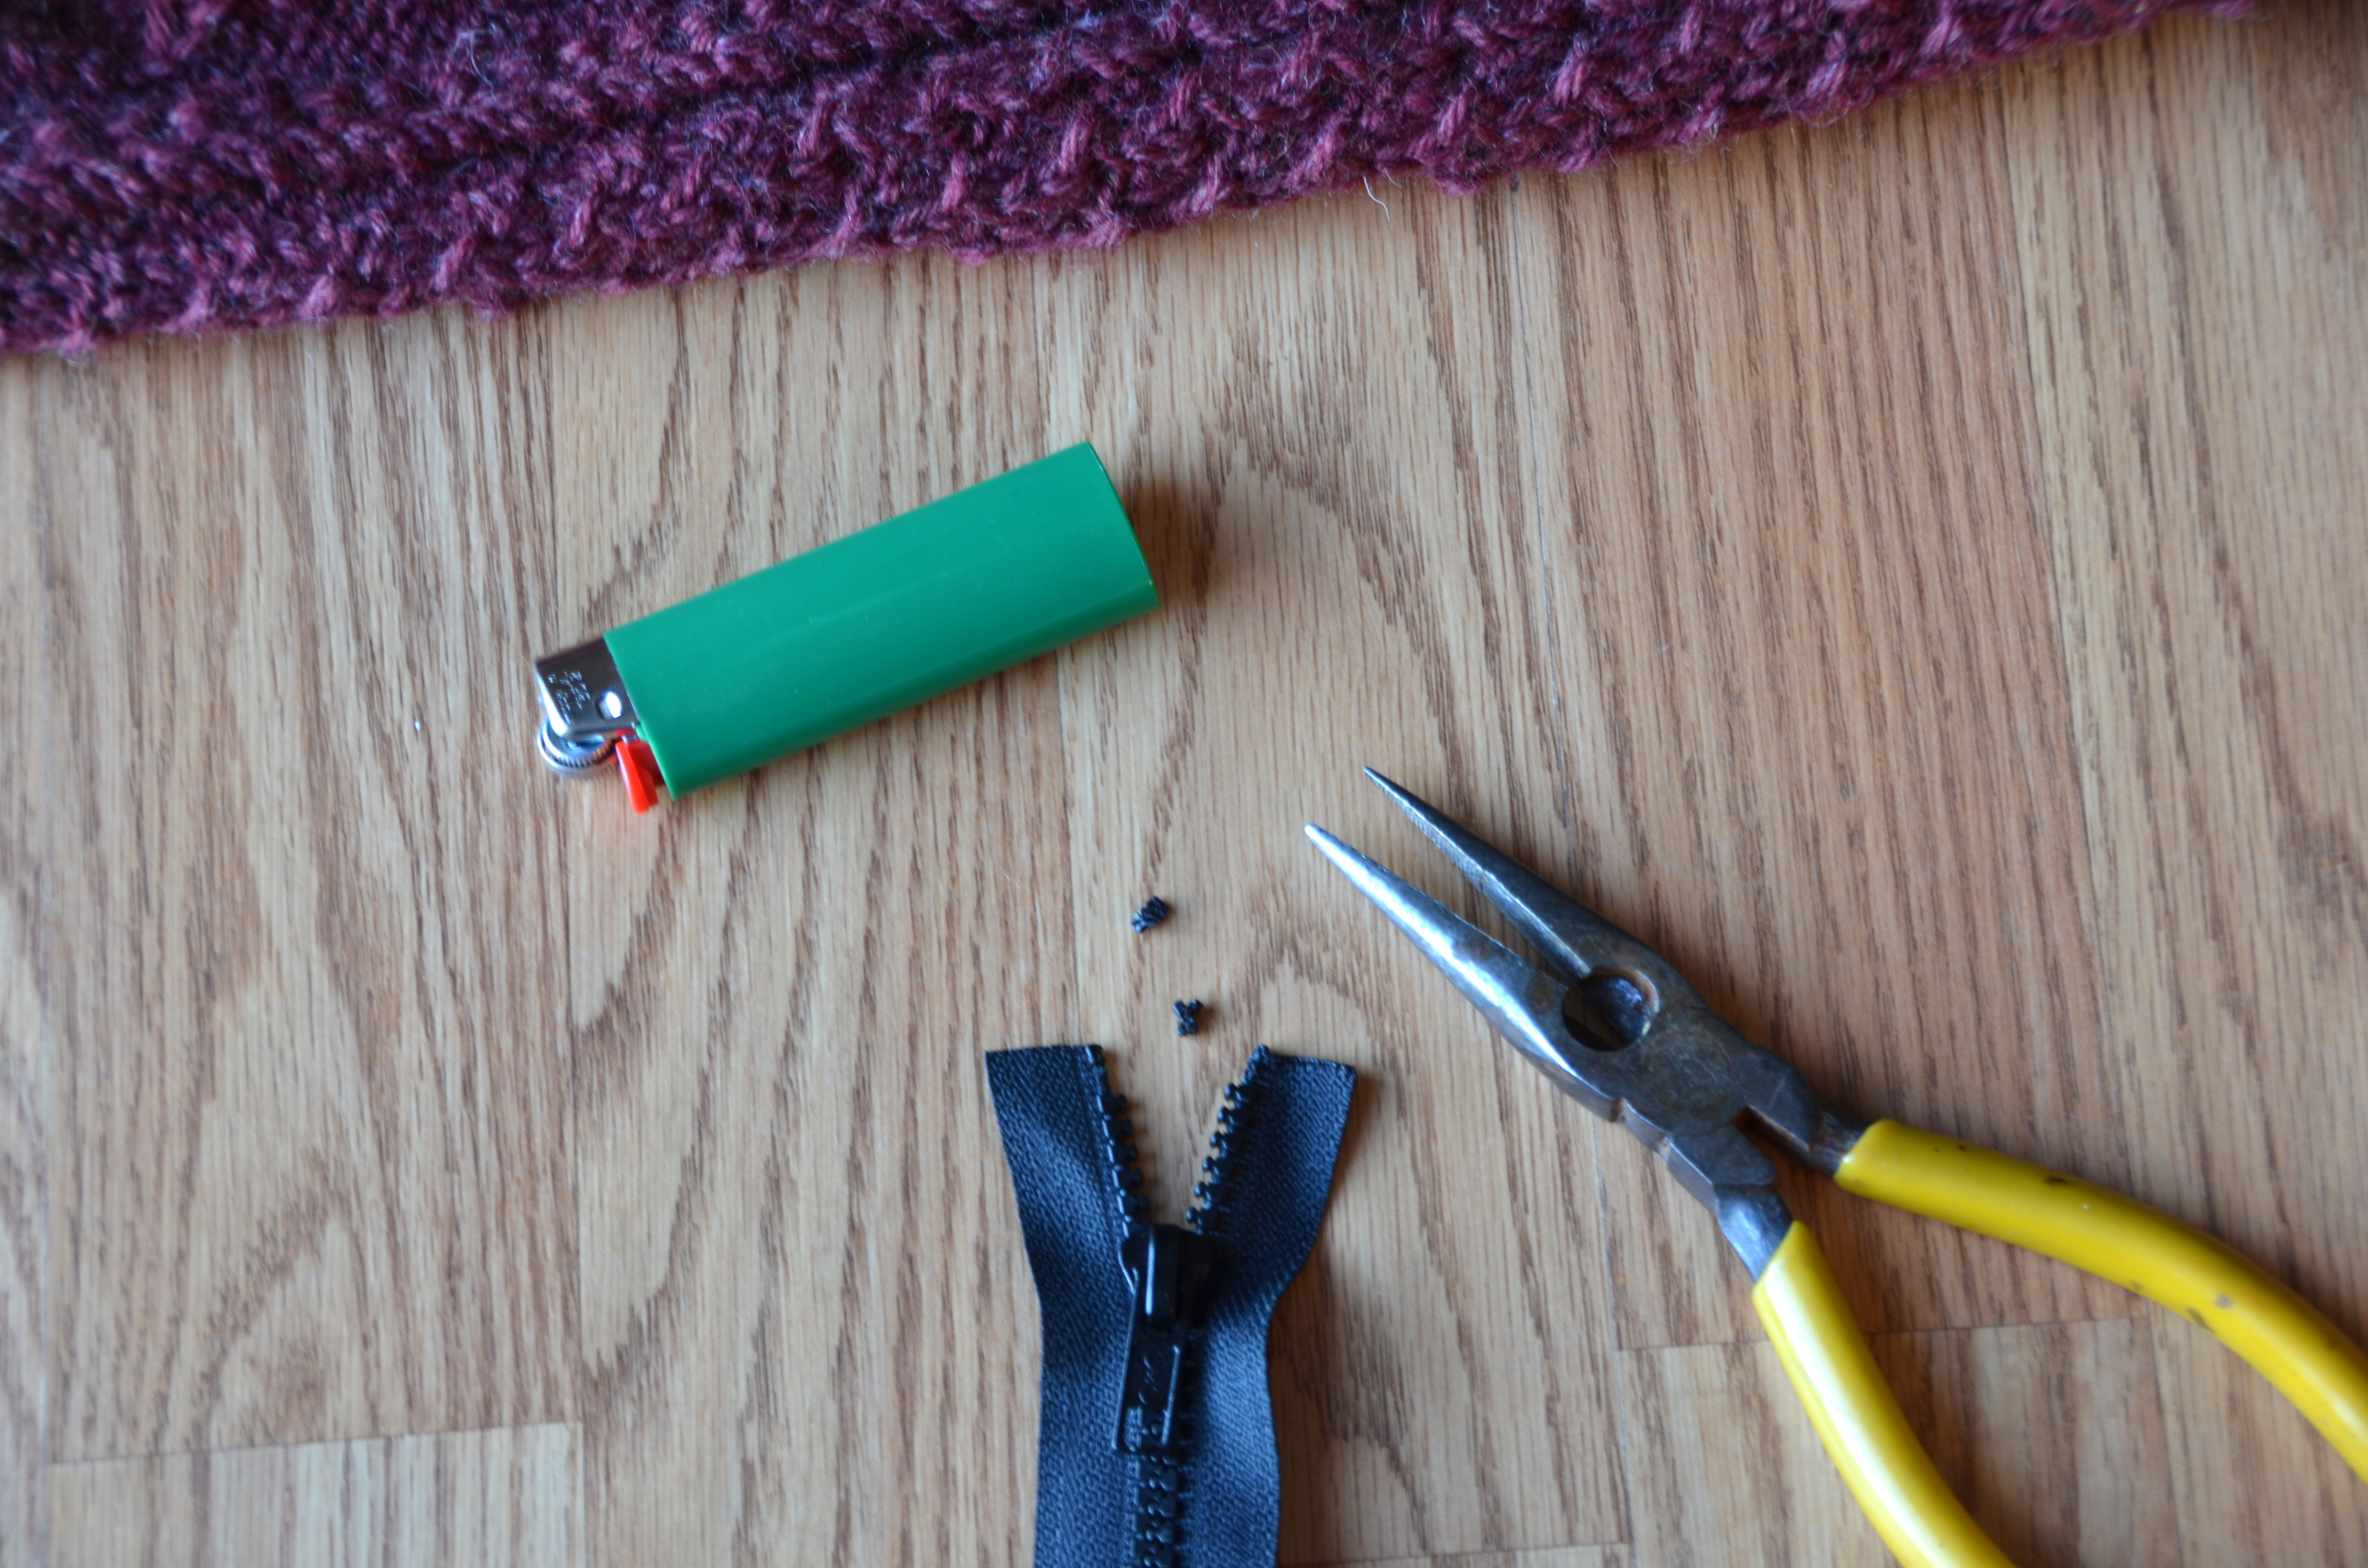
Next, we’re going to pretty-up that cut edge. I’m using a plastic zipper in the photo below. This method works great for a zipper with metal teeth, too. With pliers, carefully remove the 2 teeth from the top of the tape. If your metal zipper came with a stop (which looks like a metal tab), you can remove it from the piece you cut off and reattach to the newly shortened zipper.
Then, take a lighter or other flame and carefully melt the end of the tape. This will not work for a cotton zipper tape – it only works on polyester, nylon, acrylic – something that will melt when burned. Be careful, you want to barely melt the end just to stop the fraying of the tape where you cut it.
If you have a cotton or plant fiber tape, fold under the end and sew it down.
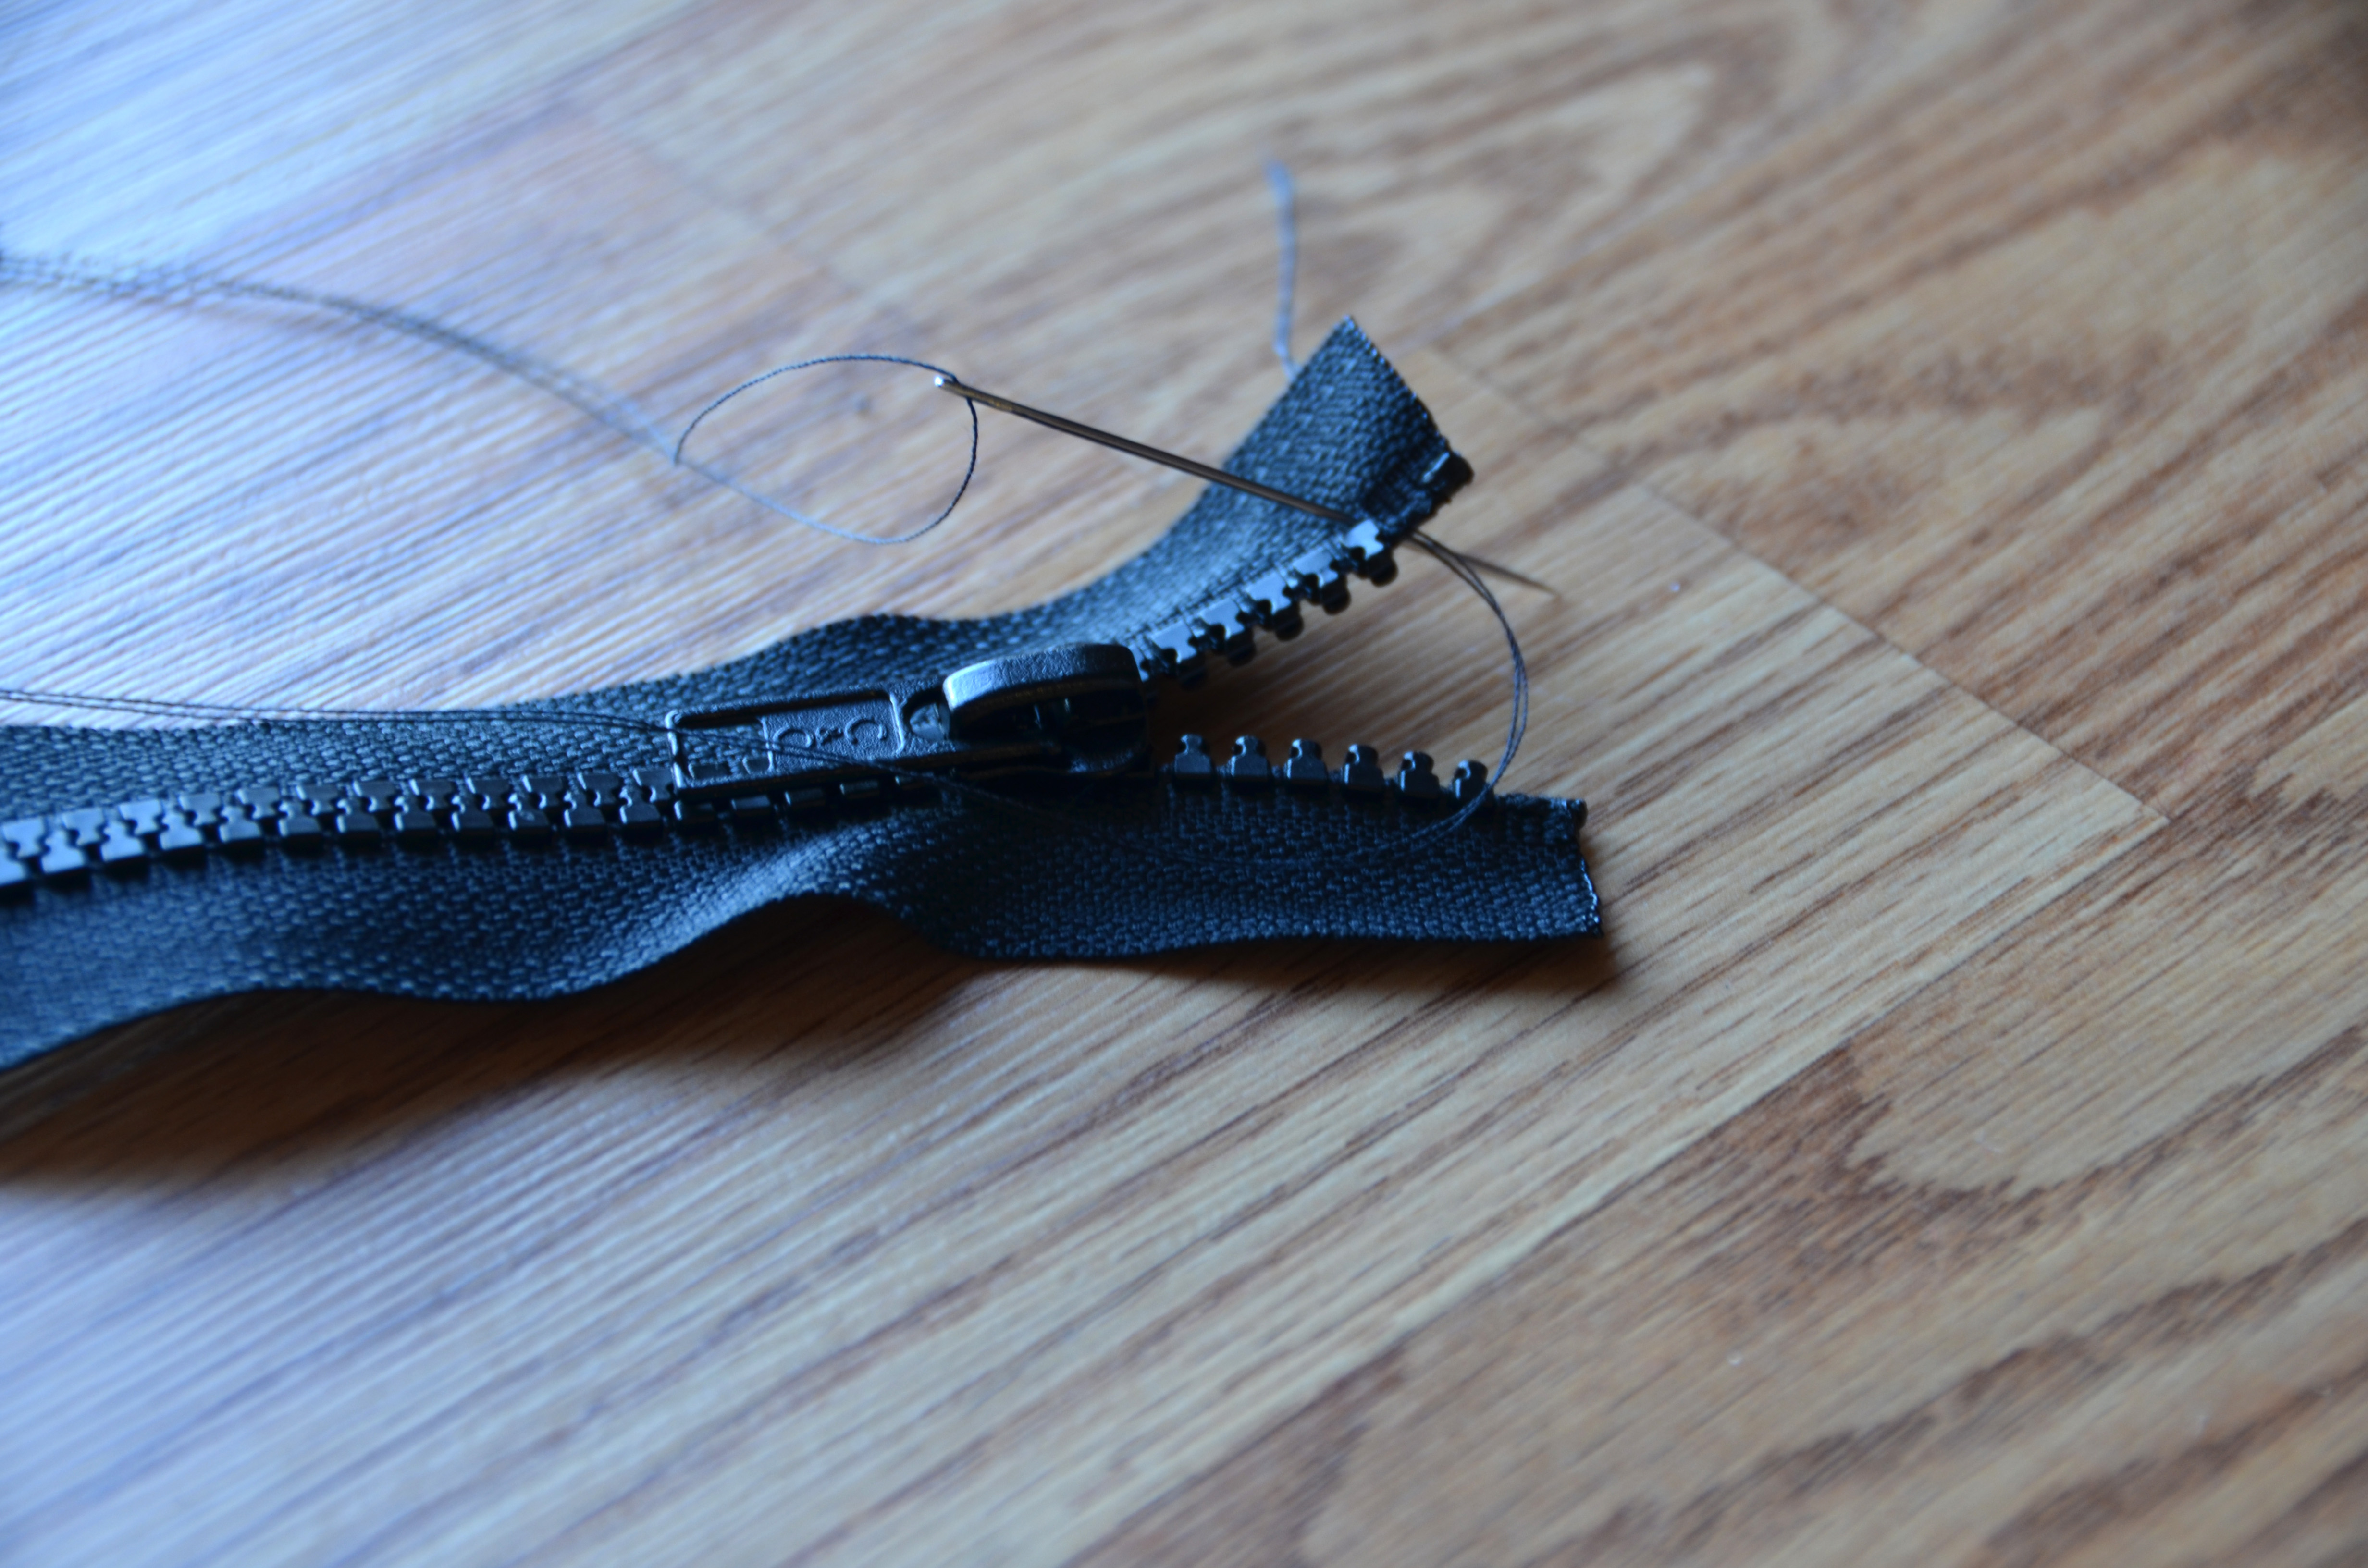
This next step probably isn’t necessary for this particular zipper installation since my zipper will be sandwiched between the sweater and knitted zipper facing. But I’ve been burned before with forgetfully sliding my zipper off the top of the tape, so I like to do everything possible to prevent that! By whip stitching around the top of the tape just above the teeth, this will prevent the zipper from sliding off. Or if you had a metal zipper with a zipper stop and reinstalled it, there is no need for this step.
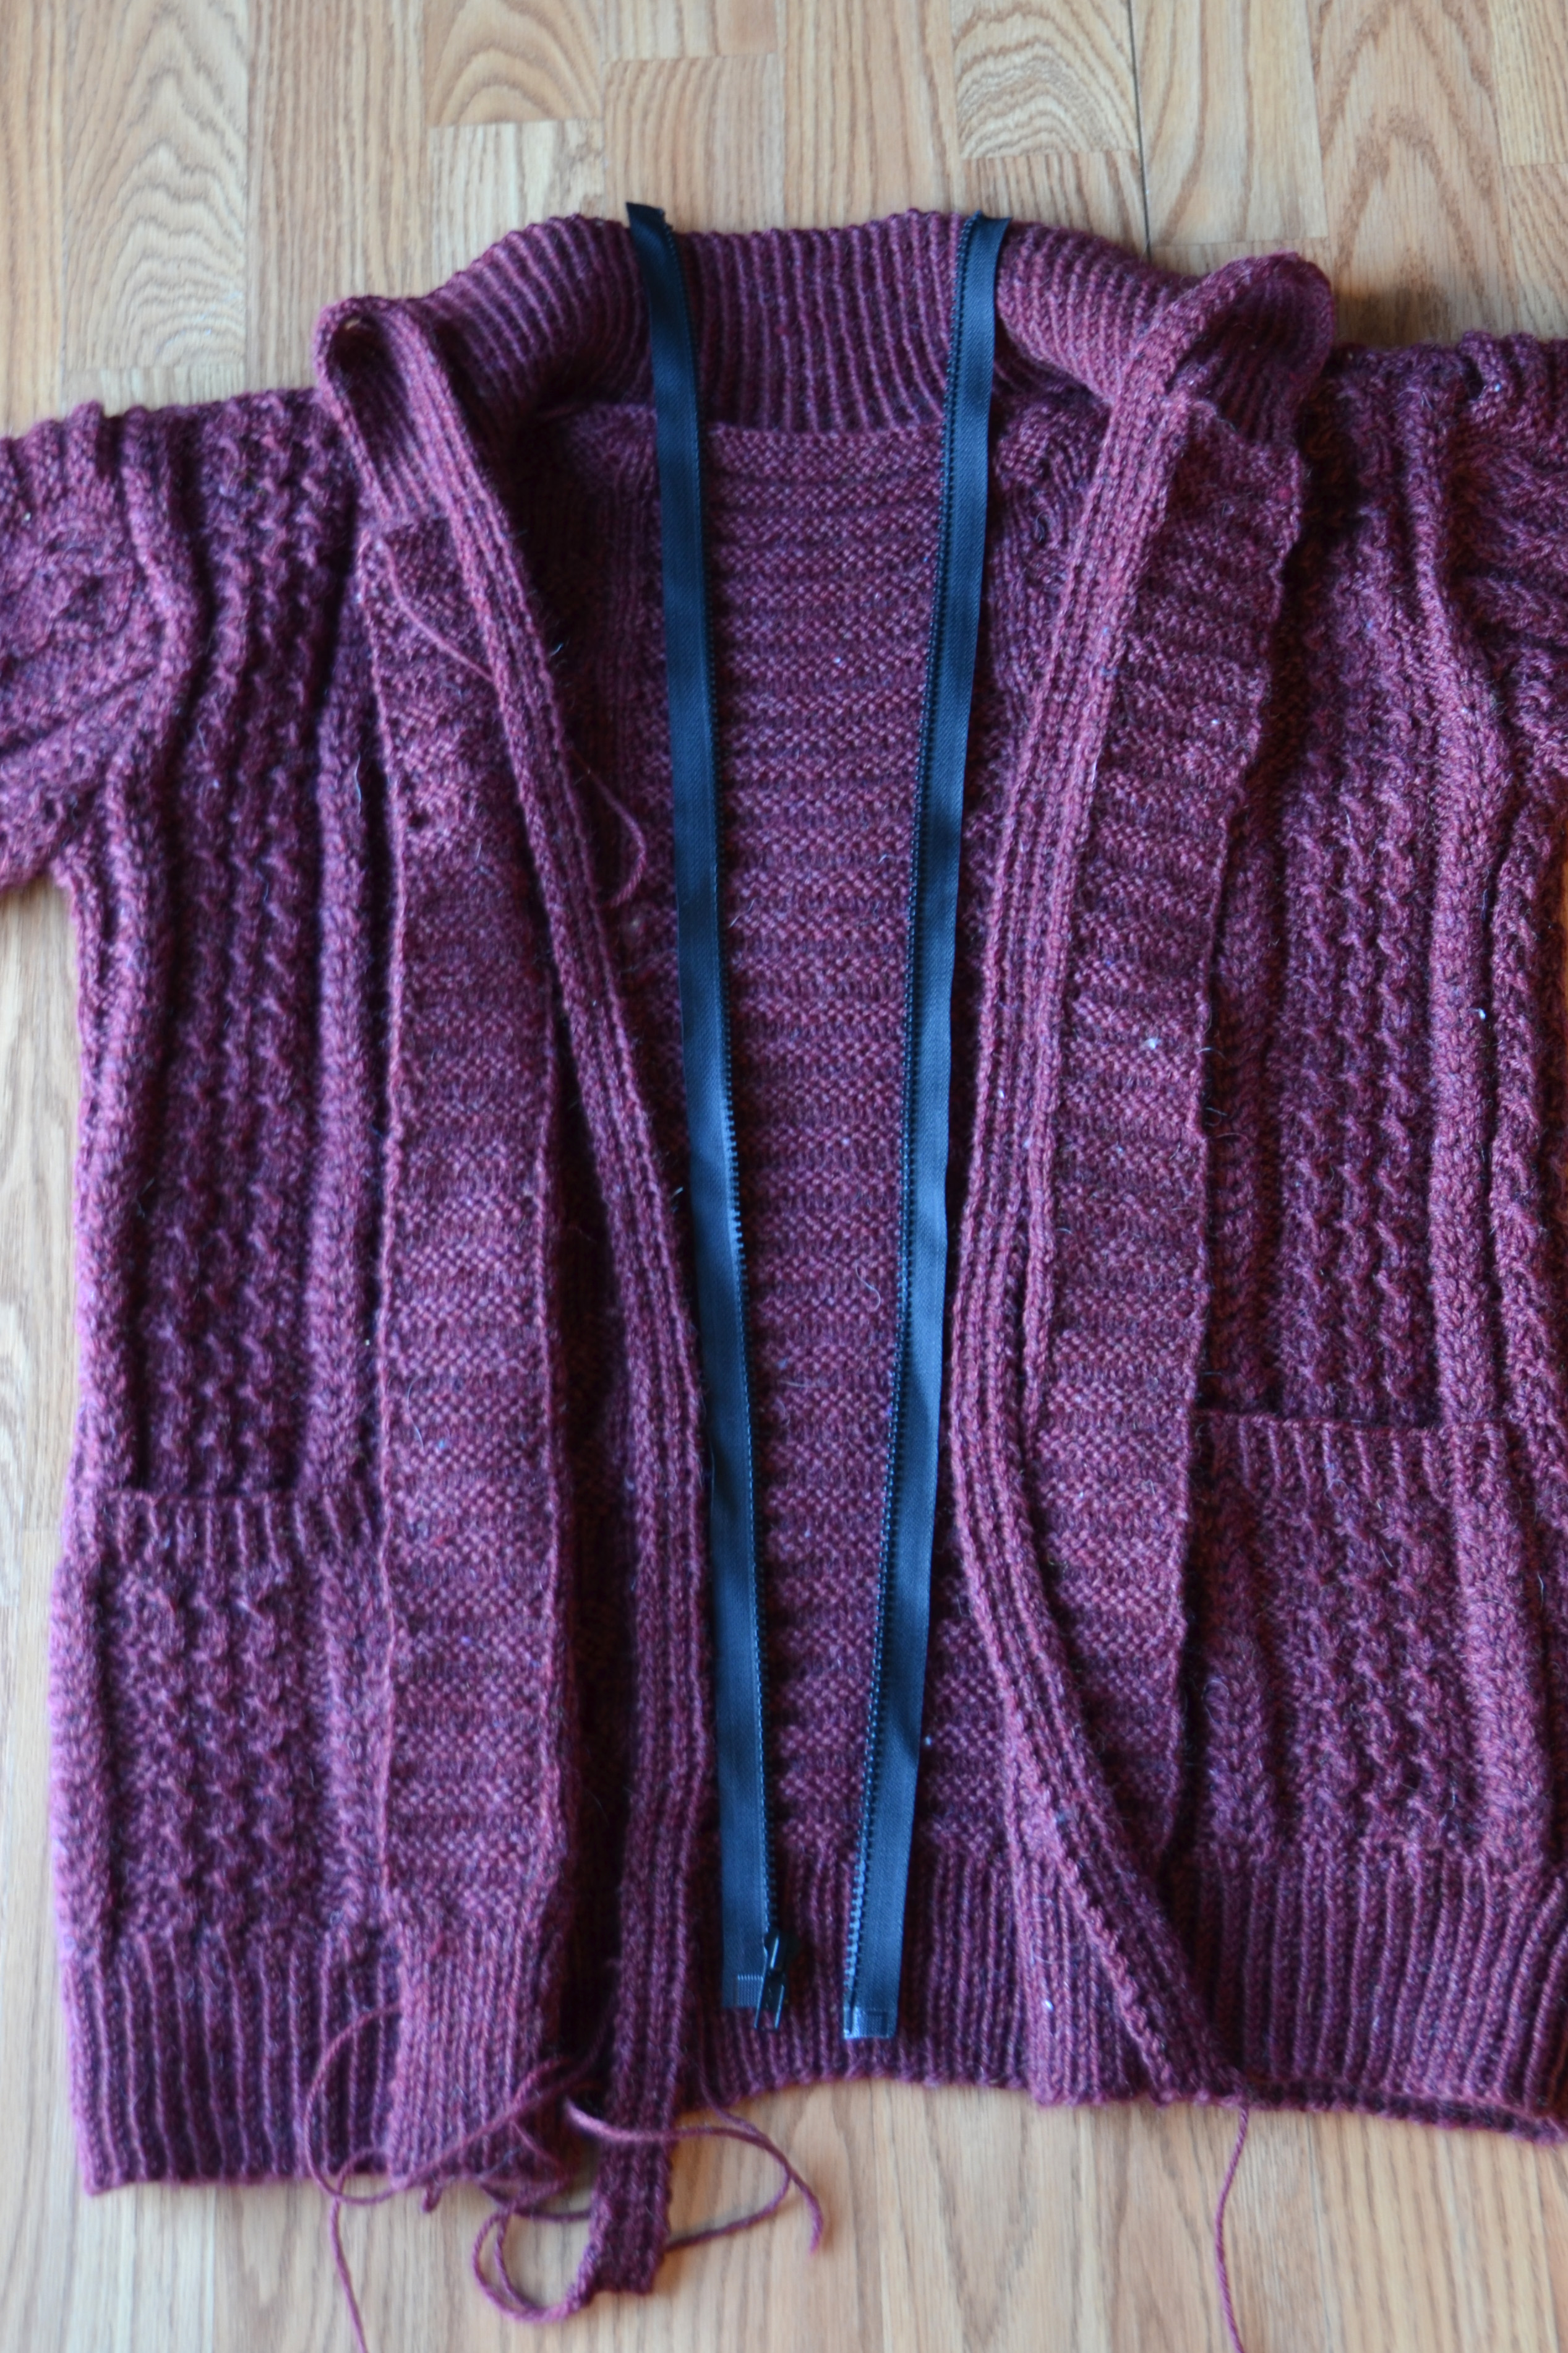
Next, unzip your zipper (you did buy a separating zipper, right?) and lay out the appropriate sides on their respective fronts.
Triple check your zipper placement!
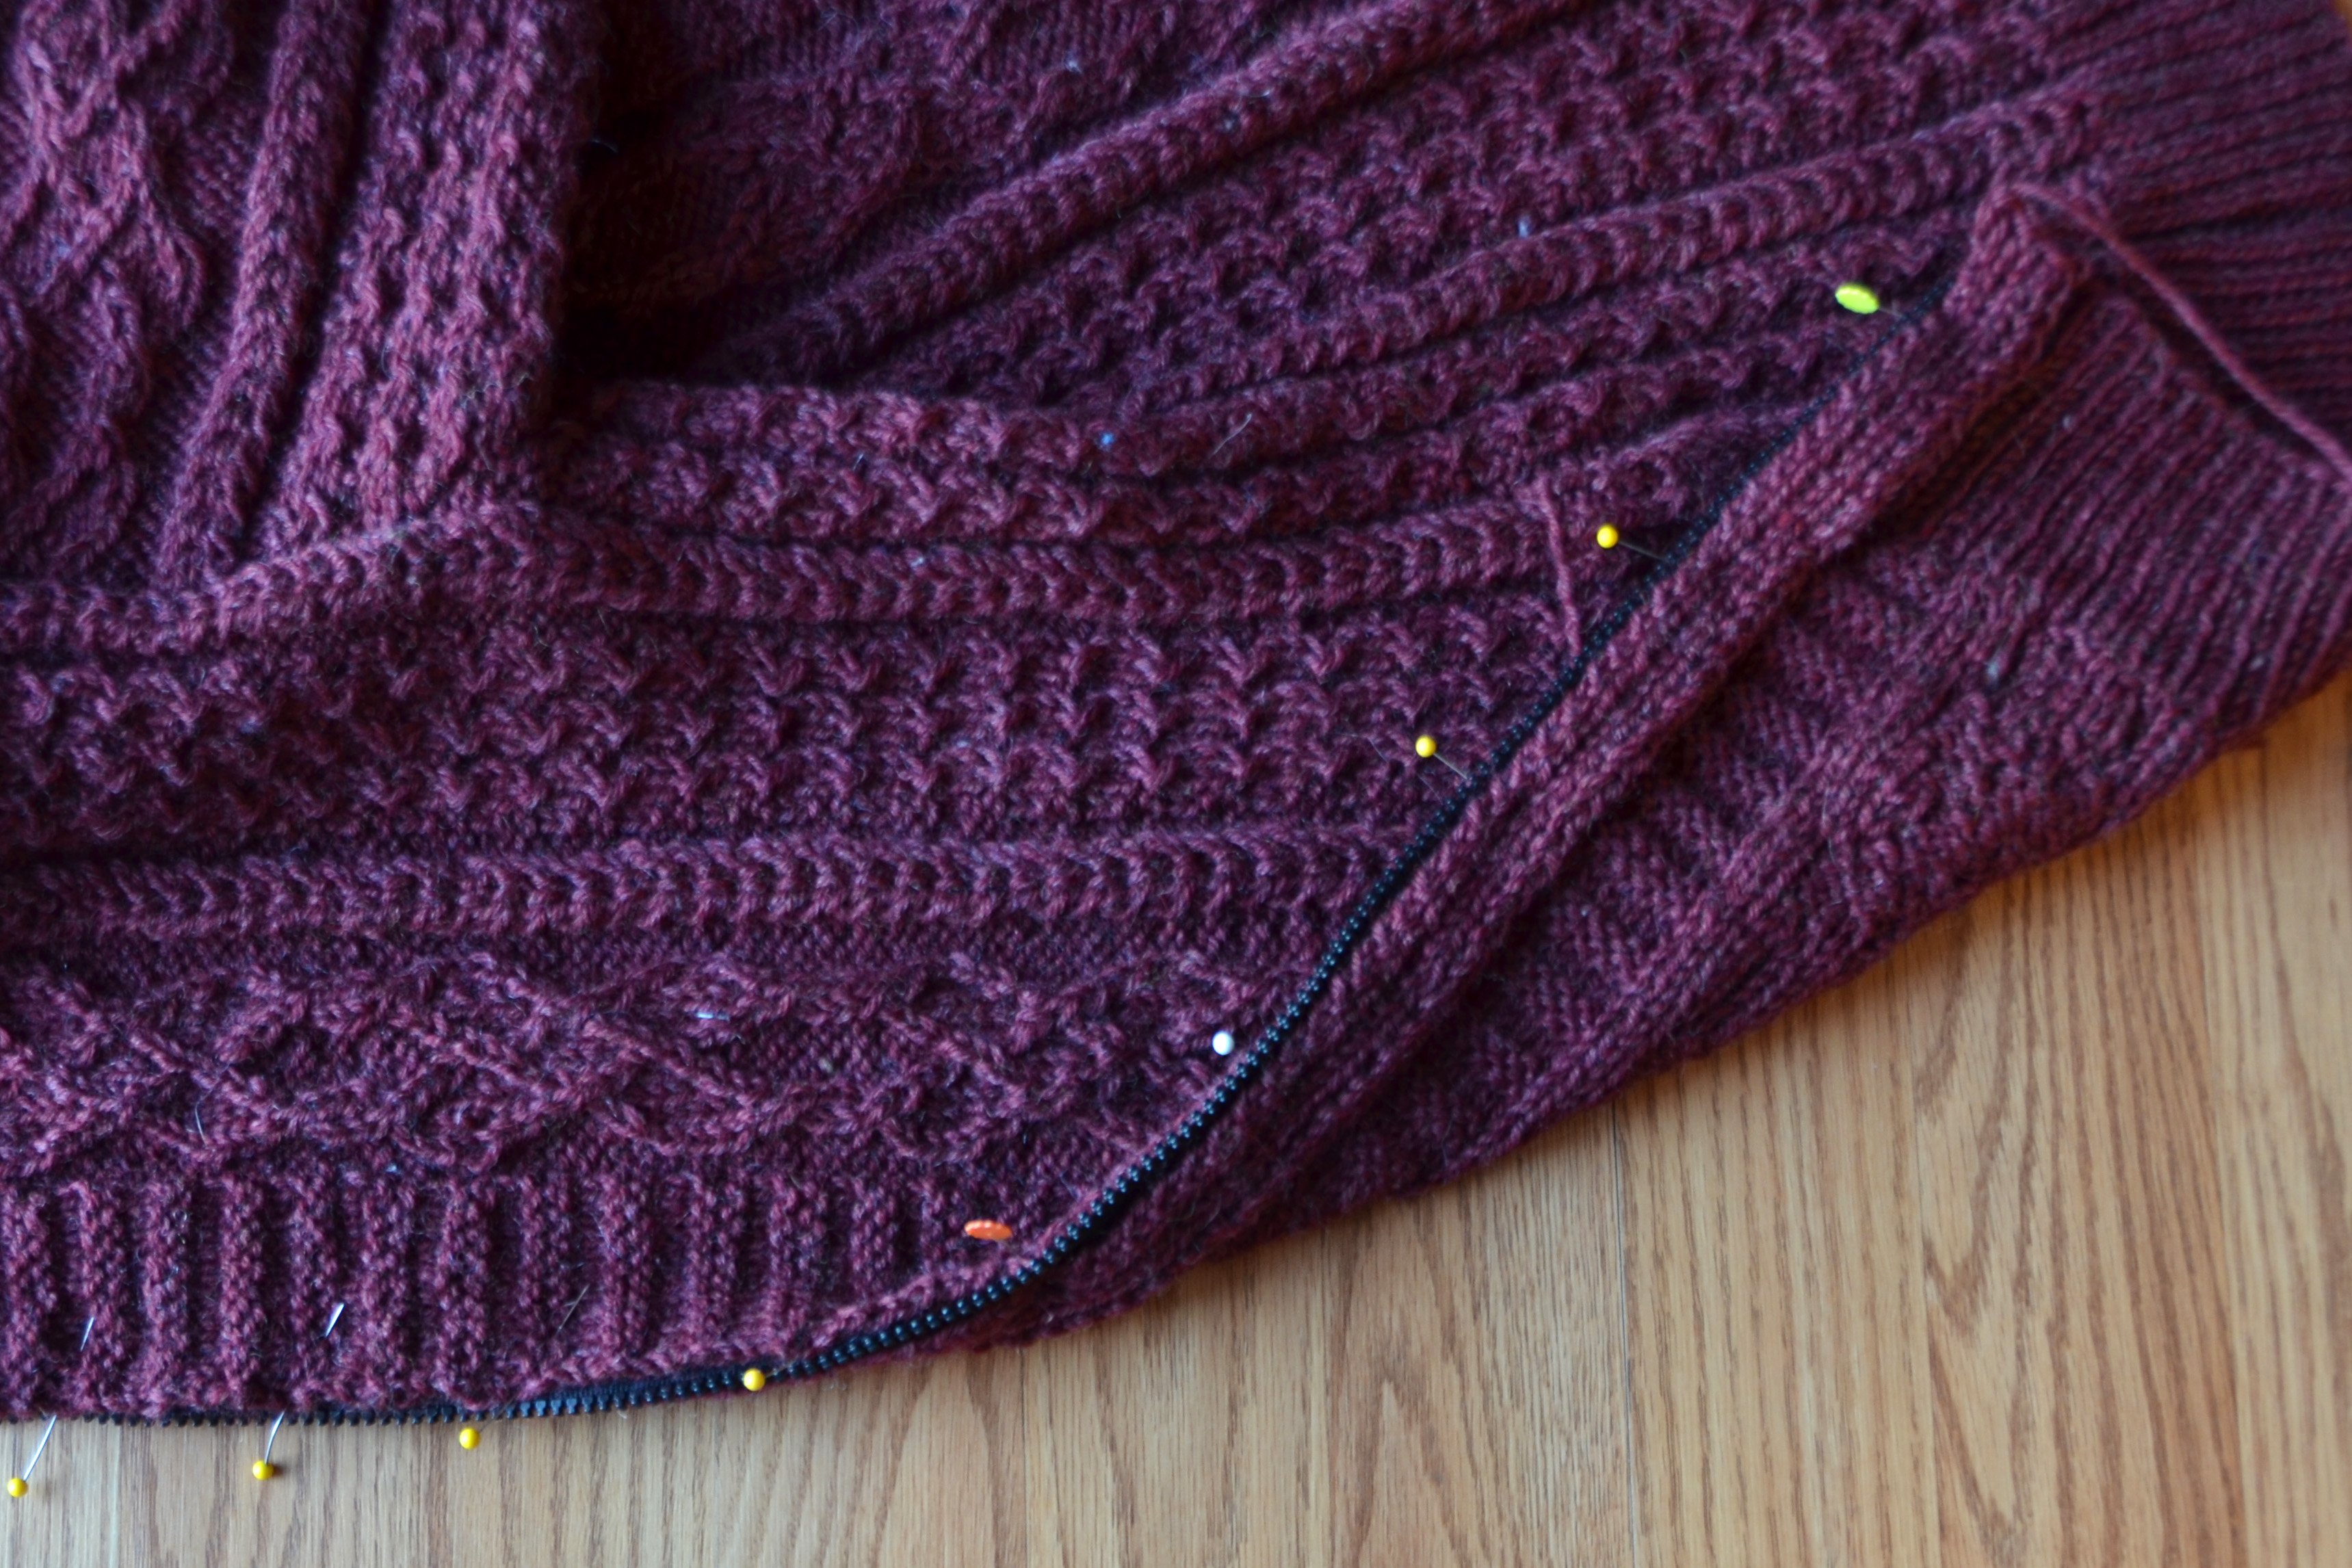
Next, pin your zipper to the sweater front. Ignore the facing for now. It’s much easier to pin it to the sweater front first and then add the facing. Begin by pinning the upper and lower edges of the zipper to the sweater. Then add in pins at halfway points between other pins until the whole thing is pinned down. Use lots of pins – you can never have too many pins!
Use lots of pins!
After the front is fully pinned to the zipper tape, one by one, remove a pin and add in the knitted facing. The zipper tape will be sandwiched between the front of the sweater and the zipper tape. You’ll want to leave a margin sticking out a little bit beyond the zipper teeth so that the knitting doesn’t get caught when you’re using the zipper.
It’s a zipper-wool sandwich. Delicious.
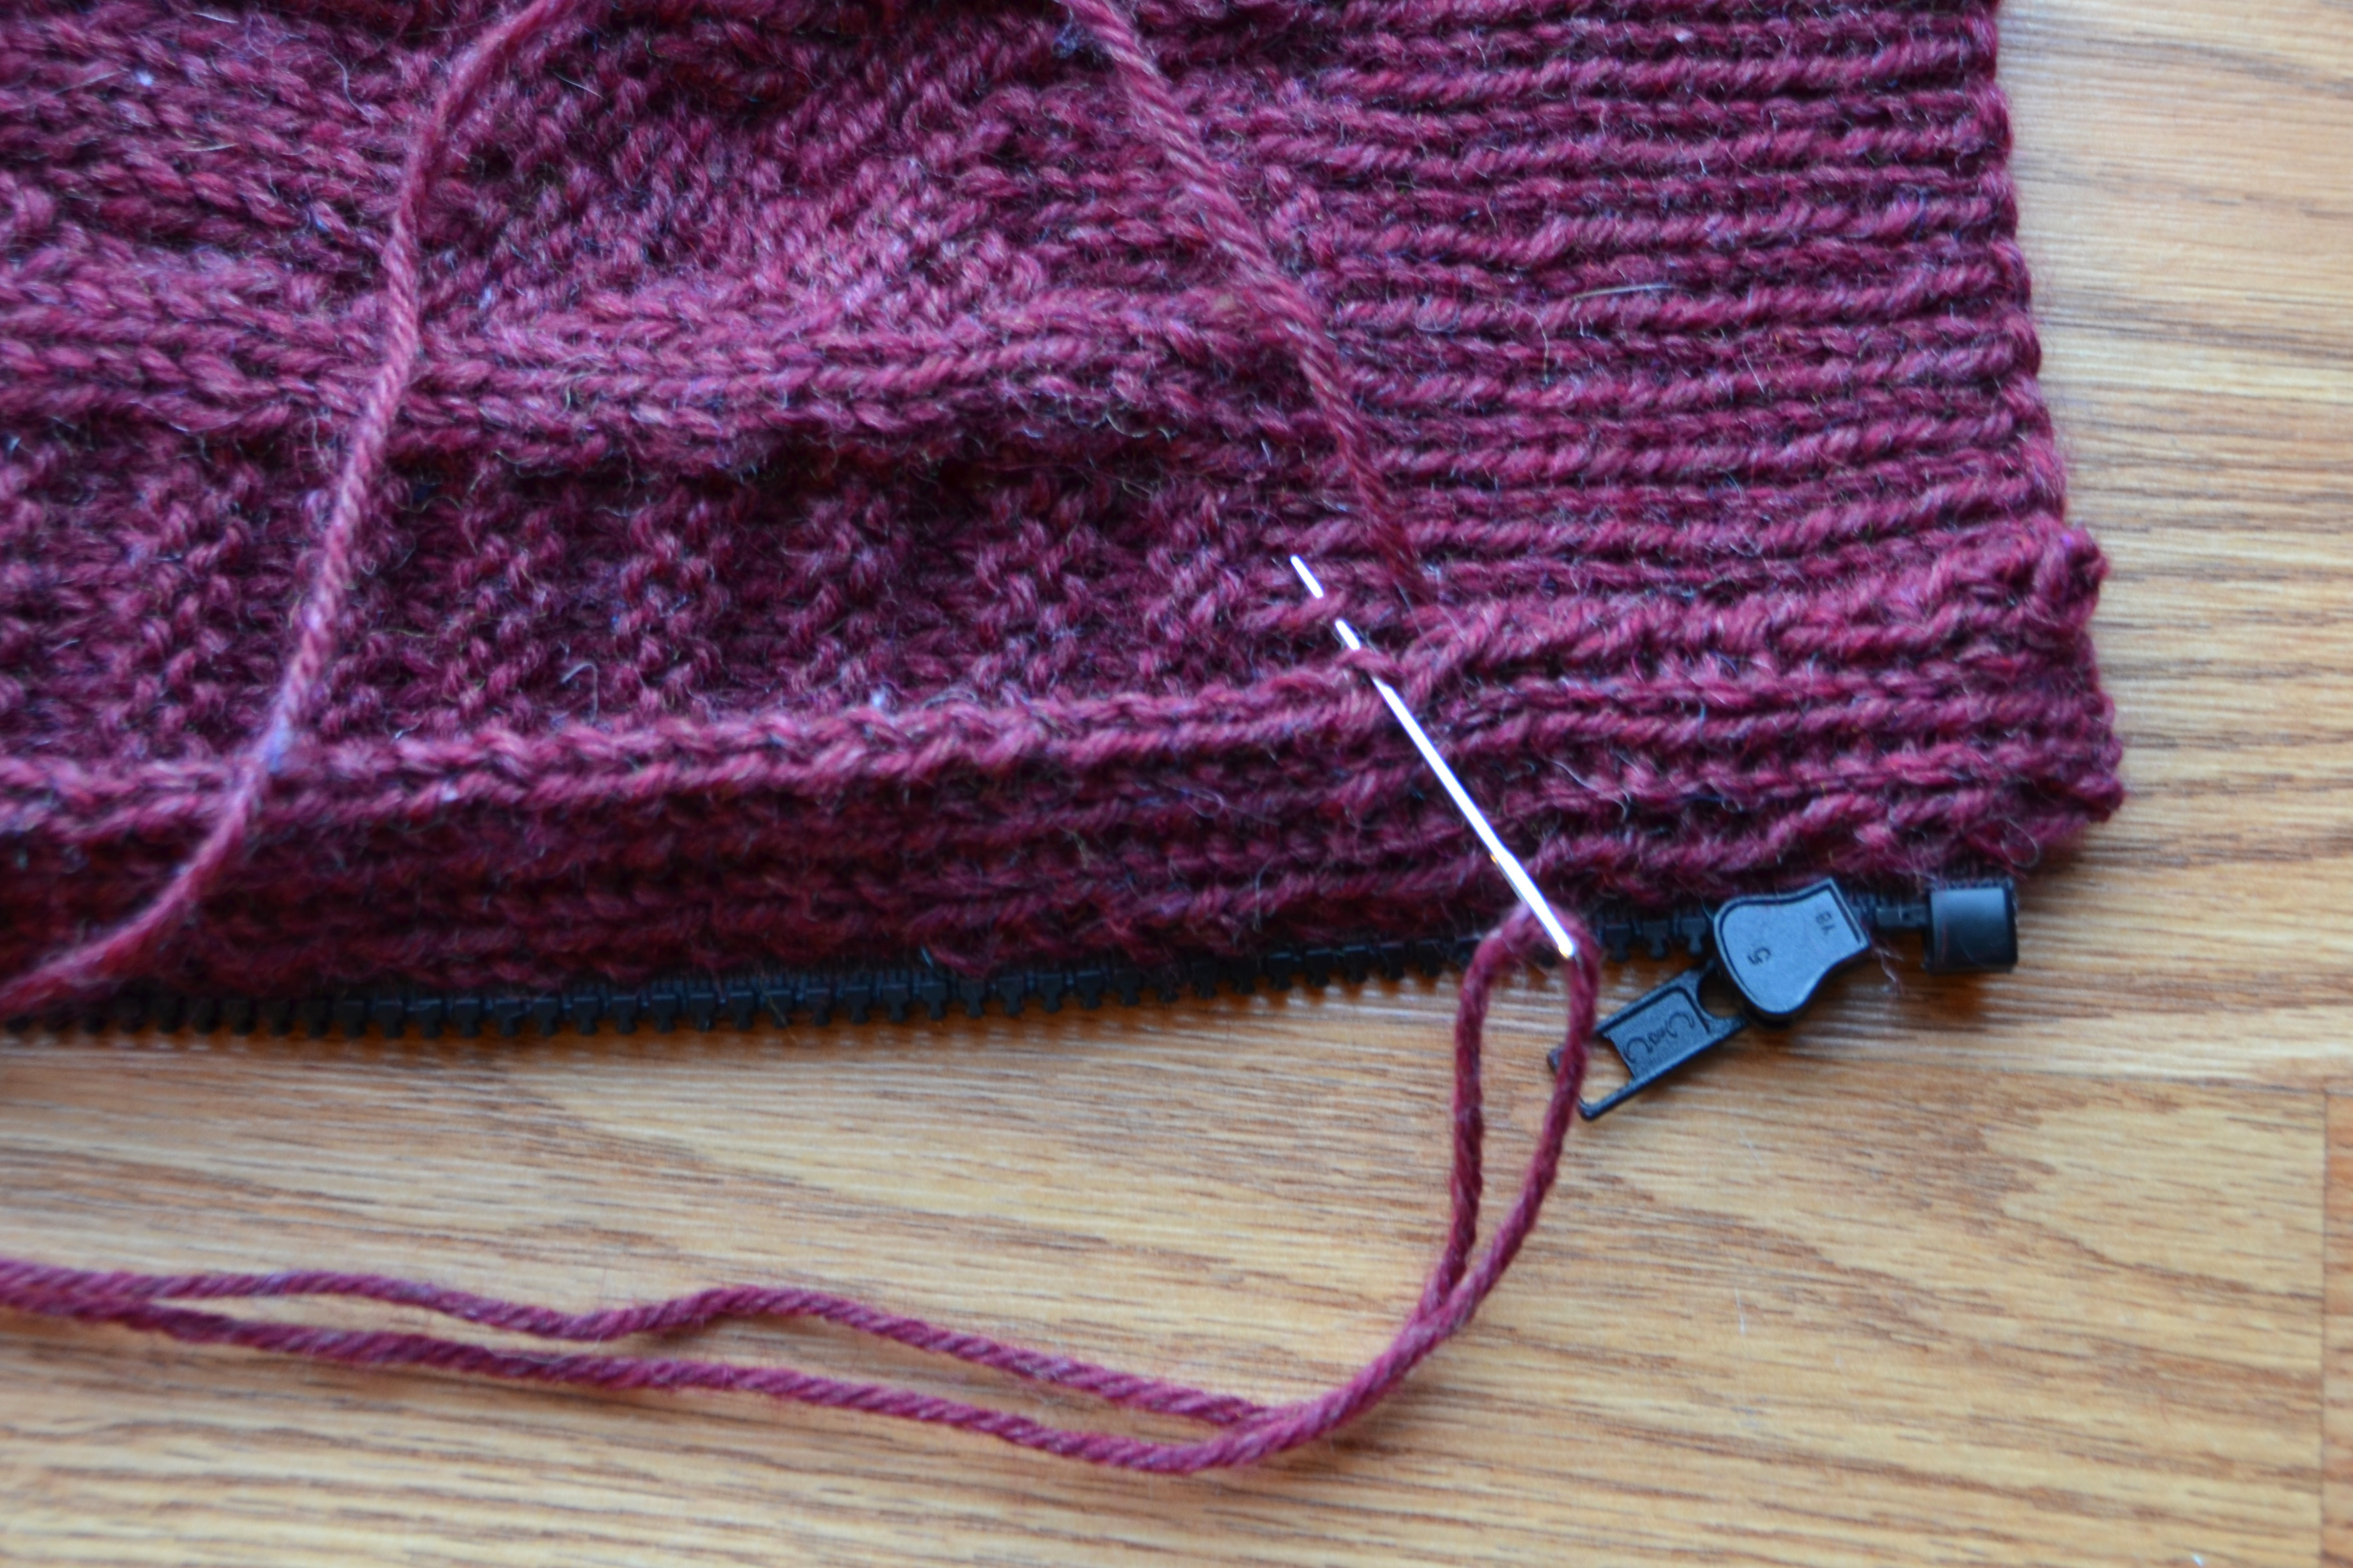
Use thread that matches or will blend in with the color of your yarn. Take small stitches and go slowly. You are sewing through 3 layers, so take care and make sure the needle is entering and exiting the fabric where you want it. I kept 1 stitch in stockinette on my edges, so I’m using that as my guide for where to sew.
This step requires patience.
I use a running stitch, but make a back stitch every inch or two – basically whenever I remember.
Once the zipper tape is sewn to the sweater, it’s time to sew the other edge of the facing down. I left long ends when I bound off my facing for this very purpose. I also split the yarn in half to reduce bulk for the seam.
On the home stretch!
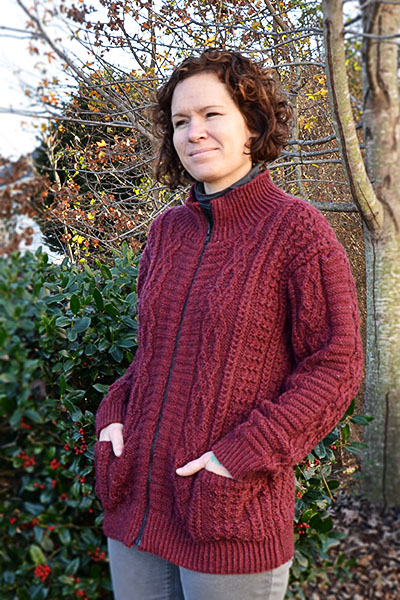
Once all your sewing is done, give the facings a light steam inside and out, and you’re done!
I really am smiling.
I love putting on a new sweater! And I’m lazy, so having a zipper is a big draw for me. Sometimes I like a buttoned sweater. But I like being able to zip and unzip a cardigan makes me happy. And pockets. And cozy!
How are your Deluxe Cable Collection projects coming along?

 Sometimes you just want to make something fun and quick, you know? Inside Job fits the bill.